Search the Community
Showing results for tags 'yawl'.
Found 6 results
-
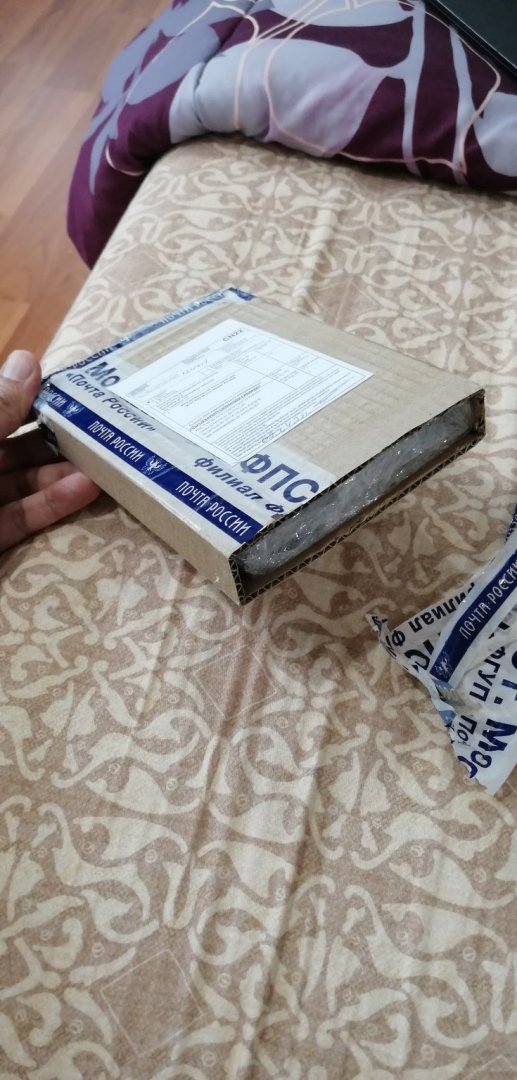
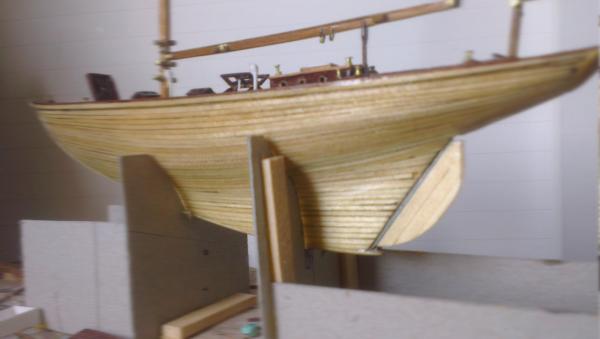
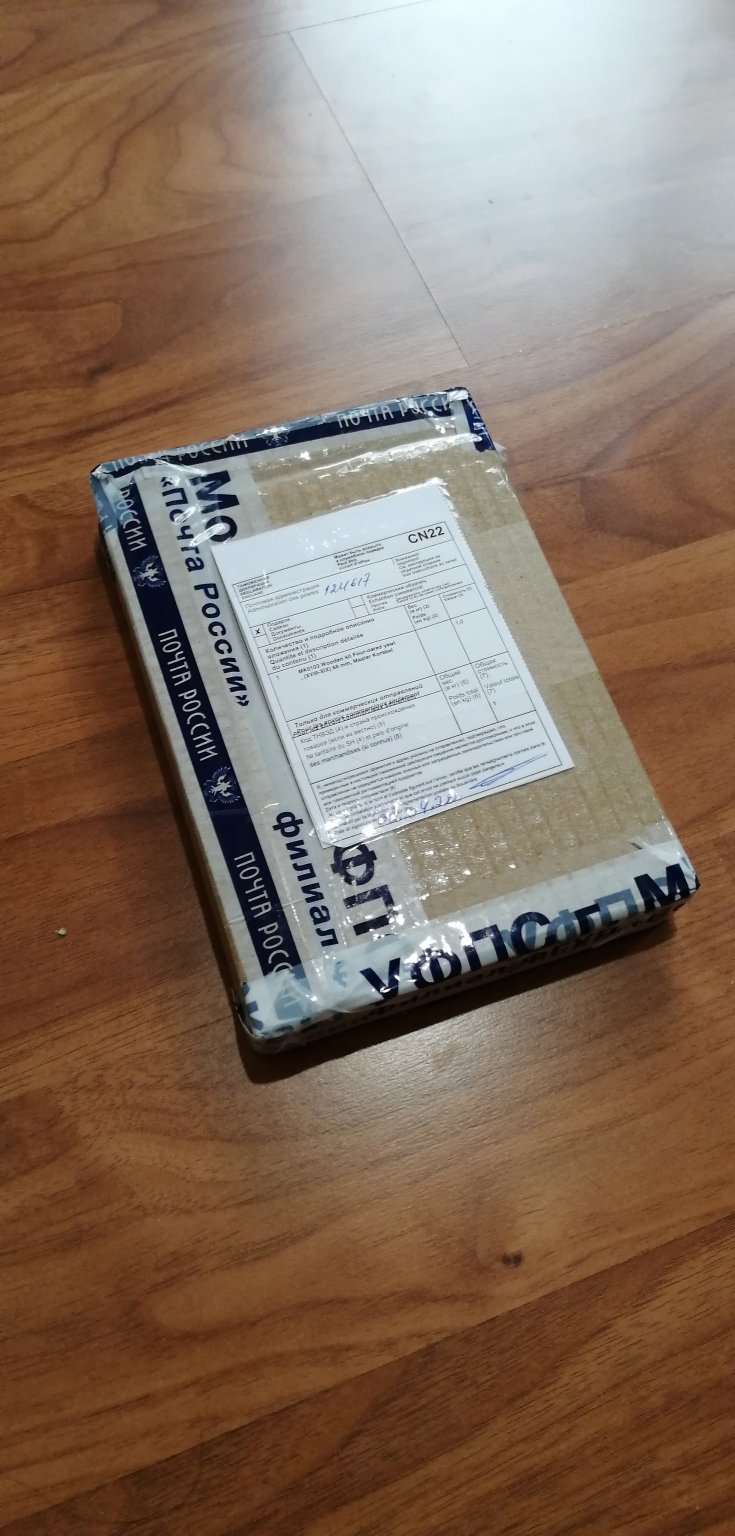
 Hello all, I have built balsa RC model airplanes before, but this is my first boat build. Also have an interest in scale armor and prefer 1:72, hence the fascination with tiny boats. Big thanks to "etsinko" for the similar inspirational build log and the genius who came up with the "quick find indexes" idea. Now on to the build. Kit ordered via Ebay on March 30, 2020. It probably got stuck somewhere due to the COVID-19 situation, but I was surprised last week when it finally showed up at my doorstep on May 5, 2020.
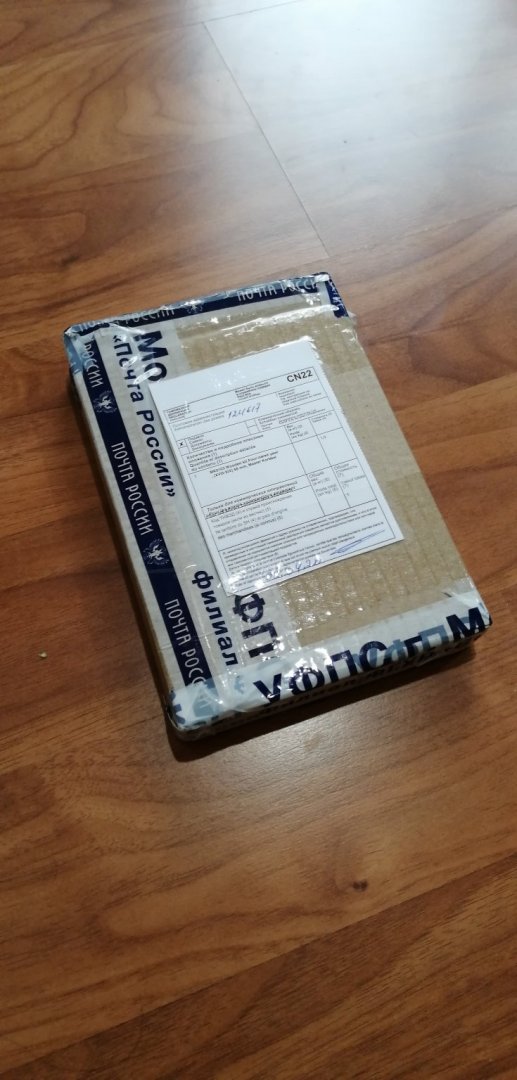
-
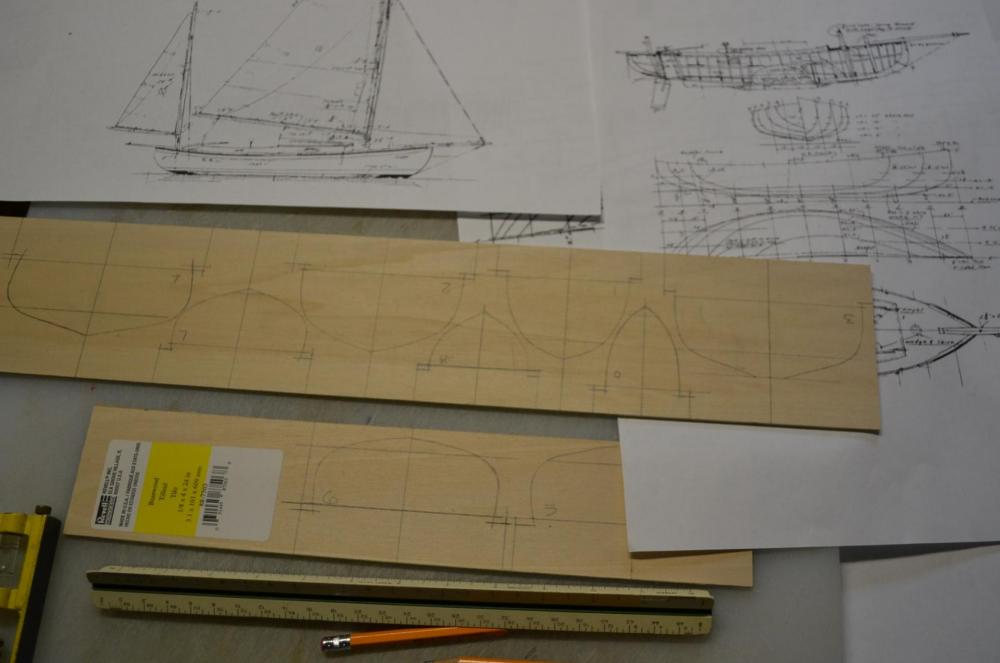
.thumb.jpg.6fd4c1b78768bb3efd745ab810936005.jpg) Now, I did not really intend to get involved in a project like this. My current boat (Deben 5 tonner) still needs a lot of work and has been going on for close to 4 years. However, this week I somehow found myself with a lot of free time to sit in front of a computer but not being able to work in the garage. I stumbled across the prints that the National Maritime Museum sells and there were some of boats carried by ships of the line that looked nice and detailed. I have always wanted to draft from printed lines and I ve been missing messing about with planks so I started playing with CAD. I just used the images the museum has on the on line shop. I progressed rather well, kind of 20% through the first lofting, so I thought I ll start a log initially with the CAD lofting and then with the boat it self, provided of course I ll get a reasonable result. Without a deck and rigging and with just a few planks it should not take more than 2 years to complete... I would like to try and do a nice lapstrake, not sure if it is historically accurate. Also, I cannot find easily much info on how these boats were actually built in terms of stringers, thwarts etch so I ll use some more modern arrangements and hope for the best, unless in the meantime I get by some more info. I admit I have not searched through MSW yet. I would like to try for a quality model, choosing appropriate wood, lining up holes, being careful with fit and finish etc. We ll see.. Enough talking, lets get down to business. This is the set of plans I used. The print costs £25 and can be ordered on line but as I said I just used the picture uploaded on the webisite. I think we are ok with copyright issues. More info on https://collections.rmg.co.uk/collections/objects/86936.html The plans show that this boat has a Davit but I will ignore this, at least for now as I do not really understand how it works. It seems like an interesting twist though. These plans are really very detailed. They include the keel, three WL, two diagonals, the sheer, all but the middle frames (this seems to be common practice) and also some of the interior arrangement. They proved later quite accurate and it is amazing that people can produce this with a ruler and a pencil. Especially the accuracy of the diagonals is impressive. Tracing the lines showed that there was slight distortion of the paper so adjustments had to be made. Getting all pieces in the correct position produced a half hull In the next photo, the sheer was created from the two views (red lines) provided in the plan. It fits the frames reasonably close. After I took this screenshot I had to re position all fore frames to account for the missing middle frame. This sorted things out. Later on I also found a small mistake and correcting it raised all the frames a bit. These is the top view of the waterlines. A bit of effort was needed to get them somewhat fair And on to the hull...not too bad. The diagonals (blue) are also added The sheer seems reasonably fair. This is the only line that really needs to be fair as it will not change and will be a reference line. All other lines except maybe the diagonals will change during the lofting cycles. The waterlines are also faired but these will get adjusted many times The hull with just the lines. Note that the transom in the plans is given in its vertical projection. It first needs to be projected in the angled plane it would normally be prior to adding to the hull This concluded the first part which is to just get all lines drawn. Now, the first lofting cycle begins. I created two more WL to help me maintain the shape of the frames in the upper strakes (green colour) I decided that the diagonals are the more accurate lines and I will follow these, using the WLs to maintain the shape of the frames. This is how I arranged the new shape and how much off the frame was. Not too much really. The small horizontal lines were added to maintain the distance from the old line, so keeping the same shape as close as possible. Later on, the WLs will be created anew and faired and the cycle will begin again. In the next two photos, you can see that the frames on the left side that have been faired follow the lines much closer than the rest Now we can try and create a bit of surface with the frames we have adjusted and see how it looks and how smooth it is. The points and lines from adjusting the 5th frame can be seen in the background. This is not bad at all considering that the waterlines have not been faired back at all. Of course the difficult areas will be first the two segment at the bow and possibly the transom. To my experience the transom always creates problems! It looks promising though. I am not sure when I ll have time to do any more work on this but it has been fun. If I ever manage to build this it will be a big baby at 640 mm LOA, some planks will be close to 80 cm long! Off to a very busy weekend, I will be doubling the lighting in my garage, it should be as bright as a supenova afterwards. Regards Vaddoc
Now, I did not really intend to get involved in a project like this. My current boat (Deben 5 tonner) still needs a lot of work and has been going on for close to 4 years. However, this week I somehow found myself with a lot of free time to sit in front of a computer but not being able to work in the garage. I stumbled across the prints that the National Maritime Museum sells and there were some of boats carried by ships of the line that looked nice and detailed. I have always wanted to draft from printed lines and I ve been missing messing about with planks so I started playing with CAD. I just used the images the museum has on the on line shop. I progressed rather well, kind of 20% through the first lofting, so I thought I ll start a log initially with the CAD lofting and then with the boat it self, provided of course I ll get a reasonable result. Without a deck and rigging and with just a few planks it should not take more than 2 years to complete... I would like to try and do a nice lapstrake, not sure if it is historically accurate. Also, I cannot find easily much info on how these boats were actually built in terms of stringers, thwarts etch so I ll use some more modern arrangements and hope for the best, unless in the meantime I get by some more info. I admit I have not searched through MSW yet. I would like to try for a quality model, choosing appropriate wood, lining up holes, being careful with fit and finish etc. We ll see.. Enough talking, lets get down to business. This is the set of plans I used. The print costs £25 and can be ordered on line but as I said I just used the picture uploaded on the webisite. I think we are ok with copyright issues. More info on https://collections.rmg.co.uk/collections/objects/86936.html The plans show that this boat has a Davit but I will ignore this, at least for now as I do not really understand how it works. It seems like an interesting twist though. These plans are really very detailed. They include the keel, three WL, two diagonals, the sheer, all but the middle frames (this seems to be common practice) and also some of the interior arrangement. They proved later quite accurate and it is amazing that people can produce this with a ruler and a pencil. Especially the accuracy of the diagonals is impressive. Tracing the lines showed that there was slight distortion of the paper so adjustments had to be made. Getting all pieces in the correct position produced a half hull In the next photo, the sheer was created from the two views (red lines) provided in the plan. It fits the frames reasonably close. After I took this screenshot I had to re position all fore frames to account for the missing middle frame. This sorted things out. Later on I also found a small mistake and correcting it raised all the frames a bit. These is the top view of the waterlines. A bit of effort was needed to get them somewhat fair And on to the hull...not too bad. The diagonals (blue) are also added The sheer seems reasonably fair. This is the only line that really needs to be fair as it will not change and will be a reference line. All other lines except maybe the diagonals will change during the lofting cycles. The waterlines are also faired but these will get adjusted many times The hull with just the lines. Note that the transom in the plans is given in its vertical projection. It first needs to be projected in the angled plane it would normally be prior to adding to the hull This concluded the first part which is to just get all lines drawn. Now, the first lofting cycle begins. I created two more WL to help me maintain the shape of the frames in the upper strakes (green colour) I decided that the diagonals are the more accurate lines and I will follow these, using the WLs to maintain the shape of the frames. This is how I arranged the new shape and how much off the frame was. Not too much really. The small horizontal lines were added to maintain the distance from the old line, so keeping the same shape as close as possible. Later on, the WLs will be created anew and faired and the cycle will begin again. In the next two photos, you can see that the frames on the left side that have been faired follow the lines much closer than the rest Now we can try and create a bit of surface with the frames we have adjusted and see how it looks and how smooth it is. The points and lines from adjusting the 5th frame can be seen in the background. This is not bad at all considering that the waterlines have not been faired back at all. Of course the difficult areas will be first the two segment at the bow and possibly the transom. To my experience the transom always creates problems! It looks promising though. I am not sure when I ll have time to do any more work on this but it has been fun. If I ever manage to build this it will be a big baby at 640 mm LOA, some planks will be close to 80 cm long! Off to a very busy weekend, I will be doubling the lighting in my garage, it should be as bright as a supenova afterwards. Regards Vaddoc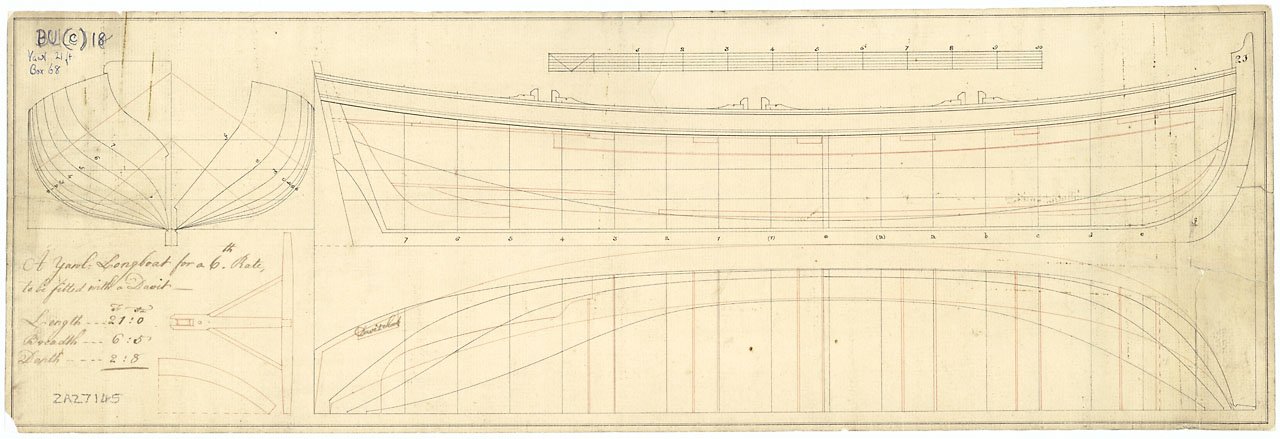
cropped.thumb.png.64da0c5486f4900ffd7b9dd417d293d4.png)
cropped.thumb.png.21f1d4a3a7b7261b0230e00e4ee0d907.png)
cropped.thumb.png.a8425a74bc480511f7716eecb3c446c9.png)
cropped.thumb.png.f588130825940cec6cfeb5905c84e774.png)
cropped.thumb.png.3aa8727d55571d503c61ee5d3f92e916.png)
cropped.thumb.png.3891bad48a5de6dde675c9eb7bb2e066.png)
.thumb.png.96fcc1de9fad79d4fe1e1c1ea7fc3436.png)
.thumb.png.e0093a2684c49af39dcfd5f05abe2ab3.png)
.thumb.png.85e73955249e7eeb71251718fd8aa2df.png)
.thumb.png.9d443c094c267acfedb70cef880bf88c.png)
.thumb.png.62f659e540c08174a003759f7b2ddf6f.png)
.thumb.png.88bc753c0e2f6aba3245942b711b5c30.png)
.thumb.png.d2c873e98758556488fd74334ccd7dc2.png)
.thumb.png.7d5d832dbaa5fd2b7e4296680a7588f6.png)
.thumb.png.8d256c385d136b48dde0eeca245d3050.png)
.thumb.png.5ab2c4518720341024e6eb690163b821.png)
- 232 replies
-
- 18
-

-

-
 I know that this is kind of Backwards, Gallery first then a Revised Build log. To start I have had the drawings for this boat for over 25 years ( purchased thru WoodenBoat. ) so, when I was Approached to build the boat I jumped at the chance.The Boat was built bent ribs over molds just like the original. So I started by making the molds, the first shot is the clients boat
-
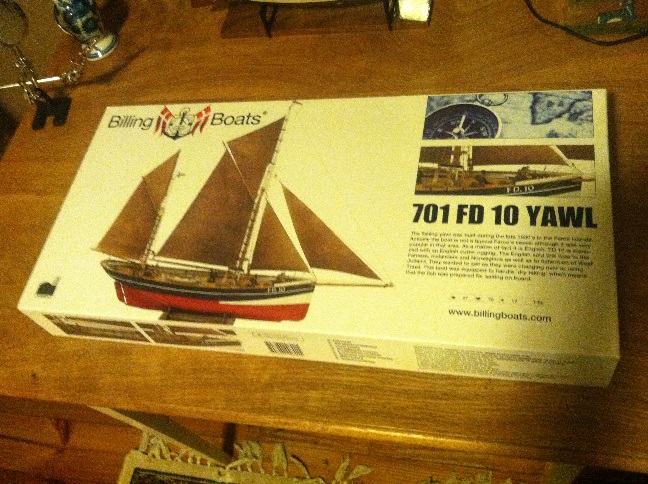
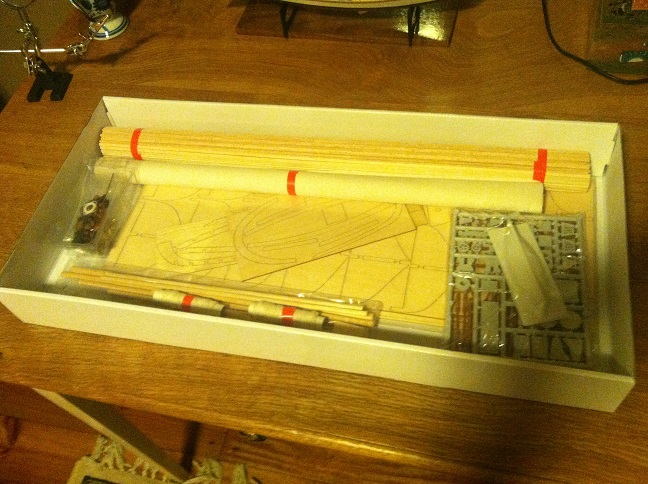
 Hi Everyone, I am beginning a build of Billing Boats "701 FD10 Yawl" Arnanes. It is the second model I've worked on, and the first was a very simple model. I may be asking for advice, so thanks in advance for that. Upon opening the kit, it became clear that the construction will be plank on bulkhead and that the hull will be built in two halves (starboard and port halves), which will then be glued together to form a complete hull. It appears to be a good model for me to be building at this point, as it will be challenging, but not discouraging for a new builder. There are essentially no instructions, but there are good labelled drawings showing where the pieces go. Related to the description of the model, I would call it a Ketch, based on the size and location of the masts: the mizzenmast is stepped forward of the rudder post and the mizzen looks larger to me than what I would expect on a yawl. Still, the mizzen boom does overhang the stern, so you could make a point that it's a yawl. Either way, I like it and am looking forward to the build! -Jason Photo's below: 1 and 2: Kit, as-received 3. Starboard hull-half, with bulkheads glued in place and carved/beveled in preparation for planking.

- 41 replies
-
- 9
-
-
- billing boats
- FD 10
- (and 3 more)
-
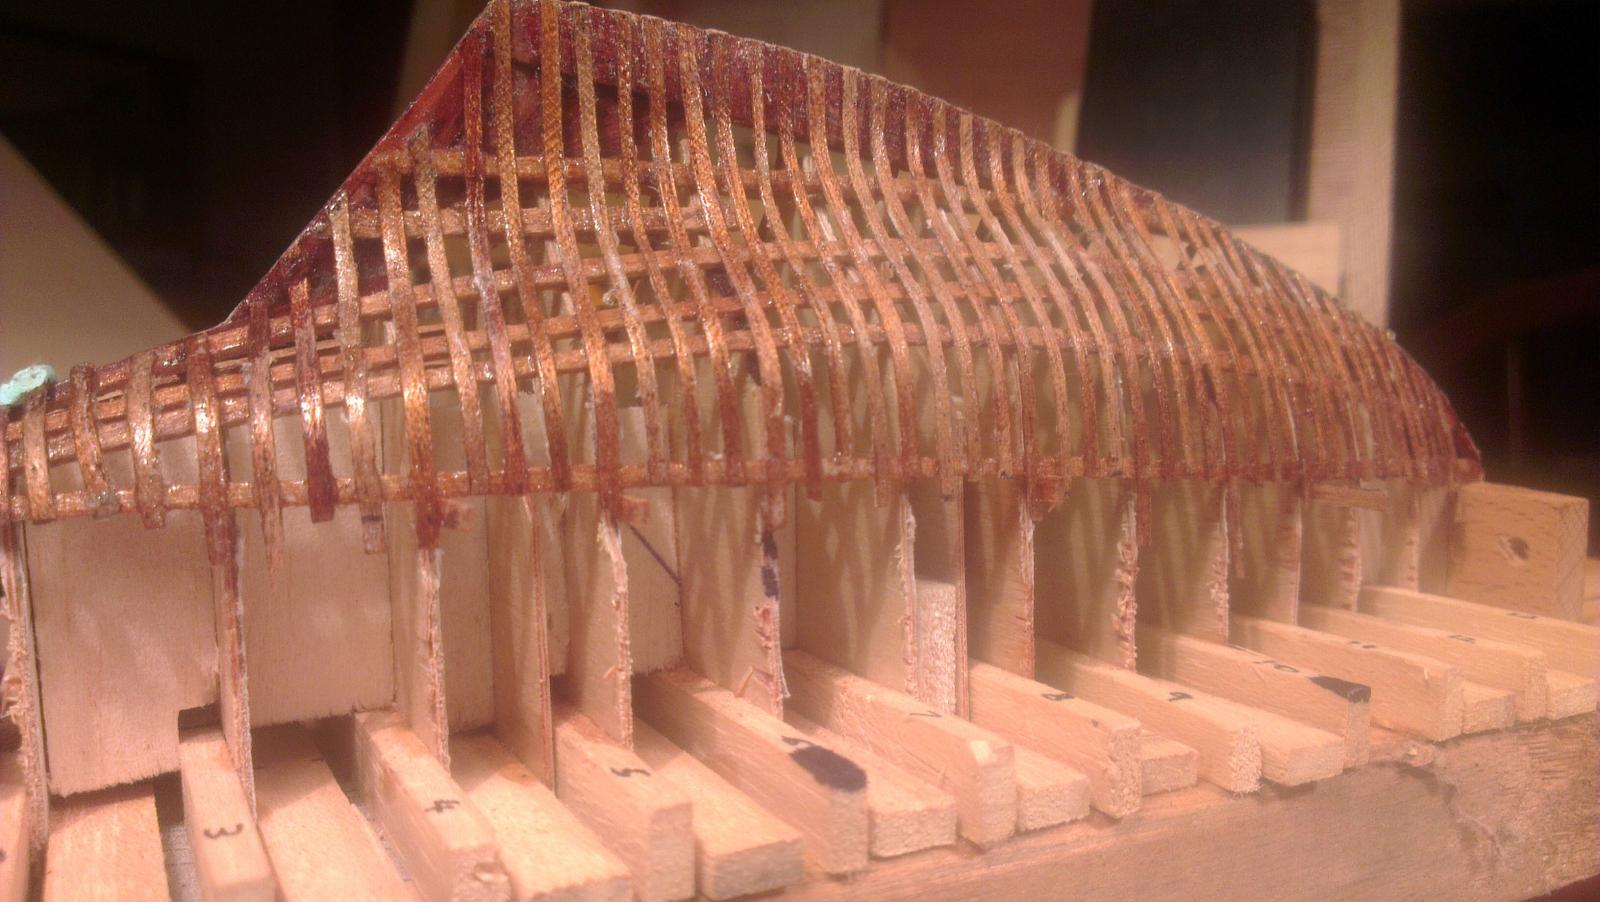
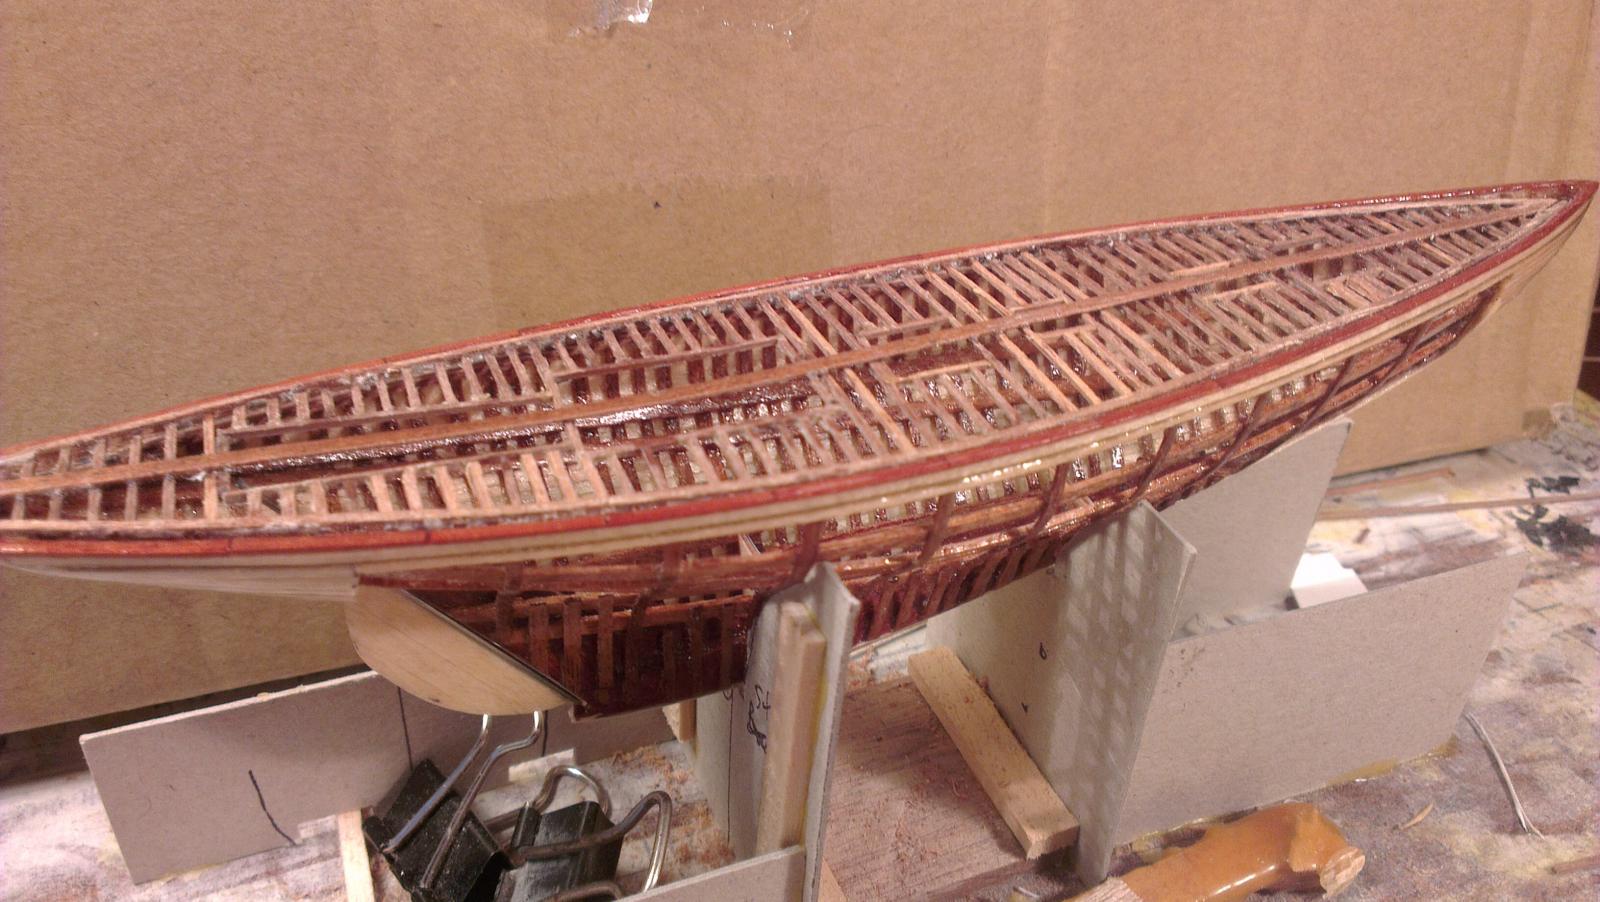
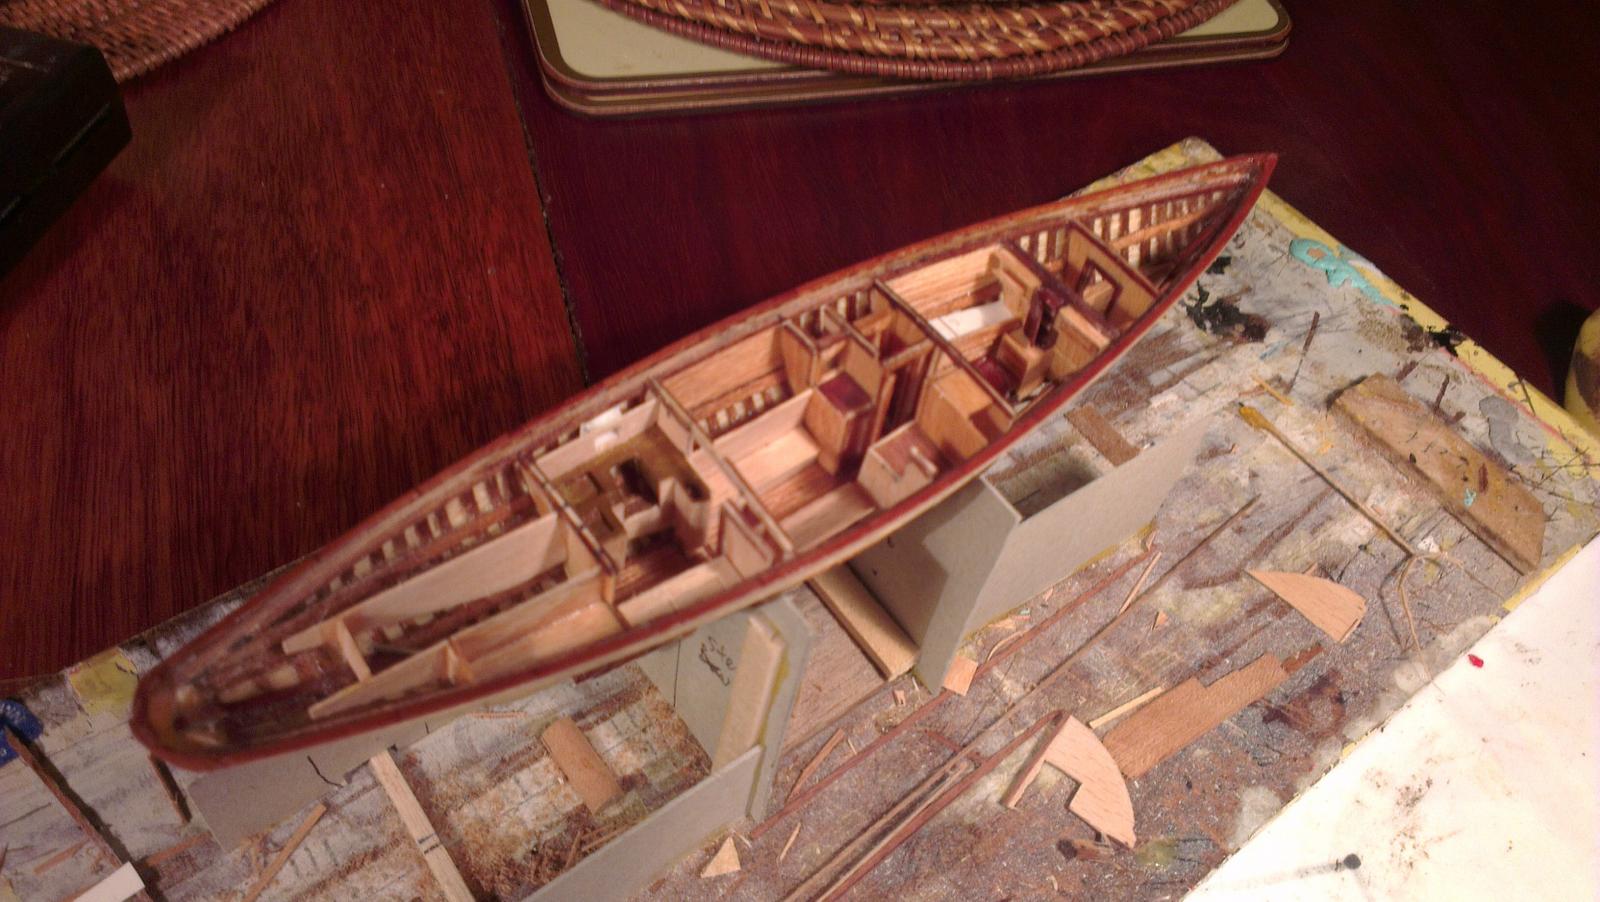
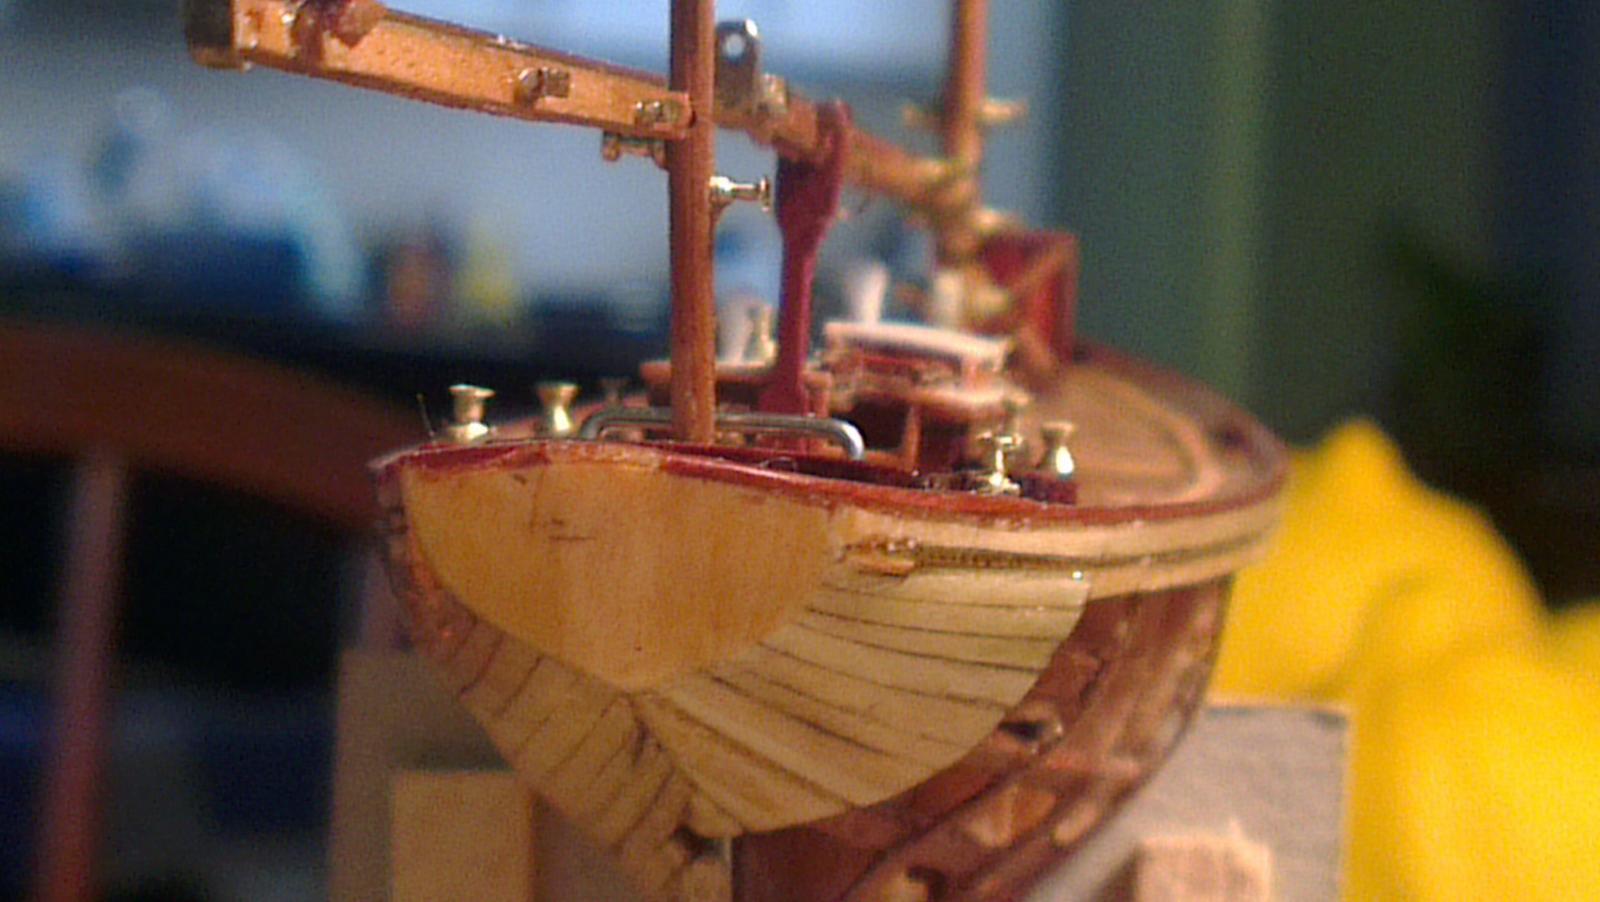
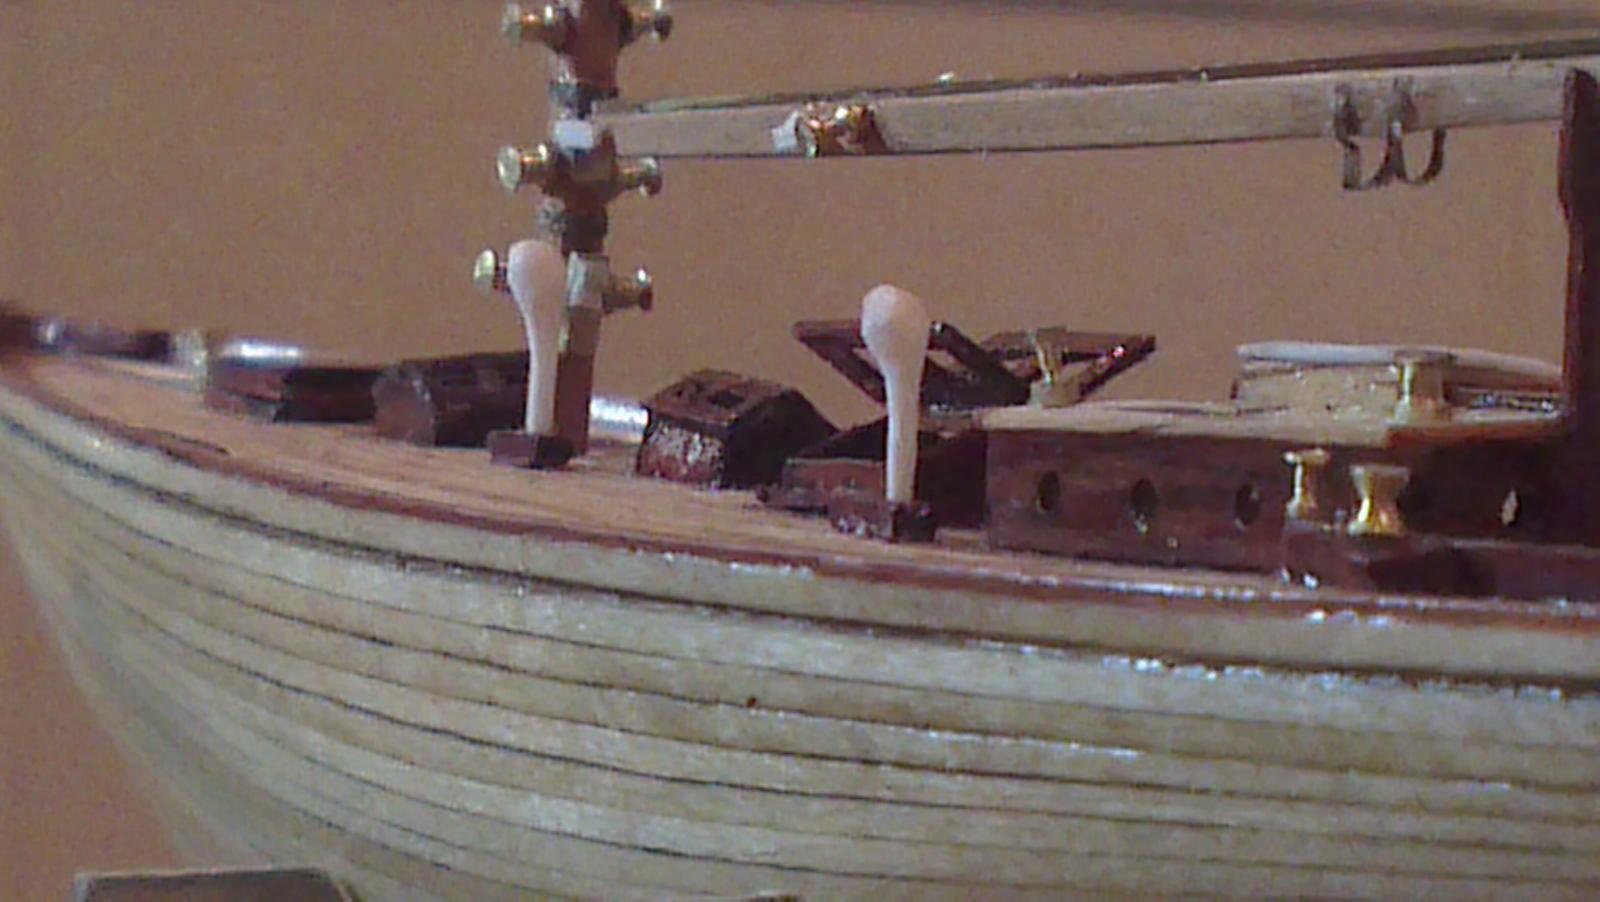
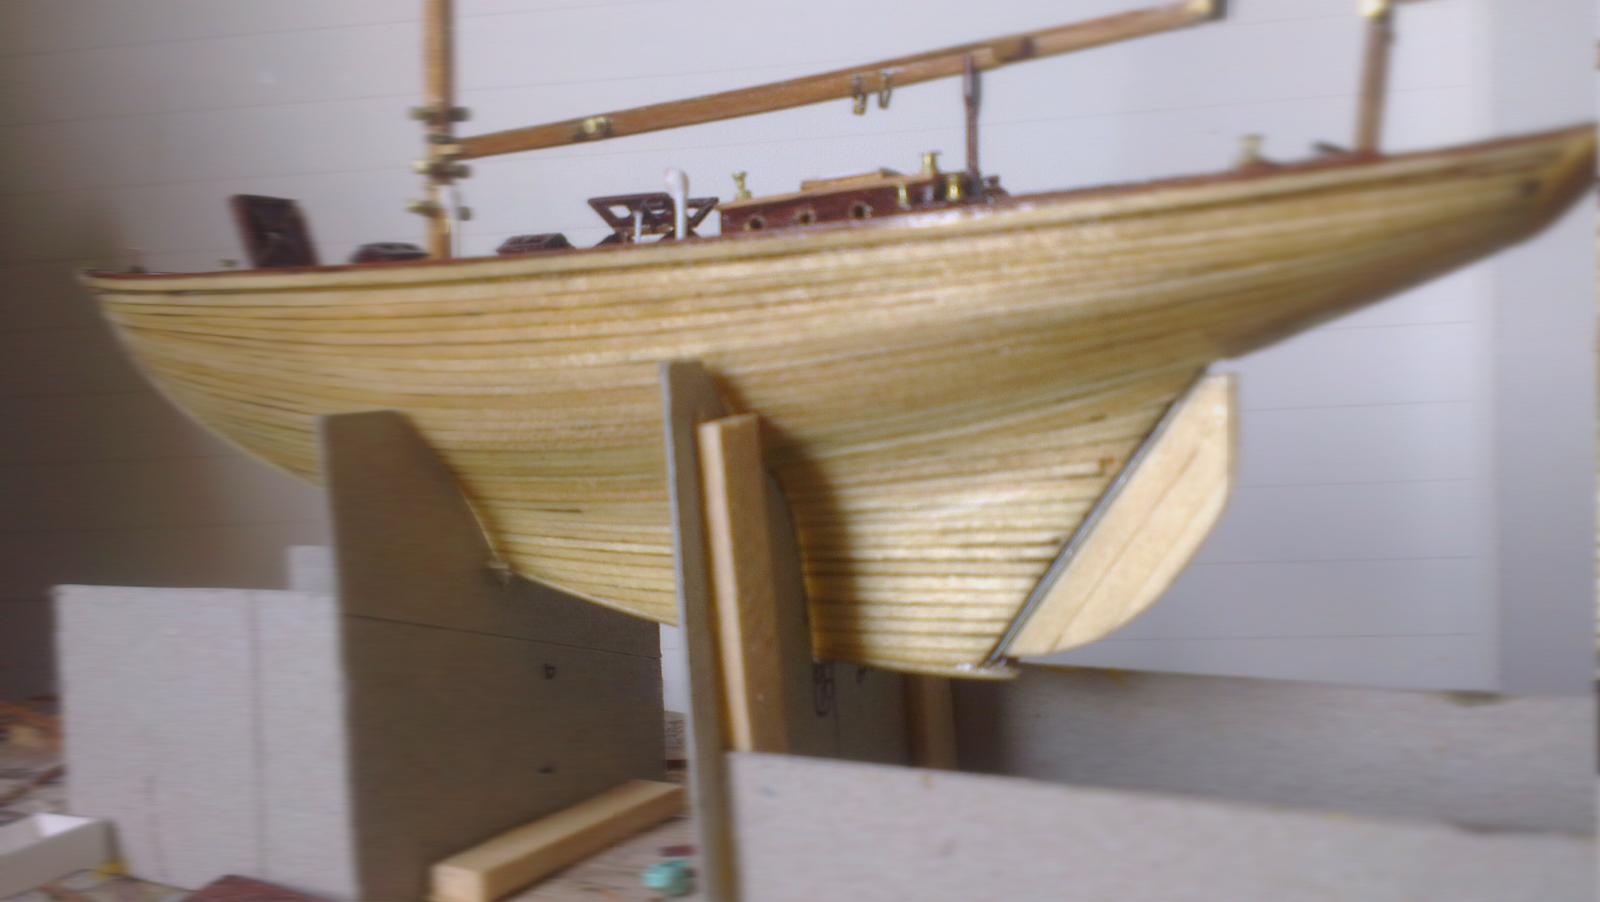
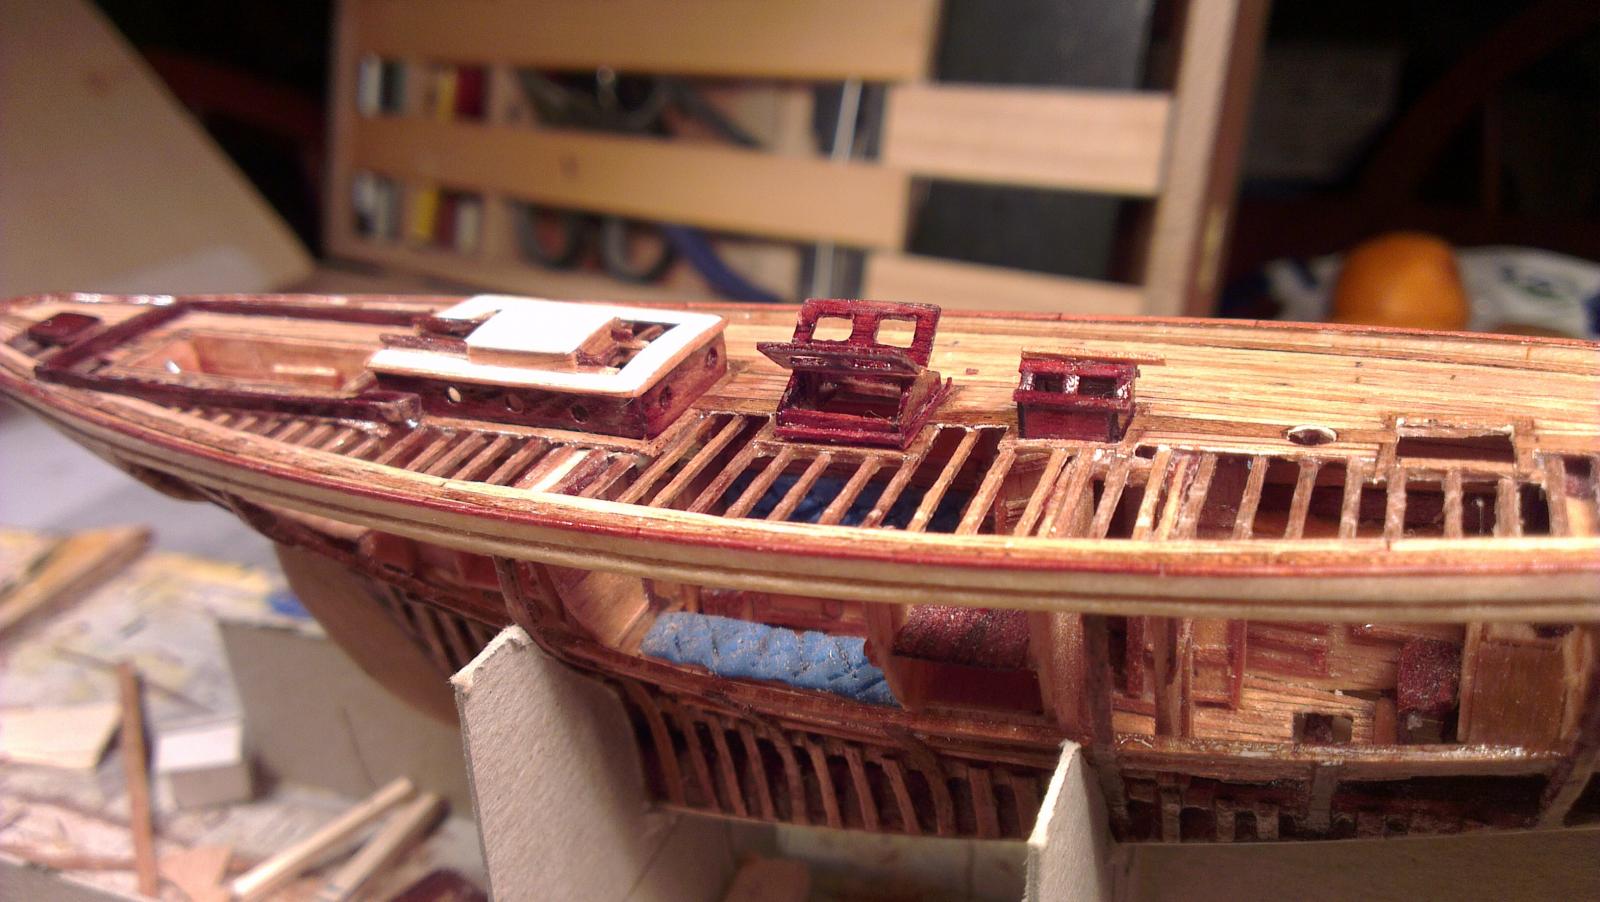
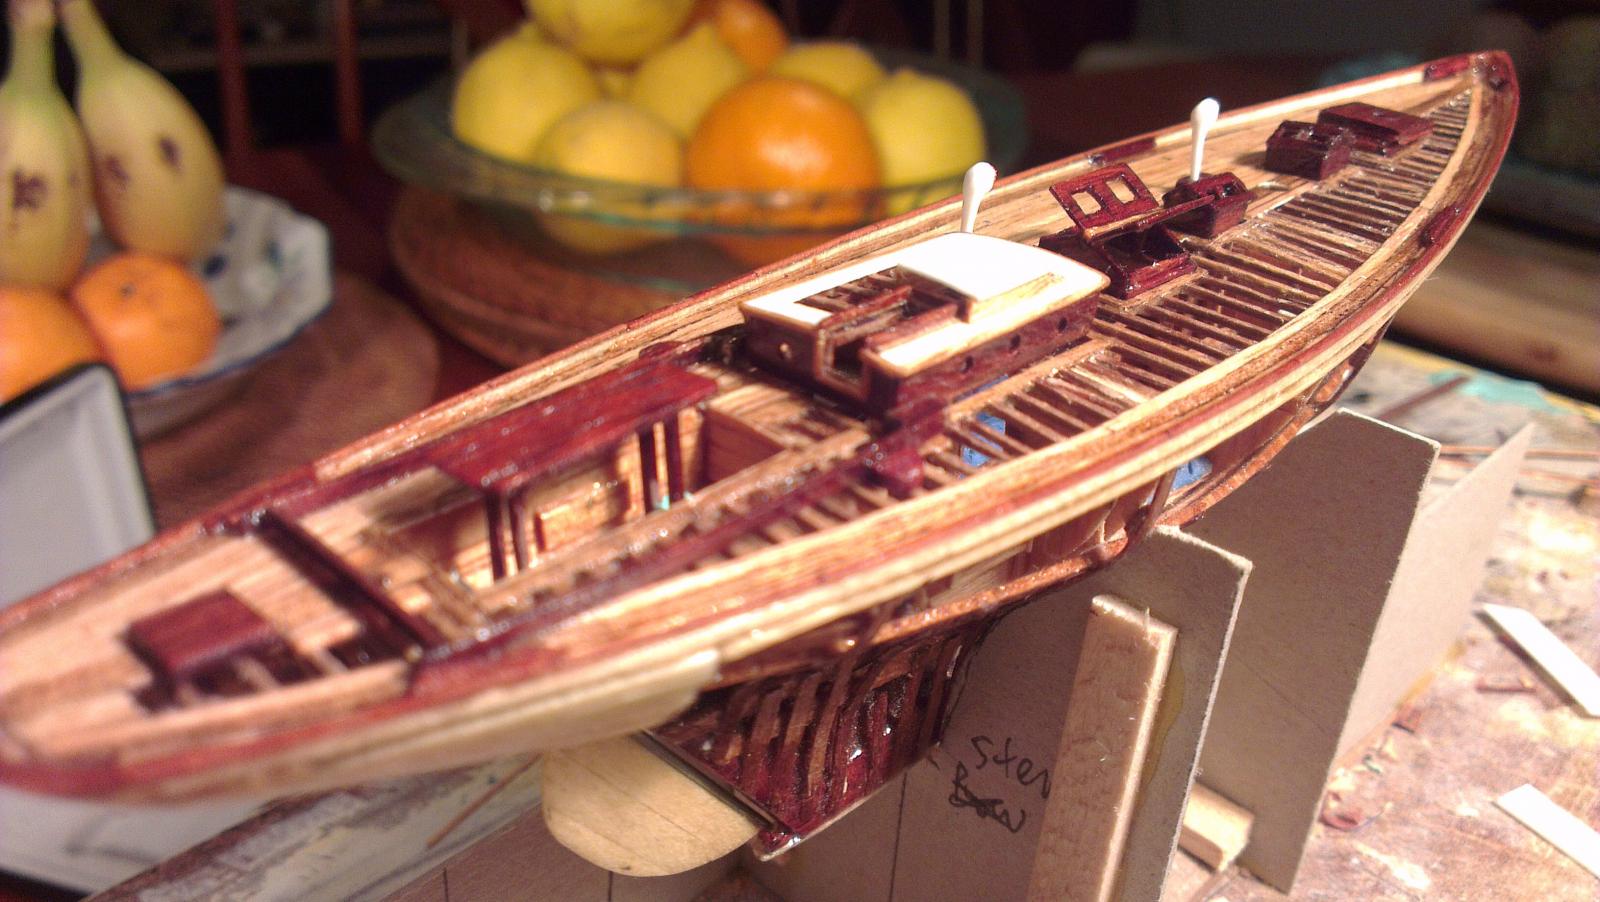
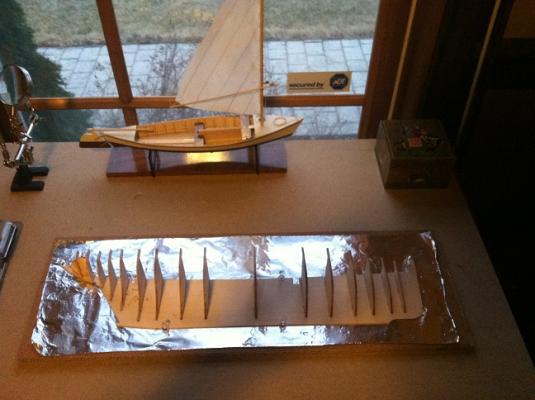
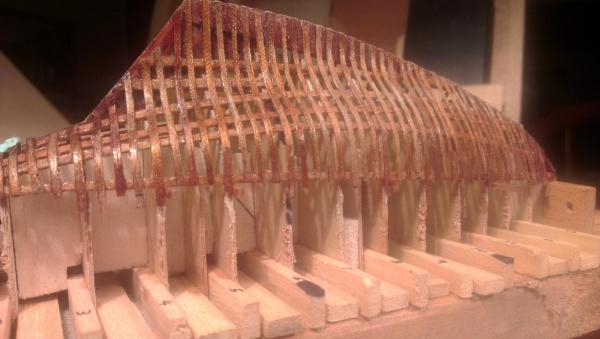
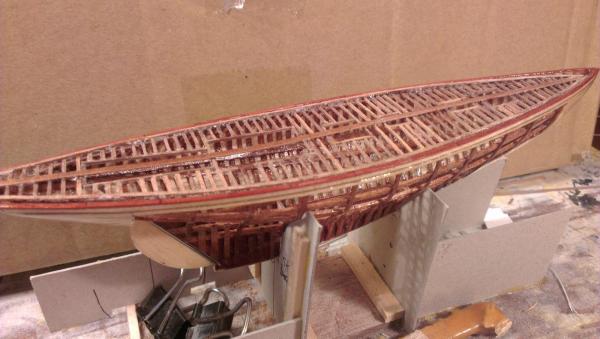
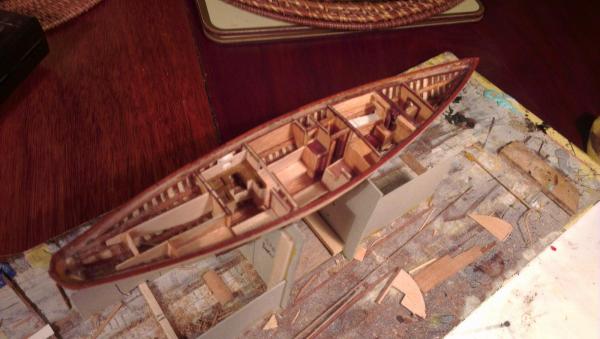
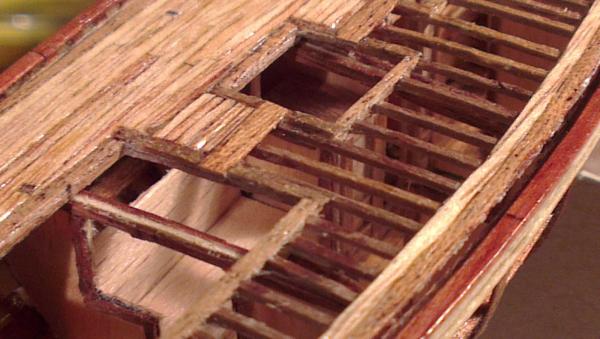
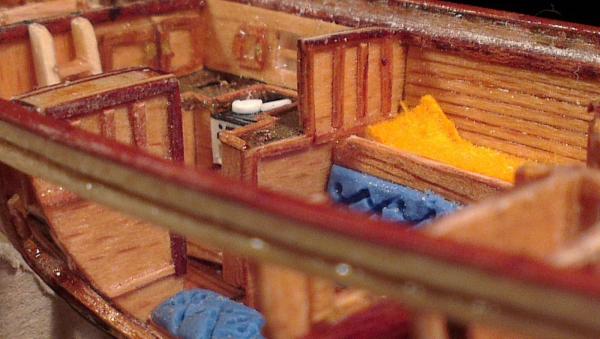
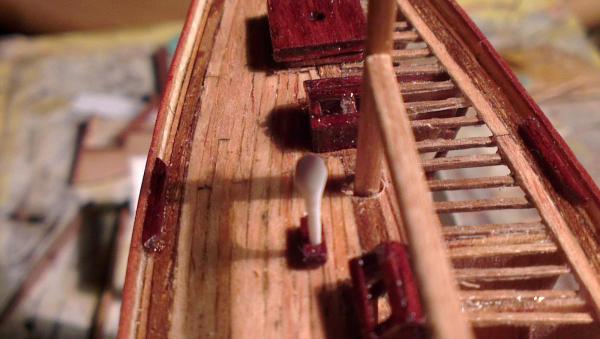
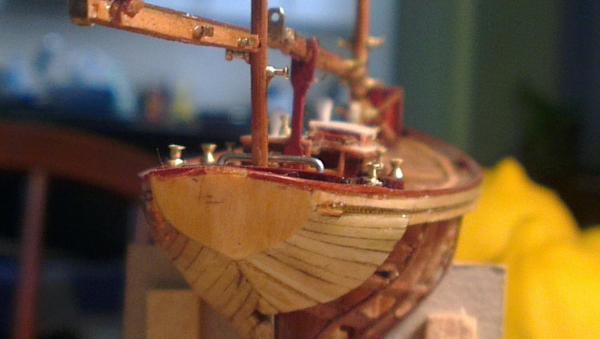
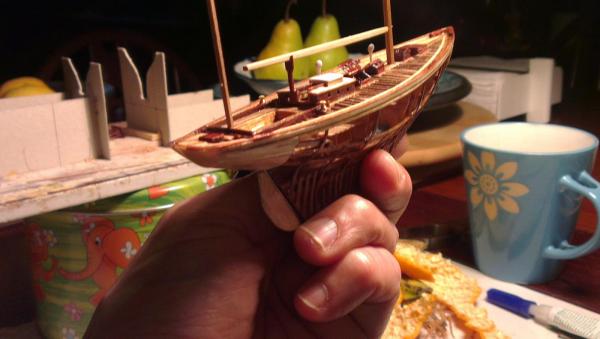
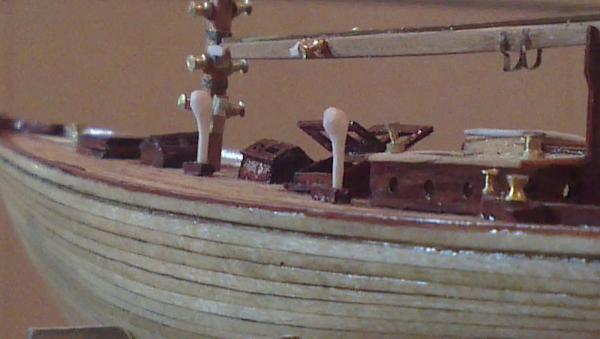
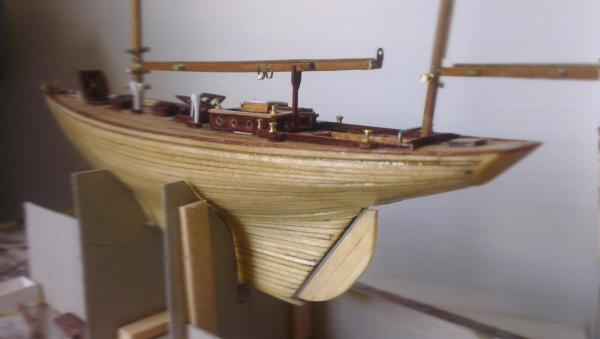
 Hi everyone. Ever since I first read about the famous Sparkman and Stevens' designed yawl (built over 80 yrs ago snd she's still racing), I've wanted to build a model of her. So, after thirty years of dreaming, I've now started to build a scratch built, miniature, fully detailed model, complete with interior accommodation, etc. The model is a true miniature, ie only 15 cms approx in hull length. As you can see, I have tried to adhere to full sized construction practices by using a built up keel and bent frames. All the wood was cut using my miniature table saw, which, is a lot of fun and satisfying, not to mention, cost effective. I still have a long way to go before I finish the masts, winches, blocks and rigging, but it's been a hell of a lotta fun so far. I hope you enjoy the model and photos. I will post more pics as work progresses. Comments, feedback and suggestions are most welcomed!
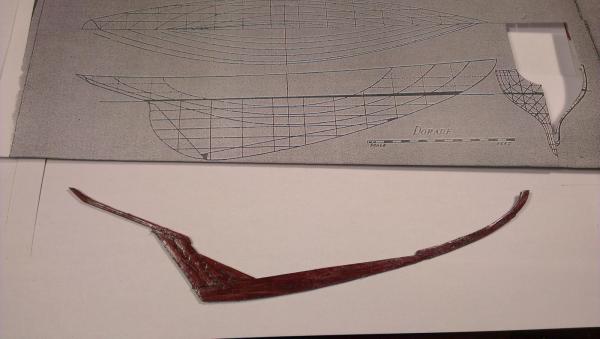


- 36 replies
-
- 15
-
-
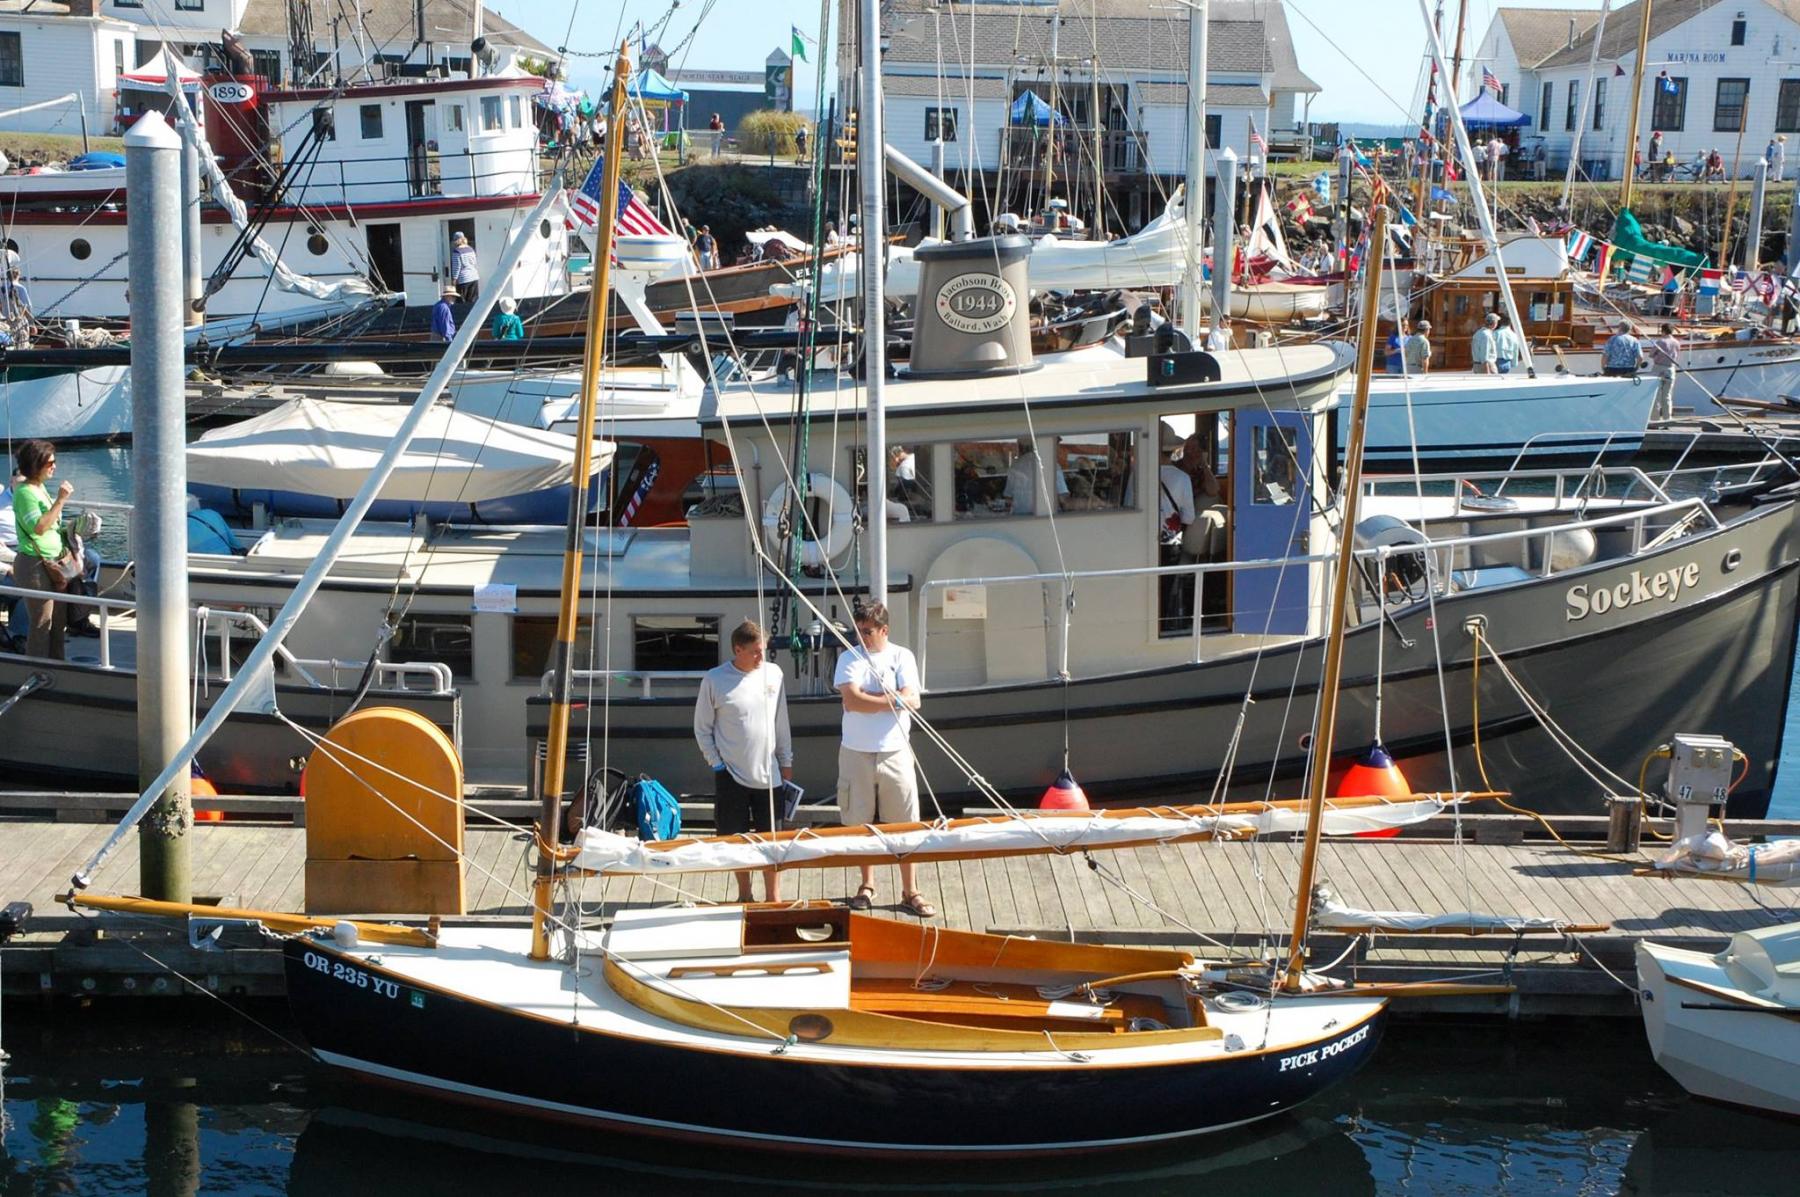
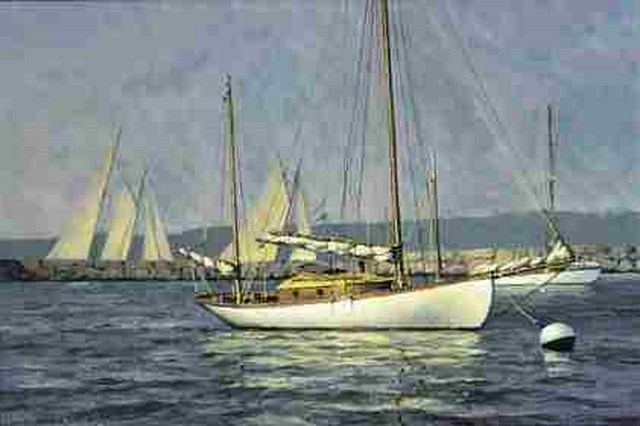
 Well here we go again. As I said in my last build, the Admiral saw a picture of a yawl and said, “Why don’t you make a model of that for me”. I don’t know about you but I find it very difficult to say no to the Admiral. What boat is it? I searched the web and I asked around, the wooden boat forum suggested that it might be the Malabar Jr. Malabar Jr. The Malabar Jr. was designed by John Alden in 1924. There are many variations, originally a sloop with Marconi sails it was also built as a gaff sloop and as a yawl, both Marconi and gaff. The cabin was also changed, most had square forward corners but some had rounded corners like in the painting. I was not able to find a picture of it as a gaff yawl, but the gaff sails would move the center of sail aft and it would require a longer bow sprit to move the jib forward to balance the sails. So that agreed with the painting. The only problem left was the shape of the bow. In the painting the stem is more perpendicular where it meets the deck. Then the word came from the Admiral. ”The painter probably took artistic license in painting the picture so why don’t you take modeling license?” So unless someone out there can tell me what this yawl is, I plan to build the Malabar Jr. with a Cap’n’Bob bow. Bob


cropped.png.c8c93436d7610c3581cdbc09ea2ce9a1.png)
cropped.png.286b2028d1ca0338407d4c72ed498302.png)
cropped.png.29efca76a26ca49cda3081d3913546ce.png)
cropped.png.9d03b140631b911b5592c085f23d0882.png)
cropped.png.2429495eb2041286ca7e3ec7b3d6ff54.png)
cropped.png.de239418595fea8a7b28e0ca036b8a70.png)
.png.22678a93620cdcd26f6295ff1df95f2b.png)
.png.66c47f3989a8c254bdb704f74bdd5e86.png)
.png.7f90347b3e8d8303c19635dd79cbb817.png)
.png.2c9727e8d613bb213ccd41a6f383fb90.png)
.png.003075eee1a91a420c6bed53b164b5e6.png)
.png.04d0f8455b35481cc3a4140bec2ff510.png)
.png.f4d7e016567ae28d9336b7ccf6a7b8af.png)
.png.a82fcfa105398891a7592ea240684306.png)
.png.1ae74c7abf234c937b2fa115309d4ccf.png)
.png.5a1bf2b8a15d6caaaf5aefd8d64d5cc6.png)