Search the Community
Showing results for tags 'America'.
-
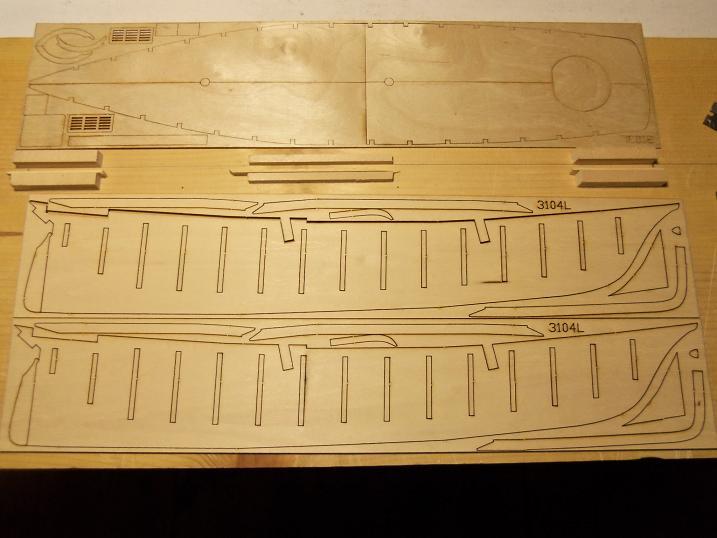
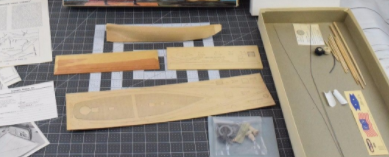
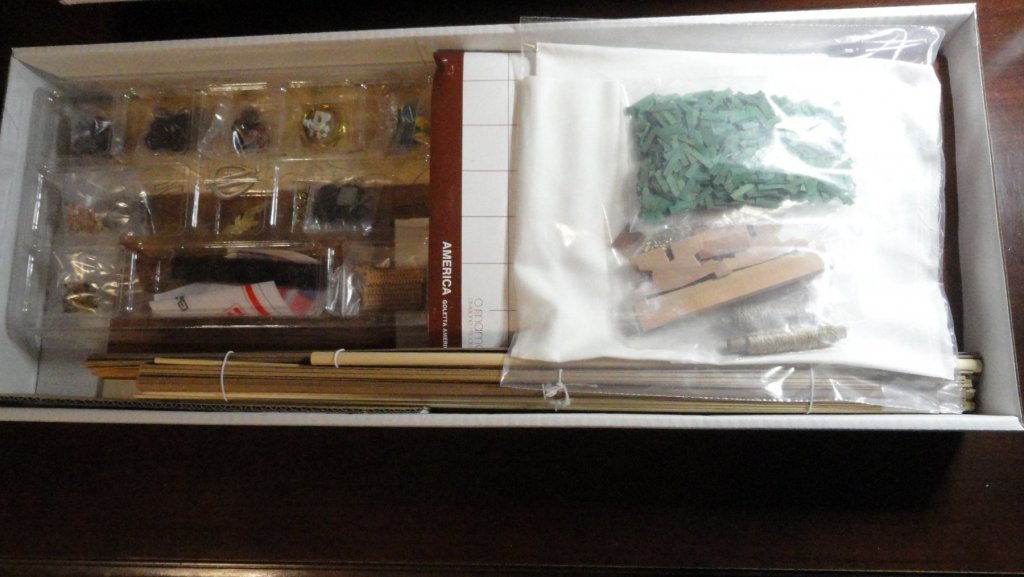
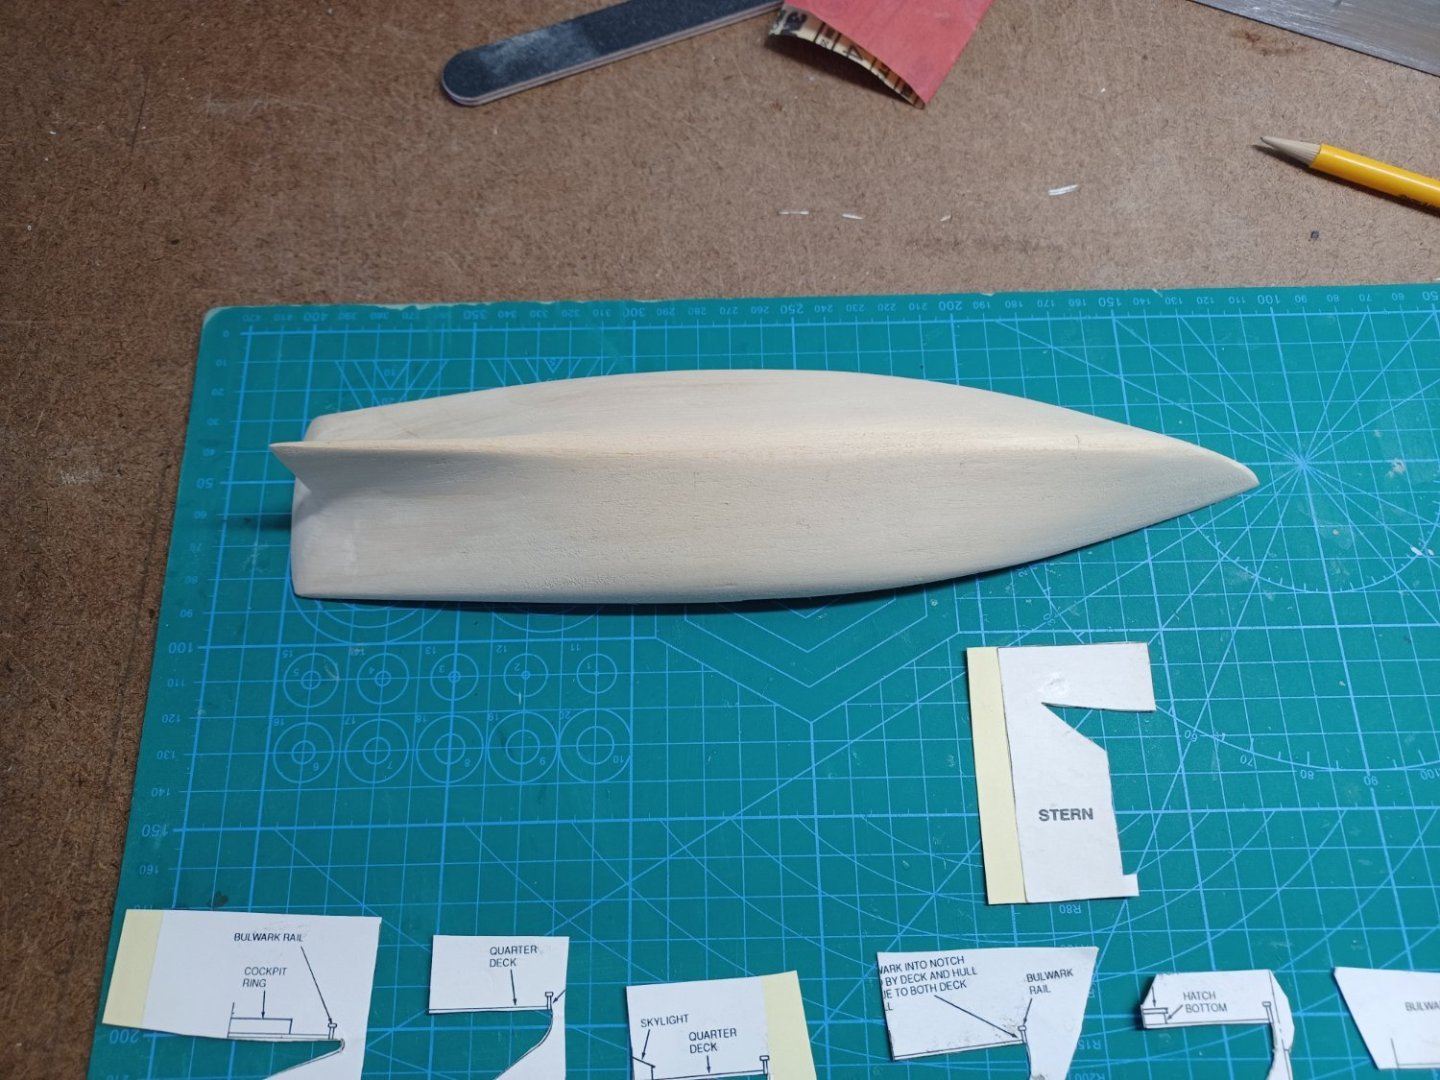
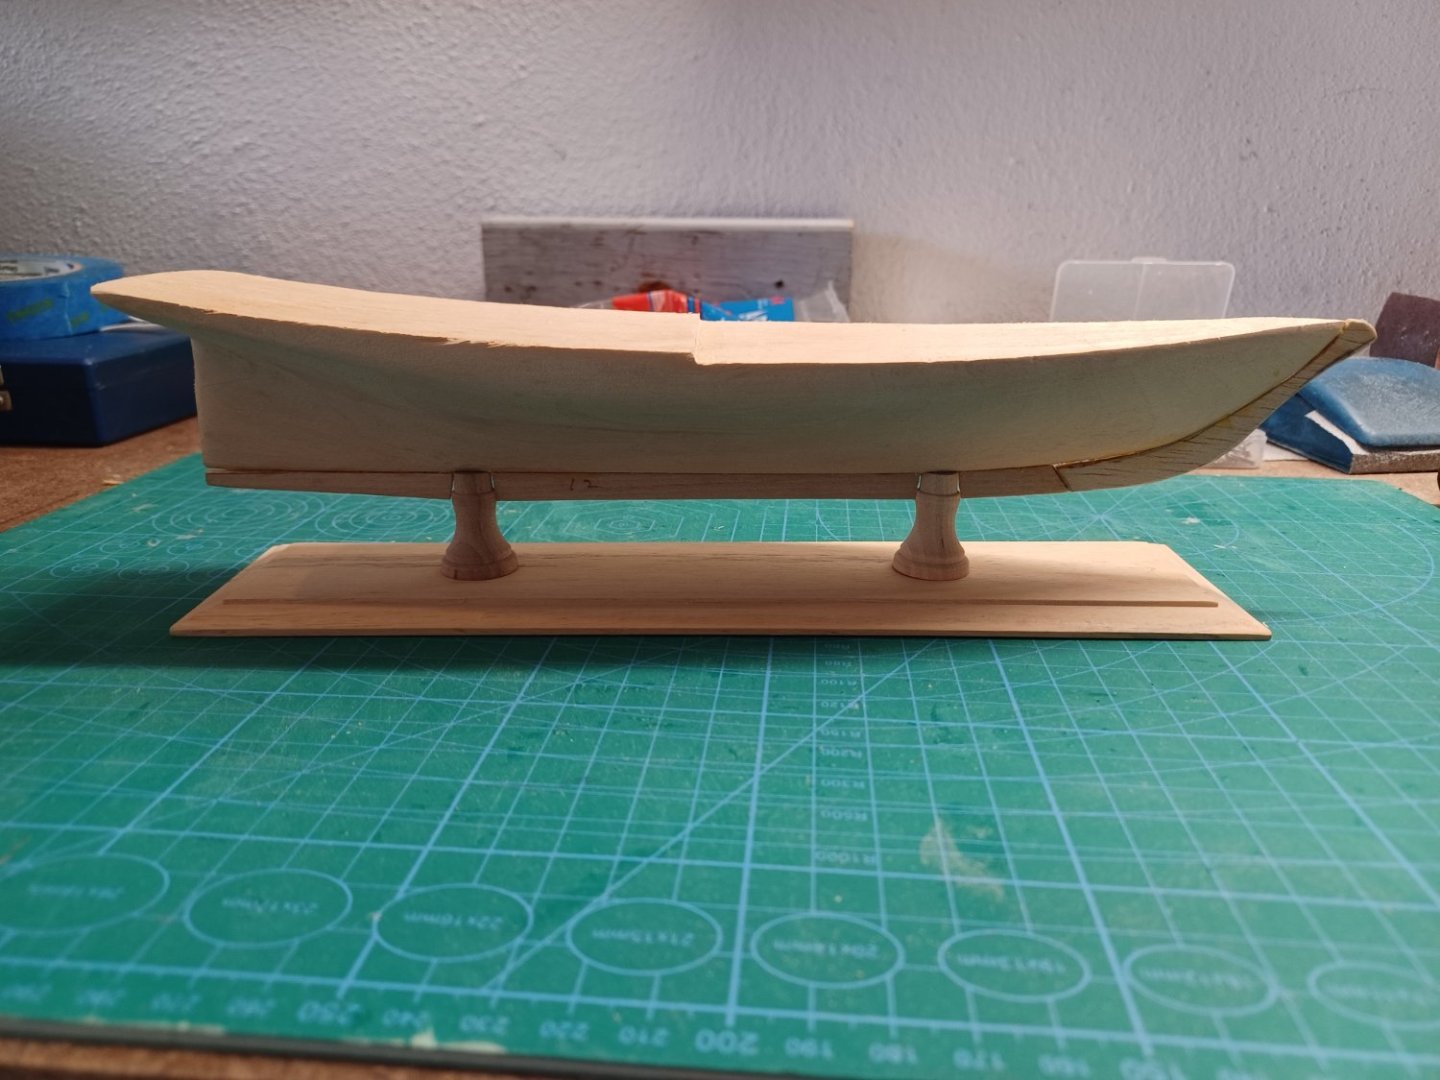
 Hi Folks For ages I’ve been trying to justify not touching several Kits that I have, Till Last weekend where I decided to warm up hands with an old Scientific Kit. My father had it built back in the 60's in Pittsburgh, and I remember lots of craftsman shift in this kit, lots of dedication. This kit would be nothing compared to the masterpieces I´ve been following on this site, but I will try to honor this kit. The Kit Parts
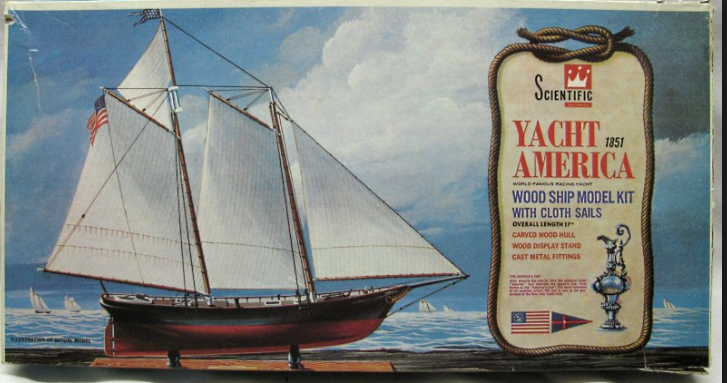
-
 New build log for Yacht America, Been looking around for a few sail boat kits which do not require too much rigging. I have built many models, more than I can remember or count of tall ships of all sizes and shapes and have chosen this Yacht model because it appears to require not to much brain power. I have never been impressed with Mamoli kits, they are made for bashing. You never know what surprises will appear during the process of the model build, so here goes.
-
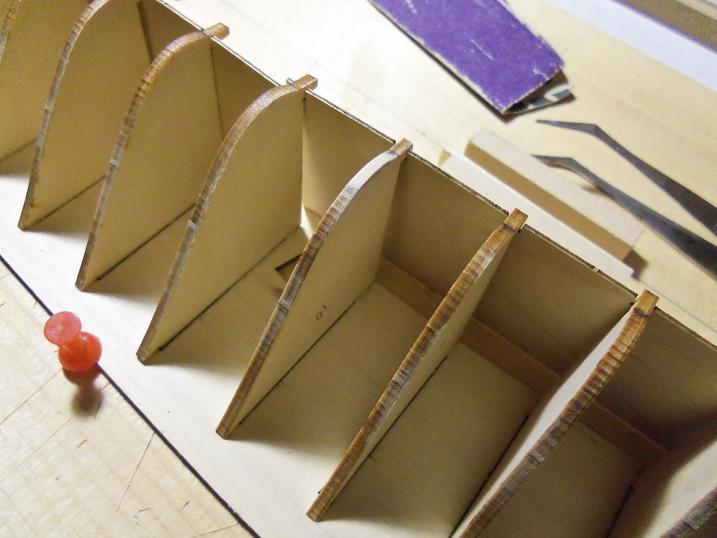
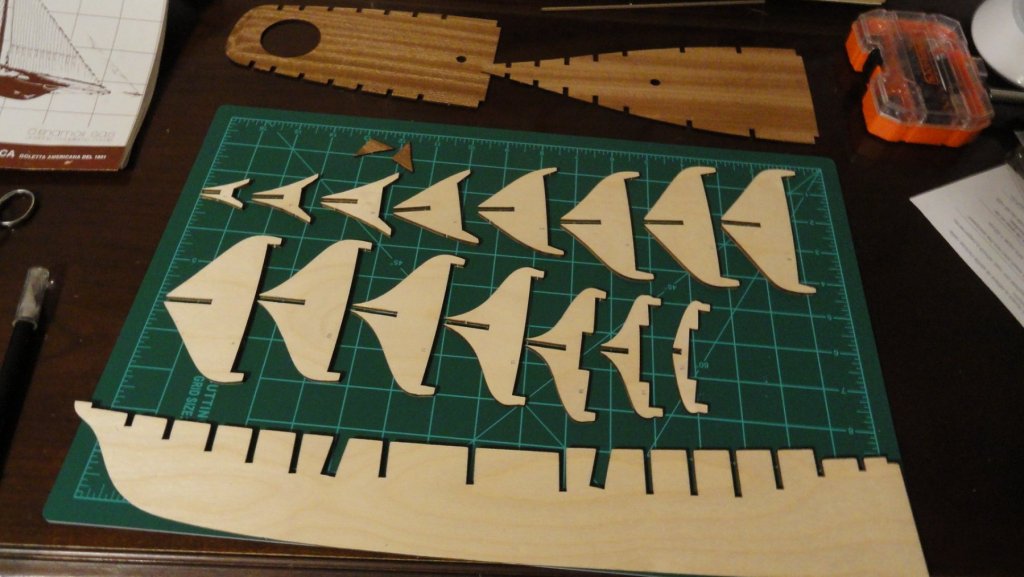
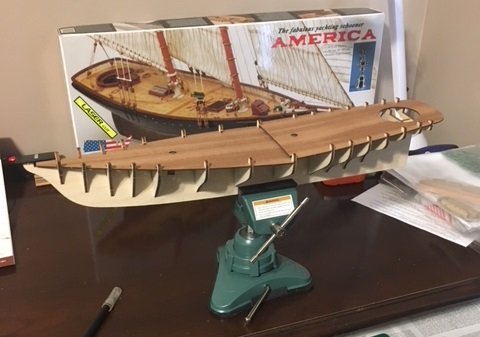
 Well, here we go... It appears that the first order of business is going to be shaping all of the frames so as to be symmetrical and form the smooth lines needed for the overall build. That could take a while, so you may not be hearing from me for a bit. I don't think that I will leave any exposed after planking, as there is no subdeck or other internals included in the kit, and I like the look of the finished craft. Other decisions that will come (much) later include: Sails or not? Coppering the hull or not? Lifeboat or not? Whatever the answers, this looks like a fun journey. Happy New Year! Andy
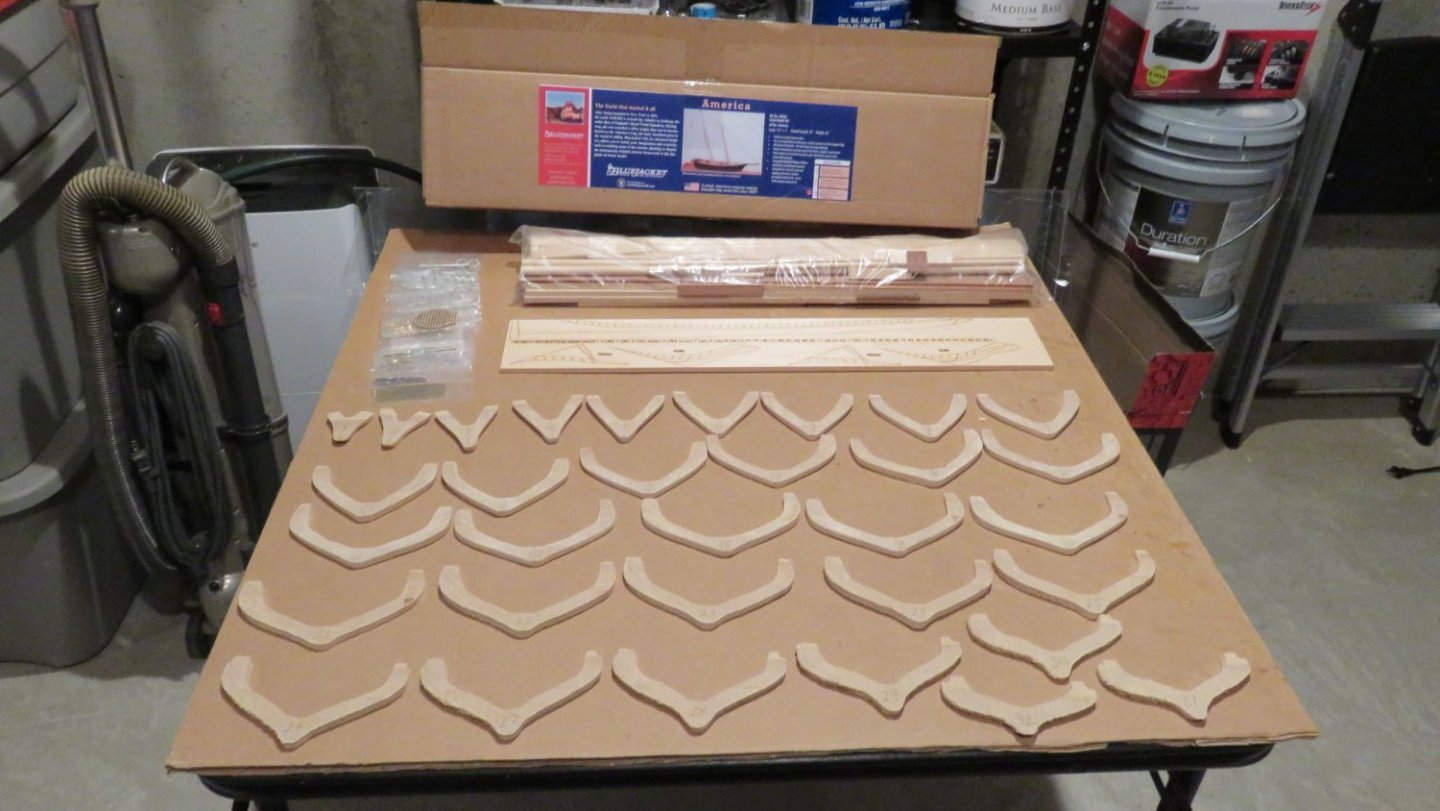
-
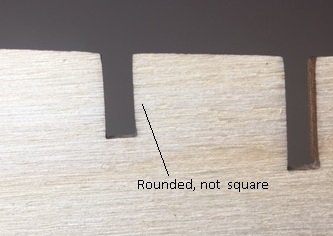
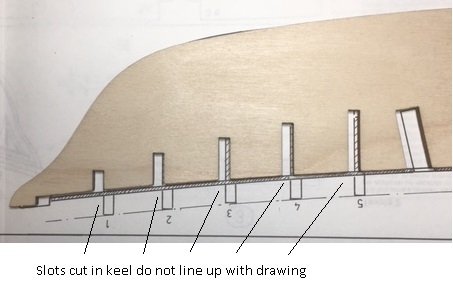
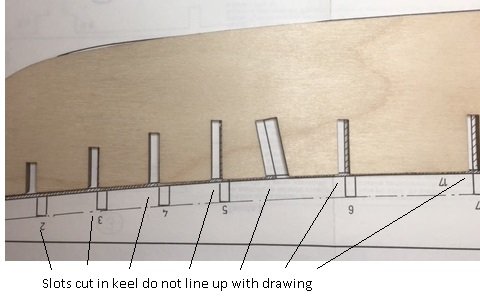
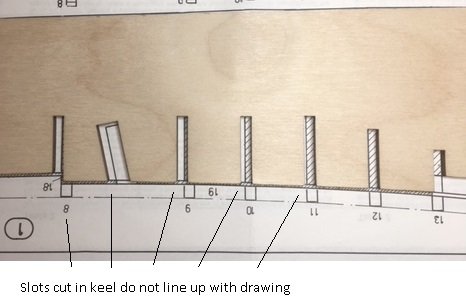
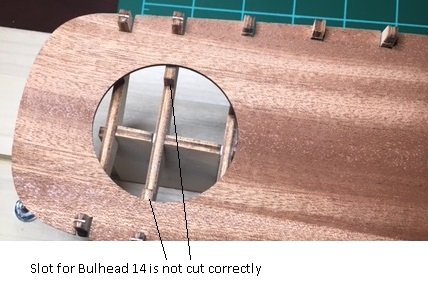
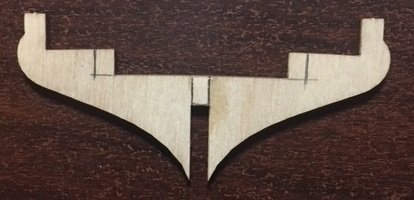
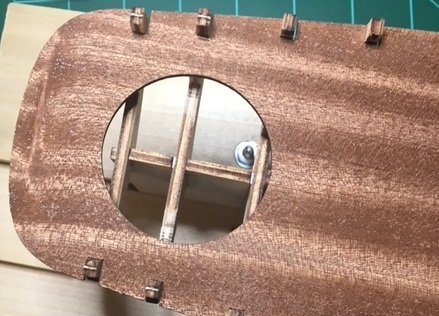
 This is my first kit build. I've dabbled with RC planes for a few years so maybe some of that experience will help me as I come up to speed building ships. I started in late December and kept my build log off-line. I meant to start the log here earlier, but just didn't take the time until now. The dates when I made my first entries are noted as follows. 12/27/2017 I purchased the Mamoli Yacht America as my first kit and received it on 12/18/2017. I selected this kit because I think it is a beautiful ship with great lines, and I also thought it would be a reasonable kit to start with as it did not appear to have extensive rigging. I considered selecting the Constructo America kit, but chose to go with Mamoli’s Amrerica kit because Constructo’s kit did not have a jib boom which to me is significant to the lines and the appearance of the ship. I realize that I could have added it, but this being my first kit build, I thought it was best to rely on the contents of the kit and follow the instructions. I also spent some time on the internet and found ModelShipWorld.com. After reading through the build logs posted by Hamilton, Mojofilter, and Flyer, and then reviewing the documentation provided with the kit, I’m thinking I may have selected the wrong kit maker. I’ll move forward with it and do the best I can. However, as I progress with reviewing the great information I’m finding in this forum and other places on line, and then using some of that information to assess this kit, I have to say I am not impressed with this Mamoli kit. I read about the fire some time back and realize the company is out of business, but I don’t see myself building any other Mamoli kits that are still avilable. Today I saw a new build log started by Greatgalleons that looks to be a good resource. The ModelShipWorld forum is outstanding, especially for us guys who are new to this. 12/28/2017 Separated keel and bulkheads. Began reviewing instructions and drawings. Labeled bulkheads. 12/29/2017 I have found an excellent resource on Youtube. Gary Brinker has posted 40 videos of his Model Expo Bluenose build (titled “Bluenose 1” through “Bluenose 40”, averaging about 30 minutes each). These videos have some great discussion and a lot of good info and insights to consider. His ModelExpo kit appears to be far superior in quality and completeness to my Mamoli kit. Completed first dry fit of keel and bulkheads. Forward bulkheads and deck fit was okay, but has some looseness. Rear deck and bulkheads were another matter. The 3 bulkheads closest to stern did not fit well and required trimming. I’m stopping to return to build logs and re-read and re-check photos. 01/01/2018 ModelShipWorld.com appeared to have a server problem and was down for a couple of days. I have not been able to re-read the build logs, but remembered some of Hamilton’s comments. I disassembled the bulkheads and keel and checked each against the drawings. I’m under-whelmed. As I look at the laser cuts, many of them are of very poor precision. For example, the slot in the keel for the second bulkhead back from the bow is not straight on either side. With the cost of this kit, and the technology of CNC machines today, the quality of these cuts is unacceptable to me. These cuts should be perfectly straight and should be cut to the correct width so that there is no looseness with the bulkheads. Perhaps there needs to be some looseness to adjust the fit, but in reading Hamilton’s build log for this kit, he seems to have reached the same conclusion. Very poor quality in my opinion. I also see the same issues as Hamilton did with the laser cut parts not matching the drawings, leaving one to ponder which is correct. I am assuming Mamoli used a CNC machine, and if so it’s obvious the CNC programming for the laser cuts did not match the drawings provided with the kit. Lining the tip of the bow up on the drawing, the following photos show the poor laser cuts. Hamilton mentioned in his log that he would shim the keel to fill in the gaps per the drawing. The dry fit with the keel, the bulkheads and the deck pieces line up relatively well, they just do not match the drawings. My concern is, where is the inaccuracy and how does this affect the build later on such as when I begin planking the hull? Did they use an entirely different drawing to program the laser cuts? Should I trust the drawings? This kit cost too much for this level of quality, or lack thereof. I’d fire these guys if they worked for me. 1/25/2018 This entry to my build log covers several weeks of work. I spent time laying each bulkhead and the keel piece on the drawings to check alignment of the cuts. I found that if I align the stern up exactly on the drawing then the slots for the bulkheads and the masts line up fairly well. However, it shifts the error to the bow as you can see below. After several dry fits with the deck pieces, it seems that the bulkheads line up very well with the slots in the forward and aft deck pieces. It doesn’t seem that the issue with the bulkhead slots in the keel piece not matching the drawing will have much impact to the overall alignment of the kit. Also, I could spend time shimming the keel piece to fill in the gaps in the picture above, but how much does that change the appearance of the model to the naked eye? I’ll give it some more thought, and might go ahead and shim it up to match the drawing. There was more looseness with the bulkheads than I realized at first, and based on the other build logs I’ve read I decided that I should shim them up to fit better. The problem I realized was that I had no spare or scrap wood since this is my first kit. Also, there is only one hobby shop within 25 miles of where I live, and that shop did not have supplies for ship modeling. They are mainly a RC shop for cars and planes. At this point, I decided I would order a supply of wood and did so from Agesofsail.com (various widths in mm, 0.5 mm thick and 1 mm thick, 36” bundles of 10). It took 7-8 days to receive so I was somewhat dead in the water until then. I’ve now trimmed, sanded, shimmed, etc., all 15 bulkheads and the keel piece, where needed and have a pretty tight fit on all 15 bulkheads. Here is the dry fit with the shimming completed. Here are the pieces showing some of the shims. I noted from the other build logs that bulkhead 14 is not cut correctly.
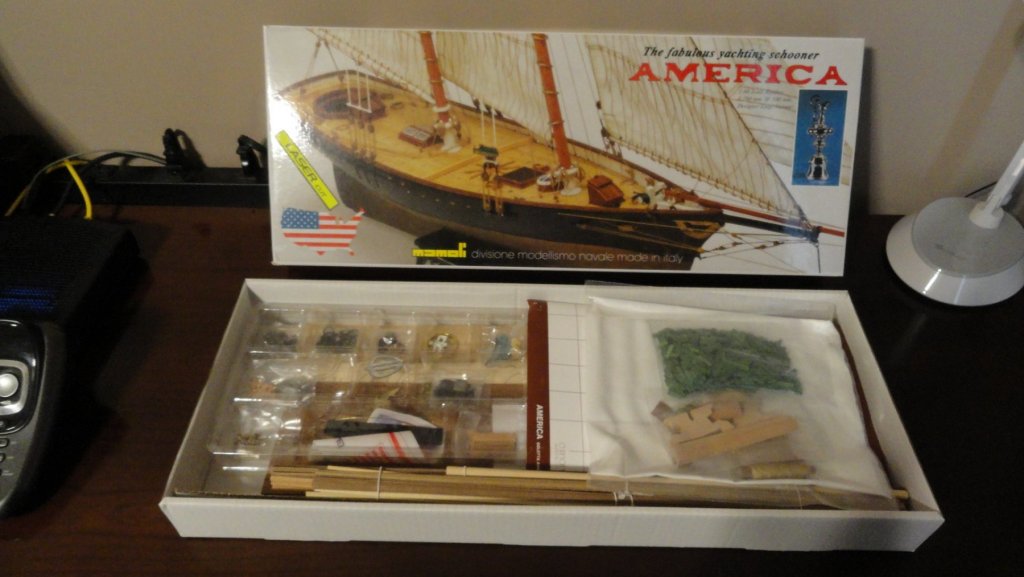


-
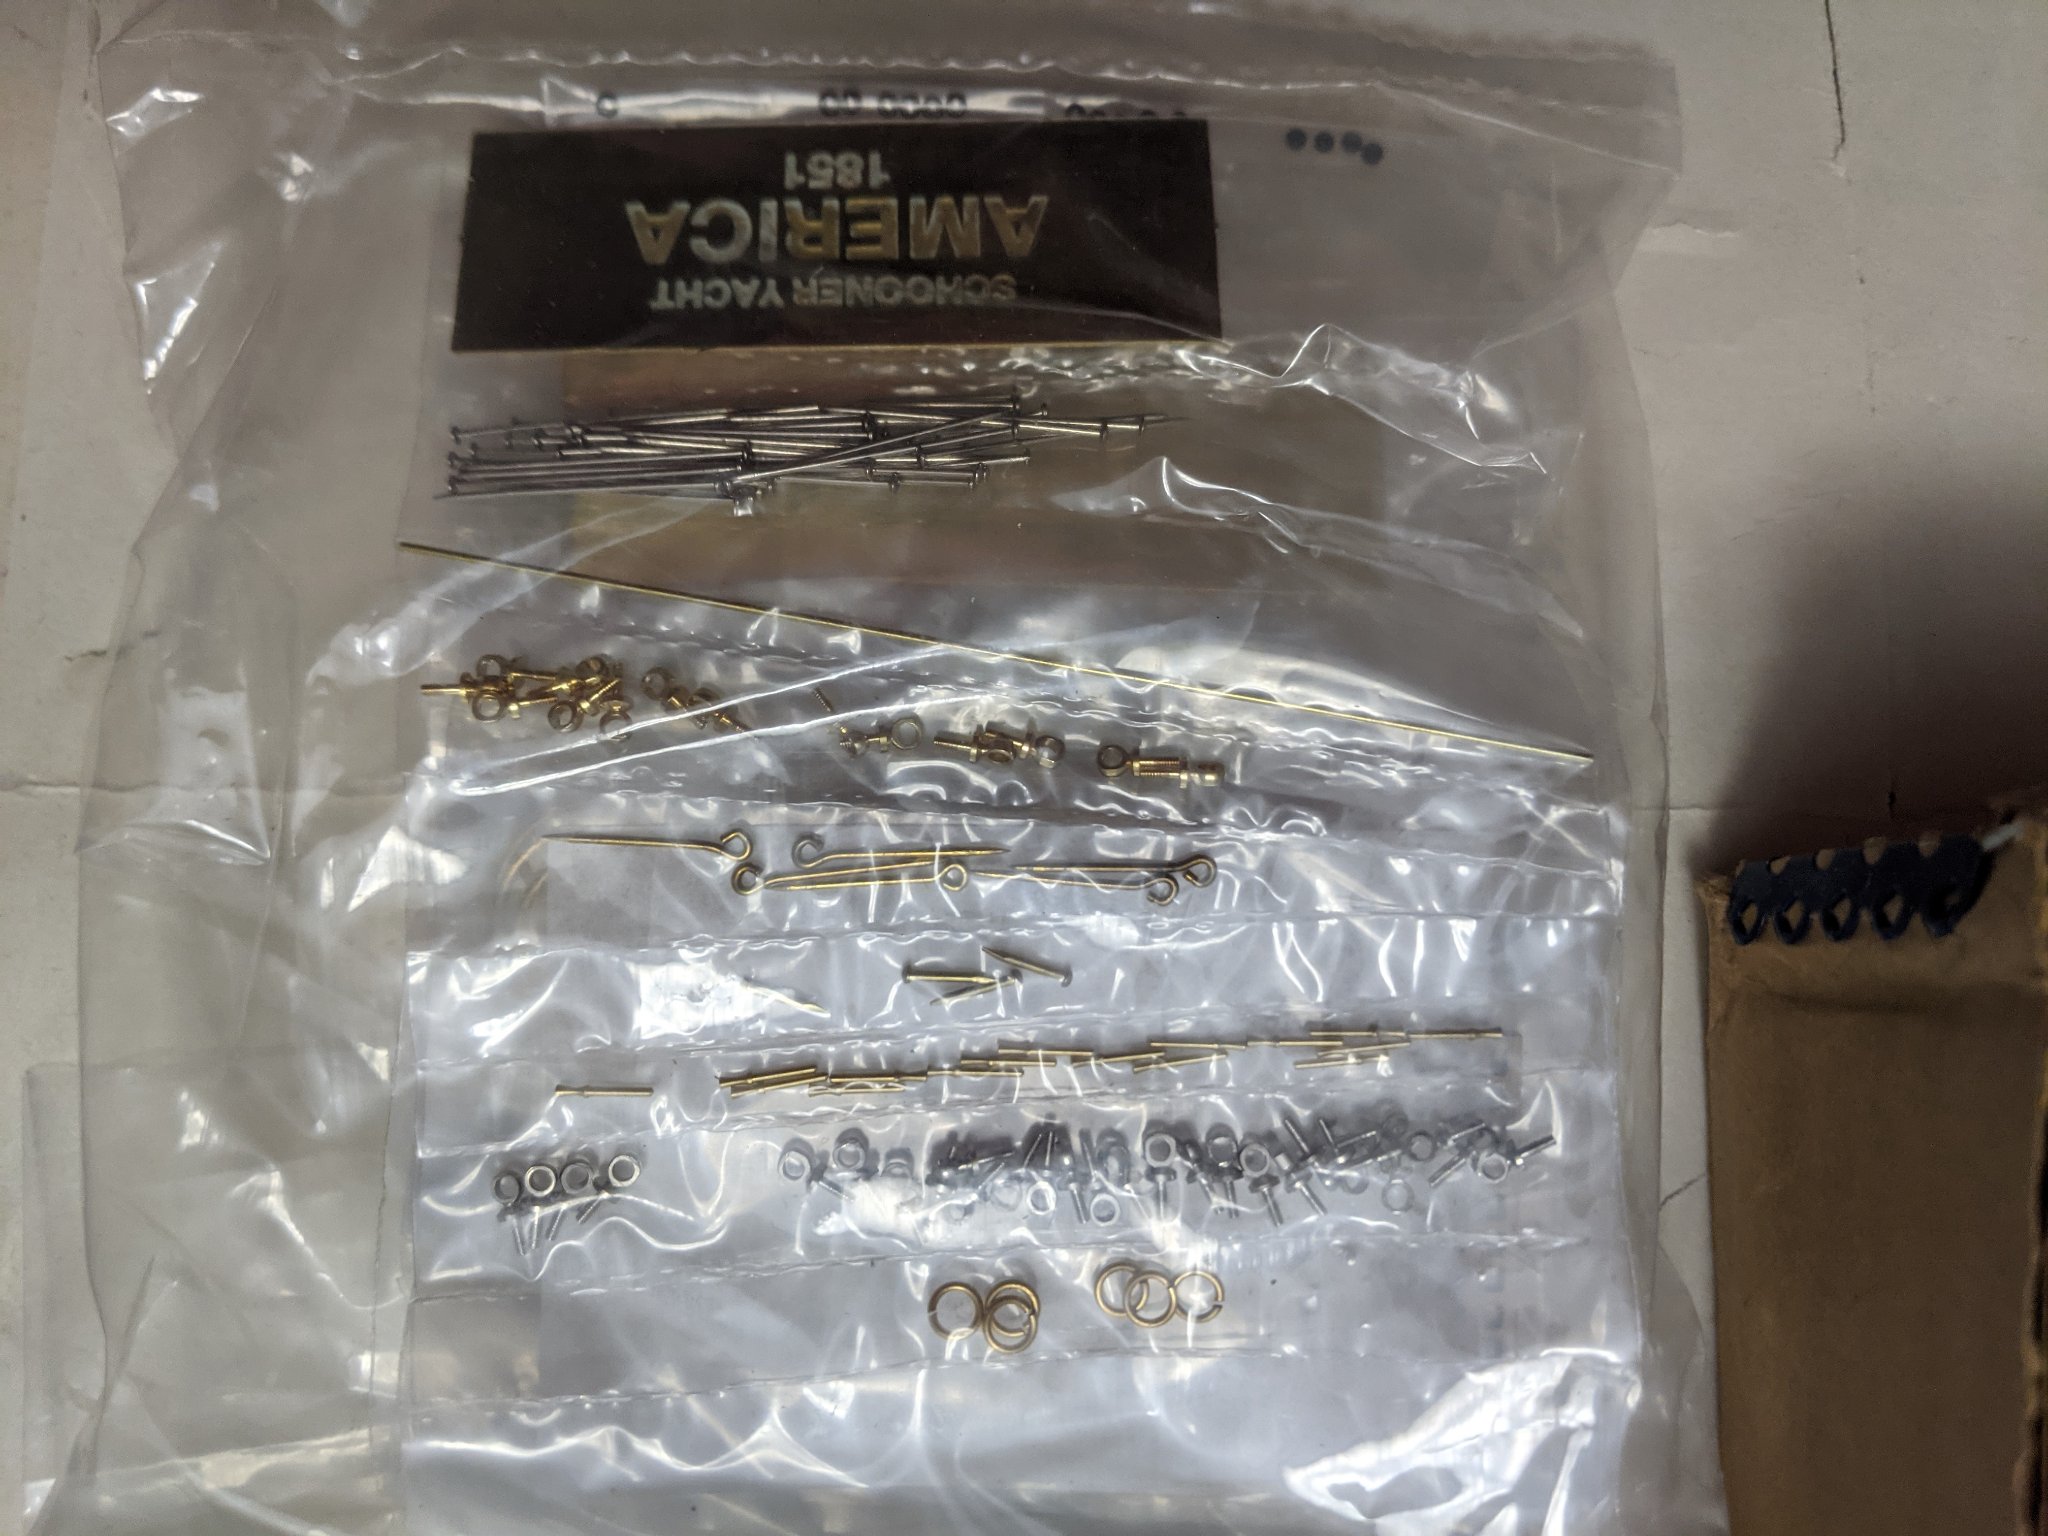
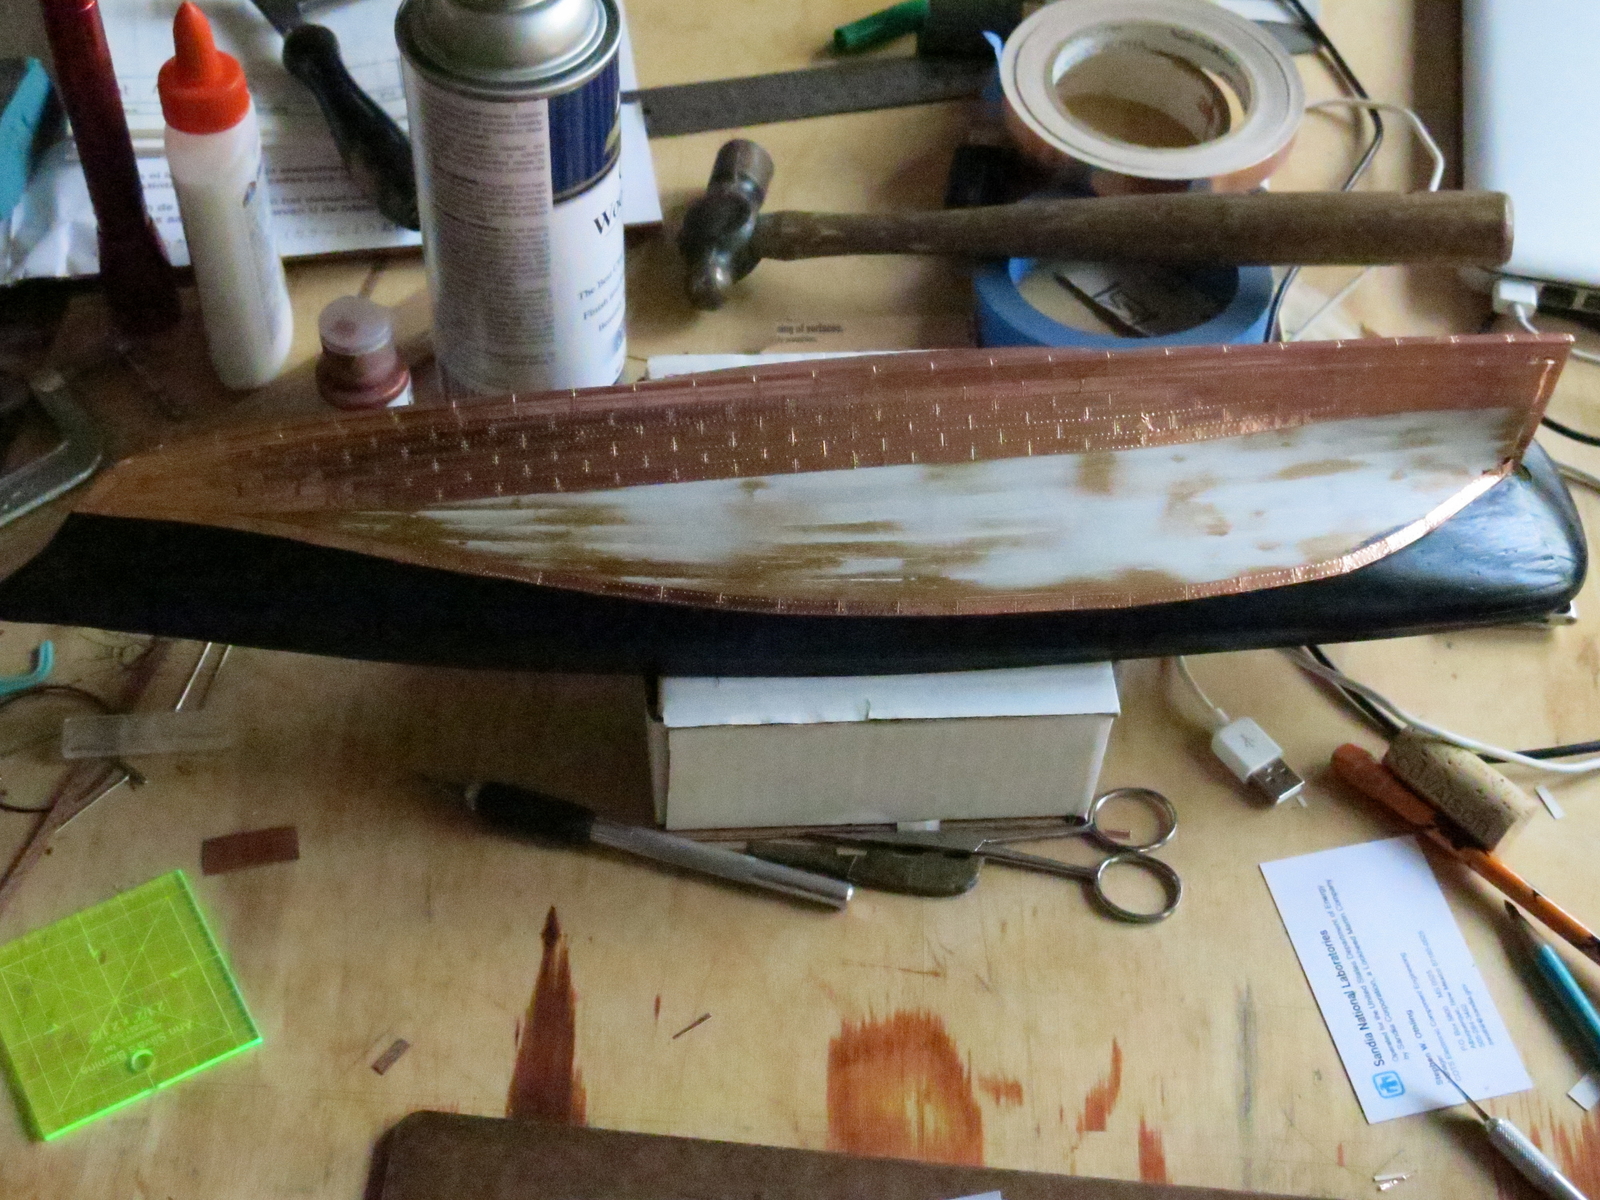
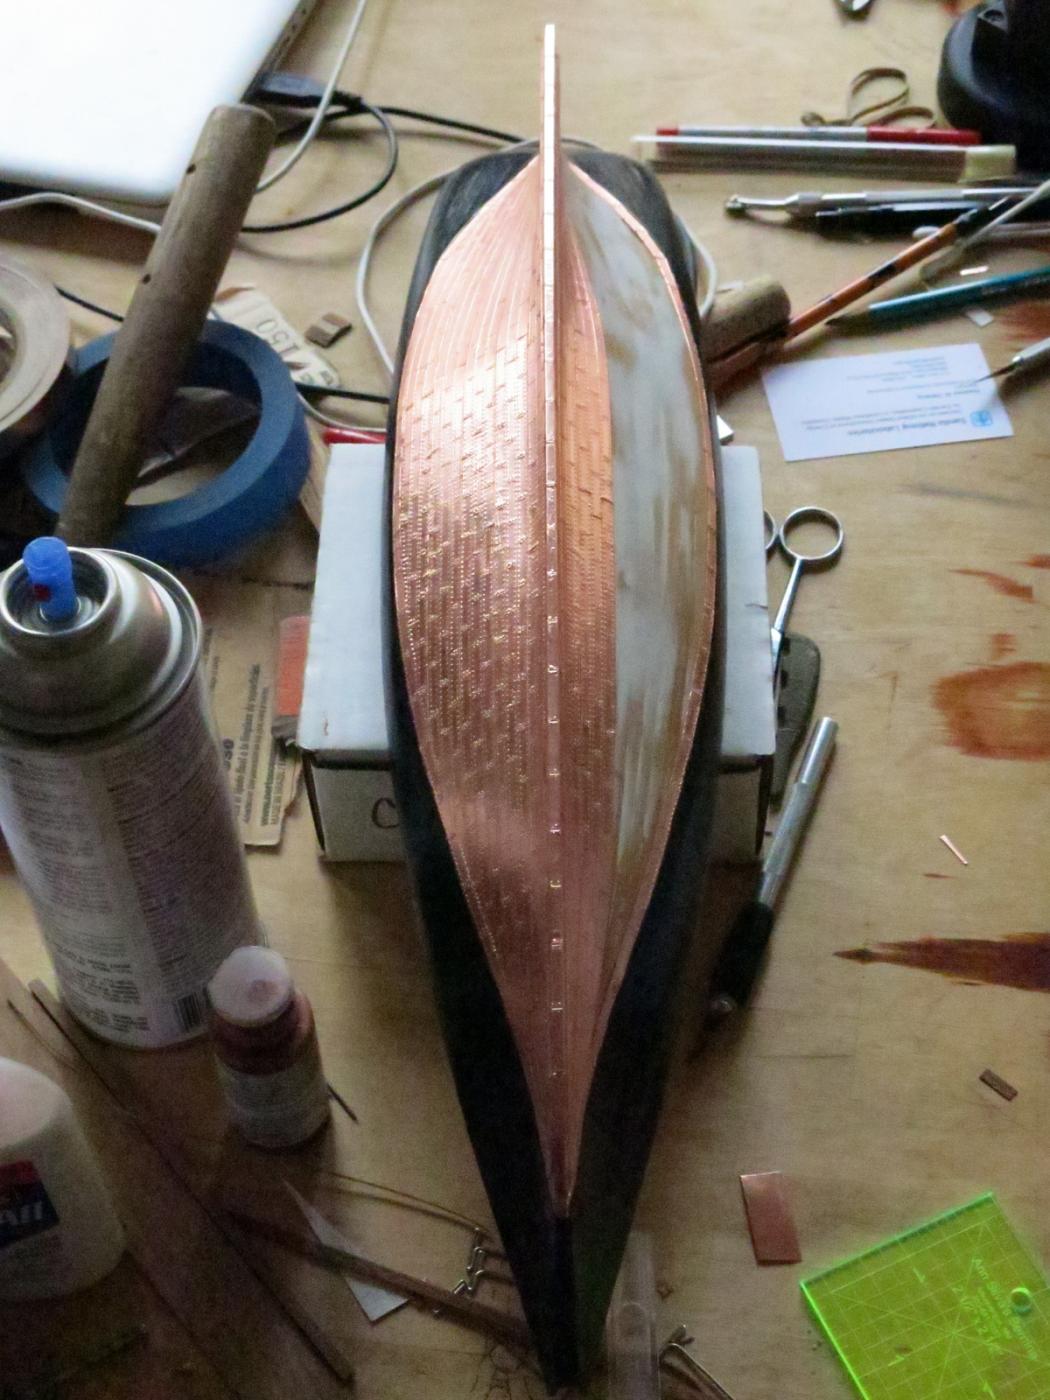
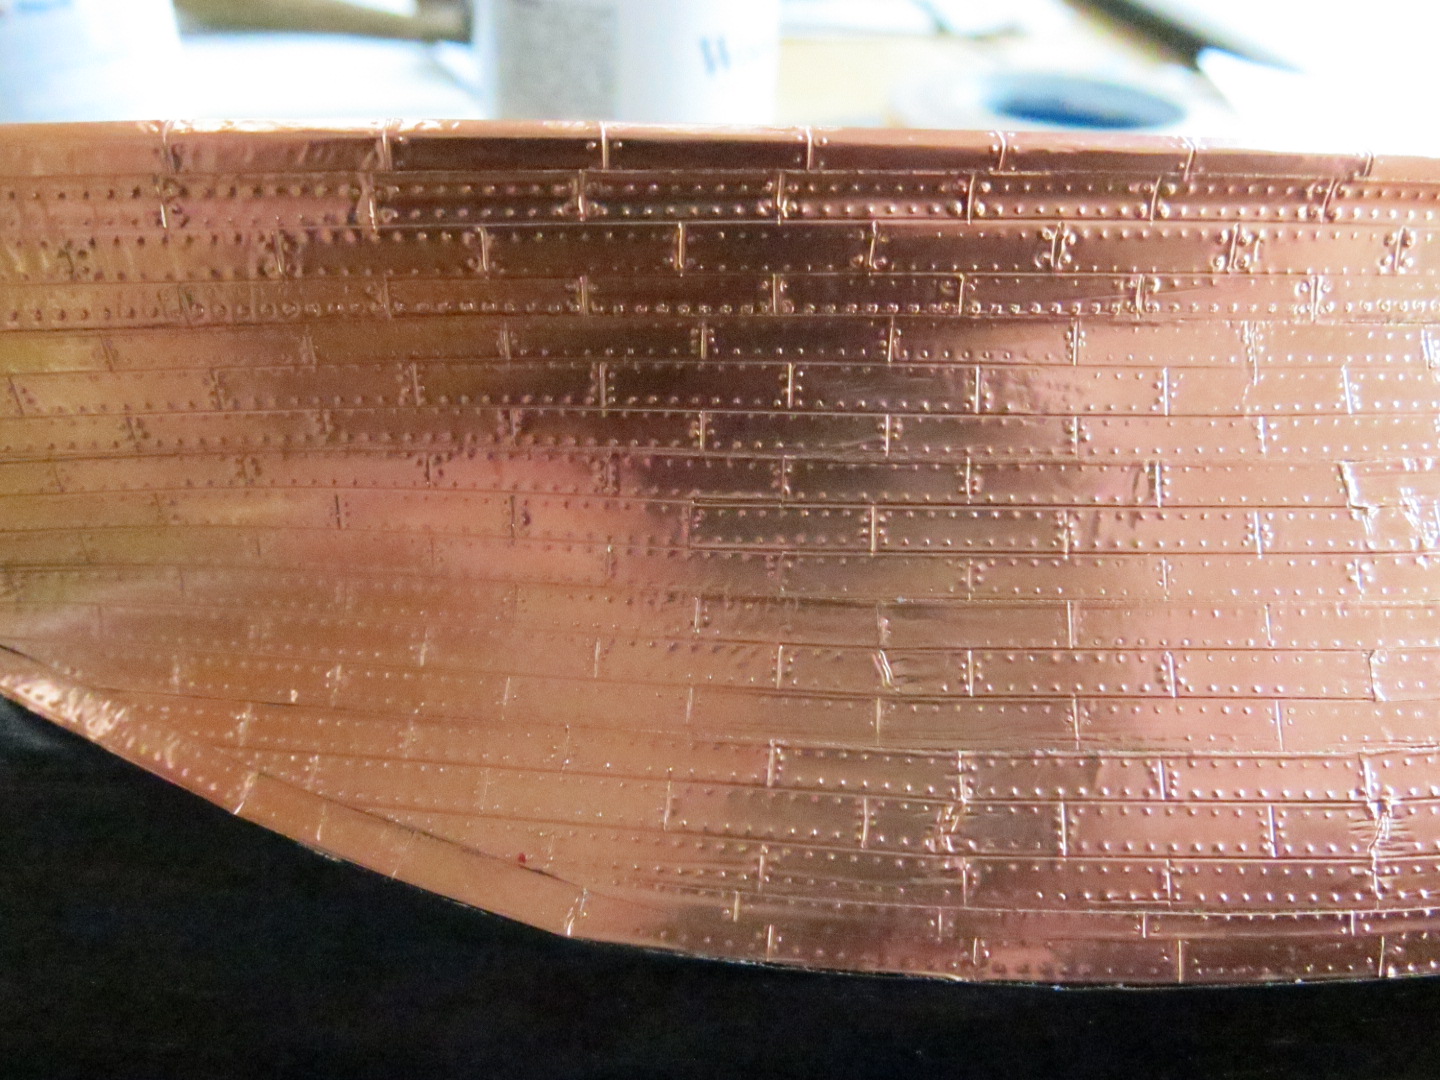
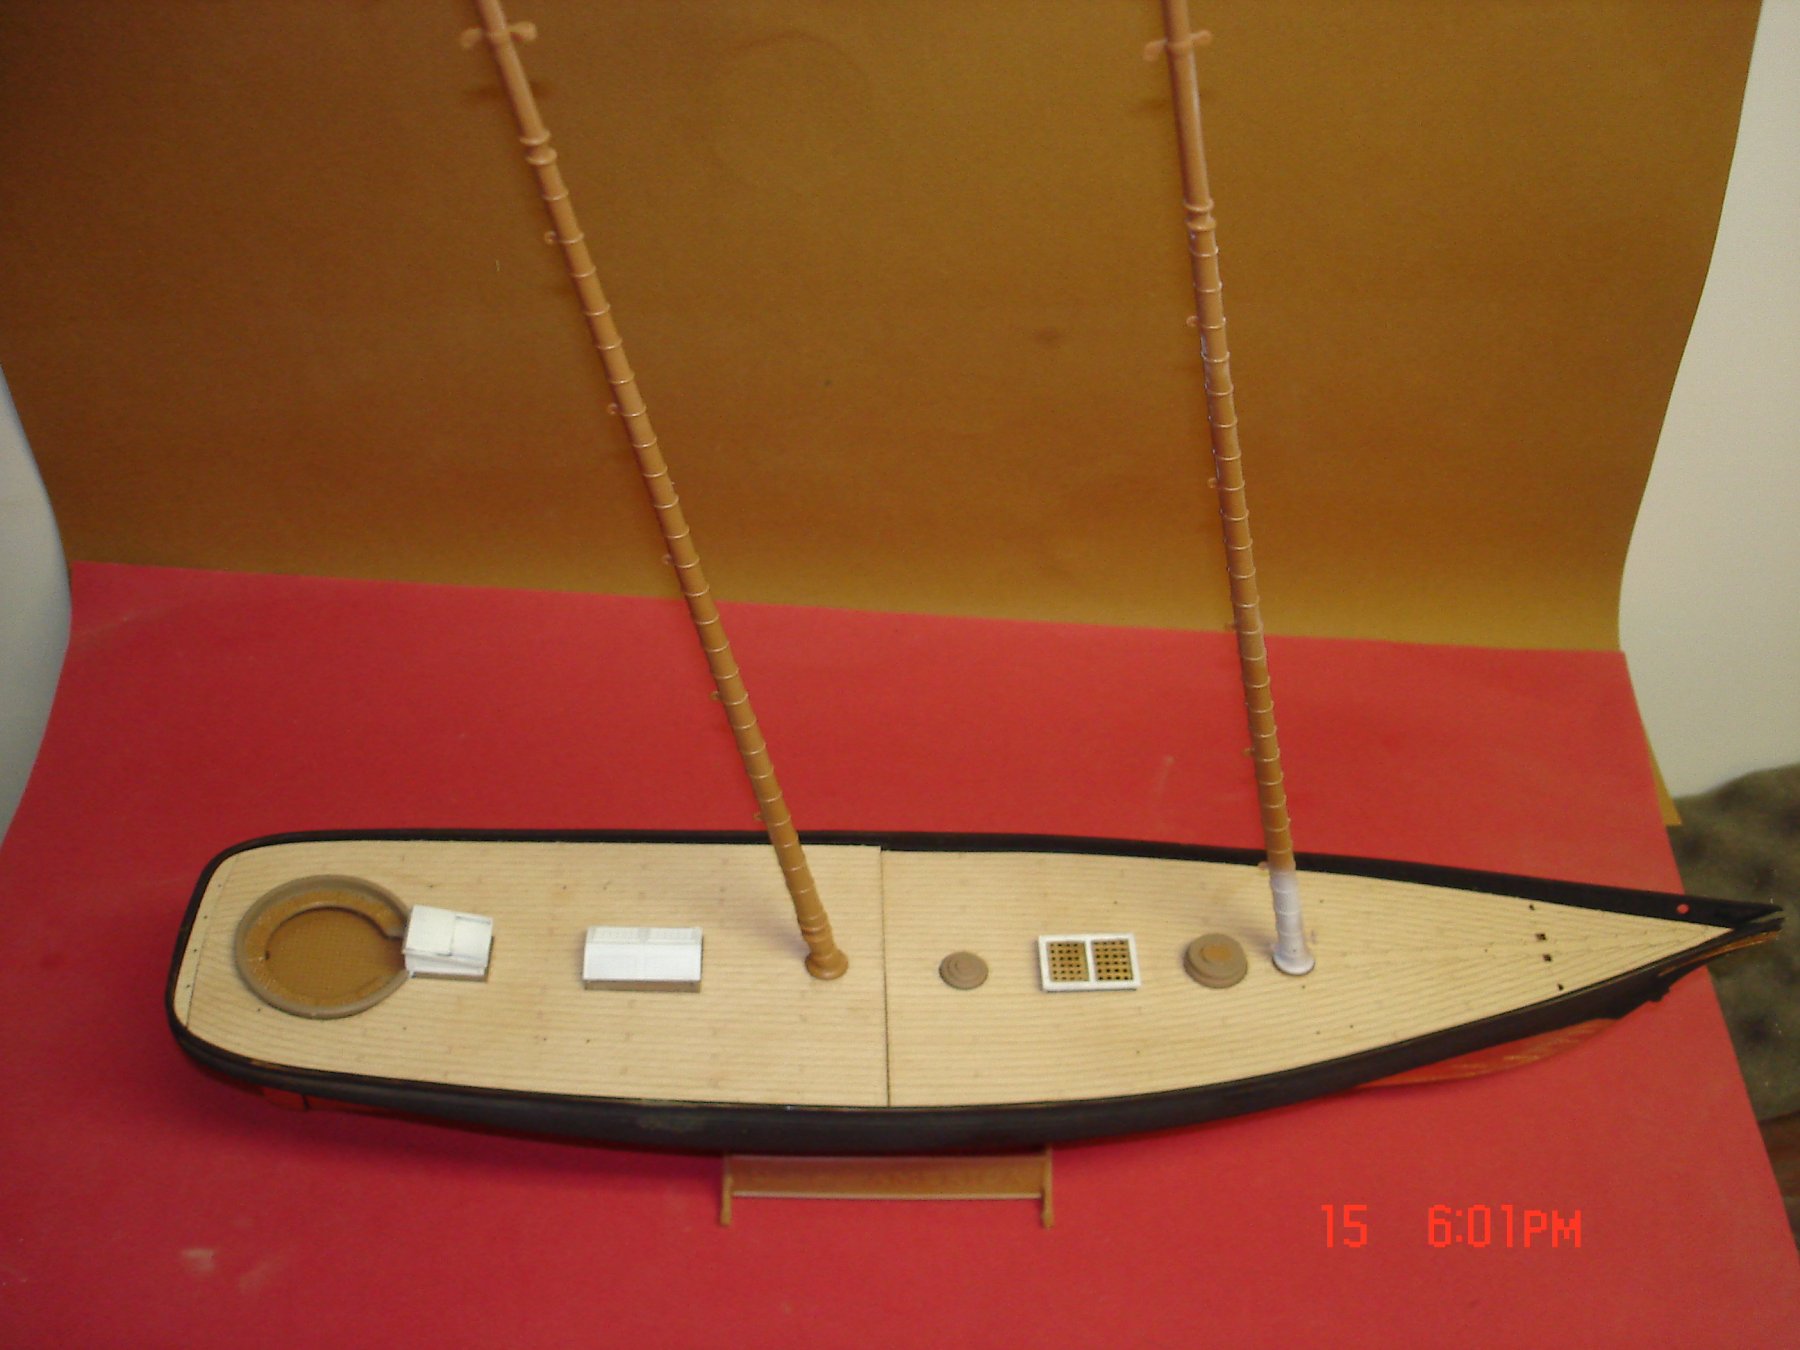
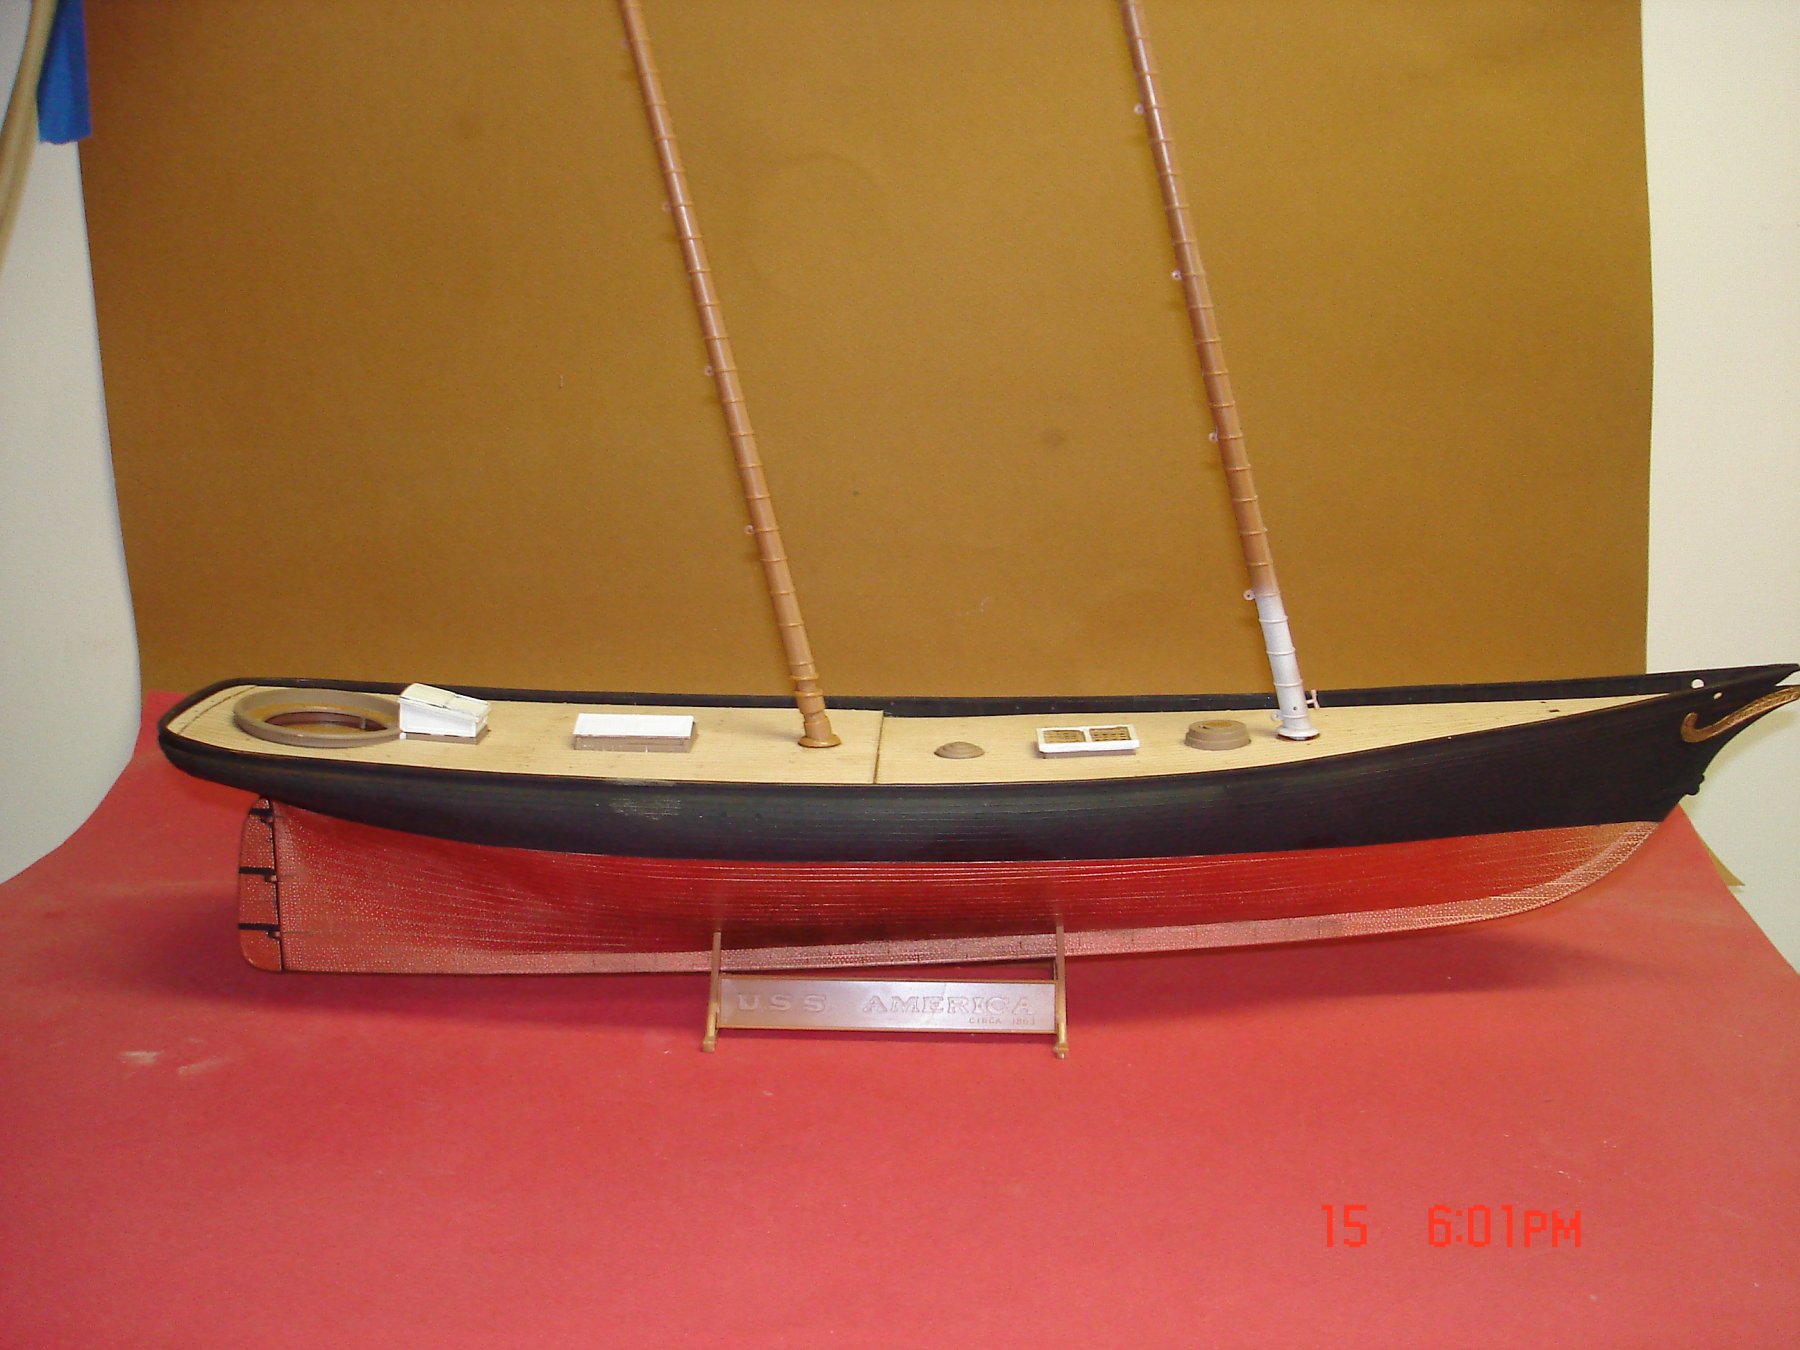
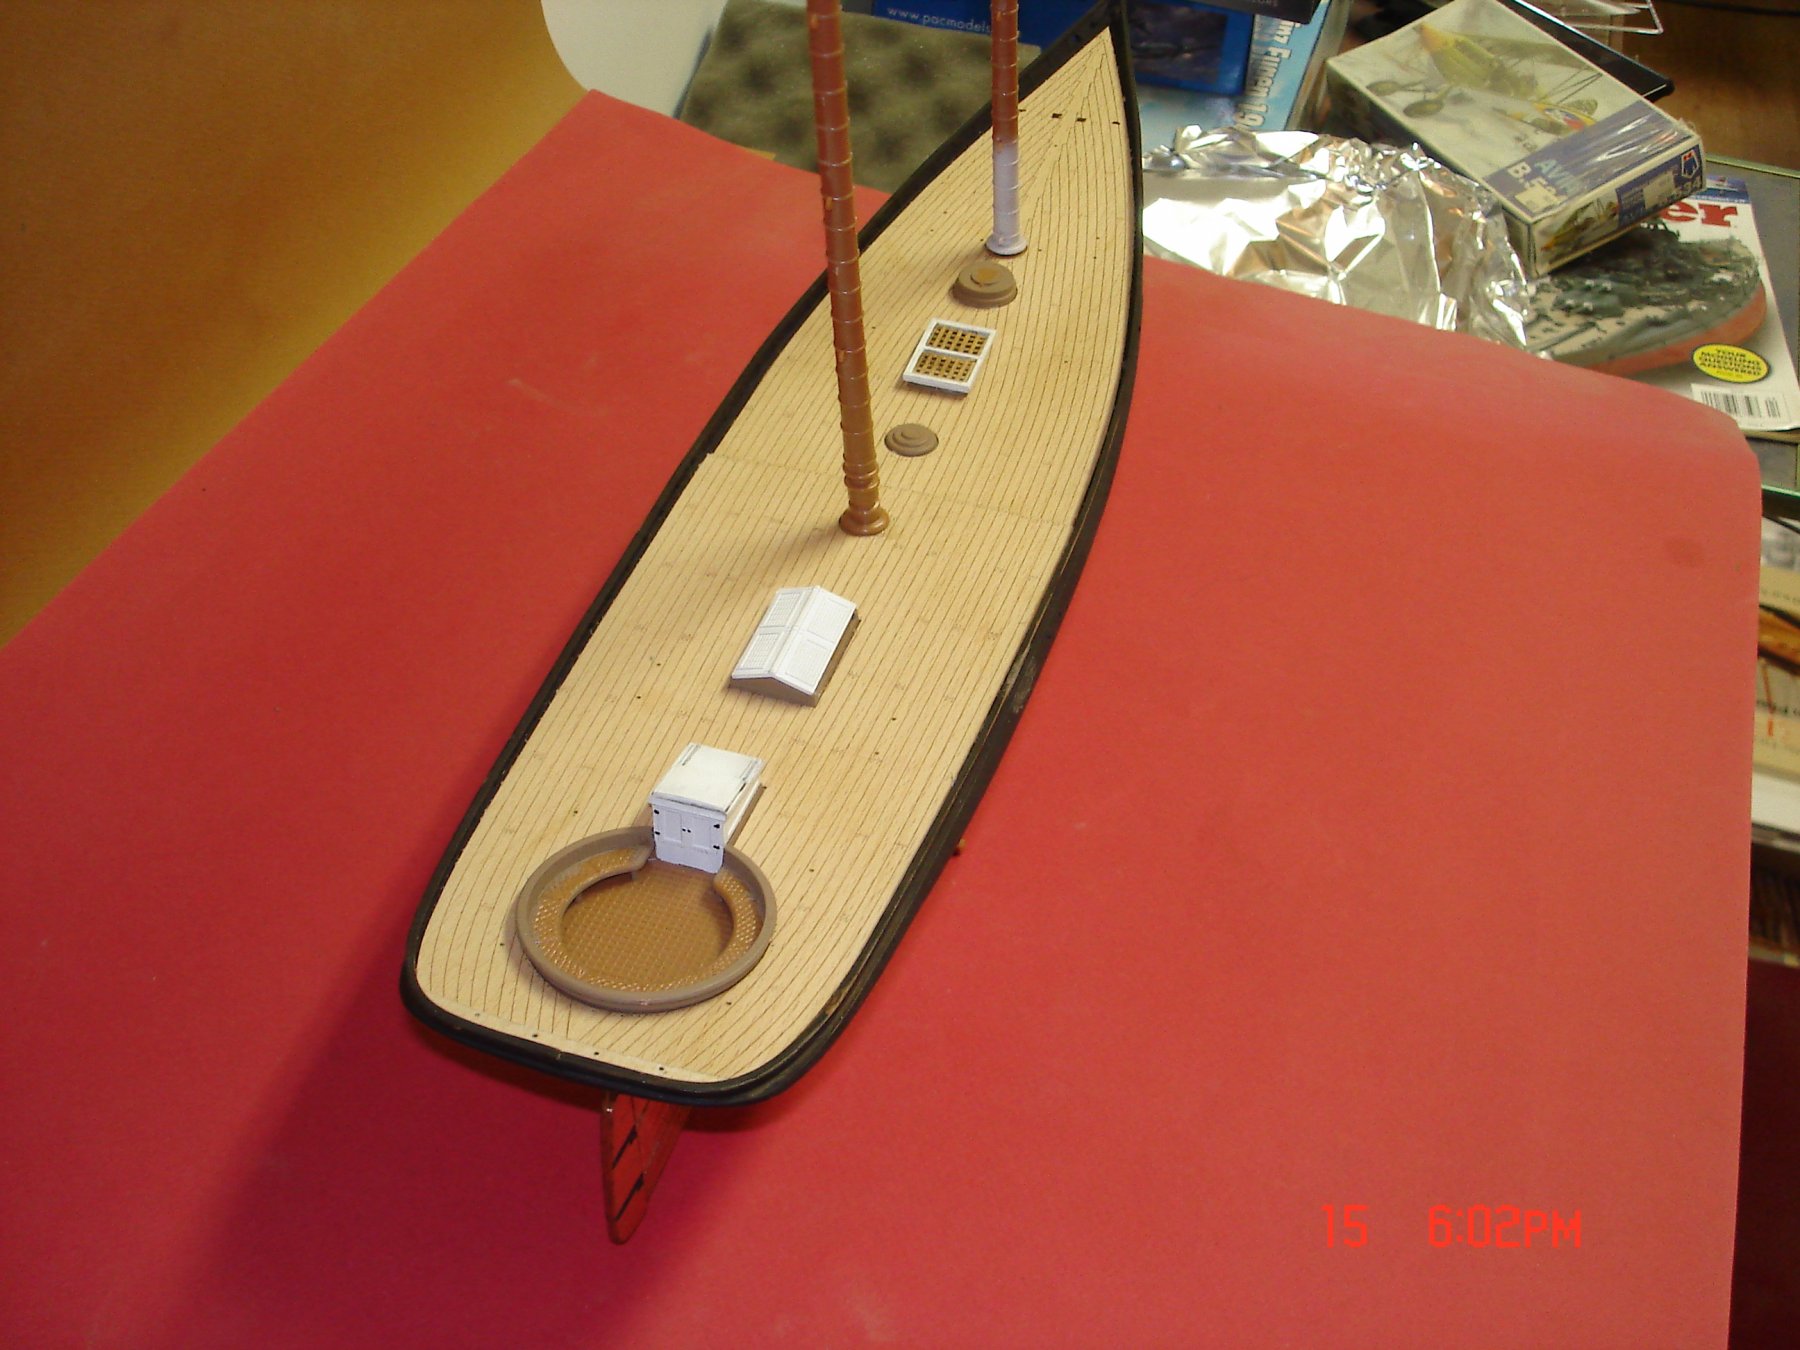
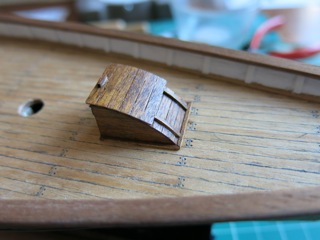
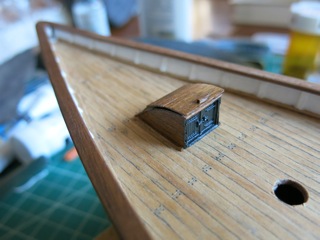
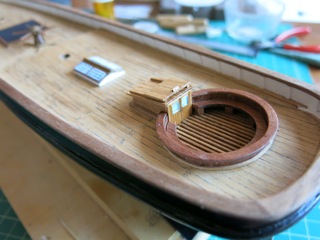
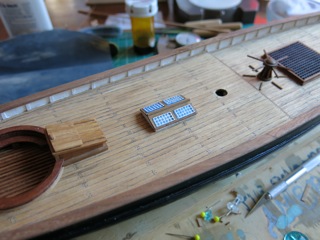
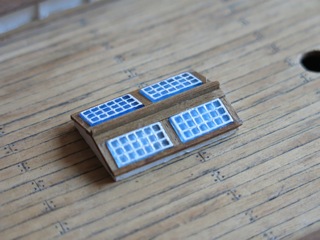
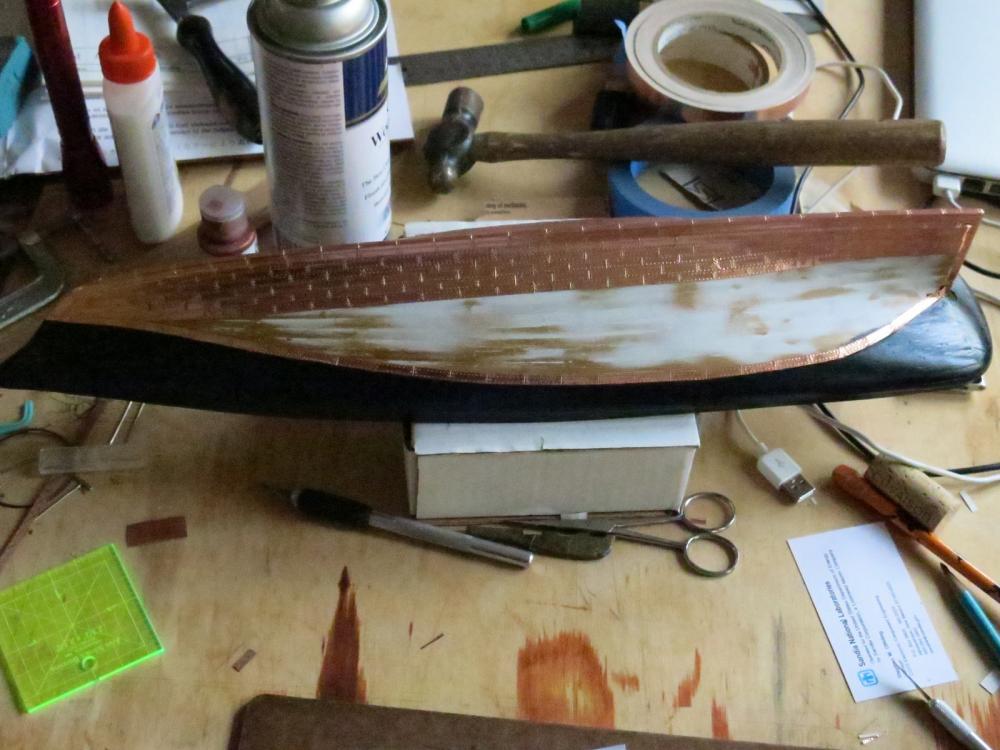
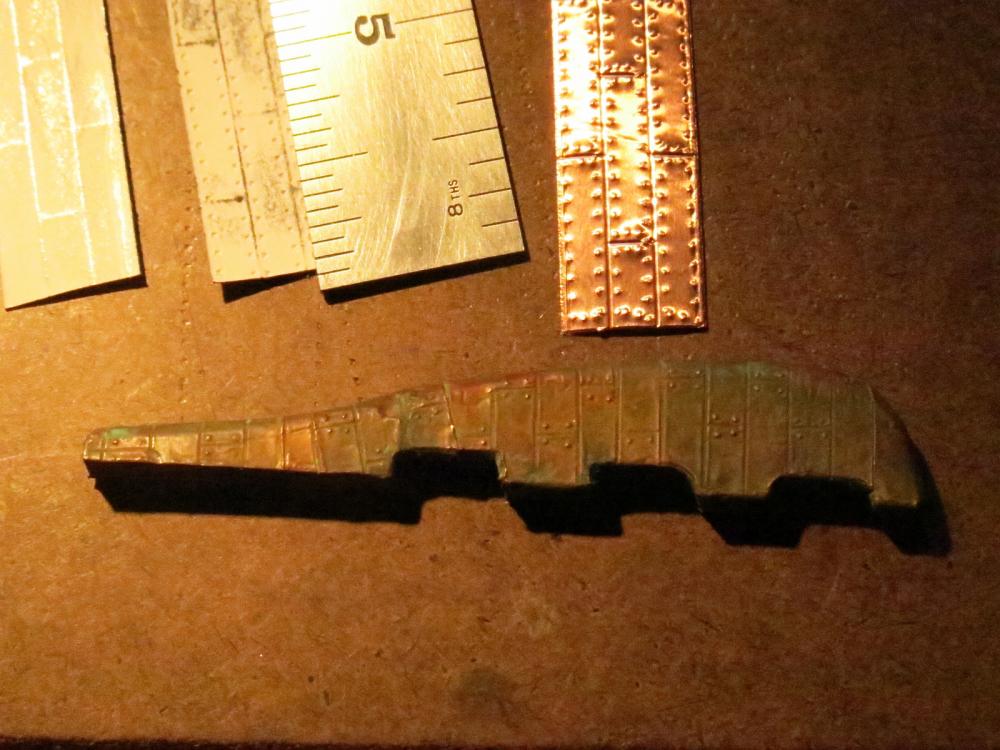
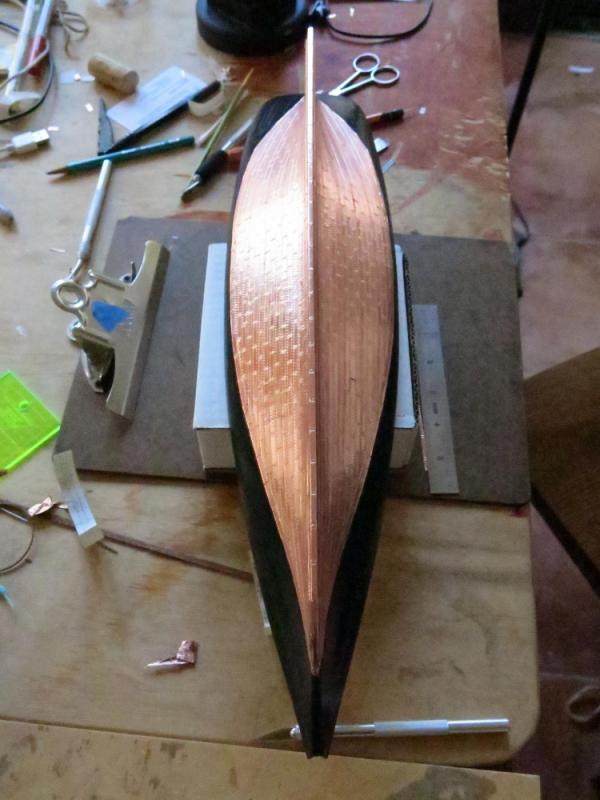
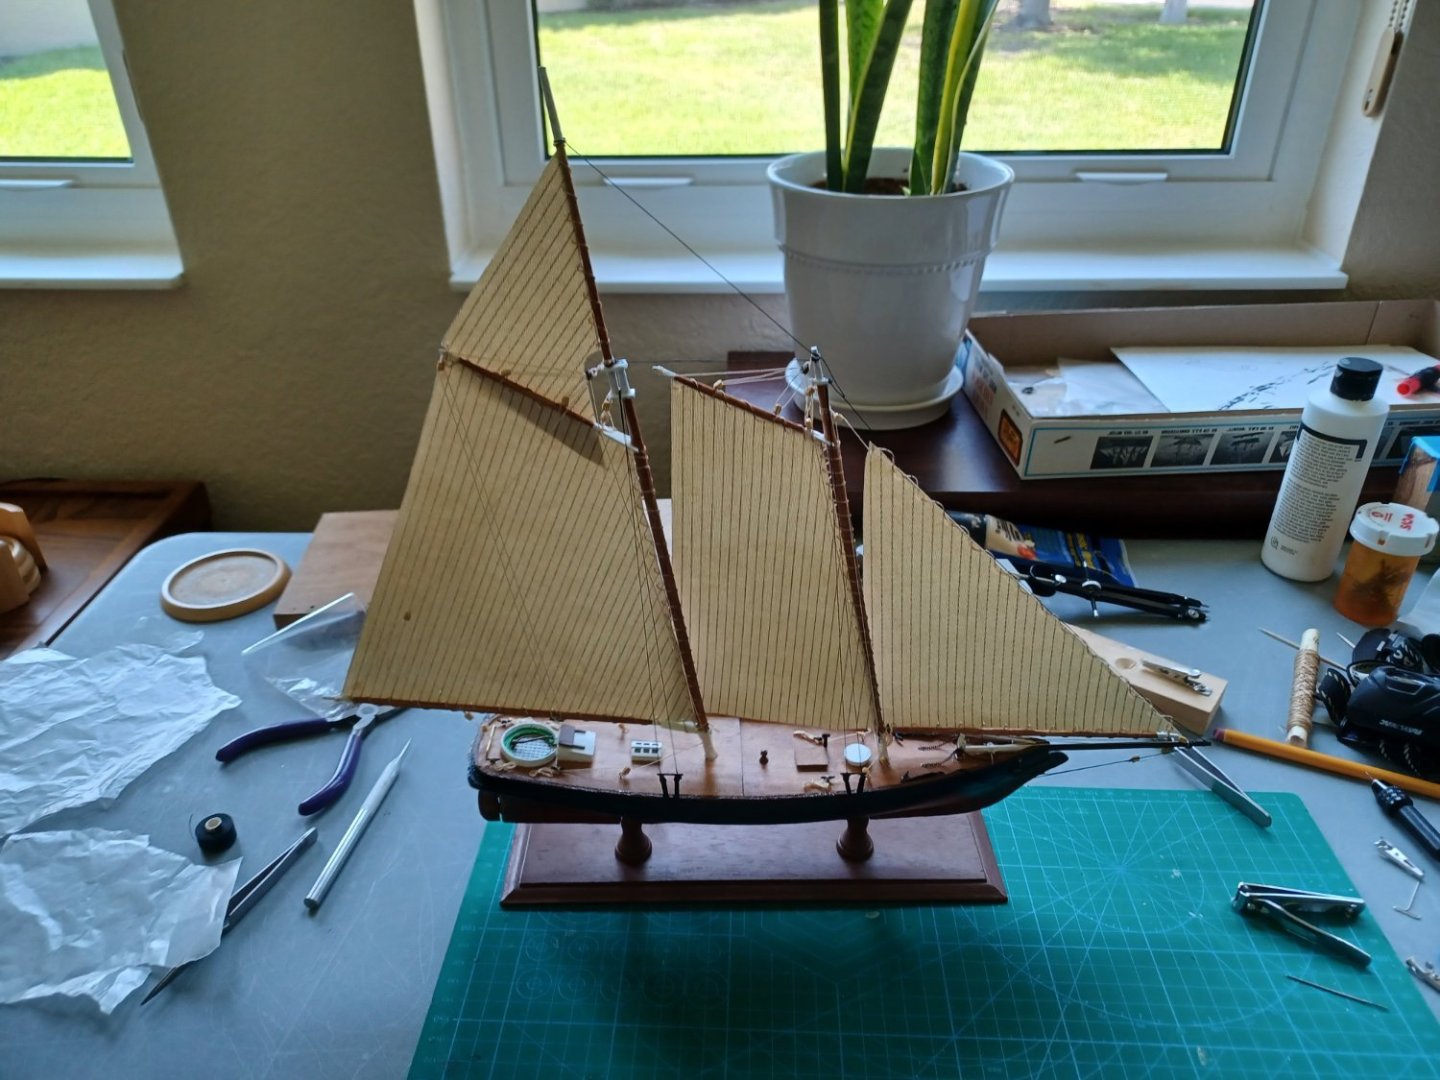
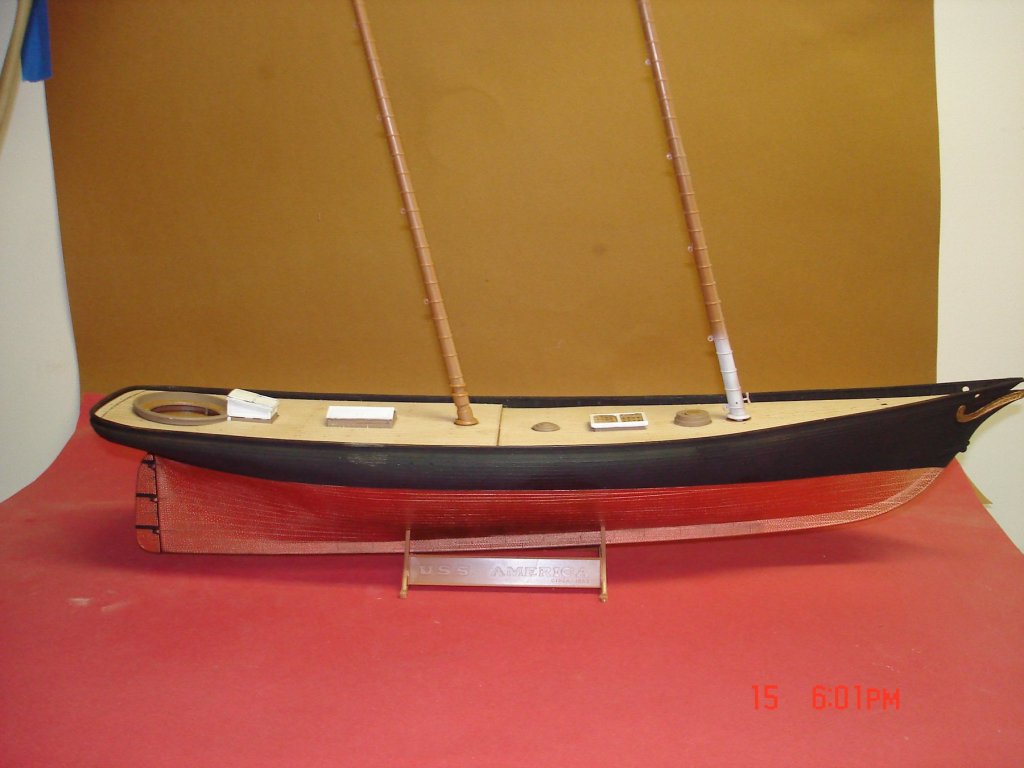
 Hello all - This will be my first posting to the forum. I started the 'America' several years ago and got the first planking on and the deck layed down, and put her away. Around Christmas I pulled her out and started in again. I got the second planking on and coppered the hull. I used 1" wide self-adheasive copper tape (electronic cable sheilding tape). I marked the individual plates from the front with a dull Xacto knife, and used a pounce wheel from the back for the rivets. I did not like the look of the shiney raw copper so I used a patina fluid (Pax I think). It went further than I wanted. I was looking for more of a brown penney color. Most of the deck furnature is on. Deadeyes for the mast shrowds are next. I've updated this first post (2016-07-07) to show coppering of hull before patina was applied I'll get some more picks as I progress. - Tim
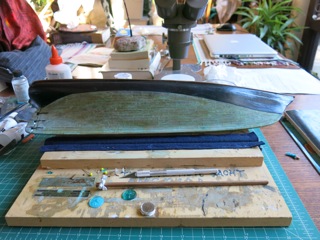


- 93 replies
-
- 14
-

-
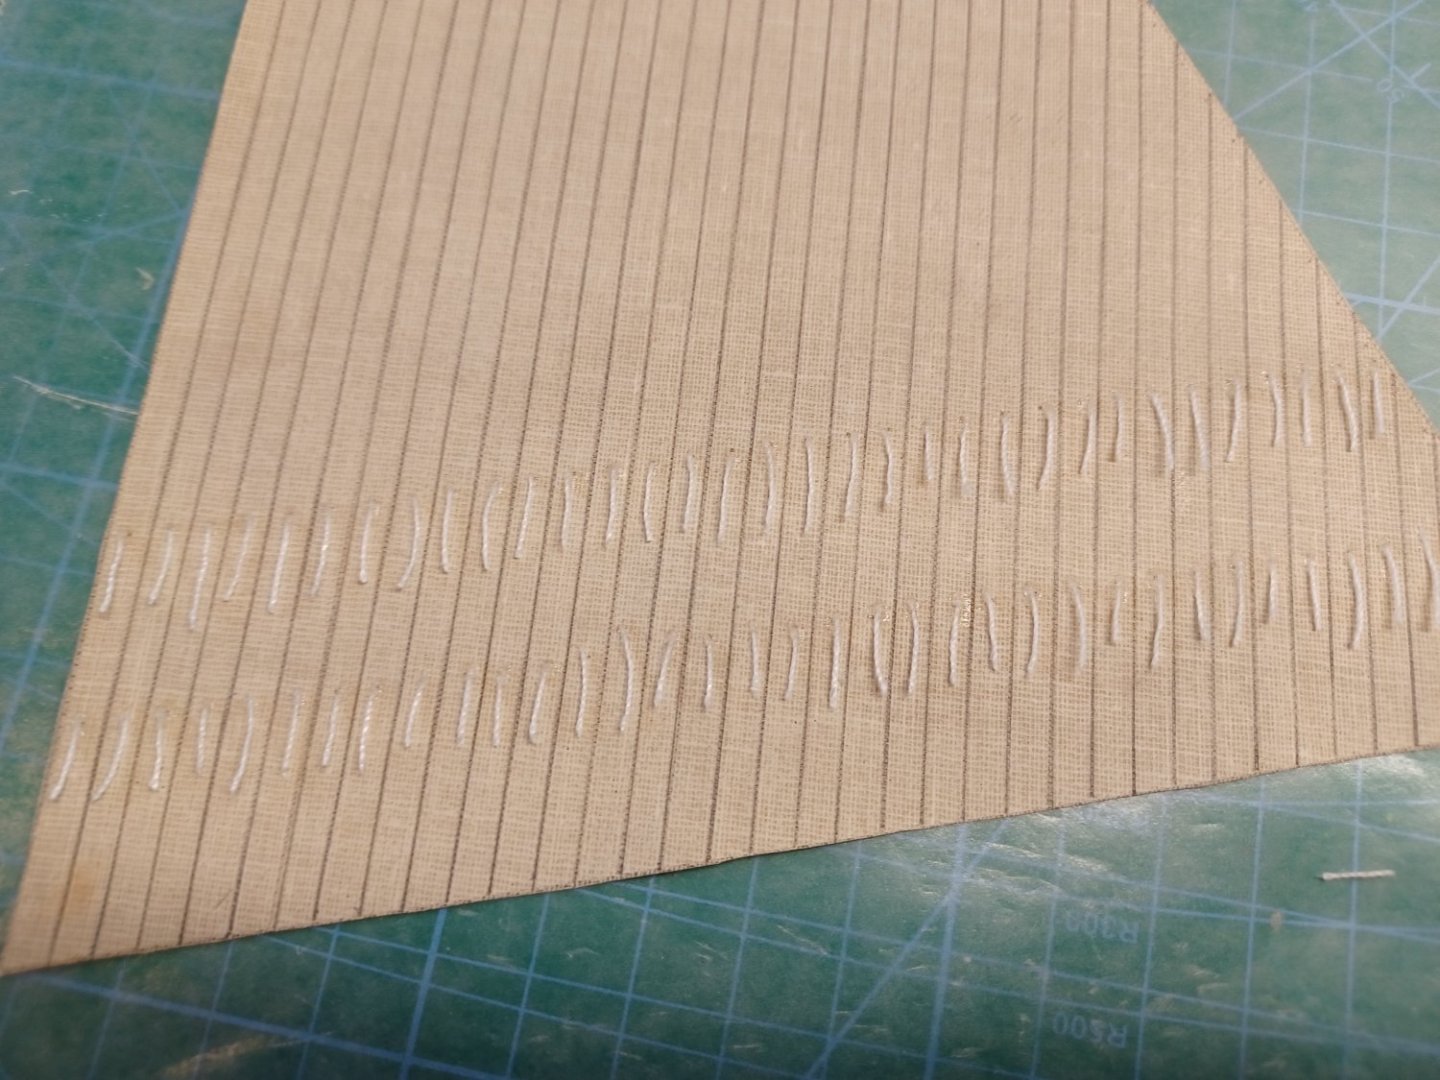
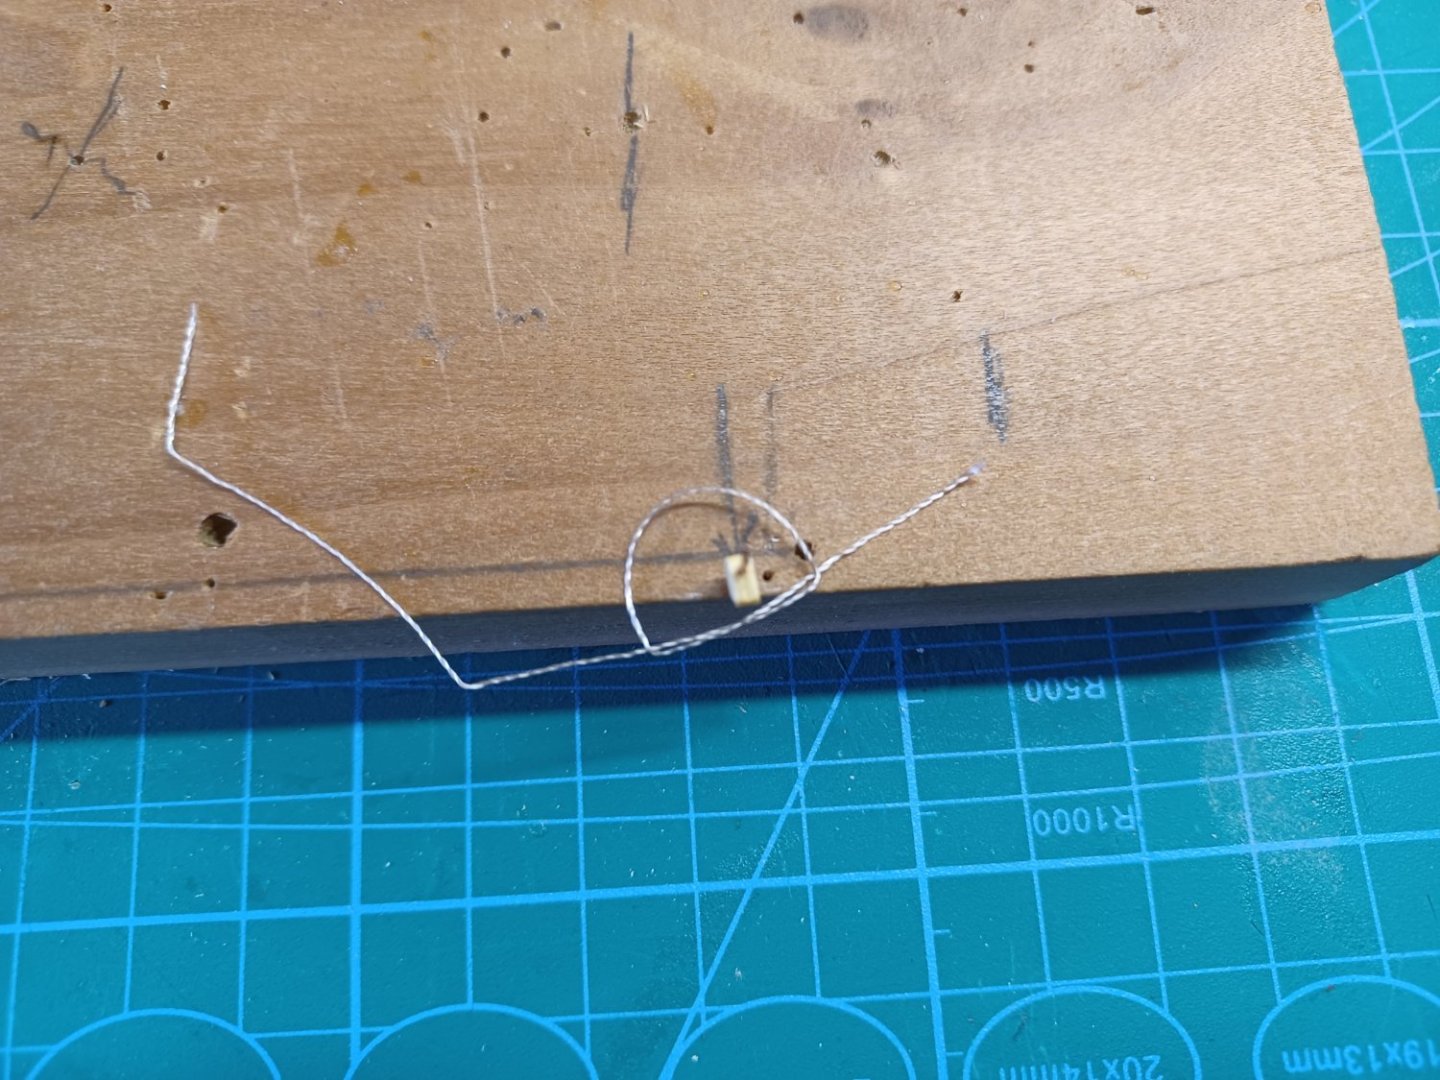
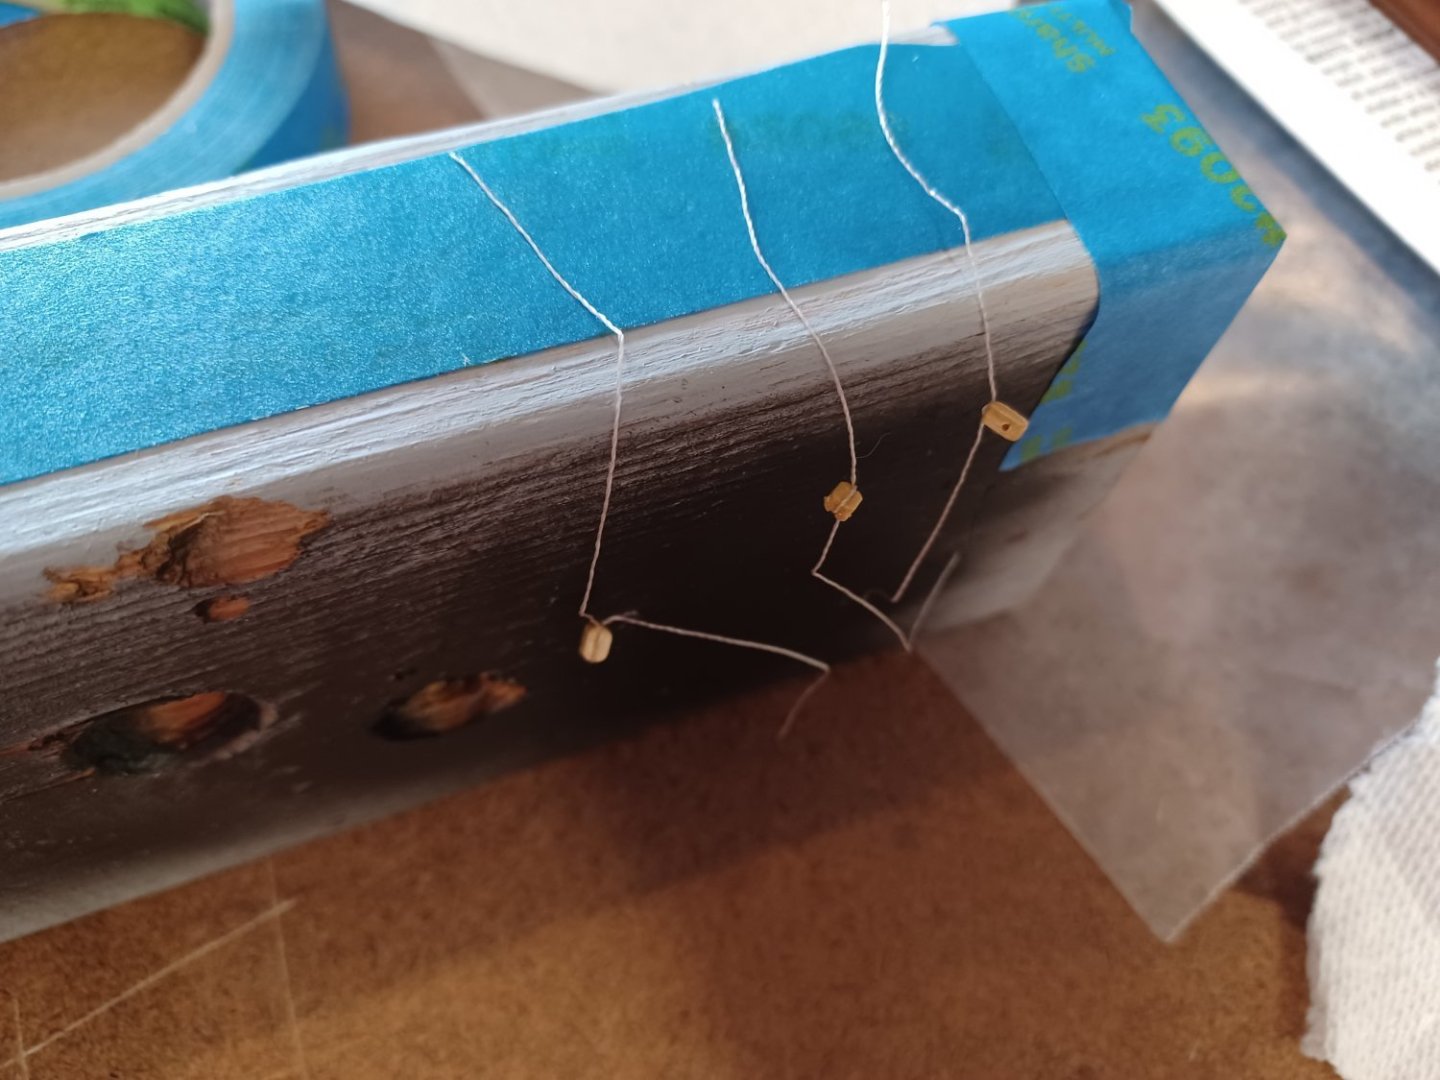
 Hi all, Recently I've become fascinated by floating things with tall poles and giant sheets of woven materials. I'd never cared much about ships but have always been interested in aircraft, and especially small plastic representations of them. I've built a few of them in the past and enjoy modelmaking, as it has taught me patience and the enjoyment of working with my hands to create a displayable piece. When I was young my father purchased a large plastic model ship, which ended up with us ditching the project after hand painting the deck and being unsatisfied with the results. While I hadn't much of an interest in ships, I had always admired the models of them. The seemingly endless amount of tied off strings and craftsmanship that went into creating wooden models seemed far out of my skill range and I figured I would leave it to the "experts". Specifically the rigging is what turned me away, thinking I barely had enough patience to do basic necessary tasks such as cleaning parts or waiting for paint to dry, so there was no way I would have the dedication to connect every tiny line that a sailing ship demanded. Recently however, I've caught some bug that has left me enamored with sailing ships, their history, and just how cool and interesting they look. I decided to test the waters of ship modelmaking by purchasing the Academy 1/350 Cutty Sark. I promised myself if I completed the model, I would purchase an entry level wooden model. After about a month's work I arrived at the below result: The rigging was painful and resulted in quite a bit of frustration, since I seemed to repeatedly have issues with the line sticking to the tweezers and not the boat, line not being as taut as I'd like, etc., but after a few days work I called it complete. While not perfect, part of my modelmaking journey has been learning to cope with imperfections and accept that the model is not destroyed just because there are paint chips and excess amounts of glue. Every screw-up on one model is an opportunity for a better next model. Enter the model that just arrived at my doorstep: I intend to hold this build log as an accountability partner and I welcome any and all suggestions/tips. I will be starting with the stand, as I have minimal woodworking skills/tools and lack a vice. I look forward to posting here! Chase
-
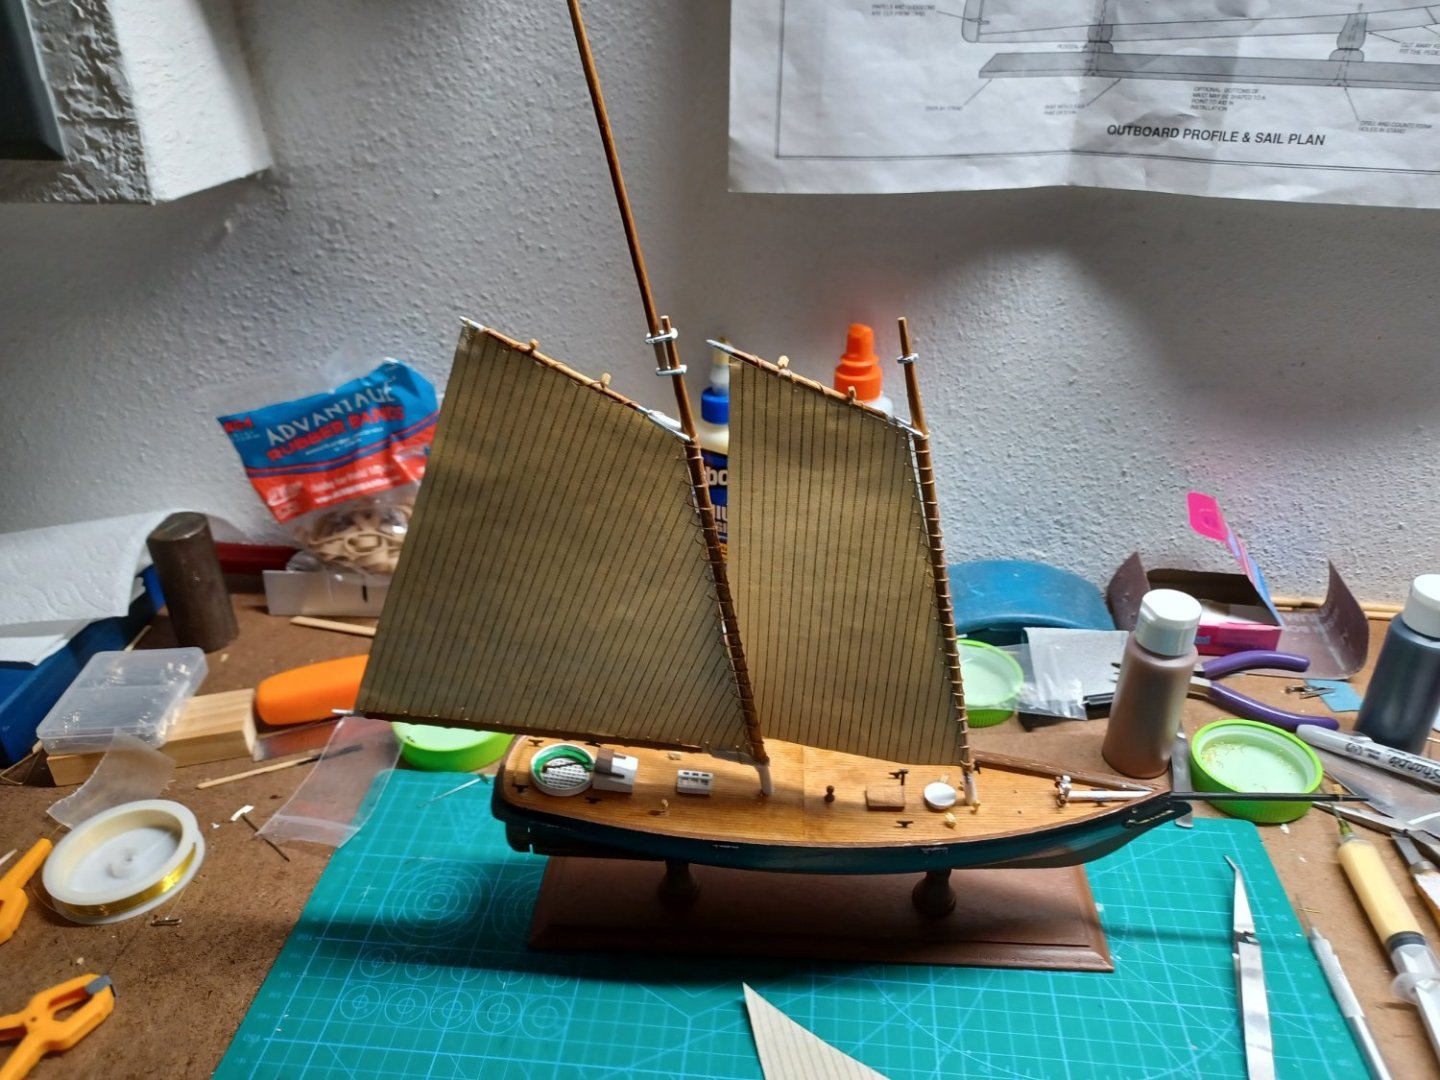
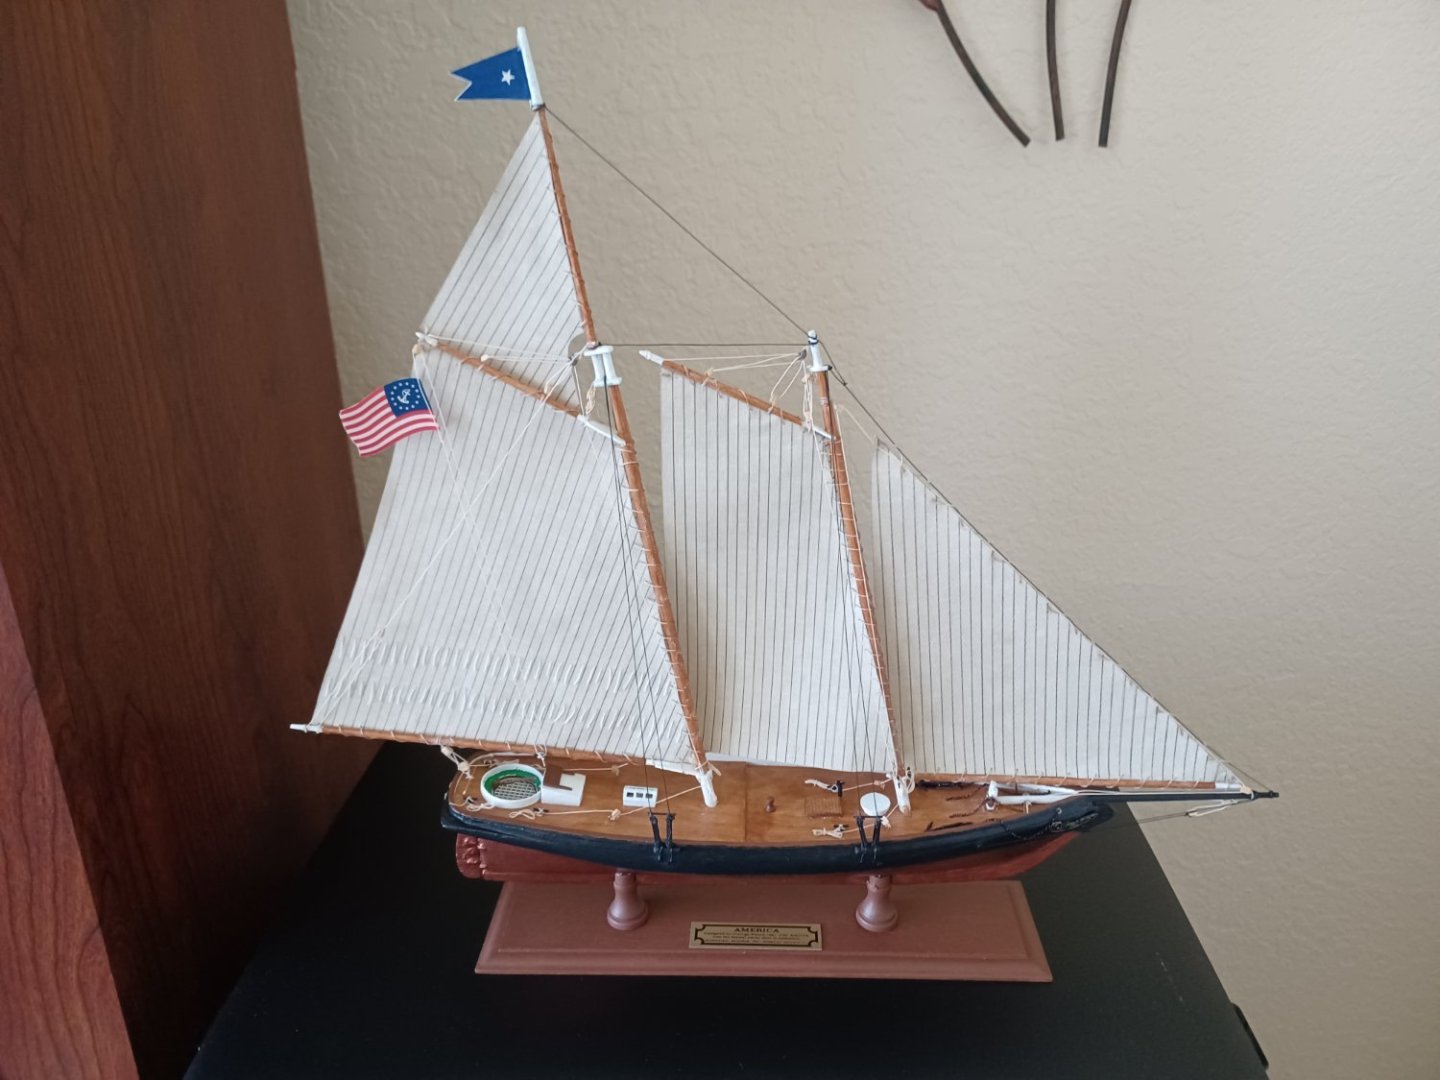
 This was given to me be a friend who had the kit in his basement for over 20 years. Build took a little over two months to complete and now that it is completed I will be returning it to him. Instructions were ok but the rigging plans left a bit to be desired.
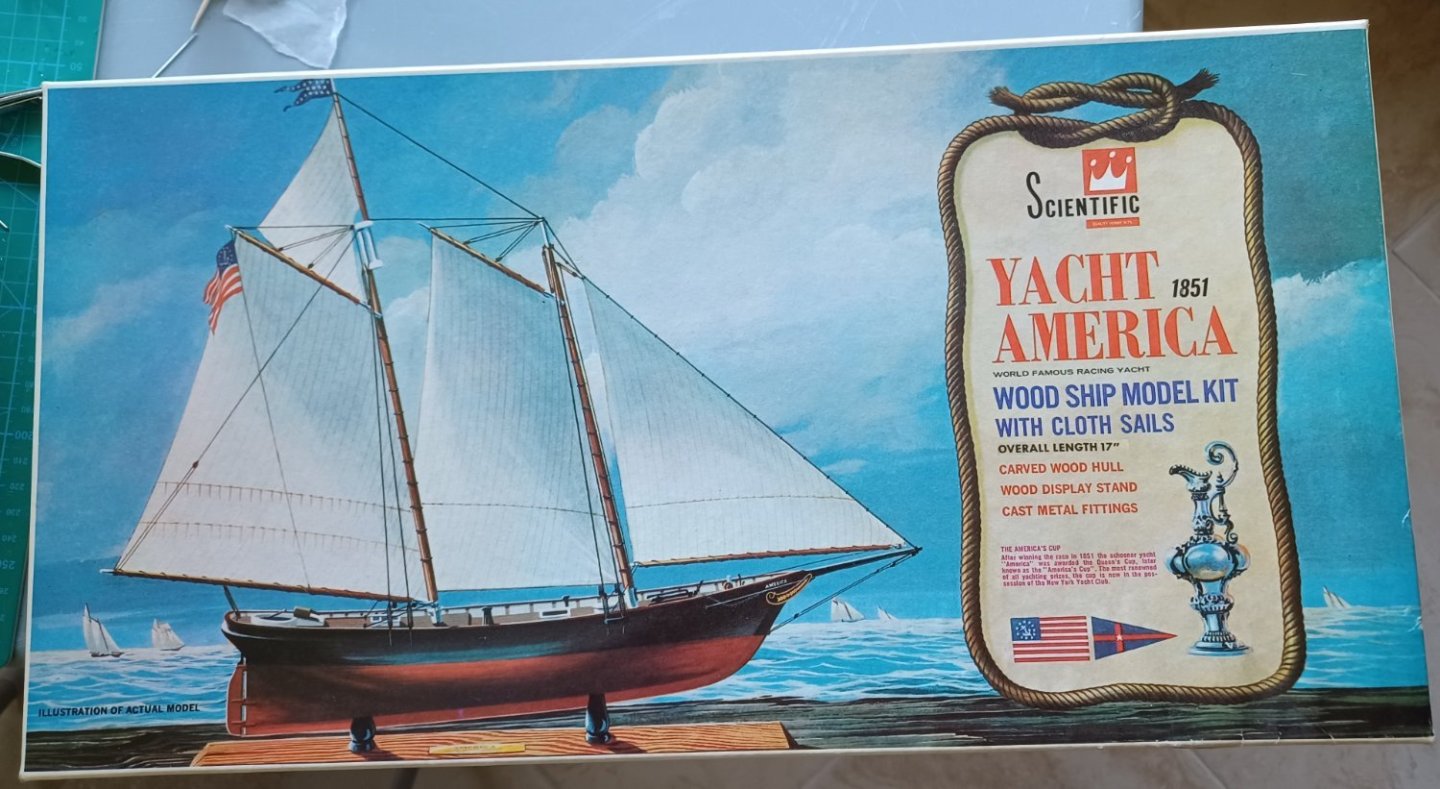


-
- 4
-
-
- America
- Scientific Models
- (and 1 more)
-
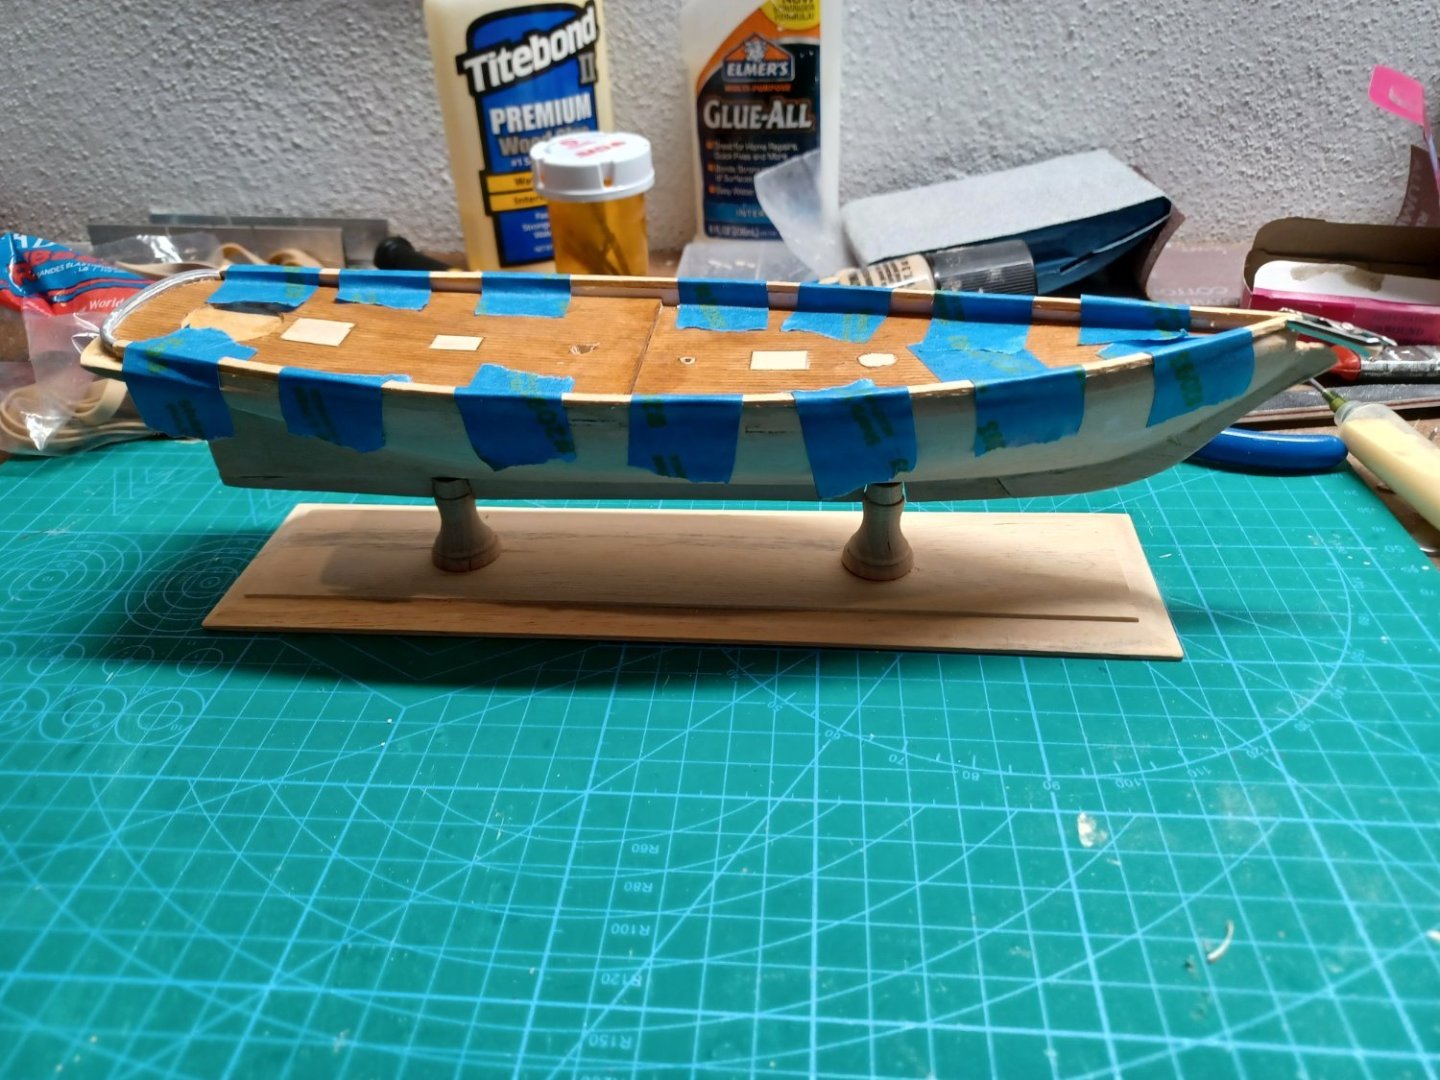
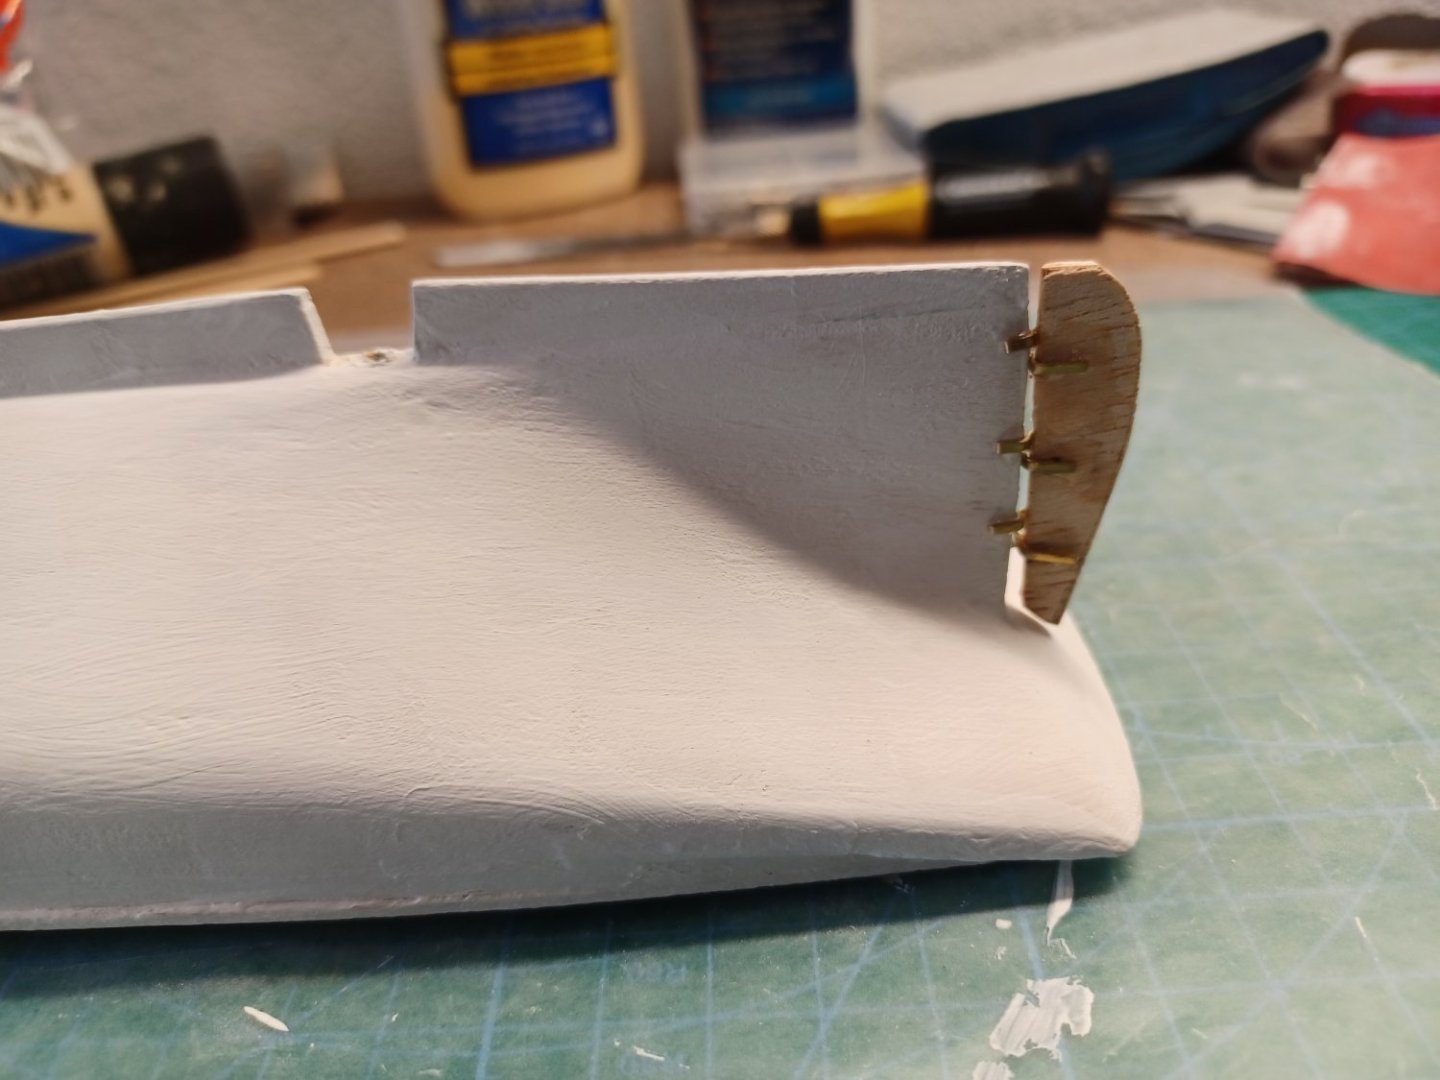
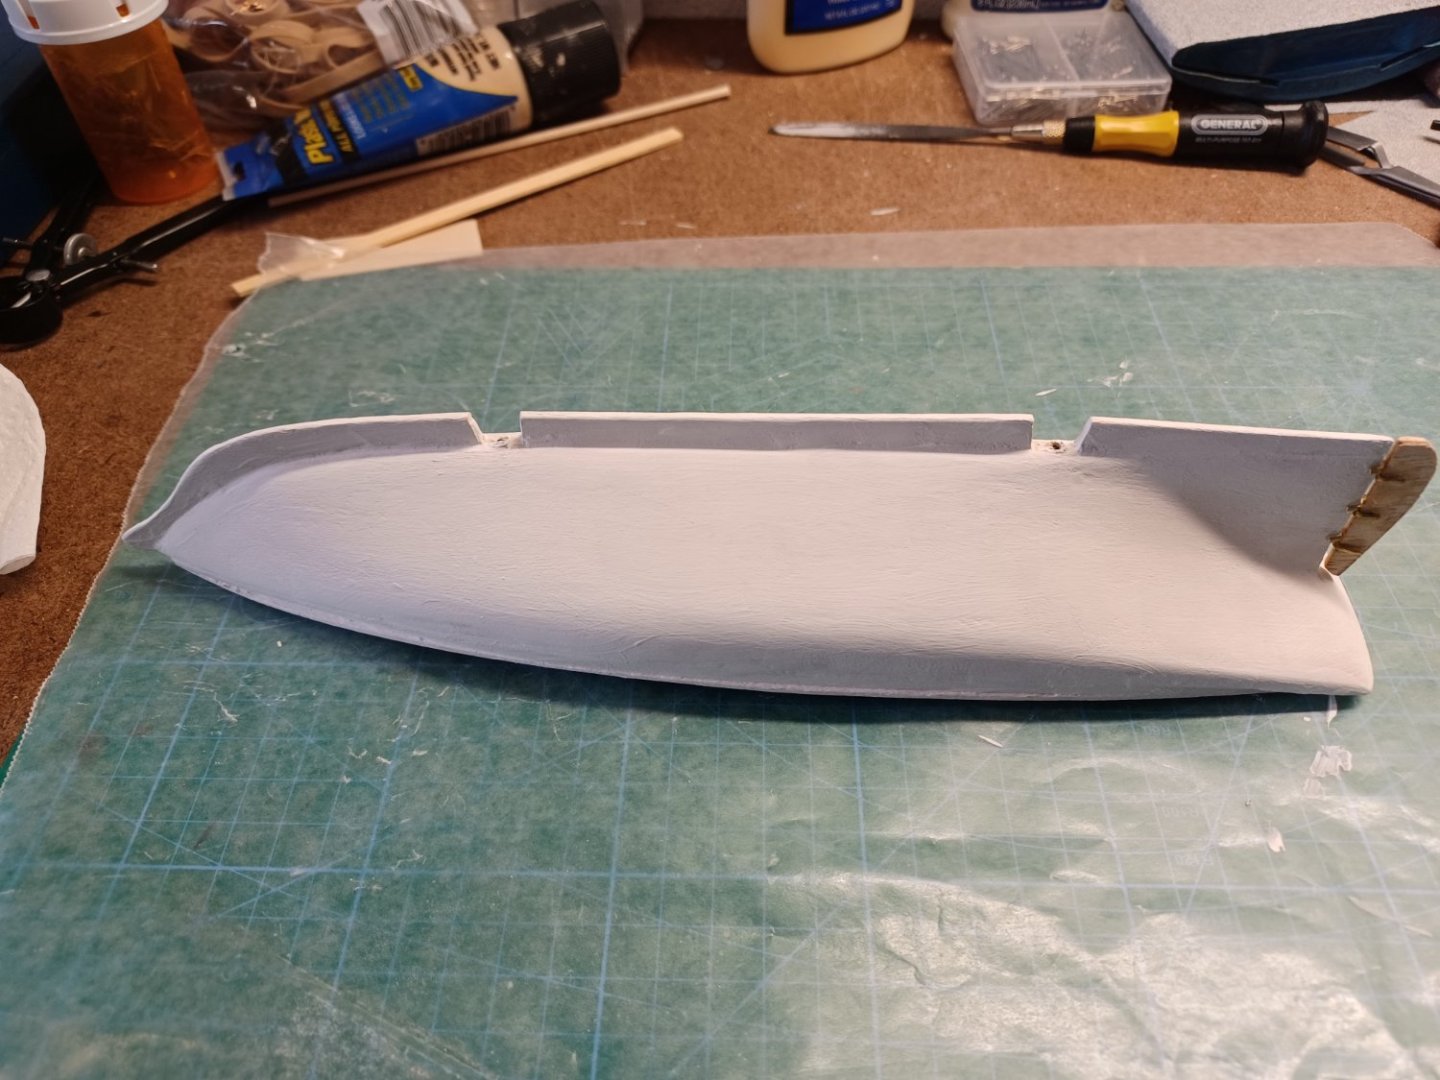
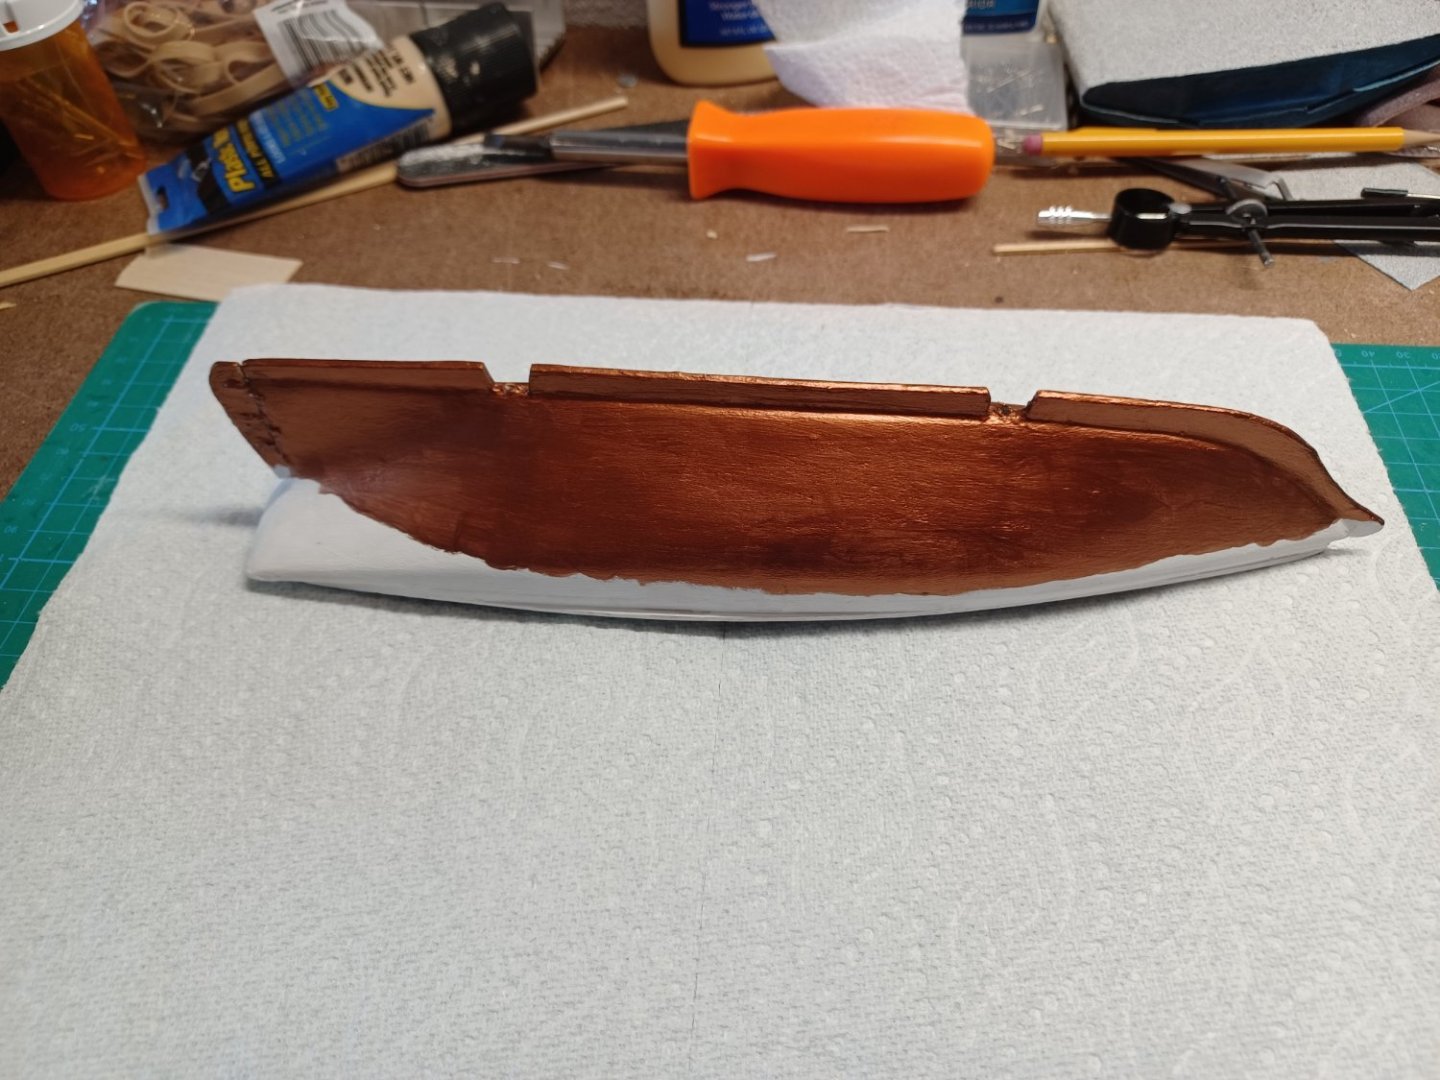
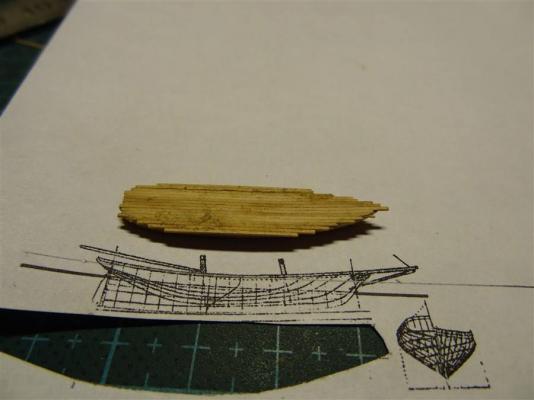
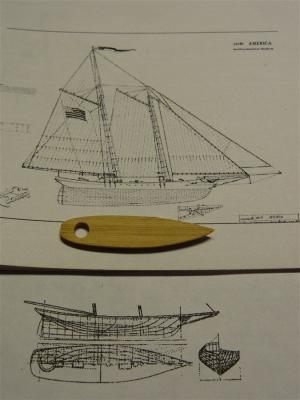
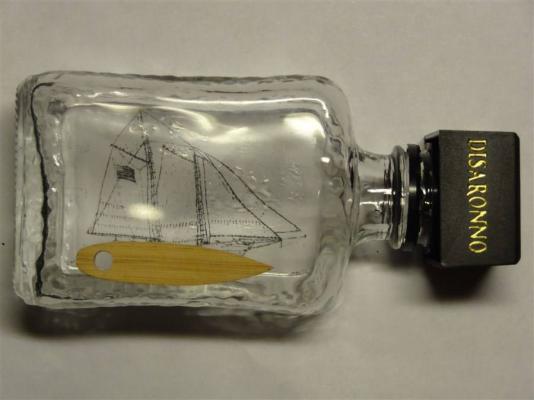
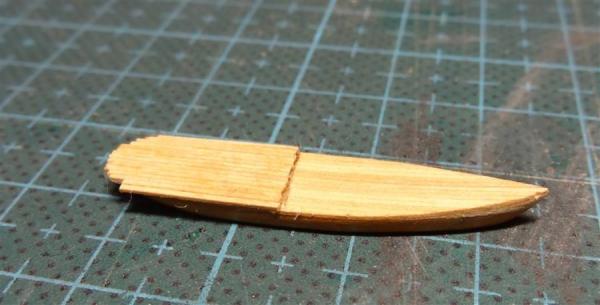
 First and foremost, I realize that this "kit" is of very low quality. Having said that, I bought this kit (and another) from Amazon as a first build to test my skills, build knowledge, and help determine the feasibility of completing a scratch built shrimp boat any time soon. After receiving the kit on Friday and putting a few hours into it thus far, I can say without a doubt that I'm hooked. That's the good news. The bad news... This kit is junk. At least that's my current sentiment. I've made it to the planking stage, per supplied instructions, and can't help but think that the included materials are not adequate to complete the project, not even to my low standards. Specifically, the length of the first plank is causing some concern. I'm currently weighing my options.. Continue along with the materials supplied and hope for the best OR order additional materials and try to turn this lemon into lemonade? I realize that this was never intended to be a high quality product but I had hoped that a proper planking experience would be provided. Maybe I should scrap the directions and look for another suitable way to cover the hull, despite not being accepted or accurate? I'm inclined to limit my expenditures and redirect my money to a more reputable supplier. Any advice, observations, or critique will be welcomed. To be honest, I should have started with something reputable. I enjoy a challenge, but only when I'm sure that the outcome will be worth my investment of time. I really didn't want to drop a few hundred without first knowing it would hold my interest either. It's been 30yrs since I've even thought about a model lol. Know I know.
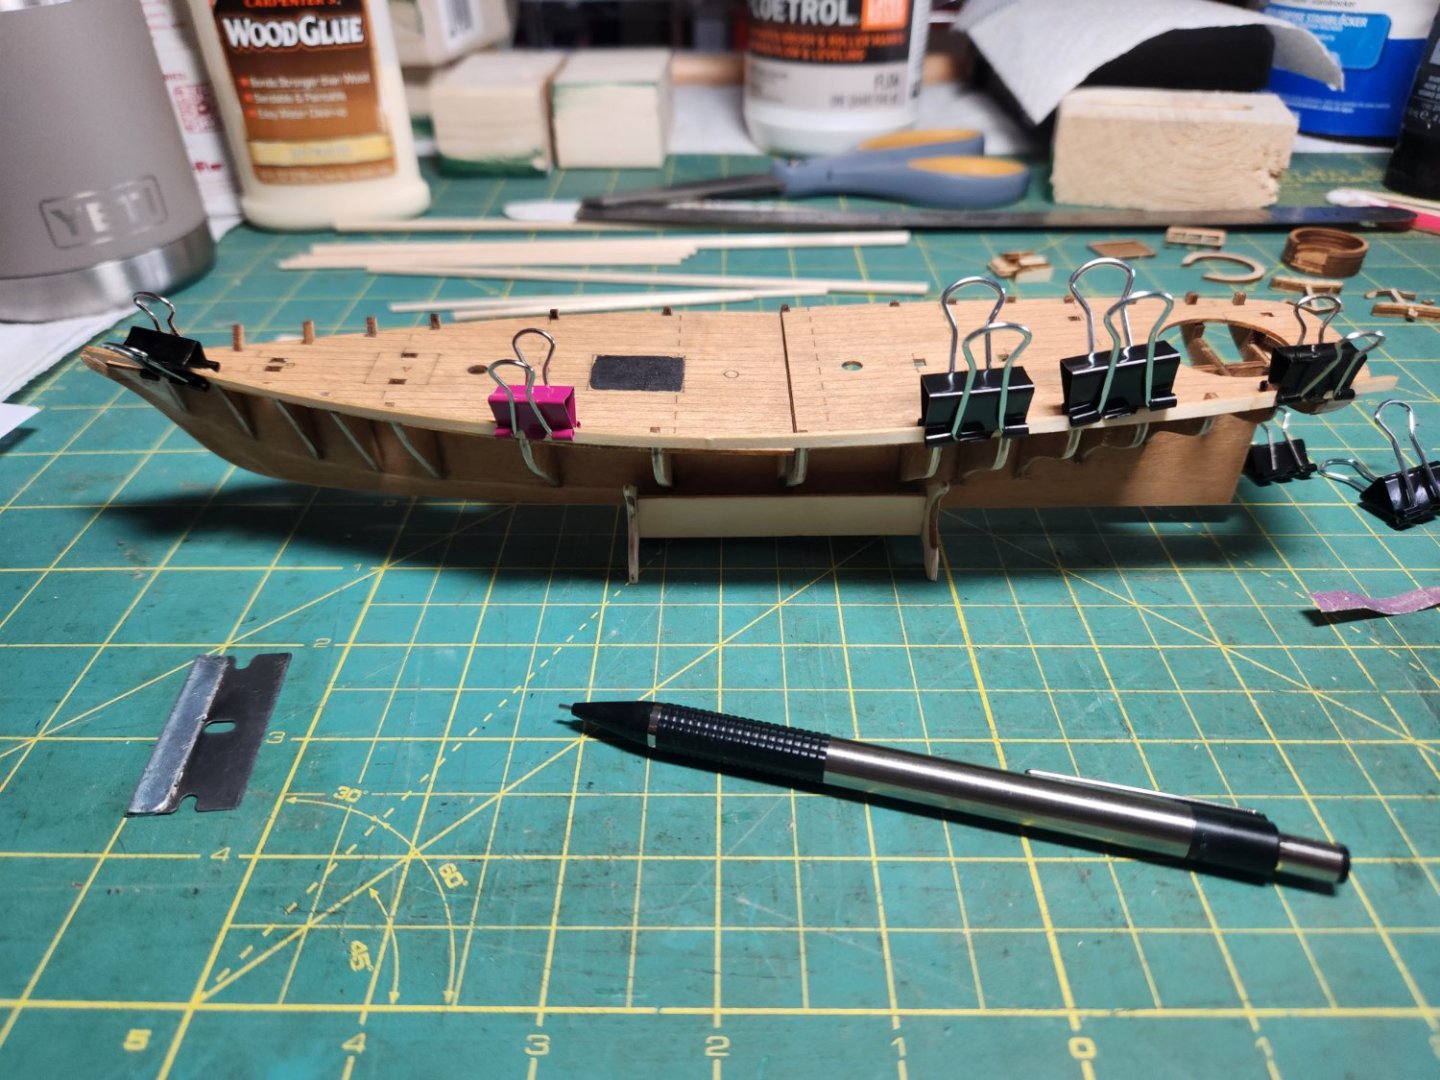


-
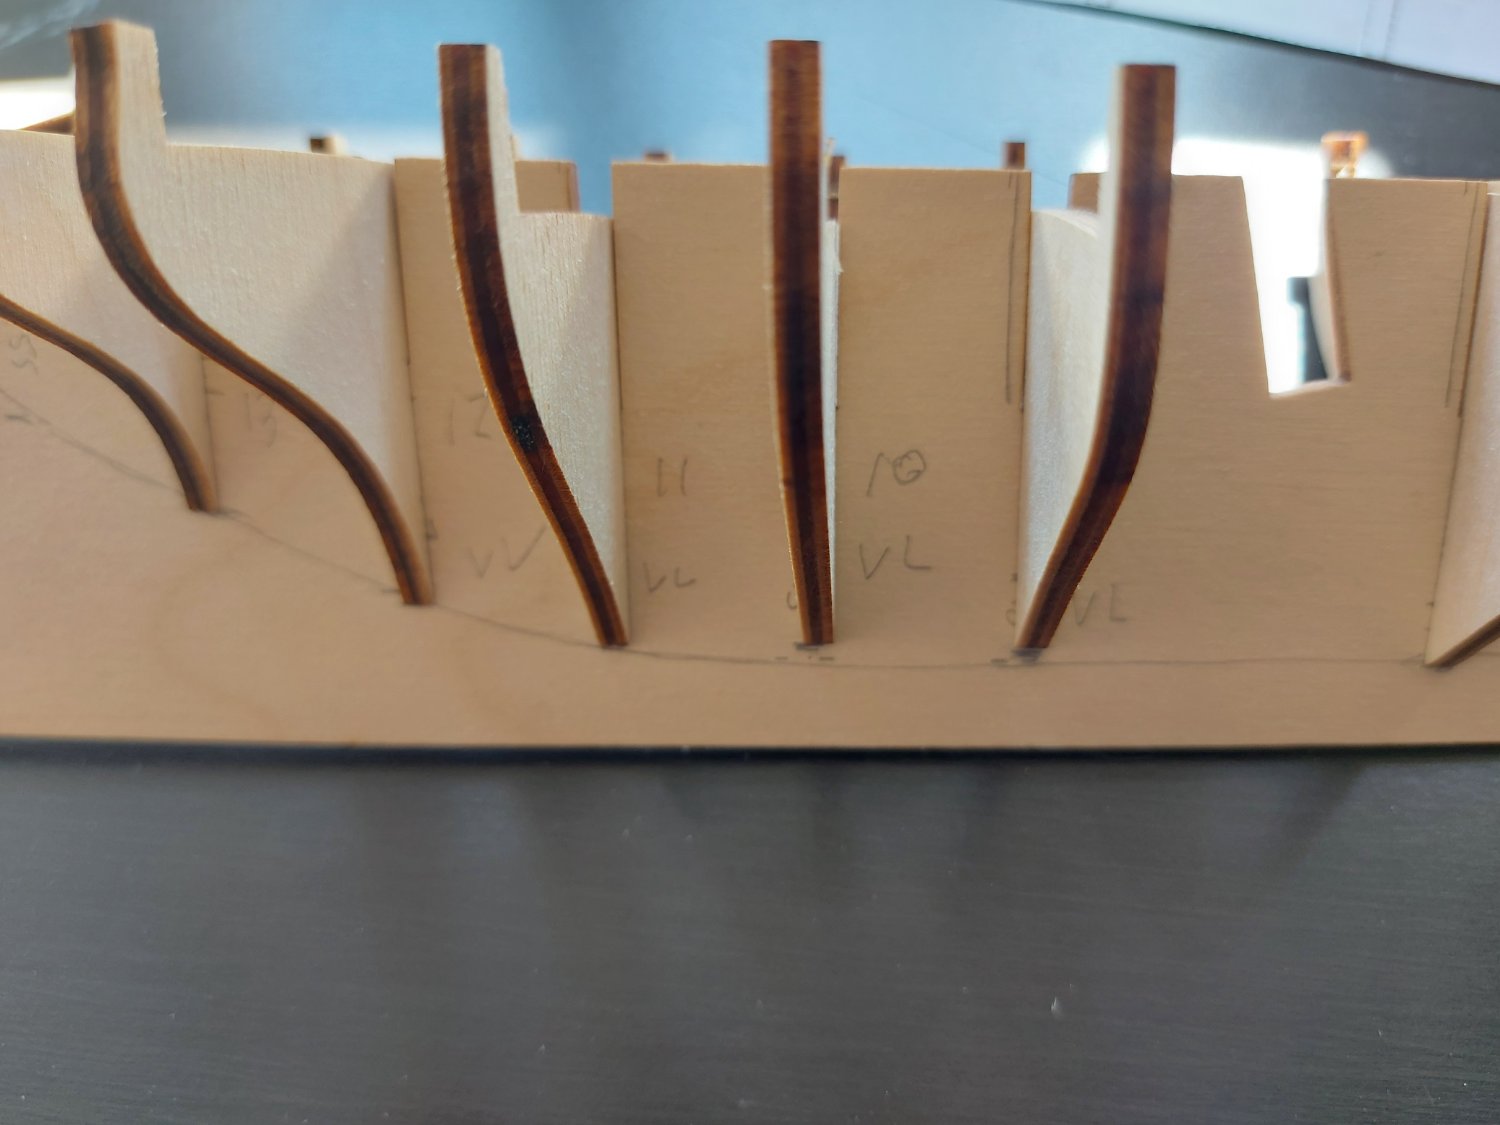
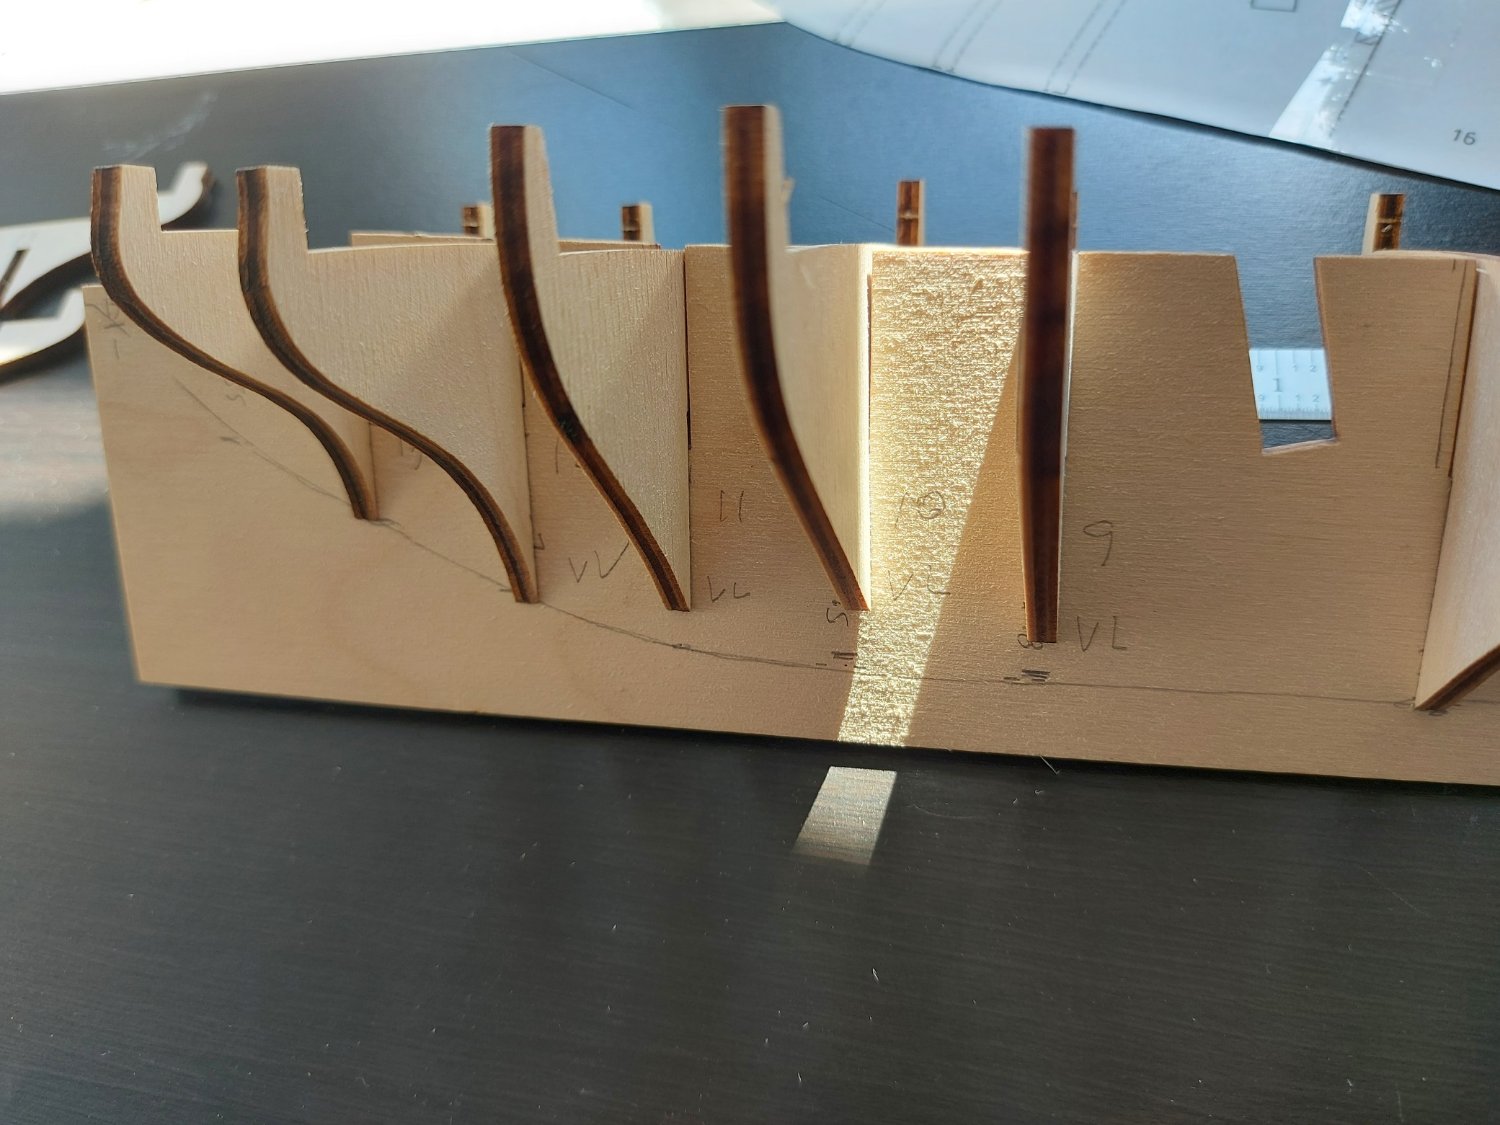
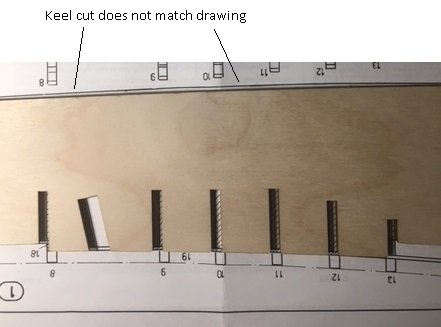
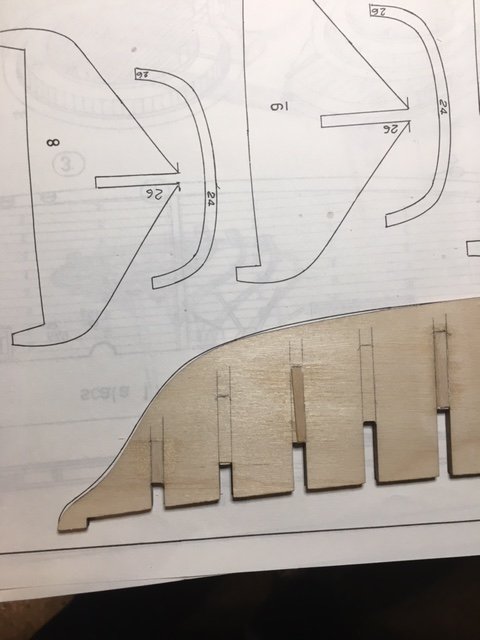
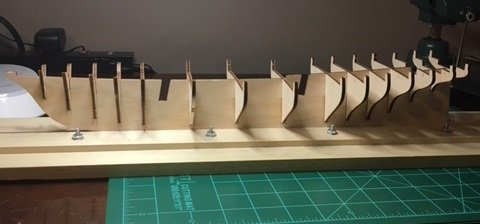
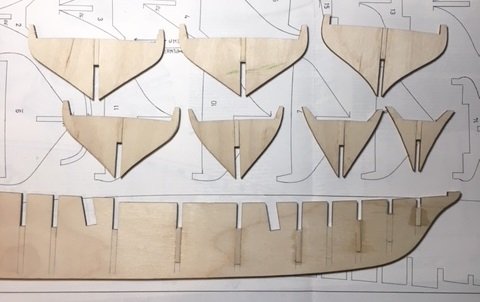
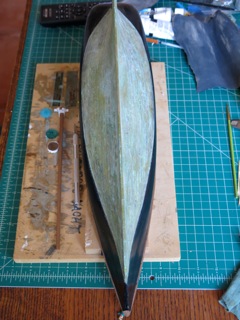
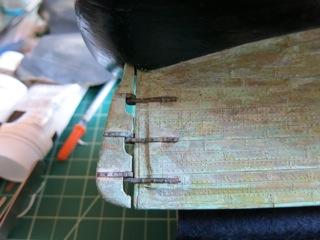
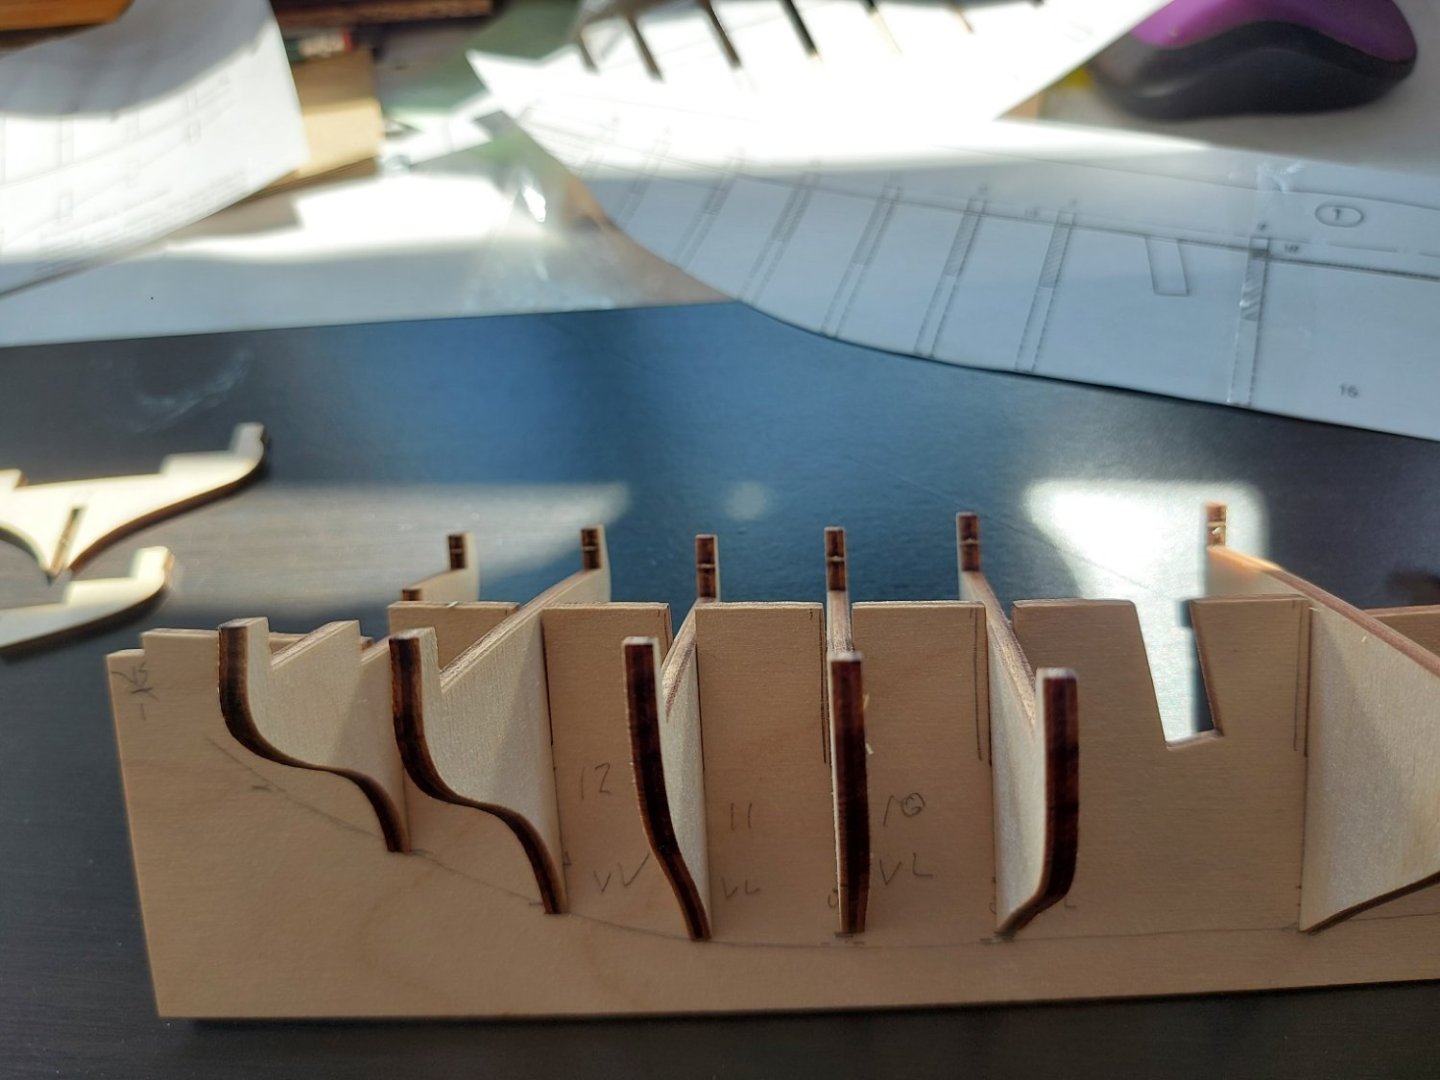
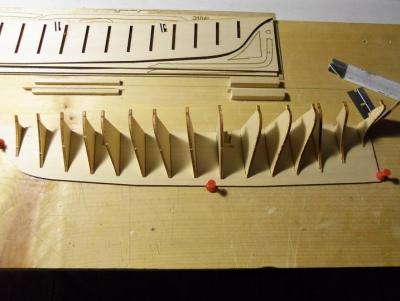
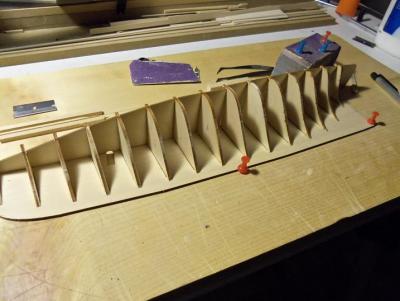
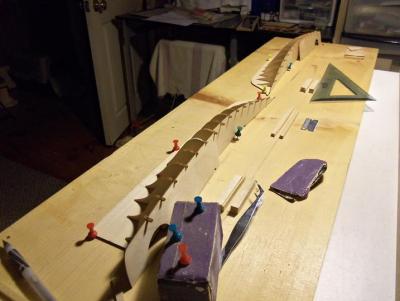
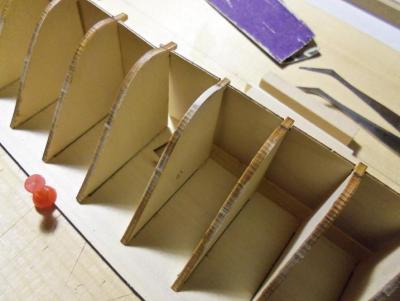
I’m starting the 1/66 Mamoli America; and I’ve read what build logs I could find. My primary source at this time is Hamilton’s from 2015. Glad I looked at that as the openings in the keel for the bulkheads are quite off, similar to his experience. I’ll be adjusting for that. I’ve found something else that seems a bit out of kilter (described below). Input requested. My thoughts are that I should make the bottoms align as well as possible and not worry about what happens up top. Exposition The top surfaces of bulkheads 9-10-11 end up well below the top of the keel (Part 16) ; ¼” for 10 and 11, and 5/32” at 11. I’m not concerned so much about where the bulkhead ends up at the top, however, I’m concerned more about where the bottom edge of the bulkhead ends up at. Using a copy of the plan, I drew a smooth line connecting the bottoms of the bulkheads and matched that to where the bottom of the bulkhead meets the keel. 1) If I raise up 9-10-11 so that the top of these bulkheads meet the top of the keel, the bottoms of the bulkhead don’t come close to matching a continuous line 2) It actually looks like I need to lower bulkheads 9 and 10 further down, to create a smooth line I attach 3 fotos. Foto 1 shows how low the bulkheads are compared to the top of the keel; Foto 2 shows how the bulkheads meet the keel, and the need to lower 9 and 10 a bit (matching comment 2 above) Foto 3 shows what happens should I move the bulkheads up to match the top of the keels; this doesn’t look right at all


-
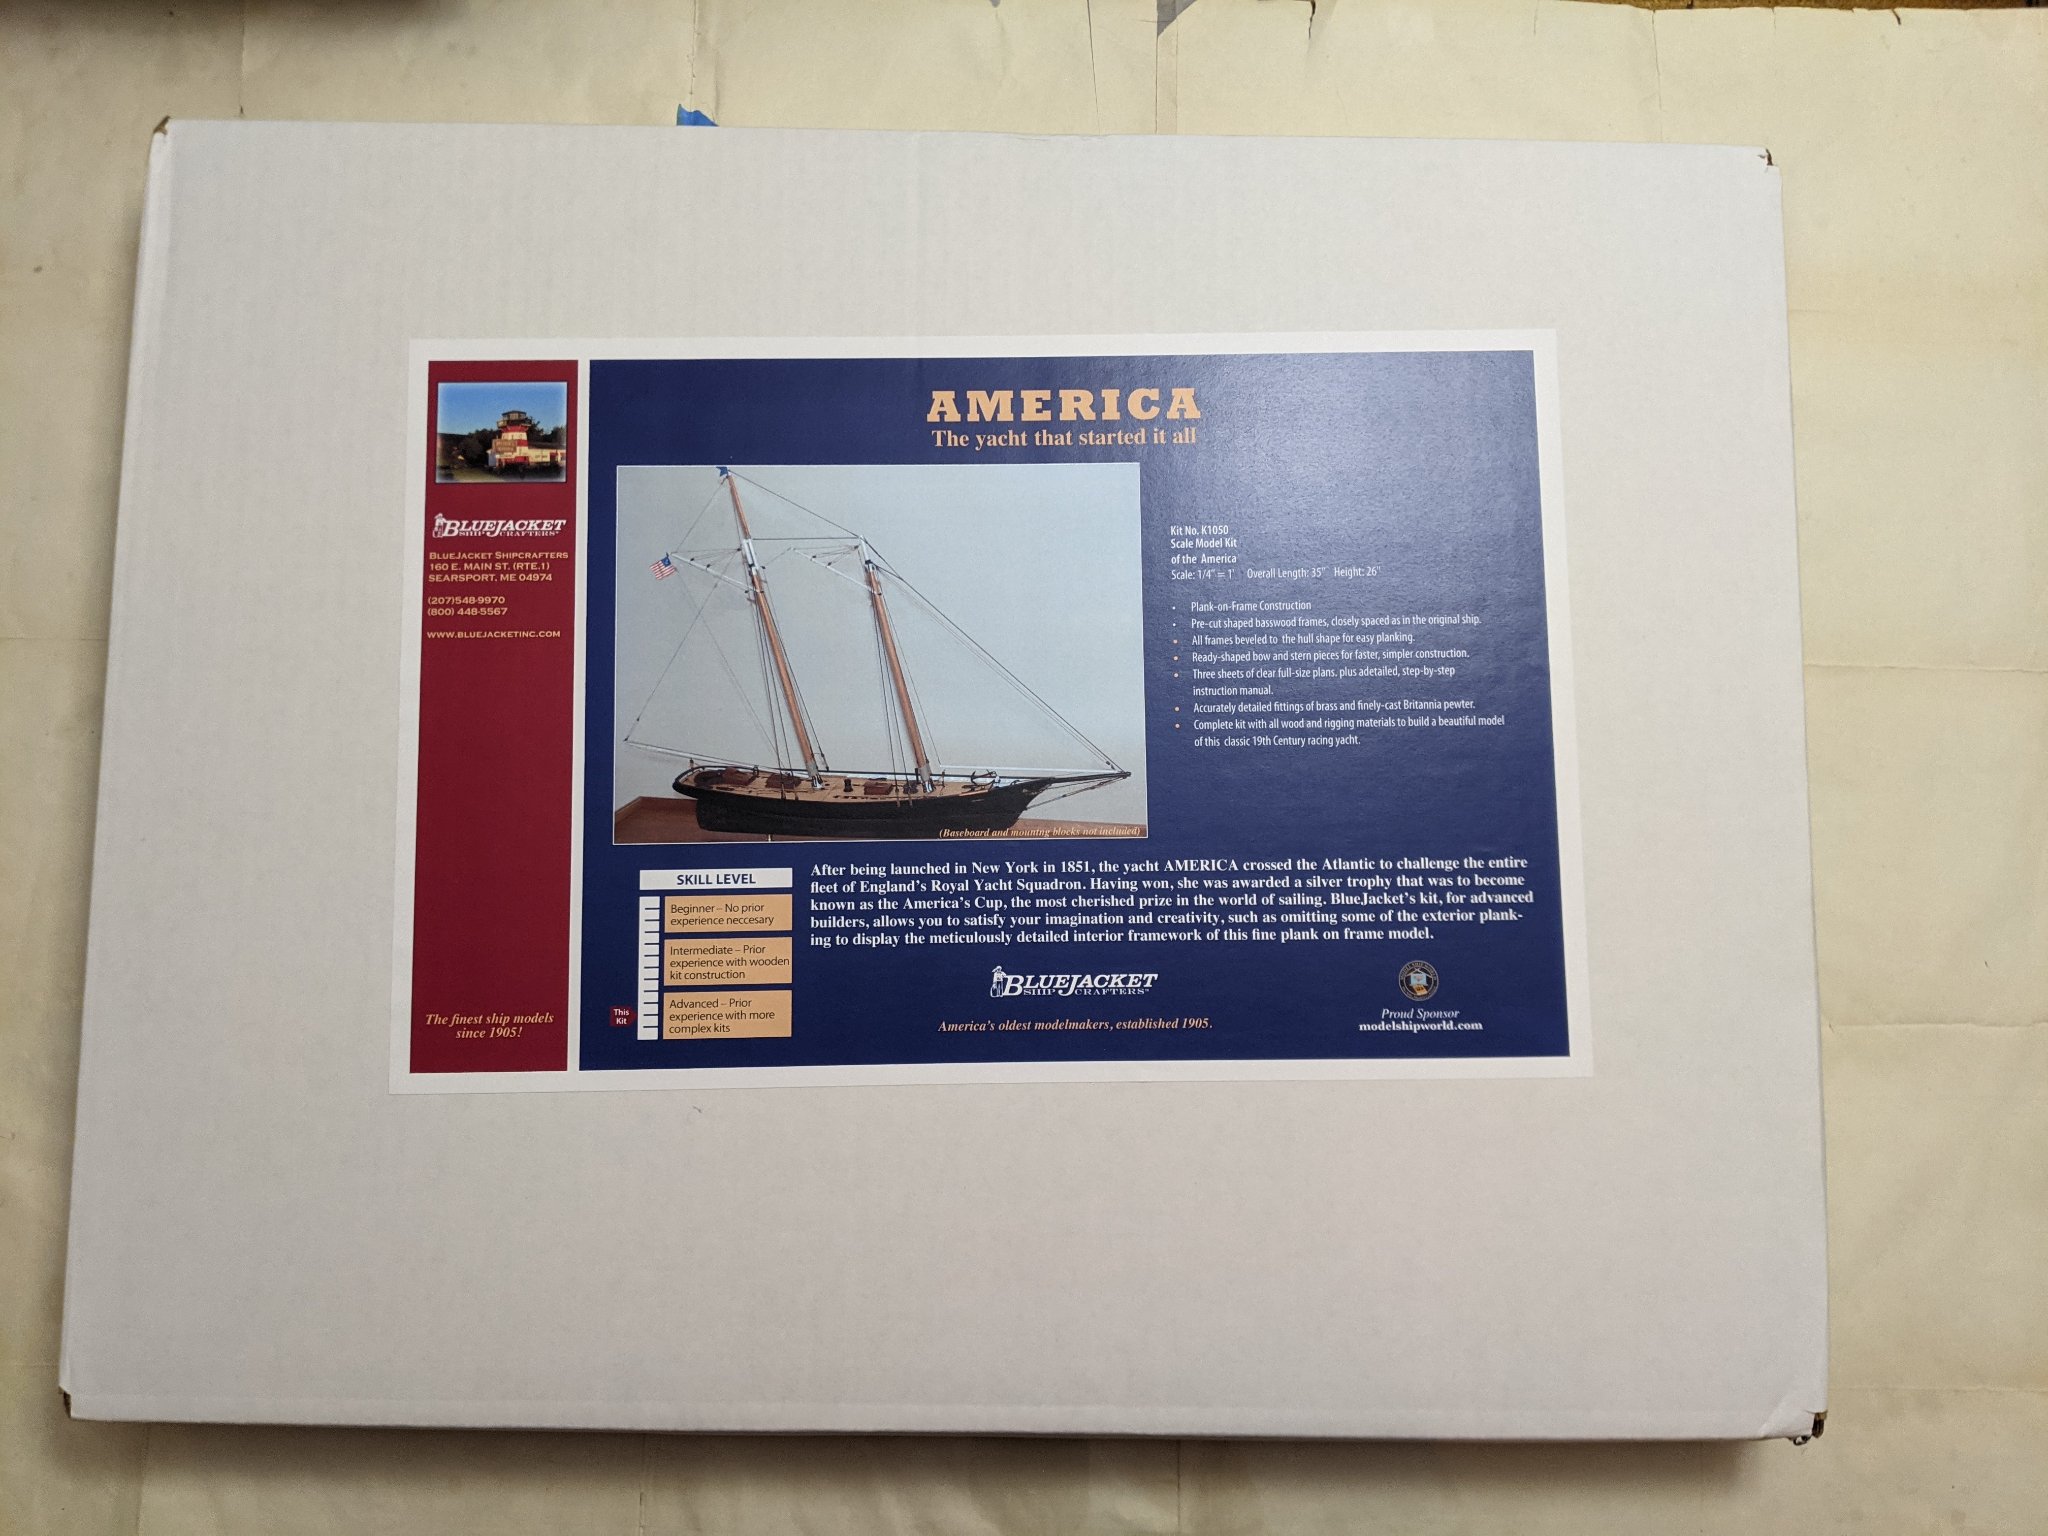
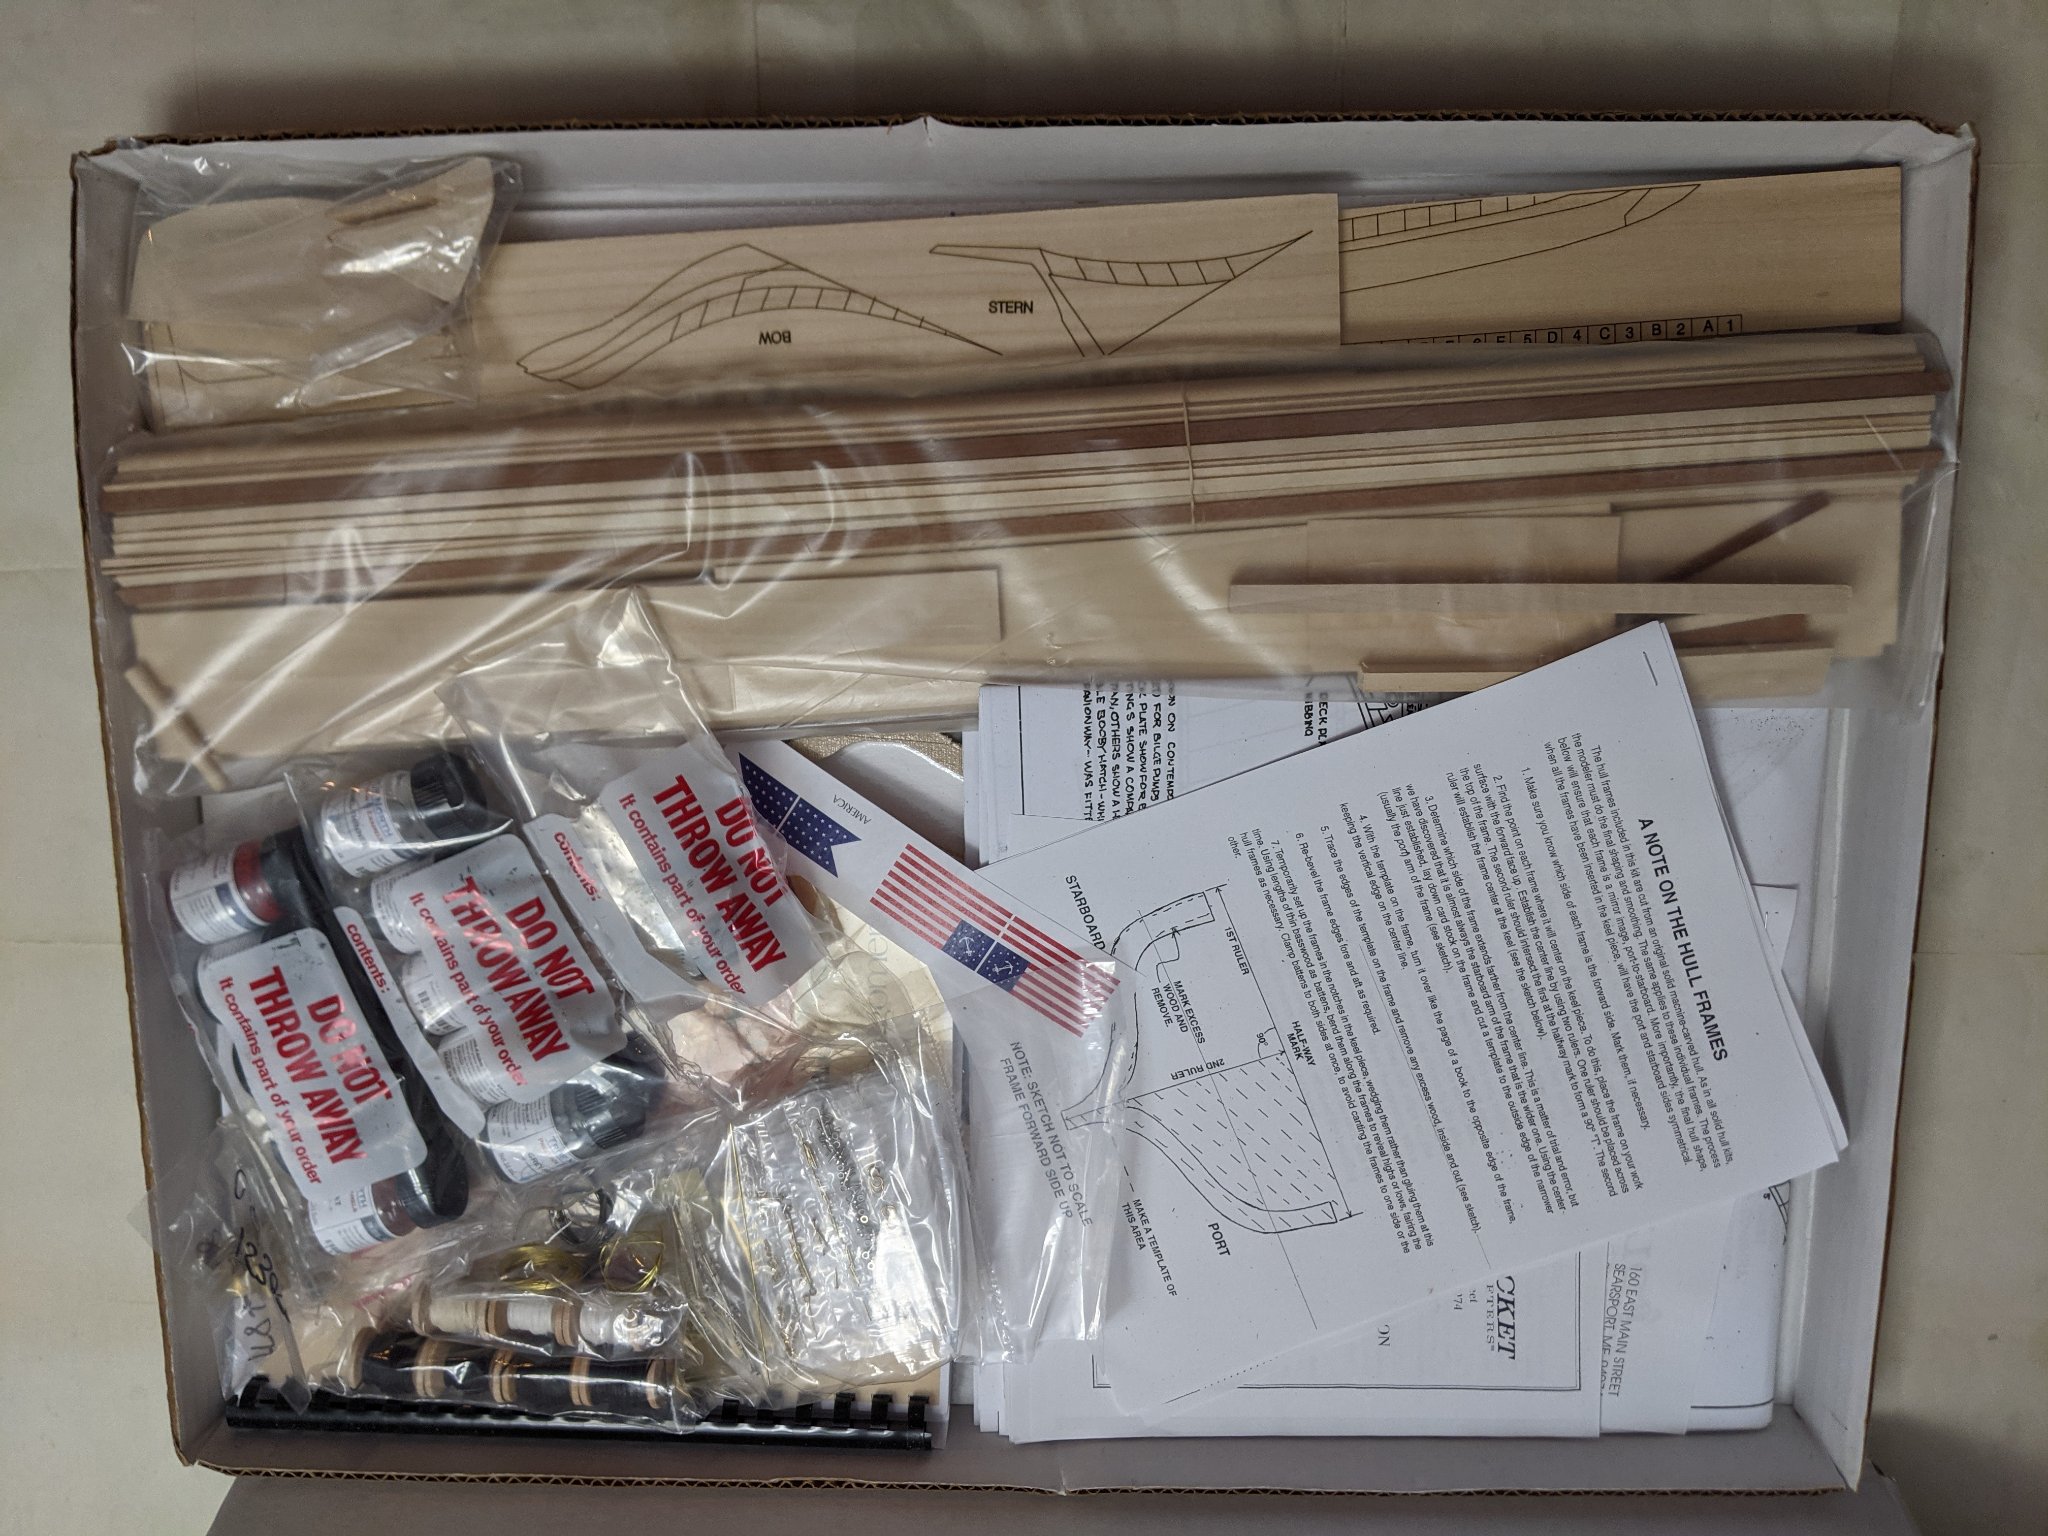
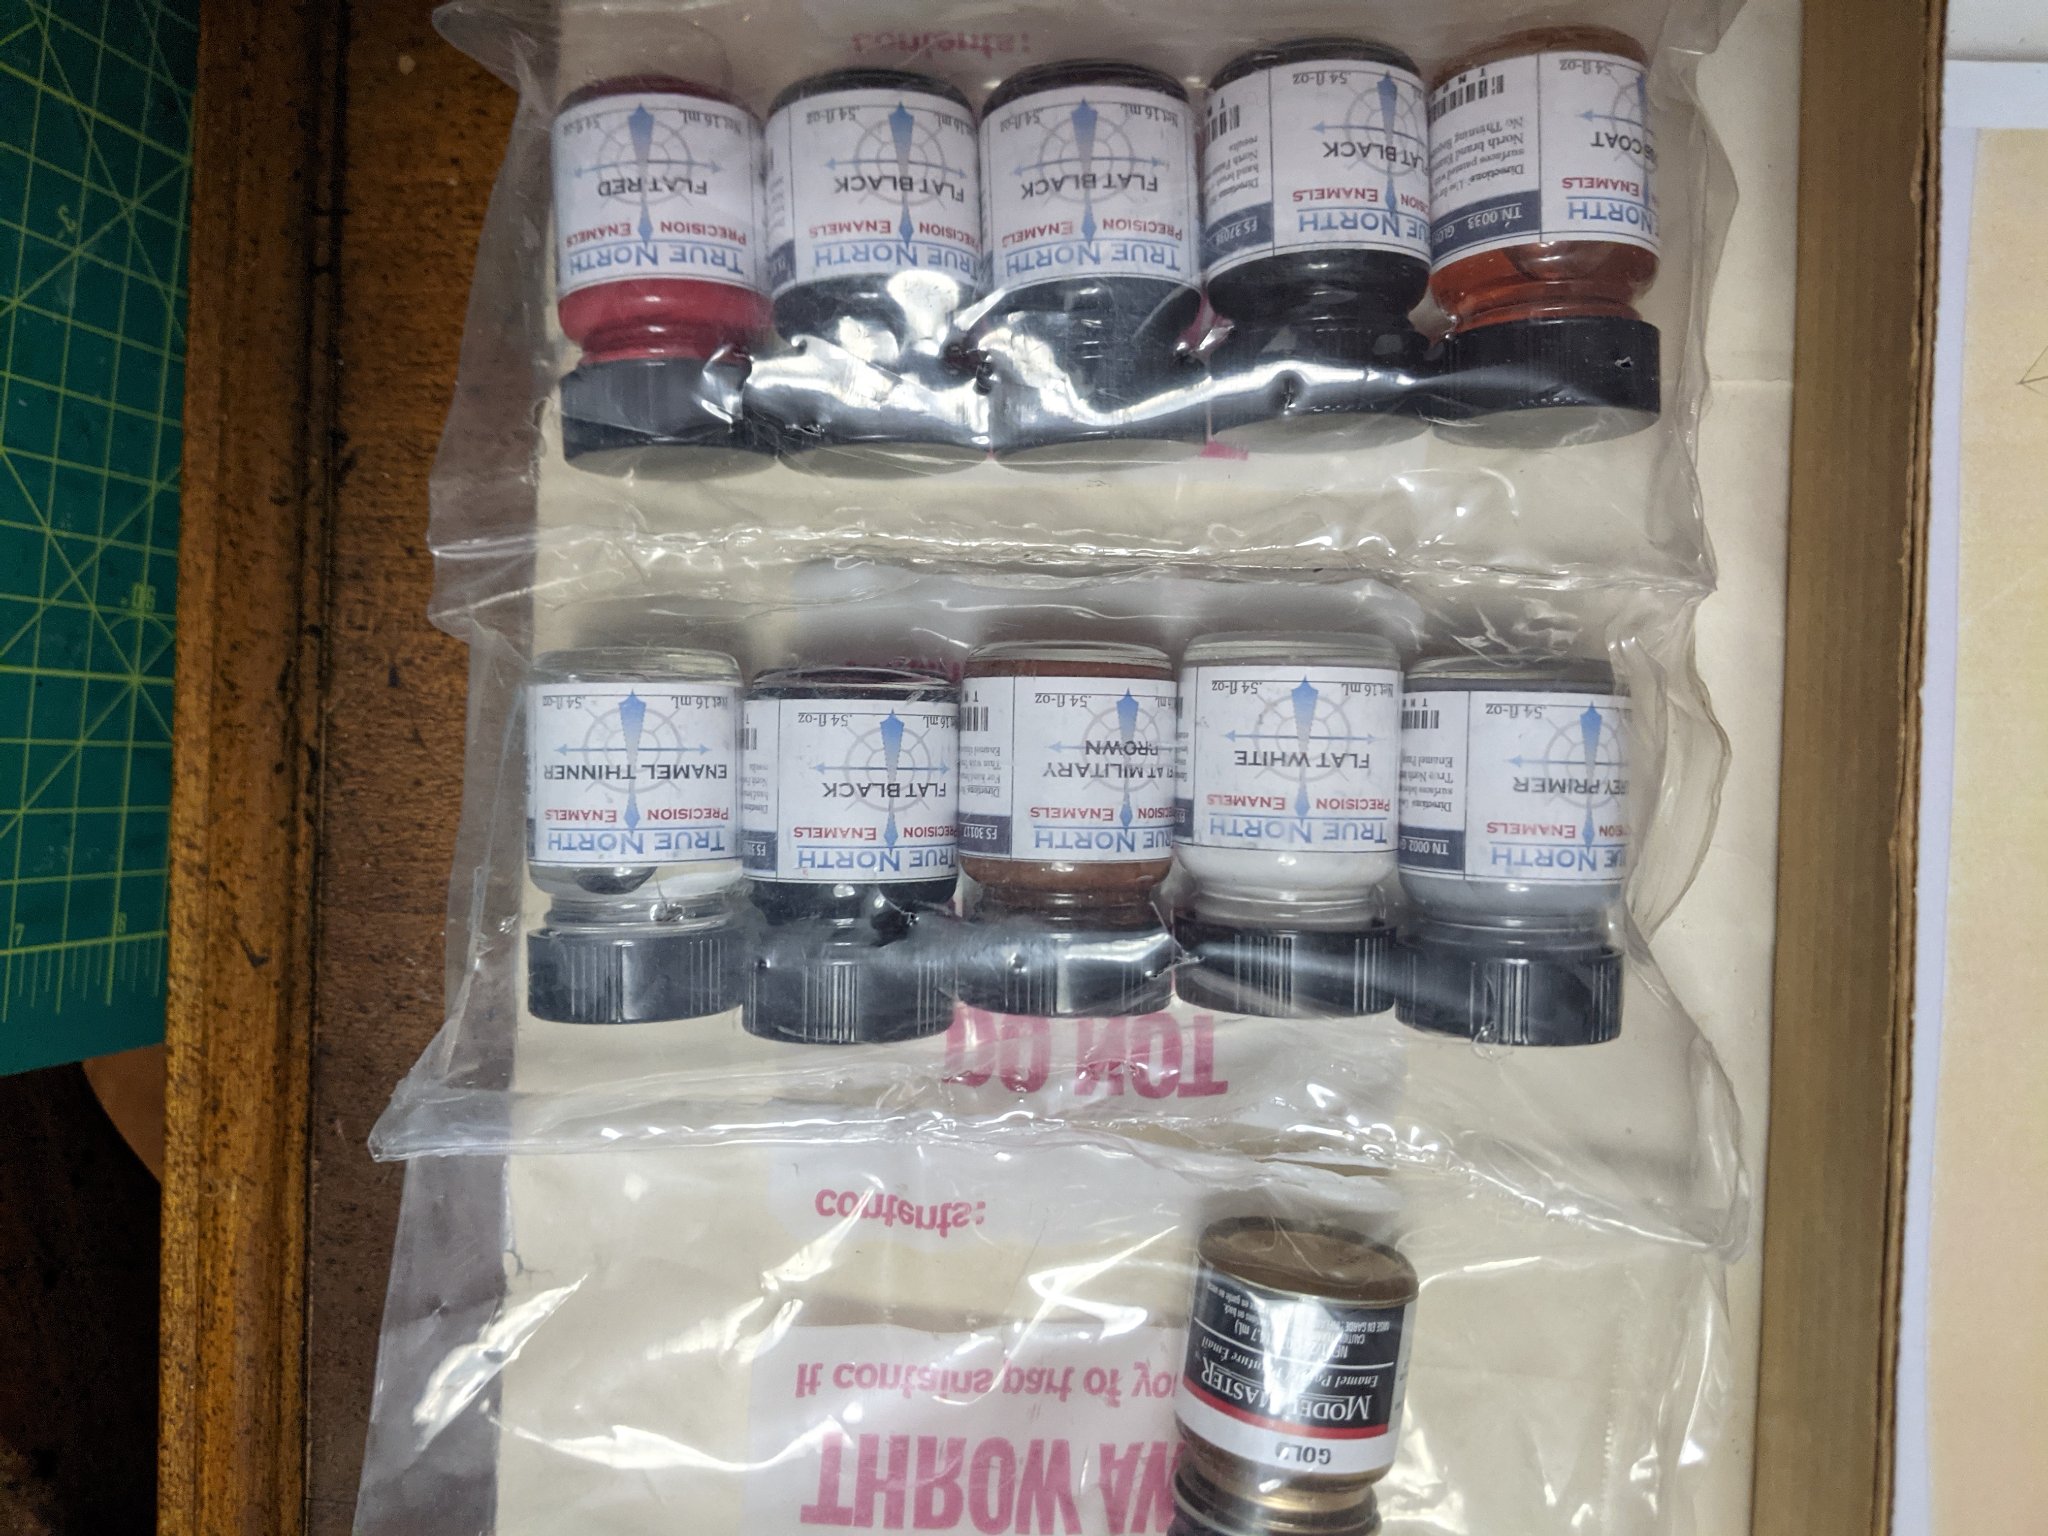
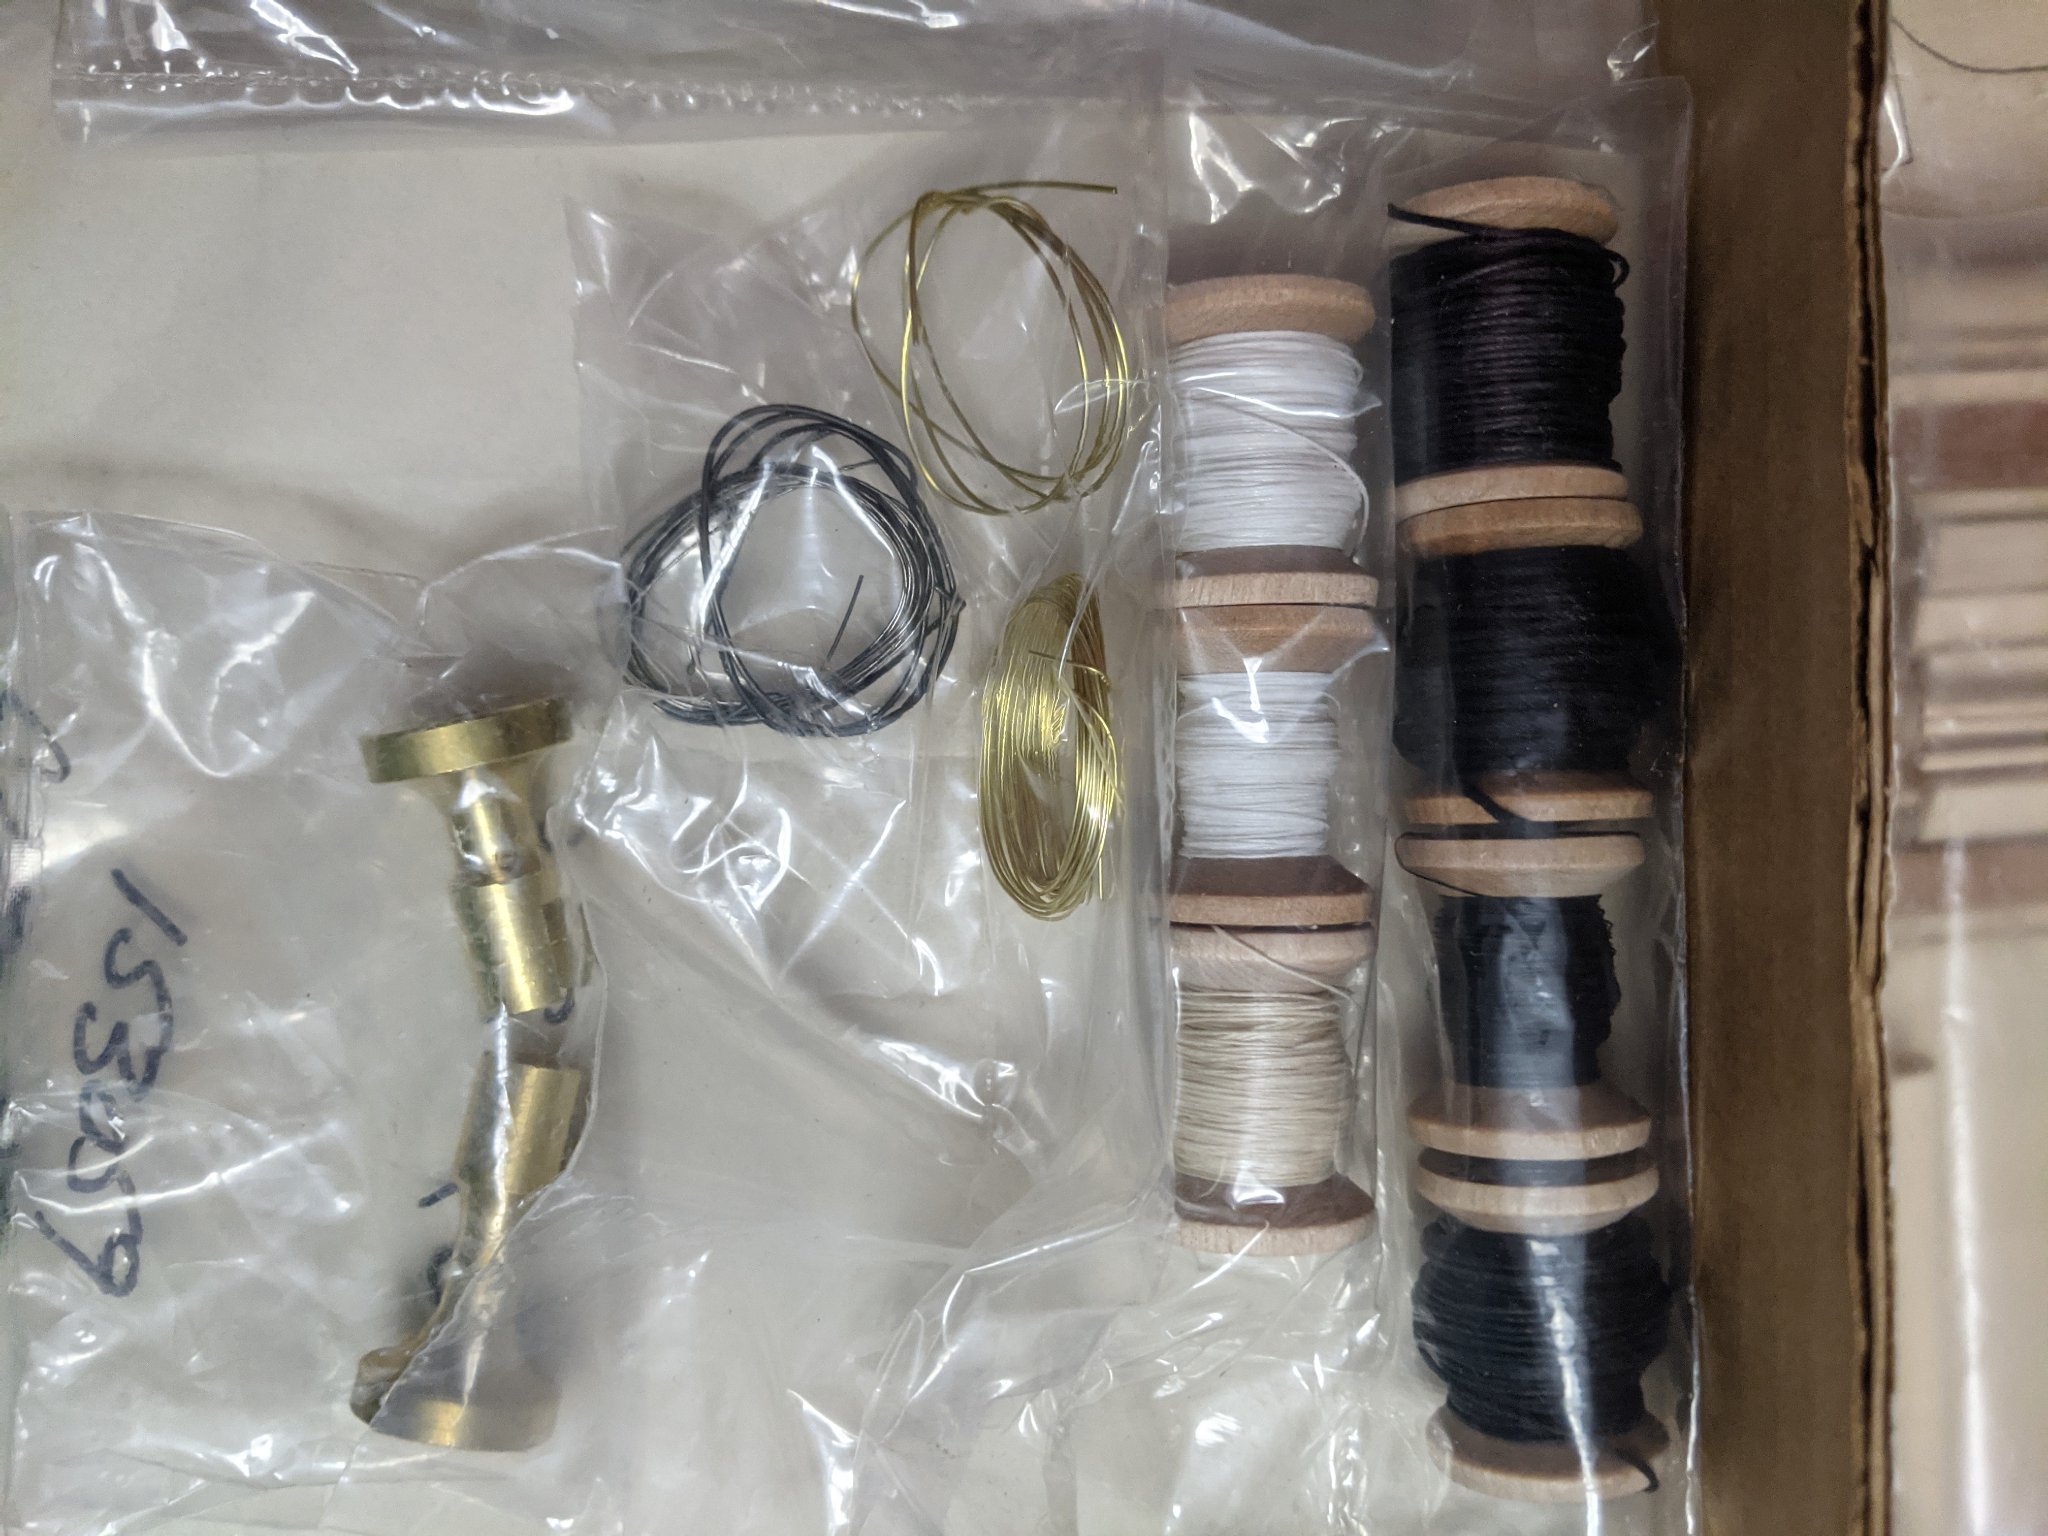
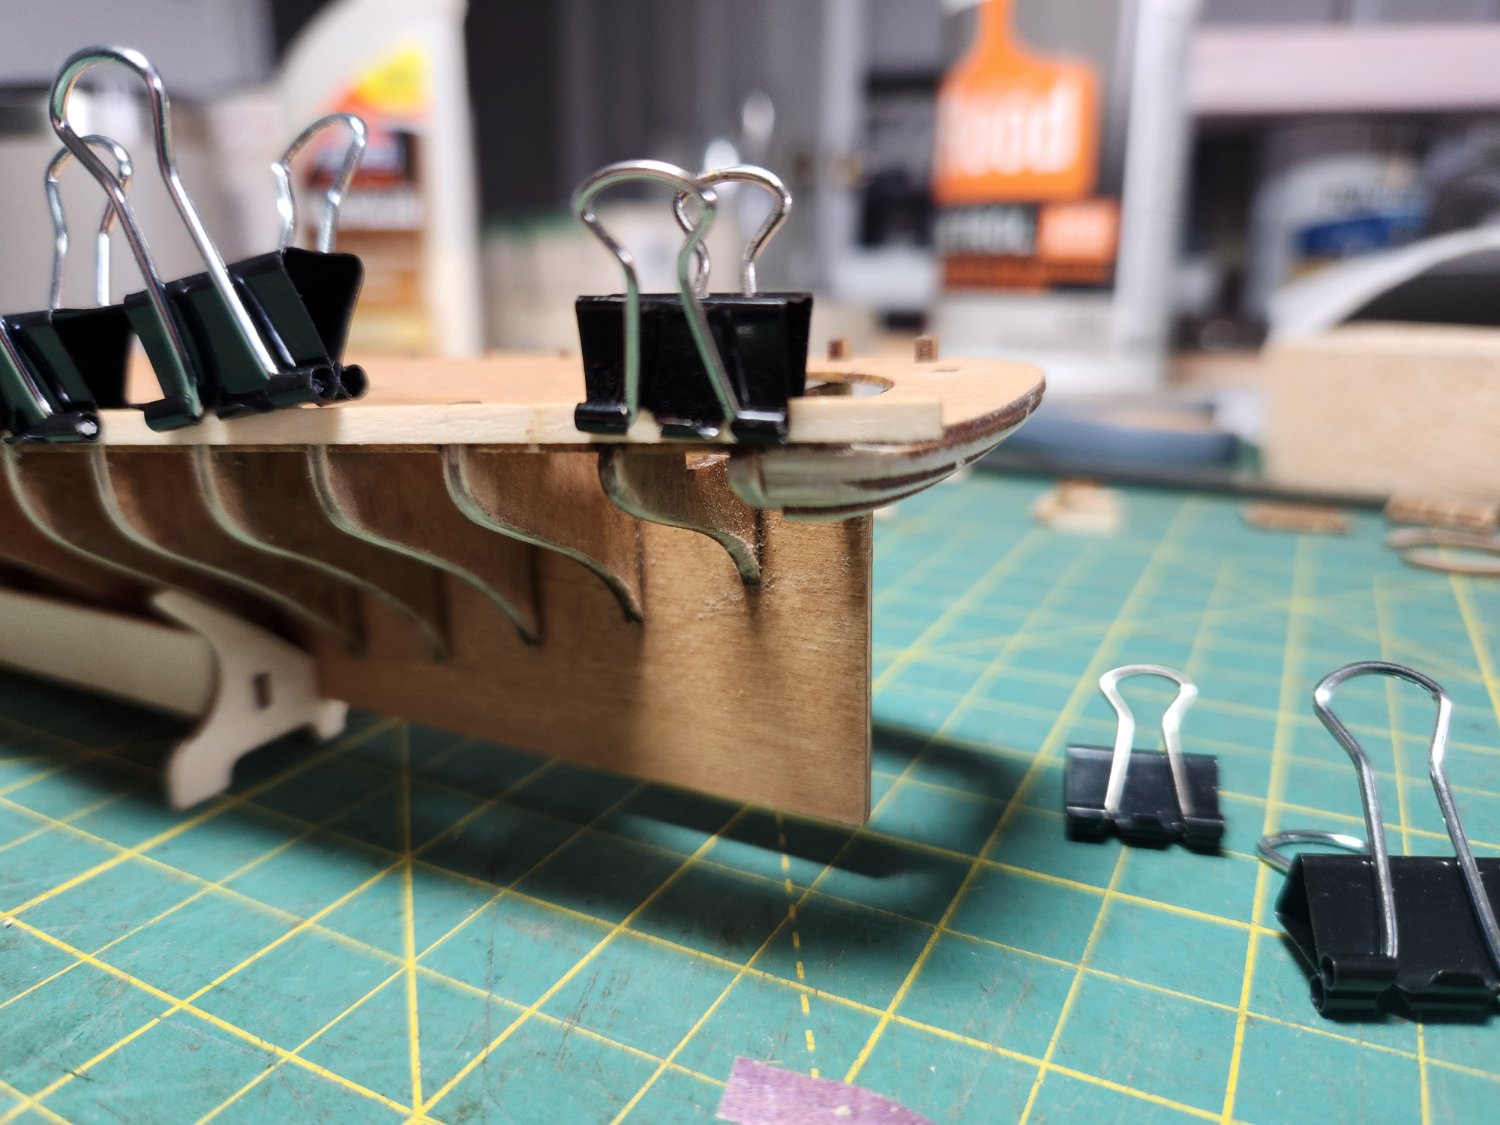
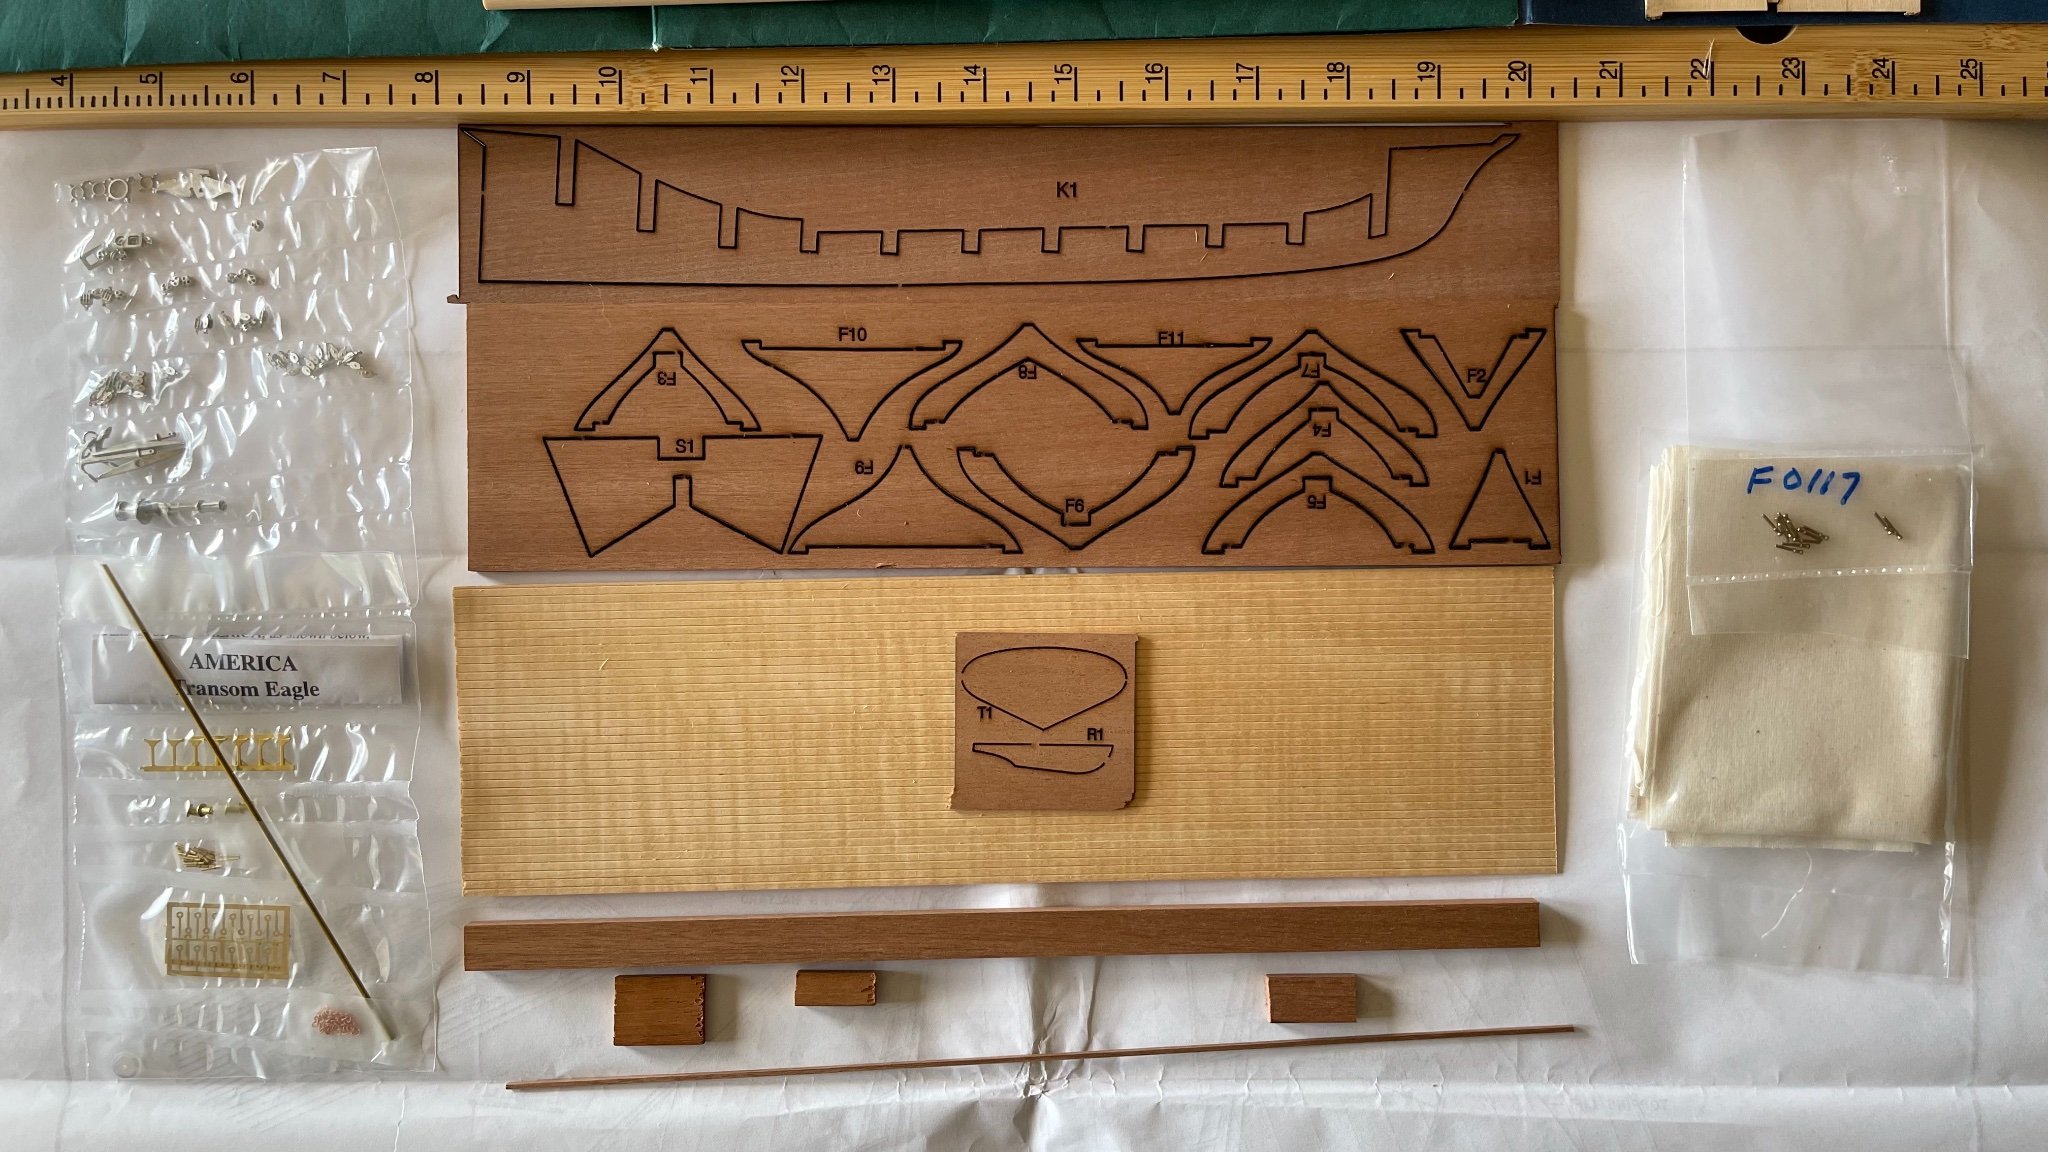
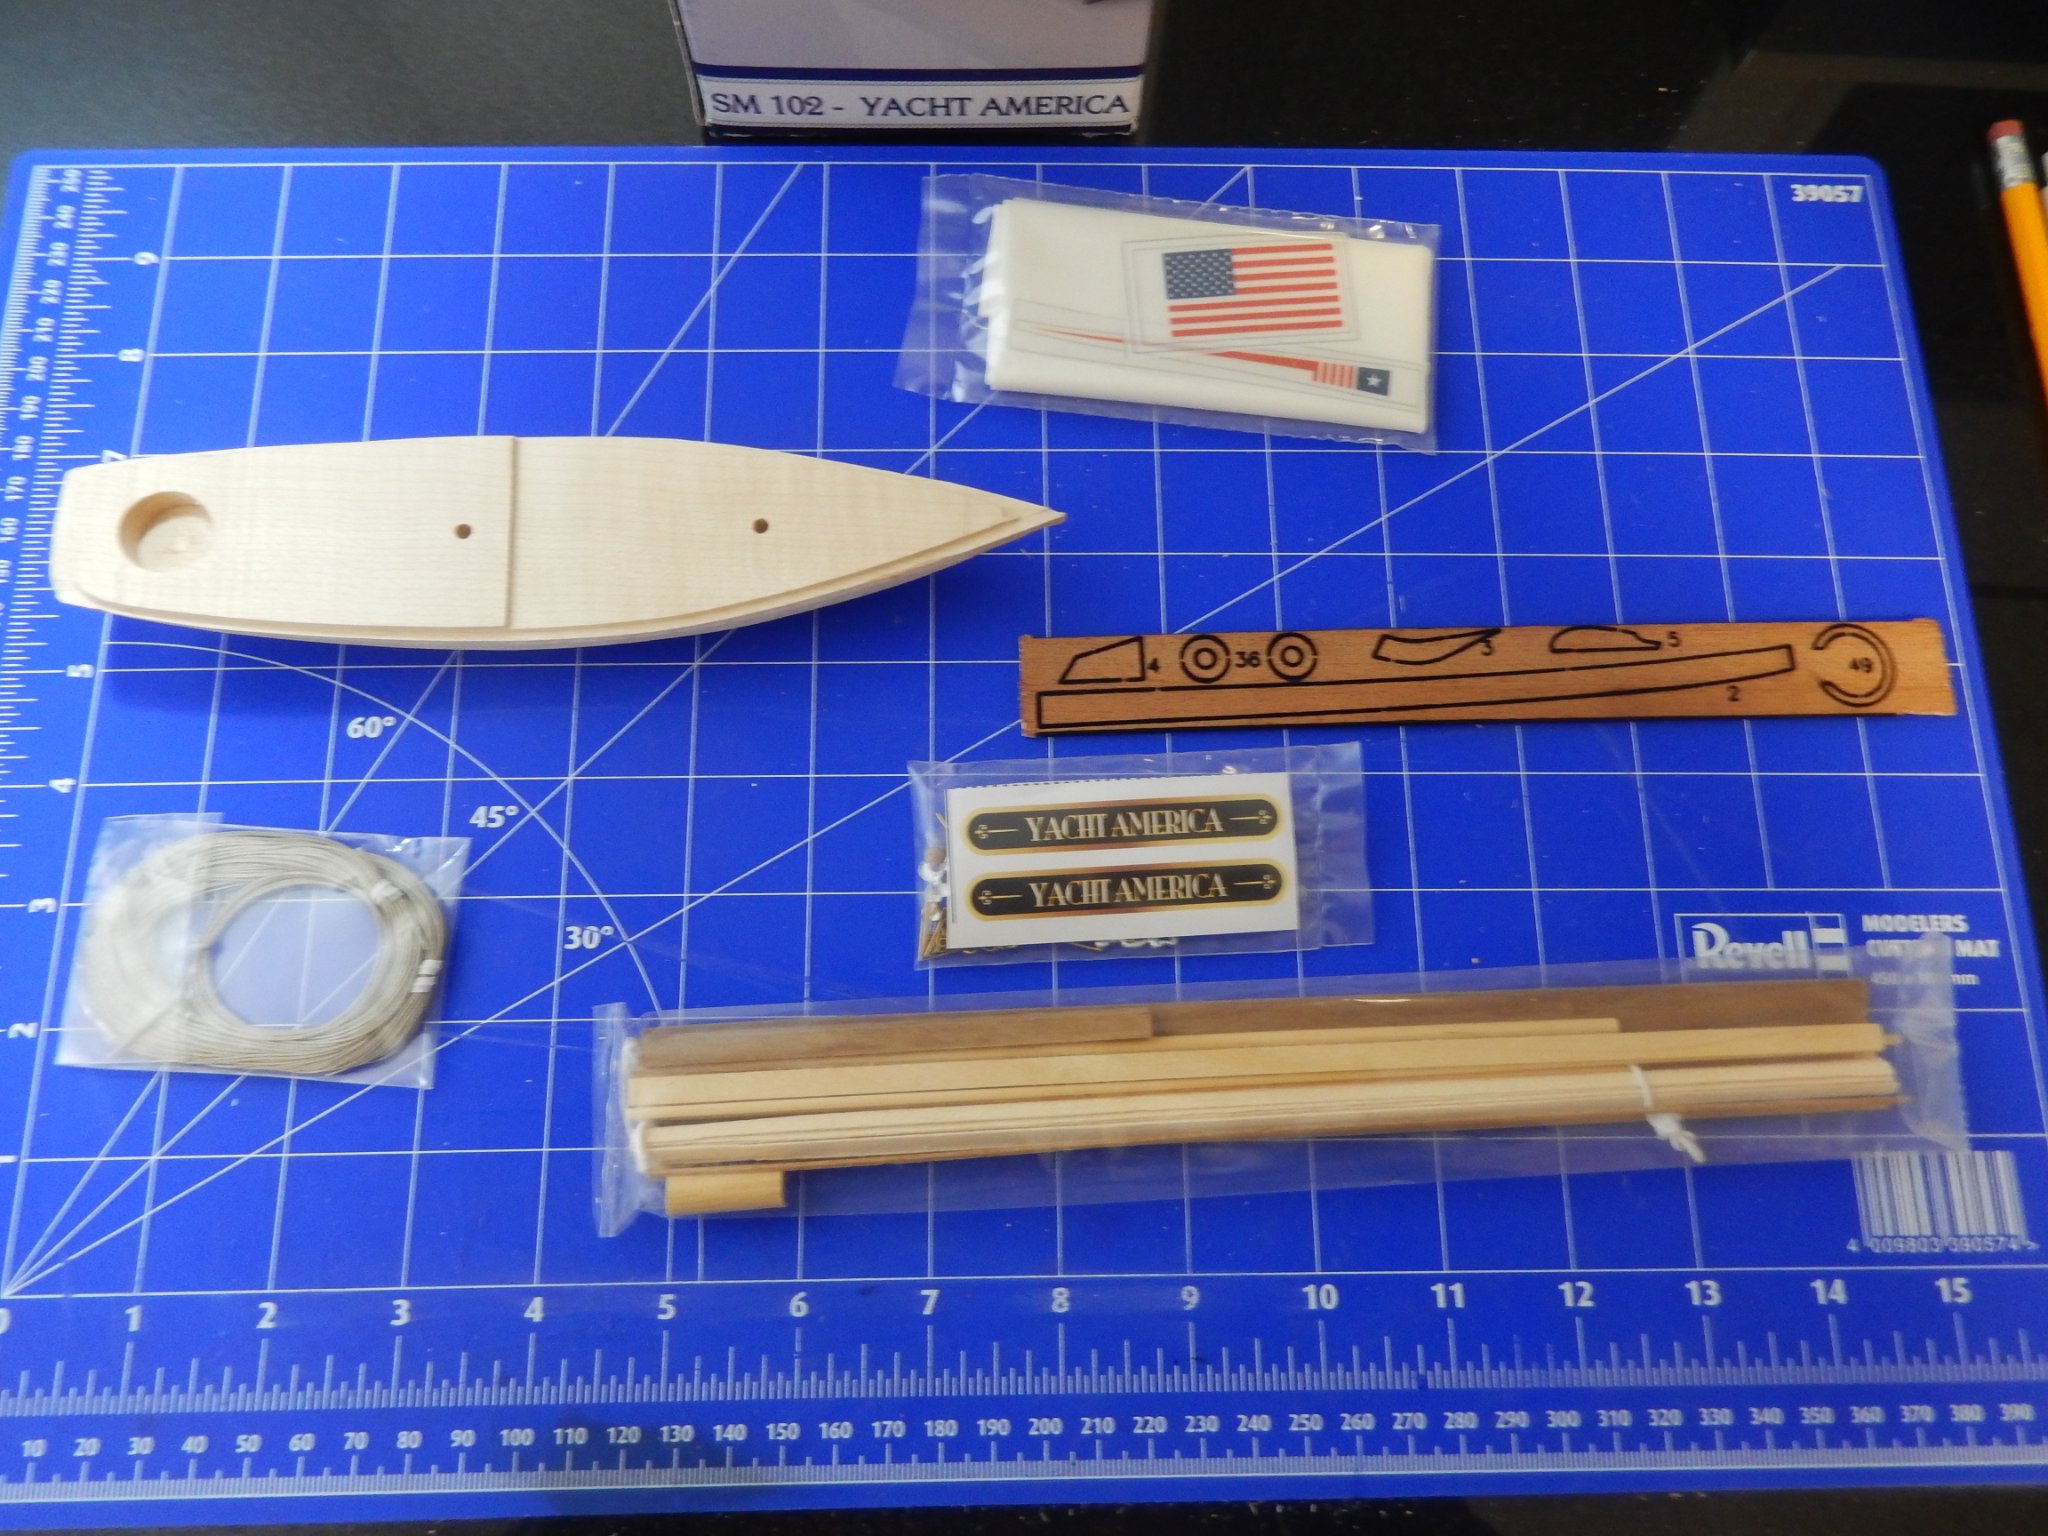
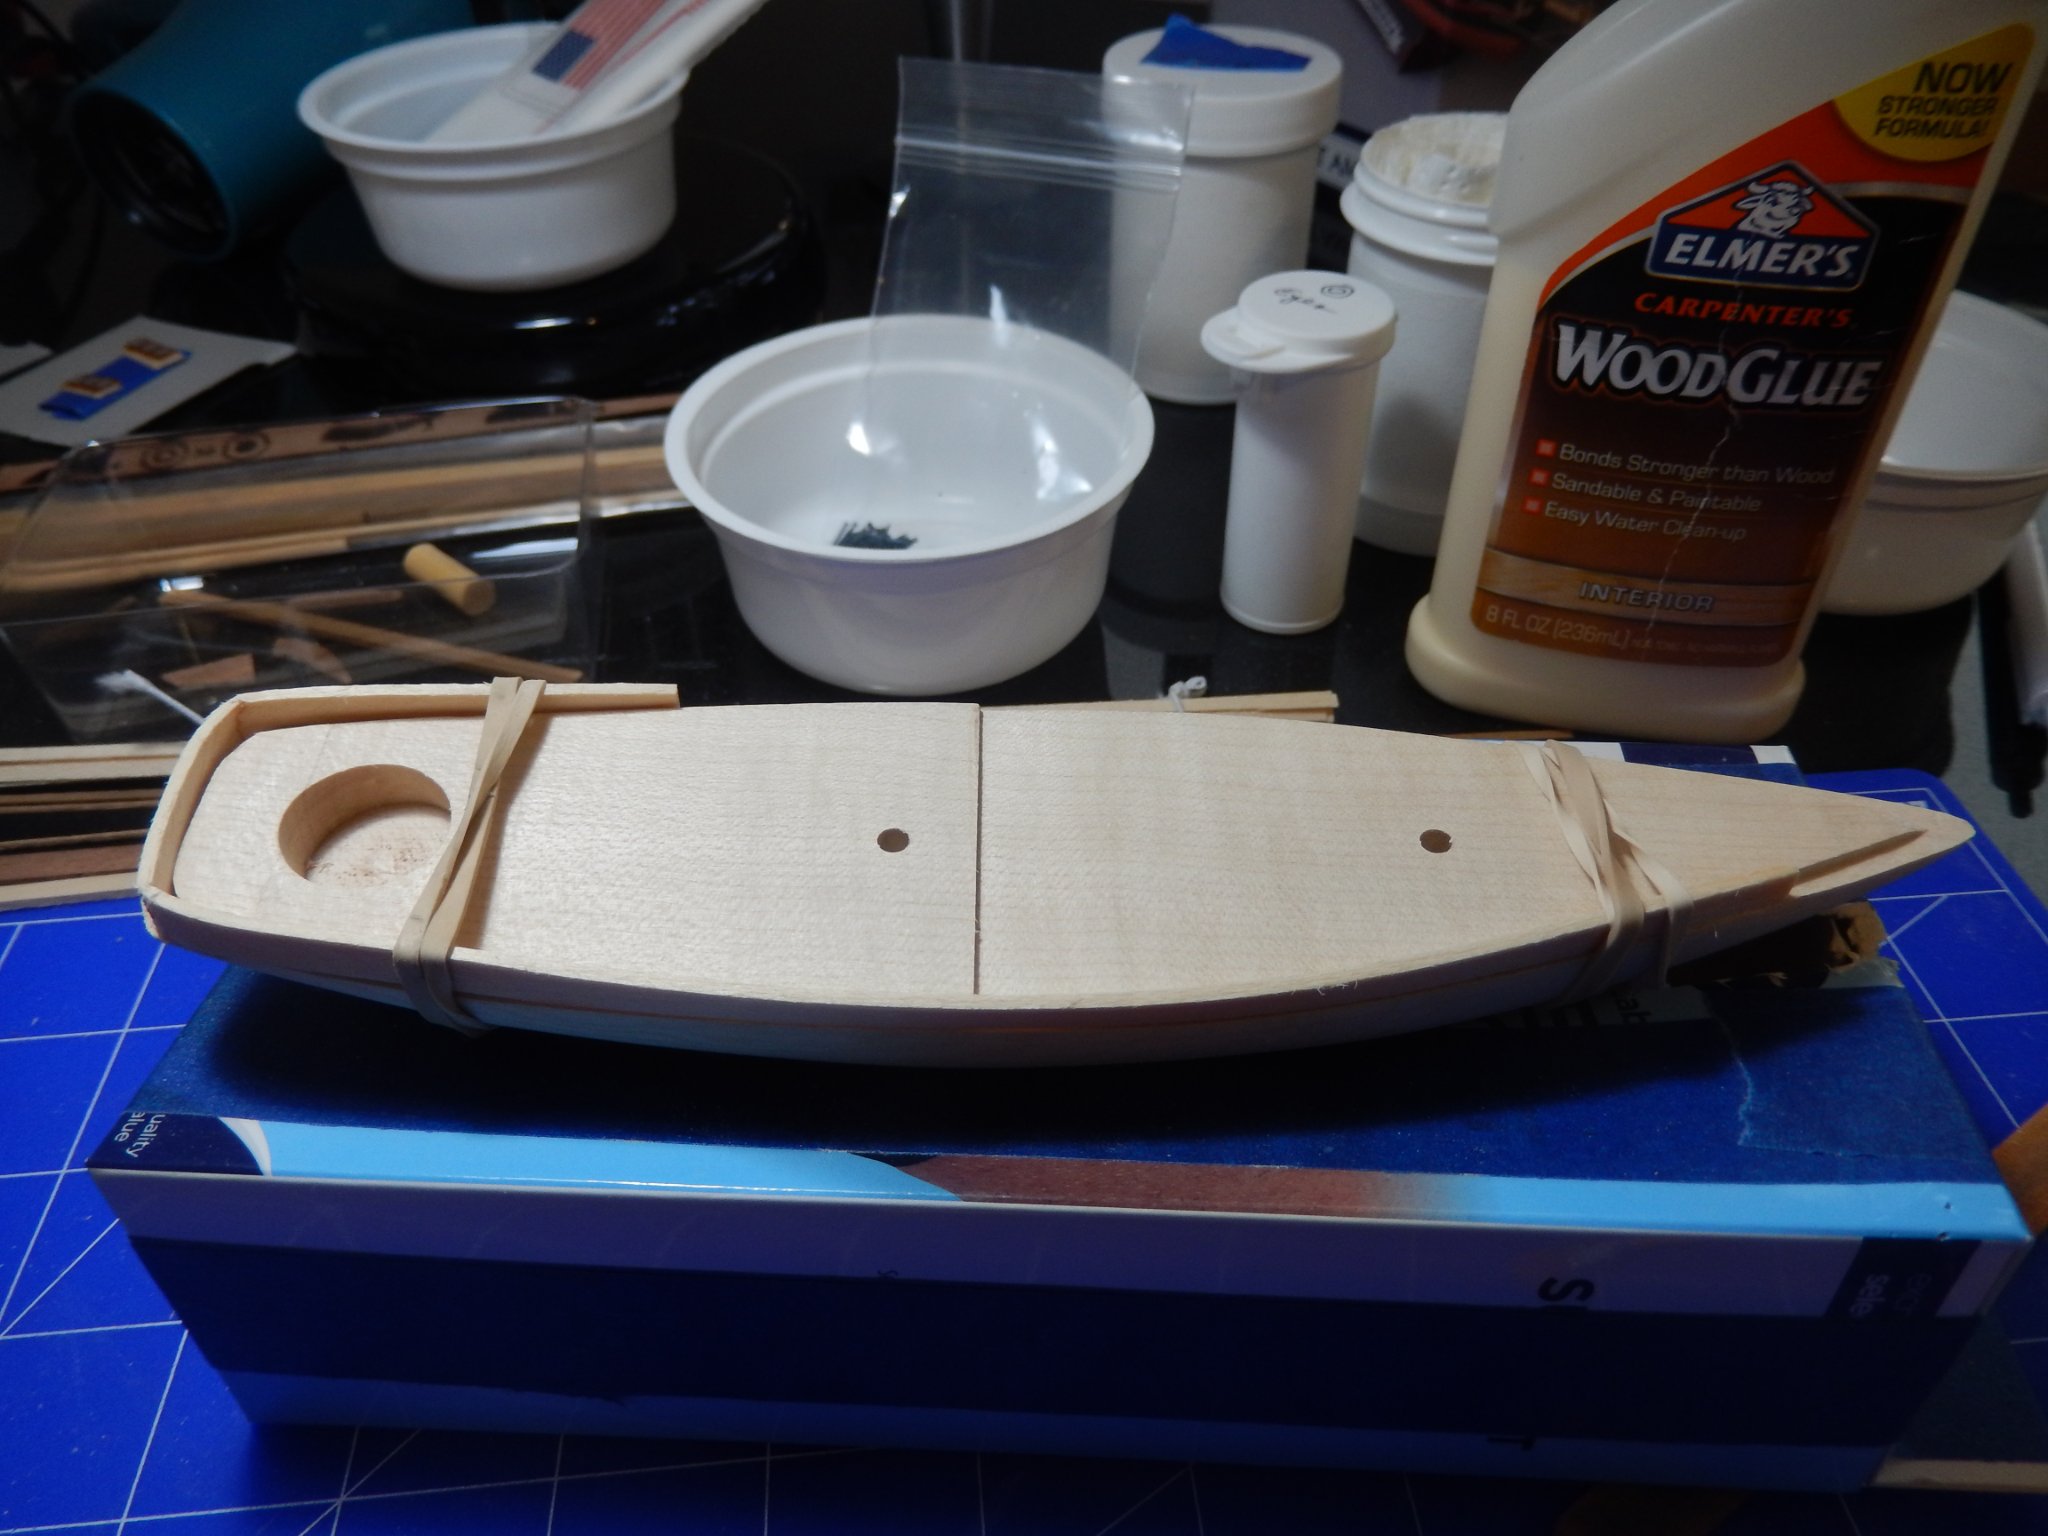
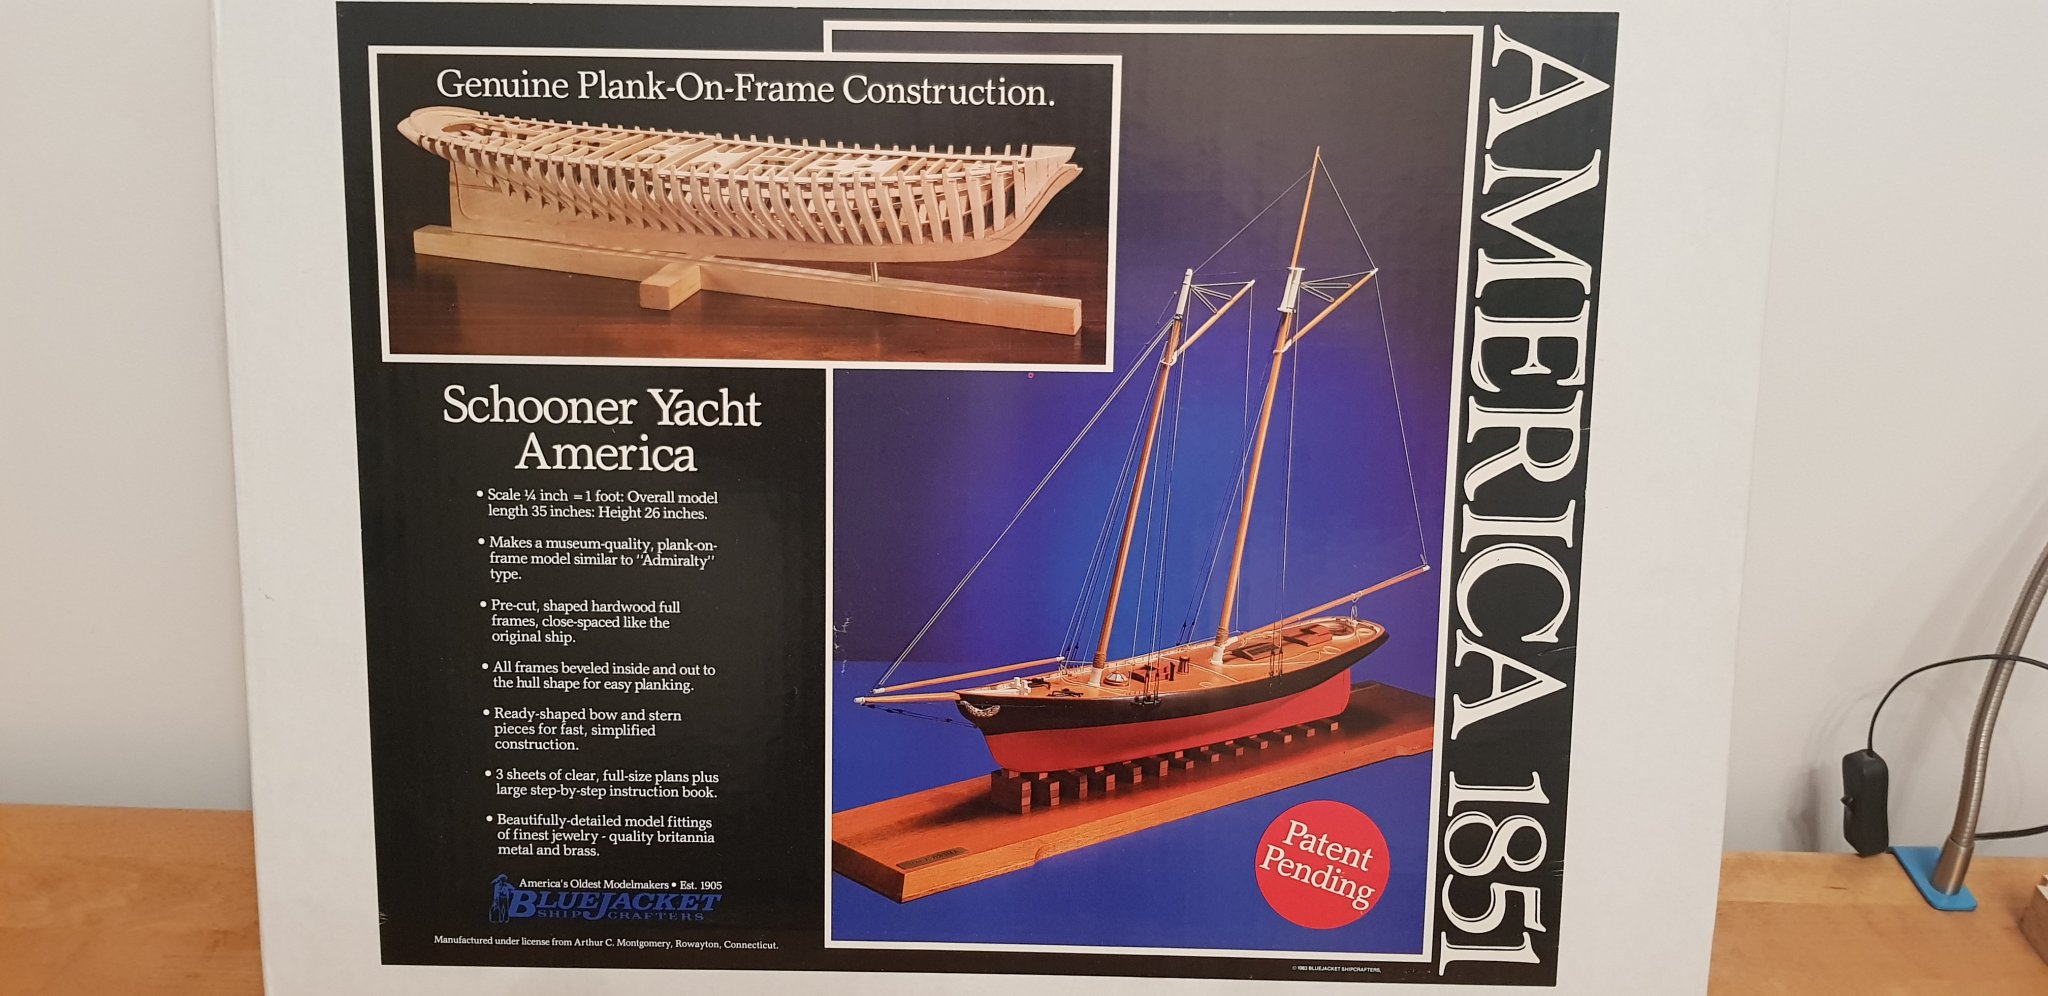
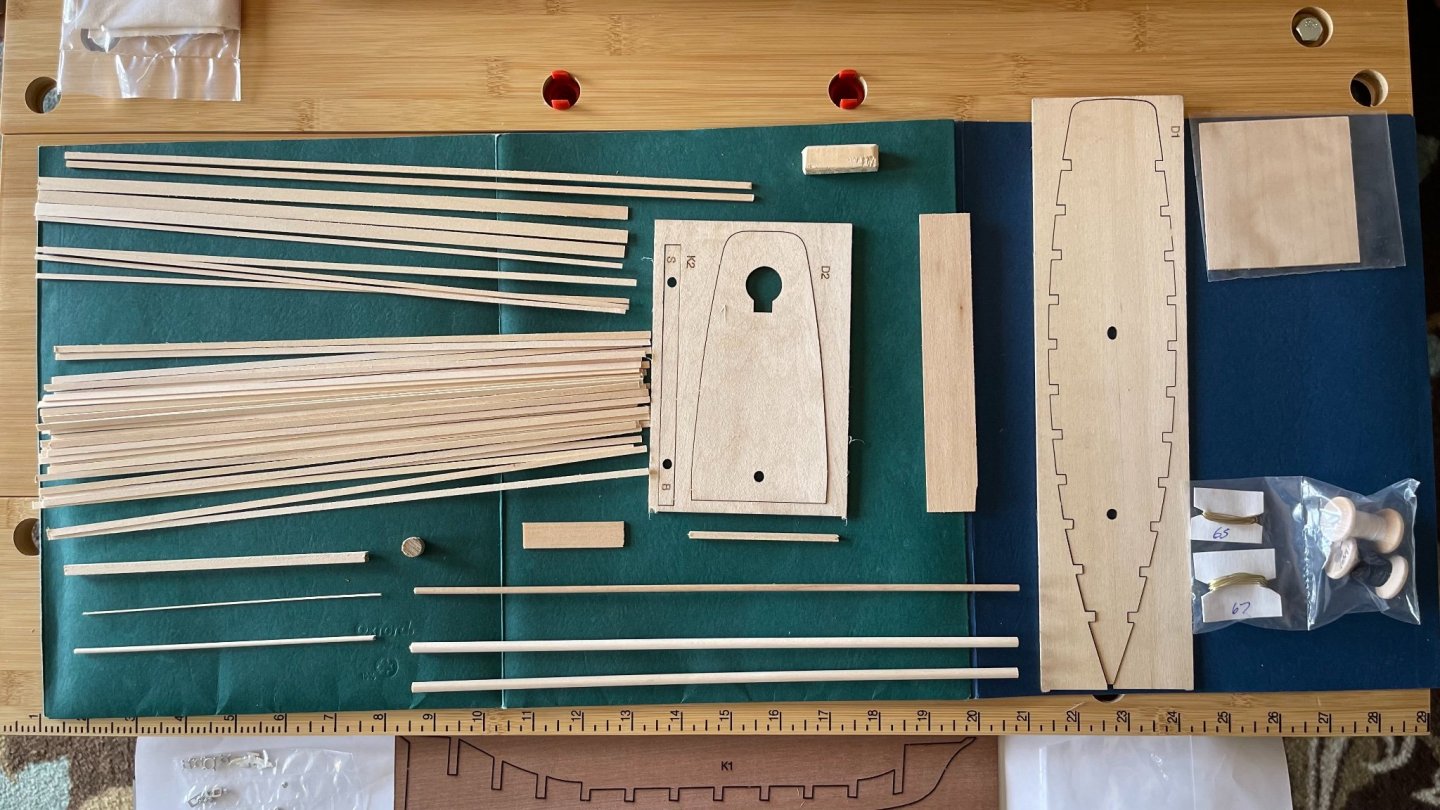
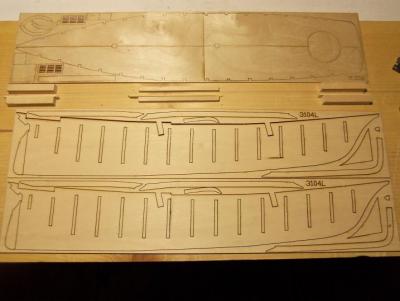
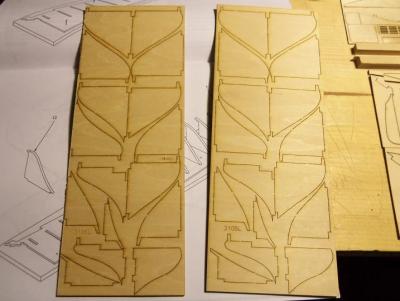
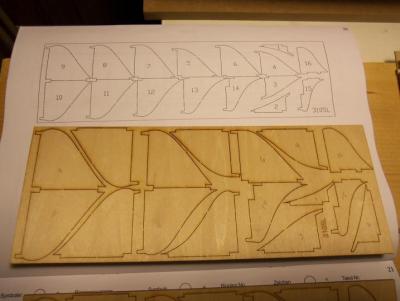
 This is the beginning of my second build log on MSW. After a 3 and 1/2 month break I chose Bluejacket’s “America” in 1/8” scale to compliment my last build of “Atlantic” ( same scale) in my collection. Having been inspired sailing on America 2.0 ( a month before the Pandemic hit), I felt that the 1/4” model of the original America by Bluejacket was beyond my skill level. This 1/8” kit naturally is not as finely detailed as the larger 1/4” Bluejacket kit but for a first time POF build it’s a good starting point. Another plus I like are the laser cut parts that should help me out when fairing the hull. Bluejacket rates this kit midway on their skill level bar measure. The three photos show the entire contents of the kit except copyrighted material. I look forward to posting my progress shortly.

- 37 replies
-
- 5
-
-
- BlueJacket Shipcrafters
- America
- (and 1 more)
-
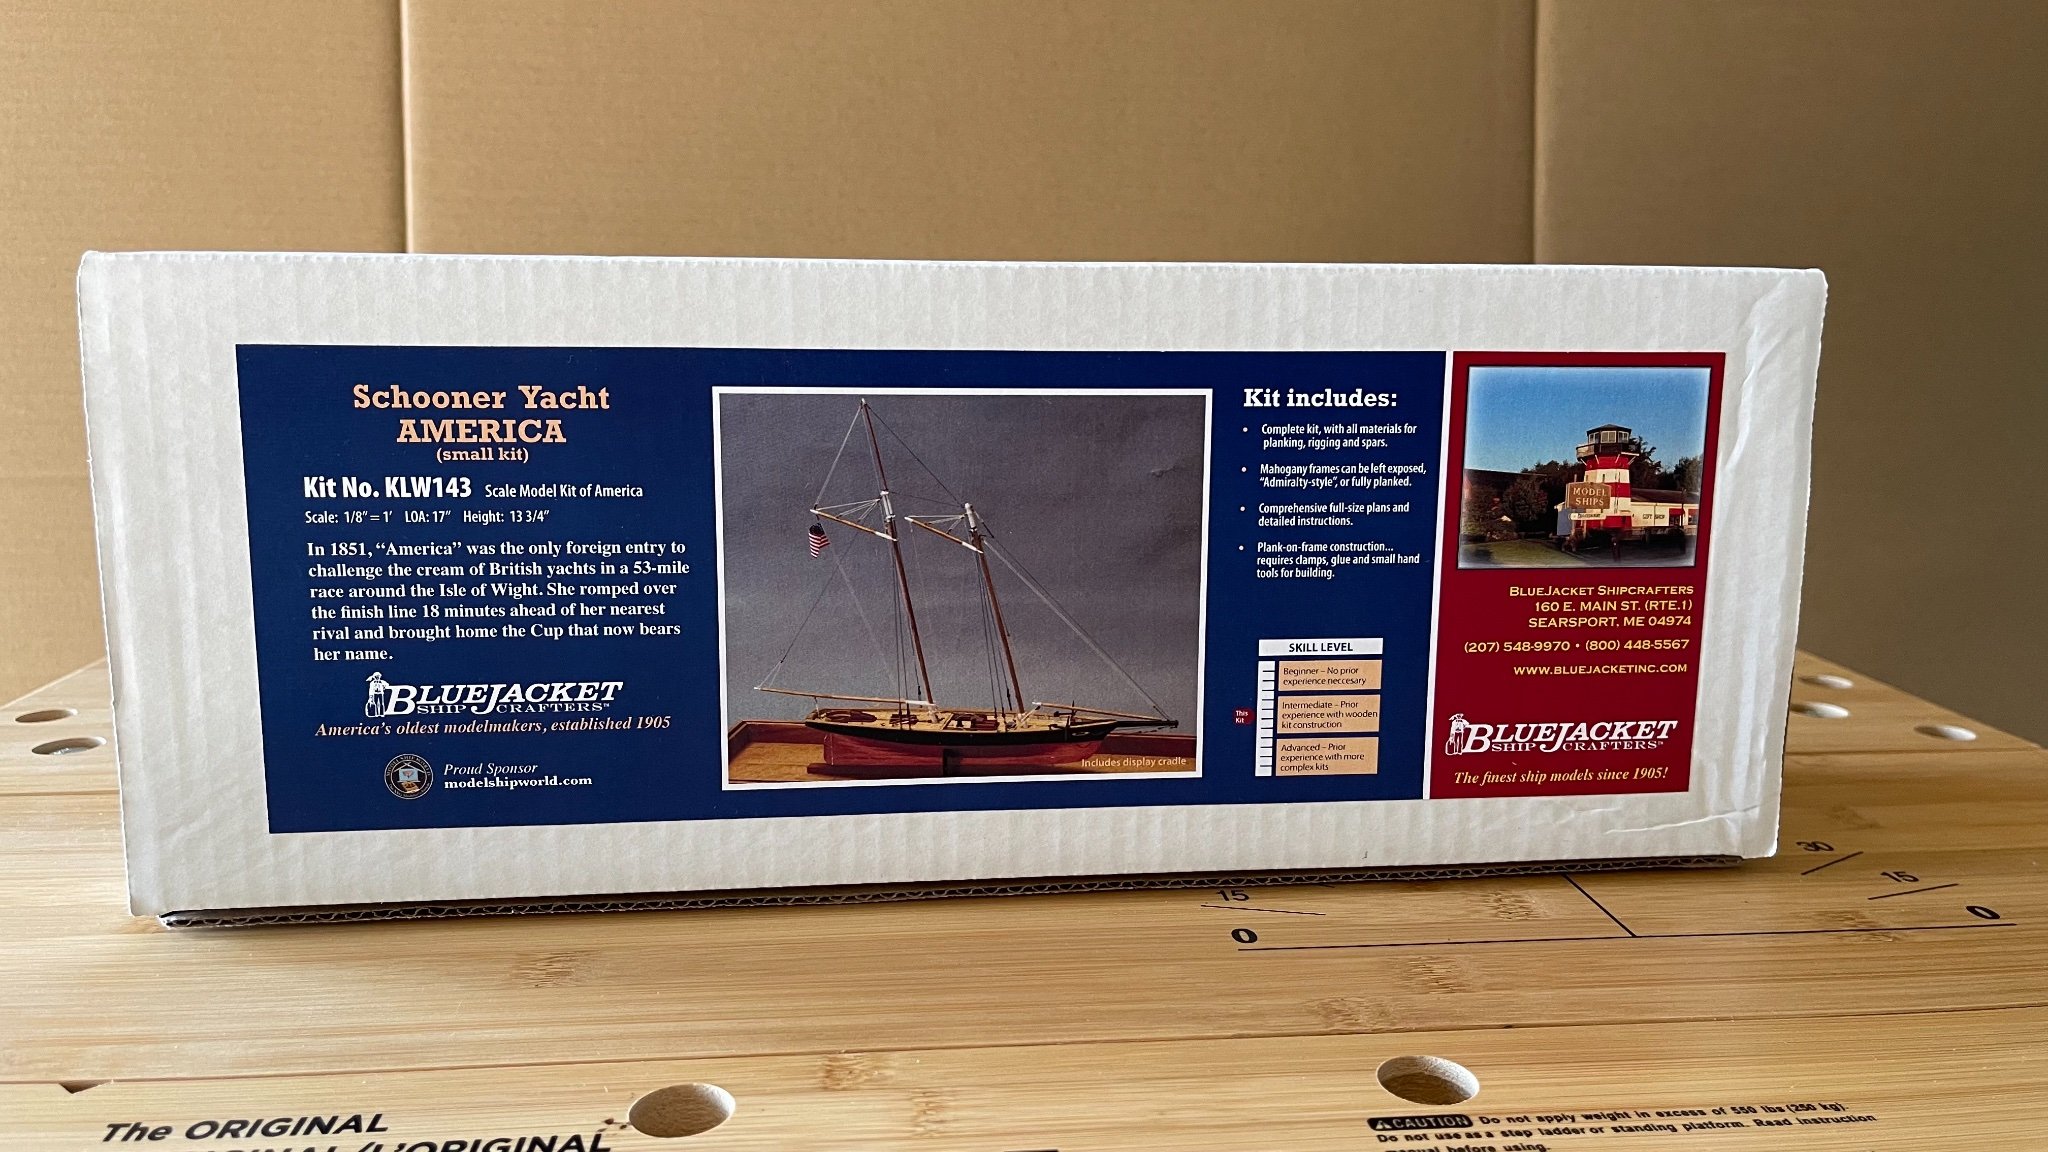
 Hi All. This is Gary from Austin, Texas making my first post. I have recently acquired the 1/48th scale America kit from Bluejacket and hope to log its build here. I have been lurking here a bit, very impressed by the knowledge and craftsmanship shown in many of the build logs. And frankly I am a bit intimidated as well. But I did not find any other build logs for the large Bluejacket America model so I hope my efforts add to the community, if only because of that. I have seen several build logs of the Mamoli version, and I am sure I will reference them more in the future. Over the last many years, I have built a handful of wooden boats and ships. The most ambitious project was Model Expo's Niagara. Sadly while building that I realized two things: 1) I do not enjoy rigging 2) I am more interested in small work or pleasure boats than warships. The Niagara has spent maybe 8 years in my closet with the standing rigging half done while I went on a boat building hiatus. Then in October, 2015, completely by accident, I drove by Bluejacket's HQ/Store/Gallery in Searsport, Maine while making my way from Boston to Acadia National Park. I made a quick U-turn and stopped in. I guess I left there inspired, as since then I built their Swampscott Dory and their Lobster Boat. Around the beginning of this year I decided to challenge myself a bit and ordered their plank-on-frame America. And yes I realize it requires some rigging, but it is minimal enough that I should get through it! Don't expect quick progress. I still work full time and have too many other hobbies. I've had the kit for about 2 months and have worked on it less than 30 hours so far. Progress will appear to be quick initially as I'll make posts to summarize those 2 months of work. But first here is a picture of the freshly opened box when I got the kit:
- 162 replies
-
- 8
-
-
- america
- BlueJacket Shipcrafters
- (and 1 more)
-
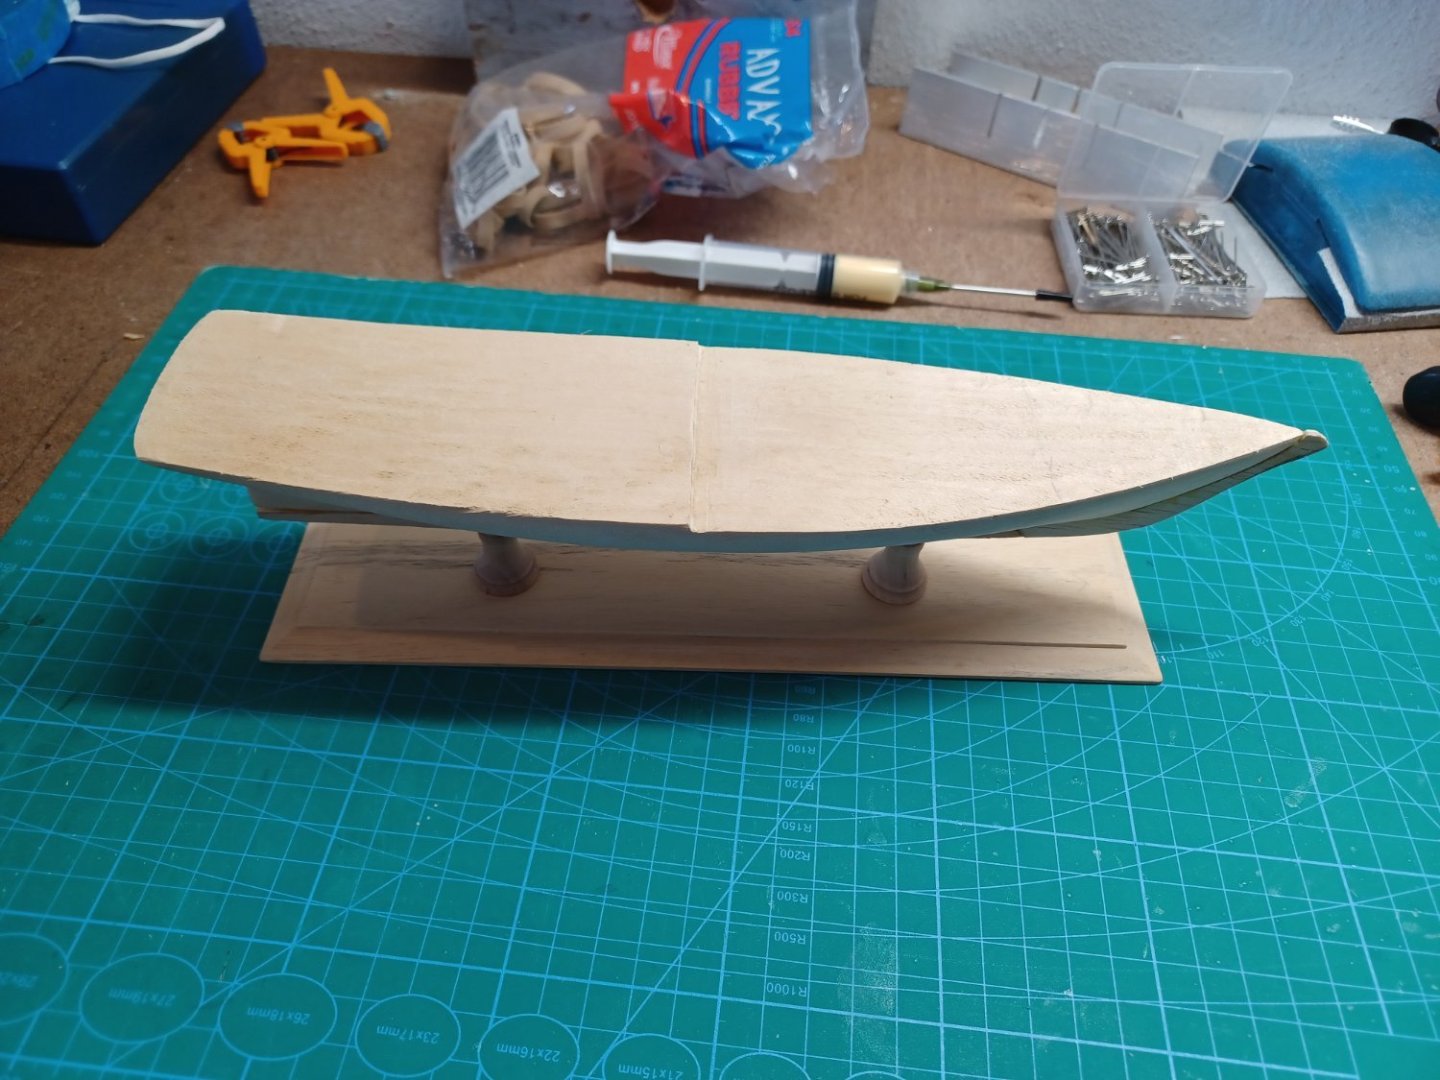
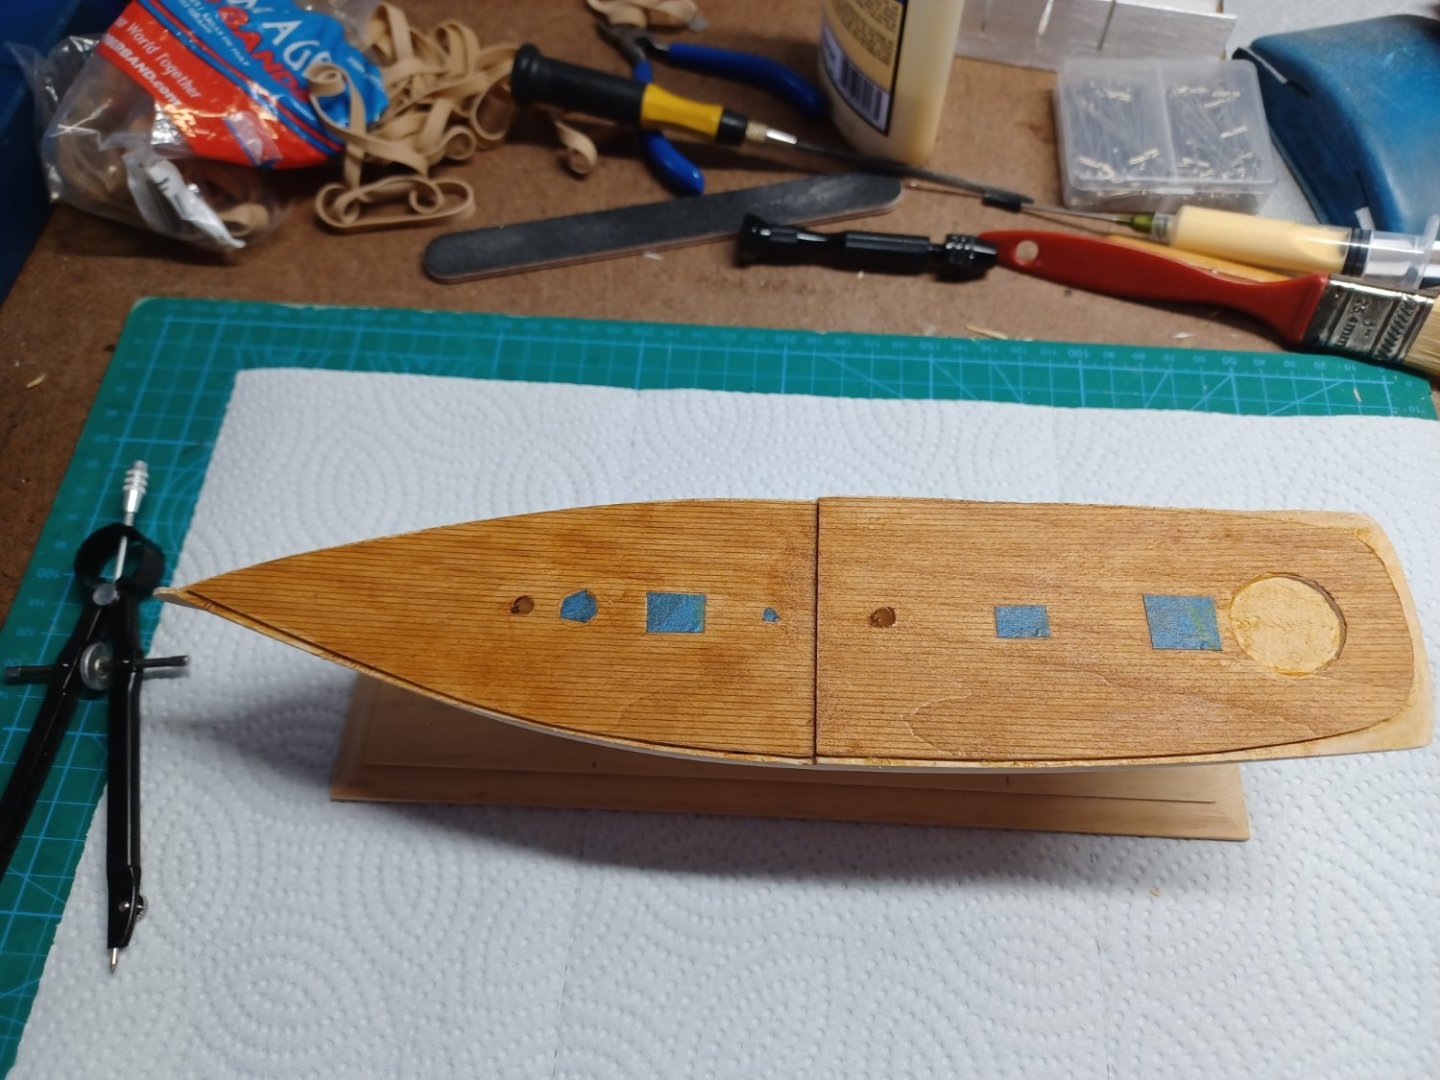
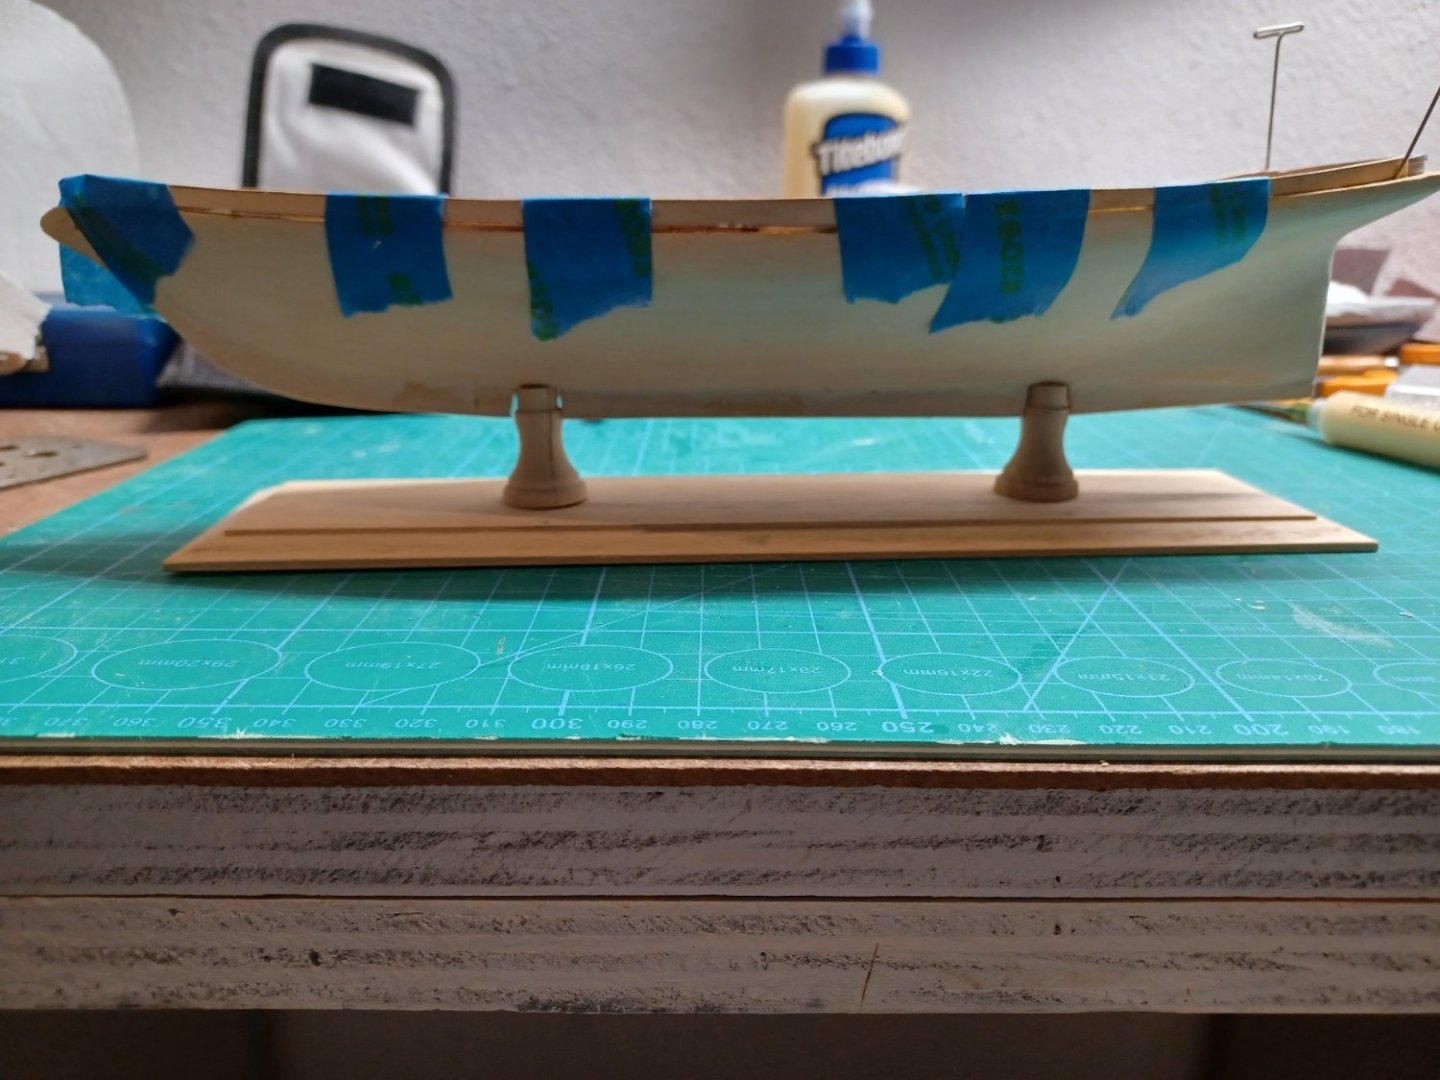
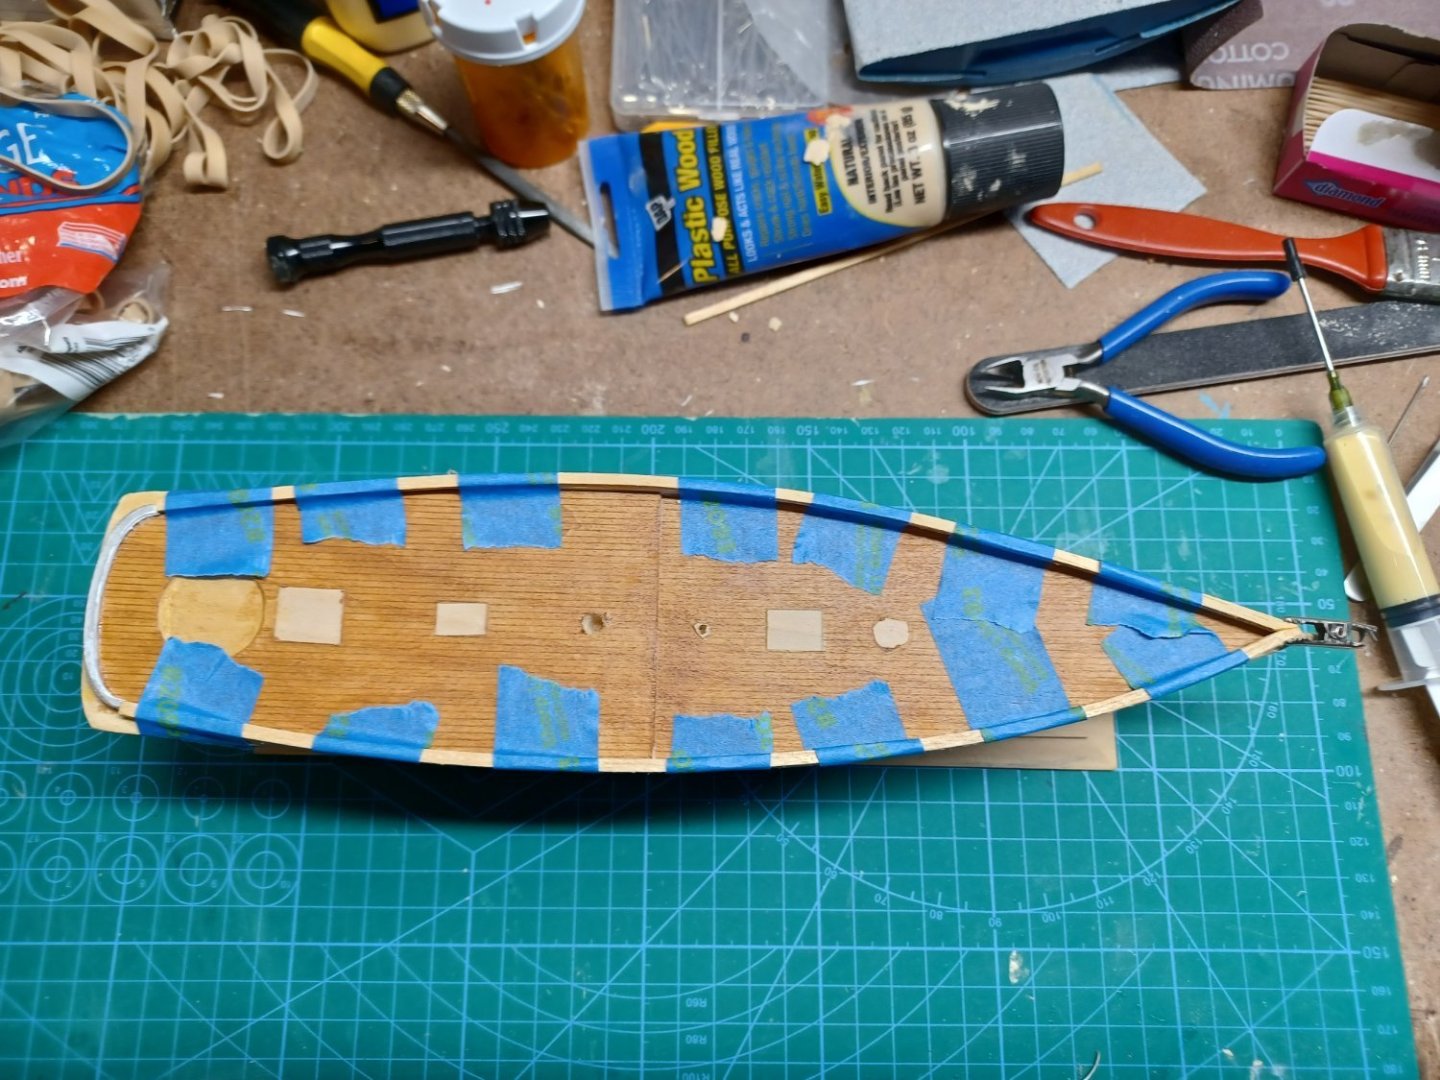
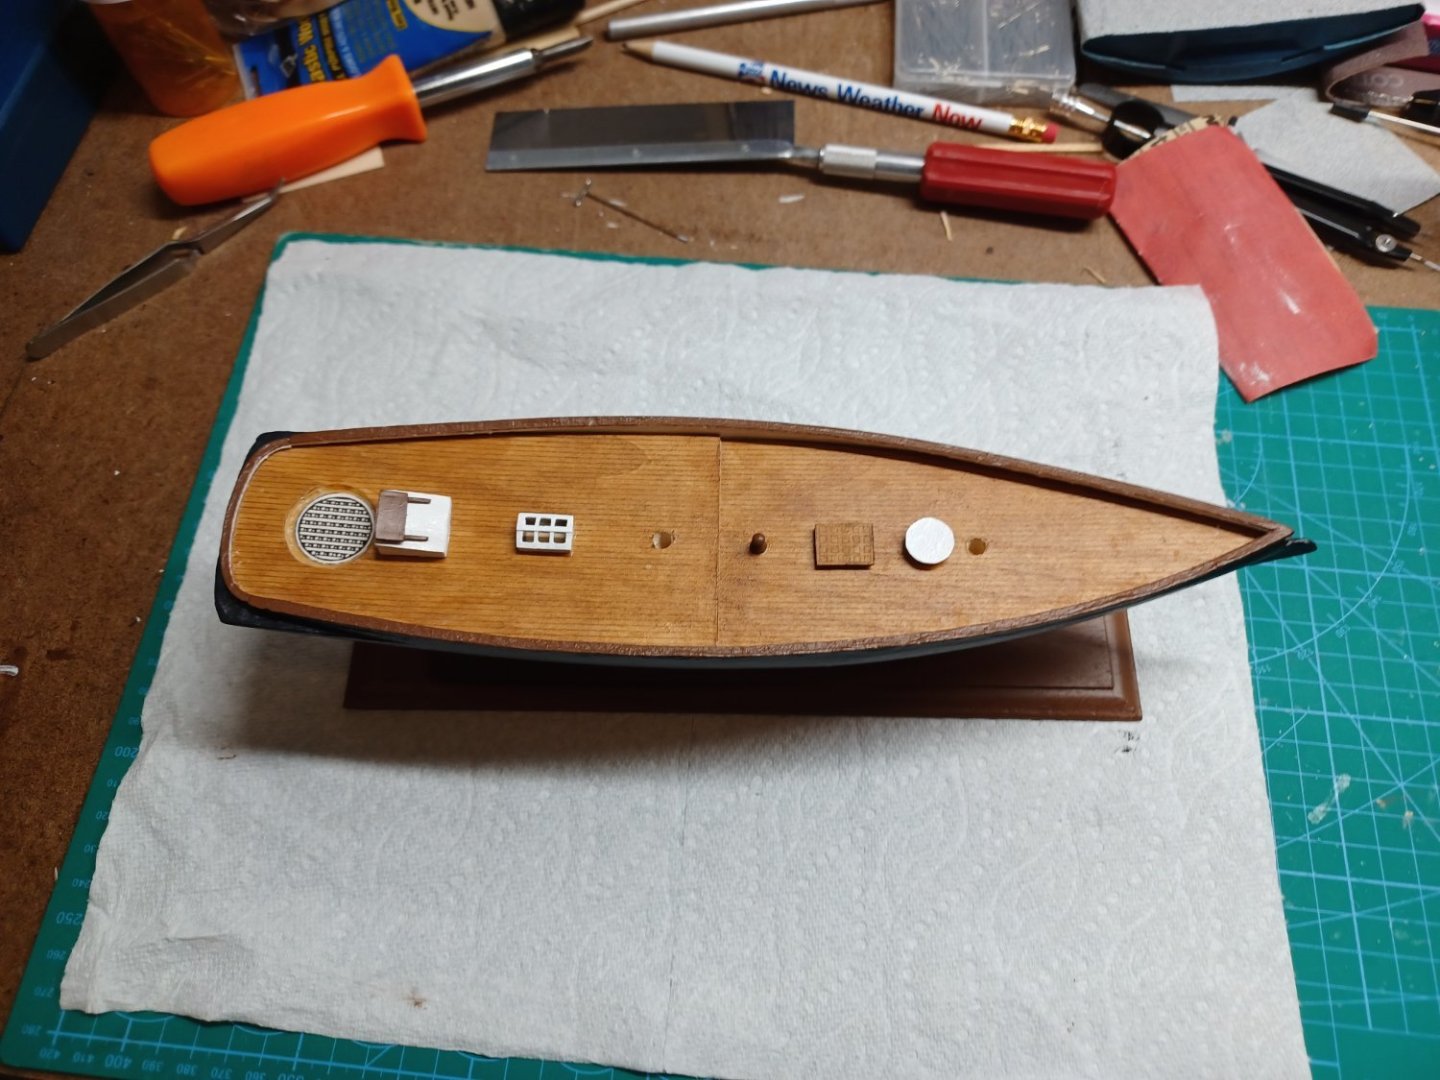
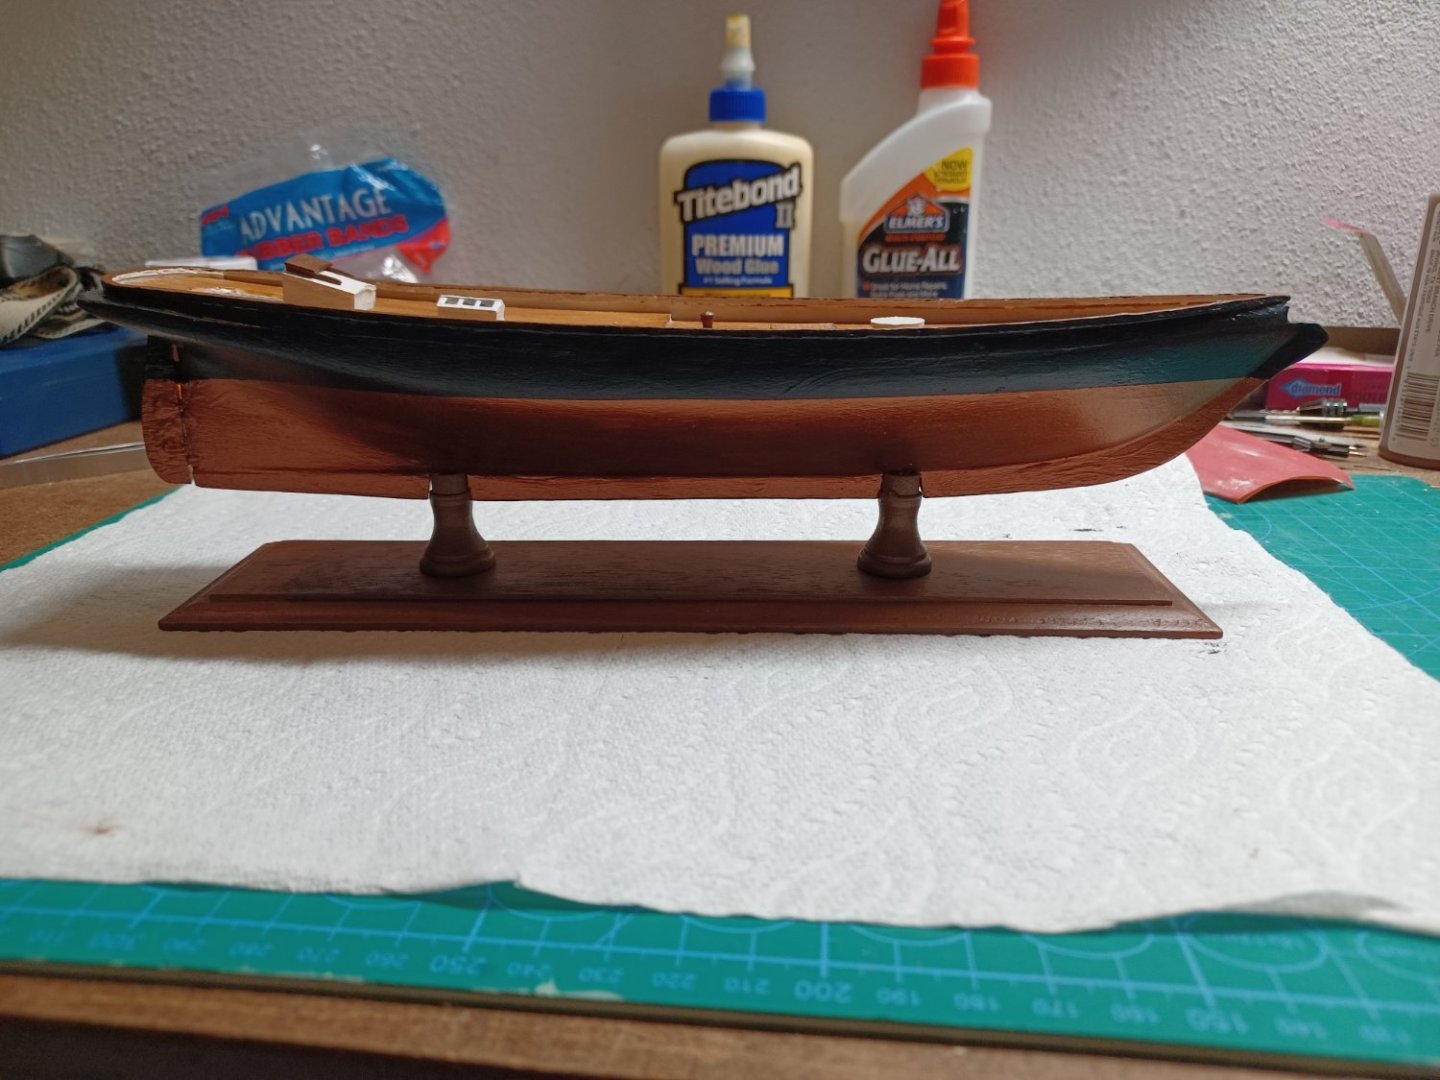
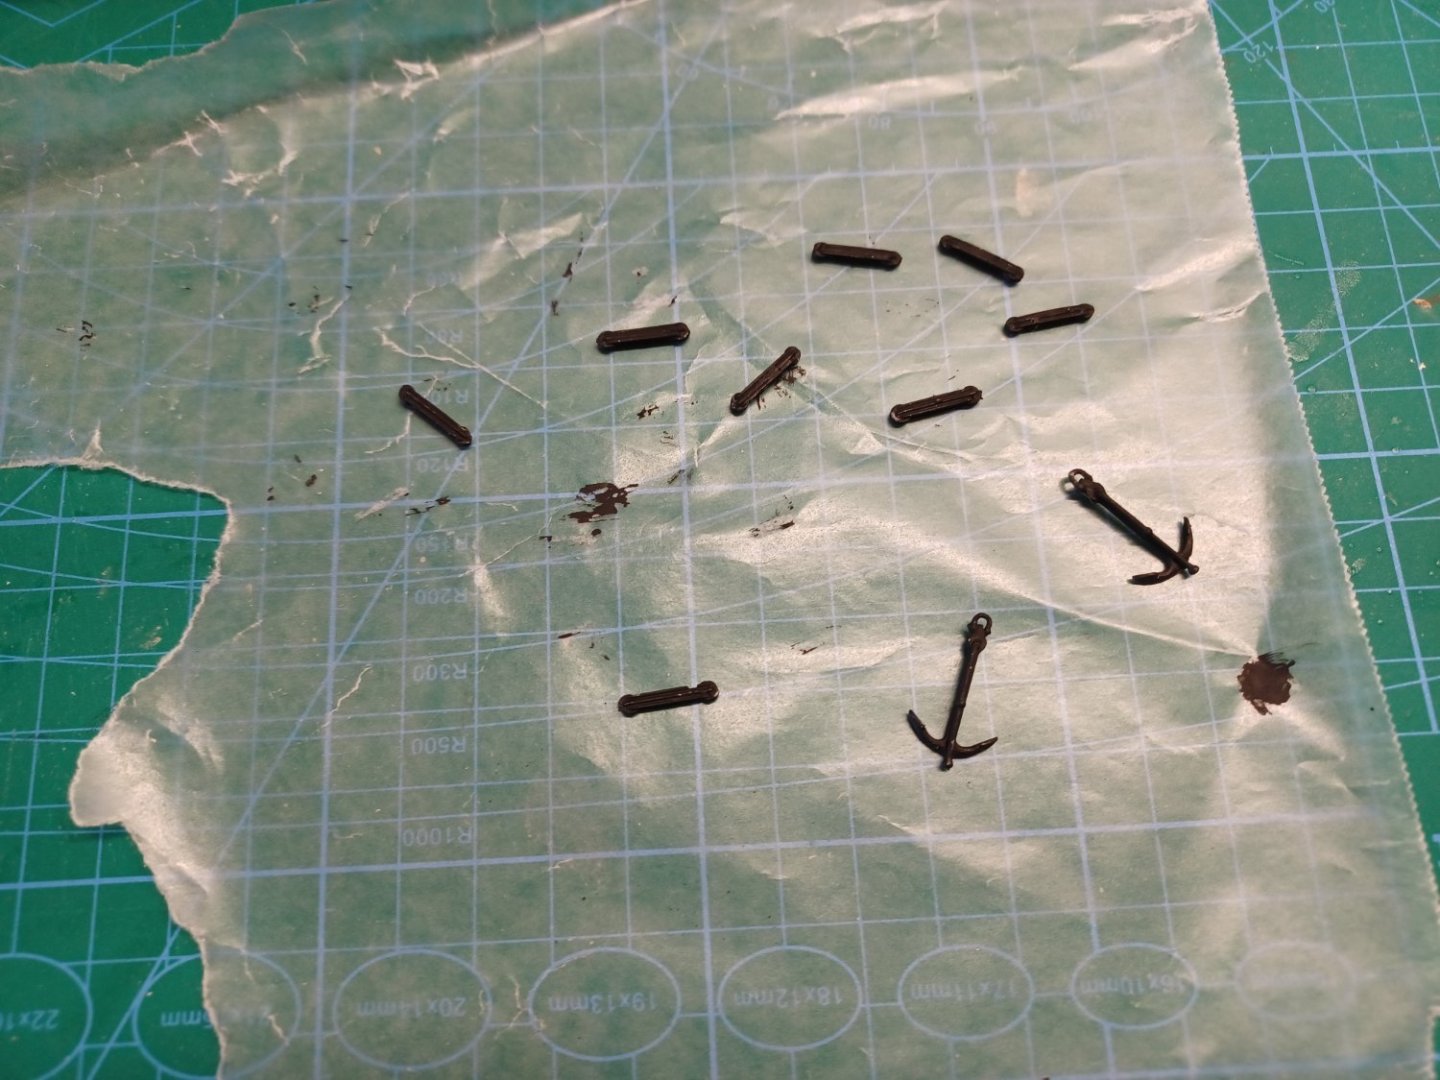
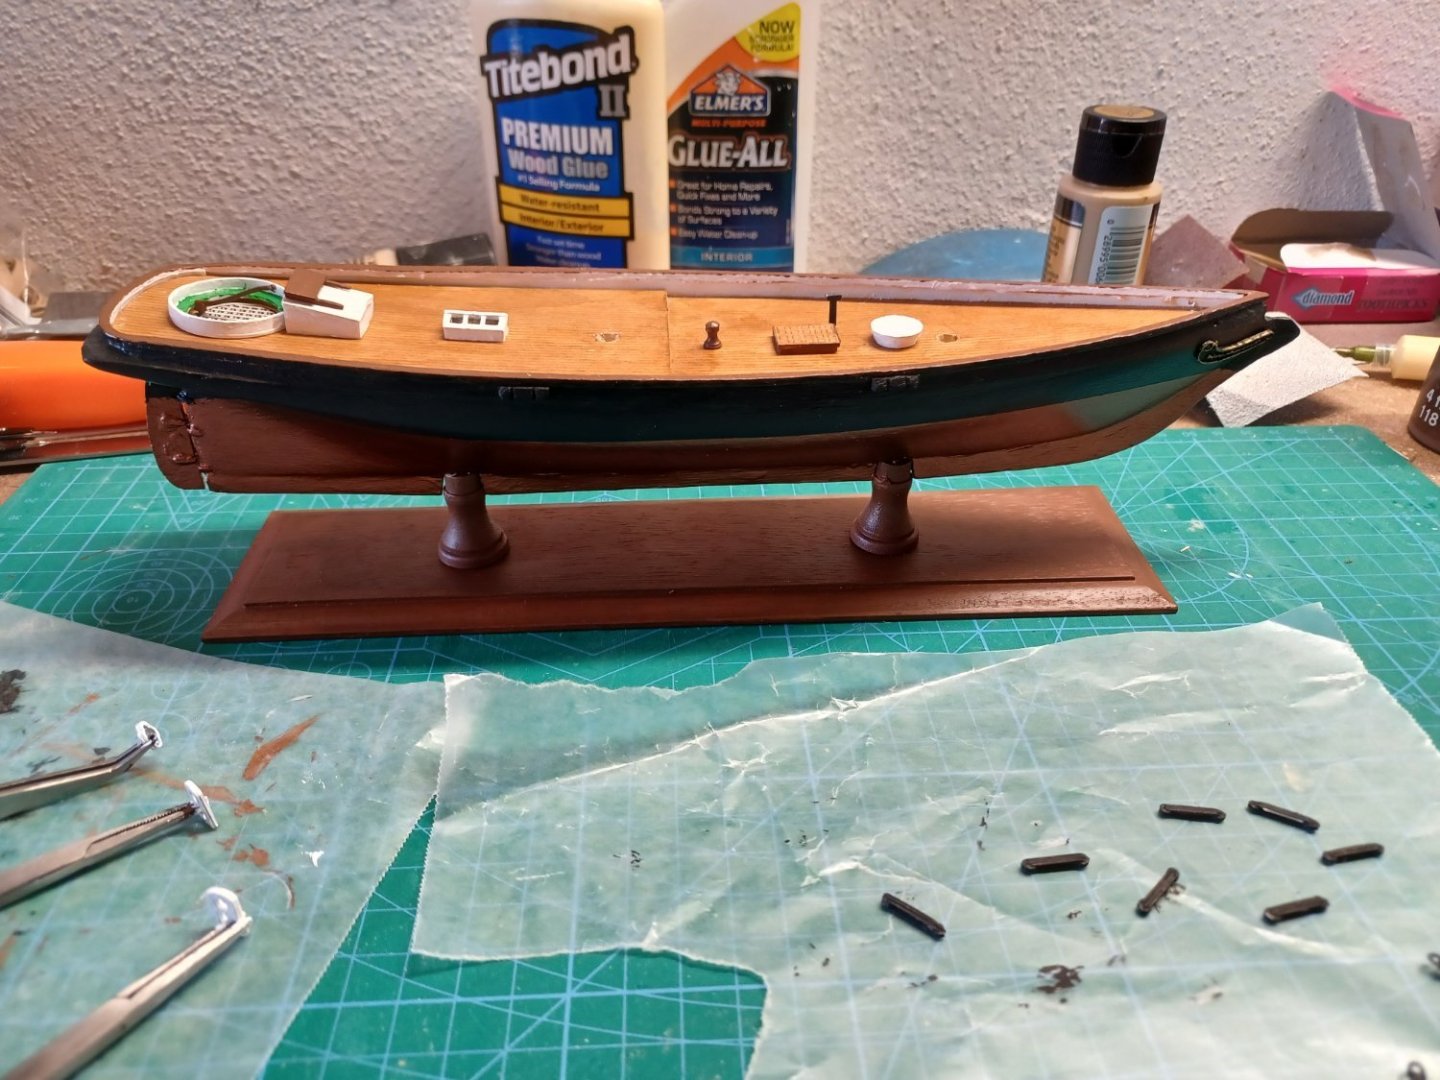
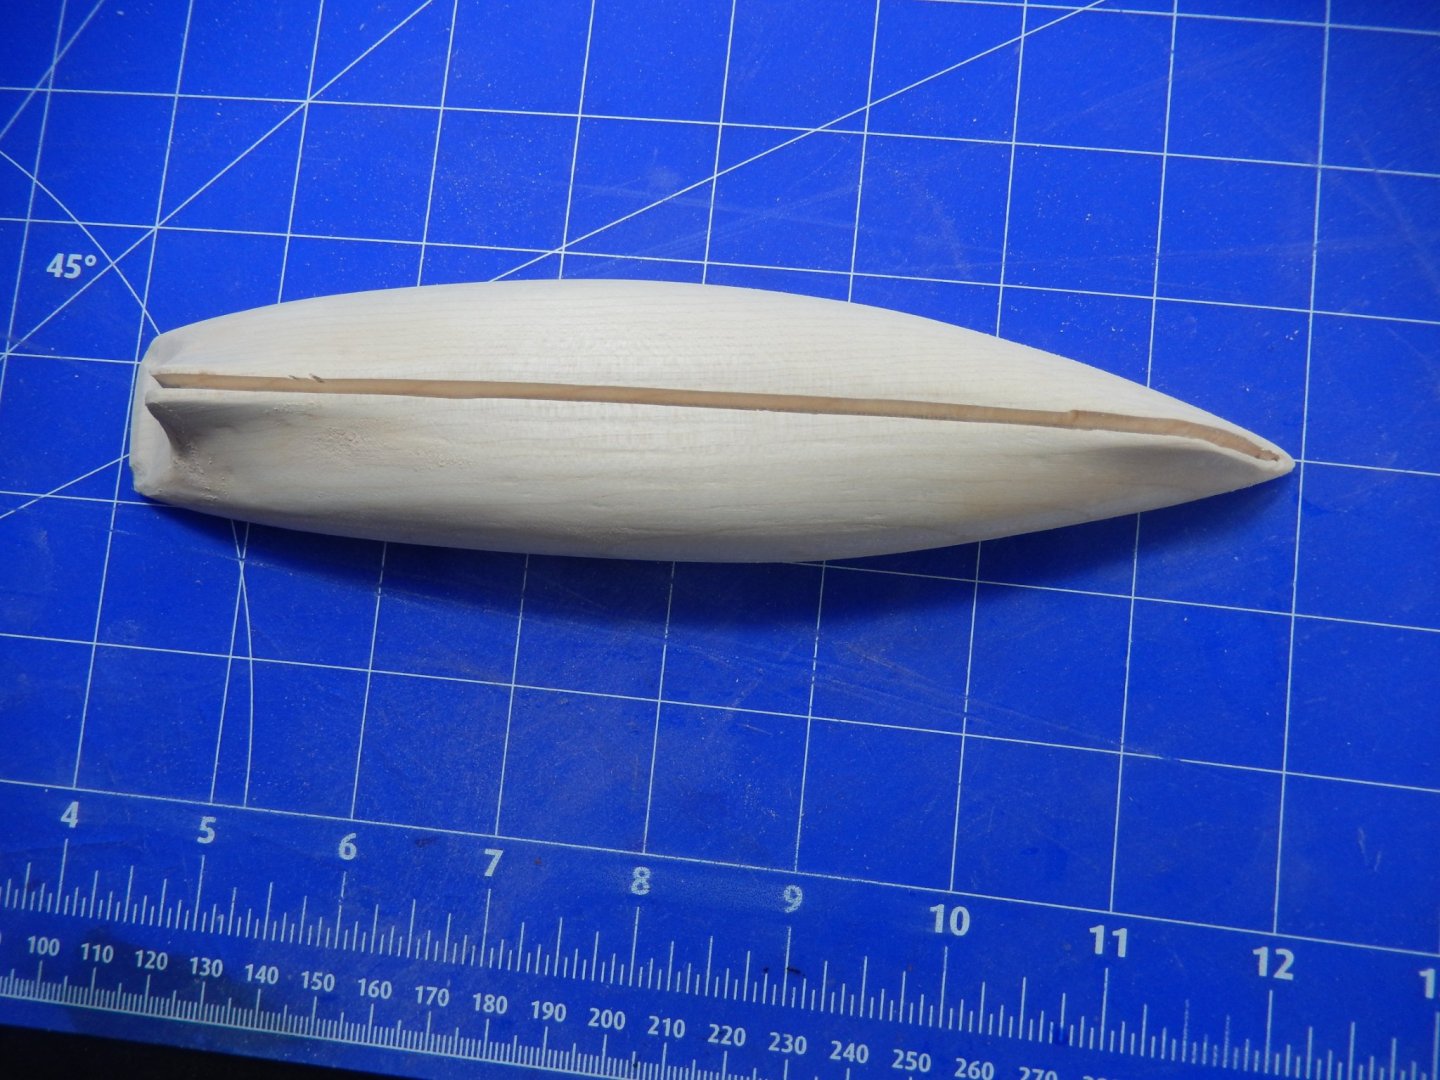
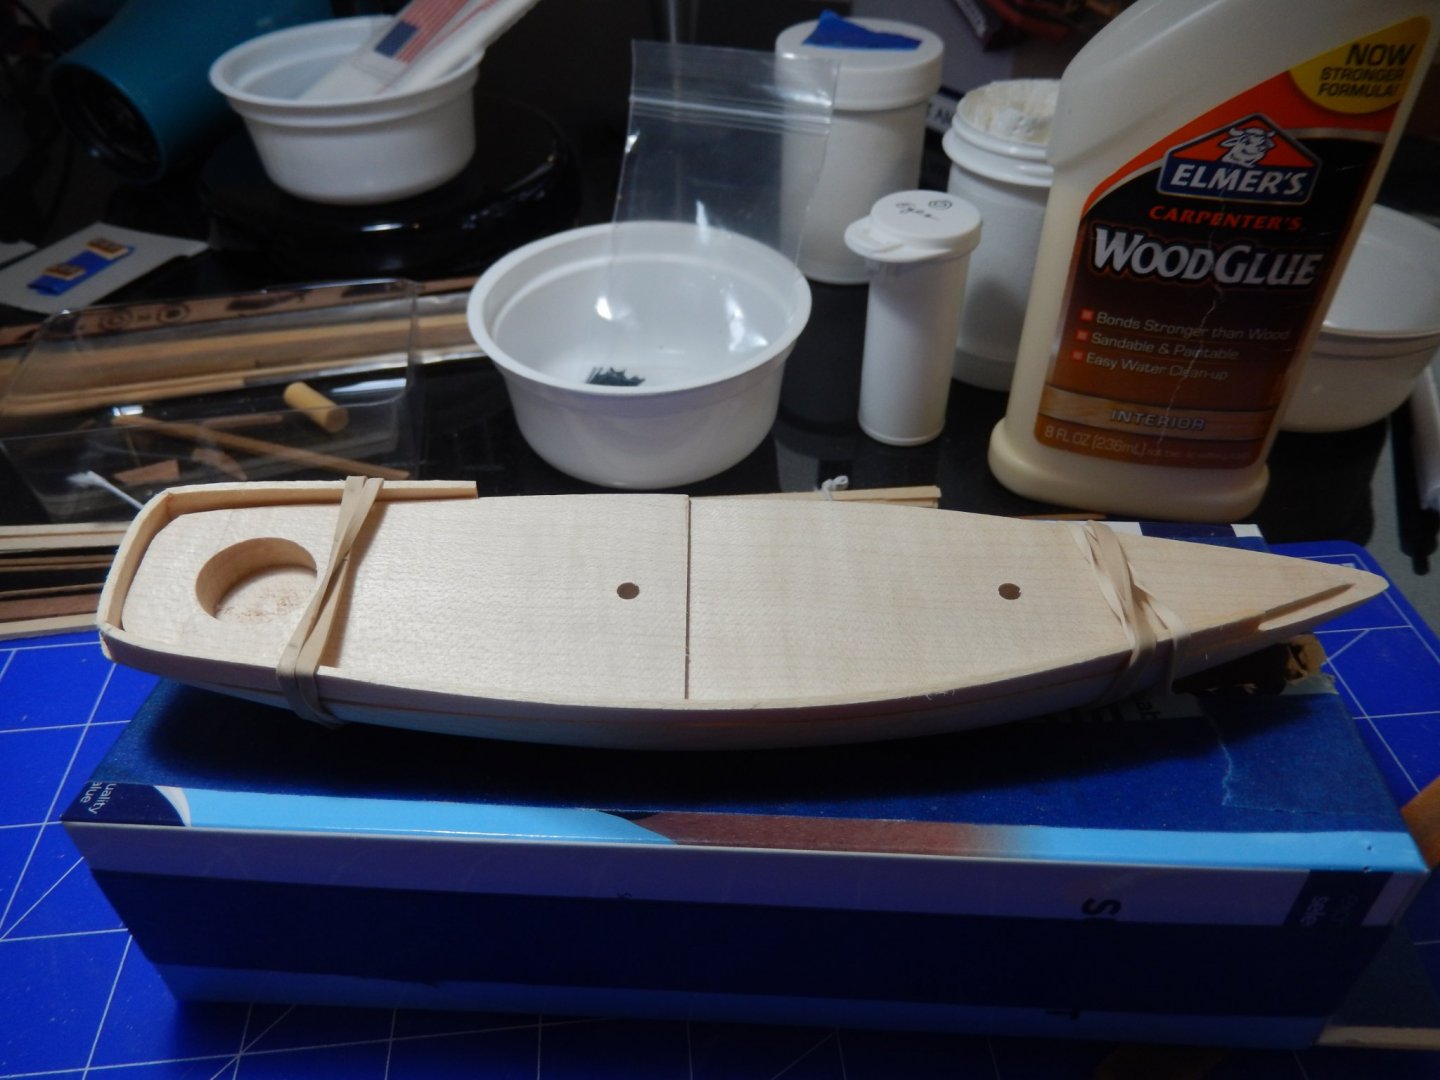
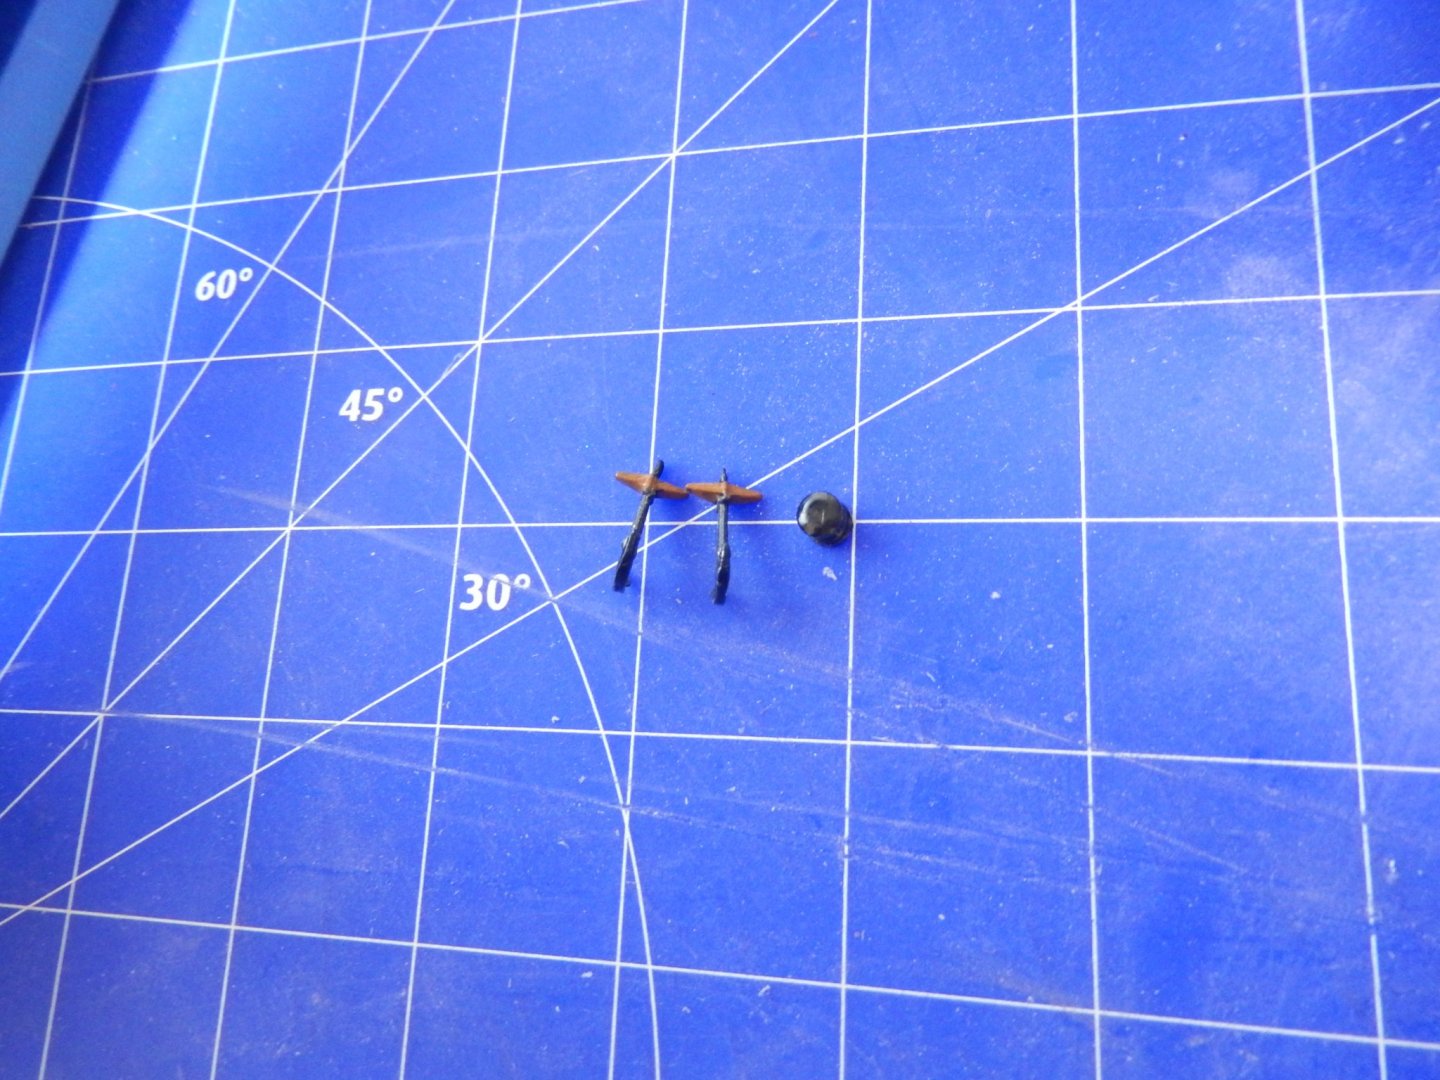
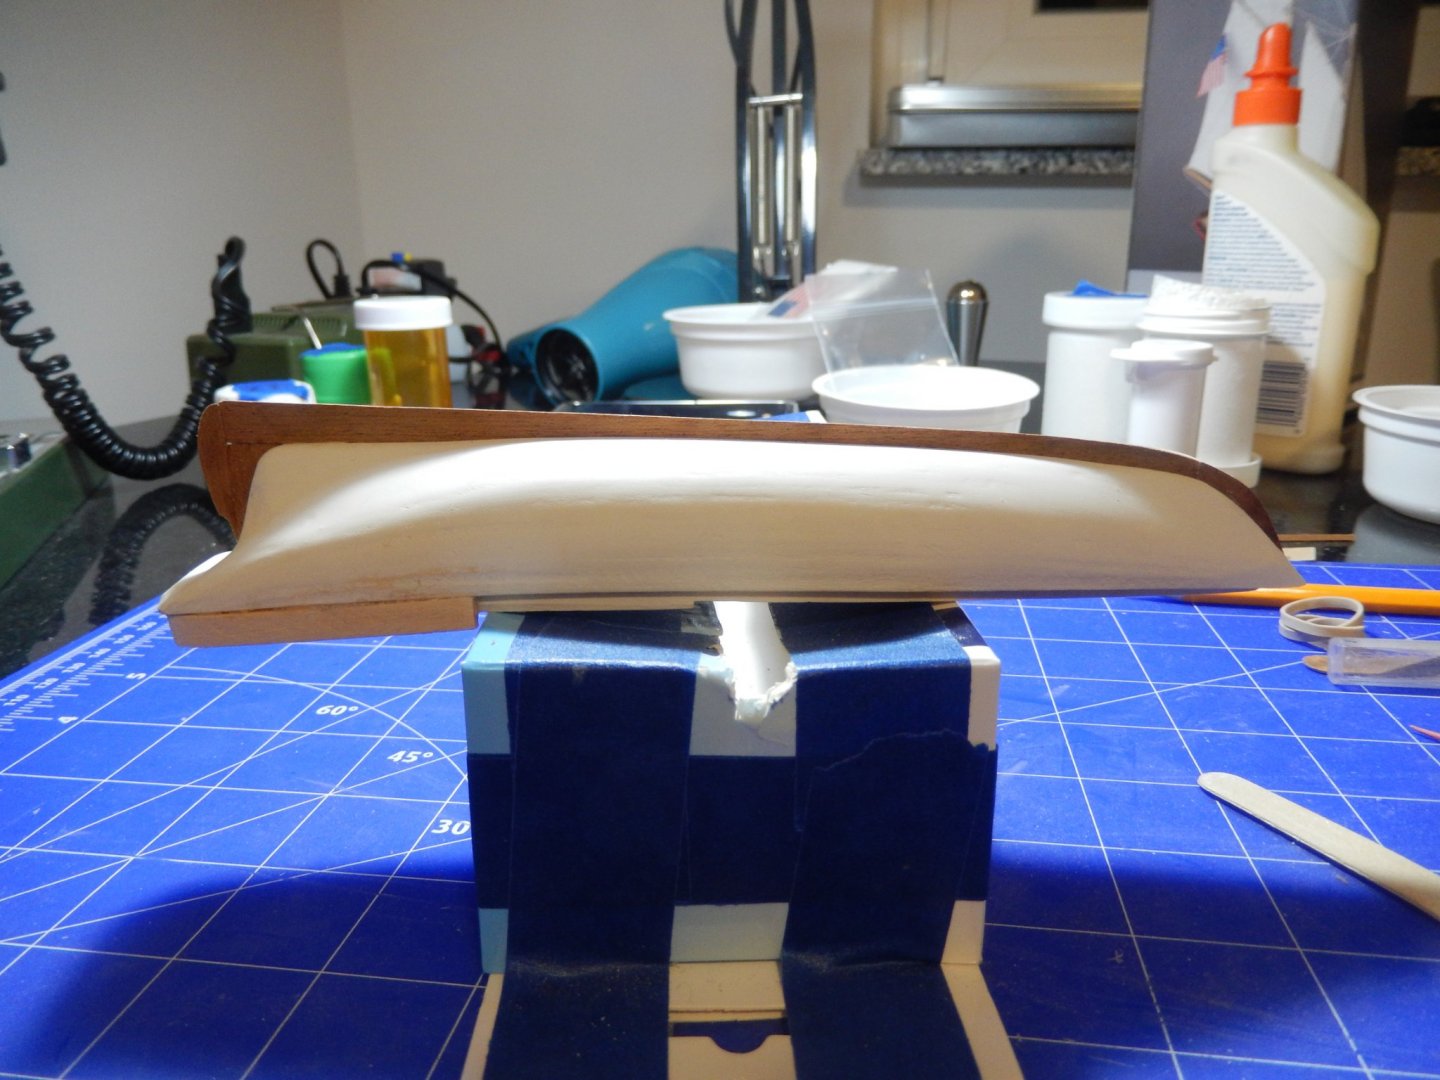
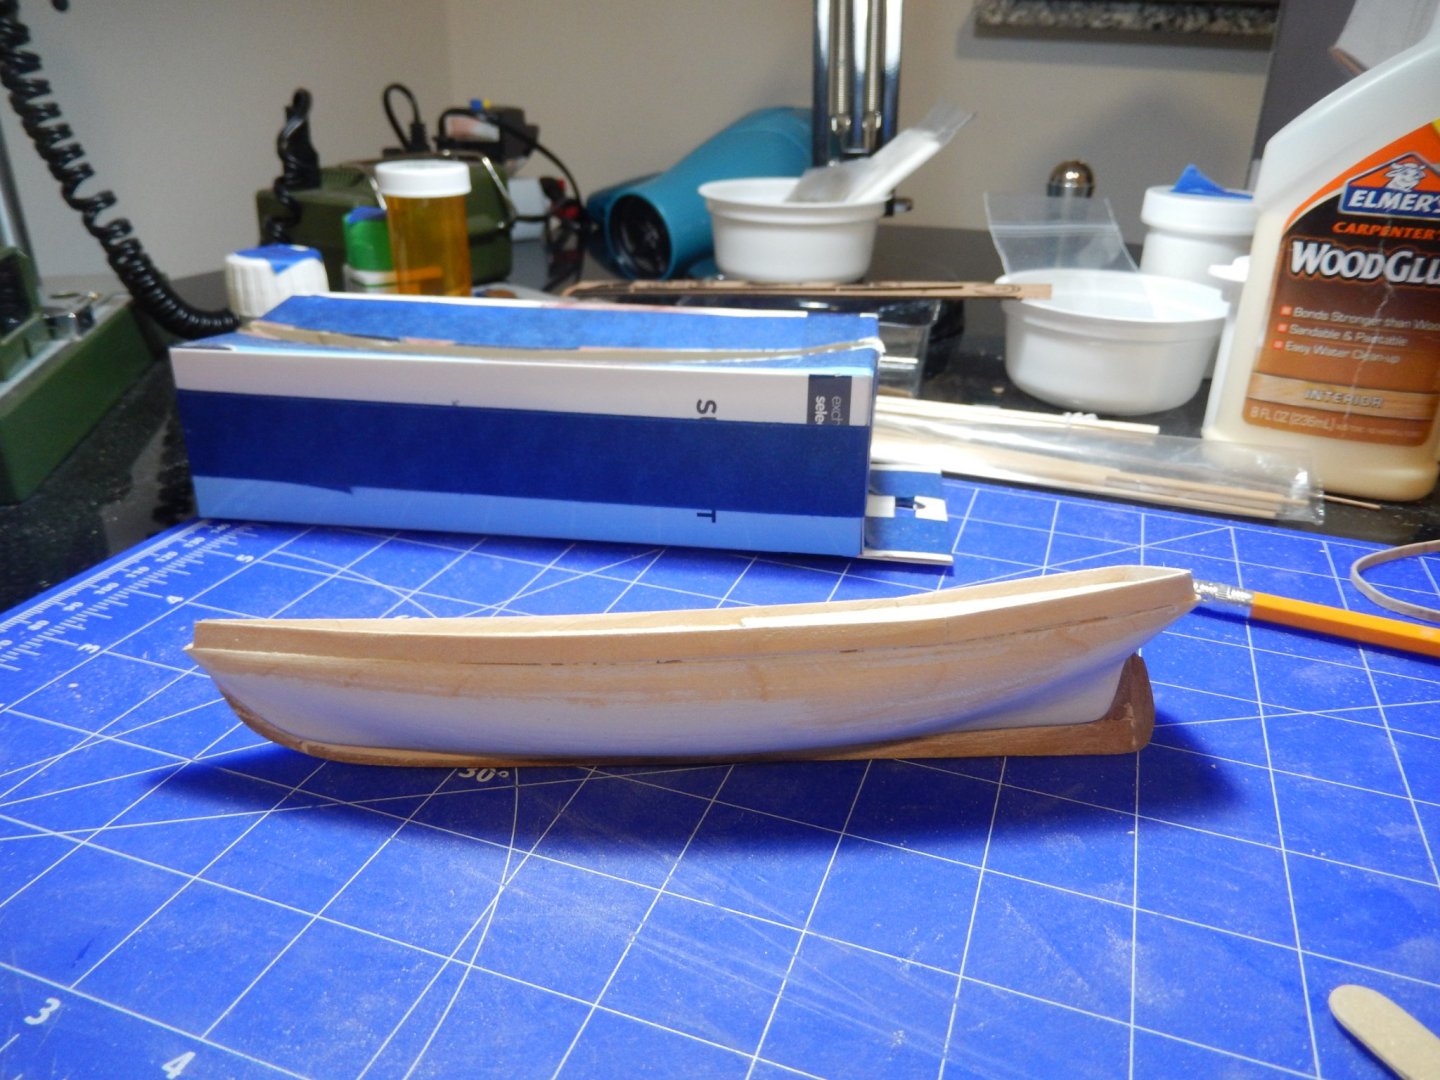
 20201230 Got started on the Yacht America (Corel, 1:155, solid hull) on Sunday – which became sanding day. I also painted some of the smaller metal parts (anchors, cleats, bright work [primed only]) as glue was drying. As of this evening I have the hull sanded, keel in place and part of the upper works completed. I gave the hull a light prime coat of white paint along the way which actually helped bring out some of the minor hull imperfections that I hadn’t seen so it was back to sanding. I filled in along the keel (machined slot was a hair too big in a couple of spots) so there was more sanding needed in that area. Will do some more work on the hull tomorrow (hopefully finish at the end of this interesting year – yea!) and then plank the deck sometime this weekend.
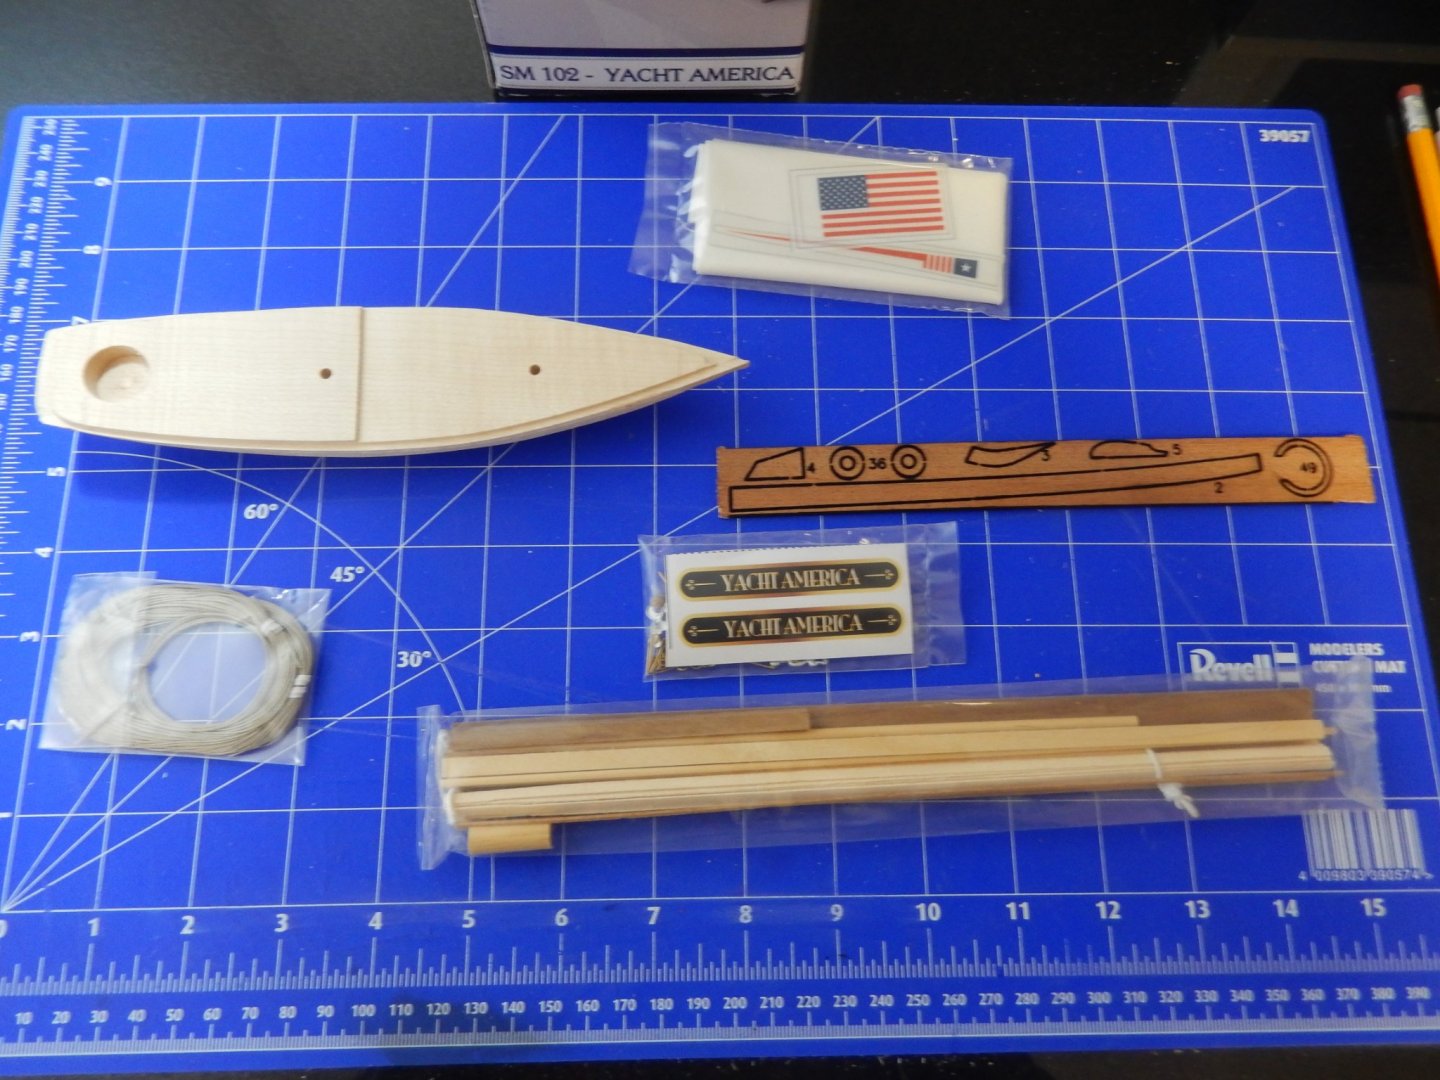

- 7 replies
-
- 1
-
-
- America
- solid hull
- (and 2 more)
-
 Got this kit from BlueJacket because I want to make transition to scratch built from kits. I hope it will help with some techniques, hopefully. The kit seems good, lots of material and fittings

-
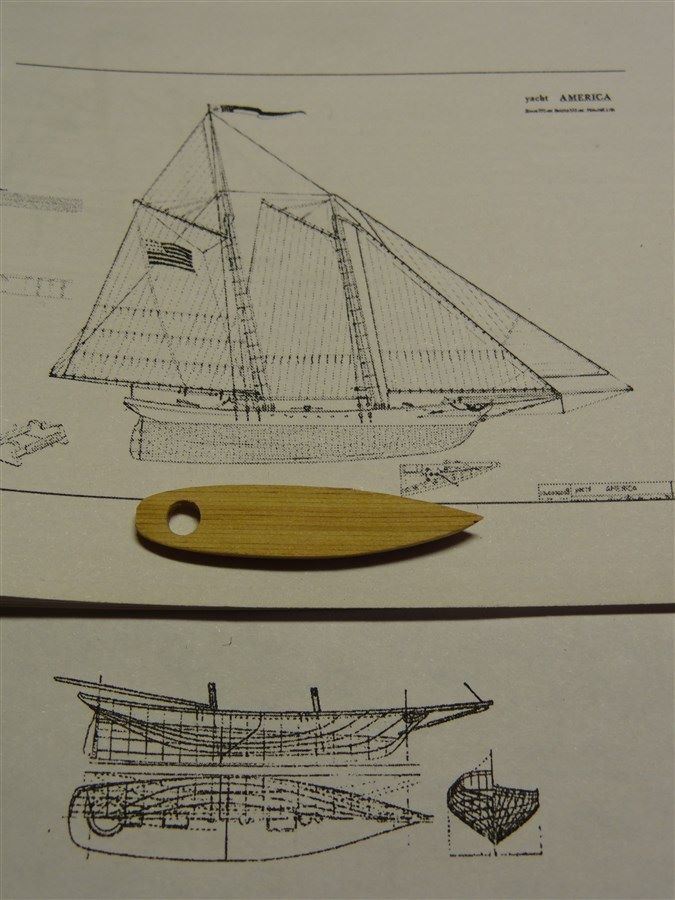
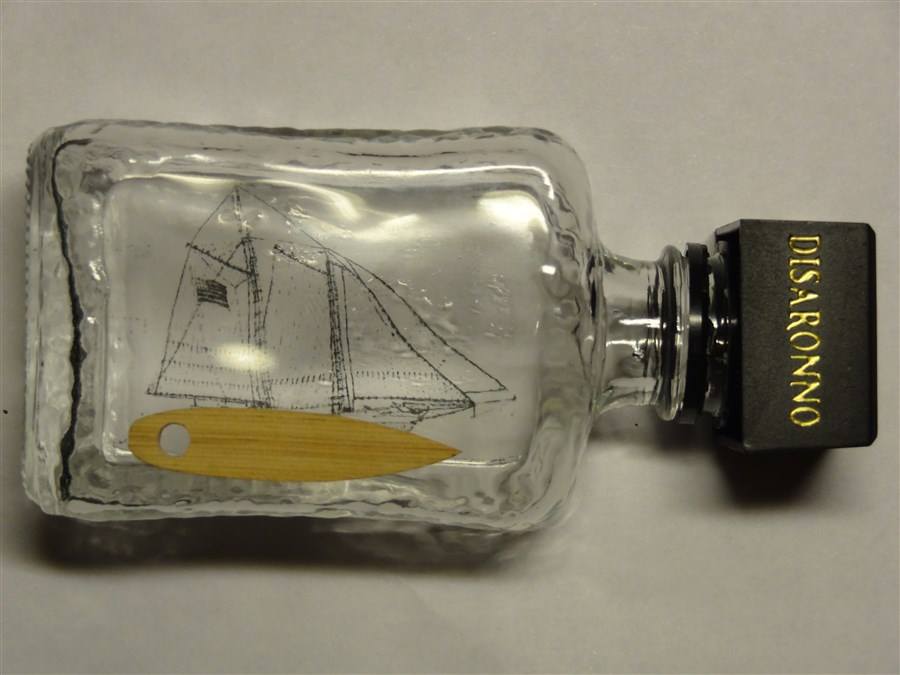
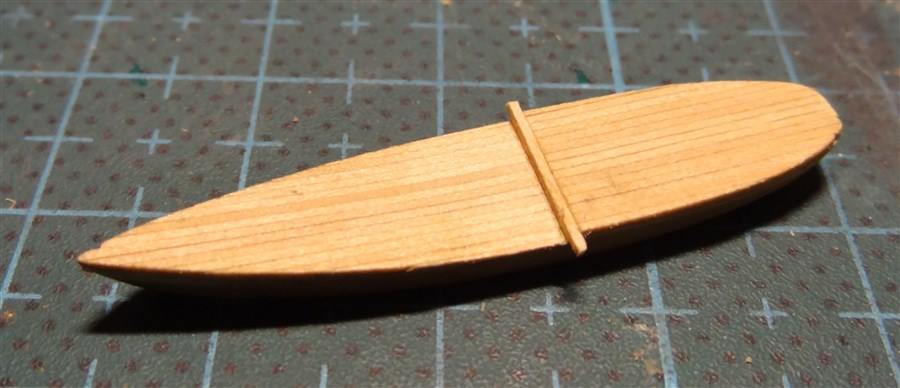
 To celebrate this years Americas Cup i decided to build a model of the original ship. This was a kit i had for many years. When i open the kit i was shocked to find that powder post beatle had attacked the wooden parts. At first i decided to just remake the damaged parts but as the work progressed i decided to make a second scratch built model using the kit to make the scratch built parts. As with my other projects i plan to make a video of this build.
- 163 replies
-
- 4
-
-
- america
- constructo
- (and 1 more)
-
 So, after finishing my Benjamin W. Latham, and after a busy summer, I have been thinking about my next build. I had several options: resuming my Hesper build now that the hull is completed, build another fishing schooner like Elsie, build the Emma C. Berry which has been collecting dust on my shelves, and also having visited Rochefort in France this summer, I saw the Hermione -again- and building the kit from A.L. tempted me. Not to bore anyone, but here was my line of thinking. As tempting as the Hermione is, and after seeing several build logs, I finally decided to stay away from this kit, as I thought a kit at that scale does a poor rendering of the real vessel. I then went back to the schooner list. My ideal choice would be a POB, scale 1/4 . Unfortunately, there are not many such kits on the market. An option would be of course to scratchbuild. After seeing the beautiful Elsie model from Erik Ronnberg at the Cape Ann Essex museum, I got the plans and looked into building it POB on that 1/4 scale. But Elsie looks a lot like the Benjamin W. Latham, so I decided to abandon this idea. Which brings me to America. A legendary schooner, well (?) documented, many models existing. Here again, no POB is available at 1/4 scale. There is the bluejacket POF, the Mamoli POB at 1/66 scale, and I think there was a Constructo available at some point. I got the 1/48 plans of the BlueJacket America and studied them carefully. As Chapelle said in his book The History of American Sailing Ships, “a great many plans of the America have been published in the past, unfortunately , however, not two agree.” However from my research, the B.J. version seems to be the closest one to the original America, especially as she competed in 1851. Because I am interested in building models as close as the real one, a scratchbuild POB option based on the B.J. plan seemed a good approach. However, I tabled that idea for now, and decided to start the Mamoli kit instead to get a general idea of the model. I expect there will be a lot of kitbashing involved, based on the building logs I have seen here. I ordered the kit and will post the progress here. Stay tuned….
 -
 My first model. So far I have cut the pieces from the boards and trimmed and sanded them. Made a few mistakes but nothing major. Mostly a learning experience. E. g. little hole should be drilled first while the board is whole.
-
 I thought this would be a good time to dust off this great kit, Revell's "America", circa 1969 edition. The hull is cast in black plastic and the sails are more usable than the vacuform sails that are in the newer released kit version. The surface detail is fantastic, both on the hull and decks. The scale is not perfect and it is not 1/56 scale...not even close...it is 1/61ish and the boat is 1/4 inch too narrow on the beam. Still, it's close enough that it is still pleasing to the eye. The instructions state that the model can be sailed on a pond (as a free-sailor) if certain steps are taken, so adding some radio gear should make it that much more fun! Instructions for free-sailing are vague on making this happen, but two steps are clearly stated. One step in making this a pond boat is to add 15 ounces of a birdshot/modeling clay mixture to the bilge from stem to stern. This is great news... you could put all the radio gear you need for sail and rudder control and still have to add lead ballast to come up to 15 ounces. The other is adding the furnished clip-on fin that attaches to the keel to help tracking and minimize leeway. I'm going to improve the sailing characteristics by following suit, but with a larger copper fin that will help by putting more weight lower and improve handling. I know this is a deviation from the prototype, but the model is too small to rely on just the hull. Also, I'm going to use as much of the kit parts as possible, but will bend the rules for ease of sailing/building sake. In other words, this should be a fun build. Before welding the hull half's together, it's a good time to paint the interior bulwarks white. Rattle-can primer and color coats for this. Taping was tedious but pays off when peeled away. This would be harder to do if the half's were joined, but still possible. The plastic parts respond very well to solvent (a medium hot type was bought at Tap Plastics) and are almost impossible to separate after it cures...about 5 minutes! This is one of the attractions of building this model, the ability to weld everything together with solvent. The cap rail is painted a rich brown to simulate Mahogany. I'm using artist oil paints for most of the detail and though it takes a long time to dry, I really like the results. Joe
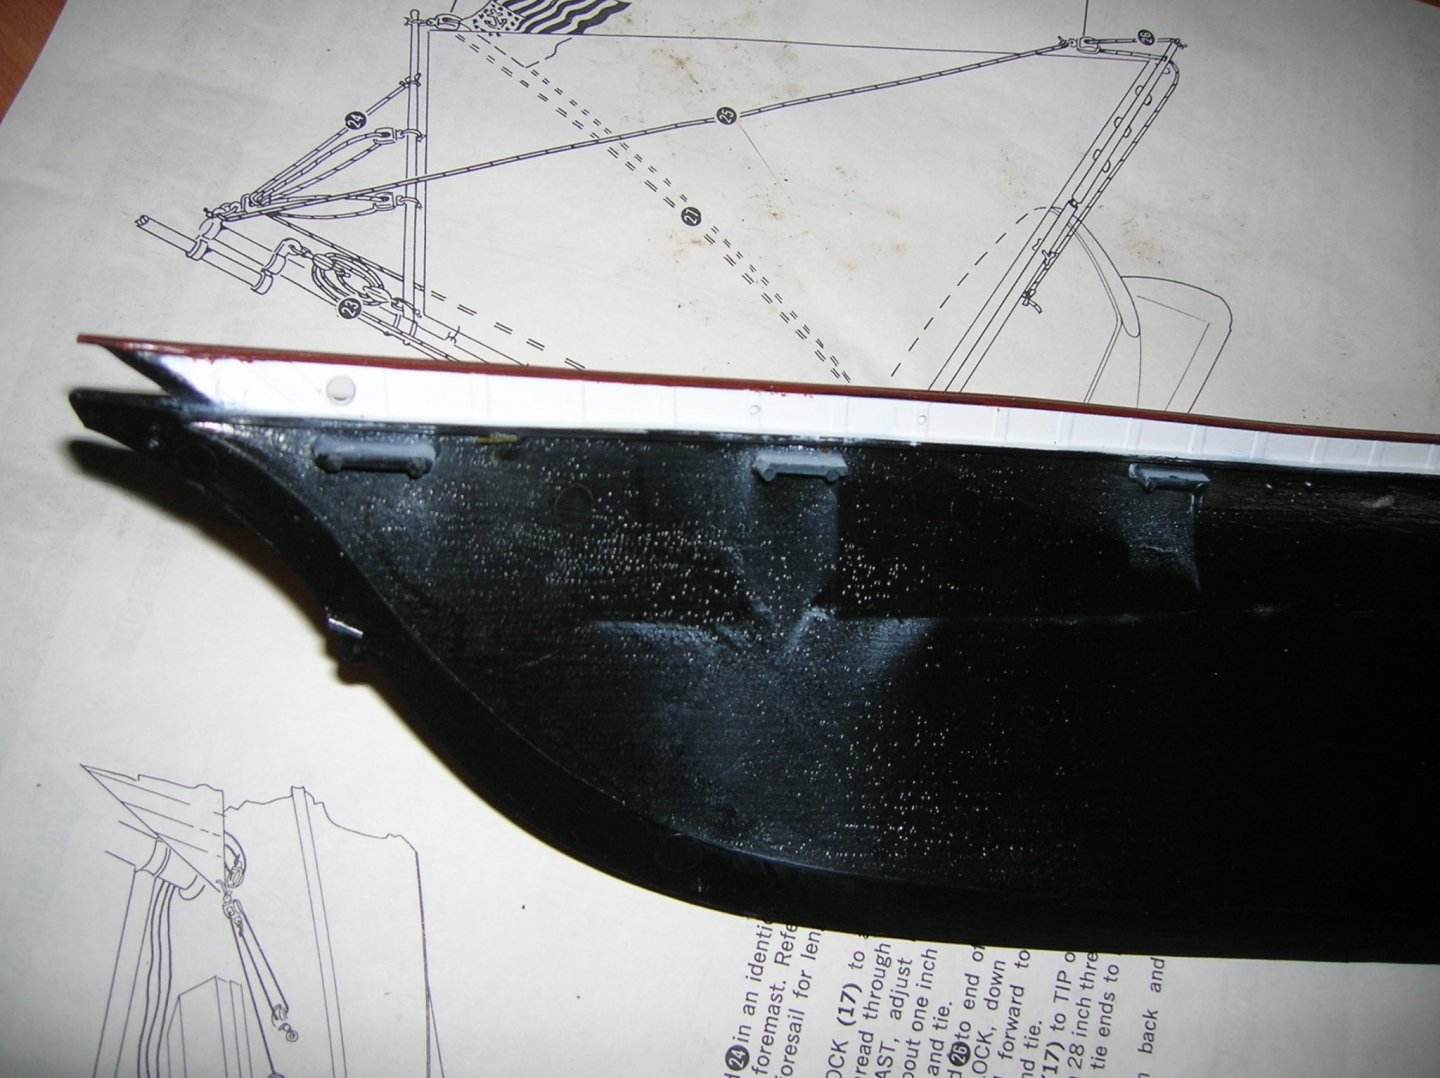
-
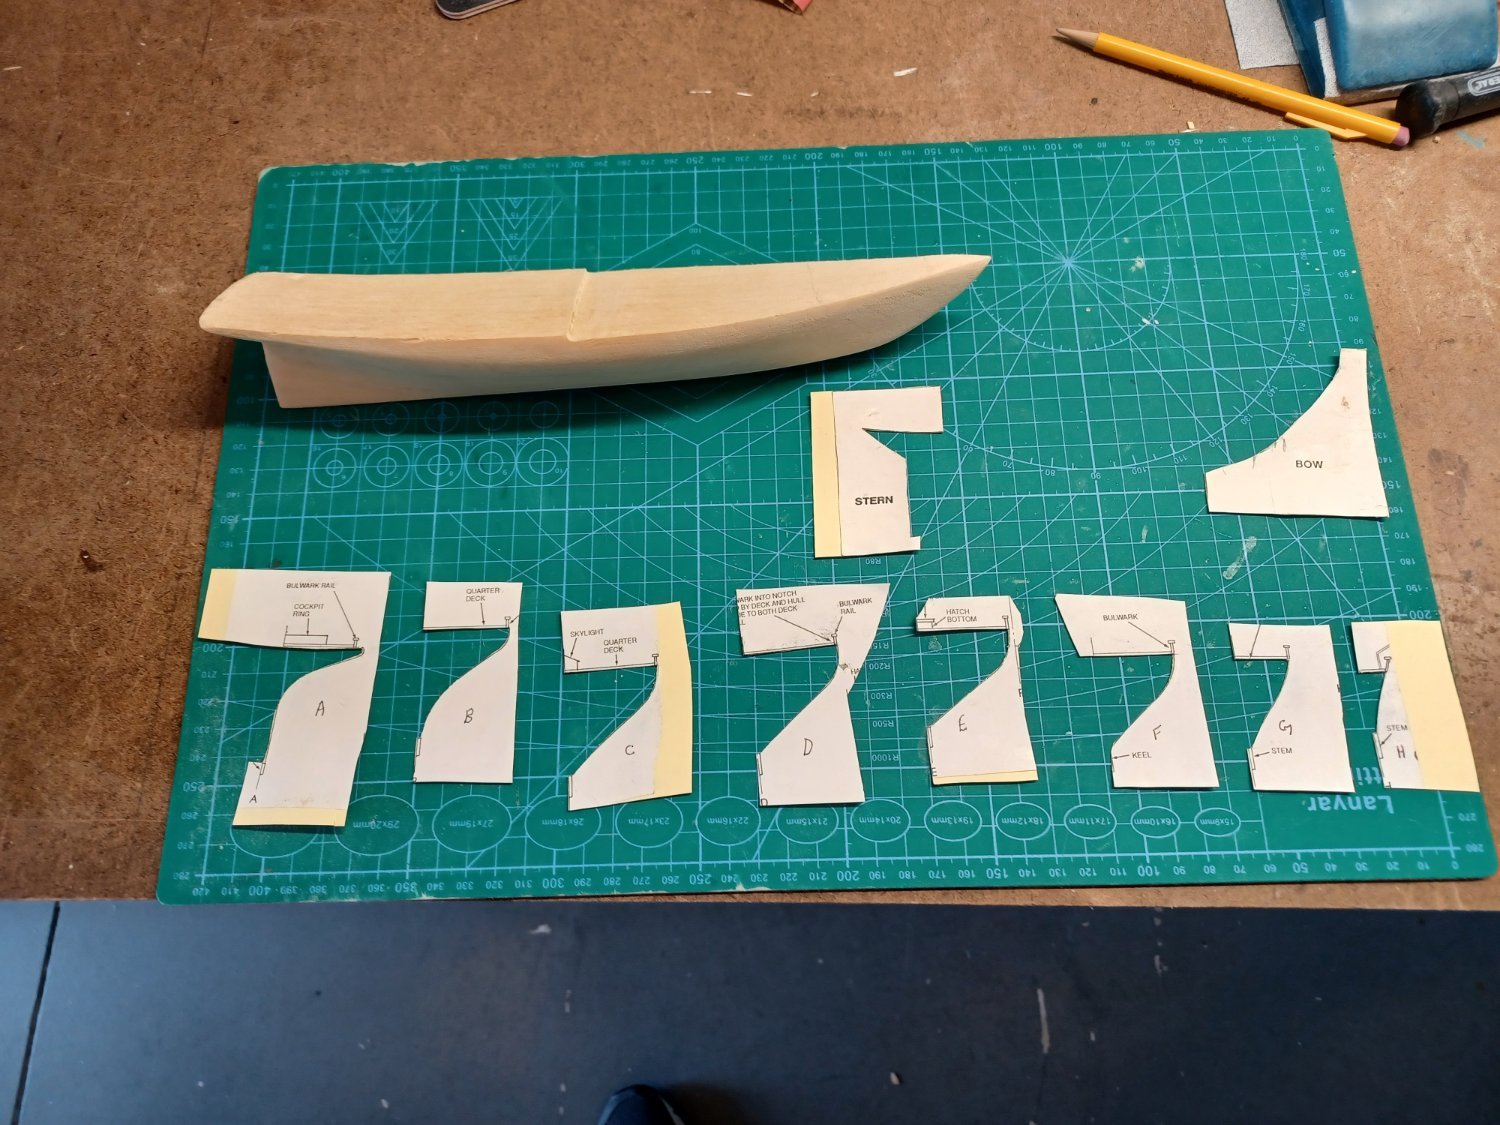
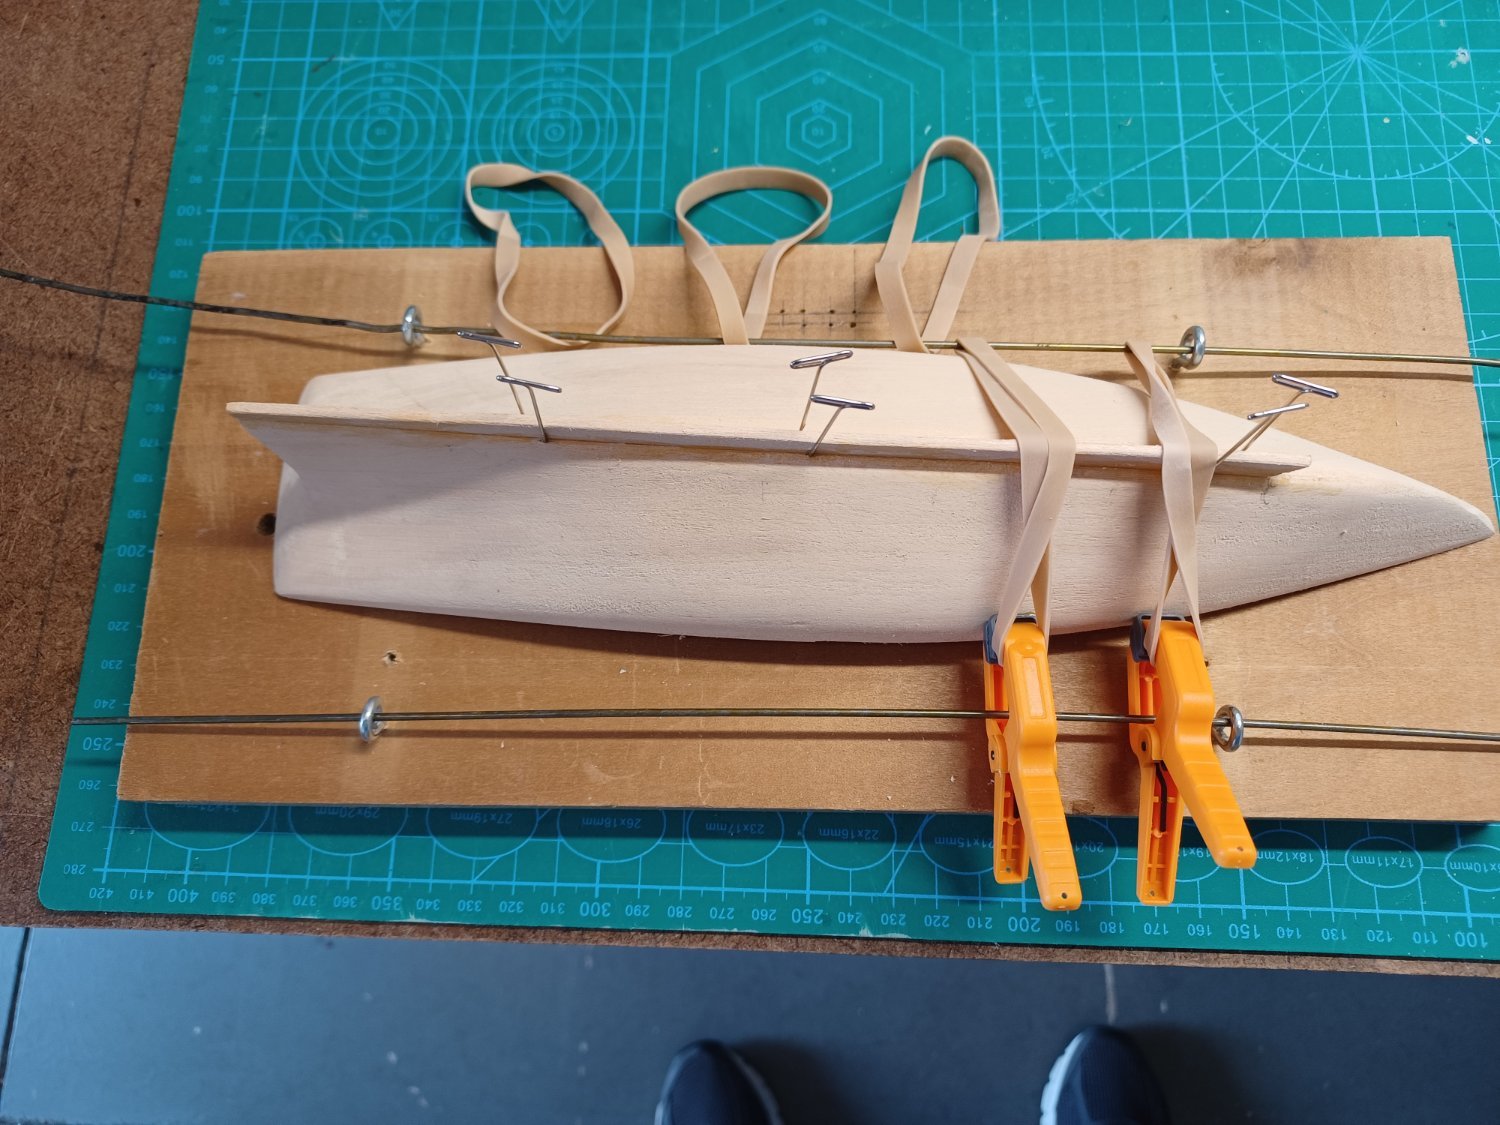
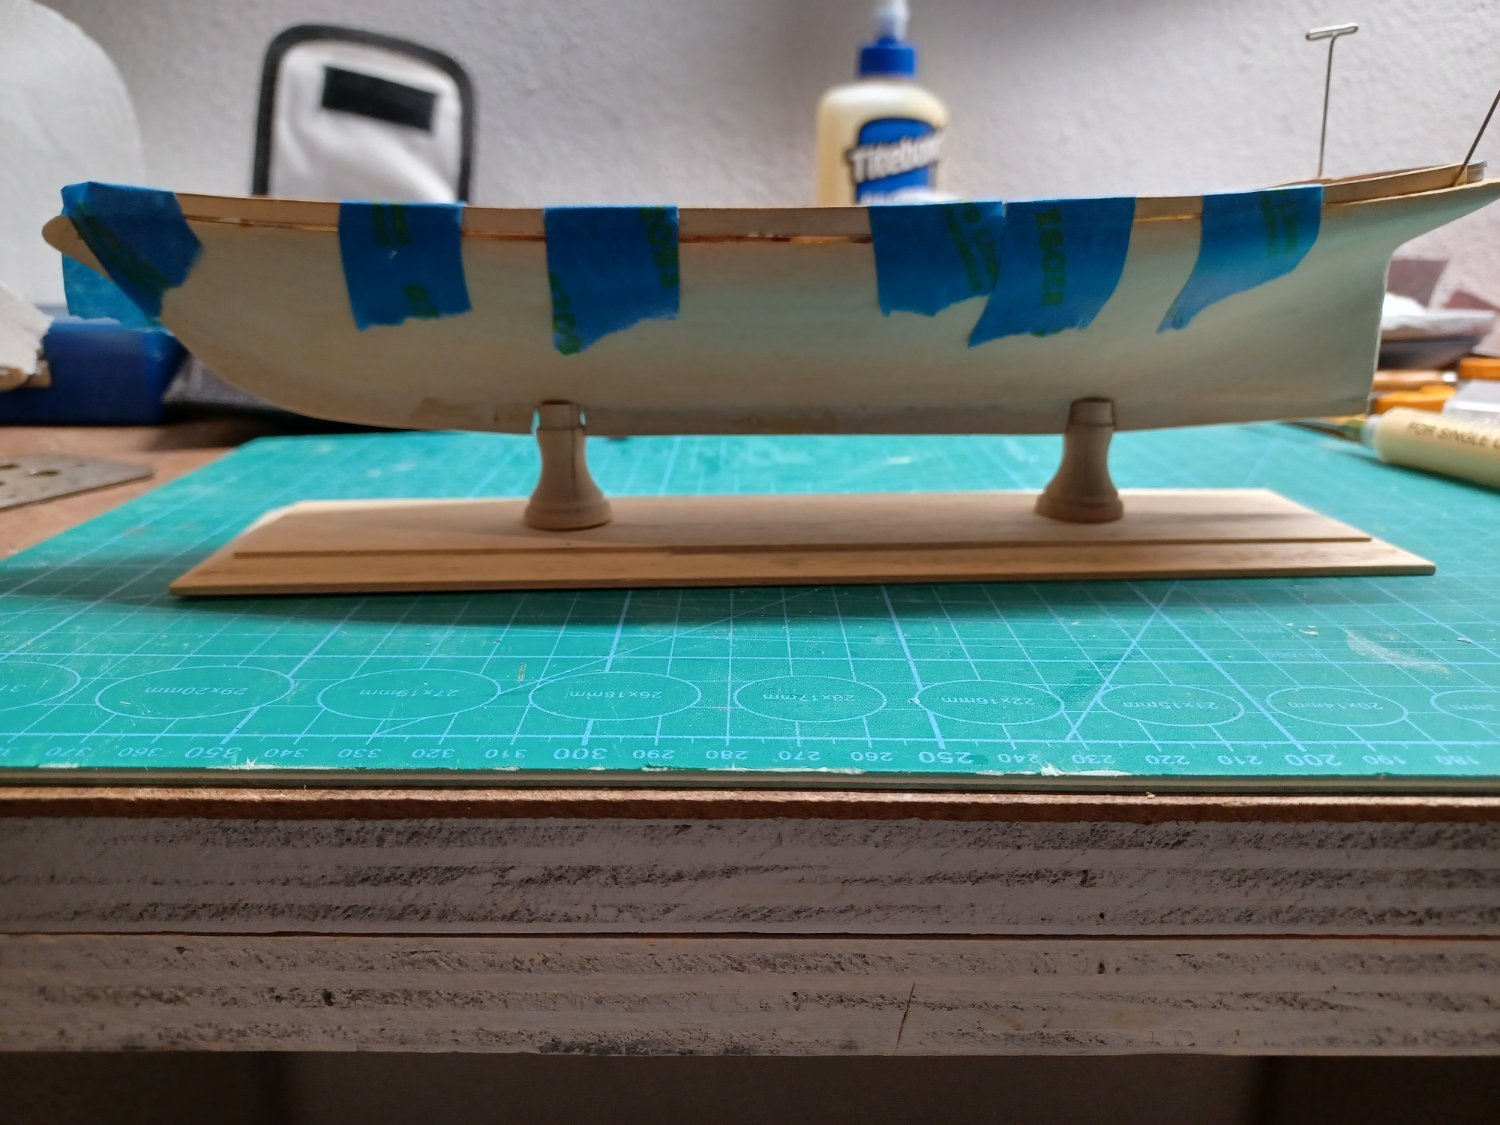
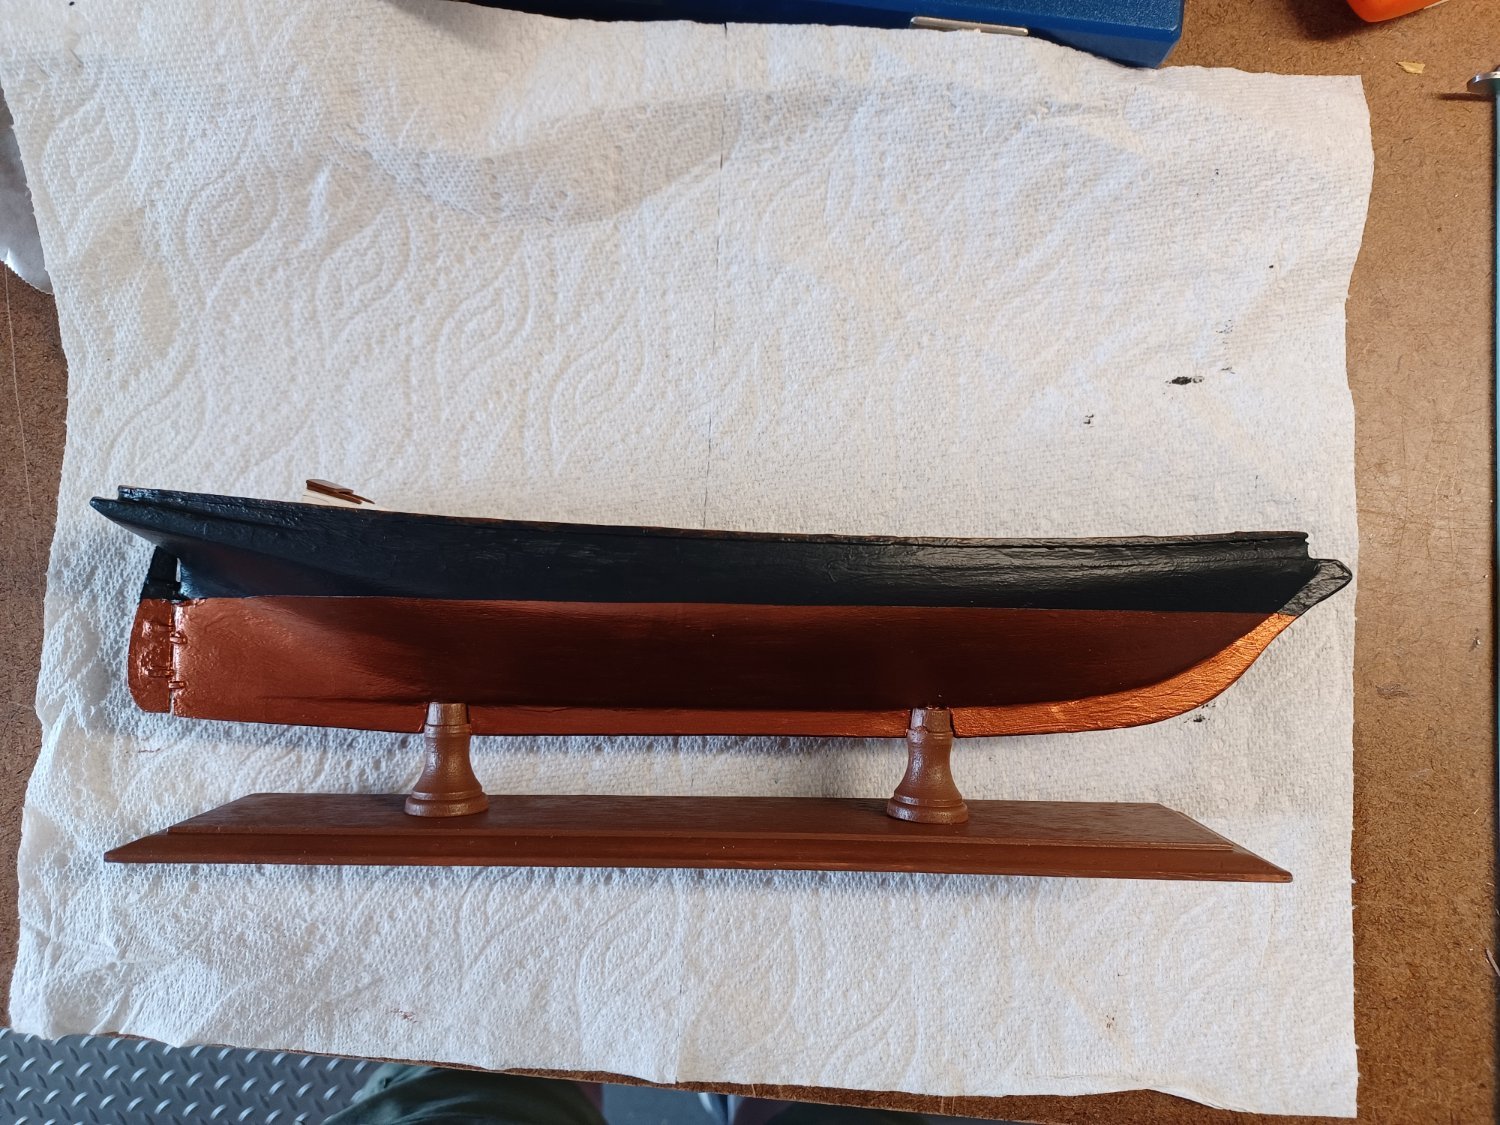
 Hi everyones! I had a break in the shipbuilding for more than 3 months. Now, before I go back to my current projects, I decided to do another short mini-project for restoring of my skills. So, I begin as usual with building of the hull. Richard Lawler Schooner America Best Regards! Igor.

- 107 replies
-
- 16
-
-
 I started this 1/96 scale kit in November 2019. I purchased this kit on eBay, it had already been started and is my first Wood Model Kit.
- 21 replies
-
- 2
-
-
- America
- BlueJacket Shipcrafters
- (and 1 more)
-
 I recently bought a plan for this America Schooner. The America II was in the US Naval Station on the Severn River when I was there. It was right next to the Meridea then. I did not have the point of perspective that I could do a sketch of it because Meridea was right between. Although the 1/4" plan is pretty good, It only has about 8 stations drawn, and none of them are spaced upon the evenly spaced frame positions, so the only way I can accomplish drawing the frames for her will be to take those station drawings and enter them into CAD and extrapolate each frame from the resulting waterlines. I am interested in working on getting this CAD drawing, but, I have never transitioned into any successful 3D skills with my DesignCAD 2/3D program. I have had an idea of the how to do the plan, but it will take a lot of trial and error before I can get it accomplished, I am sure. I have wanted to do this POF for almost as long as I have been working on Meridea, however, it was all in 2D. The lack of being in 3D caused me to have problems with the drawings in each view being coordinated (may not be the right word). I believe I am going to need some guidance on this one. Does anyone out there have and understand DesignCAD 3D MAX? I will probably need some tips on how to get the move point in a uniform position so when I paste the station into the 3D drawing they will all line up successfully. When I select the intersect of the vertical/horizontal lines the move point is always off to the side. That makes it next to impossible to get the former in exactly the right place. That has been my main problem from the start. I have also had some problems with them showing up in the right plane going from 2D to 3D. The 2D is XY, and when pasting them into the Z position, the front, top, and side views don't seem to come out right. The few times they did, I don't know how I got them there. I do understand layering, so you can hide or show each station.
 -
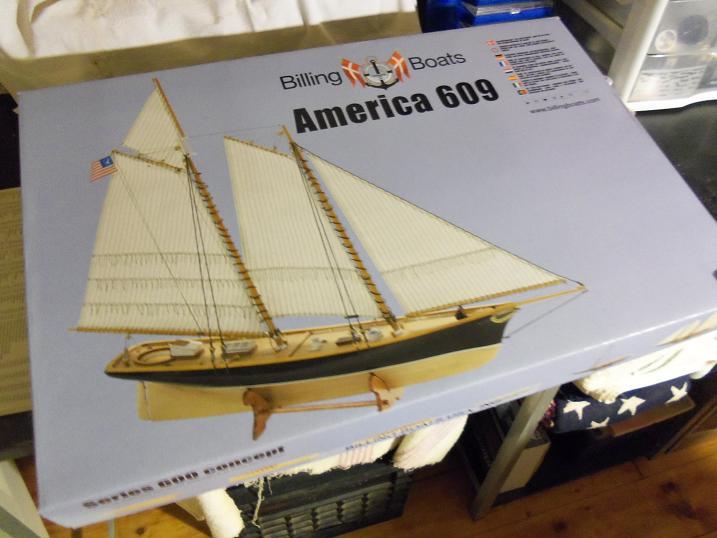
 I started this kit just after Christmas, although I didn't get this as a gift. this is a reissue kit.....I've never seen the older version, but this version looks to be of good quality. I did find a couple of small flaws in it, but nothing to go ballistic over.......they were quite easy to repair. the build starts as a split keel design, numbering the pairs of ribs was a bit of a challenge........the rib layout diagram was different than the laser cut part's panels. once I figured it out, it went much better. I will try to narrate some of the missing text, but if you'd like to read the entire build as it stands so far, you can go here: http://wenzelswharf.wordpress.com/2012/12/30/billings-america-a-172-scale-kit/ there is much more text here than I could ever put into any site.....without seeming long winded, of course. this is where the first problem surfaced.....one of the ribs was nicked by the saw and caused an edge to be flattened. the fix was to cement a piece of basswood onto the offended area and sand it to shape. on the 30th od December, the numbering, fitting and subsequent assembly of the keel halves began. they supply a nice board to assemble the halves on, but I have a large length of pine board, that worked even better......more than enough room to do both sides at the smae time. this picture gives you a good idea as to how large this pine board is. in this next picture, I will show the repaired rib.....I'm certain you can see which one.
- 377 replies
-
- 2
-
-
- america
- billing boats
- (and 1 more)
-
 I have been by the sail bug of late and nostalgia and ventured back to my youth when I made just about all of Revell sailing ships.So I picked up the USS America simple get my feet wet again with the rigging and such.I p/u from HISmodel the wooden deck and block/pulleys which the pulleys will be a new venture for me I have dealt with wood decks on the Eugen.I have the hull,decks and the mast are just about finished in painting just a little bit more.Russ lives like three houses down and says the black iron on the rudder goes so that be fixed and I went with 16' planks right or not I don't know but I mark them lined the ends and nail.I have seen alot of these decks with one nail hole ? call it my personnel interpretation Kevin

-
https://vimeo.com/275435272
-
-
- 2
-
-
- america
- cutting a square tapered mast
- (and 1 more)