Search the Community
Showing results for tags 'Cheerful'.
-
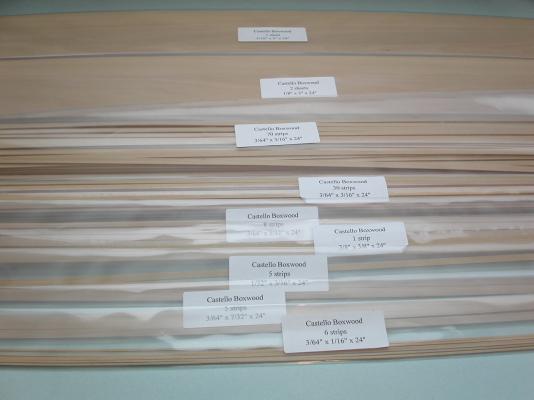
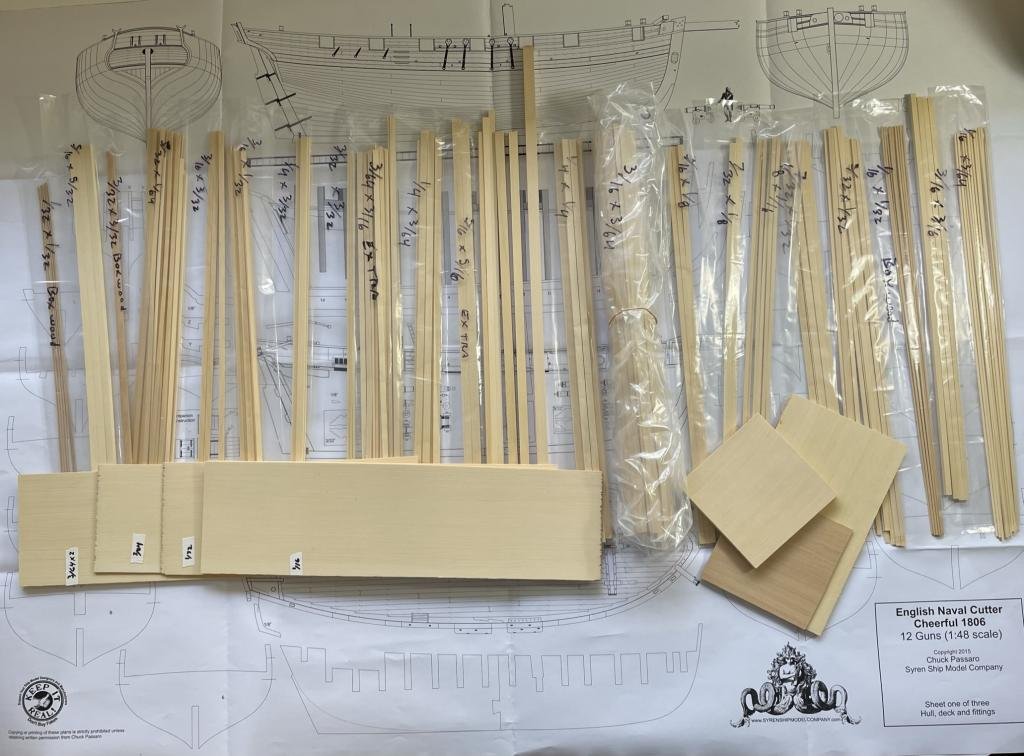
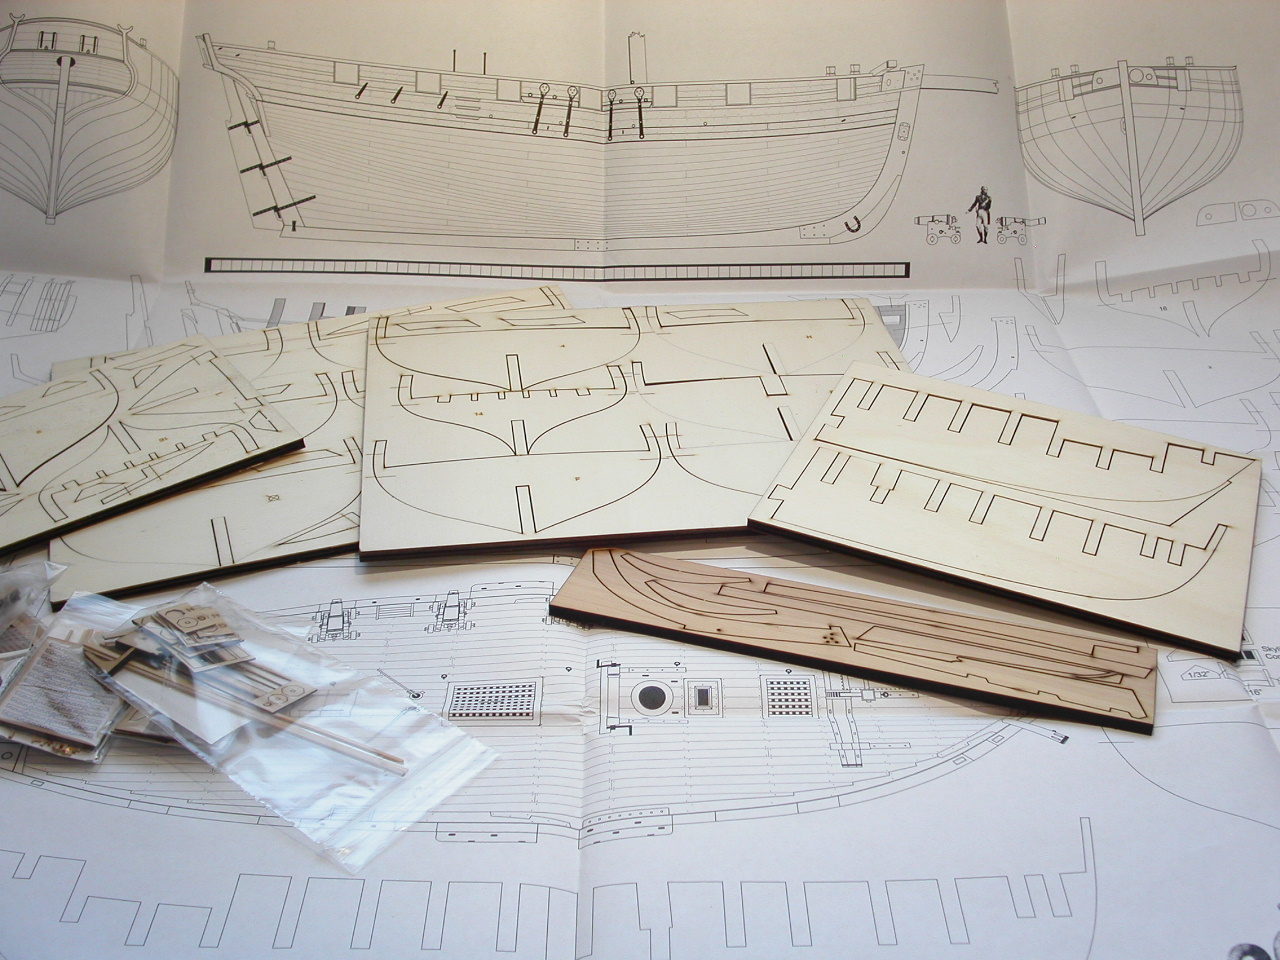
 Welcome to my Cheerful build! Little did I know when I bought a Model Shipways longboat kit last summer that I’d get bitten by the ship building bug so seriously. I finished my longboat a couple of weeks ago (see here http://modelshipworld.com/index.php/topic/10743-18th-century-longboat-by-erik-w-–-model-shipways-–-scale-148-first-wooden-ship-build-finished/?p=374717). I quickly realized that I missed putting time in daily working with my hands and building something. Aside from a Dremel, I currently don’t own any power tools suitable for modeling. So, with what Chuck offers for the Cheerful, and with the availability of a new Cheerful timbering package, with milled strip wood, from Jason at Crown Timberyard, I can build a POB ship with accurate plans, castello boxwood, and high quality rigging materials and fittings. I hope I’m able to hone the skills I developed on my longboat build, and do the Cheerful justice. Chuck, Mike (Stuntflyer), and Bob (rafine) have set the bar pretty high! Feel free to comment and offer constructive criticism. I realize how much better my longboat turned out with the input and advice from others. O.K. Time to stop typing and start building. I received my order from Chuck at Syren Ship Model Company last week, and my wood order from Jason at Crown Timberyard arrived yesterday. Here are a few photos of the raw materials . . . which will be slowly transformed into the HM Cheerful! Erik
-
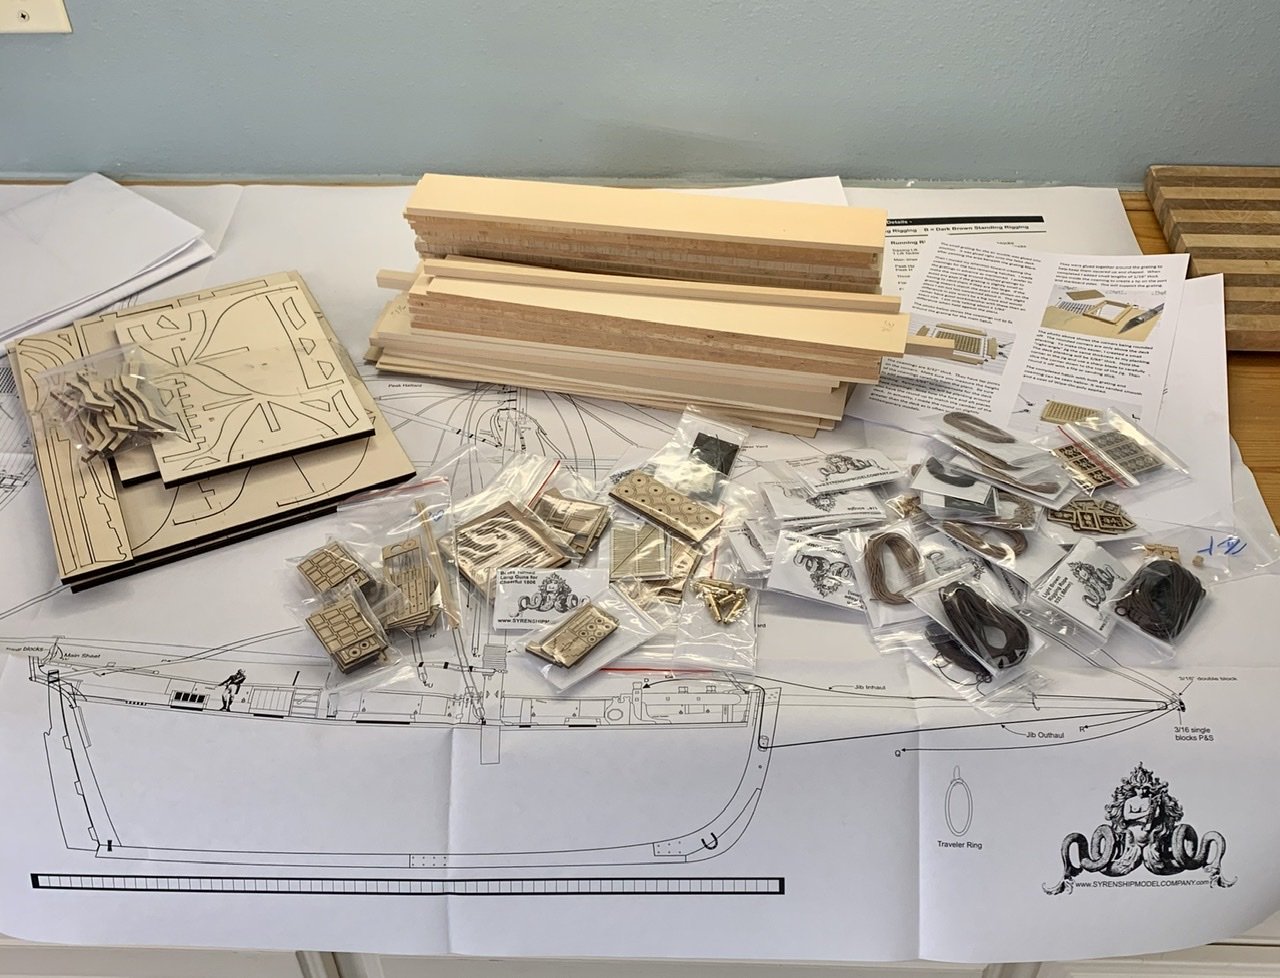
 After spending months looking at Chuck Passaro's website and reading through logs of finished and in process Cheerfuls' I ordered the kit. This being a scratch built POB I ordered the starter kit from Syren Model Company. I've been following the Winchelsea group build using Alaskan Yellow Cedar as the building material. Reading comments and looking at photos of the wood with WOP helped me buy some AYC to try on other builds. I must say "I like the way it looks, cuts and finishes" so I bought the wood along with the starter kit. When the Cheerful arrived in a large envelope and a small box upon opening the packages I immediately spread out the contents and started studying my loot. Let the journey begin. Now its back to reading the monograph and logs of how and what to start first Stay Well and Stay Safe Will
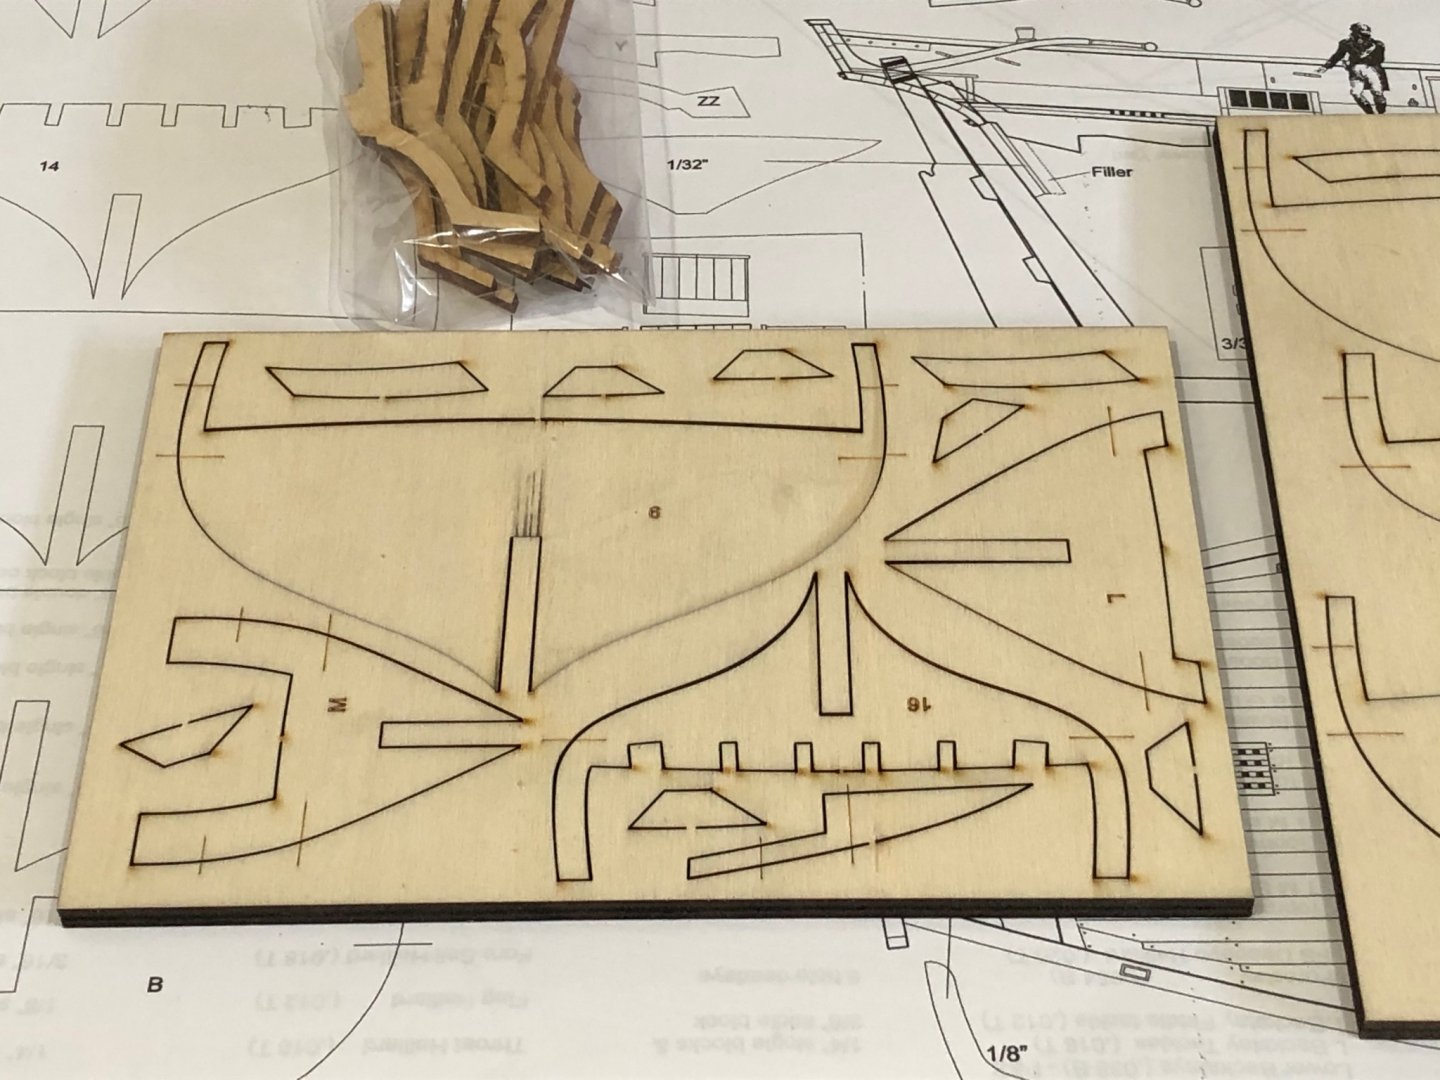


-
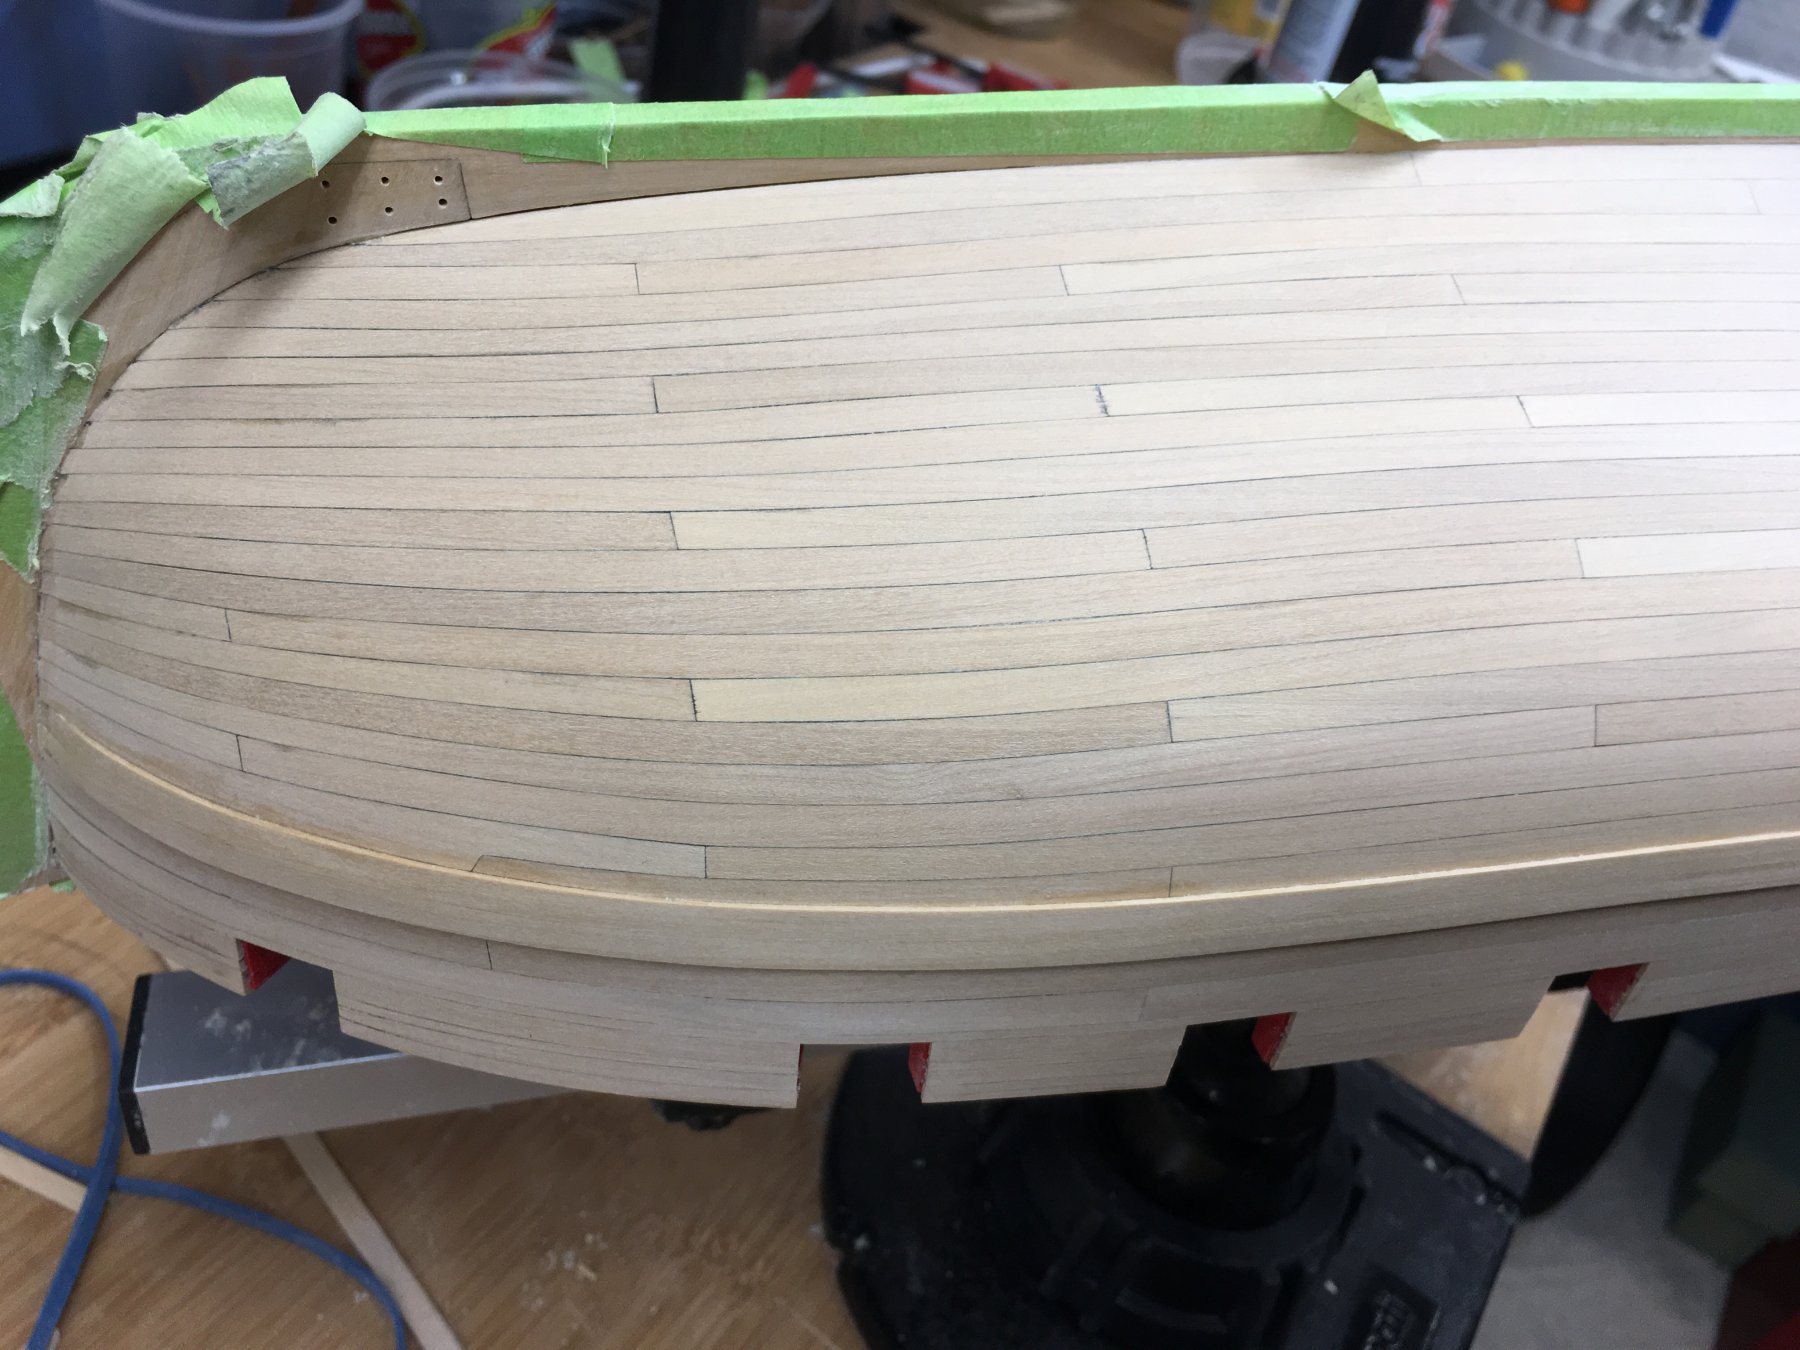
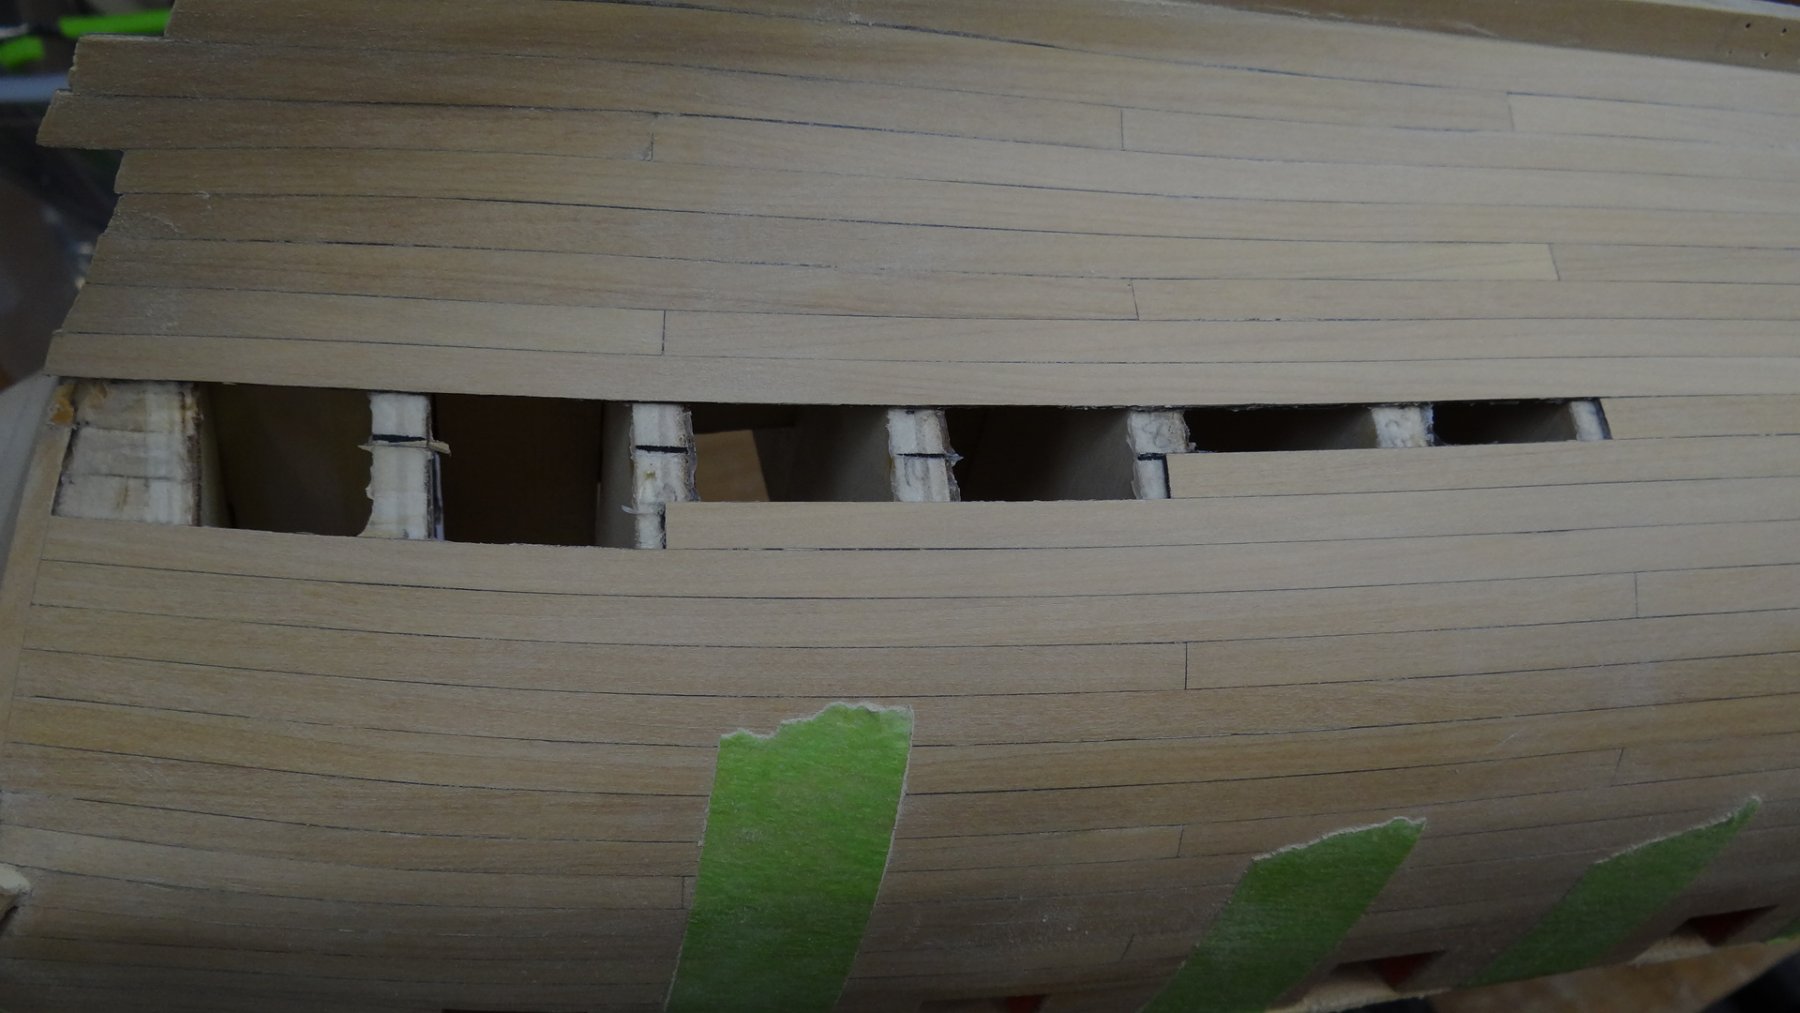
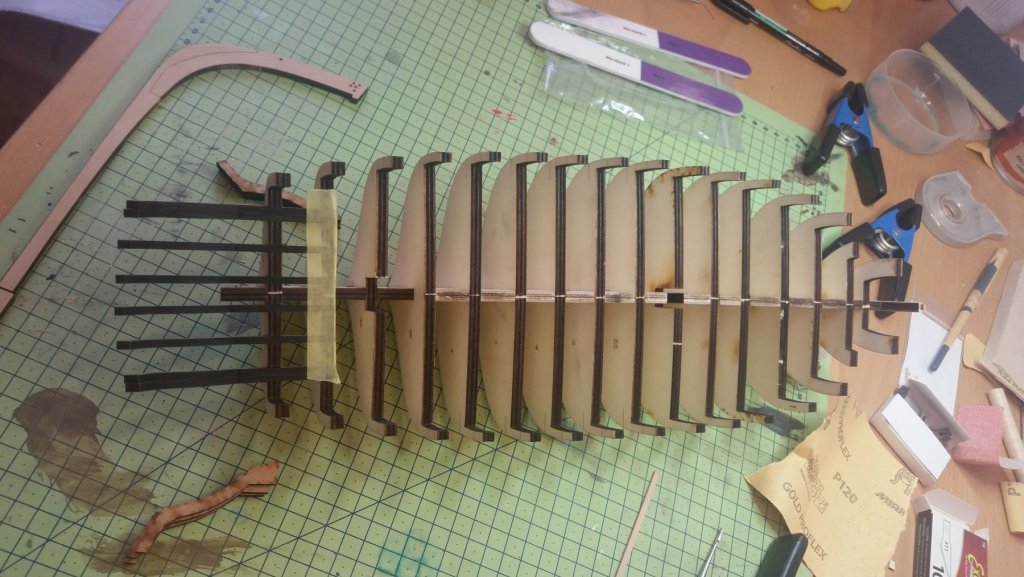
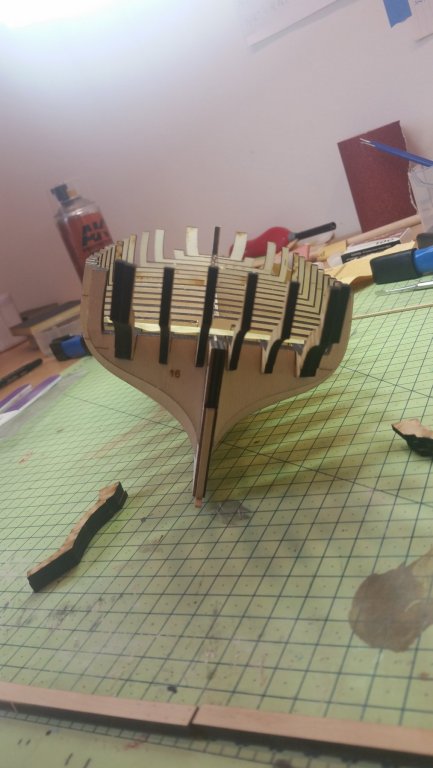
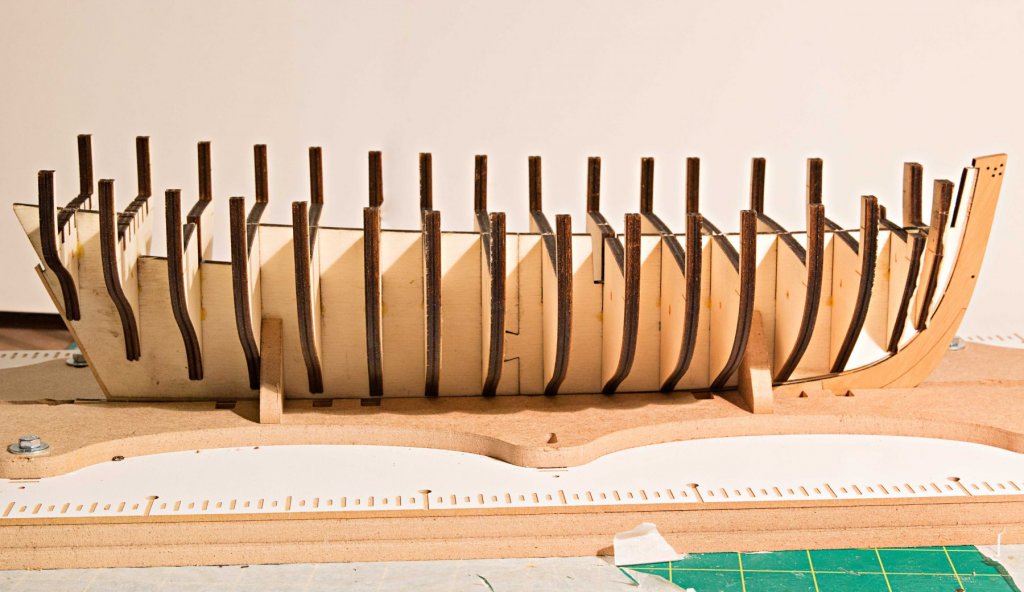
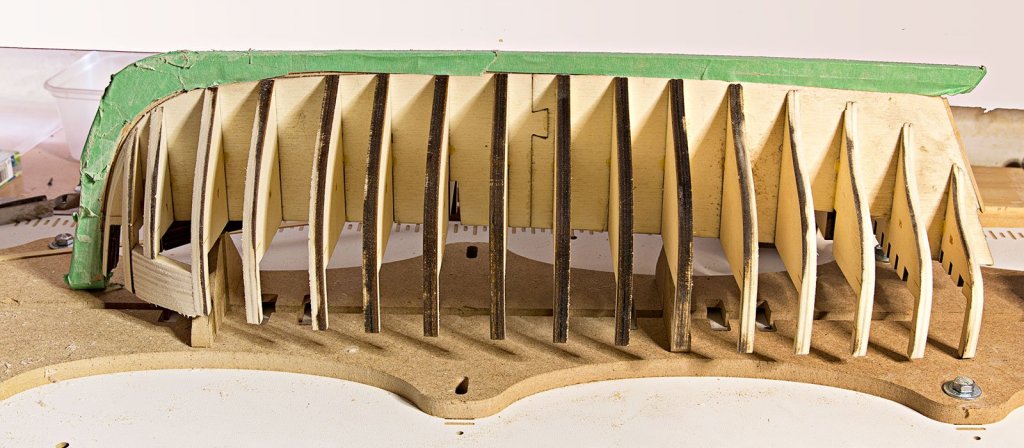
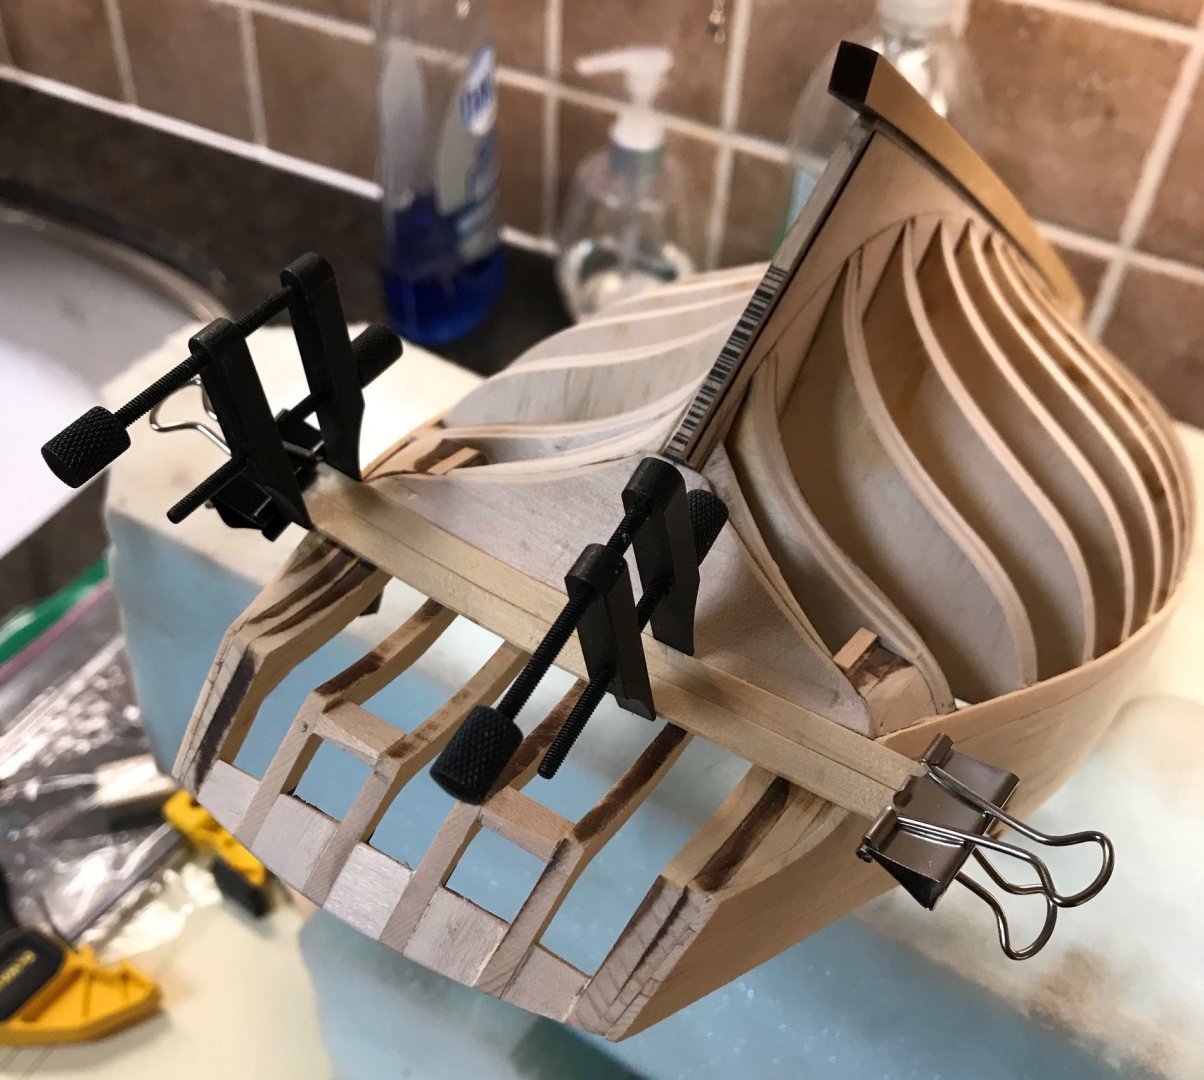
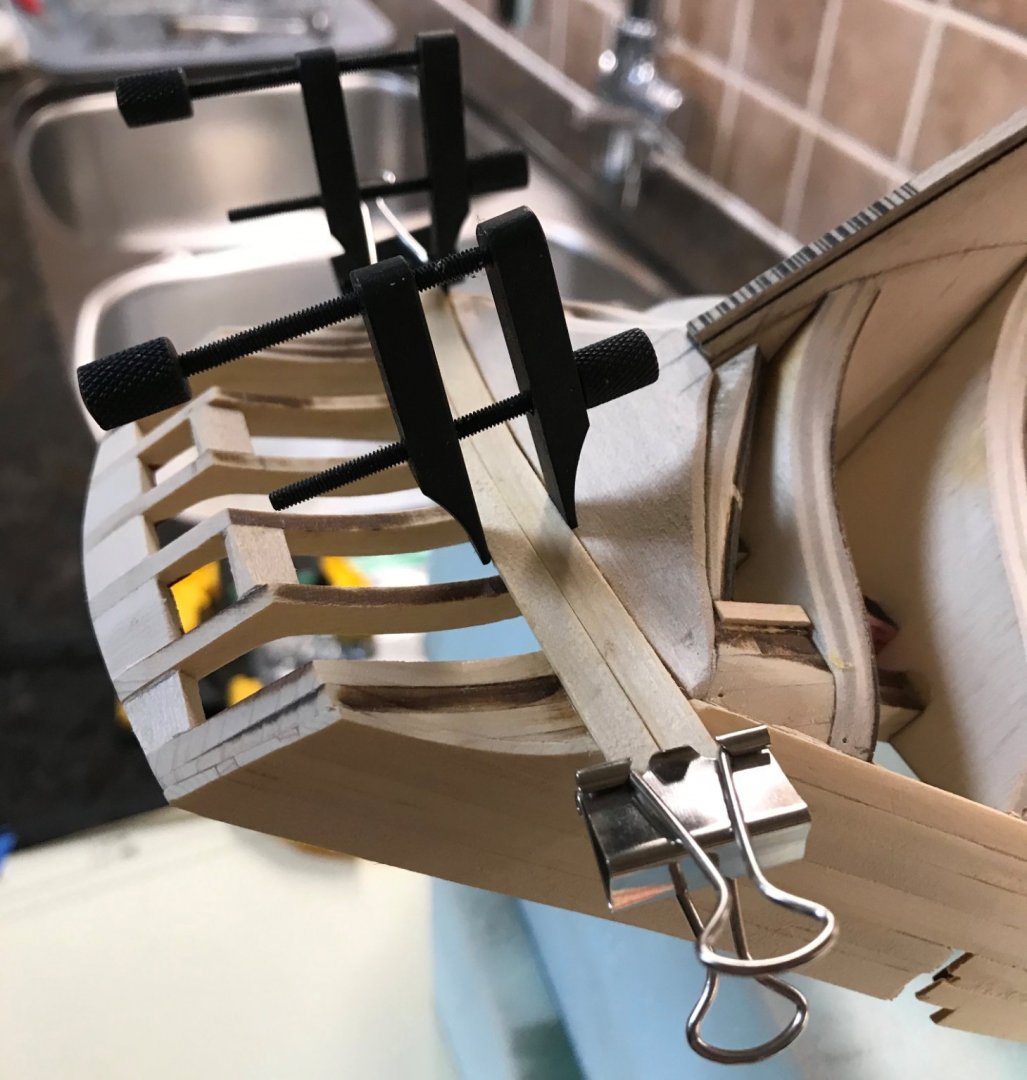
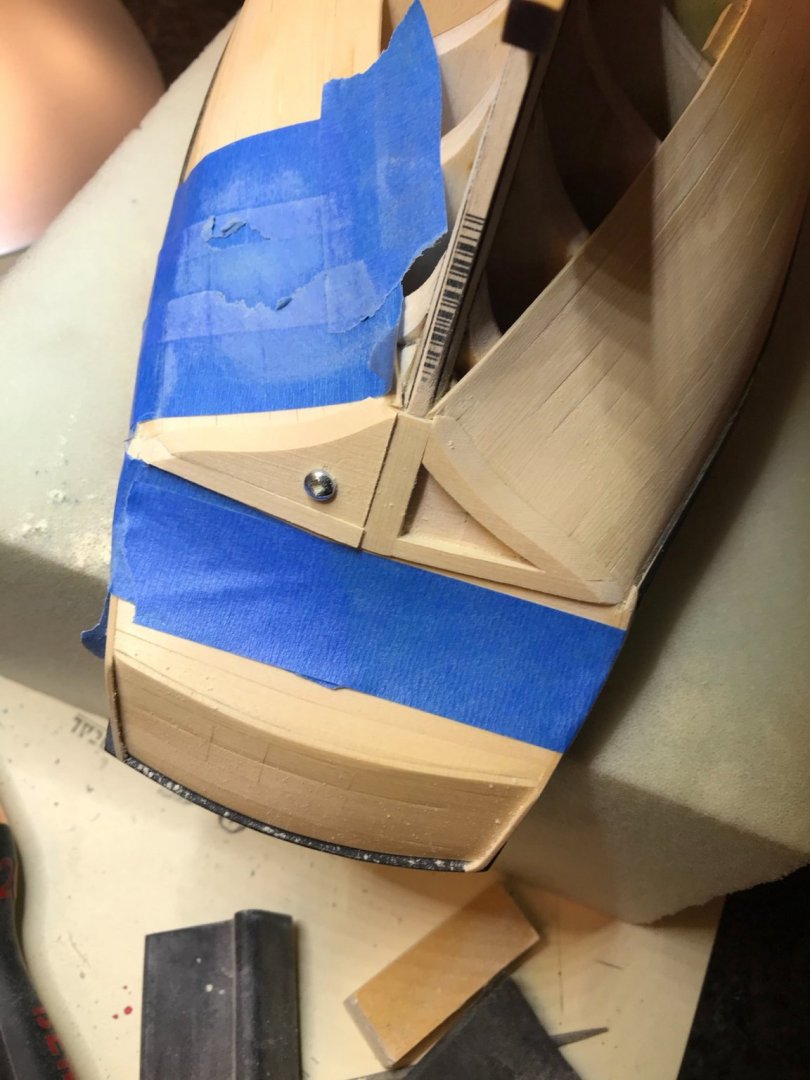
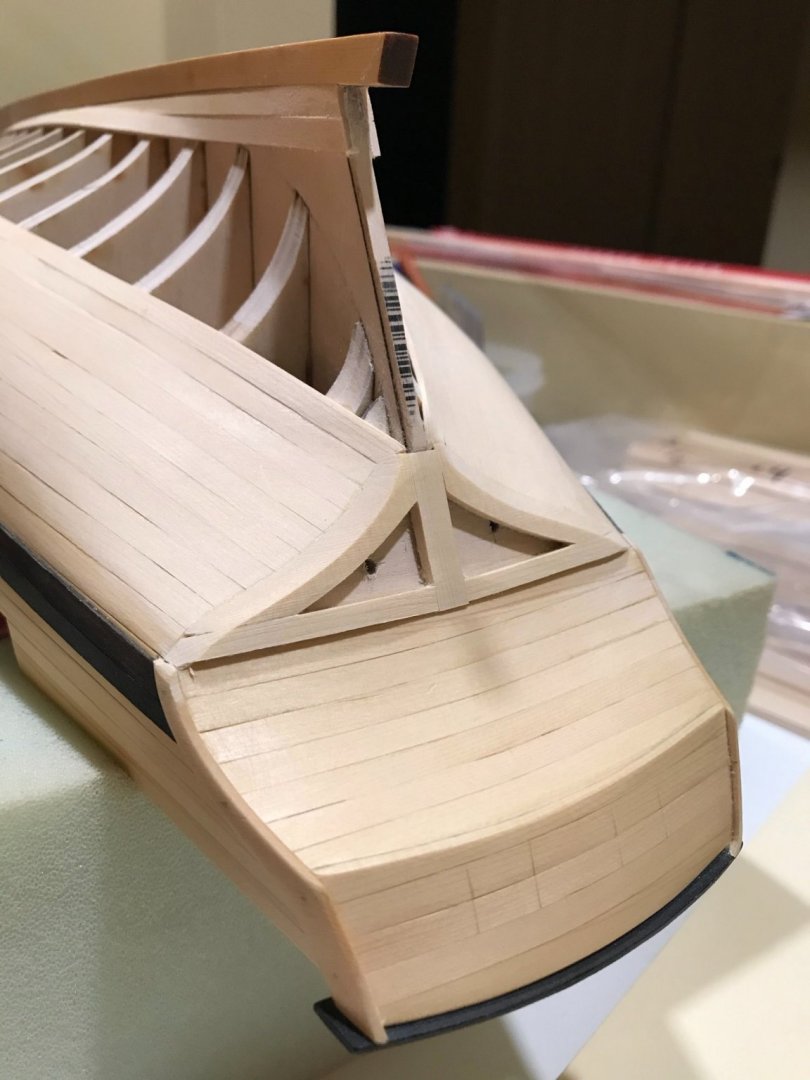
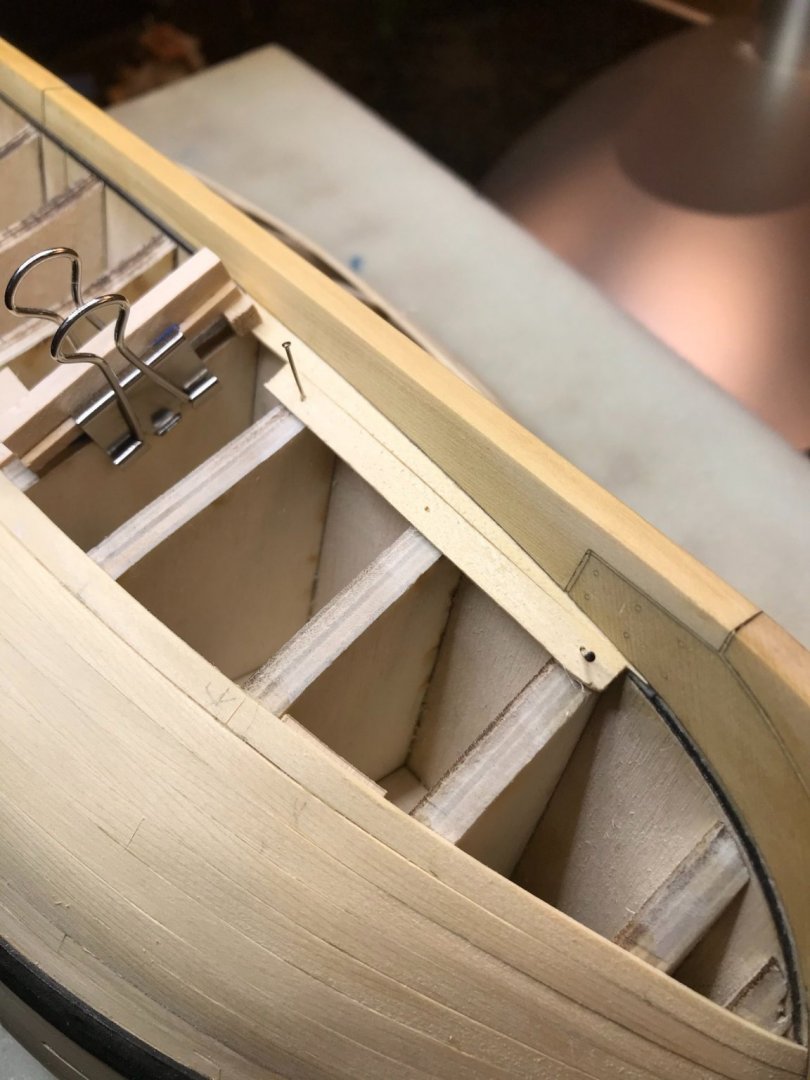
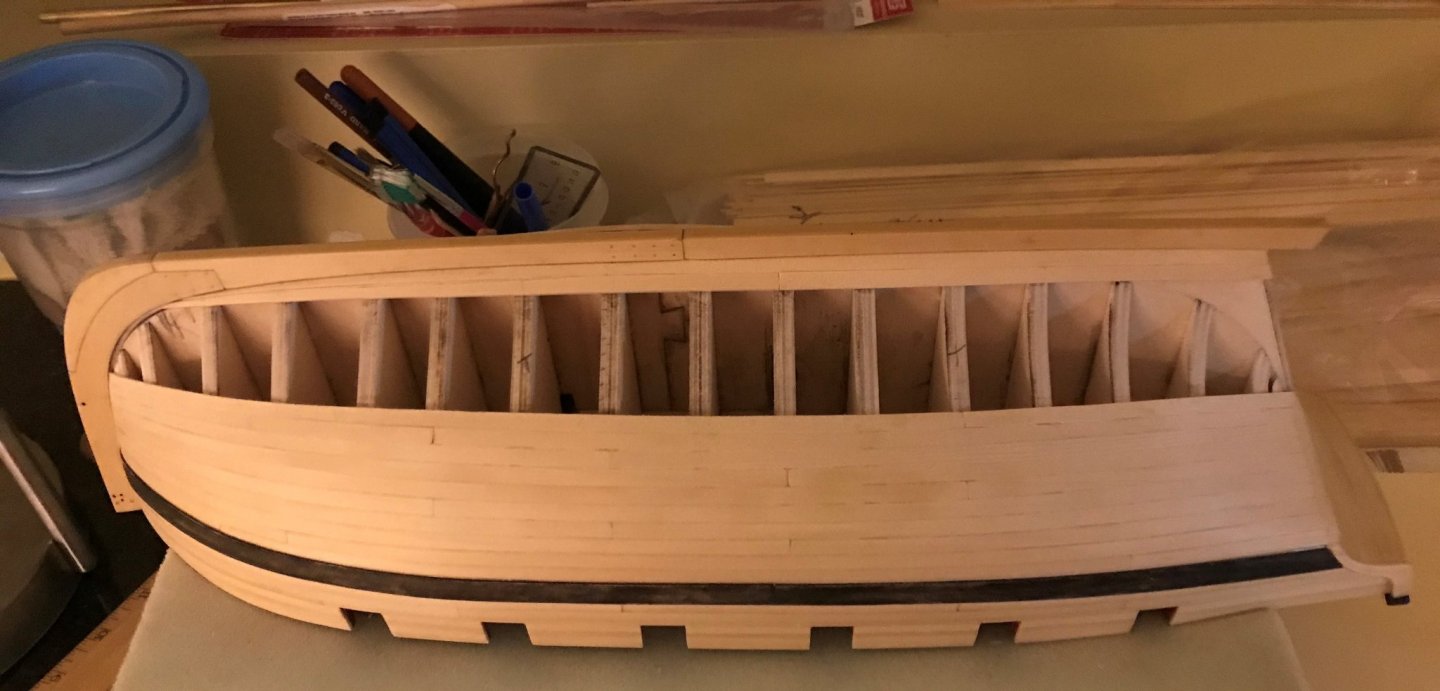
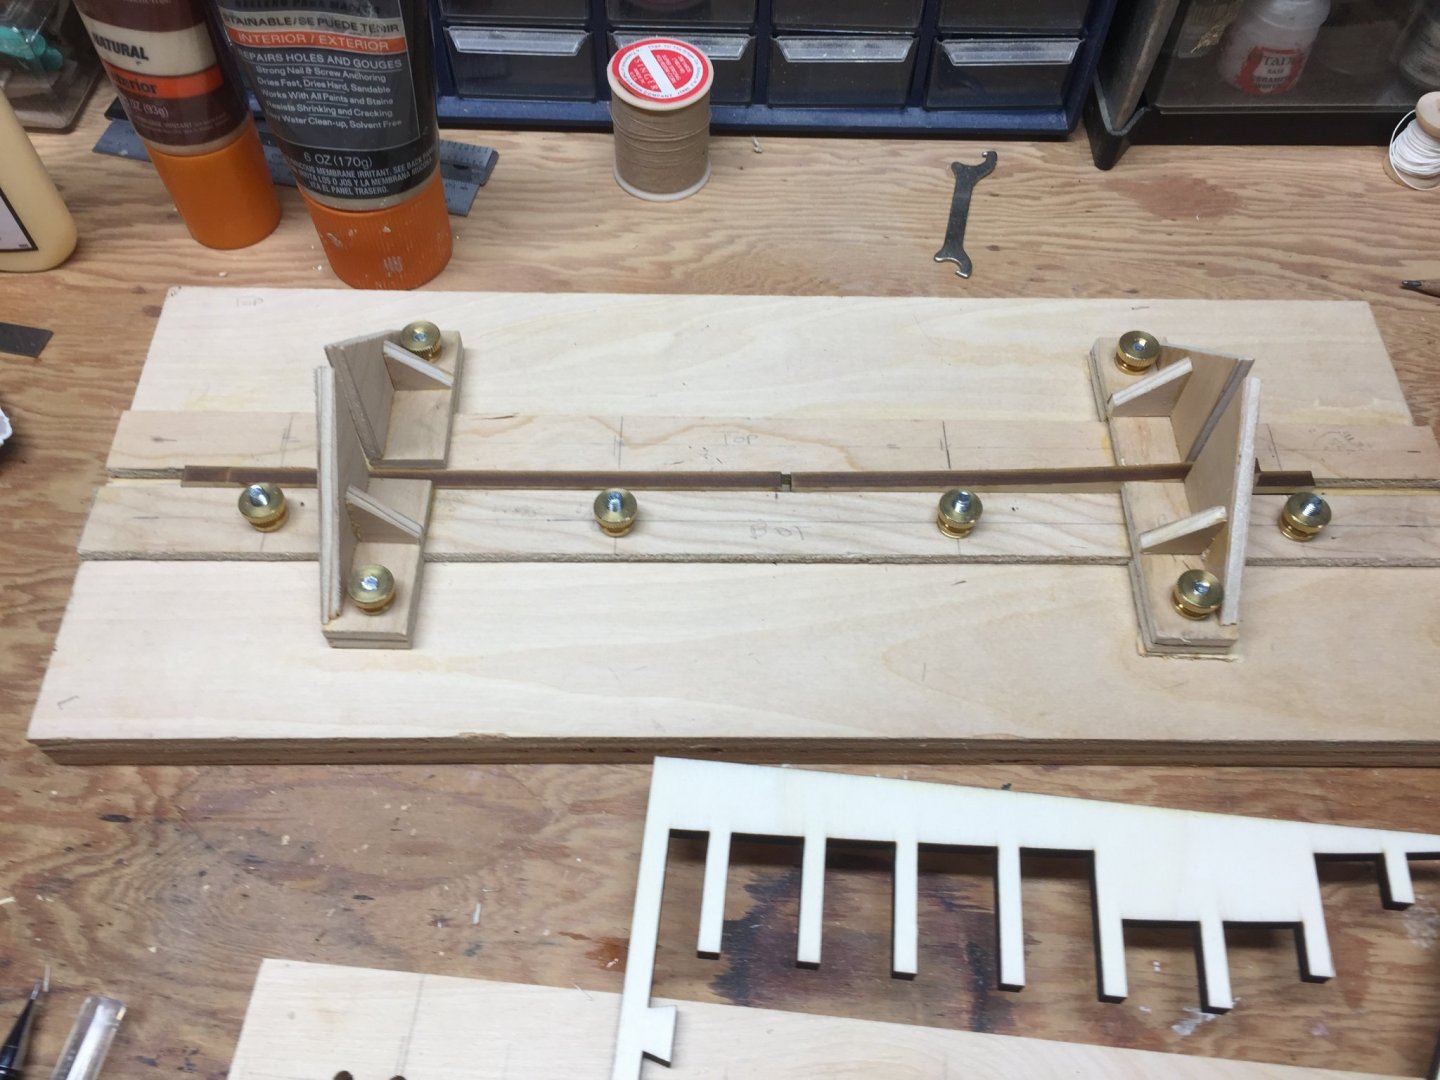
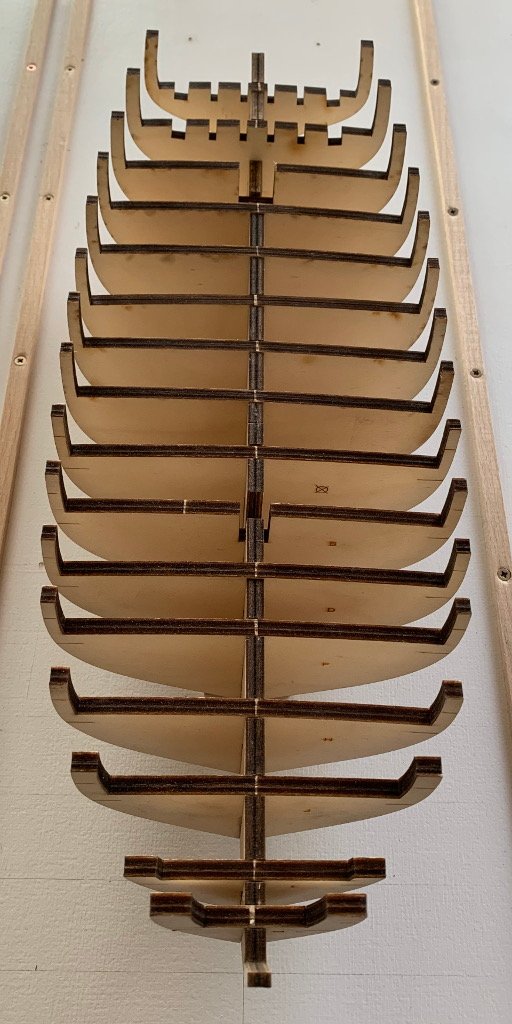
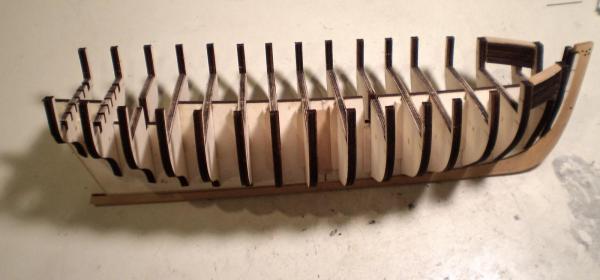
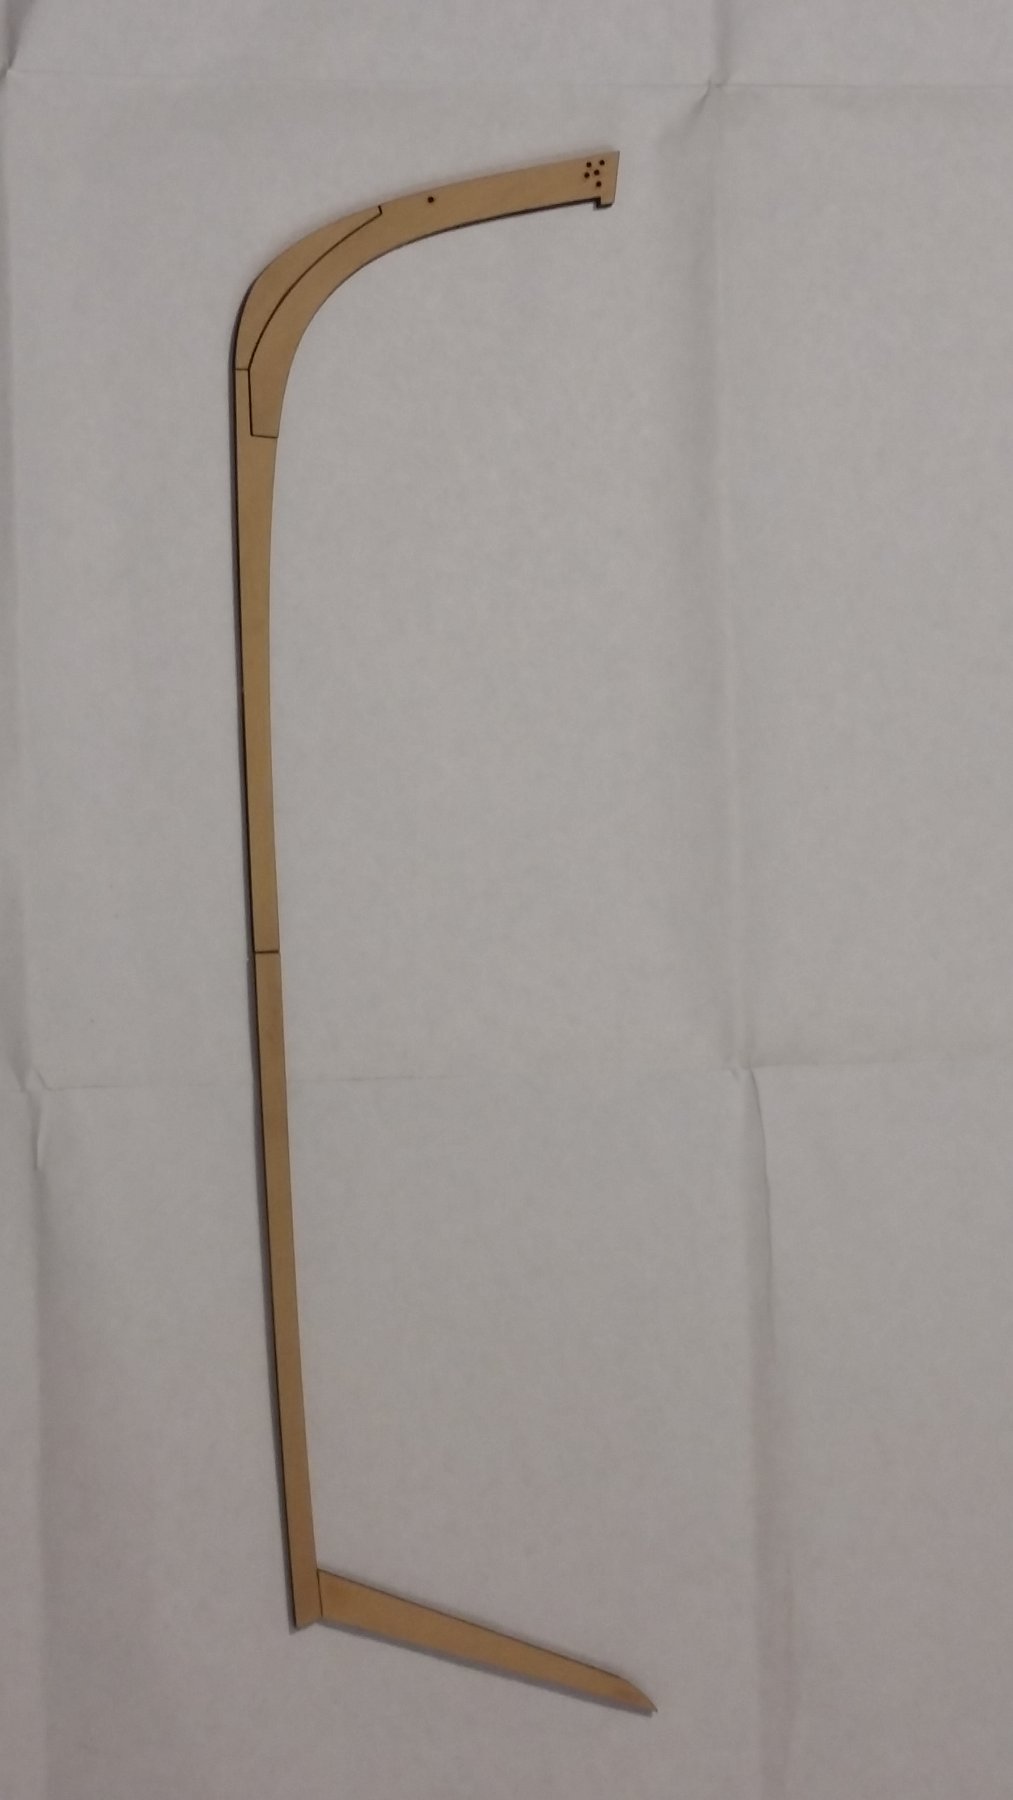
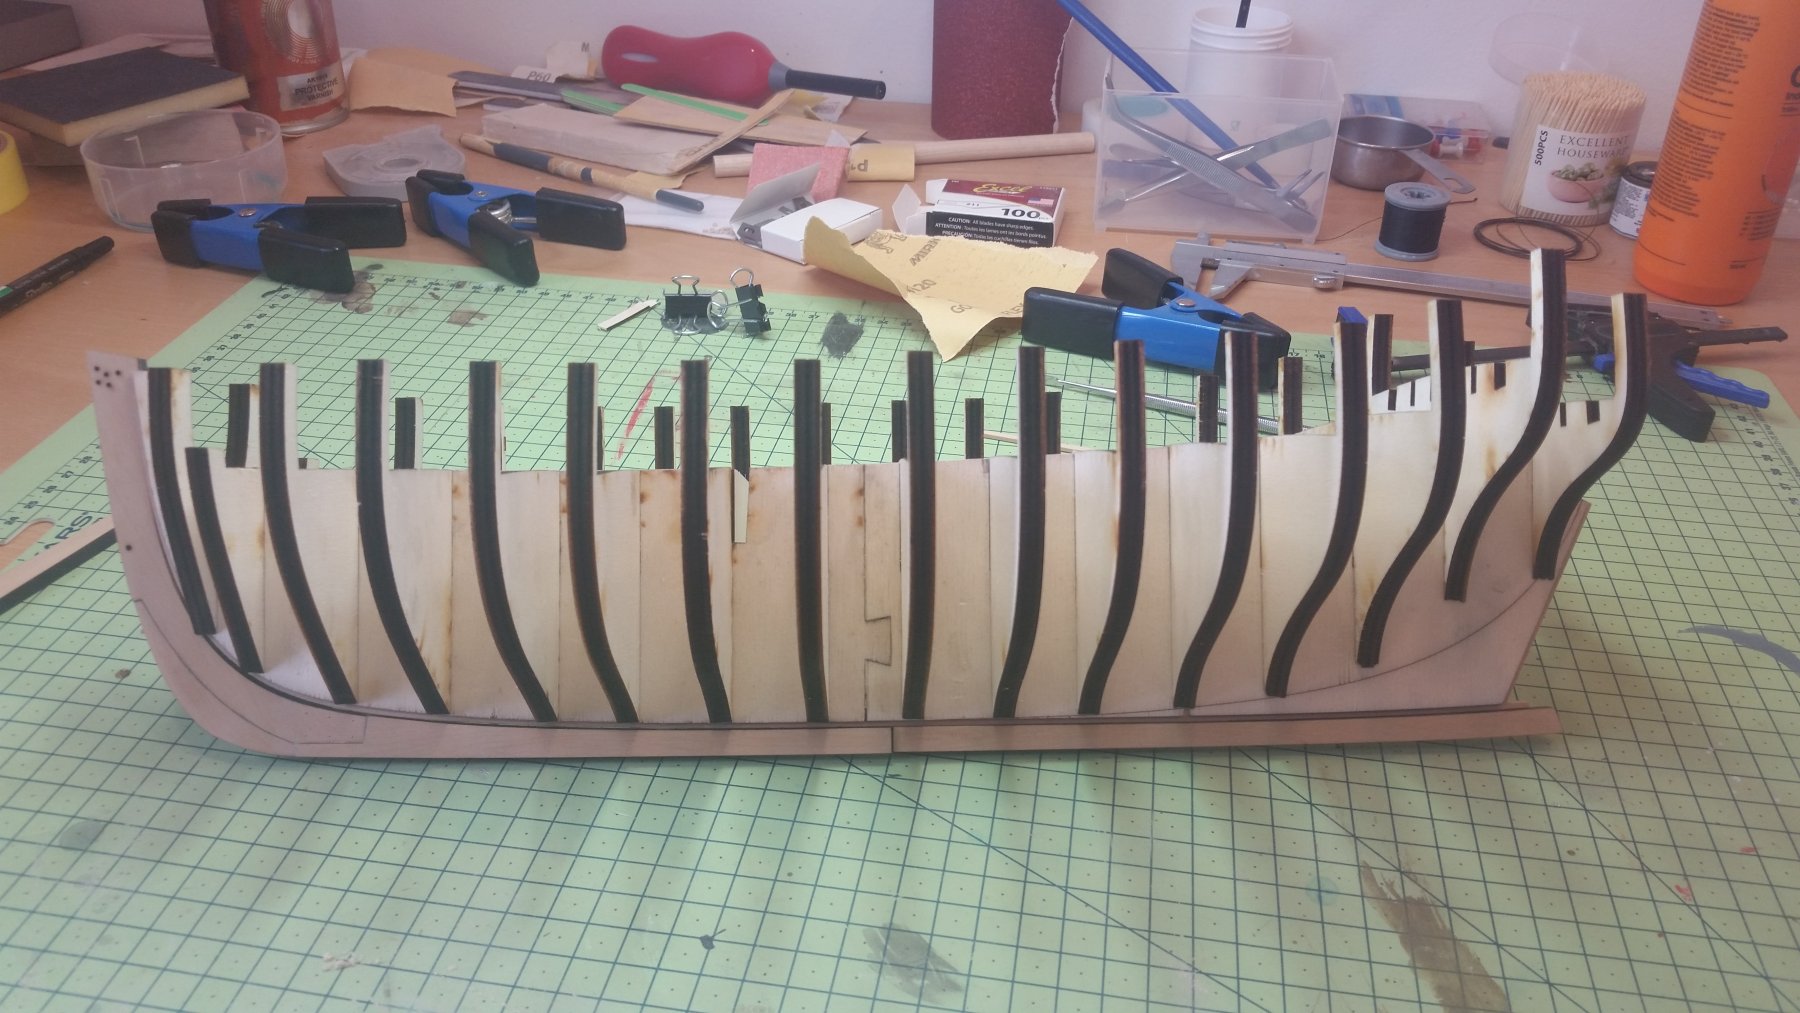
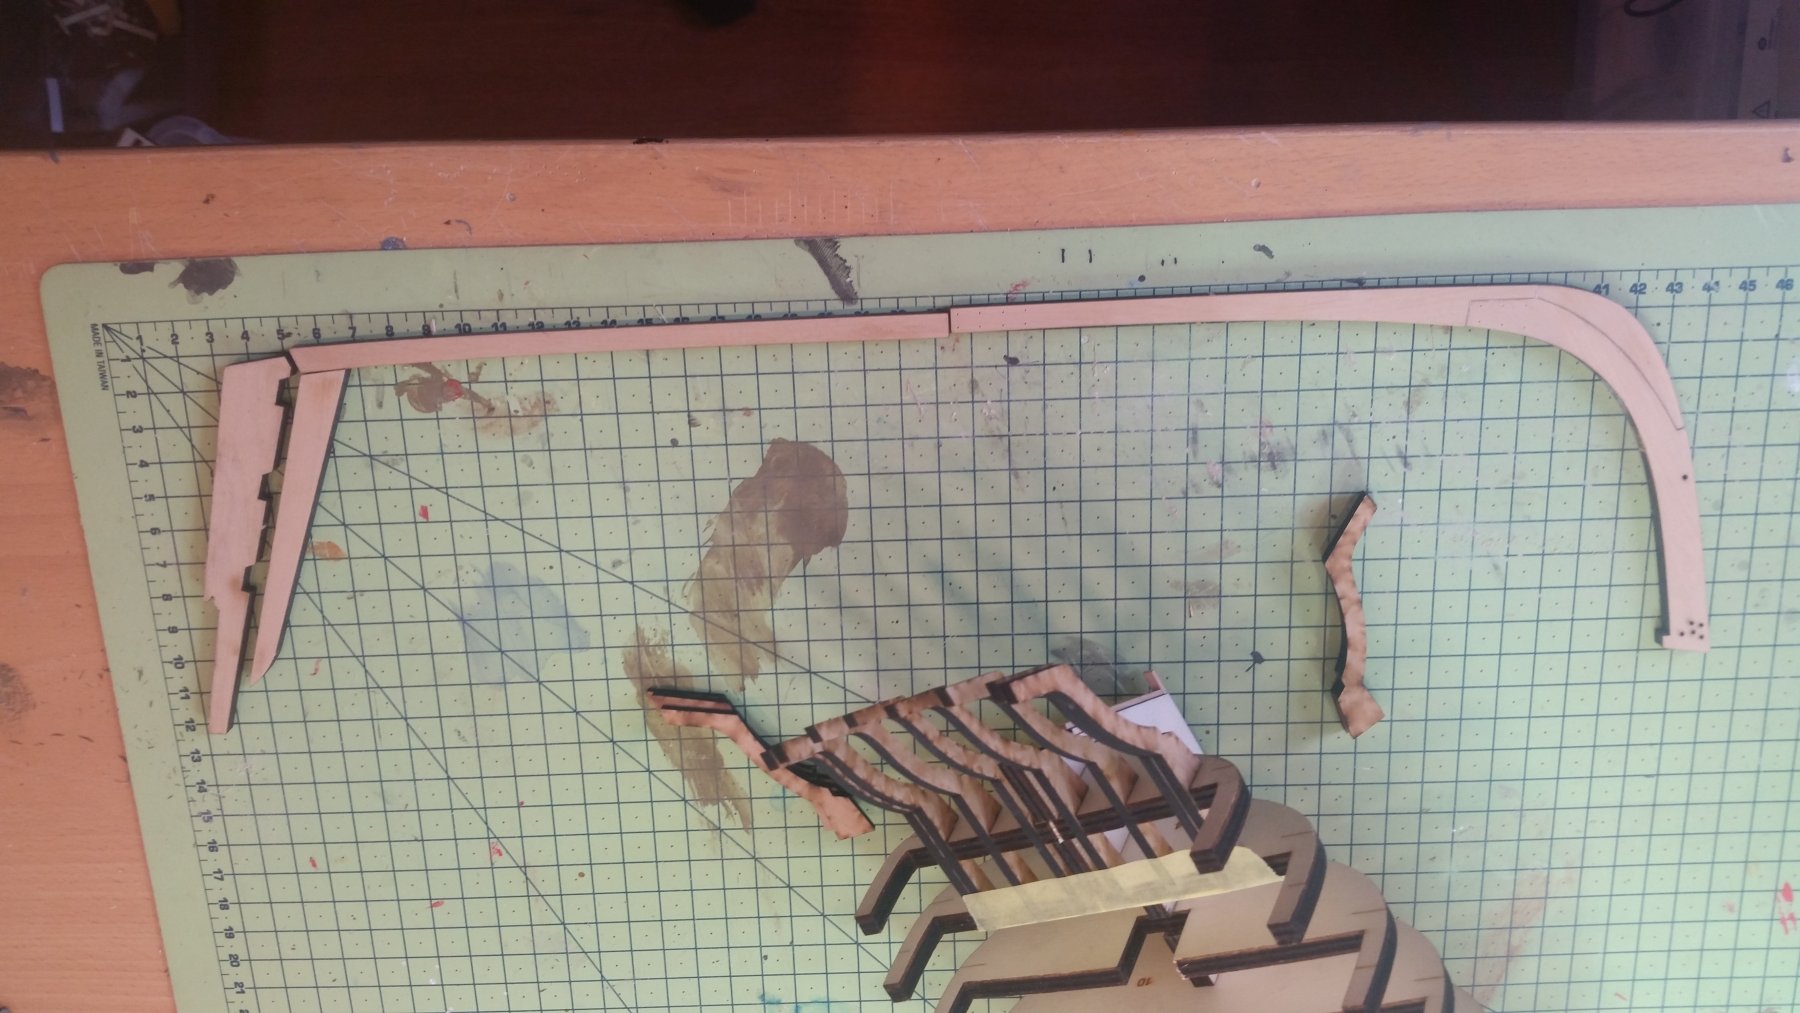
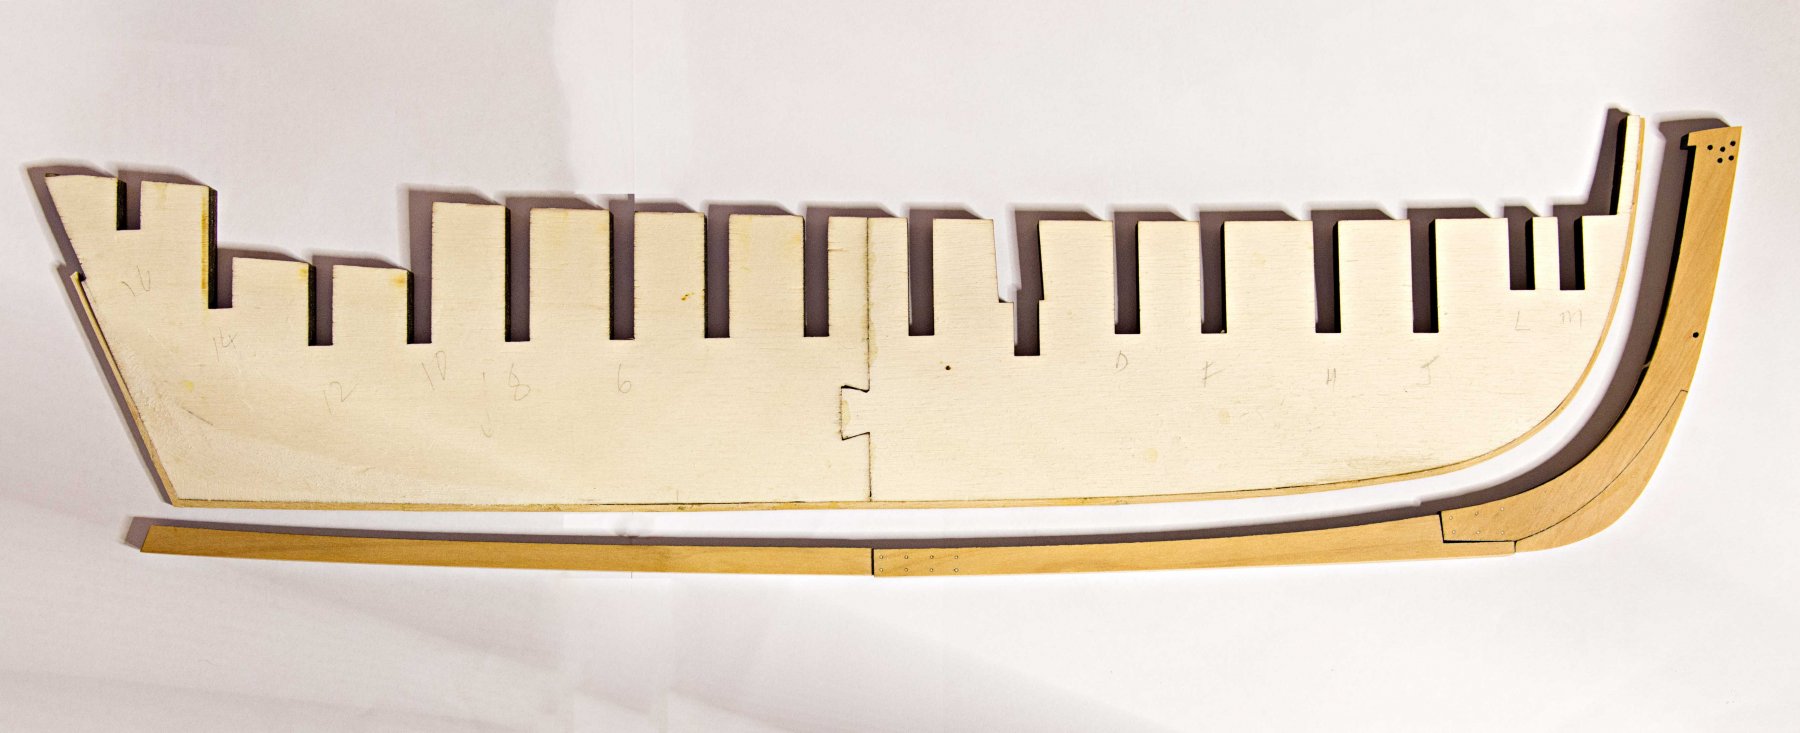
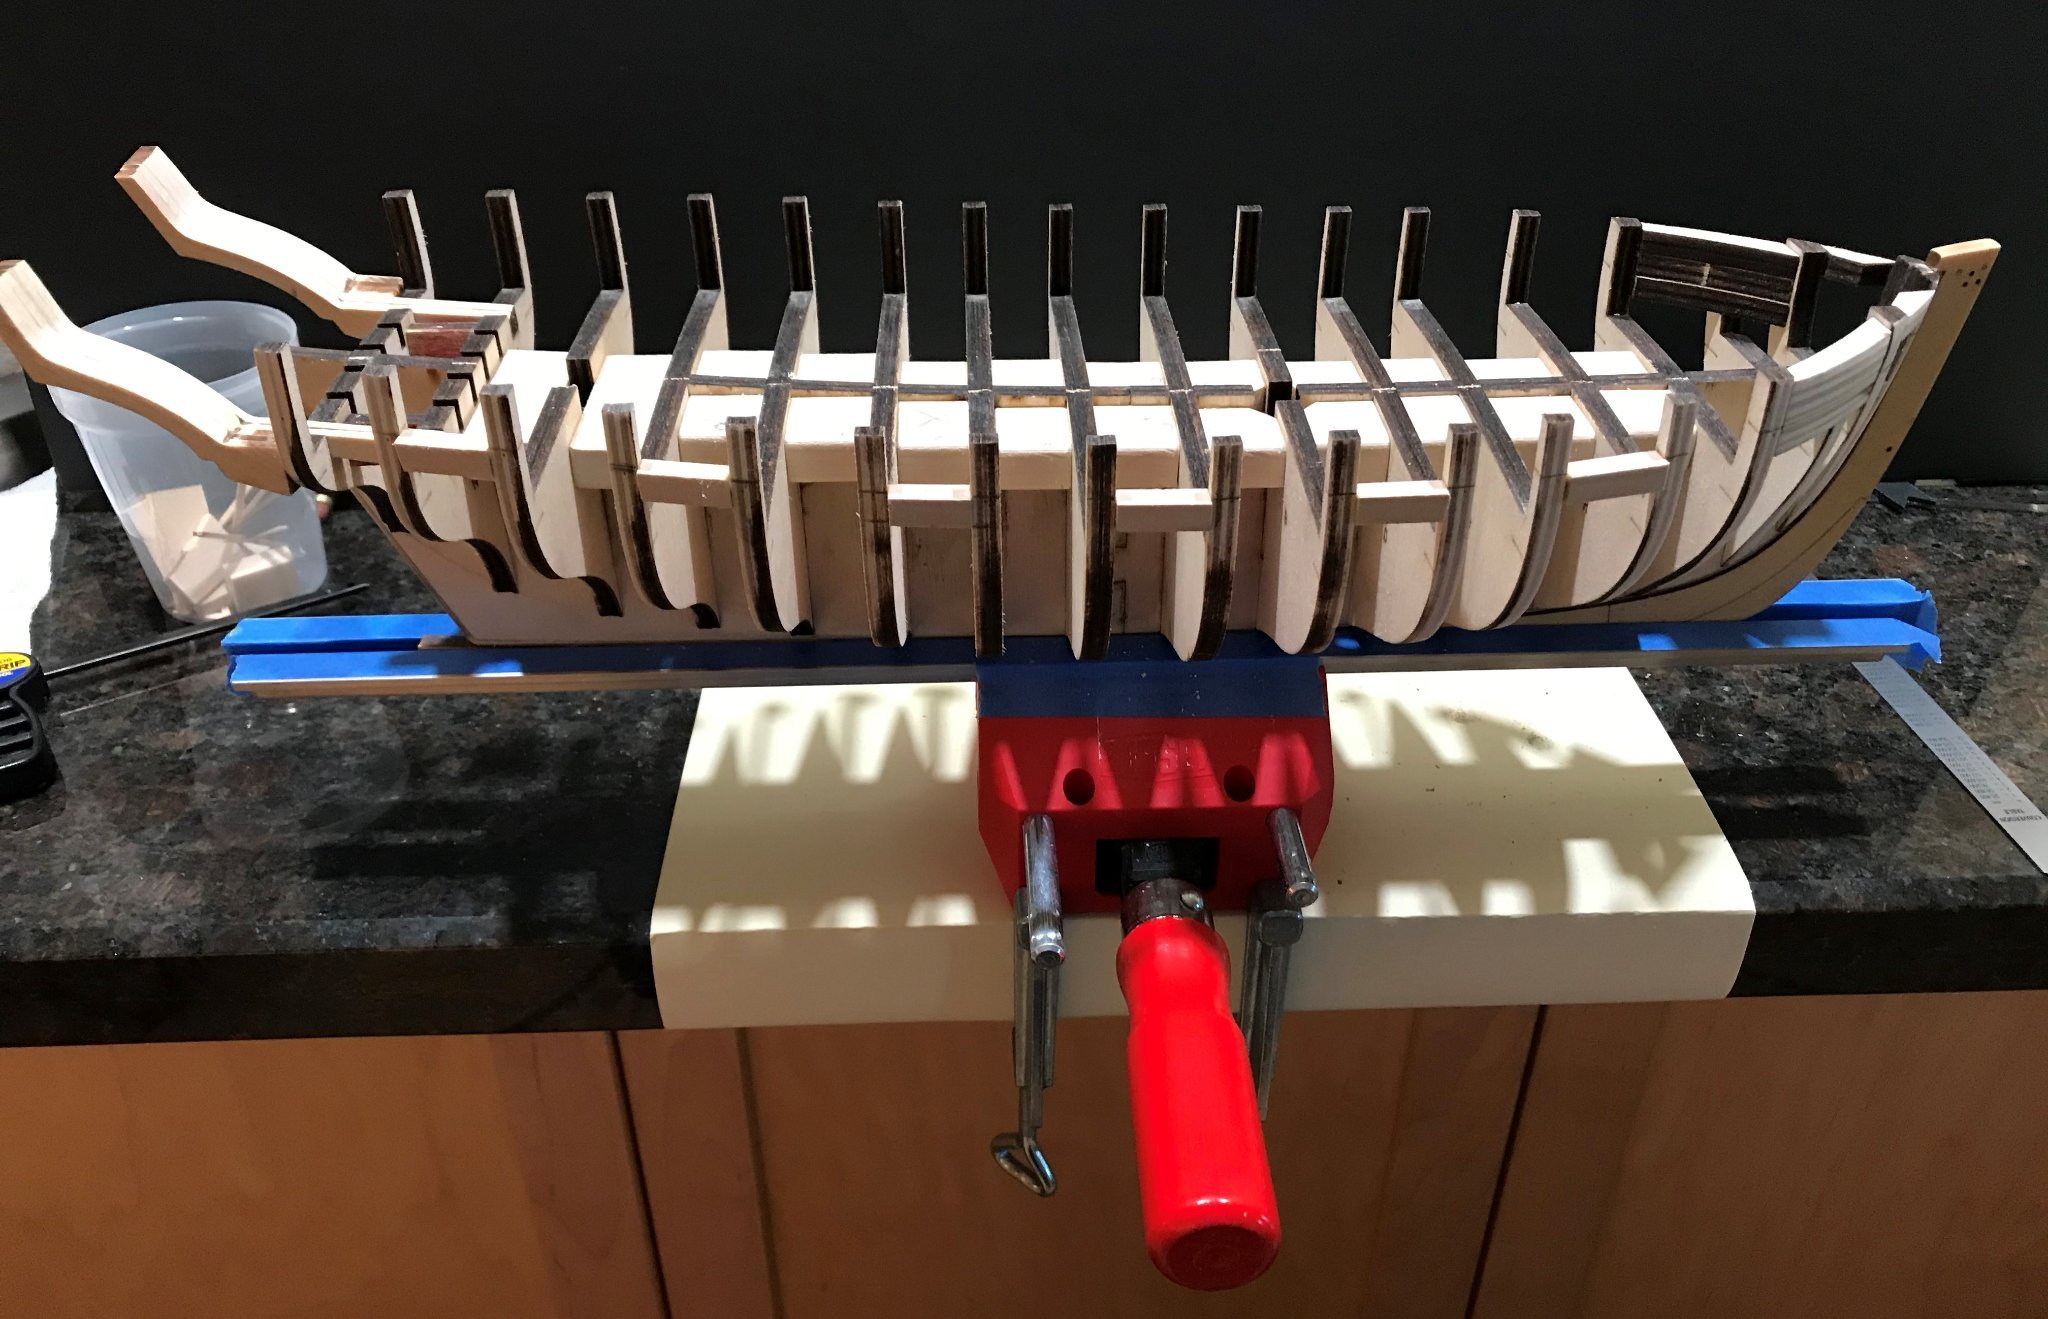
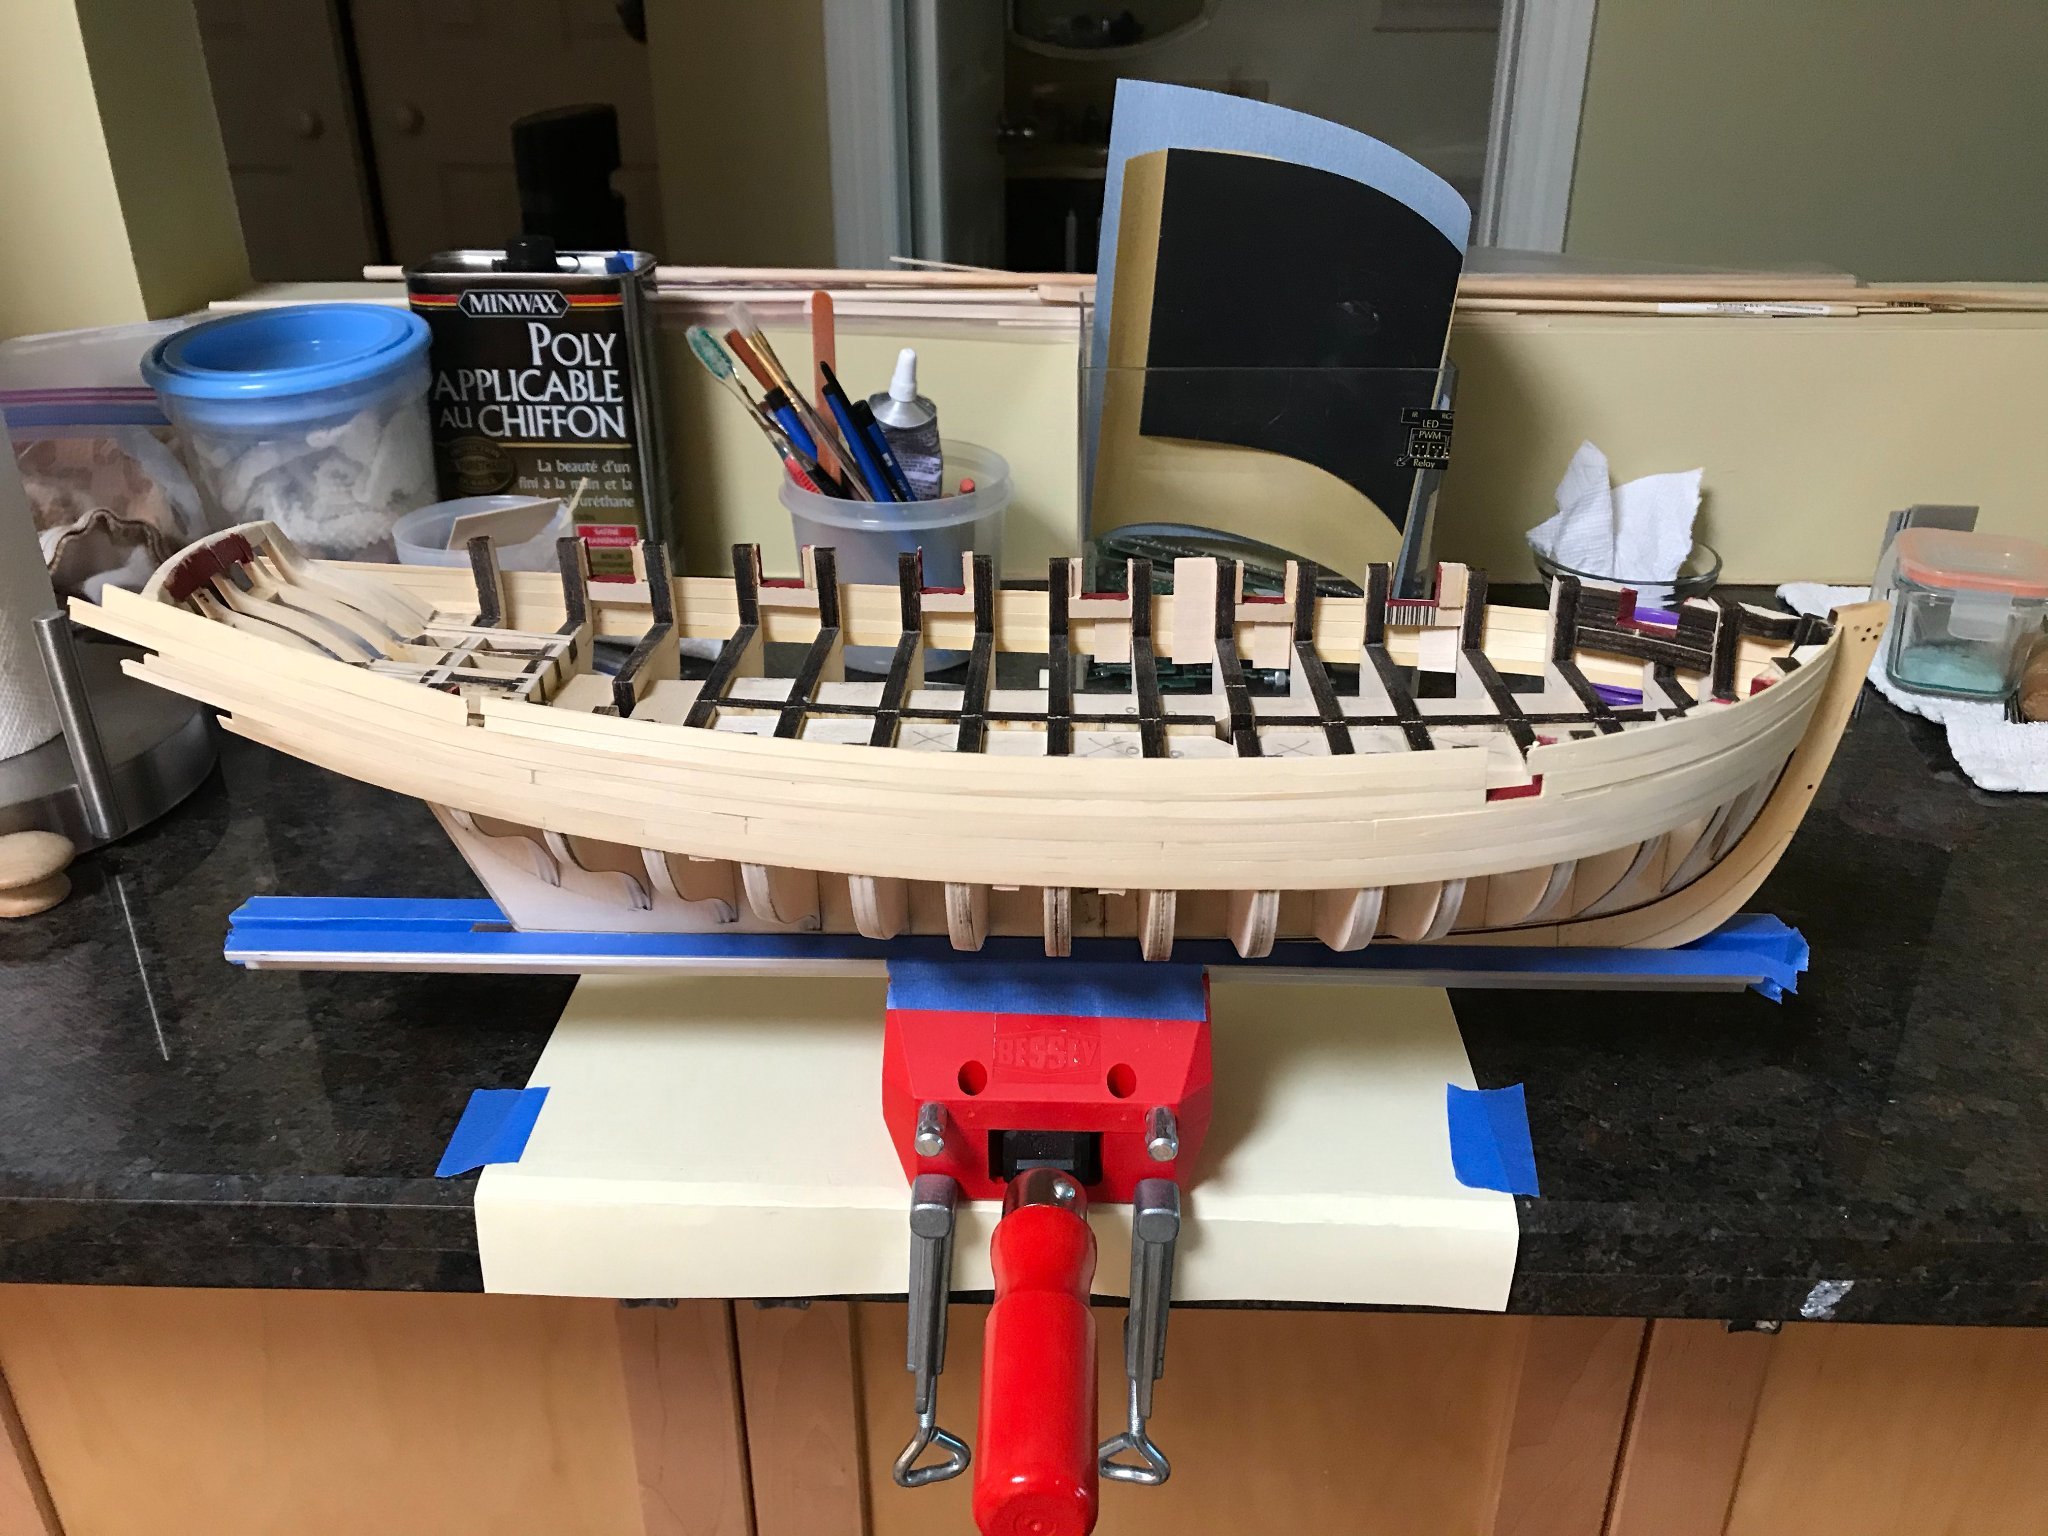
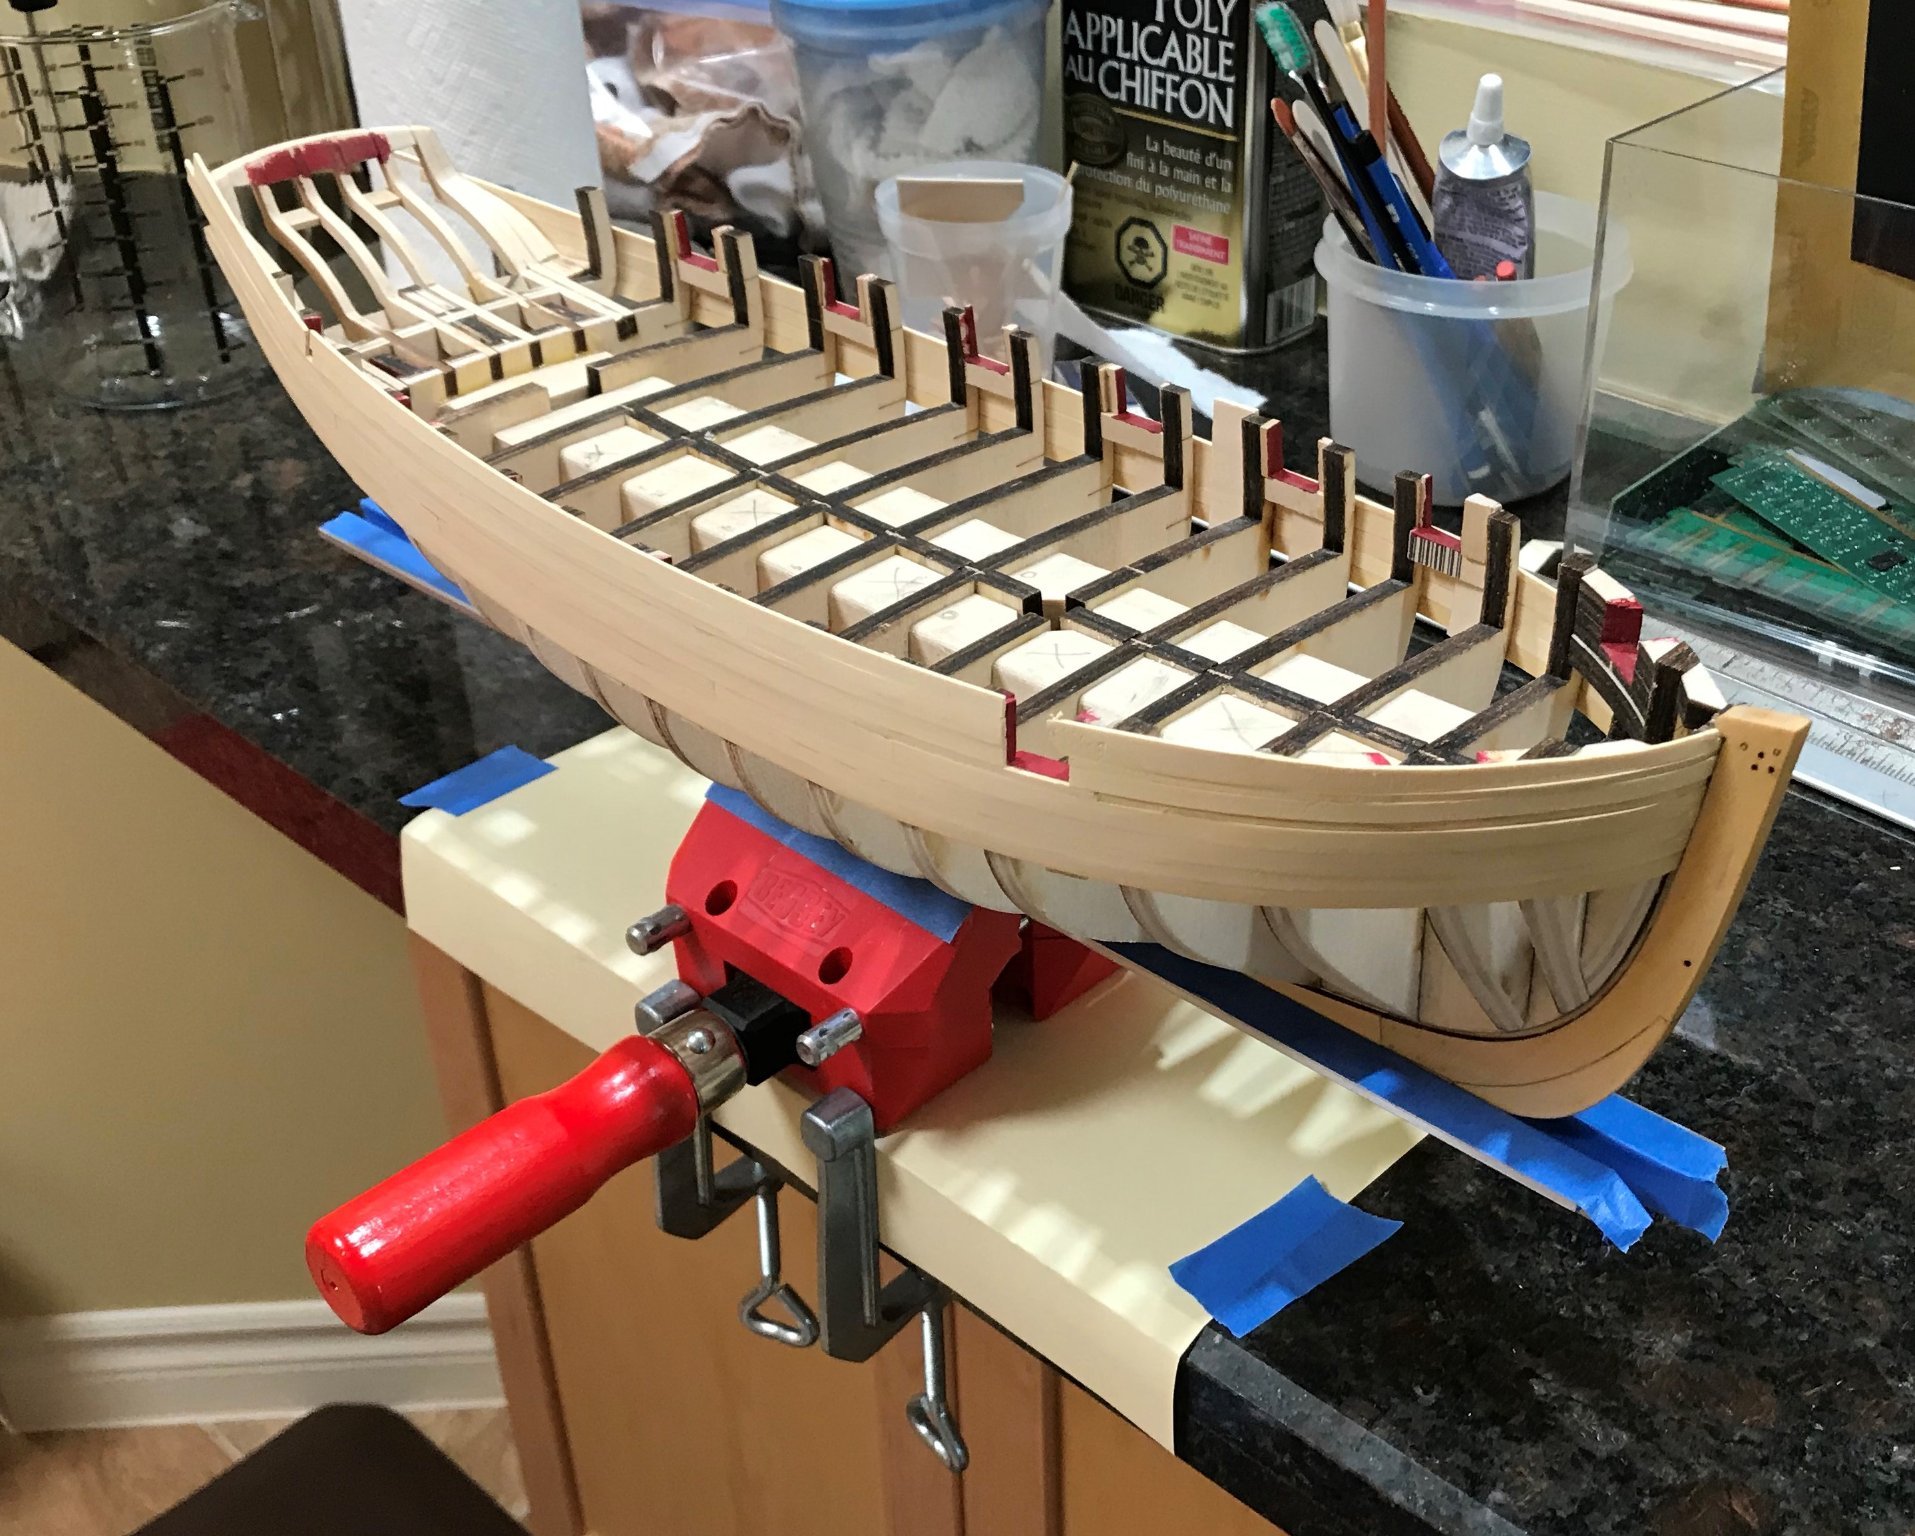
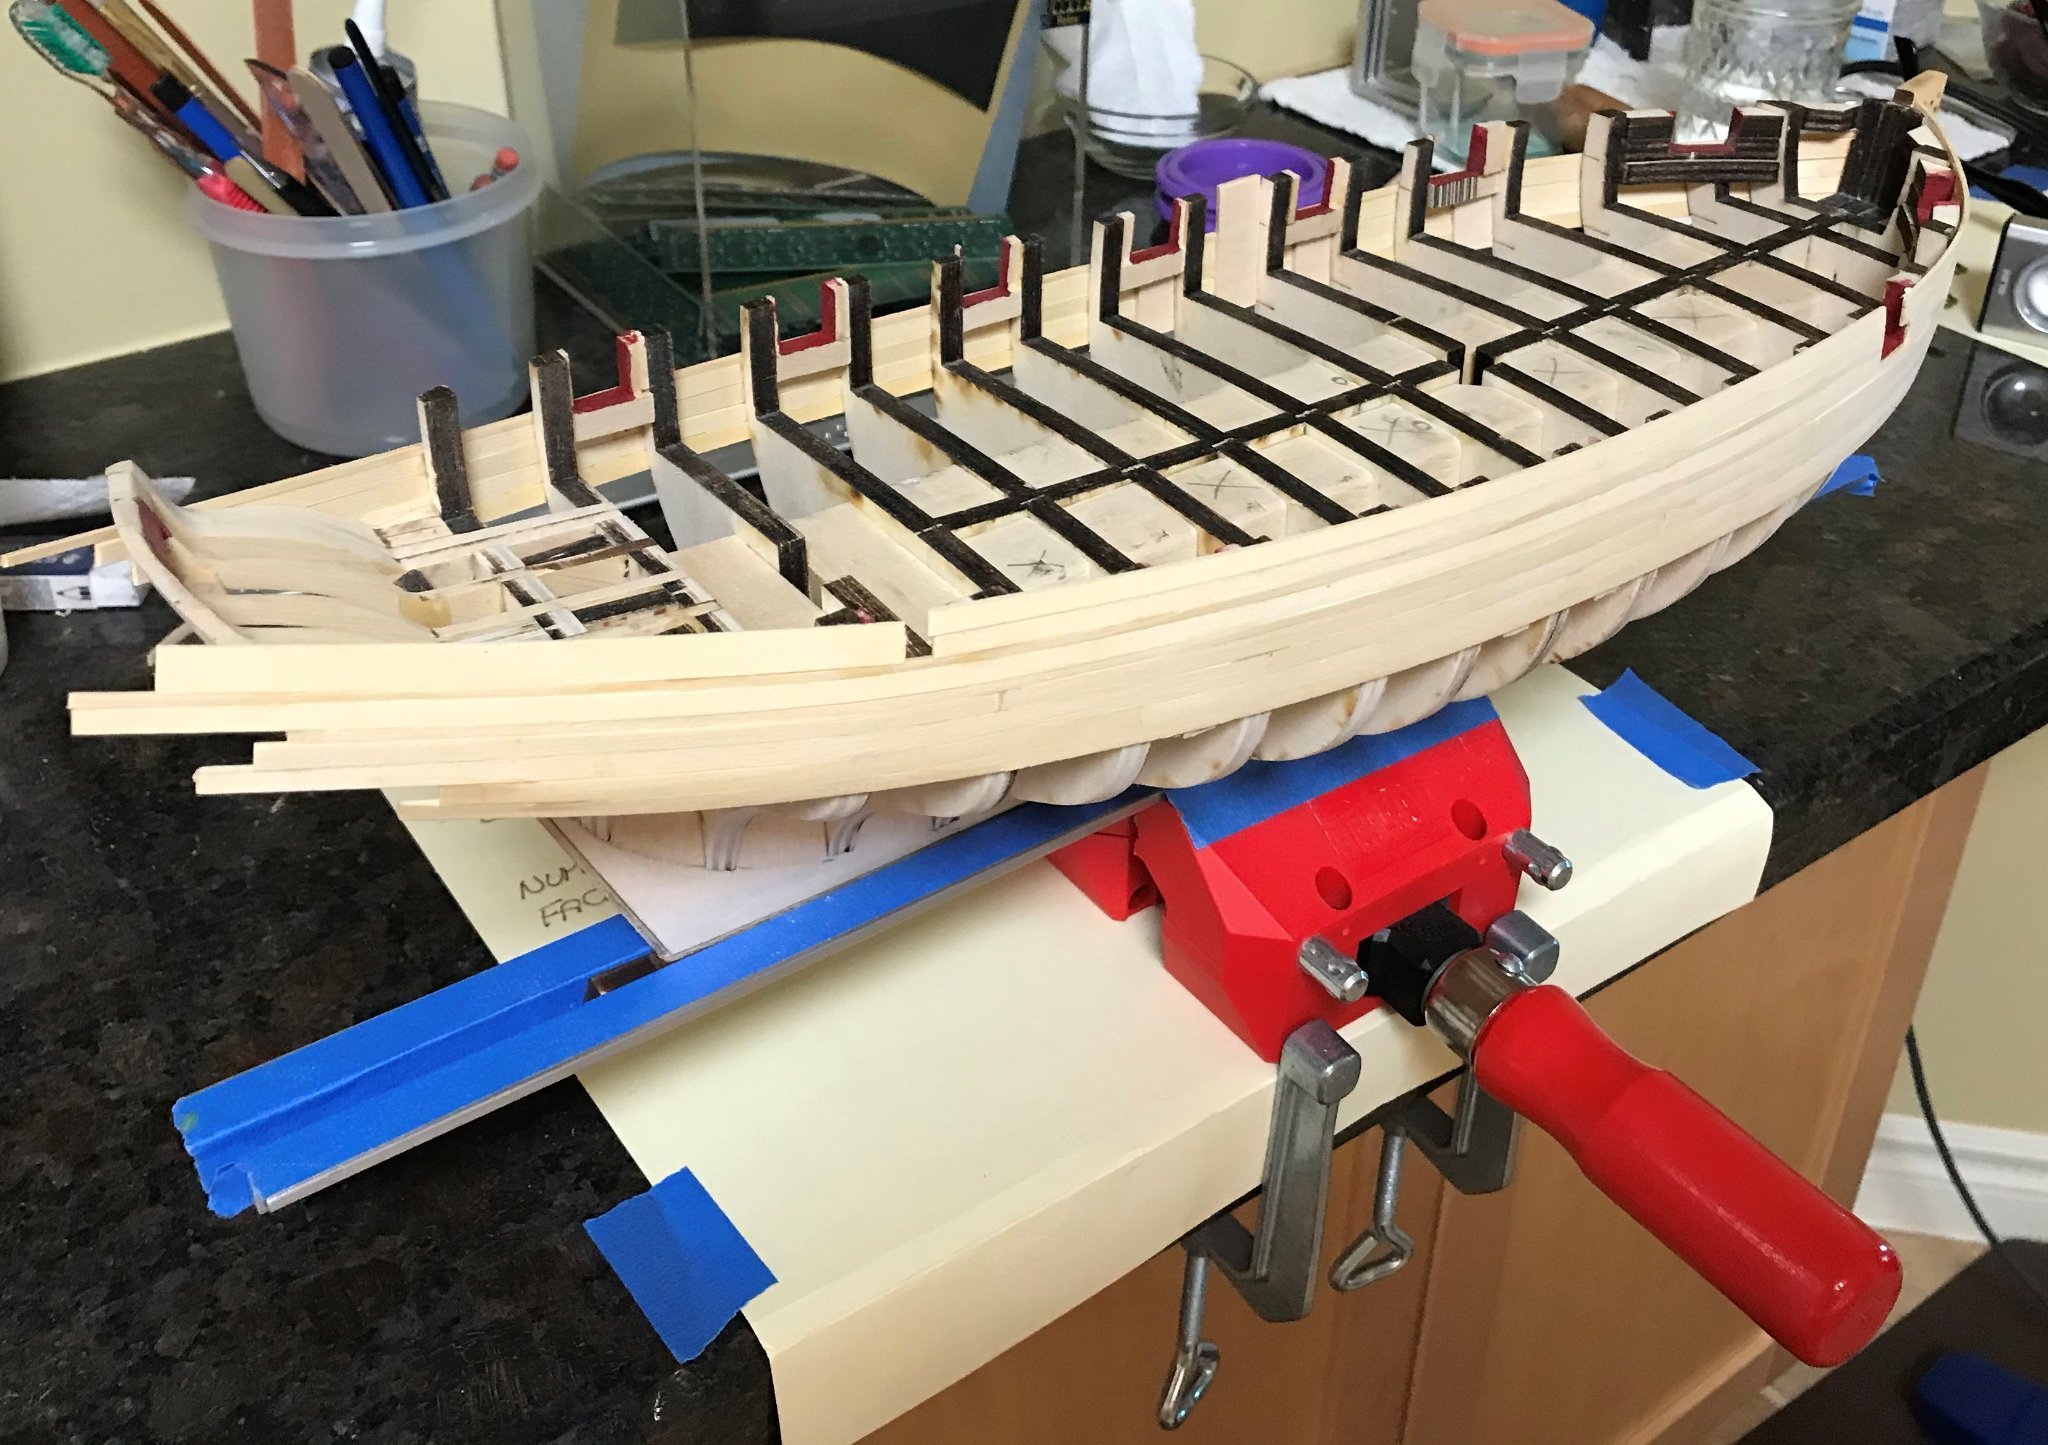
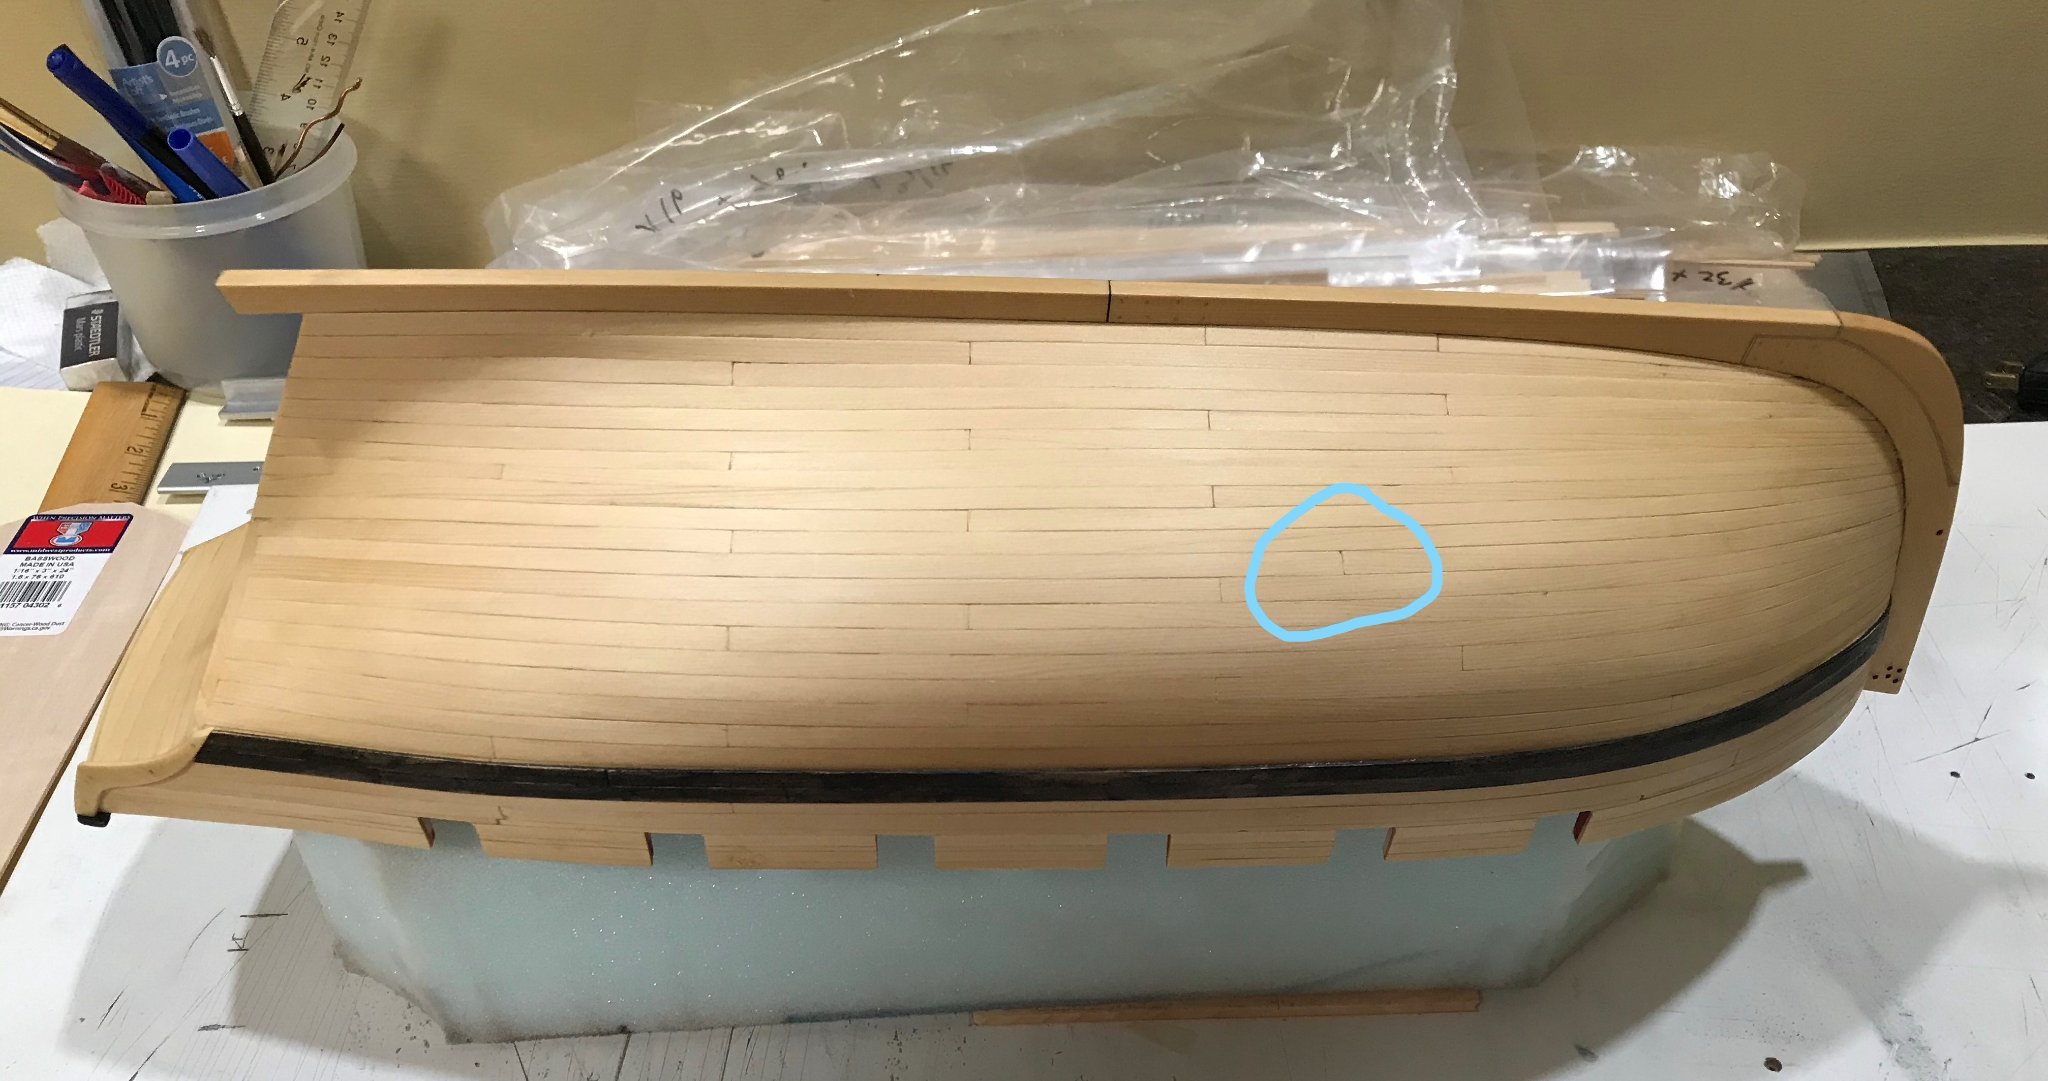
 I'm taking a break from HMS Winchelsea. For those yet to start the Winnie it's a monster requiring real dedication and stamina. And, of course, for the relatively inexperienced model maker you look back at things you've done and think: "If I did that again I think it I'd do it so much better" ( do you, I wonder ever shake off that feeling?). Aan I so want to make the Winnie really well - so a break and a re-set are in order. I've decided to have a go at Chuck's ever so pretty little cutter Cheerful. I have the advantage coming late to the Cheerful of so many superb build logs to follow. This is where I am at the moment. All the best everyone Fred
.thumb.JPG.0b938845c46caa6ebcbe748475641b6e.JPG)
.thumb.JPG.595029c48b2697ec615fbf9f5e95c4a5.JPG)
.thumb.JPG.b3b79138be5a520fb691c9b3074fd028.JPG)
.thumb.JPG.07fbf744fd2d2522f5a8bdb027e4ab31.JPG)
.thumb.JPG.4812e99750d4be057ae7411694d991e7.JPG)
- 111 replies
-
- 17
-

-
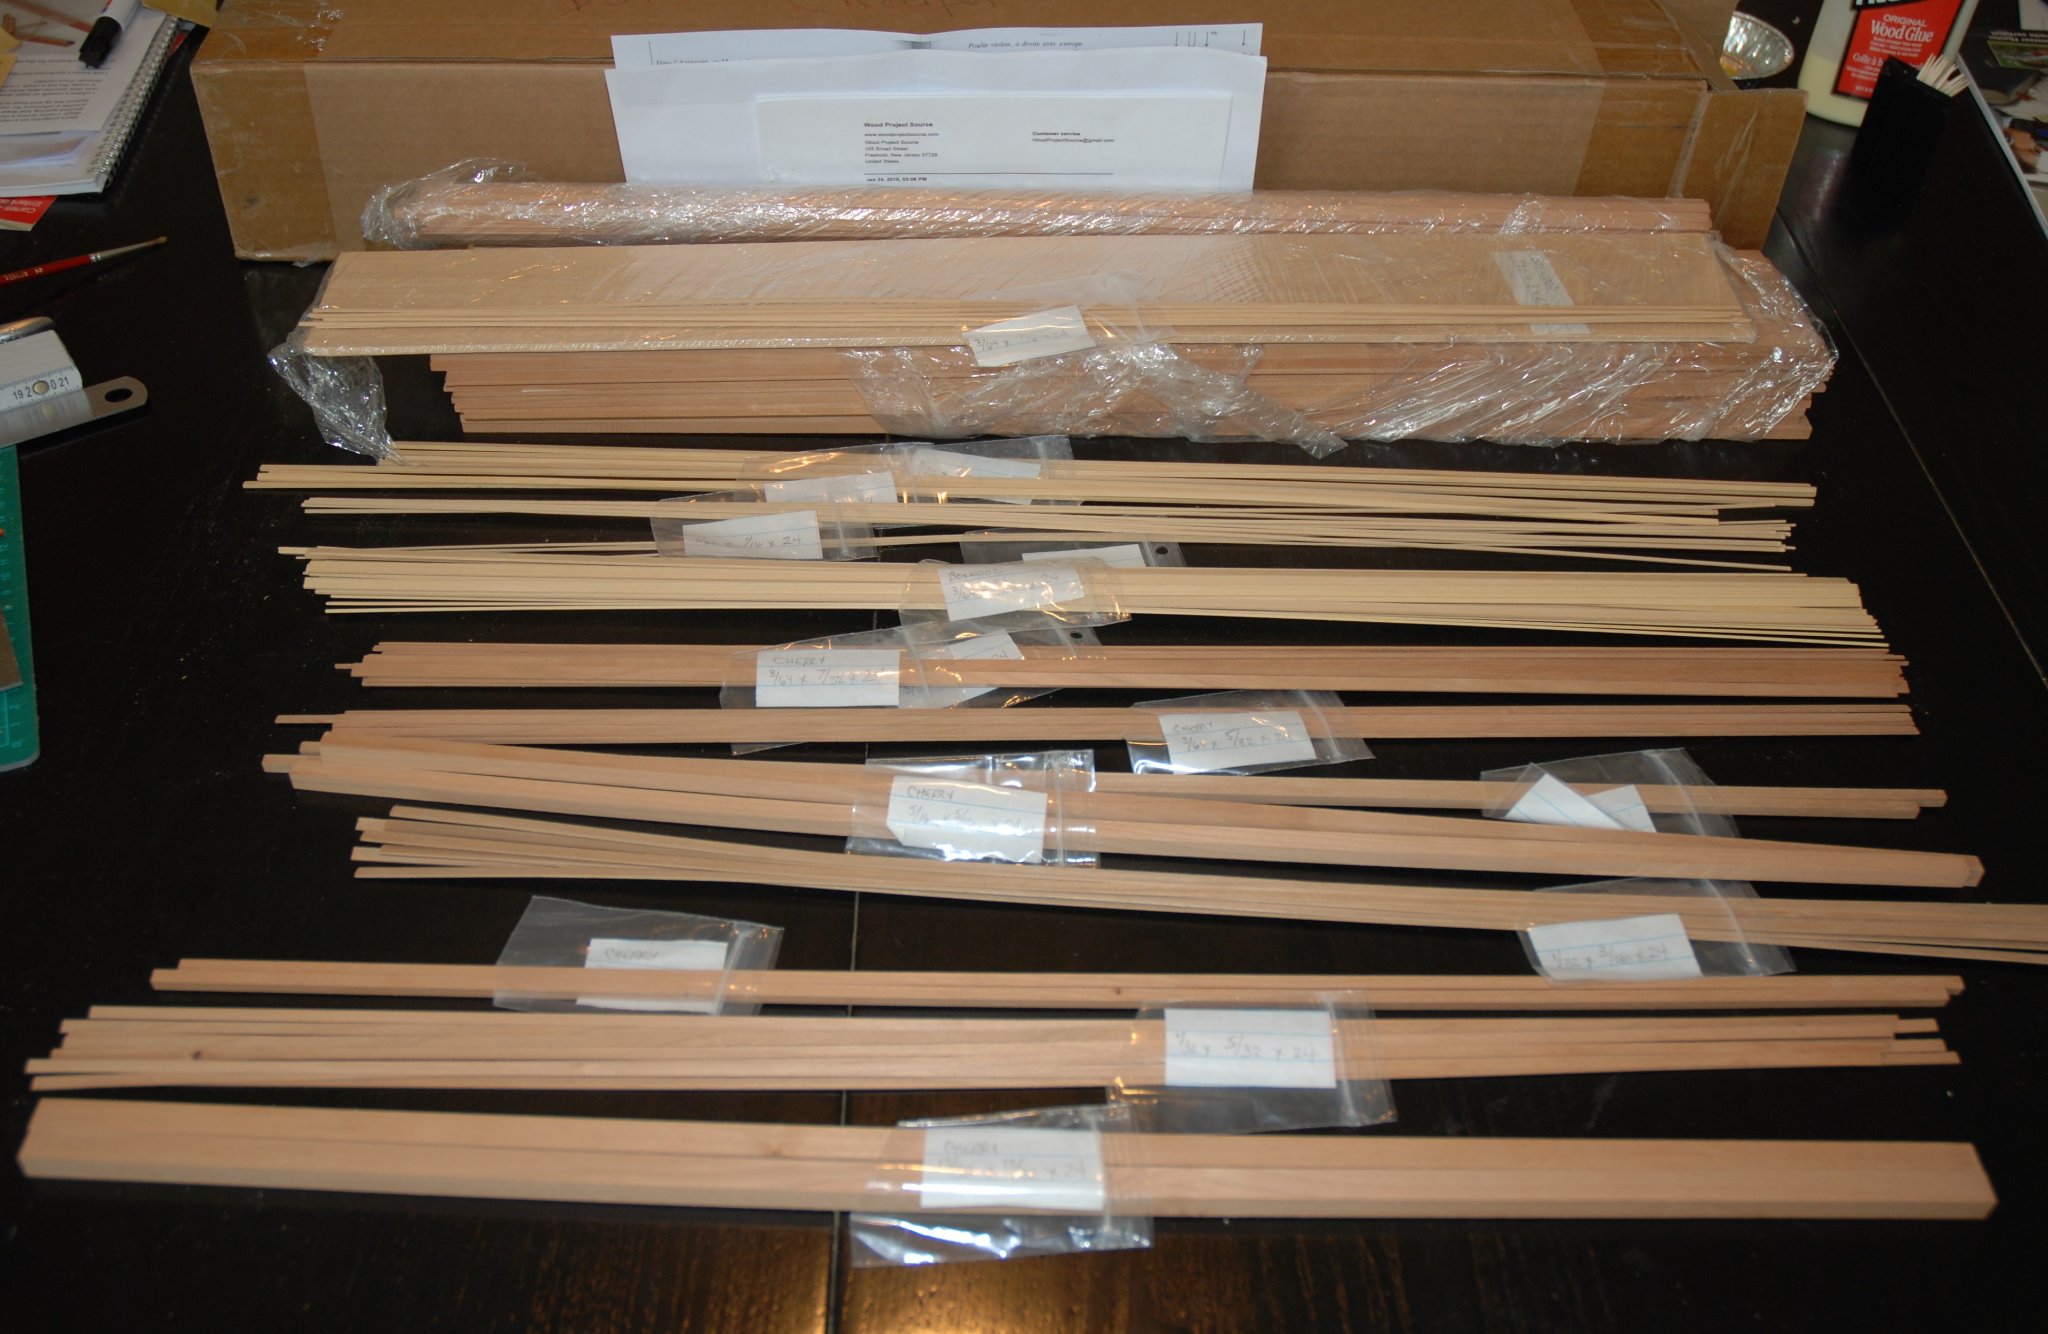
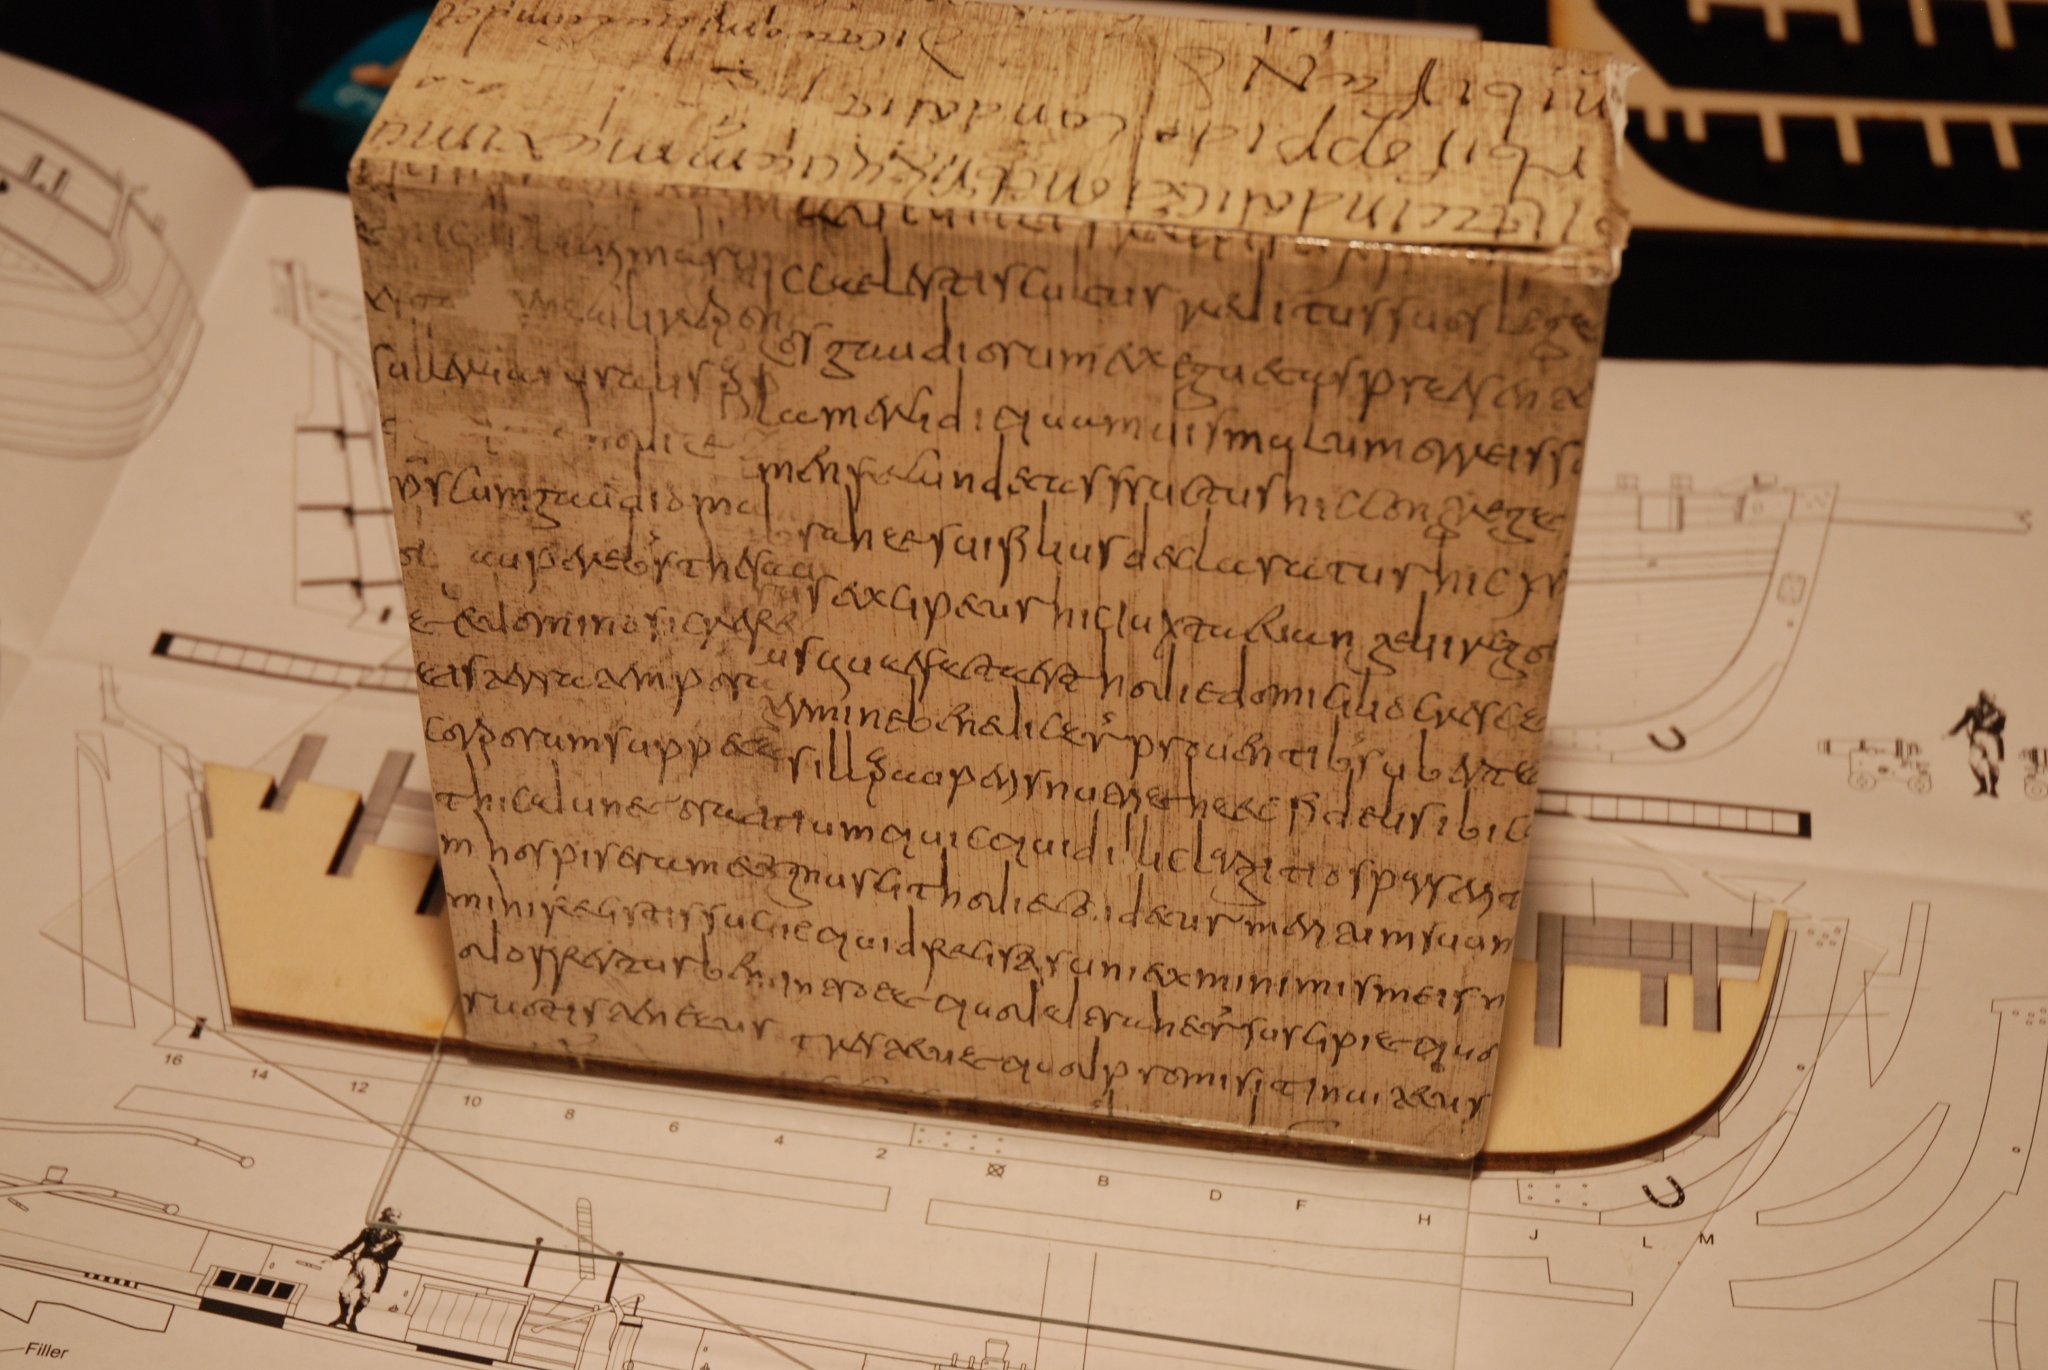
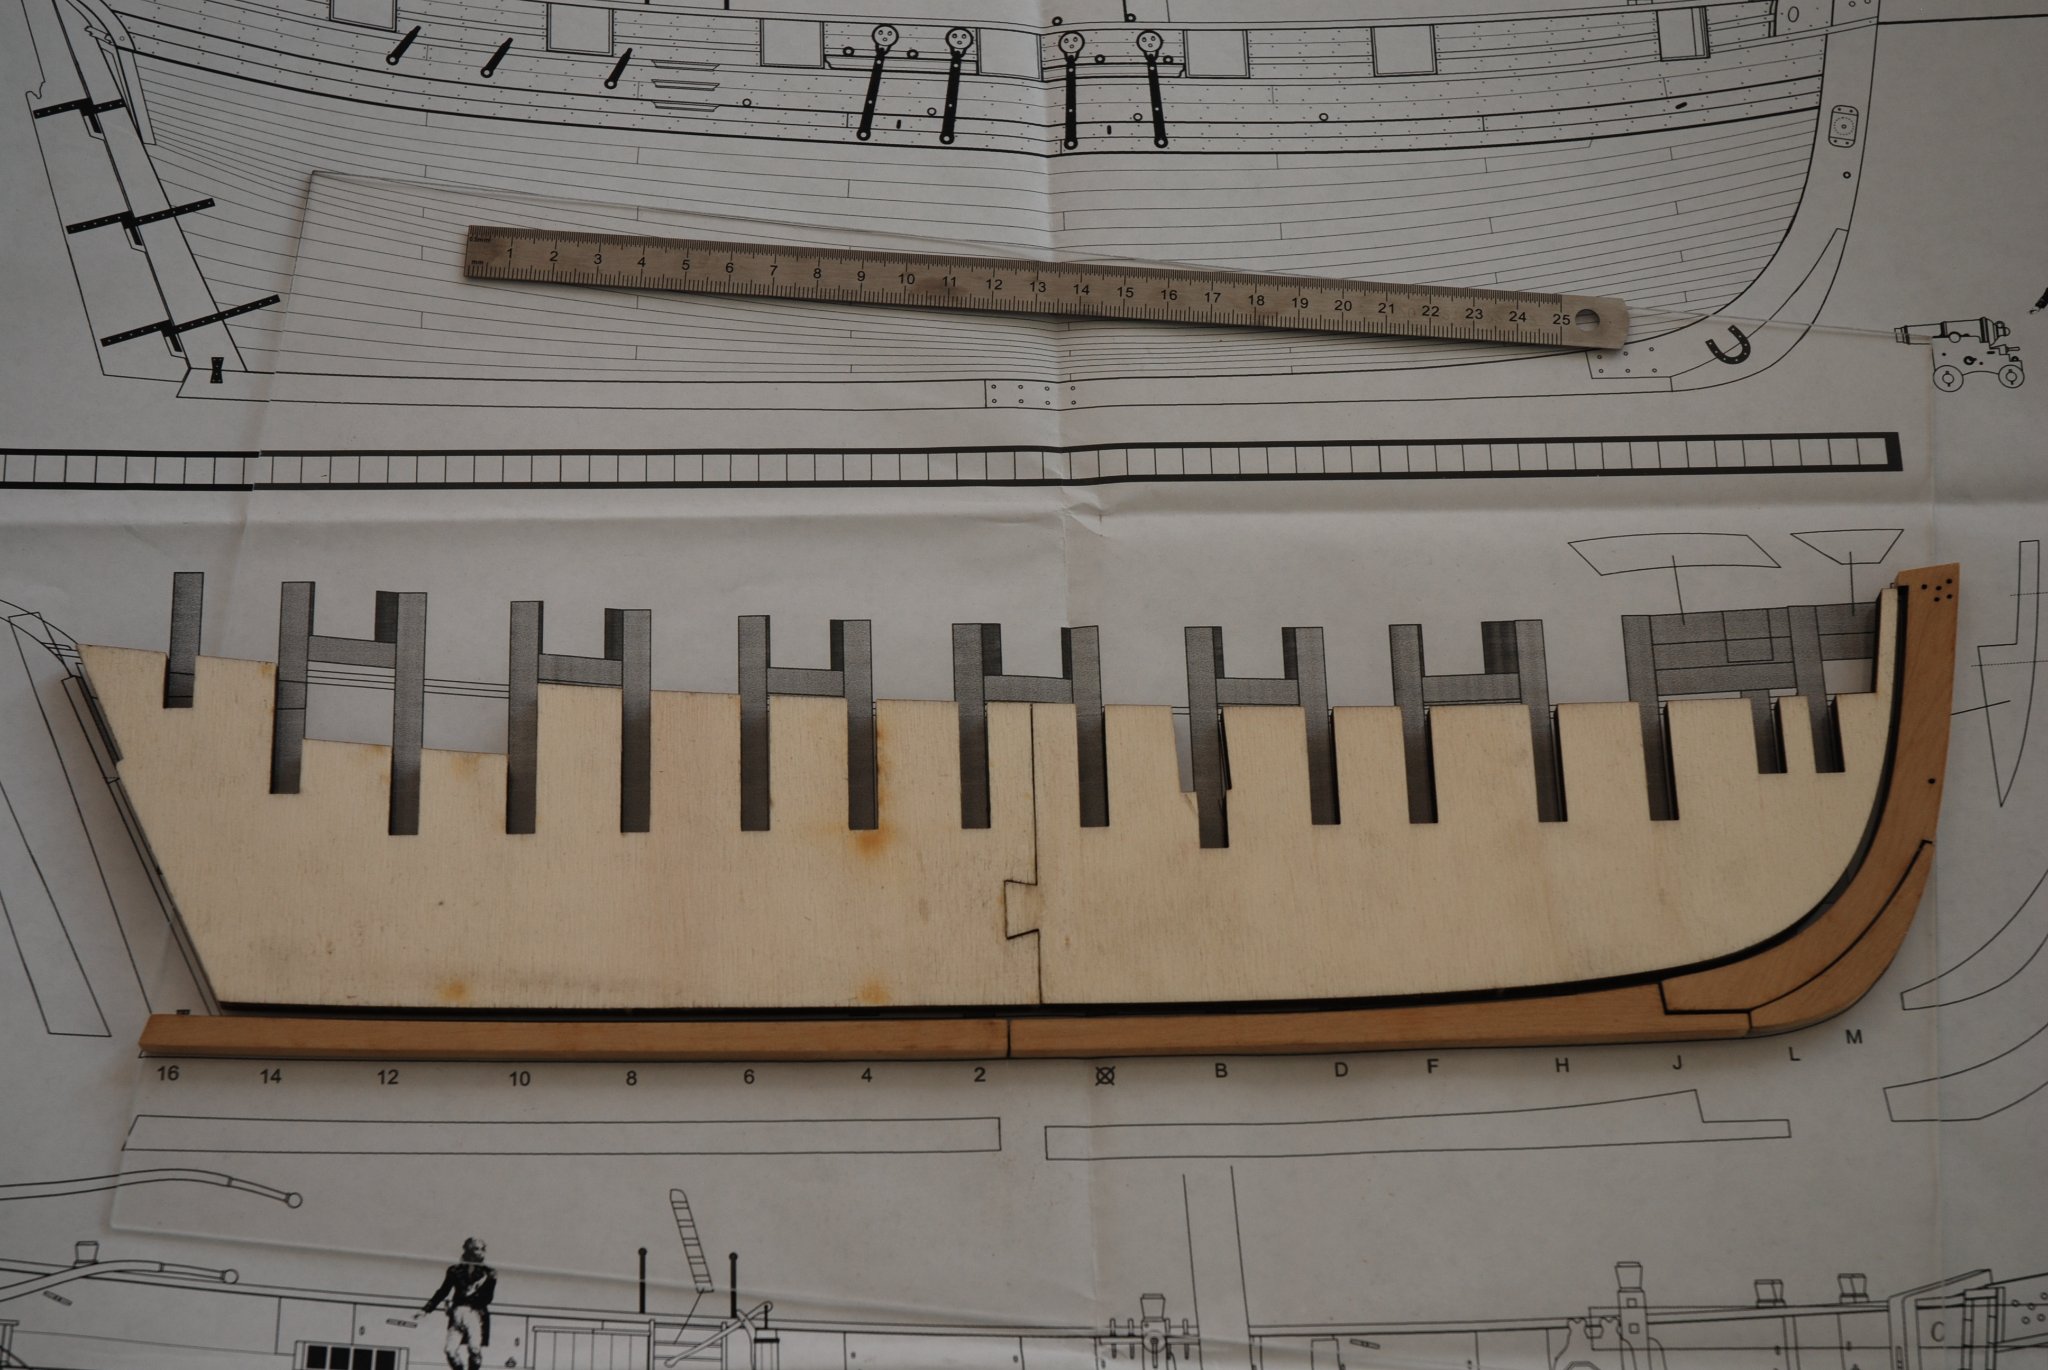
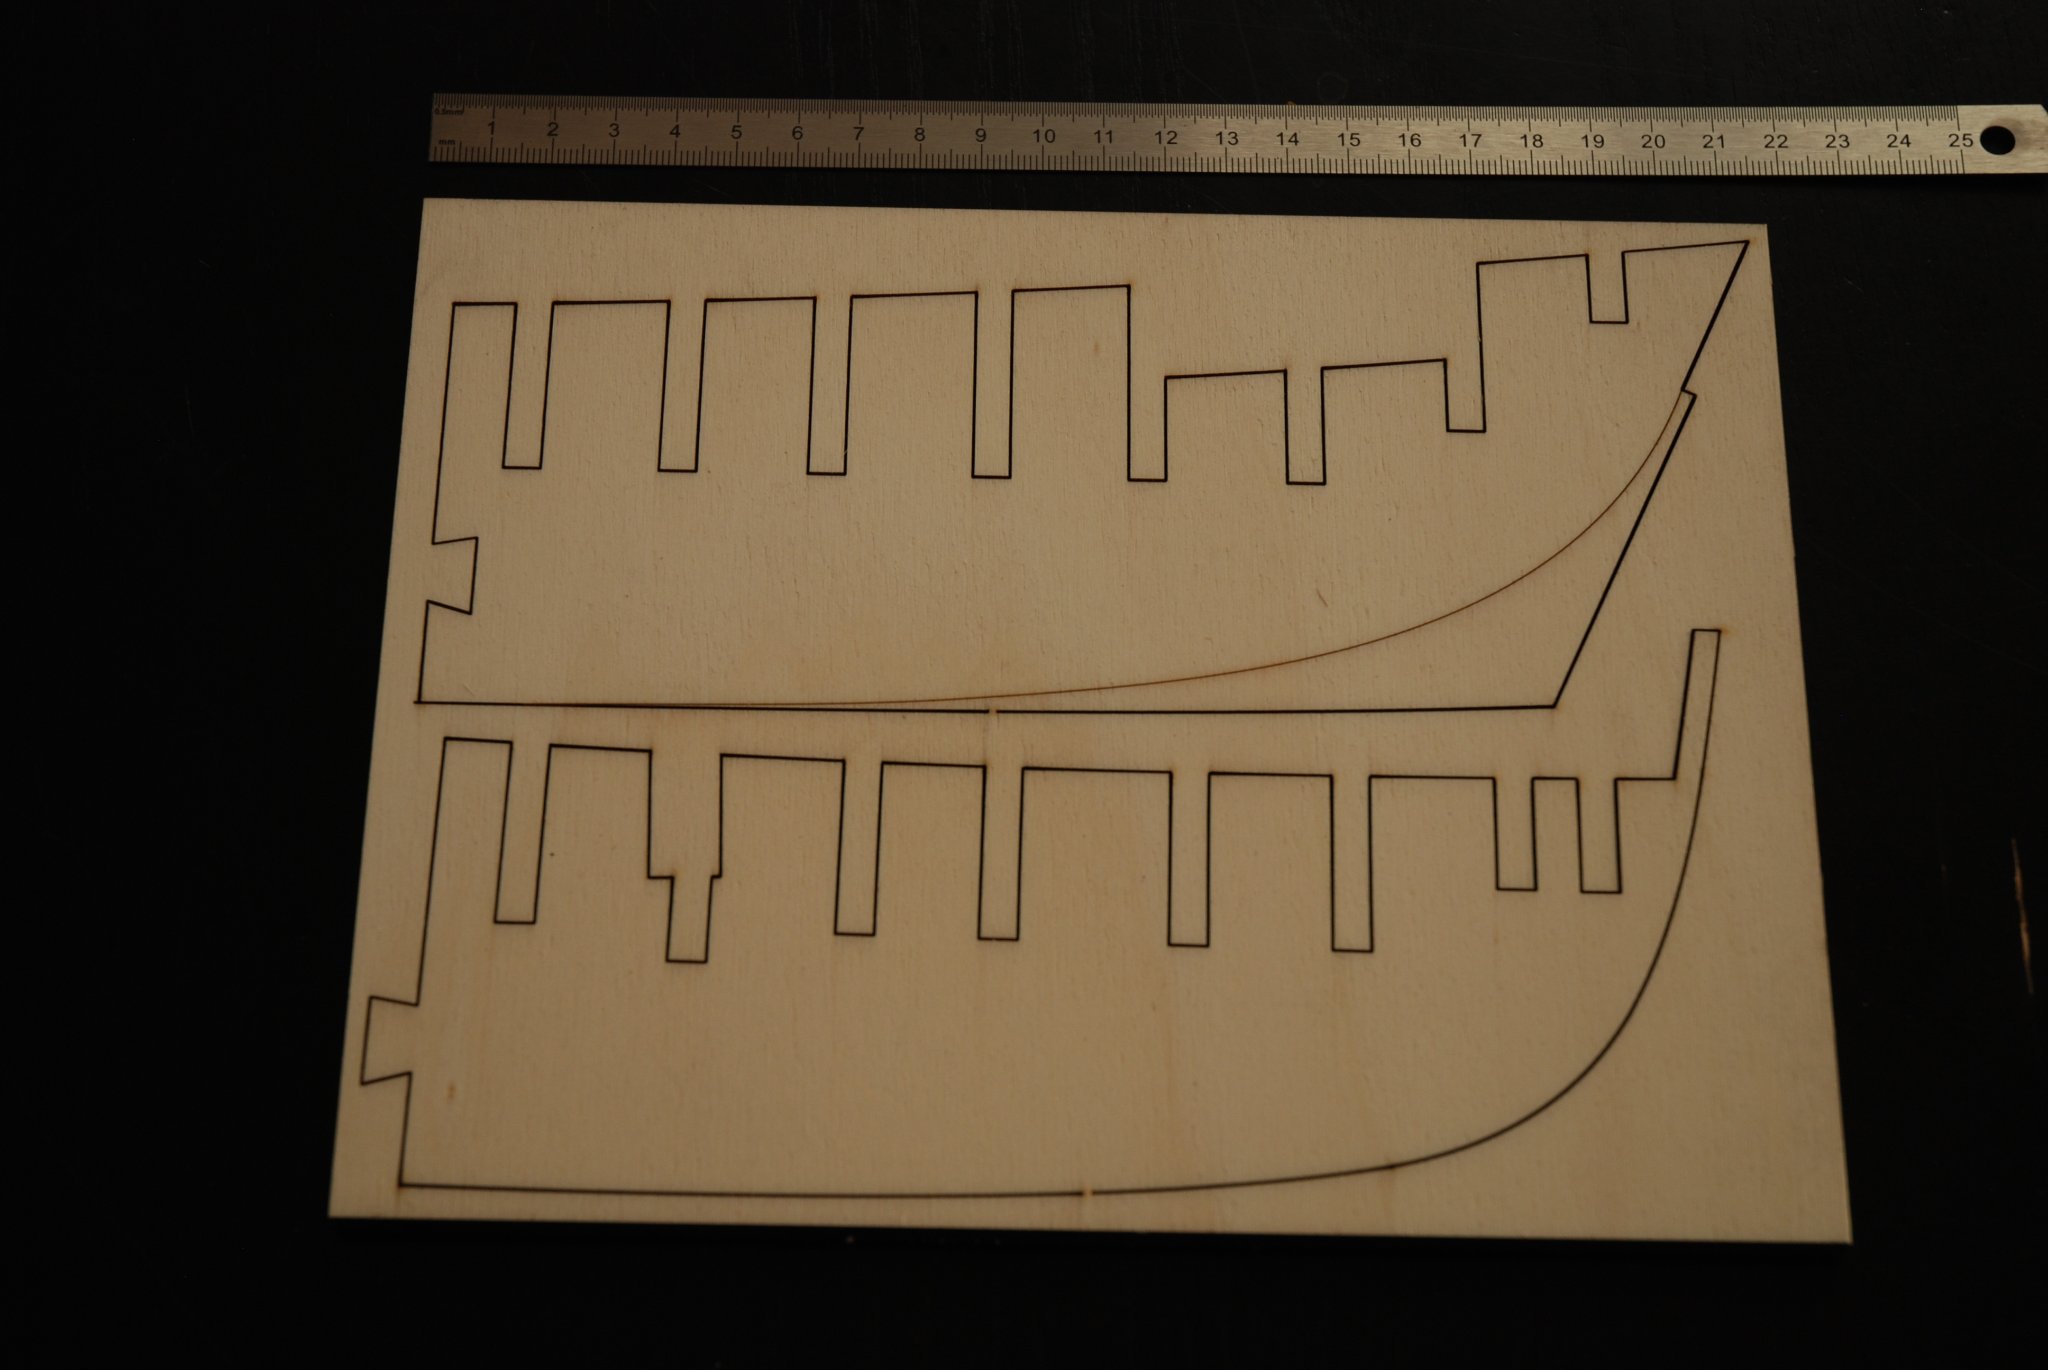
 Having completed the AVS, I can finally start this new and long awaited project. Indeed, it's been two years now that the kit has been waiting for. I really wanted to finish my work on the Virginia in order to gain some experience. I chose this project because it is an example of the best in the world of model shipbuilding. The kit is of the highest quality and the instruction manual is a model of perfection. Moreover, I have many logs on this site and they are all very informative. I will try to show myself up to the height. When I bought the kit from Syren, I immediately ordered the wood necessary for its construction. The wood comes from Wood Project Source and it is really of excellent quality. I opted for two types of wood: the hull will be Cherry wood and the deck will be Castello Boxwood. The quality of laser cutting is truly exceptional. I start by assembling the 2 parts of the keel. The gluing is done between 2 plates of glass in order to have a really flat surface. A first blank assembly of the different elements of the keel only reinforces my opinion on the quality of the kit. Everything fits together perfectly. The stem is assembled. I feel like it's going to be pure pleasure


-
 Hi am starting with chuck's cheerful, the boxwood version I wil use chuck's yellow cedar for this prodjekt and also use chuck spilling metod with lining off hull. am working on the frames and at this time is dry fittet. started also with the boxwood keel parts Svein.erik
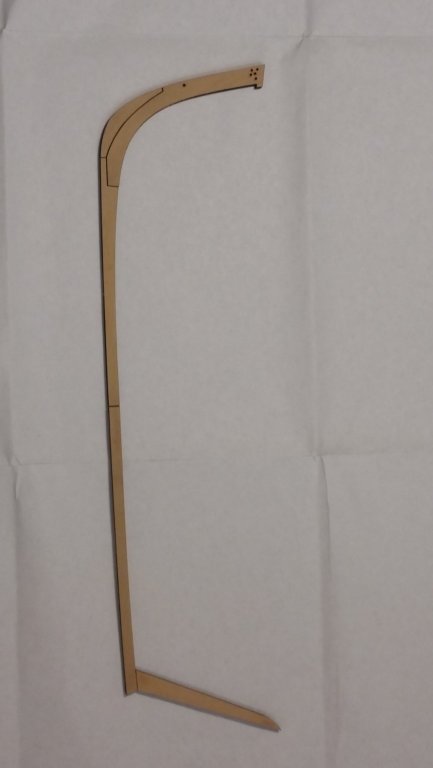


-
 After a false start in which I snapped off the bow extension when removing the bulkhead former from the sheet! Things seem to be going well now. The two sections of the bulkhead former were glued together and the rabbet strip glued in place. The stem pieces and the keel were sanded on their faces to remove laser car but the edges were left unsanded. The treenails were simulated as described by chuck using a 0.5 mm drill and filling with neutral filler. After a coat of wipe-on-polly they were glued to the bulkhead former and fitted well with out the need for fettling. As recommended by Chuck no laser char was remove from the bulkheads and all fitted firmly. Care was taken to retain each one square in all directions. The bow and port filler blocks are added. Next comes, for me, the challenging process of fairing the hull correctly I think I have a way to go yet but trial battens are beginning to look close. I am taking a rest now. I think patience is the key here I am a little concerned about taking too much of the stern as others report it getting too narrow here. John


- 160 replies
-
- 12
-
-
- syren ship model
- cheerful
- (and 1 more)
-
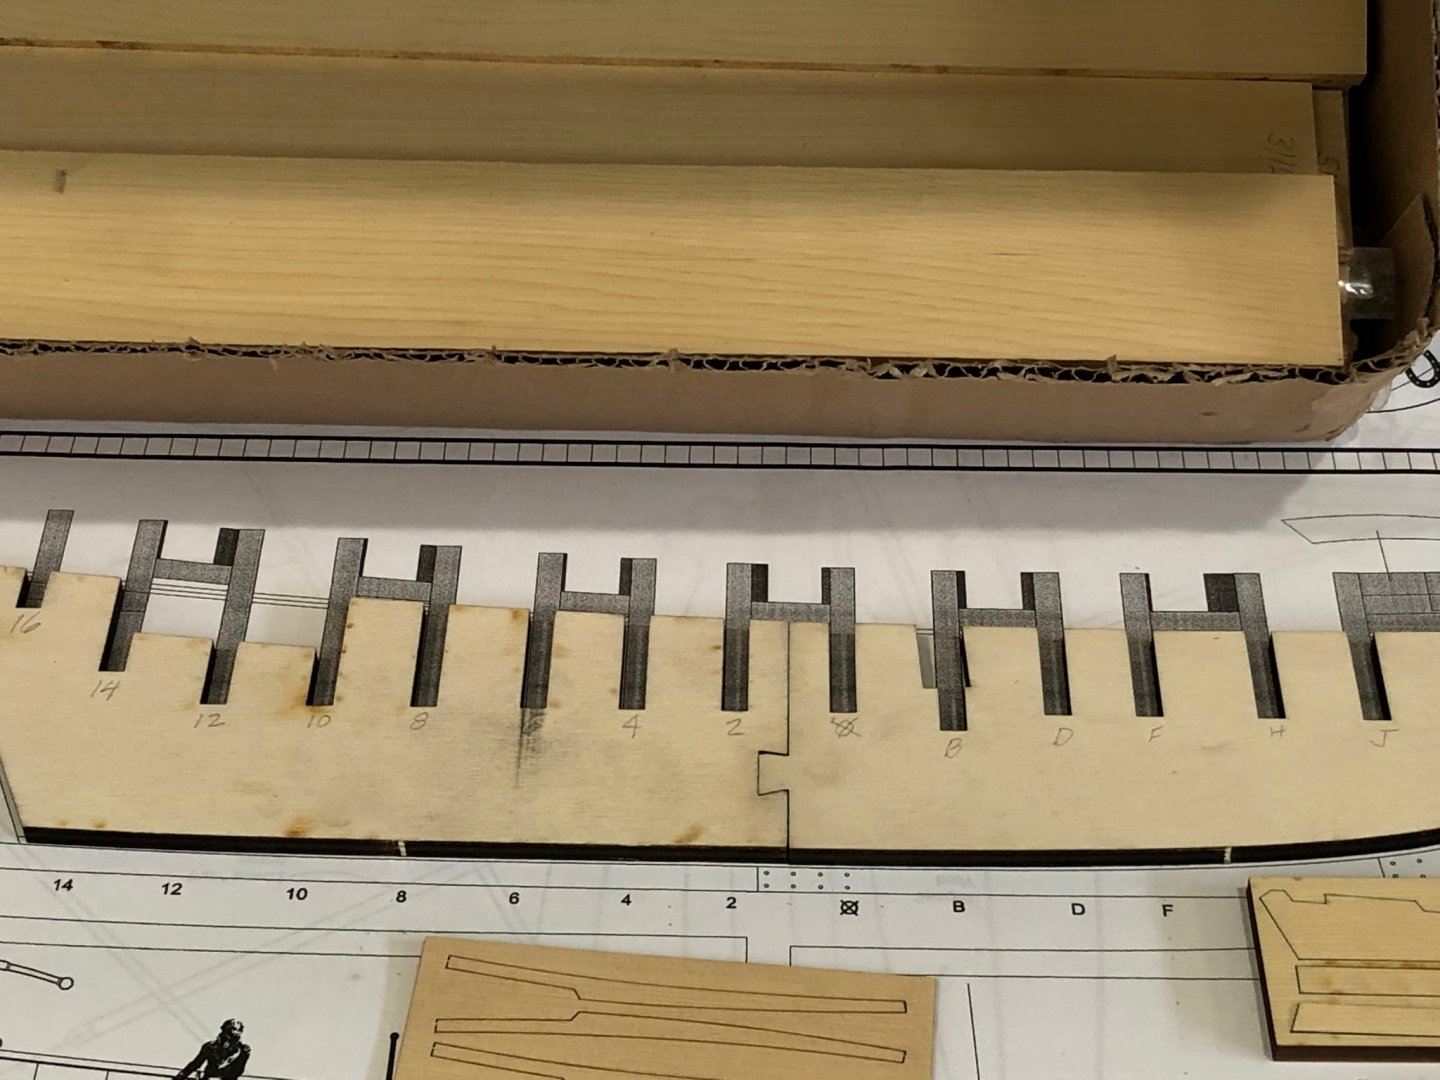
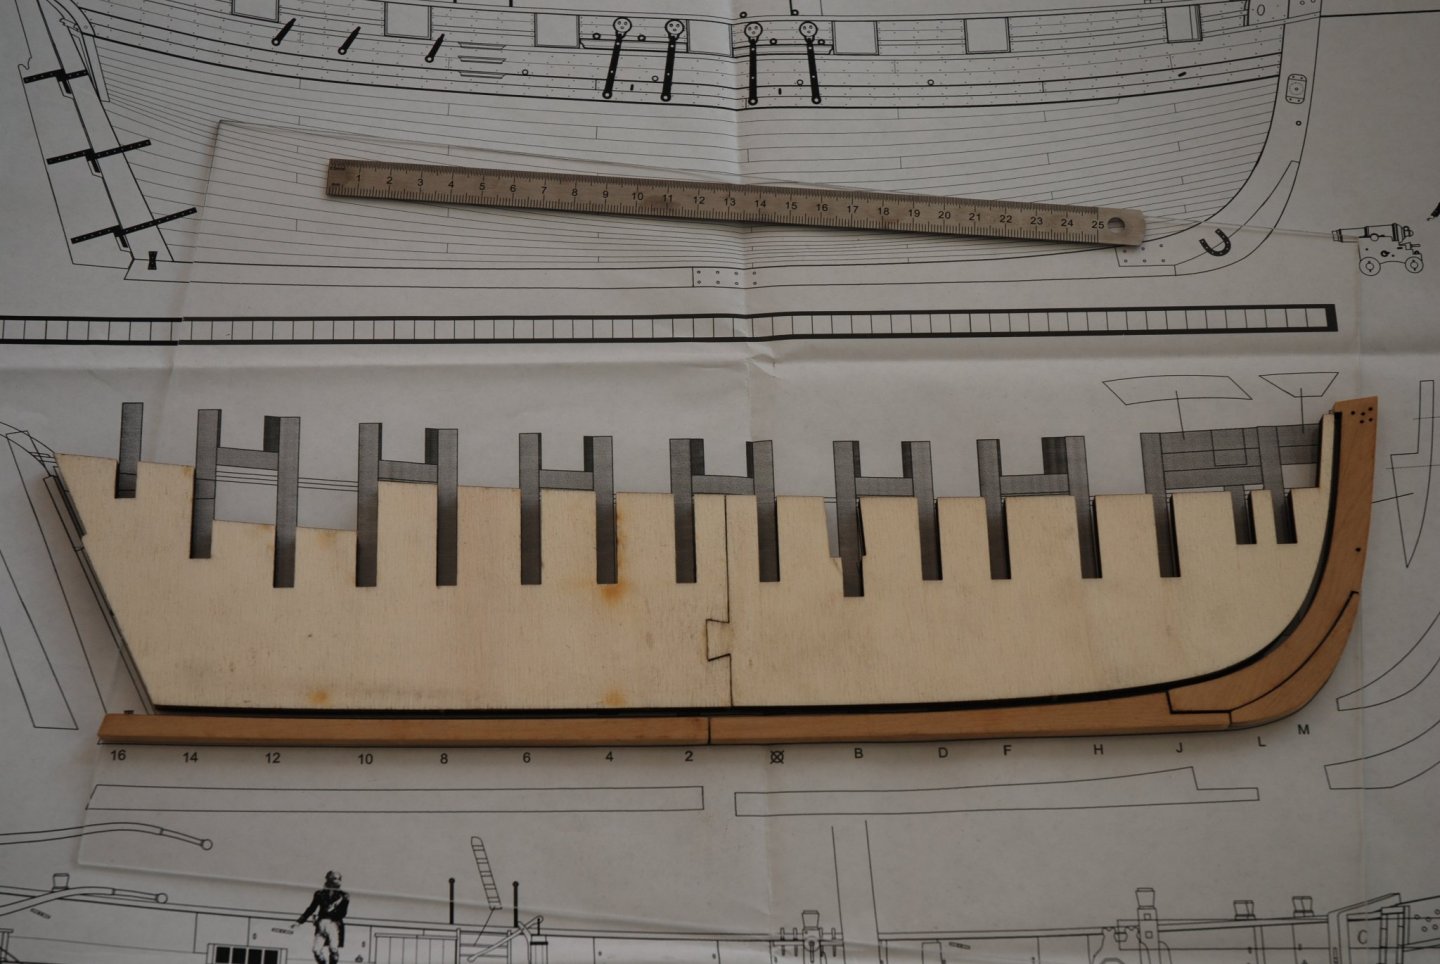
 Hey All! This will mark the beginning of my Cheerful build. Actually, I started it on 3/1. Anyway, being my Syren Medway Longboat is just about finished, I thought I’d get a jump on my next build while there’s still some winter. This will be my second and more complex build. Medway, my first build, has taught me a lot and developed some skills. It was a delightful build that came out pretty good. Yes, there are mistakes, but that’s how we learn. After building the Syren Medway, I’m absolutely sold on the kits/parts and push for more scratch building that Chuck provides. Coming from an aerospace background, Chuck’s designs are very well researched, his kit designs are very well thought out and implemented. Plus his methodology is focused and easy to follow. An added bonus is all of the great and incredible build logs! So I’m really late to this party, but that’s ok as I only found out about MSW 2 years ago after retiring. Some of my goals for building this neat little vessel is to add more skills to my toolbox, learn more about planking, scratch building more of the details. Oh yeah, I’m also milling all of my planking from AYC and boxwood where appropriate. All wood was bought from Modeler’s Sawmill - very good service! The build will probably be stretched out because as warm weather arrives I spend most of my time outdoors. Thanks for stopping by and we’ll see you on deck! Here’s a few pictures of where I’m at. We all love to get the keel built and bulkheads installed to see the basic shape of what we’re going to create, and I’m no exception. So she’s framed up and ready for fairing. I’ve also started to mill some of the planks. I’m starting with billets, then to blanks and to strips. I also like to skip around and take small bites so things don’t become too repetitive. Best Regards …. Rick
-
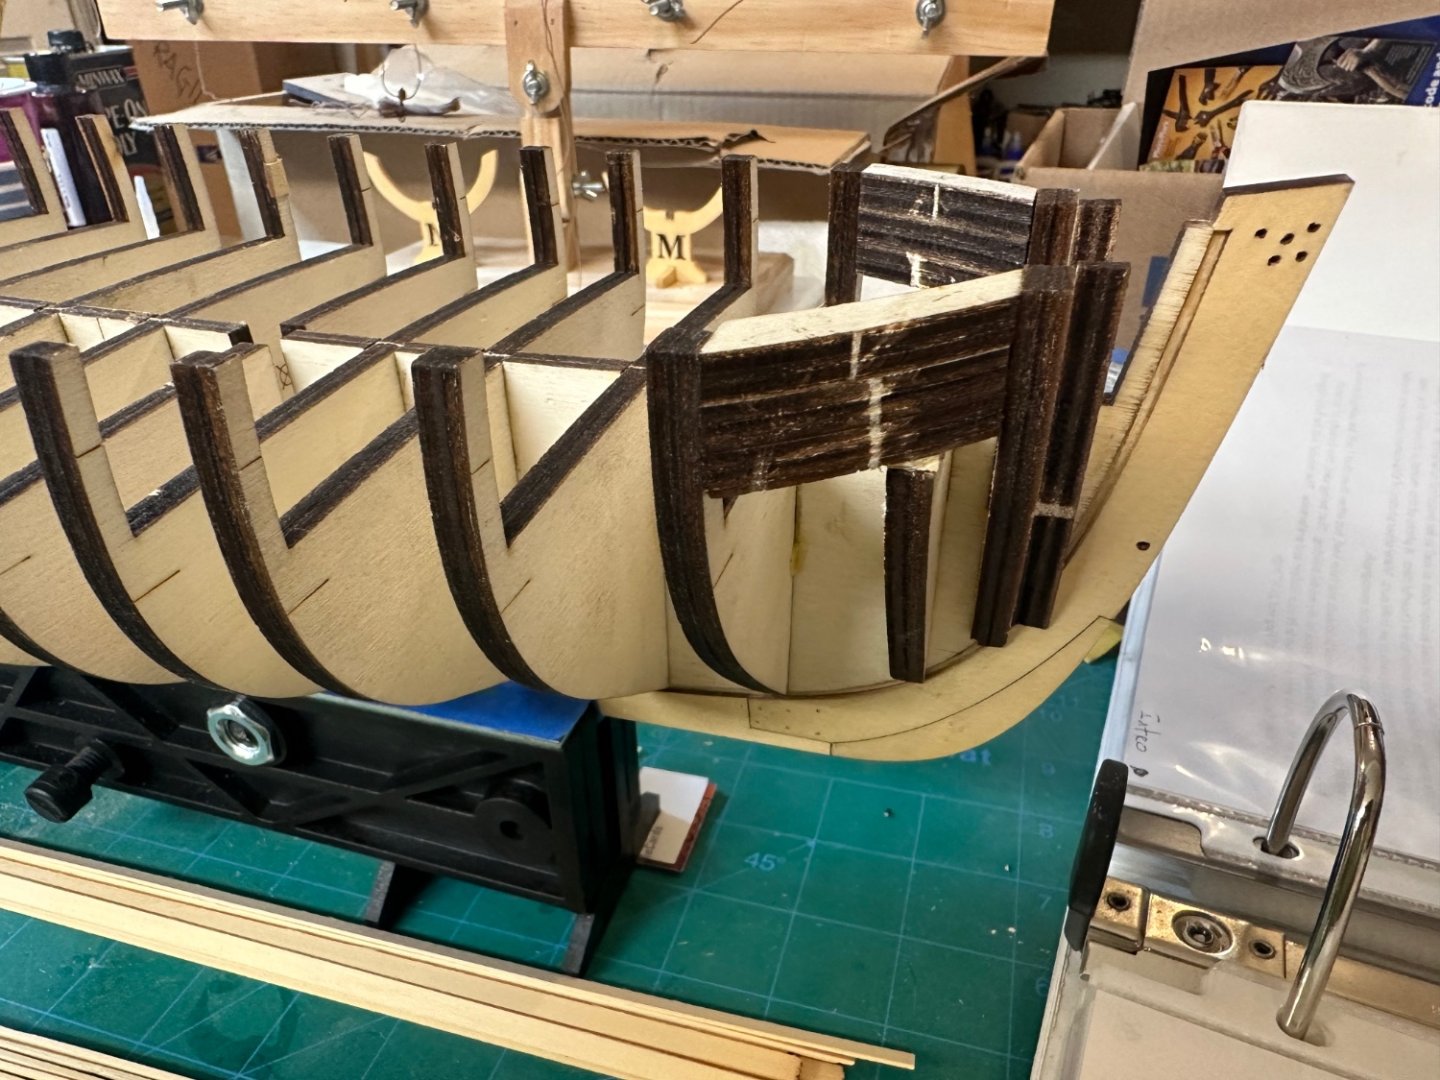
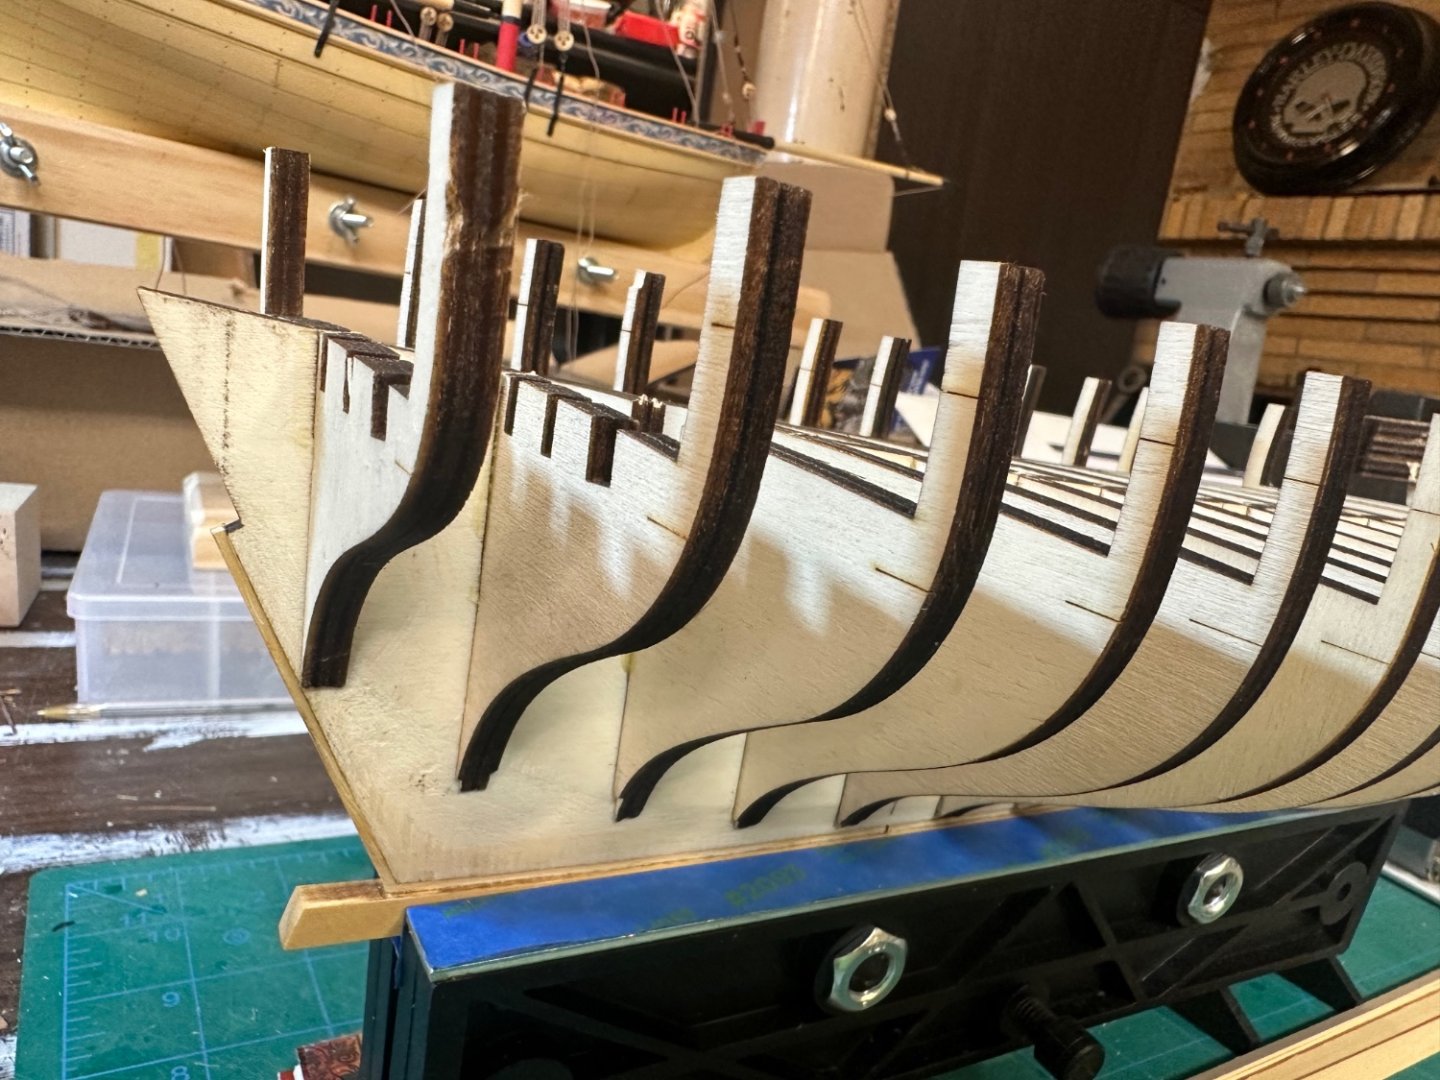
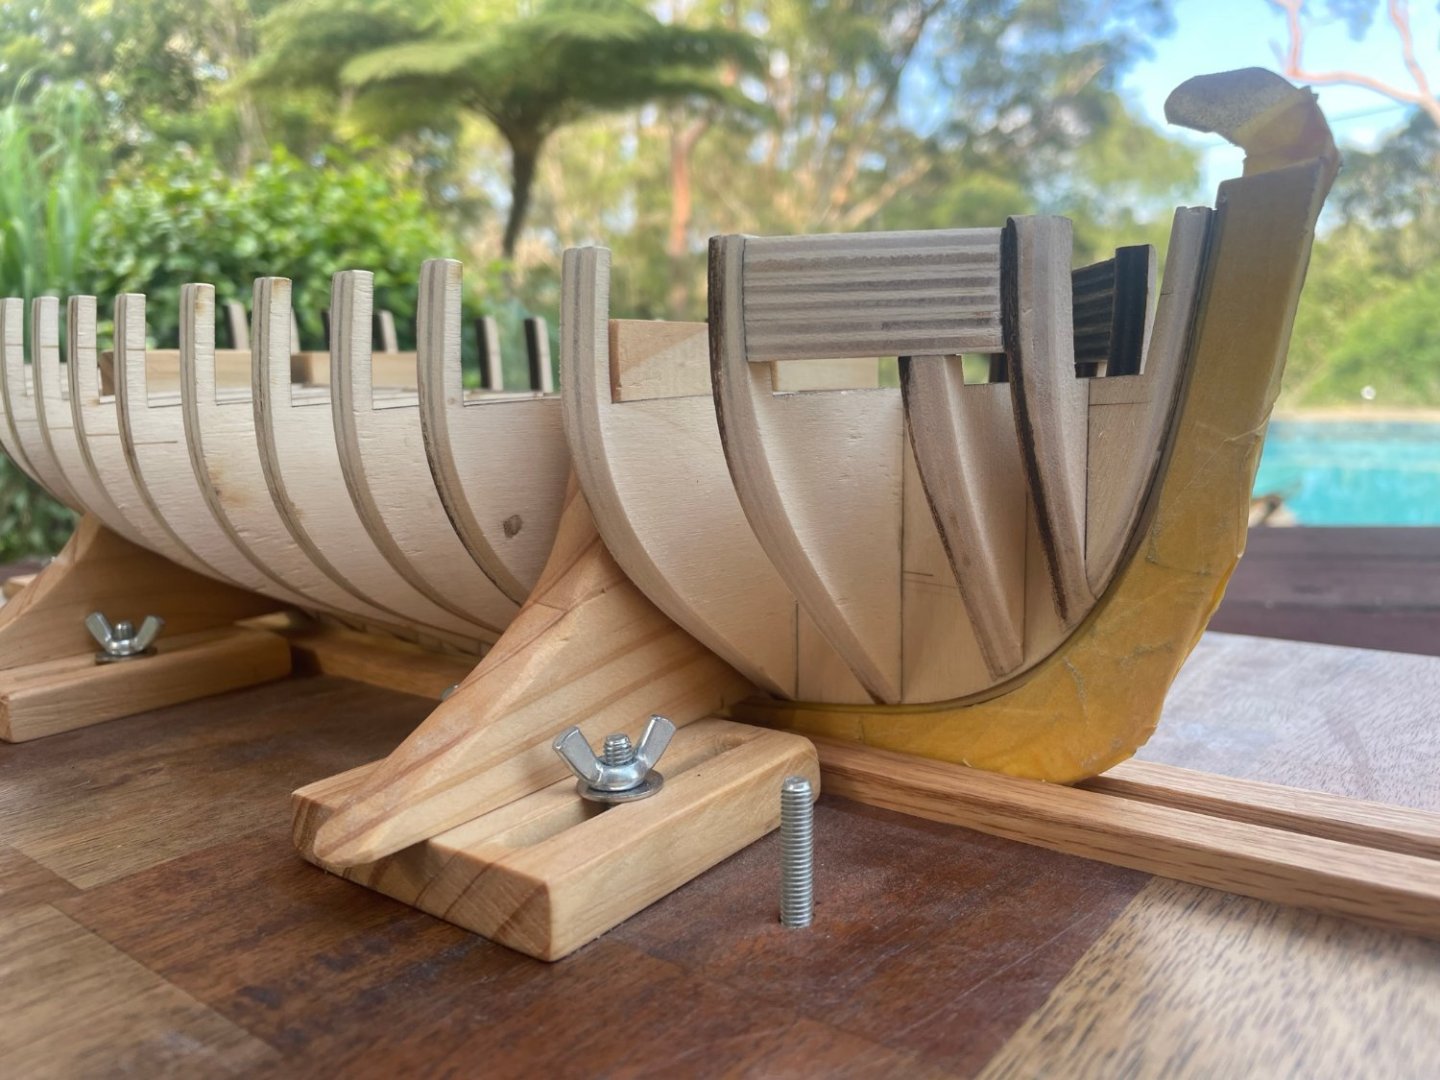
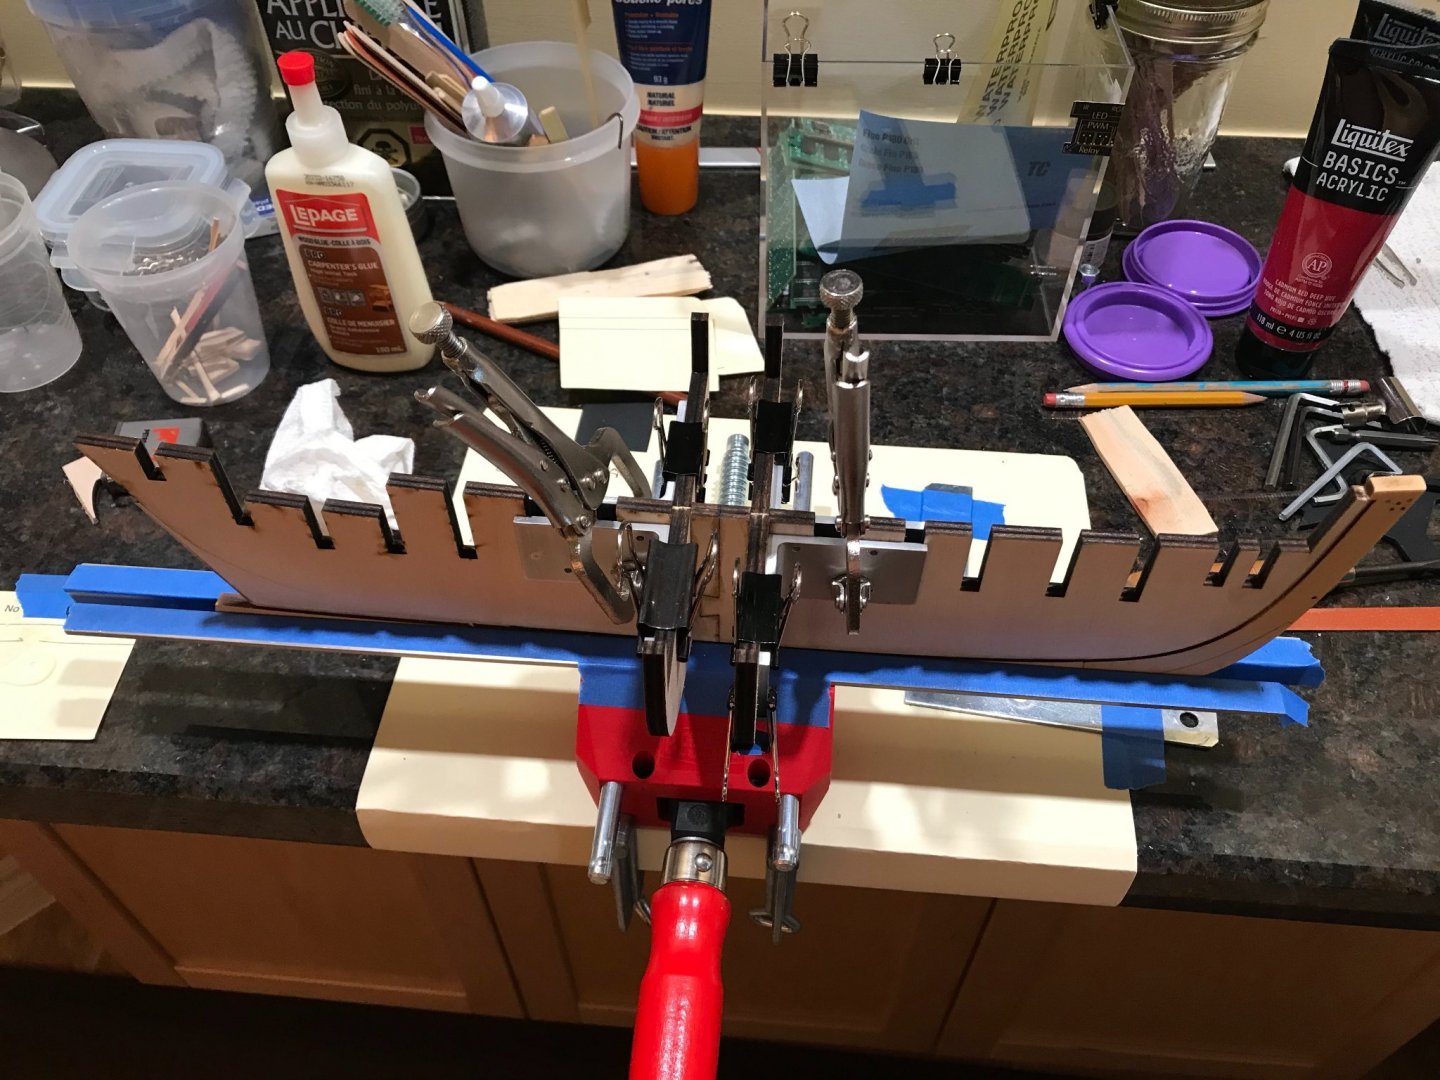
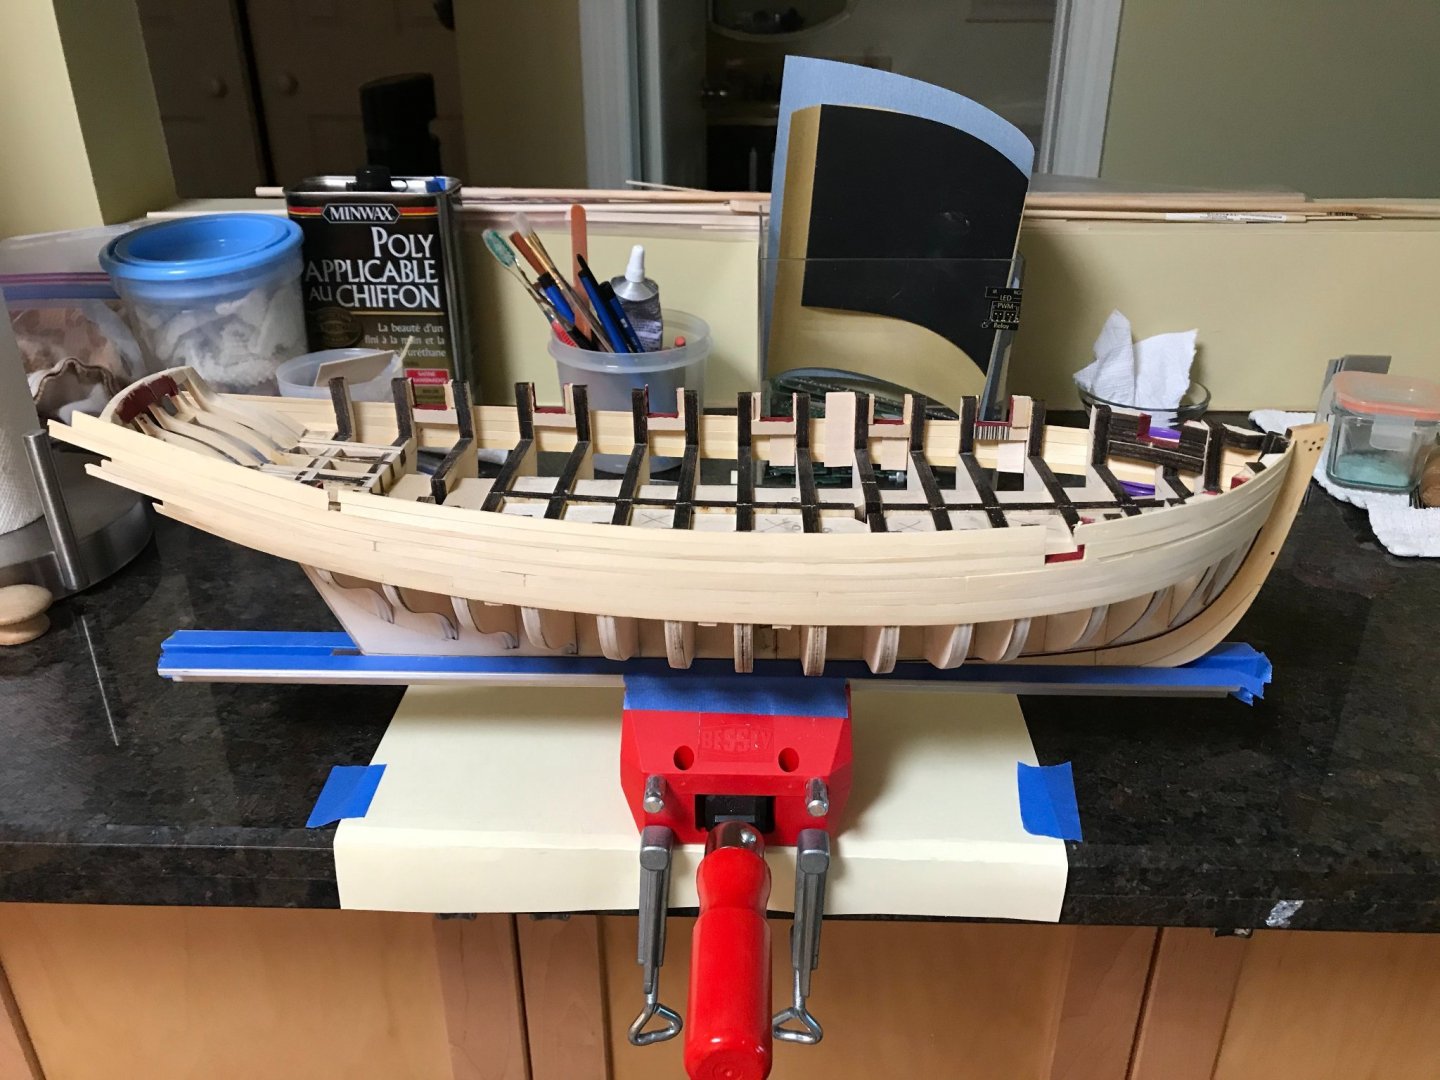
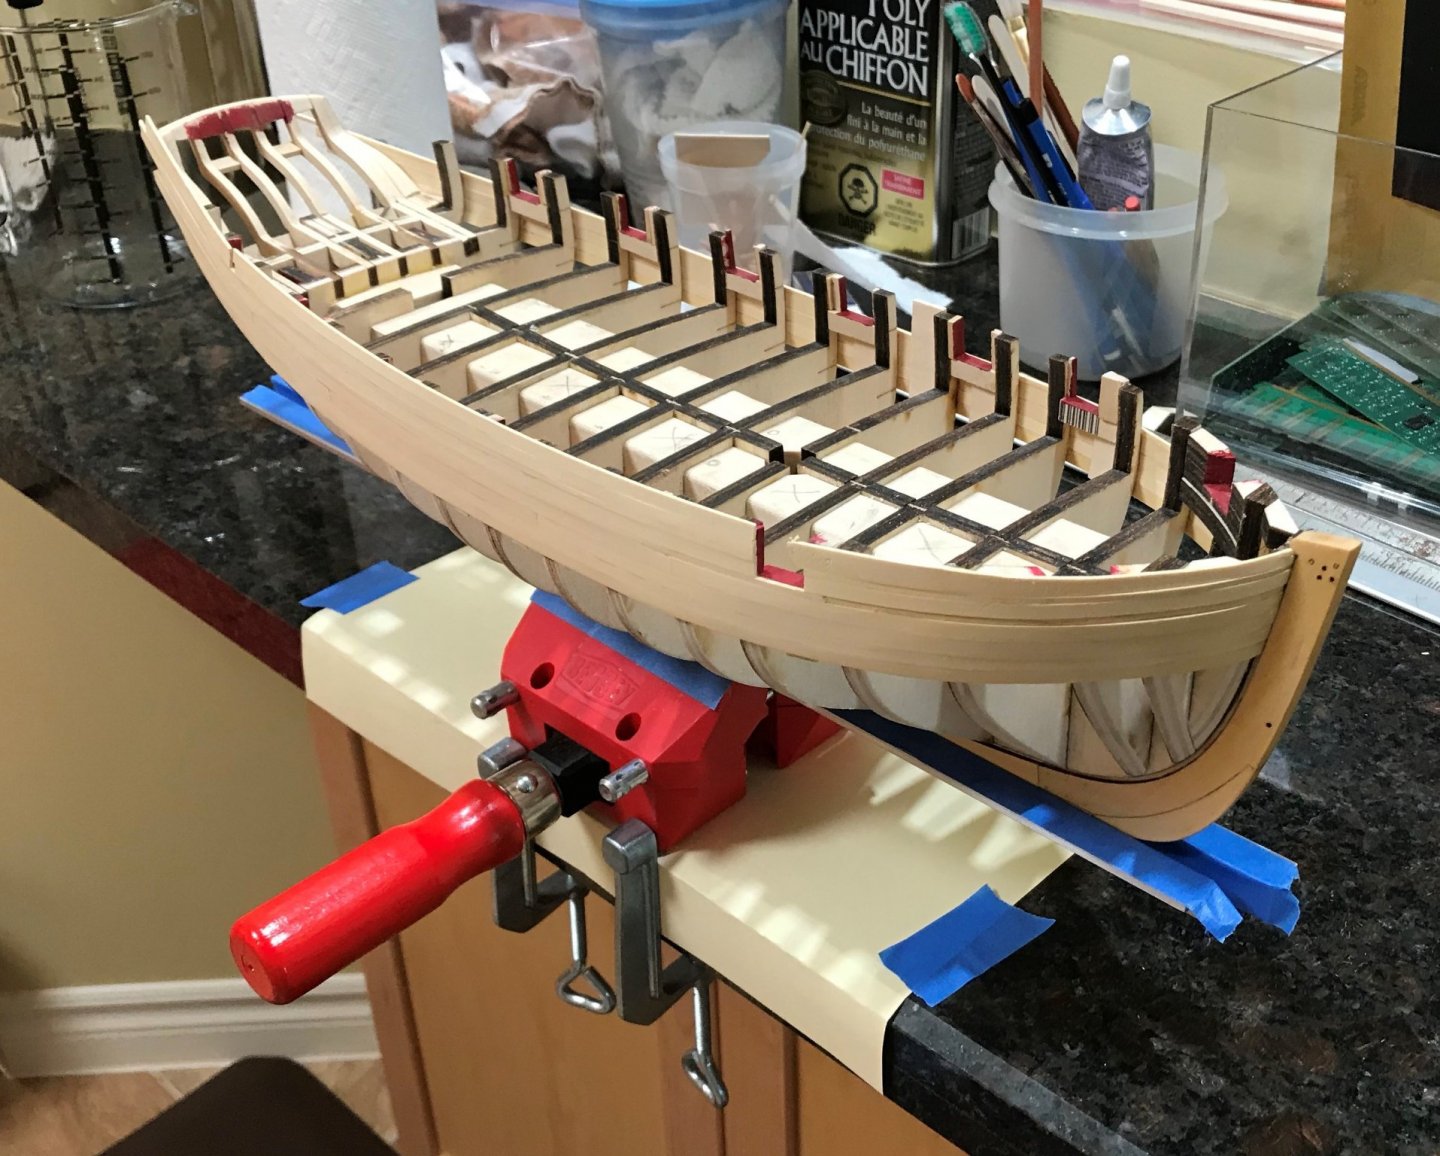
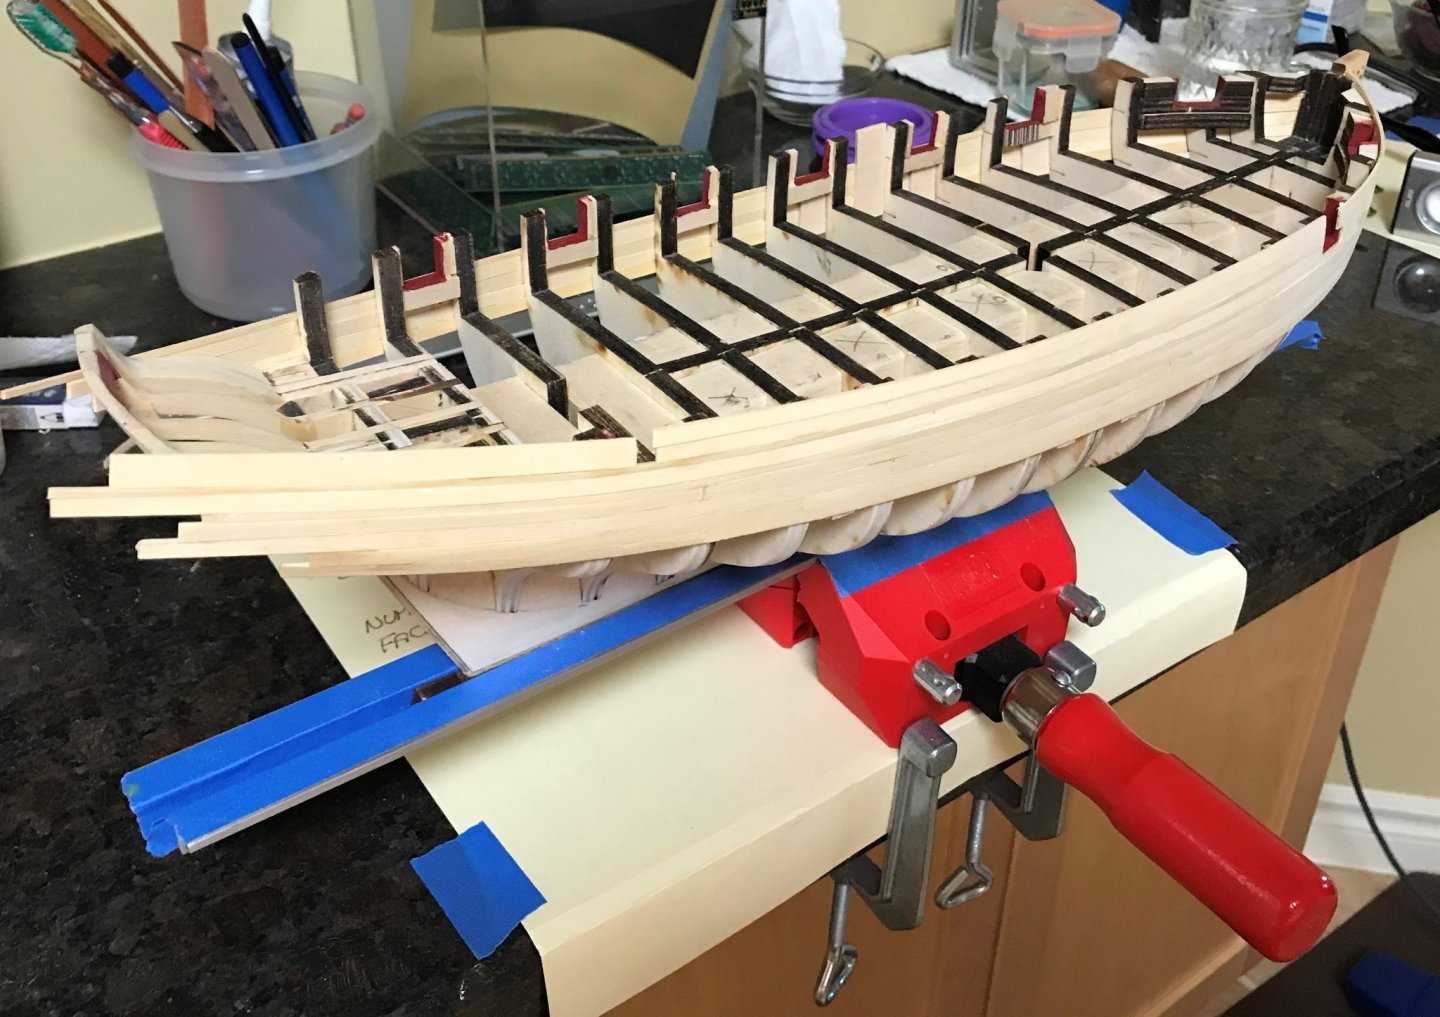
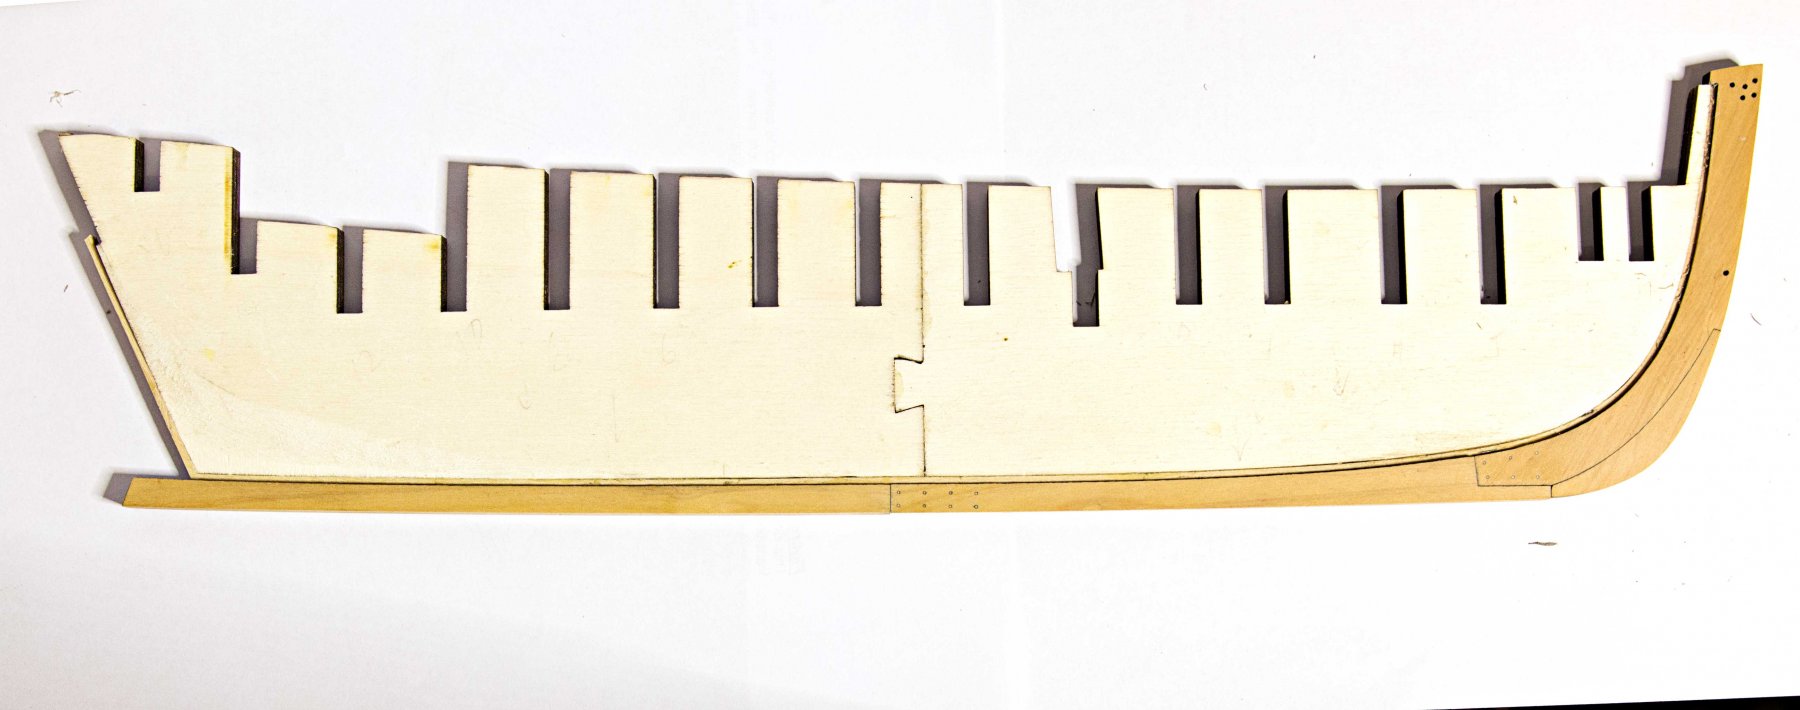
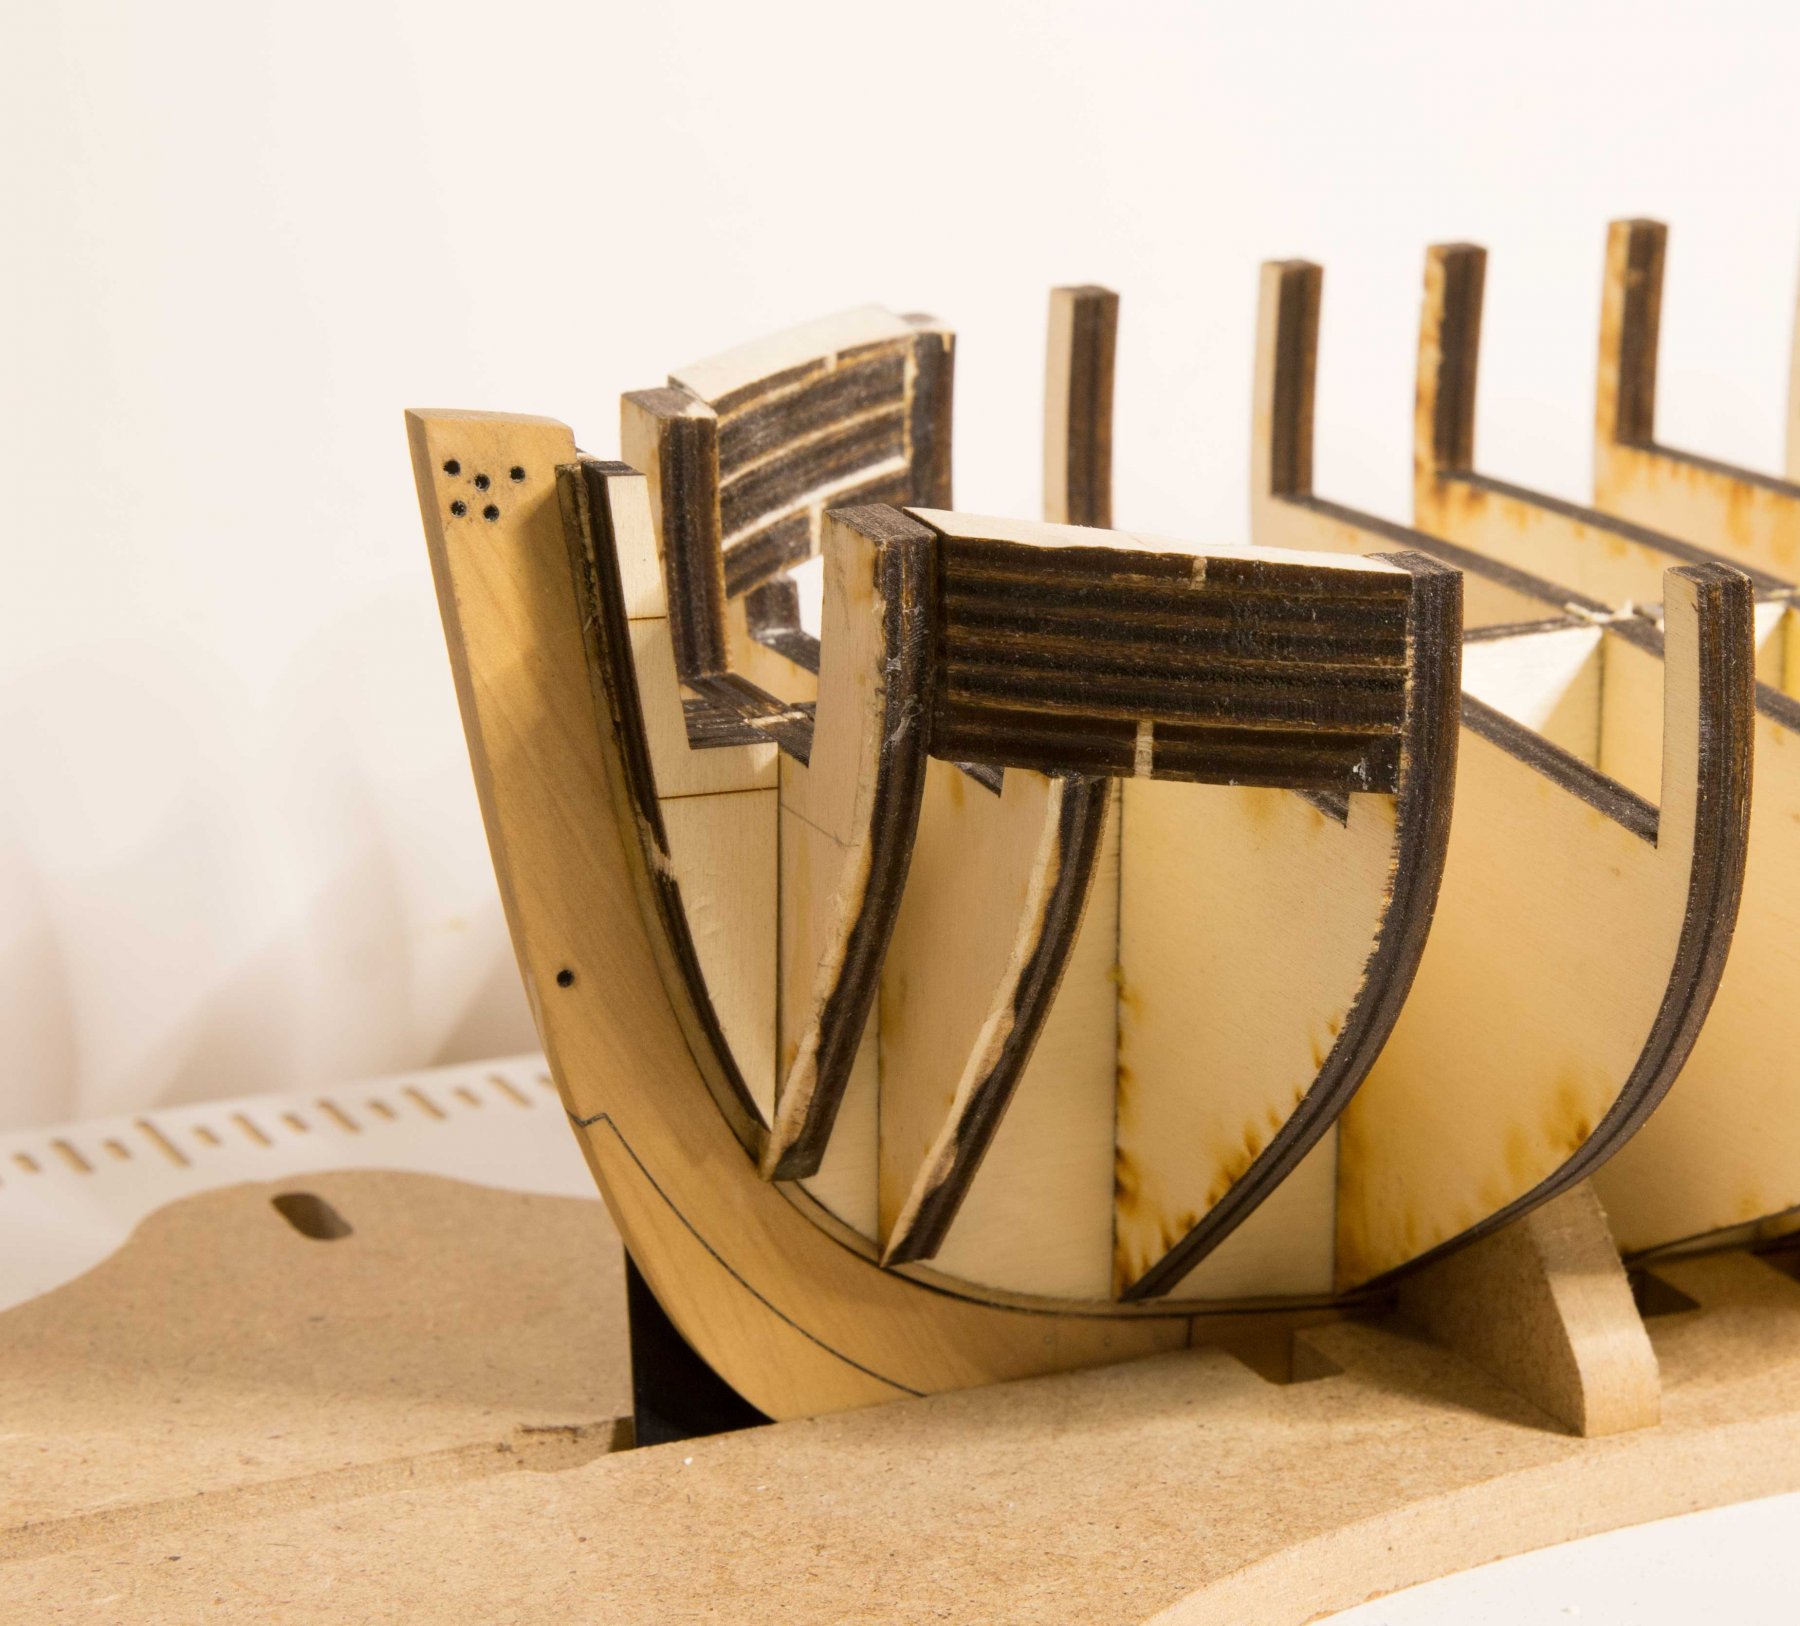
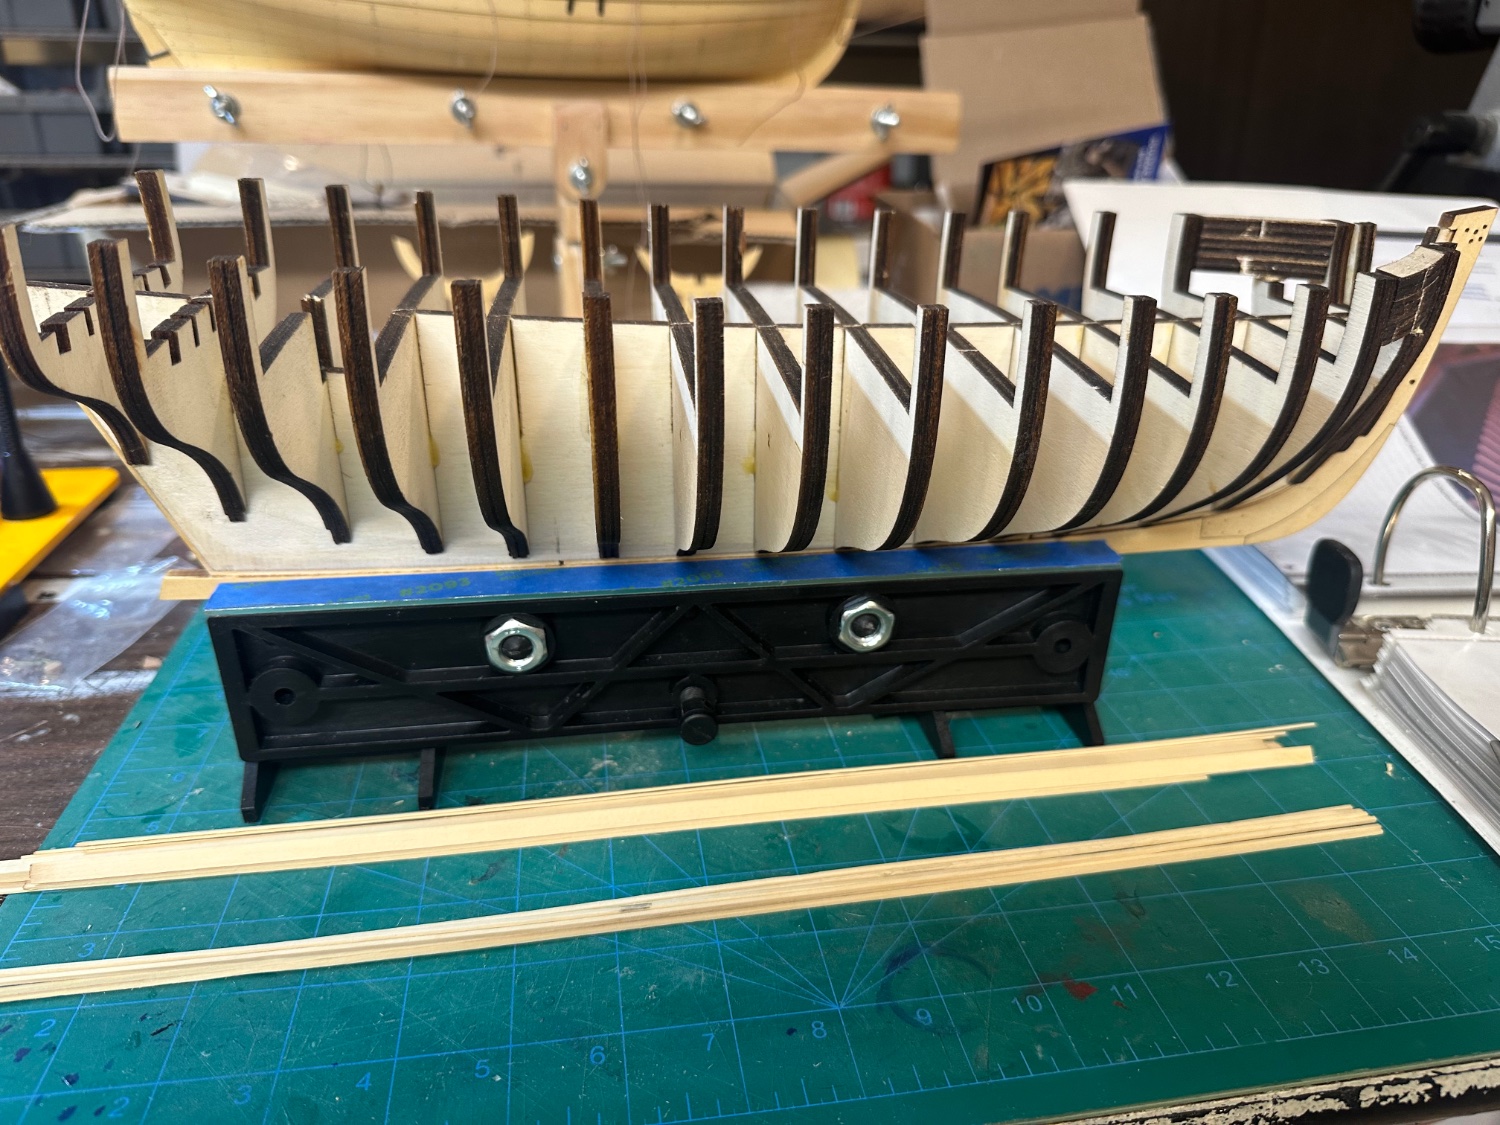
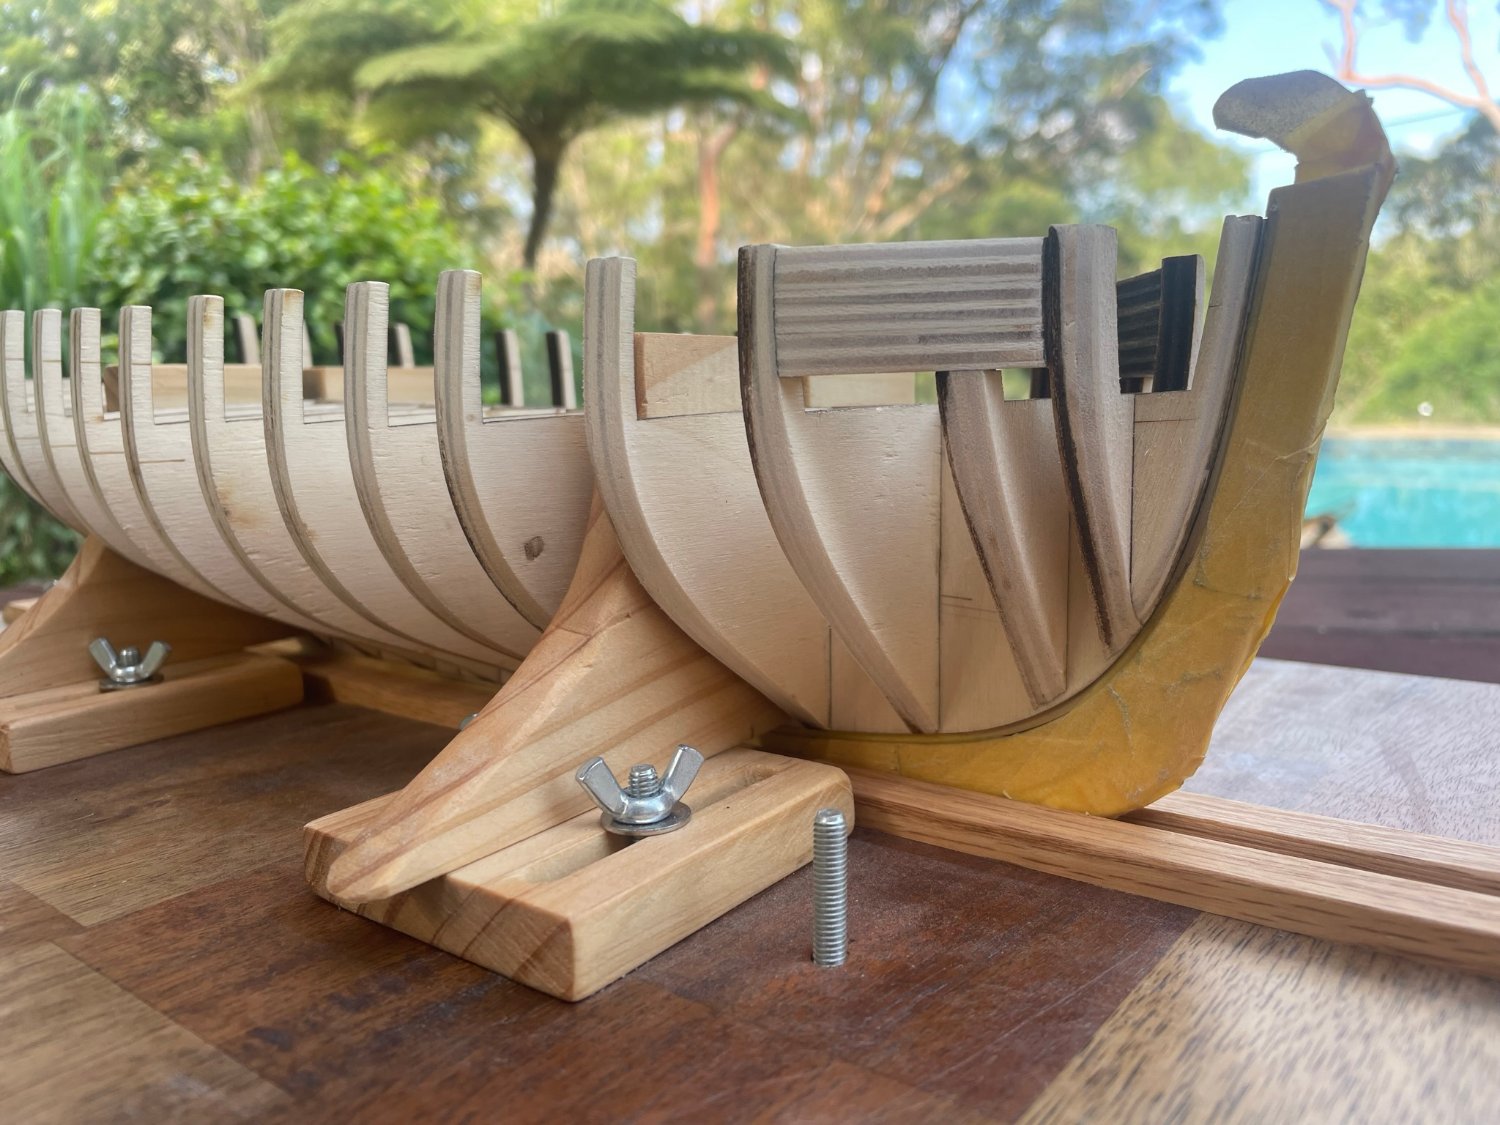
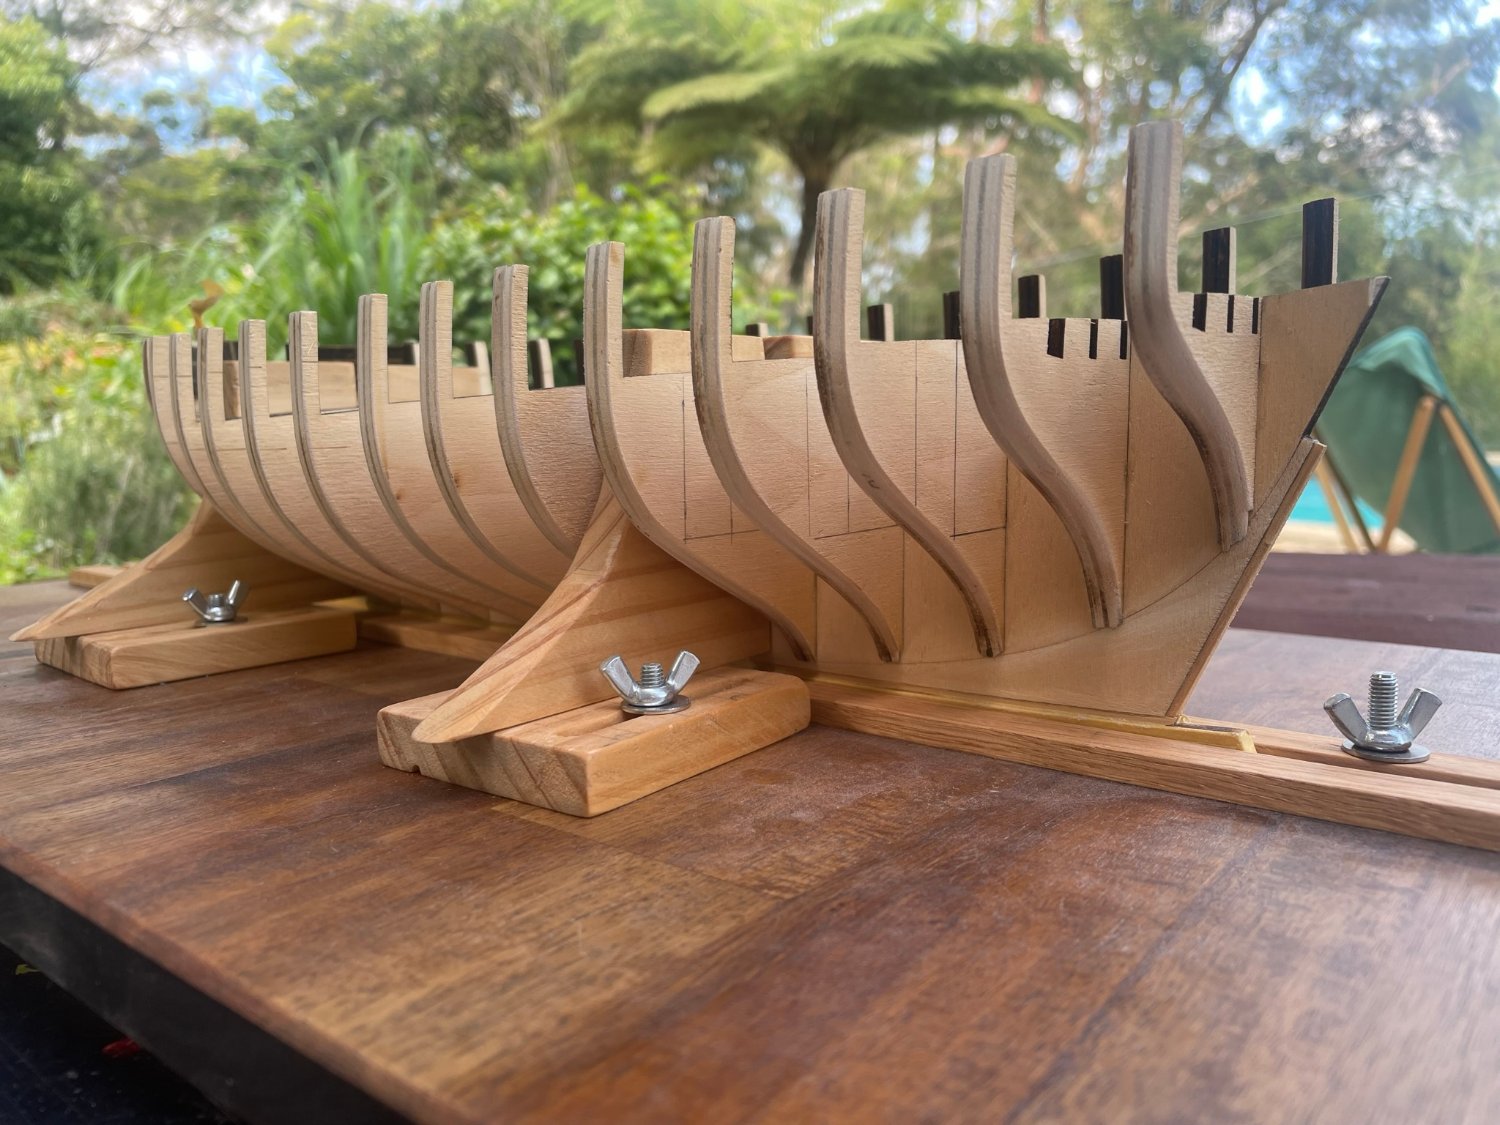
 Reading other logs... this may not be the slowest Cheerful construction, but it will probably come close. This is my first timber ship model, and I know I'm stretching the limits attempting something like the Cheerful, but I've always been one to aim high. How slow has progress been? Plans and timber ordered: August 2021 Built an extra table for the workshop and ordered lots of tools: August to December 2021 Keel laid down: December 2021 First fairing: April 2022 Second fairing: February 2023 Two young kids, house, work, cycling 7-10 hours per week. There's not much left, but hopefully progress will be more consistent from now on, if not quick. Look at all that lovely smelling timber, shipped from the US to Australia. Crazy shipping costs, but overall compared to the price of kits it's pretty reasonable, and the quality is fantastic. I got some extra to give me some wiggle room on mistakes. Keel laid - you'll notice I sketched the layout of the internal decks. Ideally I'll be including some internal structure below the skylight and hatch. Second round of fairing complete. I was hoping to get it finished in this session, but I feel like a third round will be worthwhile. My main area of concern being the bow. I look forward to your feedback... don't hold back, I want a good result 😃

-
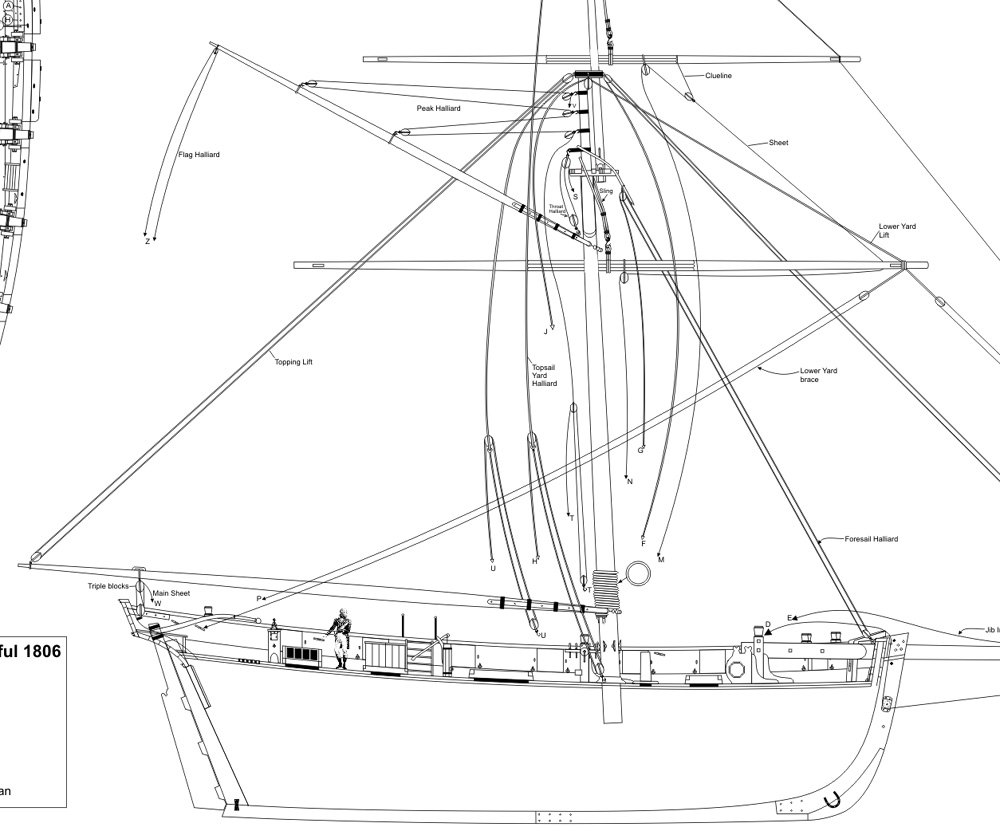
 This will mark the beginning of my project to build the prototype for the Cutter Cheerful. The plans are completed and I am getting ready to release the plans in a few months. I will be building her out of Boxwood or possibly even Pau marfin. I havent decided. This project is a POB build as you can see from the details in the plans posted below. Its not a very cumbersome project with just a cutter rig to deal with. She is carvel planked and not Clinker planked. This is one of the reasons why I chose it as a subject. Once I have the skeleton built and the hull planked, the plans will be released. The remainder of the project is pretty straight forward and doesnt need much of an explanation. I just need to prove out the design concepts for the hull skeleton. It shouldnt take too long. I will be writing a monograph as I build her and posting it on my website for free download as well as here on MSW should folks want to read it. But as I stated, I wont need to finish the entire project to release the plans as they are really straight forward. At a 1/4" scale...the hull will be 28 inches long and 26" tall. A nice size yet built at a larger scale to show some great details. I am finally at a point with the Syren store where my inventory is quite full and I will be able to enjoy working on both the Winnie and the Cheerful for several hours each day. I just cant wait to get started. Having a laser cutter doesnt hurt either. It will save me much time. Chuck
- 1,048 replies
-
- 48
-
-

-
- syren ship model
- cheerful
- (and 1 more)
-
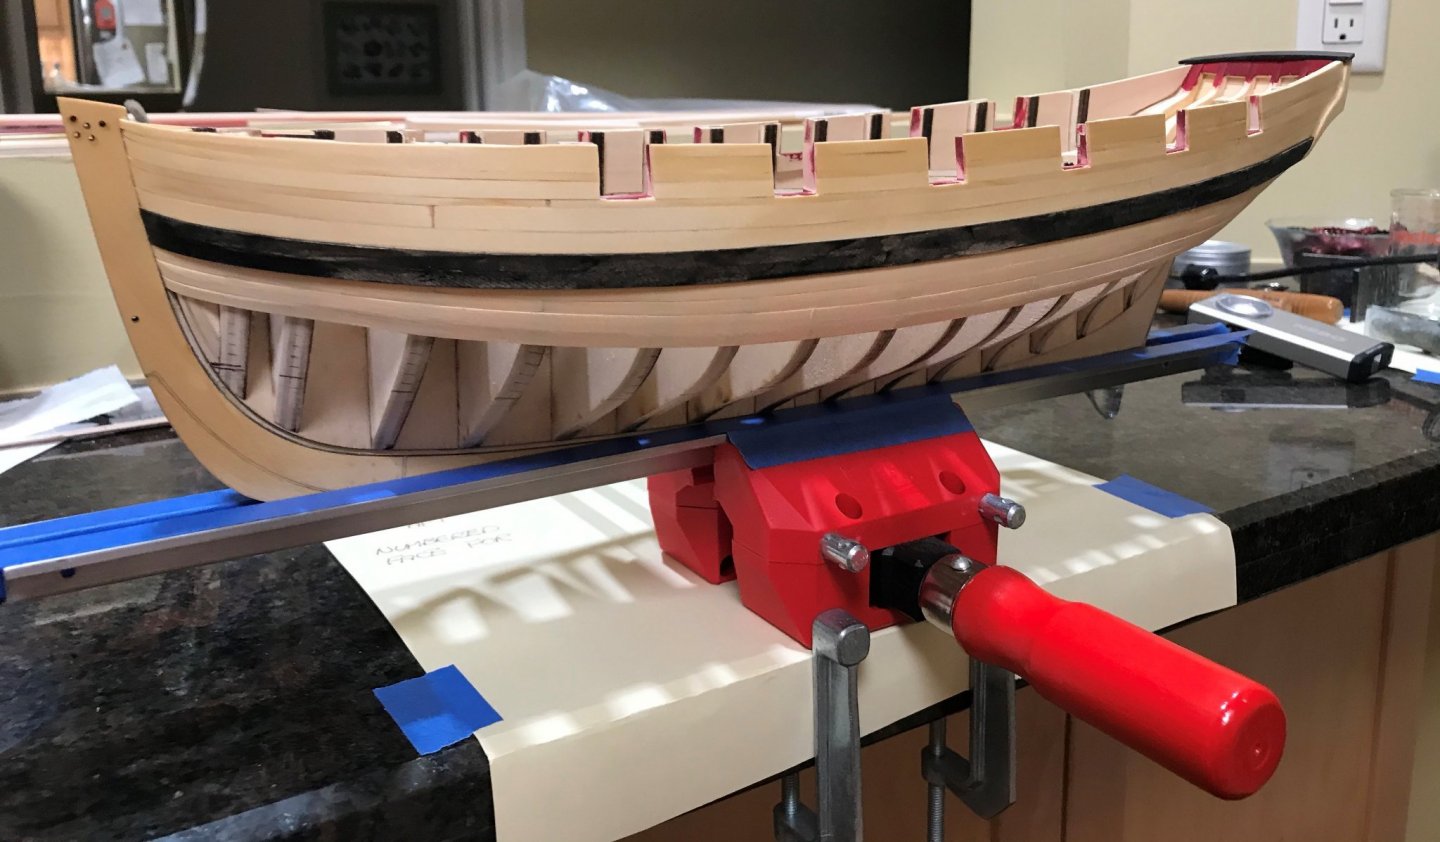
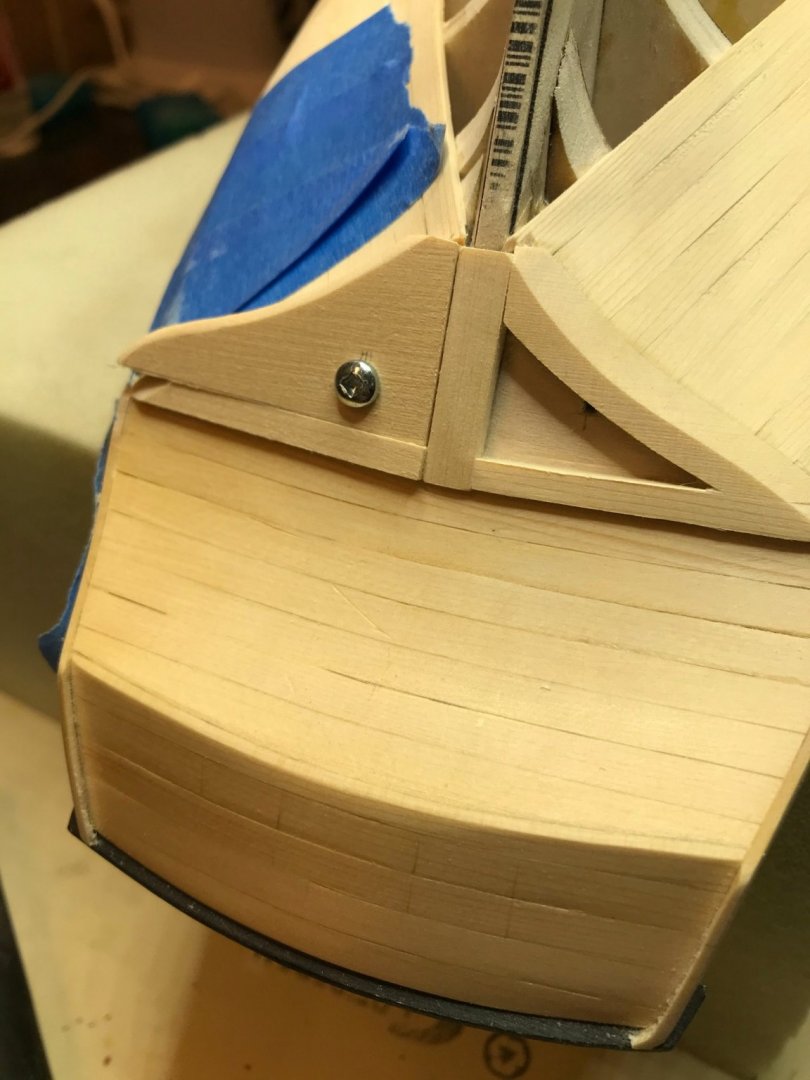
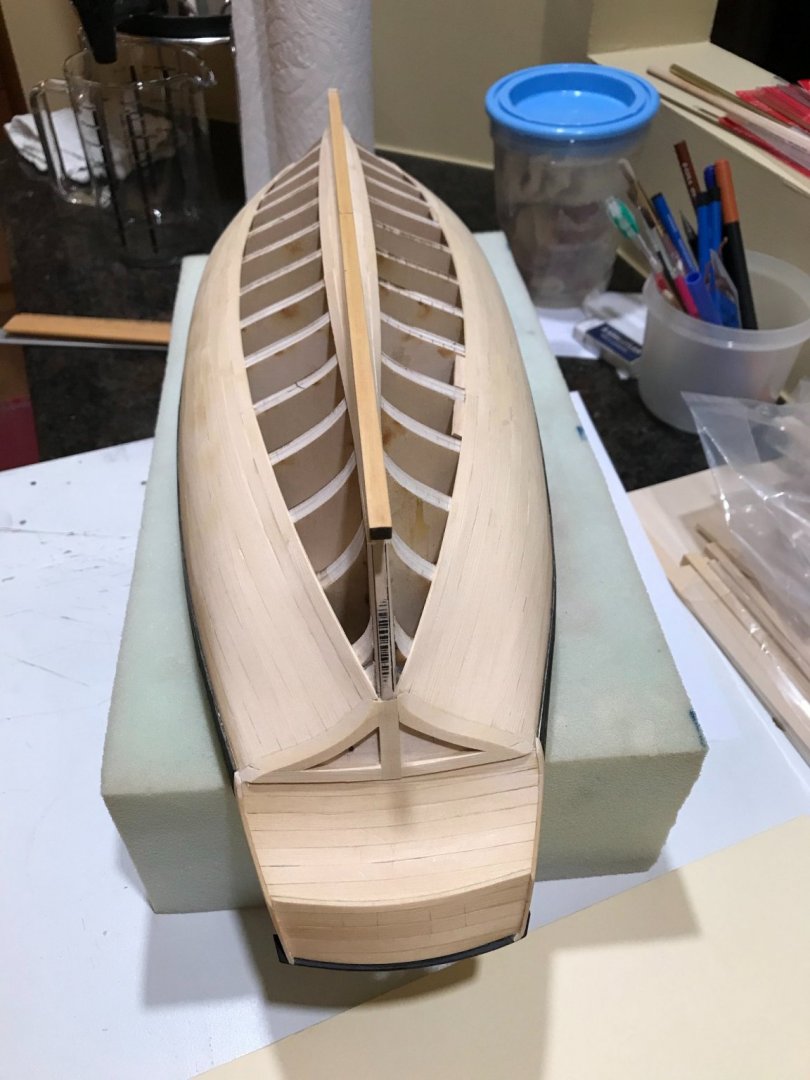
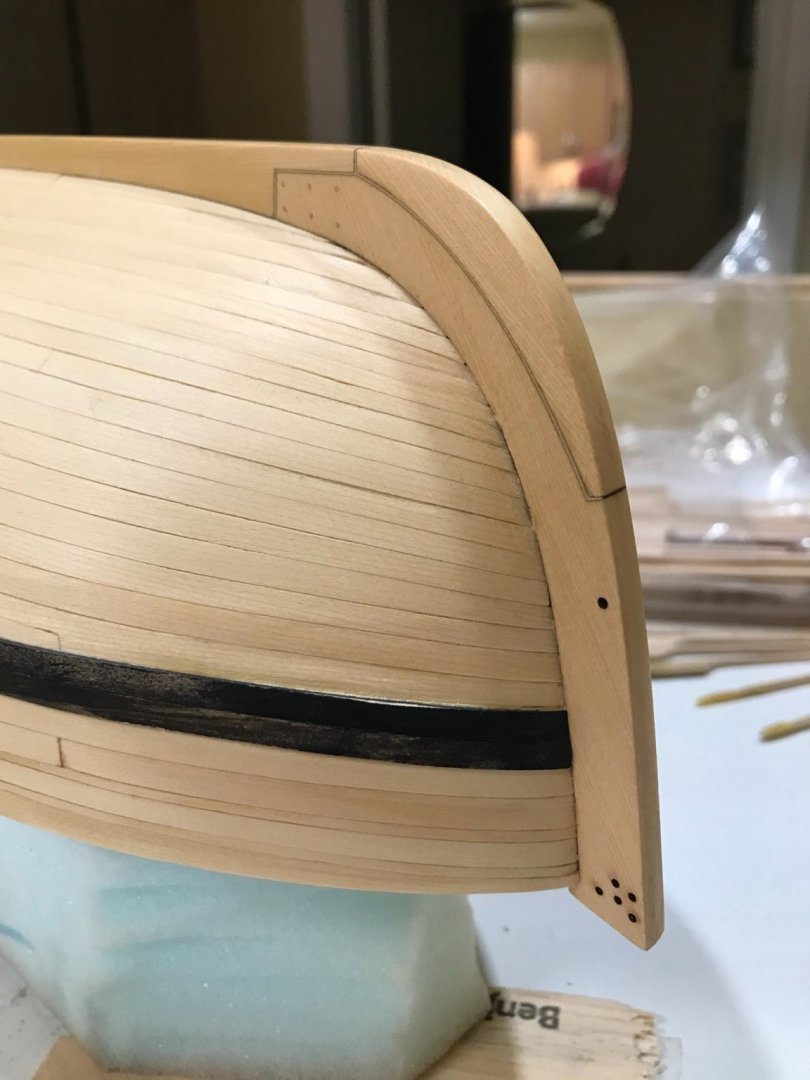
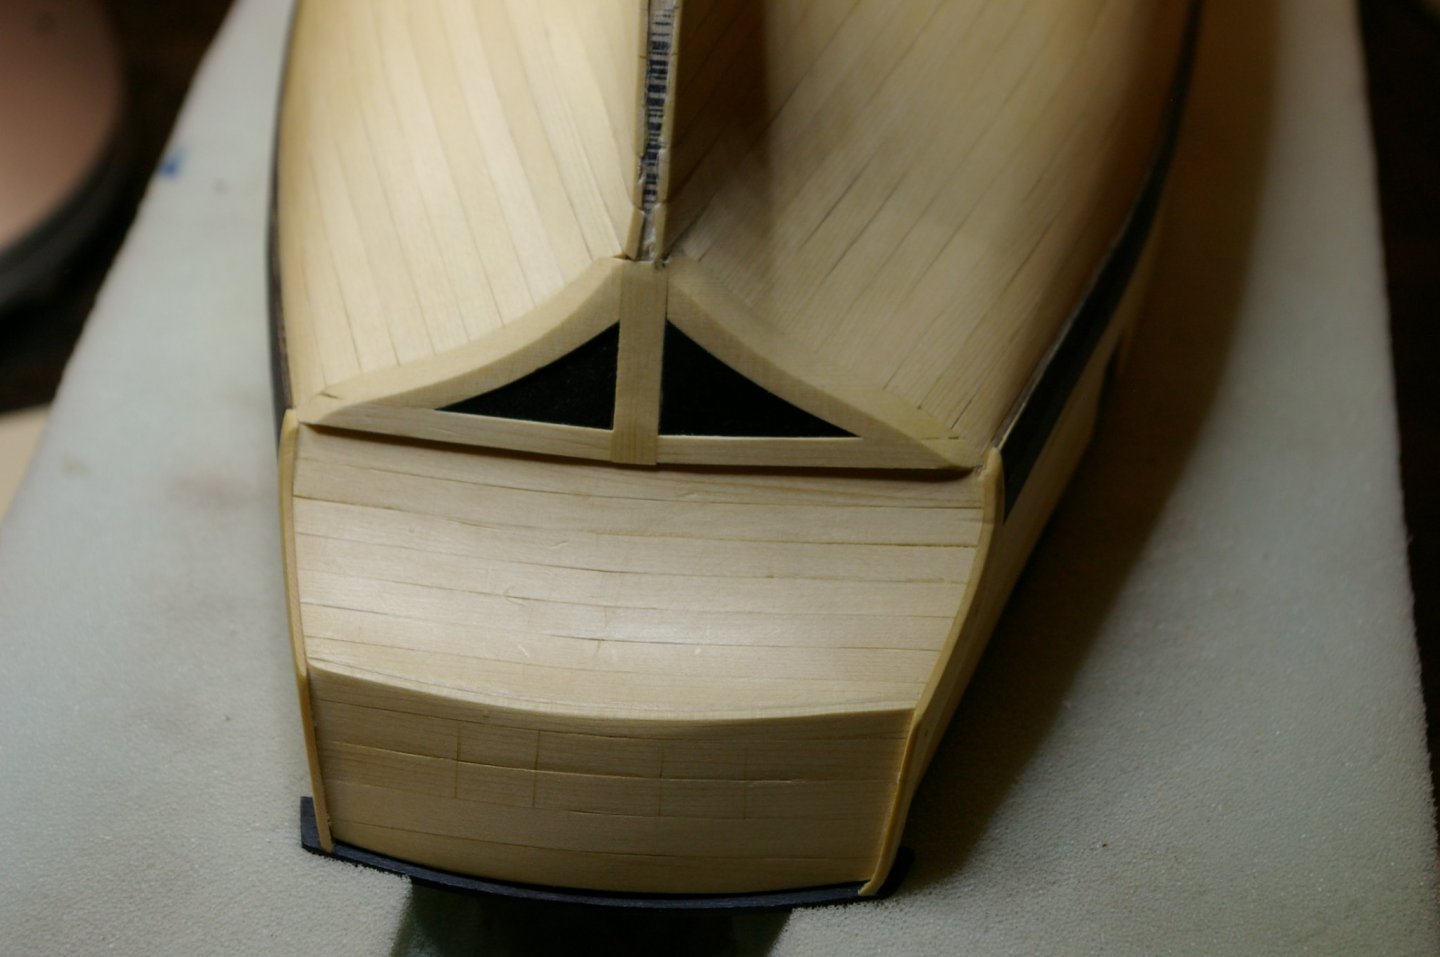
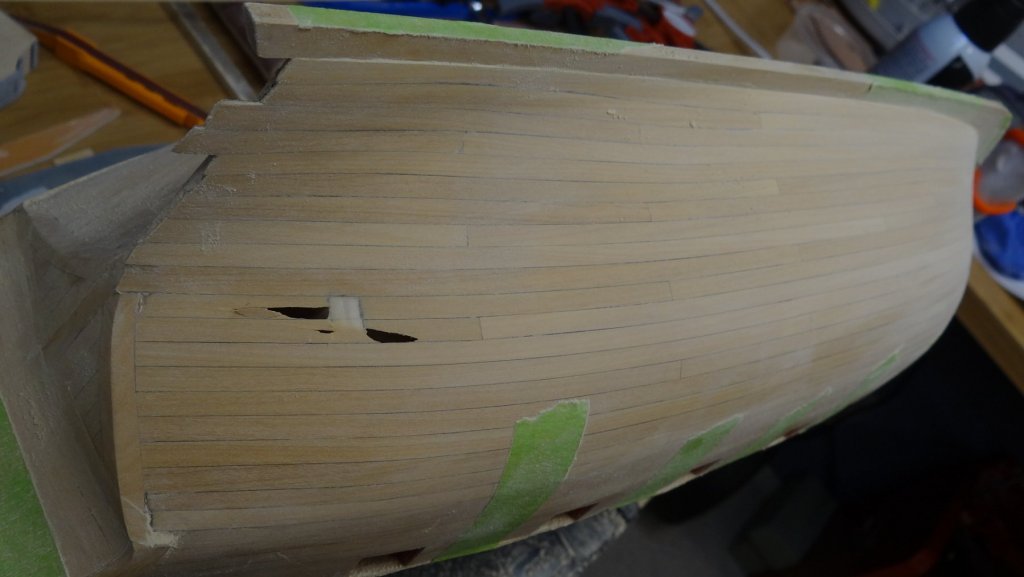
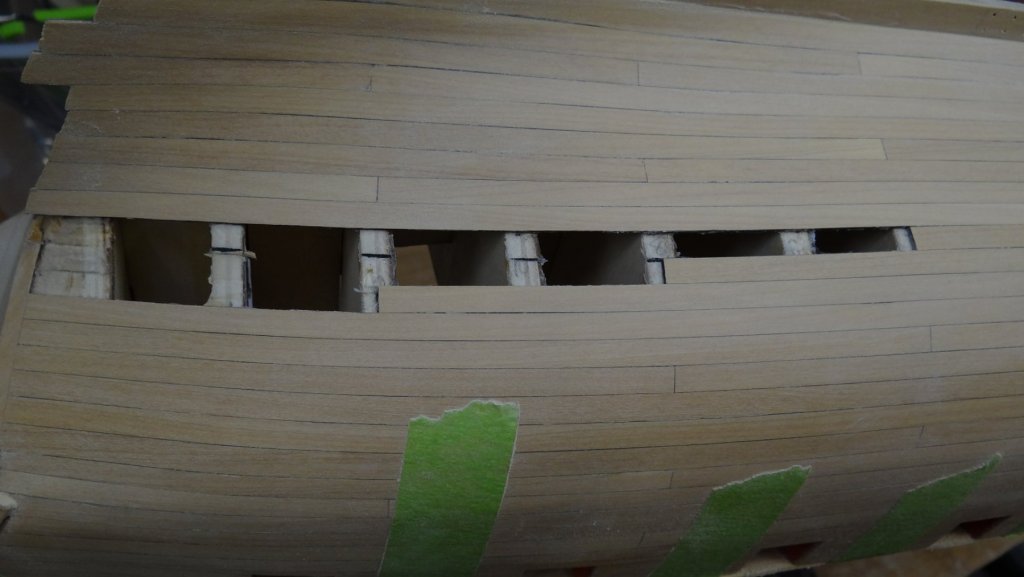
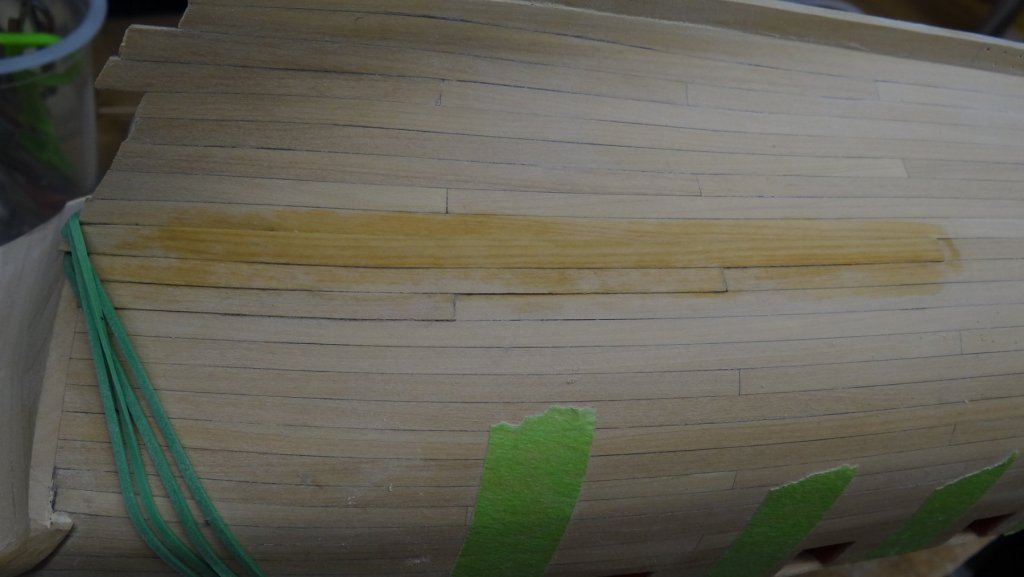
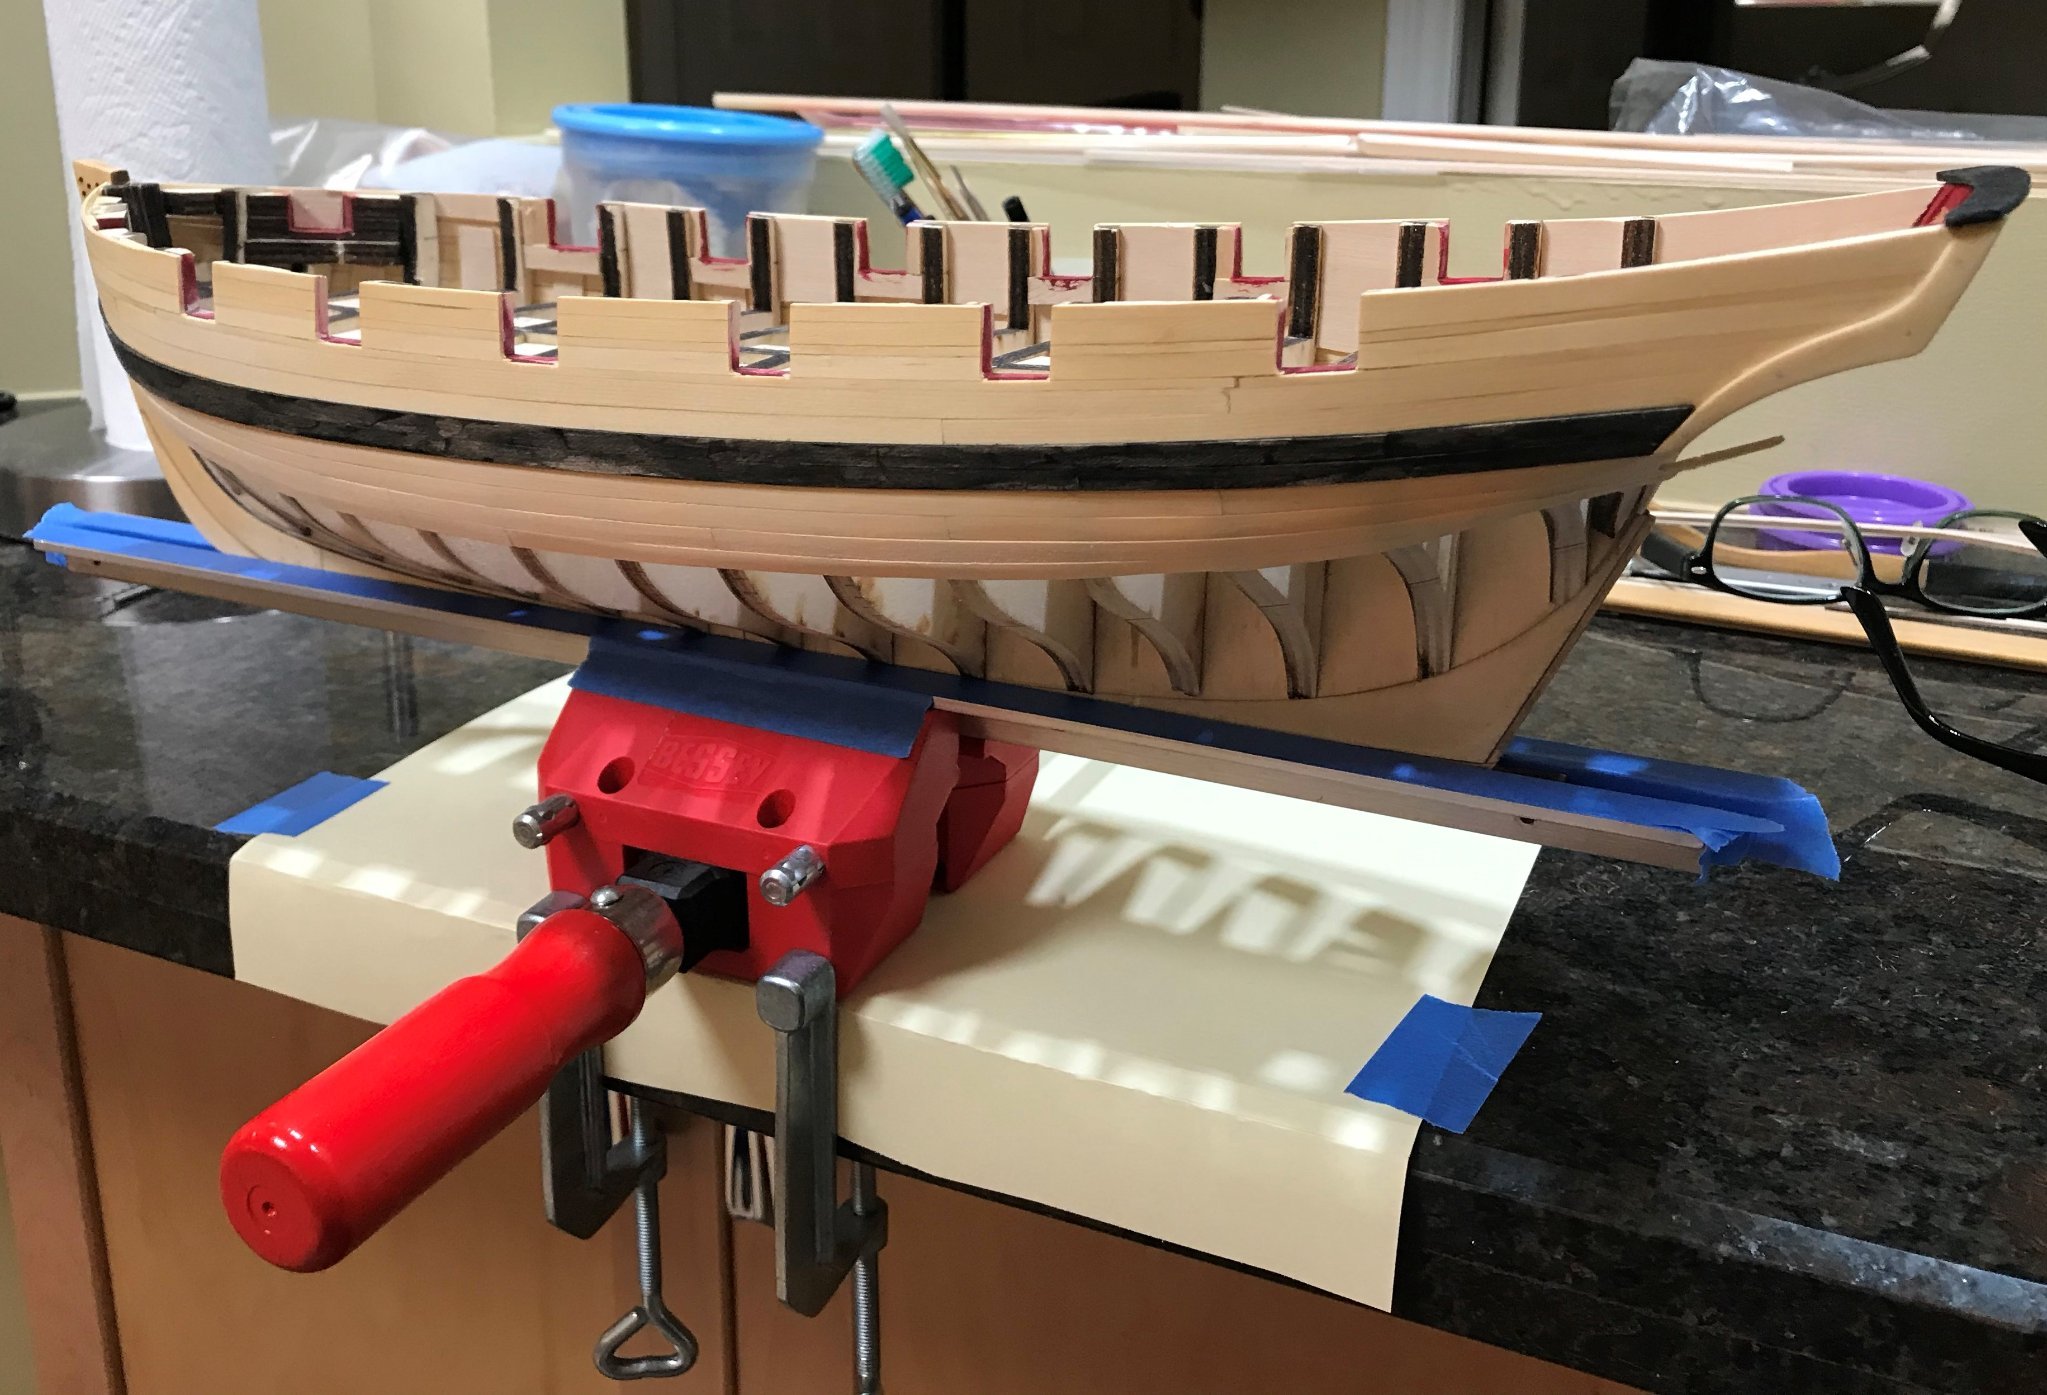
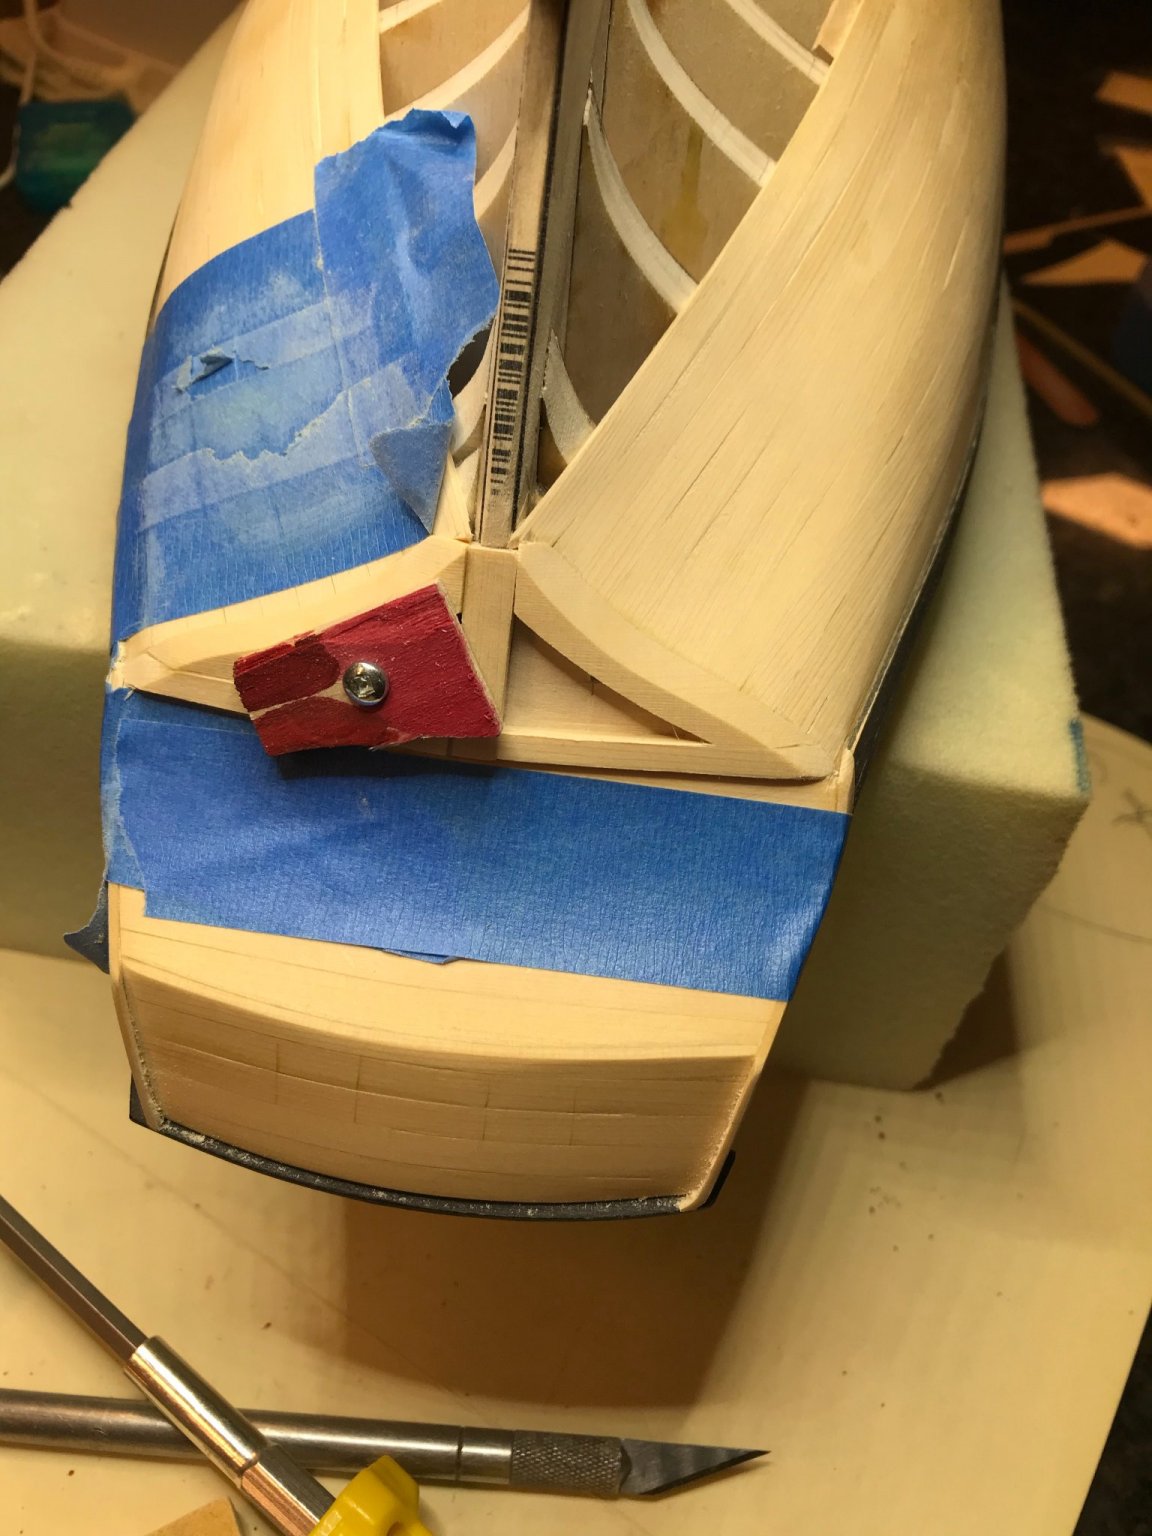
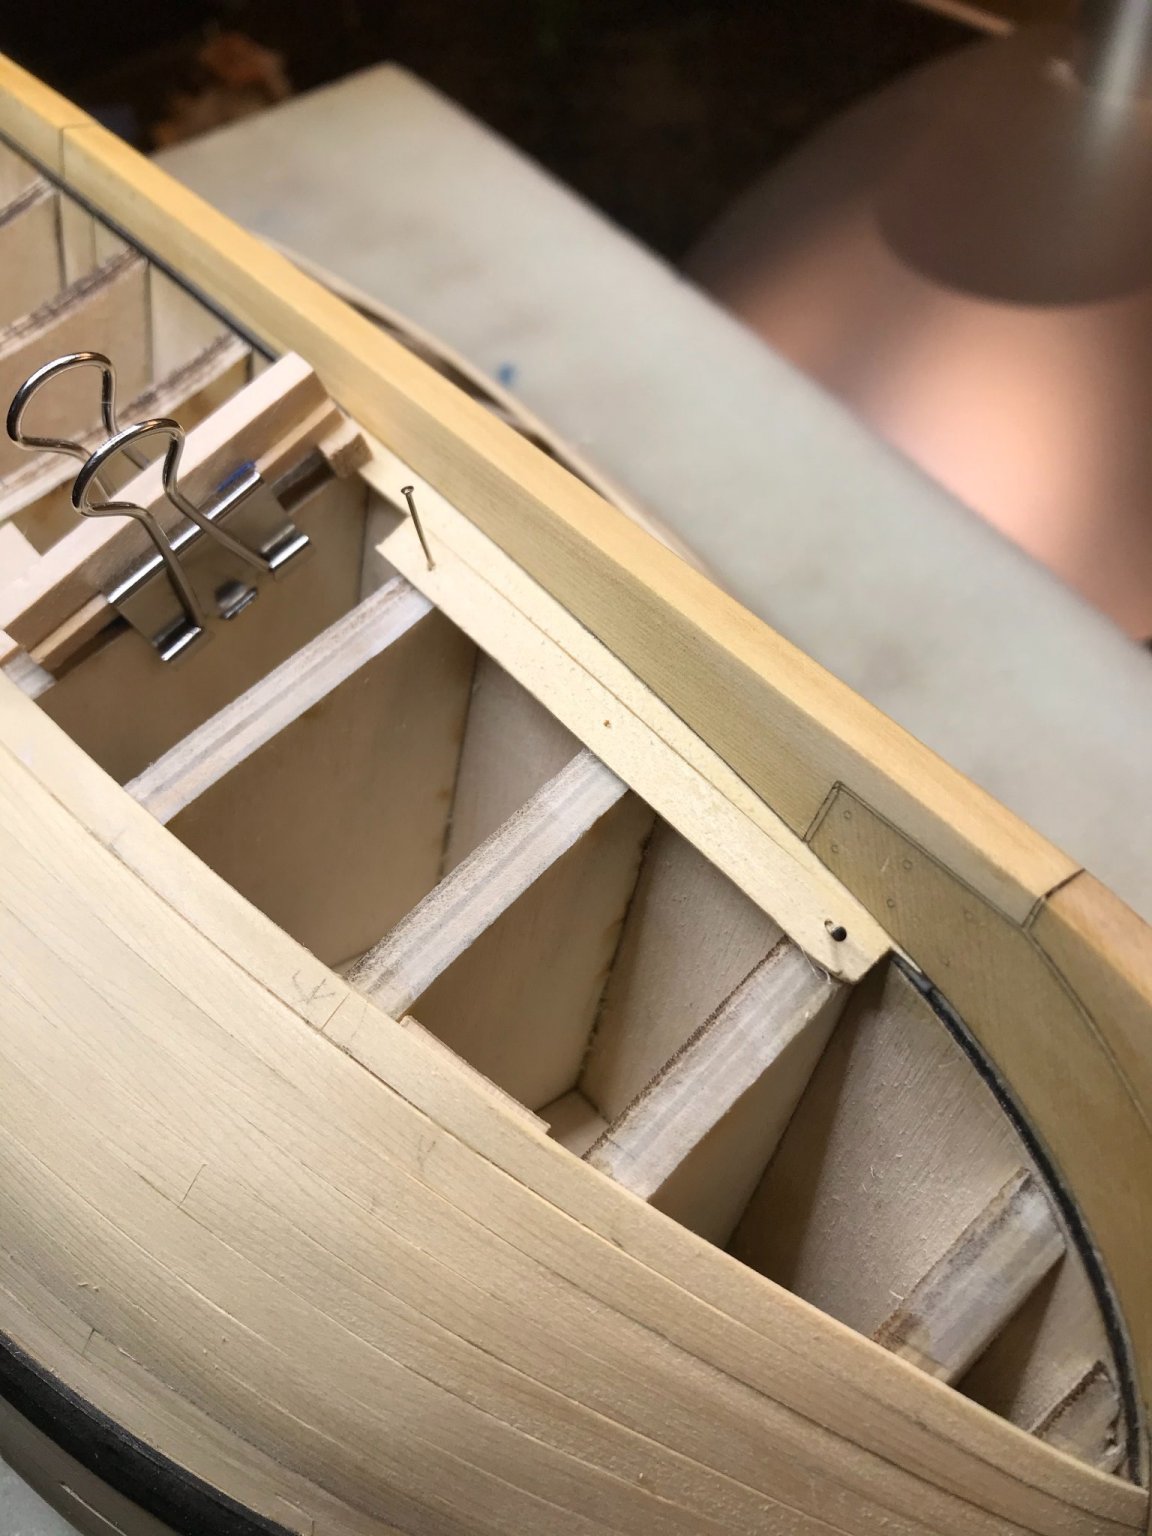
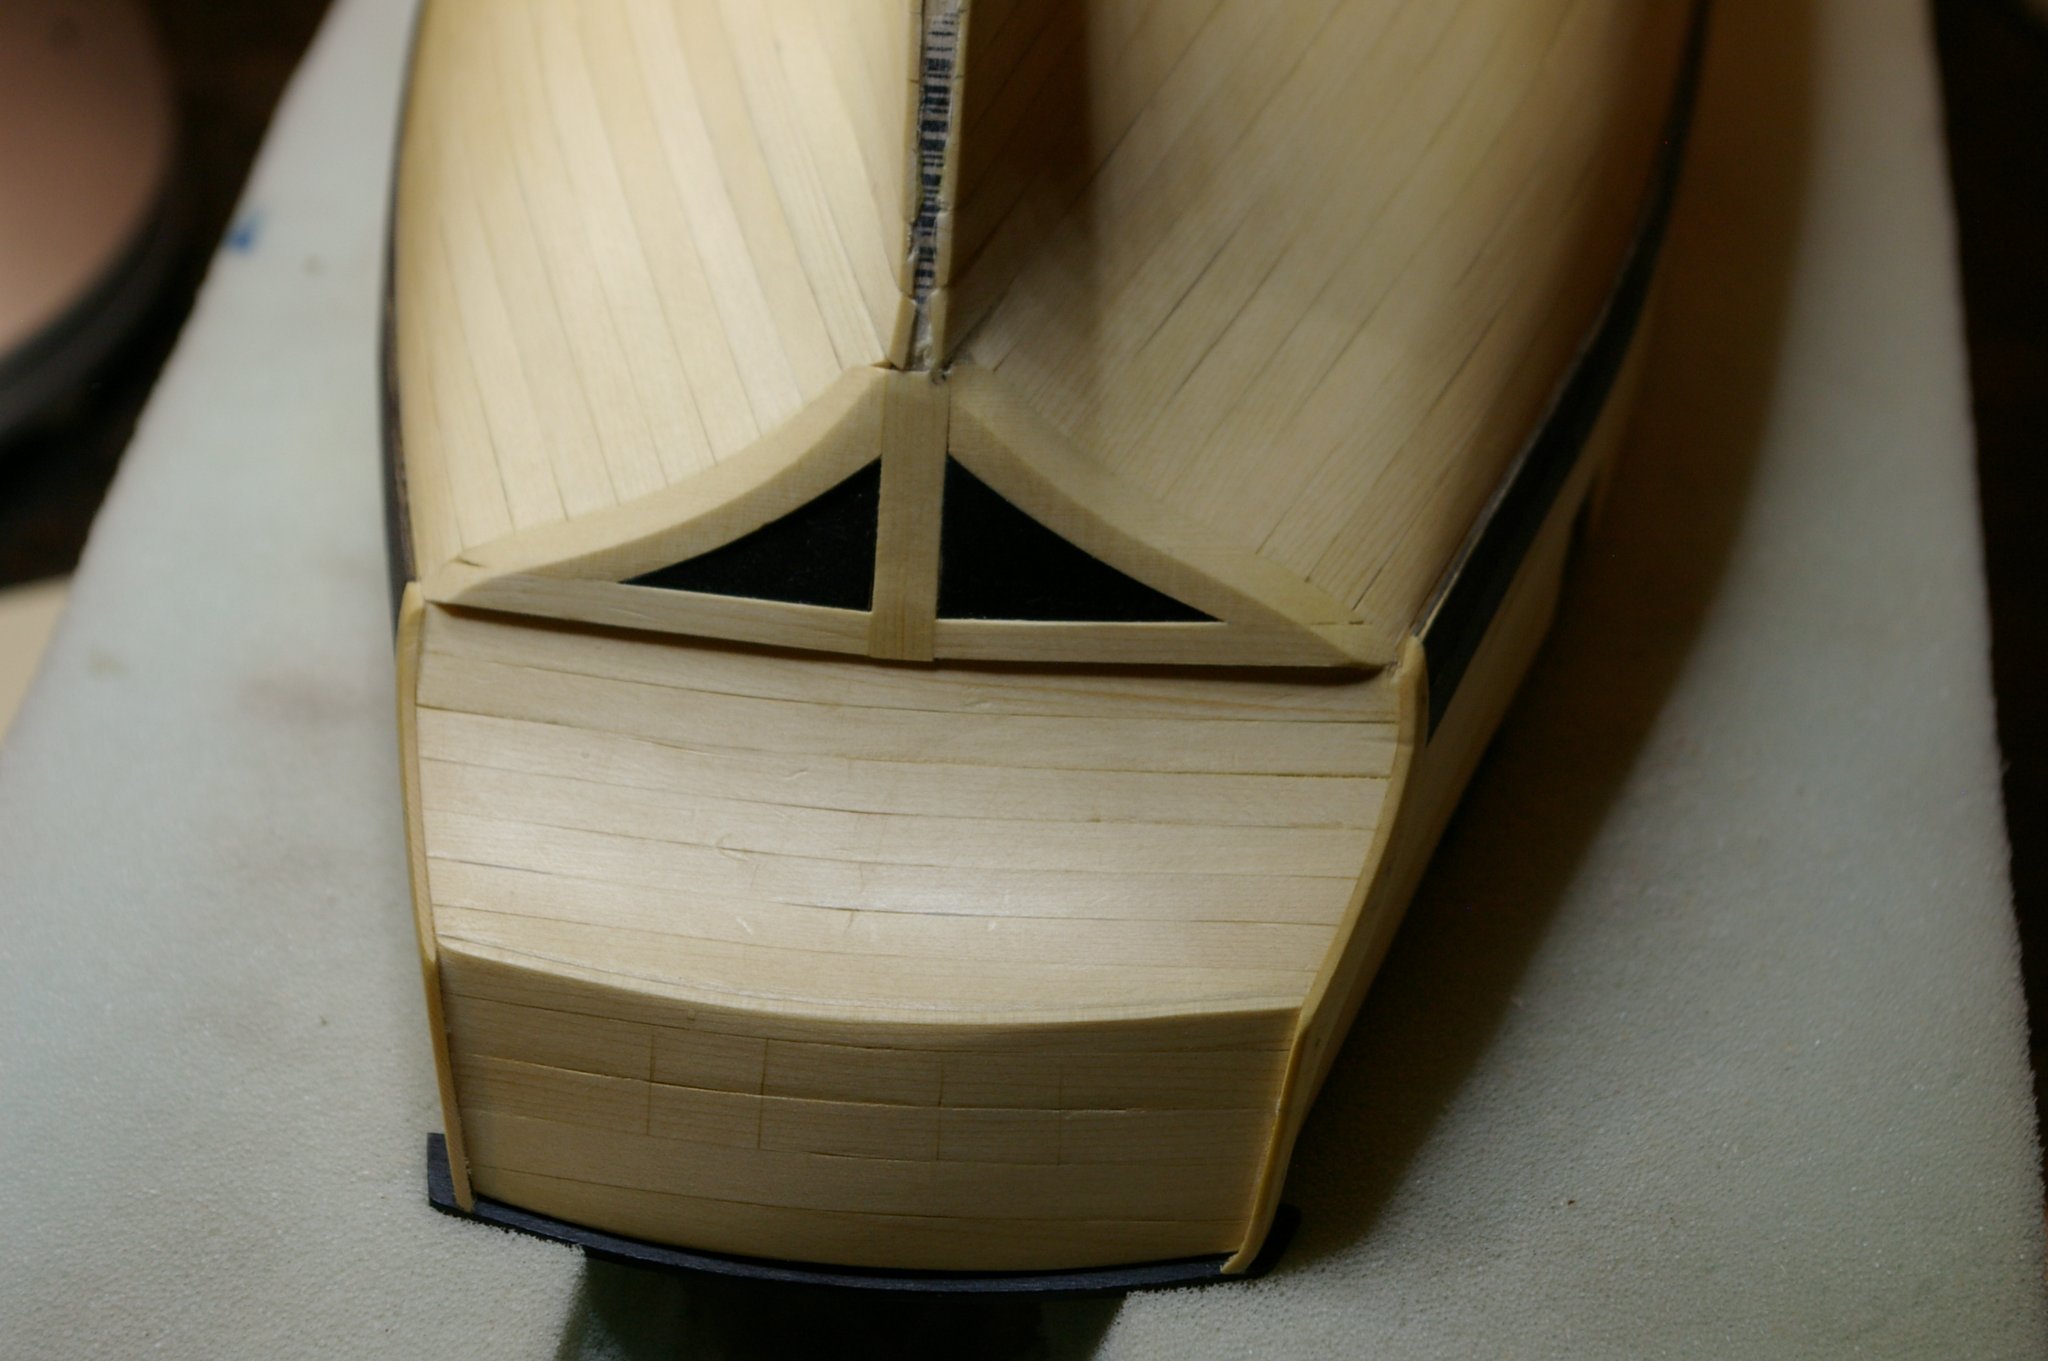
 Hello all, I have been working on my Cheerful for about a month now. In the last couple of weeks I have been flip flopping on whether or not to start a build log. Decided to wait until it was planked to see if it was worthy of showing the world. So here I am thinking that it just made the cut. While I was waiting for my Alaskan Yellow Cedar Package from Modeler's Sawmill ( Joe did a beautiful job cutting the wood ) I assembled the former and bulkheads. . I used a piece of basswood for the rabbet strip which I don't think was a particularly good plan. It seems kind of spongey and and not up to the task. The blocks of wood between the bulkheads were added for strength when fairing and to take care of a tiny wow. They were cut from a piece of pine shoe molding picked up from Home Depot. The frames for the gun ports are also basswood. They didn't hold up so nice during fairing. Lots of shredding and feathering on the vertical pieces. My wood package arrived and I was off to the races. I followed the lead of other builders by running the planks right across the gun ports but unlike others, my cutting out the port skills were somewhat lacking. This is where I stray off the path of historical accuracy. The blocks were added to the tops of the stern frames for support when fairing. I decided at this time that I was not going have seats of ease. maybe just plank over the stern frames or have taller lockers. So the blocks were left installed and I never thinned down the outer stern frames. The thinning of the outer stern frames just seemed like something that I would mess up. Using Chuck's planking tutorials made everything so much easier and the planking was completed down to the bottom of the square tuck. One of the things I'm not sure about is which side of the plank is tapered. I laid the tapered side of the plank against the straight side of the previous strake. Or would it be better to lay the straight side of the plank against the tapered side of the previous strake? Or does it even matter? A small block of left over 1/4 inch plywood was glued behind the square tuck and a hole was drilled and tapped for a 4-40 machine screw. A small piece of plywood was used to hold the outer piece of the square tuck while fairing it to the hull after it was cut to width. The garboard and another strake were added and then I went back up to the bottom of the last belt and started planking back down five strakes. Then started at the bottom and planked back up. The last strake wasn't really all that hard to do. Just a lot of test fitting. Oops, just noticed something. I went back to the square tuck to finish the infill planks. Used a piece of 1/16 inch basswood to make a template but by the time it was shaped it didn't fit too badly. I thought about scoring it to simulate planking but it looked too fragile to survive. Painted it black to see what it would look like and pressed it into place without gluing, Going to live with it for a while. I didn't want to paint the counter. So that's where I'm at now. Lots of sanding to do and I think that I would like to thin down the bulwarks before completing the fancy stuff outside.......Paul
.thumb.jpg.49c3faf8d5c2f2a0ea591a9afda550bf.jpg)


- 110 replies
-
- 20
-
-
- Syren Ship Model
- Cheerful
- (and 1 more)
-
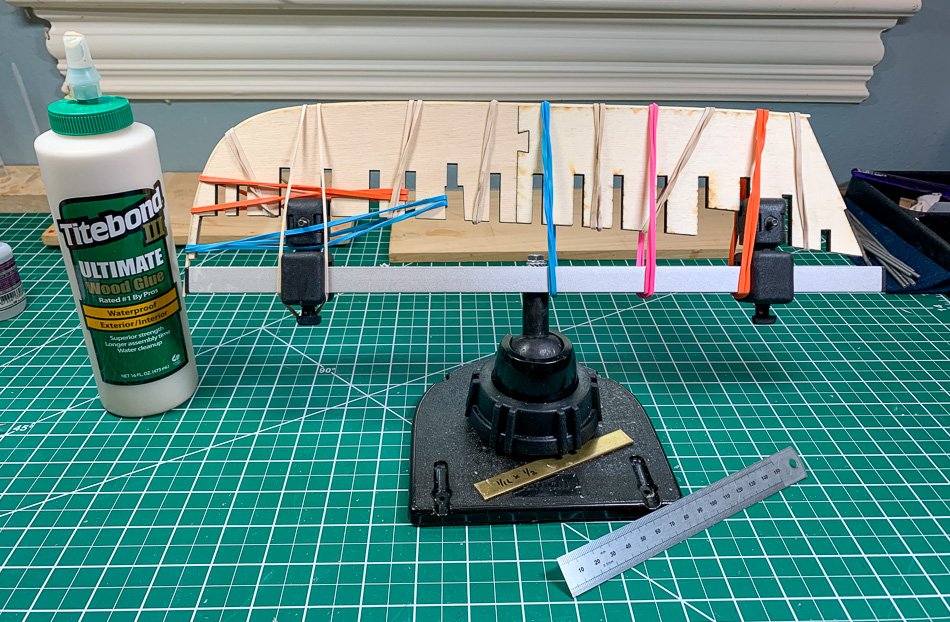
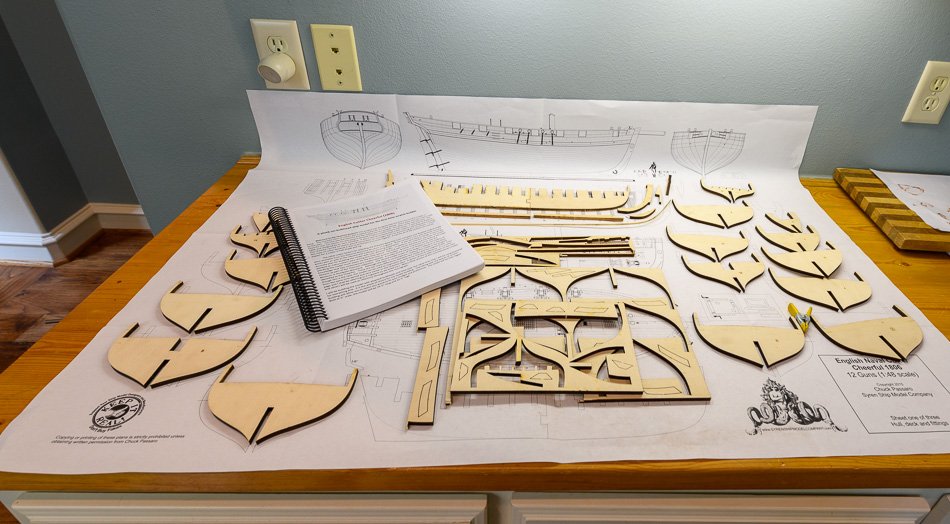
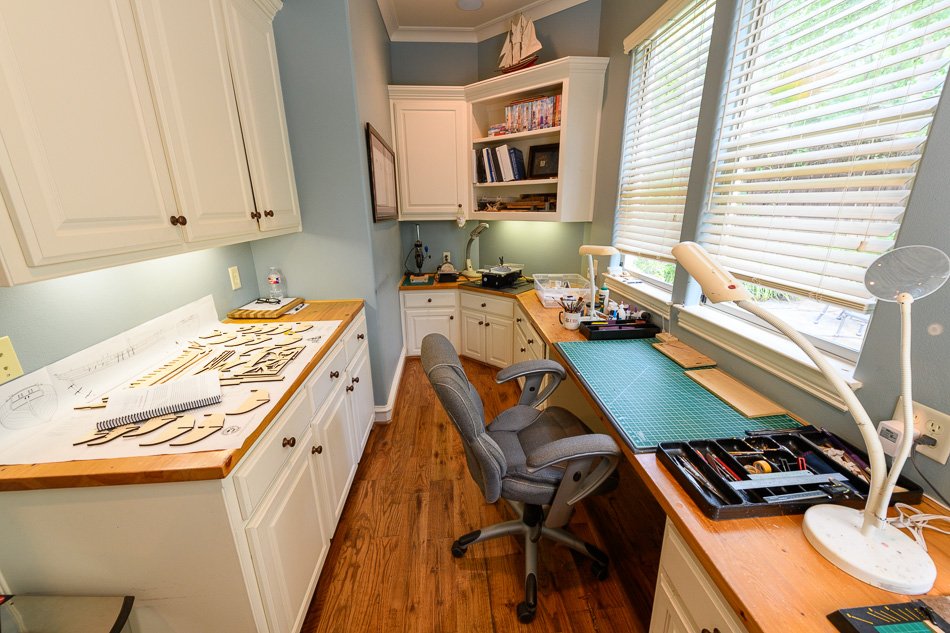
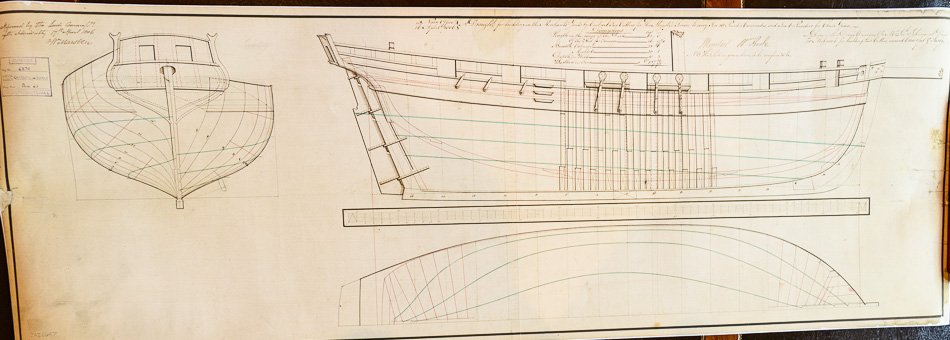
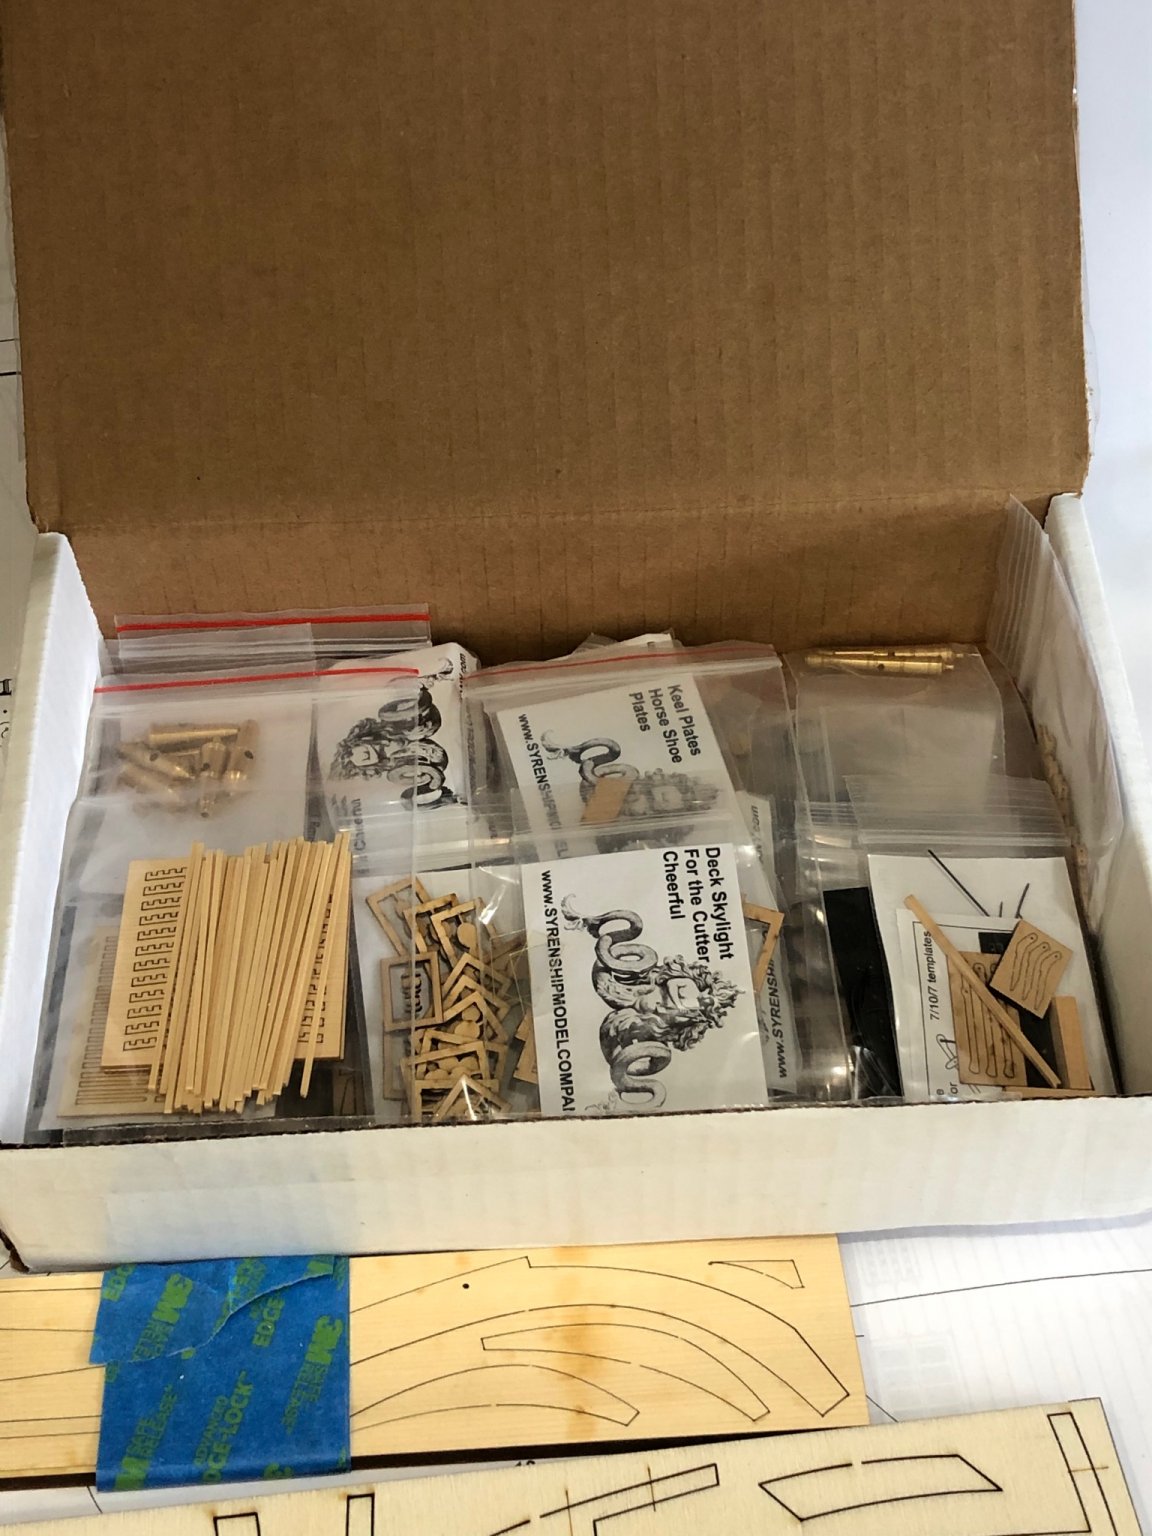
 After much research I am ready to build Chuck Passaro’s @Chuck Revenue Cutter Cheerful 1806. And so it begins... After completing nine kits over the years I am making my first attempt at scratch building. Well, I say scratch building but Chuck’s Cheerful plans, starter kit, wood package, and sub-assemblies along with his instructions and always gracious guidance make it a much easier transition. While I’m a decent kit modeler I’m hesitant to post a build log for Cheerful. There are several outstanding logs already on MSW, some from builders I’ve admired, some I’ve just discovered in searching Cheerful, and of course the master himself, Chuck. I don’t know how I can add anything to what they’ve already done. They do say however every model is unique, I’m pretty sure I’ll prove that... One thing is for sure, I’m going to learn a lot along the way. A good reason for a build log is having the council and support of the MSW community. I’m going to build it to the best of my ability, and I’m certain at the end of the build my ability will be a bit better than when I started. I’ll ask questions and share how I do things, hoping there is something useful for the next builder. I’d like to think my log will be a Cheerful read and not a Surly one (see what I did there…). For proper motivation I ordered a copy of the British NMM plan for Cheerful. I plan to hang it in my shop (next to the NMM plan of Pegasus) once frame shops are open again, whenever that is (Covid shut down for future readers). These plans are wonderful to look at - the fact these drawings turned into a ship and stood the test of time to become today’s model … very cool. We custom built our house, from the very first drawing I had the intent to include room for my model building. The architect didn’t quite get it initially, but the final blueprint has the notation “Ship Room.” We don’t have basements here in Texas due to the soil condition, so it’s fitted into the architecture tucked away on the lower of the three levels. The upside is it’s a nice sized well lit room for building, the down side is that there isn’t a lot of room for machinery, which I don’t have anyway other than the Byrnes saw and sander, so Cheerful, hand tools it is. The tub on the back right is loaded with my Cheerful collection of wood, sub-assemblies, blocks, and rope - ready to become a ship. The first thing was to print off Chuck’s instructions from the website and have them bound in a spiral notebook, something that will always be by my side along with my iPad to cross check what I’m doing with other build logs, So thanks in advance for the good ideas and experiences I’ll find and happily steal, I mean learn from. Next I laid out the frame and keel parts from the starter package and thought wow, there are a lot of bulkheads, and felt just a touch better about my first attempt at single planking. Then I remembered fairing and thought, wow, there are a lot of bulkheads… The starter package didn’t include the rabbet strip (as Chuck says, welcome to scratch building). For some reason I had the perfect 1/8 x 1/16 boxwood strip in my stock, one of the few remaining bits I had from our retired friend Jeff of HobbyMill fame. Then I wasted no time in stealing a good idea, so from BE’s log I used the waste from the hull billet to shape the rabbet strip at the bow, making it easier to install. With the two hull parts joined I glued on the rabbet strip using Tite Bond yellow wood glue, it sets up fast! I pre-positioned my rubber bands but I had to move quickly to center the strip. I have some brass gauges, the 1/16th size allowed me to quickly run the edges to get it centered. Next up, the bearding line, the keel and stem... Looking forward to comments and feedback. My log has begun.
- 776 replies
-
- 20
-
-
- cheerful
- syren ship model
- (and 1 more)
-
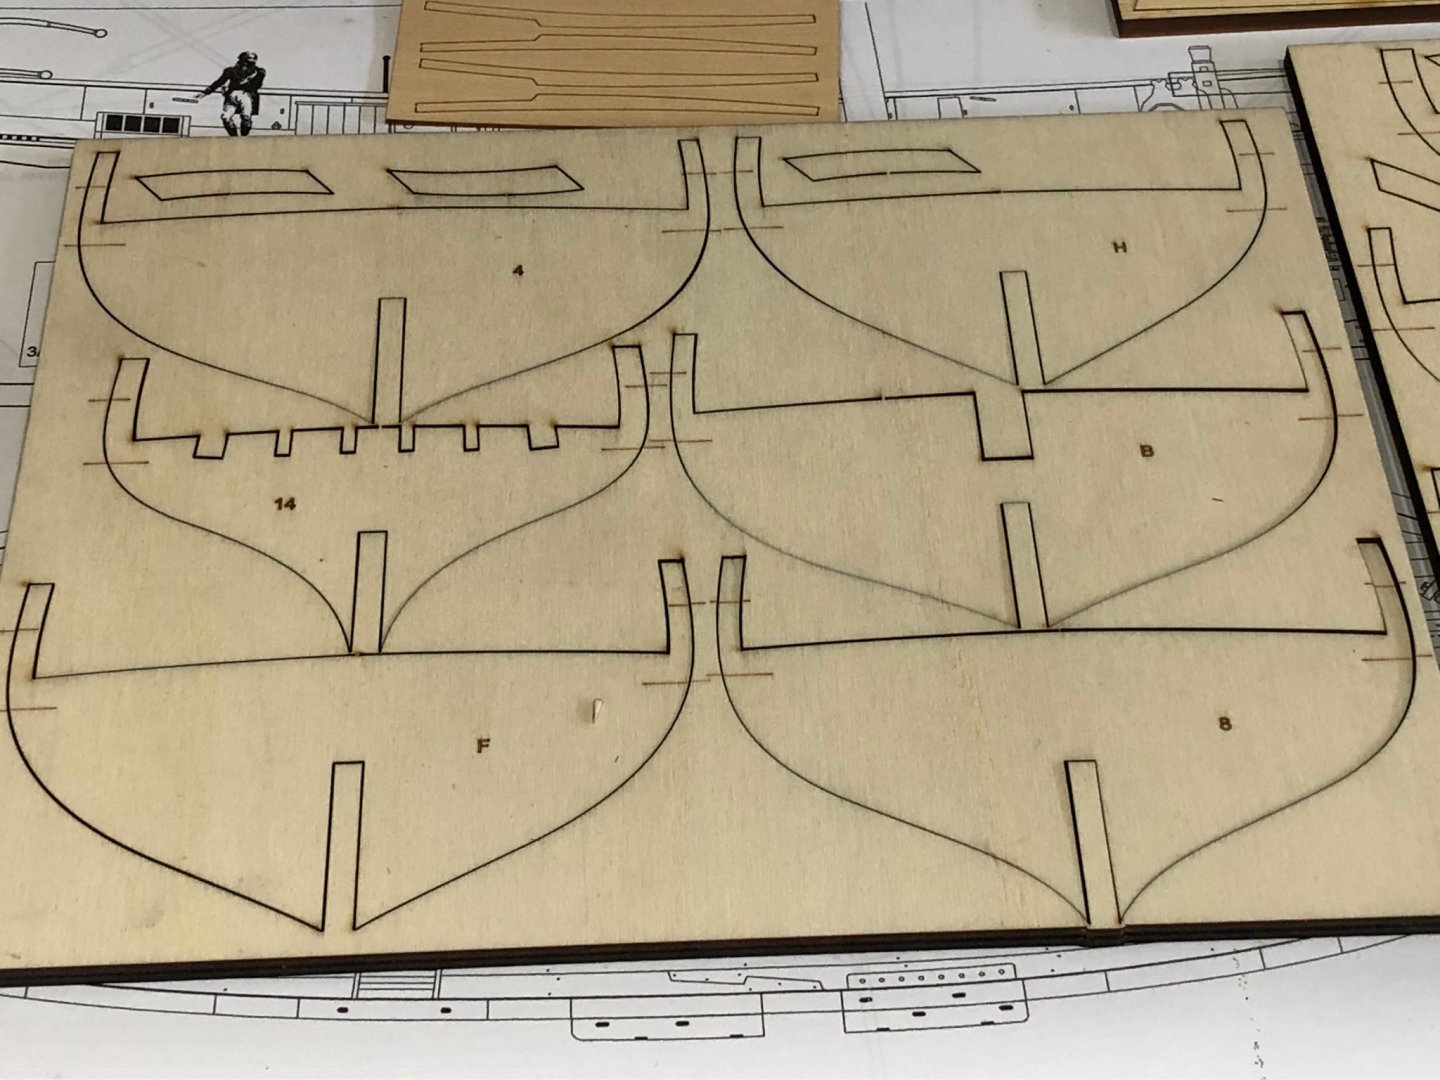
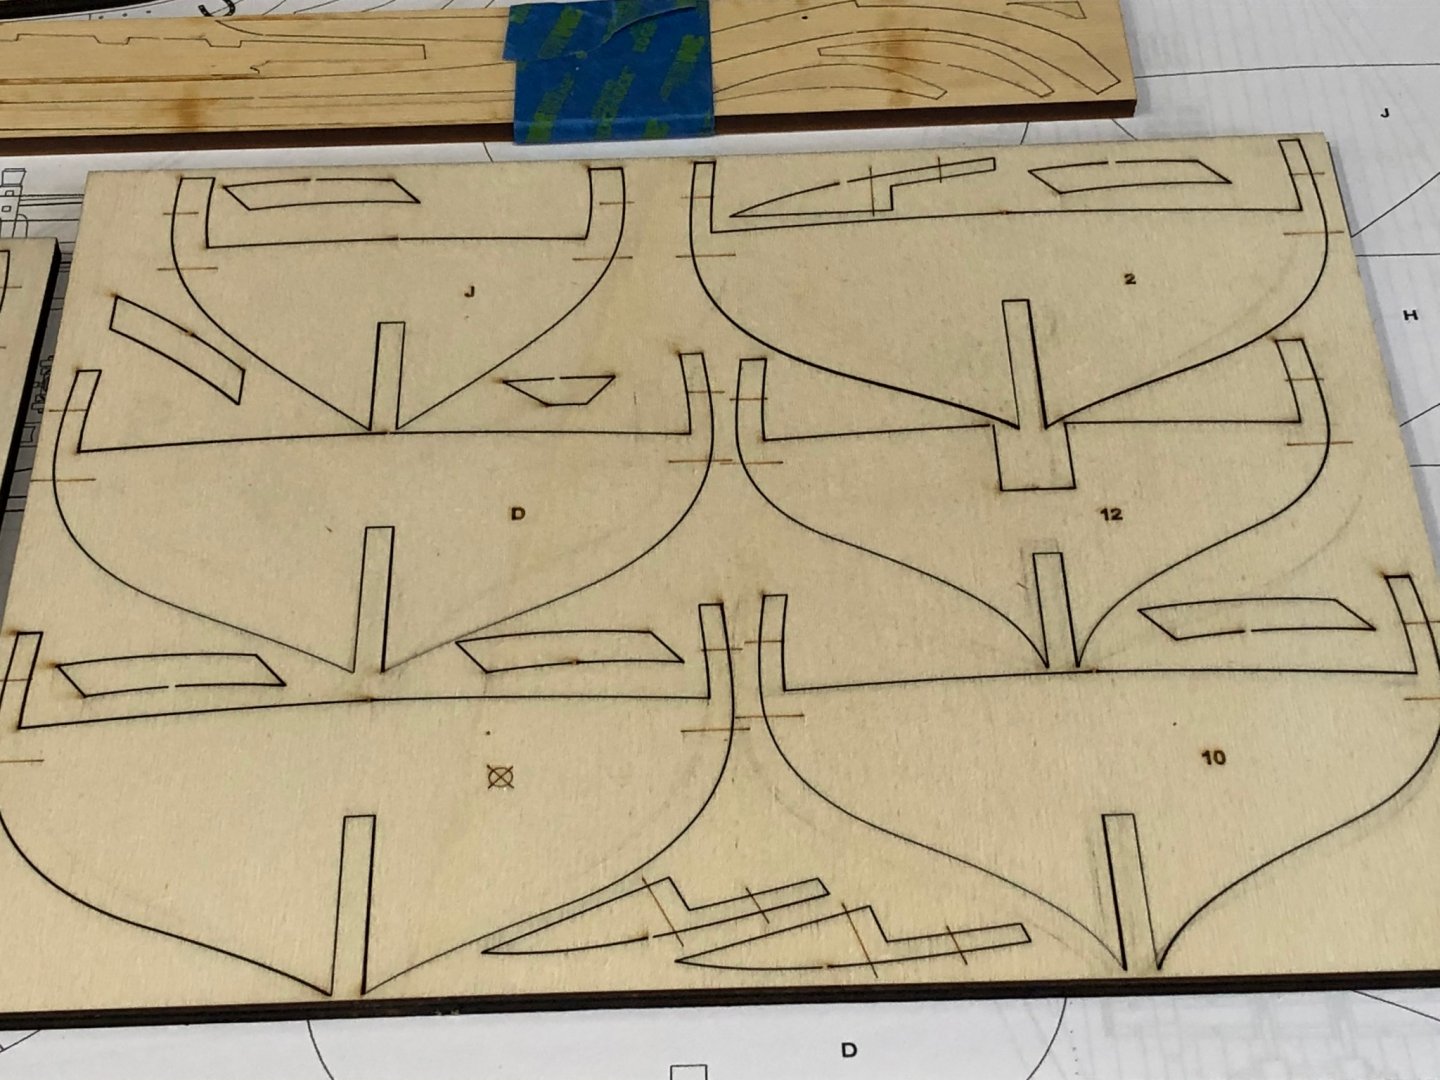
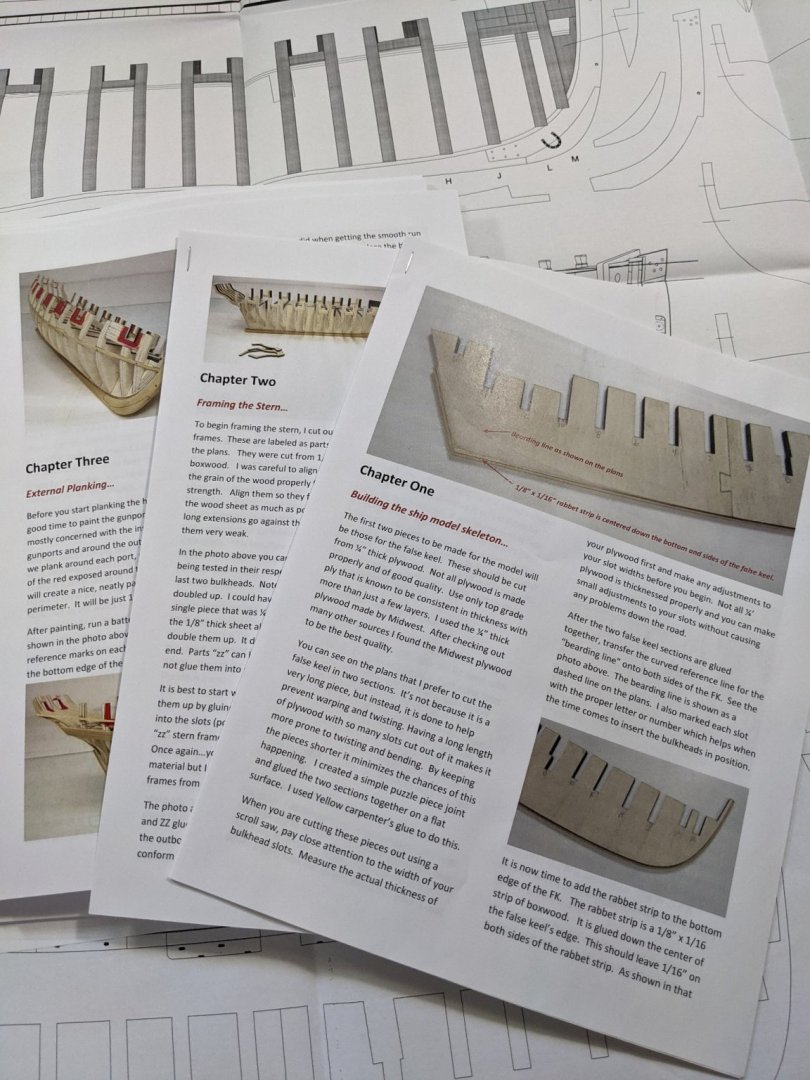
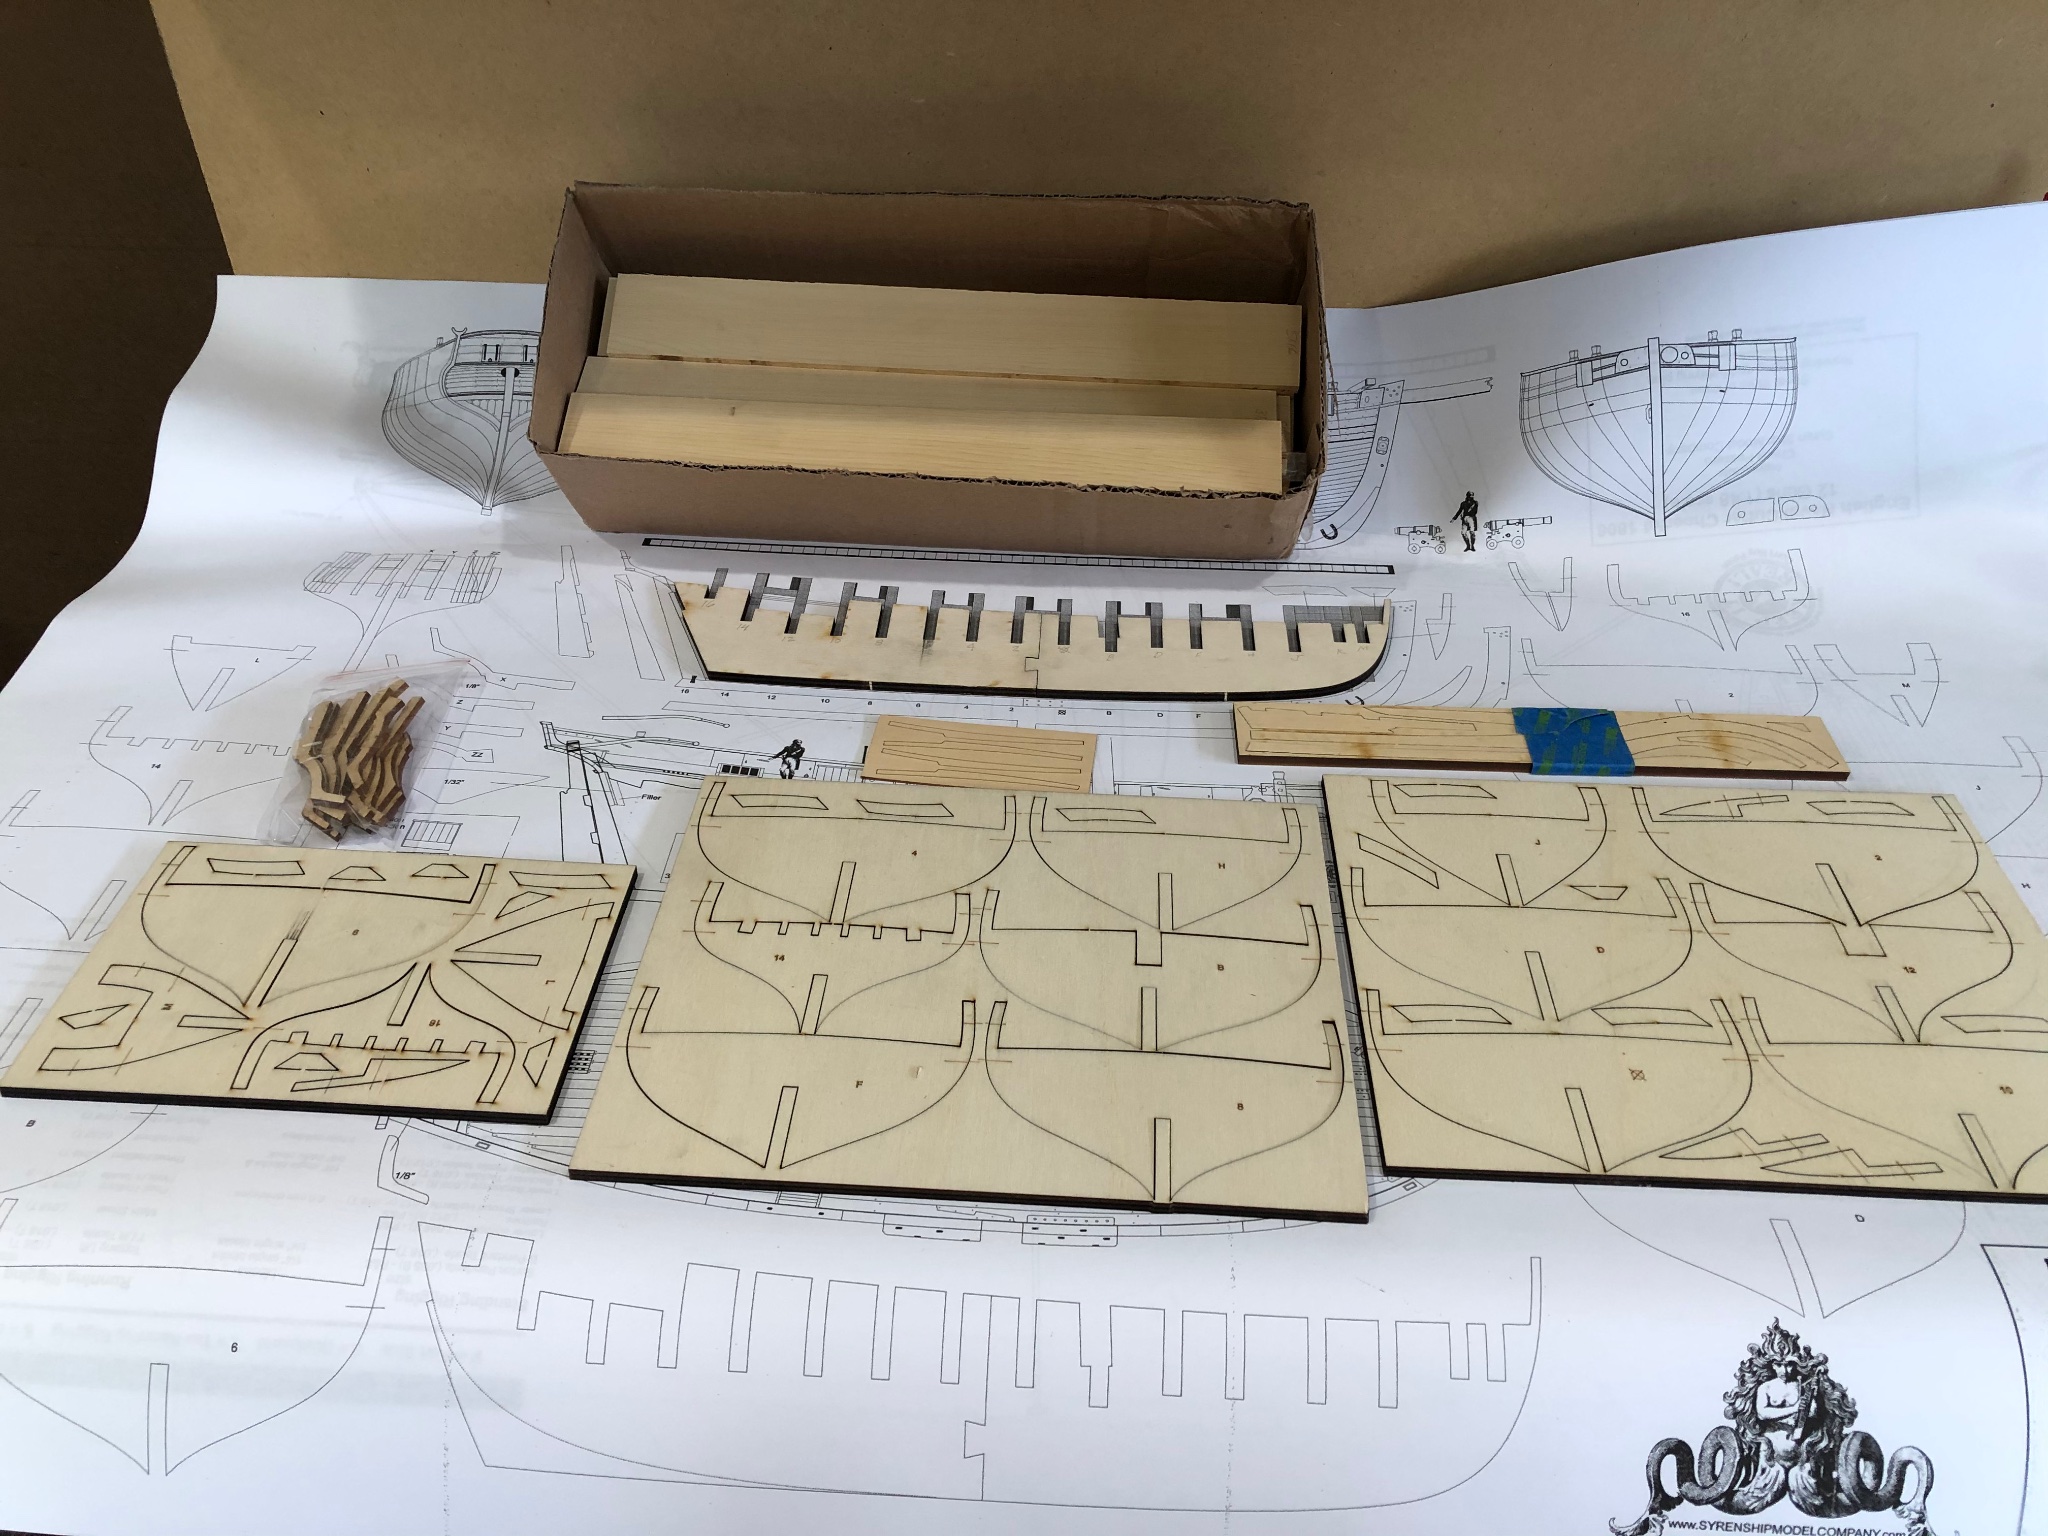
(1)(1)(1)(2).thumb.jpg.792ad774561d3d4f35888704cde27a8e.jpg) Not another Cheerful build? Yes I am exited to get started on this and wanted to share this. I ordered the starter kit which includes all the hull formers and plans. The laser cutting looks good and some of the pieces just fell right out of master. Each piece only has a couple small tabs to trim and there was very little burning on the back of the parts. The starter kit had 3 nice sheets of plans. I printed up all of the practicum in colour and each chapter is stapled together as there is a lot of information and would be too many pages to have them all in one book.
Not another Cheerful build? Yes I am exited to get started on this and wanted to share this. I ordered the starter kit which includes all the hull formers and plans. The laser cutting looks good and some of the pieces just fell right out of master. Each piece only has a couple small tabs to trim and there was very little burning on the back of the parts. The starter kit had 3 nice sheets of plans. I printed up all of the practicum in colour and each chapter is stapled together as there is a lot of information and would be too many pages to have them all in one book.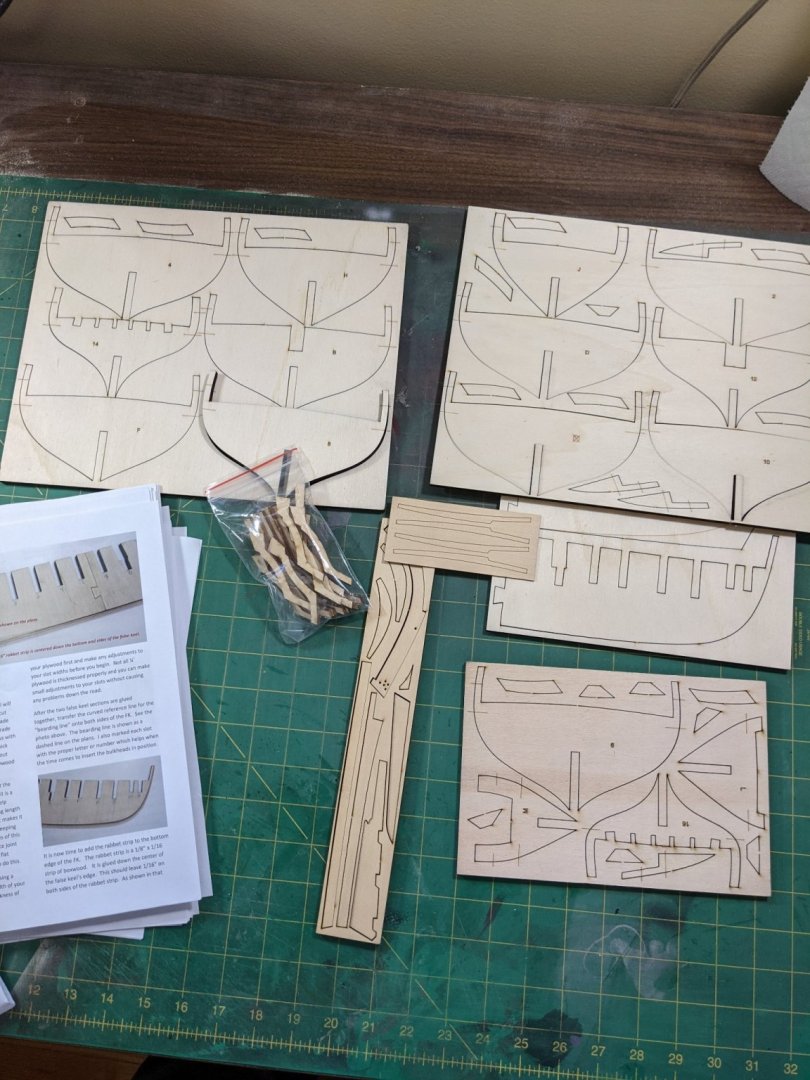

-
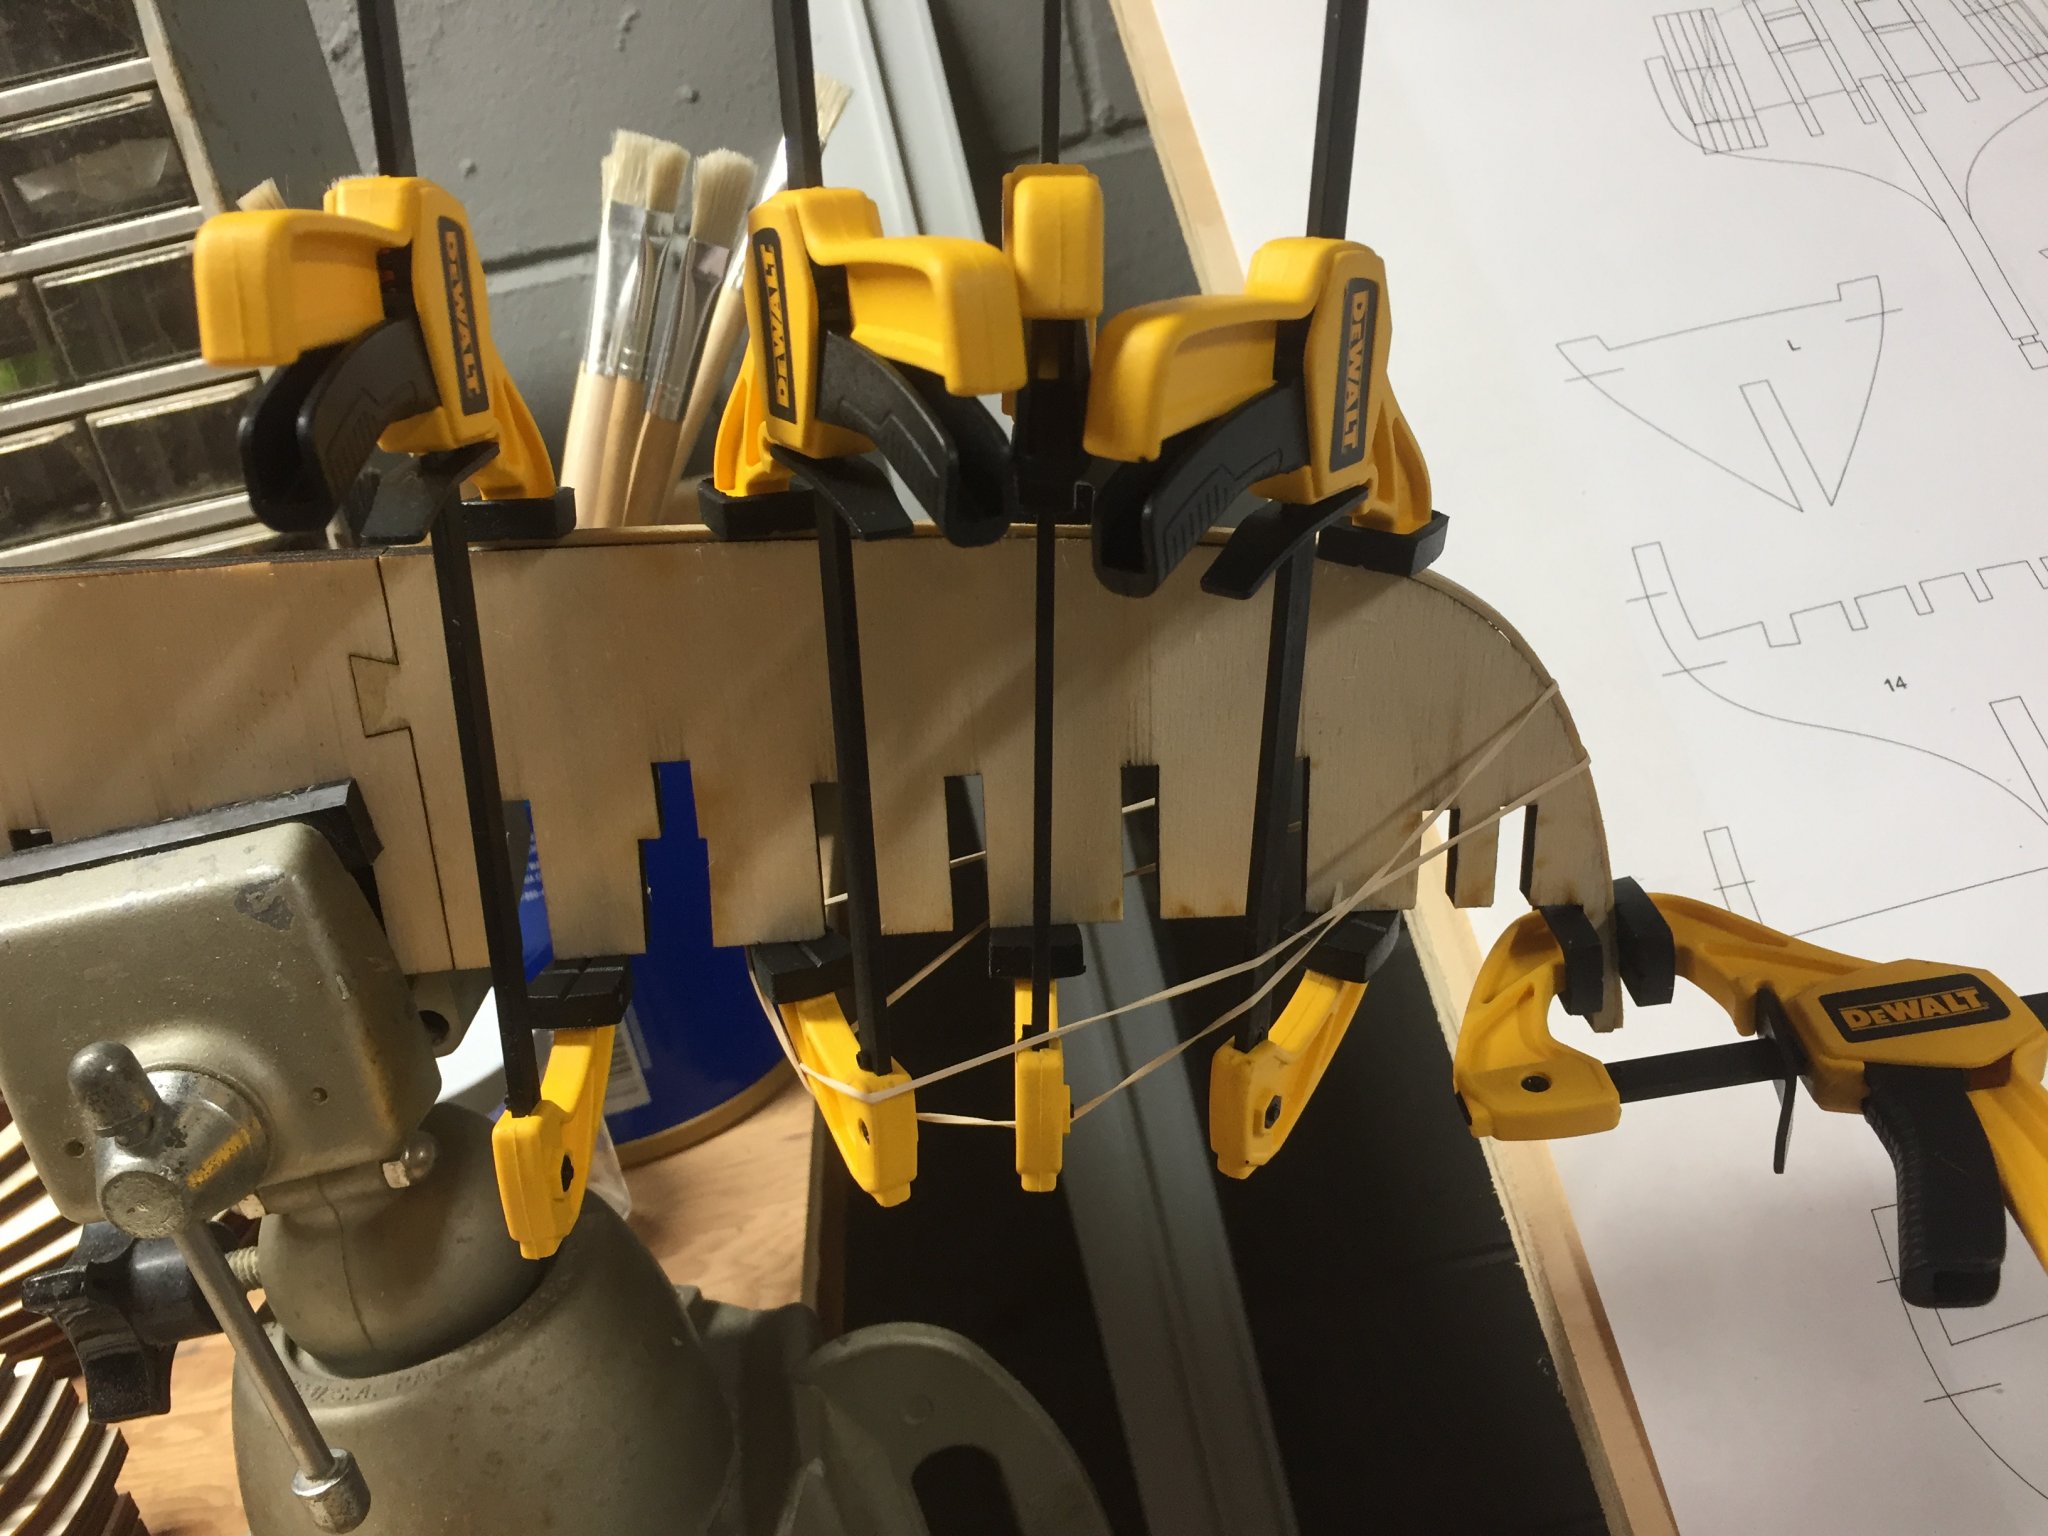
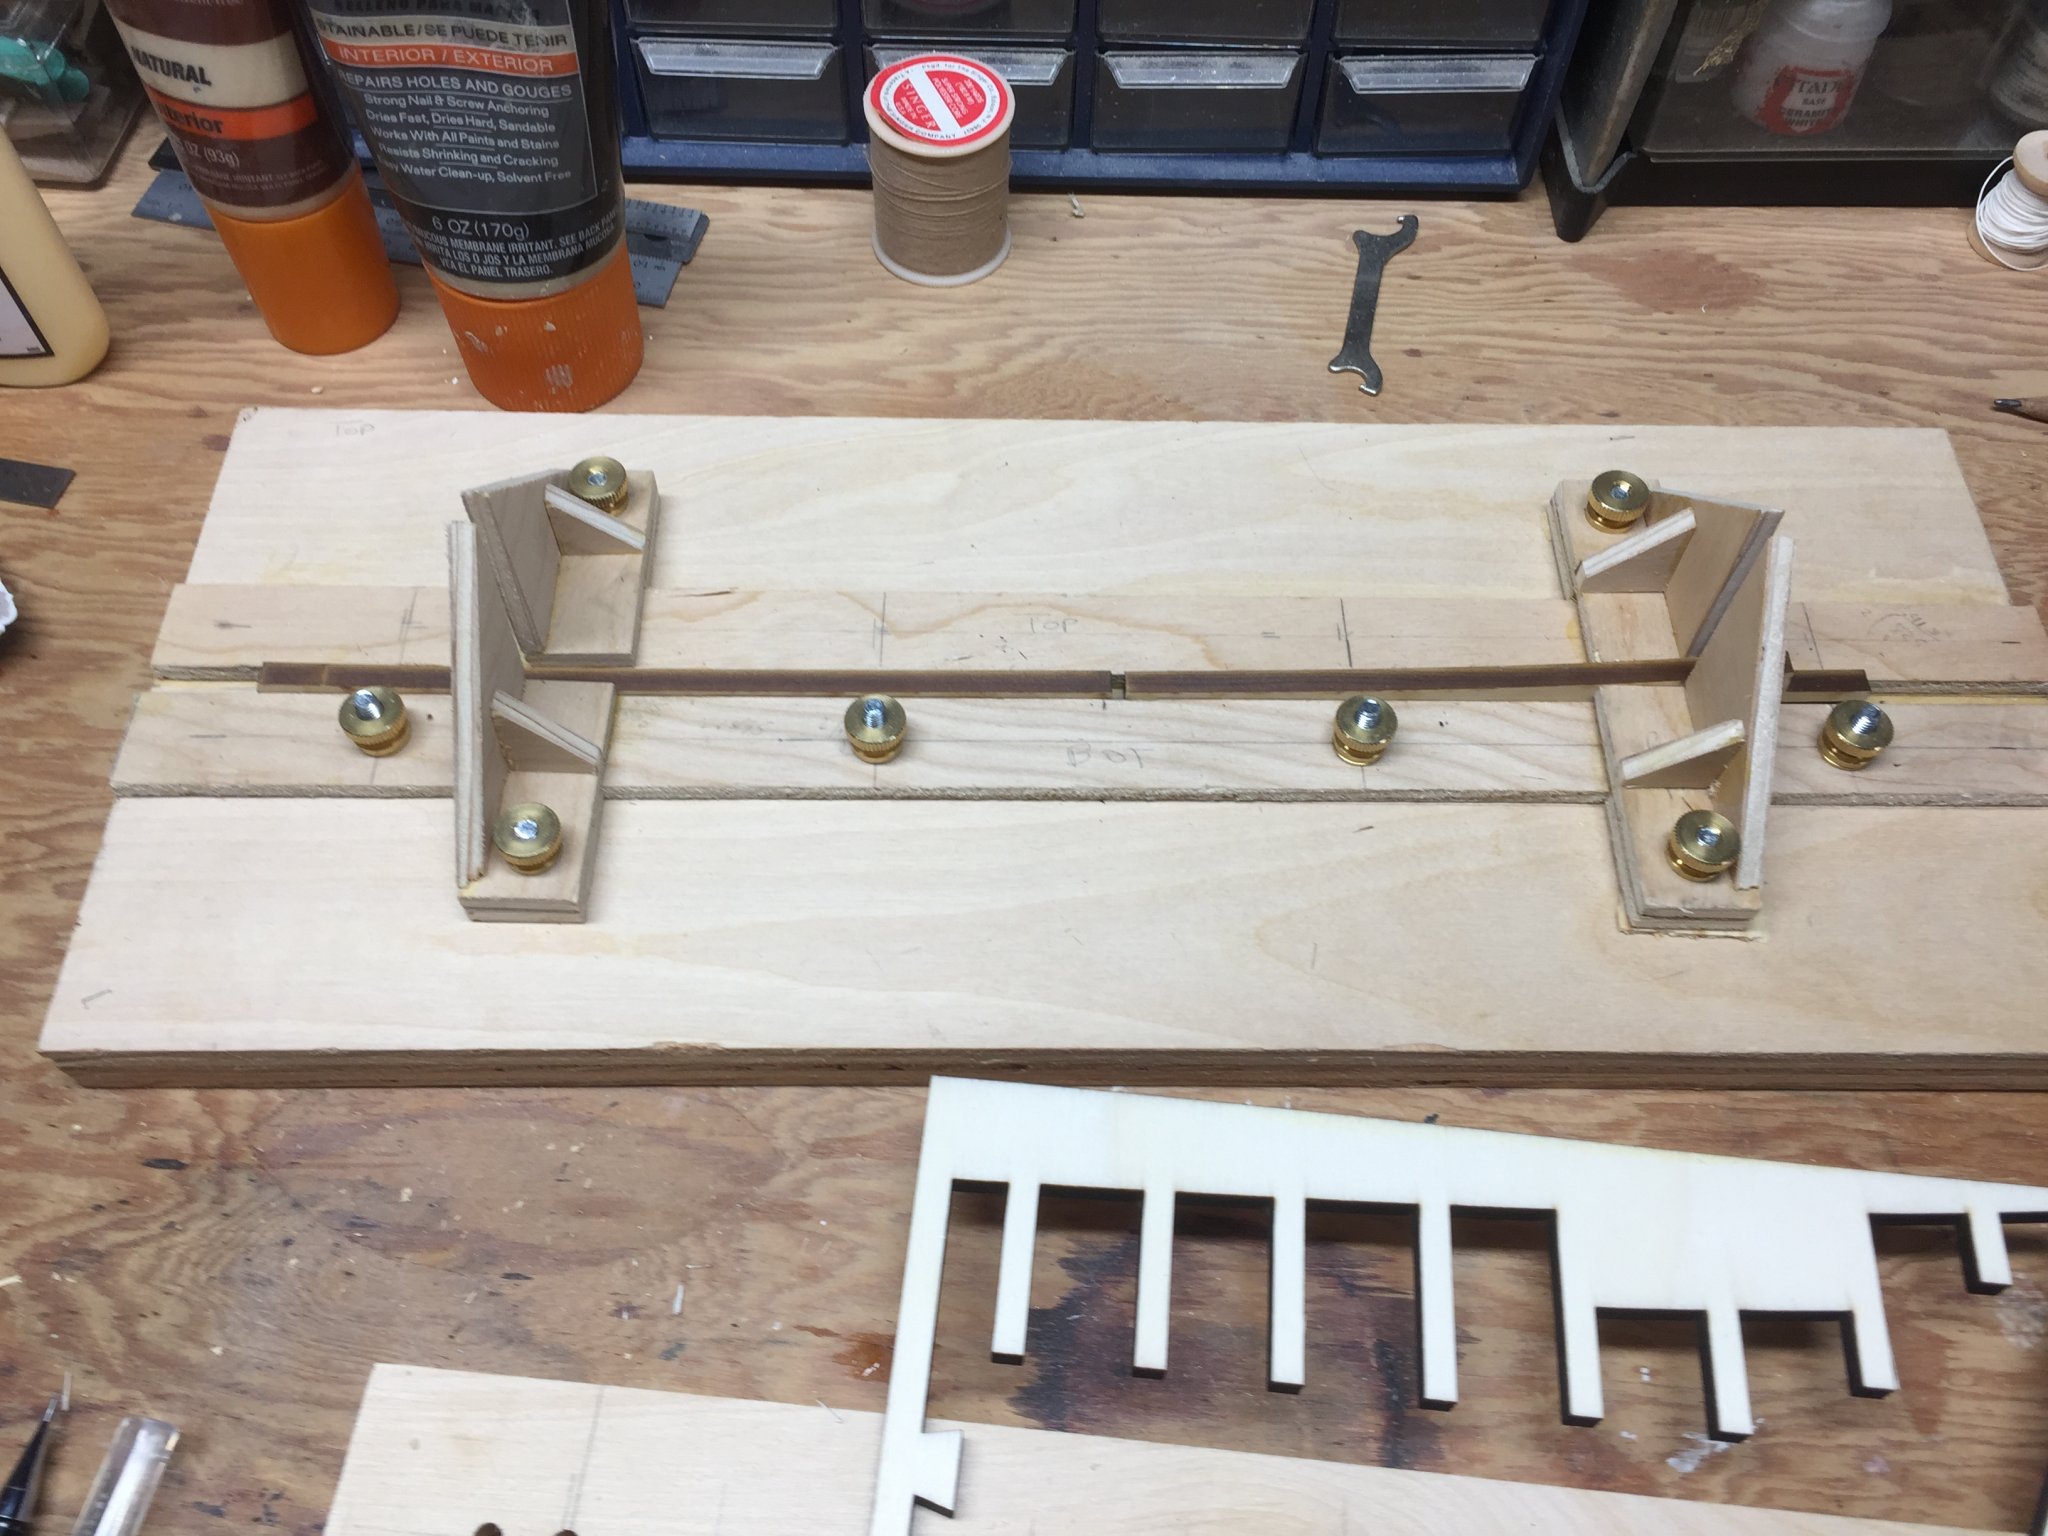
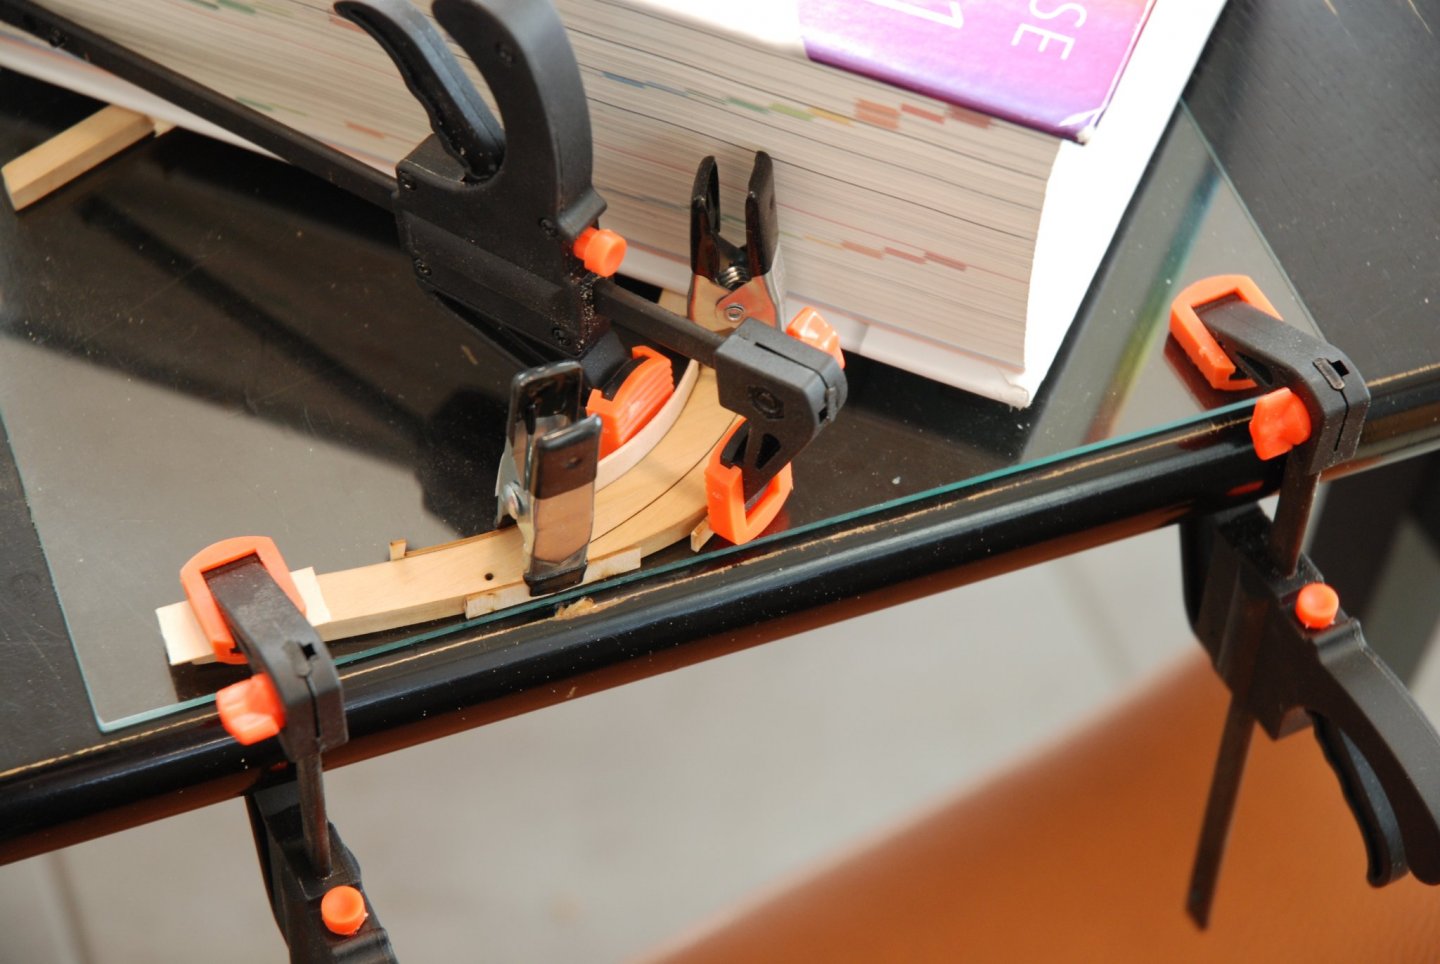
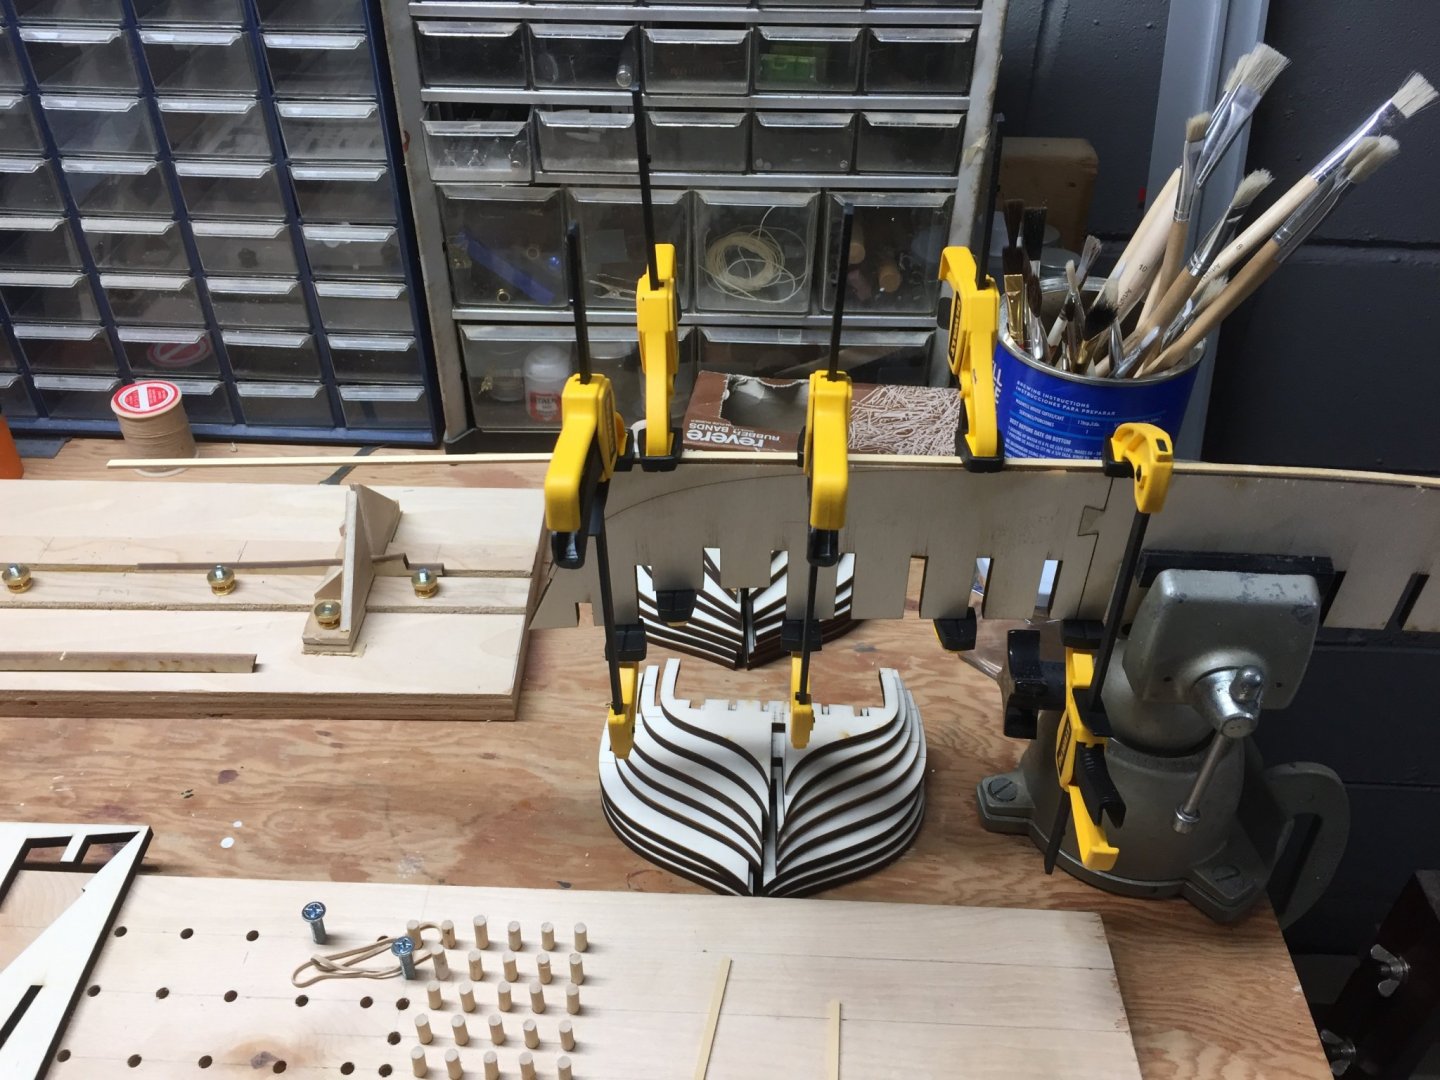
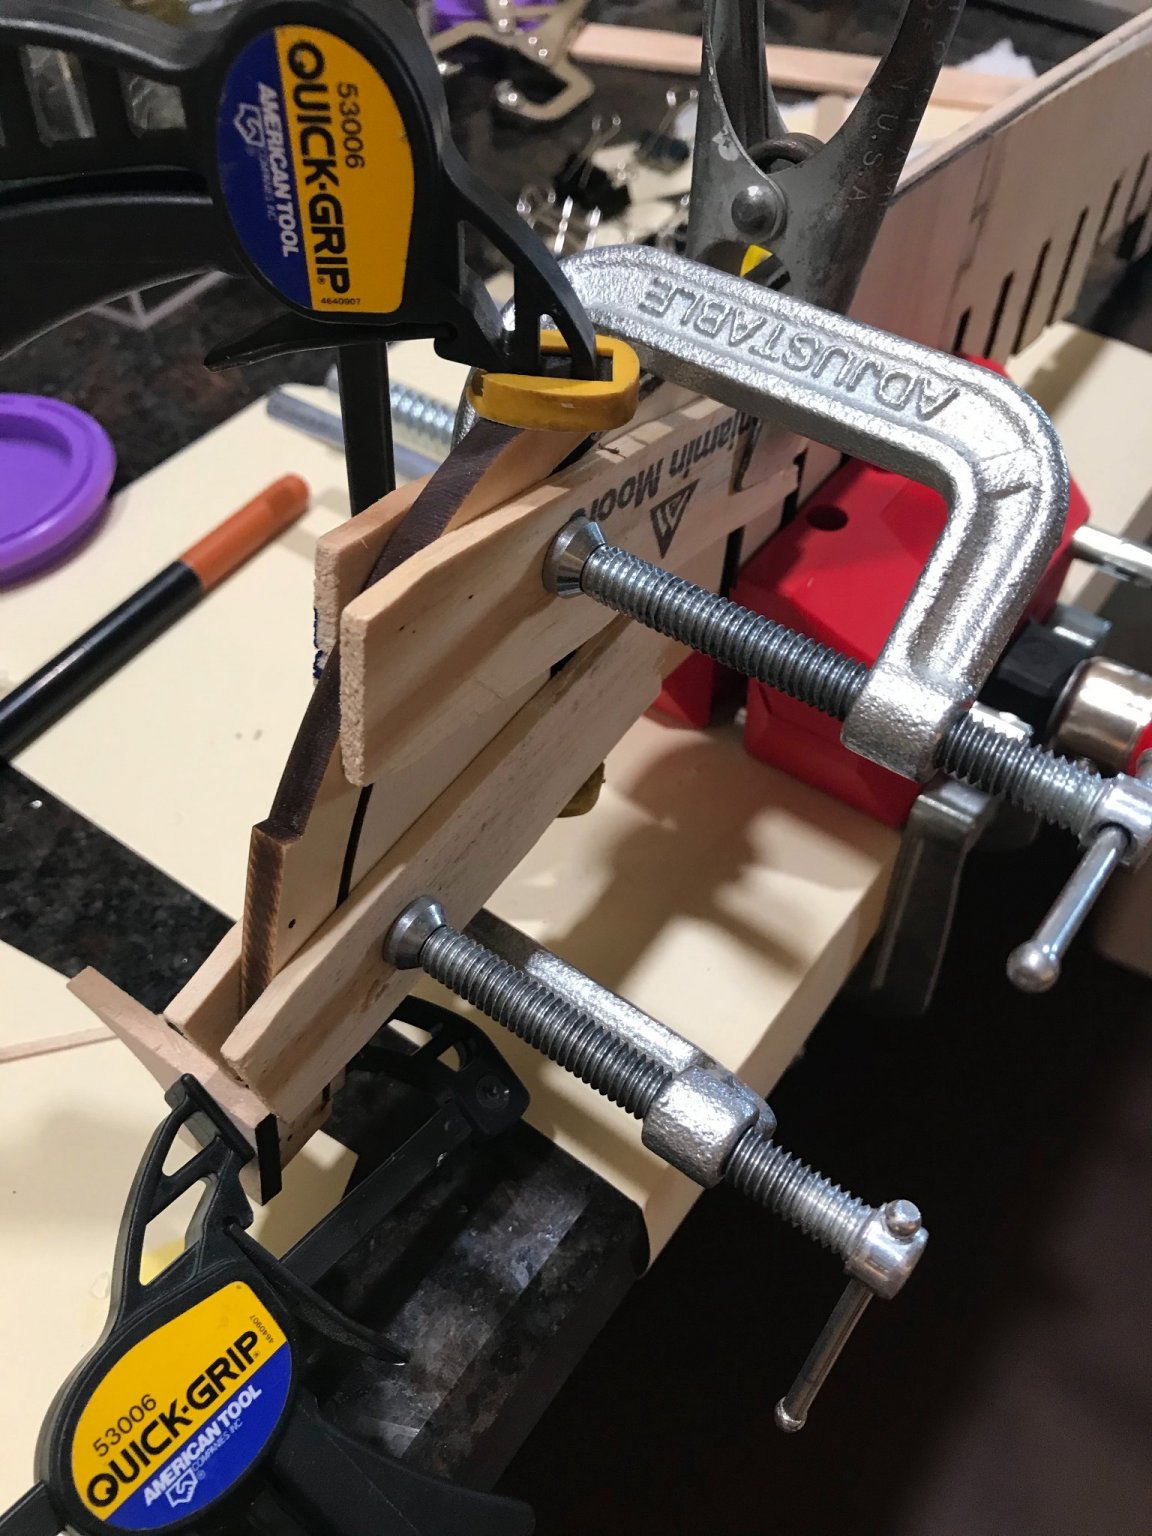
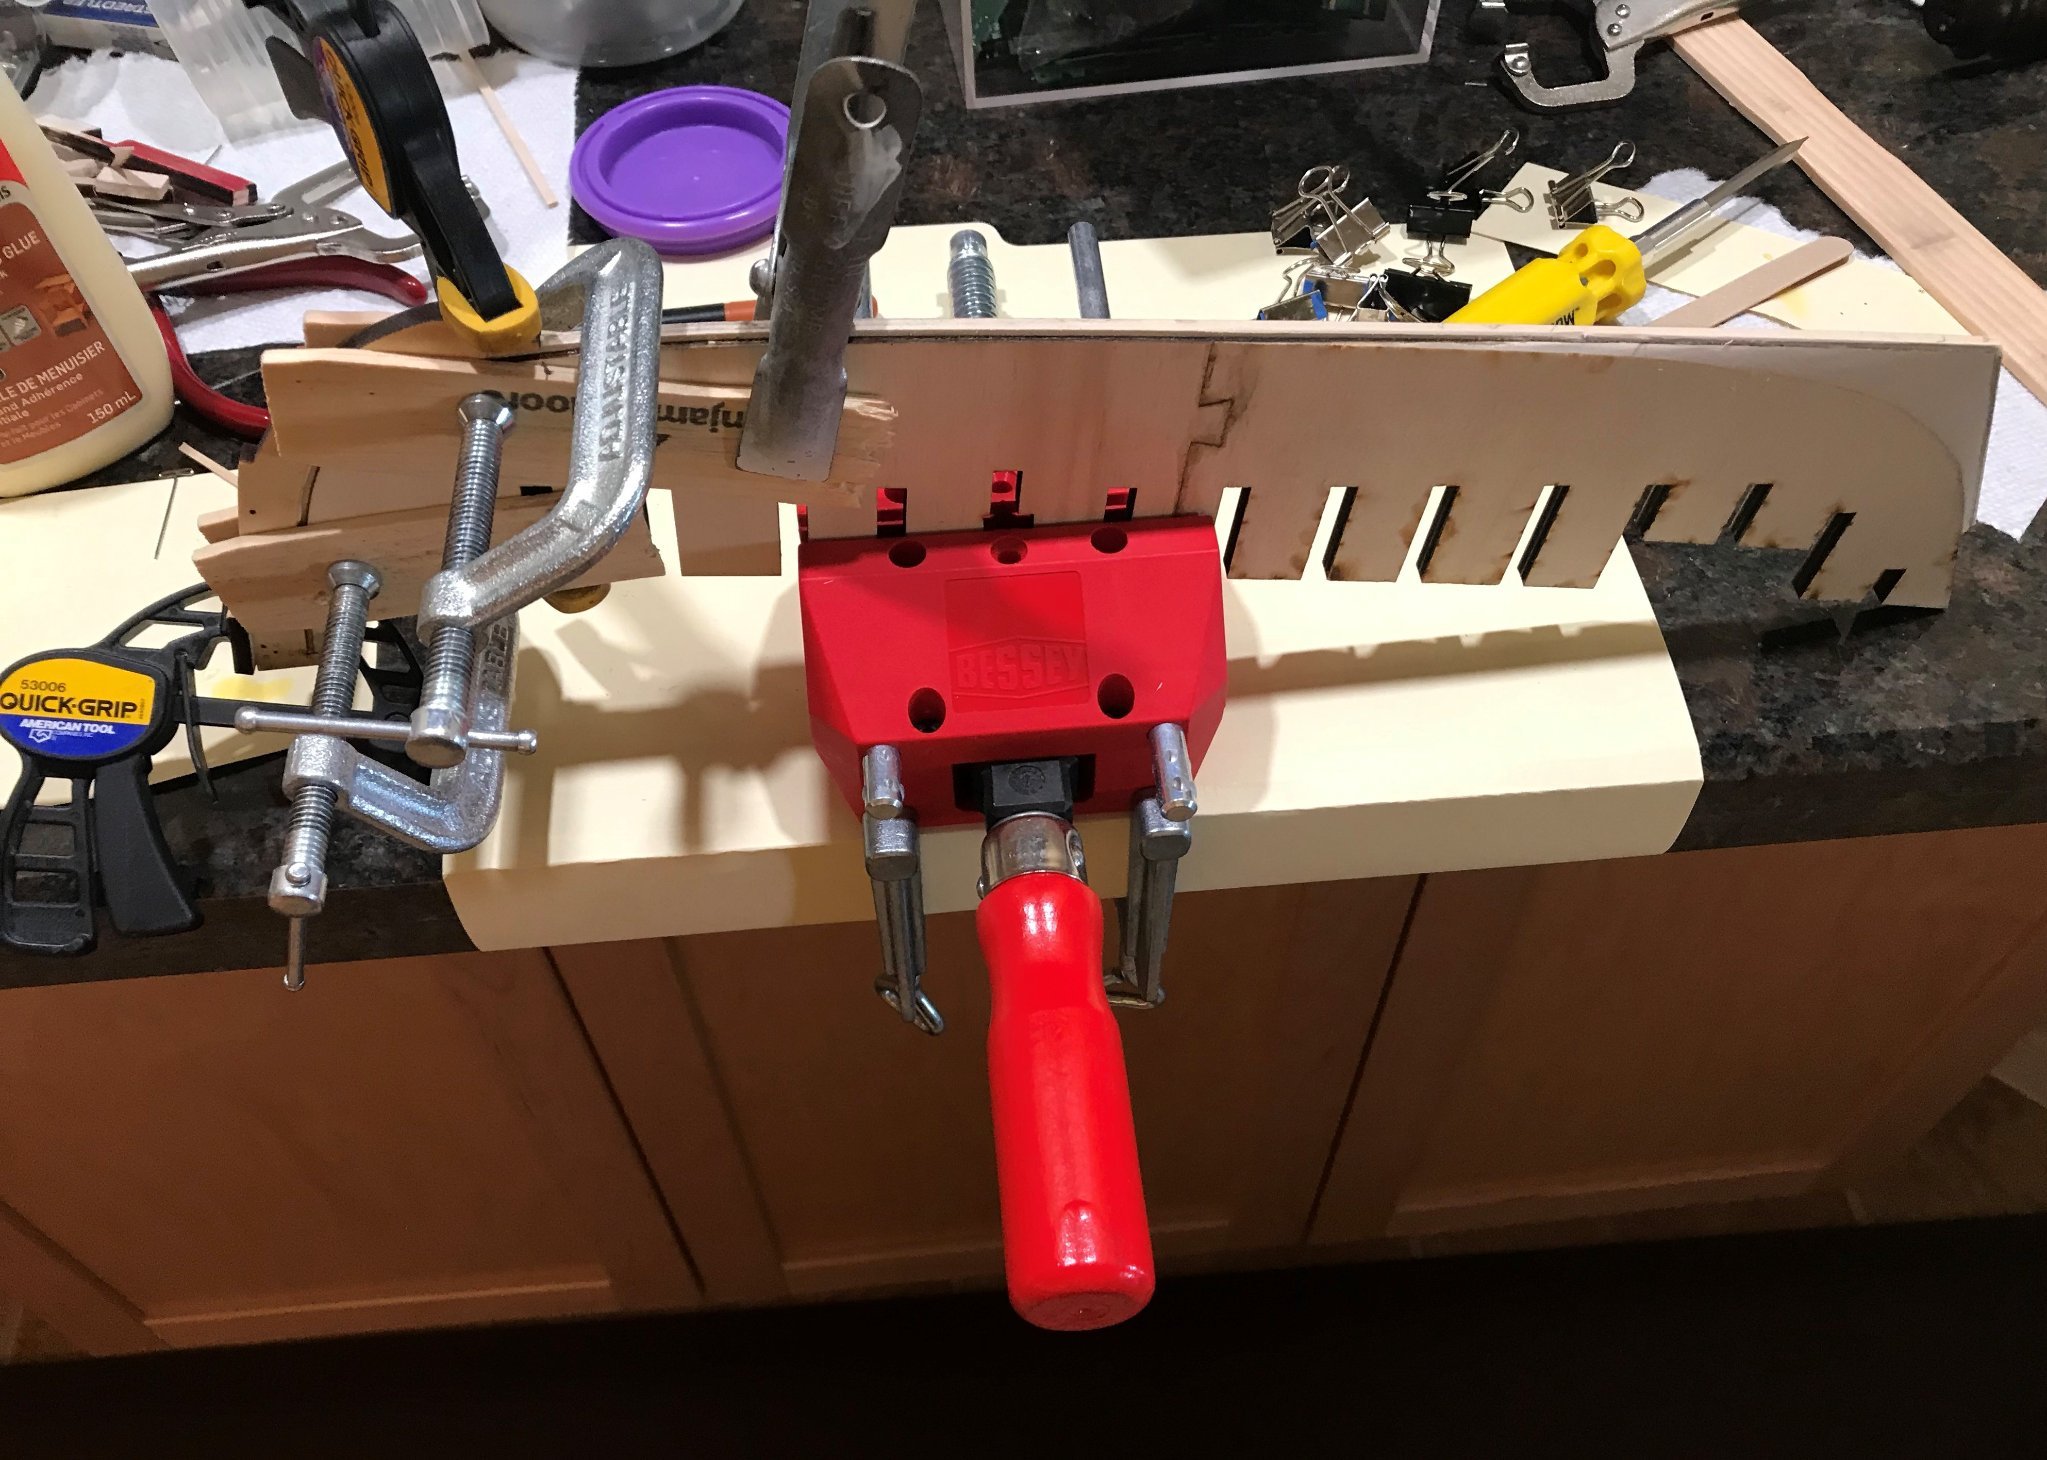
 I actually started this build in April 2018 having had a few sidetracks along the way. Fortunately I had taken some build progress photos at various stages, as I am currently at the point of finishing the deck fittings, but that will be for a future post. This is my first attempt at a plank on frame model having only built solid hull kits from either Model Shipways or Bluejacket in the past. I consider myself a novice, at best, but I am extremely fortunate to be a member of the Ship Model Society of New Jersey and have had much help and guidance from the members along the way. Special thanks to Stuntflyer, TomShipModel, Kurt Johnson, and Chuck for there everlasting patience with a novice. With that said, here goes nothing ... Using the laser cut out as a template for the bend, I have a glass sheet that I use for insuring things are flat, the log wedges were the heaviest thing I had around at the time. You can't have enough of these small bar clamps in my opinion The peg board above was made to help with bends. The pegs are removable and can be positioned in various positions to get a desired bend. (I ended up using a very different method when it came to making plank bends.) I stole this cradle design from Kurt J. who was also building Cheerful. His is much cleaner and precise.
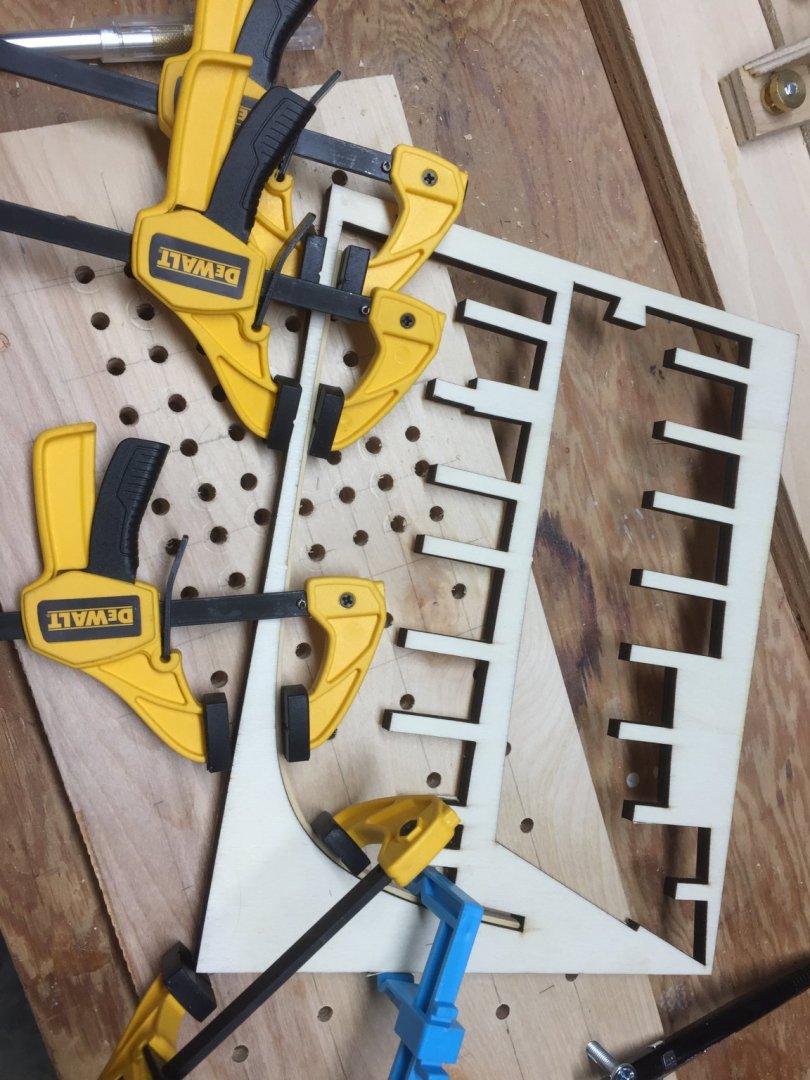
.thumb.jpg.50ac1edc95a70f355dada8c775b2fbfd.jpg)

- 54 replies
-
- 9
-
-
- syren ship model
- cheerful
- (and 1 more)
-
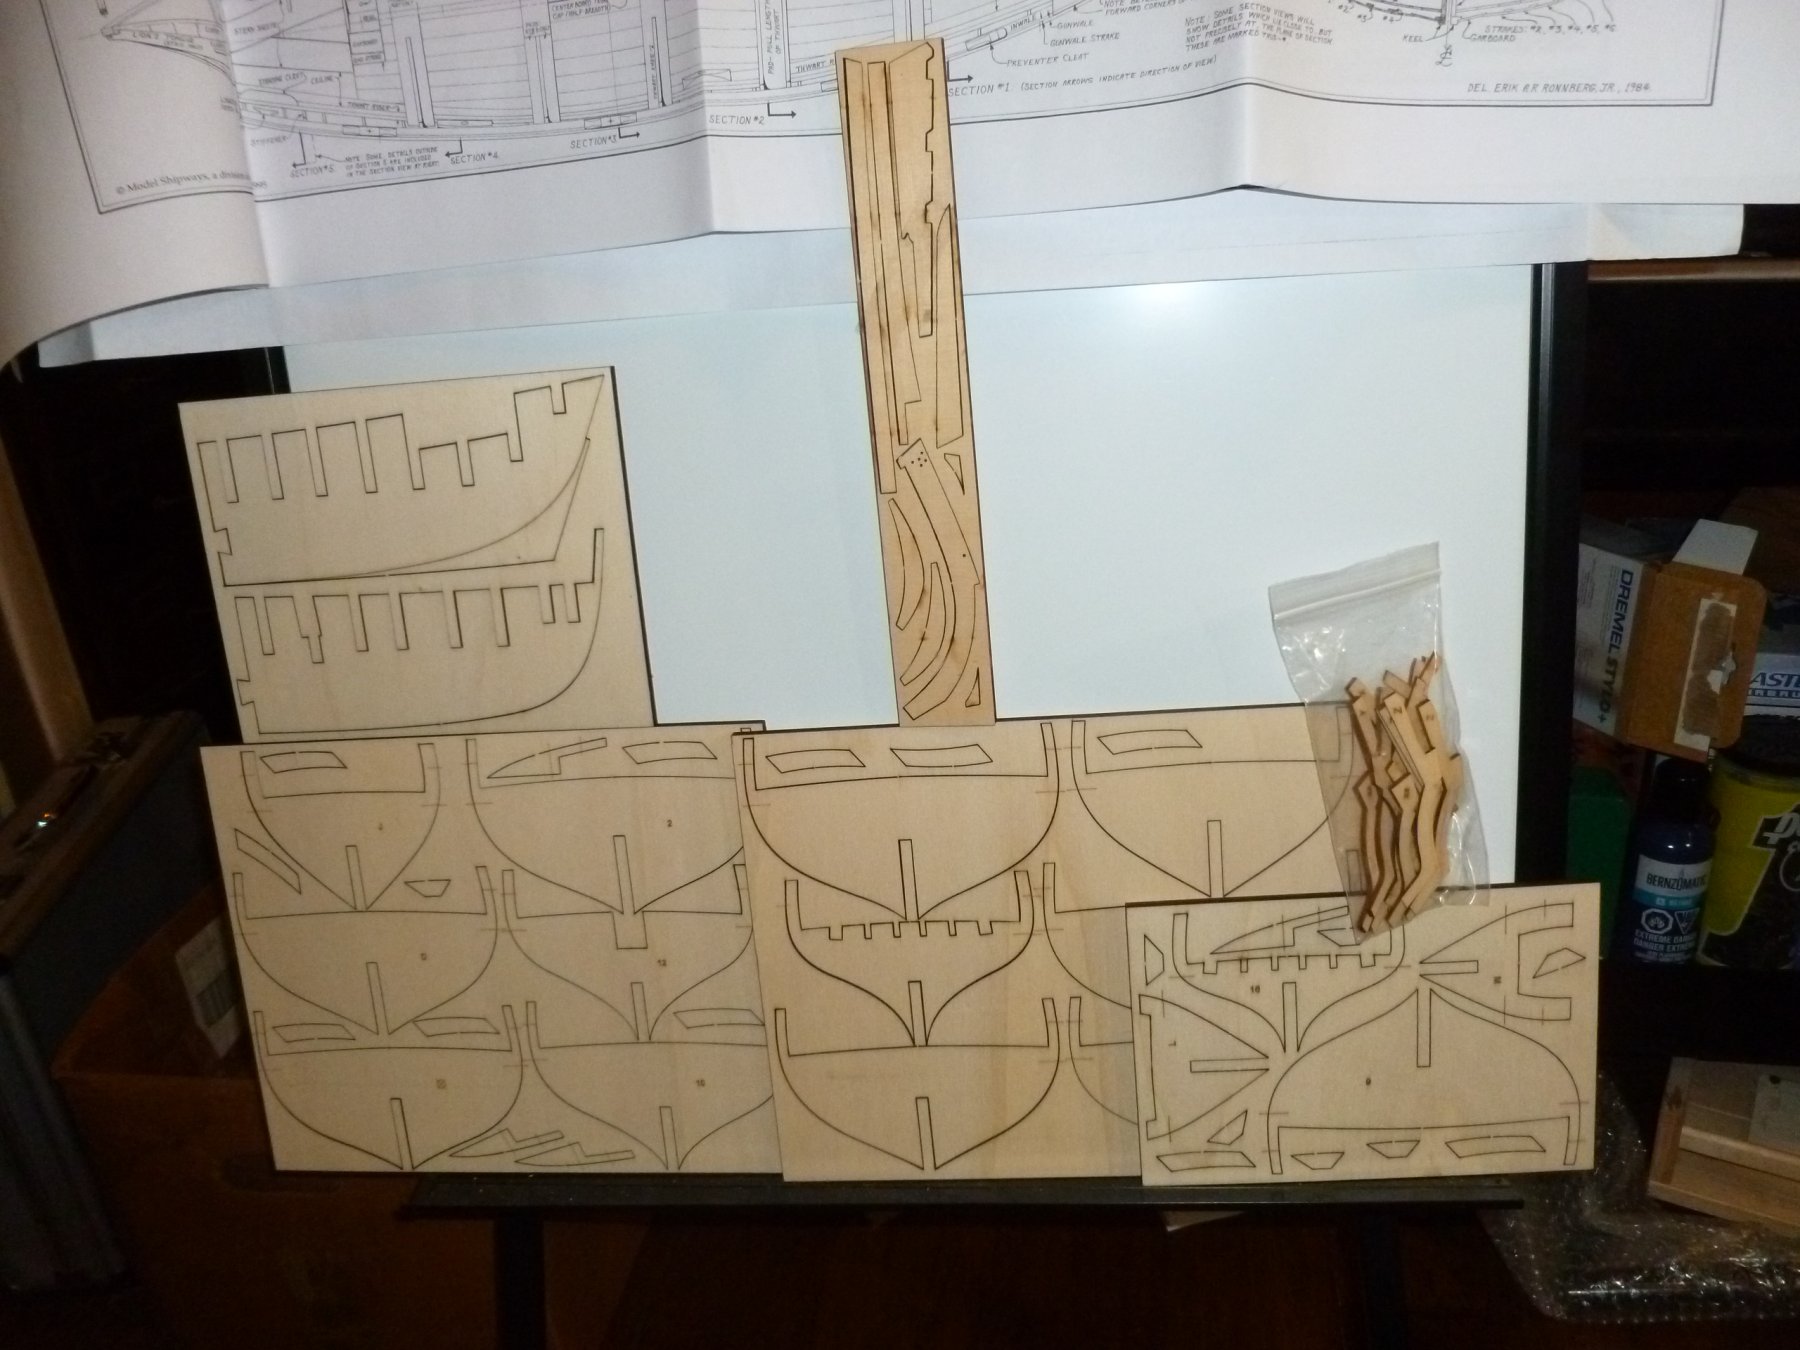
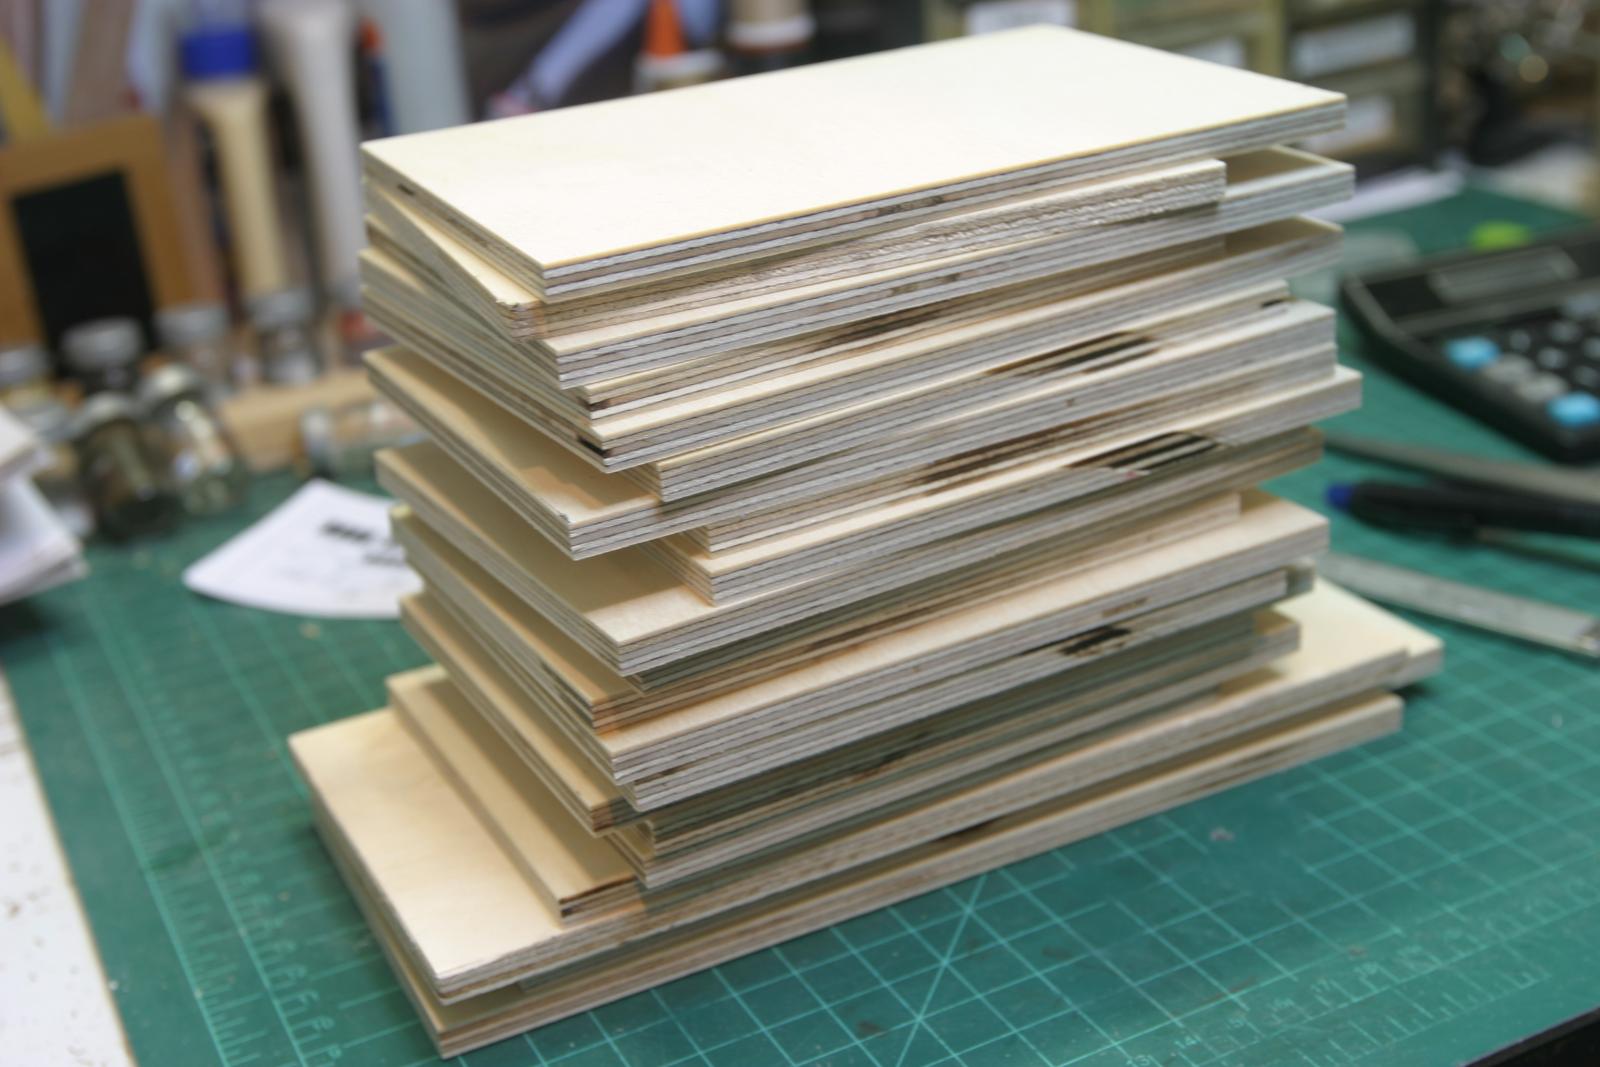
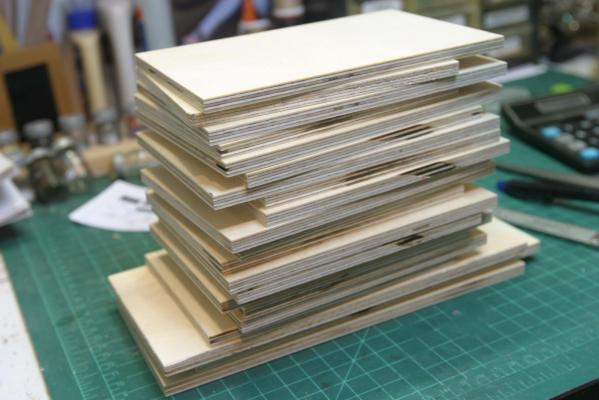
 I have never attempted a build log, but I think I will attempt one for Chuck’s Cheerful project. After partially completing 7 kits none of which are finished I found this opportunity to get away from the constraints of the kit building process. I also can avoid the rigging process that I must eventually tackle … but that for another day. The kit builds that are on hold are Kate Cory whaling brig, New Bedford whale boat, Bounty, Cutty Sark, Bounty Launch, Glad Tidings Pinky schooner, and Niagara Brig, Some are to the point of my dreaded rigging process. I am certain I’ll finish them if I live that long (72 years now). I recently received Chuck’s Keel and Bulkhead kit. Incredible quality! Five sheets of 1/4 inch plywood perfectly flat and skillfully cut. I could not be more pleased. I also received the plans Choosing to attempt scratch building the Cheerful Cutter I can work in a larger scale and attempt a simpler rigging. So on to the Cheerful build……
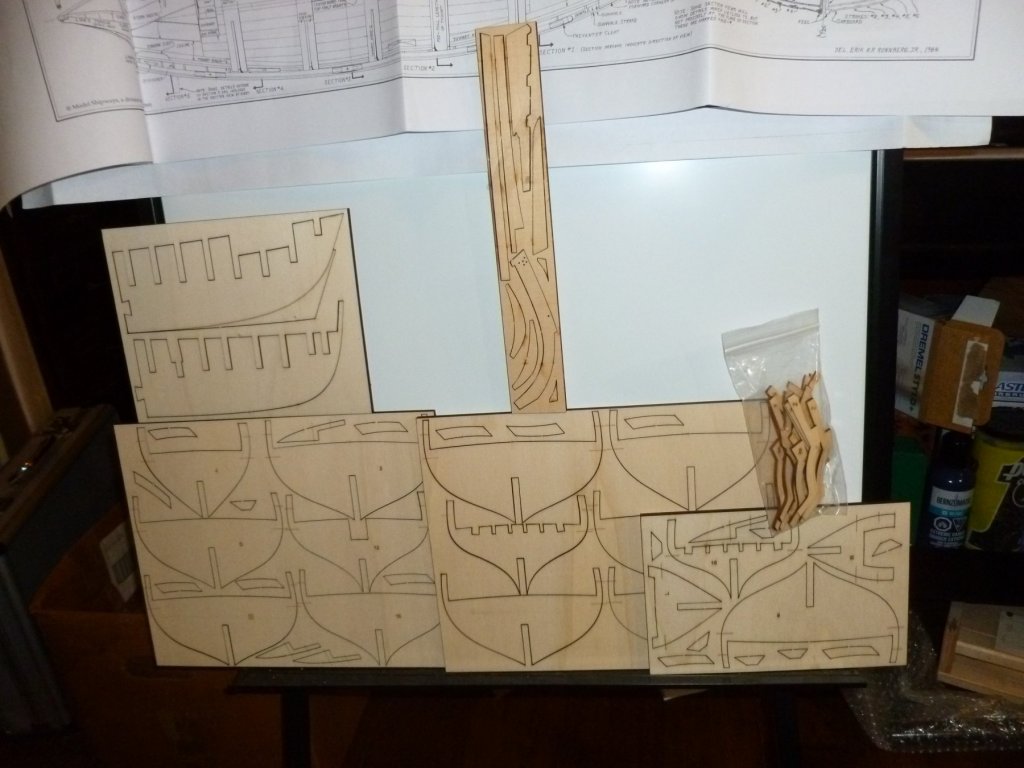
-
 Welcome to my build of Chuck's HM Cutter Cheerful. Most of the parts will be scratch built. Others like the false keel, windlass, rigging material and blocks will be purchased directly from Chuck. The wood for this project (all sheet stock) was purchased from Jason at Crown Timberyard. The quality of his wood is excellent and I am looking forward to working with it. As with my other builds, there will be many new things to learn and I will rely heavily on the knowledge base from MSW to help guide me through the process. So please don't hesitate to post your comments along the way. Thanks!.
- 450 replies
-
- 6
-
-
- cheerful
- syren ship model
- (and 1 more)
-
 In 2016 I bought Chuck's Starting set from a fellow modeler who became a father. I glued the false keel together and then packed everything in a big box. While preparing the Winchelsea build, the box fell into my hands and I decided to build both models more or less in parallel. I can practise all the building steps on the much smaller Cheerful model before I do them on the Winchelsea. Since the false keel I built at that time was no longer usable and I want to build the model from Yellow Cedar, I asked Chuck for spare parts. These arrived on Saturday morning with a small delivery of wood. Many thanks for the first class service, @Chuck . I will build the model according to the instructions and with the help of the mini-kits. I have only one change planned - I want to copper the underwater hull. The slipway is a bit big for the small cutter, but as I still had it, it was reactivated. On Saturday evening I glued the false keel together and let it dry overnight. The frames could only be pushed into the recesses with difficulty - the thickness of plywood is always subject to slight fluctuations. I made a small sanding stick out of 180-grit sandpaper and a suitable strip. Then go over the lasered edges two or three times on each side and the frames fit perfectly (the frames are not glued in now). Finally, the stem was assembled.
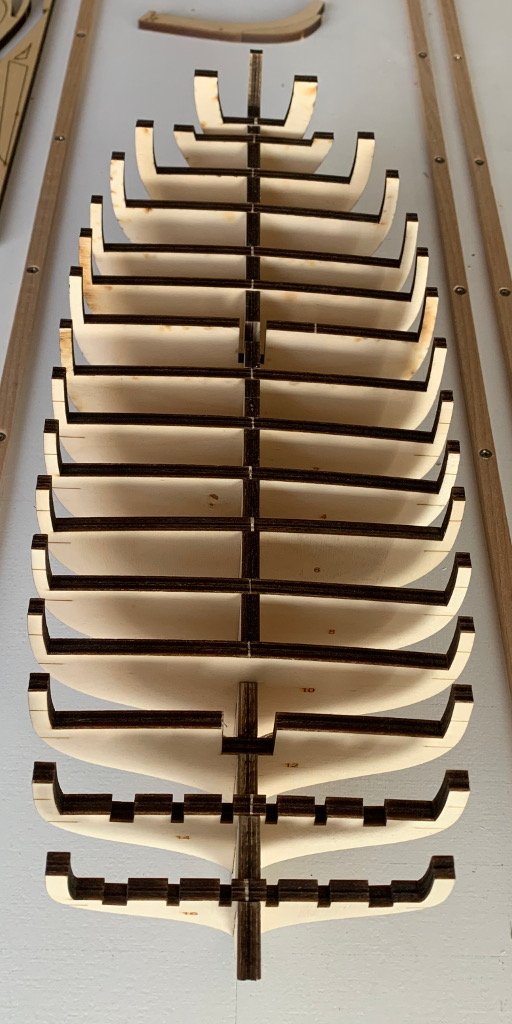
- 11 replies
-
- 15
-
-
- Syren Ship Model
- Cheerful
- (and 1 more)
-
 Hi All, Well the Winnie is in dry dock, I've finished the Cazador for my grandson, things have calmed down and now I'll start my build log for Chucks Syren Ship Model Company's HM Cutter Cheerful 1806 in 1:48 scale. The model will also be fully rigged. I plan on using a lot of Chucks available laser cut parts. Most of the wood used in the model will be boxwood except for the deck which will be holly and the bulkheads which are plywood. I know there are plenty of great Cheerful’s being built here and anything I do won't be different from those build. I've listed the build here as a scratch build but quite honestly with Chuck's laser cut parts it's a lot like a kit.The plans and practicum are Chuck’s usual splendid work. Easy to understand and very precise. Here are the laser cut bulkheads. The two halves of the bulkhead former weighted waiting for the glue to dry. The keel attached. All of the bulkheads added and drying. Lots a sanding to do next to fair the bulkheads.
-
Click on the tags in the title above (shown in black) for an instant list of all the build logs for that kit subject.
- 1 reply
-
- 1
-
-
- queen anne barge
- medway longboat
- (and 2 more)
-
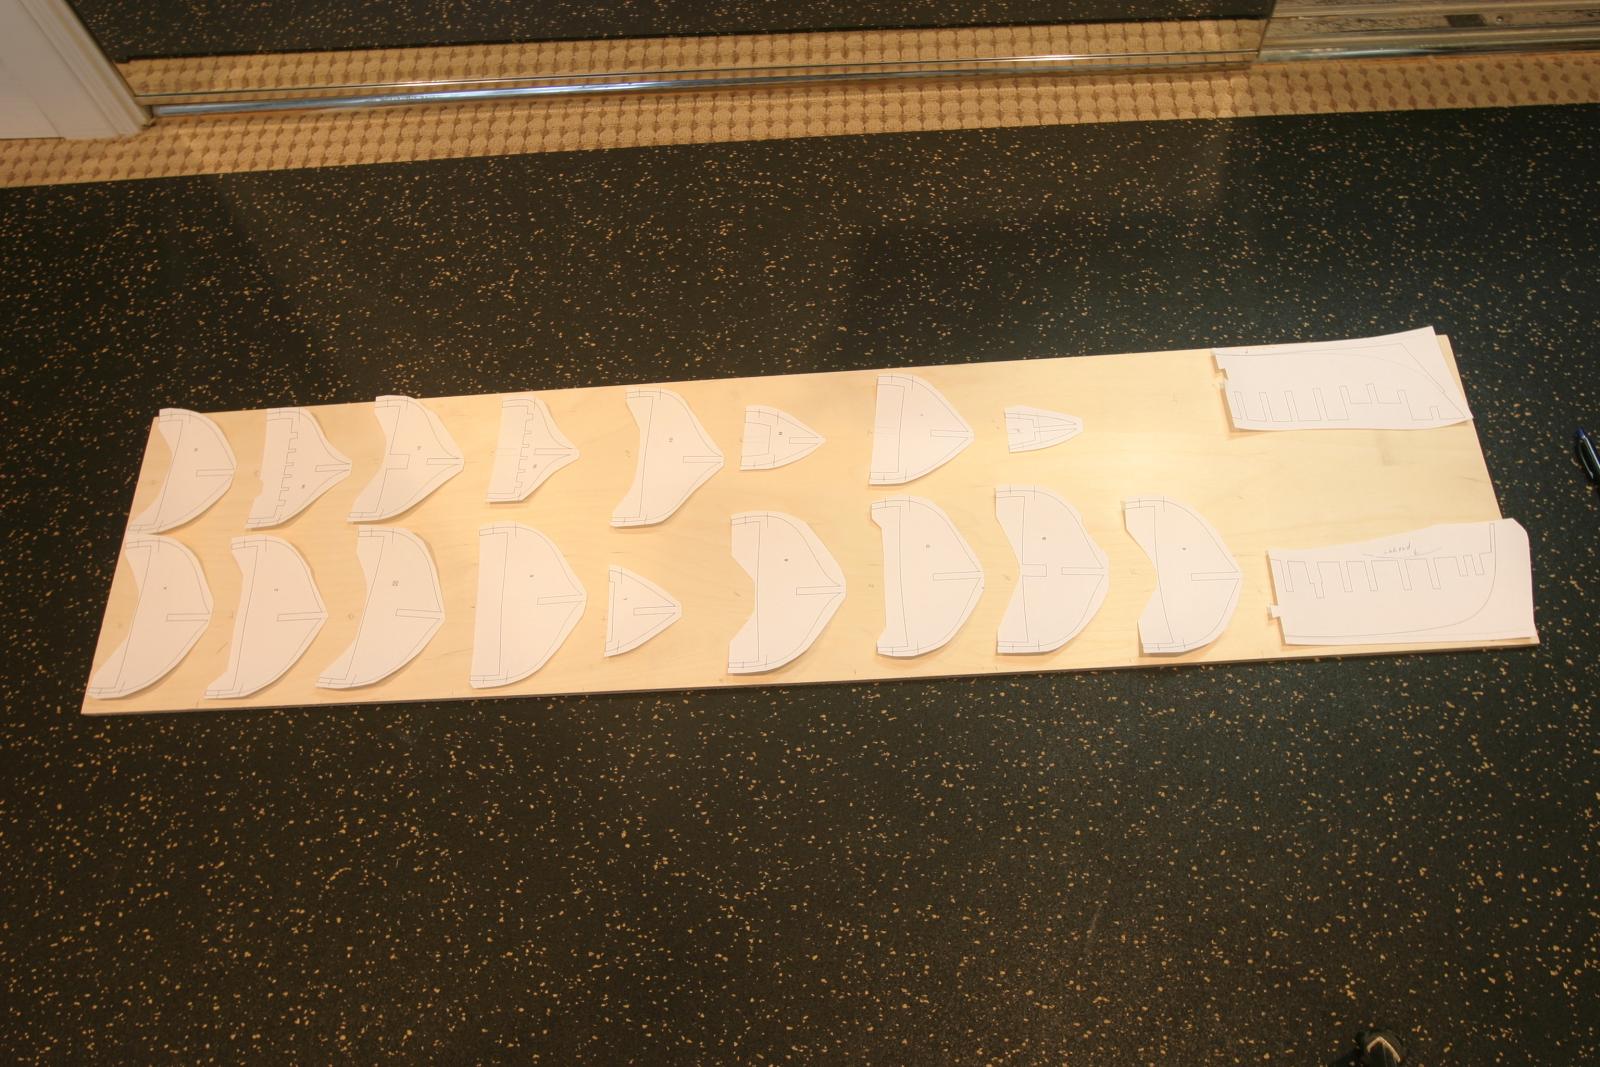
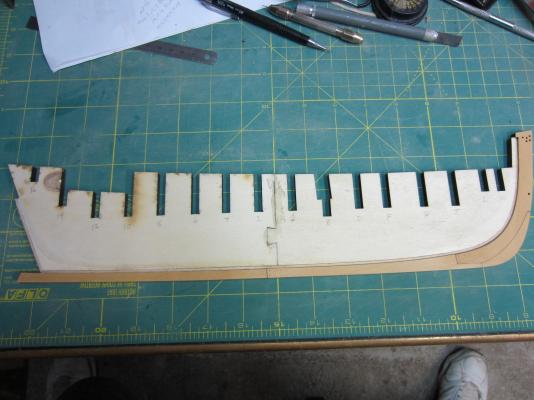
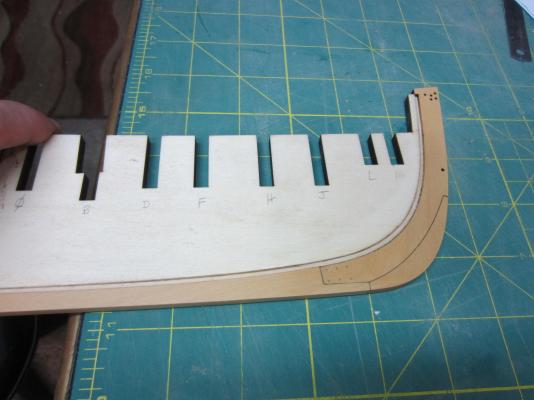
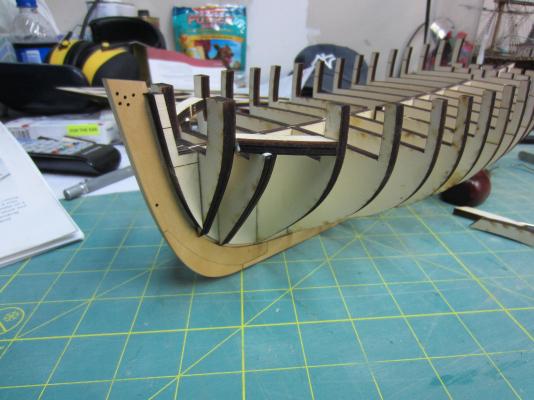
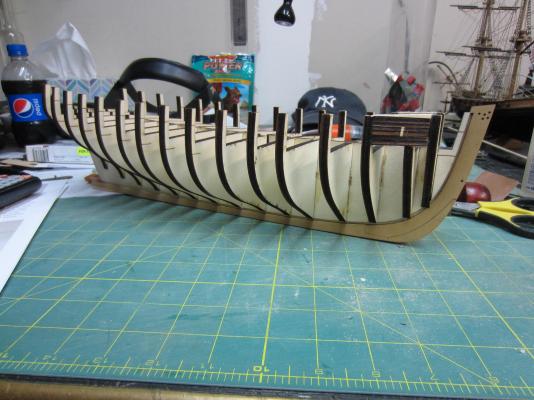
 This is from Chuck's new set of plans for the English Cutter Cheerful. While I'm waiting for the next update for my Echo Section, I ordered the plan set. I like the lines of the ship and since there is only one mast, I'm even happier. Aside from Chuck's long boat, I've not done any POB models, but since she will be fully planked, why not. Chuck puts almost as many bulkheads in as some stylized POF models out there. First up was buying the plywood for the spine and bulkheads. Lots of it in hobby shops and on line. ALERT: You only need one sheet of 12" x 48" quarter-inch material. Every piece easily fit with plenty of leftover material for fillers, etc. See pics. The material that I got is slightly over-sized so I'll run it thru the thickness sander before gluing on the patterns. Another tip on working with plywood. The good side should be UP cutting on a table saw. Use blue painters tape over every line to be cut (on both faces of the plywood) to prevent any tear-out. And use a good 80 TPI blade. There is not a chip on any cut I made so far. Cutting the slots for the bulkheads (B/H) over the spine will be critical. It's easy for Chuck with his new laser cutter, and careful layout is important if you're doing it with a saw. First off is determining a 90 degree line between the B/H slots and and the tops of the frames. I cut the patterns out by carefully cutting a line across the very top of each B/H pattern. Once the patterns are glued on each blank with the top edge flush with the edge of the plywood blank, I can use that side in my table saw sled to get a perfect 90 degree slot. For the spine (which has a curve to the bottom), I used the bottom of the plan sheet as a square reference to the slots in the spine. Maury
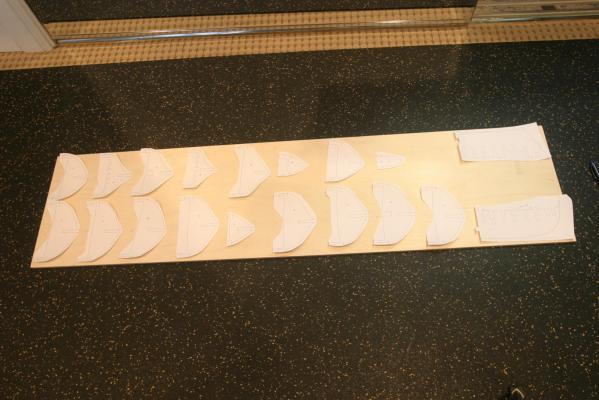
- 100 replies
-
- 13
-
-
- syren ship model
- plans by chuck passarro
- (and 1 more)
-
Here is my Cutter Cheerful for my first scratch build, it’s not quite done yet. Thanks @Chuck for amazing material. The task ahead is daunting but I have great wood, plans, guidance, and mini-kits to get there. The Alaskan Yellow Cedar is like butter. Build log to follow once I begin.
- 6 replies
-
- 9
-
-
- syren ship model
- cheerful
- (and 1 more)
-
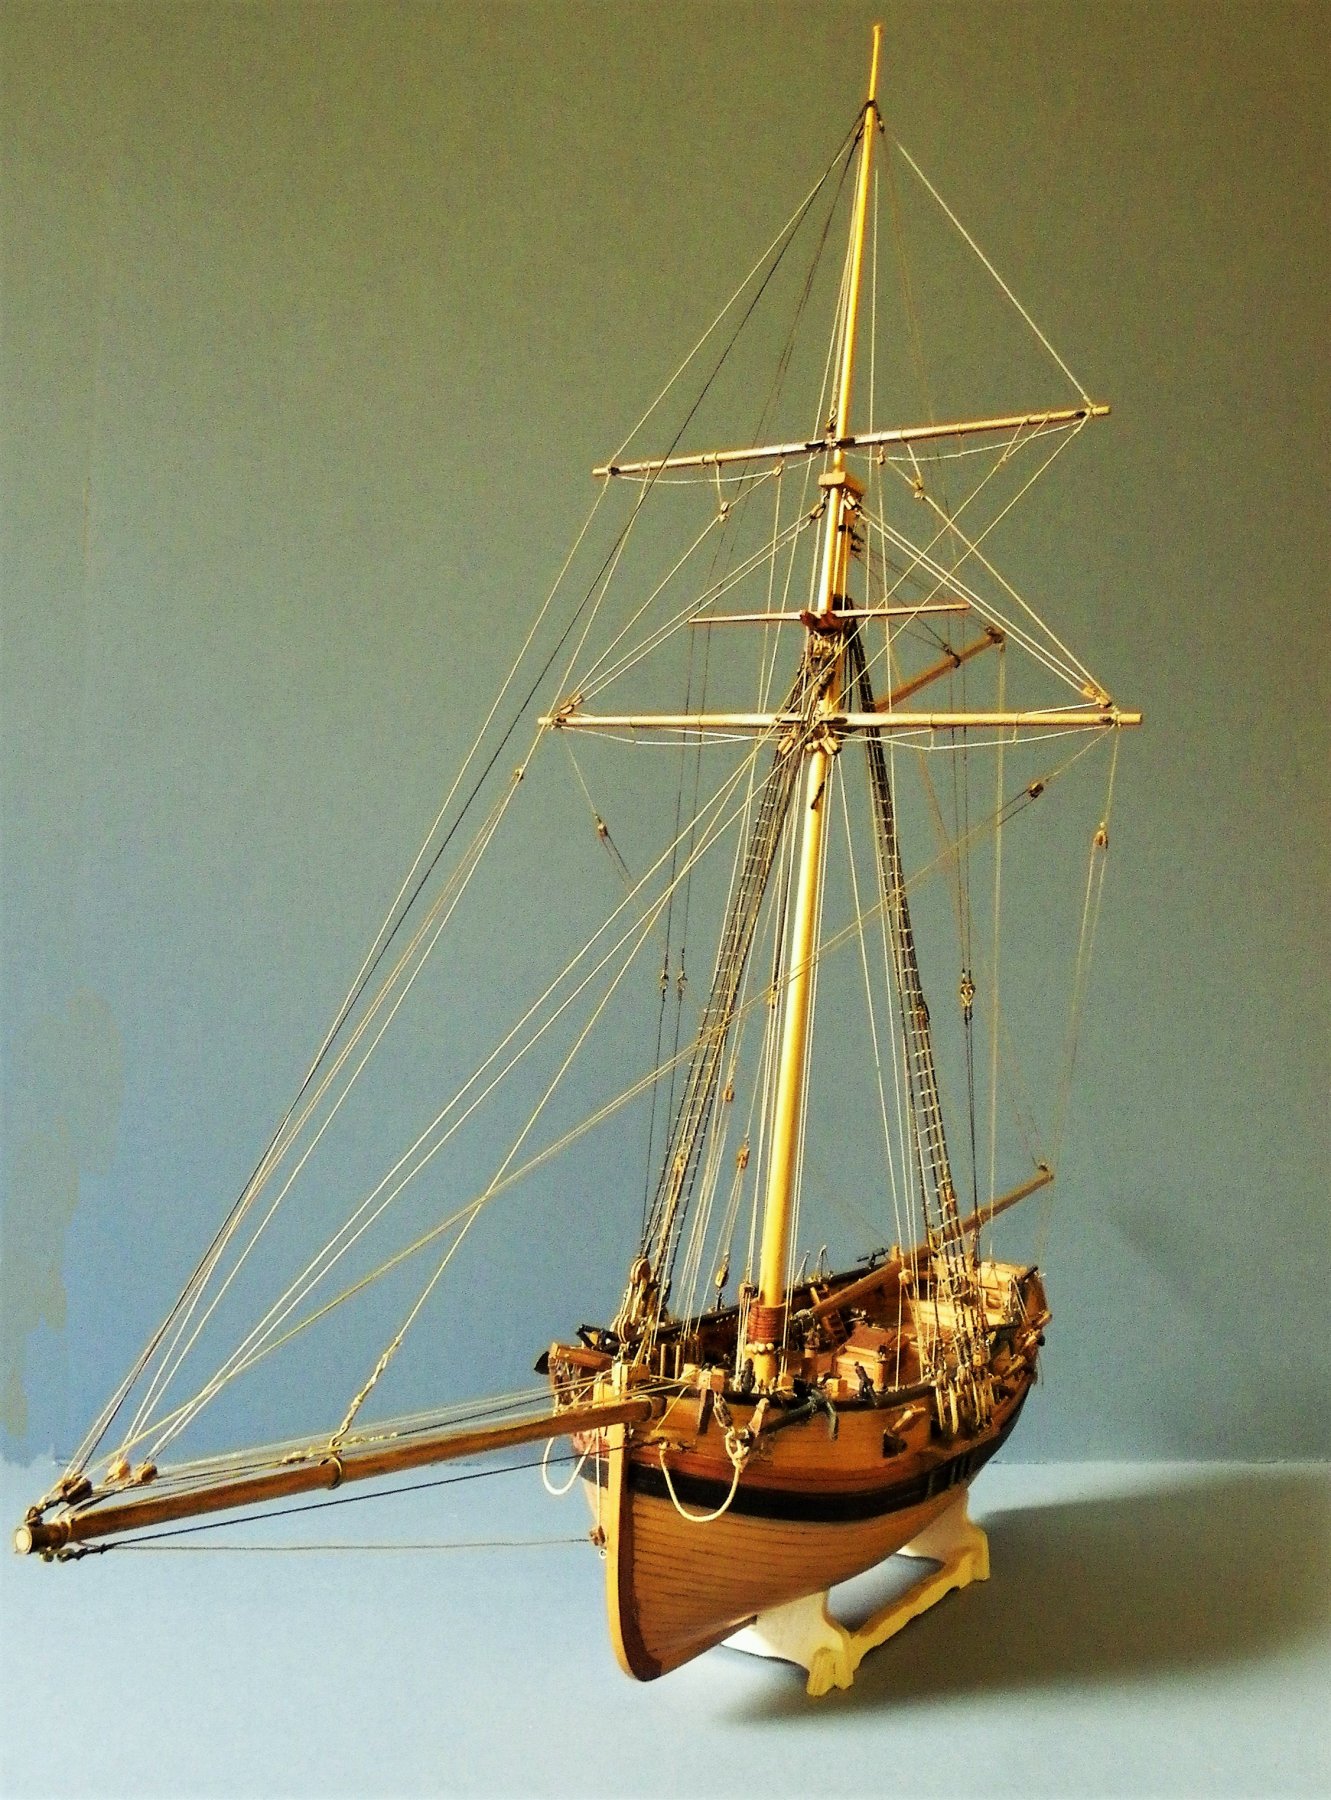
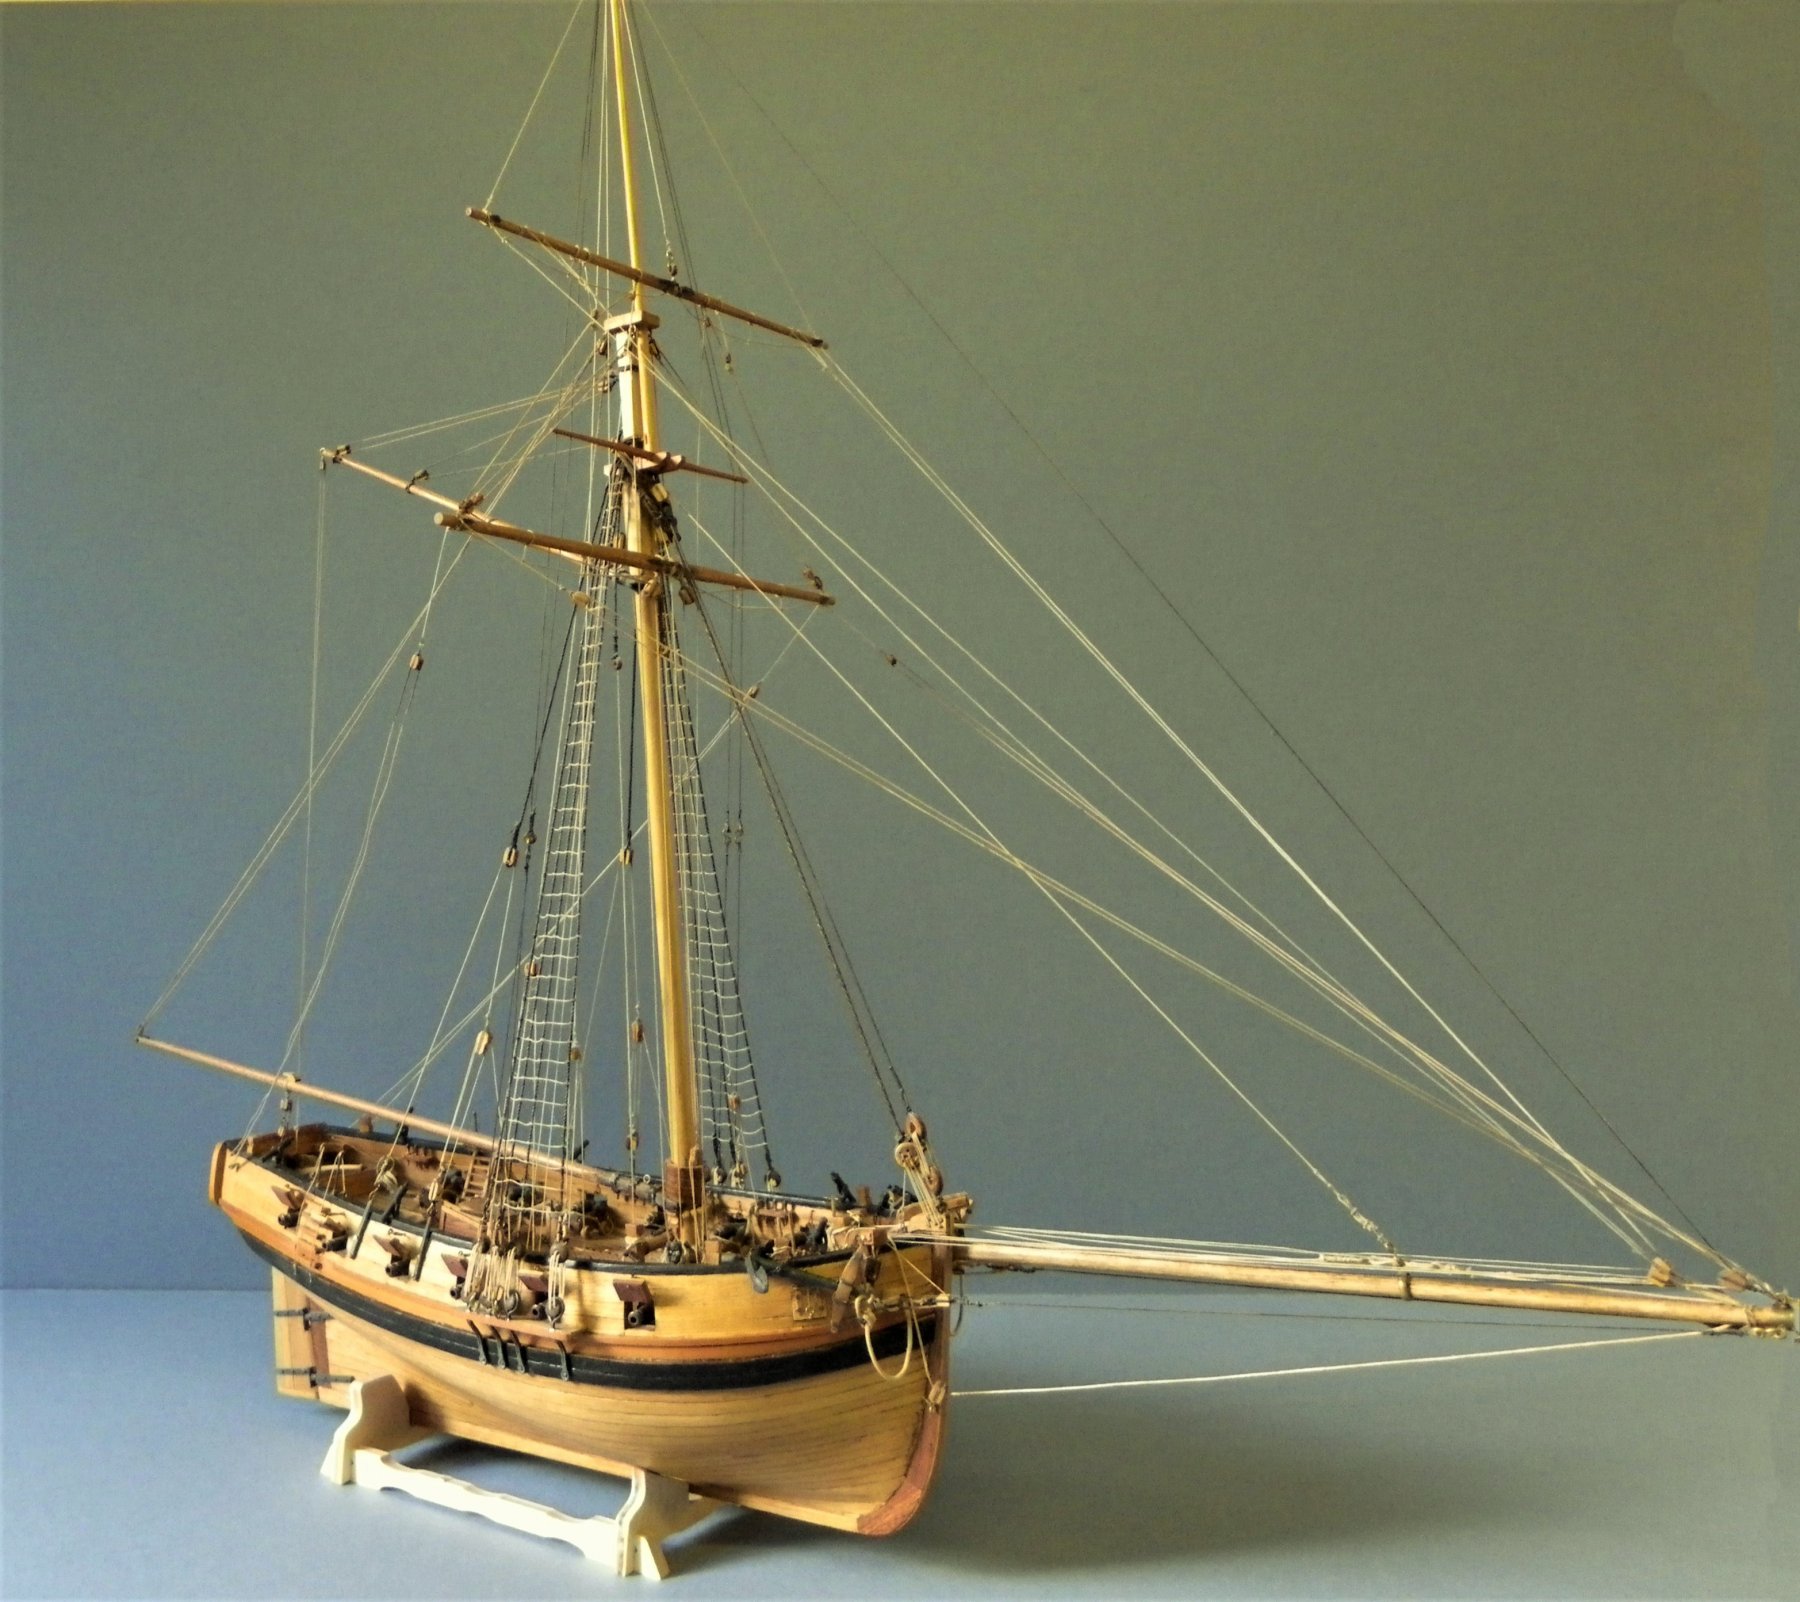
 HM Cutter Cheerful 1806- 1816 This is my new project following completion of the Pinnace and Long-boat kits. I have had this offering from Chuck's Syren stable, including the wood set, gathering dust beneath my workbench since 2016, and I have been collecting all the subsequent add-ons, and fittings as they have been issued. So I now have all the makings to hopefully do justice to the fine materials, fittings, and the beautiful plans produced by Chuck. A period now to organise the build, assimilate the instructions and read thro' logs of those who have gone before. A couple of holding pics of my last foray into cutter building some 30 years ago, a bashed version of the Mamoli kit at 1:72 scale. 3070 007 Still on display in my Dining room, uncased, but fairly easy to periodically clean, she remains one of my favourites. Regards, B.E. ps: I did show Mrs W the actual plans of Cheerful and pointed out the actual, not insubstantial size of the beast.; Fazed she was not in the least; what can possibly go wrong with her on-side .
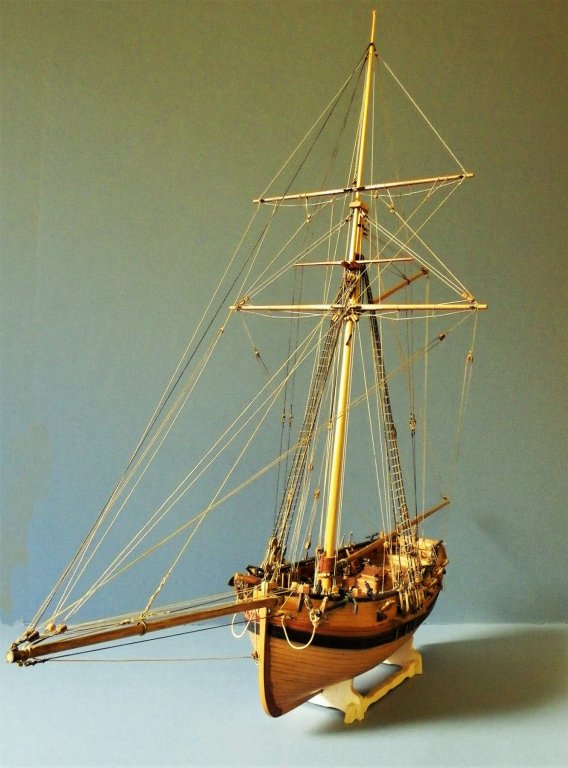

- 574 replies
-
- 23
-
-
- cheerful
- syren ship model
- (and 1 more)
-
 Yes, I have taken the plunge. I have been following the progress of this project from inception and cannot wait any longer. I ordered my plans last week so they should arrive soon (fingers crossed) and today I ordered the bulwark and keel kits from Chuck... Now how do I explain to my wife that yes we moved house 2 weeks ago and I don't yet have a workshop or area to build it... but' where there 's a will there is a way'....DIY and unpacking whilst multi tasking to create a workshop Happy days
- 39 replies
-
- 5
-
-
- cheerful
- syren ship model
- (and 1 more)
-
 Greetings shipmates, I have decided, somewhat retrospectively, to show an abbreviated build log of Chuck’s Cutter Cheerful, which has been paused for the last few months while I work on other things. I hadn’t intended to document this build because there are already so many excellent logs here. My thinking was that I’m slightly beyond the “help me” stage but not yet at the “here’s how you should do it” stage for creating a build log - putting me in limbo land. So perhaps I can go forward with a “here’s how you shouldn’t do it” log. This will allow me to go back and examine the areas I can improve for the next Cheerful build, not to mention the possible benefit to others. But I am sorry I did not take a lot of photos. Instructions for this build. Chuck's instructions are the best I've encountered. Read them carefully, re-read them and you will be happy. Stage 1: Gun Ports & Planking 1. You simply cannot be too precise with the gun port frames. I was not. I will next time. When you are talking about a 1/64th inset from the planking it is important to get the line right. I used European boxwood for these, simply because I had a piece. Harder than Castello and pinker. Sorry,no pictures. 2. One must take the time to fair the bulkheads to perfection. While Chuck abundantly warns of this, and I had thought I’d done a decent job of it, there was one or two bulkheads near the stem on the port side that were slightly “high”. This resulted in me merrily sanding right through several planks. I replaced 4 or 5 of them (but could have done a better job of even that). 3. The planking is thin. Of course, it is adequate if you fair the bulkheads perfectly, otherwise… 4. The shape of the rabbet at the stem is important. If you want the planks to fit like a lock and key, take the time to shape it perfectly, it will pay off. It doesn’t take much figuring to know how to do that, just patience with a good file. 5. Bending Castello boxwood is a truly liberating experience. Easy peasy. The first time I’ve ever used it. Absolutely beautiful wood. 6. Learn how to read the plans properly. Forgetting that the plans represent a 3-dimensional model projected as 2-D will run you into trouble. Witness my first two planks below the wales at the stern on both sides. Too narrow. I had planked most of the hull before I woke up. So I left the whole thing as it was and somehow the rest of the planks forgave me and allowed me to end up approximately where I needed to be as I planked down the stern post. I can’t remember if I slipped an extra-wide plank in there to compensate. I think I did.
- 51 replies
-
- 12
-
-
- cheerful
- syren ship model
- (and 1 more)
-
 Greetings everyone, and welcome to my first 'concurrent' build log, as I begin the semi-kit (or semi-scratch, depending on your point of view) build of the revenue cutter Cheerful, from Syren Ship Model Company (Chuck Passaro). I've chosen to place this log in the kit build section, since I am using laser cut parts from Syren for the 'back bone' - the former, keel, and bulkheads, as well as all the mini-kits that are available for the ship. This log is starting due to a set of materials that were put on sale in the trade section of this website, and I couldn't resist grabbing it, even though I have far too many kits on the shelf right now. Included in my purchase was everything that Syren produces for this ship except the new pump kit, along with what was apparently a custom wood order from Crown Timberyard with a Holly deck package and boxwood planking strips. As with my other current build log, the Picket Boat #1, this first post will be primarily for an index. The actual log begins in post #2 to follow. Section 1 - Constructing the backbone (former, keel, bulkheads). 1. The beginning - the former (false keel). 2. The keel. 3. Bulkhead start (side trip - beginning the windlass). 4. Bulkheads all on (side trip - windlass part 2). 5. Gunport sills - starboard side.
- 39 replies
-
- 15
-
-
- cheerful
- syren ship model
- (and 1 more)
-
 This will be my version of Chuck's Cheerful. In addition to Chuck's prototype build log, there are already a couple of other logs started, and I'm sure there will be many more. It should be fun to work along with the others. While waiting for the lantern parts that I needed to complete Essex, I decided to jump the gun and begin Cheerful. Since I lack power tools, and am reluctant to cut all of the framing by hand, I chose to use Chuck's laser cut bulkhead and former set. They are as near to perfect as you can get. The ply is uniform and the fit is precise. It was a simple matter to assemble the structure. Being a creature of habit, I added bracing at the bulkhead-former joints, as I've always done. Chuck didn't do this, and I'm sure that it wasn't necessary. Before adding the bulkheads, but after adding the rabbet strip, I assembled and added the boxwood stem and keel. I will be doing the hull planking and fixtures and furniture in boxwood and the decking in holly. I obtained the boxwood from Crown Timberyard, and it looks great. I chose not to get the offered package, because it is entirely composed of wood sheets from which the strips must be cut. Once again, my lack of tools caused me to get the wood mostly in milled strips, with some sheets. I'm now starting to fair the hull. Bob

- 525 replies
-
- 24
-
-
- cheerful
- syren ship model
- (and 1 more)


.JPG.cb12e687d44929dcc66df88881c34833.JPG)
.JPG.4938e2a98a8c6d6388a1ac27368e215e.JPG)
.JPG.1dace2813d05f55a51f432fe31583906.JPG)
.JPG.a882ba682feb2b7df635f2ca5fdf4ab2.JPG)
.JPG.072ca9637ad4d6b2cd784f5f9cec5797.JPG)


.jpg.0f684f32682bf5de987a935a320ee7d1.jpg)


.jpg.549a1ab91b6009971c78ca56ca2684e2.jpg)