Search the Community
Showing results for tags 'Hermione'.
Found 18 results
-
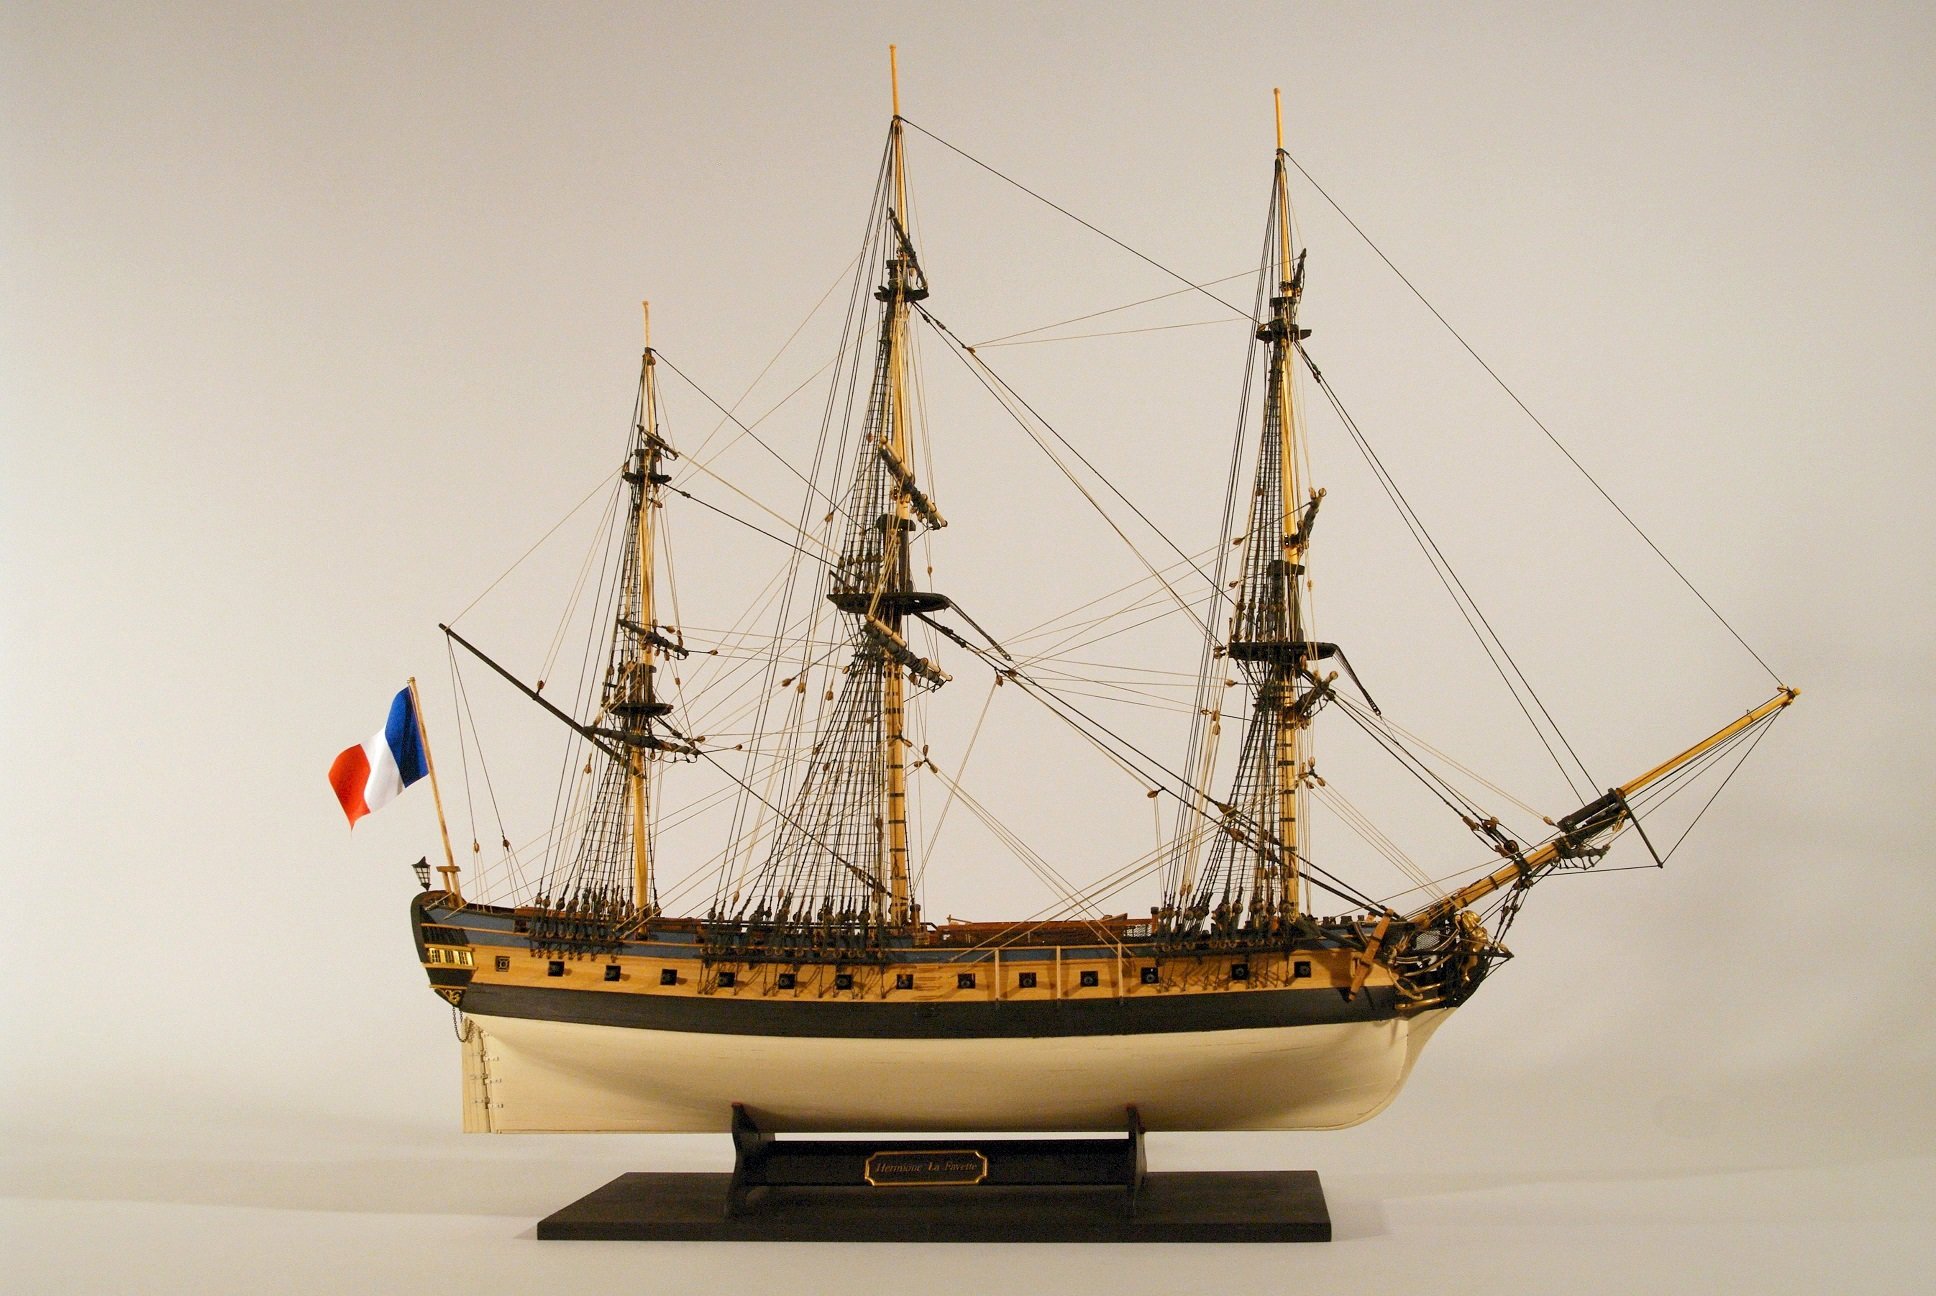
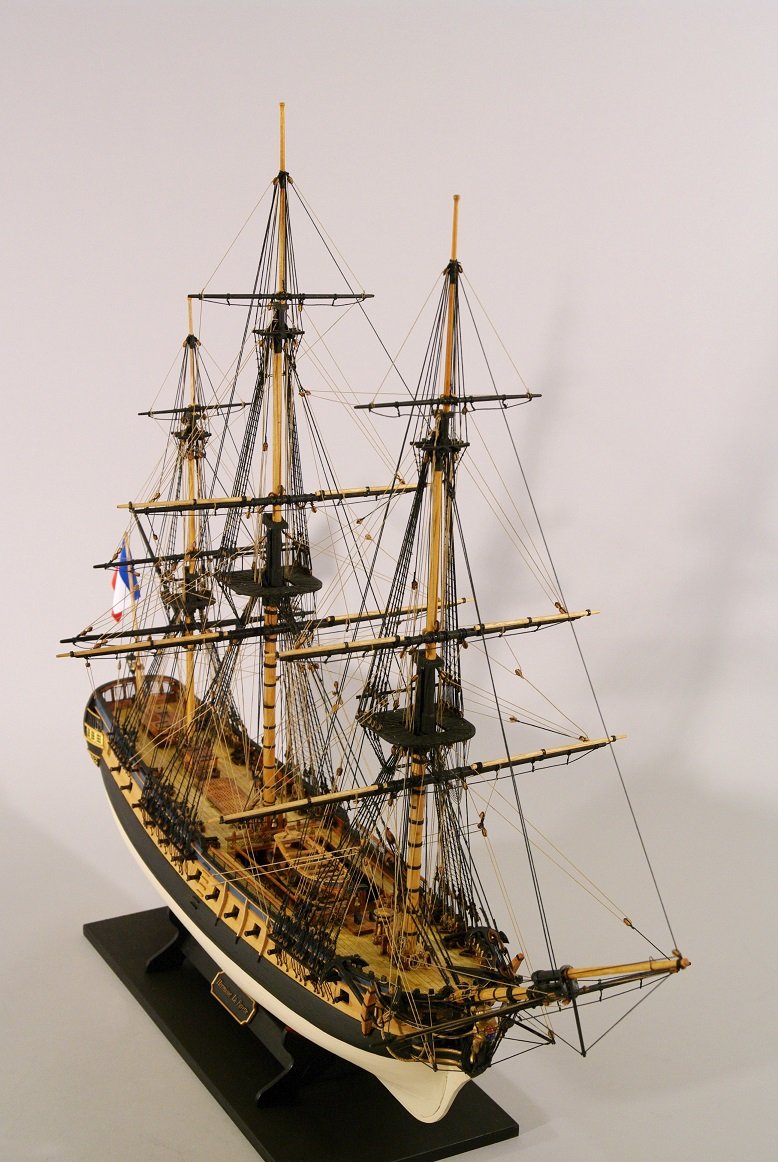
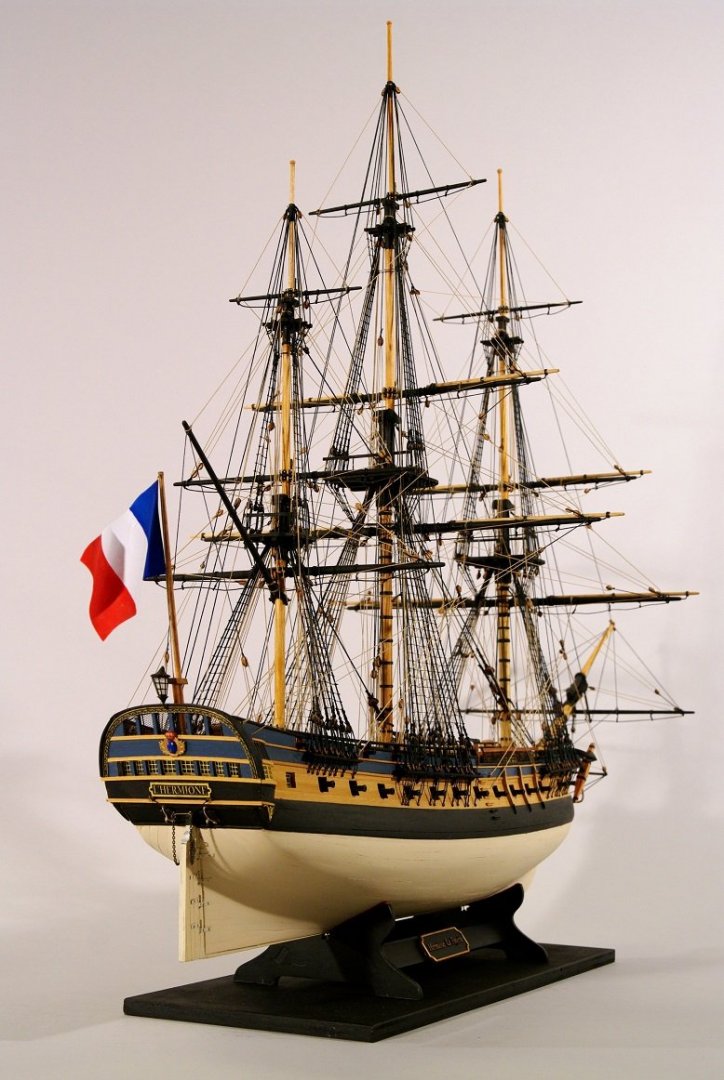
 I haven't finished my latest project, Victory-Corel, and as I wanted to embark on something new this year, I decided to pull Artesania's Hermione from the shelf....a very promising kit. Upon opening the box and unpacking its parts, the high quality is evident from the first glance
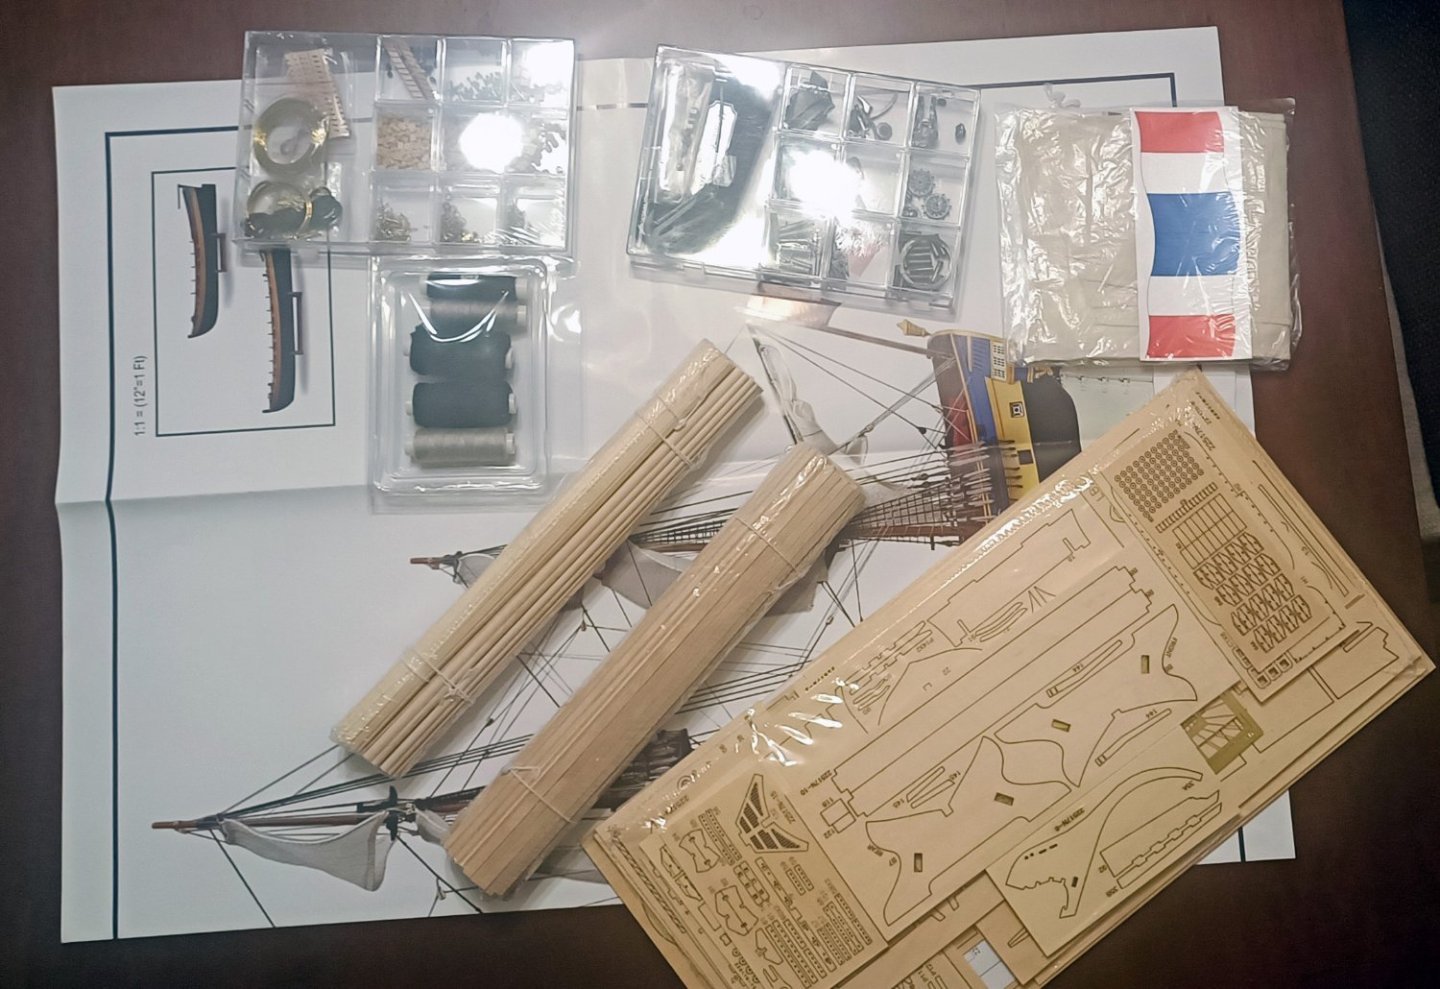
-
 Rebuilding the same model again it may sound -at least- boring or surely not exciting. But for me this time its not the case The first time I started Hermione was in 2017. I finished her in late 2018. It took me about 18 months and 600 hrs. So why do it again? In all this time, studying before, during and after building the model and ofcourse my visit to the replica Hermione in Rochefort in 2017, gave to me a whole different perspective of the project. Although A/L made and offers a good kit, still the kit of A/L represents the replica of L' Hermione and not the original ship. Ofcourse, though already during the first building of the model, I tried to take distances from the replica and build the original ship.... my historical knowledges did not allowed me to do so. Now I am more confident. Now I am aware, with more accuracy, of the distance, between the original ship and the replica. Its not only the coppering or the flag, or some detail on the deck.... its more to it. Among others, -for example- the modern health and safety regulations that the replica designer had to be in line with, have produced a lot of deviations, by adding to the original design or by leaving behind, elements and materials that were originally part of the ship's design. So here I am to make an effort correcting my build. Hopefully I will succeed to that.... but I also have in mind to avoid all the bad craftmanship and build errors of my first build, hopping that the gained experience and my better skills of today will able me to build a decisive improved model. Christos
-
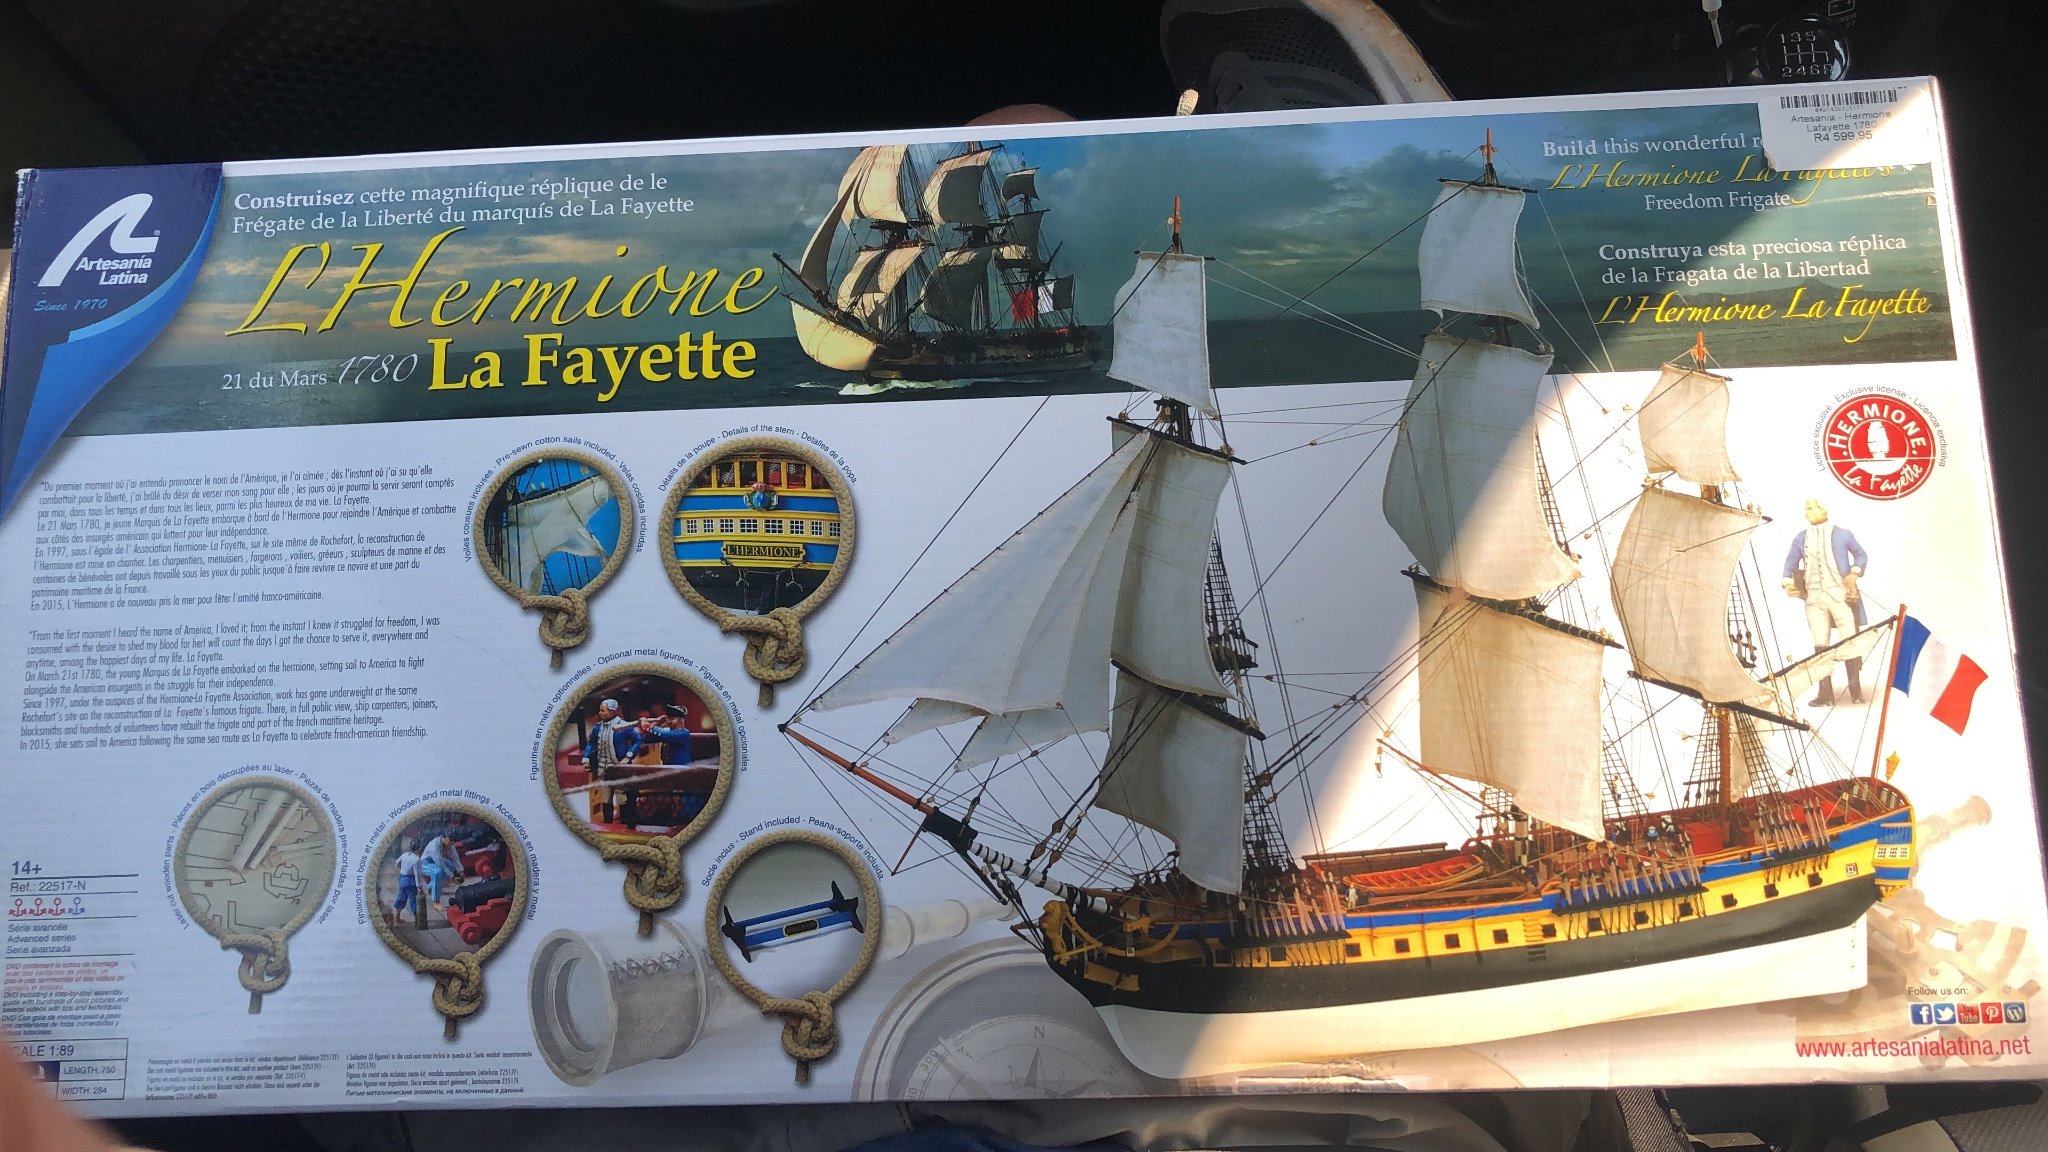
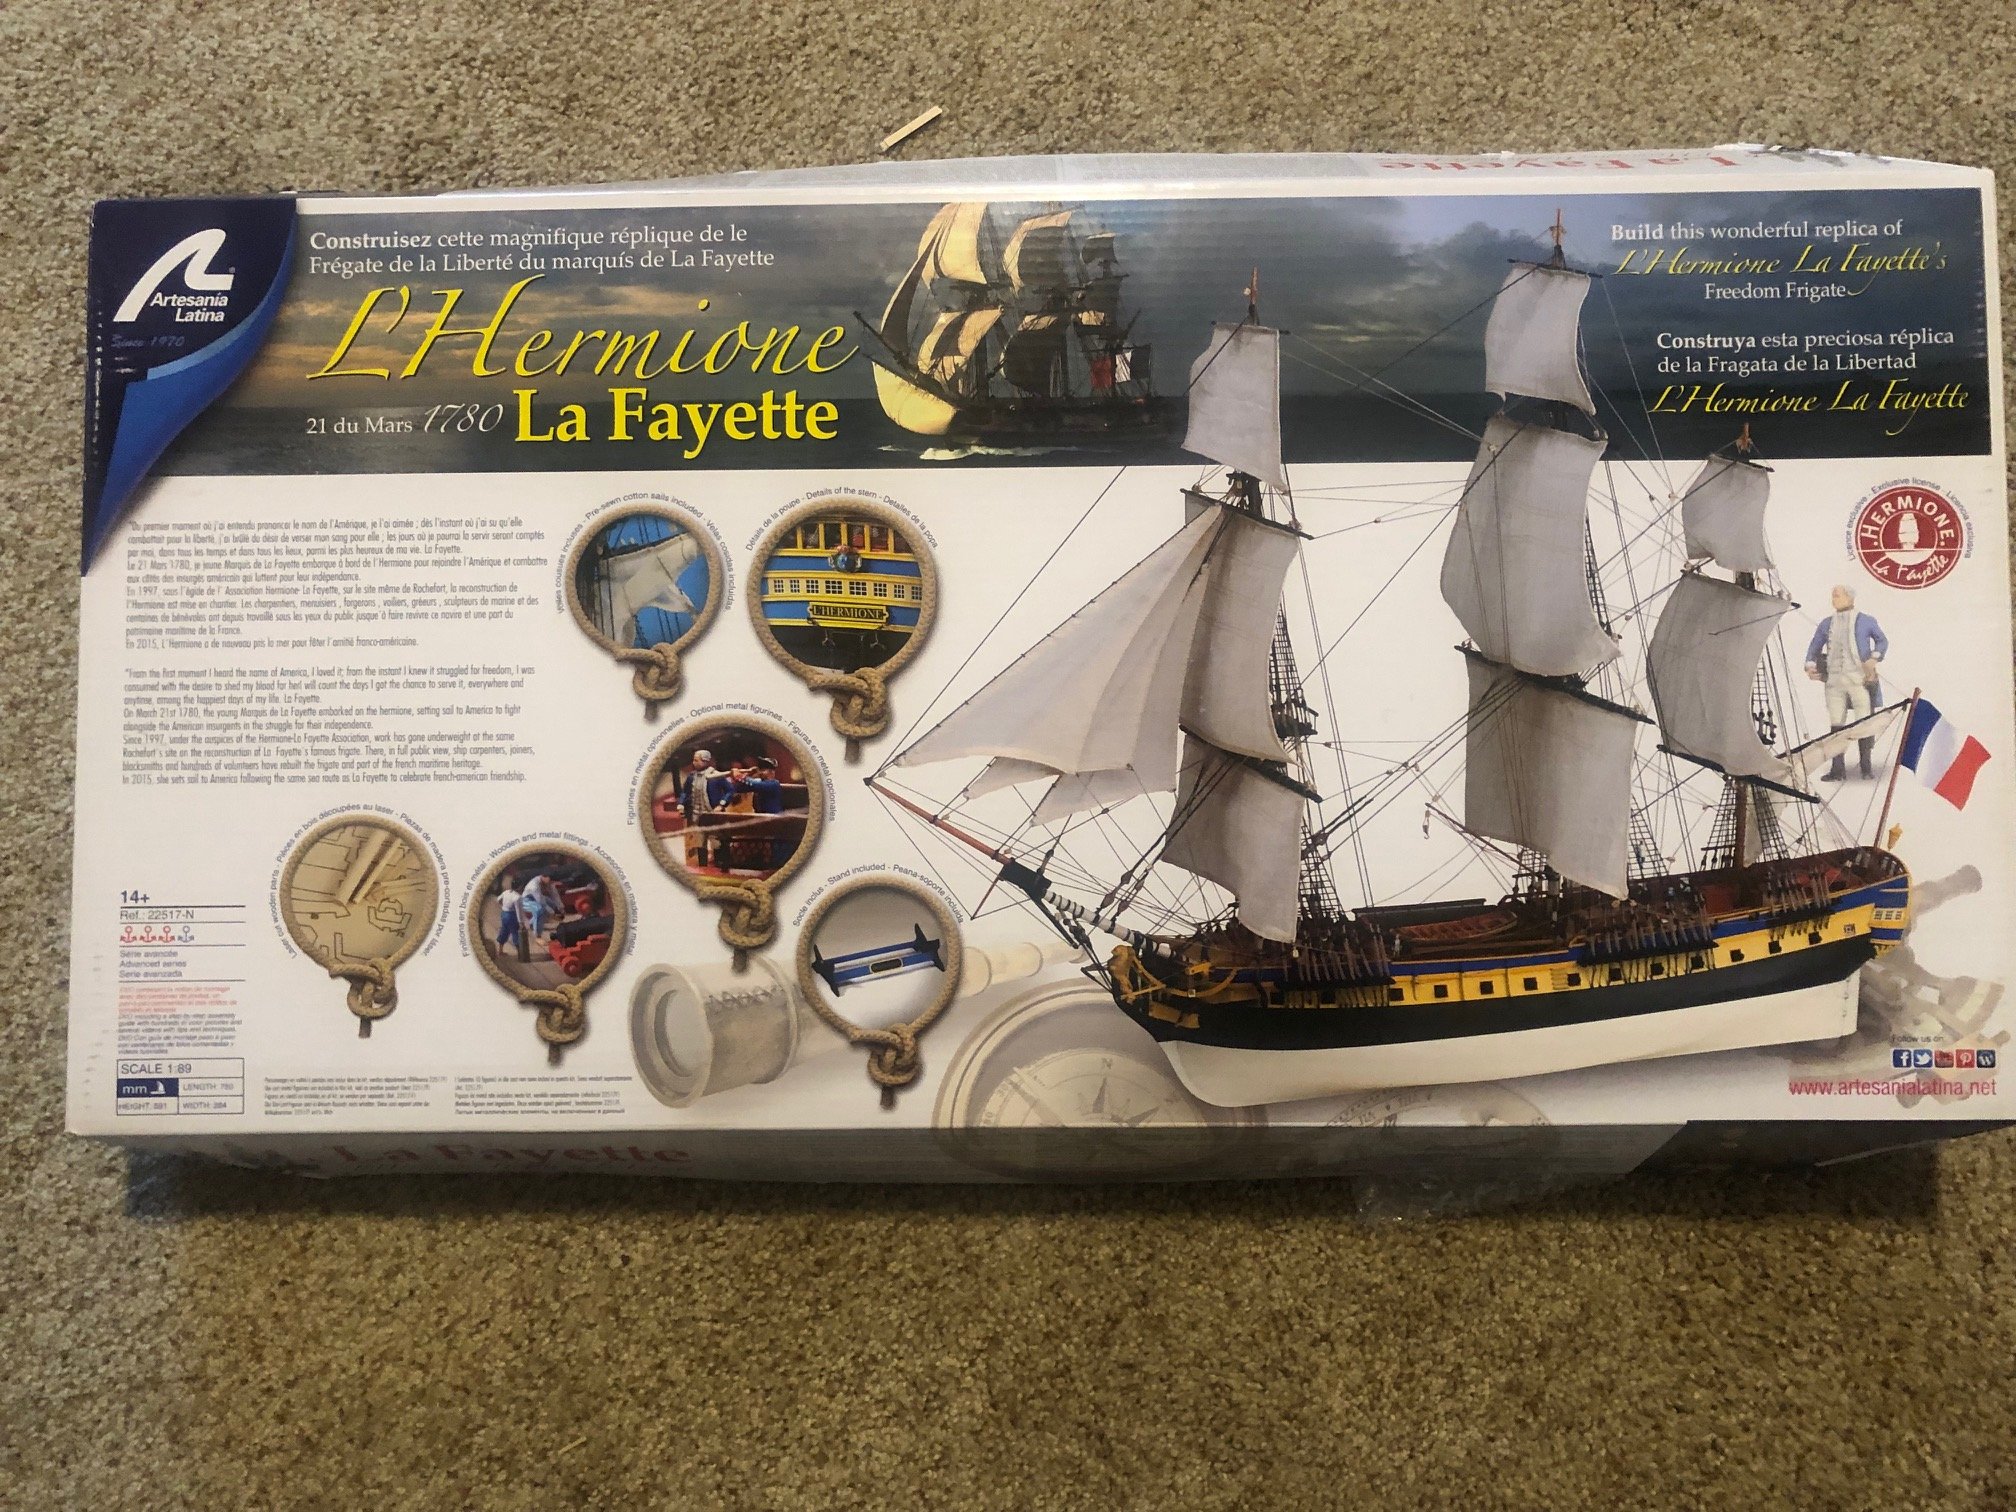
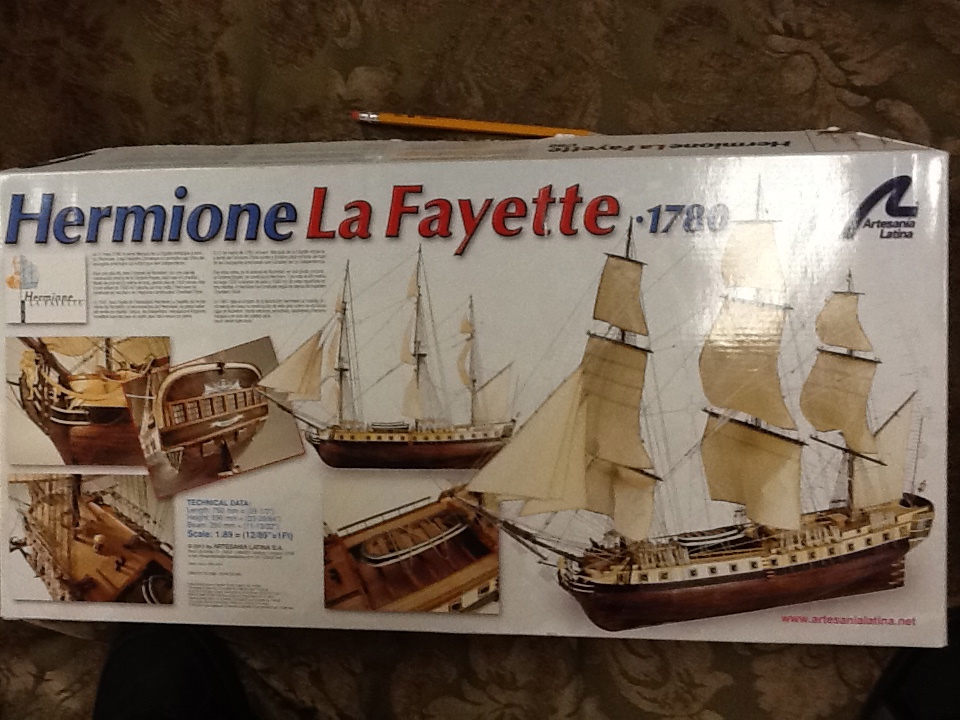
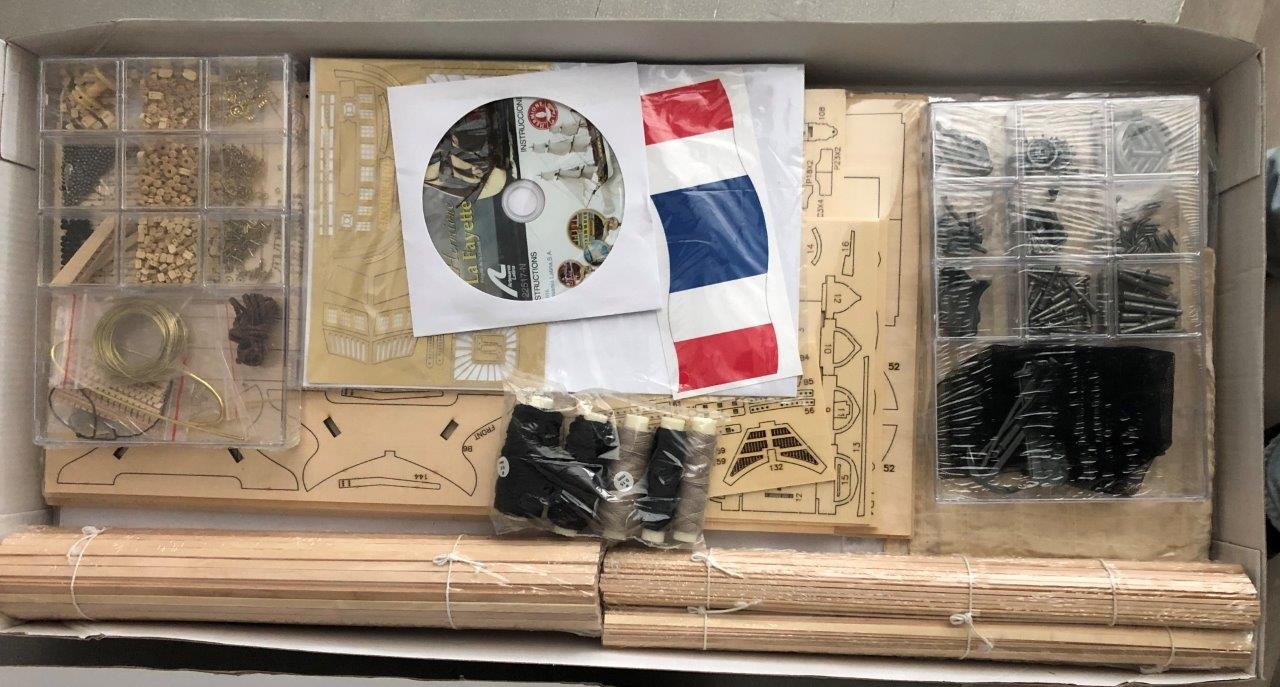
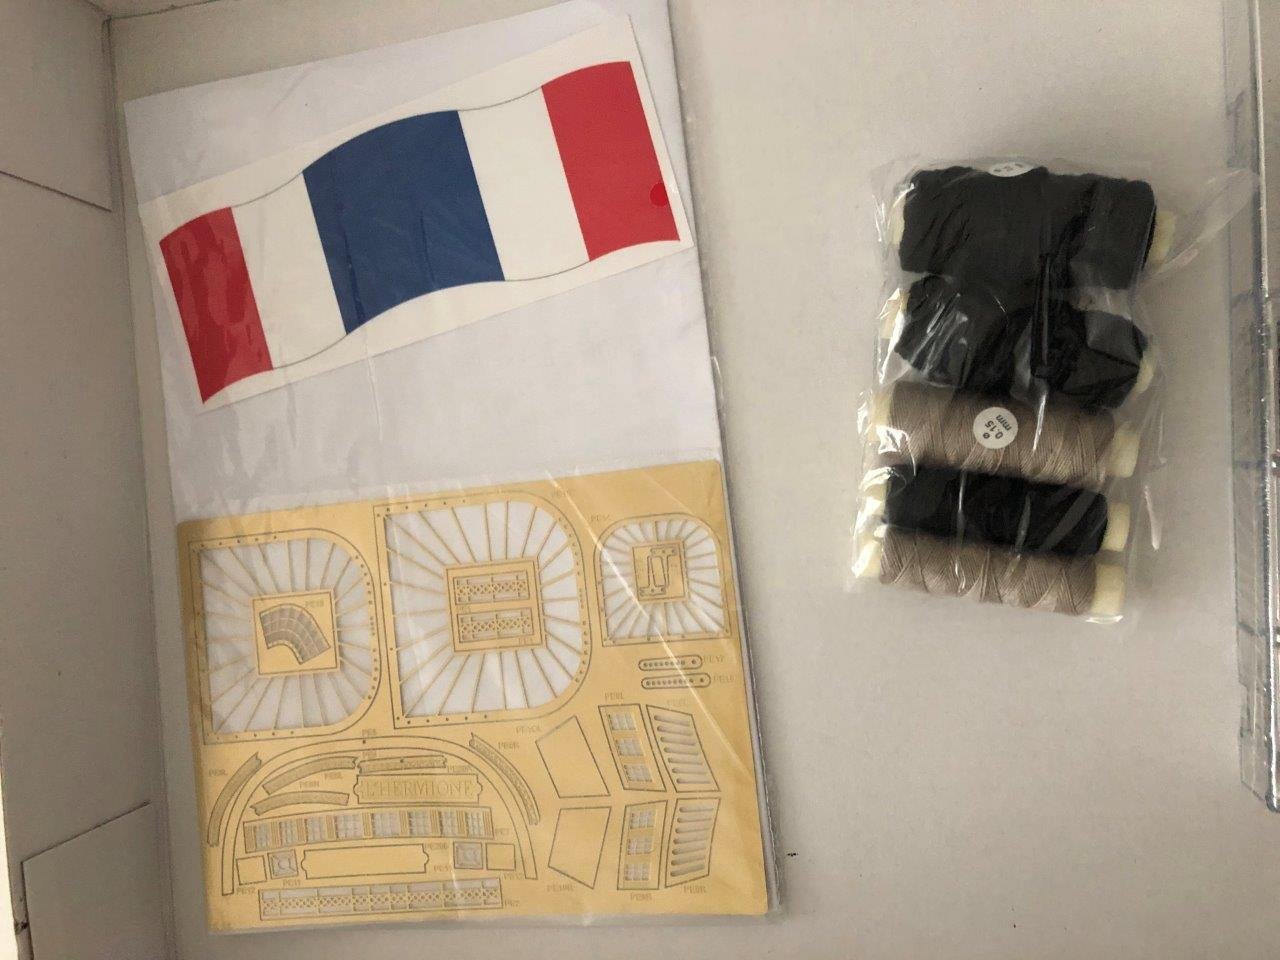
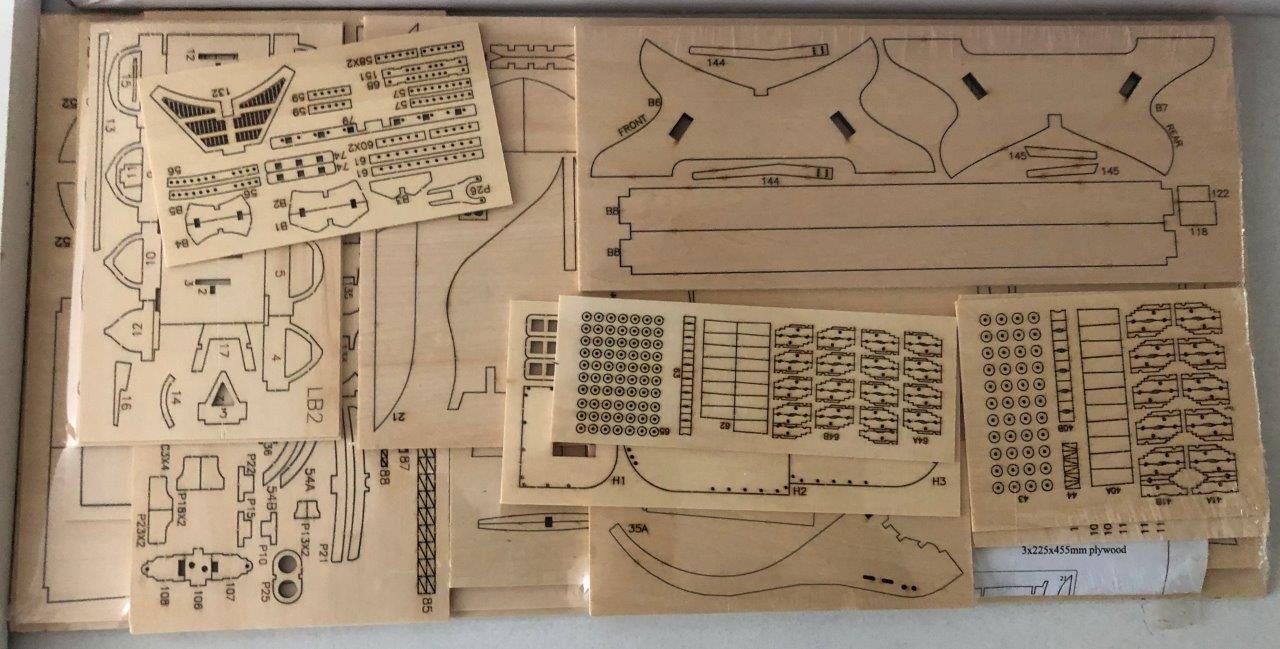
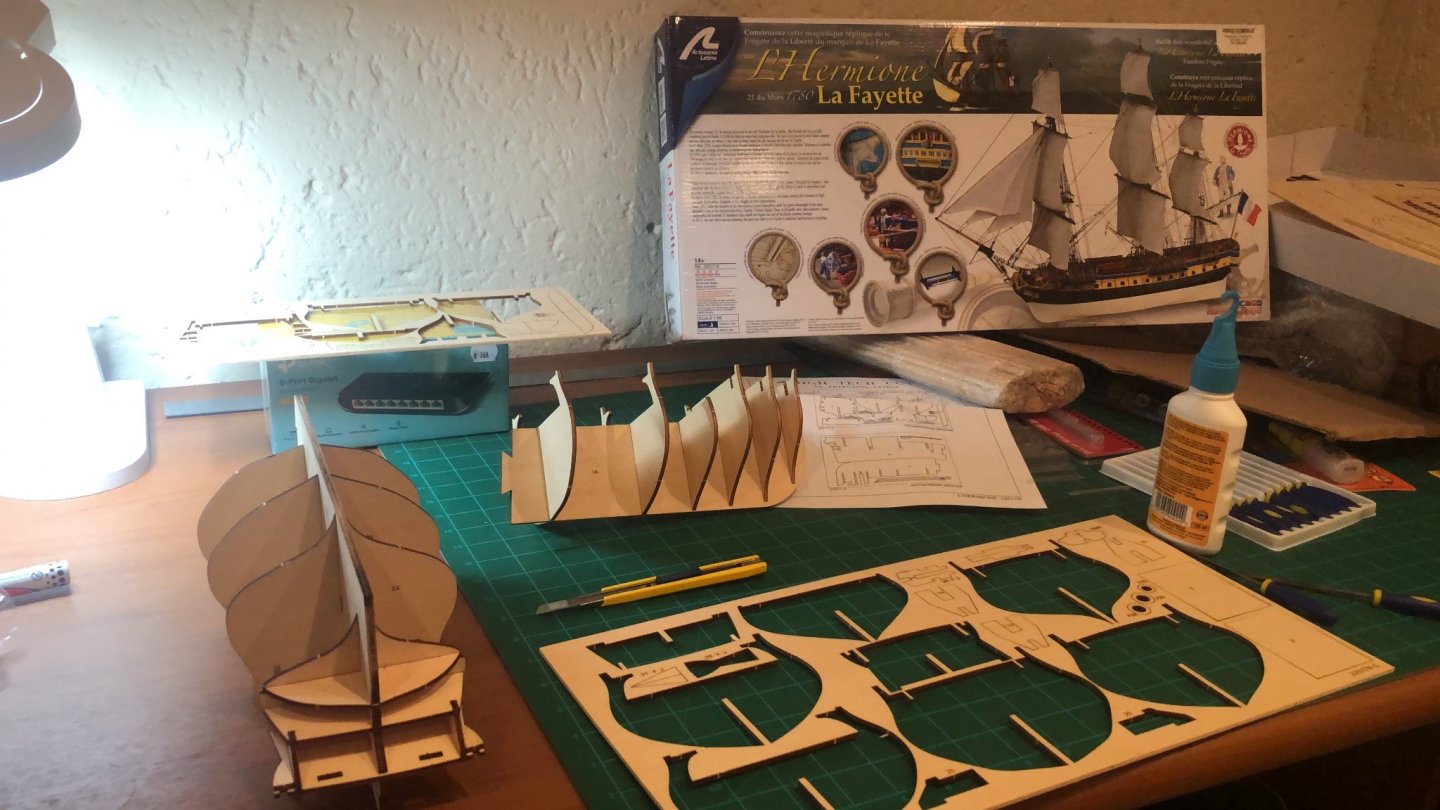
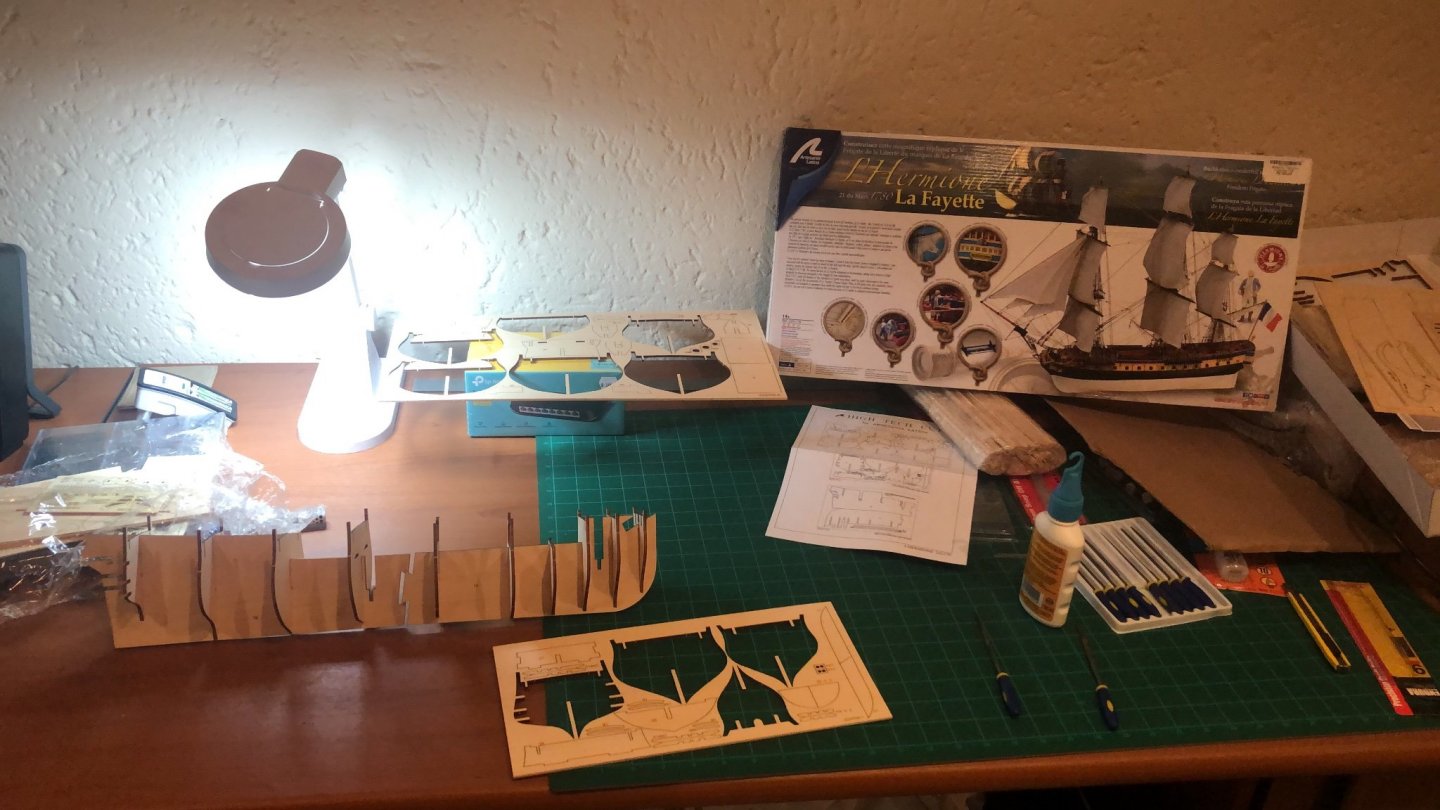
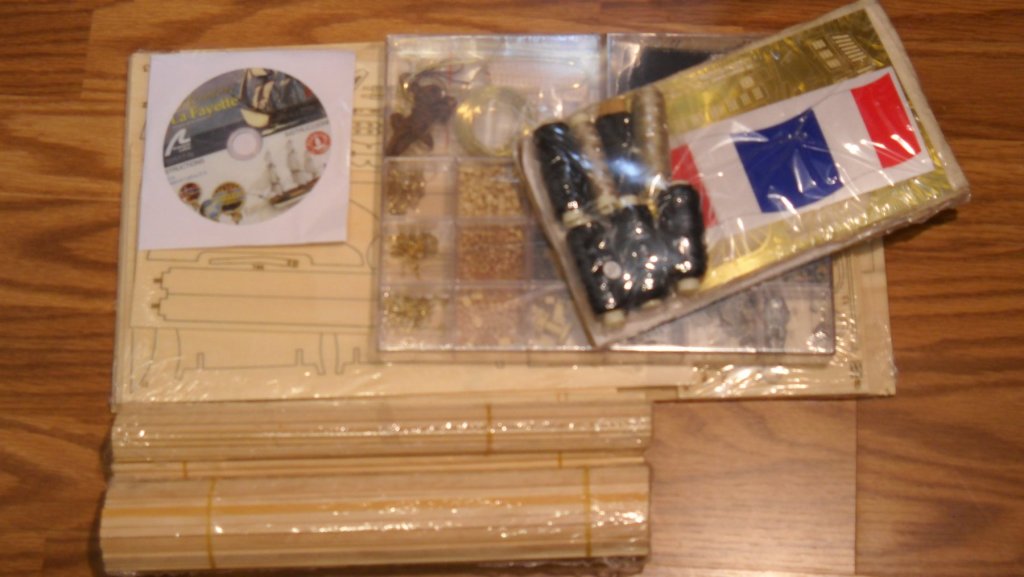
 Hi all, About a month ago I received the construction kit for my second ship by post. I finished my first ship, the President Scale 1:60 Sergal kit, for about two months now and couldn't wait to start a new ship. After some searching I finally chose the frigate "L 'Hermione La Fayette". Although I would normally not choose to fully paint the hull, in this case I think it has something. Due to my enthusiasm while building, I forget to open a ship build log, but, better late than never! What's in the box! Unfortunately no 1: 1 drawing for the exact measurements T Everything is neatly packed Sails After checking the parts, it appears that a strip of 6x6 mm is missing, luckily there was still one left from my previous ship. Music in the background, on your marks, let the build begin! 😄
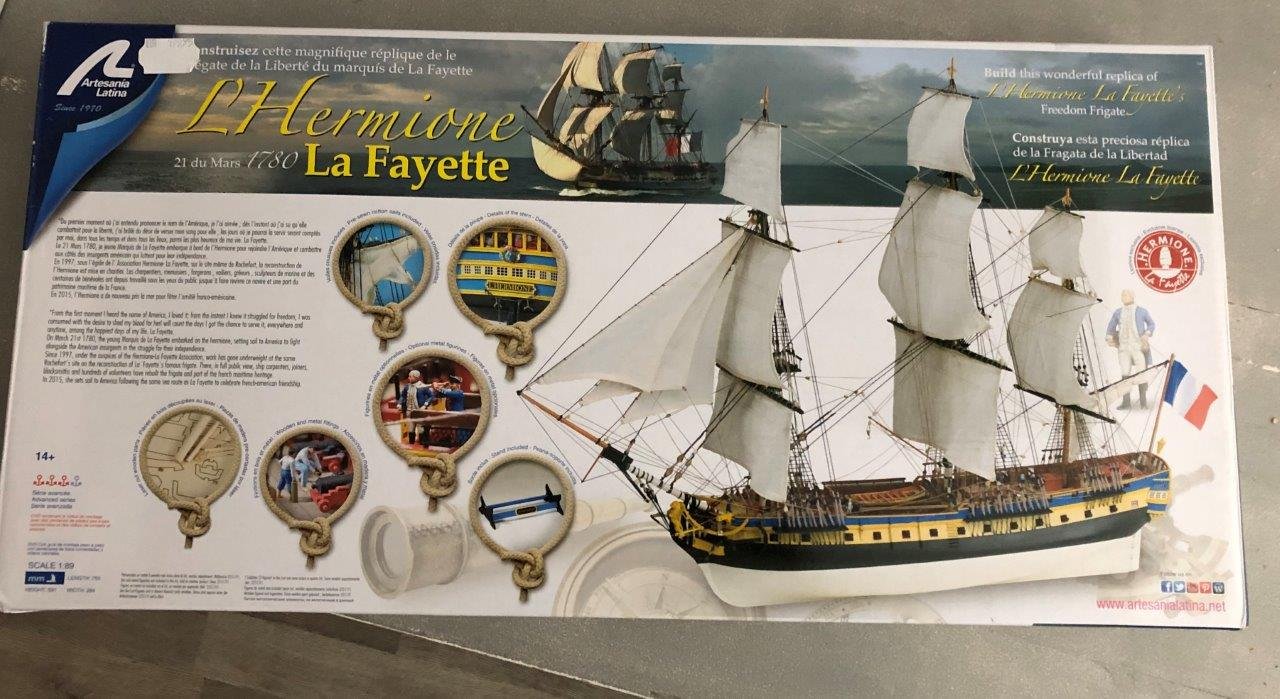
-
 Was on the fence about making another build log since my last one was 5 years in the making....anyways here it goes....
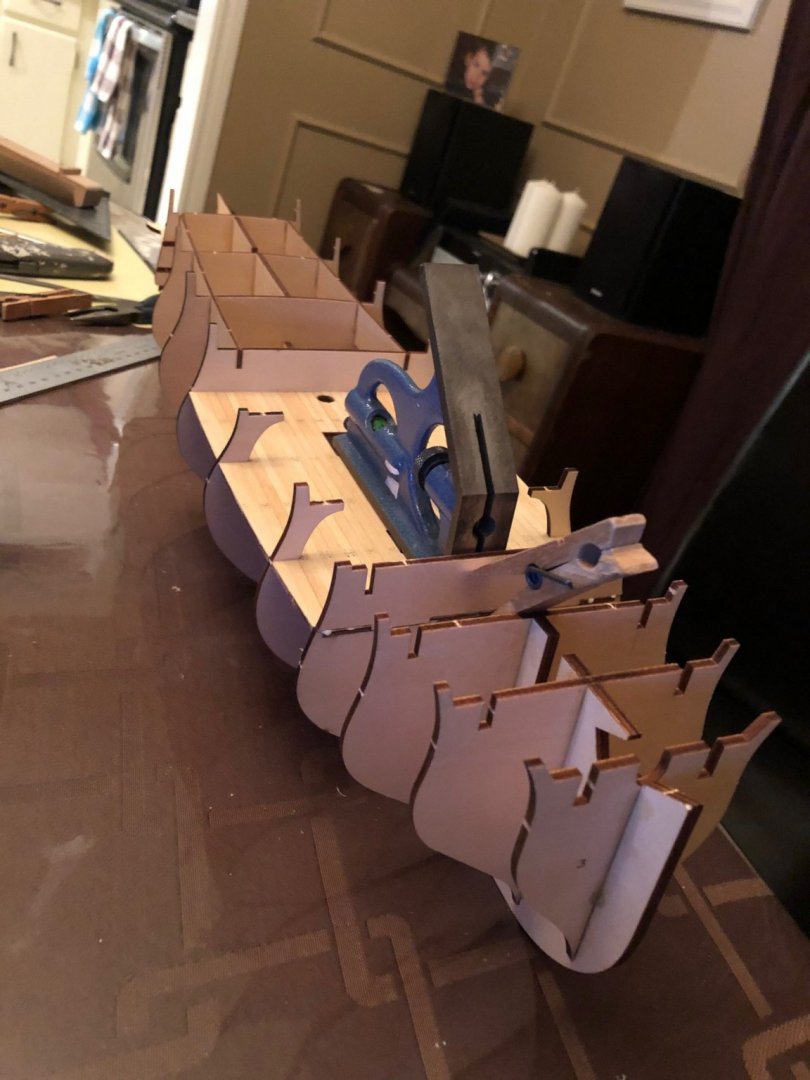
-
 Hello all, This kit was made two years ago. First, the image I love French freegate ships such as La Flore and La Renome beautifully. This kit is modified according to my taste. I think there are some mistakes. I will also write a record of the production.

- 7 replies
-
- 9
-

-

-
- hermione
- artesania latina
- (and 1 more)
-
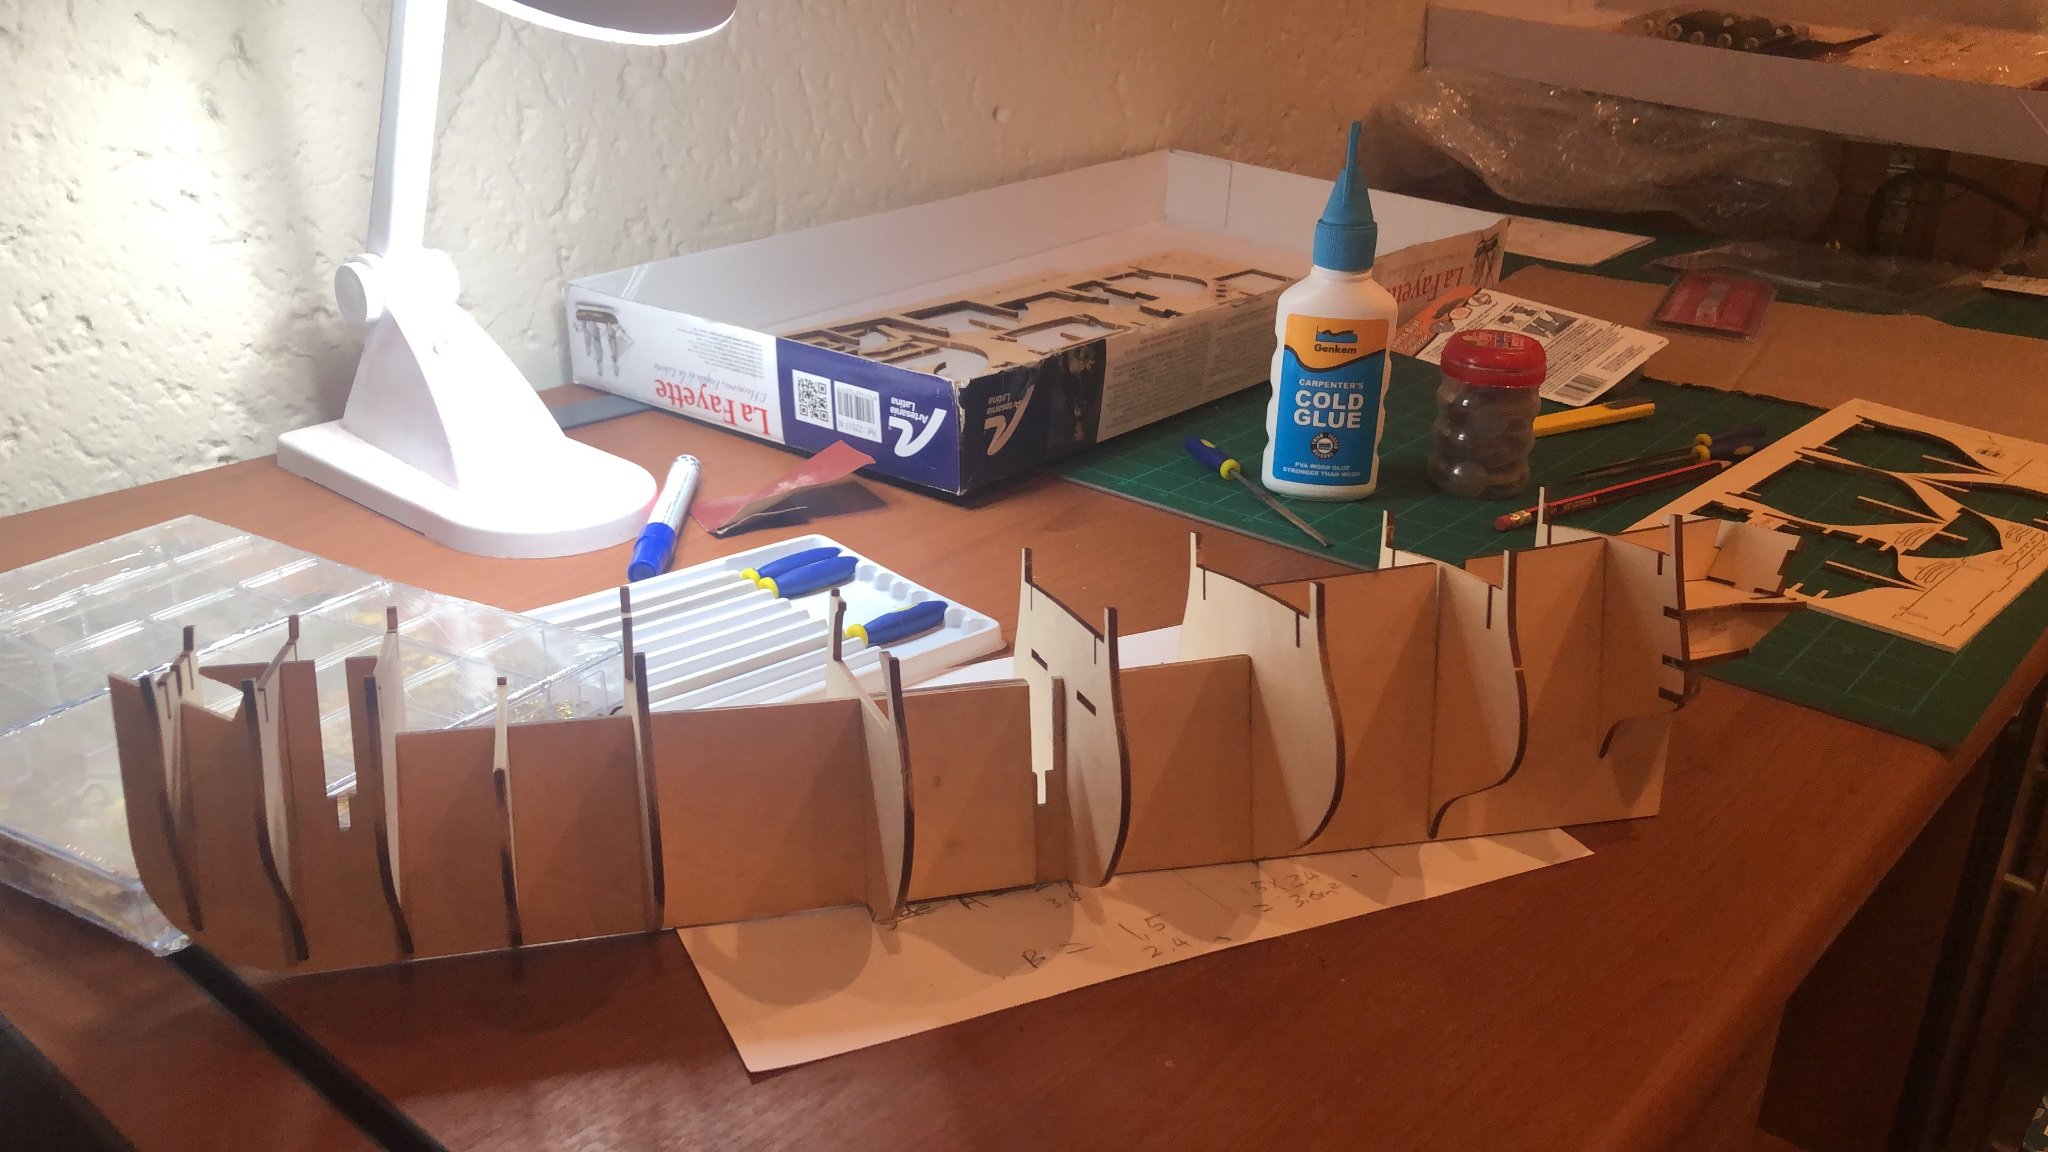
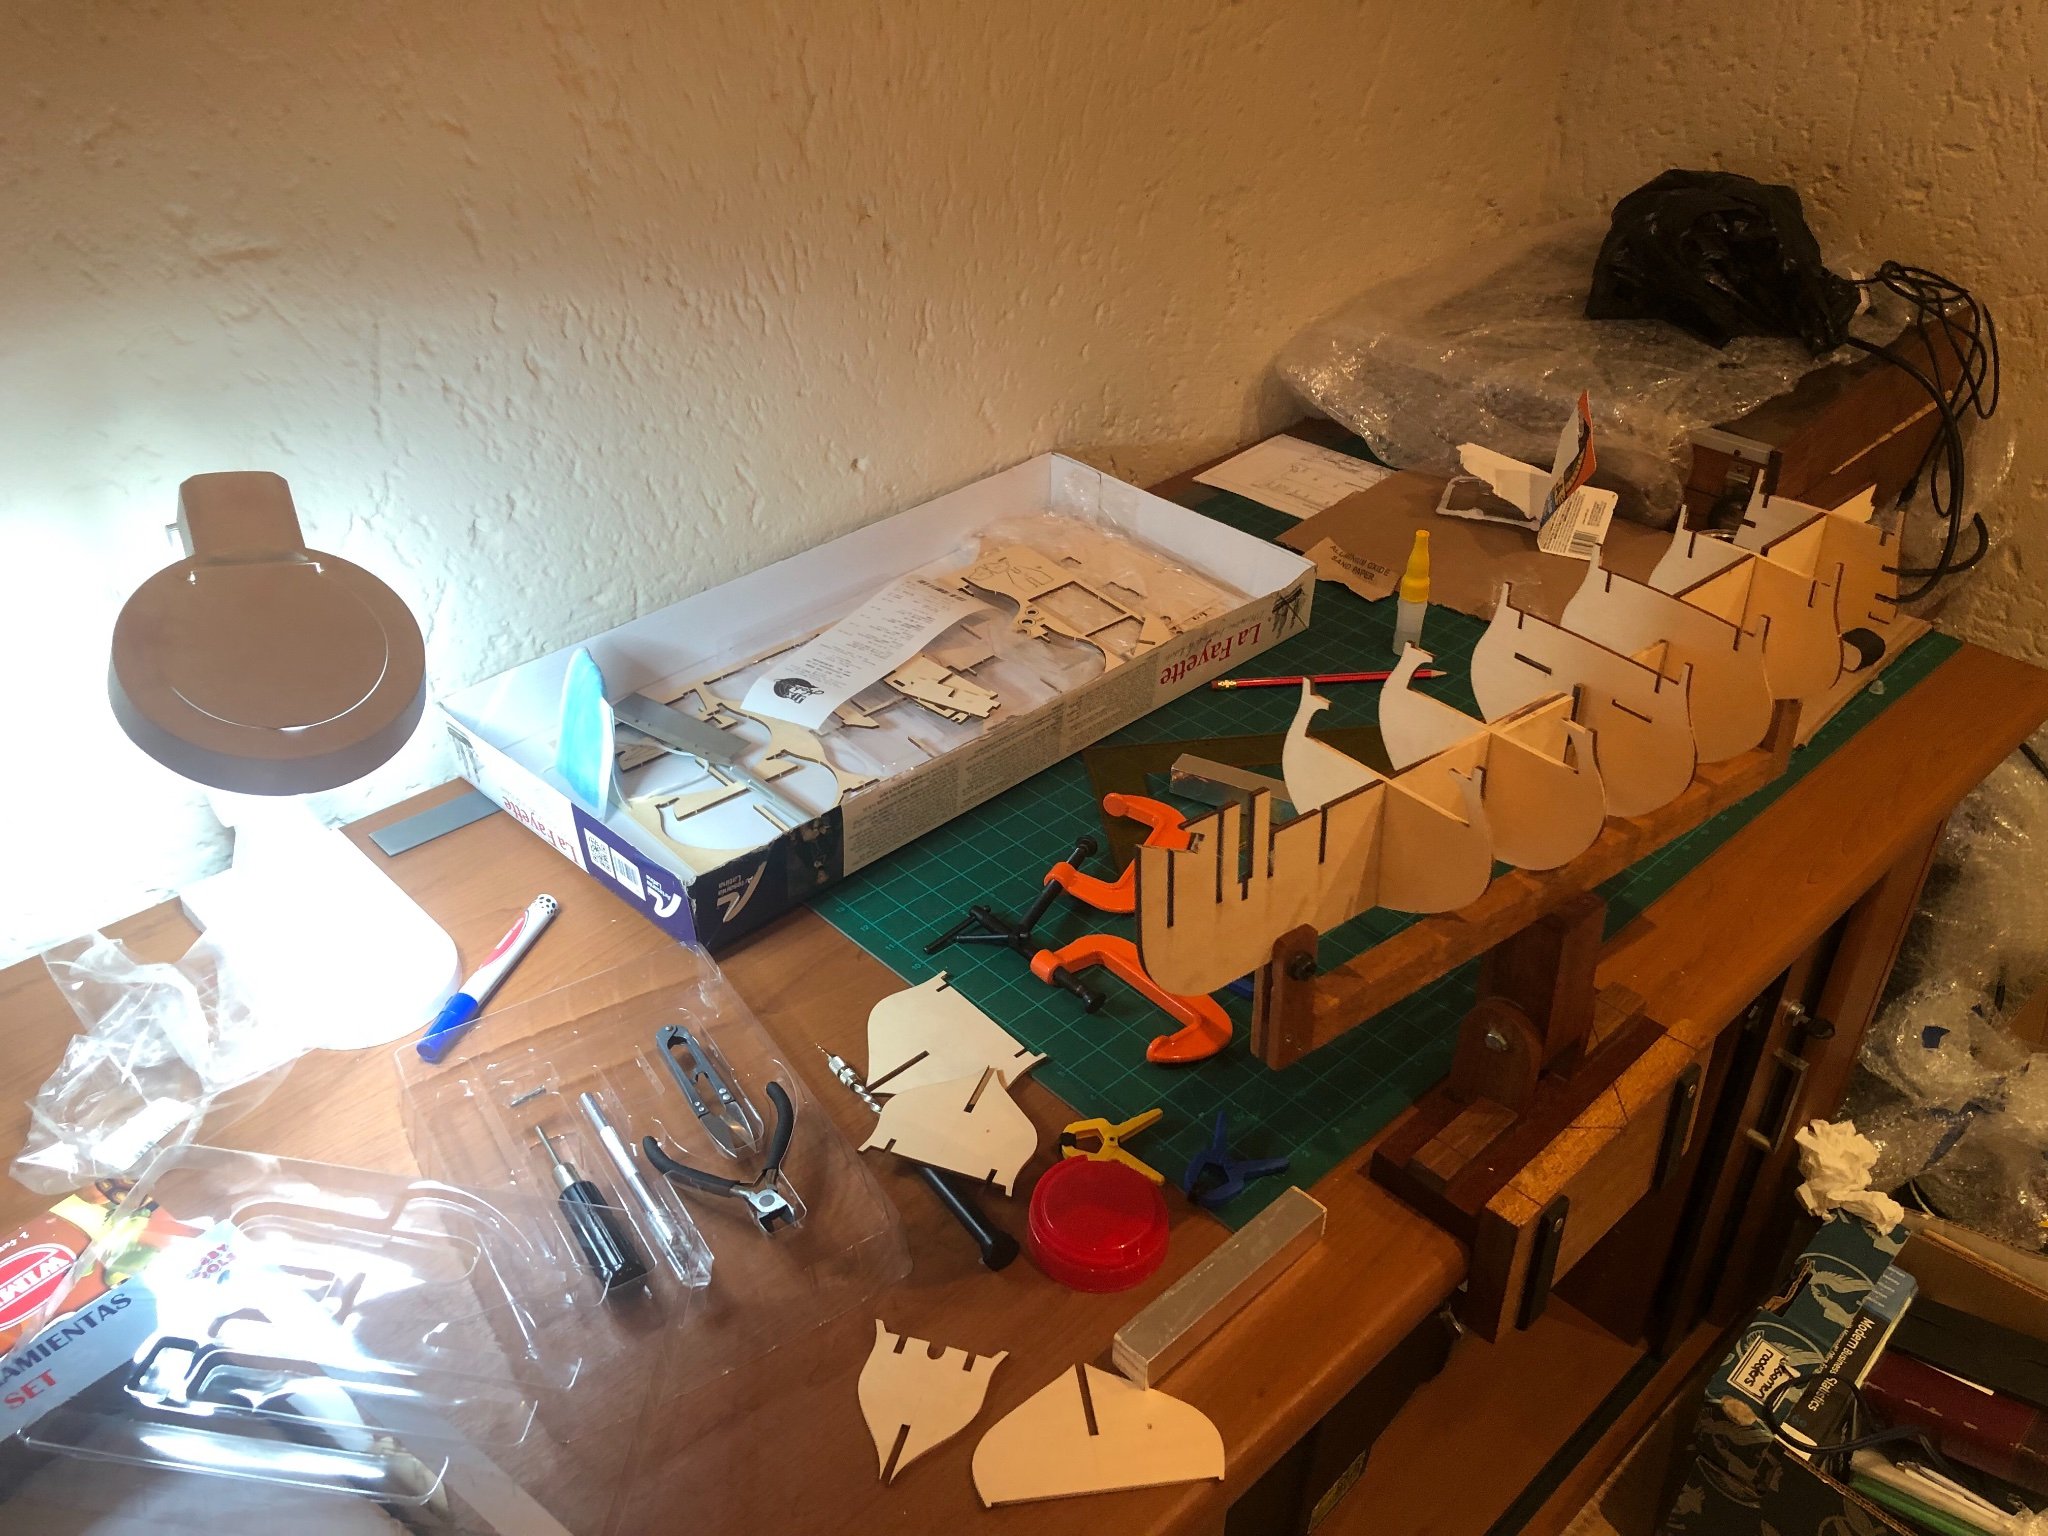
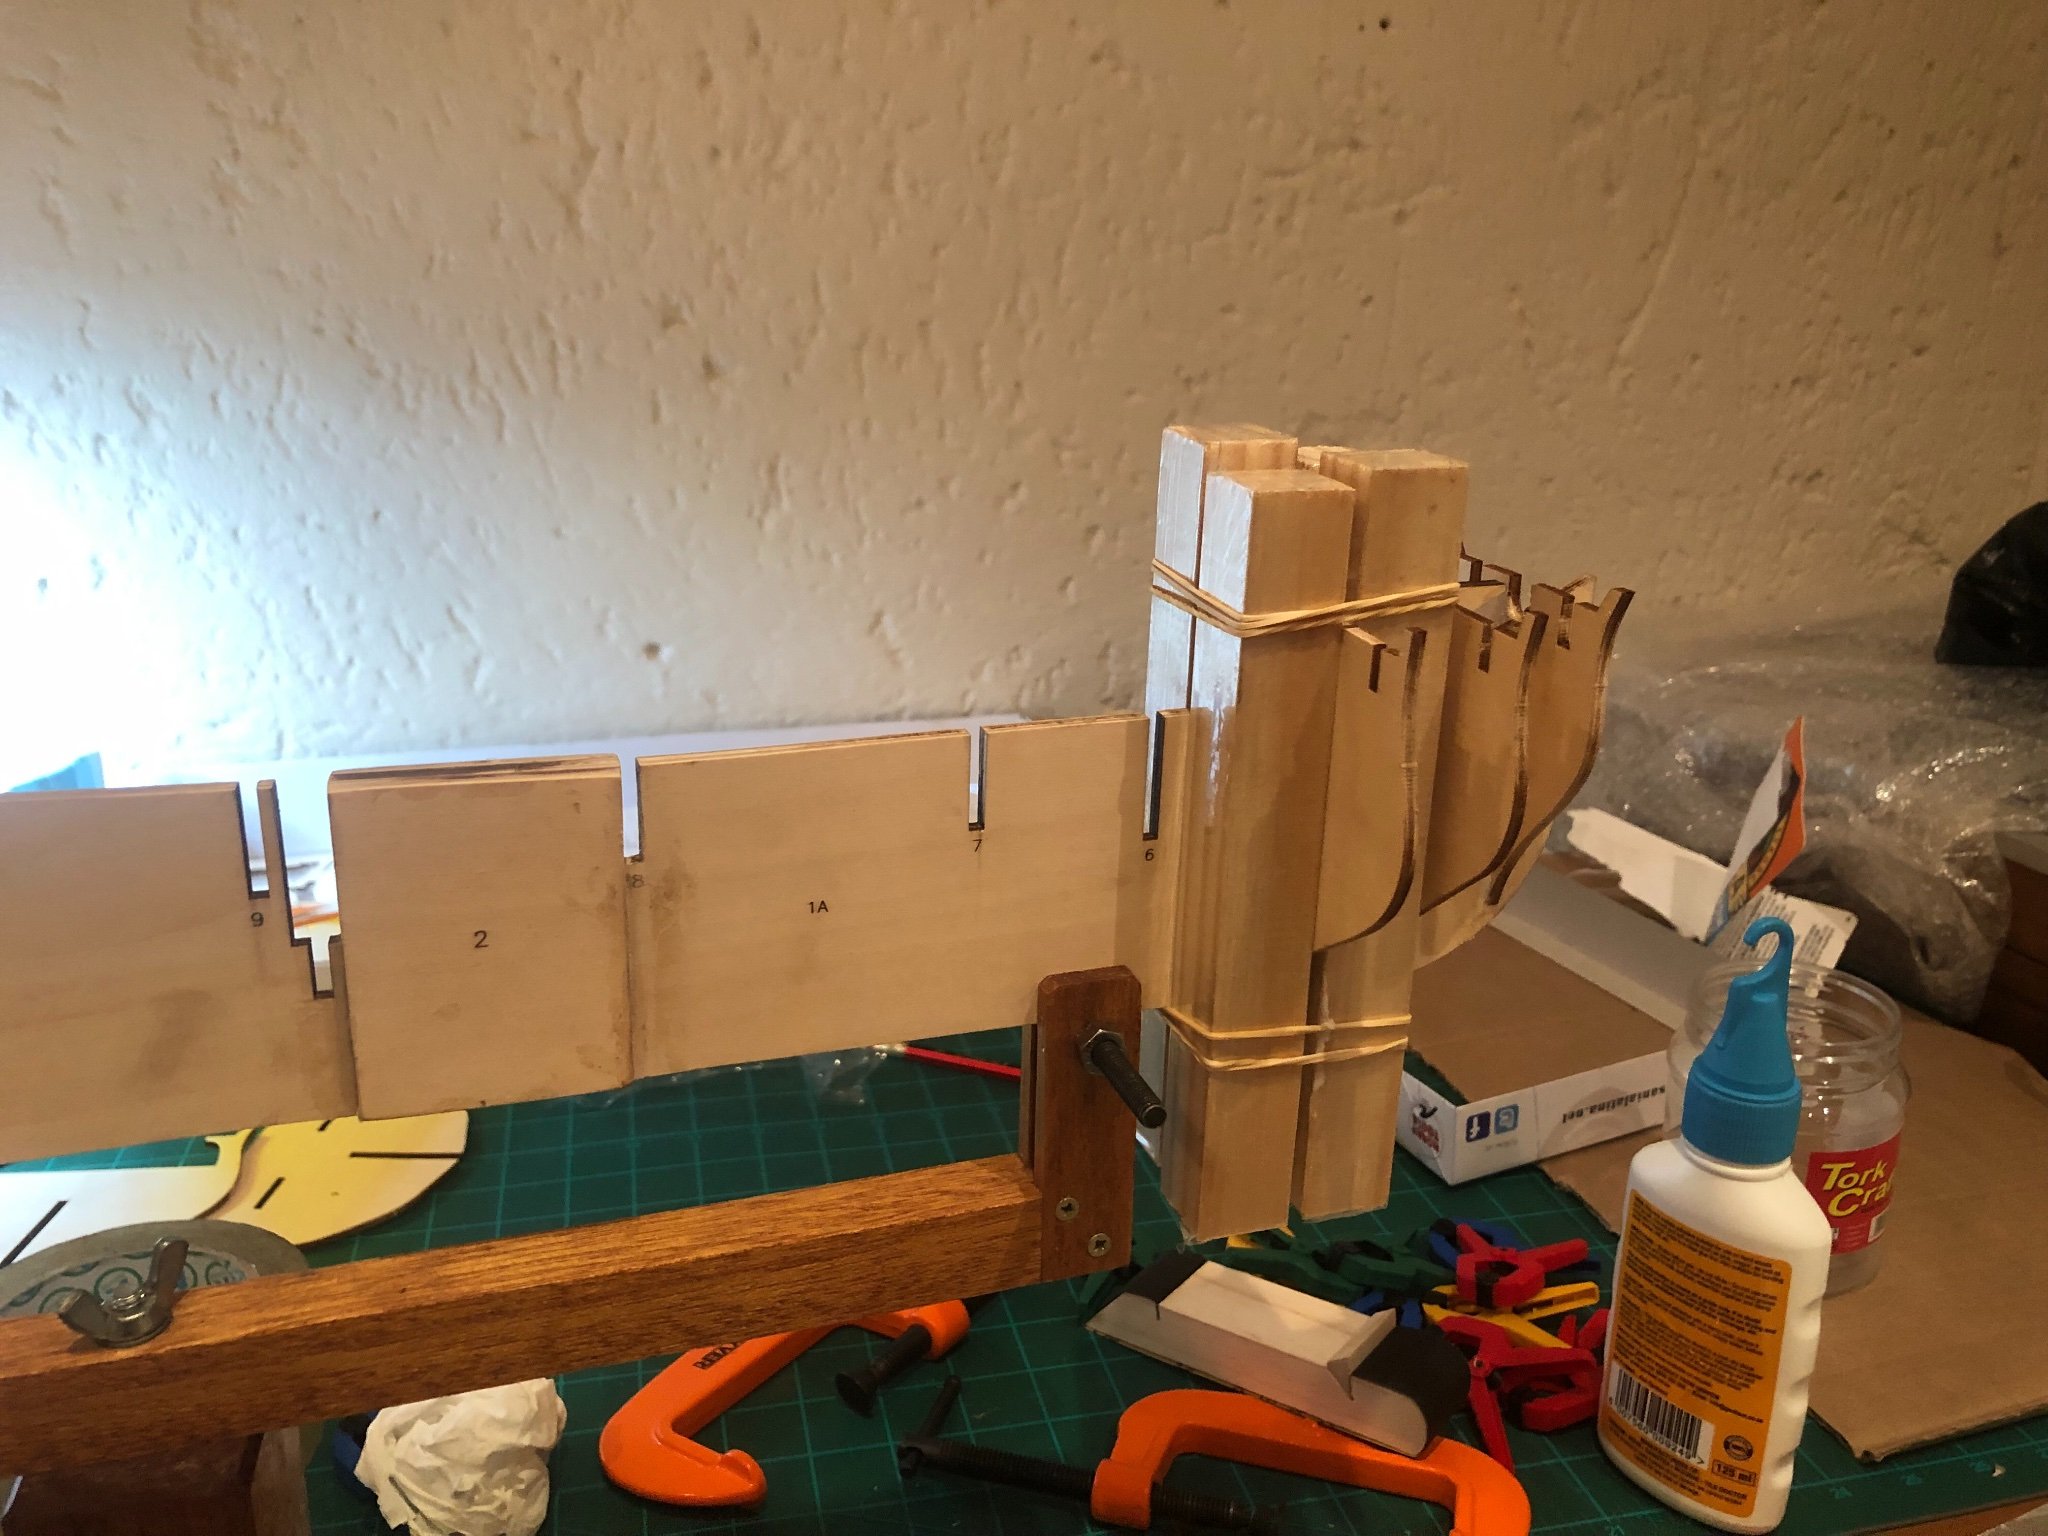
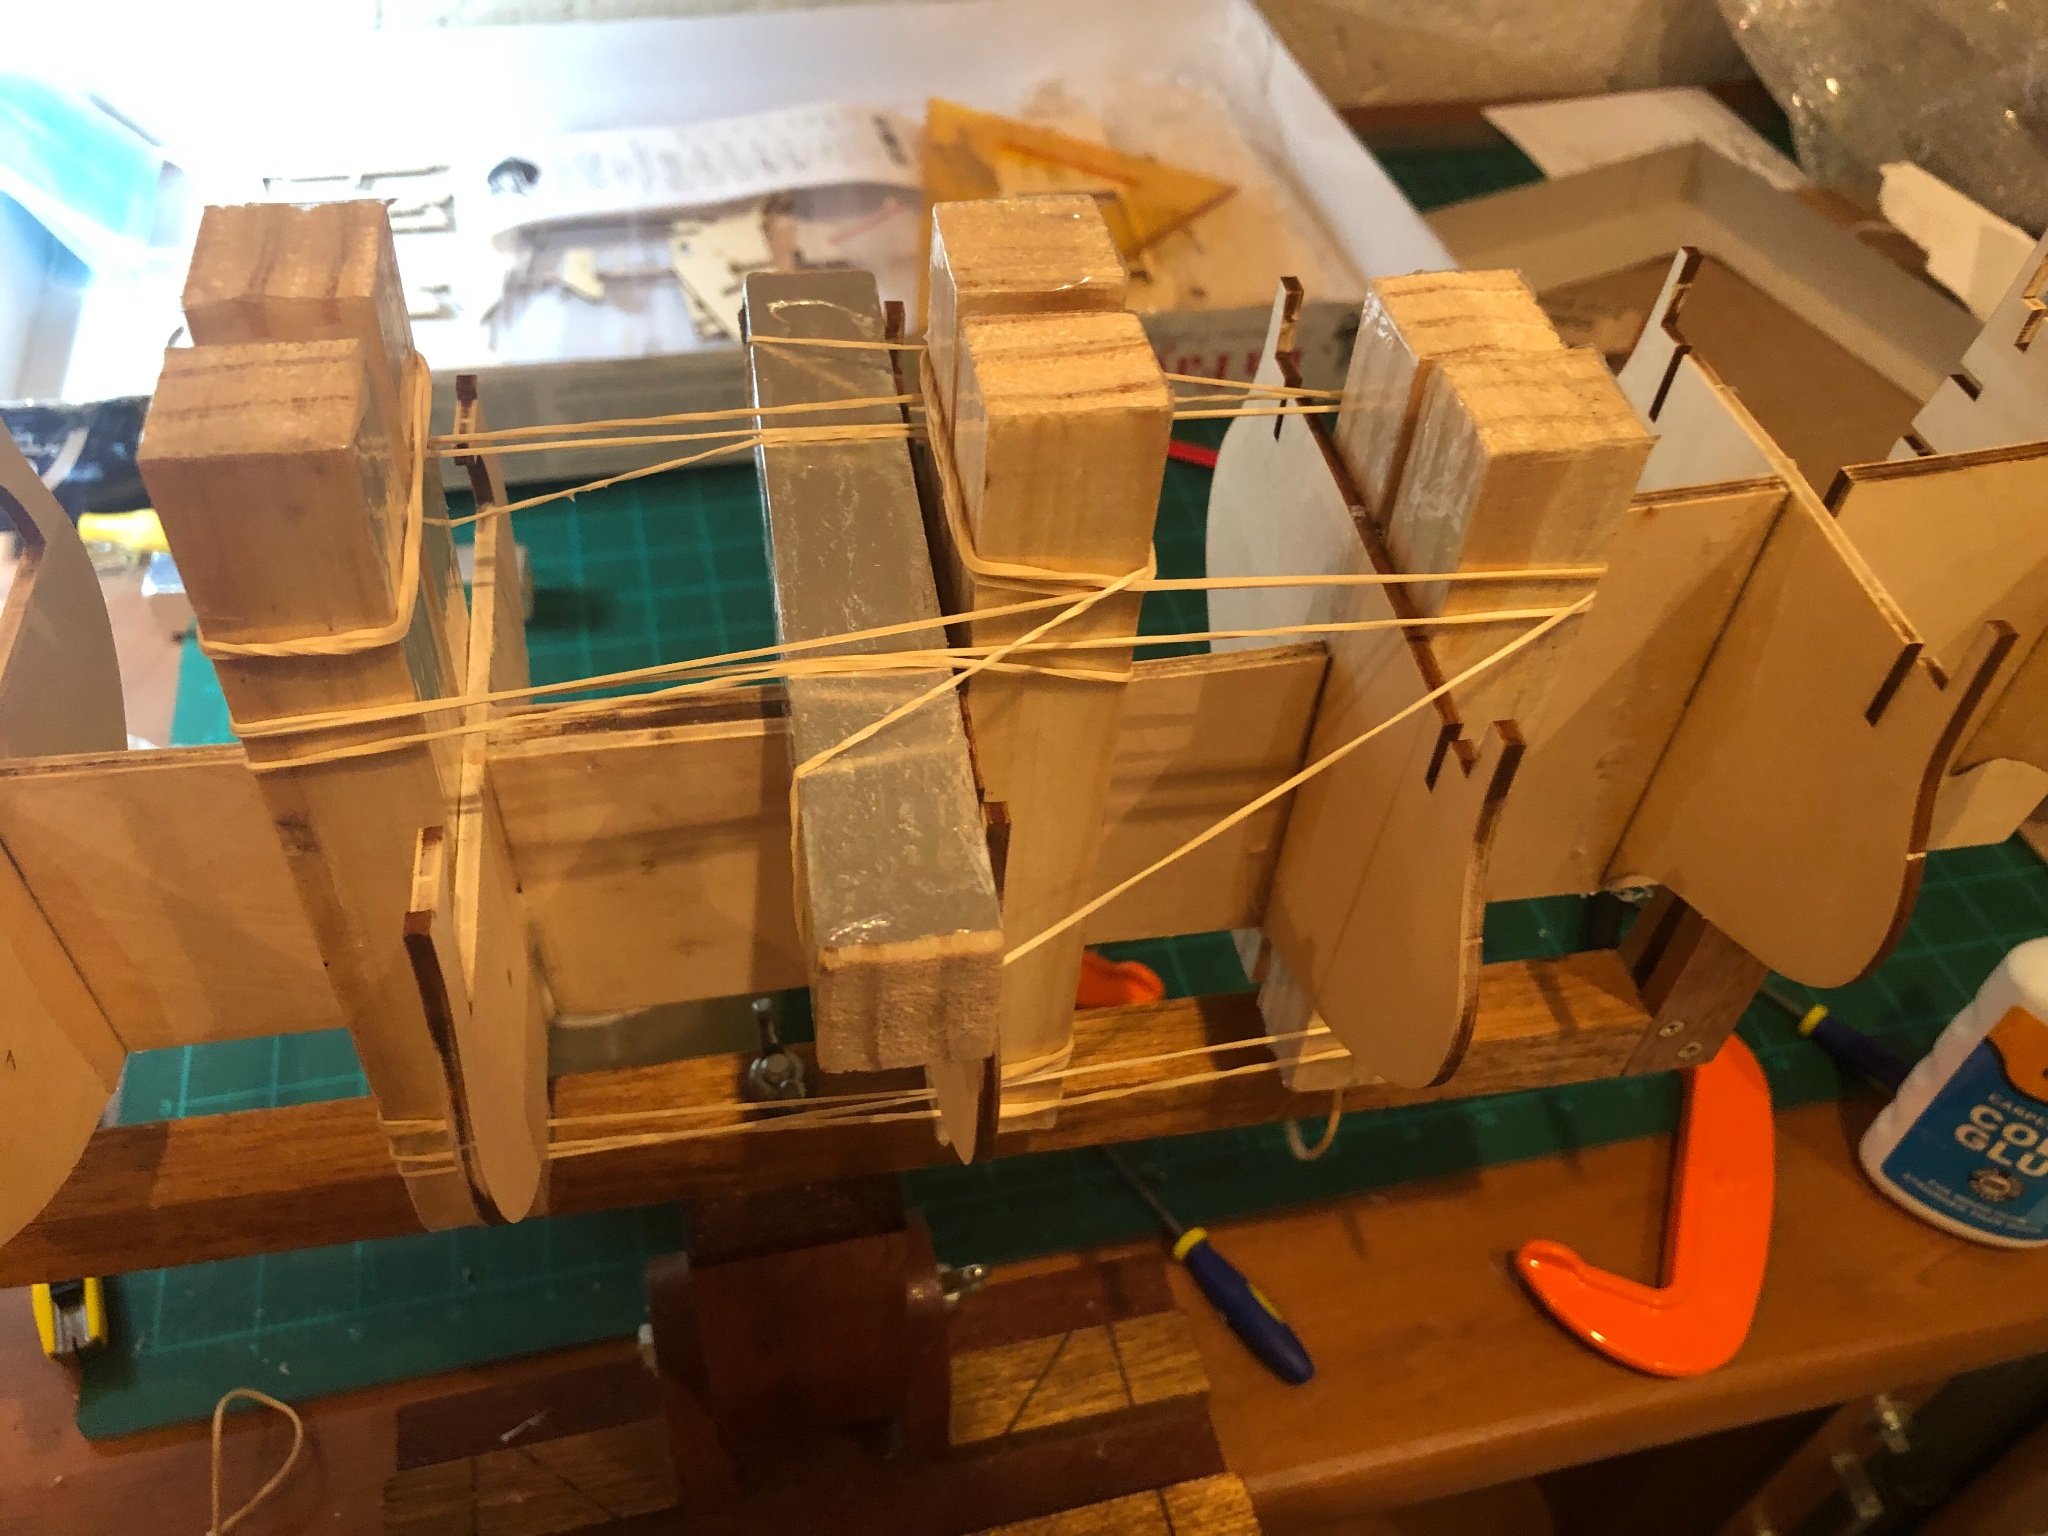
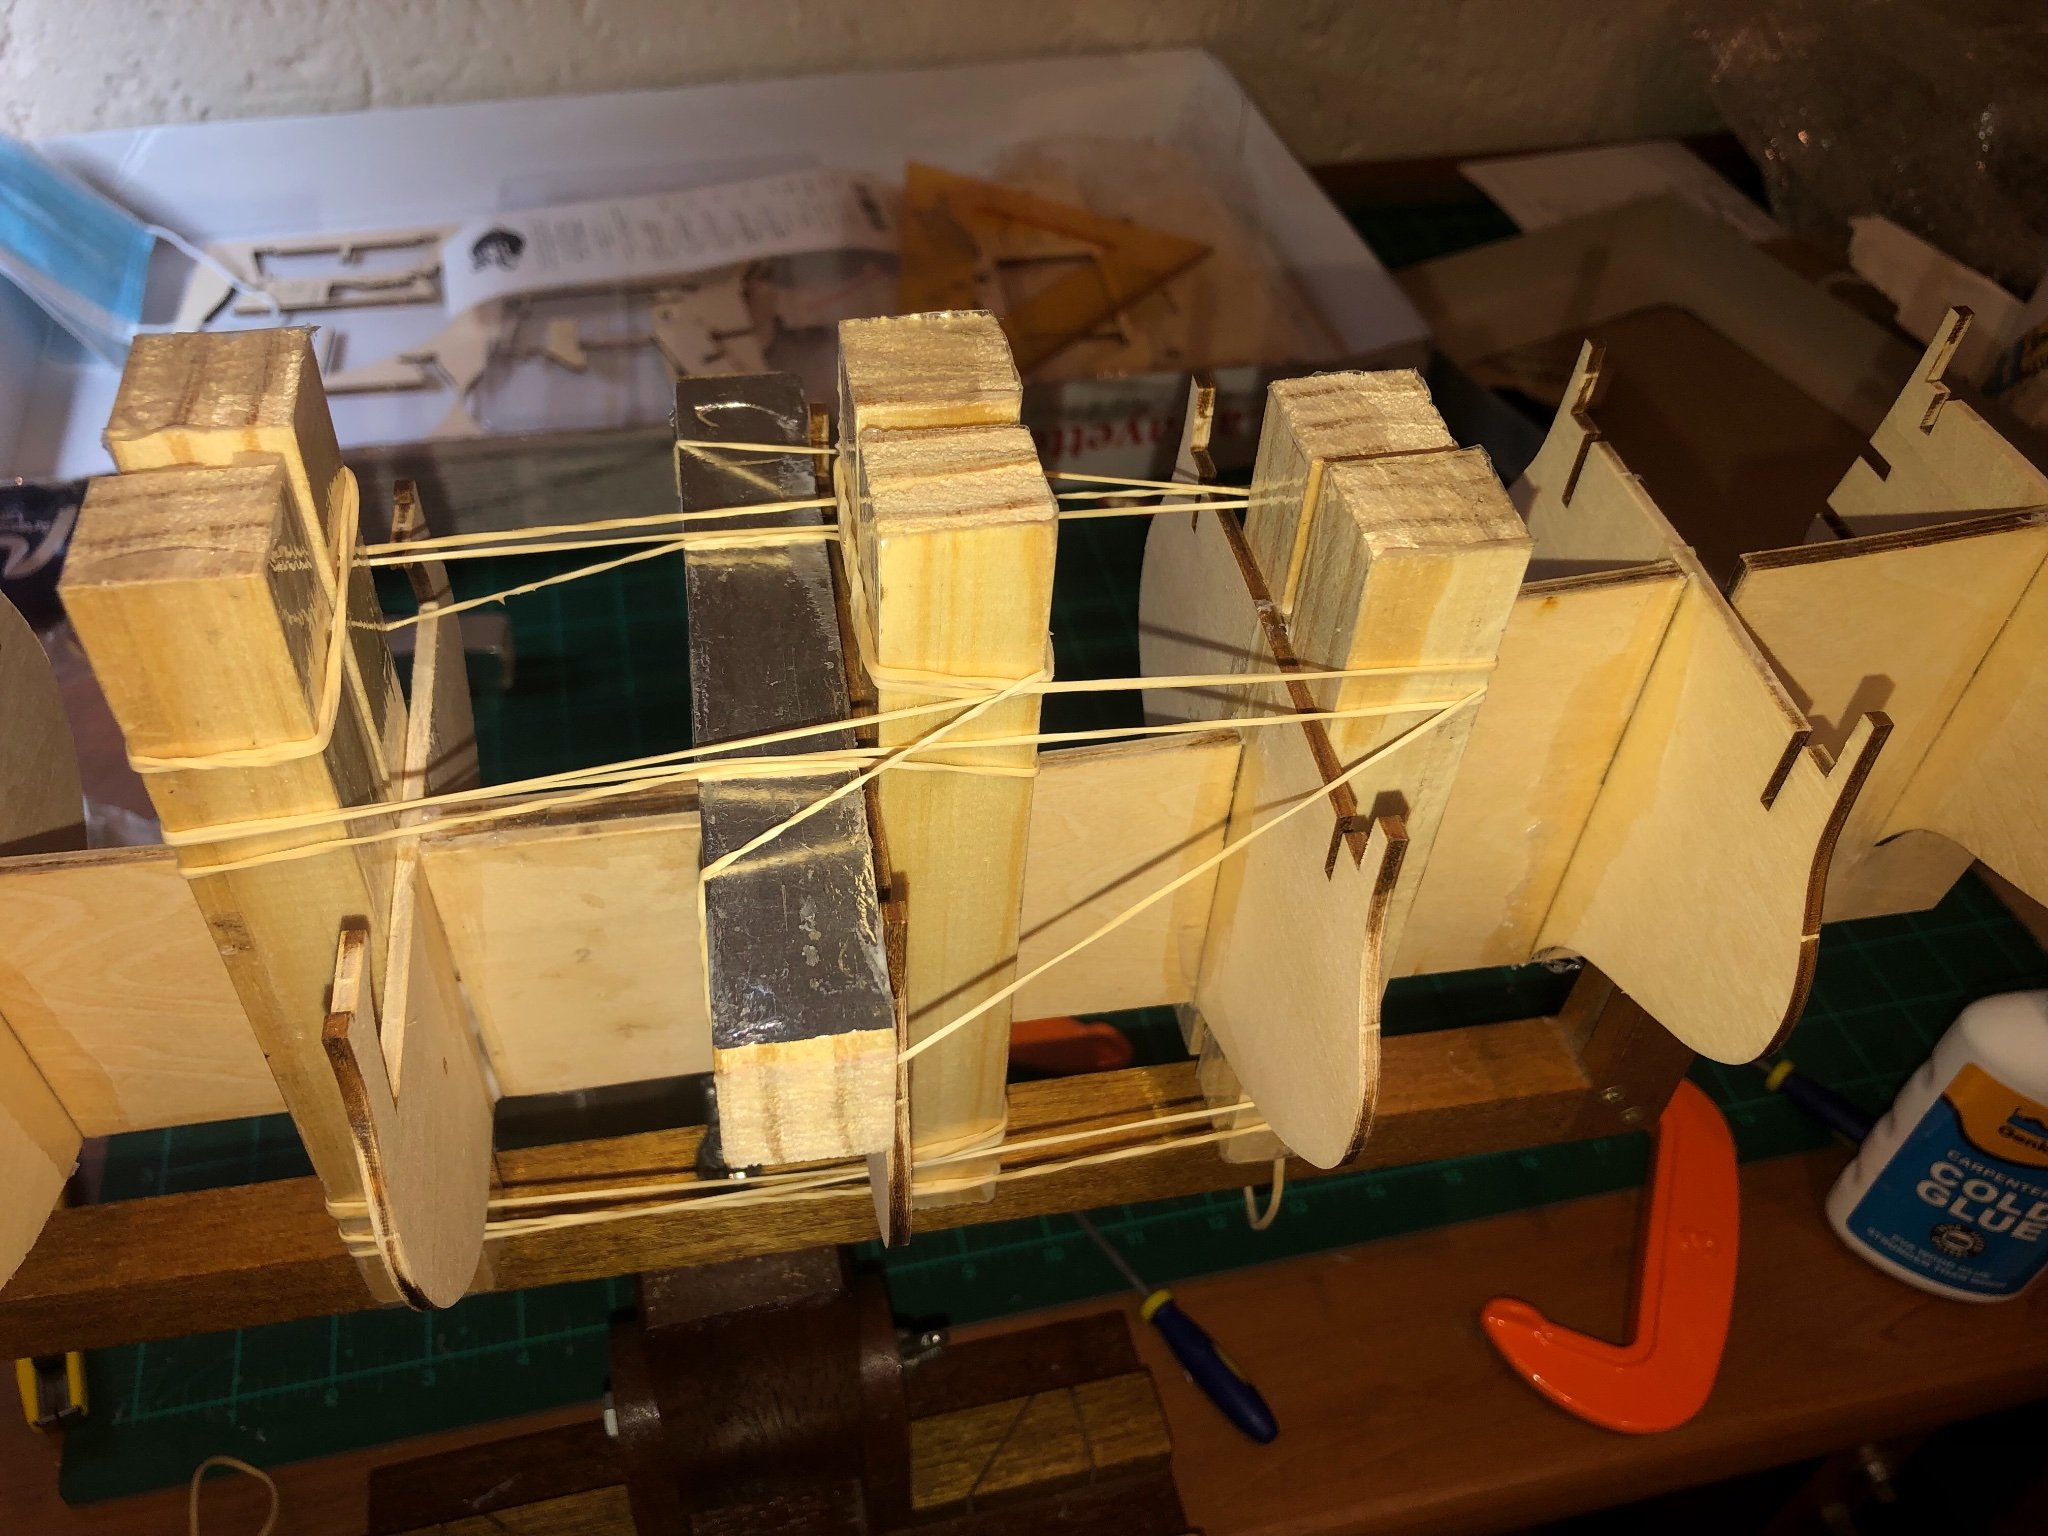
 Greetings all, My name is Barend. I have been a lurker of this forum for quite some time now and I have always had the ambition and desire to try and build a model ship, it is an art I have always admired, and seeing many of the posts here on this forum has inspired me to attempt my very first ship model, the LaFayette Hermione Frigate 1/89 by Artesania Latina. This is a very daunting, exciting and new experience for me. So I am looking forward to sharing my progress and to gather knowledge from experienced modellers from all walks of life. I am open for tips and tricks and criticism, even if it may seem cruel; I want to learn, but more importantly I want to learn the right way and to improve. Lastly, some history on this build experience so far. I bought this kit on the 4th of September 2021, and I kept it in its box since then, until last week. This was a very anxious and exciting time for me as I anxiously wanted to build it, but space and time was a constraint (University student). I picked this ship not only because it looked very beautiful on the box, but also I found the history fascinating. Additionally, the fact that a life size replica of this ship exists is a big advantage for reference images. Some of my previous/lifelong hobbies are: super complex origami, speed cubing, record collecting, classic and antique cars enthusiast, and many, many more! My goals and expectations for this build: 1. I need to remember that this will not be perfect and it is a learning experience. 2. This will take time. 3. I want to first finish this model, I have a habit of not finishing what I started, especially large projects like this. 4. I want to learn the history of the ship as well as how it was built back in the day. 5. I want my planking to be perfect. 6. I know Rigging will be a struggle, and that is Okay. 7. I want to learn patience and persistence through perseverance. 8. Most importantly, I want to have fun. And try to balance studying with ship building. 9. Finish it within 6-7 months, maybe, maybe not? Time will tell… (This list will probably expand as I go along) I expect this to be difficult but also doable. My motto for this build will be: “Smooth seas never made a worthy sailor” Note: there are two versions of this ship, I am building the newer one. Alas! Without further ado, I present you my ship (well progress, but soon she shall set sail). Here is the box, the box is very nice. The Keel was laid down on 13 October, 2021. This was when I officially started with my build. Excuse the mess! I am still space limited, I am in need of a table in my hobby/spare room. (The keel clamp was gifted to my by a close friend, he also gifted me a display case) This was the first day of building, pieces cut out and dry fitted, save for the keel as the two halves were joined prior to the dry fit. Glueing the ribs onto the from/start of skeleton. Here is my very rudimentary and admittedly wonky way of glueing the ribs squared to the frame. I stuck some tape on the “wood clamps” to prevent the wood glue from sticking to it. I have never seen anyone do it this way before. All pieces are perfectly square except one of the pieces was warped from the get go, however its only out by 0.5mm. Glueing contraption and rubber bands contraption continues… Can’t have enough rubber band right? The goal is just to get it as tight as possible, to try and negate any tolerance issues, because it can get wobbly. This process took me about 2 days with 3h work per session. But thanks, that’s all for now. I hope you enjoyed my first post, and feel free to drop comments and share some thoughts and criticisms. Also feel free to ask questions, in the unlikely event that I should have the knowledge to answer. Soon my hobby room will be properly kitted out…. P.S. Apologies if there are any formatting and other issues here, this is my first post, moderators feel free to do your job. But for now, all hands on deck and happy building to you all! Cheers, Barend


- 7 replies
-
- 5
-
-
- artesania Latina
- First build
- (and 1 more)
-
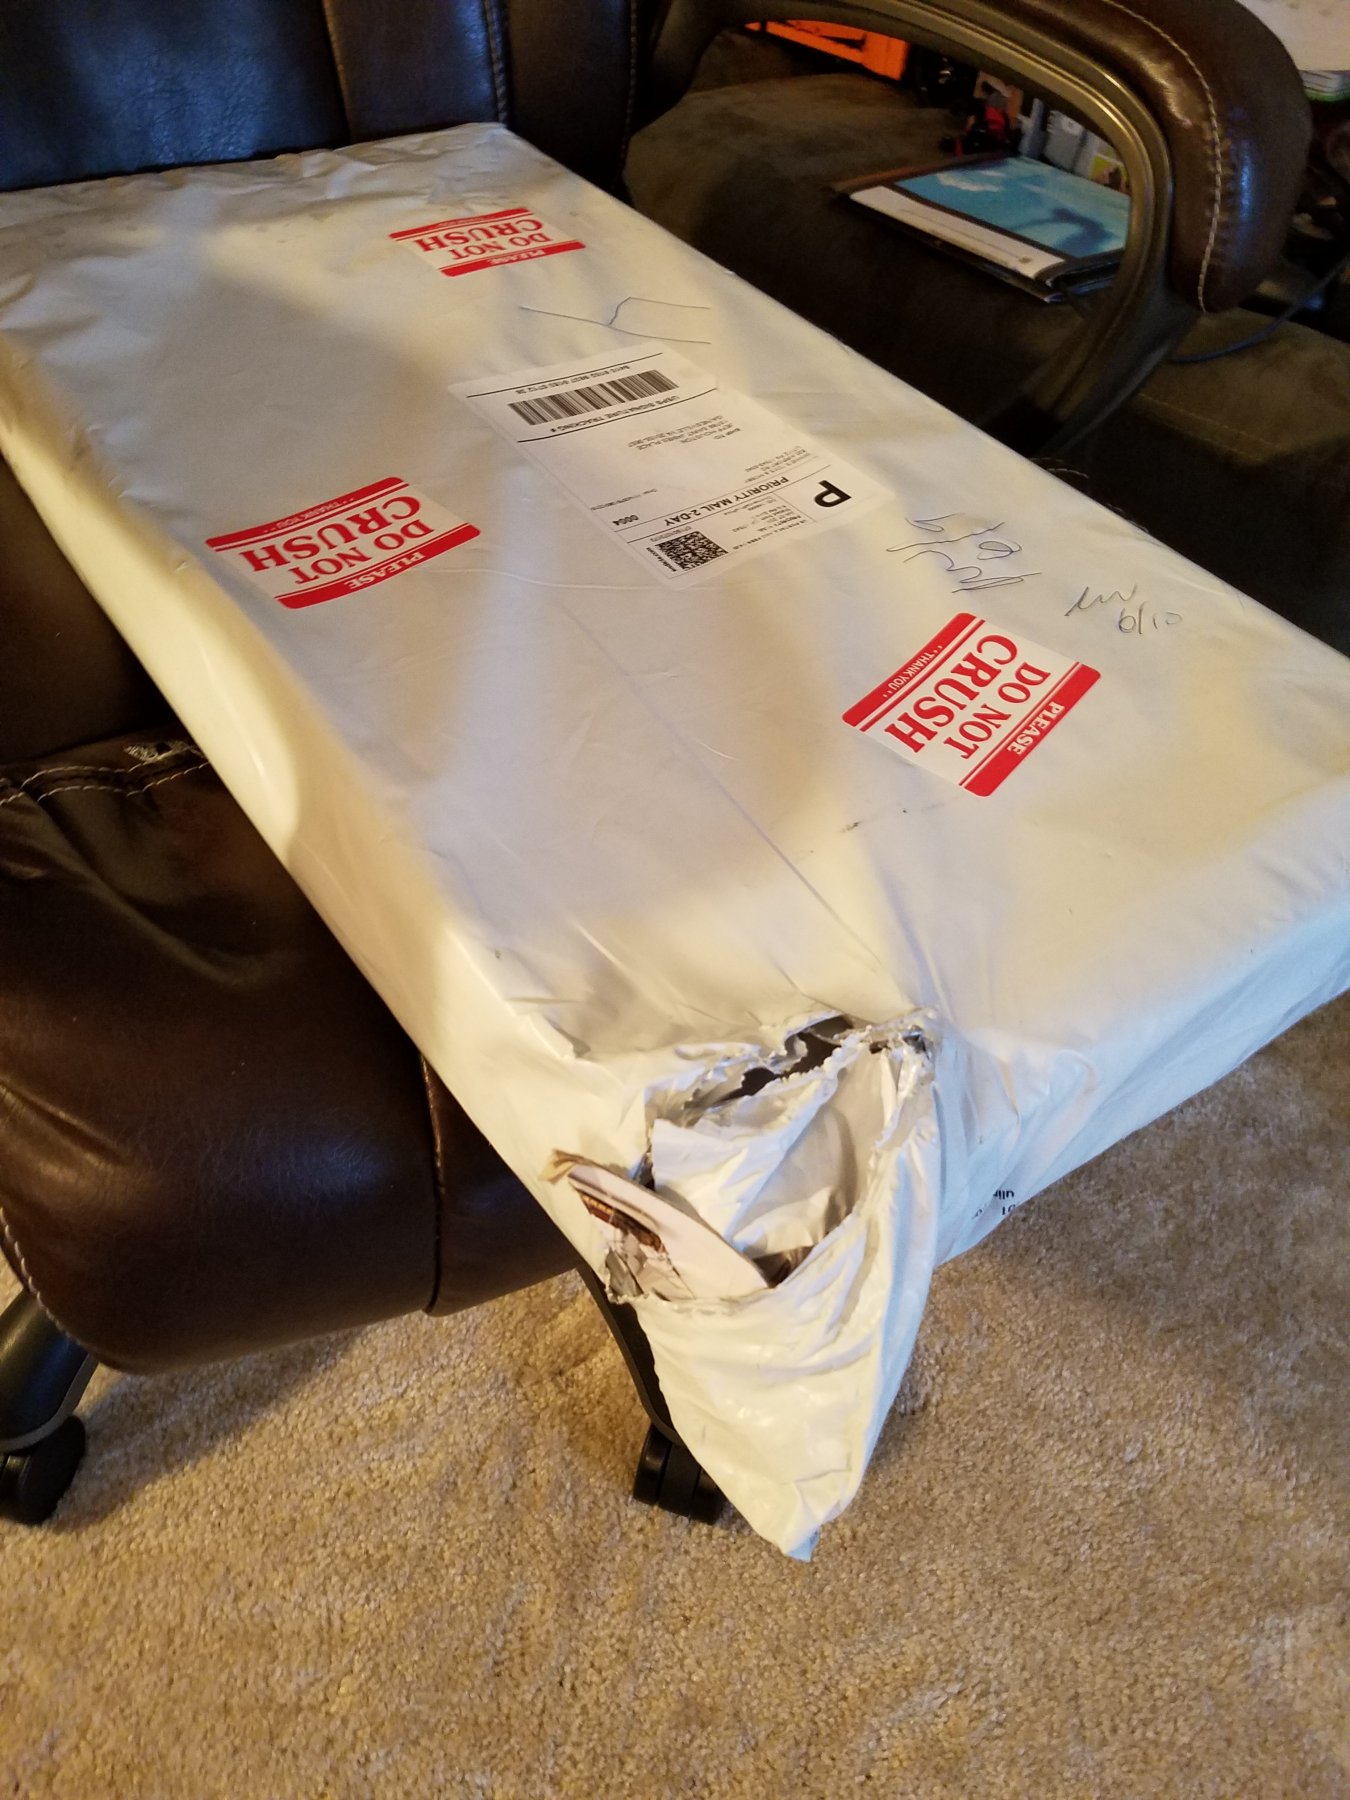
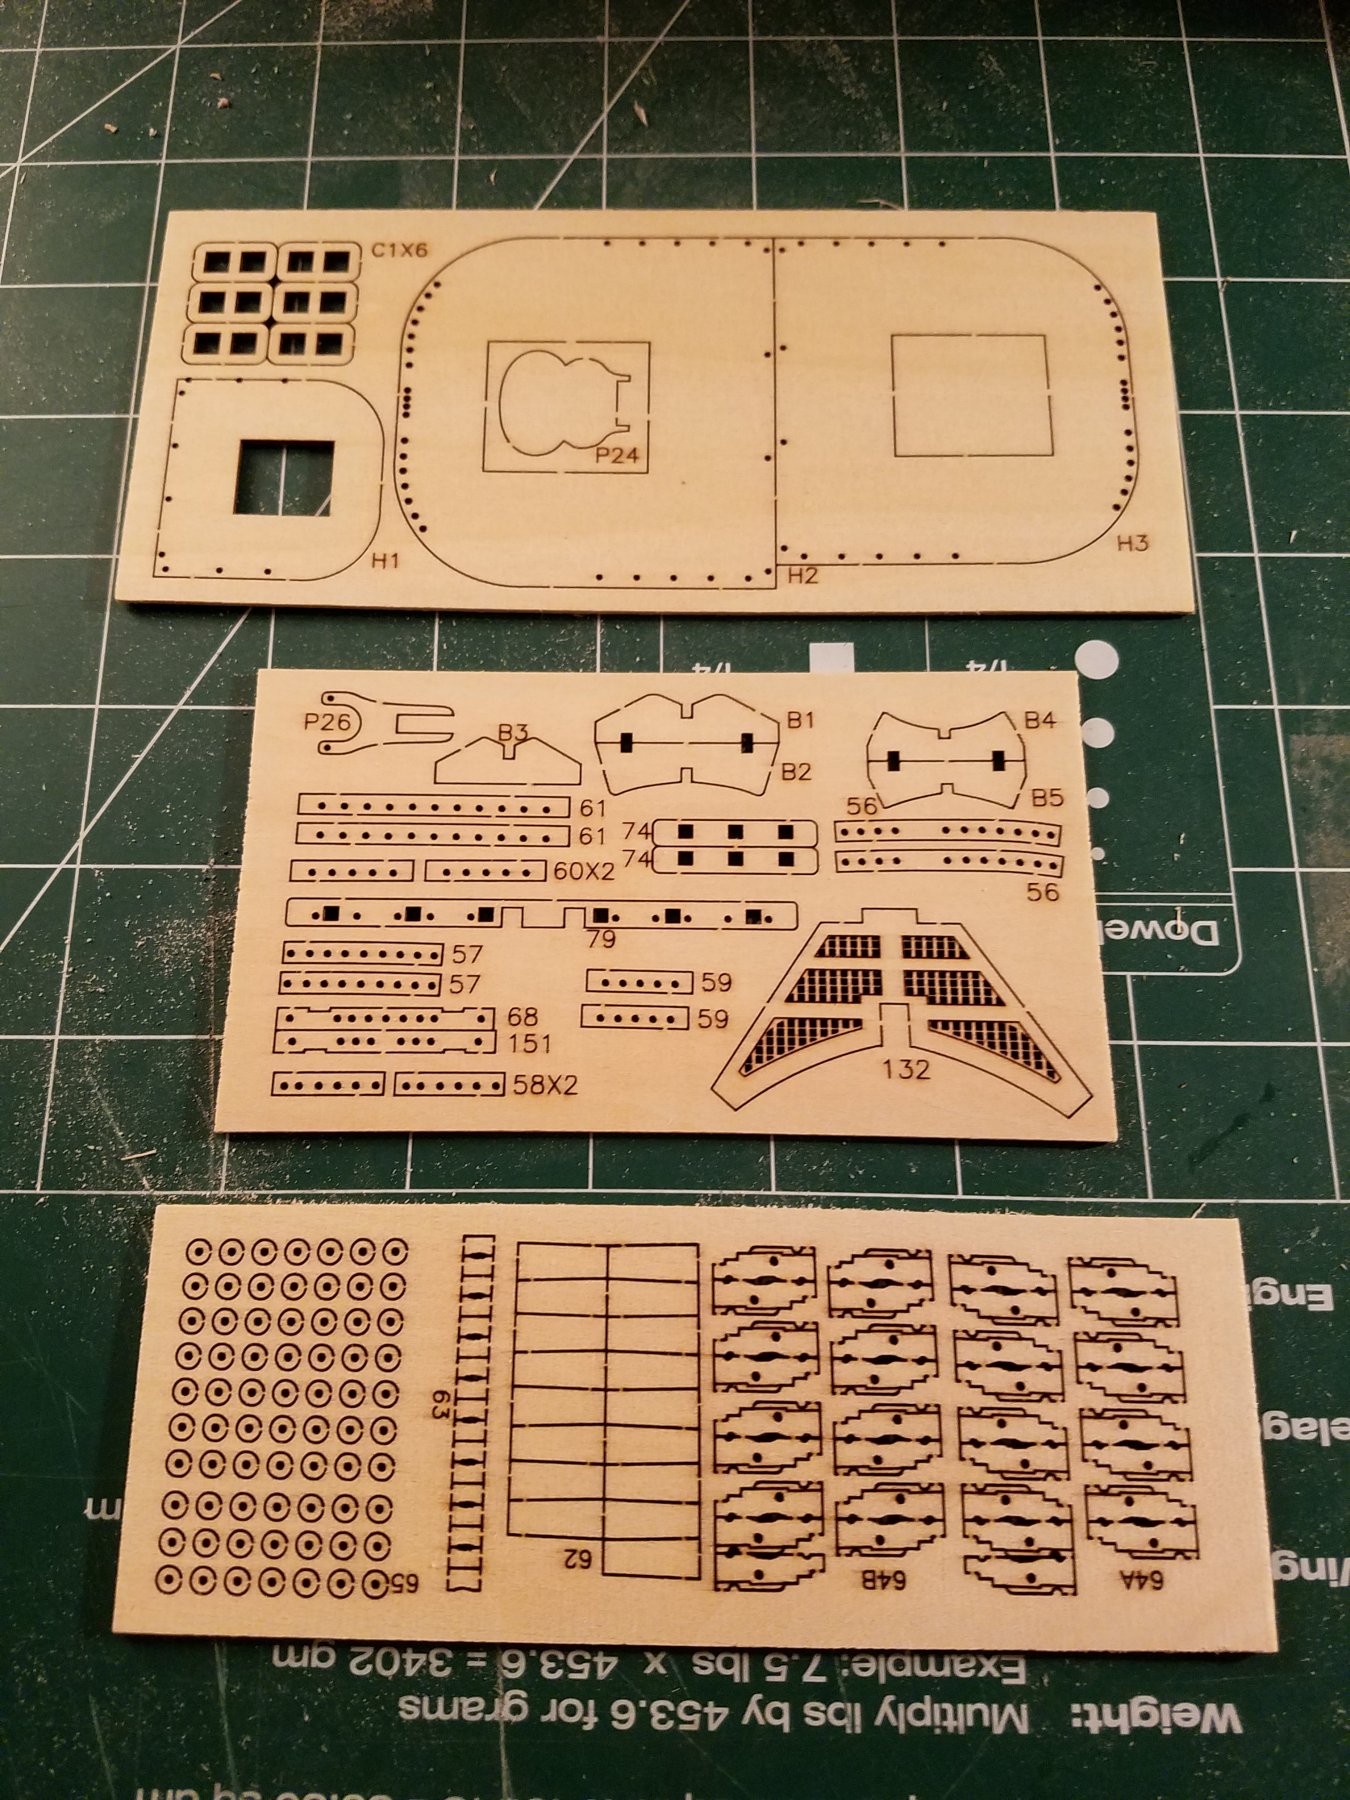
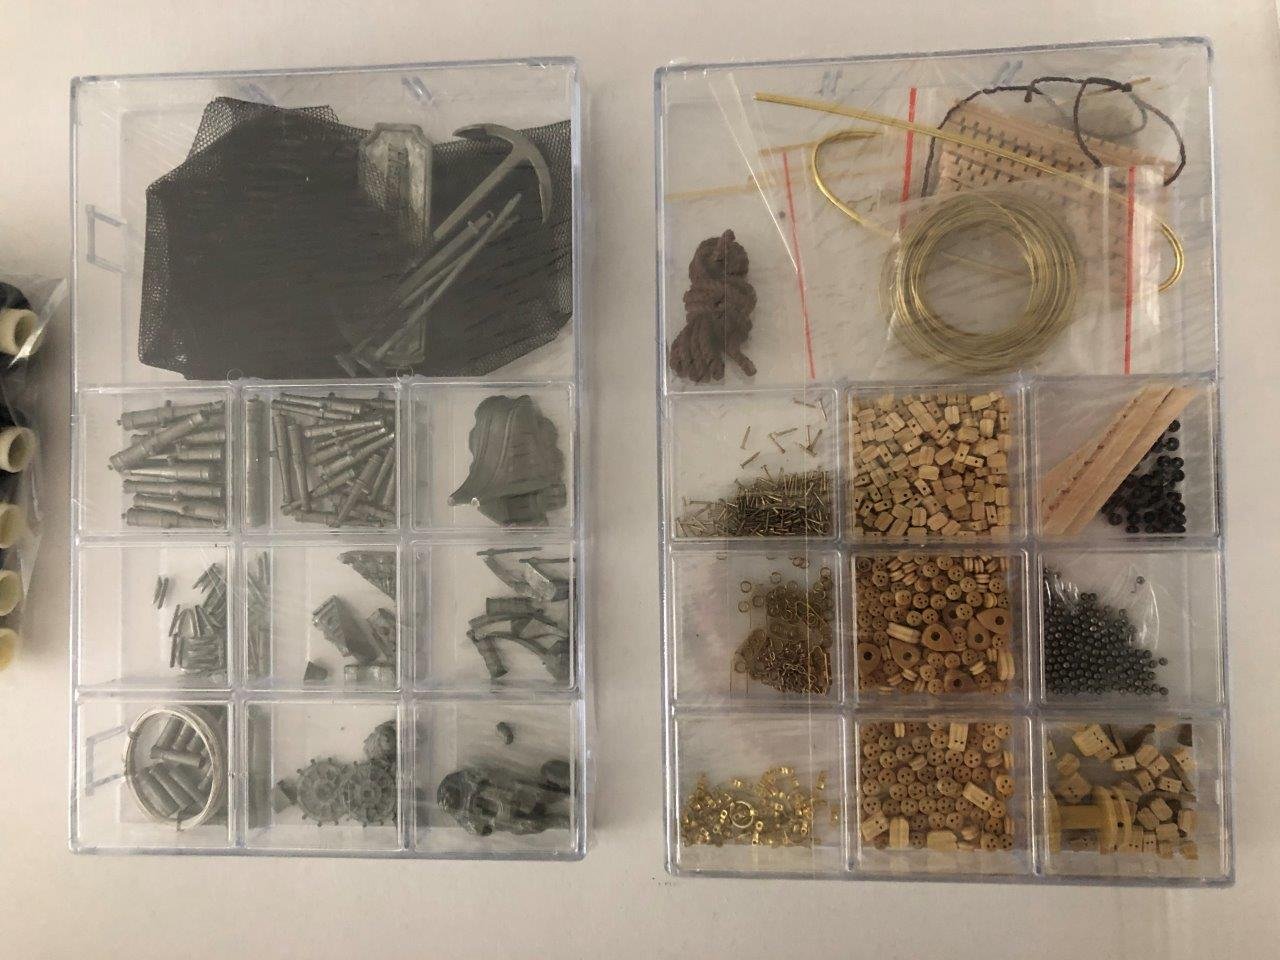
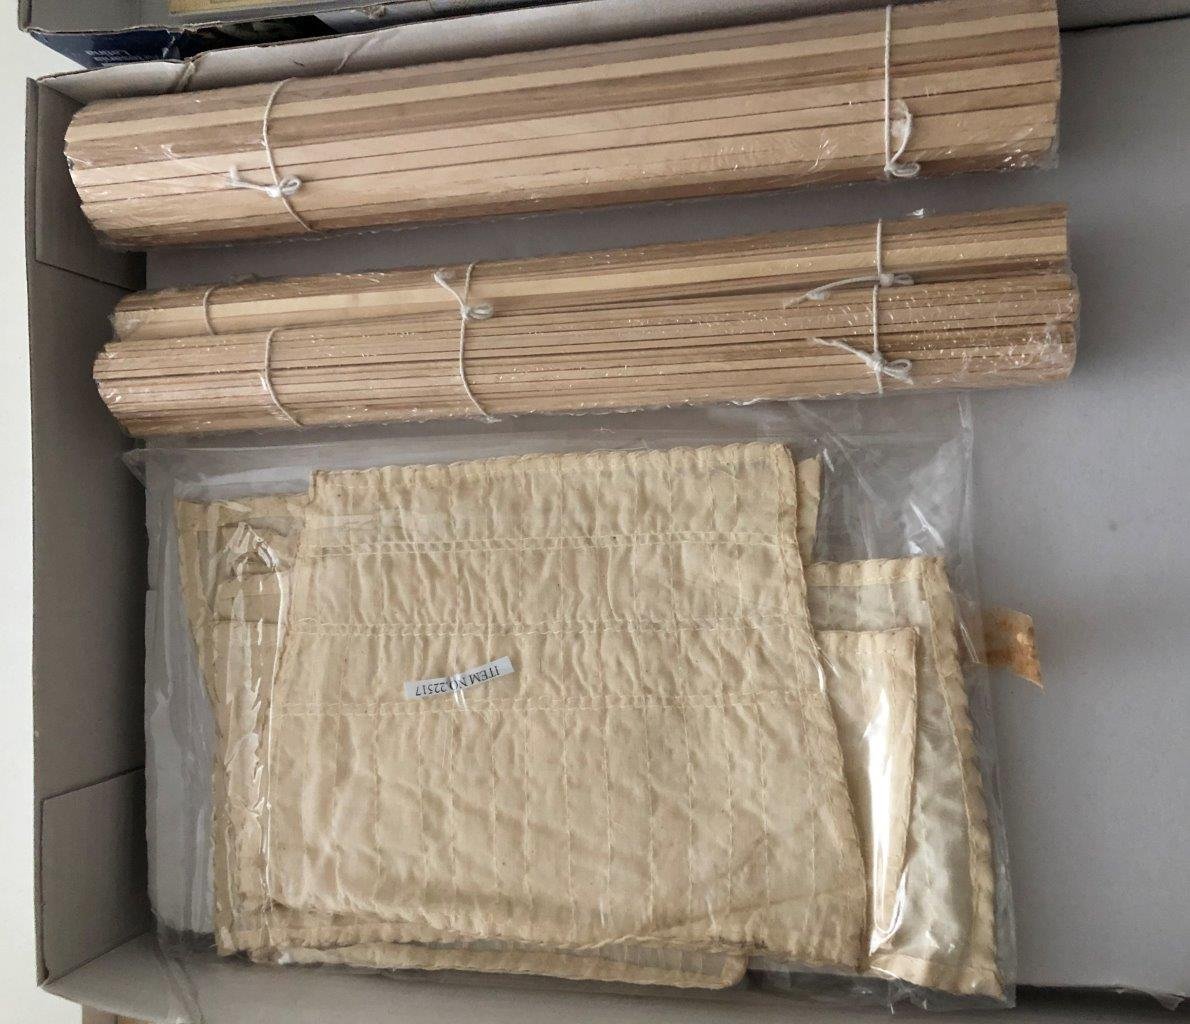
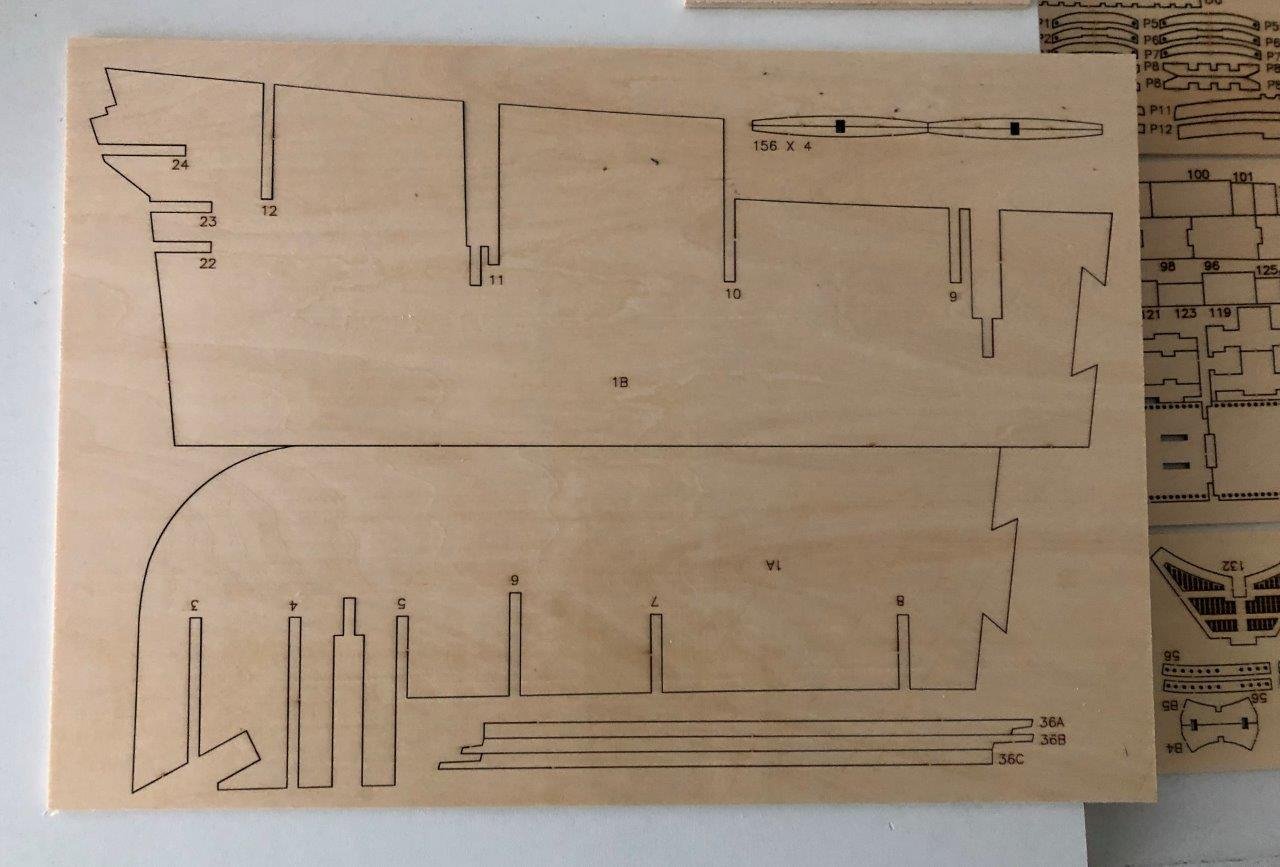
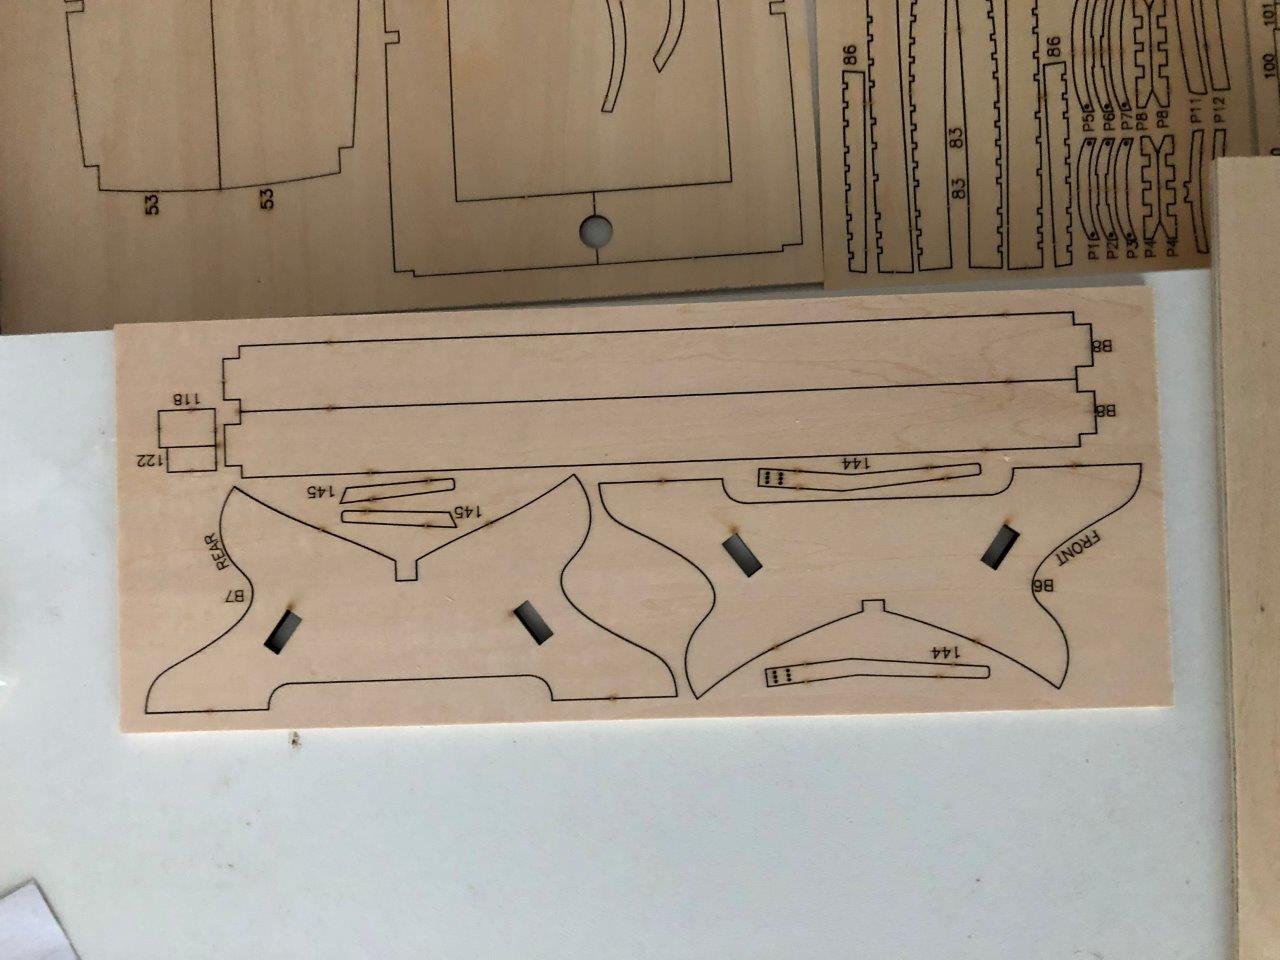
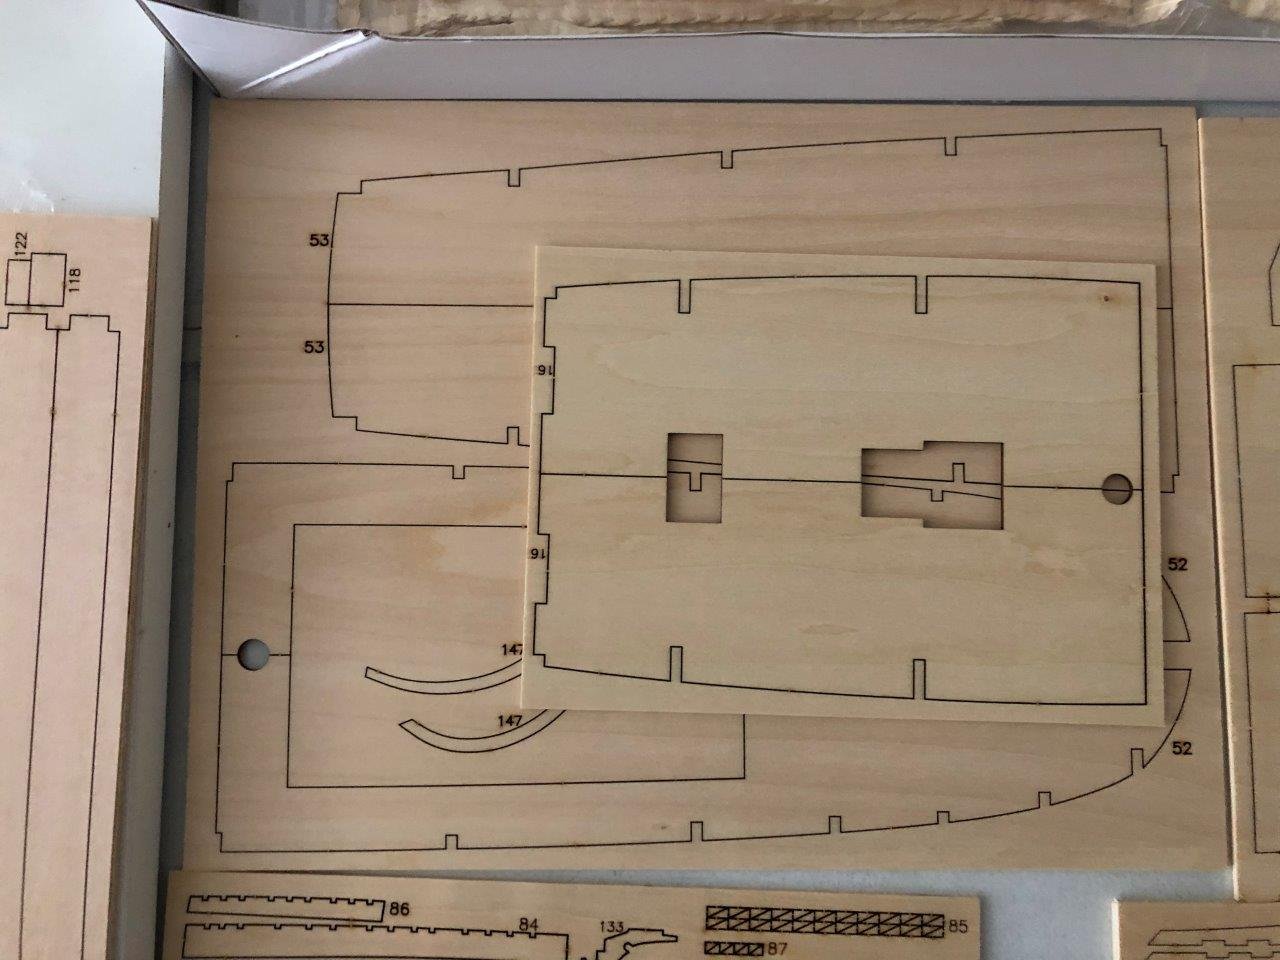
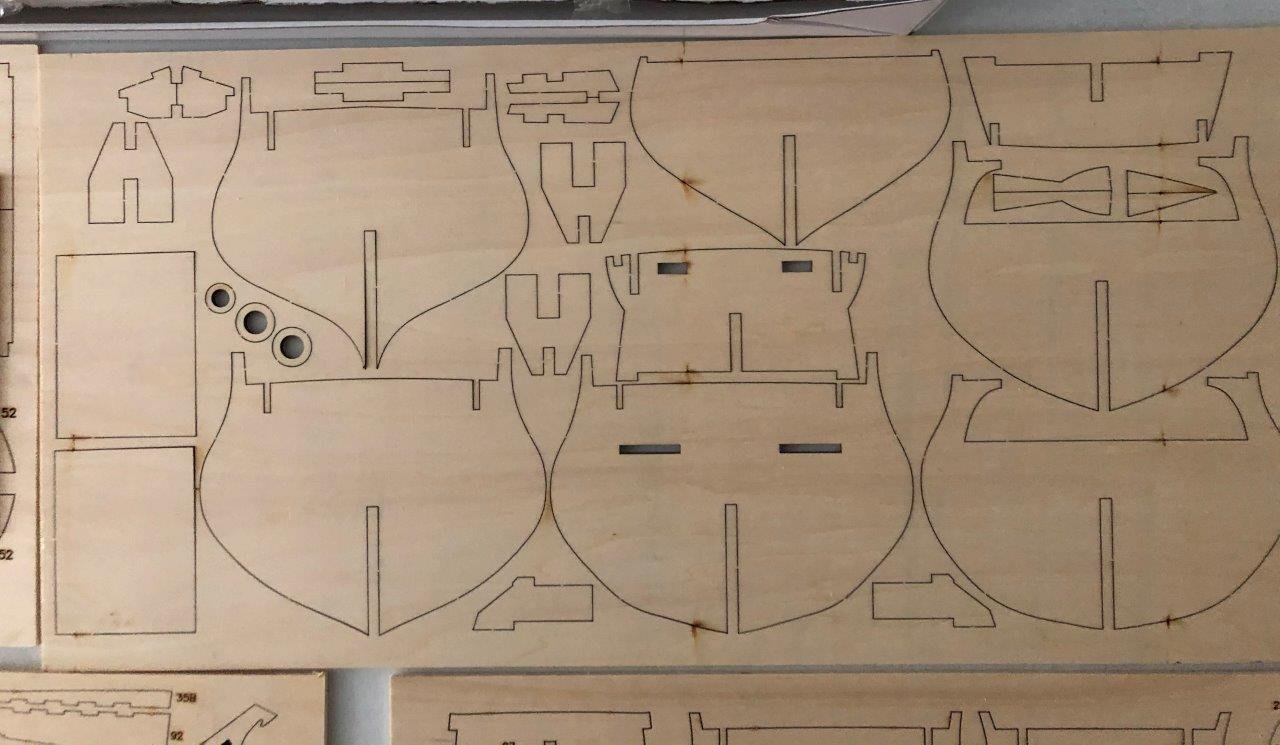
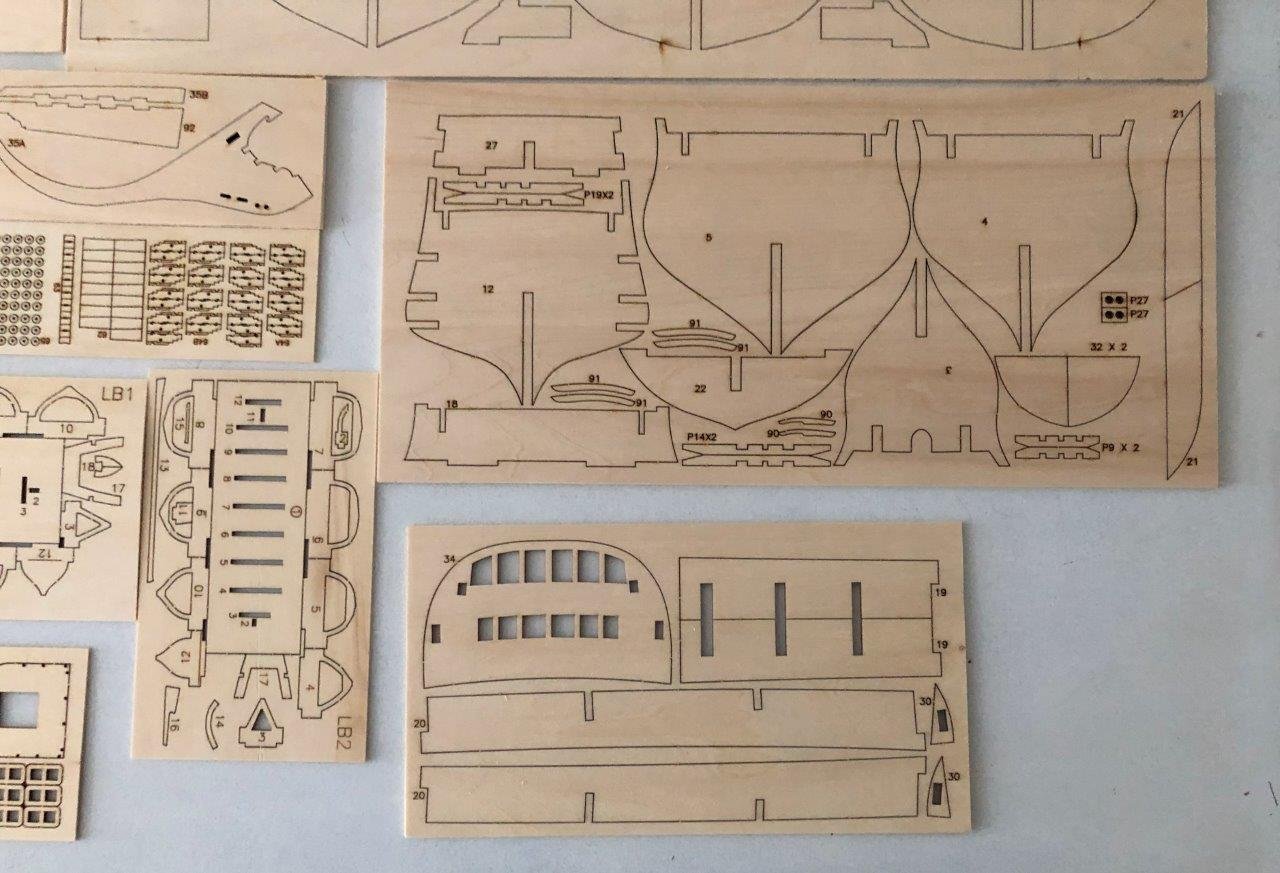
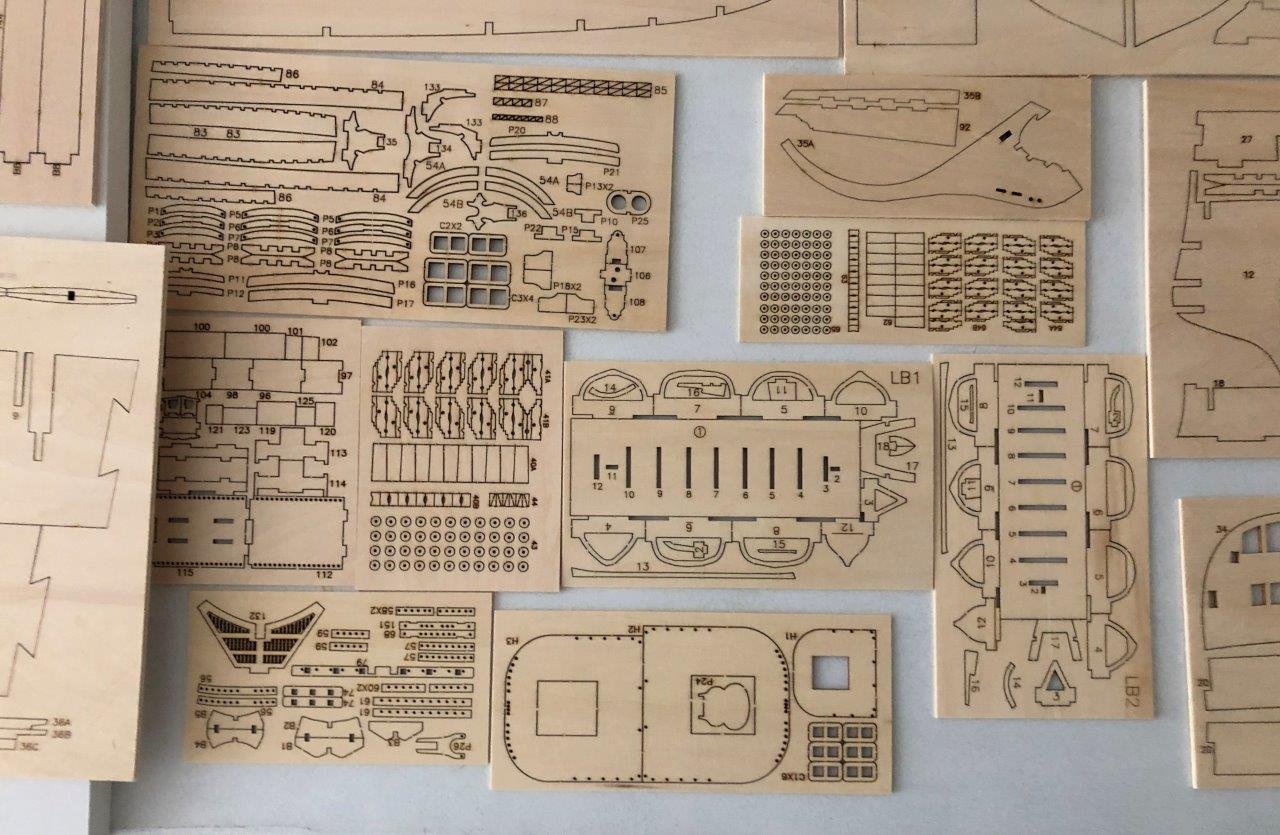
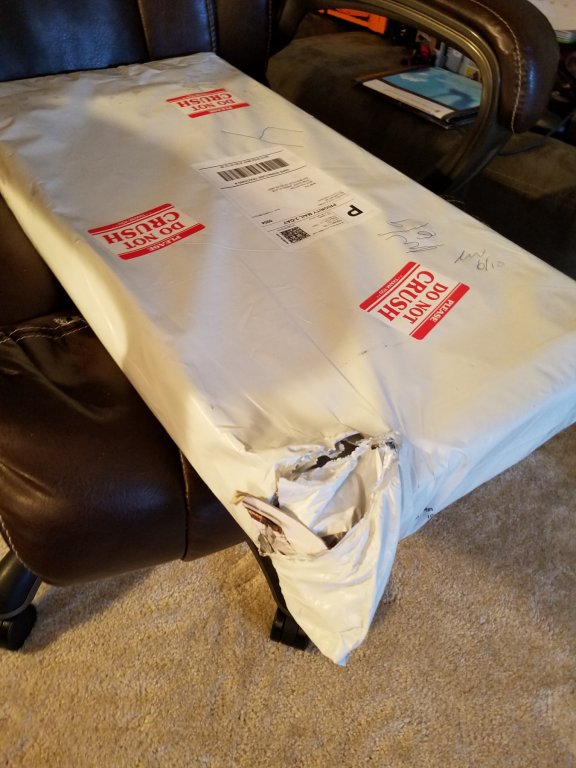
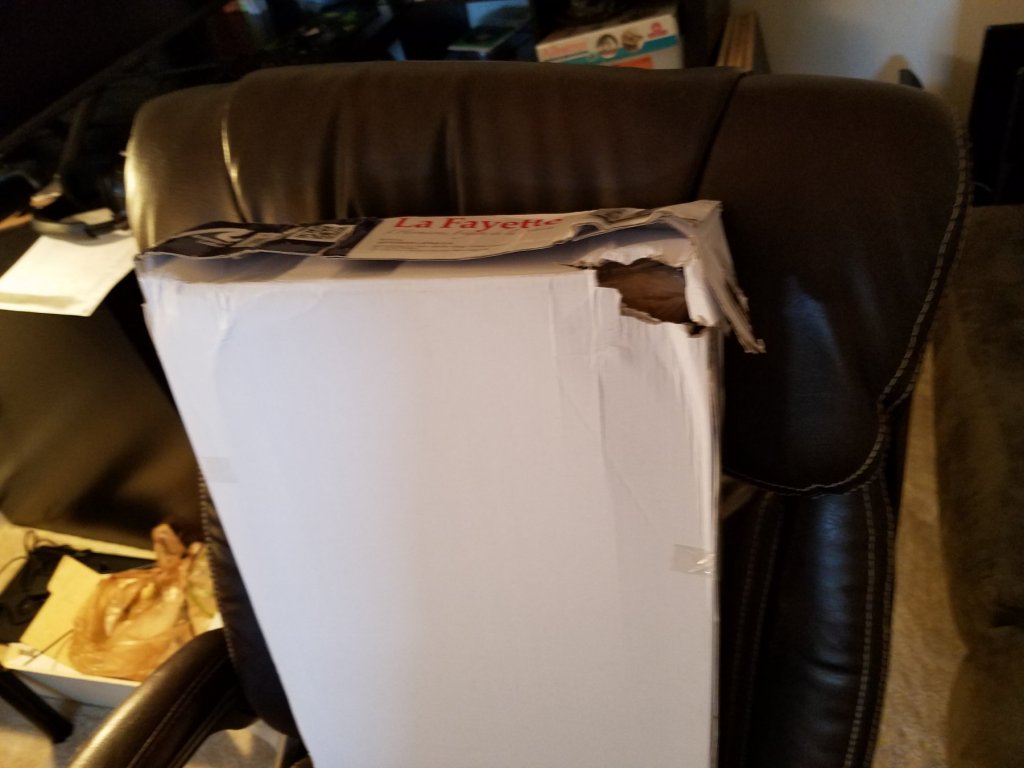
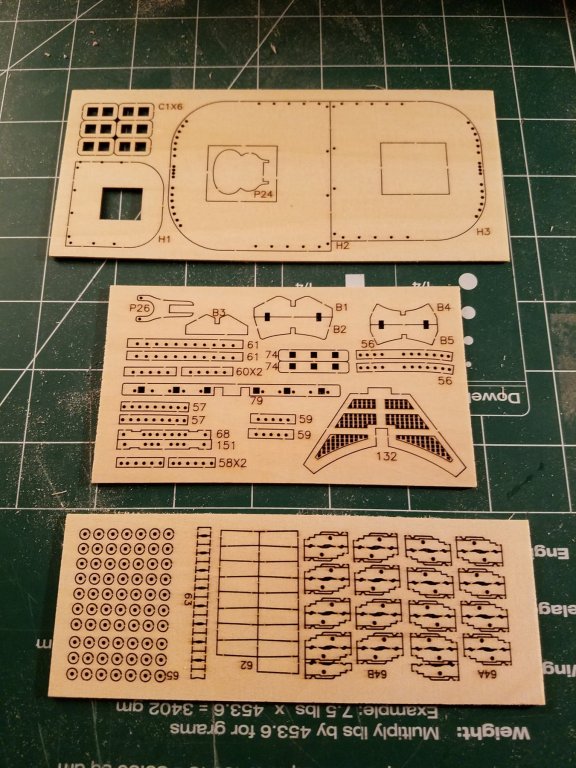
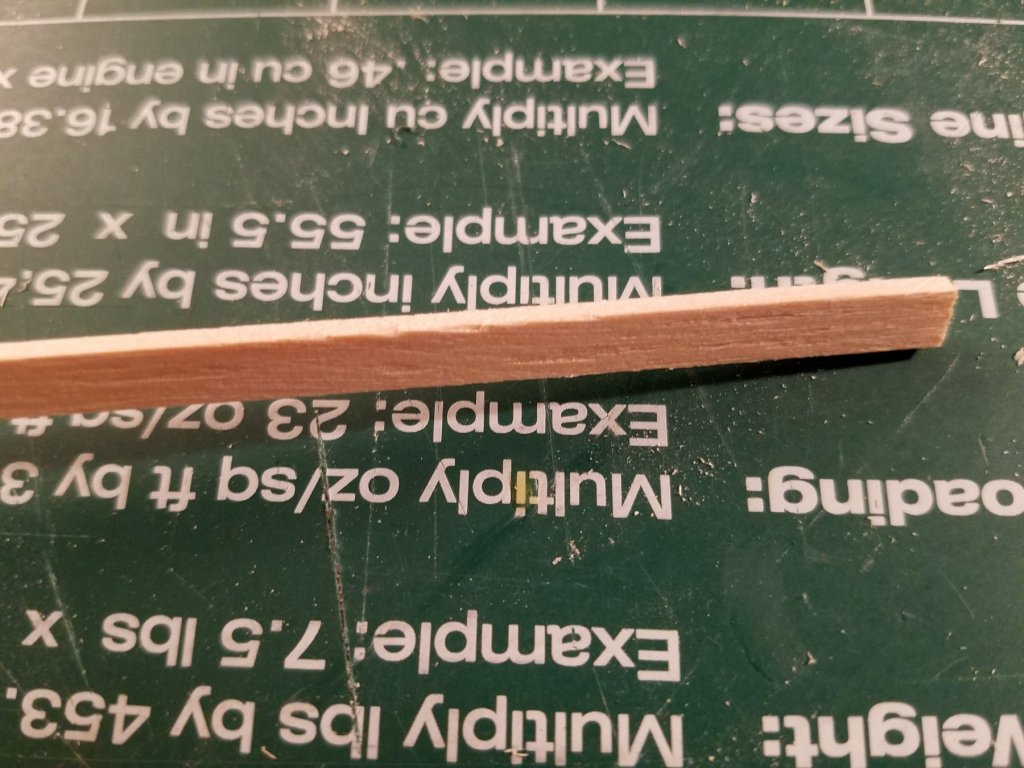
 Hello all, Since my Victory is on hold, I decided to start something smaller and easier to fit in my busy schedule and my skill level better. I don't have much time to work on this model, (between 0 - 1 hour a day if I am lucky), so I thought the Hermione would be much better choice. First off, here is how the kit arrived Its funny how it has a big red sticker on it, and it was crushed! UH OH! As you can see, I was a little hesitant to open it. I closed my eyes and opened the box and luckily no pieces were damaged! That was a relief! I was trying to find the instructions to no avail. Then I realized that they were all in pdf and jpg format on the included cd! That isnt too bad cause at least I can zoom into the photos if I need a close up. I do like how there are MANY photos to help me understand what the instructions are trying to say. I noticed that the pictures help more than the English text does! I guess a picture is worth more than a paragraph of words! Next comes the plans. It included 1 sheet of plans which just had different views of the conpleted model. I was a little disappointed that it didn't come with plans that showed any cross sections of anything. Bummer. Pretty much all the parts are basswood and ply. The few pieces that were not basswood were the deck planks. I think the reason they didnt include much other wood was to: 1) save money on making the kit 2) pretty much all parts will be painted ,except the deck planking, so why include high quality wood if it will just be painted later? The laser cut parts are very detailed with very little burn marks. I was impressed with the amount of detail they could put into those small laser cut pieces. Here are a few of them The only pieces I have some gripe with are the basswood strips. Most of them do not have good edges like so I would say a good 30% of the strips have bad edges on all sides. I think this will make planking a little more challenging, but I will have to wait and see. I will be posting later tonight on my progress but wanted to describe the kit first. I'm already farther on this model than my Victory! So far, this is turning out to be a much better choice! Jeff
 -
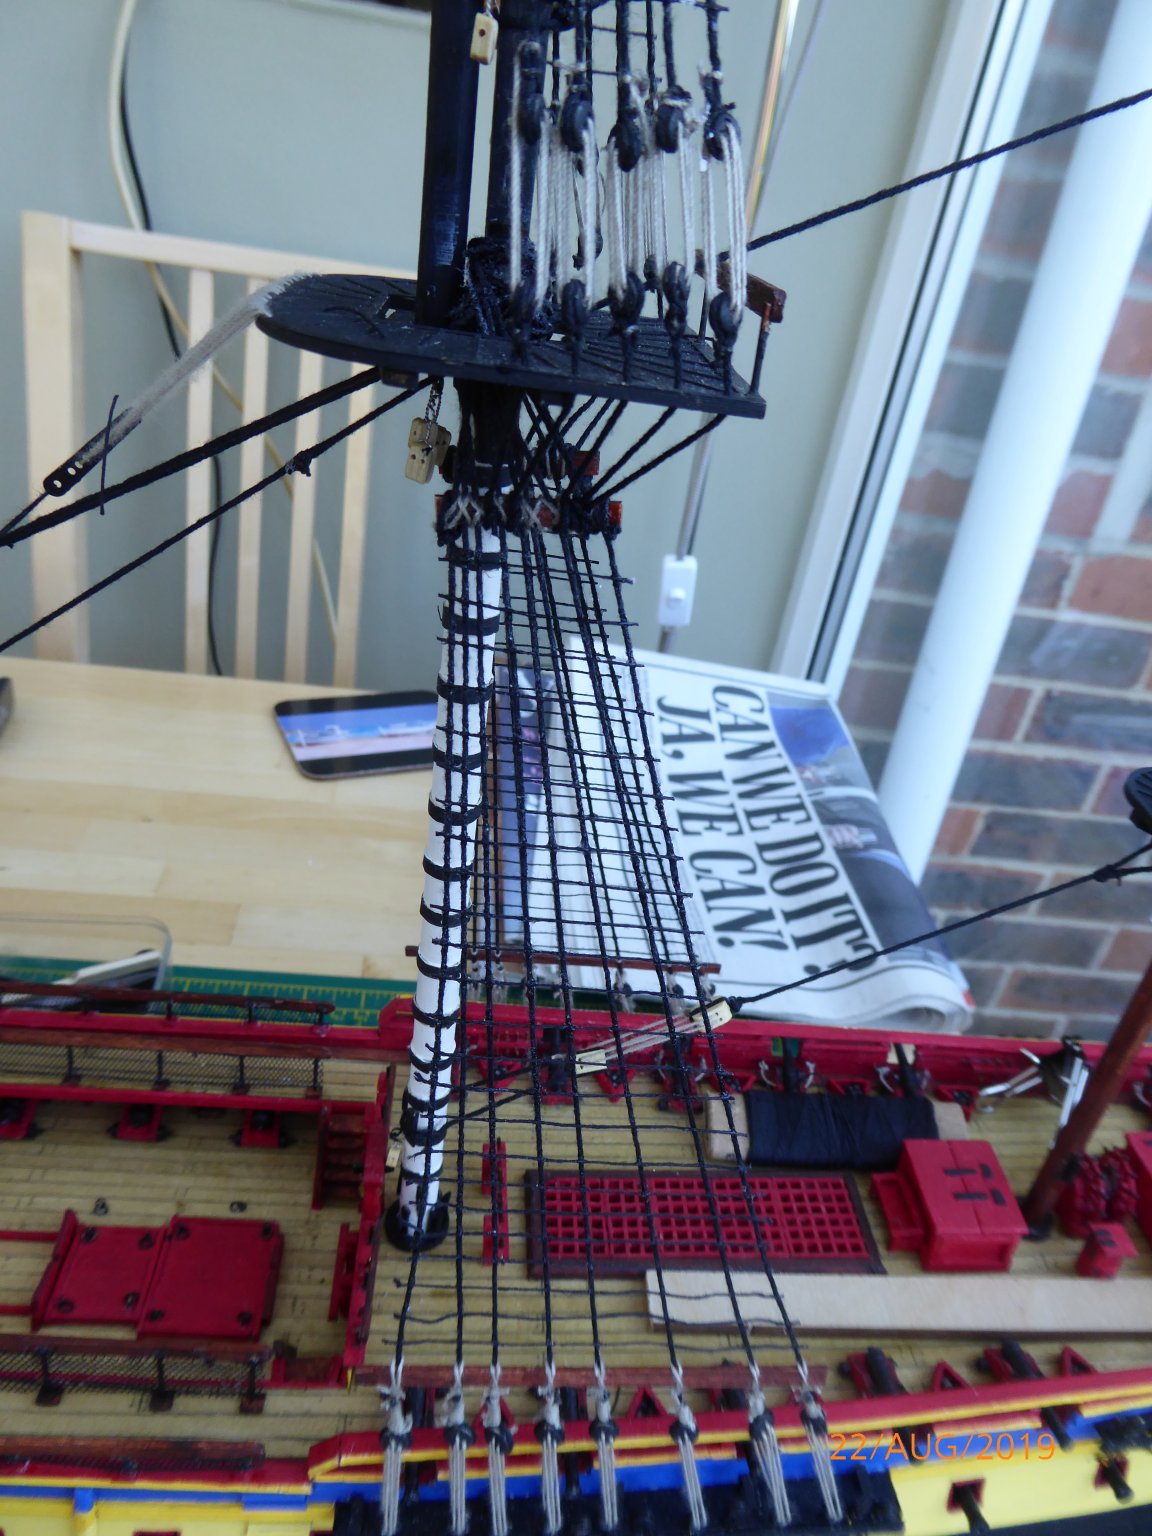
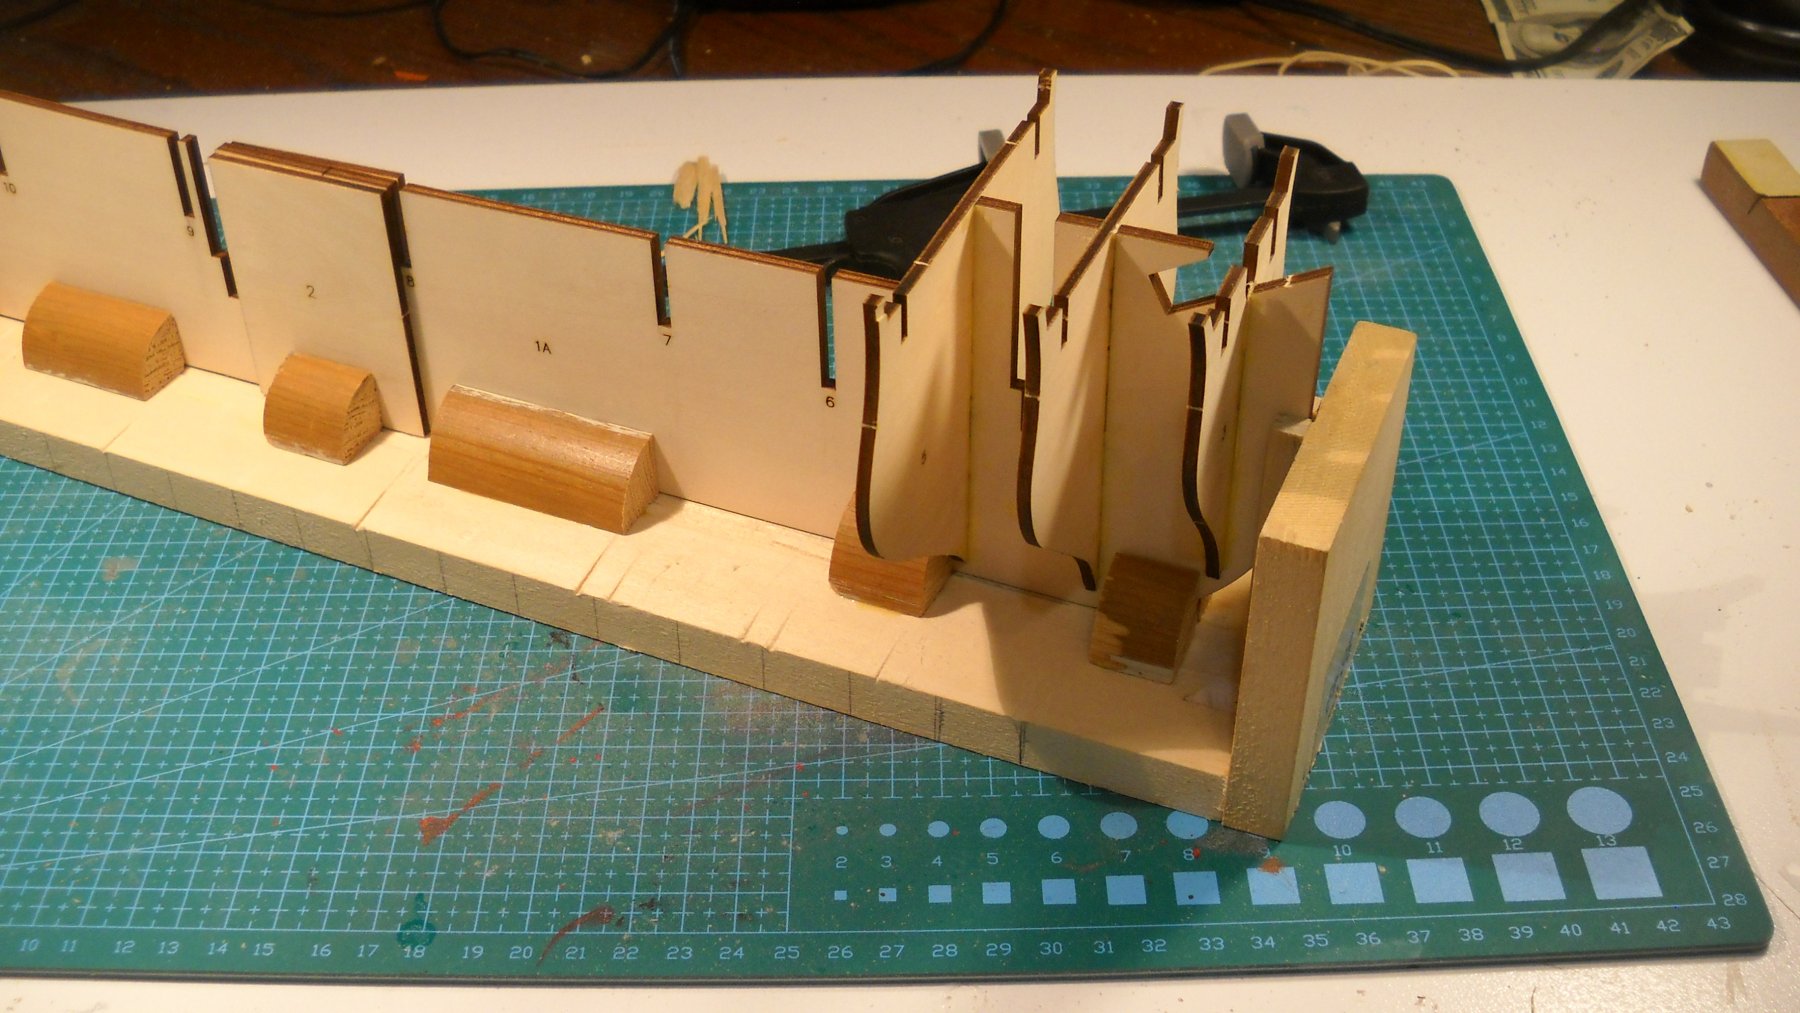
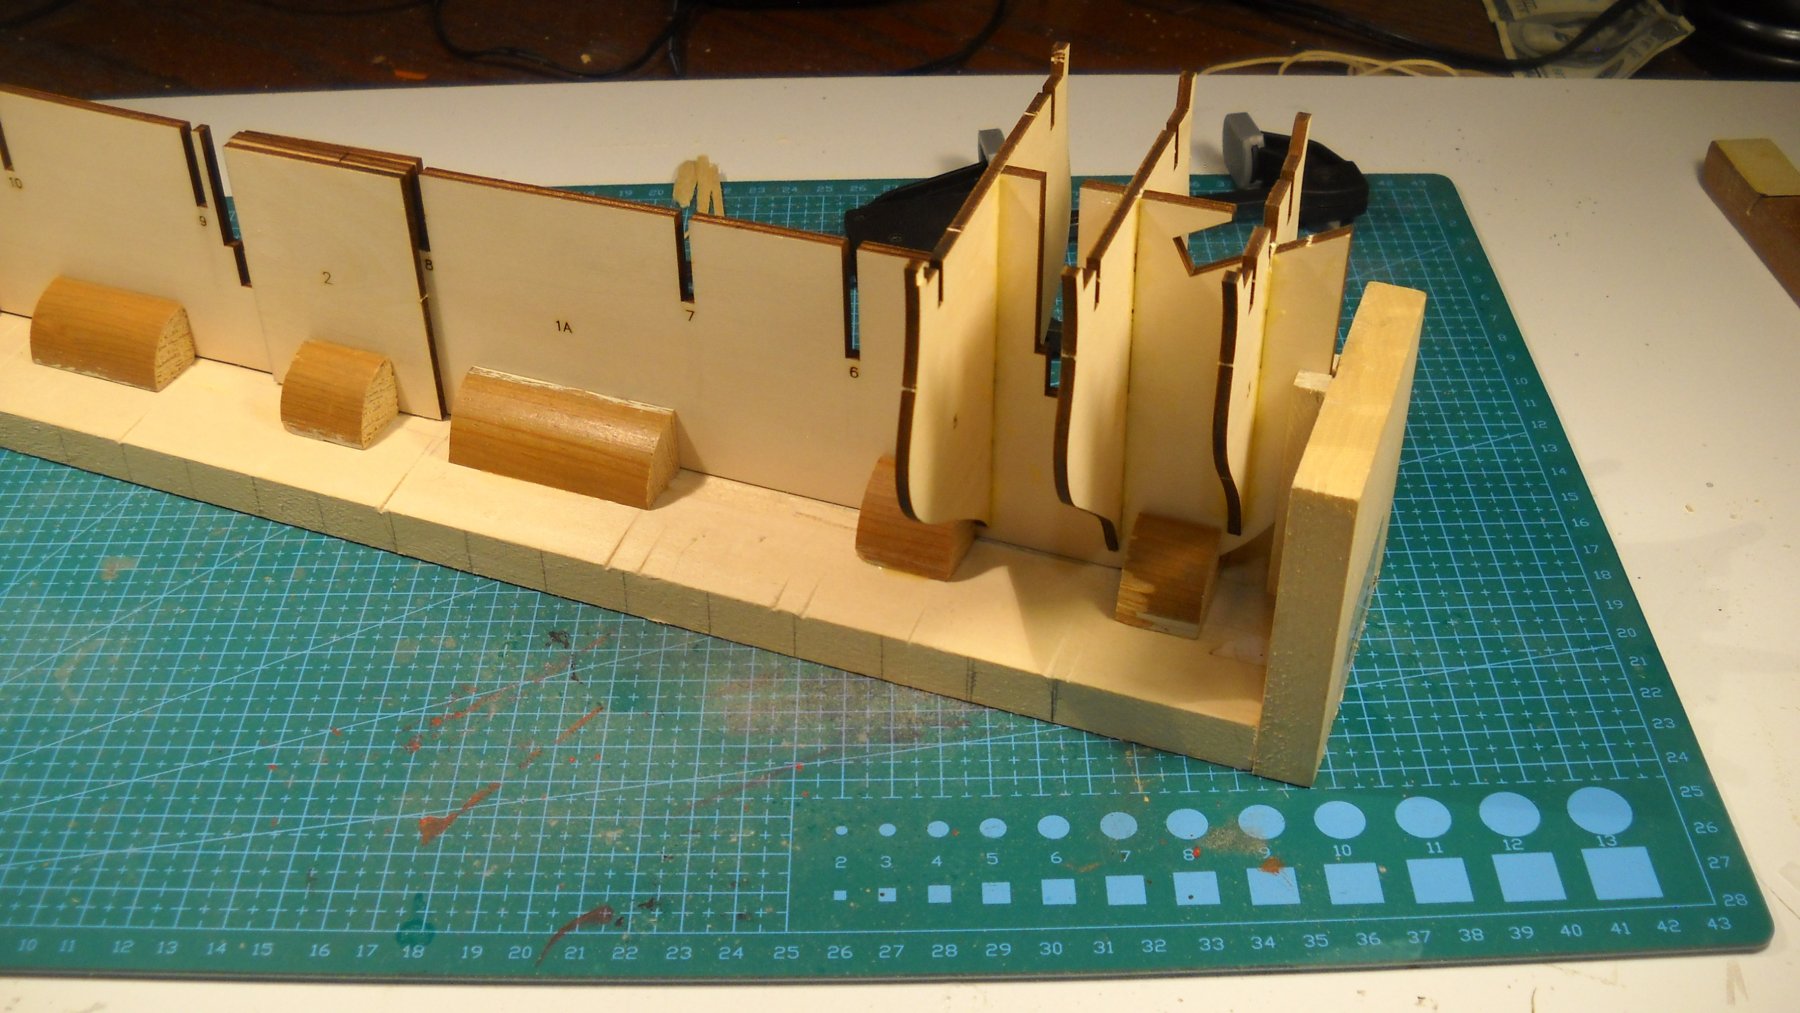
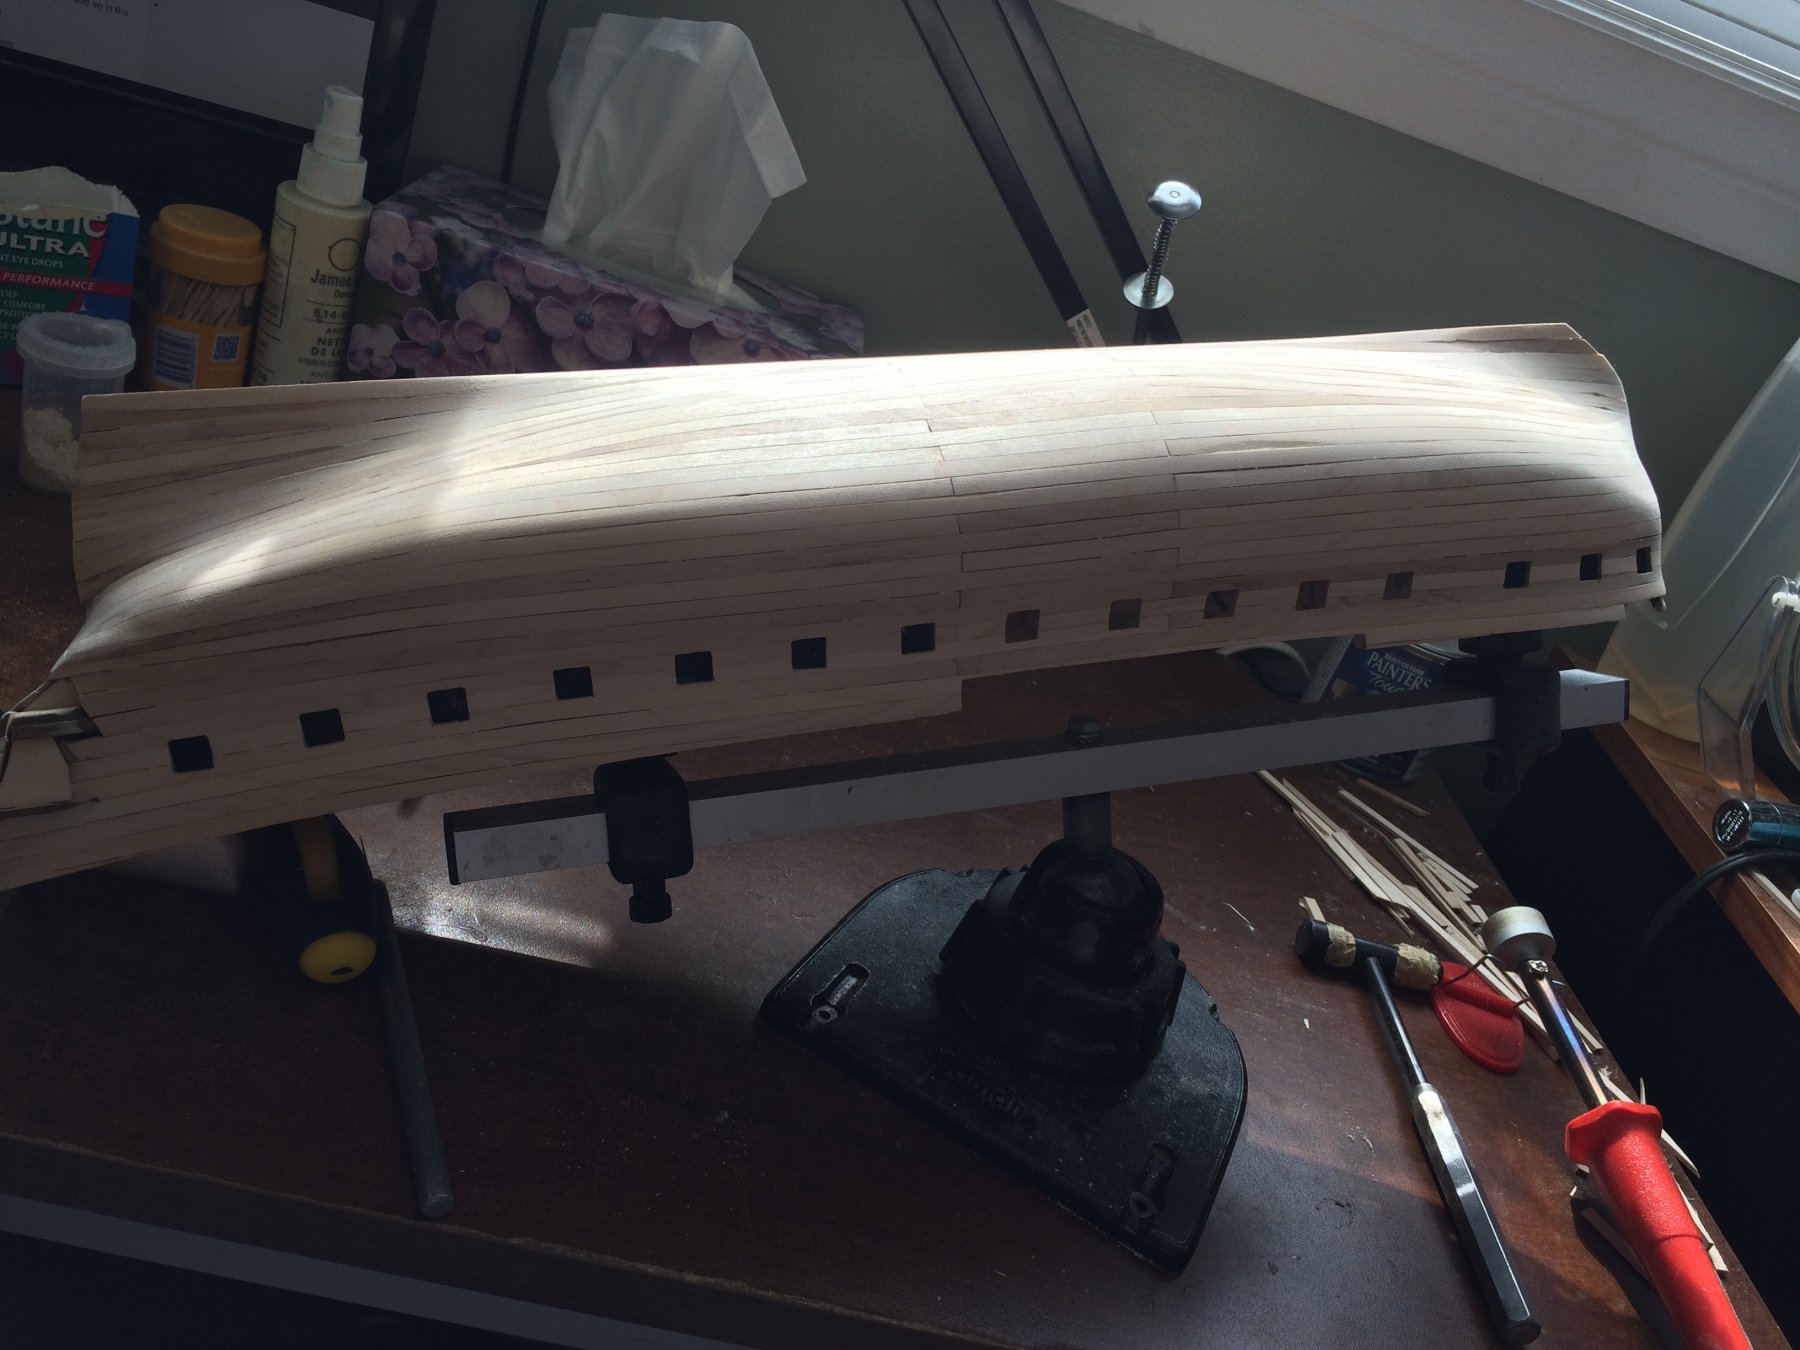
 I wanted to contribute my build log for the Astesania Latina L'Hermione. Unfortunately I didn't start taking pictures of my progress until the hull planking had been completed and much of the gun deck work was well underway. This is my first attempt at wooden model ship building. I came to this hobby with some plastic kit modeling experience (mostly aircraft and armored vehicles) and some cabinet making and wood working skills. I chose the L'Hermione kit because it seemed to provide a wide variety of challenges that come with an warship of that era and because the price would keep the “Abort” option available. As I started this kit I was completely ignorant of the various wooden model ship building networks and stumbled through the earliest phases of planking the hull on a trial and error basis. Needless to say some of that planking went through several iterations of application before I was happy with the outcome. There were a few things that I cam across during this process that are worth highlighting. During the the finishing and shaping of the hull I found that a woodworking tool known as a cabinet scrapper was a very useful tool. For those of you not familiar with this tool it is a flat piece of mildly hardened steel on the edge of which a kind of burr is created. This burr acts as a nearly microscopic plane that scrapes a small amount of wood off the work as it is drawn across the surface. I found this tool made it easier to detect the highs a lows in the hull surface and to be able to quickly work those areas. The straight or consistent edge of the scrapper also eliminates much of the “following” that comes with sandpaper. Often sandpaper makes things smooth but not necessarily along a consistent arc or plane. The other process that took some time to master was the fill material to be used to span gaps in the planking. I started out using modelers putty (Squadron or Tamiya). These putties are difficult to apply consistently and smoothly and require considerable sanding to remove. I found I had to reapply repeatedly before I had an acceptable finish. So, I began experimenting with alternatives. The two option I found where drywall joint compound and water-based wood glue. The drywall compound is easy to apply and sands much easier but it adds moisture to the planking and this can and did result in many drying cracks. The wood glue does a great job of filling the finest of the cracks and I used it as a final step prior to painting. A word on caution regarding the AL supplied gun port templates. The ports on the templates are of all shapes and sizes, most are rectangular but many are trapezoids or parallelograms. Like I said, I was completely ignorant of all the great advice available to me and I'm sure many of you read the above discussion while nodding their head and saying “Yup, that's right”. My introduction to this group came as I was seeking advice about cannon rigging for the 12 pound gun deck cannons. From here on out there will be pictures to make this more interesting.
- 6 replies
-
- 3
-
-
- hermione
- artesania latina
- (and 1 more)
-
 My Attempt at AL's Hermione La Fayette. have found it an interesting build and have now just started the sails and rigging so not far to go now (I Hope)
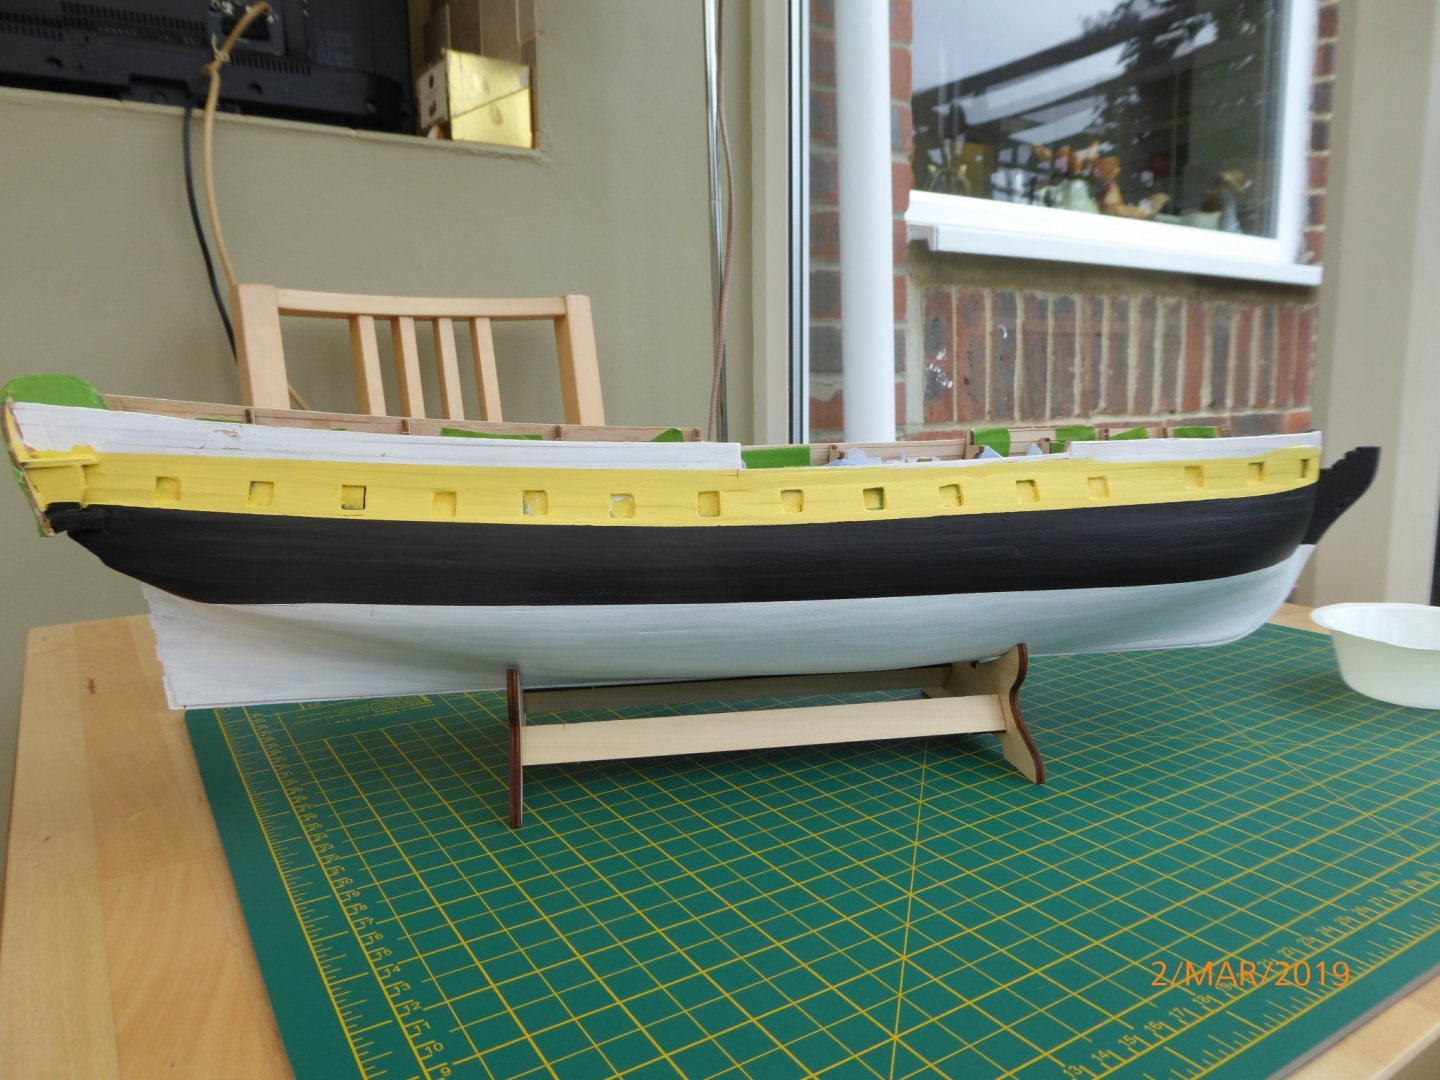


- 4 replies
-
- 4
-
-
- hermione
- artesania latina
- (and 1 more)
-
Hello all, Since my Victory is on hold, I decided to start something smaller and easier to fit in my busy schedule and my skill level better. I don't have much time to work on this model, (between 0 - 1 hour a day if I am lucky), so I thought the Hermione would be much better choice. First off, here is how the kit arrived Its funny how it has a big red sticker on it, and it was crushed! UH OH! As you can see, I was a little hesitant to open it. I closed my eyes and opened the box and luckily no pieces were damaged! That was a relief! I was trying to find the instructions to no avail. Then I realized that they were all in pdf and jpg format on the included cd! That isnt too bad cause at least I can zoom into the photos if I need a close up. I do like how there are MANY photos to help me understand what the instructions are trying to say. I noticed that the pictures help more than the English text does! I guess a picture is worth more than a paragraph of words! Next comes the plans. It included 1 sheet of plans which just had different views of the conpleted model. I was a little disappointed that it didn't come with plans that showed any cross sections of anything. Bummer. Pretty much all the parts are basswood and ply. The few pieces that were not basswood were the deck planks. I think the reason they didnt include much other wood was to: 1) save money on making the kit 2) pretty much all parts will be painted ,except the deck planking, so why include high quality wood if it will just be painted later? The laser cut parts are very detailed with very little burn marks. I was impressed with the amount of detail they could put into those small laser cut pieces. Here are a few of them The only pieces I have some gripe with are the basswood strips. Most of them do not have good edges like so I would say a good 30% of the strips have bad edges on all sides. I think this will make planking a little more challenging, but I will have to wait and see. I will be posting later tonight on my progress but wanted to describe the kit first. I'm already farther on this model than my Victory! So far, this is turning out to be a much better choice! Jeff

-
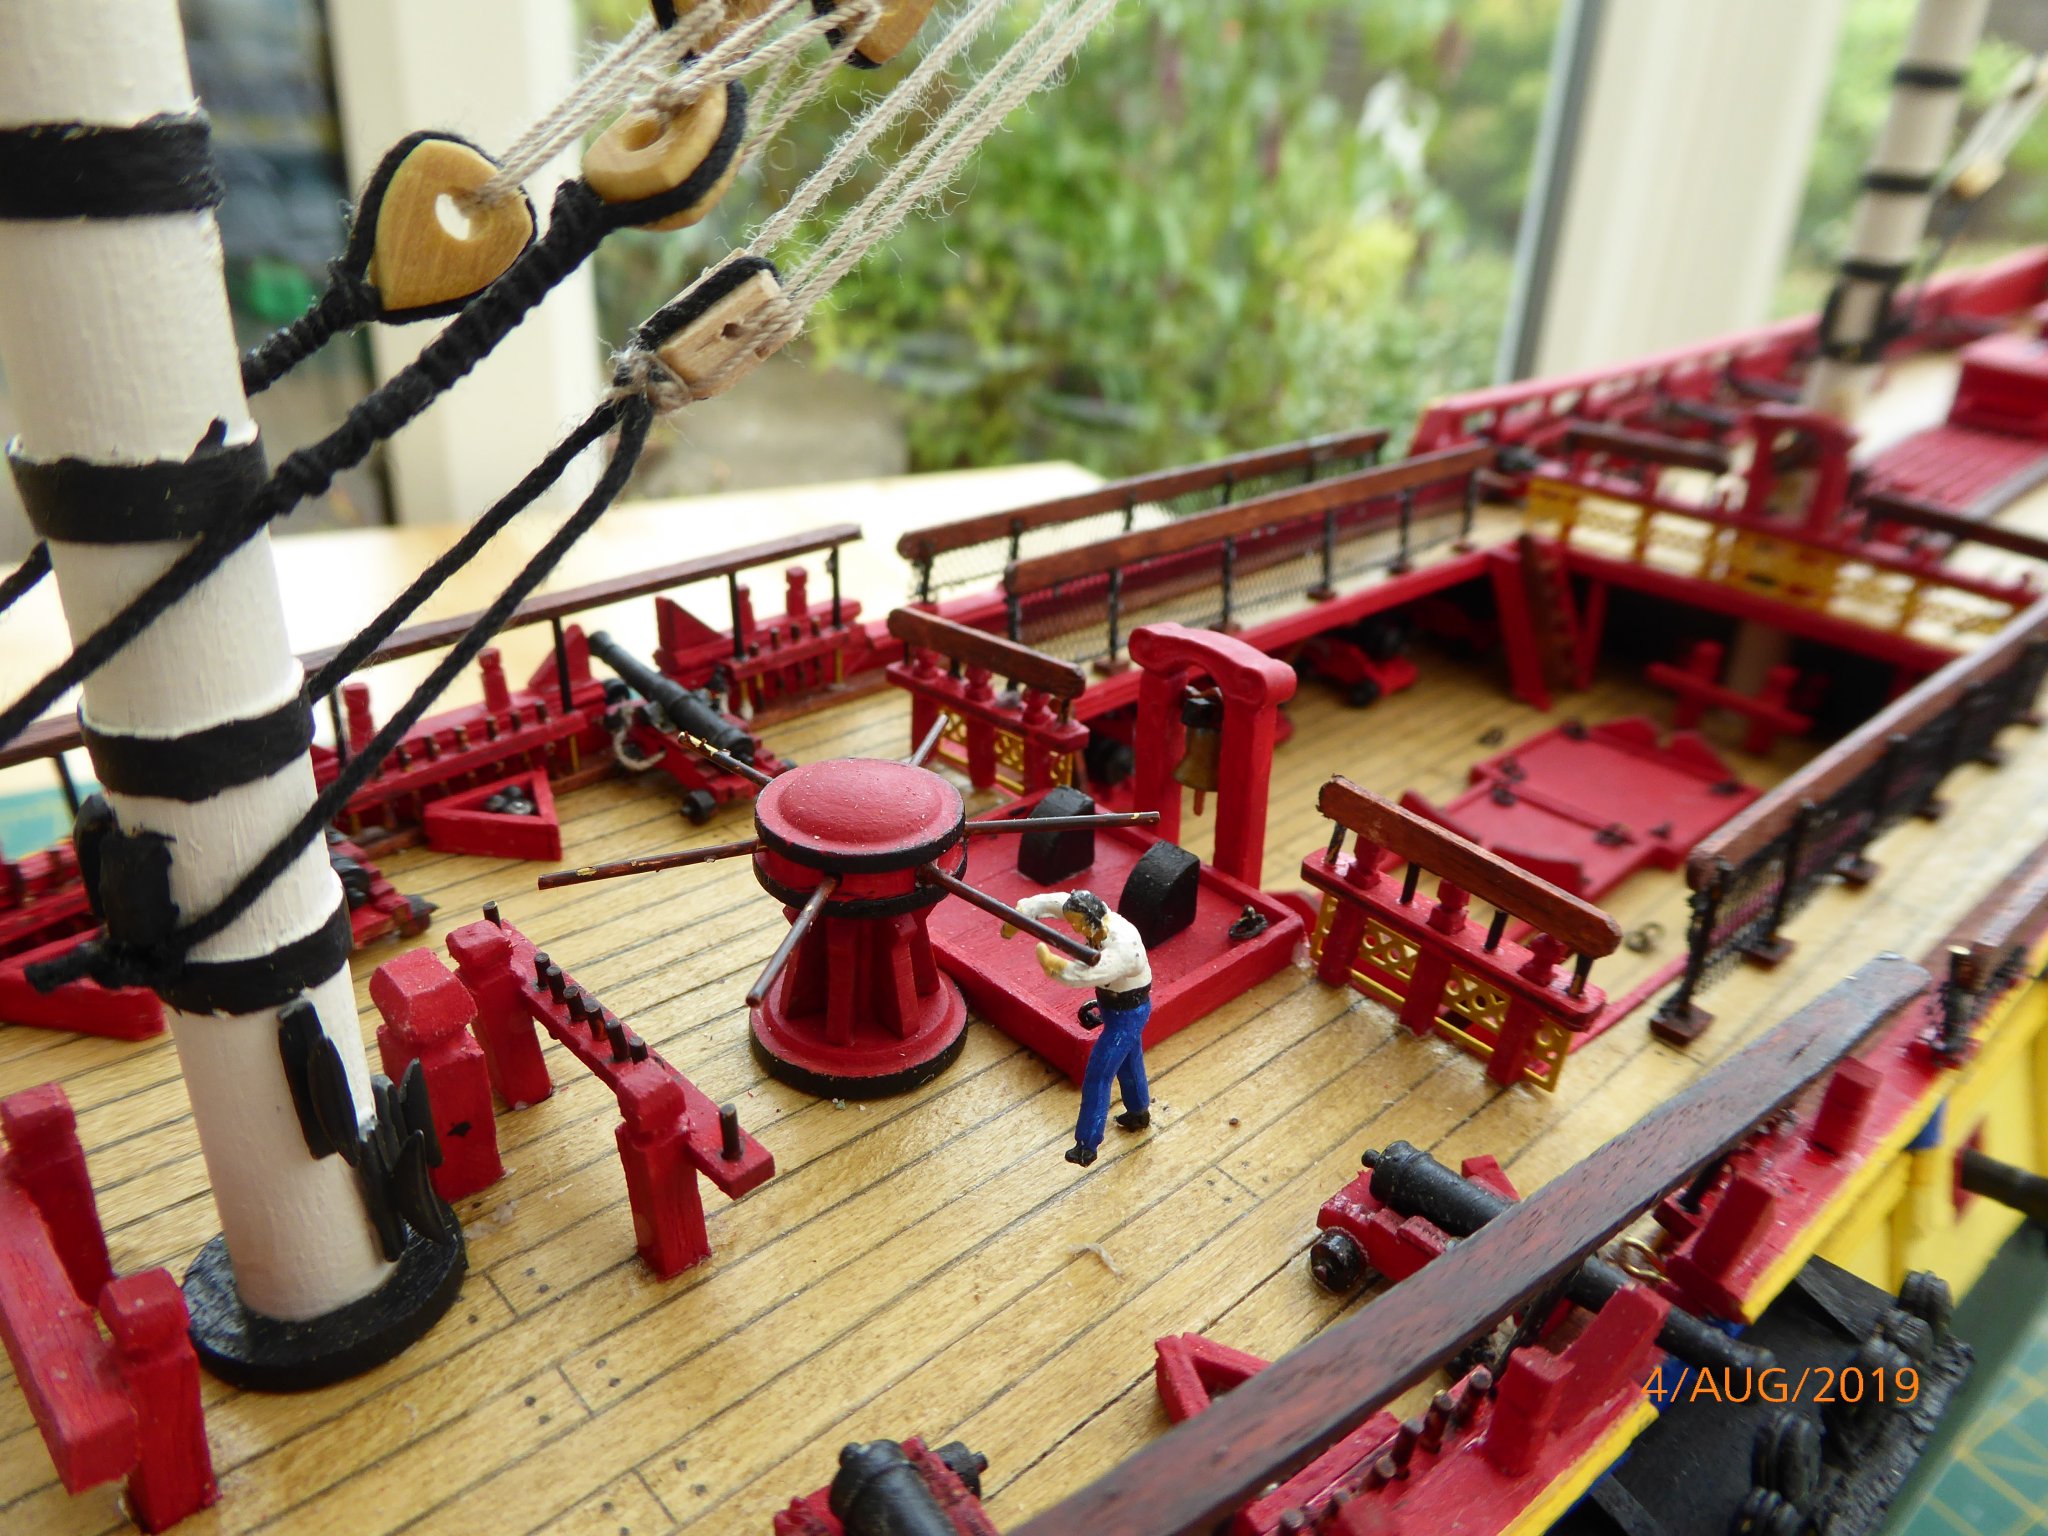
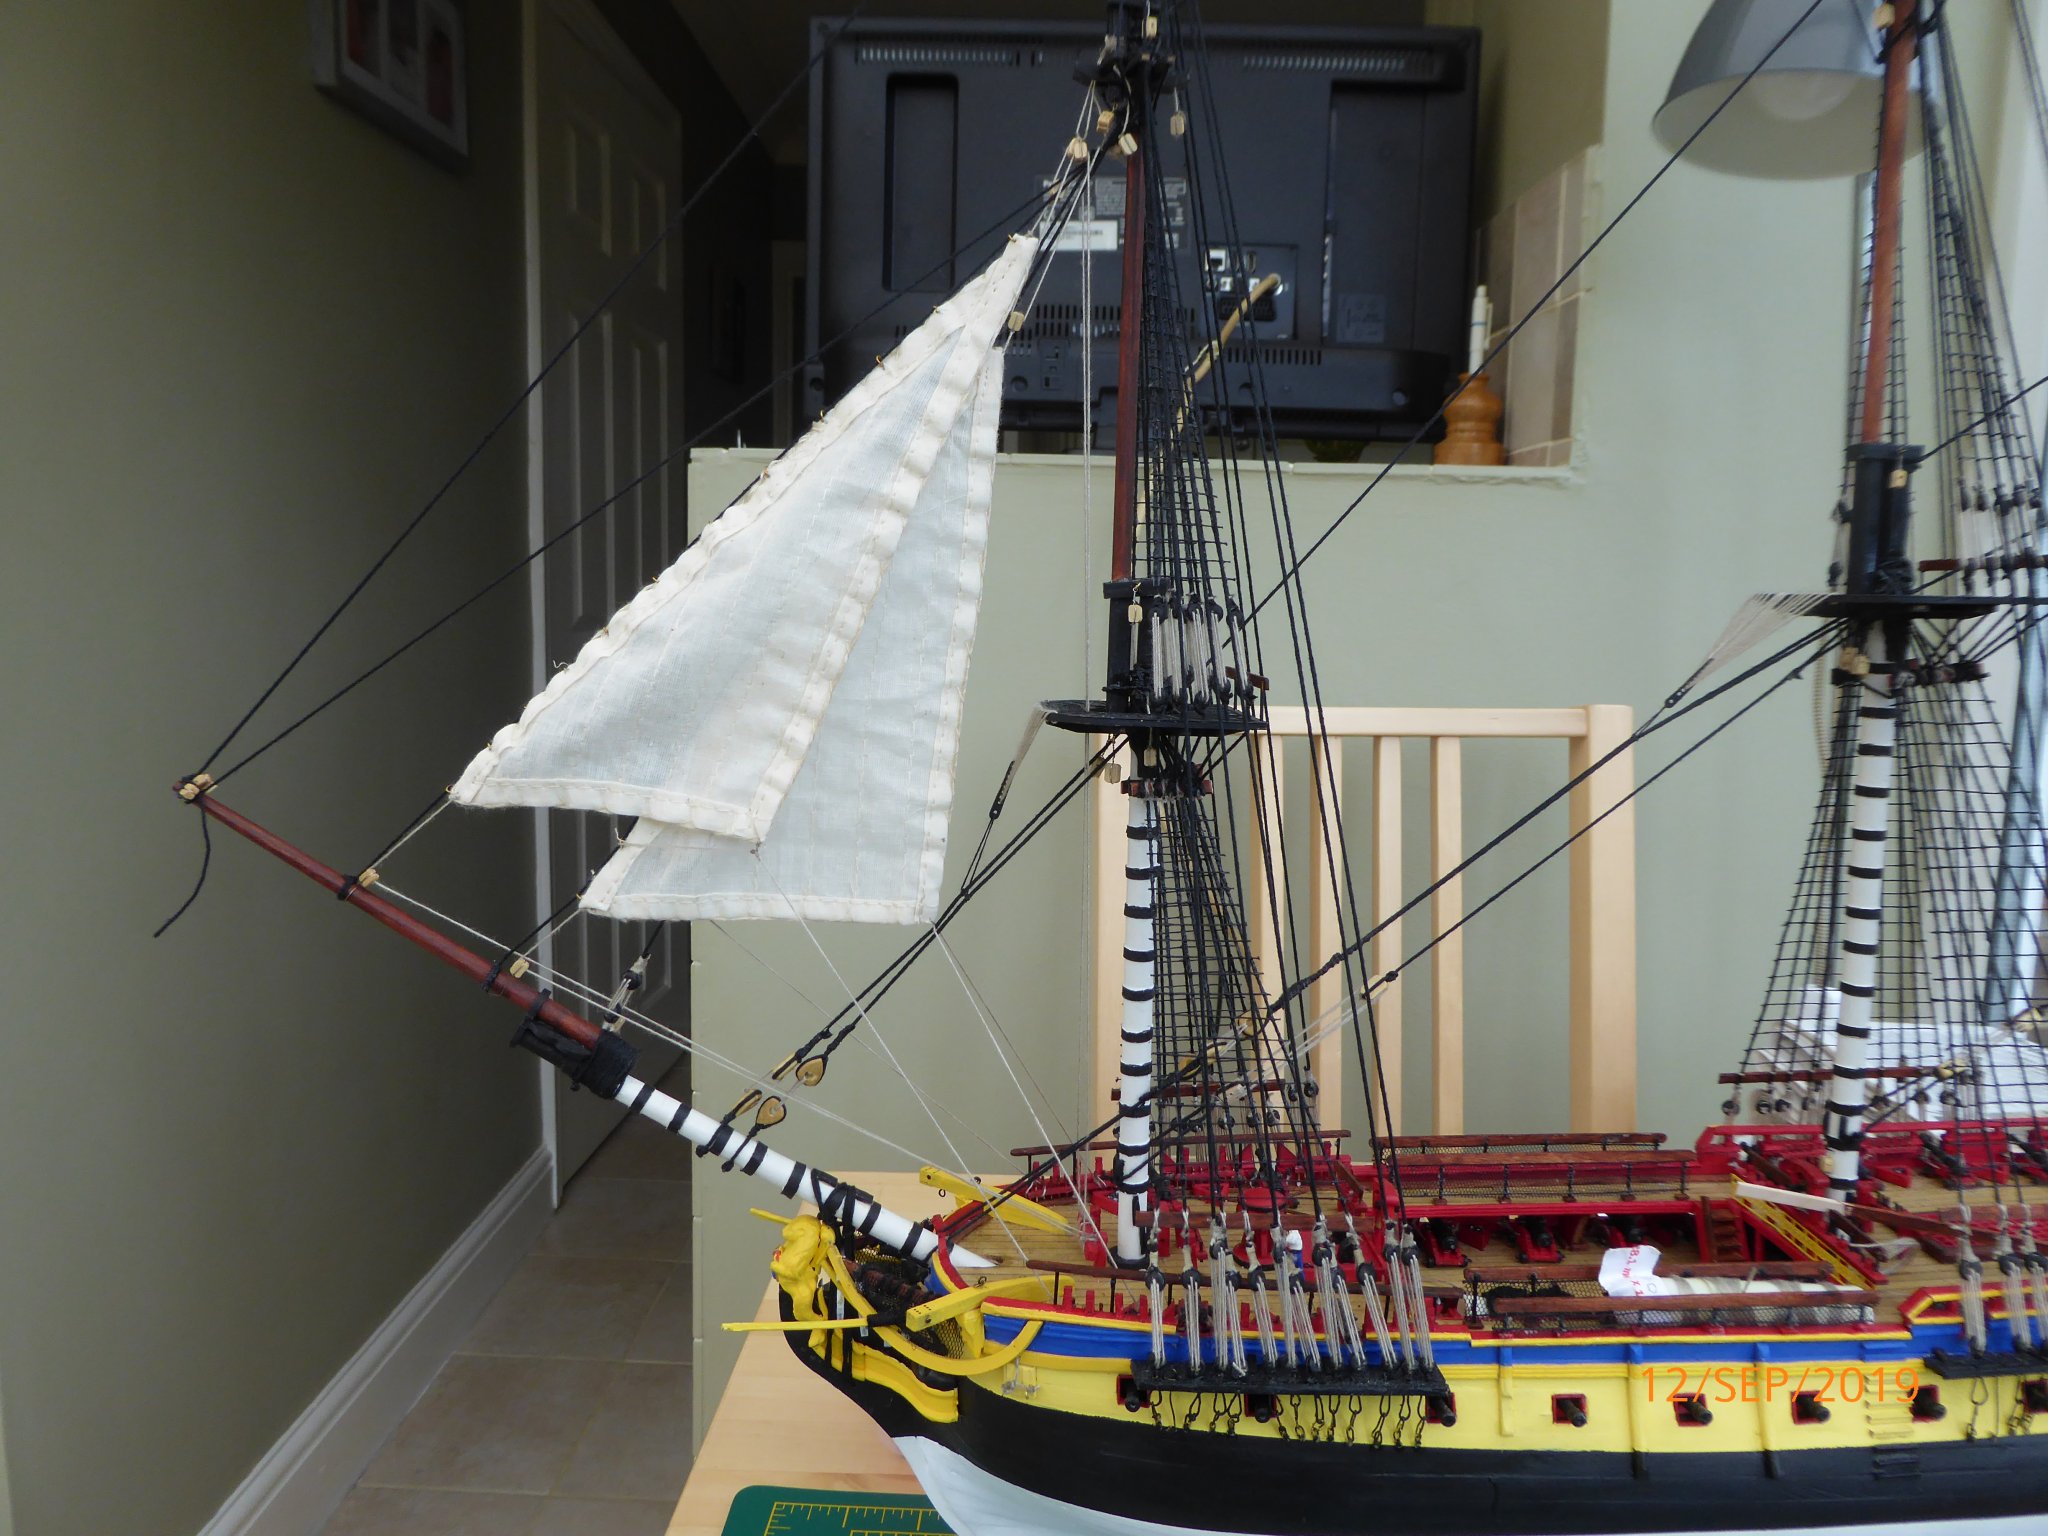
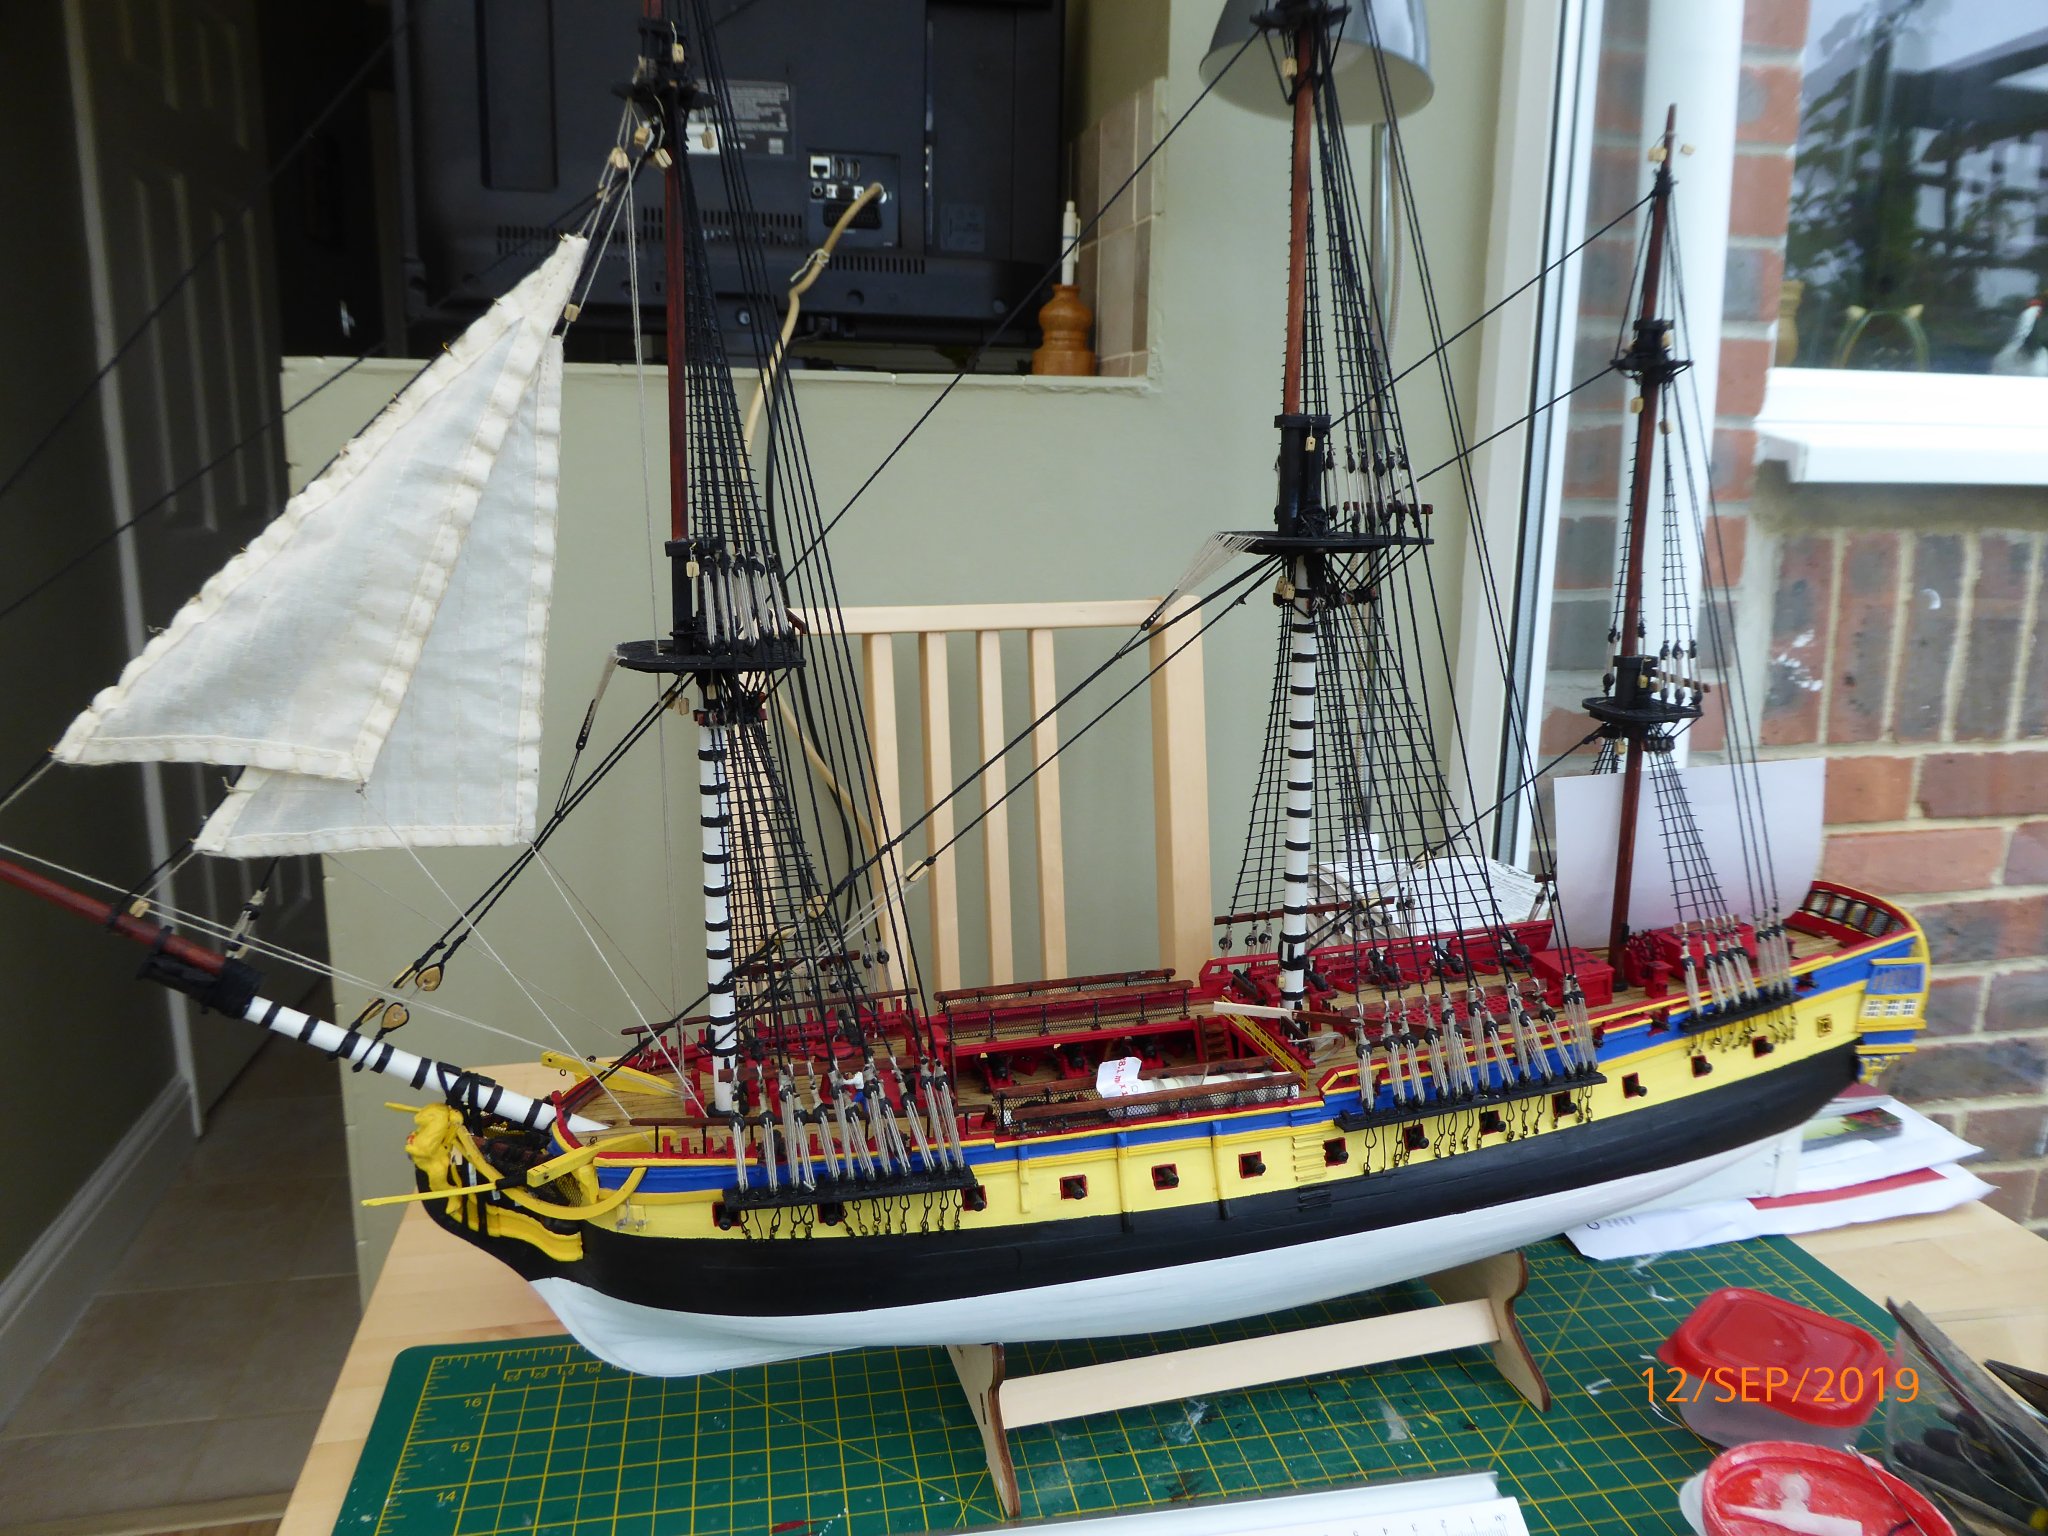
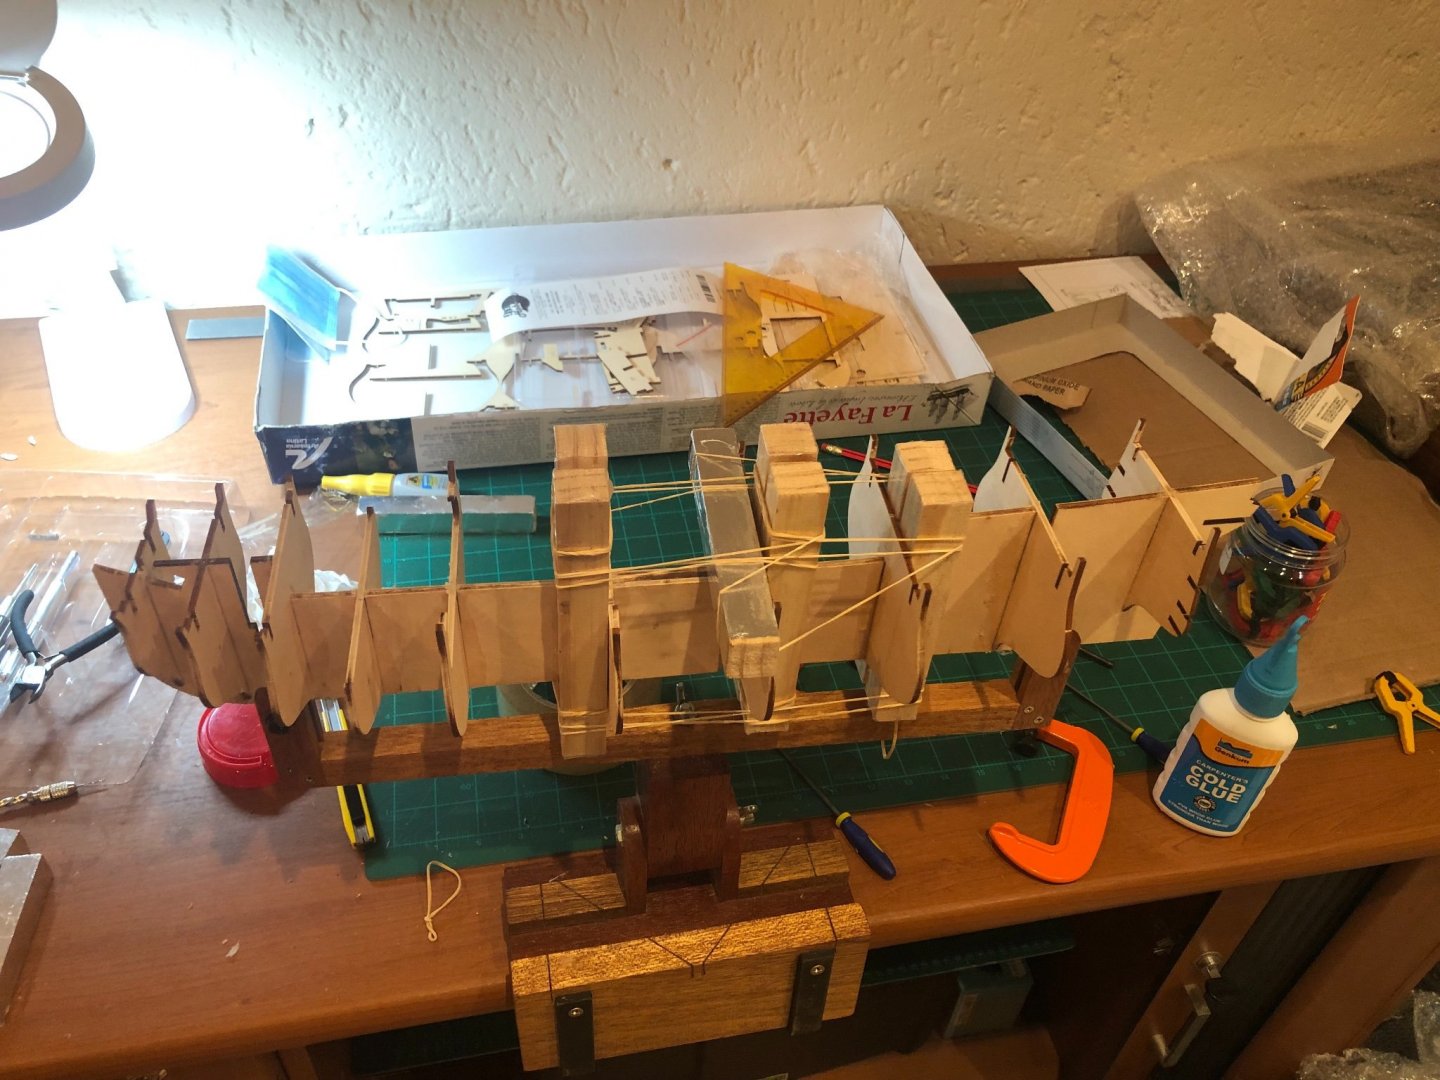
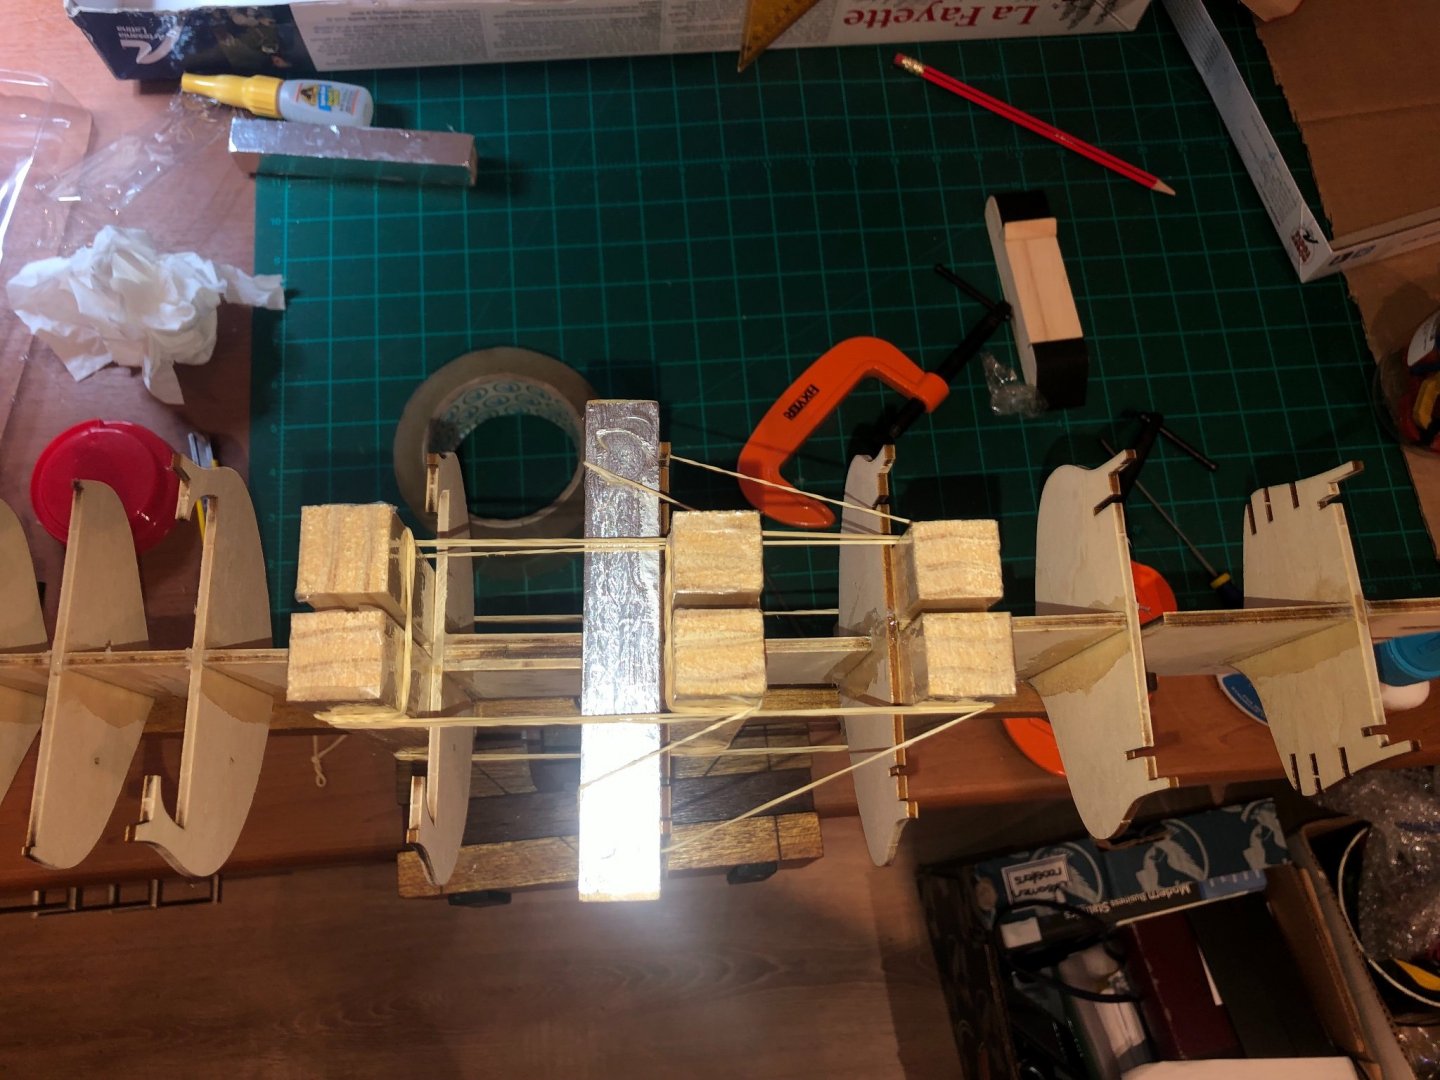
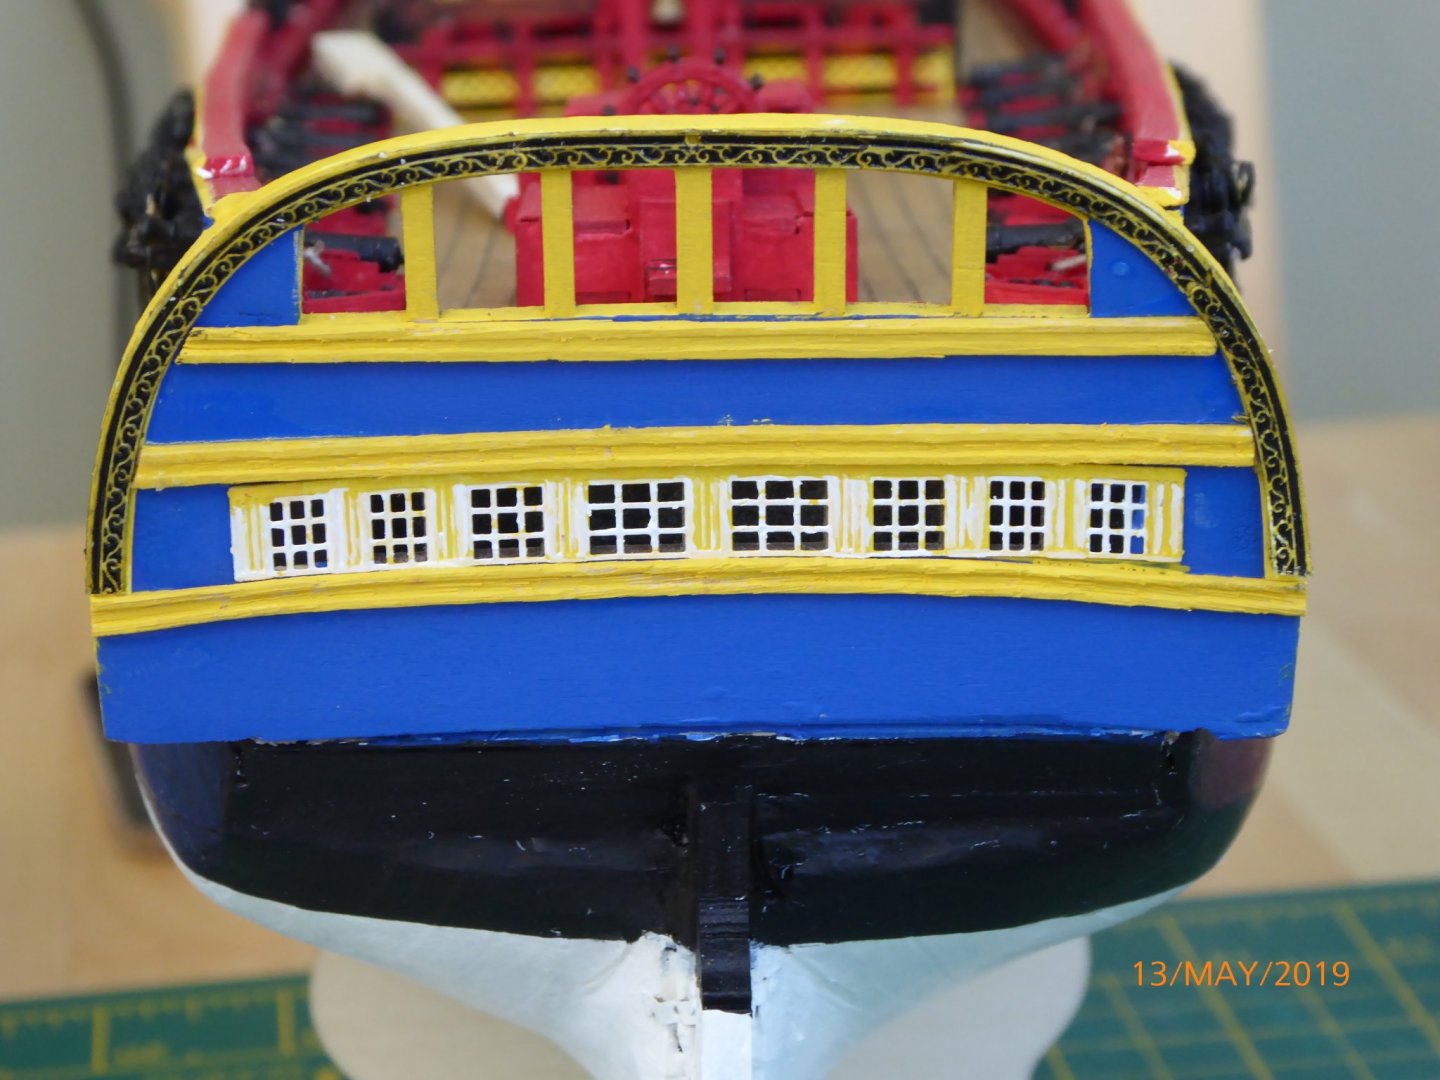
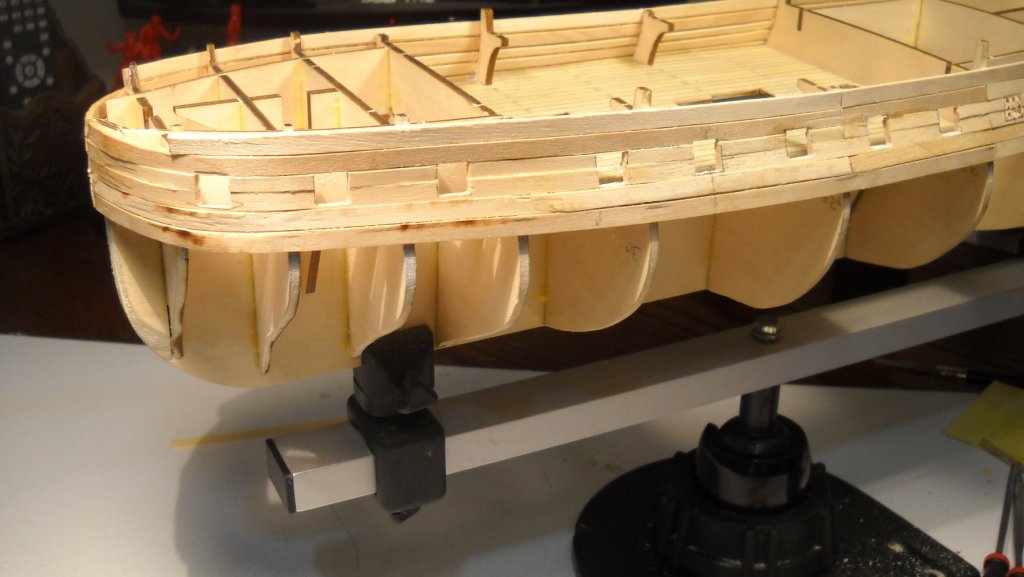
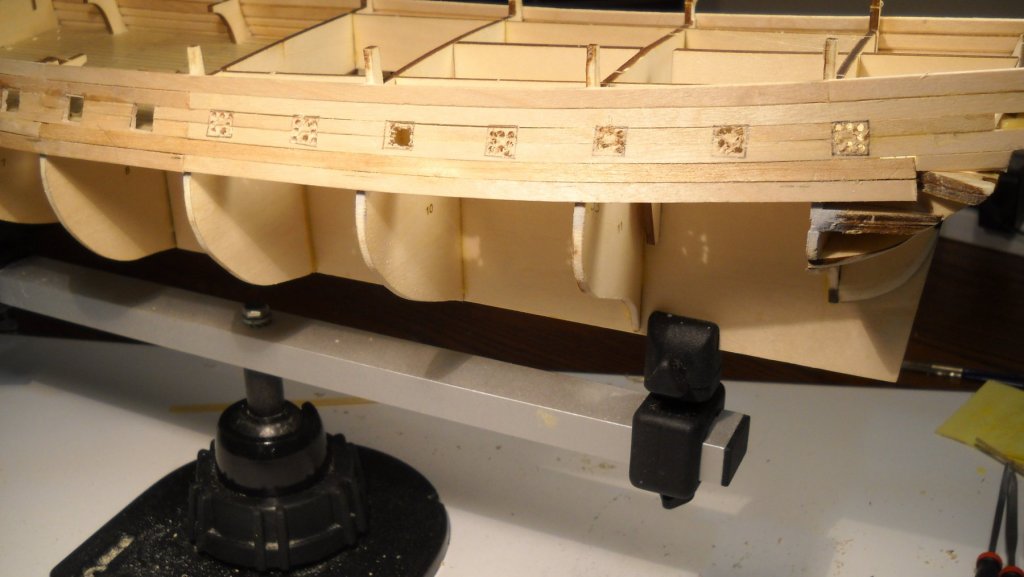
 I started this build July 9, 2018 and finished it July 22, 2019. I didn't start a build log because I wasn't sure I would finish it. It is sure frustrating when someone starts a log and just walks away without finishing. This my second build I finished if you count my 18th Century LongBoat 1/48 scale. I did take some photos along the way but wasn't as religious about it. For every ones amusement, here we go.
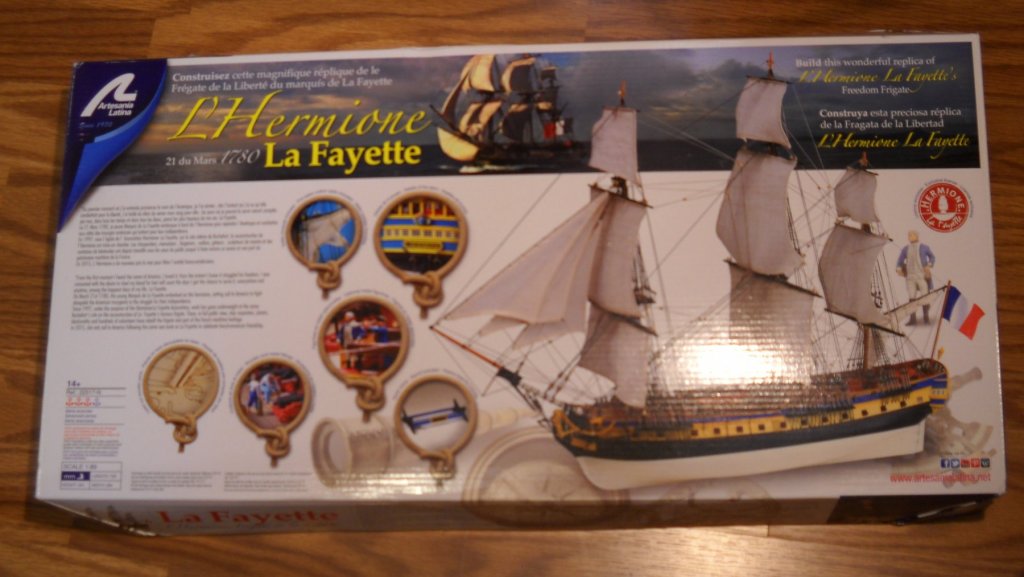


- 19 replies
-
- 1
-
-
- hermione
- artesania latina
- (and 1 more)
-
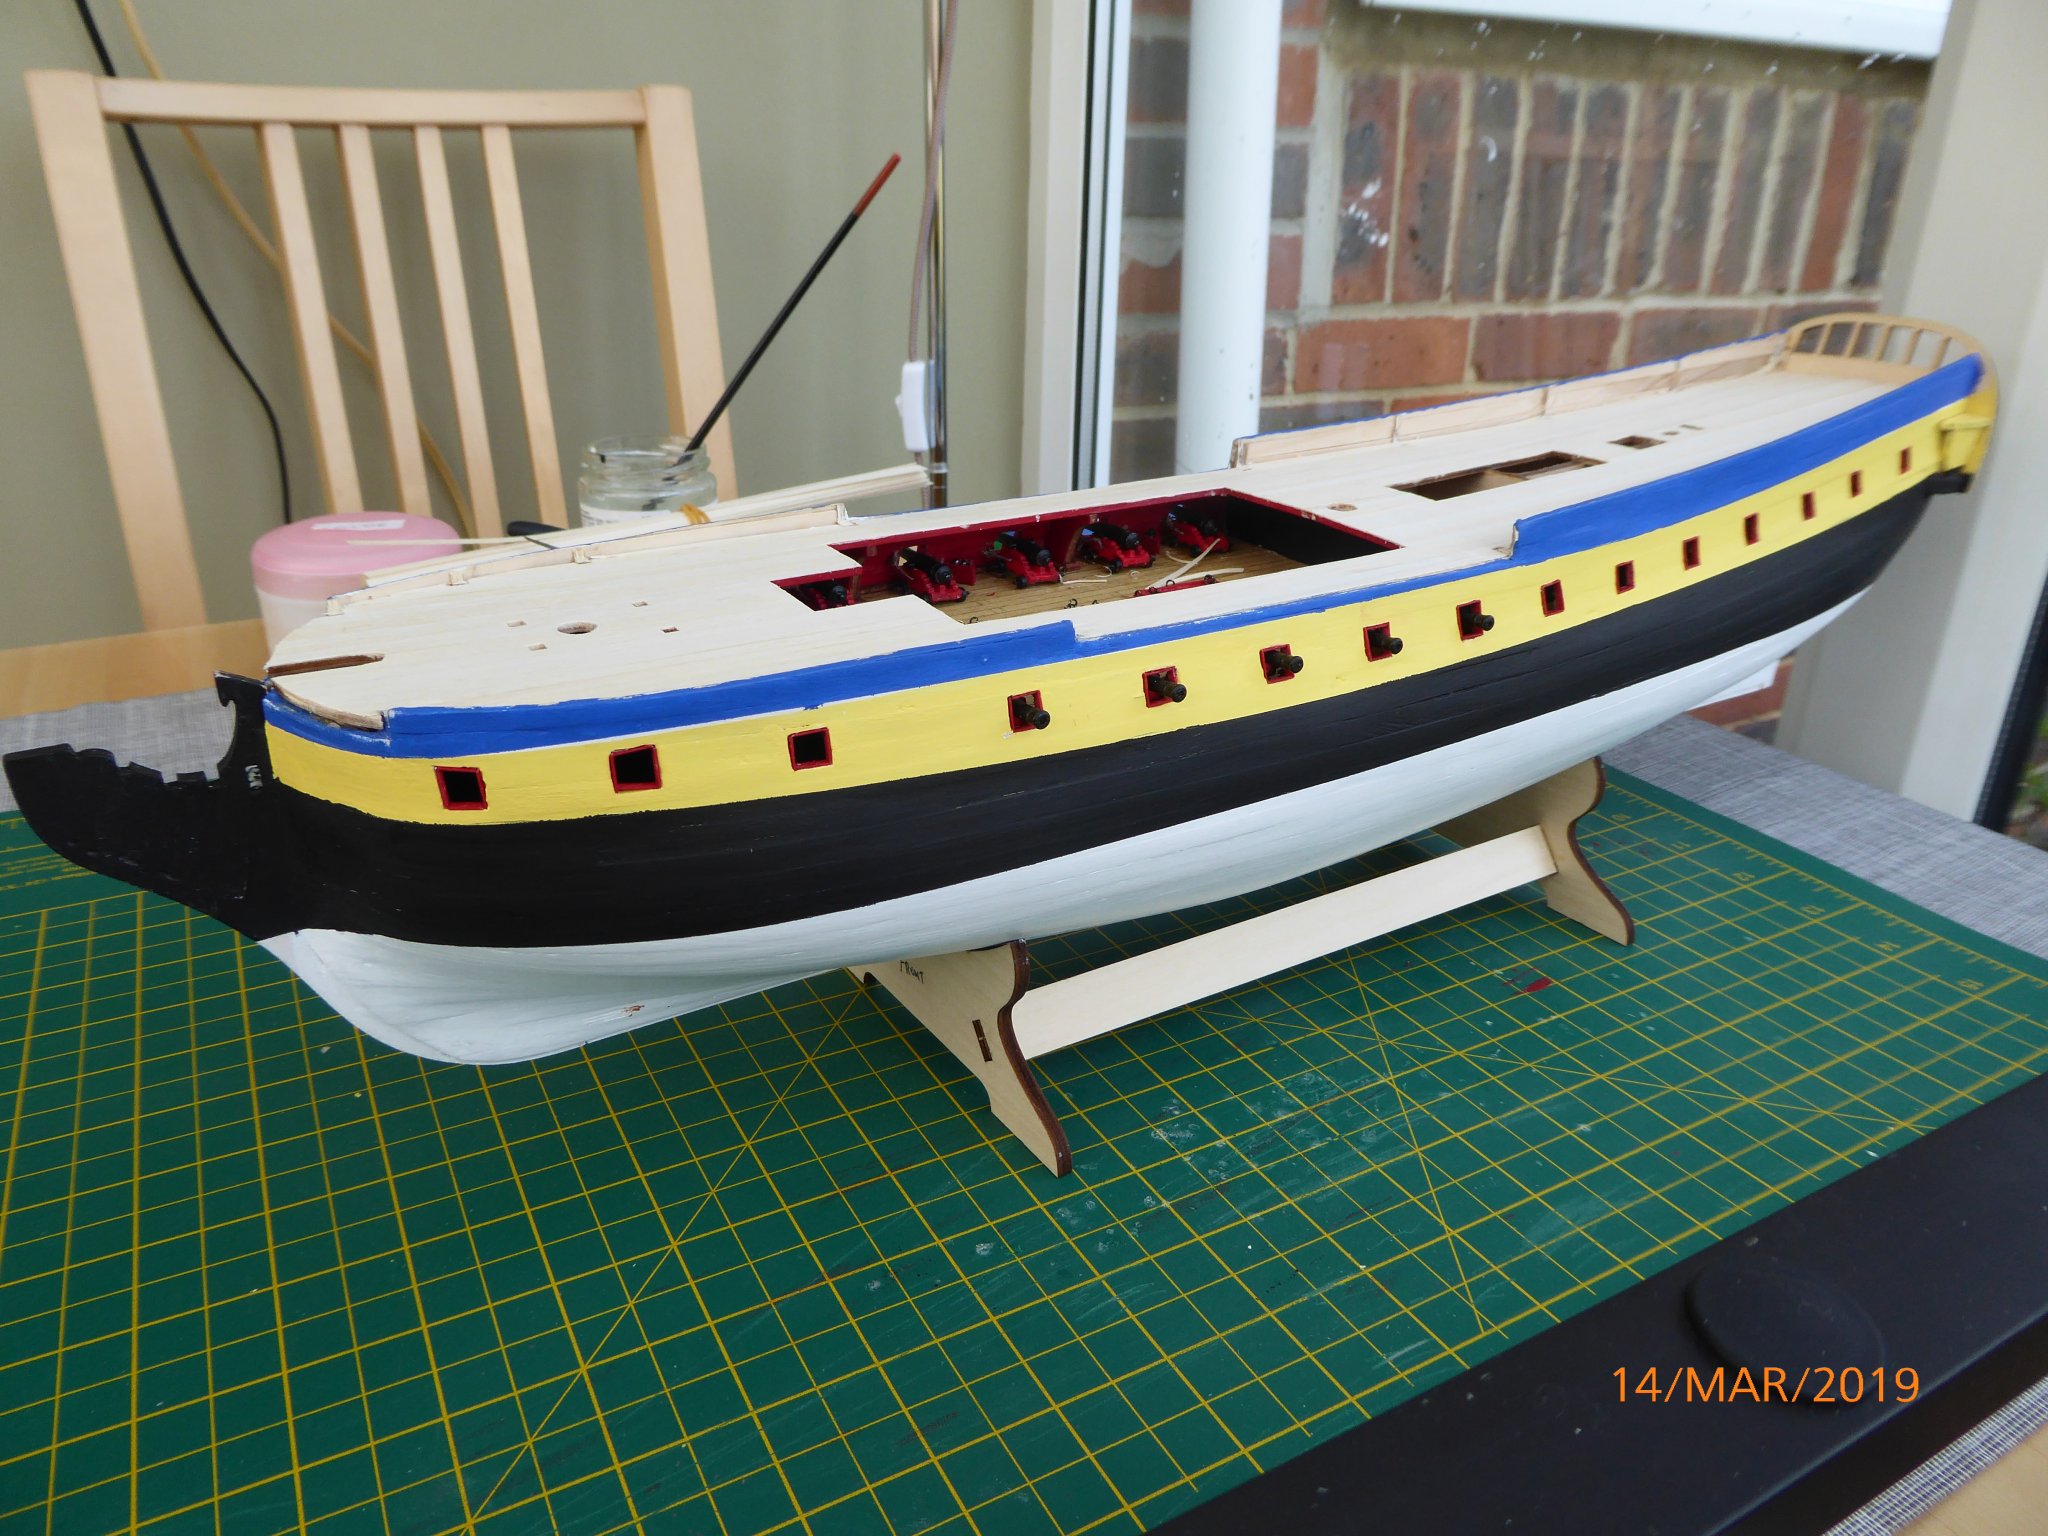
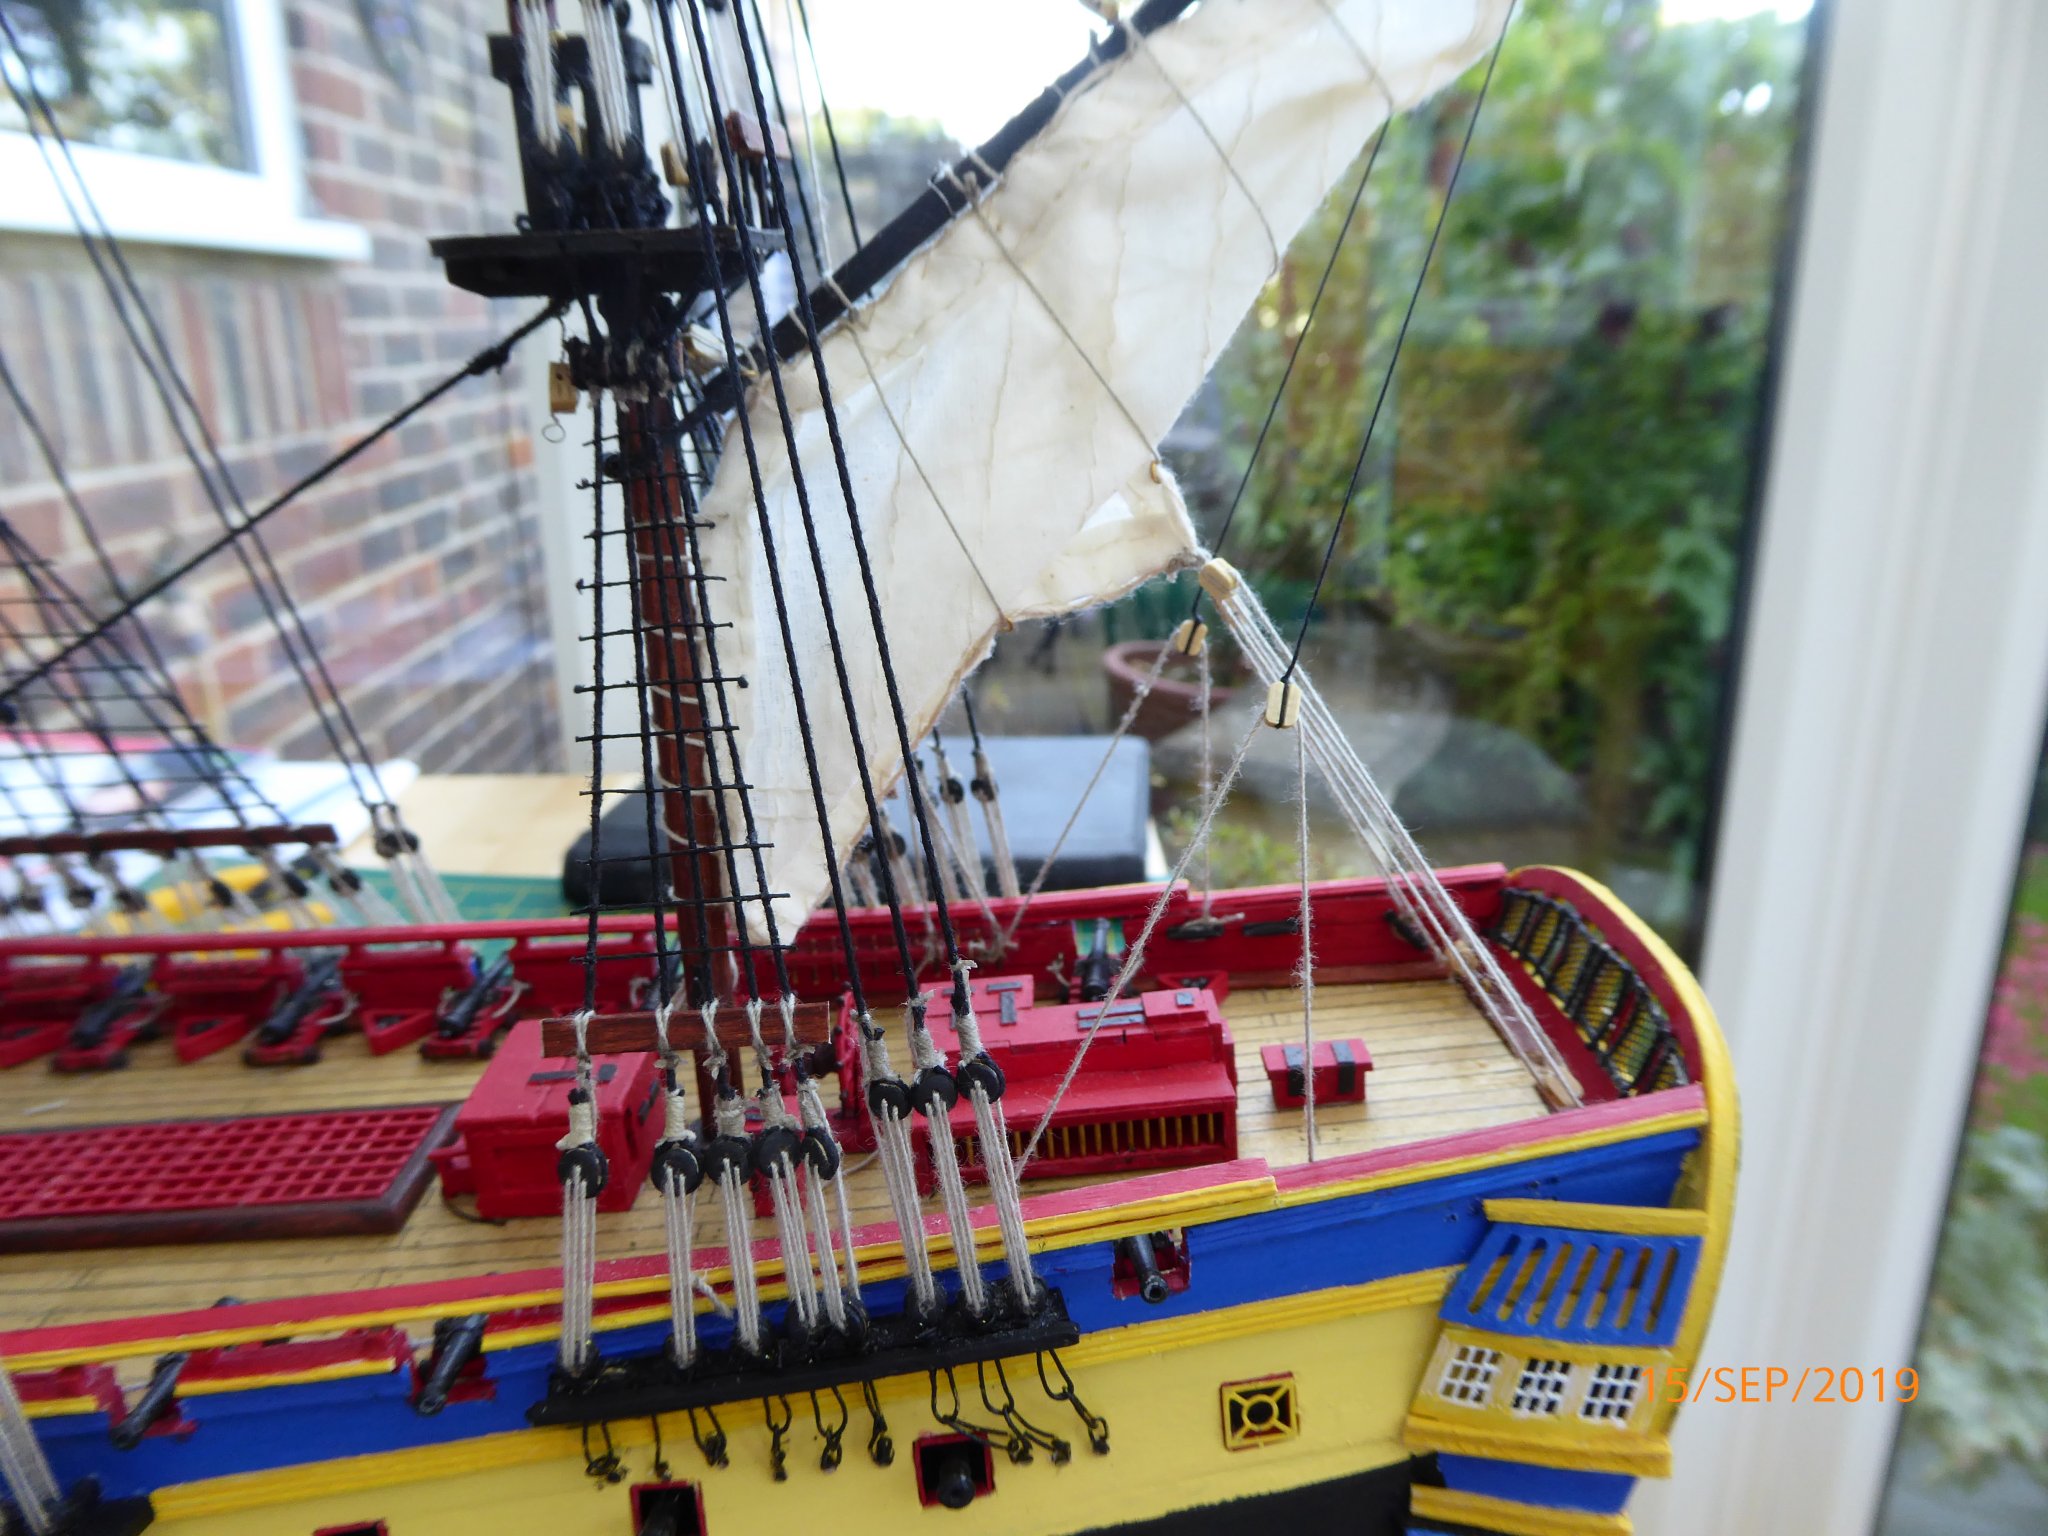
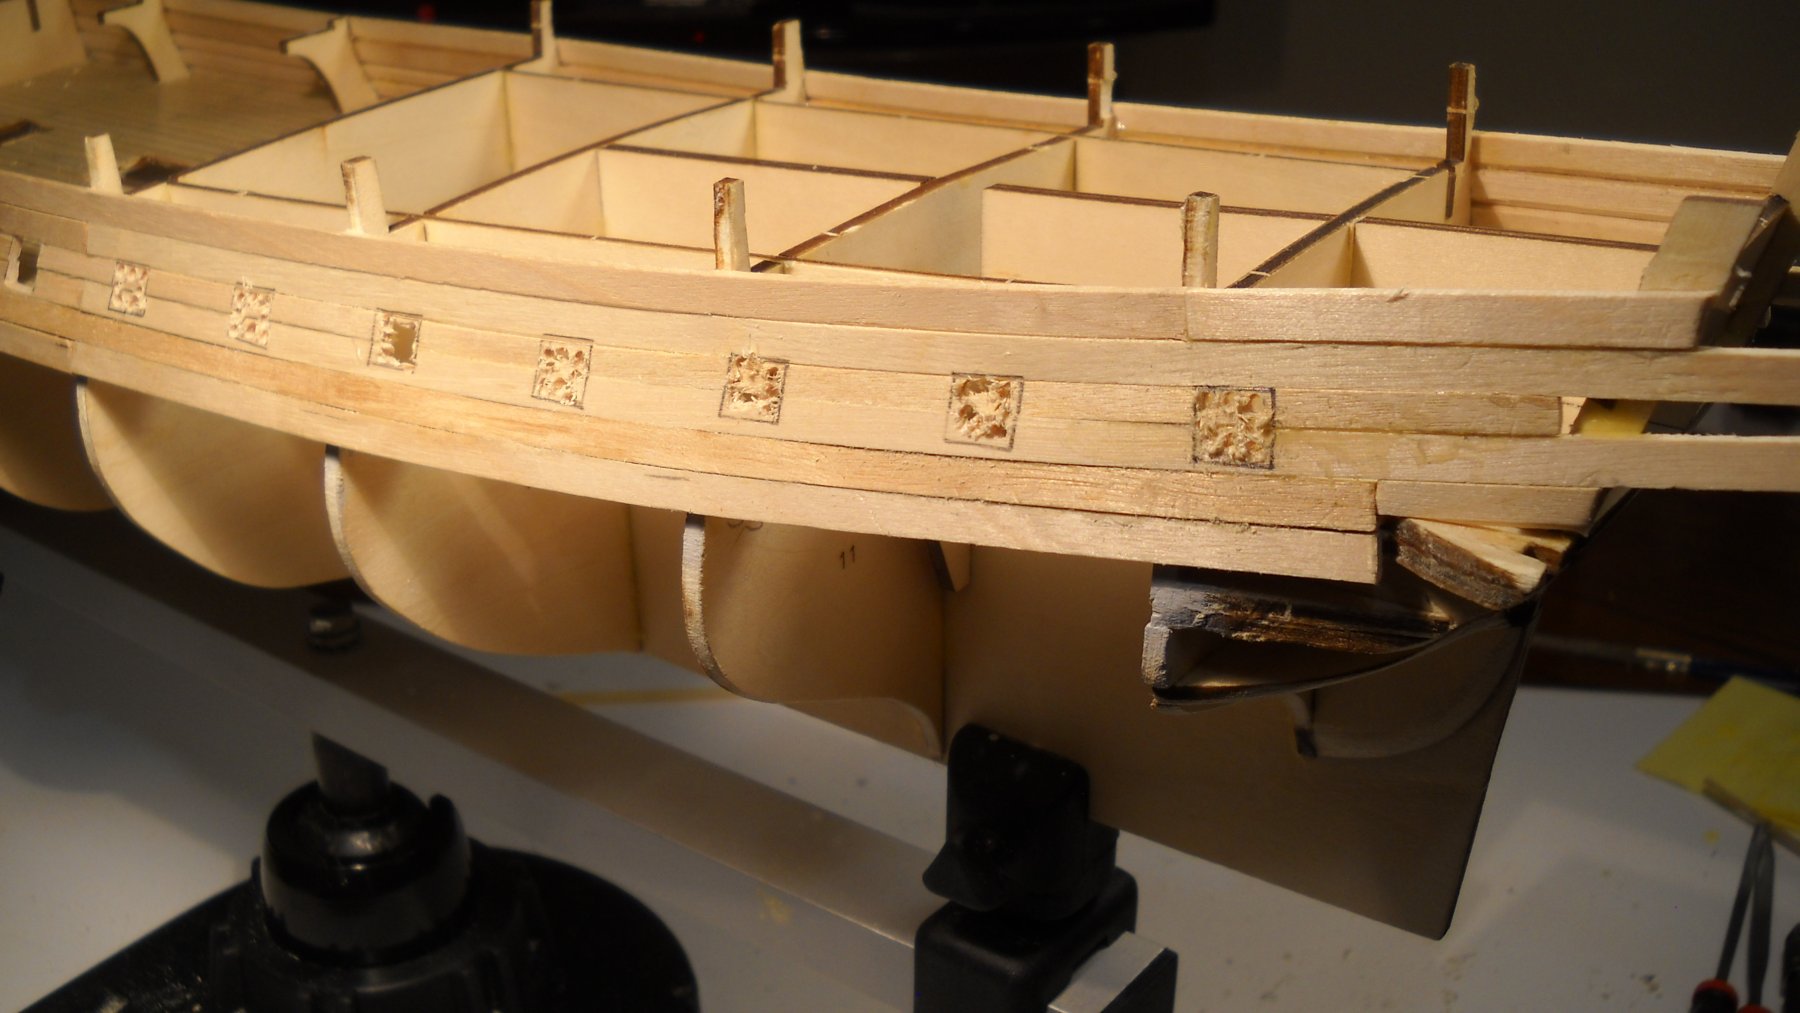
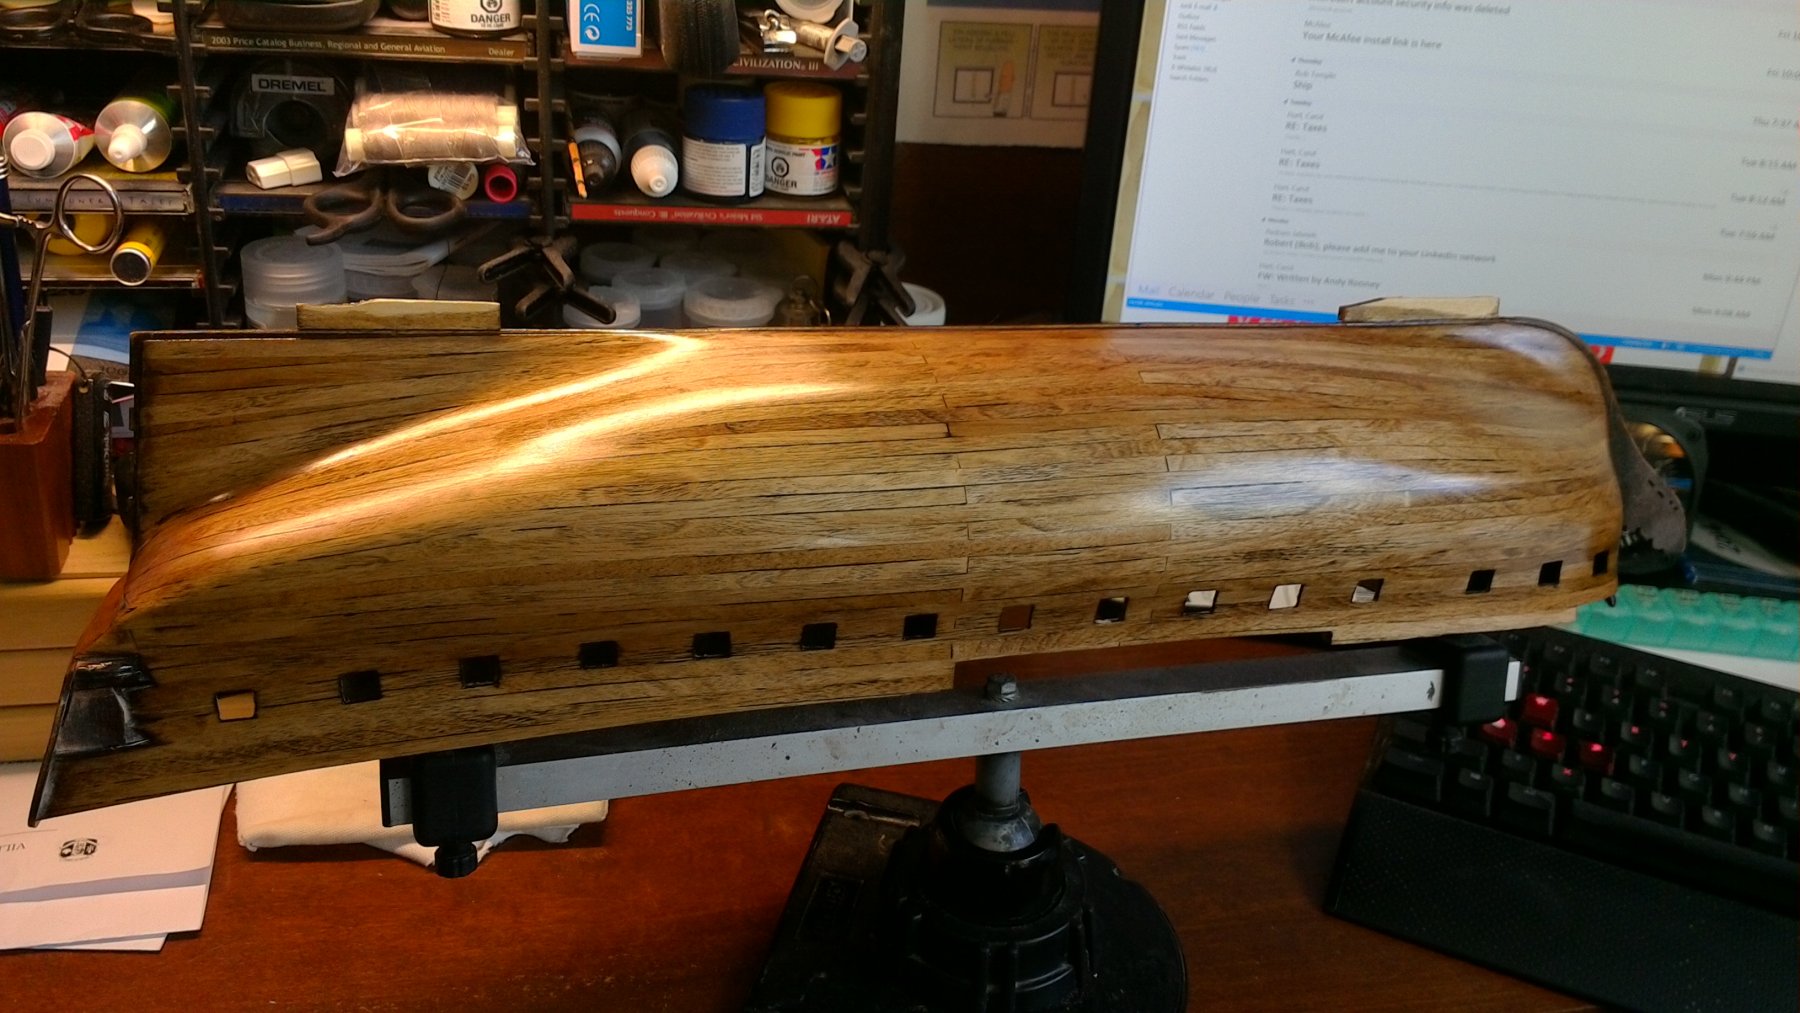
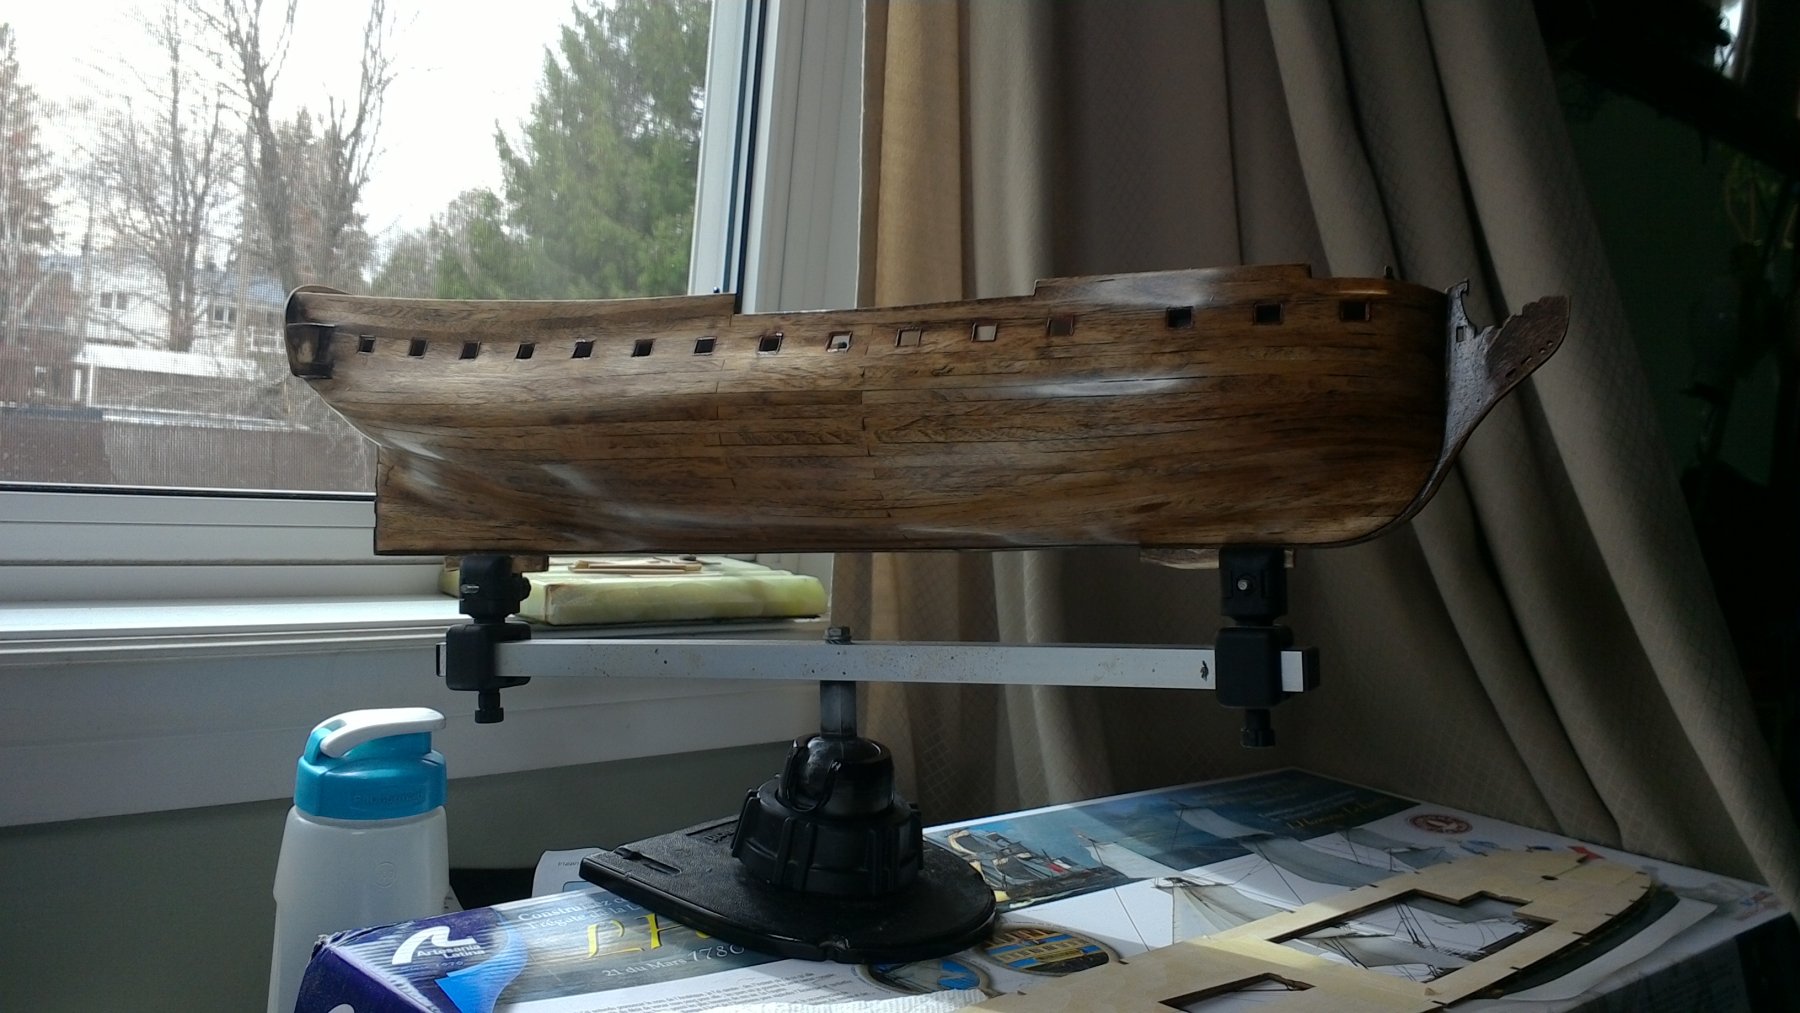
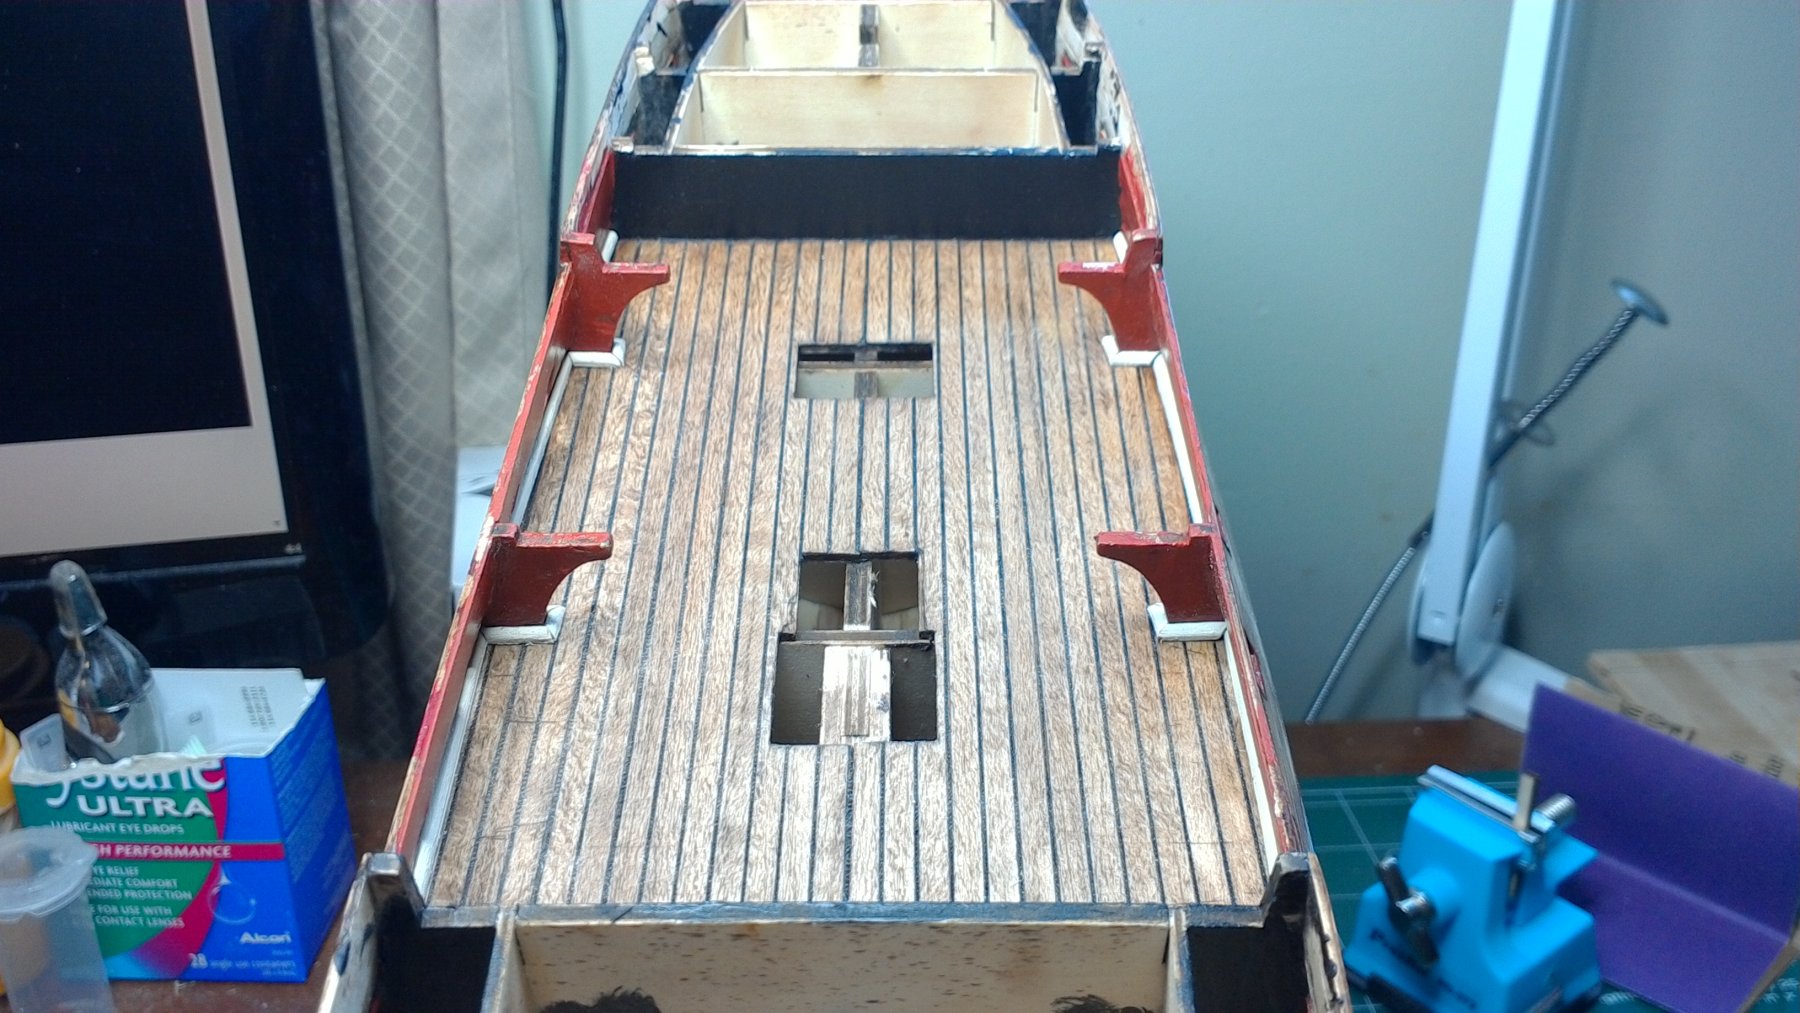
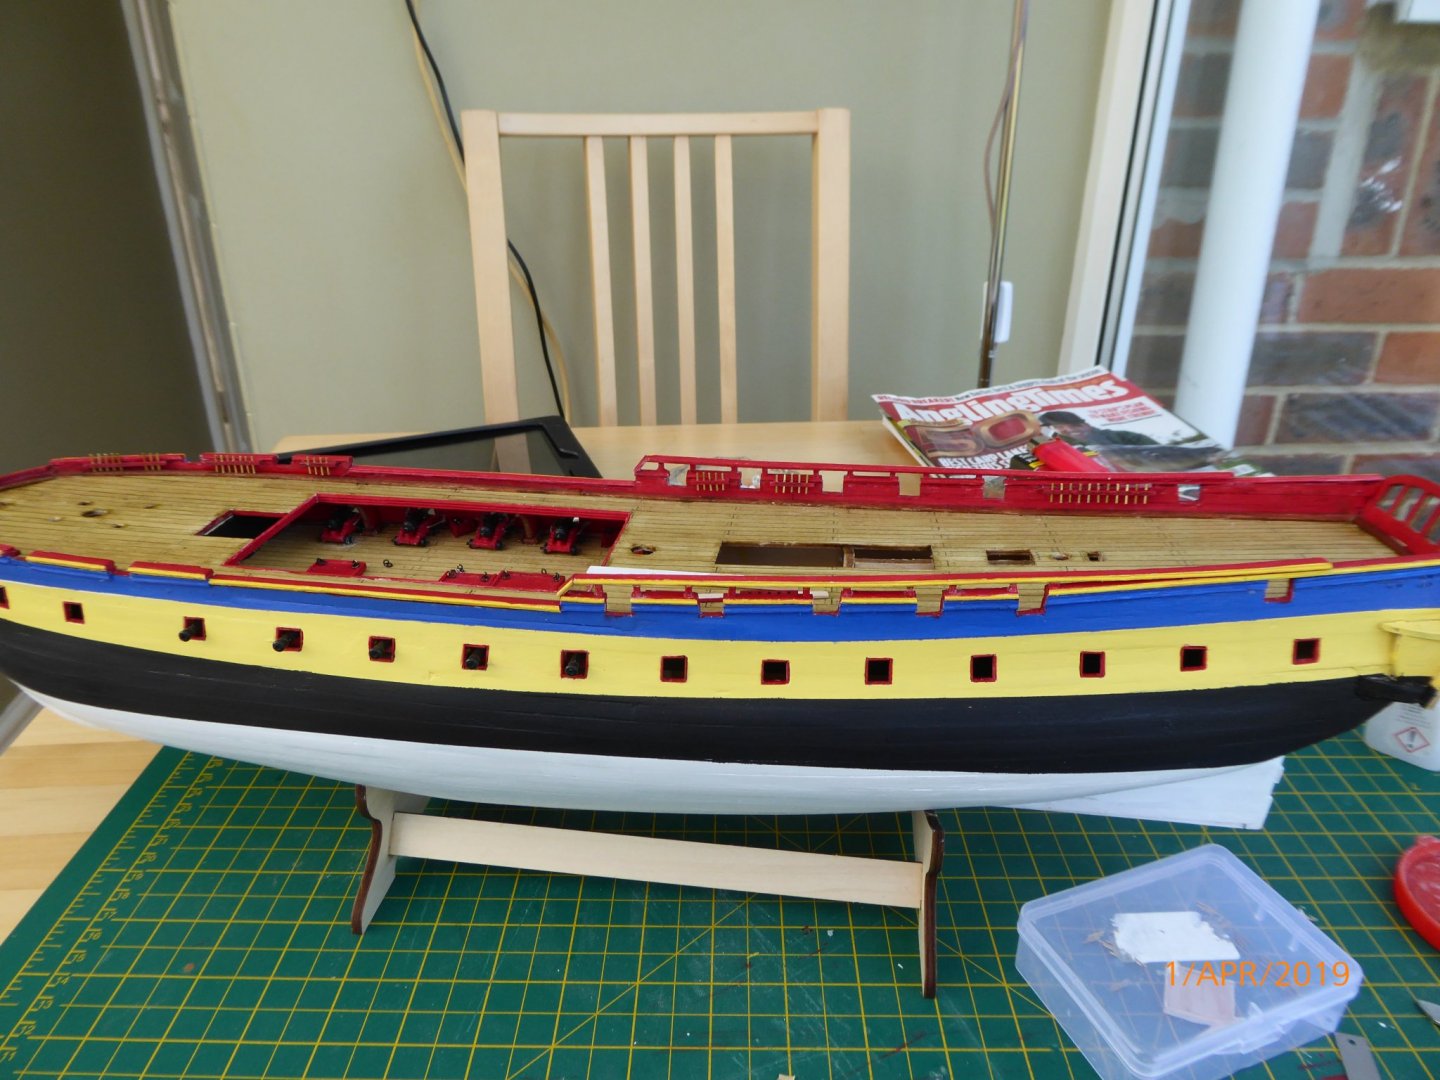
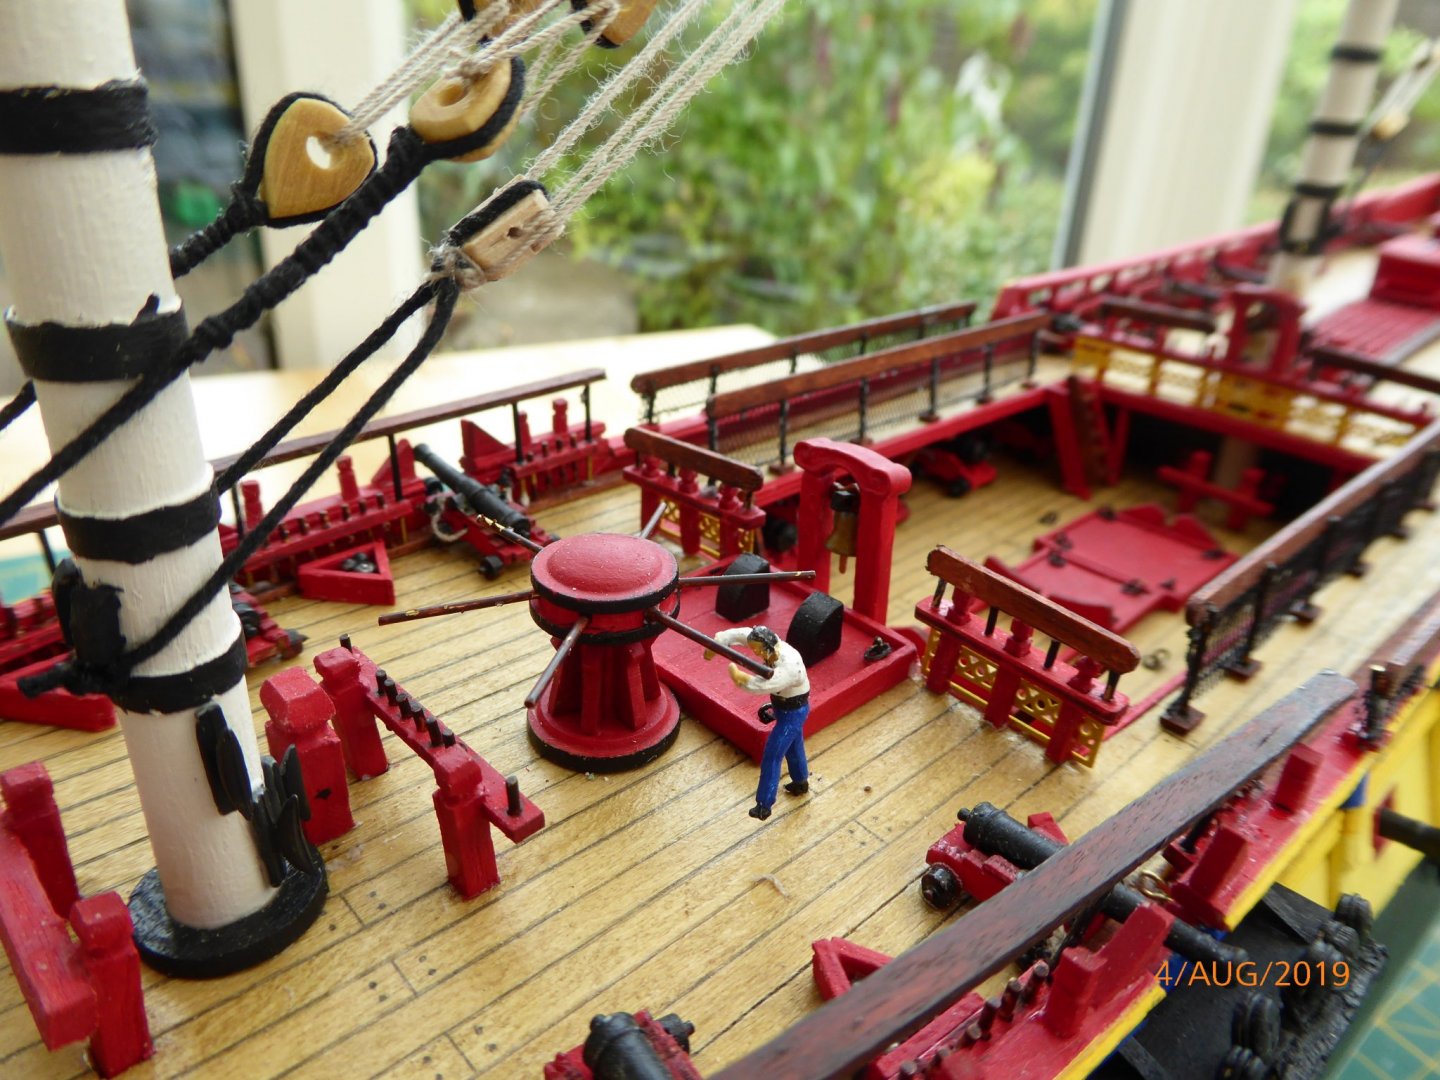
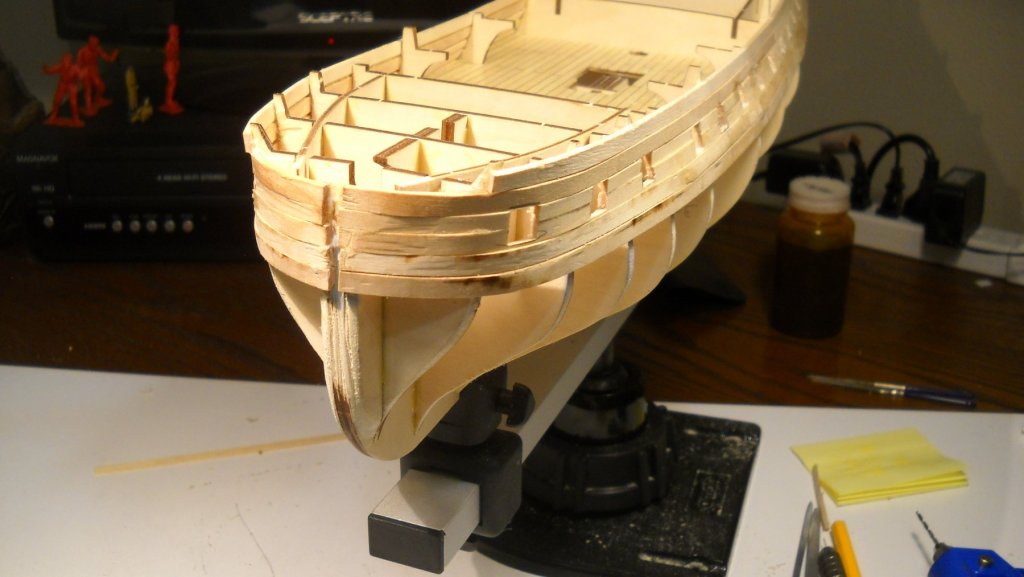
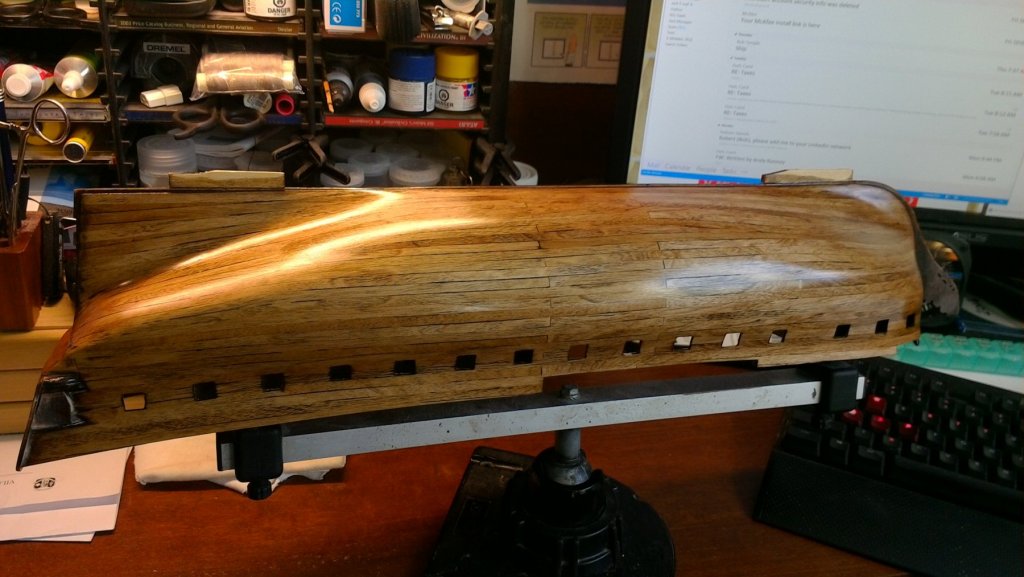
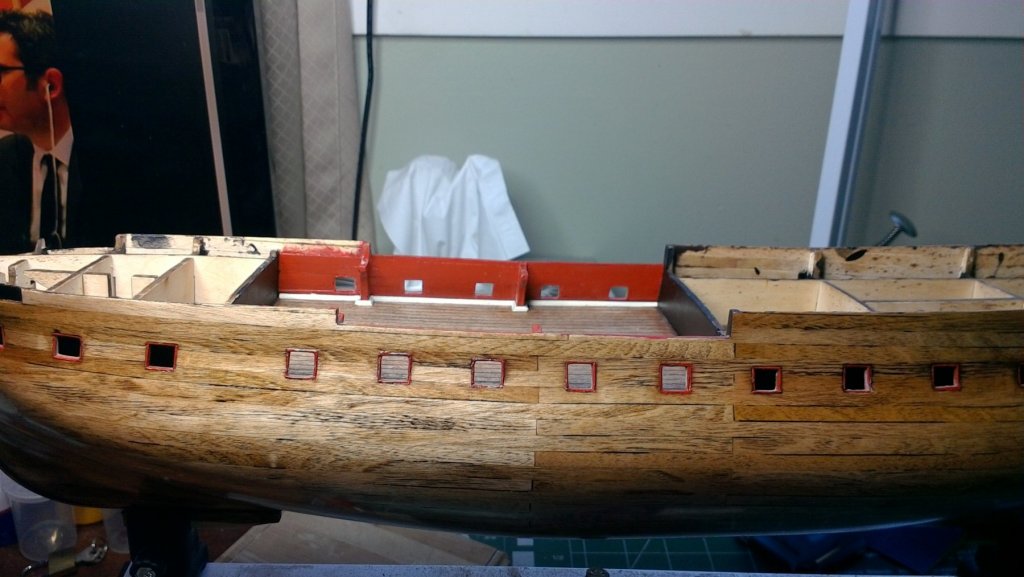
 This is my 1st build log on MSW and 3rd build to date. The kit was a gift from my wife who apparently found a print-out lying around in a strategically visible place. Intent going in was to follow the detail instructions provided on DVD, be as clean as my noob skills allow, but be creative with how the ship is finished. Not attempting to produce a faithful reproduction of the actual Hermoine. Experimented with a dark brown shoe cream on the gun deck. No big issues during planking, pics are after initial sanding. This was my 1st build without a 2nd finish layer of planks so made more effort to get tight joints. Was a bit nervous following the instructions and not having the keel installed during planking to be able to see if I was getting a nice fit with the keel. On my last kit, deviated from the instructions and installed the keel ahead of where instructed to. Decided to see how the hull turned out stained, could always paint over if not satisfied. Happy with the results at this point. If I was going to keep the stain it needed satin poly and my master carpenter brother in-law told me to use Scotchbrite rather than sandpaper between coats. Had to order online so made the mistake here of going ahead fabricating and installing the gun port moldings, too impatient for the Scotchbrite to arrive. Pic below is after 5 coats of poly. After 1st visit to the hobby shop and art supply big box store, came back with Naphthol Red from Golden for the port moldings but after doing the ports on the open gun deck didn't like the color. Re-painted with Red Oxide (shown) so had to paint over the already installed moldings on 10 ports. Not that clean, guess I will just have to live with it and learn. As my deck is a darker shade, used Titan Buff on the quarter round moldings. Was my 1st time using Artesania's micro-shaper for the moldings, it was easy to use and worked well. Might also use the Buff color on the cap rail moldings, will decide after installing the final additional planks on the upper hull.


-
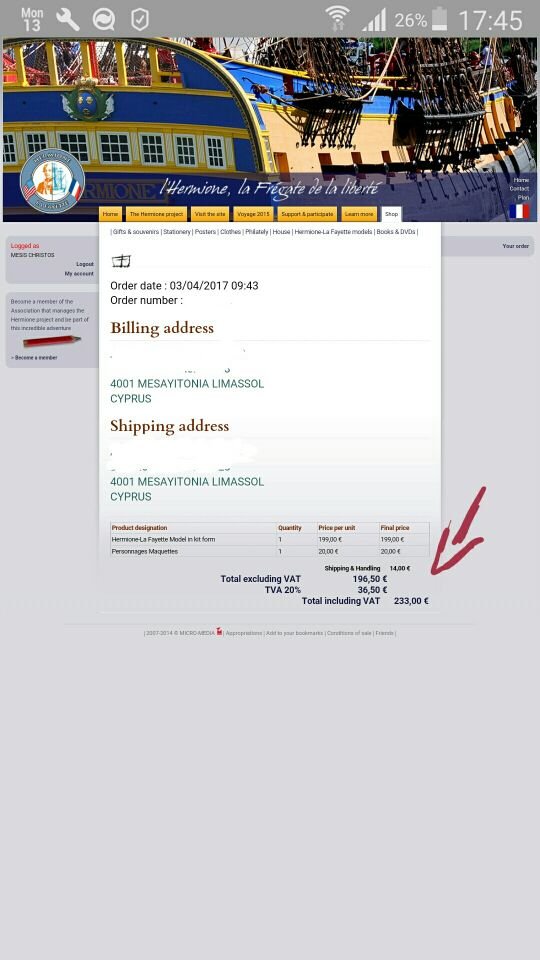
Just a few days ago I received the Hermione kit and an extra kit of its crew from AL. I boght it from the L Hermione Lafayette Museum in Rochefort France. It was the only supplier offering together both ship and crew kit. And more to that it offered the chepeast price including shipping. The best thing was that it arrived from France to Cyprus in only 4 days! Incredible! Here is my invoice.

- 317 replies
-
- 3
-
-

-
- hermione
- artesania latina
- (and 1 more)
-
 Decided to build the hull because the winter is boring.Basic construction started.
-
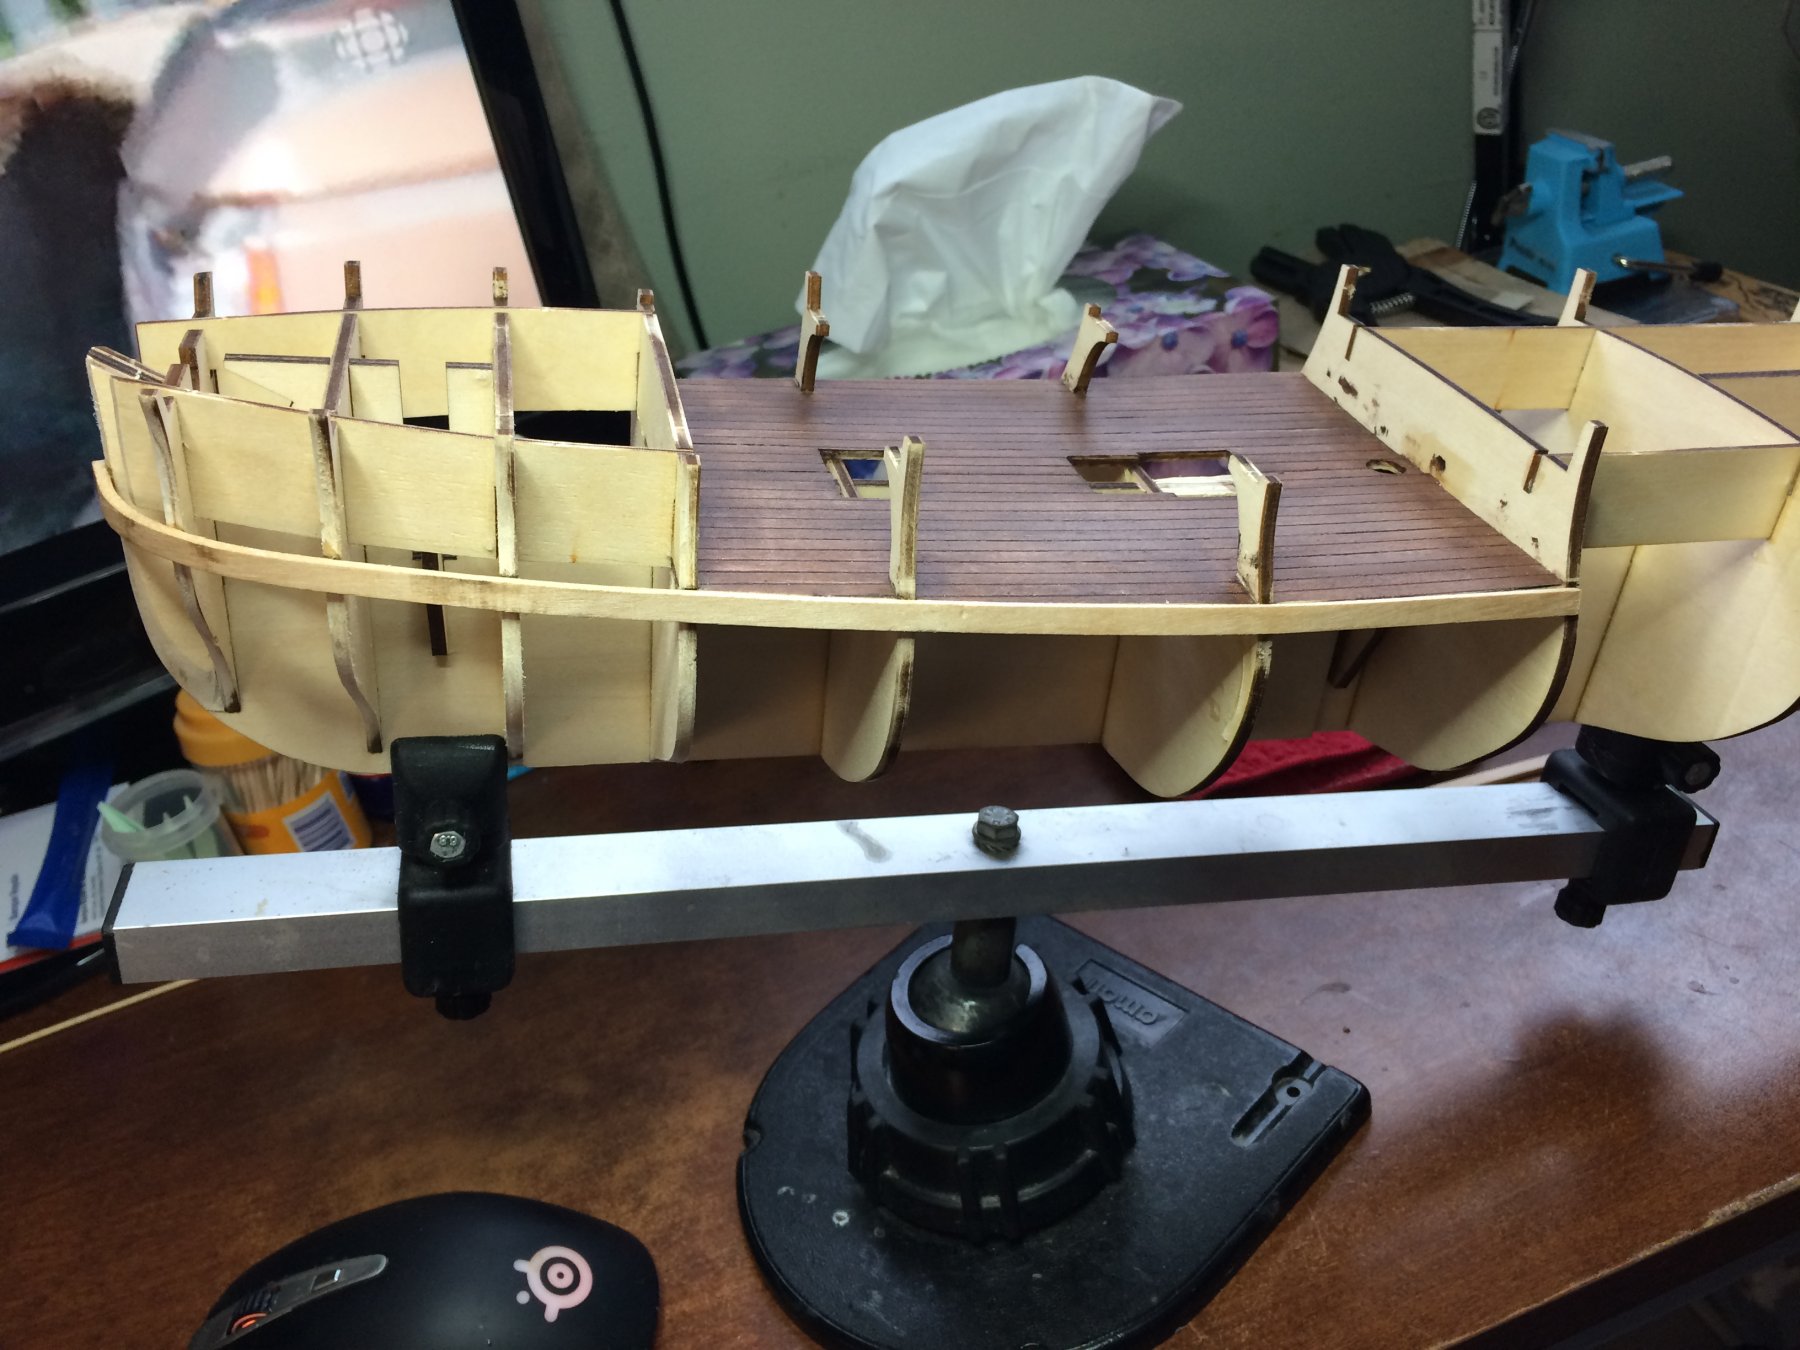
 The Hermione was built expressly for La Fayette to help with the American Revolution, and she departed France on March 21, 1780. A reconstruction of this ship has recently been completed and will set sail from France to the United States on April 18, 2015. I will be making some modifications to the kit as I go along. Since there are nice windows for the captain's cabin, I will cut openigs in the stern to look in. The solid brass side windows will have to be replaced to let in light. I hope I can pull this off. This is my second ship build, although I haven't completed the first, the Carmen, because I've gotten snagged on making the sails. Thankfully, this kit has the sails already made. Here's the box and contents: No matter what I try, the pictures come out upside down. I don't know if this because of the old iPad, or the old man. Sorry.
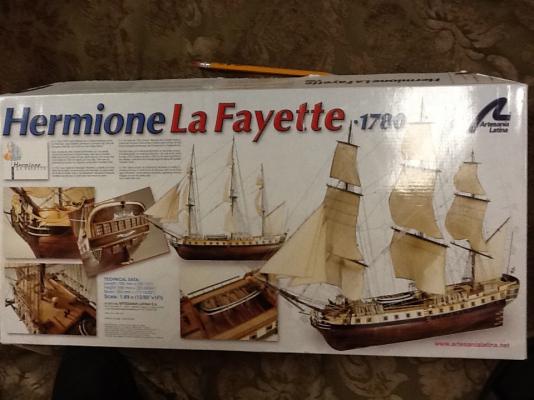
-
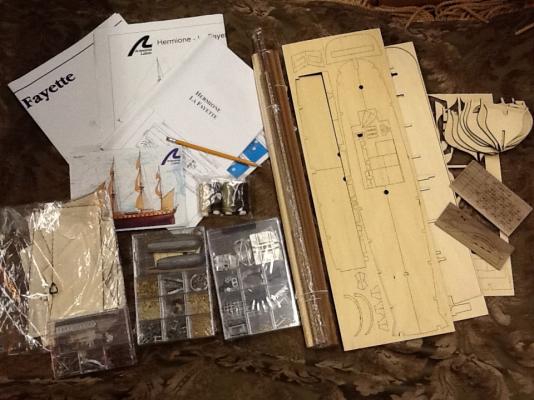
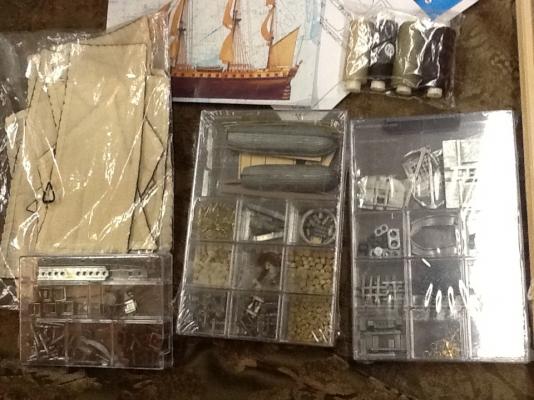
 The Beginning Hello Everybody, My name is Nick. I'm new on this forum, besides I have already gone through it a few times, and thought i may post my own topic about my build log of the Hermione la Fayette from Artesania Latina. I haven't seen a built log before of this ship, so I'm the first i think. But some things about myself: I'm 15 years (almost 16) and do this hobby since a year. I'm coming from the Netherlands, so that may be the reason that my English is not always perfect I love Sailing, and do this a lot (every saturday). I'm doing this almost 5 years. I have also a few certificates achieved, and I'm allowed to sail alone I also love this hobby, and begun last year with the Albatros of Constructo. This has gone very well and the result is pretty good. I'm doing school, and have almost vacation. So i hope within two weeks to really begin with this built. I'm hope i can make a fully build log of this ship. For now, I'm just waiting to reseve some new tools i have bought, with the reason i hadn't got good tools (I have a dremel from my father, and some sanders, but really modelling tools not). I hope to reseve them forthcoming monday or thuesday. I let you know when they arrived, with pictures of couce But enough of me, lets see some pictures of the ship itself: Some pictures of the outisde of the box: As you can see, it is a pretty big ship : And the inside of the box: Much paper work, but i have got trough them already, and know where to start : And a scale foto of the ship: The wood: And the metal parts: As you can see, most of the original wooden parts of a ship are replaced for metal. I found this very ugly, so i decided to remake most of the metal parts into wood again. I hope i can succed in this: An example I'm going to change: And then we have also the laser-cut parts: And at last, but not least, the beautiful sails that are already made for you, so you only need to assemble to the ship : So a lot of picture, and for me a difficult but great new build. I hope I can soon begin with the build itself, and I let you know then.
 -
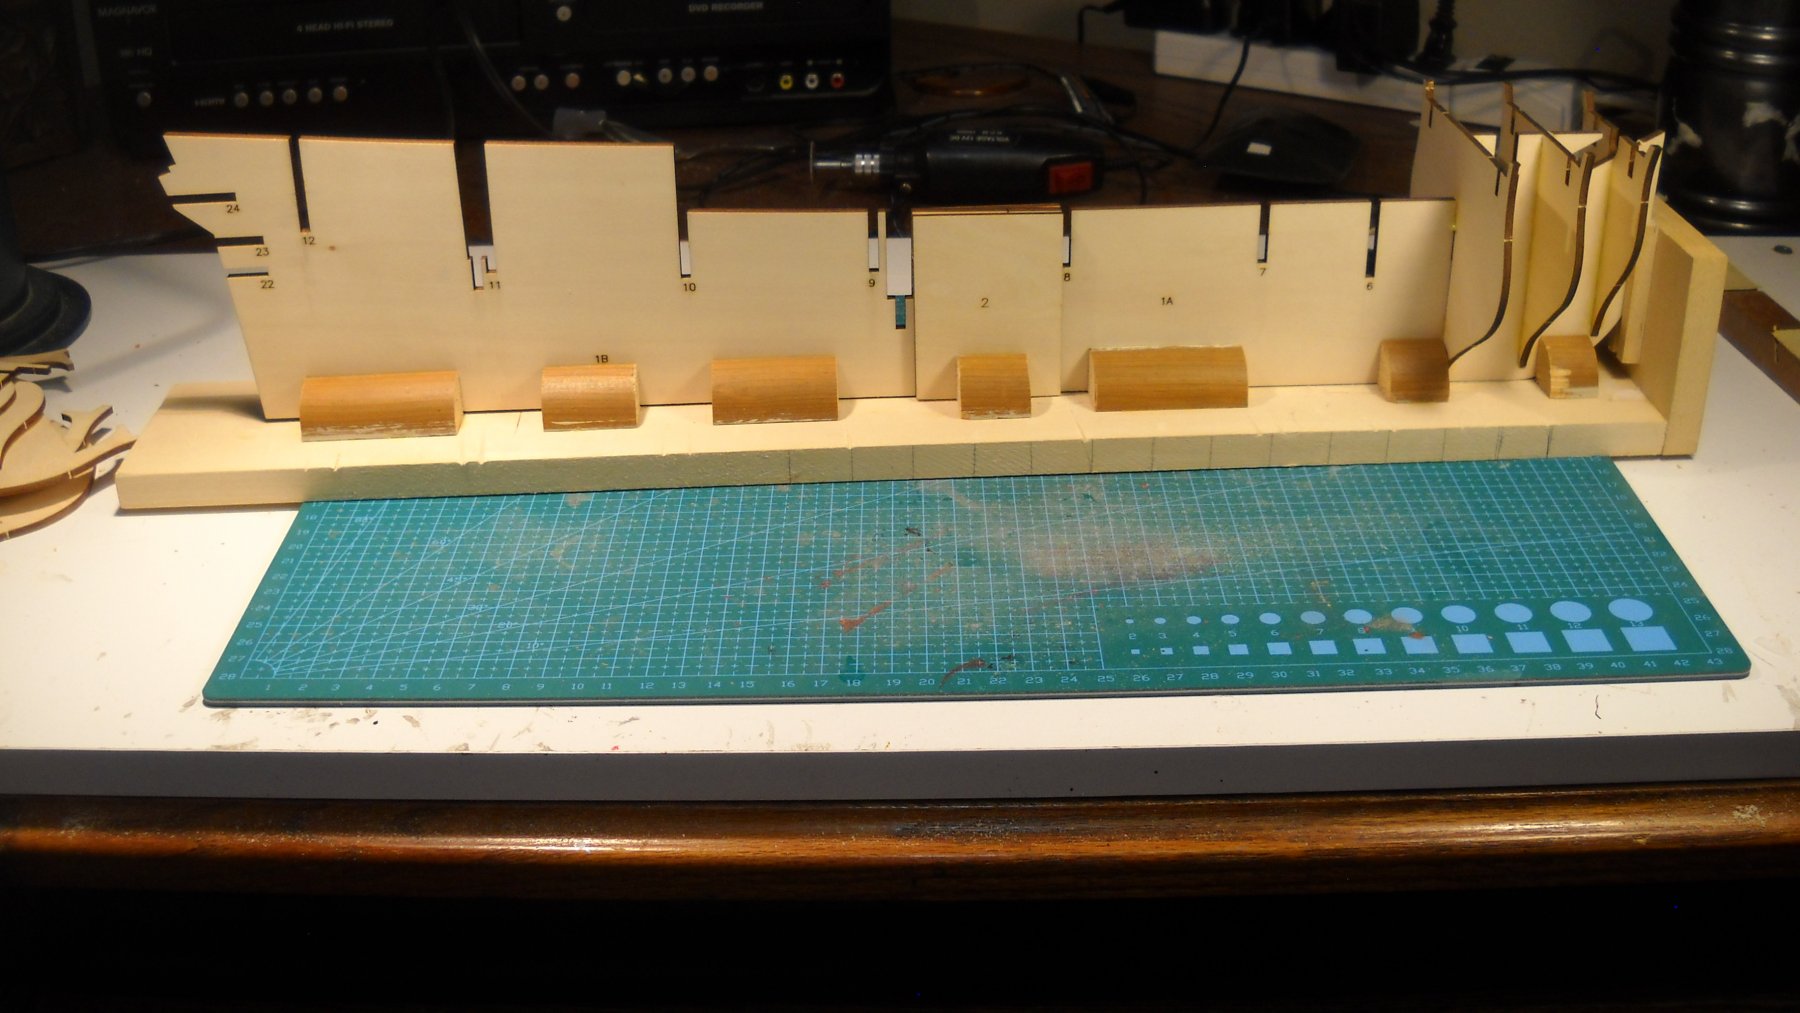
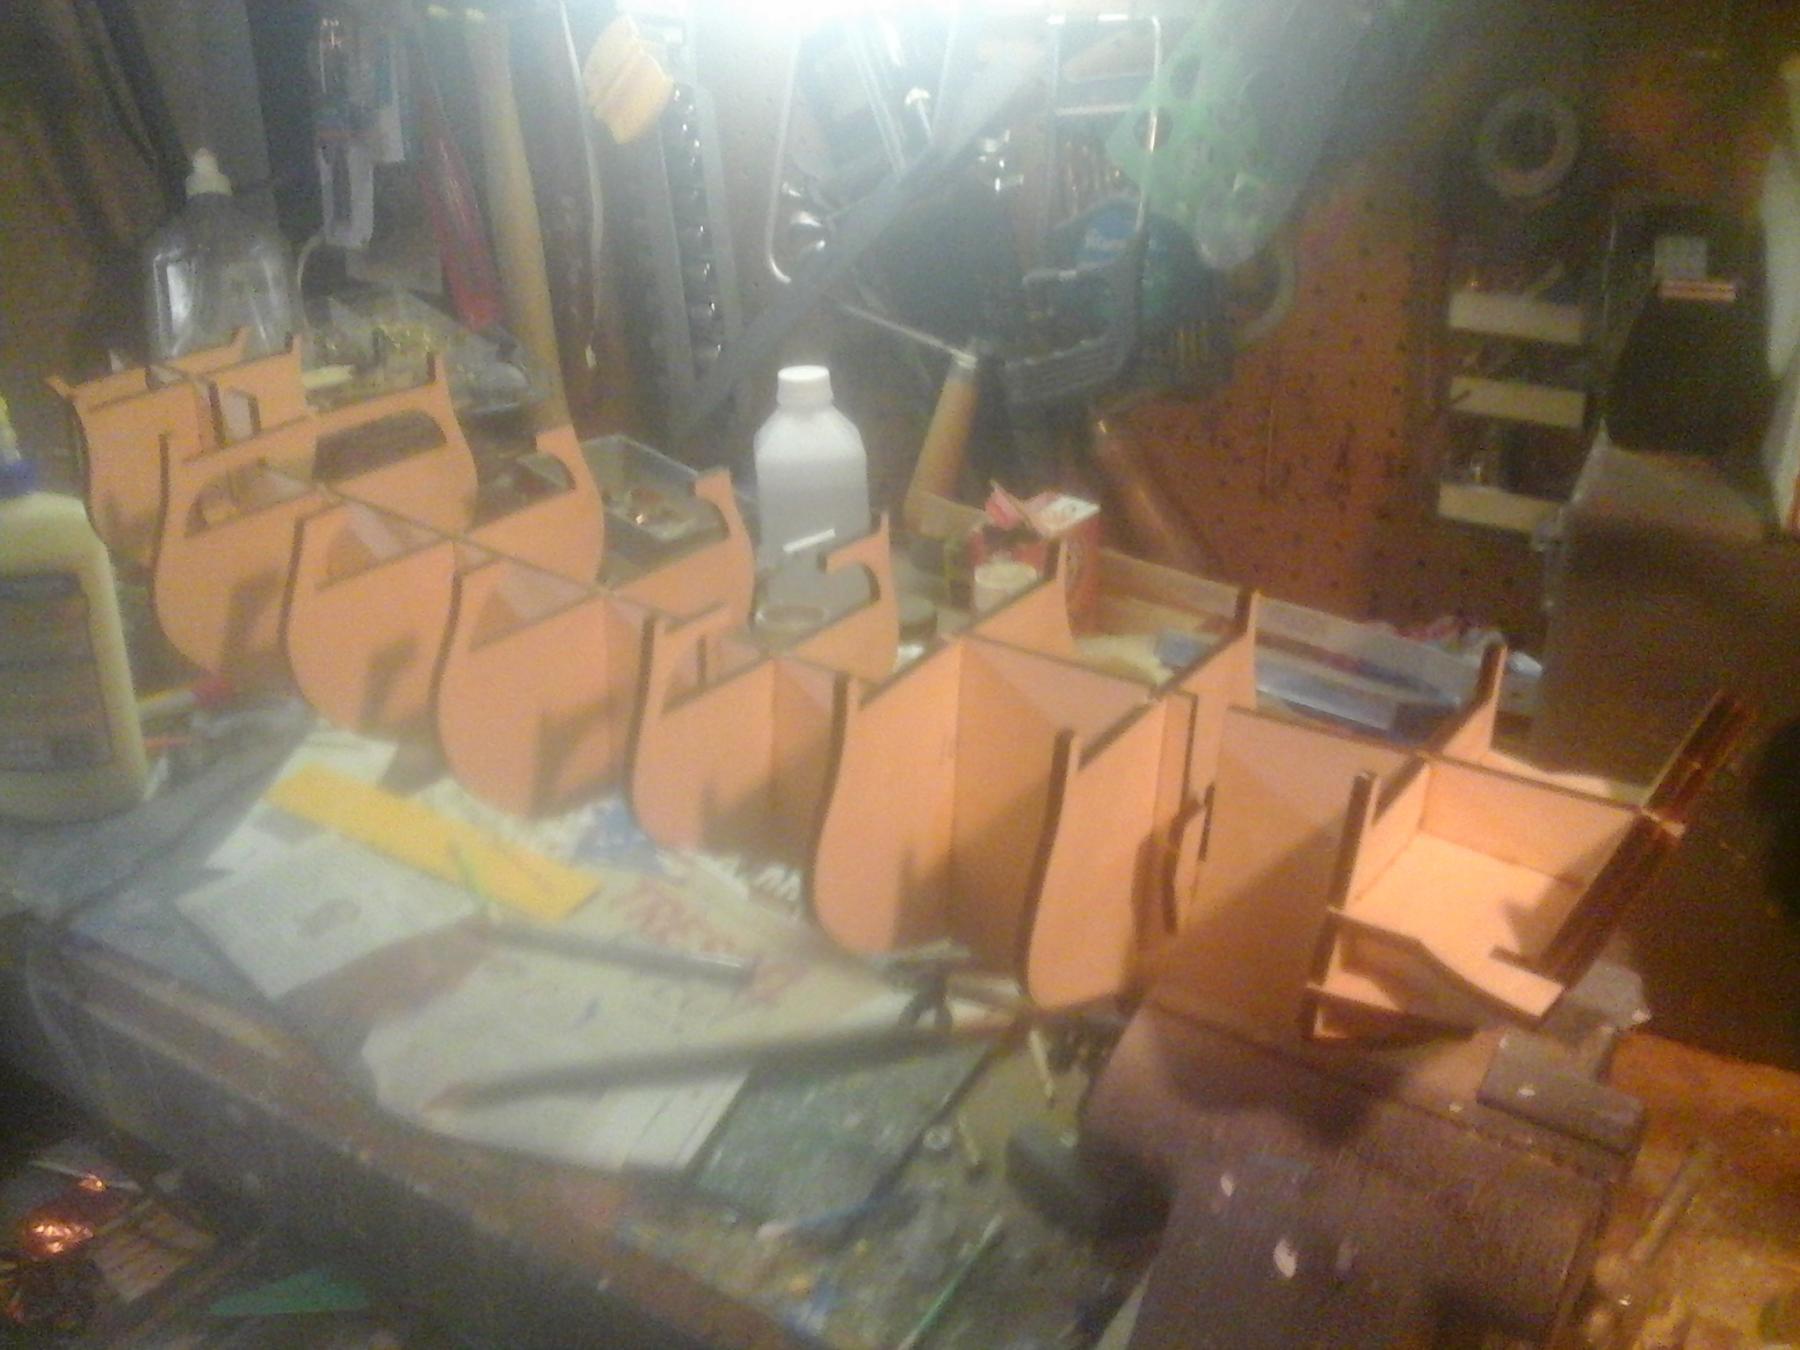
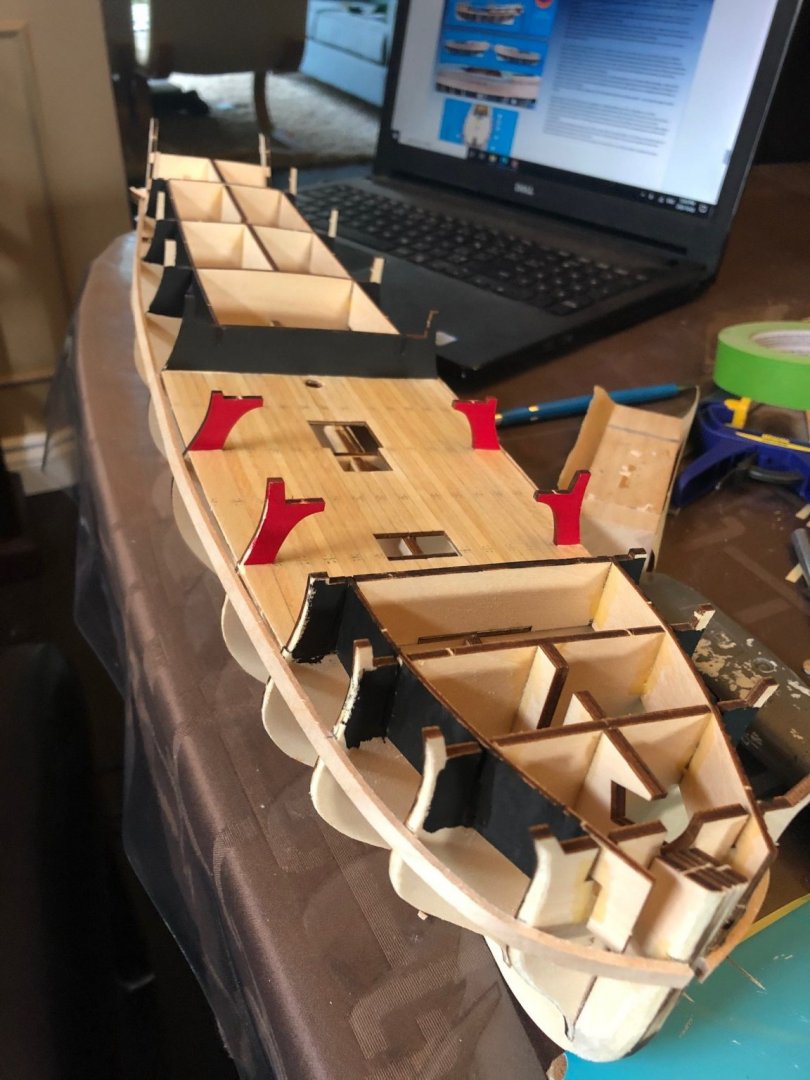
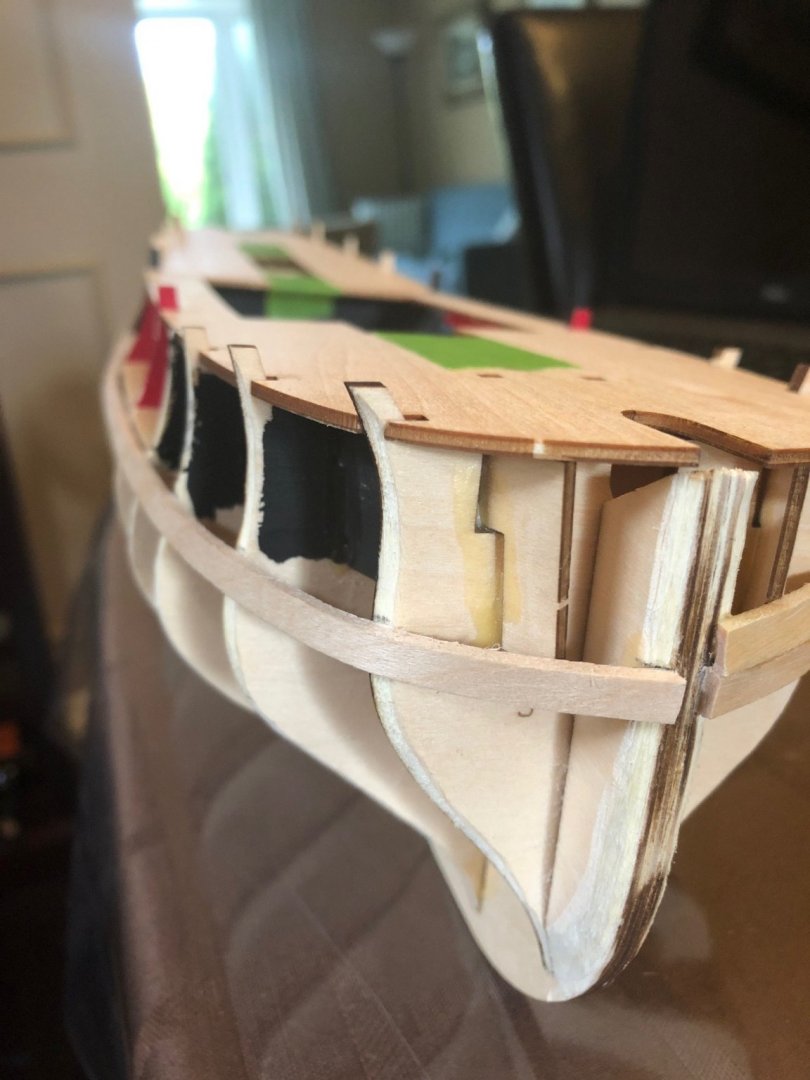
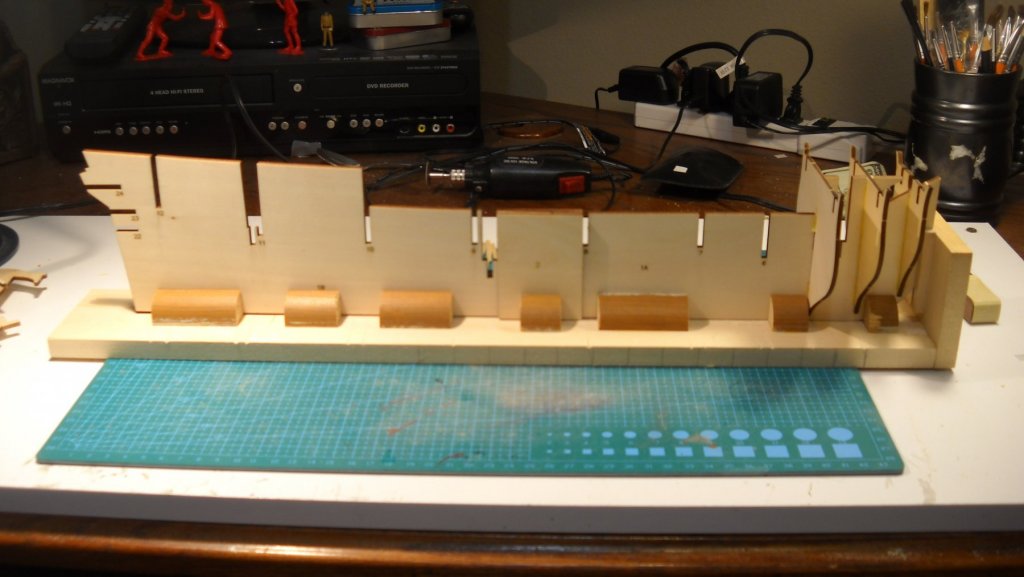
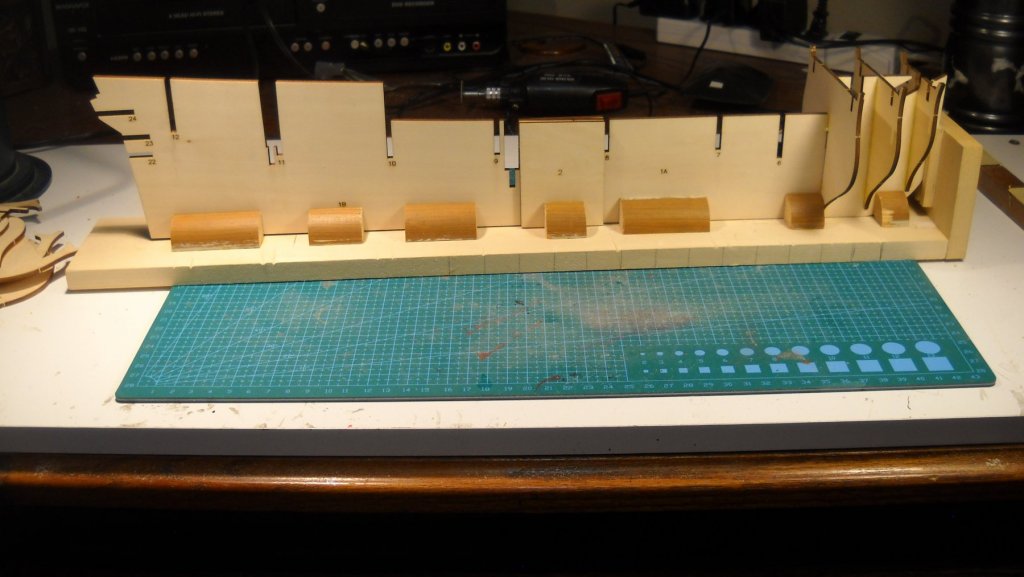
 Just started my first square rigger kit. Very excited about the information on this site. Thanks ahead for all the advice. Here is the frame. Painted white for light and added a stained lower deck. More to post tomorrow after I get working on the captains quarters,
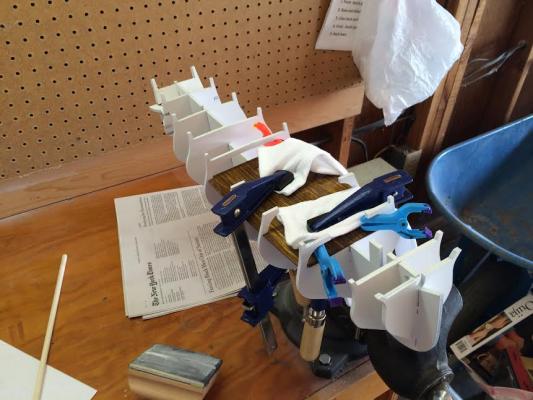
-
 first, did French frigates such as Hermione have copper plating? I am building her, and plan to leave the hull natural, using walnut veneer planking. Should I copper plate below the waterline or leave it natural? In your opinion, what would look the best?