Search the Community
Showing results for tags 'Mercury'.
Found 12 results
-
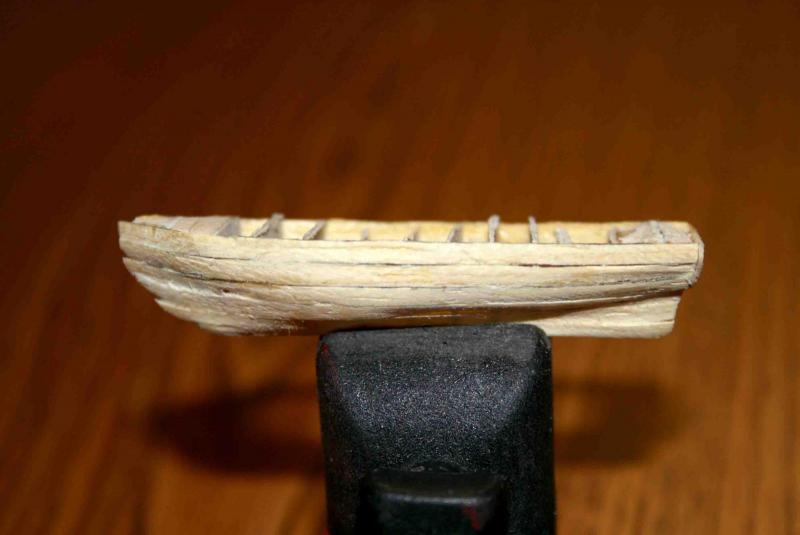
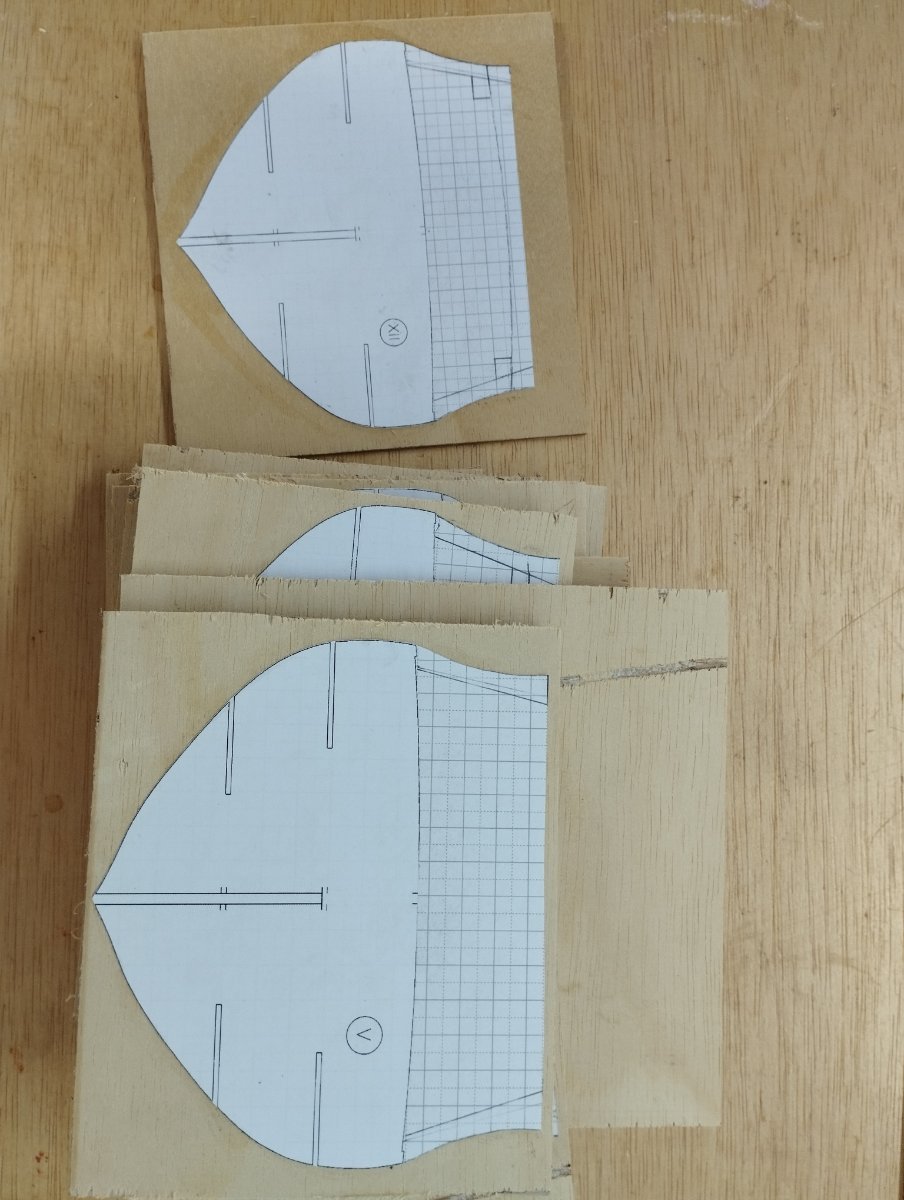
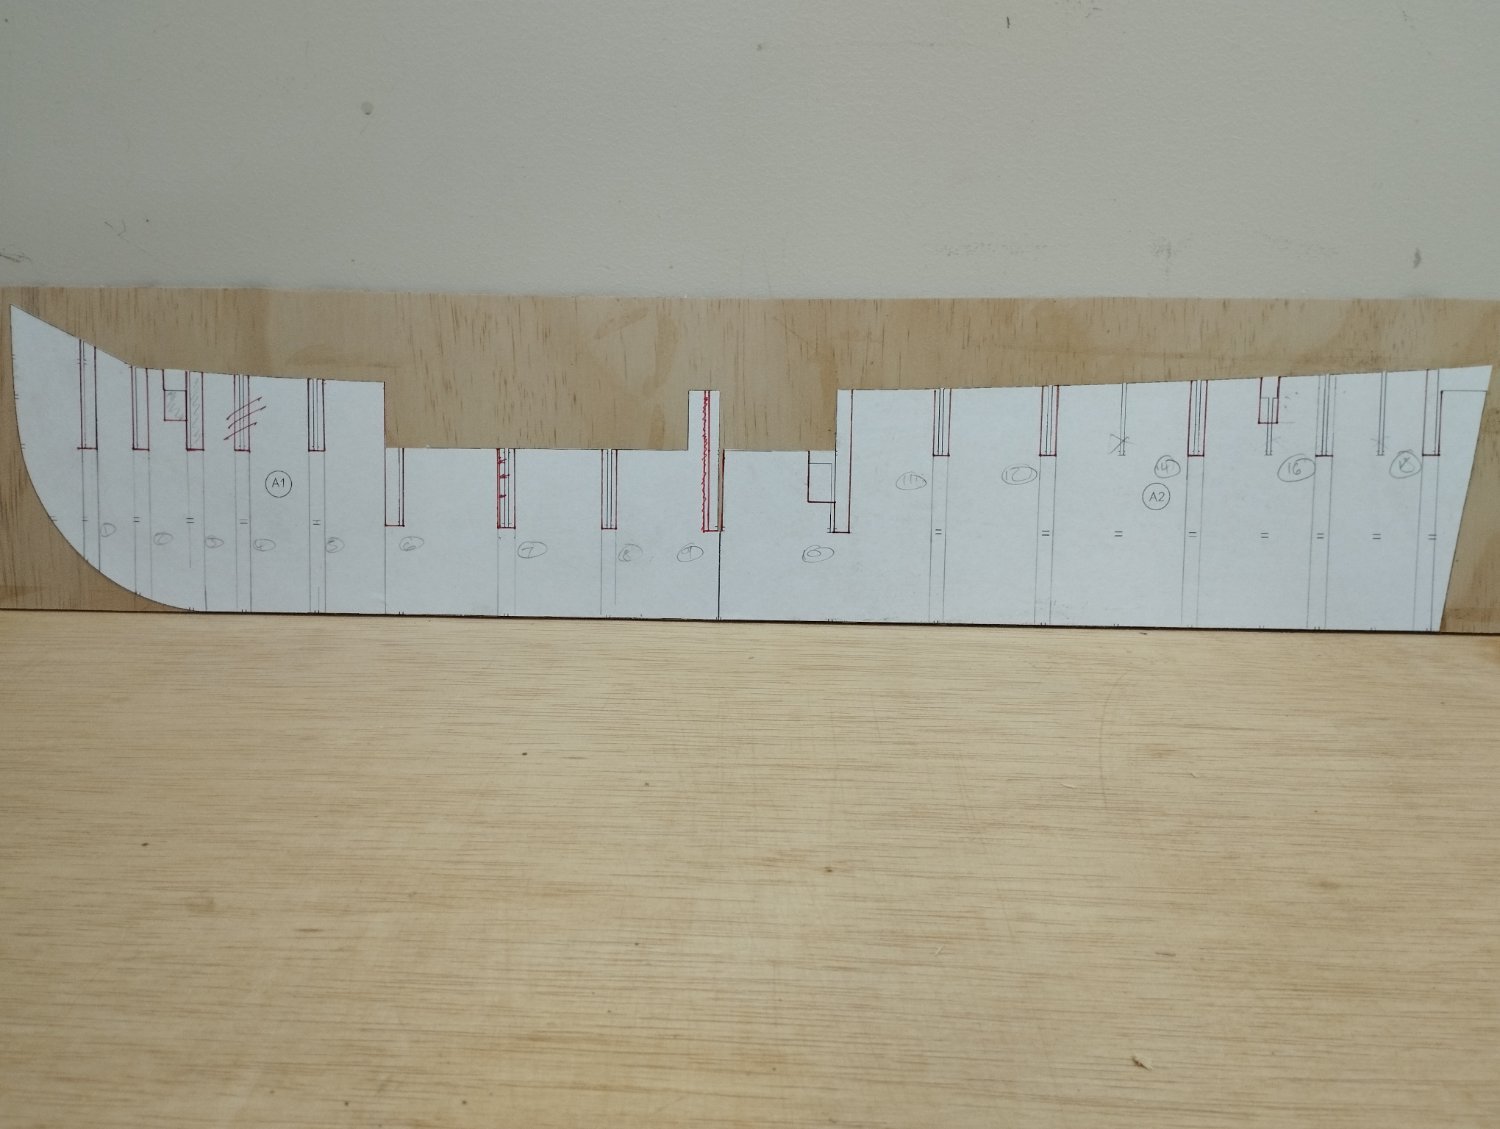
 Hi All It's with a little trepidation that I start this build log and as such a word of caution is required..... If you are of a nervous disposition and easily offended by poor quality workmanship, find a complete disregard of historical accuracy extremely upsetting and deem lowering the quality of this forum as morally outrageous then then I beg you to avert your eyes and leave now as the following content is probably not for you. Ok, for those of you that are still with me and made of stronger stuff there are some points that I need to make you aware of before I start a) I am not at one with wood b) tools are not a natural extension of my hands c) I do not see a plan on paper and turn it into a 3D matrix in my mind and compute complex curves and angles instantly d) If there are two ways to do something, I'll choose the wrong one e) If there is an easy way and a hard way, I'll inadvertently do it the hard way e) I was not blessed with any real woodworking skills and I have to make do with my God given abilities f) I enjoy making ship models and I struggle daily to overcome the points above. Let's begin This is my fourth model ship (see signature for details) and my first attempt at a scratch build. I'll be using the paper model by Shipways as the basis of the build and will be using as much as what is contained in the paper parts as templates to assist as I attempt to covert it into a wooden model. I've also downloaded the plans of Syren from wiki commons as an aid as the paper "plans" do not contain plans as such...what is provided is along the lines of Syren download The content of the paper model is really good and has excellent rigging, belaying, mast and yard info and in my opinion is as good as Caldercraft rigging plans...small example of rigging info Masts The paper model is at a scale of 1:96 so the first order of the day was to scan the sheets and print out at a scale of 1:64 and to try and identify what parts are printed on the 30+ A3 sheets and compile into a spreadsheet for ease of location. Bulk heads were cut out of 6mm plywood....this is just normal ply from the local hardware store (Bunnings), I know there is discussion in another topic on the merits of using something better but I've got to work with what I can get easily in my little corner of Queensland.... but first a little manipulation of the templates was required. As below the bulkhead templates only go to the main deck level and make no provision for the bulwarks The way the paper model caters for these is to add internal supports to the deck as shown in the photo below which has been copied from the paper build log of Mercury by @catopower These supports are few and far between and made from the templates I've used these templates to form an extension of the bulkheads I know I could have used the Syren plans to form the bulkheads but I want to use as much as what is provided as part of this build "Keel" piece is made from 3mm plywood....I can hear the gasps now "that won't be strong enough to support 6mm bulkheads....far too flimsy"....I originally considered the 6mm ply but this would result in a loss of definition of the bulkheads once a 6mm slot was cut into them. I've repositioned the bulkheads slightly to centre them over where the thin card bulkheads would have gone. The bulkheads at stem and stern have been positioned so that the face is identical to where the card bulkhead would be as I need to use these as refernece points for the bow and stern works. I've also omitted 3 bulkheads (no's 4, 13 and 17) as I deemed them not necessary with the 6mm ply and closeness to the others A strip of 1.5mm has been glued to the "keel" piece to form a rabbet for the planking. I'm further on than this but will call it a day for this initial post. Thanks for looking in Mark Thanks for looking in


-
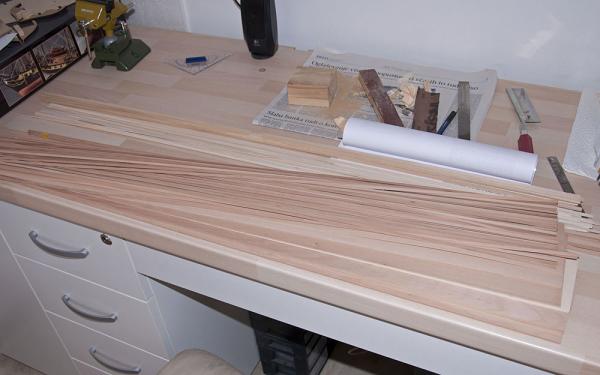
 Hello all. After completing Bluenose this will be my 2nd build. This time I wanted something with guns. There is a lot of very tempting kits and finally decided to go with Mercury, which attracted me even when I was buying my first kit. The first impression is that this kit is of very high quality. Instructions are one of the best I have ever See, especially I like separate plan sheets for rigging which will be quite a job to do. My plans: -I like natural finish of wood as seen on NMM Greenwich models. This mean that most of the model is going to be unpainted, and I am going to change A LOT of materials provided in kit. For most of the build I am planning to use pear wood, maple And some walnut. As Ebony I will stain pear wood. Today I received wood from Germany (2nd picture) . -There will be no coopering on hull, reason is above. -Deck planking. Laser engraved plywood deck looks good, but not good enough for me. I will most likely use maple, but have pear For backup. As this is my second build and still don't wont to overcomplicate it I am thinking to use "normal" straight Pattern for planking like on brig Syrene for example, instead of curvature shape. -Armament. From personal aspect I like the look of guns instead of carronades on deck more. Don't ask me why, just like them . So I am still in research if there is any possibility that Mercury carried guns before carronades or has sister ship. This can be Seen on HMS Cruizer (guns) vs. HMS Snake (carronade) and Le Cyclope vs. Le Cygne. I have already purchased 6pdr Guns but will wait with that. If anyone could help me with this information I would very appreciate it. -Sails. I am planing to do Mercury with partially set sails Well, that's it for the moment.
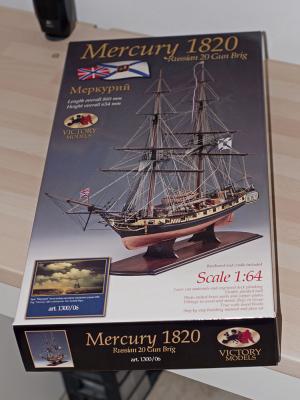
- 120 replies
-
- 18
-

-
- mercury
- victory models
- (and 1 more)
-
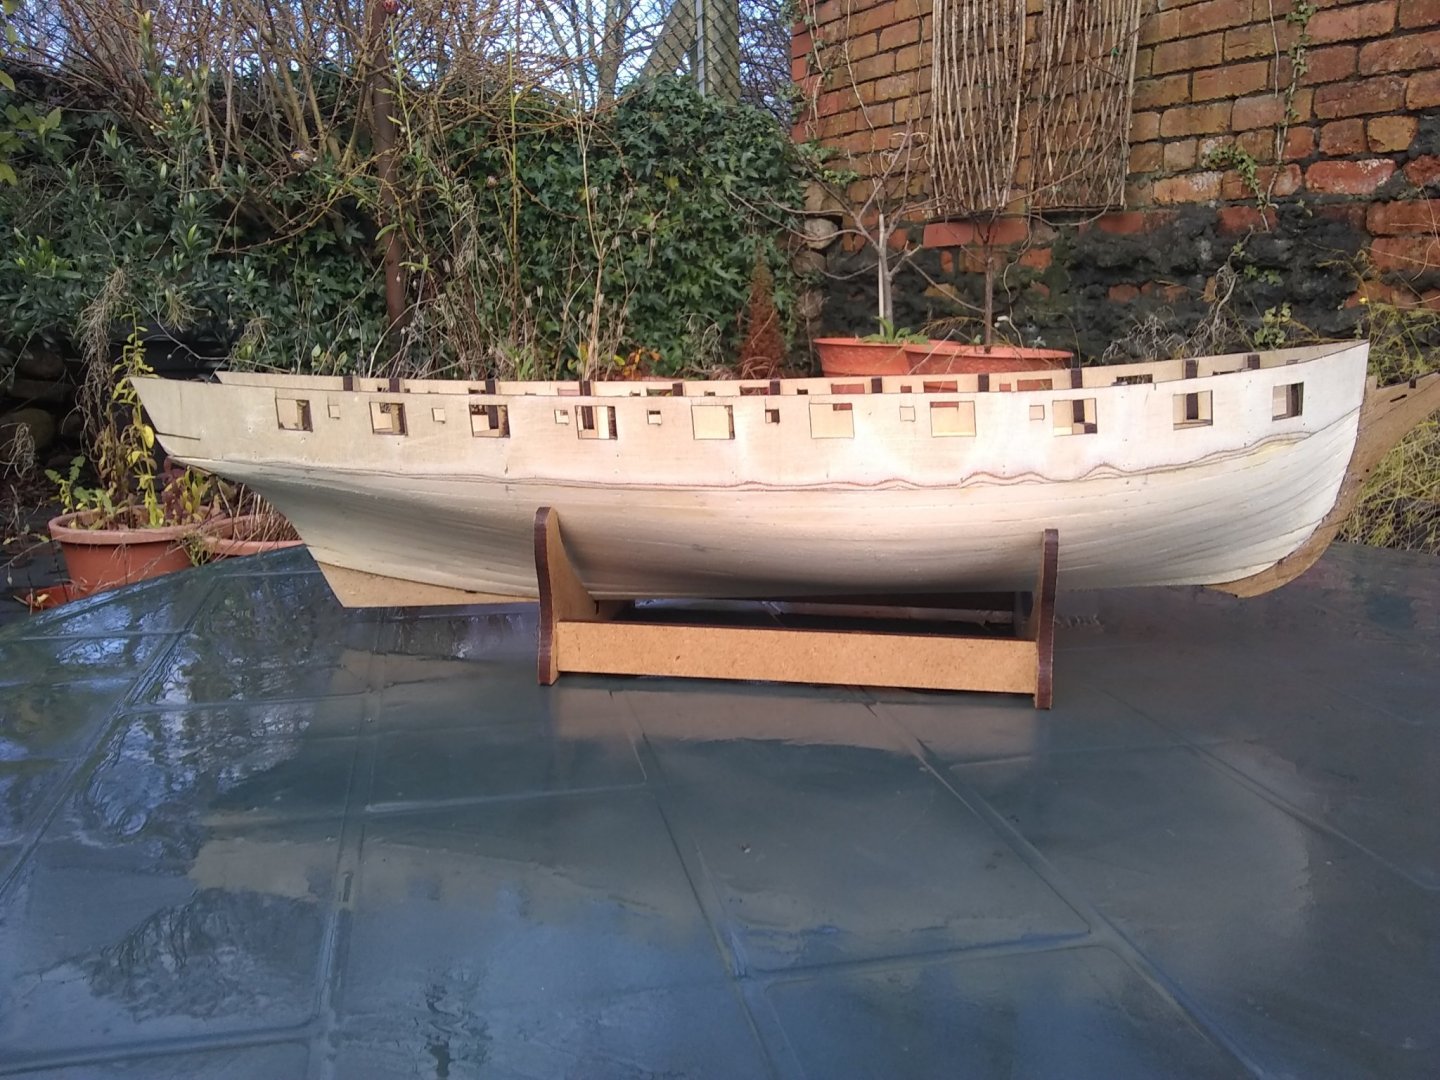
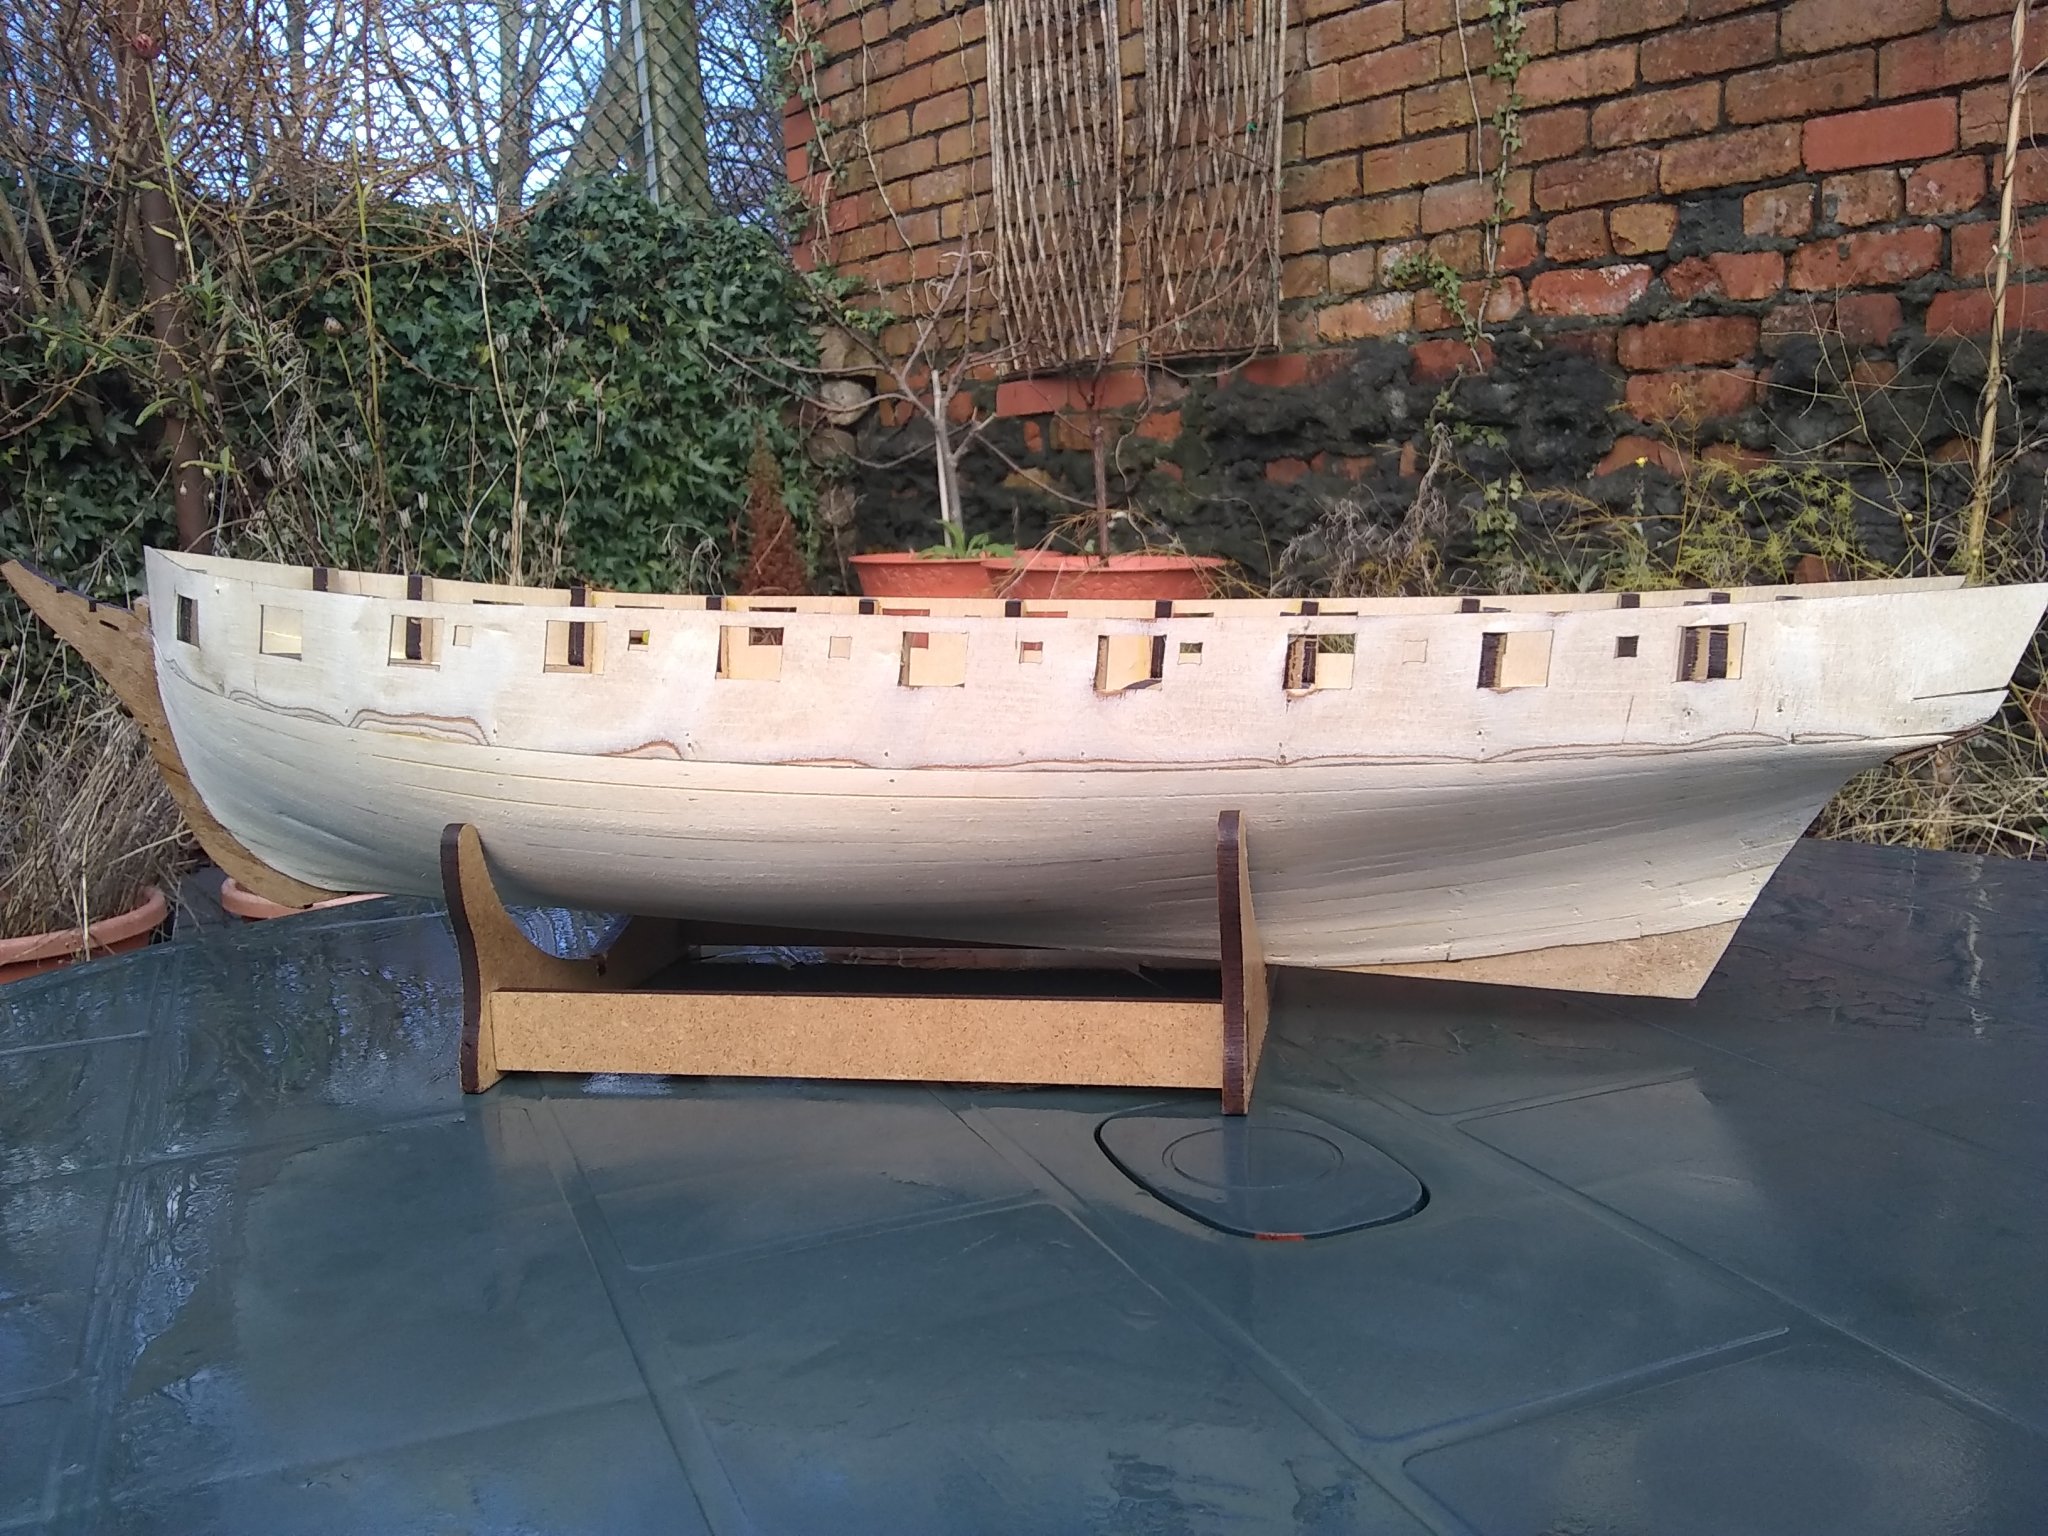
 Not much to see yet - this is the first planking of the hull just about finished.
- 21 replies
-
- 10
-
-
- mercury
- victory models
- (and 1 more)
-
 I started my HMS Mercury by Shipyard Models. I couldn’t help it. I had to do it, lol. I’ve been wanting to build a frigate for a long time (a few years now). So, I started one. HMS Mercury was a Sixth Rate 28-Gun Enterprize Class Frigate. Her primary battery consisted of 24 x 9 lb. guns. This is a POB kit, out of card. Something I have learned in my last two completed builds is that I work well in card and I enjoy it. I am intending to build it straight out of the box, with hand carved guns and decorations. Sails will be made from muslin again. So here’s the start: Here’s the lower deck pieces and the false main deck: The Mercury is a little farther along than what I’m showing here. The laser-cut cardboard framework, which came with the base kit, is fall together quality. I had the frame assembled and glued within a couple of hours. Everything lined up perfectly. If you have never tried a Shipyard kit, I cannot recommend it enough. I have not been this happy with a kit for a long time.
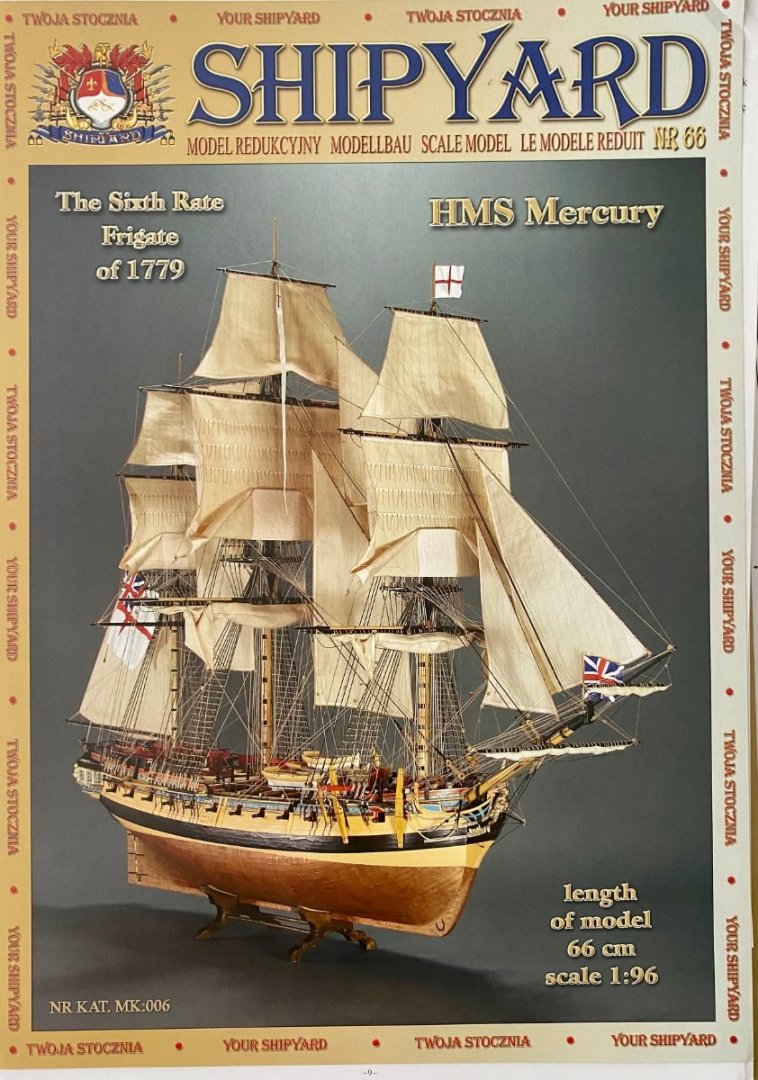


- 50 replies
-
- 14
-
-
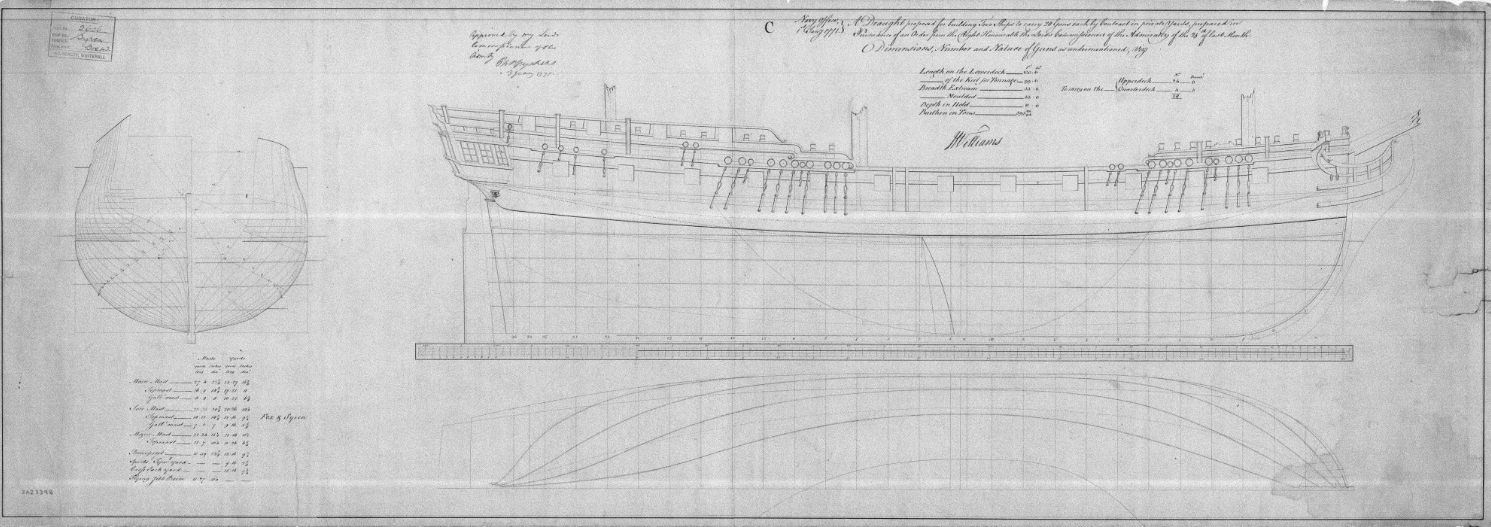
 Hi everyone. I would like to present to everyone my attempt to build a sailing ship from the Shipyard set. This is a 1779 model of the HMS Mercury frigate. HMS Mercury was an Enterprize-class frigate. The model is made of paper and is modified by me using wood and metal.
.thumb.jpg.84d664a84f6fcb5935f227b8a5a2521d.jpg)
-
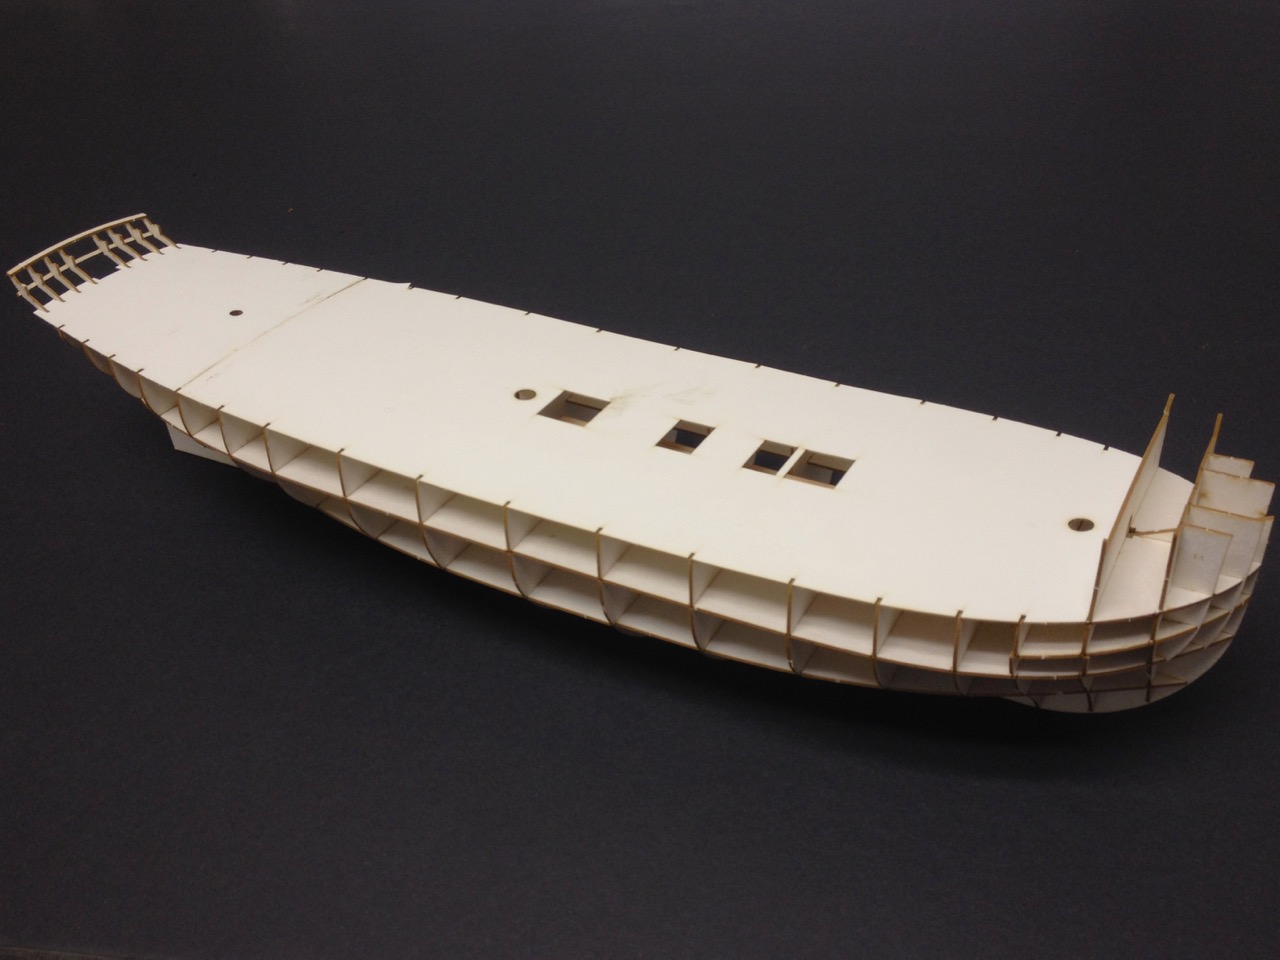
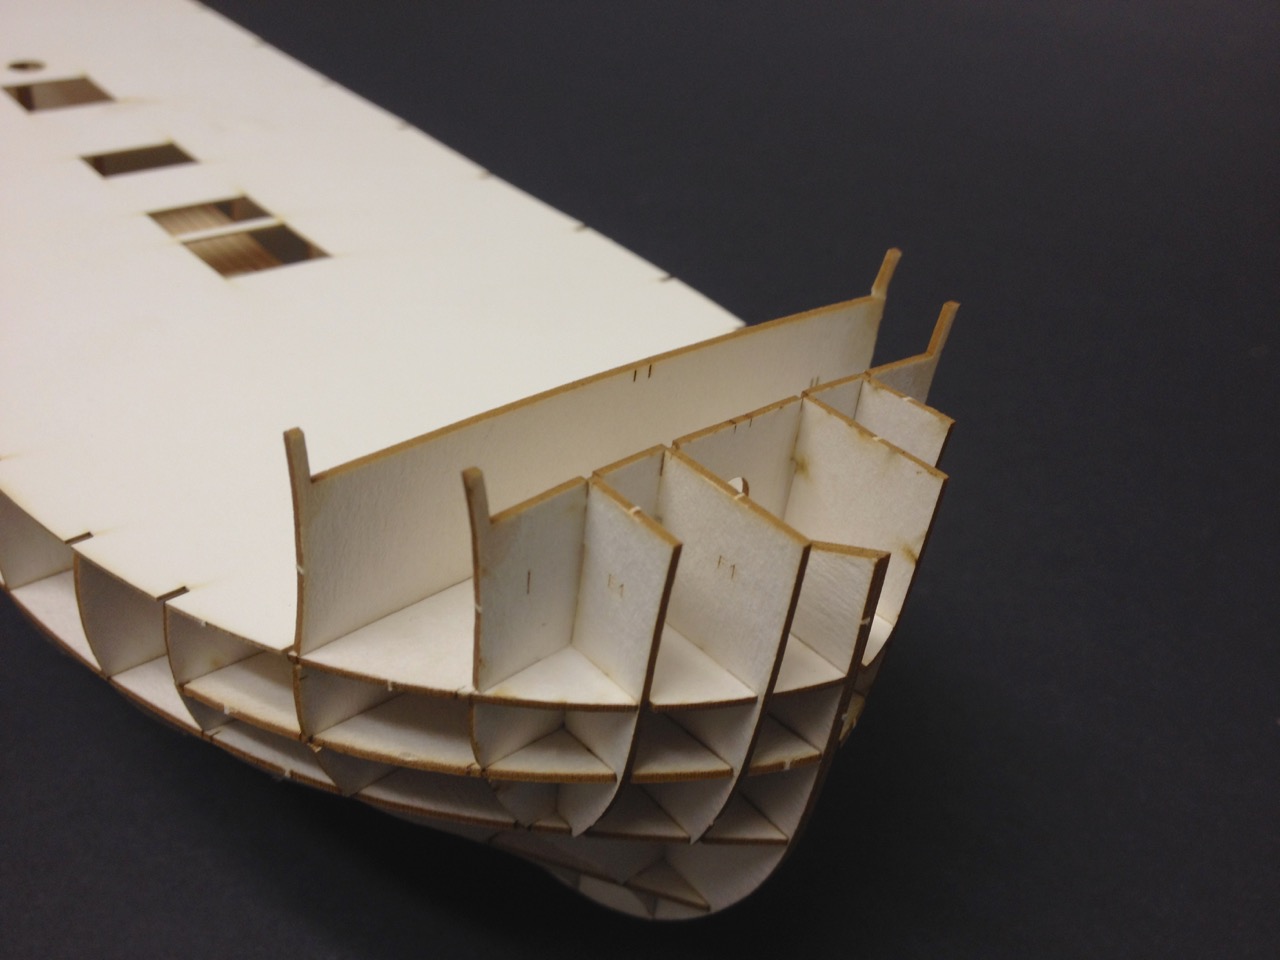
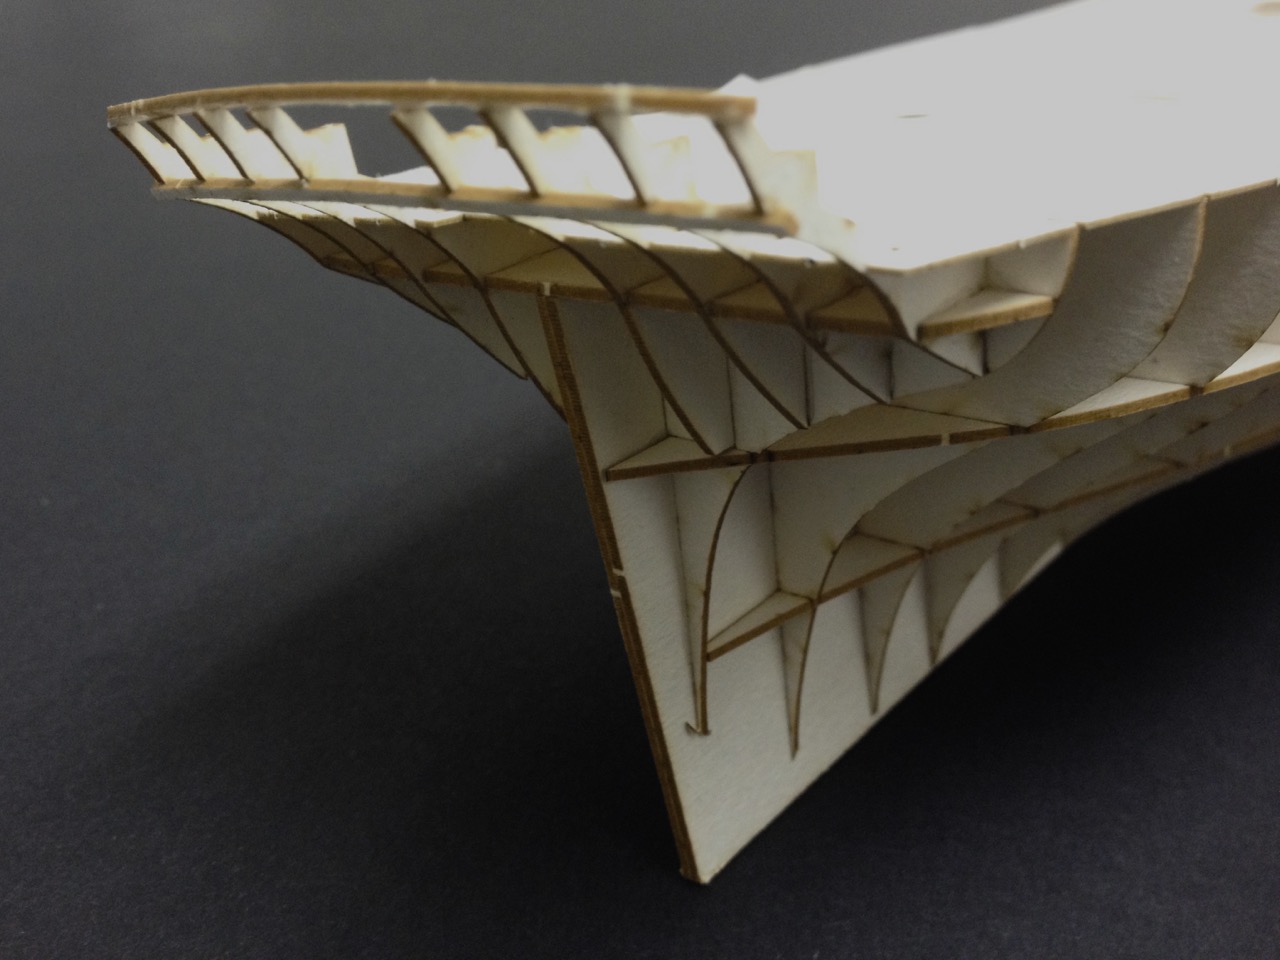
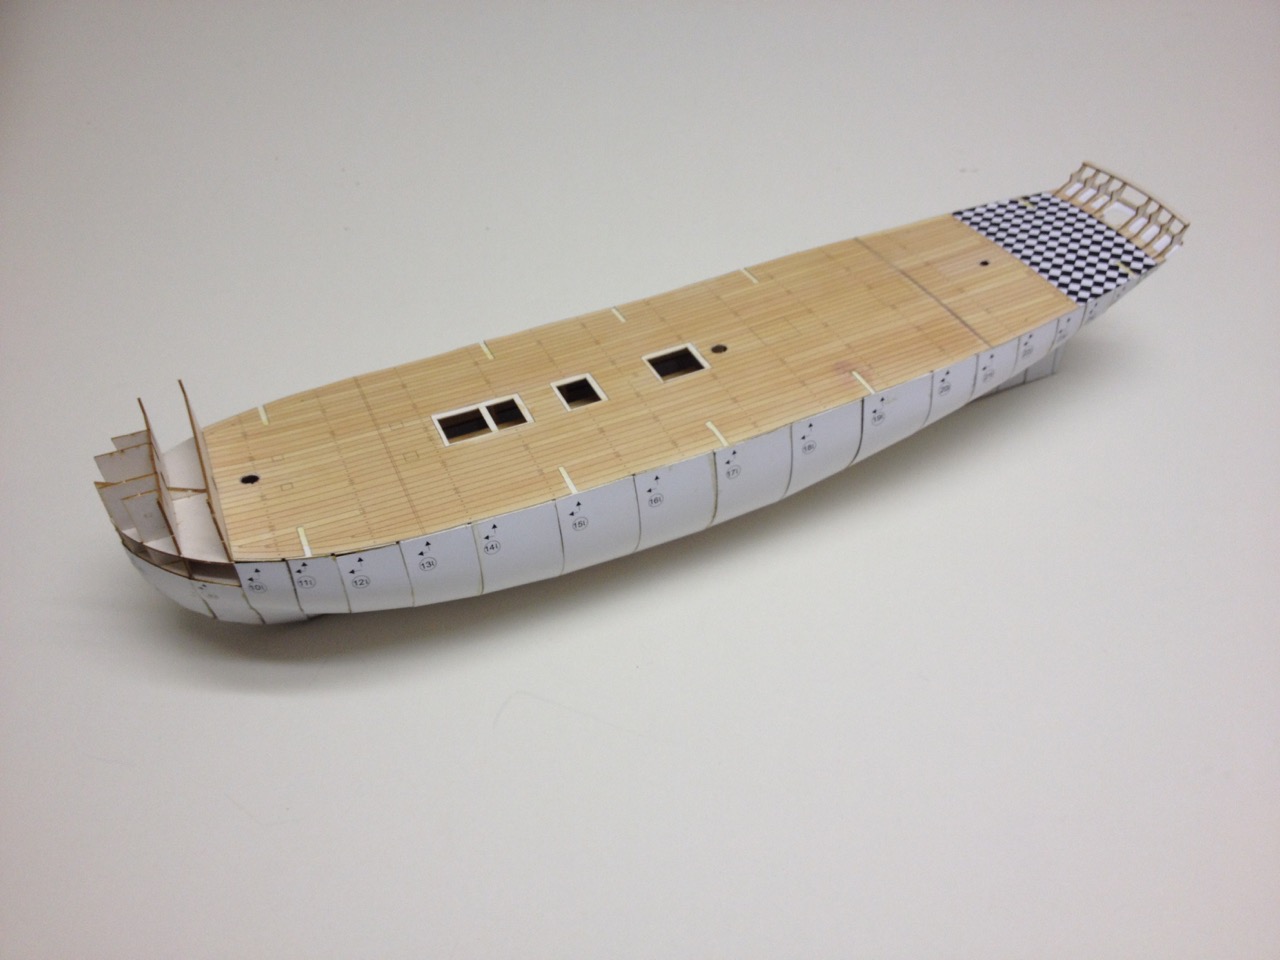
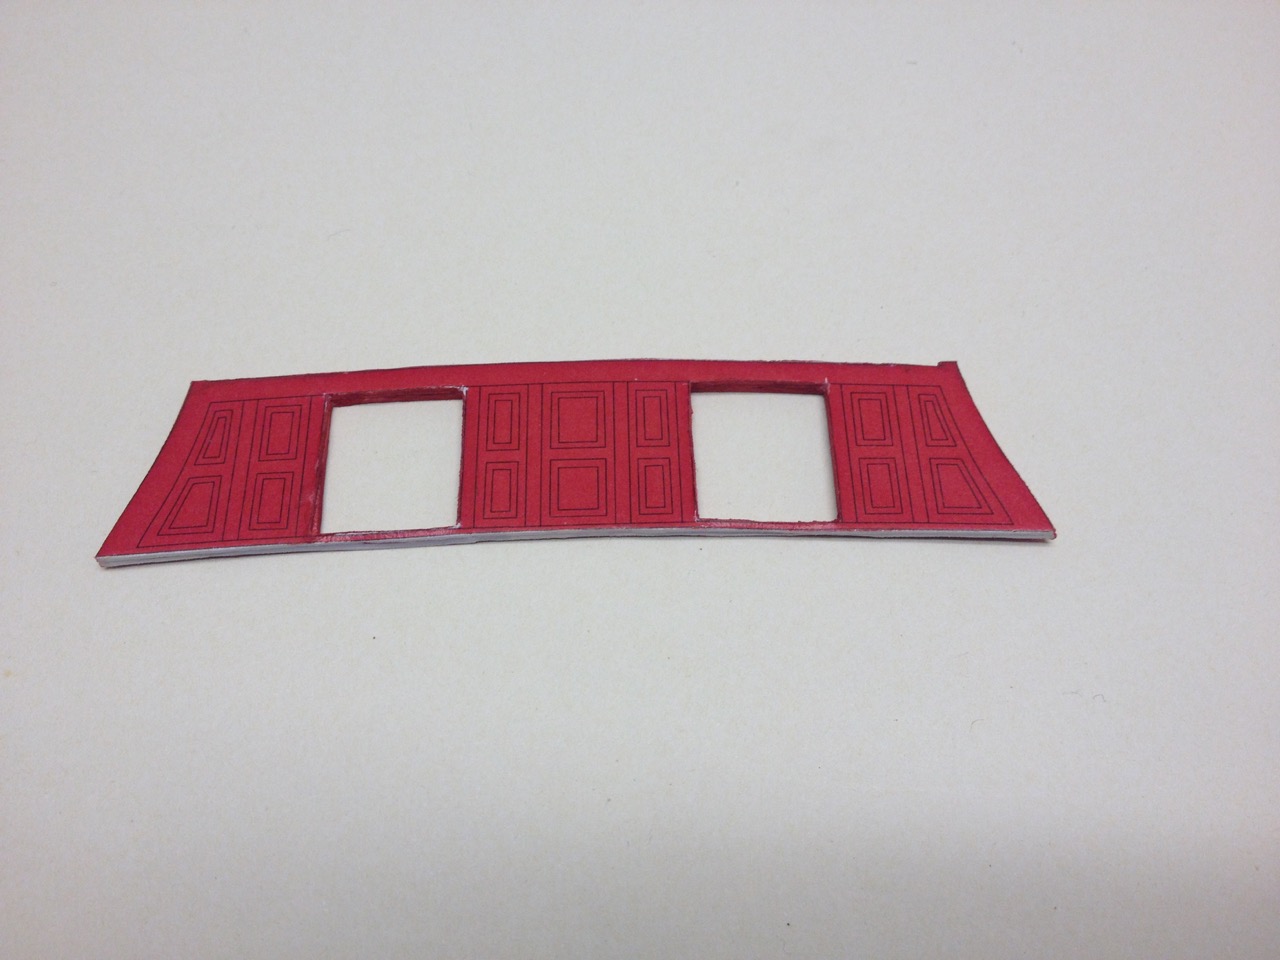
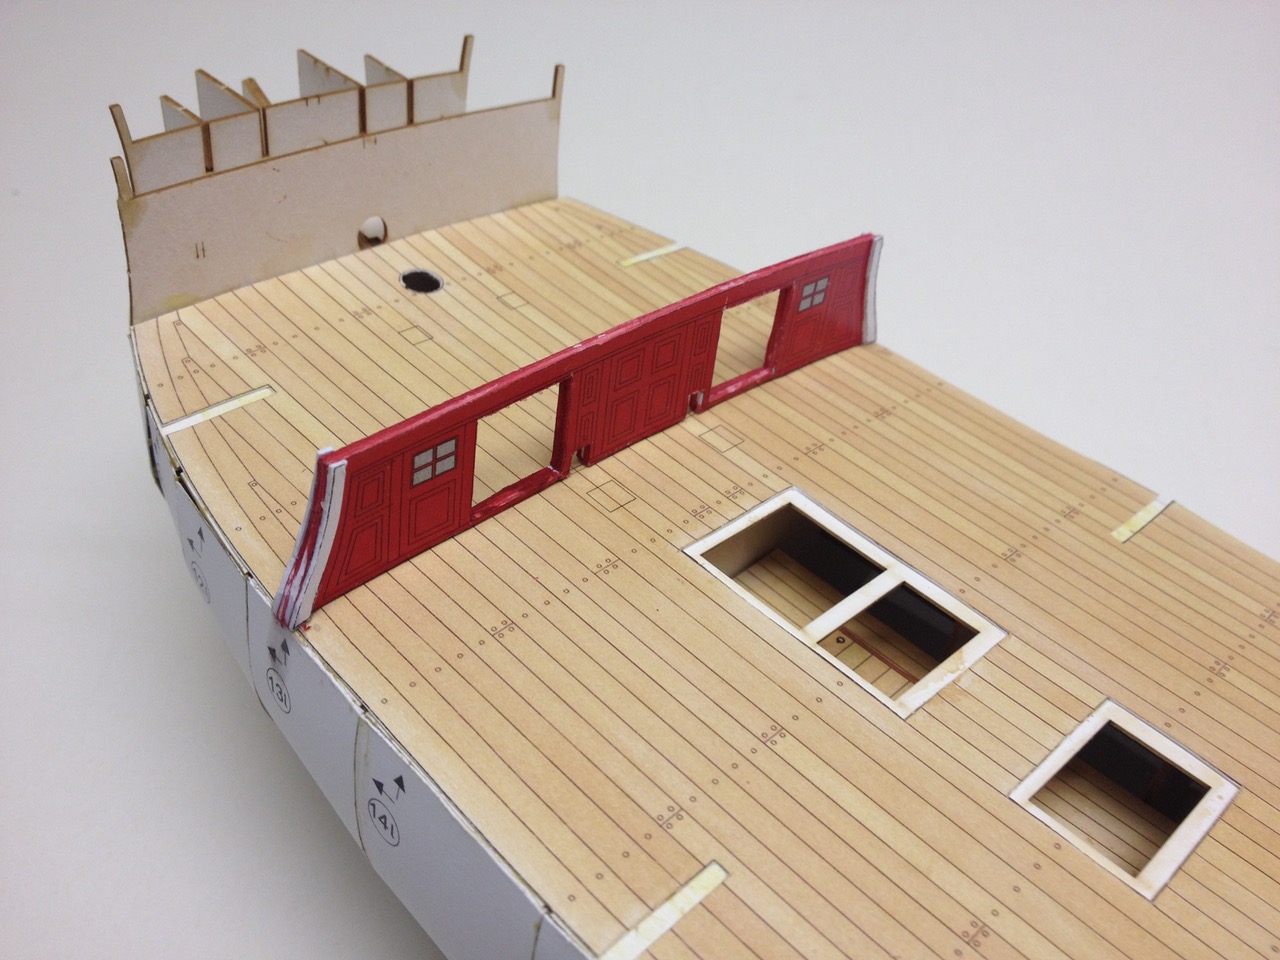
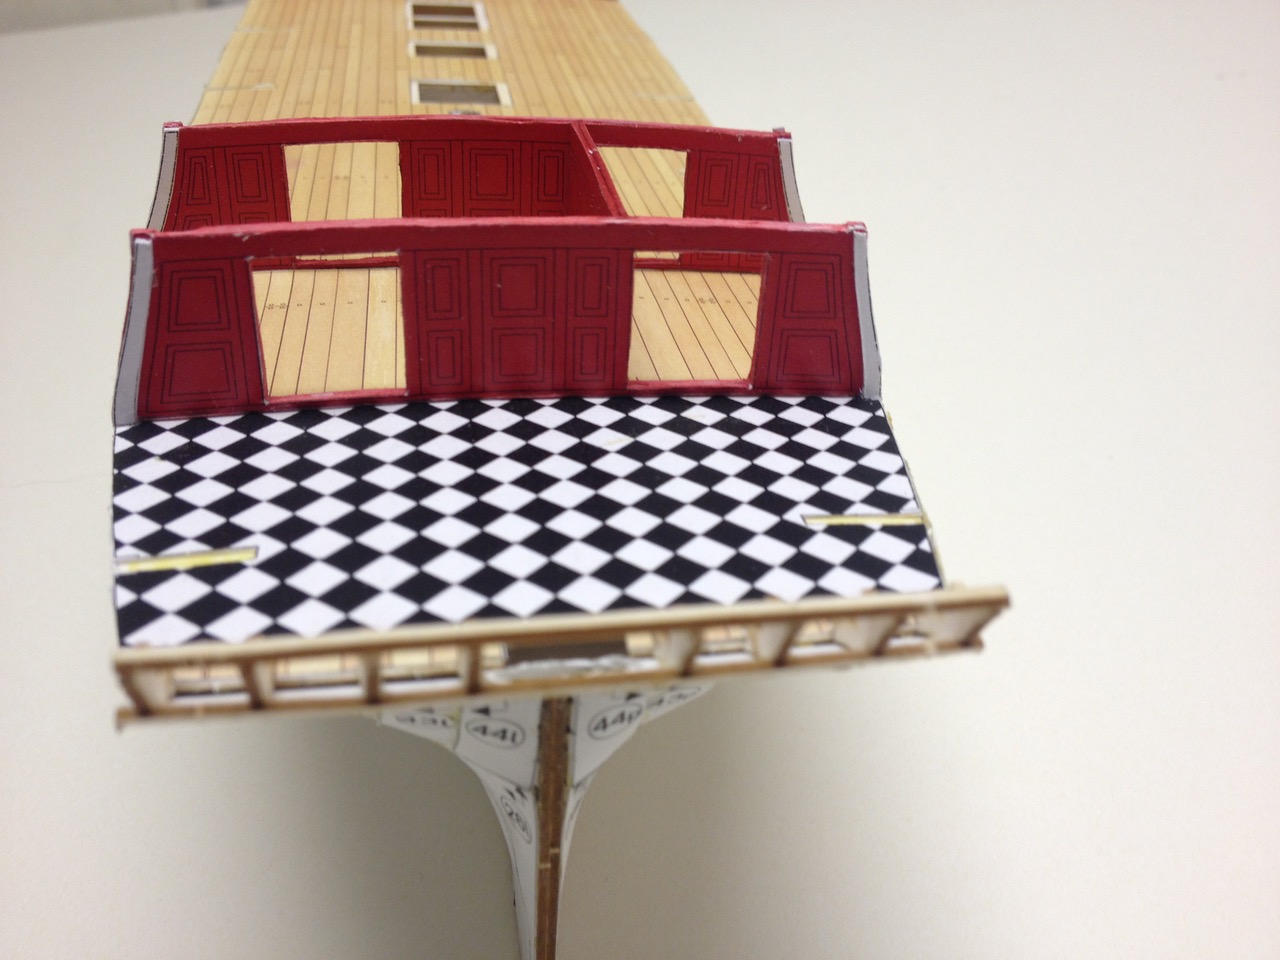
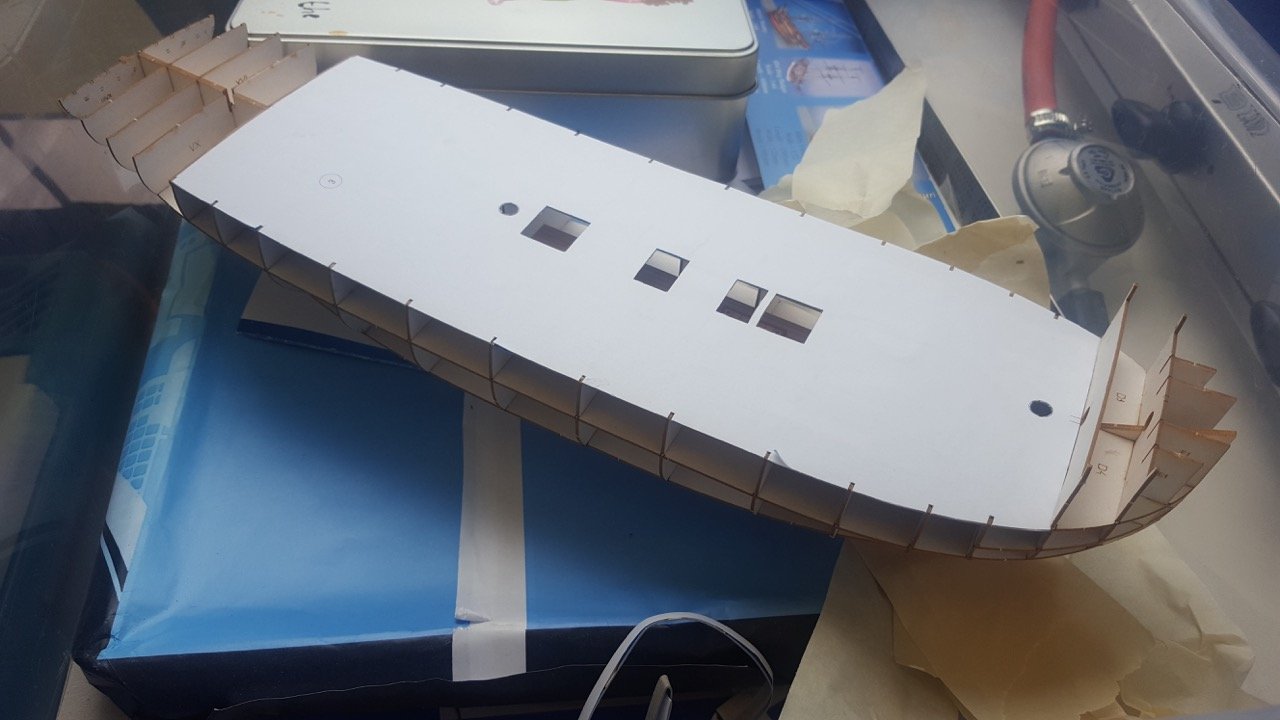
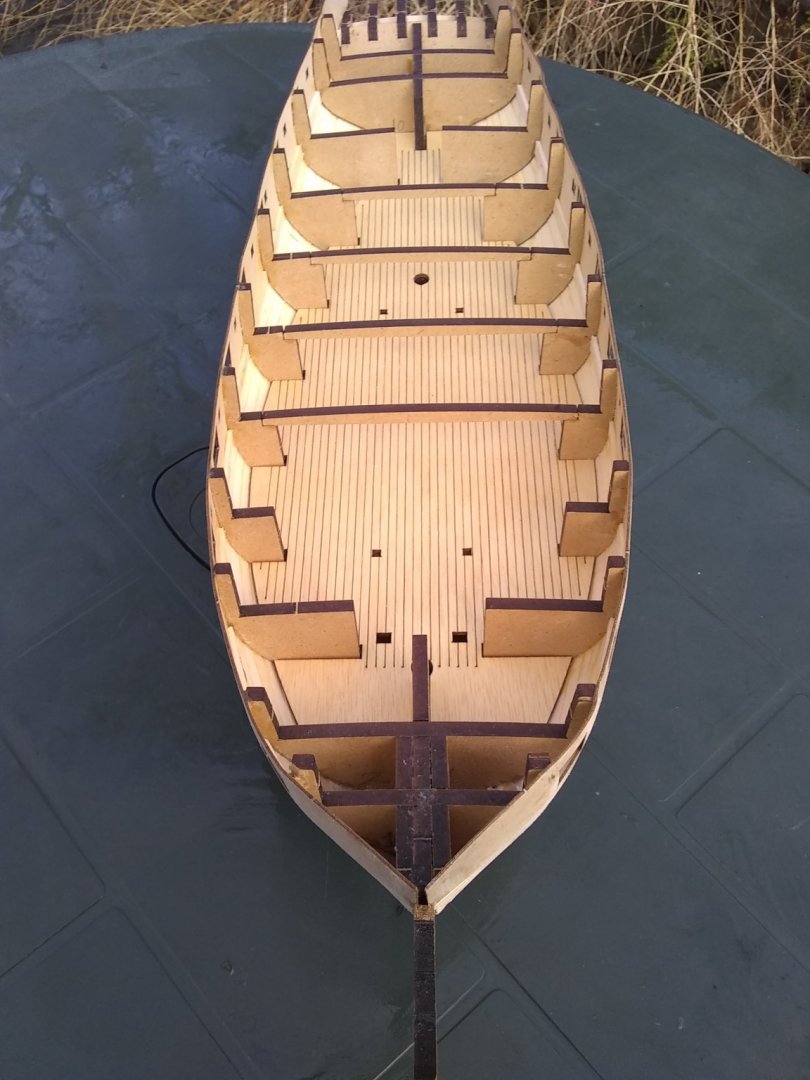
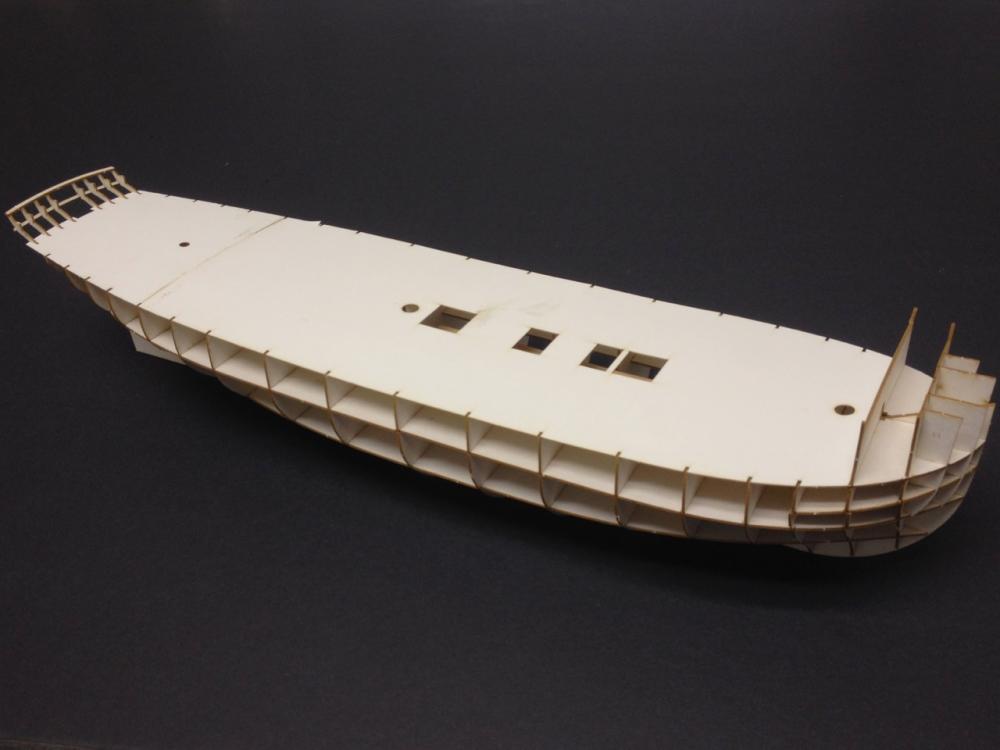
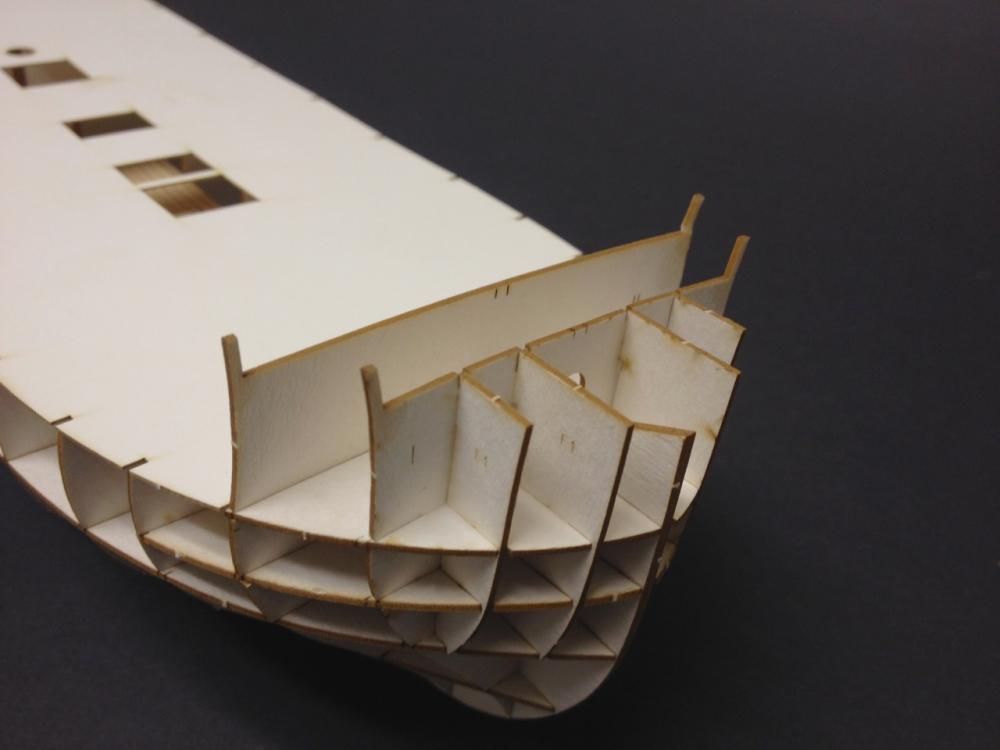
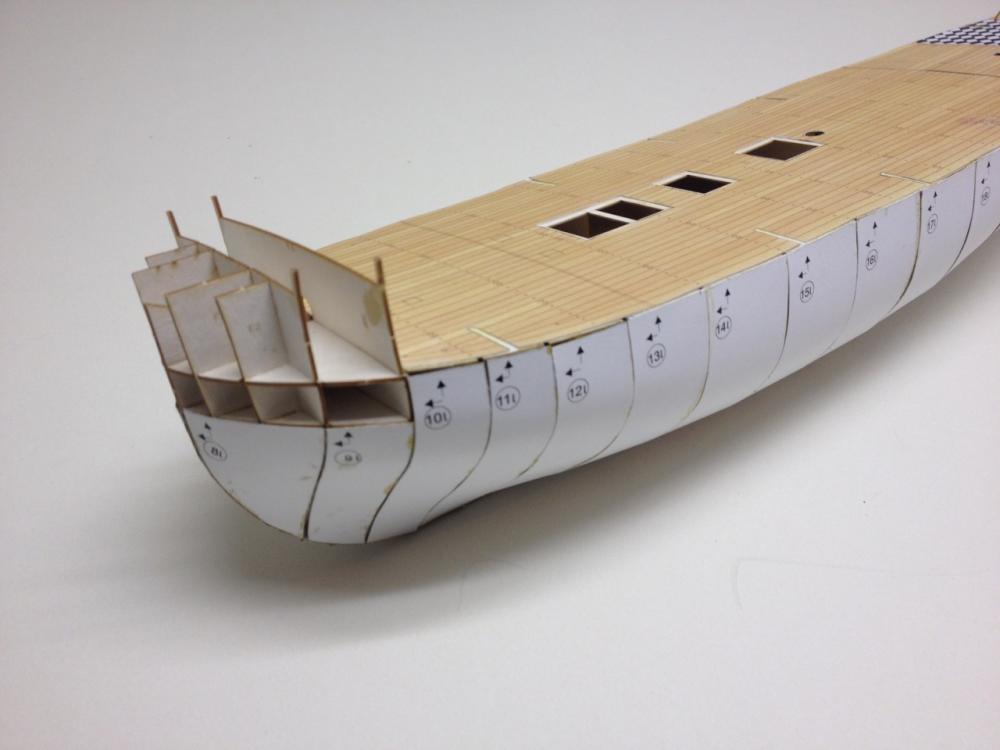
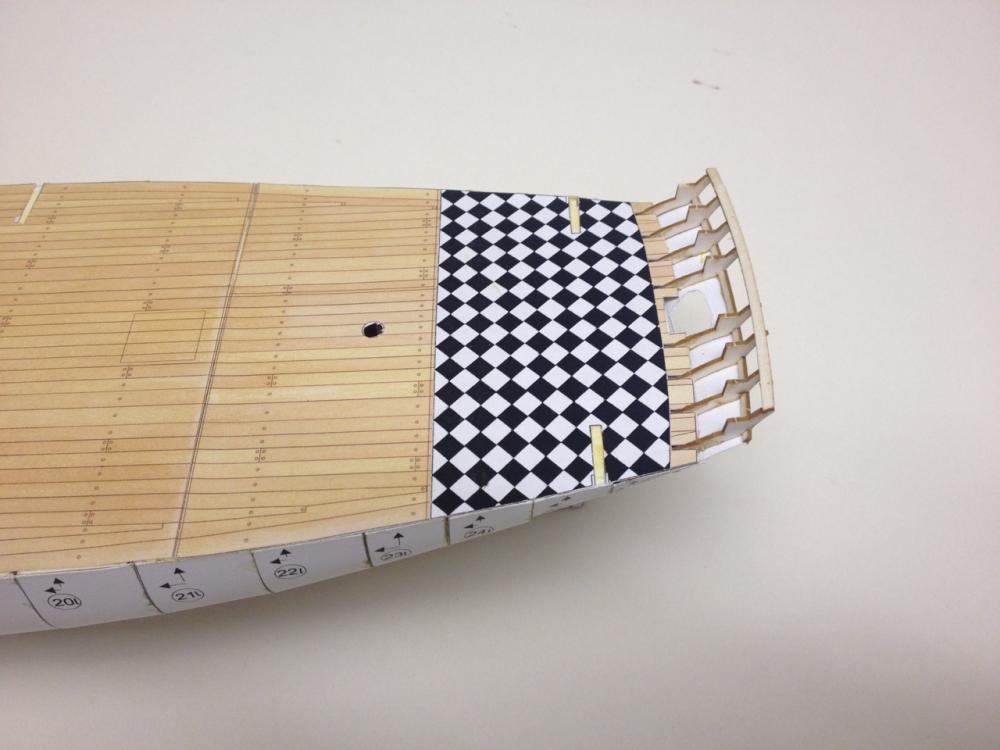
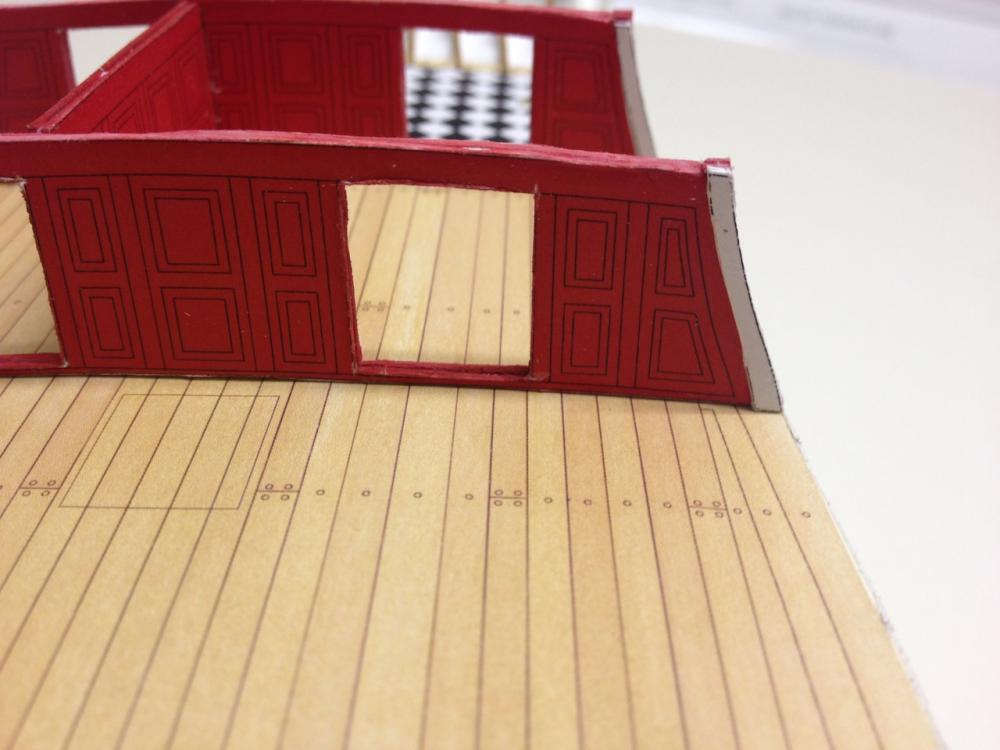
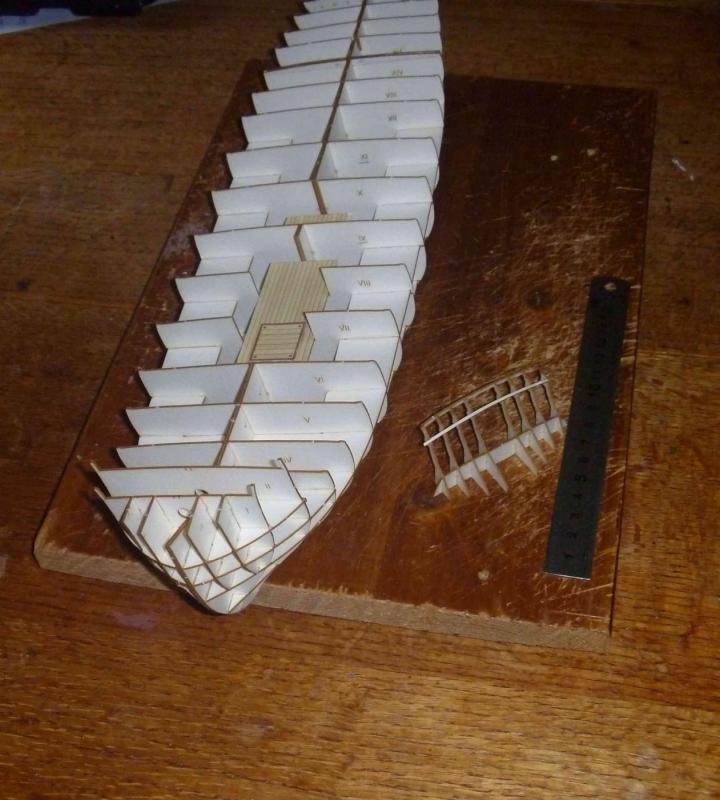
 Having completed HMS Alert, which is now safely in a case, I'm left with a kind of paper emptiness... I have plenty of projects, but I'm so accustomed to having a paper model project in the works that it just didn't seem right to not have one now. So, I've taken on the 28-gun Enterprize-class 6th rate frigate HMS Mercury. Shipyard (Vessel) makes 2 versions of HMS Mercury. One is a 1/72-scale boxed kit with laser-cut parts and all the fittings, brass cannons, resin figurehead, wooden spars, cloth sails, plus paints, brush and rigging line, etc. However, that version is a lot pricier than the simple 1/96-scale paper model where you have to cut everything out yourself. I got the latter from Ages of Sail for around $40. The kit includes pre-printed parts that you have to cut out, plus laser-cut framework that makes hull-construction very quick and accurate. I've actually had this kit for quite a while, probably at least a year or more. I also started it some time ago so I would have a hull that illustrates how these kits go together. I was going to just do a partial start and give it to Ages of Sail as a demo model. But, that never happened. As I got further along on the Alert, I thought about how interesting a larger ship might be. Also, knowing the complexities of a 3-masted square rigger, I thought I might just build this as a kind of admiralty style model. Possibly building a launch ways and adding pole masts for the launching flags. In fact, right now, that's my plan unless I eventually change my mind and decide to rig this model. The kit includes some 15 pages of printed parts, the laser cut framework, several sheets of drawings and templates, including patterns for making sails. Printed parts are included for two different color schemes. The completed, fully rigged model, measures about 26" long. The hull itself is just about 16" long. I put the hull framework together many months ago. It goes together very easily and takes very little time. More recently, I started putting on the first layer, which basically turns the model into a hollow solid hull model. As you can see, I also added the deck. The parquet floor is a separate piece which sits on top of the wood-pattern floor. Lastly, over this past weekend, I wanted a distraction, so I started working on the cabin partitions. I have to say that this is one advantage that these paper models have over their wood counterparts – there is much more internal arrangement provided in these kits. It even includes furniture for the great cabin. So, there you have it. Another paper model begun. As I said earlier, this isn't a priority project, just something I'll tinker with over time. But, like HMS Alert, it may very well get to the point where it takes on a life of its own and demands more of my time to take her to completion. Clare
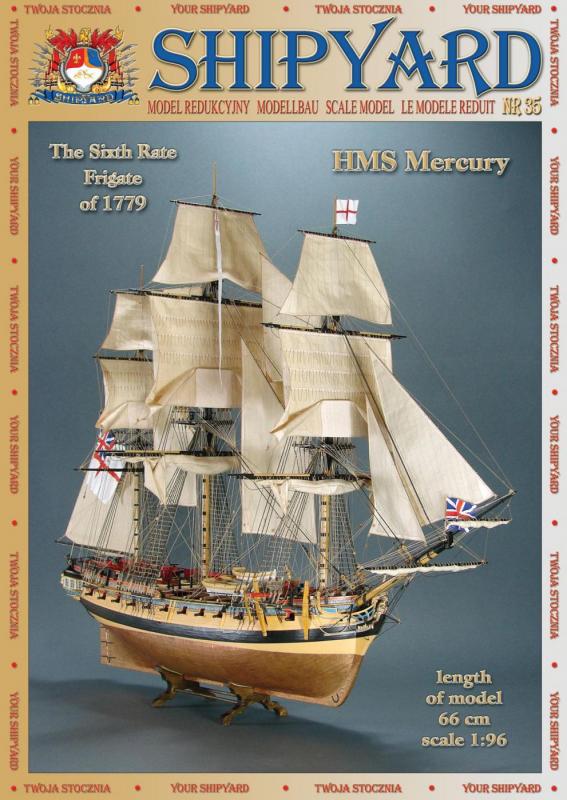


- 81 replies
-
- 29
-
-
 Click on the tags in the title above (shown in black) for an instant list of all the build logs for that kit subject.
 -
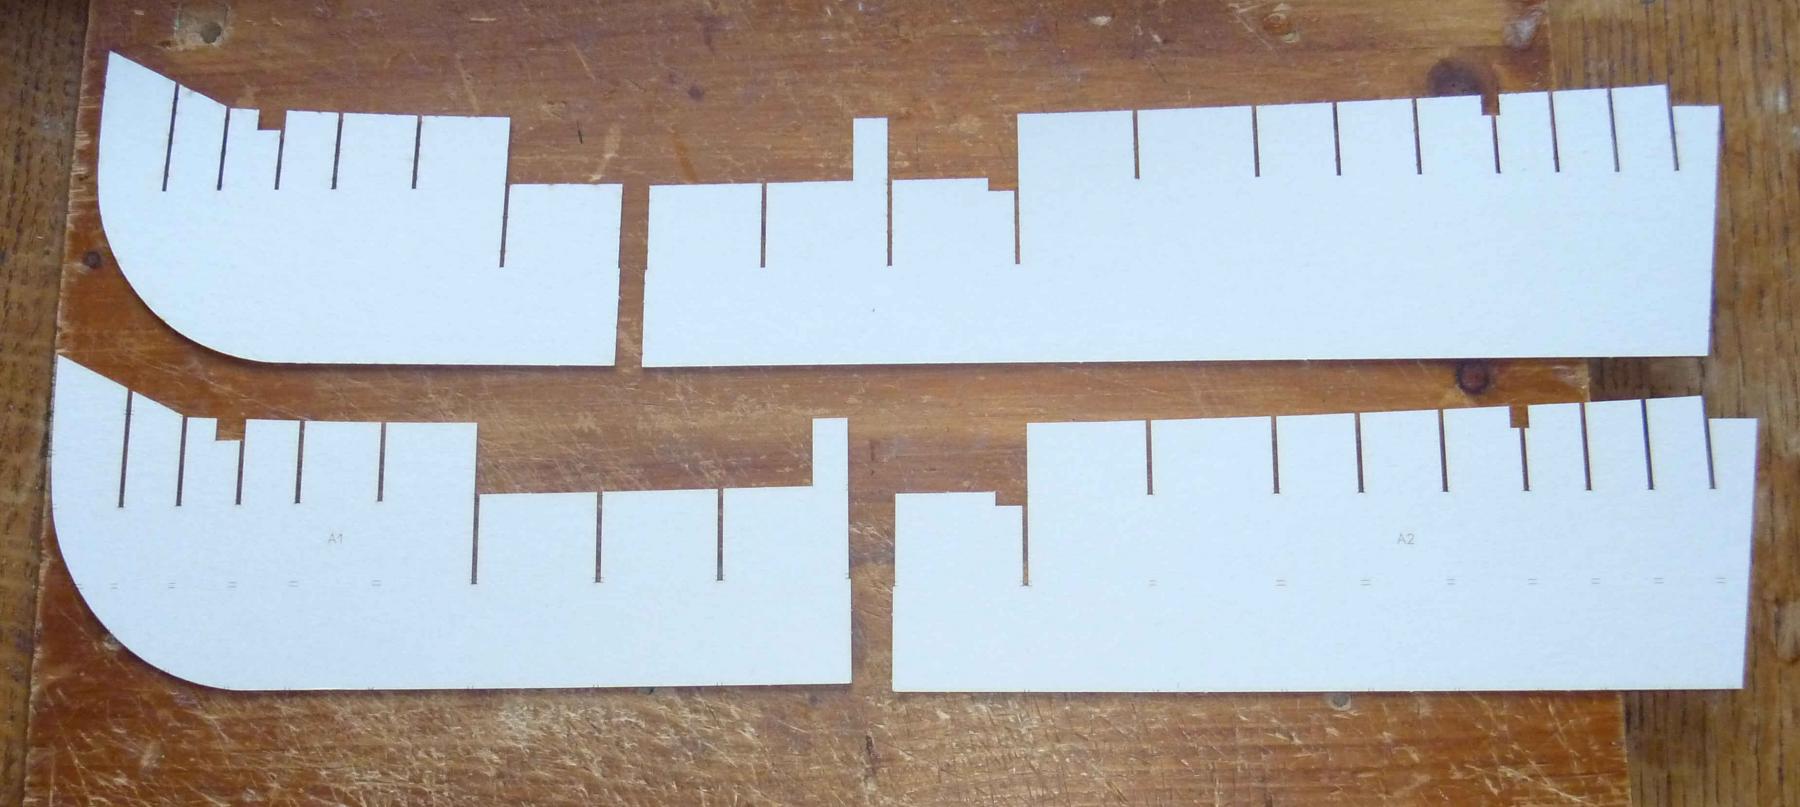
 I had a search, but couldn't find any other build logs of this model, so although I feel deeply unqualified, I thought I'd post a build log. This is the first card model I've built - in fact, it is mainly paper, with a laser-cut card frame (ShipYard also do a card version which is 1:72, and much more expensive!). So this won't be a masterclass, but hopefully the surprises and lessons learned as I go will be helpful to someone else following in my footsteps I started this model last year when I went on holiday - my main build is way too big to travel, so this one is more manageable (and a little less anti-social) - it may take me a while to finish, but hopefully I'll get there. I started by assembling the card structure of the ship. The diagrams provided are excellent, and the laser-cutting so good that this was very simple, and with a little care, it went together very nicely. I've read elsewhere that using a little superglue to wick into the extensions at the tops of the bulkheads strengthens them somewhat... I was too slow, and they got pretty mashed up. I'm hoping I'll be able to make up for that later on. So far, I've skinned the lower part of the hull, and started putting the details onto the gundeck. Here's a slightly more in-depth description of what I've learned, and done so far. Basic tools: Carpenters glue (Aliphatic) UHU glue (really really useful!) Pritt stick Superglue Lots of sharp xacto blades #11 and a handle Cutting mat 0.5, 1, 1.5, 2mm card to stick the paper onto where directed. (This was found in my local art supplies shop - I found it really hard to get online) 1. Assemble the frame from the laser-cutting. I used Carpenters glue to do this, and lego bricks to check it was all lined up... I think this was probably overkill, because with the deck on, it's pretty rigid, but it was my first attempt so I wanted to make sure it was all perfect. Sandpaper was useful to bevel the frames once put together... the card won't go over them (or have a flat surface to stick to) without this step, so it's pretty crucial. That said, it's pretty quick compared to bevel the frames on wooden models... that means it's even easier to go too far! - I marked the edges of the bulwarks with a marker so I could tell when I was not only reducing one side, but the overall outline of the bulwark. Once the frame was built, a couple of detail bits get stuck on to the lower deck (a brown sharpie was useful to edge the bits that are cut out to get rid of the white edges and make it look tidy), and then the false deck was then added... I made a mistake here by splurging on carpenters glue thinking that the paper covering would lie flat if only I pushed it down enough... not so much, it seems. It ended up looking horribly bumpy and I thought I'd wrecked the model... The answer (for me) it turns out is to use UHU, add it to the card, and then use a piece of card to scrape it and make it nice and flat, then add the paper, smoothing it as you go. This ends up in a nice flat surface... Thankfully, as we'll see, the false deck gets covered over later with a second 0.5mm sheet of card with the real gundeck pattern glued on top of it, so disaster was well and truly averted, and you'd never know I stuffed up now! Here's the first gun deck - you can't see the bumps, but trust me... they're there! More later. Rob
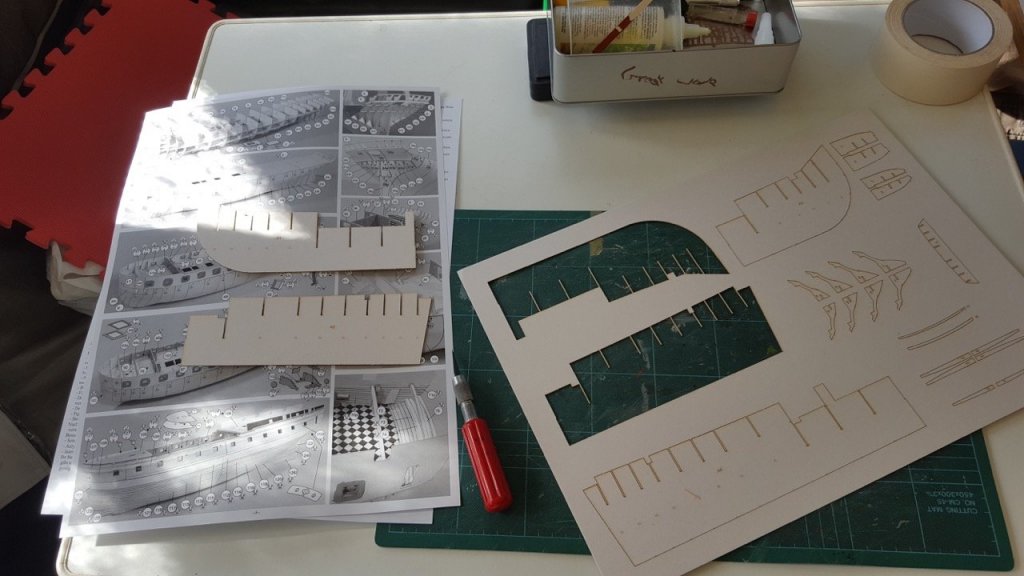


-
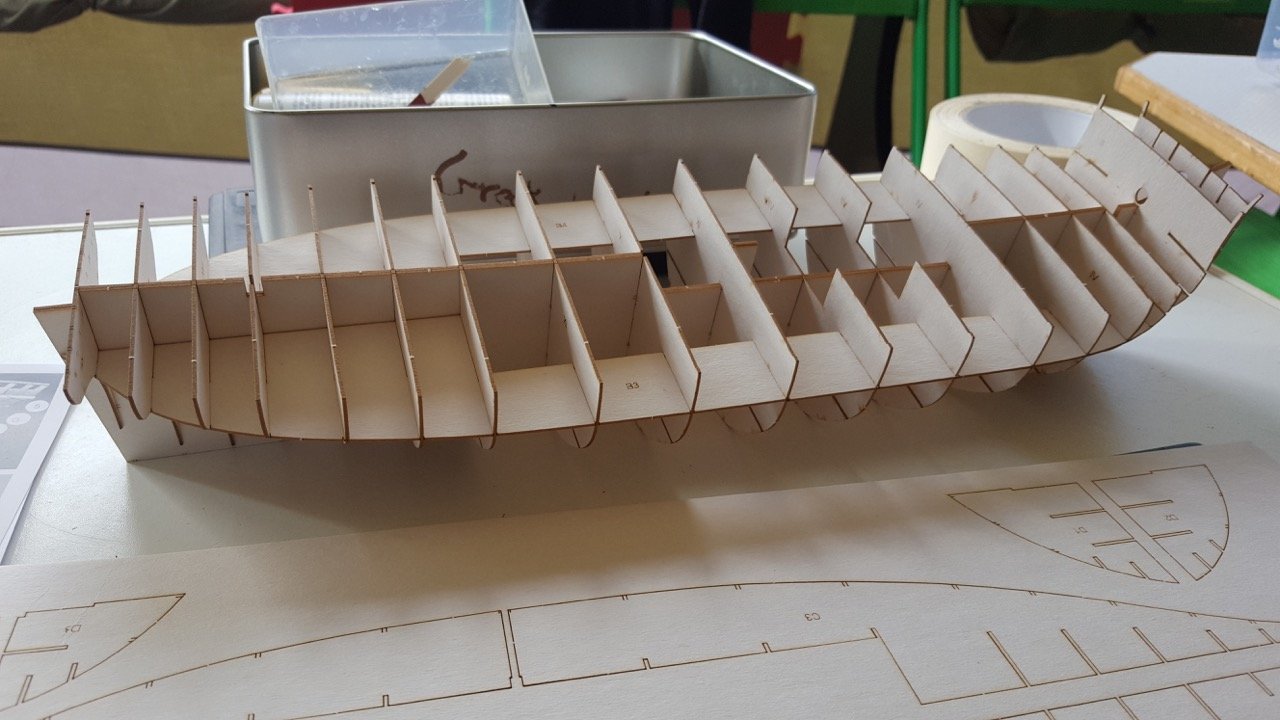
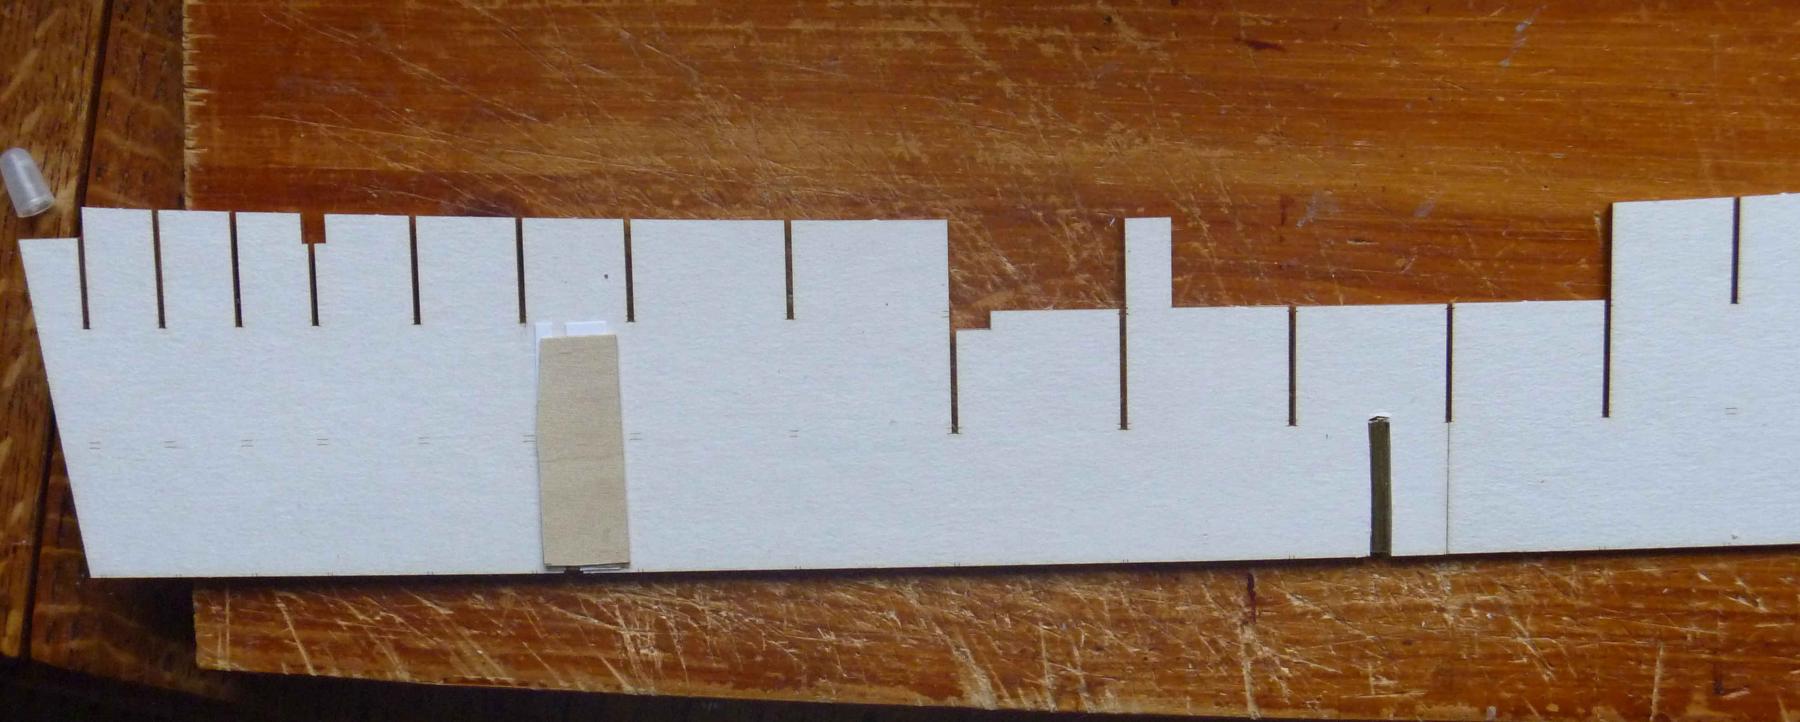
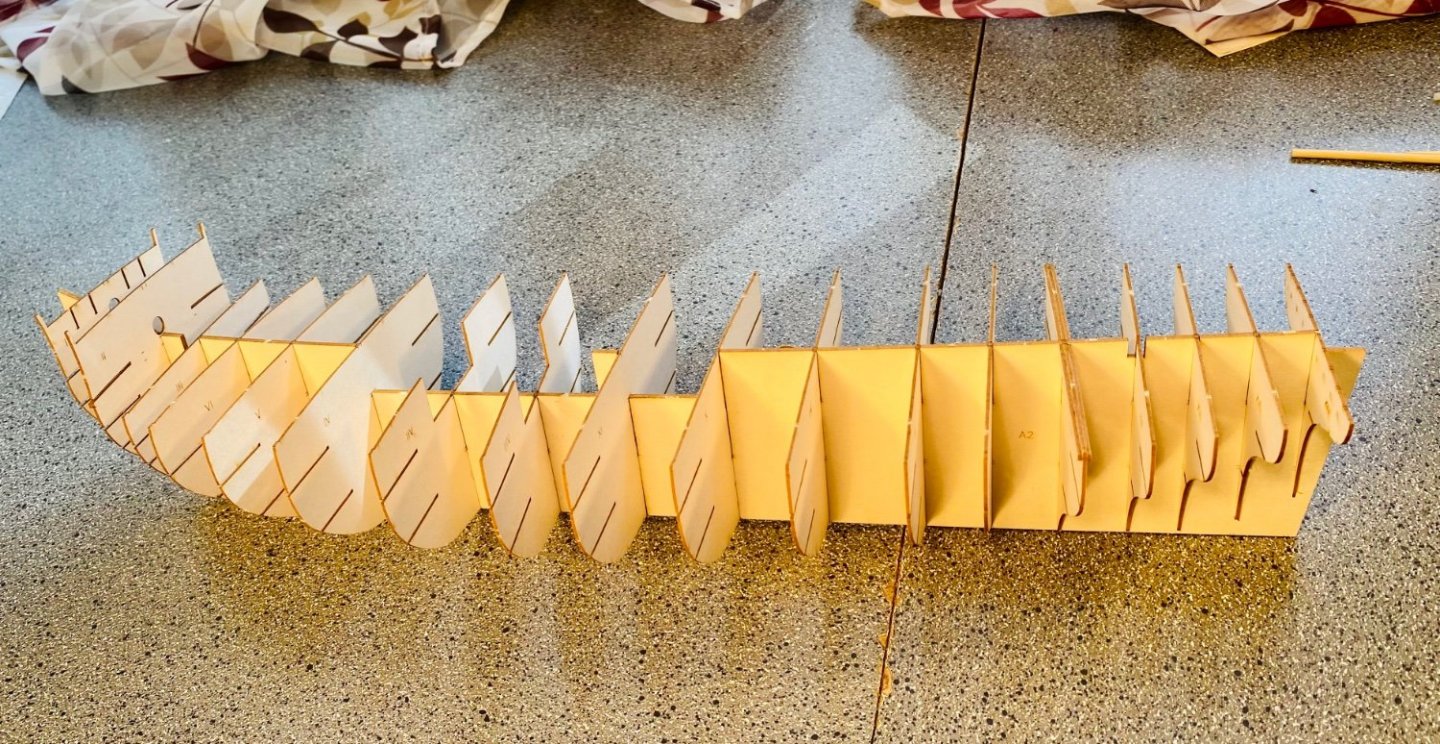
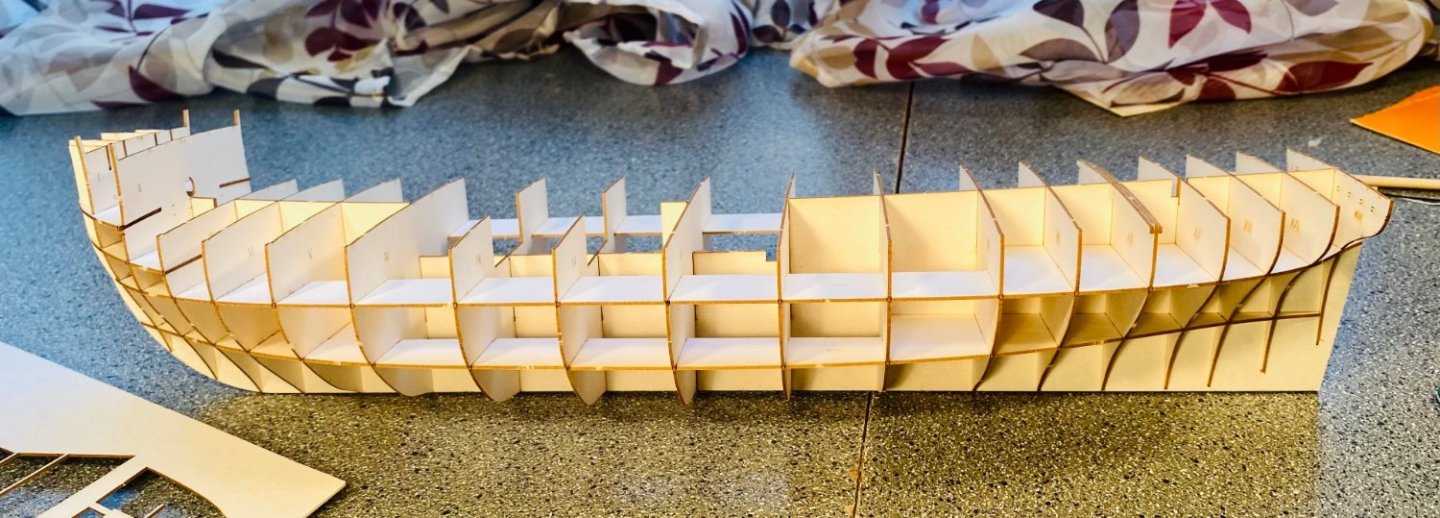
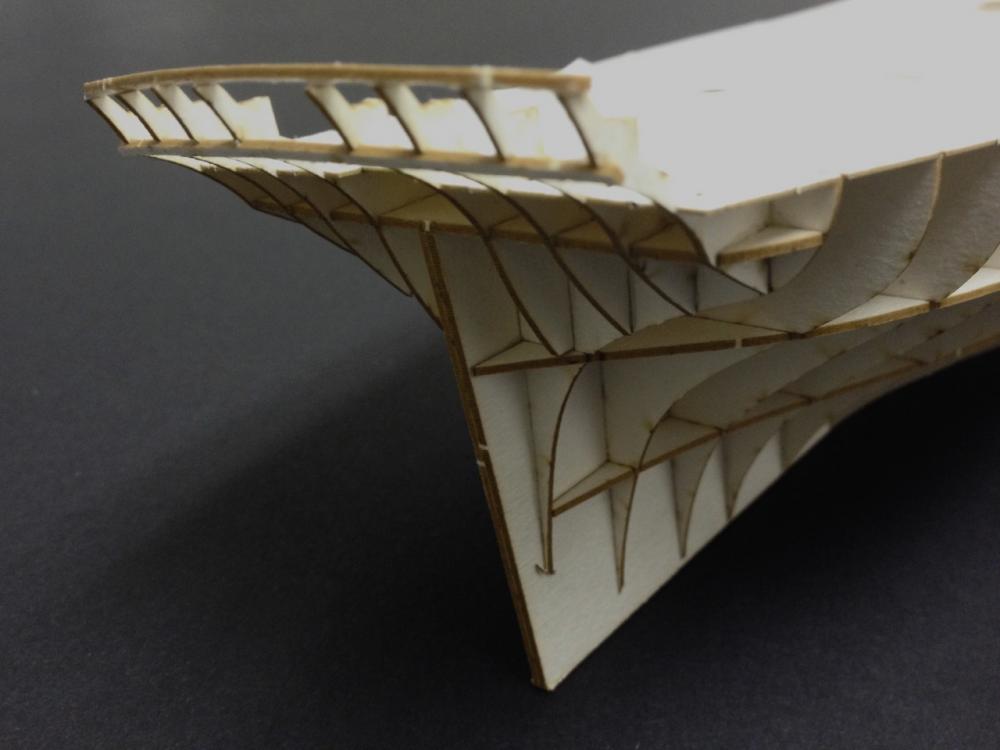
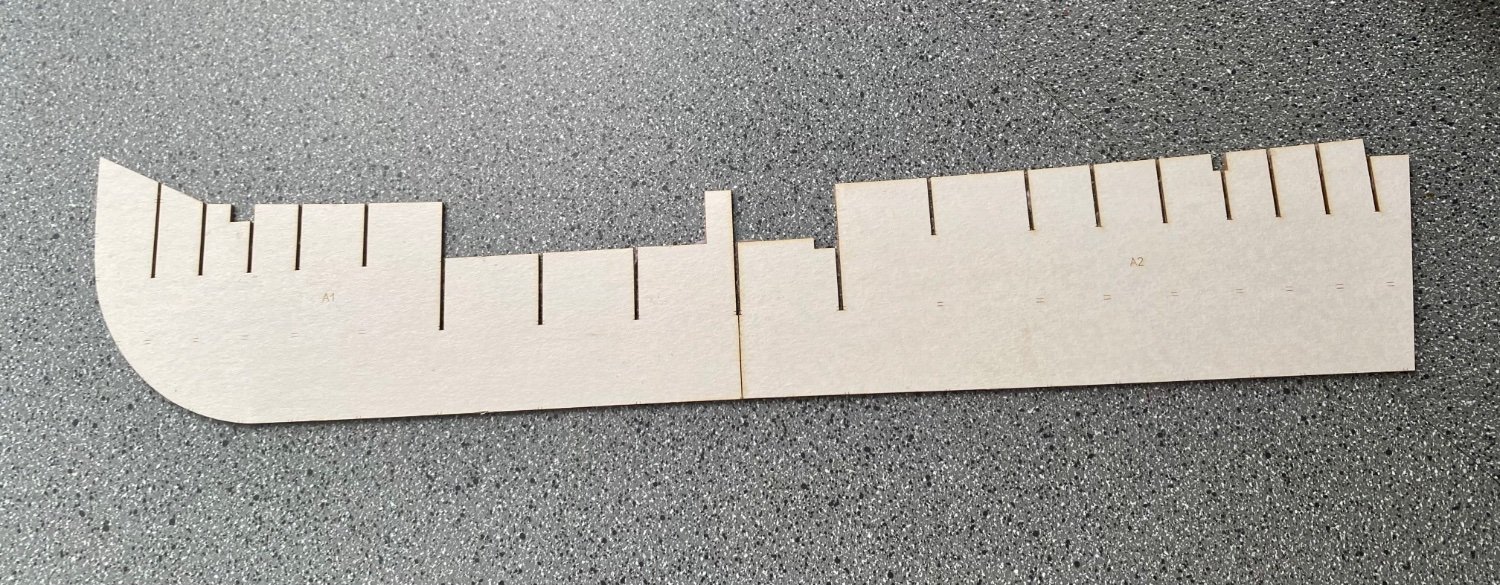
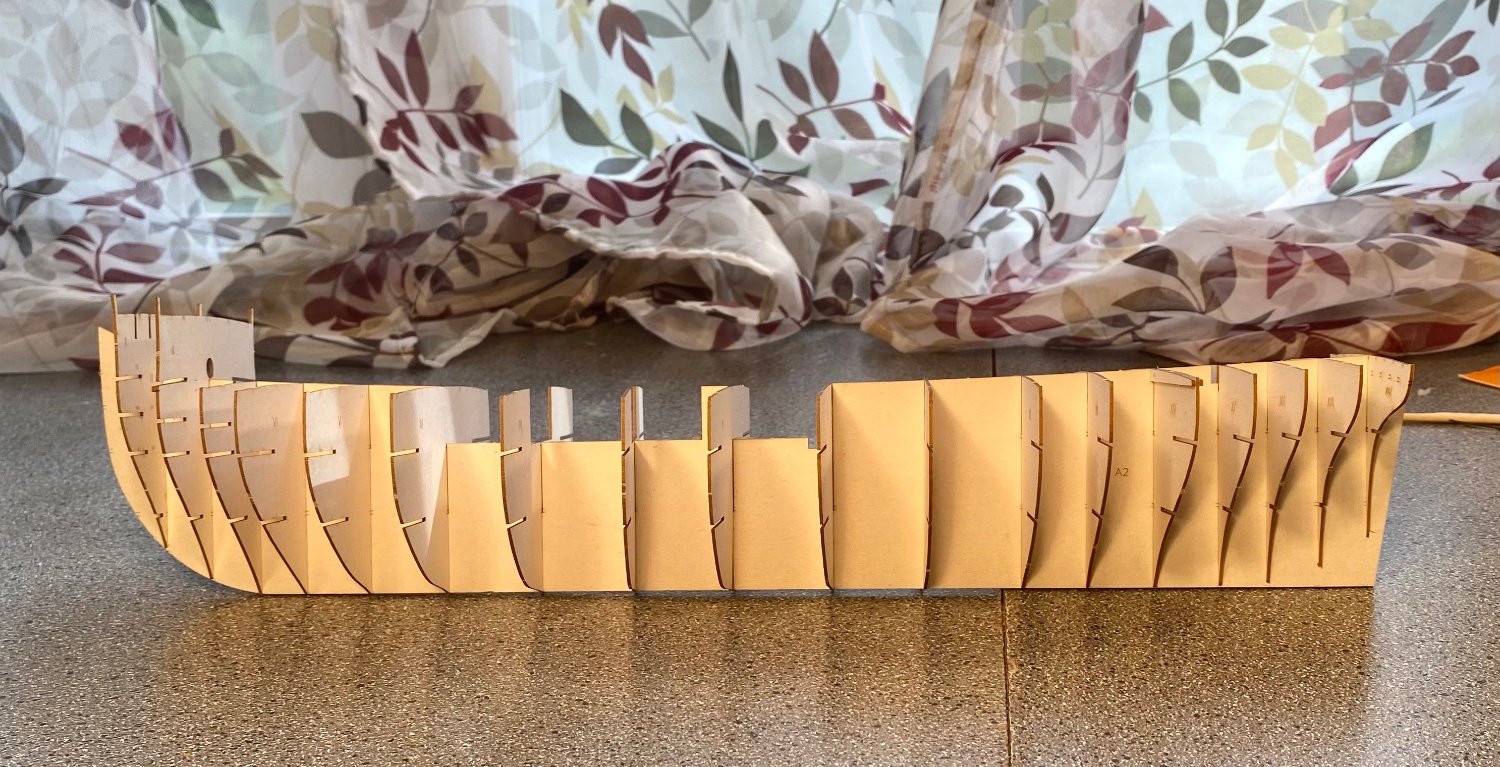
 I've started this kit, which was a Christmas present to me from the First Mate (although she's not terribly enthused!). It's similar to the Enterprize kit also by Shiptard, but the Mercury version is slightly more expensive and includes a laser-cut skeleton although otherwise identical as far as I know; laser parts are available as extra for the Enterprize and there are extra kits of masts and of pre-made sails for both kits. I'm intending this as a hull-only model, loosely based on Admiralty models. I've previously done mainly wood kits, but also HMS Saumarez and Consul Pust in paper/card. This kit is considerably more complex and definitely not for beginners. It's 1/96 scale, and the skeleton is about 390mm with the kit claiming 660mm for the completed model It's an impressive kit: 15 pages of printed parts (1 x A4, 14 x A3) well-printed on good quality paper, 3 A3 sheets of laser-cut skeleton, 11 A3 sheets of instructions and photos and a sheet of flags. It includes printed parts for the 1779 original (decorative) and post-1795 (Nelsonic black-and-ochre), although the choice doesn't have to made for a while. The printing looks good and sharp, and the laser-cut parts (on 1mm card) are beautifully precise; my only minor gripe is that the card on the coarse side and needs a bit of care to avoid delaminating. I didn't have to make any adjustments to the skeleton to get things to fit, which is commendable. The instructions are non-verbal, with a series of photos of the kit being bullt and the instruction to add parts in the sequence shown, which is fairly clear with care, although the parts are clearly numbered but aren't in number order on the sheets so a lot of time is spent searching! Some also have to be doubled onto card of 0.5. 1.0 or 2.0mm. I started after Christmas and I am expecting it to take me well past Summer. Some photos: firstly the kit as unpacked (and I think keeping track of all the bits will be a major exercise in itself). Secondly the spine, which is two thicknesses of the 1mm card, with a substantial overlap. Thirdly, I've cut in two brass tube for a mount later - I may not use them but they need to go in now just in case; not very neat as they will be hidden inside. Lastly for now the skeleton ready for plating. Note how small the horns are on frames I and II, and the fiddly small pieces for the stern framework. The instructions say to build this off the ship and attach when done, which I haven't got to, but again they look fragile. PS I started this as a simple kit review last week, in the Card and paper models section, but it's going to be a buildlog, so I've re-started it here.
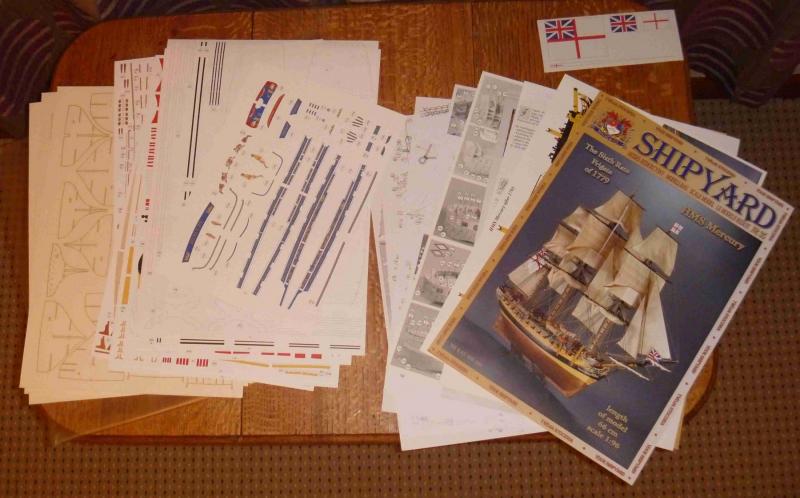


-
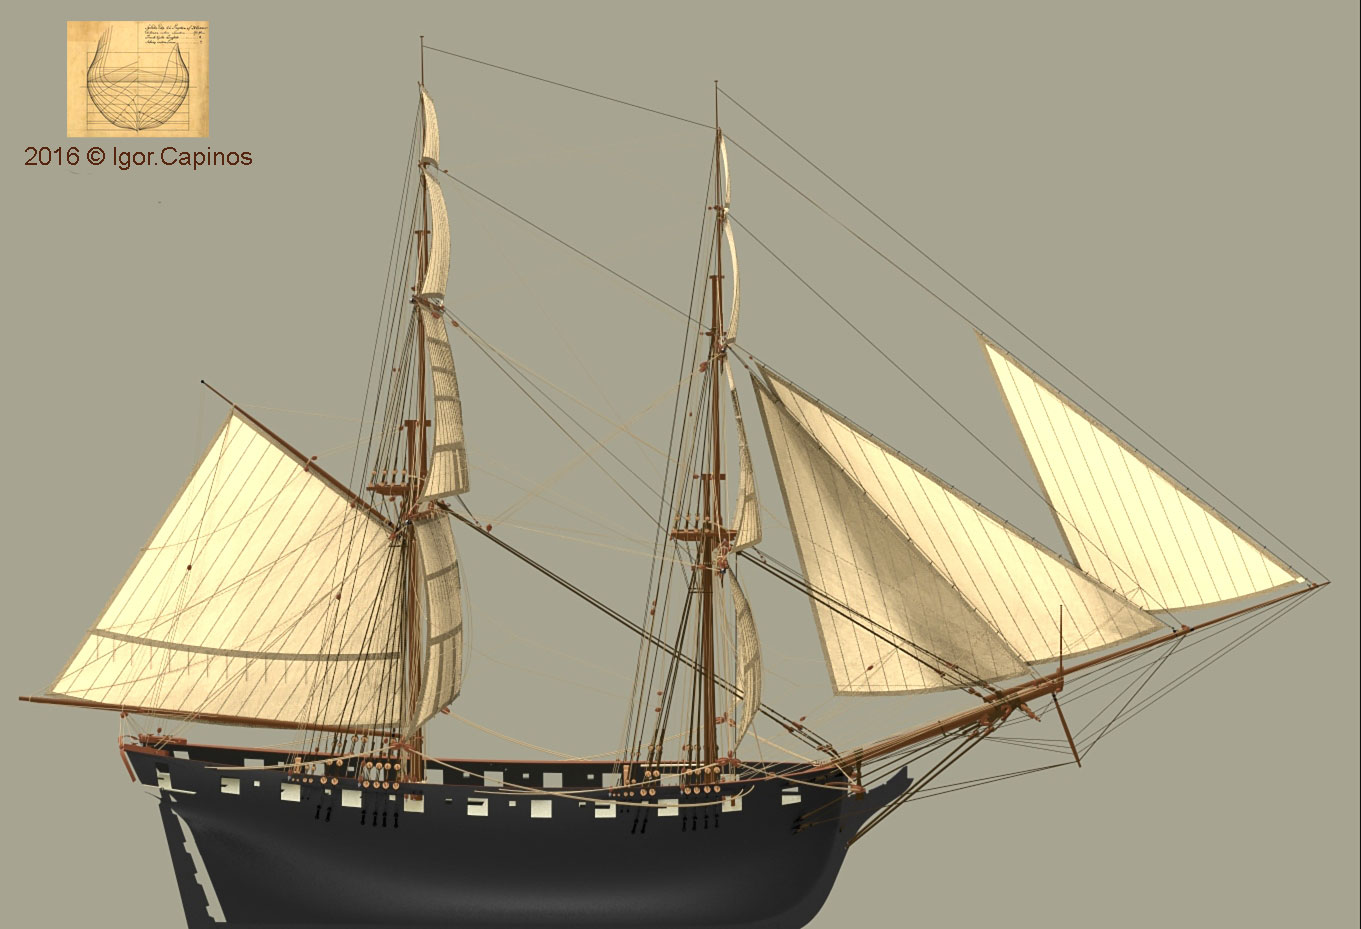
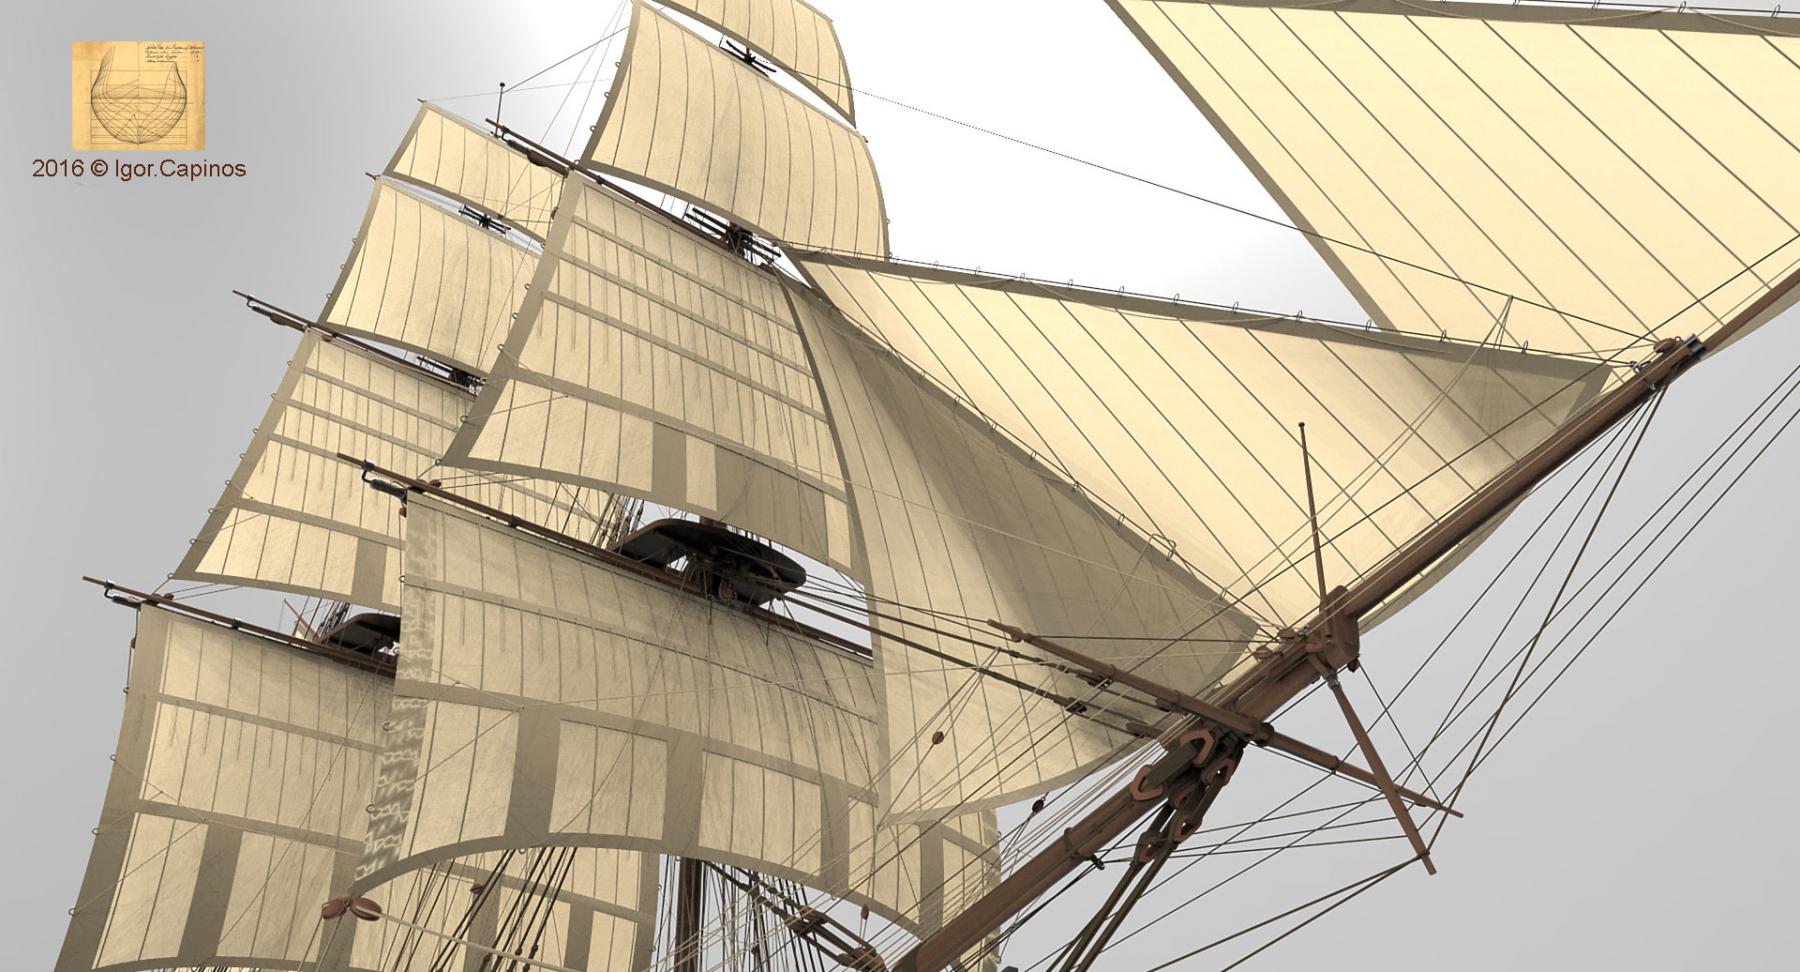
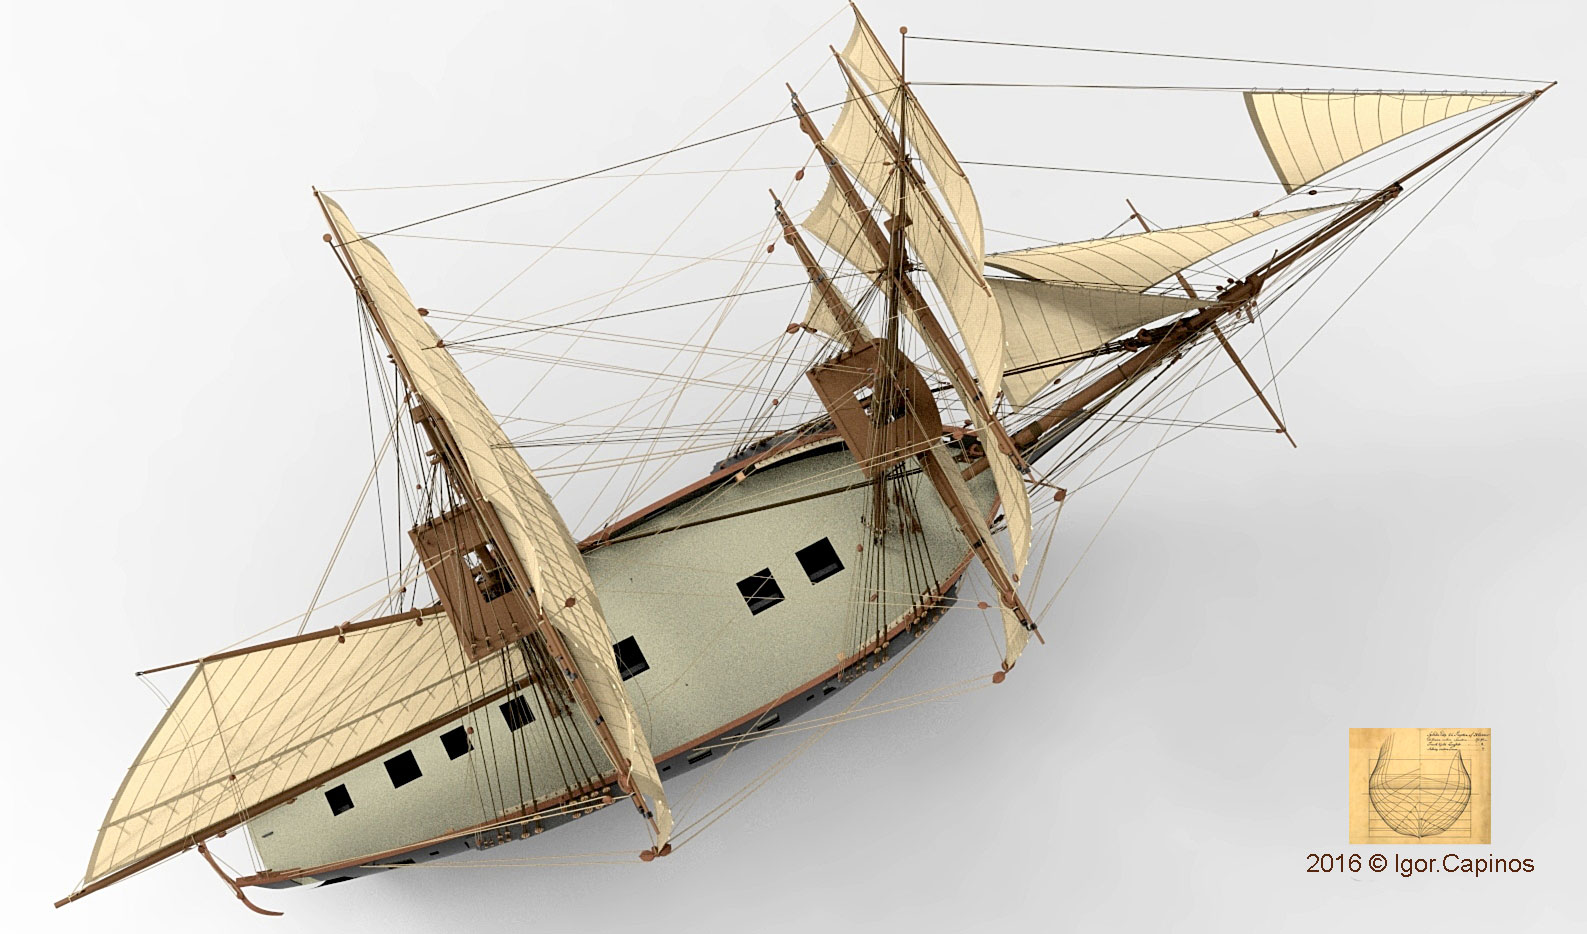
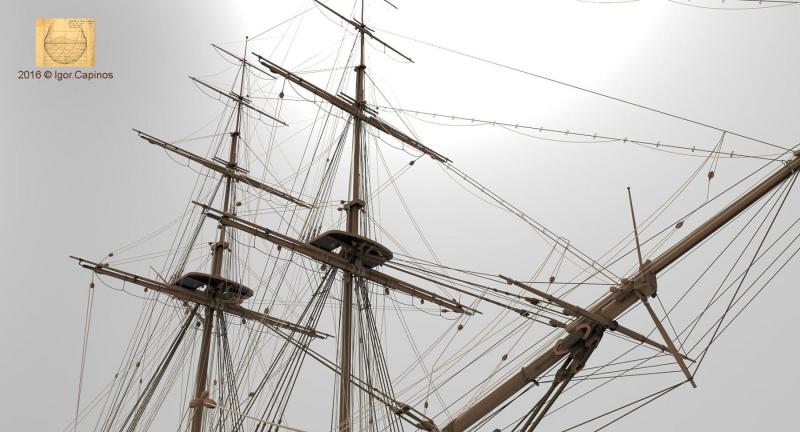
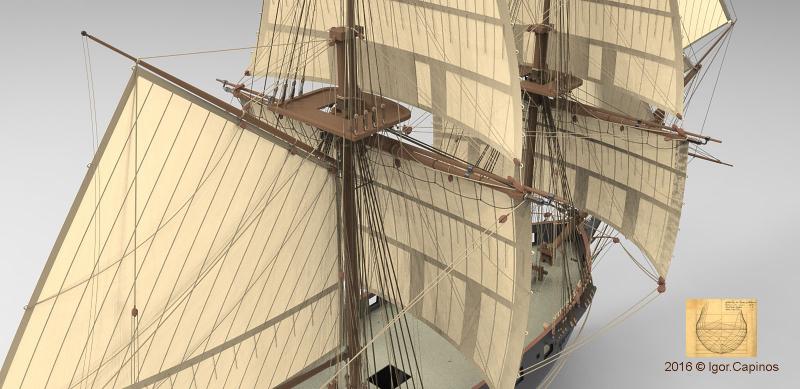
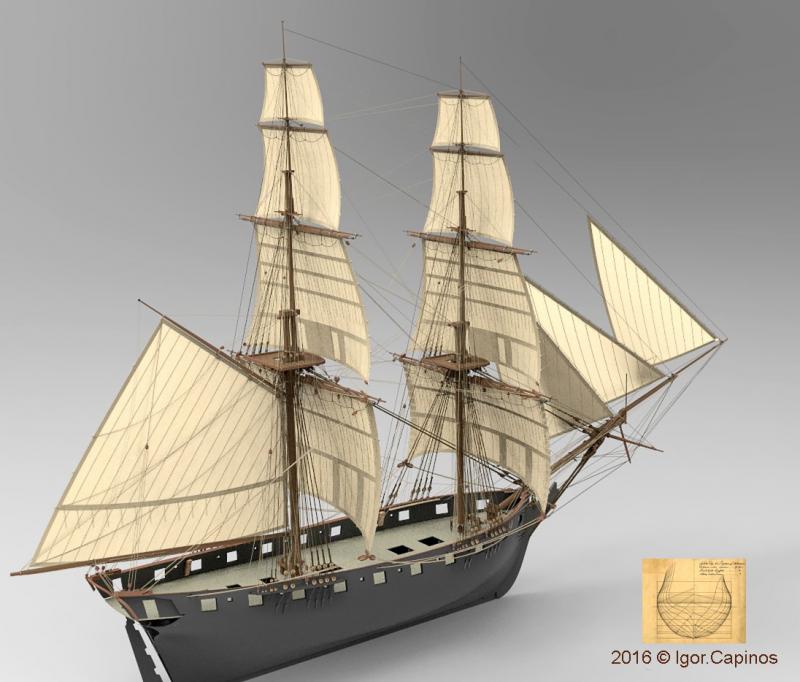
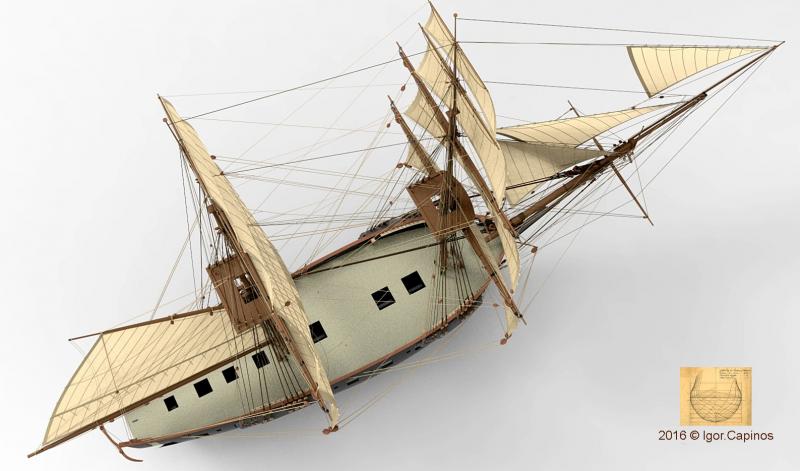
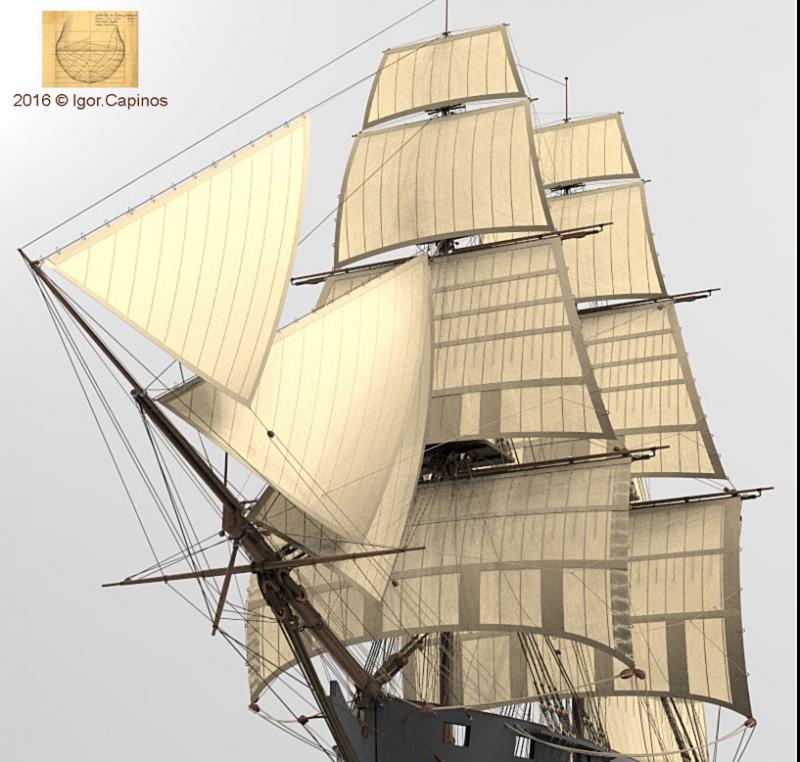
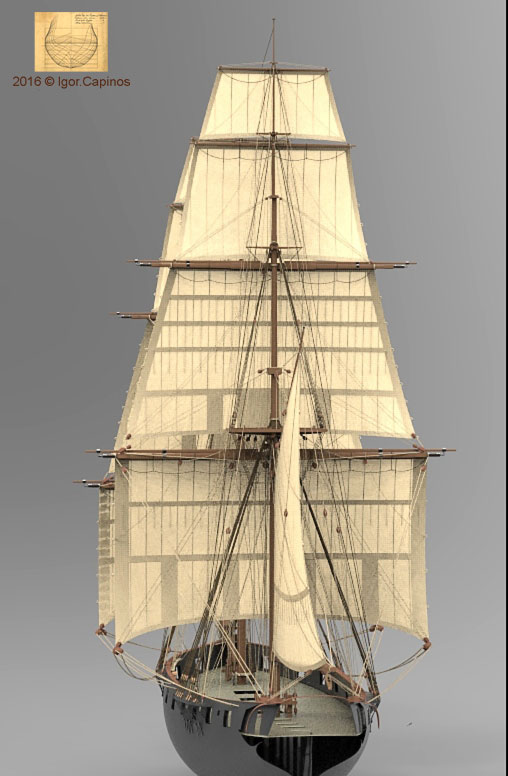
 Hello everybody! I finished 3D model rigging of the brig Mercury. Only rigging and sails
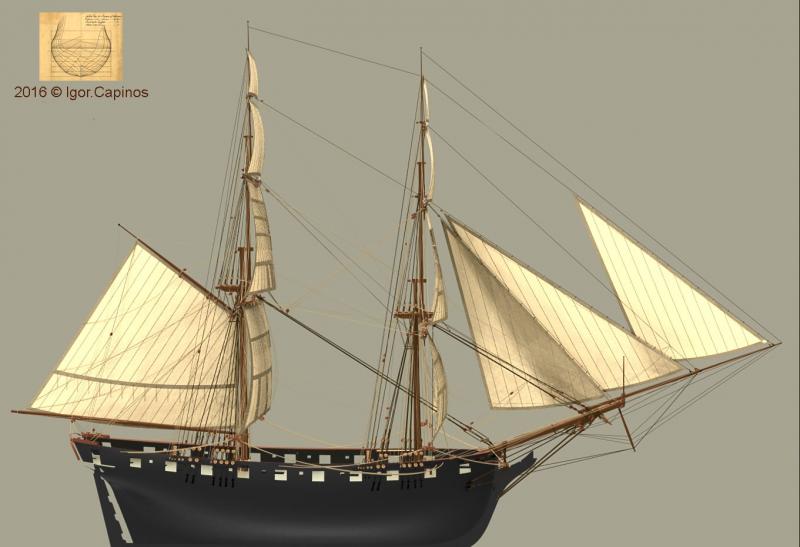

-
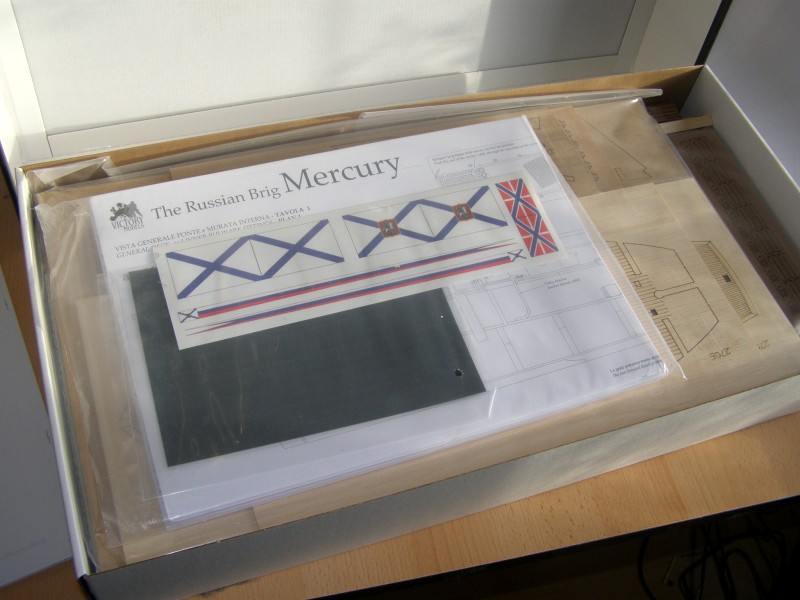
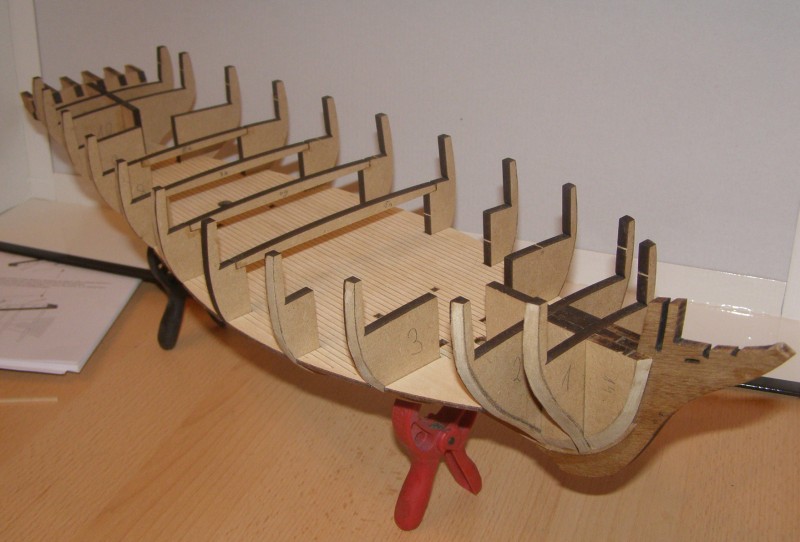
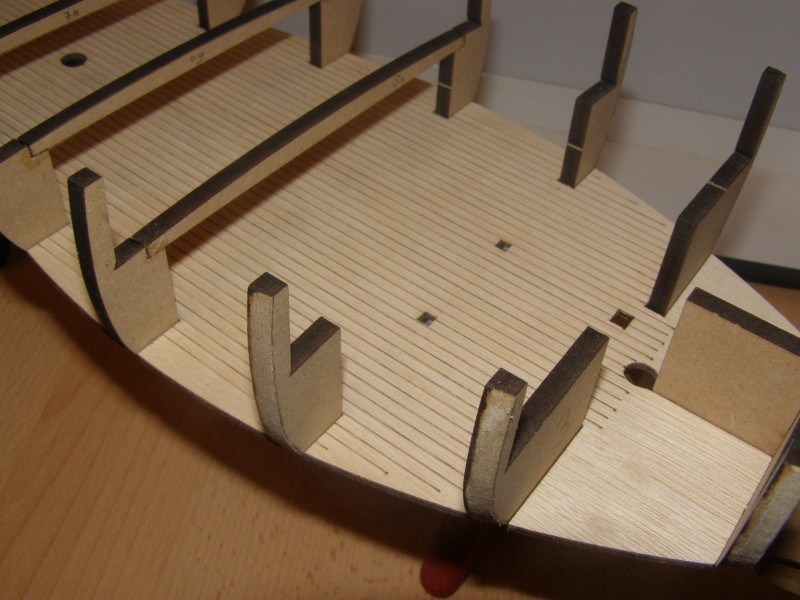
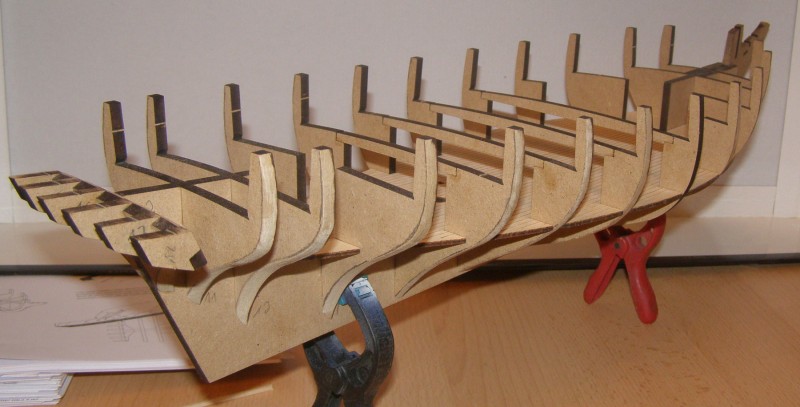
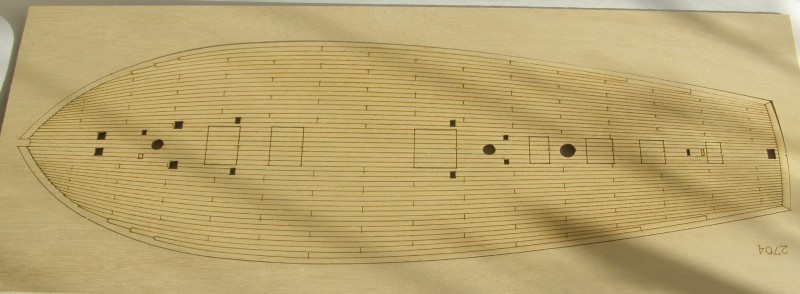
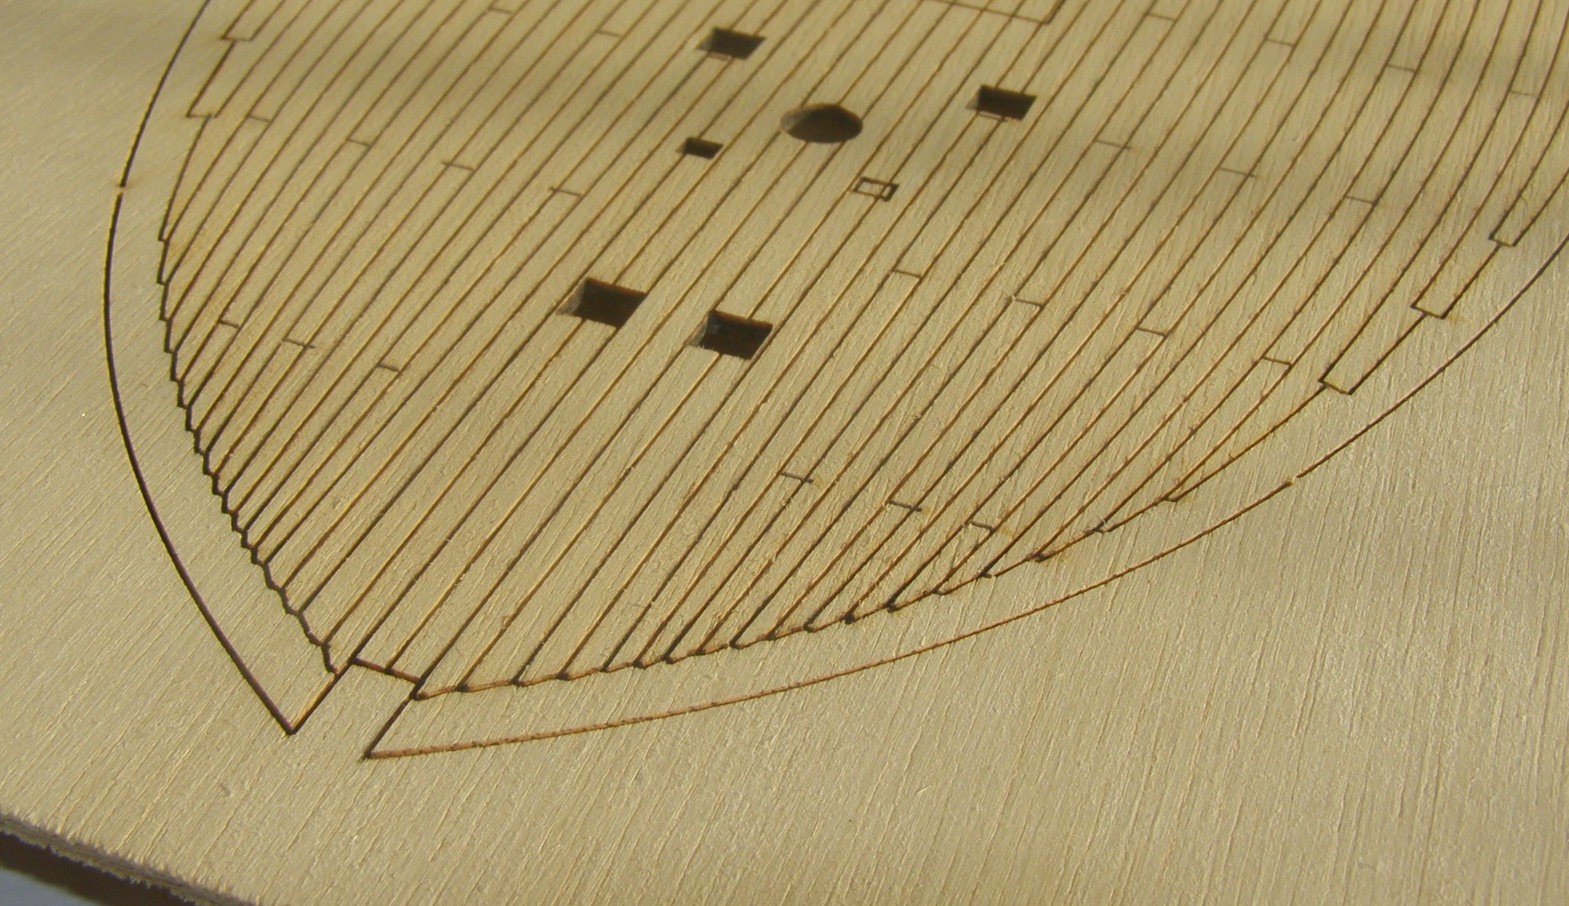
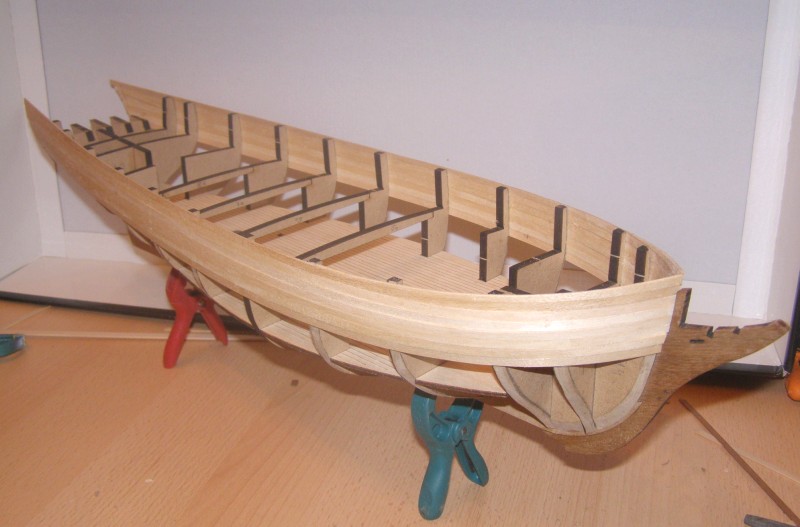
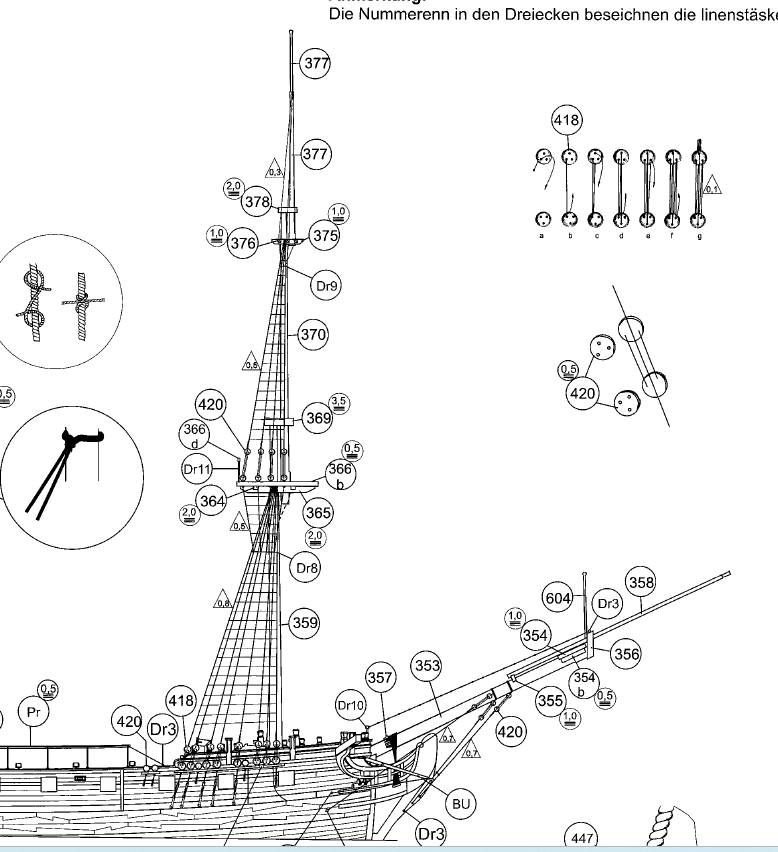
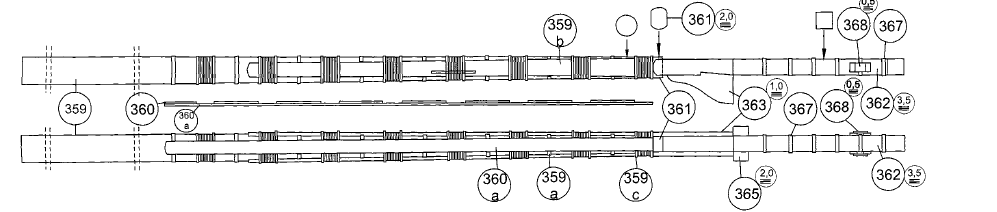
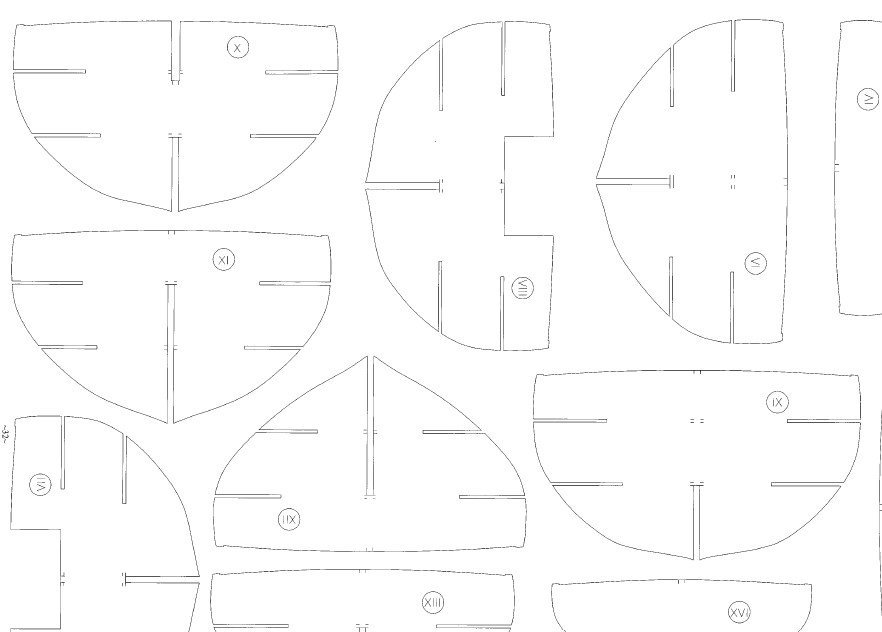
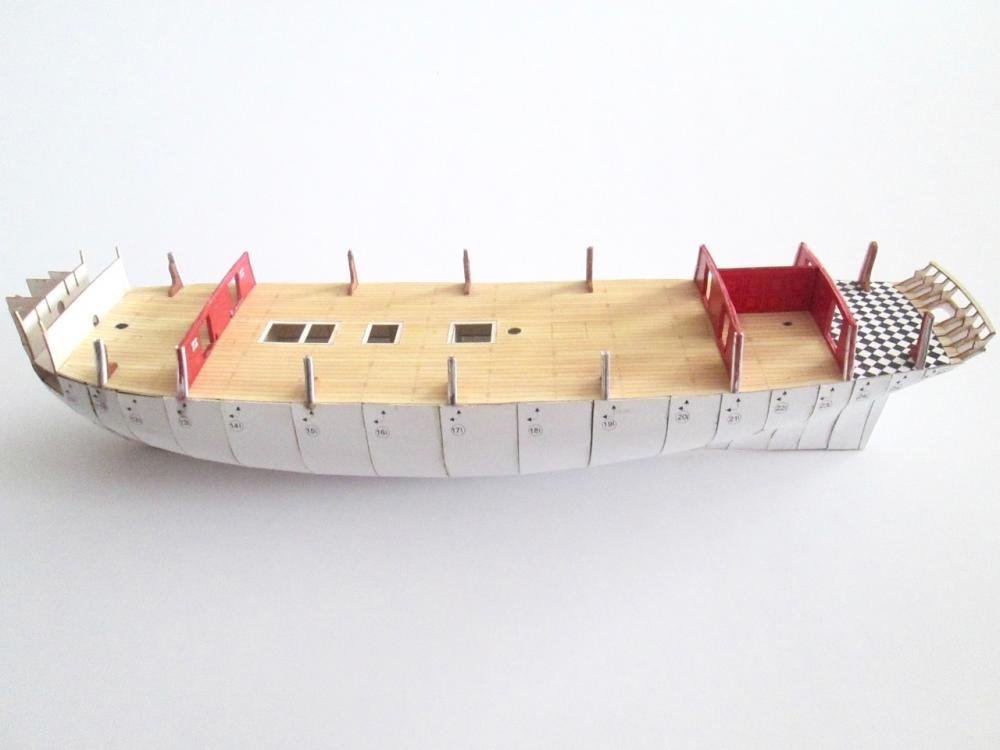
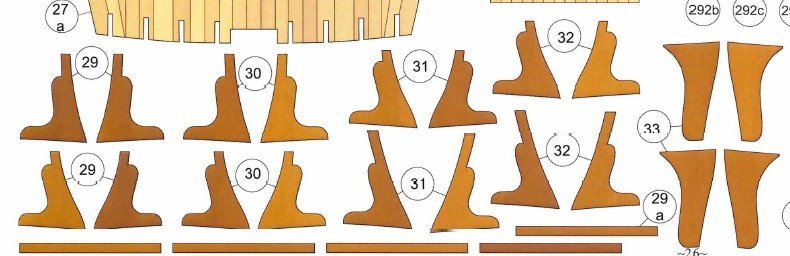
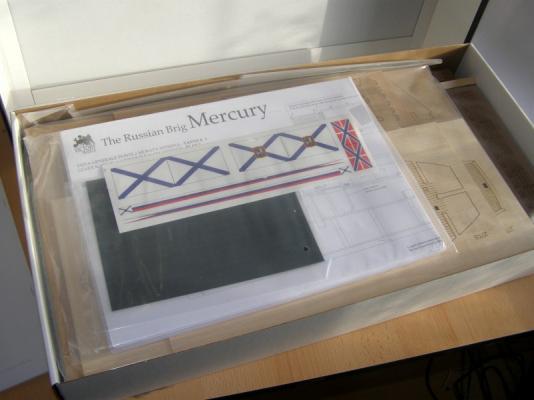
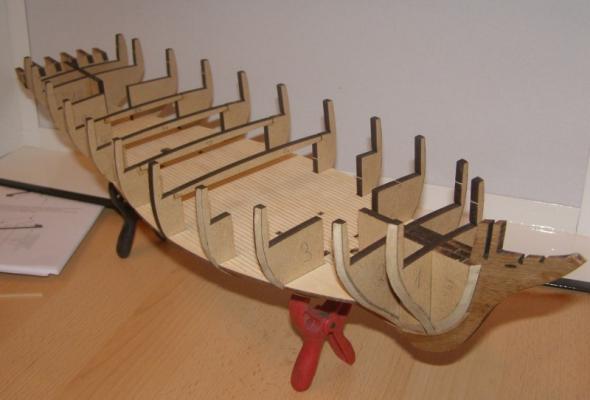
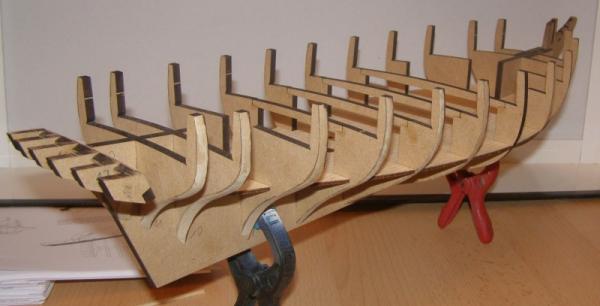
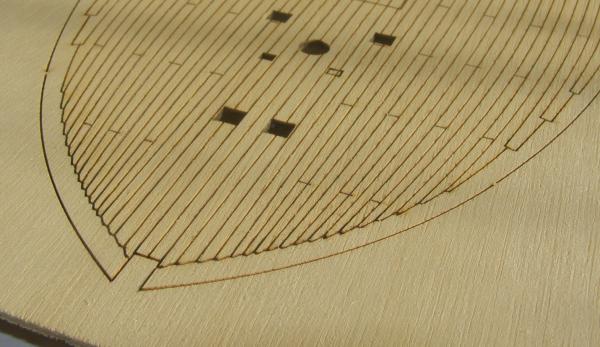
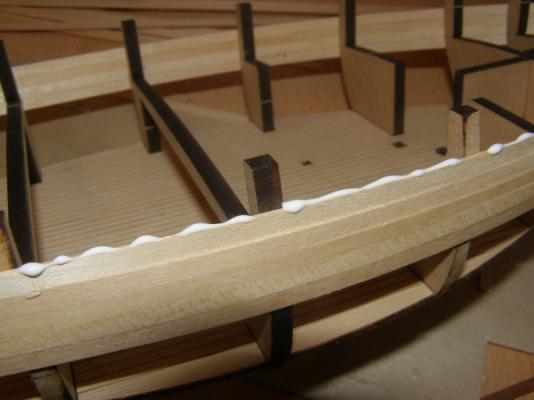
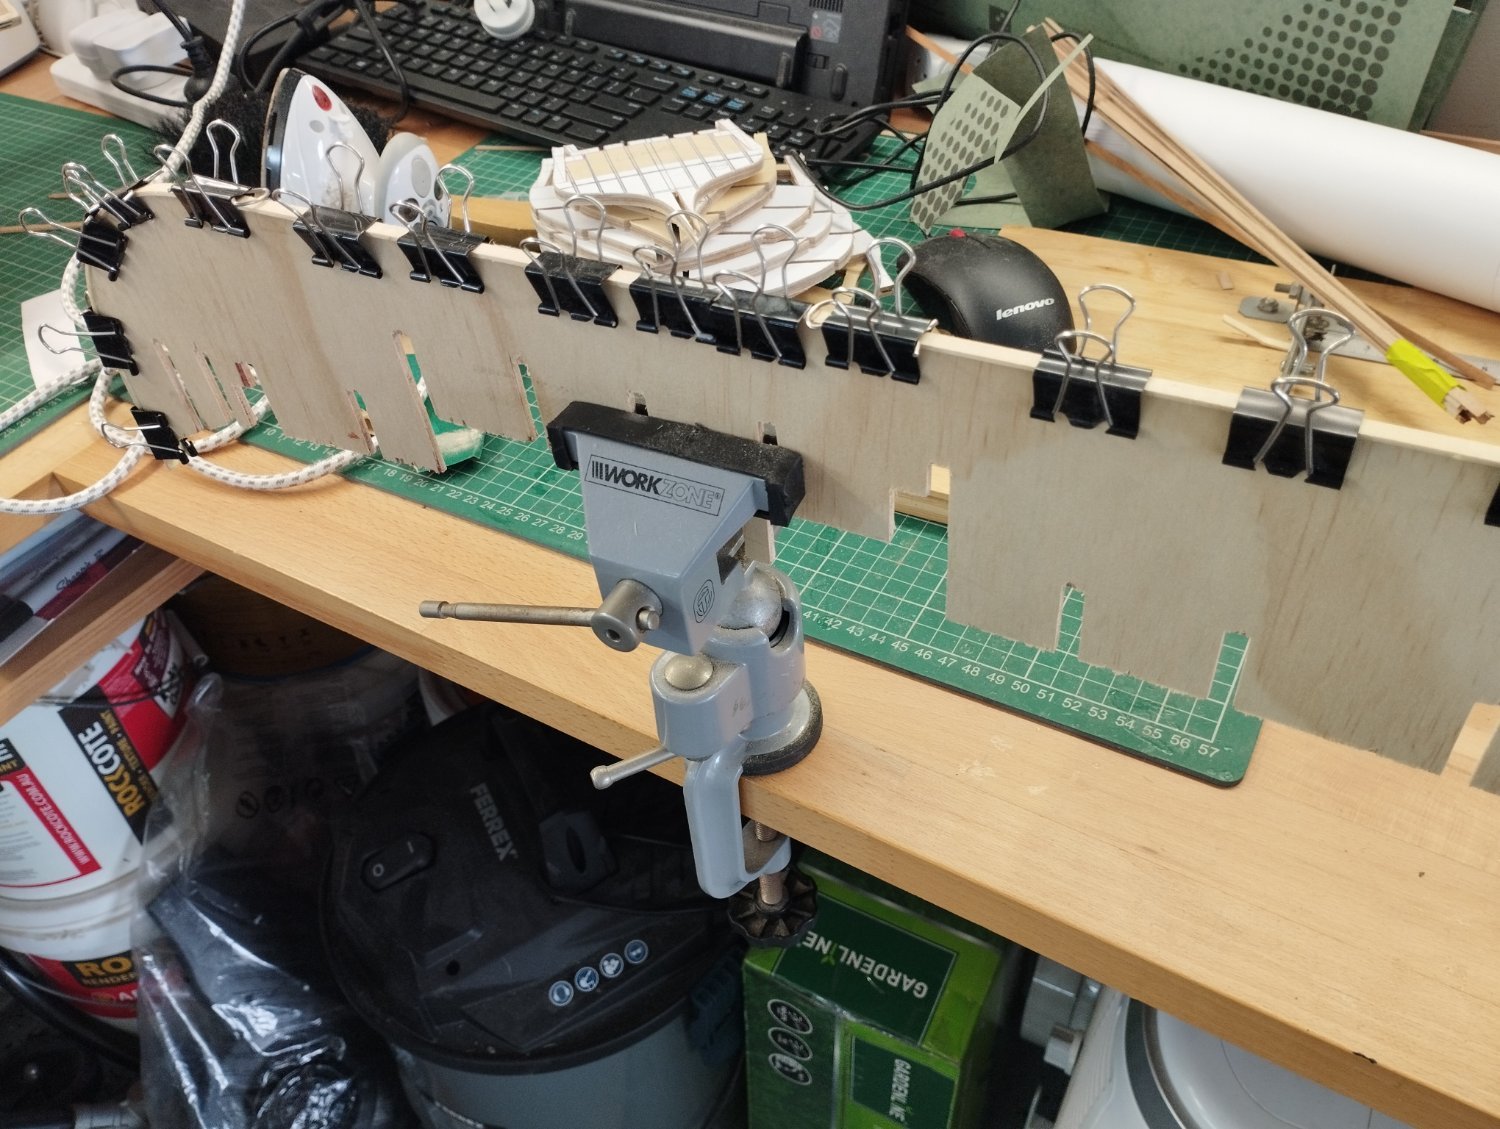
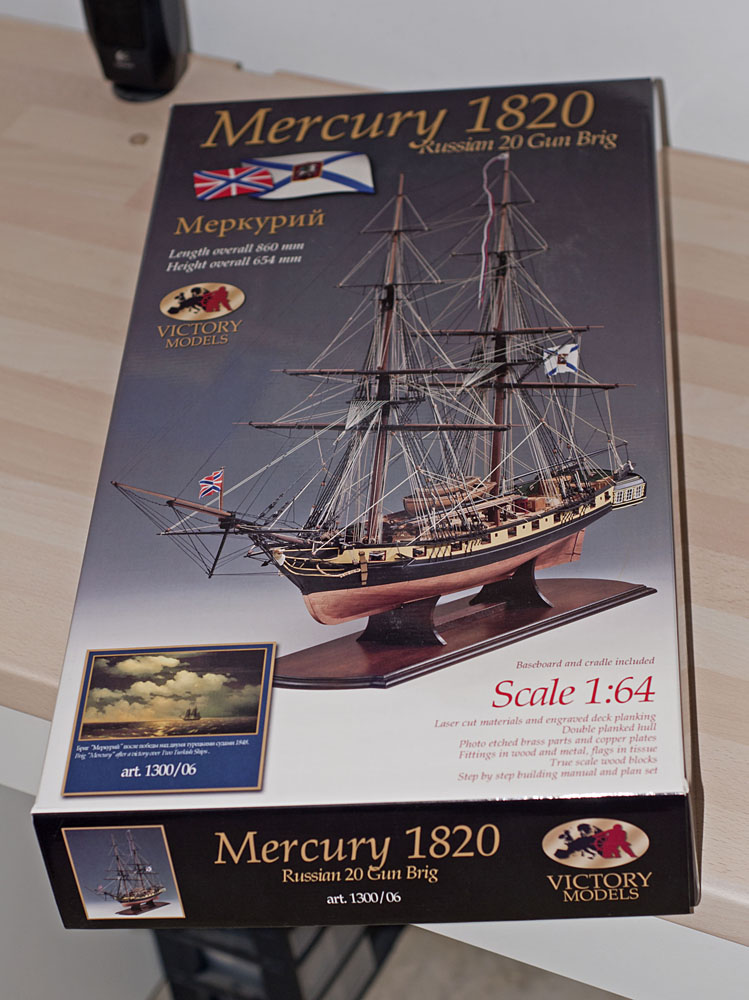
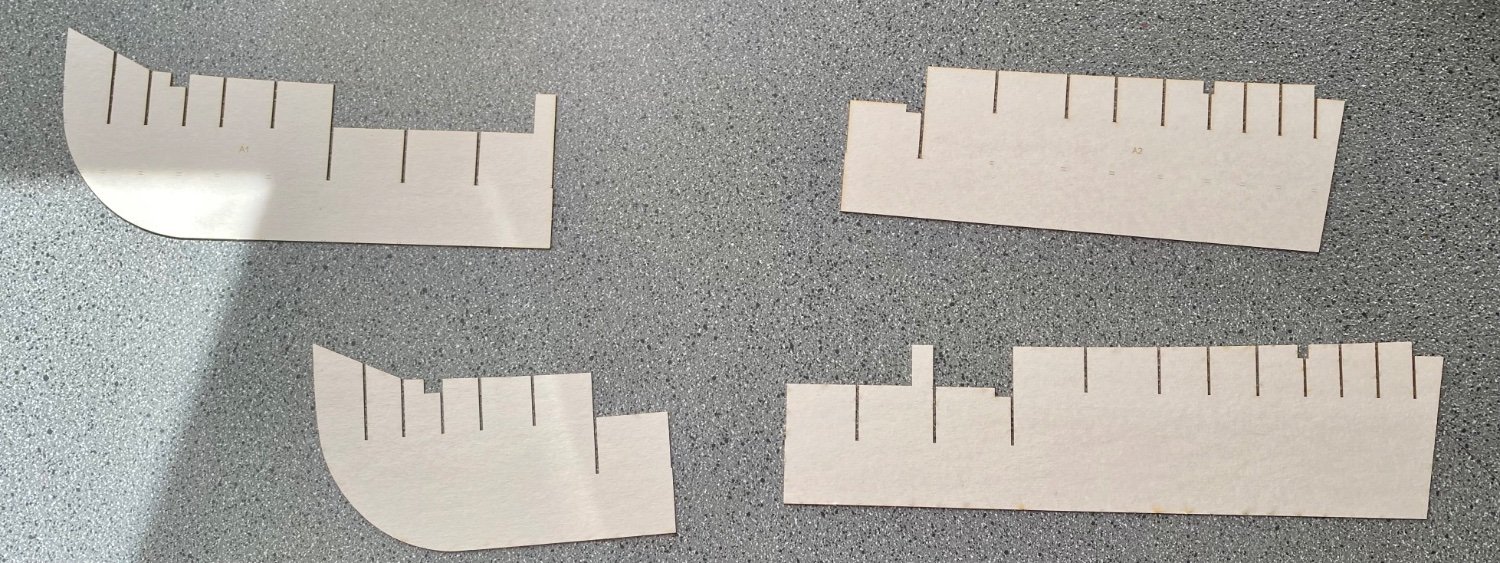
 Hello, a few days ago I started a second project: The Russian brig Mercury. The original The Russian 20 gun brig Mercury (Меркурий) was laid down in Sevastopol on January 28, 1819 and launched on 7 May 1820. She was designed as a patrol ship to guard the Nothern Caucasus coast. The Mercury fought in many important naval battles during her career. The kit The weight of the box is really notable. The shipping details showing the kit weighed 6 kg. No wonder, the 5 mm MDF for keel and frames weighs more than plywood. Furthermore the kit contains many brass etched parts, 17 plan sheets, a flag set, a 20-page step-by-step instuction (hull assembly only) and much more. Scale: 1:64 Length overall: 860mm Height overall: 654mm I wonder why there are no building logs. In fact I found only one in a Russian forum. Is there something wrong with this kit? Or with the ship? Anyway, let‘s start! The false deck and the gundeck are a special feature of the kit. The planks are laser-engraved. It looks pretty nice. Unfortunately it‘s plywood. Next stage and the first problem was to fit the plywood gun port patterns. I‘ve soaked the parts for one hour, but for all that it wasn‘t possible for me bending the patterns vertically. So I planked the bulwark with 1x4 mm stripes. That means a little more work but much more easy on the nerves. Later on I can use the gun port pattern for marking the gunports. The planks are only glued among each other, not to the frames. And here we have the bulwark; still without the gunports:
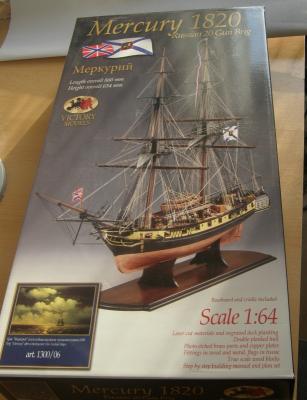


- 55 replies
-
- 10
-
-
- mercury
- victory models
- (and 1 more)
-
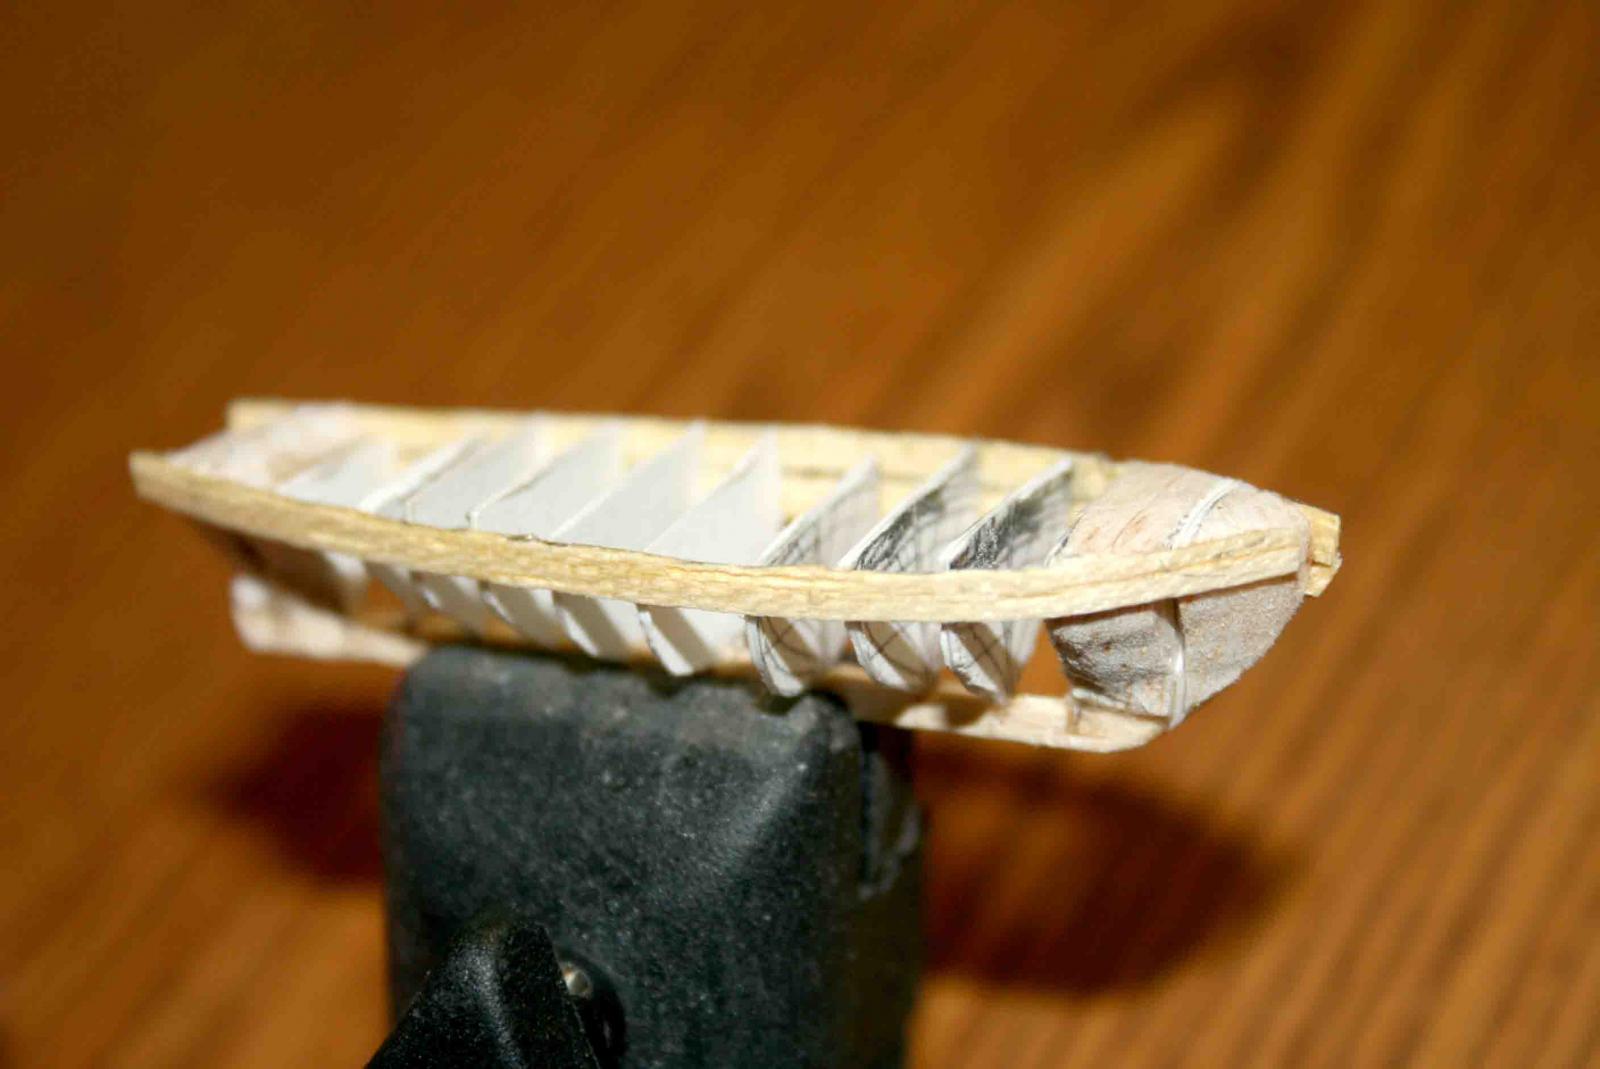
 I've finally got started on a new project. I'm working on a ship called the Mercury. She isn't actually an existing ship but a ship drawn by a pirate in another forum I'm a part of. Truth be told I'm a bit of a pirate as it was the fourth Pirates of the Caribbean that got me into this craft. This ship comes at the request of another pirate so I will do my best to do it well so I don't get keel hauled or marooned some where. I do plan on making this a dual build but for now I'm testing things out. I've done a plank on bulkhead once before with my English Cutter the Fly. It turned out to be one of my best ships so I hope the technique will do the same for these ones. so far things are coming along. If it works out well I'll start the other one. I chose this method mainly to test the draughts. It's one thing to draw a ship it's another thing altogether if your drawings actually work. Also I like the realistic look it gives me.
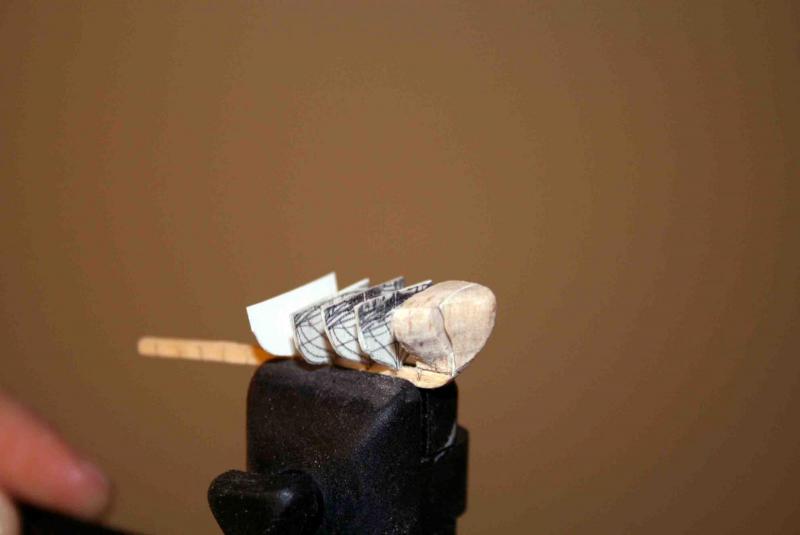


.jpg.84dcc2c4da9aaf2cc9a732c04b2c5ed3.jpg)