Search the Community
Showing results for tags 'Rattlesnake'.
-
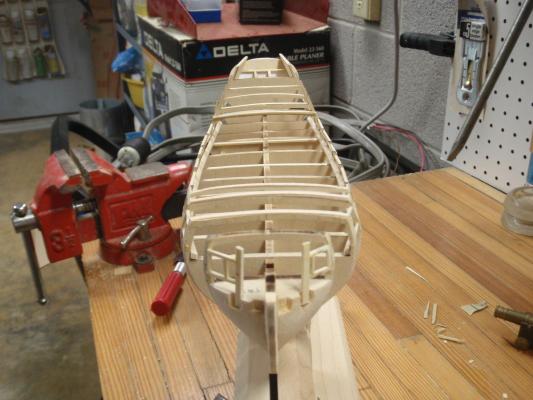
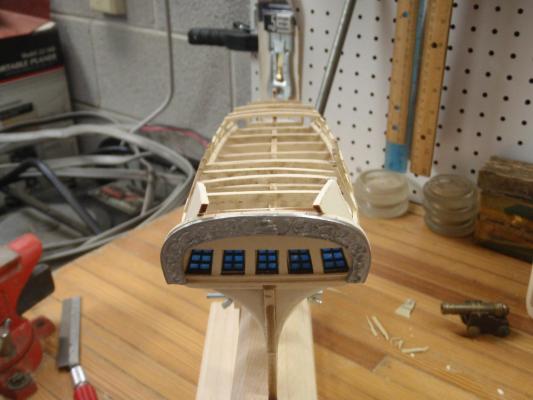
 Finally cooling off in Florida - time to start another build, the rigging plan on this one is a nightmare, the set that I got the plan is all black and white. The instruction booklet says that the running rigging should be in red. Contacted Model Expo a couple of weeks ago to try to get the plan with running rigging marked in red and so far no response. Used dremel drill press to drill pilot holes in the keel to pin it in place. Slots in bulkheads were all too tight and had to be sanded to widen.
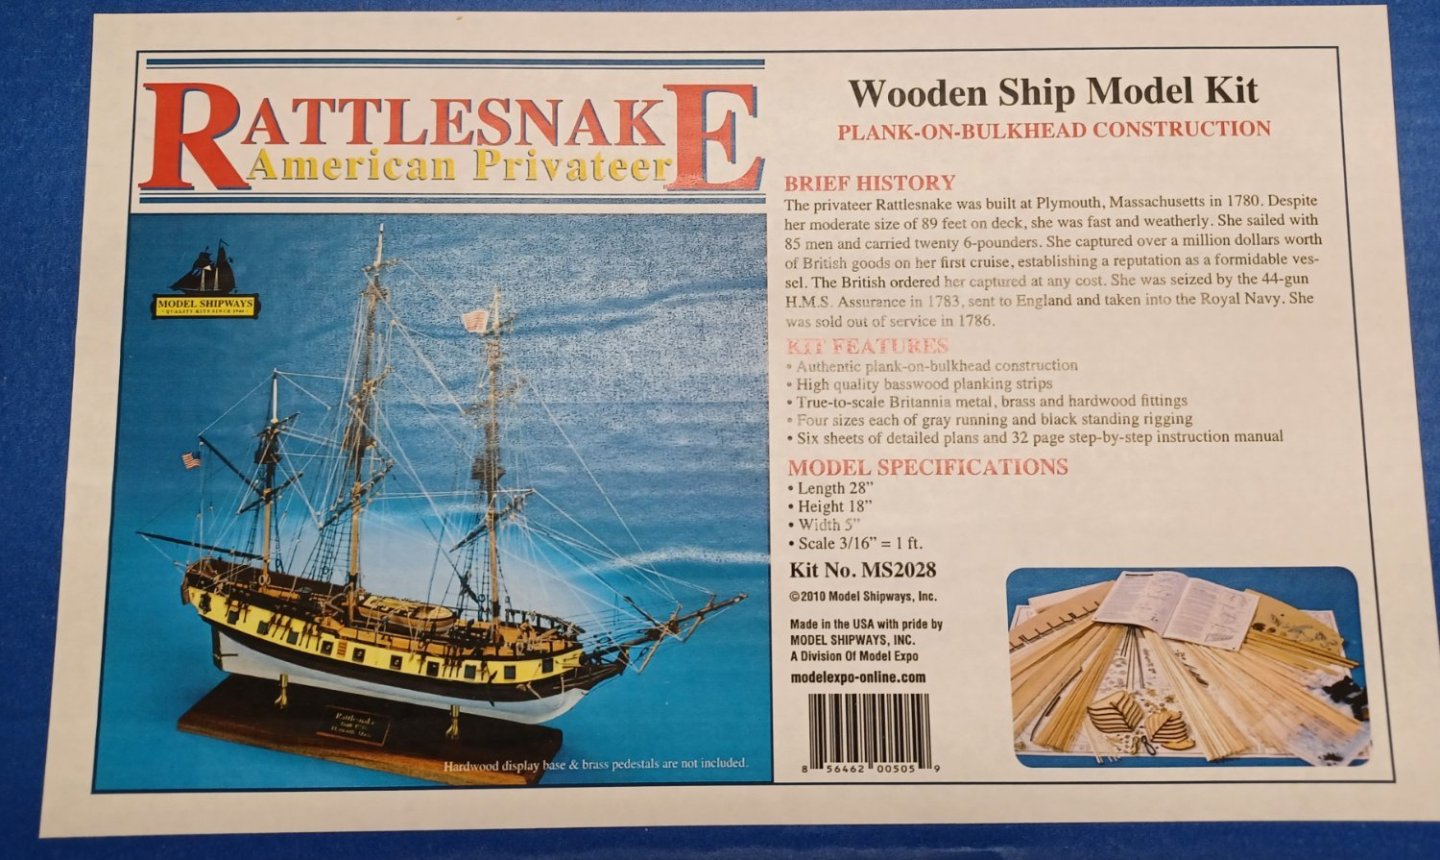


-
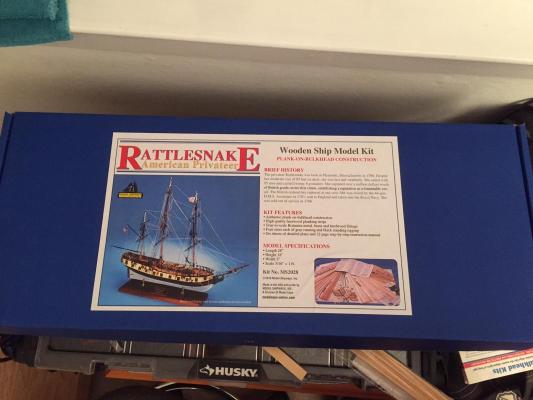
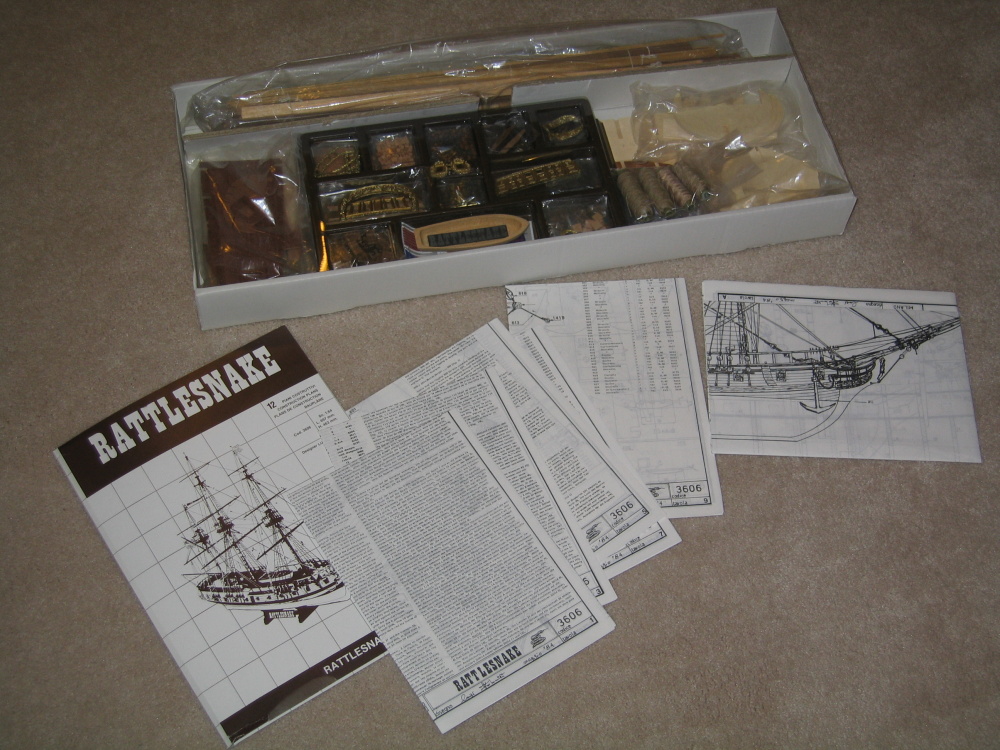
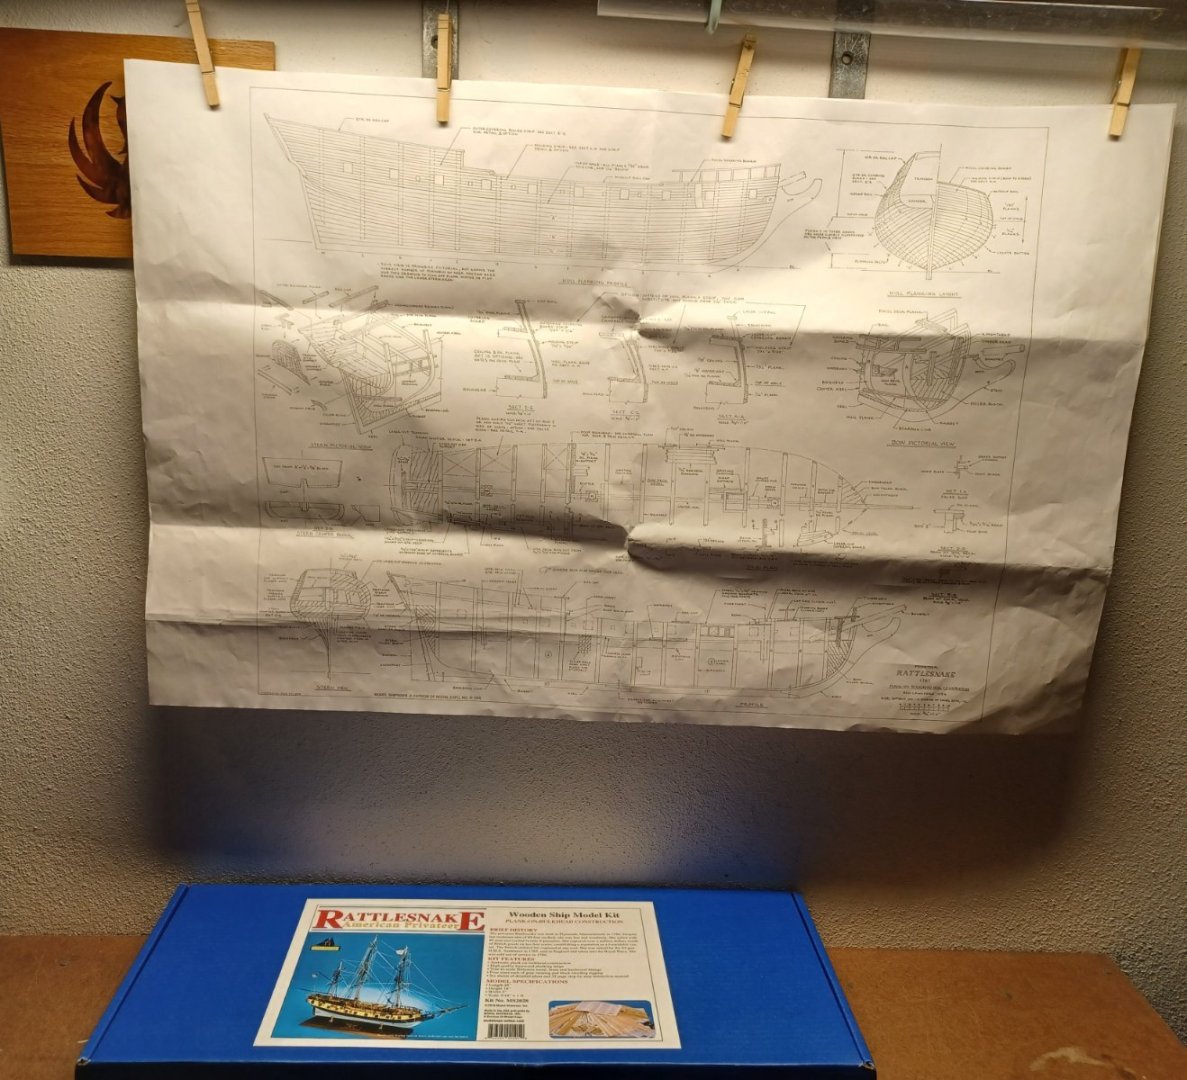
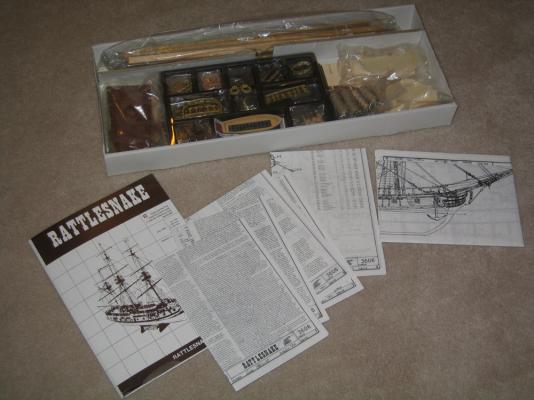
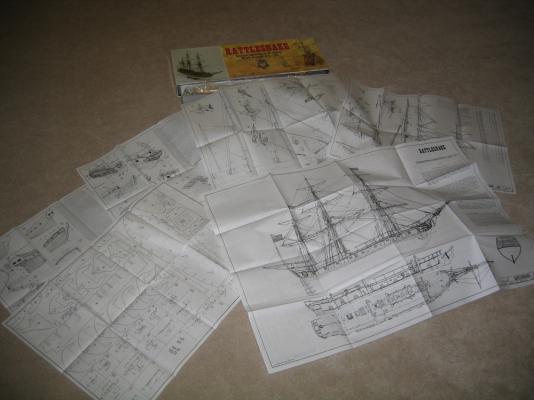
 Introduction Rattlesnake is my second model build. I finished Bluenose 1 back in June. This took me 2 years to finish. I decided to take a little summer break from modeling before starting Rattlesnake. I think that it was a good idea to give modeling a rest because I am now very eager to go. I consider my “official start date” as October 8th. In August I completed inventory of the kit. I also spent a lot of time throughout 2022 studying build logs for Rattlesnake and putting together my own build plan & instructions. I created an Excel spreadsheet to compare the instruction manual from Model Shipways, the plan I used for Bluenose and several build logs from this MSW website. Using all this information, I created my own plan. I thought about purchasing the Bob Hunt Practicum from Lauck Street Shipyard. But after reading JS Gerson’s build log, I decided not to. The Mamoli kit seems to be quite different from Model Shipways and I’m not ready to do a major kit-bash. I do plan on buying the masting & rigging practicum from Lauck Street. But that’s a ways off!! I share this thought process for anyone who is considering how to proceed with their own Rattlesnake build. I look forward to sharing my build log with you and I encourage you to share any comments or words of wisdom that will help me with this project! Thanks! Here are a few pics showing the completed inventory and the kit box cover:

-
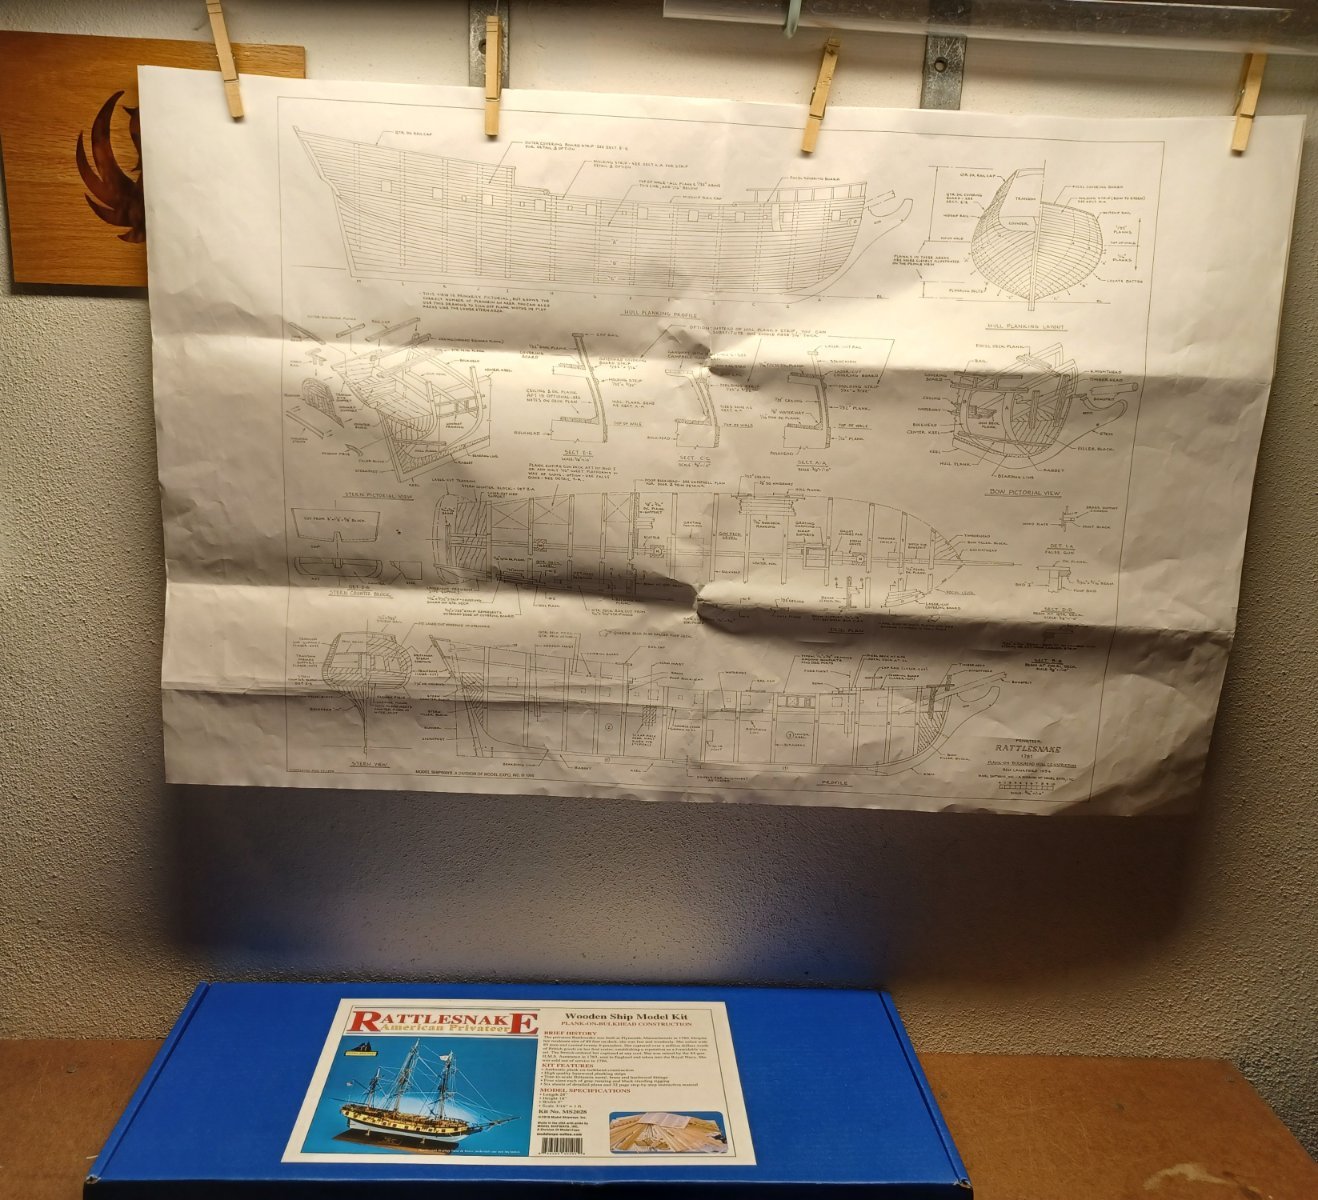
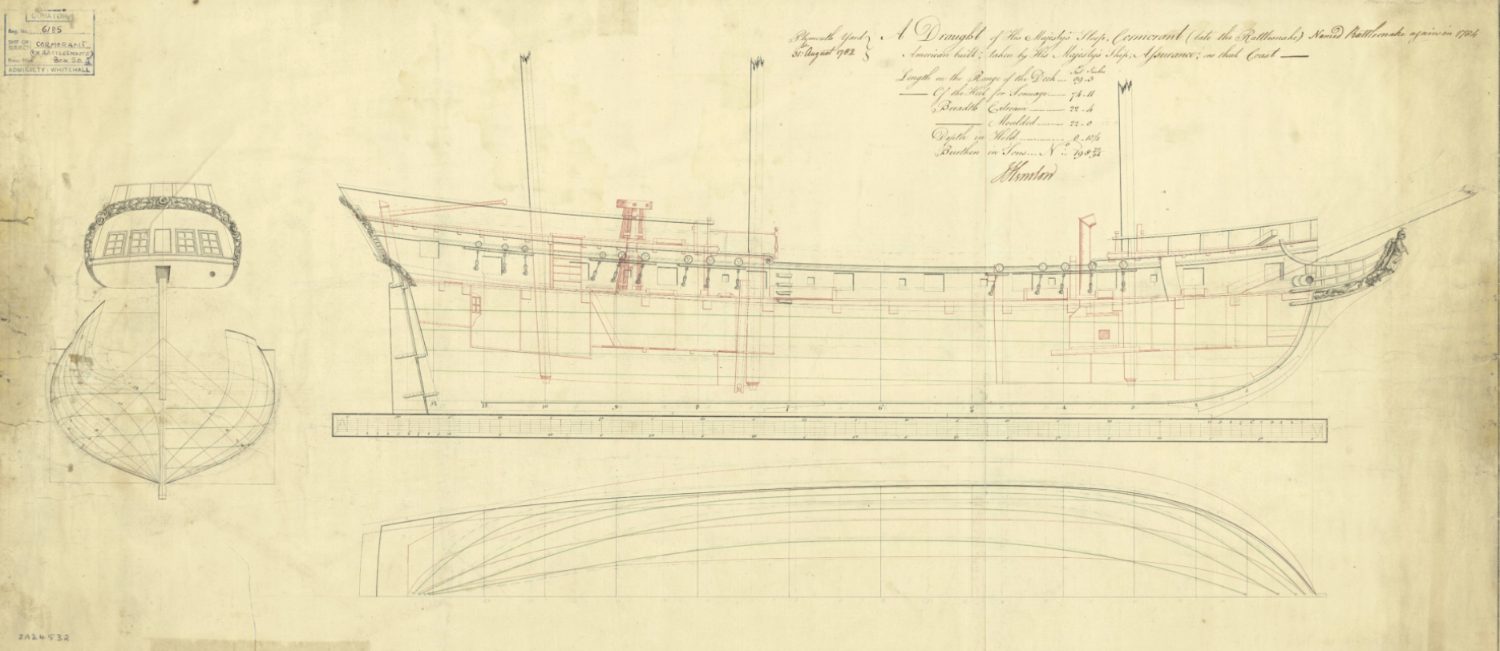
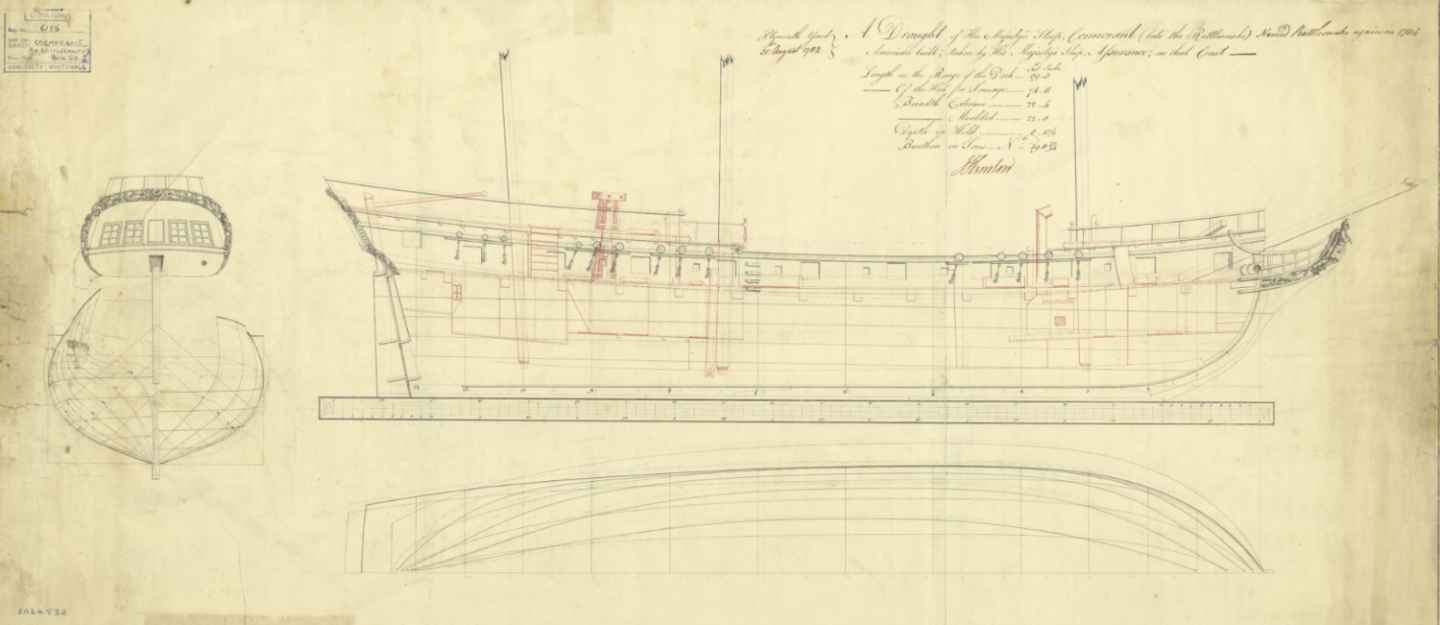
 The Mamoli kit of Rattlesnake was my first wood ship kit over 25 years ago. Here it is, not quite finished. I gifted it to a relative, and the story of how I caught up with it later will be left for another time. I have always wanted to do the Rattlesnake again, and now with the idea of seeing what 25 years of experience, education and inspiration might bring I am launching this project. I cannot begin to document all of the inspiration I have received from the members here at MSW, but I will try to point out specifics as they occur . Bear with me as I jump around a lot and talk about my resources and plans for this build. I am using the plans from the Model Shipways kit, which I acquired apart from the kit. These plans are drawn by George F. Campbell and further refined by Ben Lankford . All plans of Rattlesnake that I am aware of; Mamoli, Hahn and Model Shipways are derived from the drawings from the NMM and are available at WIKI commons. I purchased copies from the NMM several years ago, but the copies at Wiki are actually much better. Chappelle also reproduced the lines in " The Search for Speed Under Sail ", and it is my understanding the plans are available from The Smithsonian. For the most part, I am using the plans from Model Shipways to create the skeleton and basic rigging, which I will cross reference with other sources. I will use the NMM drawings for details. I have decided to build at 1:48 in order to have more play room with details, and use some 3rd party add-ons such as the capstan kit from Syren. I'm also looking at the 1:48 18th Century Longboat from Model Shipways as an add on. I have scanned the framework from the MS plans and am in the process of upscaling from 1:64 to 1:48. I use Adobe Photo Shop Elements 2020, and it is a simple matter of resizing the scanned images by a factor of 125%. All comments and questions are welcomed..
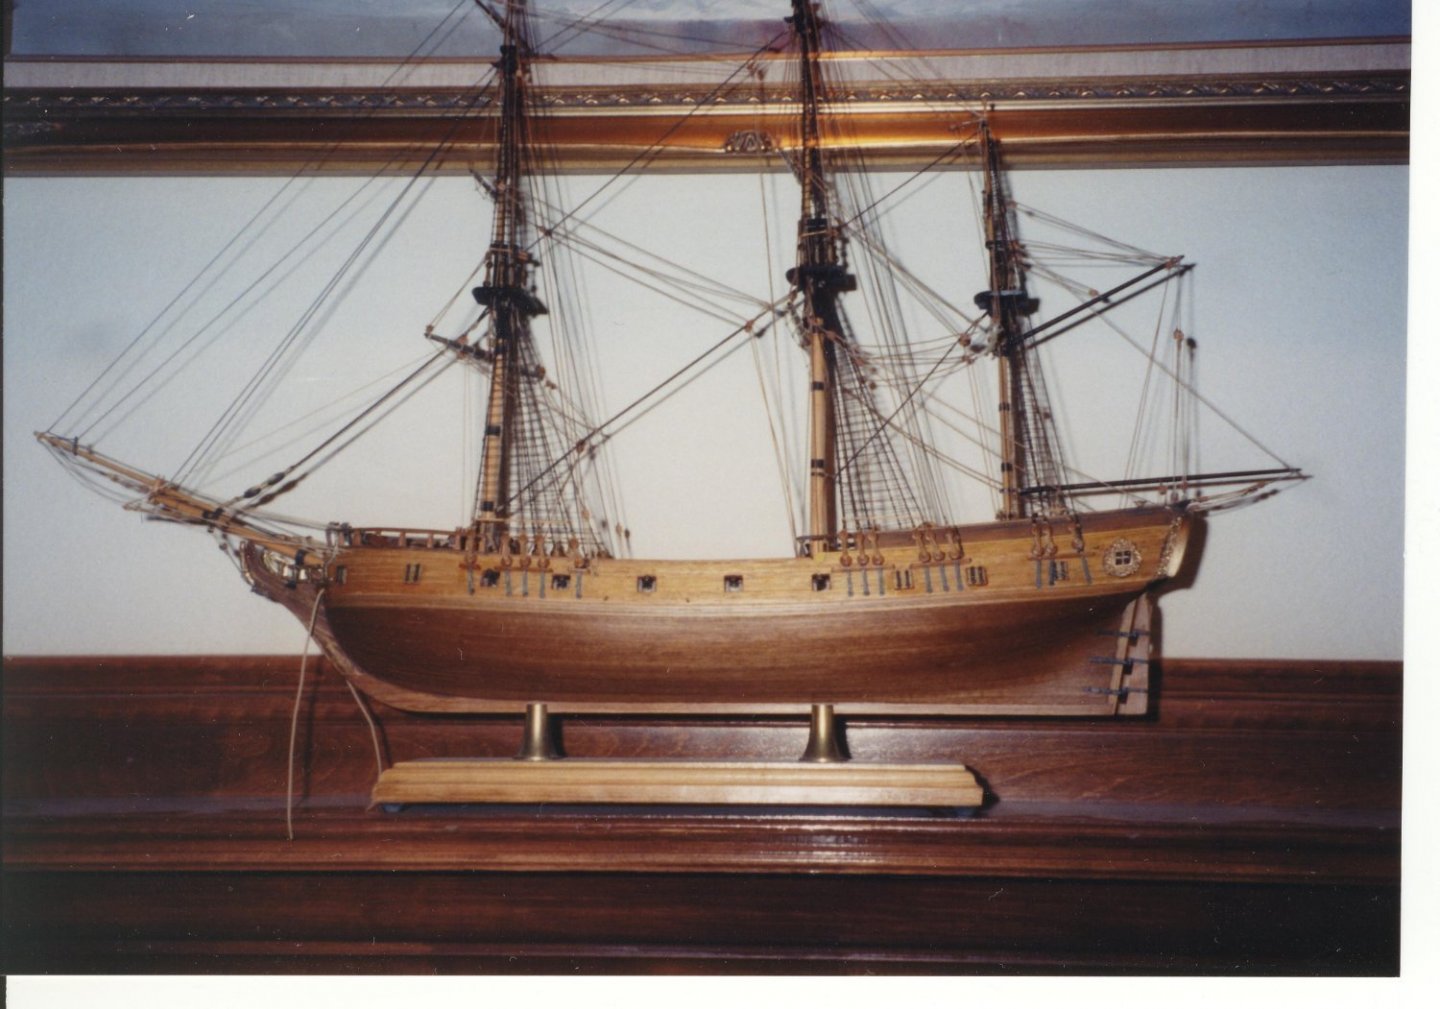
-
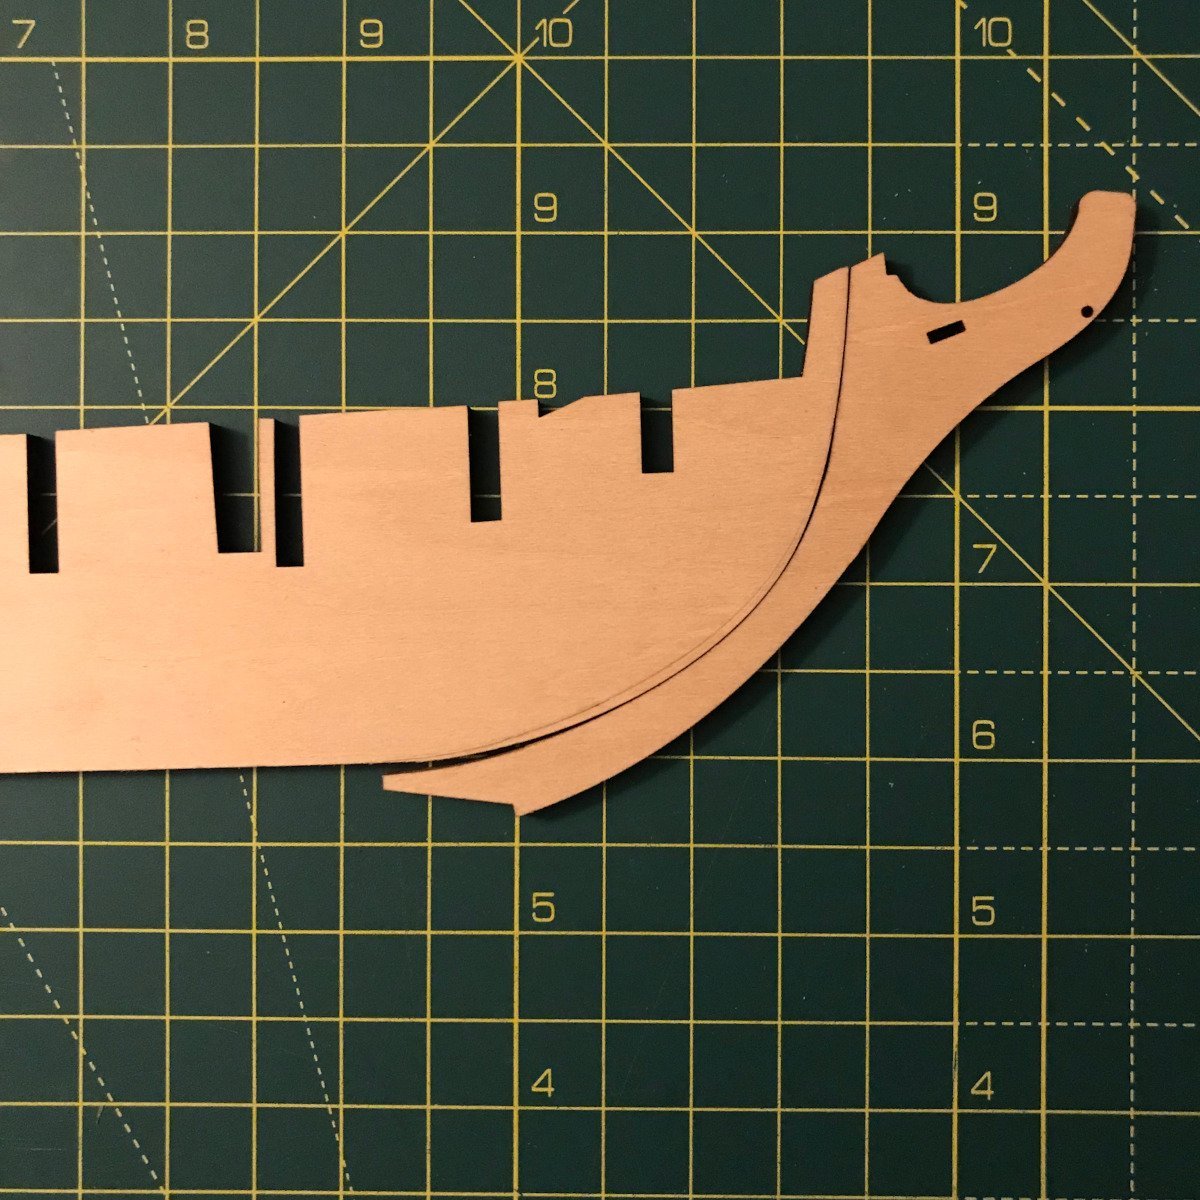
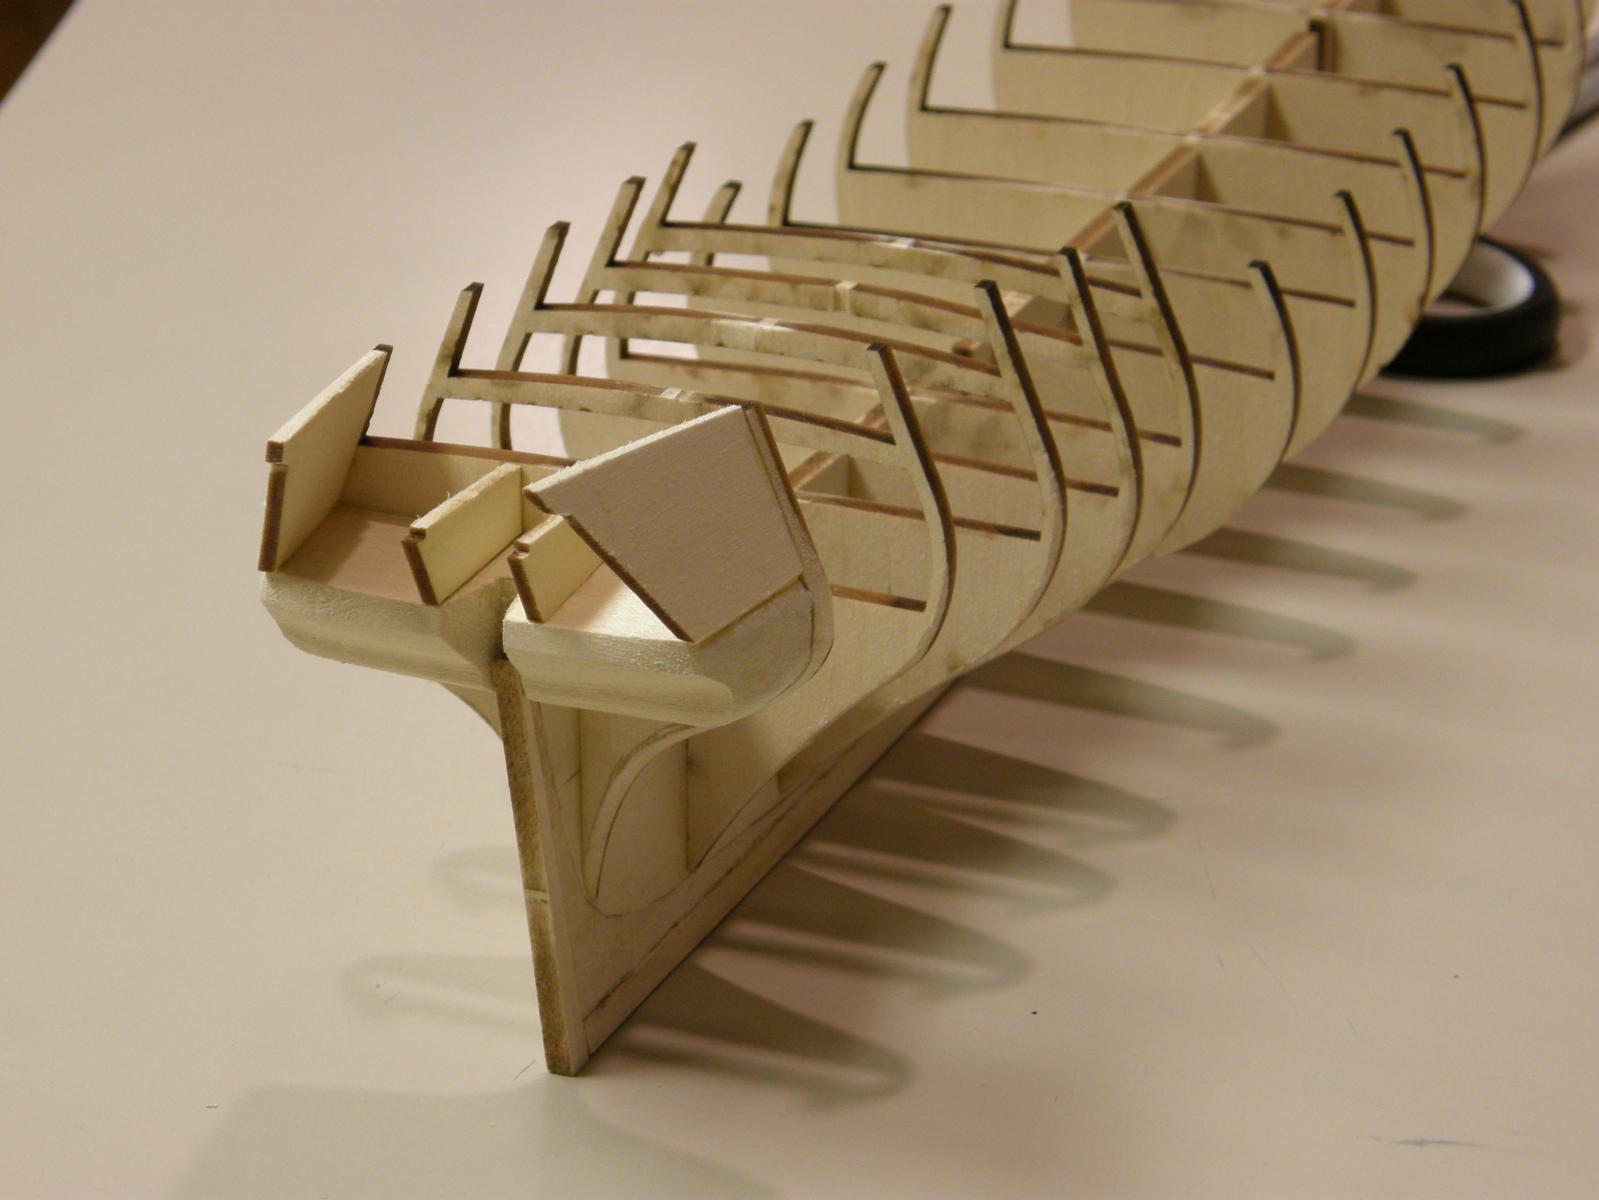
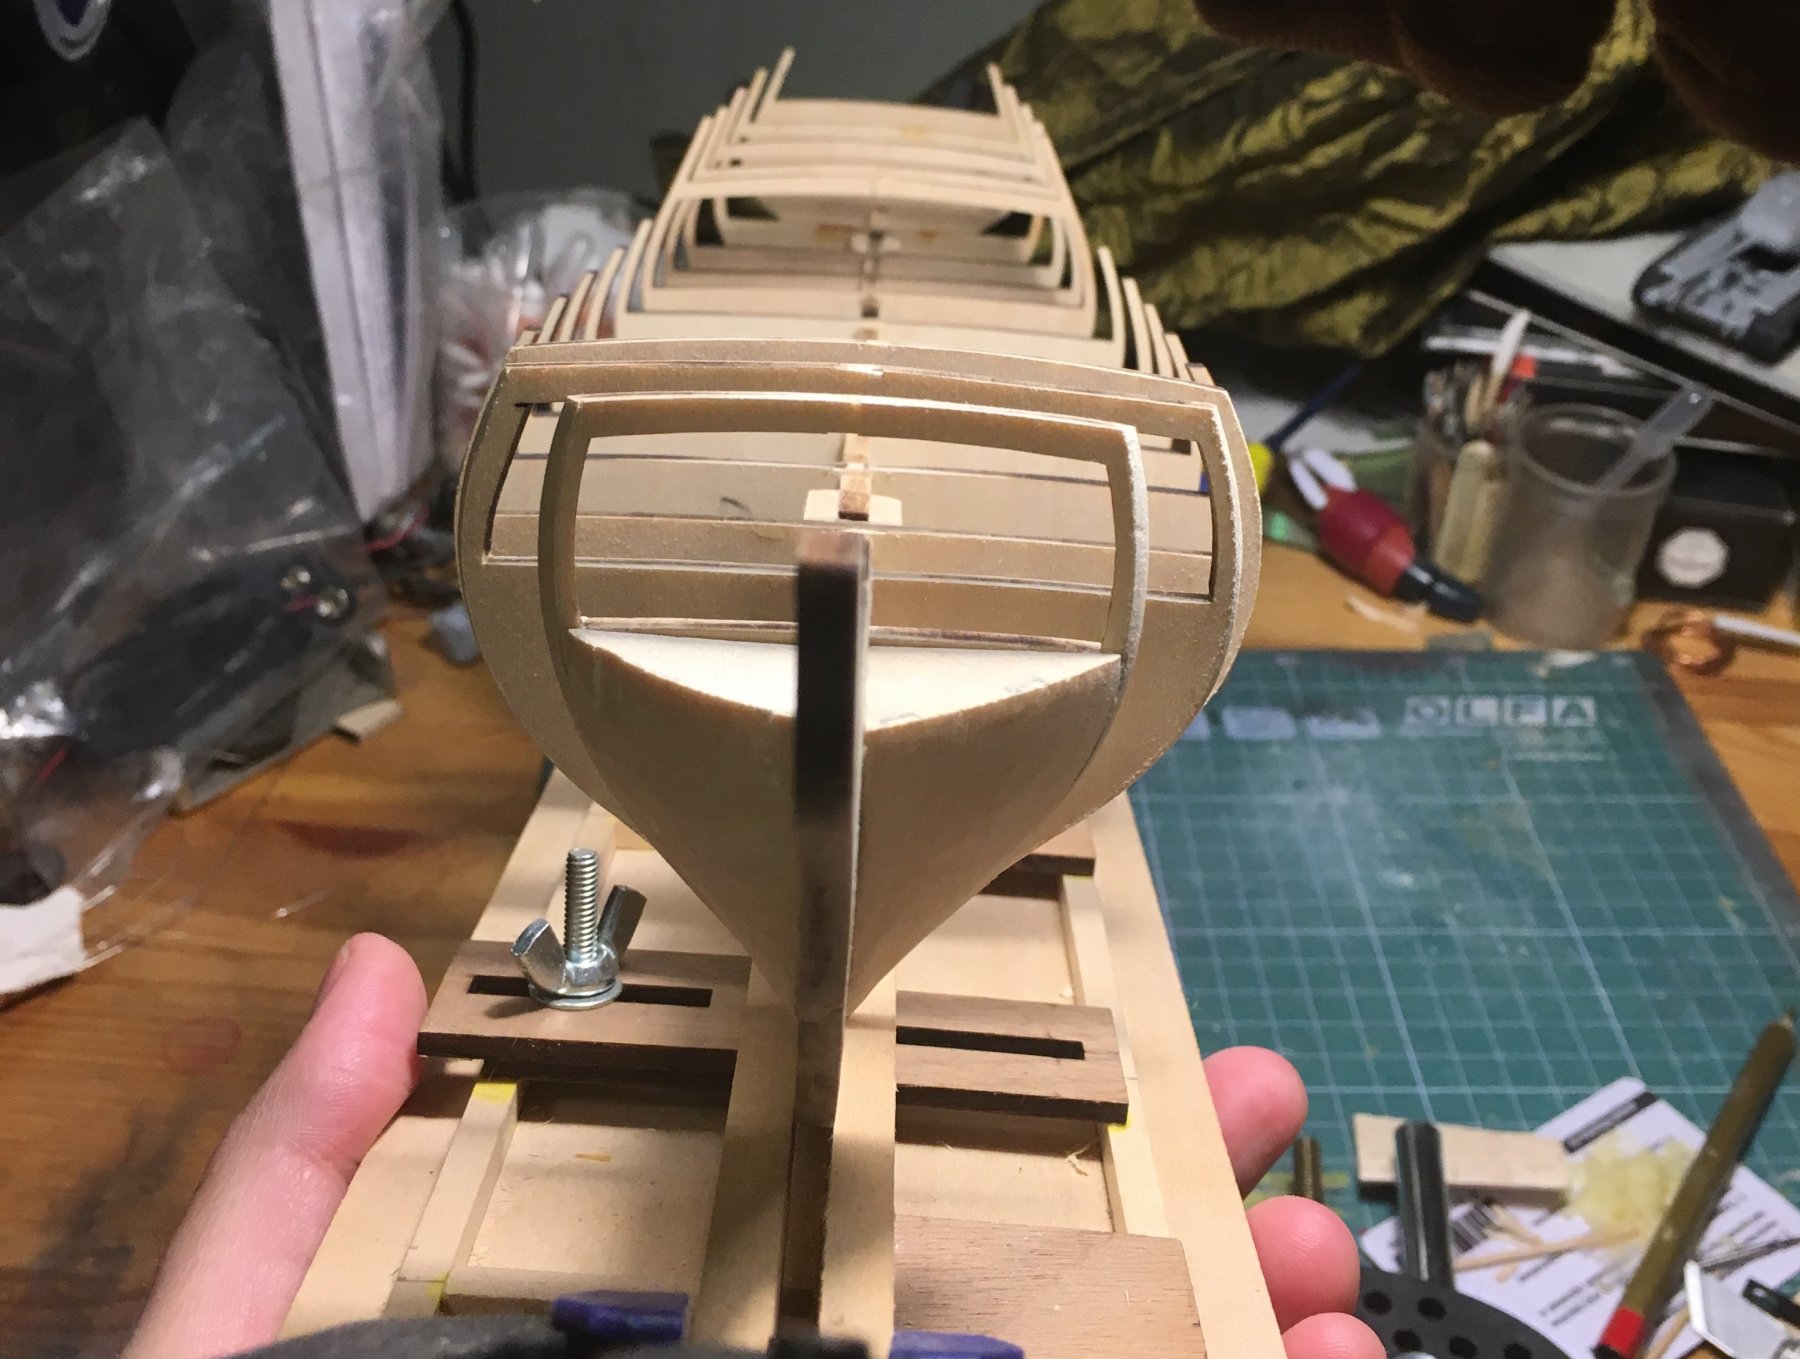
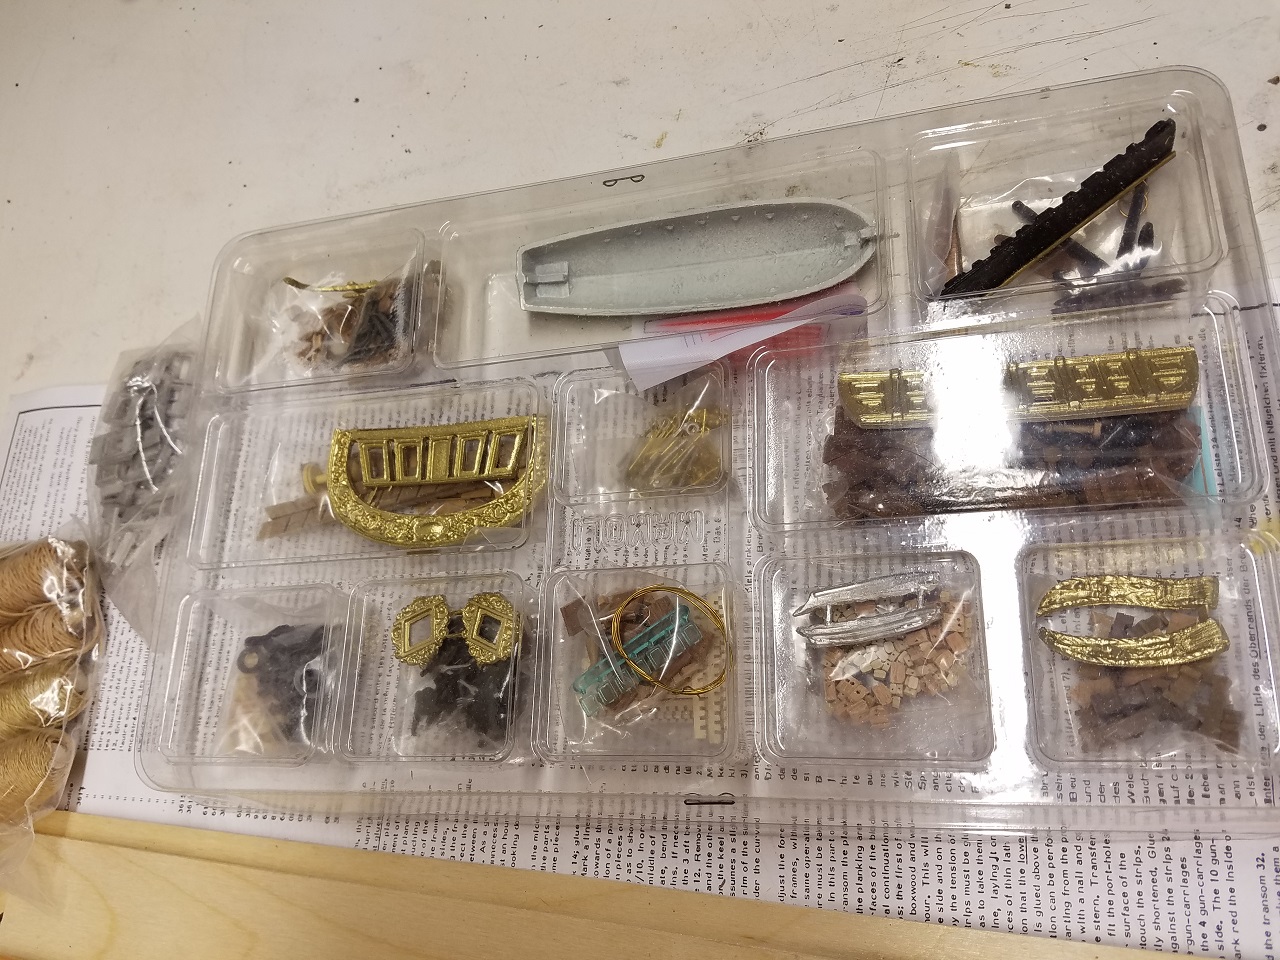
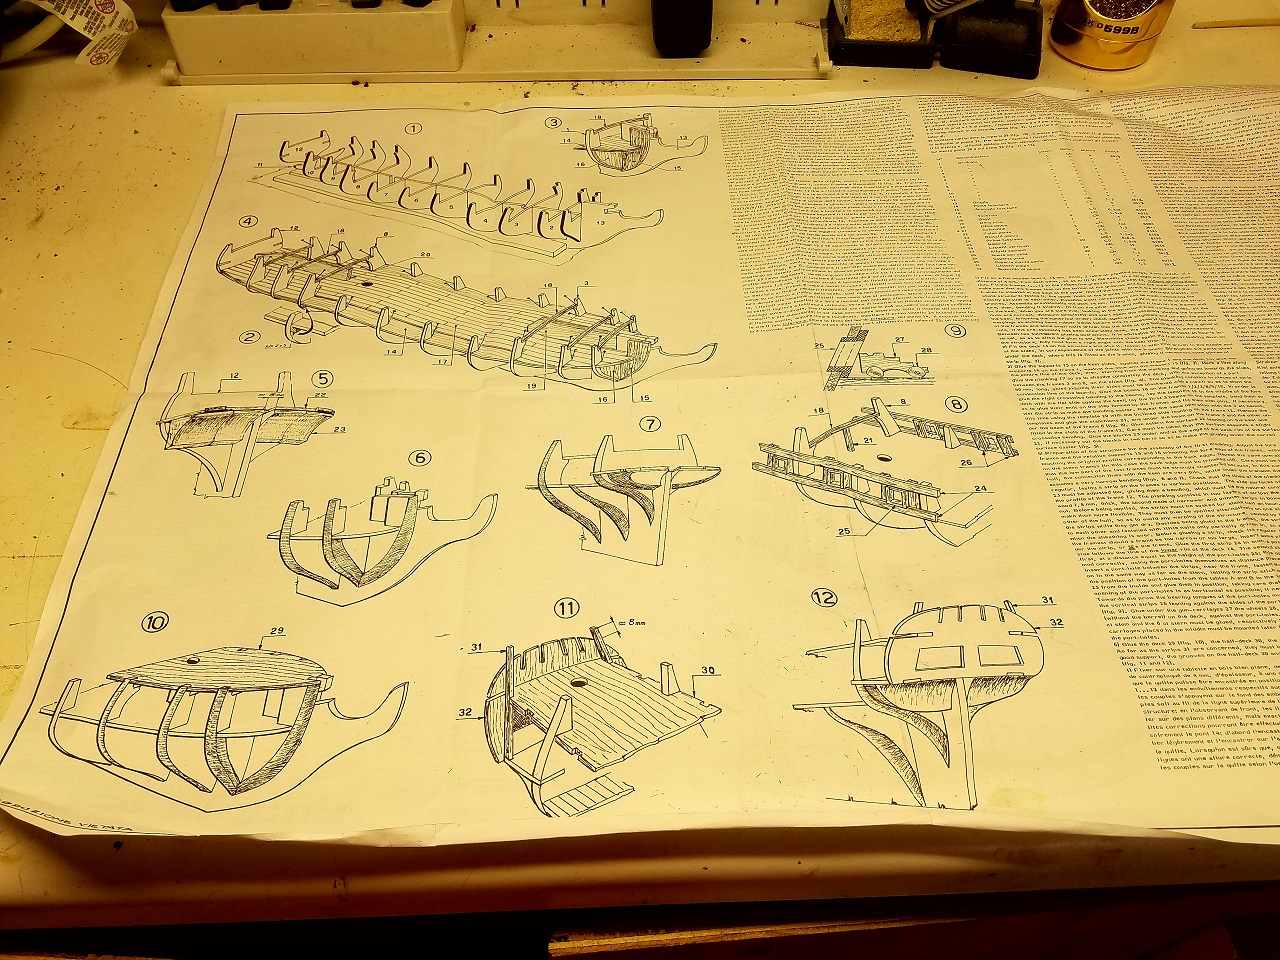
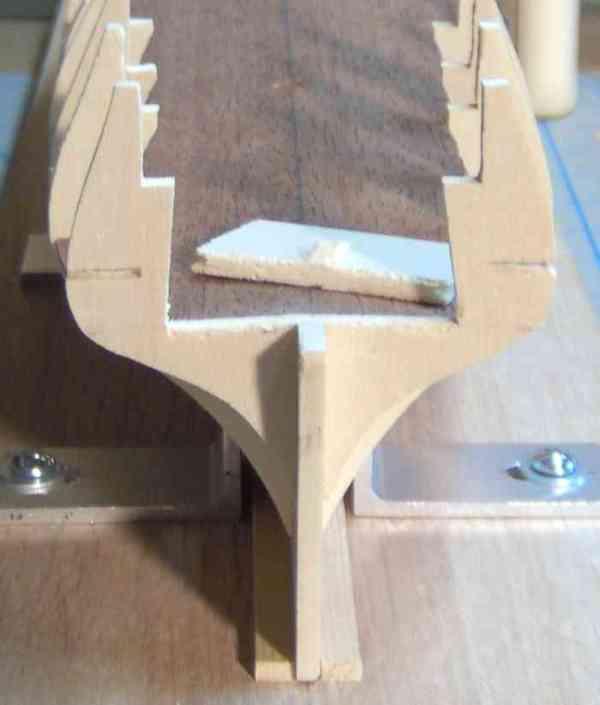
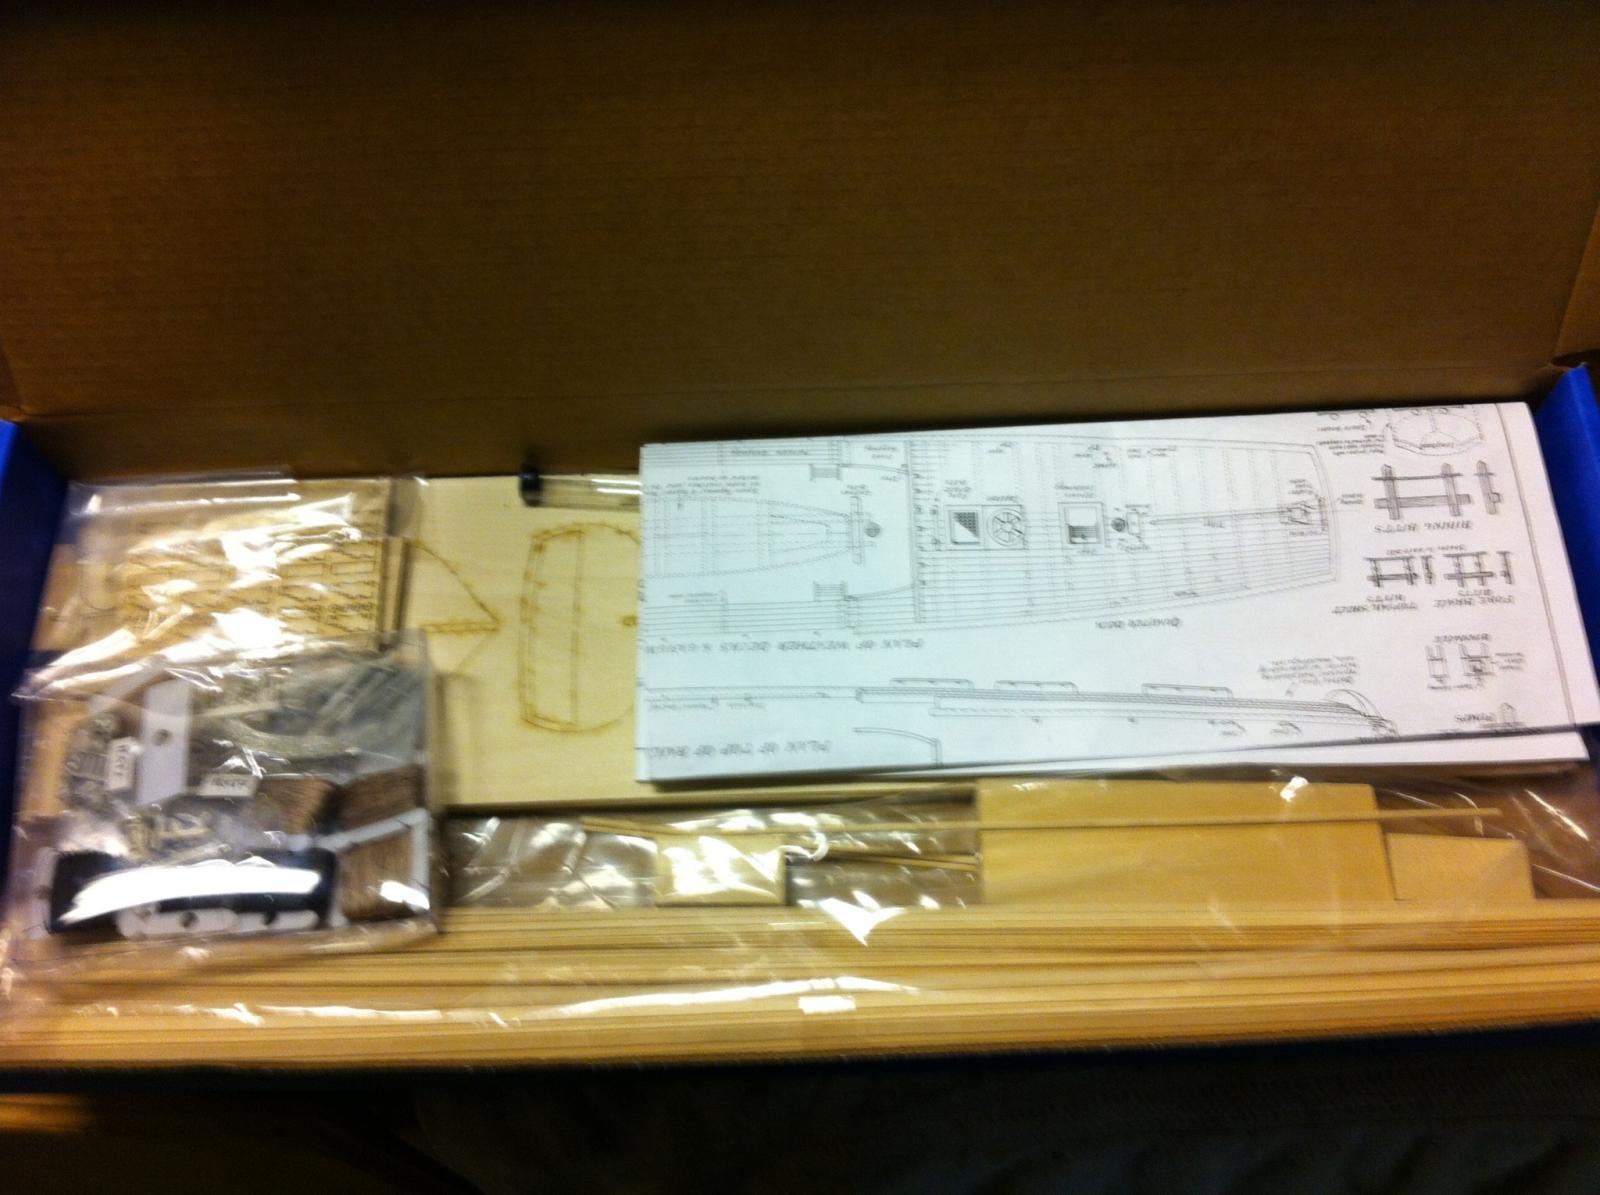
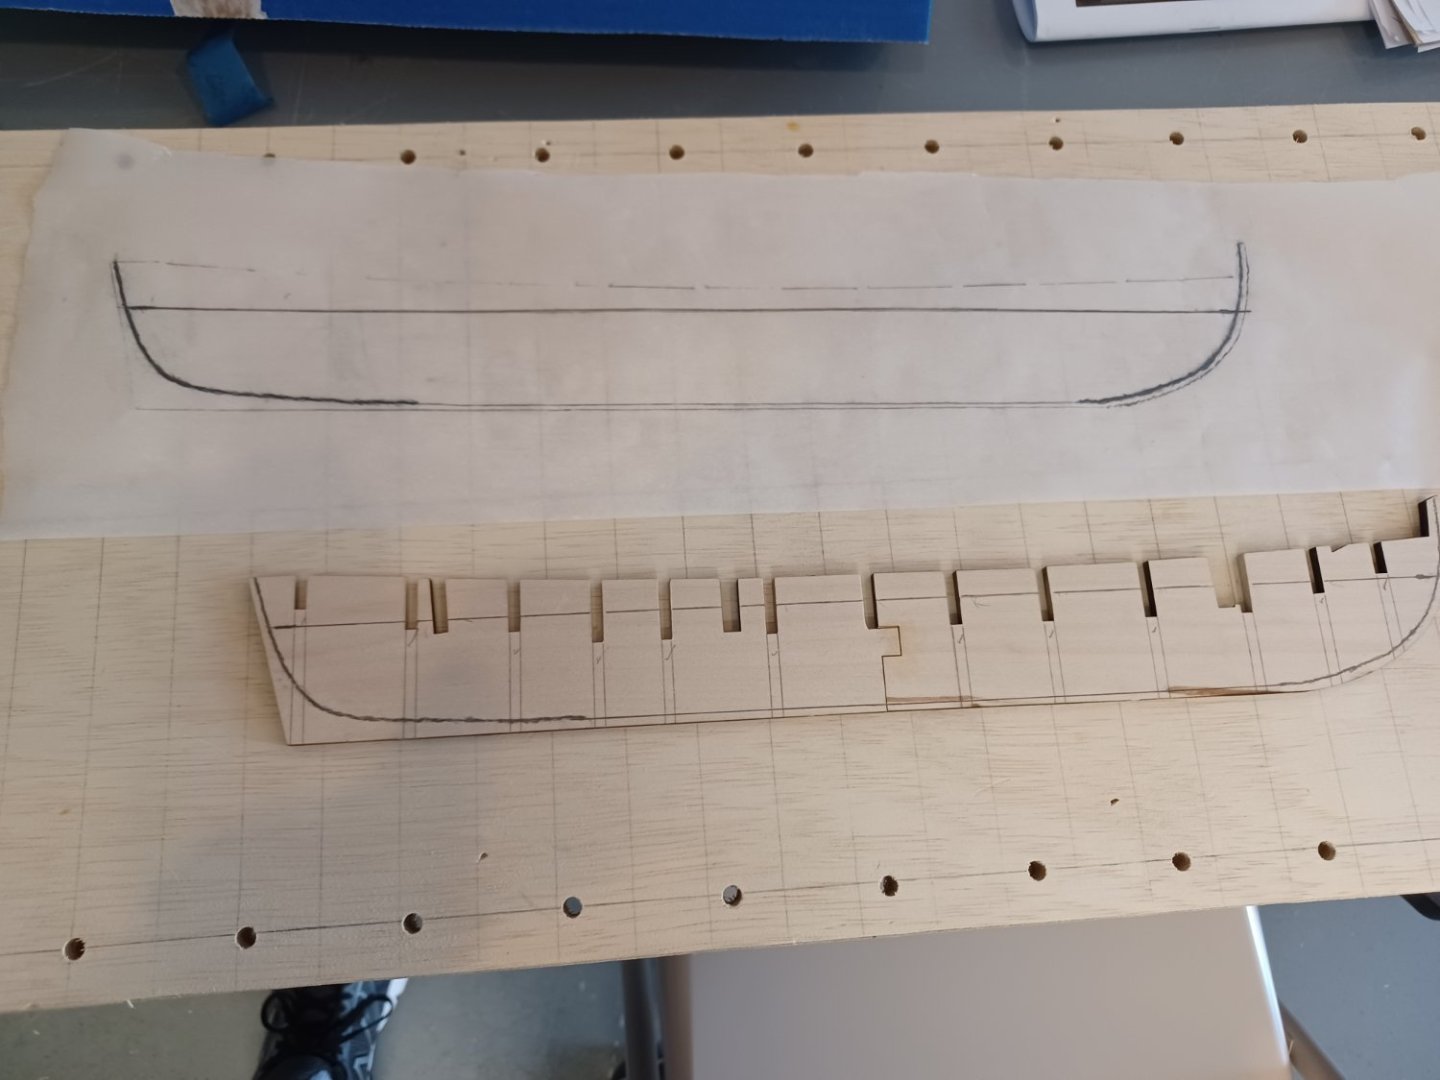
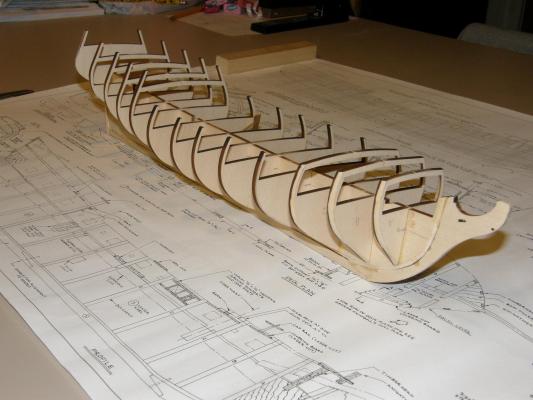
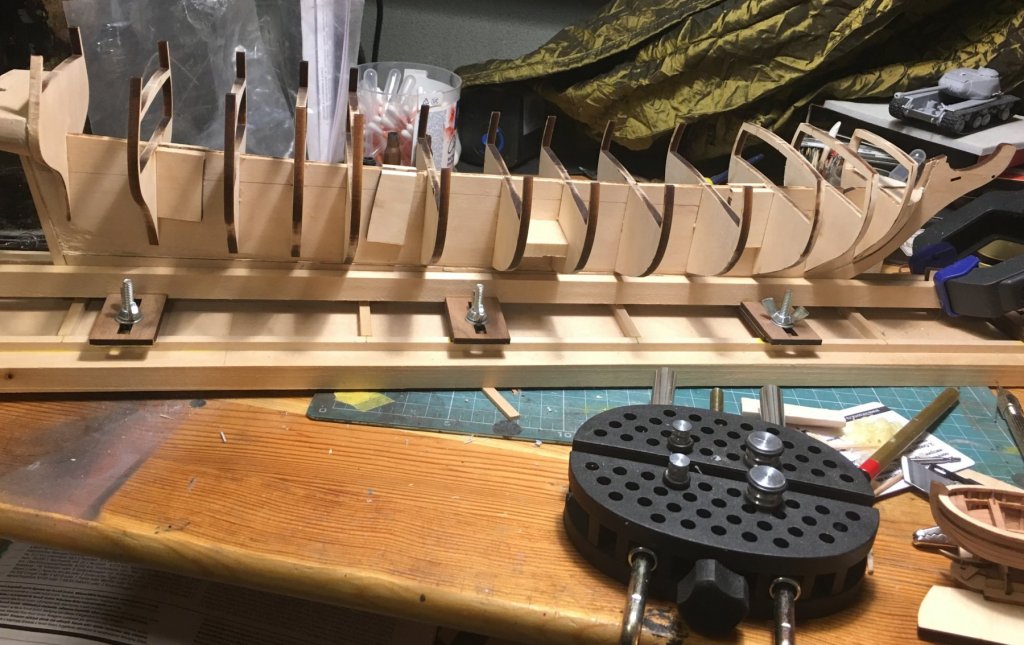
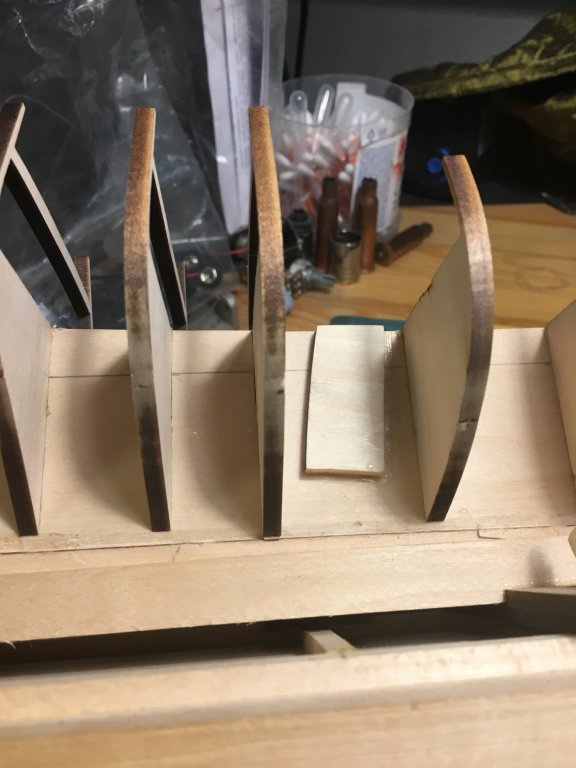
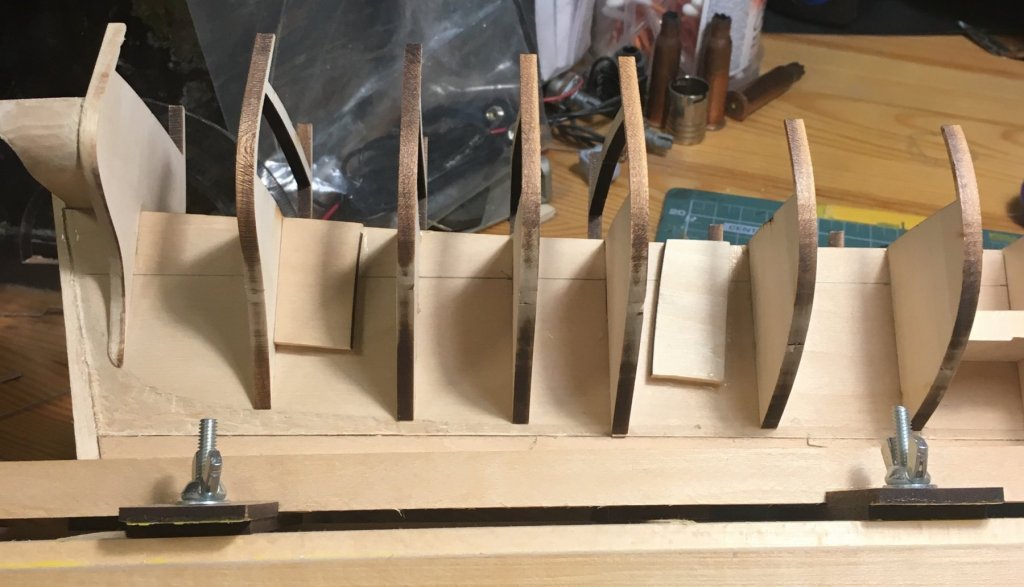
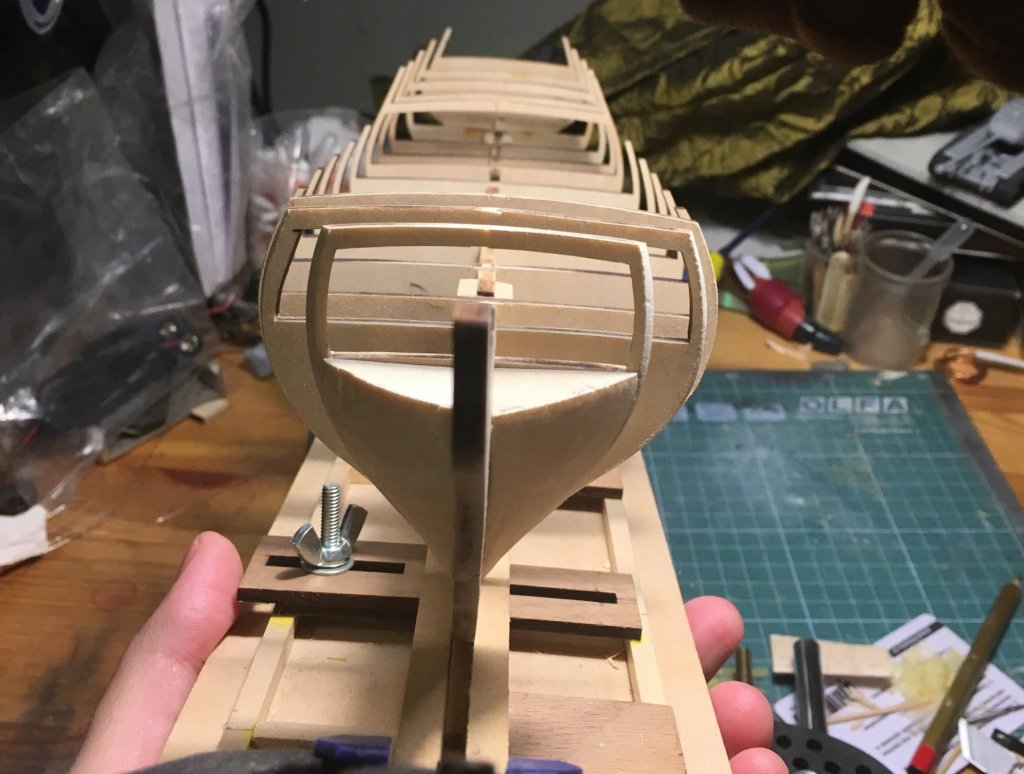
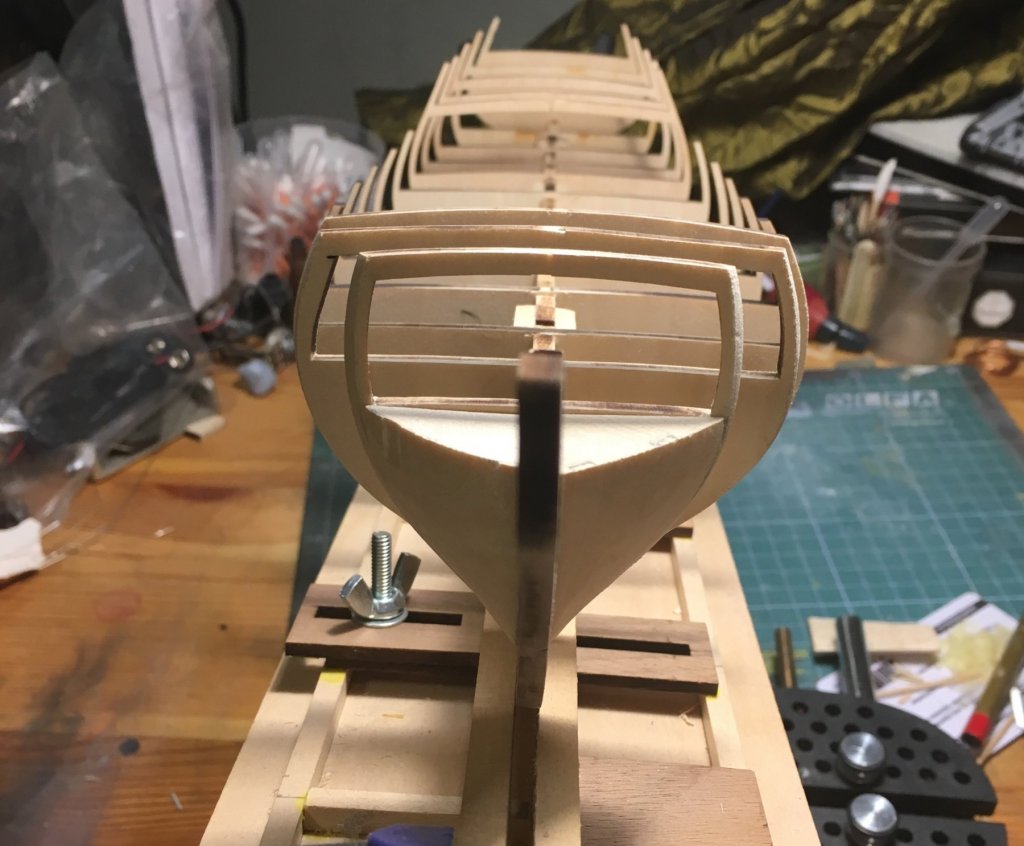
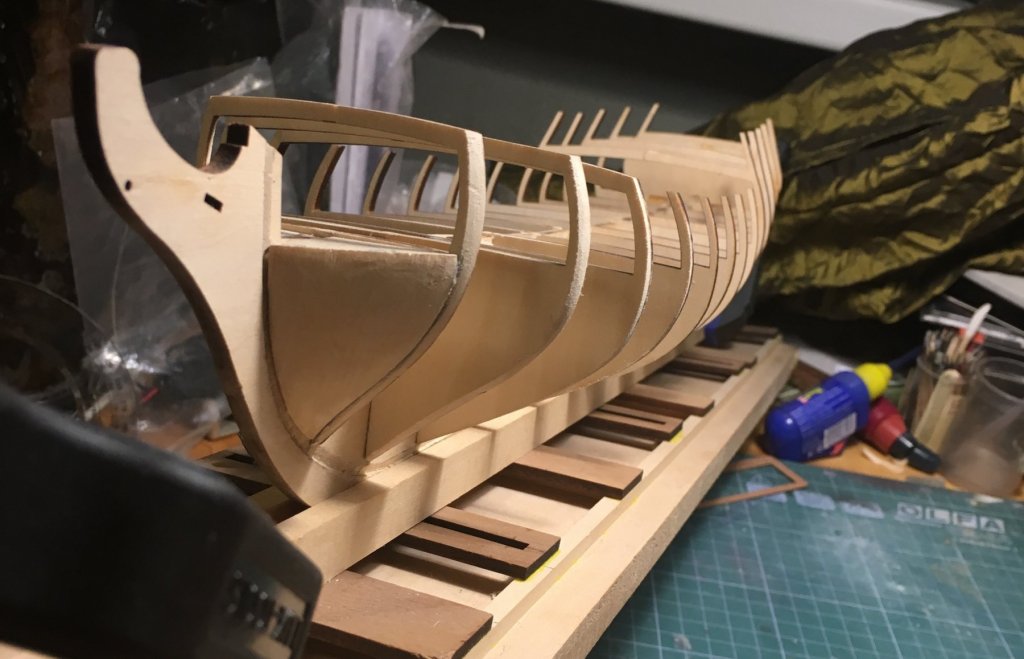
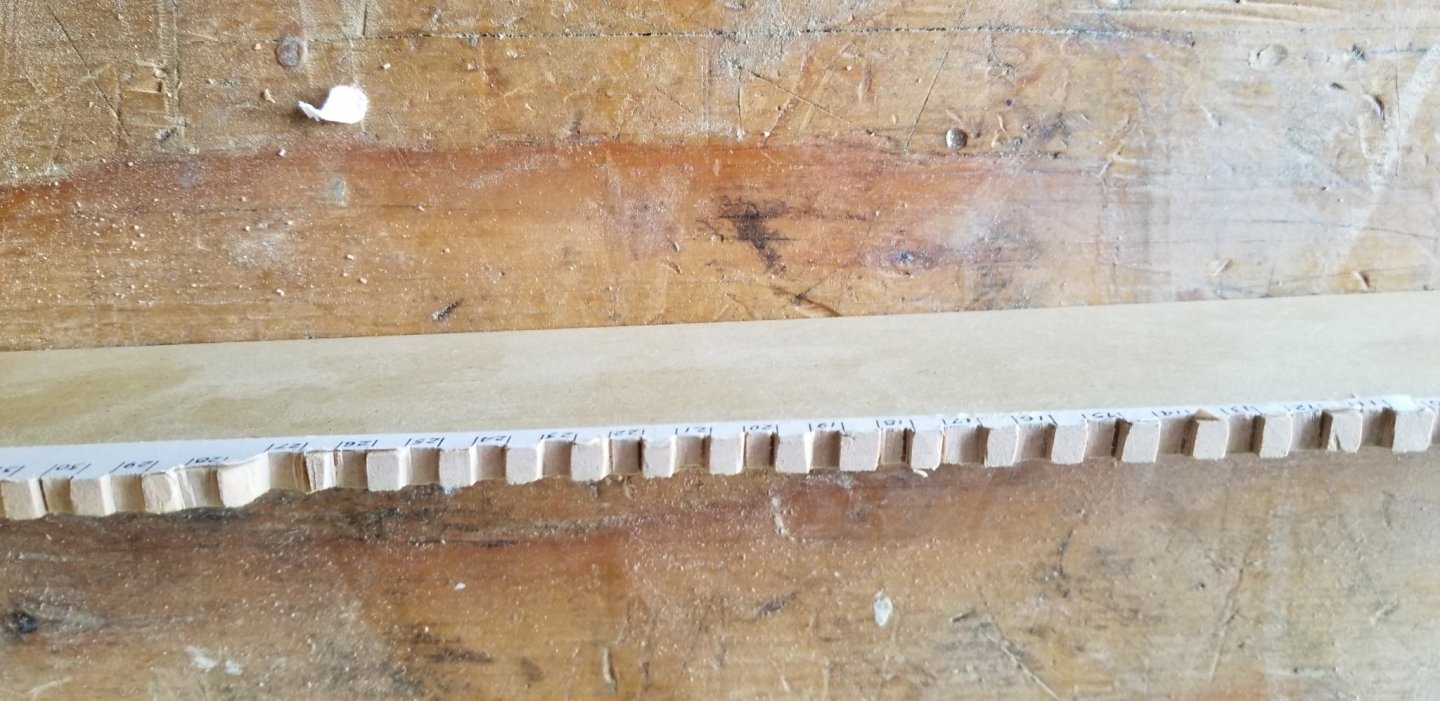
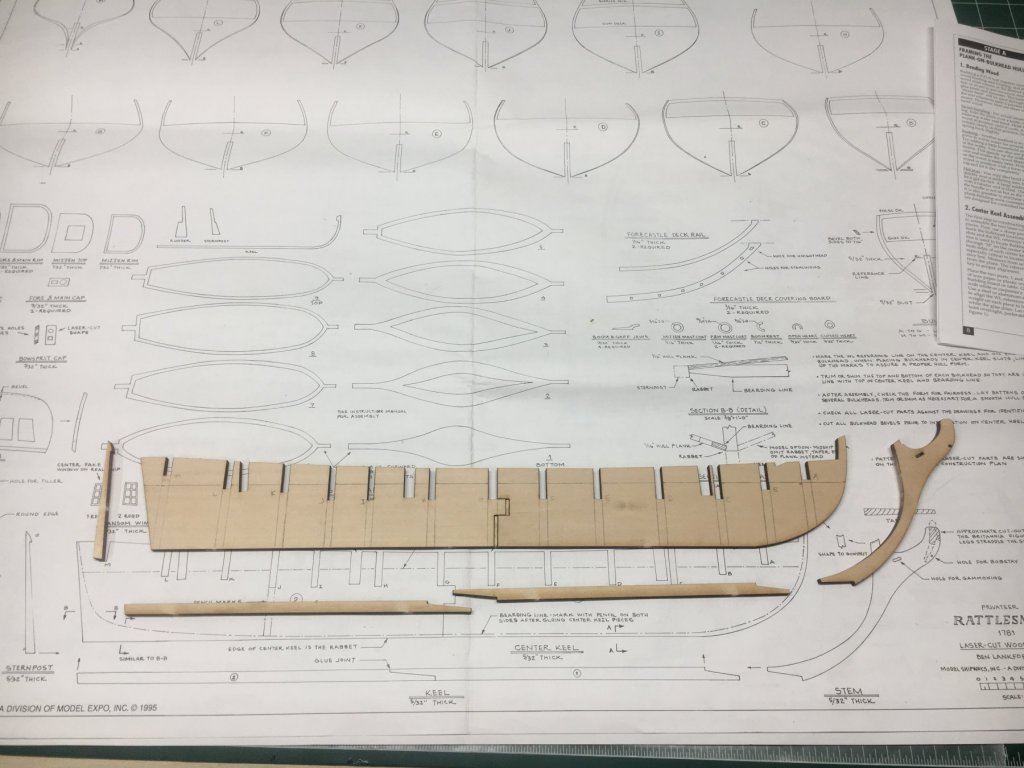
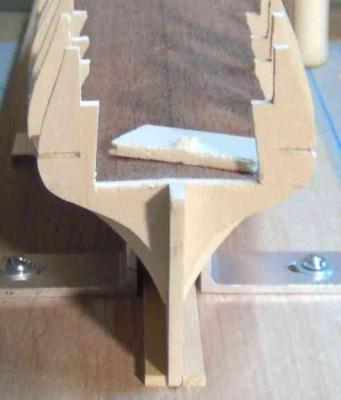
 For my first build log I chose the Rattlesnake kit from Model Shipways because it’s just such a pretty looking ship. I think I am up to the task of building it, although I still consider my self more of a beginner-intermediate modeler. I also have Bob Hunt’s Rattlesnake practicum for the Mamoli version of the kit which I will probably look to for ideas. I’ve spent quite a but of time reading other build logs for the Rattlesnake here on the forums and I have to thank all of the modelers for posting them; those build logs will help tremendously as I work through the kit. The Kit The kit arrived and I took inventory. I’m glad I did because it was missing the filler blocks. Model-Expo has a good missing parts policy so I got them replaced. Unfortunately, they only sent me one of the bow filler blocks, but I don’t think that will be an issue as there is plenty to go around. The britannia fittings are in pretty poor shape. I’m probably going to replace most of them with alternatives. I’m not sure what to do about the transom carving. It looks like the mold may have split so the border is bulging out a bit. Also, like others have posted, the curve of the transom carving is too narrow and will have to be widened by bending it. the curve is off by so much that I fear it will break from bending. The Keel Construction of the keel was straightforward, but the curve where the stem meets the center keel was way off so I had to trim it you can see the amount I have to trim on the center keel in the photo. . I also had to add a shim between the two center keel pieces to get the length to match the plans. Even so, the slots were still a bit off. The shim between the center keel pieces I wish I had cut the rabbet before installing the keel, stem and sternpost. It would have been easier.

-
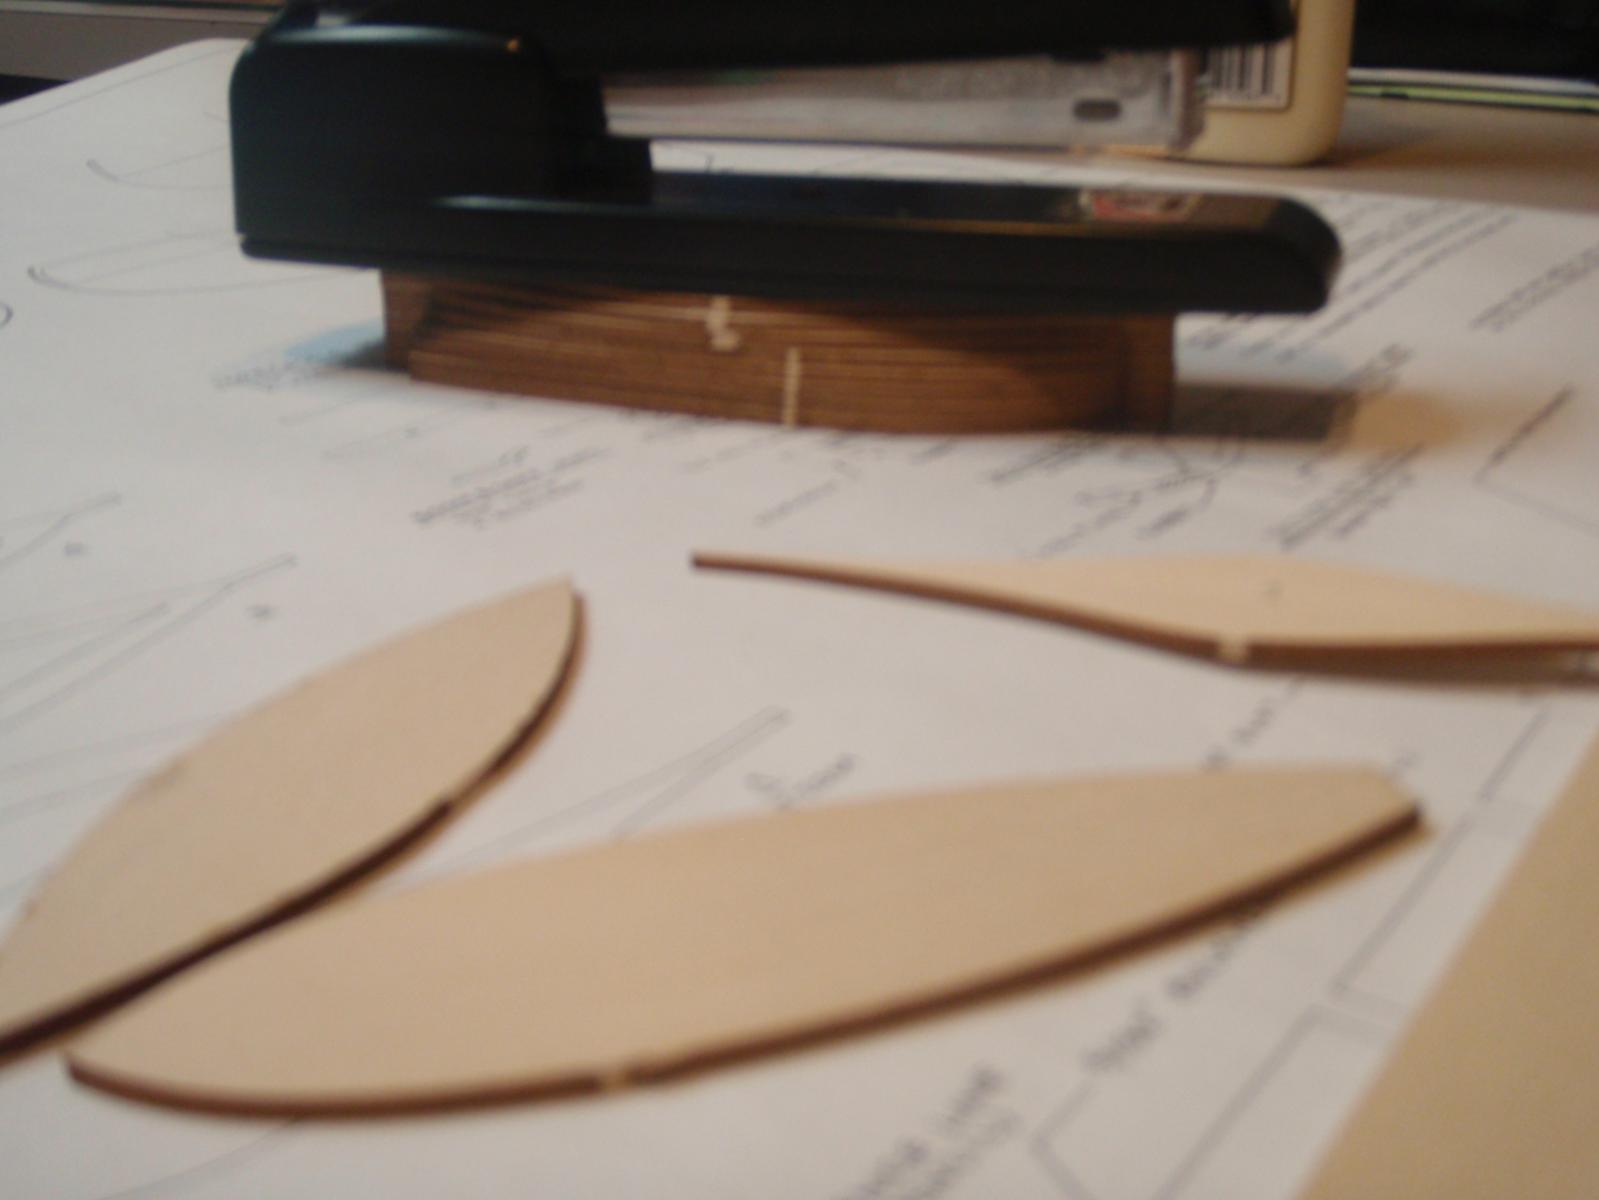
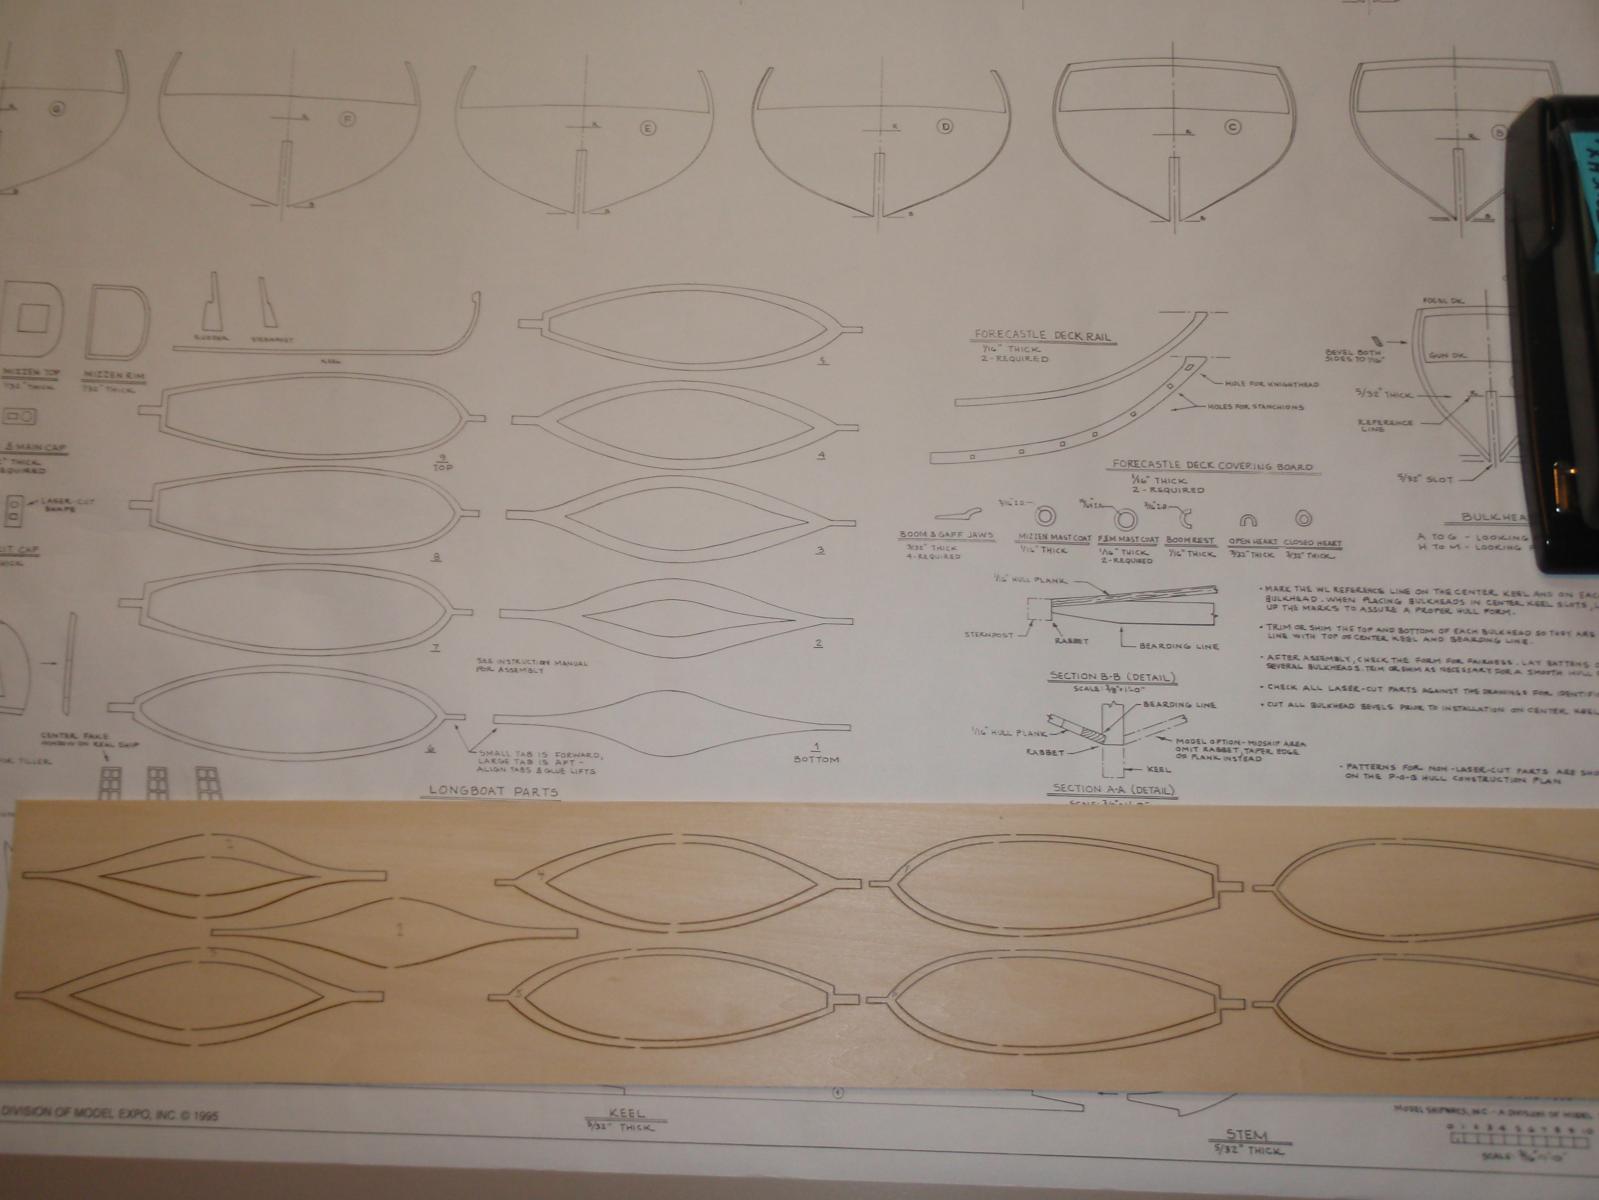
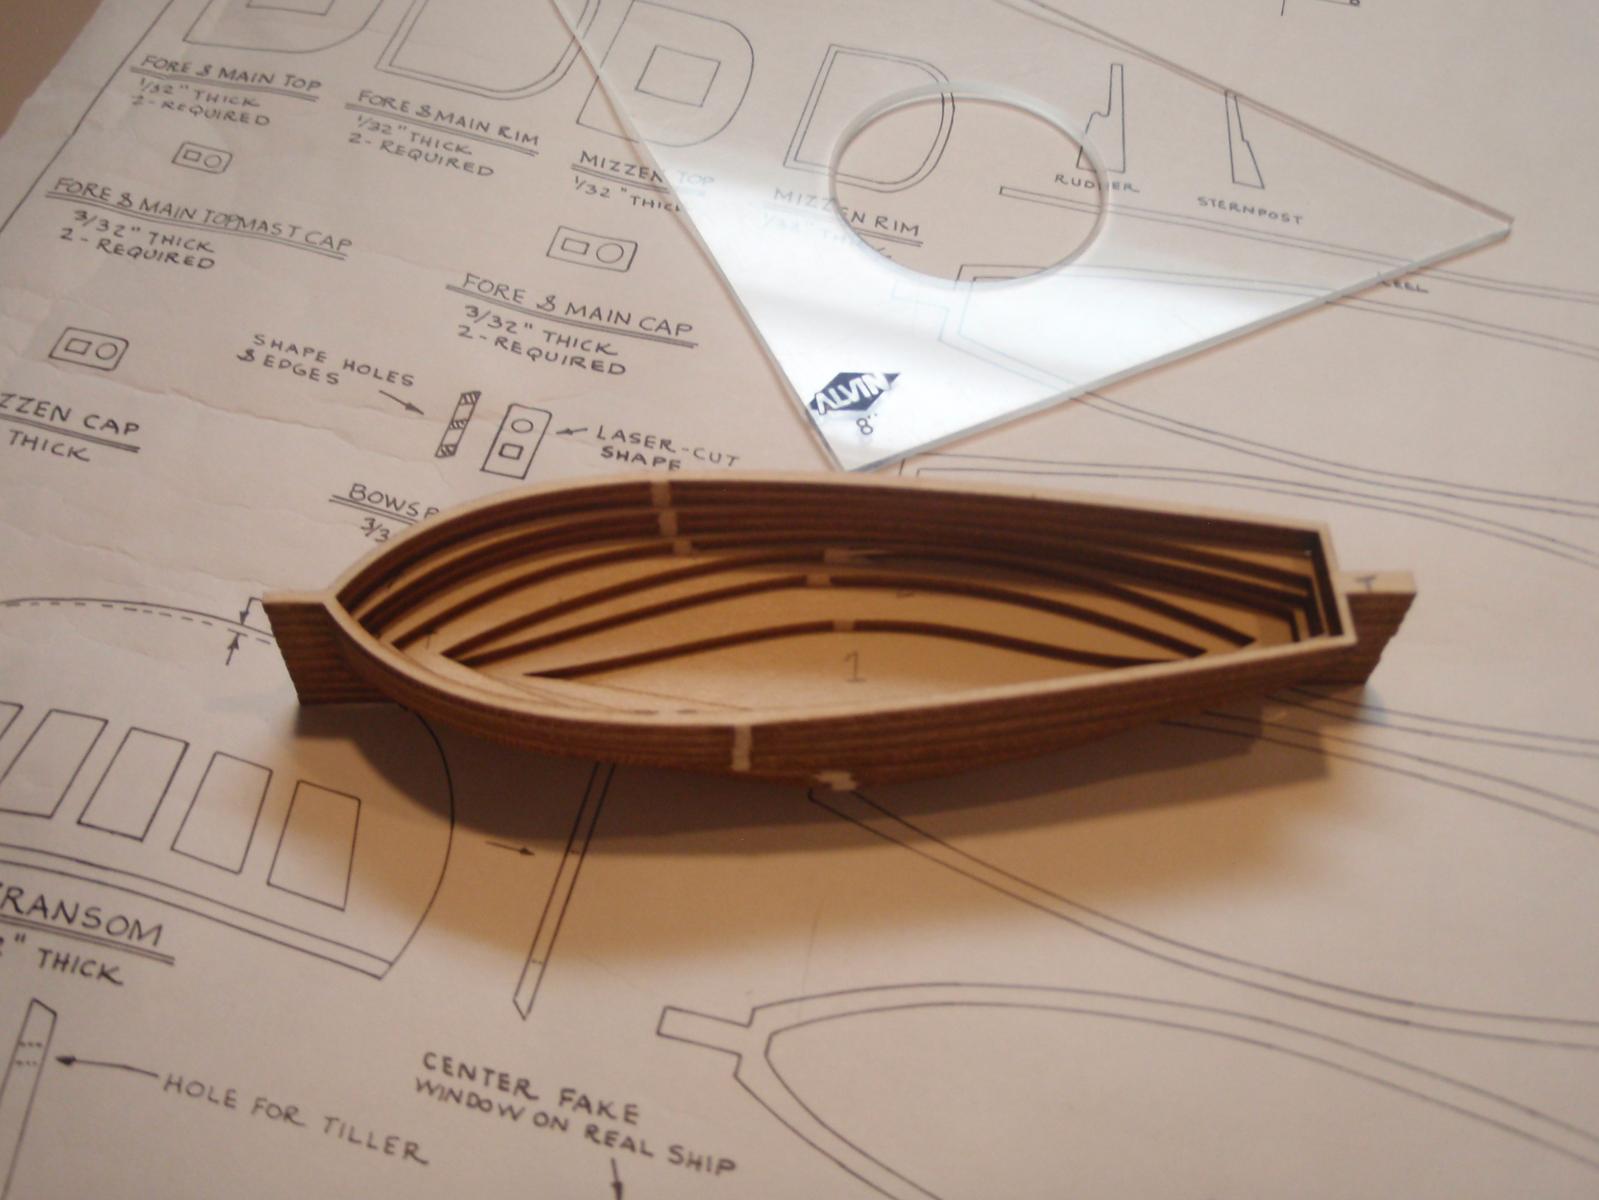
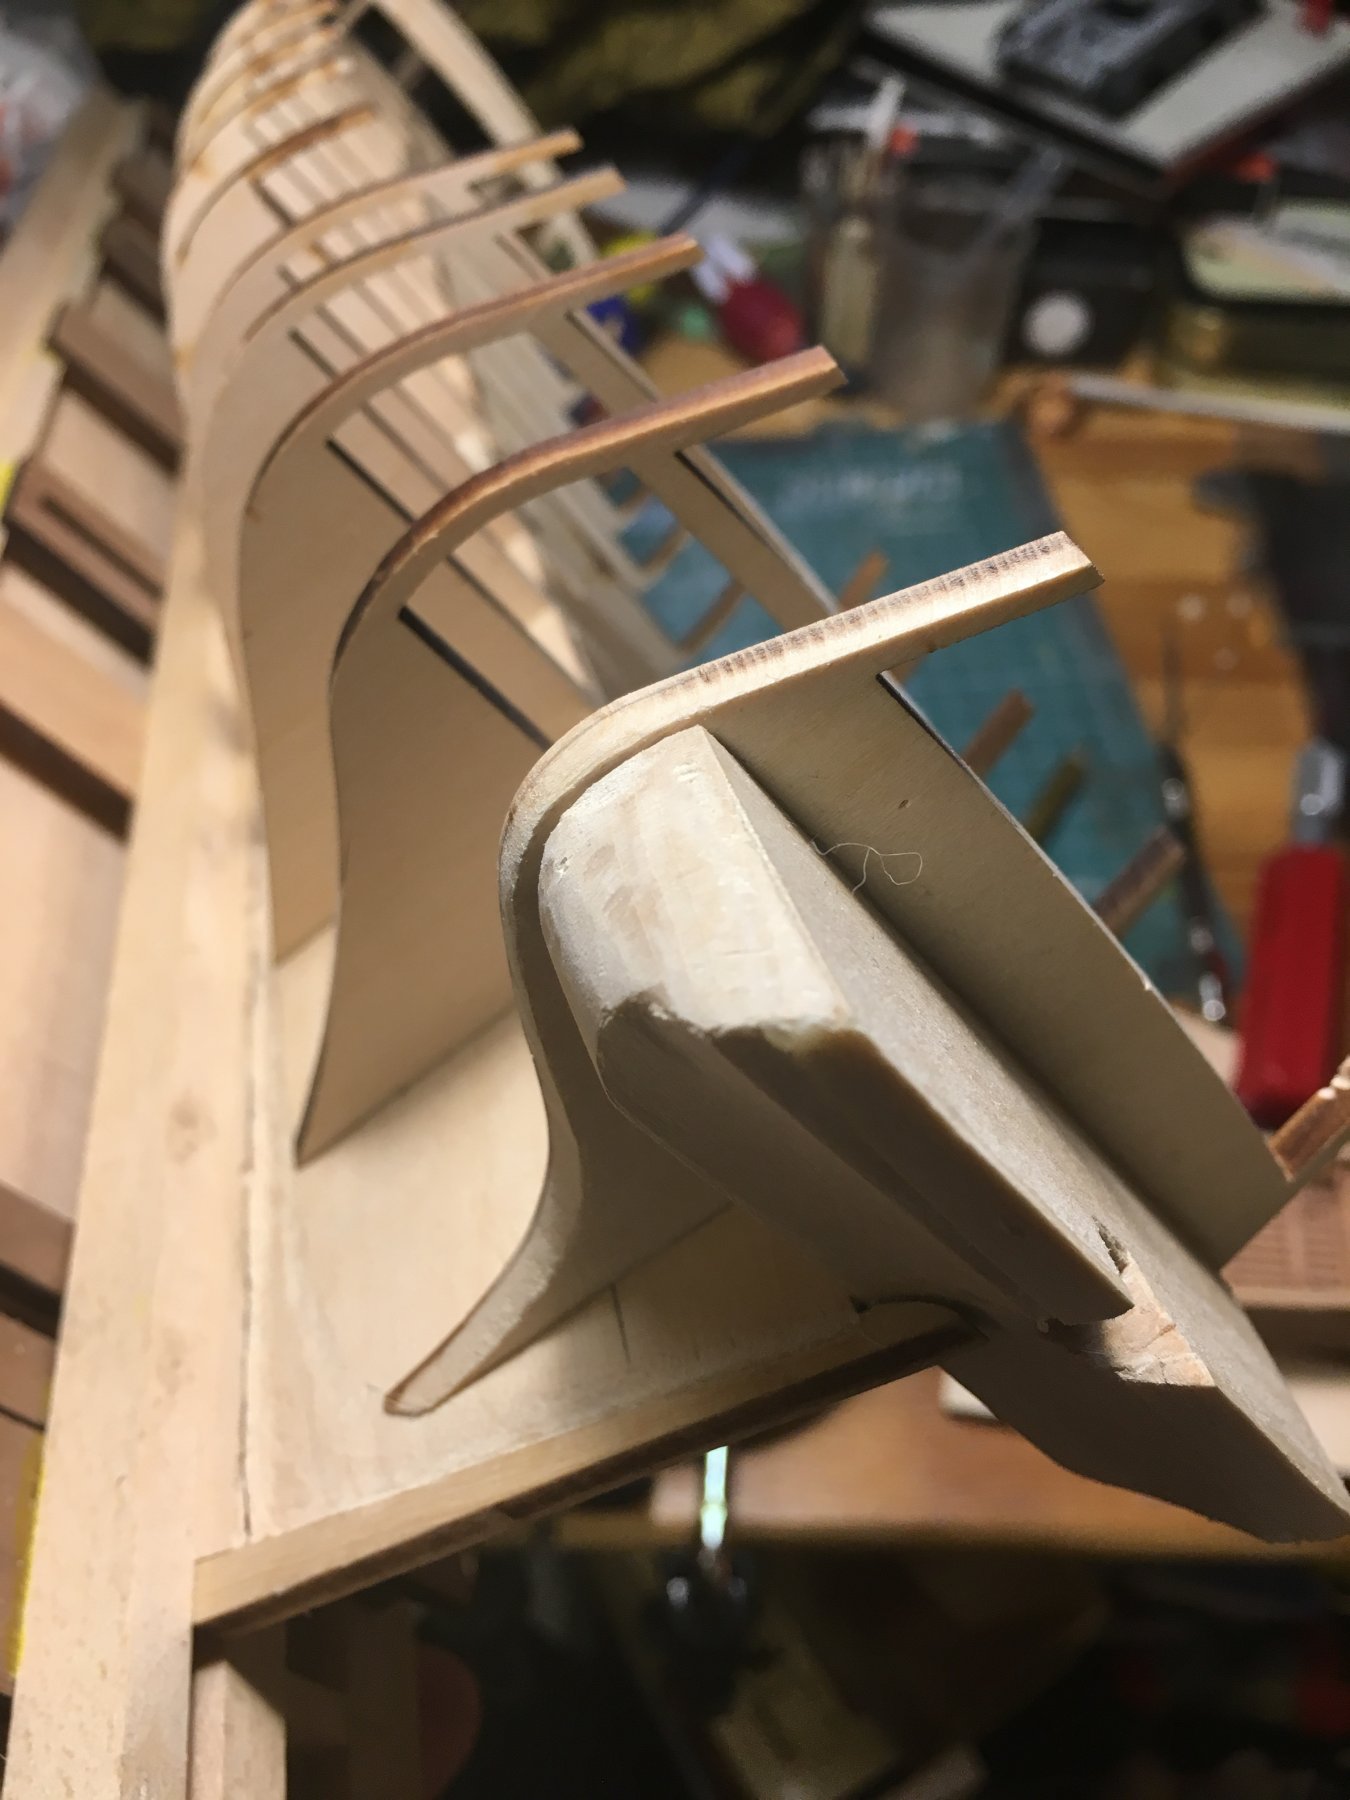
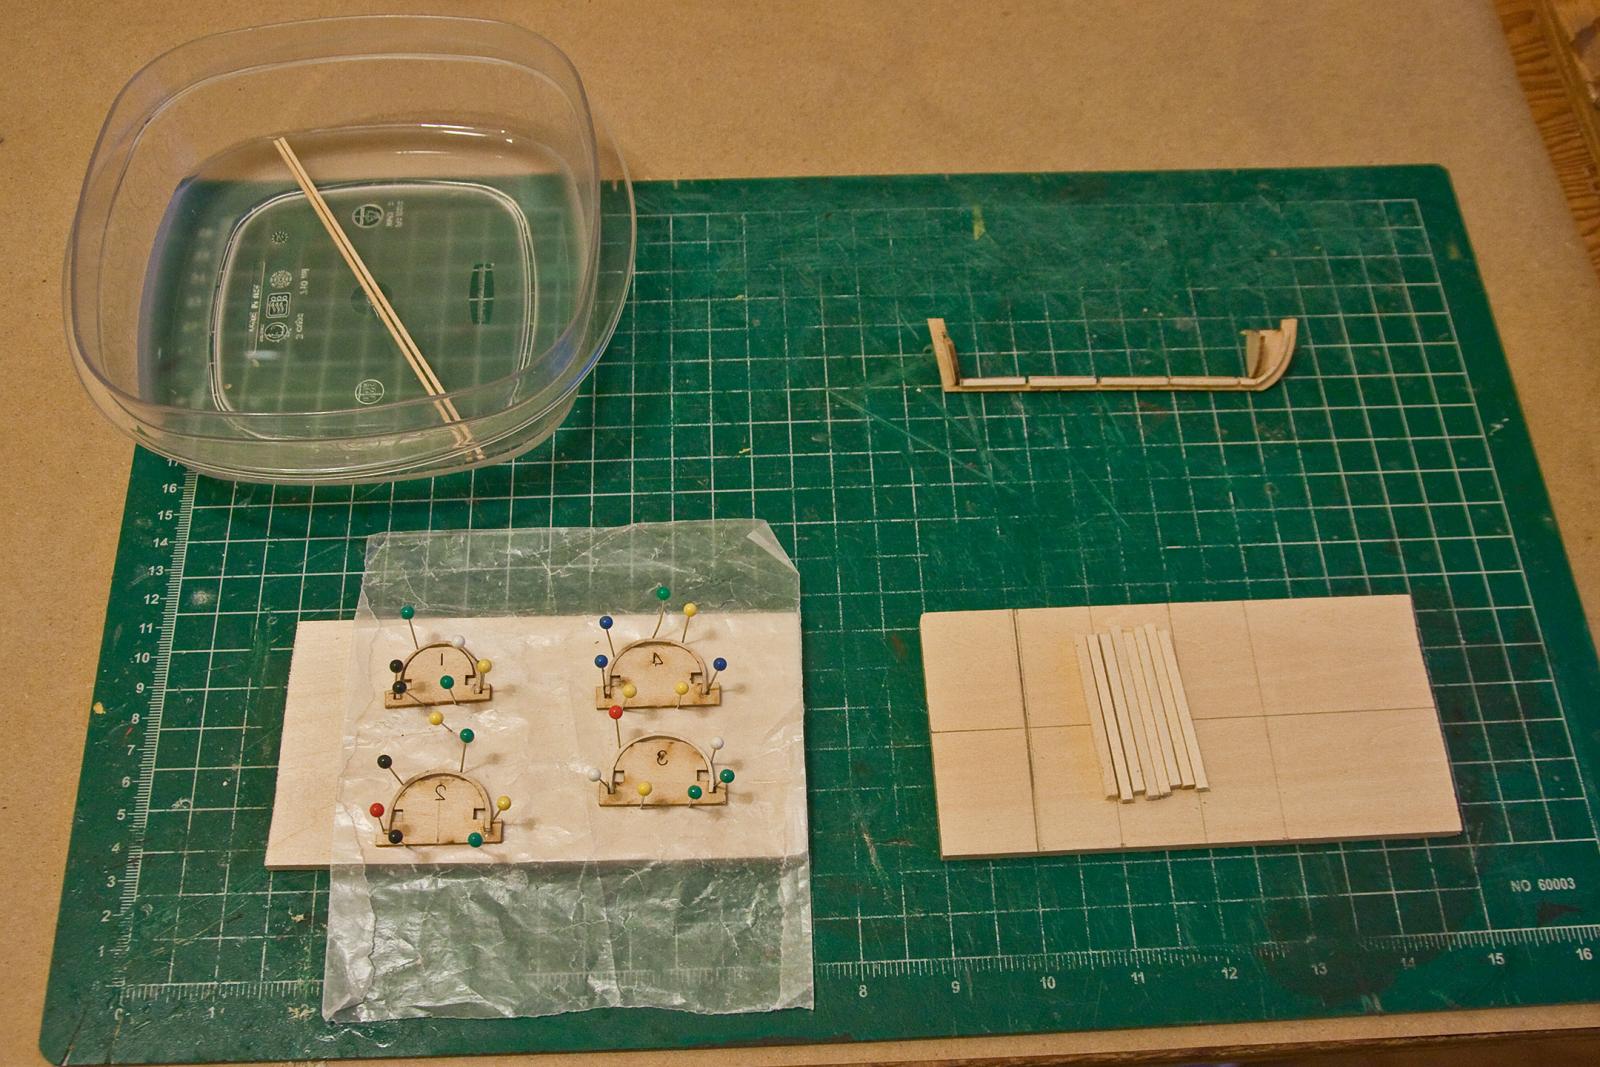
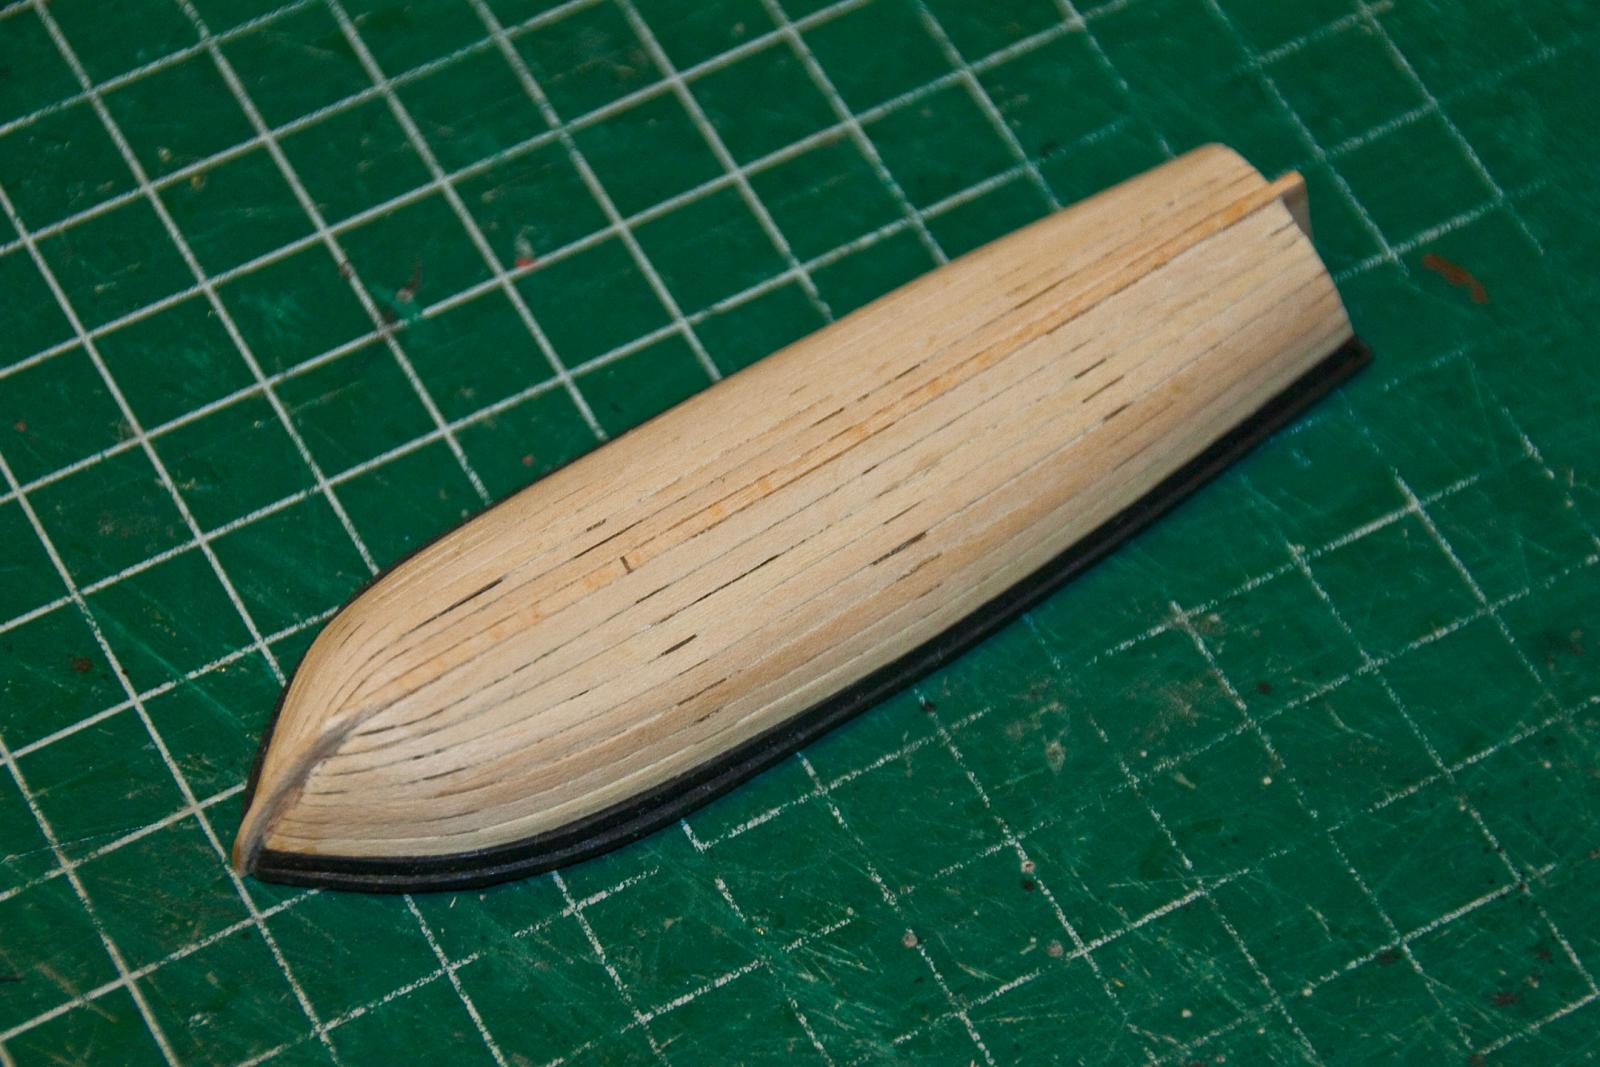
 I started a log with a few photos of my build on this site before the great crash - then my own computer crashed and I lost some photos myself. I've been building so I decided to take the time (we can't wait until we have enough) to start the log again. Reading the logs and responses on this site and seeing the museum quality work, I know the kind words and encouragement you all give. I also know any criticisms or suggestions is entirely for the best. So I post this log to give and receive as much help as possible. These are some of the original pics. My gosh this kit has some fragile parts! Now some of the gun port framing. Ship's boat. I shifted to this to get up the nerve to start planking. Plus that, it just looked fun. This is a small 'bread and butter kit' inside the Rattlesnake kit. The instructions give a hint to glue all the layers together using the stem guides except the last one, that will make sanding the inside easier. I say stack them together, mark the lines and sand as much as you can separately, then glue them together. It's a very small space Sorry blurry. Stapler holding down the layers
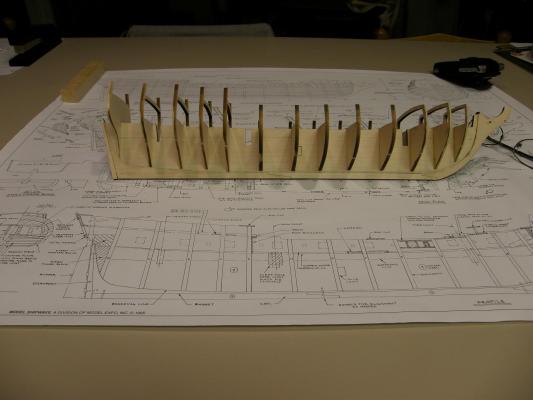


- 152 replies
-
- 1
-

-
- rattlesnake
- Model Shipways
- (and 1 more)
-
 Good Evening Everyone, I know most of you and hope you will continue with me on my building journey, this time, the Rattlesnake…American Privateer. After getting my feet wet with the Lady Nelson, I do plan to slow down on this one and really try to do it as perfect as my skills will allow and be as accurate as I can at the same time. I suspect this build will also fall into the “kit bash” category because there are just to many components that I am disappointed to find in the box (for instance, all the blocks are from Amati). I am in good company on this build with javajohn and OldSalt1950 building the same kit and Gregory building the kit in 1:48. The journey begins with an inventory and a wish list for replacement parts and components.
-
 After lurking on the site for a few months taking advantage of all the great information, I'm jumping in. As I've been working on the model for a couple of months, I have a bit of catching up to do. This is my second build since getting back into modelling. I built many, mostly plastic models of ships, planes, tanks back in my younger days. Jumped into wood ship models about 2 years ago. Based on the advice on this site I started with the Model Shipways Phantom. With that under my belt I've started the Rattlesnake. I still consider myself very much a beginner. Most days I wish I had instructions like the Revel plastic models from my past. I guess that's part of the hobby and what makes a community like this so valuable. so here goes....
- 53 replies
-
- 2
-
-
- rattlesnake
- model shipways
- (and 1 more)
-
 I am tackling my first intermediate model, the Expo Rattlesnake. I see some nice logs out there, and perhaps I will start a log. Any suggestions before I start? I am intimidated, because there are not "step by step" like other models that I build. A few questions of my own before I start. 1) Why not sand the Rabbets instead of cutting them? Sand them before gluing any bottom keel? 2) If you do cut rabbets, how do you you measure 1/16th of an inch cut off with such a crude chisel? 3) The instructions say "Bevel the Bulkheads" before you put them on ship? I thought the bevel was to achieve Fairness. How can that be done before putting them on? 4) The bulkheads have a center piece that appears to be a cut out, yet some of the builds show that enter piece as not being cut out? 5) I can't exactly locate the Wale Plank location. I see it on the plank diagram, but its hard to determine exactly where to place it. Please advise. 6) The rigging looks very scary, and I don't see any details on how to install blocks, details on how to wrap the string, etc. Maybe that can wait till later. Thanks Bill aka Cpt Striker
 -
 Since updating the shipyard, decided that I'd start and new project. Once snake bit, it is an itch you just have to scratch, so into the deep end of the pool I go. Not much to show right now, the keel frame is being glued up so while that is curing, I'll be re-reading building logs and doing the background work to get the frames installed square, establishing the dreaded rabbet and prepping for hull planking.
-
 Beginning a build of the Rattlesnake US Privateer by Model Shipways. This is only my third model, second wood ship. Previously I have built the USS Constitution by Revell - Scale 1/196 - Plastic 18th Century Longboat by Model Shipways - Scale 1/48 - Wood After building a plastic ship model and a wood ship model, I am totally hooked on the wood ships. My first wood ship build was purchased as a combo kit from Model Shipways which included the kit, paint and tool kit. I falsely assumed that if it came with a beginners toolkit that it was a beginner ship model. After receiving it and seeing how small it was, I researched further and found it was for advanced builders. Although a bit dismayed, I gave it a go and did complete it slowly. I learned a lot during the process. I probably learned more about what not to do. For this build, I used the MSW Model Ship Kit Database to pick my next model. http://mswshipkits.ampitcher.com/ This is a much larger ship and rated at an intermediate level. I hope the larger size will make it a little easier in some ways. After reading the instructions for the kit, it provides a lot more "beginner" details on how build a wood ship. It is much more detailed than the longboat instructions.
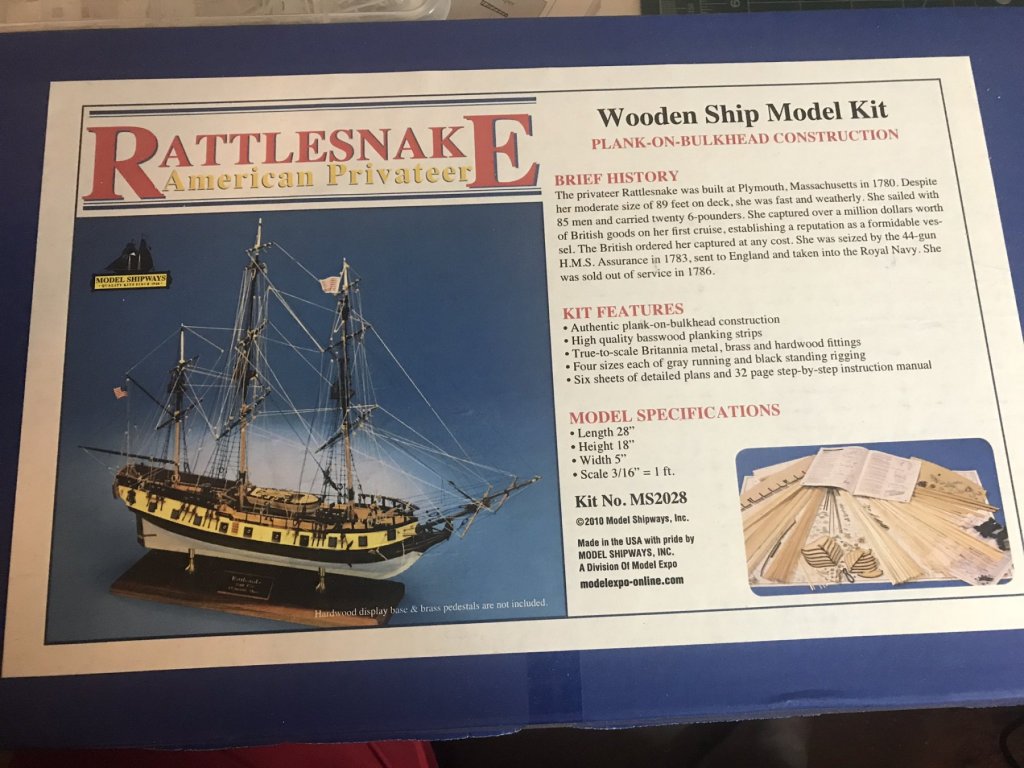
-
 Greetings, dear colleagues! This is my first log on this forum and I'm happy to start publishing in such a great community. Now a few words on history of the build: I've bought this kit about 15 years ago and until 2017 it was laying on a shelf waiting for it's turn to be built. I've searched through all the logs based on this kit both here and in Russia to see what other people do with it. Sad to see that most builds are unfinished - I cannot say why, since in my opinion it's a very attractive prototype - a small ship-rigged vessel that looks like a frigate (from afar), scale provides an ability to detail the model a bit and it does not take too much space to keep and display. Well I opened the box (I like the box of my kit - the white one - with great polygraphy - better than those that they pack their models into these days) and first two moments caused a bit of puzzlement - instruction says to glue the halves of kiel frame and false kiel details and to cut the rabbet afterwards. Strange, but that works - I've done that exactly the way it's described in instruction and all went well! Next puzzle were the frames - I use the rule of measure seven times and glue/cut one time - and it saves me always - I've dry-fitted the frames according to plans and nothing fitted at all. I've said a lot of good Russian words towards "manufacturers who cannot cut a few well-shaped details with a laser" but then I've figured out to attach the frames to the drawings - and everything was clear: the letters engraved on the frames are wrong! So I've restored the right consequence of frames and there were only some cases of asymmetry of frames to deal with and the basic structure was complete. Now I'm in a process of planking and it goes very slow - about a strake per weekend 🙂 The thing that terrifies me the most - is planking of decks. I have an intention to make it right - with cuts into waterways in the nose part and with correct flow of planks but I still do not fully understand the theory of this process. So here are the pics of process form the beginning until present moment:
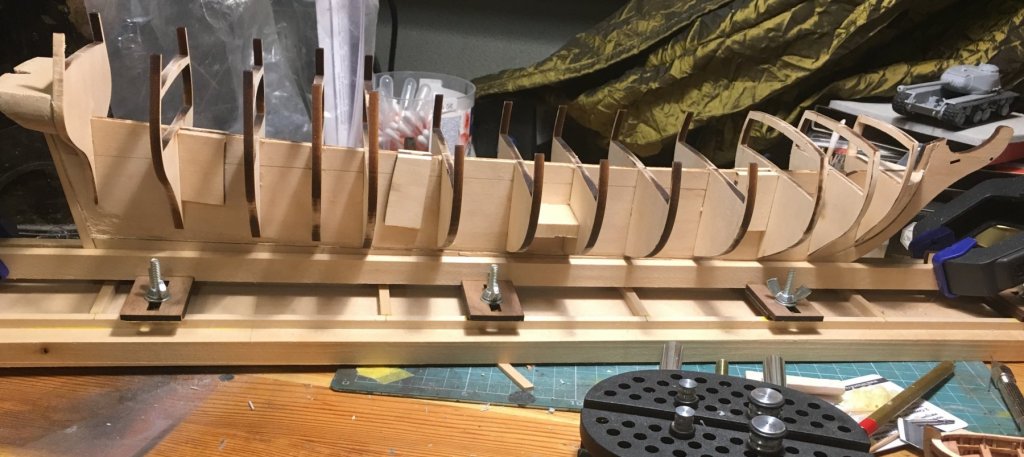

-
 I final finished my first wooden boat, the Mini Mamoli British Schooner Evergreen, a 1:125 Scale Solid Hull Model after a two year build. This was my first attempt at such an endeavor in 30 years. I had started the Billings Boat’s POB Zwarte Zee , an ocean tug back then but got about only about 85% complete. I never finished it. So with a completed build under my belt, I set my sights on the 1781 American Privateer, The Rattlesnake. I considered the Evergreen my “training wheels” for this build. Although technically the Zwarte Zee was my first POB boat, all of the planking flaws were covered up with wood filler and paint. This would be my first true test in this construction method. What you see is what I built for better or worse. This build was started in October 2010 and I have only now decided in May 2013, to post my build log. I was reluctant to do so because compared to the others members who post comments regularly and have submitted their many build logs, I am but a beginner. I have knowing or unknowingly made many errors, omissions, and mistakes. It would be like hanging out my dirty laundry. But after some prodding by some of the members, I agreed to post my build if anything to show the error of my ways to anyone who wants to follow a slooow moving project. I had a choice of the Mamoli or the Model Shipway kit. After a little research I discovered Robert Hunt’s Practicum (http://www.lauckstreetshipyard.com/) and thought this is just perfect for me. Having struggled through the minimal instructions of the Norwegian translation for the Zwarte Zee and the simplistic instructions translated from the Italian for the Evergreen, and after reading the free sample Chapter 1 with its highly detailed instructions and detailed photographs, I was easily convinced to purchase Robert’s practicum. There I found that the practicum was based on the Mamoli kit, so I chose that kit to build. To be fair, Mr. Hunt did state that his practicum could also be used for the Model Shipway kit. The practicum was written to both supplement and enhance the original kit instructions or to kitbash the project. Because the “journey” to me is the purpose of building a model, rather than the destination, the final model, I chose to build the kitbash and plunked down my money: · Basic kit - ~$240 · Robert Hunt’s Practicum (http://www.lauckstreetshipyard.com/) - $150 · Harold Hahn’s plans ¼” scale - $45 · Reduce the Hahn plans 74% to match the kit’s 3/16” scale (1:64) - ~$25 · Hobbymill Wood Package (http://www.hobbymillusa.com/) - $210 This not a cheap build/modification. This does not include the tools that I accumulated and still am accumulating for this project. Hell, it’s a hobby, so it’s OK, that and the fact that I just retired and am a bachelor. A kitbash goes beyond what the basic kit instructs to make the model more interesting, challenging, and pleasing. In this case Mr. Hunt’s practicum is based on the model Harold Hahn, a master model builder, built using plans he created based directly from the original British Admiralty drawings. Although this is an American ship, it was captured by the British and it is from them we can thank for having the historical drawings and the name Rattlesnake. In this model Mr. Hahn used direct woods to create the colors of the ship. Therefore in keeping true the Hahn model, the practicum substitutes the basic kit wood with a wood package purchased separately from Hobbymill (http://www.hobbymillusa.com/); and has you purchase the Harold Hahn copyrighted plans which Robert is basing his kitbashing modifications. Since Mr. Hahn built his model in ¼” scale, the plans have to reduce to match the kit scale of 3/16” (1:64). Your ordinary office copy won’t do the trick due to the size of the sheets. You need a large copier and one that can do reductions, specifically 74%, the kind found at a large stationary store, graphics, or engineering firm.
- 973 replies
-
- 2
-
-
- rattlesnake
- mamoli
- (and 1 more)
-
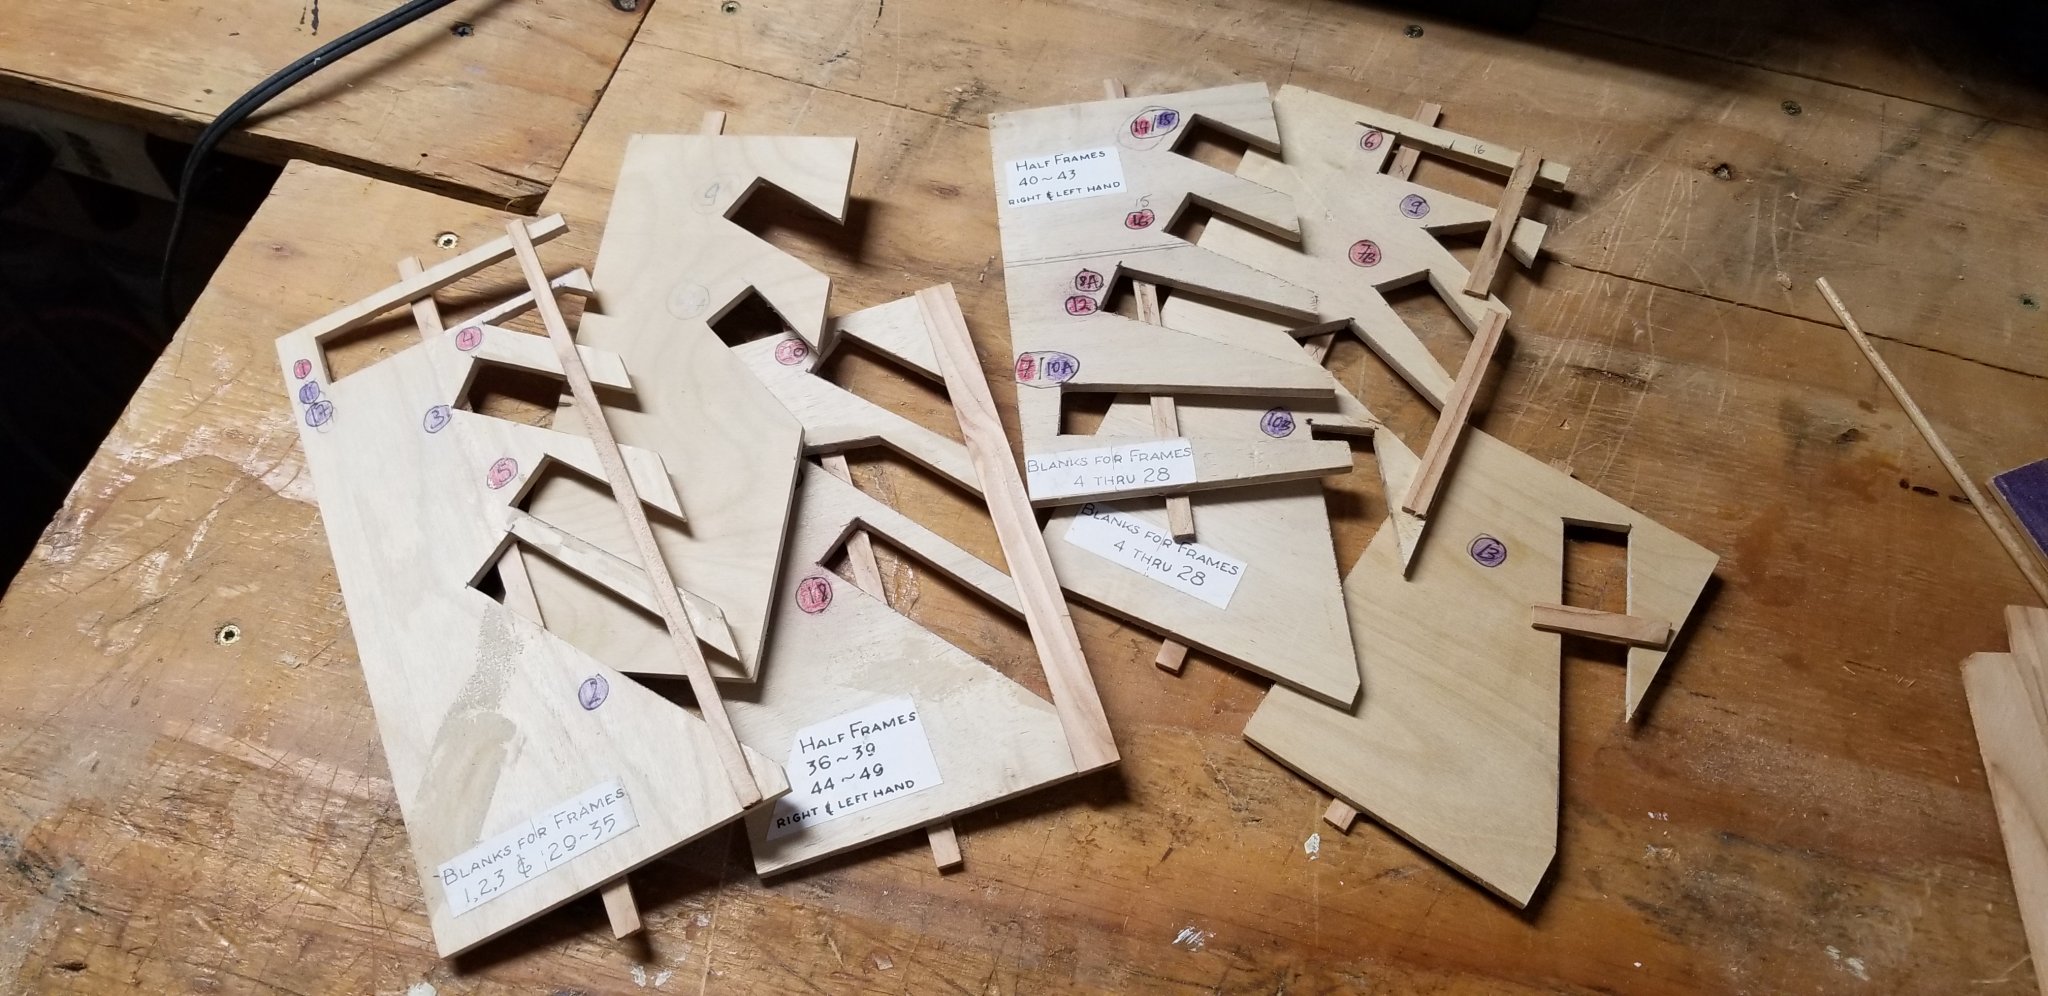
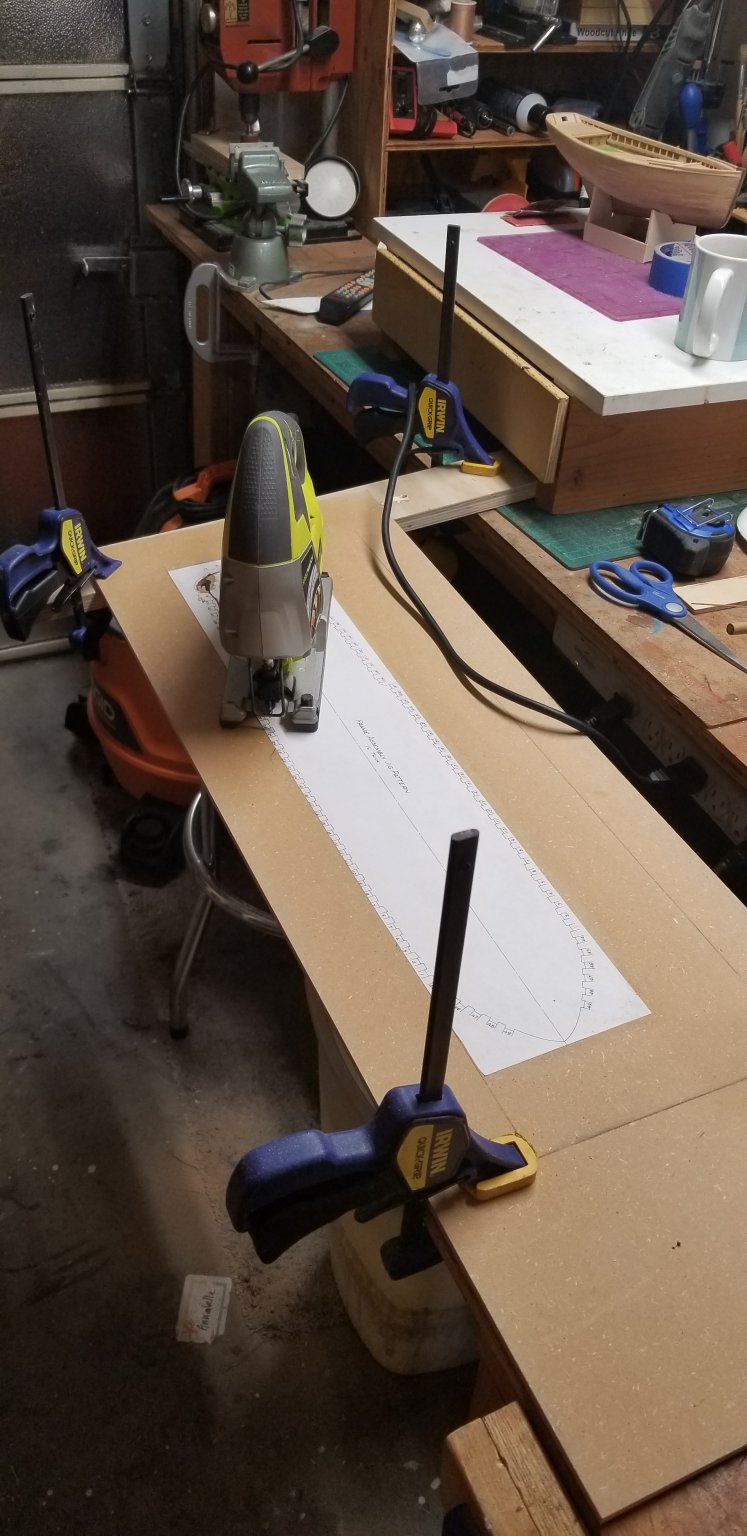
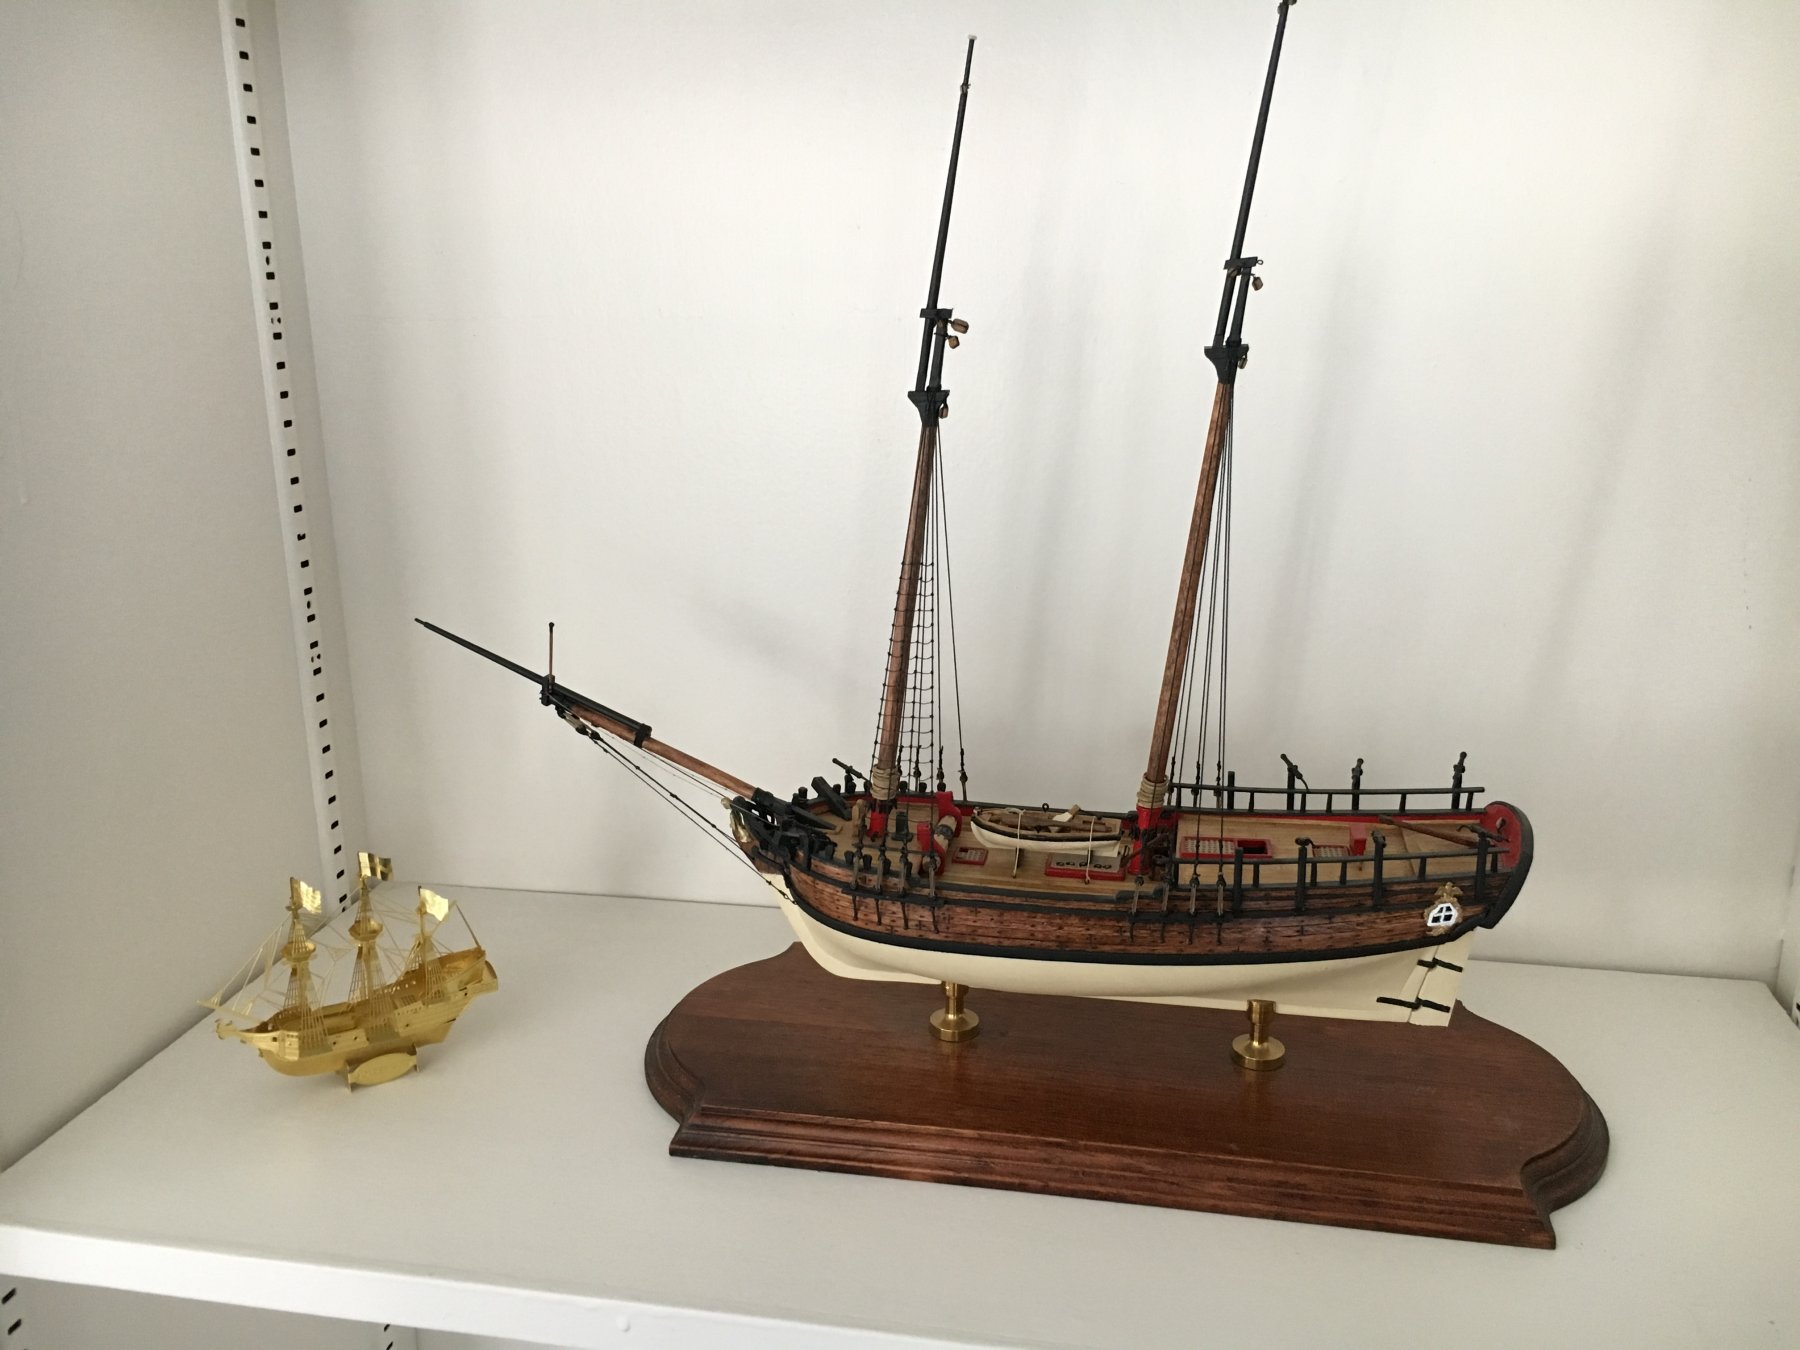
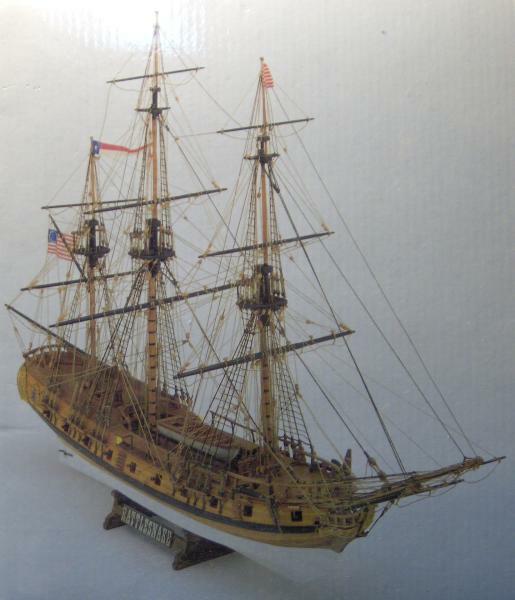
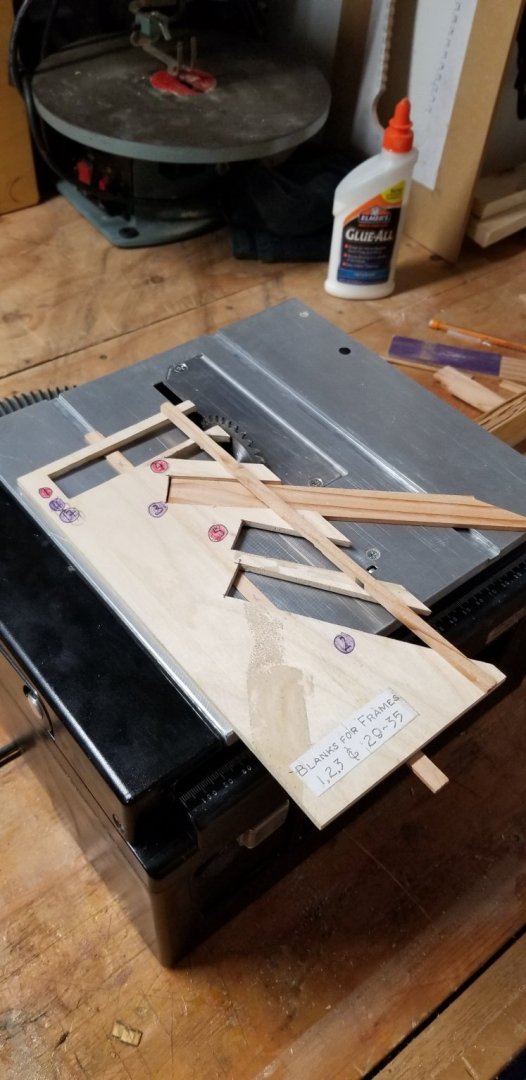
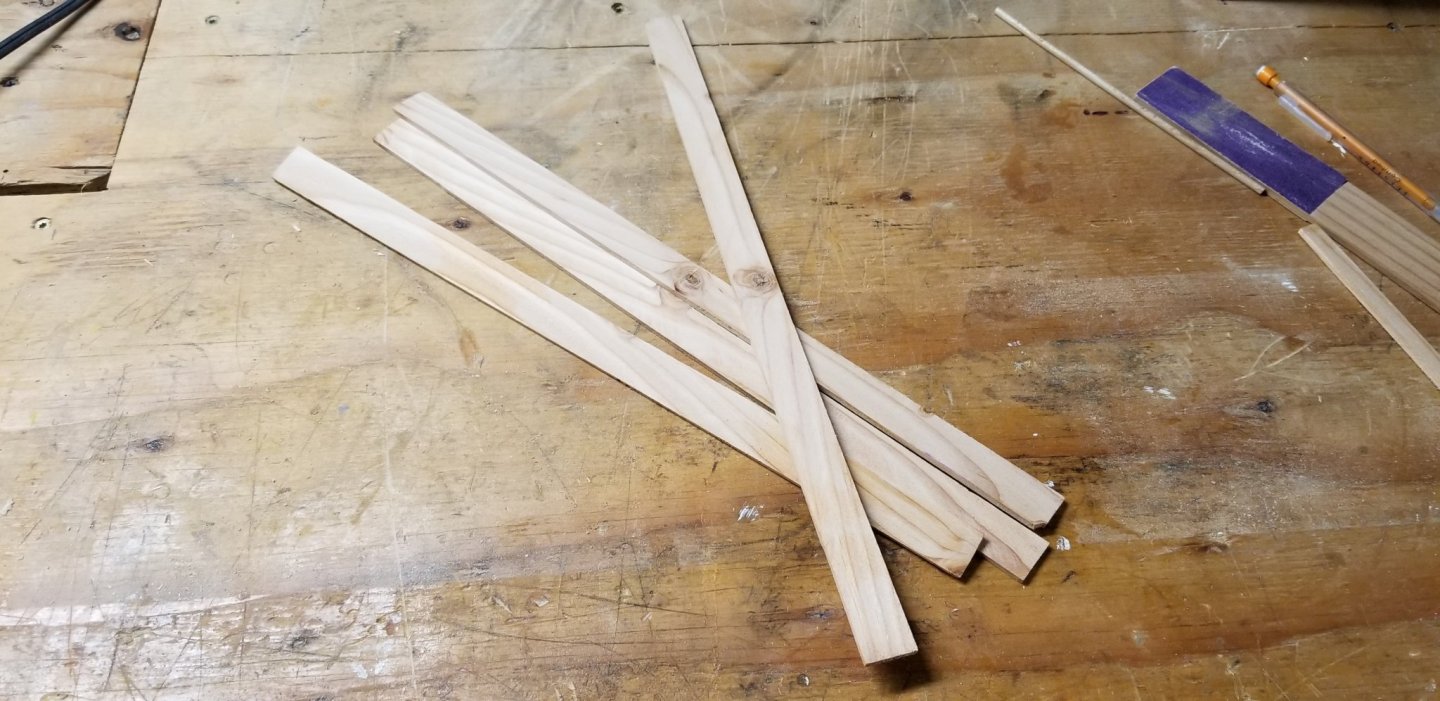
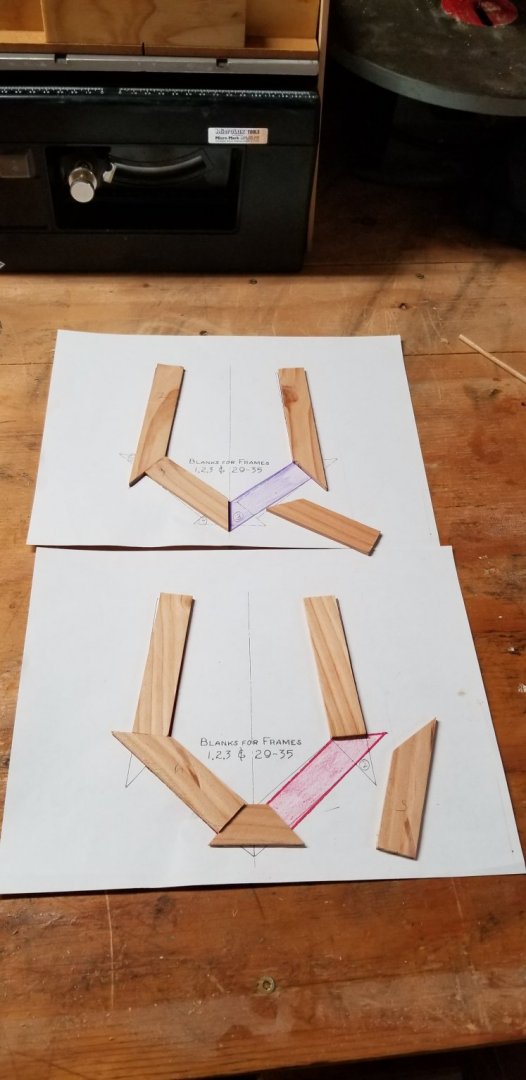
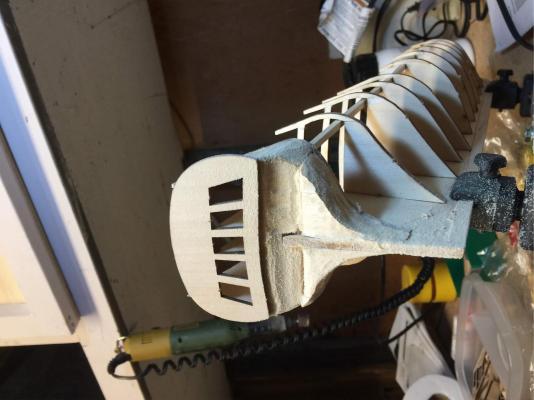
 Hi All, It is time to start a new challenge for me in this hobby. I have been looking for a scratch build model for a while now. One of our club members gave me the plans for the Rattlesnake using the Hahn Harold method. After looking at the plans and reading about this ship, I decided to jump into it. Here are the fully rigged model dimensions: Length: 37" Breadth: 12" Height: 24 5/8" Some history HMS Cormorant was probably launched in 1780 at Plymouth, Massachusetts. She was commissioned as the Massachusetts privateer Rattlesnake in 1781. The Royal Navy captured her shortly after she set out on a cruise and purchased her. In November 1781 she carried to England the first news of General Cornwallis’s defeat. The Royal Navy registered her under the name Cormorant. In 1783 the navy renamed her Rattlesnake and paid her off and sold her in 1786. Rattlesnake was probably drawn by John Peck of Boston, Massachusetts, and probably built at Plymouth in 1780. She was very lightly built and was reputedly very fast. Rattlesnake had the appearance of a miniature frigate, with detached quarterdeck and forecastle. Rattlesnake was commissioned on 12 June 1781 under the command of Mark Clark (or Clarke). She had barely begun her first cruise when she encountered the 44-gun frigate HMS Assurance, Captain James Cummings commanding. Assurance captured Rattlesnake on 17 June. He sent her into New York, where she arrived on 8 July. The Royal Navy purchased her on 28 July at Boston. (Wikipedia). For the past few months, I have been asking a lot of questions to my club experienced builders, read a few books and studied the plans. I had decided to use Cherry for the frames. First, I created the jig to handle the frames. I used a jigsaw to remove most of the waste. Here is my first mistake. I am not sure why but I started to use a copping saw to cut the notches in the jig and few rasp. None of the angles were perfect. I have scroll saw, why did I not use it?!?!?? Here is the damage Here is the redo one with the scroll saw. Much better Jigs are cutting all the frame components. A lot of them but all angles and lenghts are covered I will need around 450 pieces to make them. To practice and test I made some billets made of pine (2by4). Here is the jig in action. Colored the frames for use of locating where each of the parts are going. Made a new crosscut sled. Next step, preparation of the cherry billets . Pictures to come....
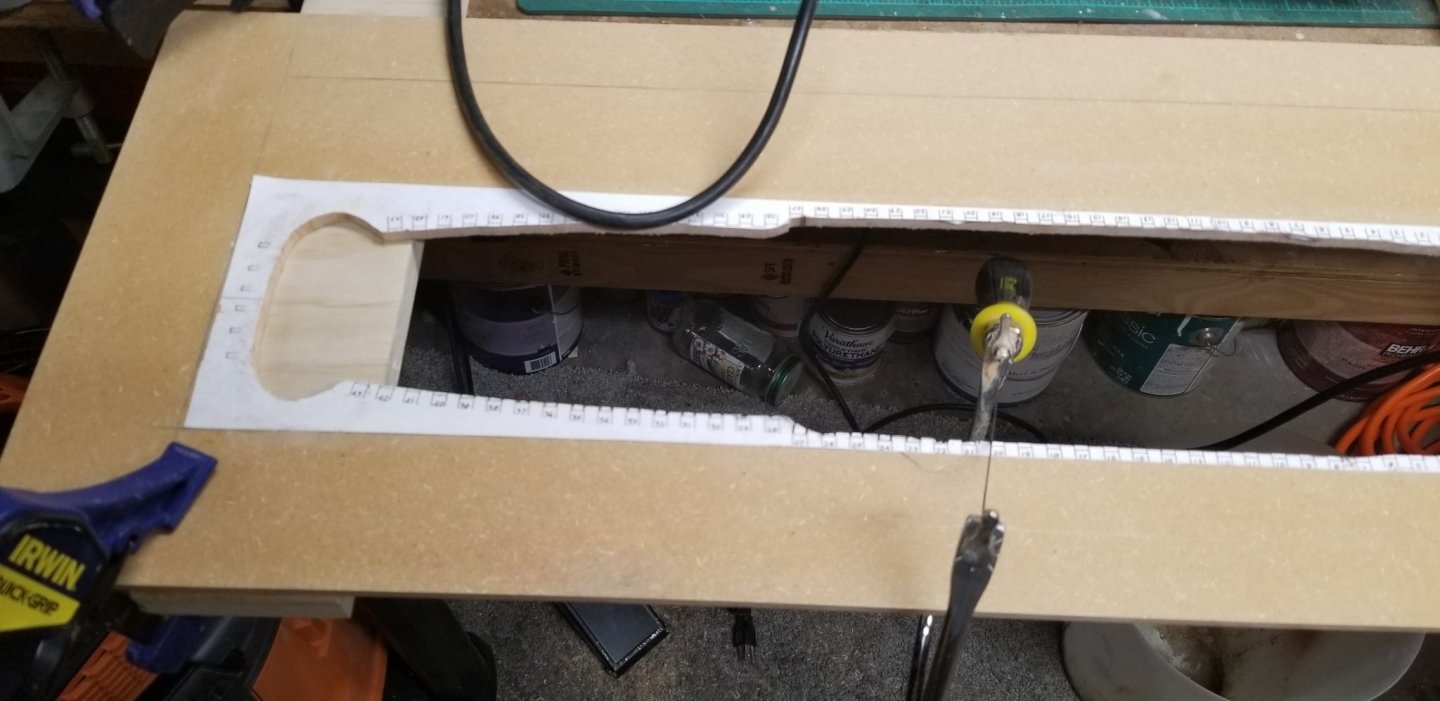


- 50 replies
-
- 16
-
-
- rattlesnake
- brig
- (and 1 more)
-
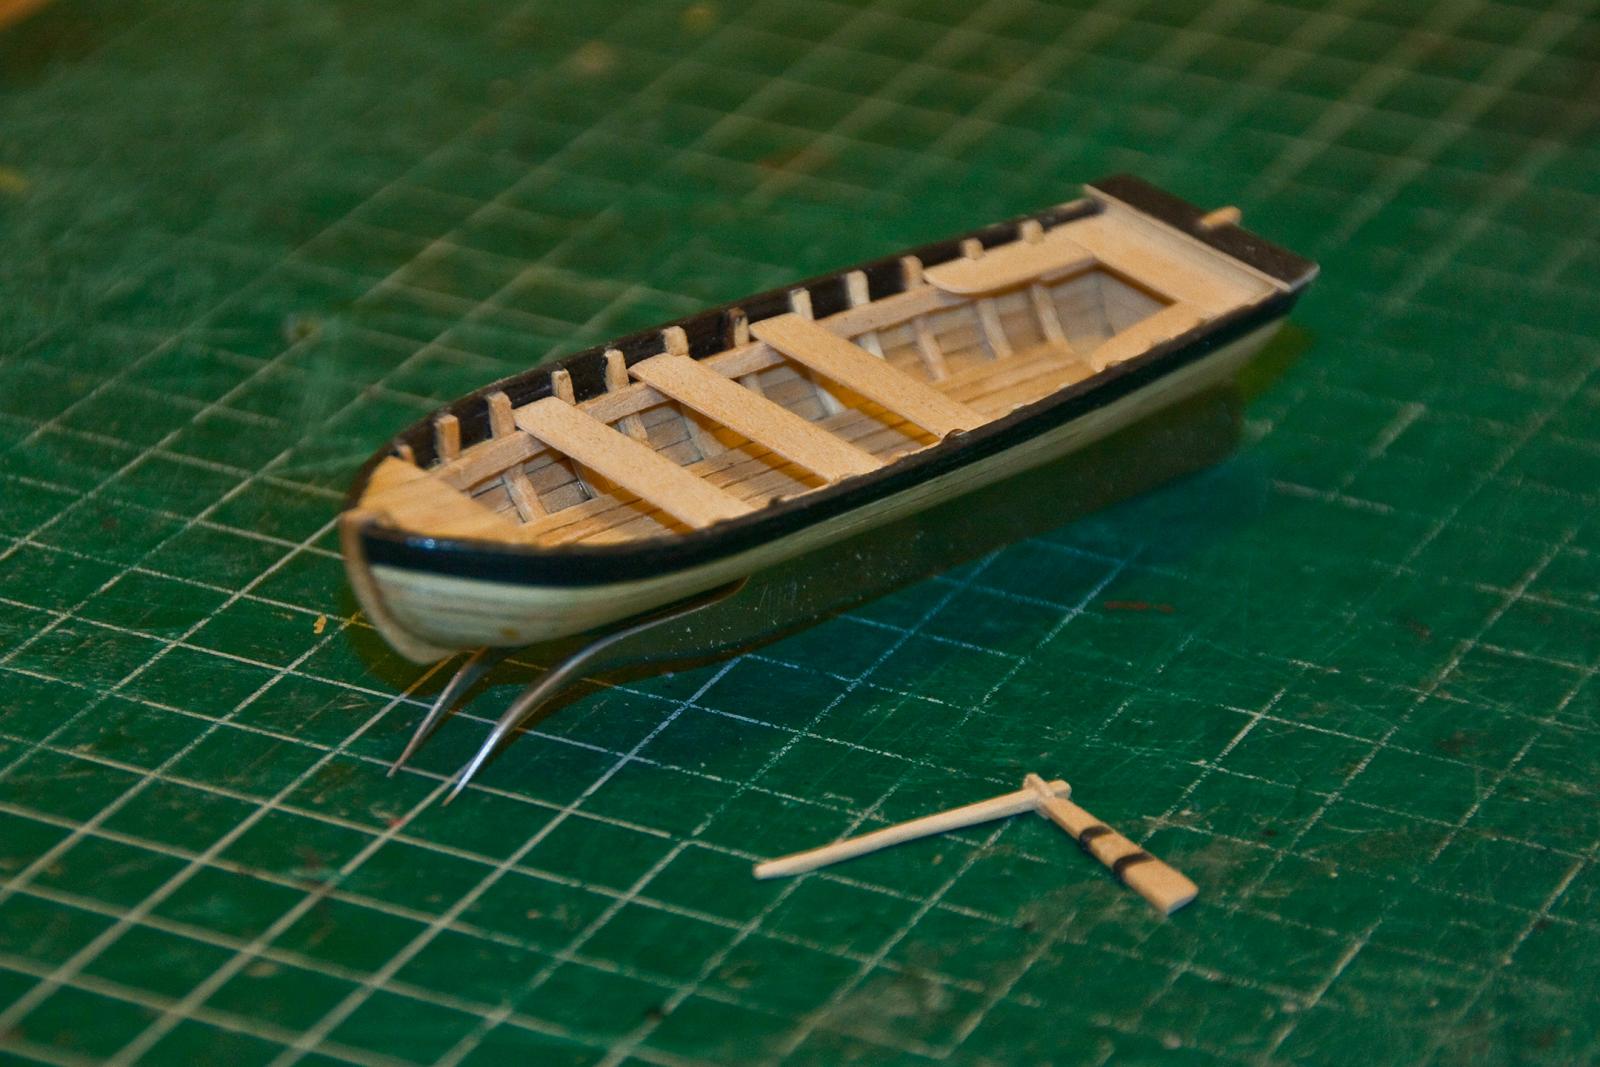
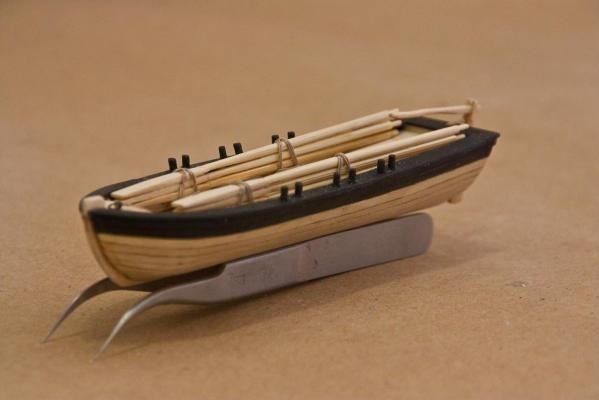
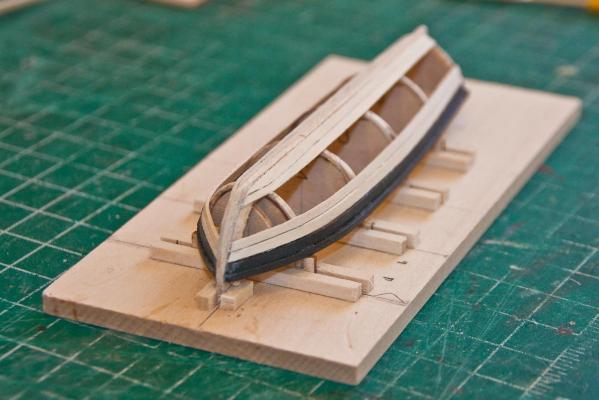
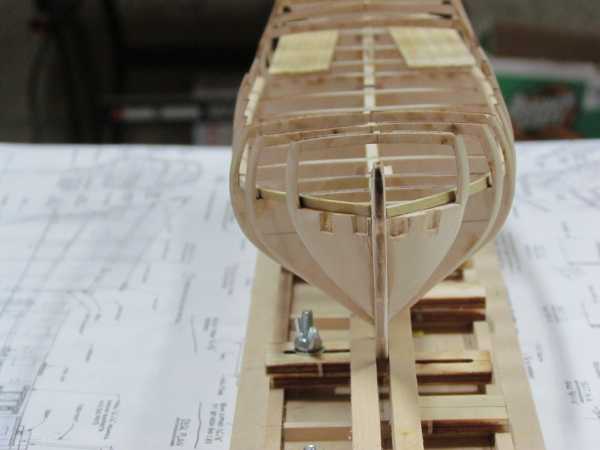
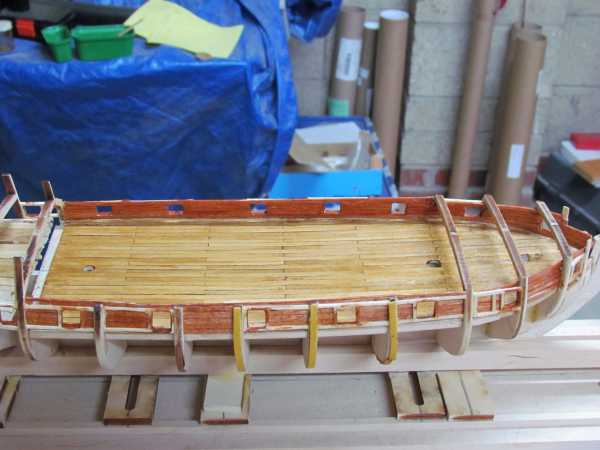
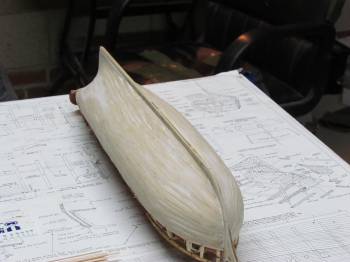
 My first ship build was the single mast, "Armed Virginia Sloop"; my second was the two mast American Privateer, “Fair American”. Now I feel I’m ready to move up to a three mast ship and I chose the Model Shipways, “Rattlesnake”. It should offer me new challenges and keep me busy for a long while. I plan to use the plans from the ME kit, as well as plans from the Mamoli kit. I also acquired the plans from Howard Hann, which will be my ‘go to’ source whenever there are ‘disagreements’. I don’t intend to use the Robert Hunt’s kitbashed version. One challenge with the Rattlesnake is that it is a smaller scale than the two previous models. I’ll have to get used to smaller blocks, lines and many other items found on a Revolutionary era ship. To help in the transaction, I decided to make the ship’s boat first. I purchased the Model Shipways 4.75 inch boat, which seemed to be about the right size based on the kit’s plans. Rather than do a whole build log on the boat, I attach some photos of the boat’s build in progress and the finished product. I have to thank the build log by JSGerson. I followed his log and didn’t really have any problems.
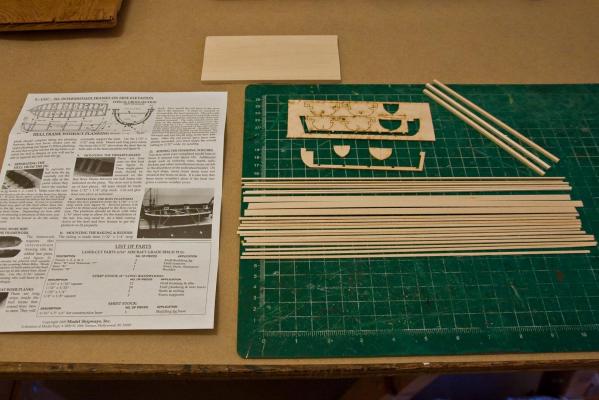


- 481 replies
-
- 23
-
-
- rattlesnake
- model shipways
- (and 1 more)
-
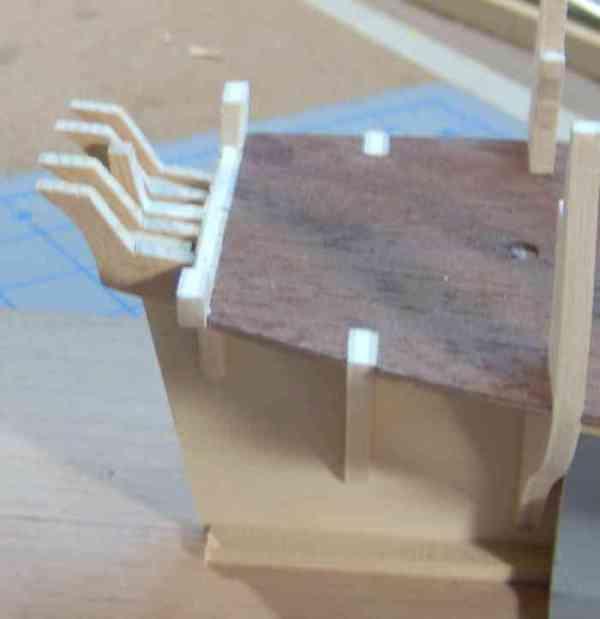
 Welcome everyone to my first build log. This will be my second ship model. My fist ship was the Model Shipways solid hull Sultana kit which is currently in the rigging stage. I bought the Rattlesnake kit probably four or five years ago, but after examining the kit and instructions I felt a little overwhelmed. With only a couple scale car builds for modeling experience I decided to put the Rattlesnake on the shelf for a later date. I was currently in the Navy at the time and while I was bouncing around from place to place, my interest in building a model ship returned. I noticed that the Sultana had a very detailed practicum, so I gave it a shot as a learning experience before I attempted the Rattlesnake. Unfortunately I didn’t start a build log on the Sultana and I wish I had. This forum is full of knowledge and experience and probably could have prevented many of my mistakes. With the absence of a practicum and this being my first POB ship, I’m sure I will have many questions. So to start off I cut out the pieces for the center keel. Lining them up with the plans I noticed the same misalignment that some others have had. It might not have made a difference in the end but I decided to shim the two halves out slightly to split the difference. Now the mast slots at least line up. This weekend the plan is to drill holes for the dowels on the keel, sternpost and stem. Then taper the stem and glue them to the center keel.

-
 Welcome to my (second) first big build! Without much fanfare, we'll just start with the usual kit splash! Please do forgive the purple hue everywhere, I have some plants growing on a shelf above me. No, I don't grow THAT :9.

-
 See plastic model completed 'Golden hind' - now moving on to wood ships- Rattlesnake. See photos attached. struggling with the beginning of planking on the Rattlesnake!

-
 Not sure what the protocol is here for reposting a pre crash build log started in Apr 11. post a few to keep things simple I will go with a quick time line getting up to my current stage
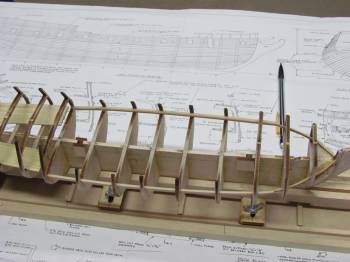

- 57 replies
-
- 1
-
-
- rattlesnake
- model shipways
- (and 1 more)
-
 So, spurred on by my return to the forum with my Constitution, I'm starting a build lot for my Mamoli Rattlesnake. I bought this kit through Cast Your Anchor in Toronto who were able to track one down for me. At this stage, I have the first layer of planking on the hull, the false decks in place and some of the planing on the bulwarks done. This is my first non-Model Shipways kit and so far it seems to be ok and so far so good. I needed to shim a number of the bulkheads, but that doesn't seem to be out of the ordinary. I had a bit of trouble getting the transom set correctly. The tabs in the rear deck didn't seem to want to line up with the slots in the transom. If I forced it, things didn't look quite right, so I cut them off and measured carefully against the plan and I think things are ok. I have the Bob Hunt practicum for this kit, but have to admit I'm not actually using it. For this particular kit, his practicum involves much kit-bashing. I chose not to go that route, because it involved ordering Hahn plans, changing their scale, ordering special wood etc. all of which I didn't want to get into. While the practicum claims to be helpful if just building the kit out of the box, it really isn't as all of the pictures only show the kit-bashed version. The kit instructions (which appear to have been translated out of the Italian by machinery) are actually quite good, once decoded as are the plans and I think I'll do just fine with them alone. Despite essentially building the kit out of the box, I am making a few minor "kit-bashing" choices nevertheless. There are cast metal parts representing the windows in the transom, the doors under the quarter deck, the head rails and the crosstrees, all of which are pretty crumby. I'll be making all of these from scratch. I have started the doors in the picture below, but they are not completed yet. I think I'll use the cast metal part for the curving scroll work around the transom, as it will look ok once painted and for sure a whole lot better than any carving attempt I might make. I read about a painting technique in a Blue Jacket newsletter that looks like it might work well. One picture below shows the cast metal windows which I'm discarding and the start of my alternative windows in the transom. I'll try to do better than with my Constitution build log and post another update before a year has passed. David
.JPG.89cb9112db07b5fa87f5bb494c58c278.JPG)
.JPG.6be93f2193d537765cb1ed0f265b09e8.JPG)
.JPG.7338c8c6ffd99705cad3e56e1e50a48a.JPG)
- 67 replies
-
- 5
-
-
- rattlesnake
- mamoli
- (and 1 more)
-
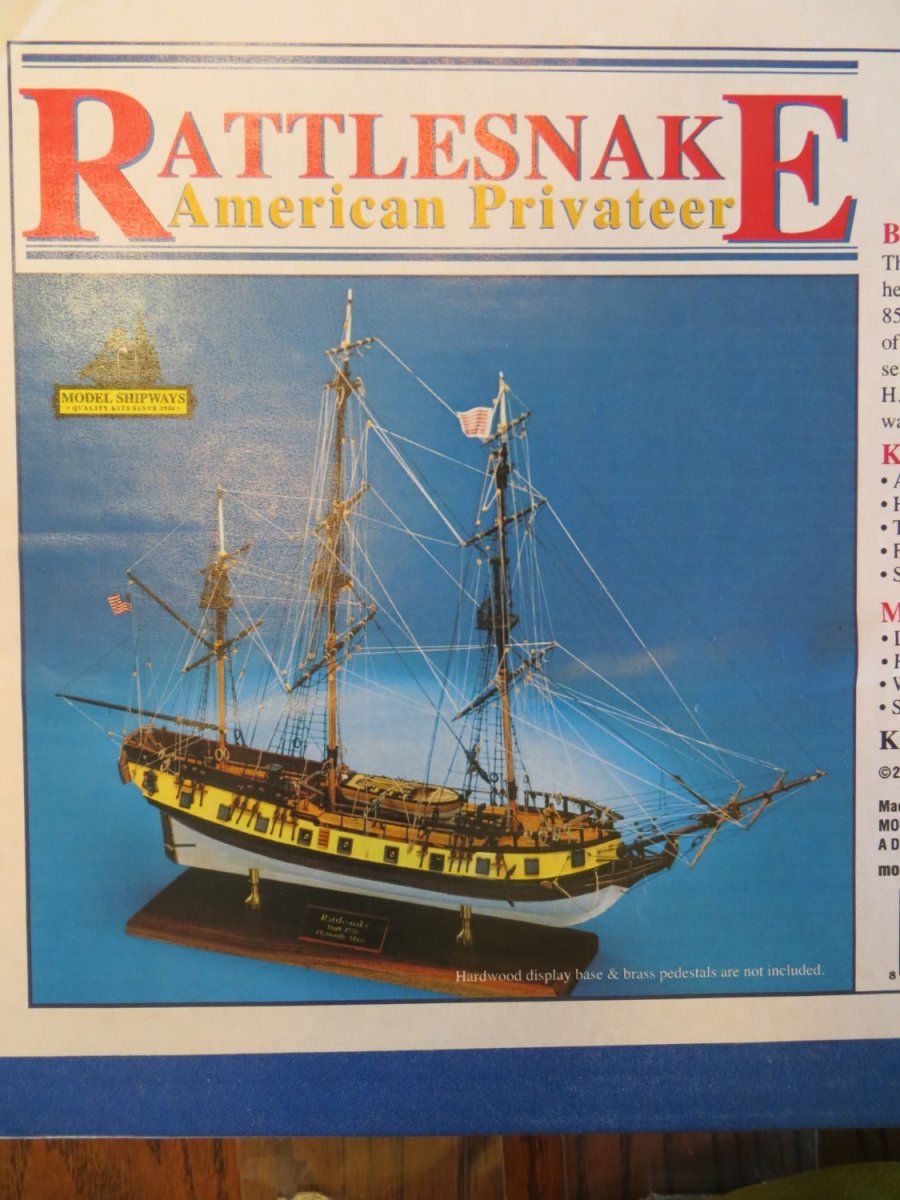
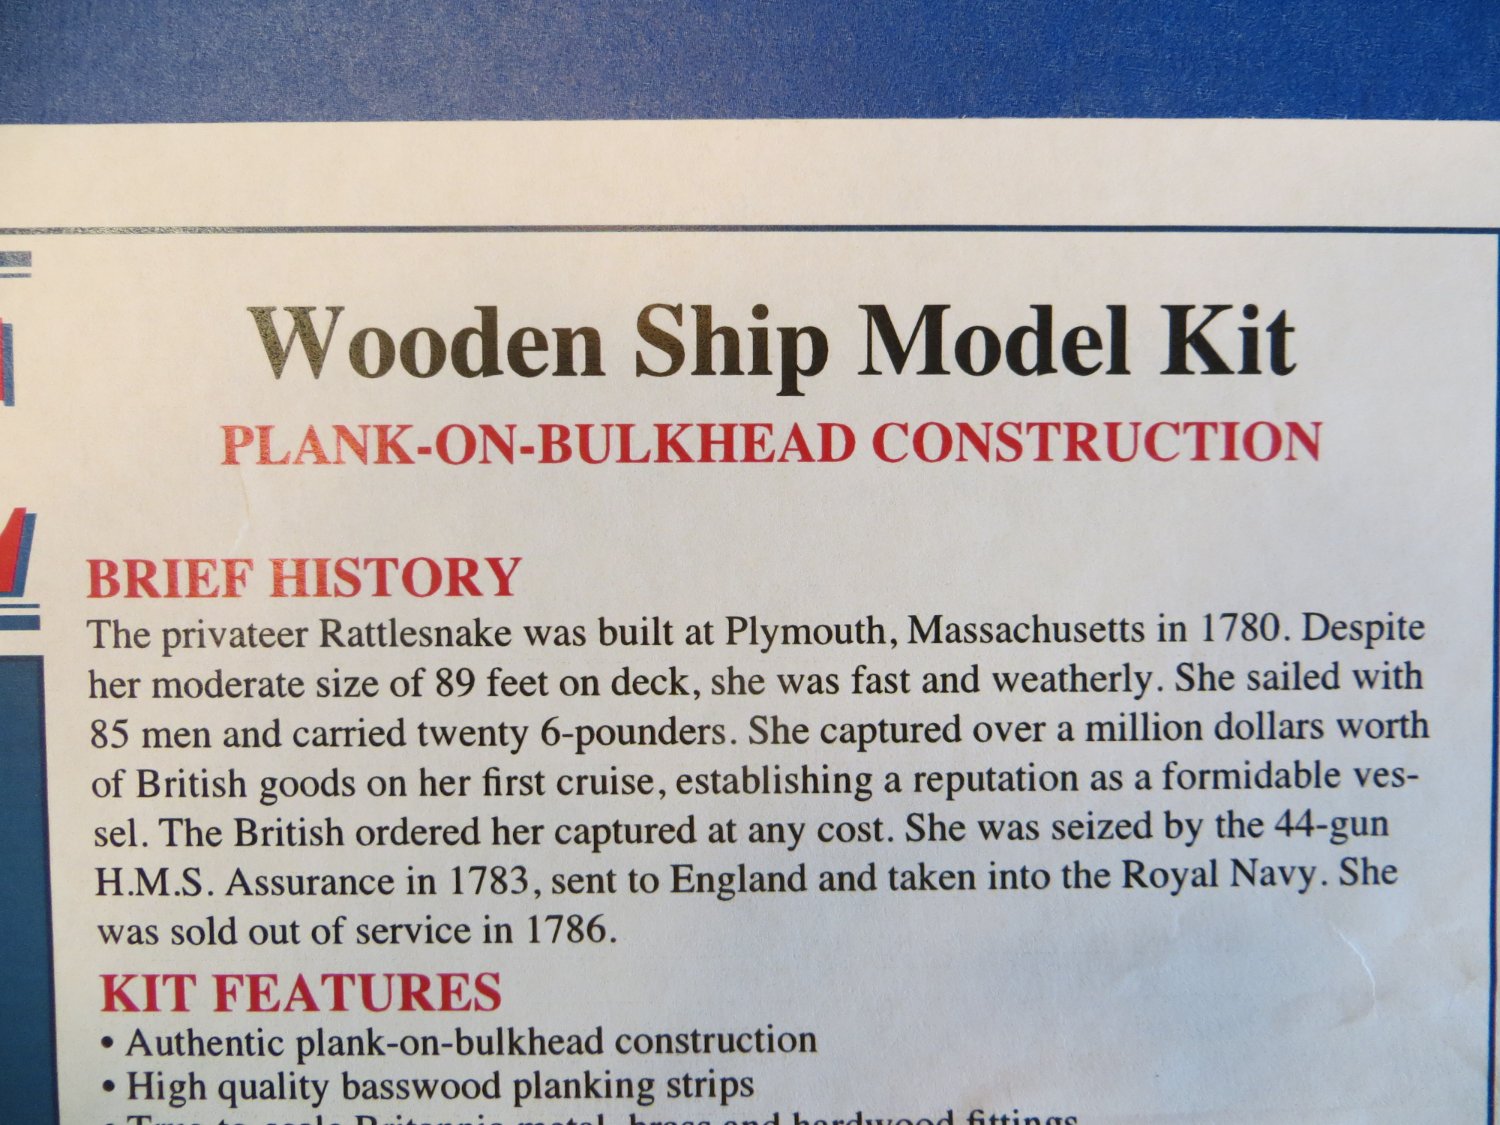
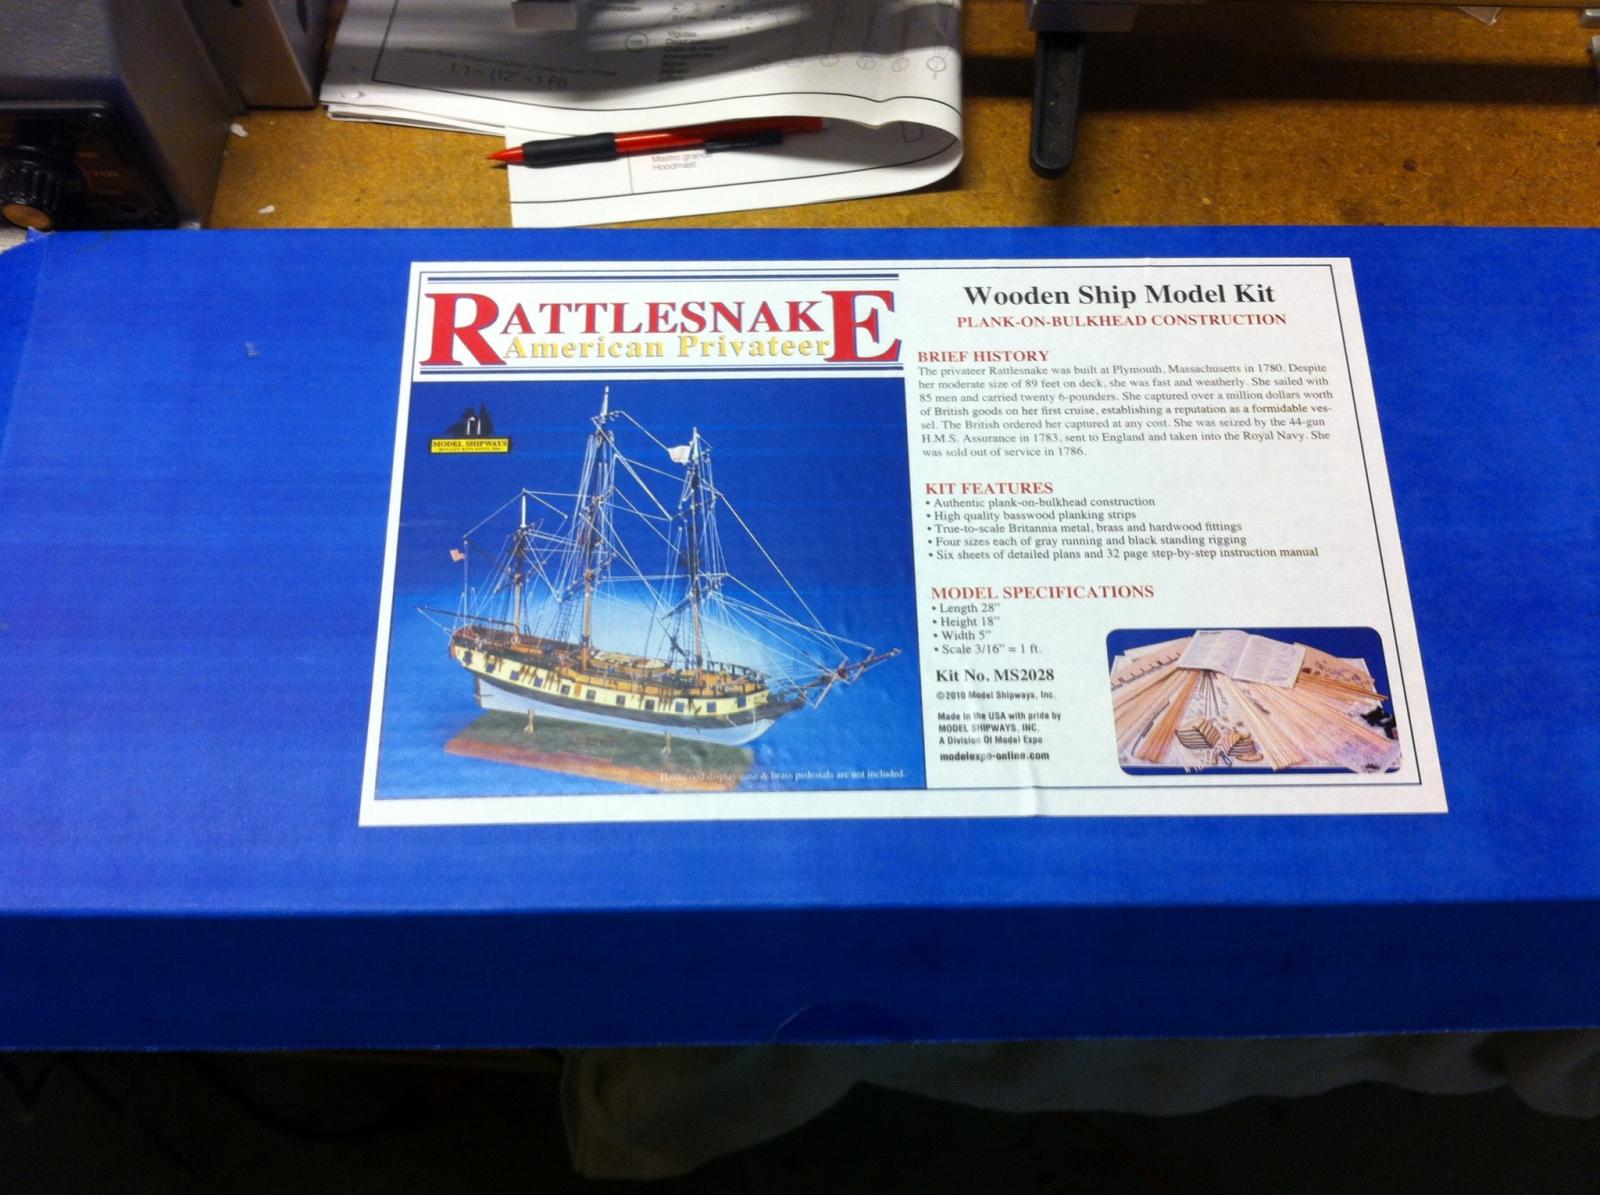
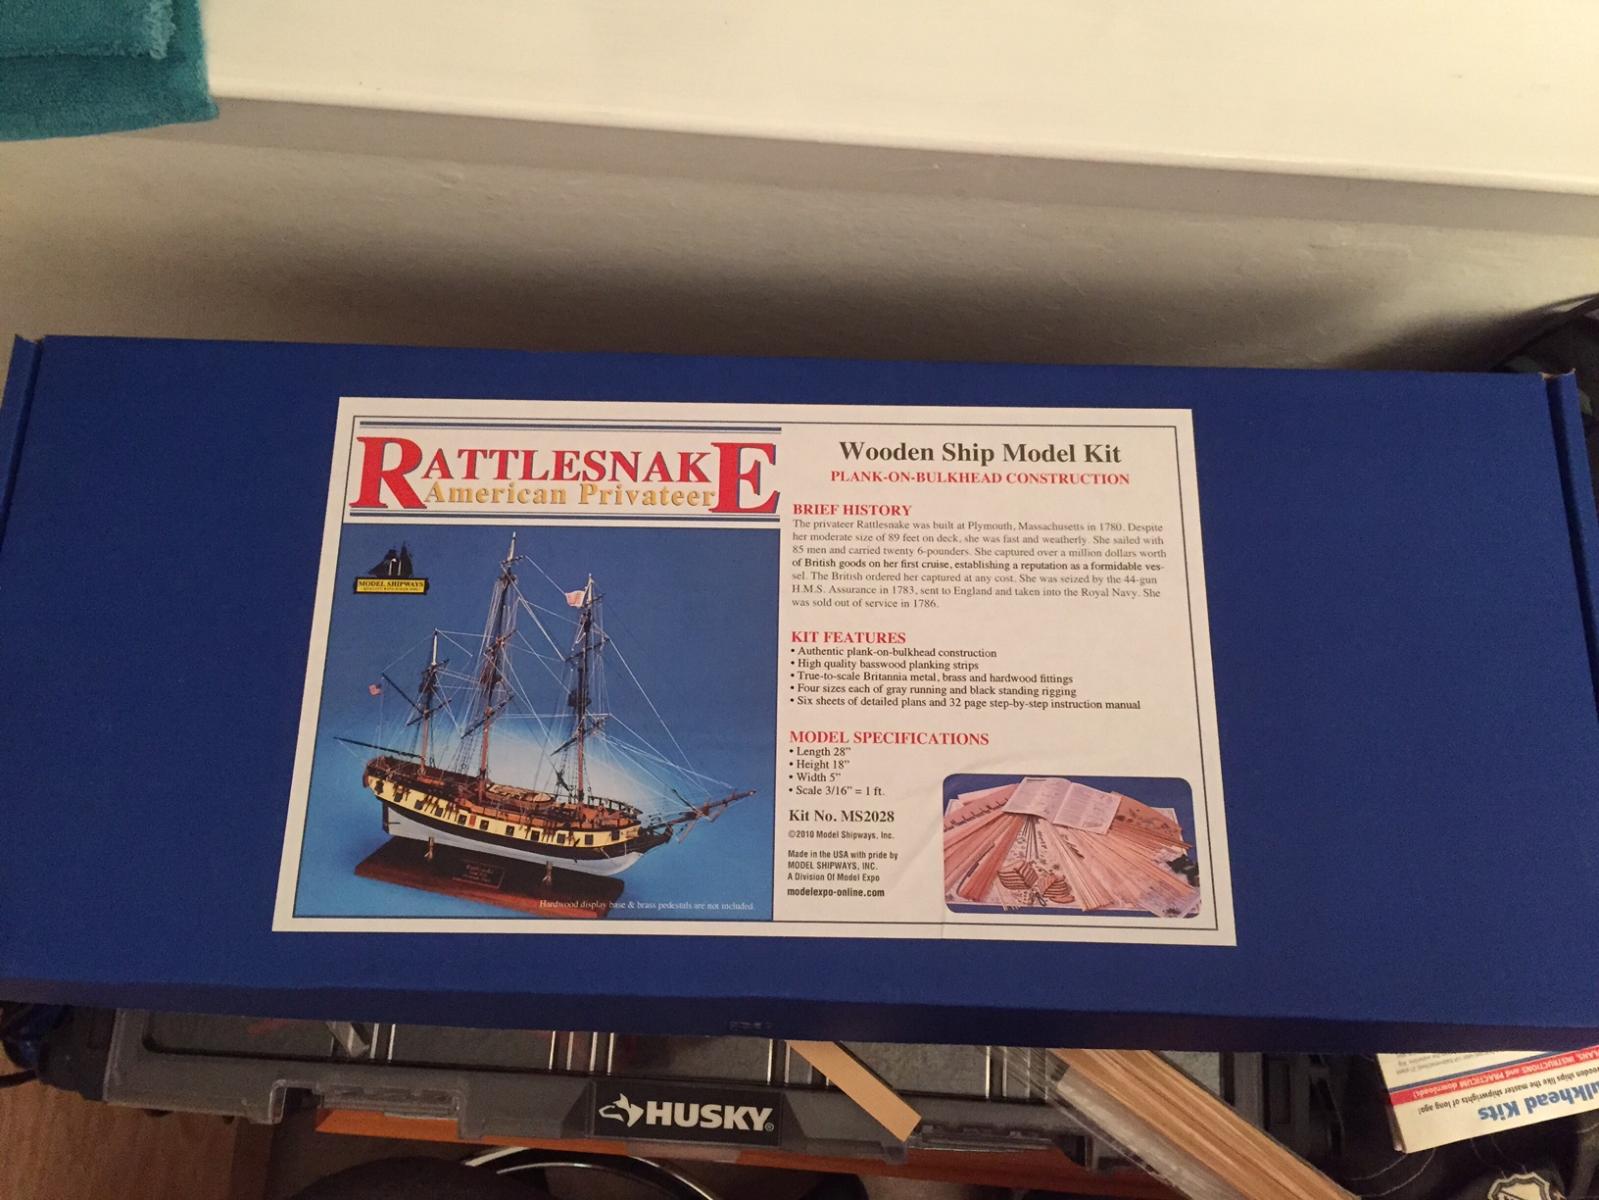
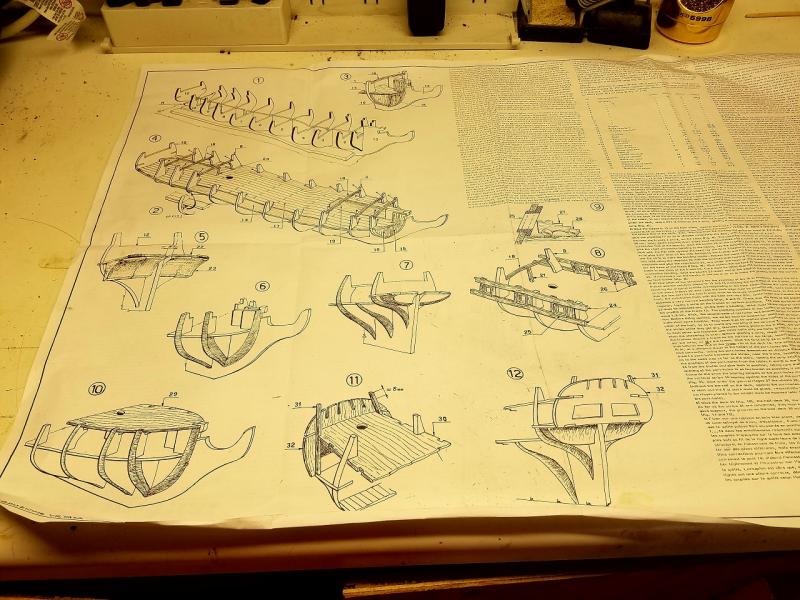
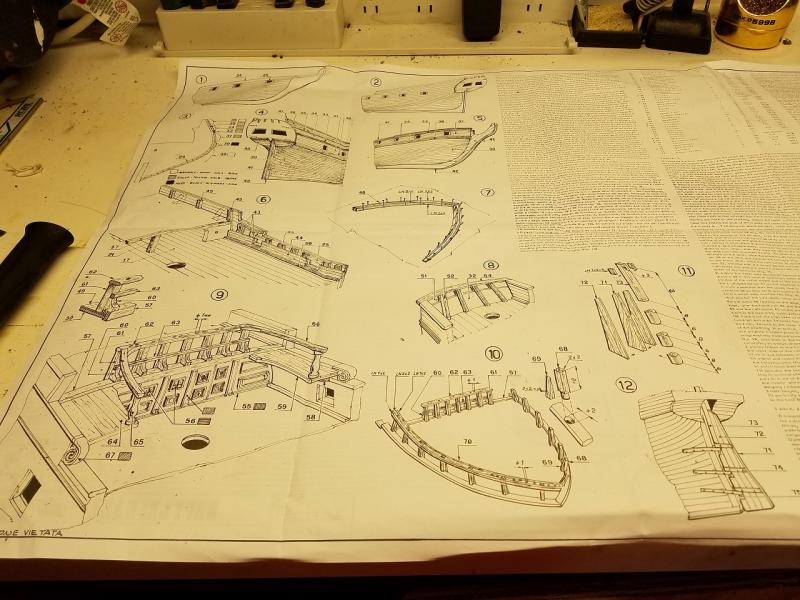
 Static: Rattlesnake 1780 (Model Shipways MS2028) 1:64 Note: The first section of this log is a repost originally created in 2012 First, I would like to thank all of those who have taken the time to create or re-create thier logs on Model Ship World. Your efforts have been invaluable to me and I am sure will be to many others. Thank You All As for my story: I purchased the Model Shipways Rattlesnake kit around five years ago from a local hobby store. After assembling the false keel, I realized the magnitude of this endeavor and decided it best postponed for another day. The box sat on my shelf until recently when I found the Model Ship World forums. This is where I discovered the build logs, like great sagas, some taking years to complete, they inspired me, renewing my interest in ship modeling and giving me the confidence to restart this project. Kit Review/Preview: According to the manufacturers website http://www.modelexpo-online.com/product.asp?ITEMNO=MS2028 The kit is an Intermediate Level build. Originally, a solid hull kit, it was converted to plank on bulkhead with updated instructions in 1994 by Ben Lankford. The rigging, hull details, and original kit were done in 1963 by George F. Campbell based on Admiralty draughts and an earlier reconstruction published by Howard L Chapelle. The manual is informative and judging by comments posted regarding other manufacturer’s attempts, seems to be above average. It is not however, as clear as some of the other manuals provided by this same manufacturer. All of instructions for the Model Shipways kits sold on the Model Expo site are available for download at no cost. As are some very helpful practicums. These were very useful to me, either clarifying the steps in the manual, or elaborating on tasks in which I have no experience. The parts in the kit are, again to my untrained eye seem to be of good quality. The wood contained in the kit is primarily Basswood and this I am sure is to maintain an affordable initial cost, allowing the builder to add wood upgrades at his own expense, and choosing. Castings seem OK, only requiring minimum cleanup, and a generous supply of additional hardware is included. Two double-sided sheets of plans round out the kit. I picked up some inexpensive wood for the optional second planking and recently purchased a few additional lengths of Cherry plus a sheet of Walnut. Overall, I am very pleased with the product Model Shipways provides. I would like this log to be as open as possible. I will attempt to post pictures, comments, questions, and any information I discover on the way as I have seen others do. I will also try to accommodate any request for additional pictures or responses so please feel free to ask. My goal is to create an atmosphere encouraging feedback, especially those pertaining to any corrections/improvements regarding the methods needed to complete this model. I enjoy writing so I will apologize for my wordiness from the start. My main priority however is to just have fun and enjoy the hobby and this blog. Comments, criticisms, or suggestions, are always welcome and appreciated! Please note that I have very little or no experience in model shipbuilding. I have built some RC aircraft, rockets, and if I can use the phrase “a boatload” of plastic.
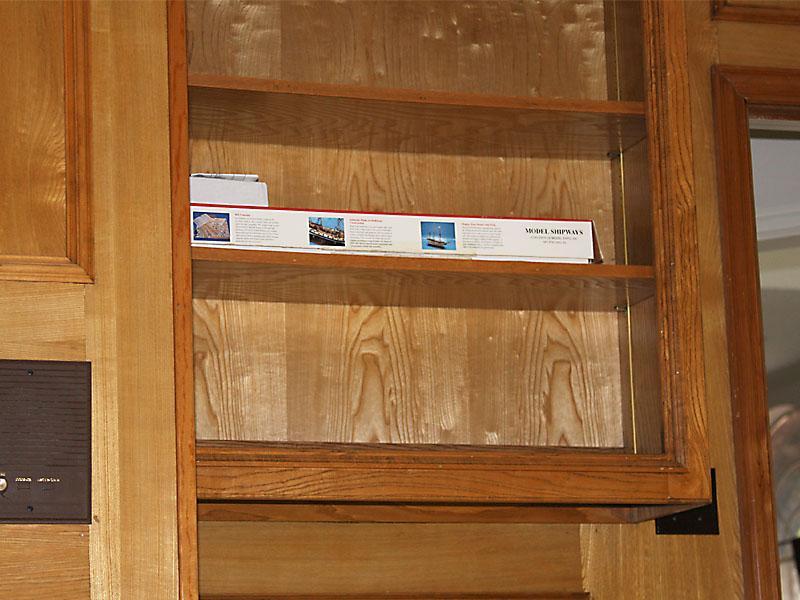
-
 I've invited my 15 year old granddaughter to follow along. Let's see if she does and how much she participates. I was building the Niagara and got to the rigging and was intimidated so I thought I'd build this one to get some simpler rigging experience. Here's my Niagara. http://modelshipworld.com/index.php/topic/6701-niagara-1813-by-justblowininthewind-model-shipways-164-first-build/ So far I'm impressed with the laser cuts, the written instructions are a challenge to say the least. The plans themselves are not bad at all. I made the box for holding the wood for the Niagara. The blue tape on the left is left over from the Niagara. The duct tape is for this ship. I made that from display shelf scraps from Home Depot. I'm only showing the 1st 2 sets of plans as they're what's relevant now.
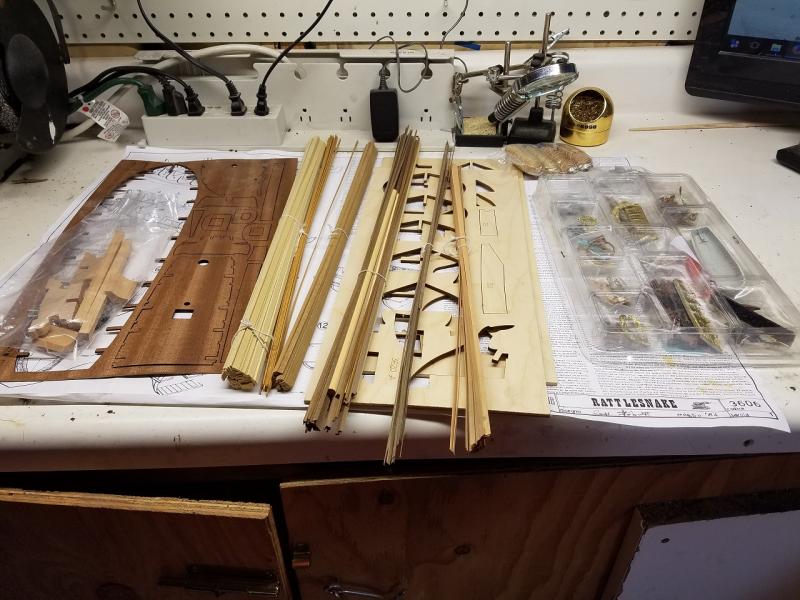

-
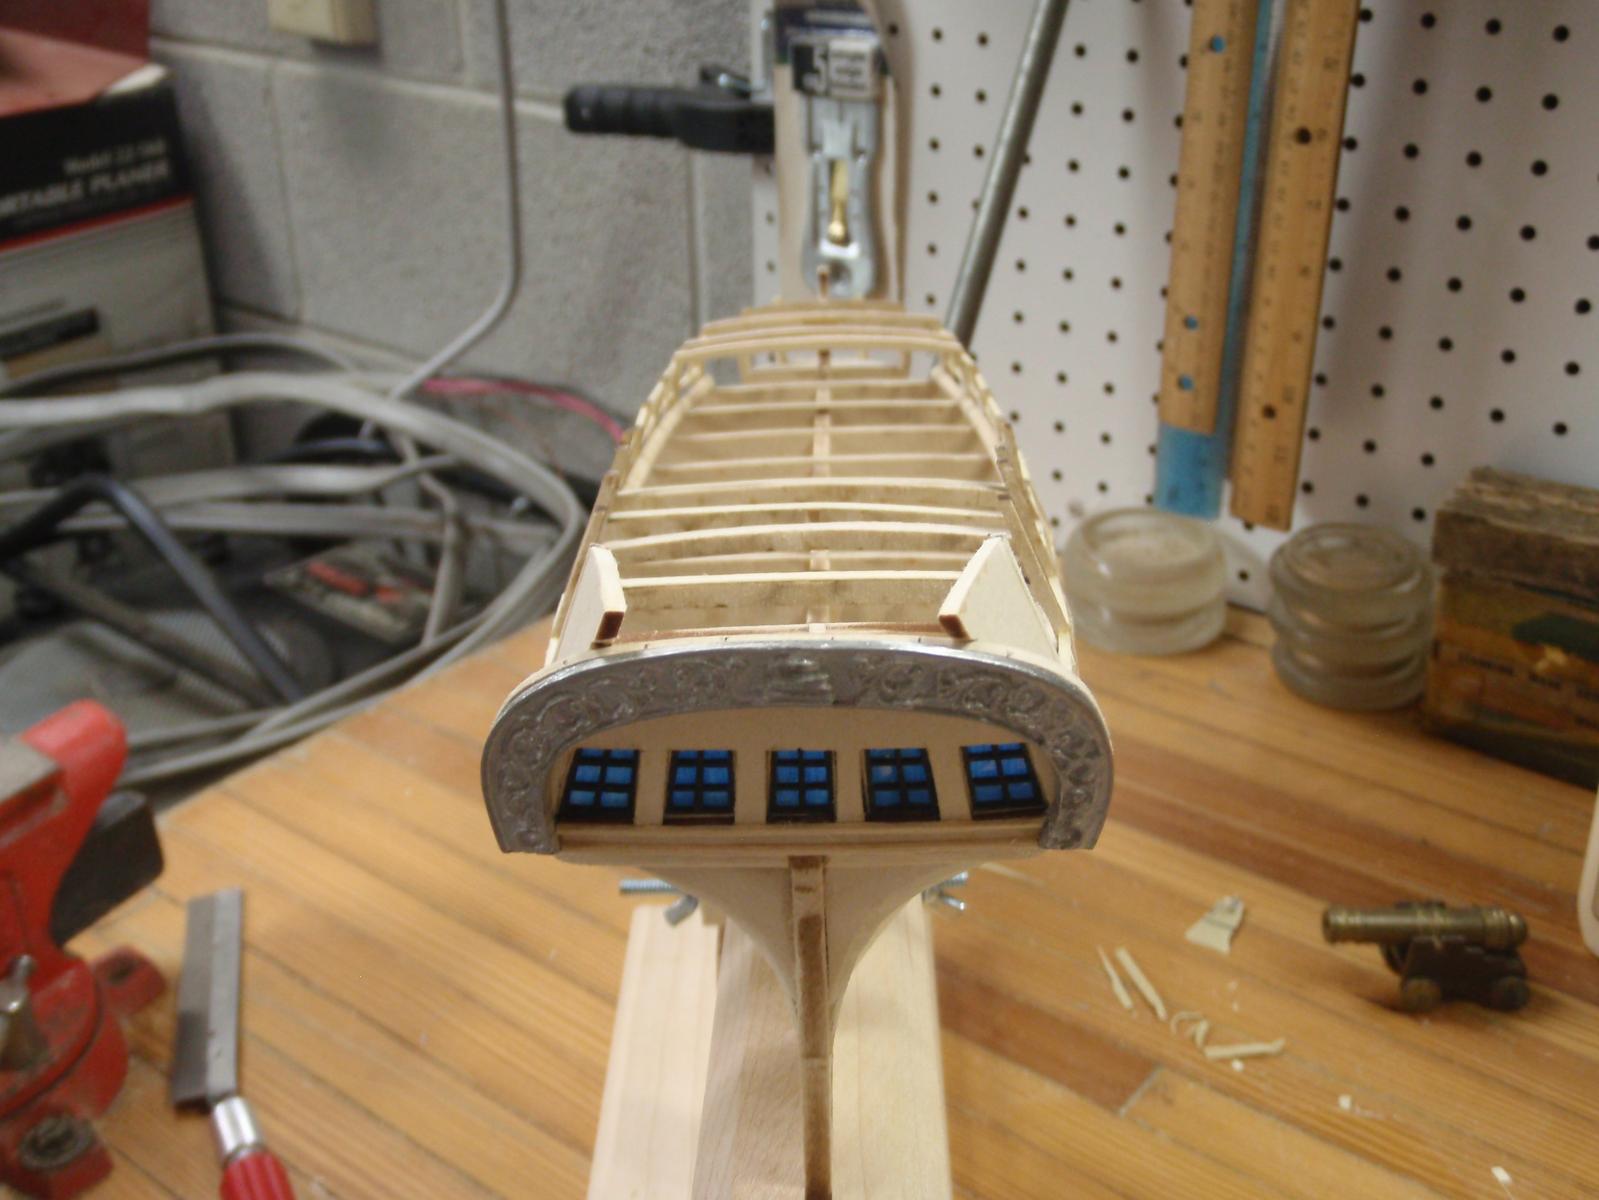
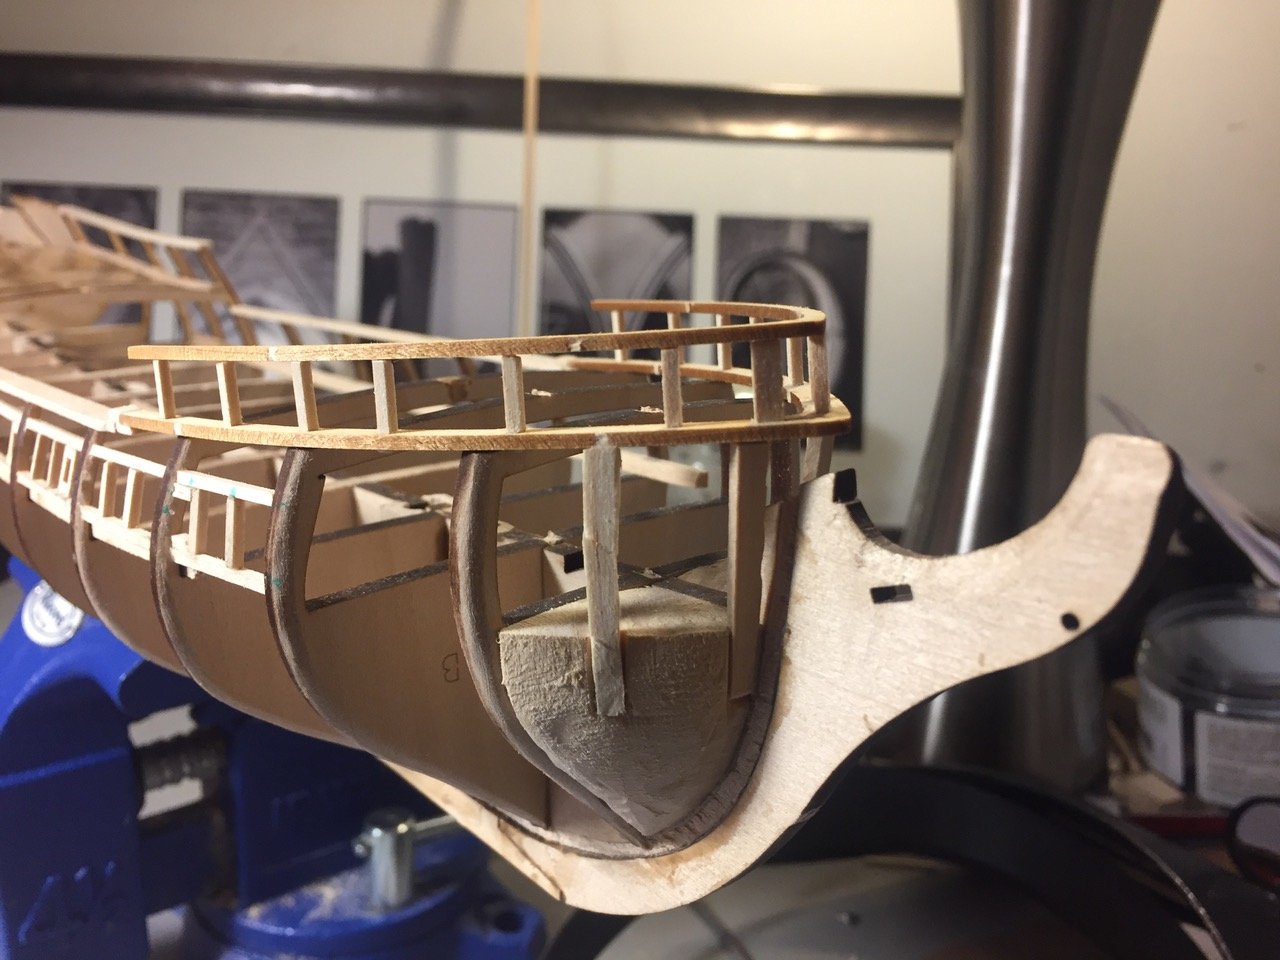
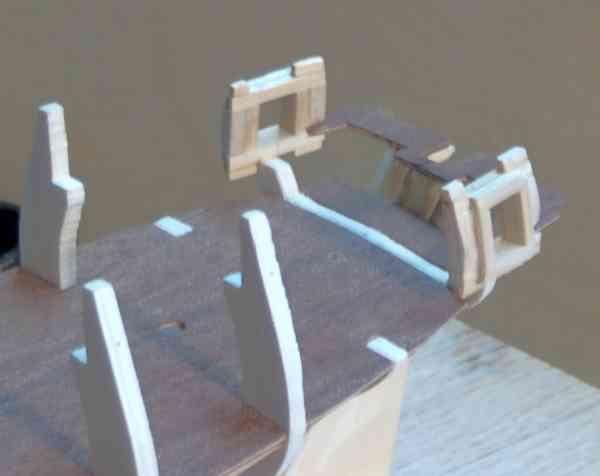
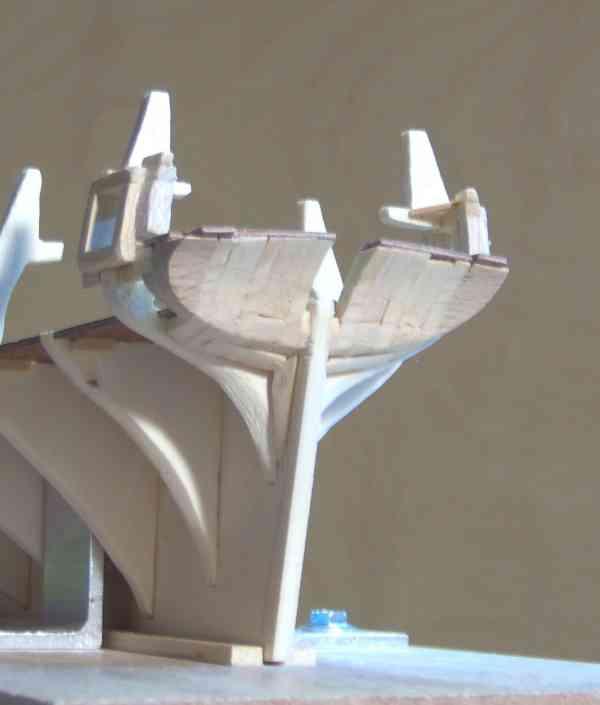
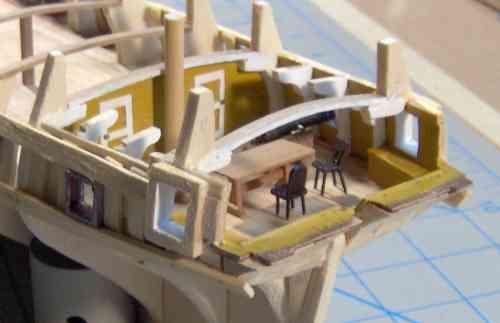
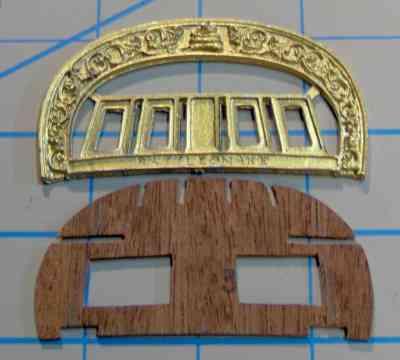
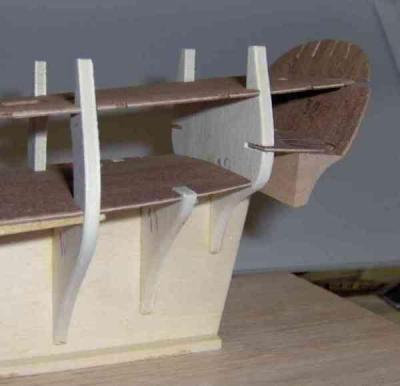
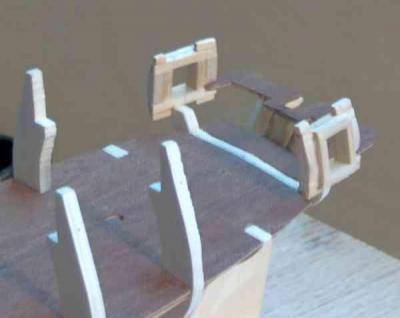
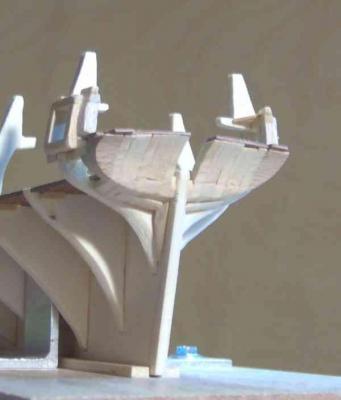
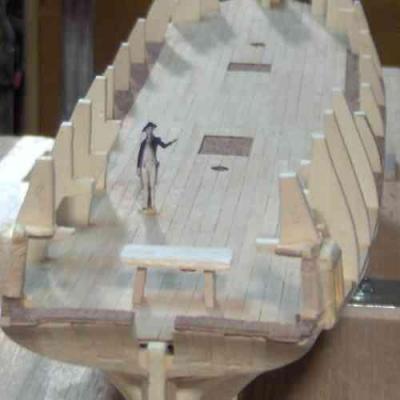
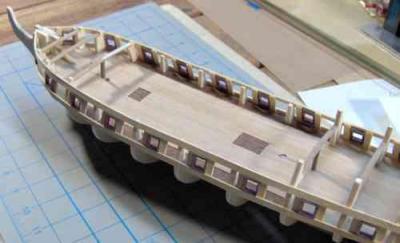
 Ha! The midshipman has lost the log and reel in the stormy digital sea! After a long hiatus due to "personal issues", I was about to get back to working on the Rattlesnake and then I find much has been lost in the software change. I thought I'd go ahead and repost some info/pictures before I actually got into it in earnest. I had been wanting to build a replica of an 1870s Ohio River steamboat my ancestors owned and operated, found this site looking for tips, fell in love with some of the builds here, found a great deal on a Rattlesnake kit on eBay, and picked up this infernal shipmodelling disease. I had kept my MSW Rattlesnake log photos in a separate folder on my computer so they're all set to be reproduced. Here's the box picture of the Rattlesnake... Handsome ain't she? The metal parts provided for the transom, quarter lights ( I used to call these windows until I got a little nawdikal ejukashun), and other areas made me cringe, so I thought I'd replace them with wood or other appropriate medium. Here is the supplied transom decoration and window frames and the supplied transom base with the window area excised... Here are the original pieces dry-fitted/taped. The #12 bulkhead is located at the position of the quarter lights, and the horizontal piece, #22, cuts into the cabin space, so I will modify that area to add the quarter lights and open up the cabin to approximate its fullness, as I will be making the lights (windows) clear instead of the blue paper simulated glass. Part of #12 cut away. Pseudo-framing of transom.... Quarter light frames (very fragile at this point!) made and stern "bench" from #22 piece.... I think this shows the template for adding the structure/frame above the light frames (hey, forgive me, it's been a while....) Here's the rough-shaped transom, balsa filler and the supplied beechwood pieces at the outer ends. The beech was surprisingly easy to shape; could have used it for the whole thing , as designed, without much heartache. Most of the main deck planking done, with a scale Captain Clarke (hey! looks like John Paul Jones....) Gunports and framing, fore- and quarterdeck supports, and fake bowsprit root in case that area is visible.... I had grandiose visions of outfitting the captains quarters, adding quite a bit of fine detail, but I've decided it would not likely be too visible anyway, so I'll keep it simple and move on. With what I have, I'll add rings, rig/secure these cabin cannons for sea, add a couple benches, and move on to finish the stern pieces, decks, and then the dreaded planking........ I may not get to this right away, but the intention is there....stay tuned.
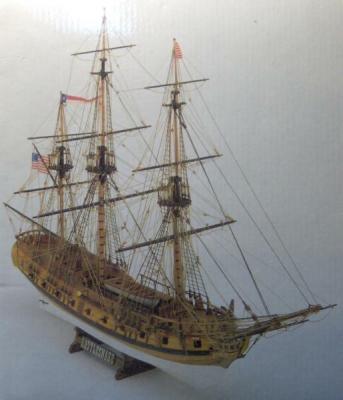


-
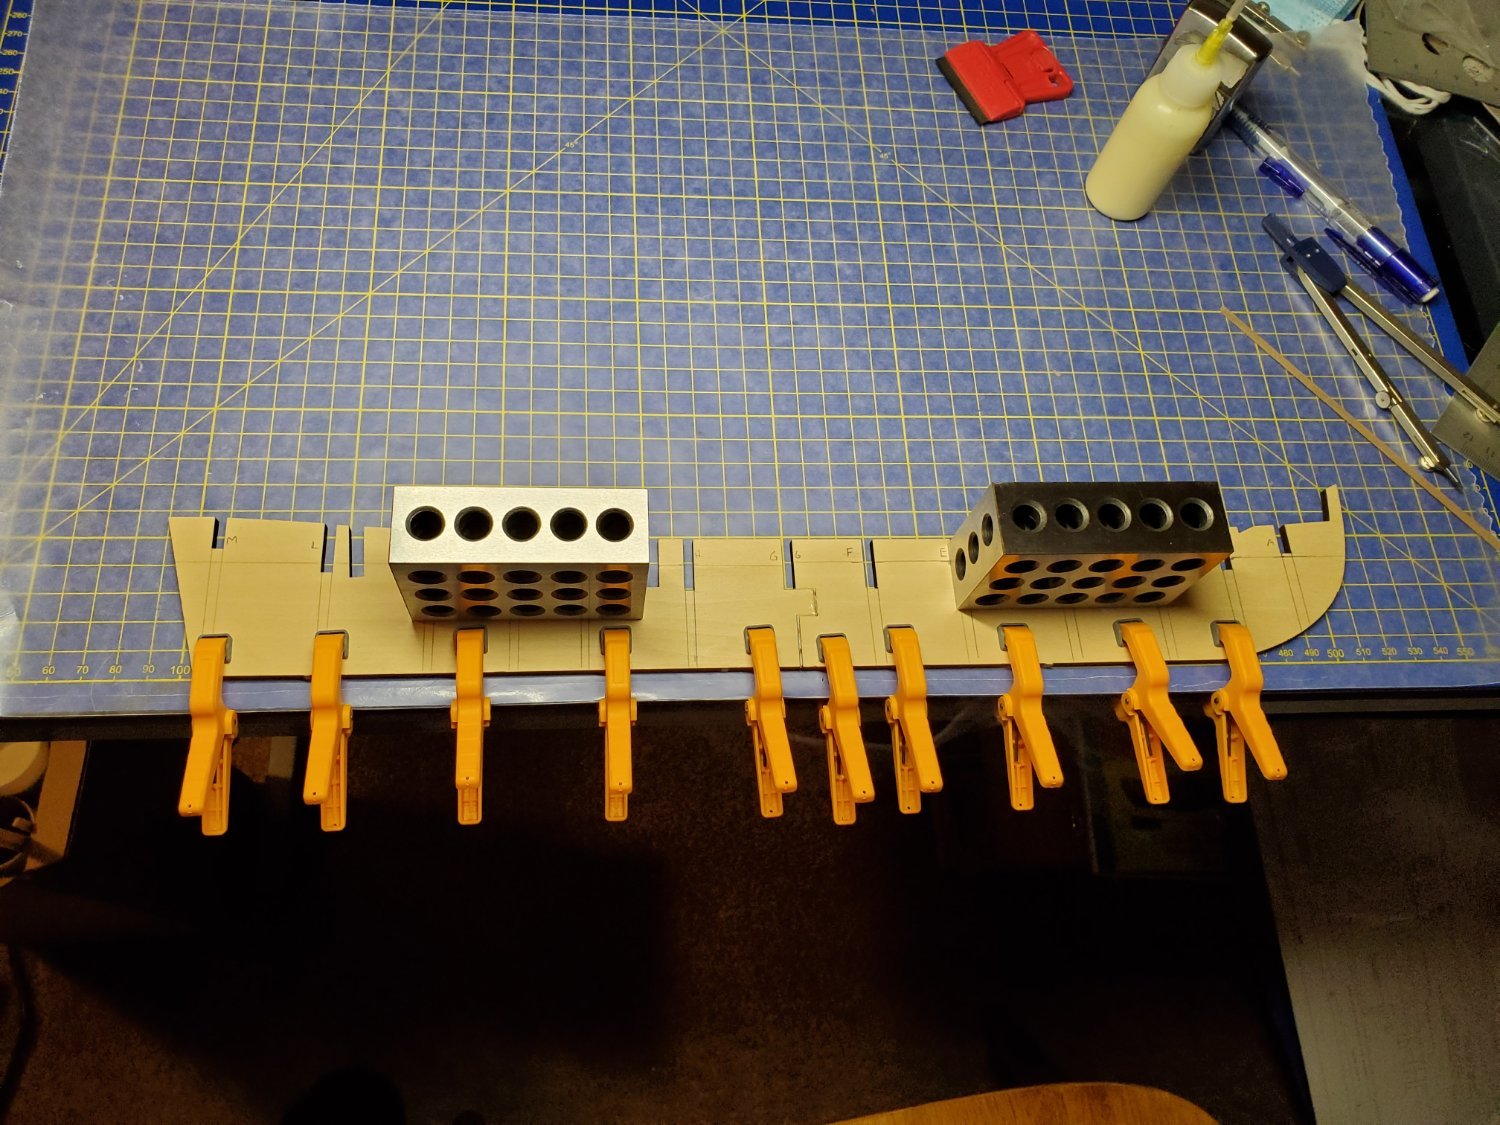
 I started this build four or five years ago. We moved across country and haven't lived in a place I could set up shop until recently so am now outfitting a new shop while I restart this project. Many pieces on the bulkheads broke in the move so I basically started by glueing all those back together. I also just added the aft filler blocks and am roughing them in.
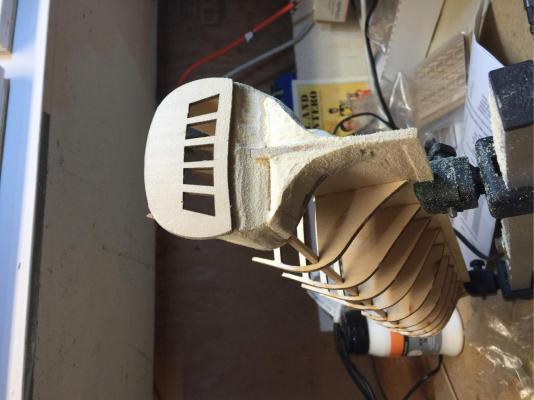

-
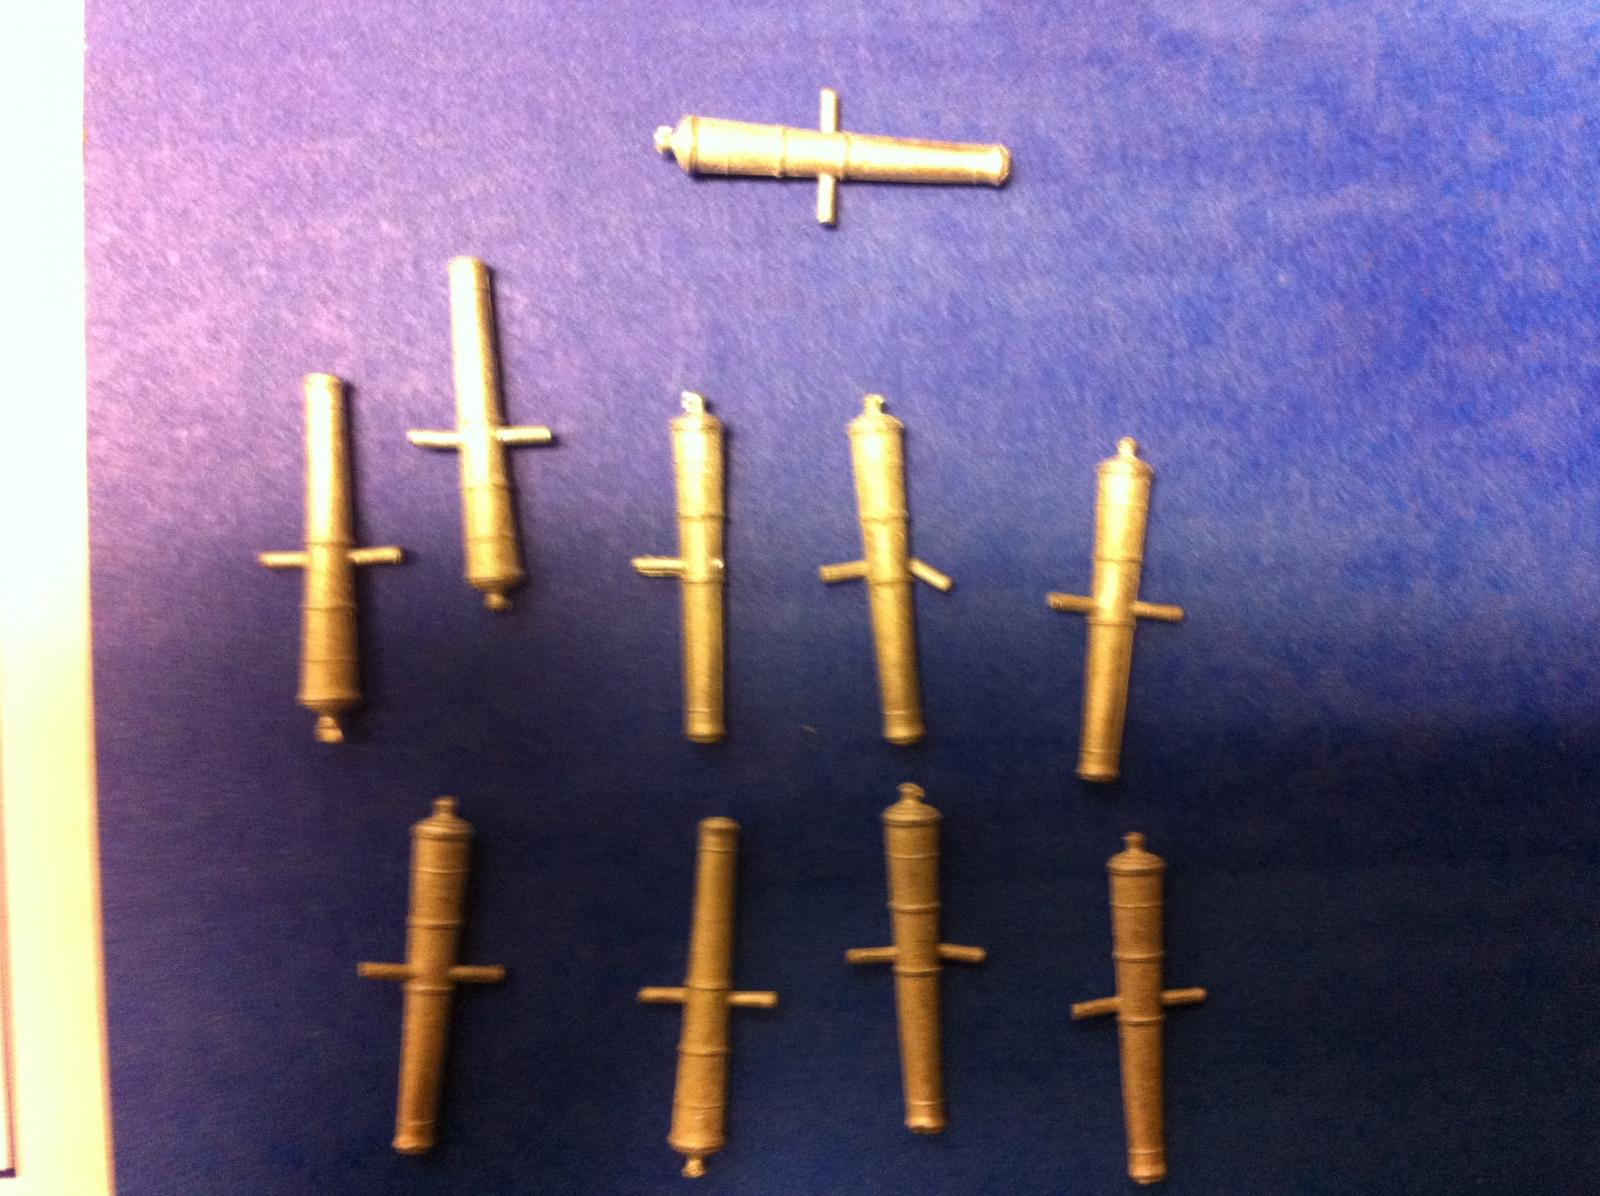
 So this will be my 3rd build and my first model shipways kit. Up front I am impressed with the supplied kit. After inventory the any issue was some broken or bent cannons. I have read extensively about model shipways customer service so we will see how that works out. Oh yea and just to let everyone know up front I am an absolute F.U.N.G. So most of the proper terms for the parts of the ship are beyond me, but I am learning. Makes me wish I had payed a little more attention about navel history during boot camp. So here we go !


-
 Throwing my hat into the ring with the Rattlesnake, I received the kit about two weeks ago but put it aside to finish my longboat. I picked up the fair a frame kit from modelexpo at the same time and started putting it together last night. After I get back from the family Christmas it will be time to implement a lesson learned from my longboat build, measure, separate and label all the wood, cordage, blocks, deadeyes etc to ensure I don't use the wrong size when I'm not paying attention then it will be off to the turtle races!