Search the Community
Showing results for tags 'blocks'.
Found 8 results
-
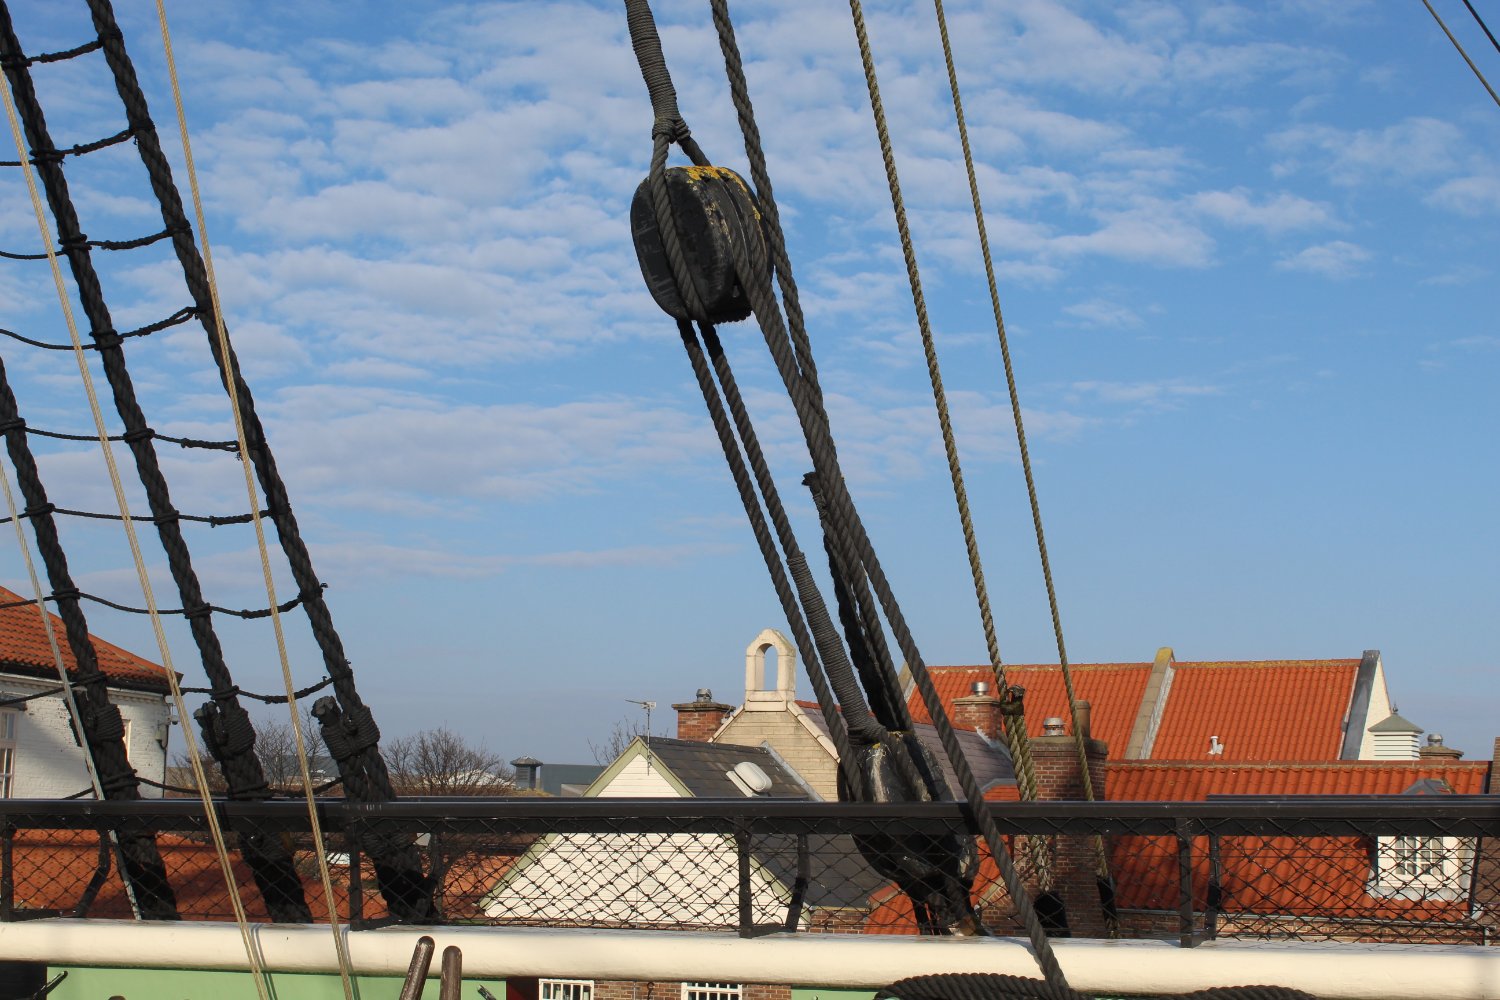
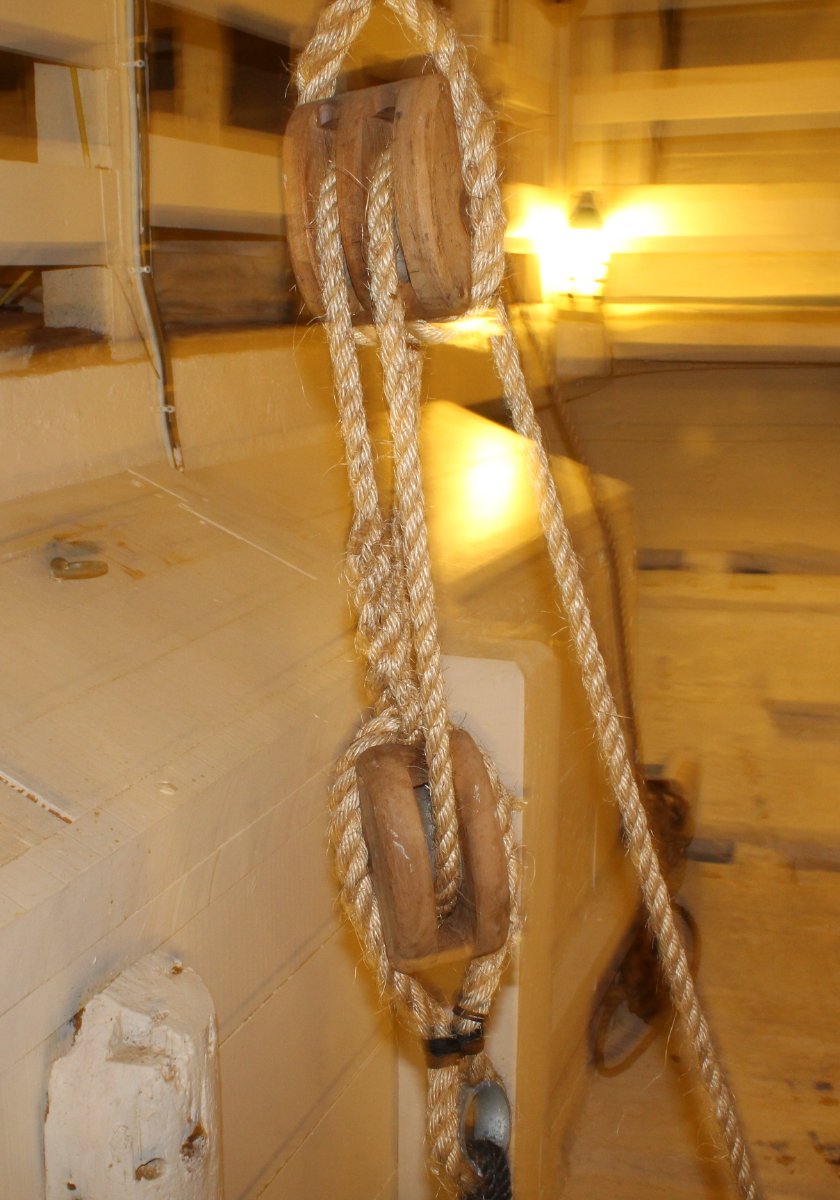
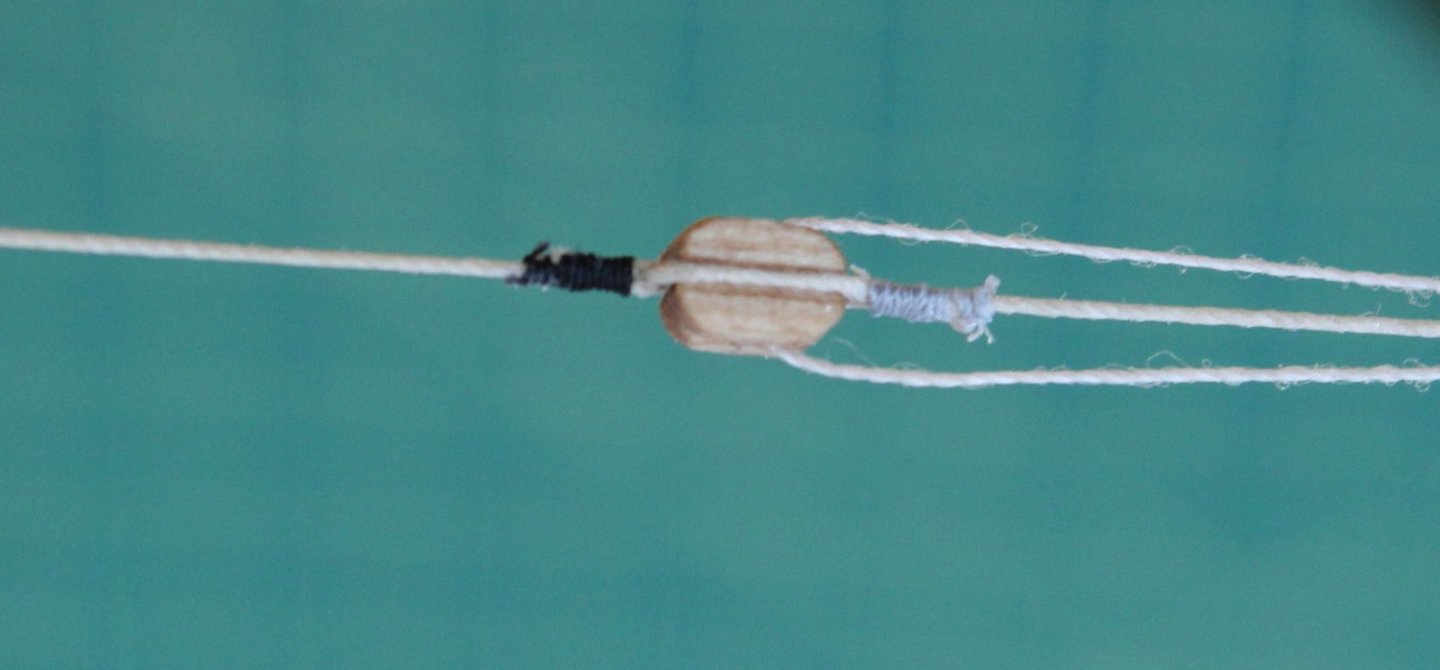
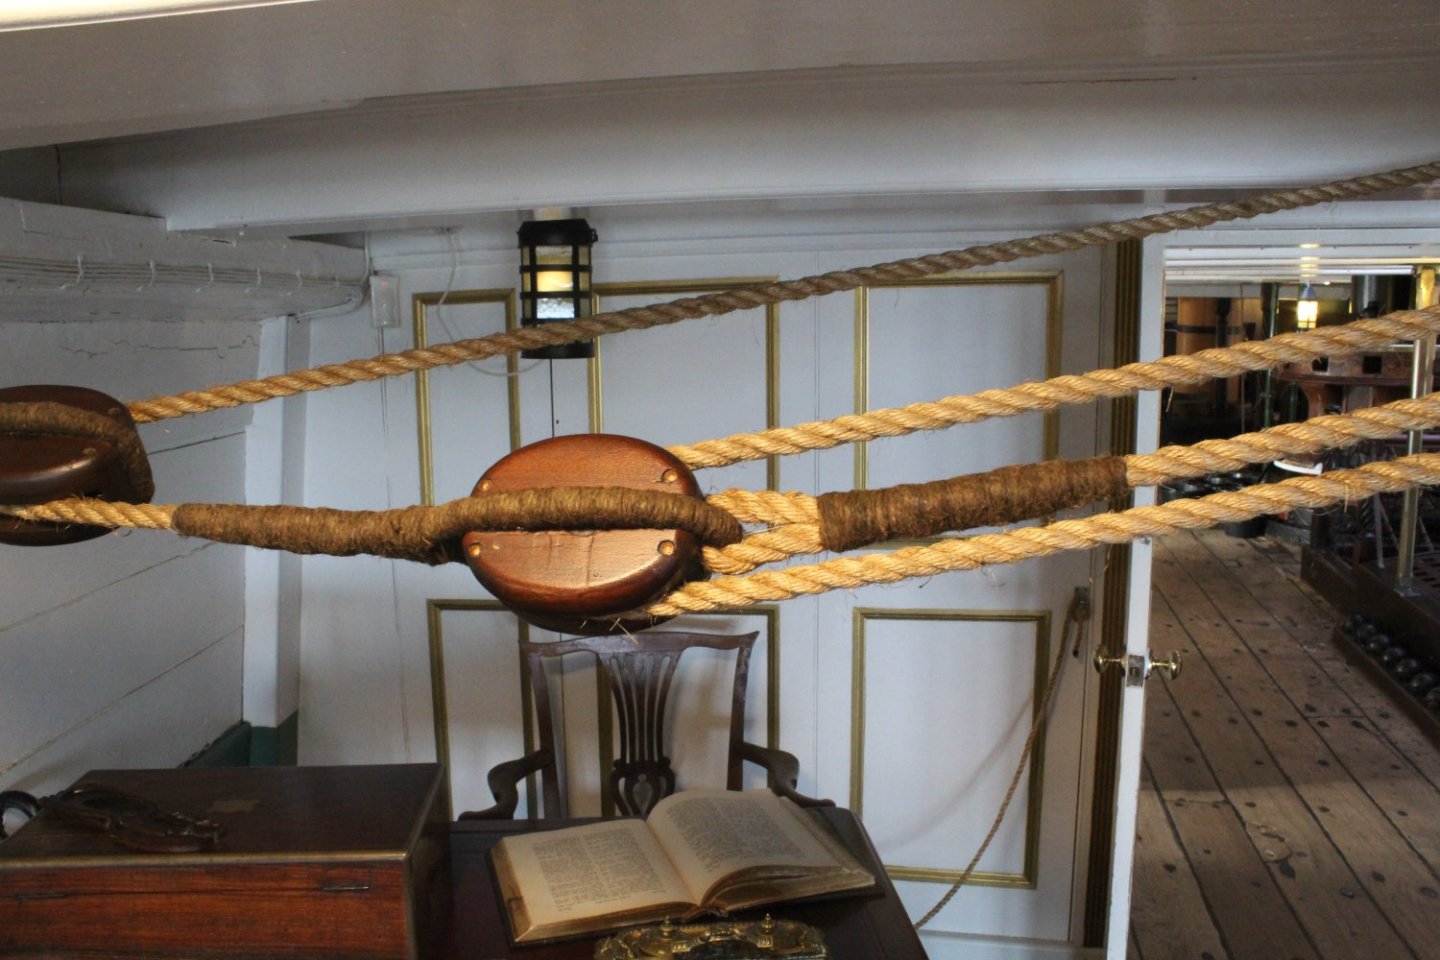
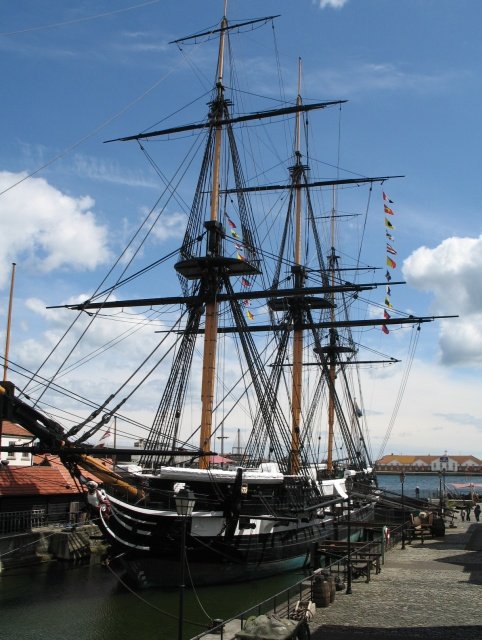
I visited The National Museum of the Royal Navy Hartlepool to have a look around HMS Trincomalee which is a Royal Navy Leda Class sailing frigate built shortly before the end of the Napoleonic wars. It is well worth a visit. Part of the reason for the visit was to look at the rigging to see if I could improve my methods in readiness for my next project which will be the HMS Indefatigable. I am fully aware that the Indy is a different class of ship to the Trincomalee. Also the Trincomalee, being a museum exhibit, has undergone a lot of restoration work. . I took plenty of photo's of various aspects of the rigging (and belaying) and it quickly became apparent that there were plenty of things I could do which would yield better results. With that in mind, and knowing it will be a couple of weeks before the Indy kit is released, I thought I would experiment to see what I could do better. When looking at the following photo I noted that the rope used to seize around the block had been served. I also noted that just have much more the rope was seized compared with what I would normally do. I decided that using a served rope around a block was not something I was going to replicate. I did however try extend the amount of thread seized and I also ensured the seizing extended past the cut ends of the thread. In the two pictures below I used 0.25mm natural thread which was seized using unwaxed Semperfli Spyder thread. I used grey spyder thread at one end and black spyder thread at the other. I think the grey looks better with the natural thread. I am going to order and try some differ spyder thread colours as there is a nice looking brown spyder thread which I think will be a mch better option. In the following two photos the seizing consisted of alternate half hitch knots 16 on the bottom and 16 on the top. I probably could have added a few more to extend the seizing even further which is something I will experiment with over the next couple of weeks. I have also attached some more photos of blocks which I will try to replicate over the next few days. In the next photo the bottom block required a thimble adding to the bottom of the block. In this photo the bottom block is secured to the hull via an eyebolt arrangement,


-
I have done this in the 1970's but I cannot remember the mm sizes that I need to buy. I am rebuilding a ship plastic model. The model is The Soleil Royale. Instead of using the plastic pieces for the blocks and dead eyes I want to buy wood. I did it years ago and the wood added a nice touch. The problem is I don't know where I can buy these online ? I also do not know what sizes I need mm and single, double ?? I really want to make this plastic model as real as possible. Thanks .
-
I recently got the "Scotland" 1/64 scale and discovered the deadliest and the blocks are really really REALLY small! I know I will need to drill out the holes for the rigging to go through the holes, even if I crazy glue the tips of the thread. So what I'm worried about is the drill bit cracking the item. What can I do to avoid this problem?
-
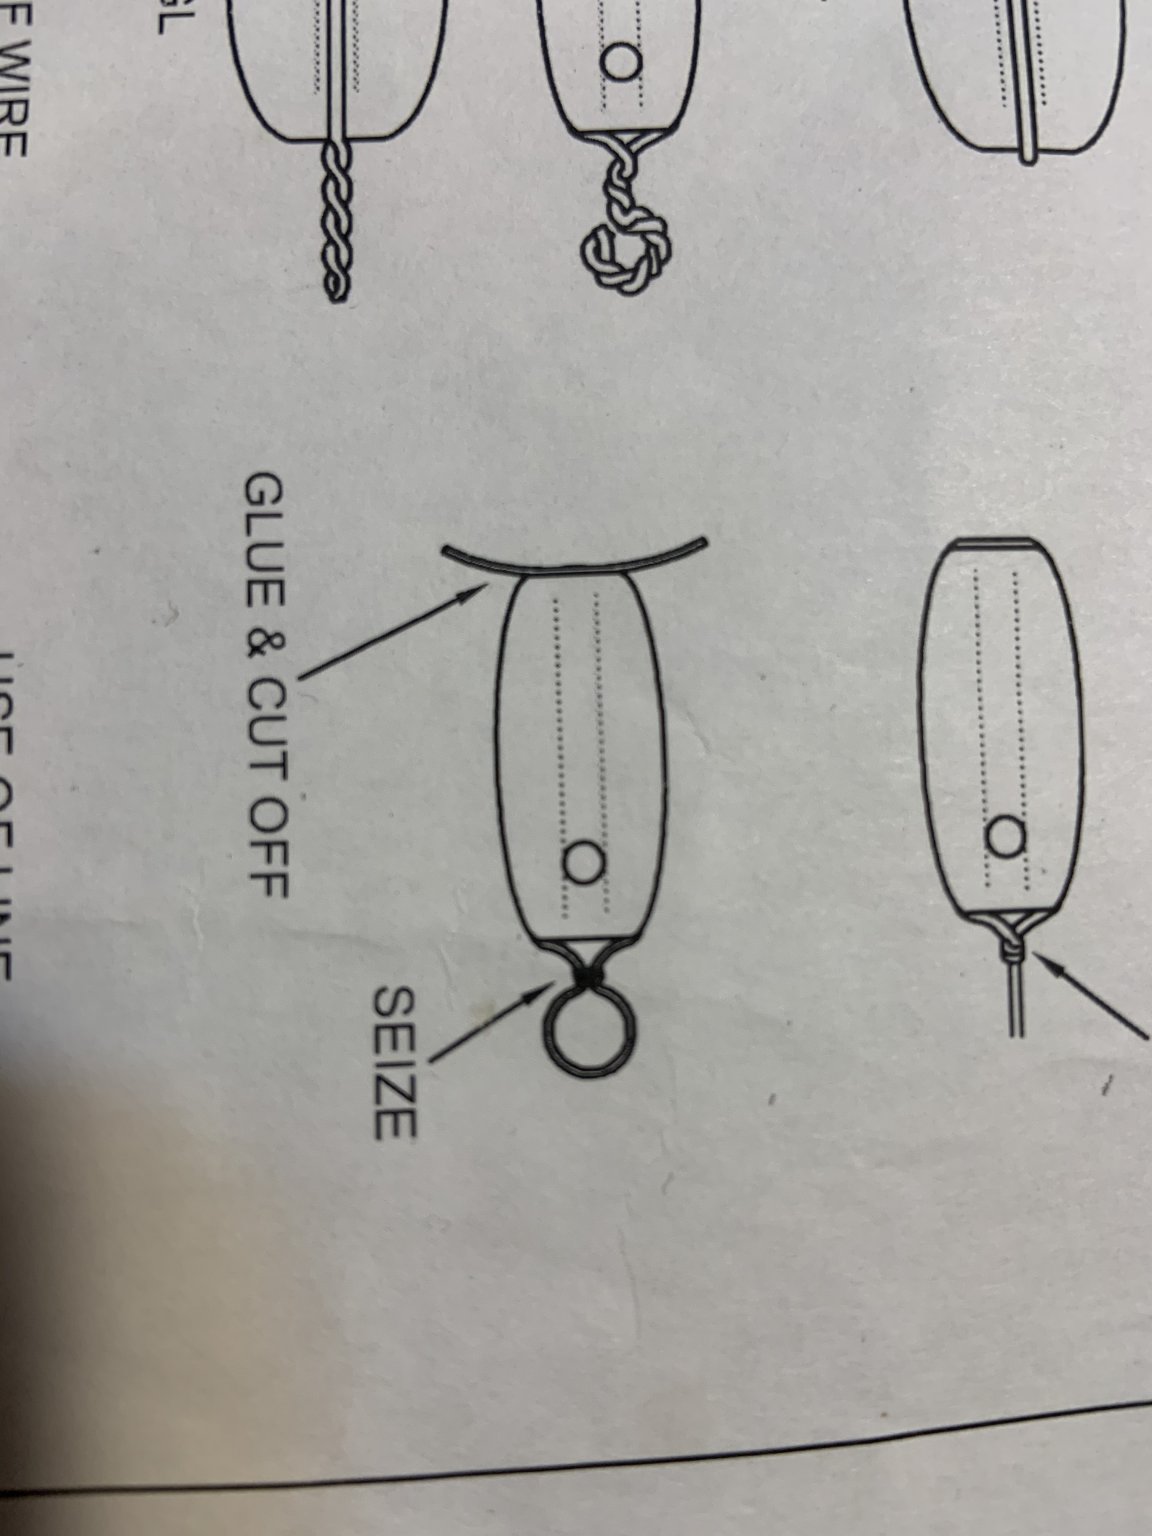
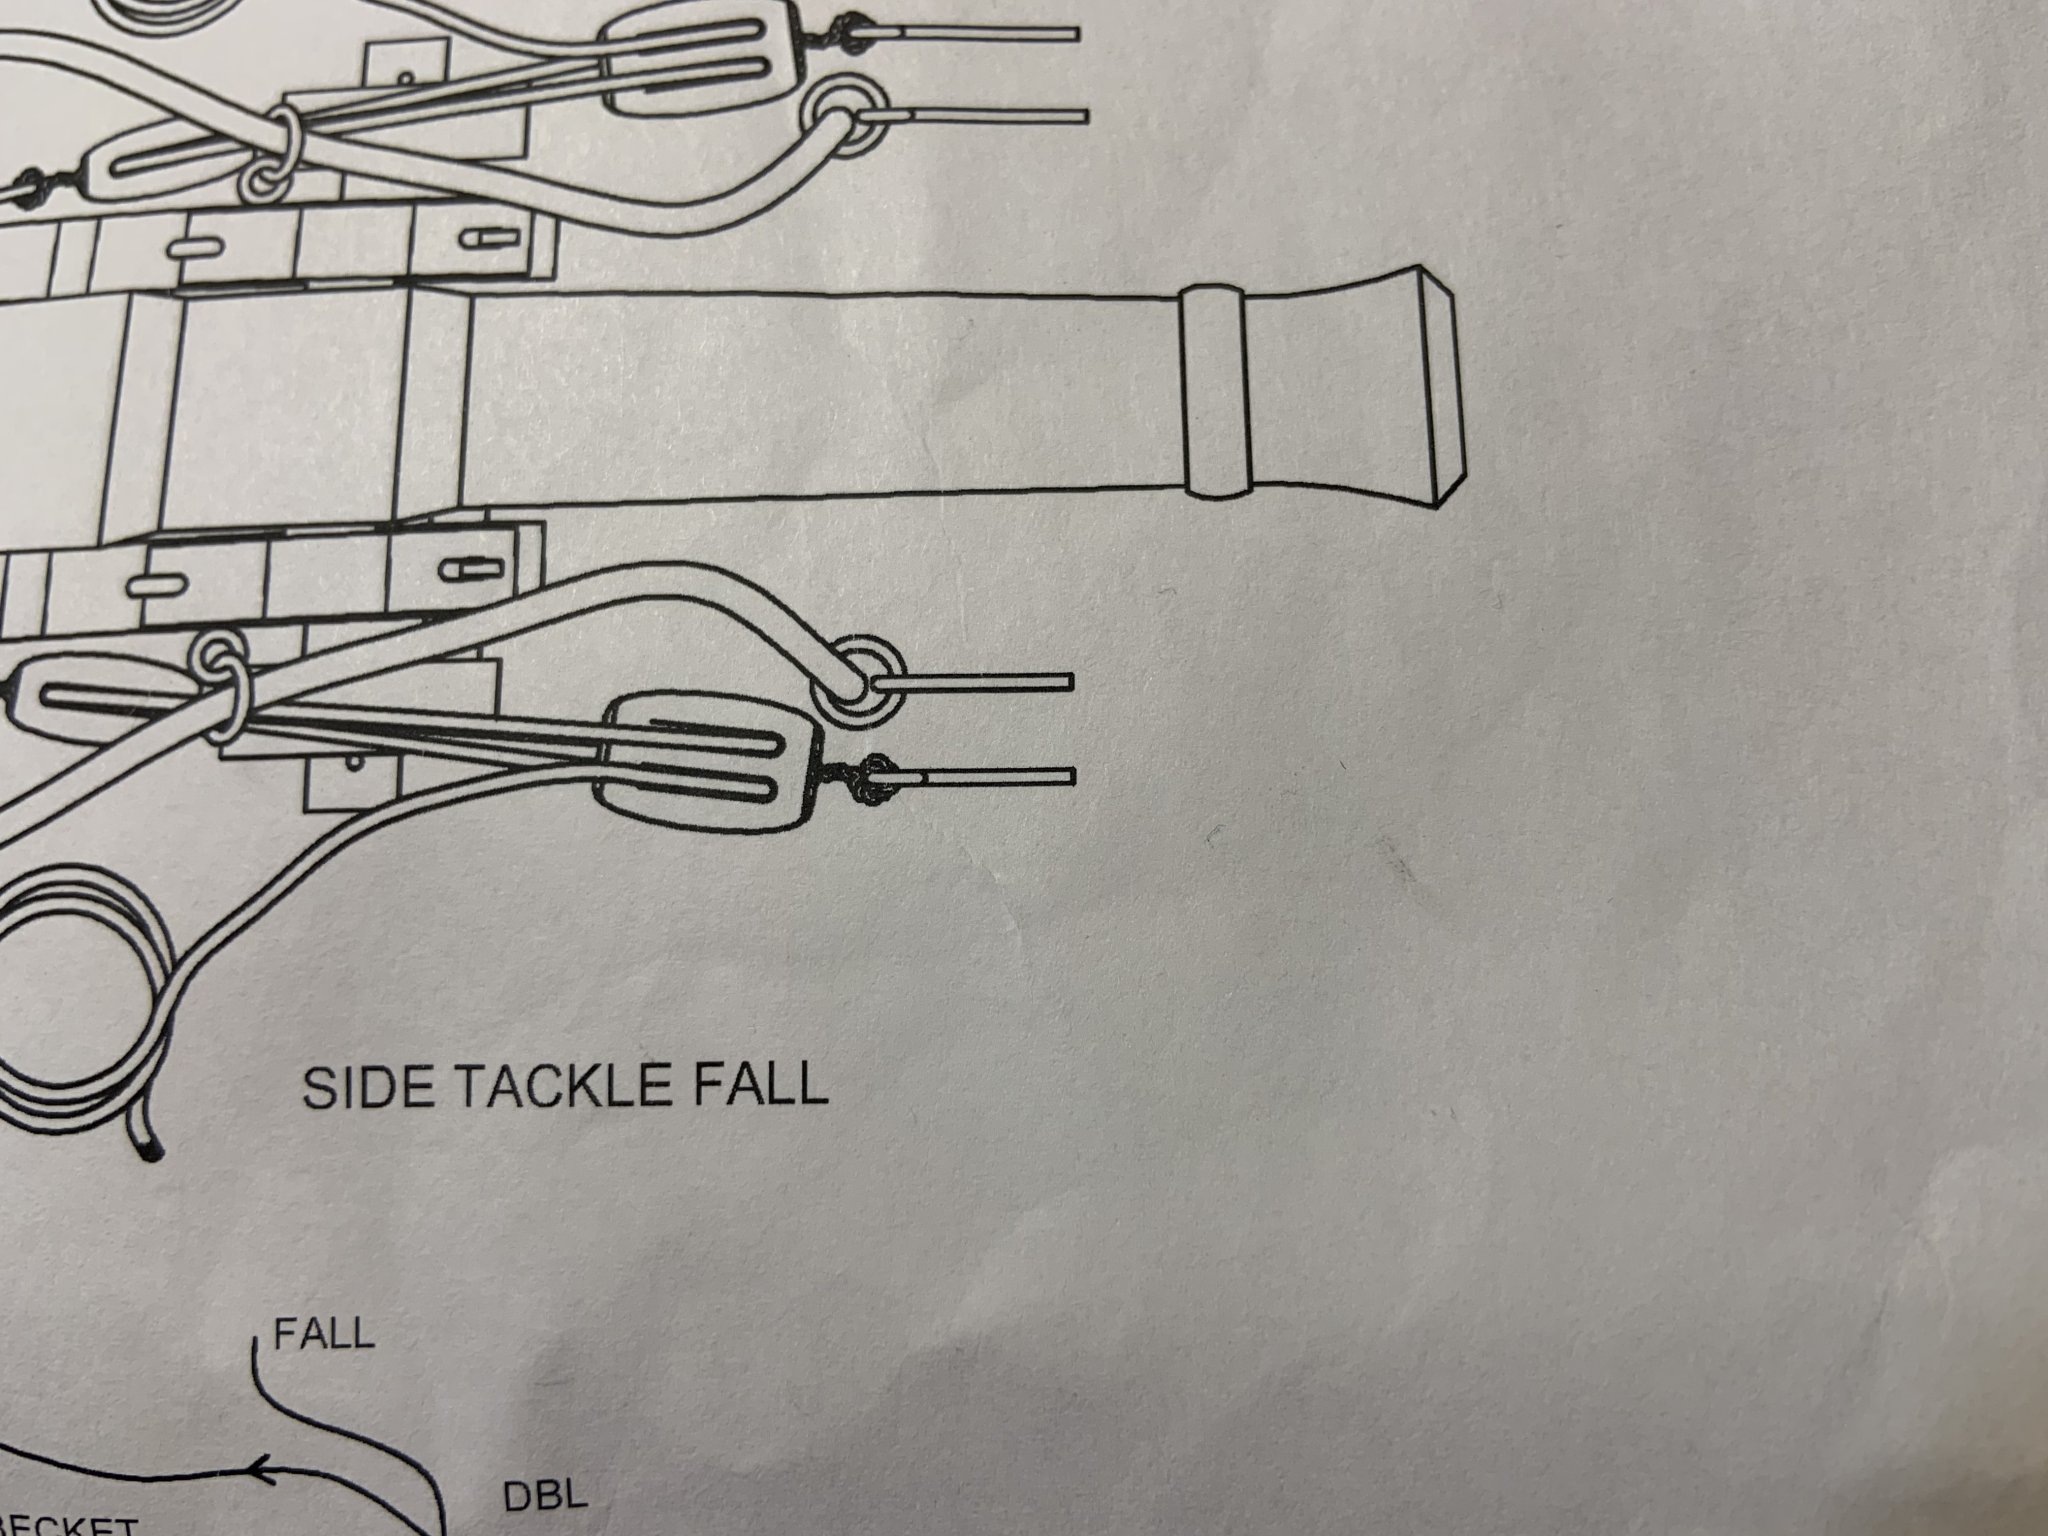
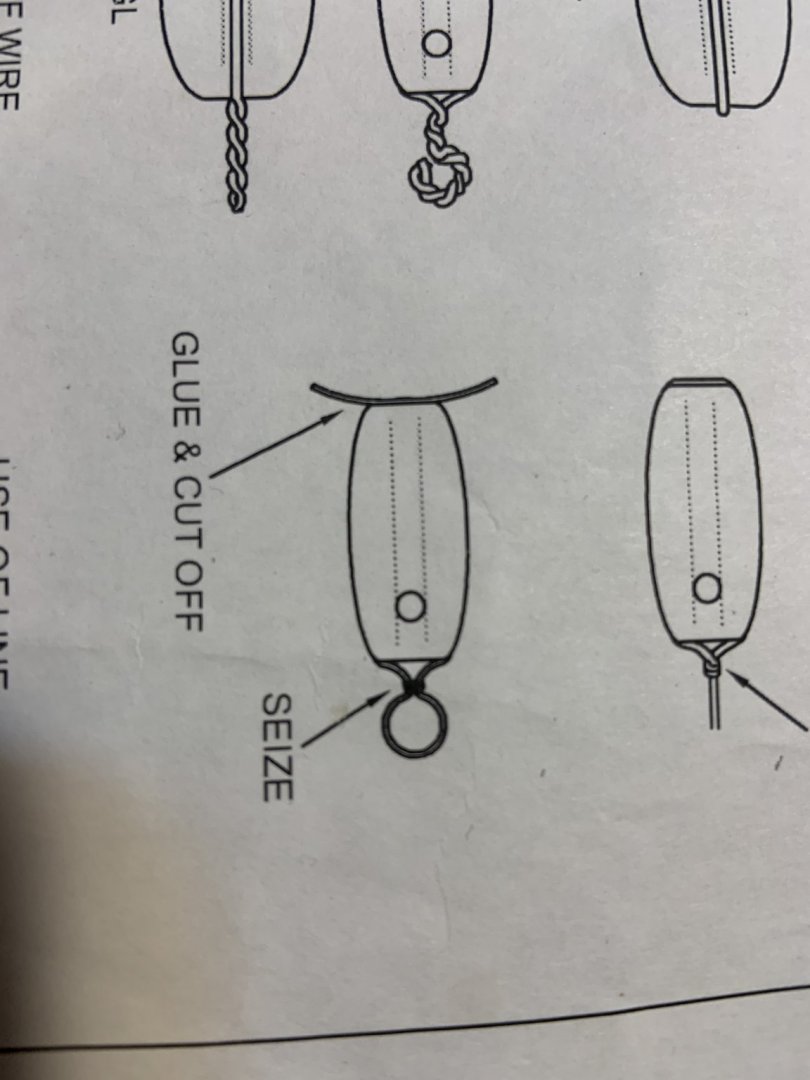
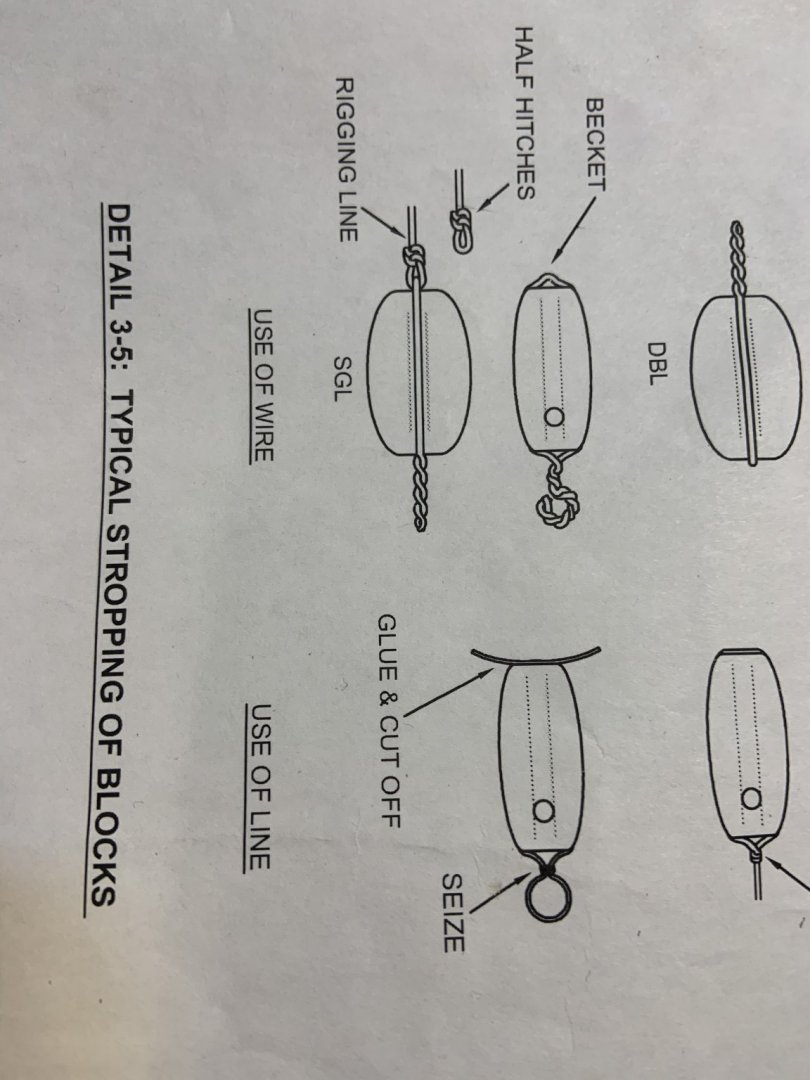
Hello all! I’m having great difficulty with this concept and am wondering if anyone has a solution? Essentially, I need to strop double blocks for rigging the cannons on my ship, but I am rather confused as to what happens to the end of the line. It seems like it is supposed to feed back into itself? That seems a little beyond my capabilities, but I’m very curious to see what others do. It’s something that’s so common, I don’t see the actual process mentioned very often, nor do I see it detailed much at larger scales. At a smaller scale, it’s a lot easier to give the illusion of a properly stropped block, but at this scale I am at a loss for how to proceed. Any help is greatly appreciated! Here are a couple pictures to illustrate what I mean. (I know, the last picture is definitely not the best way of doing it, right?)


-
MAY 20TH THROUGH THE 24TH 2019 (MON-FRI) BlueJacket's rigging class is a popular event. We run it from 9 to 3 for 5 days (although some people leave early on Friday.) IT IS A CLASS FOR NOVICES. We don't assume you know anything about rigging a ship model. All tools and materials are provided with the class fee of $400. You get a hull to work on, all the sticks and dowels, the glue, blocks, deadeyes, threads, wire, beeswax, and the following tools: Excel hobby knife and blades Pin Vise Assortment of drill bits tweezers needle nose pliers flush cutters cuticle scissors (best for clipping rigging) and probably some other things I forgot If you use magnifiers for your modeling work, you should bring them. By the end of the class you will have learned how to use the tools, tie a multitude of various knots, and will have completed what you see in the picture below: You can see shrouds, backstays, bobstays, gammoning, vangs, topping lift, ratlines, hearts, throat halyard, peak halyard, sheet tackle on a traveler, lifts, braces, forestays, etc. Obviously, we don't waste a lot of time to make the model look pretty! We want to concentrate on the rigging. At the end of the class, BlueJacket will ship your model and materials to your home, again all part of the tuition cost. Monday will include a pizza party for lunch and a behind the scenes tour of the BlueJacket facility. In addition, all students will receive a 10% discount on anything they buy during that week. Kits, tools, books, gift items, you name it! The hours of 9-3 are flexible, we have the hotel conference room available 24 hours a day for the week. If you bring a family member, the 3:00 PM cutoff lets you do some sightseeing around the area. But if you need to catch up a bit, the room is yours! Classes will be at the Fireside Inn in Belfast, 4 miles from BlueJacket on Route 1, tel# 207-338-2090. You can ask for the BlueJacket corporate rate if you choose to stay there. There is a pool and Jacuzzi, exercise room, a decent breakfast bar, and all rooms have an excellent view of Penobscot Bay. If you are the camping type, Searsport Shores is also nearby. Class is limited to 12 people with payment in advance. Full refund up to 2 weeks before, 50% refund up to 1 week before. Unfortunately, cancellation less than a week in advance cannot be refunded except by extreme circumstances, which we reserve the right to determine.
-
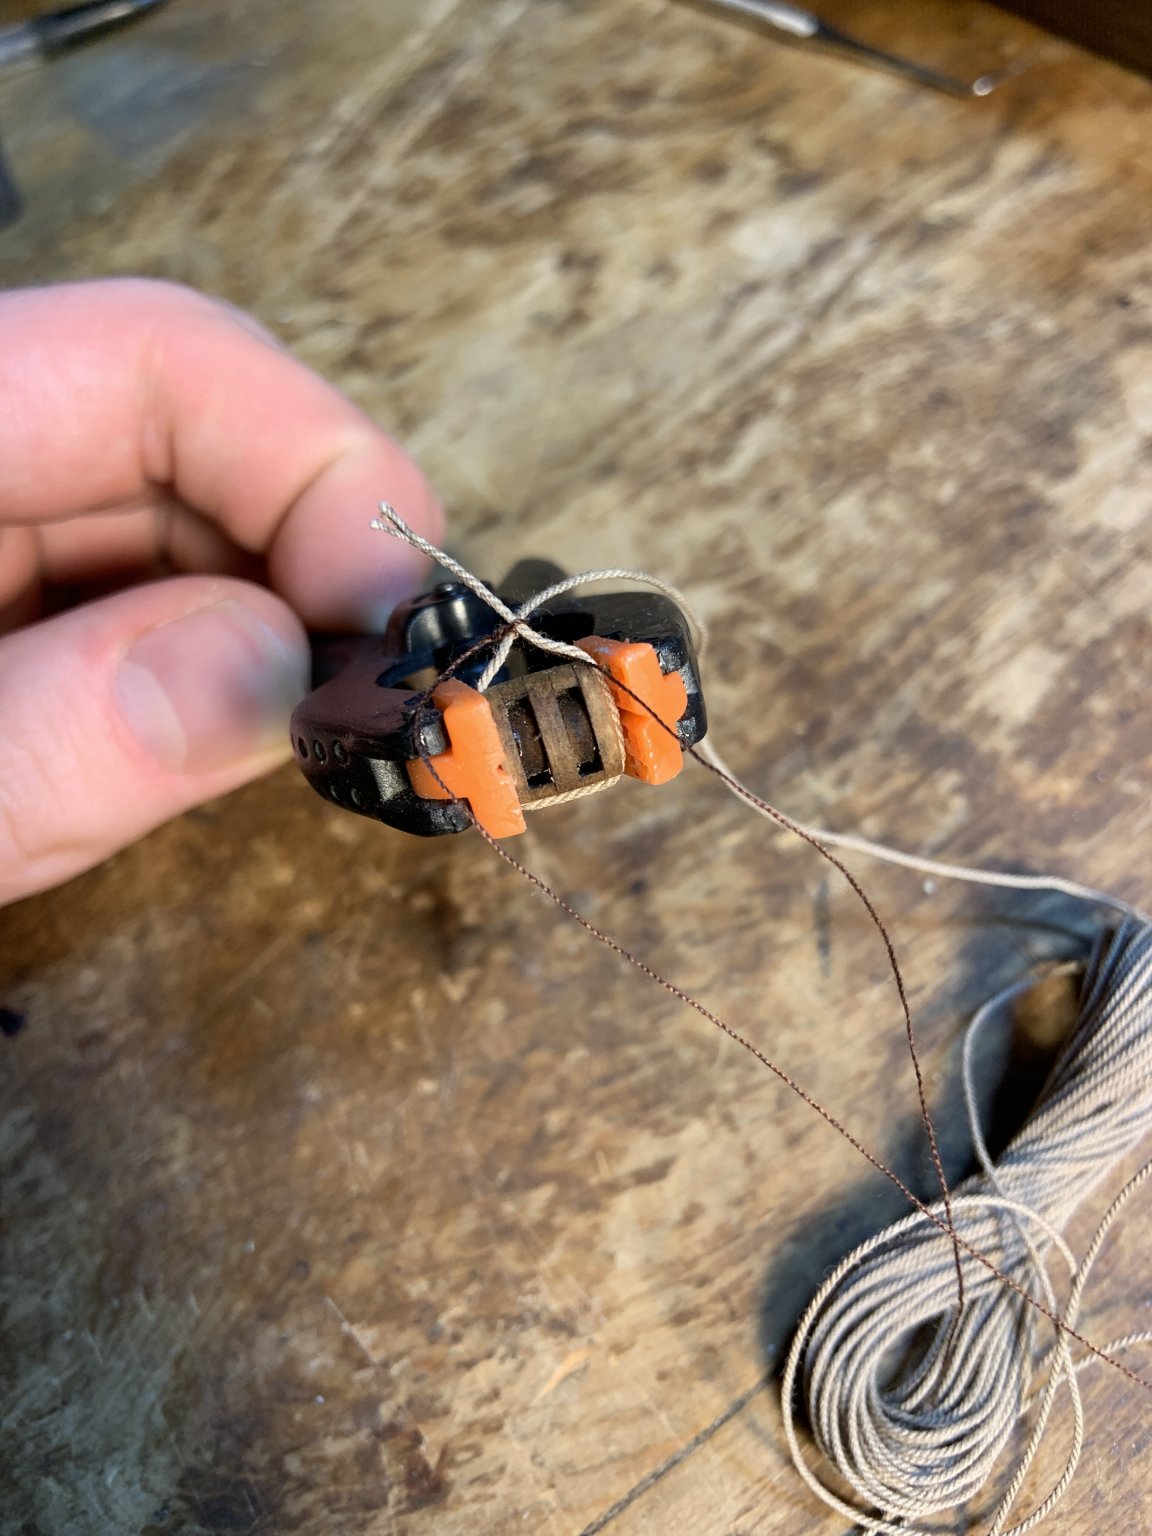
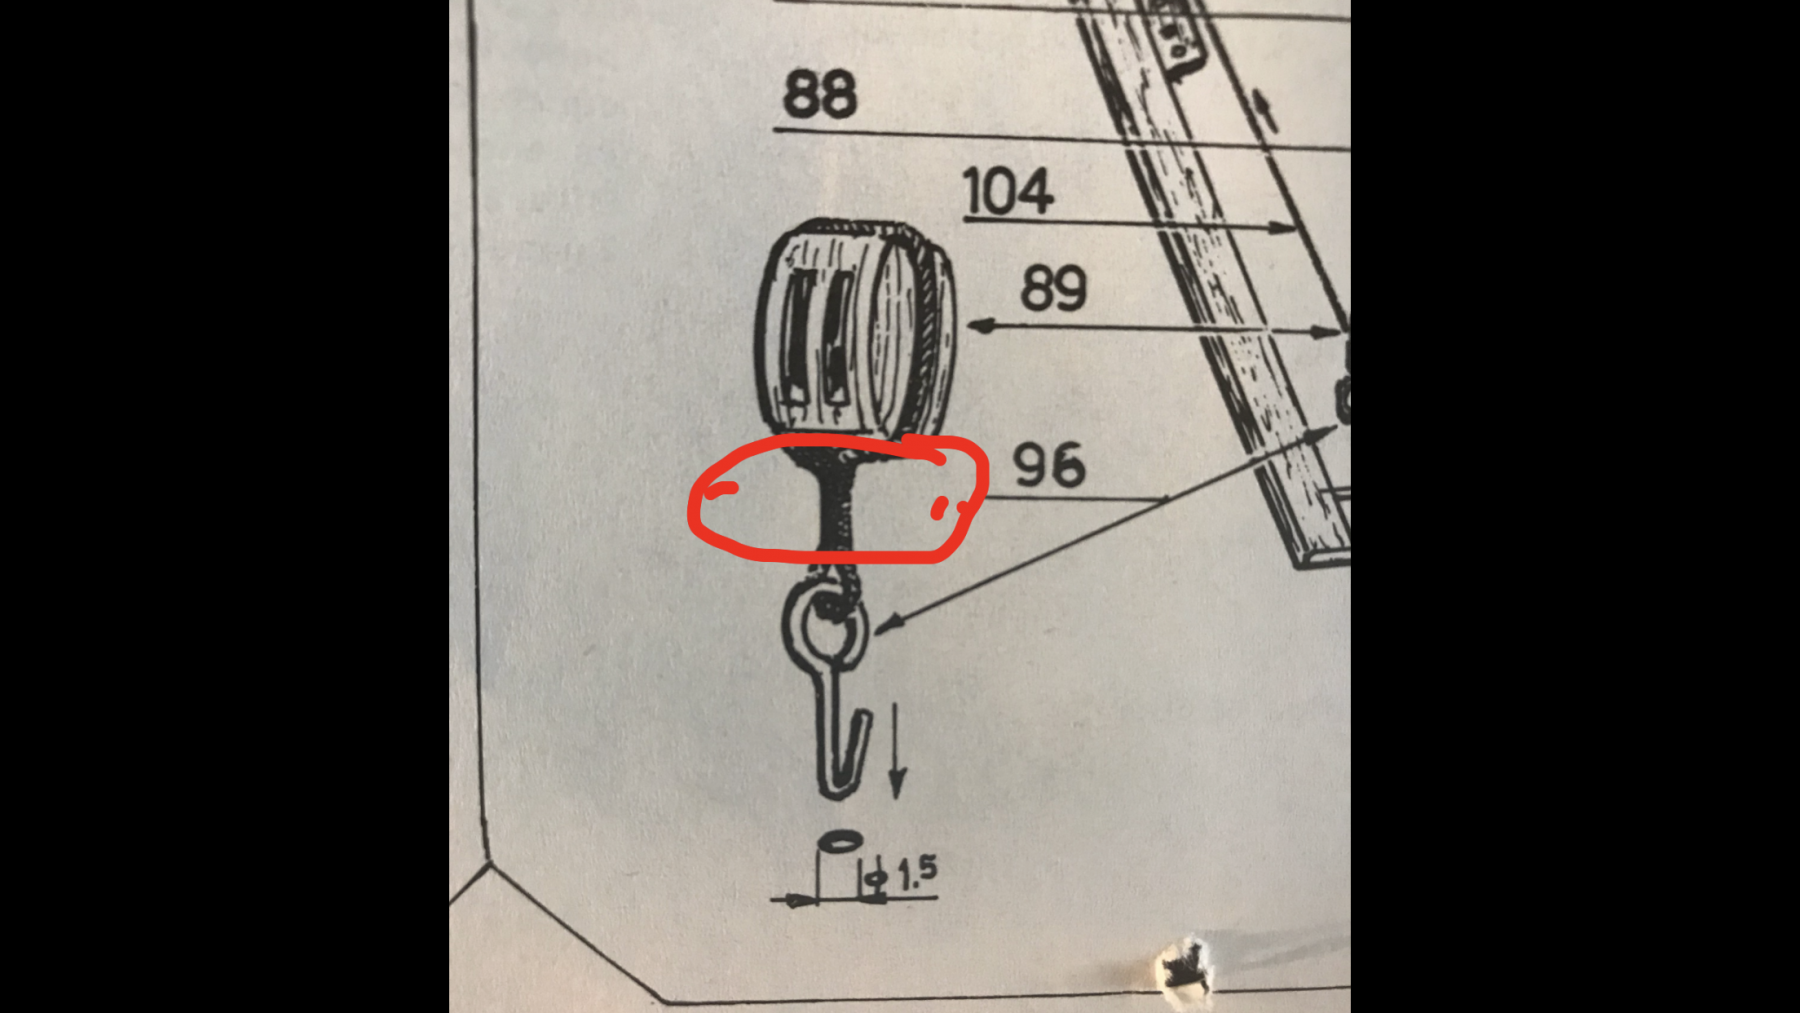
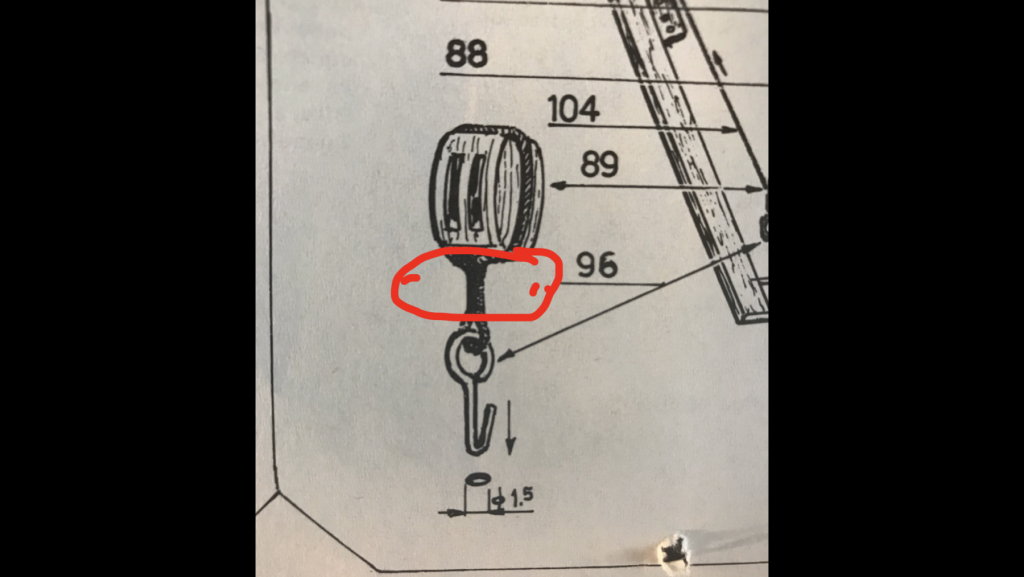
Hi there guys. I’m currently working on Mamoli’s HMAV Bounty and I’m reaching the tiller rigging stage. I’m trying to do a quality job and am happy with my progress so far but I’m approaching the rigging stage and don’t want my rigging job to let the model down.... I have several questions that will probably seem really basic to some of the seasoned modelers on here. But I’m struggling to find information or clear answers on the subject. Firstly is it correct that the thicker rope between the block and the loop that goes through the eyebolt in the illustrated picture on my bounty plans is from a separate smaller rope making it appear to be thicker? Or is it the same rope? Which is the ideal way to do it? Is here any good videos or books that I can download that can show me how to do these kind of basics? I have no shortage of ropes so either way doesn’t bother me...I’m just trying to do it most realistic looking way possible and learn. Secondly the way the plans are asking me to fix the eyebolt into the the deck seems unusual to me. And I just wanted to clarify that it isn’t another mistake in the plans (which I have noticed a few) The eyebolt has a width of .5 mm and drilling a 1.5 mm hole in the deck sounds wide to me, even for a folded eyebolt. Just wanted to check that this is common practice.
- 5 replies
-
- 1
-

-
- tiller rigging
- blocks
- (and 1 more)
-
I'm finally about to start the running rigging (With Sails) and the first instructions are about connecting the rigging to the yards. Basically, the thread goes through a hole at the top of the mast and then somehow connected to the yard. What I don't see is, How the heck am I supposed to connect the thread to the yard? I'm assuming I just tie it on or is there some subtle part of the instruction I'm missing? Also, other halyard instructions for the other yards look like the rigging just goes through some blocks but never actually tie onto the yard. Is that correct? A large number of blocks were added to the yards in earlier instructions. I see in one part of the running rigging instructions where they note that fact and that the rigging should be done with those blocks. It seems like there are more blocks (I could be wrong) then there is rigging to them for those yards (for that one instruction part). And, there are tons of other areas where blocks are needed for other rigging all over the rest of the instructions. Is there an assumption that some of those blocks that were previously rigged would be used in those other instructions and not just the area noting their usage? Sorry, if this seems confusing, but if you've completed this any time recently, I think you might understand what I'm getting at. Thanks.
-
Hi All, I am starting the rigging for a 3 masted square rigged English ship from around 1800. In have looked in a few books and other internet ressources about the subject, but I cannot figure out how the blocks that are fitted under the masts' tops are called, how many of them are there and what are they used for. Can anyone help?