Search the Community
Showing results for tags 'drakkar'.
Found 16 results
-
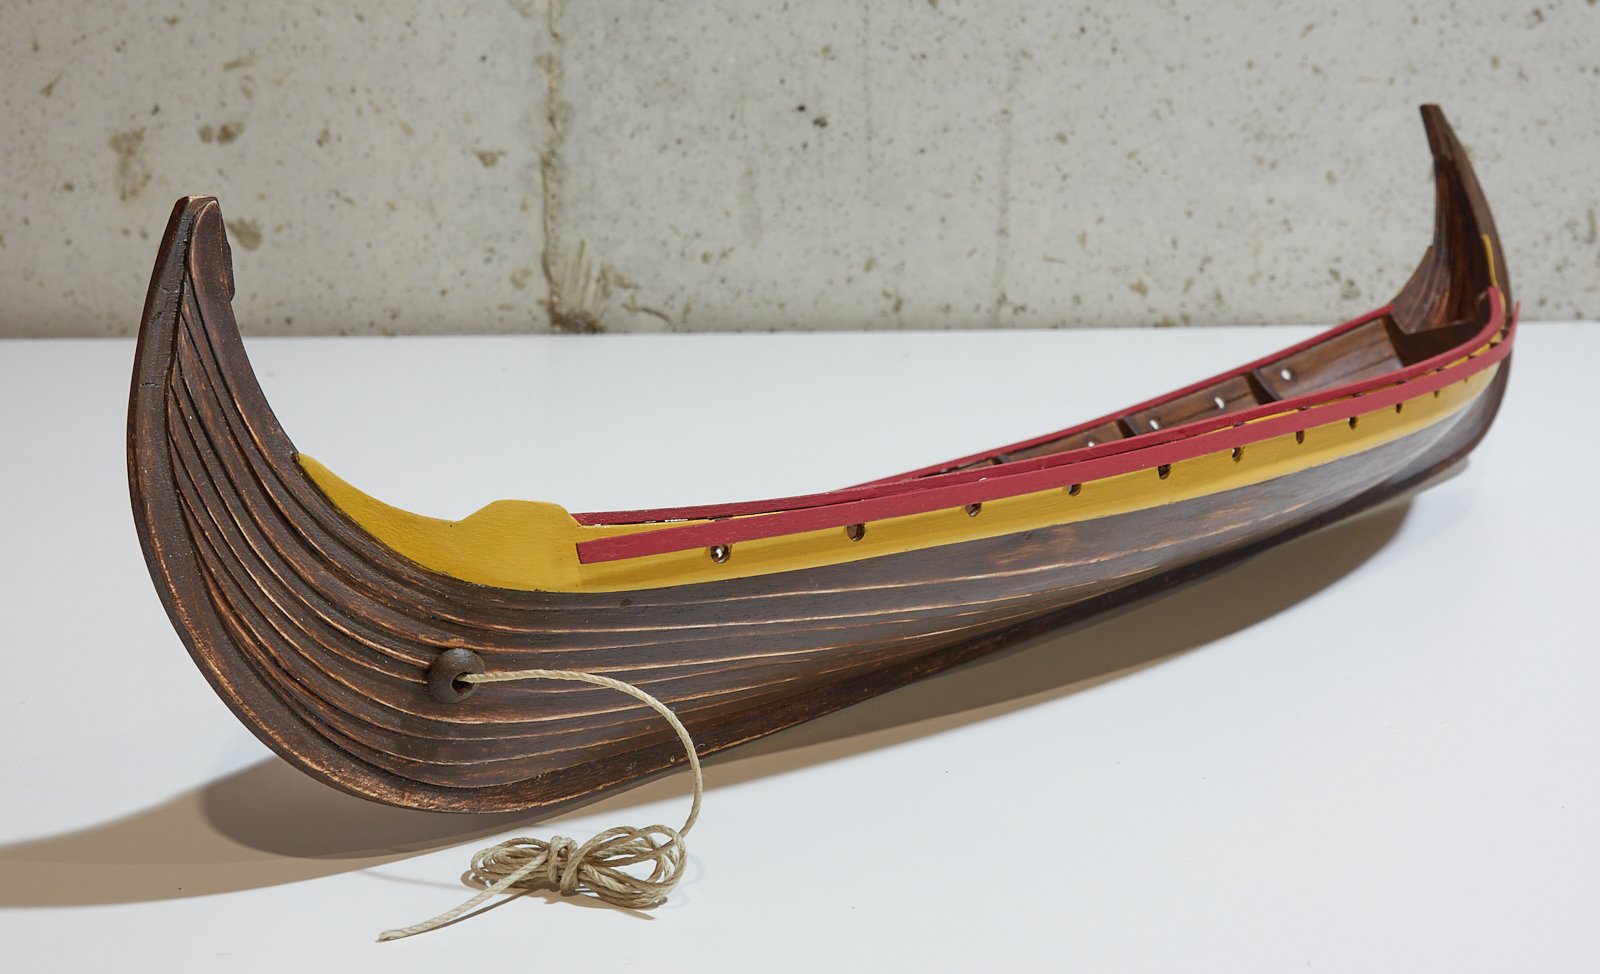
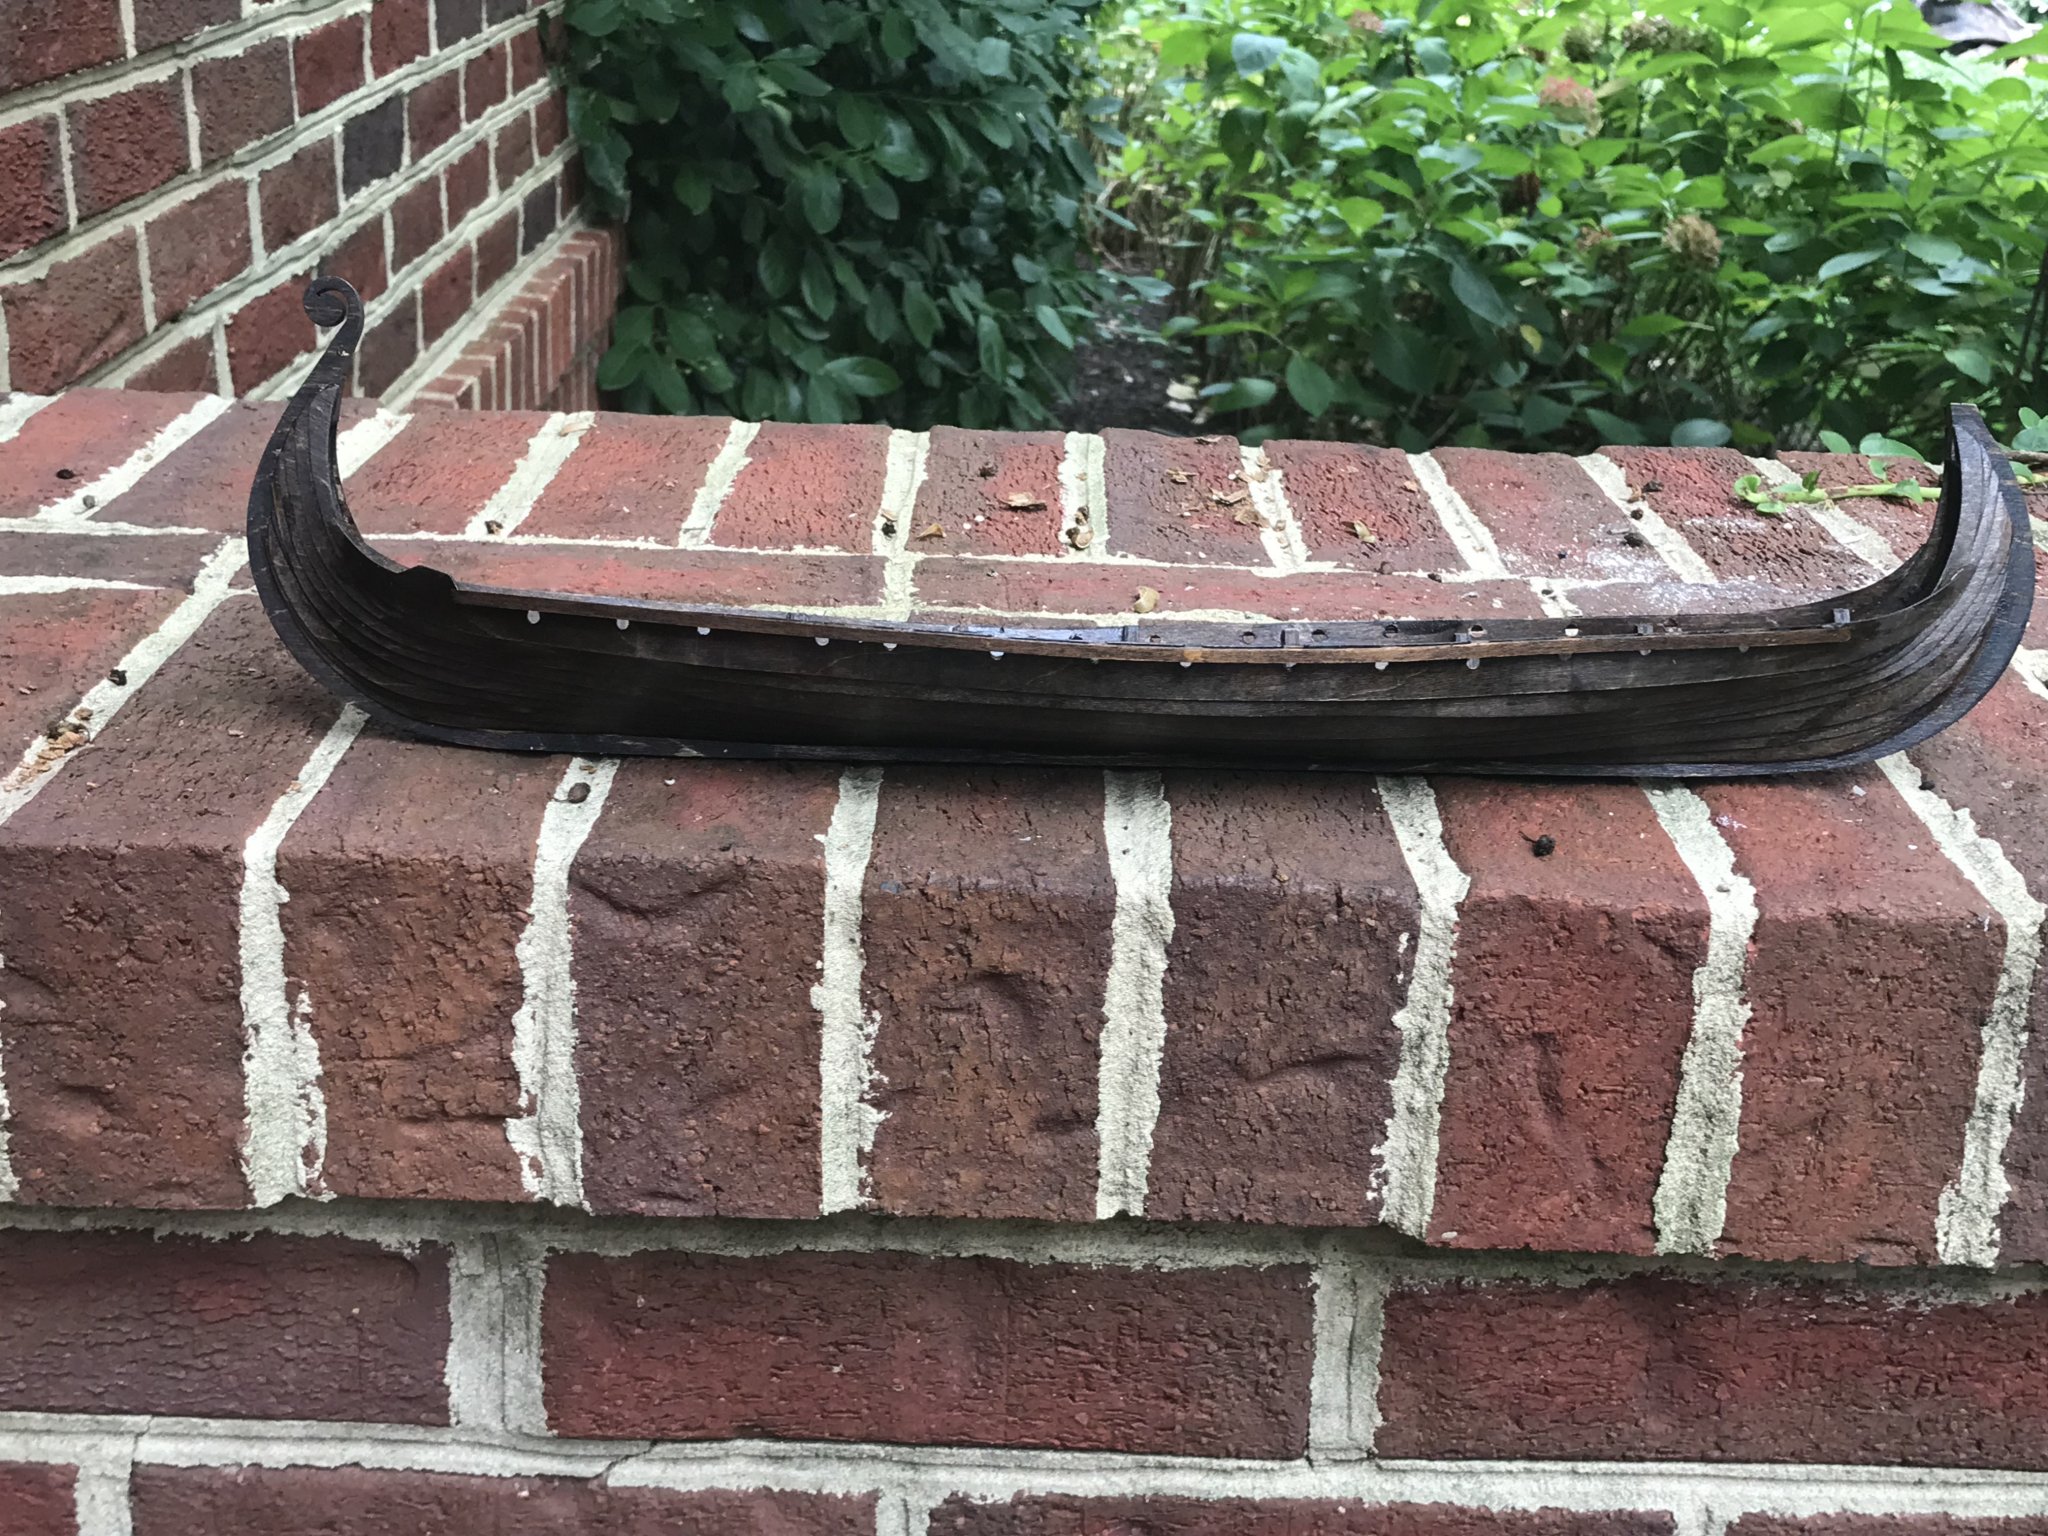
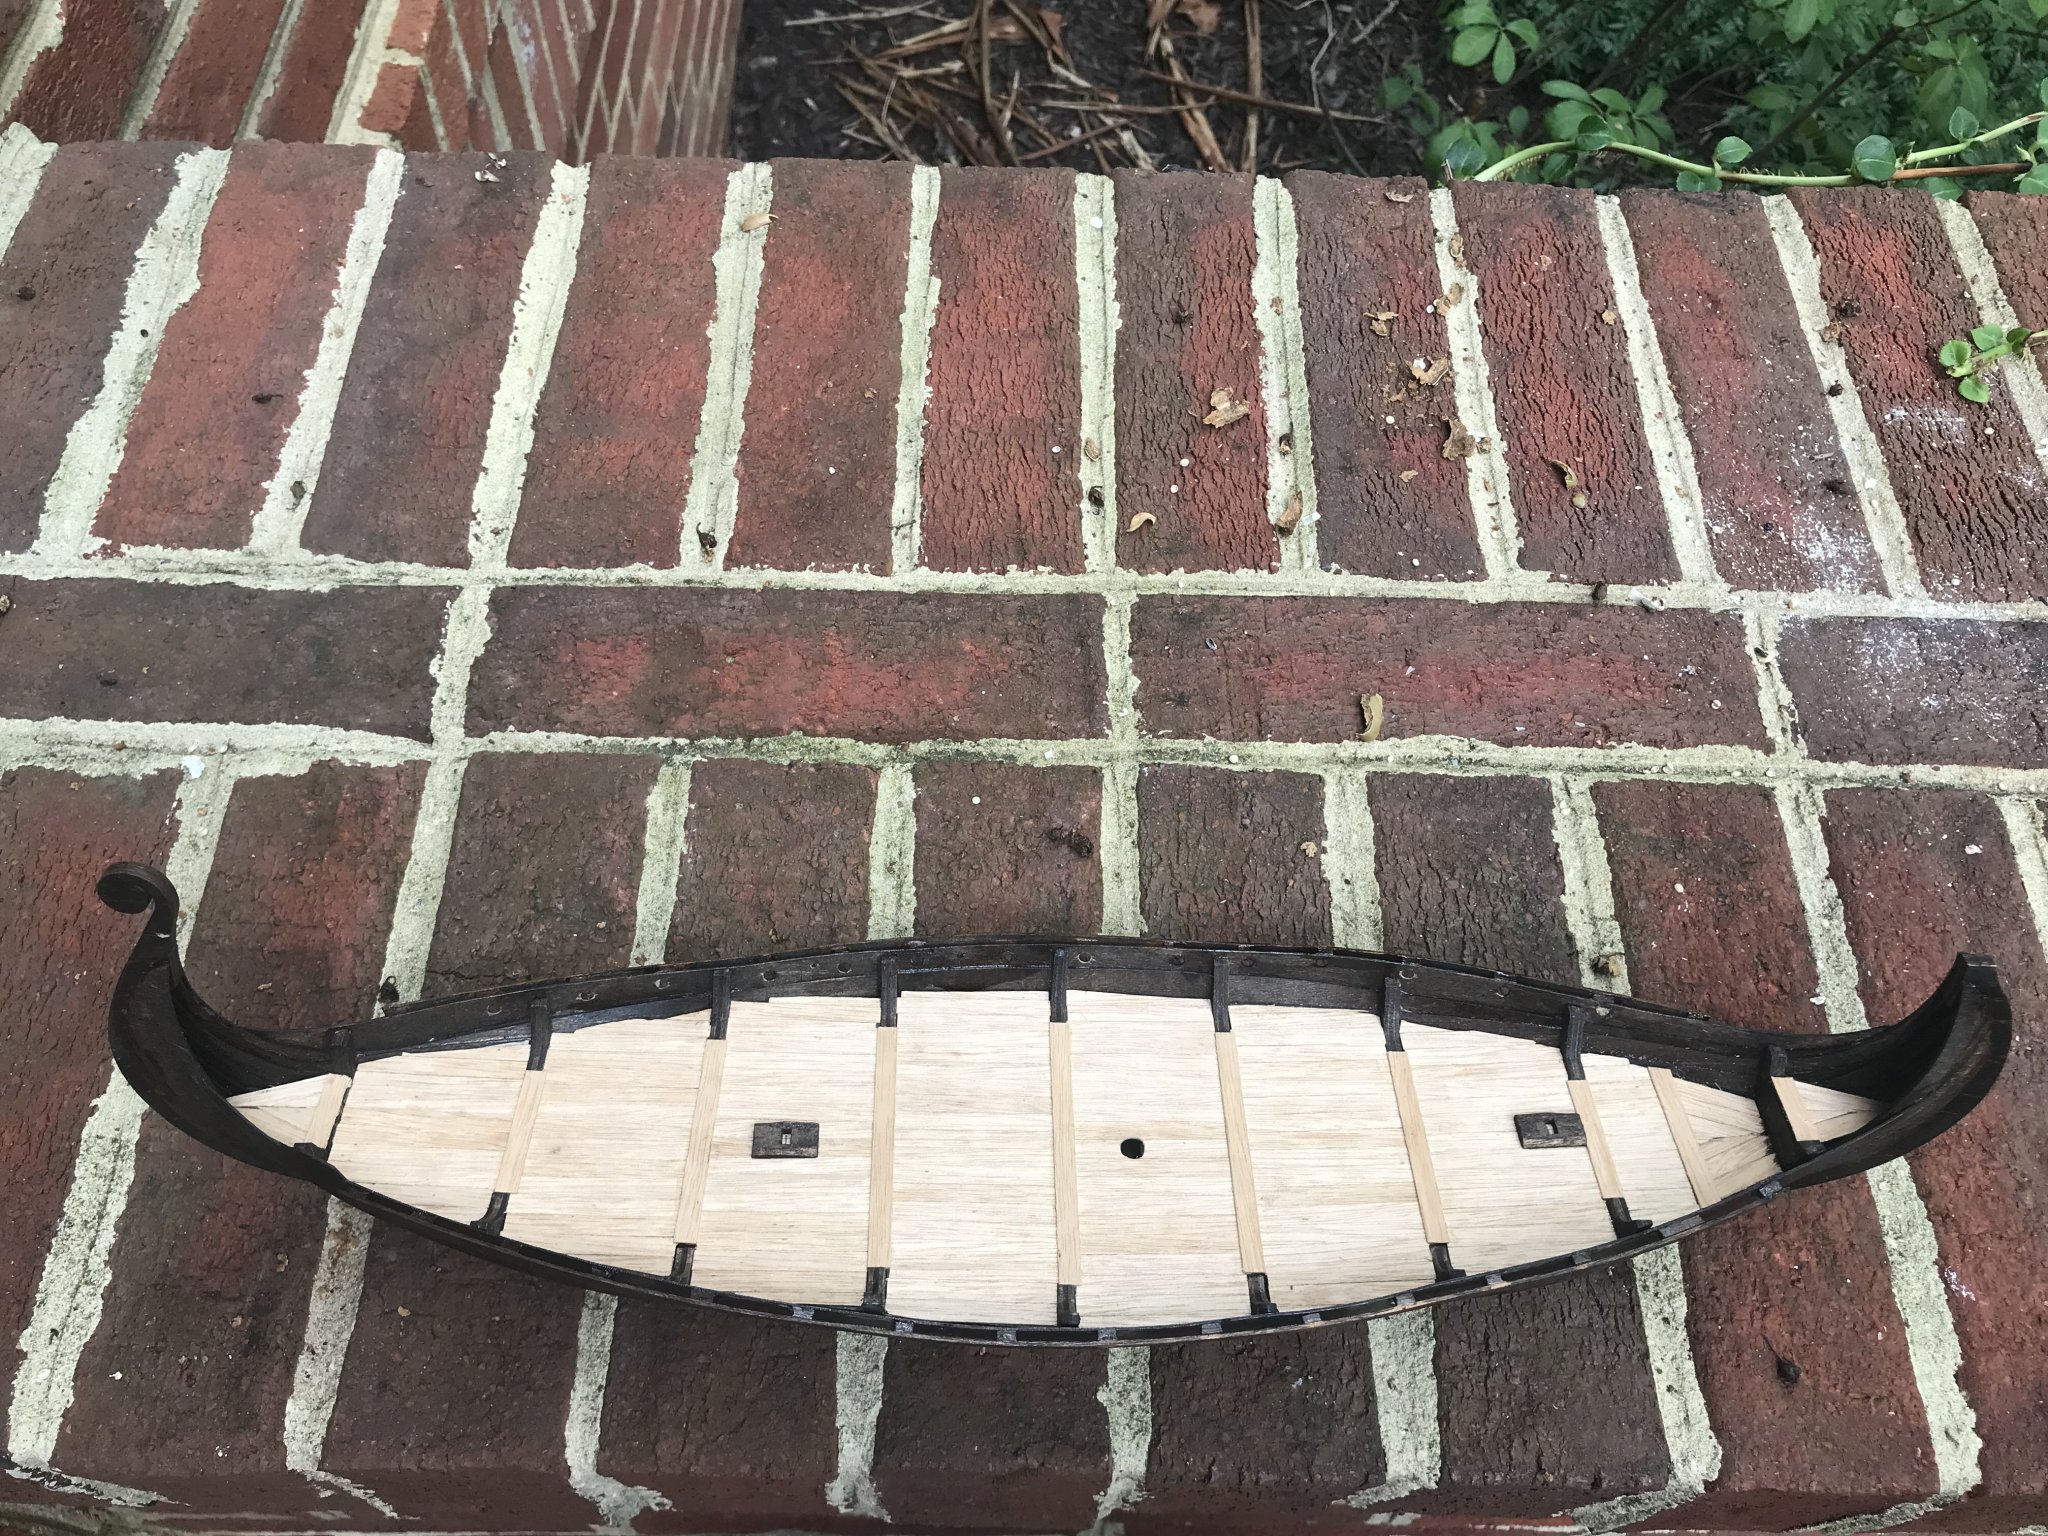
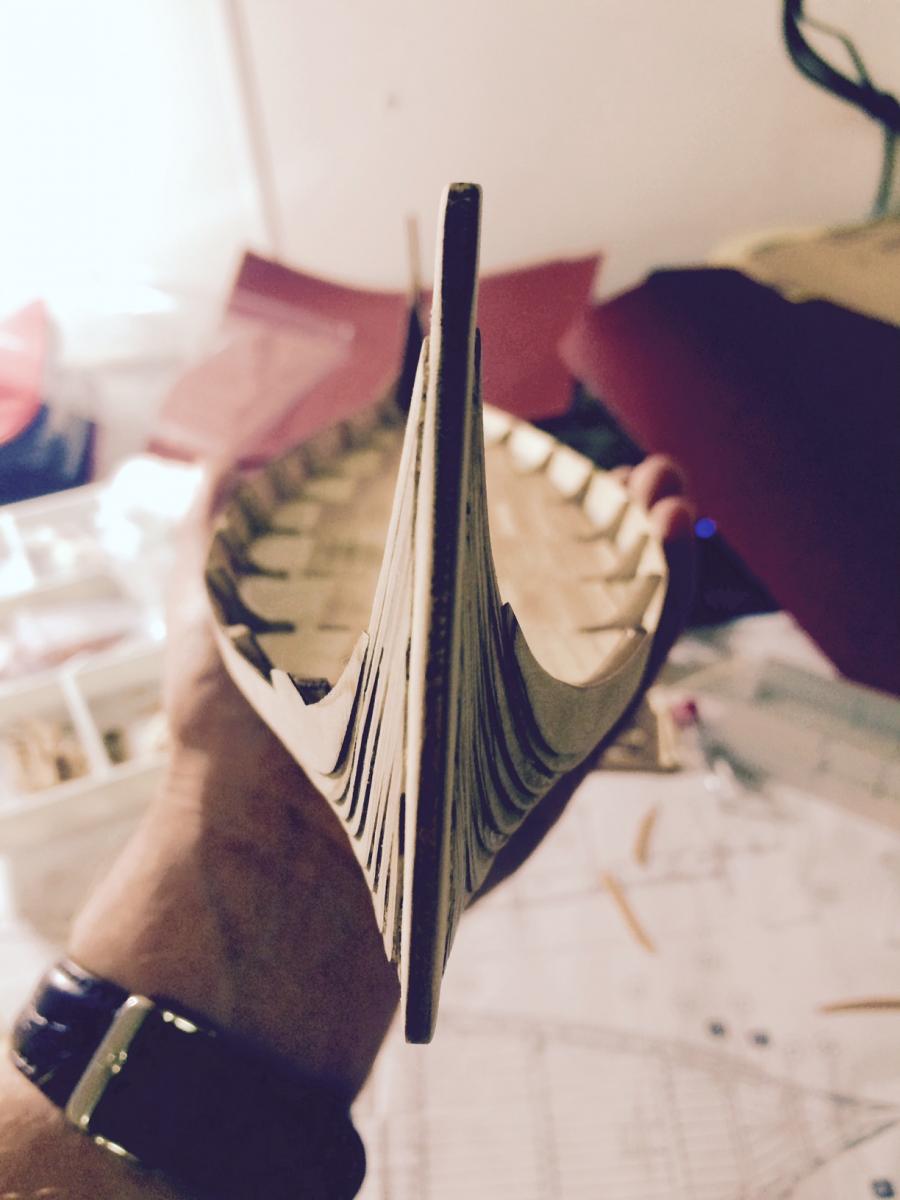
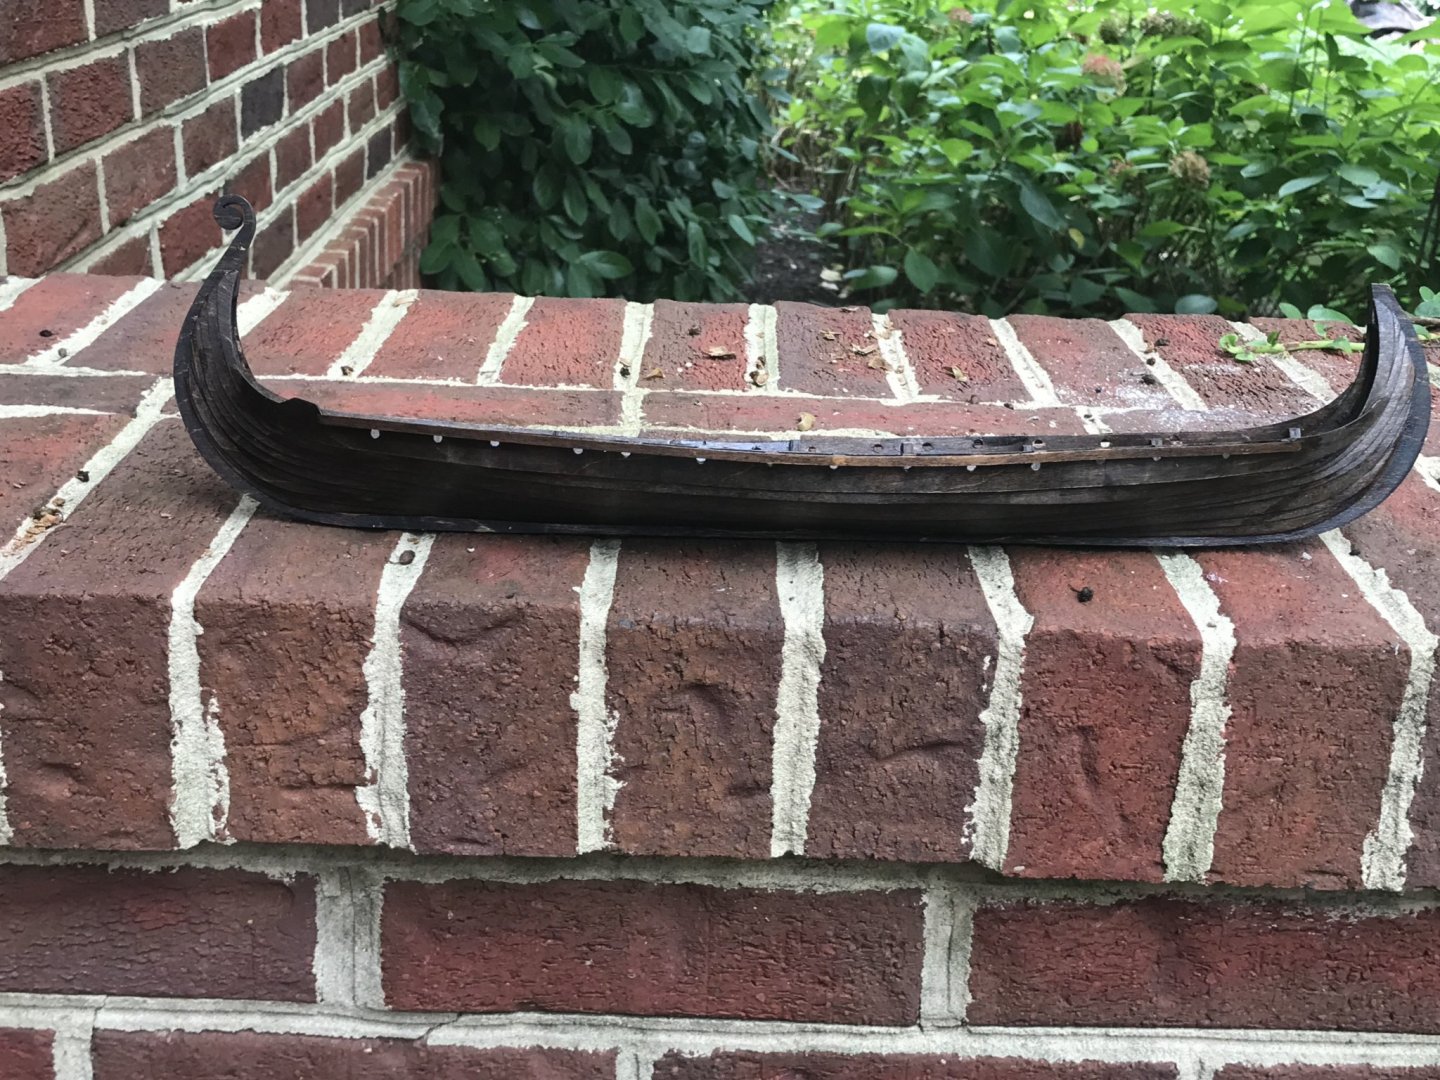
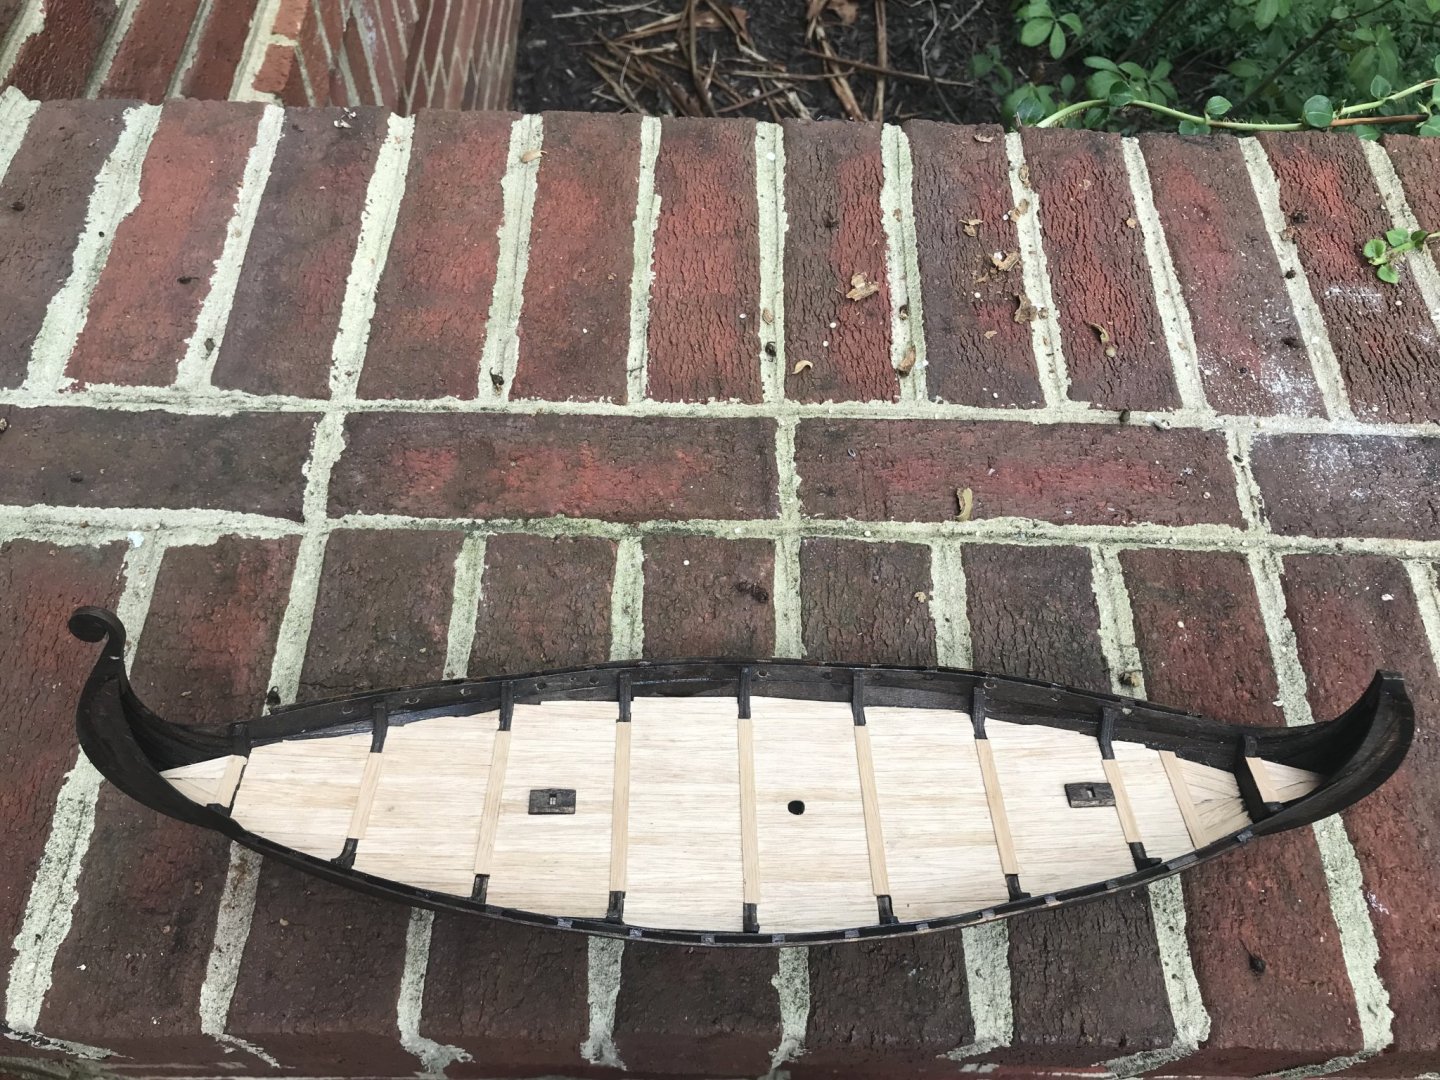
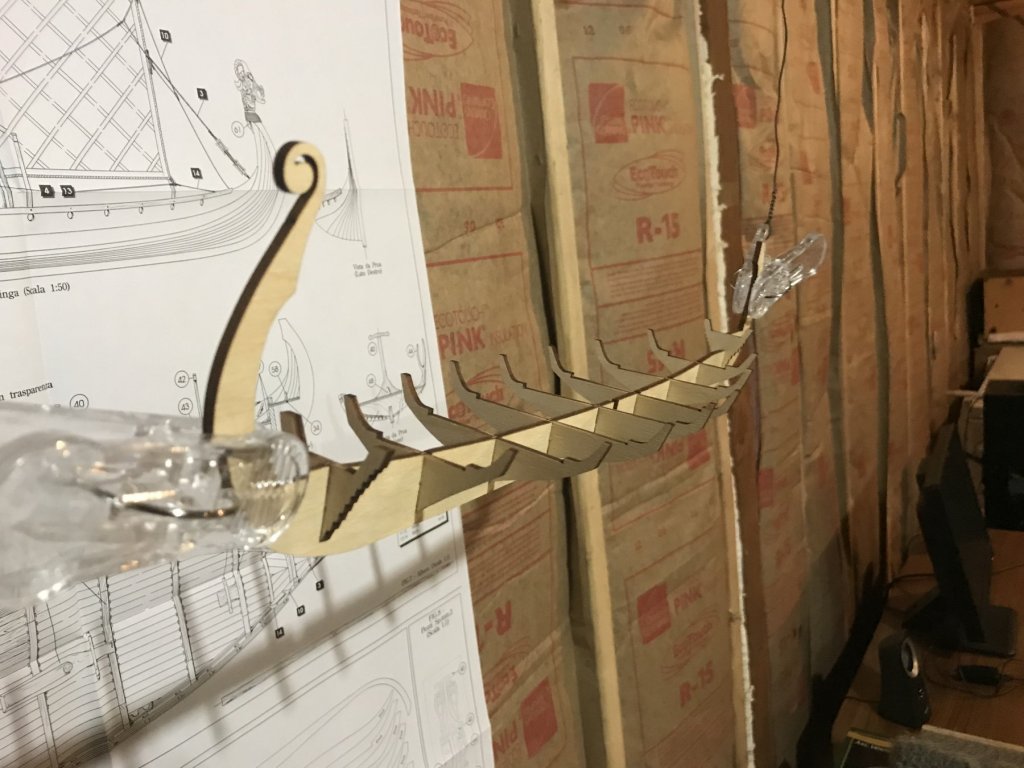
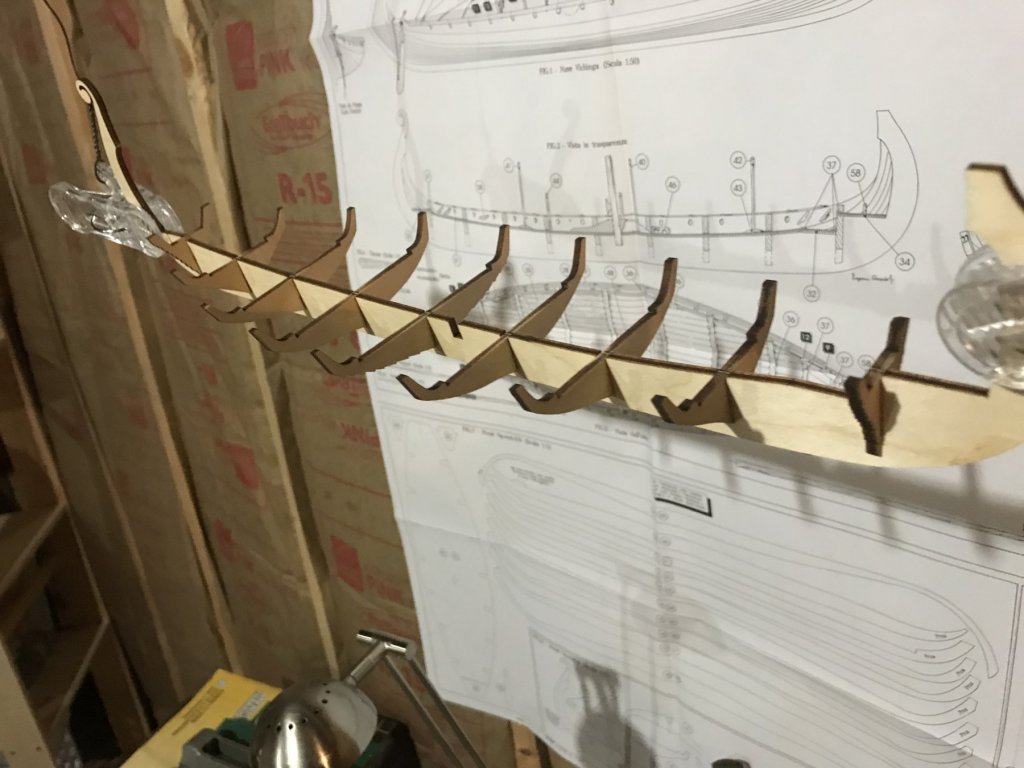
 In the belief that it’s better to get back on the horse than walk away, I decided to try again to construct the Amati Drakkar model. Of course, it’s better to not fall off the horse in the first place, but that option doesn’t usually exist for me. My first attempt ended when I decided that the hull was not forming along the ribs properly and was pulling too far away as I approached the gunwale. As it turned out I abandoned ship too soon. I have since learned that, with some effort, I could have disassembled the hull and tried again. Live and learn. Here is the hull as it looks today. Kind of a funky and beat-up appearance, looks like it’s had a few encounters with reefs or other solid objects. The cap rail on the gunwale is not part of the Amati kit, but fashioned from boxwood strips. Also, the planking inside the gunwale is not part of the kit, but an addition that I decided to add for reason I'll explain in a subsequent post. I always liked the red and yellow combination and thought I’d at least do my sail that way. So I needed no convincing, but cathead’s log convinced me that the red and yellow was a nice combination. In Matt H’s log I learned of the minor problem inserting the rope for the rudder after the deck is installed, so I decided to take care of that detail in advance.
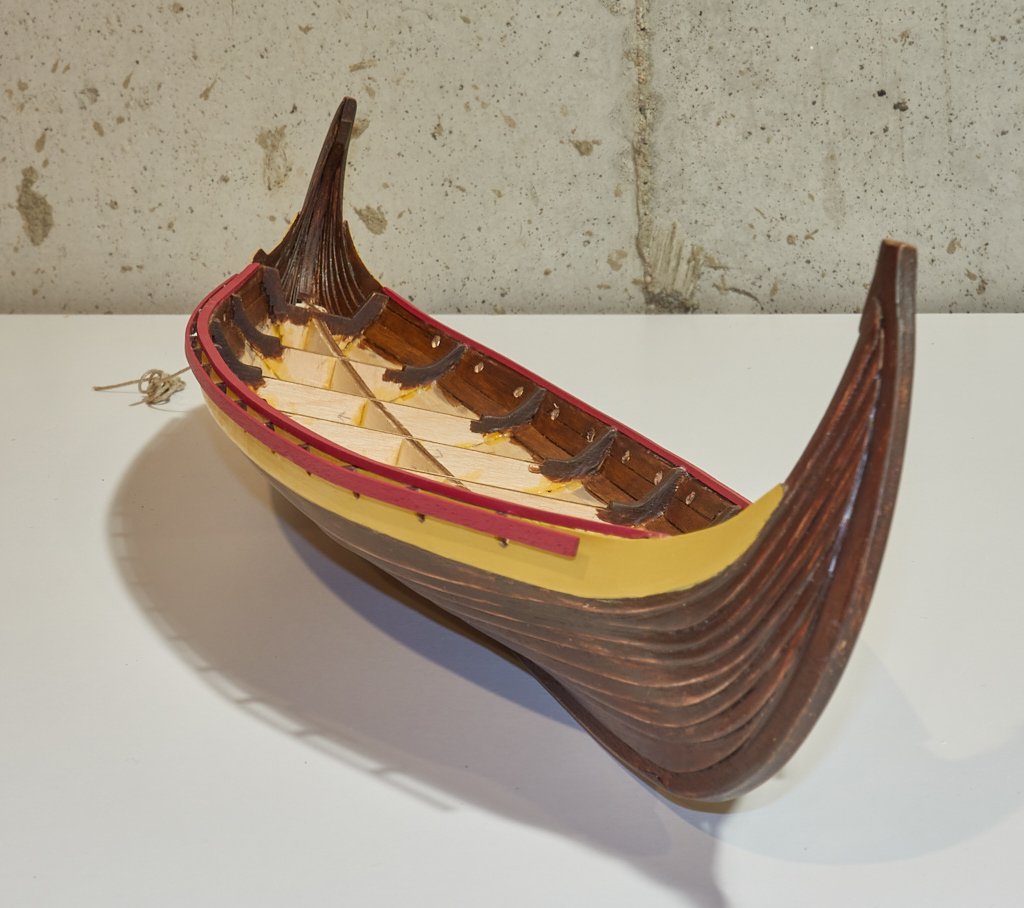
-
 So, for some reason, back in March, a video of someone building a model ship showed up in my YouTube feed. I watched it and was enamored. I love intricate detailed stuff and this seemed right up my alley. I began researching how to build wooden ship models and came across this site. Down the rabbit hole I went, searching for the best model to start with. The Viking Drakkar showed up several times for a good first time build. I ordered it and I built it. Thank you to all the people who have build blogs about this model. It really helped me out. I chronicled the build; so, here goes my take on this ship model.
 -
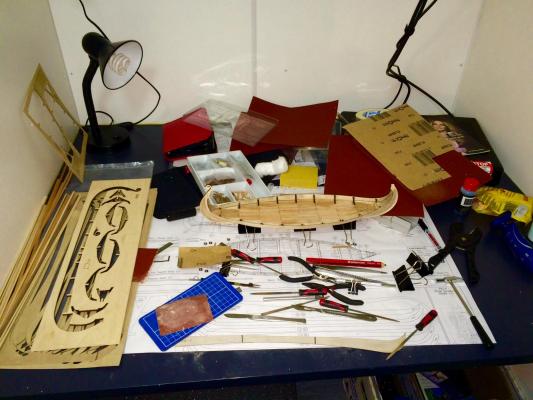
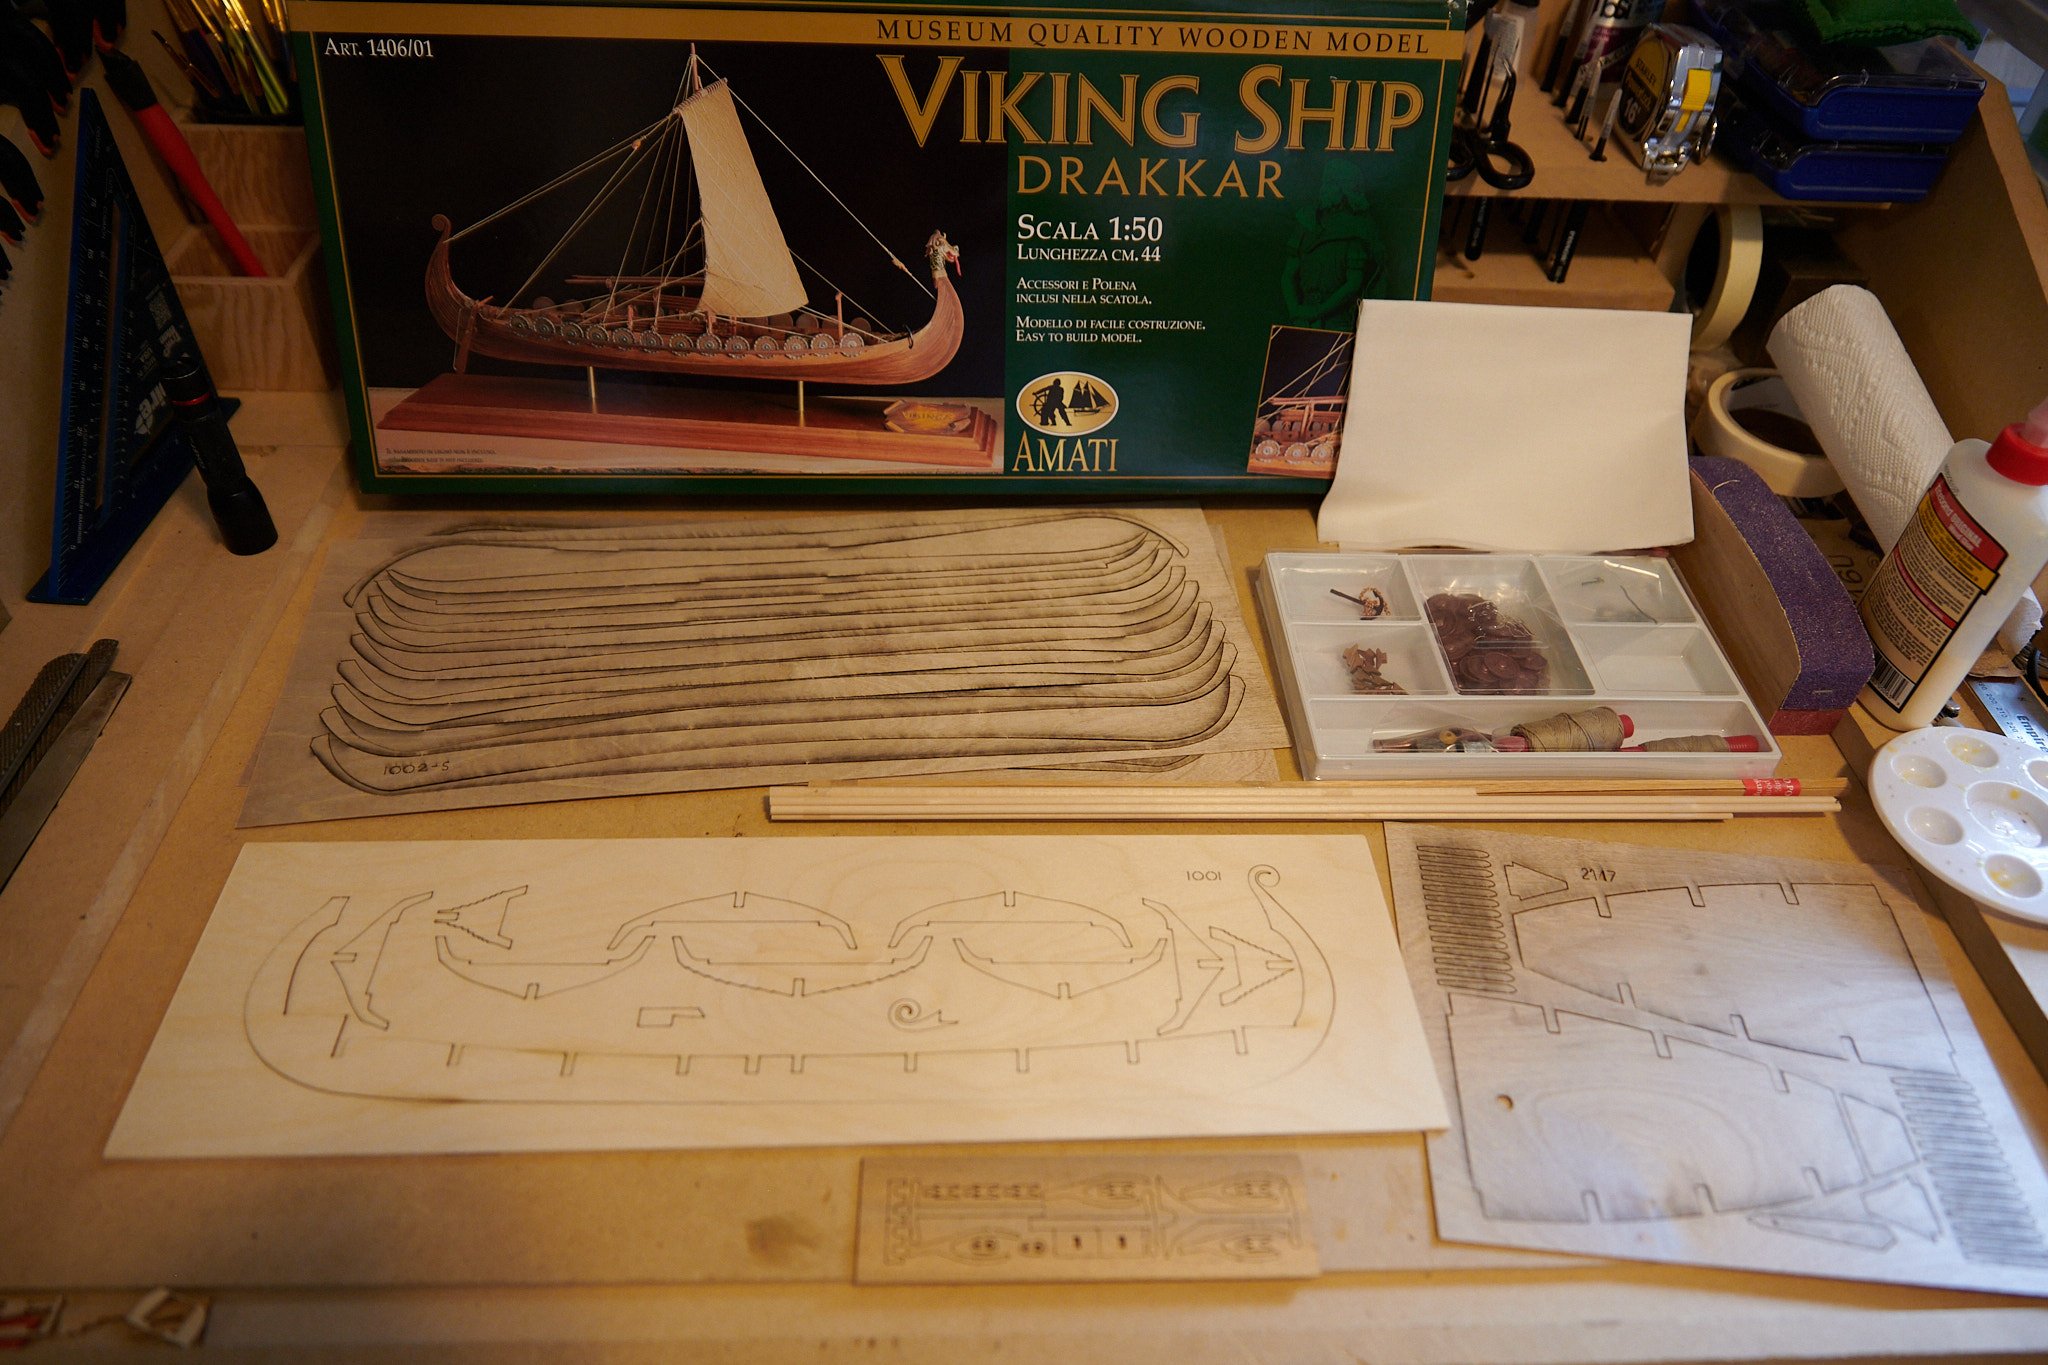
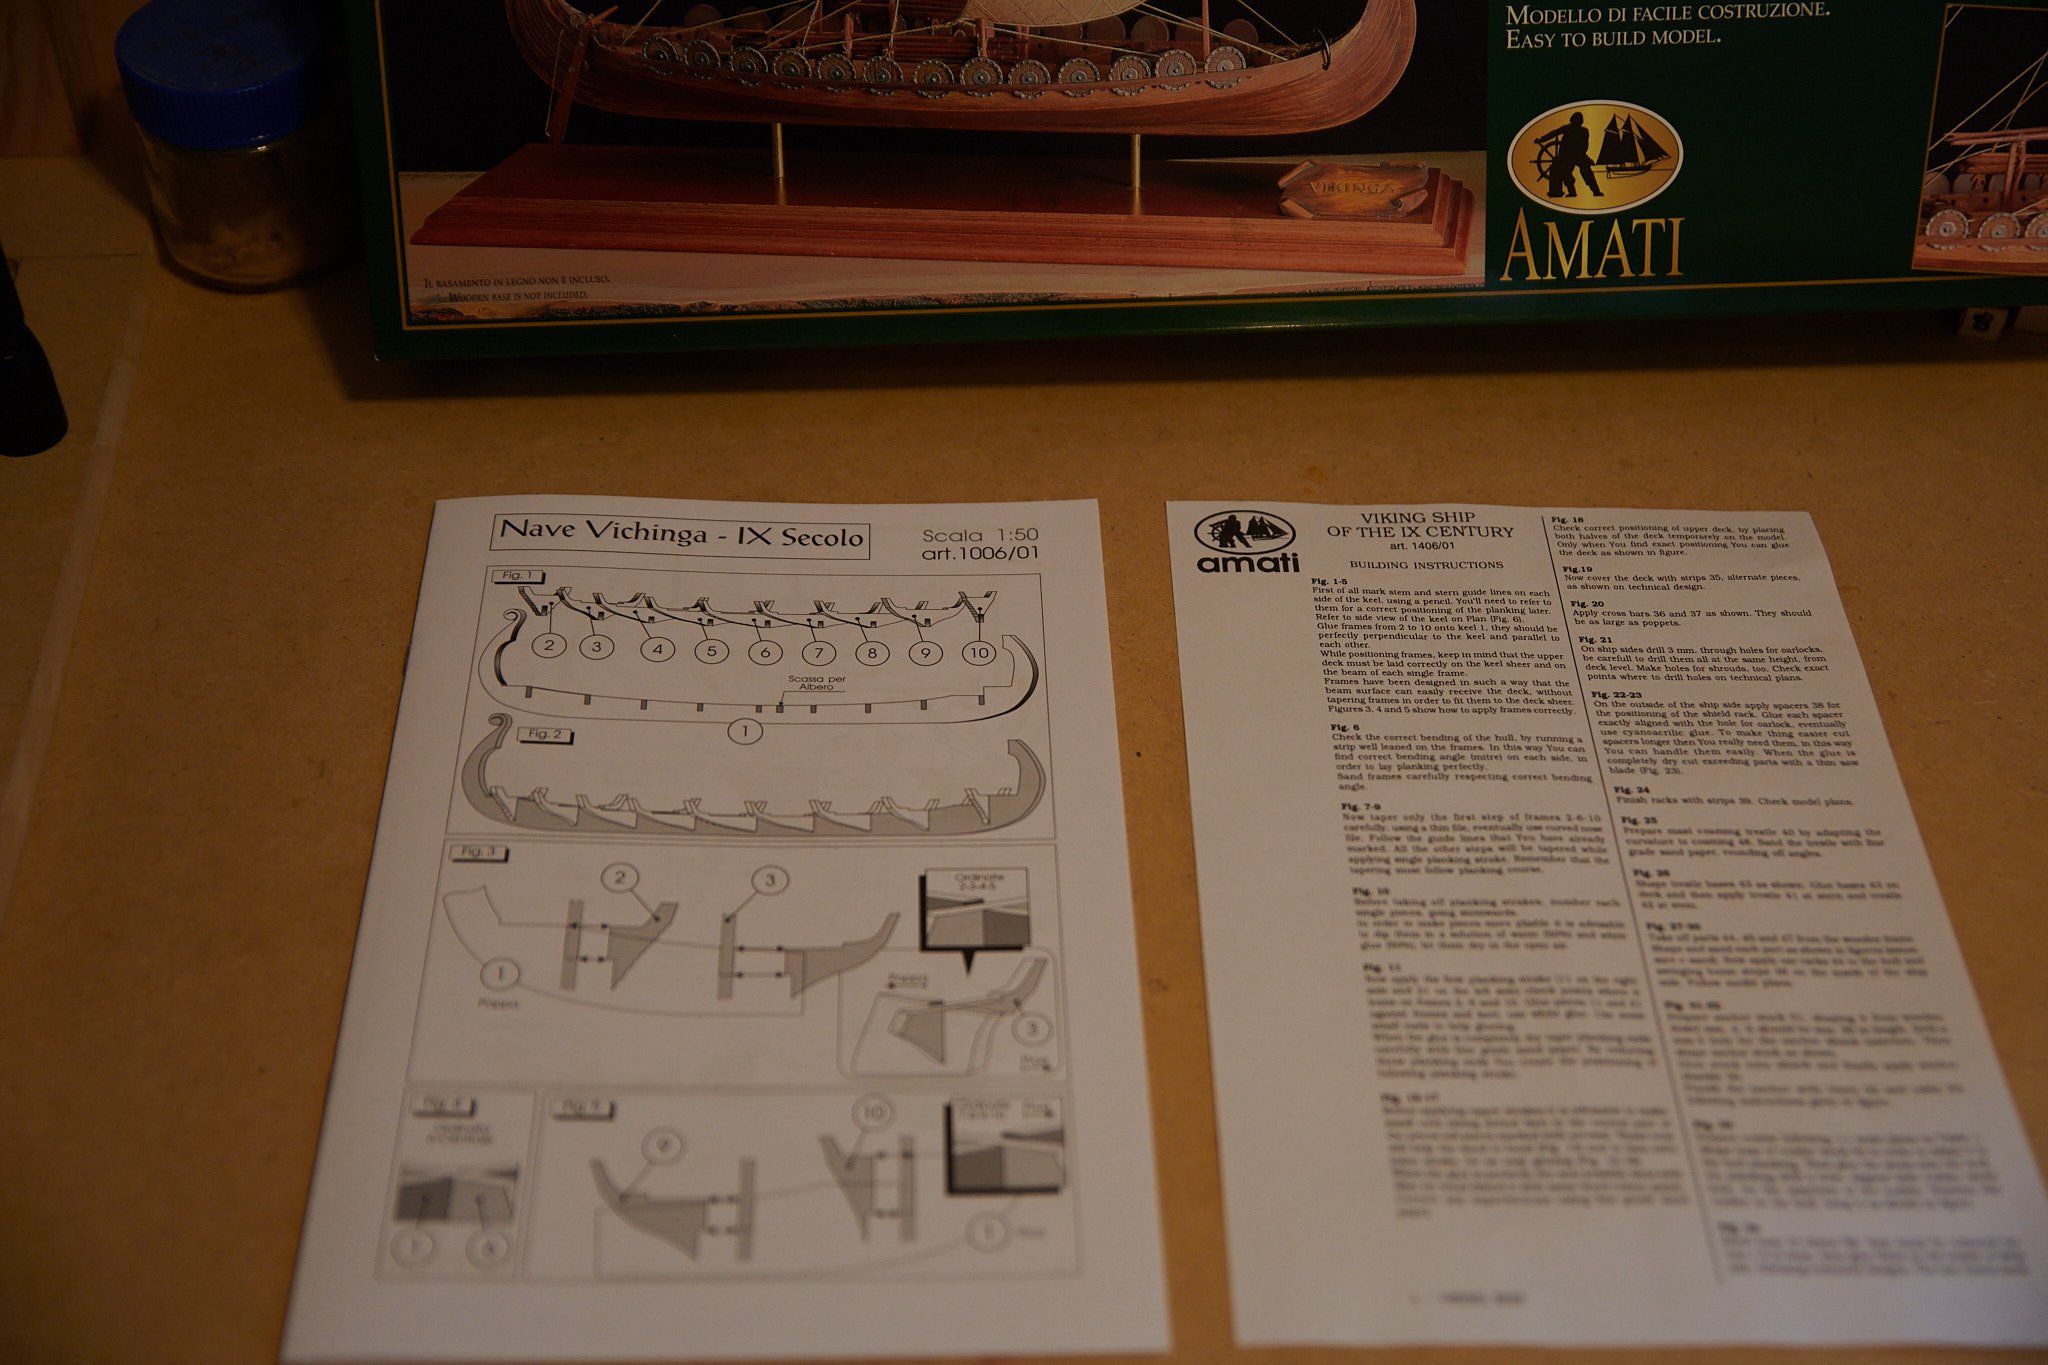
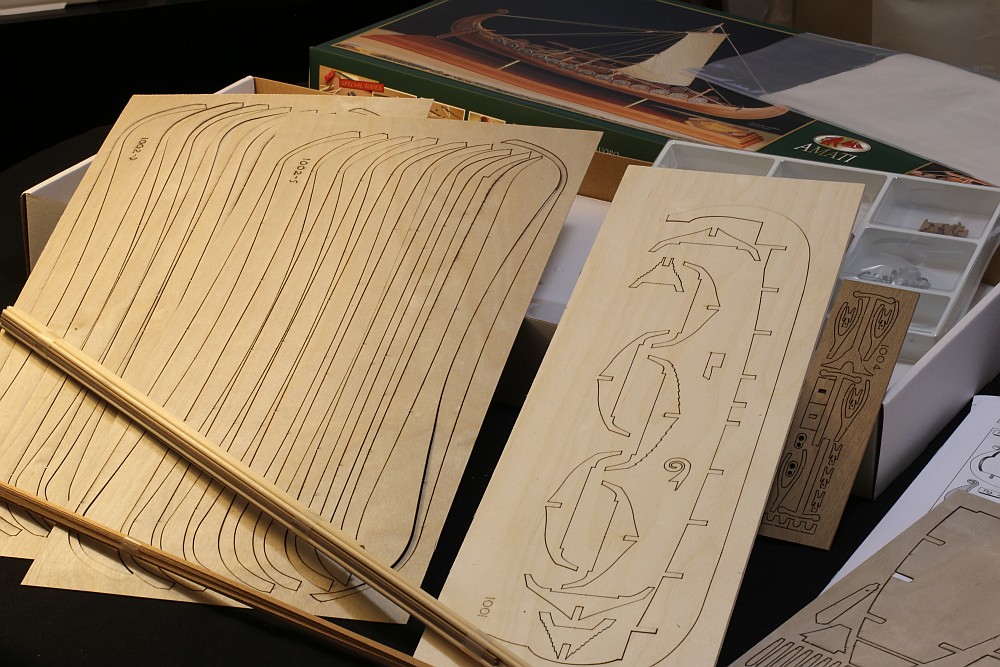
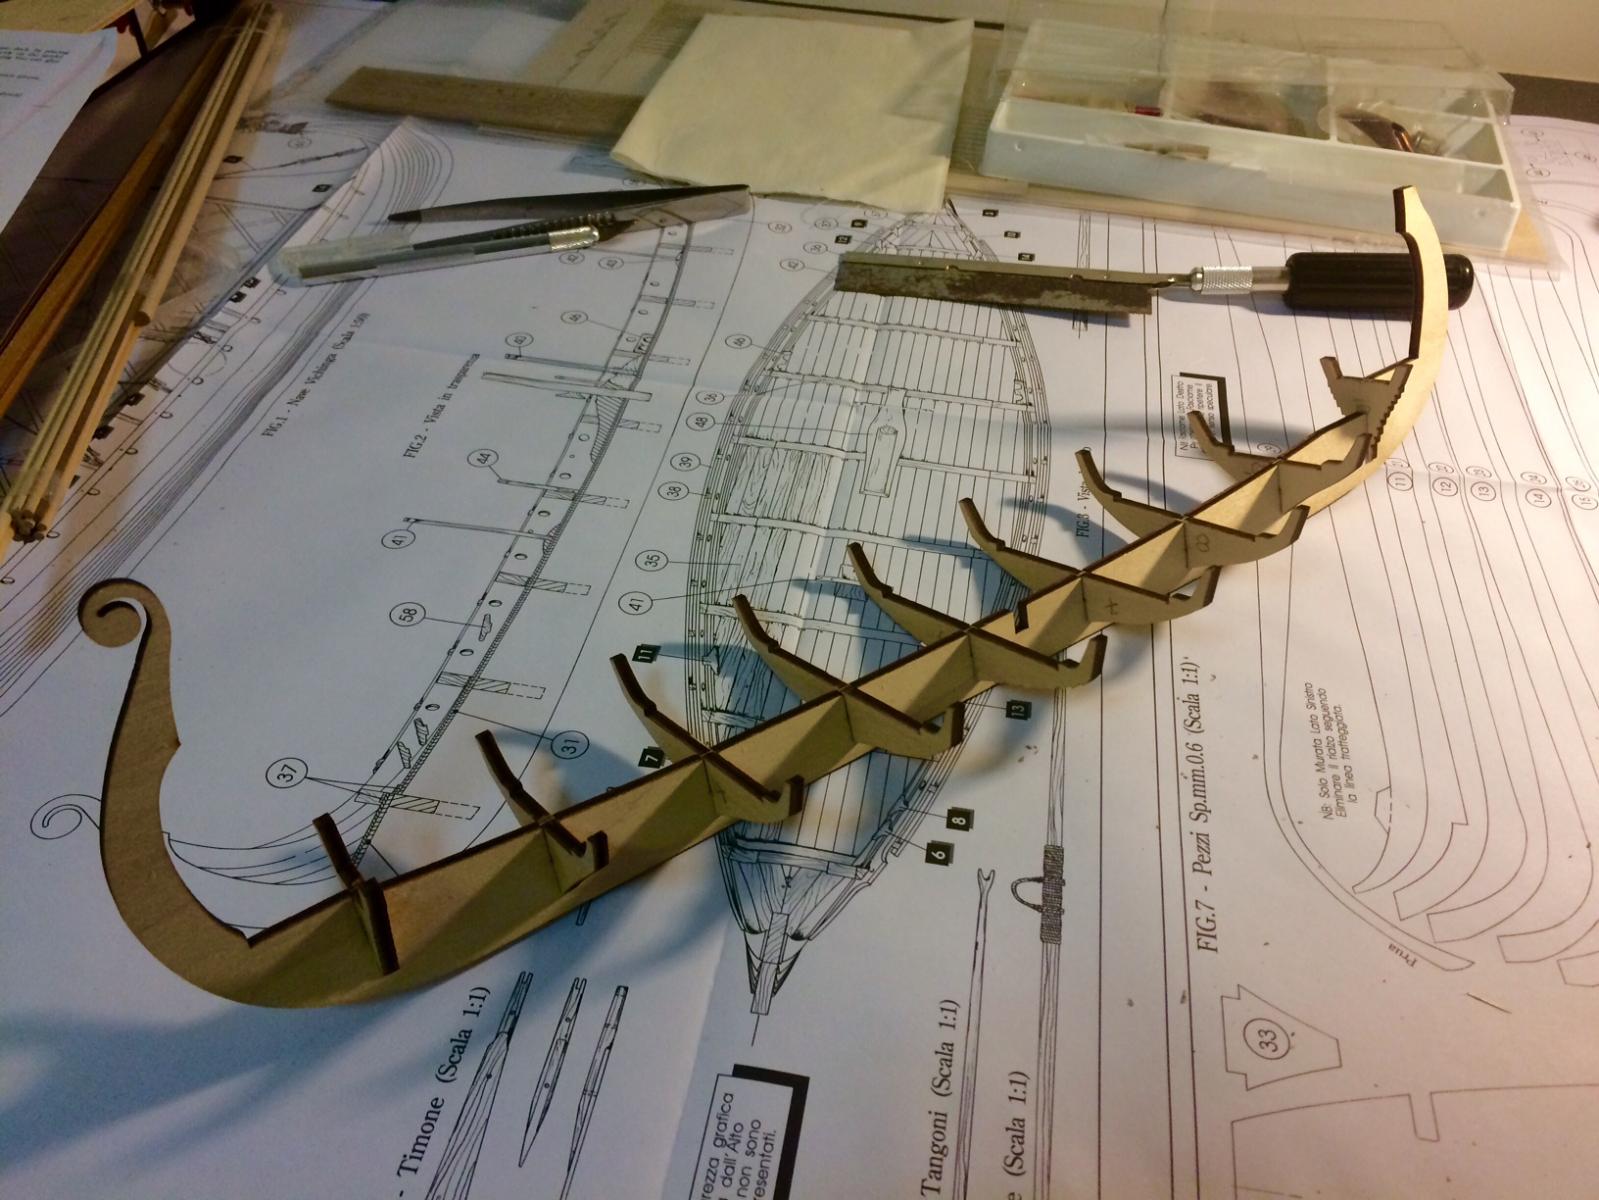
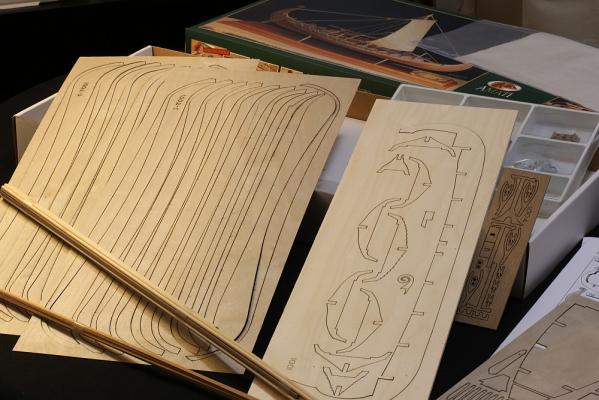
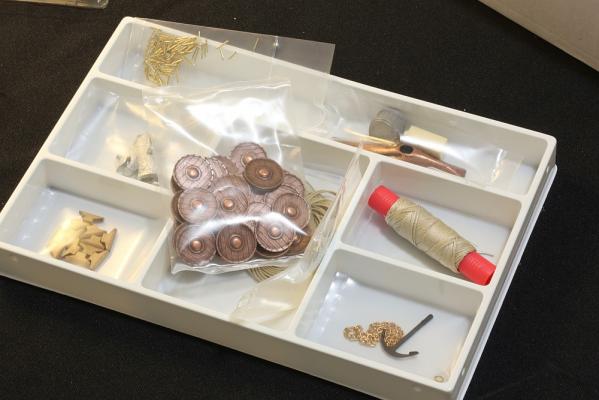
.thumb.jpg.63af0ca81bbc689f4f2bee1cdb4b7b78.jpg) Here is my most recent build. I have historically started ships and not finished them, or sidelined them and start something new, so this time I decided to wait until I finished the build before I posted my build log. Although I am not quite finished, I am almost there and will have it completed within a week or so, depends on how long the oars take me. I have not abandoned the other builds I have started, but decided to put them on hold while I work on some slightly smaller projects before moving forward with them. As usual here is the required box opening and contents photos. Everything was well packaged. There is a single sheet of plans that were in Italian, some picture instructions with a few words in Italian. The text instructions had a separate sheet in English. I did have to get my phone to look up some Italian to English translation on a few words in the images and plans, but overall the instructions were adequate. I will make several smaller posts of my progress rather than one large one. More to come shortly.
Here is my most recent build. I have historically started ships and not finished them, or sidelined them and start something new, so this time I decided to wait until I finished the build before I posted my build log. Although I am not quite finished, I am almost there and will have it completed within a week or so, depends on how long the oars take me. I have not abandoned the other builds I have started, but decided to put them on hold while I work on some slightly smaller projects before moving forward with them. As usual here is the required box opening and contents photos. Everything was well packaged. There is a single sheet of plans that were in Italian, some picture instructions with a few words in Italian. The text instructions had a separate sheet in English. I did have to get my phone to look up some Italian to English translation on a few words in the images and plans, but overall the instructions were adequate. I will make several smaller posts of my progress rather than one large one. More to come shortly.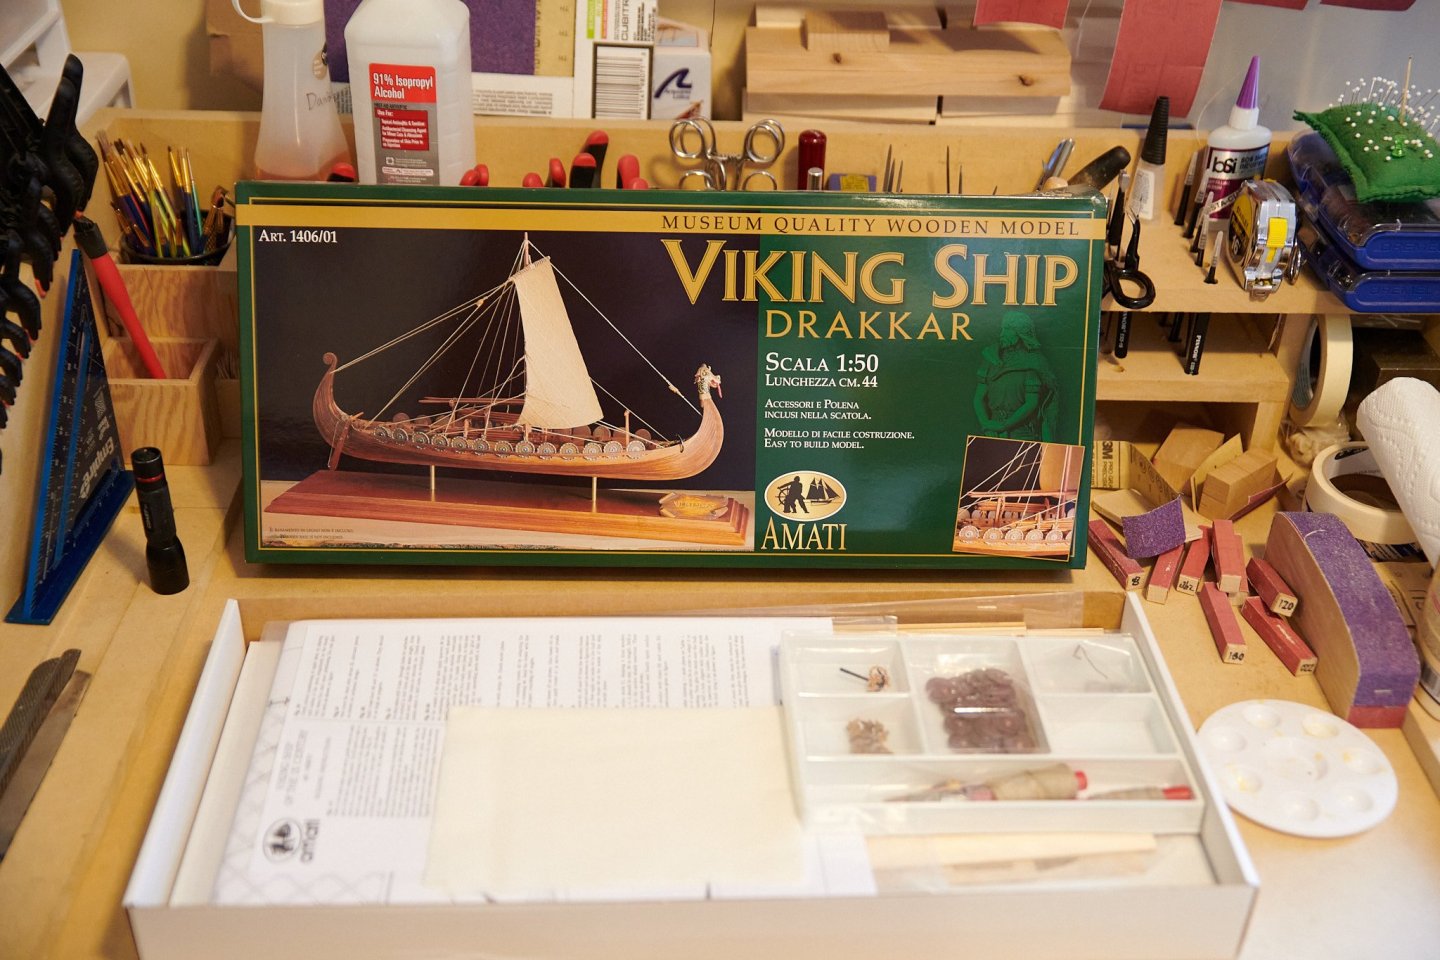


-
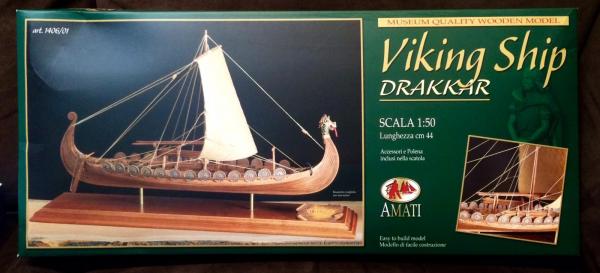
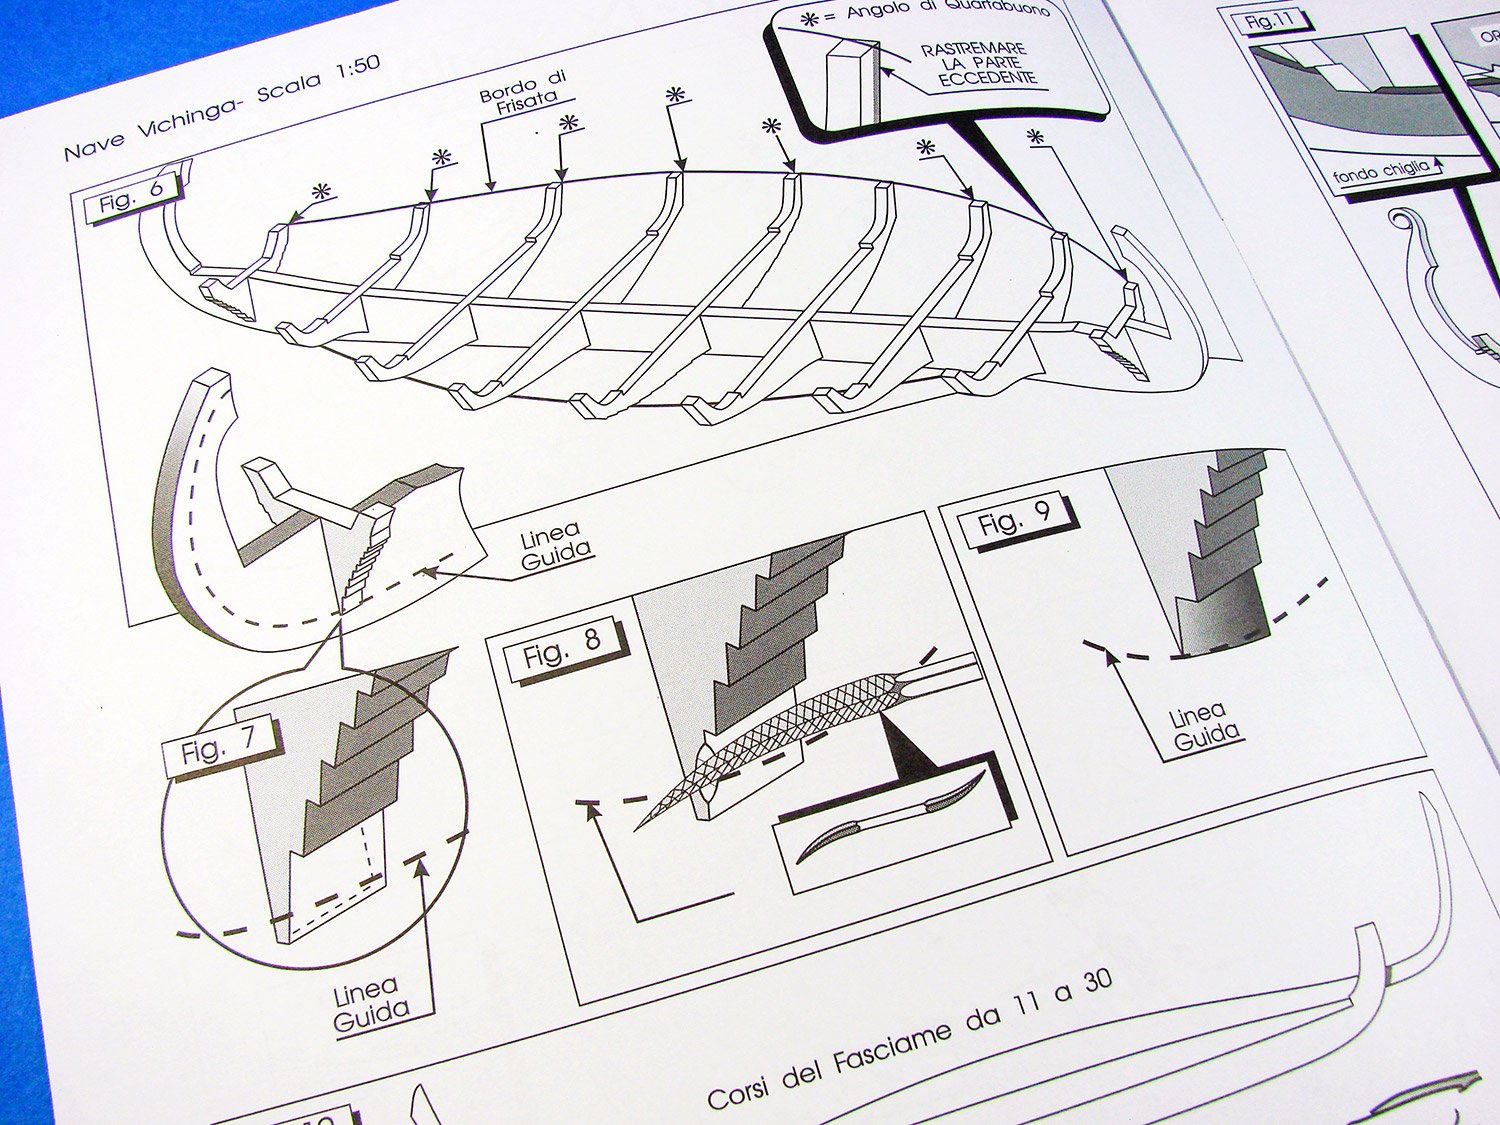
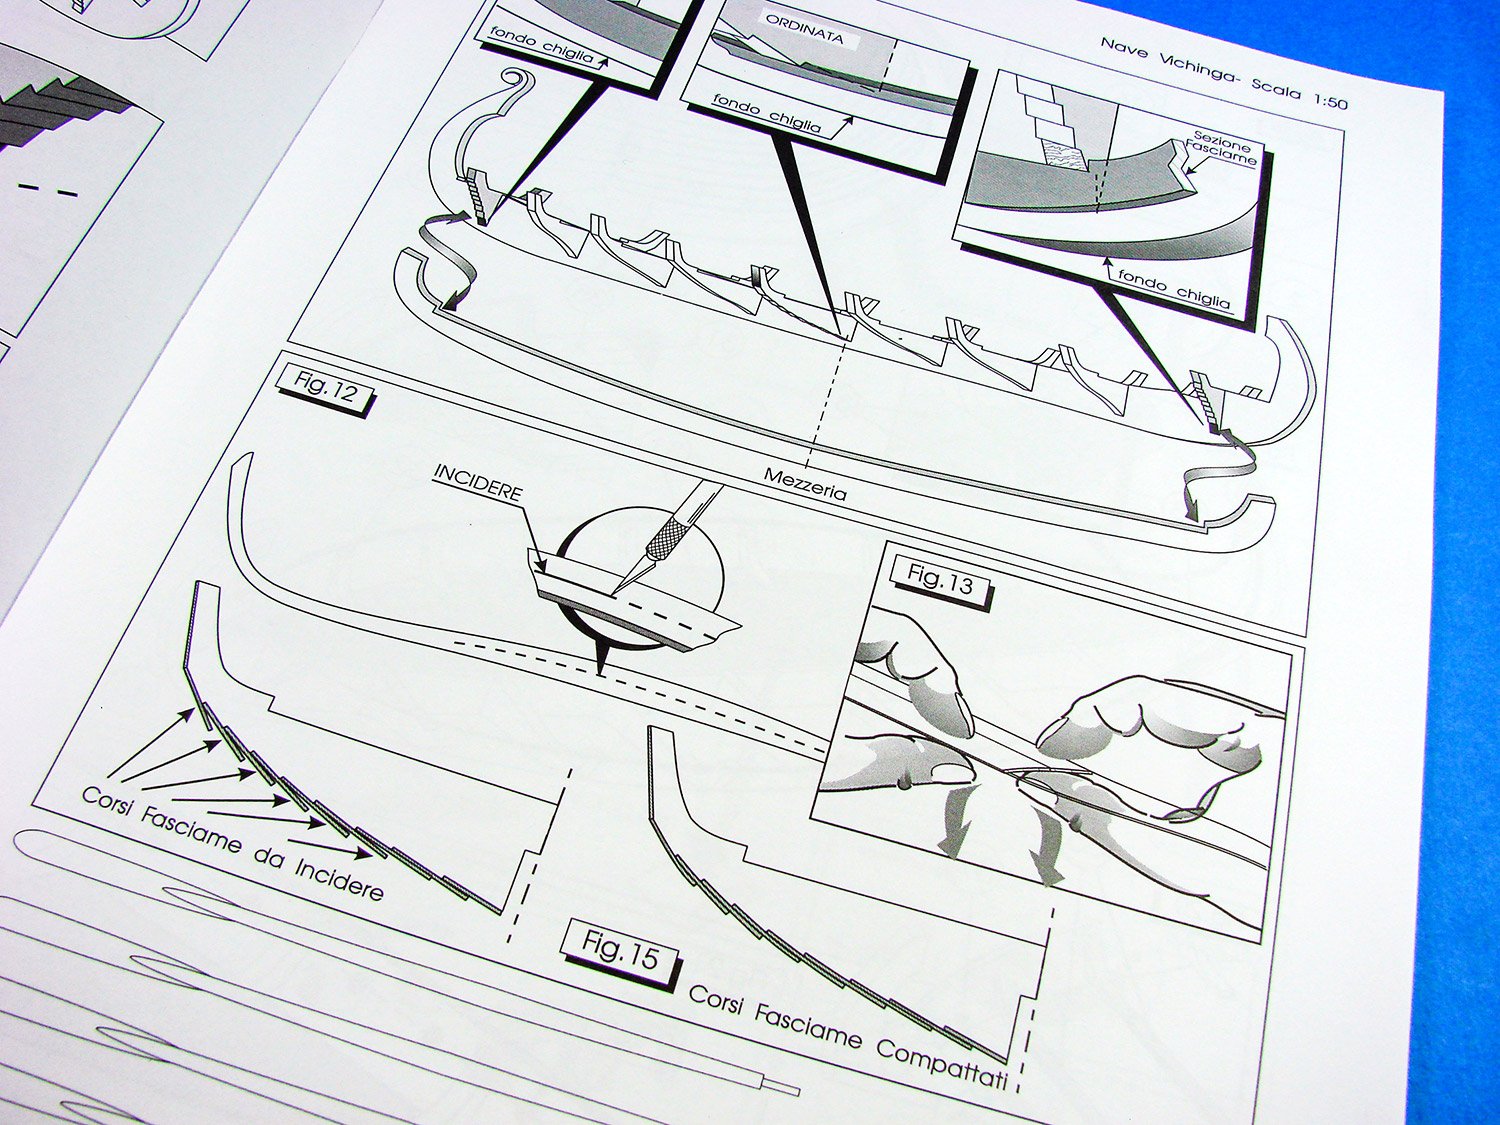
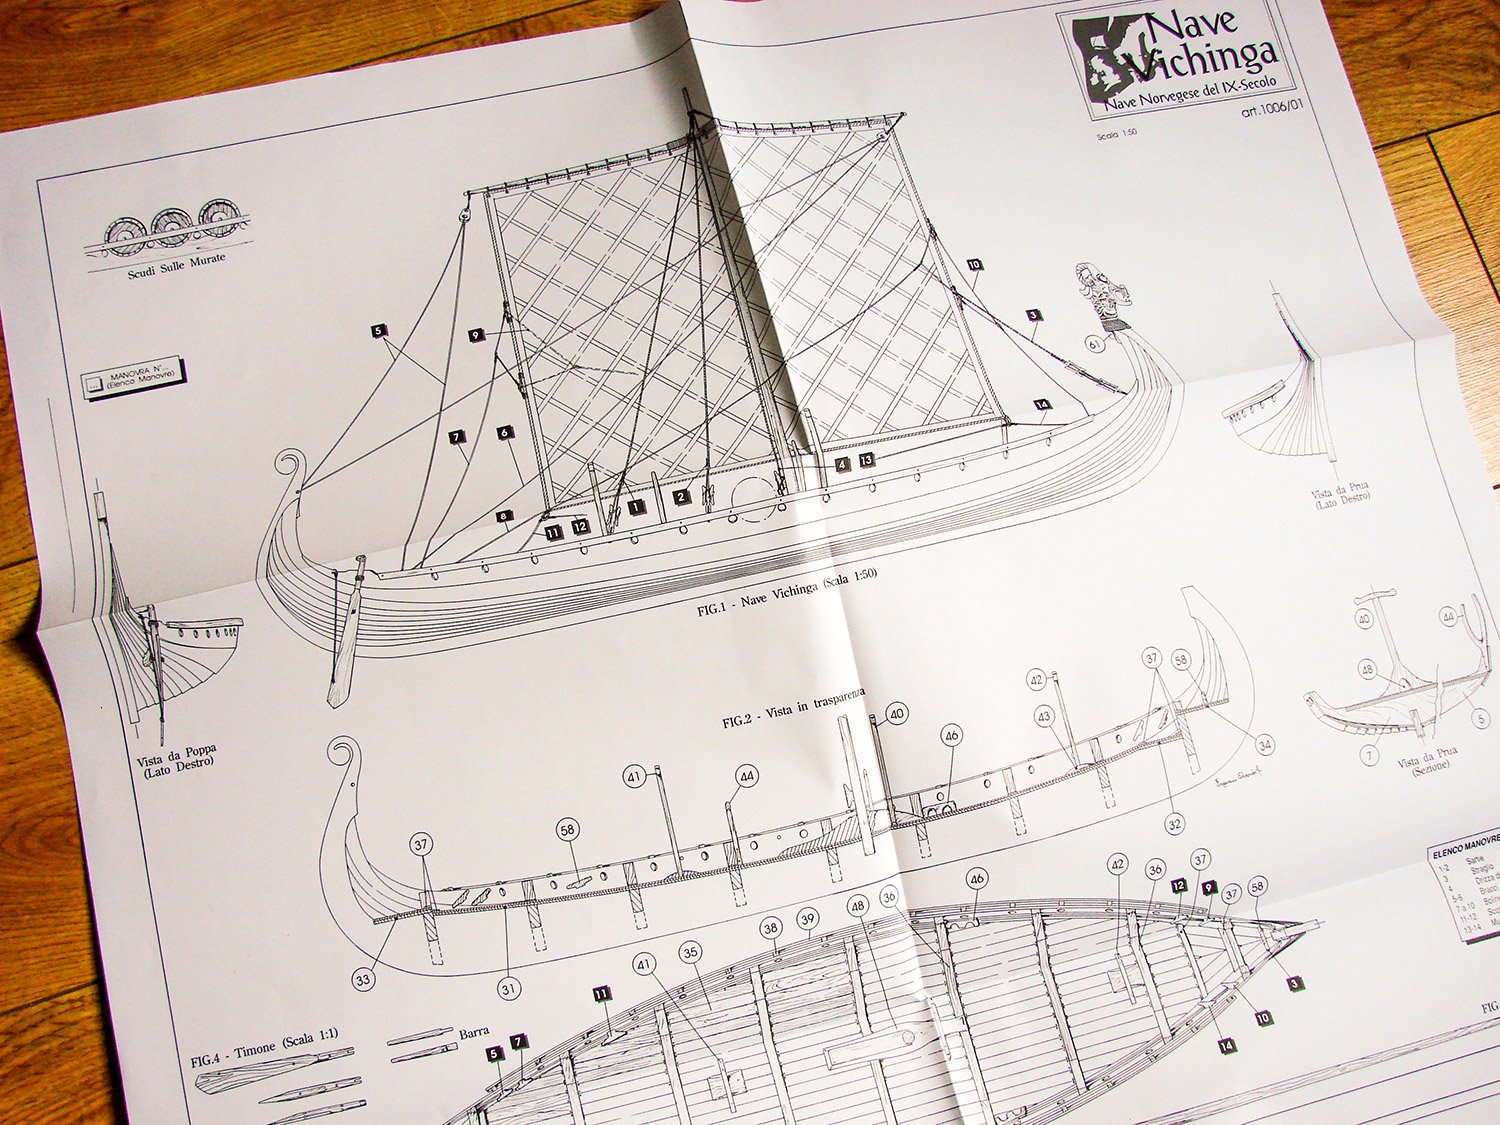
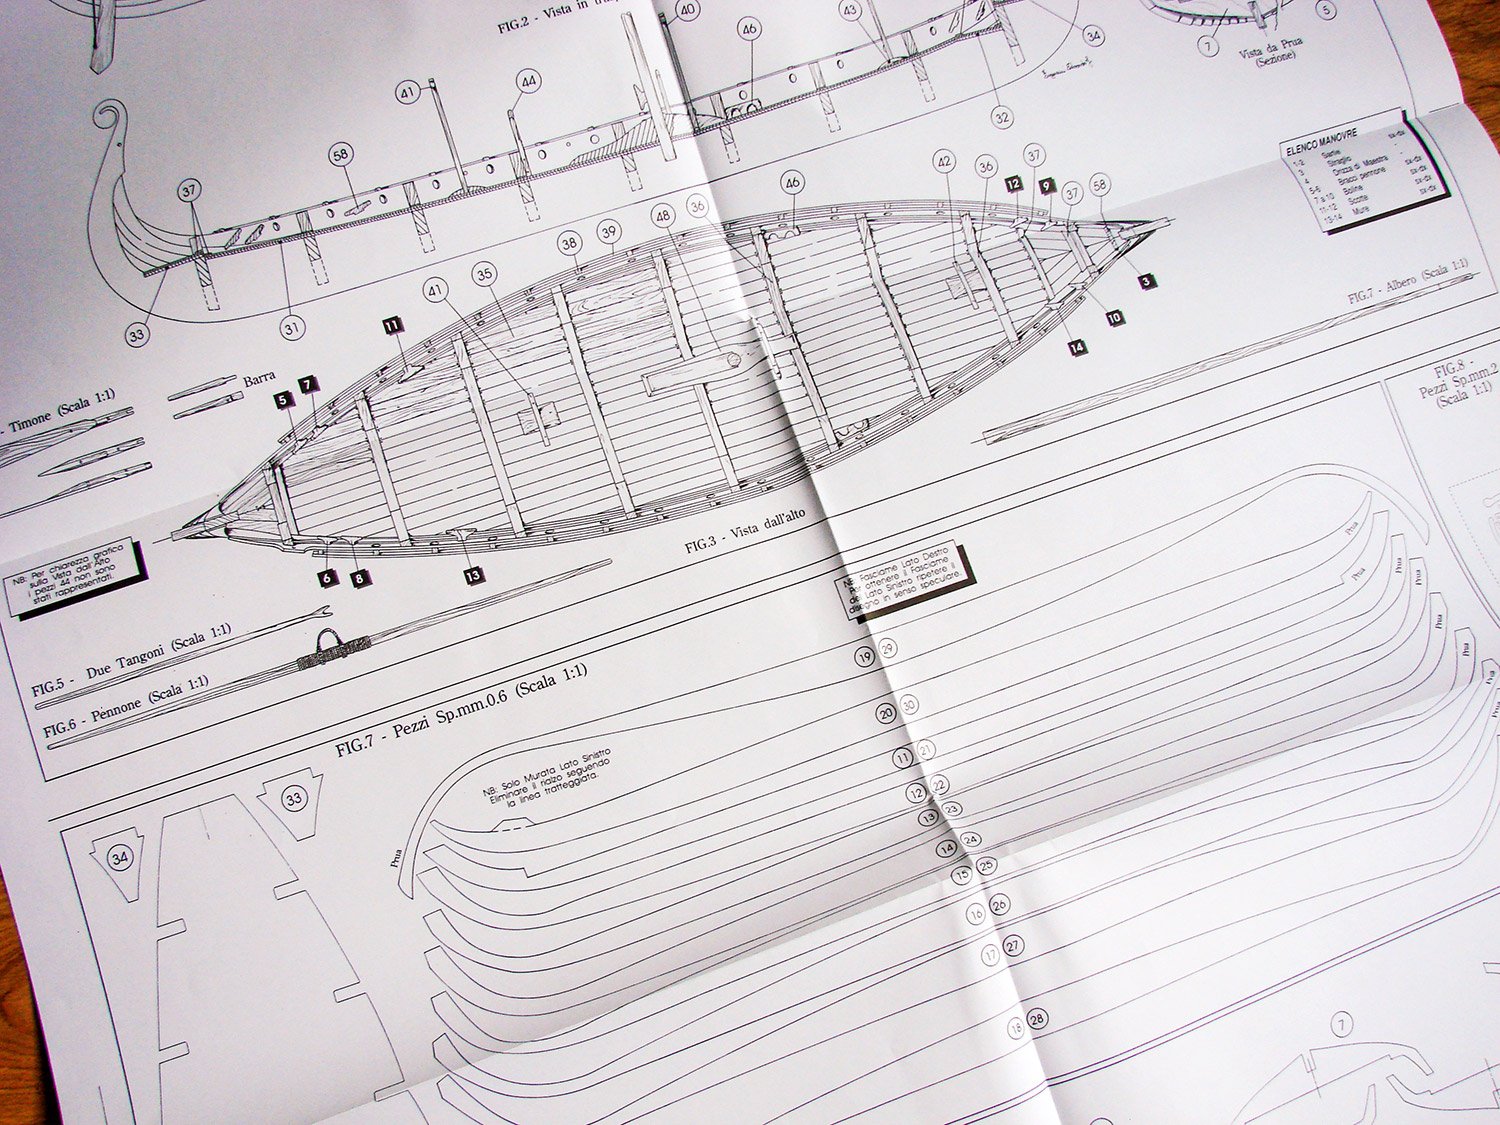
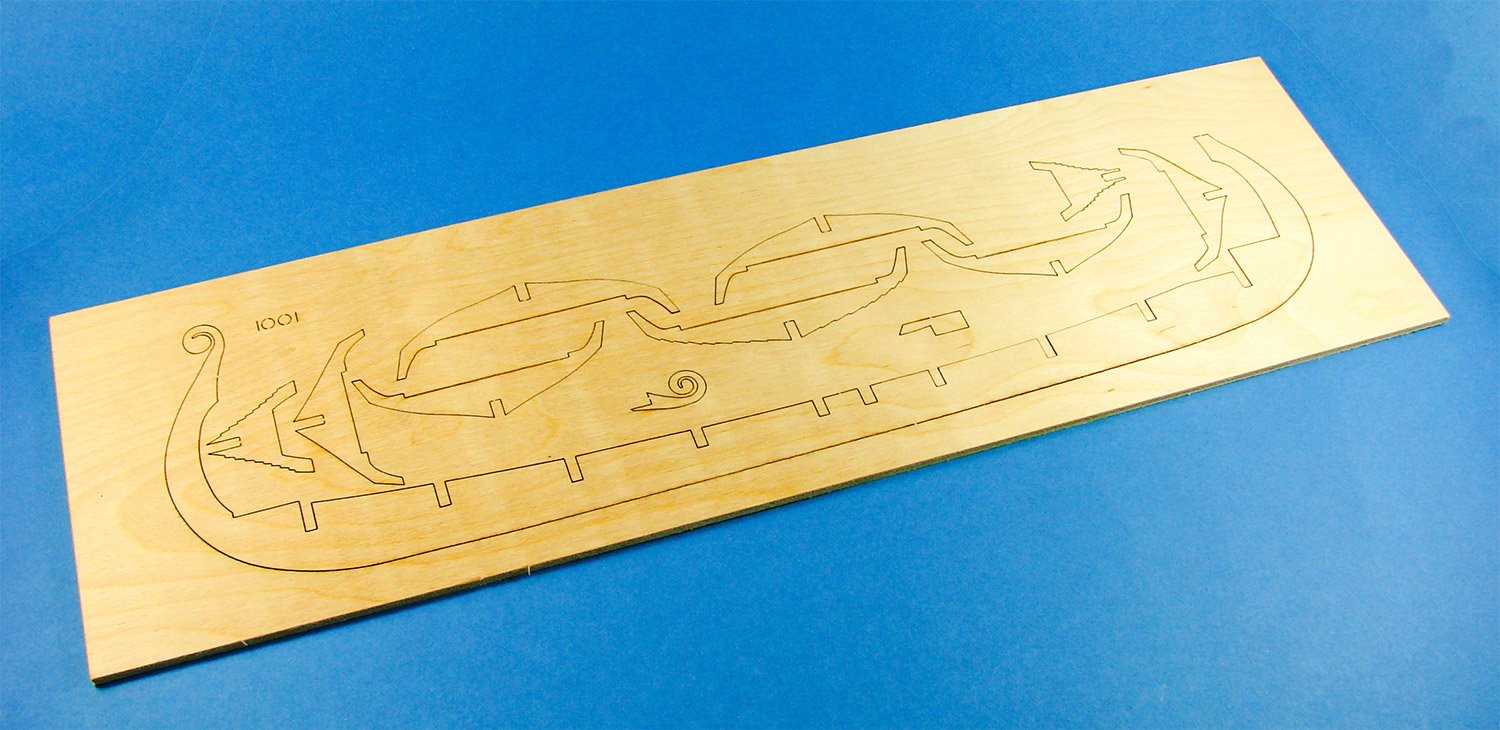
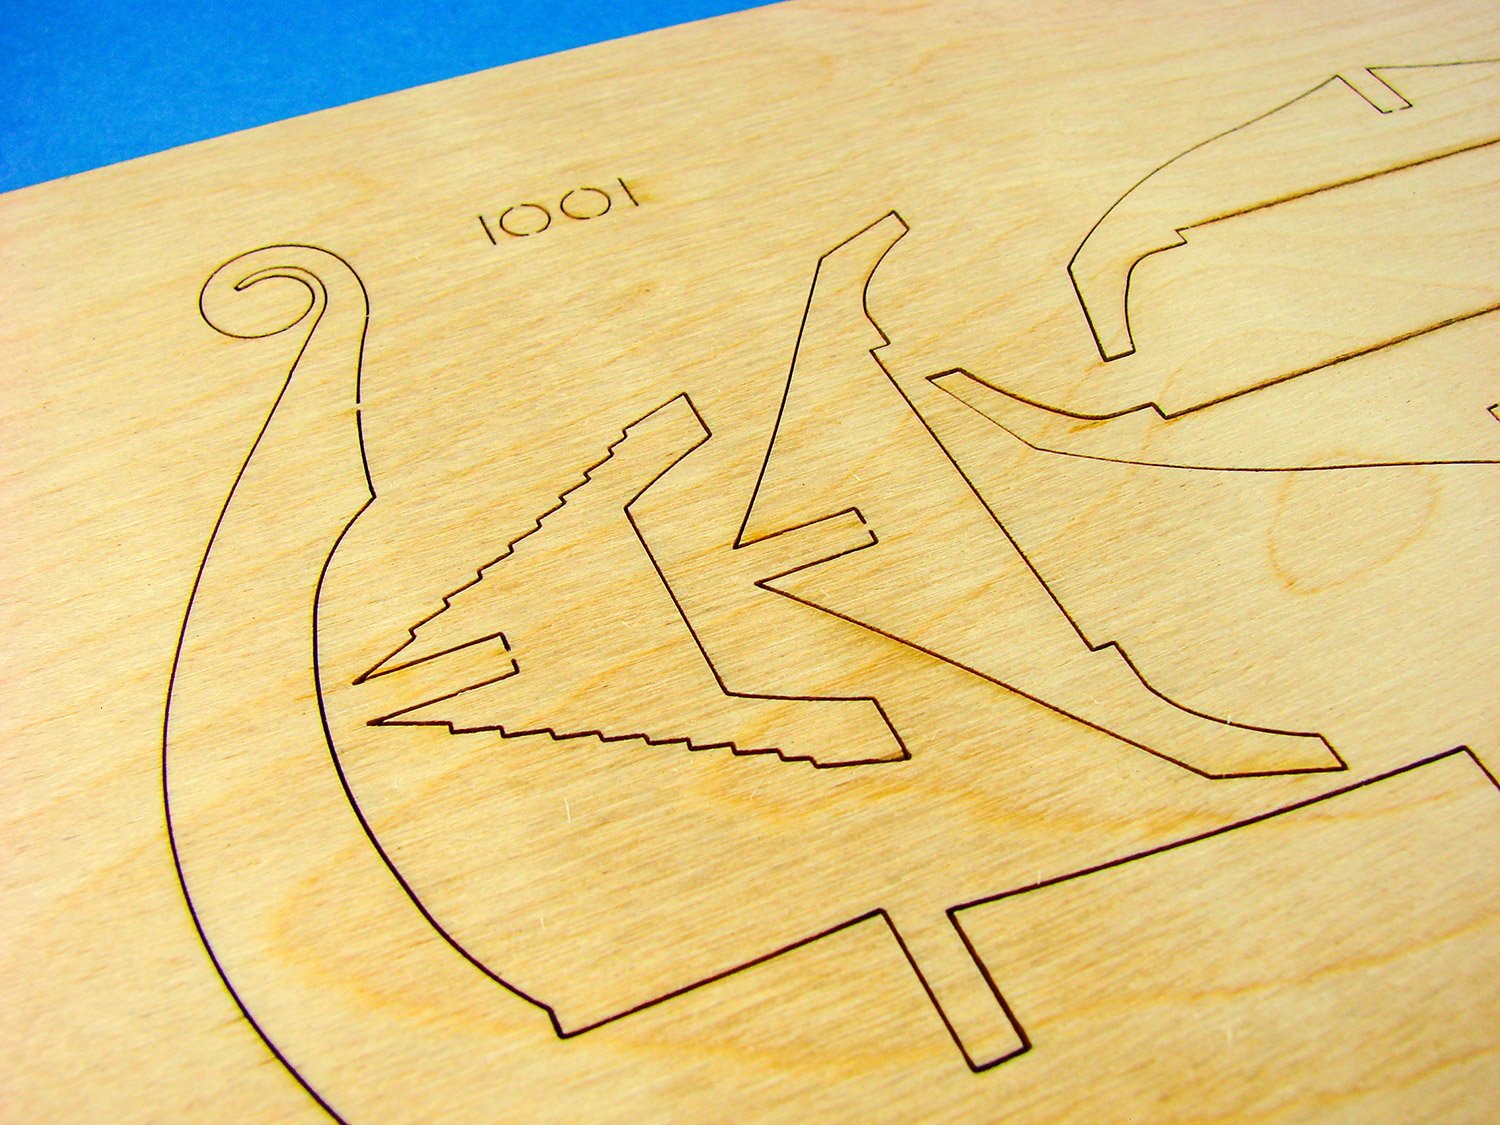
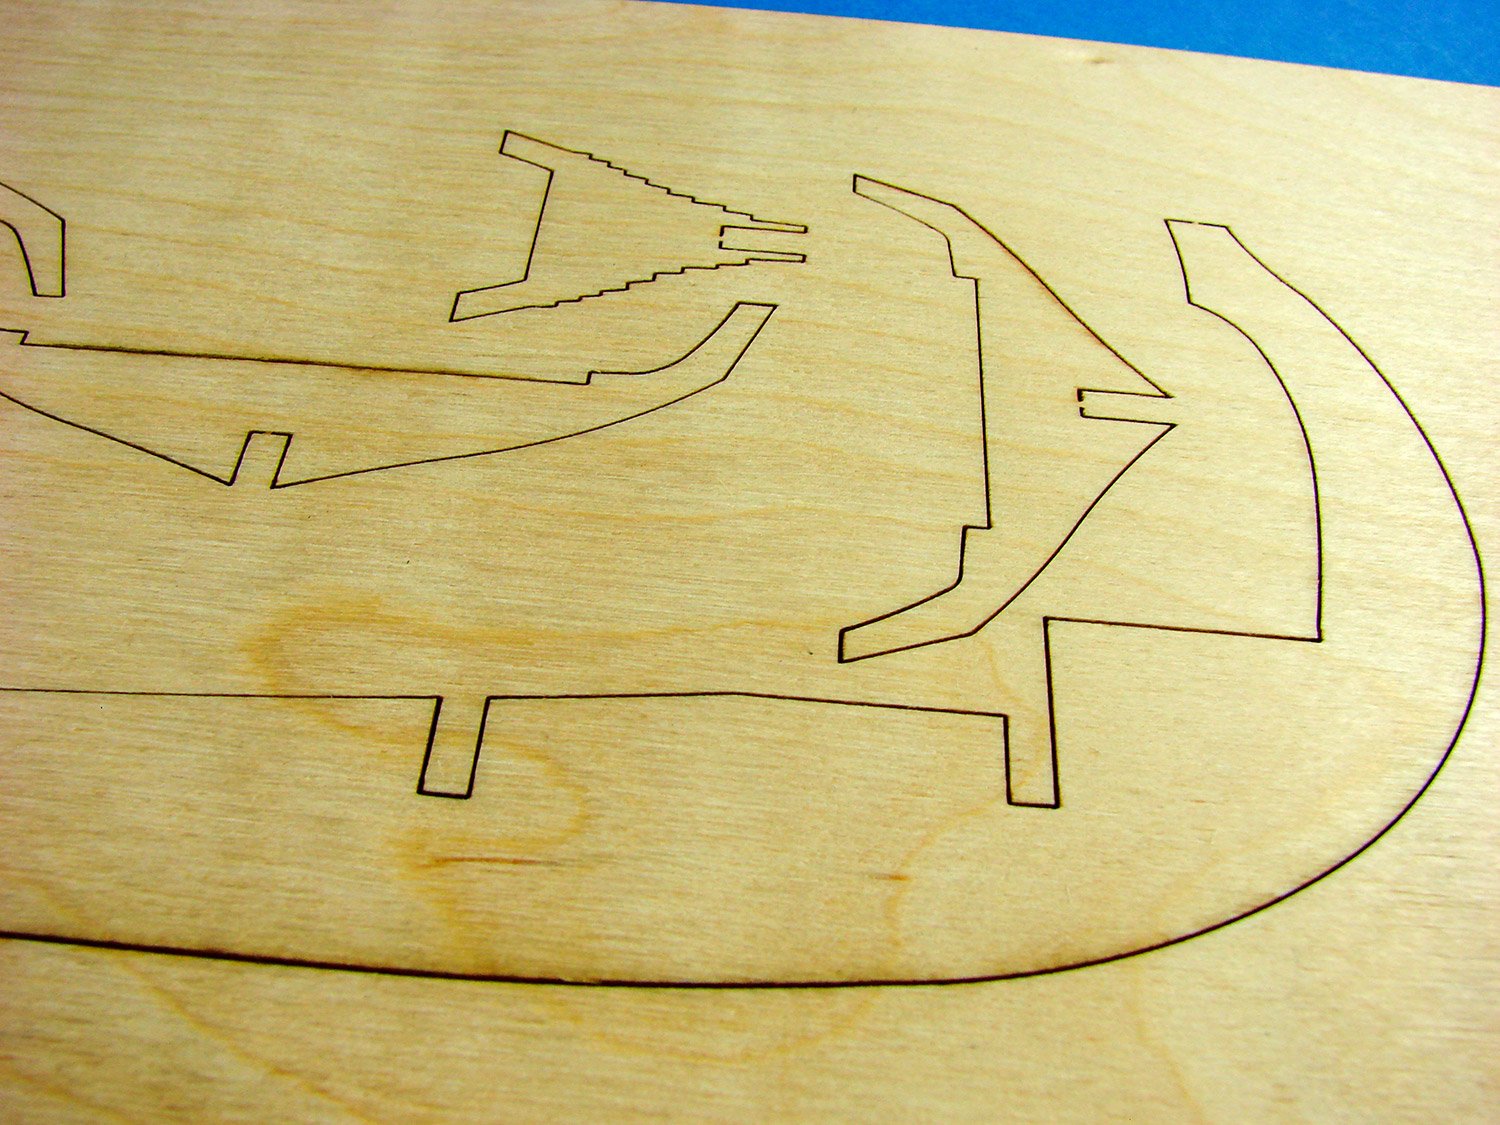
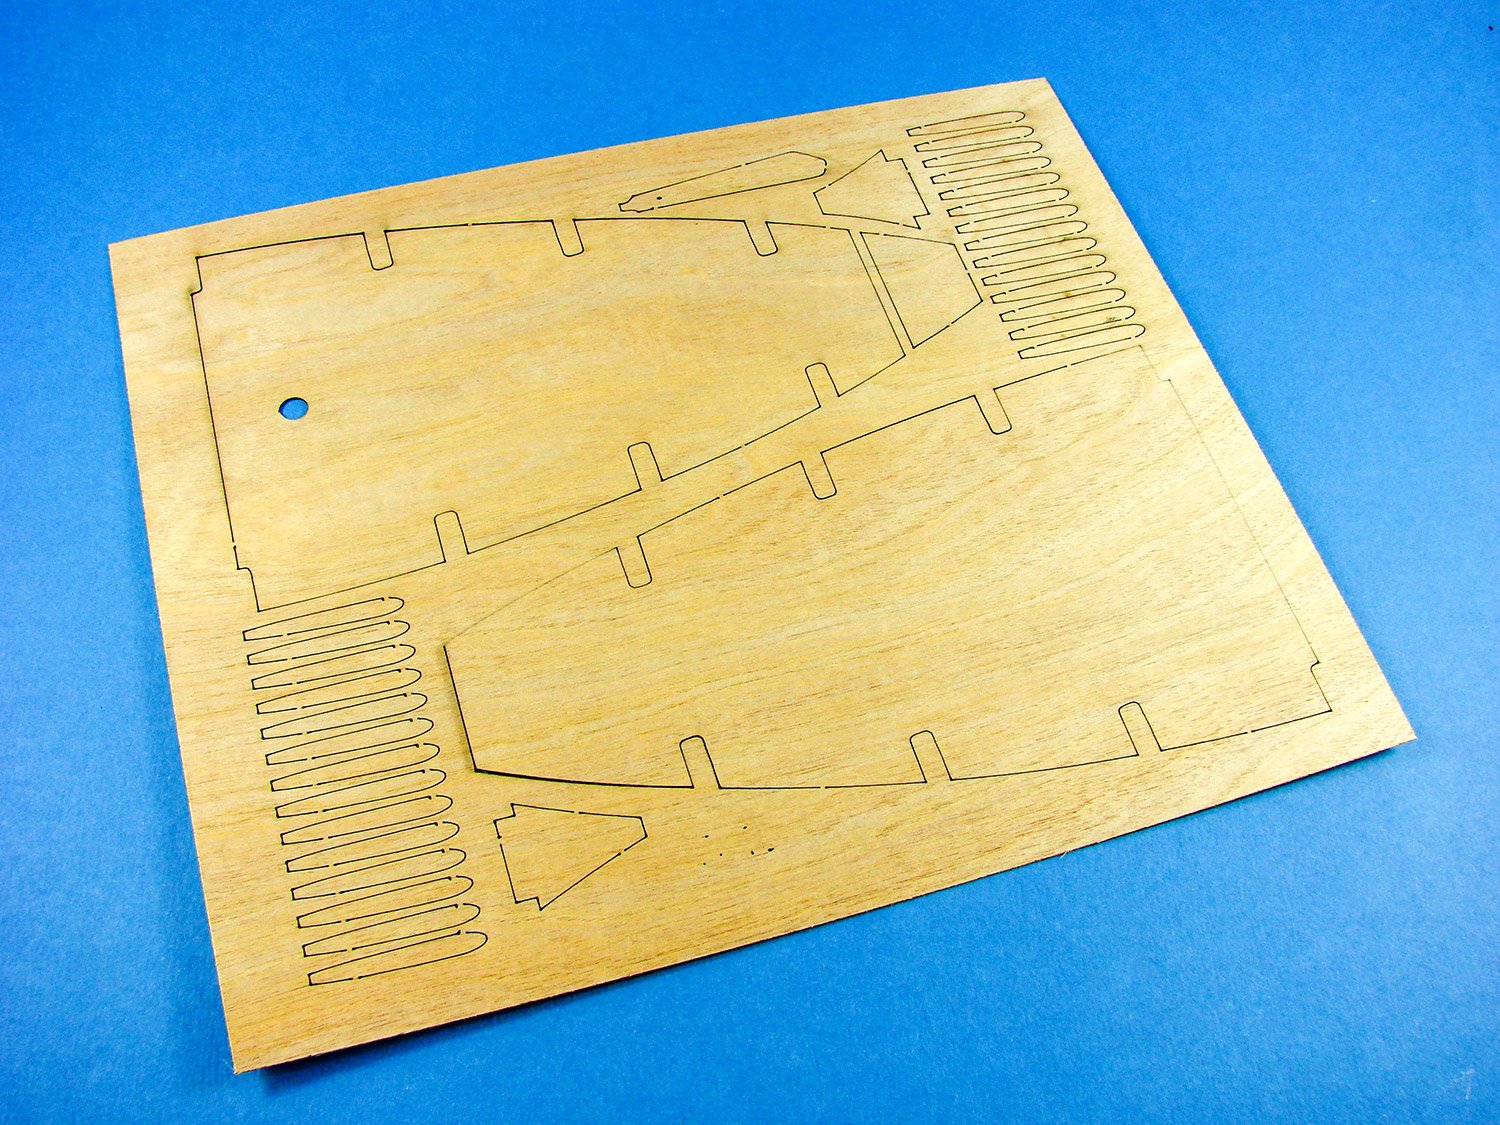
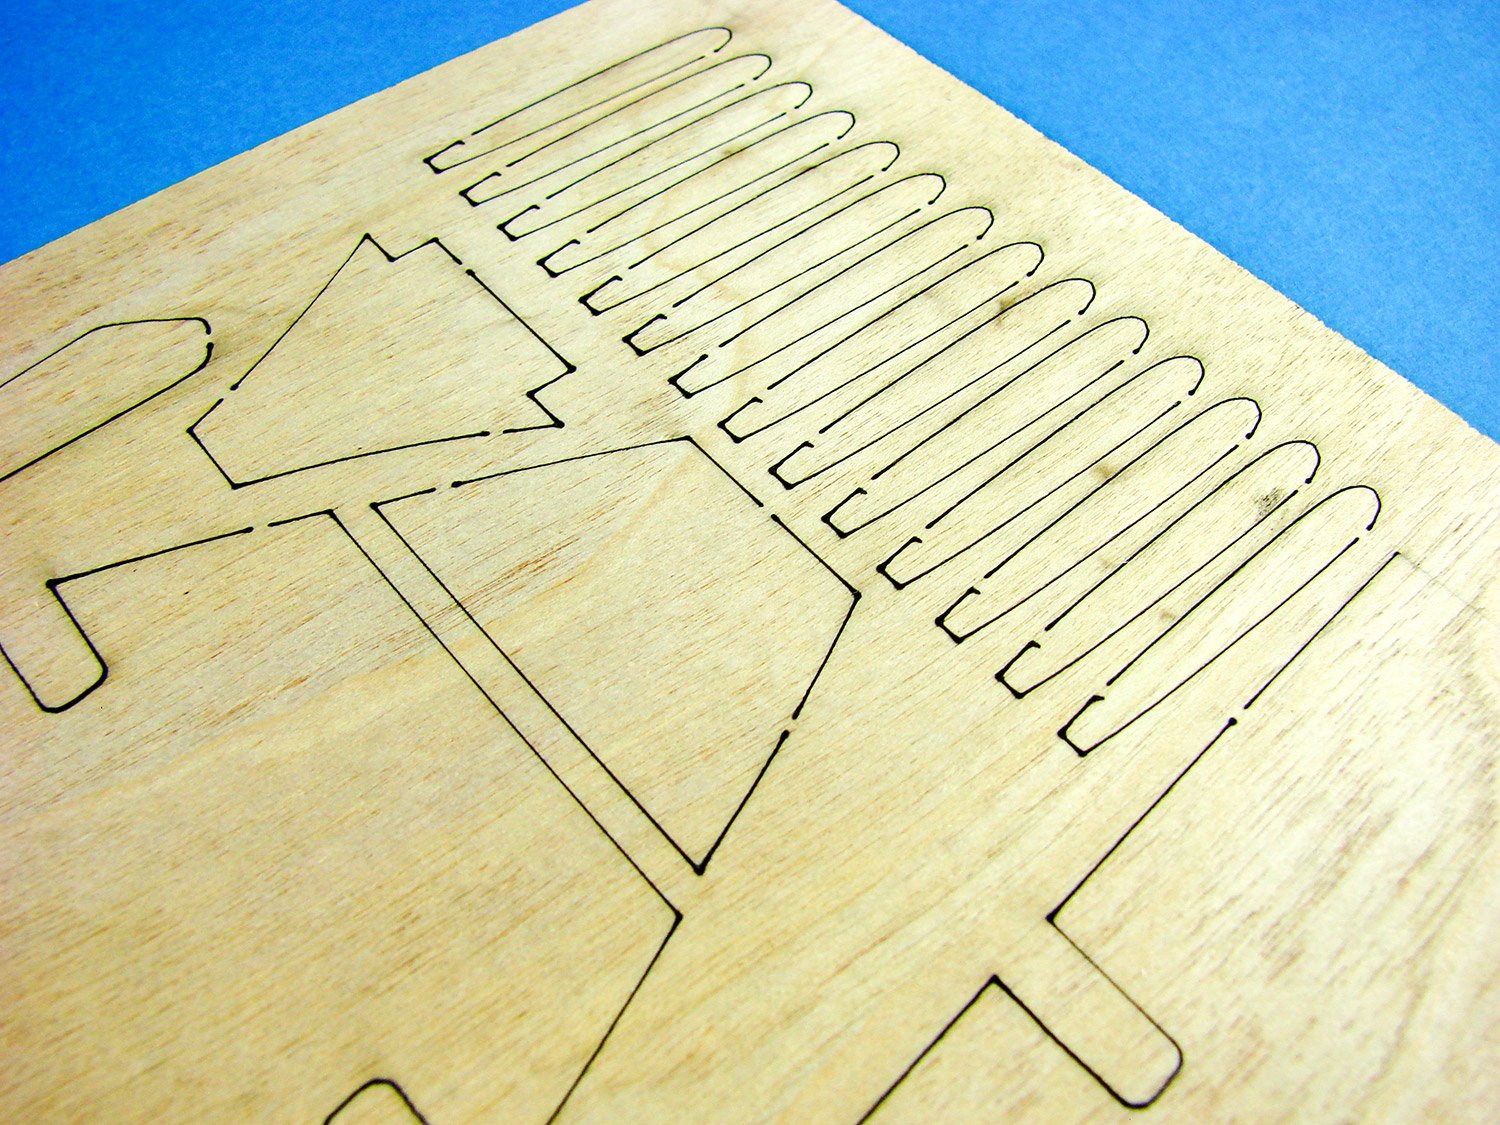
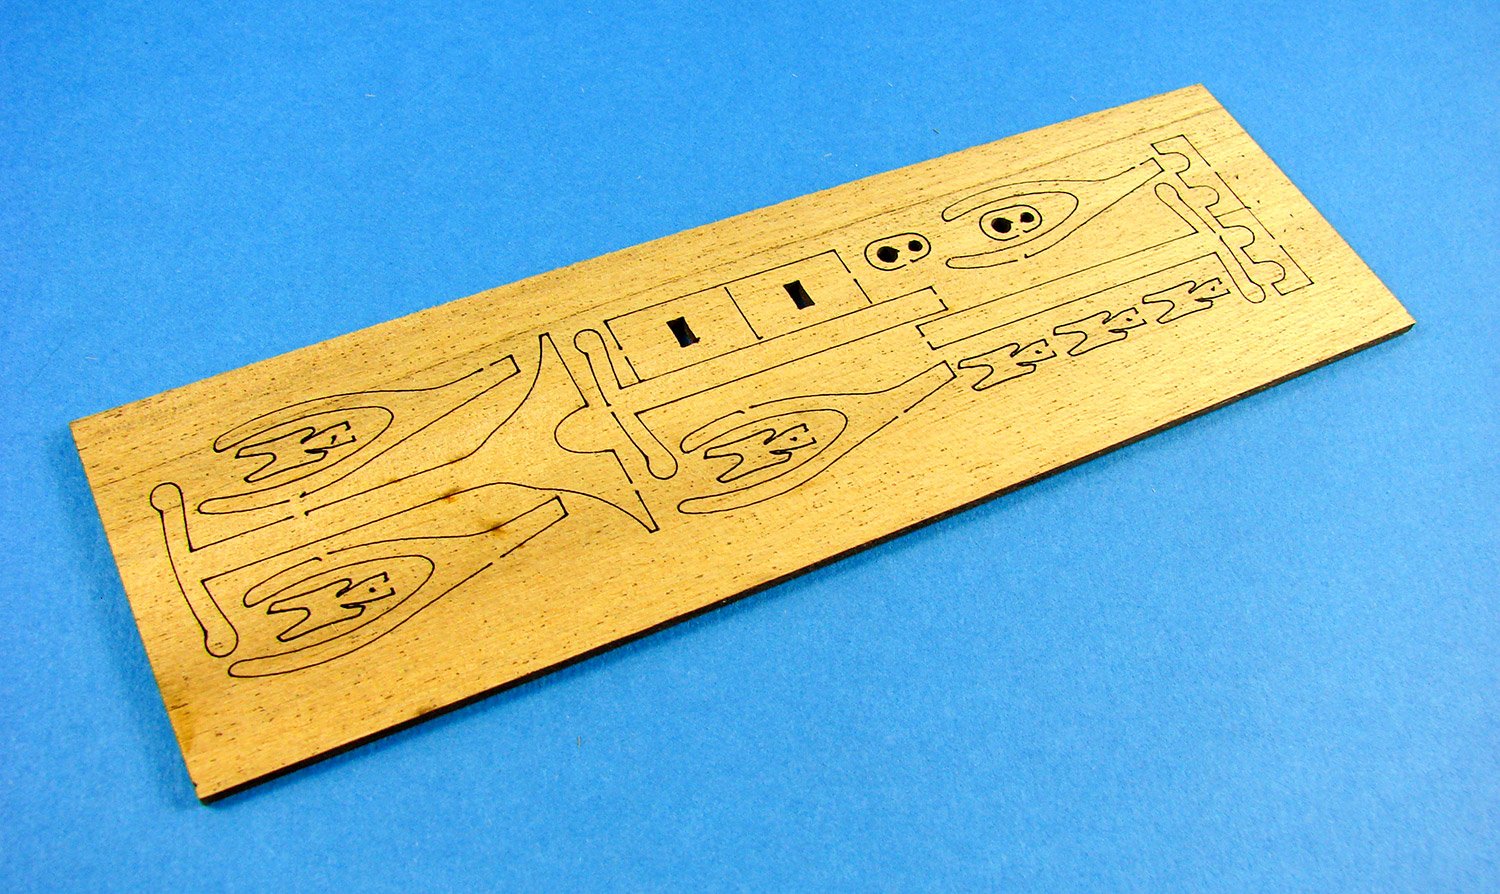
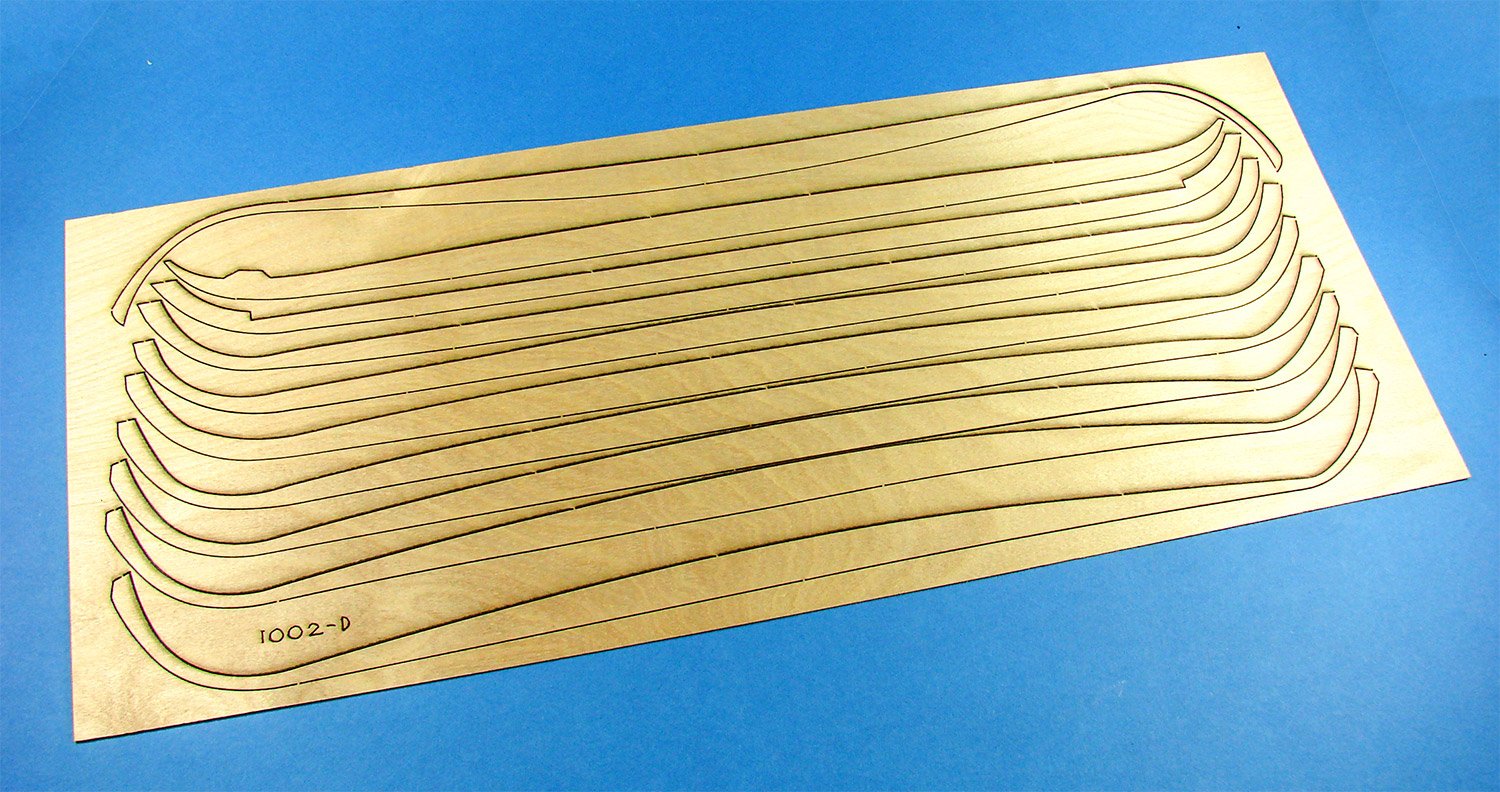
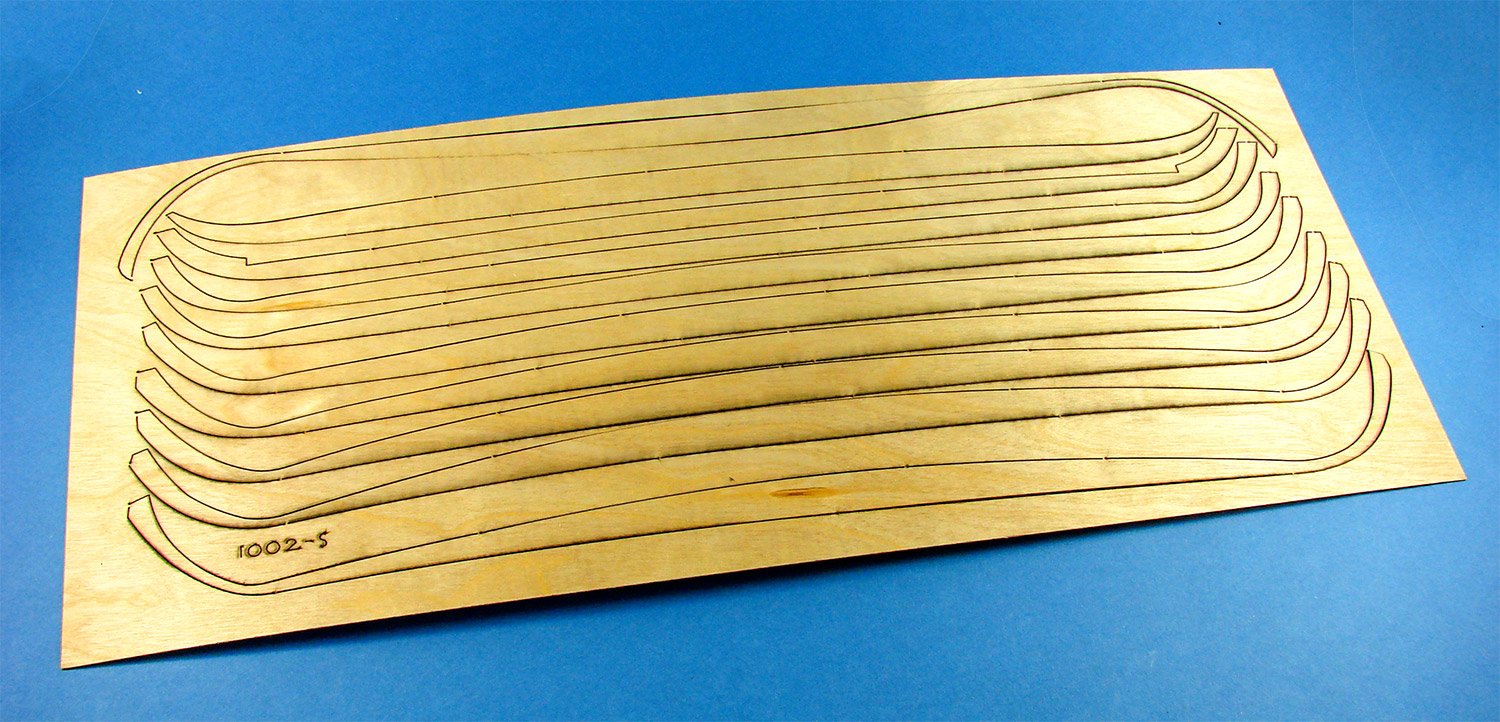
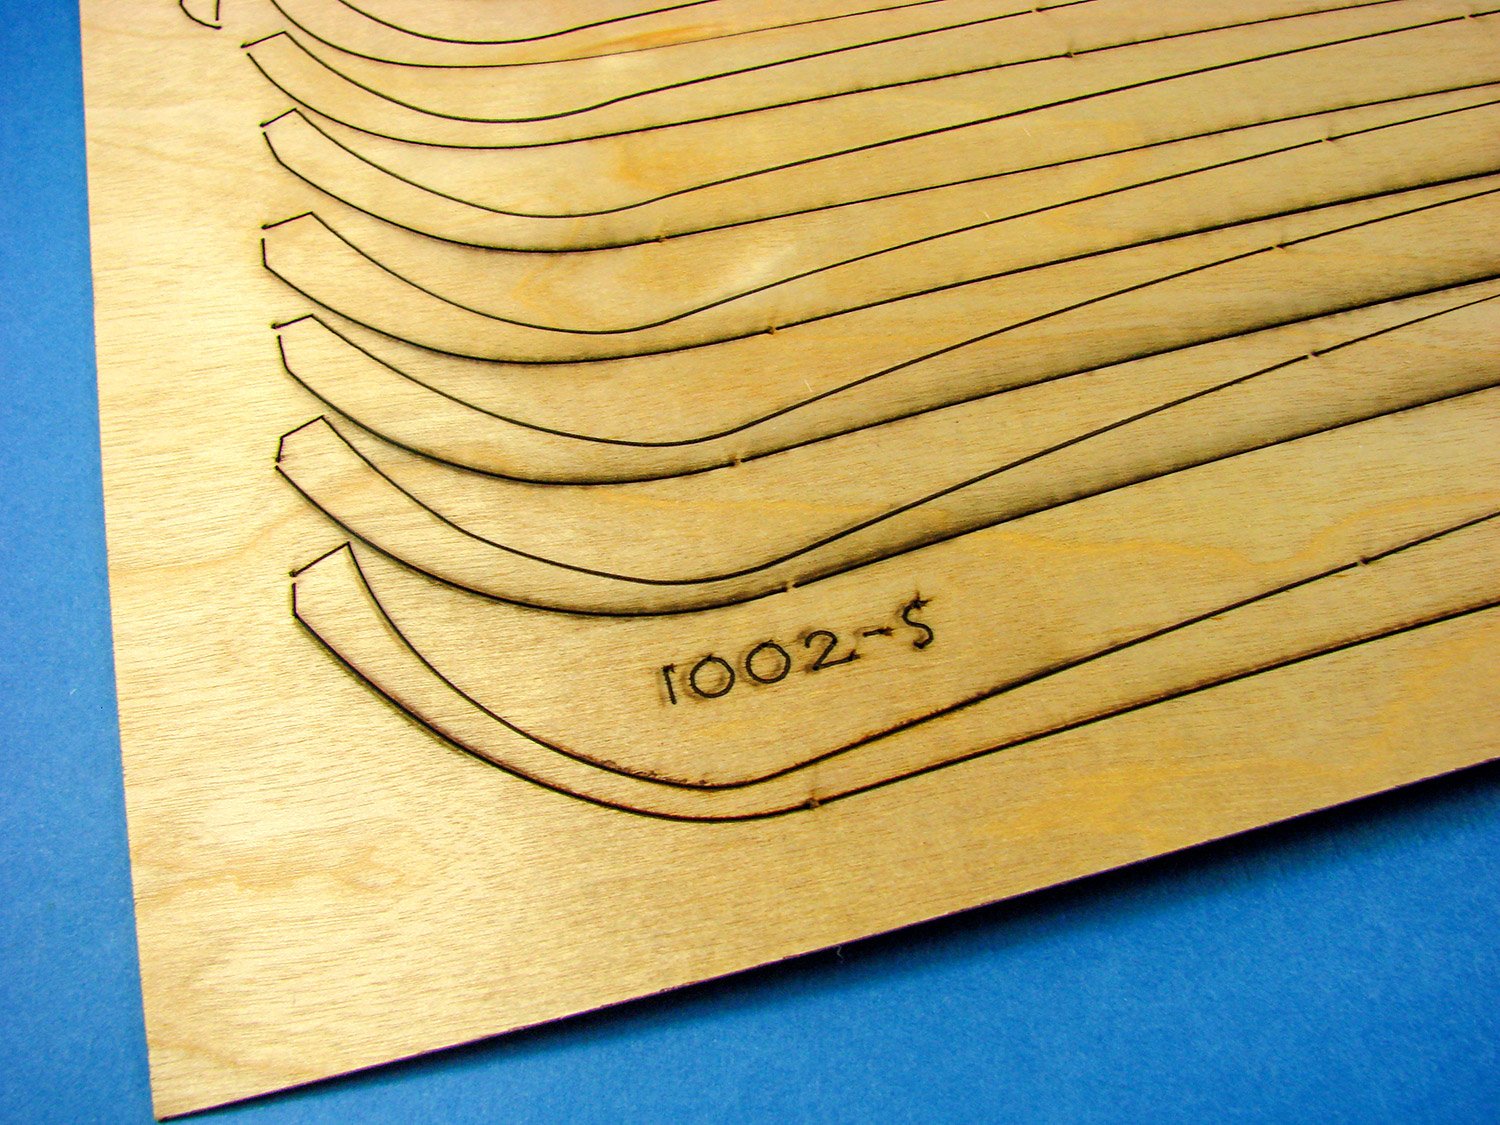
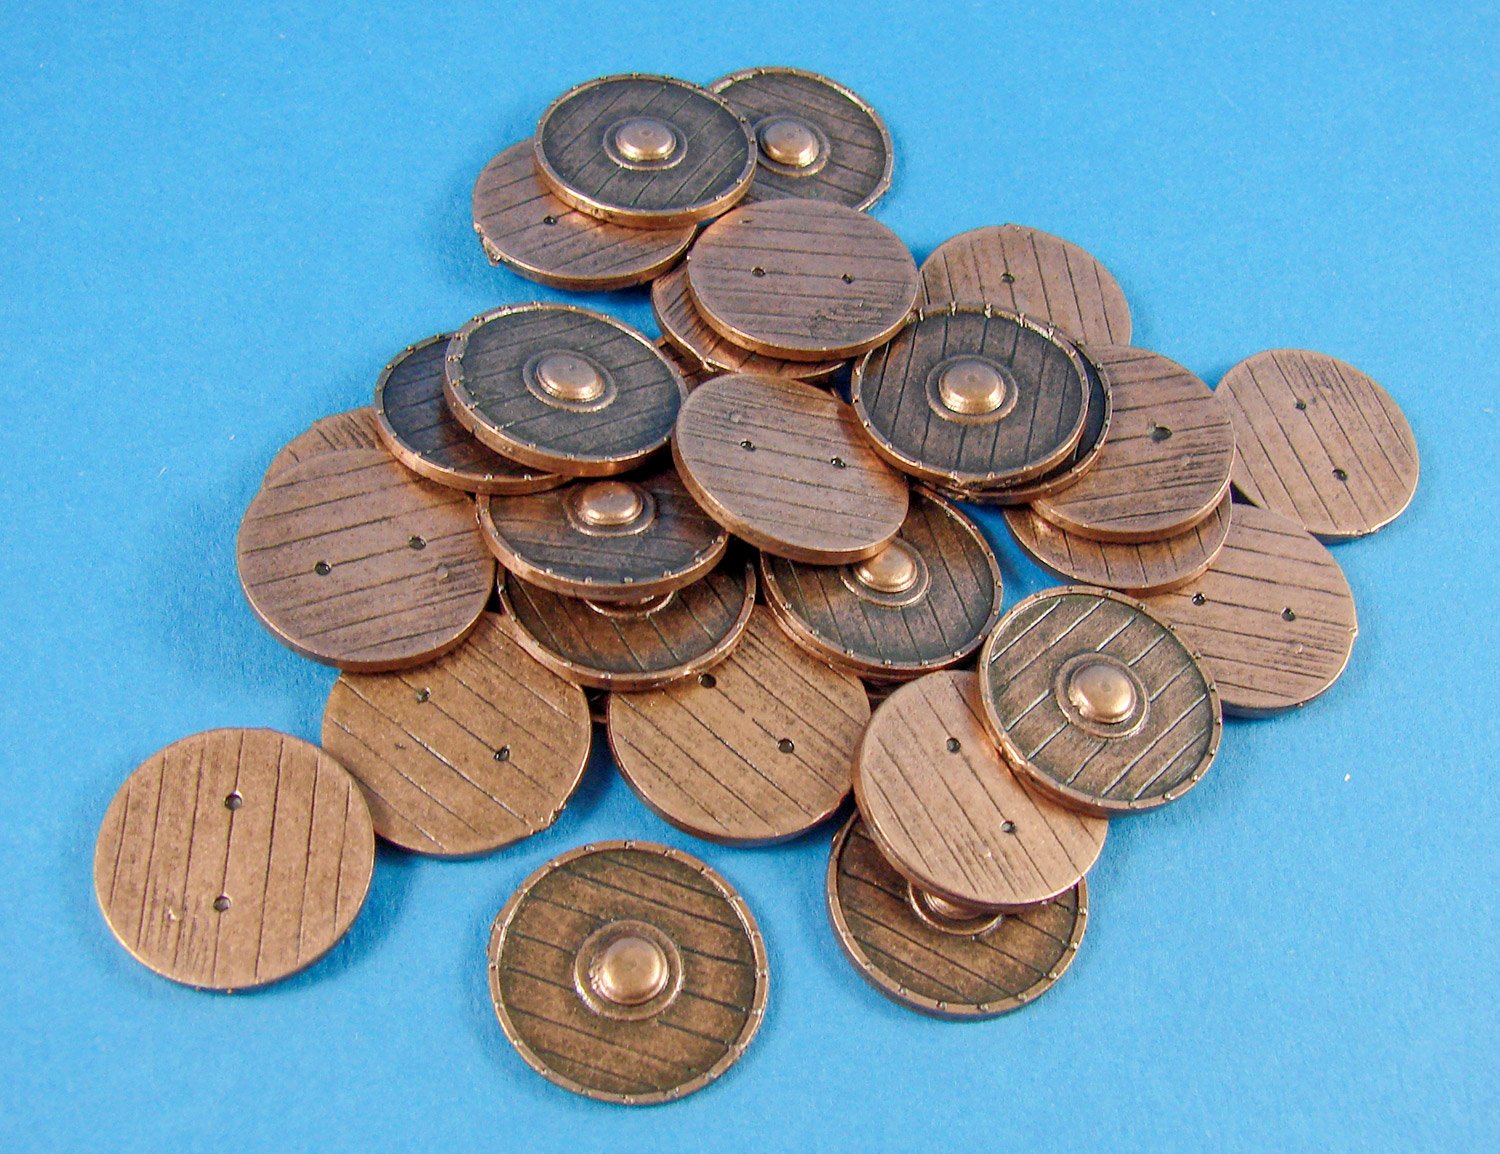
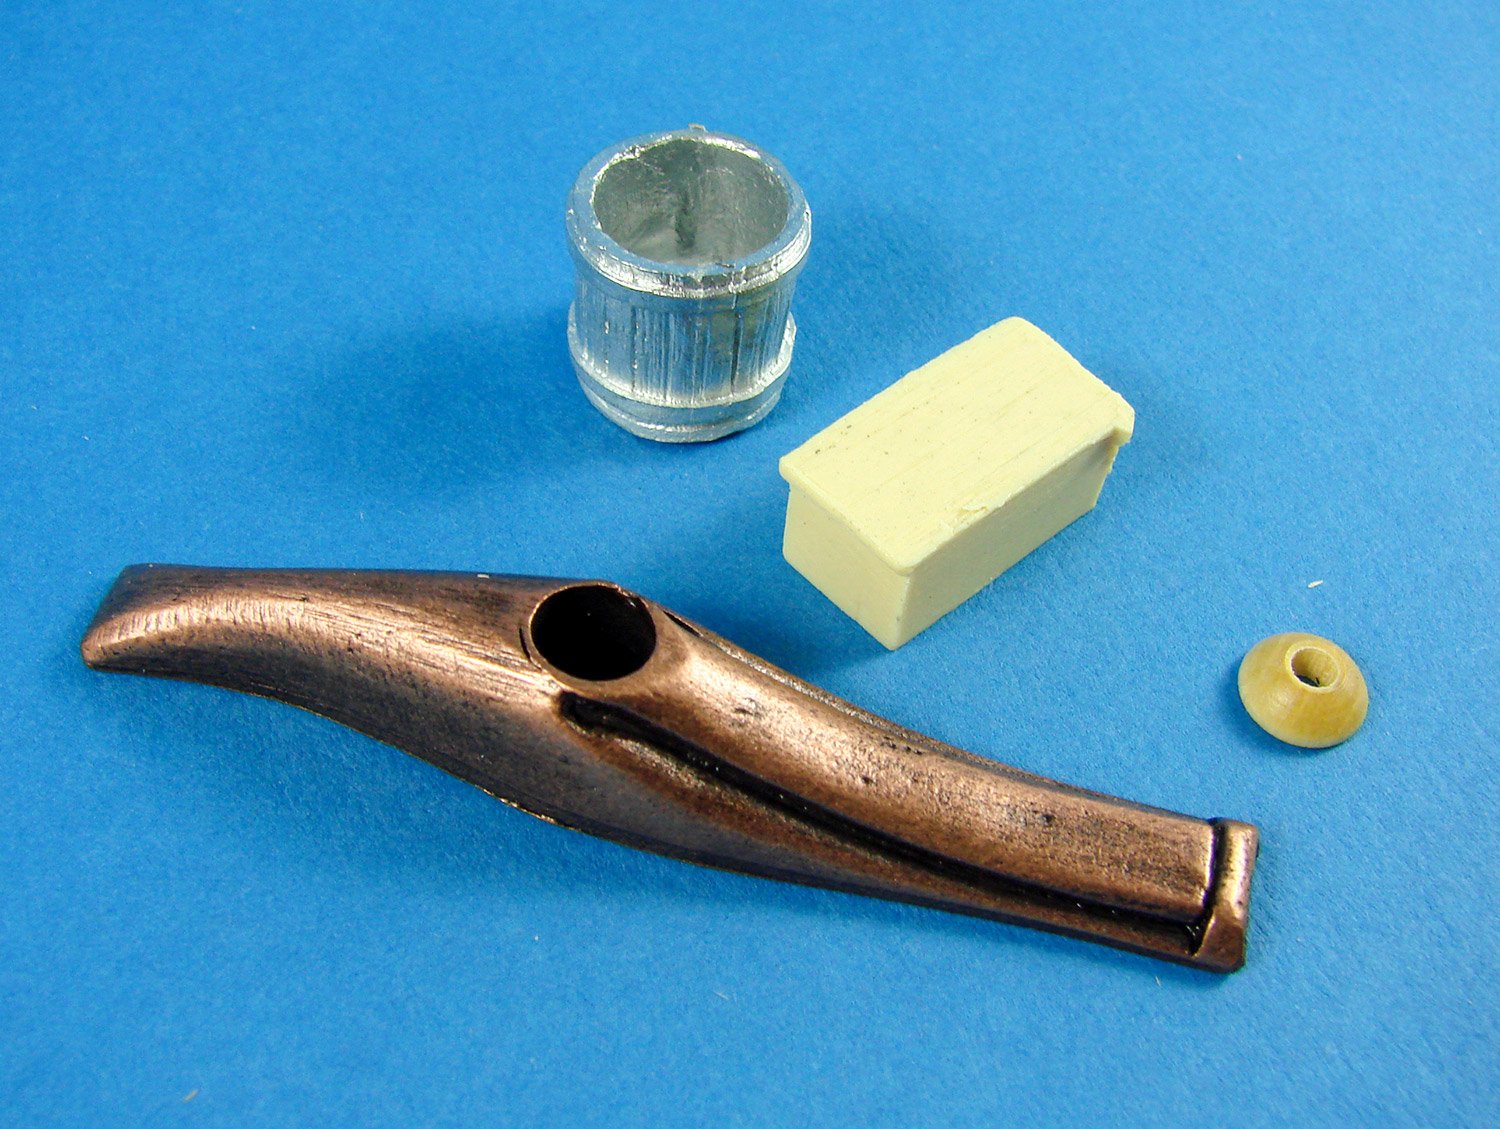
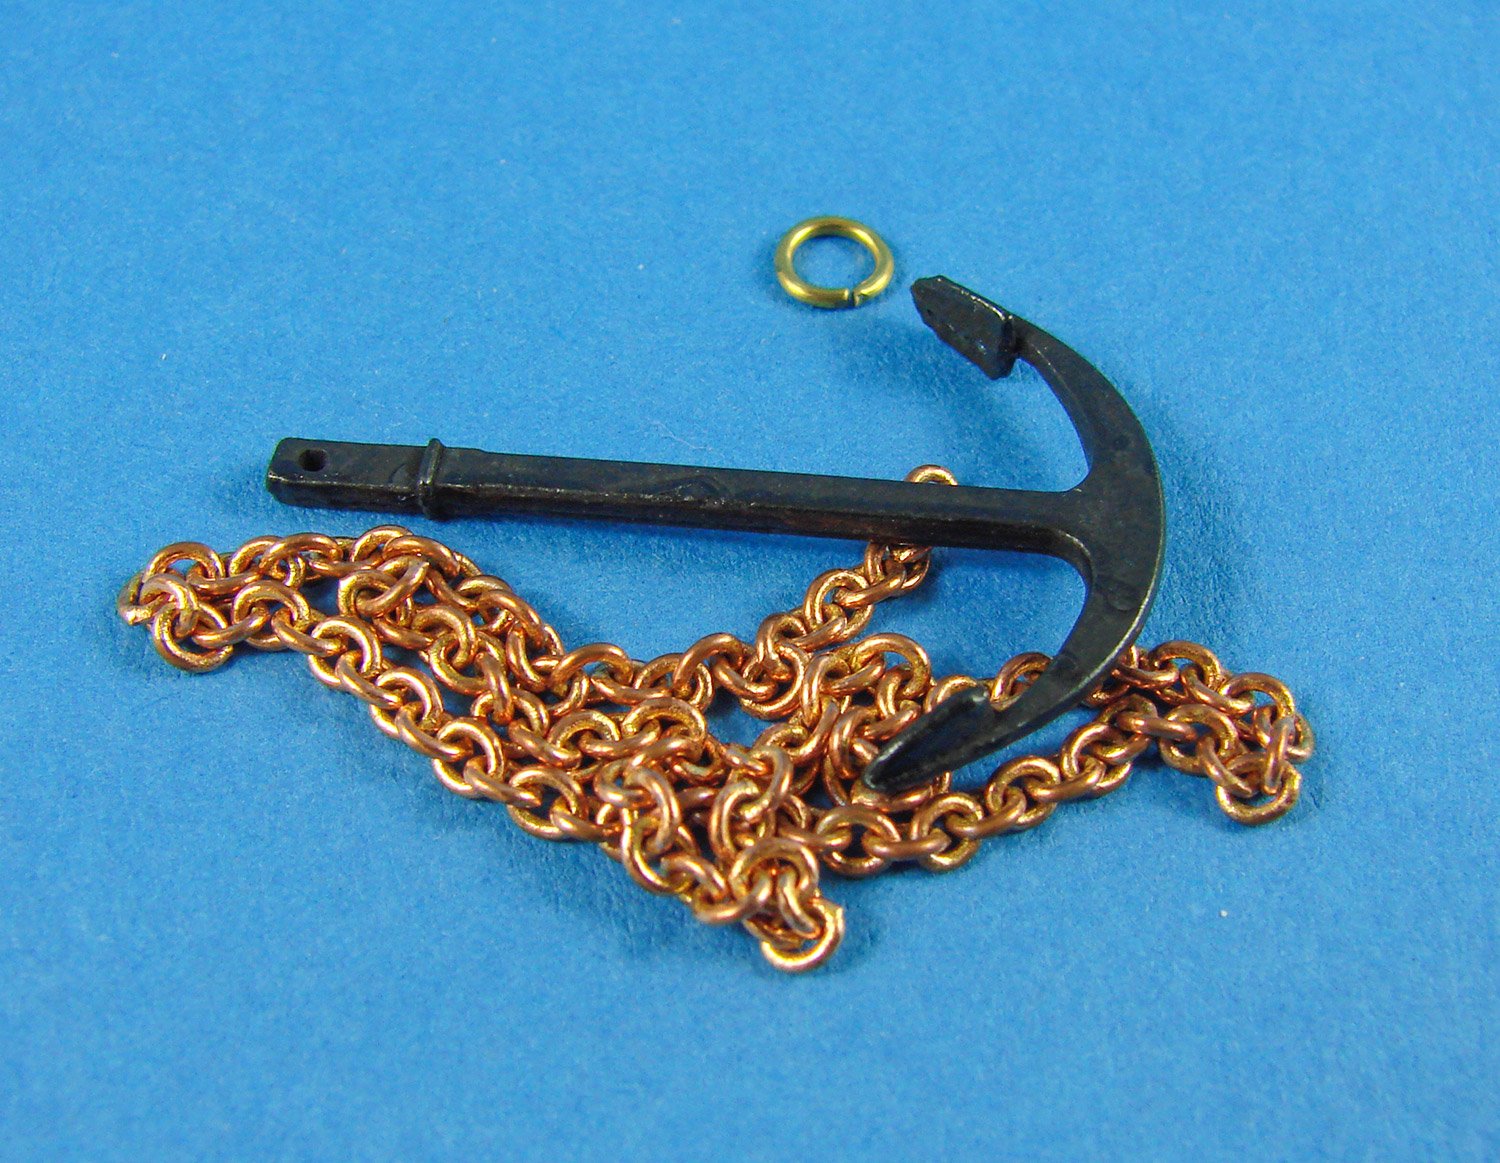
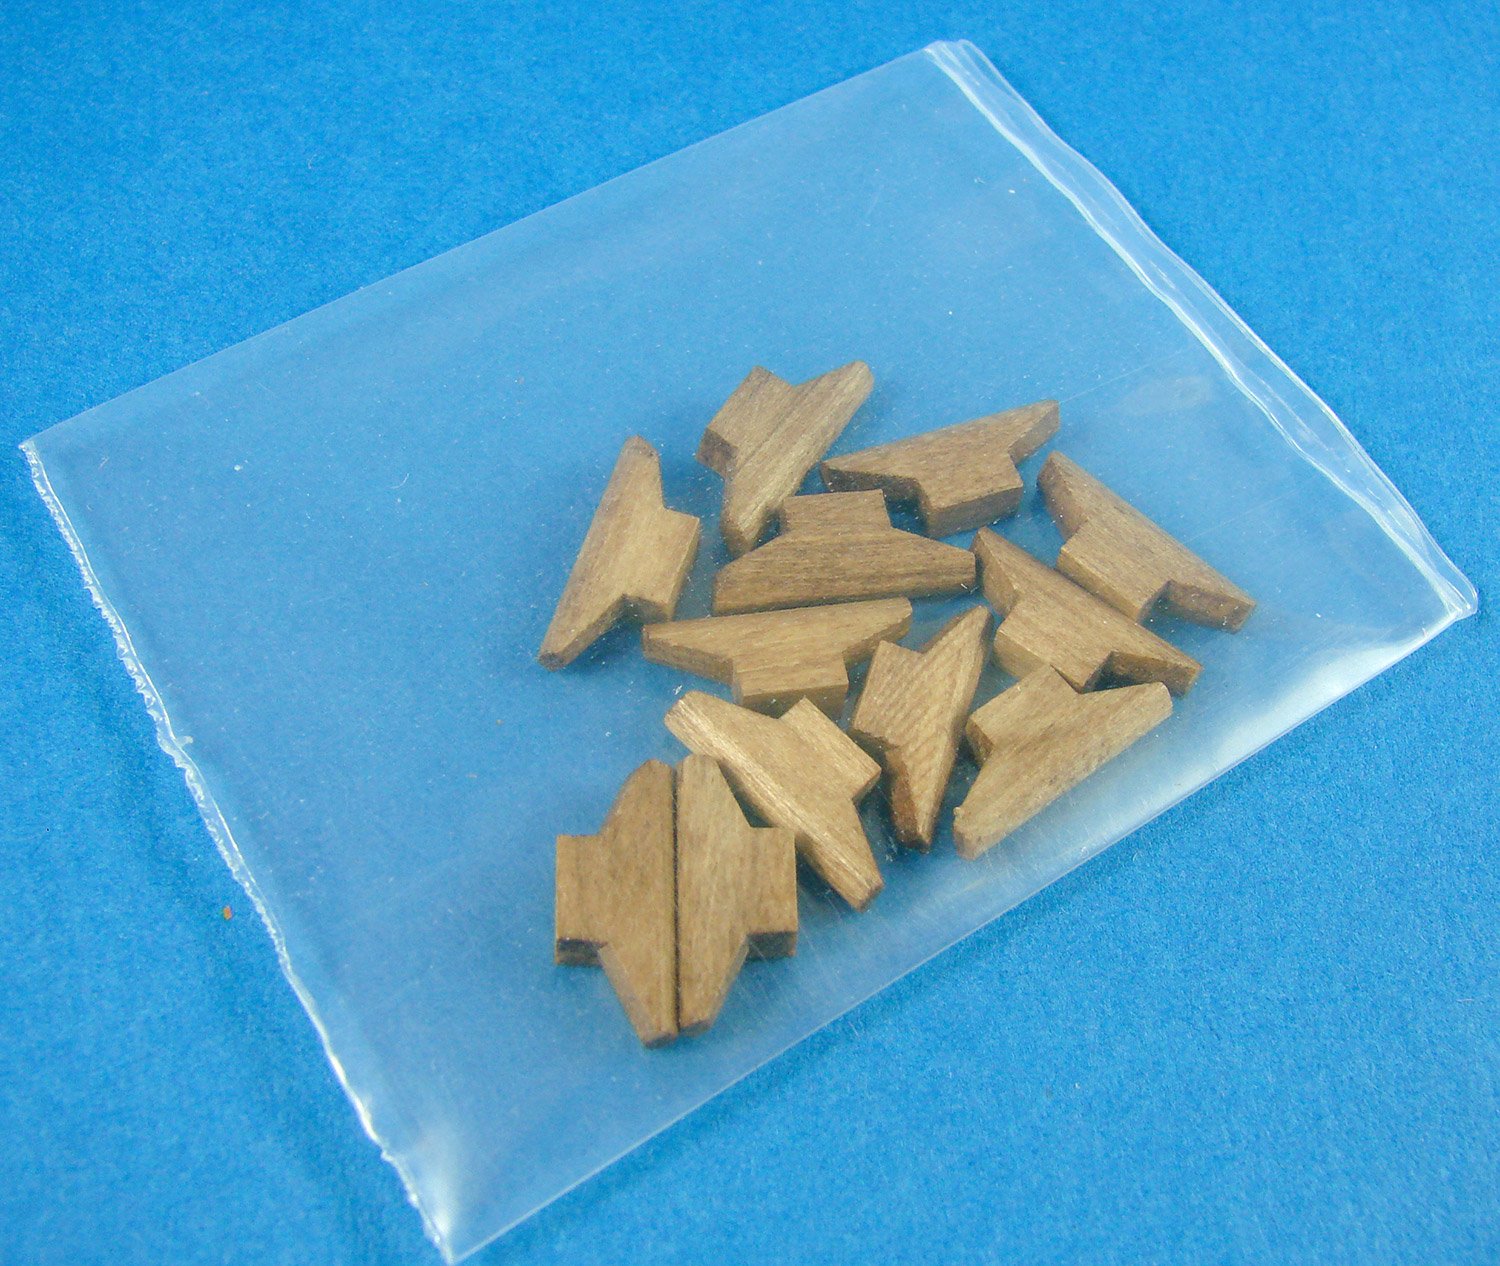
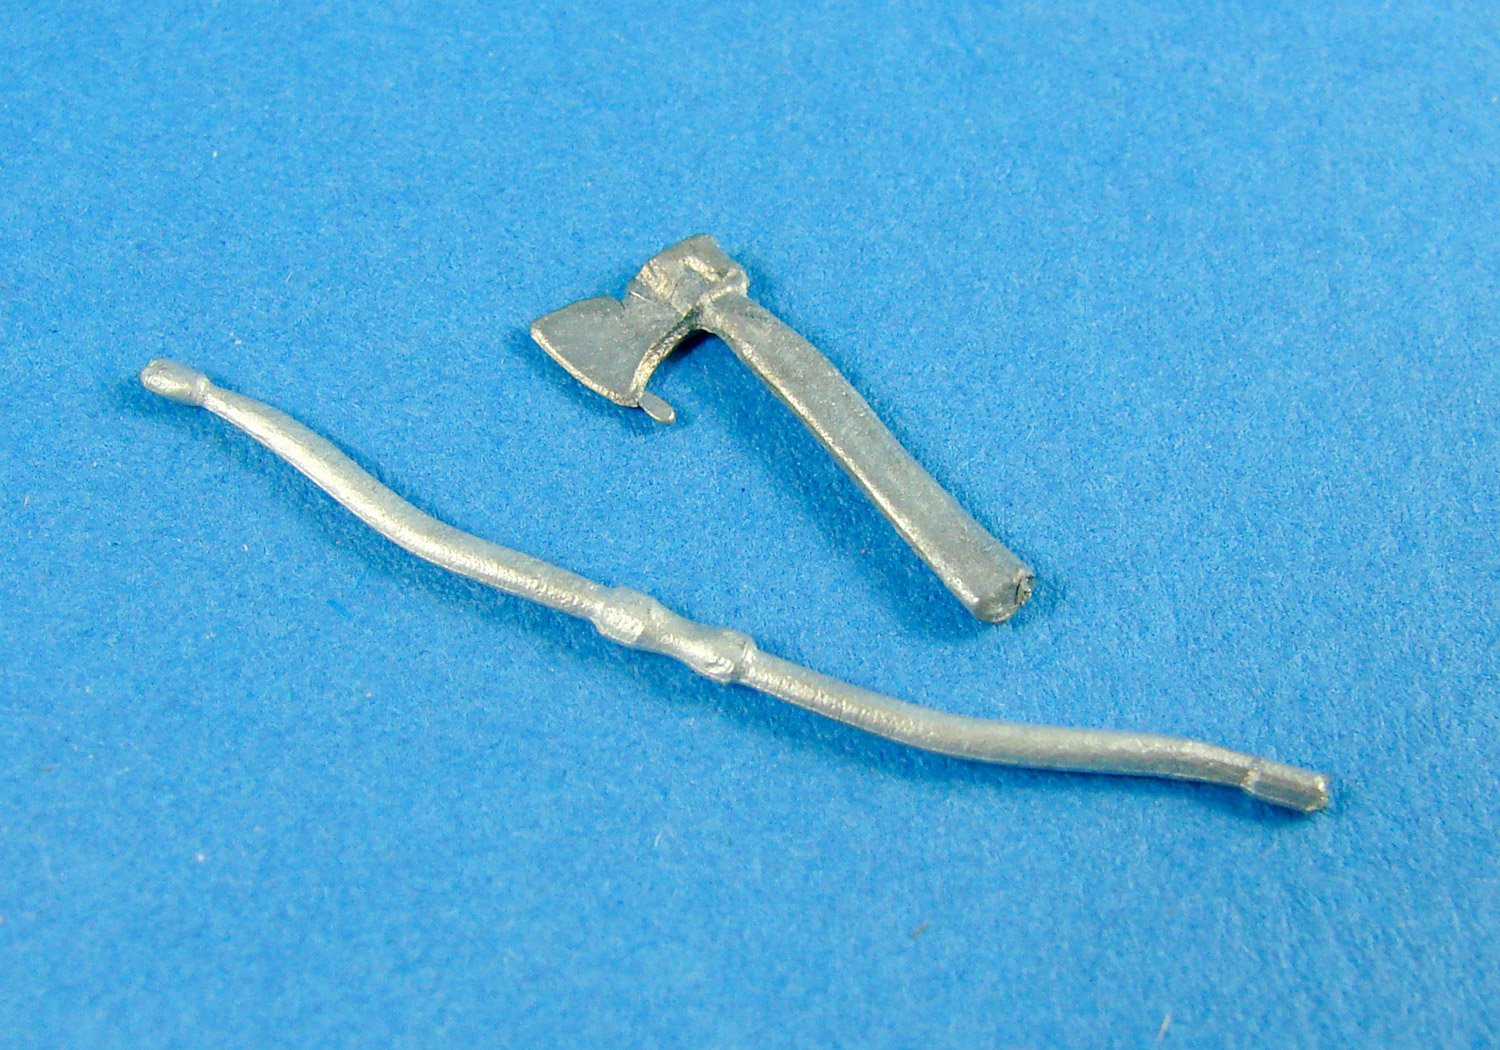
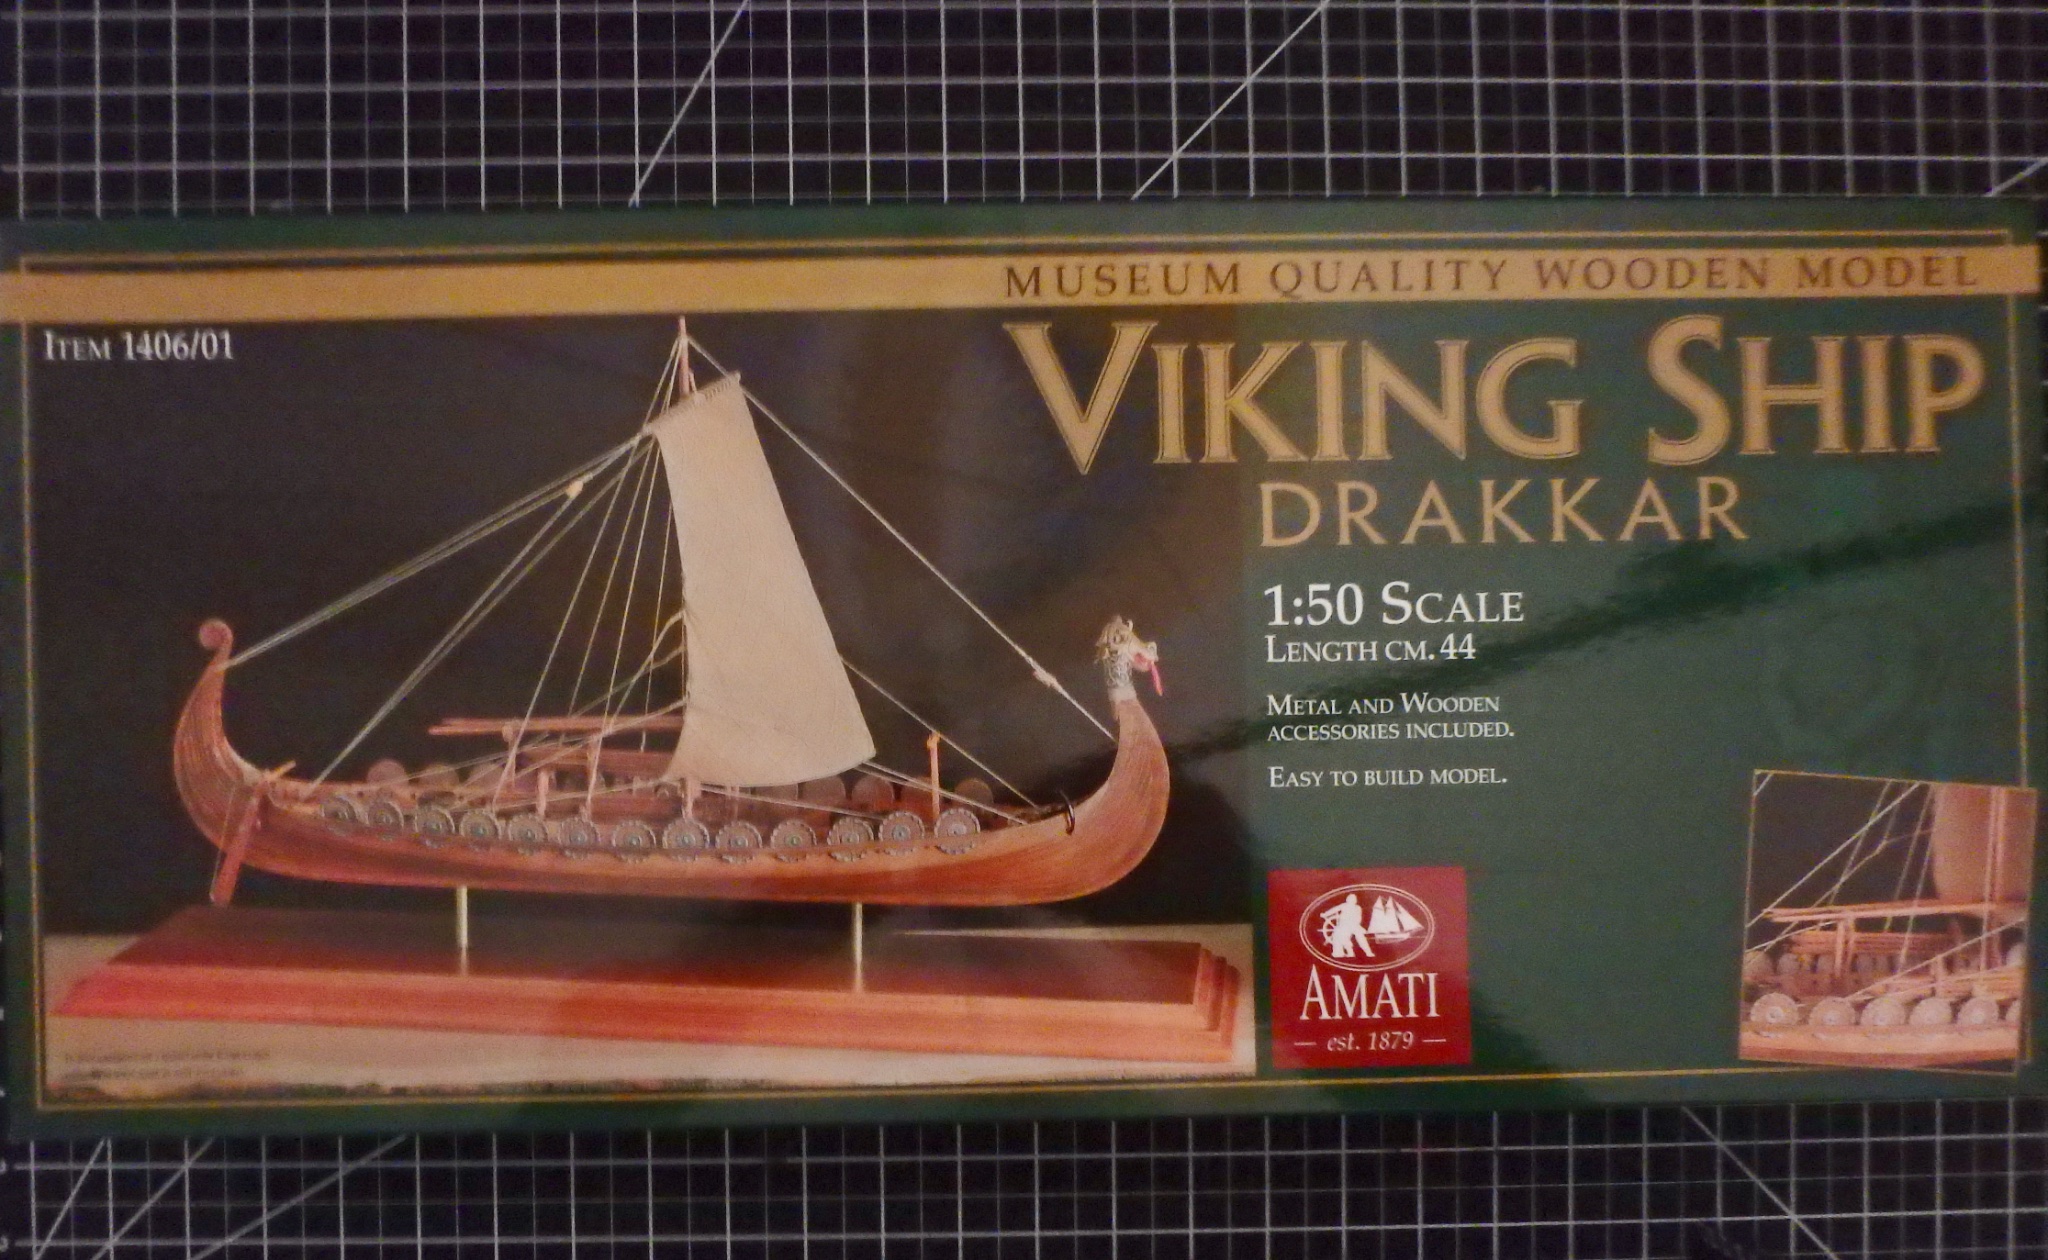
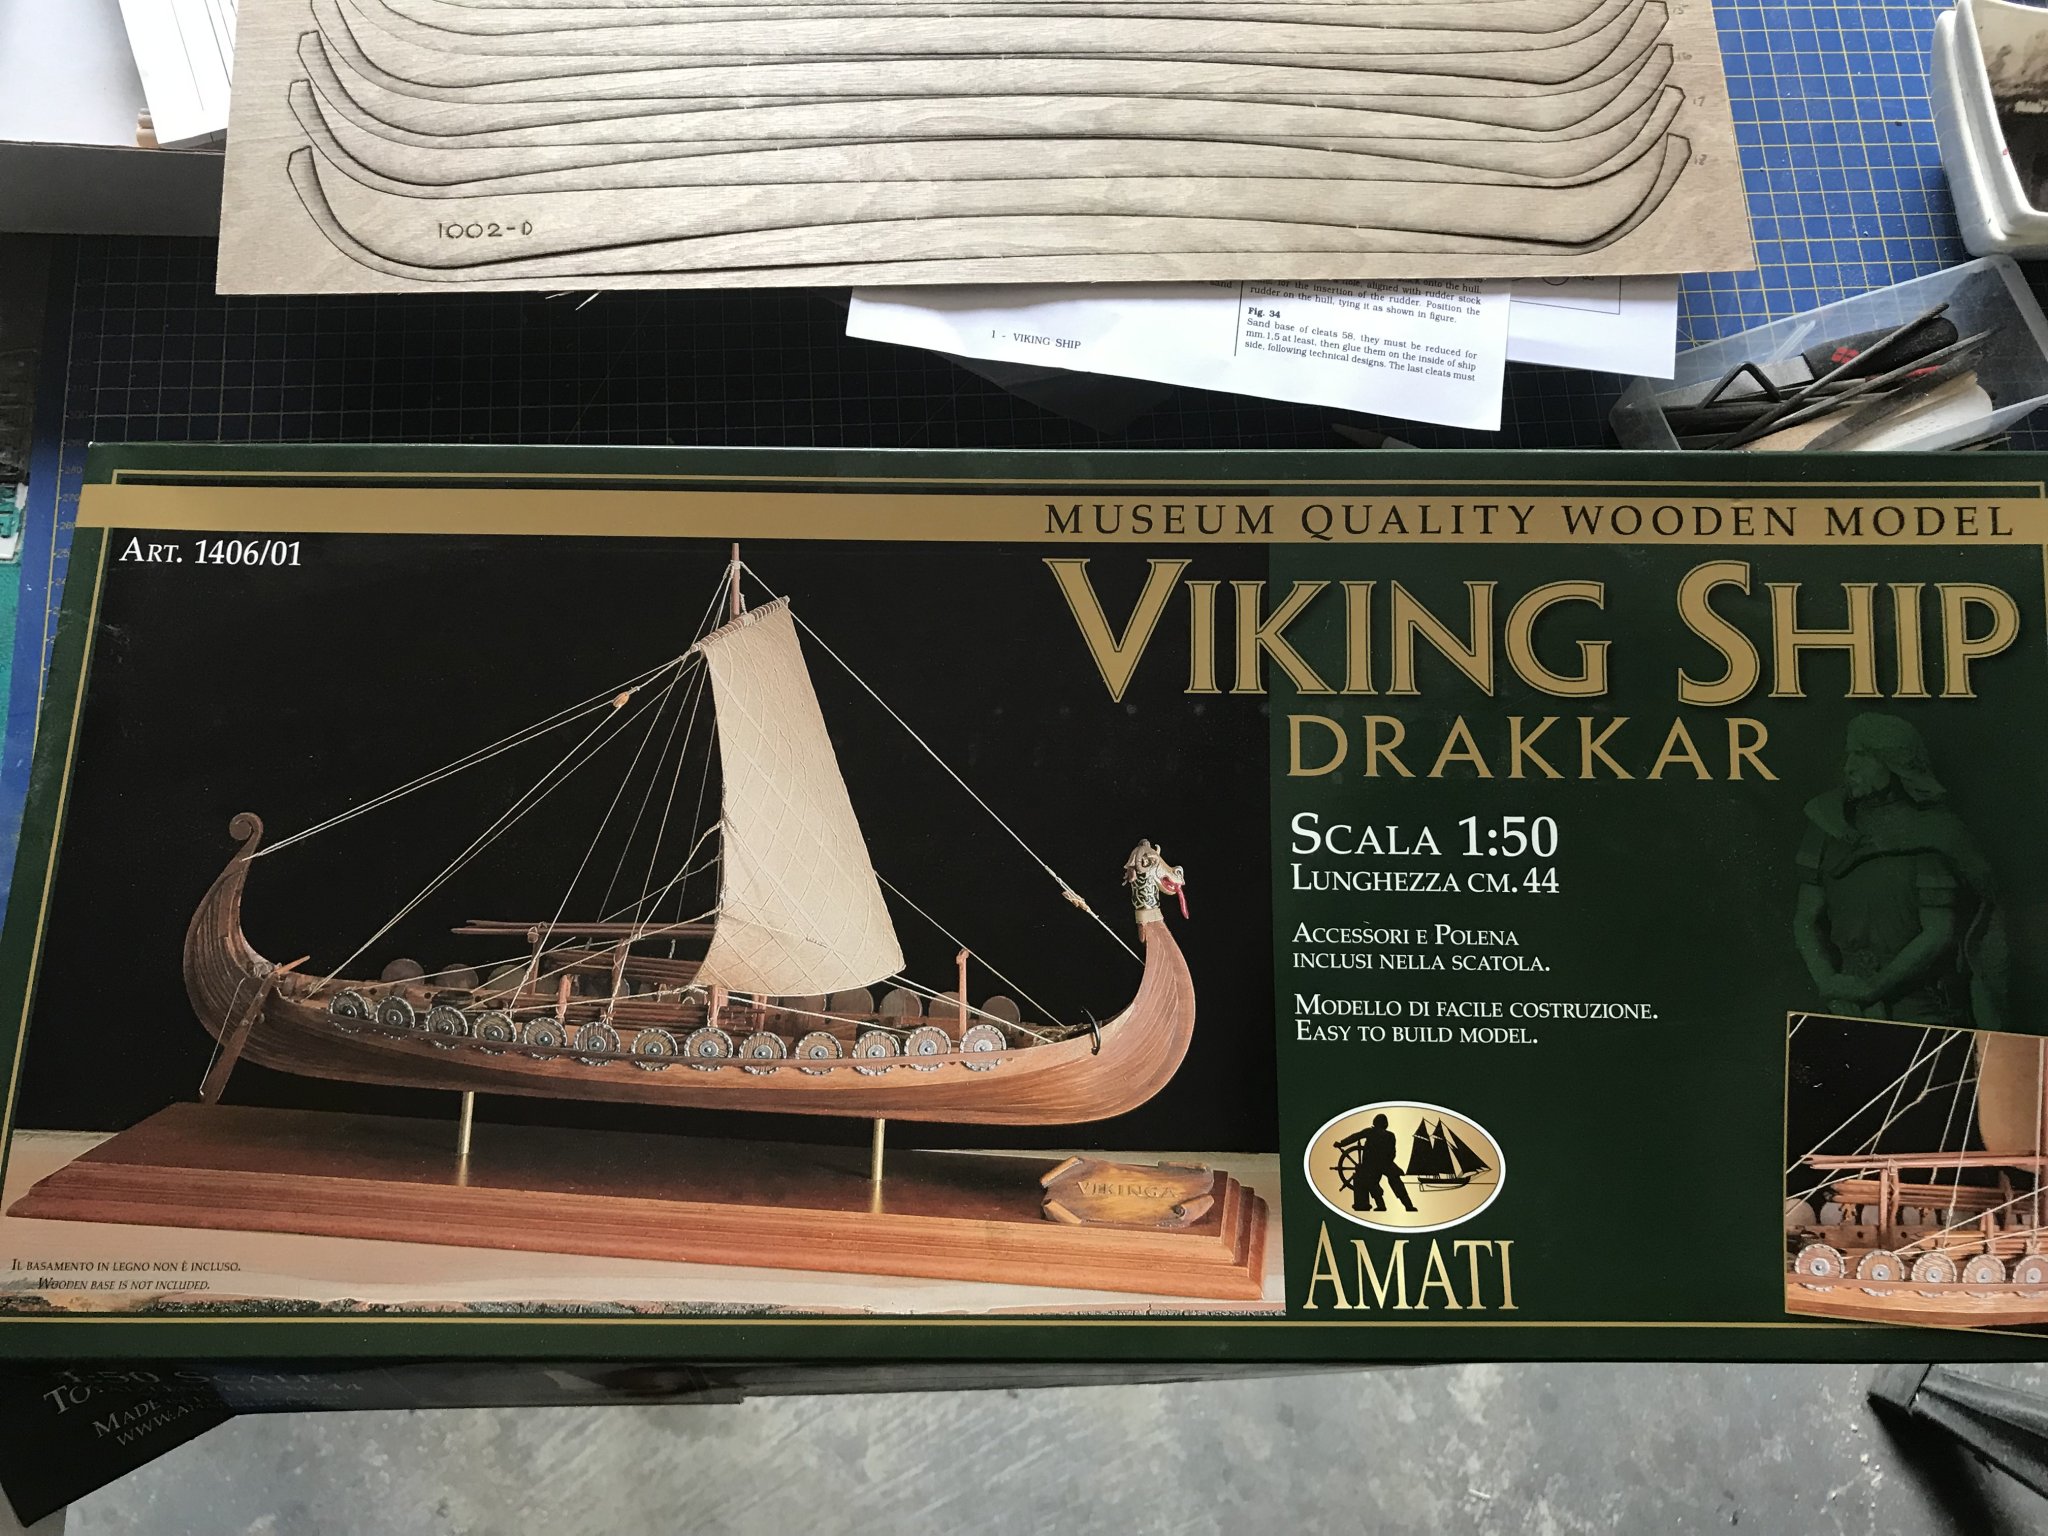
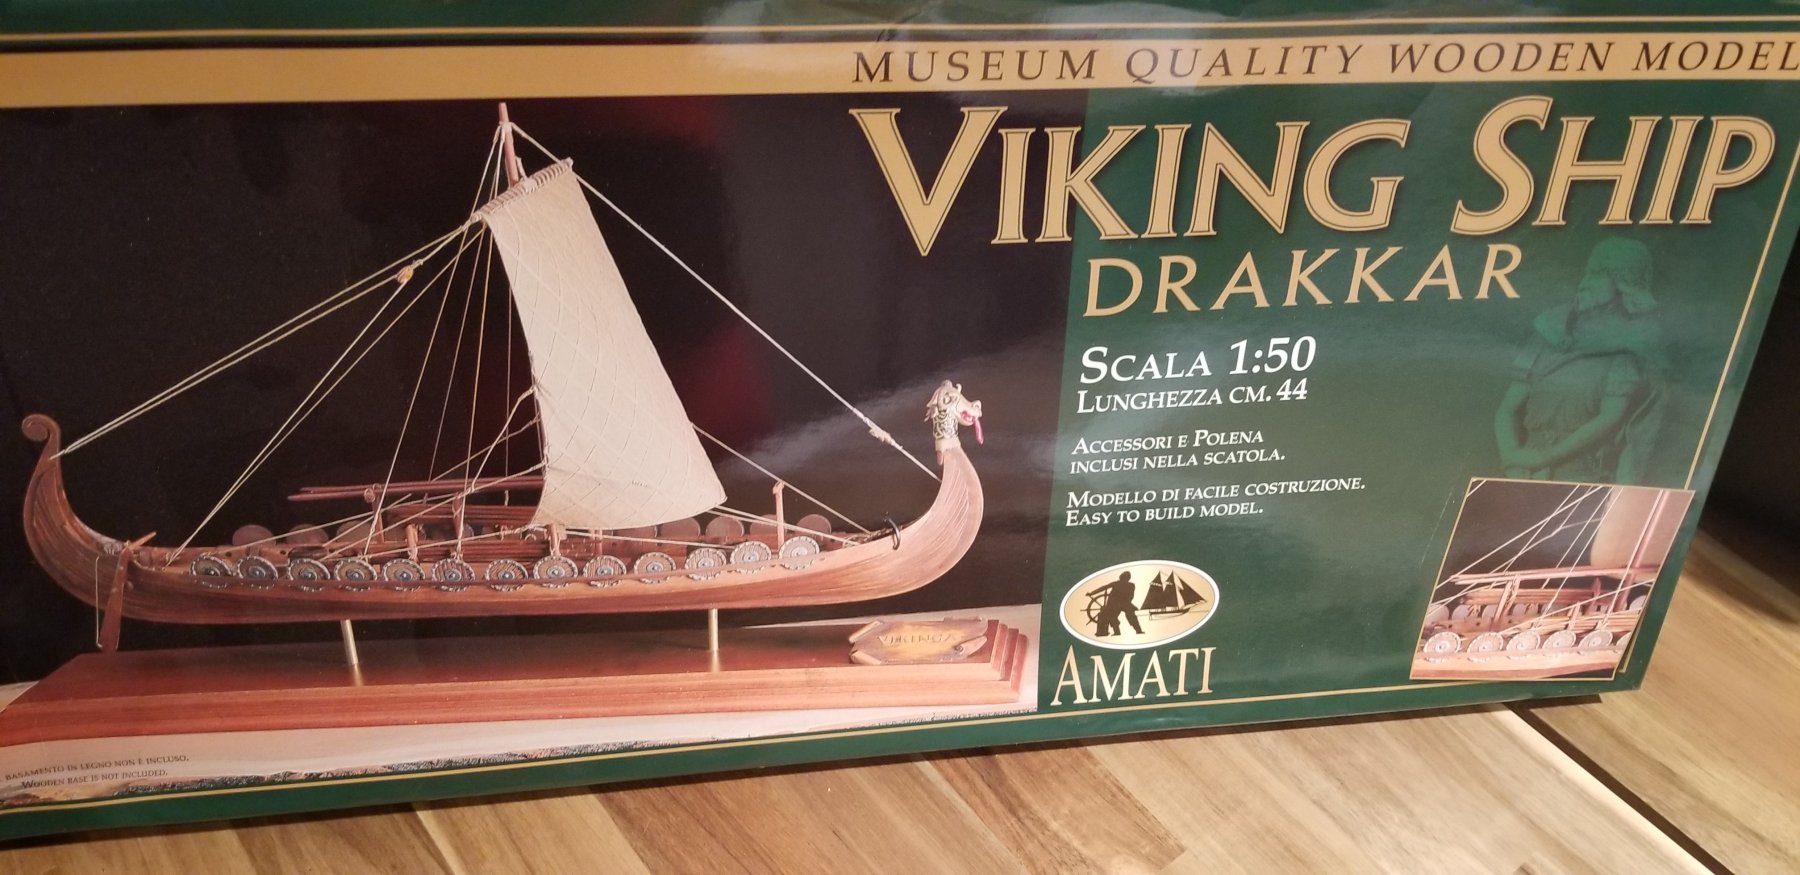
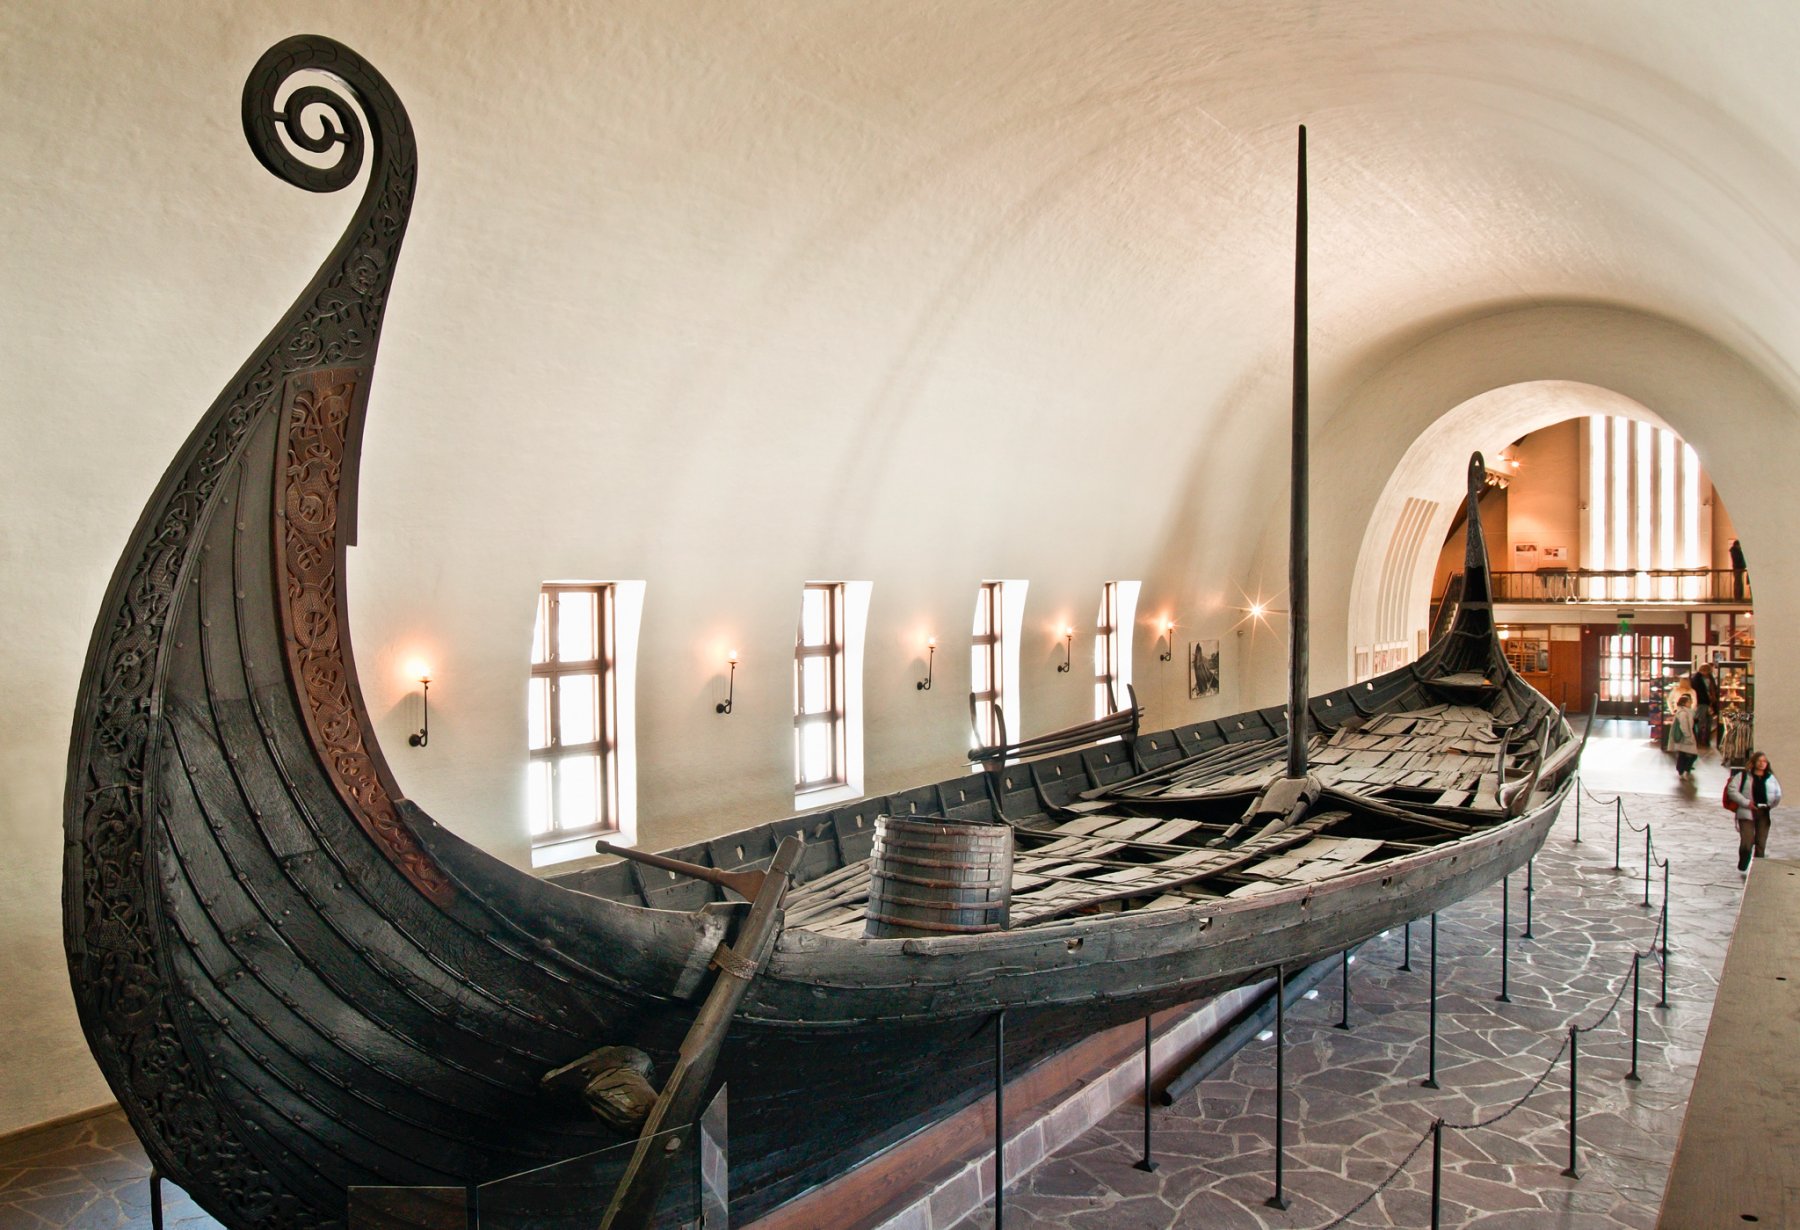
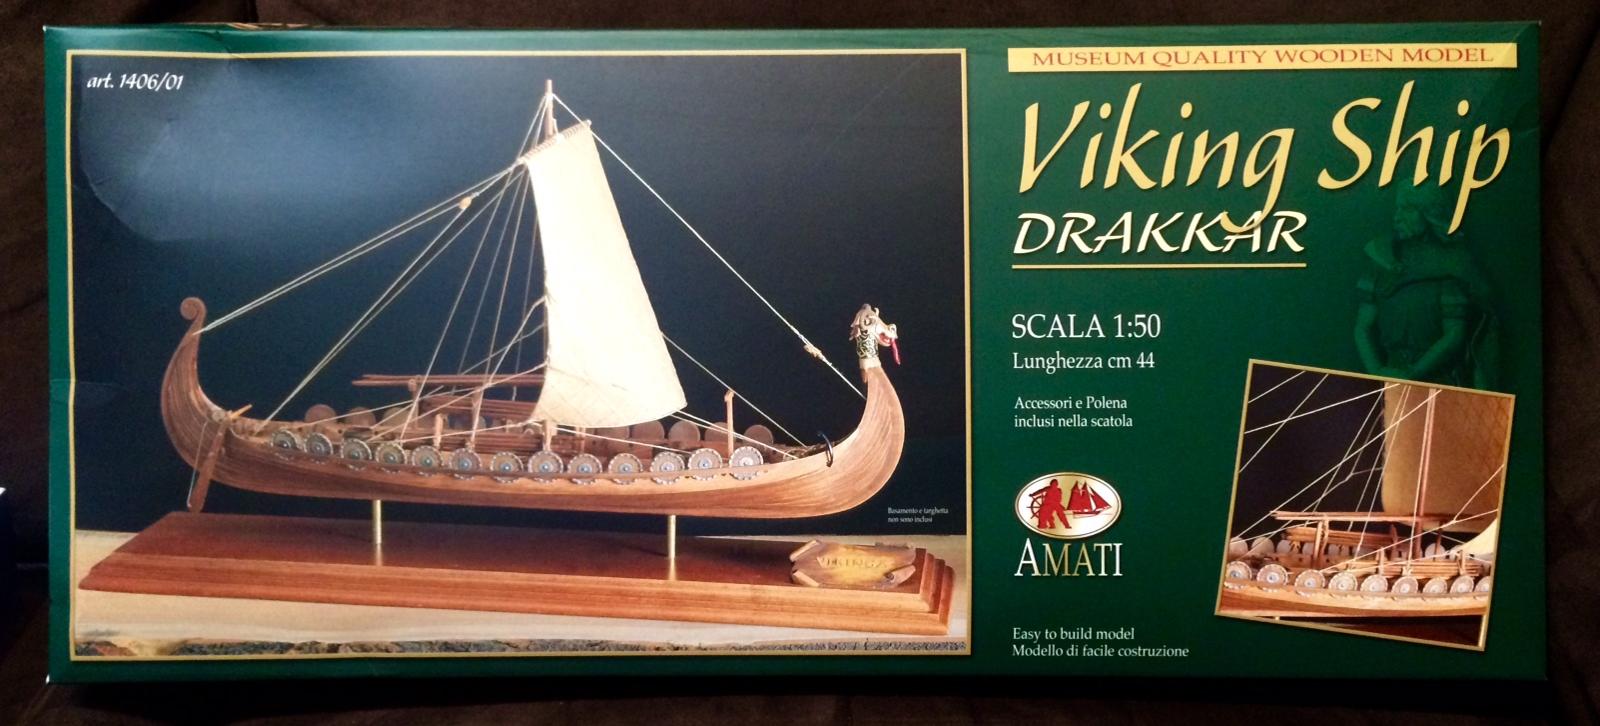
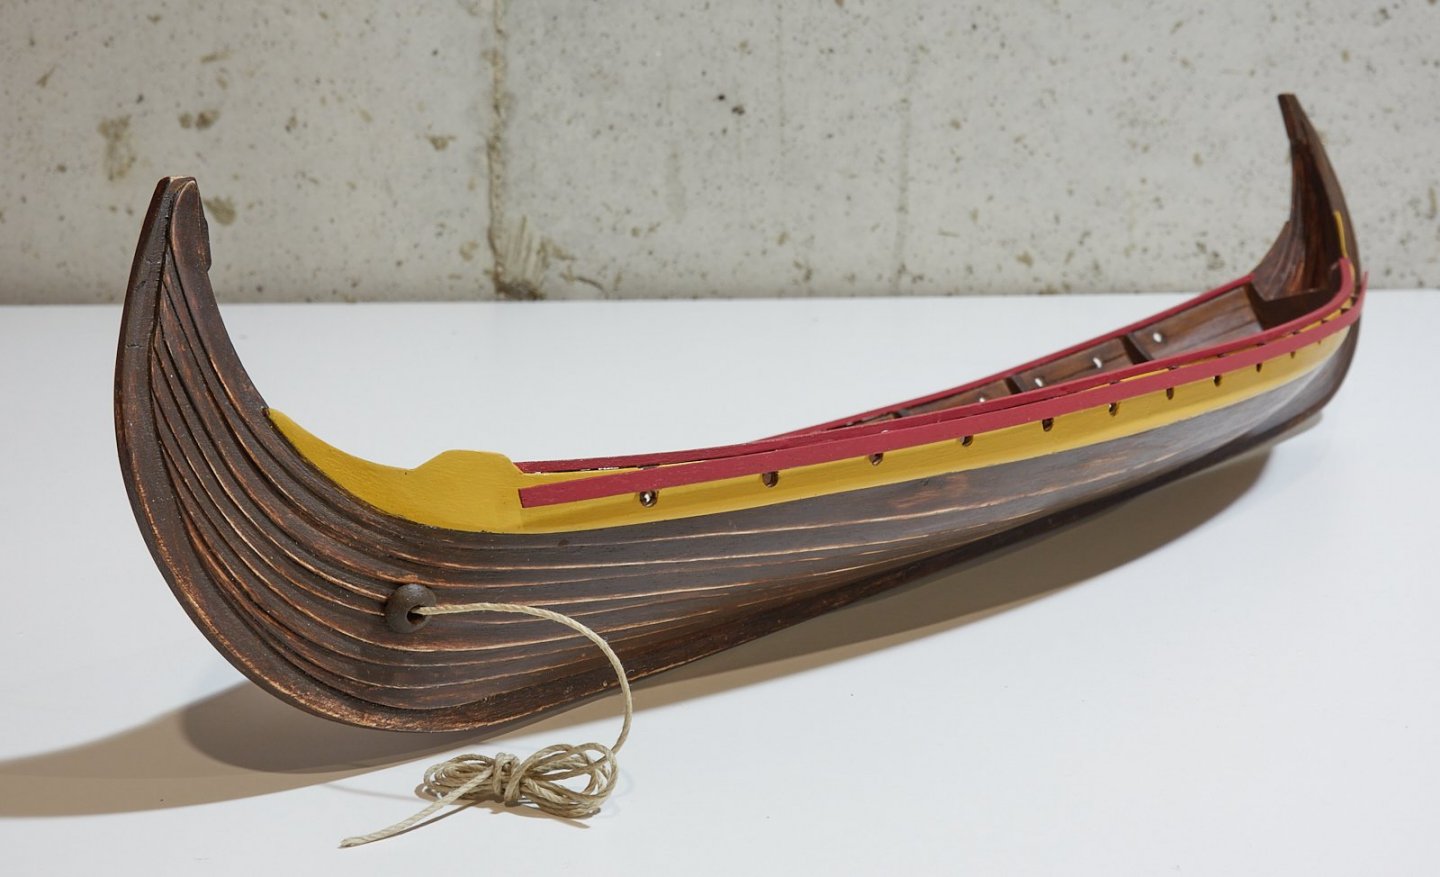
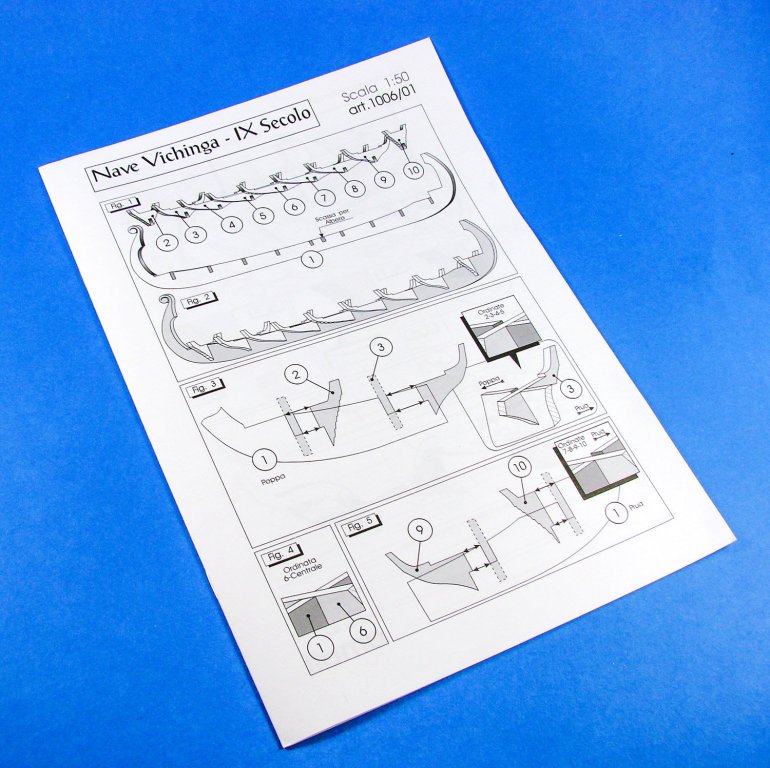
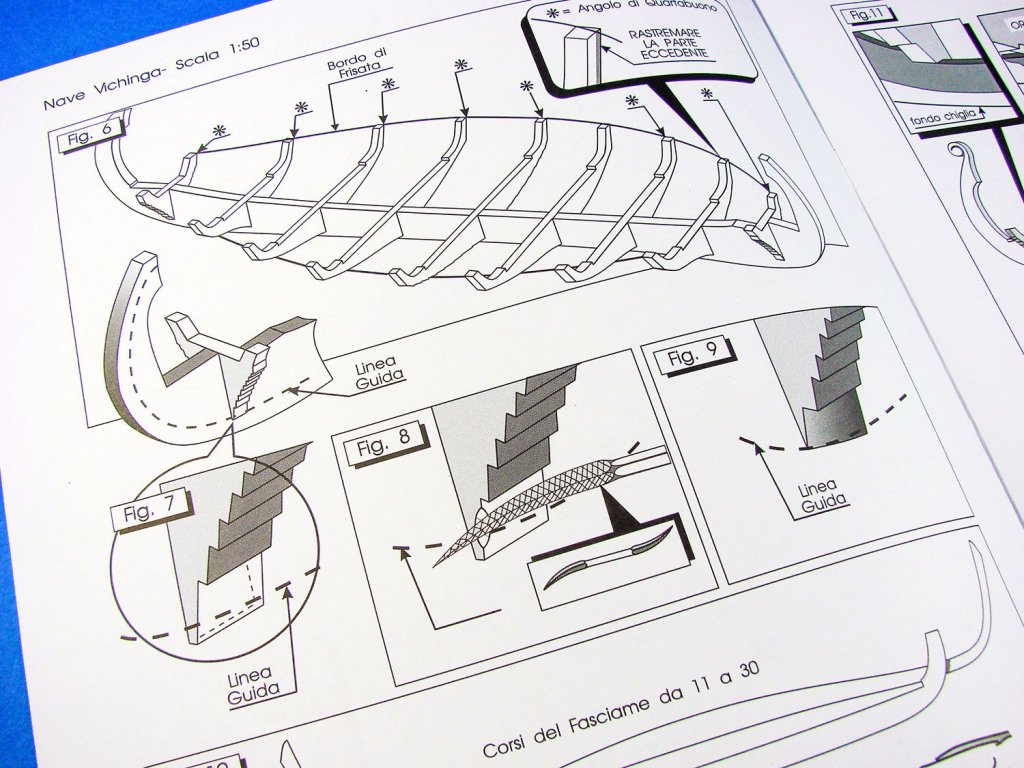
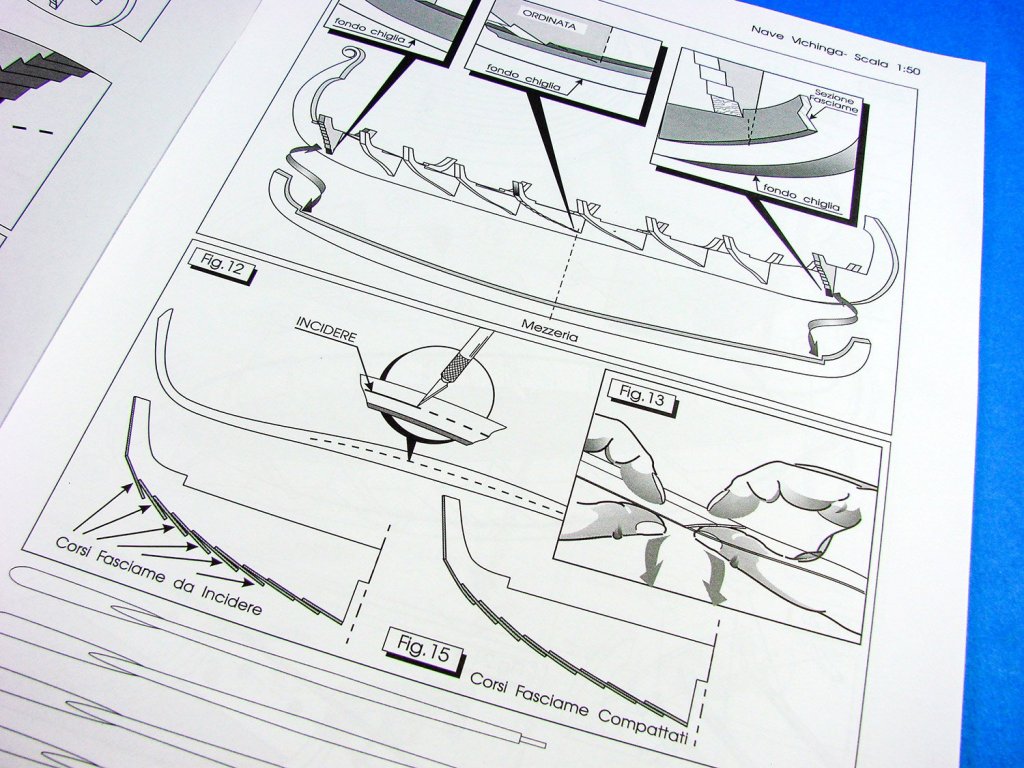
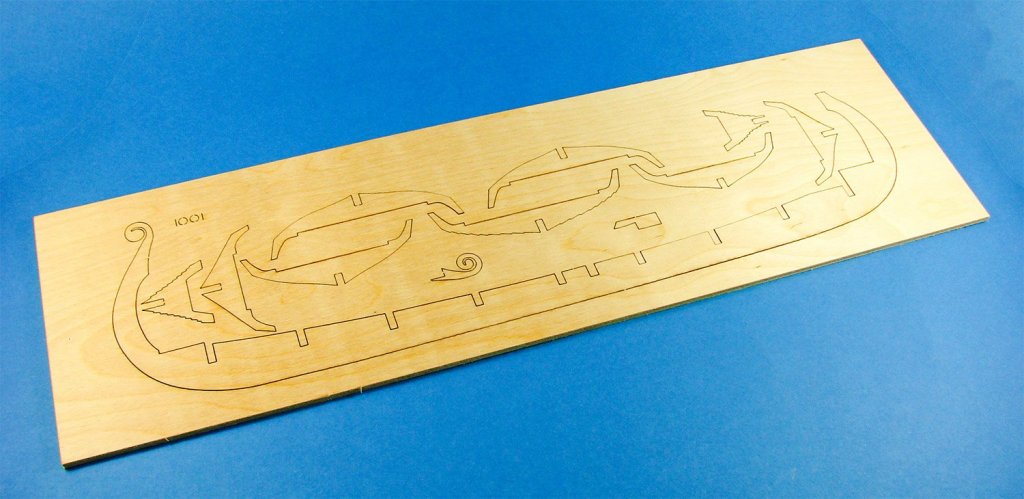
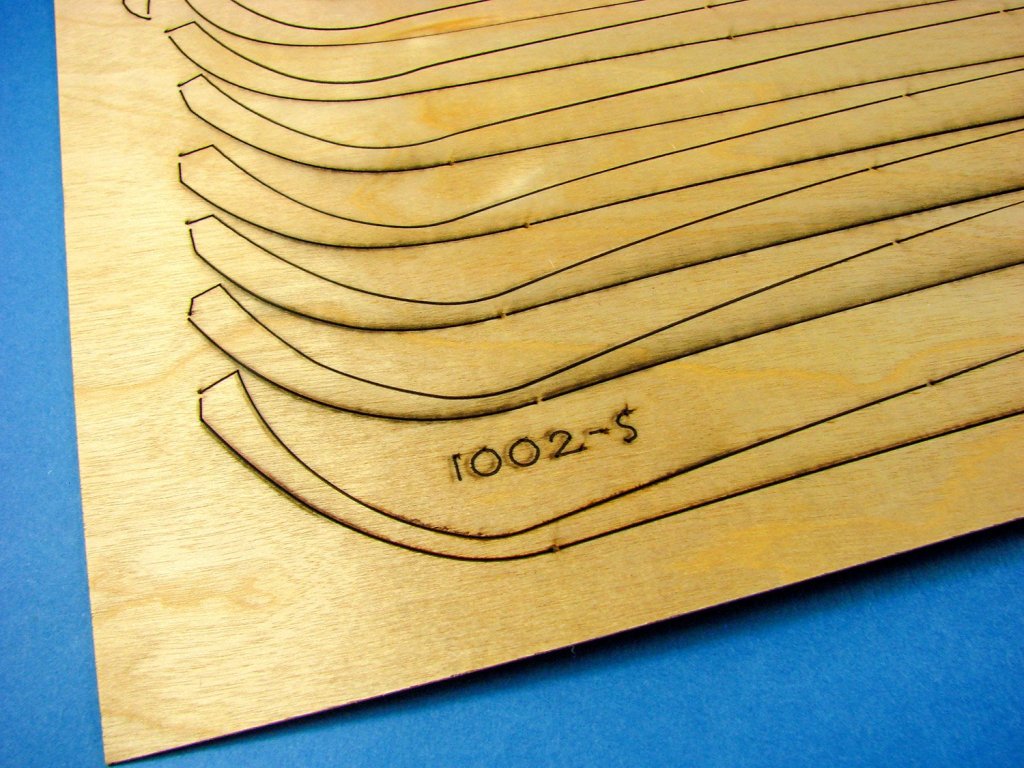
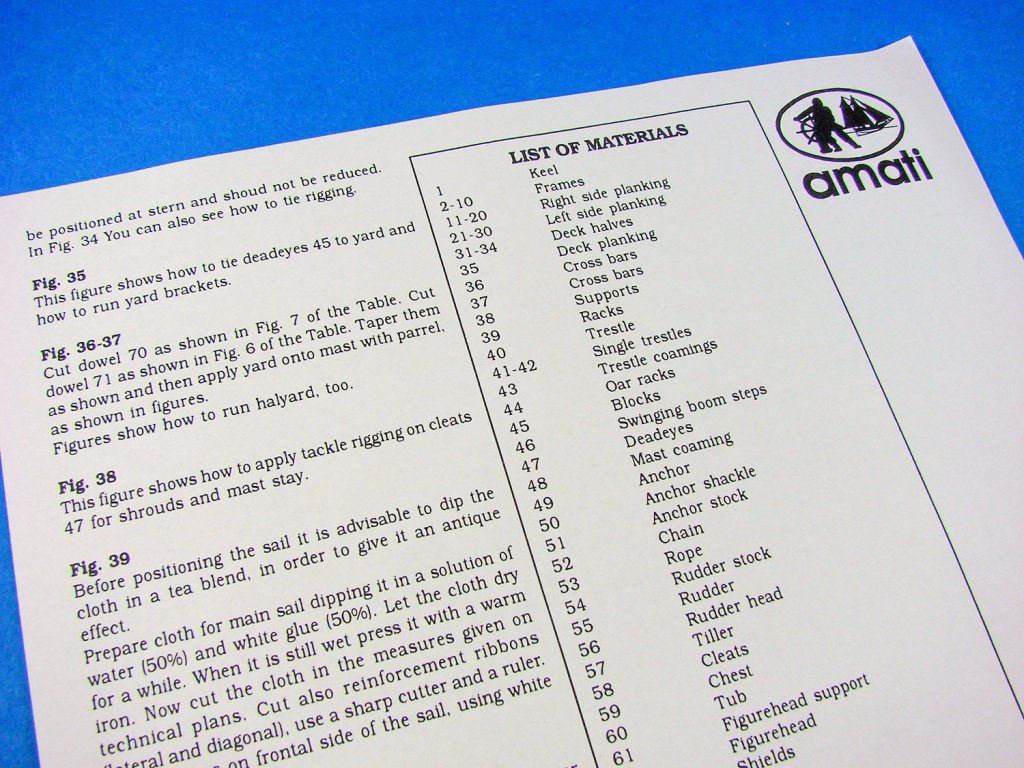
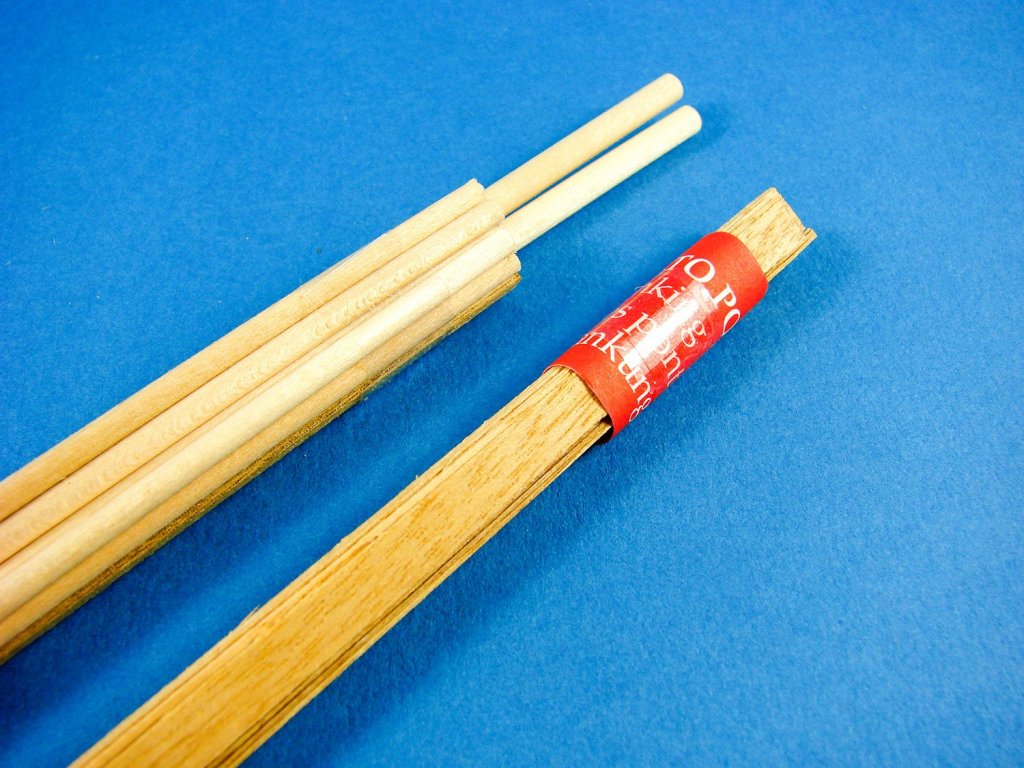
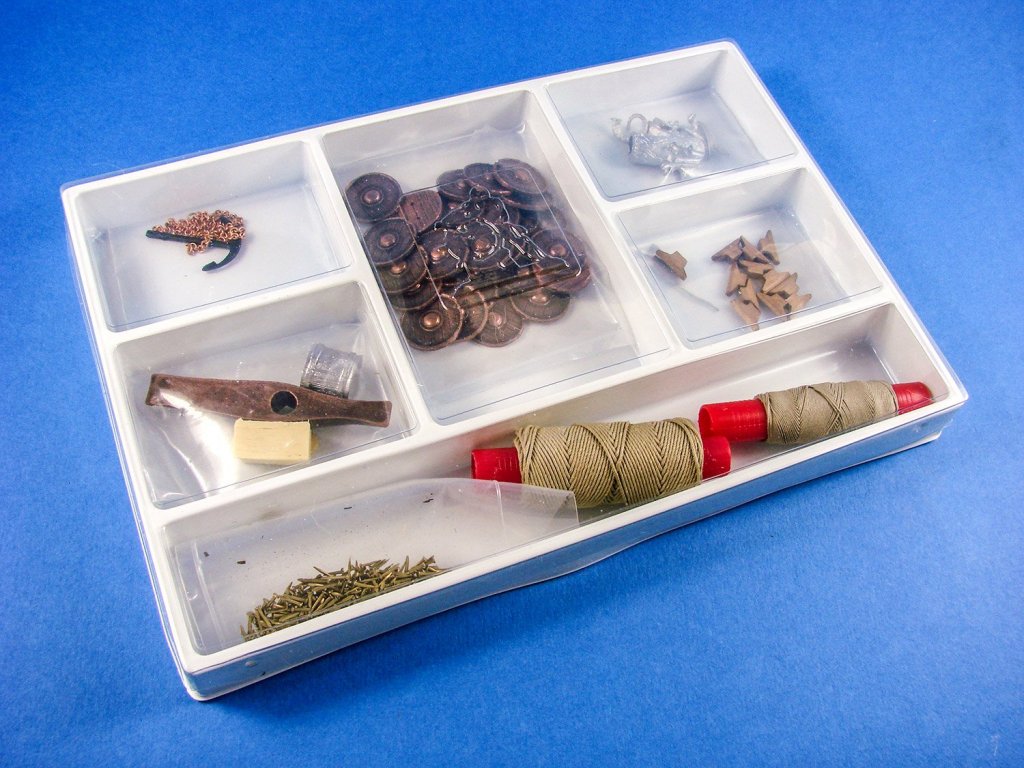
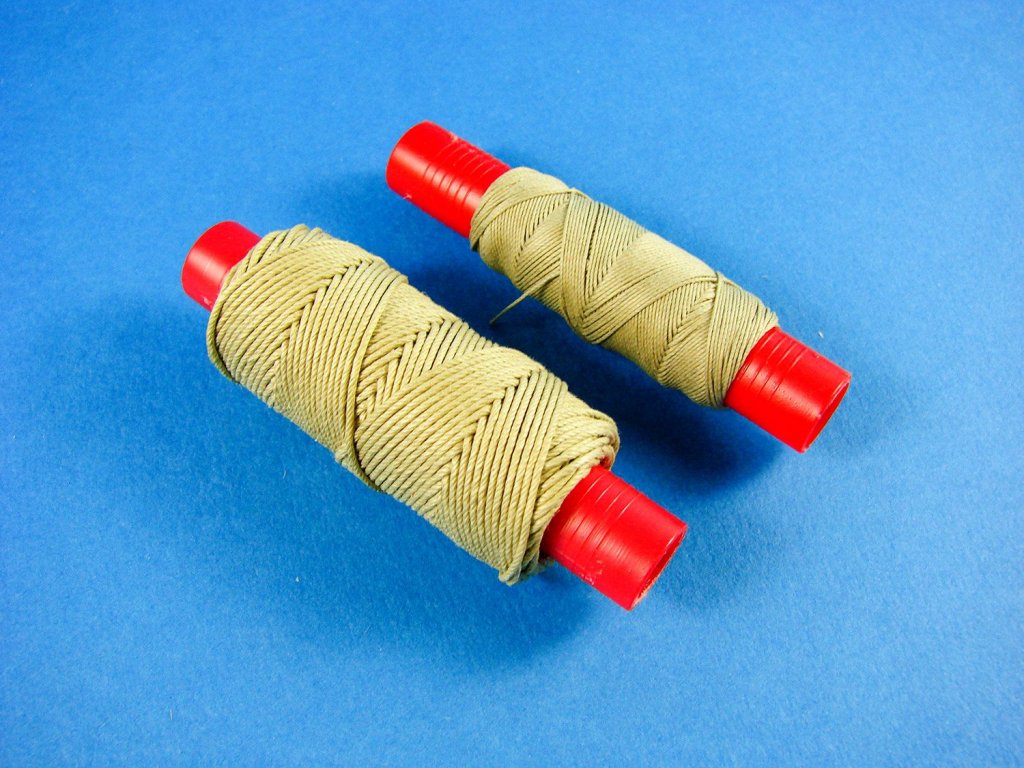
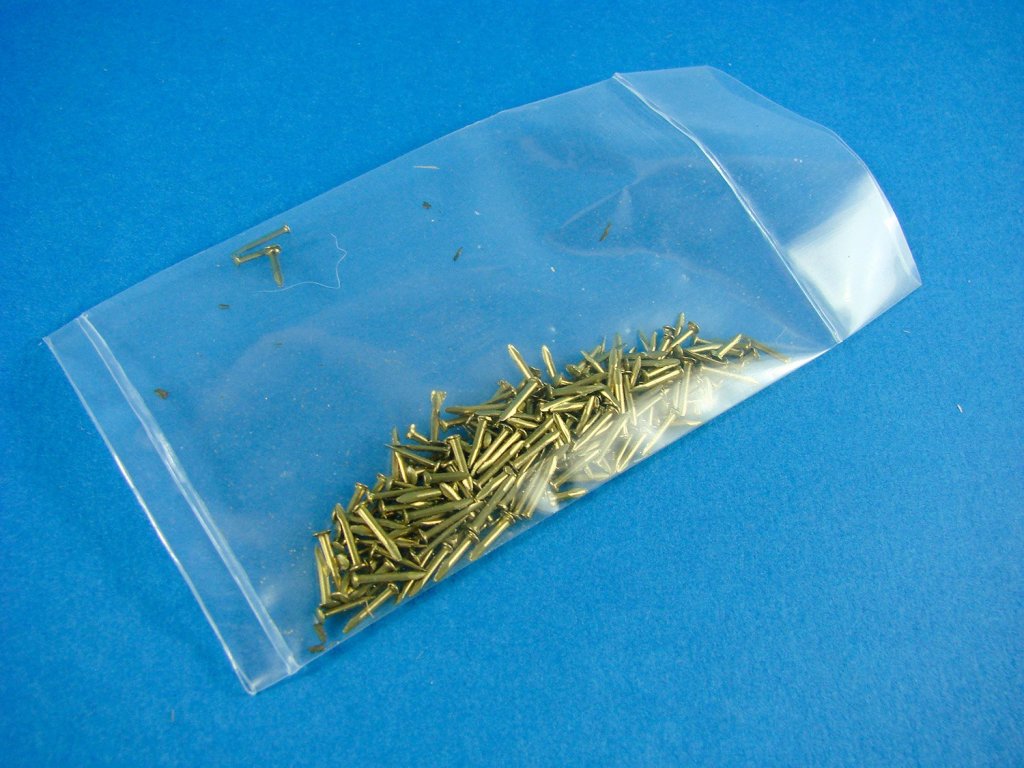
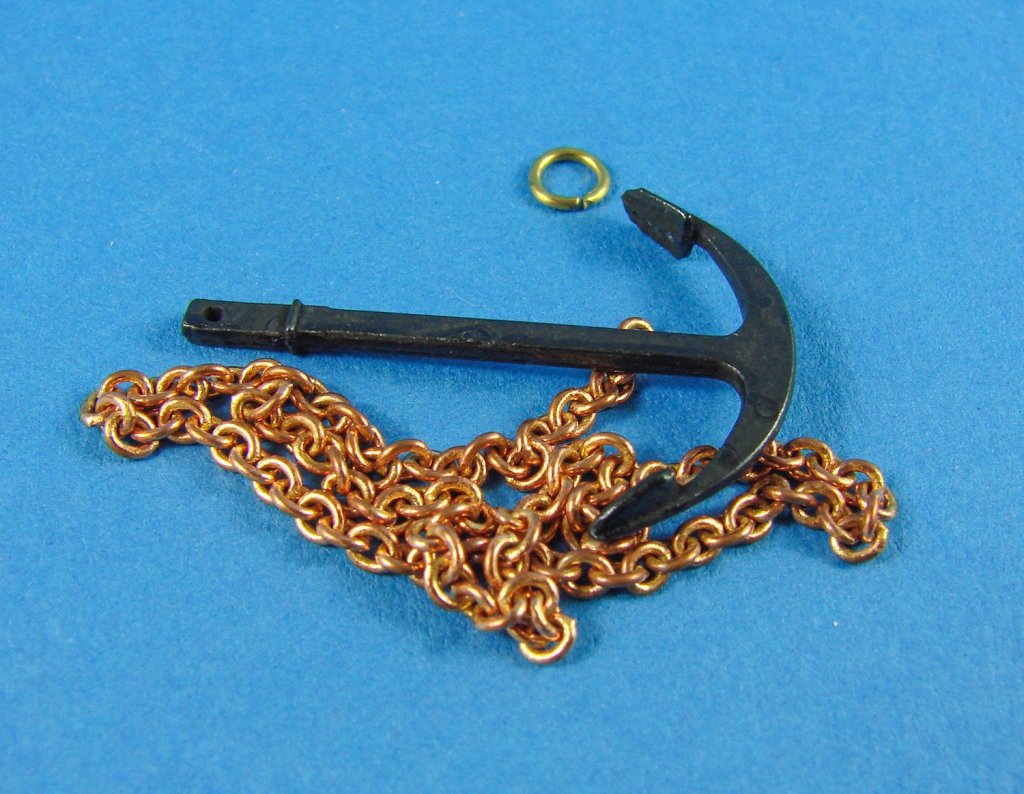
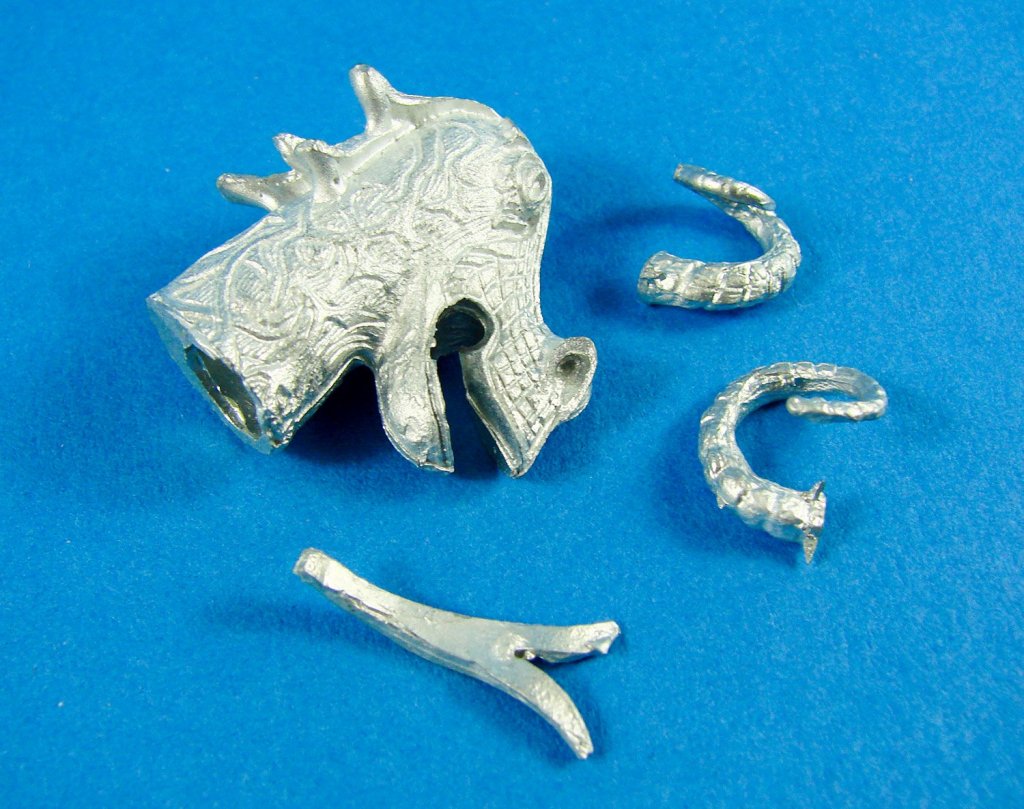
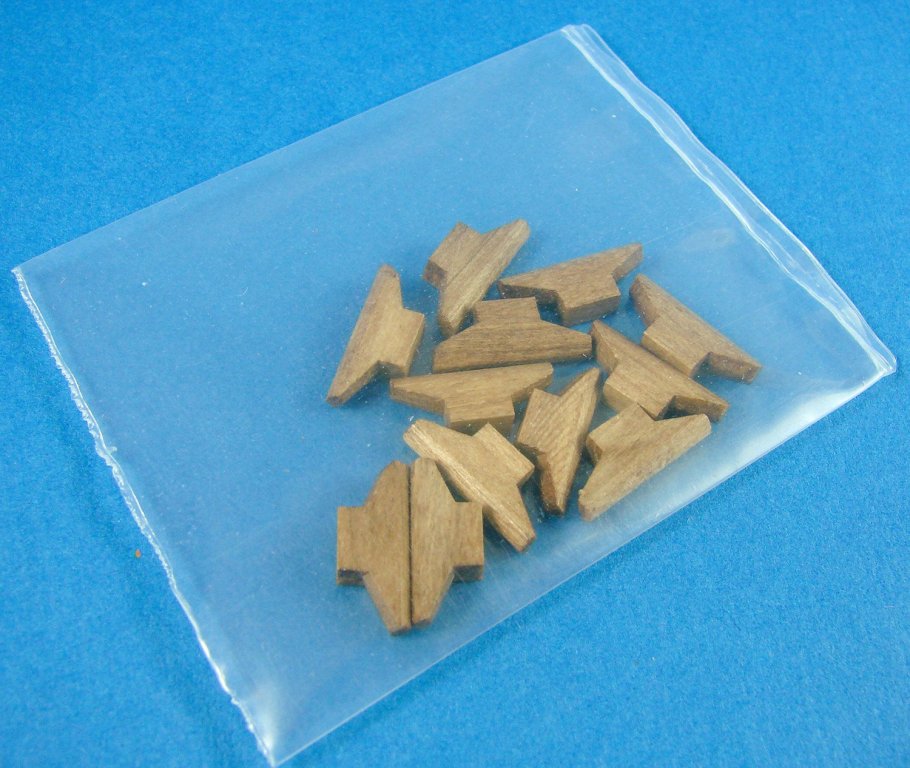
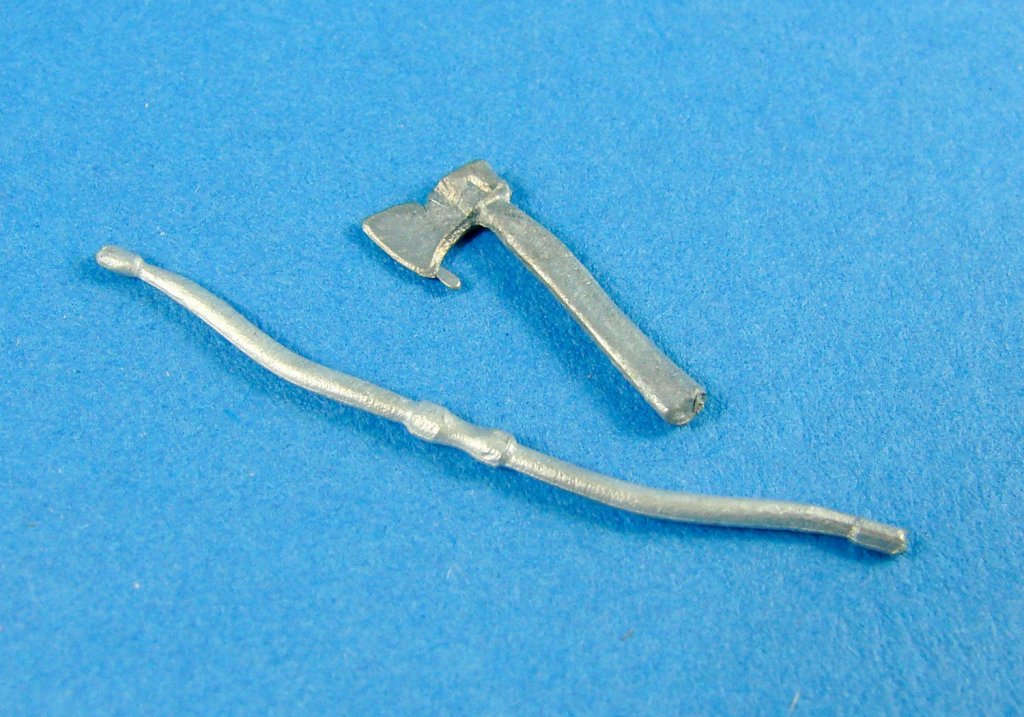
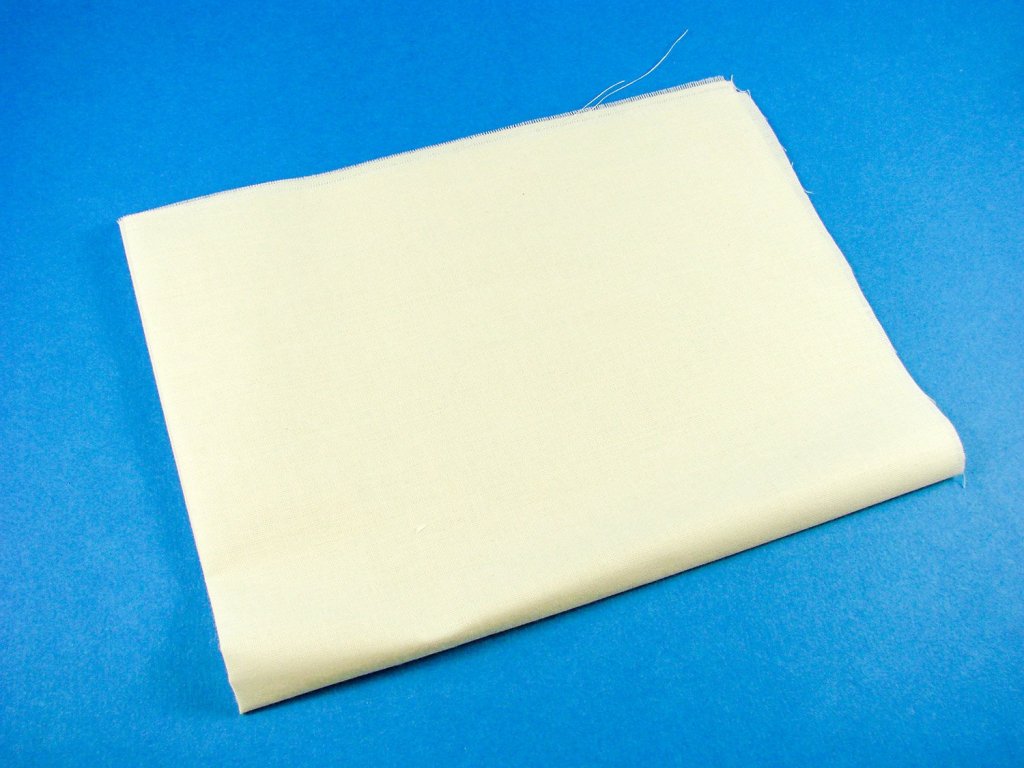
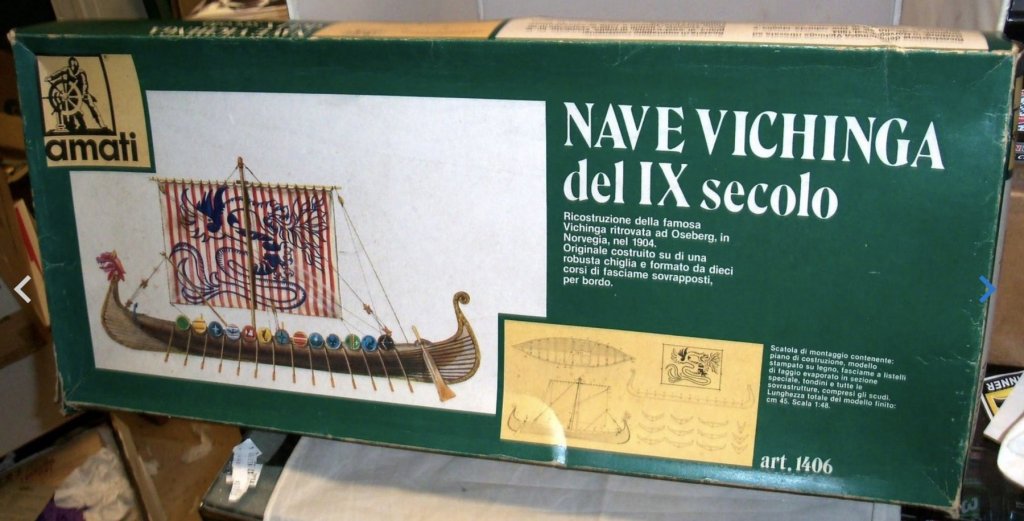
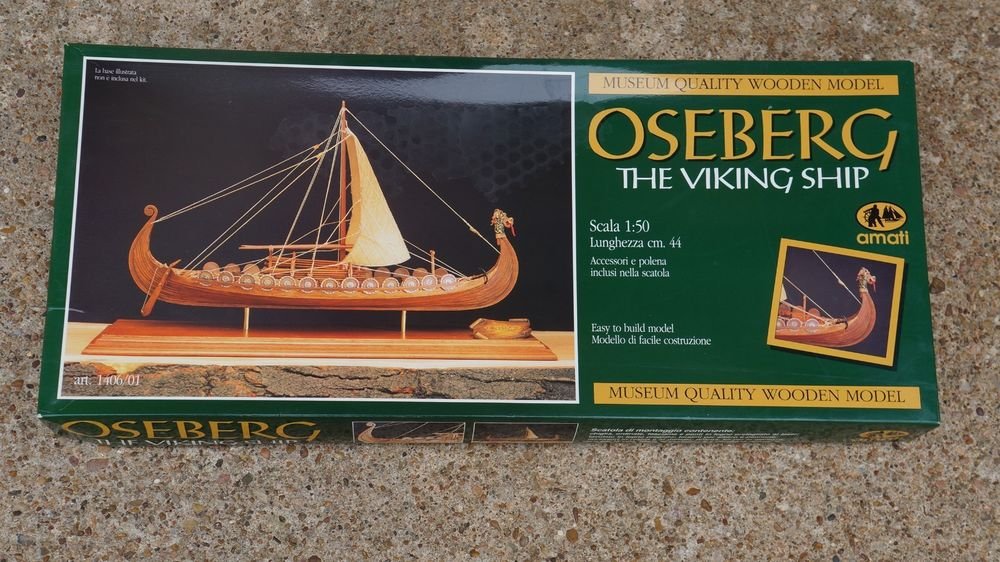
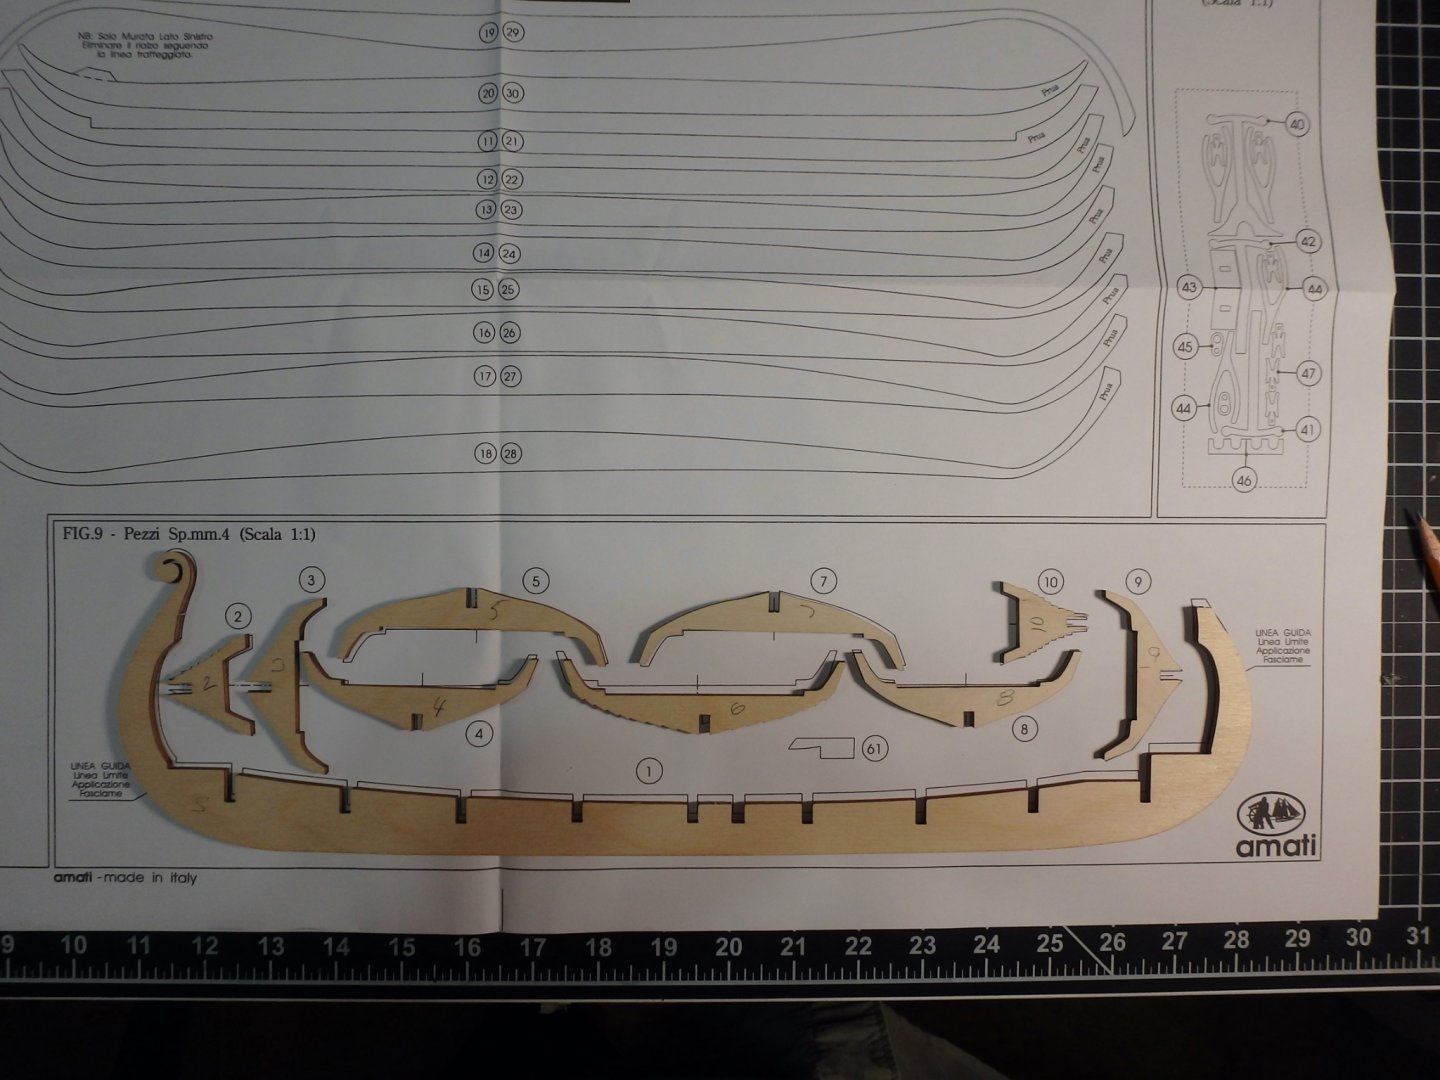
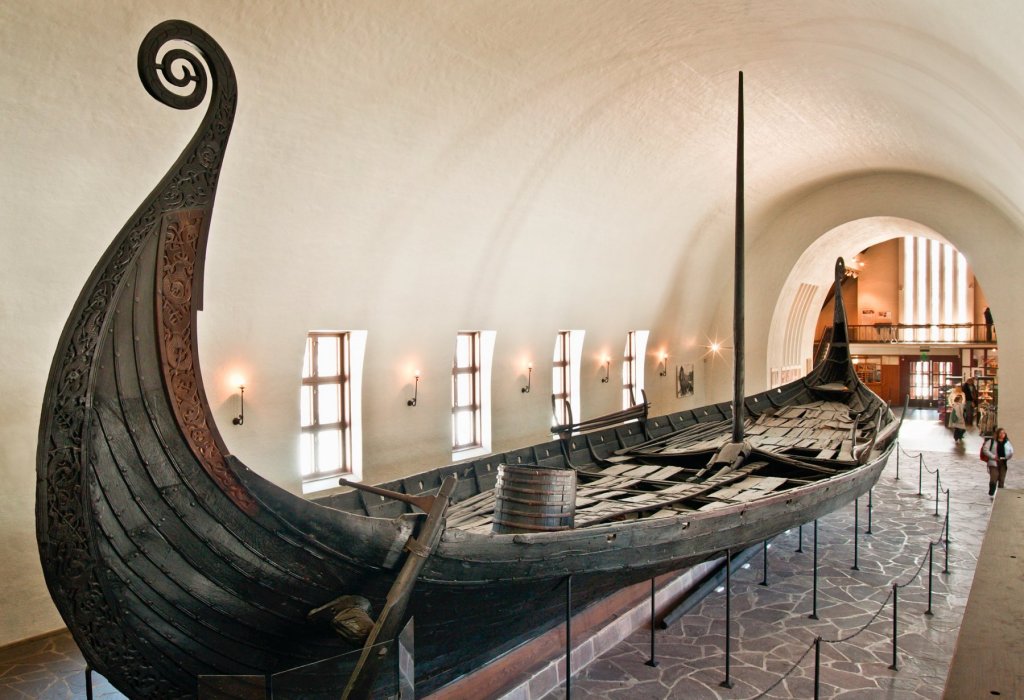
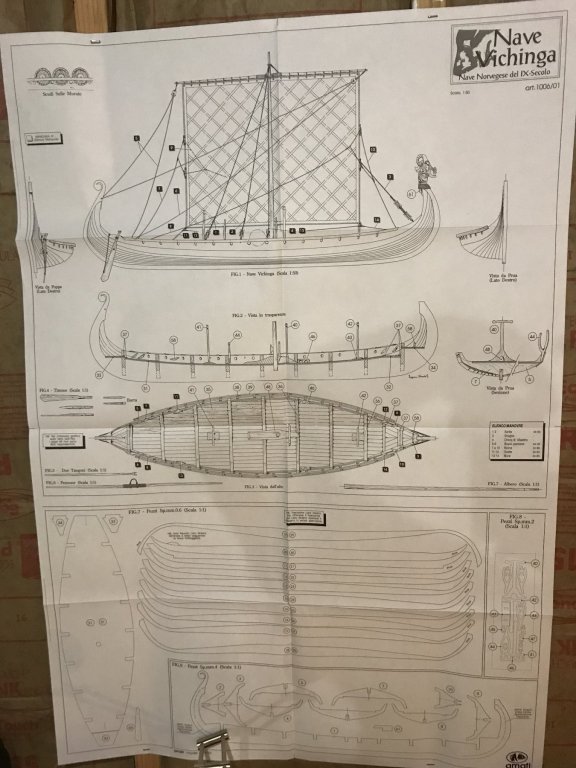
1/50 Viking Longship – Drakkar Amati Catalogue # 1406/01 Longships were a type of ship invented and used by the Norsemen (commonly known as the Vikings) for commerce, exploration, and warfare during the Viking Age. The longship's design evolved over many centuries, beginning in the Stone Age with the invention of the umiak and continuing up until the 6th century with clinker-built ships like Nydam and Kvalsund. The longship appeared in its complete form between the 9th and 13th centuries, and the character and appearance of these ships have been reflected in Scandinavian boat-building traditions until today. The particular skills and methods employed in making longships are still used worldwide, often with modern adaptations. They were all made out of wood, with cloth sails (woven wool) and had numerous details and carvings on the hull. Longships were characterized as a graceful, long, narrow and light, with a shallow-draft hull designed for speed. The ship's shallow draft allowed navigation in waters only one meter deep and permitted arbitrary beach landings, while its light weight enabled it to be carried over portages or used bottom-up for shelter in camps. Longships were also double-ended, the symmetrical bow and stern allowing the ship to reverse direction quickly without a turnaround; this trait proved particularly useful at northern latitudes, where icebergs and sea ice posed hazards to navigation. Longships were fitted with oars along almost the entire length of the boat itself. Later versions had a rectangular sail on a single mast, which was used to replace or augment the effort of the rowers, particularly during long journeys. Drakkar are only known from historical sources, such as the 13th-century Göngu-Hrólfs saga. Here, the ships are described as elegant and ornately decorated, and used by those who went raiding and plundering. These ships were likely skeids that differed only in the carvings of menacing beasts, such as dragons and snakes, carried on the prow of the ship. These carvings allegedly protected the ship and crew and warded off the terrible sea monsters of Norse mythology. It is however likely that the carvings, like those on the Oseberg ship, might have had a ritual purpose, or that the purported effect was to frighten enemies and townspeople. No true dragon ship, as defined by the sagas, has been found by archaeological excavation. Extract from Wikipedia The kit This isn’t a new kit, and in fact I know this was once released under the name Oseberg Viking Ship, again by Amati, some years ago. I know there to have been at least two boxings of this over the years. In fact, some vendors still have it listed as this, or may even carry that older kit in stock. I’m unsure as to when the kit changed its name to the current Drakkartitle. The kit itself comes in a high quality, glossy and attractive box, carrying a colour image of the profile of the vessel on the lid, and accompanying small detail photo. It can be seen on the lid that the 1/50 scale equates to 44cm length. Inside the box, Amati has given some strength to the packaging my adding a card shelf to make the interior shallower and preventing the contents from rattling around because there is surprisingly little timber by the way of sheets, than you might expect due to the way Amati has approached the design. A Plywood sheet contain the keel which incorporates the curved bow and stern, plus also the nine bulkheads that are notched to match their respective positions on the keel. As you see, the construction is quite traditional in this respect, and the shallow draught of the ship is the reason for a relatively low number of ply sheets. Now, whilst there is of course some strip stock in this kit, the ship’s planking isn’t associated with this. Instead of what would be a rather complicated method of planking, this particular model is provided with two sheets of thin, laser-cut planks which are perfectly shaped to follow the contours of the hull, and also sit within the stepped recesses of the bulkheads. These planks are produced from very thin plywood and just require the scorched edges of the parts gently sanded and then sitting into the recesses. Those bulkhead recesses will need to be slightly sanded for the planks to fully conform, and most definitely at both stem and stern. This is clearly shown in the accompanying instruction manual. It is also necessary, again shown on the instructions, to trace a curve to stem and stern, which sets the line against which to plank to. Also presented in plywood is the main deck, in two large main pieces, and three small sections. With the model planked and the tops of the bulkheads previously sanded to conform to the keel, these can be attached and then planked with the supplied strip stock. Deck planking is done in short pieces that only span between each former. I’m pretty sure that these sections could be removed on the real thing, and tools, weapons and food stored in the void below. Strip wood stock is included for the deck planking, and dowel for the mast and oars. Timber quality is excellent, with tape holding together the various bundles. A smaller piece of walnut sheet is also included, and this contains parts for the rudder paddle, oar storage frames, rigging blocks, belaying posts and bases etc. Laser cutting quality is nice and fine with only minimal timber to snip through to release each part. For protection, all timber sheets are placed in a thick, clear sleeve, as are the instructions manual and plans. Fittings Sitting on top of the timber sheet is a vac-form plastic box with a removable clear lid. The box has six compartments holding a few loose wooden pieces, rigging cord, as well as the metal fixtures and fittings for the Drakkar. The small number of loose wooden pieces are for the cleats. These just need a little final shaping before use. A large bag of metal shields is included, with their respective bosses and timber details cast in situ. I’m unsure as the metal for these, but they aren’t white metal, and possibly some alloy. They have also been given an aged finish, but I would carefully paint these to make them look more realistic. A single anchor is provided in metal, utilising a wooden stock, and a small length of brass chain is provided for this. A small number of cast white metal parts are included, and these are for the ship’s dragon head (with separate horns and tongue) and a deck bucket (slop outtoilet?), longbow, axe etc. The casting here is very nice and when painted, should really look the part. A bag of brass nails is included, and these are well-formed and sharp, unlike some I’ve used over the years. You are best drilling a small pilot hole before applying these, so you don’t split any timber when you drive them through the hull planks and into the bulkheads. As Viking Drakkar were of a very shallow draught, the mast needed something substantial to hold it in place. Under the deck would have been a keelson to locate the base of the mast, but above deck, this was achieved via a hefty wooden block. That had a wedge as part of its structure. As far as I can tell, these were called the mastfish and wedge, respectively. For some seriously interesting information on these vessels, check out this link: http://www.hurstwic.org/history/articles/manufacturing/text/norse_ships.htm As well as two sizes of rigging cord for standard and running rig, a piece of sailcloth is also included. You will need to make the sail yourself, including the diagonal strips that run at 90 degrees to each other. You need to sew along the edges after folding them in, replicating the looping stitch that should be seen. One thing you’ll need to do is to buy some fabric paint for the sail stripes. Aging the sail can be done with the age-old method of soaking in tea, should you wish. However, another method is to soak in a Potassium Permanganate (KMNO4) solution. Only a little is needed, and you can gauge the finish on a test piece as the colour develops when you remove from the solution. Also included is a chest that can be sat on the deck as extra detail. This is cast from a cream-coloured resin. Plans and instructions Amati include an 8-page basic instruction manual for this model, guiding you through the principle steps of the model and explaining the various key areas of construction. Illustrations are in line drawing format and are clear to understand, despite the Italian text. A separate sheet with English annotation is also supplied for those of us who haven’t grasped the rudimentary elements of that beautiful language. Of course, a plan is also included for the model which describes things in greater detail, including the rigging stages. This is also typically easy to understand and also contains the shapes for a good number of kit parts, so if you were to screw up, then with a little extra timber, you can right your wrongs. Conclusion As I originally stated, this isn’t a new kit, but it is one that has stood the test of time and for me, still ranks as the best-looking Drakkar you can buy in kit form, and certainly the most authentic in appearance. I know some people don’t like the plywood planking, but as you shouldn’t need to thin the planks much (if at all), then this doesn’t feature as an issue for me. Some timber edges will need to have the charring from the laser cutting removed, but again, this isn’t a problem as far as I’m concerned. Amati has designed this kit to be relatively straightforward and they have succeeded. As far as price goes, it can vary, but I’ve seen in in the UK/EU for around £90 to £100. I’ll start my own building log of this on Model Ship World very shortly. My sincere thanks to Amati for sending this kit out for review here on MSW.


- 15 replies
-
- 11
-

-
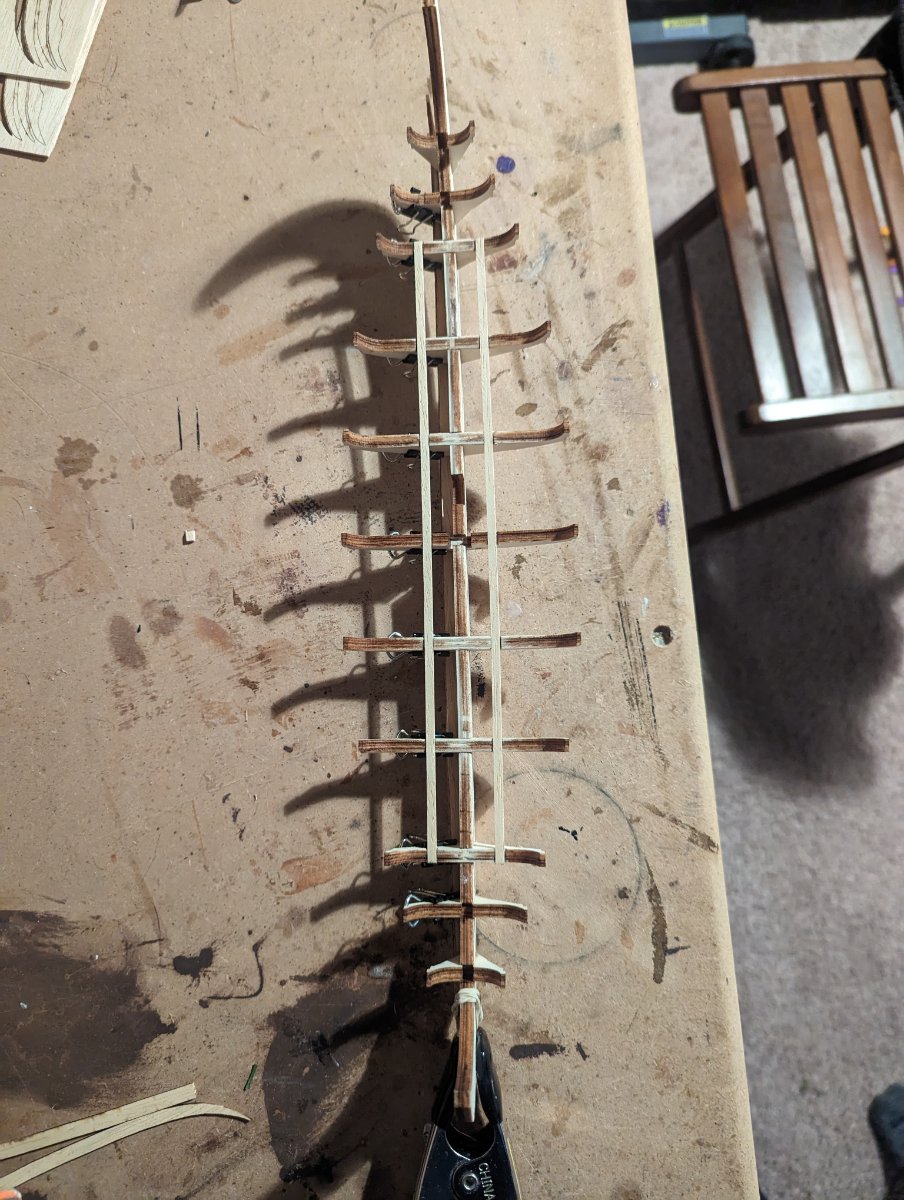
 Hello! I have myself a Viking ship model and thought I'd put together a build log. Its my second undertaking in wooden models, having recently wrapped up my first build on Occre's Polaris. I got the Drakkar as a birthday gift and was very excited to pop it open and have a look. Flipping through the instructions provided by Disar, I realized that Occre was really holding my hand through my first model. So while I'm excited to share the progress I make on this build, I also think that I'm much more on my own with this build and fully expect to seek input from the community when I inevitably get myself into trouble! I got the keel and bulkheads out of the rather thick board with only a little difficulty. As I was dry fitting the pieces, I noticed a couple of things... First, all of the bulkheads were smooth. Several Viking ship build logs I've seen here, notably Amati, a few of the bulkheads are notched to help guide the layering of the hull boards. Since mine doesn't have that, I'll have to commit a little extra effort to measuring and lining things up. Second, the top of most of the bulkheads were not level with the keel. This kit does not have a false deck, the deck boards are laid directly on the bulkheads and keel. I thought it very important that it all be level together, so I sanded or filled notches in various bulkheads until they were all level with the keel. And here lies my first mistake! By making the tops all level, I'd now misaligned the bottoms of the bulkheads, to which the garboard strake is meant to attach. So I've got some fairing repair ahead of me. But I have had some good luck. As I was preparing to start this build, my wife told me I had to fill my own stocking for the upcoming Christmas holiday. A perfect excuse to go grab a few new tools! Just a few small things but most notably a right-angle clamp that helped get the bulkheads into place. And that's where I am now... I have a lot of planning, measuring, and marking to do on my hull pieces before anything else gets fastened. I'll let you know when there is more progress.
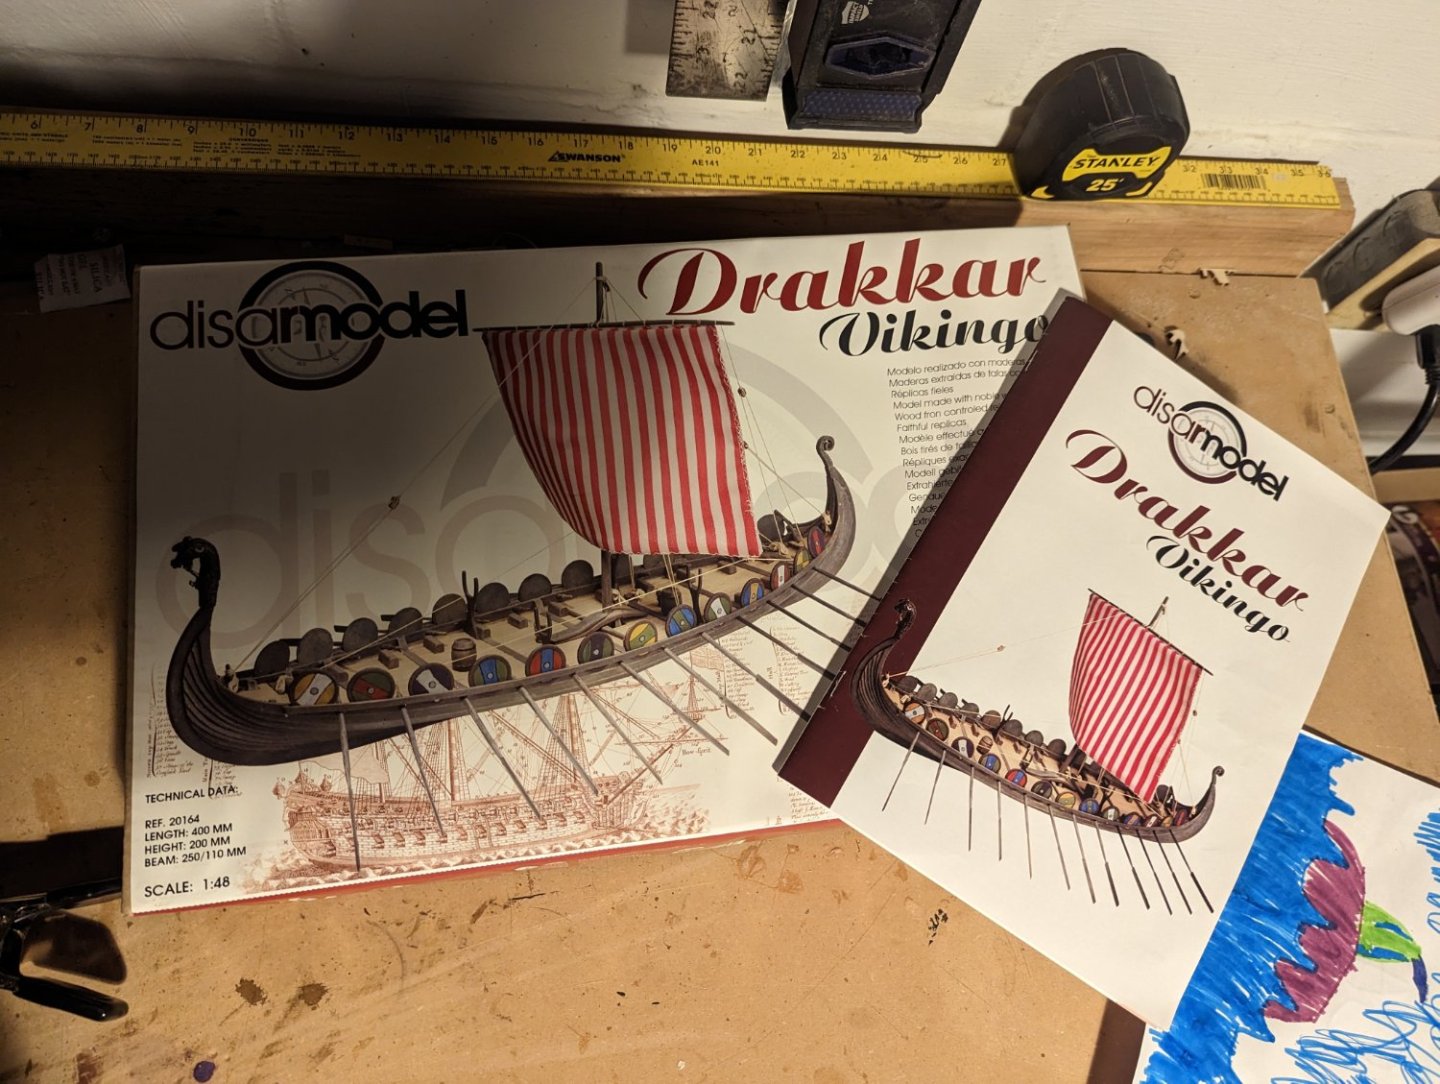

-
 I'm not sure how much appetite there is for another Drakkar, but here goes. I chose this model because I thought it would be a manageable first ship build, and I've long been interested in Viking history and lore. I do plan some modifications. Looking at the Oseberg Ship and other surviving examples, the rib spacing appears to be too wide, so II'll be adding ribs above deck to make the spacing look more historically correct. I also plan to make some changes to the rigging. The cleats riveted to the hull planking, to my eye at least, aren't mechanically sound, and don't appear historic. I'll most likely go with attachment similar to that used on Draken Harald Harfagre reconstruction with shroud pins for the standing rigging. I'm sure there will be other small mods, but perhaps a bit controversial will be replacing the dragon figurehead. The included figurehead looks a bit cartoon-like for my tastes, so I'm thinking of carving something up based upon a Viking era dragon head pin.

-
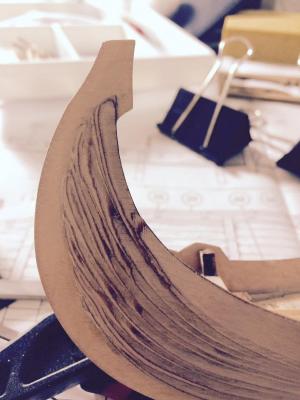
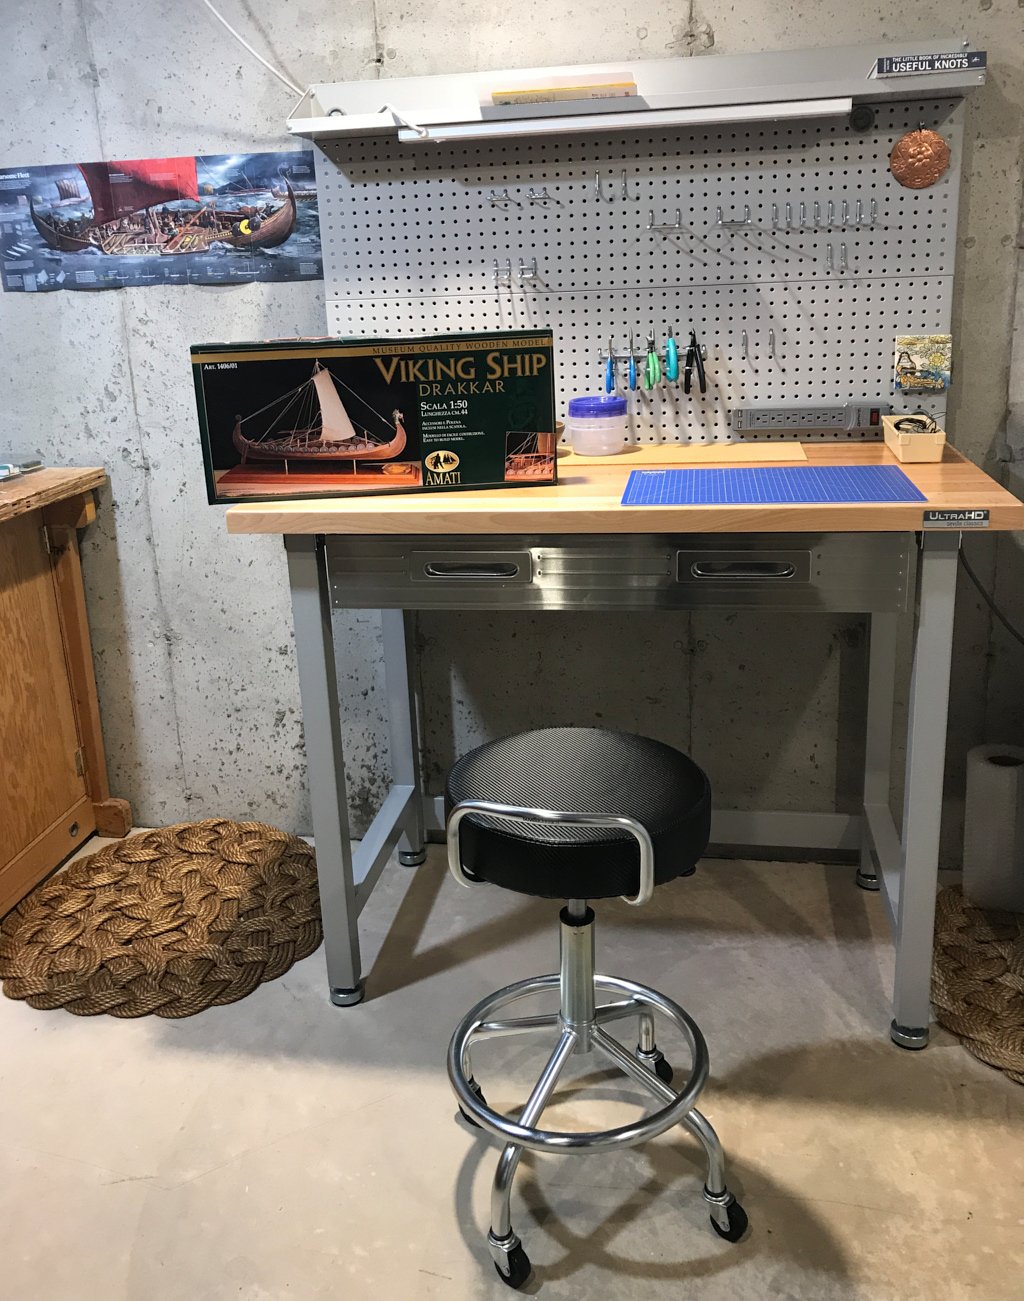
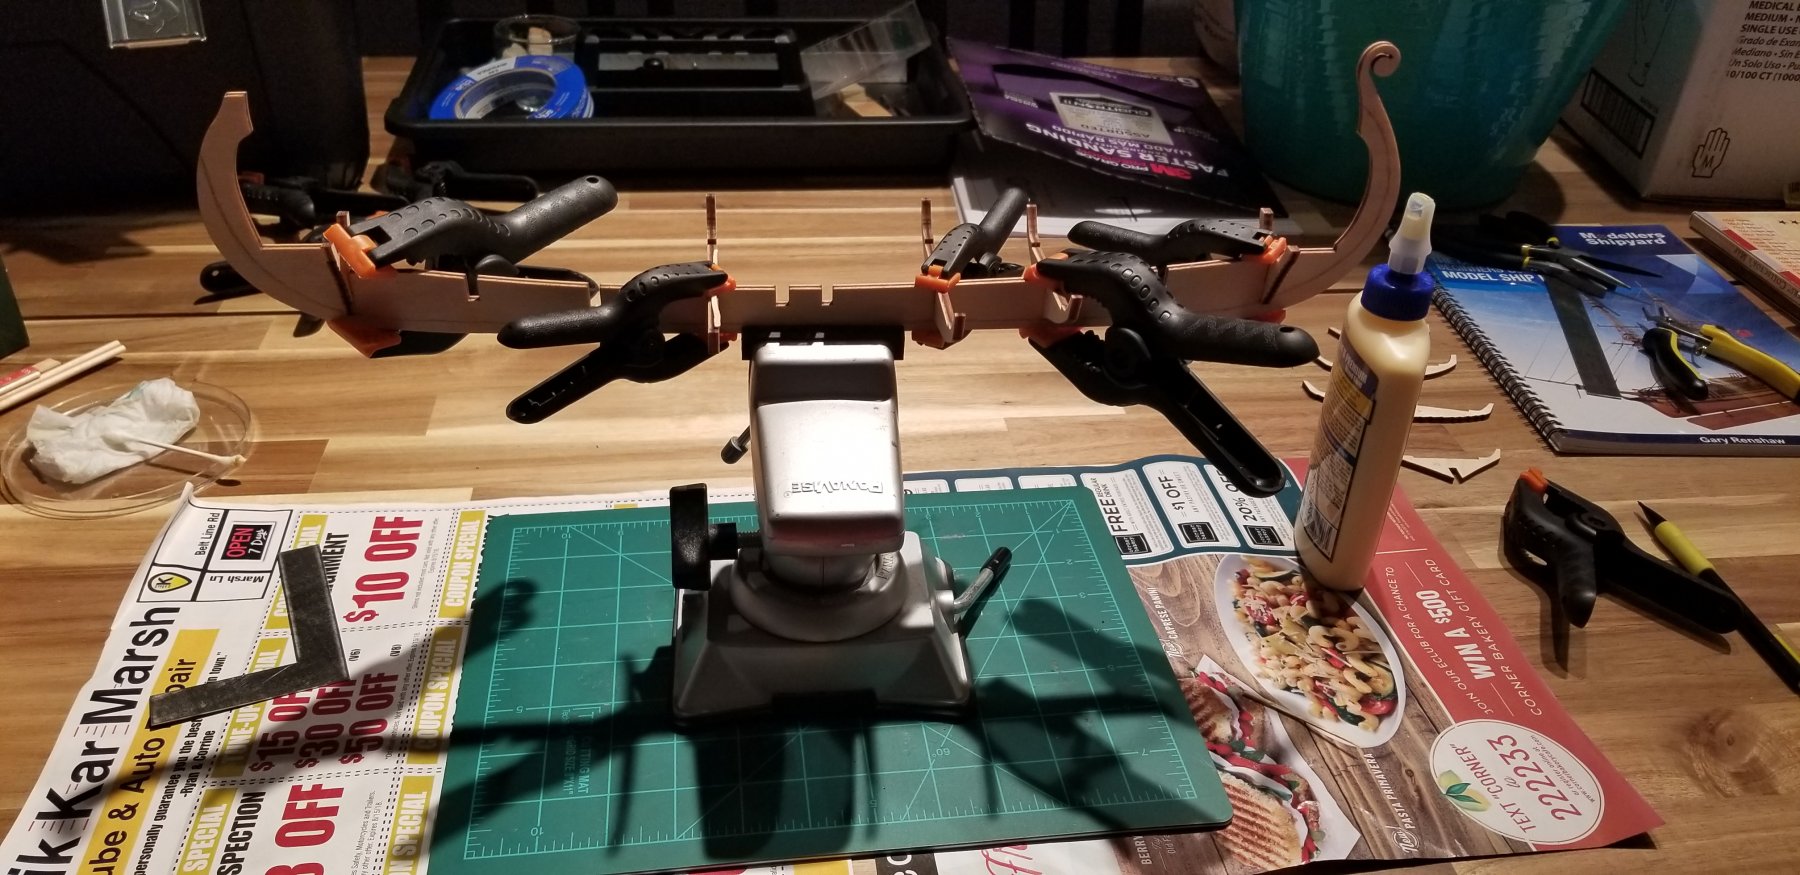
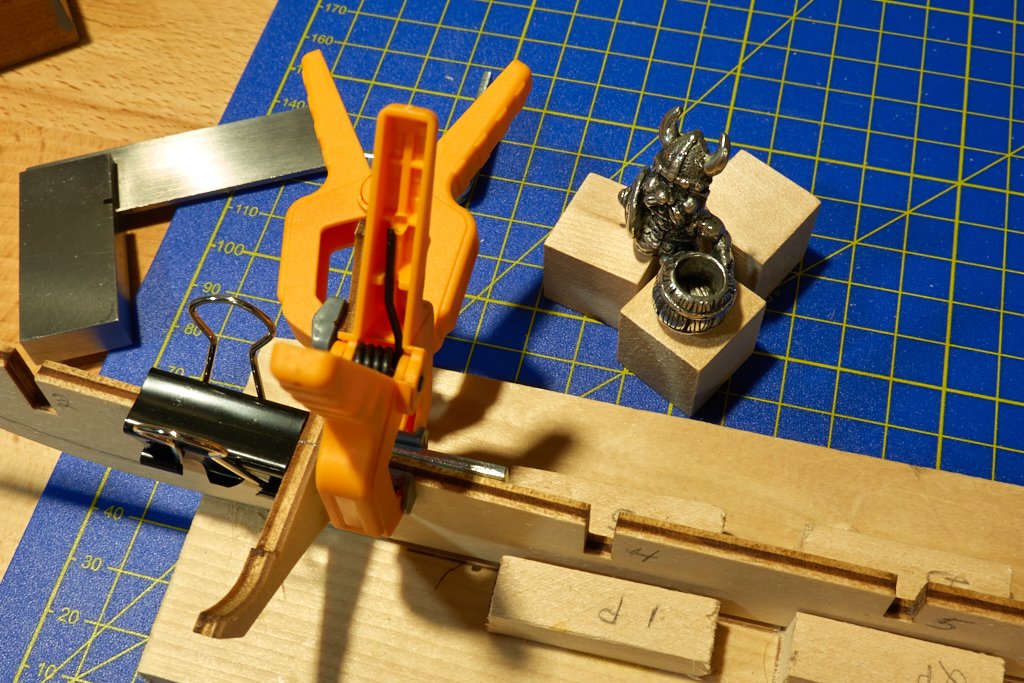
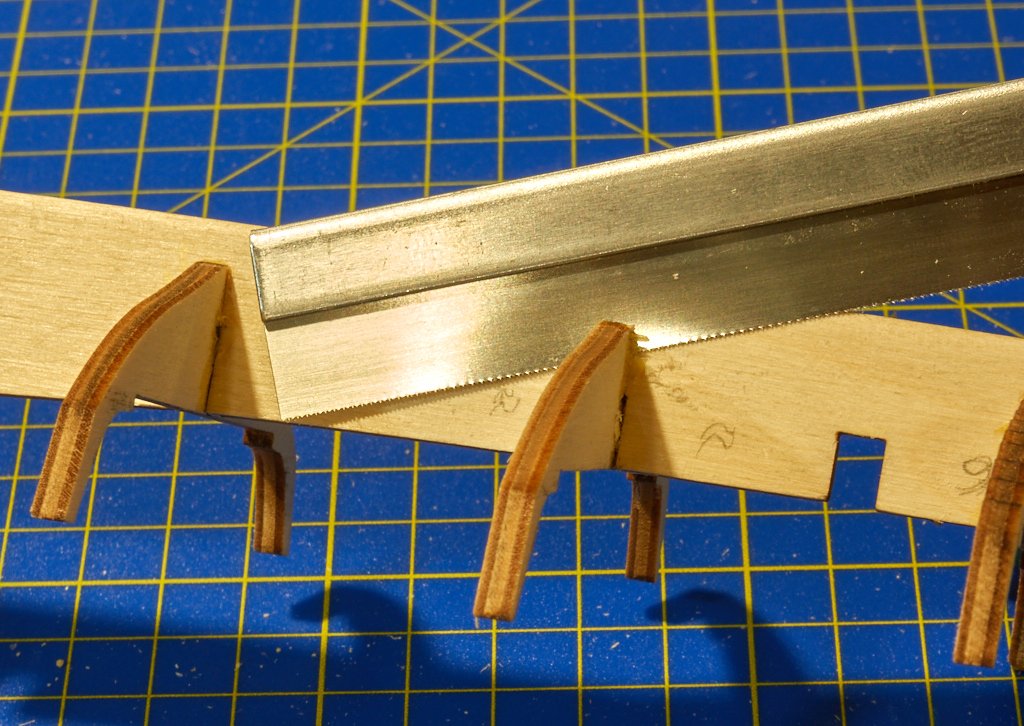
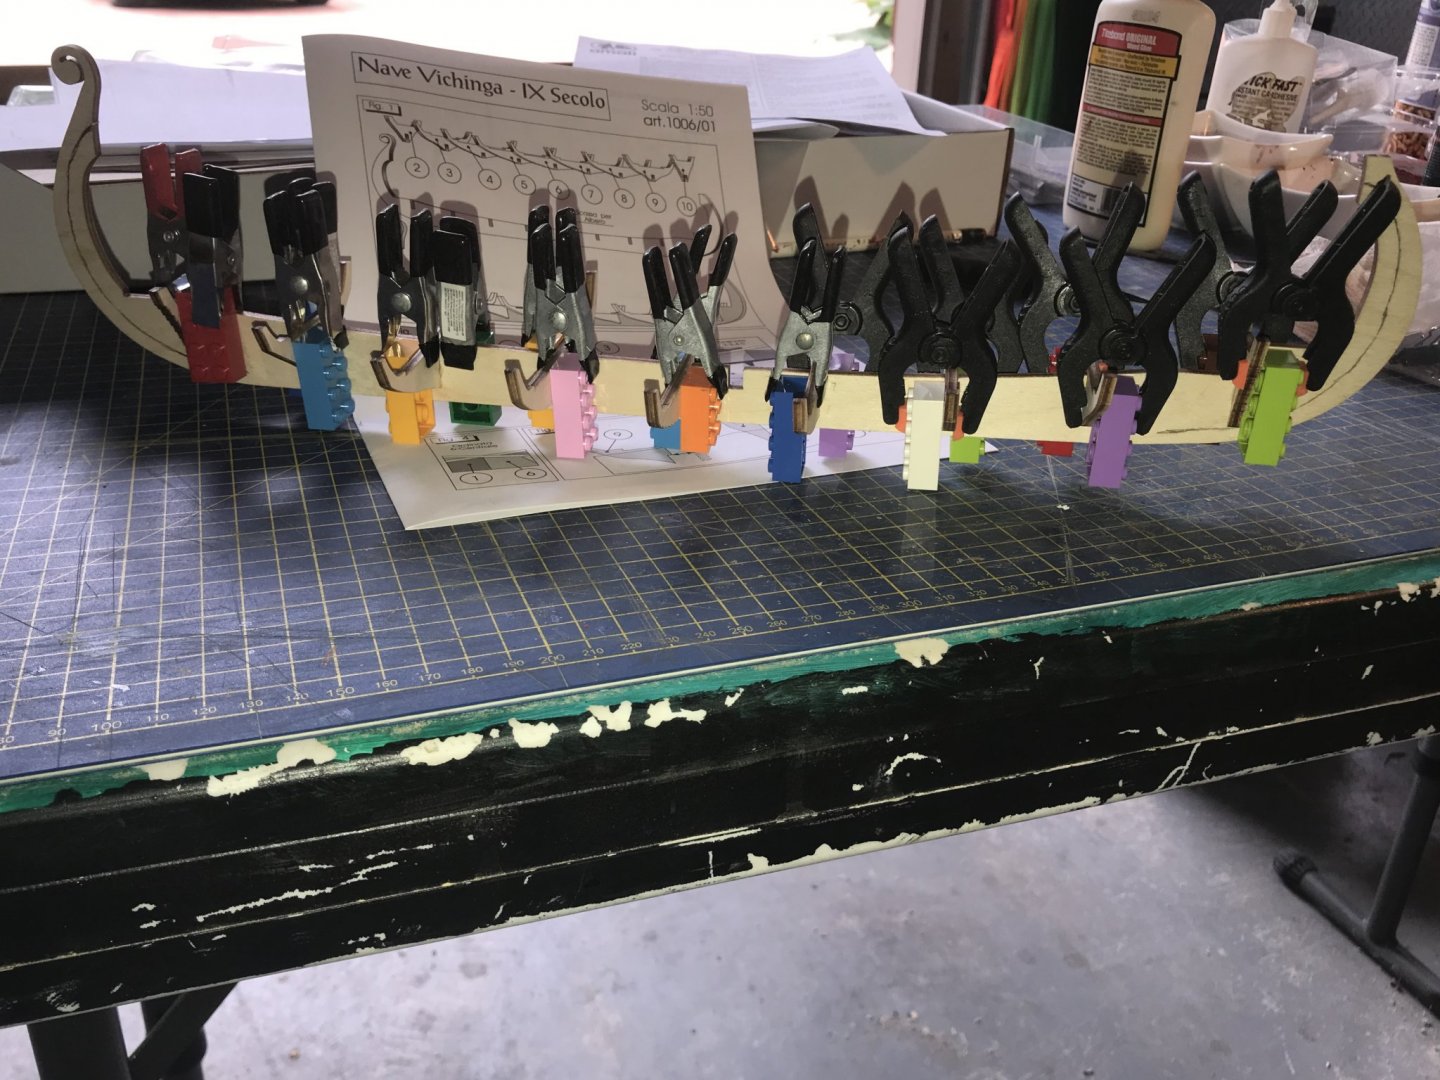
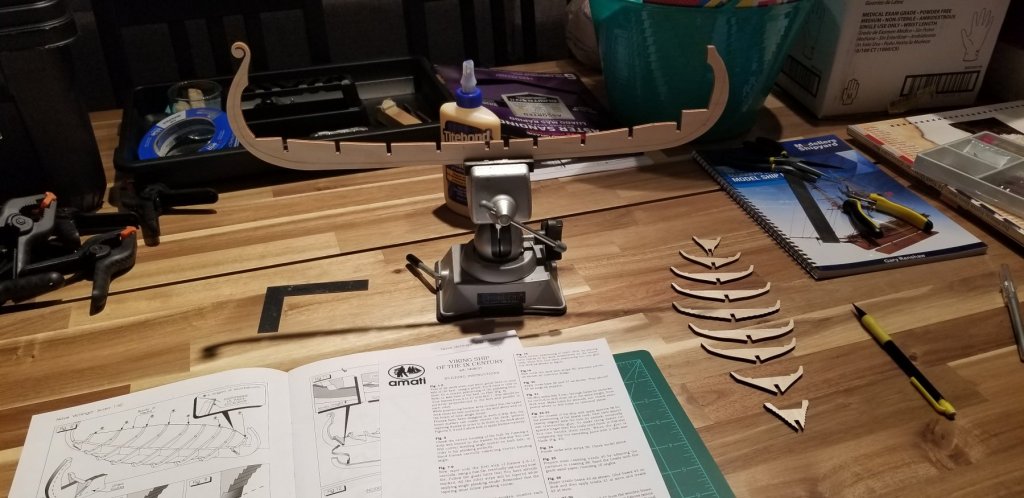
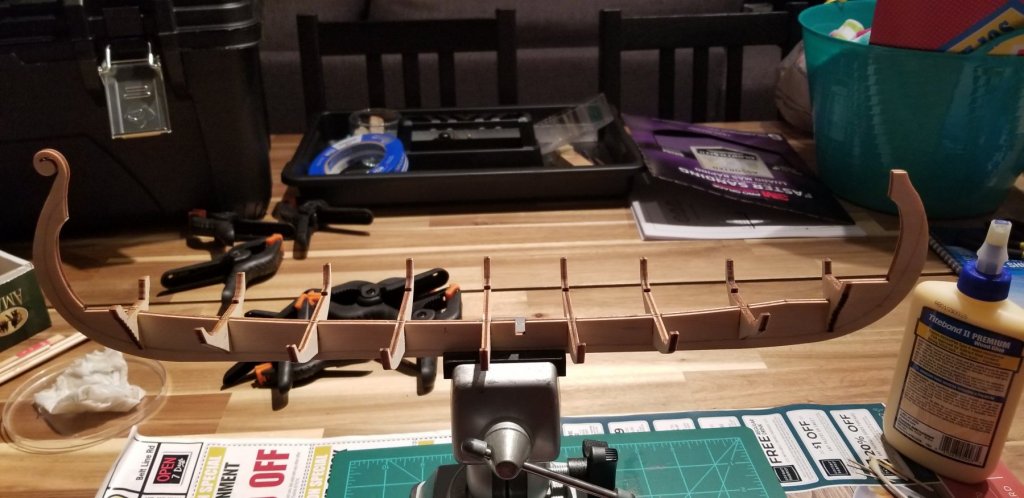
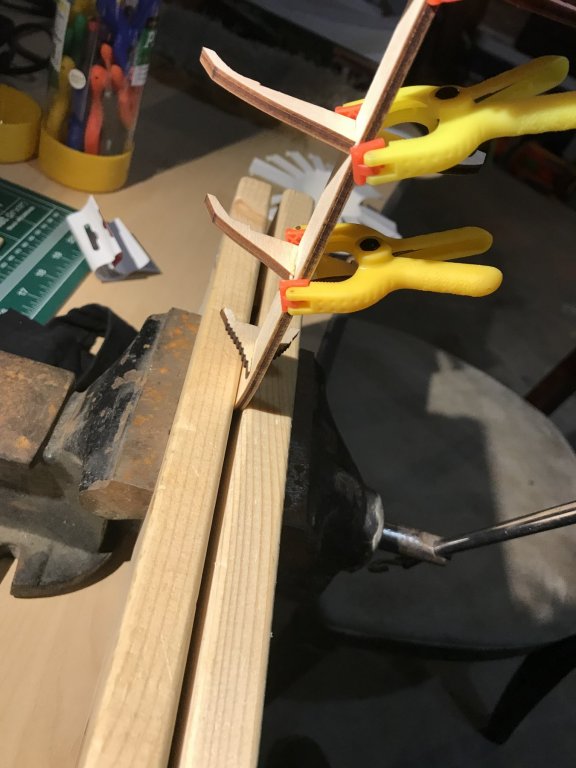
Thanks for looking at my first ever build log! For my first wooden model project I chose the 1:50 Amati Drakkar Viking ship for several reasons. The kit seemed challenging enough, but not too challenging, and perhaps forgiving of beginner errors. We shall see. Being optimistic, I have a perfect shelf to display the finished model. We recently finished binge watching “The Vikings” and “The Last Kingdom” mini-series, so we’re on board the Viking craze bandwagon. Criticism and comments on my build or log are welcome. Praise is also accepted, but only if warranted. 😊 For starters I wanted a dedicated workbench and found a nice one on amazon. The kit and a few preliminary tools came from Ages of Sail. More tools were ordered from Model Expo. The folks at both of those two shops were extremely helpful. I checked the kit’s “List of Materials” and everything was present and accounted for. The first step in the instructions is to draw a guideline for the strakes at the stem and stern. I copied the 1:1 scale drawing and used cutouts from that. A part not listed in the kit is a more ornate curve for the stern. James H’s MSW build log pointed that out to me. This curve is apparently based on the Oseberg ship reconstruction, which itself comes from images on 9th century coins and picture stones. So, my very first cut was to remove existing curve from the stern. The replacement is on the right. The next decision was how to square the frames to the keel. On my kit the frames were rather loose fitting. I looked through several build logs of this kit but didn’t find a precise answer. Matt H suggested using Lego blocks, which seemed good. But I don’t have any, and didn’t want to buy a huge set of them. I found some 59-cent hardware store brackets in my household tools. I convinced myself, probably incorrectly, that these were square. I used one and cautiously started gluing with Titebond II. Here is Captain Aegir watching the progress. When done I dry fitted the deck and realized that I screwed up two frames: #7 was tilted several degrees to port, and #5 was 1 mm above the level of the keel, creating a gap between the deck and keel from frames #4 to 6. I tried ungluing with 91% isopropyl alcohol, but that didn’t seem to work. That stuff is hard to come by these days anyway. After thinking about it, I decided to use my new razor saw to cut through the joint. After cutting the four legs of the “H” I easily squared off #7. Repeated gentle wiggling on #5 allowed me to remove it and file the slots so it’s level with the keel. The frames are now all glued, no doubt not perfect, but hopefully good enough. After going through all that I discovered jack.aubrey’s build log of a Dusek Viking boat. He posted a simple solution to squaring the frames that I wished I had seen earlier. Live and learn. - Nelson


-
 Click on the tags in the title above (shown in black) for an instant list of all the build logs for that kit subject.
 -
 Hi my name is Keith, and I thought I should make a post to prove that I actually build ship models rather than just lurk! This is my fourth ship model. The first two were abandoned due to catastrophic failures, the third (Artesania HMS Bounty) was completed, and this is my fourth. Four models over the space of 20 years and my amateurish skills hardly qualify me as being even worthy to browse this site, let alone post. I am in fact about 75% through the build - I now know that this model is not going to be a failure, so I can avoid the shame of starting a build log and not finishing it. This is why I am posting! I made this thread for two reasons - first, to help others who may be contemplating building a Viking ship. Second, to solicit feedback on the mistakes I have made along with suggestions for improvement. This boat is intended to be a gift for my friend. He is half Swedish, looks like a giant Viking, and makes jokes about his heritage. I did some research as to which kit to buy. I am aware of three. Artesania Latina was quickly ruled out because it is too basic and does not look authentic. That narrowed it down to either Billings or Amati. The Billings model is of the Oseberg ship, which is sitting in a museum. From what I can see, it looks like a pretty accurate model with some very nice details. However, I do not like Billings' excessive use of plastic. The kit that I inspected had plastic parts which were not moulded properly, so it did not leave a good impression. I therefore took a punt and ordered the Amati kit from the local hobby shop (Float A Boat). To my knowledge, this kit is based on a fictional ship with no original in existence. This doesn't bother me, but it may bother you. Anyway, on with the boat. First, some unboxing photos. The box in my pristine (for now) modelling area. Box contents (L-R): planks, planks, frame, deck furniture, deck, instructions. All laser cut. Only after I started working on the model did I realize that the quality of wood supplied was rather poor. I am not sure what wood was supplied, it is some kind of laminate. Box wood, perhaps? I have more detailed photos later. The manual was surprisingly good. I am used to the poor efforts of Artesania Latina. By comparison, this manual (in Italian, with a separate sheet in English) was clear, well labelled, and well translated. Accessories. Everything present and accounted for - let's get started!
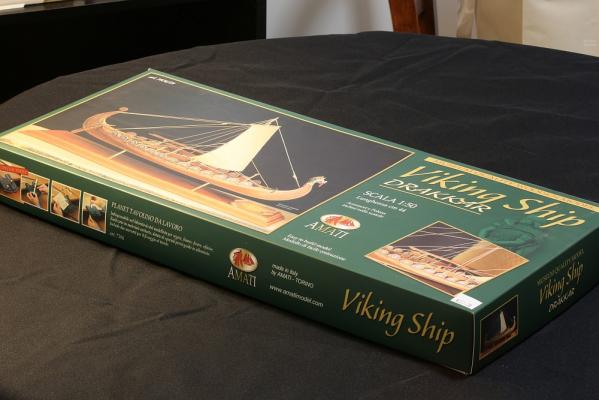
-
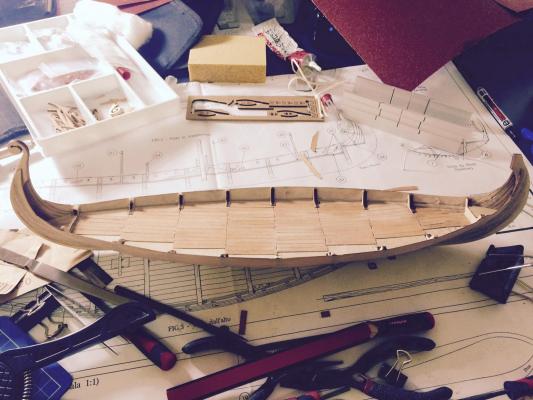
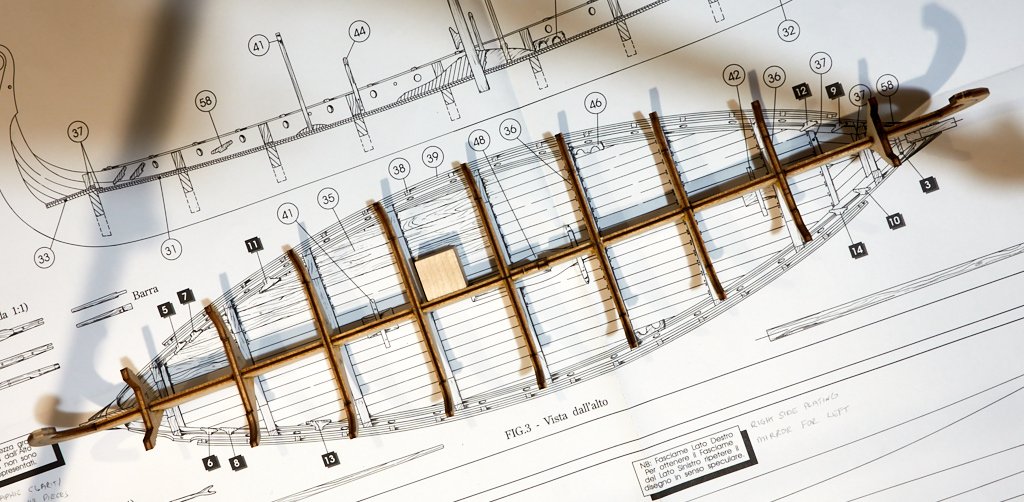
 I am waiting for a few items for my Mayflower build and I made the mistake of opening the box of my next build the Viking Drakkar by Amati. The kit is detailed on other logs so I will not go into it other than to say the wood quality appears good not great. I have decided to use the kit supplies wood and other accessories although I might add a few items done the road. I’ve been working on the ship for a few weeks so I will catch up with this log. The keel and frame assembly is pretty straight forward. Three of the frames have notches in them to help align the strakes which are all precut and fit well. I found several pics of Viking ships and decided to stain the strakes and frames in a dark walnut before assembling them to the frame. Next up was adding the false deck and planking. All straight forward. The planks were laid center offset per plans and it came out ok. Not sure yet what stain to use on the deck but it will be stained. I then drilled all holes for oars and shrouds. And added spacers and racks on hull. I will show the sail down so oars will be shown in their racks. I’m now working on trestles. That about catches up to where I am in the build.
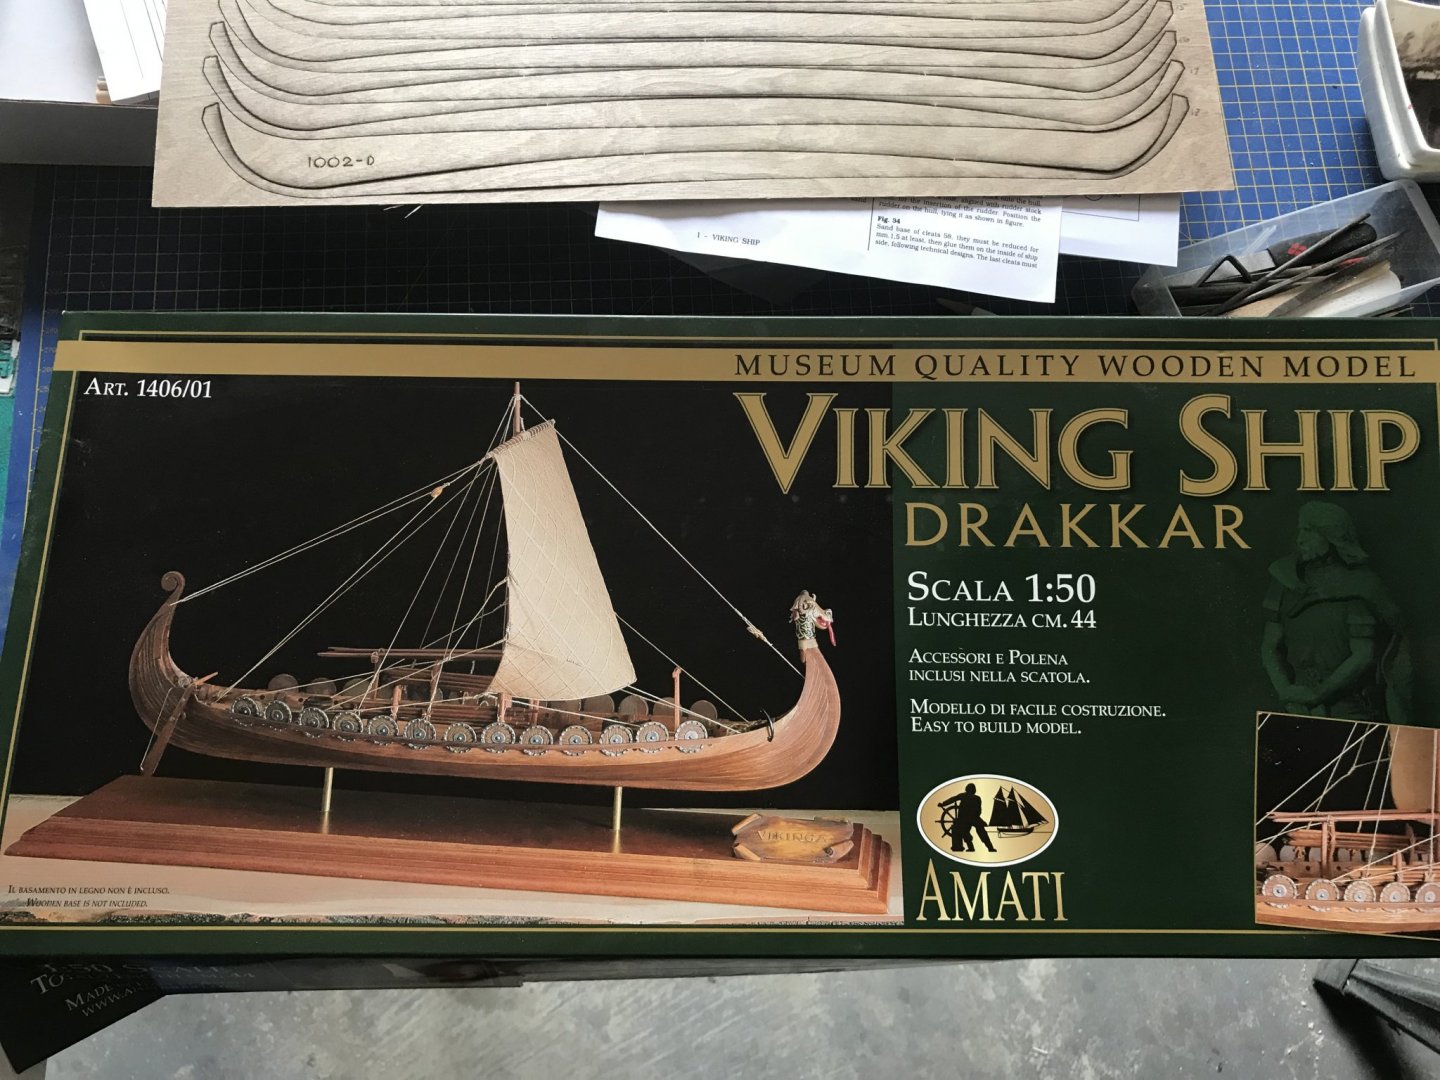

-
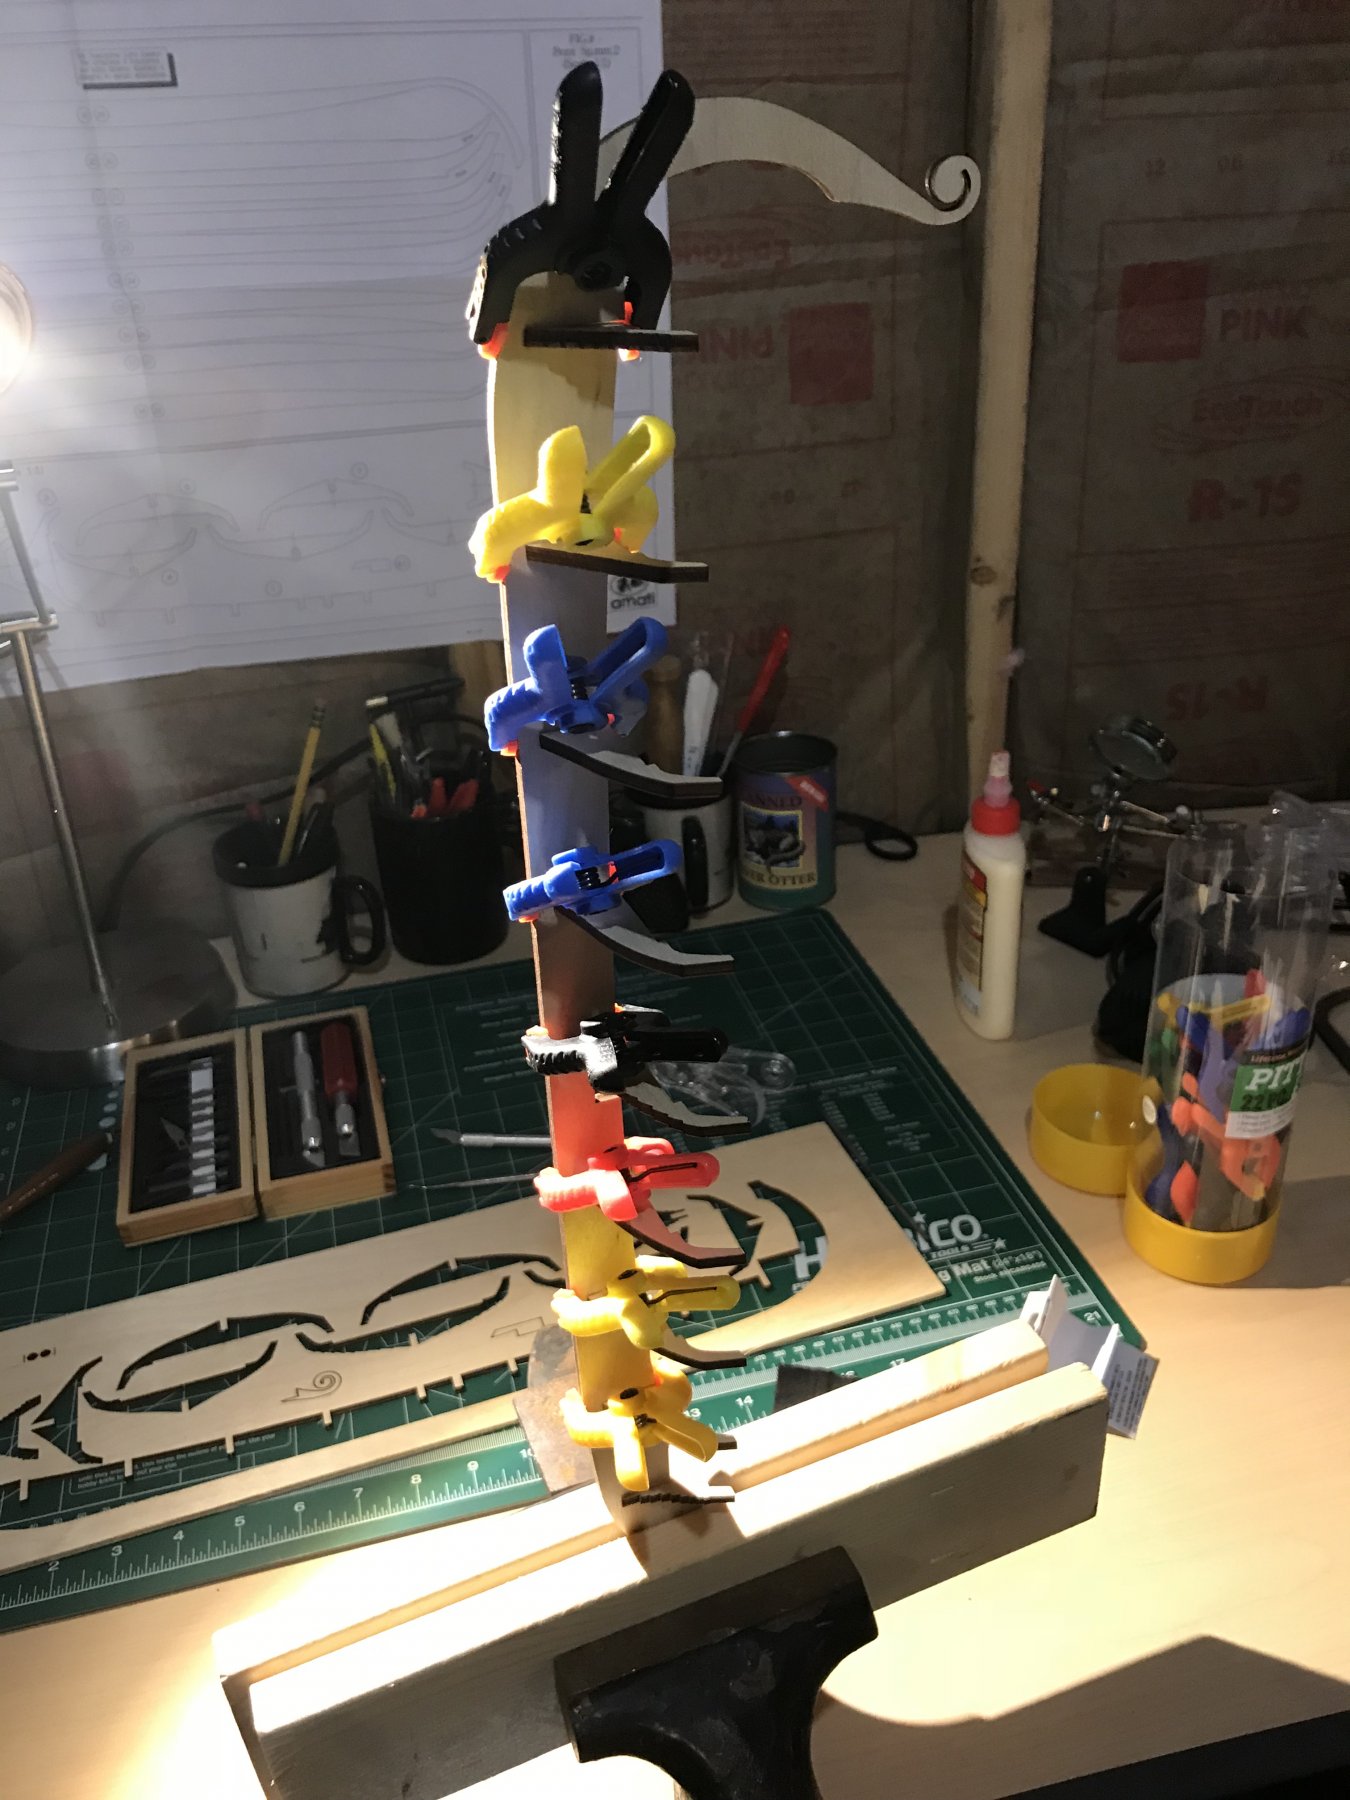
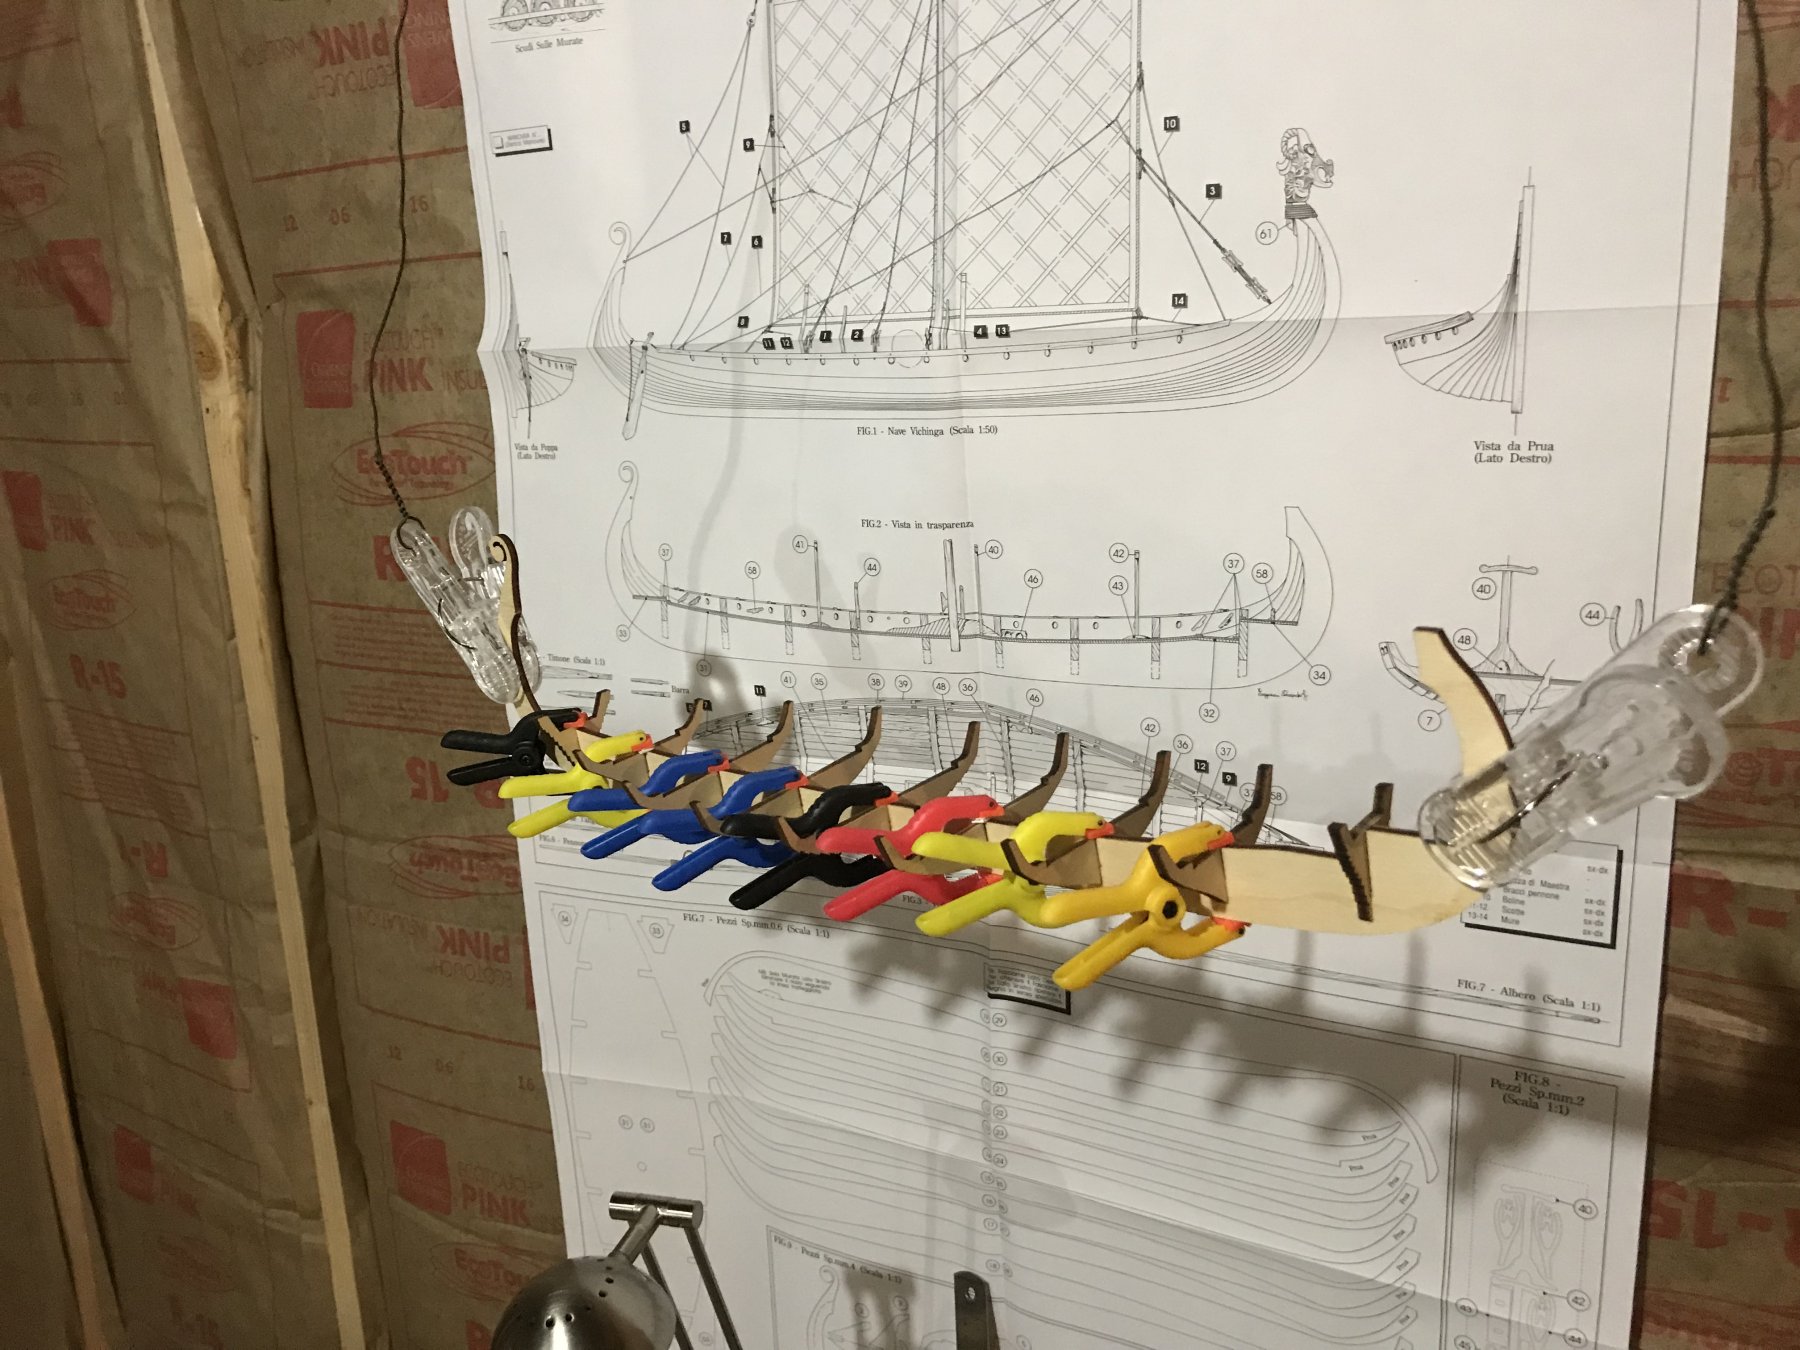
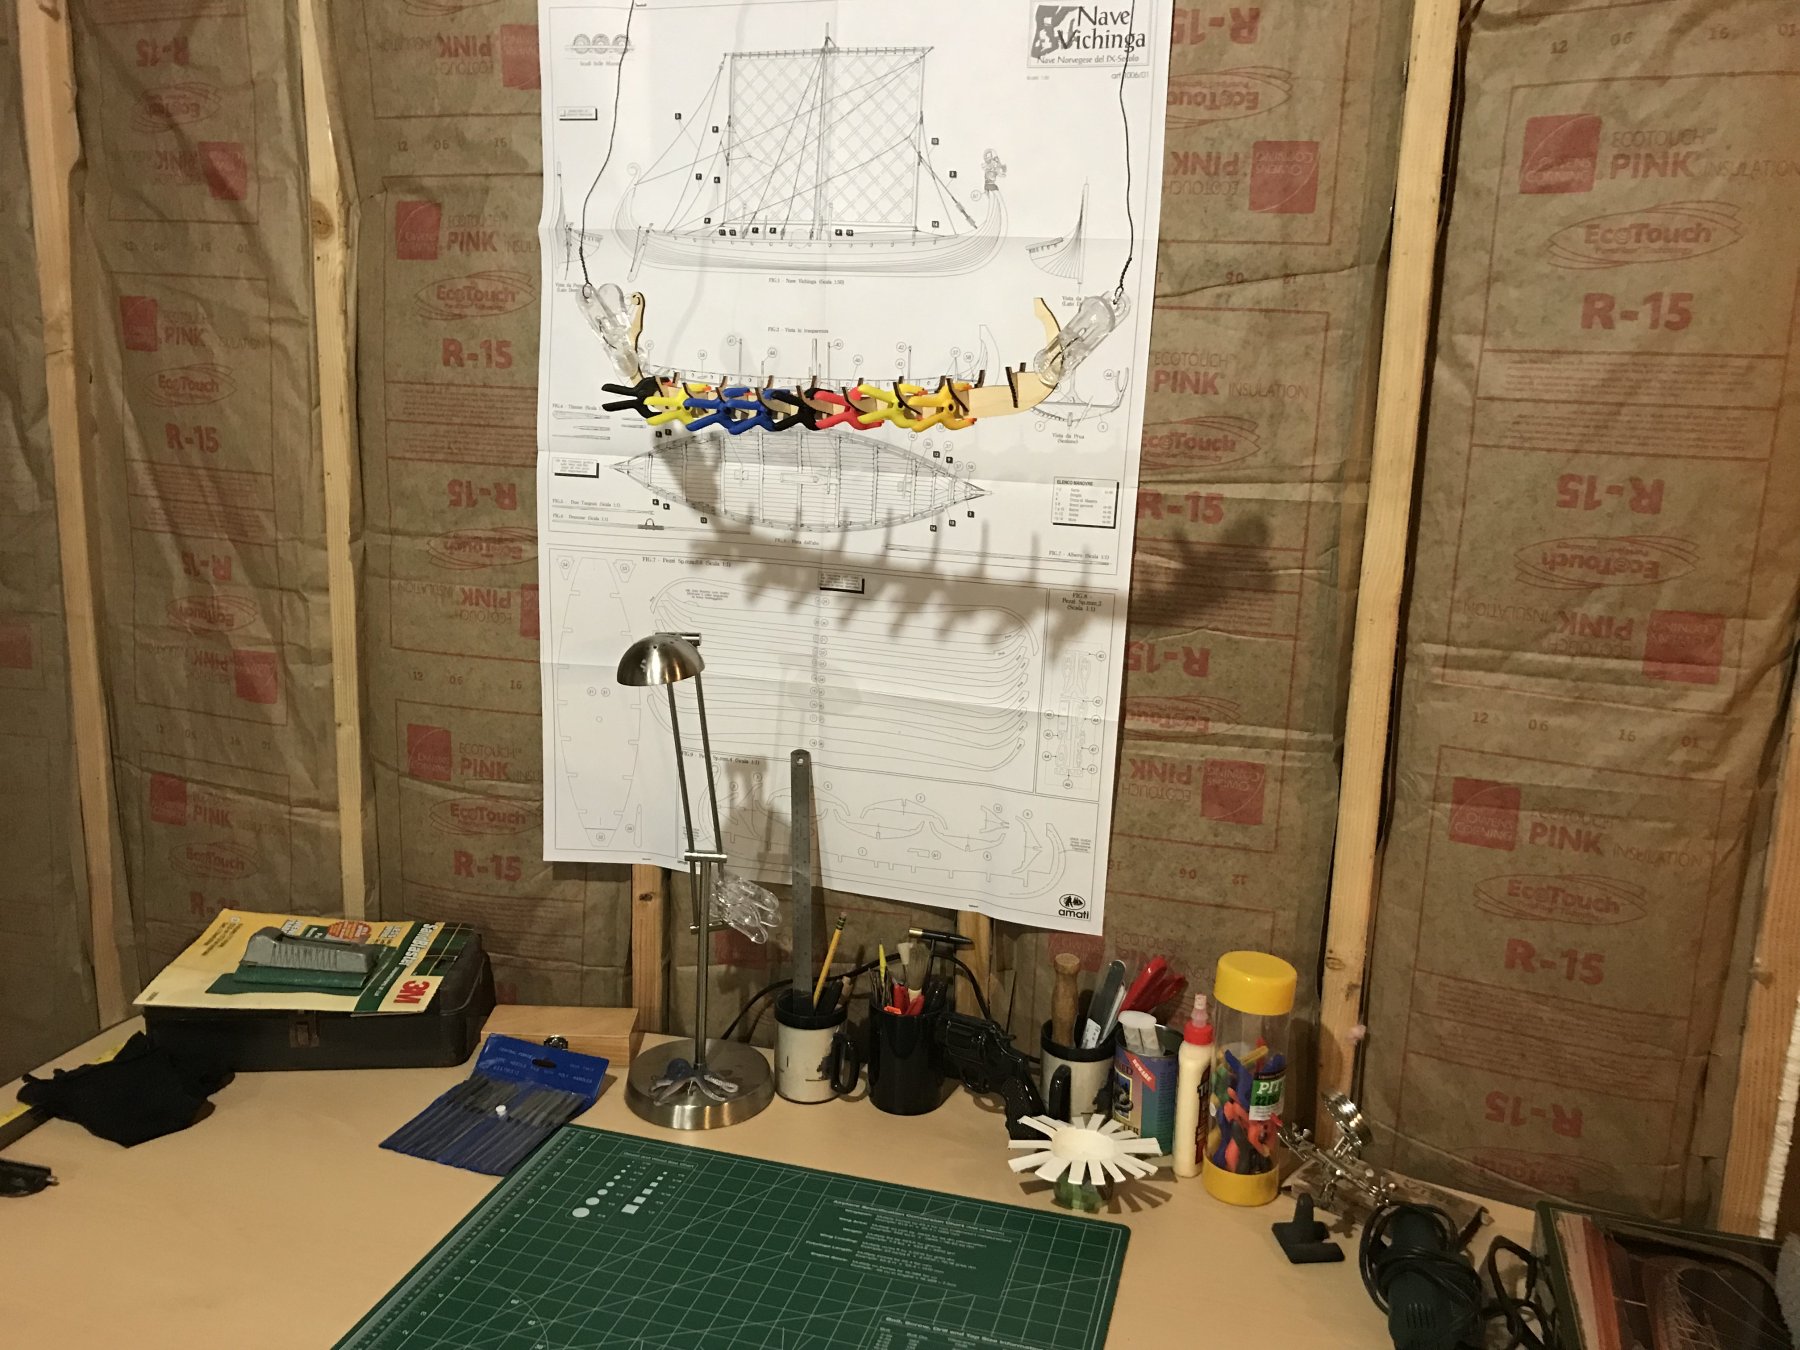
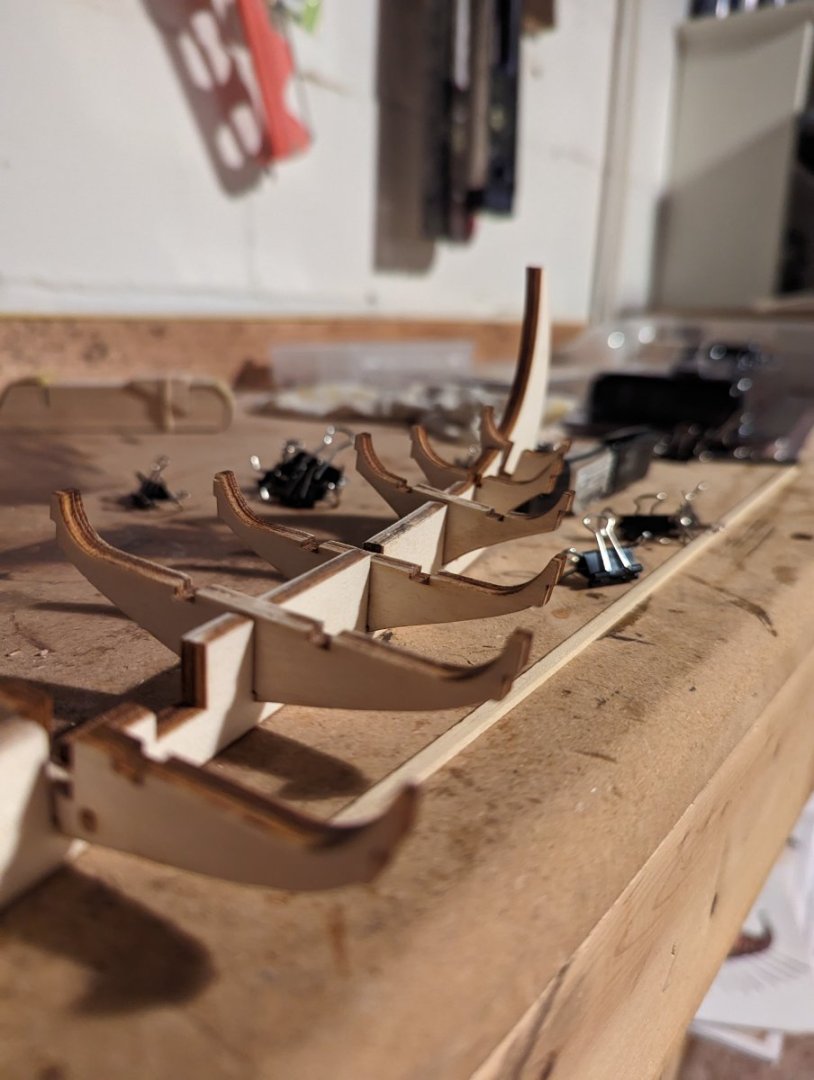
 Hello MSW! After perusing build logs for the past week, I have finally sat down to work on my own kit. A little back story for me. My great uncle recently passed and had spent many years building ships. When last I visited him in Chicago, he had at least 5 ships on display. I had spent the majority of my family's visit there talking about modeling and found my interest in the hobby. Before we left, he had given me a box to kickstart my toolbox. For my birthday that same year, my mother bought me the Amati Drakkar kit to encourage me to pursue it. Well, after almost a year of sitting in my closet out of fear for lack of space and time, I have no opened up that kit and got to work. I appreciate the advice a lot of you have given me and the build logs that are available. I have learned a lot and hope to apply at least some of that knowledge to this kit and all going forward. To start things off, I read through the parts list and skimmed the entirety of the instructions. Then I cut out of the keel and frames, dry fitted to see how much adjustment would need to be made during gluing, and got to gluing. I ended up having to shimmy the smaller frames on the bow and stern because I didn't realize the clamps had held them at an angle. They were square horizontally with the keel, but not vertically. Luckily I caught it before the glue set too much and I could get them off without any damage. I re-glued them and made sure they were held straight and let them sit.

-
Evening folks! I recently reviewed Amati's 1:50 Viking Longship 'Drakkar' here on MSW: For a good number of years now, I've been writing articles for the plastic modelling press but I'm rapidly feeling the need to do what I seriously enjoy, and that's some wooden modelling. There are so many great kits out there that I can be stuck for choice, but as I now have this beautiful and historic ship in my stash, it seemed silly not to look at it and build it. At the moment, I'm sticking my flag in the plot and saying that this will start in the next weeks, and I hope to finish it in a sort of dark timbered appearance that will homogenise the ply keel and shaped planks, but still retain some natural feel to proceedings. I know this is too dark for an actual working ship, but you get the idea: Watch this space

-
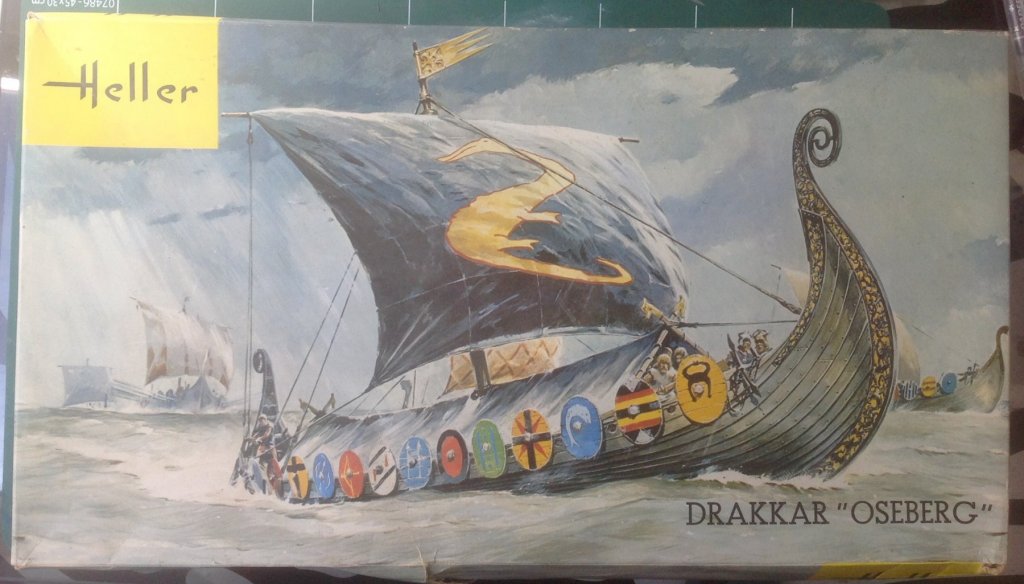
I recently found a complete Heller Drakkar "Osberg" plastic model kit at a vide grenier. It's the version with the lighter yellow Heller panel on the top left of the box, so from about 1971! 5€ seems like a bargain. As was standard, glue and rigging and paint are not part of the kit. l have three questions:- 1.) What glue, other than that currently sold by Heller online is appropriate for this kit? 2.) The notes say use Number 16 thread for the rigging. The inevitable Google search identifies how complex thread description can be. The only ‘16’ I can find is a weight of 16, the equivalent of Tex of 105, denier 950, cotton count of 5 and a metric number 9. Is there a more suitable alternative ? 3.) The major pieces look very shiny. Is there any prep required before painting, other than a light sanding ? 4.) What paint is appropriate for a plastic model of this sort ? Many thanks in advance for your help.
-
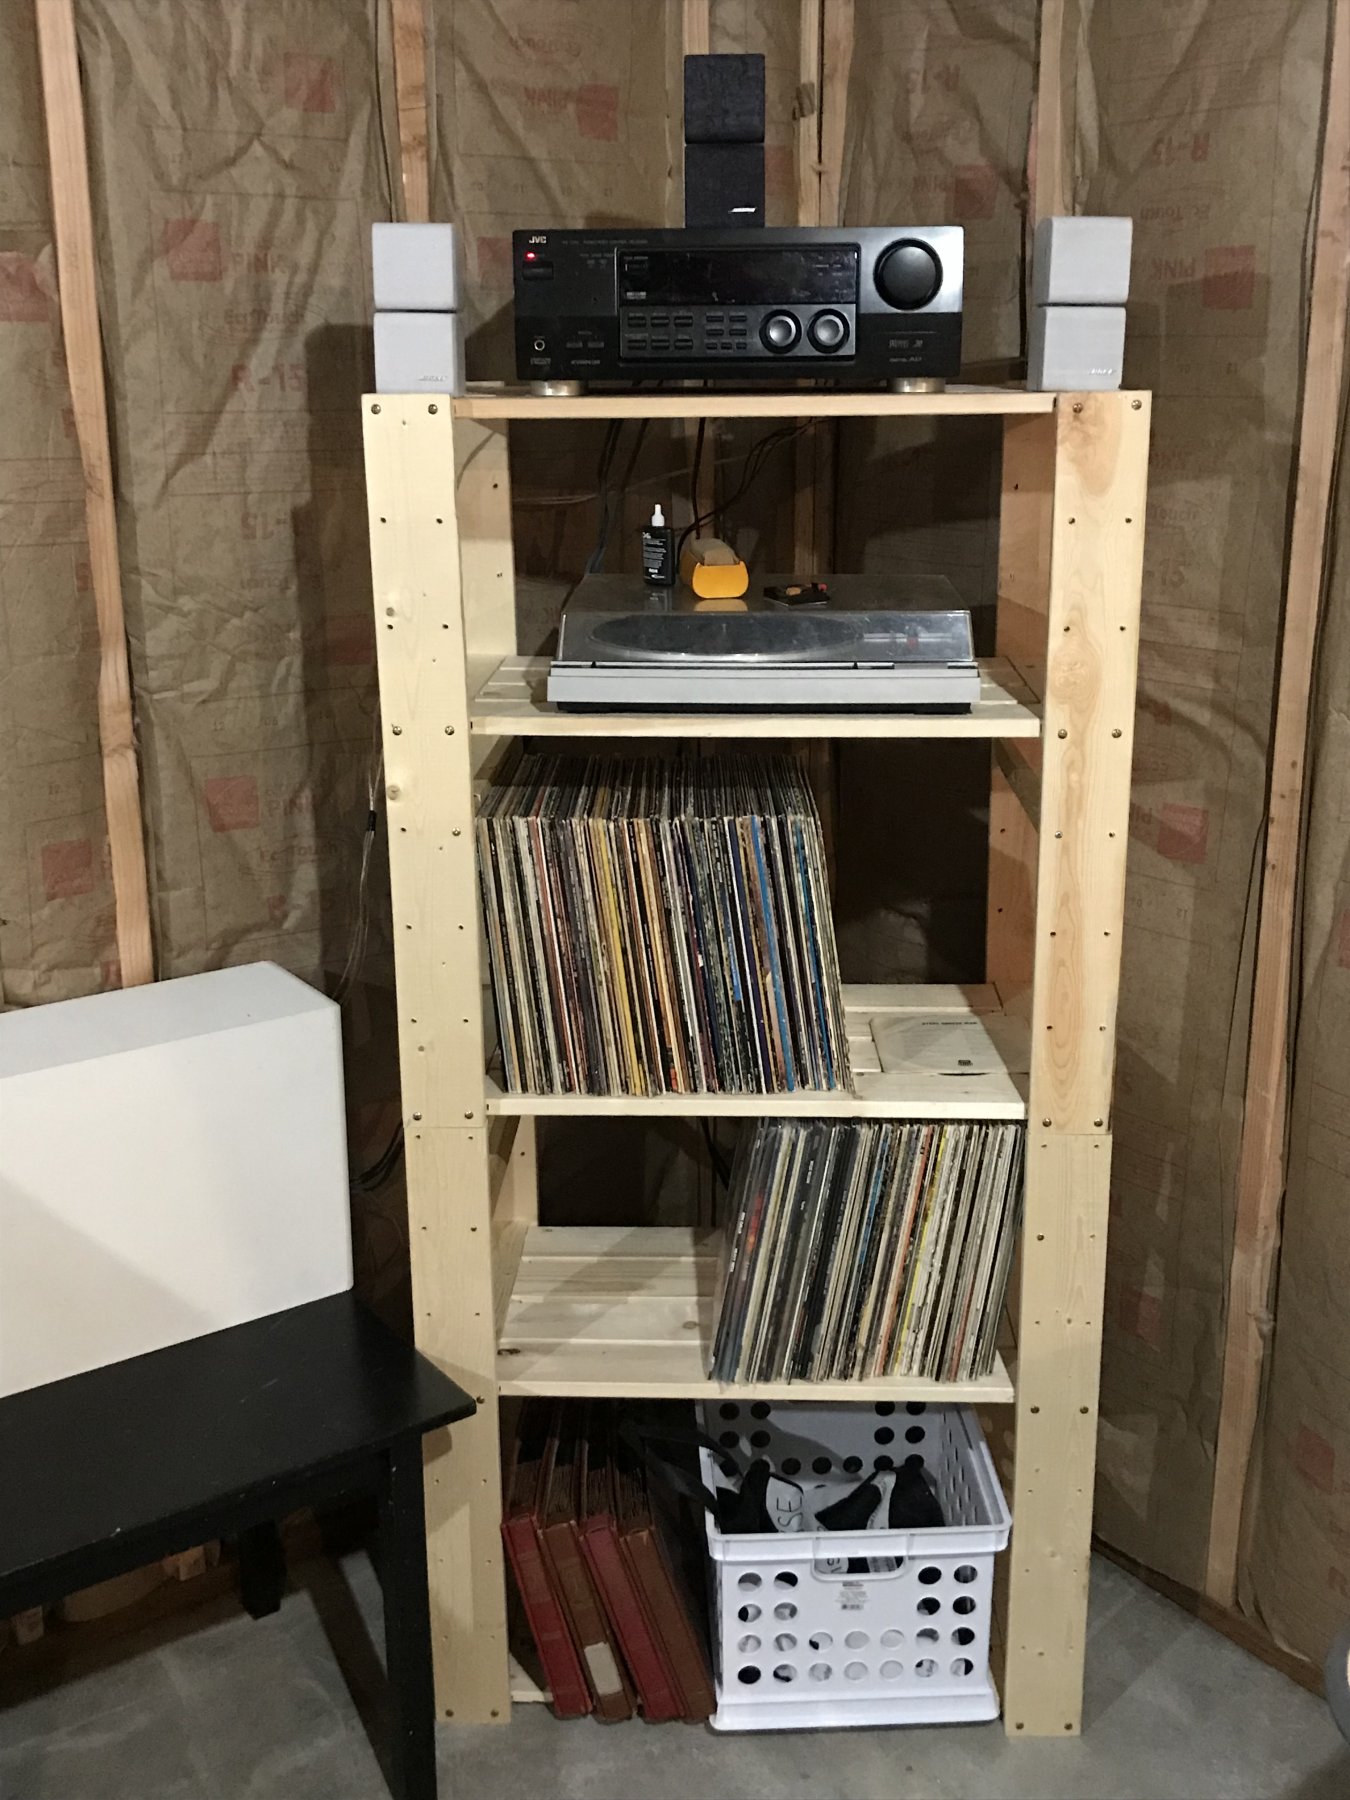
 So I finally have begun my Drakkar build. This is my first wood model, and my first ship. I am pretty excited about it. I just set up my turntable and stereo in my new basement with my modeling desk, it’s pretty nice and very relaxing to listen to some classic country and fiddle away with this kit. I started by cutting the center beam and ribs away then filed or sanded any excess (flash?). Then used a small vice with some t shirt remnance to hold the keel while I applied glue with a small carving tool to each ribs joint and each joint in the center beam, then used some small clamps on each piece to hold it in postition. I then used a small straight edge to check if they were square and adjust accordingly. I have yet to decide if I will use the dragon figurehead included with the kit or the scroll piece, or possibly make something custom? I have plenty of time to mull it over I suppose. If you are wondering why the beginning model is hanging from some wire from my ceiling, it’s to keep it away from my cats.


-
 Hello Everyone, My name is Jerry and I have decided to try and build the Amati kit of The Viking Ship Drakkar. I chose this model because of it's appeal as a different way to go from the usual tall ship models I have recently constructed. (See below) I sincerely like the idea of an open, long boat type which I hope will enhance our growing fleet of ship models. Besides the Victory and Half Moon I have previously constructed the Cutty Sark about 16 years ago. I said OUR growing fleet because my Admiral caught the building bug, so simultaneously I am coaching her as she endeavors to build Amati's HMS Bounty. I felt my work on the Drakkar would allow me some time to instruct her whereas another complicated build, such as the HMS Victory, would occupy all my time. Of course, I may be wrong and find the Viking Ship complicated enough to load my mind and give me little time to assist the Admiral. I hope not or I'll probably never hear the end of it. I also wish to thank KeithW for having posted his build of the same boat as I'm sure I'll find it very useful during my period of construction. At this time all I have done is to remove the keel and frames from their laser cut sheets and as soon as there is something, hopefully useful, I will be happy to provide photos. It is my intention to photograph every stage of the buils which I hope will be useful to others and will also provide material for anyone who I hope will use it to offer any criticsm, positive or negative, Realizing it's customary to provide pictures of the kit box, the parts and plans, I have decided to forgo this with th eknowledge that the kit arrived complete and in fine shape. I wish everyone a great day and hope to post my initial progress soon. Best, Jerry
 -
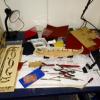 Hi all, This is my second attempt at a model boat, as I needed something that I could work on in the evenings whilst working away from home. As such I needed something smaller (less masts/rigging) and less complex that would be relatively easy to move around with me. With hindsight possibly not the cleverest idea I have had but was willing to give it a go. Did get stopped once at the airport, as they were curious as to the contents of my luggage (my first trip bringing the majority of the 'tools' across) didnt even cross my mind till I was queried about it and had to explain myself. Anyway decided on a Viking long boat, as it is an era that interests me along with being relatively different to the tall ships (including being less complex and a fair bit smaller). So had a look online, as Perth doesnt have the greatest selection of hobby shops and a couple of days later I had the Amati kit in my hands. Kit looks pretty good, and relatively easy to get a move on. The precut planking is a breeze, and progress is relatively quick (yet have still been working on this for the last 6 months or so) along with a great sense of acheivement compared to the my last model with more traditional planking. As mentioned in the other build threads the laminted wood isnt the greatest quality unfortunately. Didnt realise the challenge of trying to complete this task whilst remaining relatively mobile, luckily I have managed to lock most of my tools and the model itself away in a locker between trips. And so far only had to do a couple of car trips with it all. One of my temporary build sites...... As mentioned this is a bit of a catch up post, and will get a few more photos of where I am up to now. And then it will slow back down again, but almost at the point of having to take this model on a plane trip across Australia. Now this could be interesting!!