Search the Community
Showing results for tags 'fifie'.
Found 21 results
-
 The Fifie is a design of sailing boats that was a traditional fishing vessel used by Scottish fishermen from the 1850’s until well into the 1900’s. Their vertical stem and stern, long straight keel and wide beam made the Fifies very stable in the water. In the 1900’s many were converted to motorized craft. As and aside, this model will be the longest boat on my shelf when I am finished (at 27.5” long by 18.5” tall and 9.1” wide). As I progress in my boat building hobby, I am beginning to wonder where I will put all the boats I have built, and plan to build. I would like to know if you people are displaying all of your boats? I’m thinking my early creations will end up in a box in a closet, and my latest will be placed - . . . I don’t know where! . . . since I am running out of shelf space. The previous models are collecting dust, and I would like to continue building for many more years. I guess I will have to either buy enclosures or learn to build them. Still, the question stands - as to where I put them. Since the Fifie is larger than my previous boats, I need to determine my storage/display strategy very soon. I would like to know what all of you are doing with your boats! Back to the subject: the Kit itself looks like a quality set of components and instructions (so far).
-
 Ahoy all! It has been a number of years since I have posted here, and for good reason. We've a new addition to the family, and both he and my eldest have been the focus of my attention and energy. In our last home reorganizing I was able to secure myself a large dining table in our second living room to use as my "miniatures workshop". Finally, onto the build, with one final preface: I am a novice, but keen to improve. I'd appreciate any and all feedback. I'm as far as the first planking but have photos of prior steps. I will upload a group of pictures and explain as best as I can.
 -
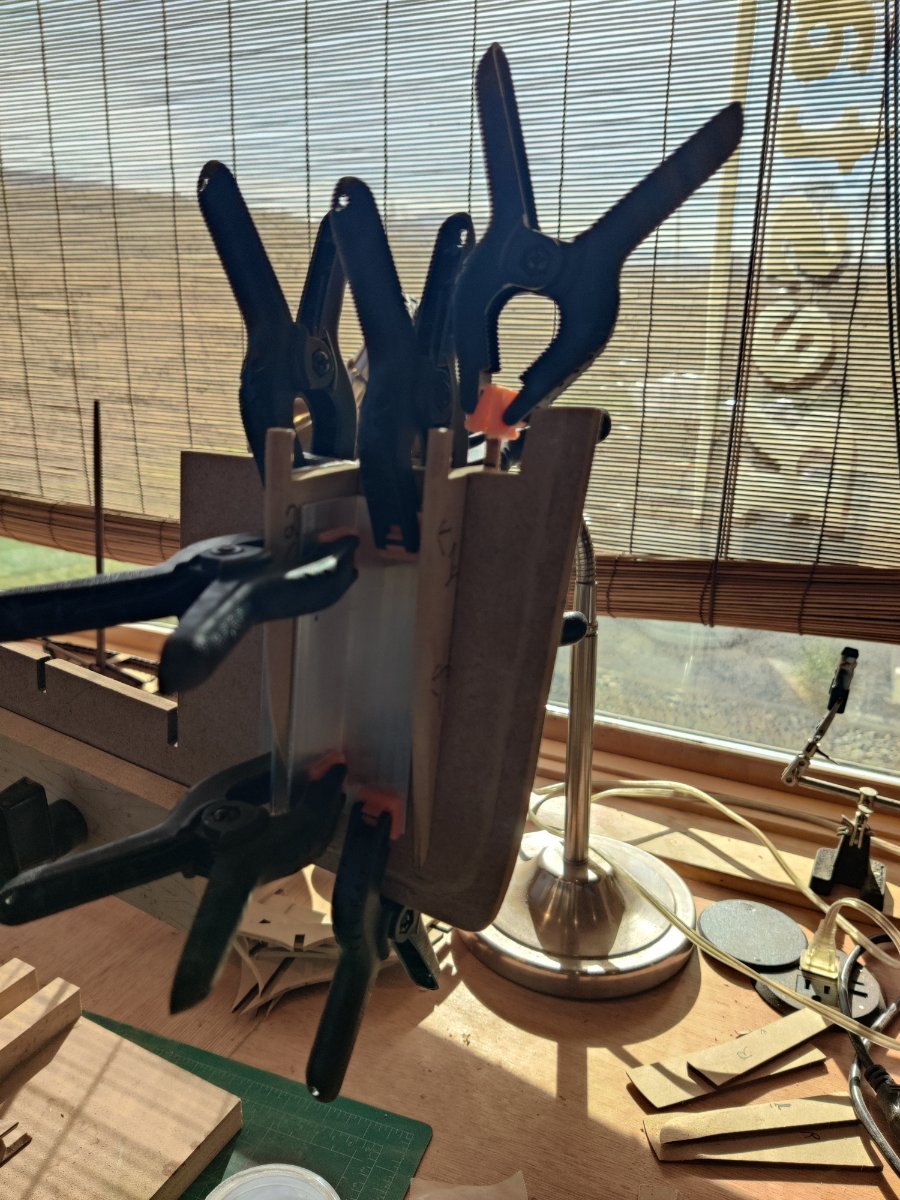
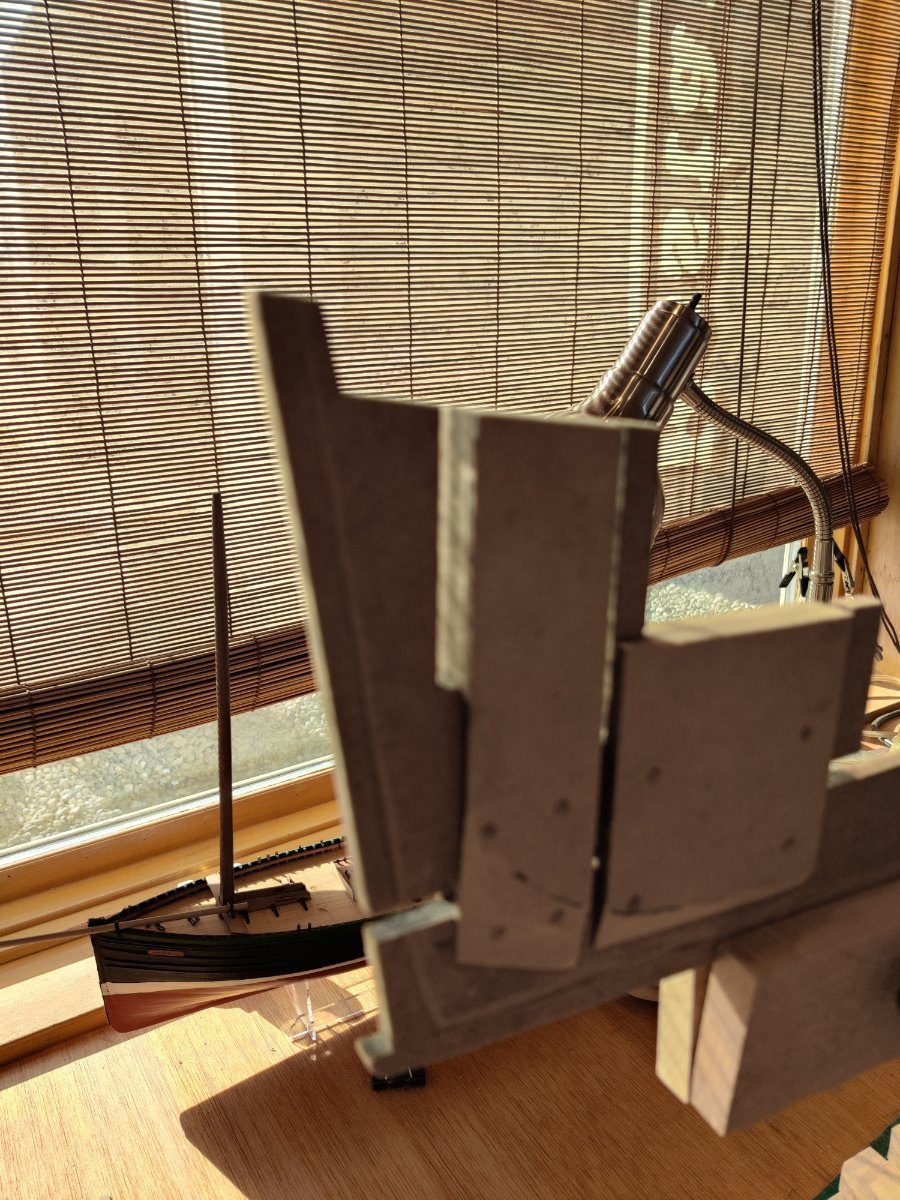
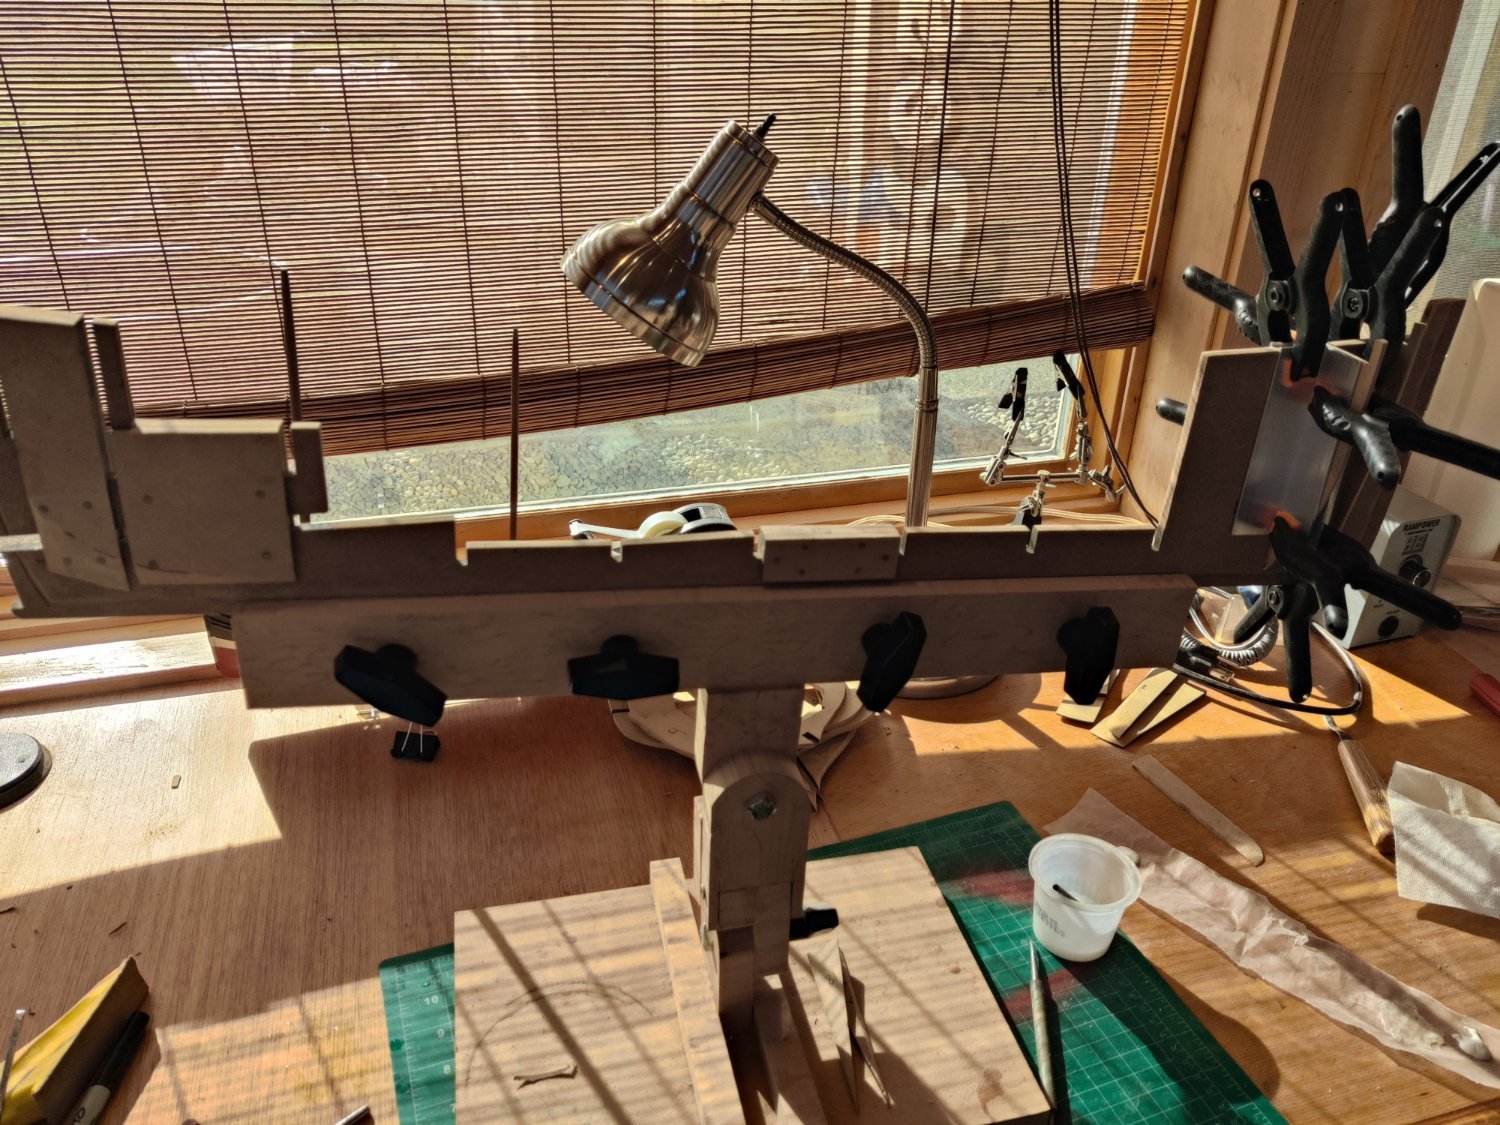
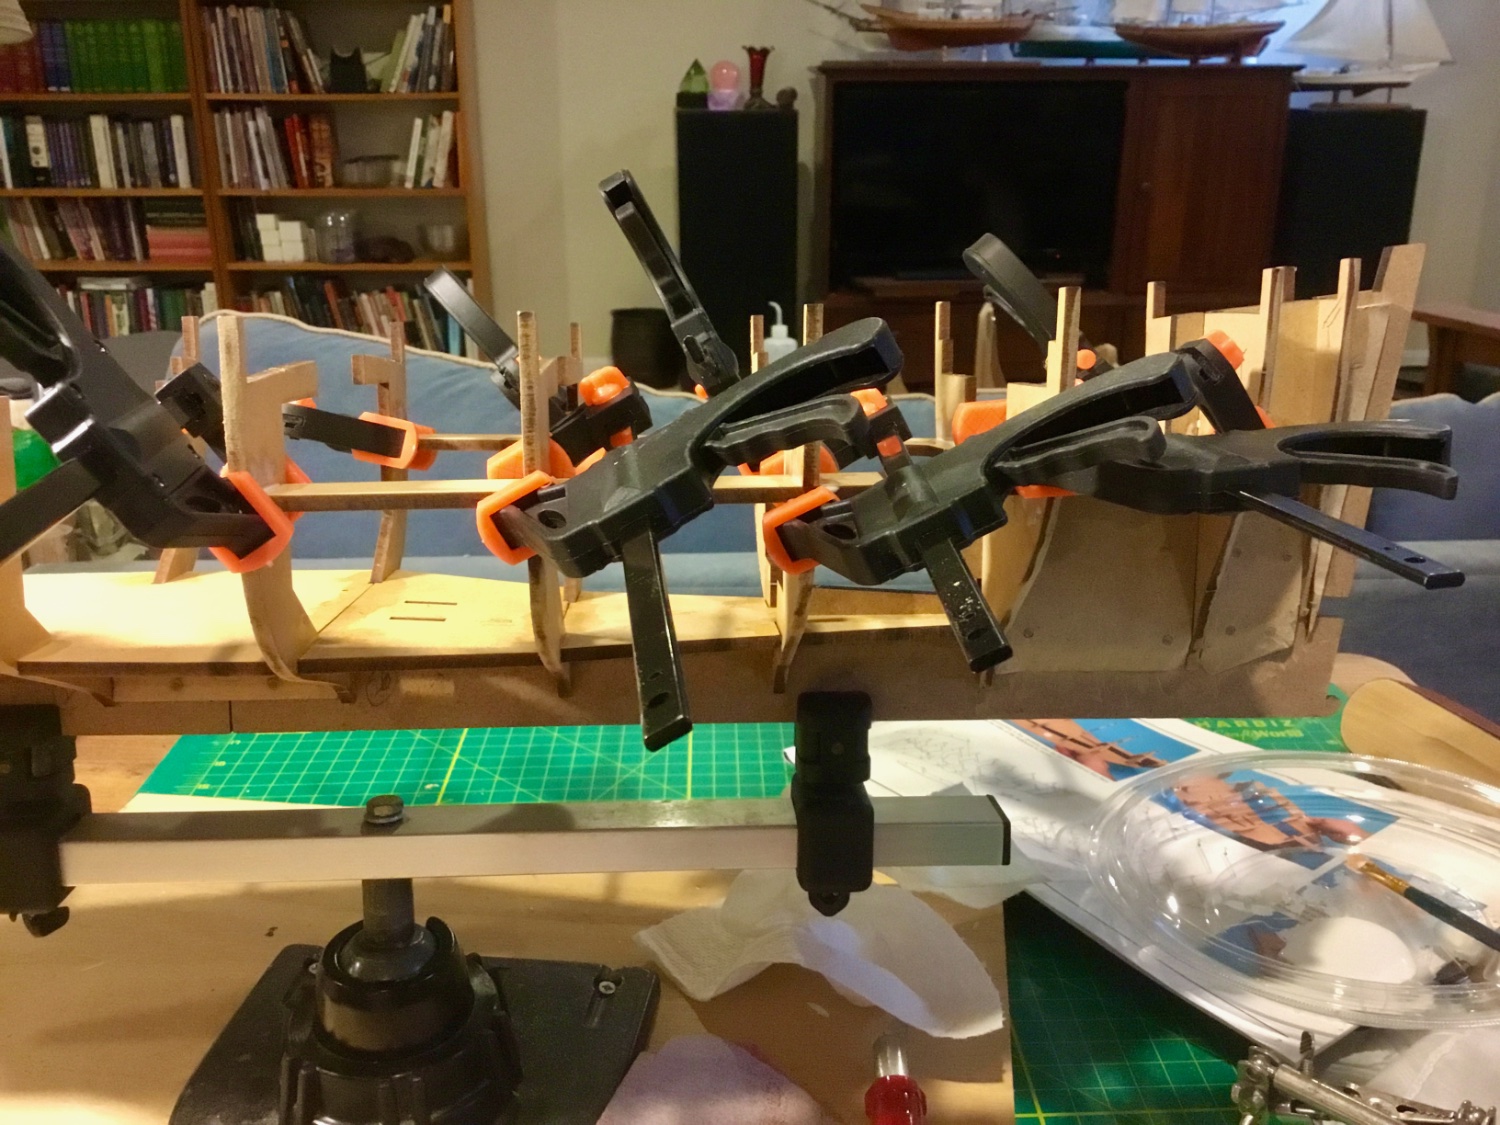
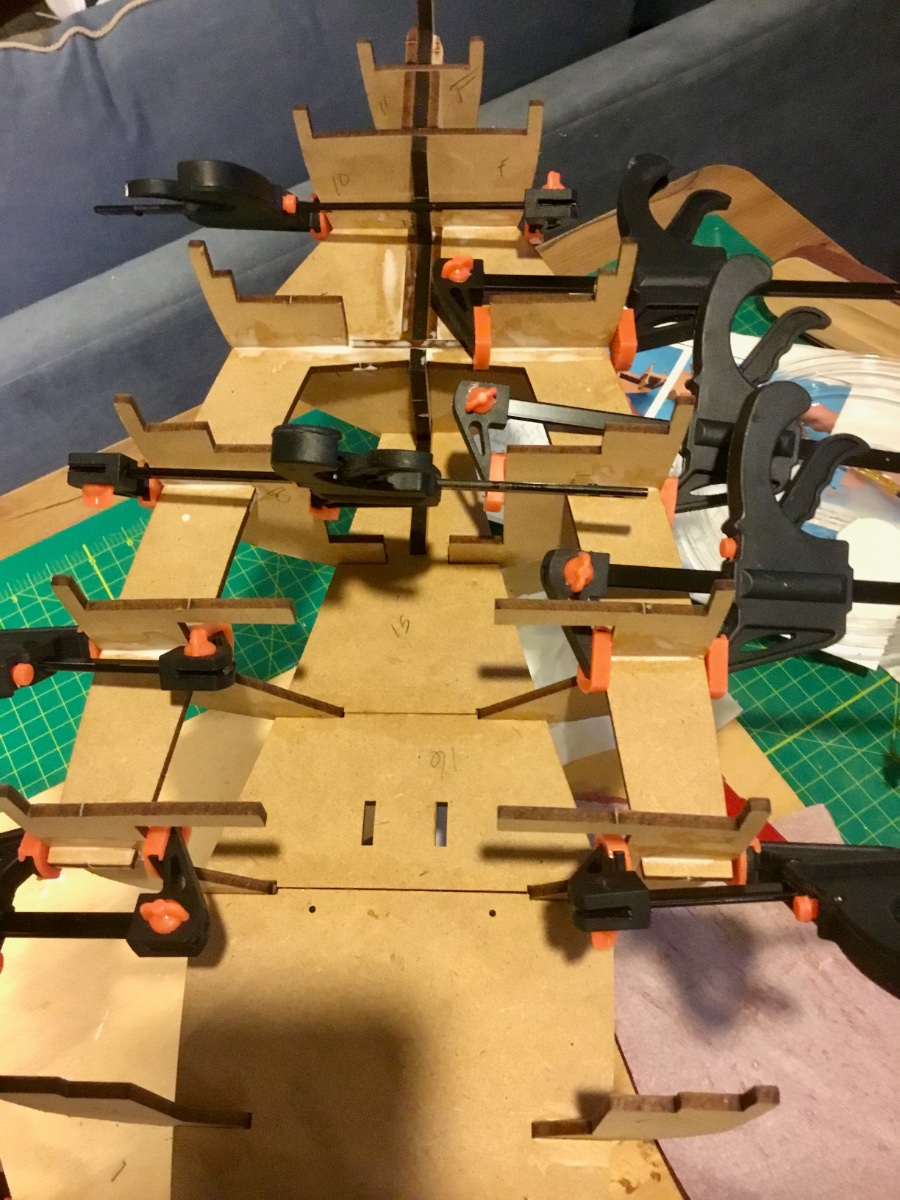
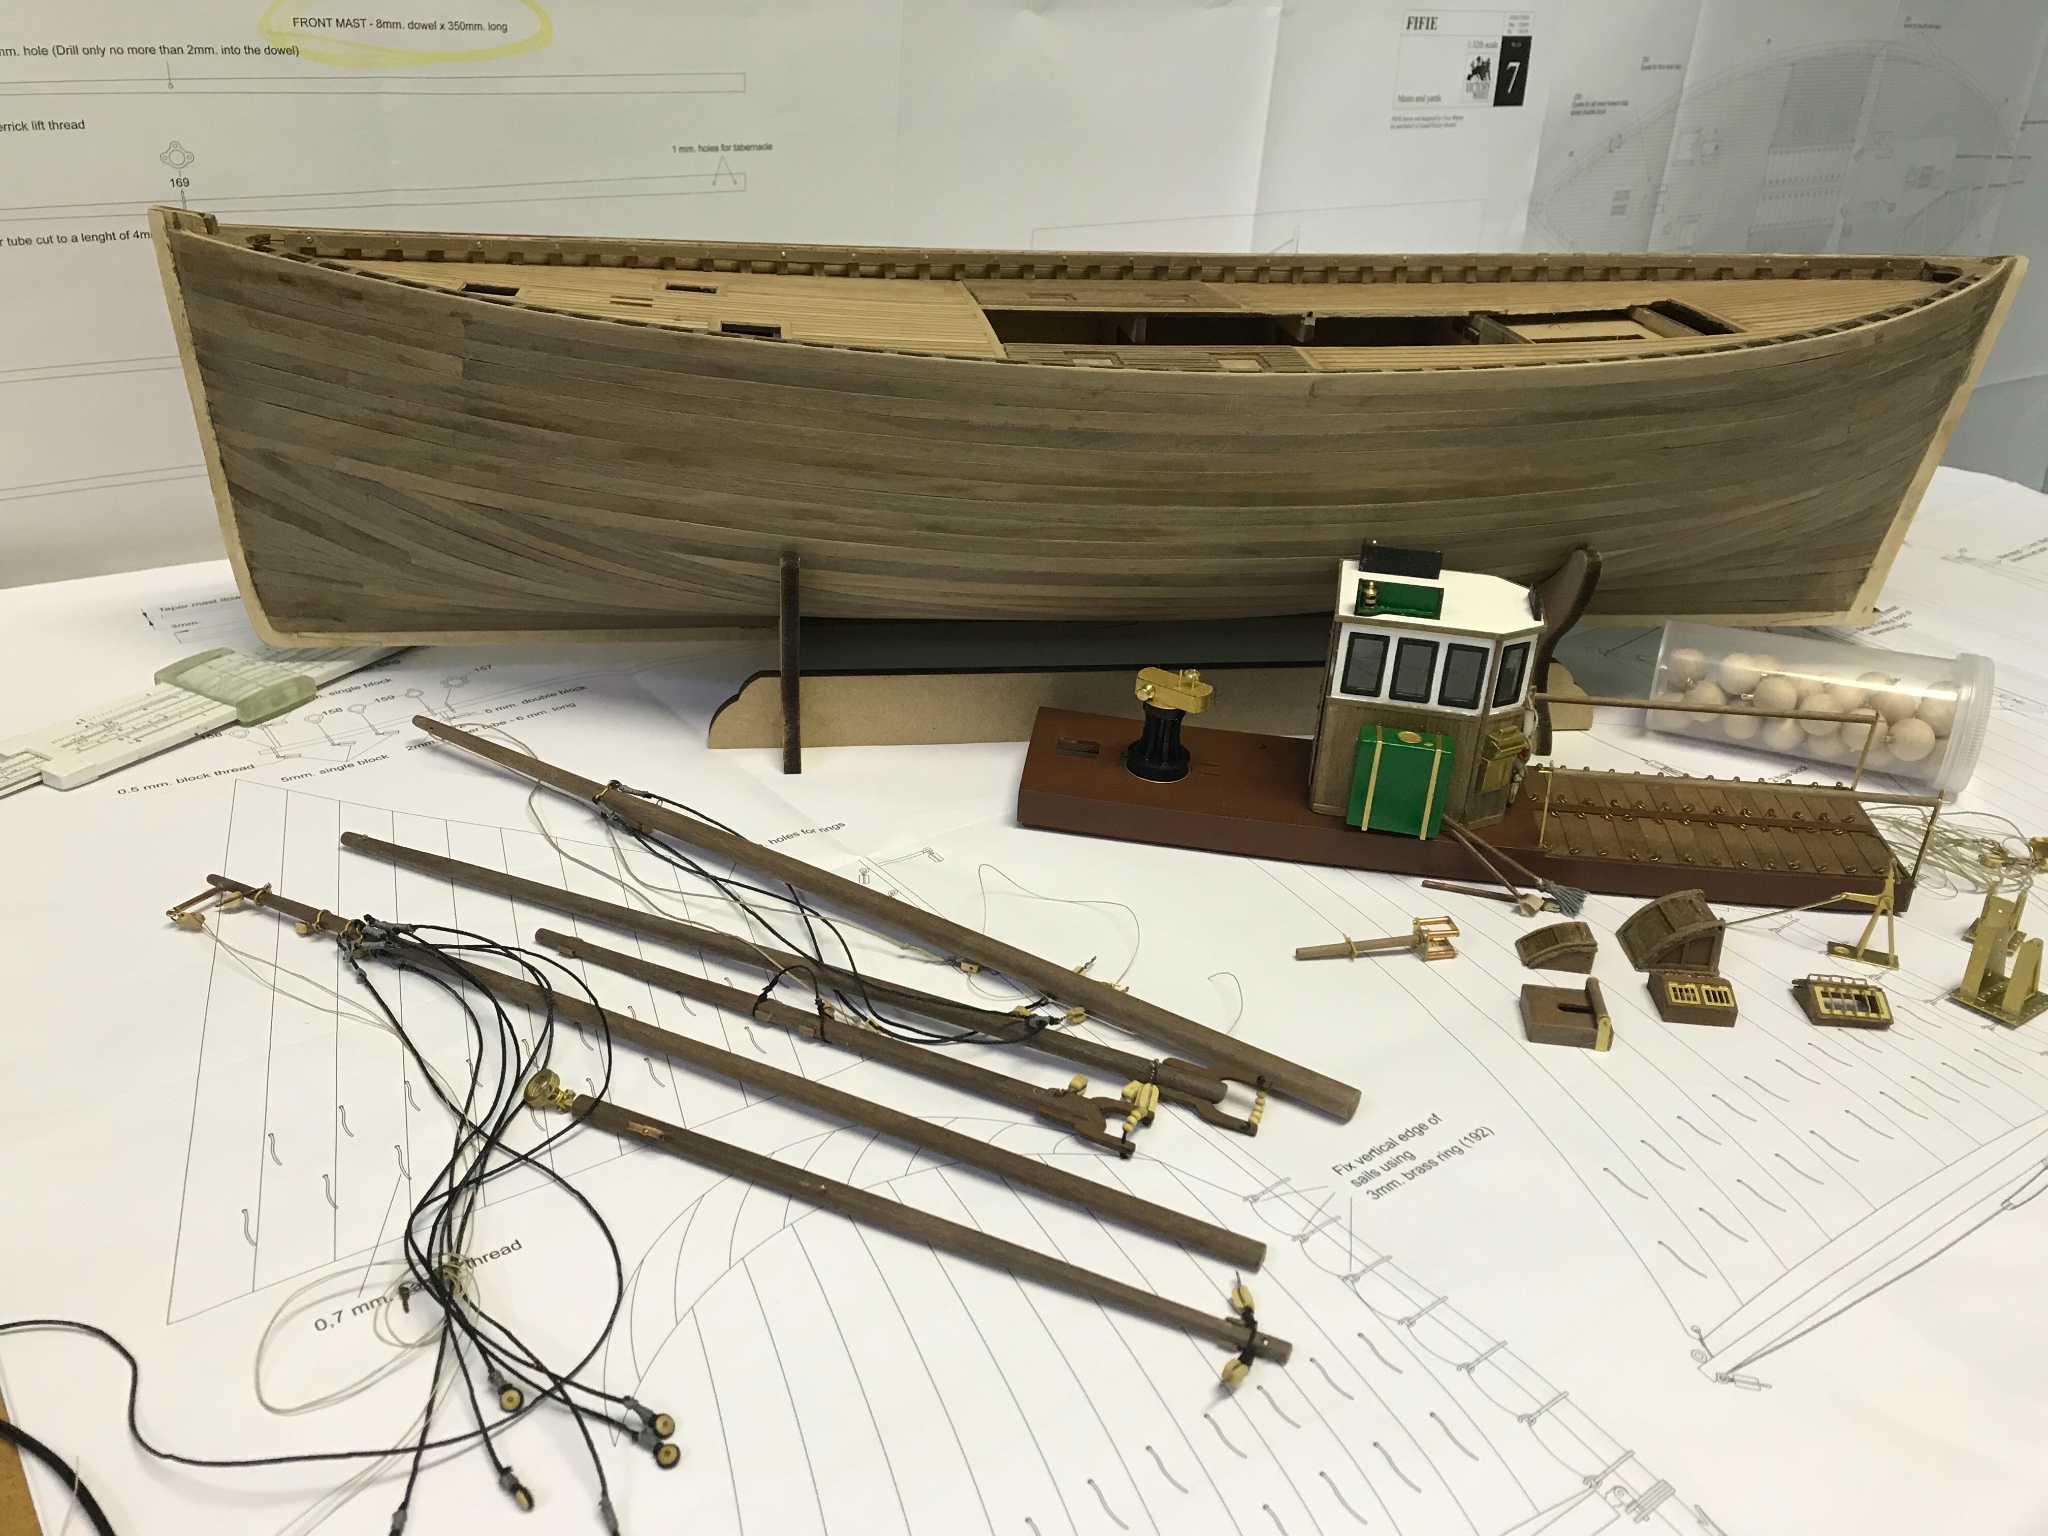
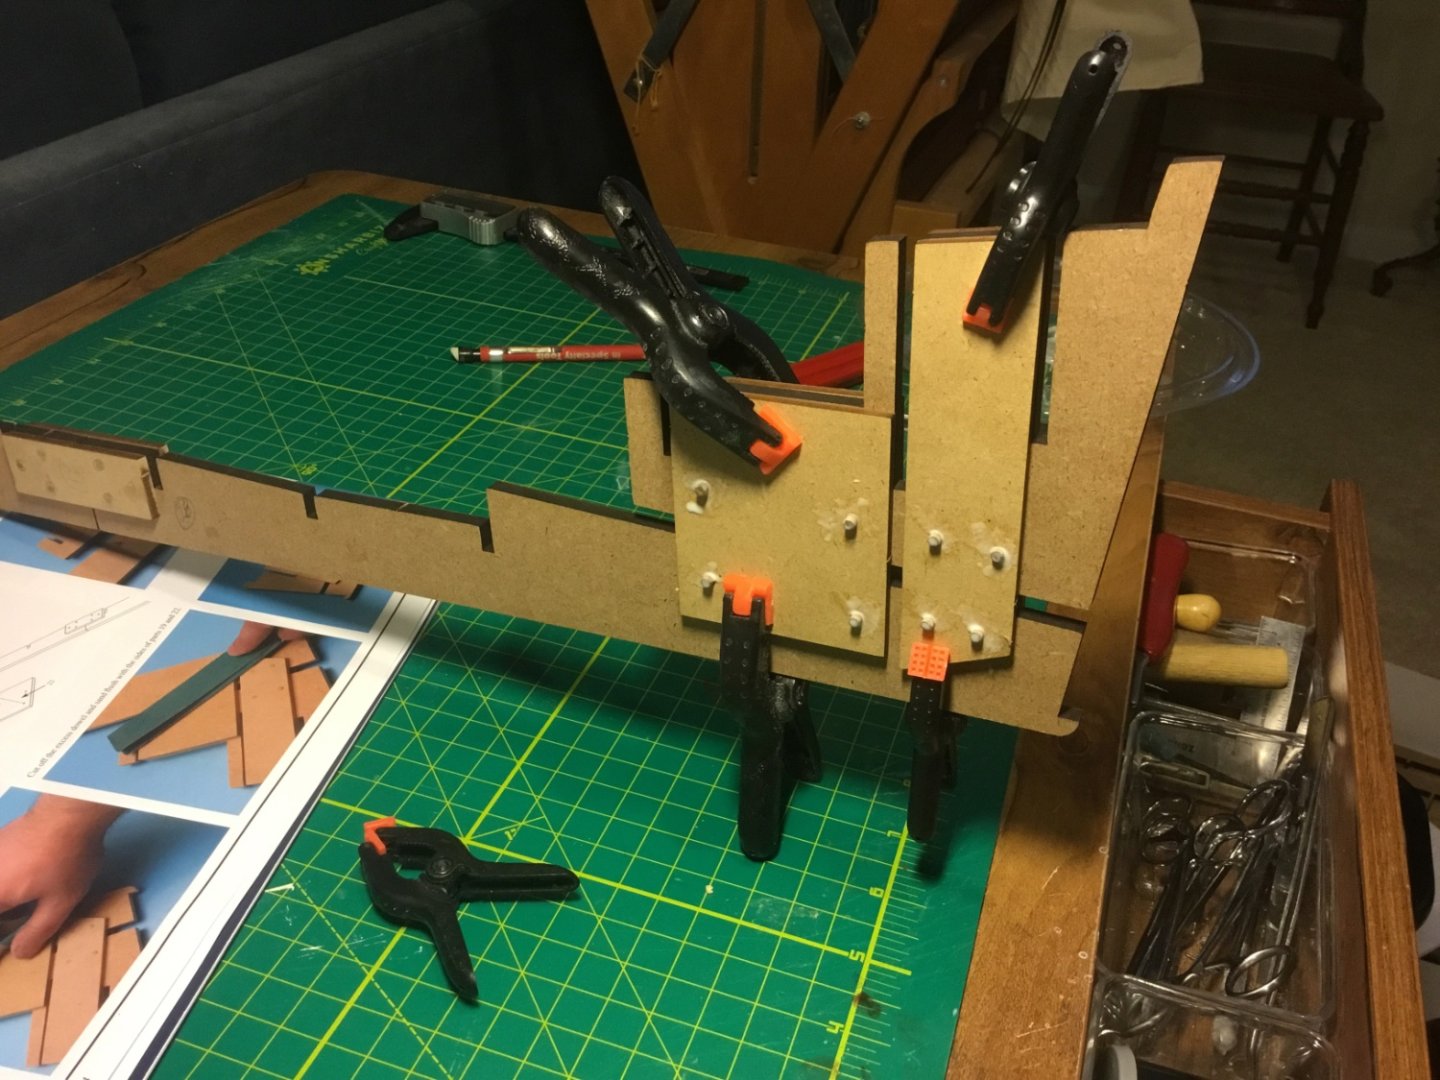
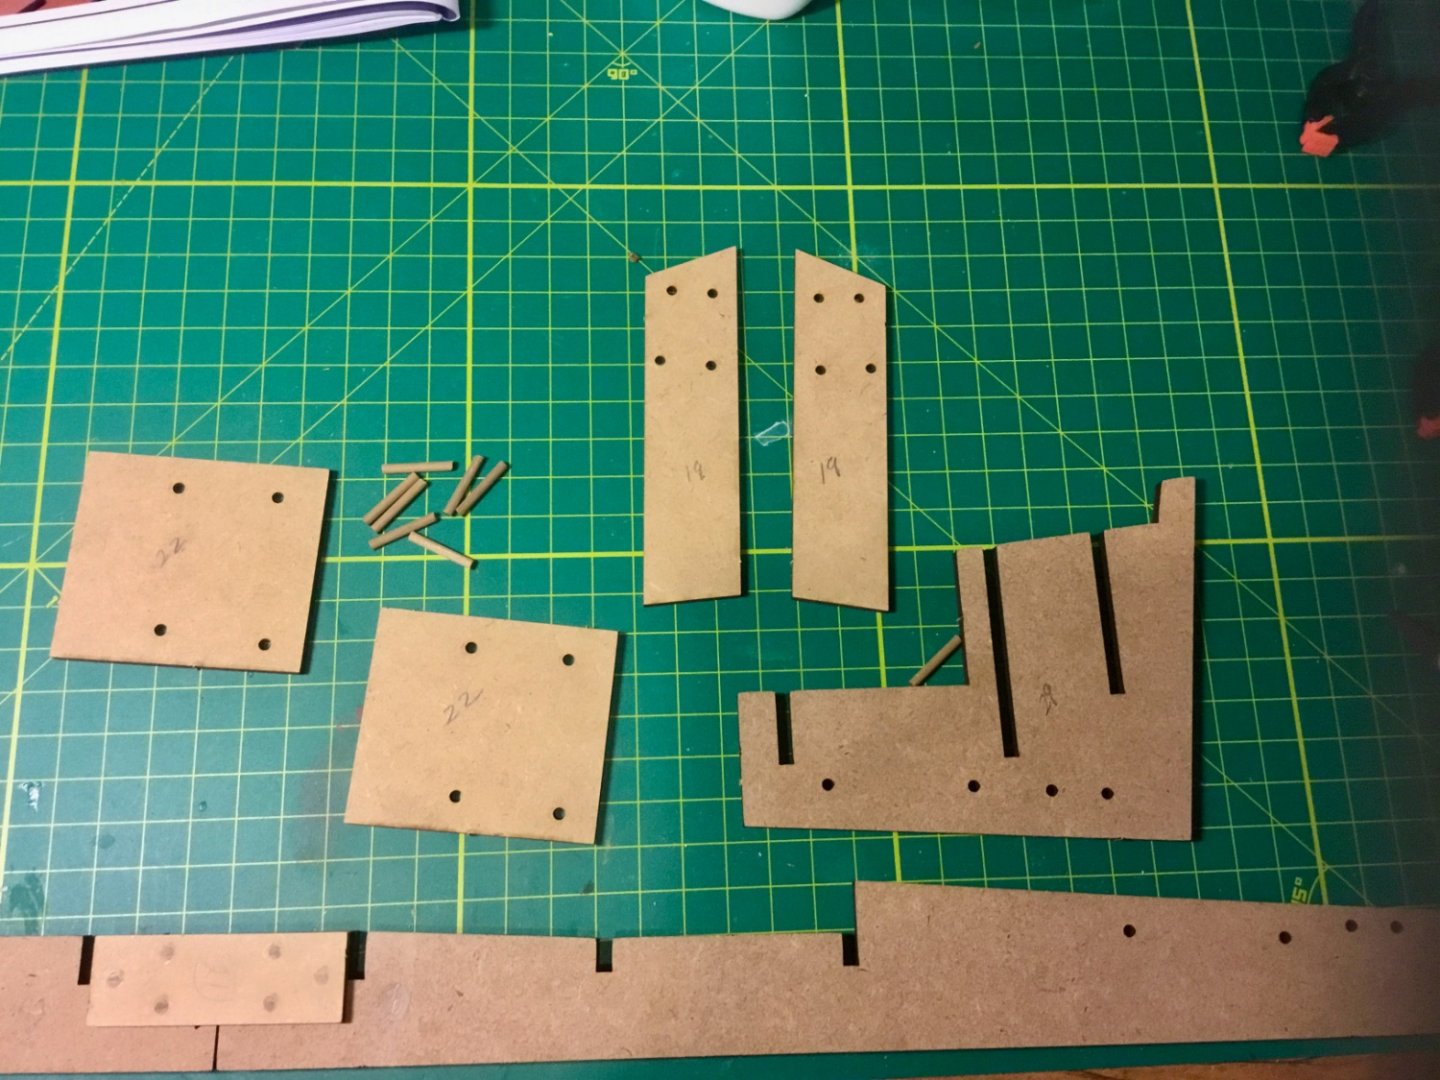
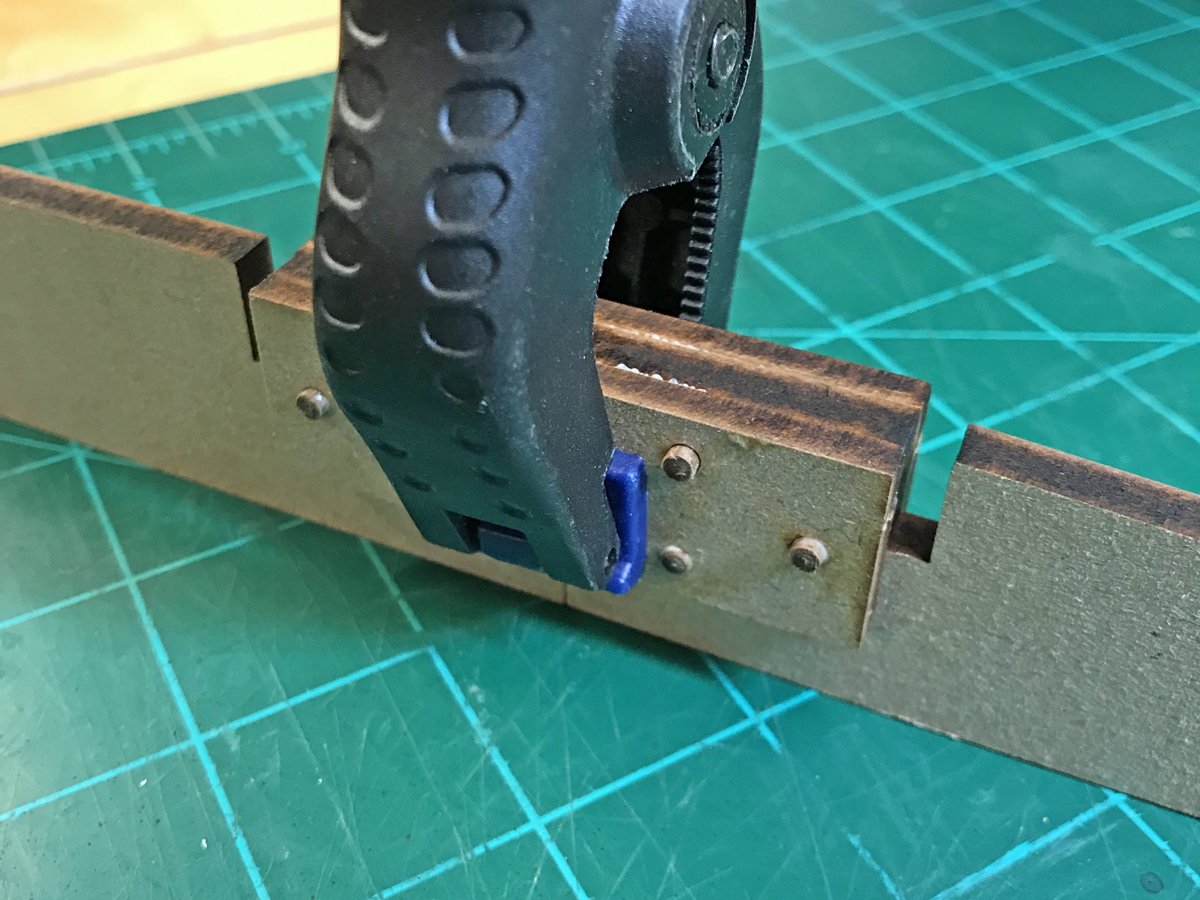
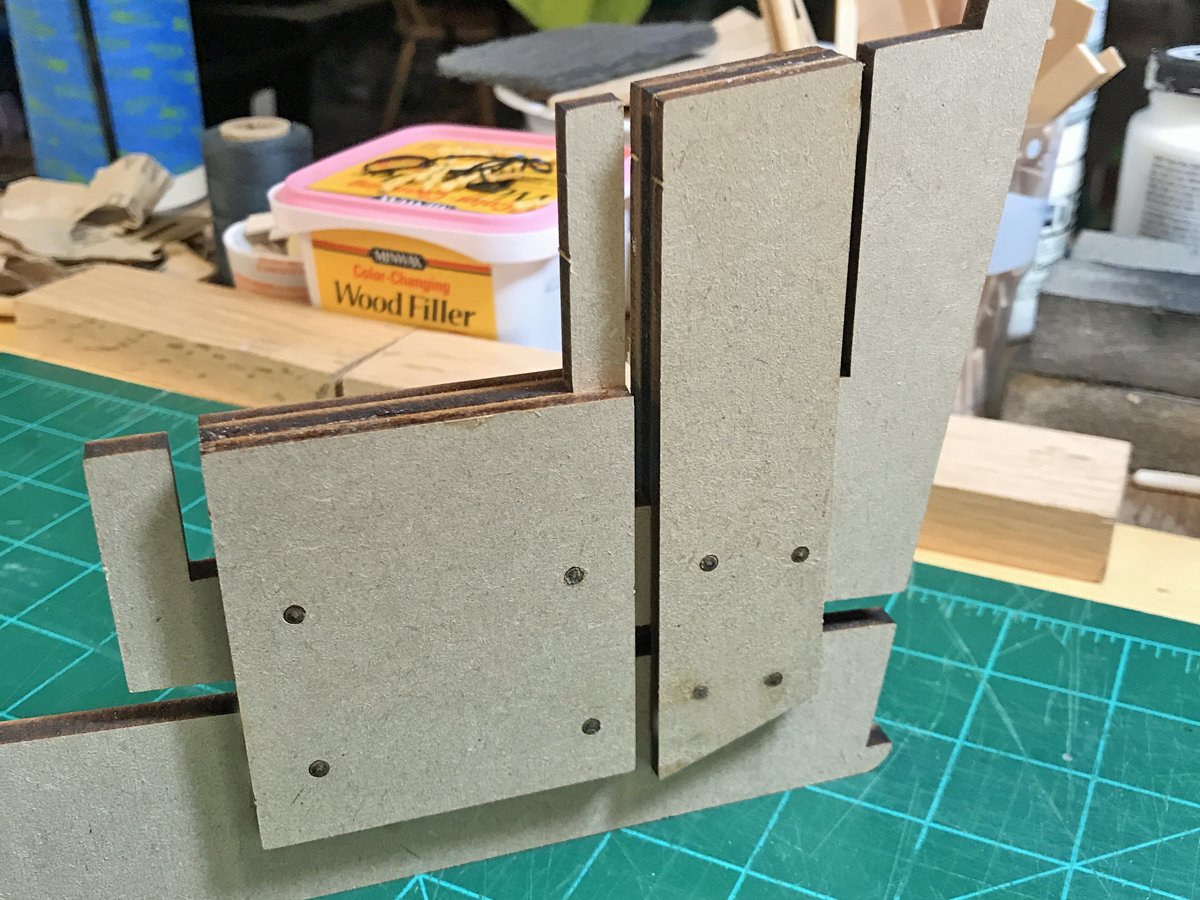
 After almost completing Lady Isabelle, by Chris from Vanguard Models I knew I wanted to do another model by Chris. Lady Isabelle created plenty of challenges for a newbie yet it was gratifying to be successful and learn new skills at the same time. I have yet to complete the rigging on Lady Isabelle. Having never done any rigging it is all new. The challenge I have is that I only have complete use of one arm, I have severed the motor nerve for my right bicep so I am unable to lift my right arm. I can put in place on a chair arm or table and then have limited use of my right hand. The challenge is not being able to elevate the arm or hand so tying knots or doing seizing is a one handed process, even with the use of a third hand clamp it is very difficult. So far after 40 hours of work I have gotten two blocks seized and one hank completed. It is exhausting mentally to do it. So I decided to do another boat and work on the rigging for just two hours a day, with the hope of eventually getting it the masts at least rigged. I decided to do the Fifie because it is 1/30 scale and hope that rigging will be easier with the bigger scale. We shall see. Because there are some great build logs for Fifie by DSmith20639, PJG, Tim Moore, and Ken I will not show the box or parts. However, I will echo their sentiments that Chris Watton is a great designer of boat models. I will concentrate on showing how I have been able with my physical limitations to complete some tasks which may be helpful to other newbies who have not yet gained the skills of the awesome model makers on this site. The first pictures below show the keel clamp I have made. It Is able to hold a long keel. it can rotate forward and back ward as well as left and right. It is essential to me being able to reach things with both hands simultaneously. It also shows the aluminum quarter rounds that I use to make sure the bulkheads are perfectly square. I have 4 of them to completely lock the bulkhead square. I also have them in 1/2", 3/4", 1", sizes in lengths of 2" and 4" so that they can be used on smaller scale models, like Lady Isabelle and larger scale models like Fifie. After almost completing Lady Isabelle, by Chris from Vanguard Models I knew I wanted to do another model by Chris. Lady Isabelle created plenty of challenges for a newbie yet it was gratifying to be successful and learn new skills at the same time. I have yet to complete the rigging on Lady Isabelle. Having never done any rigging it is all new. The challenge I have is that I only have complete use of one arm, I have severed the motor nerve for my right bicep so I am unable to lift my right arm. I can put in place on a chair arm or table and then have limited use of my right hand. The challenge is not being able to elevate the arm or hand so tying knots or doing seizing is a one handed process, even with the use of a third hand clamp it is very difficult. So far after 40 hours of work I have gotten two blocks seized and one hank completed. It is exhausting mentally to do it. So I decided to do another boat and work on the rigging for just two hours a day, with the hope of eventually getting it the masts at least rigged. I decided to do the Fifie because it is 1/30 scale and hope that rigging will be easier with the bigger scale. We shall see. Because there are some great build logs for Fifie by DSmith20639, PJG, Tim Moore, and Ken I will not show the box or parts. However, I will echo their sentiments that Chris Watton is a great designer of boat models. I will concentrate on showing how I have been able with my physical limitations to complete some tasks which may be helpful to other newbies who have not yet gained the skills of the awesome model makers


-
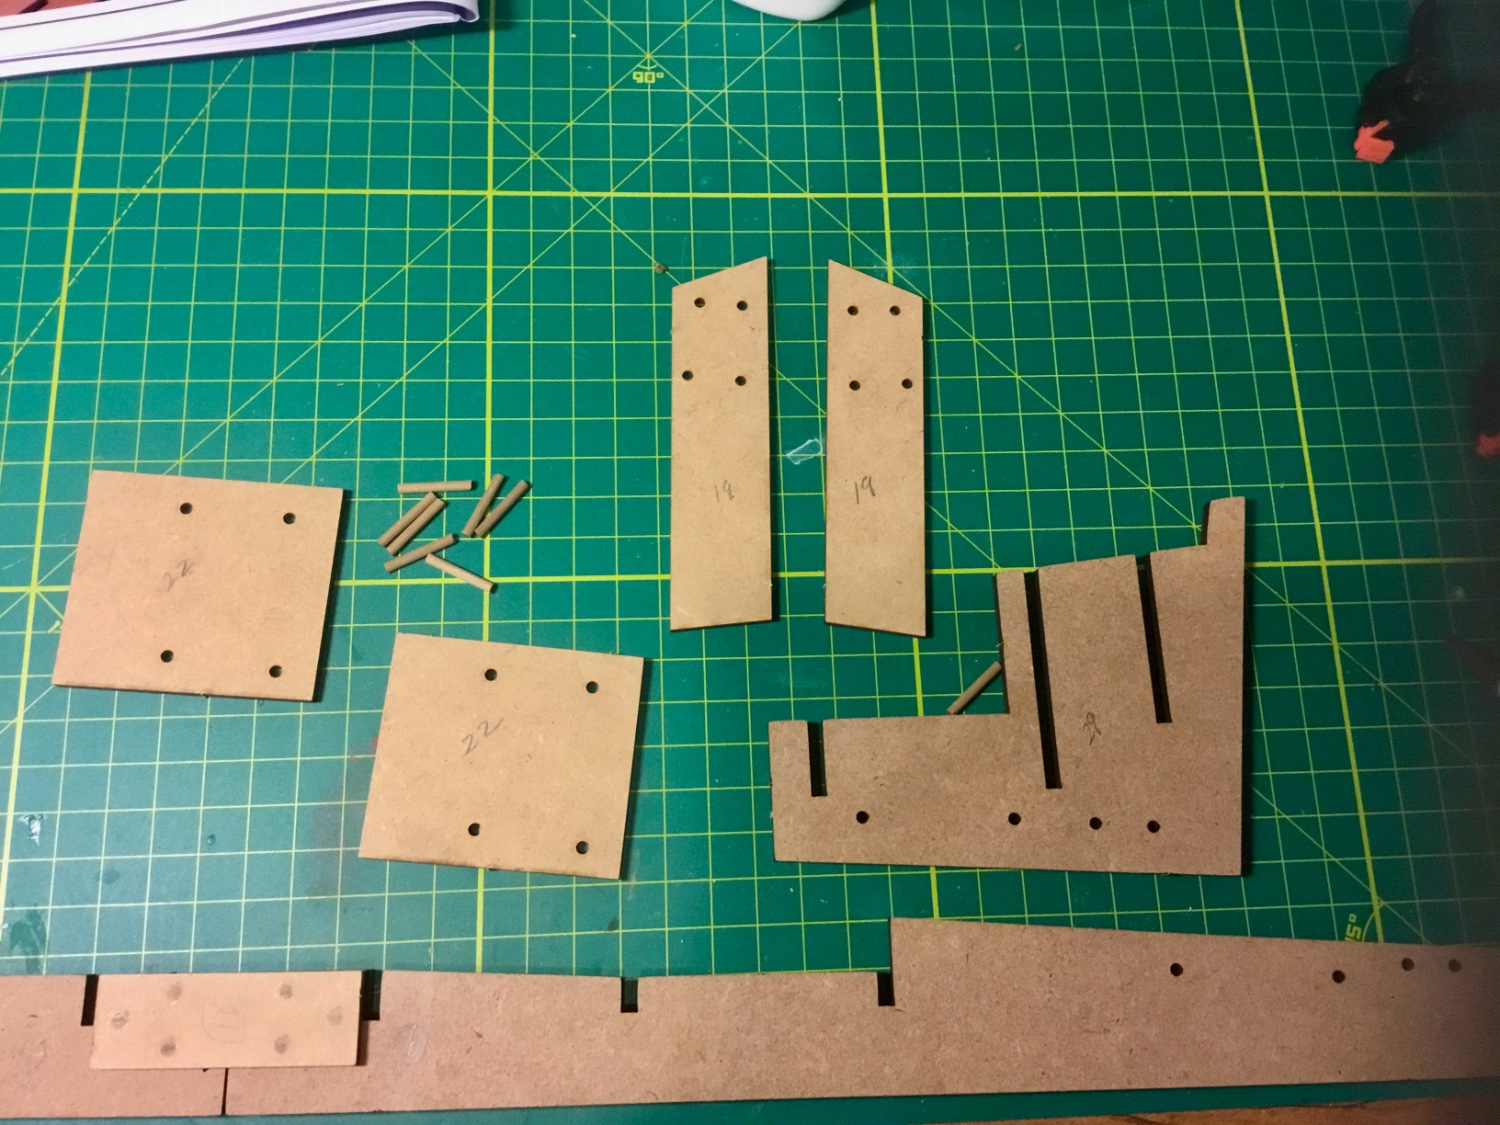
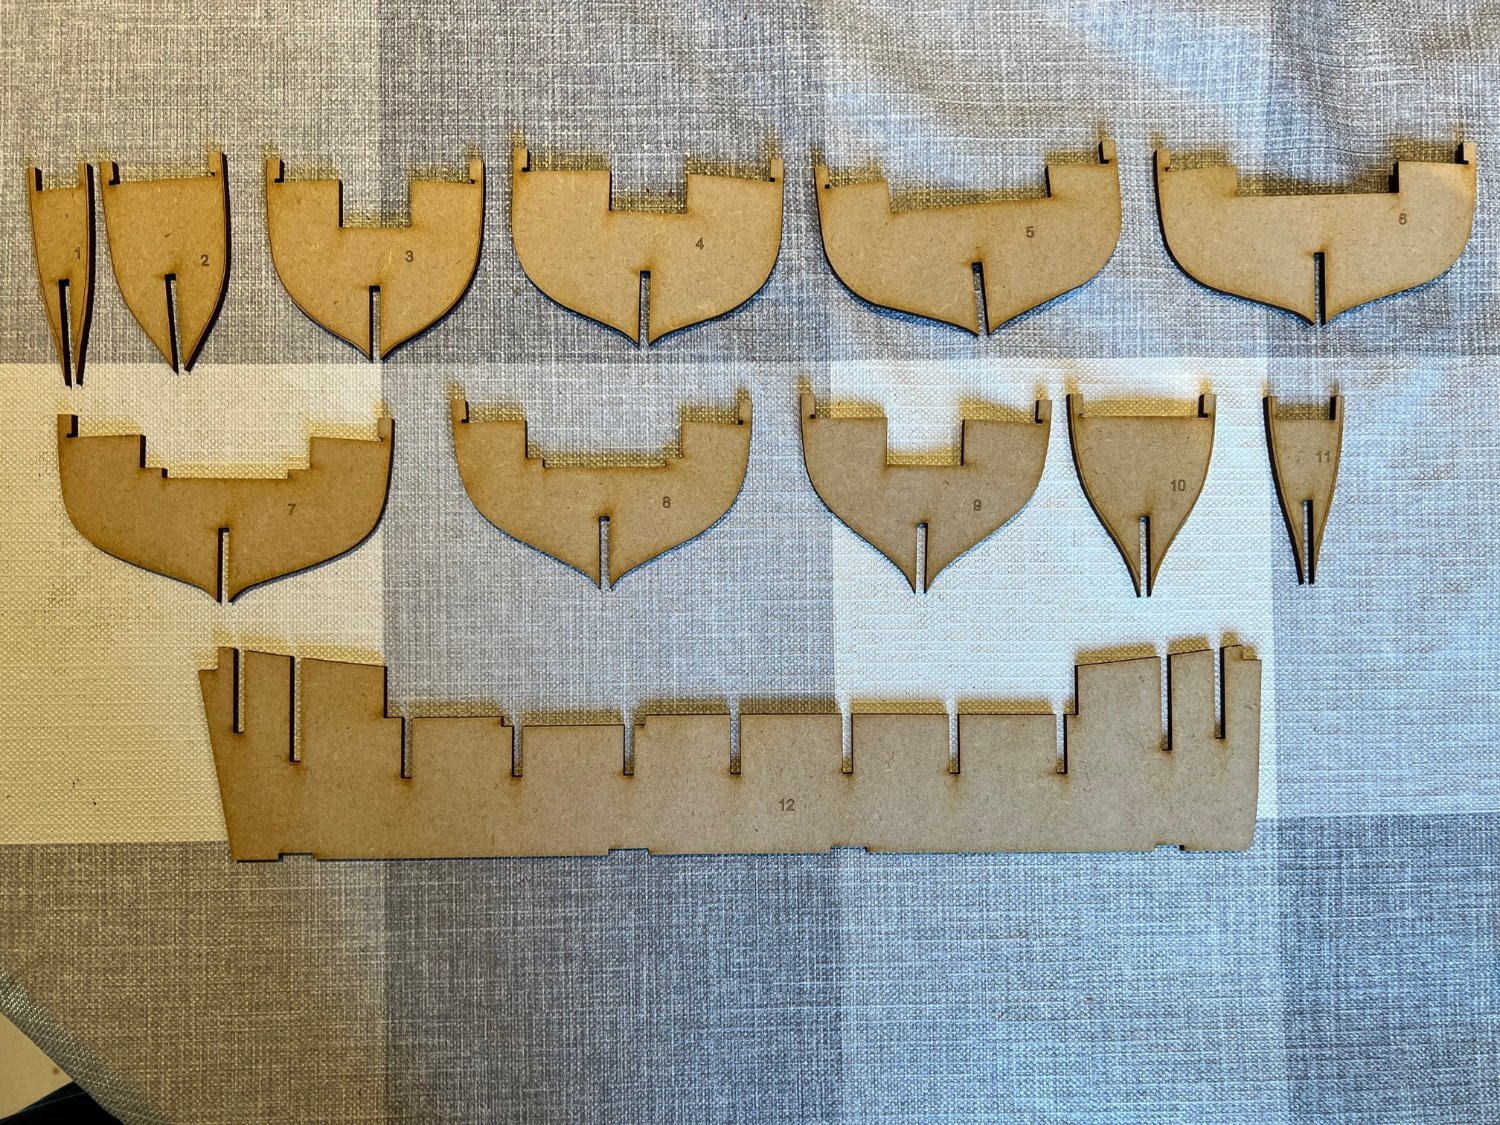
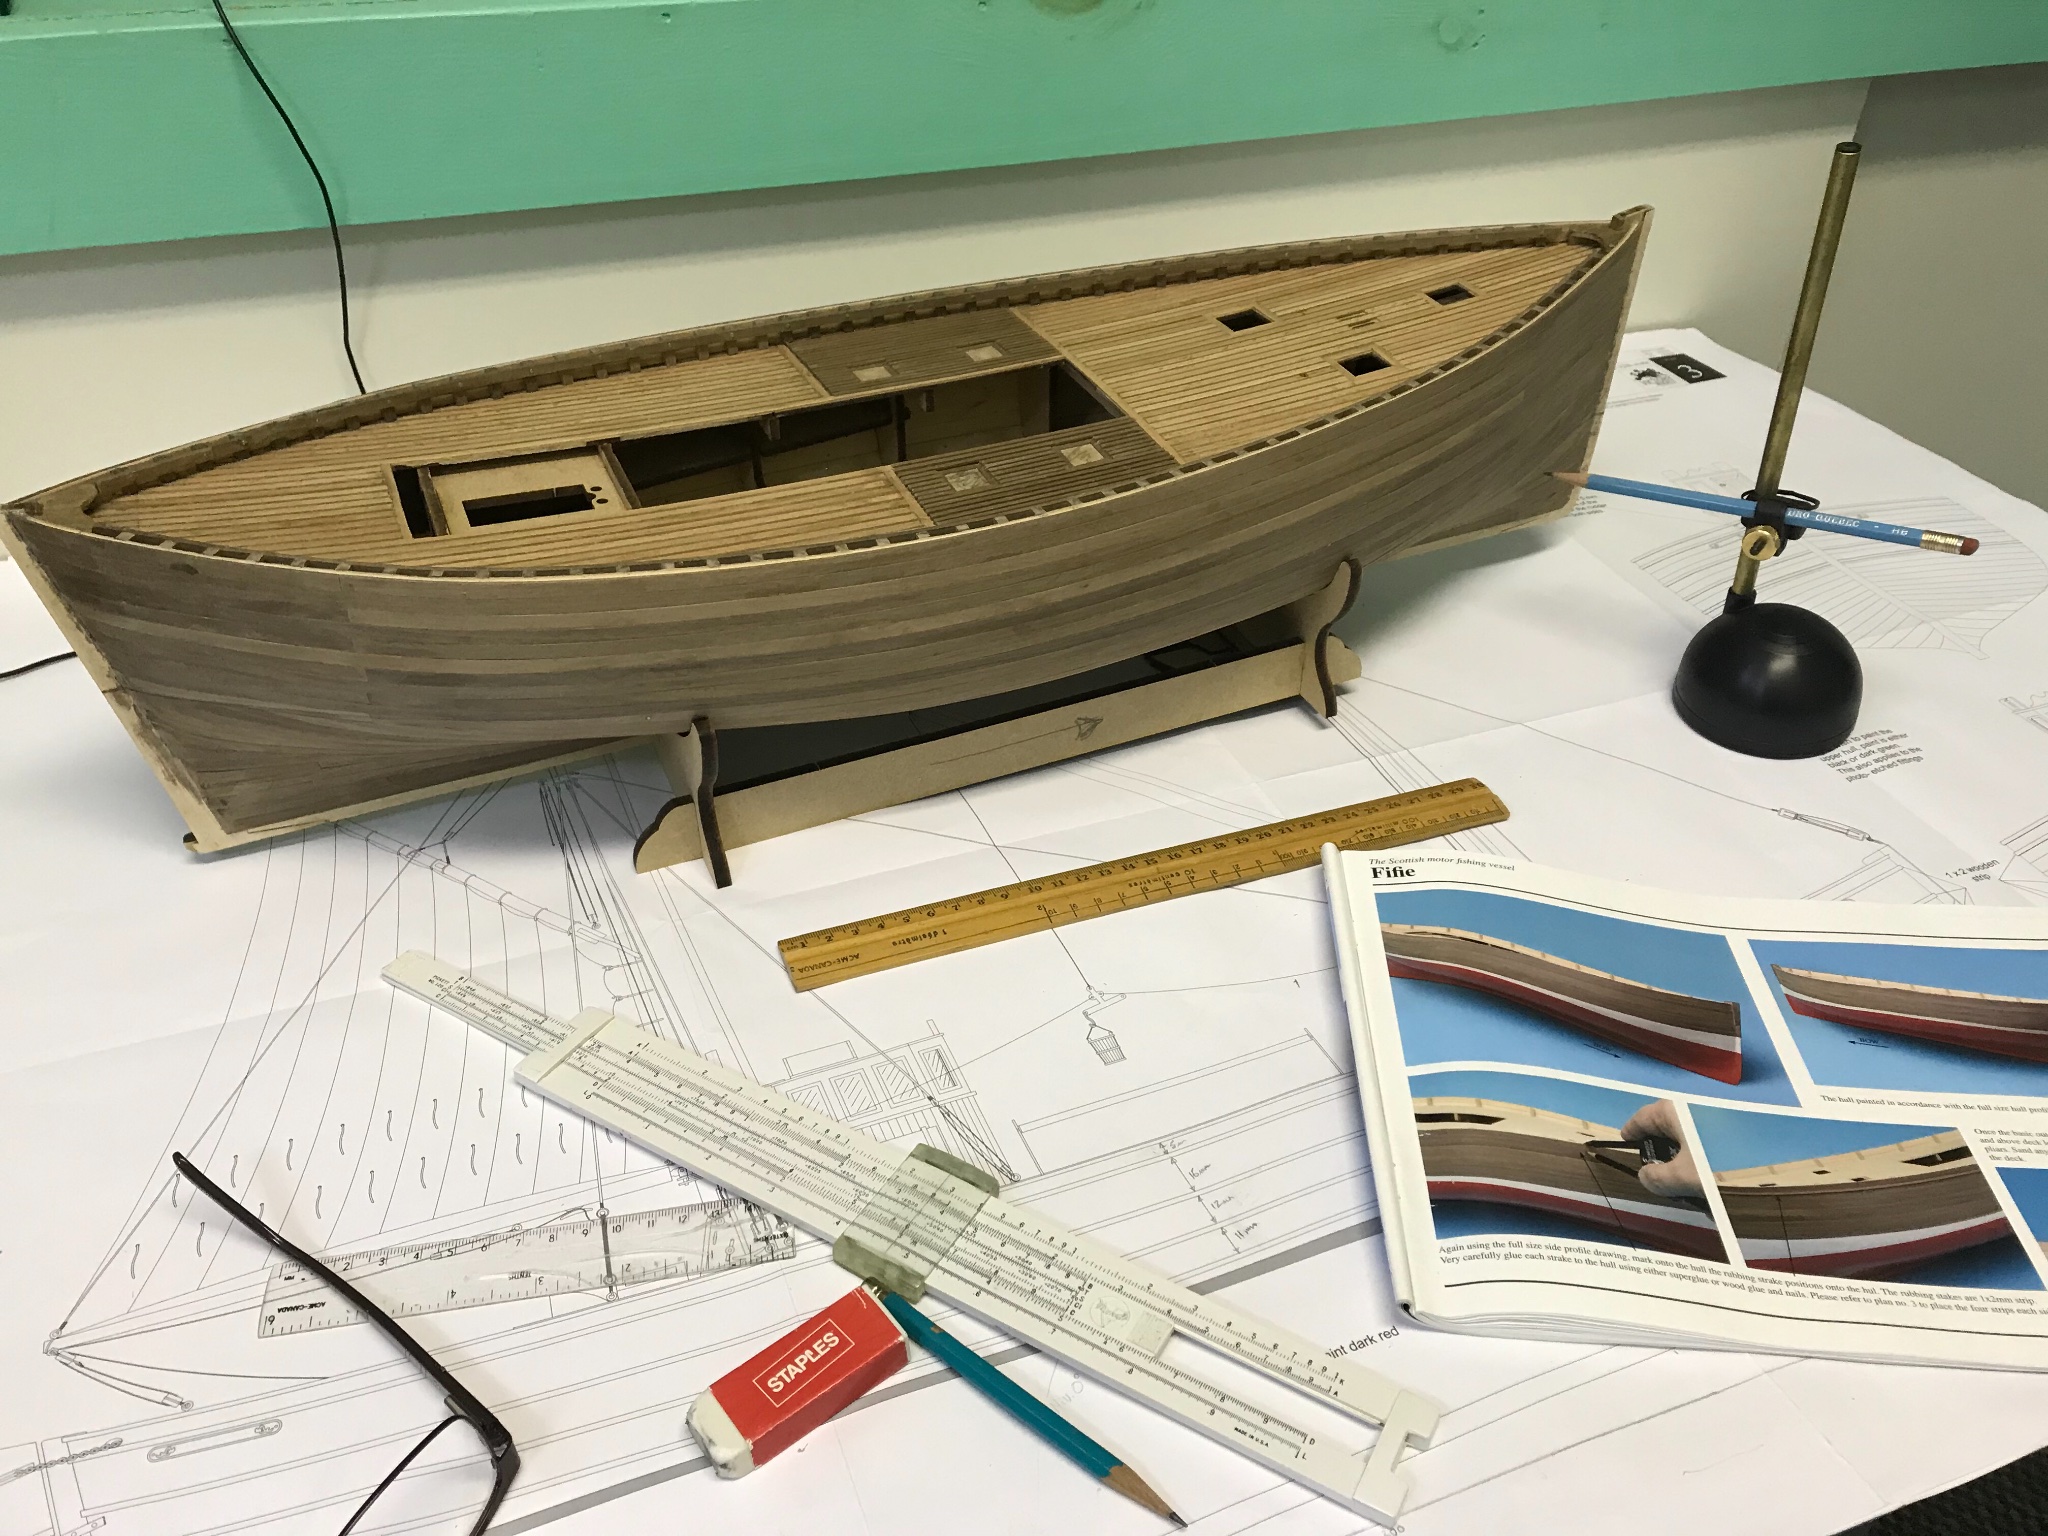
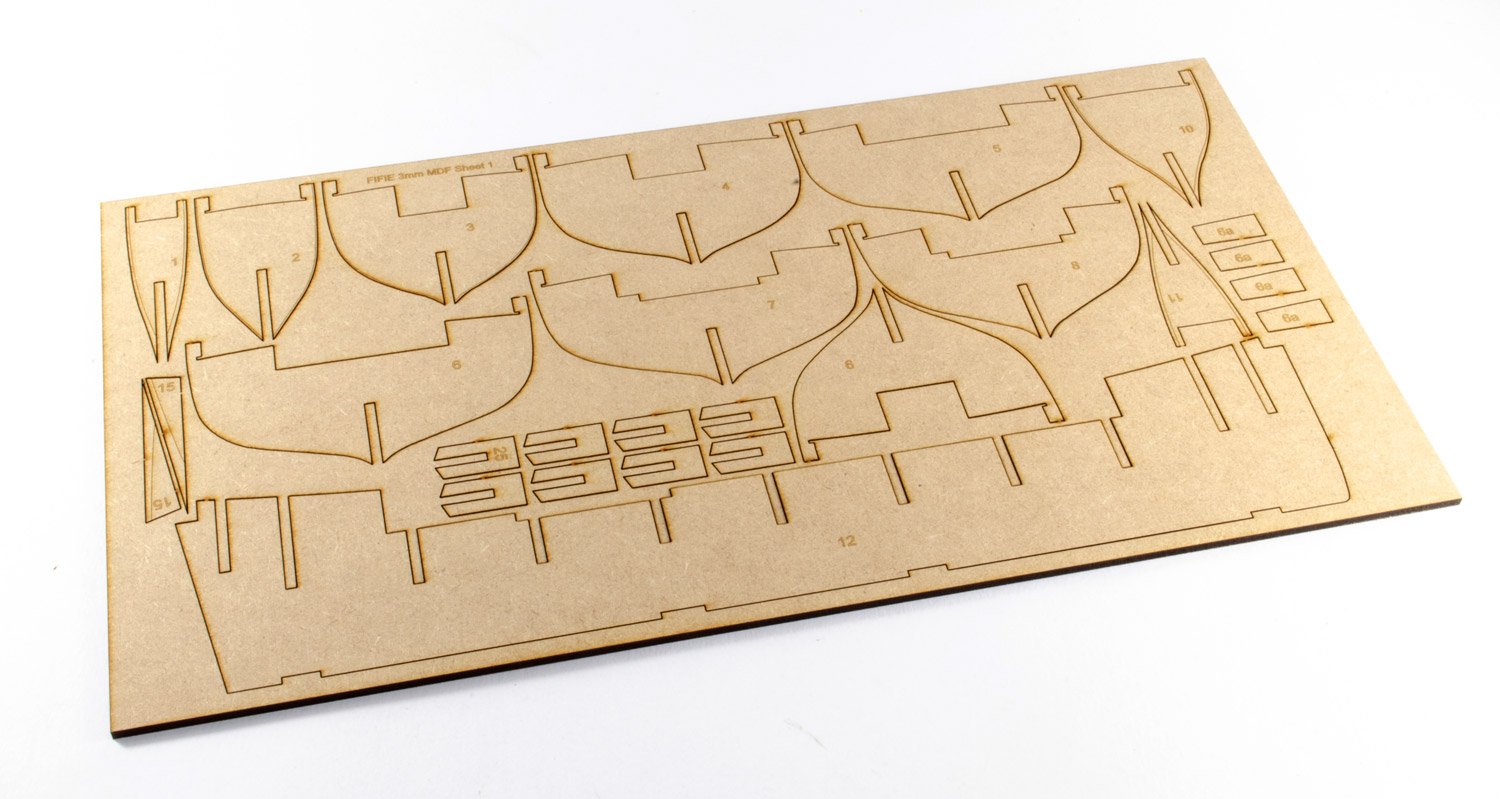
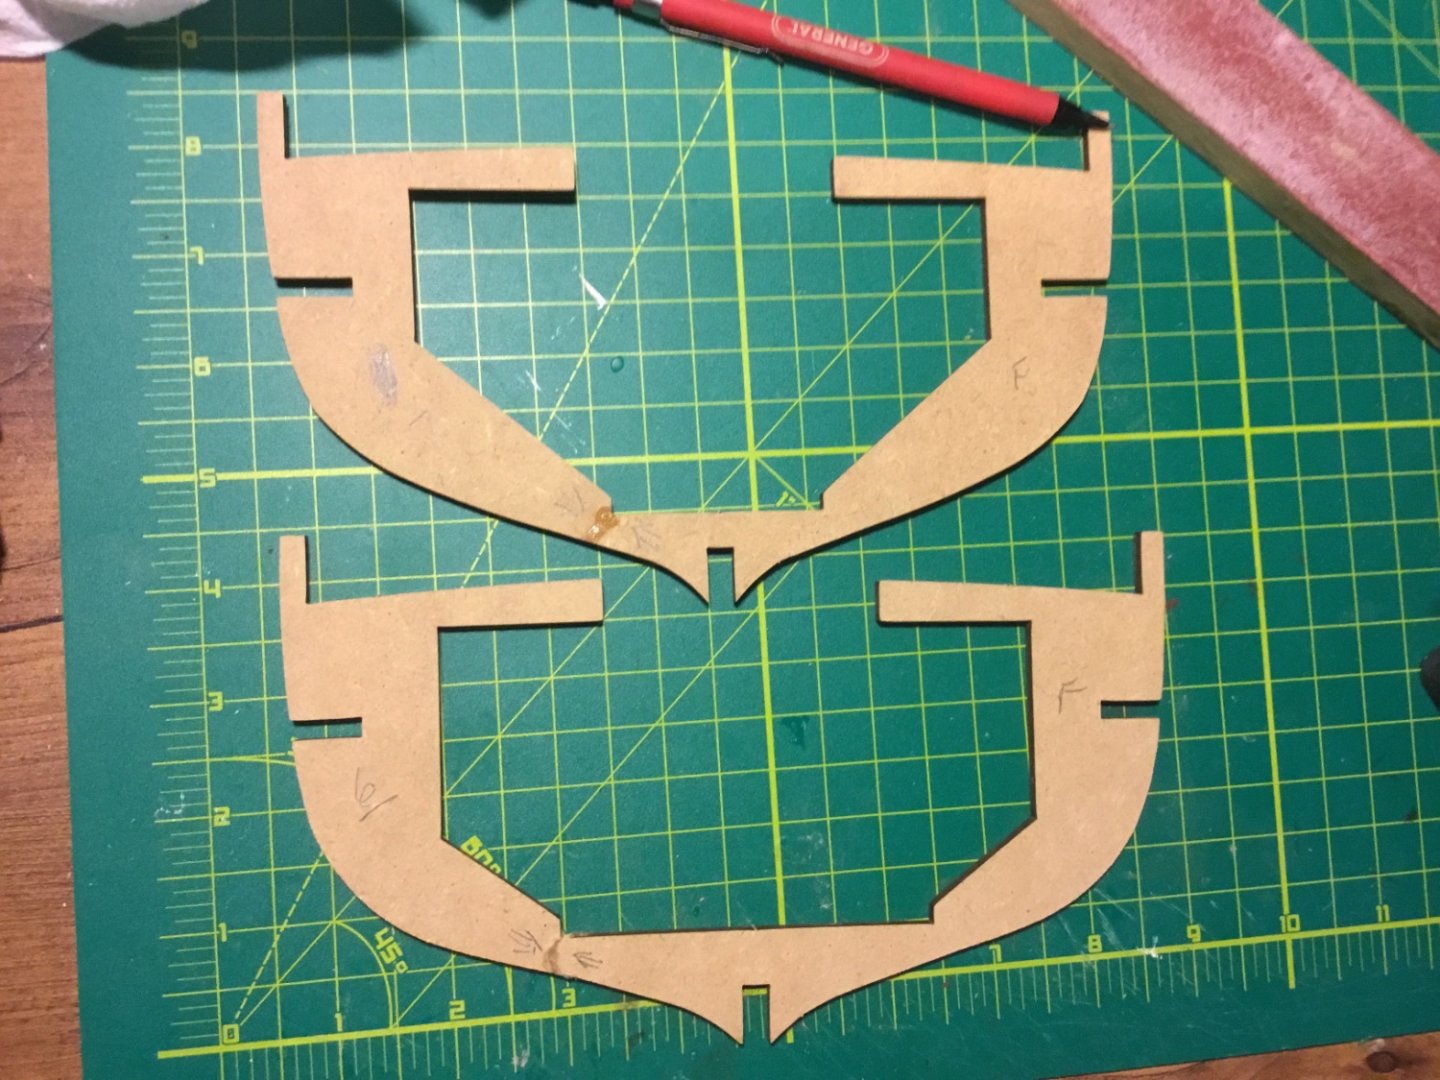
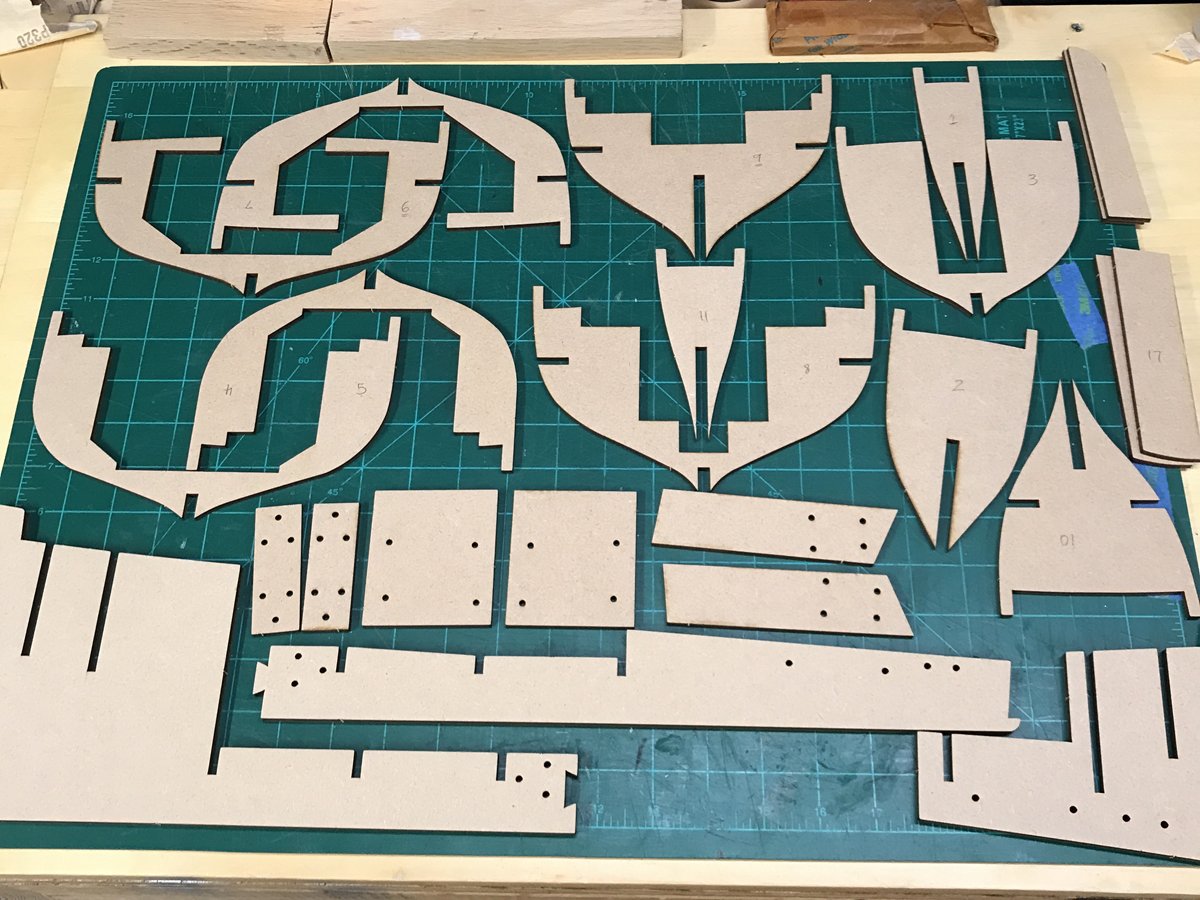
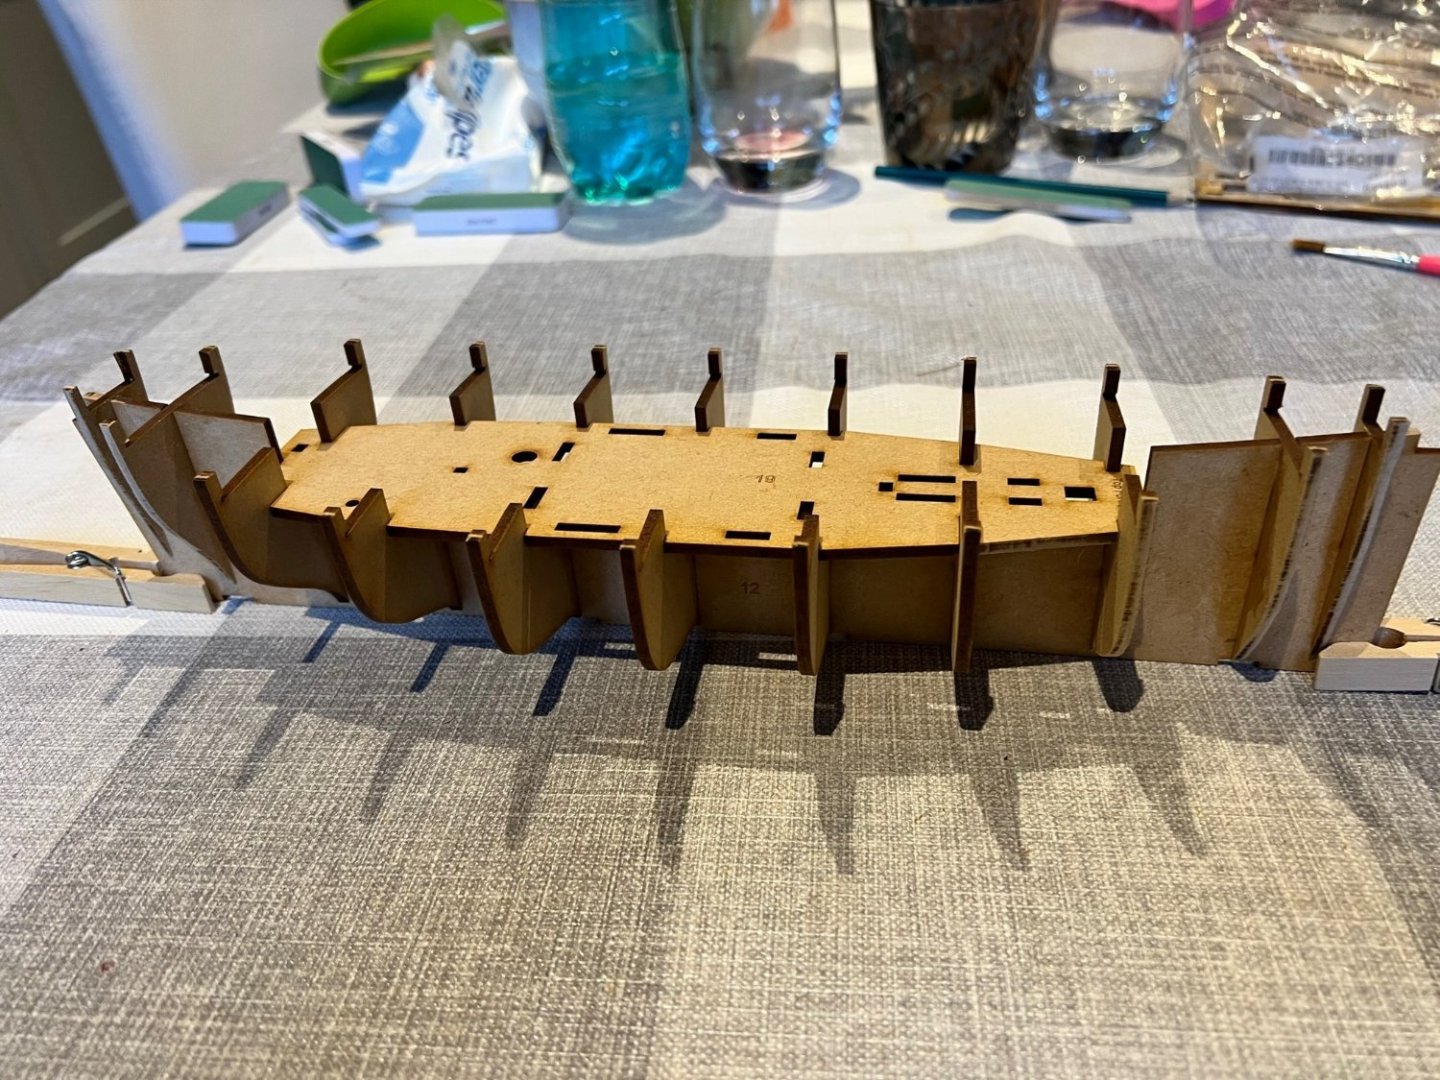
 Began build of Fifie Scottish fishing vessel by Amati. MDF hull parts presented a few problems. Sanding of parts required use of a respirator and shop vacuum because of the fine dust. Somehow one bulkhead broke and another almost did even though I thought I was being very careful. Never had that problem with wood frames. Plans called for numbering parts before removing from laser cut sheets and rough beveling fore and aft bulkheads before installation. It would have been nice if Amati had used the laser to number the parts and indicate an approximate line for the beveling. I assembled the hull parts following the directions , and used a batten to fair the frames. Next up is to install the main deck panels and then begin the first level of planking.
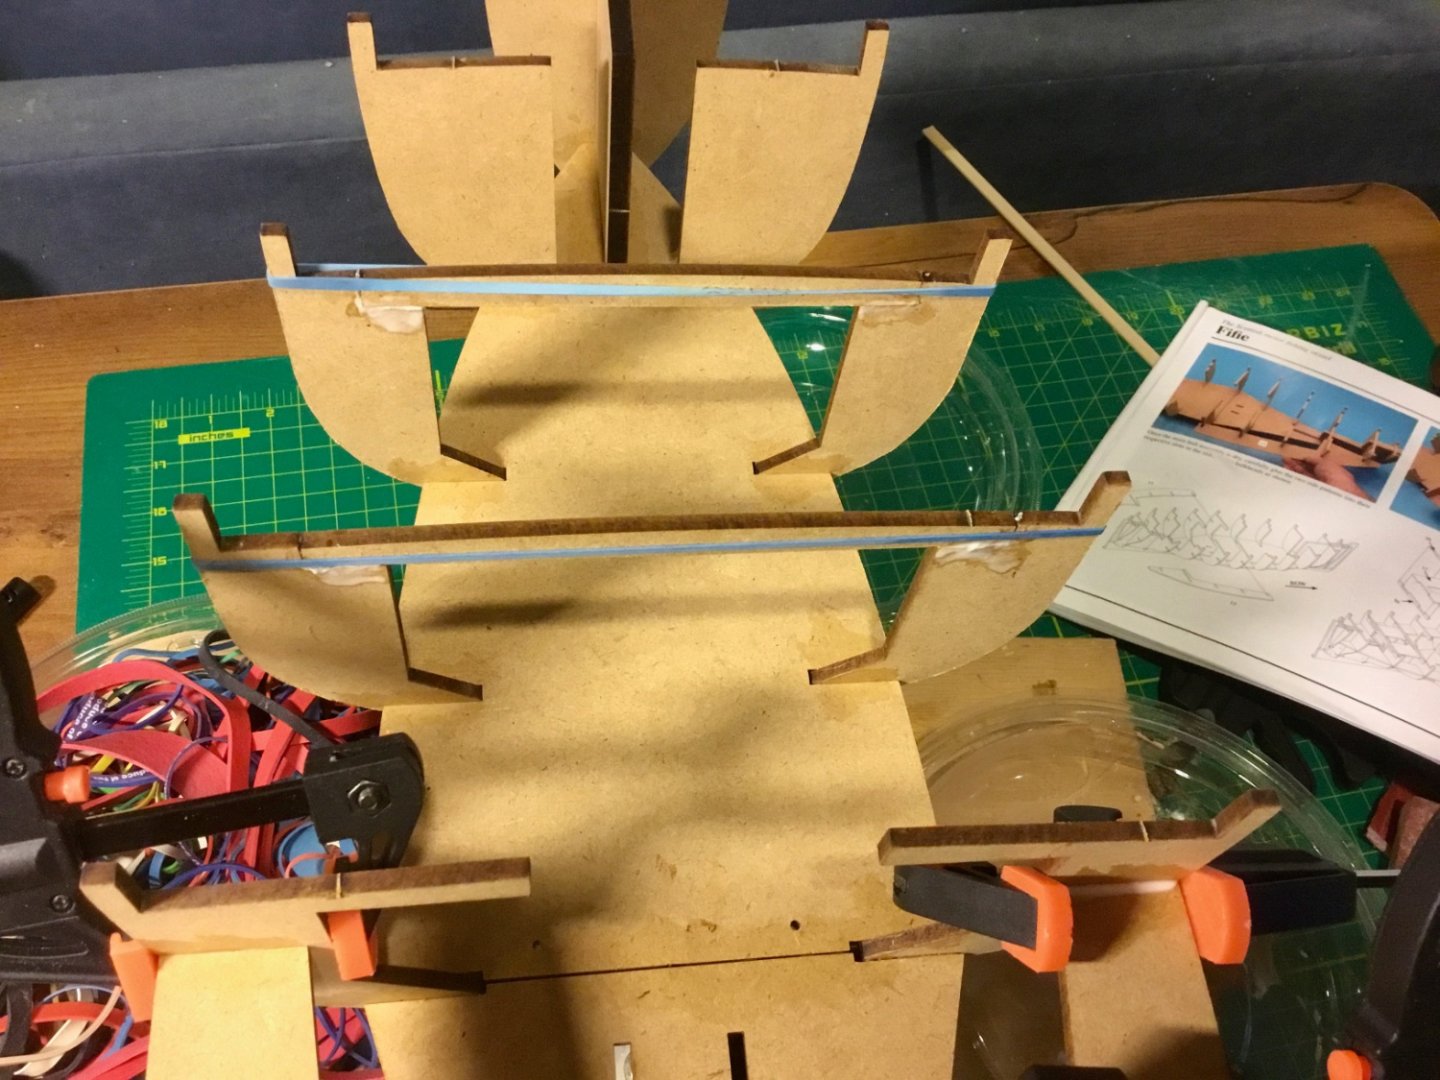


-
 Good morning all, I want to share with you an alternative nice way for caulking the deck of your model ship. I used this technique for the Fifie as you can read by the thread title, but I think the best use case would be for modern era Yacht or similar. I chose this technique because this type of sealant (used in real ships) helps sealing the whole deck as this is an RC model. Precautions is never enough eheh 😁... In any case, I hope it will be useful for people out there building big scale yachts, modern ship or just want to try a new technique ⛵ Here is the link to the full video. https://www.youtube.com/watch?v=CybjsdaI1J8
 -
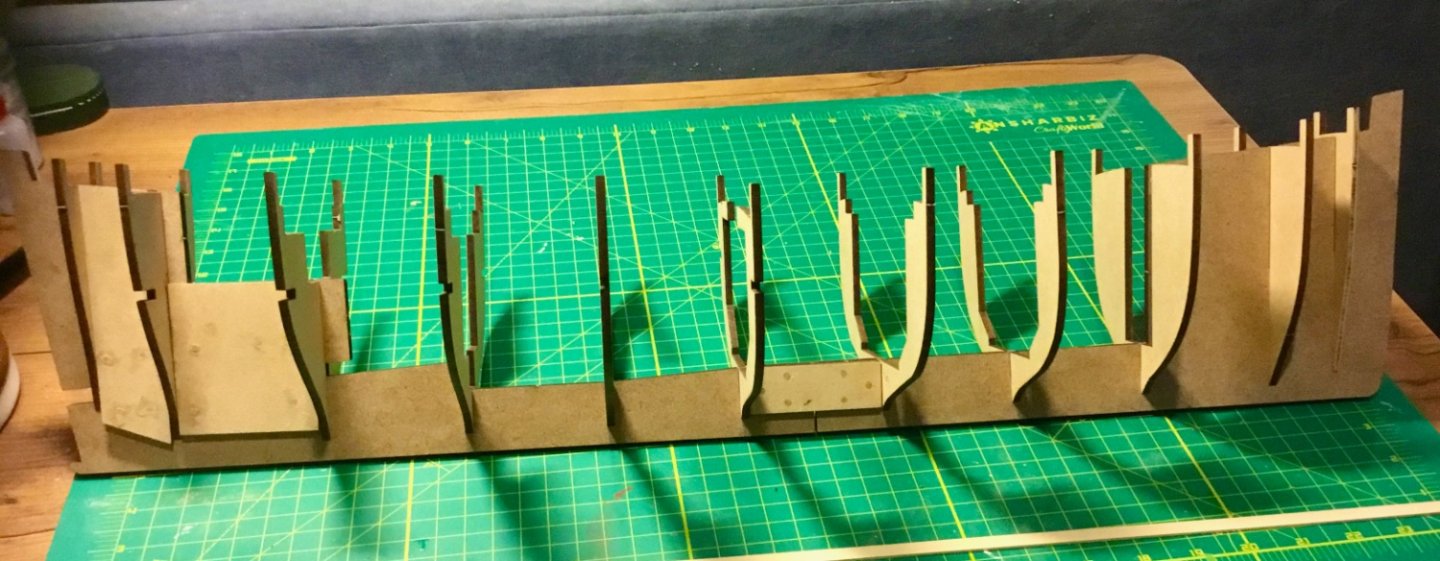
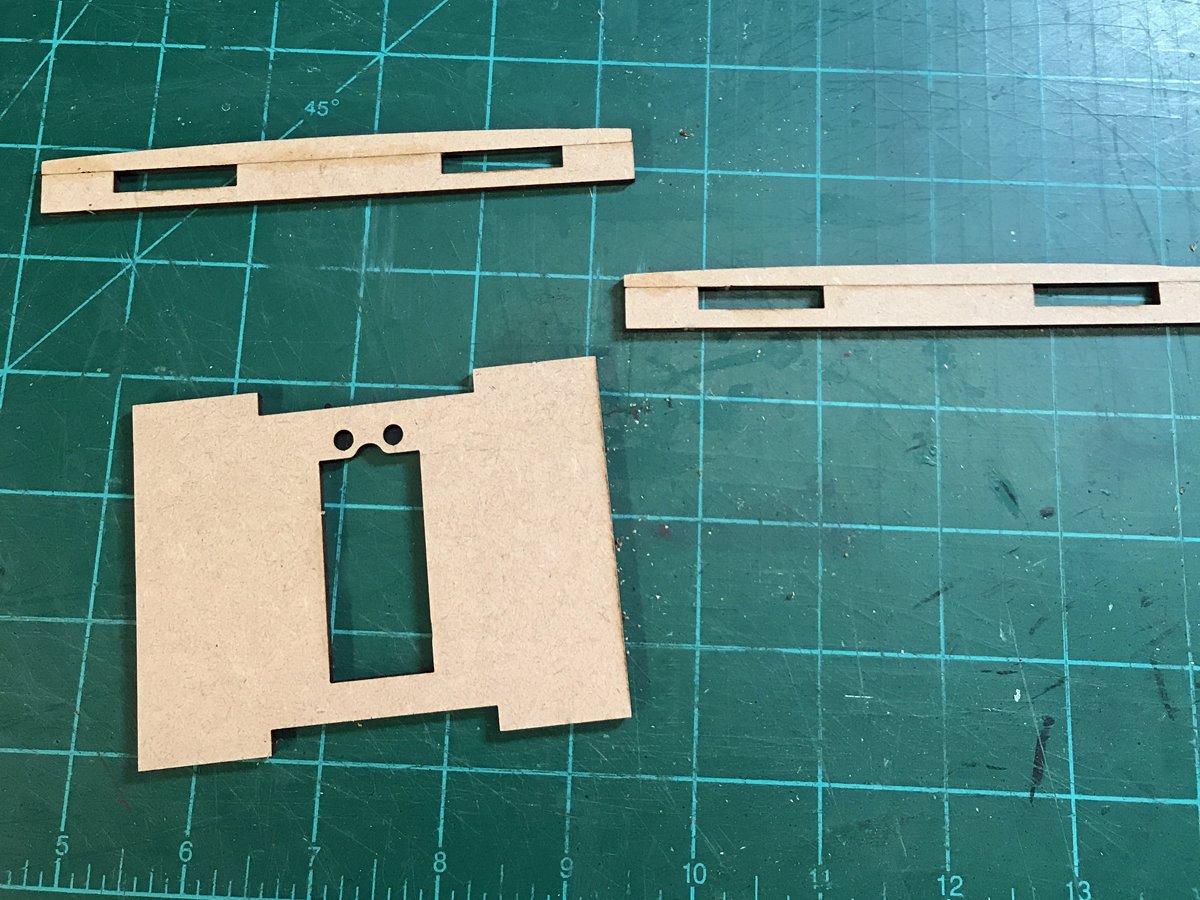
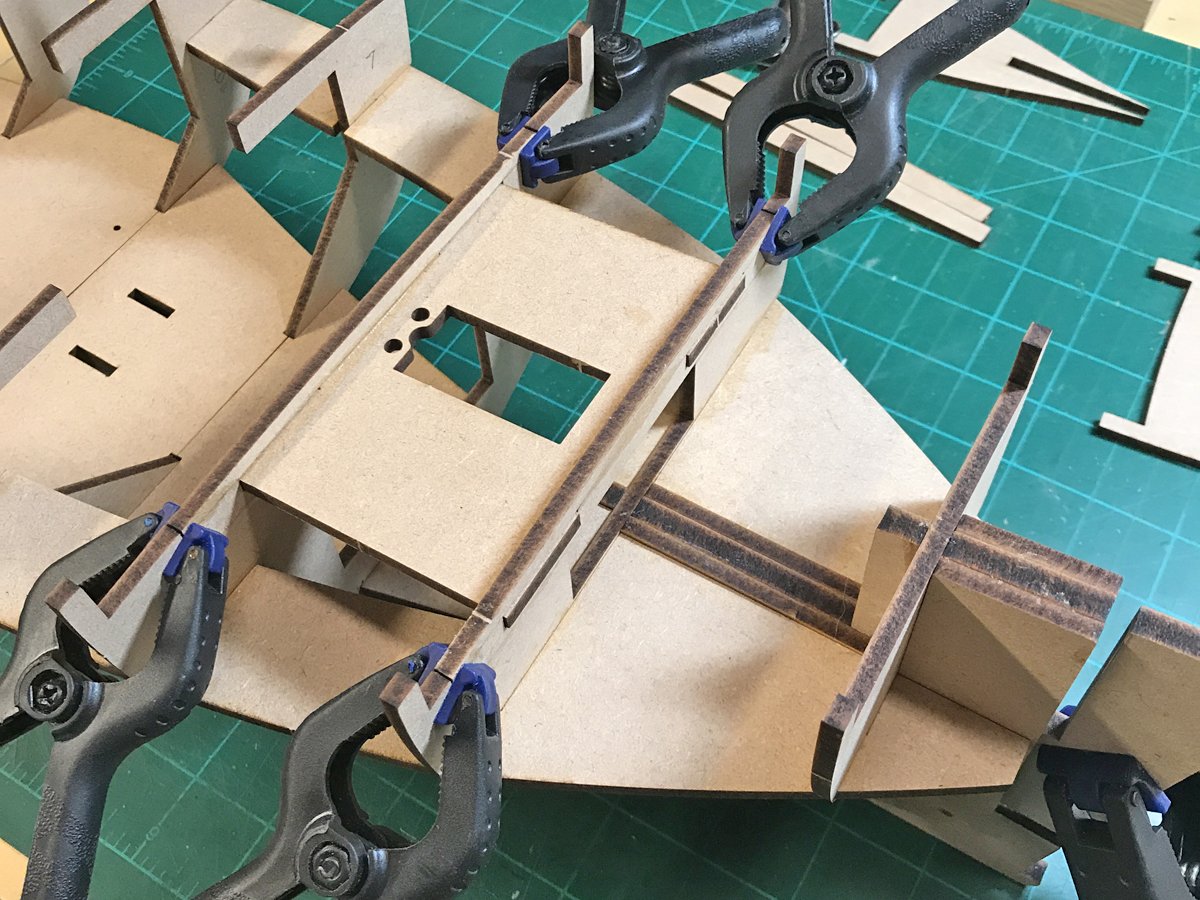
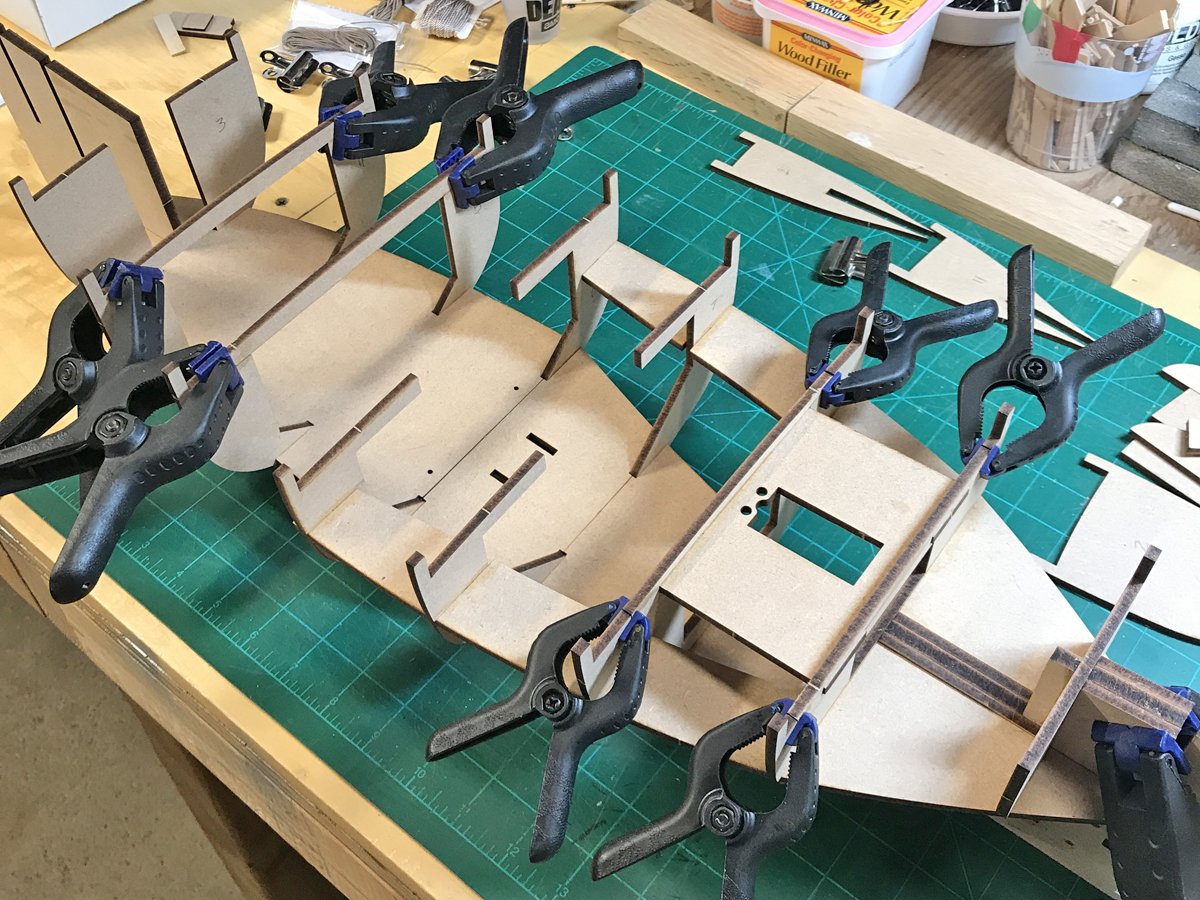
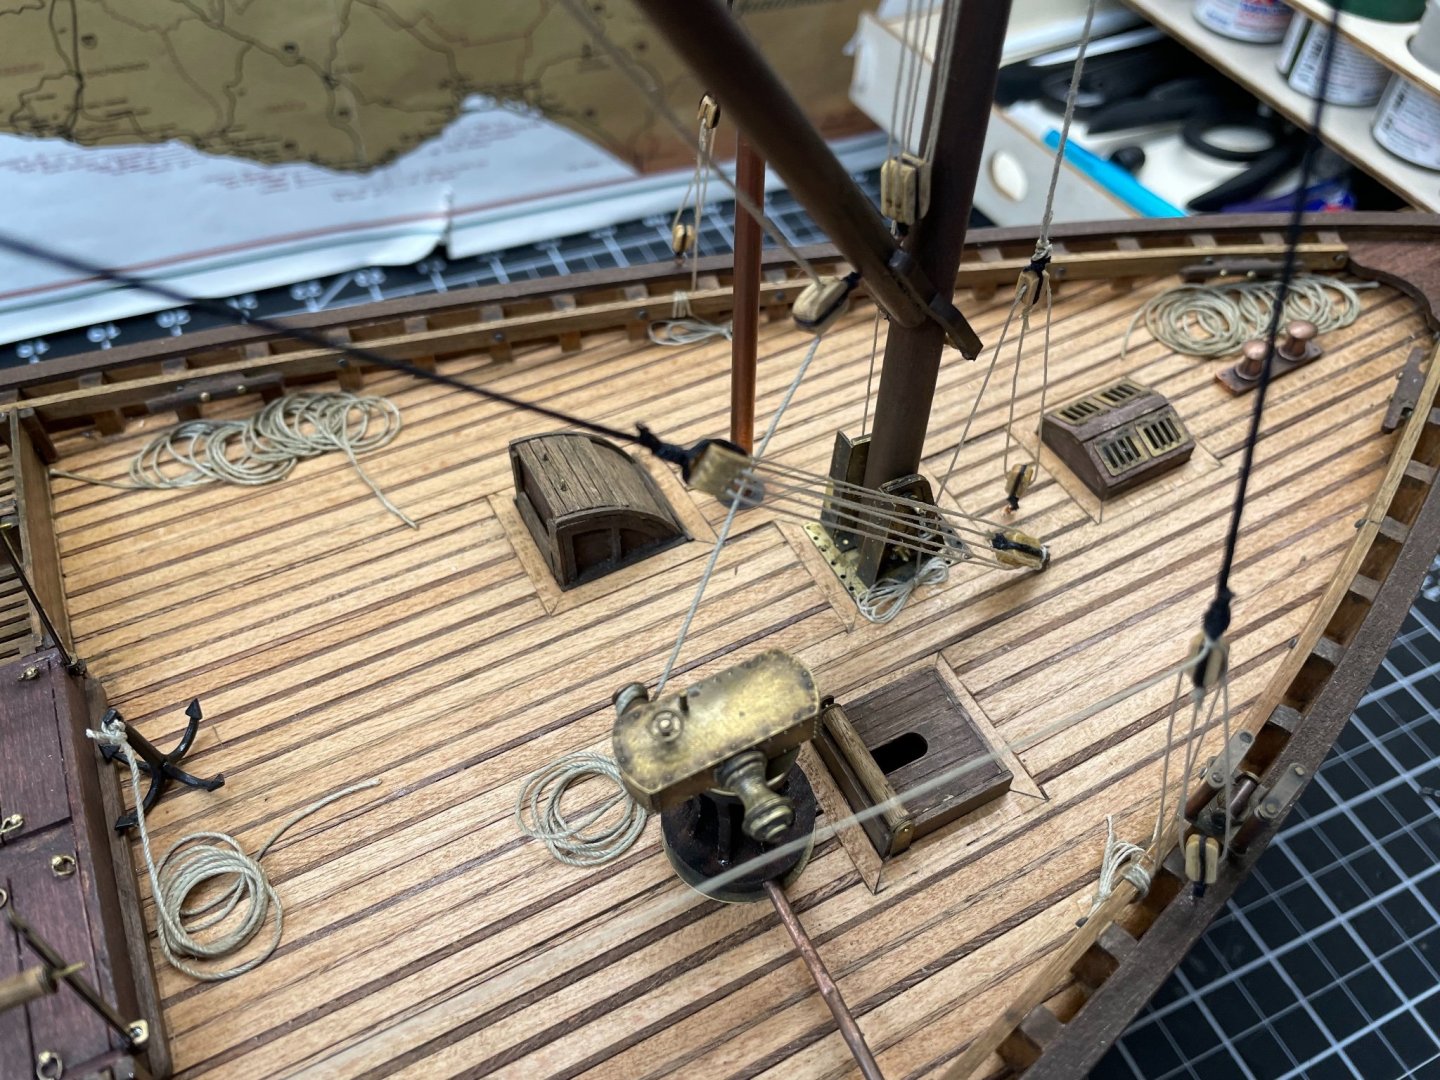
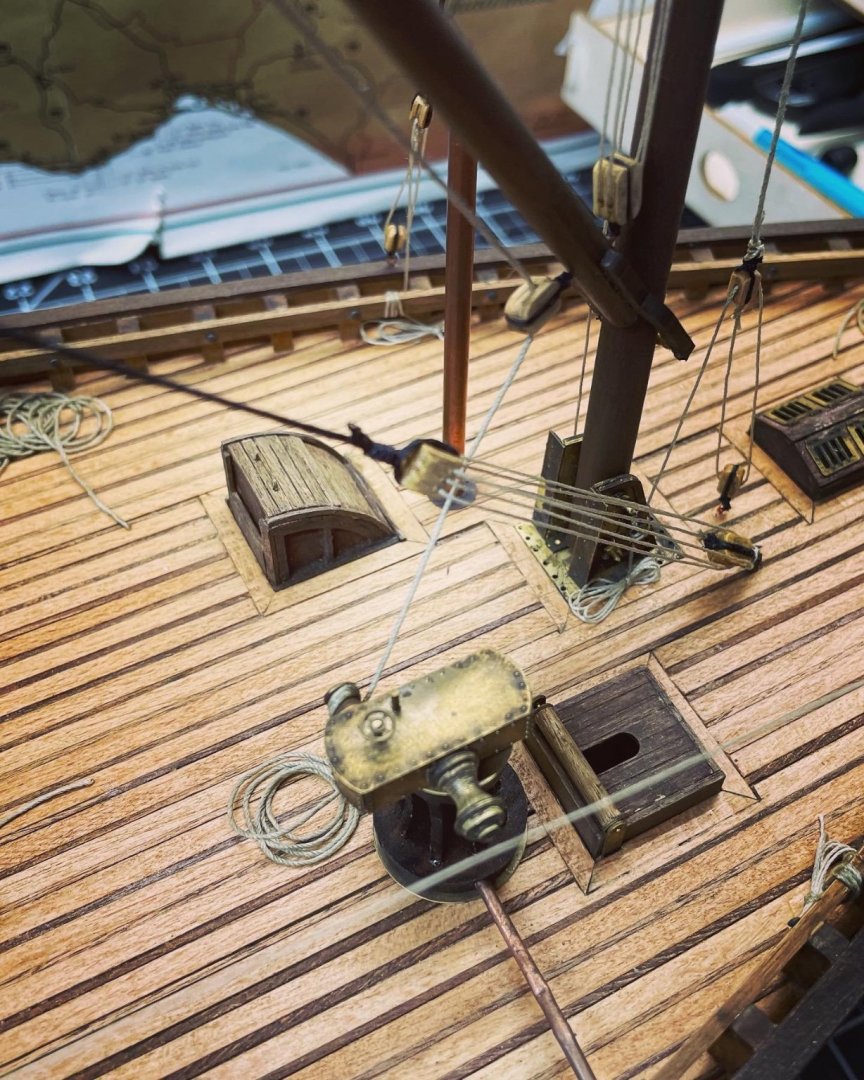
 I won’t spend much time going over the kit in general because James H did a very thorough job of that in his excellent review here. As James said, the box is packed with high quality material, a clear, full-color instruction booklet and 7 sheets of detailed plans. I’ve read lots of great things about Chris Watton’s kit designs here and from what I've experienced so far, the praise is well-deserved. A word of caution for those of you with limited work space...this is a BIG kit! I knew the specs going in but didn't fully appreciate the sheer size of this thing until I started dry-fitting the frames. I'm drooling over the possibilities in terms of adding detail to this build but you need to have plenty of space if you decide to give this one a go. I have fairly ambitious plans for this kit. I'll be displaying the Fifie as a waterline build in the act of hauling nets. I haven't quite figured out how I'll be pulling this off but I love the look of these boats in the water and really want to display it that way. I'd also like to add some crew if I can get my hands on some halfway decent 1:32 figures to rework into Scottish fishermen. With that said, here we go... A nice big box full of high quality stuff! The die-cuts here are very clean and precise...not at all like my previous build. Kudos to Chris Watton's clever engineering which makes assembling the frames problem-free and extremely sturdy. Even I can't screw this up! Stern assembly. The bulkheads fit perfectly without modification. Making quick work of the frames thanks to excellent fit/finish. Each part adds stability and guarantees correct alignment. This tray is intended to house the rudder servo if you plan to do an RC build but needs to be installed regardless. And just like that, if you're not going to be chopping the hull off at the waterline (probably a wise choice!), the sub-deck can be installed. I, however, will need to do some additional planning to add support and stability for the surgery to come. Stay tuned...
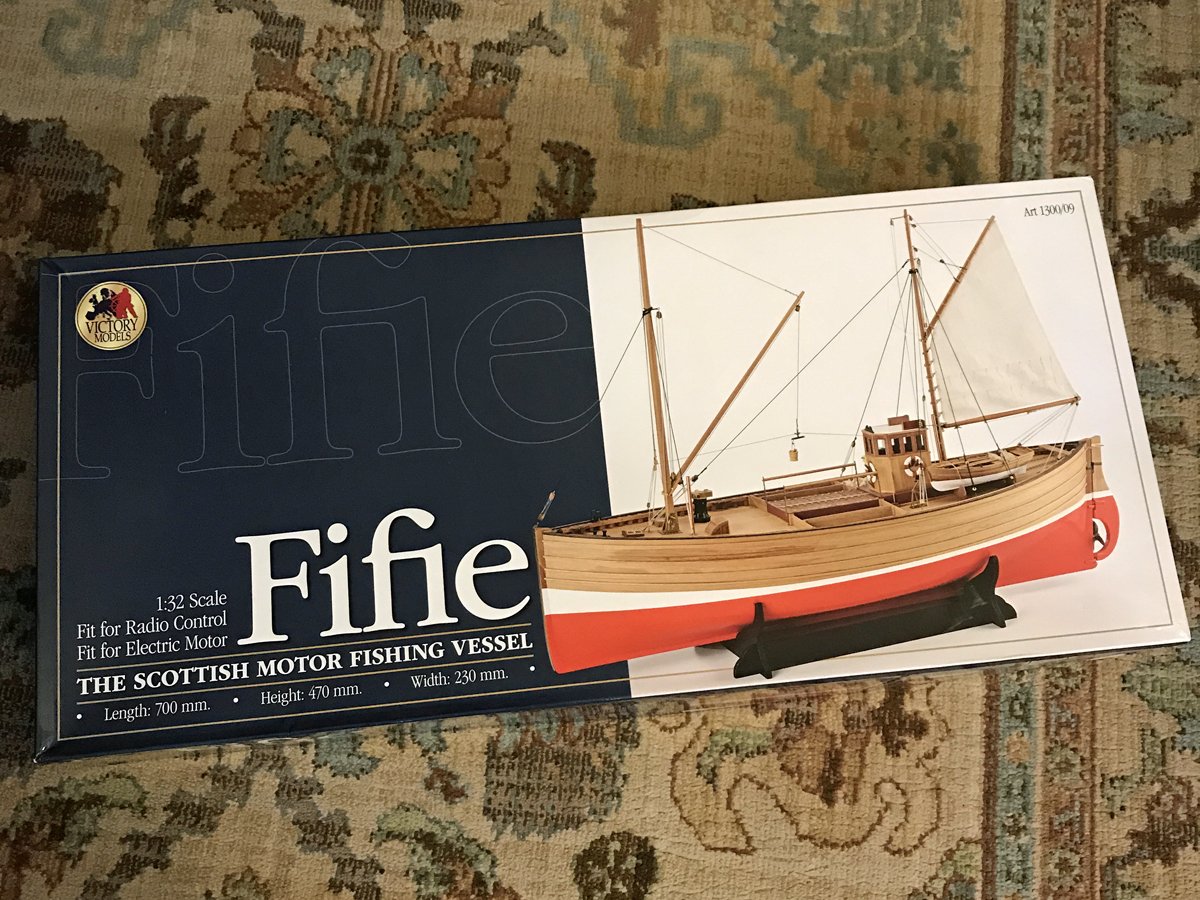

-
 Started new build of the Amati Fifie. Several nice build logs on the forum w;hich I have reviewed and from which I will shamelessly filch ideas. I continue my trend of always have the next project chosen by the old Monty Python line: " And now for something completely different." I'm out of display room here in Rochester, Minnesota, to this one will travel to our place in Marblehead, Massachusetts which seems a more appropriate home anyway.
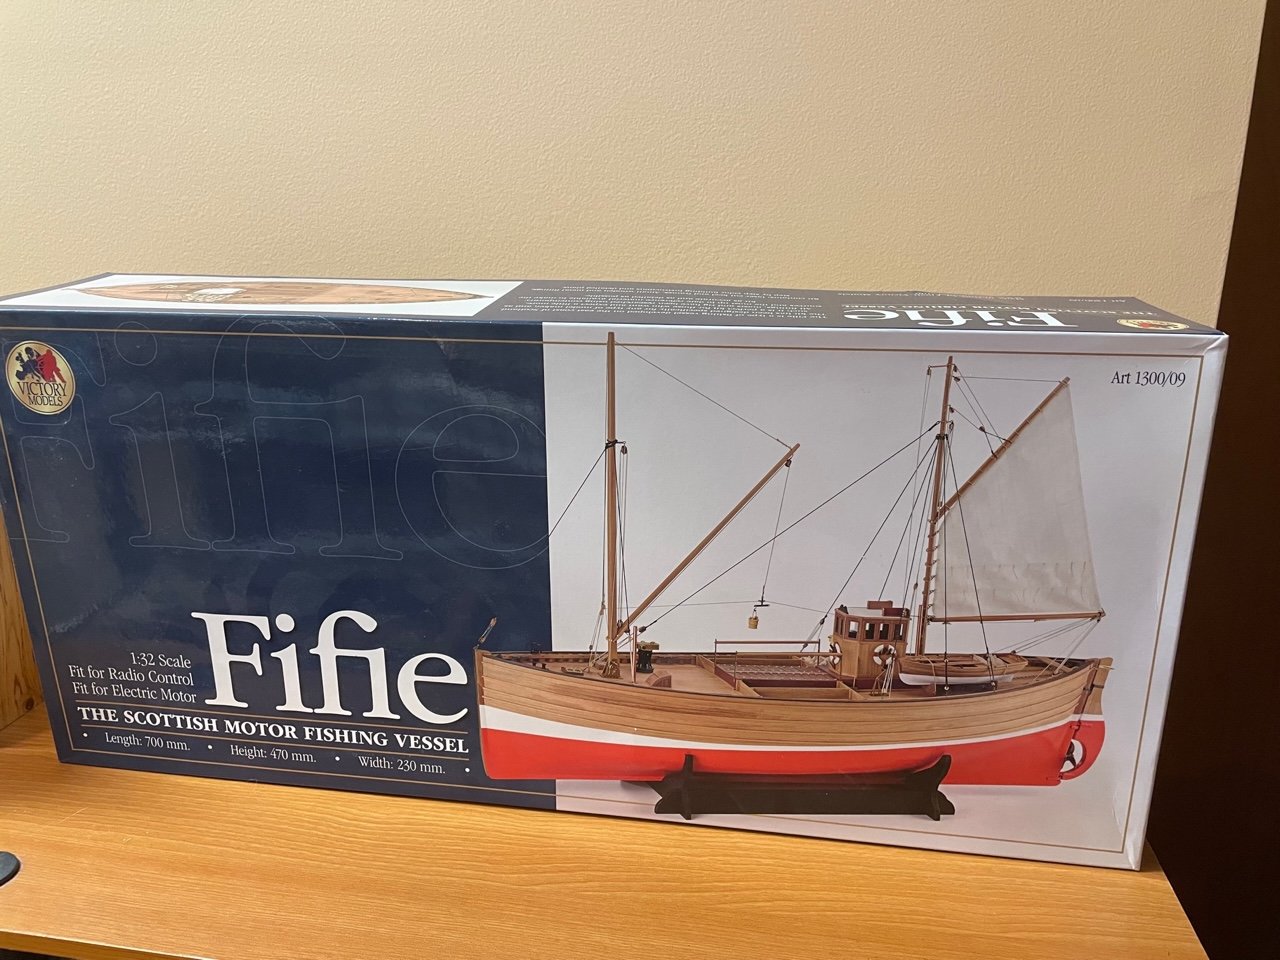
-
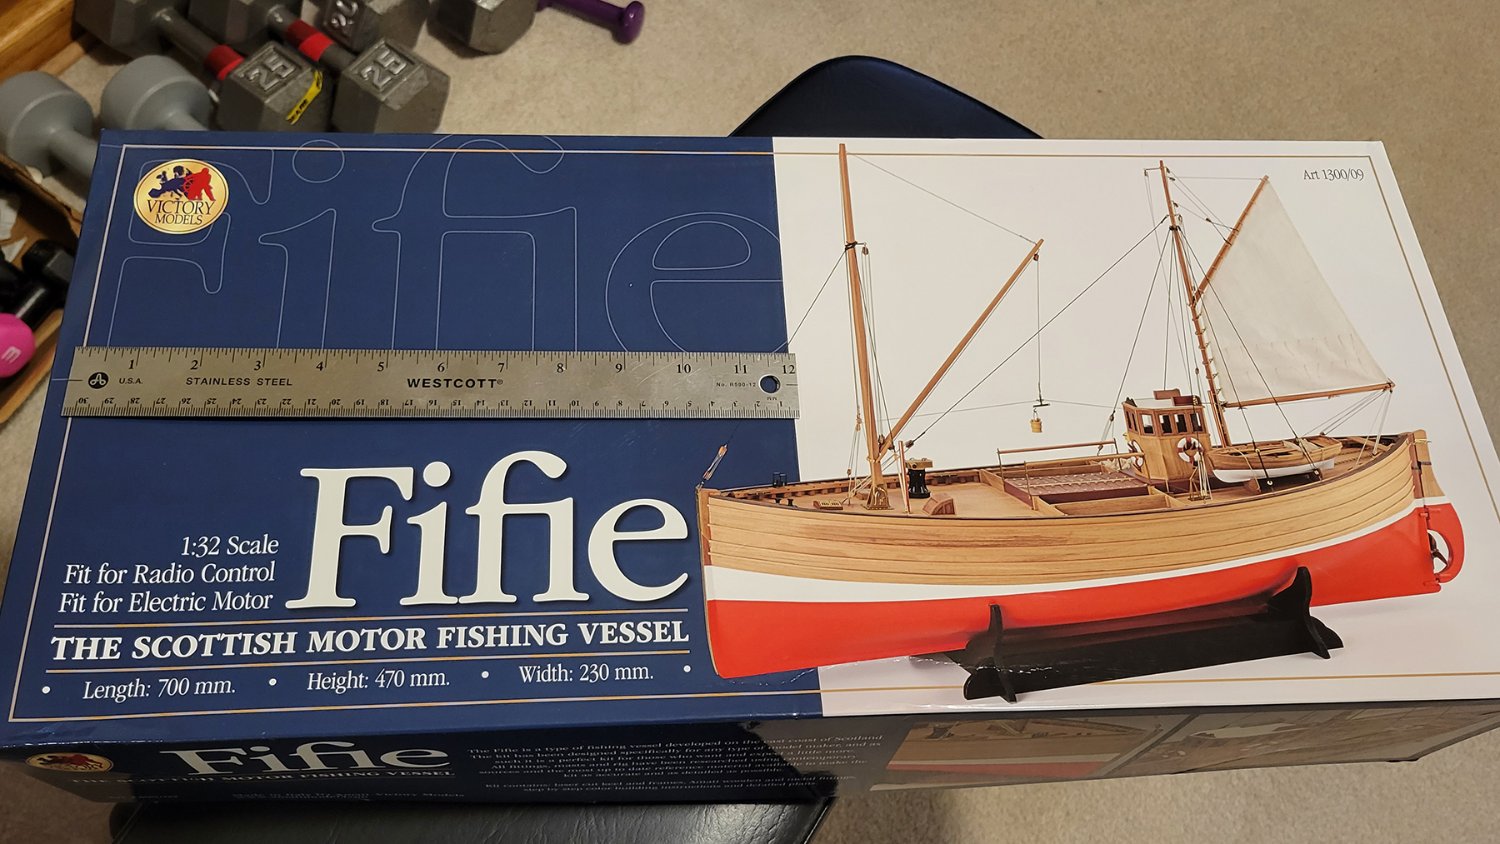
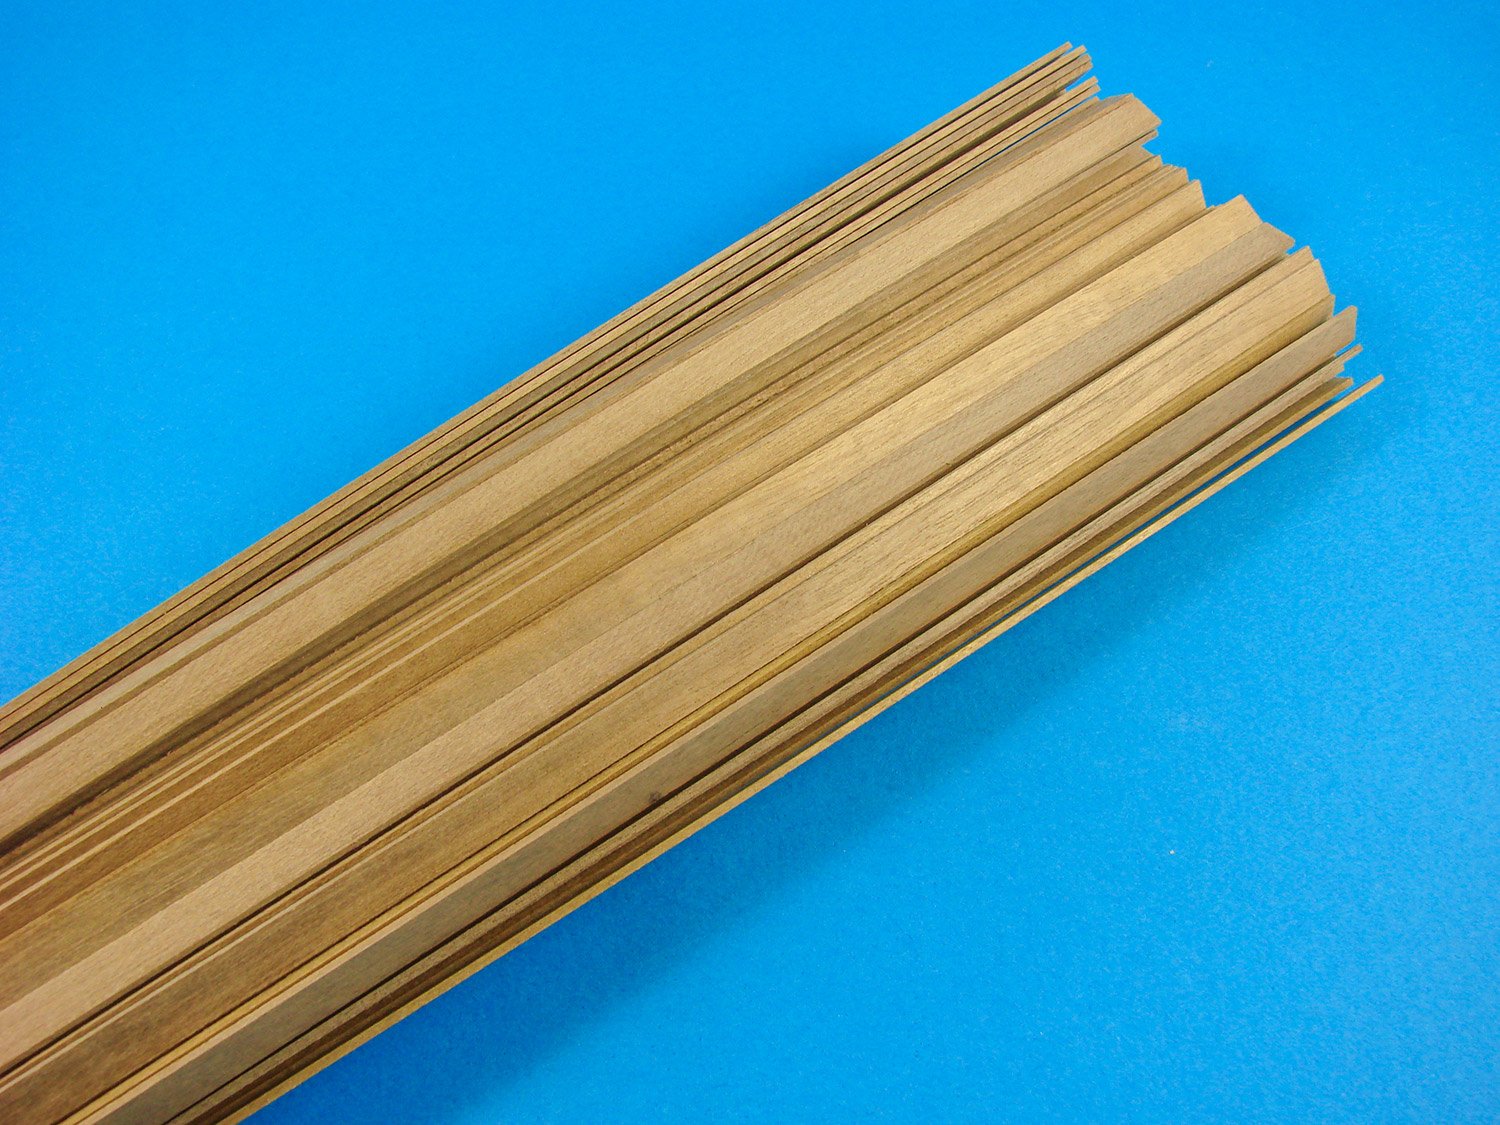
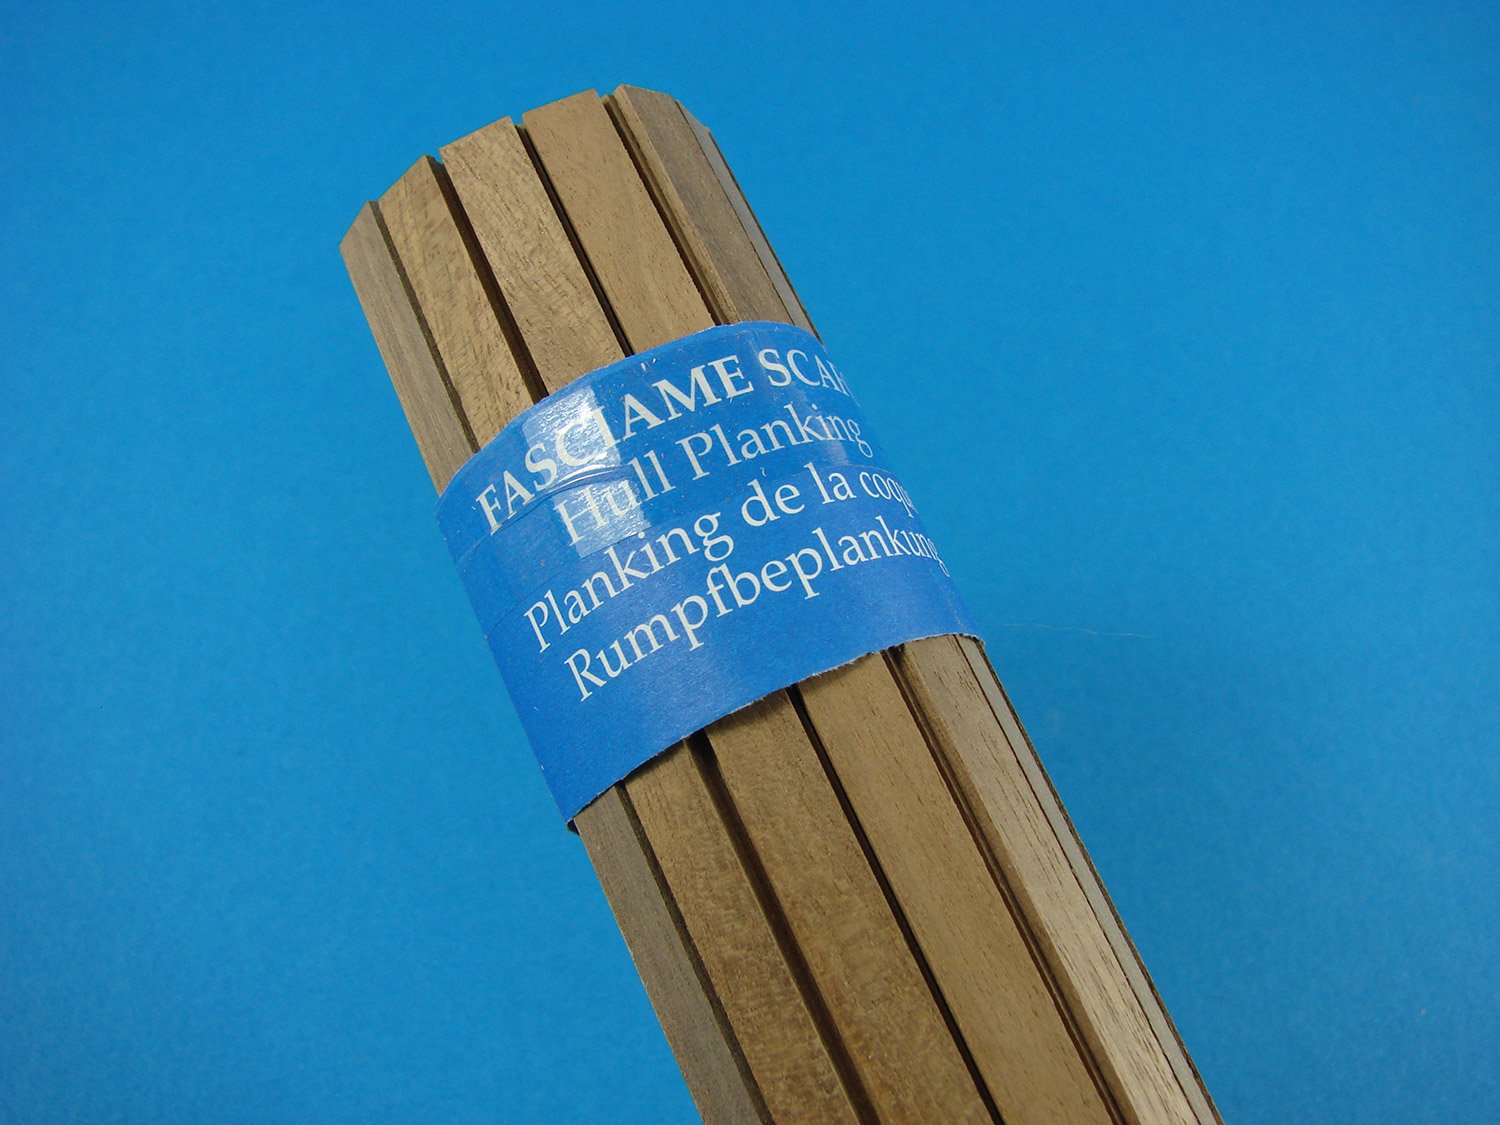
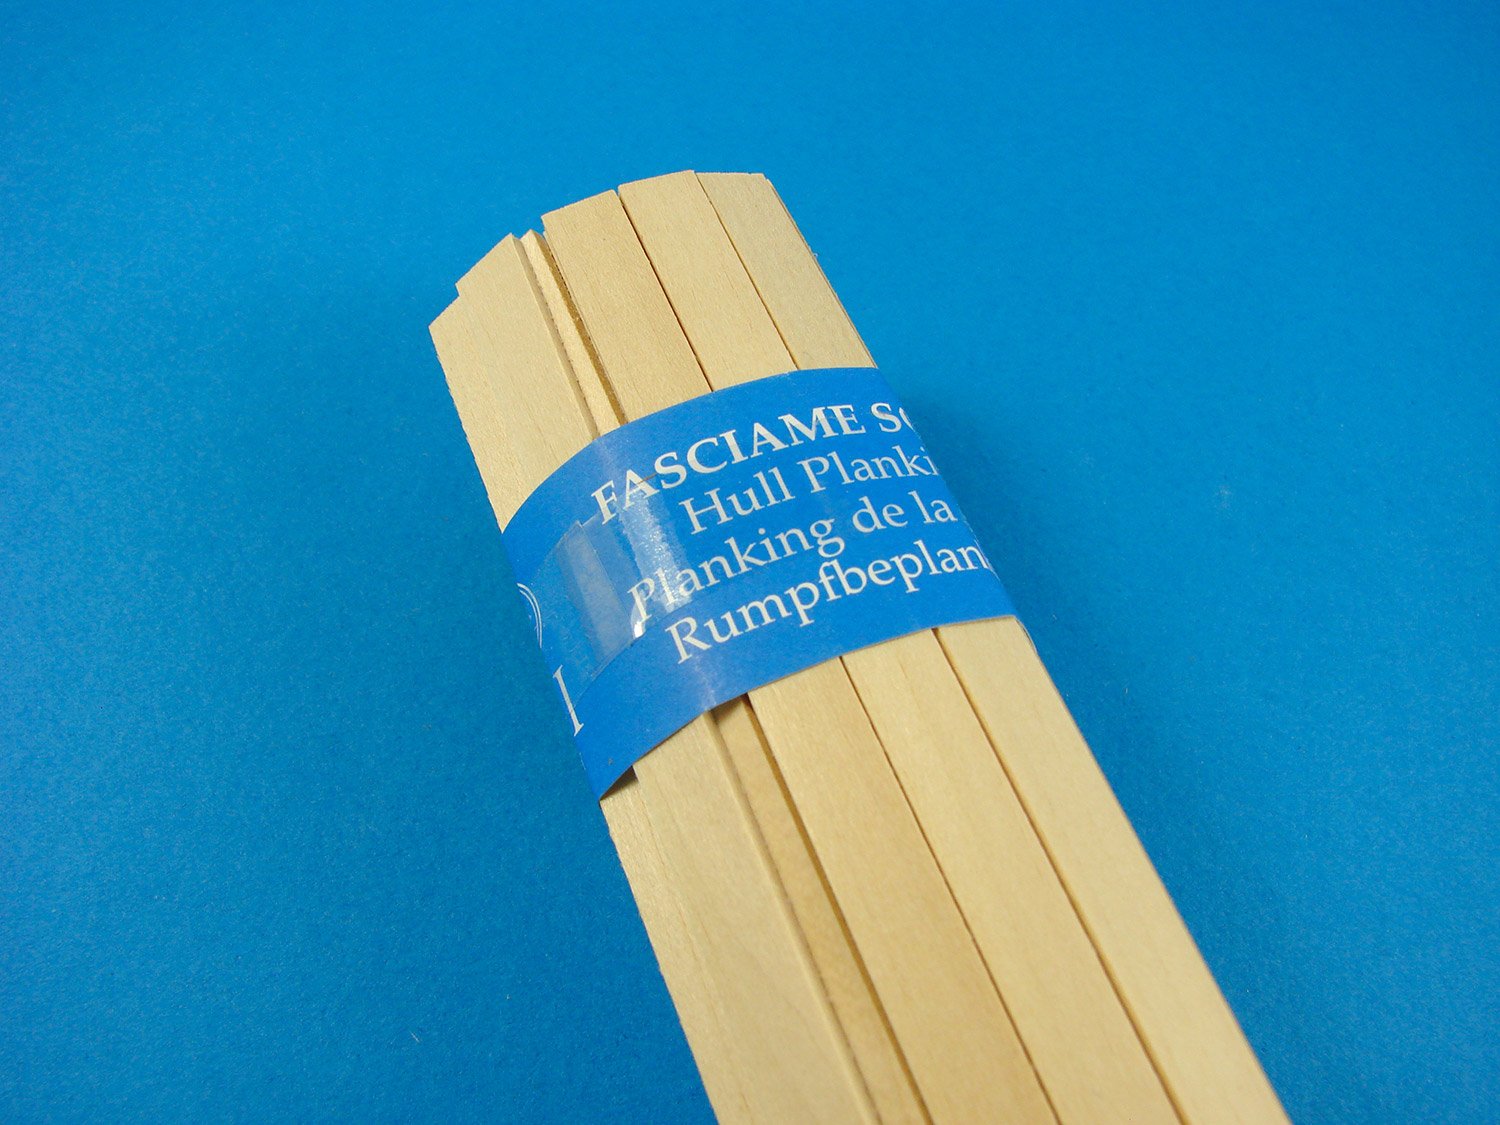
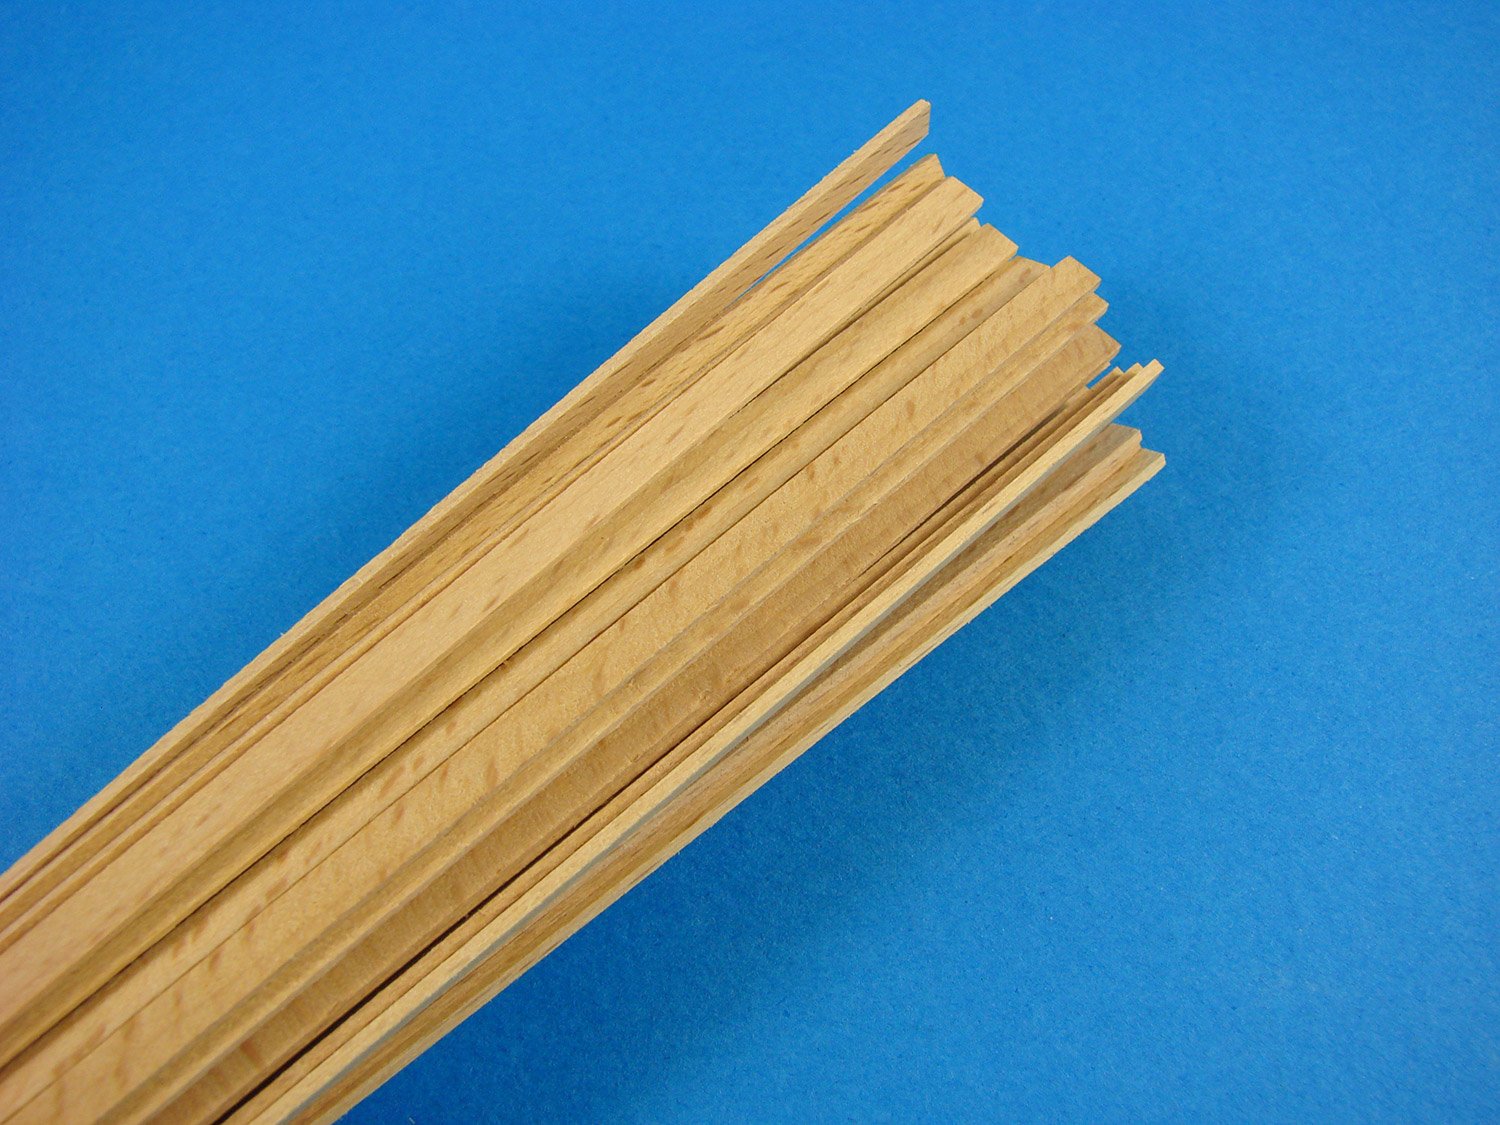
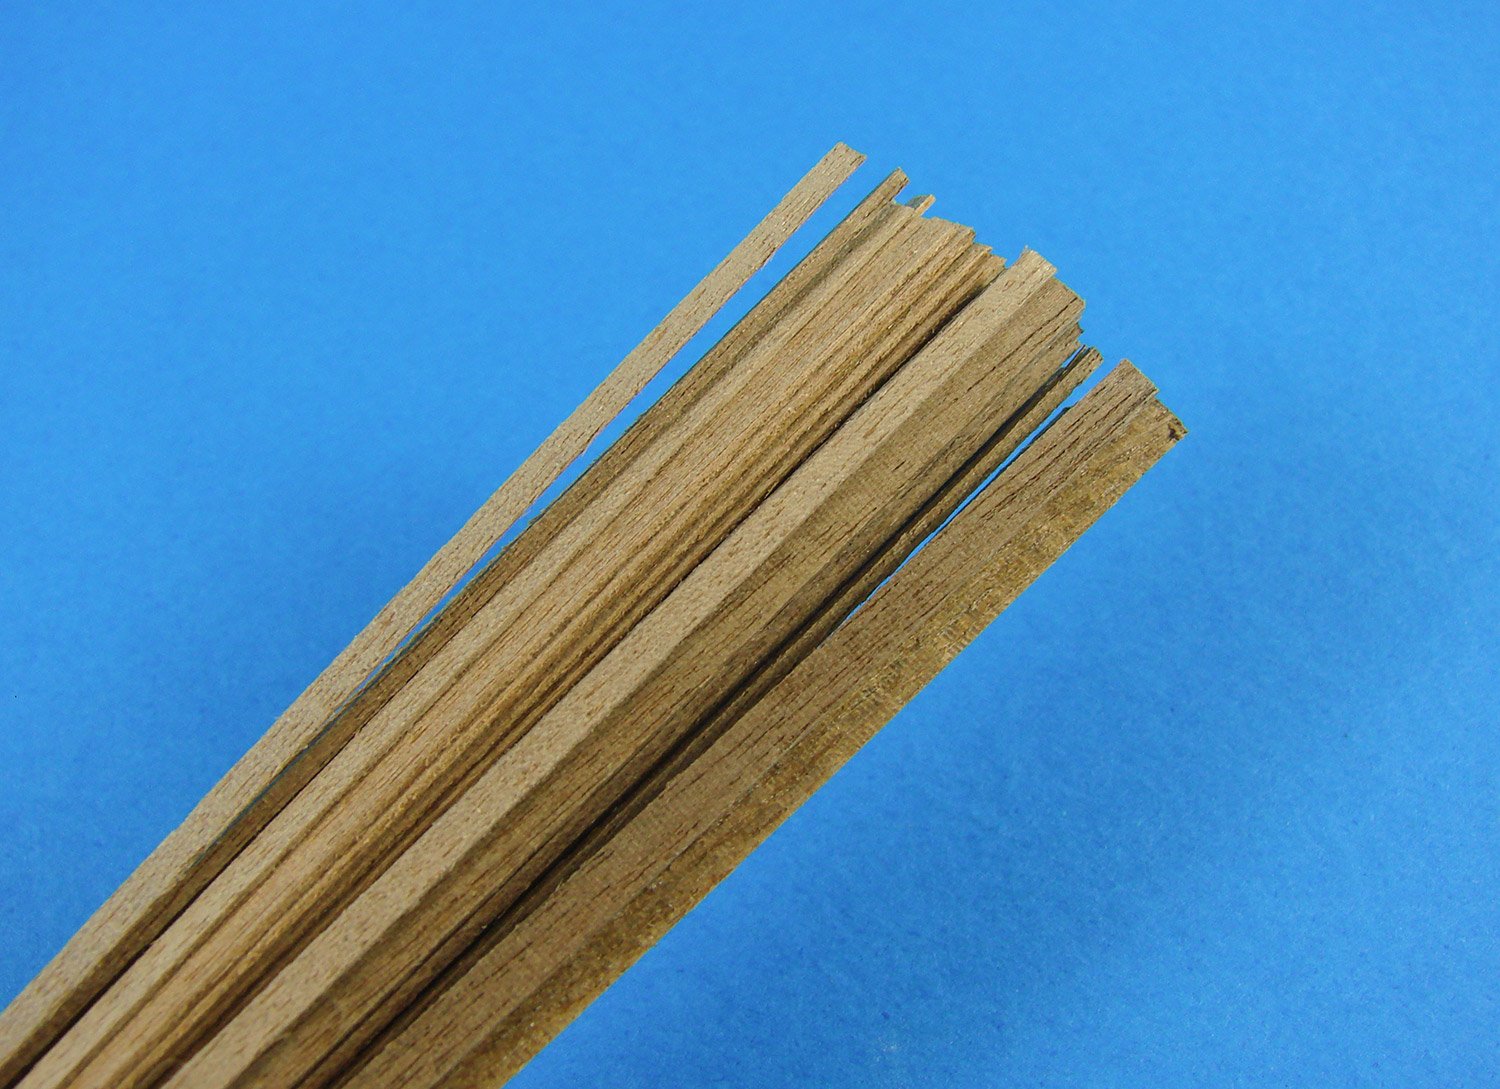
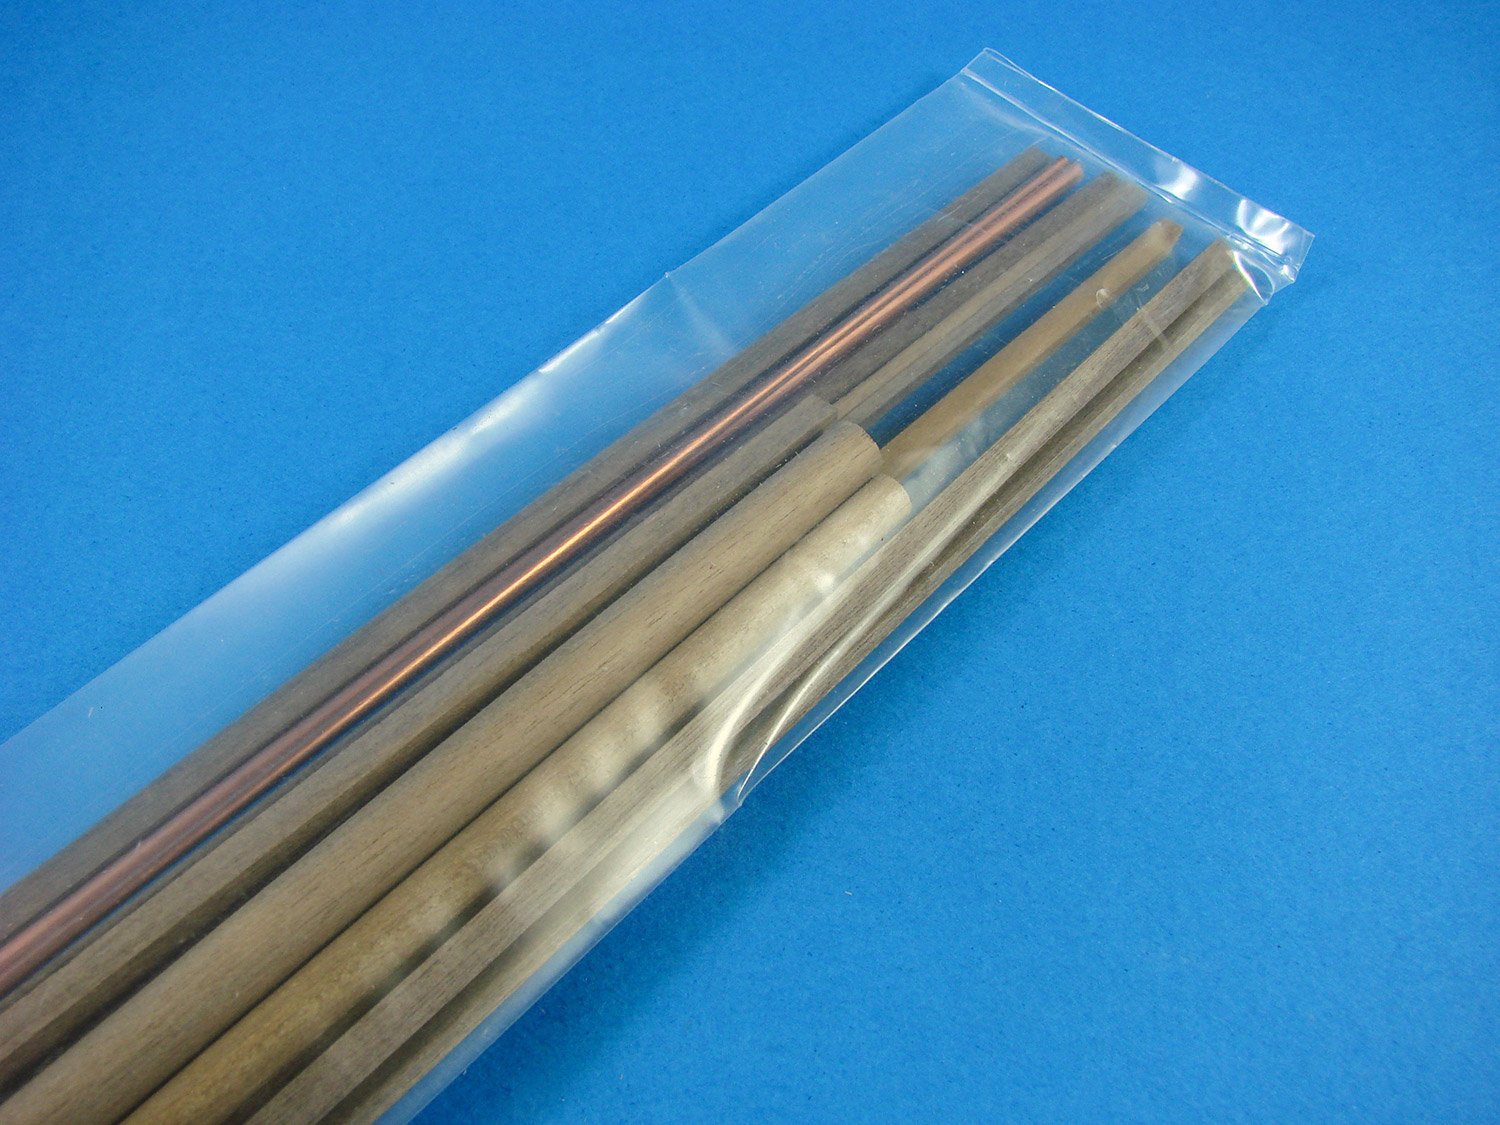
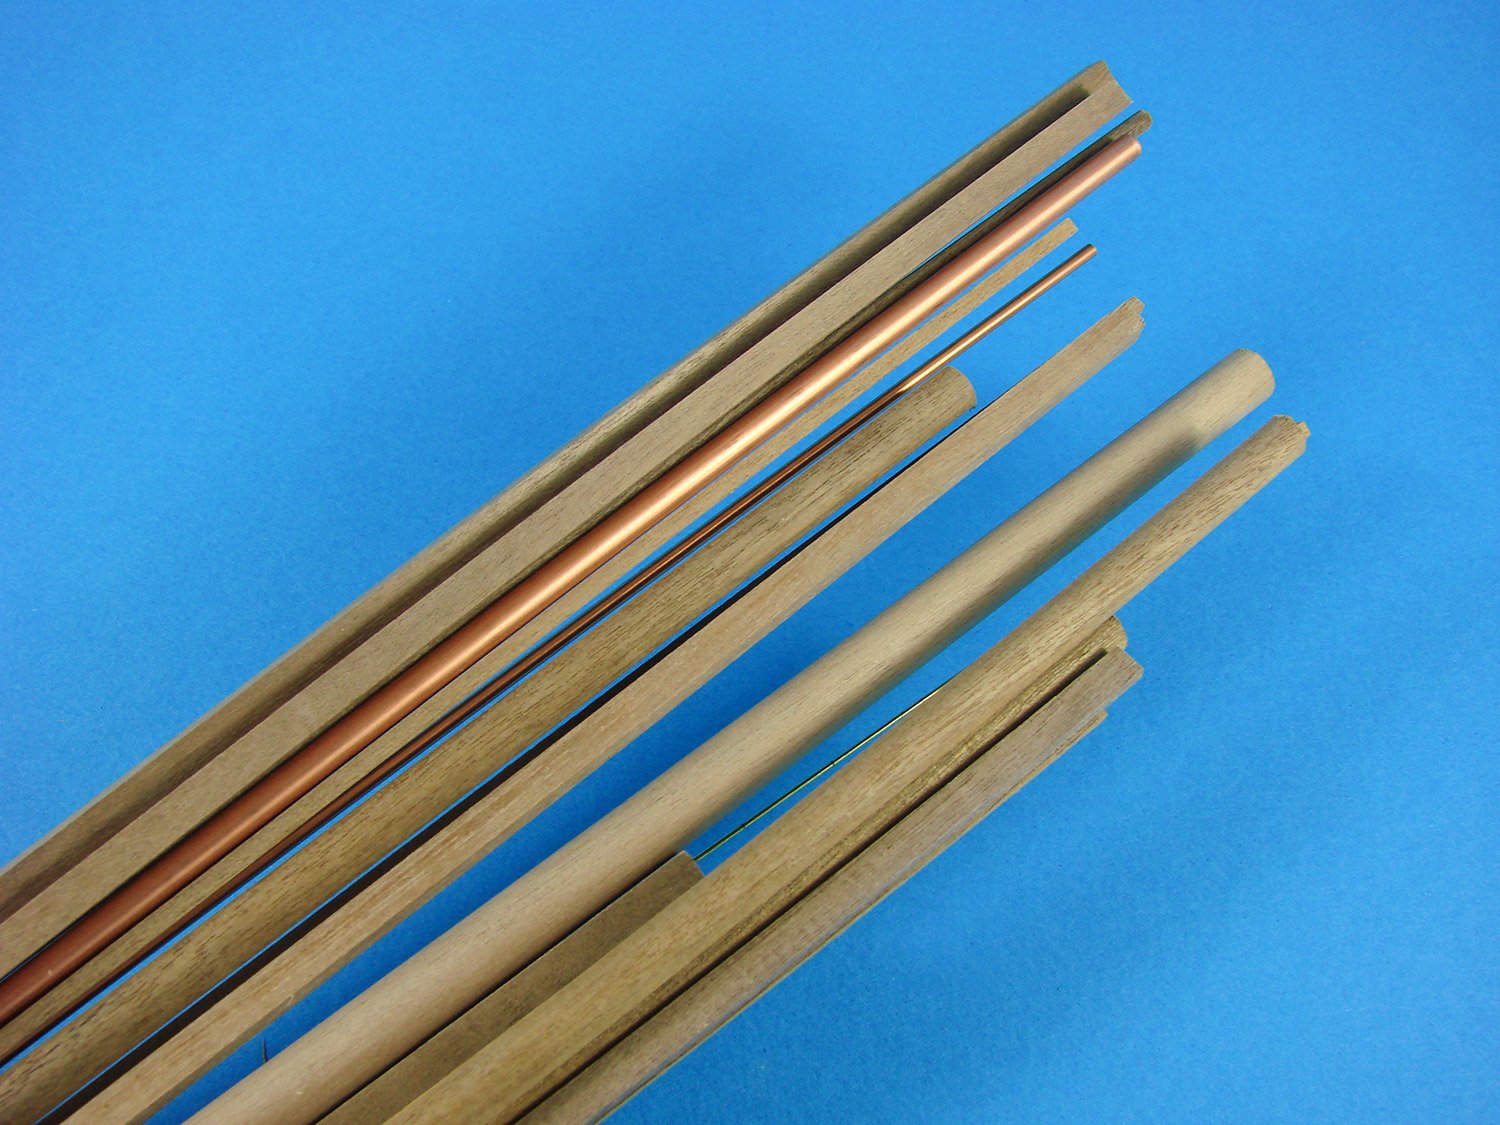
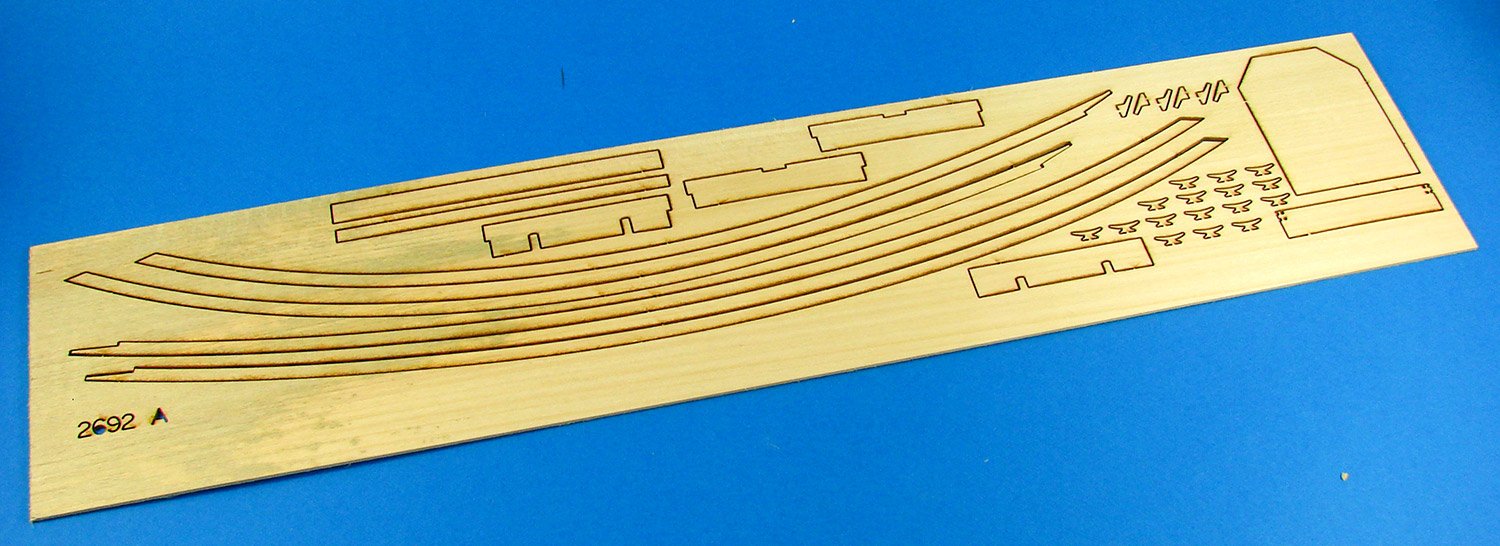
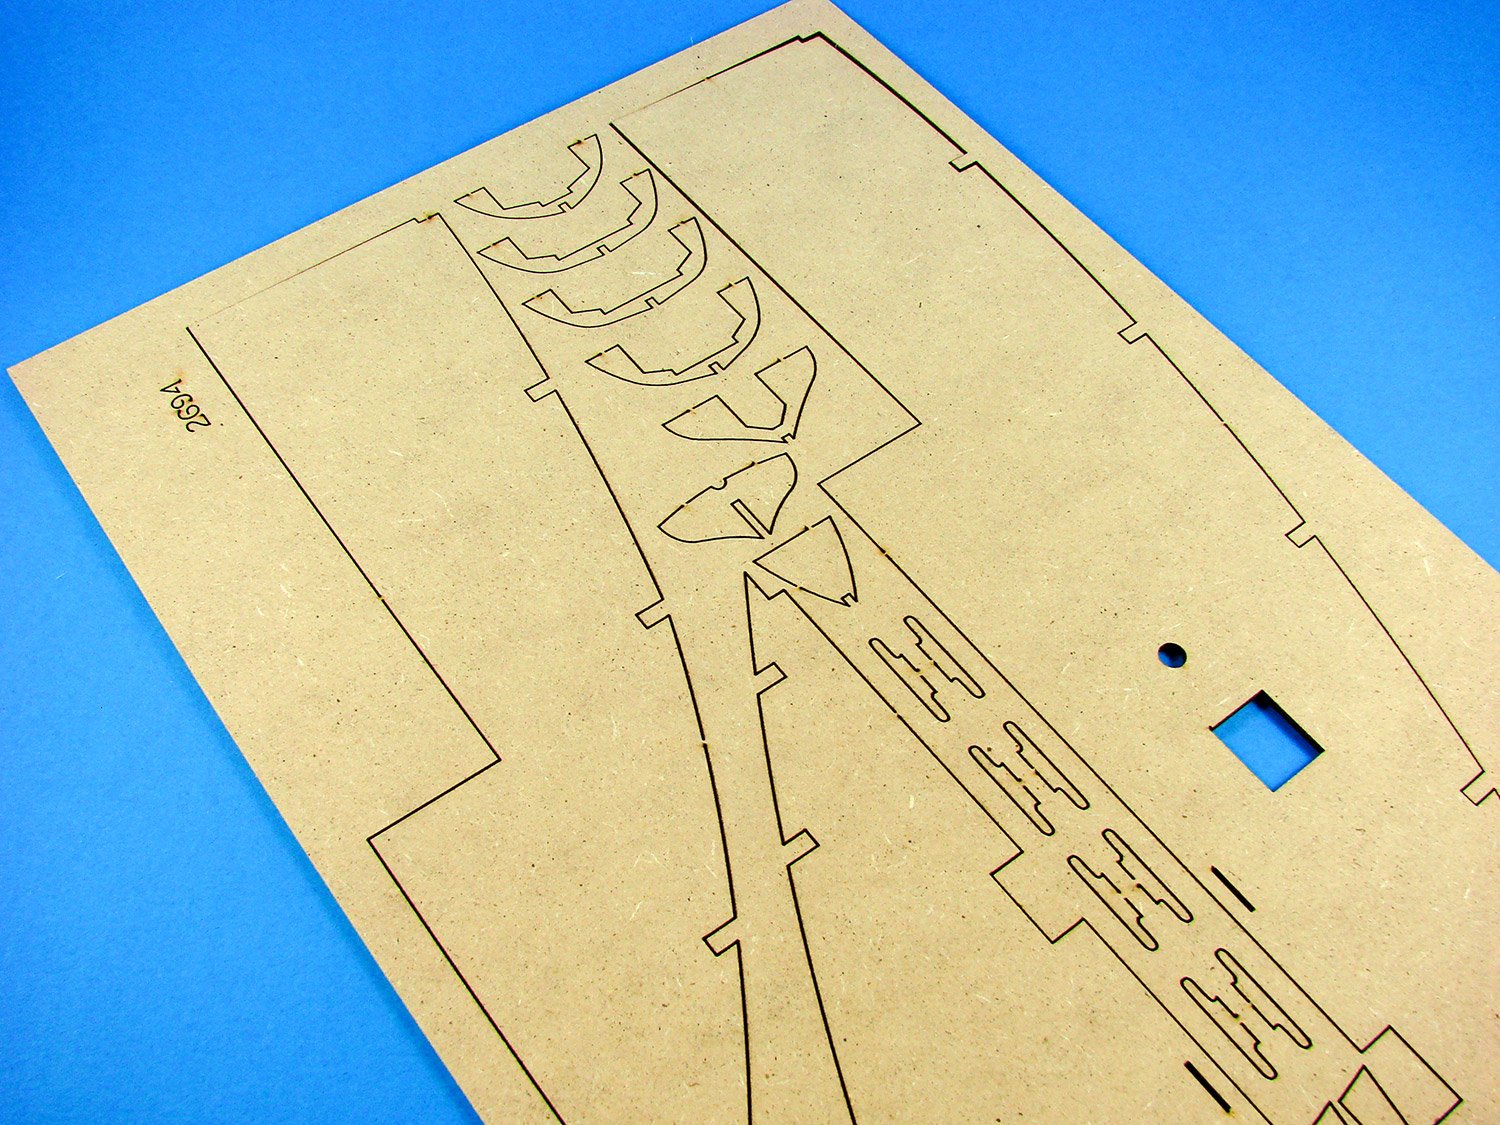
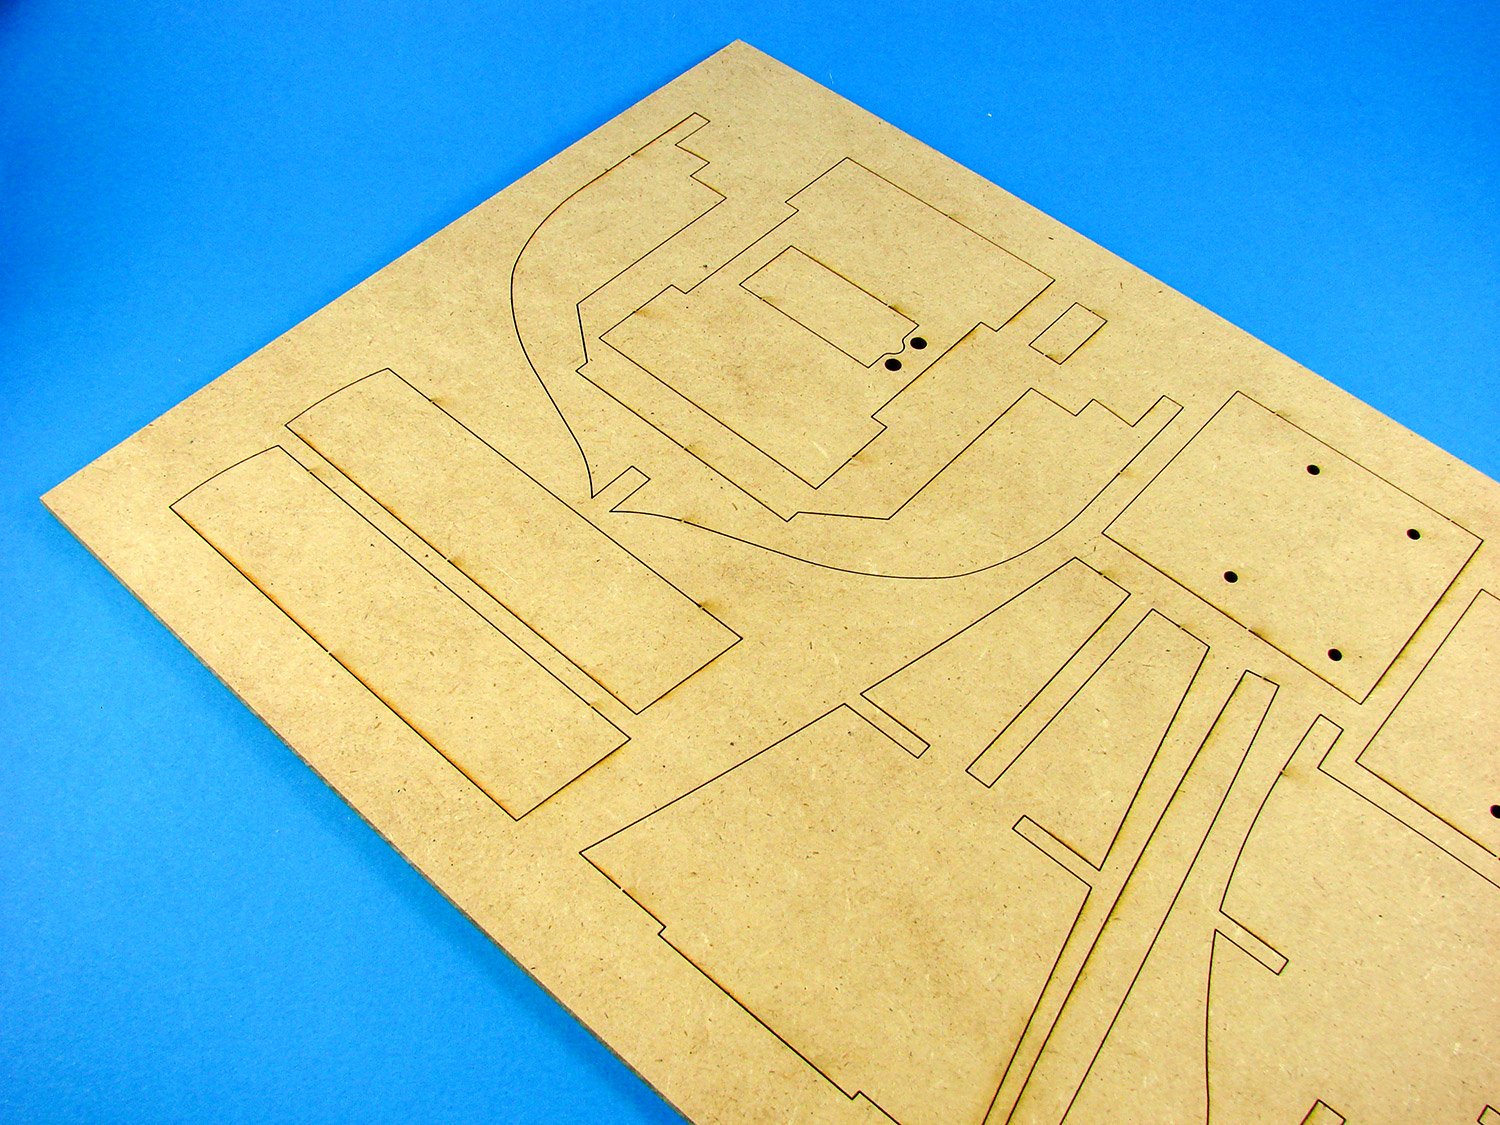
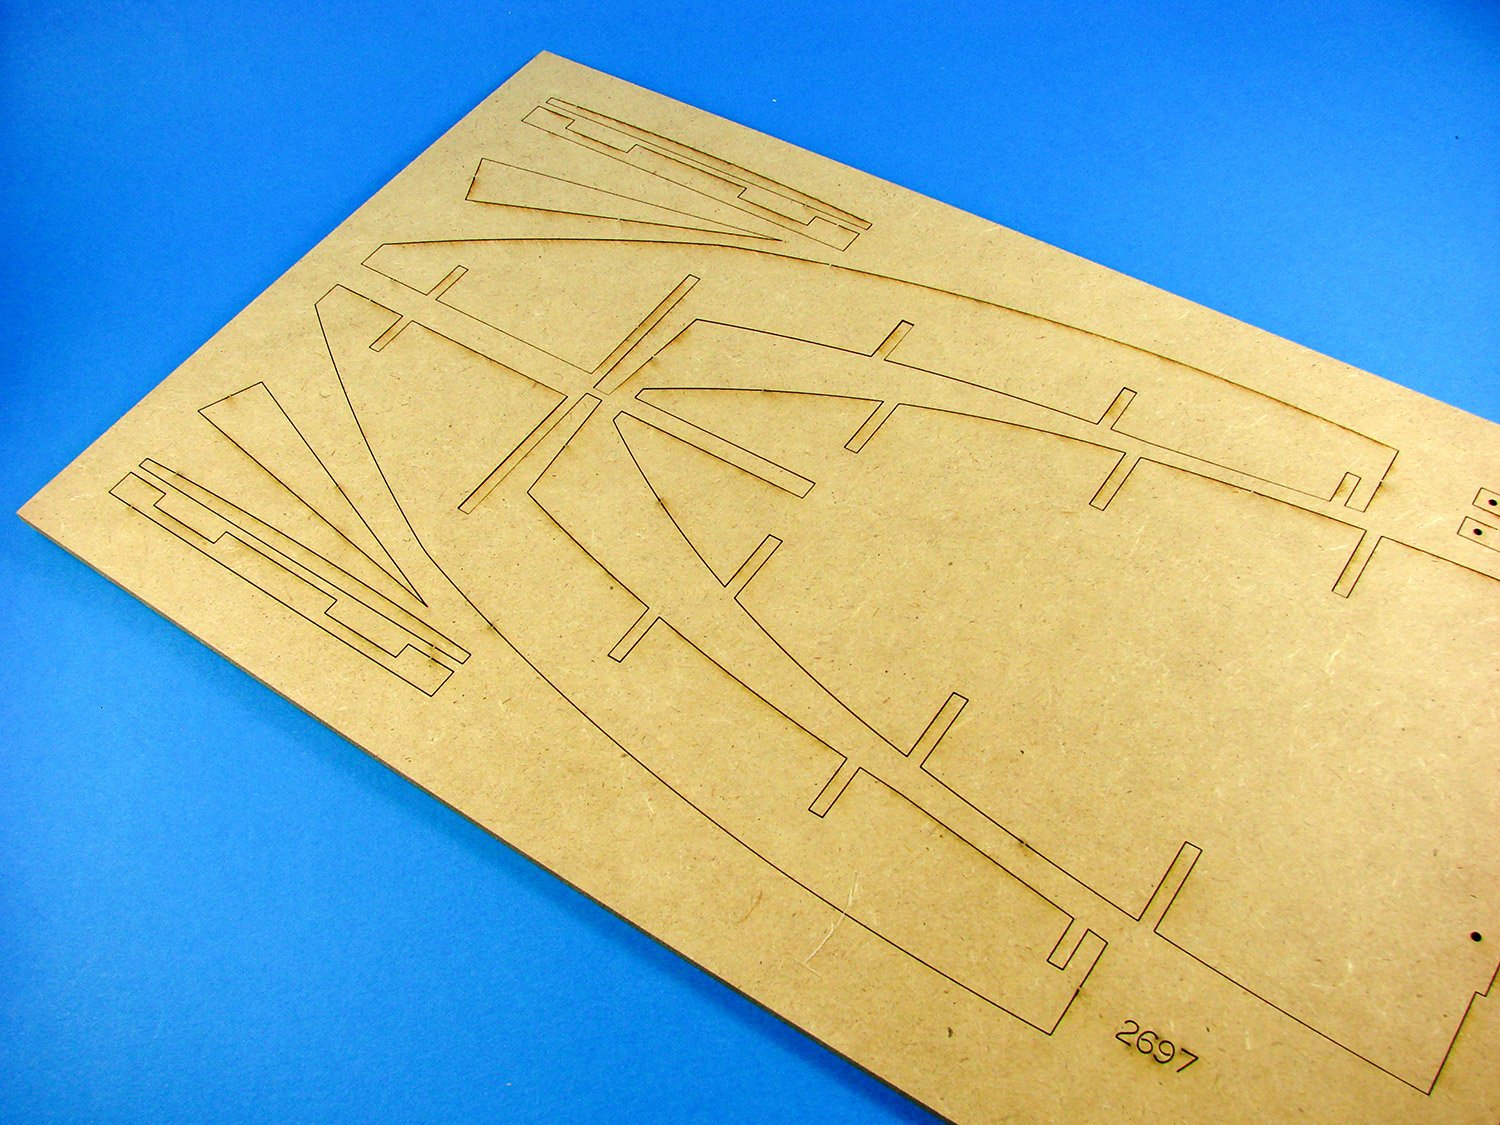
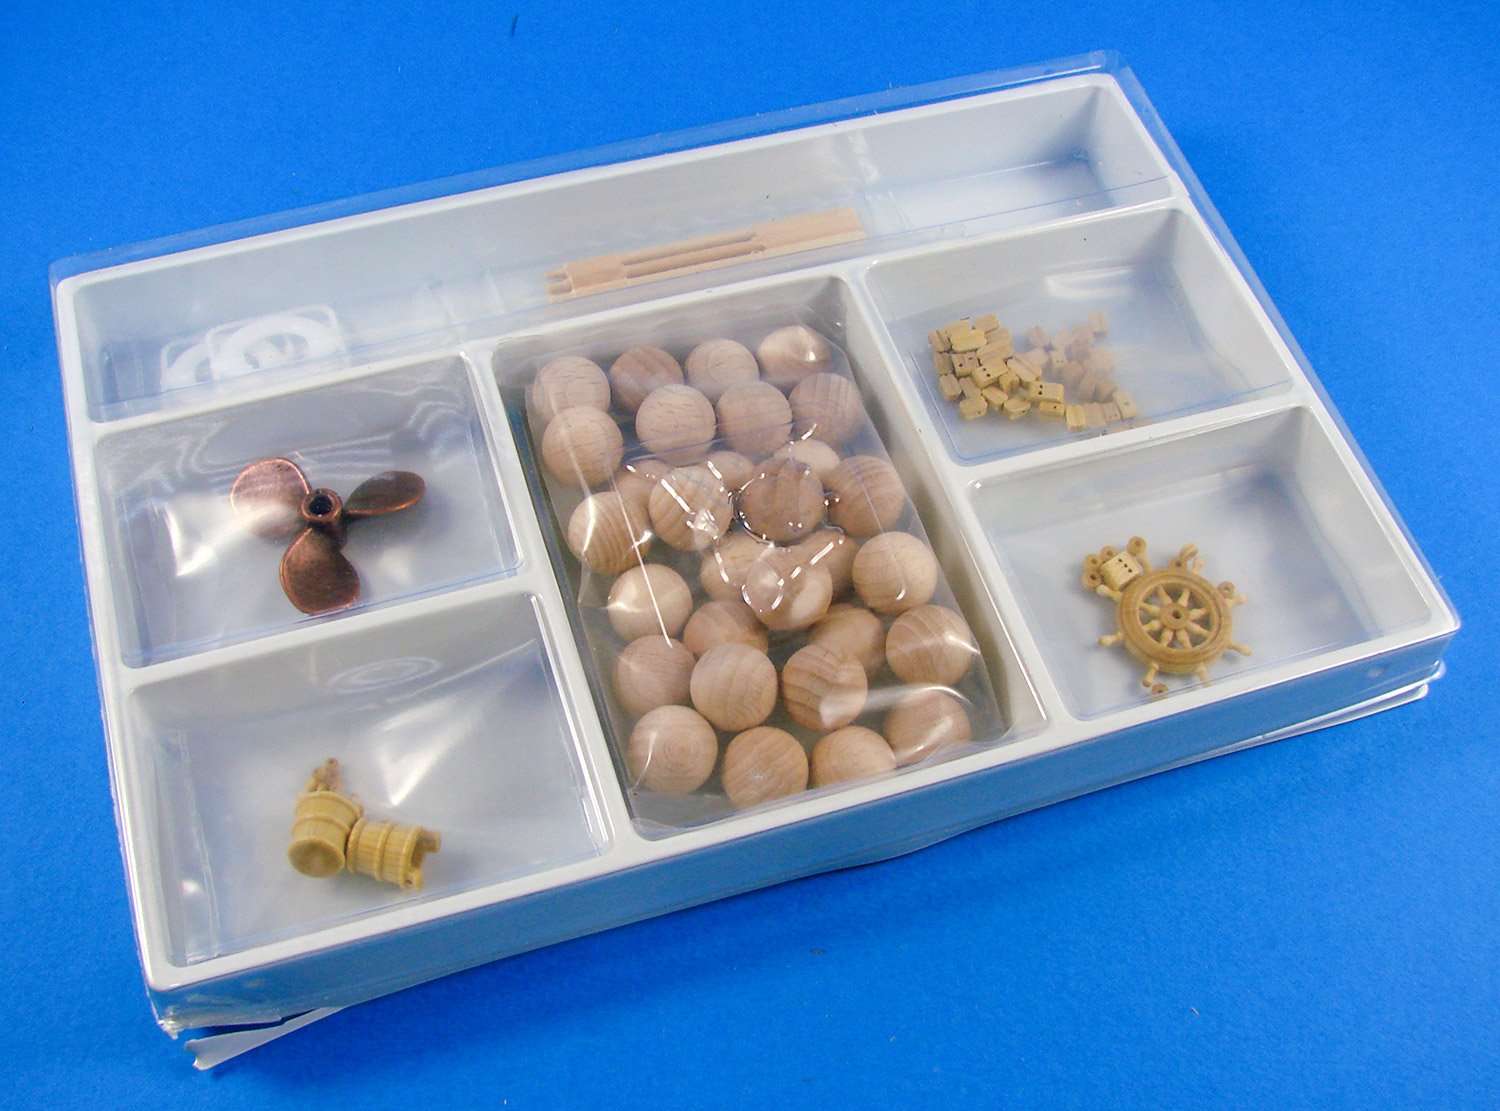
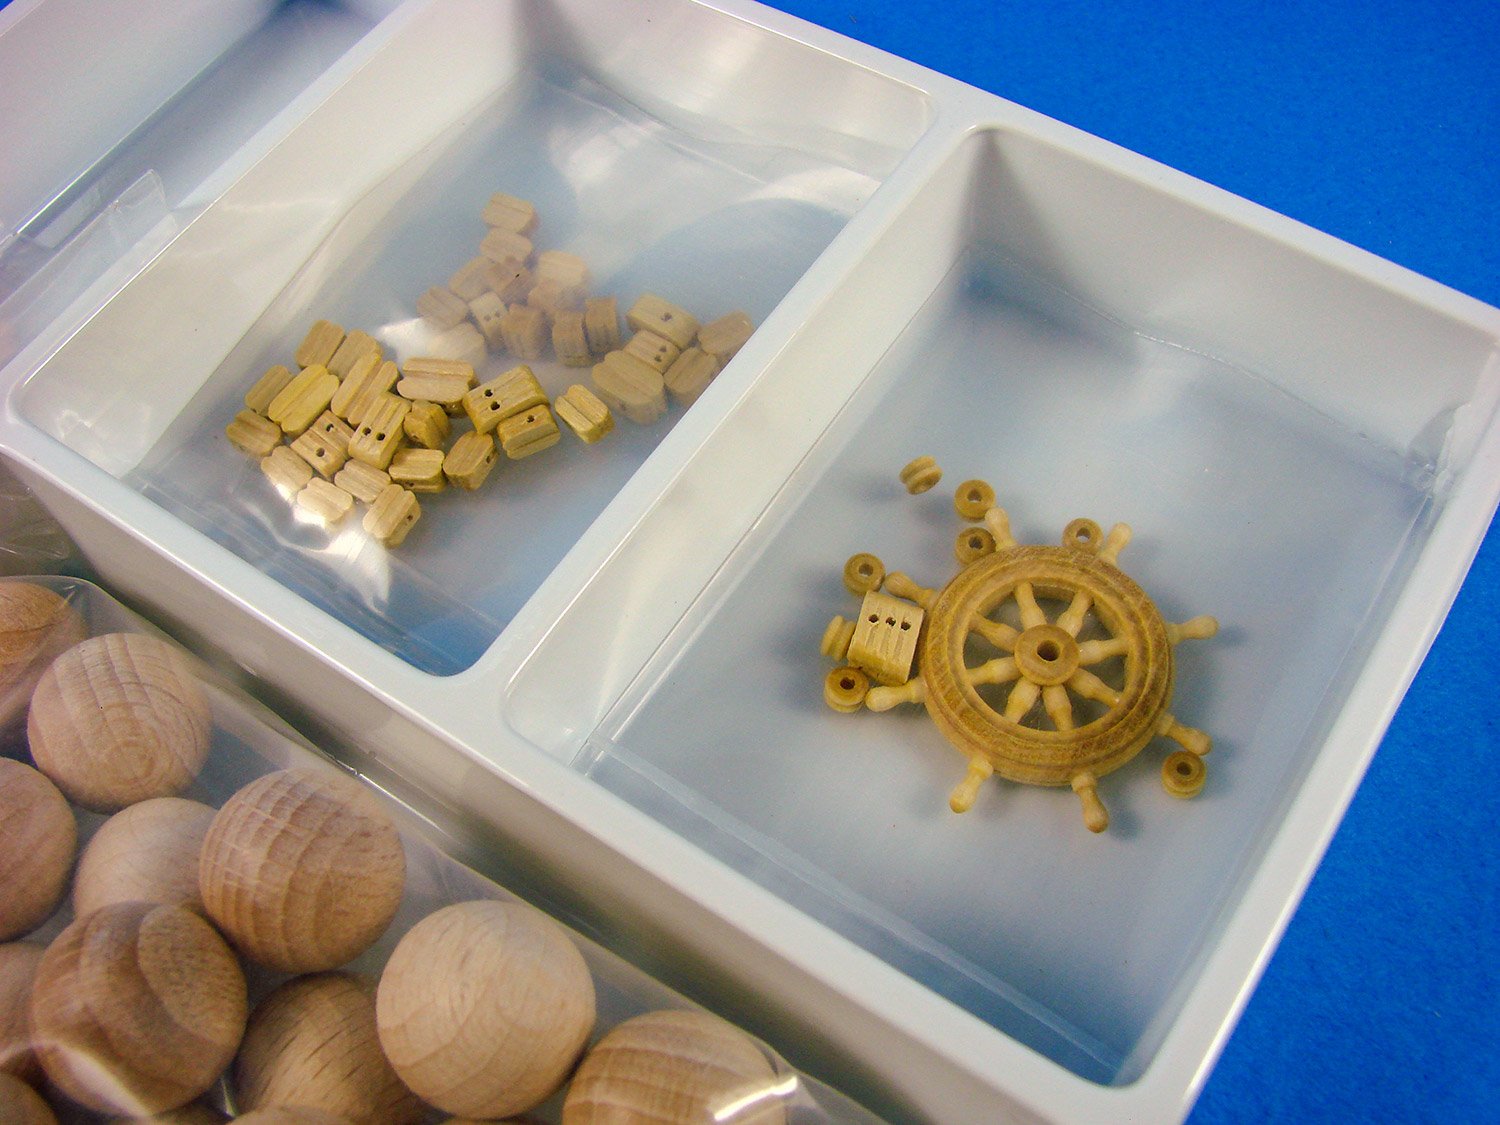
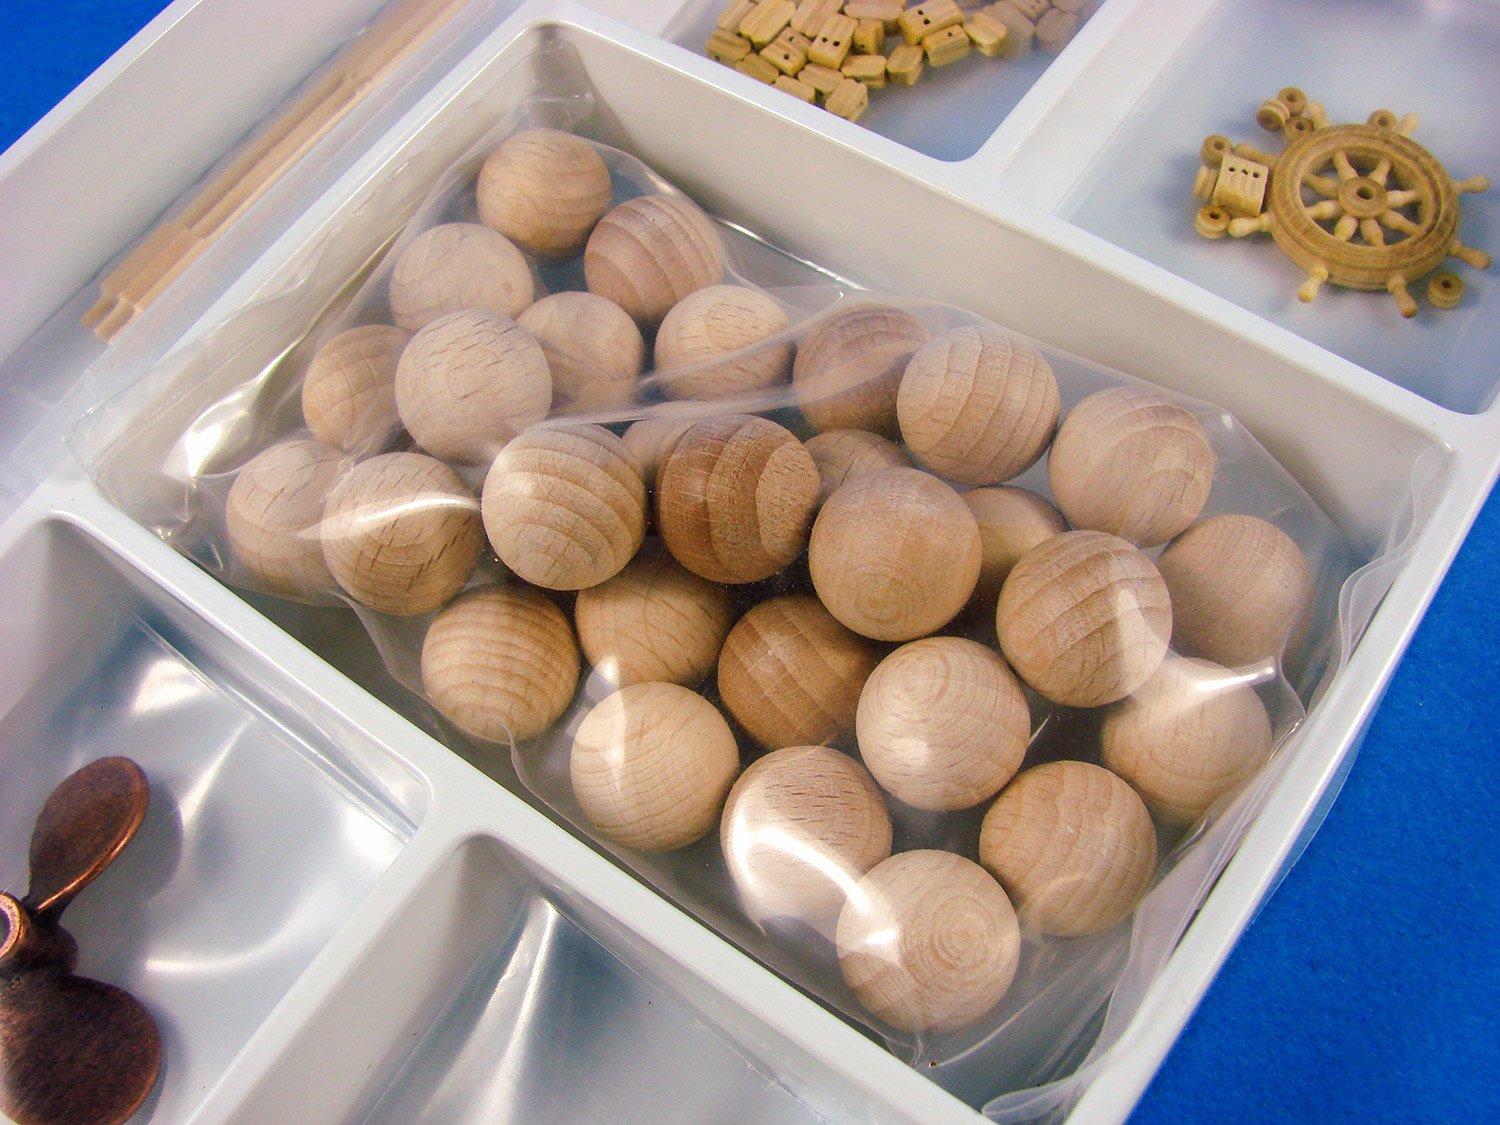
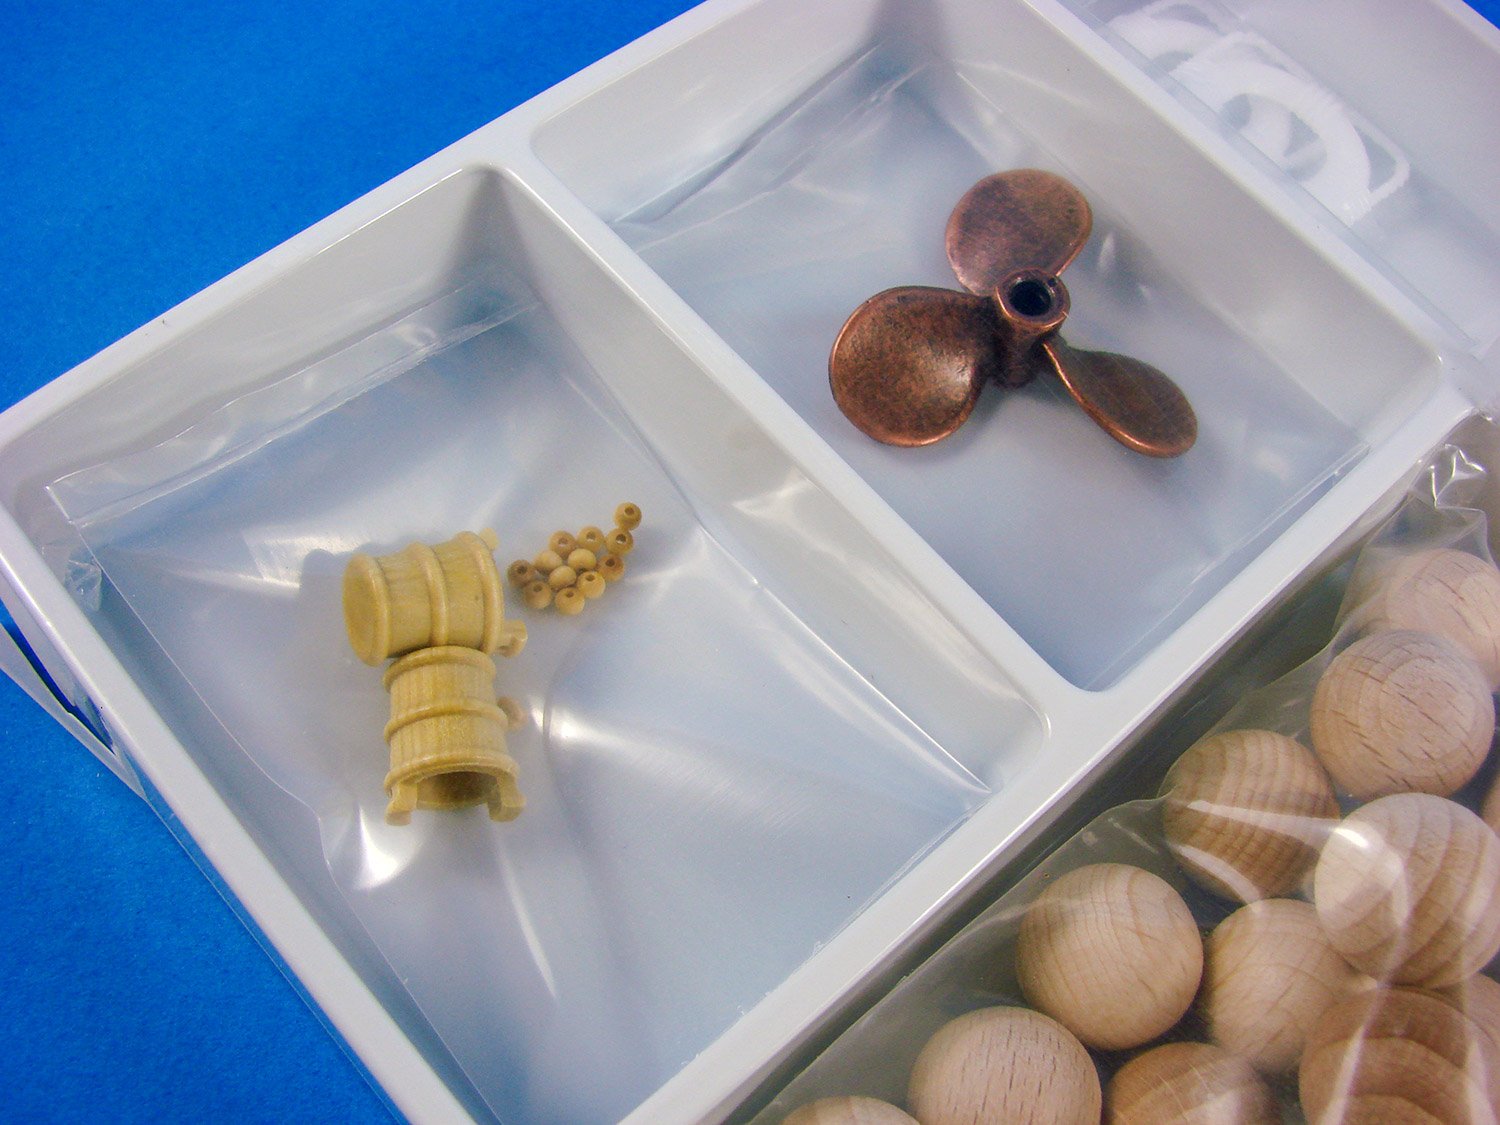
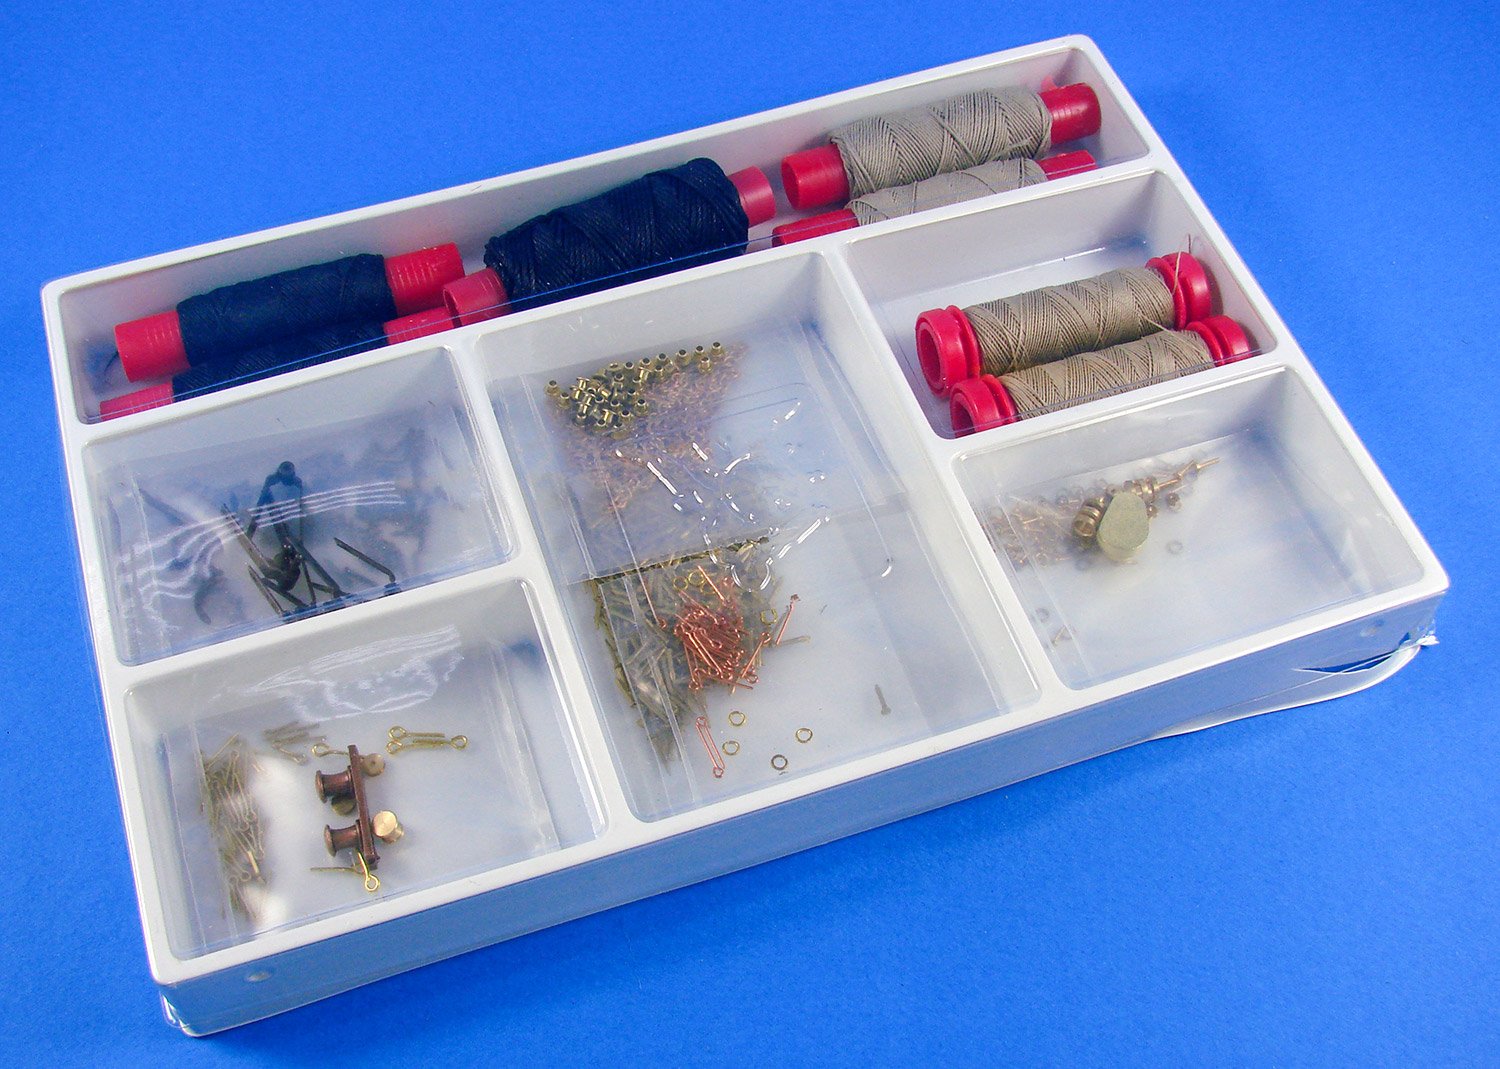
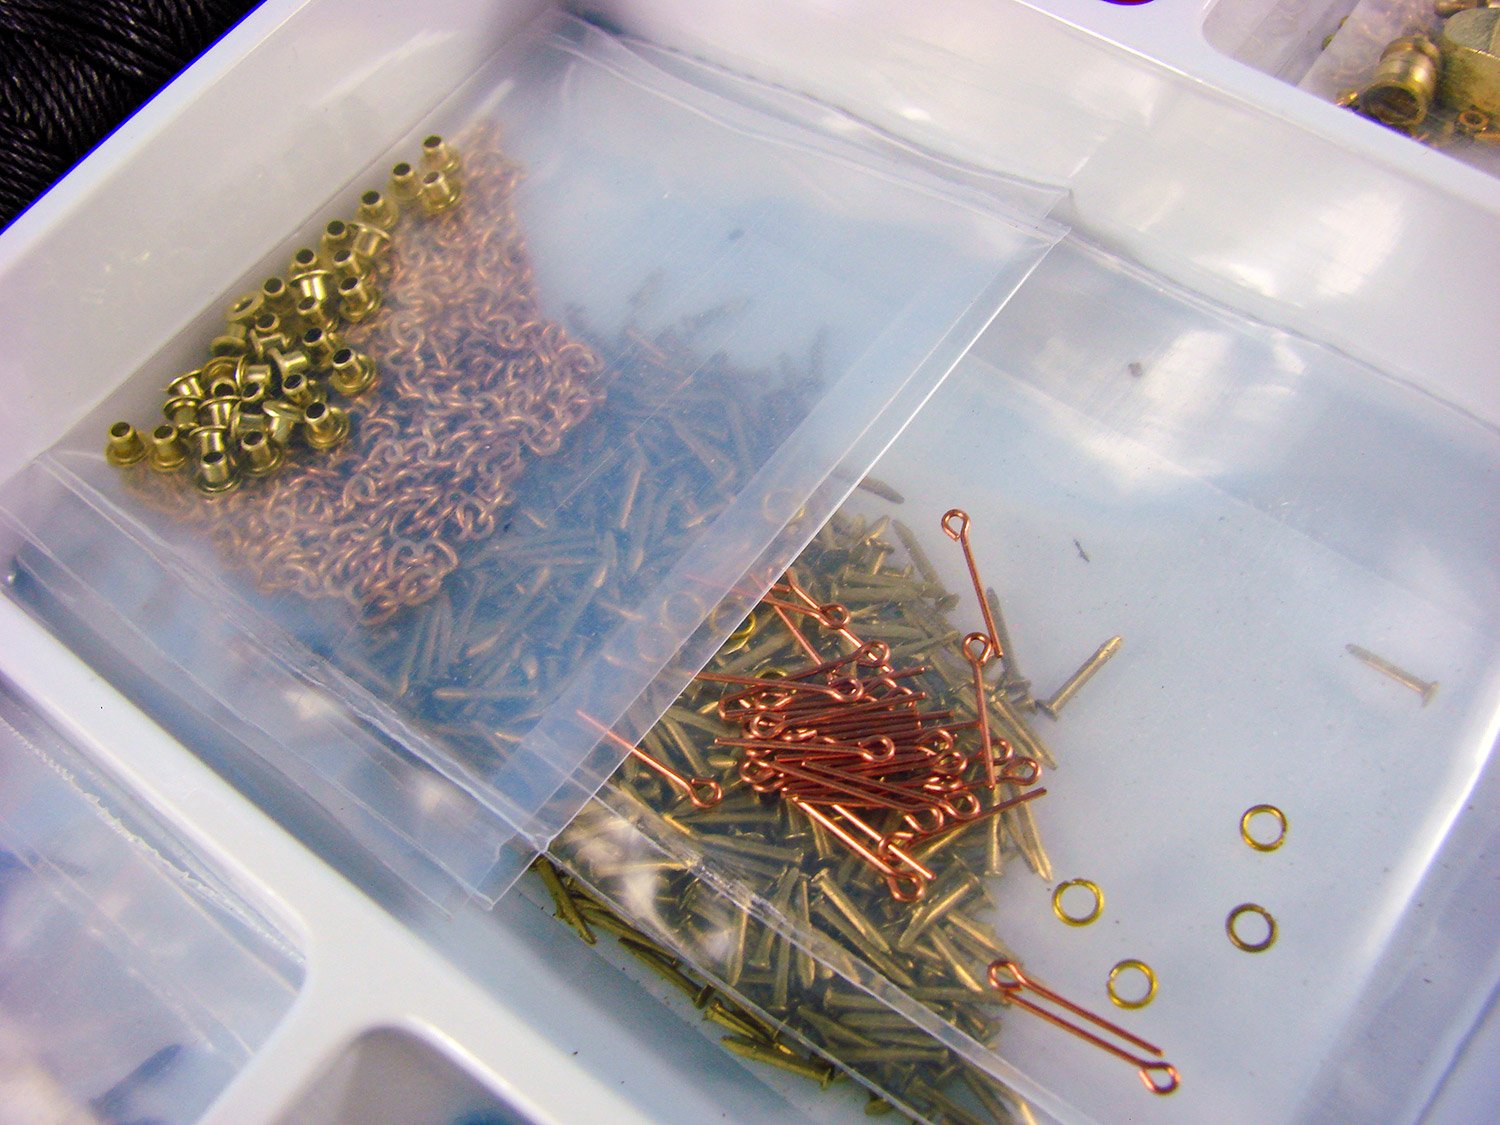
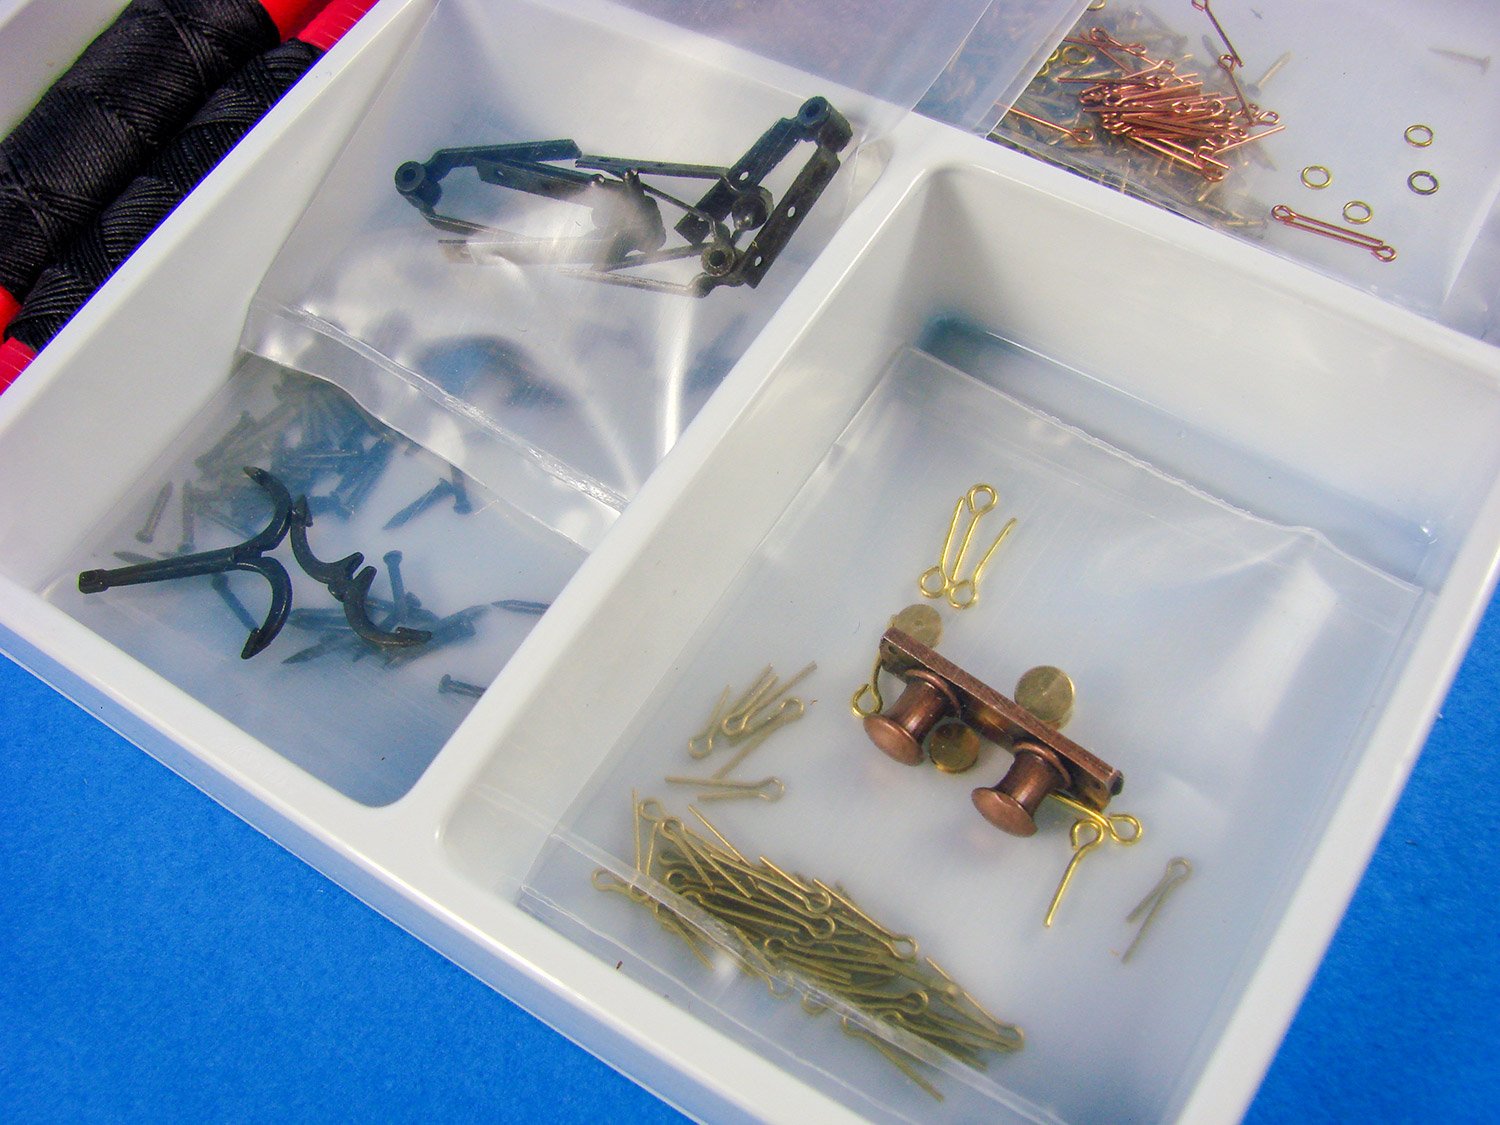
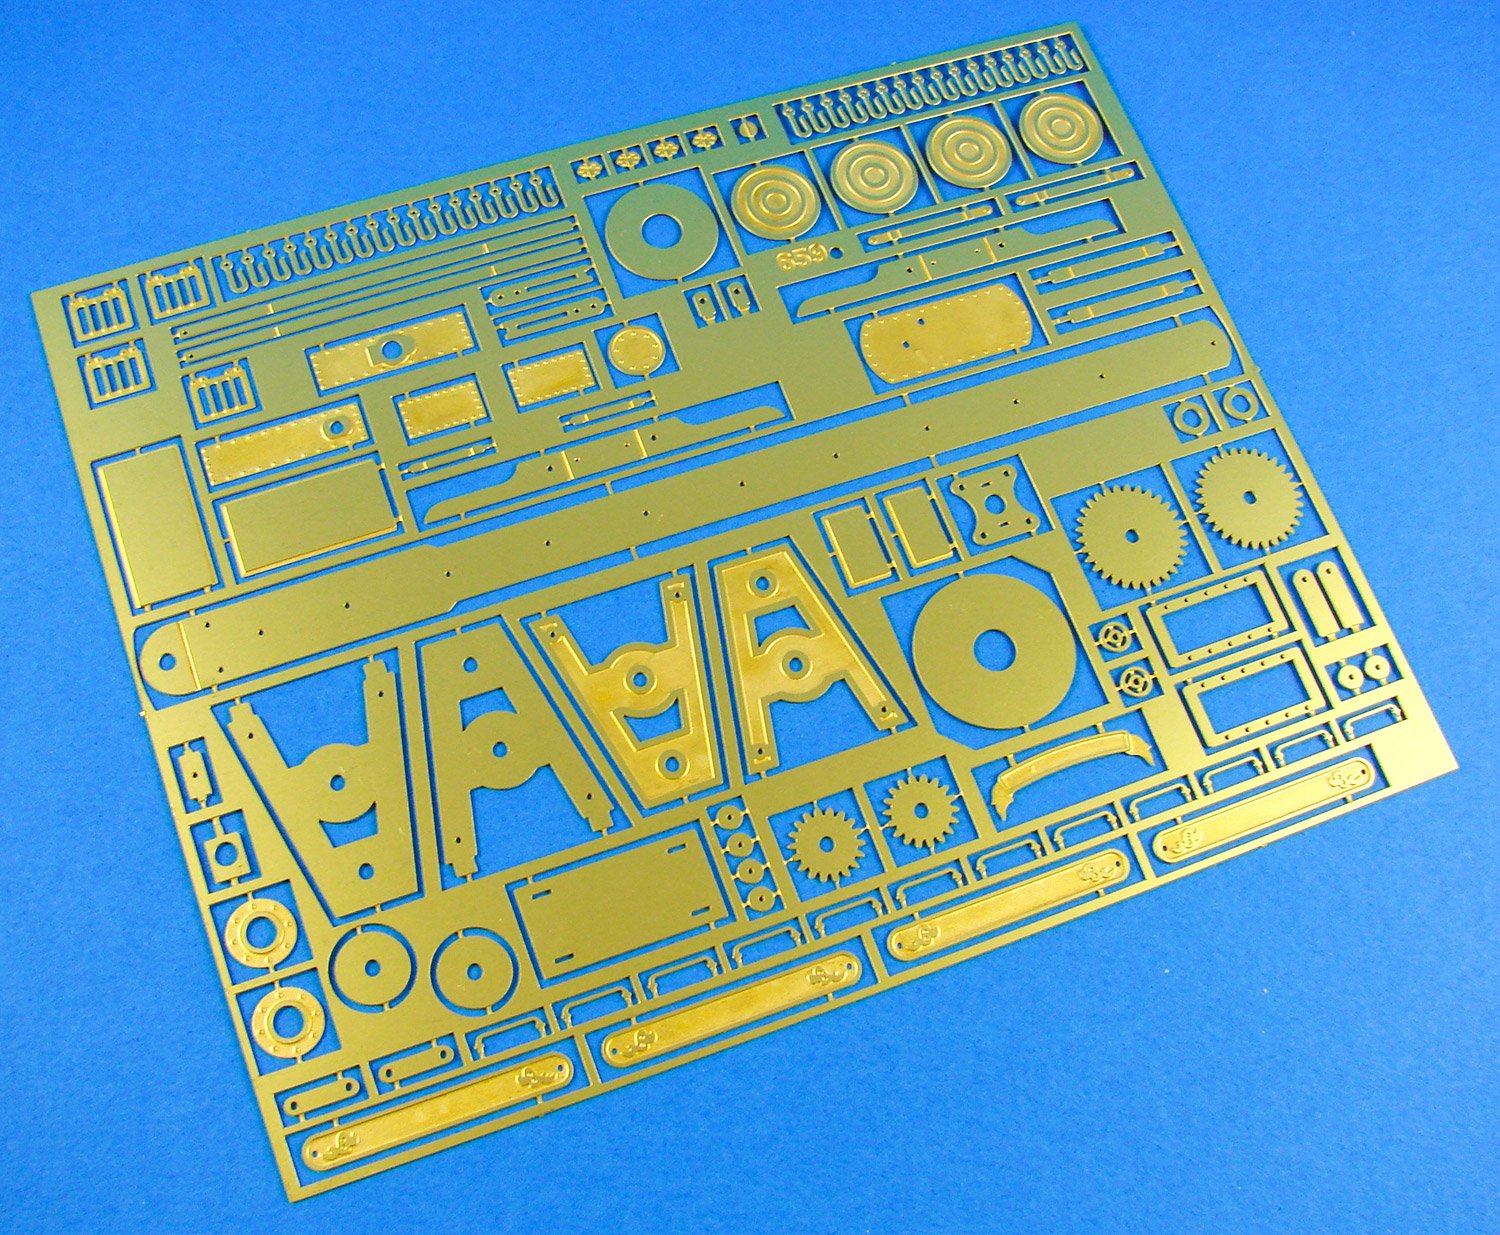
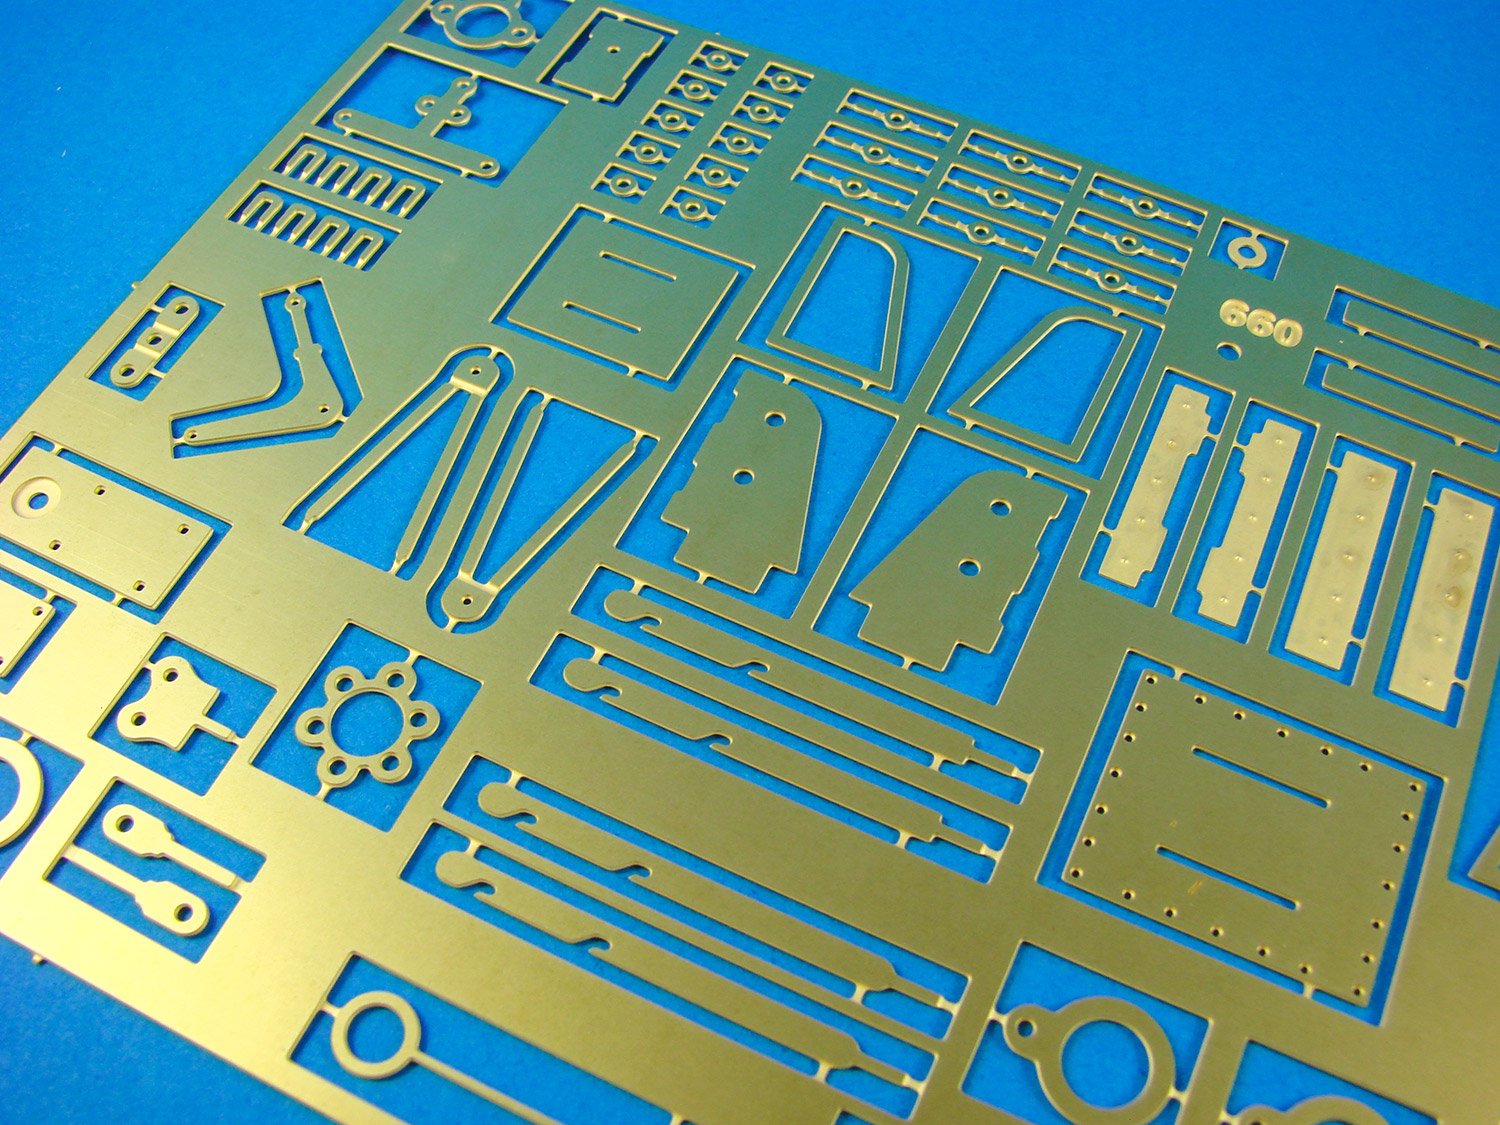
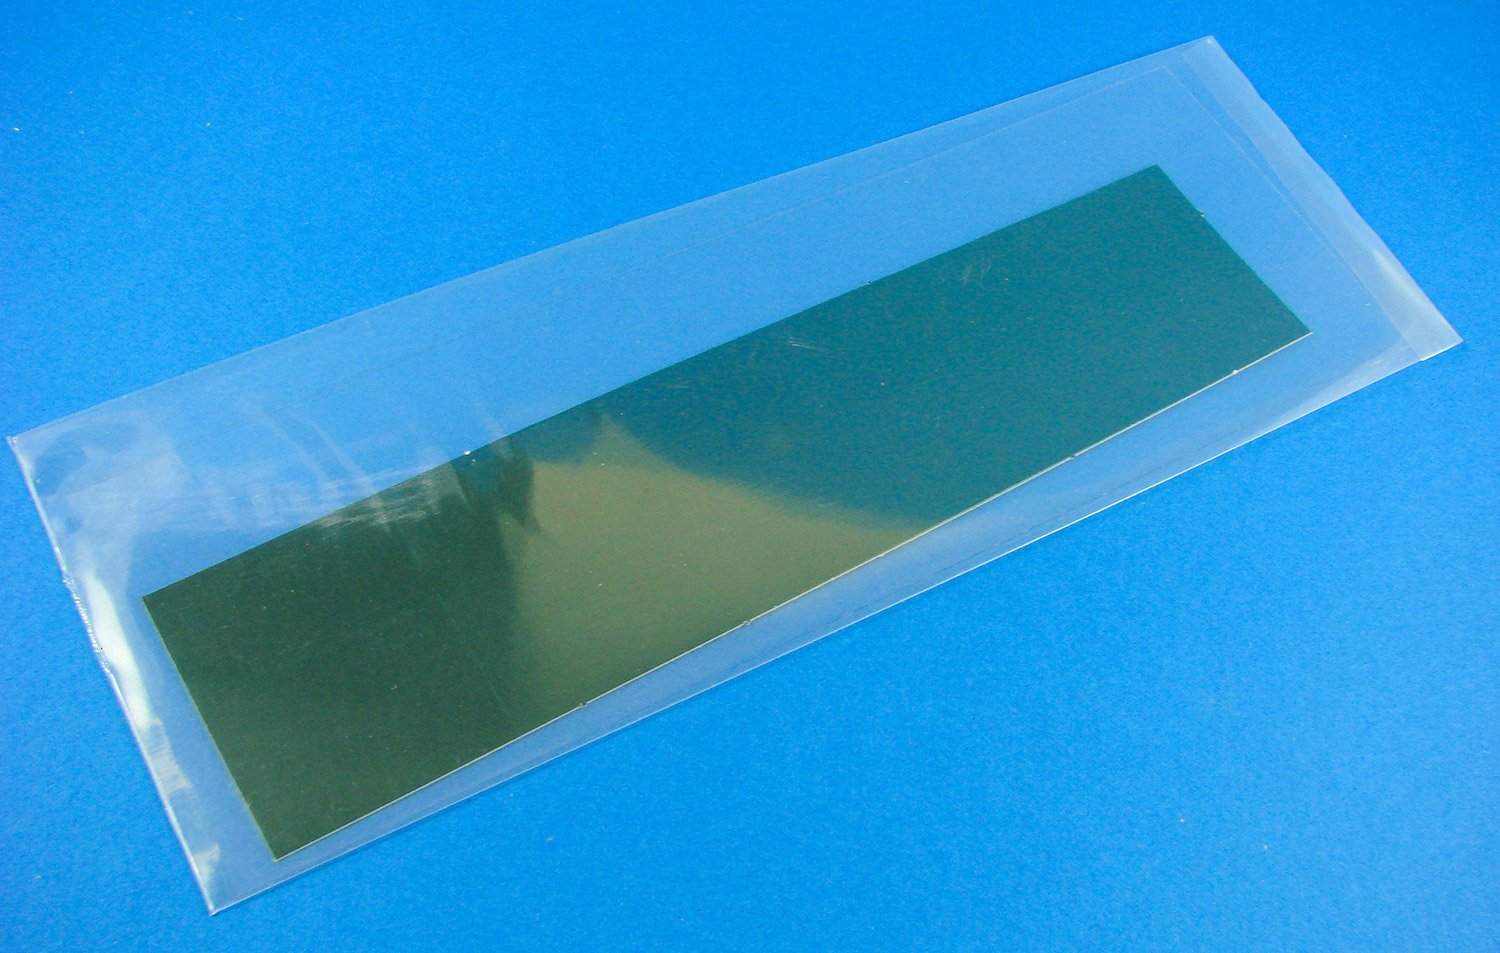
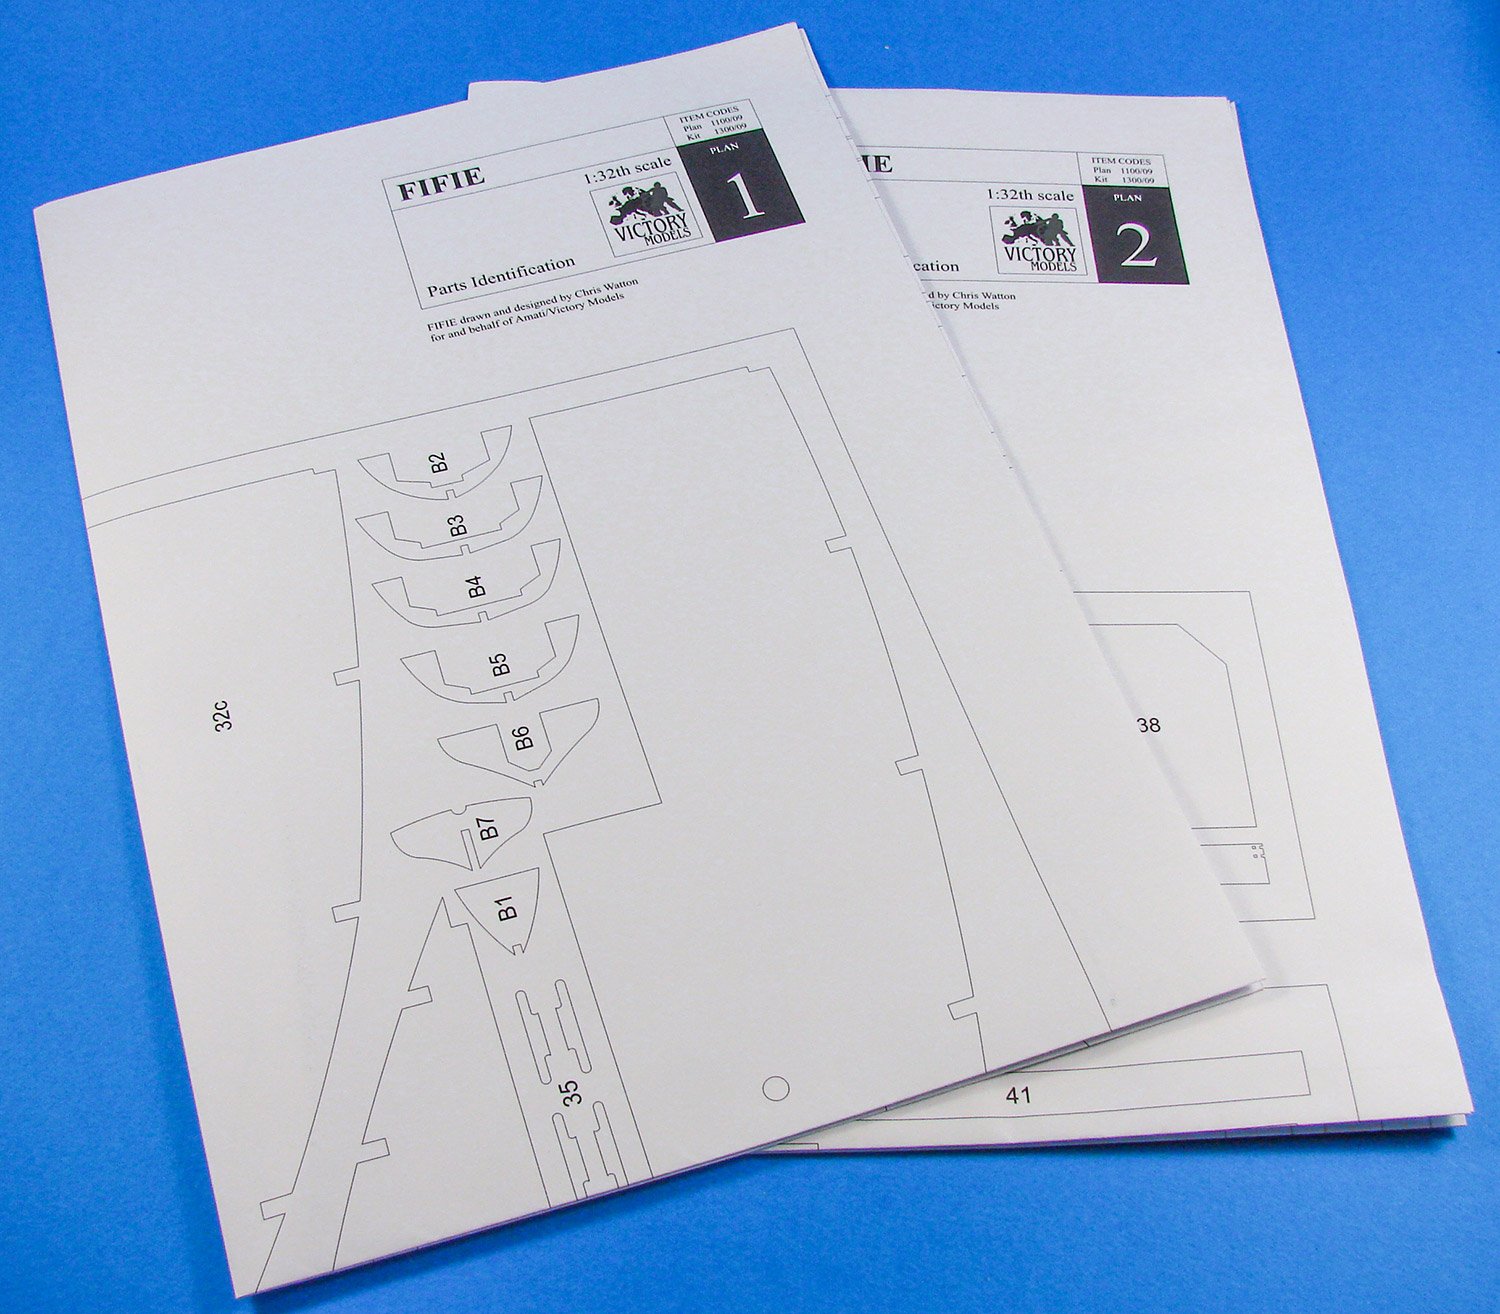
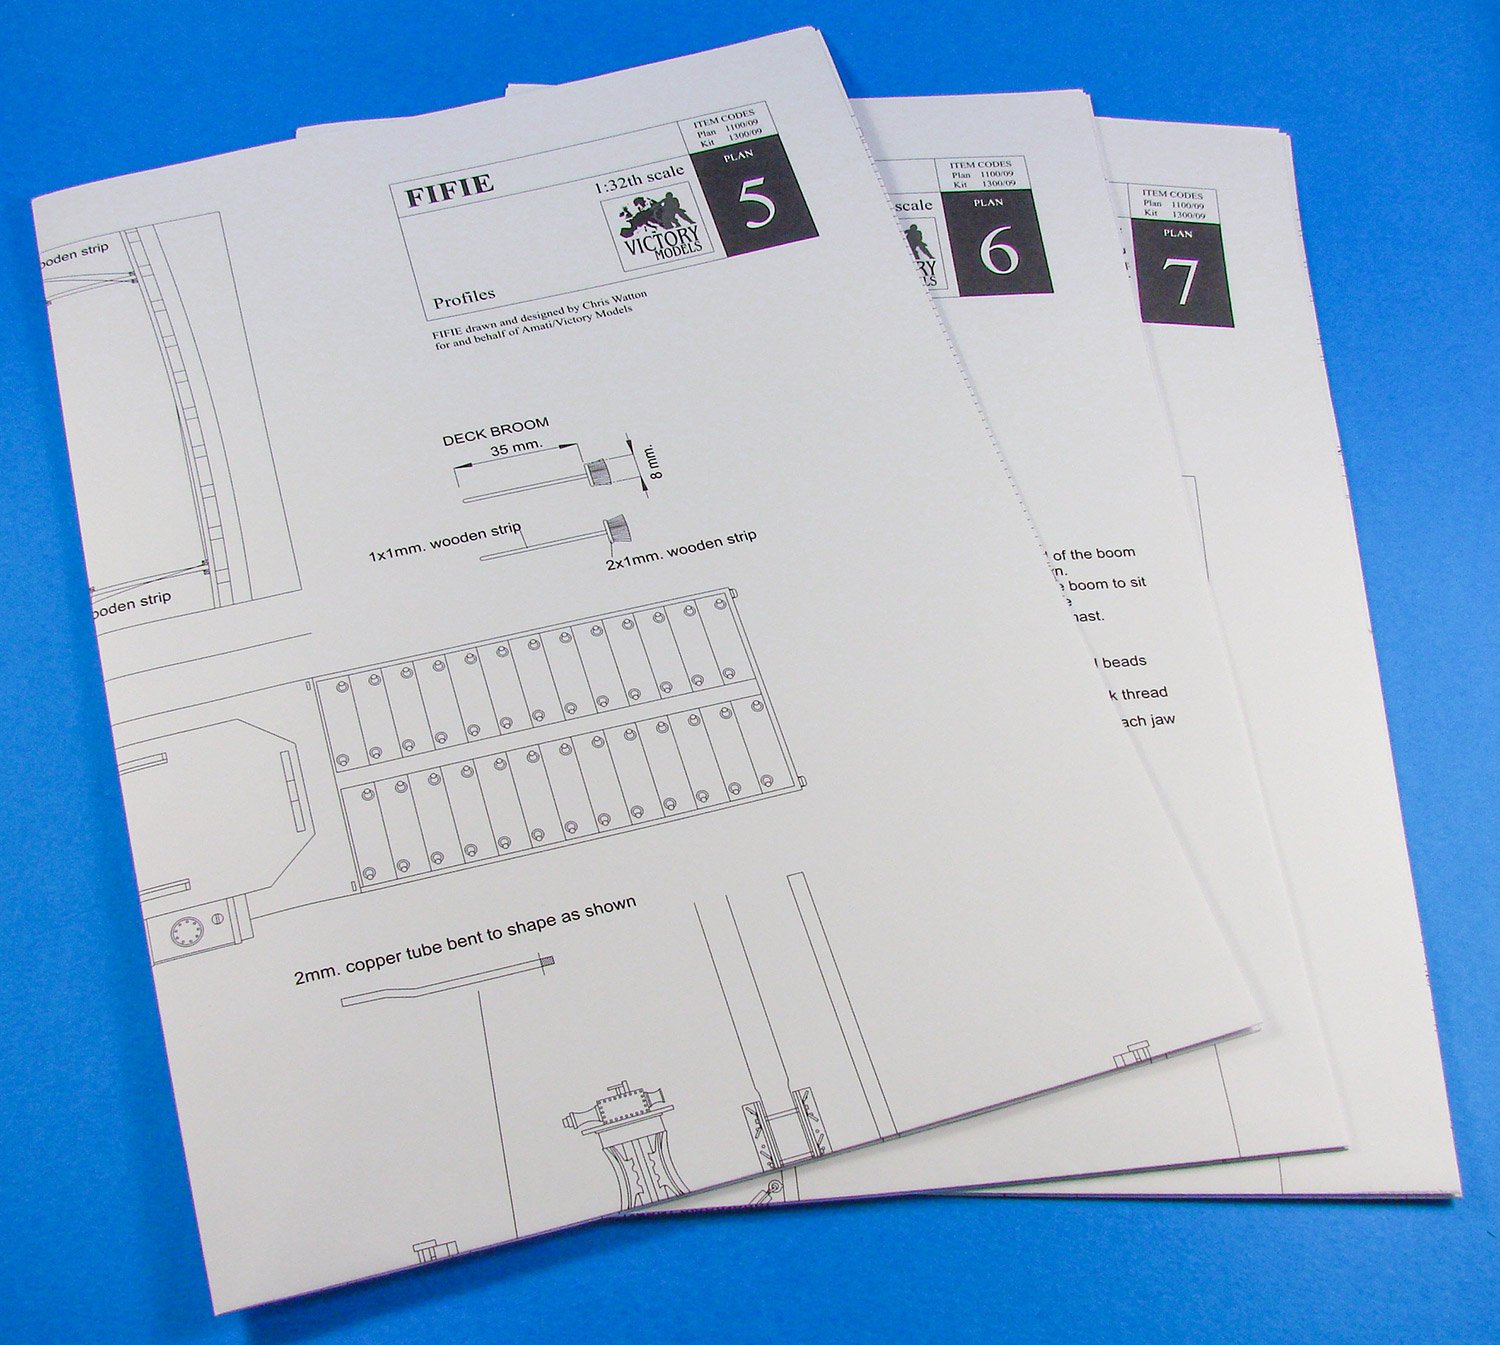
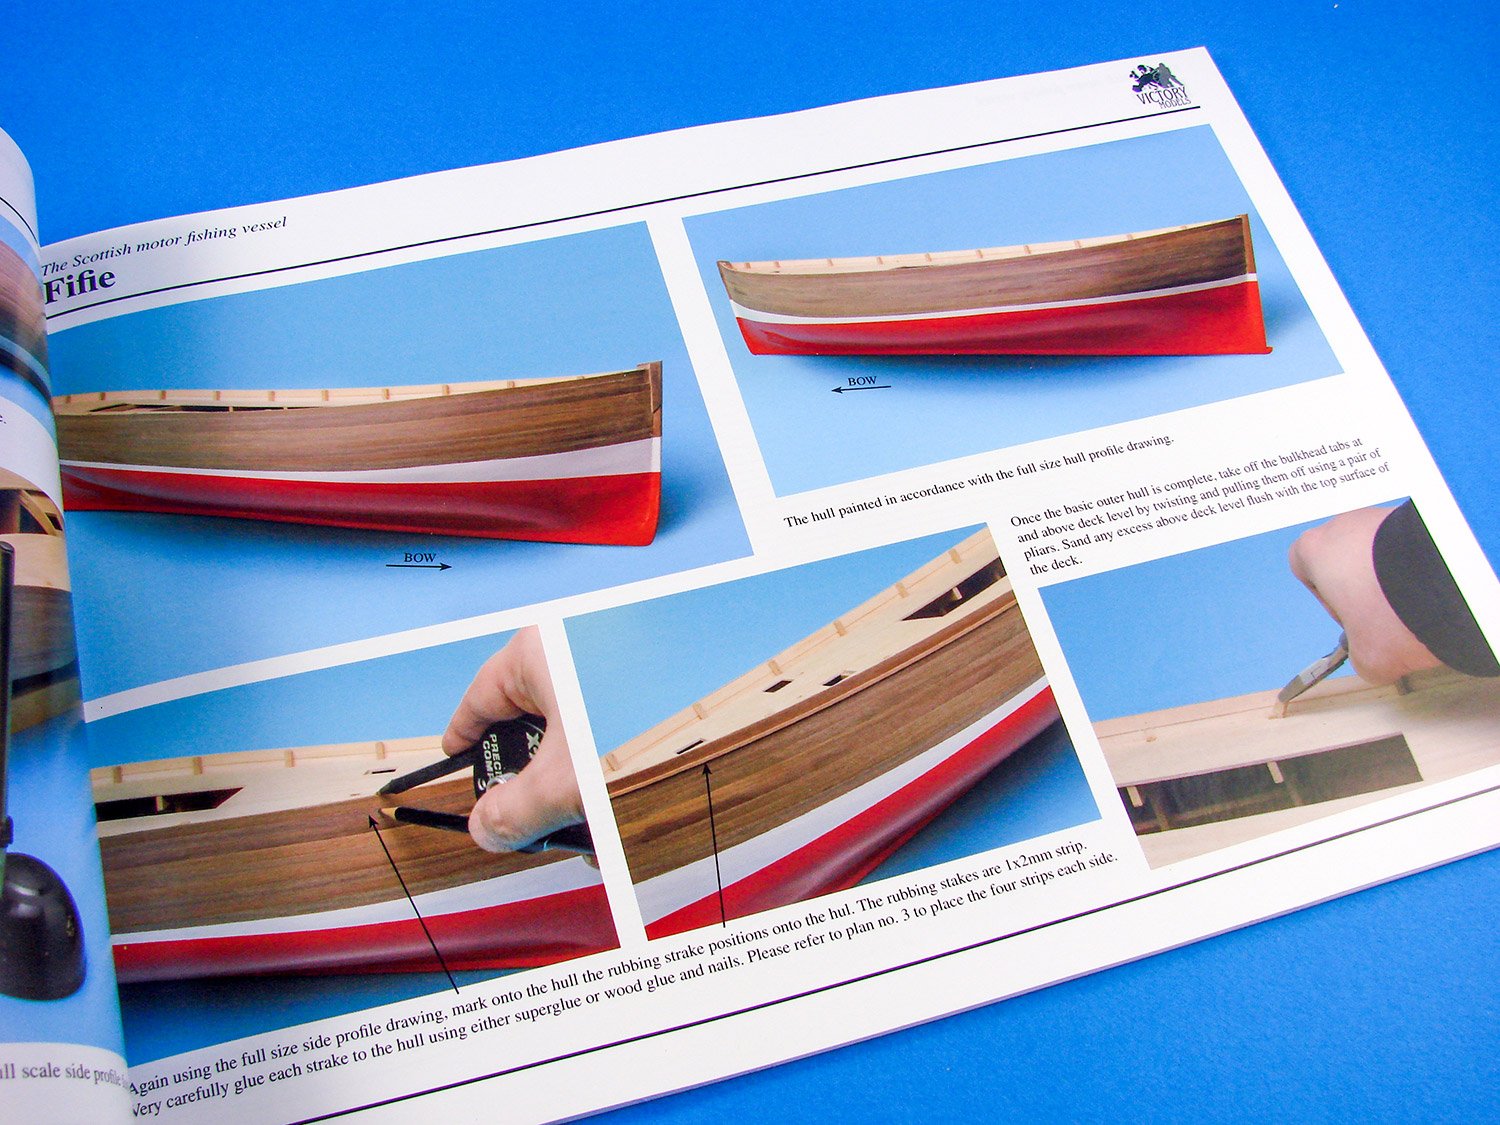
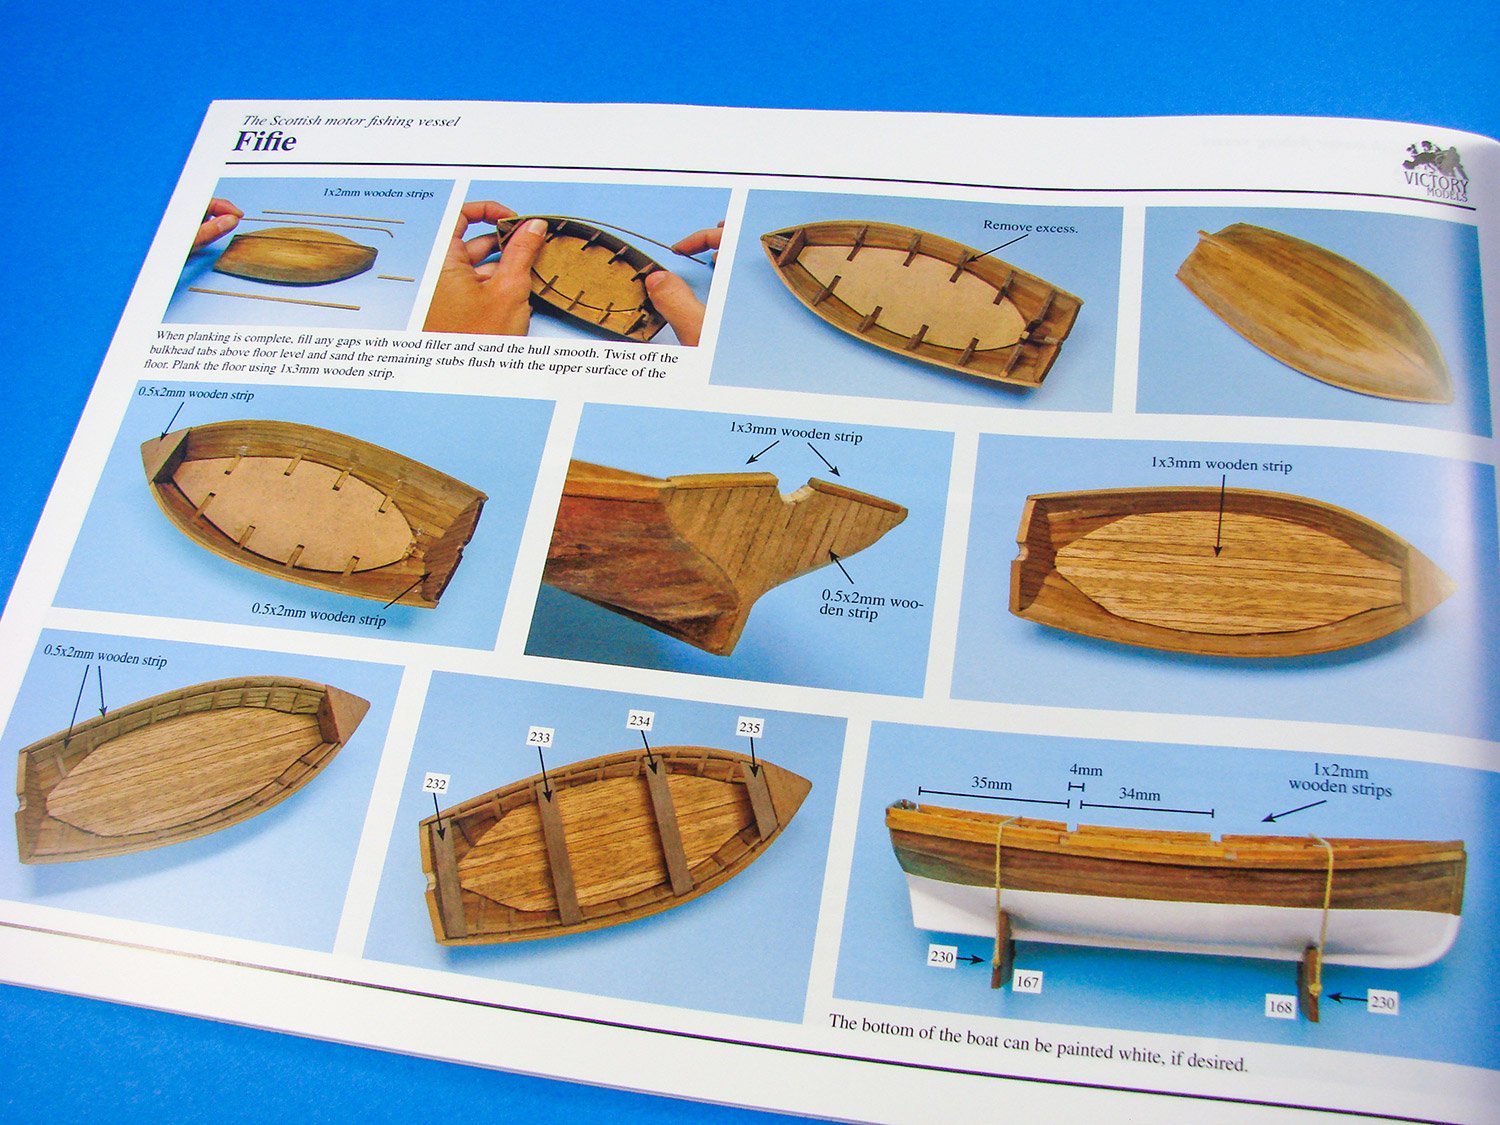
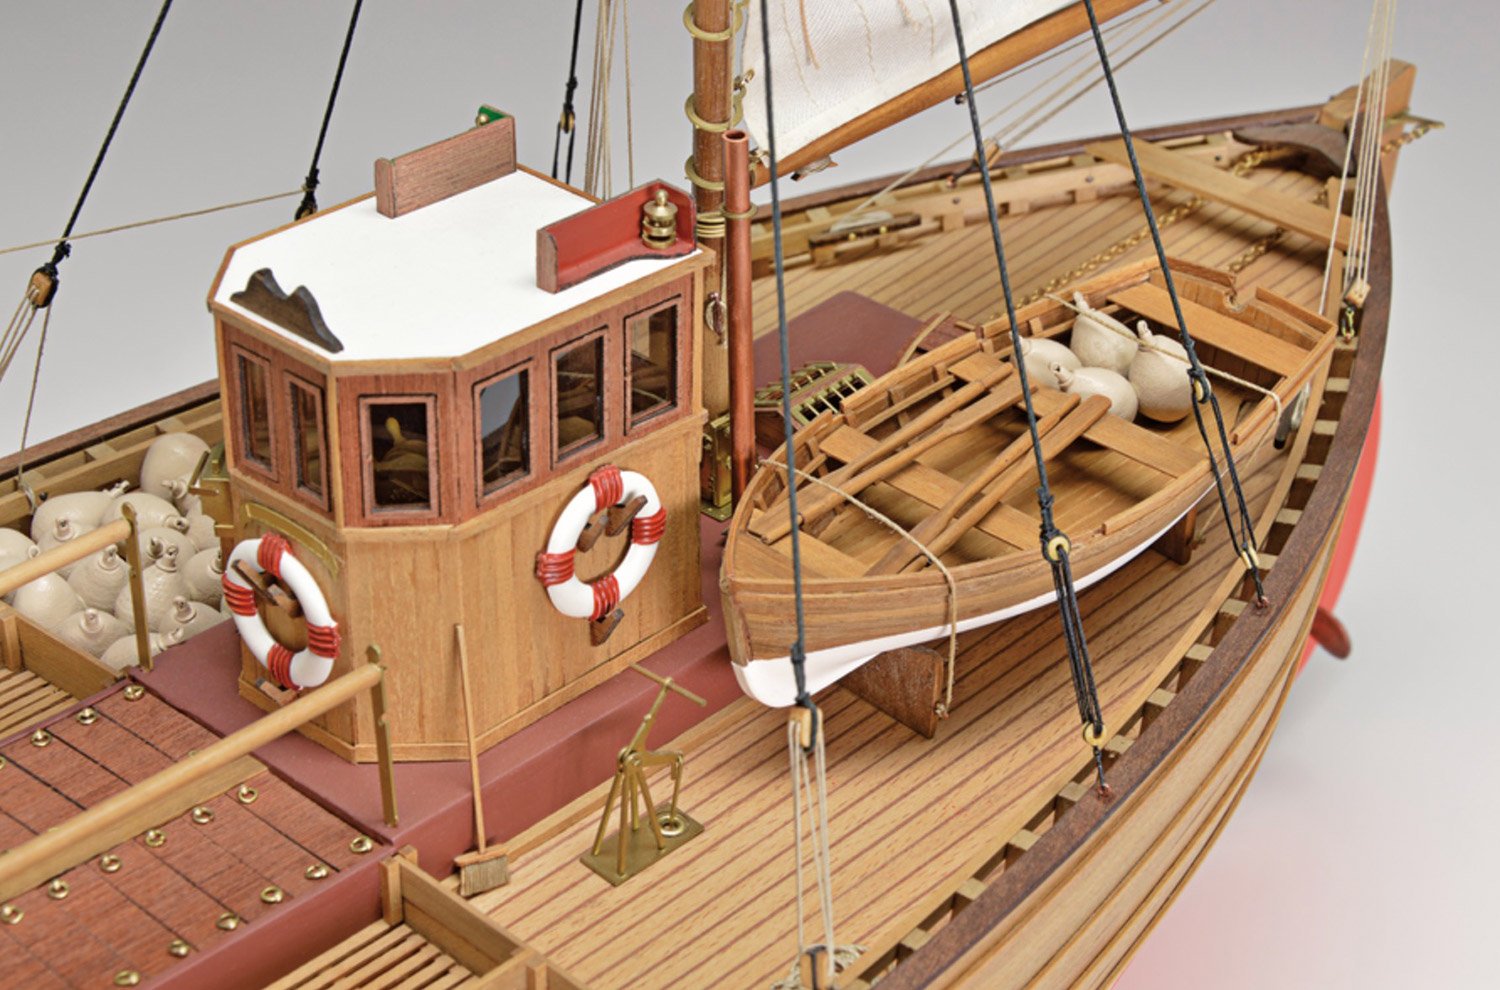
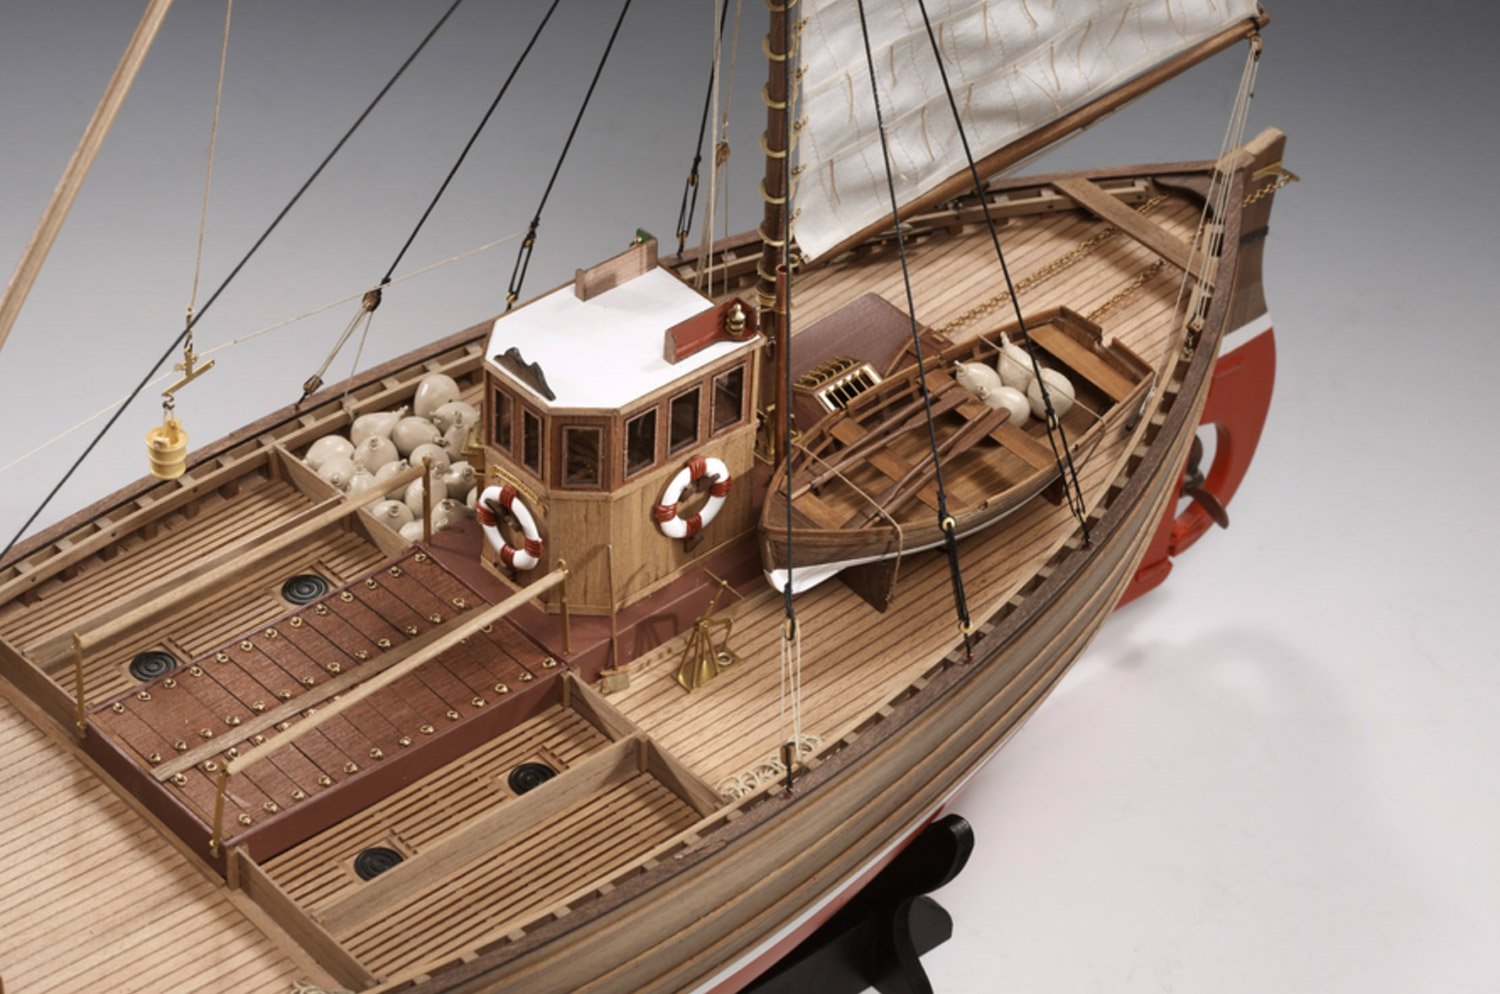
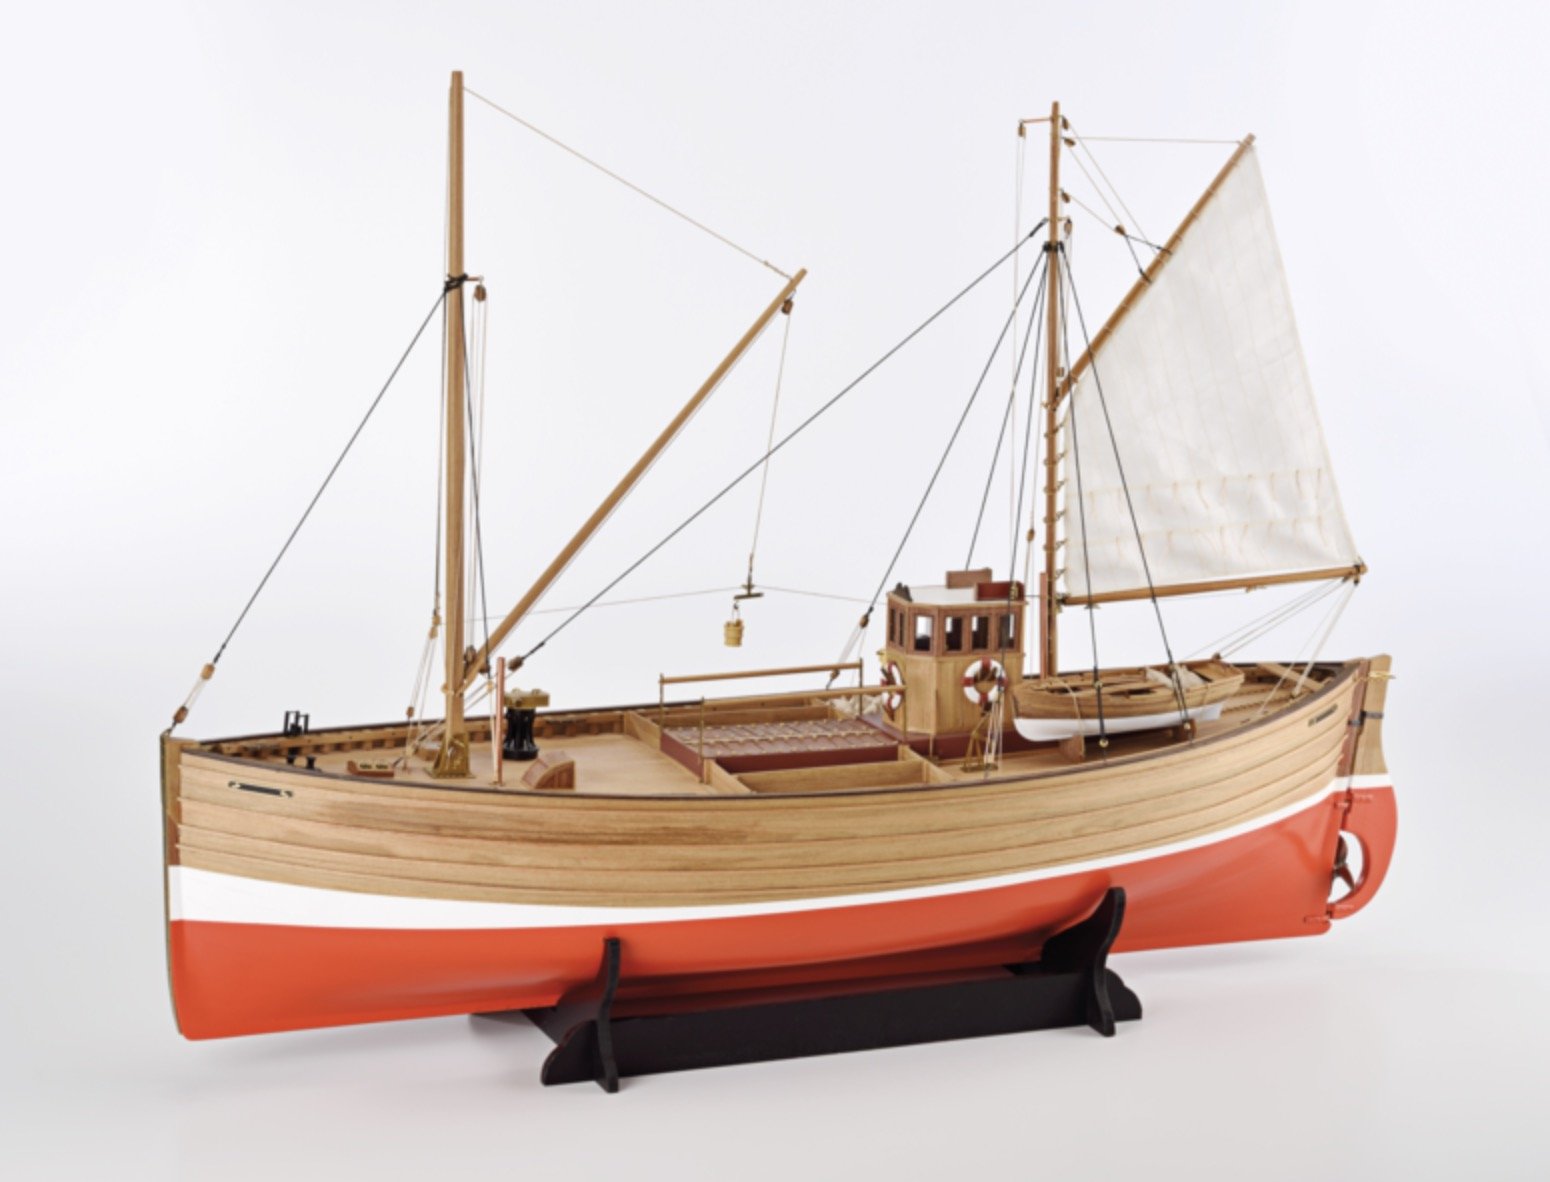
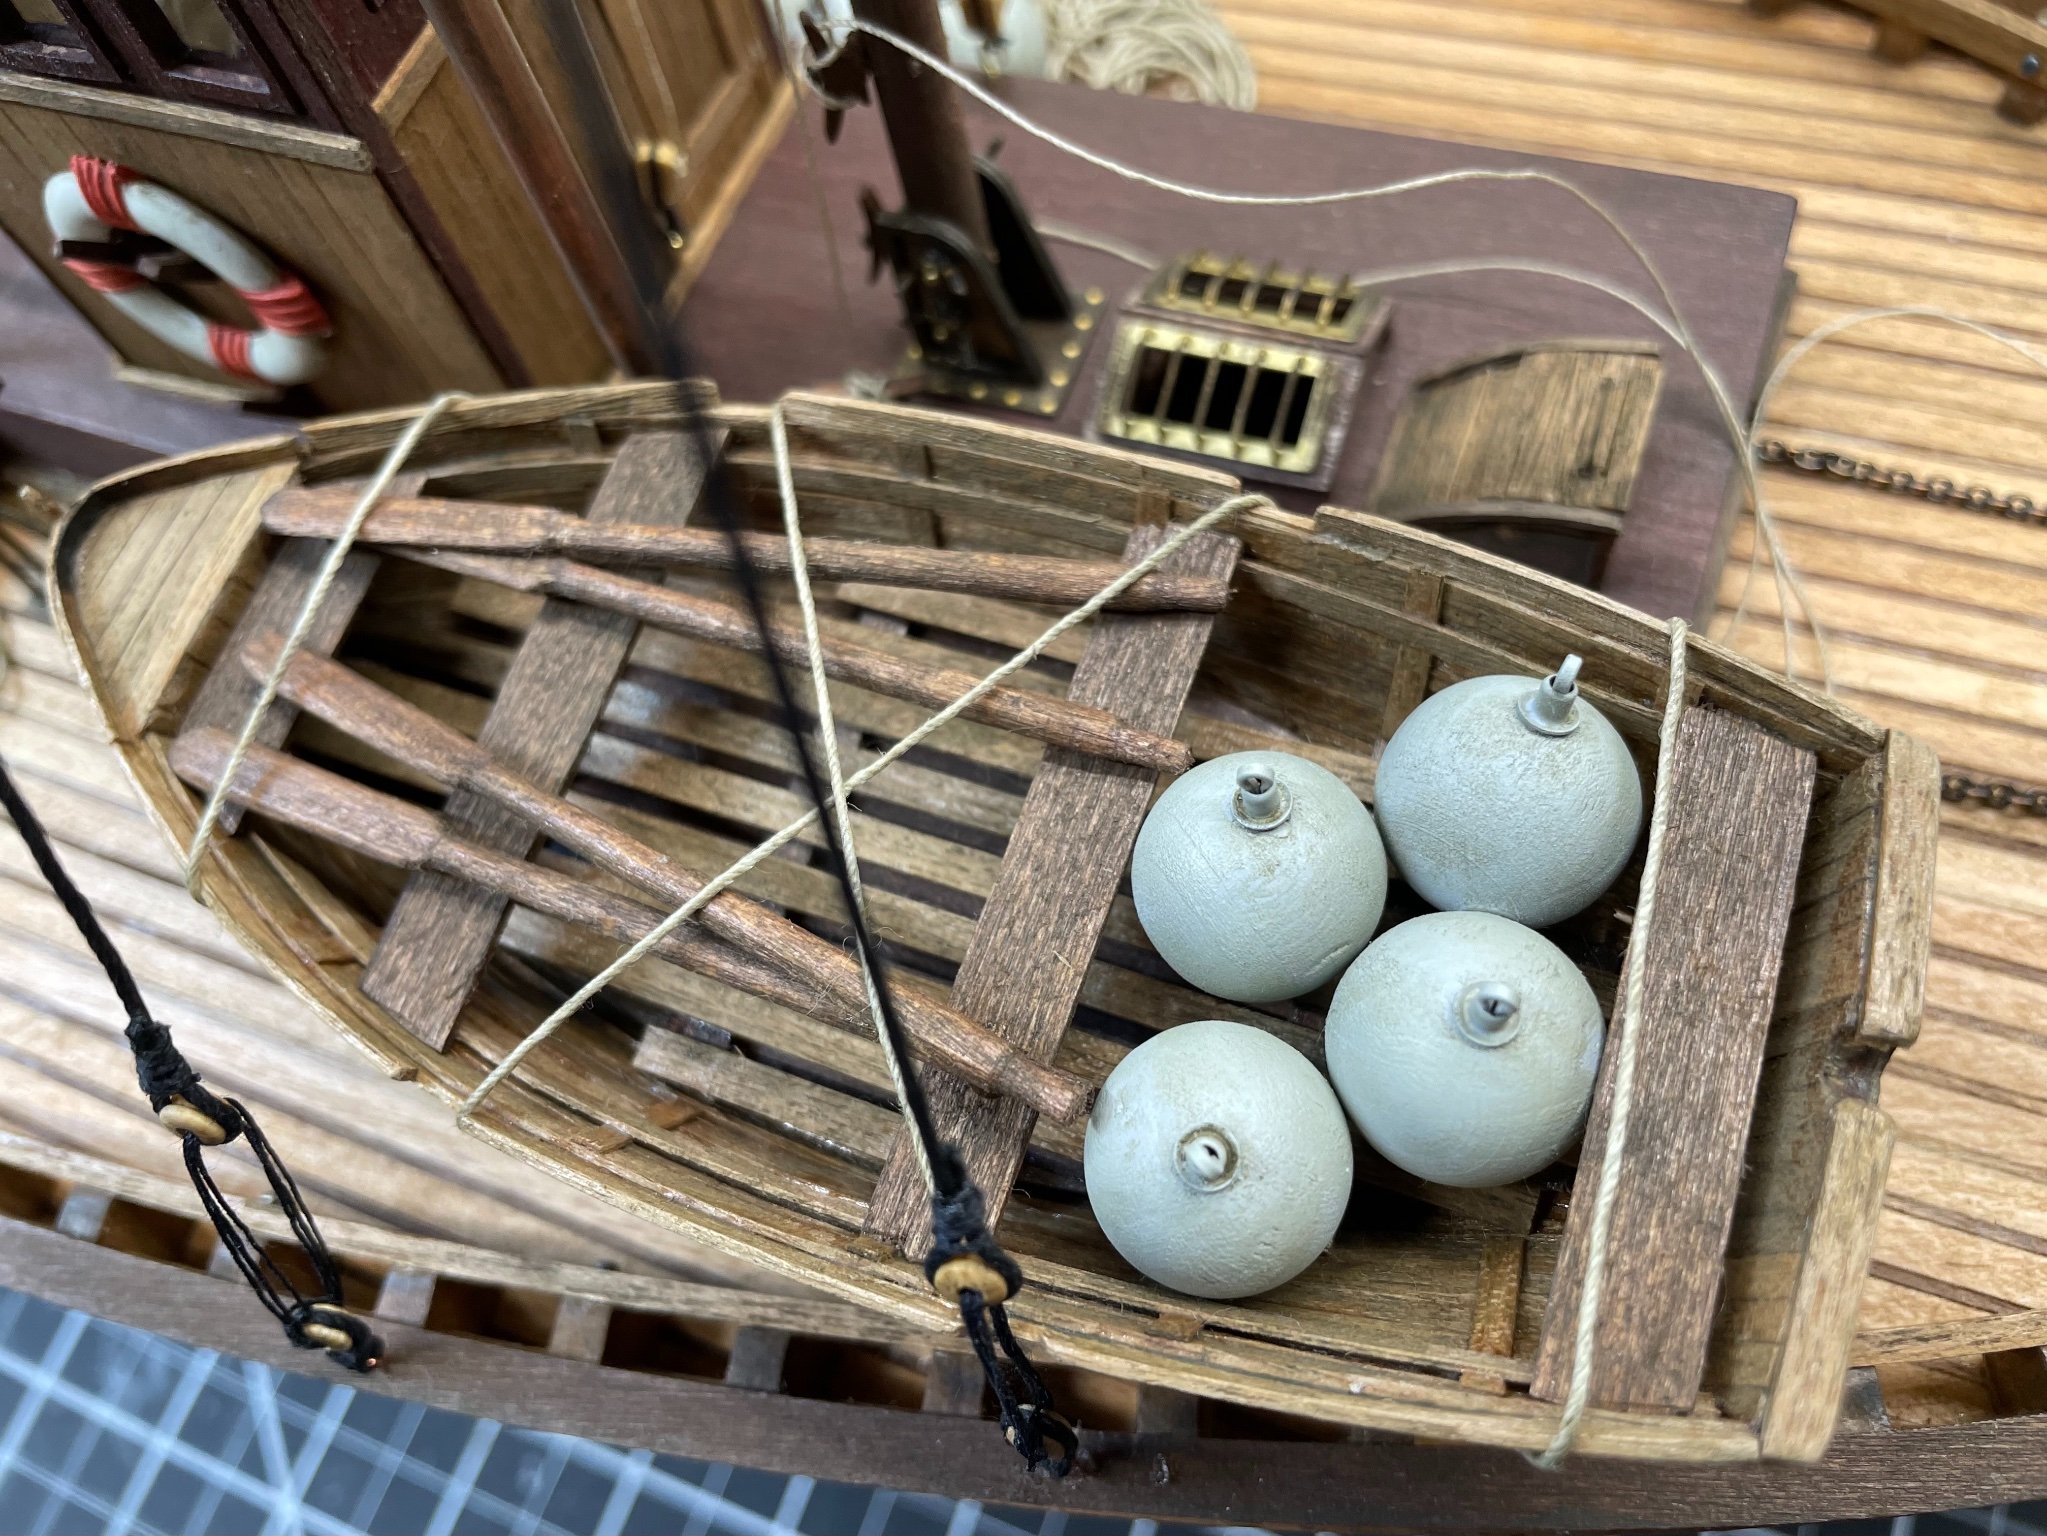
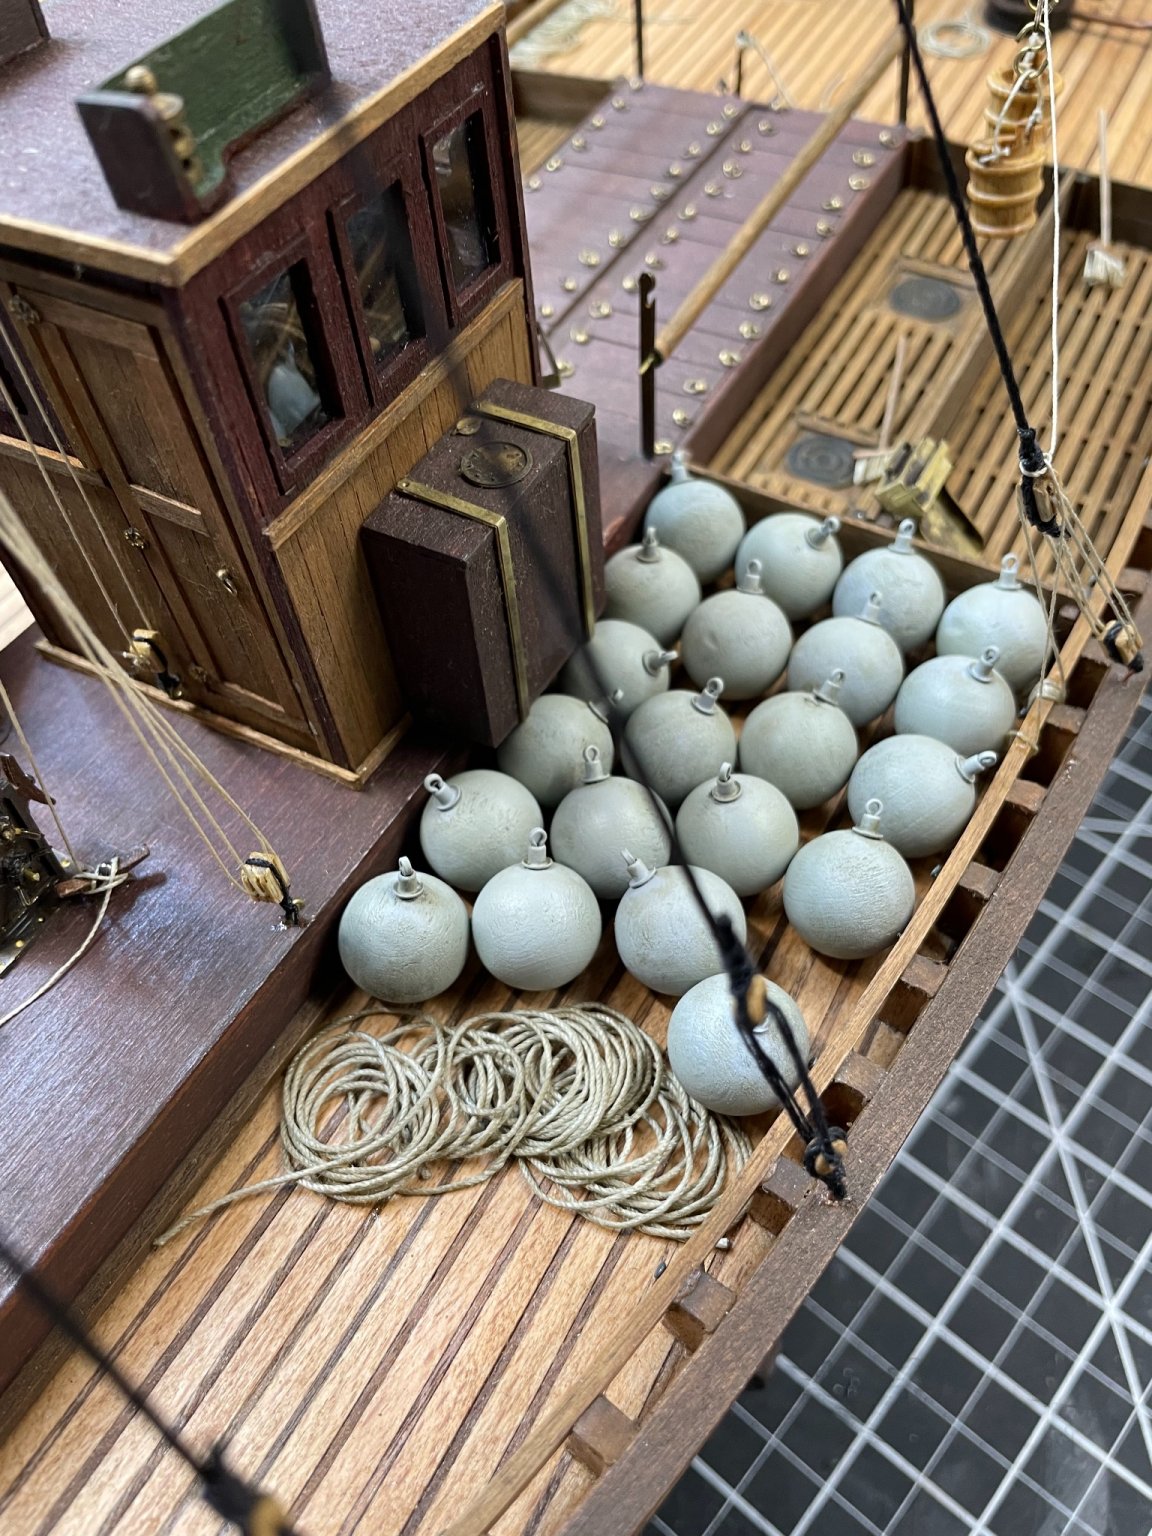
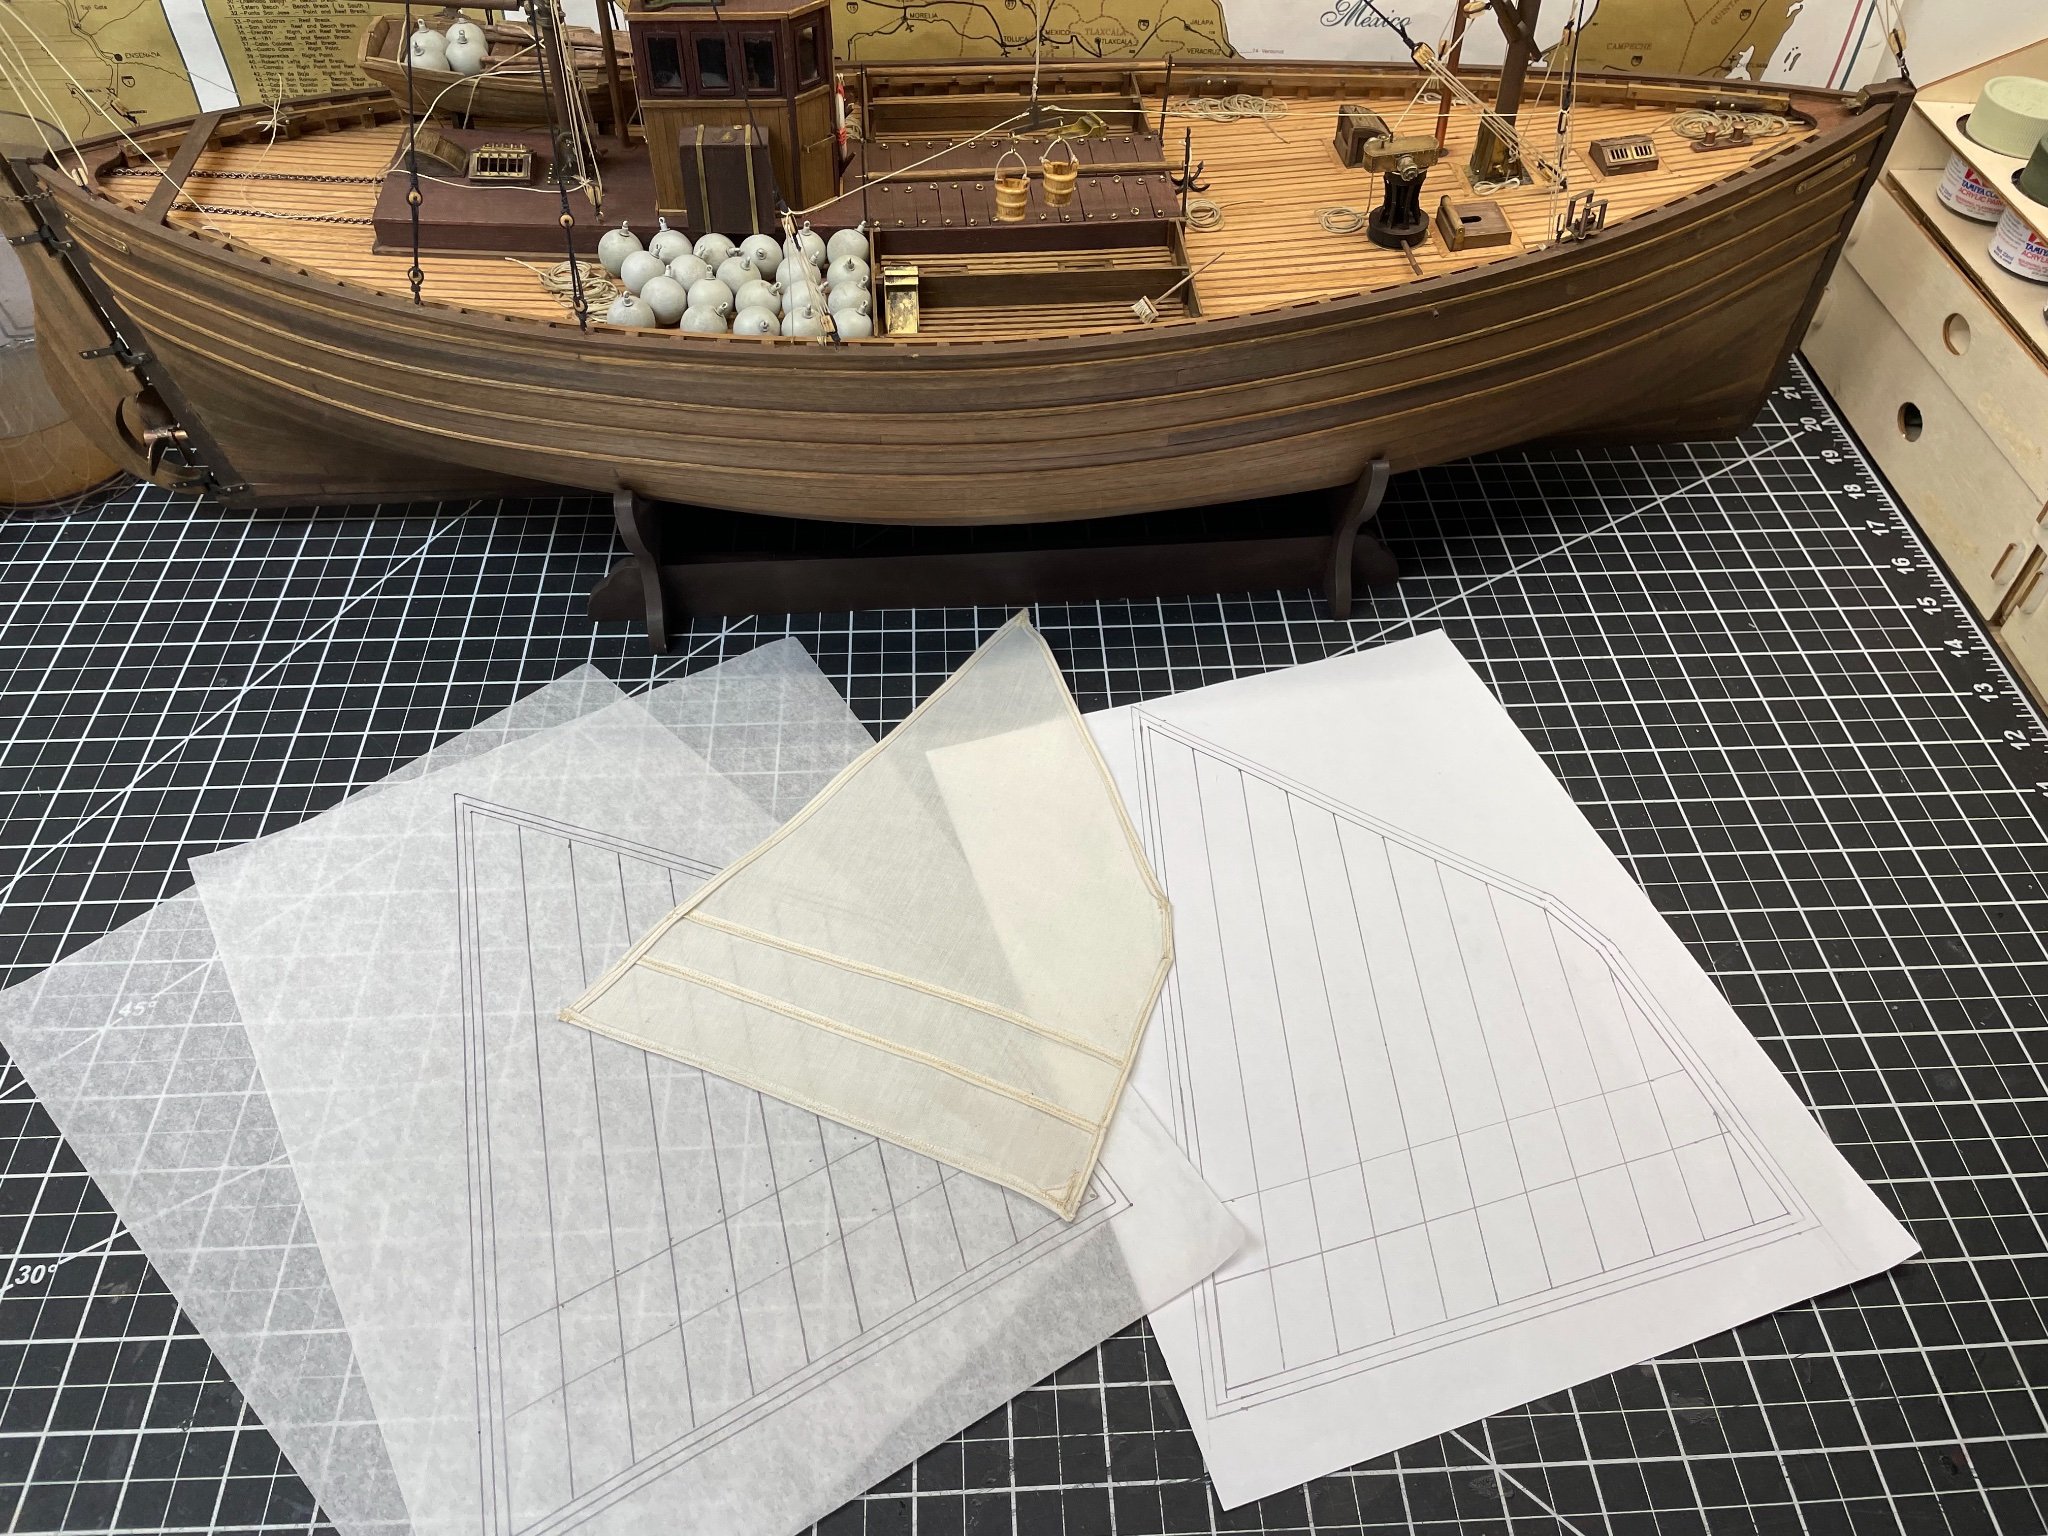
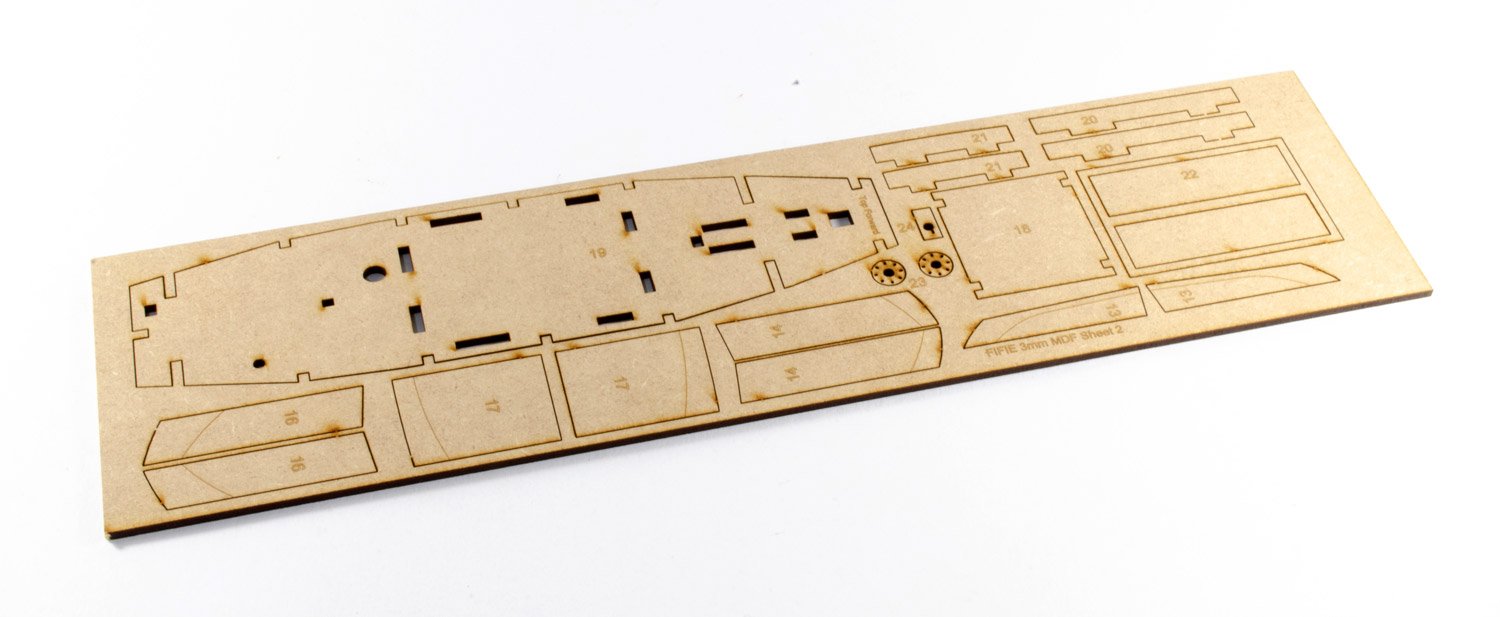
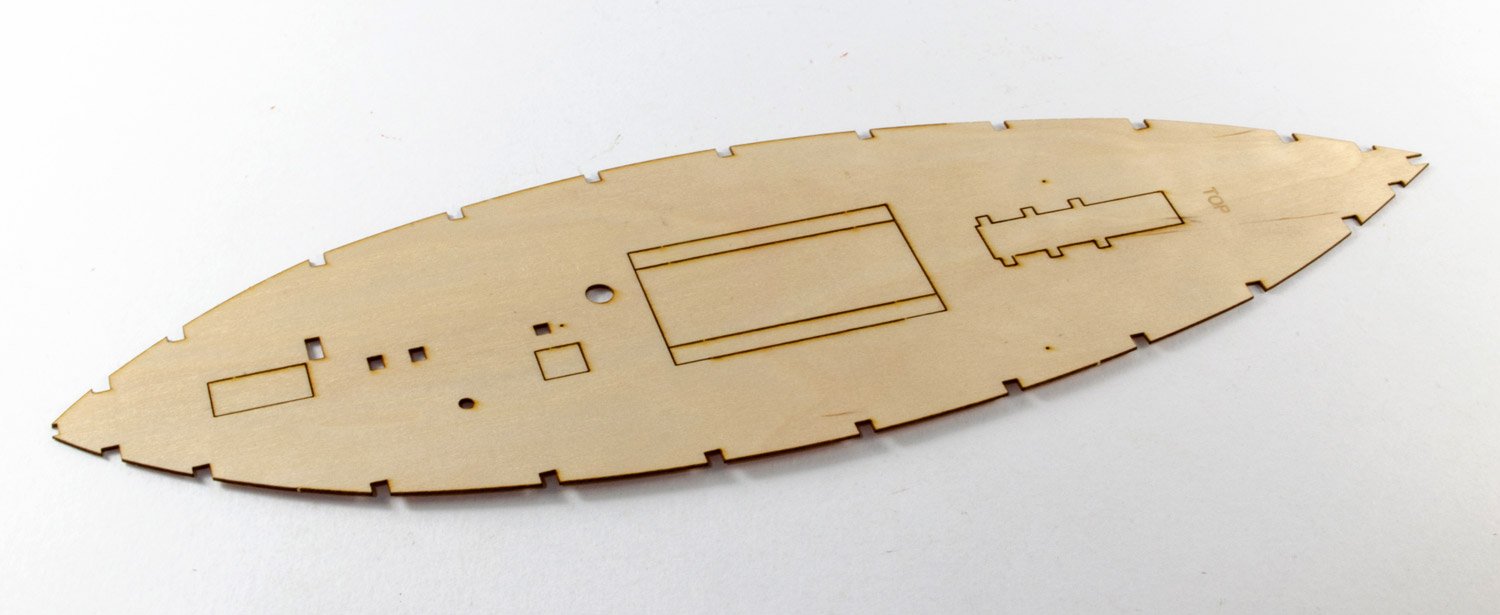
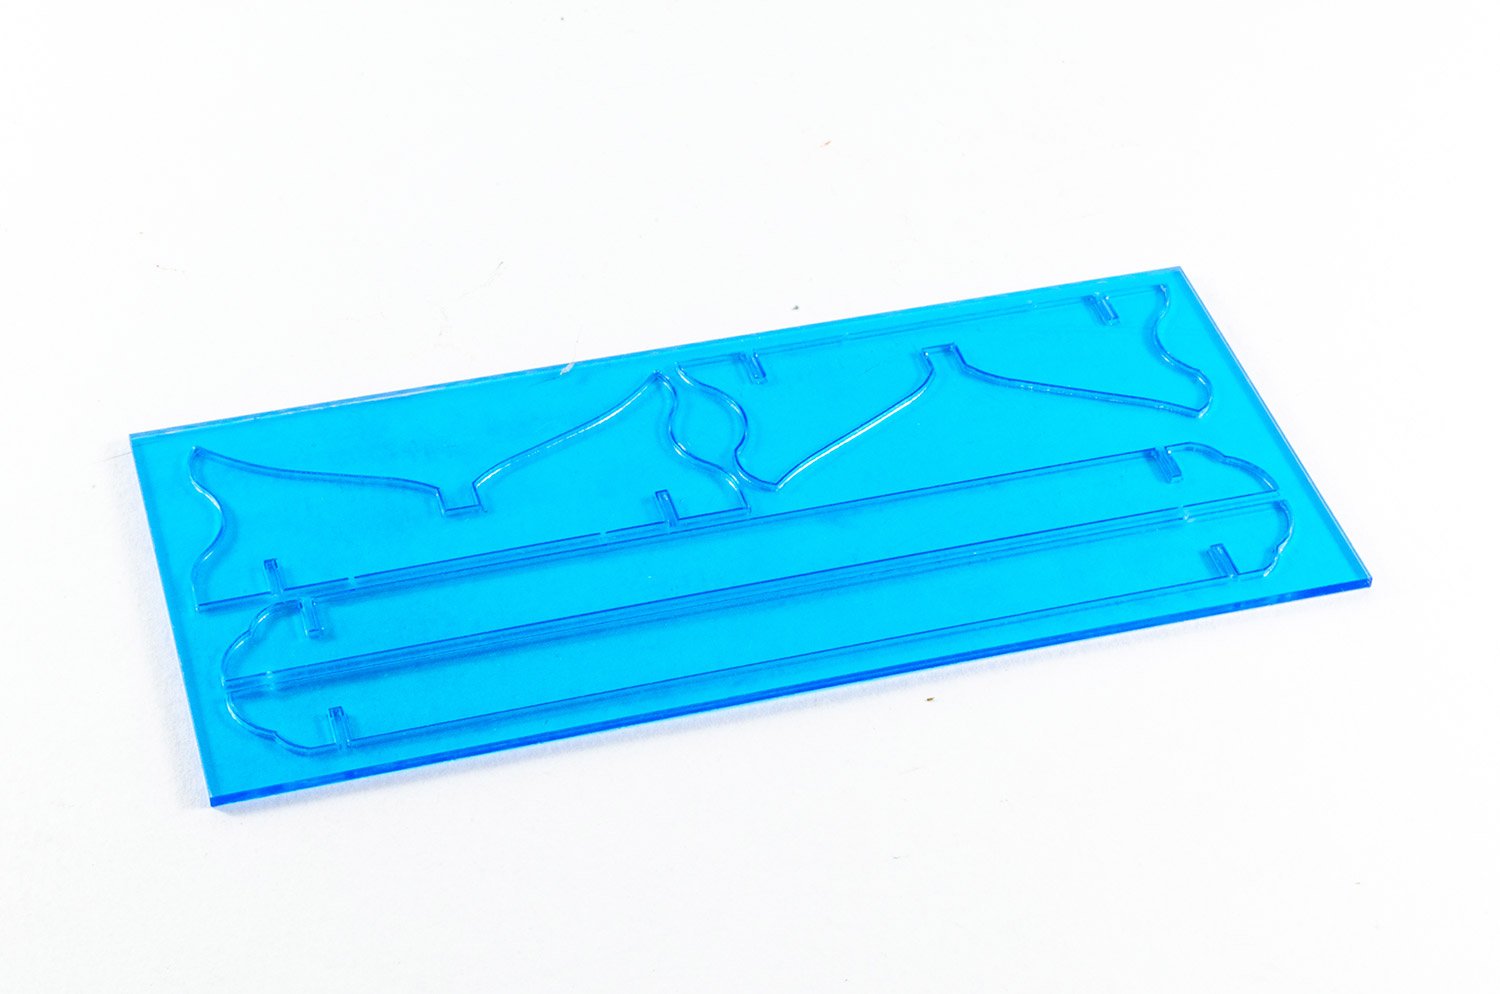
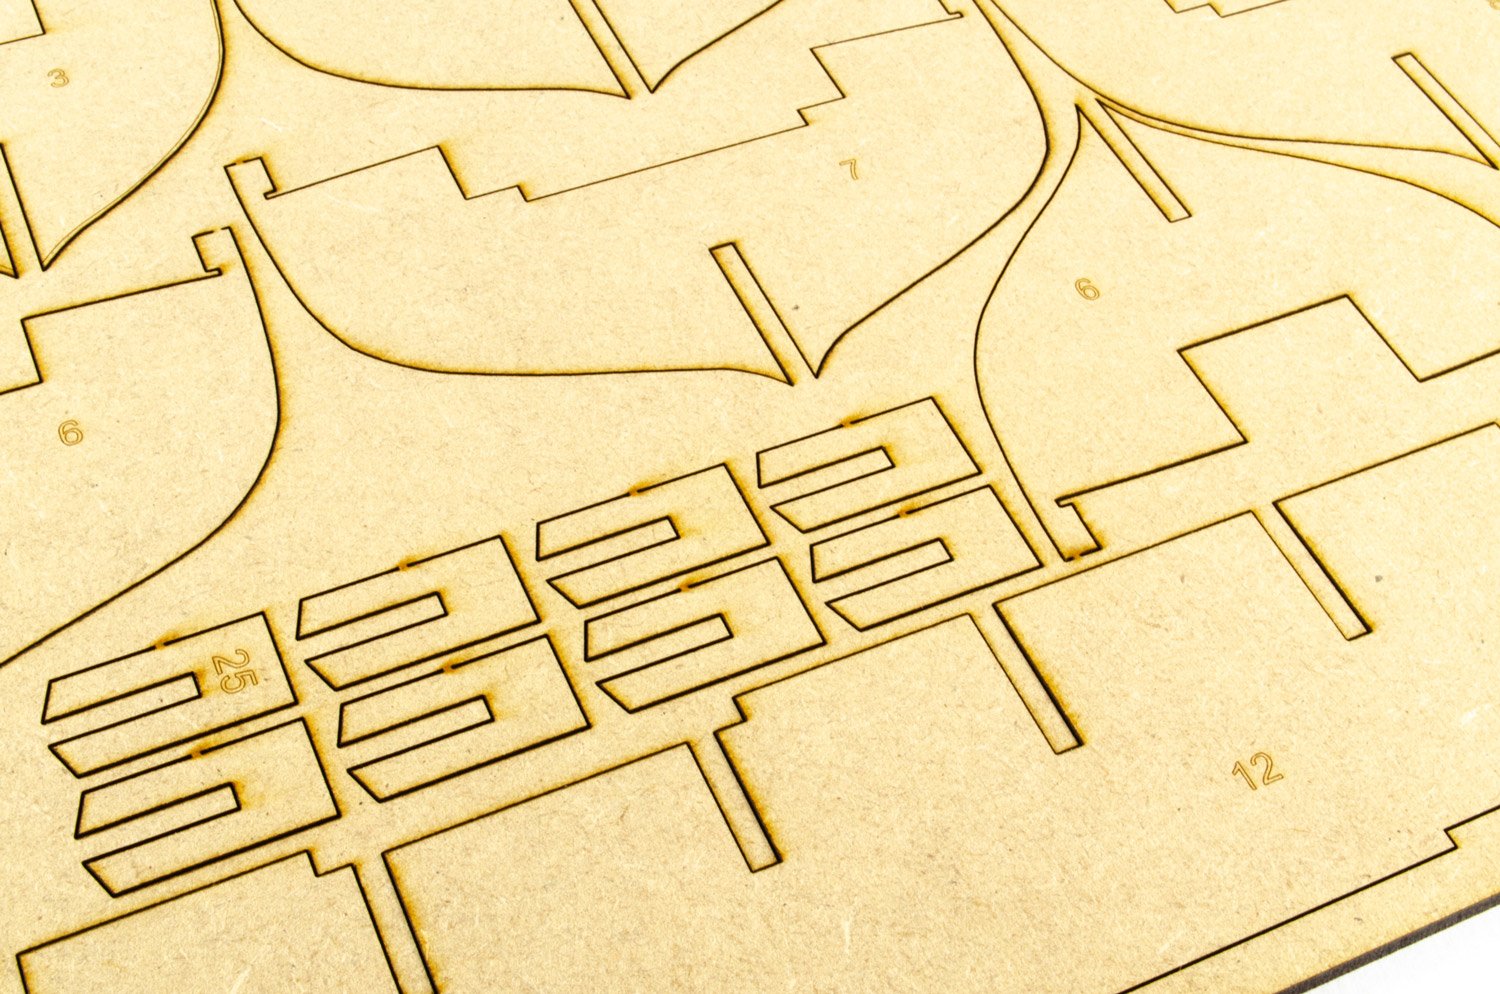
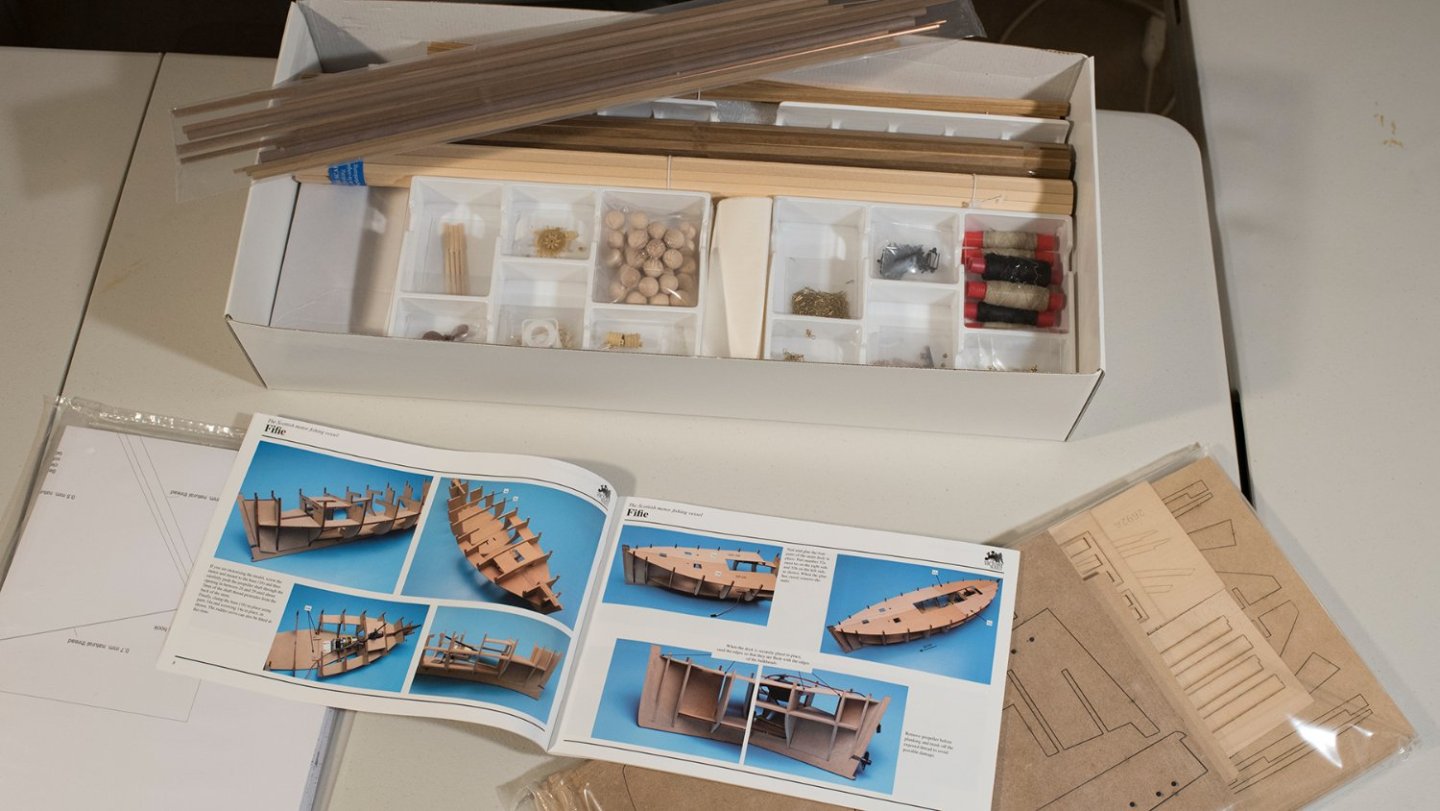
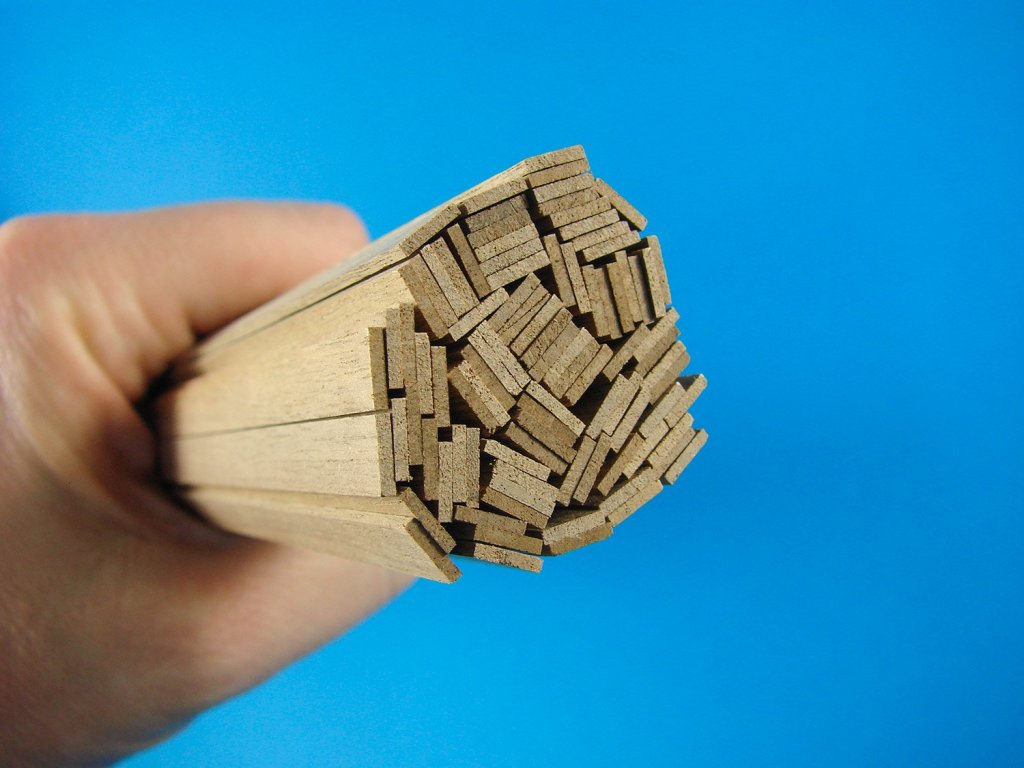
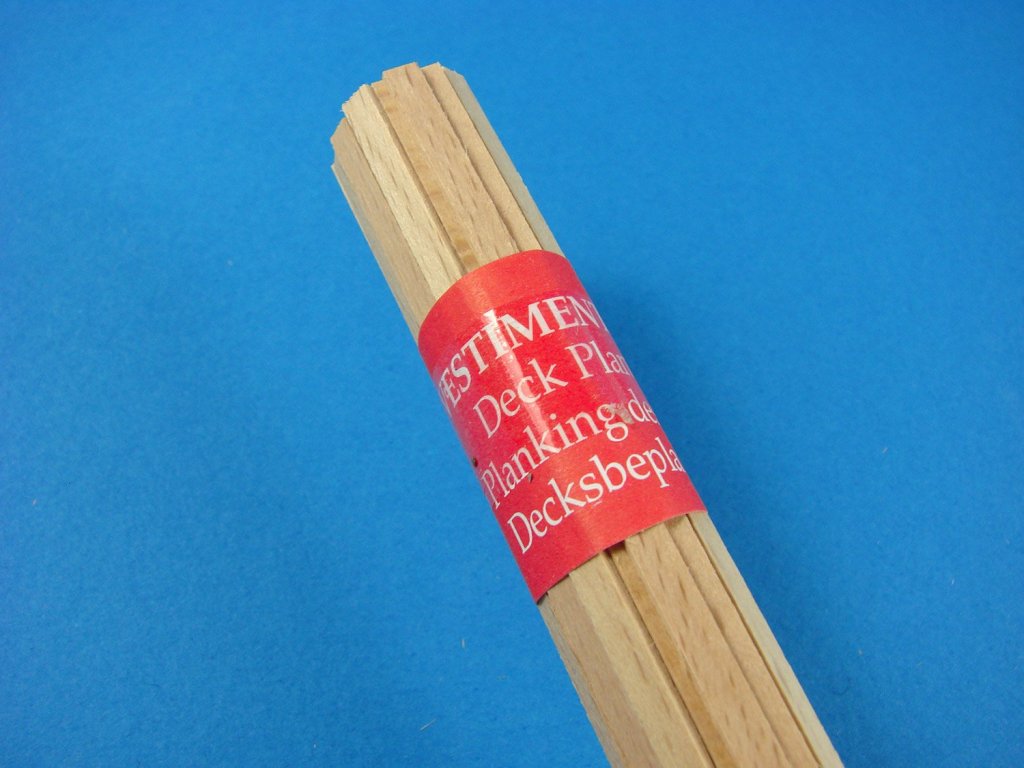
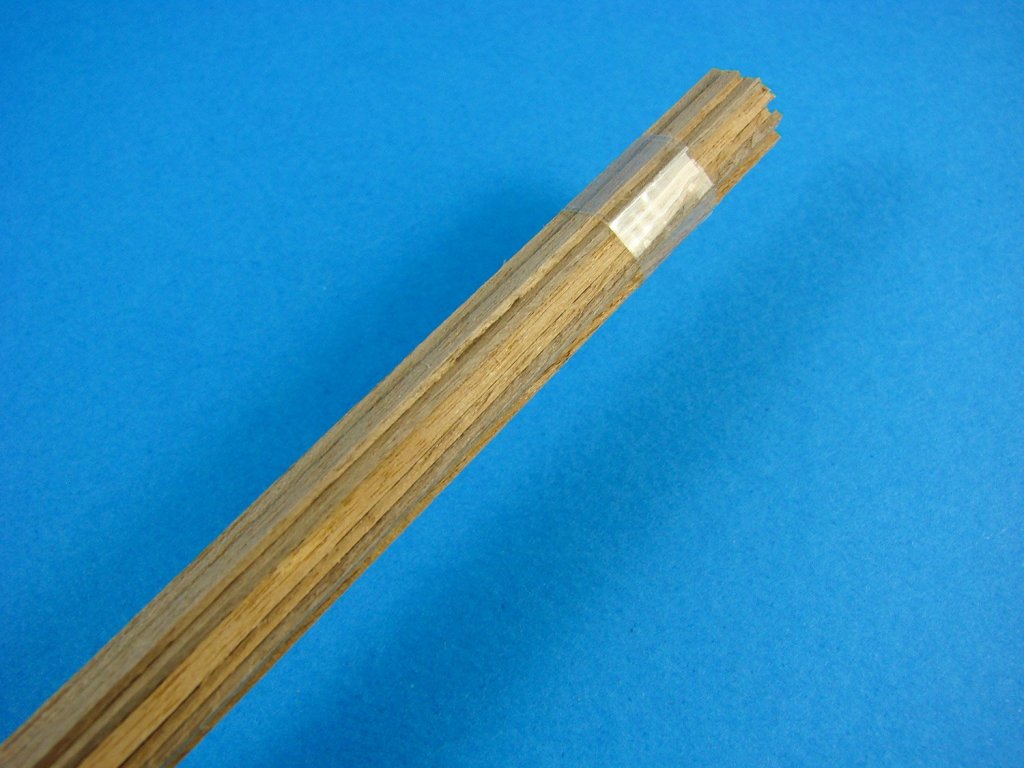
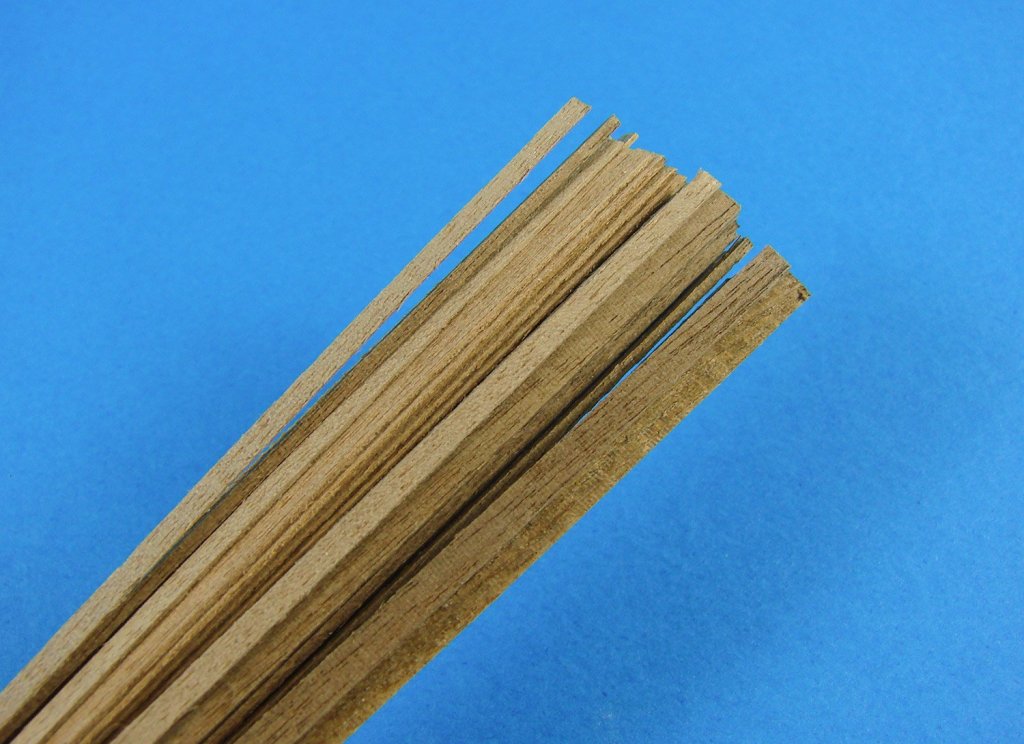
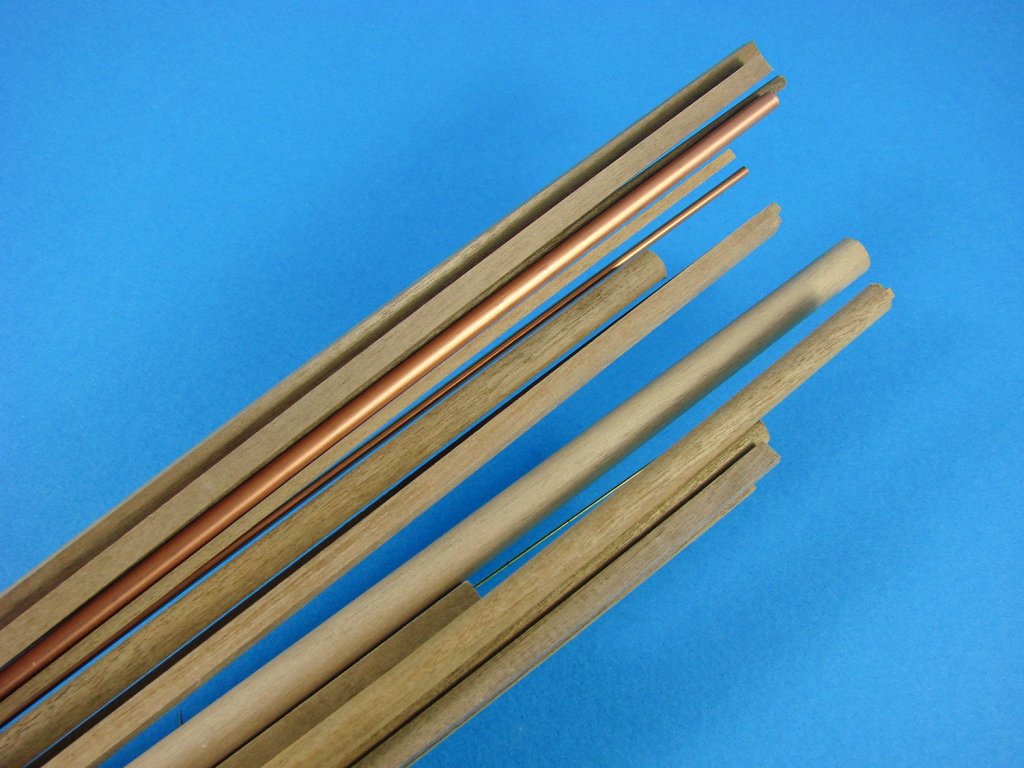
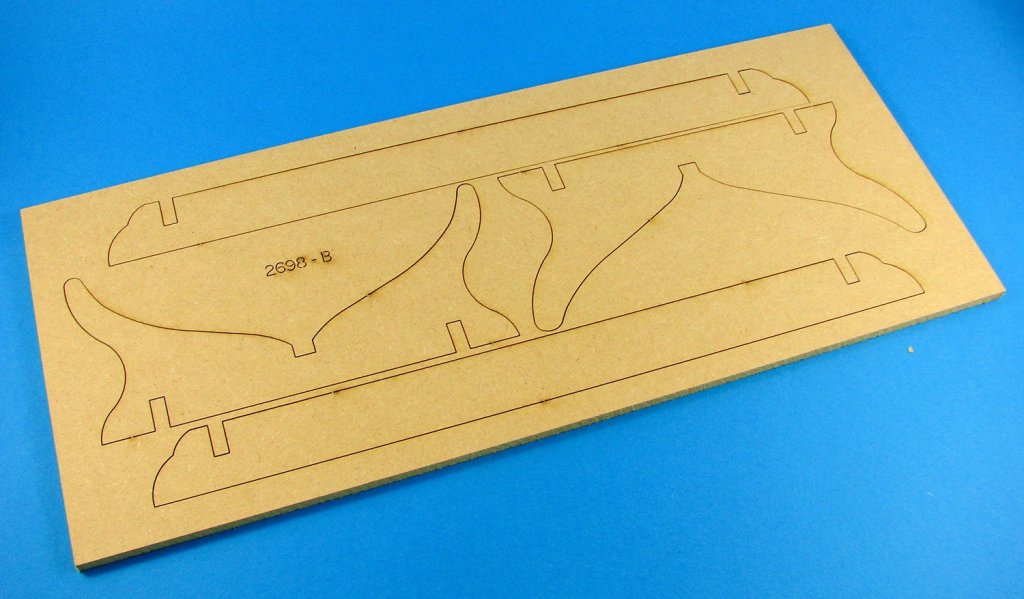
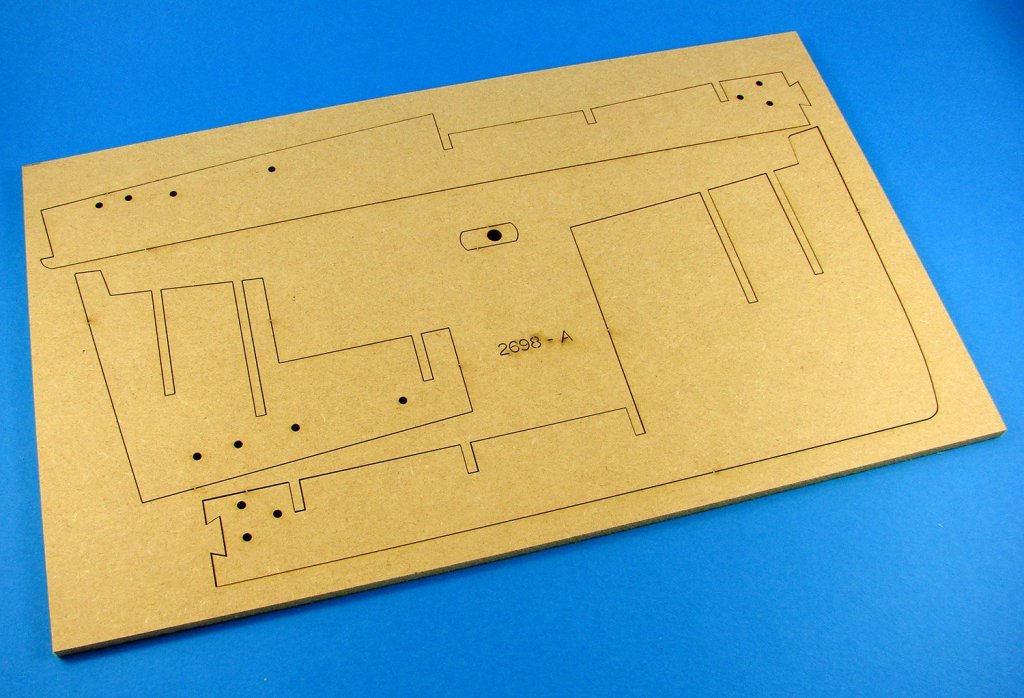
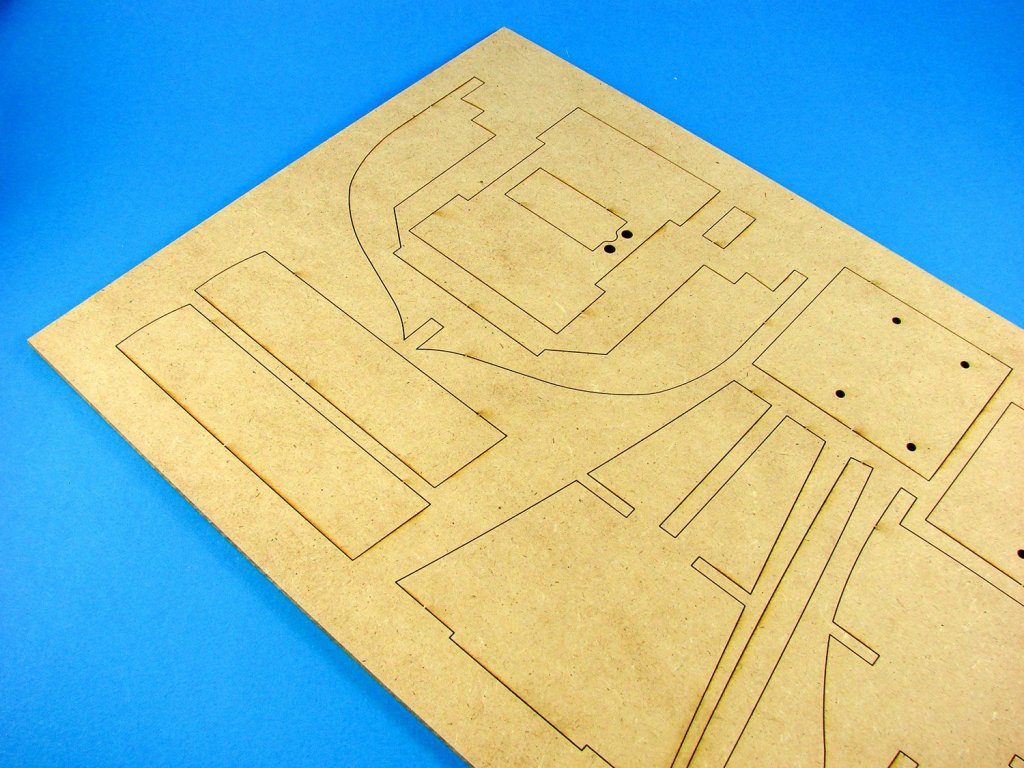
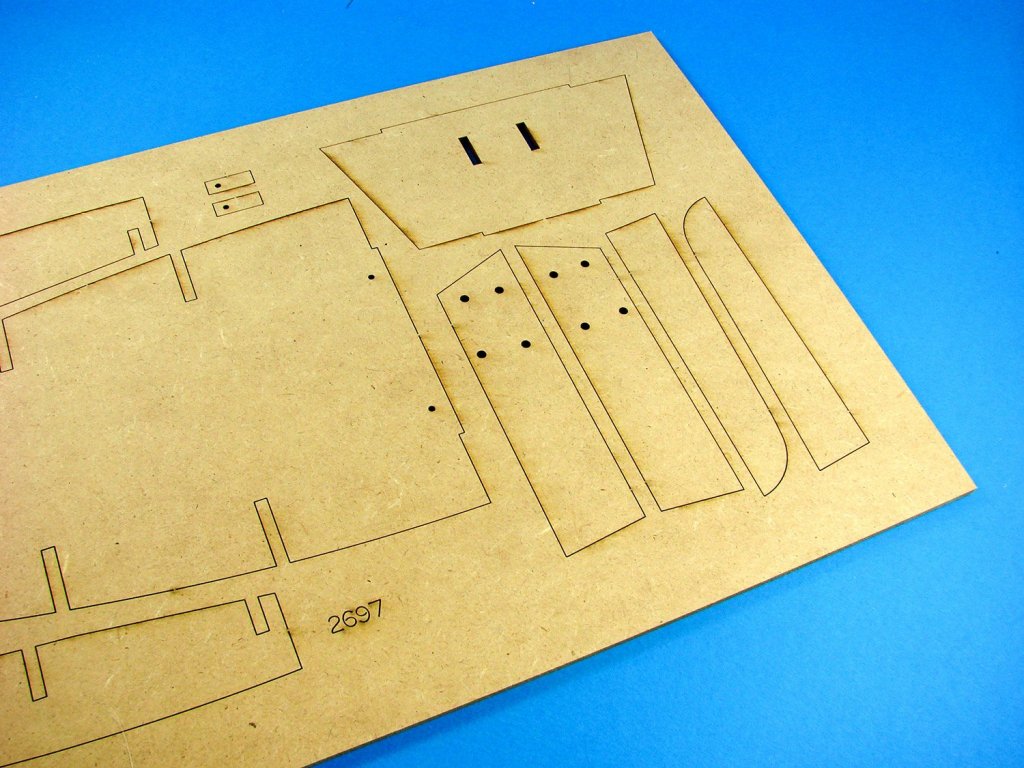
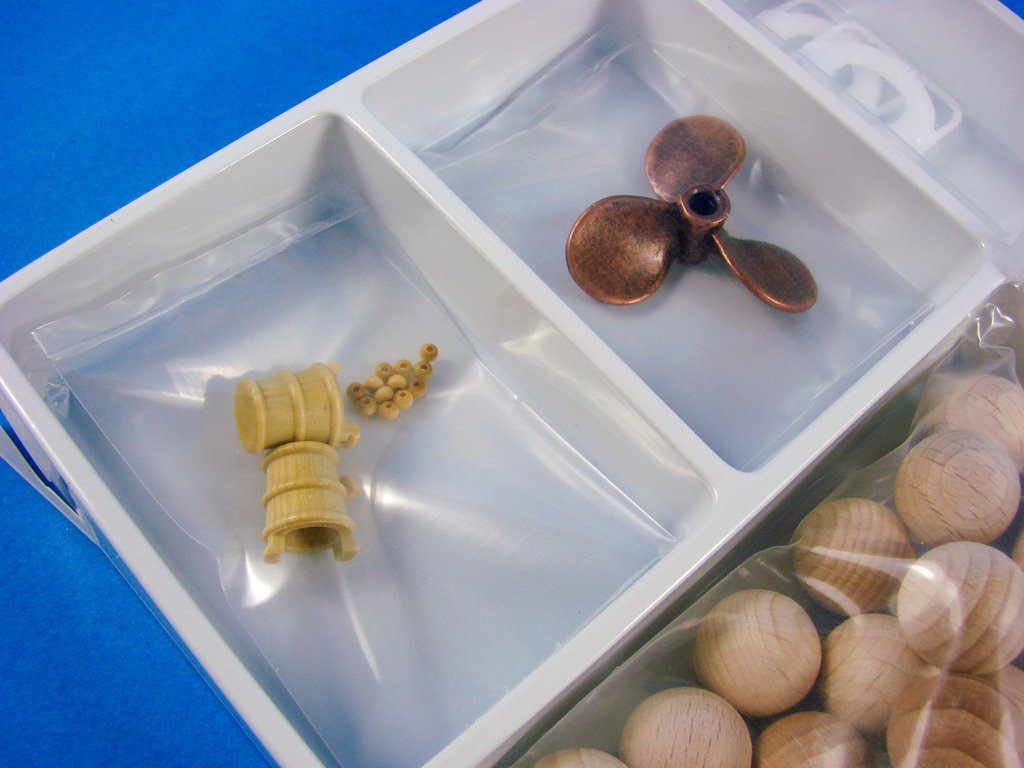
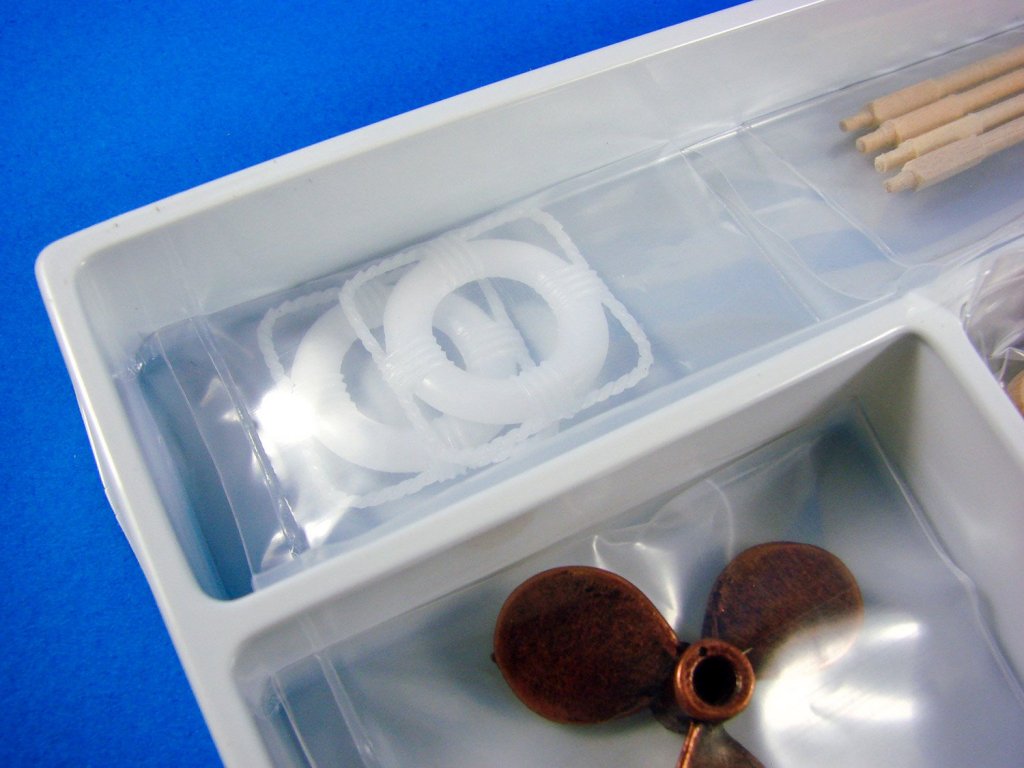
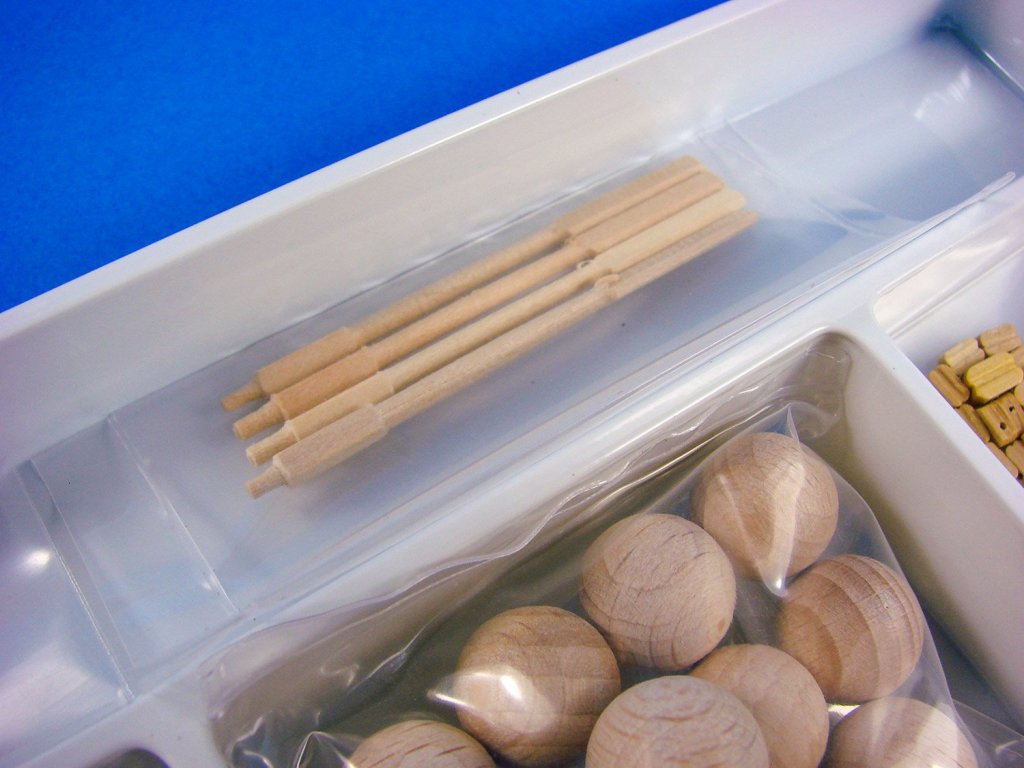
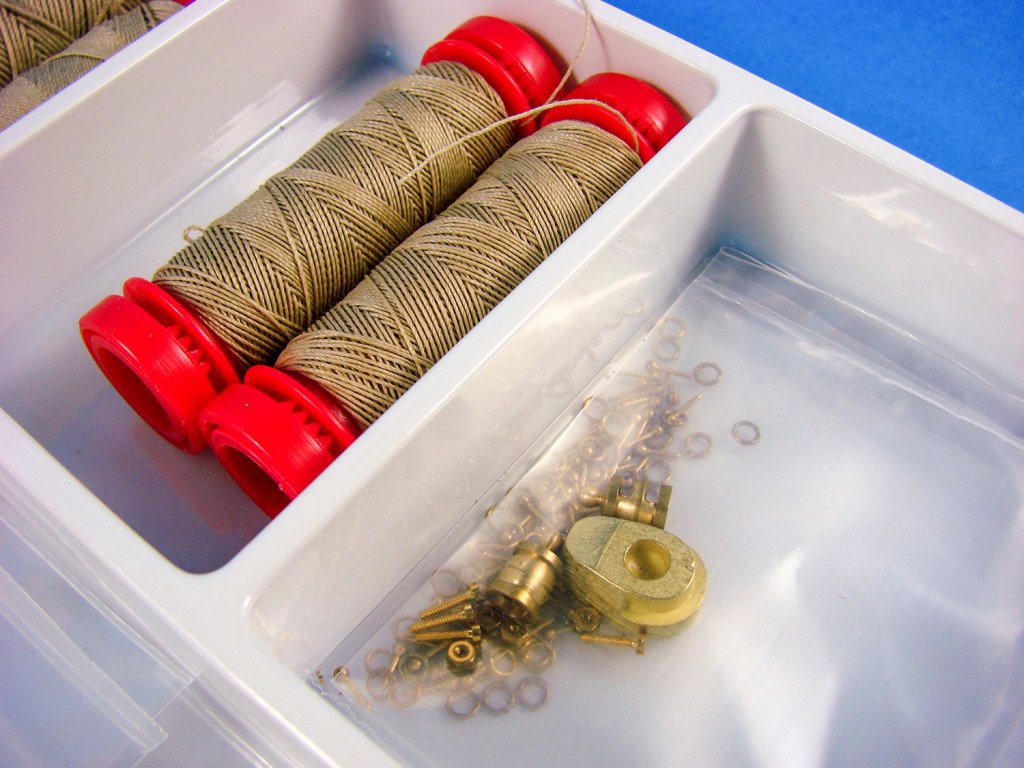
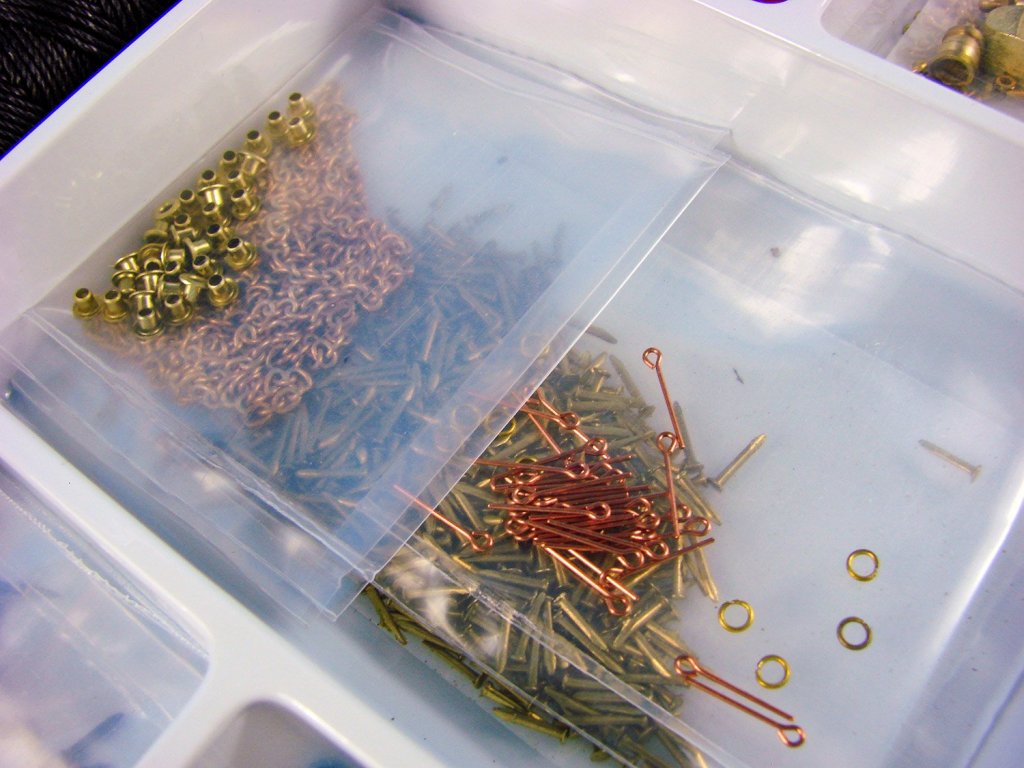
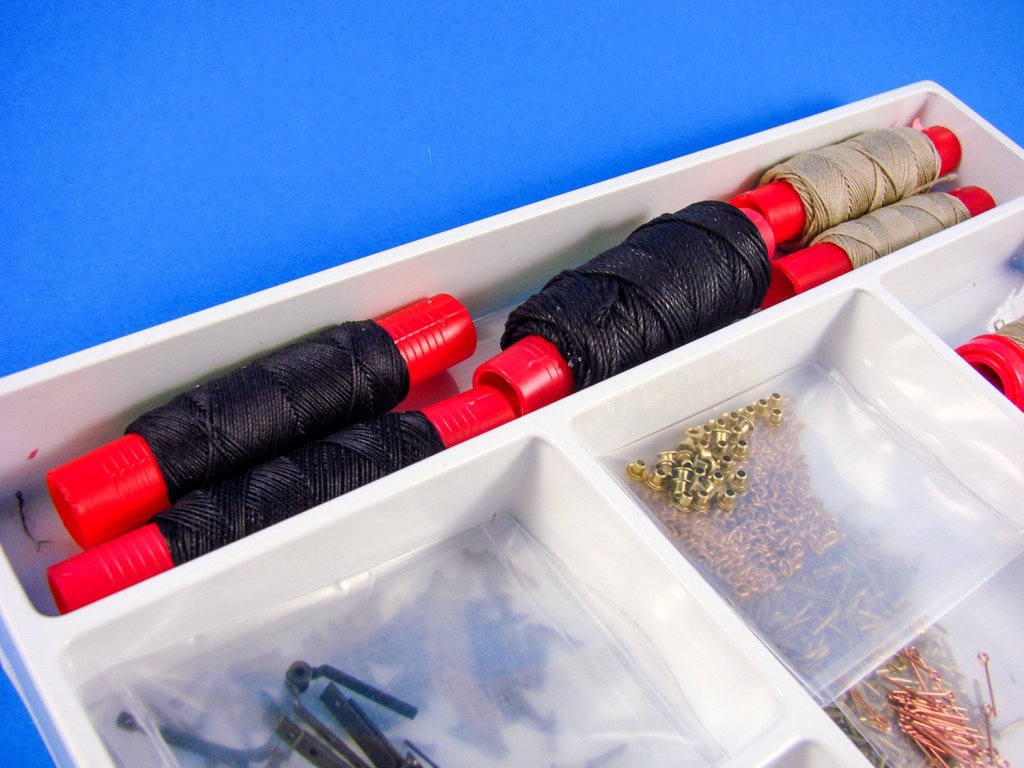
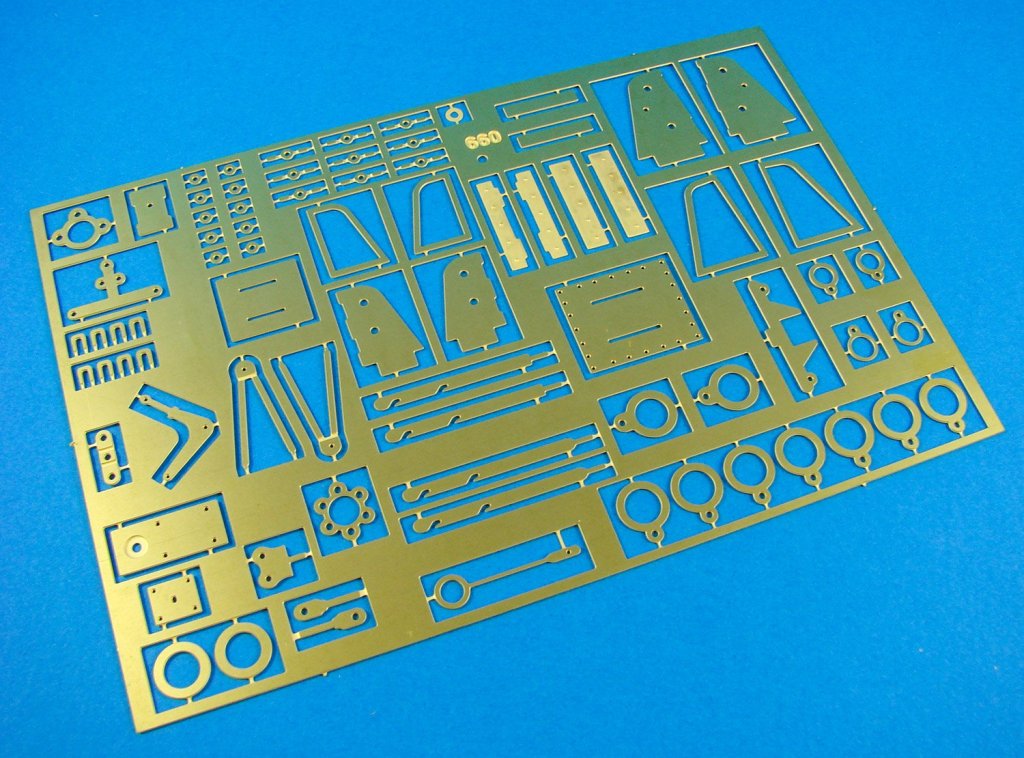
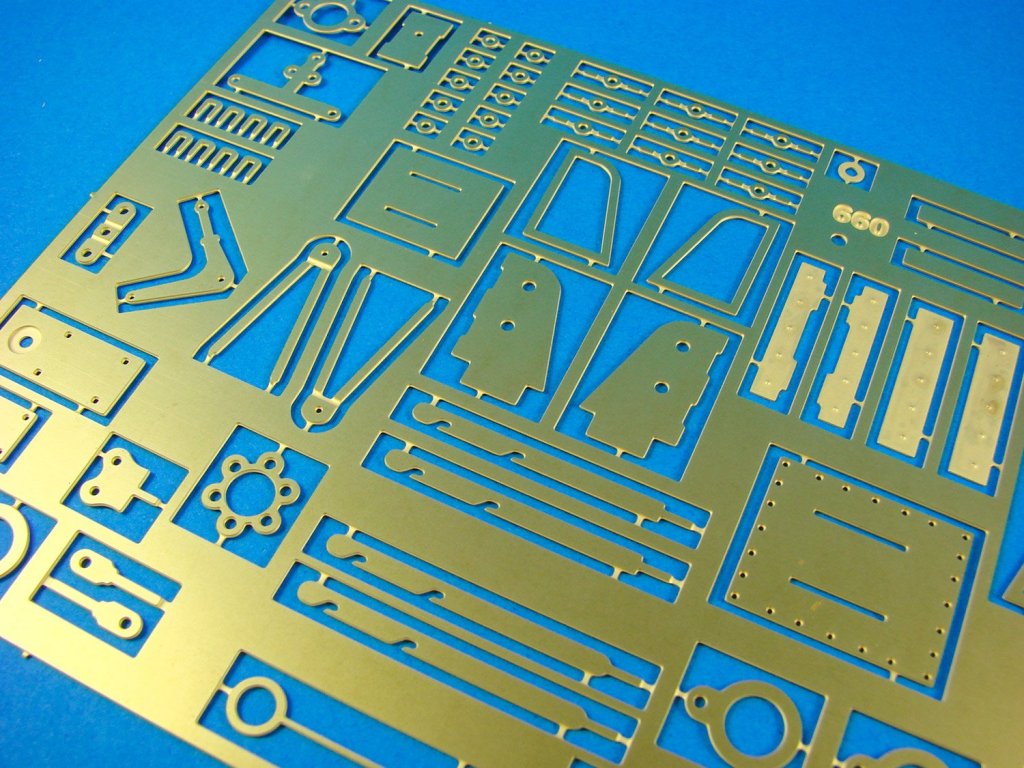
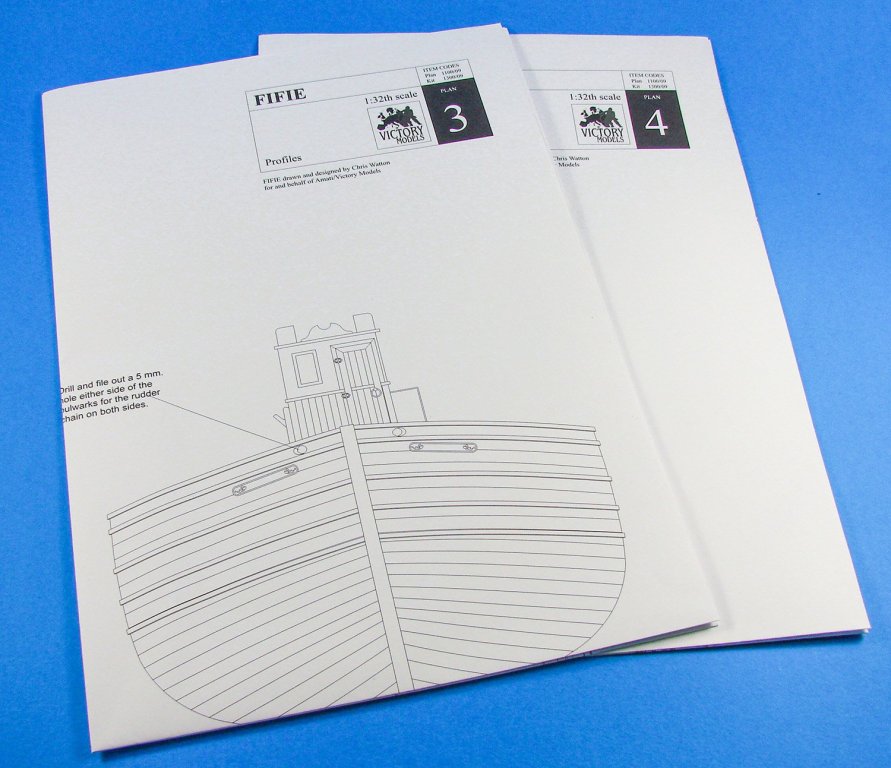
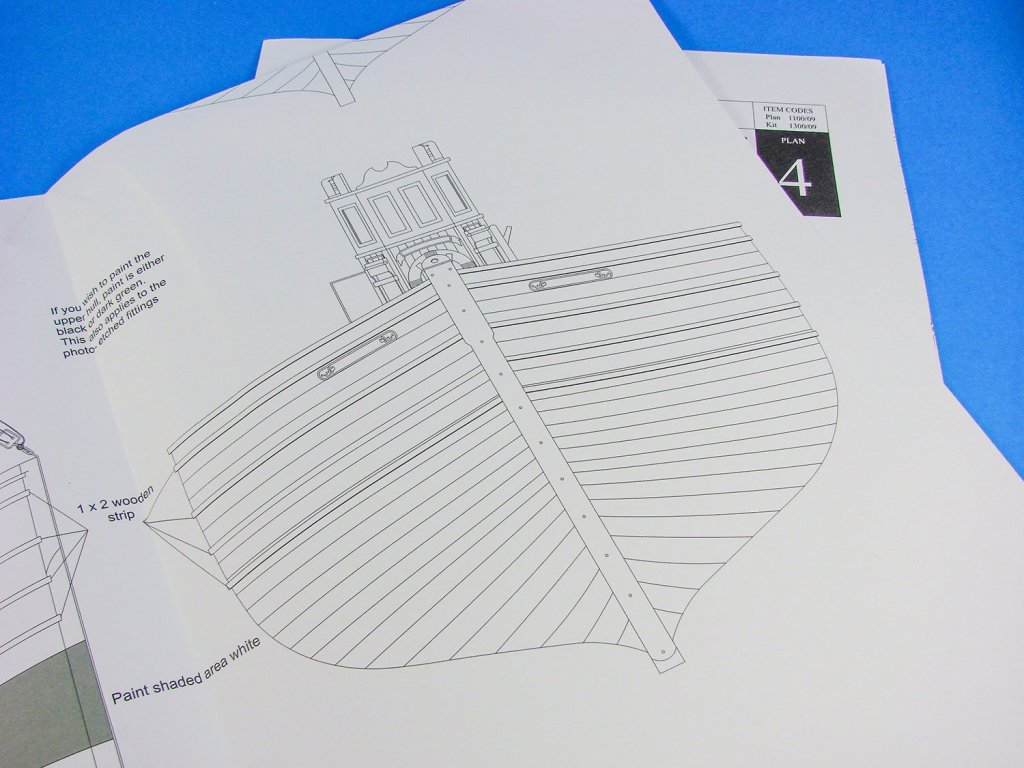
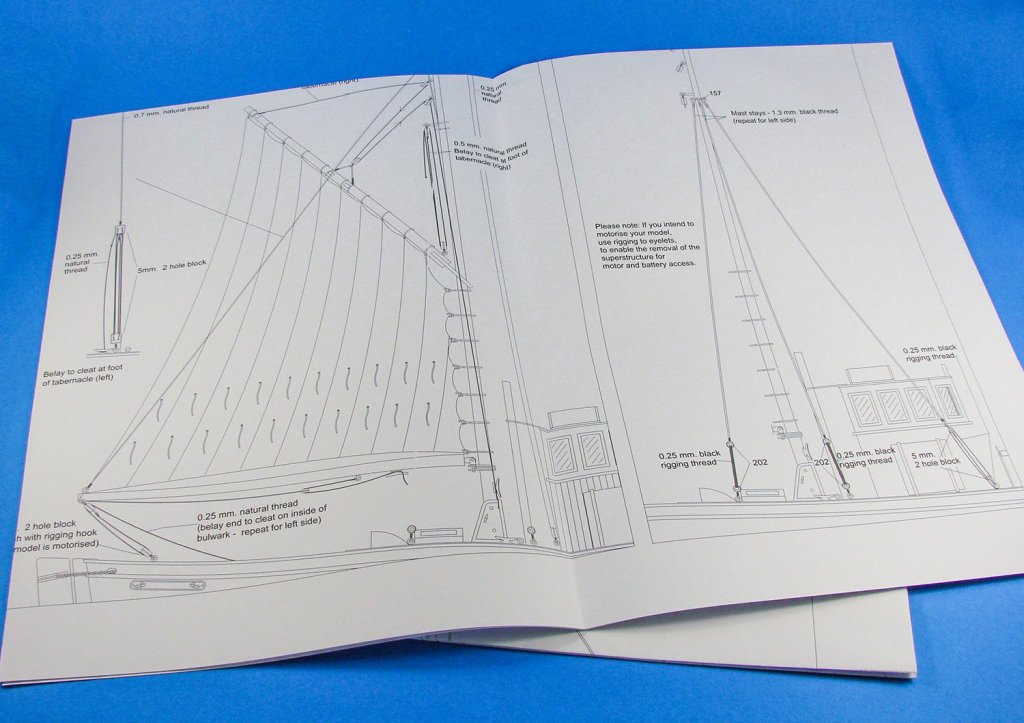
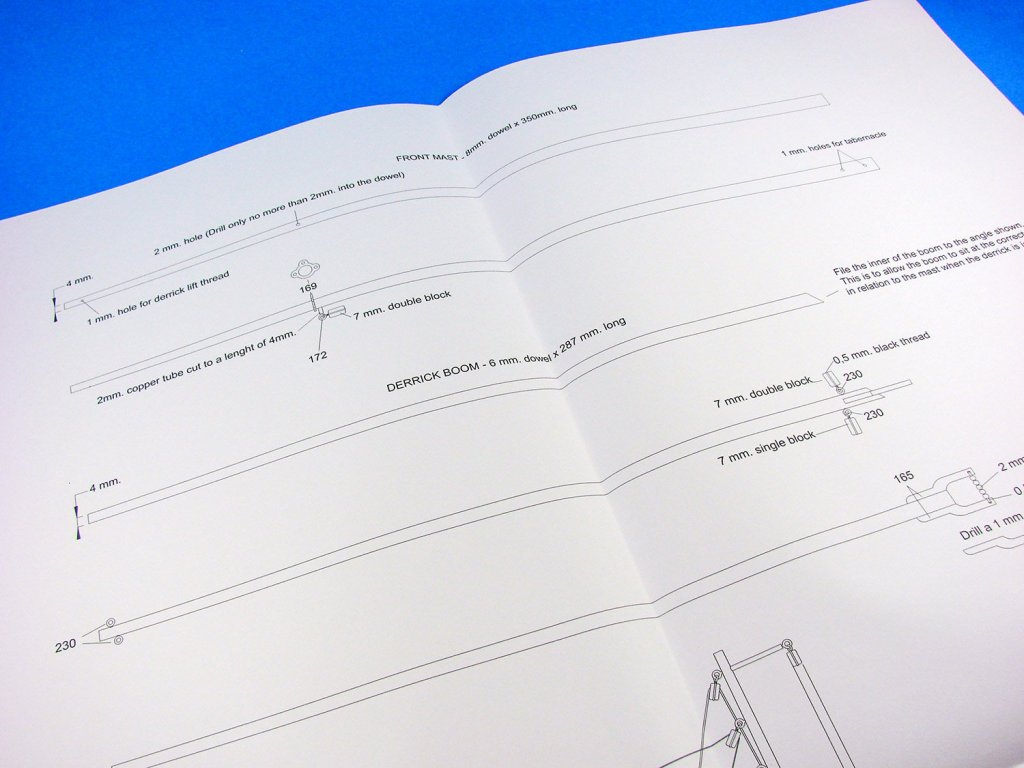
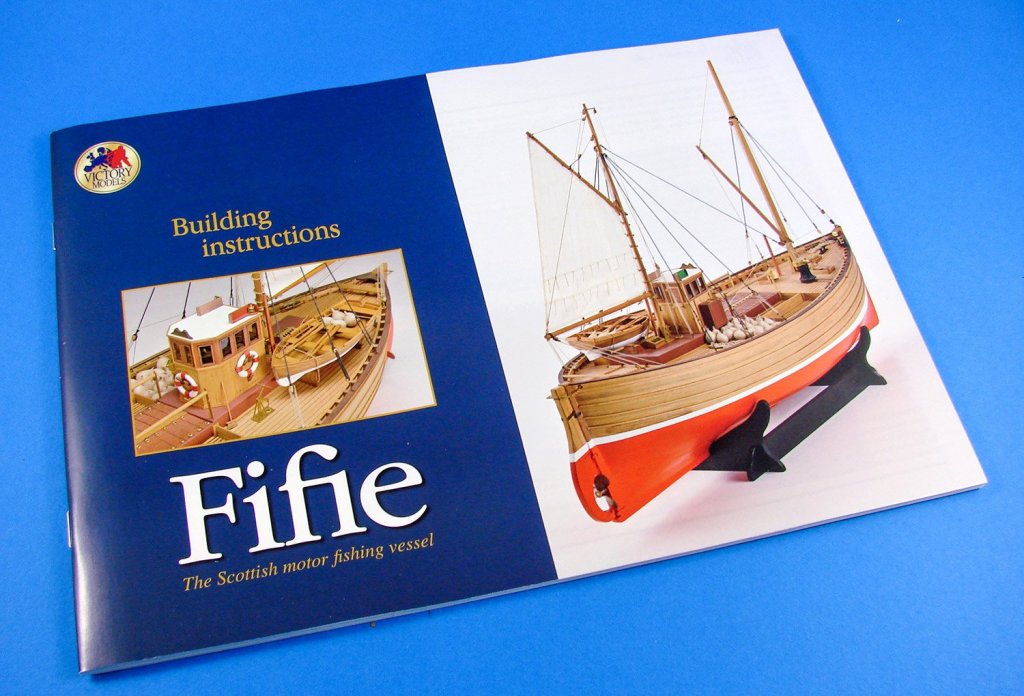
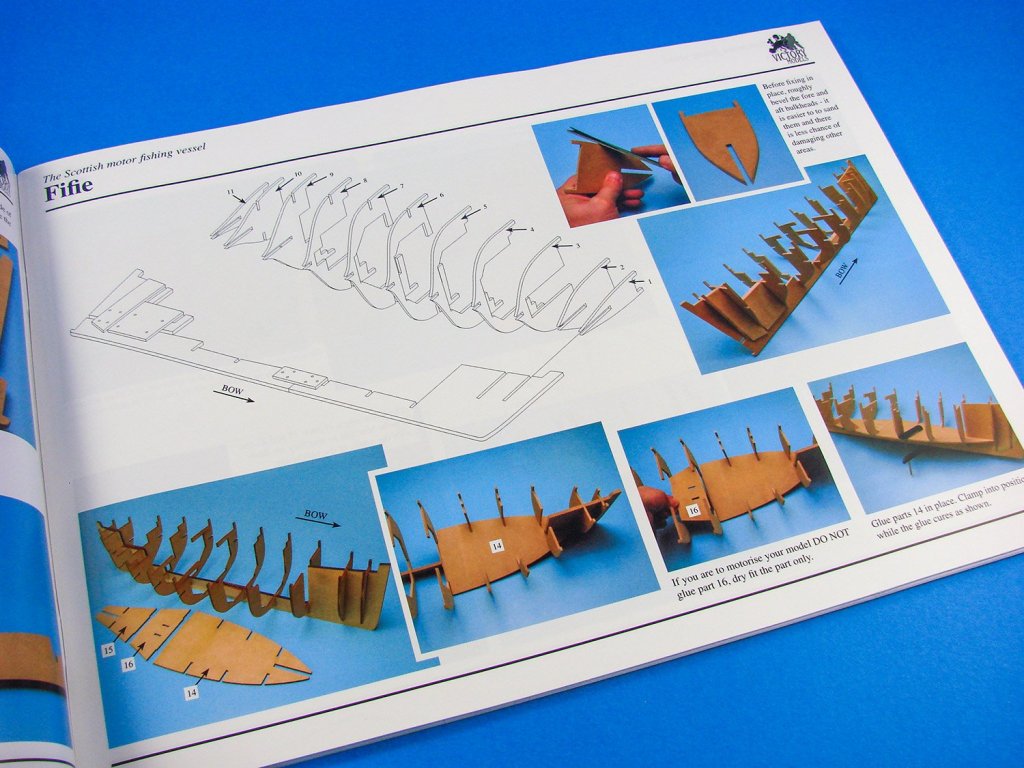
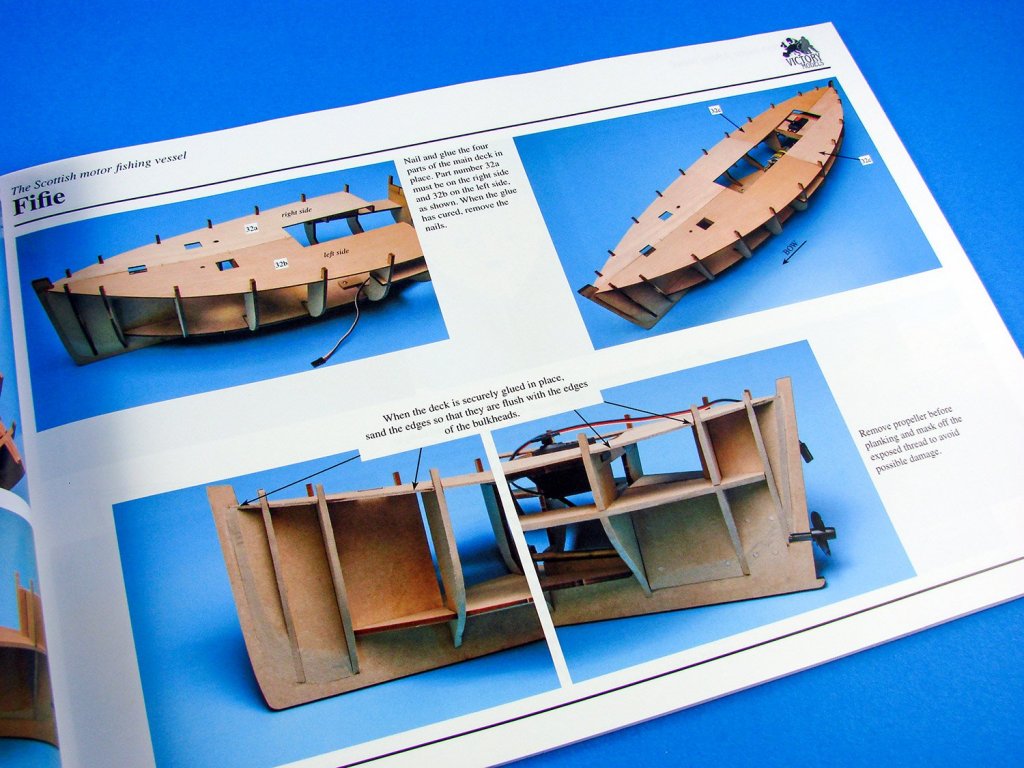
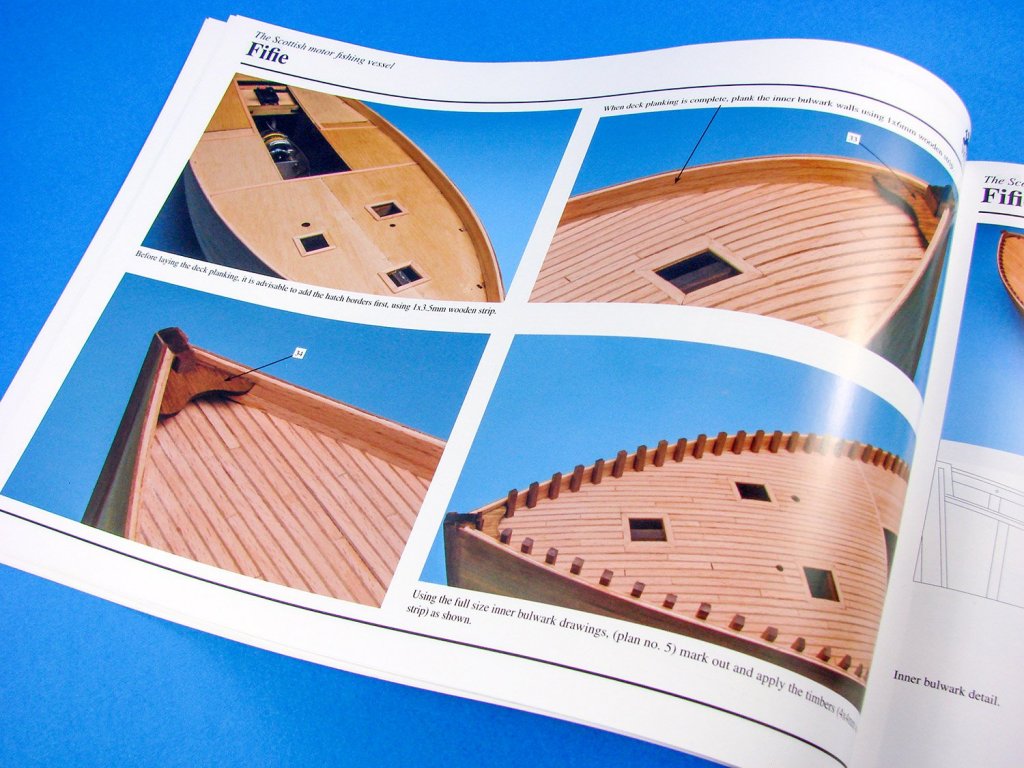
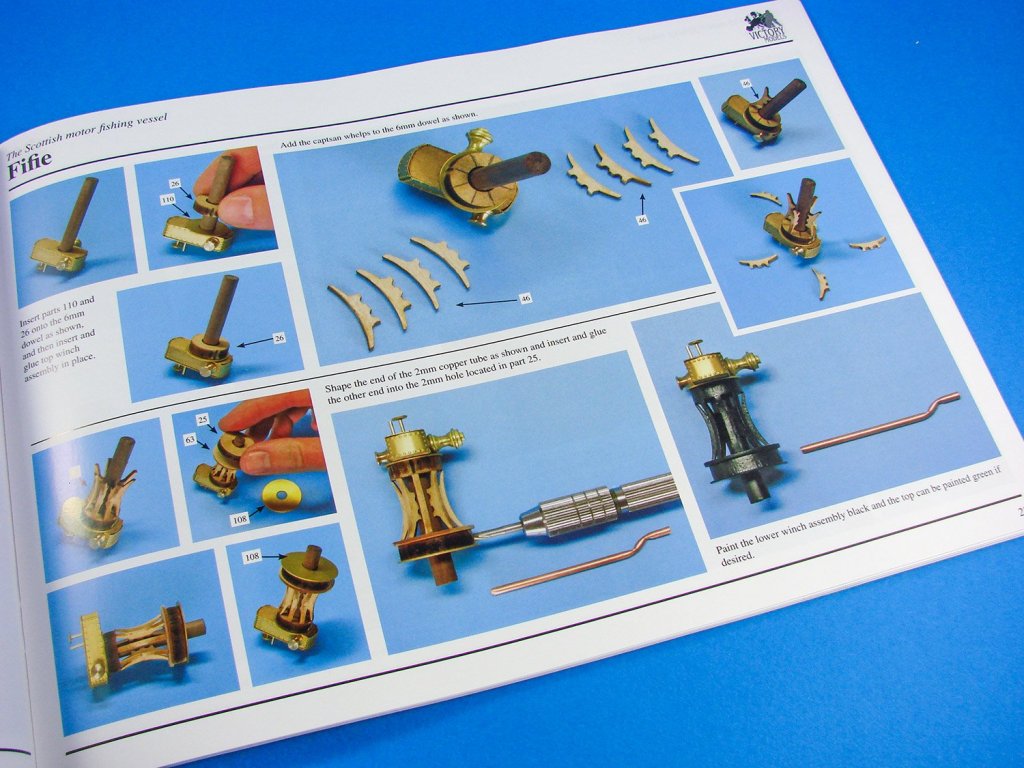
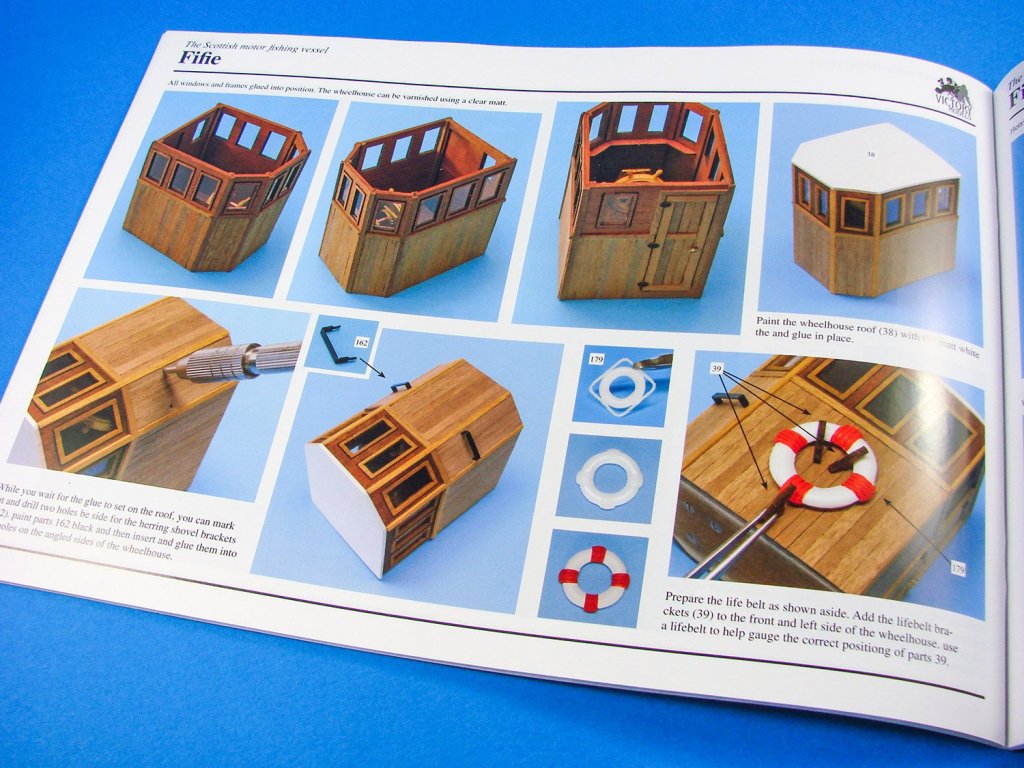
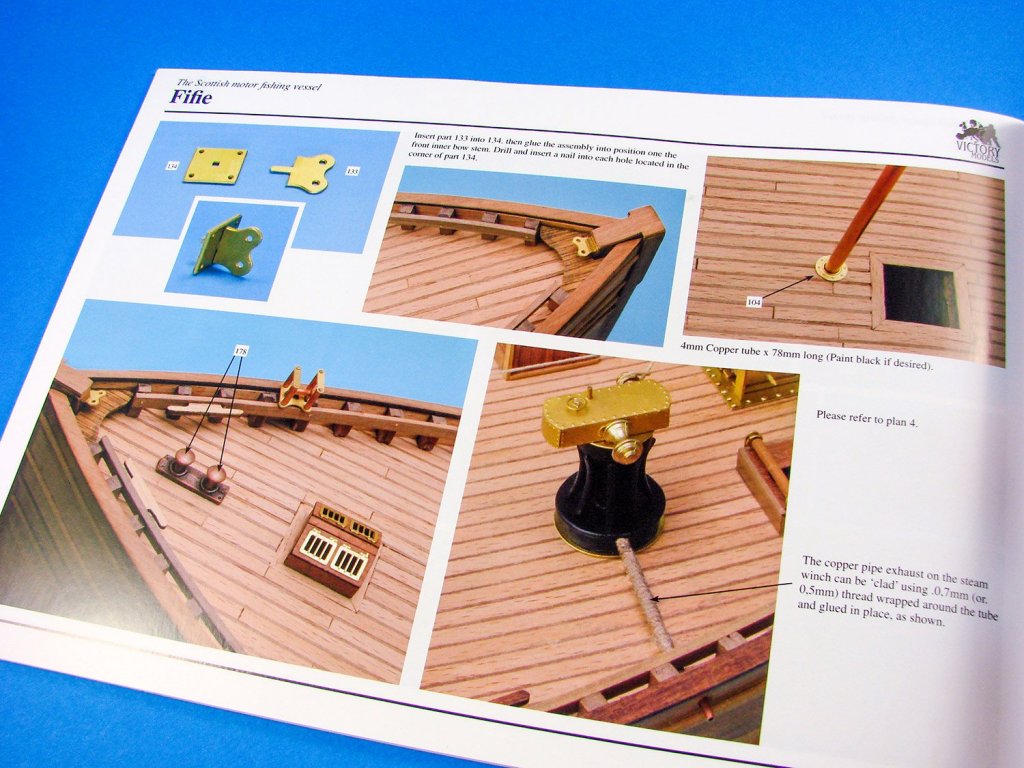
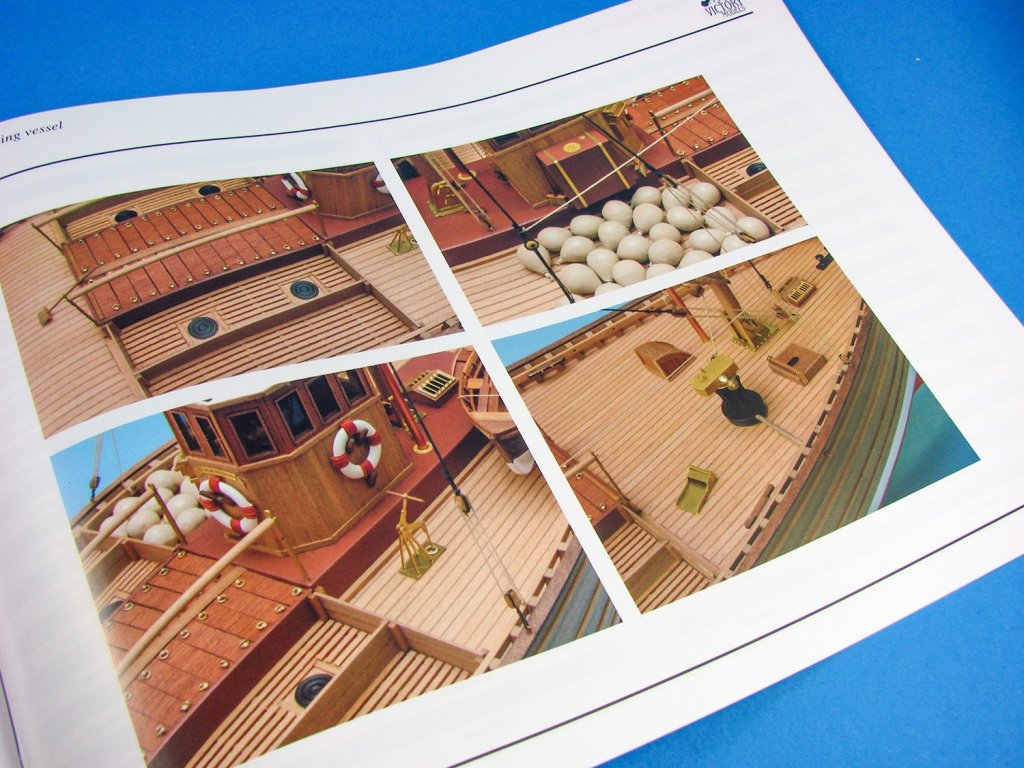
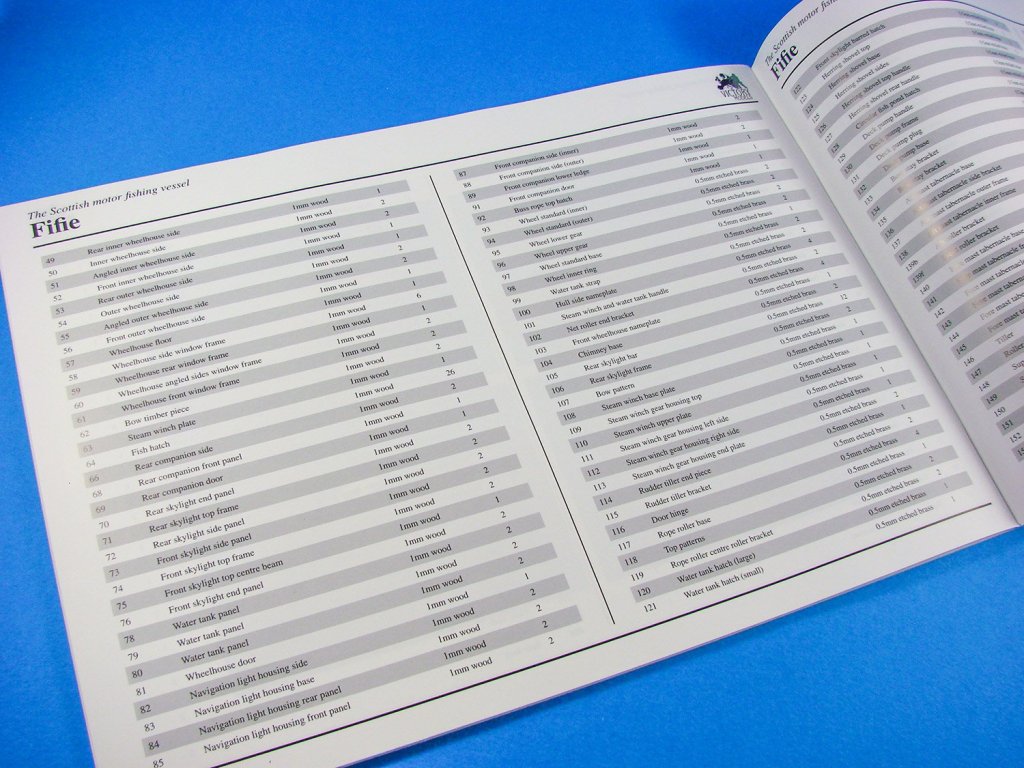
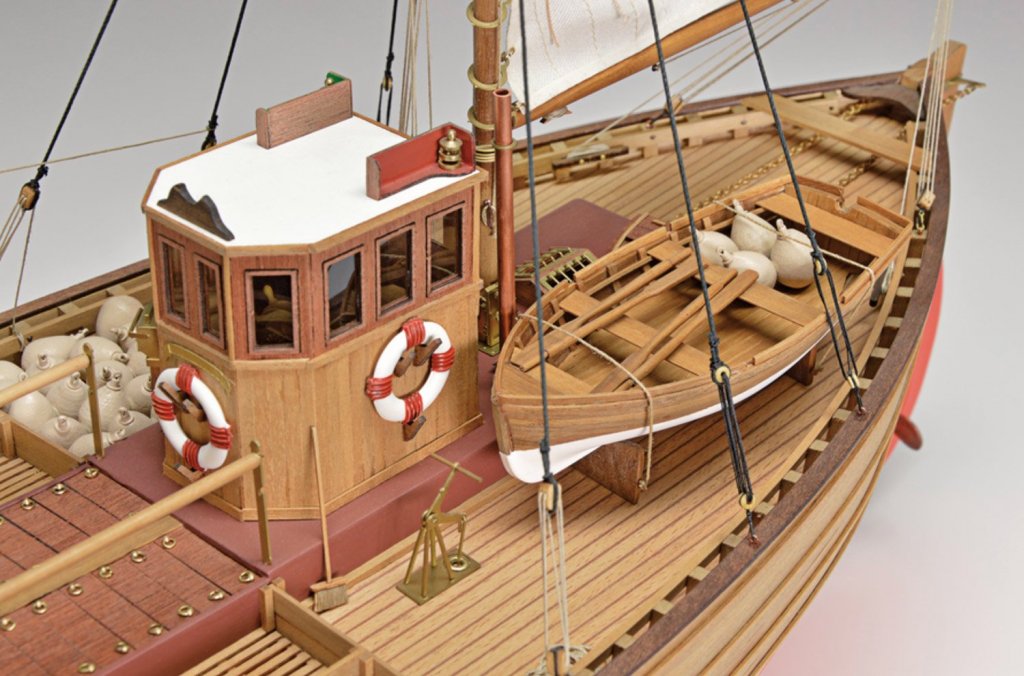
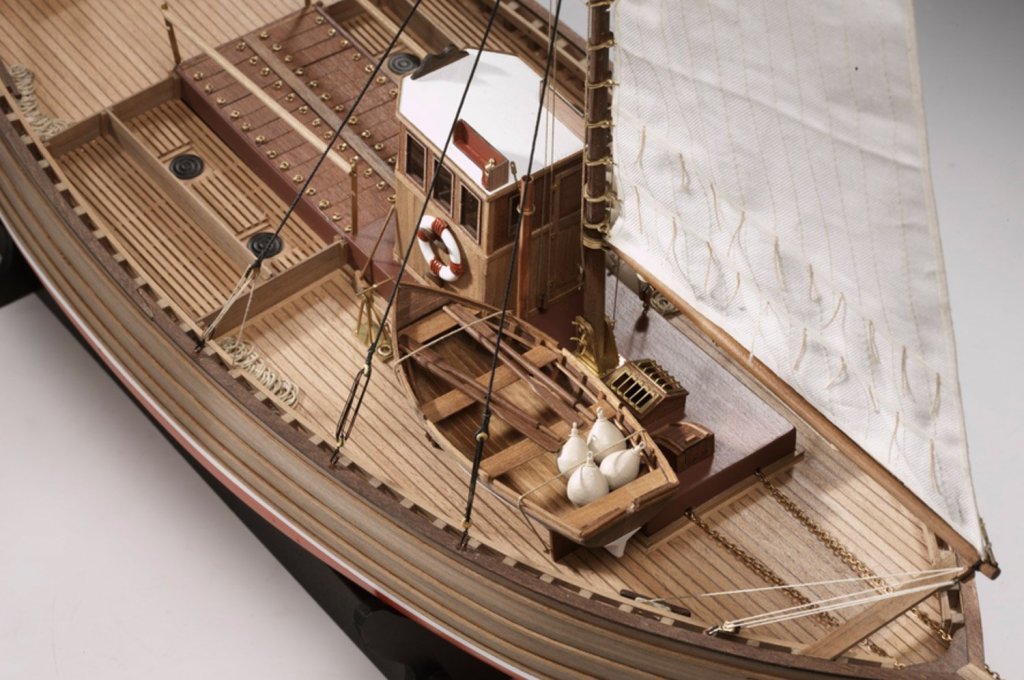
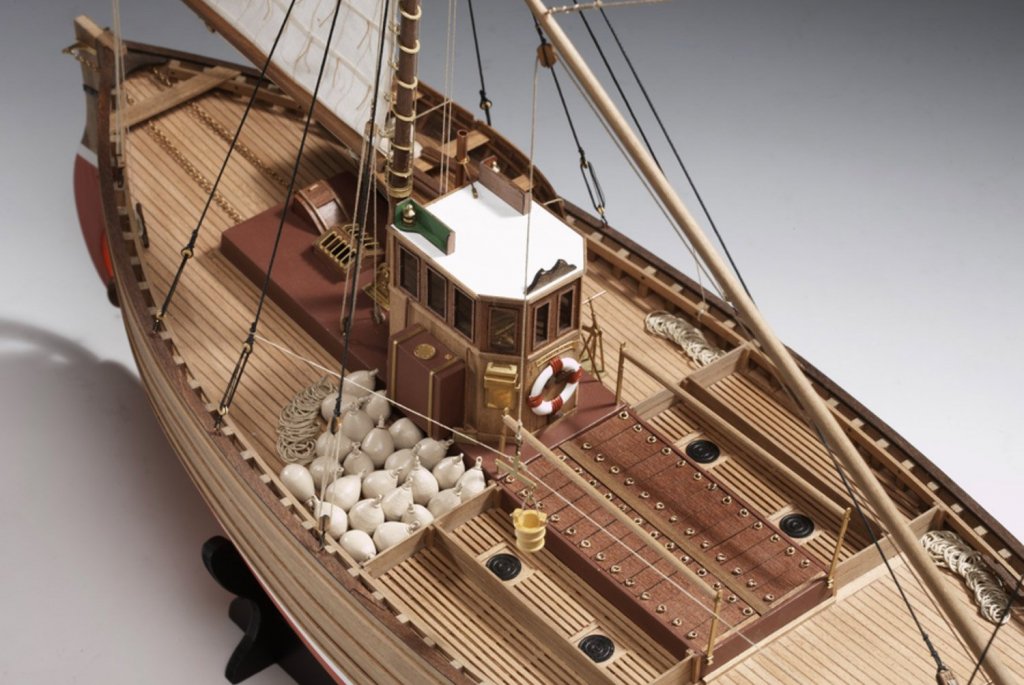
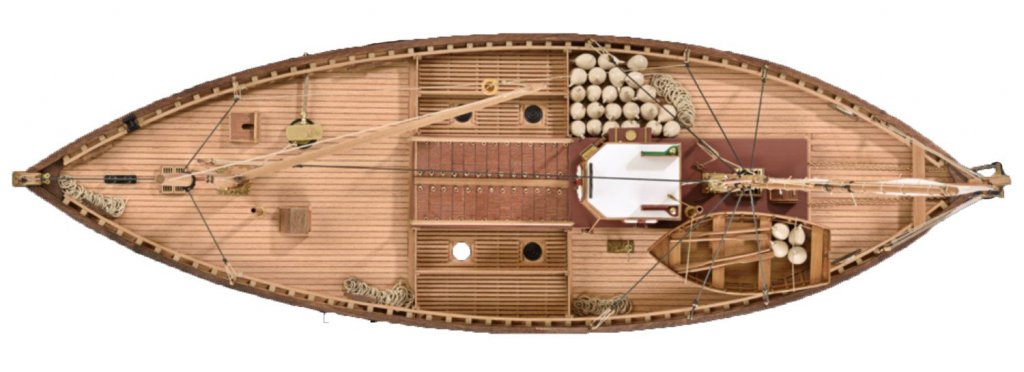
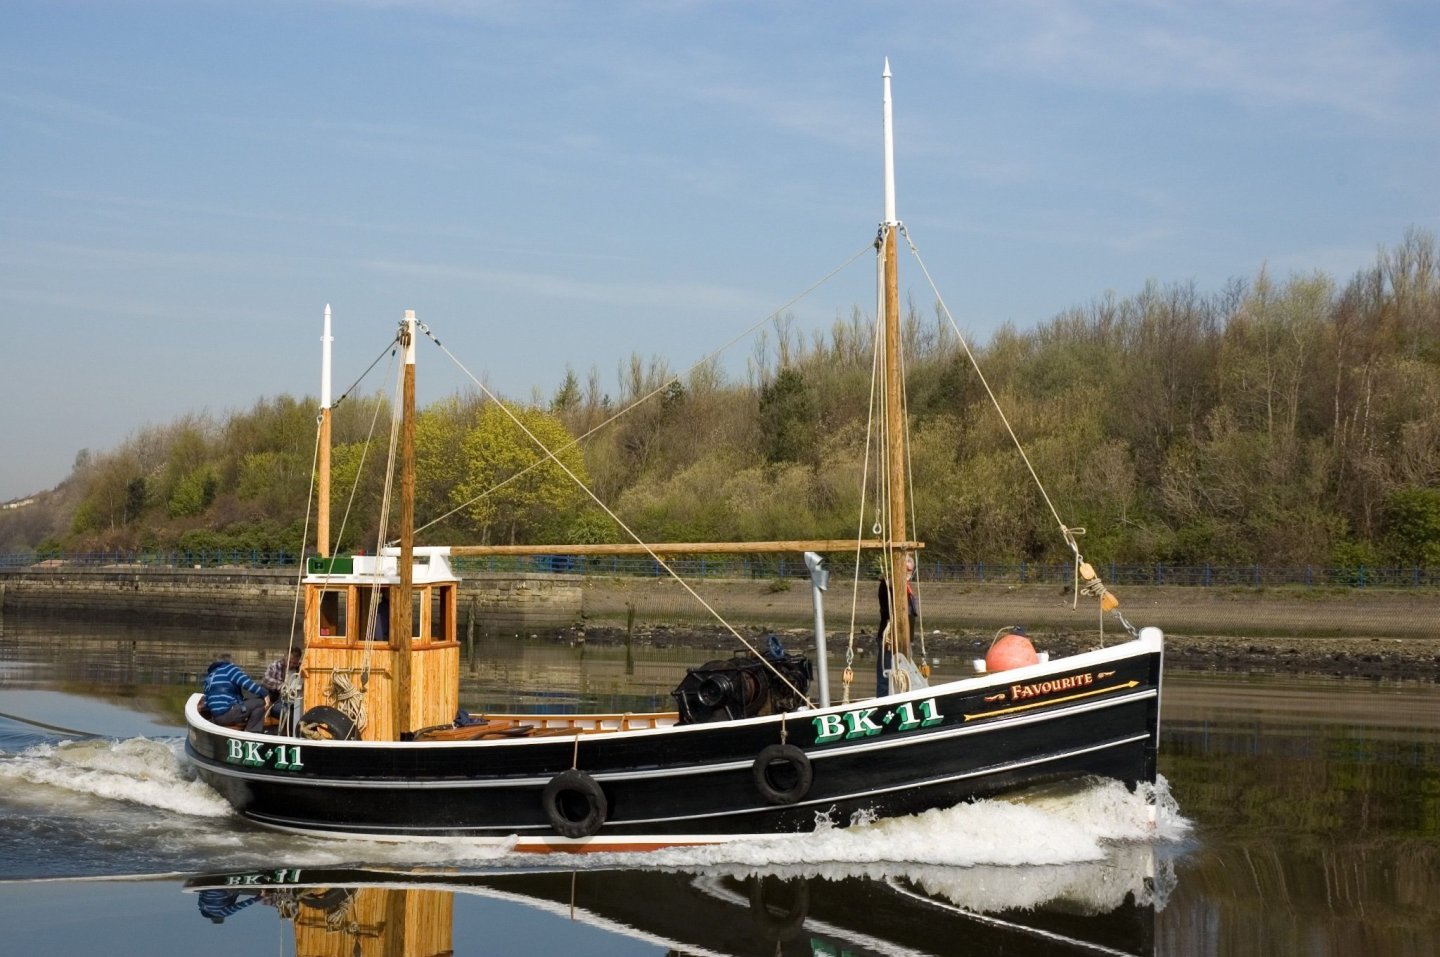
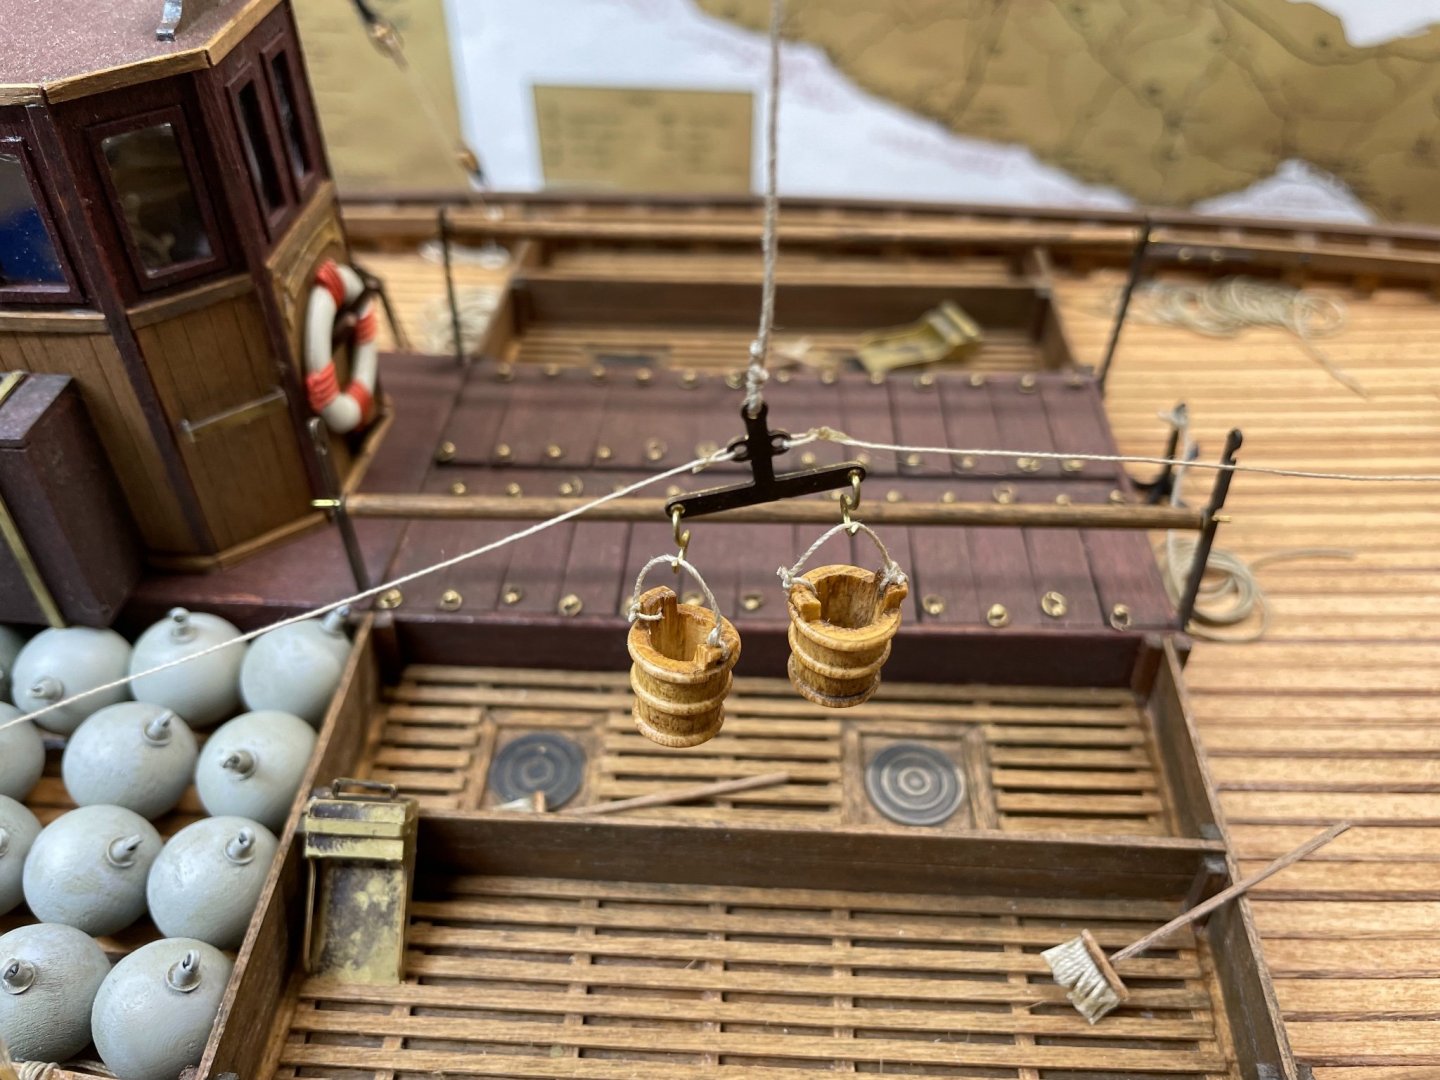
 1:32 Fifie – The Scottish Motor Fishing Vessel Amati Catalogue # 1300/09 Available from Amati for €220.00 The Fifie is a design of sailing boat developed on the east coast of Scotland. It was a traditional fishing boat used by Scottish fishermen from the 1850s until well into the 20th century. These boats were mainly used to fish for herring using drift nets, and along with other designs of boat were known as herring drifters. While the boats varied in design, they can be categorised by their vertical stem and stern, their long straight keel and wide beam. These attributes made the Fifies very stable in the water and allowed them to carry a very large set of sails. The long keel, however, made them difficult to manoeuvre in small harbours. Sailing Fifies had two masts with the standard rig consisting of a main dipping lug sail and a mizzen standing lug sail. The masts were positioned far forward and aft on the boat to give the maximum clear working space amidships. A large Fifie could reach just over 20 metres in length. Because of their large sail area, they were very fast sailing boats. Fifies built after 1860 were all decked and from the 1870s onwards the bigger boats were built with carvel planking, i.e. the planks were laid edge to edge instead of the overlapping clinker style of previous boats. The introduction of steam powered capstans in the 1890s, to help raising the lugs sails, allowed the size of these vessels to increase from 30 foot to over 70 foot in length. From about 1905 onwards sailing Fifies were gradually fitted with engines and converted to motorised vessels. There are few surviving examples of this type of fishing boat still in existence. The Scottish Fisheries Museum based in Anstruther, Fife, has restored and still sails a classic example of this type of vessel named the Reaper. The Swan Trust in Lerwick, Shetland have restored and maintain another Fifie, The Swan, as a sail training vessel. She now takes over 1000 trainees each year and has taken trainees to participate in the Cutty Sark Tall Ships Races to ports in France, Denmark, the Netherlands, Ireland as well as around the UK. Extract from Wikipedia The kit Fifie is packed into a large, heavy box that certainly hints that there’s a good quantity of material included to build this historic fishing vessel in all its glorious 1:32 scale. I do admit to particularly liking this scale, having built plastic models for many years and indeed for magazine publication. It’s definitely something I can relate to when eyeing up the various dimensions and features. Amati’s presentation is flawless and certainly stands out, with its large, glossy lid that captures an attractive view of the Fifie. It has to be noted here that the hull is usually fully painted, with green being common above the waterline, but this model was finished to show off the beauty of the walnut timber supplied in the kit. And why not! For those that don’t know, this kit, under the Victory Models label, was designed by Chris Watton. Many of you should be familiar with that name and his design pedigree. At 1:32, this kit is no shrinking violet in terms of size. Fifie is 700mm long, 470mm wide and with a height of 230mm (sans masts). Lifting the lid does indeed show a box crammed with materials. Inside, we have several bundles of timber, plus a packet of timber dowel/strip/metal rod/tube, a thick packet containing numerous laser-cut sheets, another packet with plans and photo etch, and underneath the main timber, we have sail cloth and fittings packs. Thick foam is included to stop the main materials from banging around in the box. Strip wood Fifie has a double-planked hull, with the first layer being constructed from 1.5mm x 7mm lime strips. These, like many of the other bundles, are 600mm long, and very cleanly cut with no fuzzy edges Sixty-five of these are supplied. The same quality goes for the second planking layer, which is supplied as 90 strips of 1mm x 6mm walnut which is some of the best I’ve seen in a kit. There is little colour variation in these, and they look pleasantly uniform. I’ve always found Amati’s timber quality to be exceptional and this is no different. As well as elastic to hold the bundles some labels are also included to help identity the material. Other strip wood is included (beech and walnut) for such things as deck planking, caulking (yes, caulk plank!), lining the various deck hatches, sheathing the deckhouse structures, rubbing strakes etc. These bundles are both taped and bound with elastic, with the deck planking having an identifying label also. Cutting is clean and precise. Dowel and tube/rod Various lengths of dowel is included for masting, false keel strengthening pins etc. and thicker strip wood for the timberheads. All is supplied in a nice uniform walnut colour….no nasty walnut dyes/stains in this kit! These latter lengths are also packaged into a thick clear sleeve, unlike the others. Note also various lengths of brass and copper wire, as timberheads well as some copper tube. Some mounting parts are included for RC conversion, but you will need to purchase other items to complete the model for radio. MDF sheet items Again, Amati has made extensive use of 4mm MDF for the hull false keel and bulkheads, and all are laser-cut, as are all individual wooden items in this kit. Cutting looks very precise with very little in the way of scorching, apart from very localised discolouration. I know many don’t like MDF as a material for our models, but MDF sands easily and is also warp-free, lending itself to a nice, true hull. You won’t see any of this when you start to lay planks. There are FOUR sheets of this material, and you’ll notice that there aren’t any parts numbers engraved on here. You will need to refer to the first two sheets of plans which contain the parts references. A single sheet of 2mm MDF contains parts such as the four-piece deck, cleats, and the bulkheads and keel for Fifie’s single launch vessel. There is also a single 6mm sheet of MDF (sheet 2698-B) which contains the four parts needed for the cradle. I’ve seen numerous sites which now sell this model claim that no stand is included with this model. Well, this sort of proves that statement incorrect. This is the same cradle shown on the box lid images. Of course, you’ll need a suitable MDF primer for this, and some nice coats of gloss lacquer to get the best from this. Ply sheet parts SIX sheets of thin ply are included for just about every other timber construction elements of Fifie, including the deckhouse, deck superstructures, keel sheathing, and bulwark capping strip. Again, all parts are laser-cut and will require minimal effort to remove any edge char. Fittings Two boxes of fittings are included in the very bottom of the Fifie kit box. Some of the weight bearing down has caused a small crack in the two vac-form fittings boxes, as you can see, but all parts within are absolutely fine. The first box contains the cast metal propeller, deck buckets, ship’s wheel, rigging blocks, life preserver rings and a whole load of beautifully smooth wooden balls for making the many buoys which sit on Fifie’s deck. These are perfectly circular, yet the ones on the box image are slightly shaped. Instructions show these as the balls, and you could perhaps opt to use a little putty to add some shape to these. The second fitting box contains seven spools of rigging cord in both black and natural colours, nails, various cast fittings such as bollards, plus rudder pintles, anchors etc. Copper eyelets, chain and ferrules etc. make up the set. Sail cloth Should you wish to add sails, then enough material is supplied for you, in bleached white cloth. Photo-etch Very few kits come without photo-etch parts these days, and this is no exception, with TWO sheets of 0.7mm brass with a very high number of included parts. A quick scan around the sheets will easily identify parts for the mast bases, steam winch, engine skylight, capstan, deck hand pump, wheel assembly, herring shovel, tabernacle, mast rings, etc. Acetate and card I have to say I’m not entirely sure what the card/cartridge paper is for except for maybe general use, but the thin acetate is obviously for the cabin windows. Instructions and plans Without a doubt, Amati produce some of the very best instruction manuals to come with any model kit. For reference, check out my Orient Express Sleeping Car review and that of Revenge. Fifie is no different with a luxurious and fully-pictorial, 64-page publication. Whilst this isn’t perfect-bound as with the previous reviews, it is in full colour and produced to a standard that’s still far higher than many contemporary manufacturers, with each stage being shown under construction so you get a perfect idea about what is required at that point in construction. Text is also in English, or at least in the sample I have been sent. The rear of the manual contains a complete components list. Backing up this publication is a set of seven plan sheets. The first two of these are for identifying the various timber and PE parts. The others show general profile and detail imagery, as well as masting and rig drawings. Remember that the hull itself is built entirely from the photographic sequences so everything you see on these drawings is for external details. Conclusion I have to say that you get a lot of kit for your money with Fifie, and when I first asked Amati what they envisaged the RRP to be, I was quite surprised at this. Everything about Fifie is quality, from the packaging and presentation, to the beautiful, photographic manual, fittings, sheet and strip timber, all the way to the superbly drawn plans. I’m very surprised that the gestation period has taken so long for them to bring this excellent kit to market. It’s also a Chris Watton thoroughbred. If you’ve seen his previous designs, then you’ll be familiar with the format of Fifie, which was quite the different vessel for Chris to tackle, when everyone seemed to think he would only design fighting vessels, armed to the teeth with cannon. I must admit that Fifie did take me quite by surprise too. The very shape of this iconic and historic vessel is so homely and welcoming and for me, invokes images of those times when fishing communities were happy and thriving. Whether you’re a fan of Chris’s work or not, Fifie is most certainly a kit that you should consider dropping into your virtual shopping cart next time you visit your favourite online model ship/boat retailer, and of course, if RC is your thing, then this kit will also suit your genre! VERY highly recommended! My sincere thanks to Amati for sending out the sample kit you see reviewed here. To purchase directly click the link at the top of the article to take you to Amati’s online shop or check out your country’s local distributor. Plans are also available from Amati, for €21.00
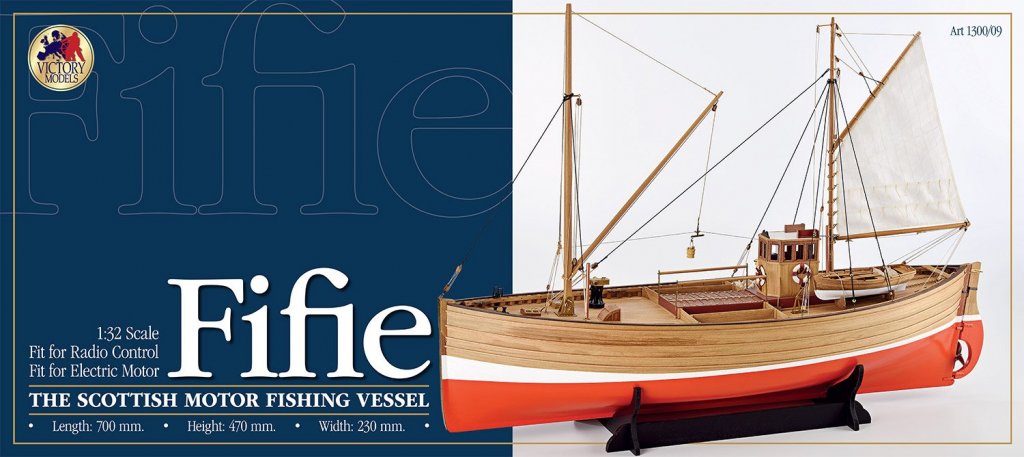


- 56 replies
-
- 24
-

-
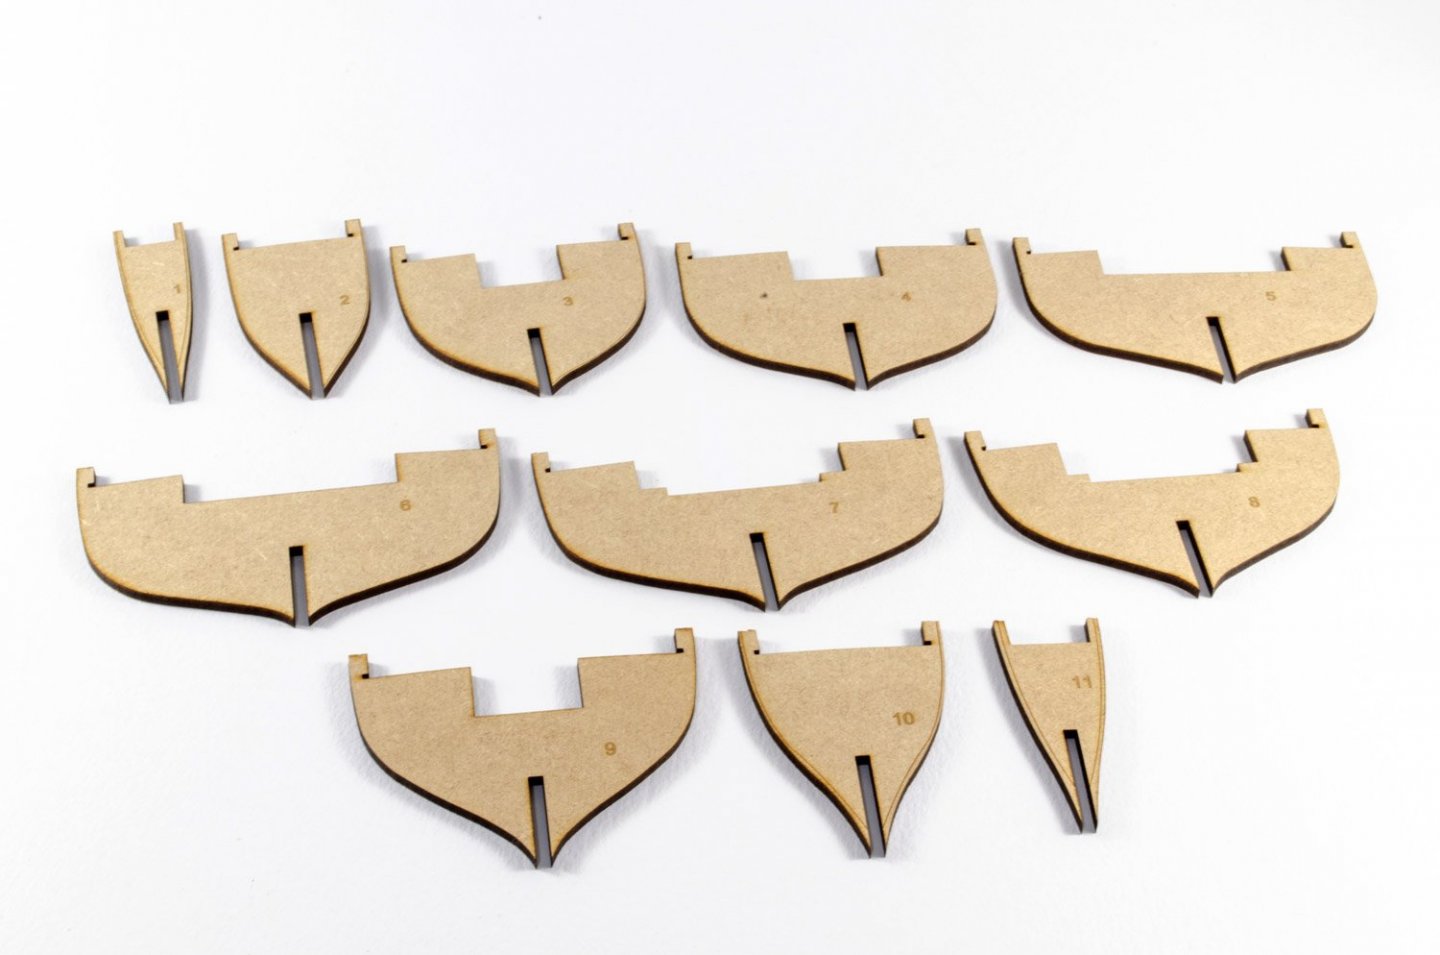
 I have been researching this build for some time while working on other projects and I have been checking on this forum to obtain valuable information. I just finished my Emma C Berry and have started the Fifie. I have opened the box, check the materials, and studied the plans and instruction so I will not bother with pictures of these items. My first task was to mark the MDF forms with their respective numbers before I removed them. This is done. Then I assembled and cold fitted the cradle to hold the model after which, I glued it, primed and painted a dark brown. These will be my first pictures
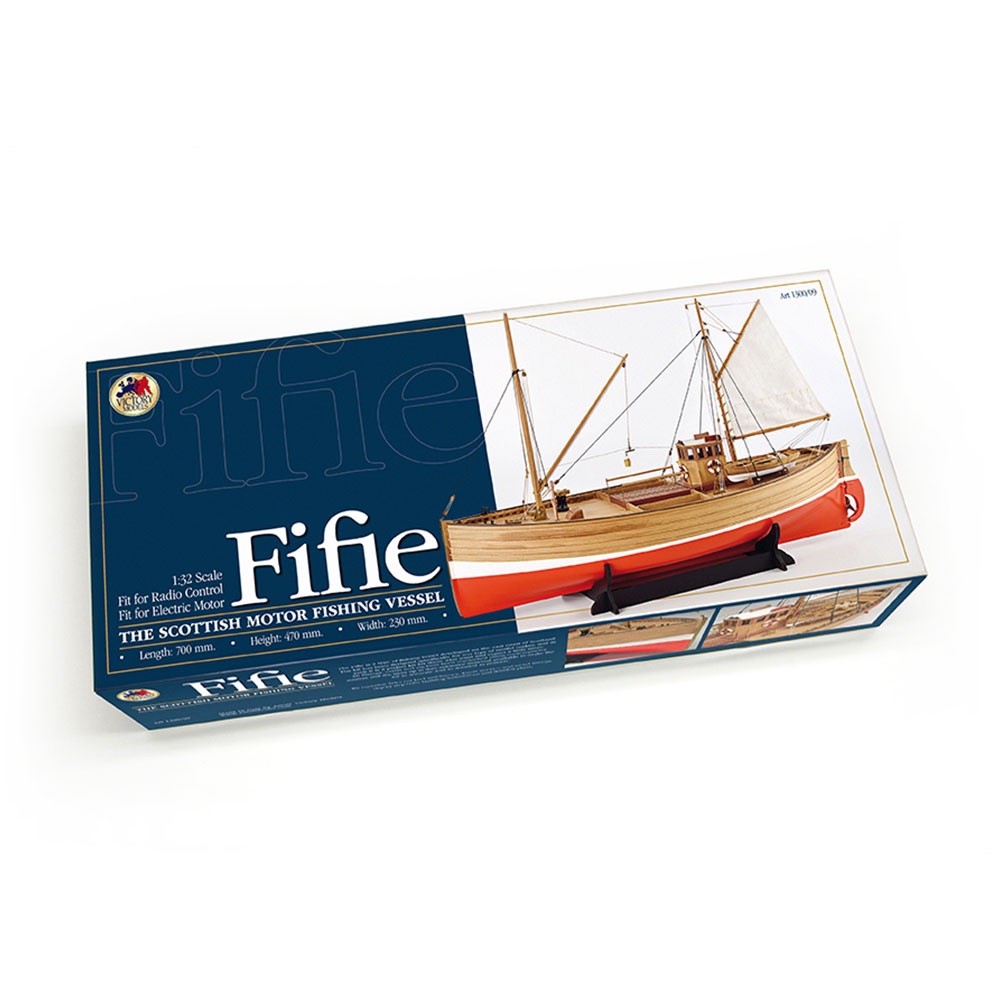
-
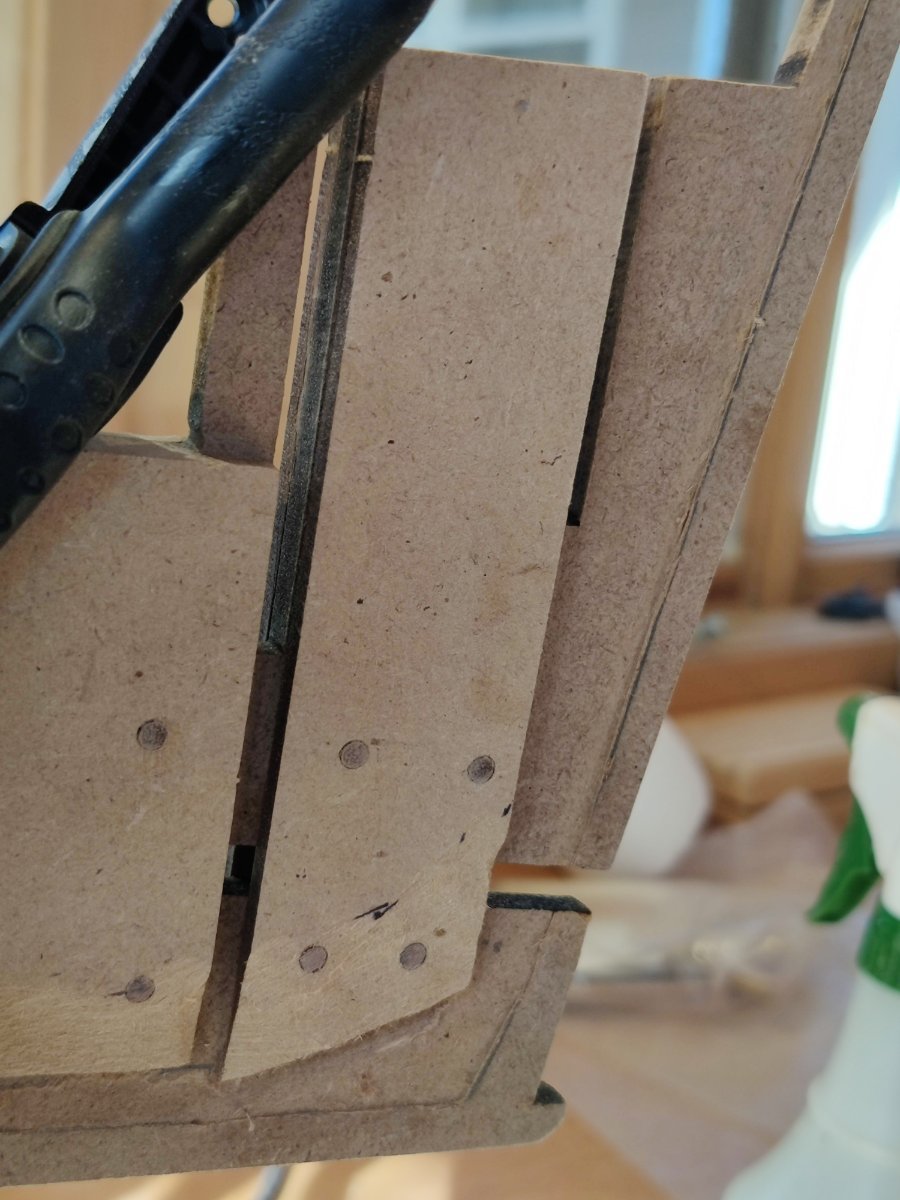
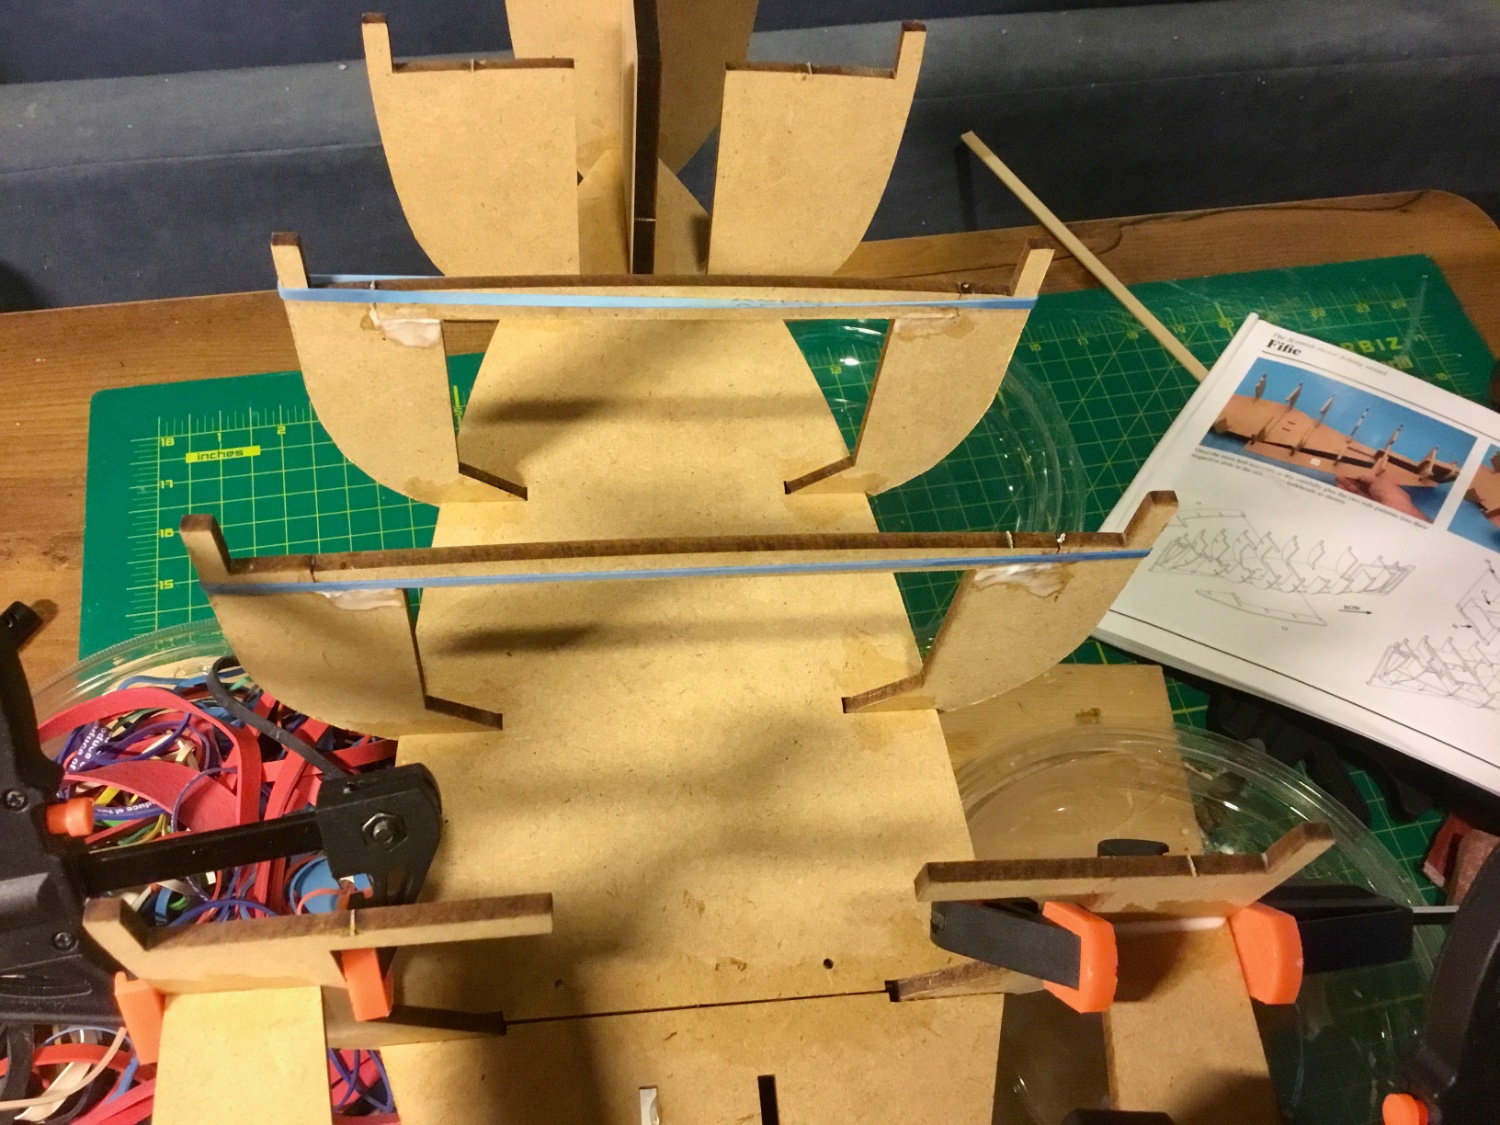
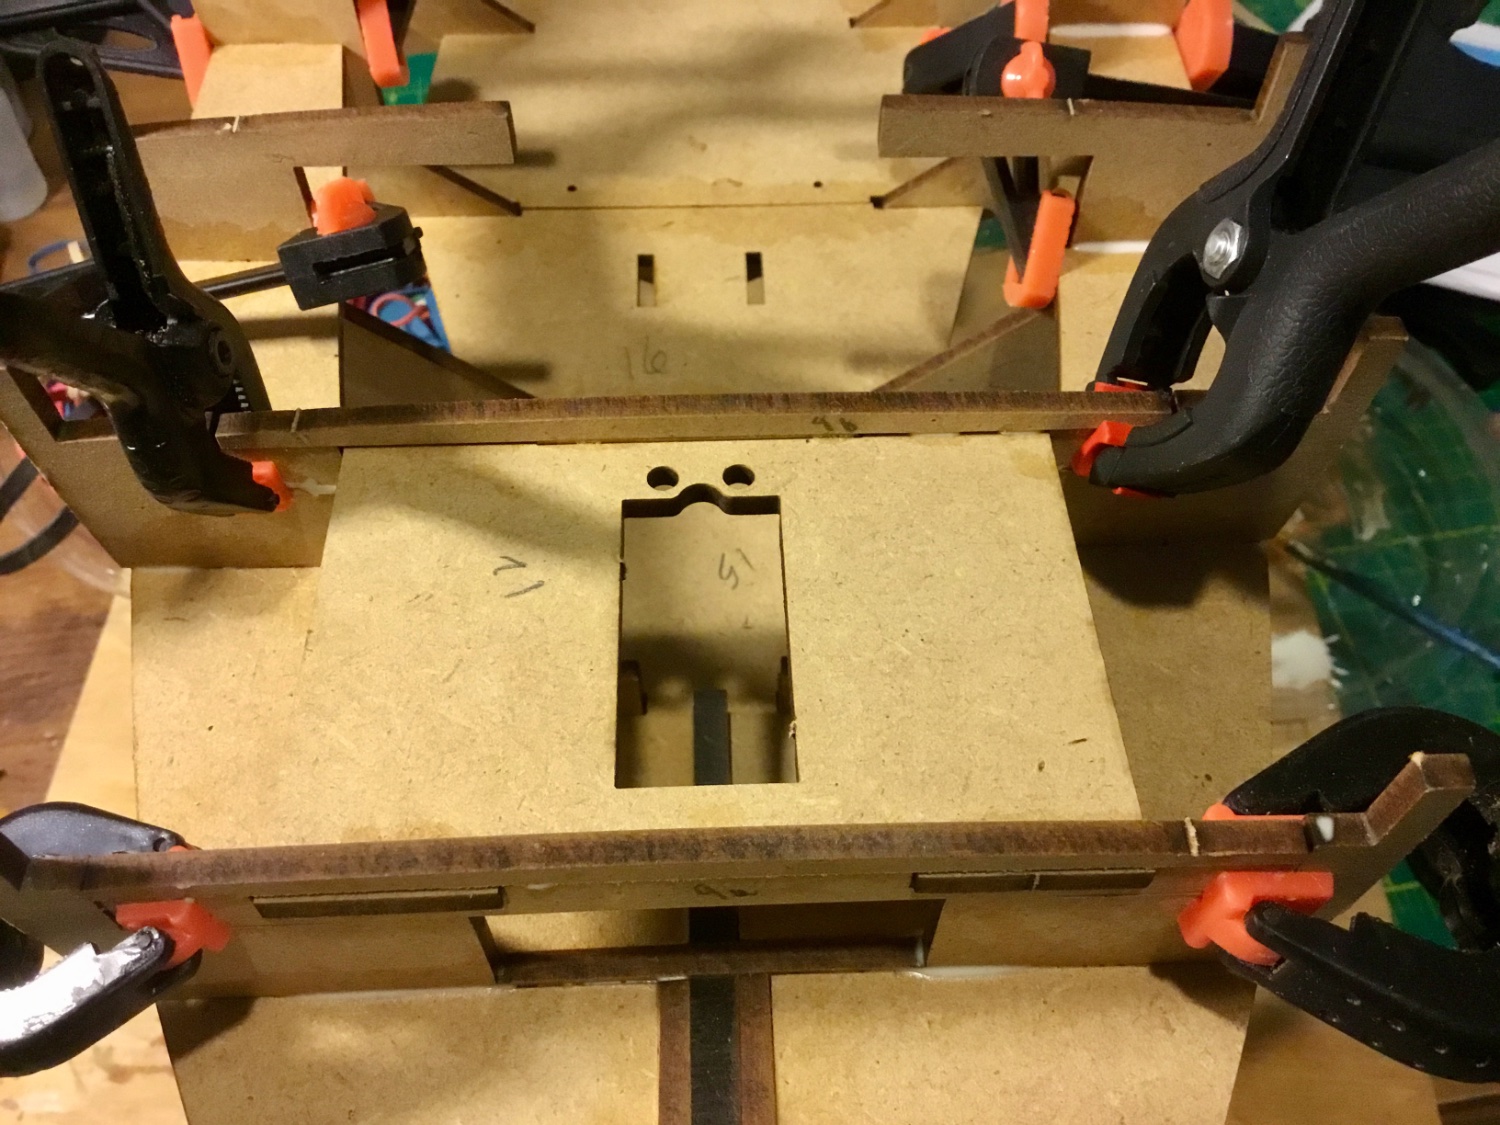
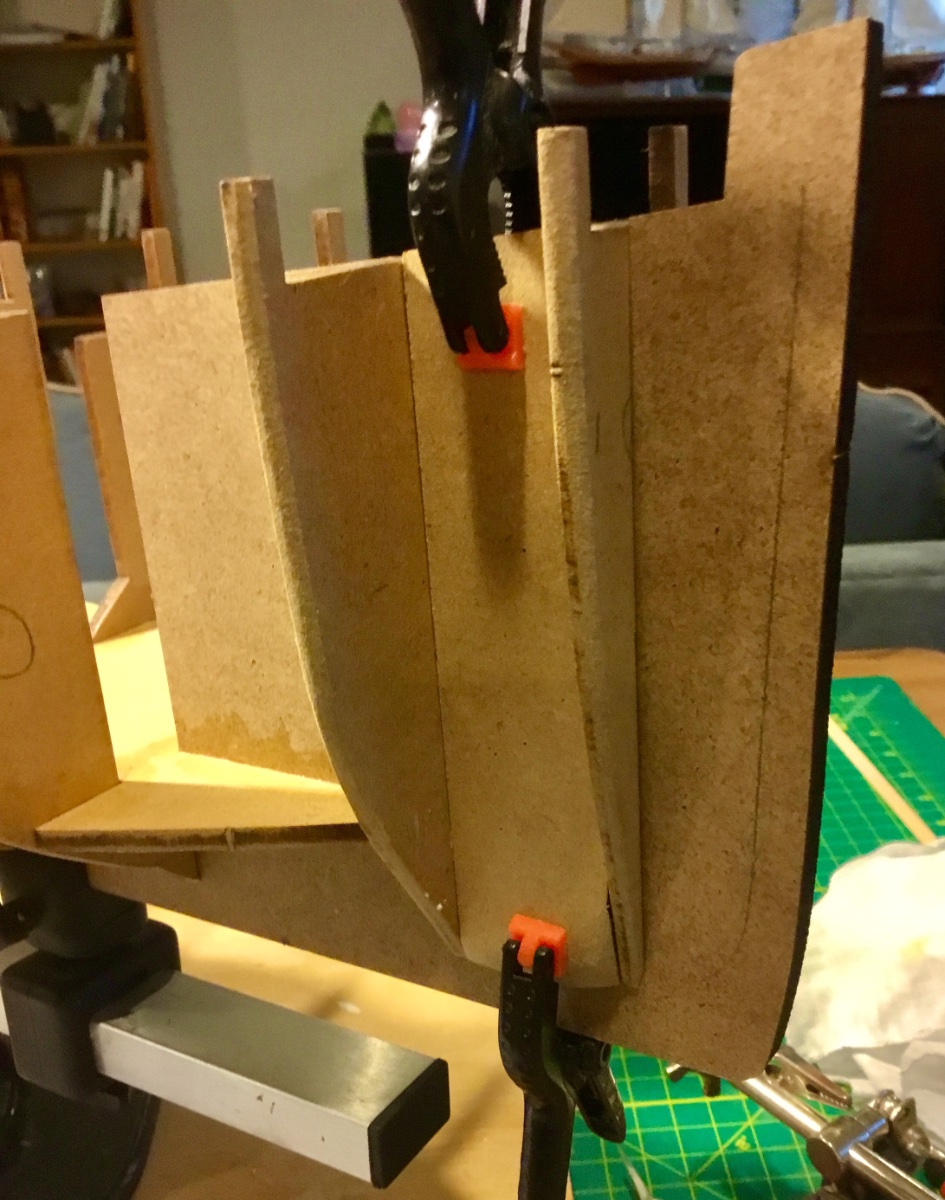
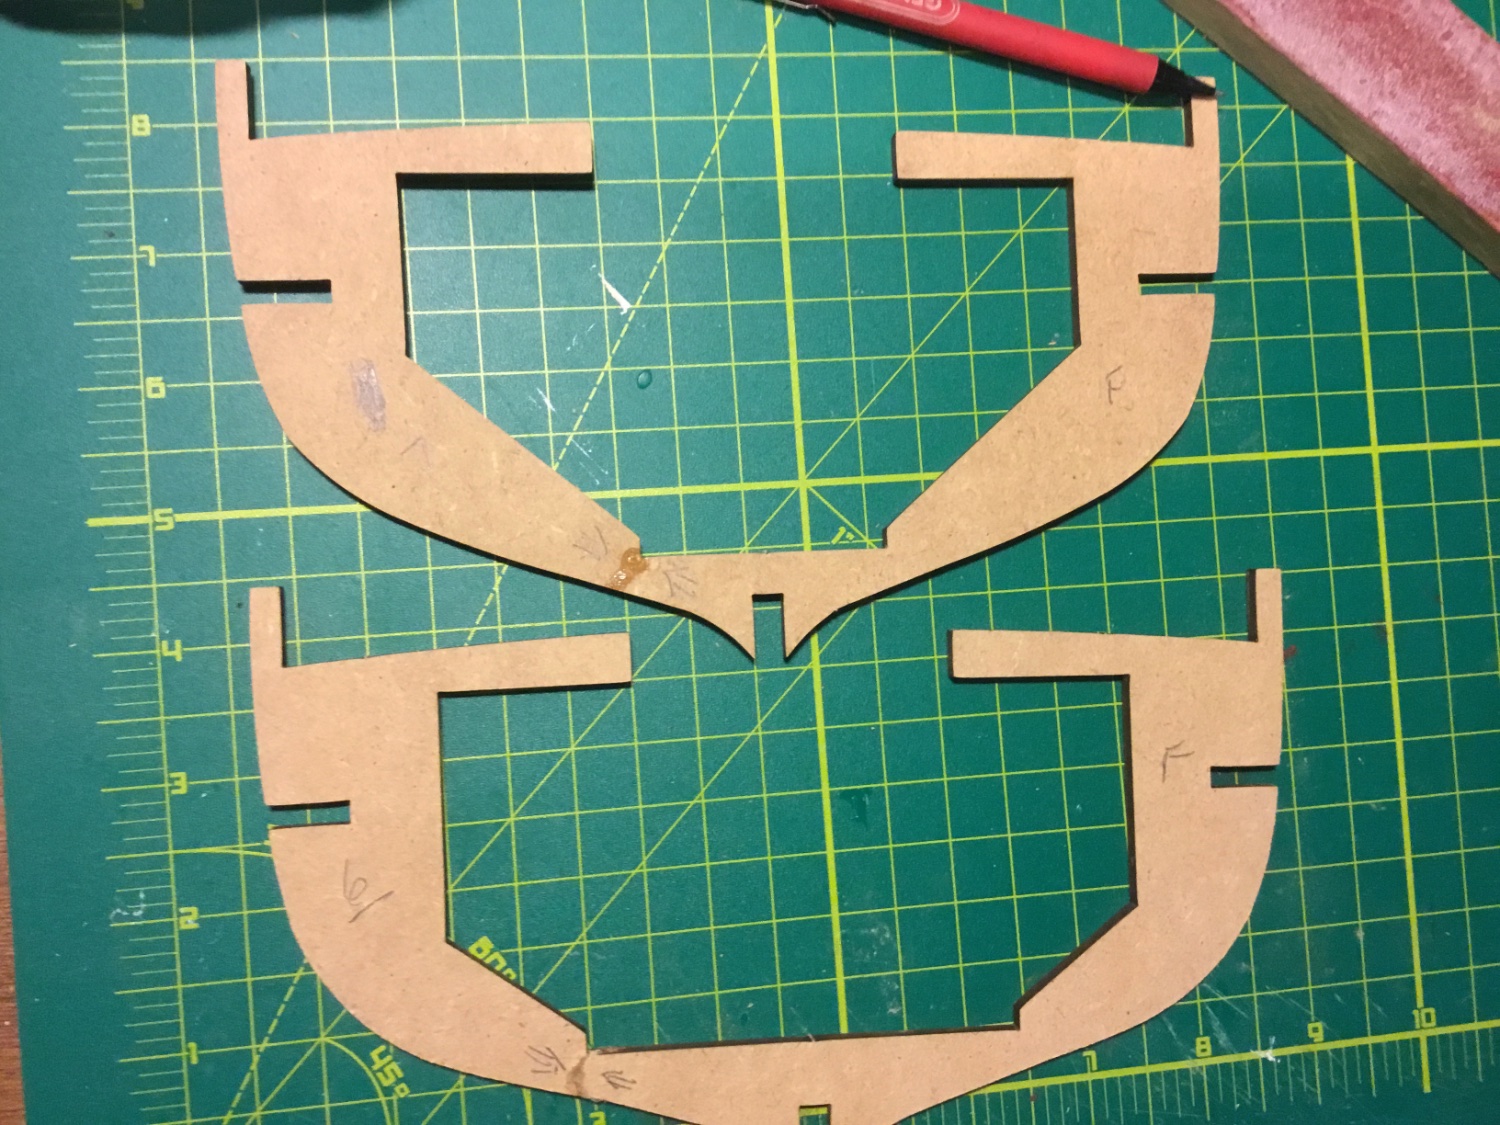
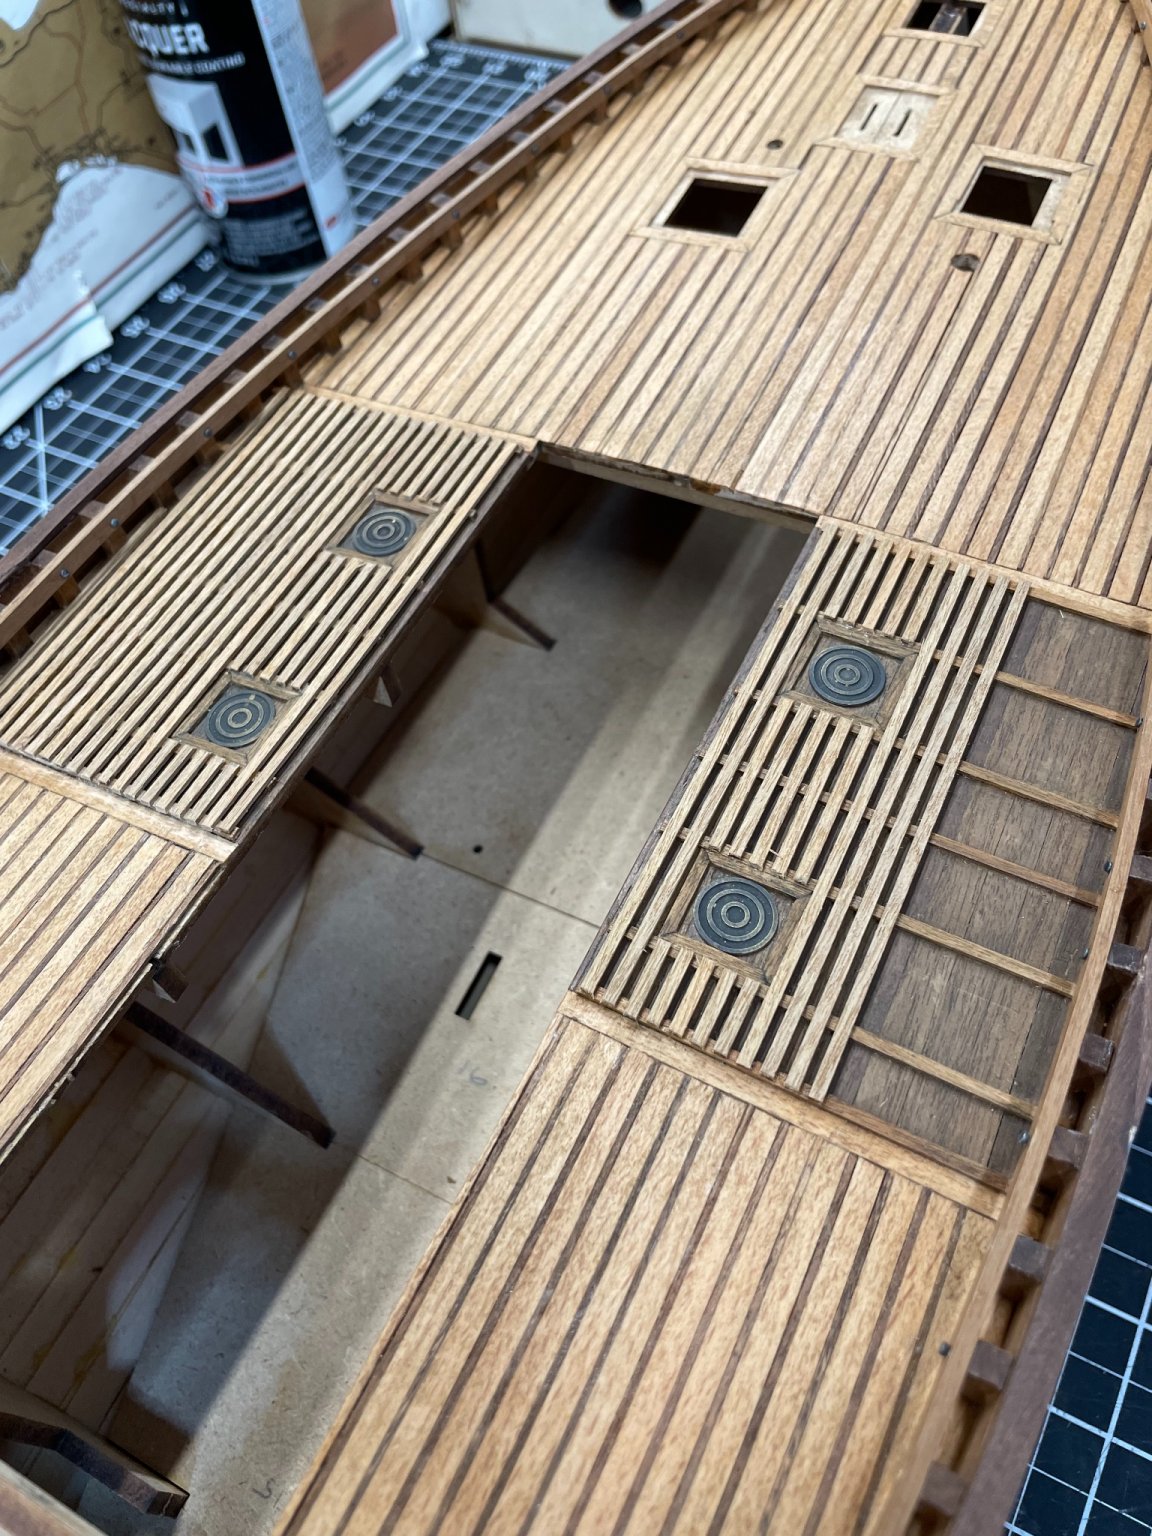
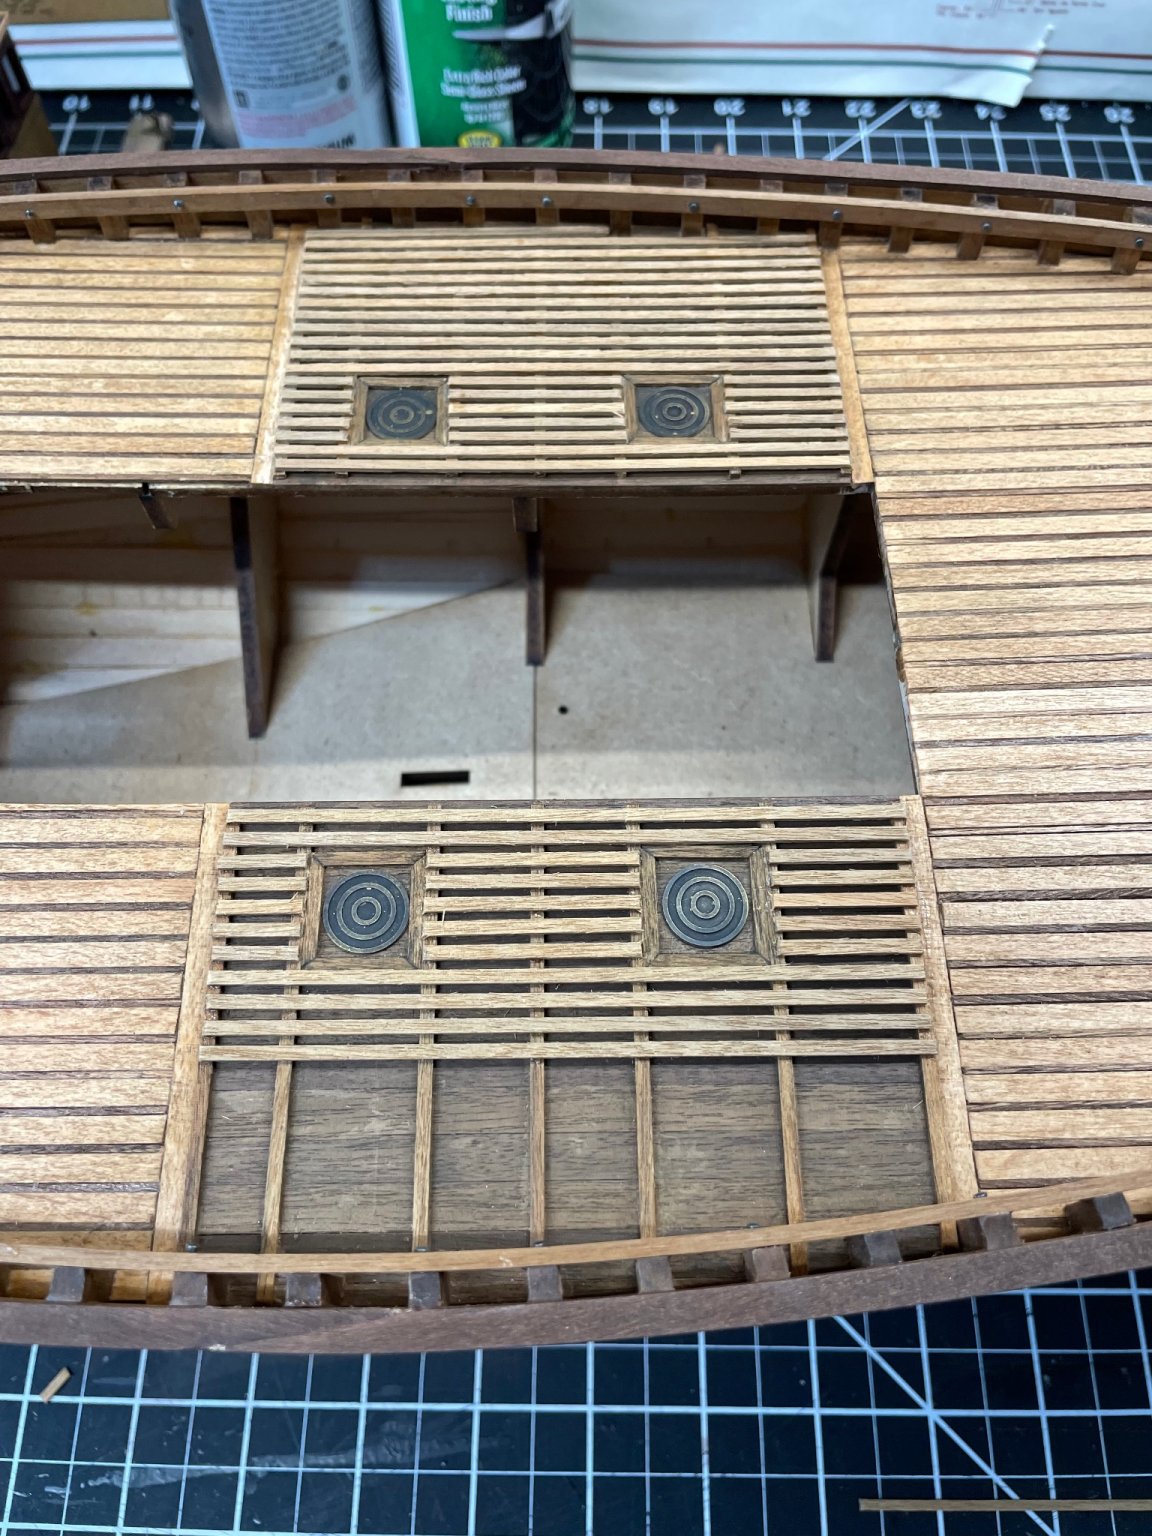
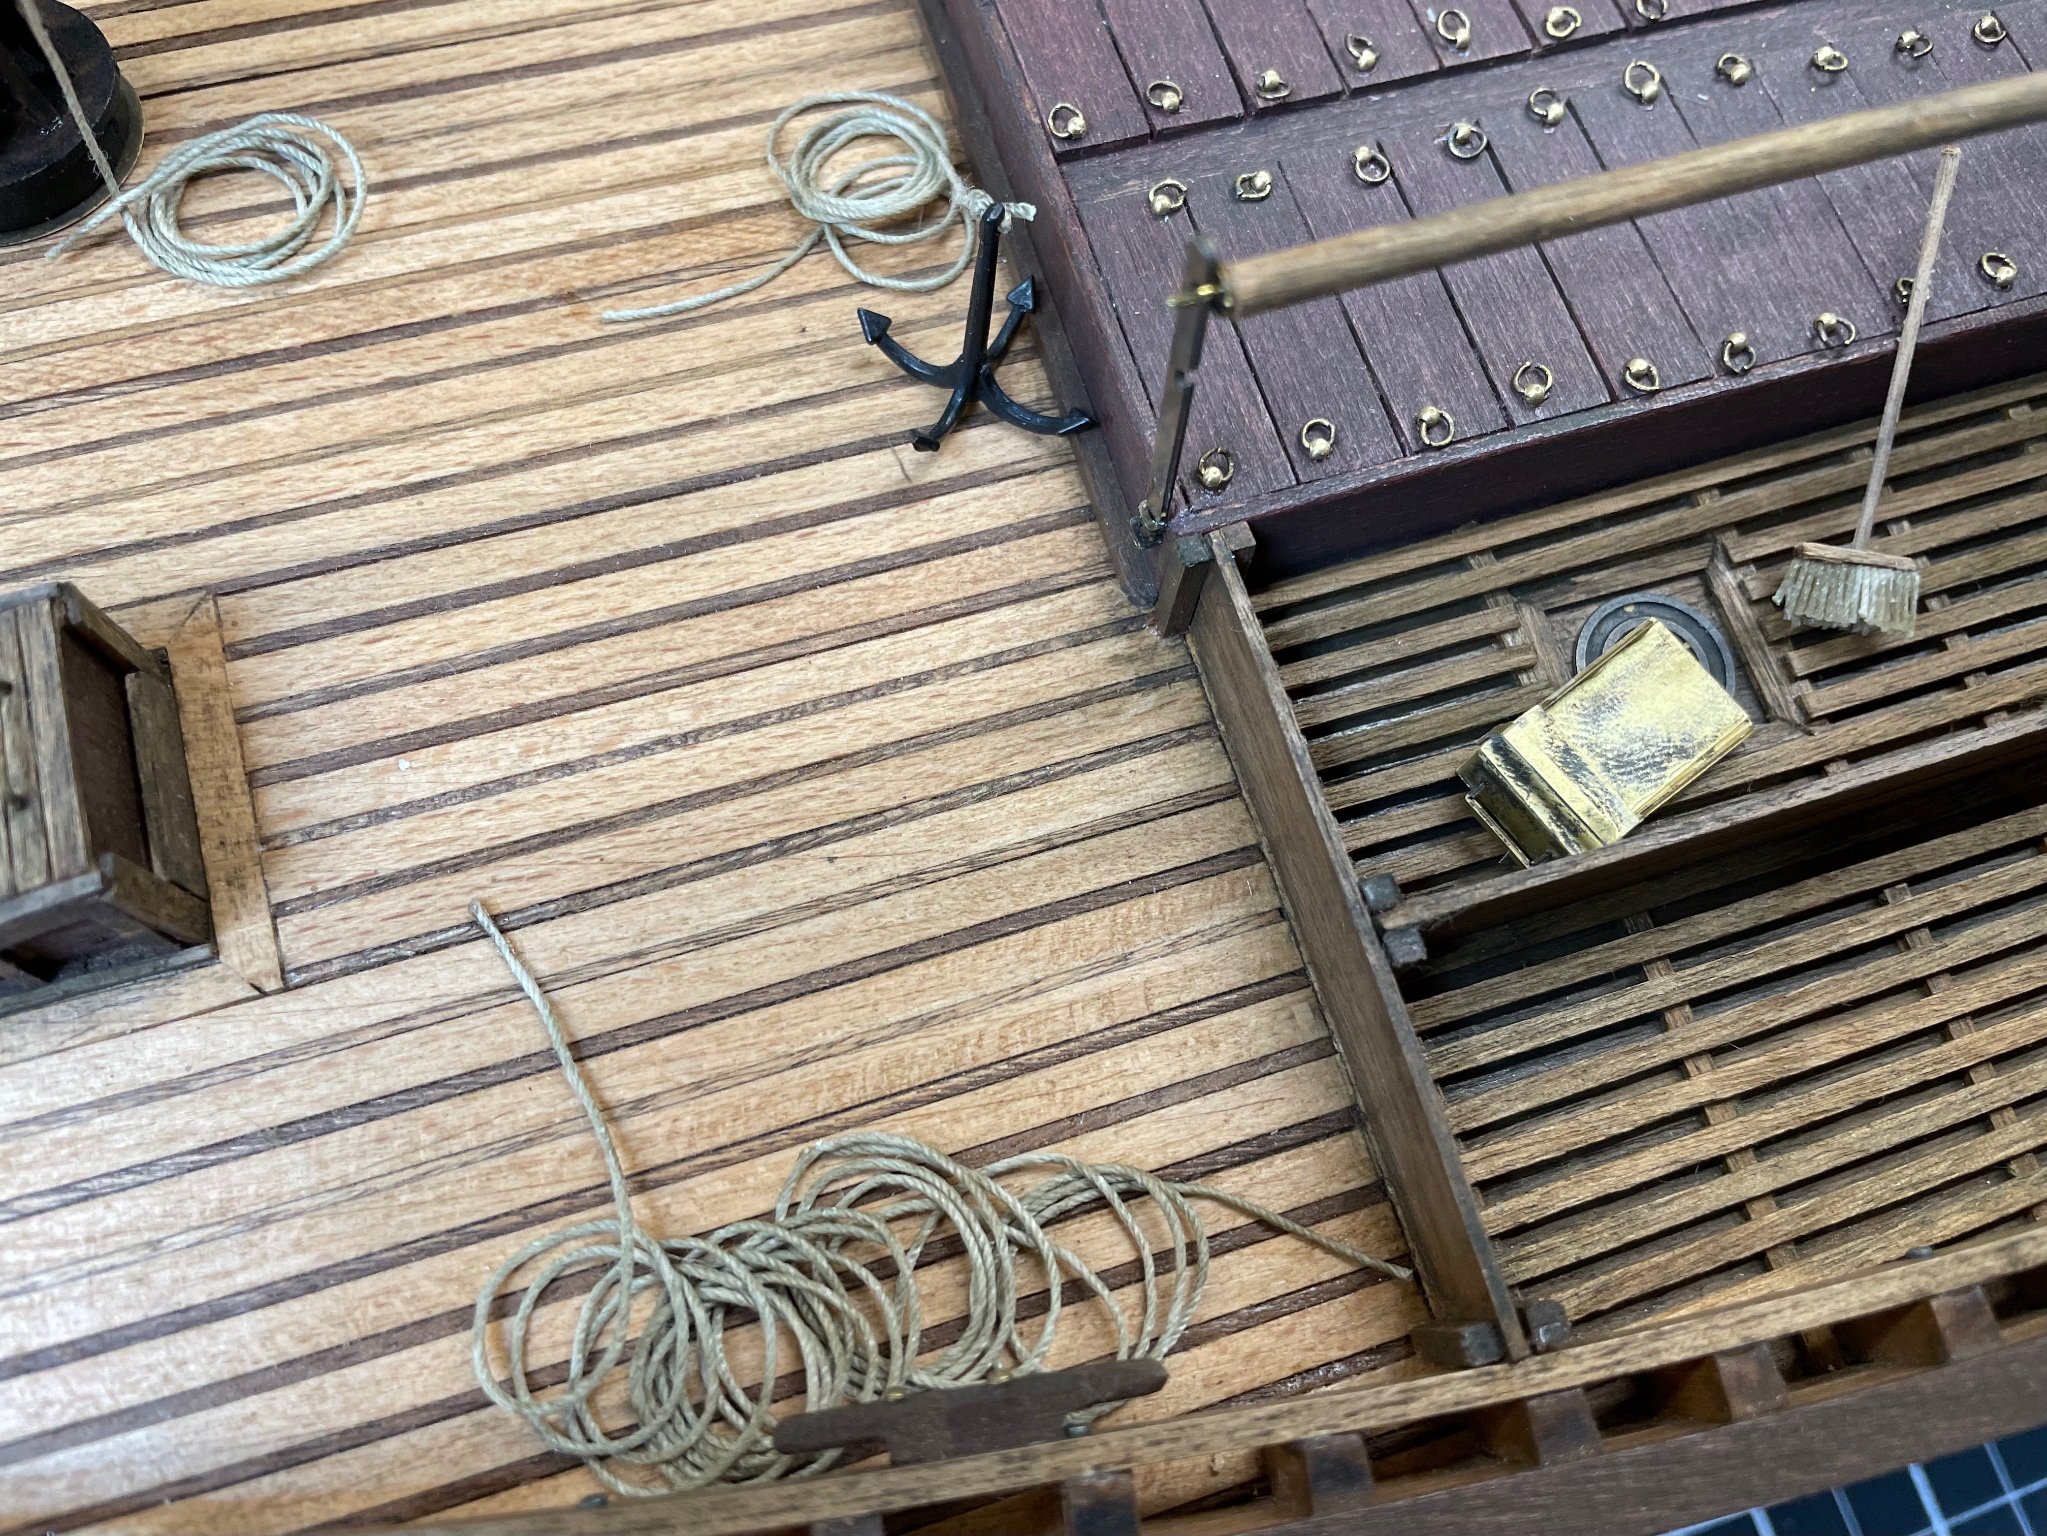
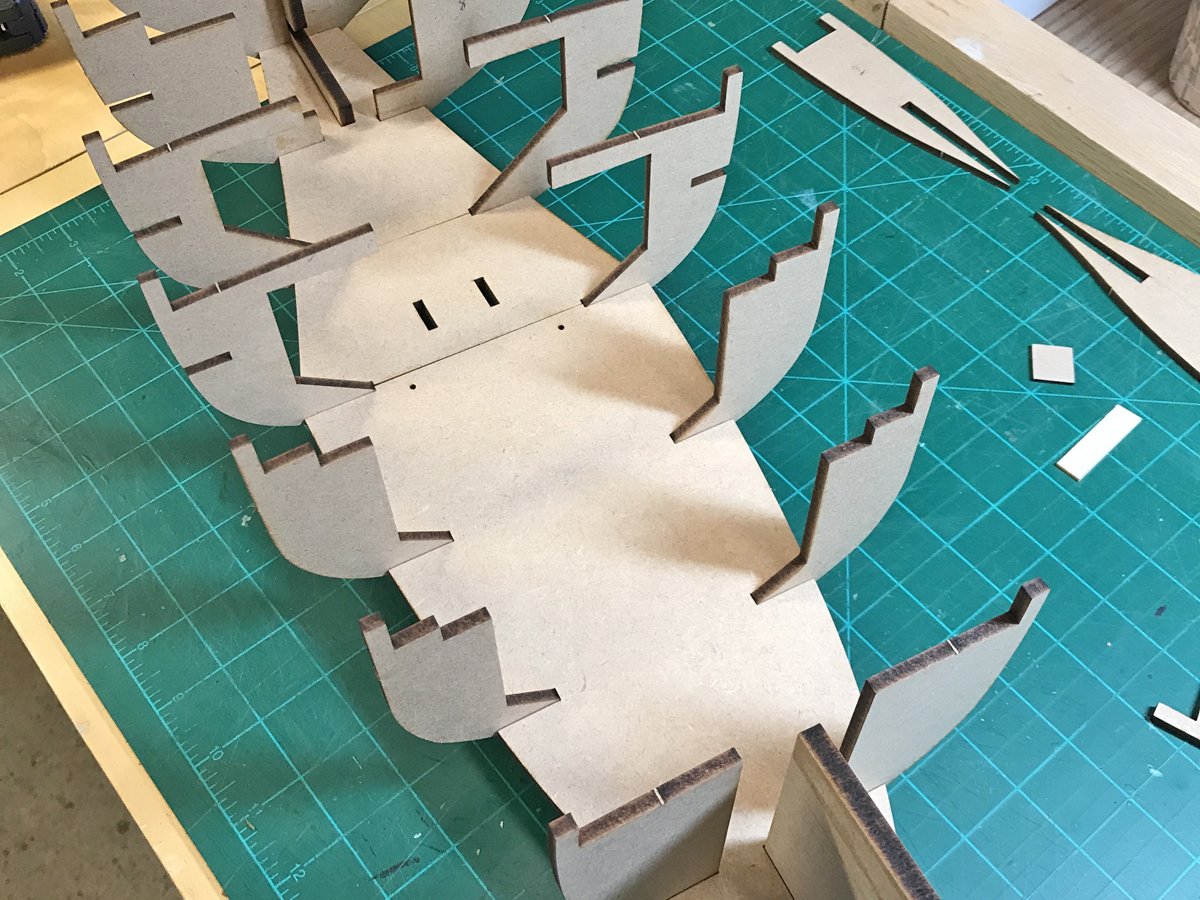
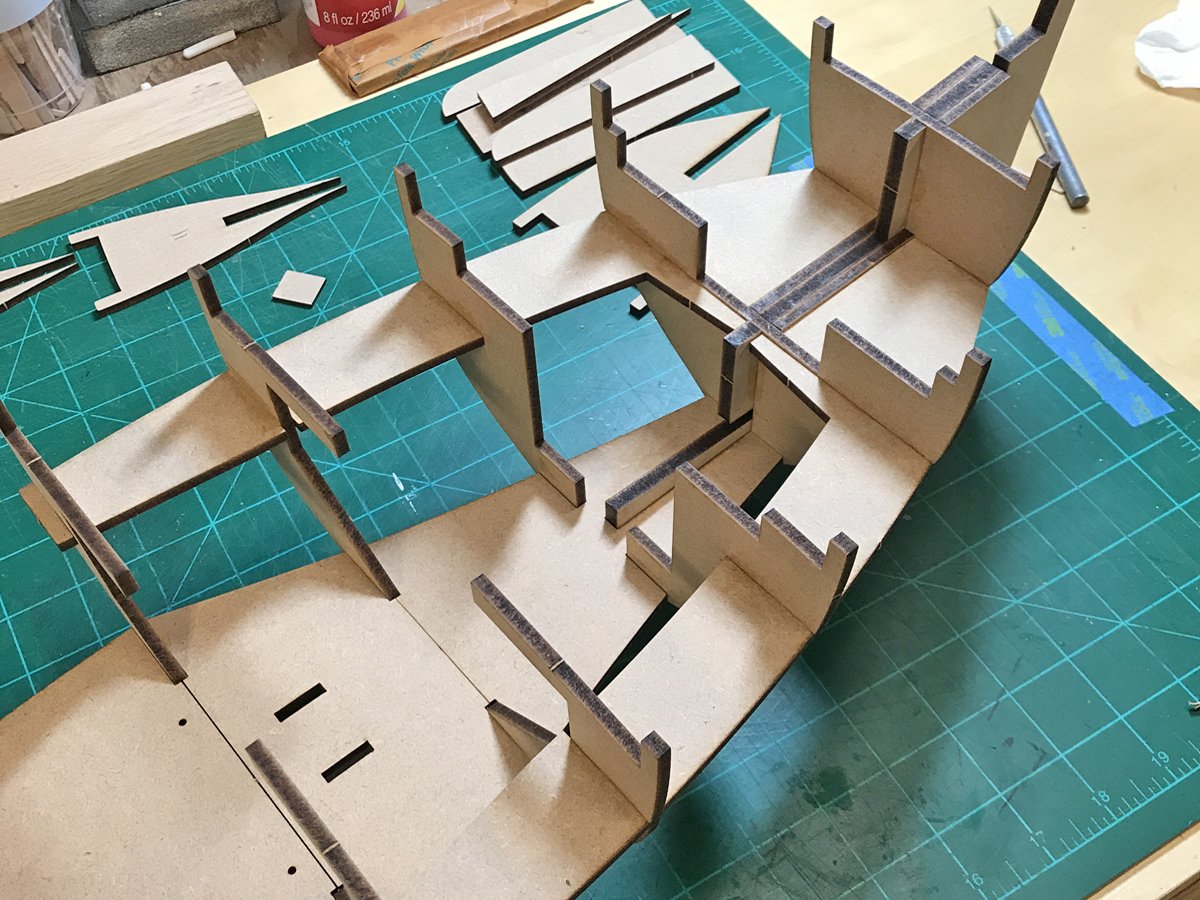
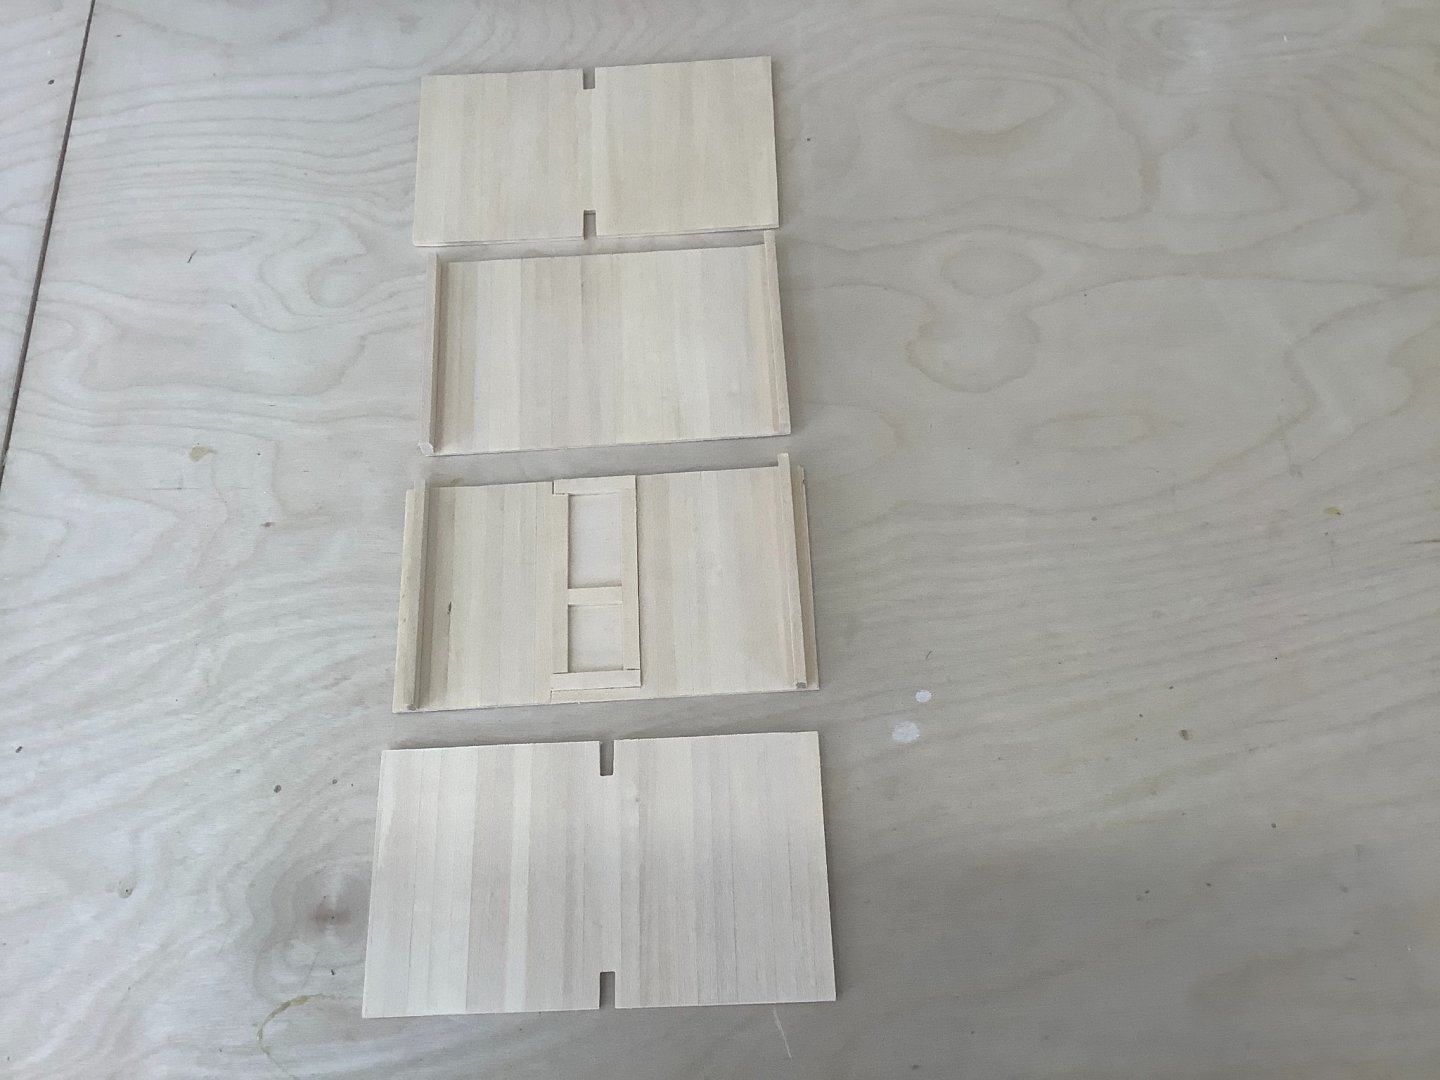
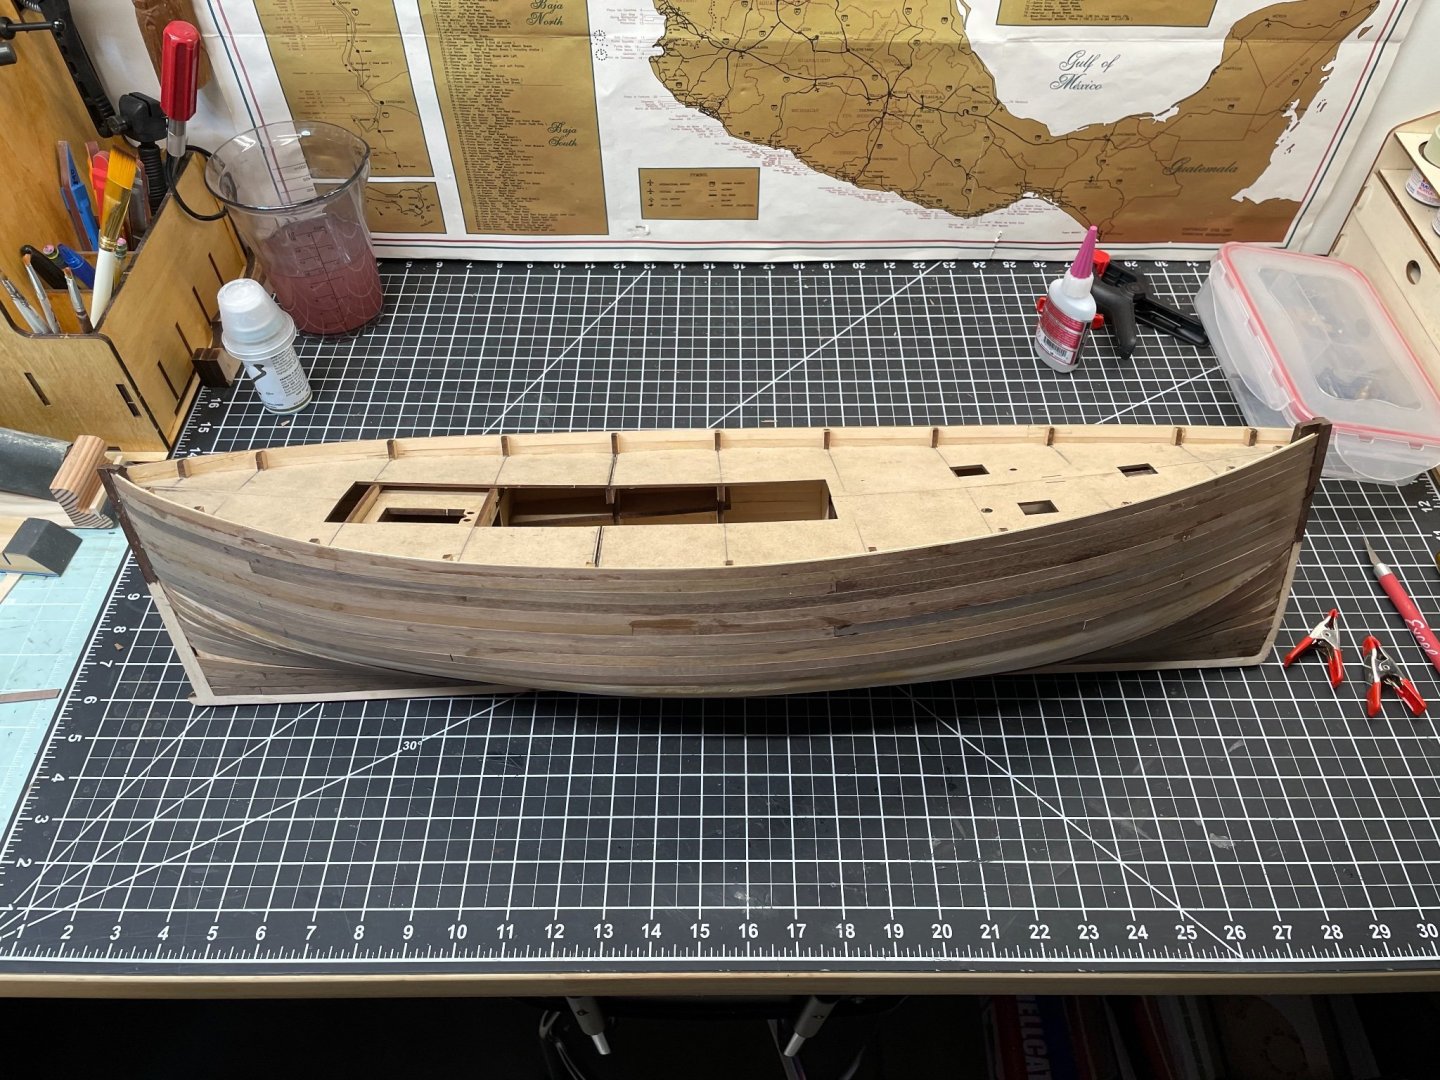
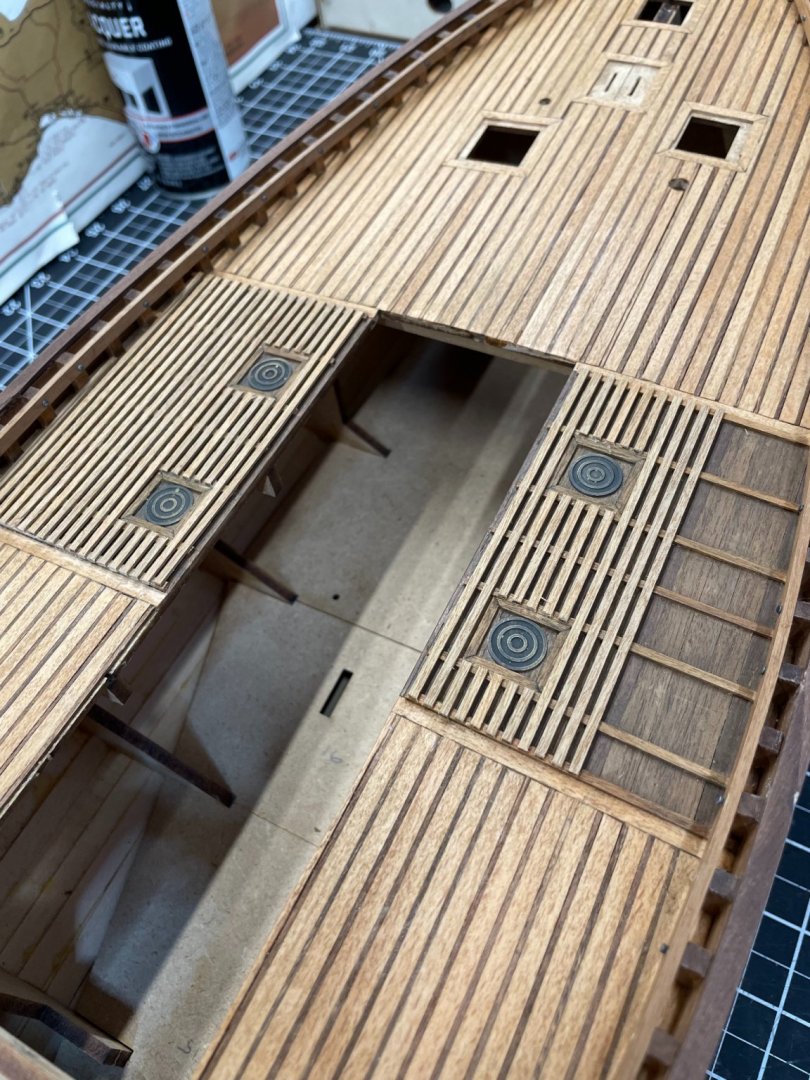
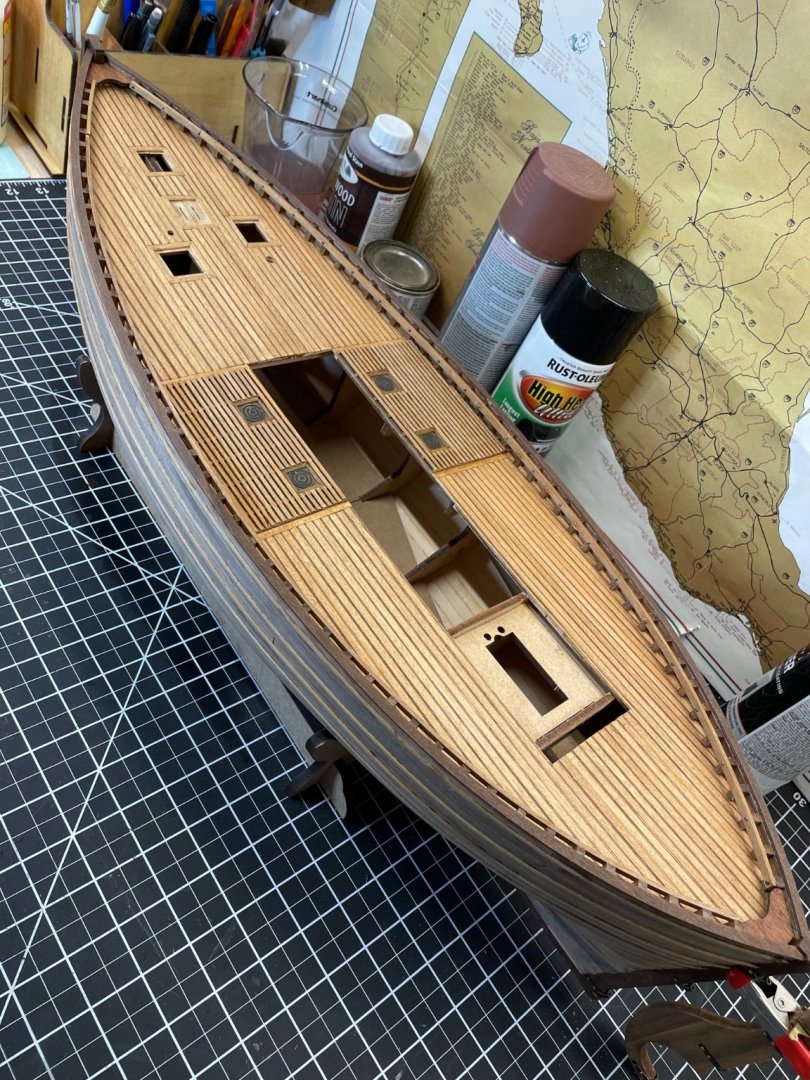
 I was looking for something different after the long haul voyage with the Bounty, and picked up this Scottish motor fishing vessel from Amati last year. It’s a beautiful kit that looks very good quality. Seems a good choice for a first build given the clarity of the plans and instruction, and anybody else. I’m not entirely sure where I’ll go with it in terms of the overall interpretation but we will see. The basic frame goes up straight, fast and trouble free because of the quality of the design and fabrication. There’s a large hatch area in the centre of the vessel that I might leave at least partially open, so I’ve built a simple enclosure under spanning a couple of frames. I’m imagining this will eventually house a pile of fish crates, nets and other fishing paraphernalia. I’ve incorporated a door to the forward cabins and rear hatch to what would presumably be the motor areas, but not detailing anything outside the hold area as it won’t really be visible. Easier to install and finish the enclosure now in pieces while the frames are still open. The walls are planking on solid panels, with a simple deck floor on sleepers over the mdf base to level it up. Enough goofing around with this, time to do the planking...
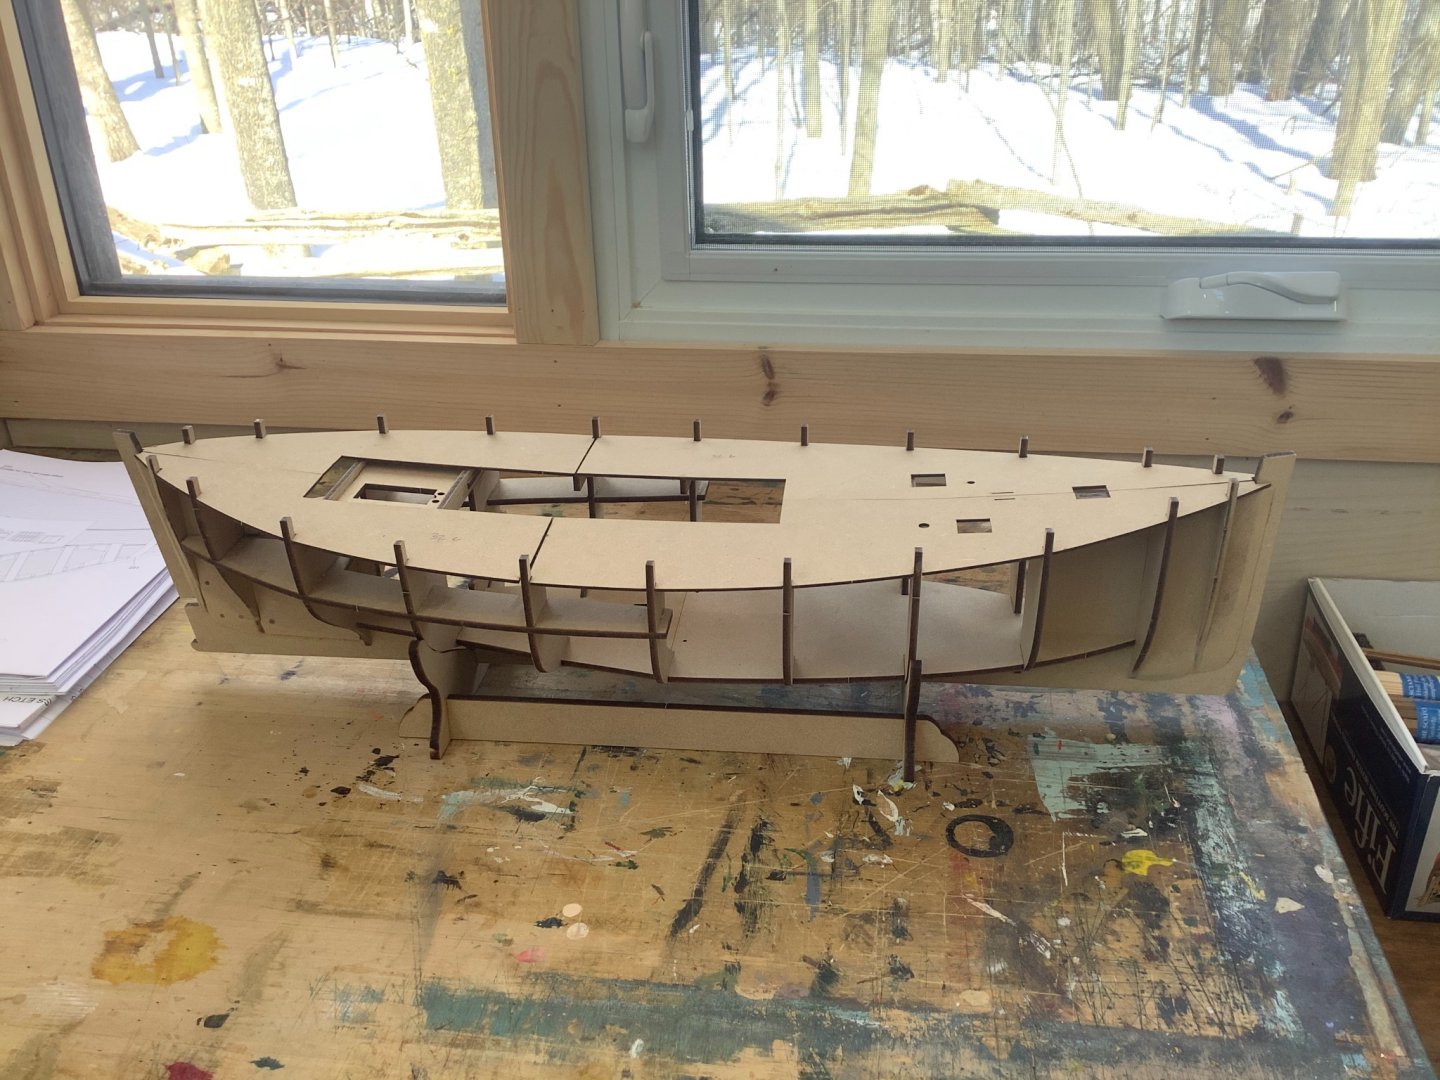
- 76 replies
-
- 6
-
-
- Fifie
- Victory Models
- (and 1 more)
-
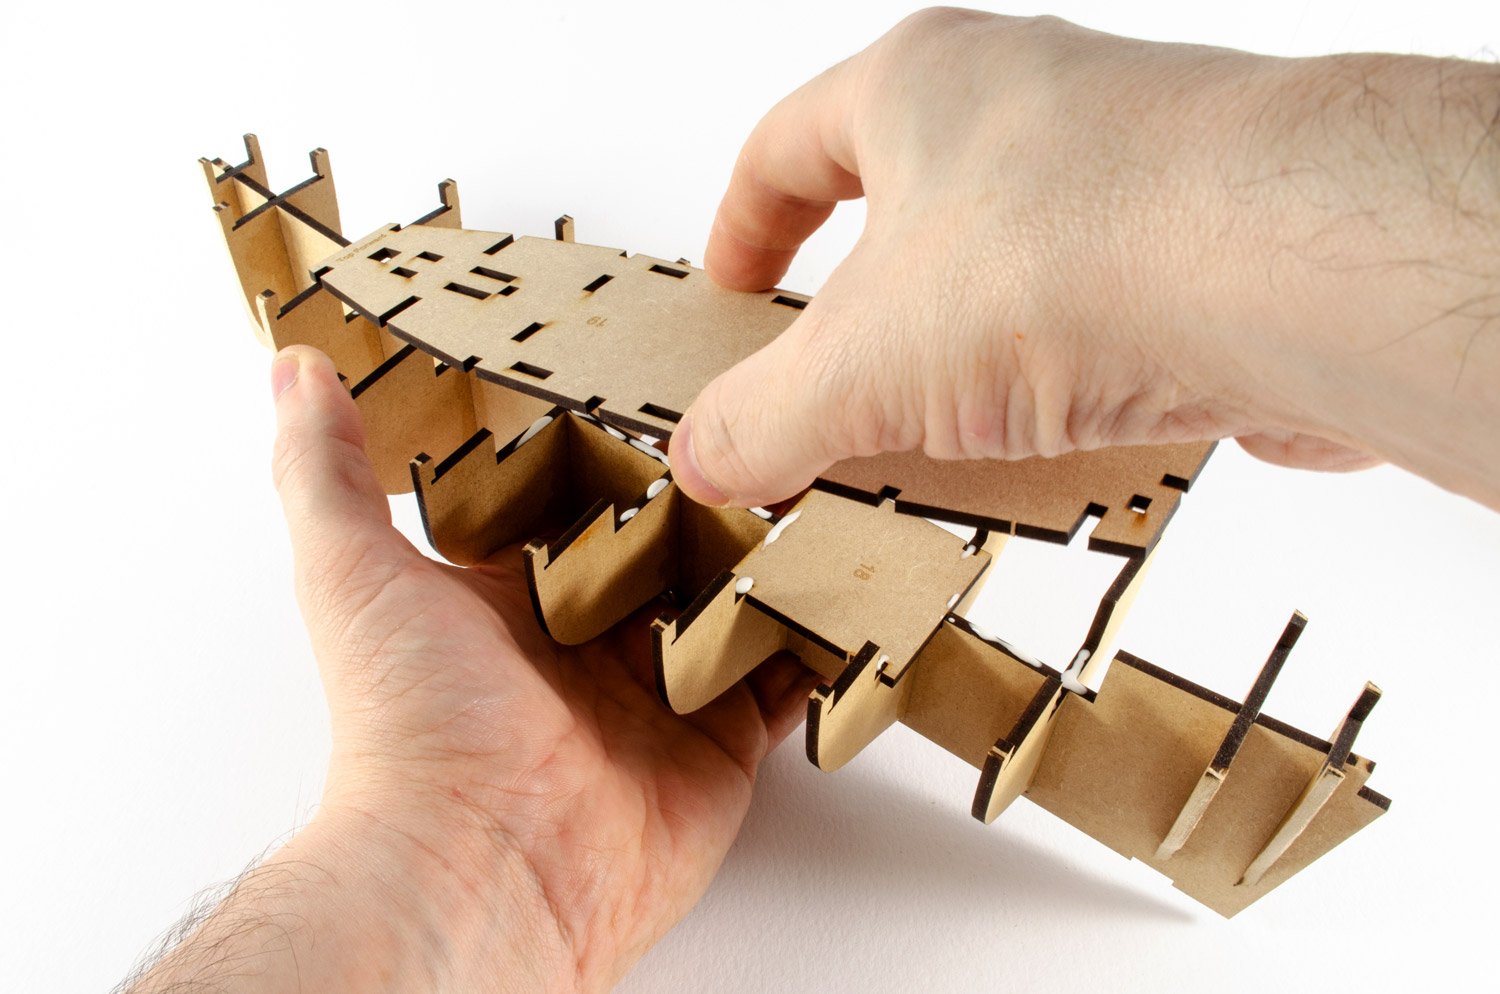
 This is my build log for the Fifie. I'm a beginner to wooden boat modelling and this is my first build. Any advice or criticism is very welcome - I have a lot to learn! My first impressions of the kit is that the instructions and plans are excellent and highly accessible to me as a beginner. The parts are beautifully laser cut with only tiny tabs holding the parts in their wooden sheets. The materials feel very high quality too. So far I am hugely impressed by Vanguard and hope to make more of their models in the future. So the build started today, the bulkheads have been bevelled and mounted on the false keel with the lower deck in place (unglued) to keep them aligned. Leaving it to dry overnight before progressing further.


- 42 replies
-
- 9
-
-
- vanguard models
- lady eleanor
- (and 3 more)
-
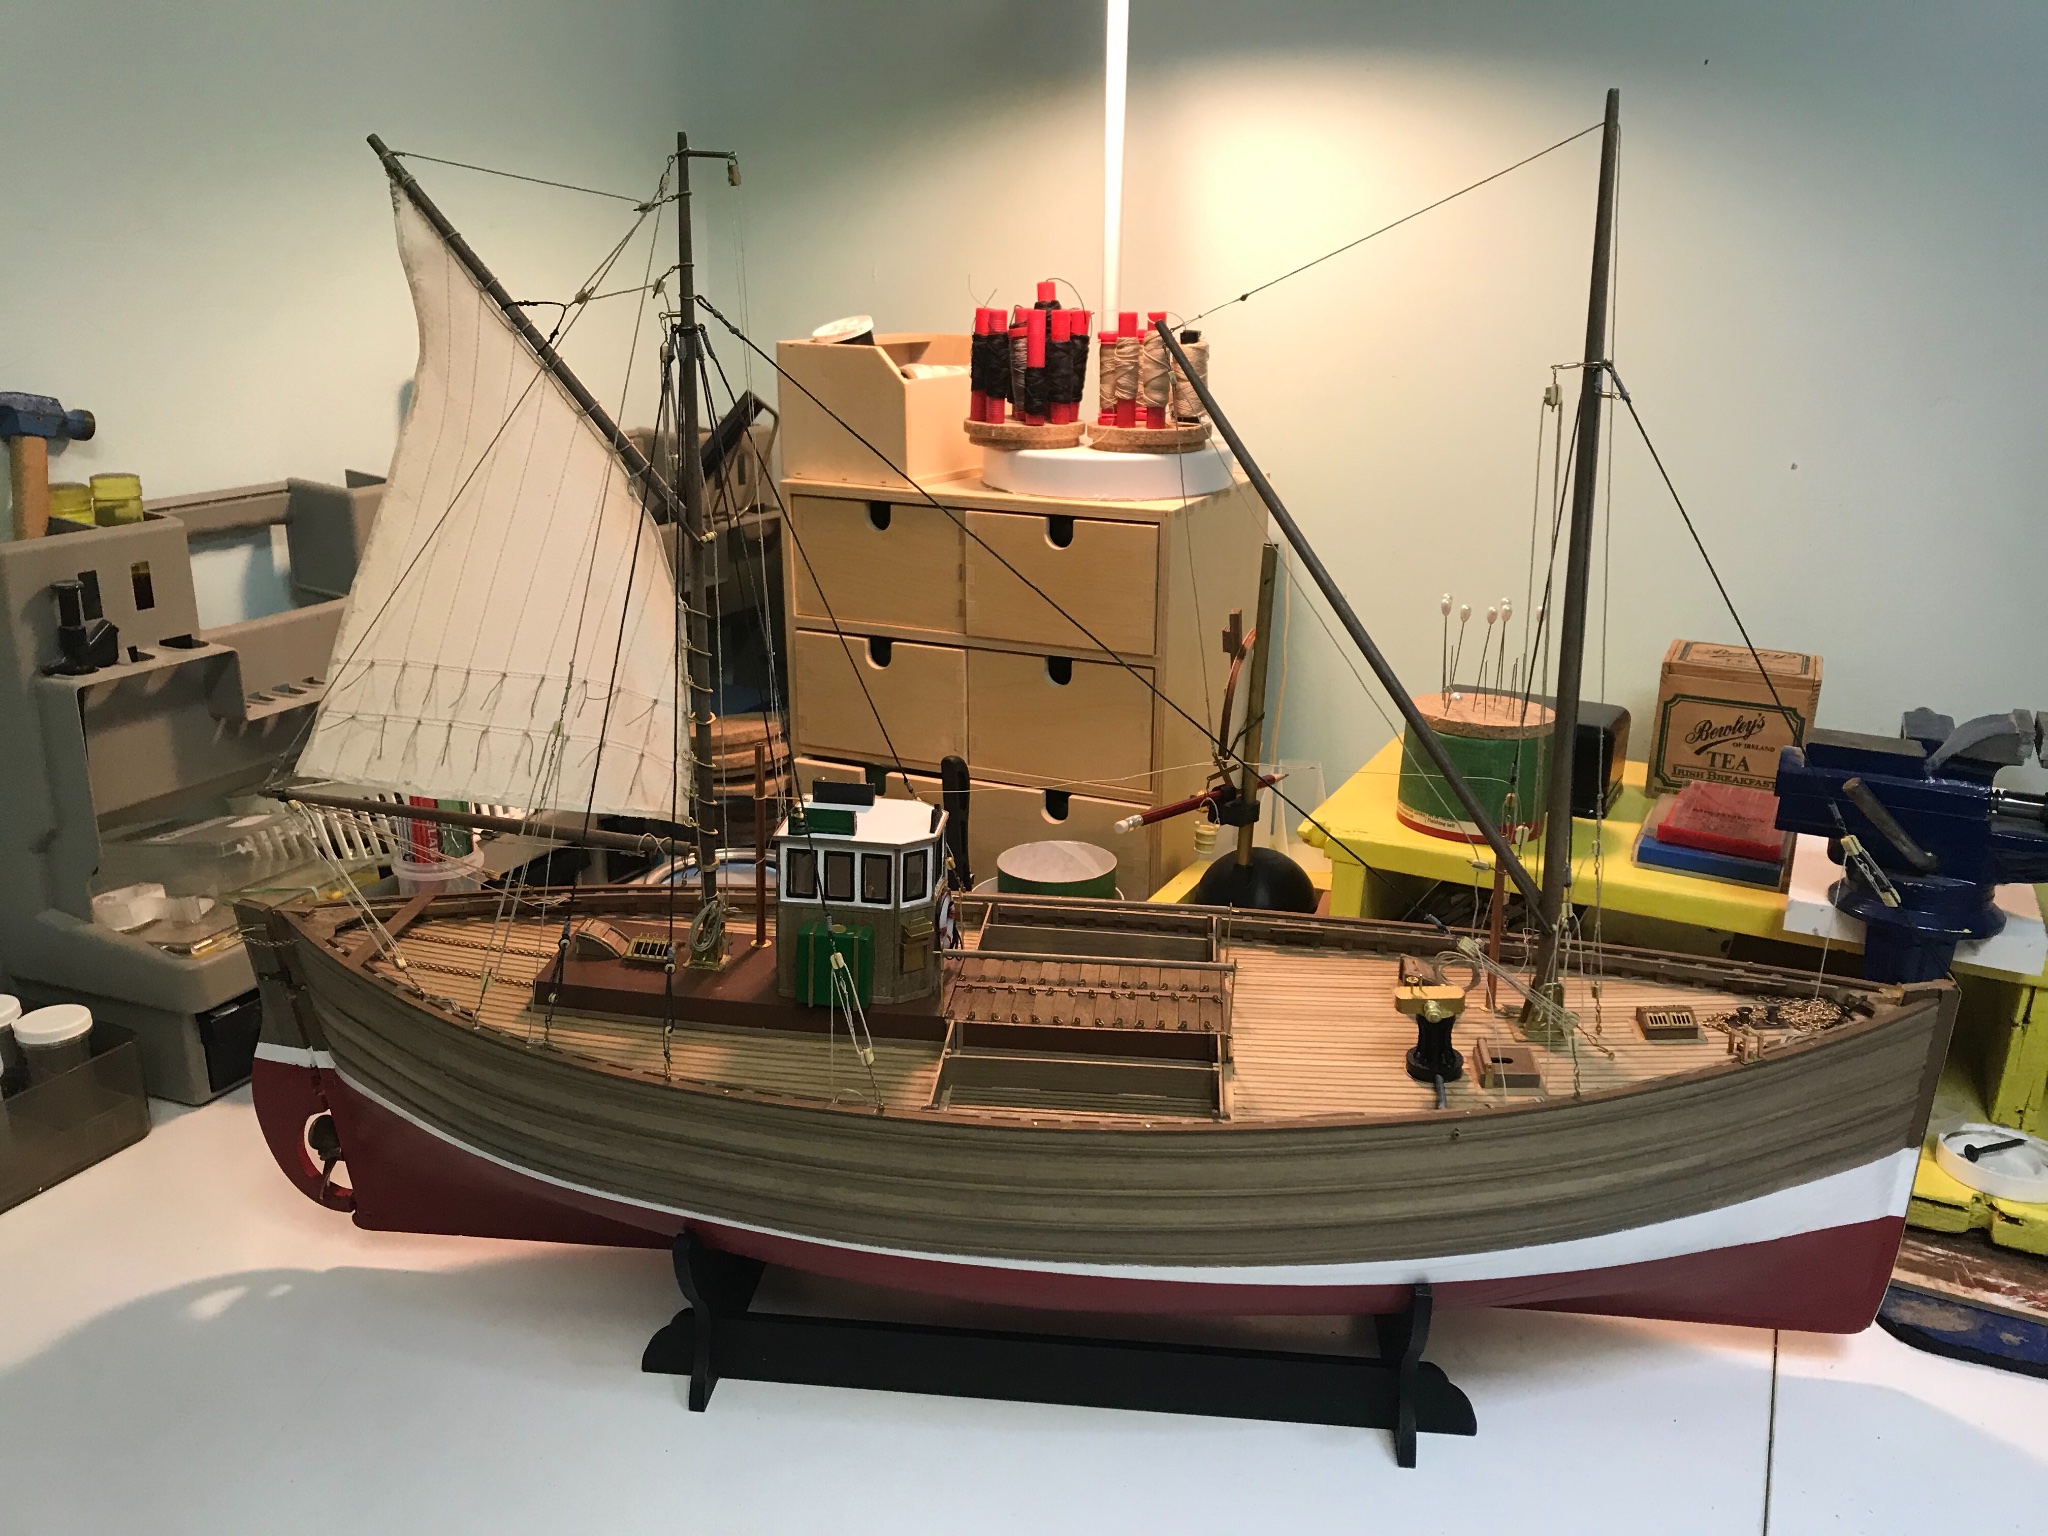
 Ok so this is my second build. My “learning build” was Occre’s Essex. I learned a ton, mostly 3 things: 1. Patience 2. Enjoying the process 3. I like the word working far more than the rigging…. So I started the Fifie in March 2021 and just finished it. I’ll upload all the photos in rapid succession. one thing I do know is that I know very little about model ship building. So to get better, I’m inviting any and all feedback on woodwork, rigging, weathering, customization. Anything you think will help as I move on to my next project (TBD.). And any suggestion on a good next level project? Thanks all!!!


-
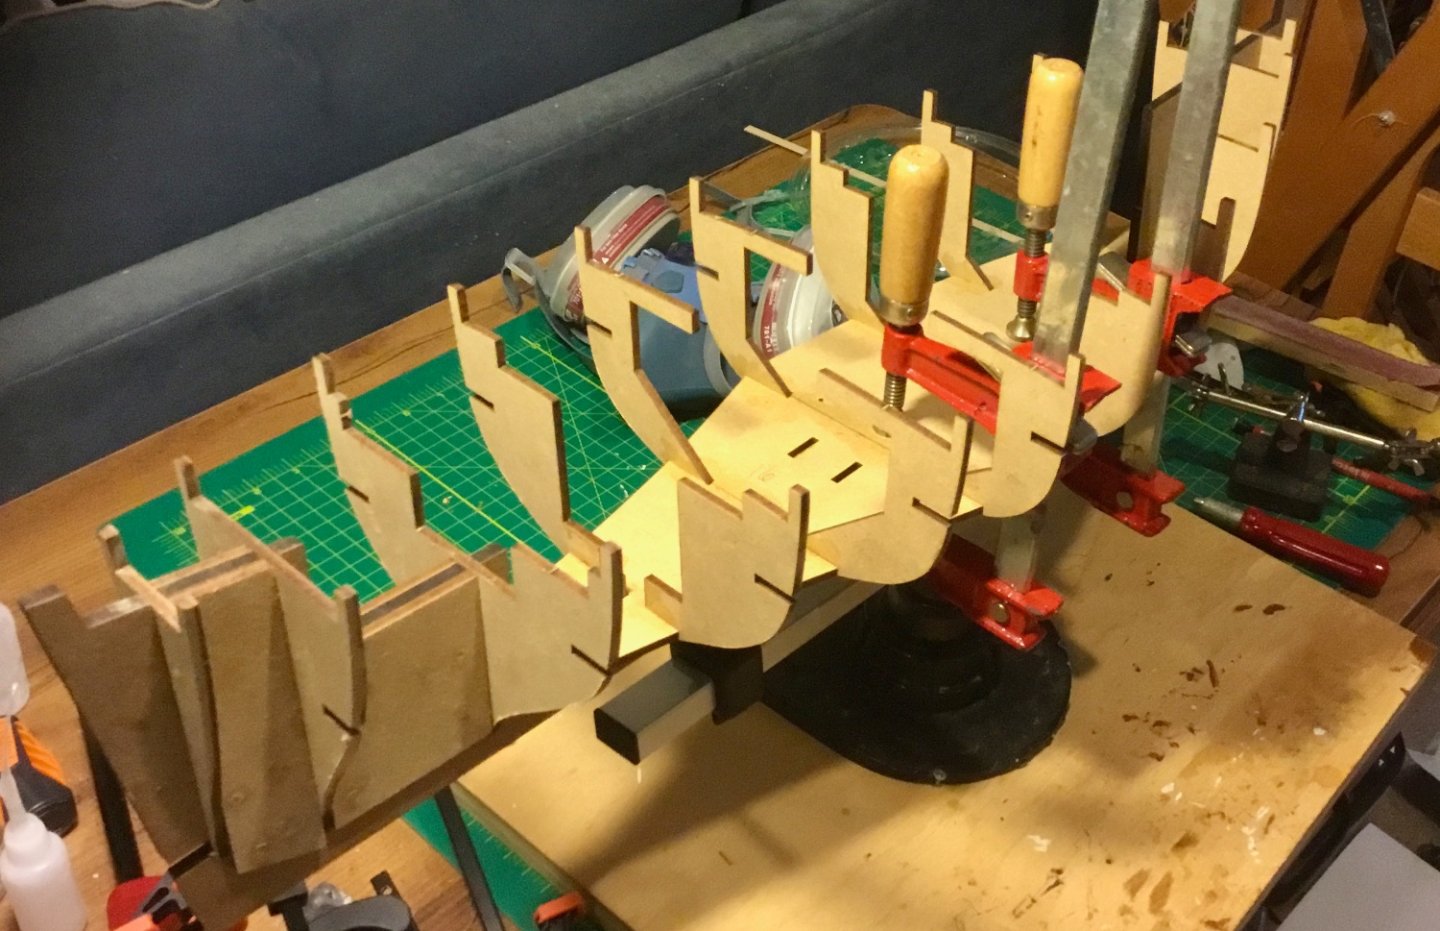
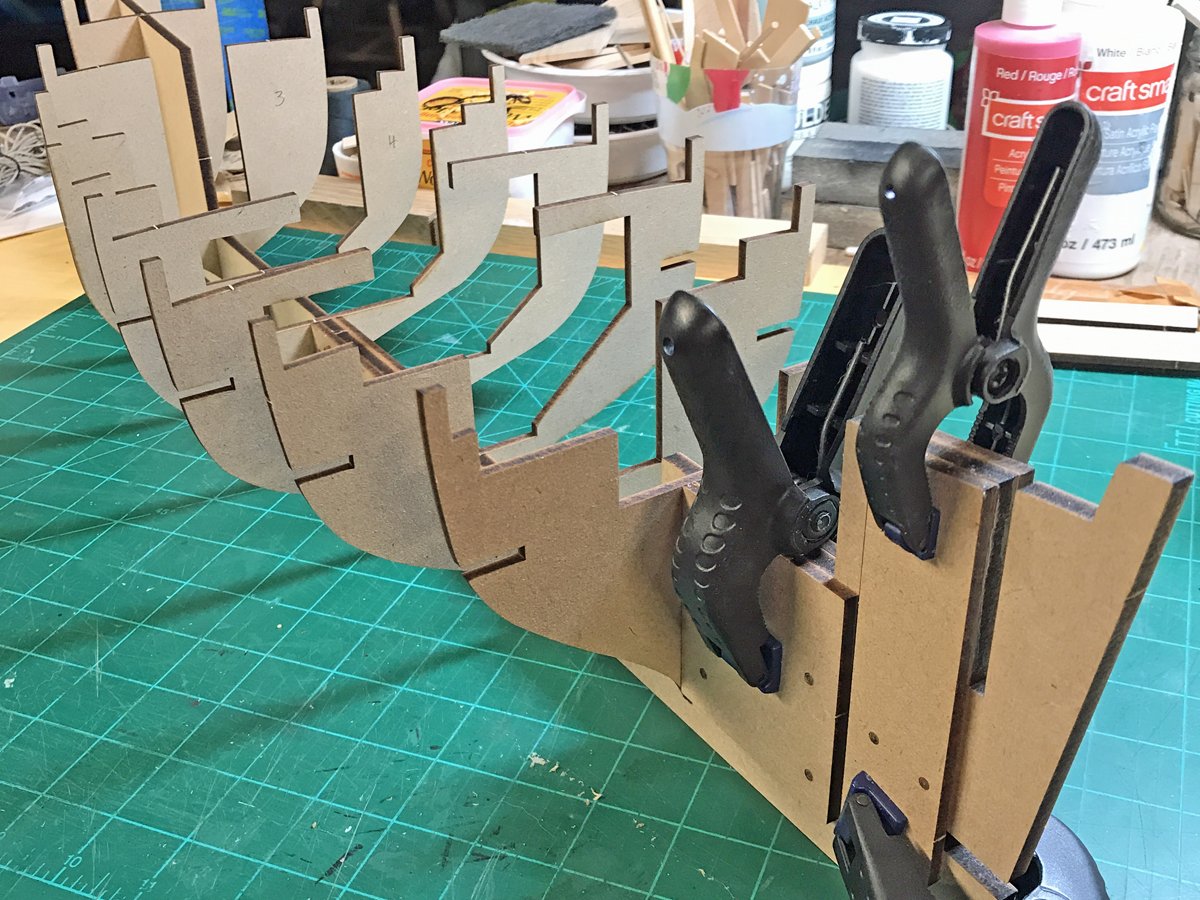
 After deciding to try out this hobby I made my first mistake. I selected a ship that had poor instructions and did not have a single build log on this site. I have put that model on the shelf for now and decided to look for a model more fitting to be built by a newcomer. After seeing and reading the build logs by James H and BE I was very interested in building the Lady Eleanor for my first ship build. The Vanguard model site had the complete manual for this kit available for reading. That convinced me that between the other build logs and the very complete instructions that this was a good kit for a total newbies first build. The model is extremely well built and the directions take a beginner thru the steps assuming you know very little about ship building and terminology. I really appreciate the instruction detail and there are plenty of photos to help visually with the build. The initial building of the bulkheads on to the false keel was very easy. The bulkheads fit snugly into the keel and required no squaring. Here is the ship assembled with the bulkhead and sub structure put together.
- 38 replies
-
- 12
-
-
- vanguard models
- fifie
- (and 2 more)
-
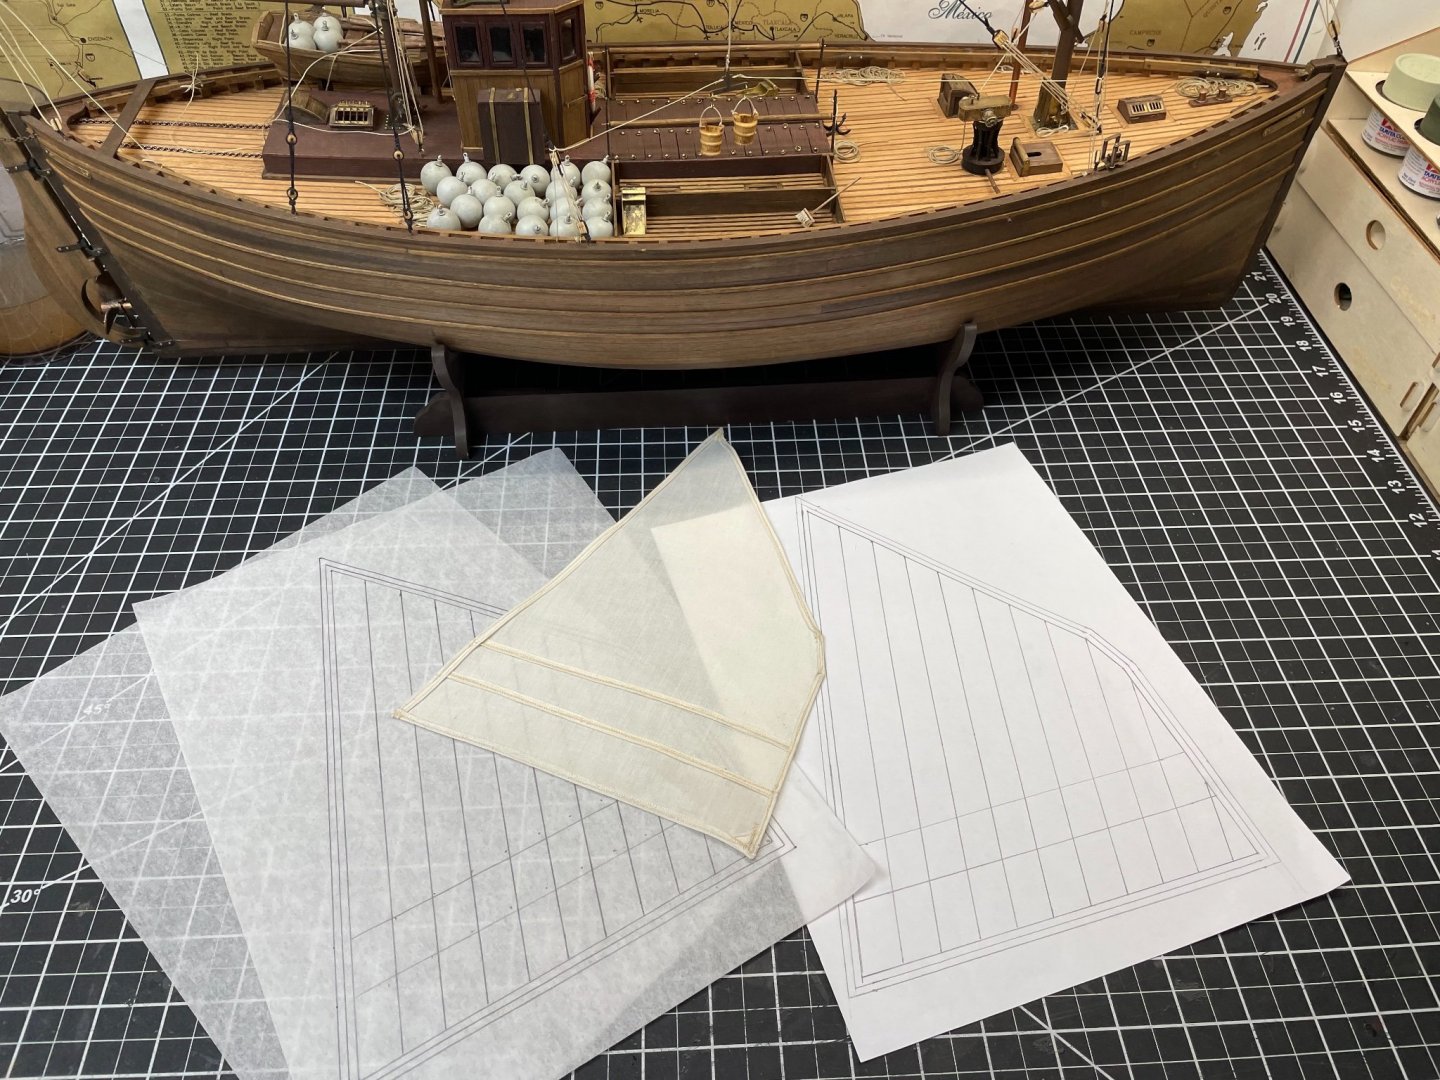
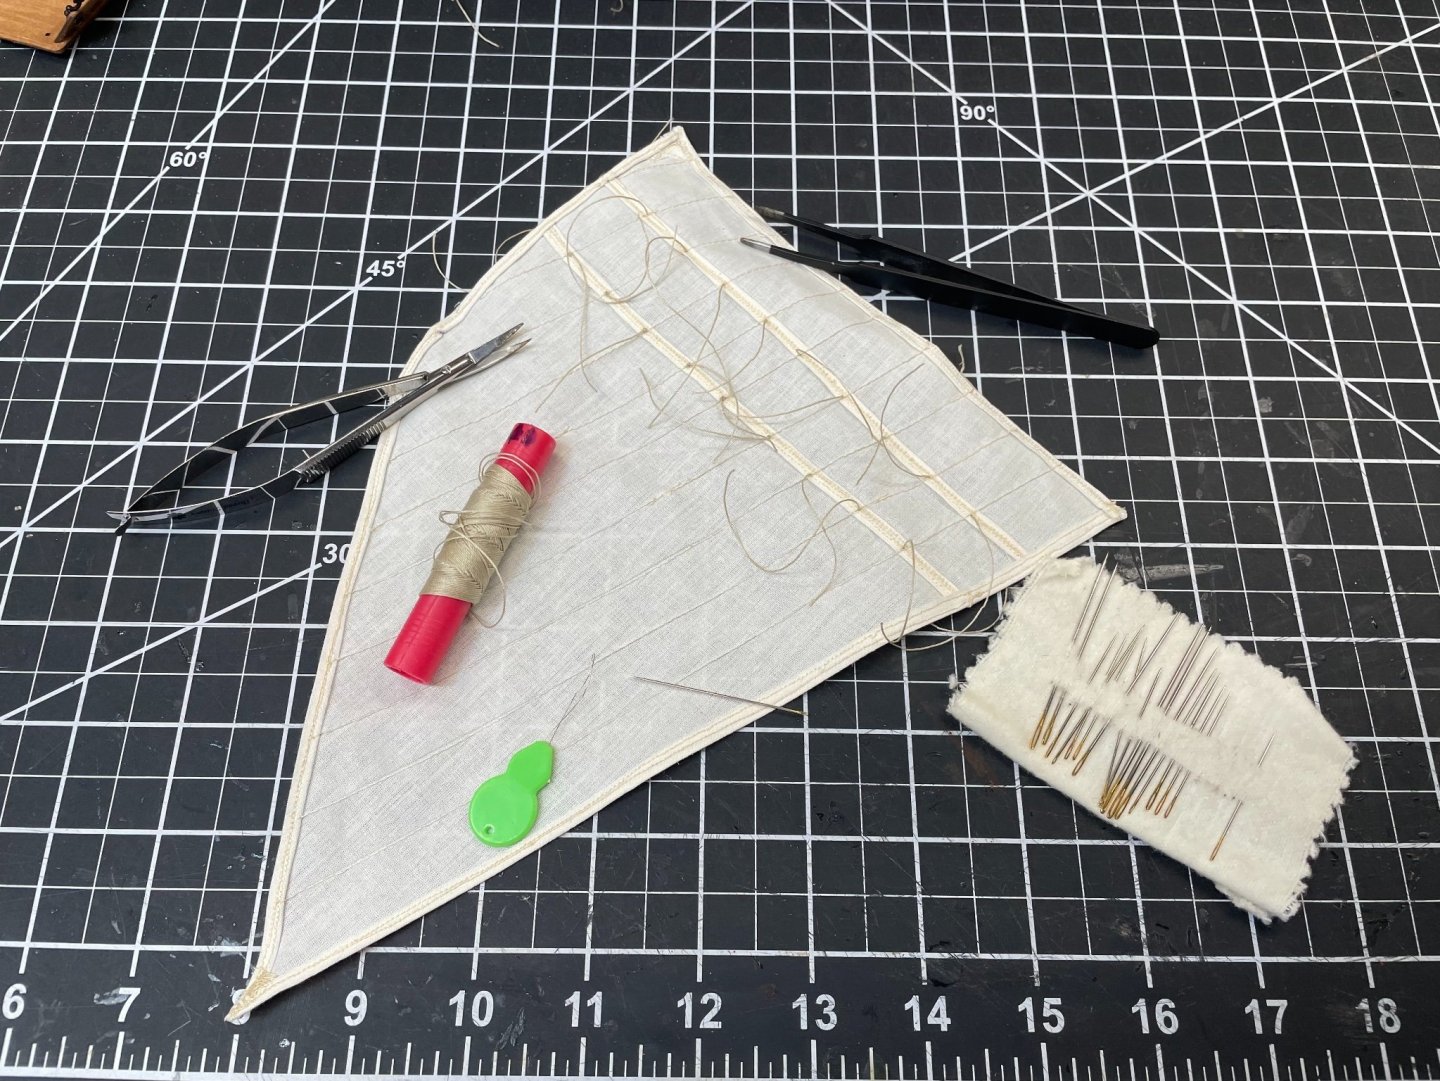
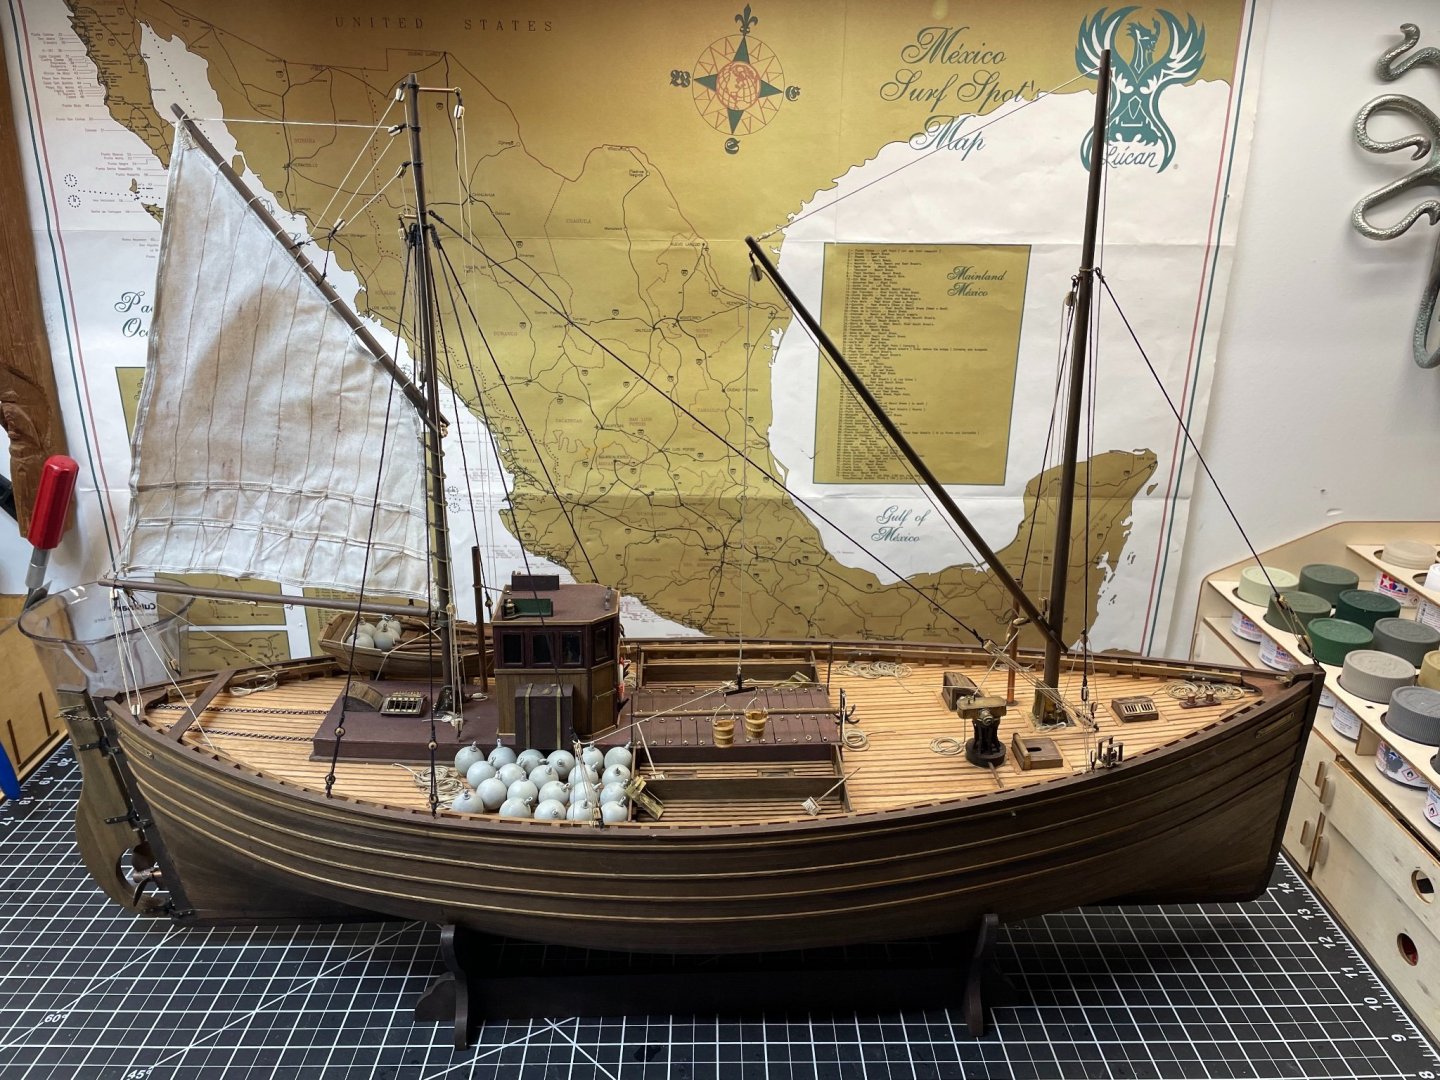
 I have been researching the famous Scottish Fifies, and am inspired to try building a model of a small to medium sized boat of 42-feet (12.8 meters). Detailed information about these boats is hard to find. Evidently, the real boats were mostly built by sight, without the help of plans or half-hull models, so there is not a lot of documentation to discover. Most of the sources I did find focus on the large Fifies (60 to 80 feet loa) of the early 1900s. However, from various historical photographs and writings, I am under the impression that smaller boats were more common-place during the late 1800s. In addition, there are very few surviving Fifies left in the world today. One smaller boat, the "Isabella Fortuna," survives as a Scottish National Historic Ship. She was built in 1890 and is 43 feet loa. By using written descriptions, historical photographs, and the plans of larger boats, I have developed my own paper line-plans of what I think would be a typical boat in existence, circa 1870 - 1880. Here are some of my sources:
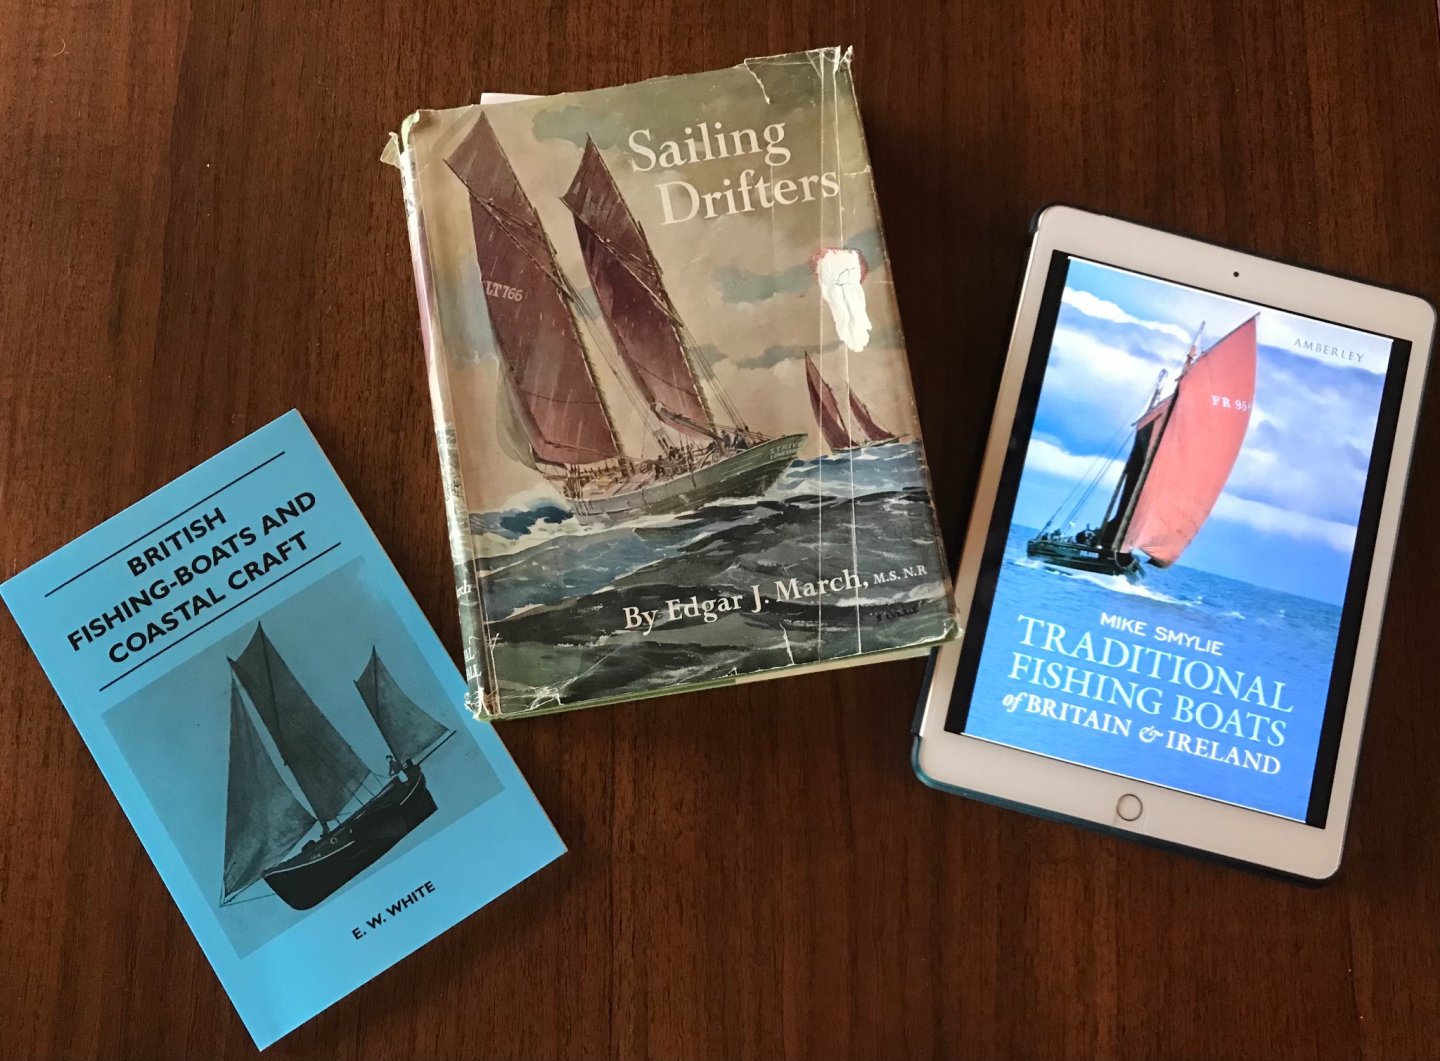
- 85 replies
-
- 10
-
-
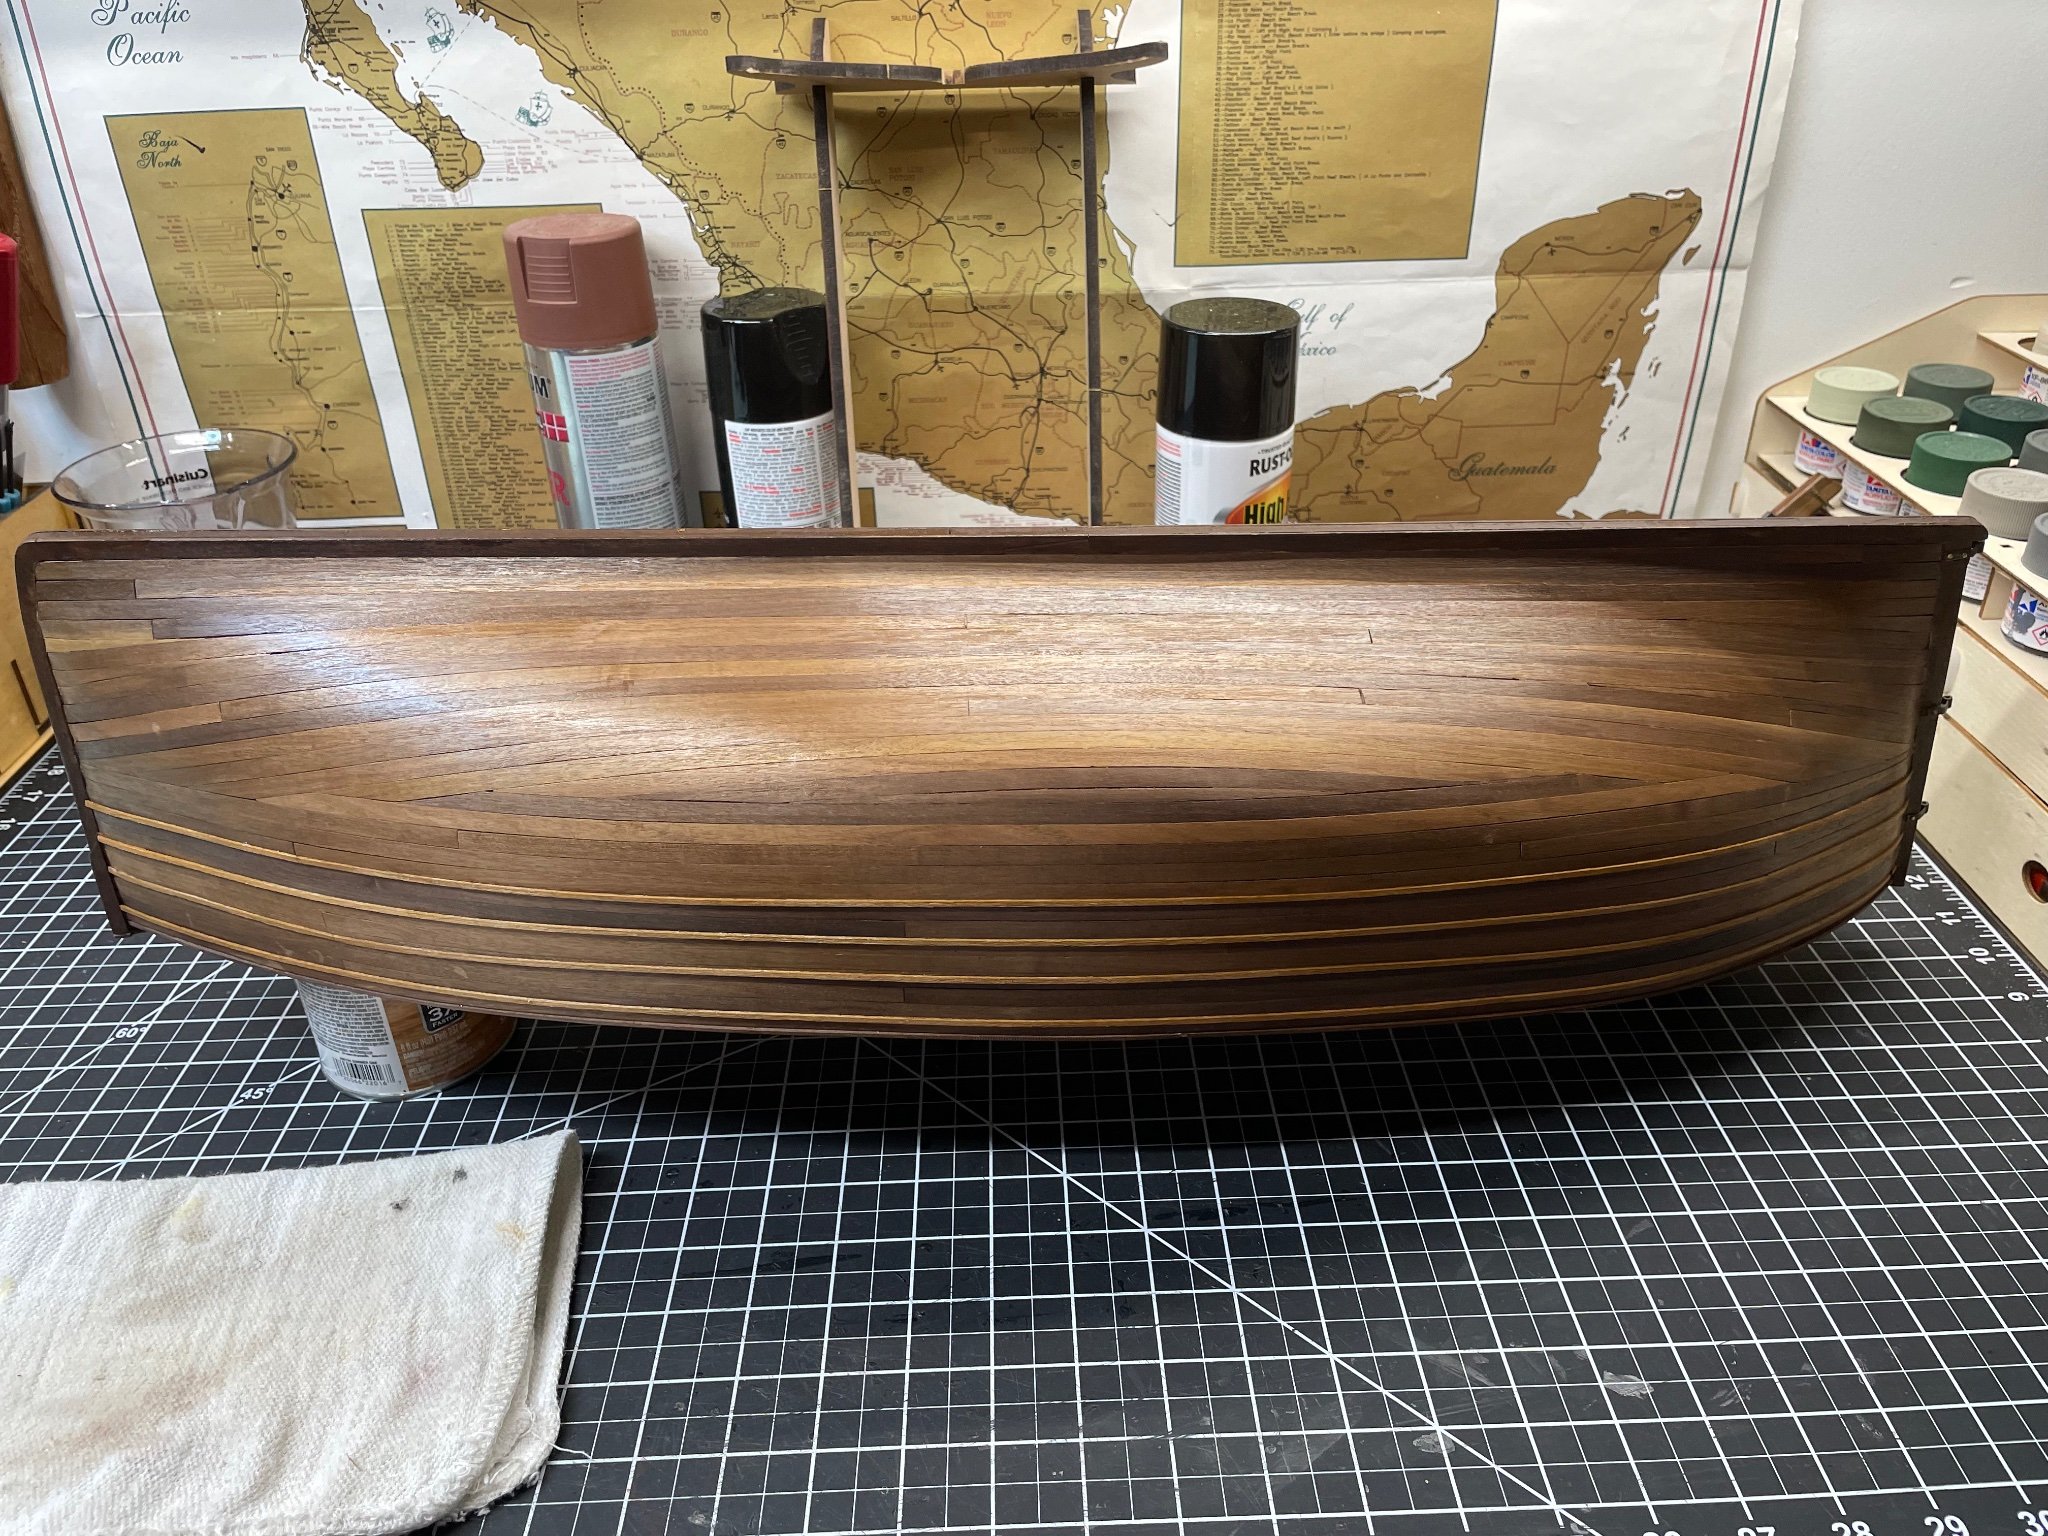
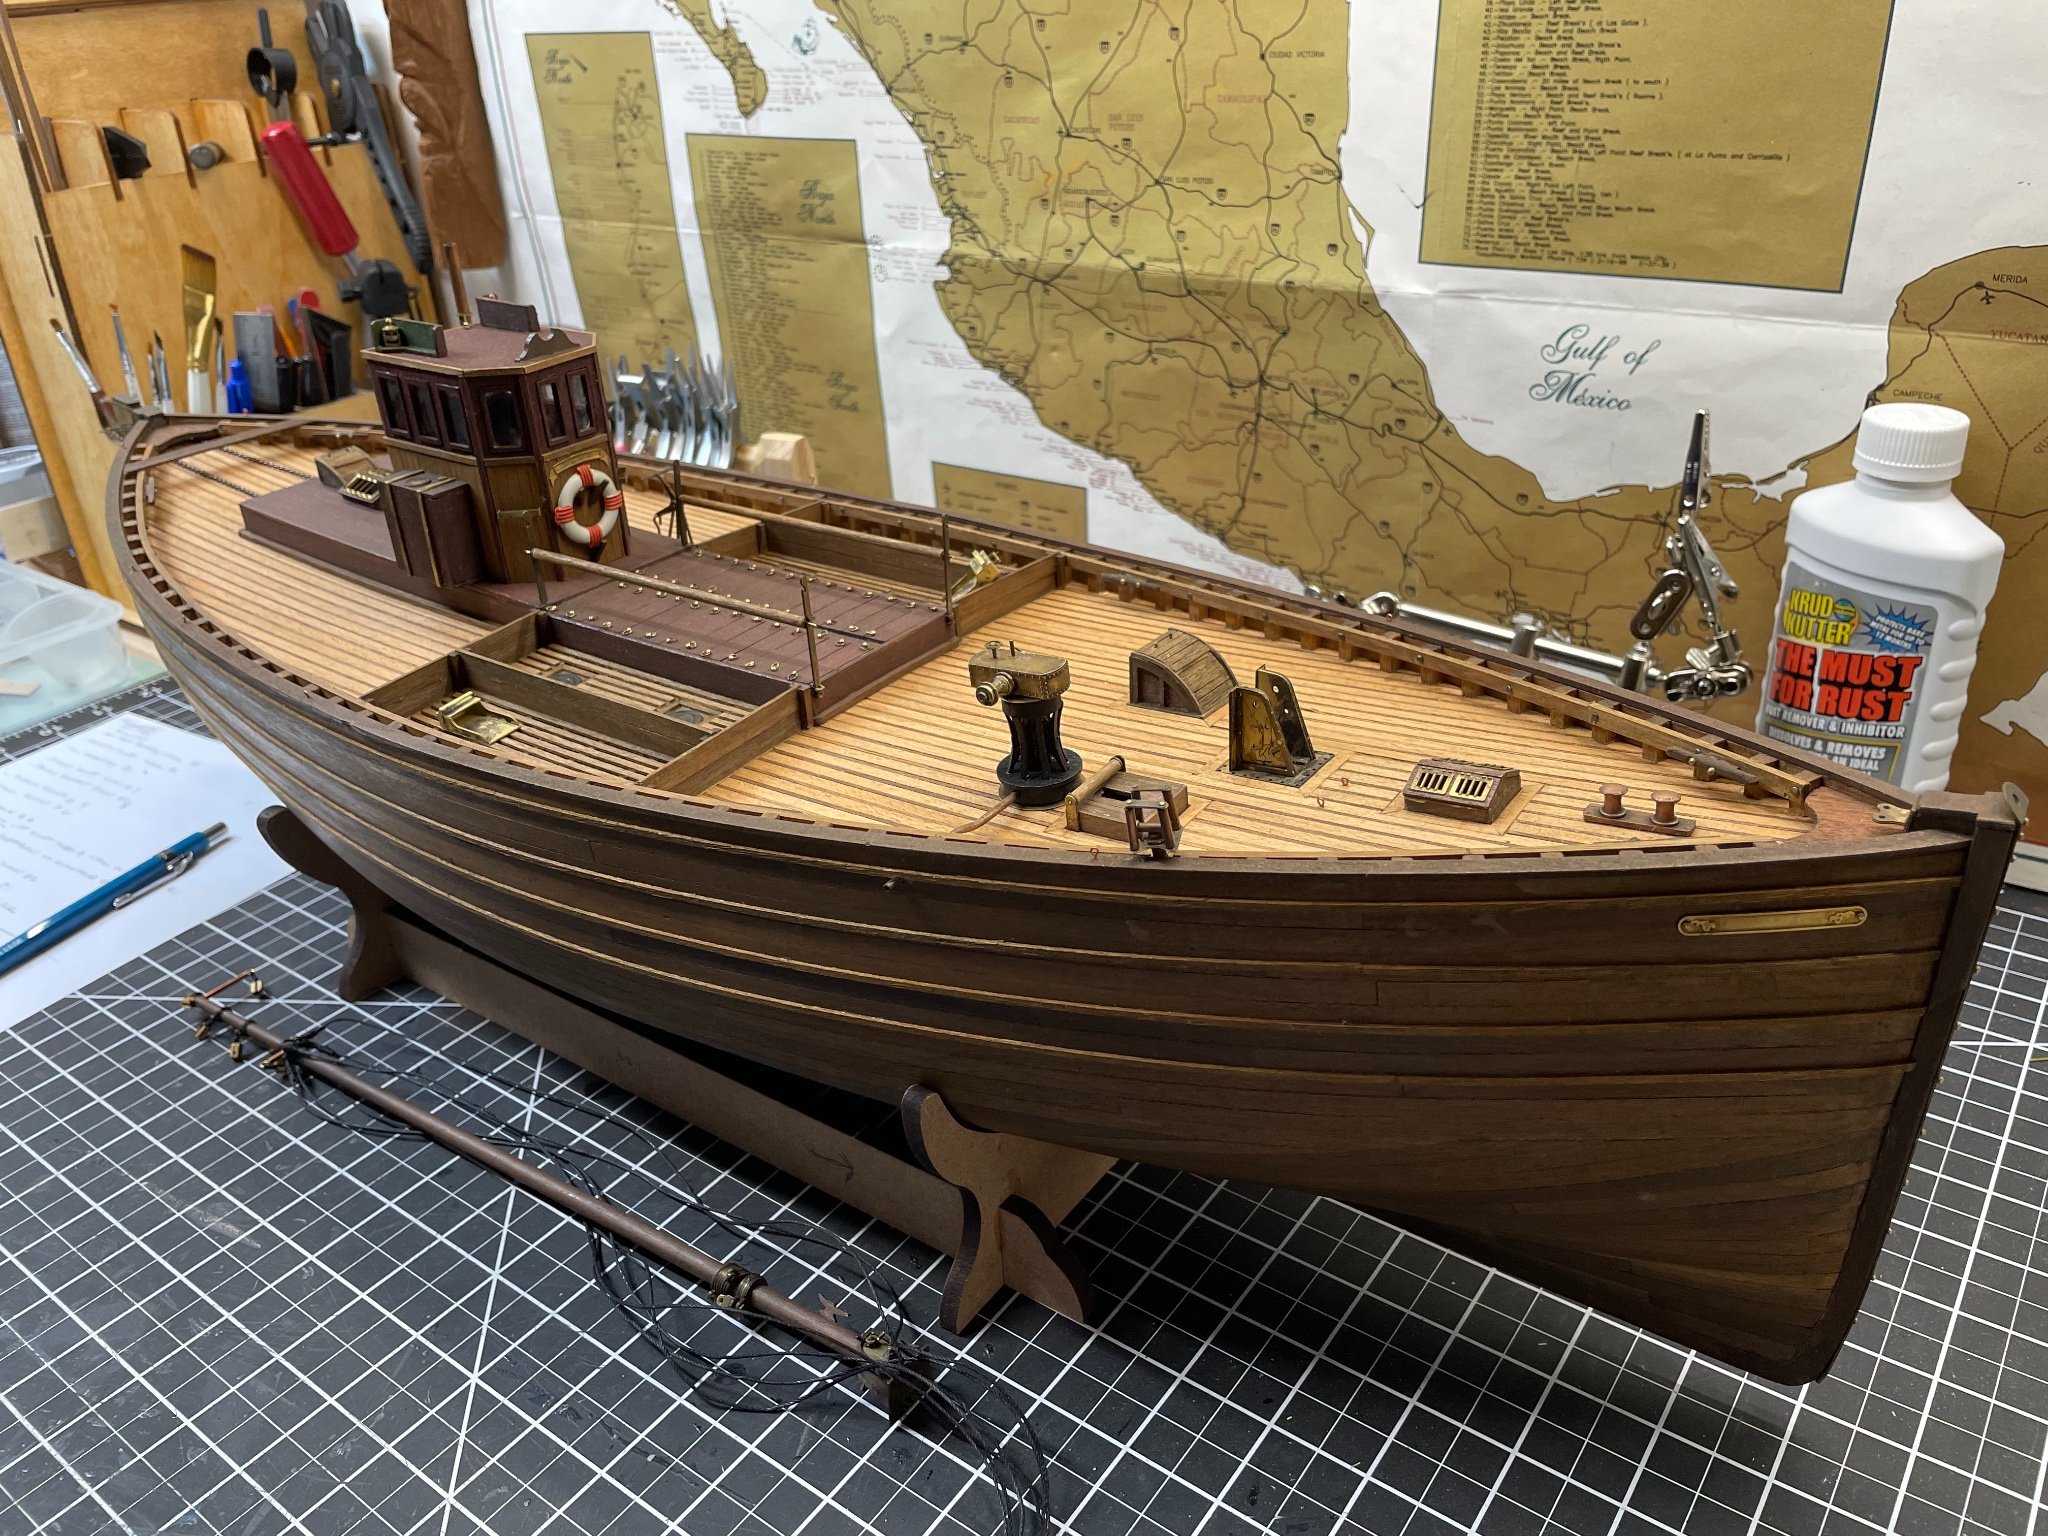
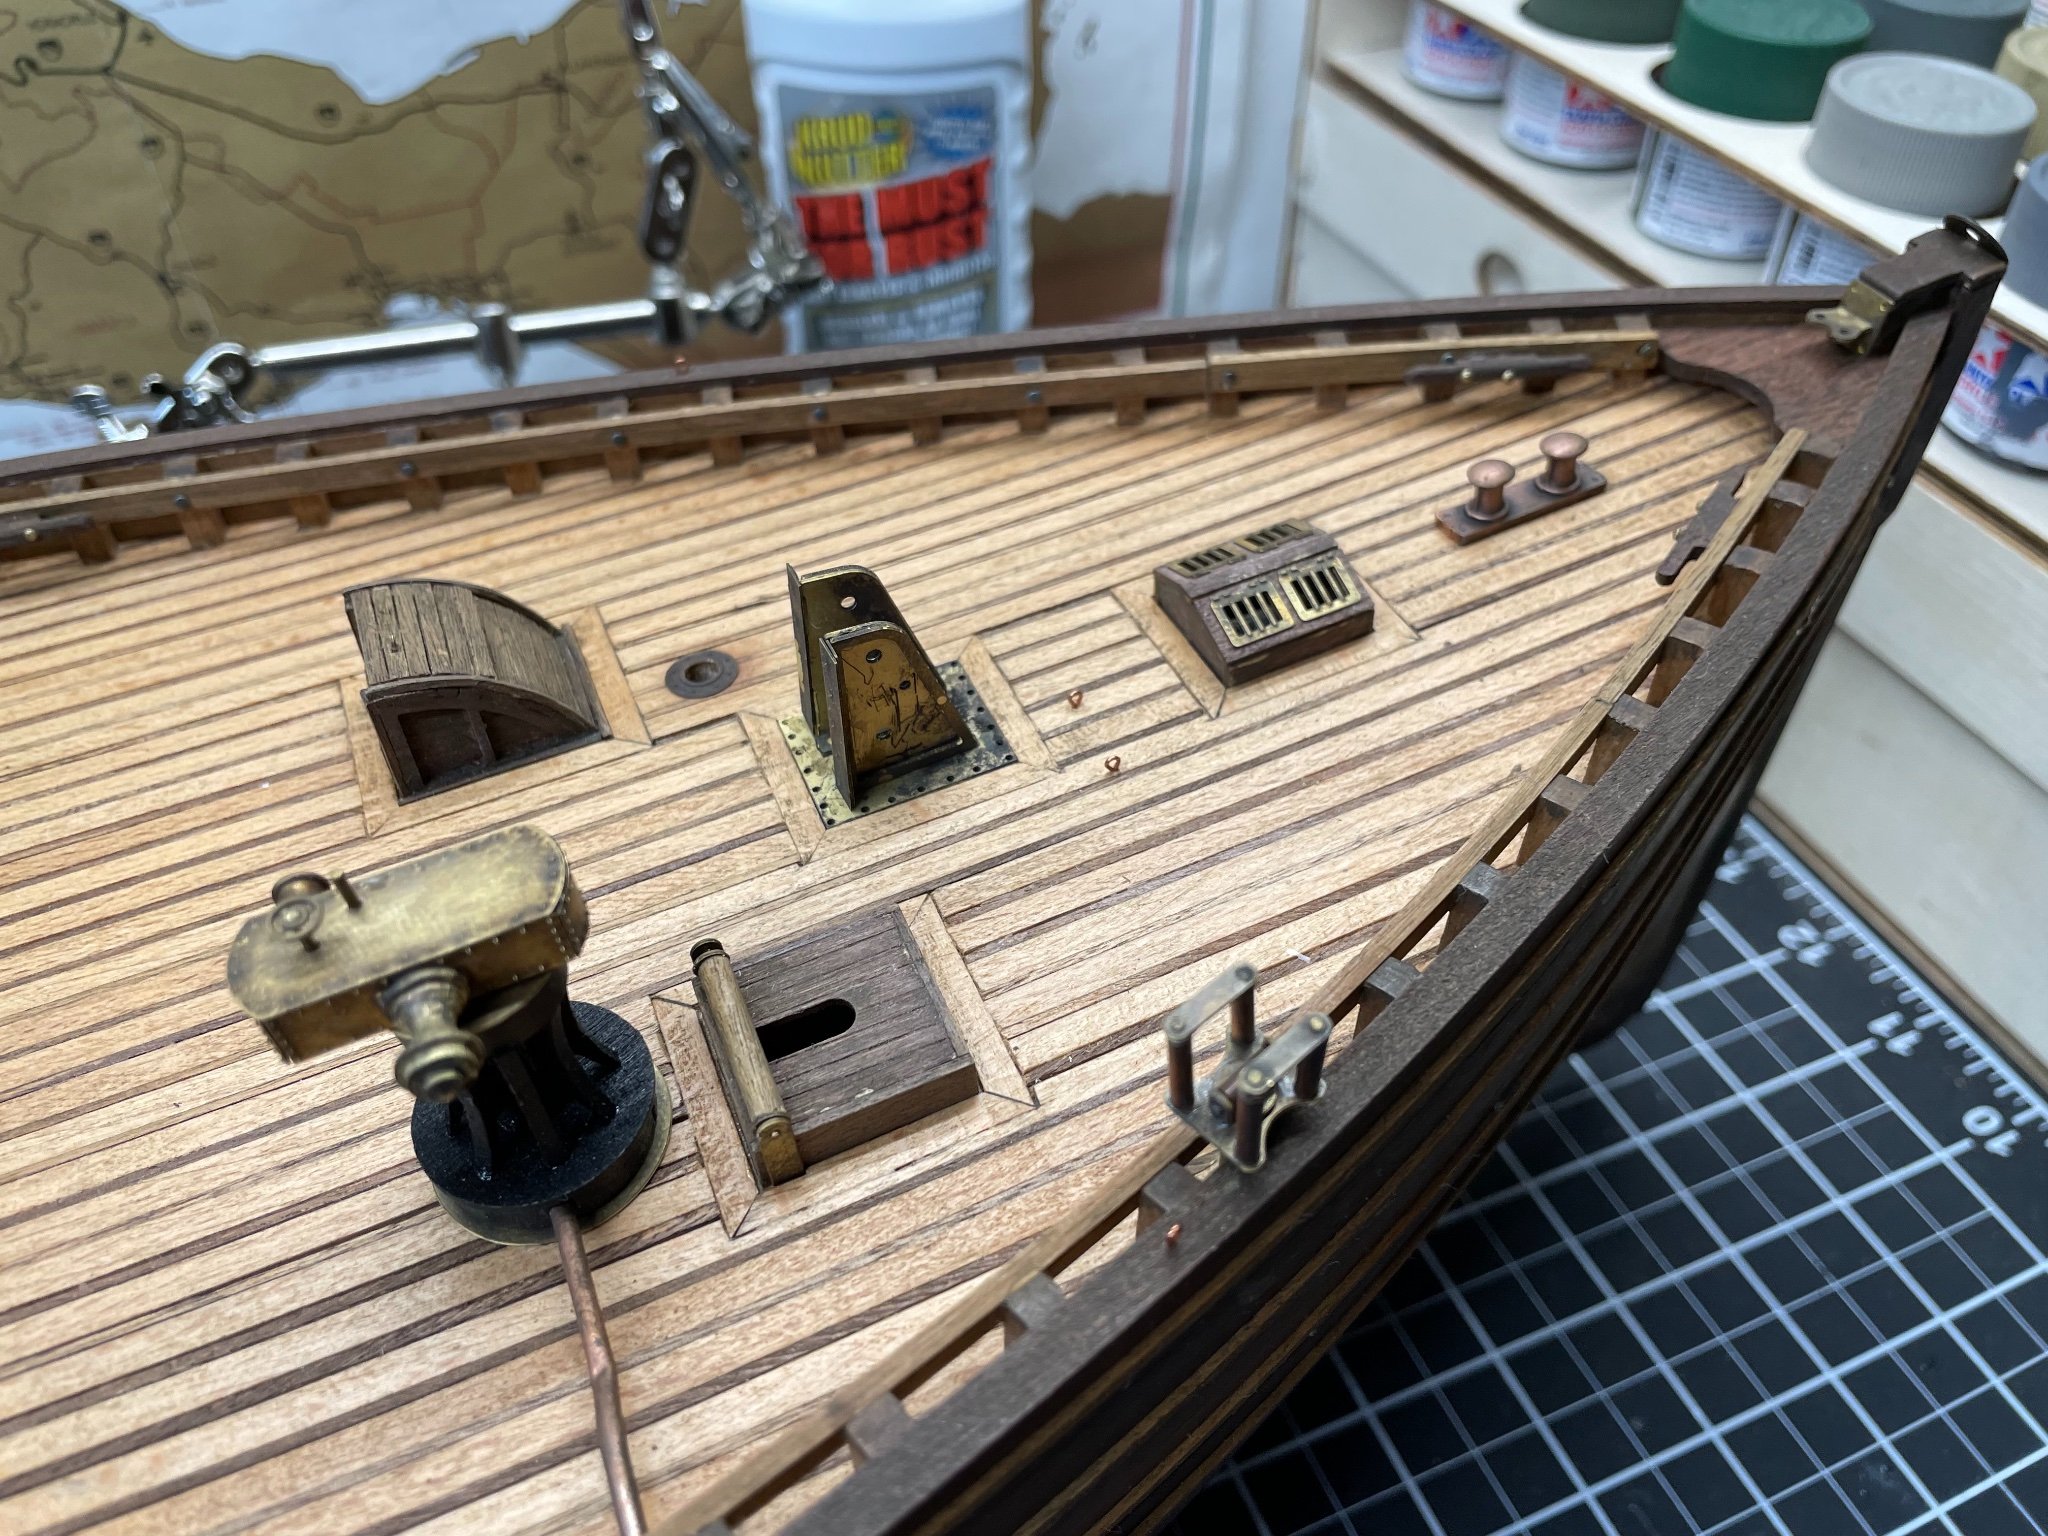
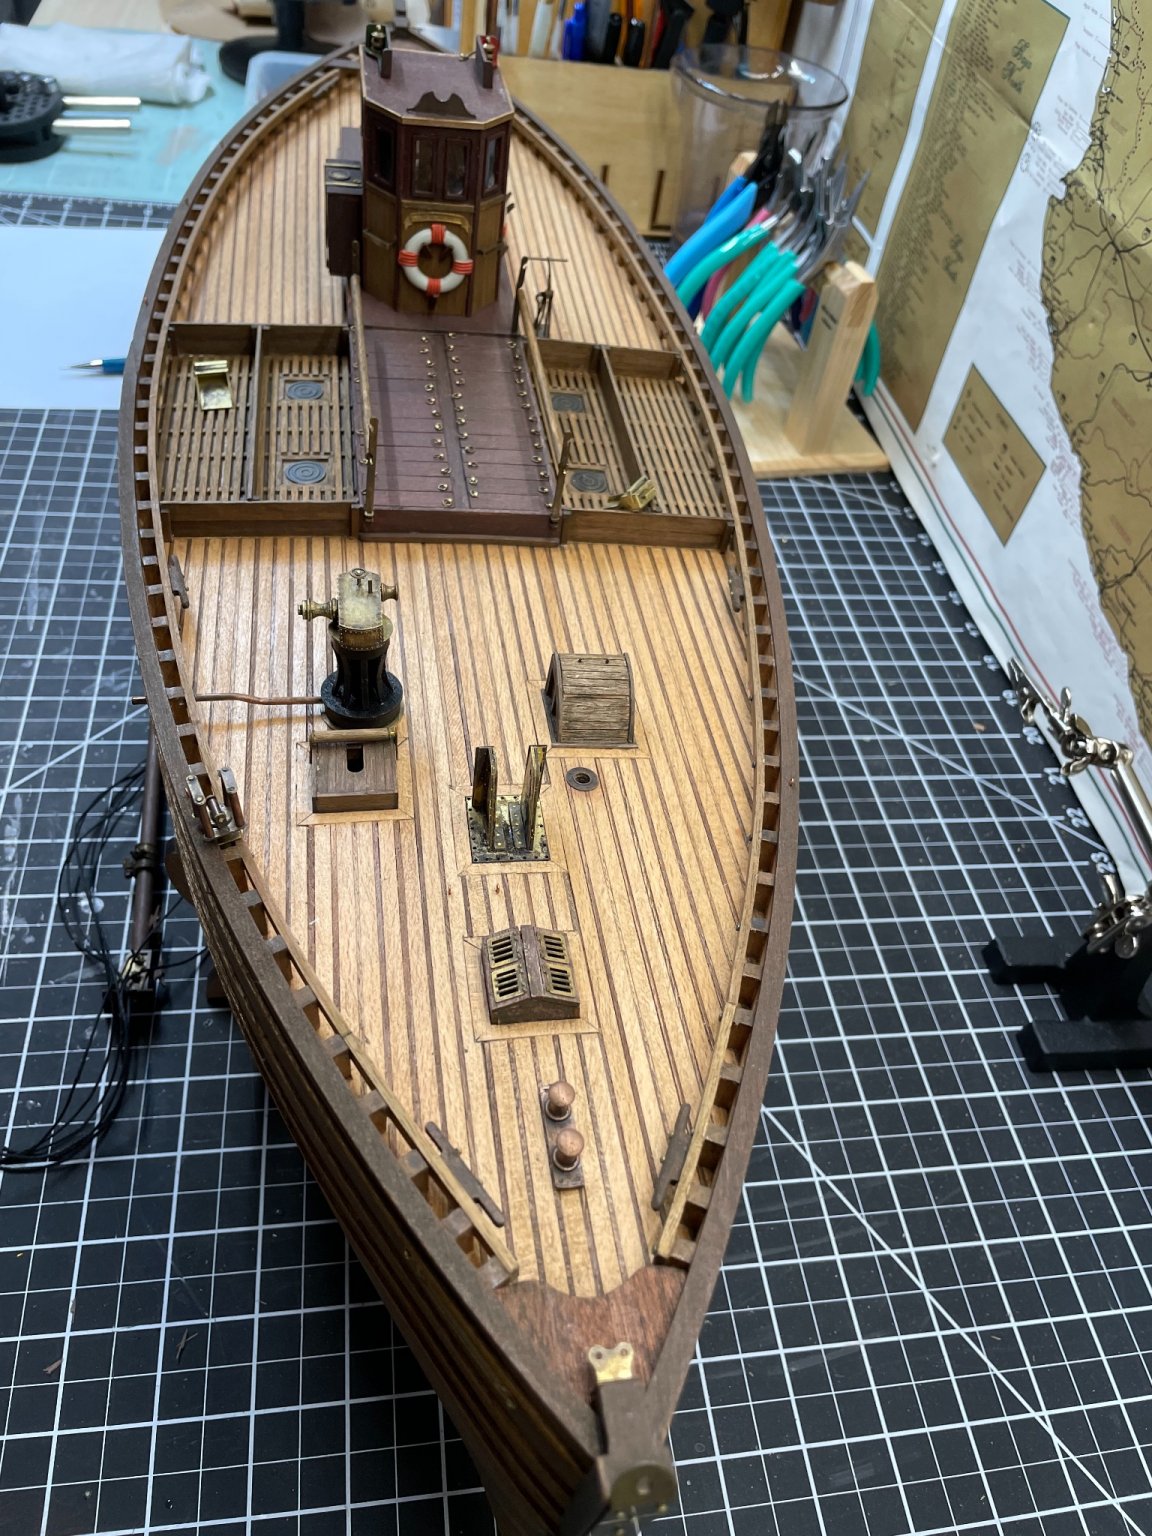
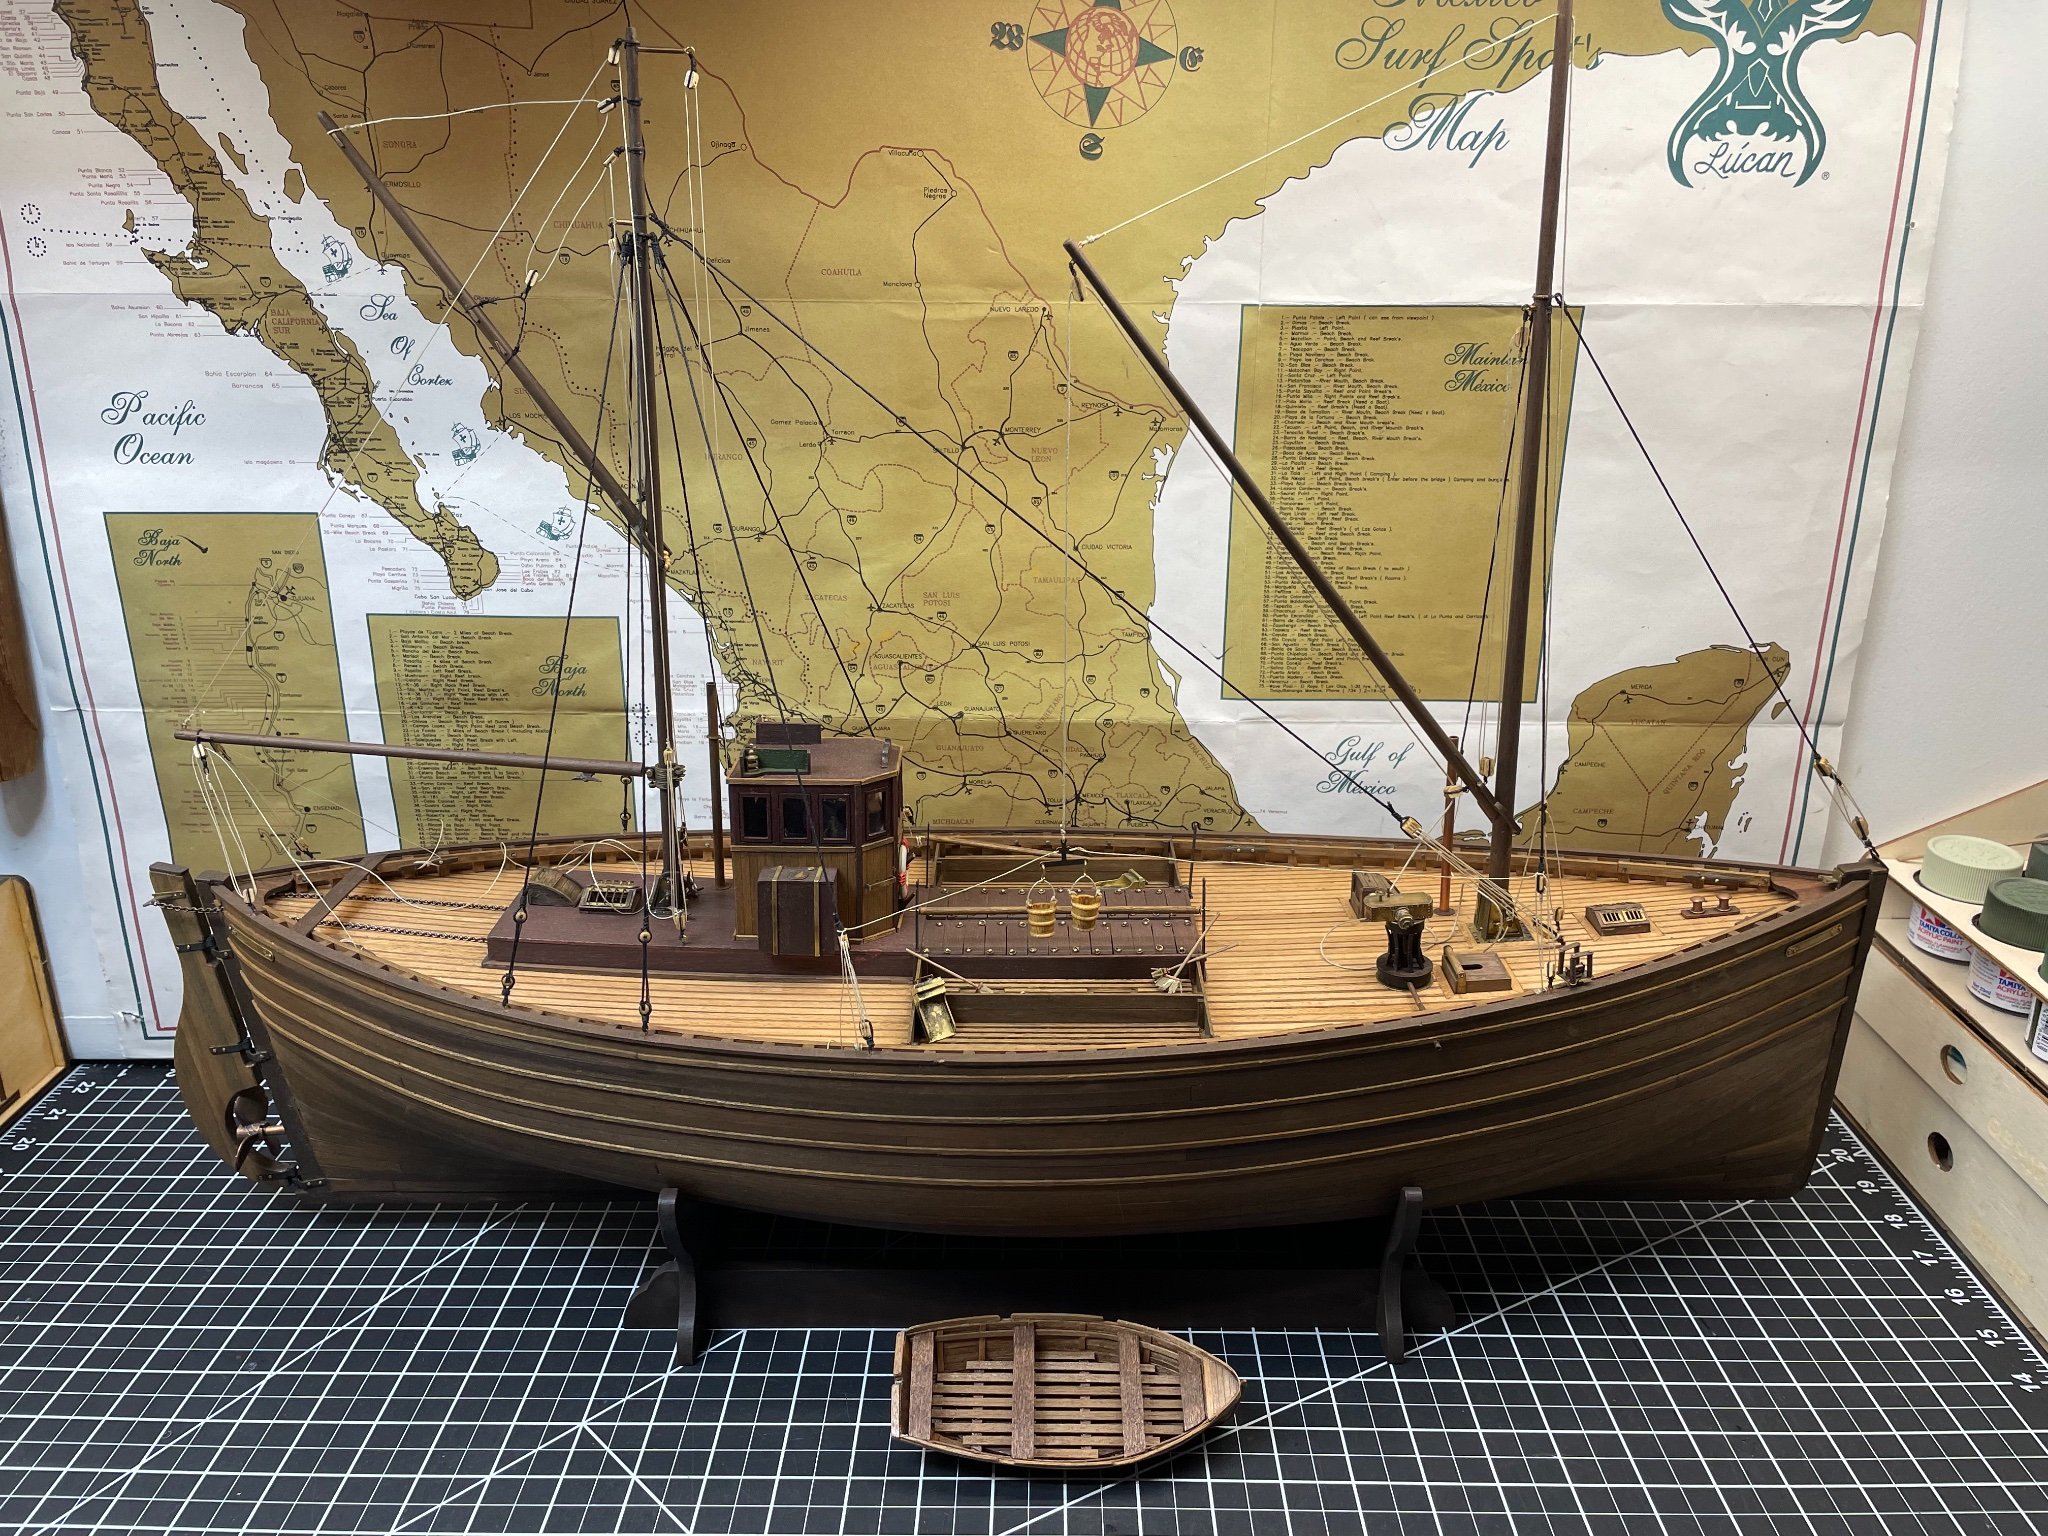
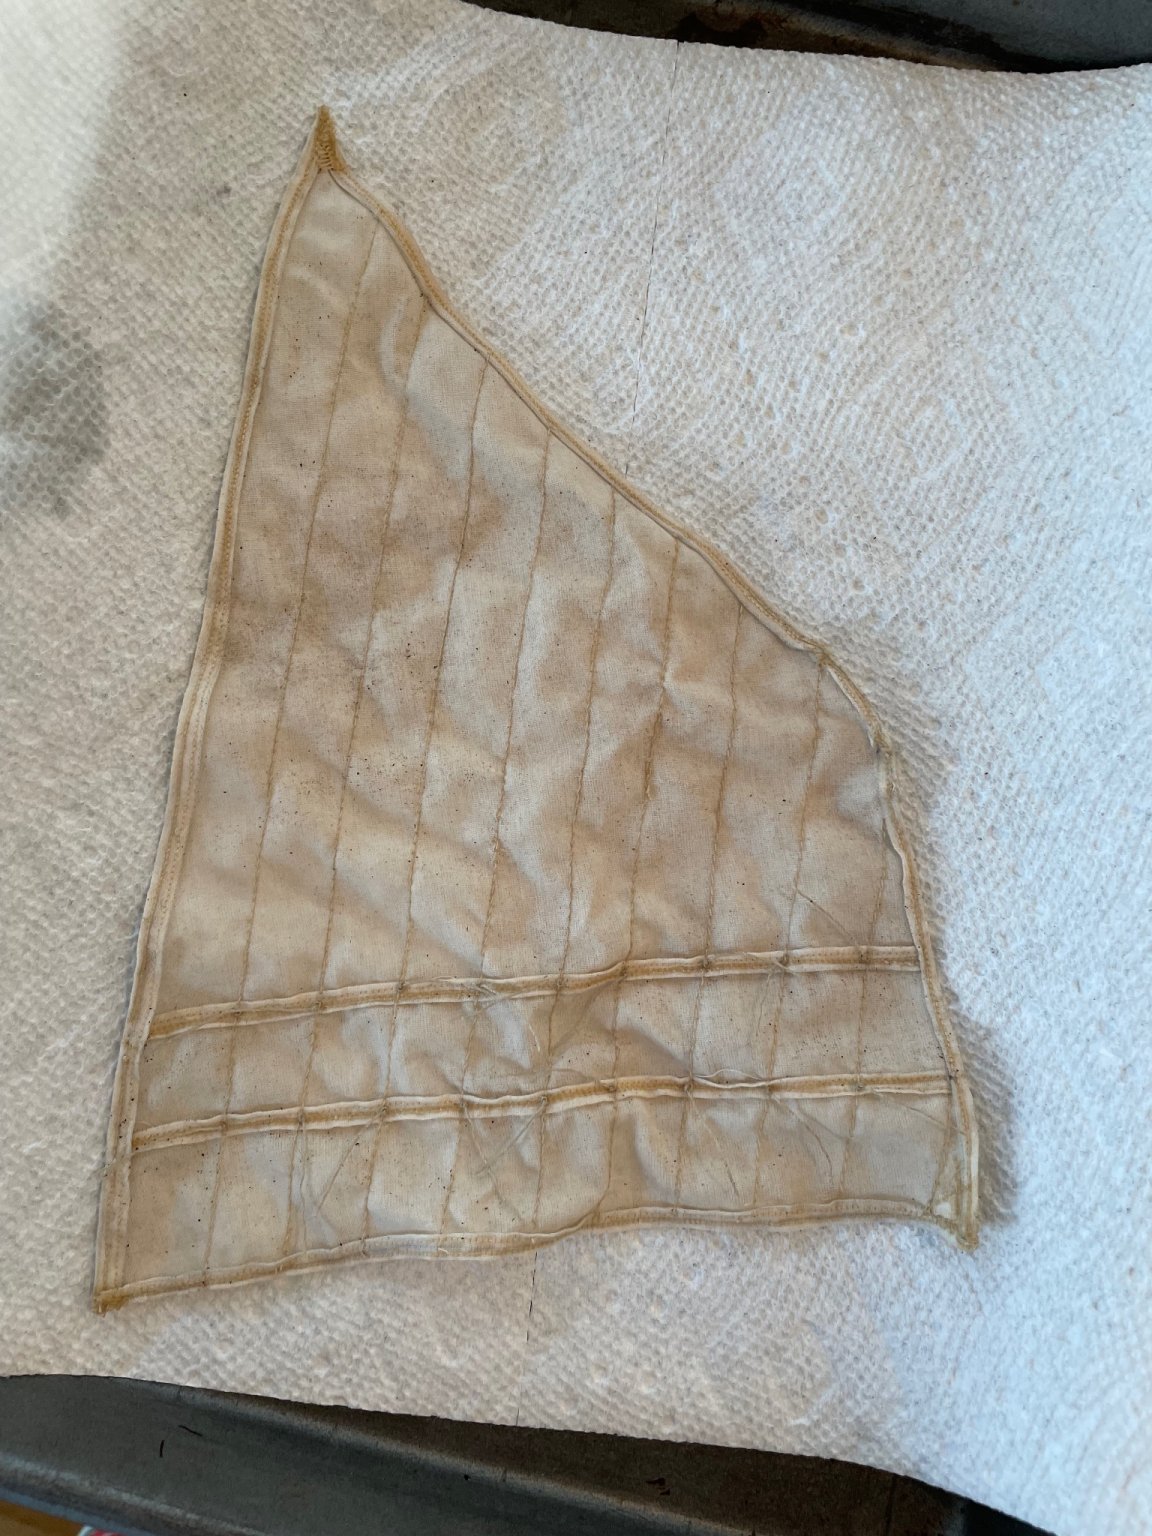
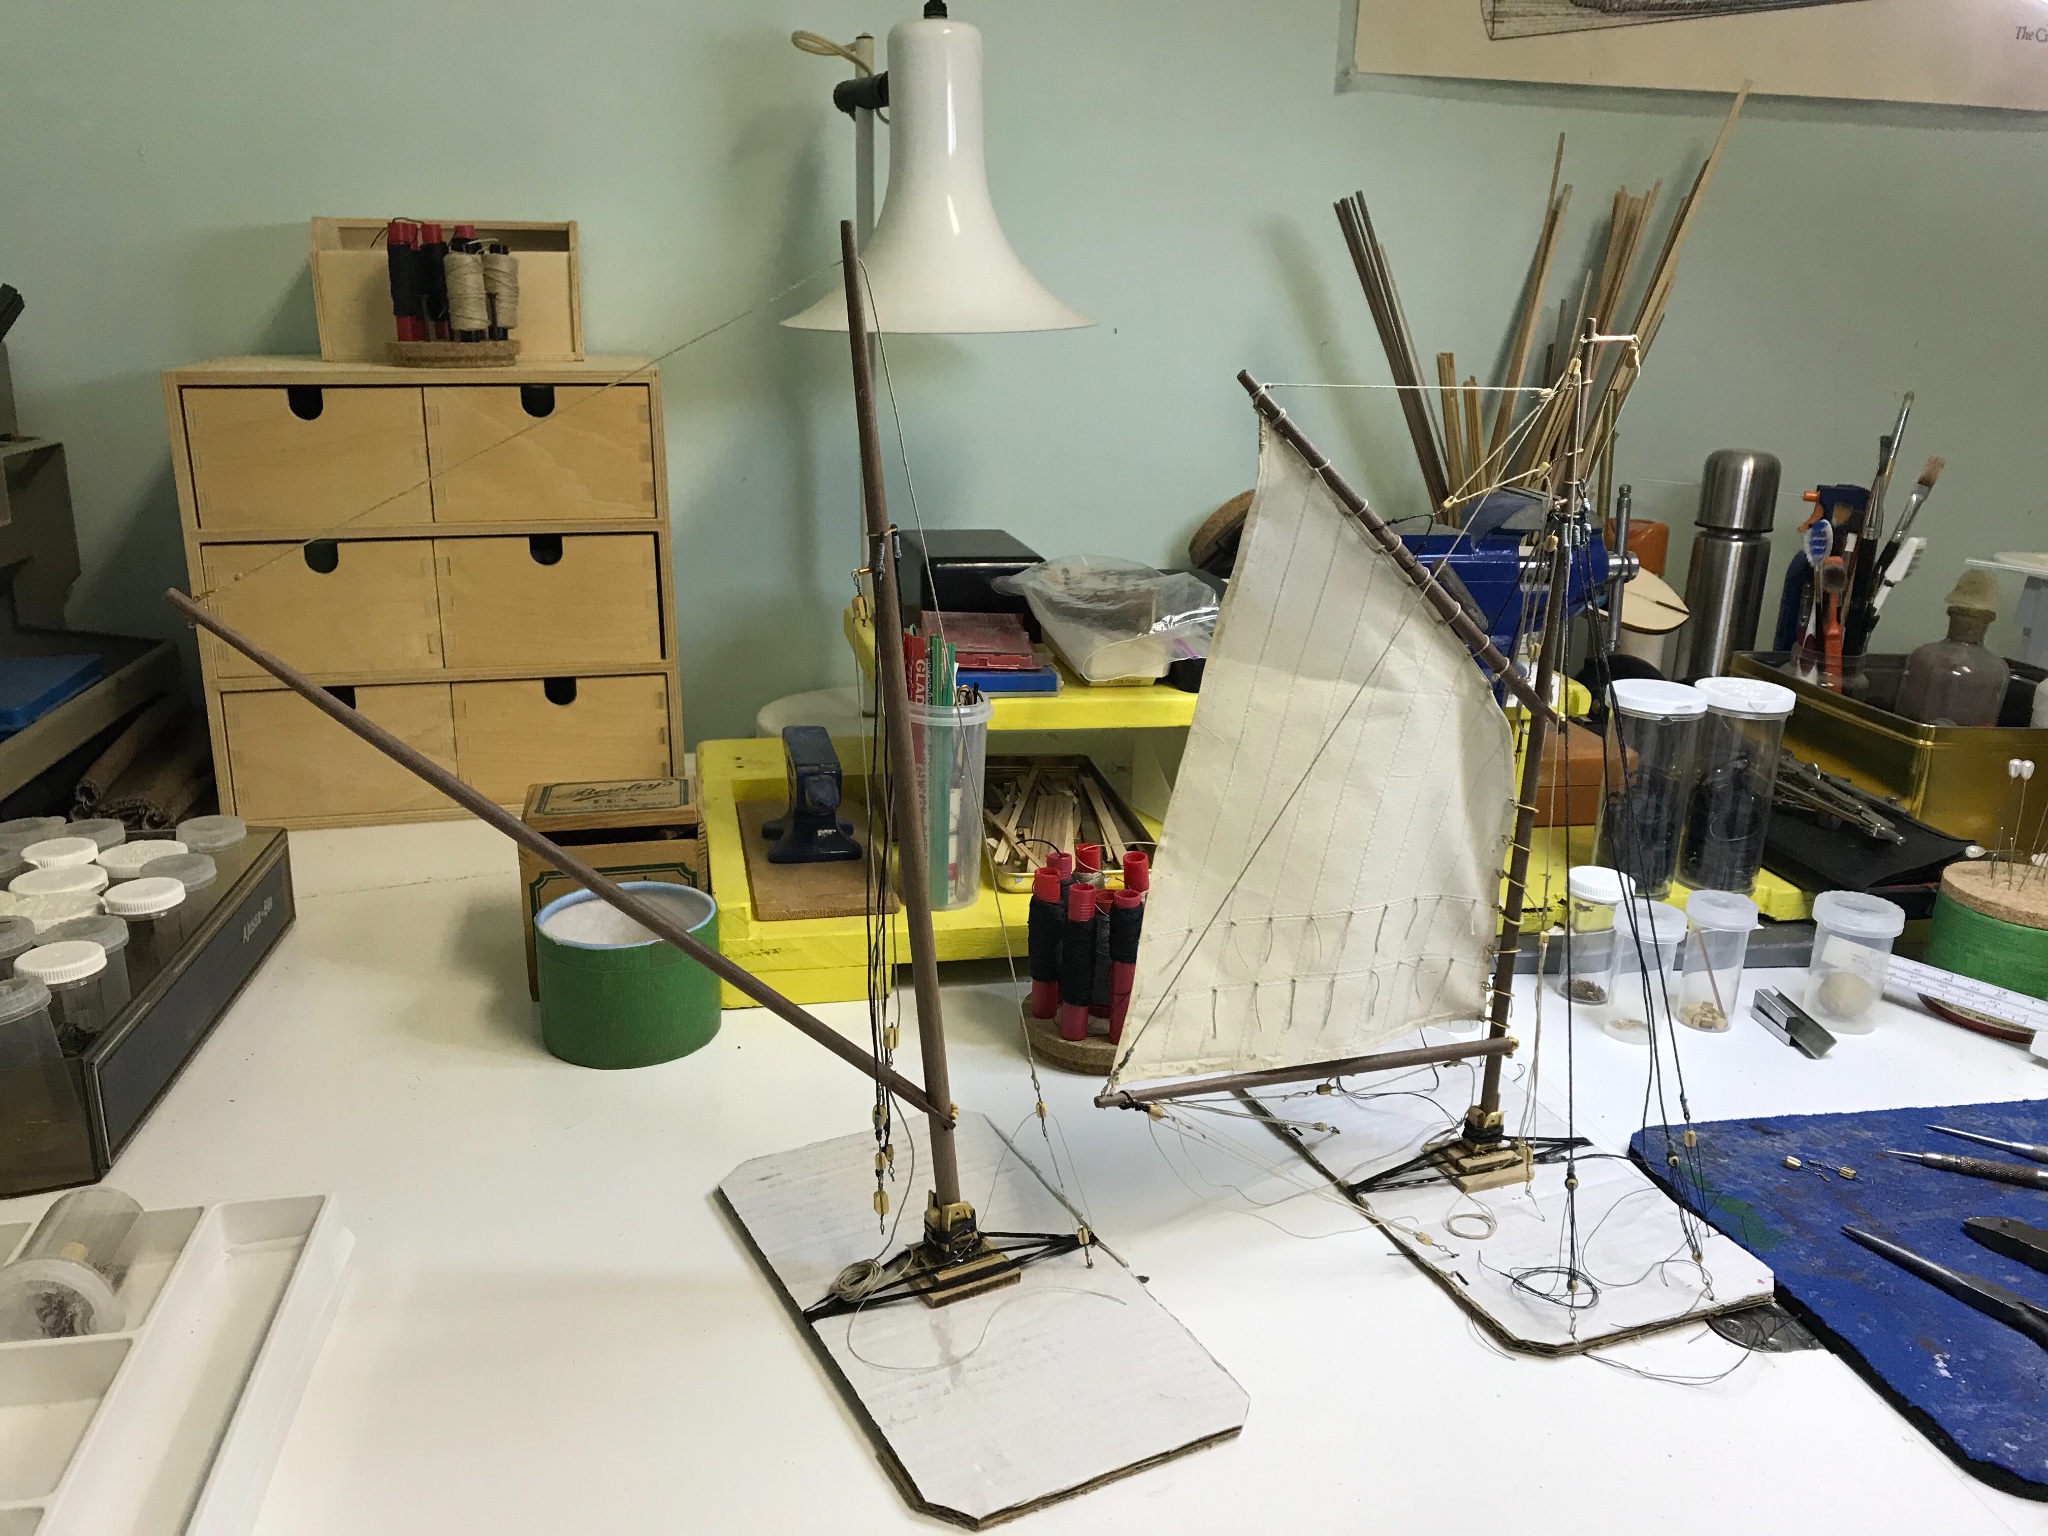
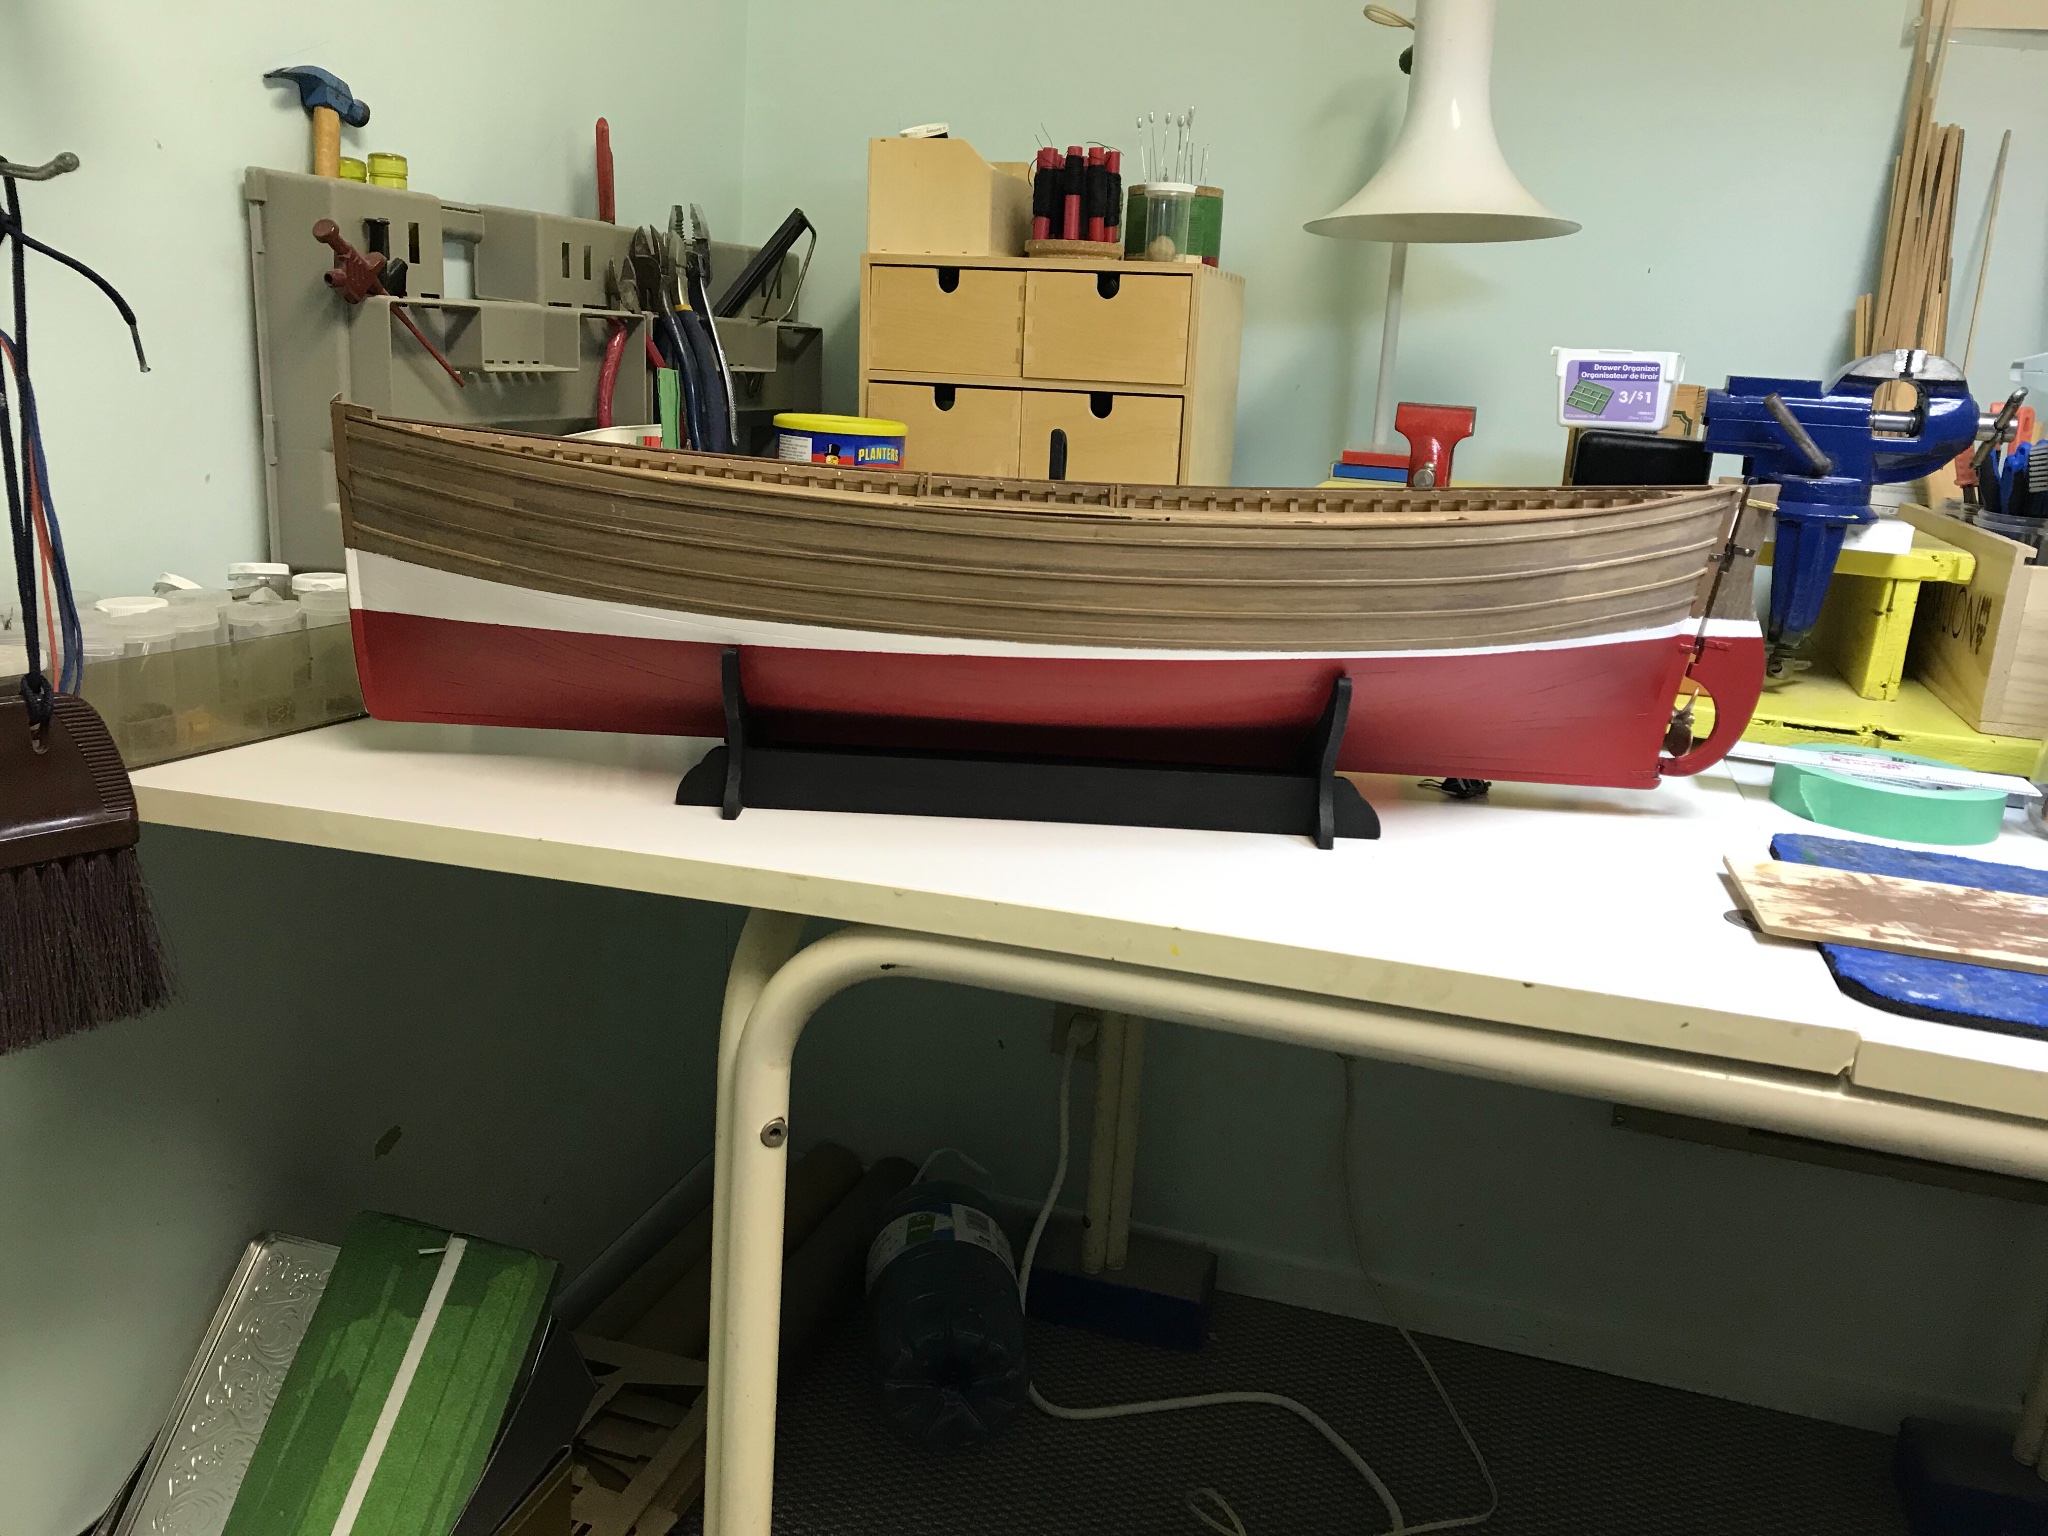
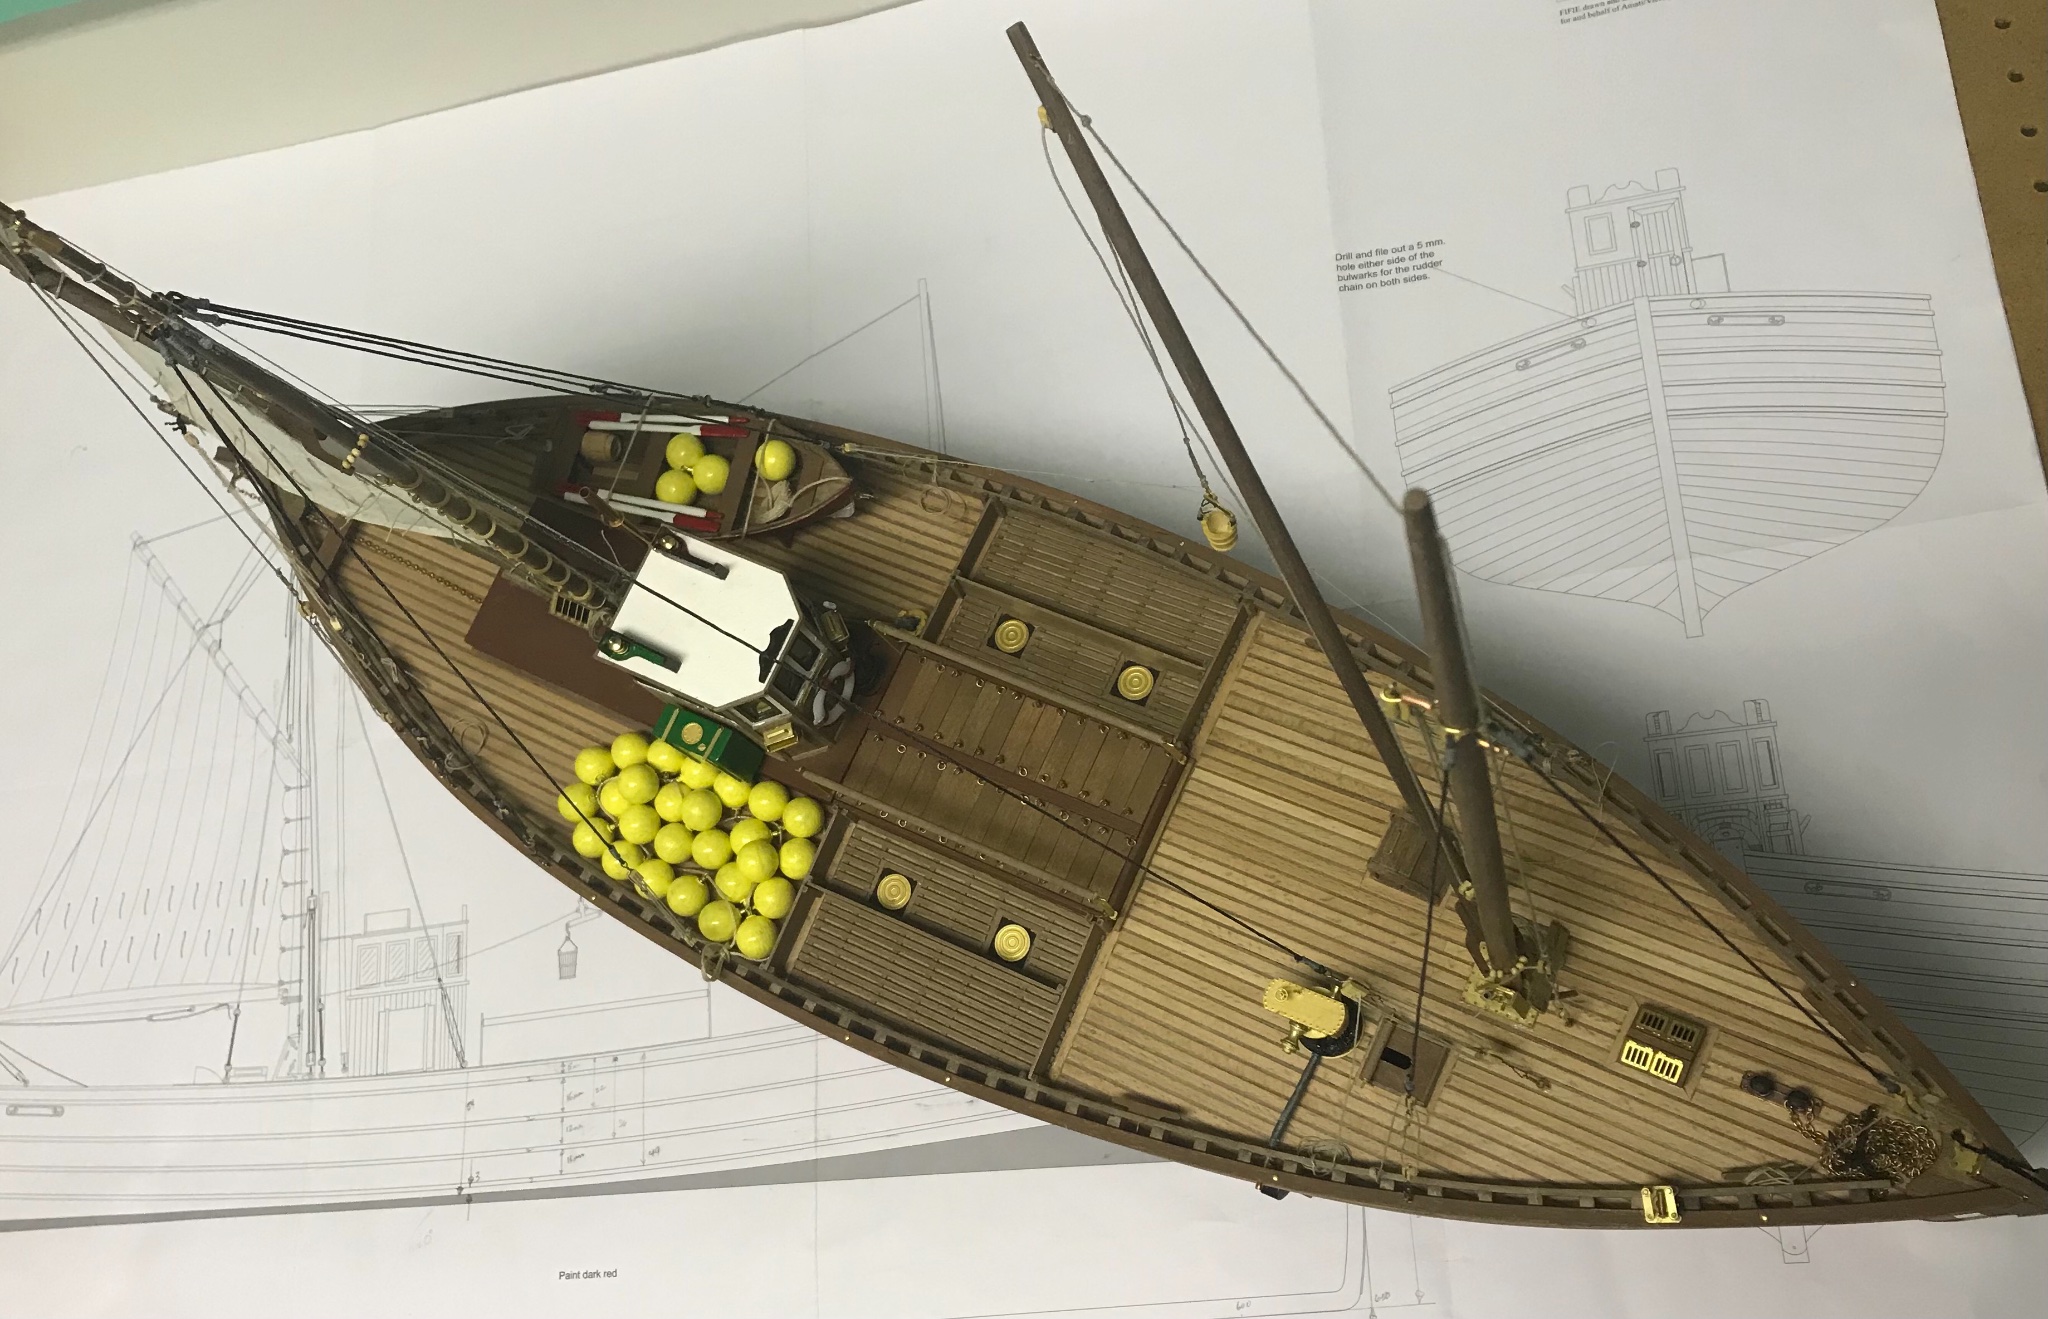
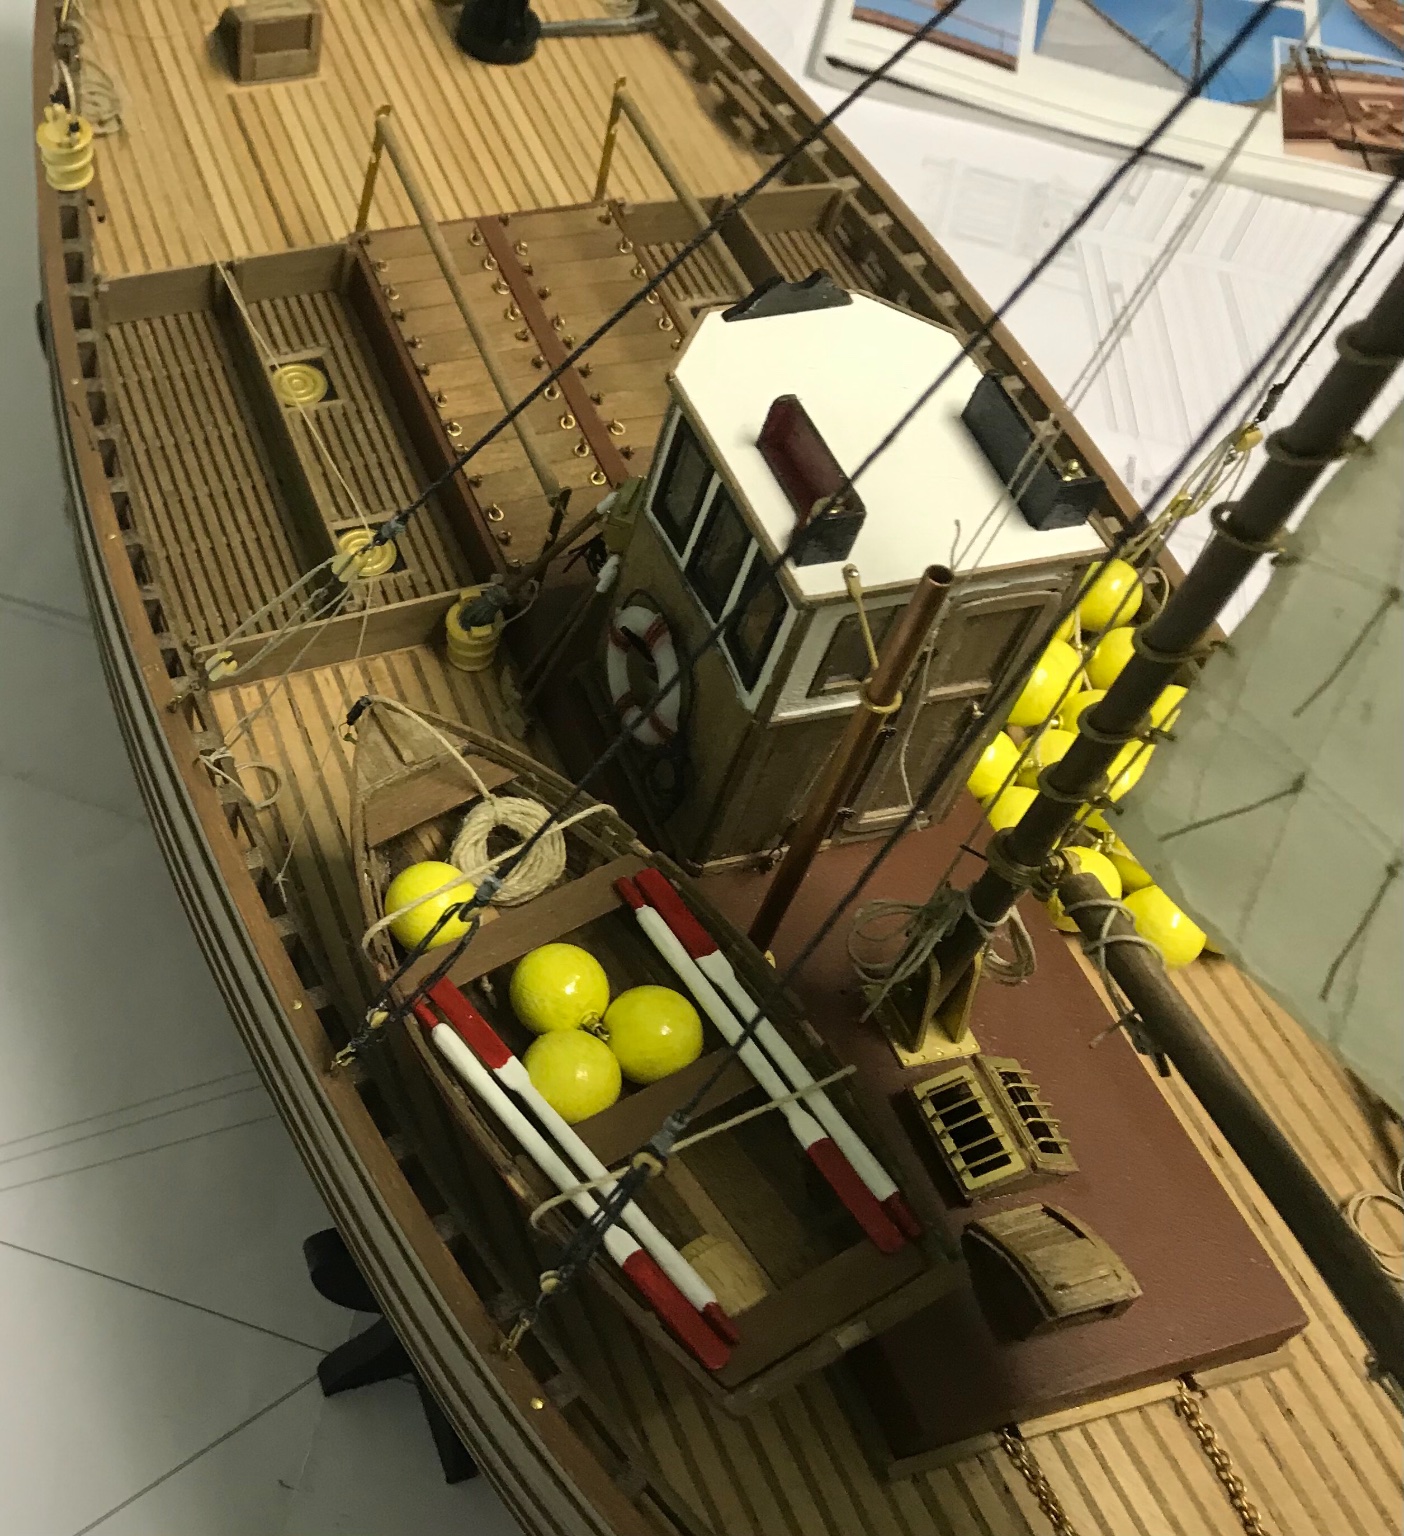
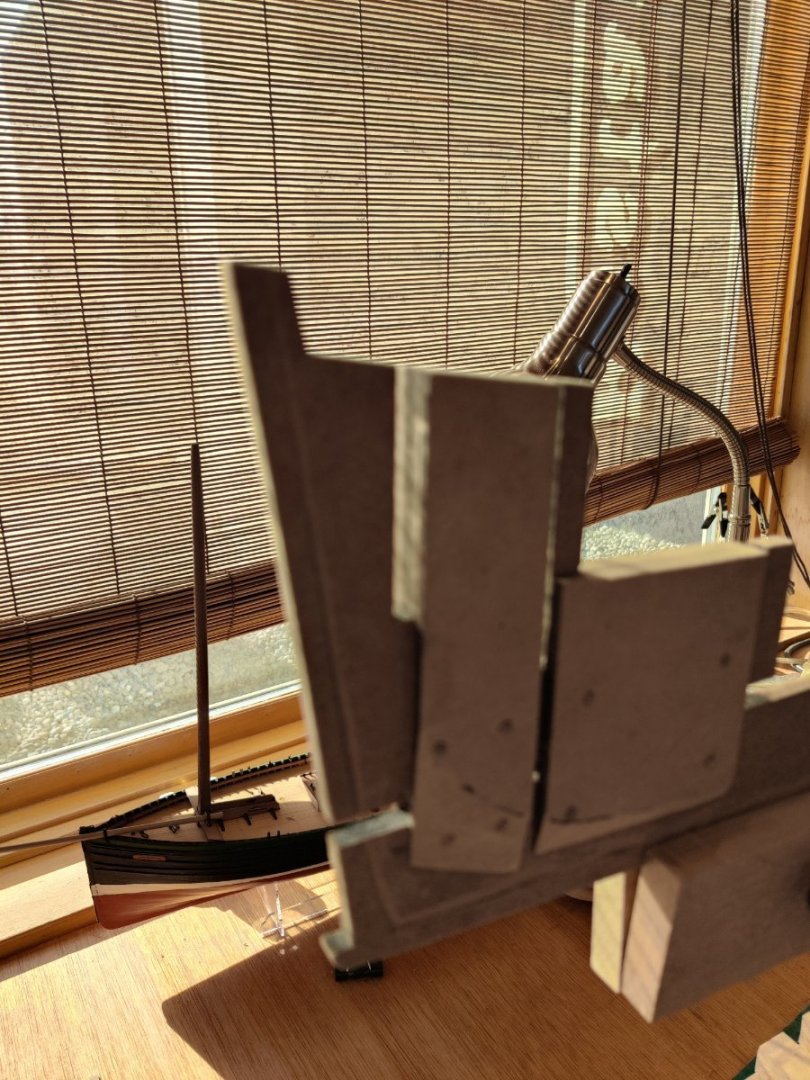
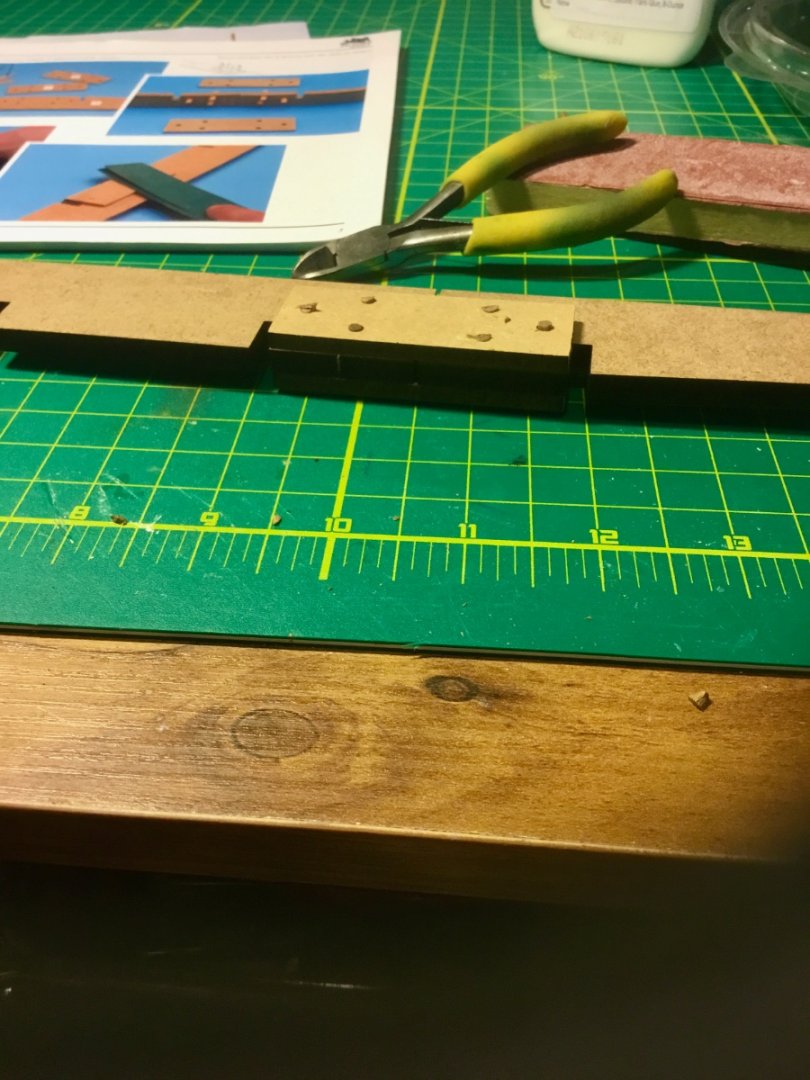
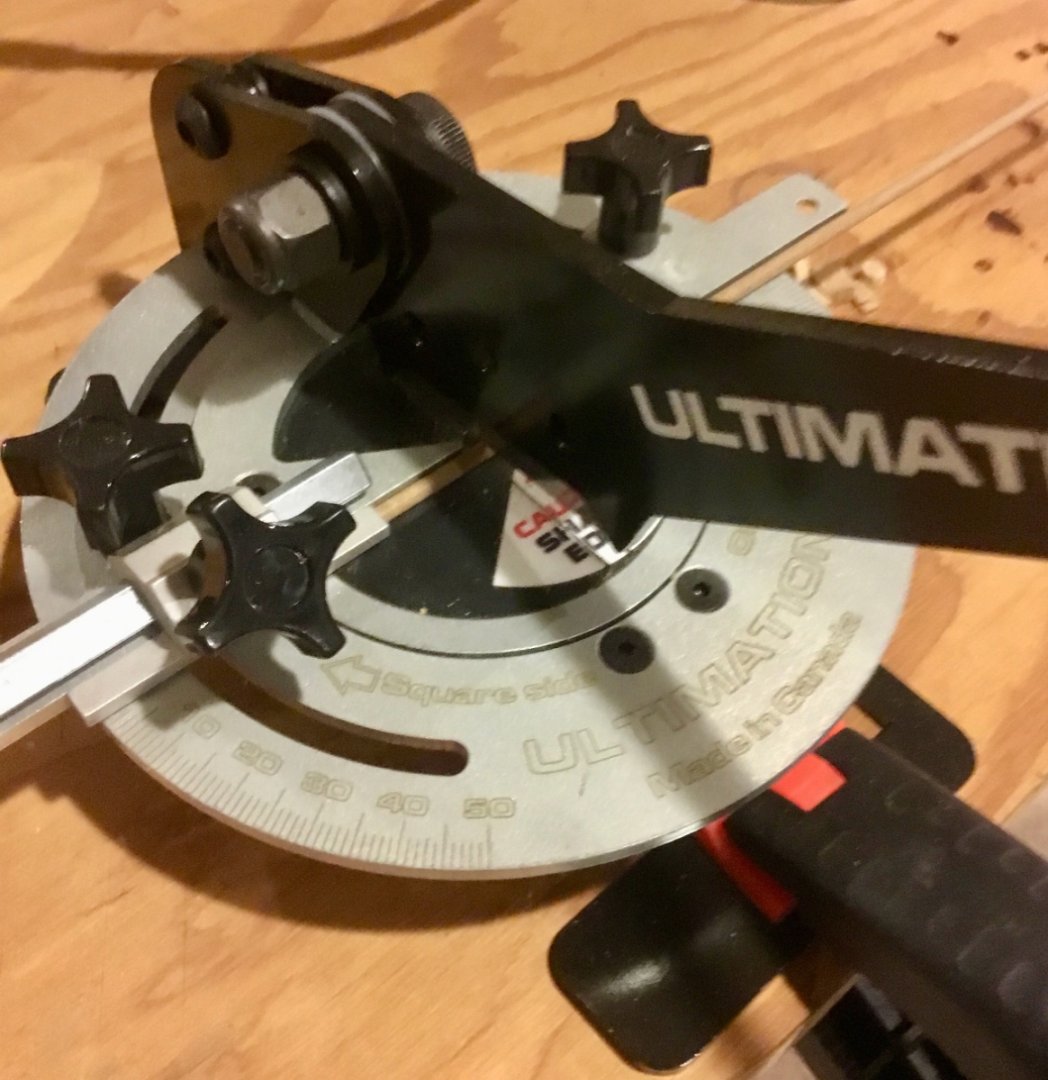
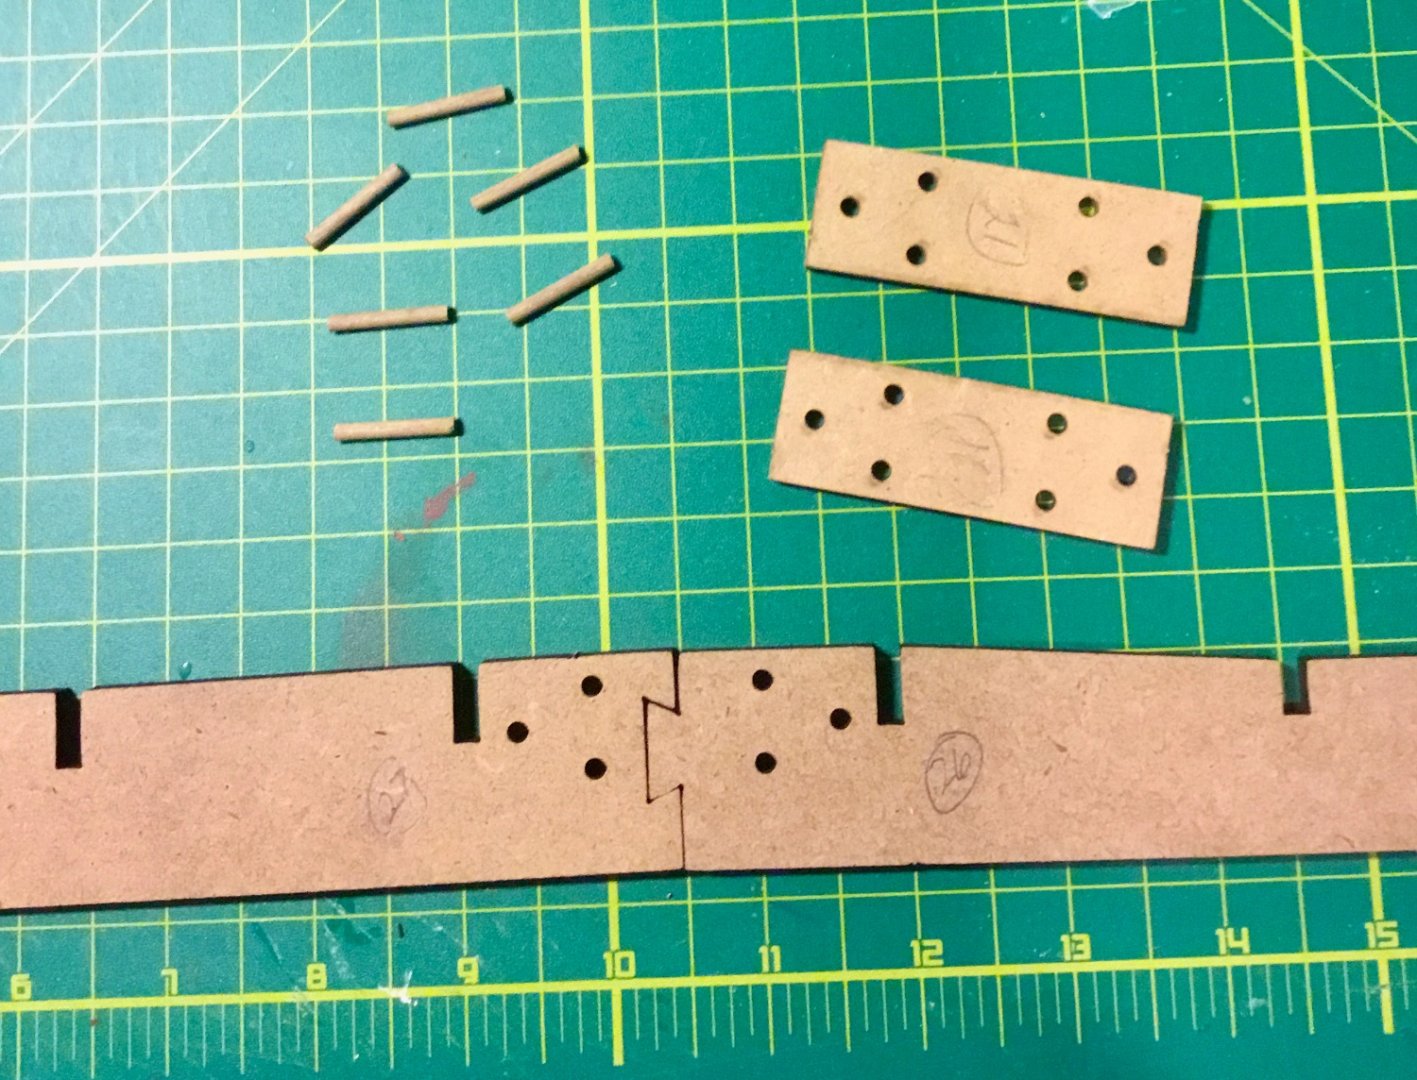
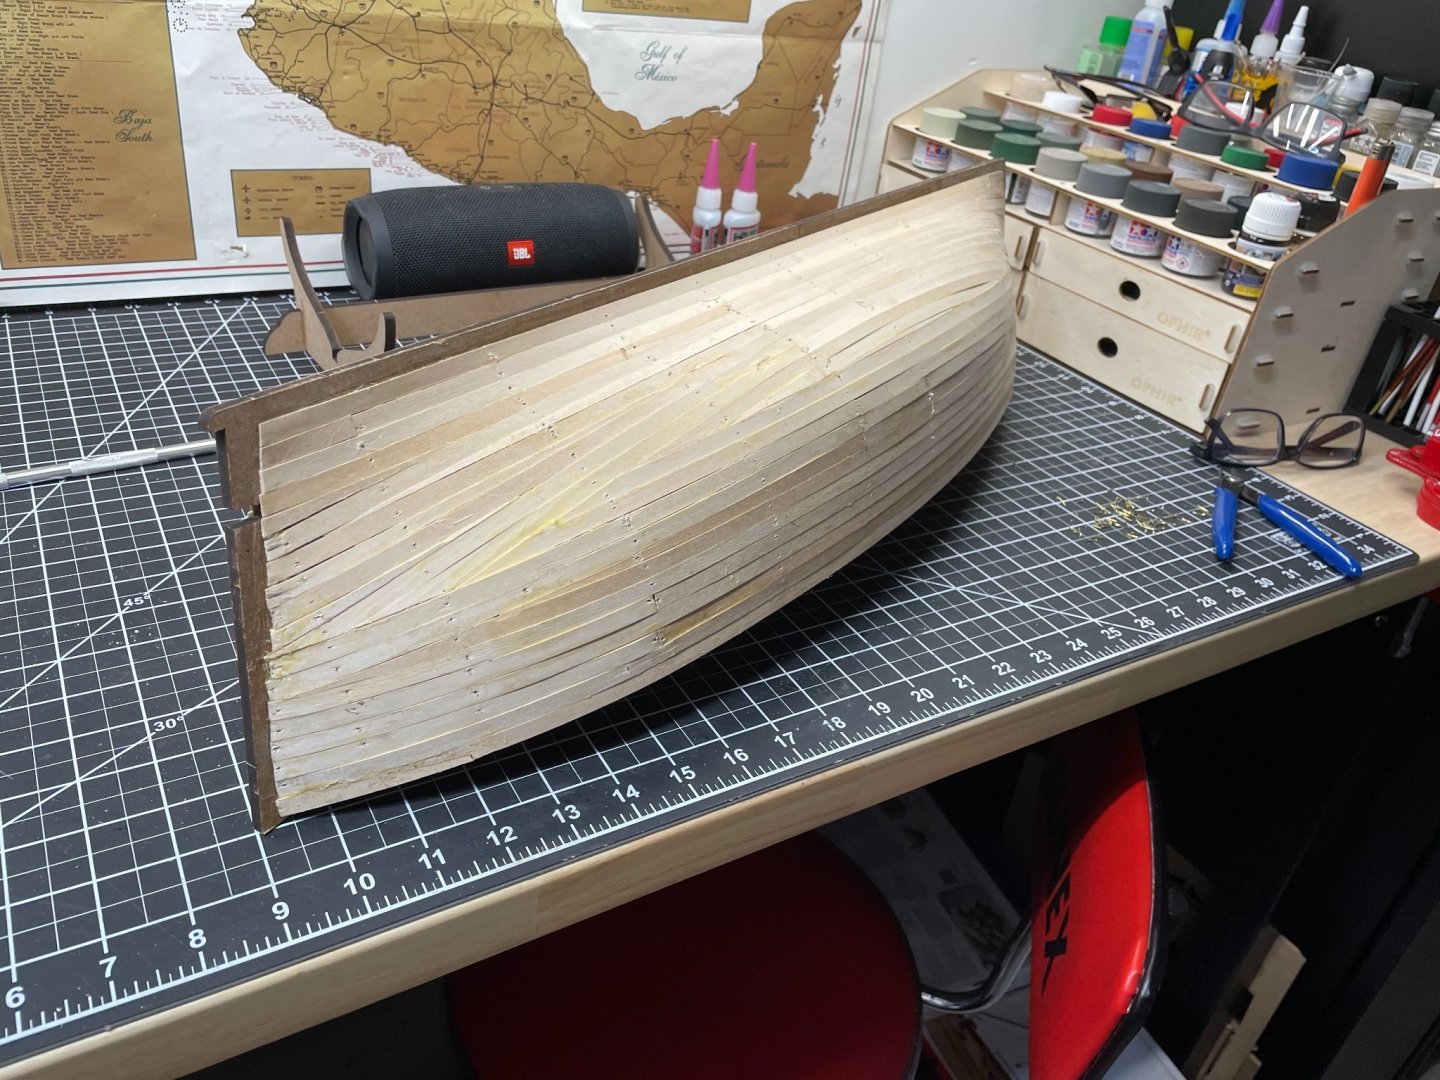
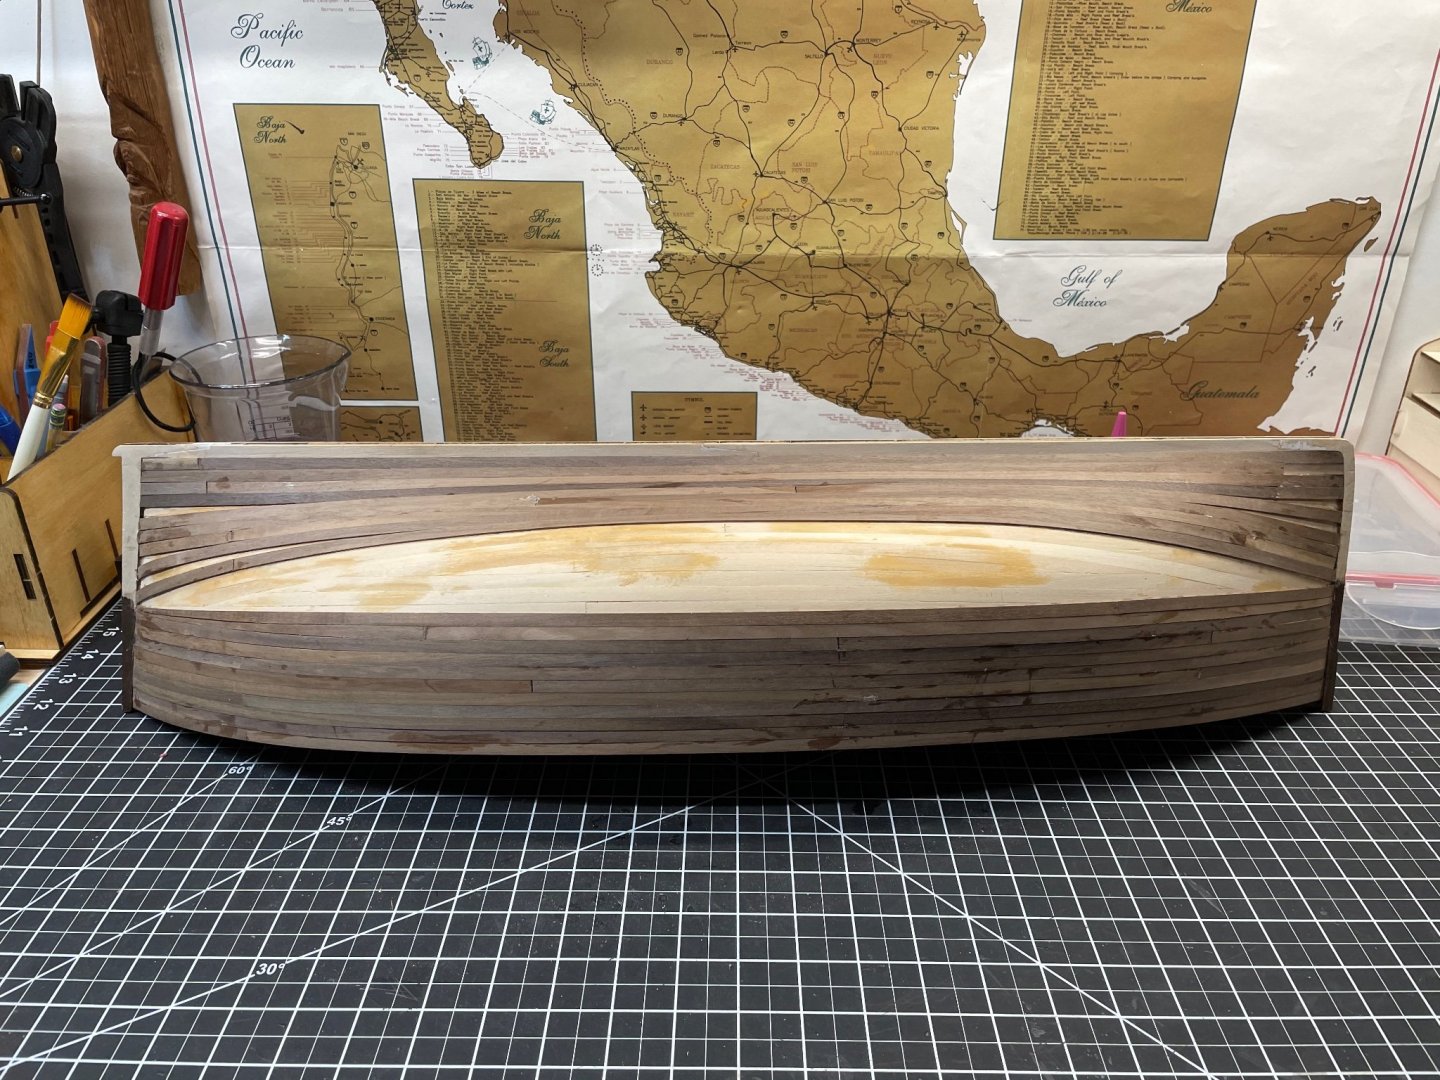
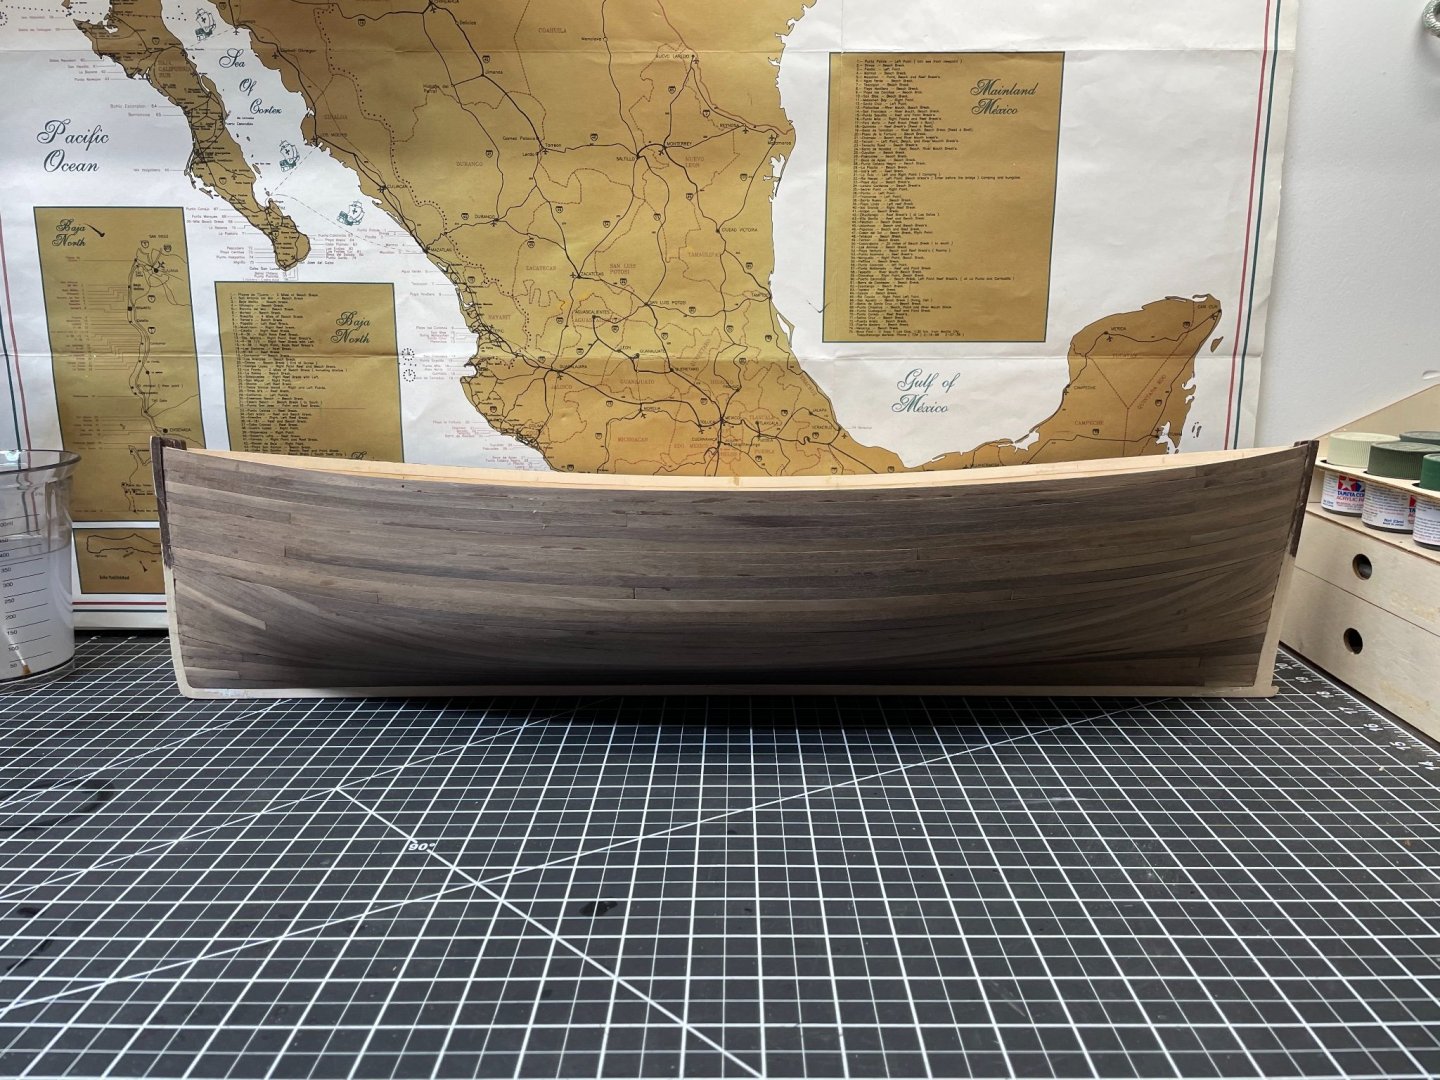
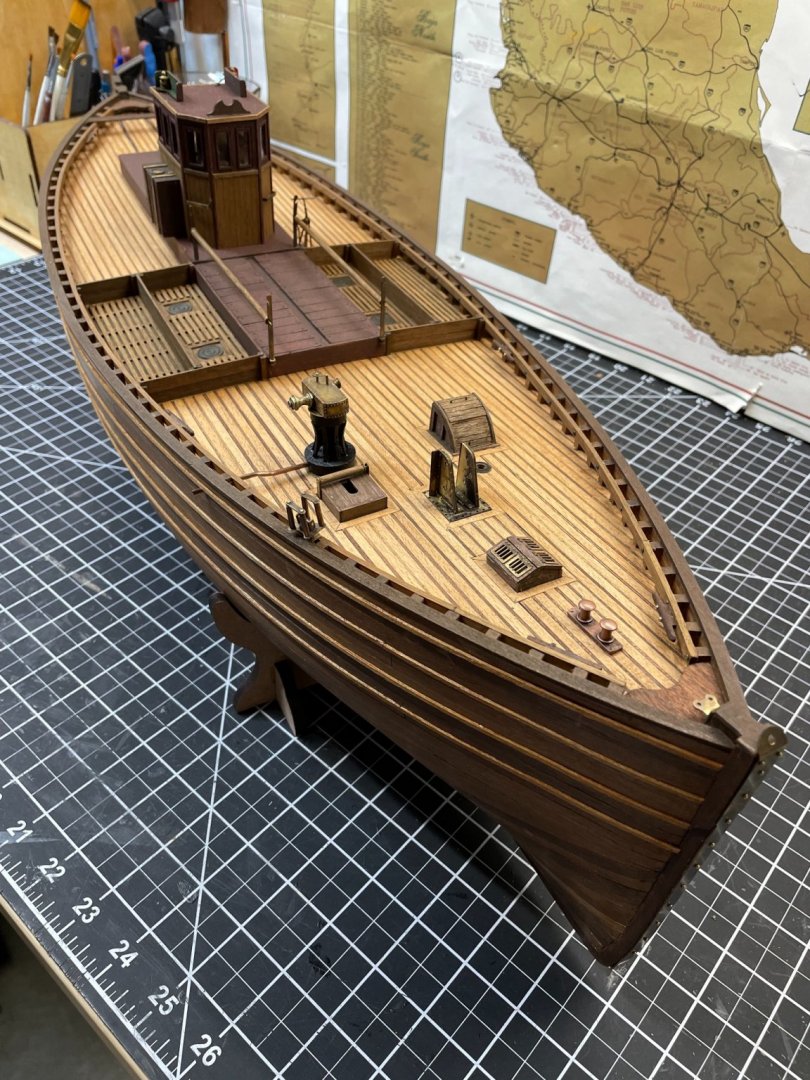
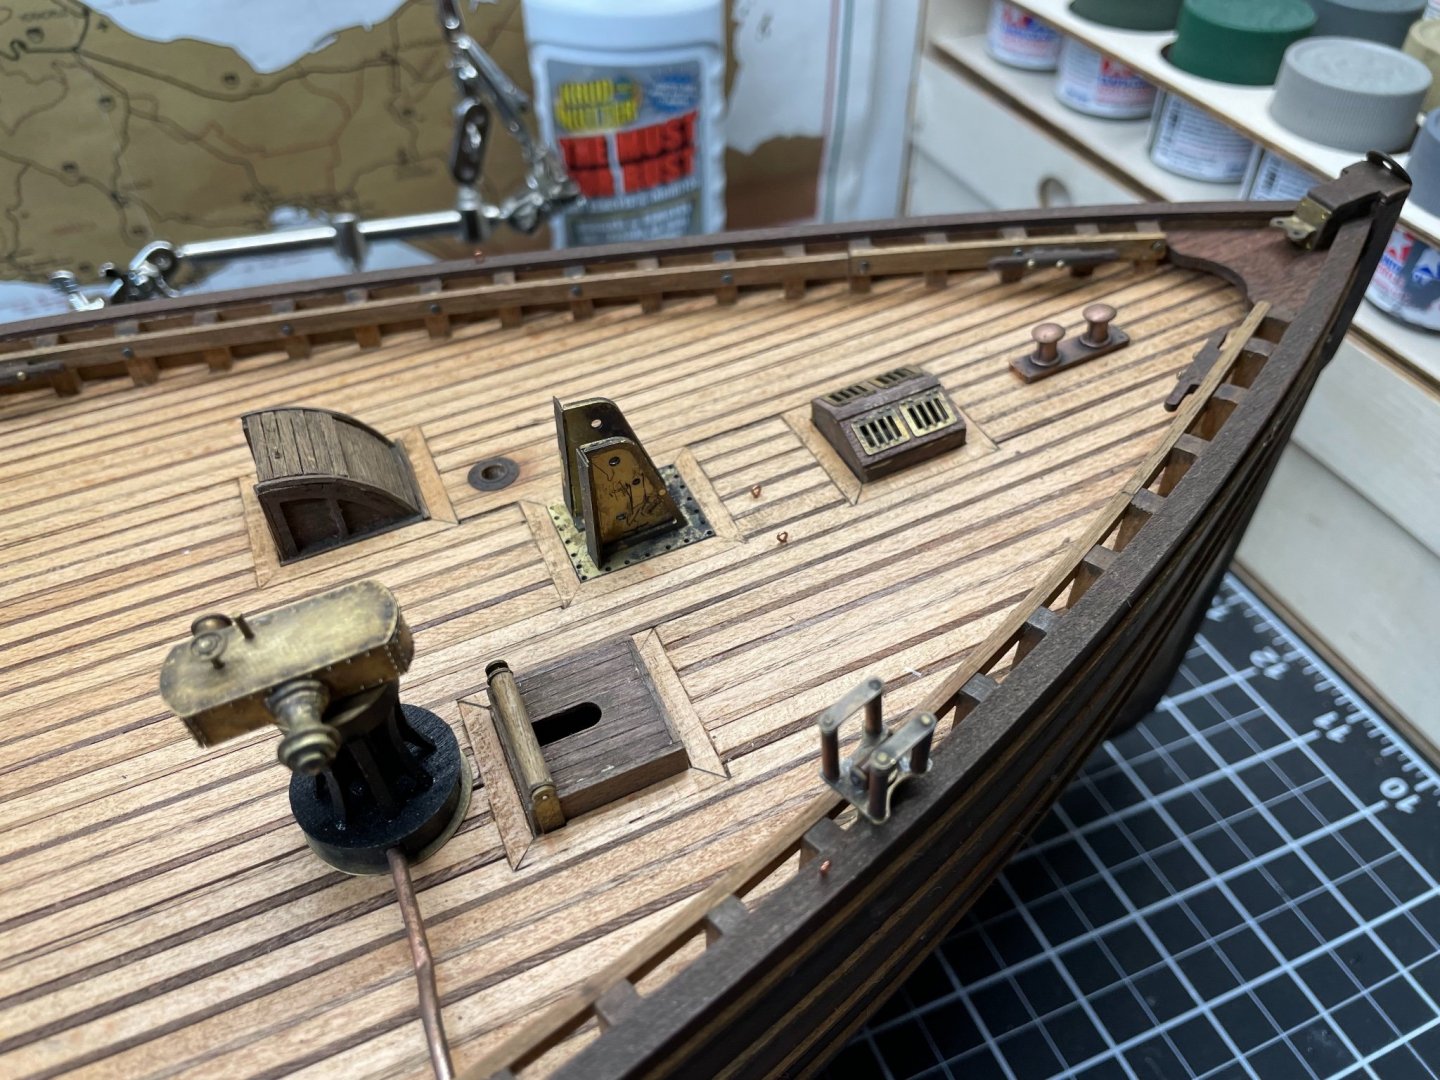
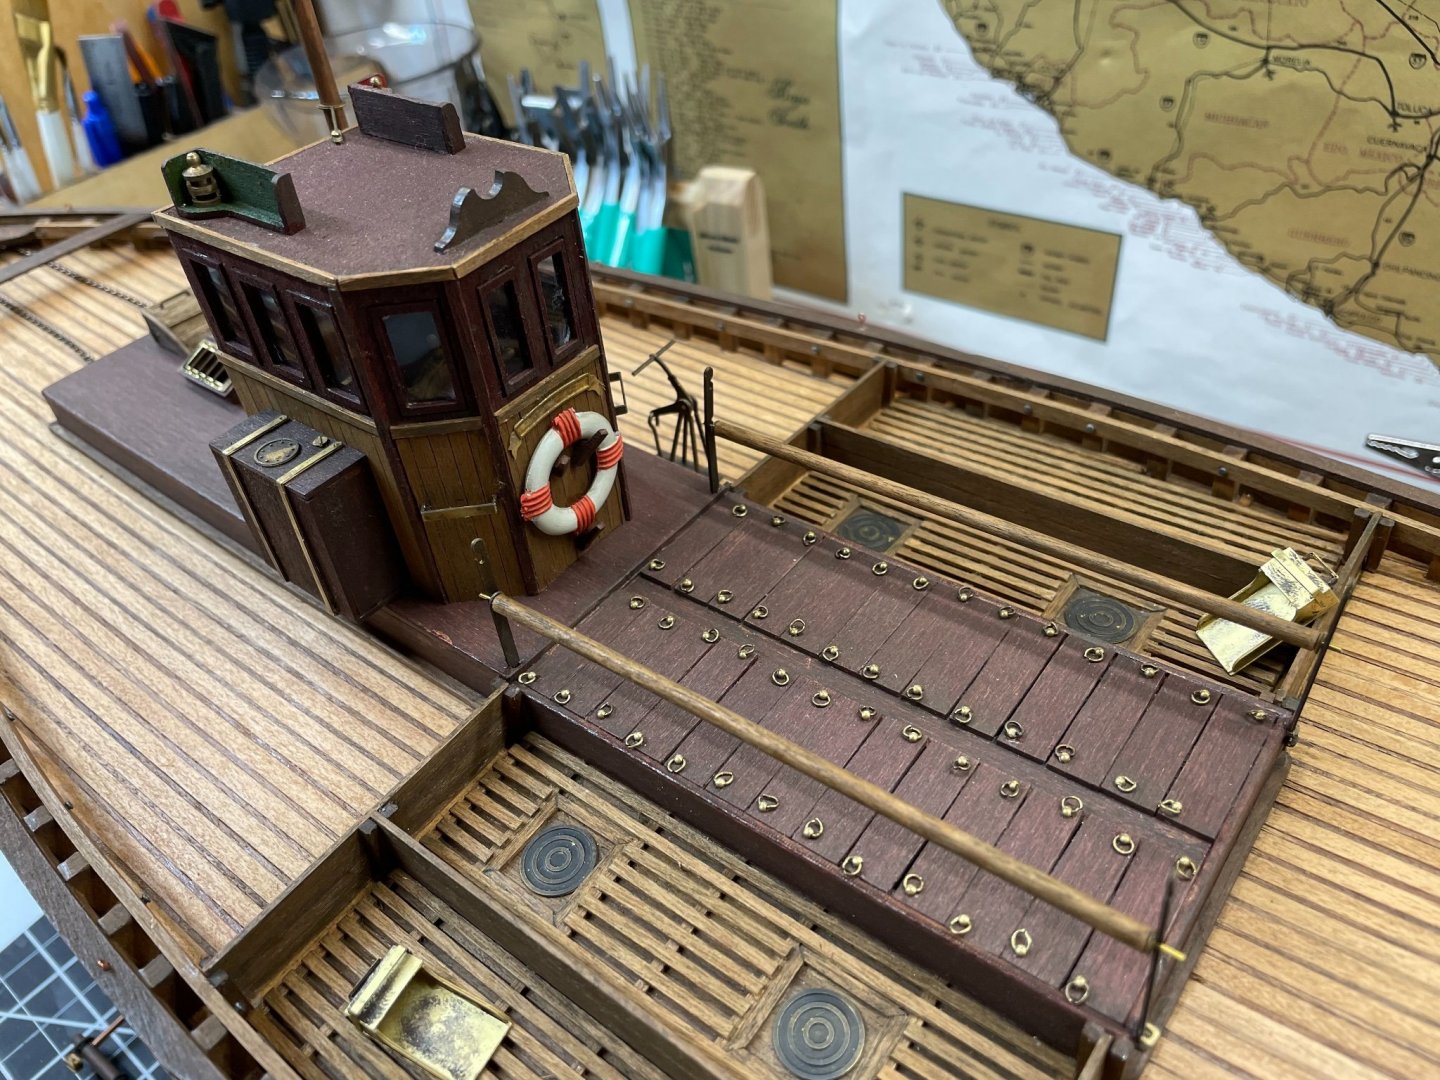
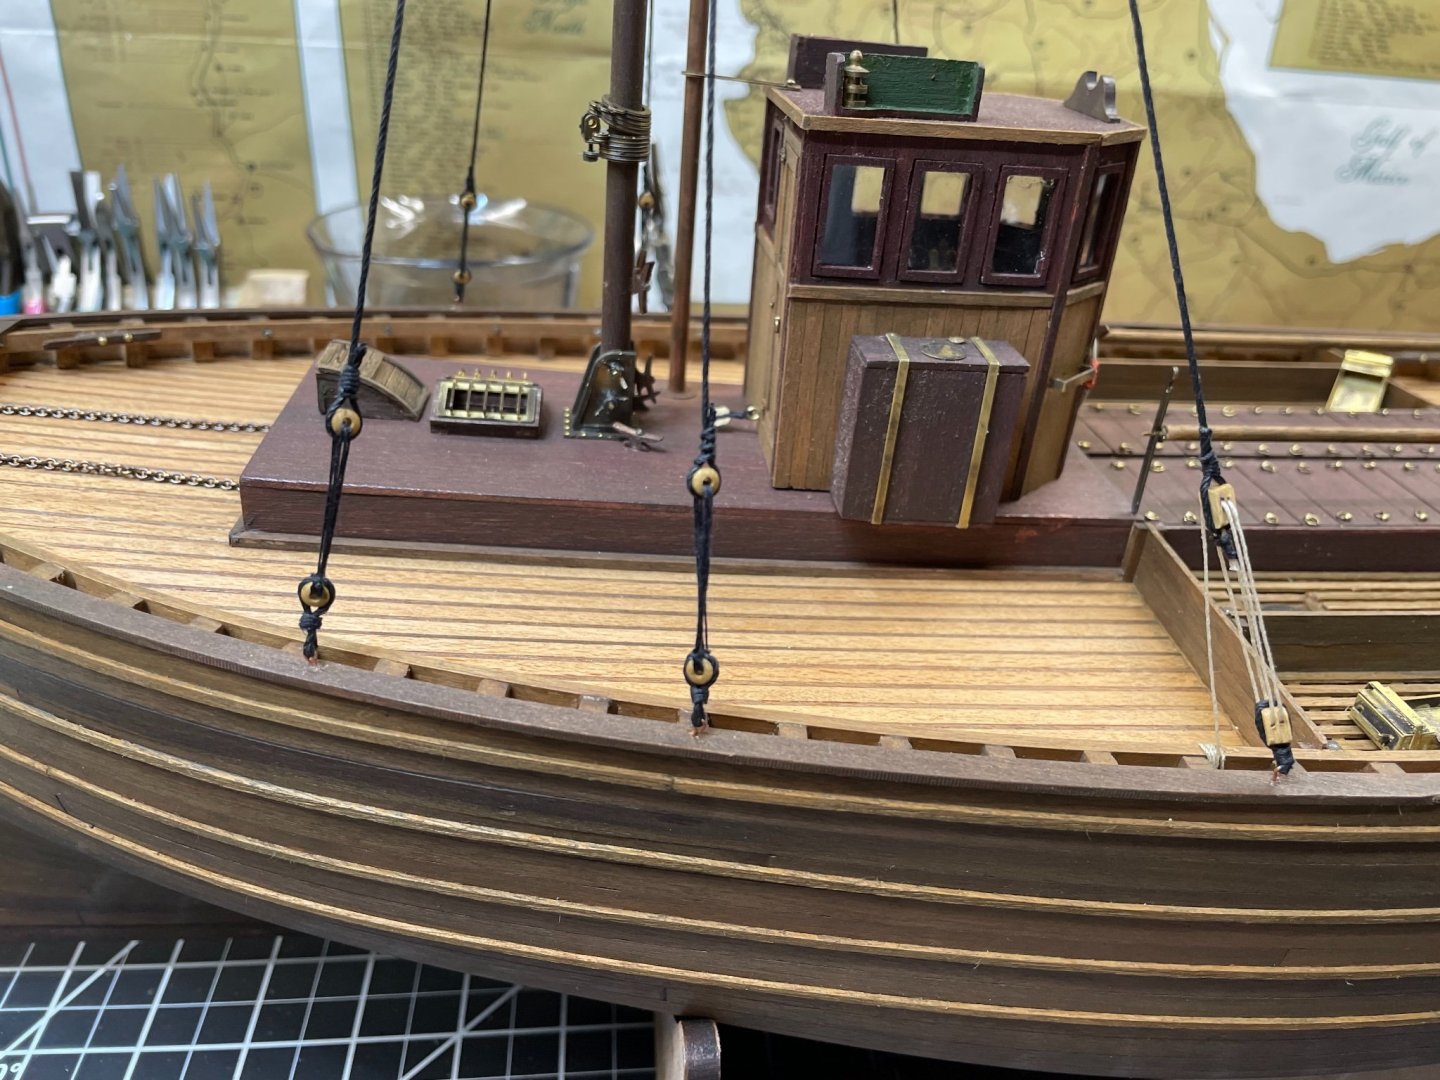
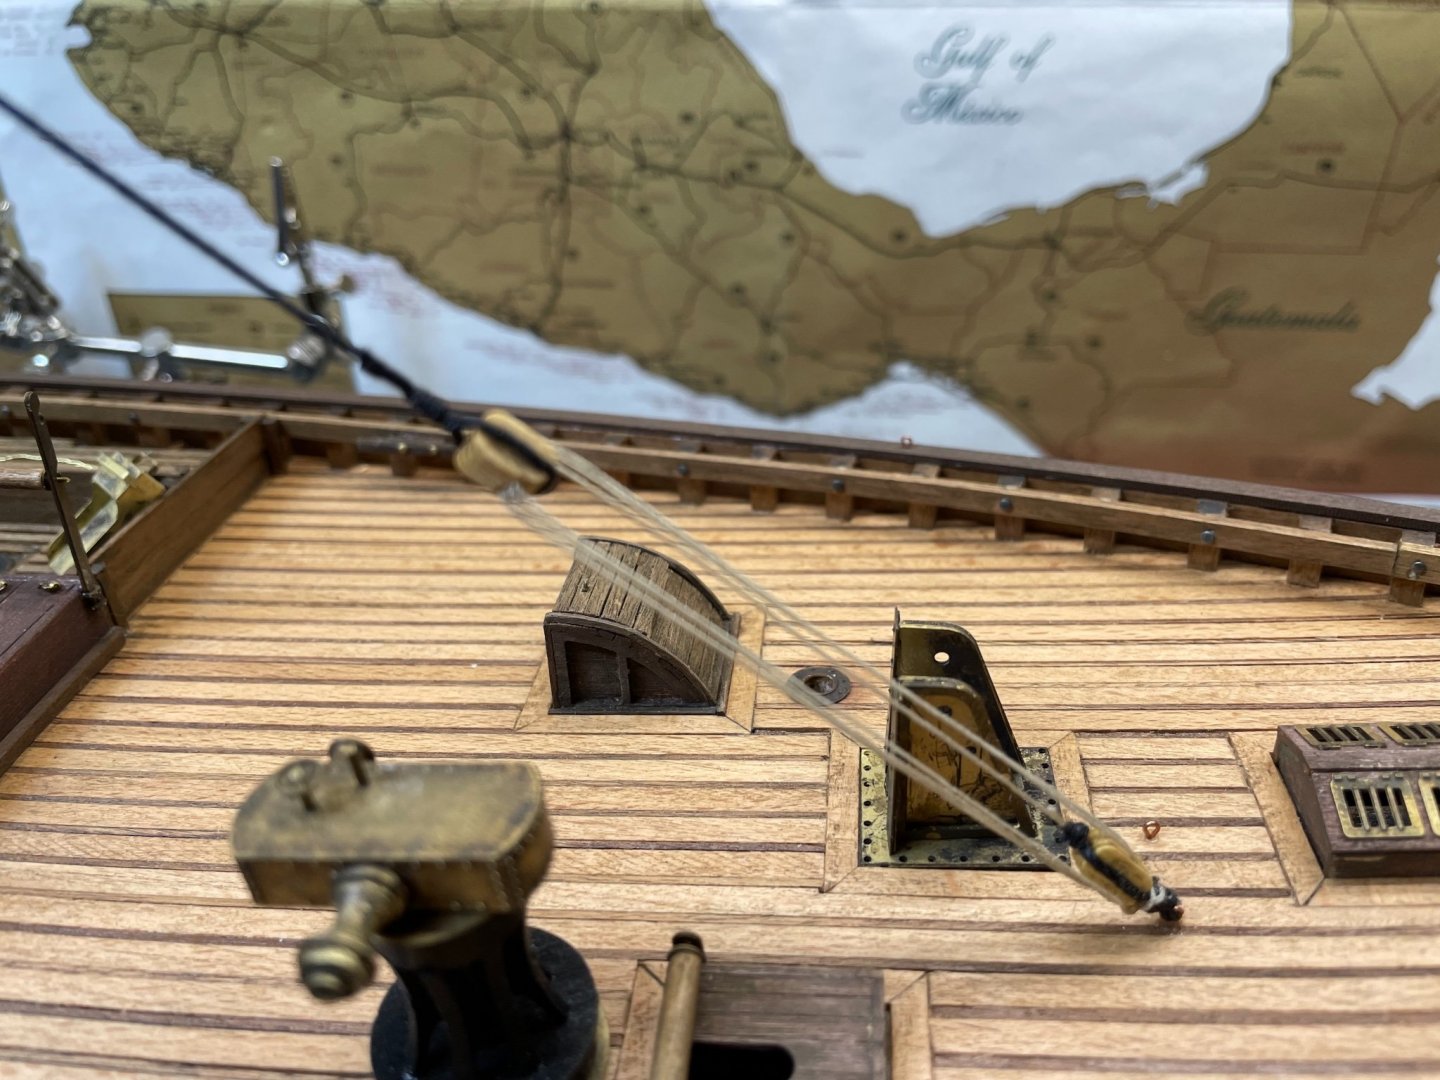
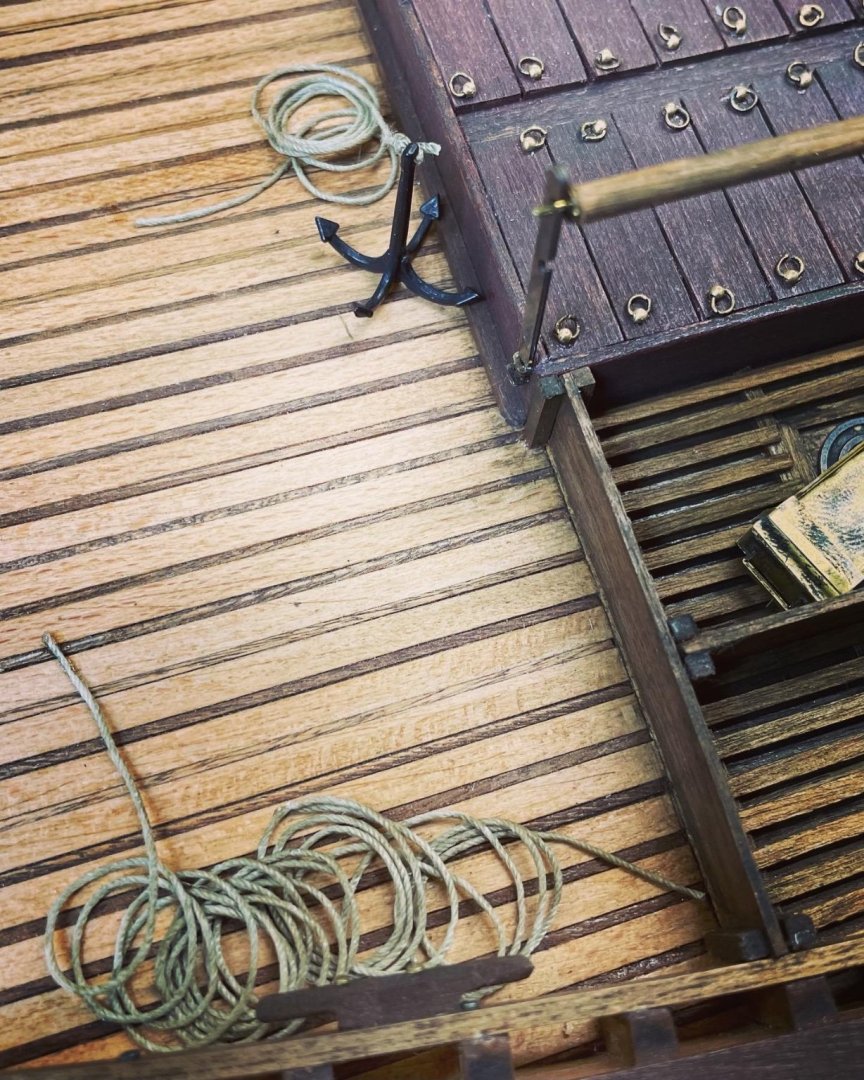
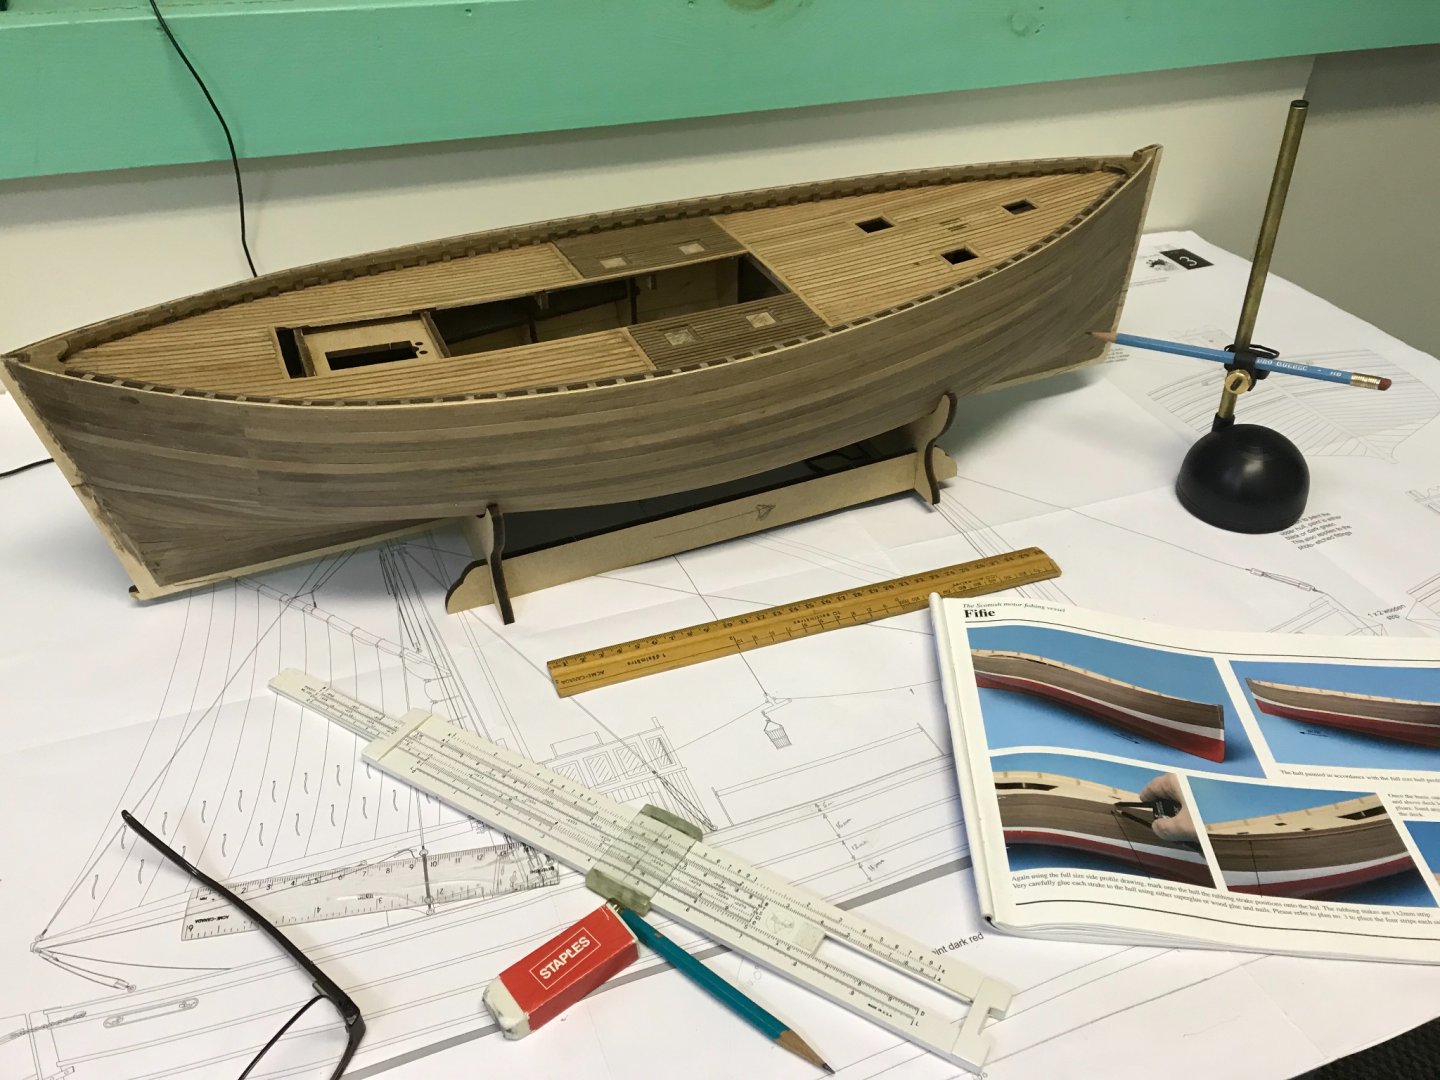
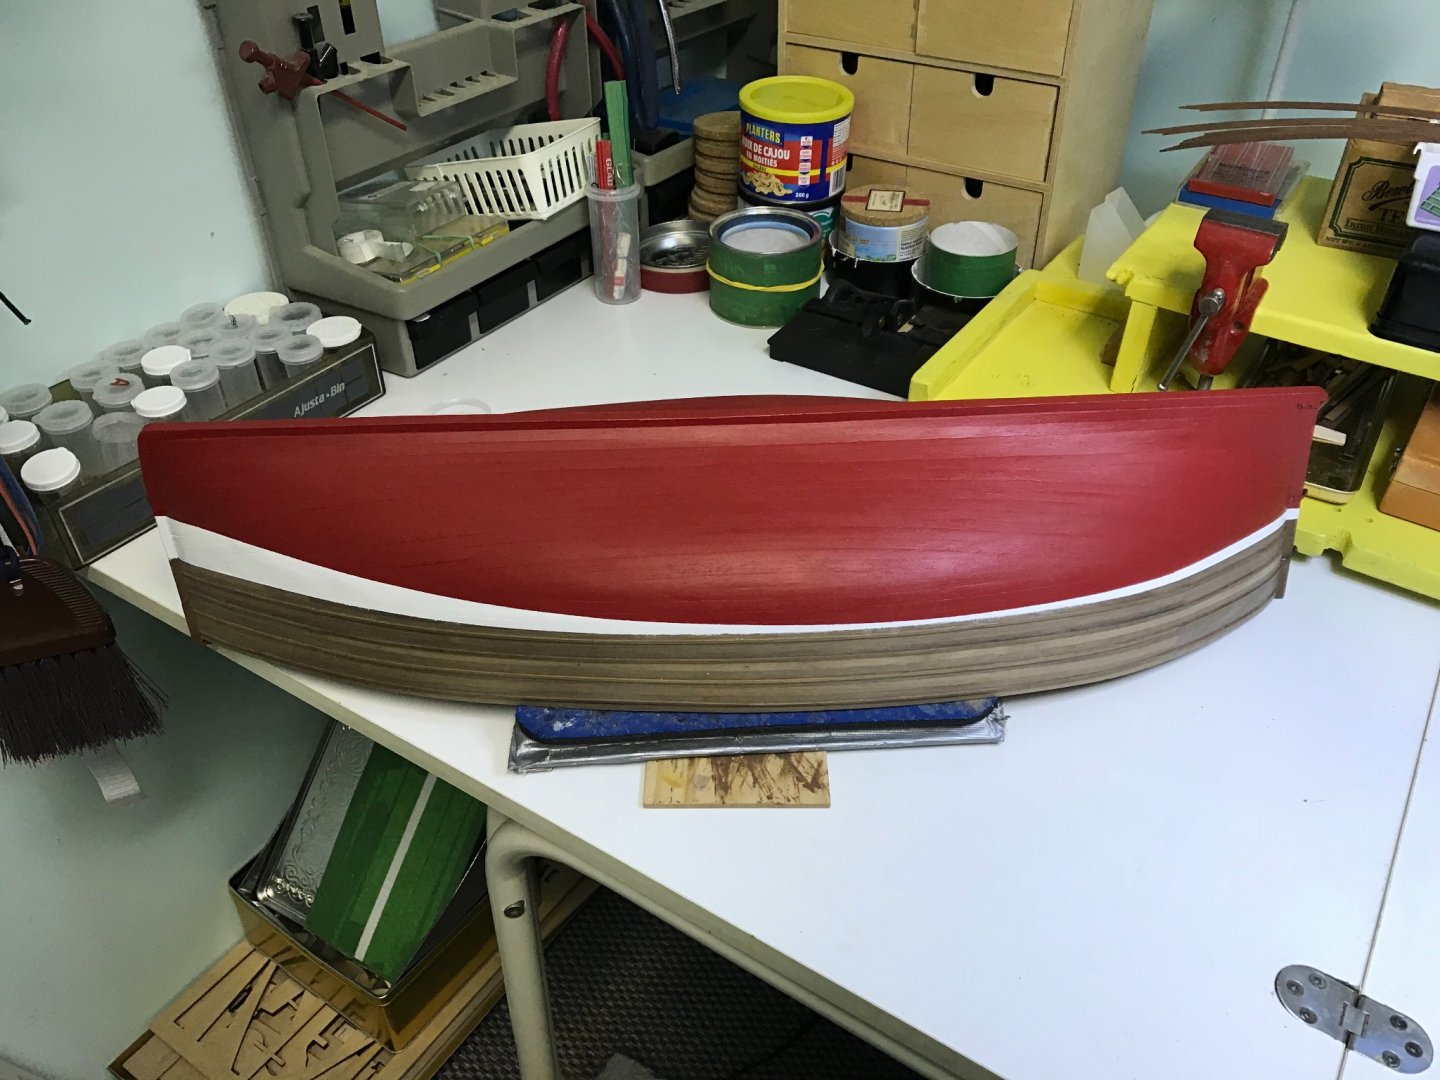
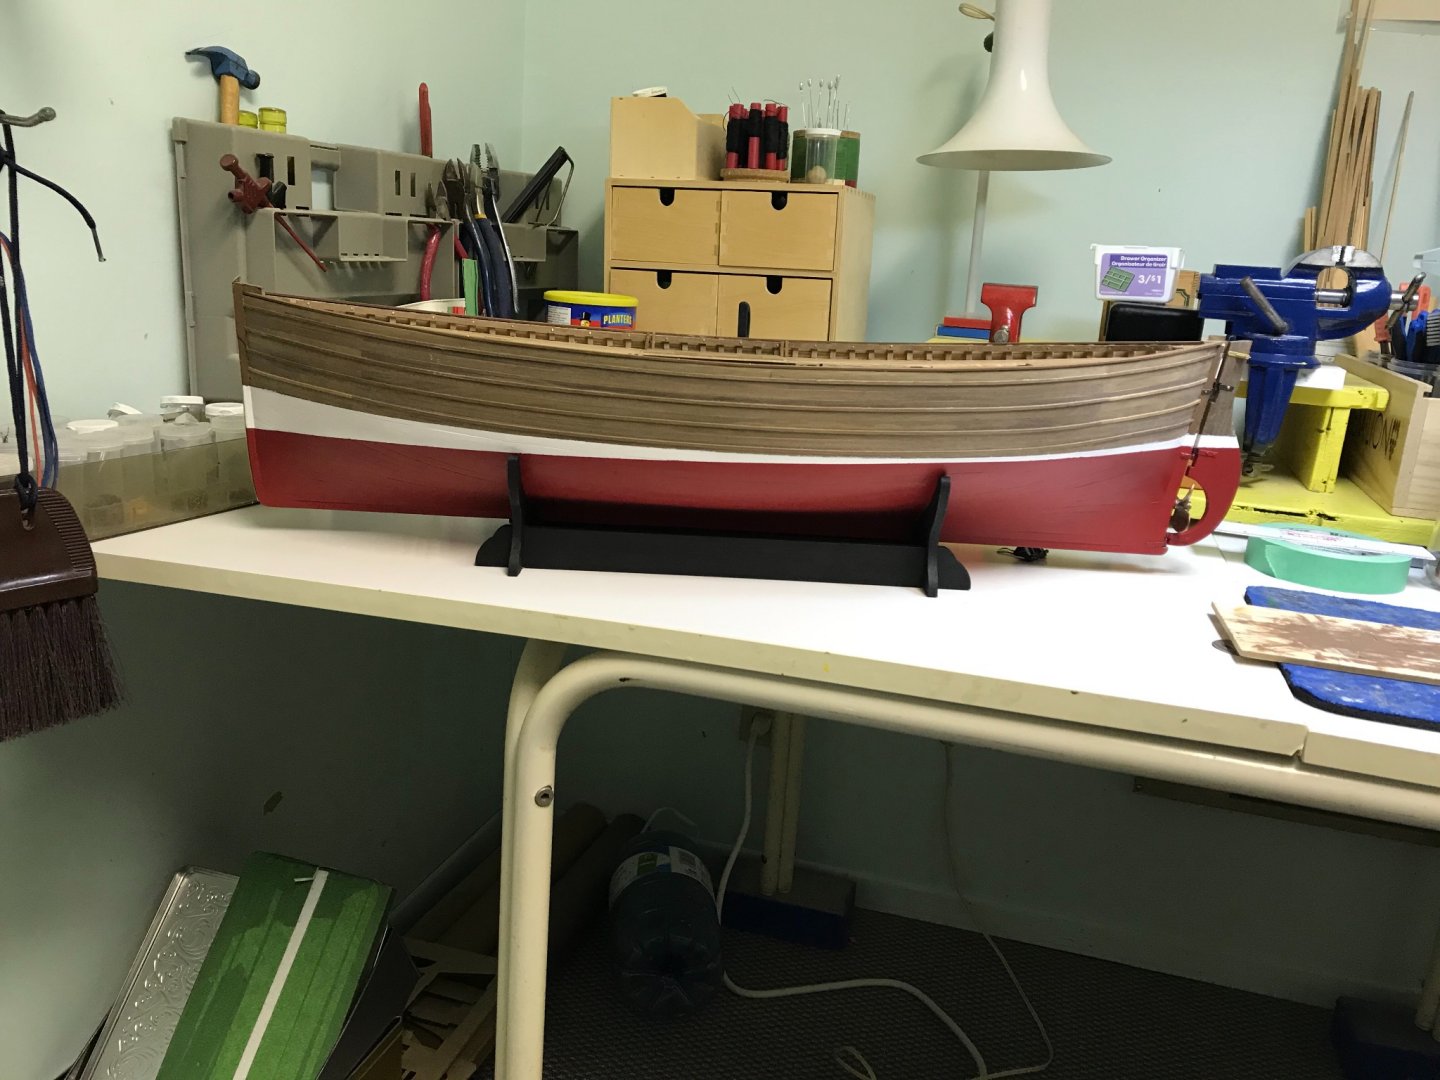
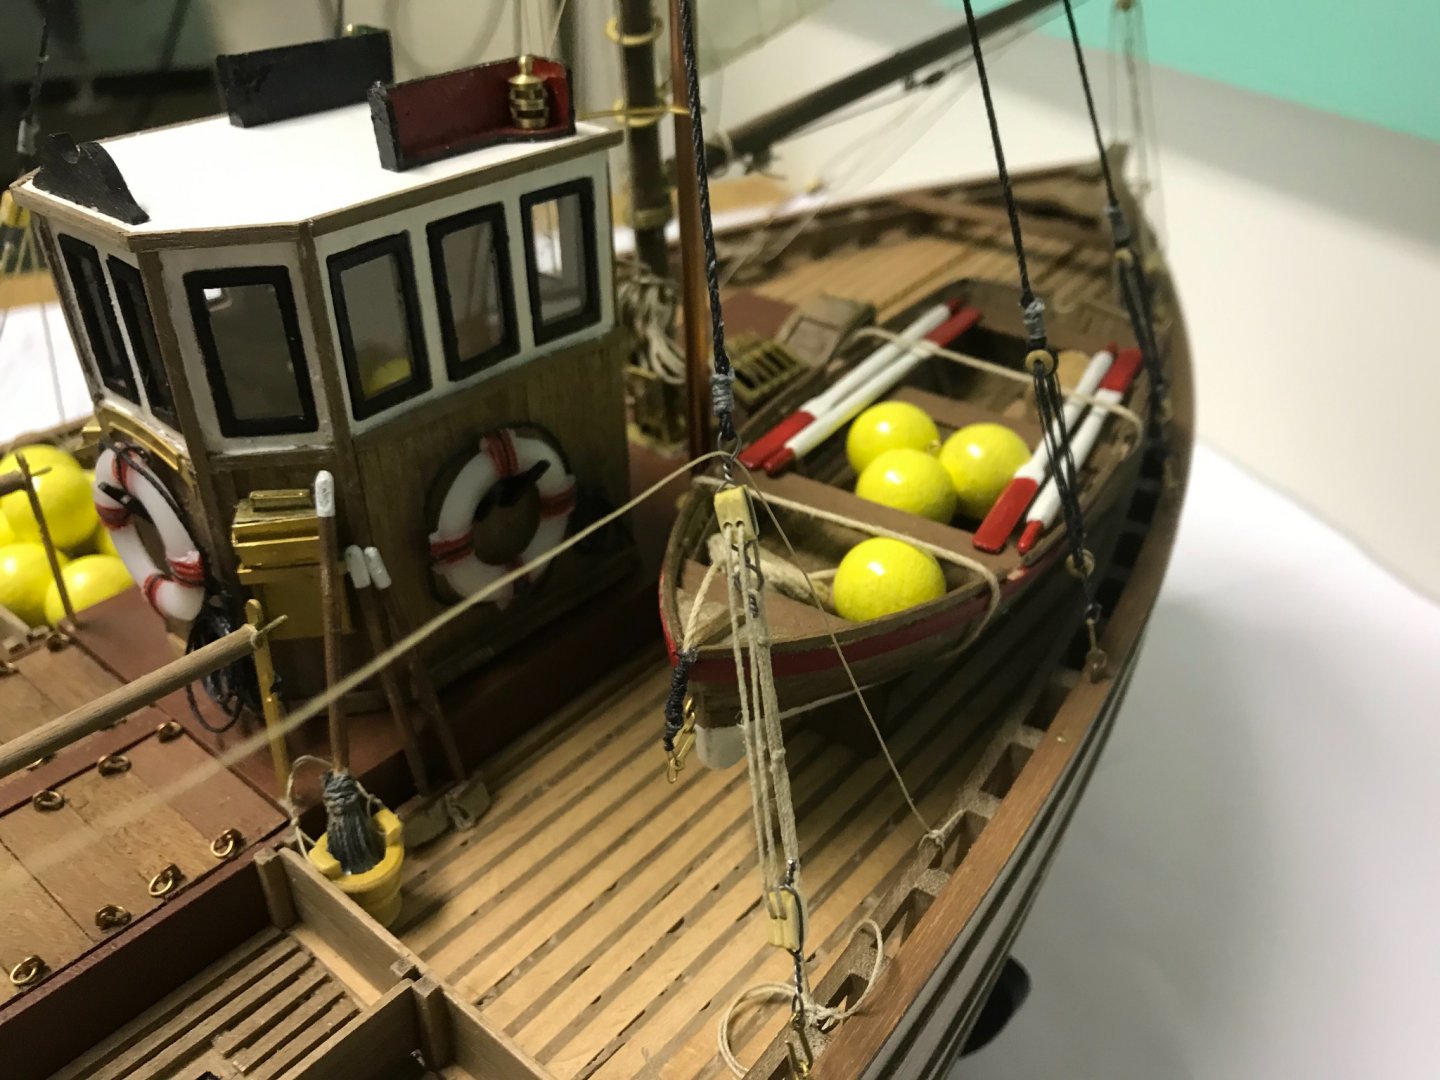
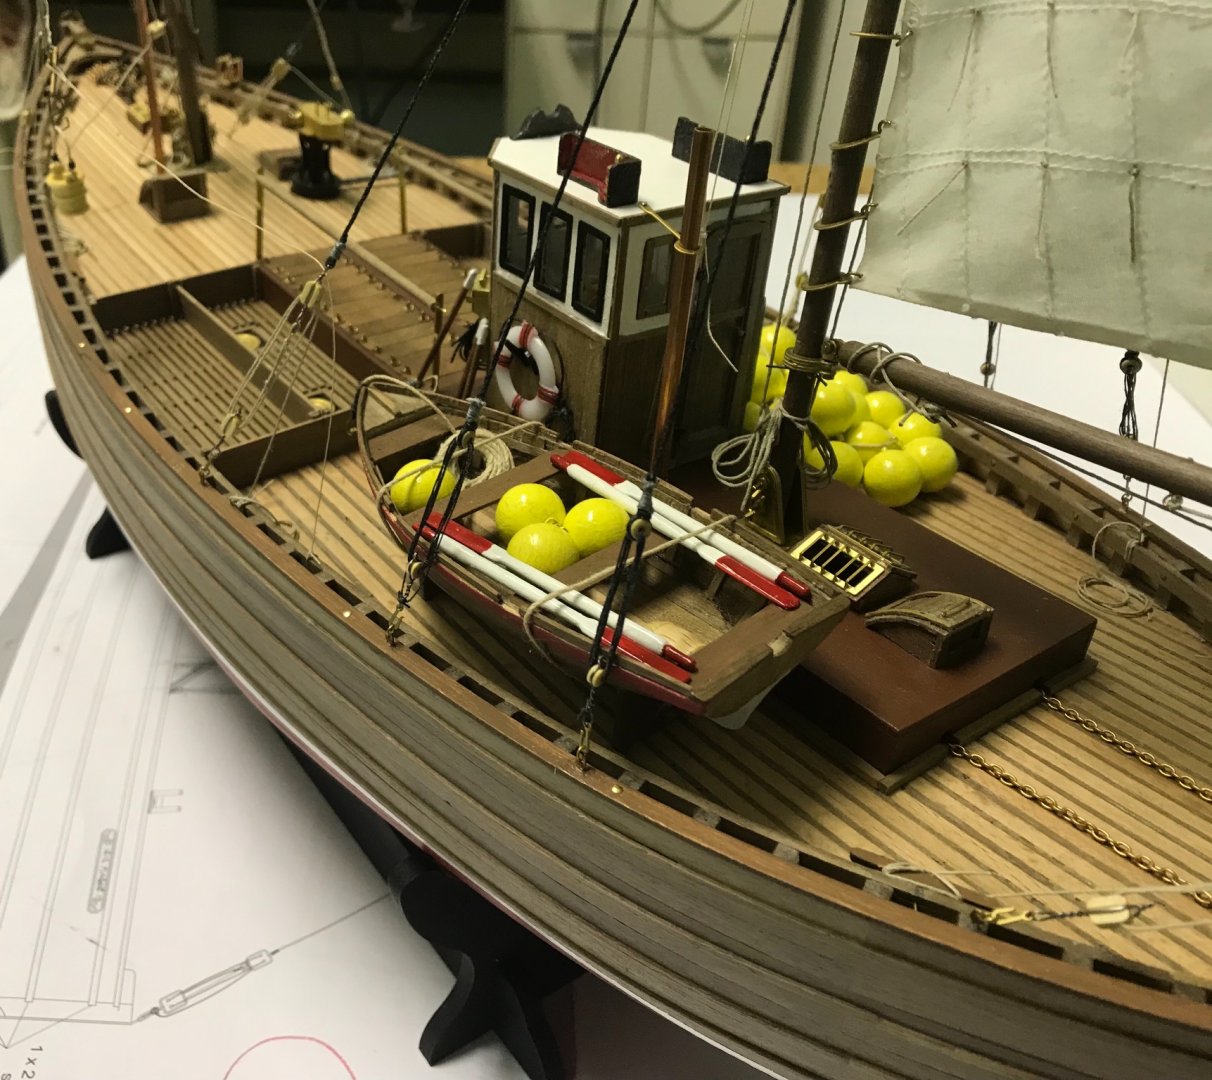
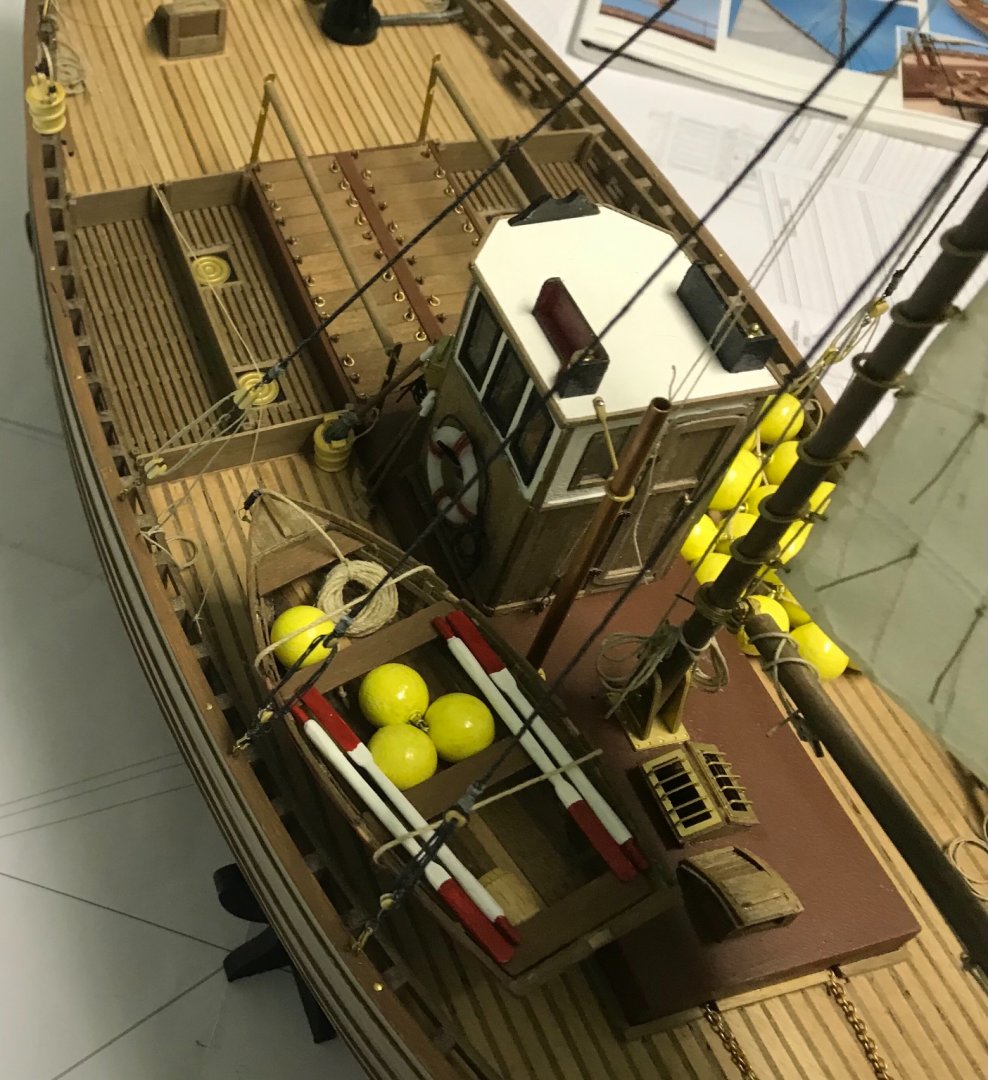
 I built the model differently than my usual procedure. At first I was very hesitant about the different types, colours and finishes to use on the boat. I was going for a "weathered" look as opposed to "nice & shiny". Then, the Covid-19 thing brought shopping for materials to a halte. So, I stated to build all the components separately, do the paint and then final assembly. Here are some of the steps.


-
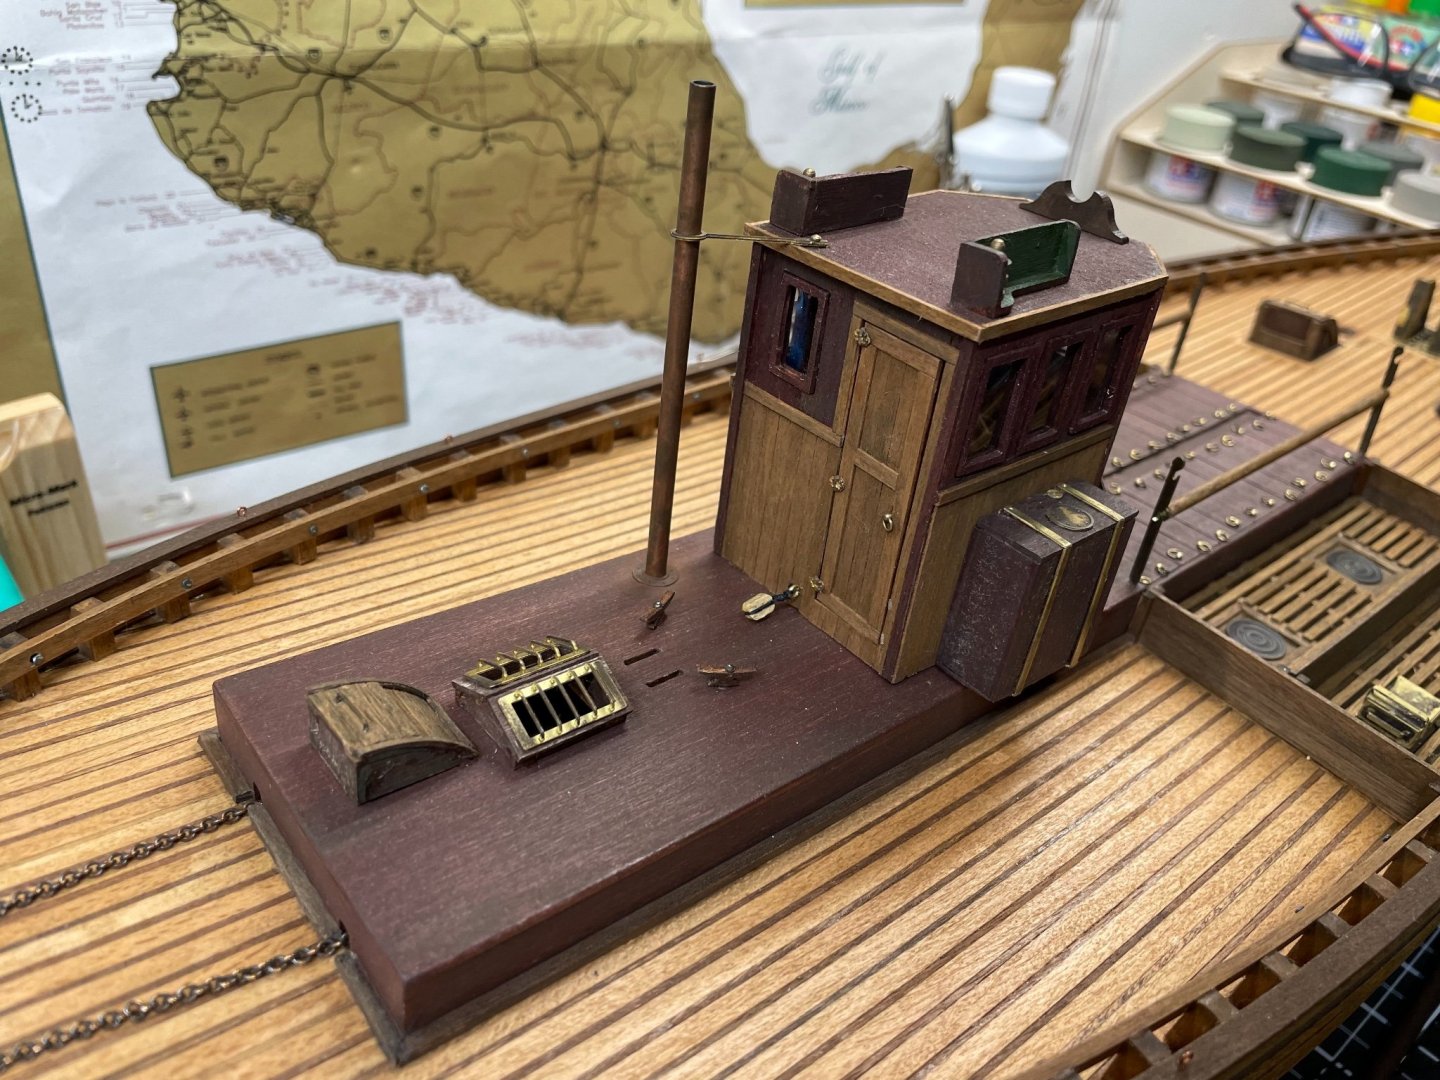
 I'm curious as to what the purpose of the steam capstan on a Fifie drift net fishing boat is. As the title says, was the capstan used for hauling up the sail (or sails?) and/or pulling in the nets? I watched Jim Duthie and Andrew Strachan being interviewd on - 'life on ZULU and FIFIE herring drifters' ( https://www.youtube.com/watch?v=6xitrXHT4LU) Jim and Andrew have good, strong regional accents and use auld Scots language. Some of the comments I picked up are... 5.50 mins - "steam capstan for hauling the sail" 9.12 - life in sail boats versus steam drifters 9.45 - hauling nets - differences between sail boats and drifters ...net over stern? 10.55 Sail boat has coal stove, and a boiler for the steam capstan to howse (?) the mast and the fish. The impression I got was that the steam capstan was initailly introduced to assist with lifting the large sails, and then later also used to haul in the nets. But I could be completely wrong. Anyone have any thoughts? Thanks, Richard
 -
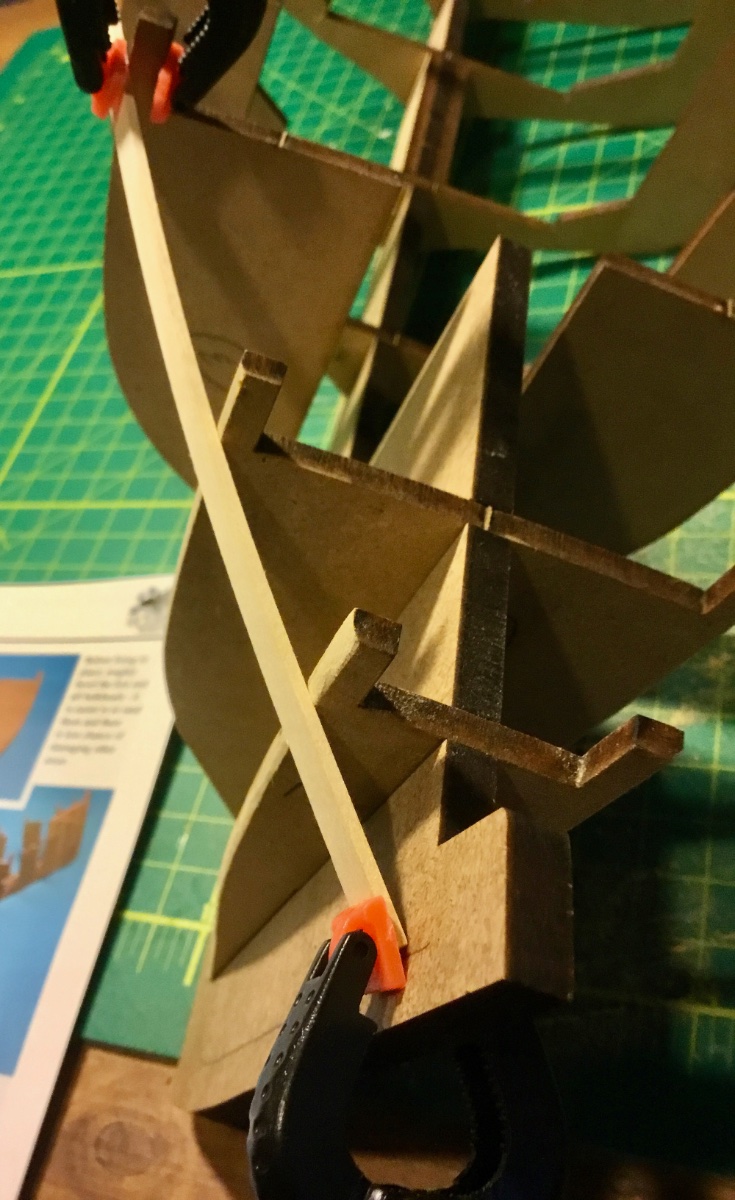
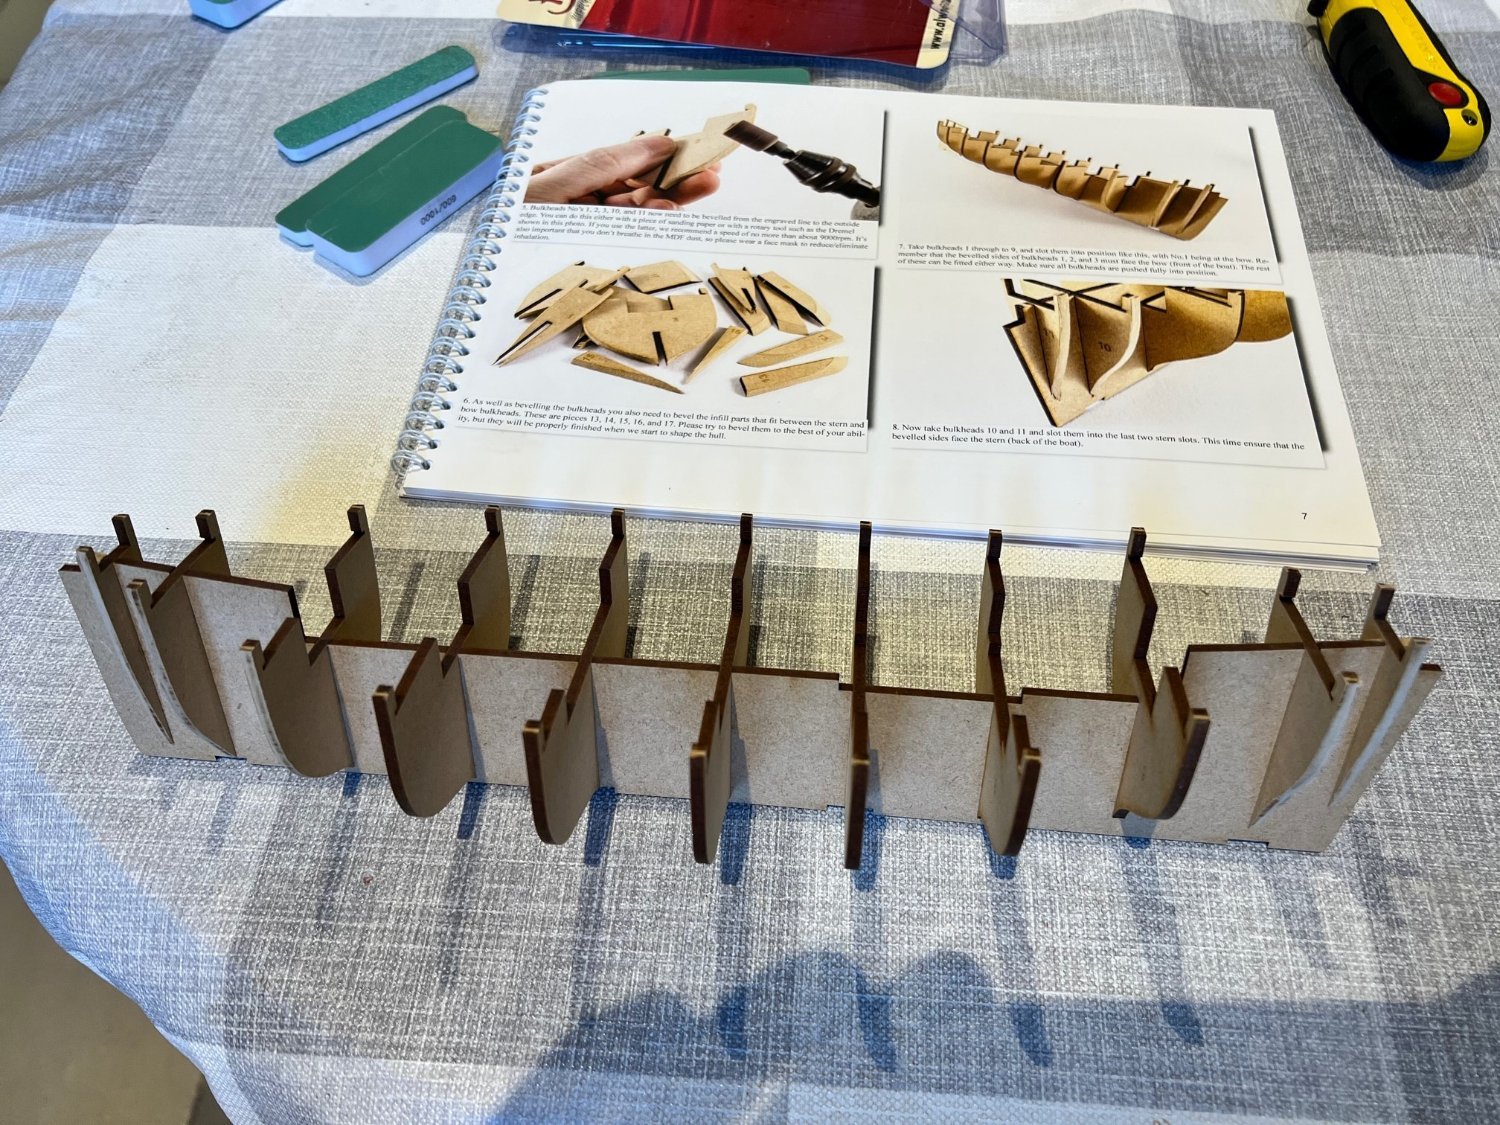
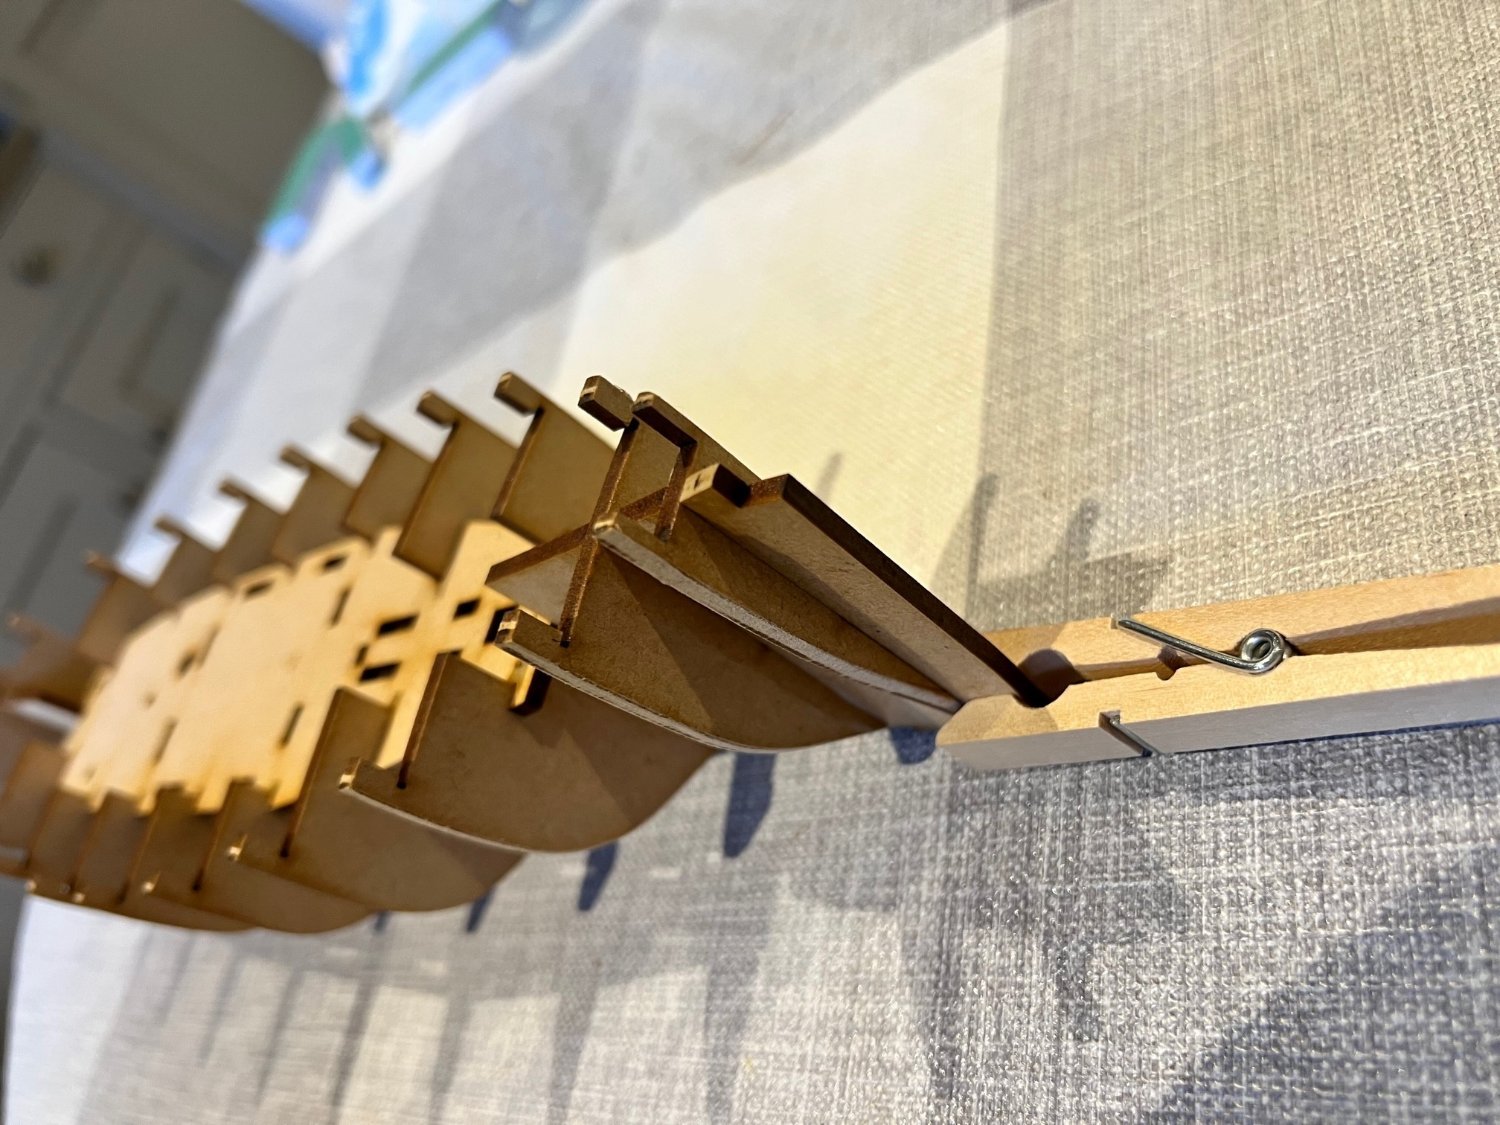
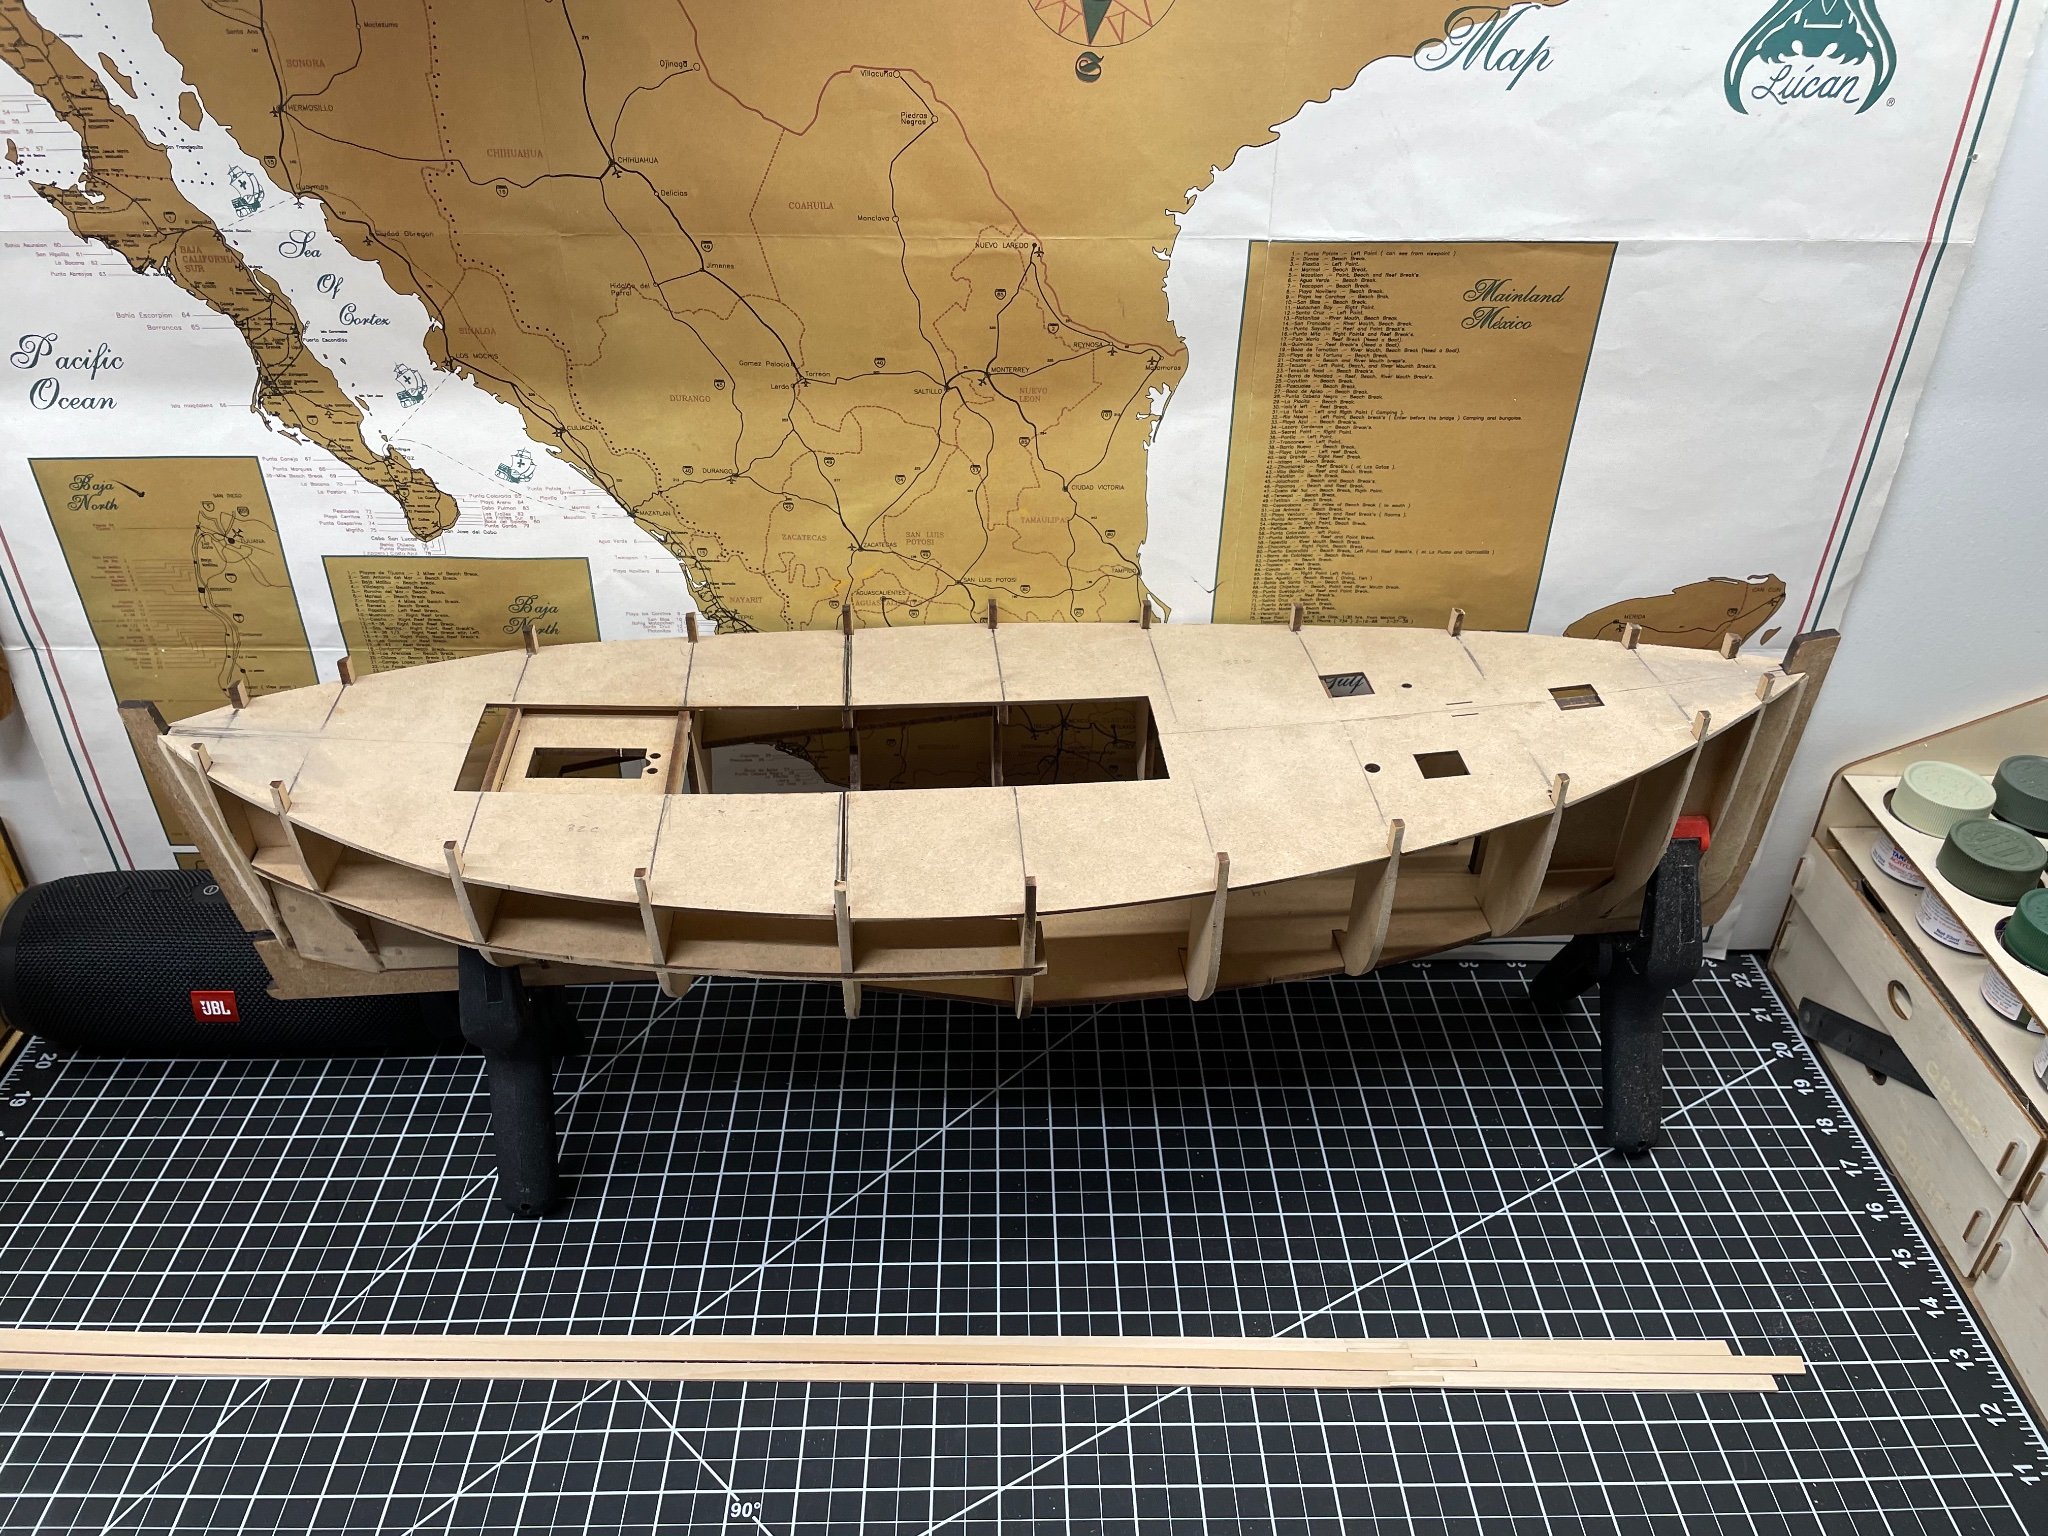
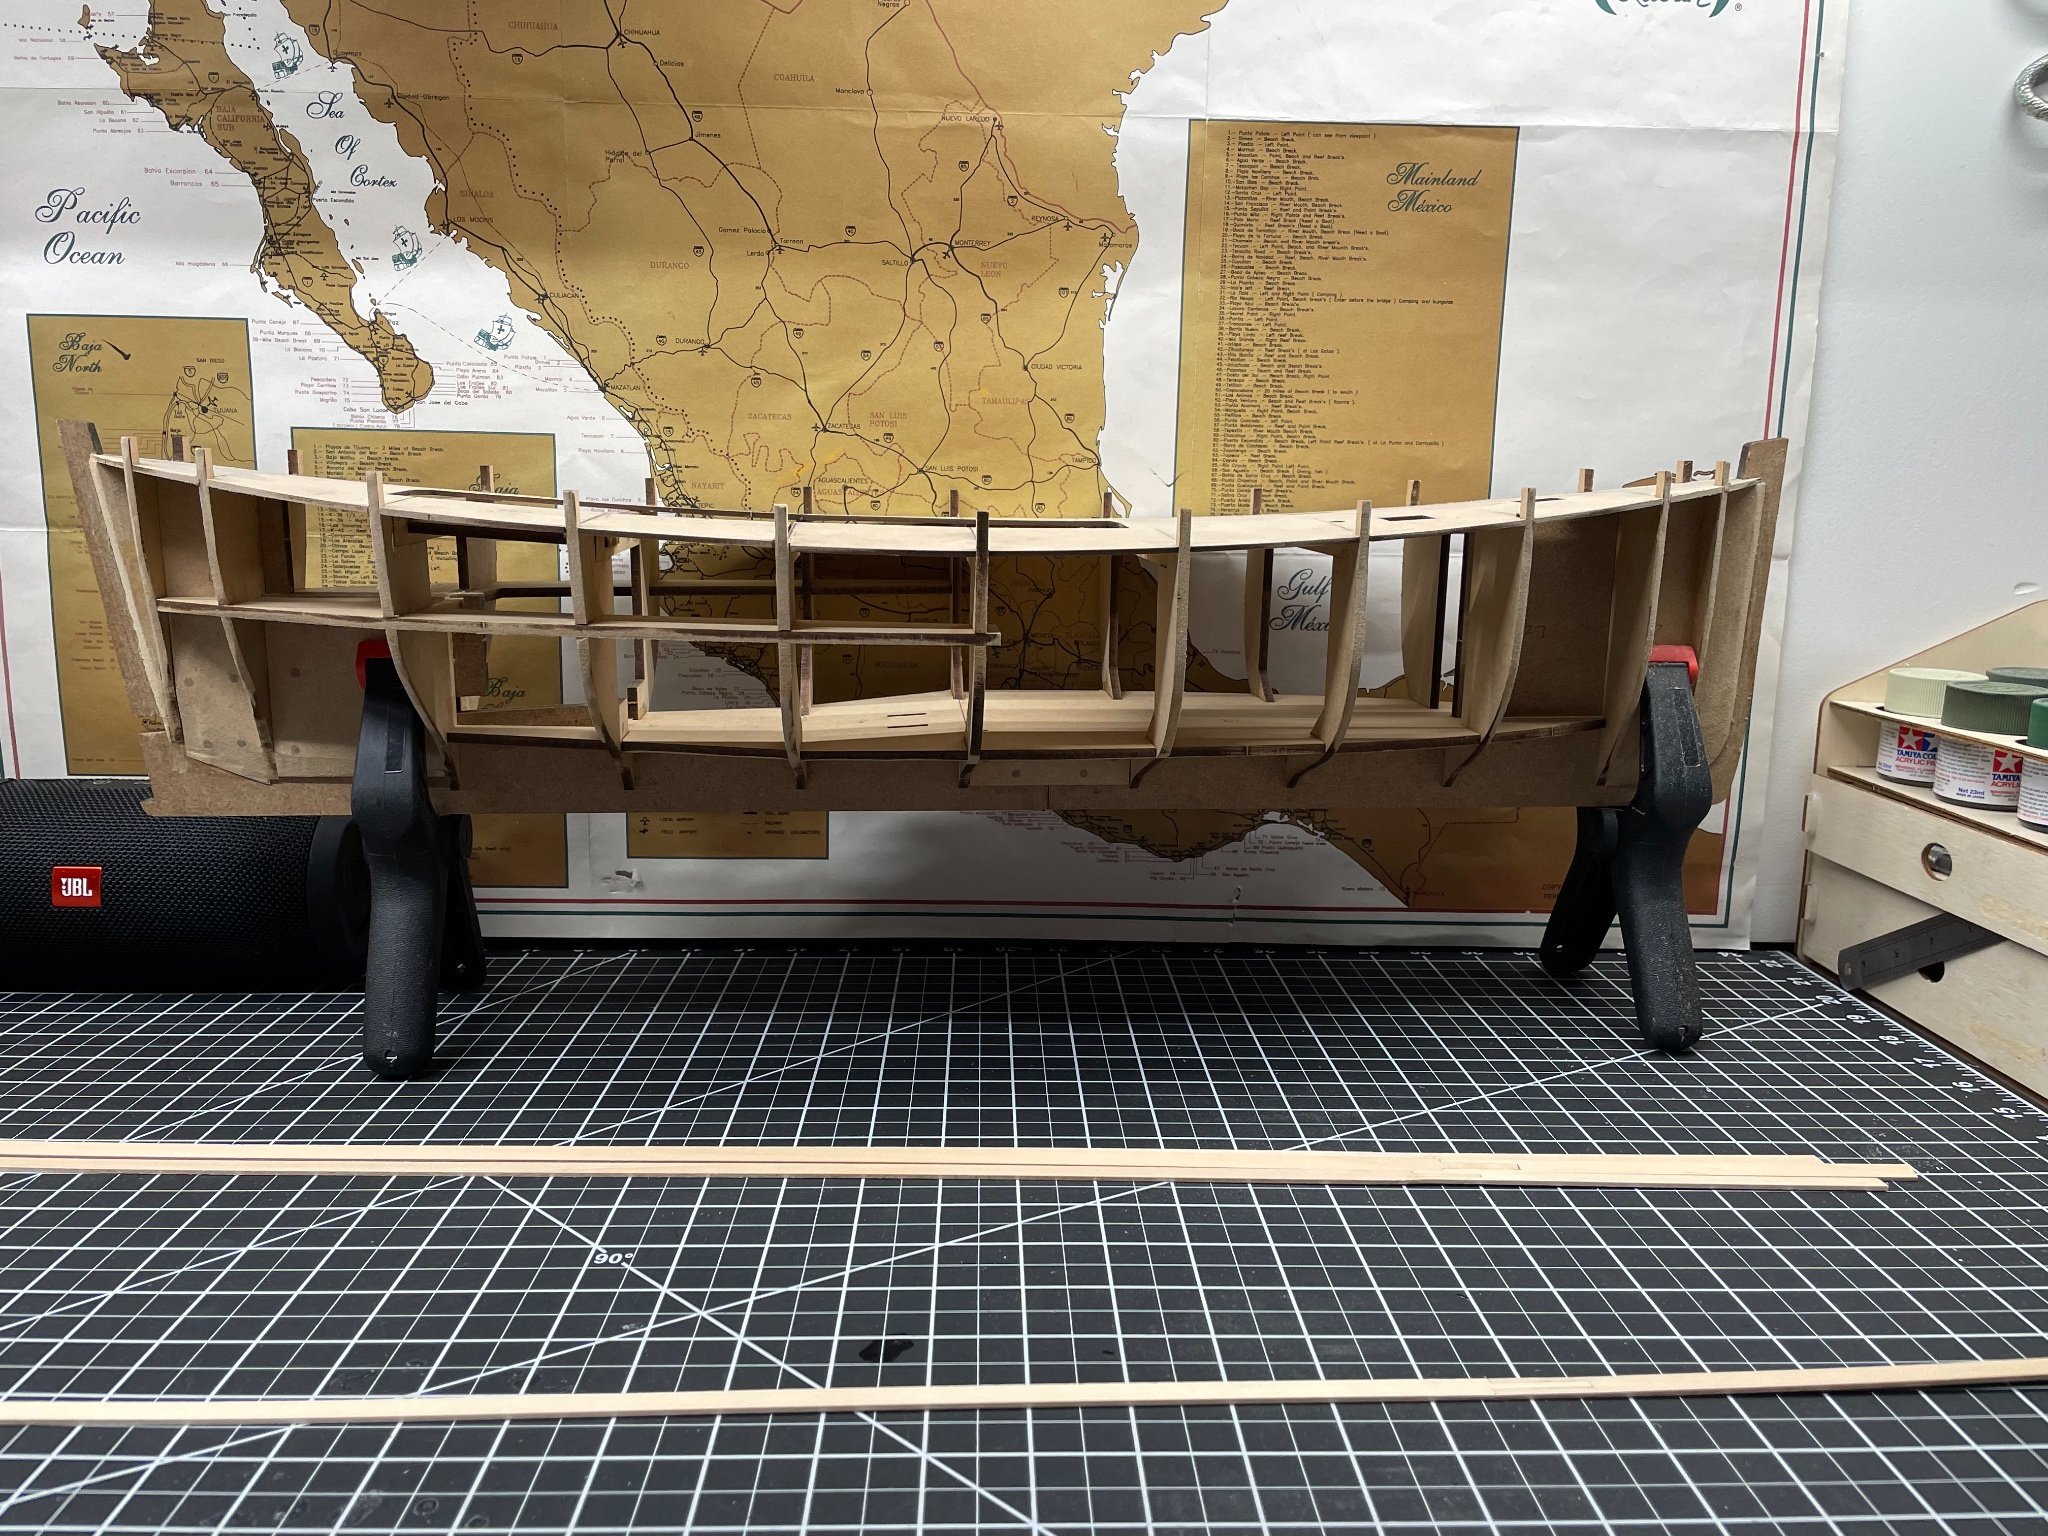
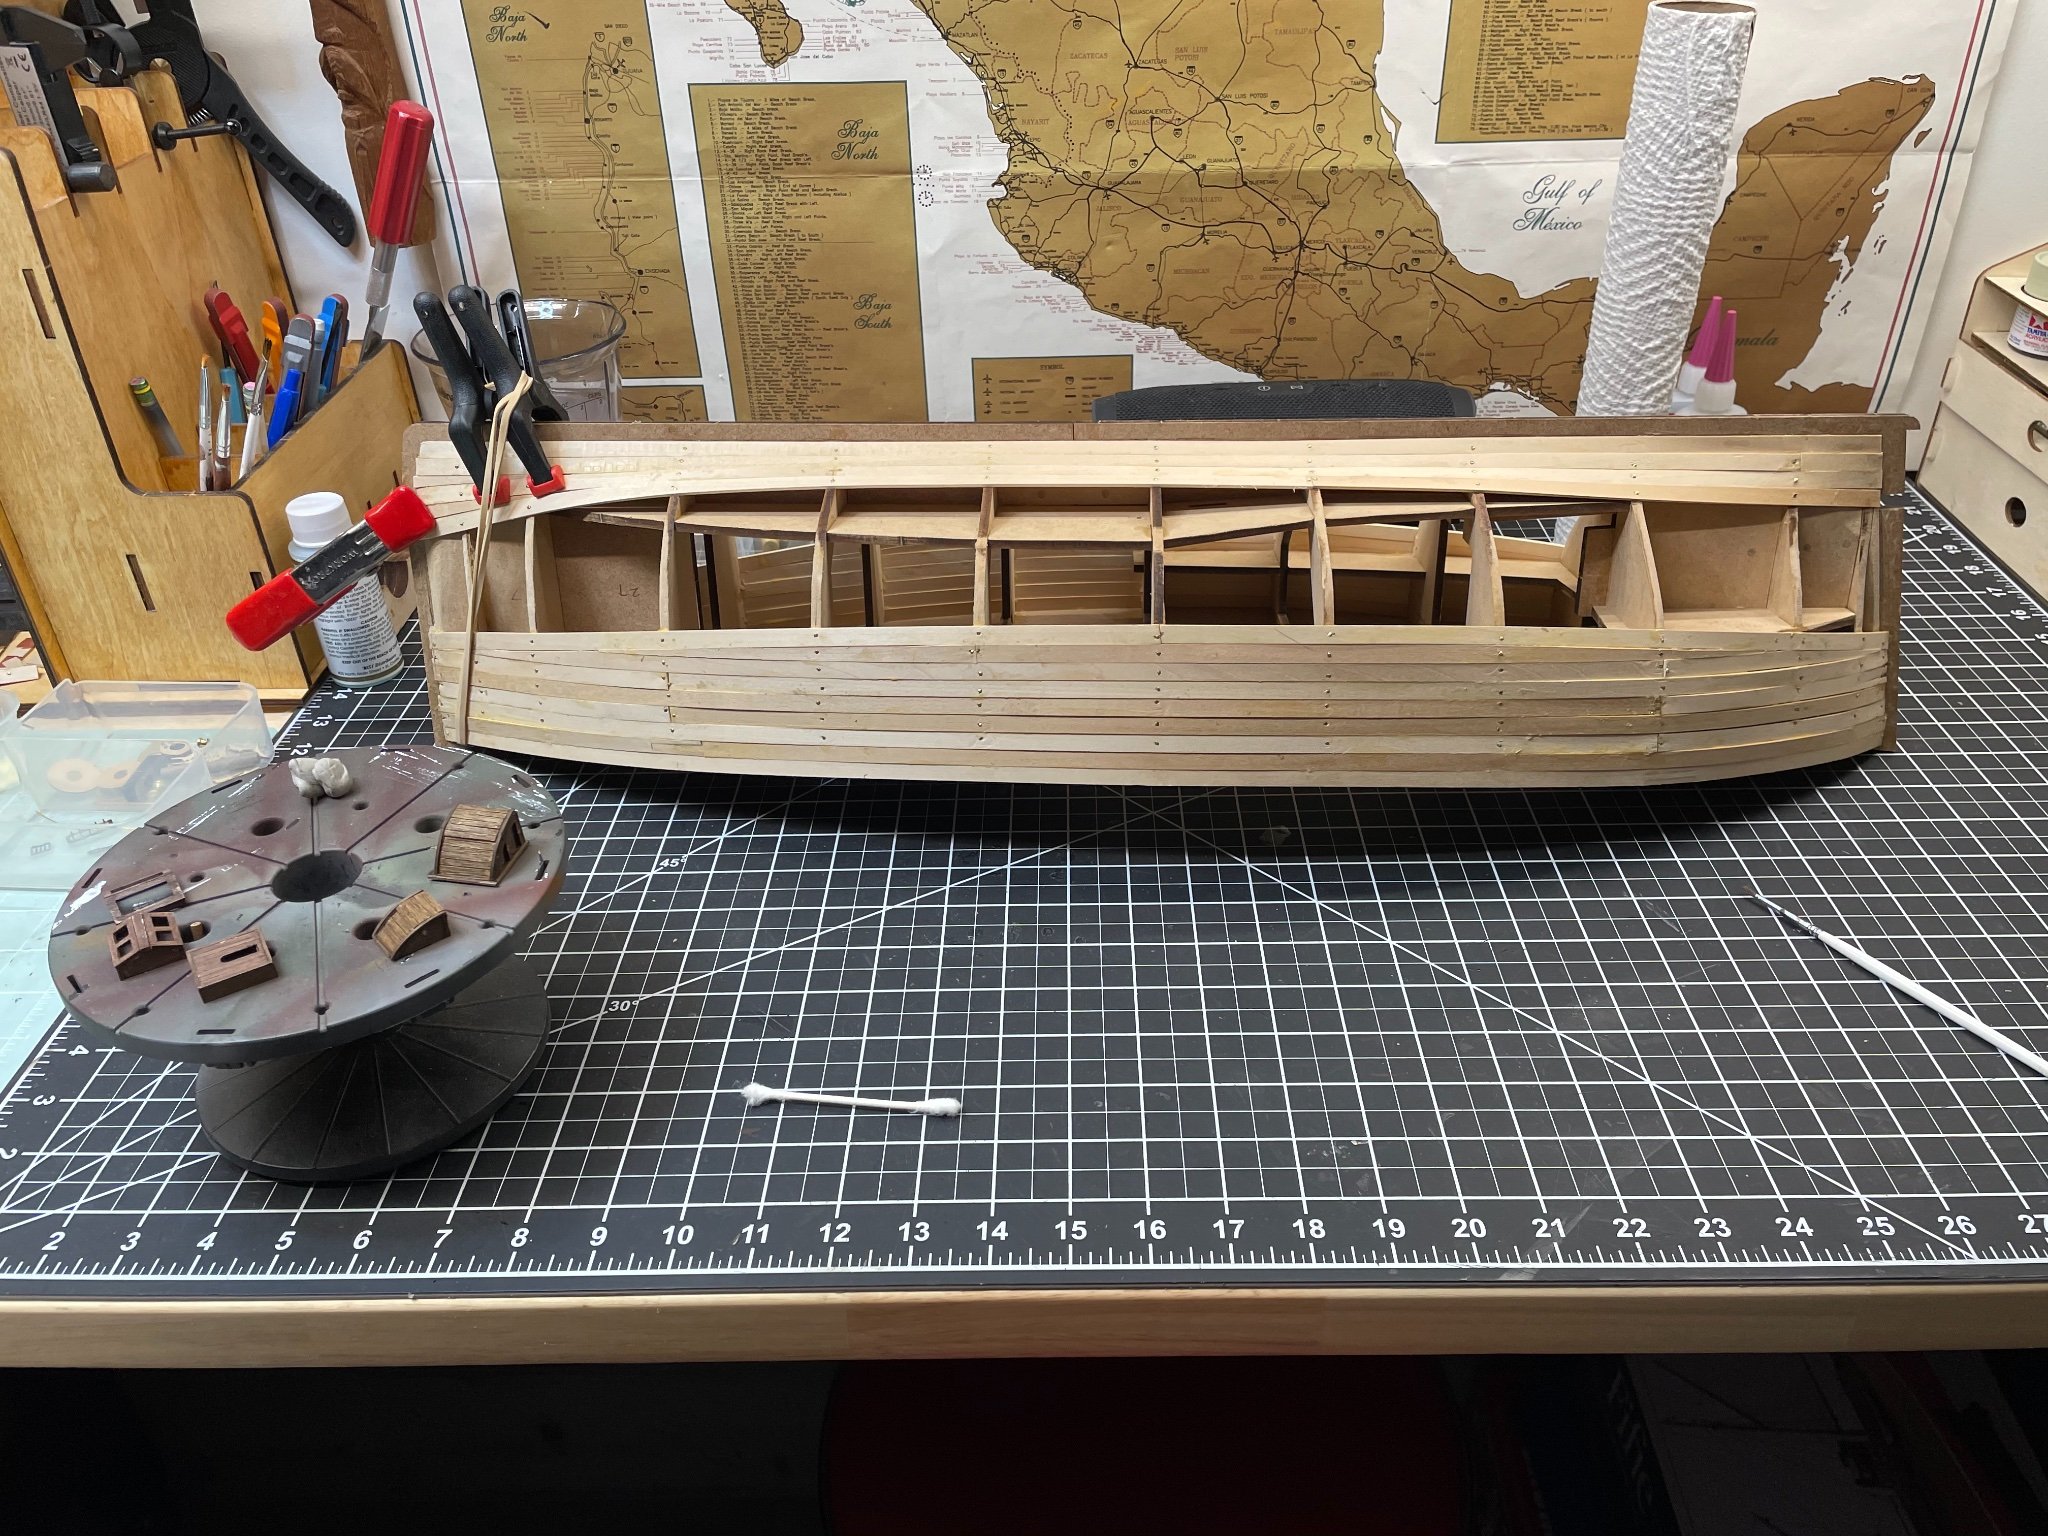
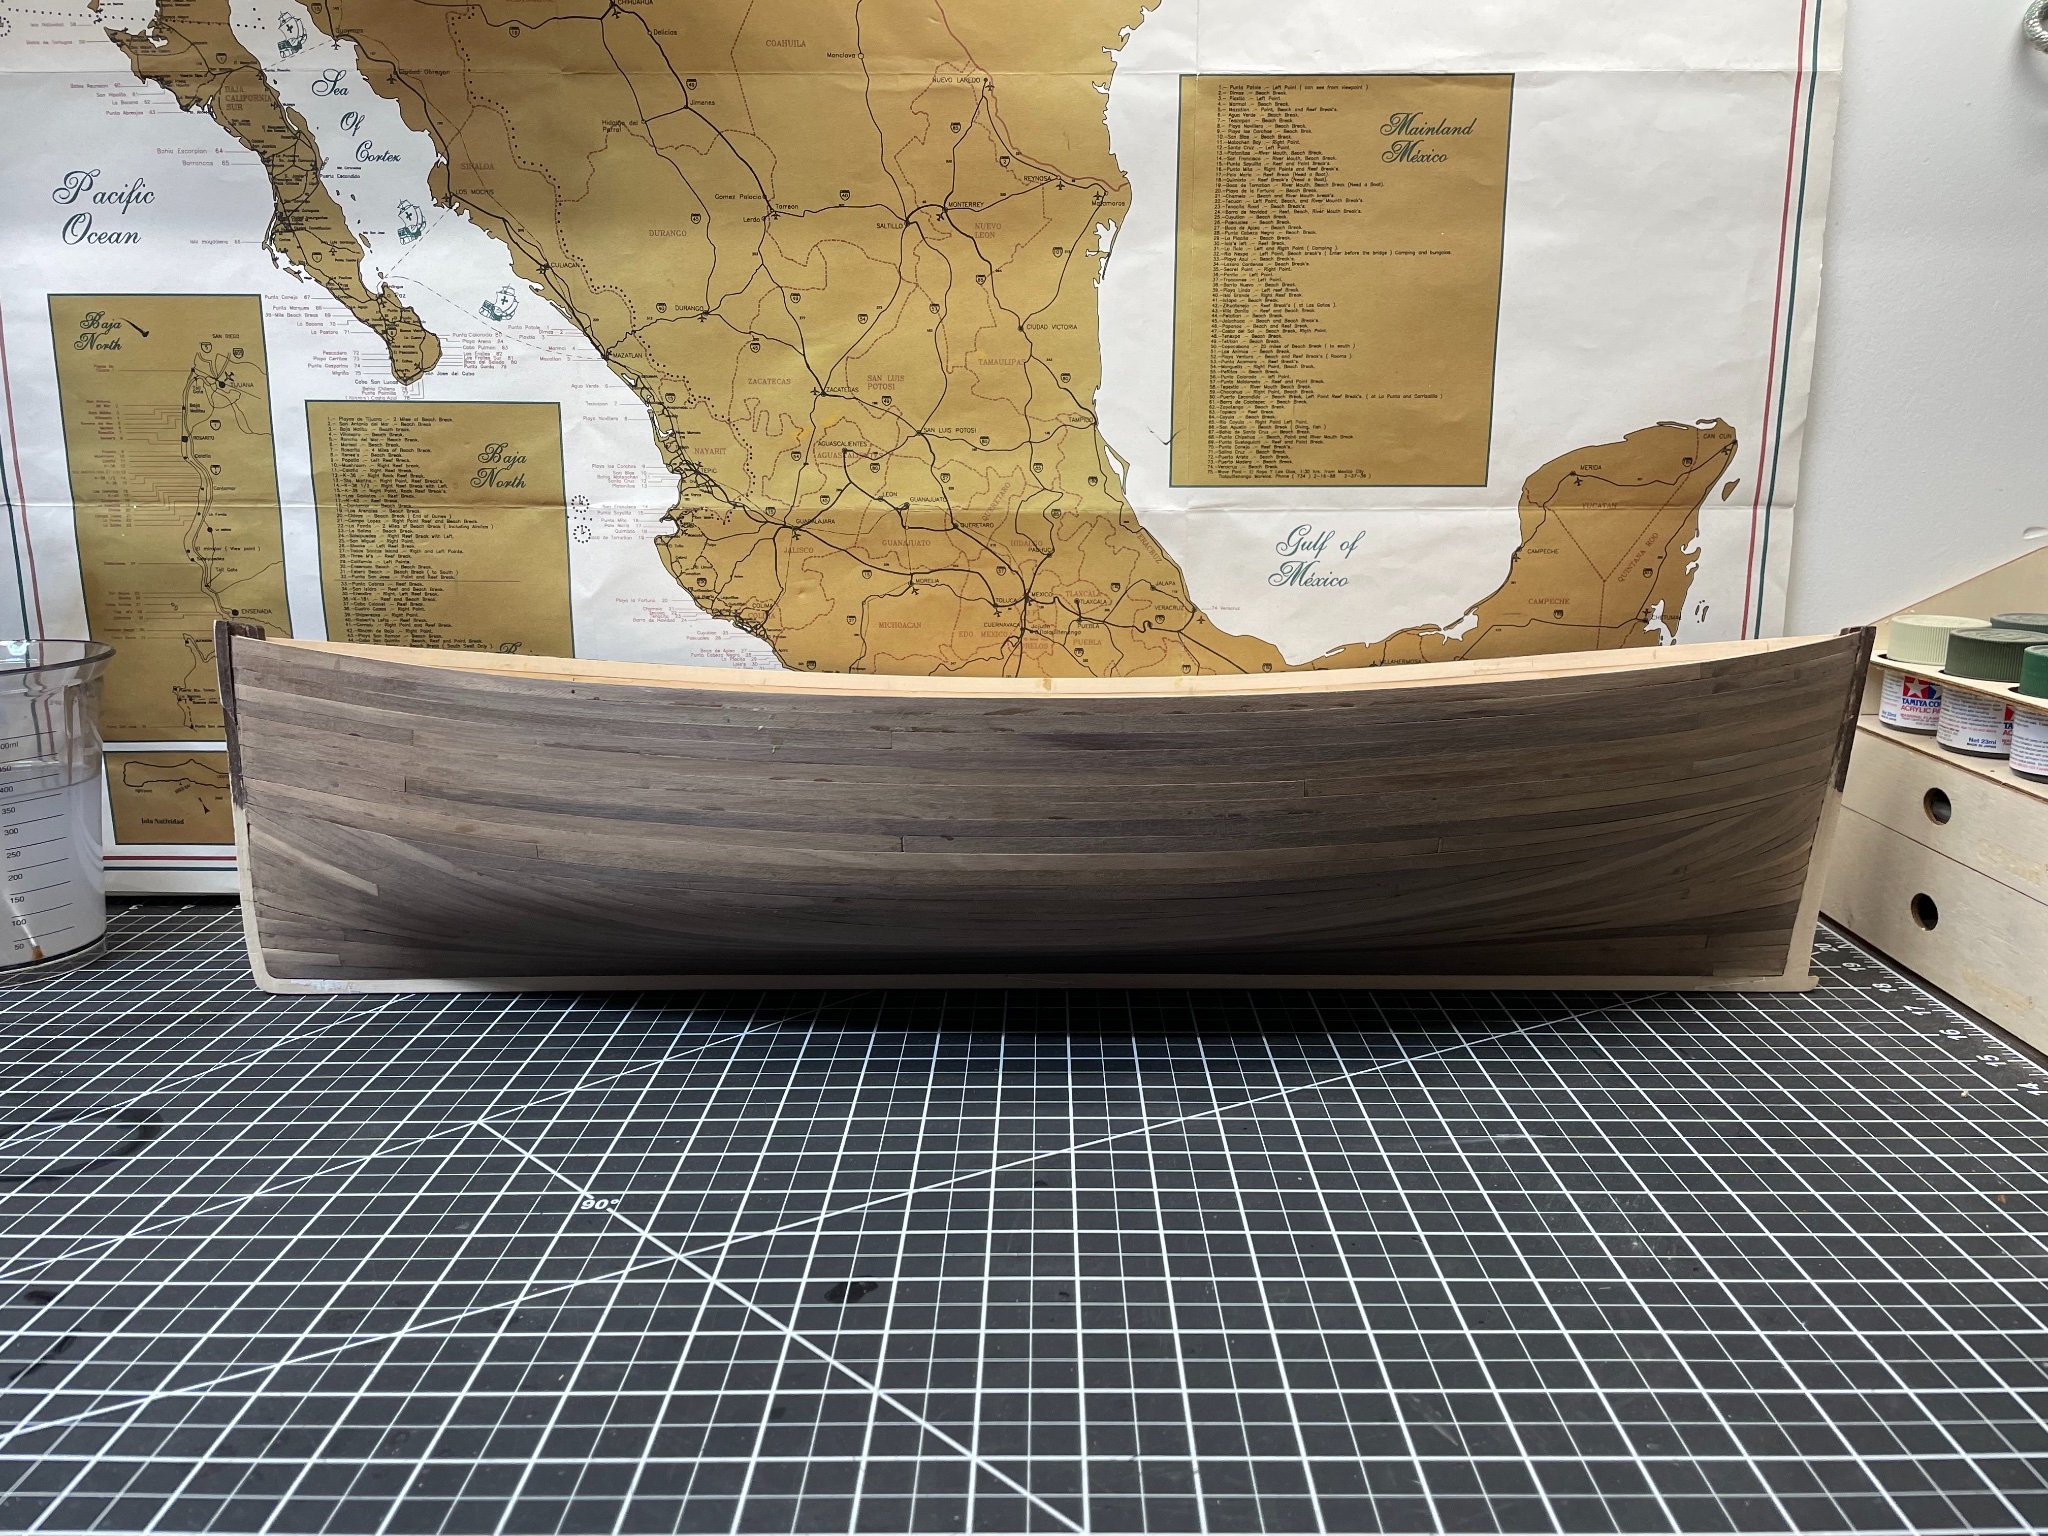
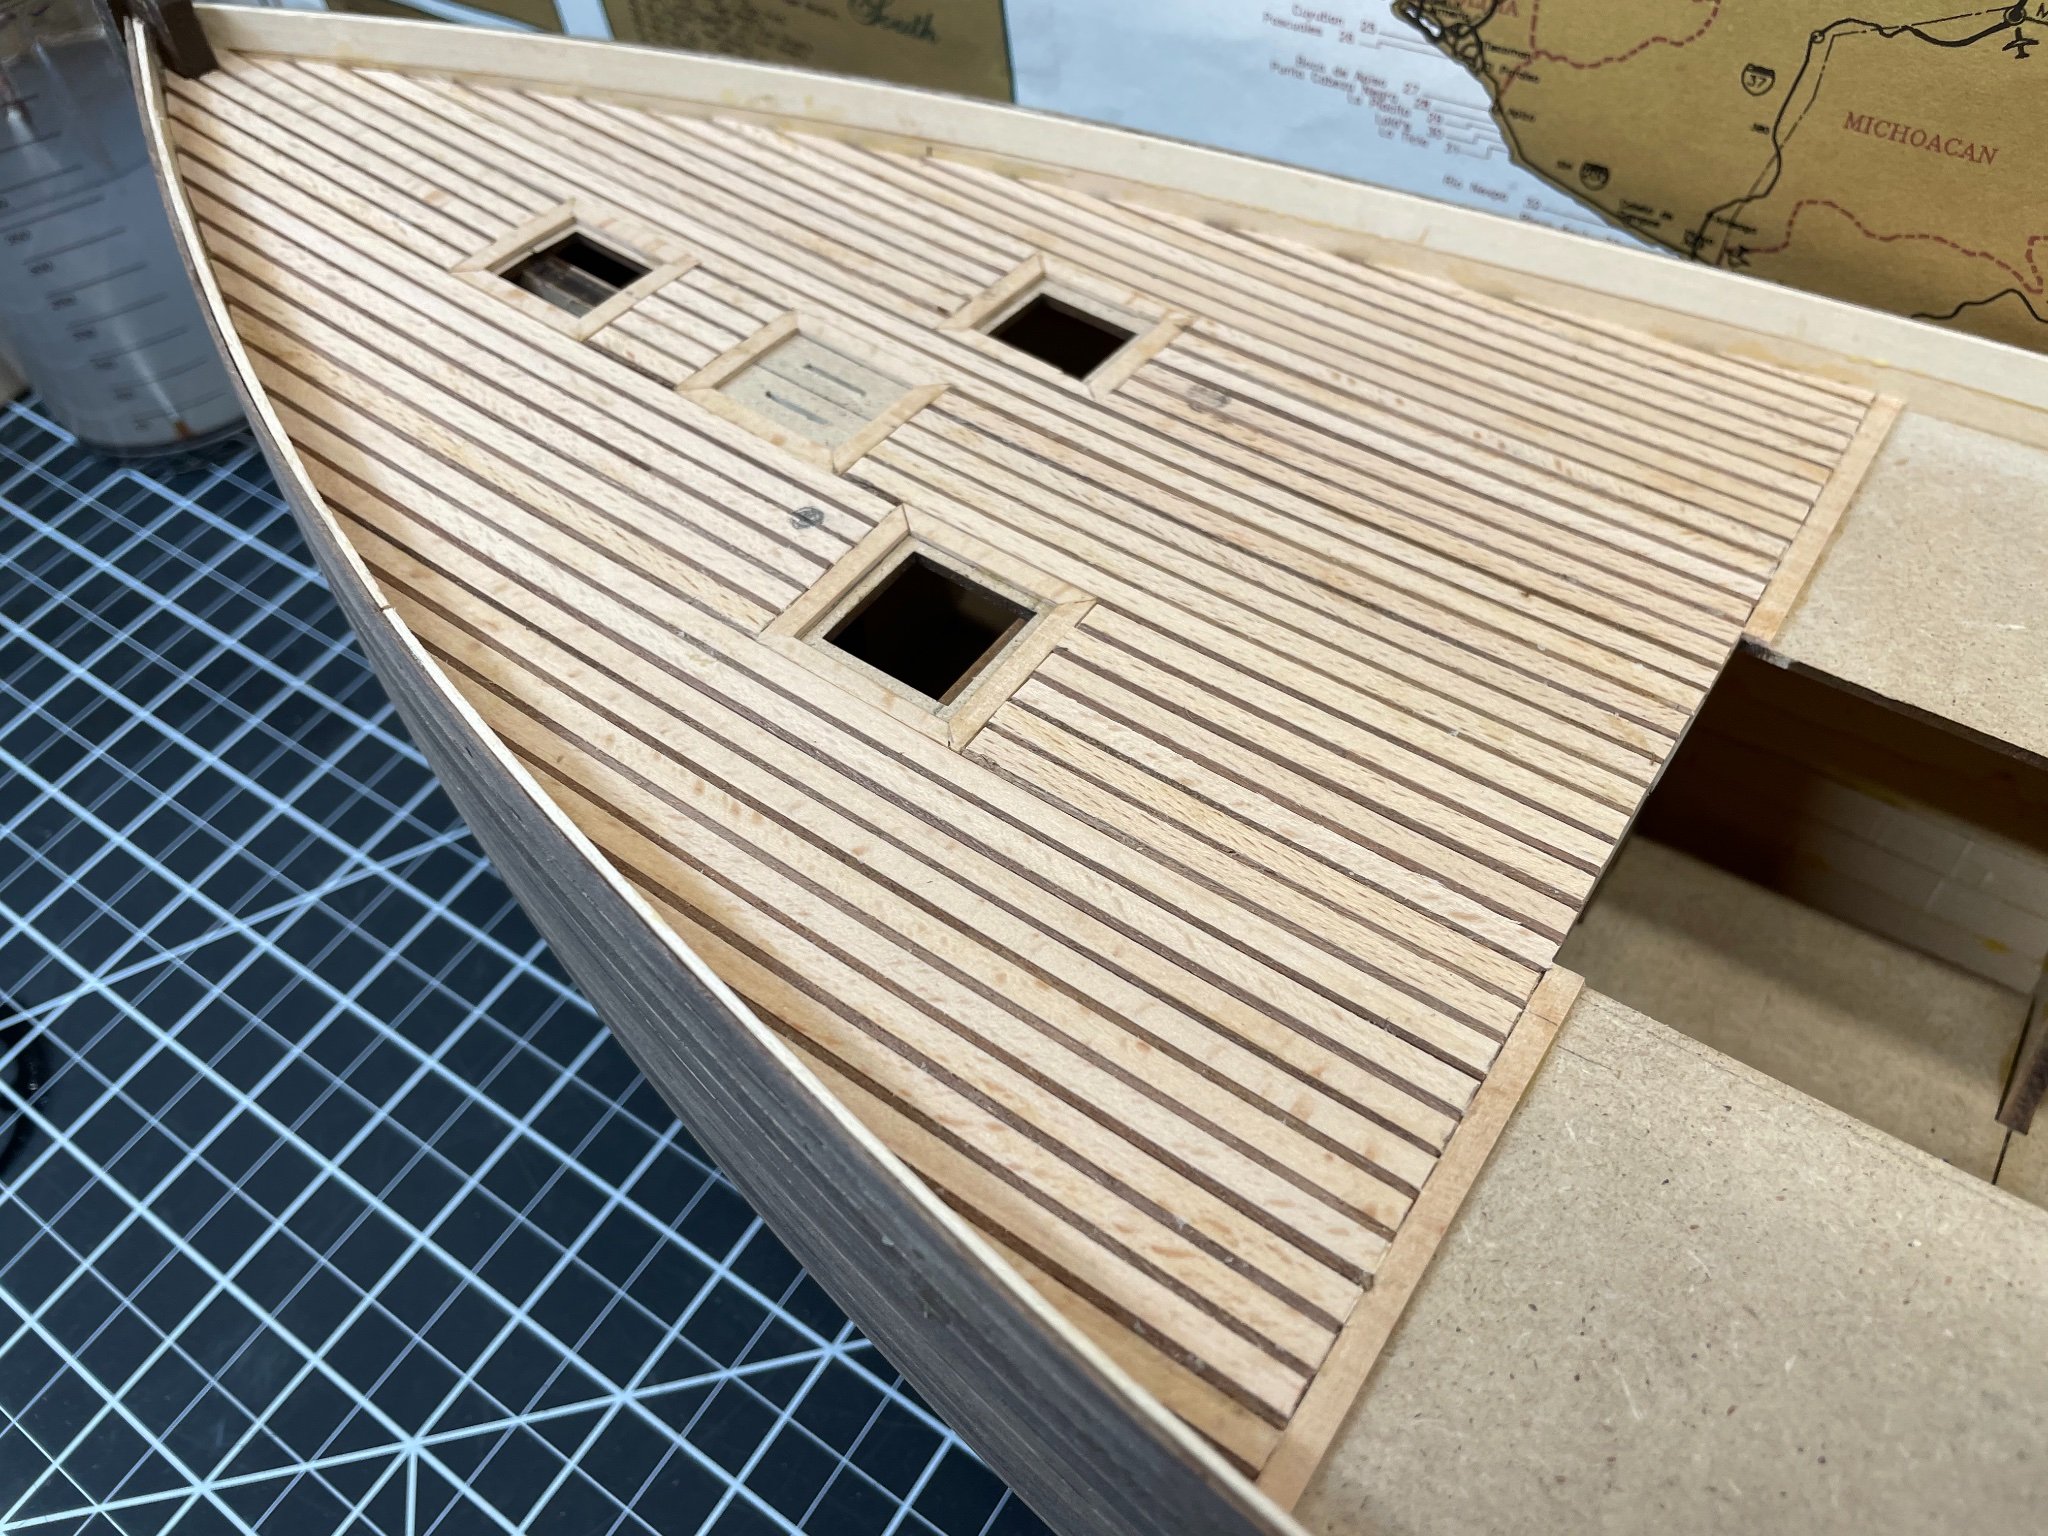
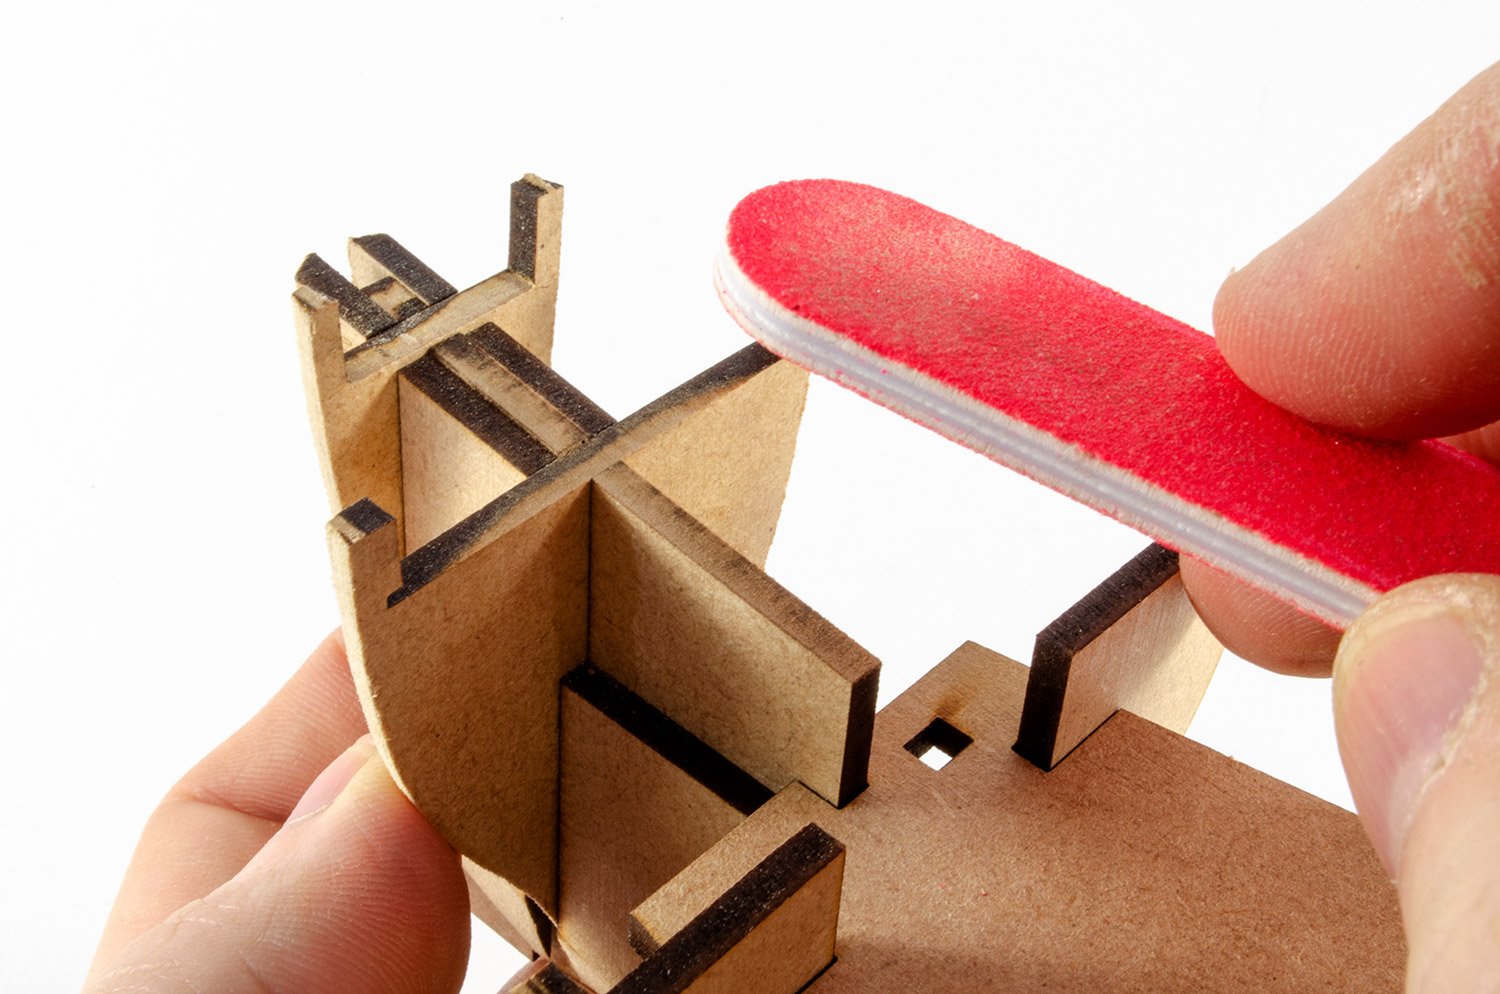
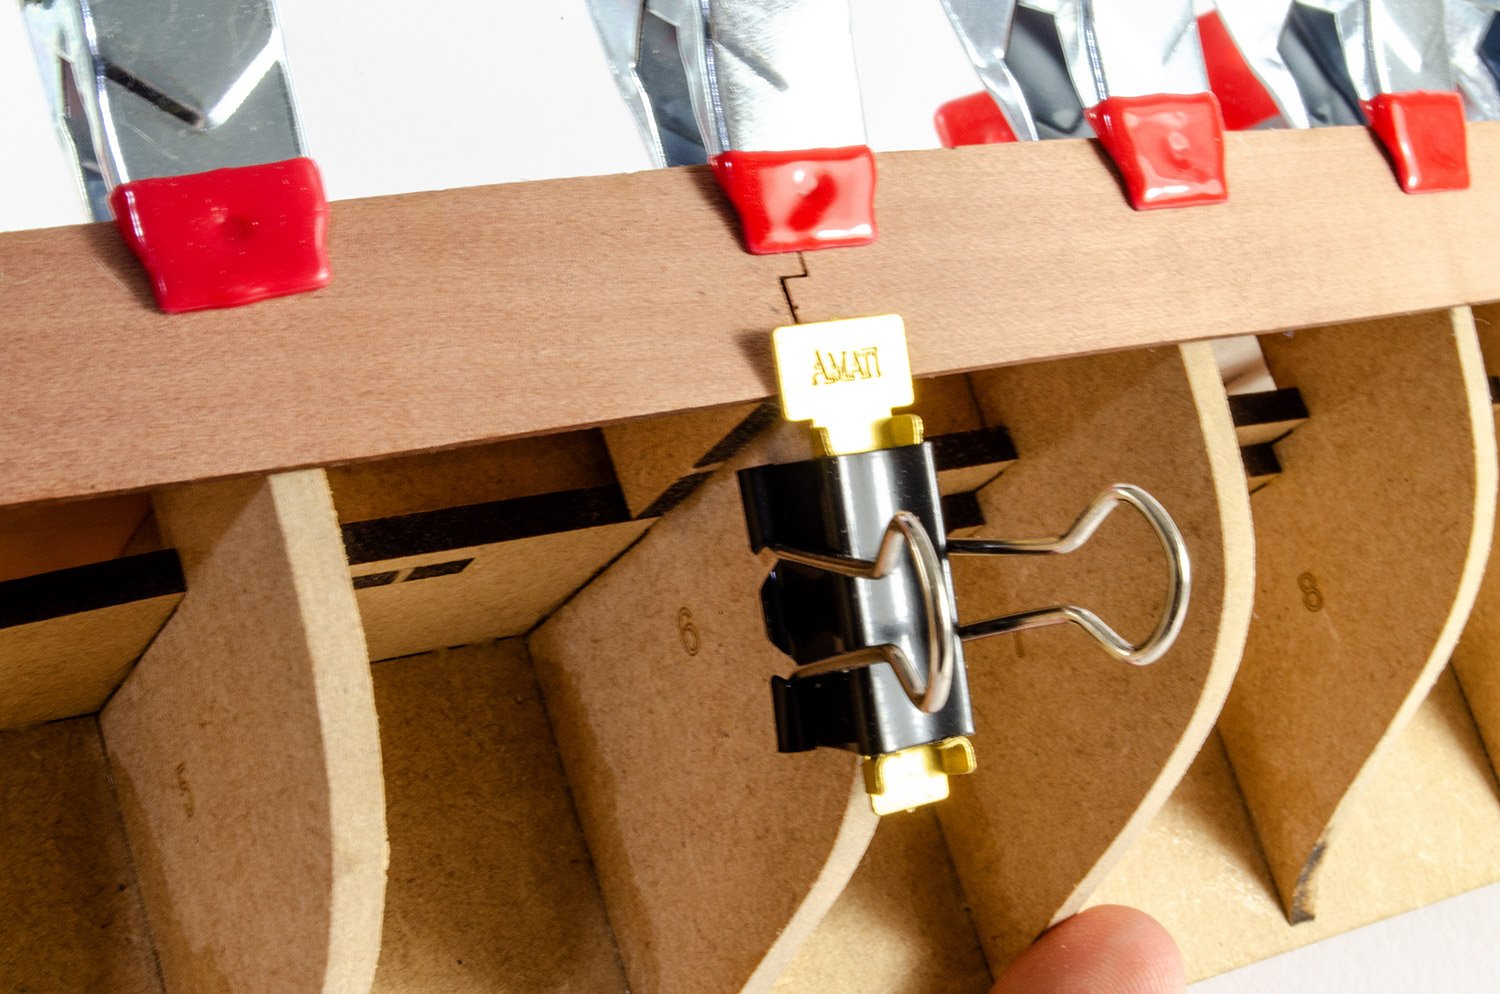
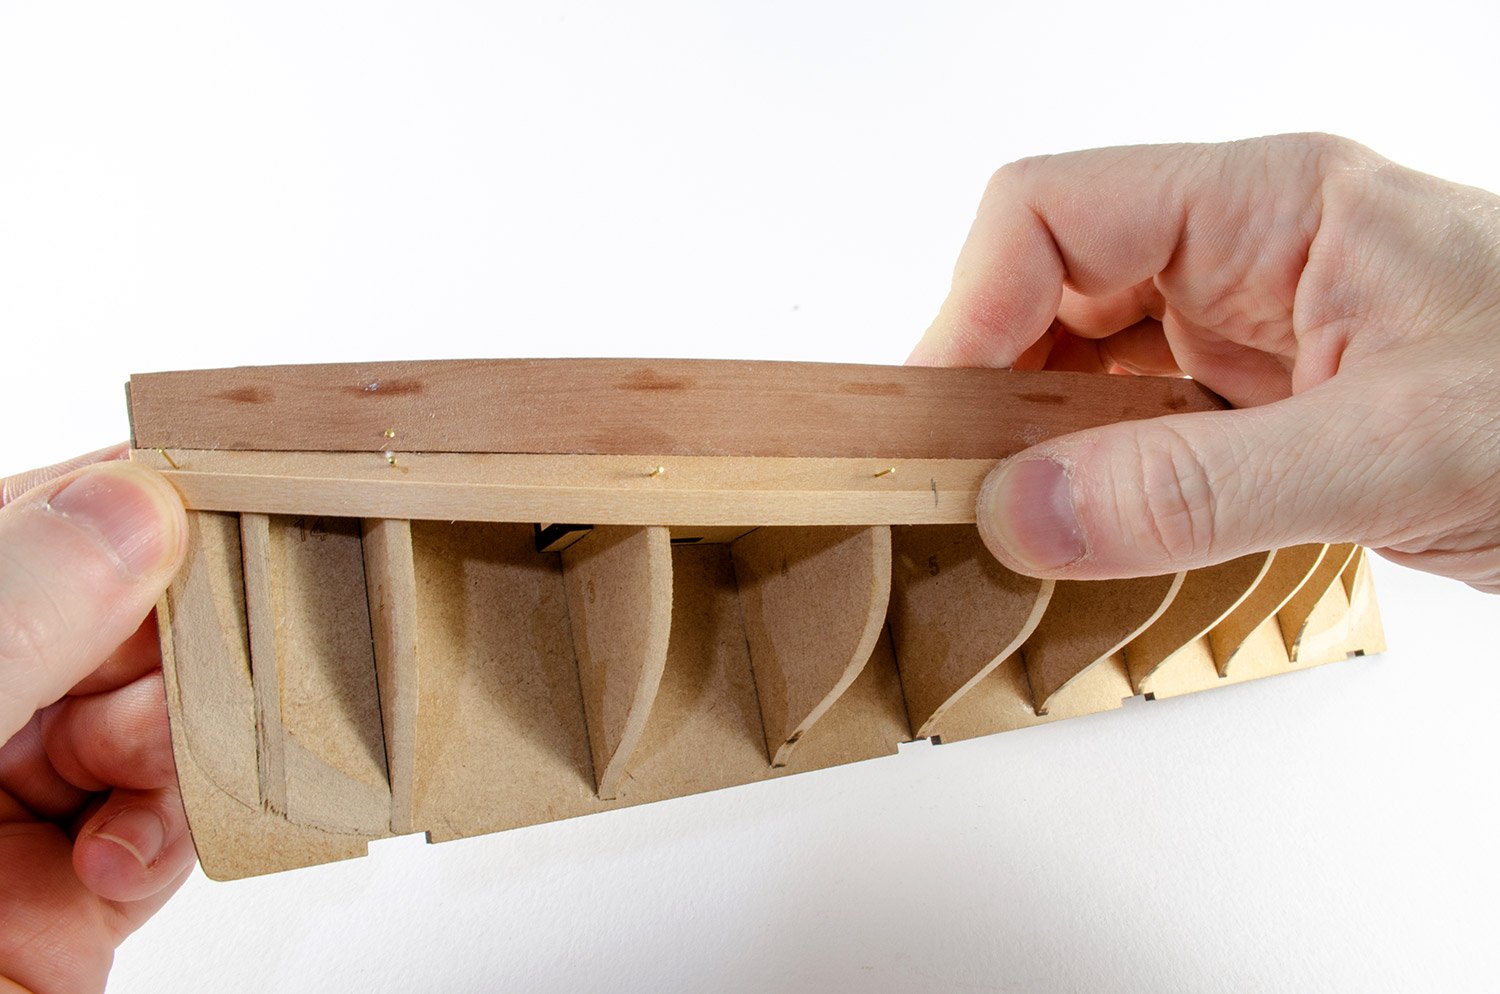
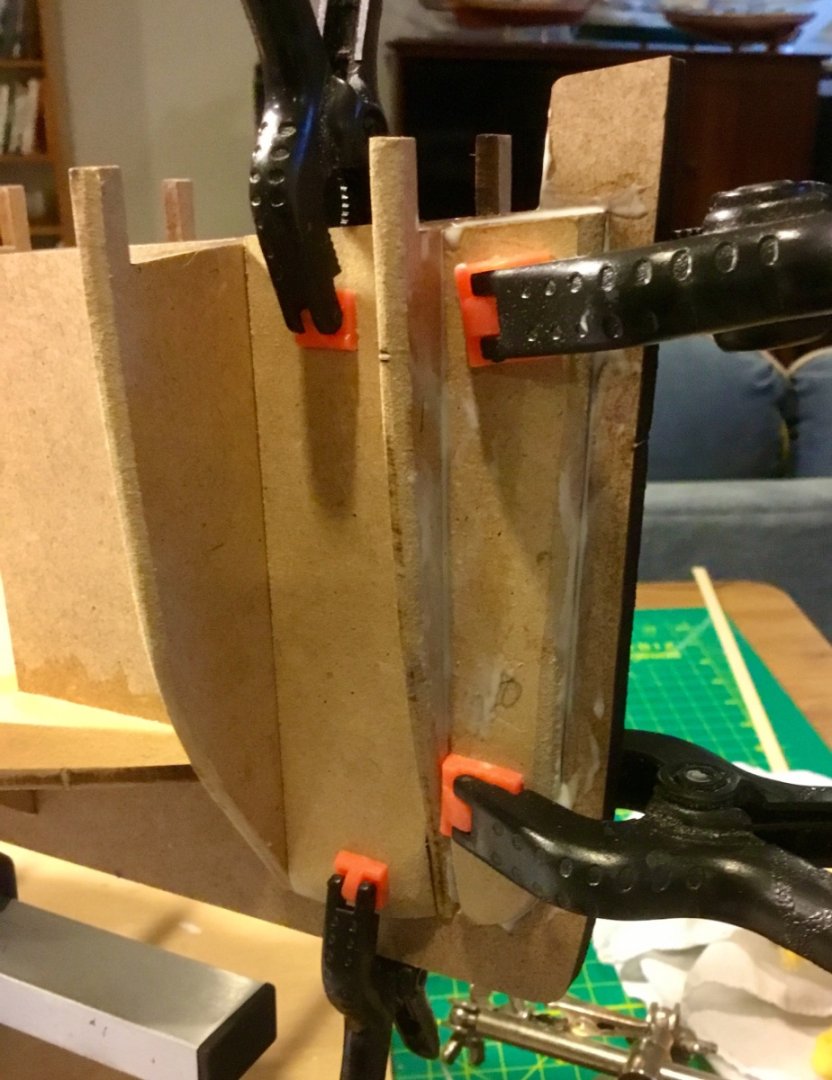
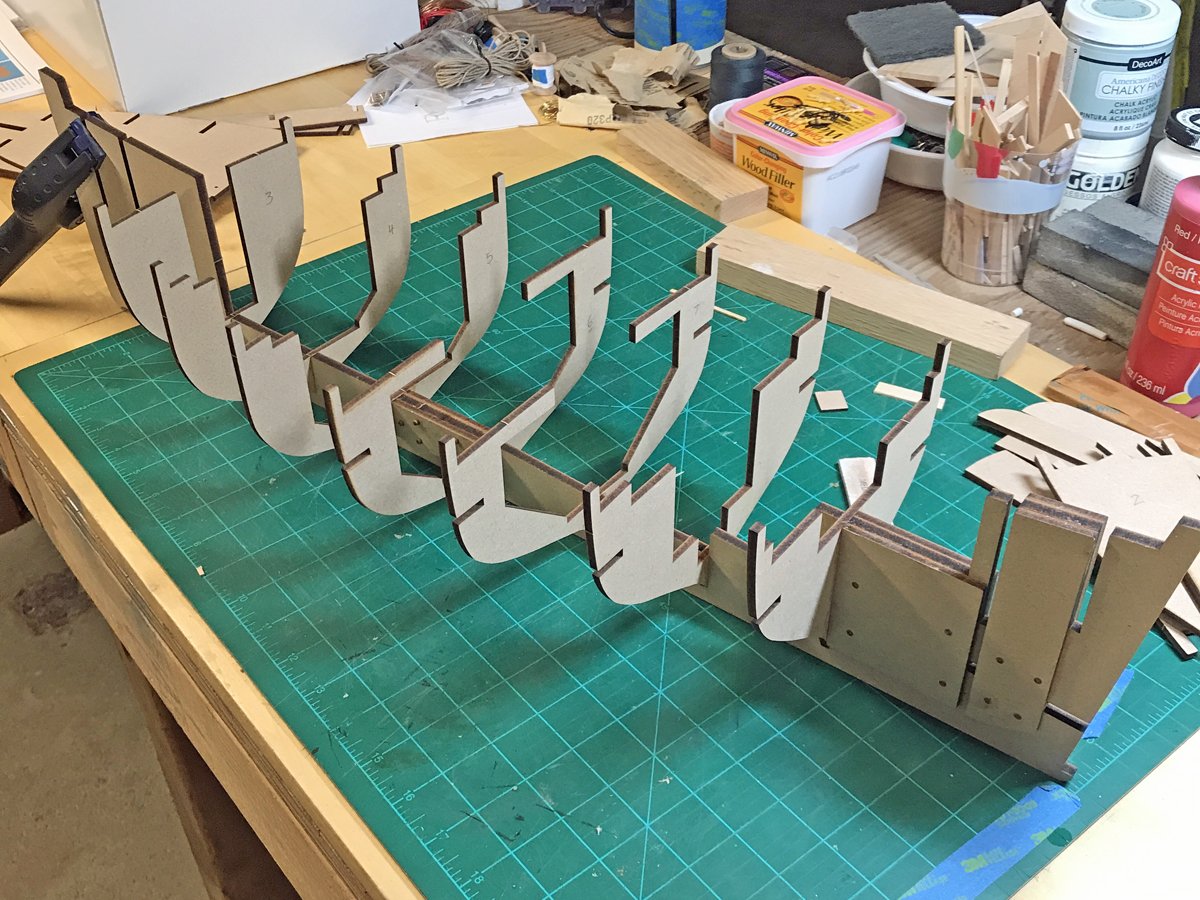
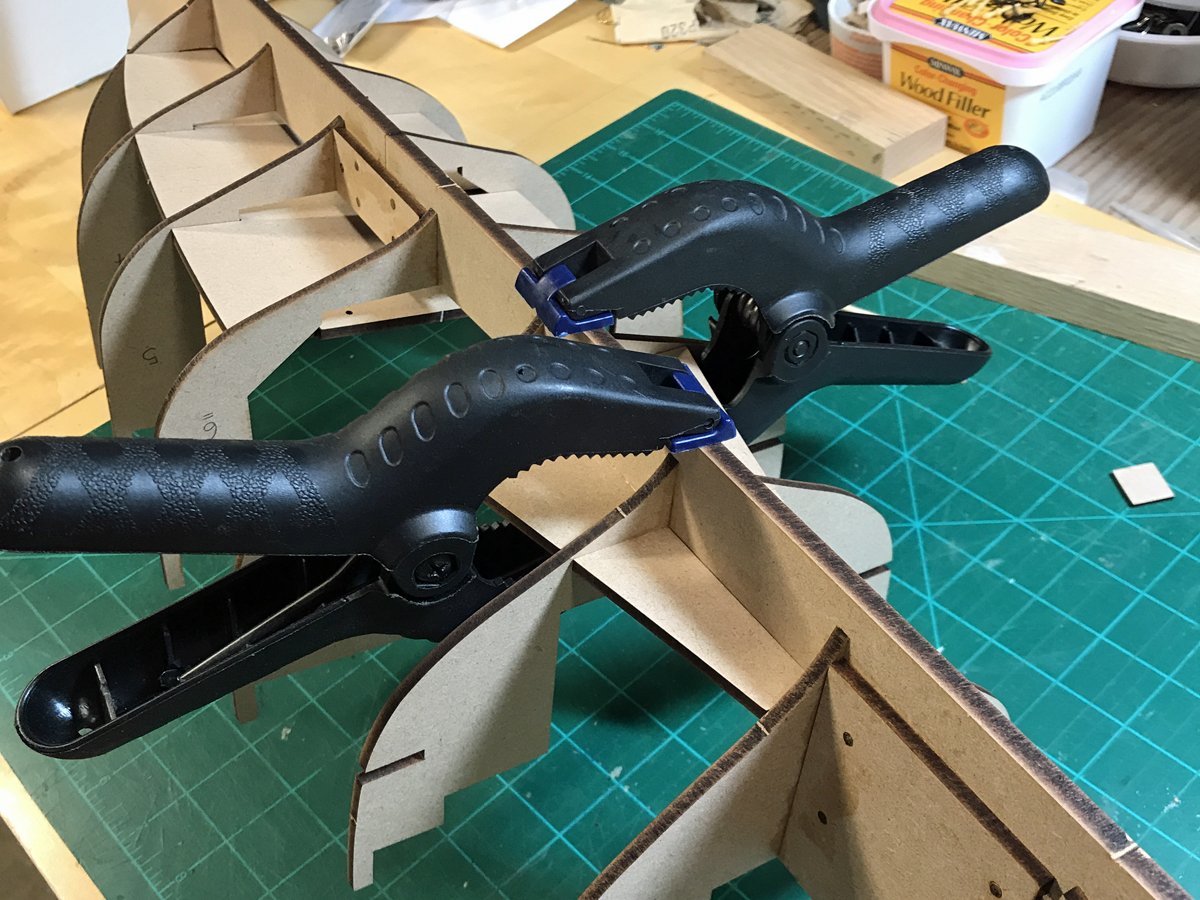
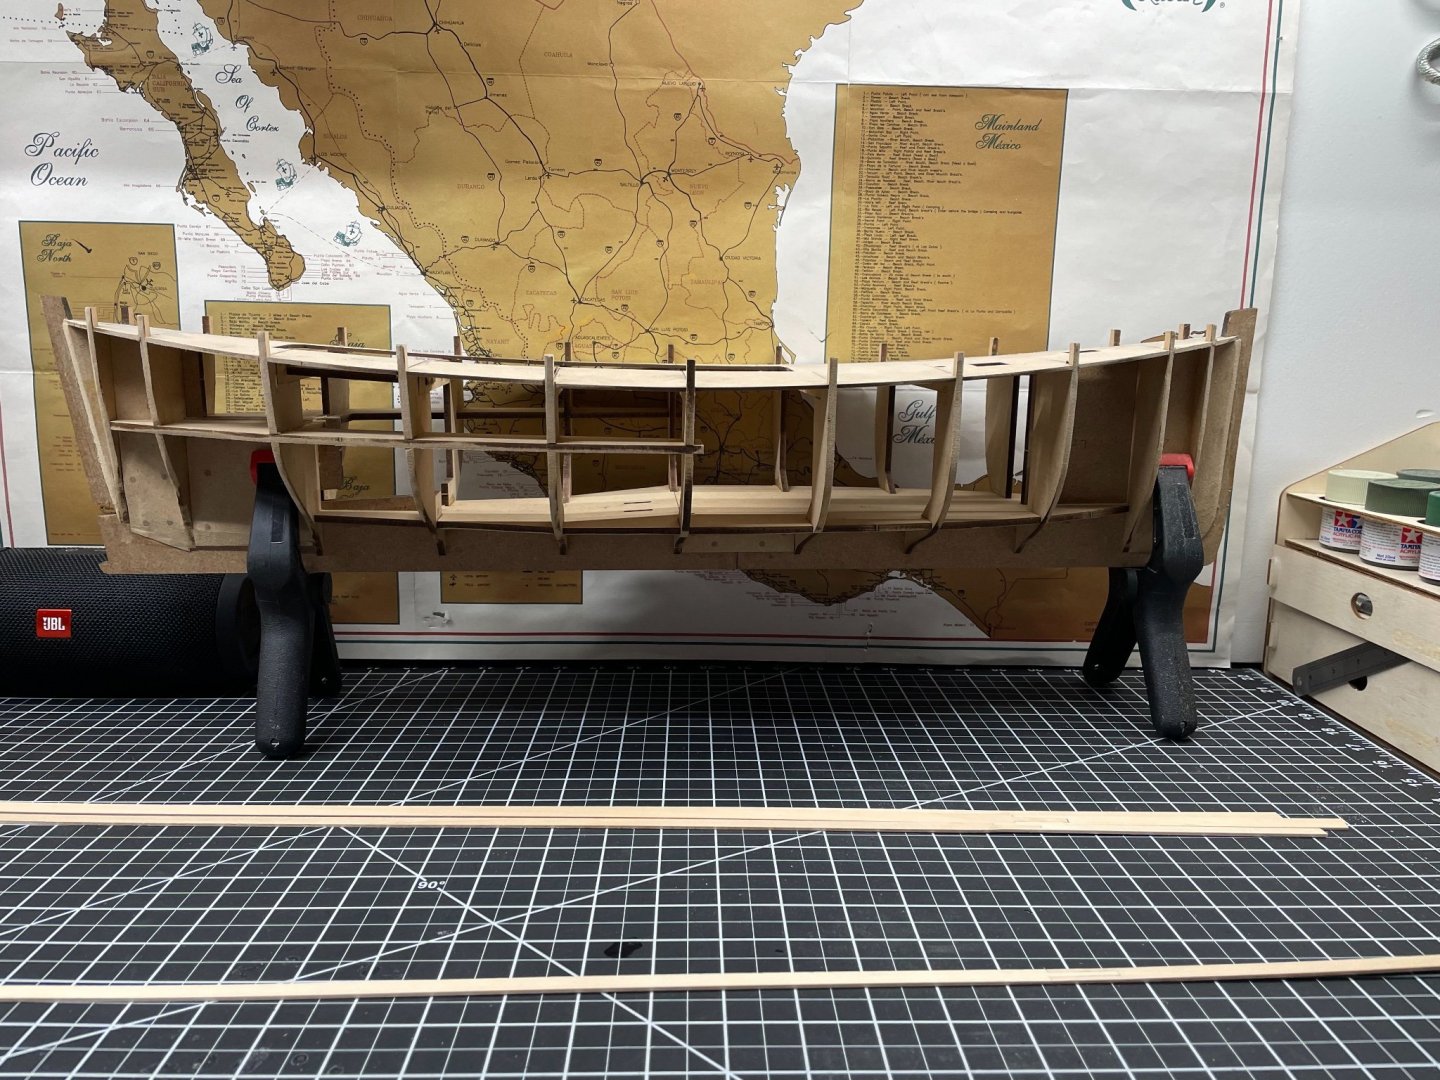
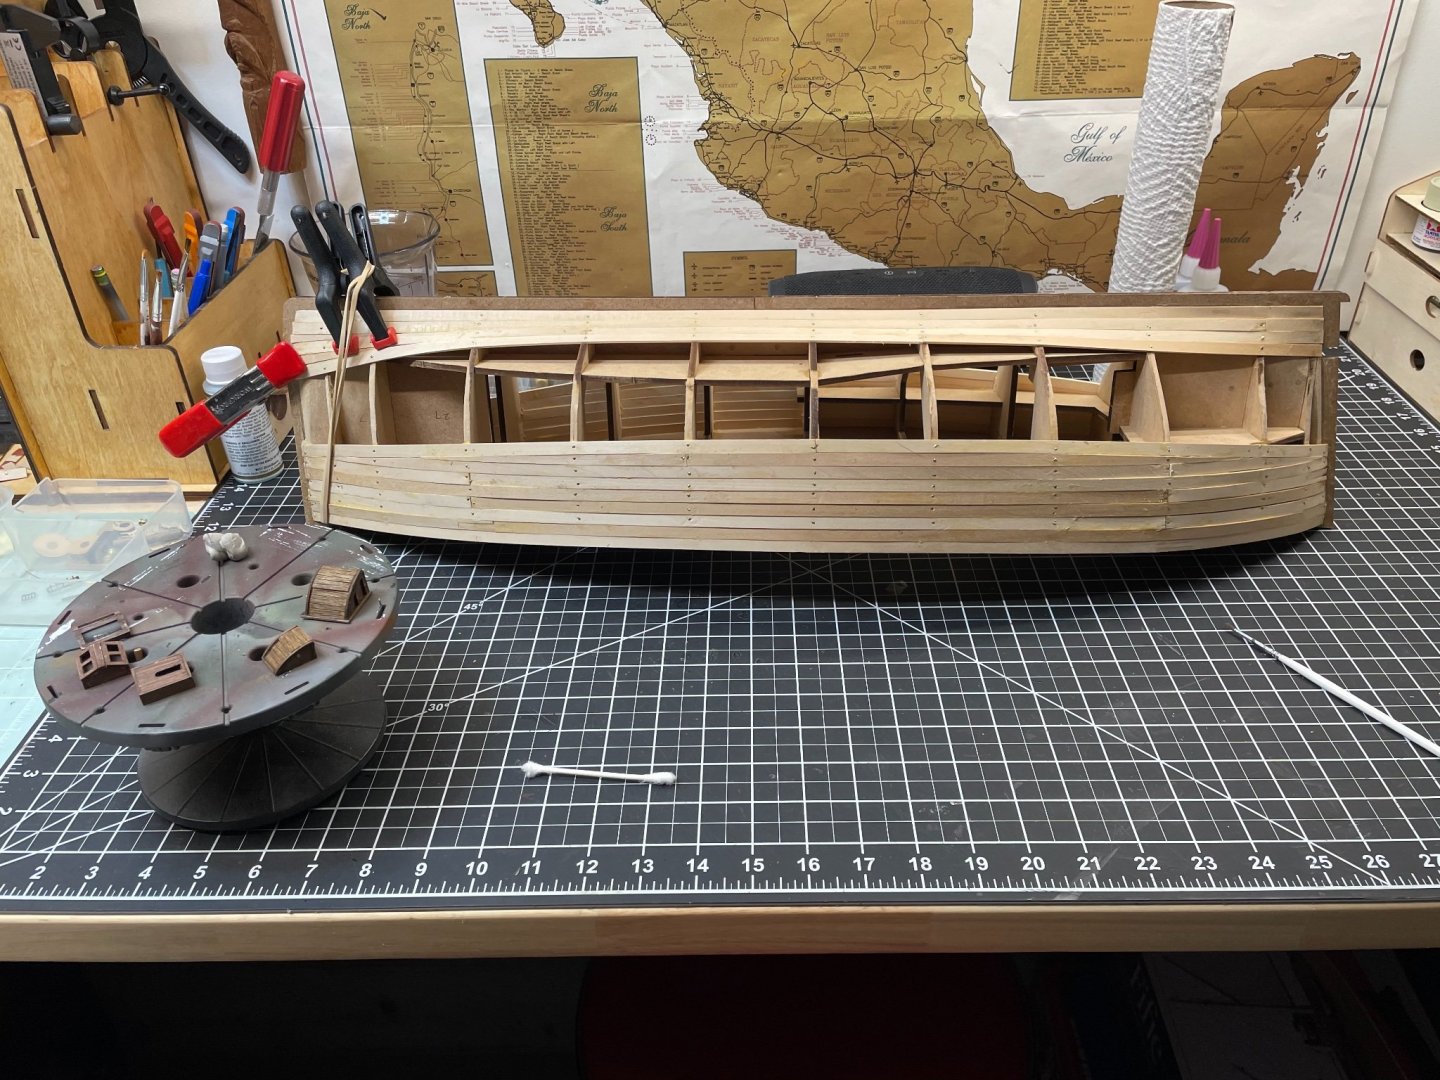
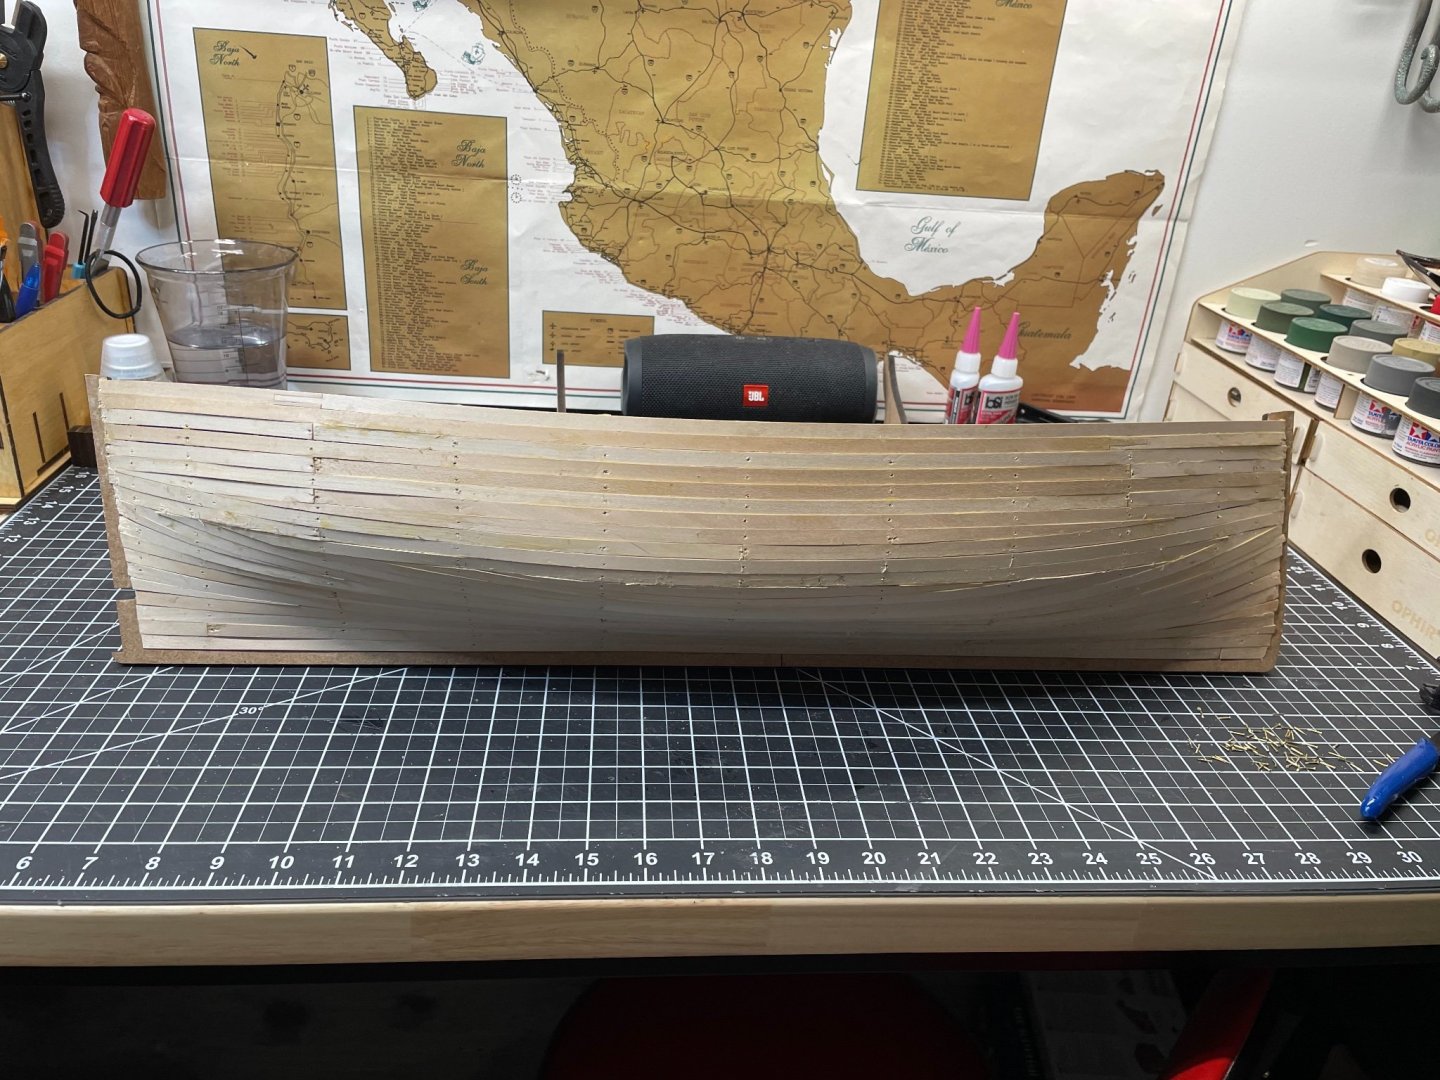
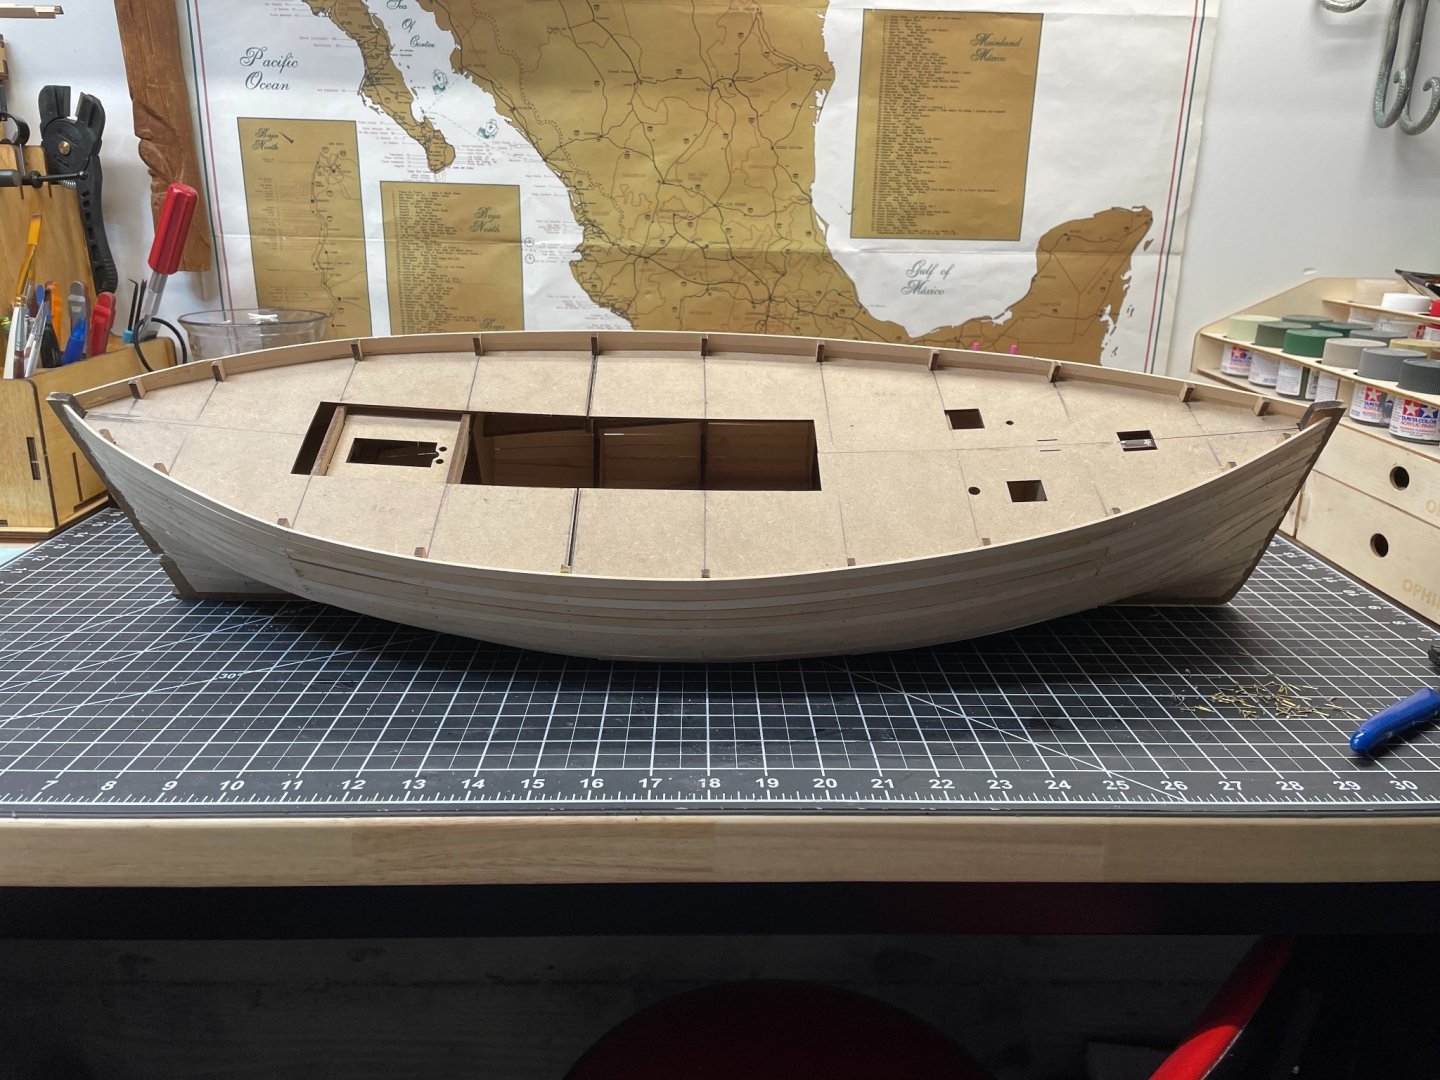
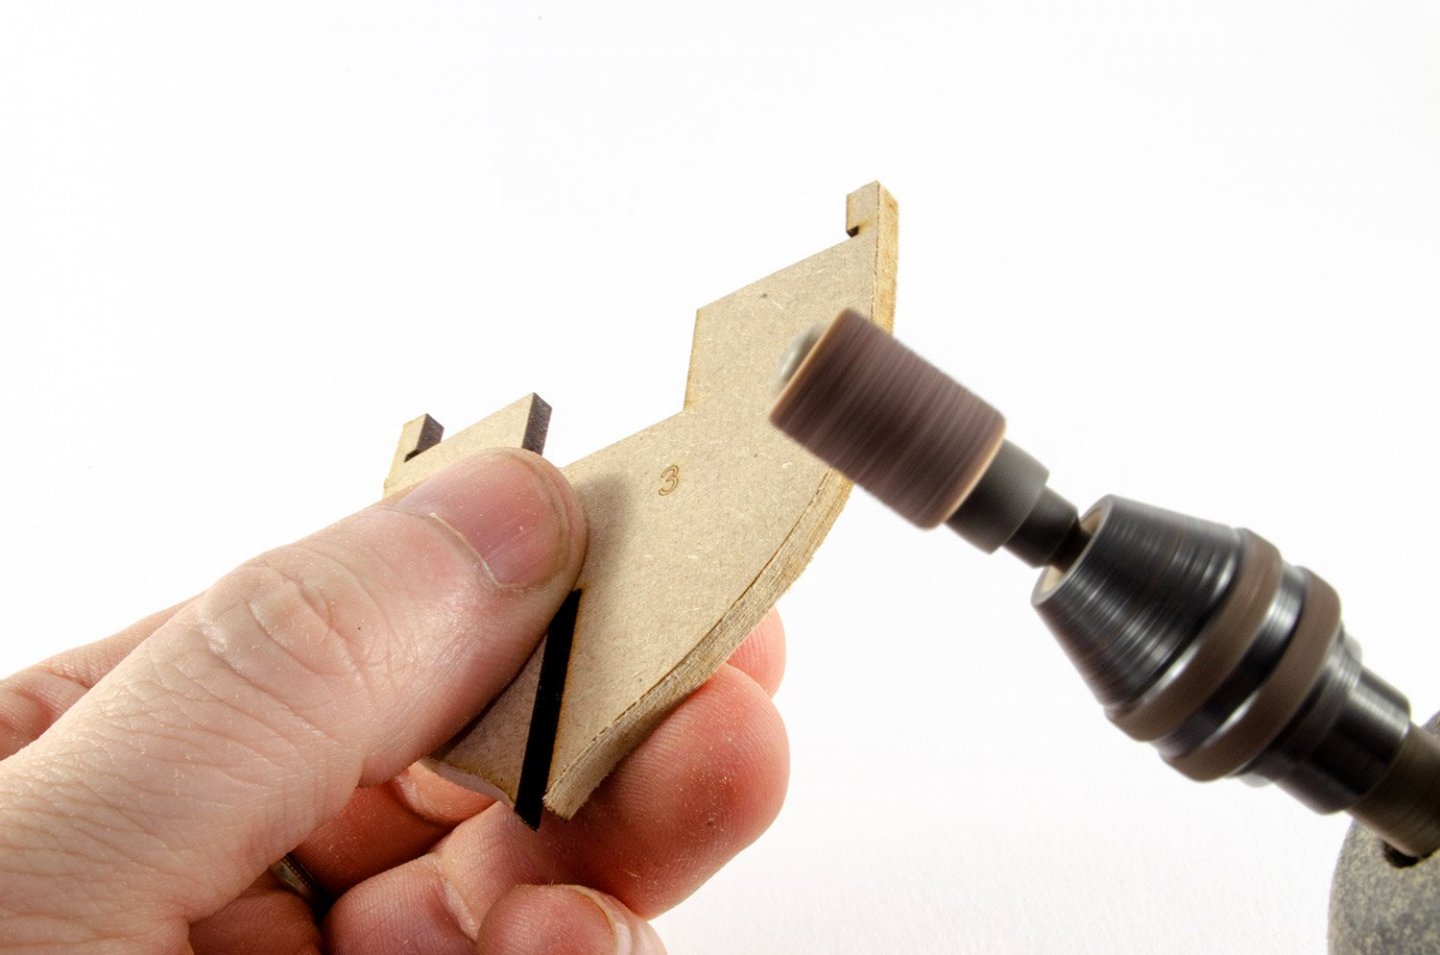
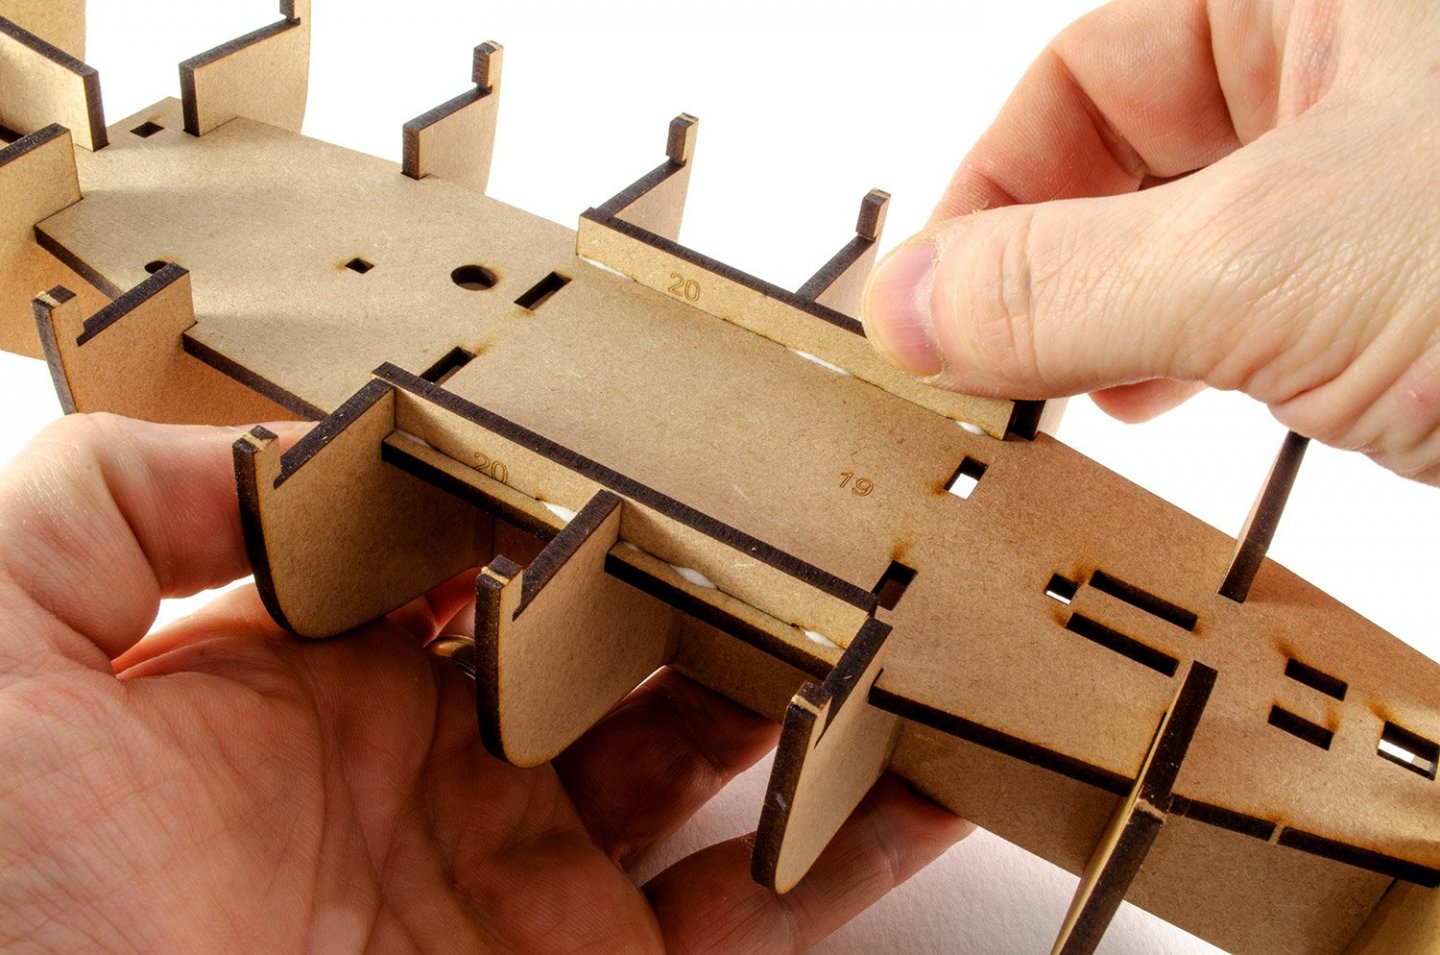
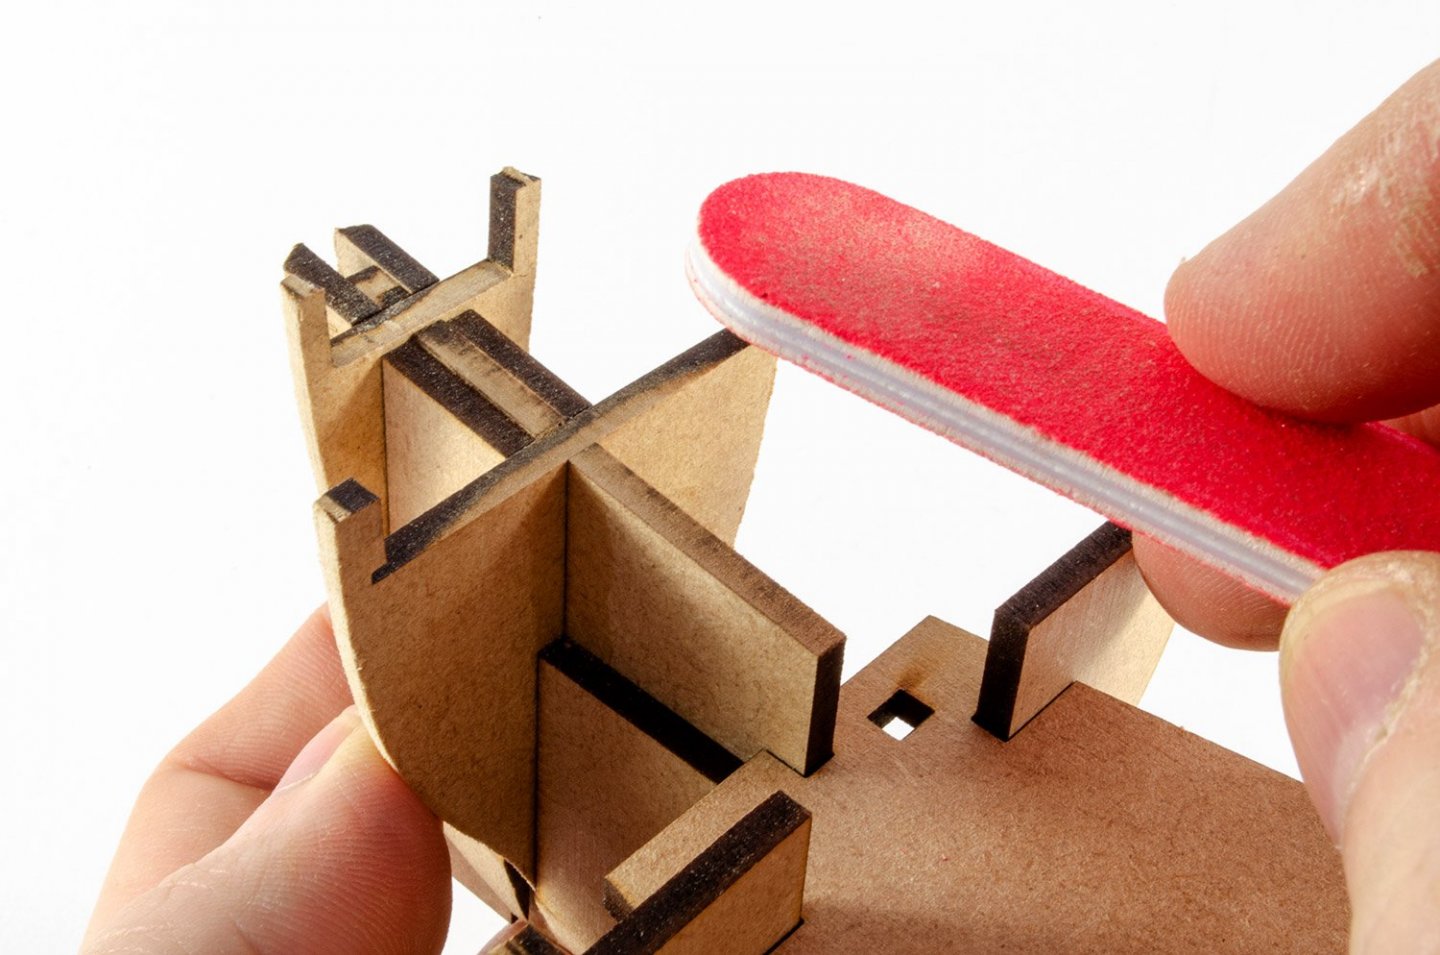
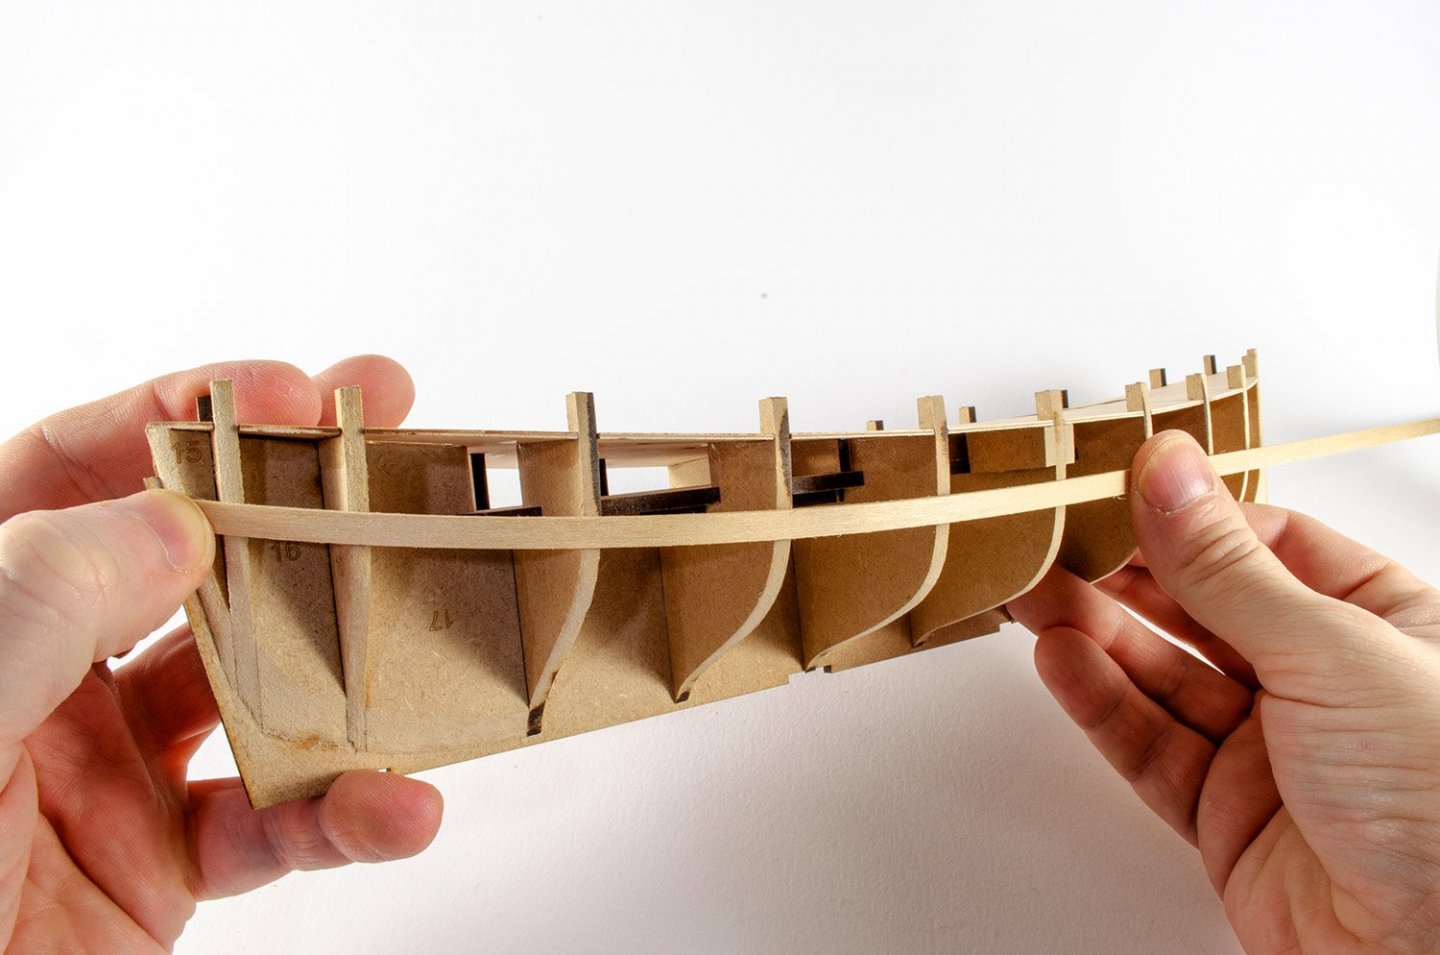
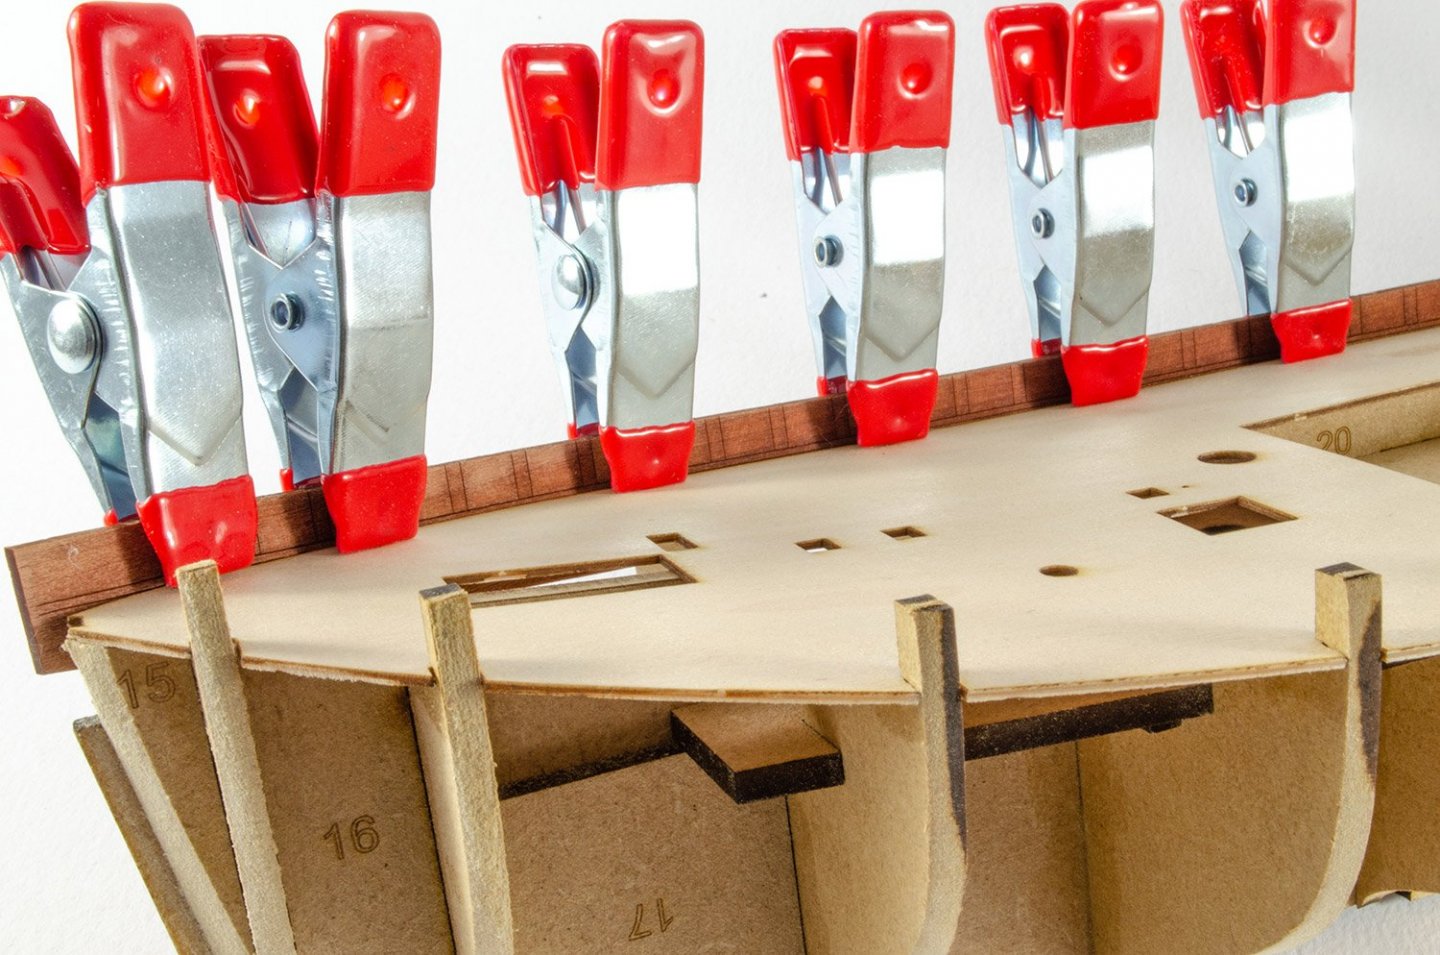
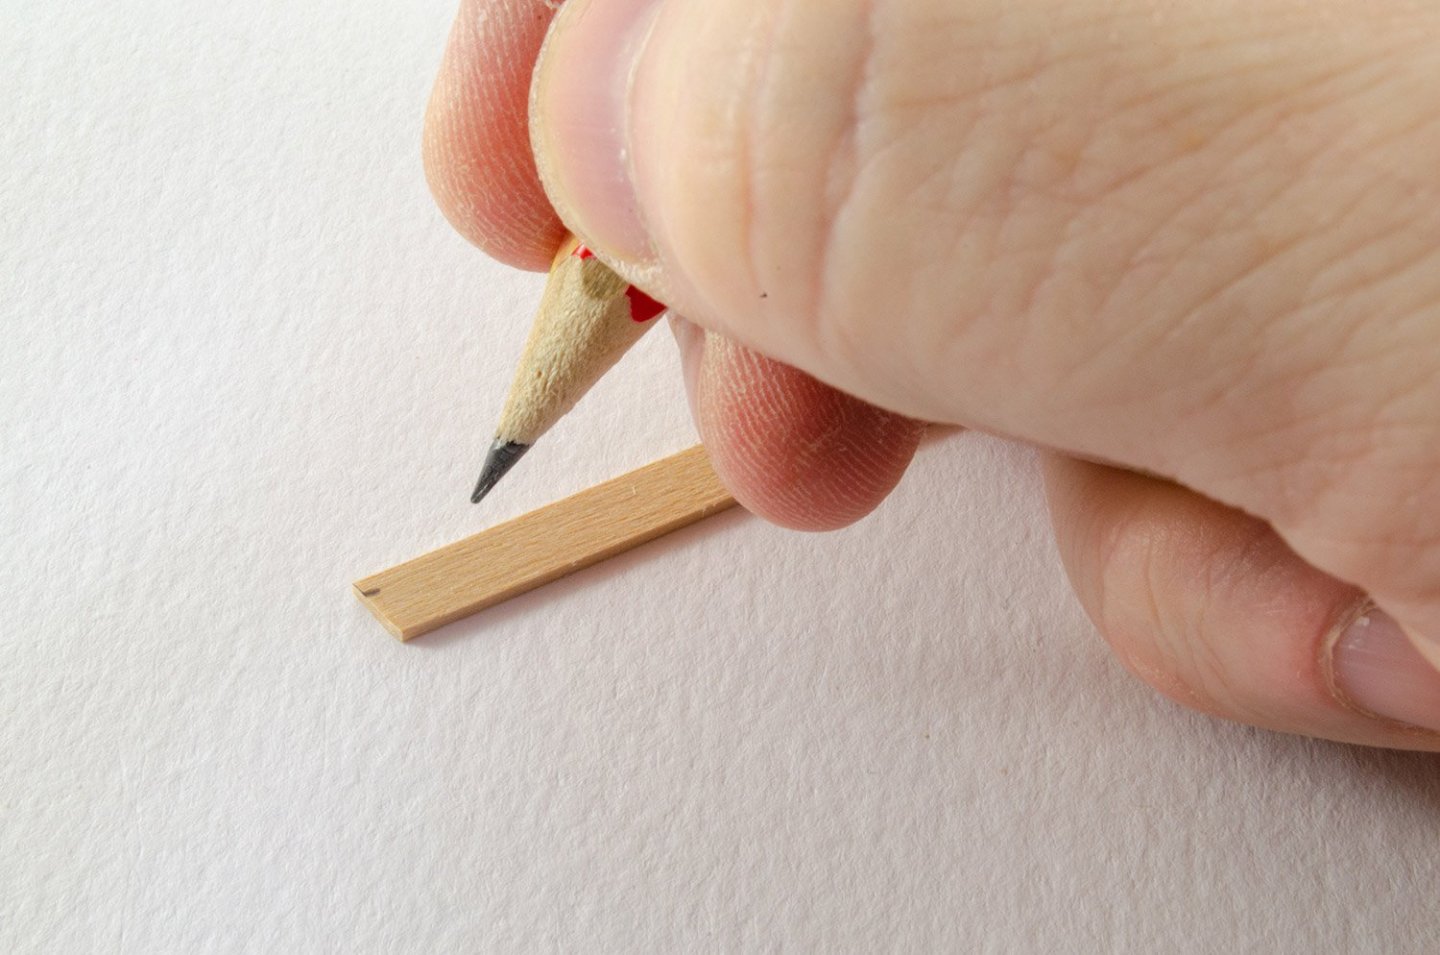
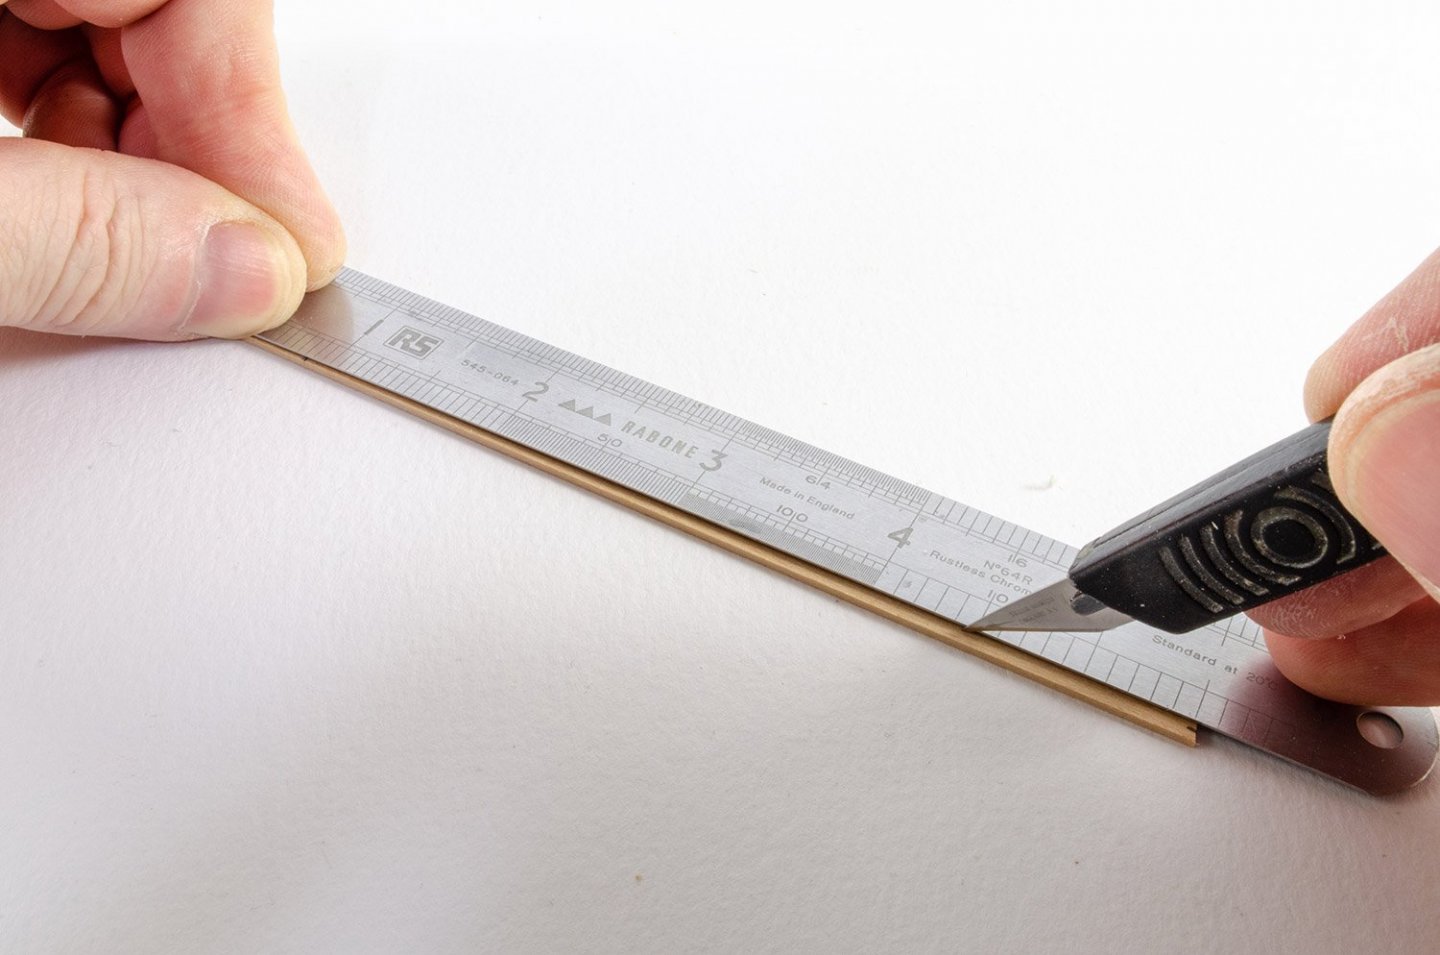
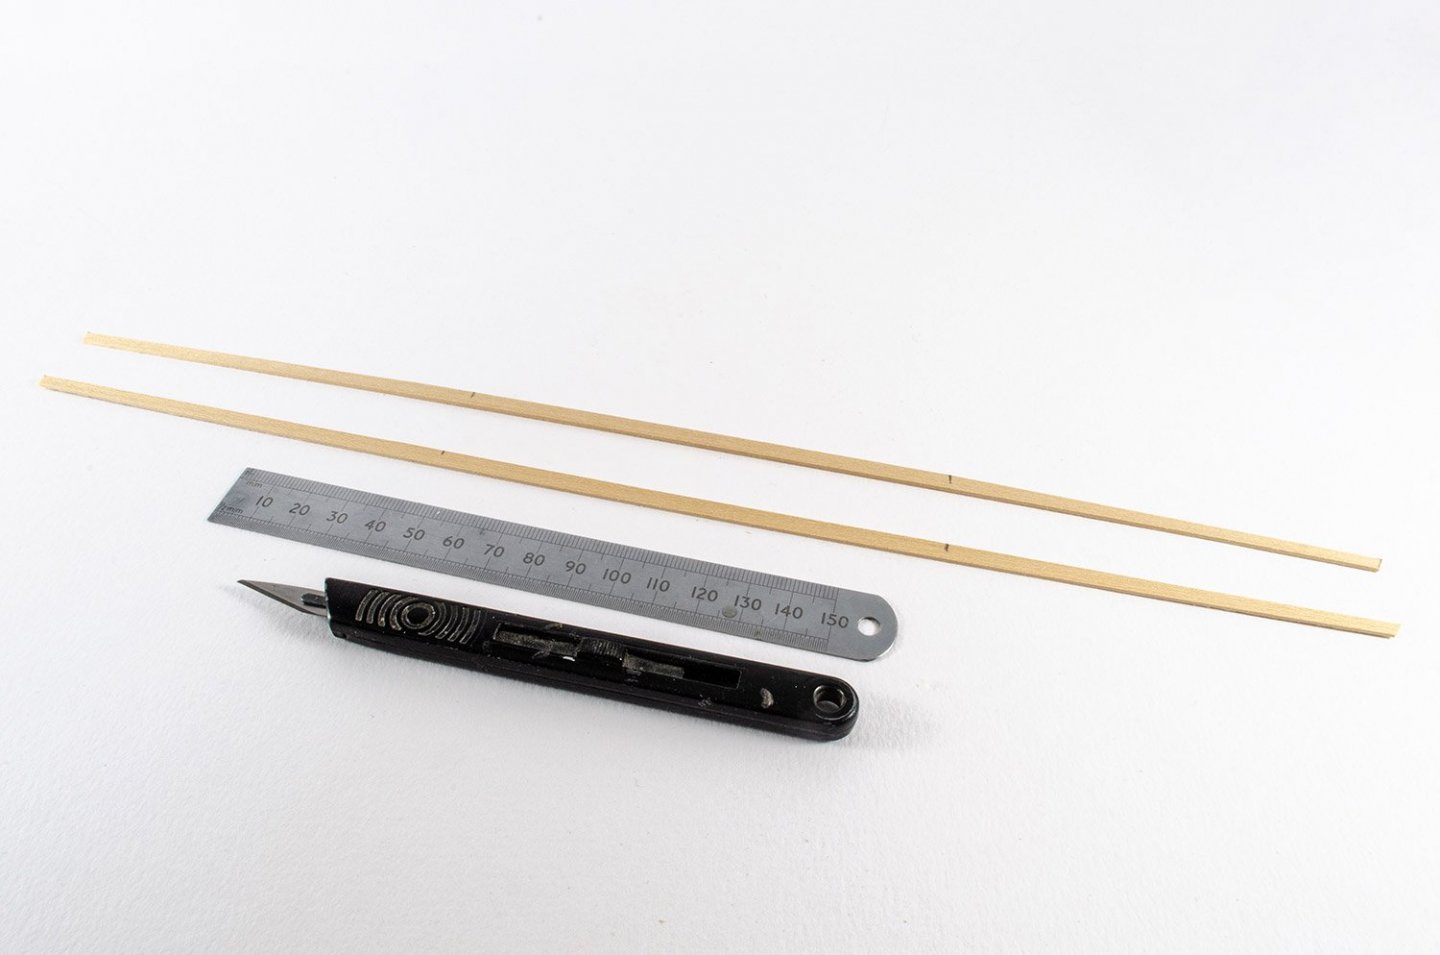
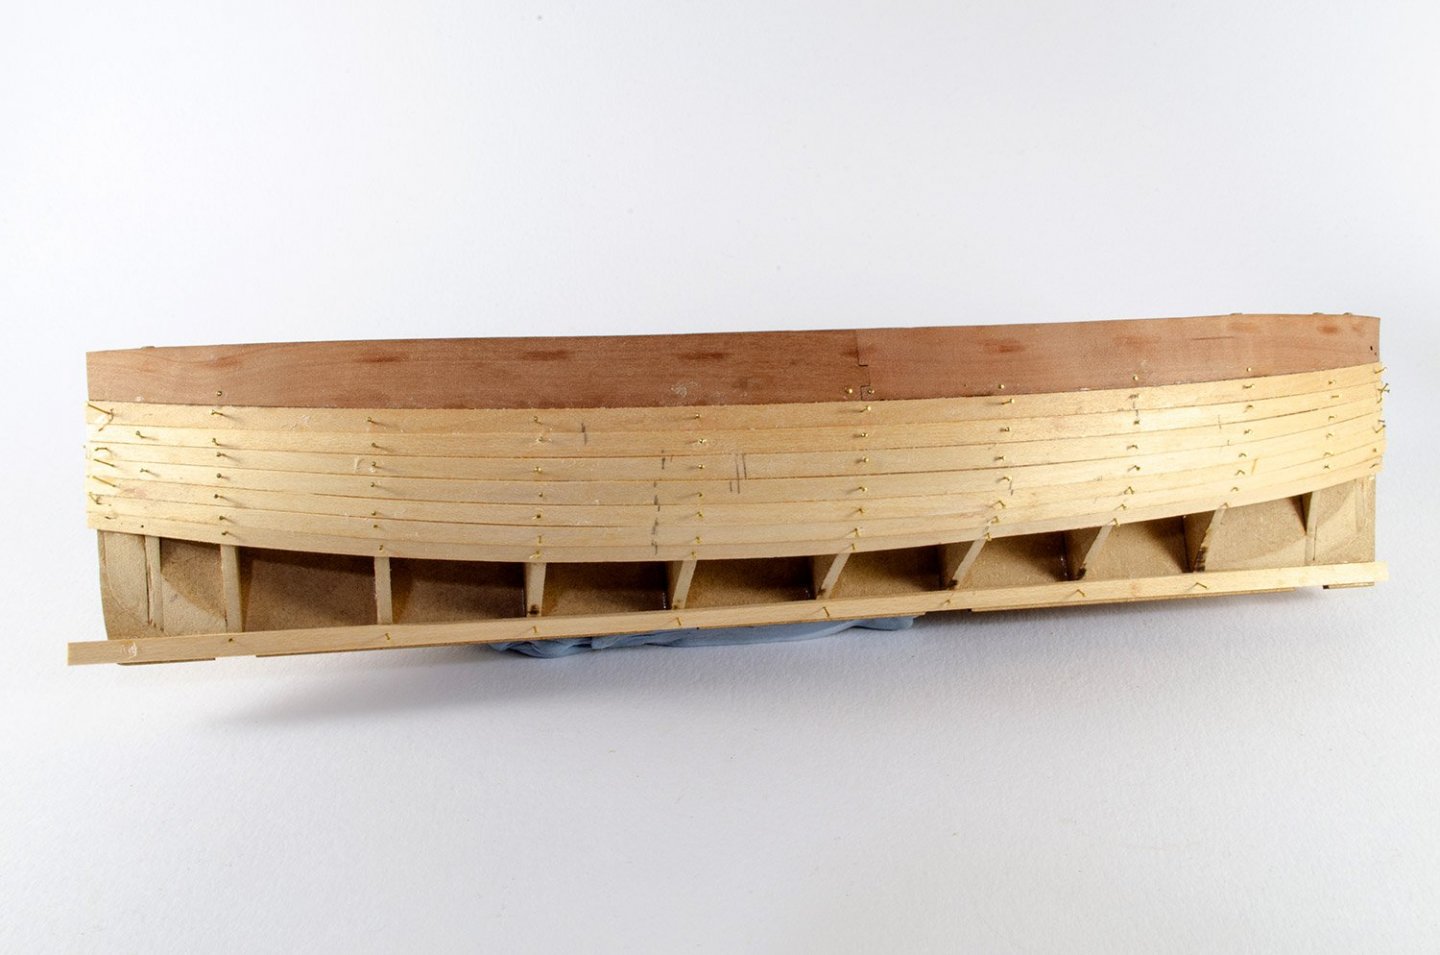
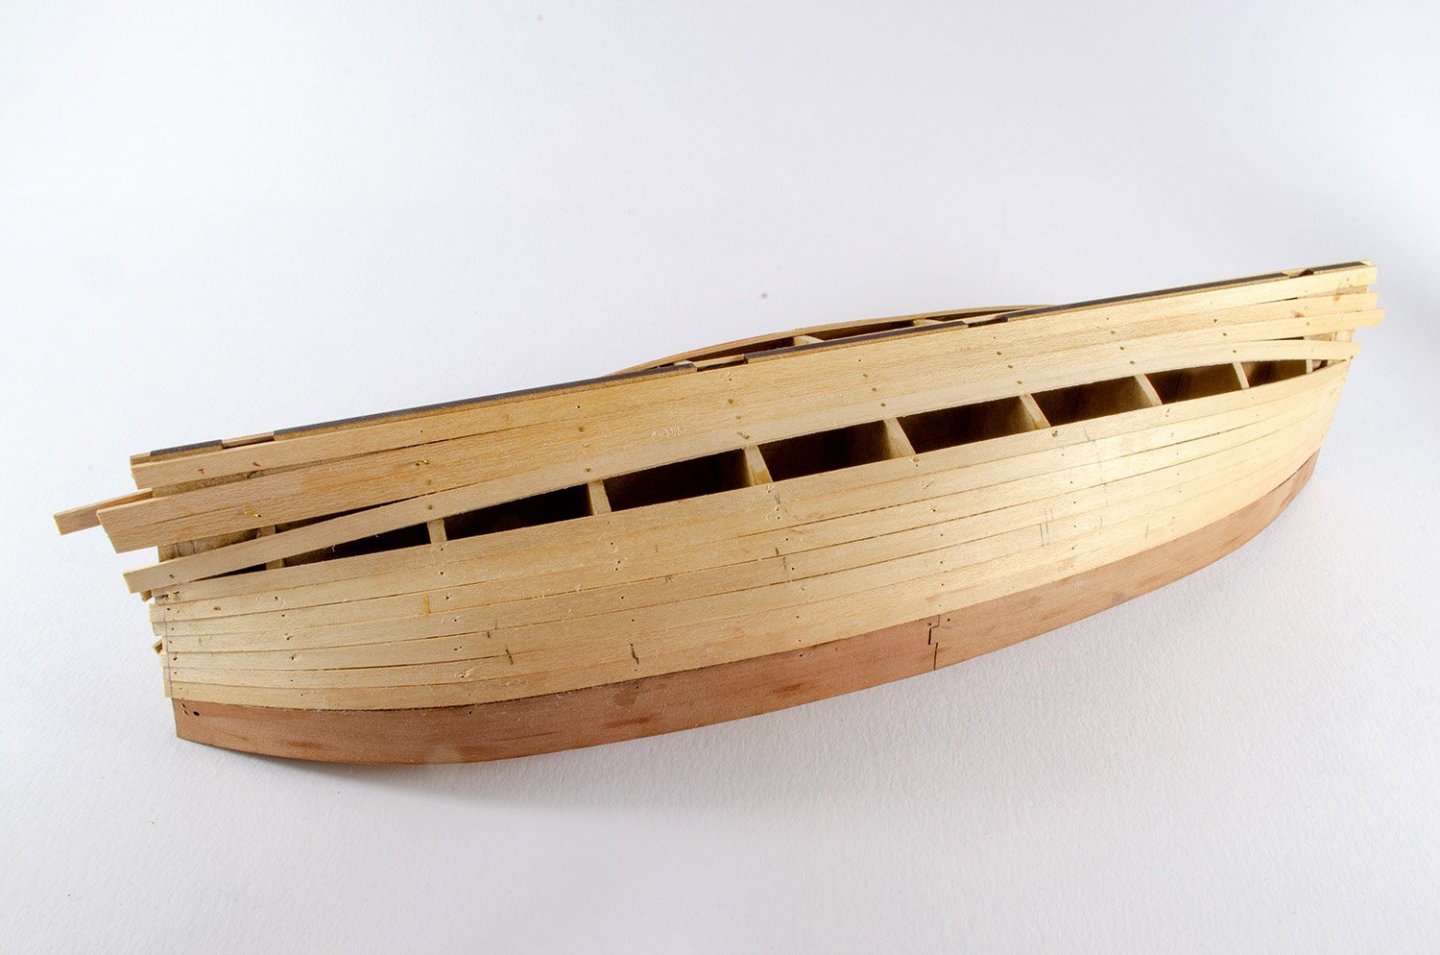
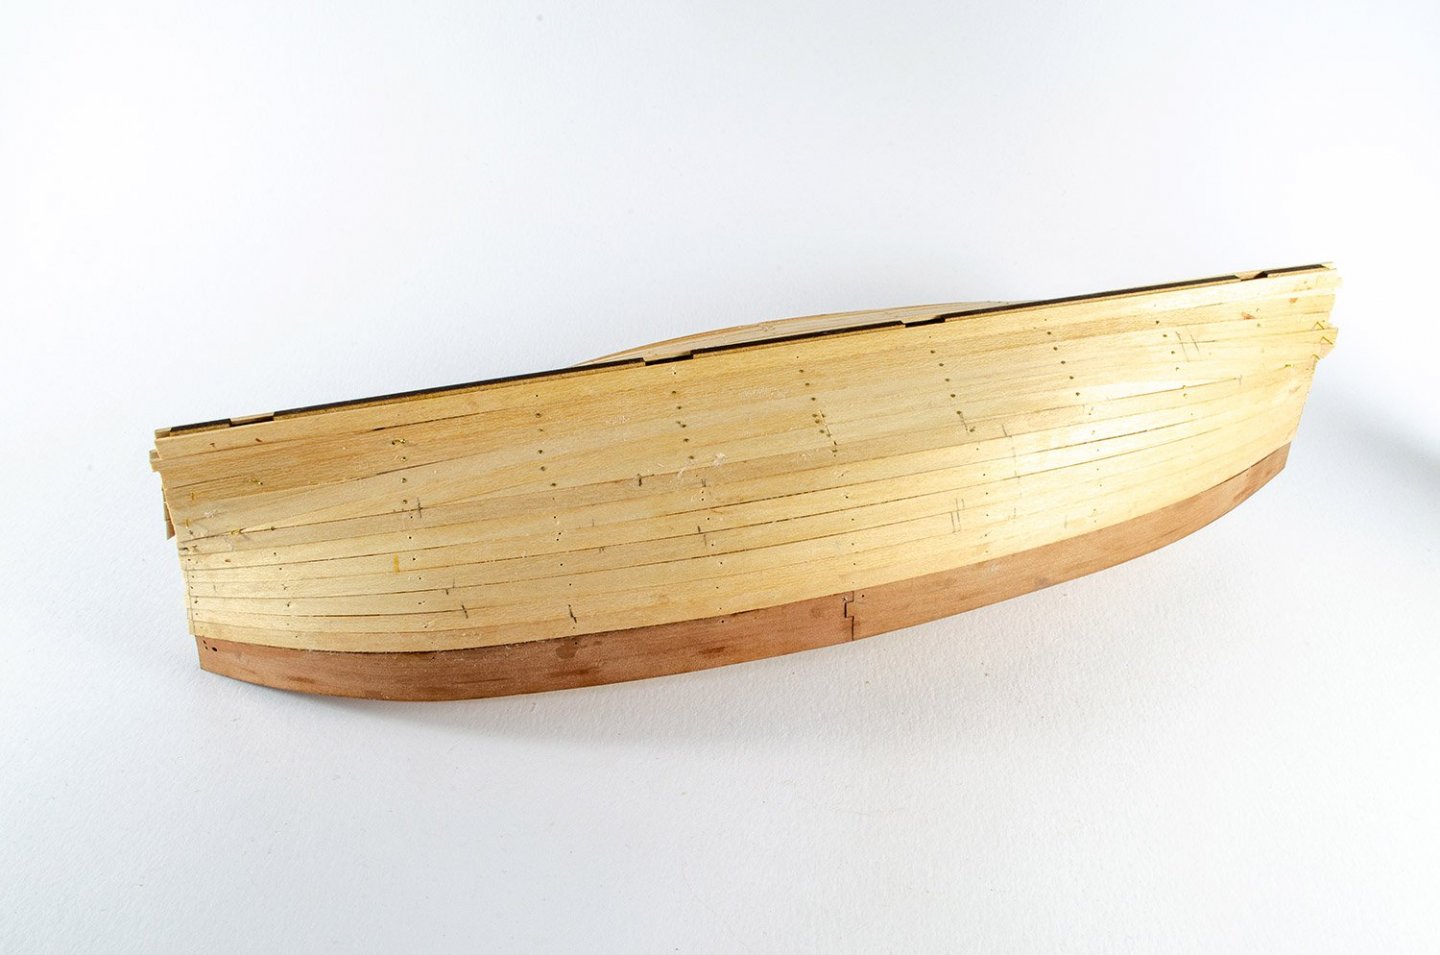
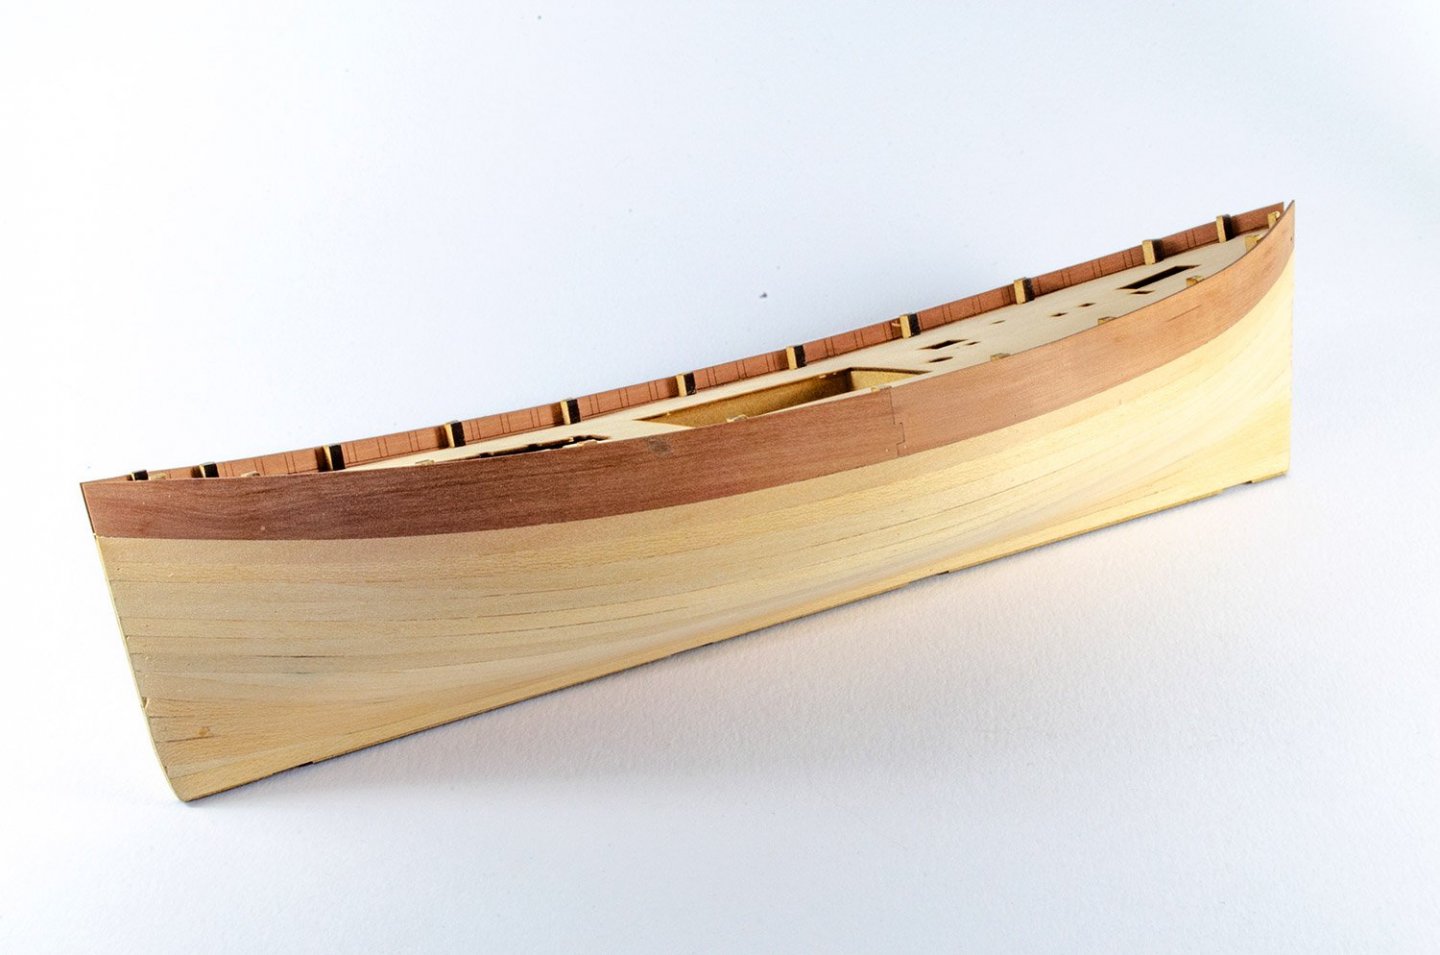
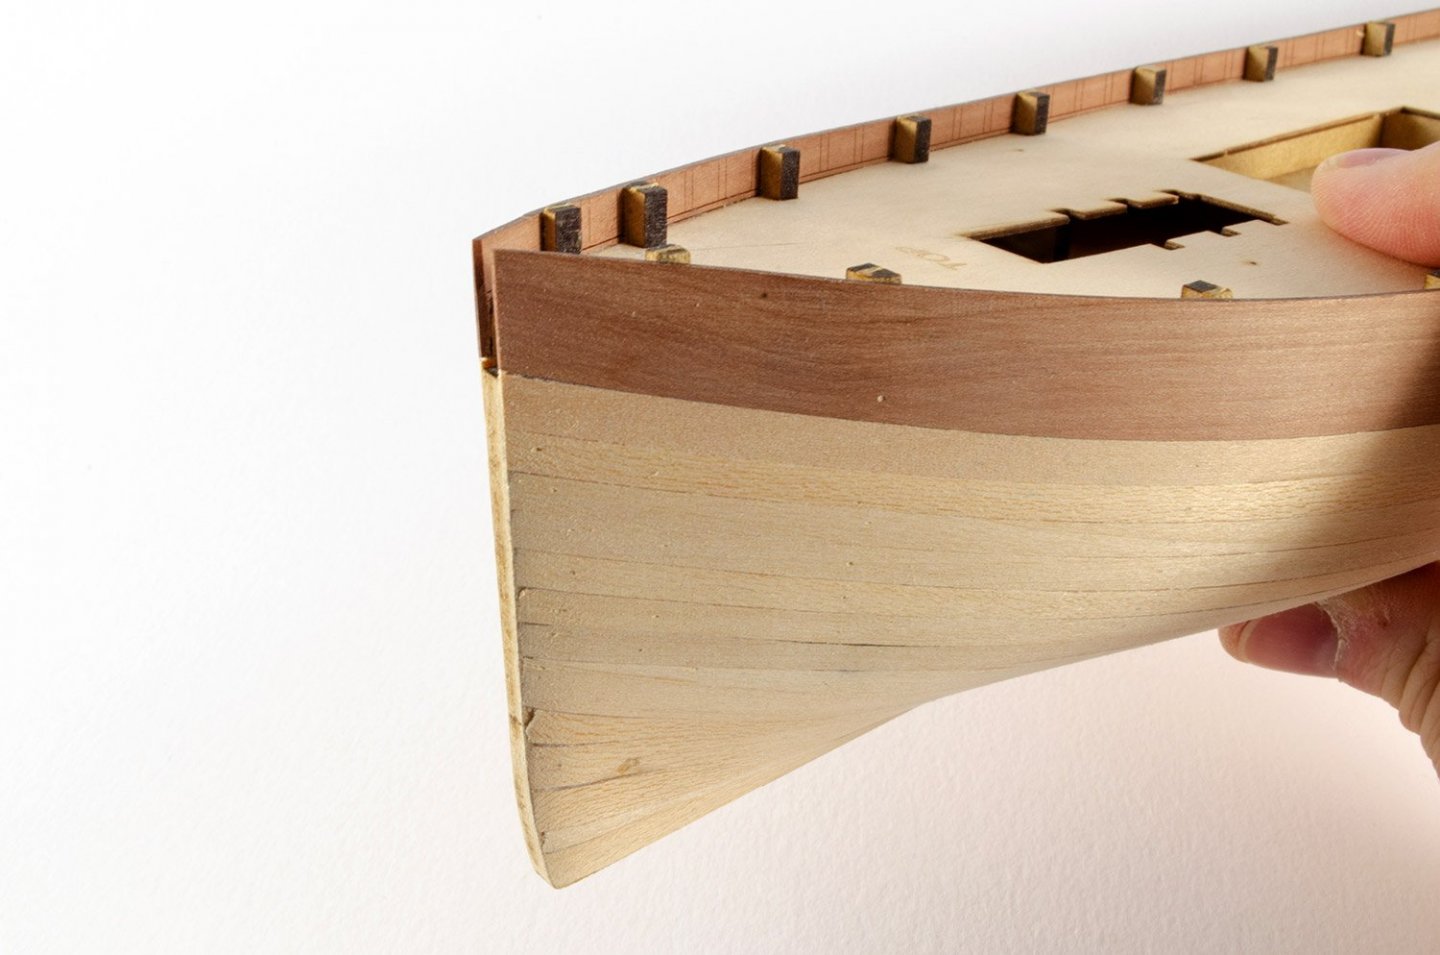
Hi all, Whilst in the last stages of building my Zulu from Vanguard Models, I took the opportunity to start the Fifie and get this finishing in good time so Chris can use my photos and text for the instruction book. I took a look at this kit last week, here. This will be another abridged build as I need to get the model done as quickly as I can, but you'll certainly get the gist from my photos. Whilst the Zulu was a nice simple model, this one is actually slightly simply, with a more regular hull with no sheer at the stern. The stern rake is quite shallow. Like Zulu, the Fifie comes with engraved bevel lines. These are only a rough guide, but definitely saves time later by getting rid of some waste material now. I used my Dremel on 9000rpm for this. The bulkheads are now slotted to the false keel and once the glue is set, the square insert that supports the end of the aft mast, is fitted, followed by the inner frame platform. The platform must be fitted with the 'TOP FORWARD' engraving at the top....and you guessed it, forward also! The fish hatch side walls are now installed. These have different length tabs and can only fit one way. Zero way to get this wrong! Before fitting the deck, I use a sanding stick to level the top of the bulkheads at bow and stern, so they are in line with the sheer. The deck is now popped into place without glue. The outer edges lock underneath the upper bulkhead tabs. I now use glue to brush into the joints from underneath. The hull on this is very easy and quick to fair, with the infilled blocks taking the brunt of the sanding rework. The pear bulwarks are 1mm thick with engravings to identify where they belong. No way you'll easily bend these around the bow without some assistance. Both front and rear of the bulwarks are soaked in hot water for about 15 to 20 mins and the excess moisture towelled off. These are then fitted to the hull with no glue, and clamps to secure them until they are completely dry. I could get away with a couple of lime planks that didn't need tapering, but after that, all planks working down from the bulwarks, were tapered. Working up from the garboard plank, I allowed the planks to more or less follow their natural flow, and then infilled with stealers. I always take my time with first sanding so I know the second layer will flow nicely. Back to the cave for more work!


- 9 replies
-
- 17
-
-
- Fifie
- Vanguard Models
- (and 2 more)
-
Hello all, What a great website. Been reading it for a few weeks - so much to absorb 🙂 I'm halfway through building my first ship (Artesani Latina Dallas 1815 Cutter), and about to commence the masts and rigging...gulp! I actually started the Dallas about 25 yrs ago but a job change etc got in the way so the mostly completed hull + box of parts was tucked away in a safe corner of my attic for a rainy day. With the current quarantine/shielding situation the rainy day has arrived, and I restarted working on the Dallas a few weeks ago and found I really enjoyed it. So much so that I ordered Vanguard Models Fifie for my next project, and it arrived this morning. My background is design engineering and business development. Anyway, I thought I said 'hello', and congratulate the admin and members on one of the best hobbyist sites I've ever seen. All the best, Richard
- 16 replies
-
- 7
-
-
- new member
- dallas
- (and 1 more)
-
Click on the tags in the title above (shown in black) for an instant list of all the build logs for that kit subject.
-
Click on the tags in the title above (shown in black) for an instant list of all the build logs for that kit subject.
-
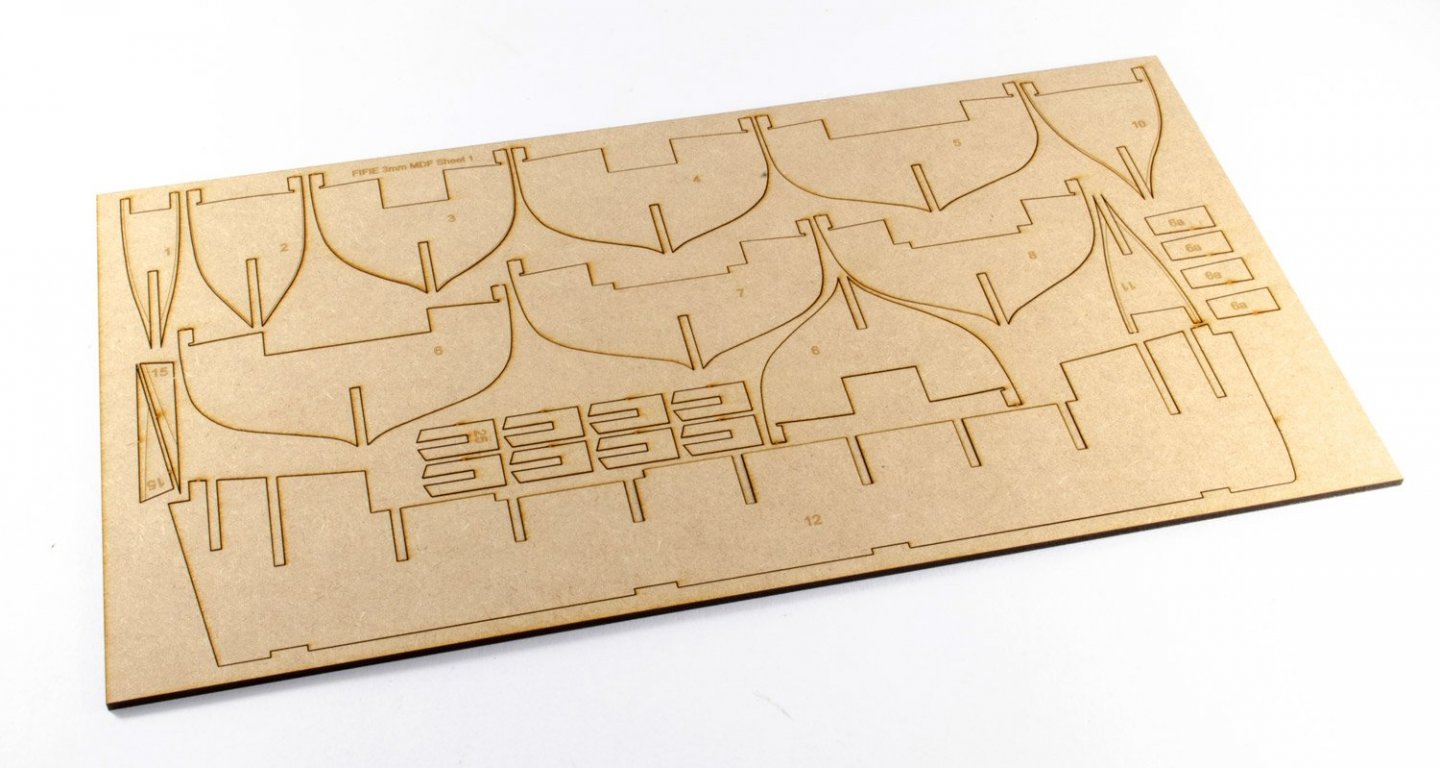
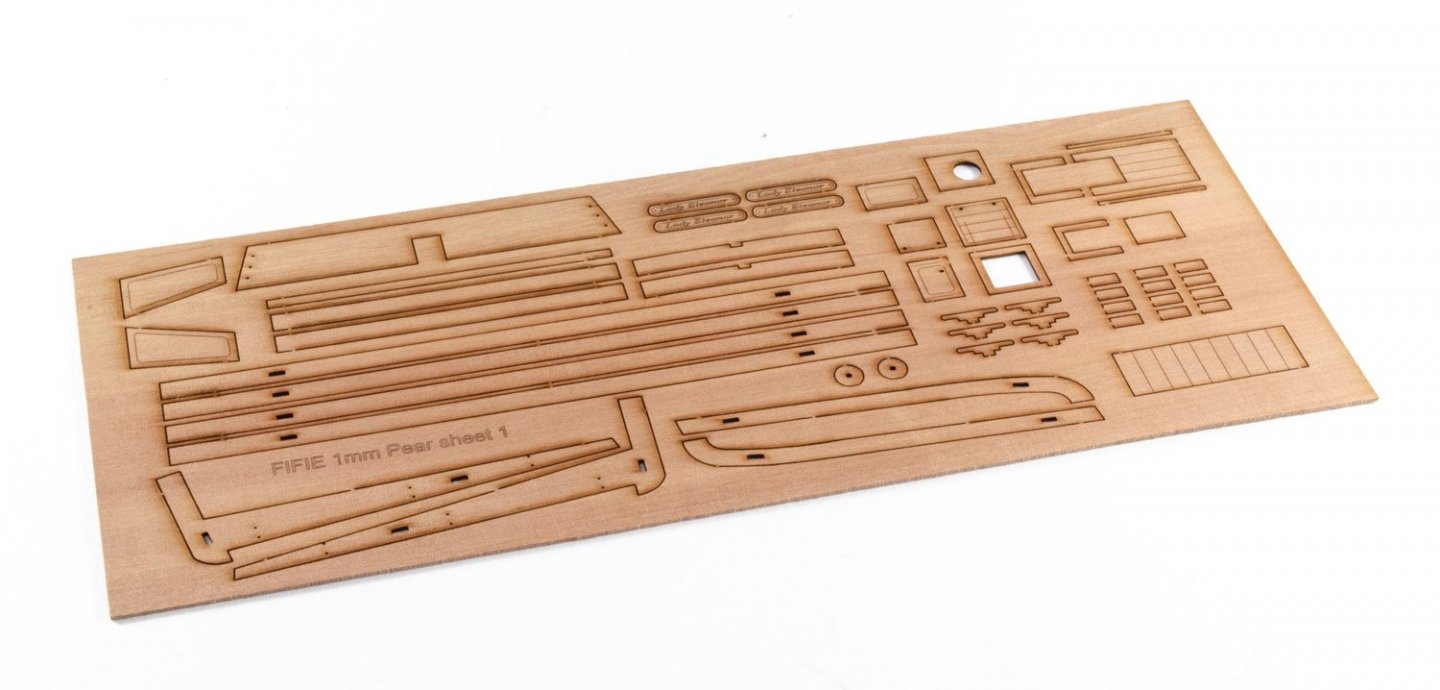
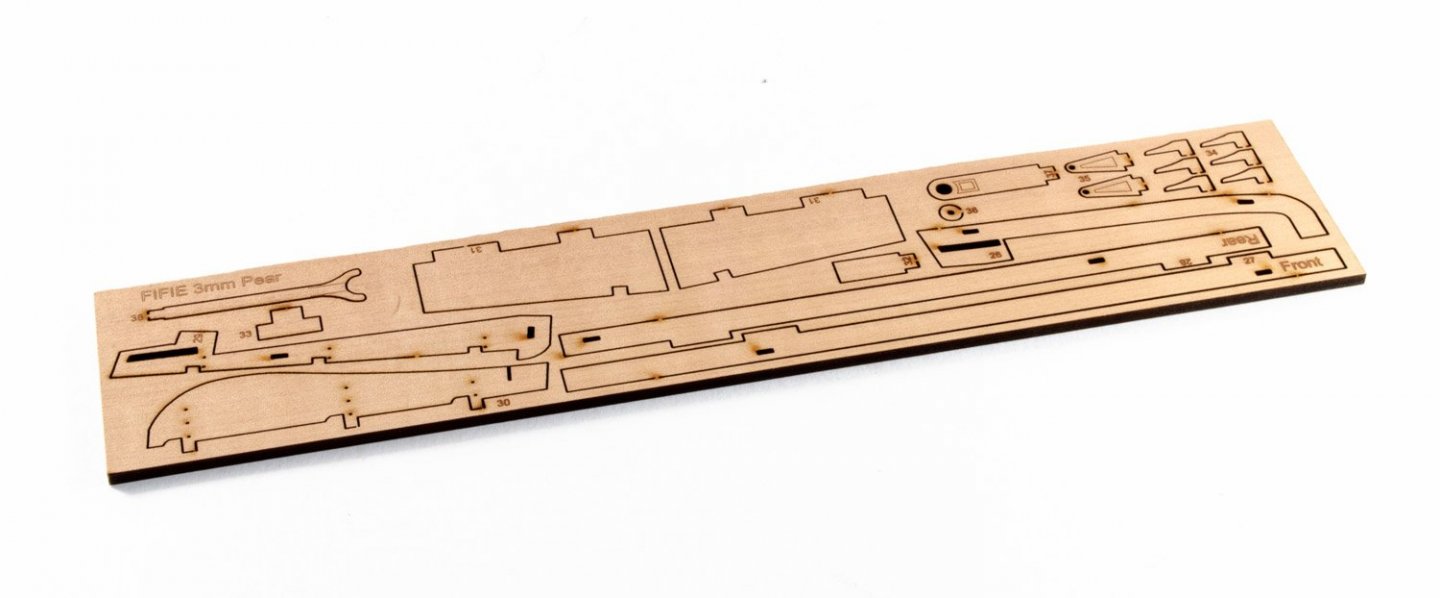
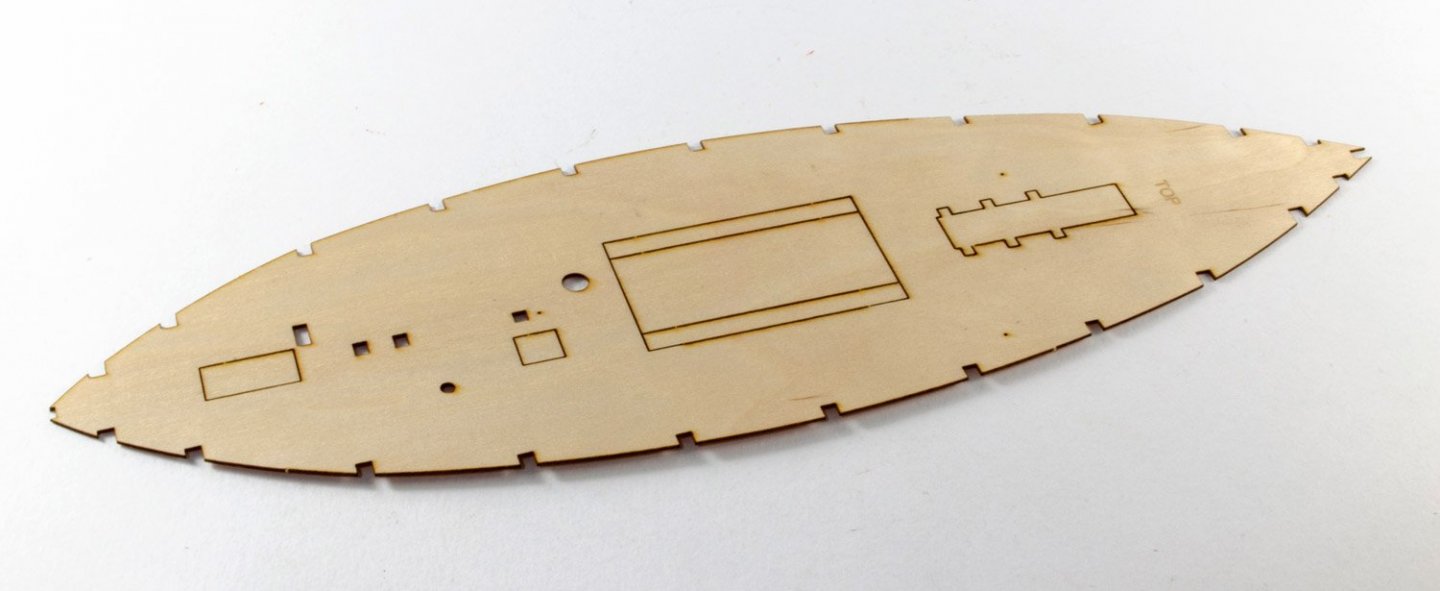
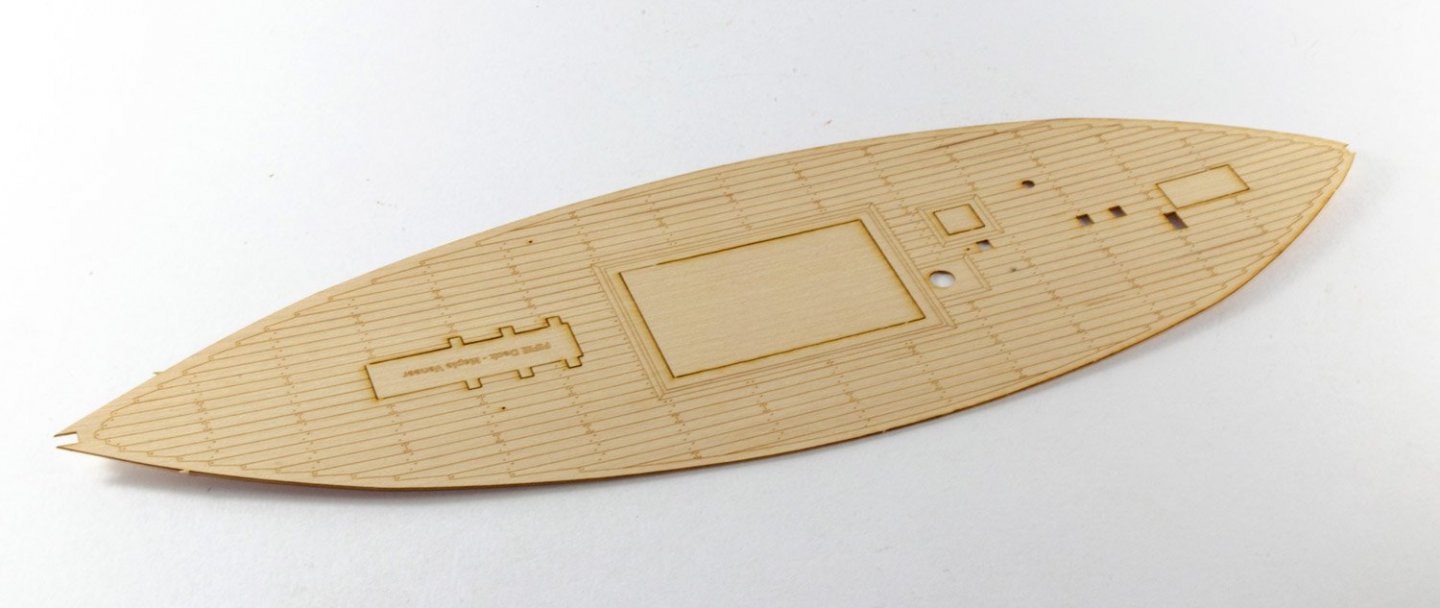
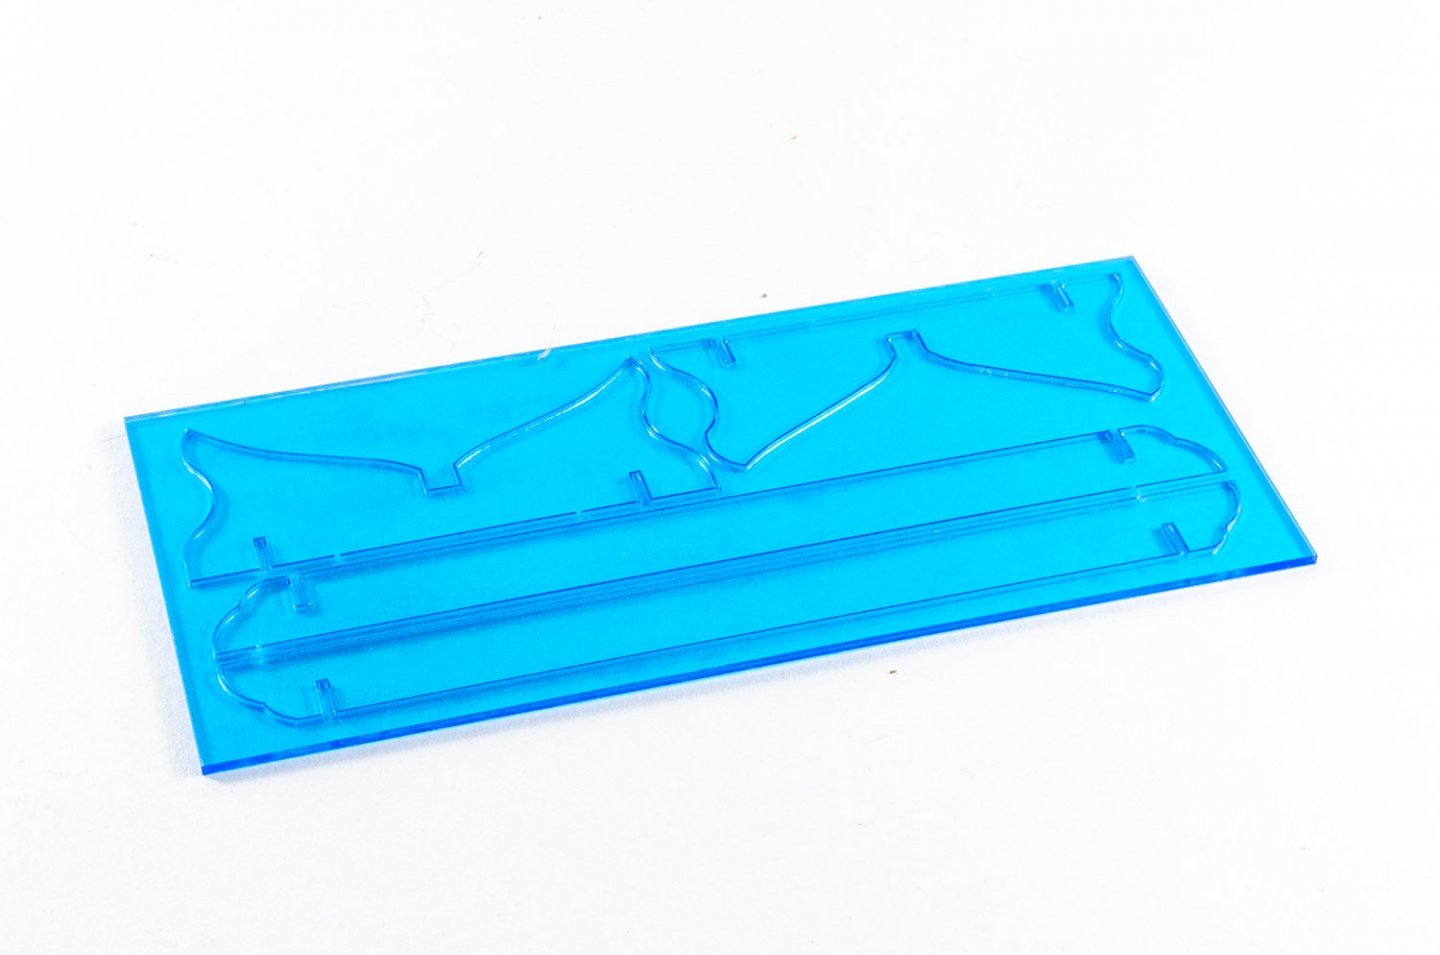
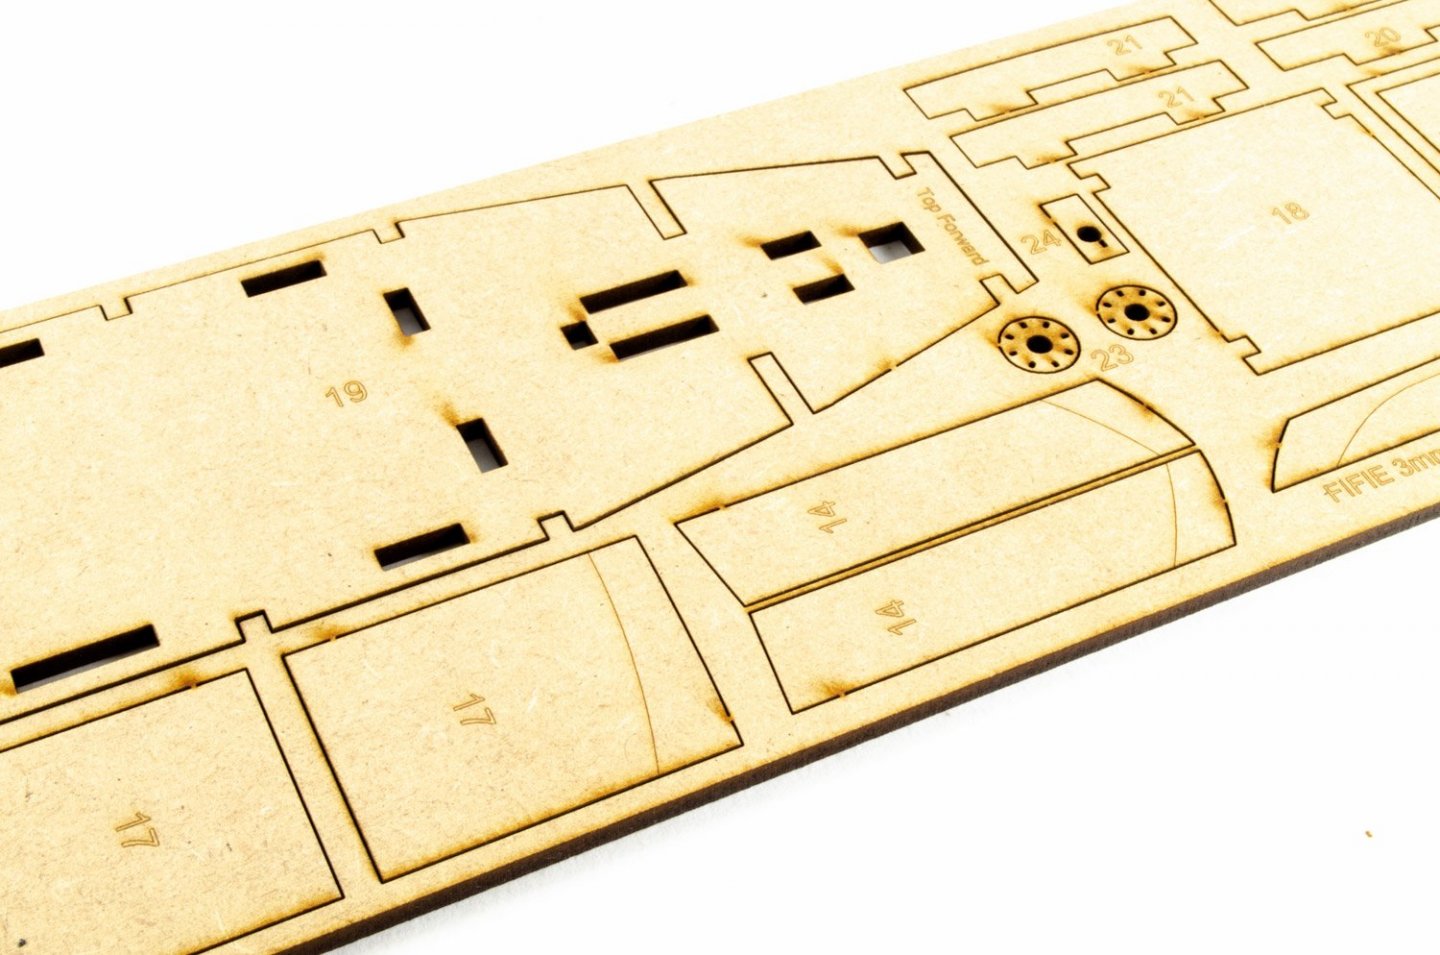
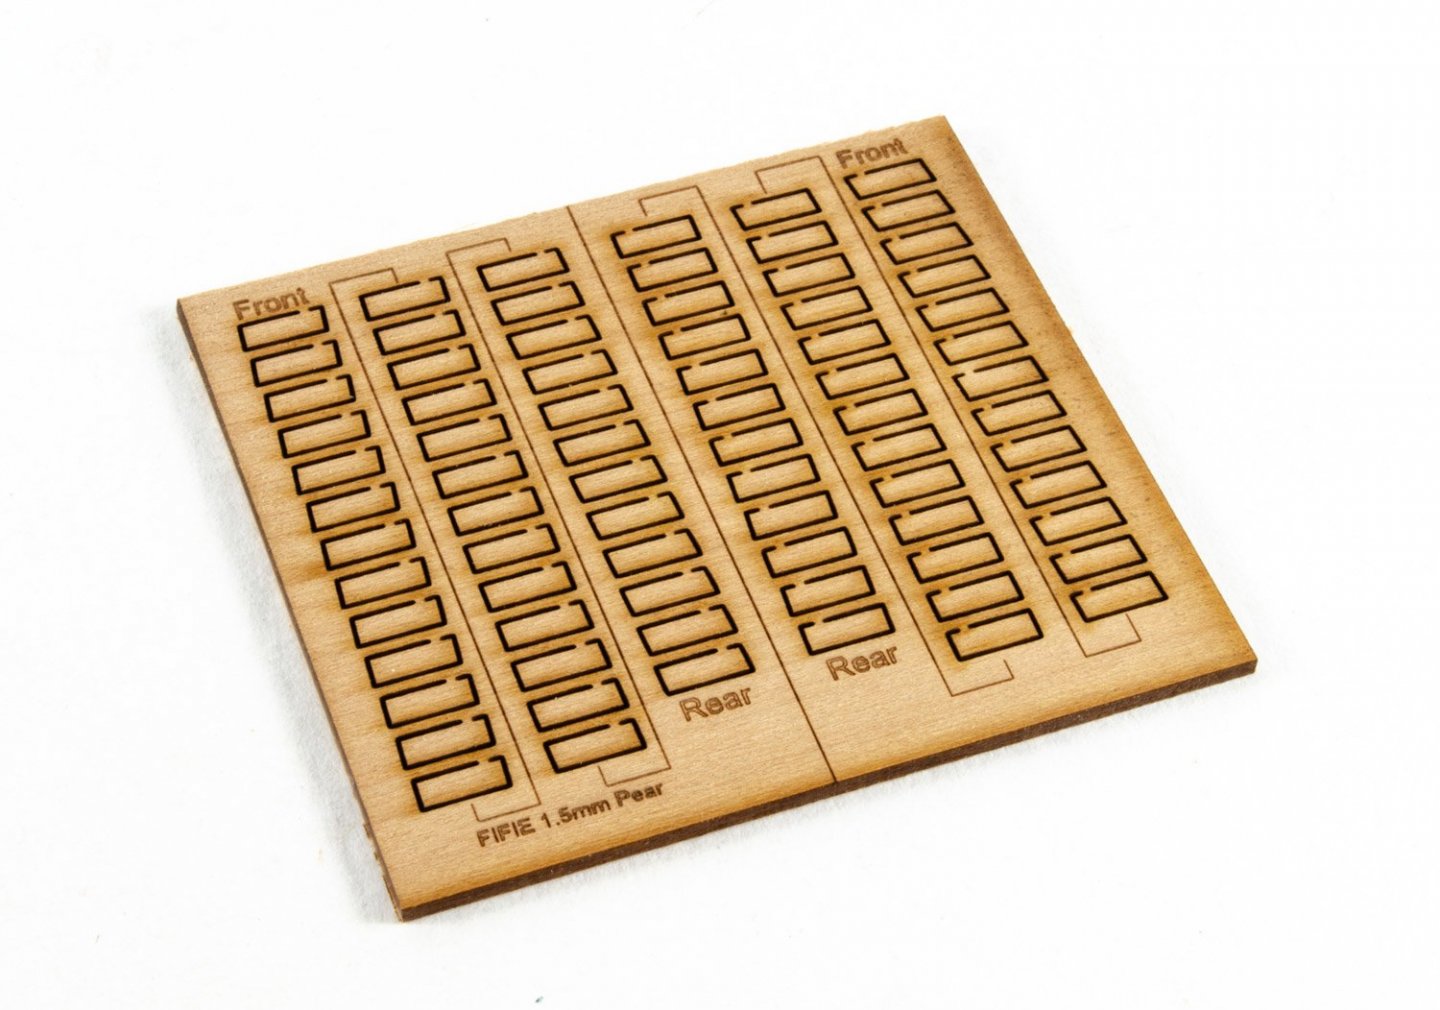
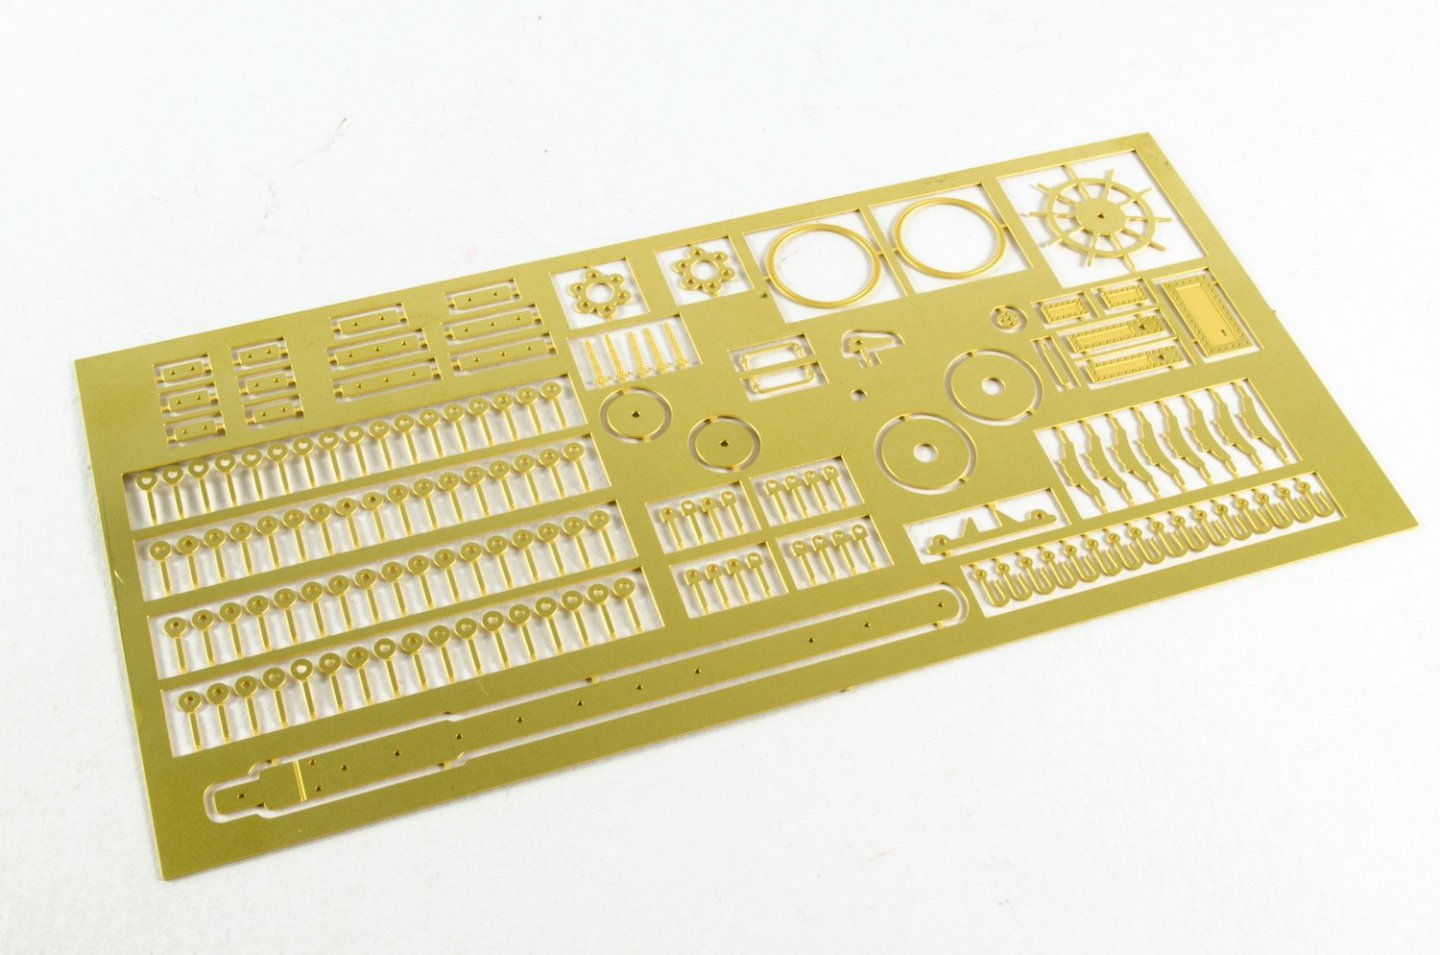
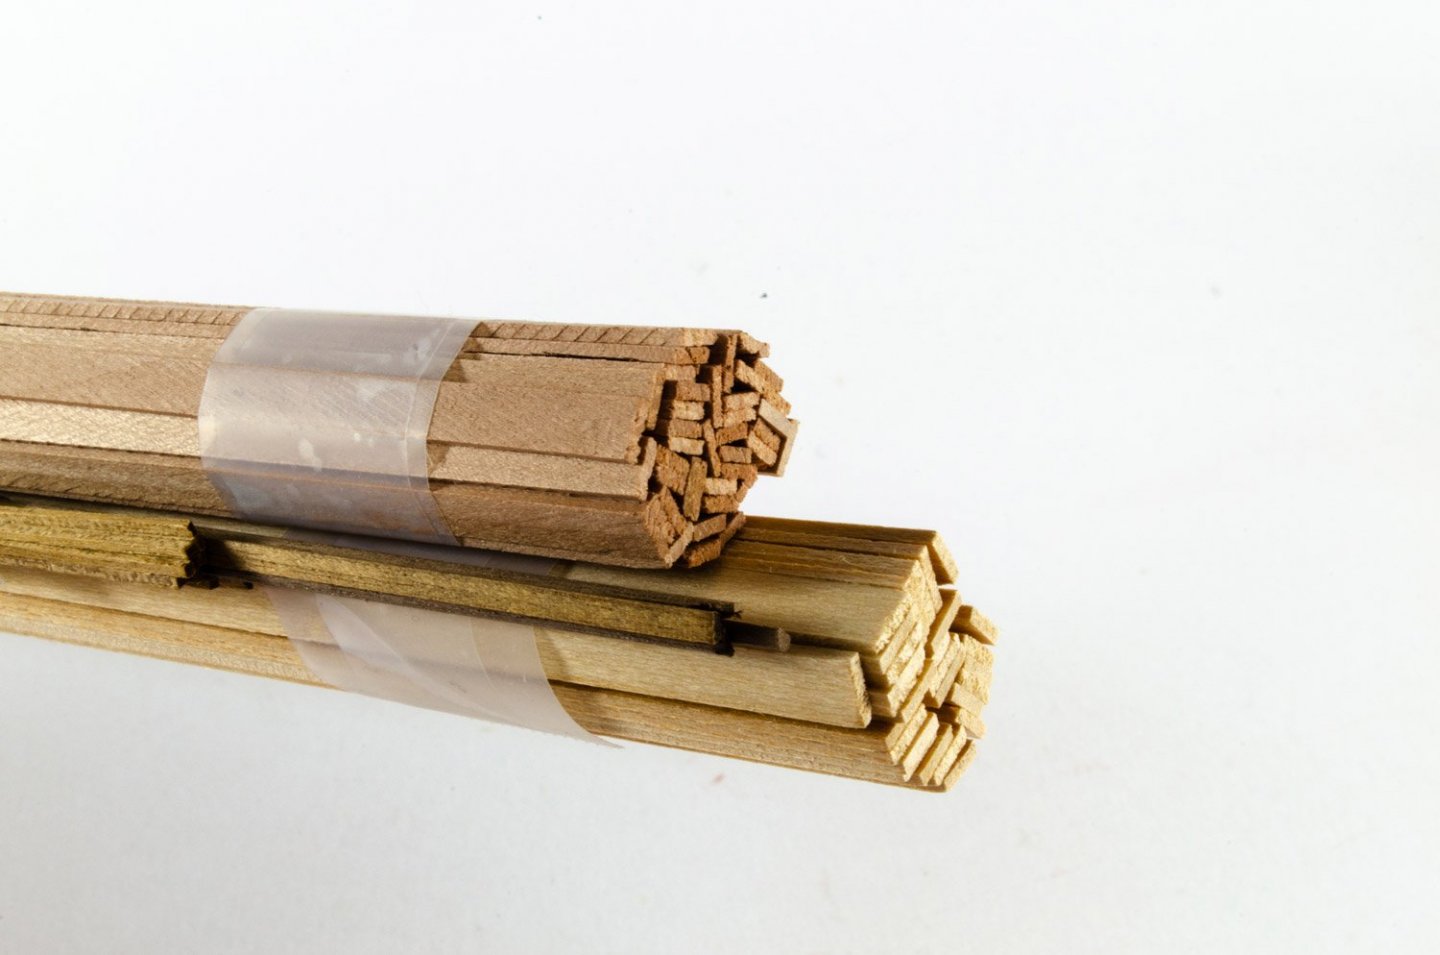
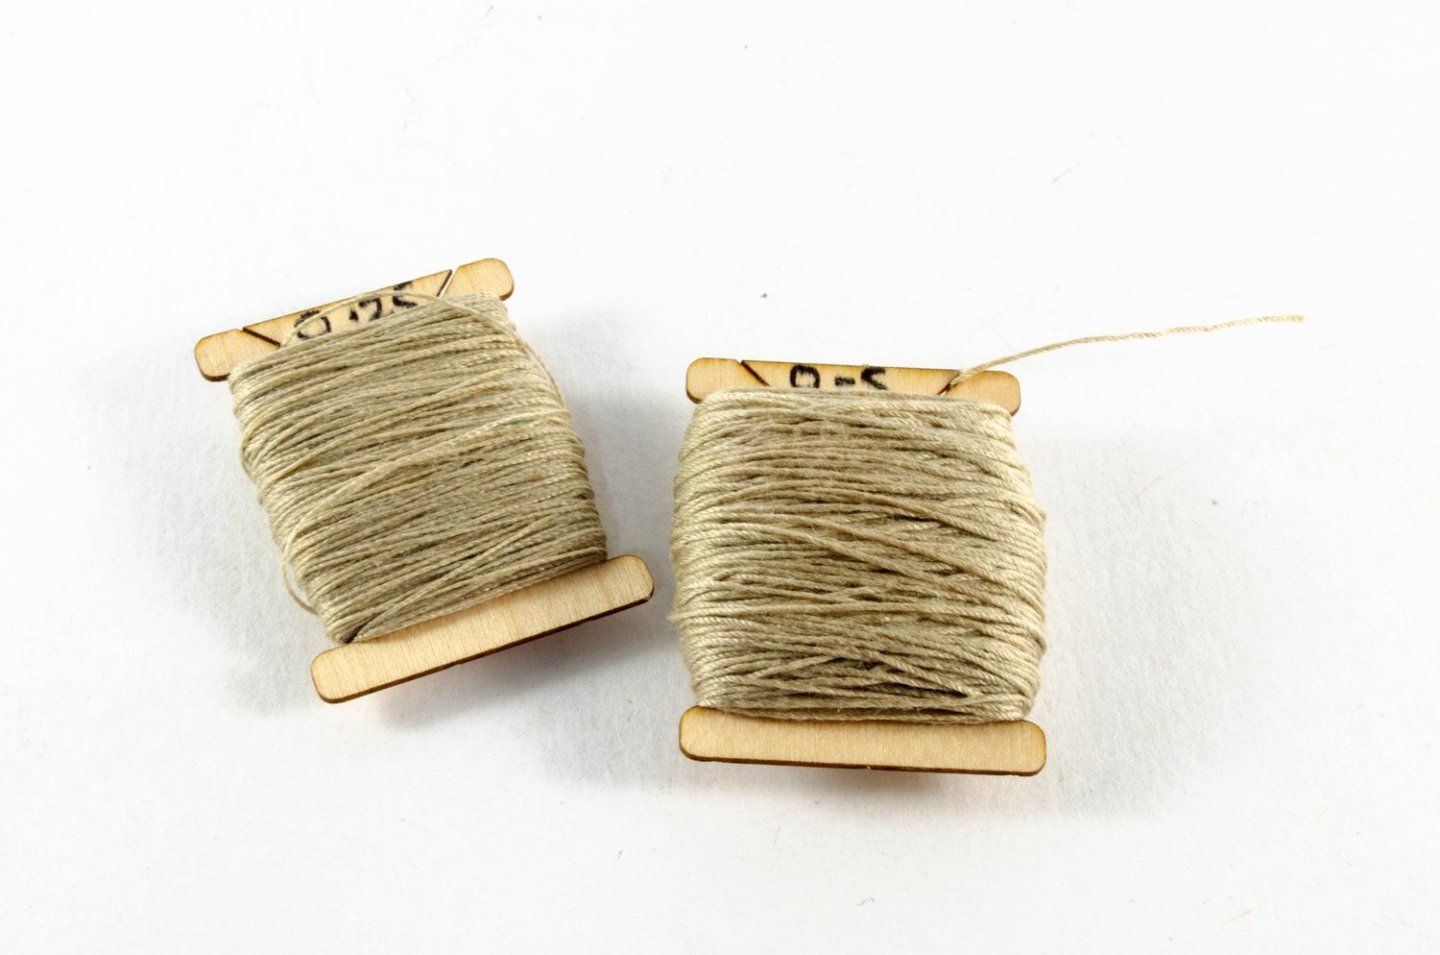
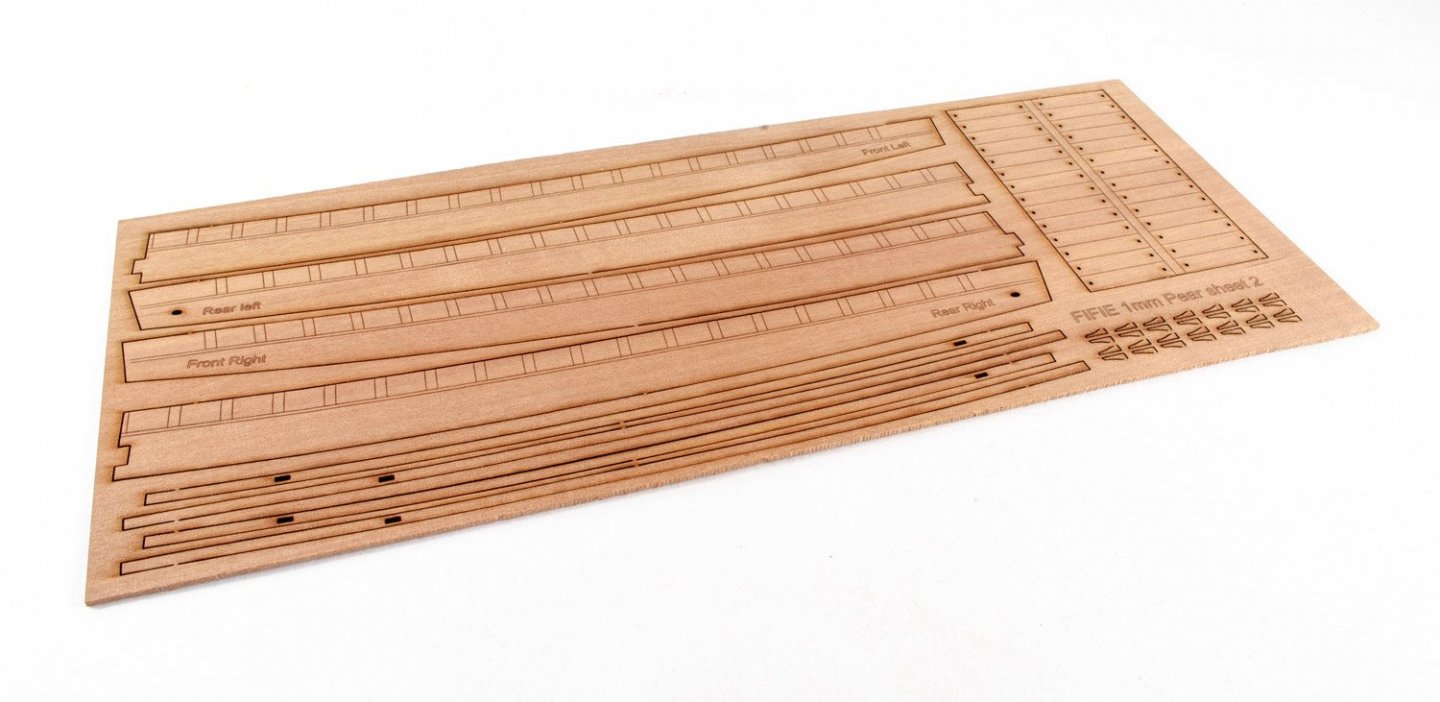
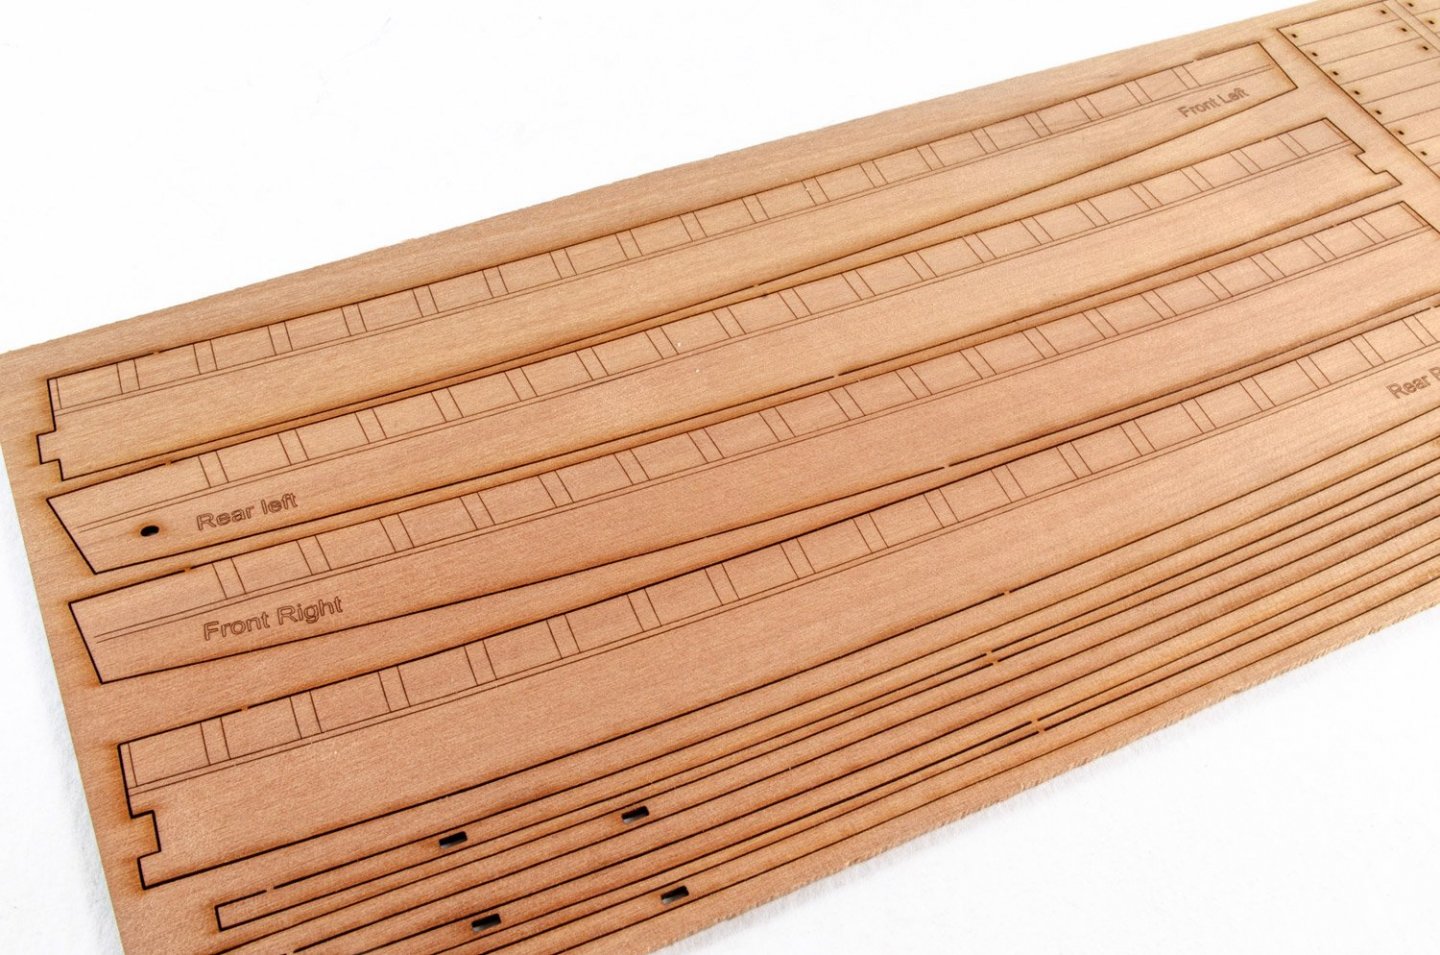
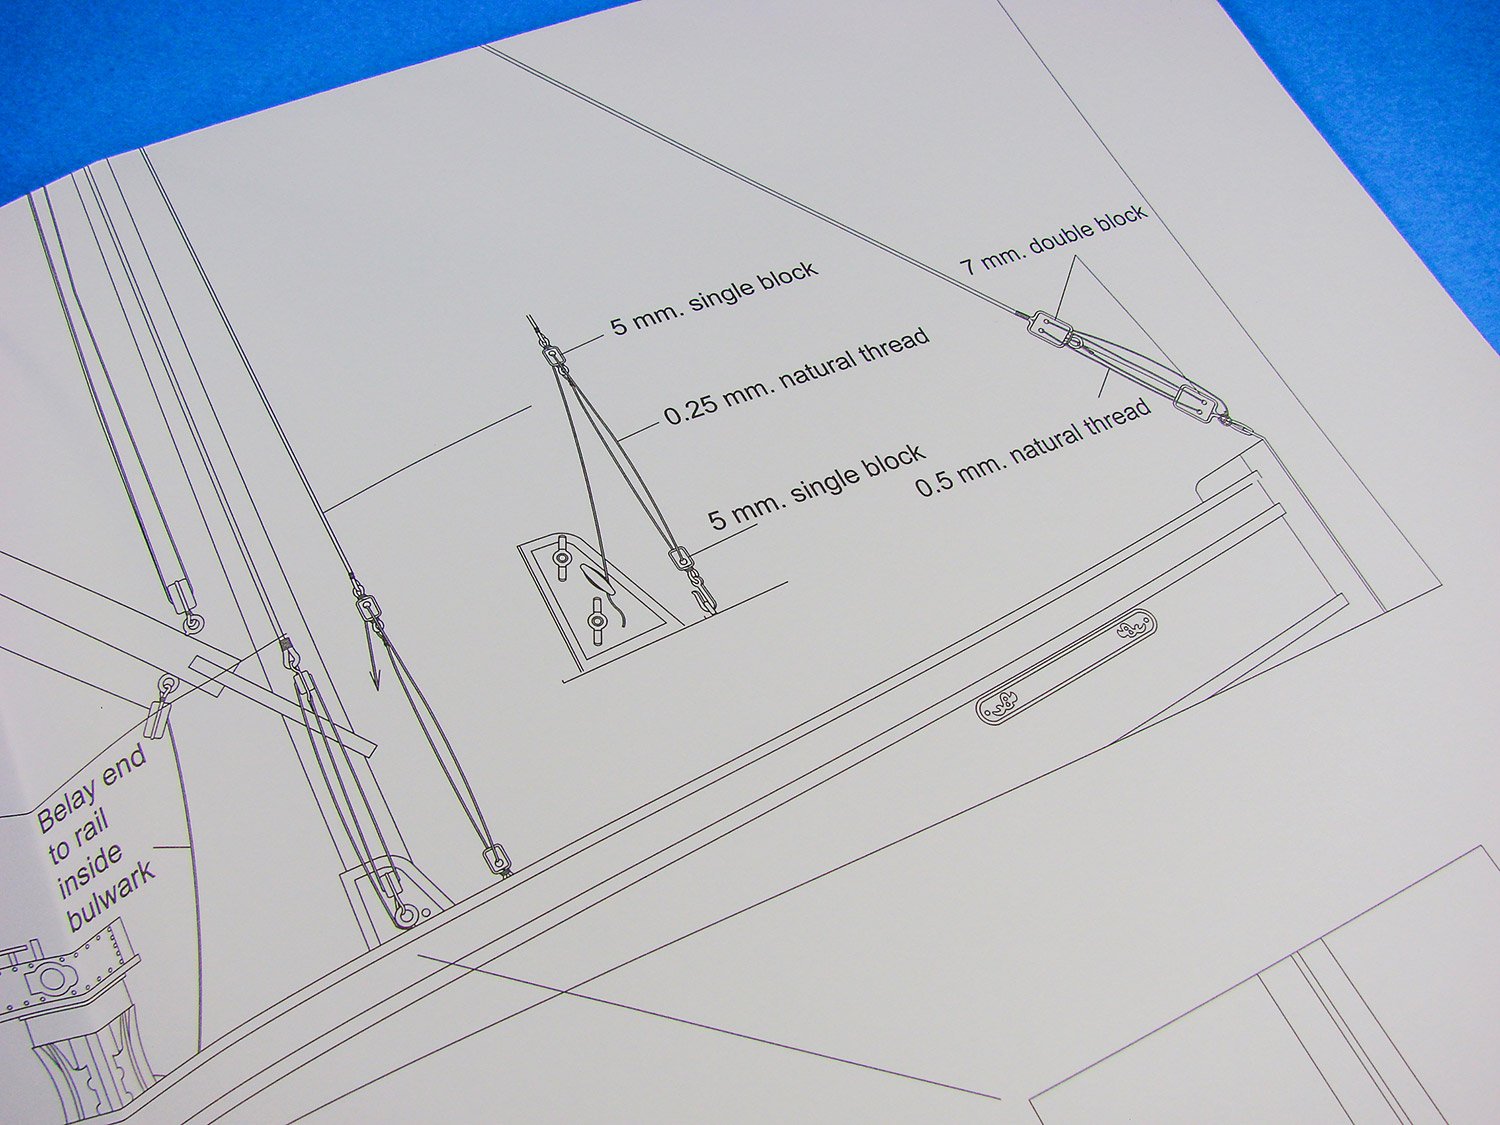
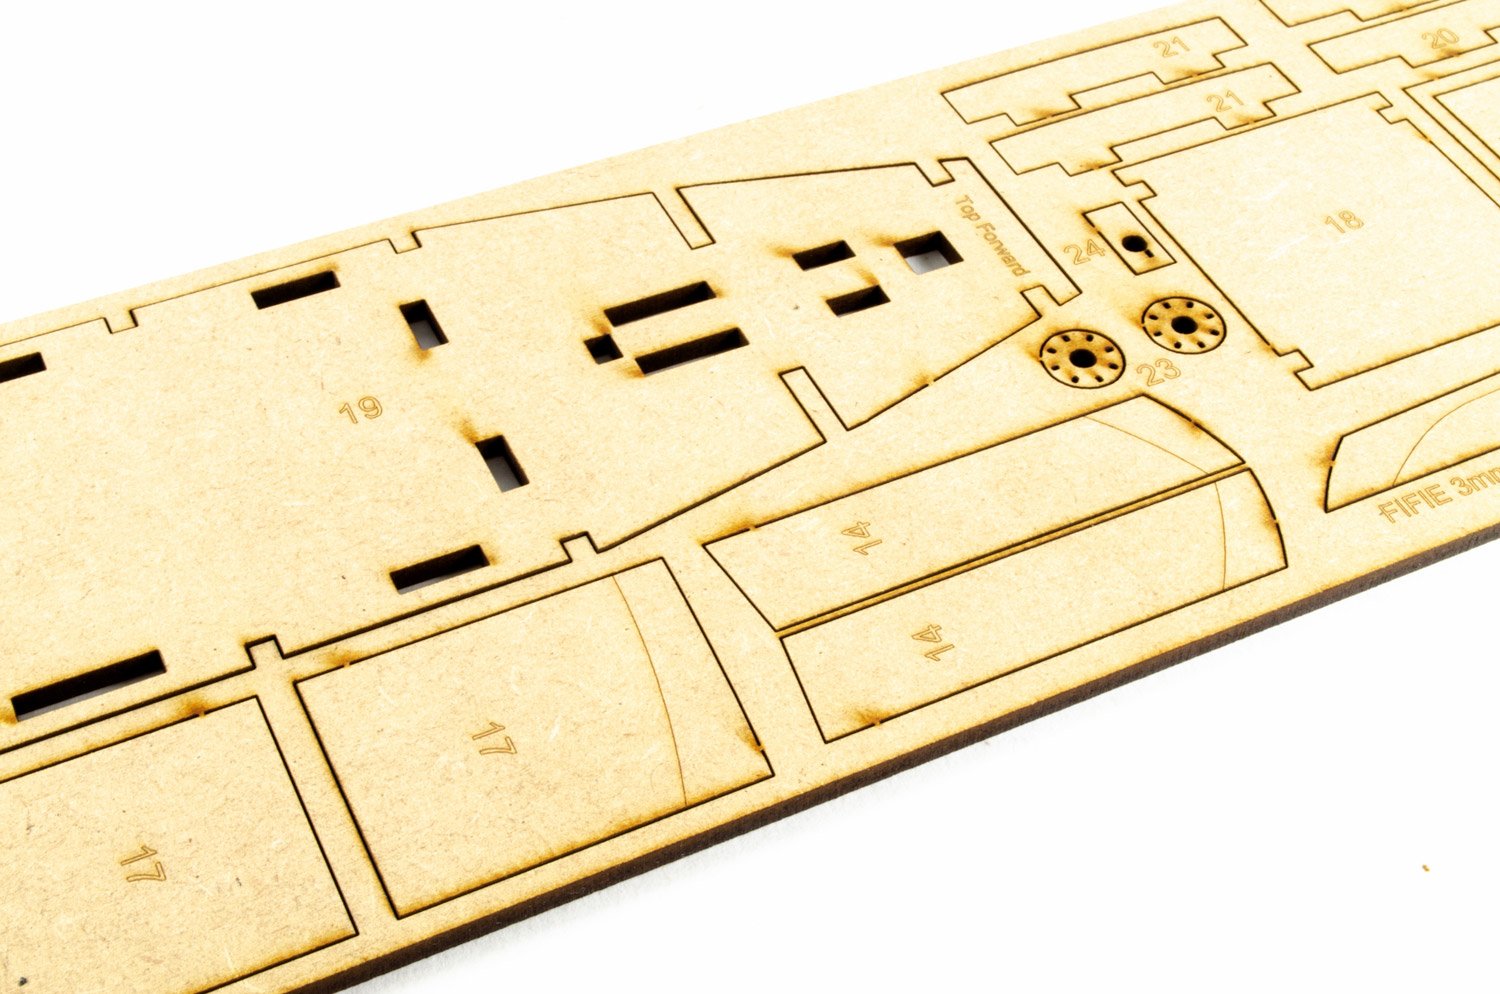
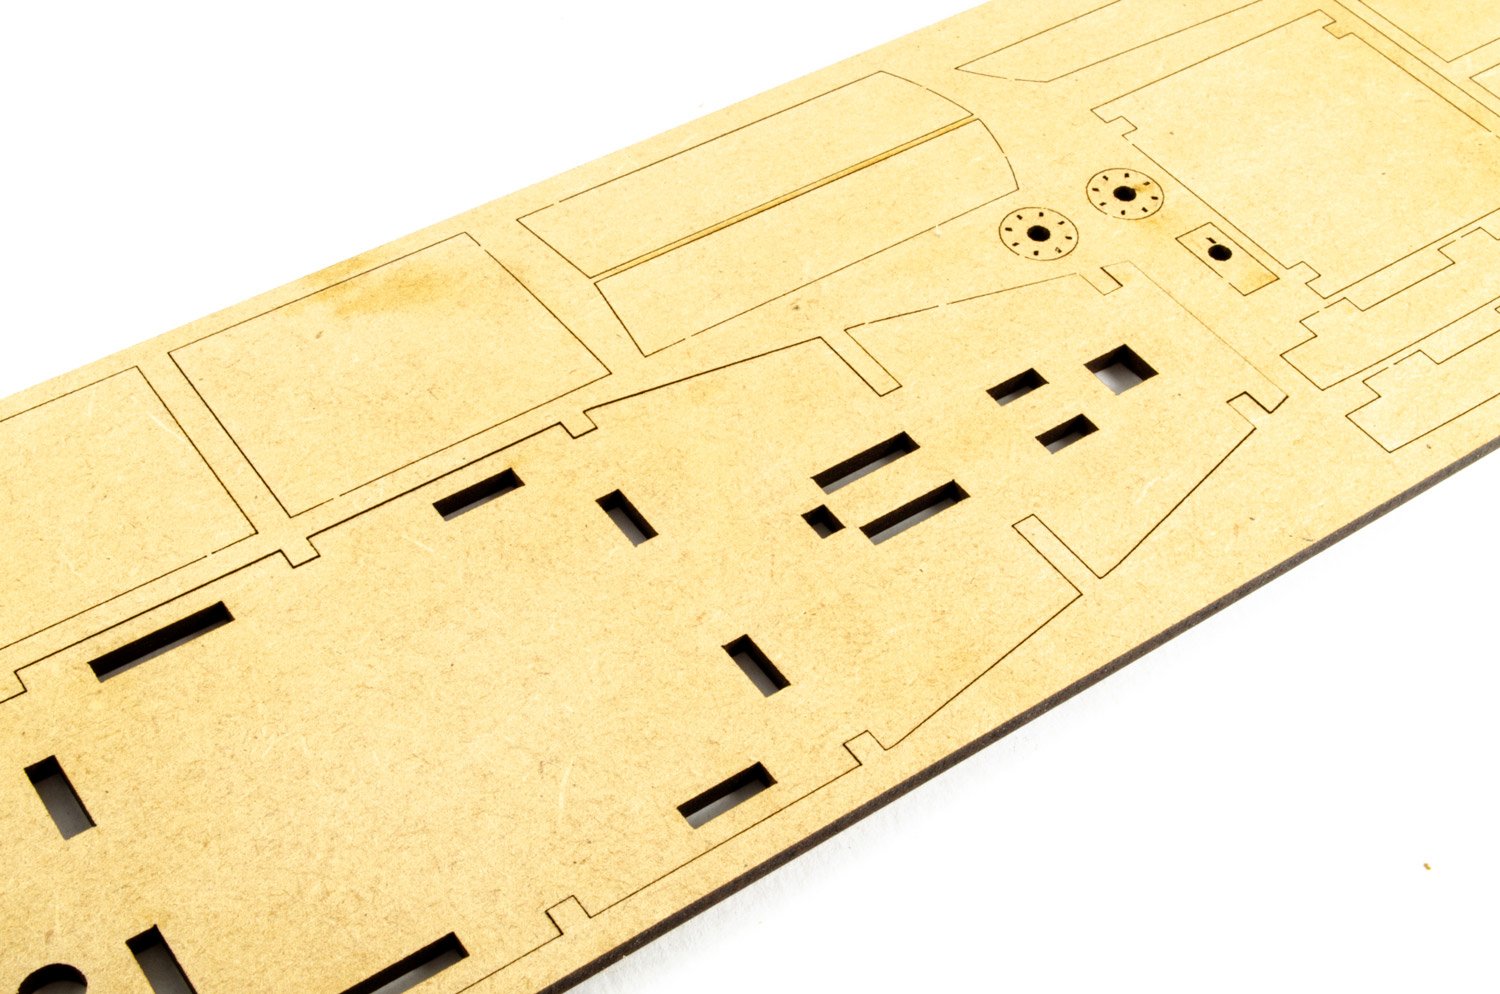
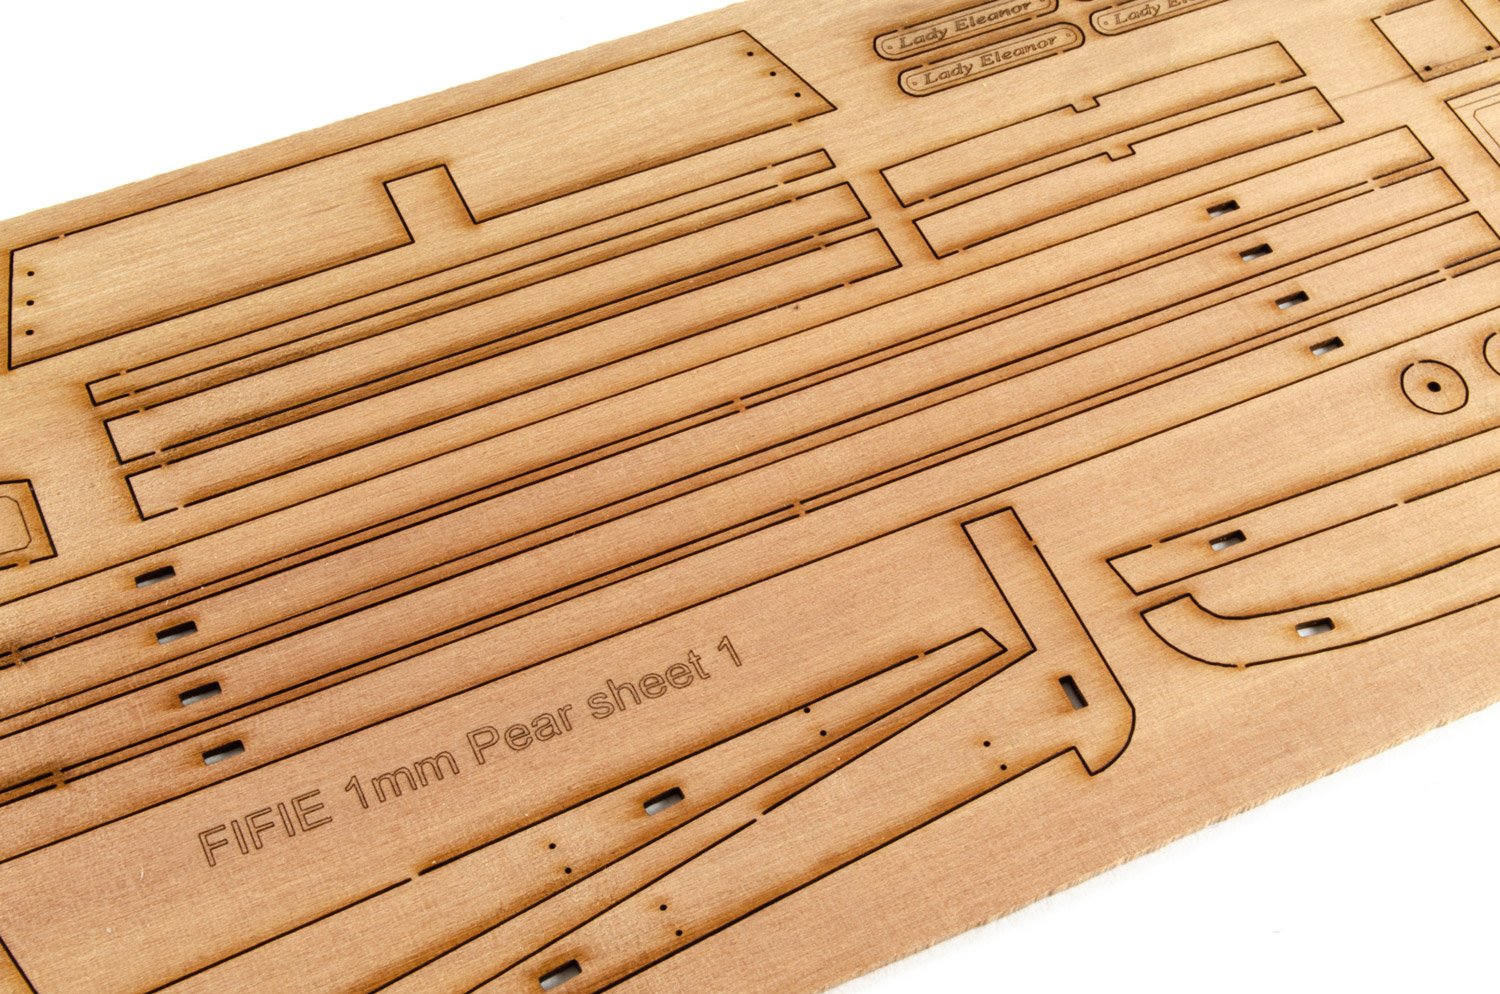
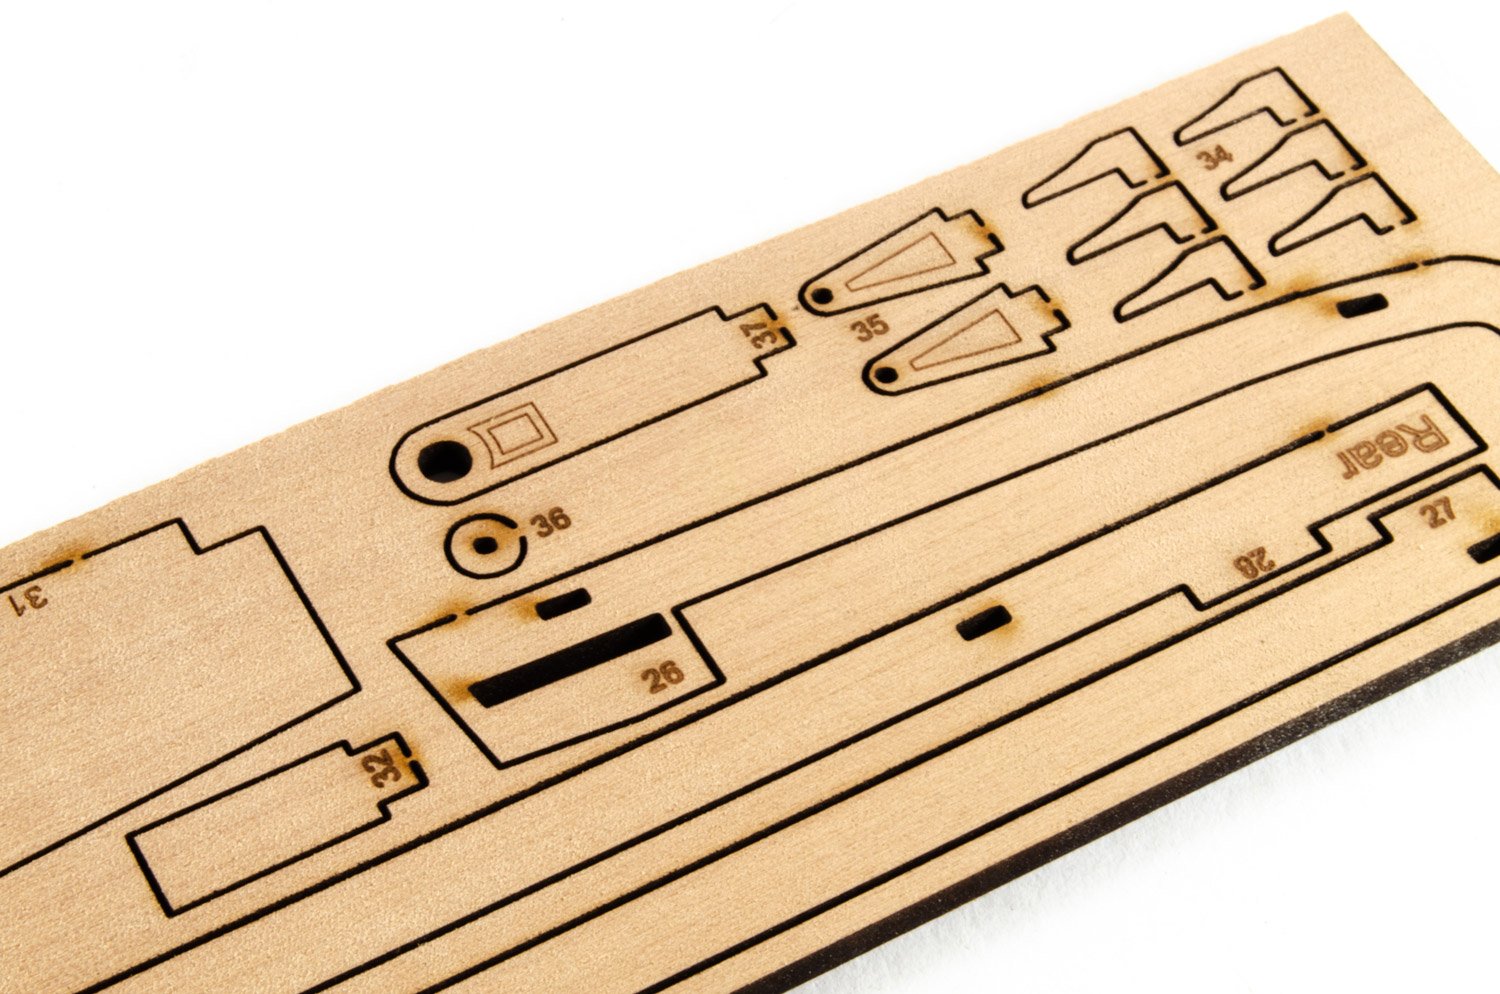
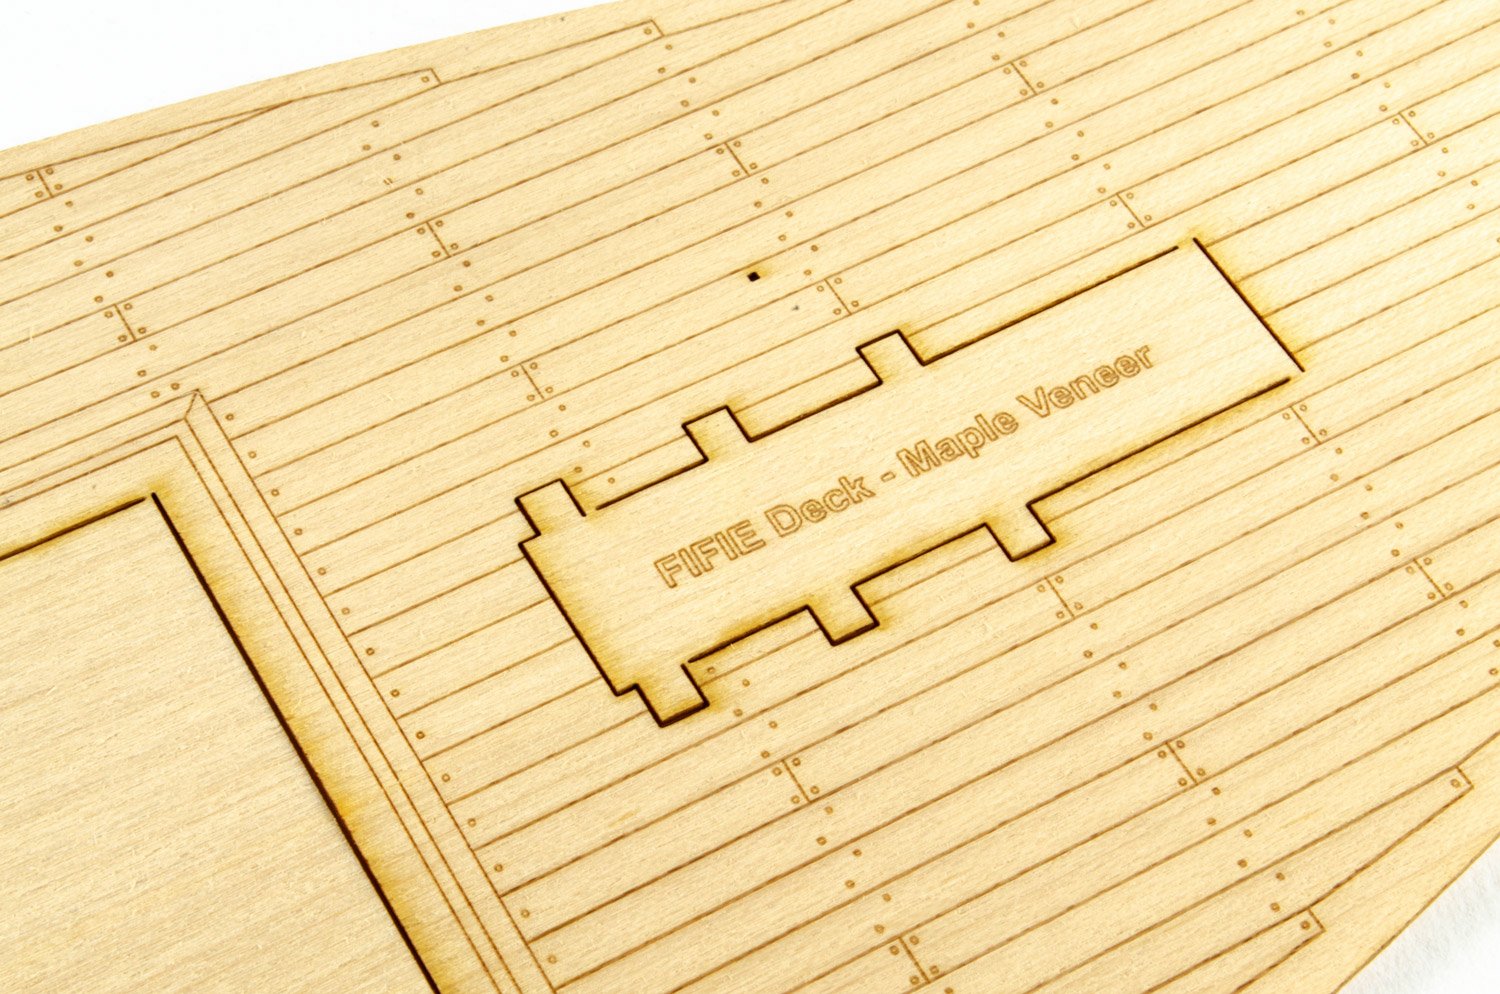
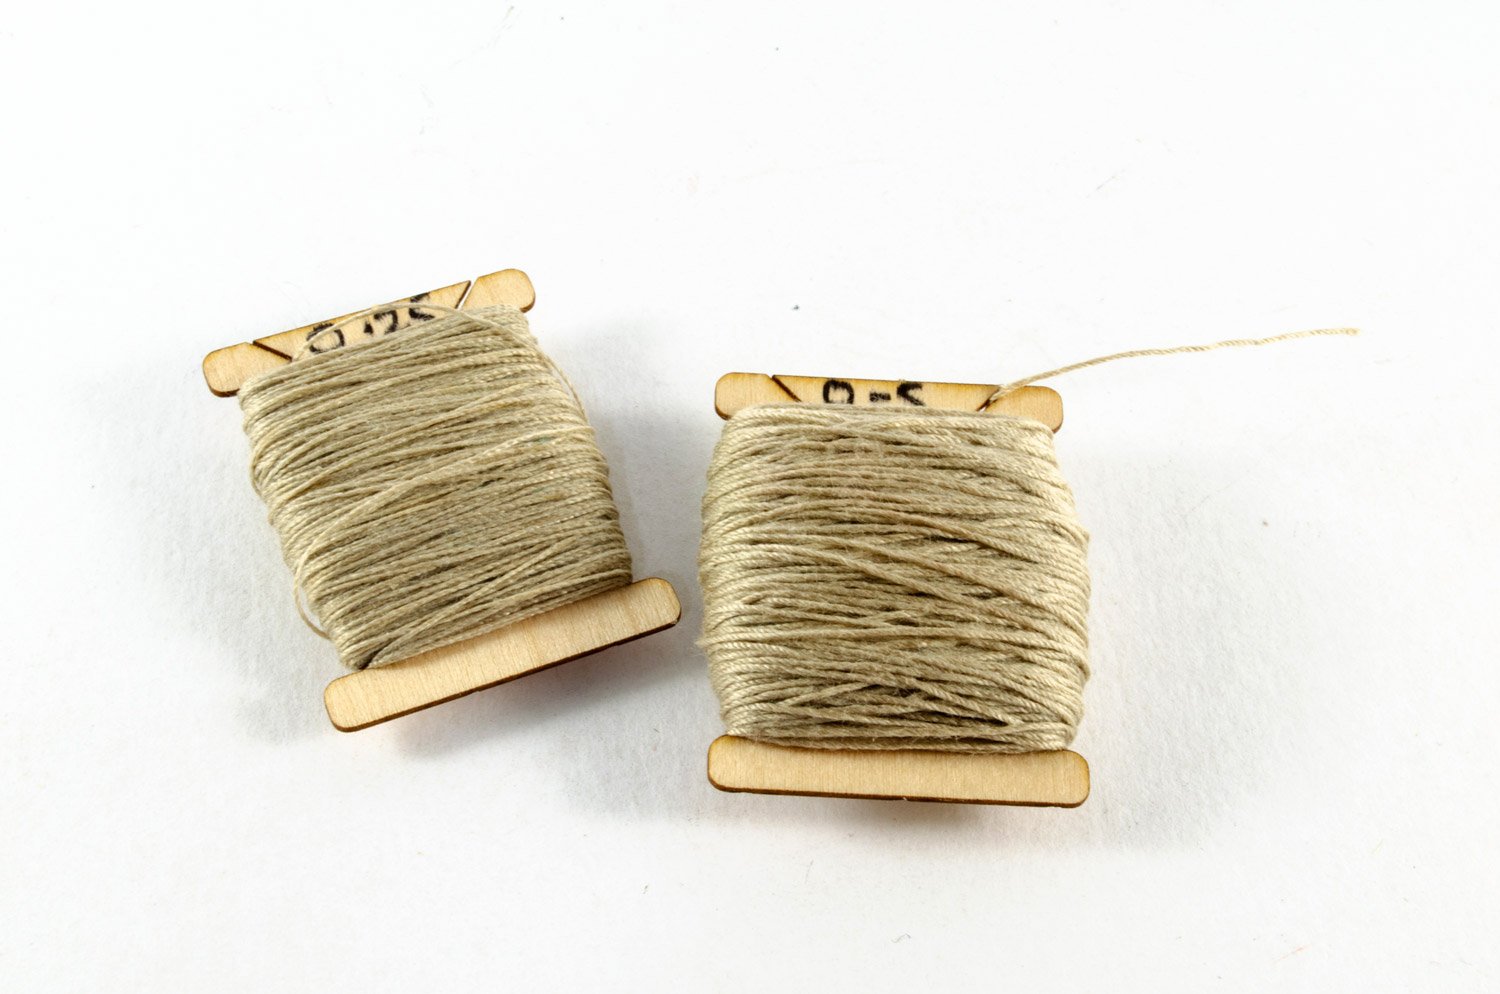
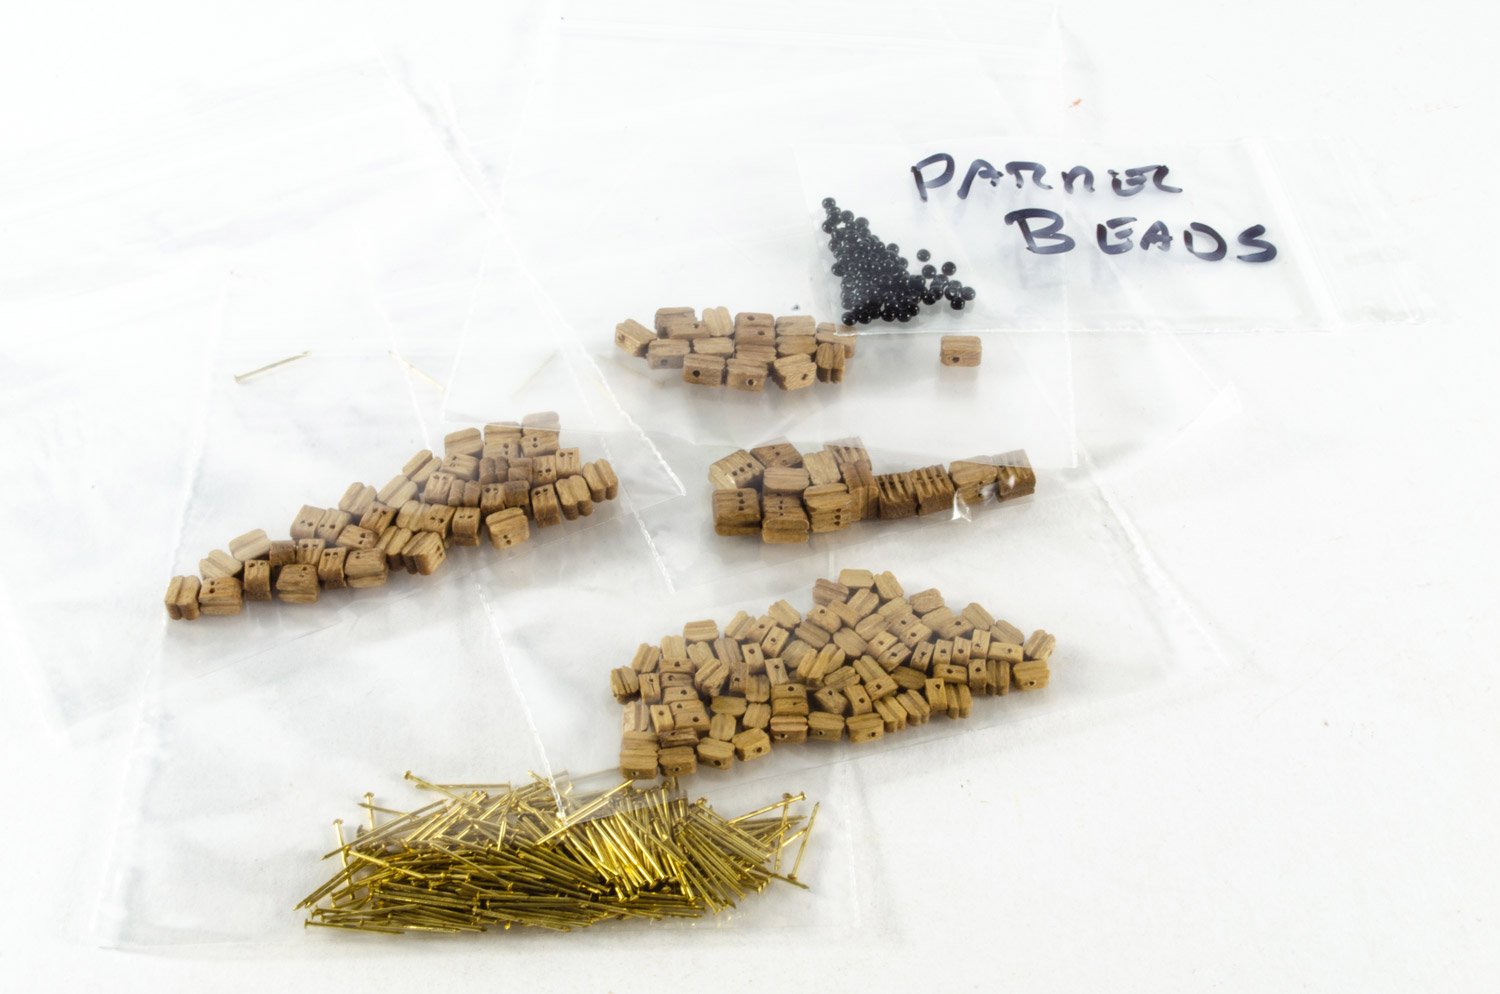
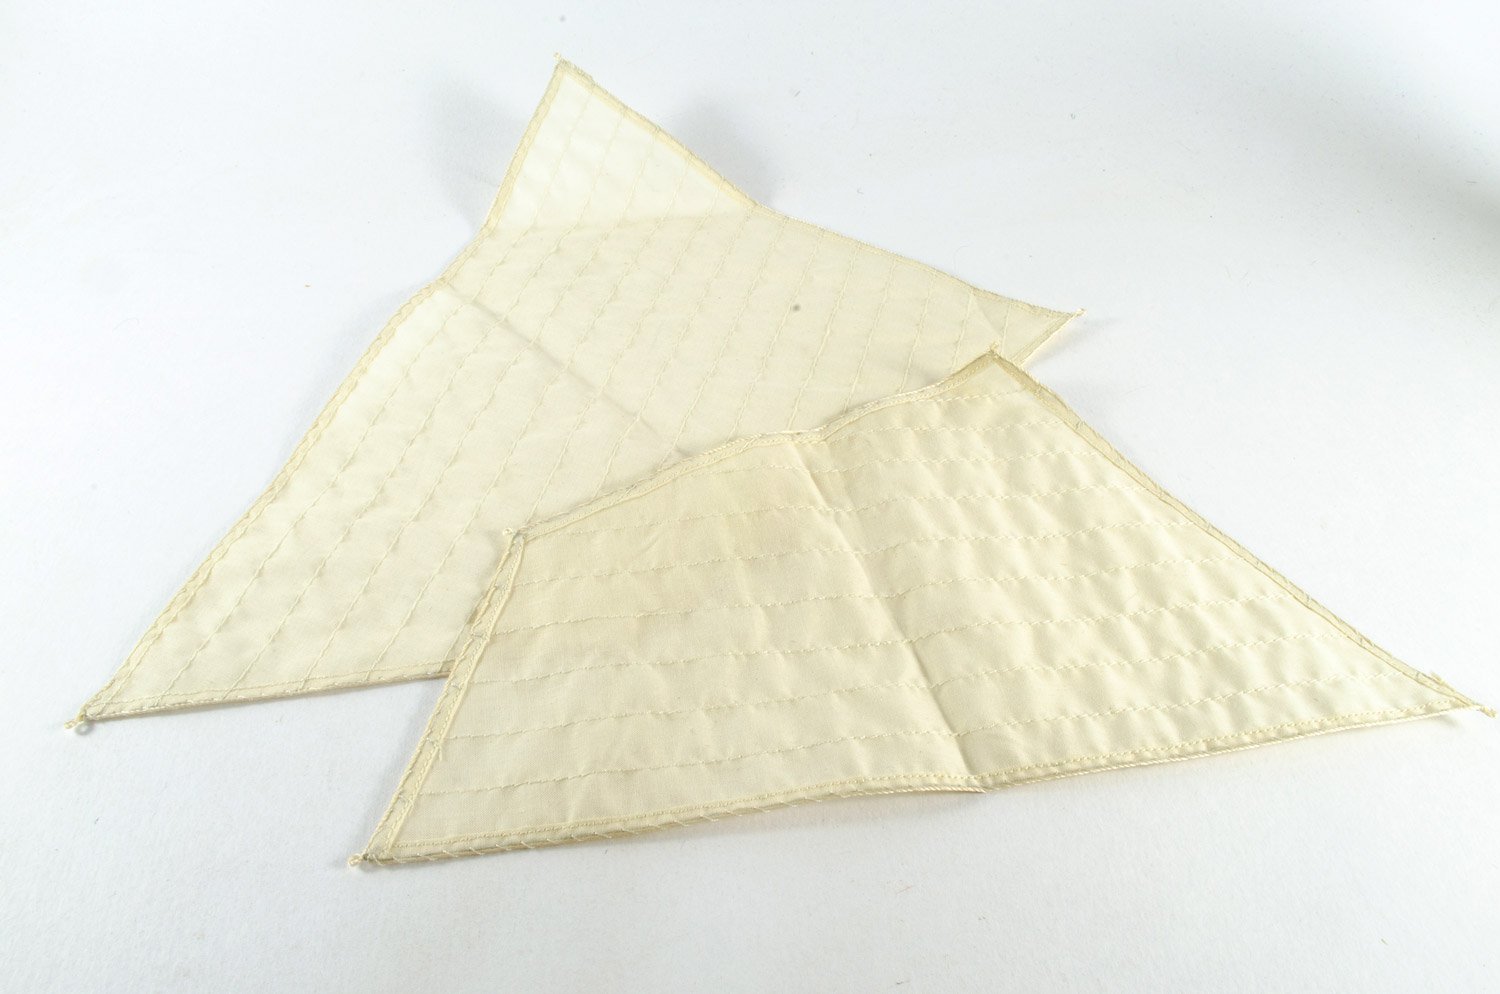
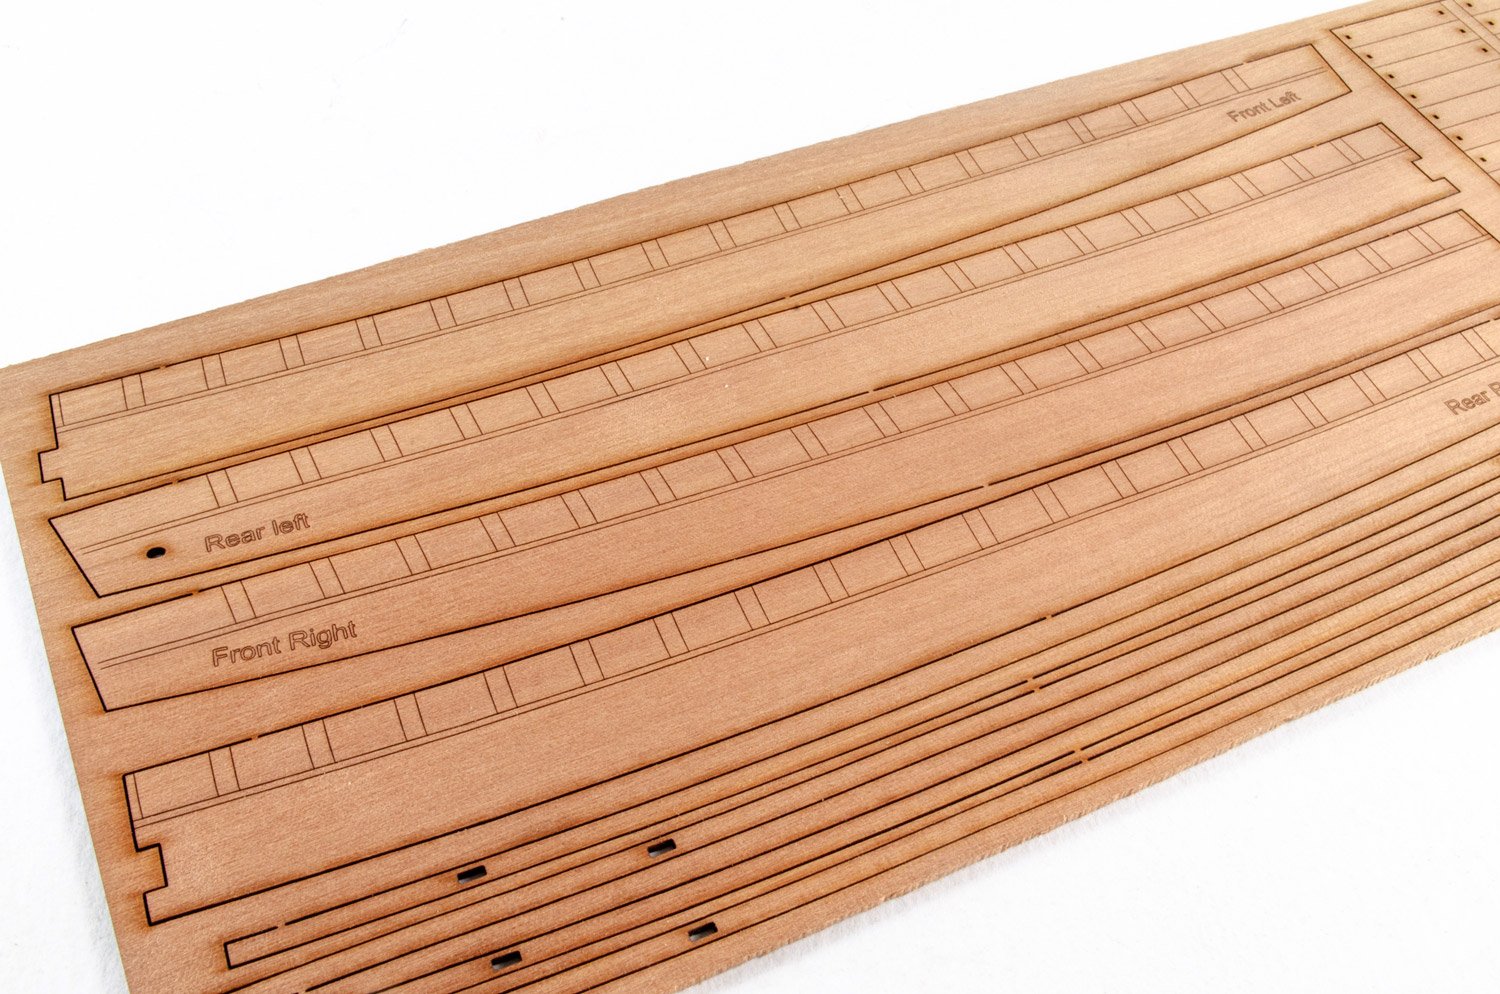
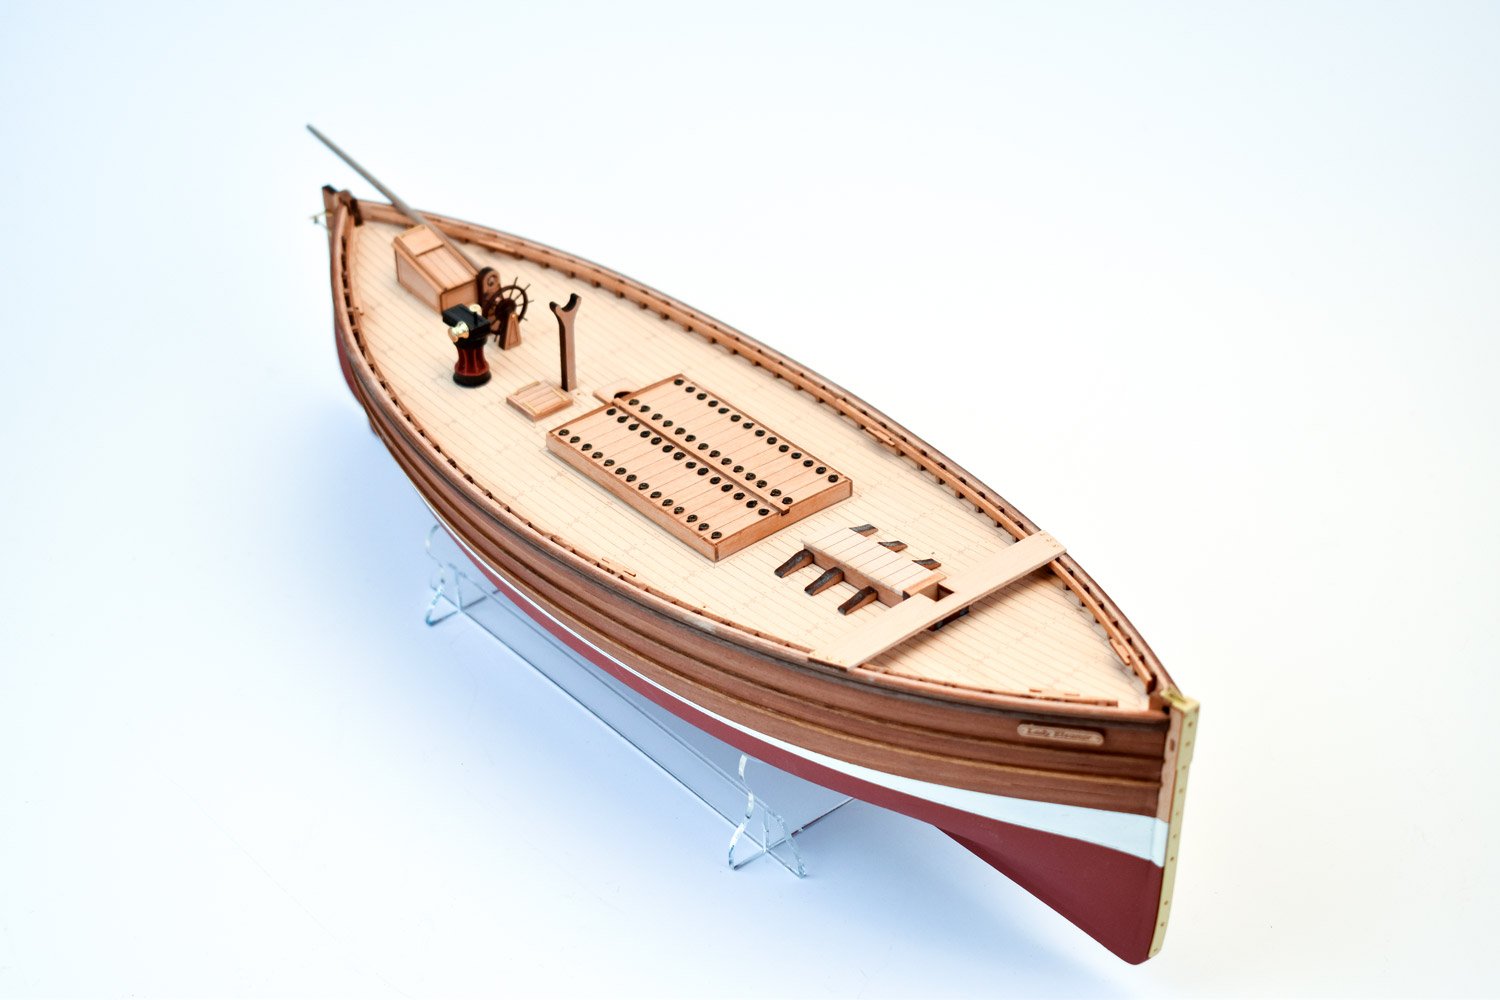
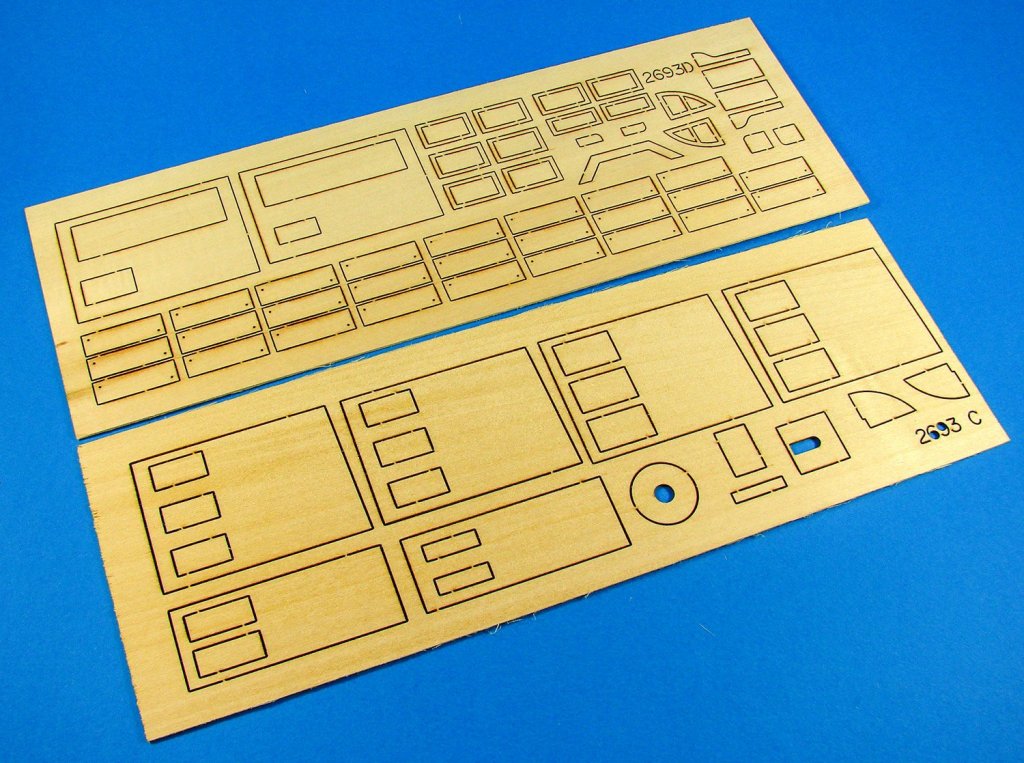
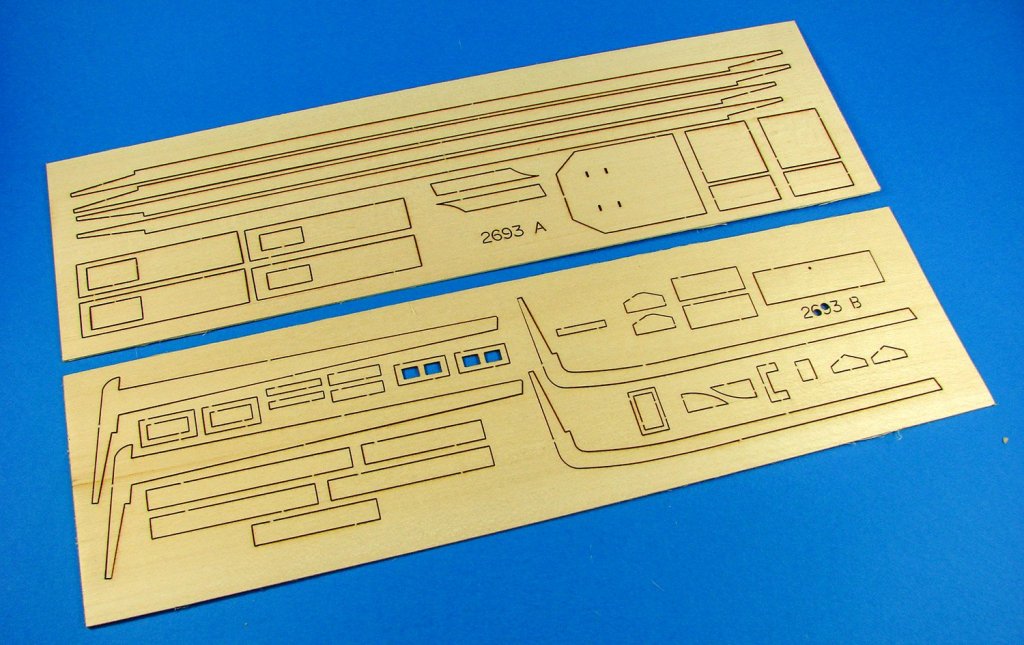
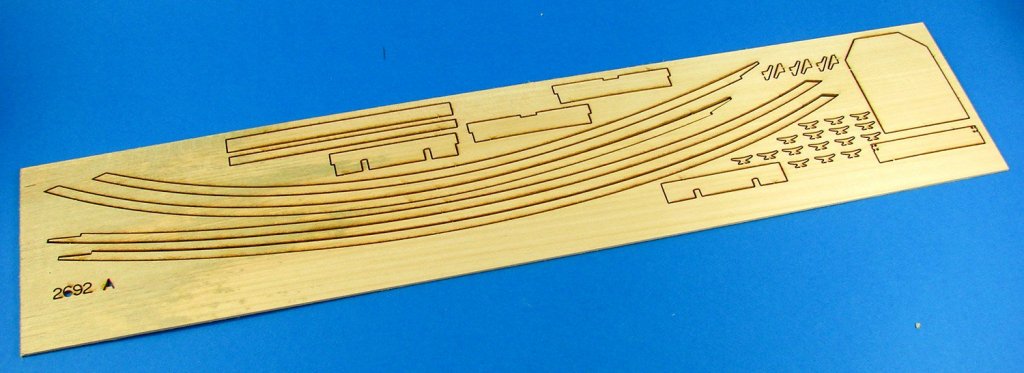
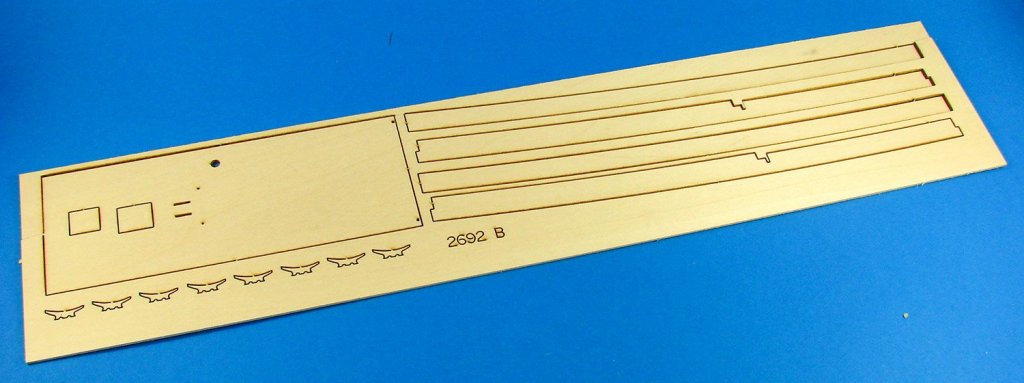
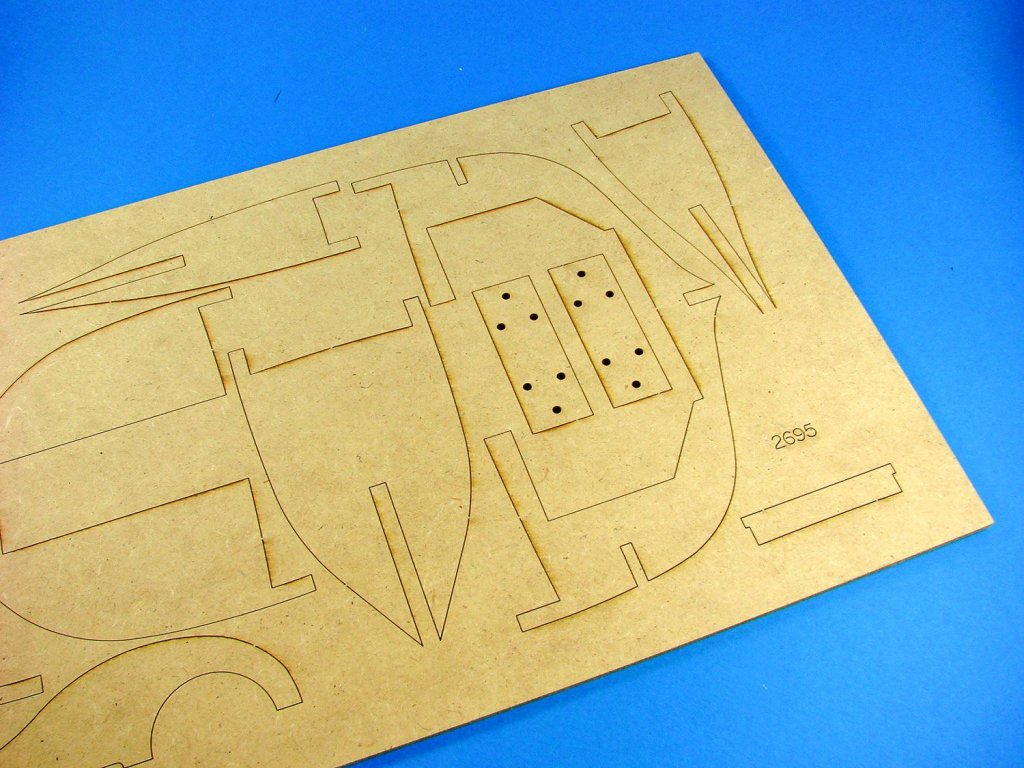
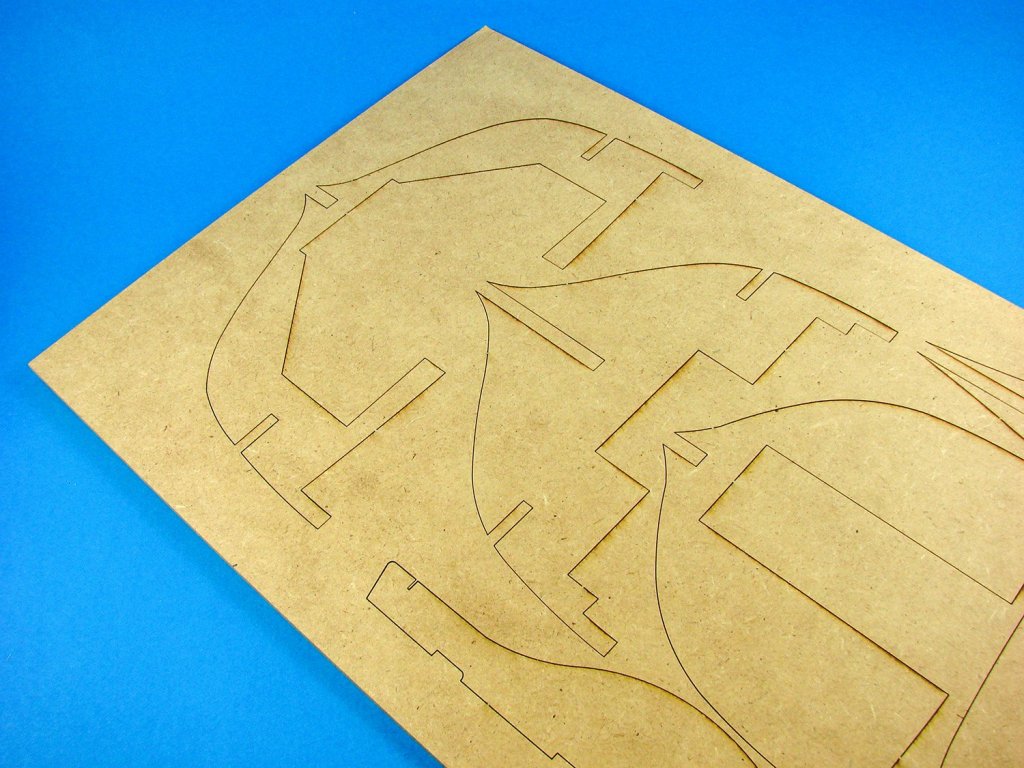
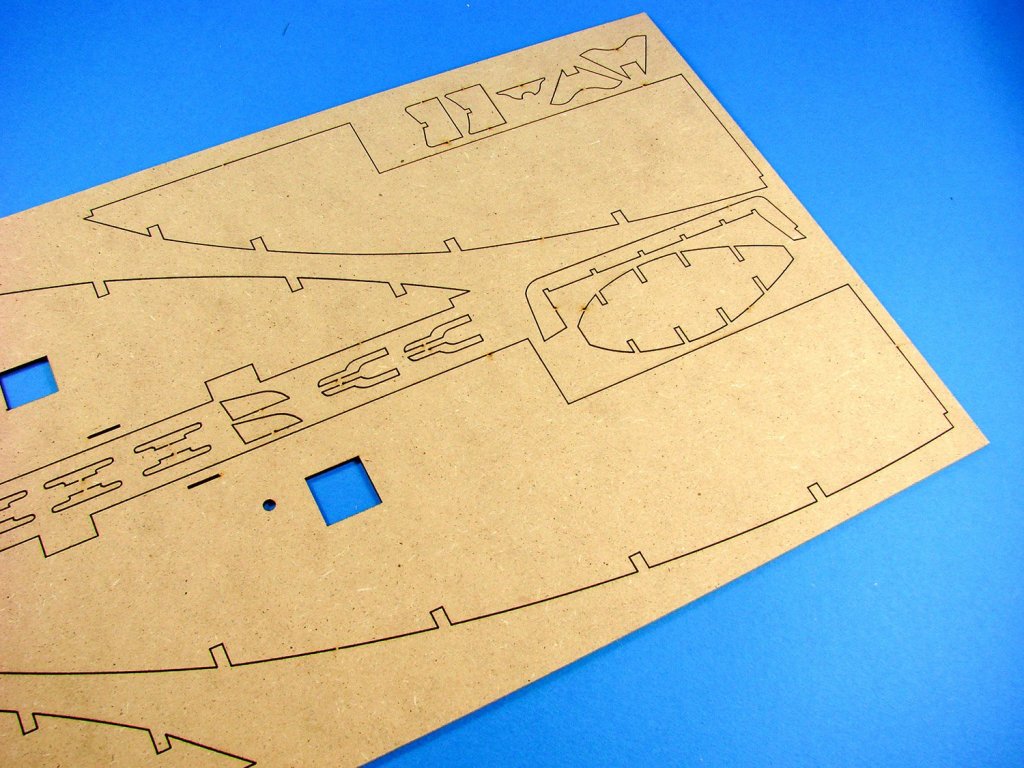
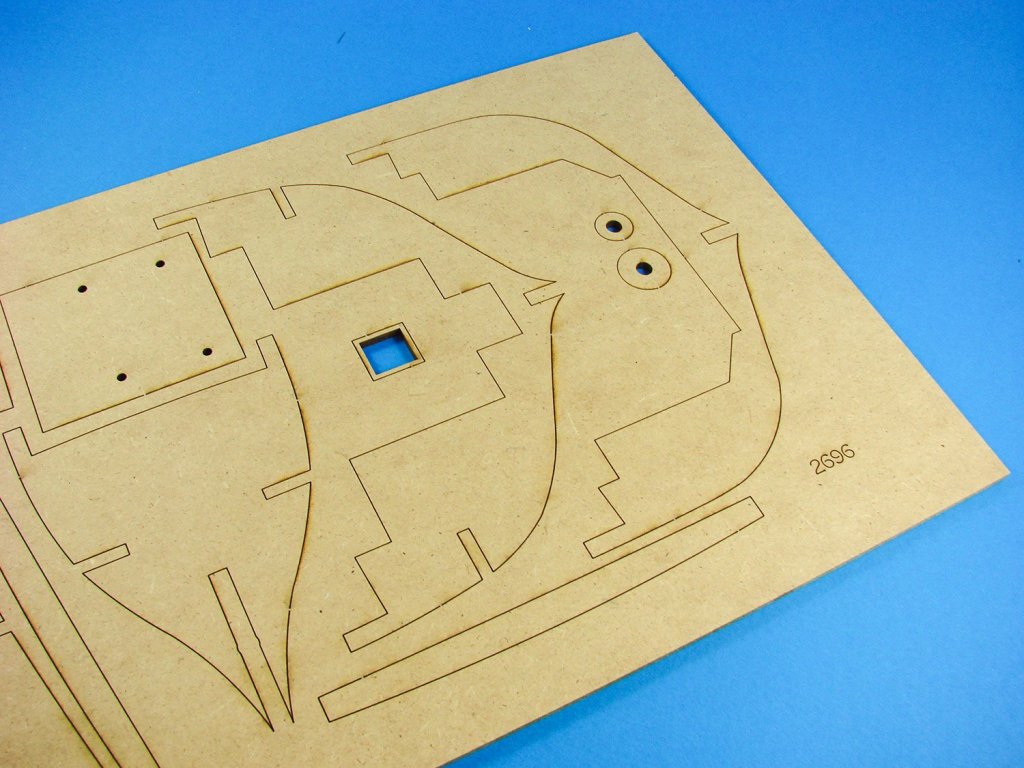
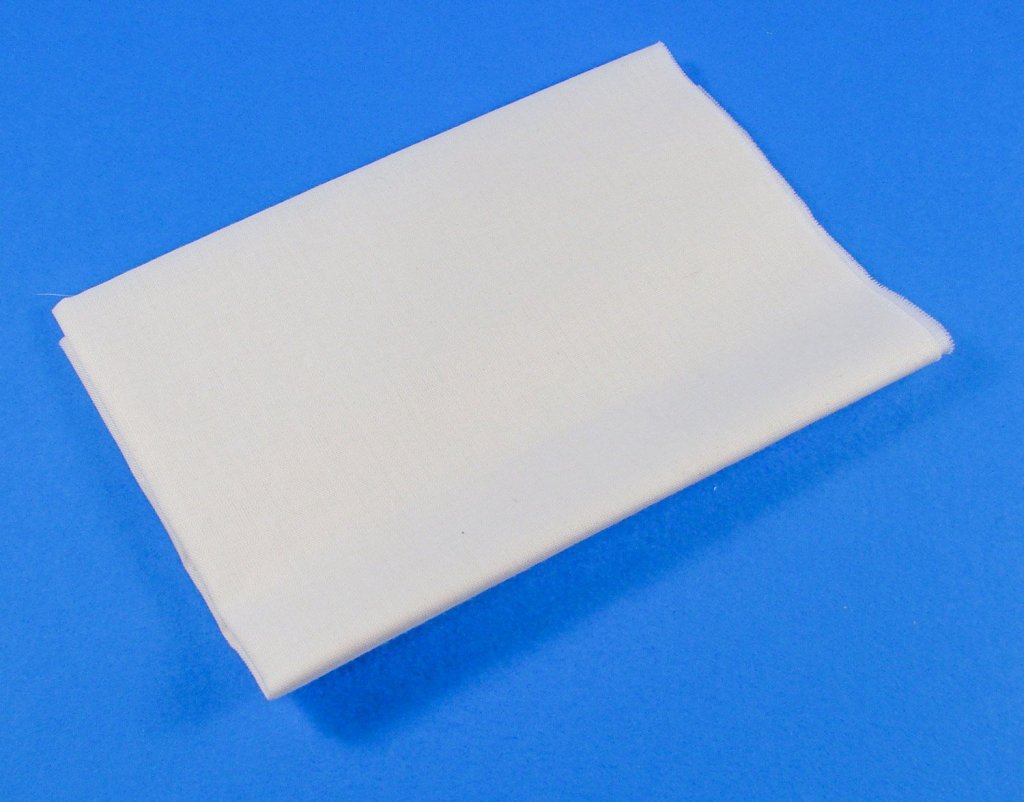
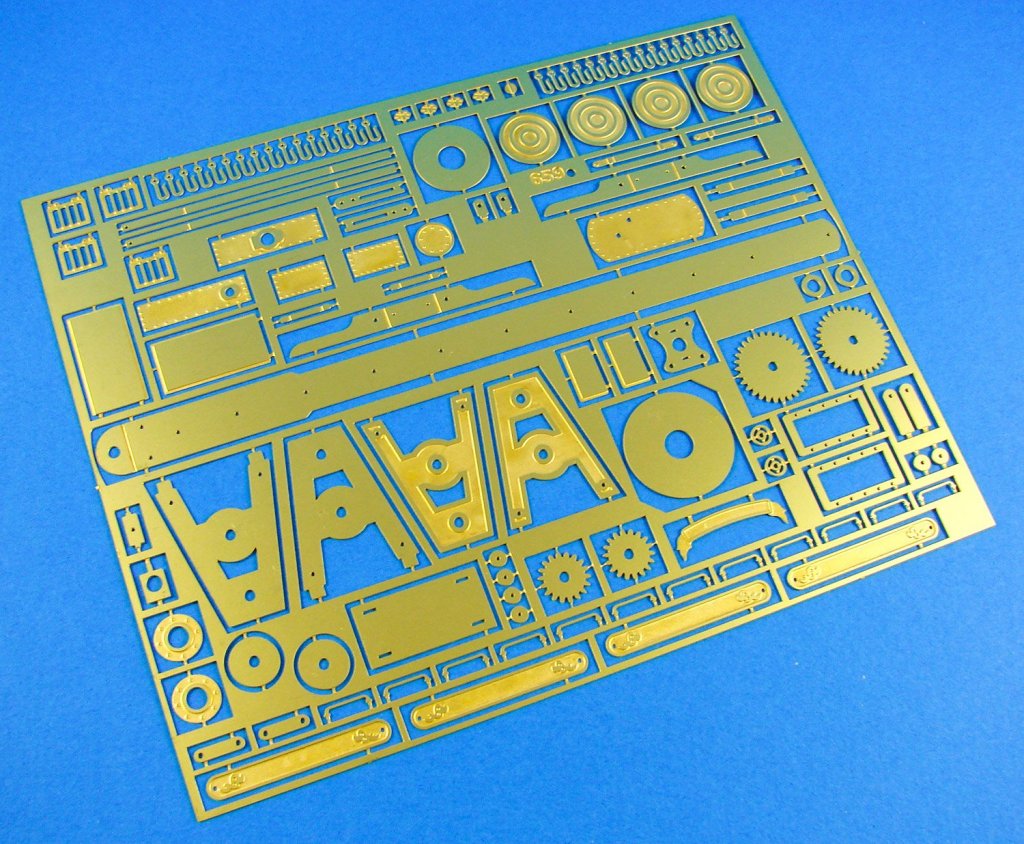
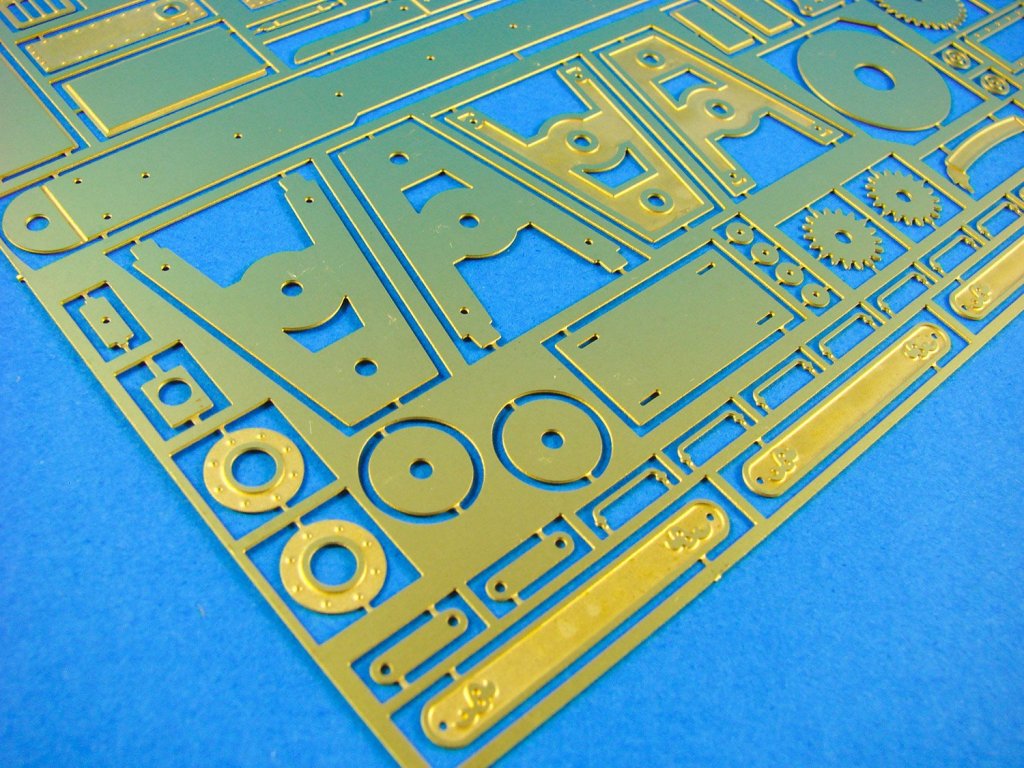
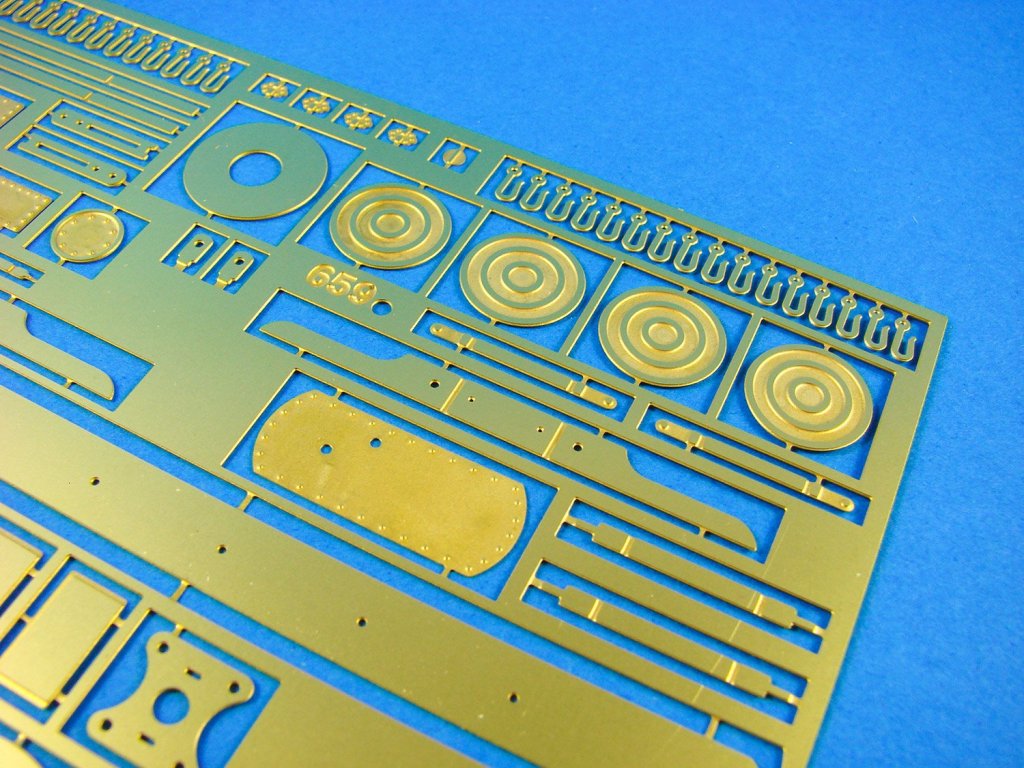
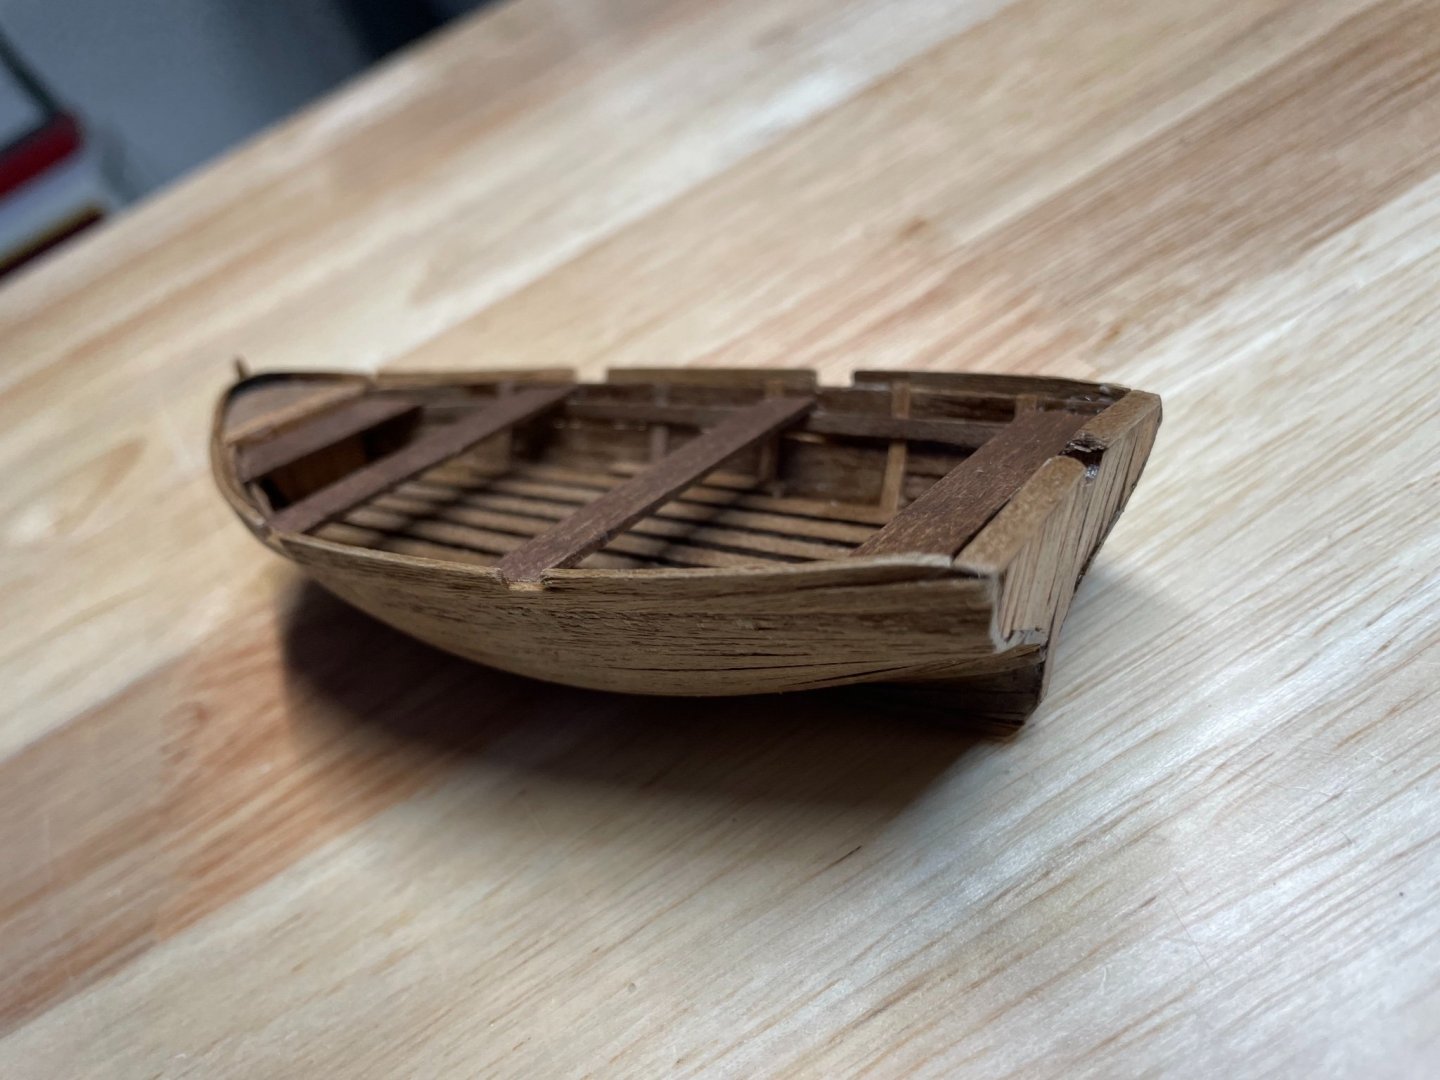
1:64 Fifie Fishing Boat, 'Lady Eleanor' - KIT PREVIEW Vanguard Models **Coming soon** To be released at the same time as the Vanguard Models' 1:64 Zulu fishing boat, reviewed HERE, will be the traditional sail version of the Fifie. Again, this kit is aimed at the beginner, but with materials and detail that will appeal to the more experienced modeller too. Having more or less built the Zulu, I can tell you that I had great fun doing so! The kit will be supplied with lime planking for the first layer, and pear planking for the second, as standard, plus pear for the keep and numerous other elements such as inner bulwark facings and superstructure parts. Timber quality is excellent throughout, as are the fittings etc. As with Zulu, this Fifie was shipped to me without the plan sets which are currently being worked on, and without the box or instructions. This kit I have here will be built for the instruction manual you will be provided with. The Fifie contains: 2 x 3mm MDF sheets 2 x 1mm pear sheets 1 x 2mm pear sheet 1 x 3mm pear sheet 1 x 2mm acetate sheet 1 x 0.8mm ply (single part) 1 x 0.7mm maple or lime wood laser cut/engraved deck (lime is standard) 1 x 0.4mm PE sheet Timber strip Rigging cord, parrel beads, rigging blocks MDF sheets Two 3mm sheets are supplied, and as you can see, these also include engraved bearding lines etc. All parts are laser engraved with numbers too. Cutting is clean and it won't take more than quick knife cut to release the various elements. You will also see parts for the winch, temporary clamps for the keel, and superstructure core parts. Note that the bulkheads have a recess into which the deck will click, meaning no pesky nailing down at the edges. 2 x 1mm Pear sheets These sheets contain superstructure external facings, inner bulwarks in two parts each, and also keel facing parts. After the main keel is fitted, these sit on top, with tabs to locate them. This creates a rebate into which the second layer of pear planking will set. It's a neat idea and worked great on my Zulu. Note the 'Lady Eleanor' plates that fit on the boat's bow. 1 x 1.5mm pear sheet This small sheet just contains the timberheads for the inner bulwarks. 1 x 3mm pear sheet Like Zulu, the Fifie has a single sheet of 3mm pear. Here you will find the keel parts, foremast step and crutch, rudder, and elements for mounting the boat's wheel etc. 1 x 2mm acetate sheet This model also comes with a clear acetate display stand. Just peel off the protective blue film and slot together! 1 x 0.8mm ply (single part) The deck is supplied in two layers with this ply deck being what you glue to the hull carcass. Like my Zulu, this will just click into place nicely. I even added glue after this was fitted! 1 x 0.7mm maple or lime wood laser cut/engraved deck My kit was supplied with a maple deck which is at a slight extra cost to the standard kit. A laser-engraved limewood deck is standard. 1 x 0.4mm PE sheet One sheet of PE is included. Here you will find parts for the winch (plates, mechanism box and whelps), rigging points, boat wheel and keel plate for the bow. Timber strip All timber is high quality. Here you will find both layers of planking and the rubbing strakes. Rigging cord, parrel beads, rigging blocks 0.25 and 0.5mm natural cord is included, as are the various blocks and fittings etc. Please excuse the inaccurate number of blocks in these photos are my Zulu blocks are also in there and not yet separated. Optional sails If you want to finish your fisher with sails, and they do look great on this type of model, then they will be available as an optional extra. These are cotton-based and pre-made with a bolt rope etc. Lastly, here's a photo of Chris's prototype Fifie. I'll be starting mine tomorrow.