Search the Community
Showing results for tags 'granado'.
-
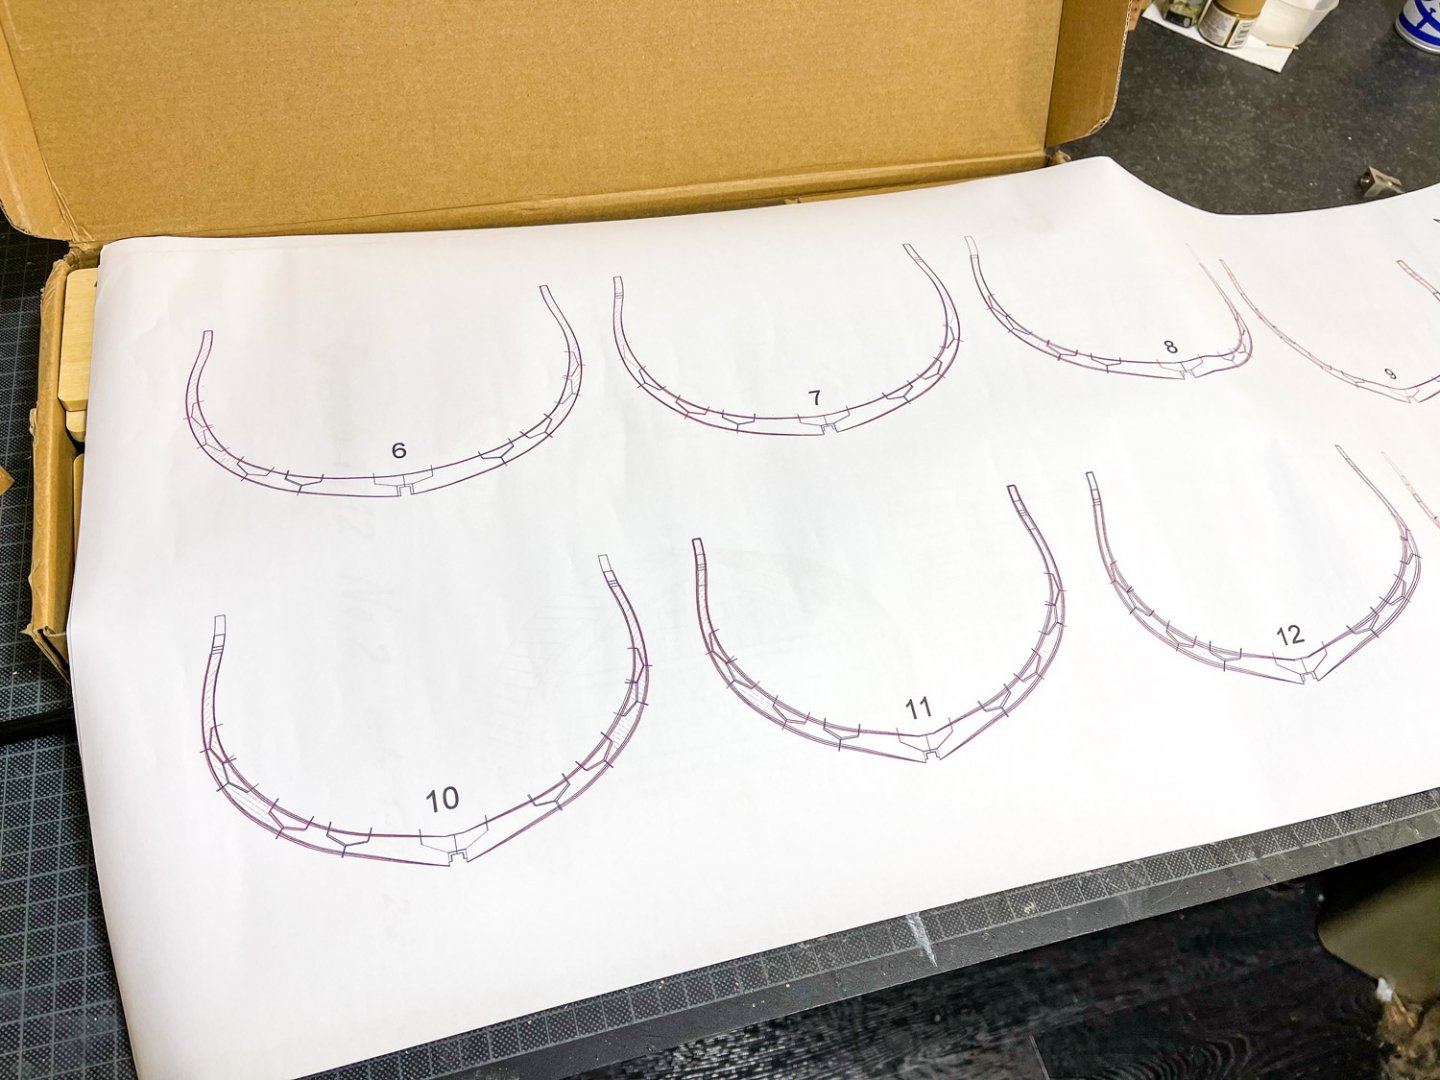
 Bonjour, The Granado is my second wooden ship build these year. This follows the ship Endurance which you can follow the link to in the MSW gallery. Before to start I learned many things with the forum. Thank You Timmo, Joe, Kevin, Brian, Vane... I was a little bit disappointed when I opened the box because 3 sheets missing. Thanks to Glenn (Cornwall) the problem was rapidly solve. Like everybody the fitted of the gunport pattern is not easy. At the end Ithe gunport cutouts of each pattern (port and starboard) were not fully aligned (1-2mm) !
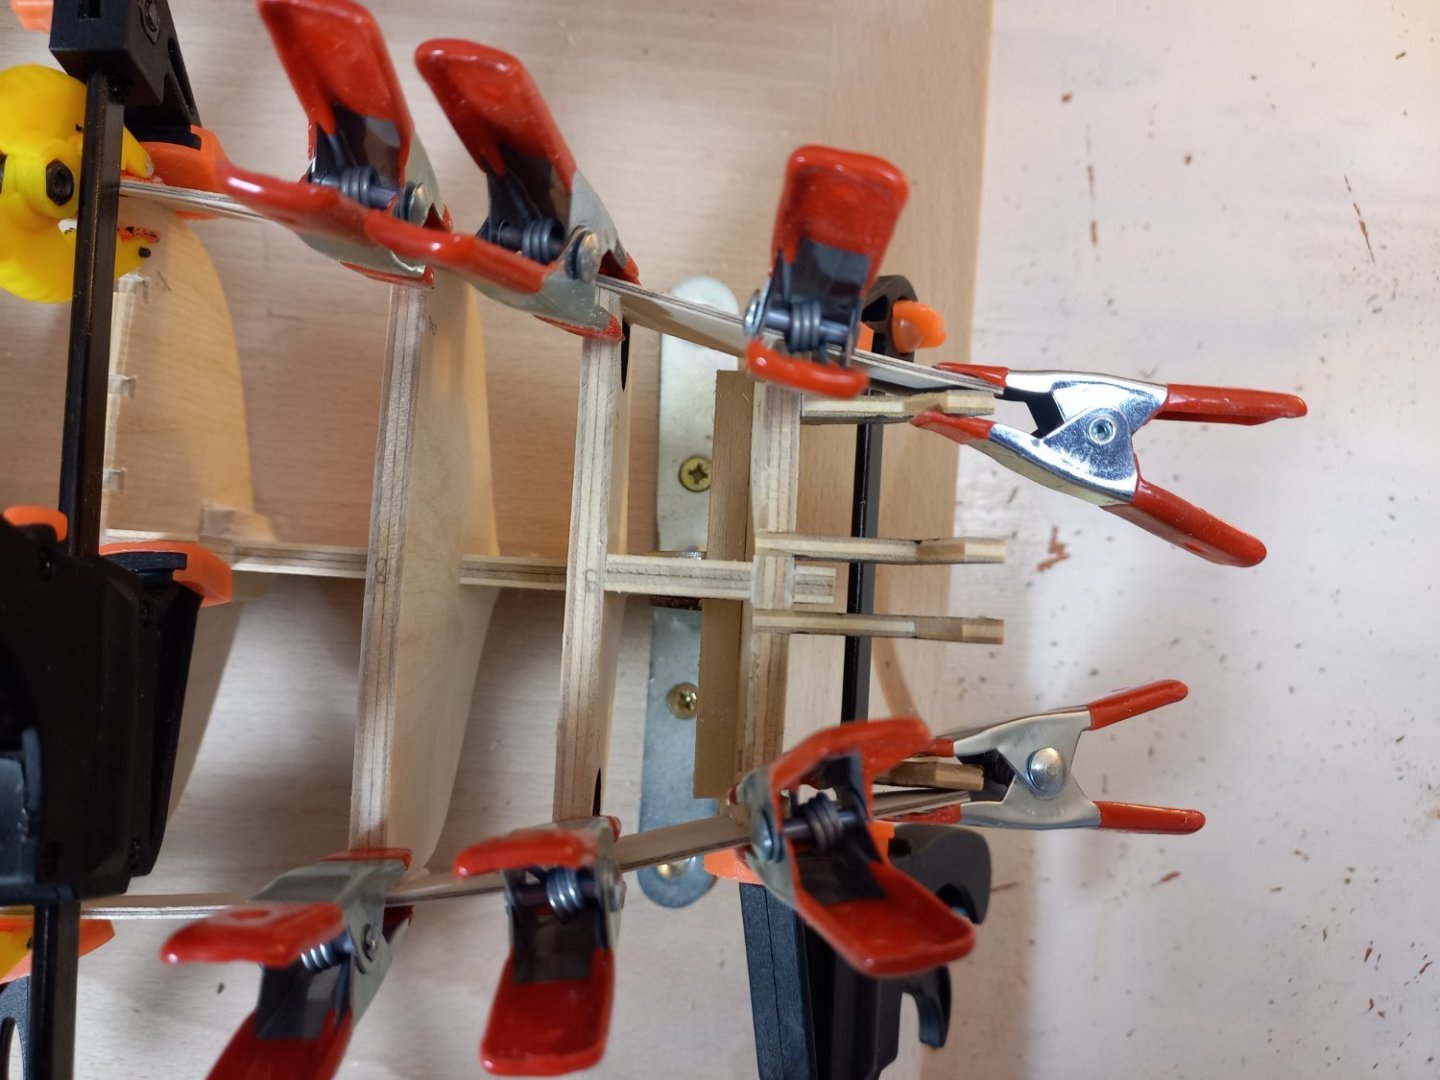
.thumb.jpg.bcf05ffc08f9a29b014466aa03f0ba62.jpg)
.thumb.jpg.5769dd69c685acc88474bd3b7b80453d.jpg)
-
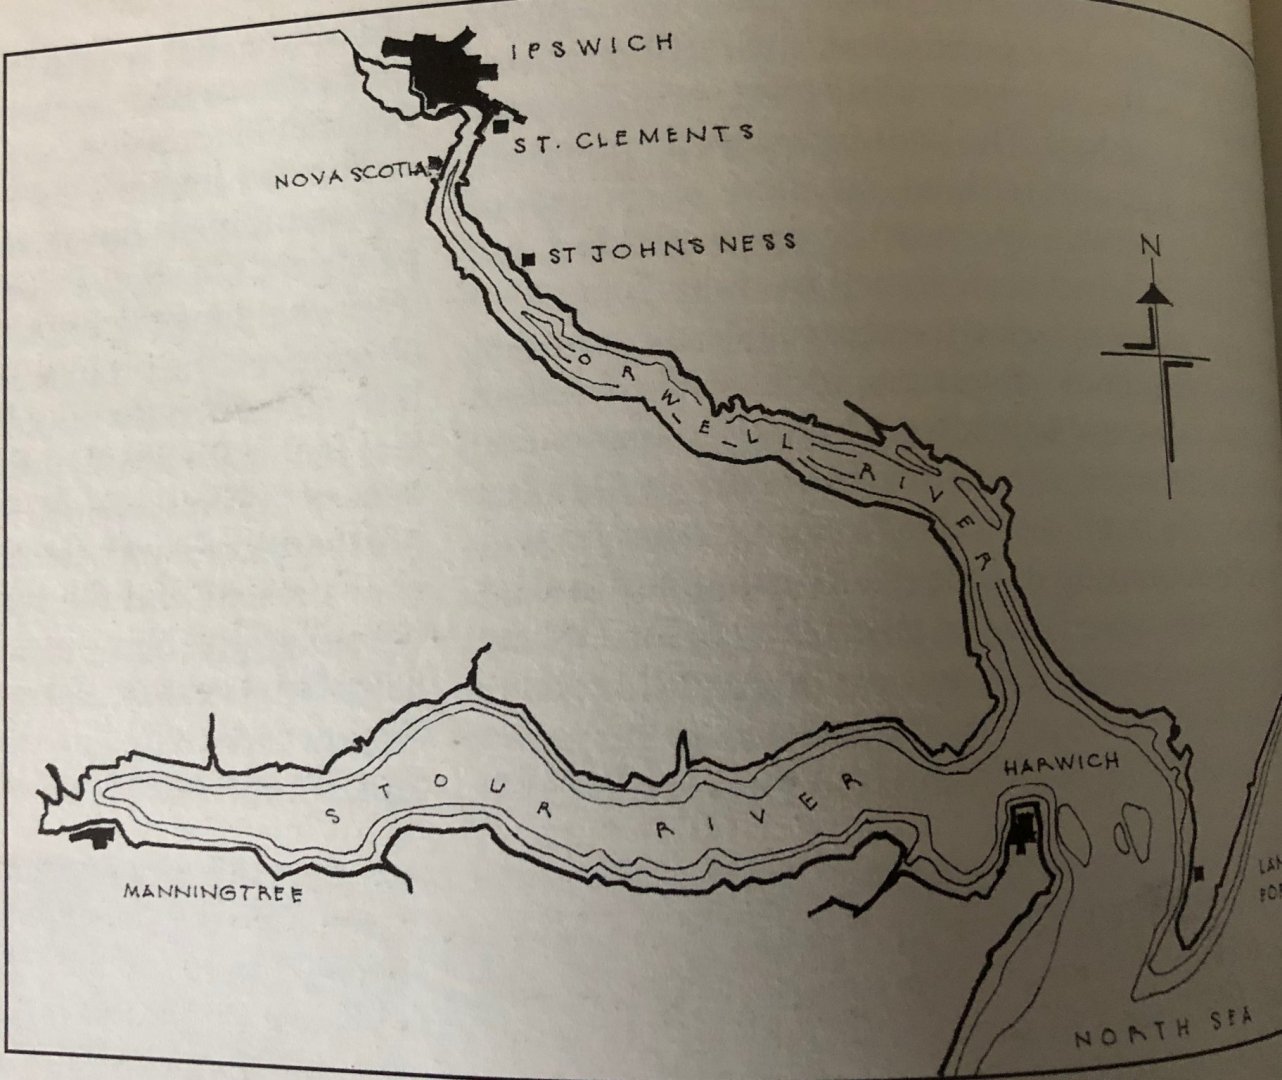
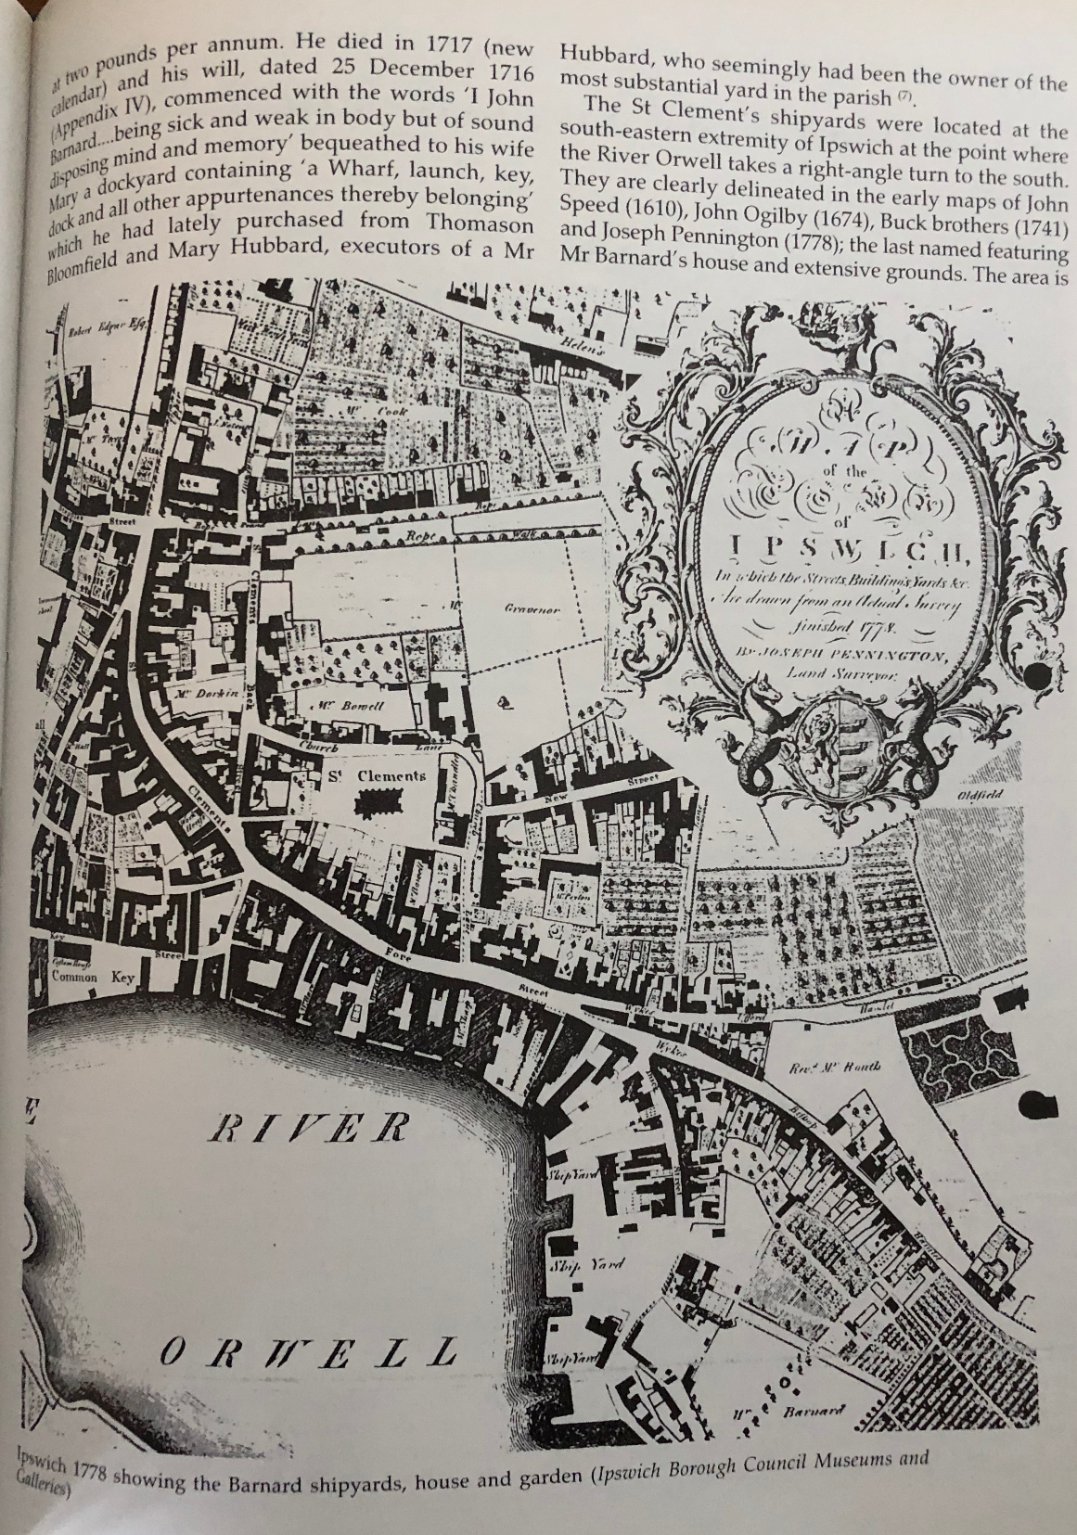
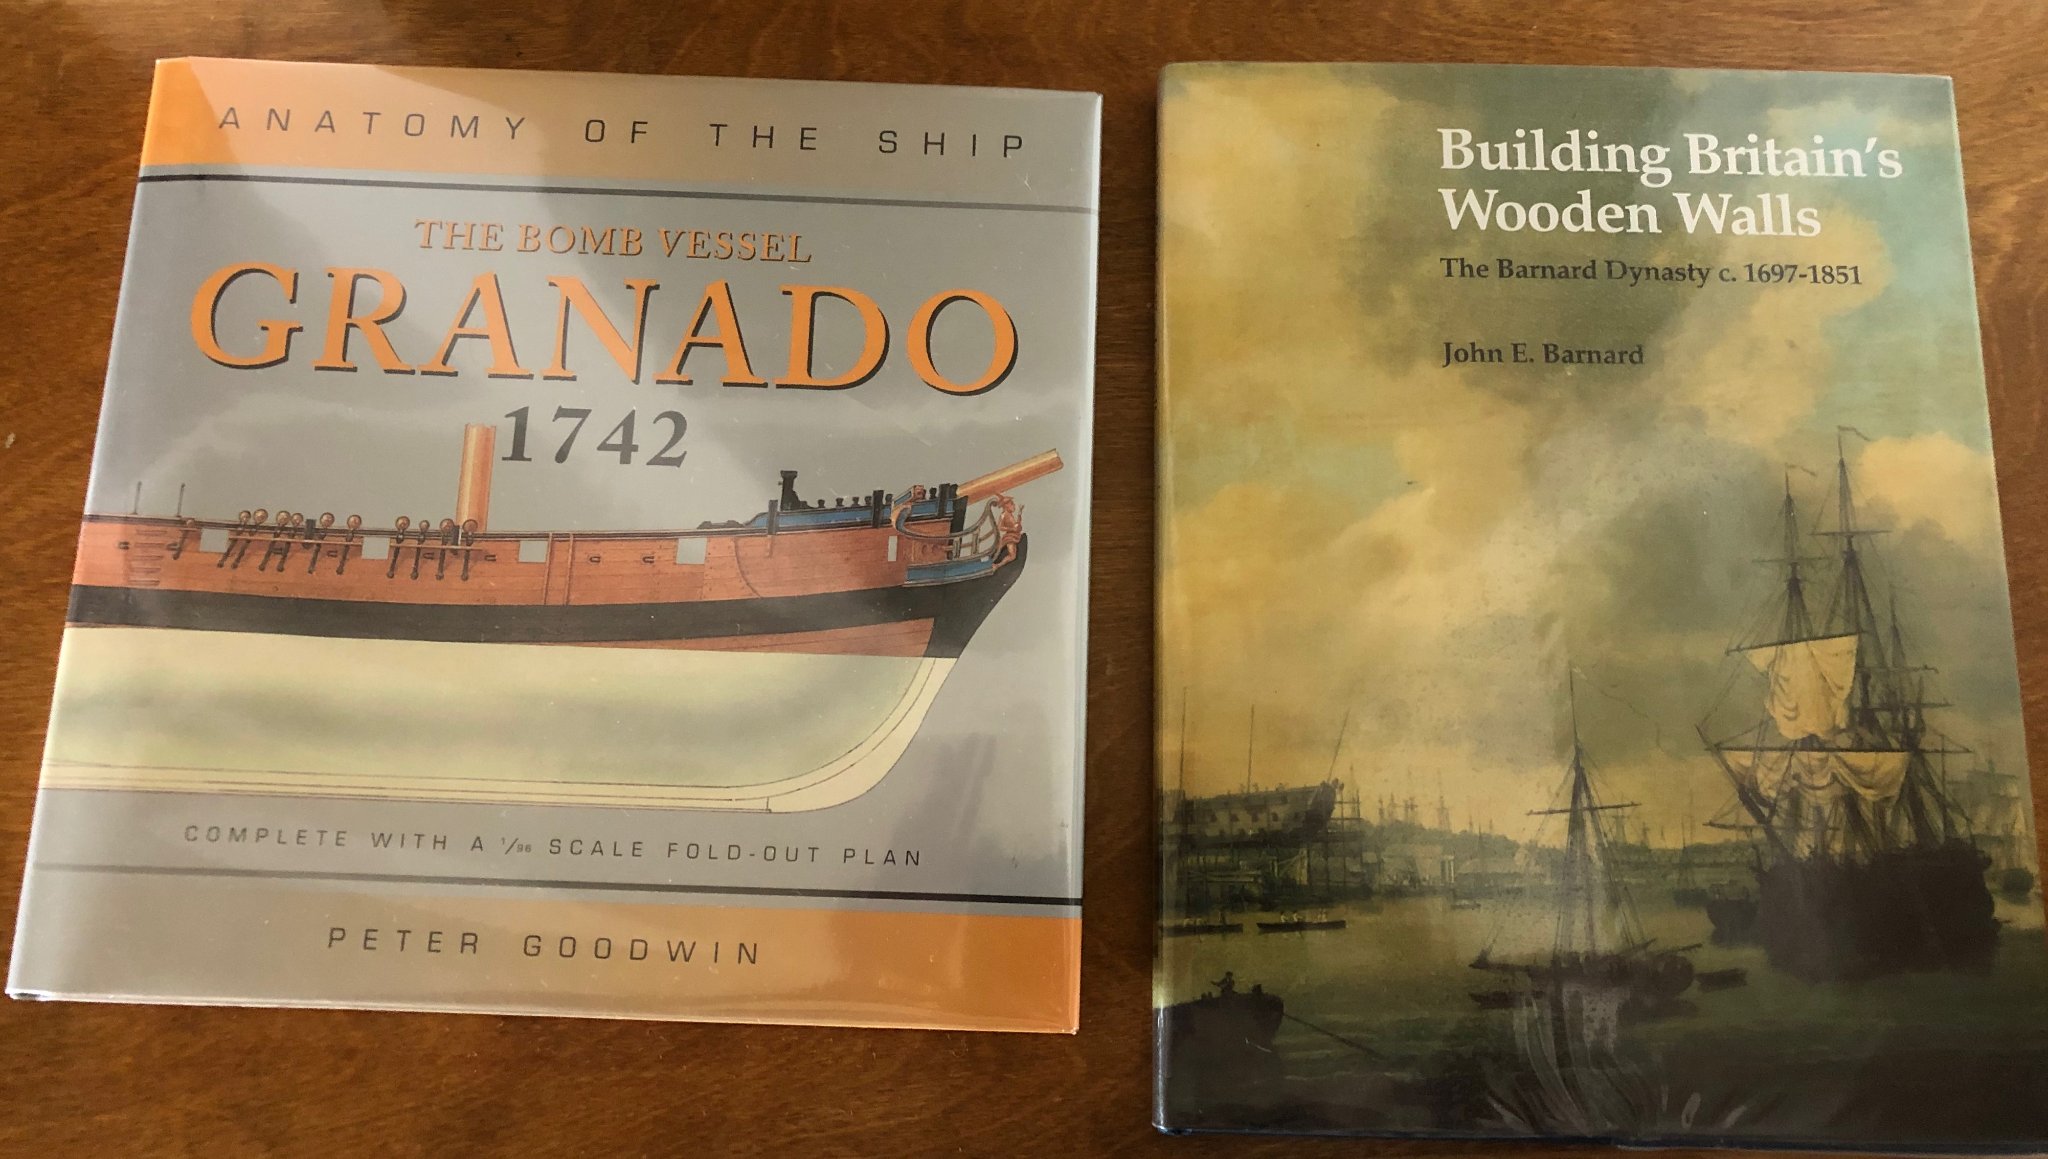
 Well, with the continued encouragement of Vane, I have decided to break the ice and start a build log for my efforts on the HMS Granado. I have ordered the AOTS reference and my wife was super kind and found a nice reference book on the builder.... Granado was ordered to be constructed on September 14th, 1741 and the keel was laid on November 18th, 1741. The construction of the ship occurred at St Clements on the River Orwell near Ipswich. The Granado's design was unusual in that she was to be used as either a sloop or a bomb vessel, being constructed with a conventional square stern. Launched on June 22nd, 1742, Granado was initially taken to Harwich, and fitted out and put in commission as a sloop. It was not until 1756 that Granado was fitted for the first time as a bomb vessel from an Admiralty Order on July 26th 1756. However, between the launch of Granado and her fitting as a bomb vessel, a number of changes had been made as compared to the original Admiralty plans, the most noticeable of these were as follows: 1. Two extra 4pdr carriage guns were added (Admiralty order of June 20th 1745) bringing the total 4pdr carriage guns to 10. 2. Two bow chaser gun ports were added allowing accommodation of the extra guns either under the forecastle as bow chasers or at the fifth gunports. 3. The mortars as shown in the Admiralty plans are two 13 inch mortars however when fitted as a bomb vessel this was actually changed to 1 x 13inch and 1 x 10inch mortar. This is confirmed by the provisions list on March 30th 1757 which details 50 large and 50 small shells. It was during its period as a bomb vessel that Granado was involved in her most active role. On January 22nd, 1759, Granado and the squadron under command of Commodore John Moore anchored off Basse Terre. By January 24th troops had occupied the forts of Basse Terre and Fort Royal, and the town had been devastated by fire caused by the carcasses discharged from the bomb vessels. On February 7th, the fleet moved to attack Fort Louis at the entrance to Cul de Sac Bay. The attack began the following day and by February 15 the bombardment ceased with the capture of the Fort. Granado remained as a bomb vessel until the Admiralty Order to fit her as a sloop on March 20th 1760. Granado was again converted to a bomb vessel in August 1761 and she remained as such until she was sold on August 30th 1763 for £575. During this period Granado was involved in the action of capturing Morro Castle and El Morro in the West Indies and the capitulation of Havana on August 13th 1762. .


-
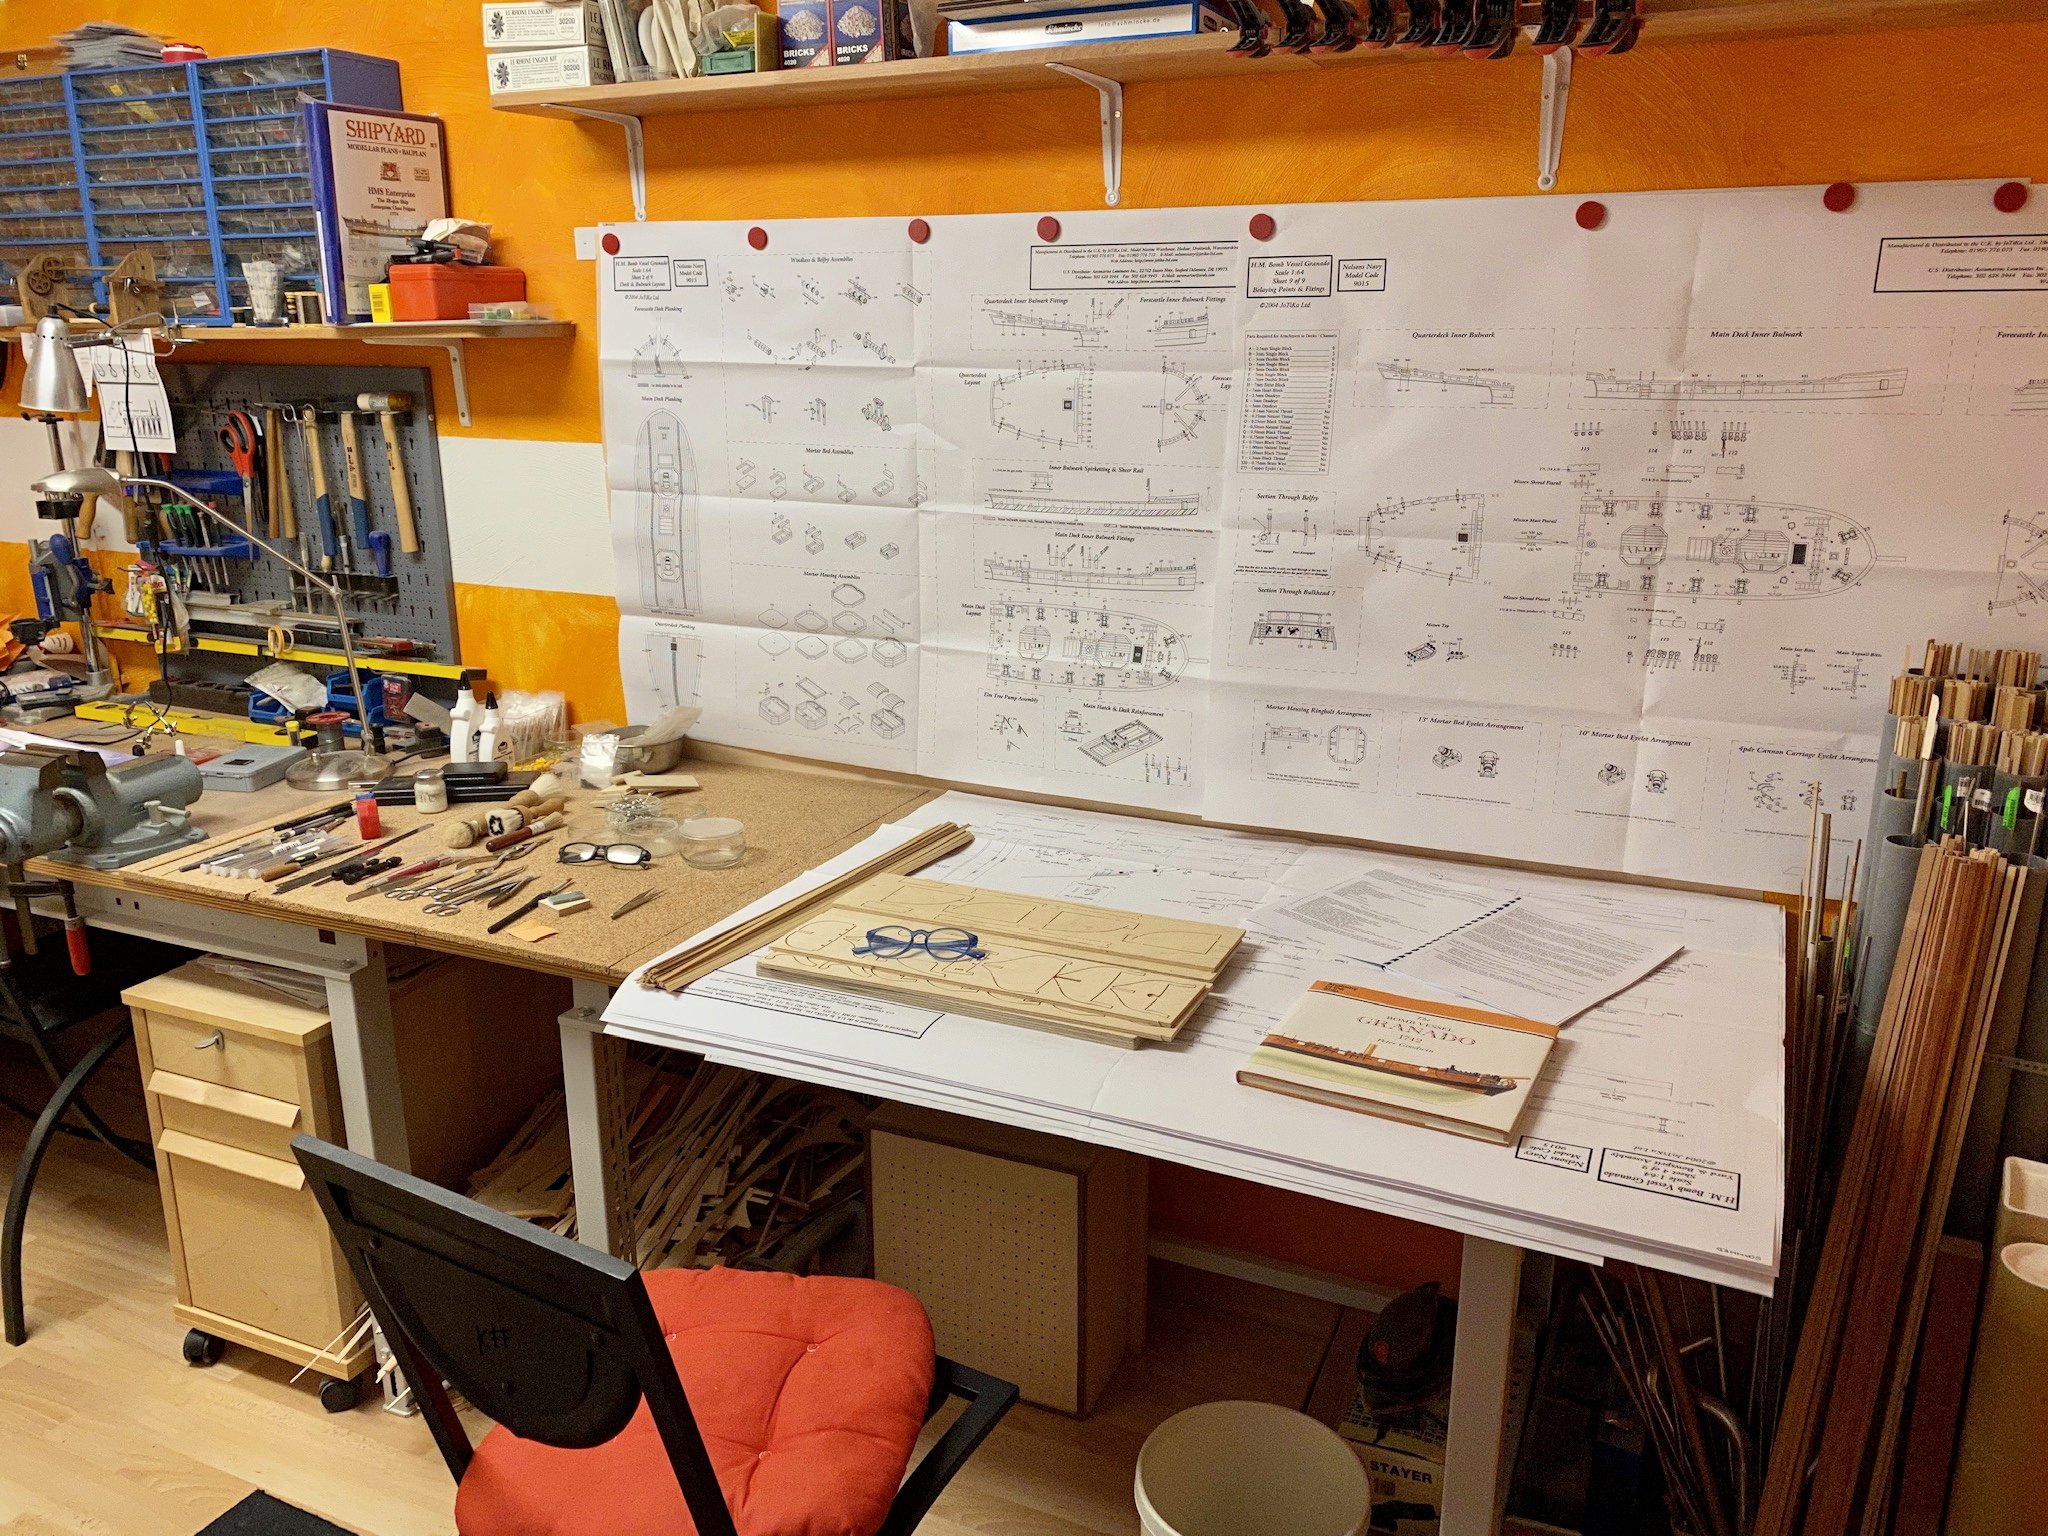
 Well my kit arrived, and my workbench is mostly cleaned off, so I had best start my build log. I'll post some pictures tomorrow, if my first Covid shot doesn't hit me too hard.
- 38 replies
-
- 10
-

-
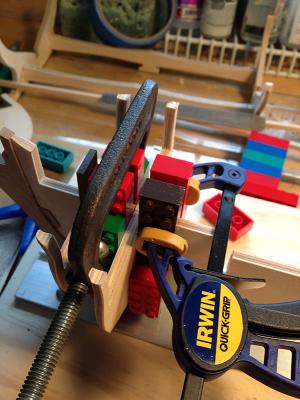
 I was looking for something a bit different for my next build, and most assuredly did not want to copper, having done so on my last three builds, so after much thought I have settled on the Caldercraft Granado. There are some nice builds of her going on her on MSW which have given me some great ideas and nice inspiration. The kit is very nice right out of the box, with decent looking wood, nice fittings and excellent plans and instructions. I have yet to decide how far I'm going to go with changes and alterations wood wise, but I have some time to decide on that. So...let's get started! She's upright on her building board with rabbet and bearding line cut and the first few bulkheads installed. I'm glad we saved (my now teenaged sons') Legos! Nothing too exciting yet...
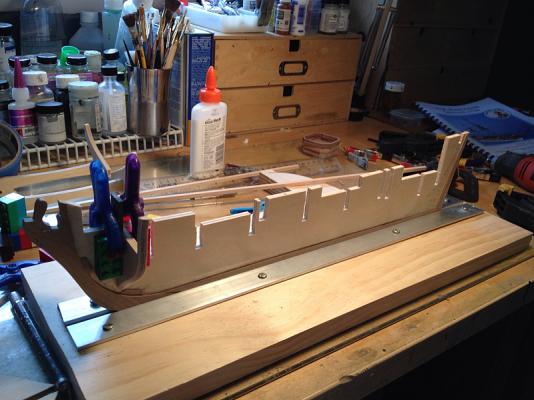
- 302 replies
-
- 9
-
-
- granado
- caldercraft
- (and 1 more)
-
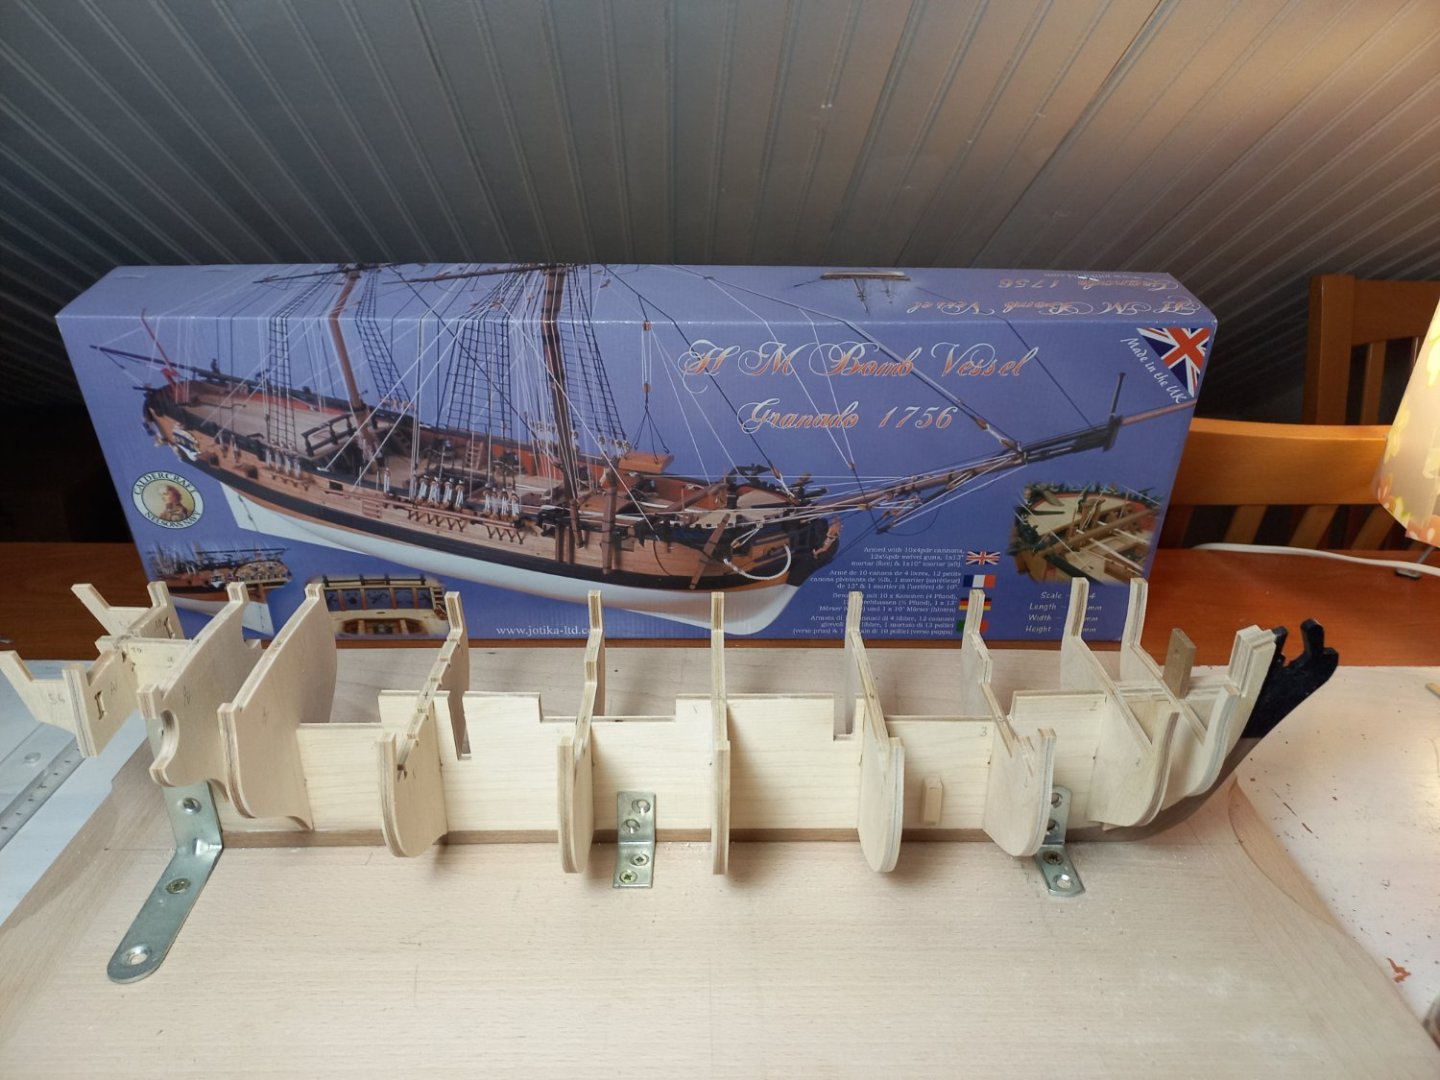
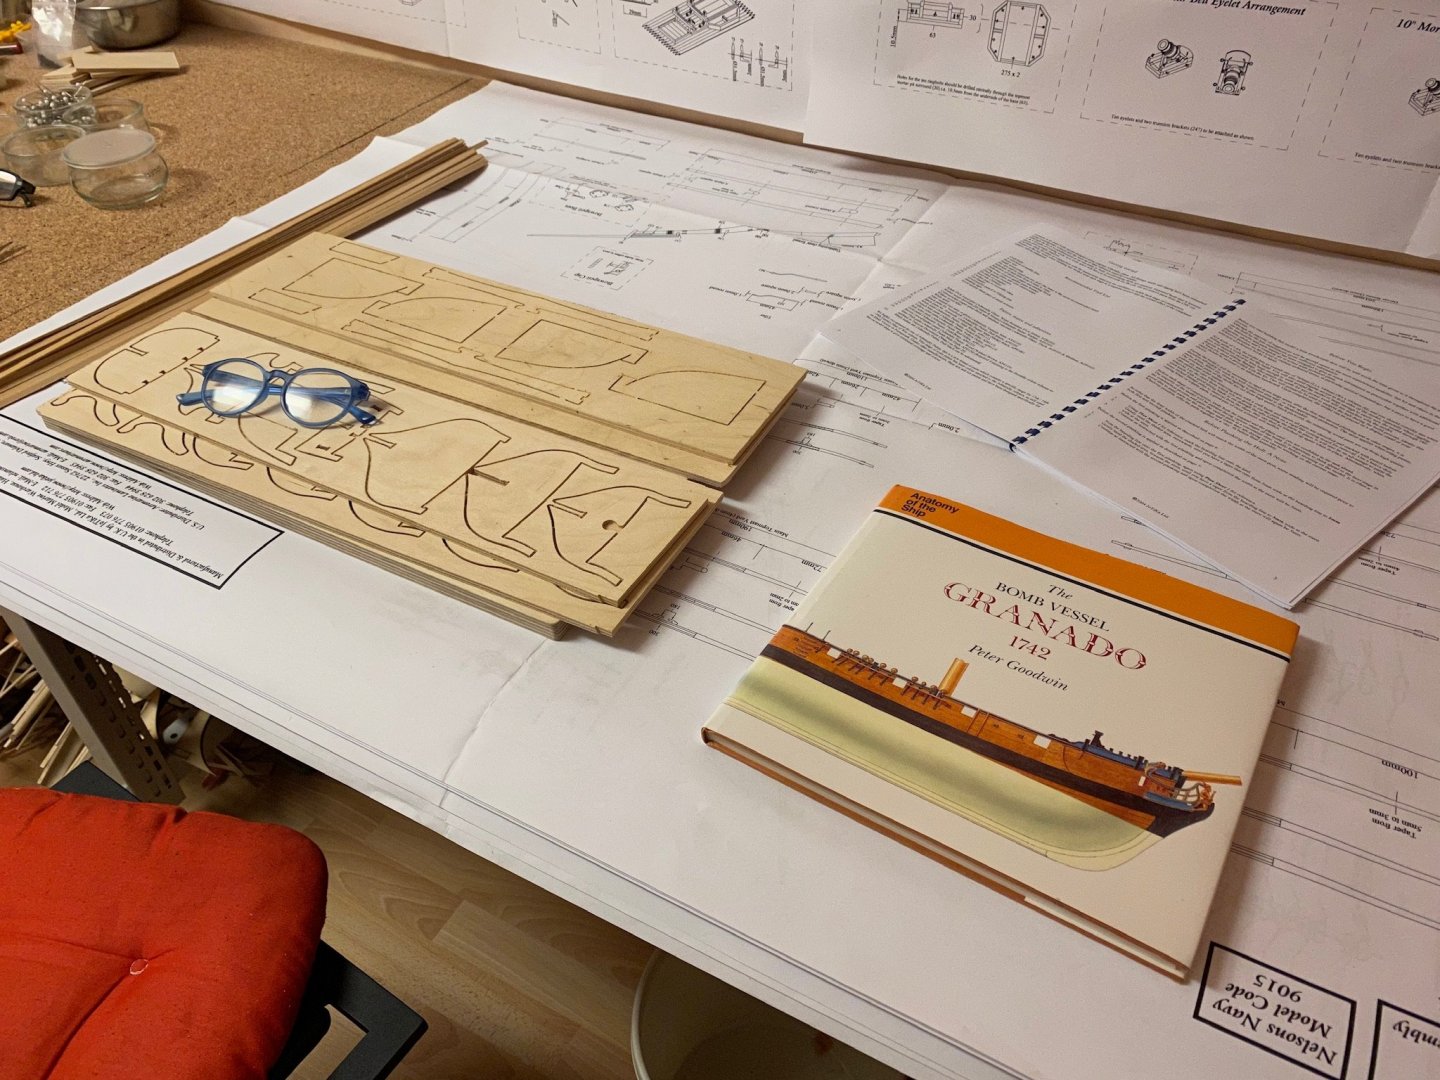
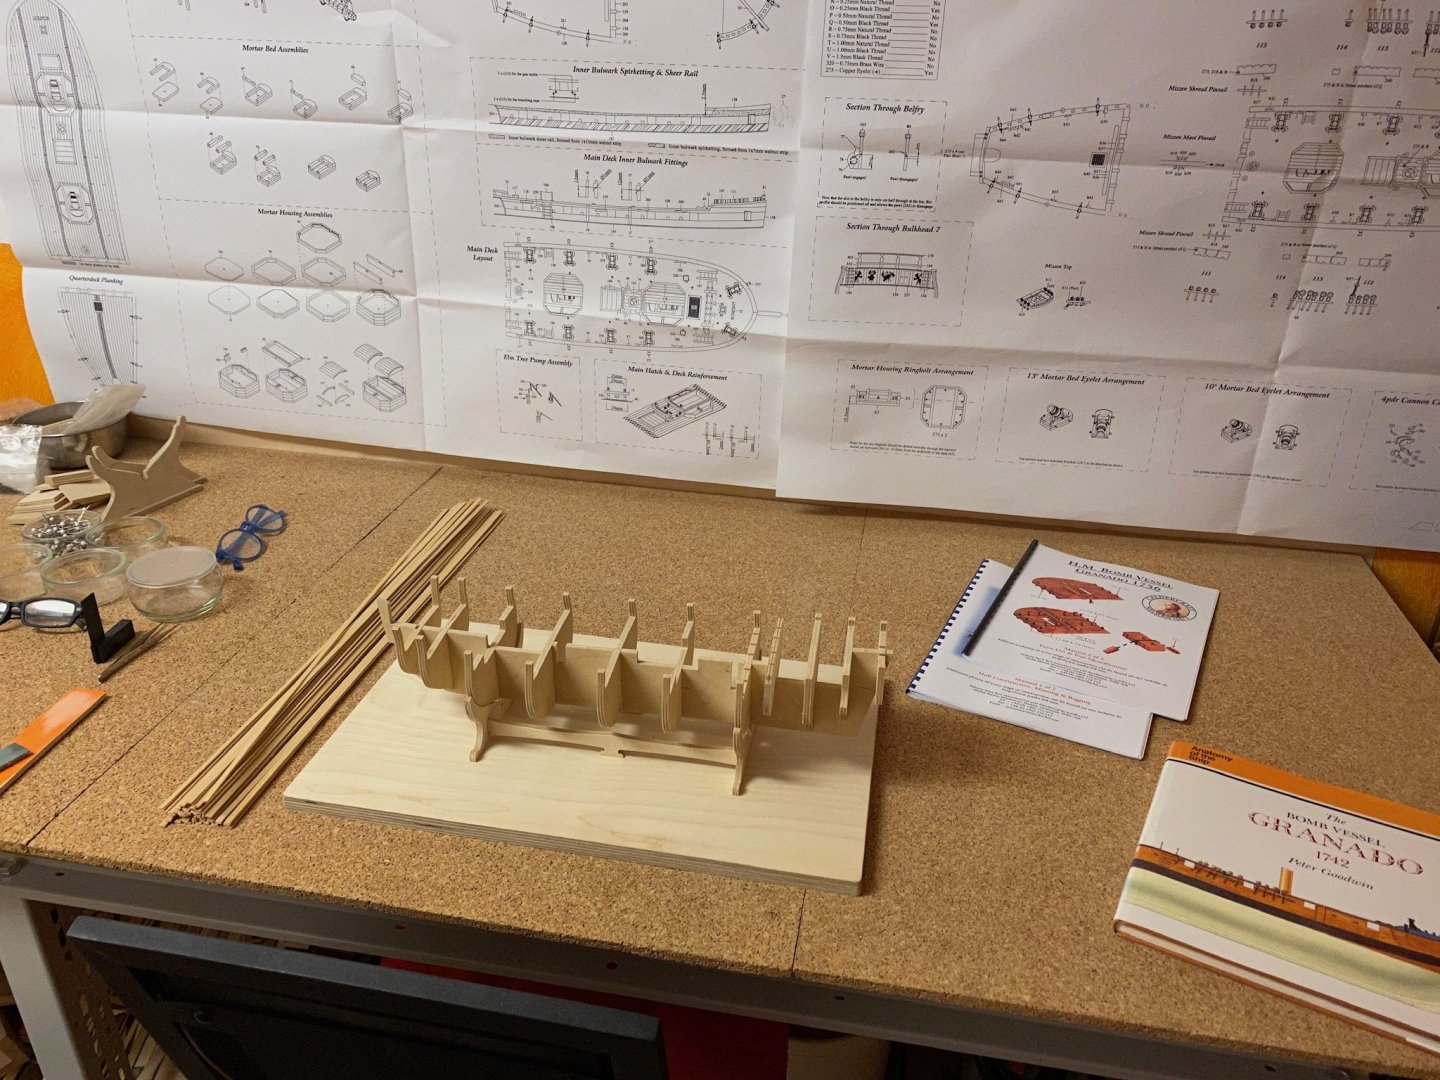
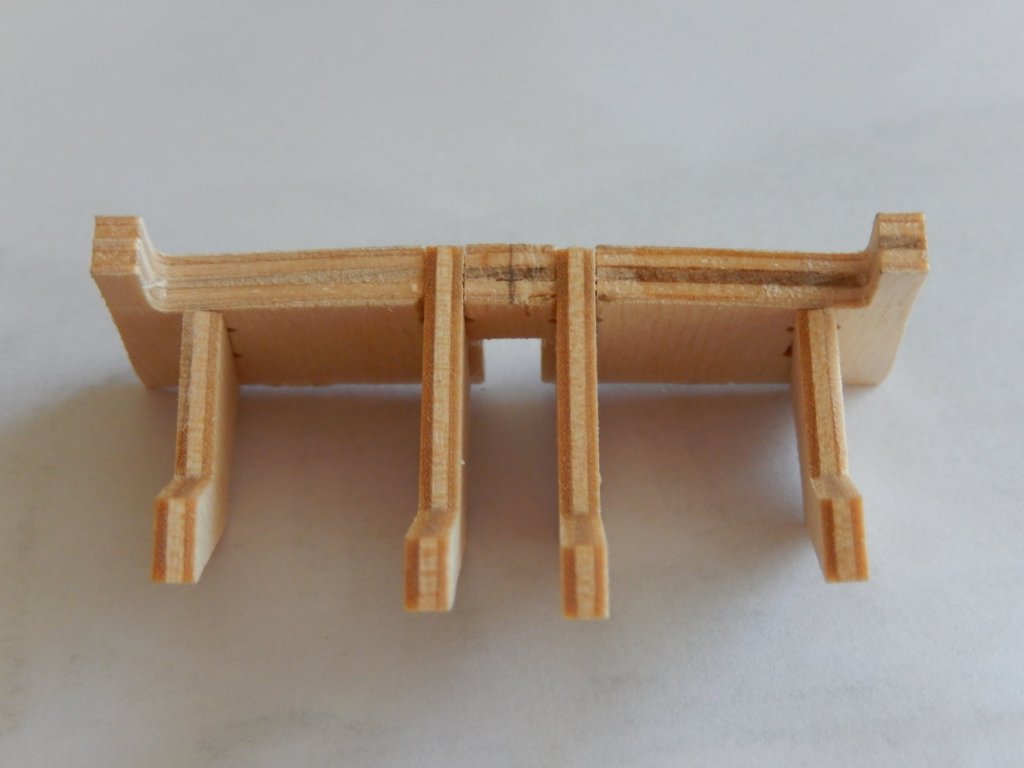
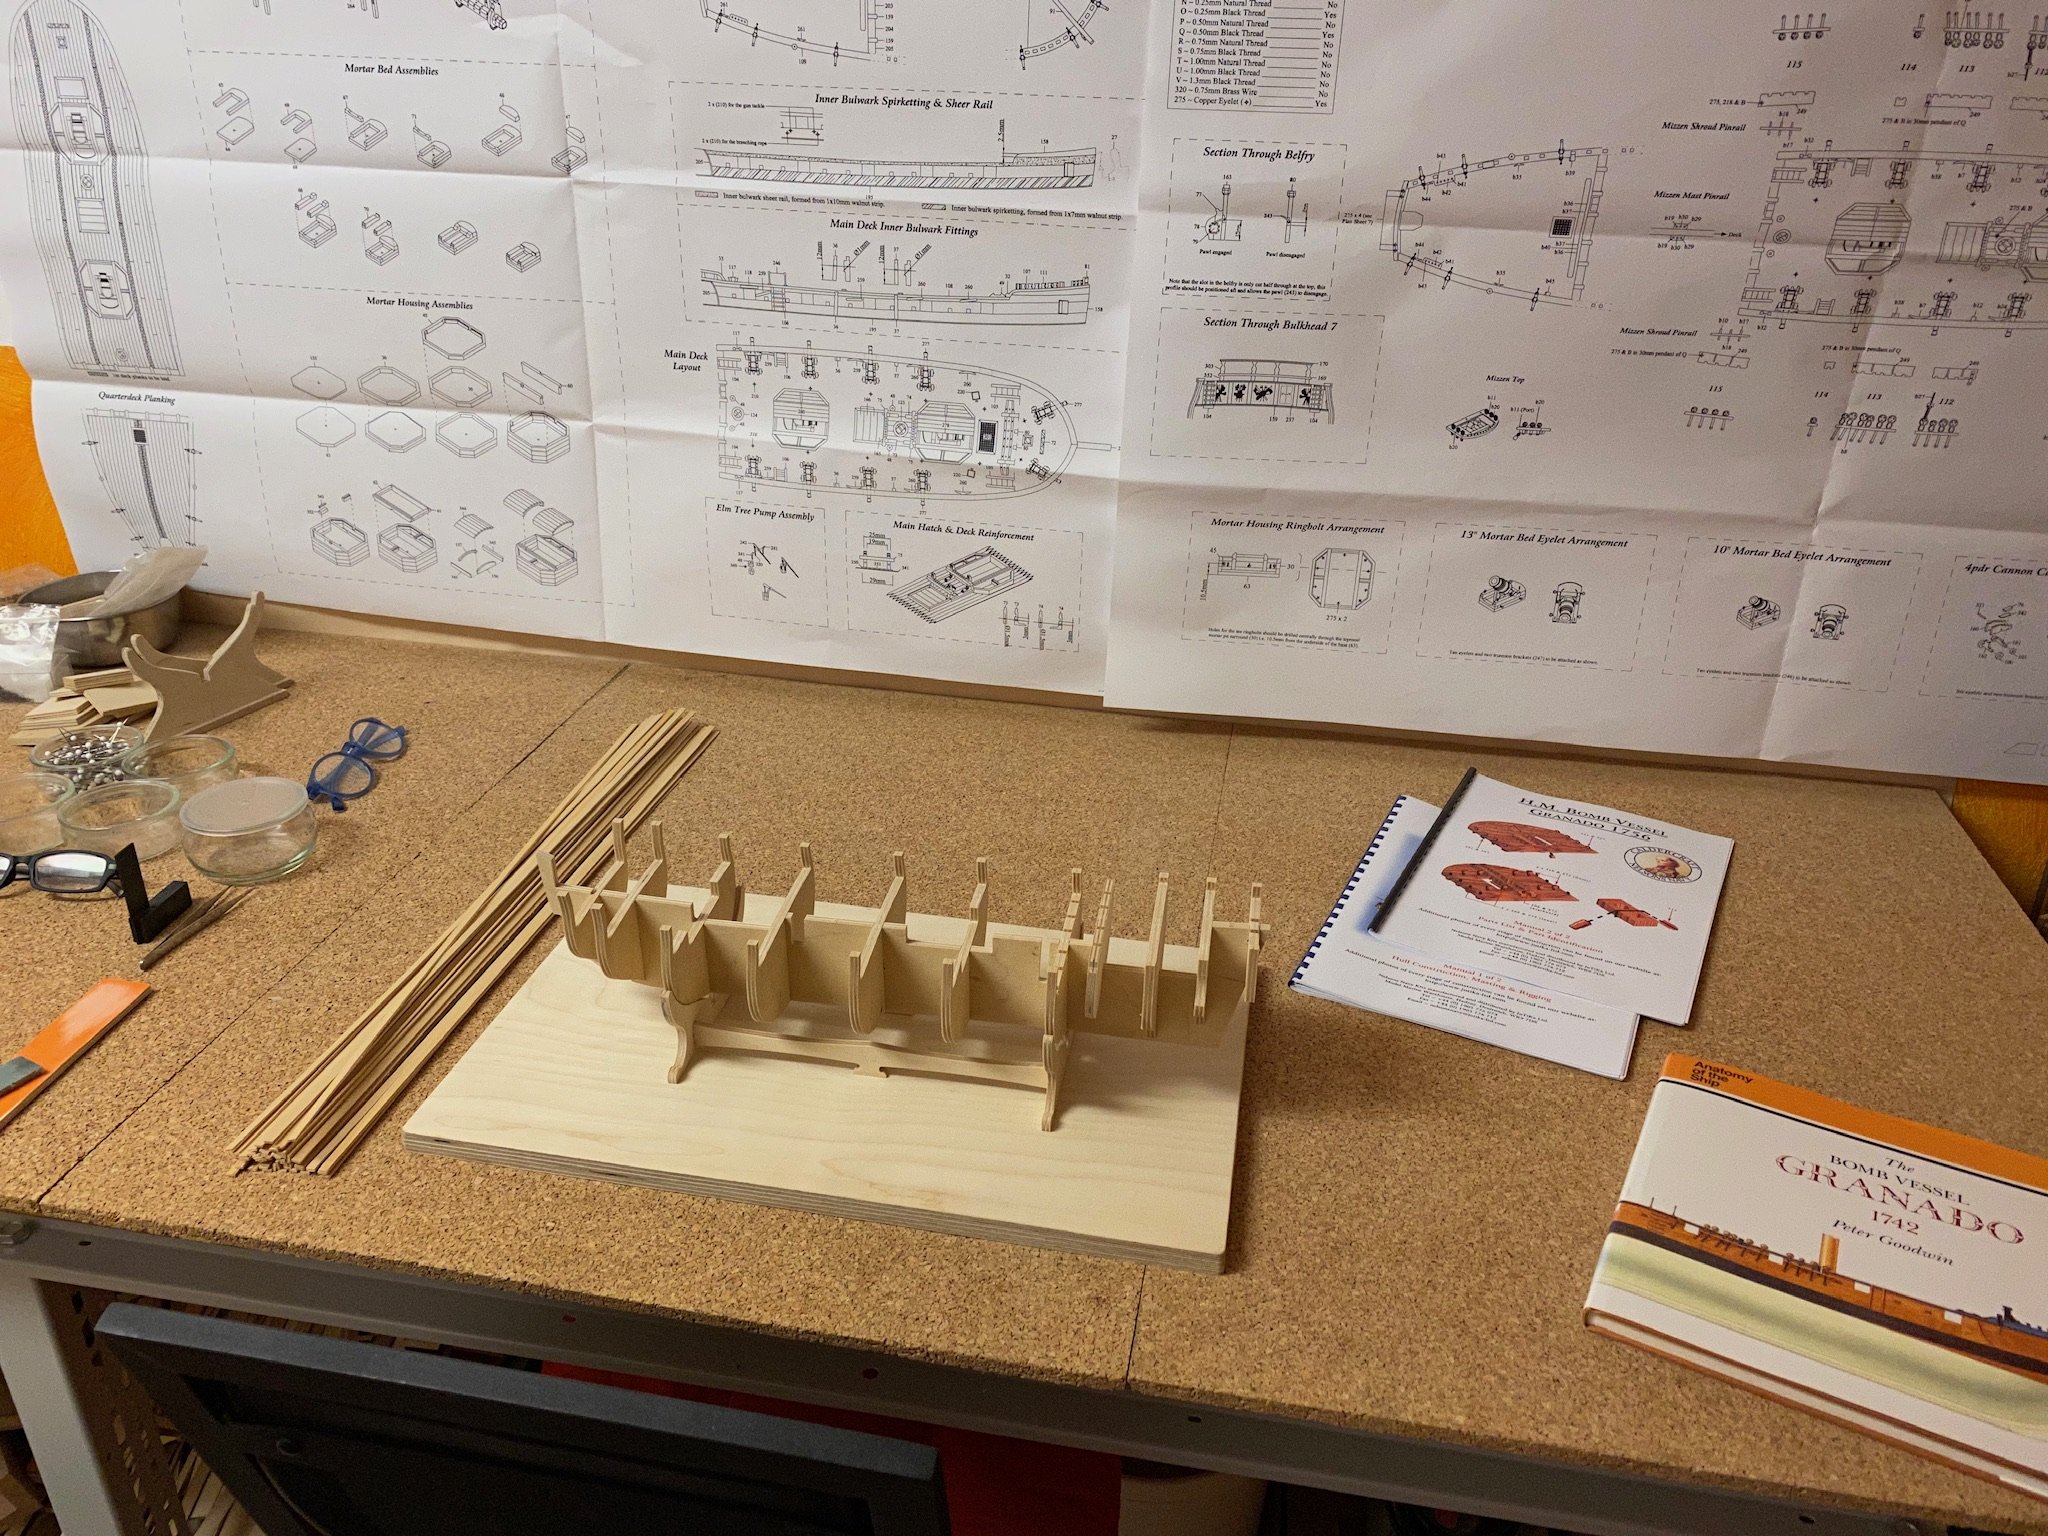
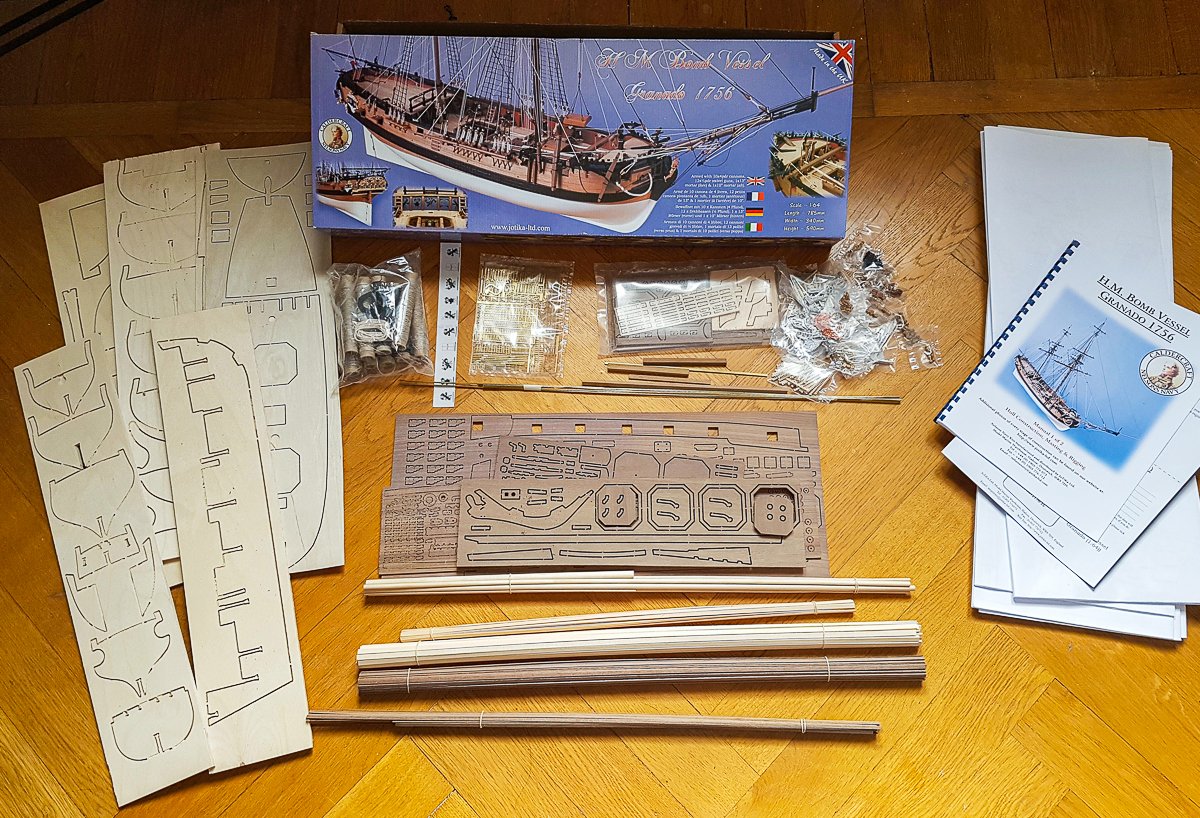
 Hello everyone, this is my forth kit build and my second build-log. I bought this kit on eBay for a very reasonable price some years ago because this model is one of some that forced me into the hobby and I hoped to develope enough skill someday to build it. So let’s give it a try. I wanted to build the Cheerful next but after building the Sherbourne and the AVS I got a little tired about modeling another single-masted ship. So returning to 1/64 scale - seems tiny in comparison to quarter-scale. The kit itself seems to be of good quality - except for the supplied walnut stripes that look awful. So I may replace that wood. I was also able to get an old copy of the AOTS book related to the Granado that might prove very useful for reference. First thing I did was to build the supplied rack to put the model on during the construction. Then I carefully released all the bulkheads to dry-fit on the keel.

-
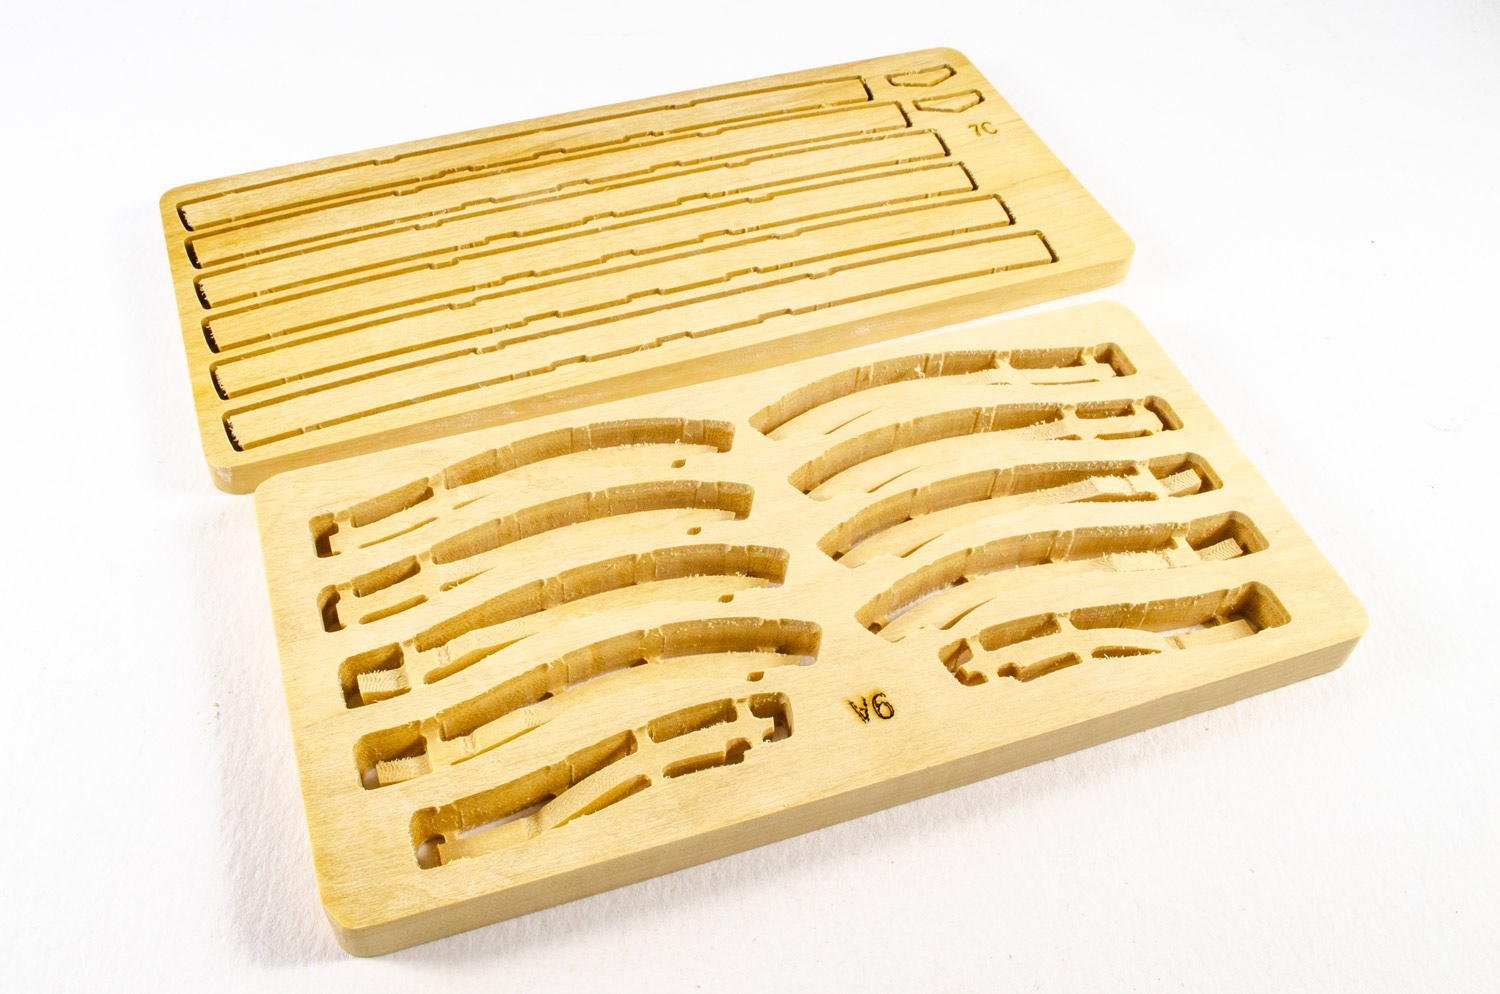
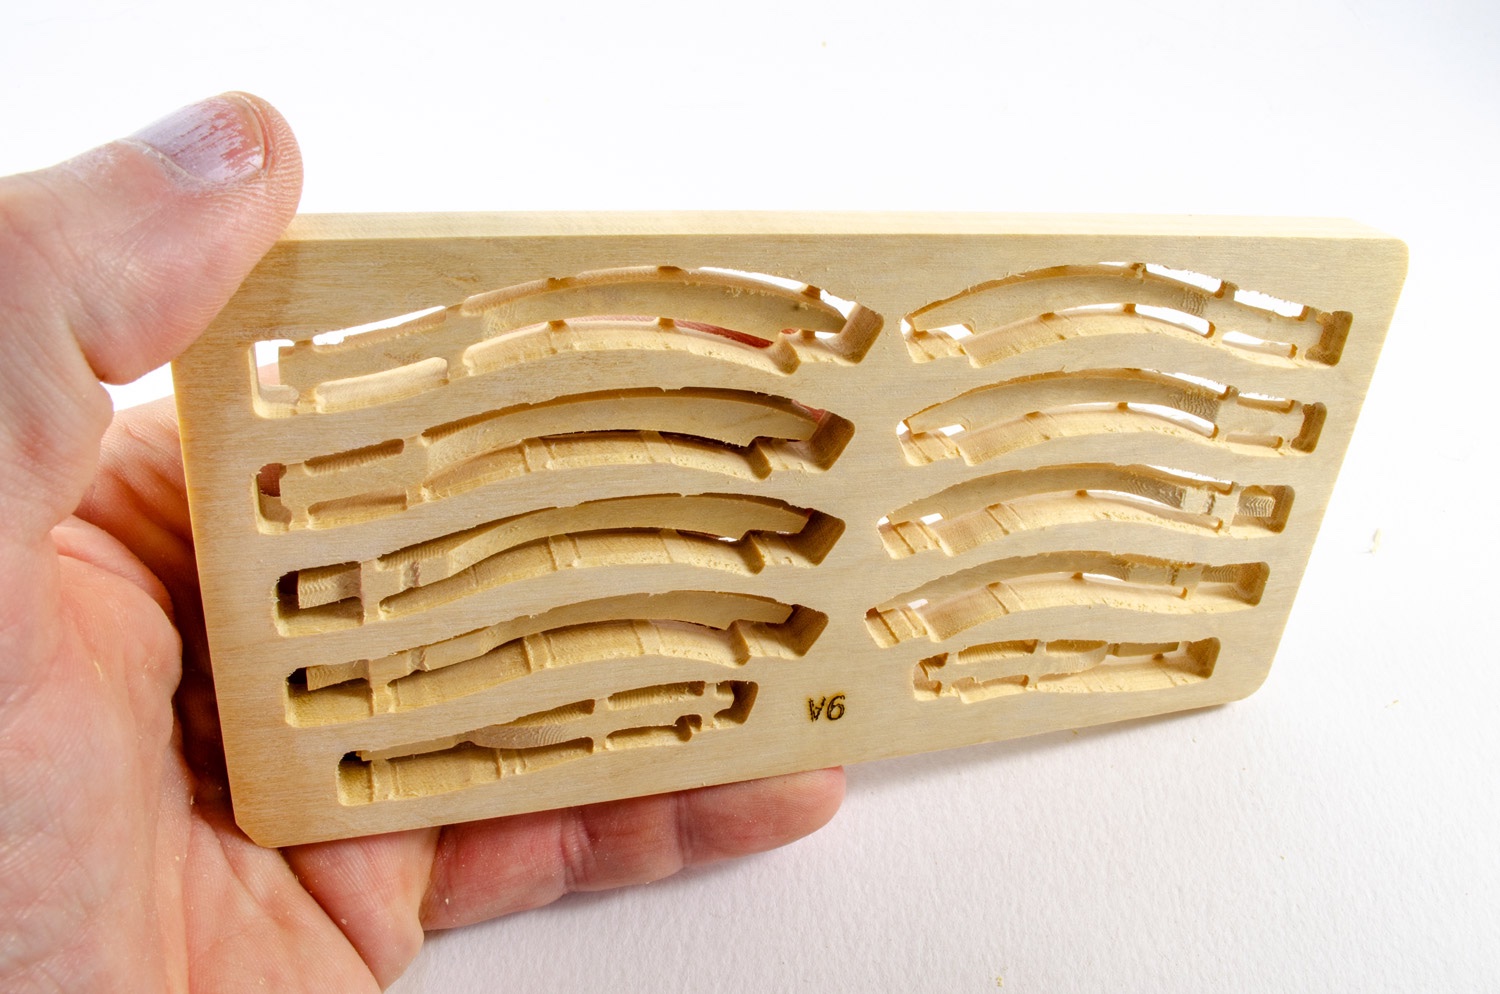
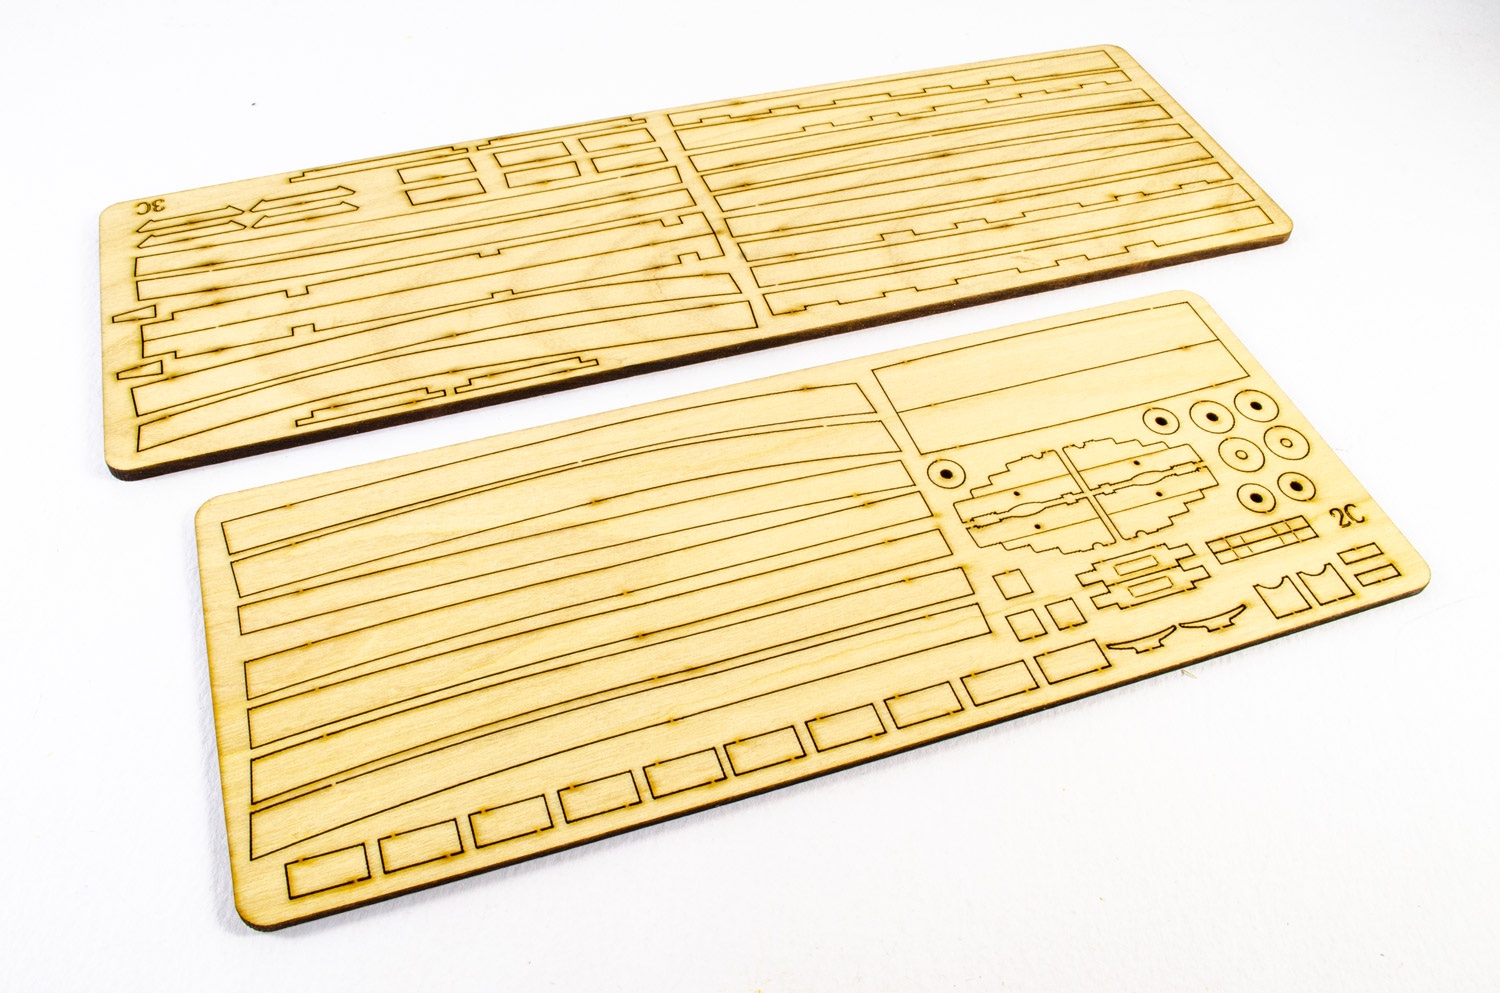
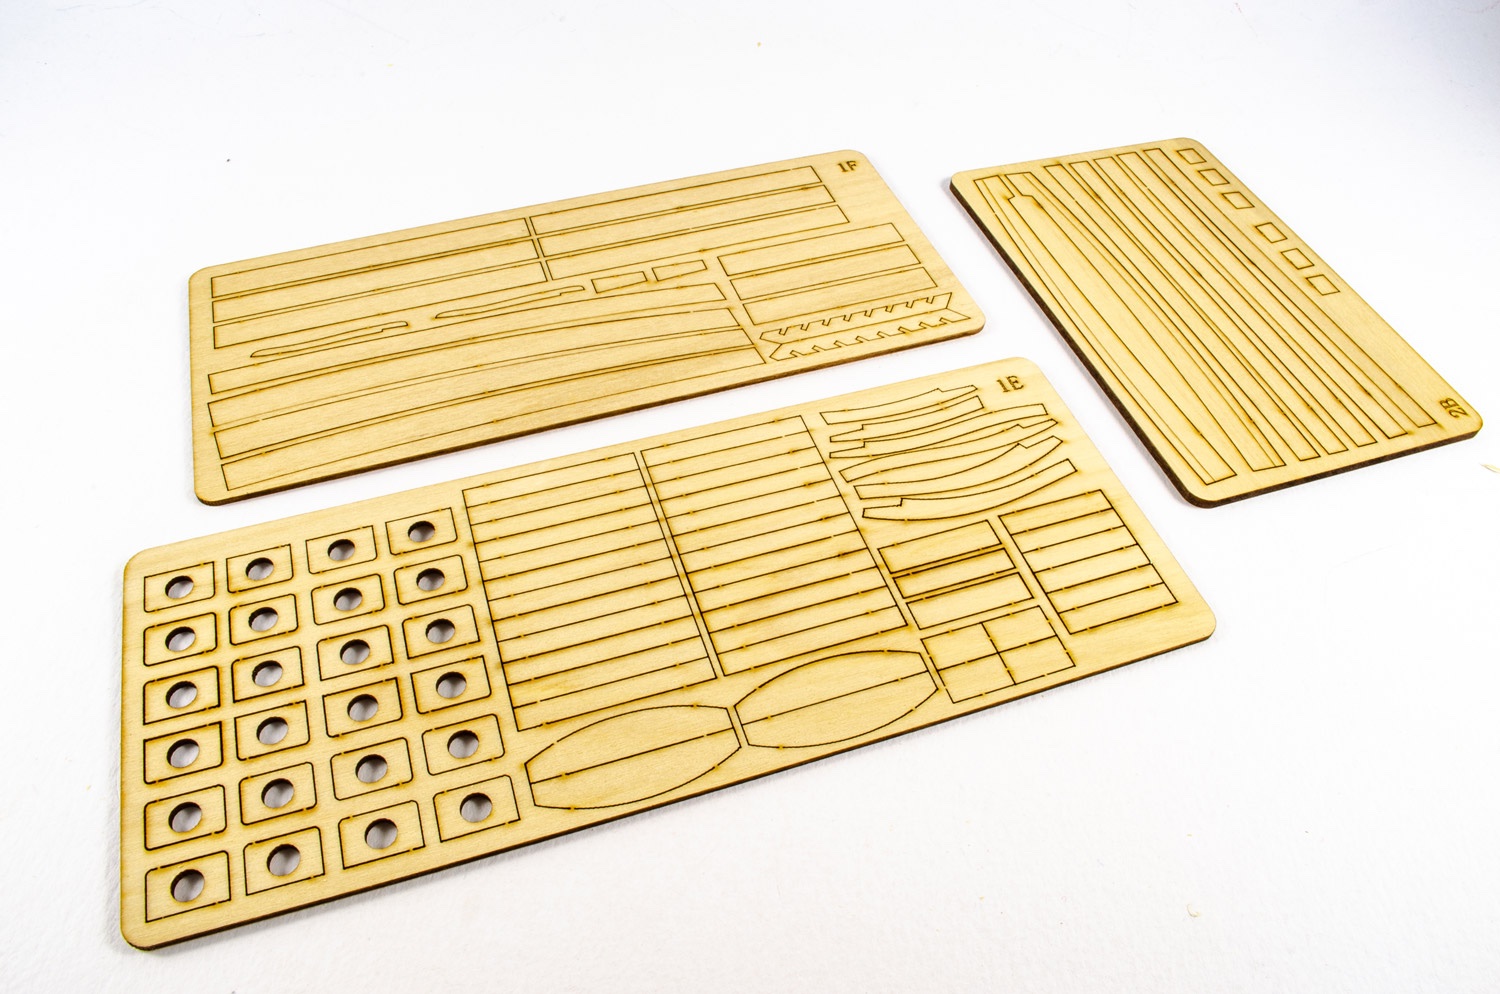
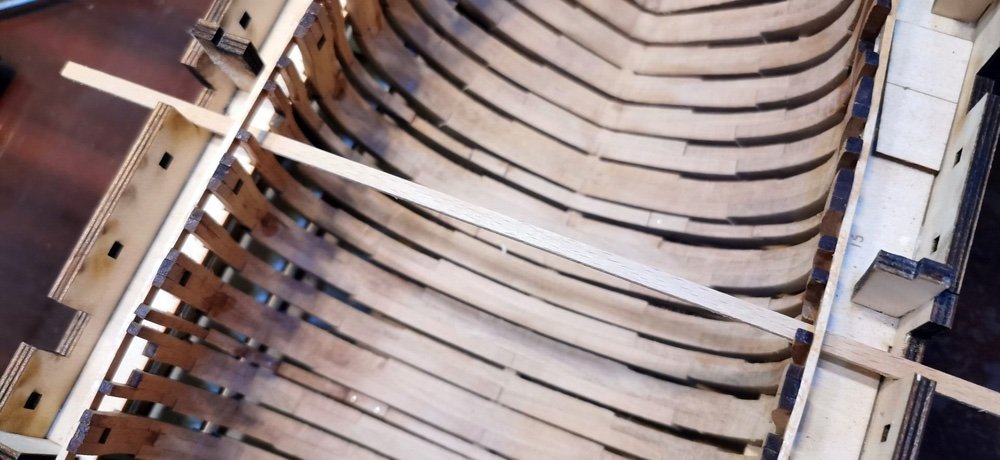
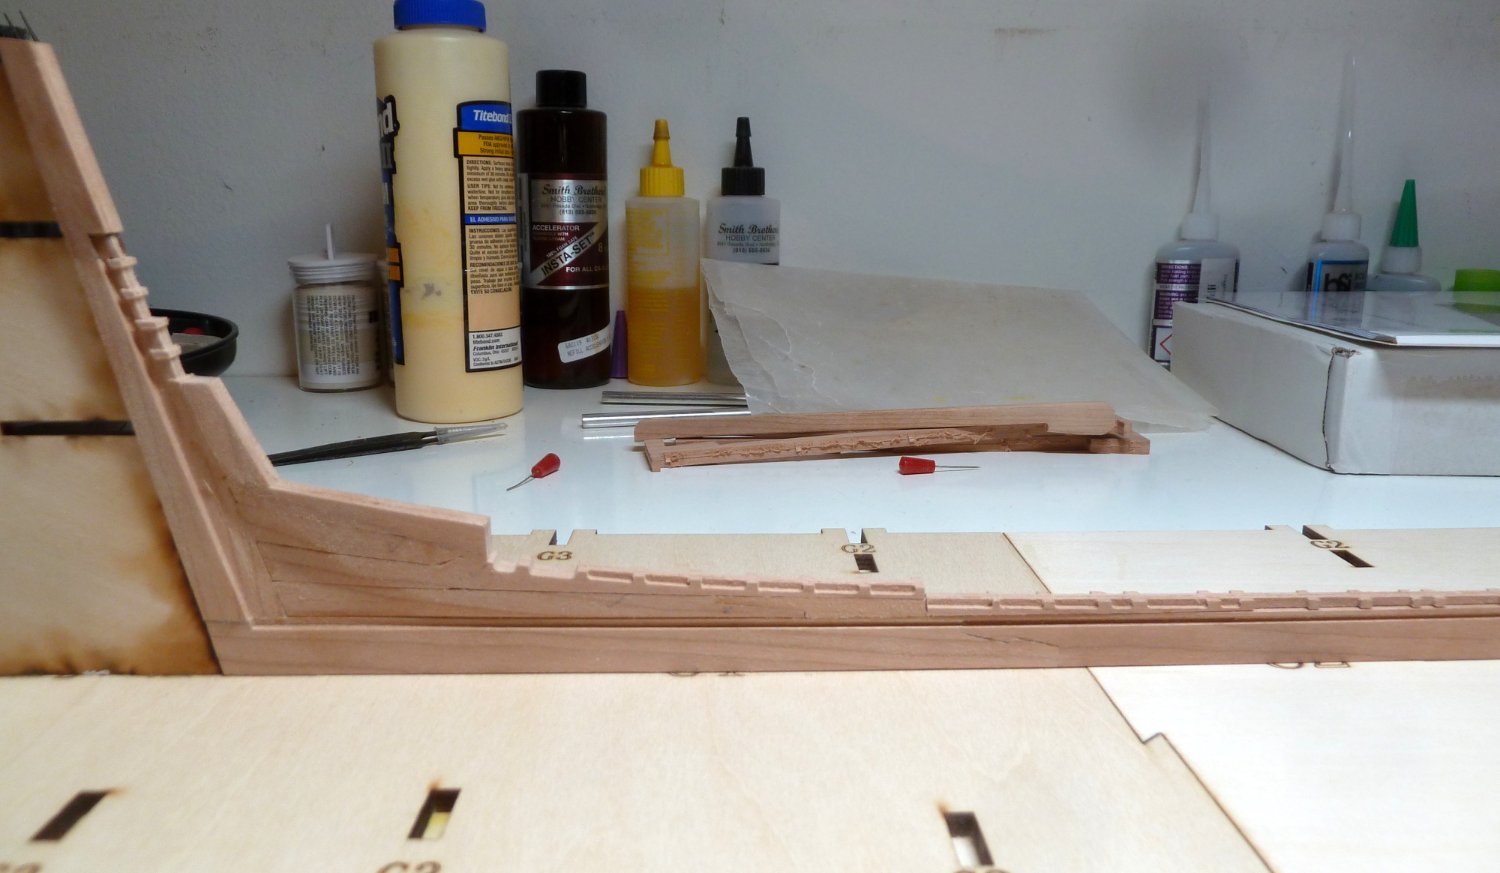
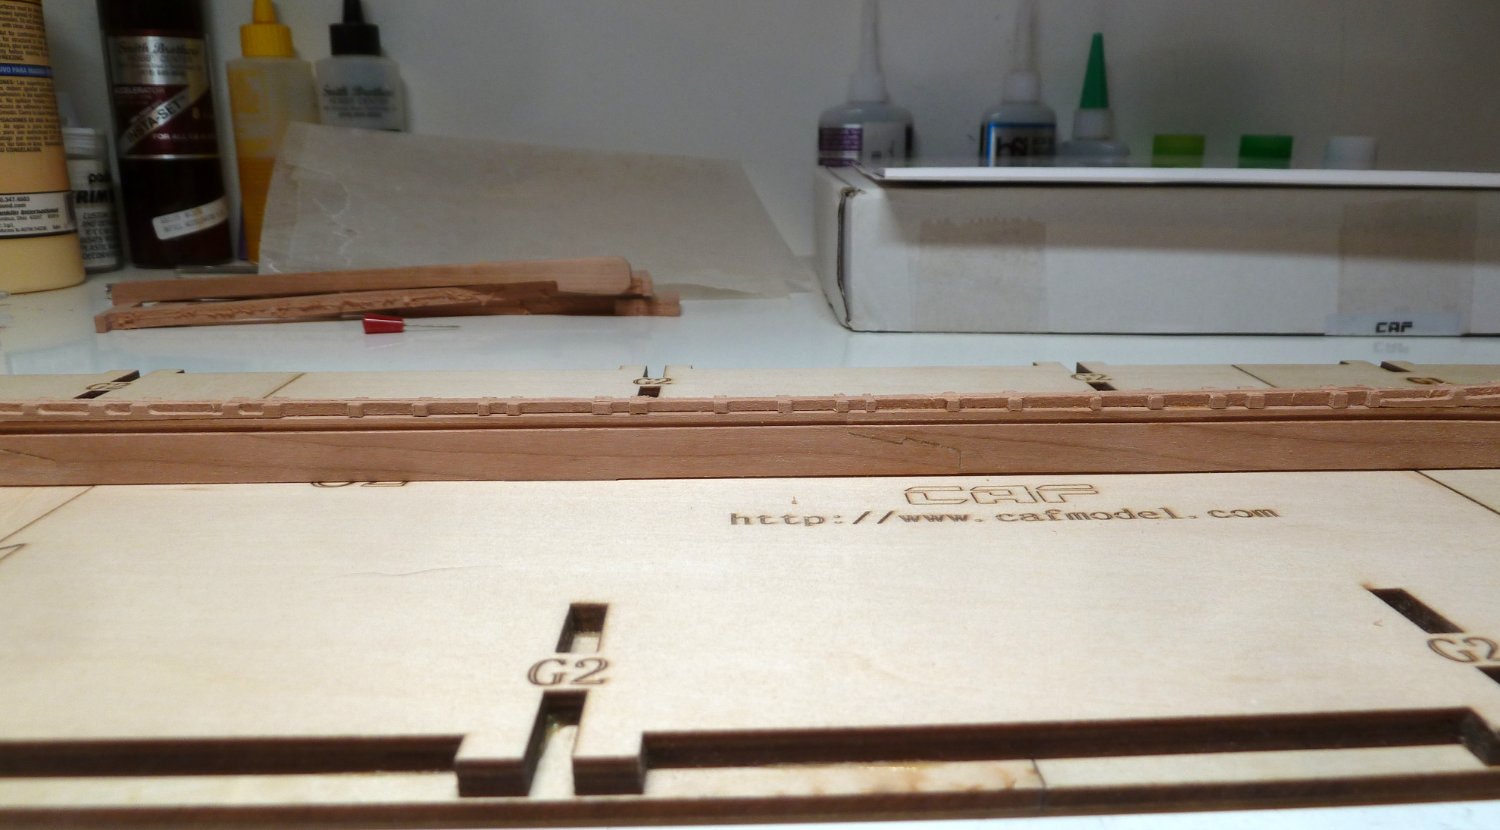
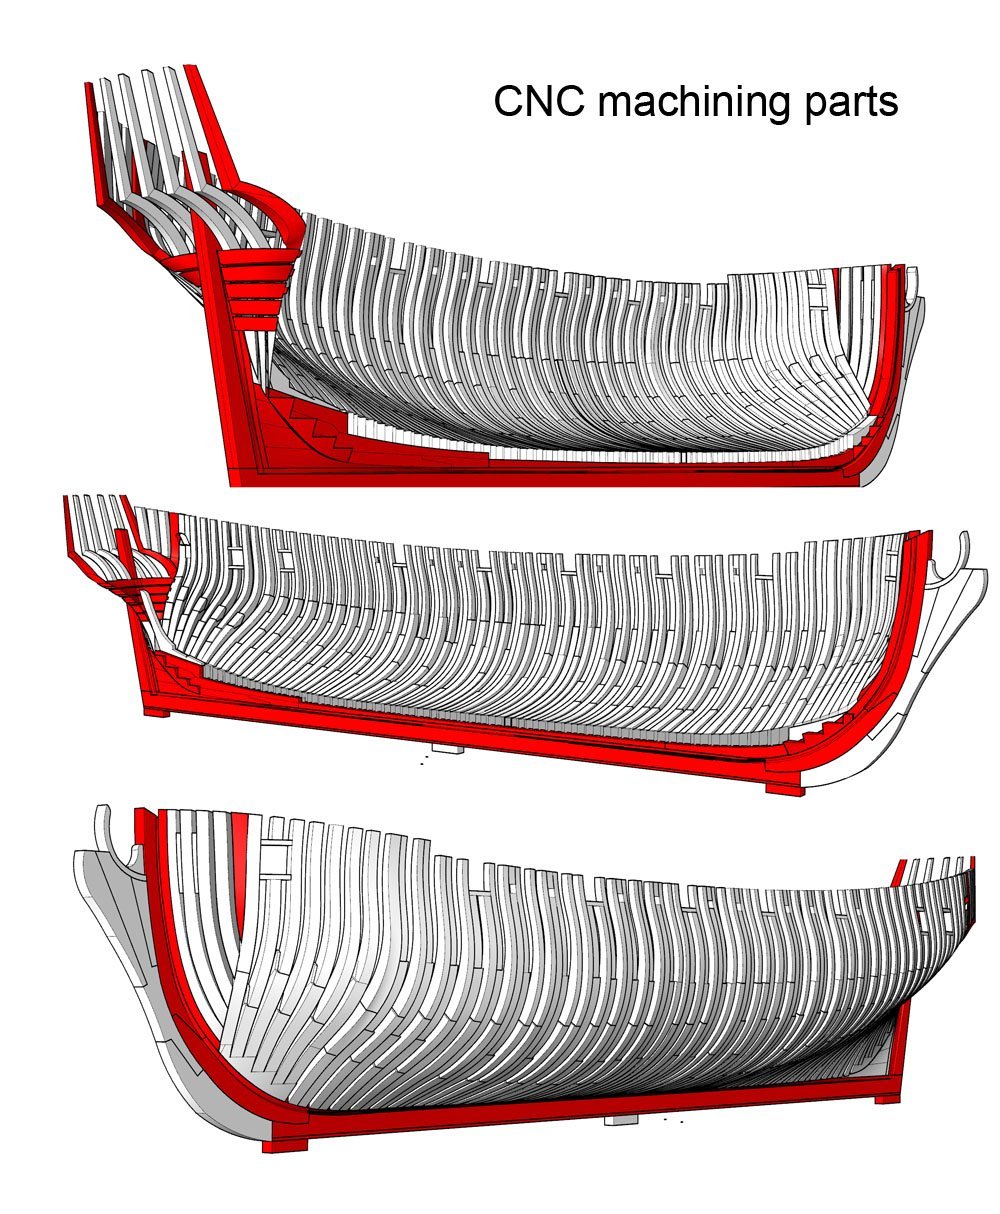
 I started my CAF Granado kit part 1 this weekend and was asked to start a build thread. Overall, Tom did a great job on both the manufacture of the kit and the instructions. This is a first effort for me on building and admiralty style ship model. I worked through step 7 of part 1 and just need to figure out part 8A-1 and 8A-2. I removed them without identifying which is which. I struggled with the CNC Router parts in that after sanding away the rough edges of the parts, the fit of one part to another left some slight gaps. Some needed a bit of filler made from sanding dust and some yellow glue. It did help somewhat. As far as the laser cut parts, very careful removal of the laser burns yielded parts in which once assembled, joined together very nicely with hardly any gaps to speak of. Throughout the build I will have to pay closer attention to laser burn removal and parts fit. Any and all suggestions or observations will be welcomed.

-
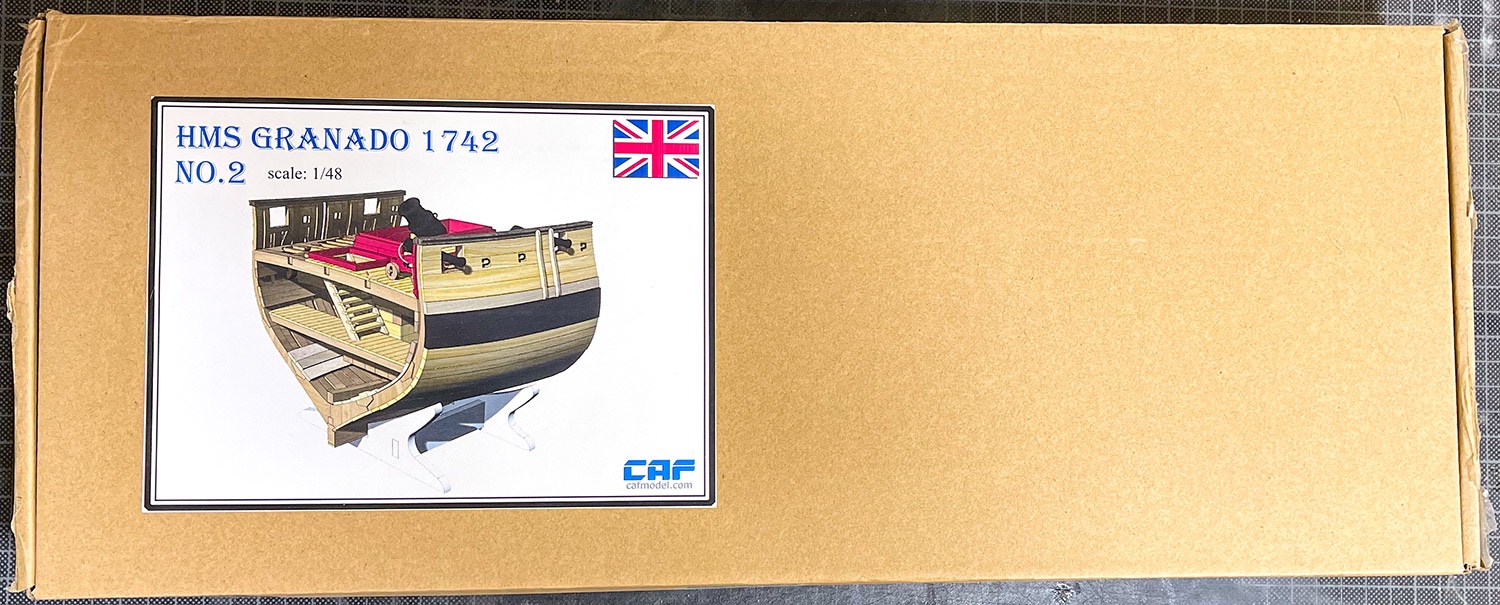
 This will be my build log for the CAF Model HMS Granado, 1/48 scale. I've always wanted to build a true plank on frame and thought this would be a good place to start. This is to be more of a side project so there won't be rapid progress. I'll open the box this weekend and post some pictures of what's inside as a start.
 -
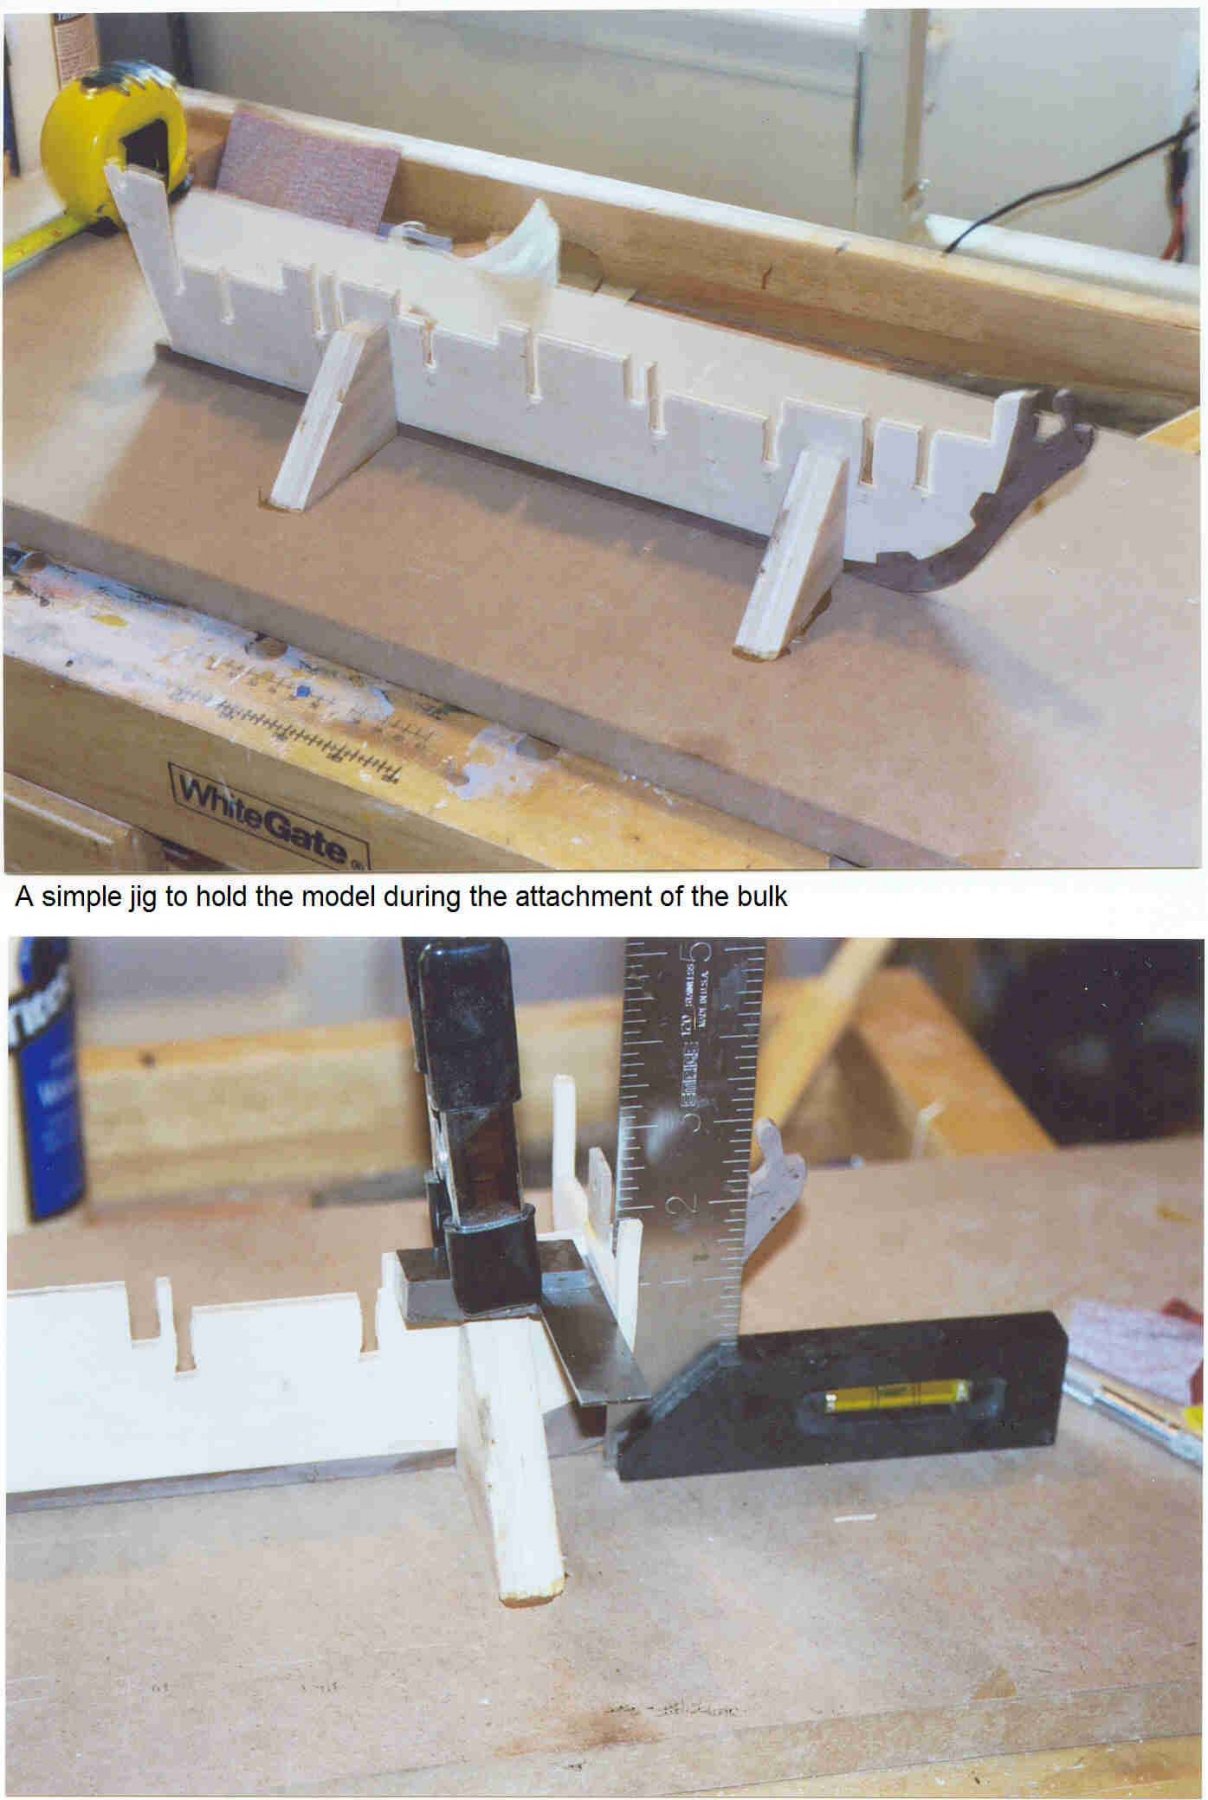
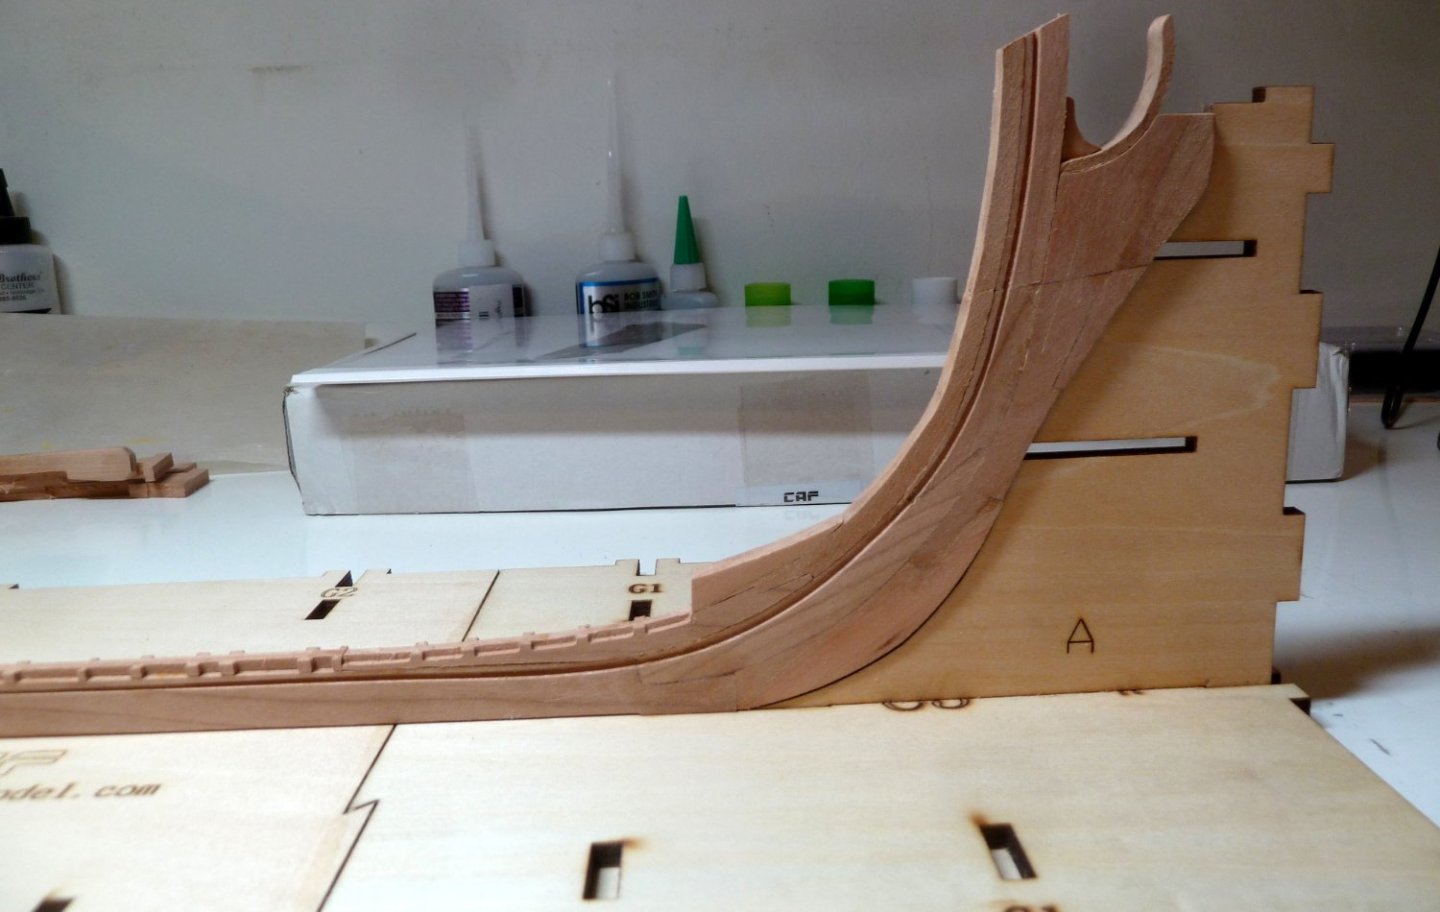
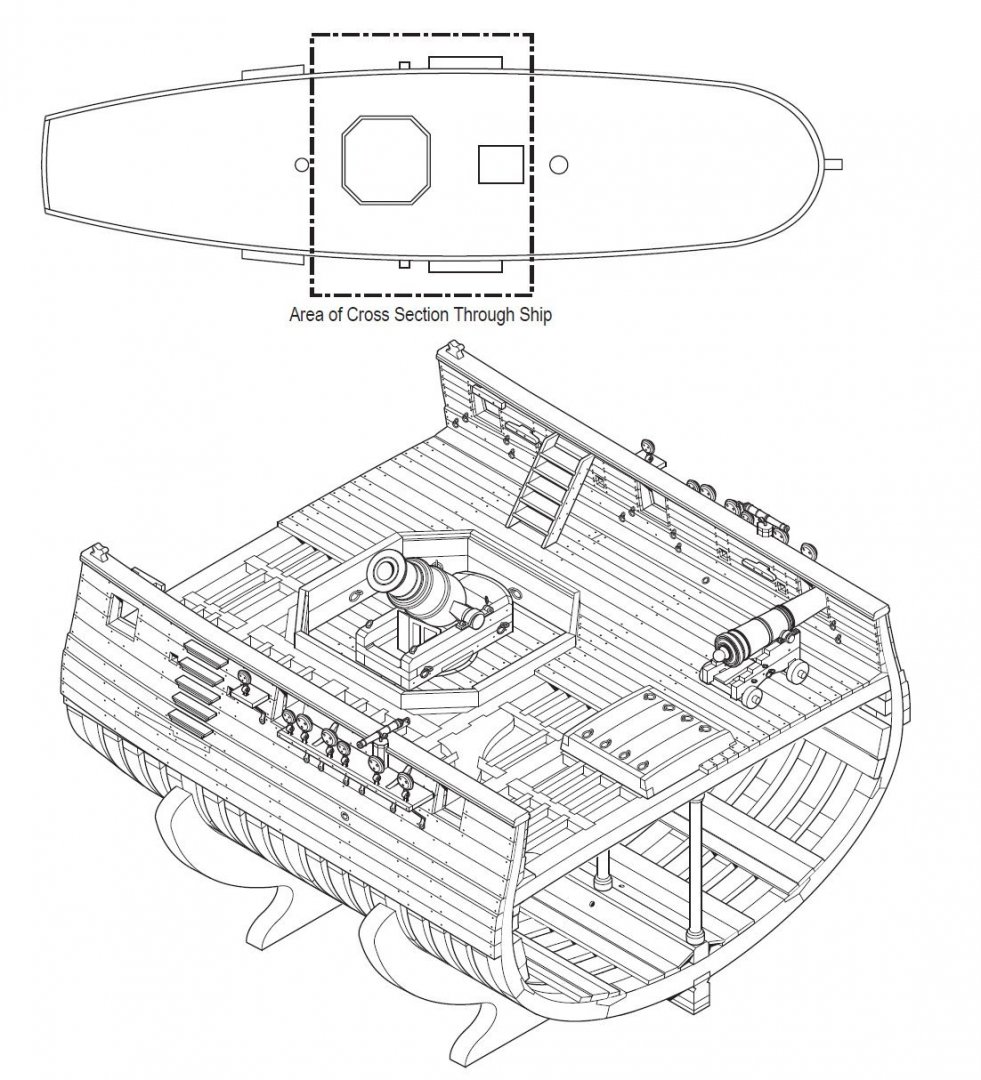
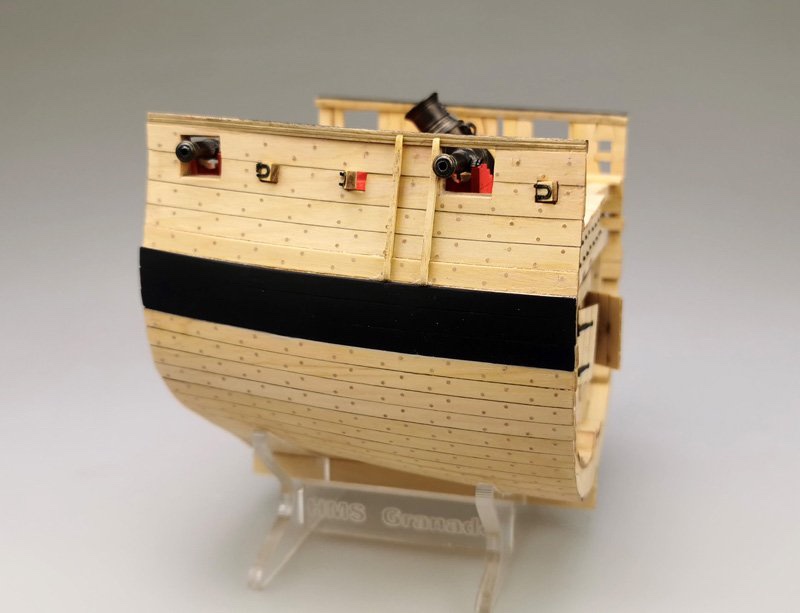
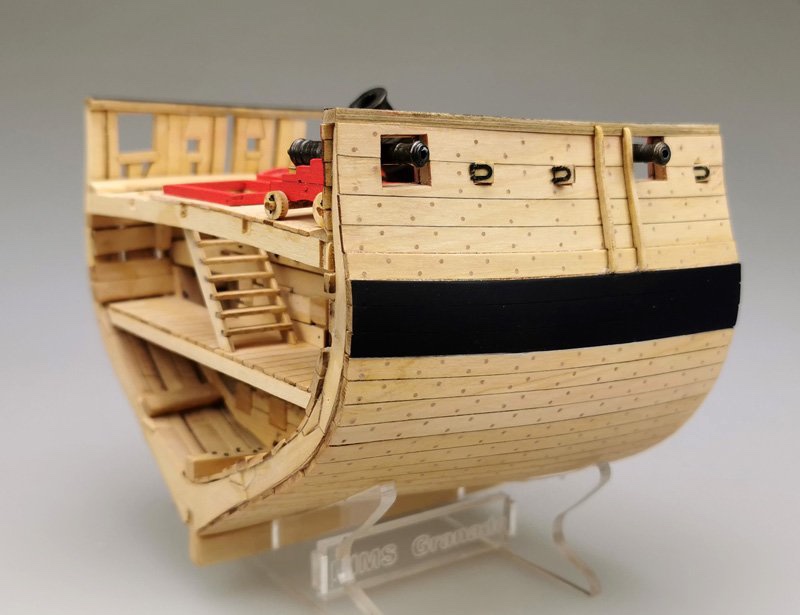
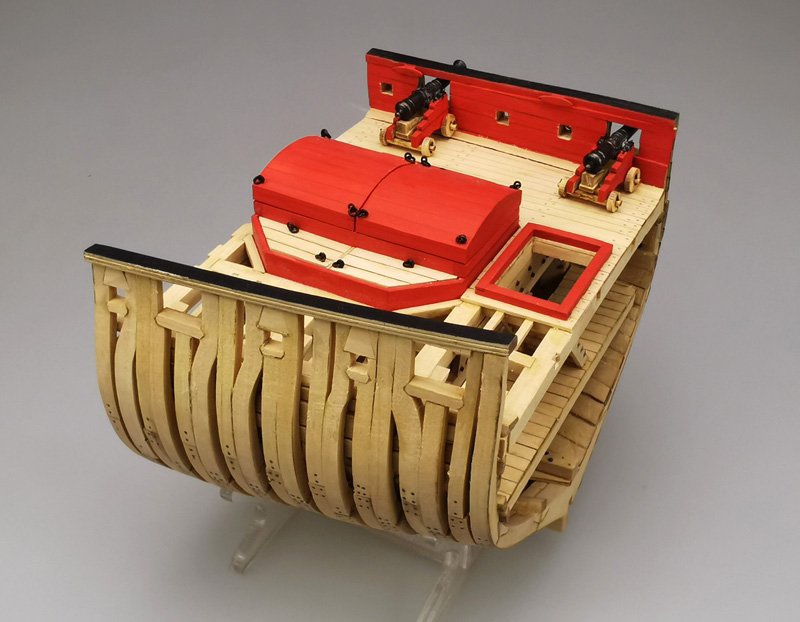
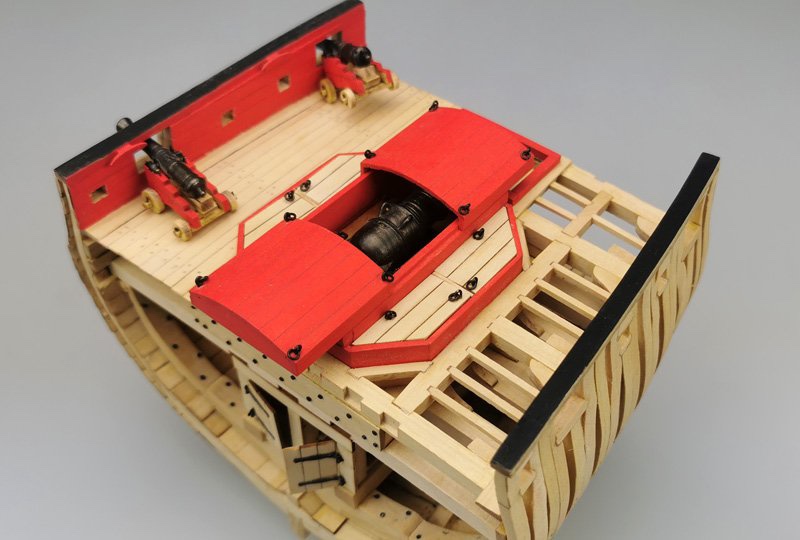
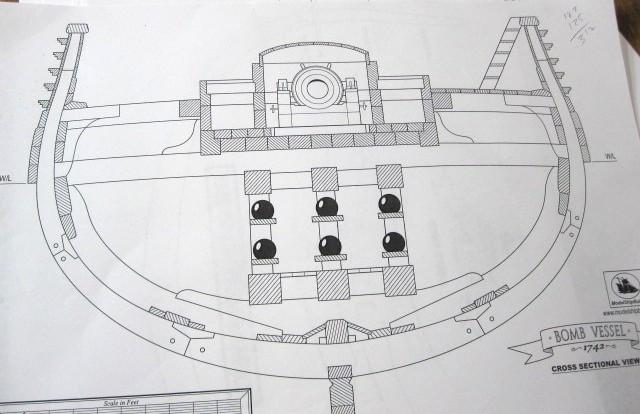
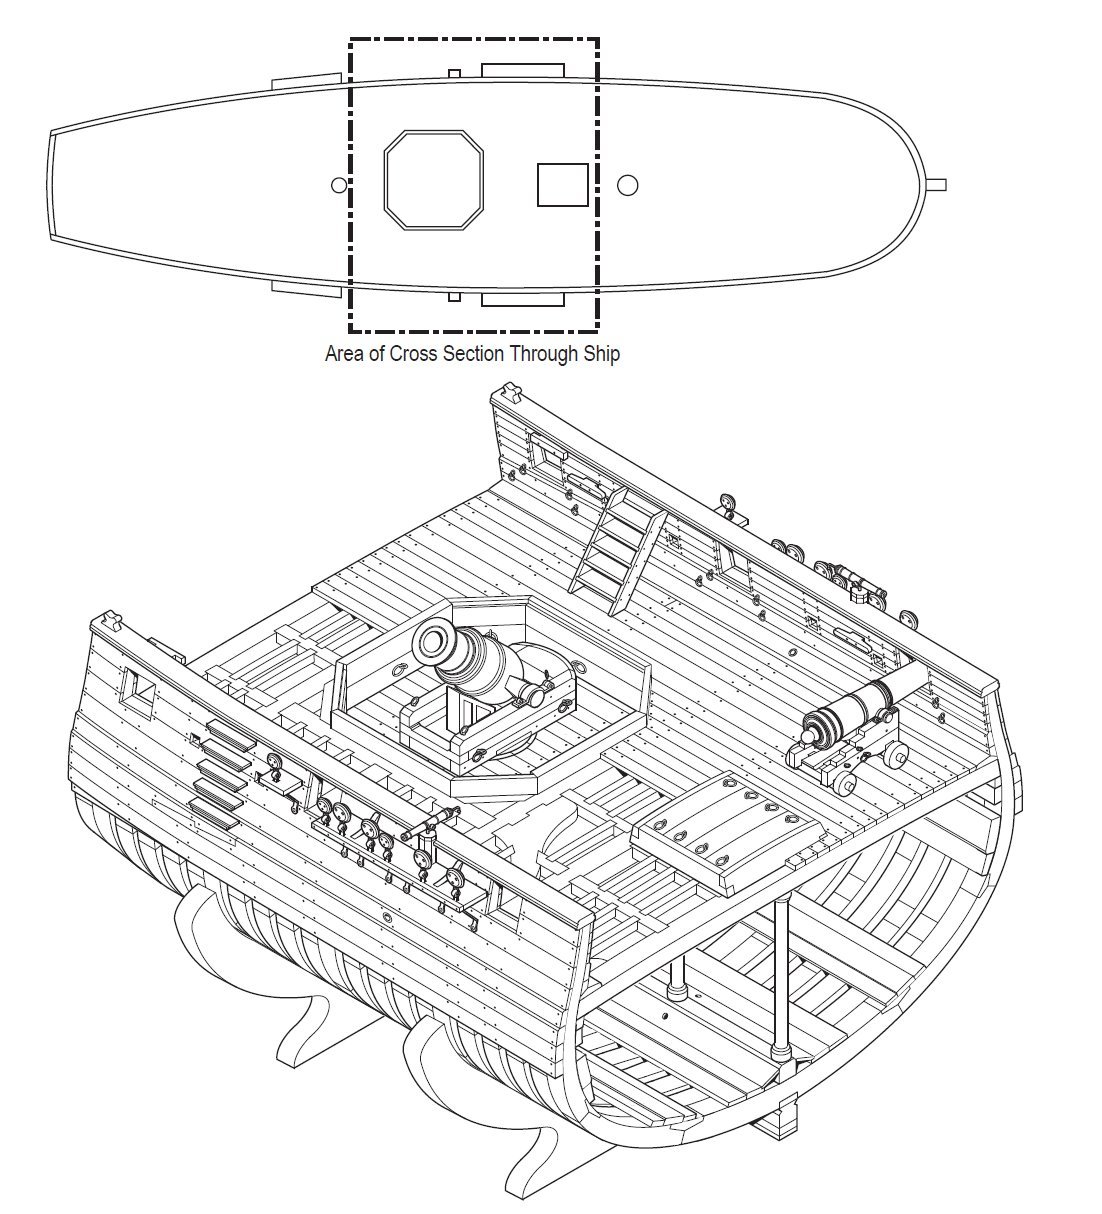
 This is my log for my scratch build of a cross section of the bomb vessel HMS Granado. The plans were drawn by Jeff Staudt and were based on Peter Goodwin's AOTS book, which I plan to use as a reference. The section is from the center of the ship and includes 3 gun ports on each side, and a pit for a 13" mortar, one of two mortars on board. The rectangle in the image shows the location. I purchased the plans in 1/24 scale, but that is clearly too large for the space the Admiral has alloted for the model so I'll build her in 1:32 scale. Even at that reduced scale, the model is 7-1/2" high, 10" wide and 10-3/4" long! Granado was one of a dozen bomb vessels, or mortar-armed ships built by the Royal Navy between 1740 and 1742. She was launched at Ipswich on June 22, 1742. The vessel was 91'-1" long with a beam of 26'-2" and was 269 tons burthen. This is just about the size of HMY Caroline! The Granado was a small ship! Despite this, her framing was very robust - to handle the weight and recoil force of the two mortars on board. The framing is one double frame, followed by three single frames with this sequence repeating. Jeff's plans were somewhat stylized for ease of construction. Each frame uses typical chock and scarf construction, rather than the sistered frame approach used by Hahn and others. One interesting feature in construction is the use of reinforcing timbers fitted to the floors and lower futtocks of the frames below the mortars. These were called floor and futtock riders and were designed to beef up the frames so thay could safely absorb the recoil shock from the mortars. The double frames were 2 feet wide and 20” thick near the keel. The single frames were 1 foot wide and 20" thick at the keel. As is my preference, I will attempt to build without the use of paint or stains. The hog, keel and upper false keel will be beech, as will all the frames. The lower false keel will be ebony. We'll begin by constructing the framing jig
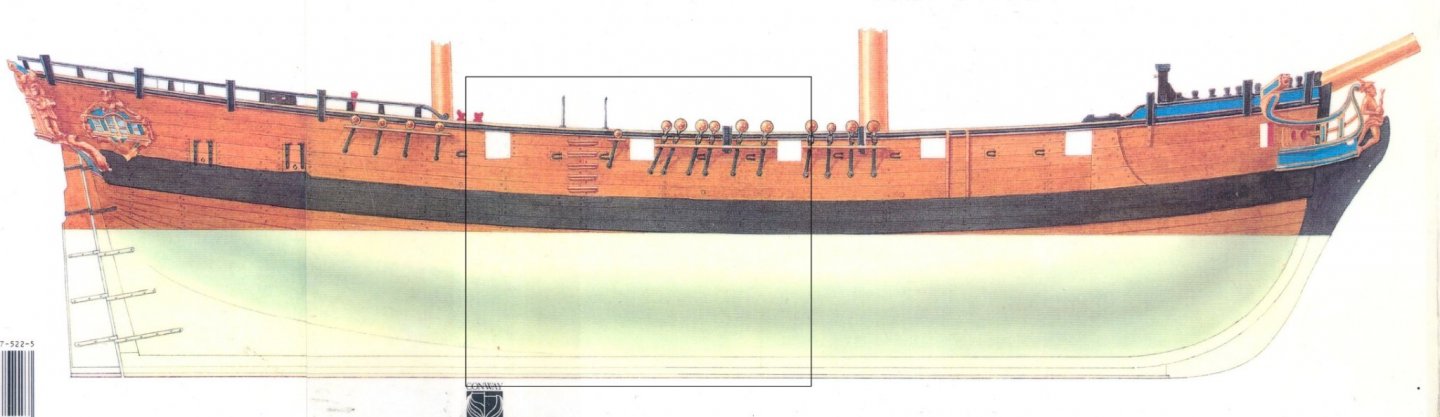
- 143 replies
-
- 10
-
-
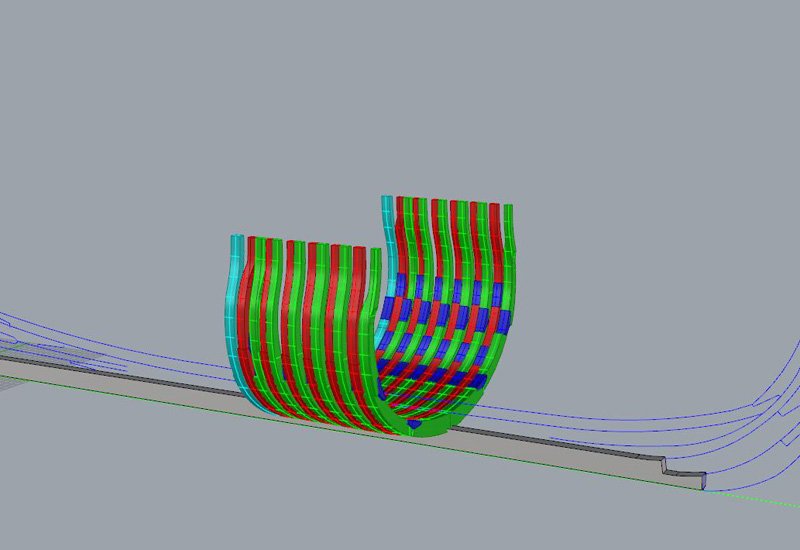
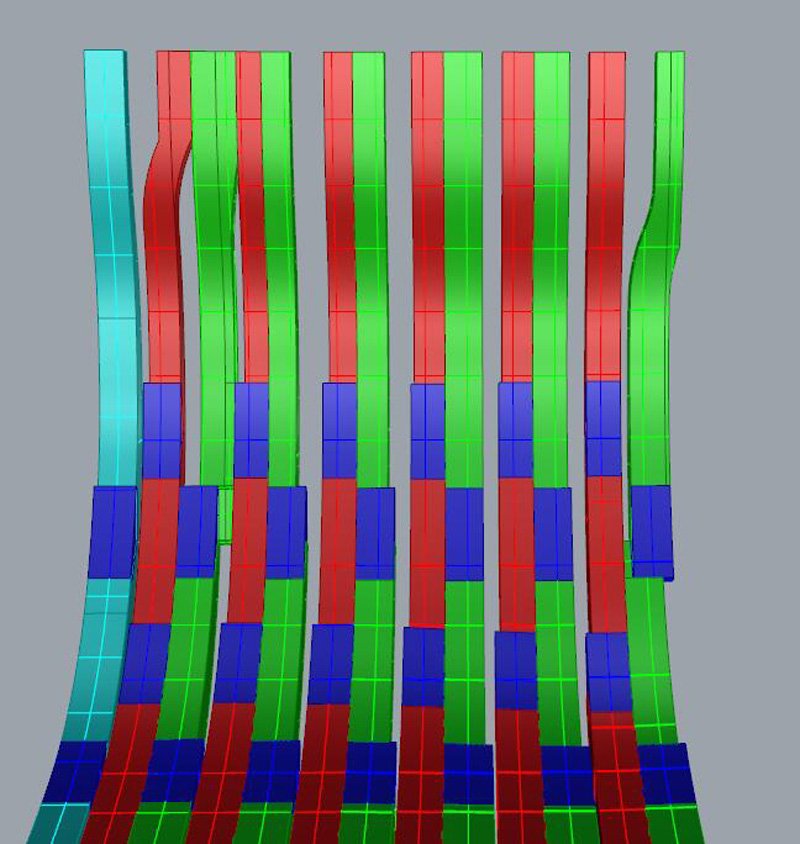
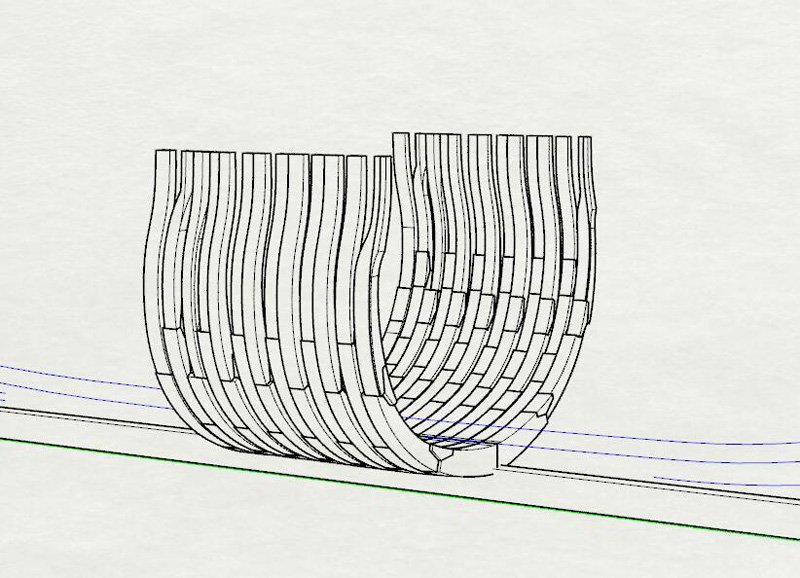
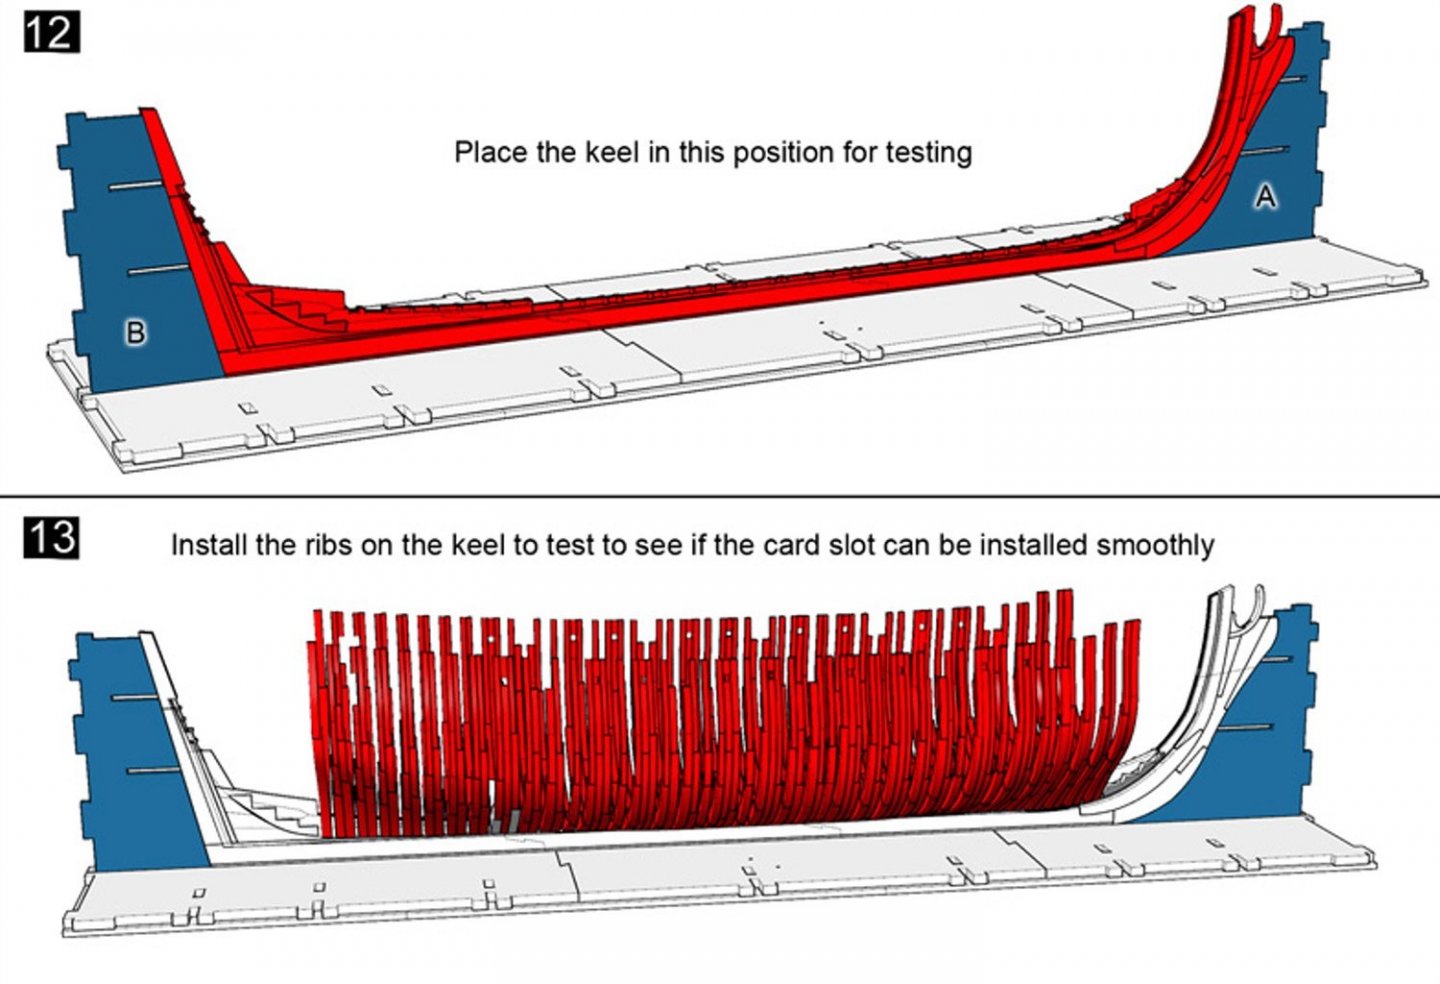
 https://cafmodel.com/products/hms-granado Coming soon Le coreur is done and we're starting a new project Our mortar ship La salamandre is temporarily unavailable for sale due to copyright issues, so we are ready to start a new mortar ship. I started to design this kit in 2013, but his ribs were too complex, so he was stranded later,After years of experience, we feel that we can continue now。 This is a model photo of the museum This is the final state of design in 2013

- 67 replies
-
- 16
-
-
- granado
- cross-section
- (and 1 more)
-
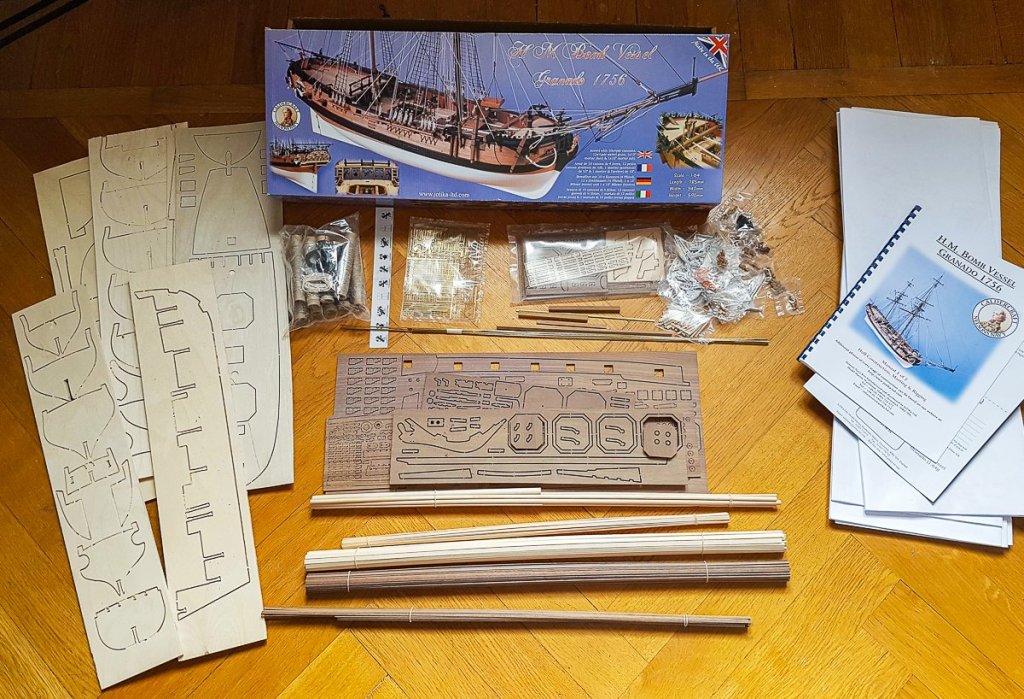
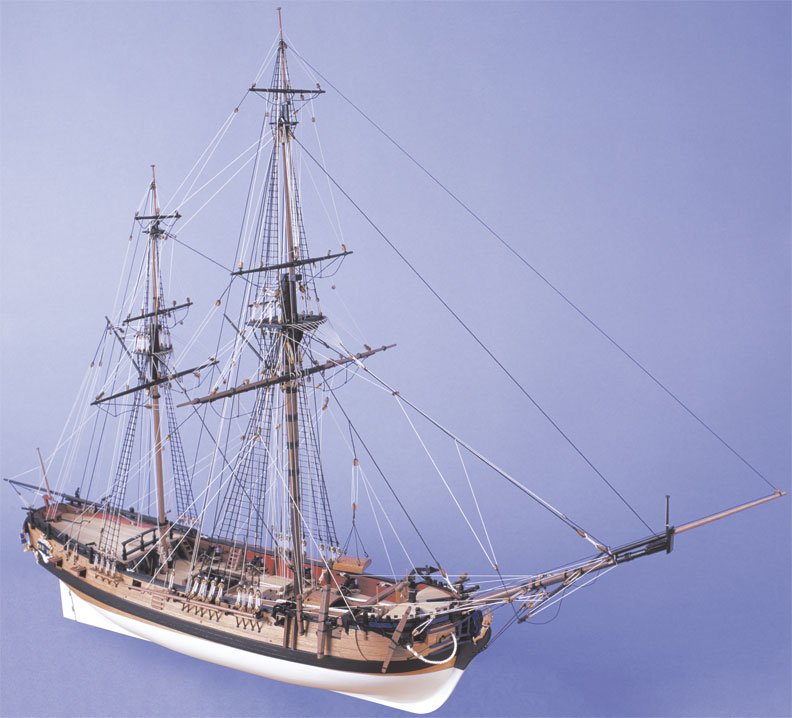
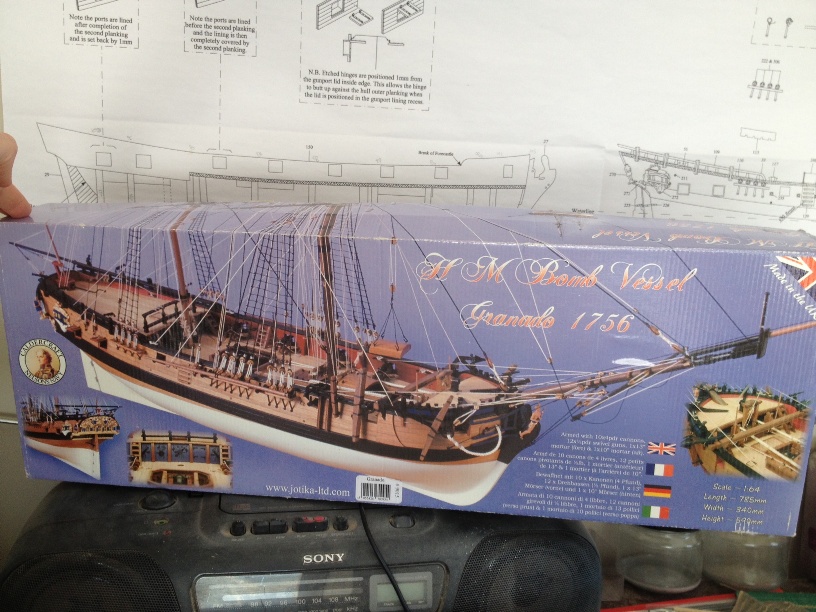
 HM Bomb Vessel Granado - 3rd build My third build I am actually doing in slight parallell mode to my HMS Snake. Both vessels are similar in size and so far it has been quite easy to do something on the first model and then the same to the other. I hope I havent taken on too much since I am also rigging my HMS Victory from Corel. I think the Granado is a really beautiful model with nice lines and also a rather unique look with the huge bomb throwers in the center of the ship. This will be a great addition to my other builds. History According to JoTiKa, 12 bomb vessels, including Granado (the sixth), were built at the outbreak of the War of Jenkins's Ear in 1739. Granado was ordered on September 14th 1741 and the keel was laid on November 18th 1741. Although it is uncertain who designed the Granado, it is commonly attributed to Thomas Slade, the naval Surveyor who oversaw the construction of the ship at Ipswich. Thomas Slade also went on to design famous ships such as H.M.S. Victory. Granado was unusual in that she was designed to be used as either a sloop or a bomb vessel, being constructed with a conventional square stern. Launched on June 22nd 1742, Granado was taken to Harwich, fitted out and put in commission as a sloop.An Admiralty Order on July 15th 1745 was issued 'to fit her (Granado) as a bomb' but this order was reversed on July 17th 1745 and Granado remained as a sloop. It was not until 1756 that Granado was fitted for the first time as a bomb vessel from an Admiralty Order on July 26th 1756. Between the launch of Granado on June 22nd 1742 and her fitting as a bomb vessel July 26th 1756 a number of changes had been made to Granado's configuration as compared to the original Admiralty plans the most noticeable of these are as follows: 1. Two extra 4pdr carriage guns were added (Admiralty order of June 20th 1745) bringing the total 4pdr carriage guns to 10. 2. Two bow chaser gun ports were added allowing accommodation of the extra guns either under the forecastle as bow chasers or at the fifth gunports. 3. The mortars as shown in the Admiralty plans are two 13 inch mortars however when fitted as a bomb vessel this was actually changed to 1 x 13inch and 1 x 10inch mortar. This is confirmed by the provisions list on March 30th 1757 which details 50 large and 50 small shells. Granado remained as a bomb vessel until the Admiralty Order to fit her as a sloop on March 20th 1760. It was during this period as a bomb vessel that Granado was involved in her most active role. On January 22nd 1759 Granado and the squadron under command of Commodore John Moore anchored off Basse Terre. The following morning the citadel and batteries of Basse Terre were bombarded. By January 24th troops had occupied the forts of Basse Terre and Fort Royal, the town had been devastated by fire caused by the carcasses discharged from the bomb vessels. On February 7th, the fleet moved to attack Fort Louis at the entrance to Cul de Sac Bay. The attack began the following day and by February 15 the bombardment ceased with the capture of the Fort. Granado was again converted to a bomb vessel in August 1761 and she remained as such until she was sold on August 30th 1763 for £575. During this period Granado was involved in the action of capturing Morro Castle and El Morro in the West Indies and the capitulation of Havana on August 13th 1762. The kit This kit is one of the newer from Caldercraft and that is very noticable. The plans and instructions are extremily good and way more describing than the HMS Snake. This kit is also has much more parts in it and seams to be much more detailly made. Its a much more complex build and probably not suitable as a first model. The wood was better in this kit however I think Caldercraft makes a bit of false advertisement when they only provide walnut for the second planking while all of the photos they have on this ship is made of a much brighter wood (probably boxwood).
- 101 replies
-
- 5
-
-
- caldercraft
- granado
- (and 1 more)
-
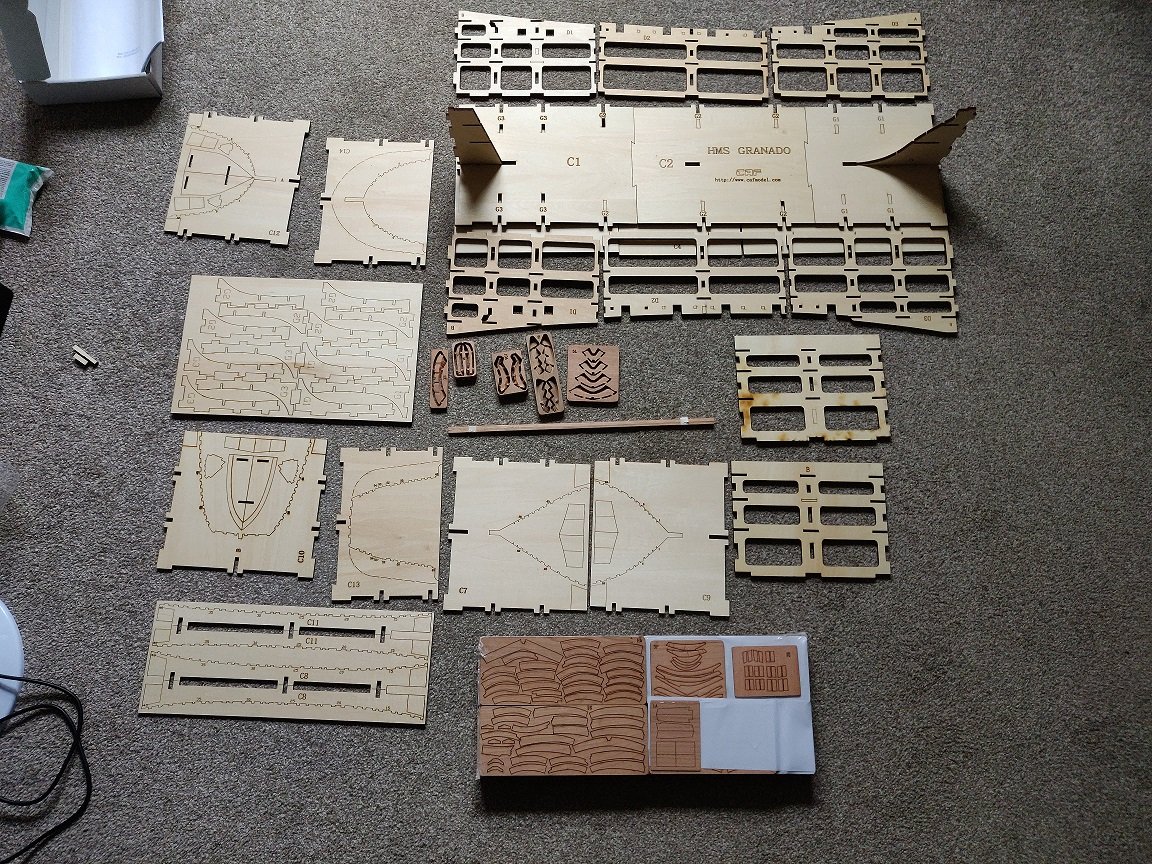
 At last time to get started. HMS Granado full kit by CAF. There has been much discussion about kits and cost etc and yes in the UK, total is over £1000.00 but looking at all the parts supplied and remember all of the work gone in to produce the kit then in my opinion it’s worth it. Box 1 arrived in a week, that's good, no damage. Wood looks good with a slight variated in colour remember this is a natural product and will have colour variations. The instructions are in pictograph form with the odd text and quite understandable (it is helpful if you understand ship terms and building. Anatomy of Ships, Model shipwright, SeaWatch books SOS plus others are a good source of information & knowledge. There is a good video series on the HMS Thorn from the Swann practicum model built by K Kenny, a 1/48 scratch built model. 1/48 is the scale used for the old Navy board models in the UK with ships built with metric (France, Spain, Sweden etc) were 1/50. So CAF use 1/48 for the kit, this means a good level of detail can be achieved even by beginners like me.
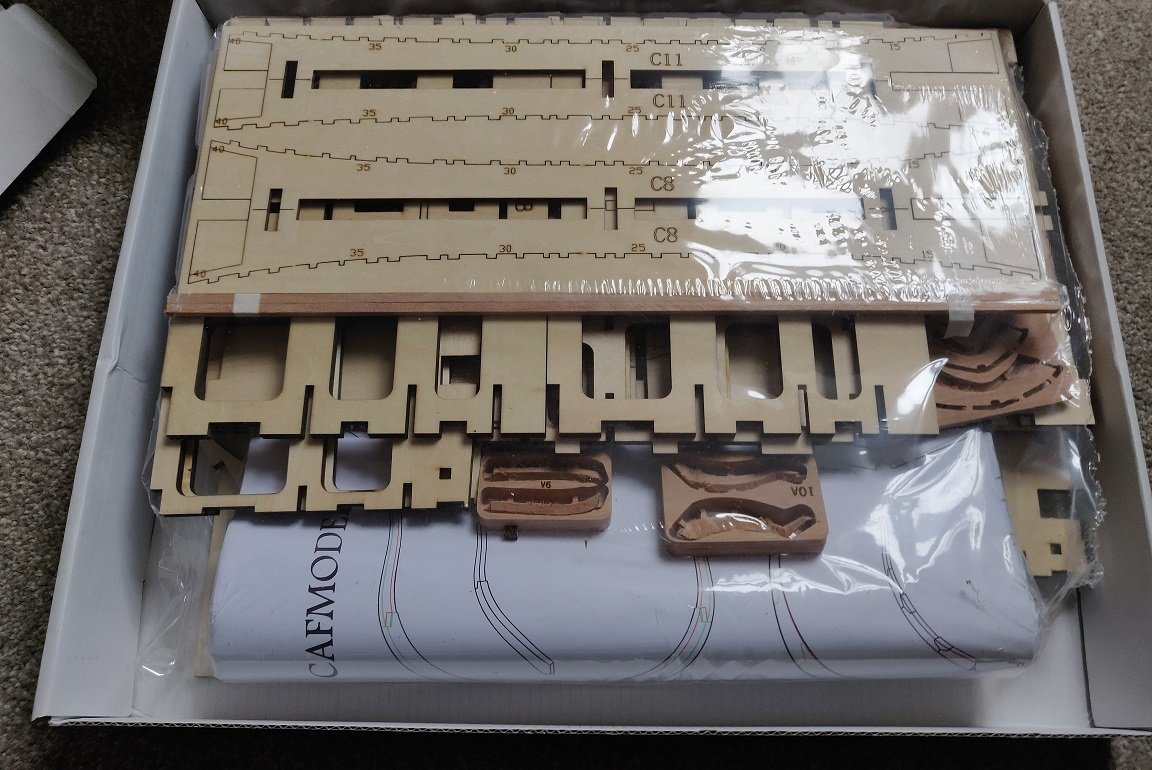
-
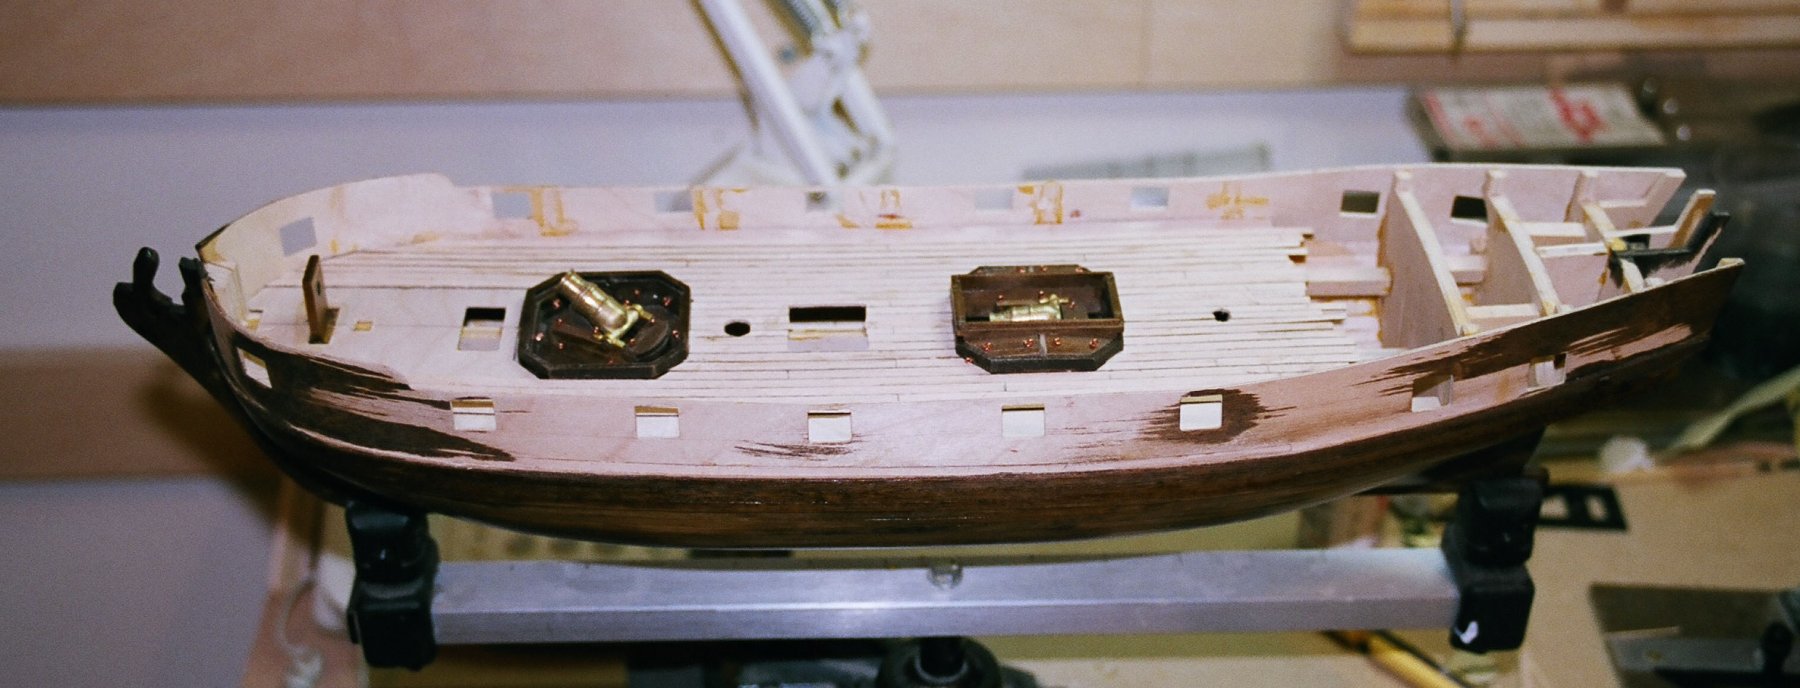
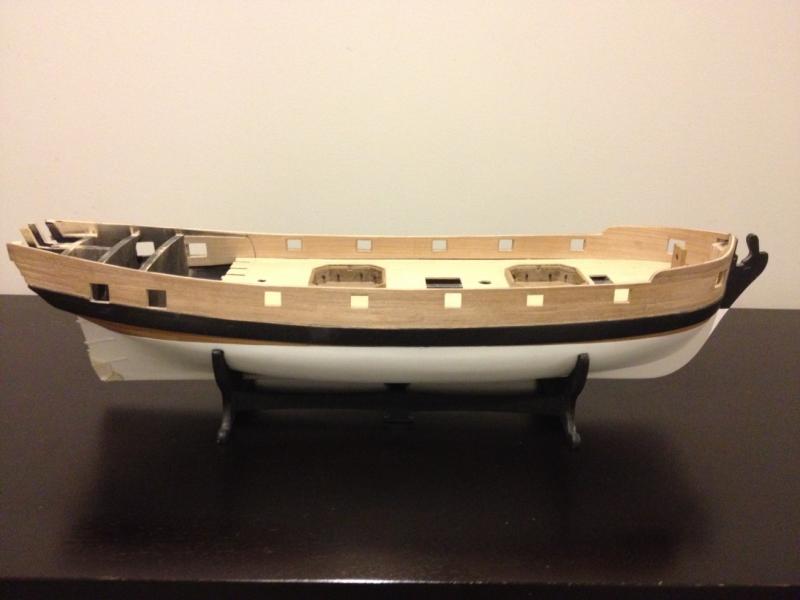
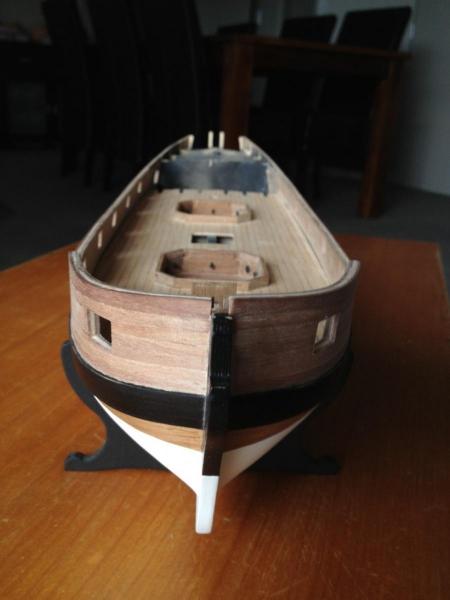
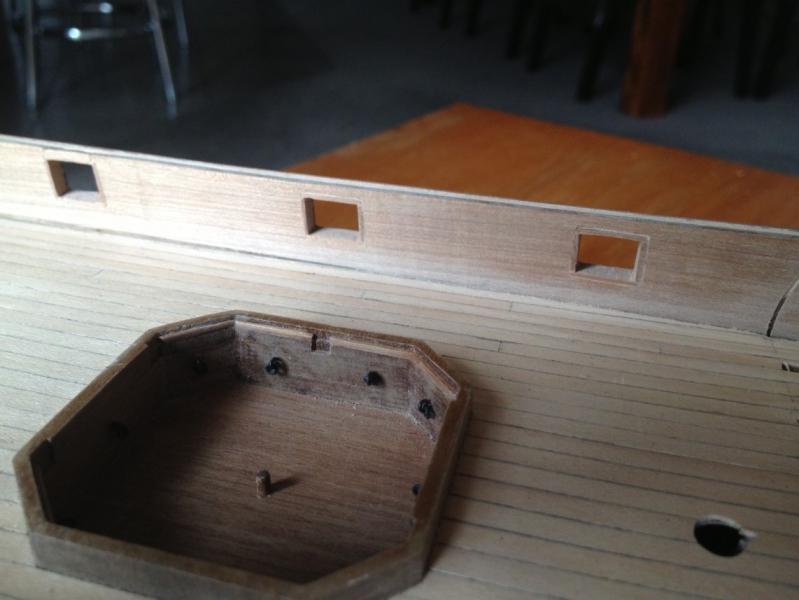
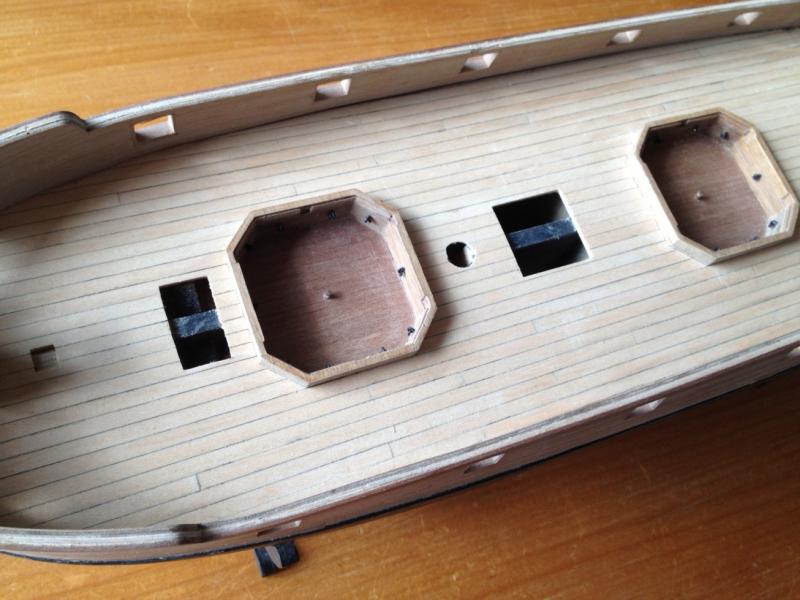
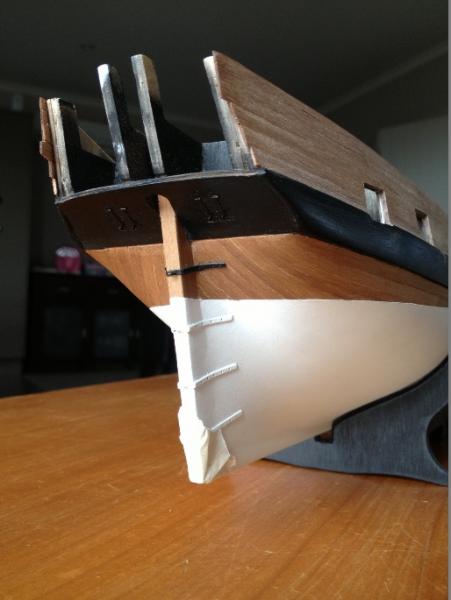
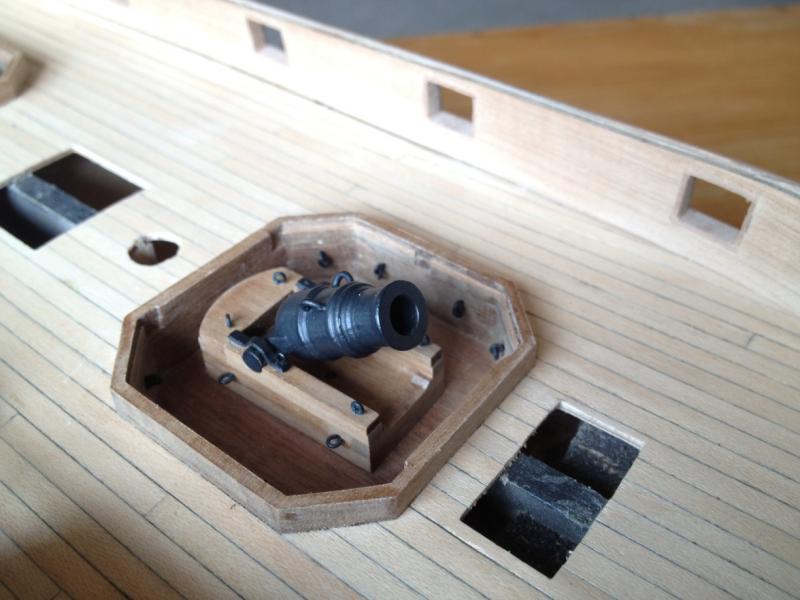
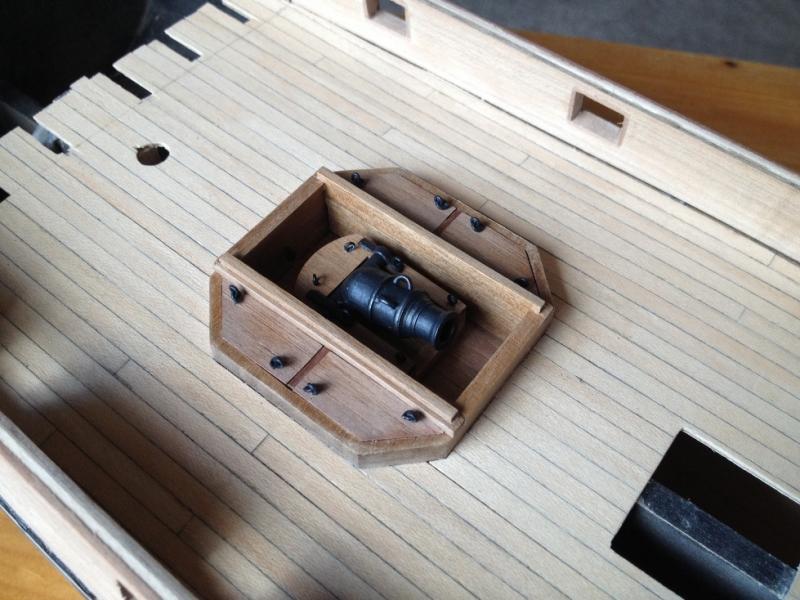
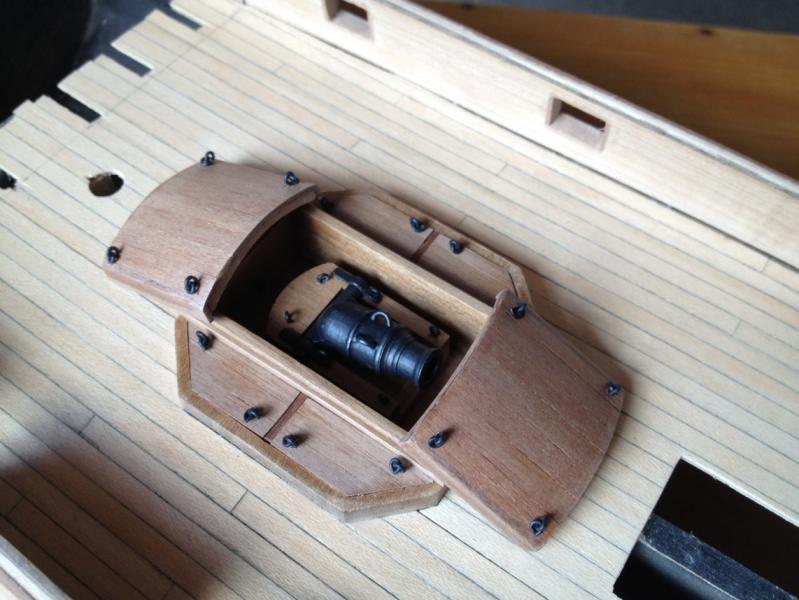
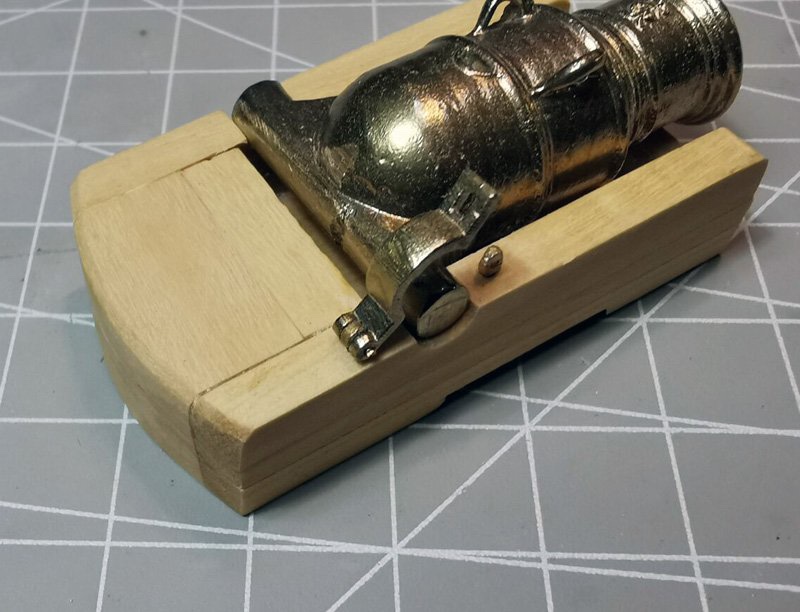
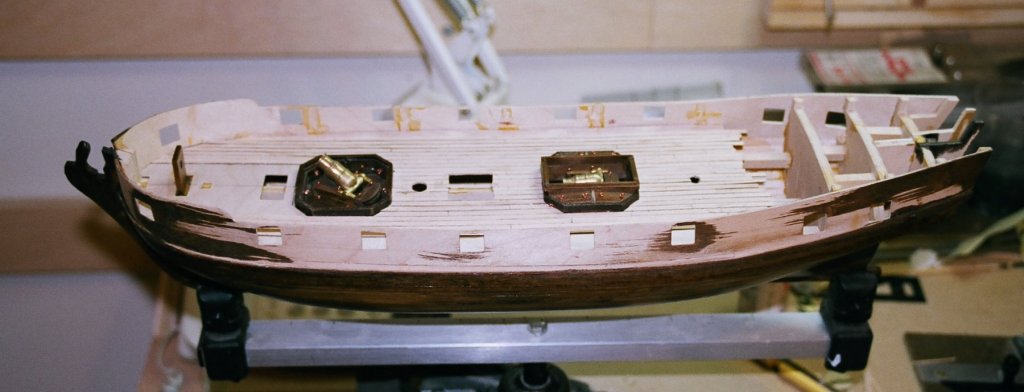
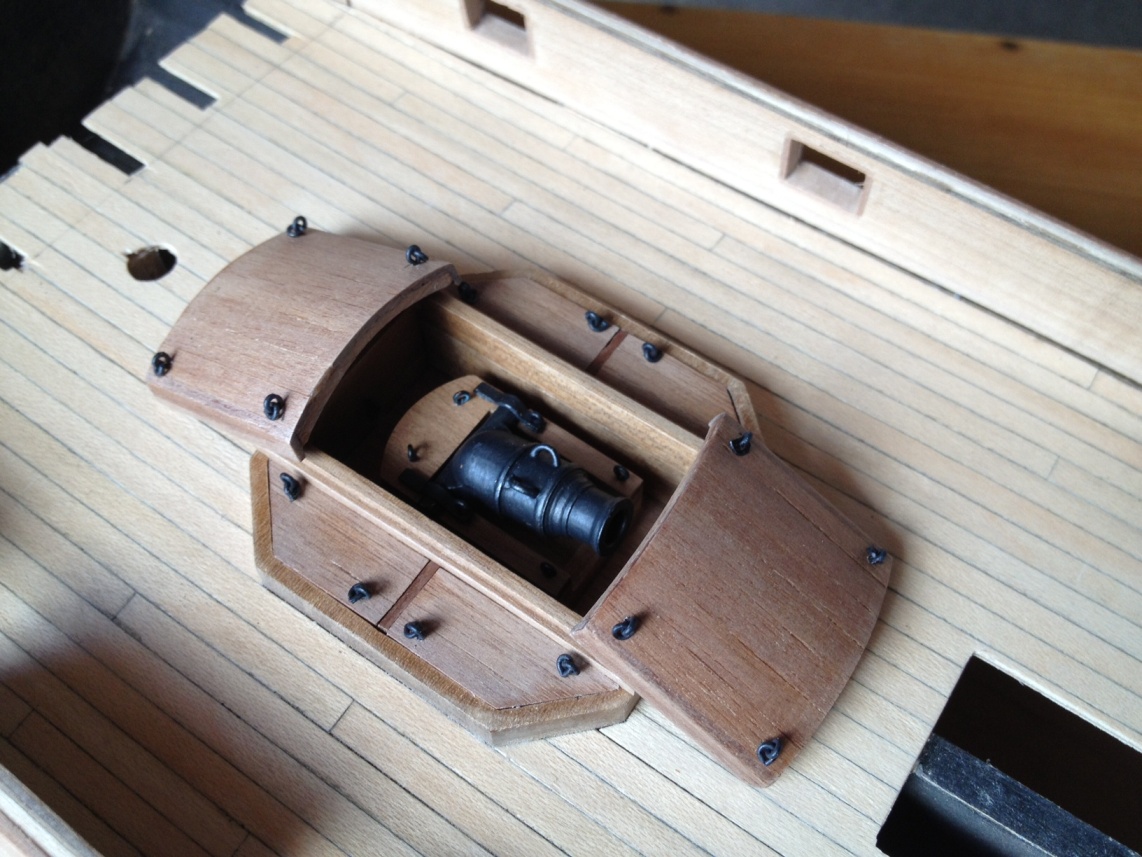
 The Granado is my second wooden ship build. This follows the cutter Sherbourne which you can follow the link to in the MSW gallery. The Granado was chosen for a vessel offering more than a single mast but still able to be displayed in a reasonable space. Firstly a tribute to all the prior Granados on MSW's former incarnation - they proved immensely helpful and I owe a huge tribute to you all in helping to spot impending difficulties and work around them thanks to your efforts. After wantonly pillaging MSW for help with my first build it's time to add to the basket of knowledge that MSW members have so graciously given to me. This build is by no means complete but hopefully of use to others as I found previous members' posts. So on to the build... The build was started in April 2012 and at this stage I've just completed the second planking above the wales and filed out the gunports. The Caldercraft kit is all the usual business like efficiency with little in the way of complaints. The fittings are top quality with turned brass cannon, limewood for the first planking and walnut for the second. No, it's not a botch. The lens curve making the stem appear out of alignment here. One thing to watch for on this kit is setting the gunport patterns correctly. I thought I was being very clever in measuring the placement from the base of the keel. It resulted in patterns not quite meeting the tips of the bulkhead patterns. As a result at least half of the gunports had to be raised slightly. Better to just fit them to the tops of the bulkheads. Oh well. Another thing to watch for is the sweep ports. The instructions don't mention them until after the gunport patterns have been installed despite the plans showing them as illustrated. From there it's the somewhat more difficult matter of cutting them through from the outside and matching them up with the inner spirketting - no easy task. If your want the sweep ports showing on the inside then tak e gauge of where they should be before installing the gunport patterns and adjust once the lot is installed. It's not difficult but comes down to reading the instructions all the way through before taking any steps. I found it made more sense to skip ahead in the build and install the lower stern counter before the upper hull sides were planked. It allowed the upper stern counter to be shaped to fit and also allowed the wales to be shaped to fit around it. The black used here is probably a bit too dark to see the chase ports to best effect. That might be looked at later. The mortars went together nicely after some cleaning up. The mortars themselves are nicely cast brass that just needs some time with a file to bring out the best. Some brass wire handles were added as per Peter Goodwin's excellent Anatomy of the Sip Grandado book. The example here is the stern mortar - the smaller of the two on board. Following shots show the mortar surrounds in place which are identical for each of the two mortars aboard.

- 366 replies
-
- 6
-
-
- granado
- caldercraft
- (and 1 more)
-
https://cafmodel.com/products/hms-granado-1

-
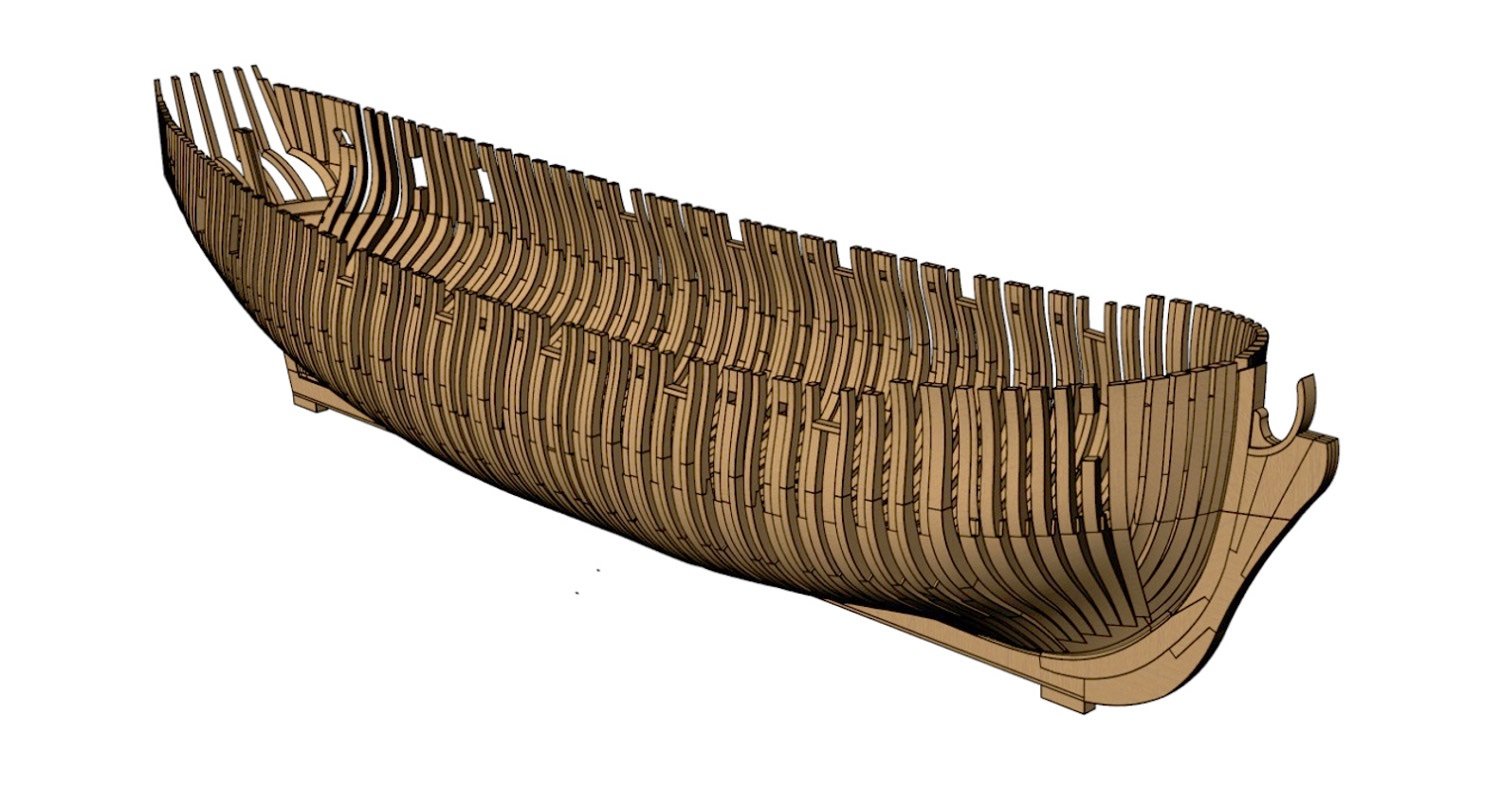
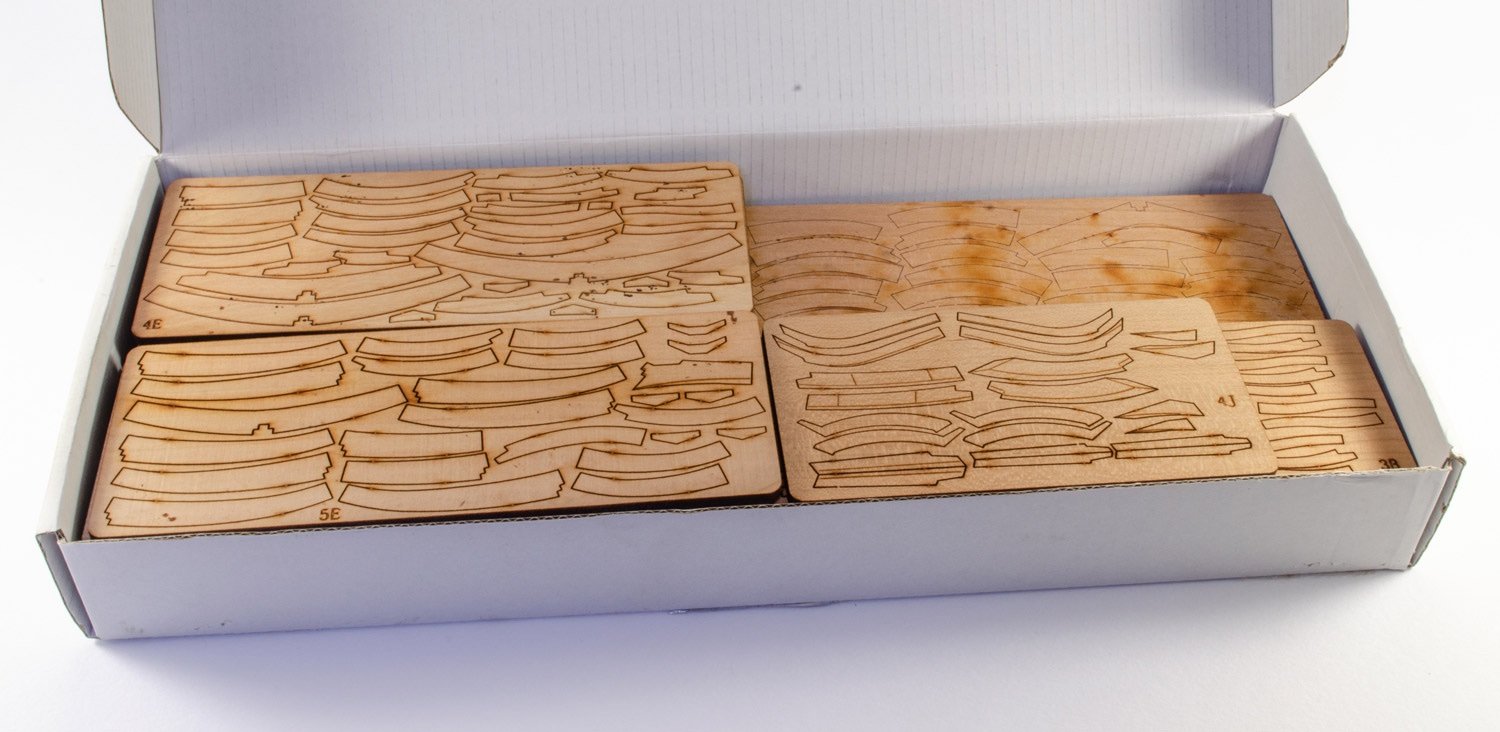
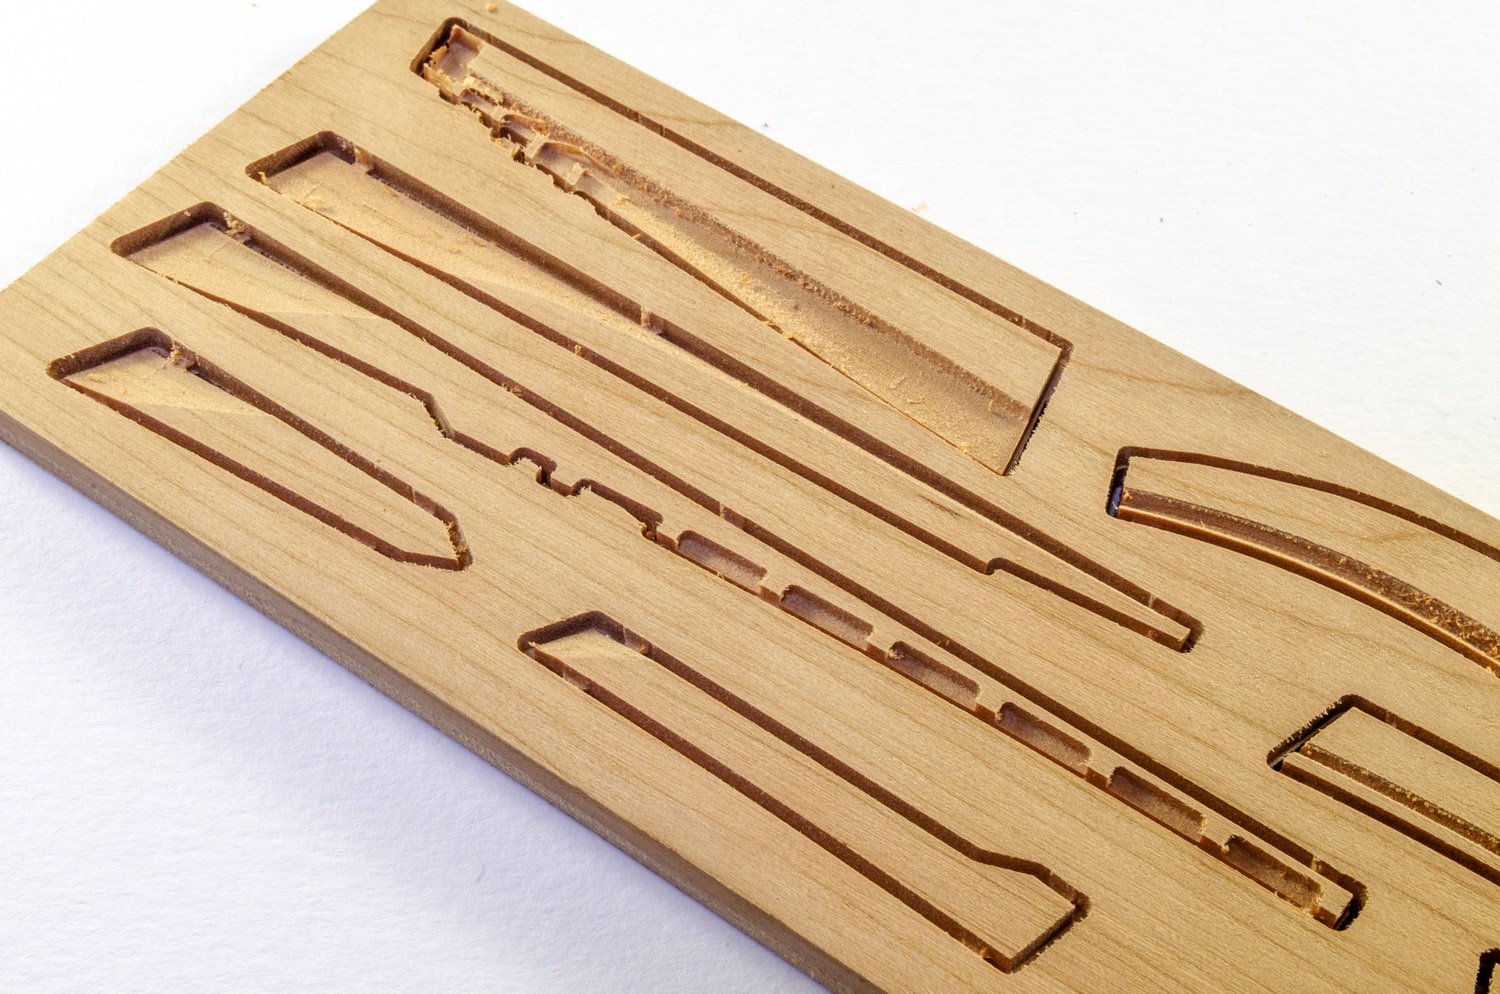
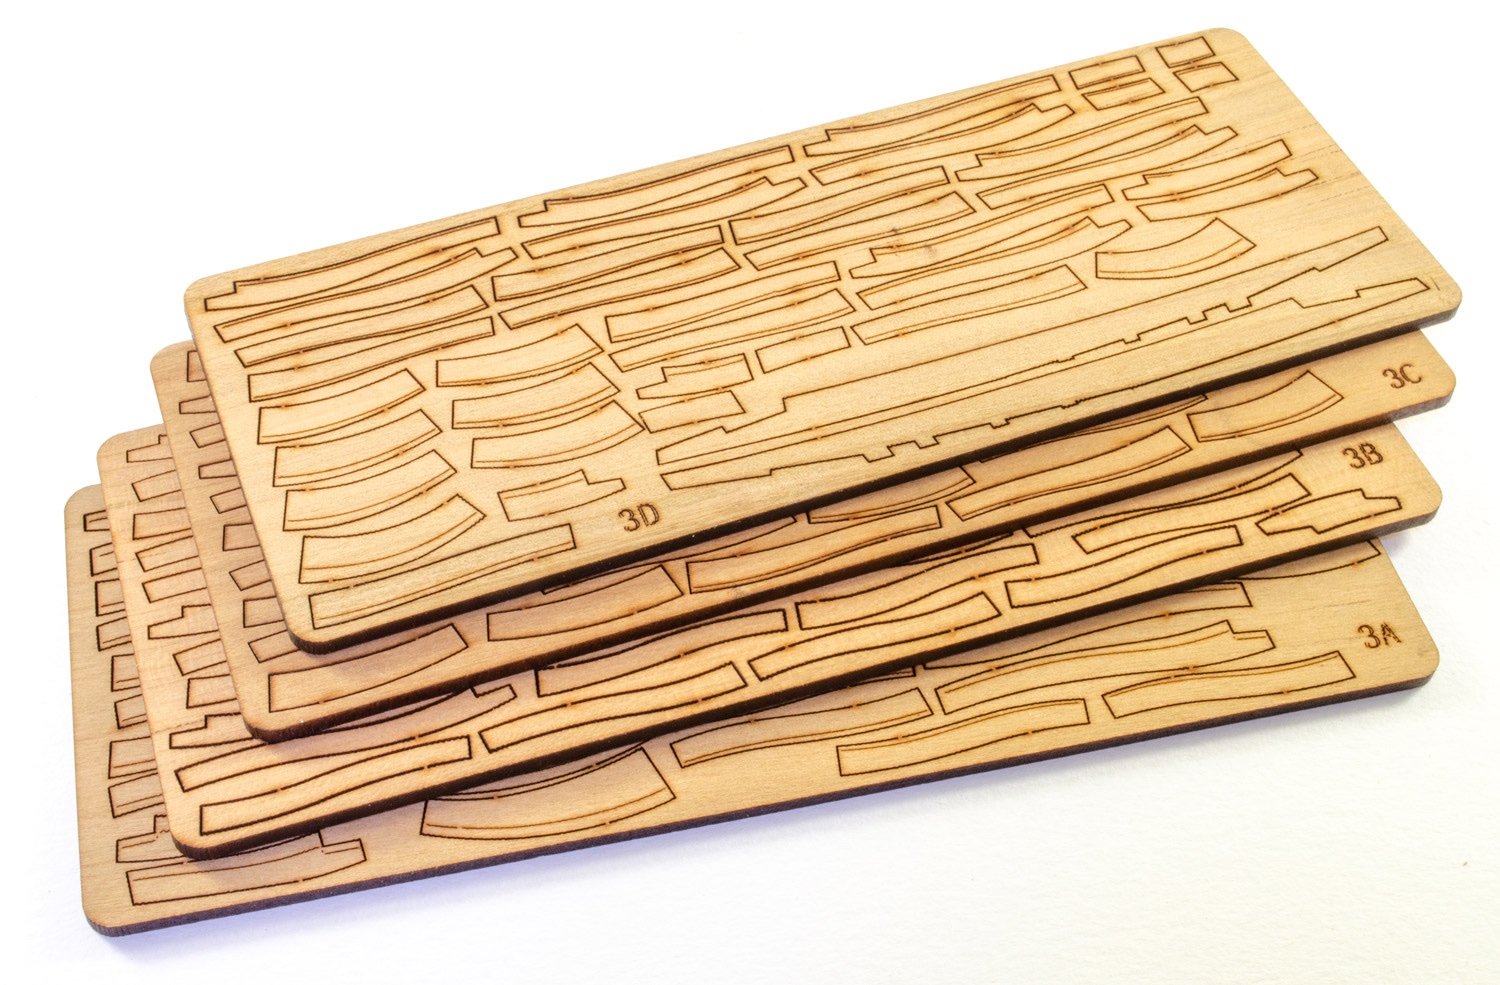
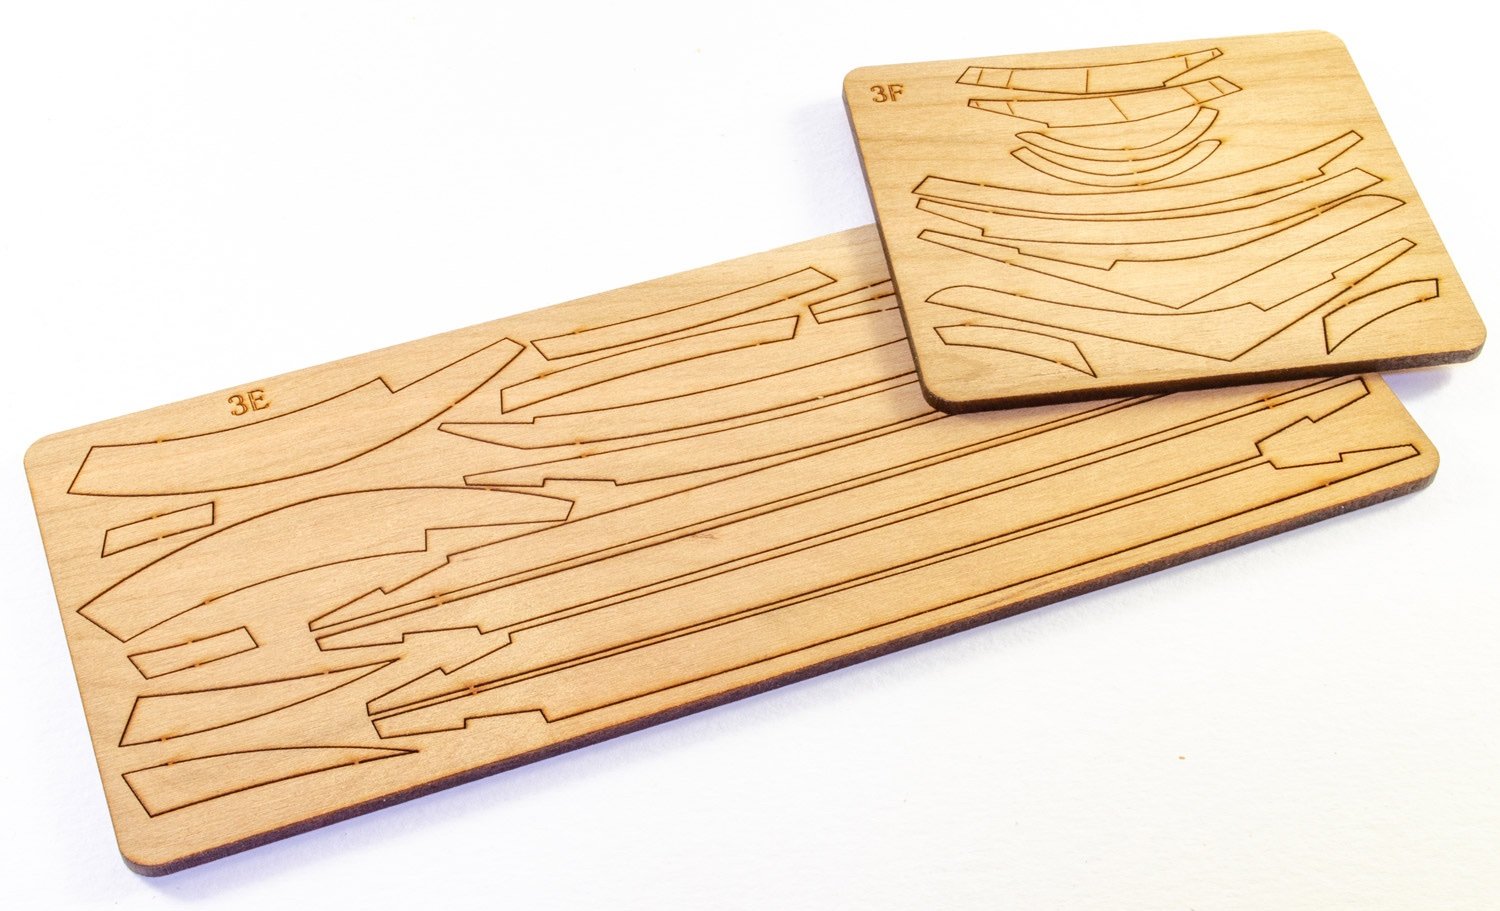
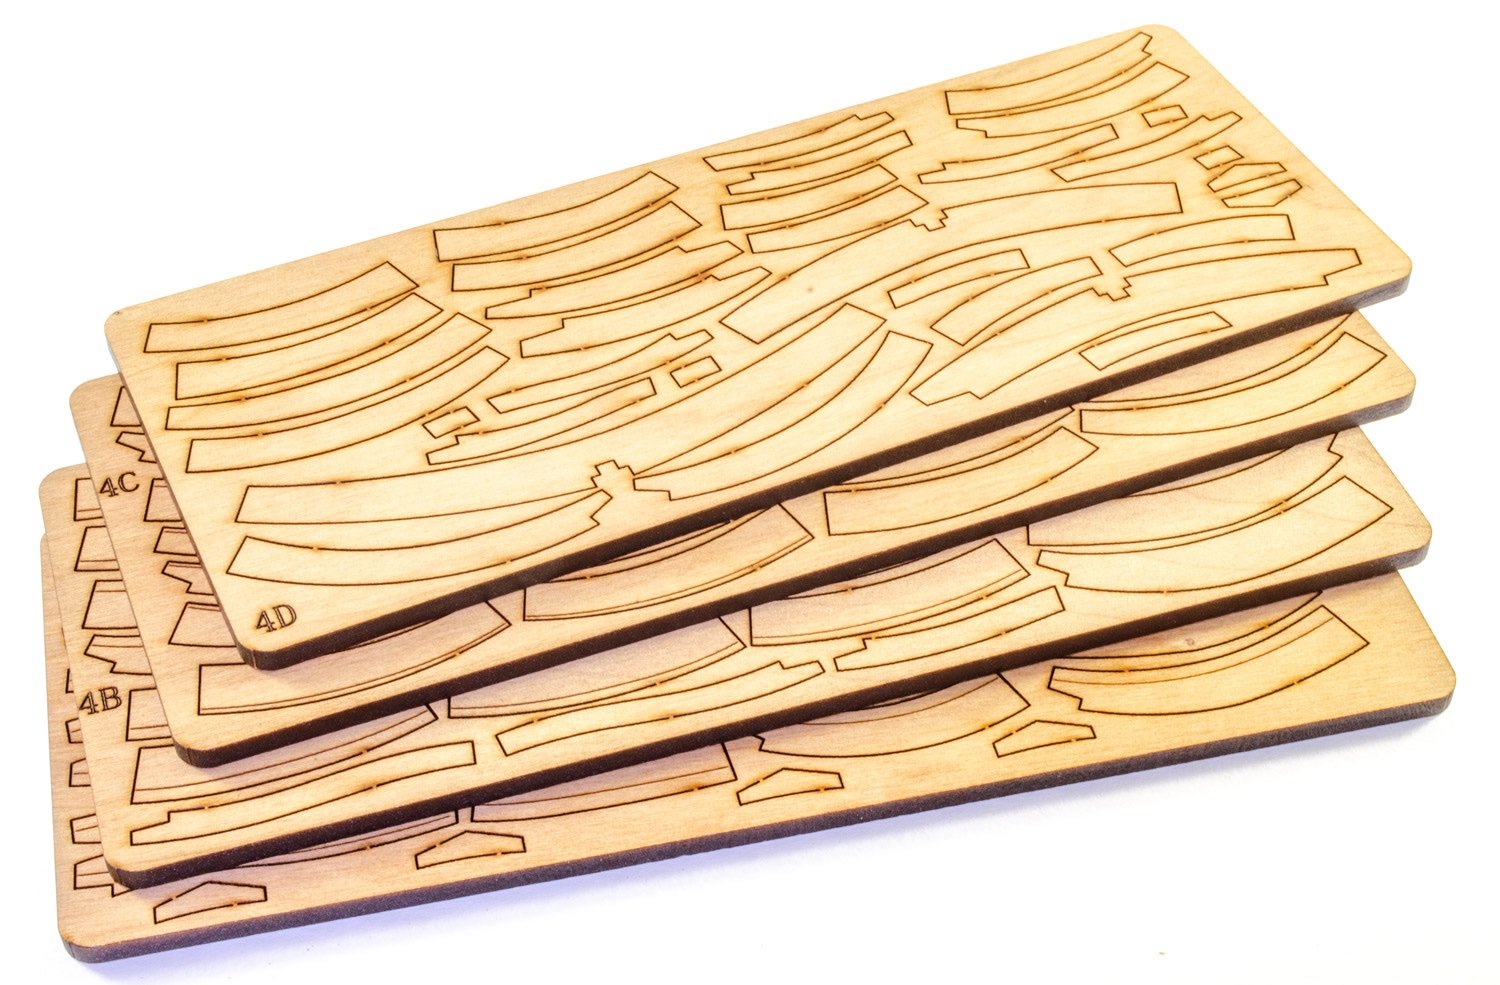
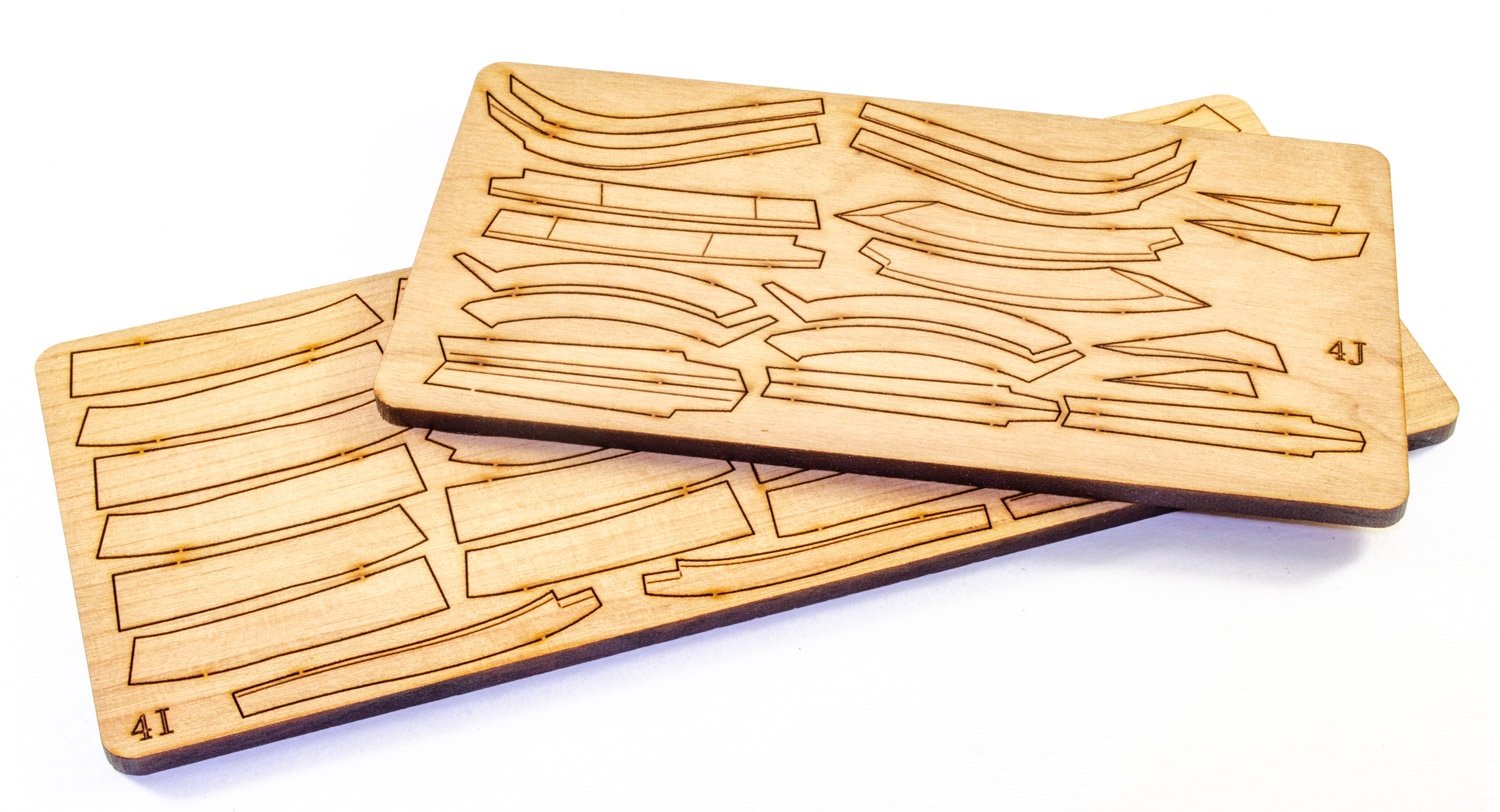
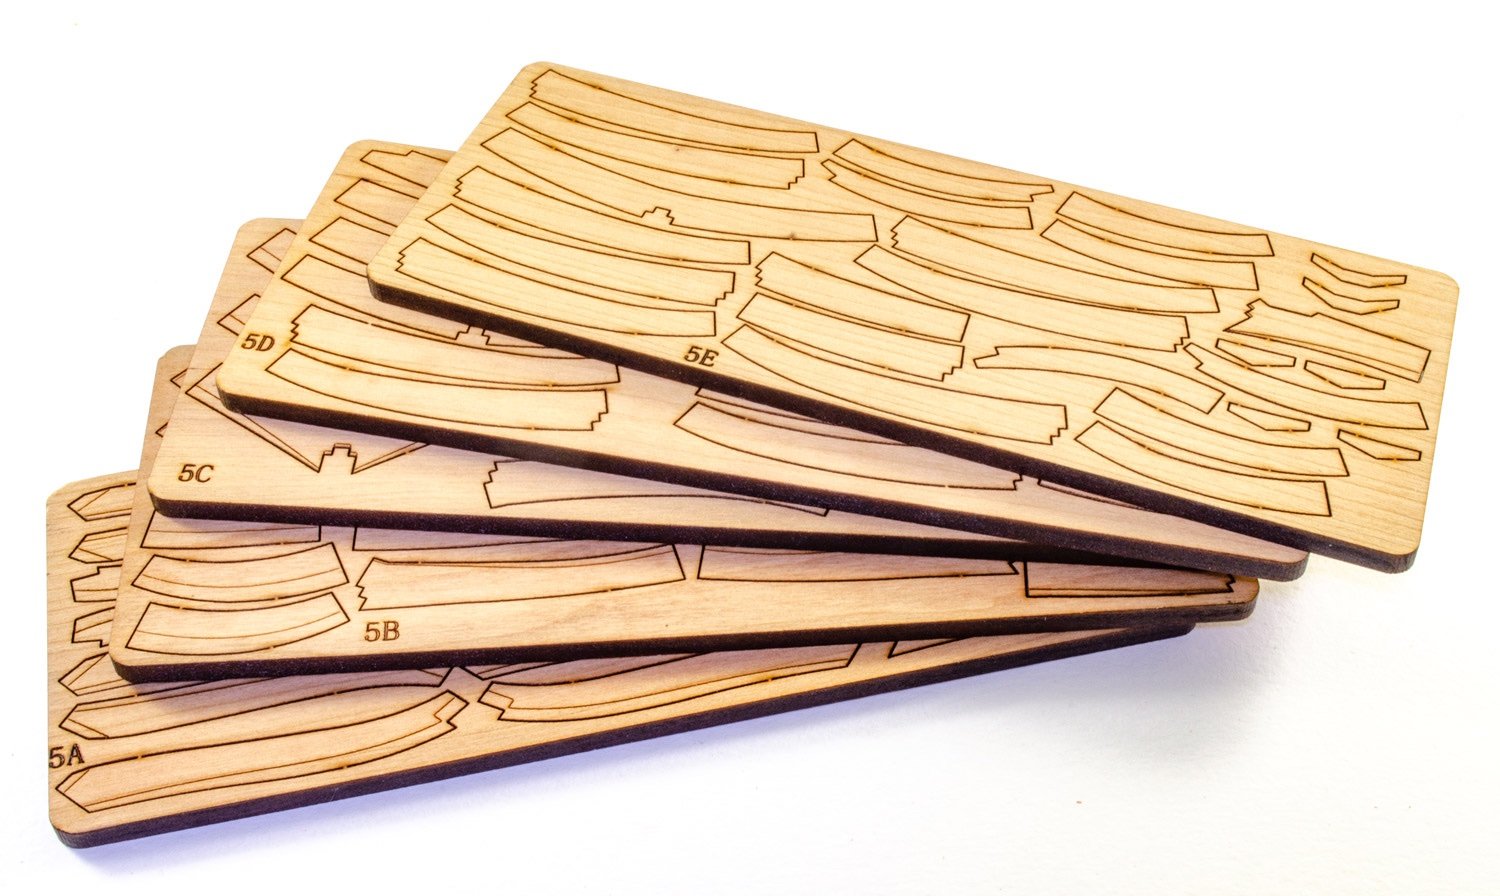
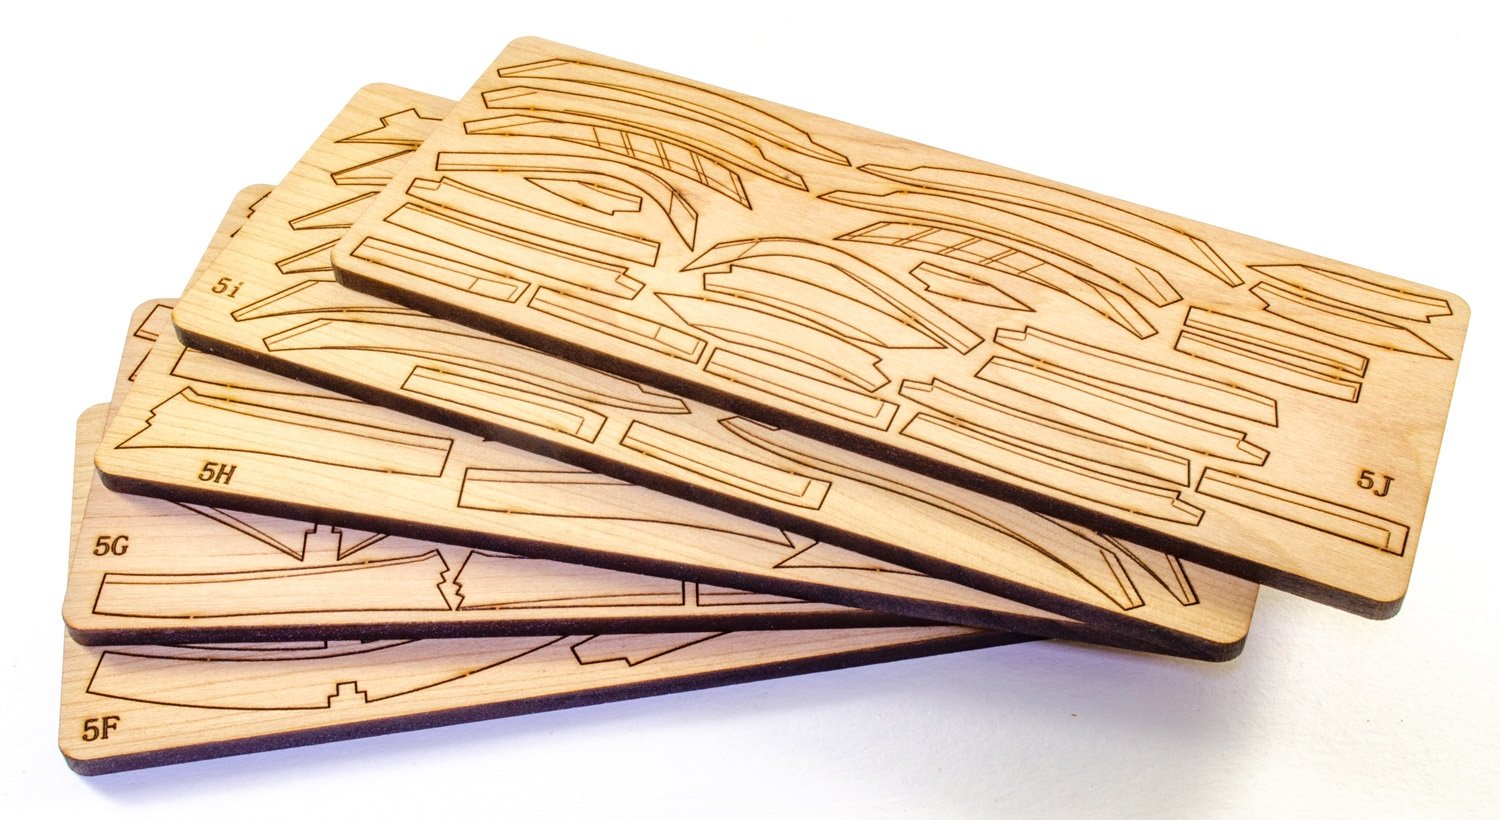
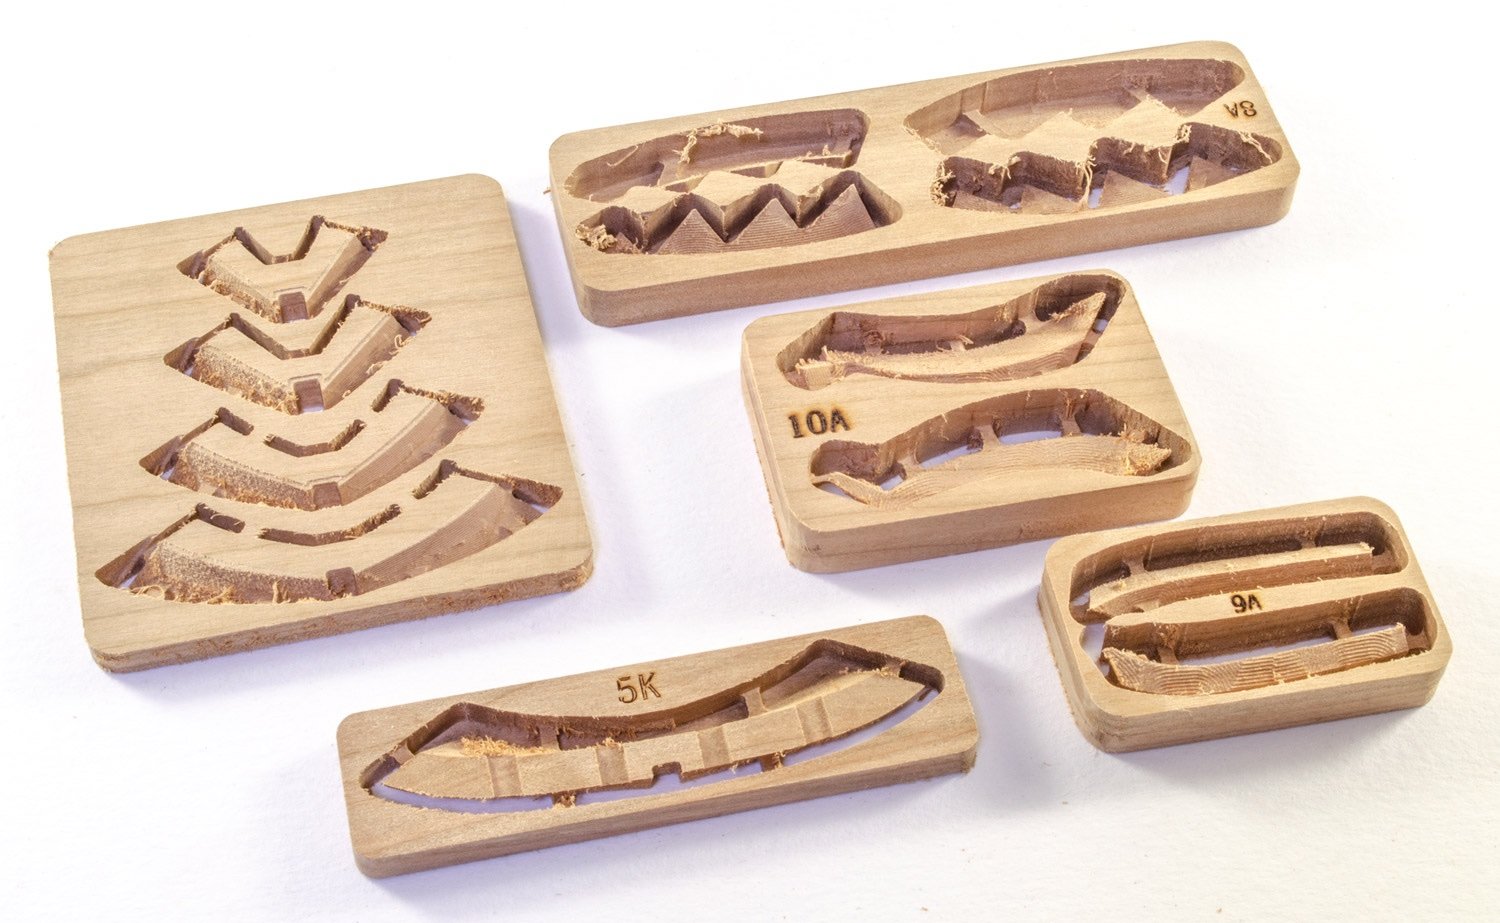
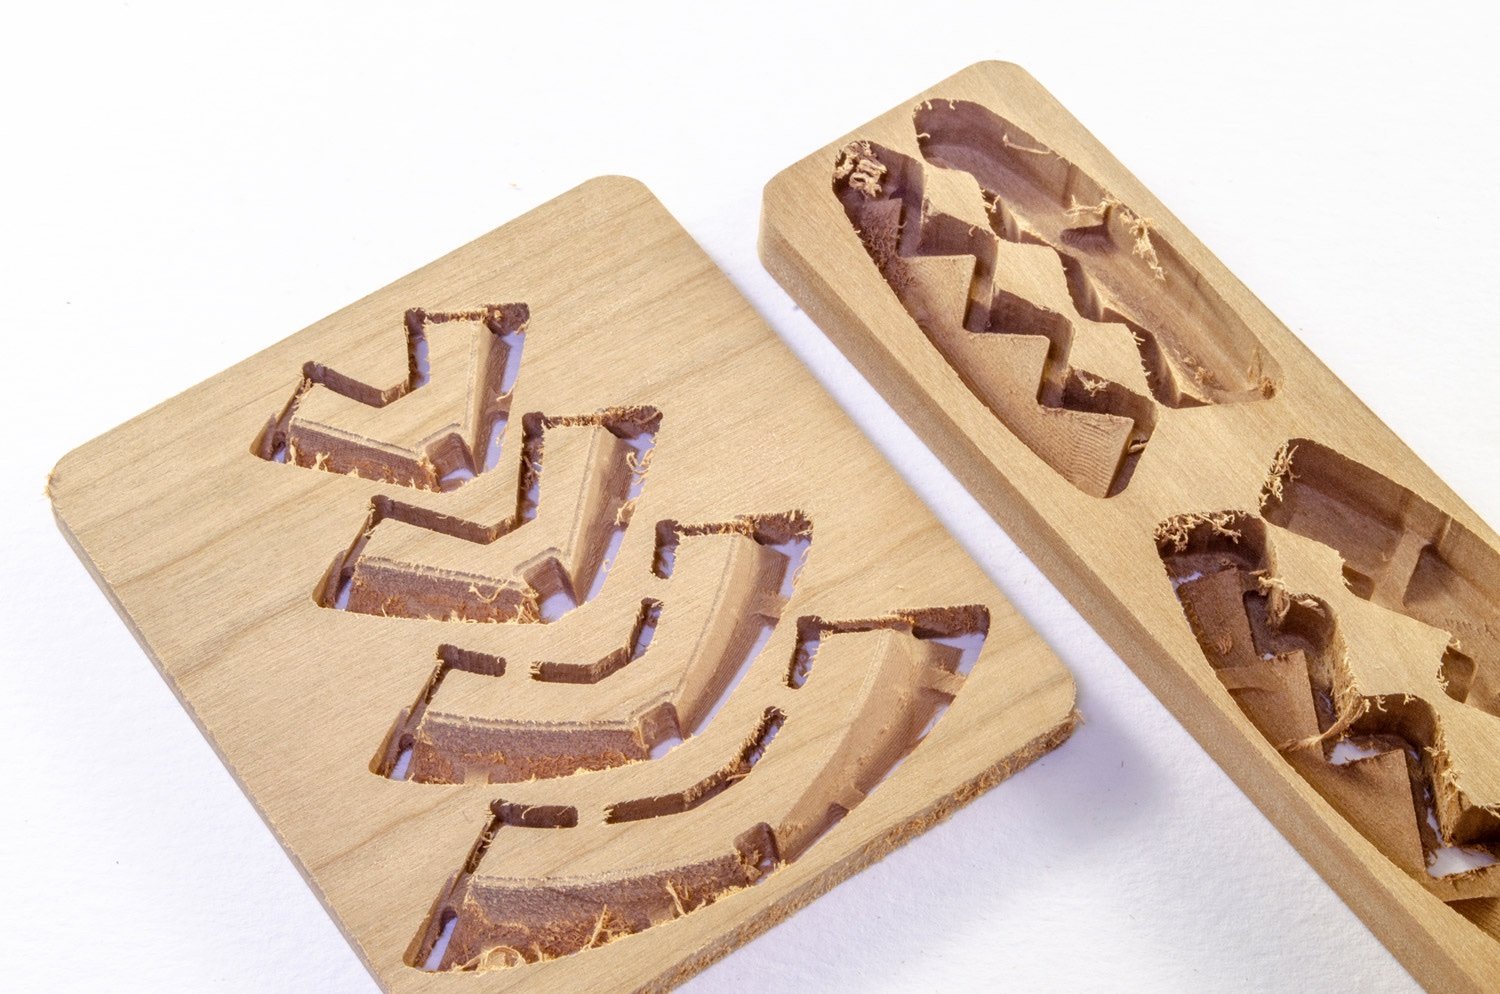
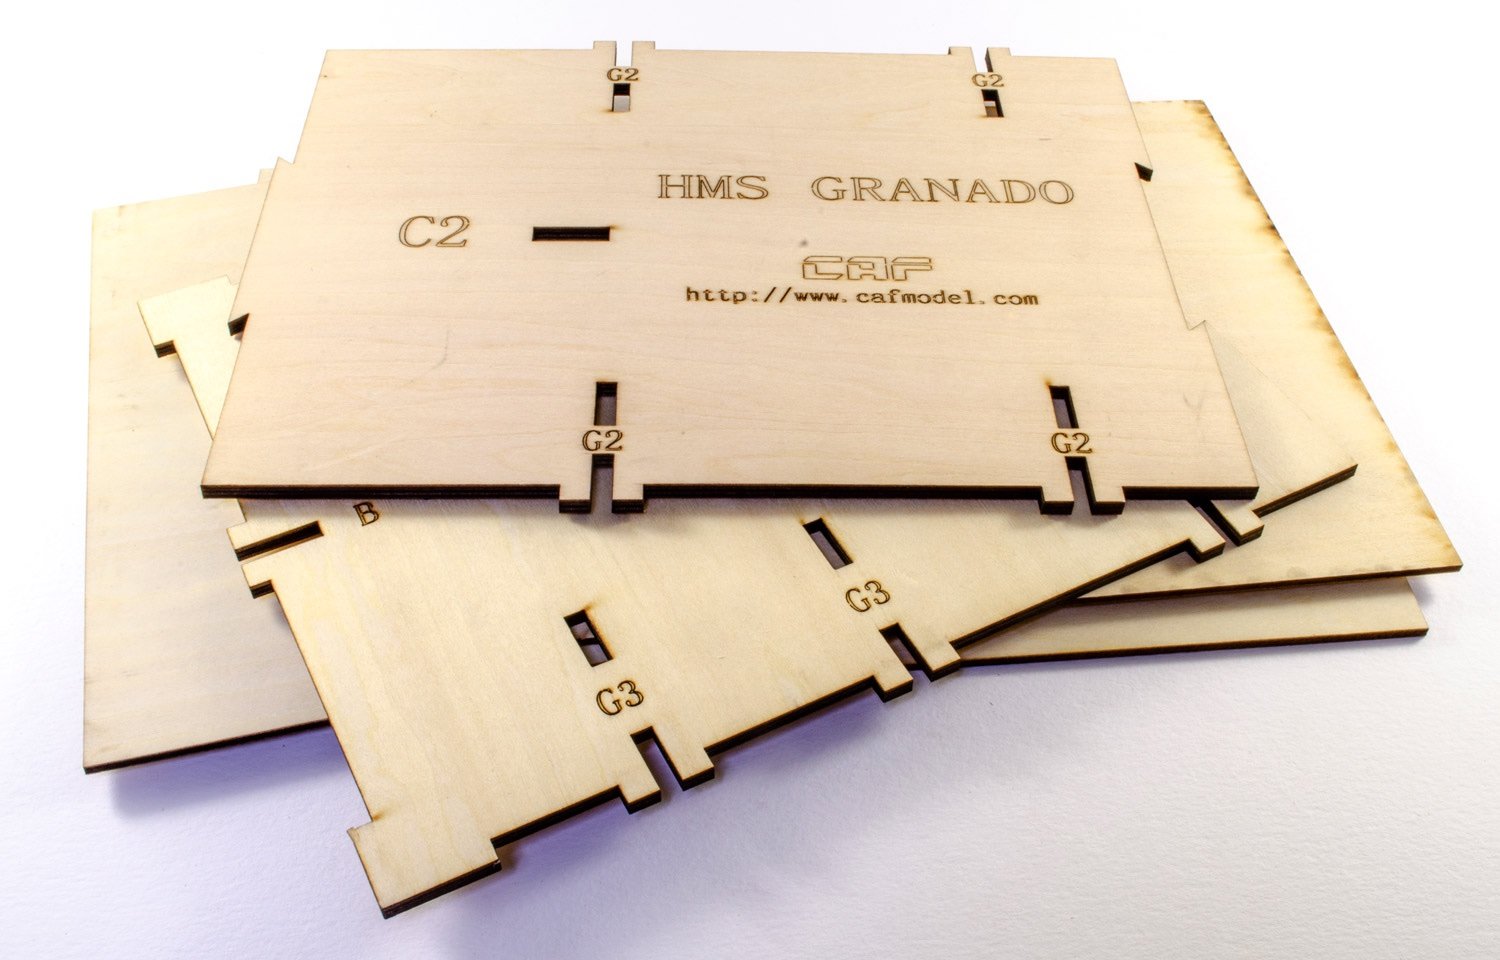
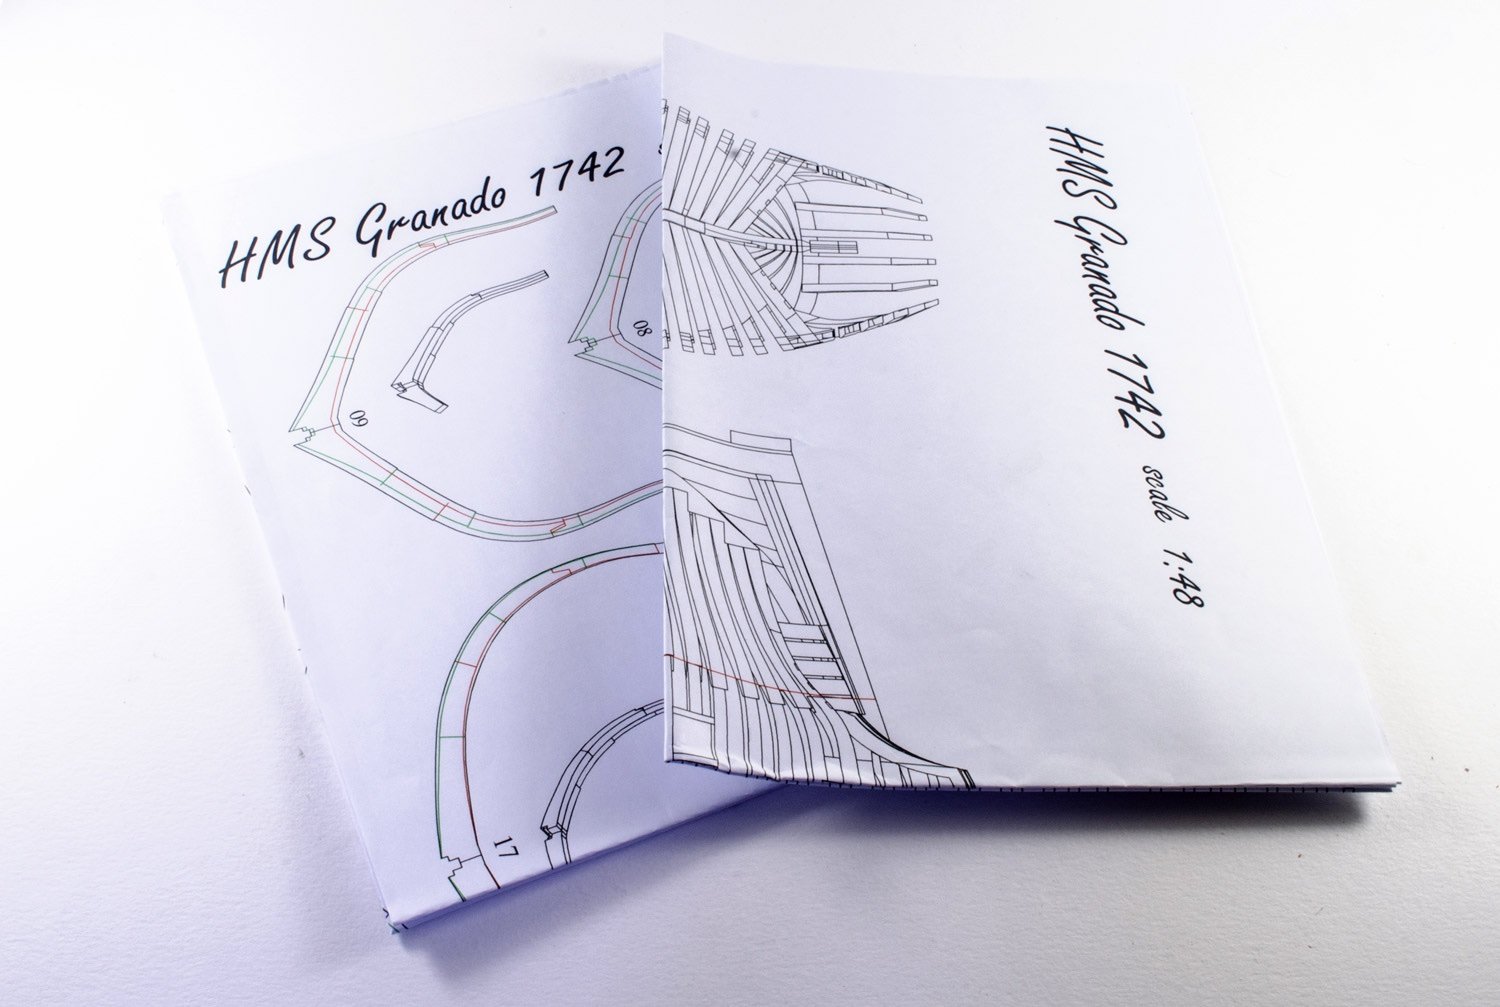
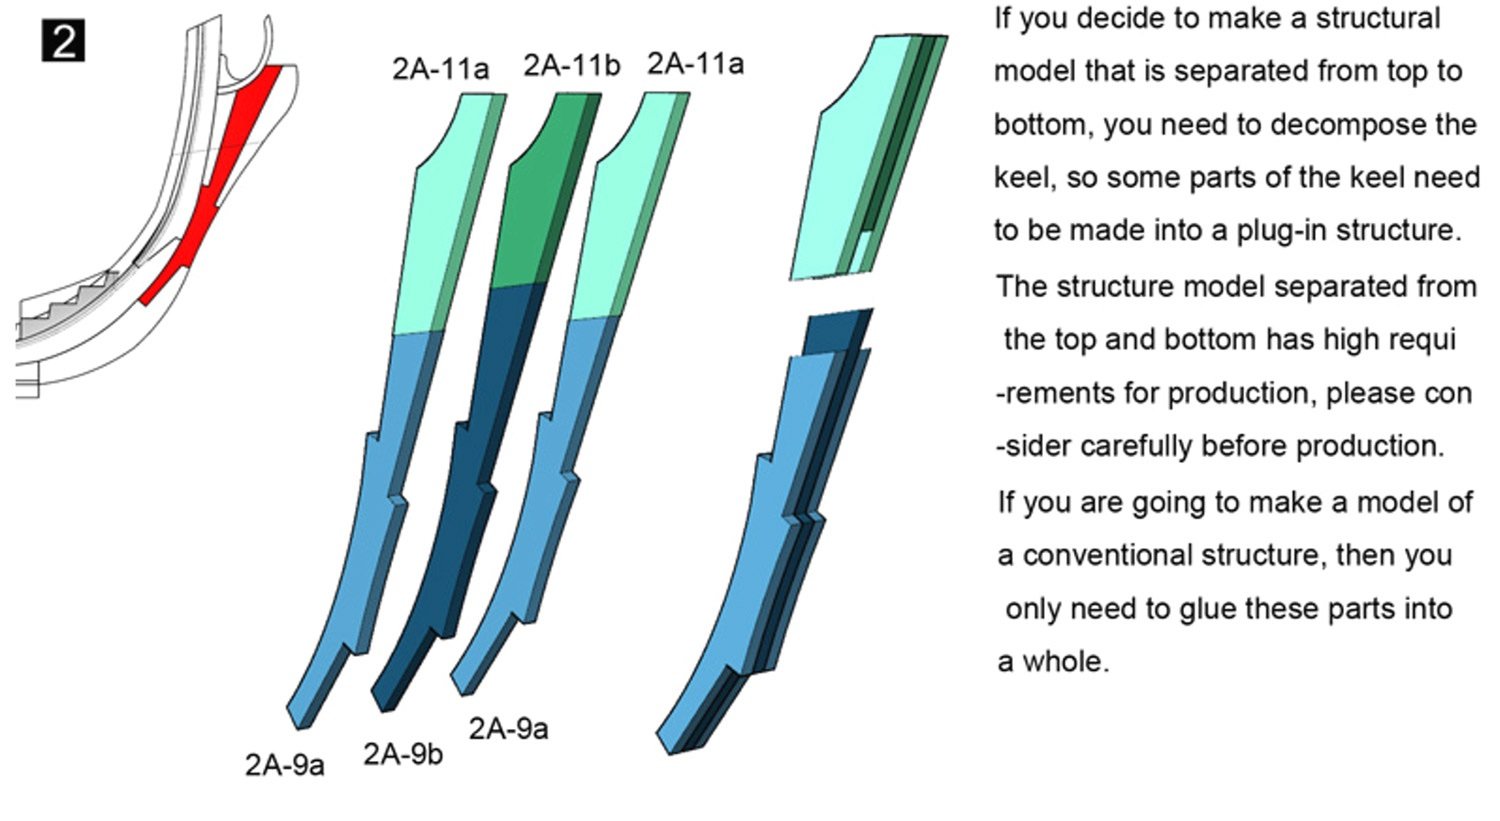
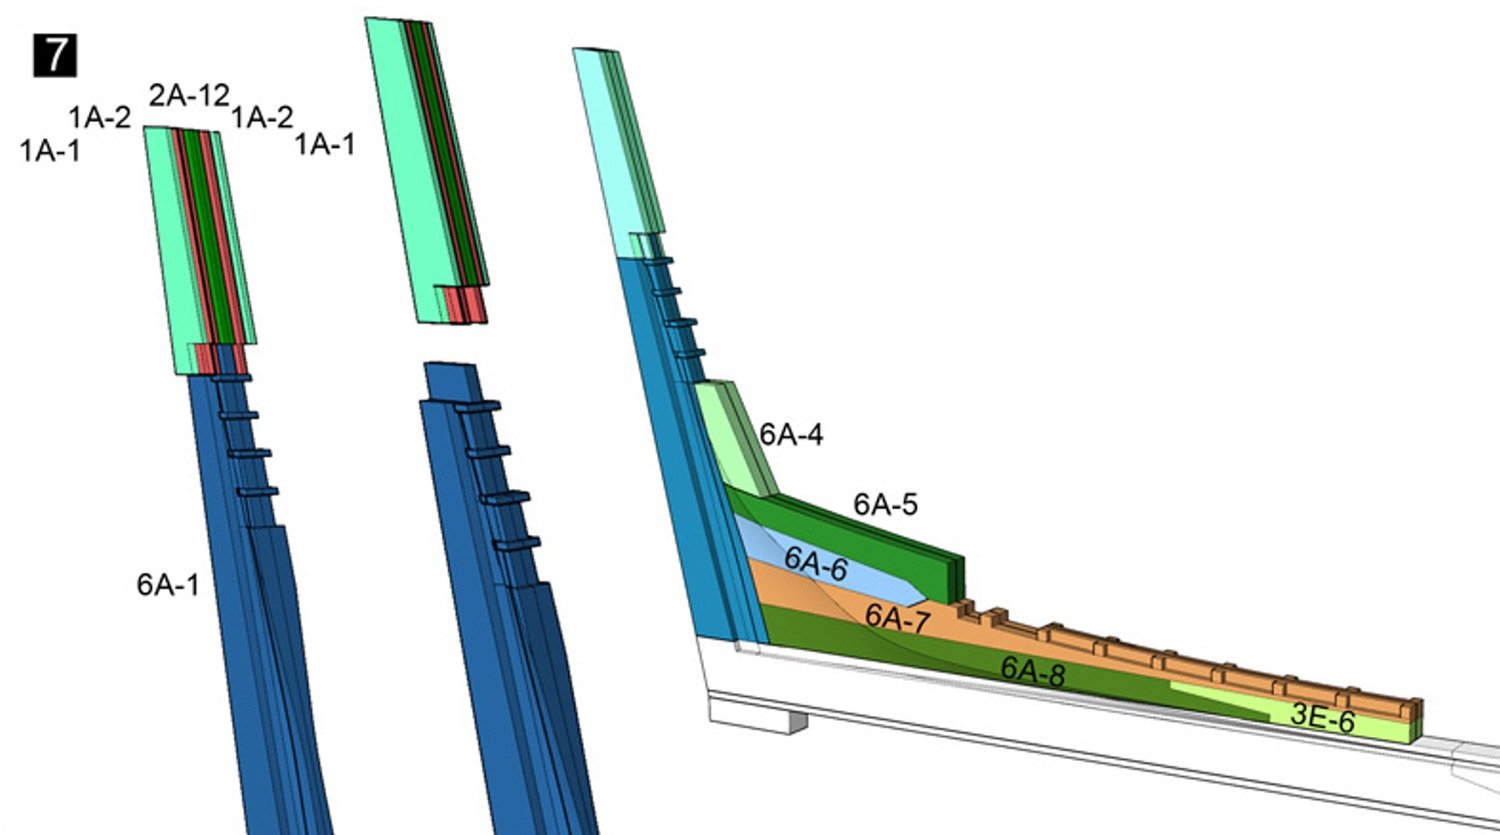
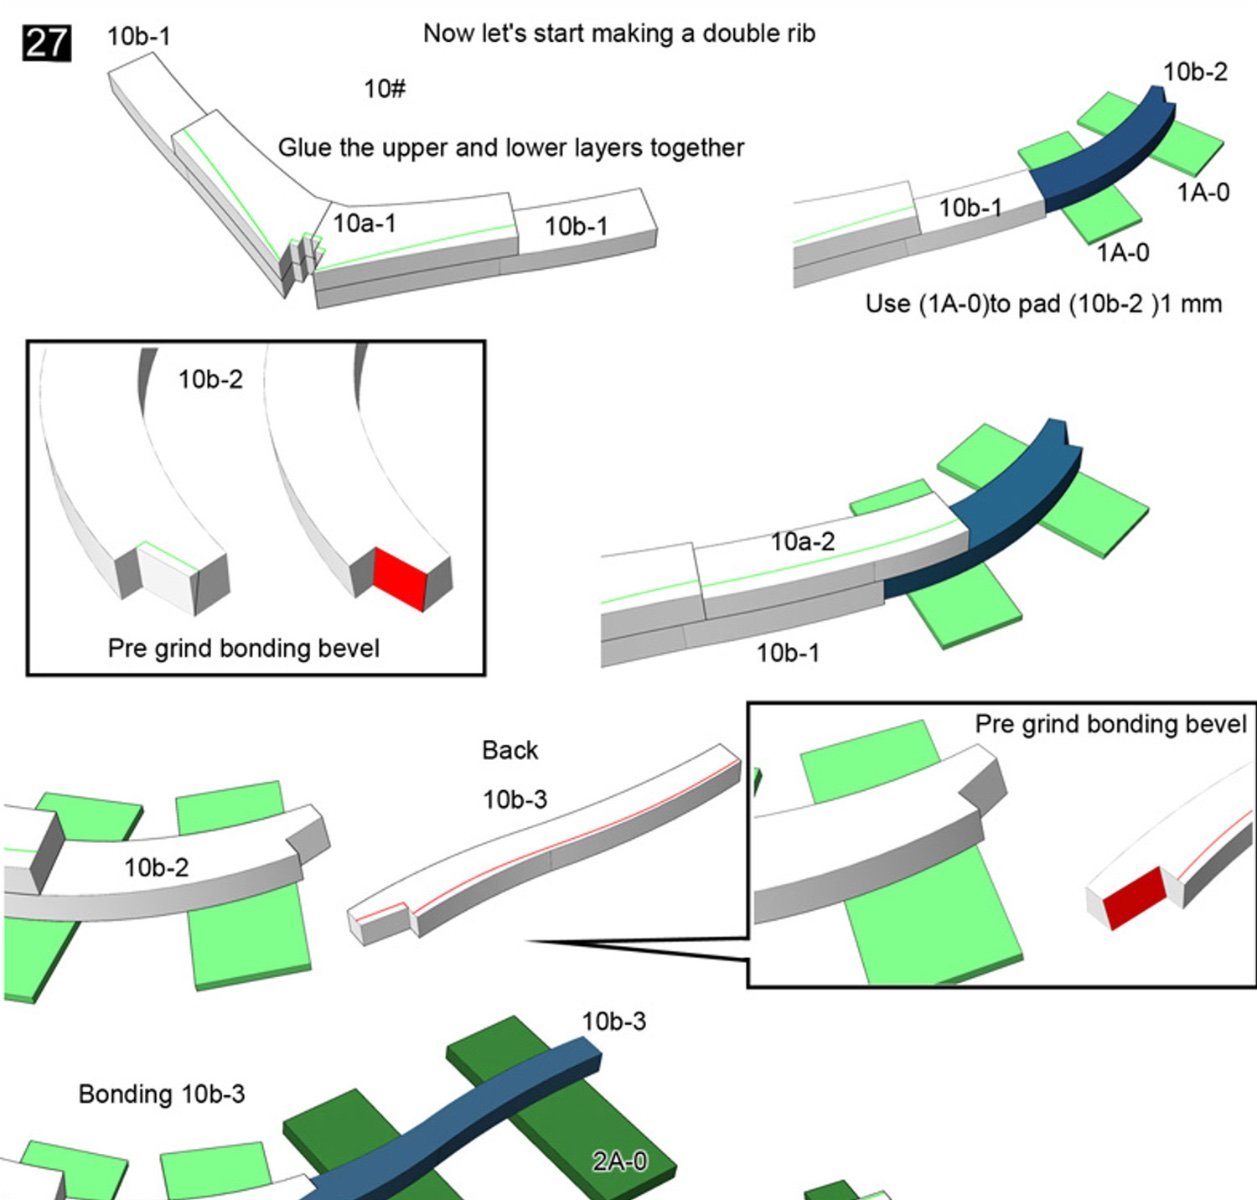
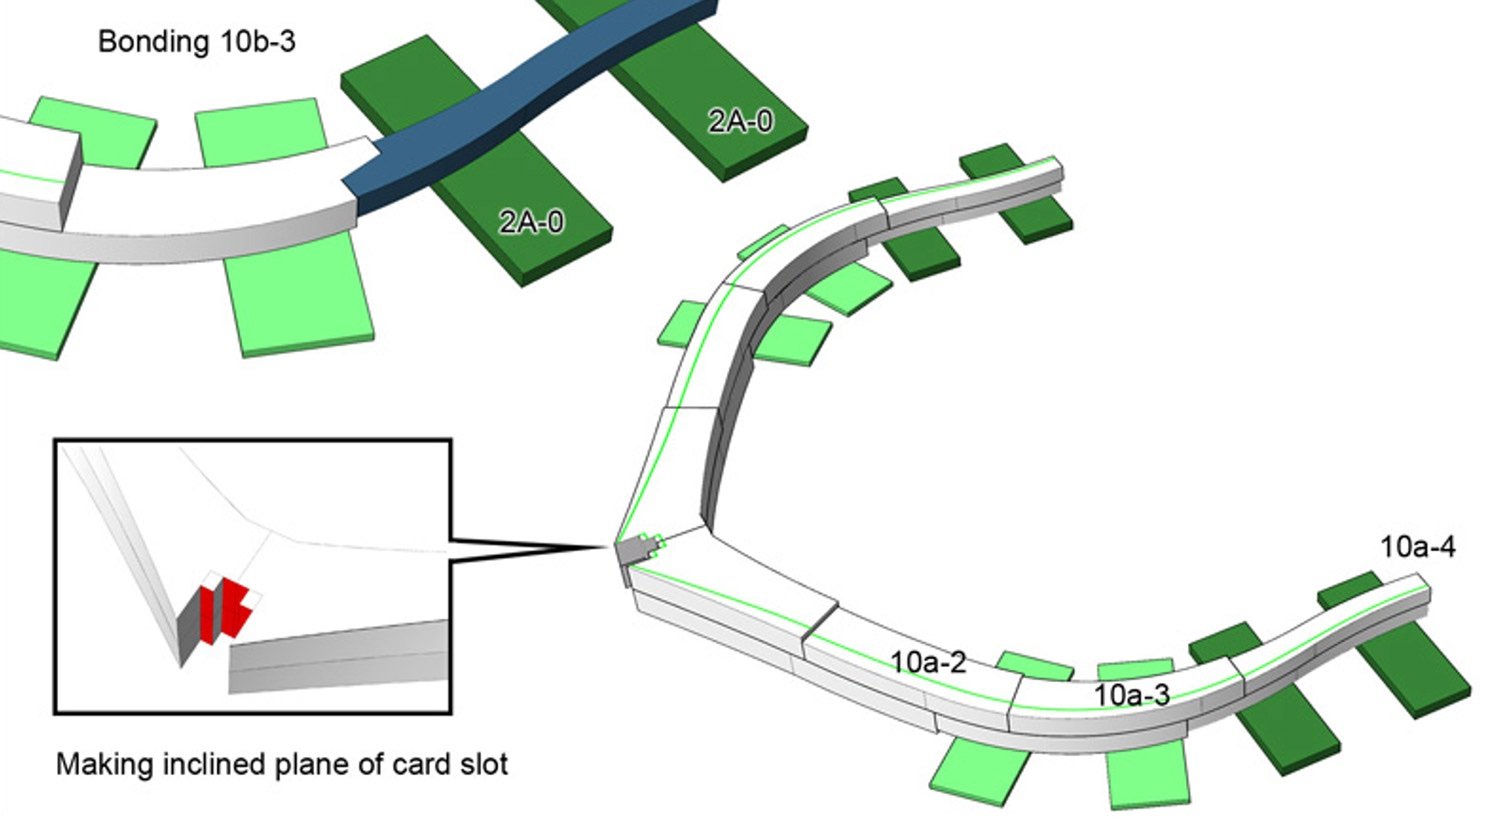
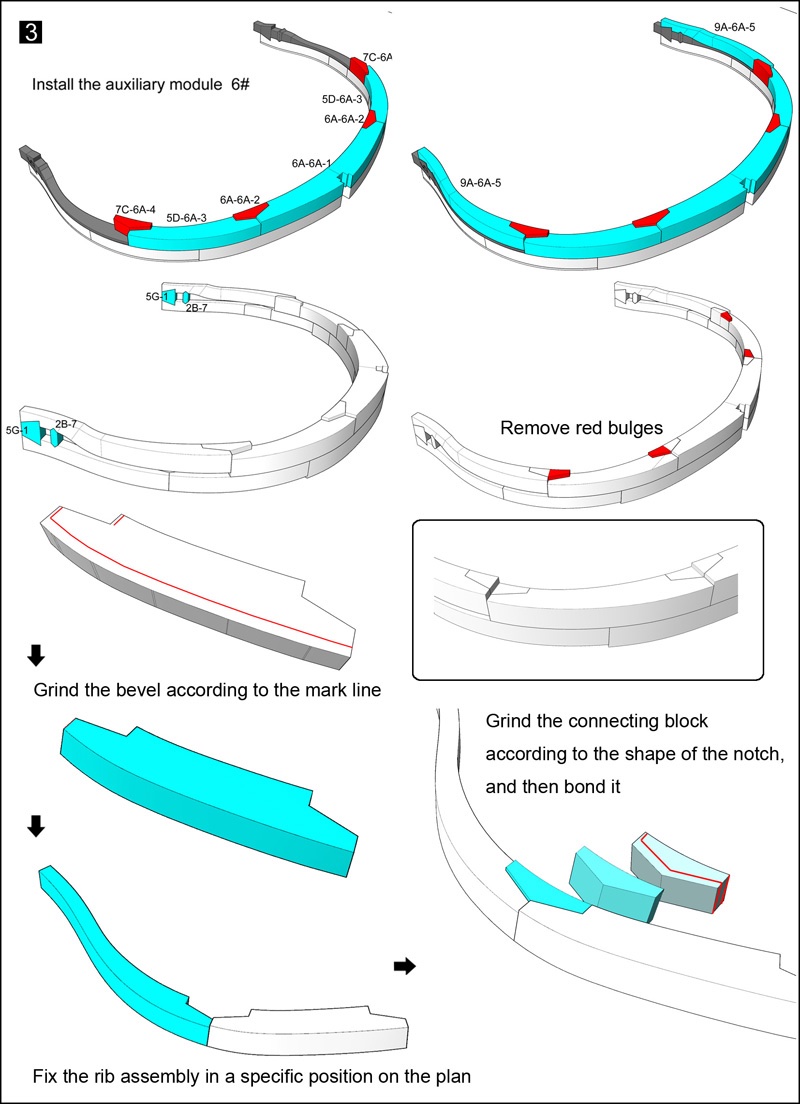
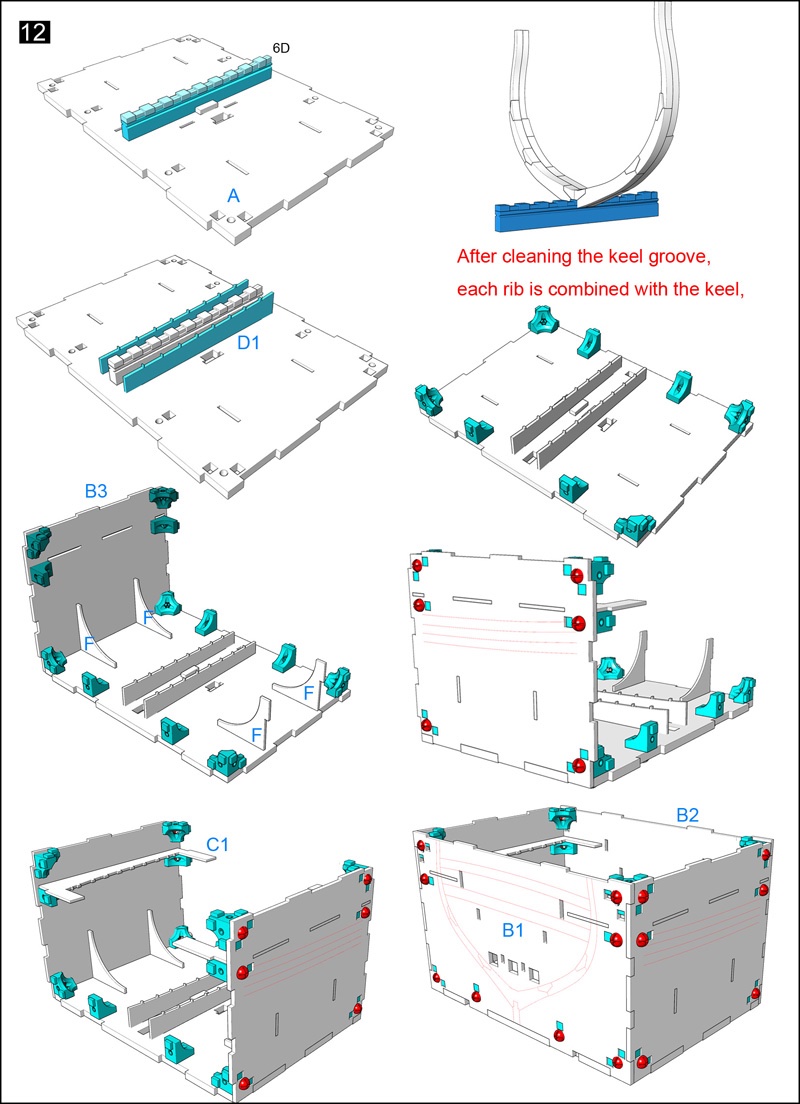
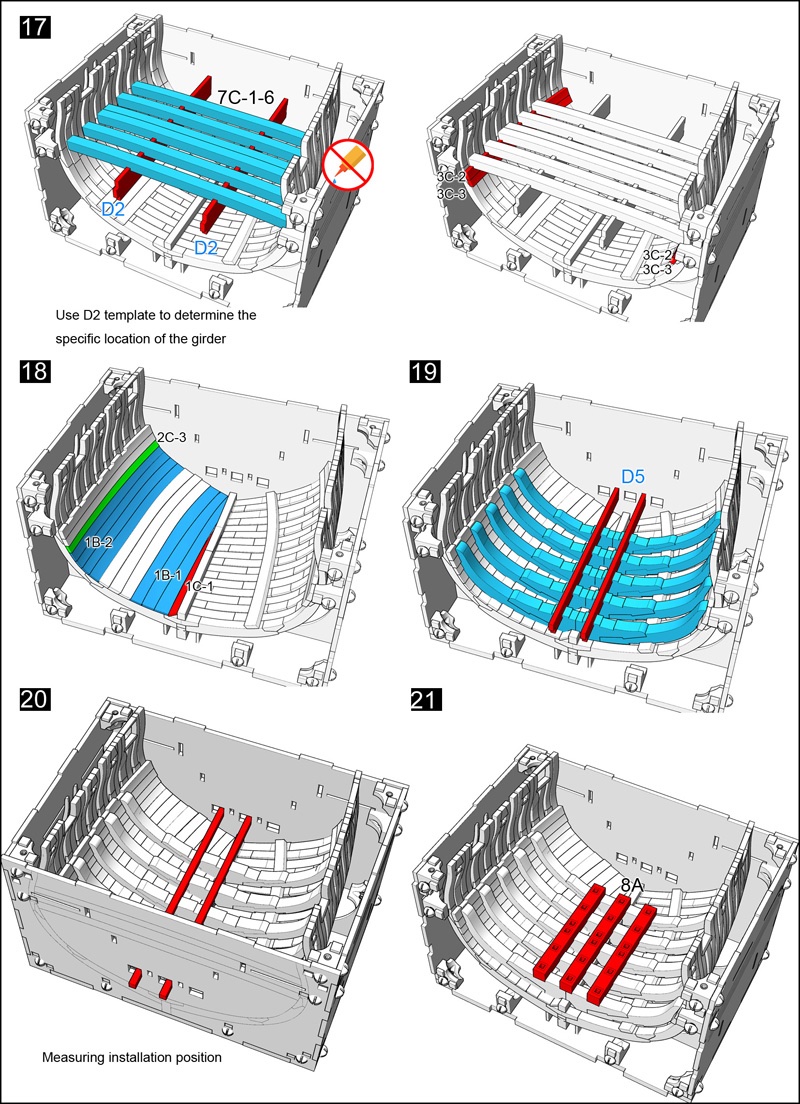
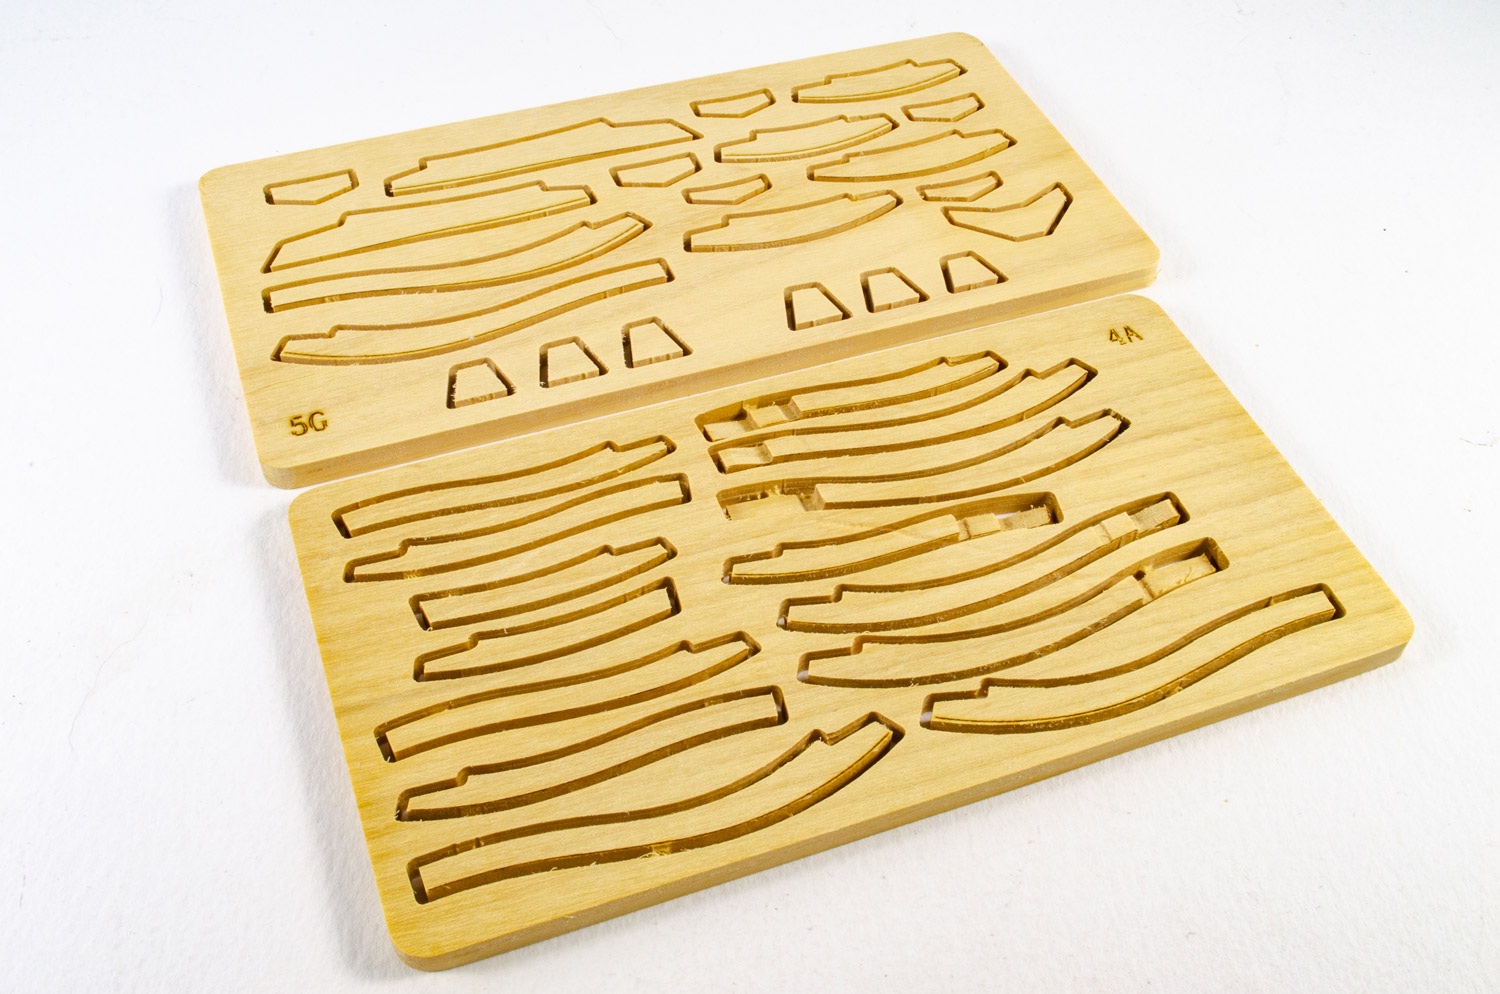
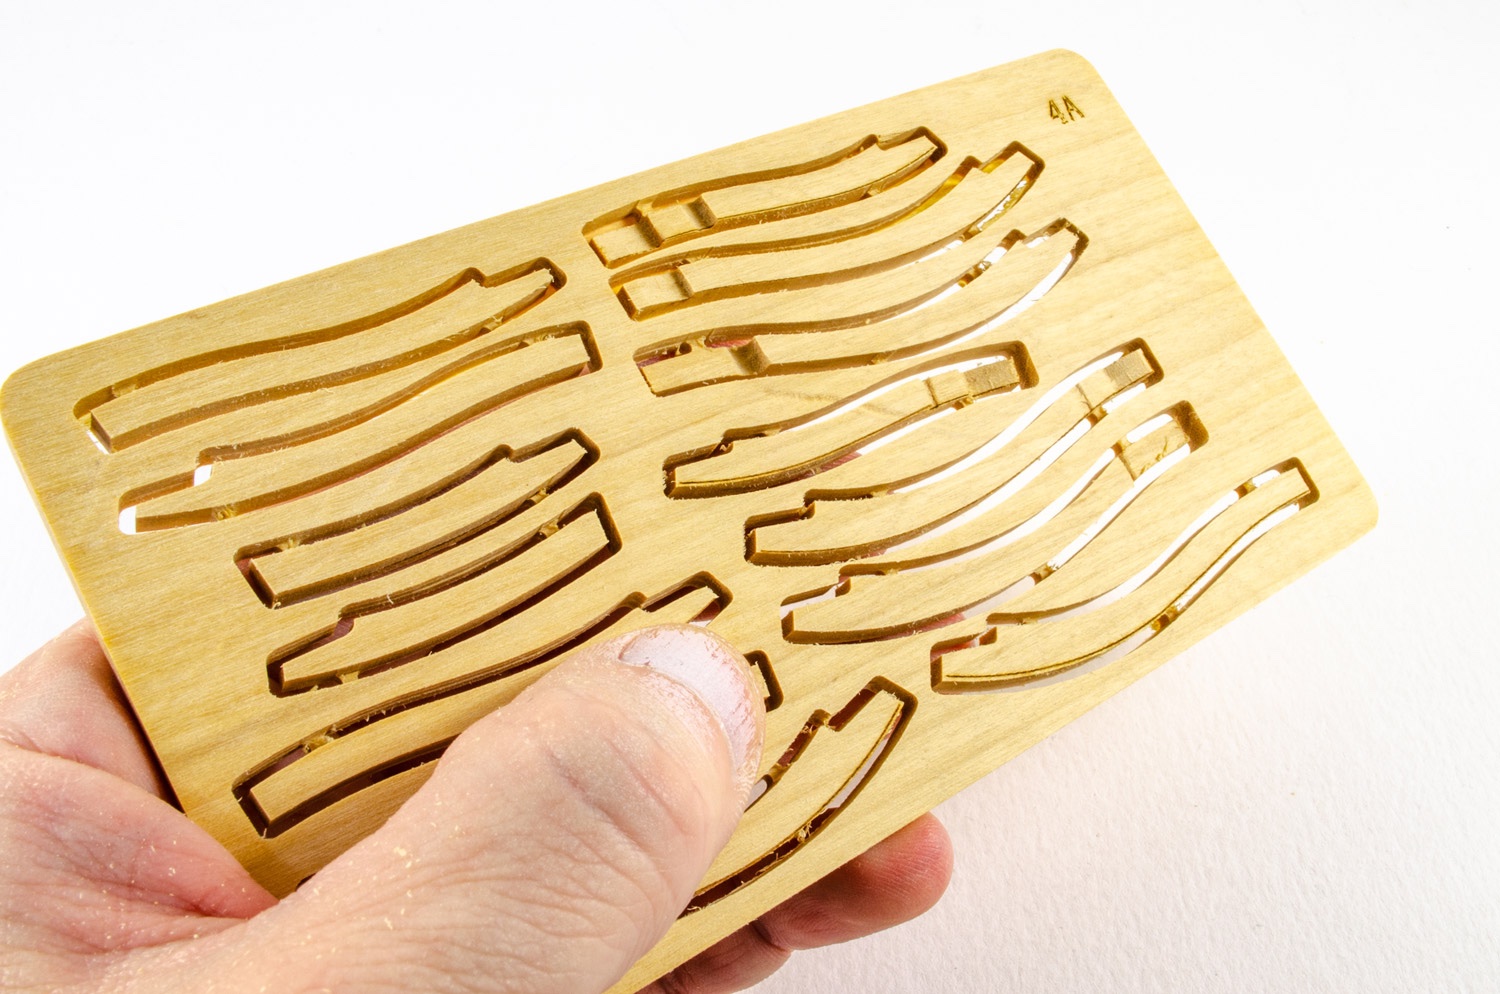
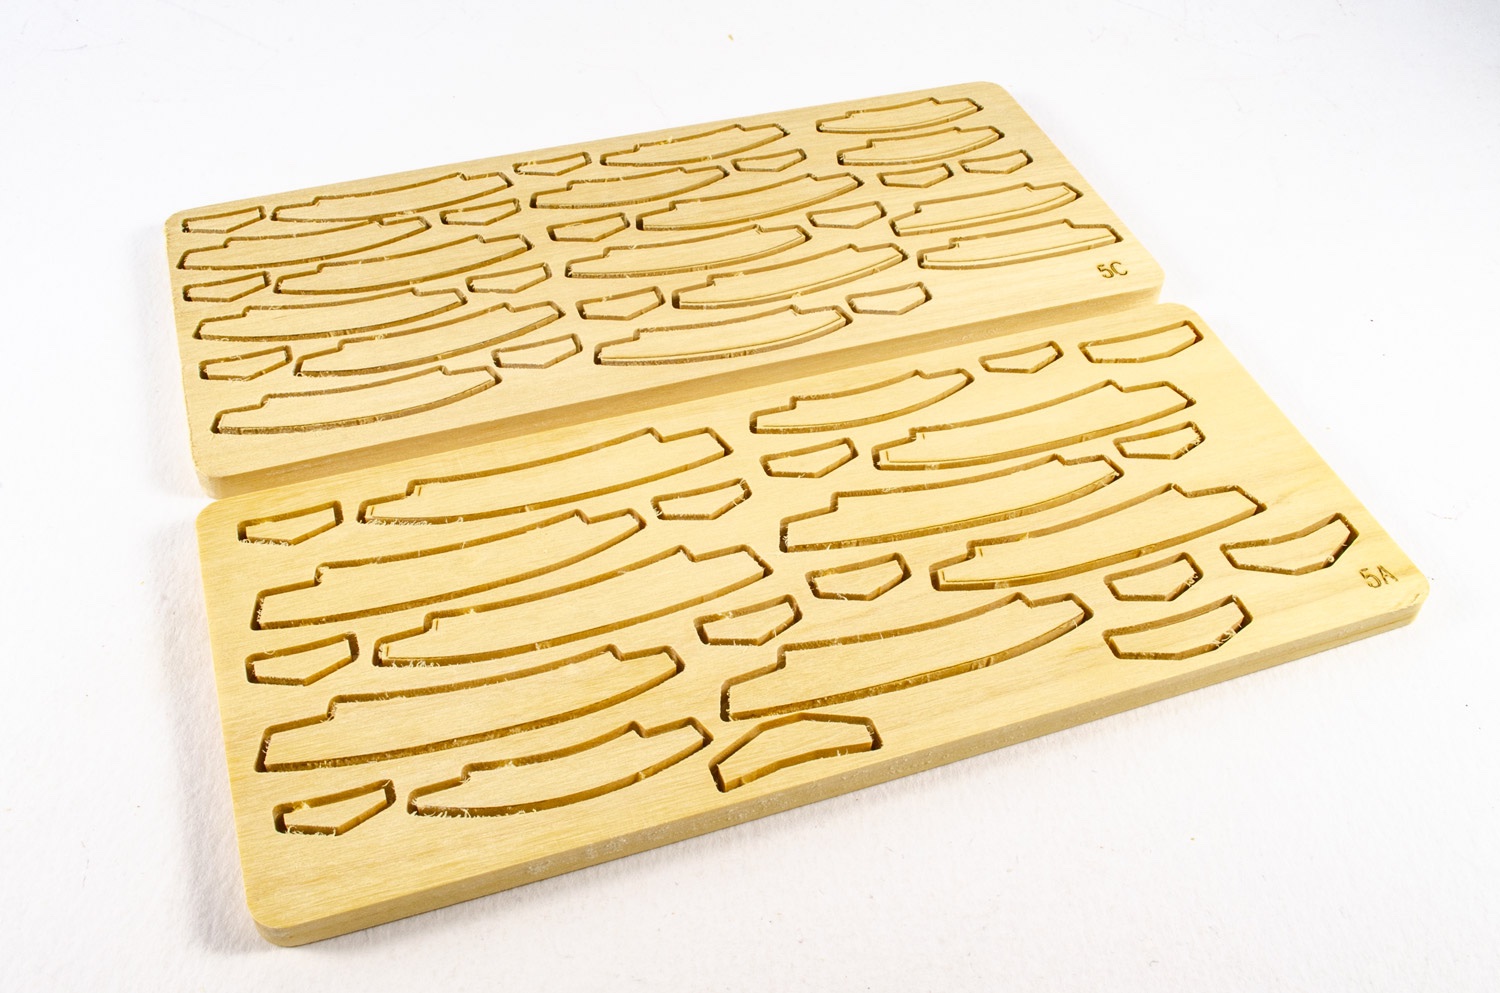
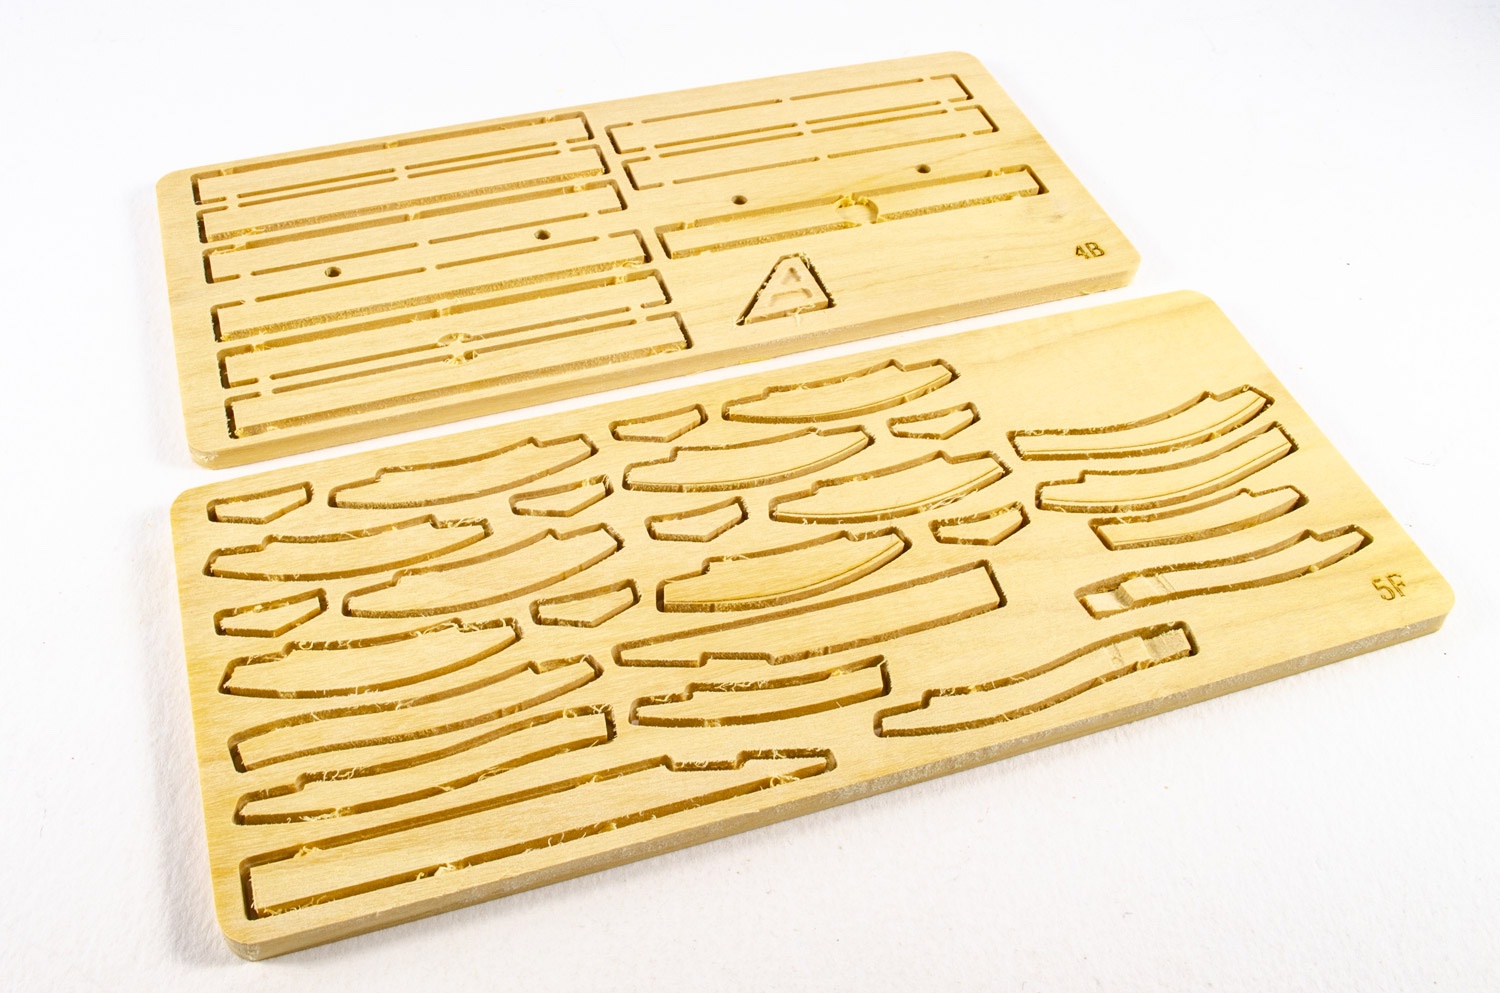
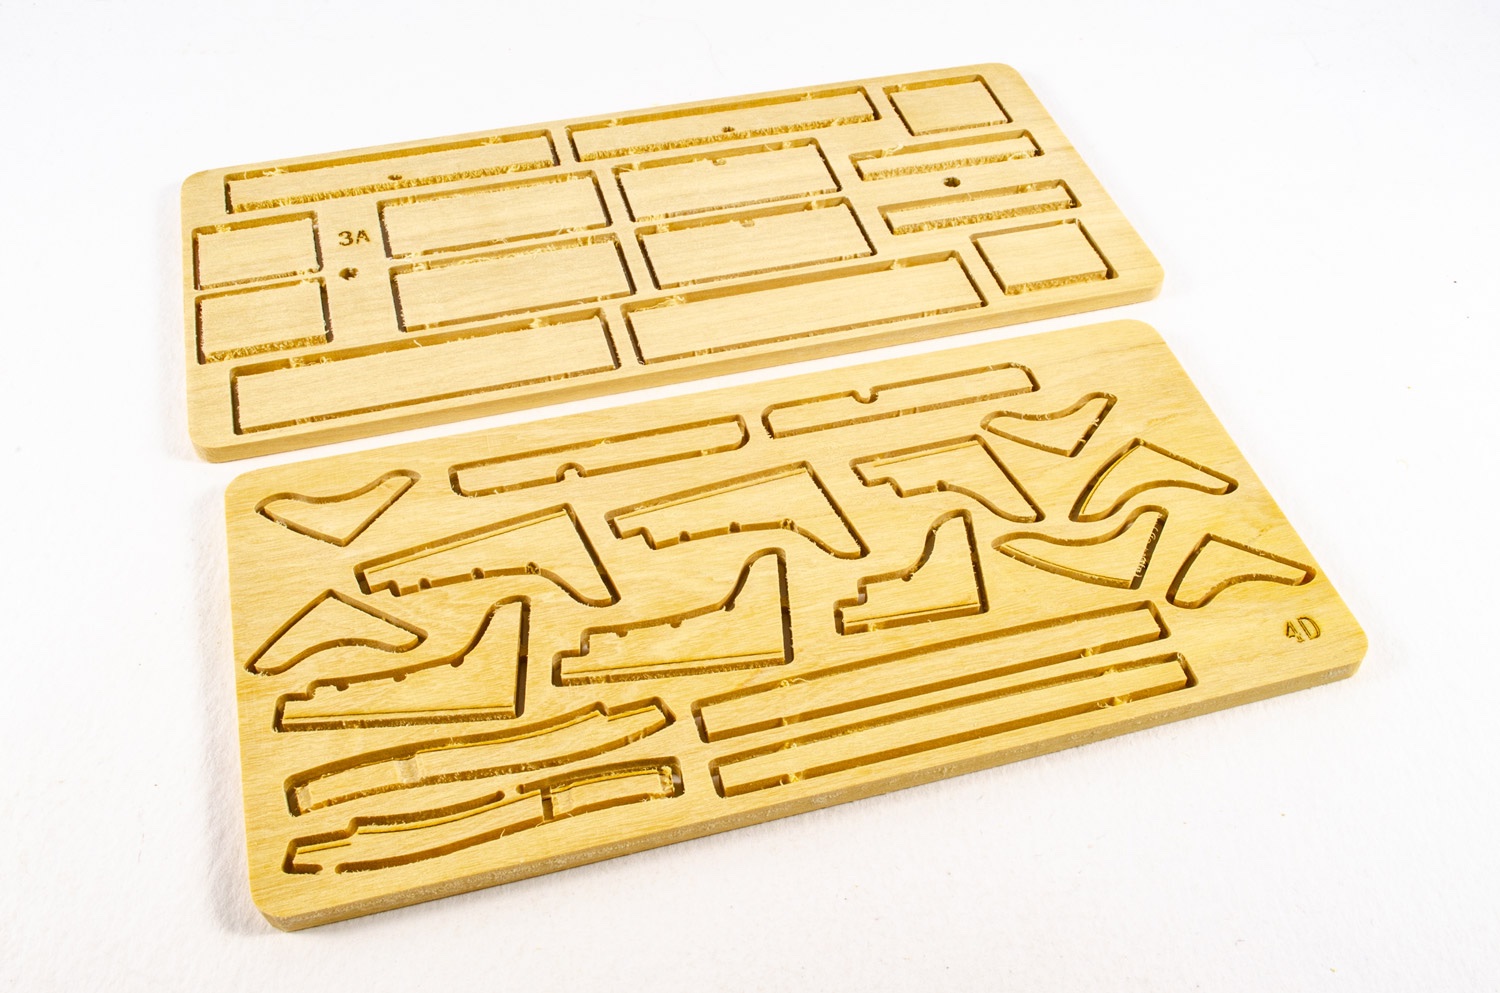
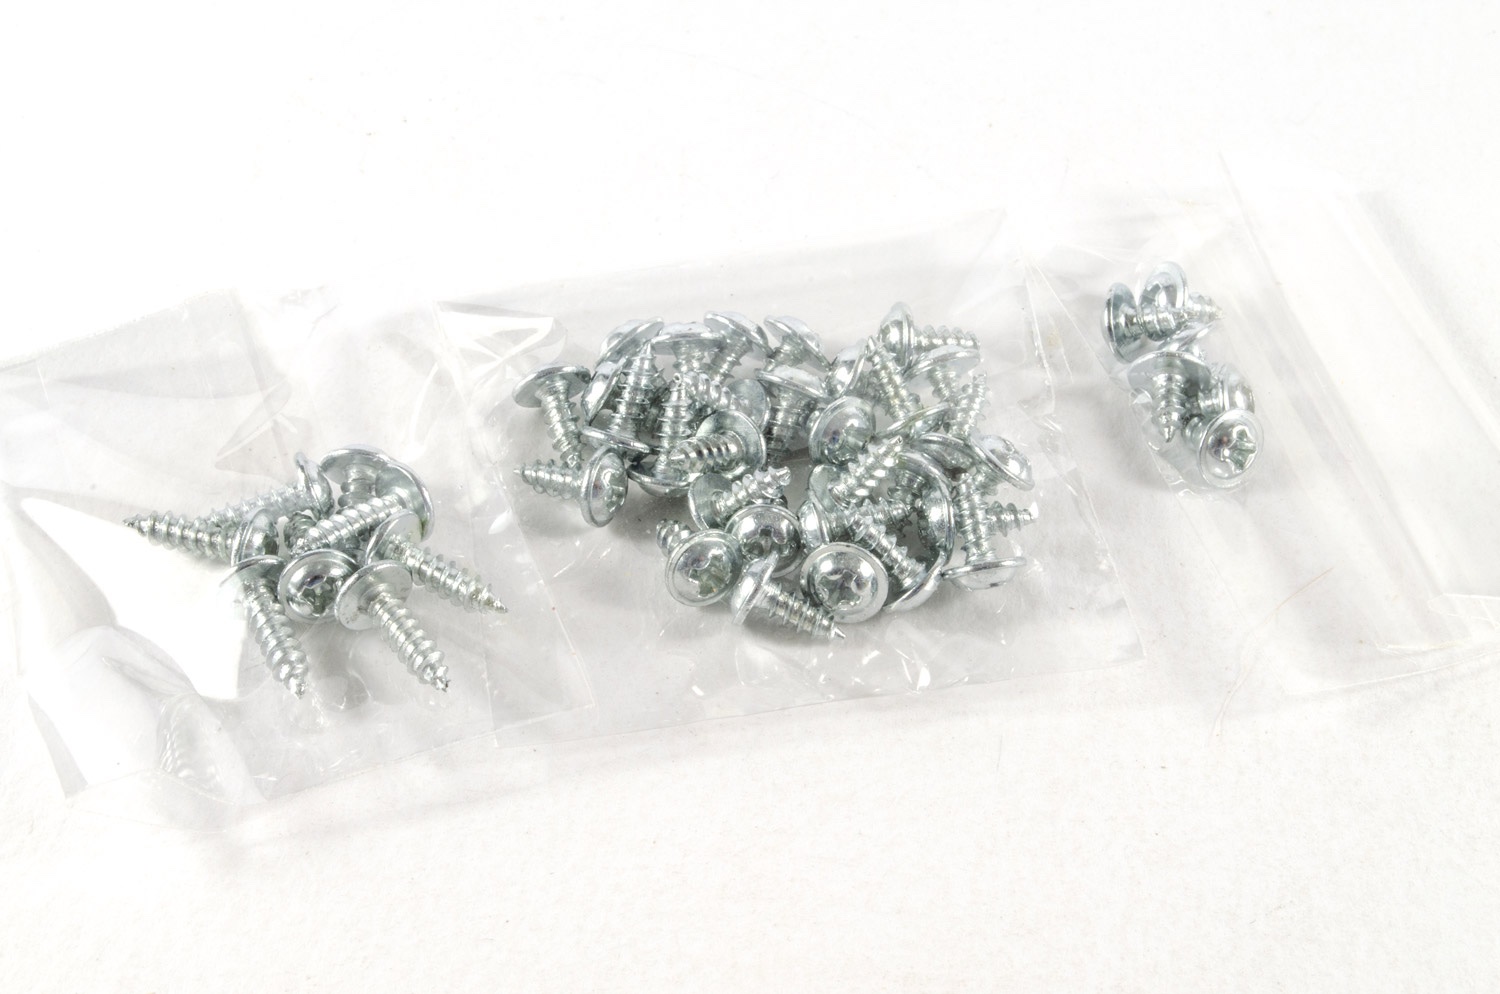
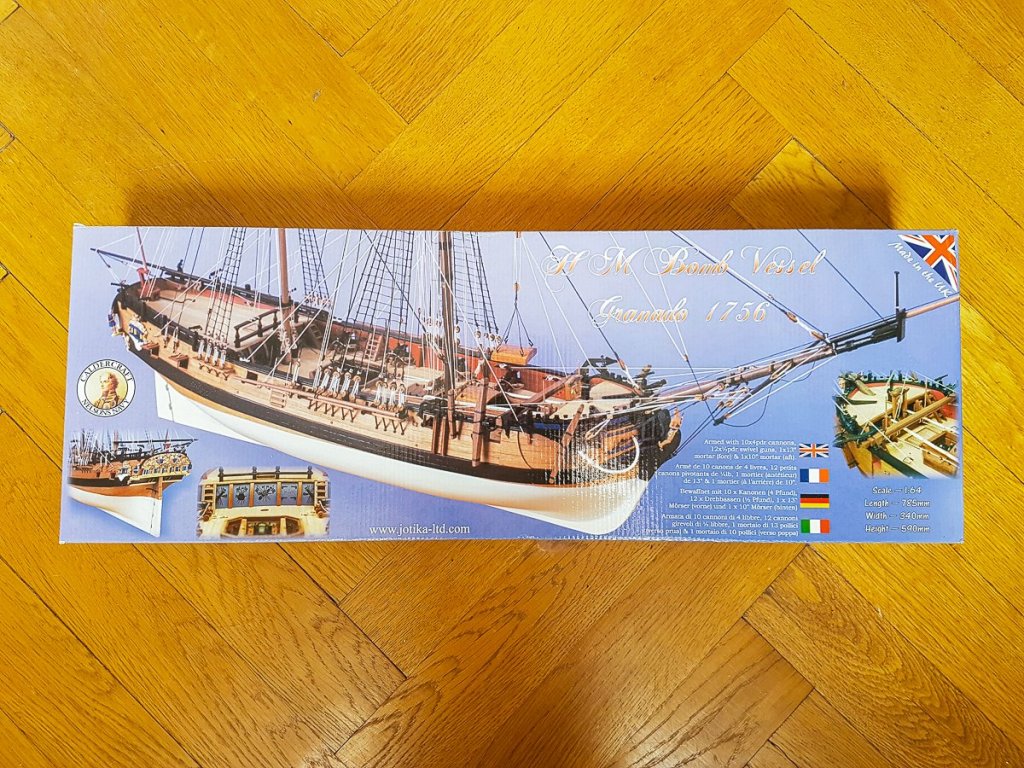
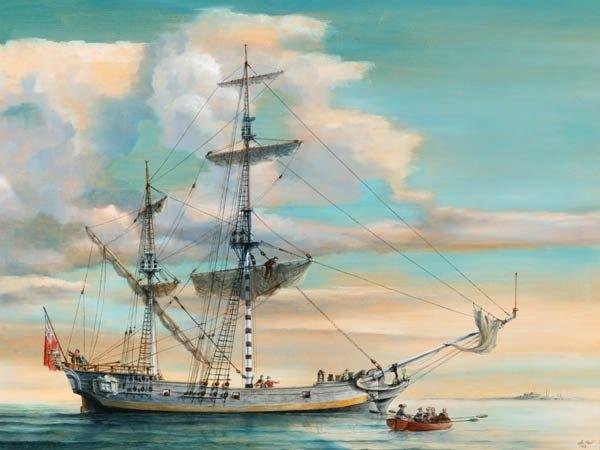
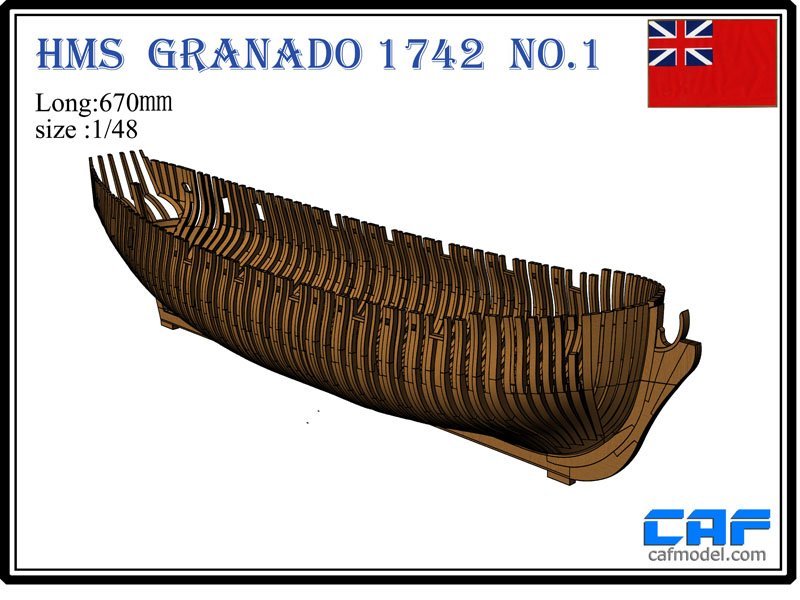
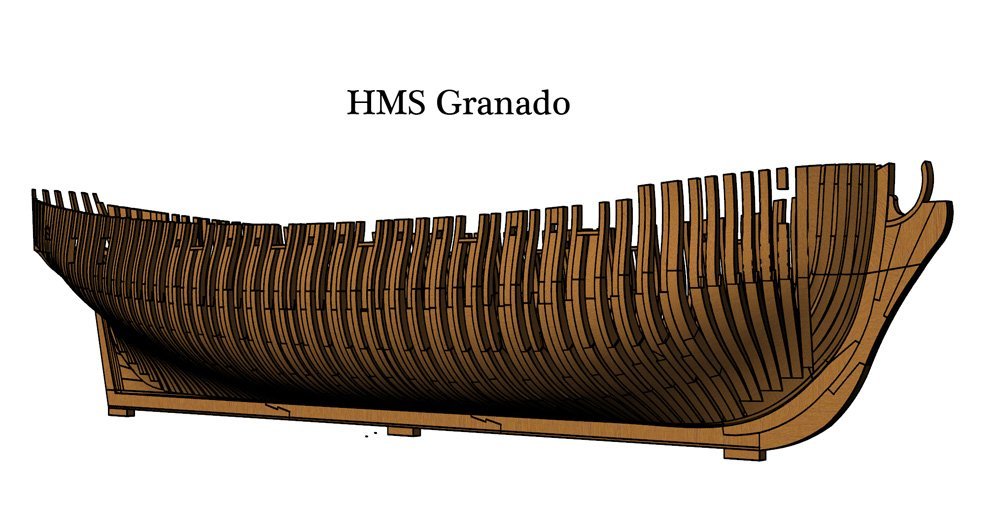
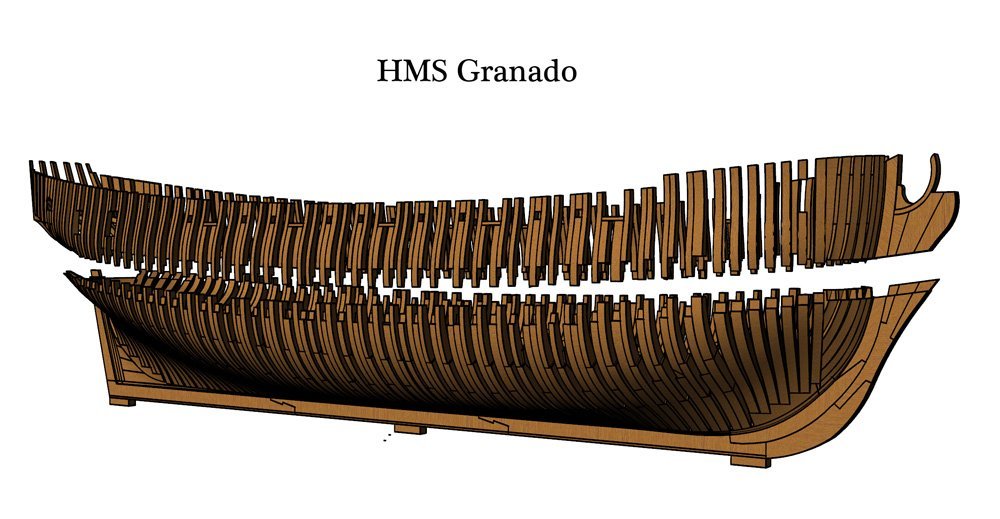
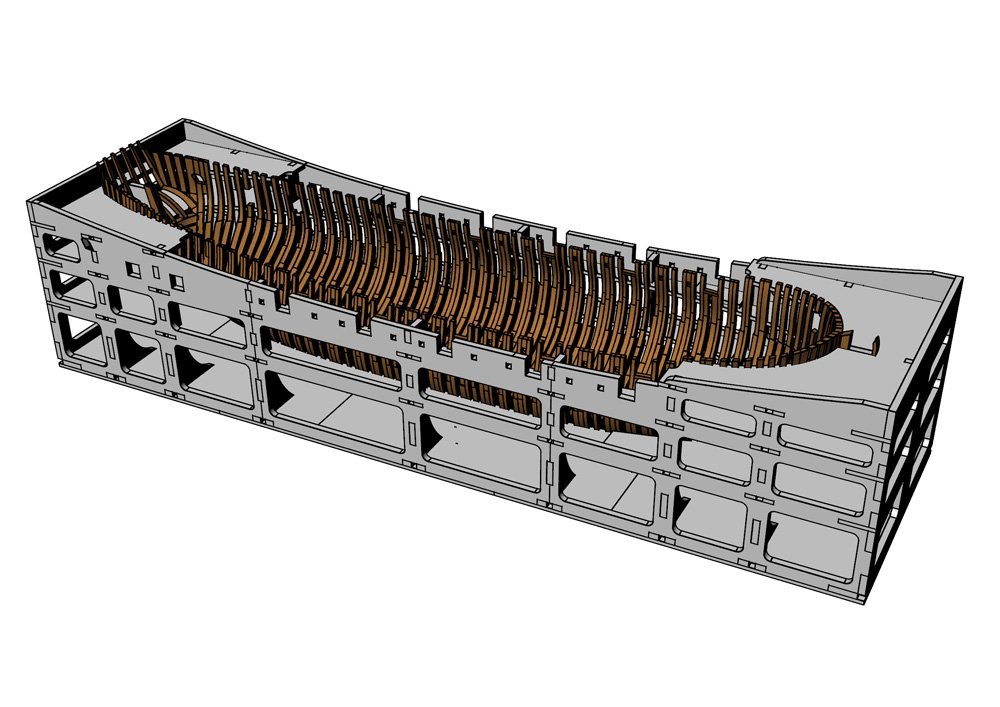
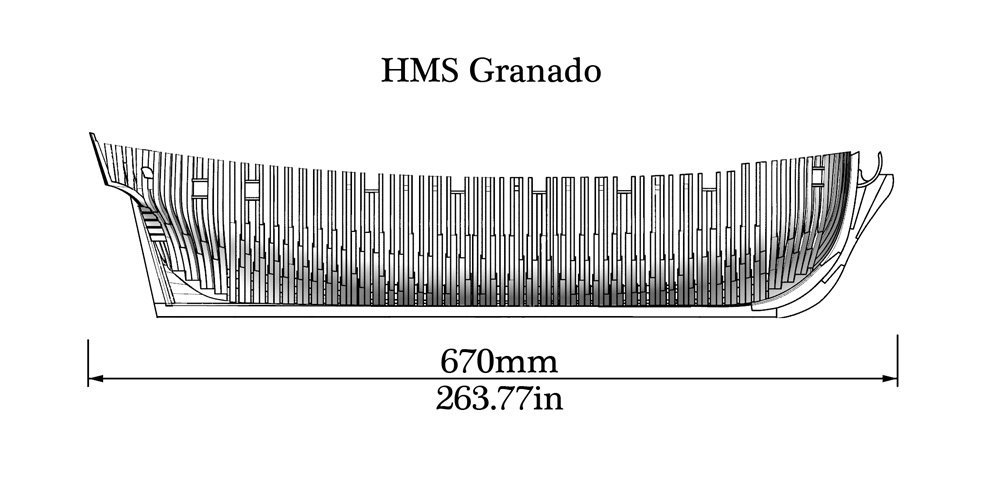
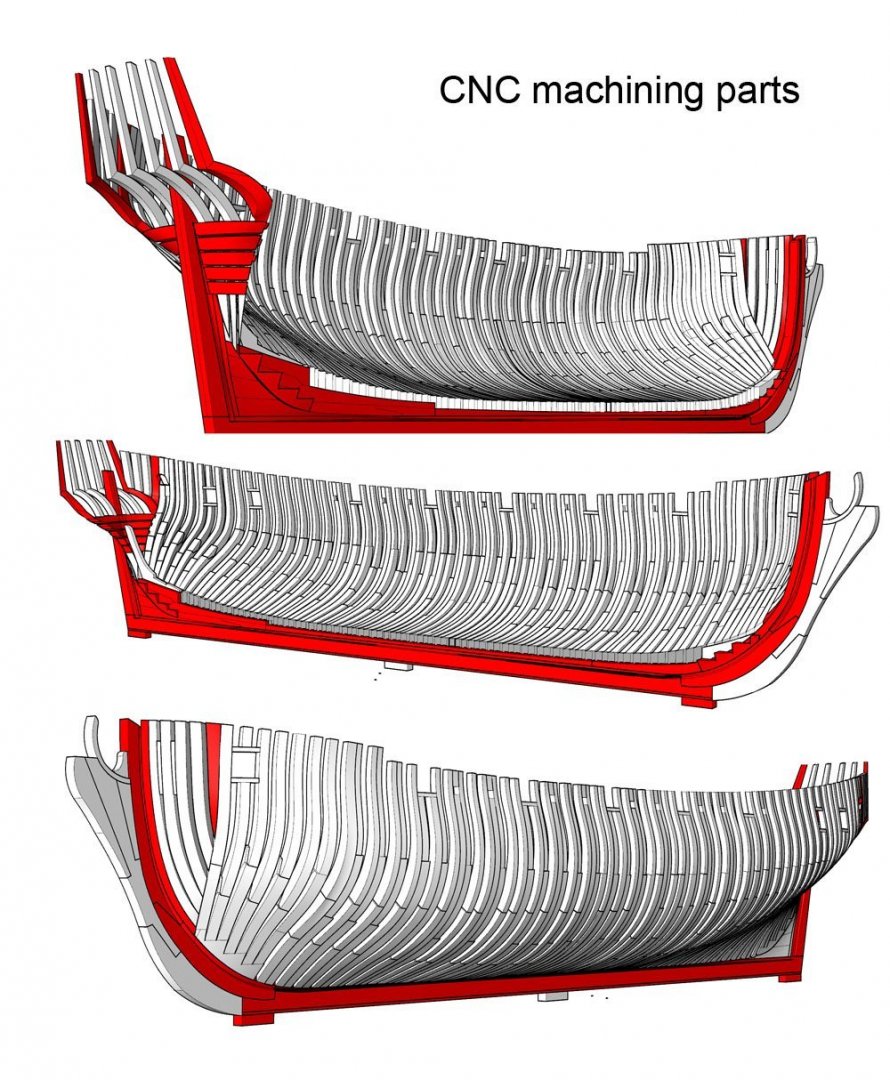
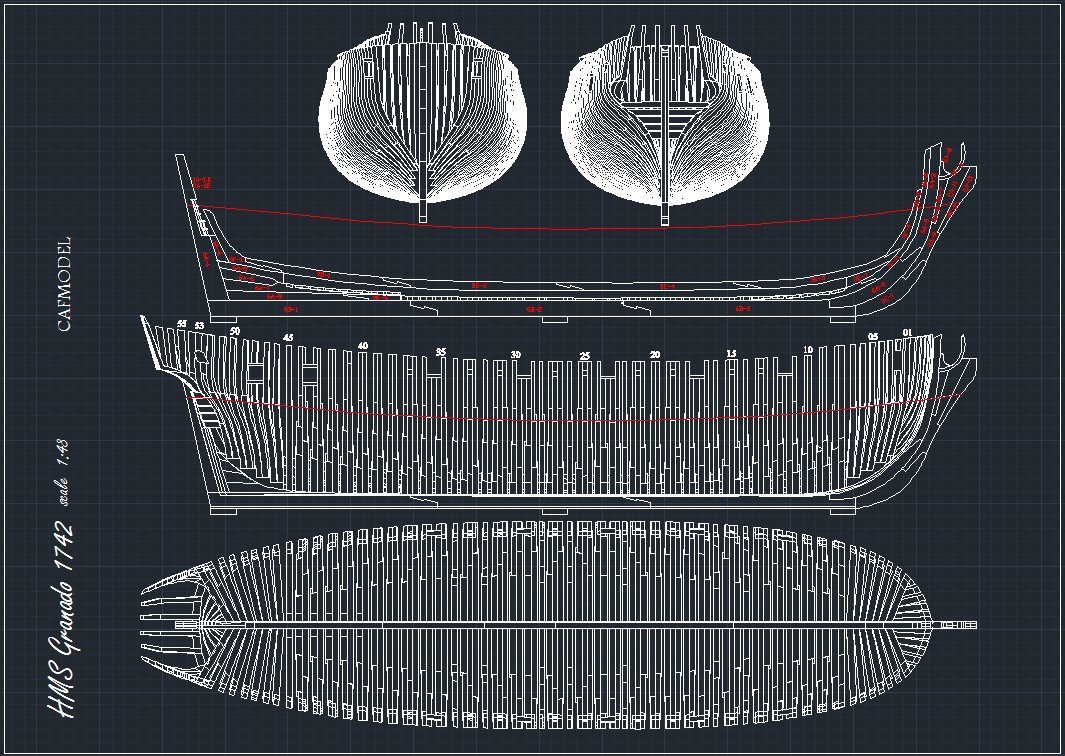
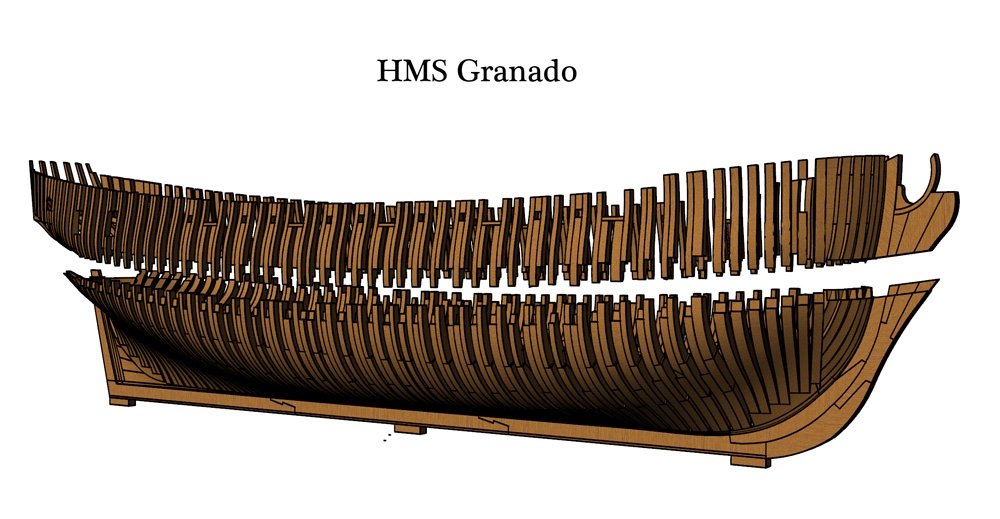
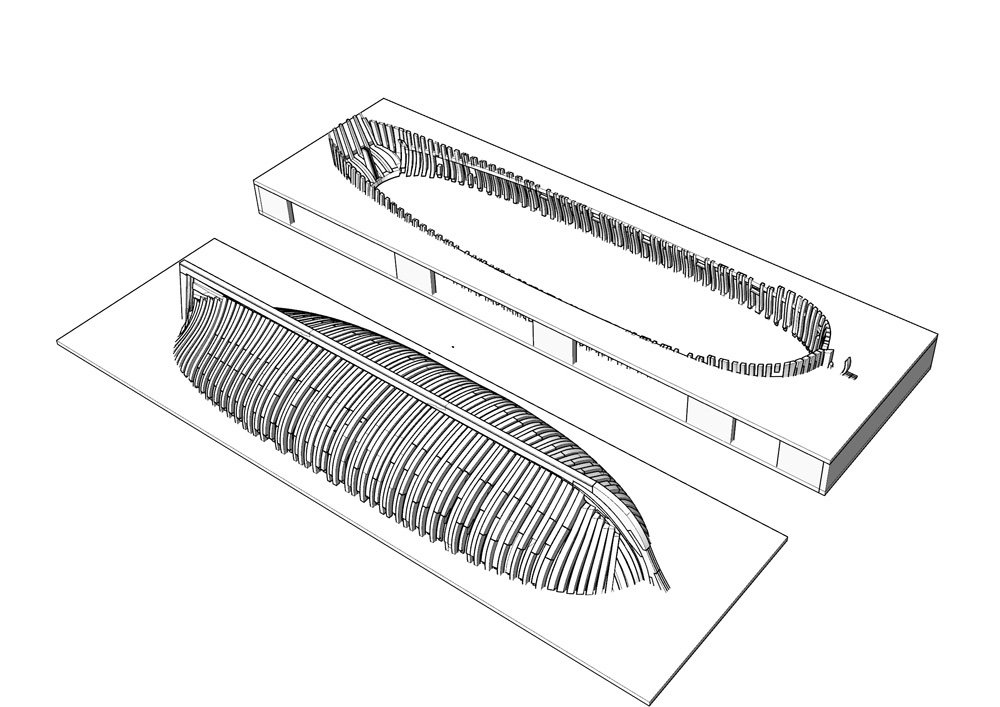
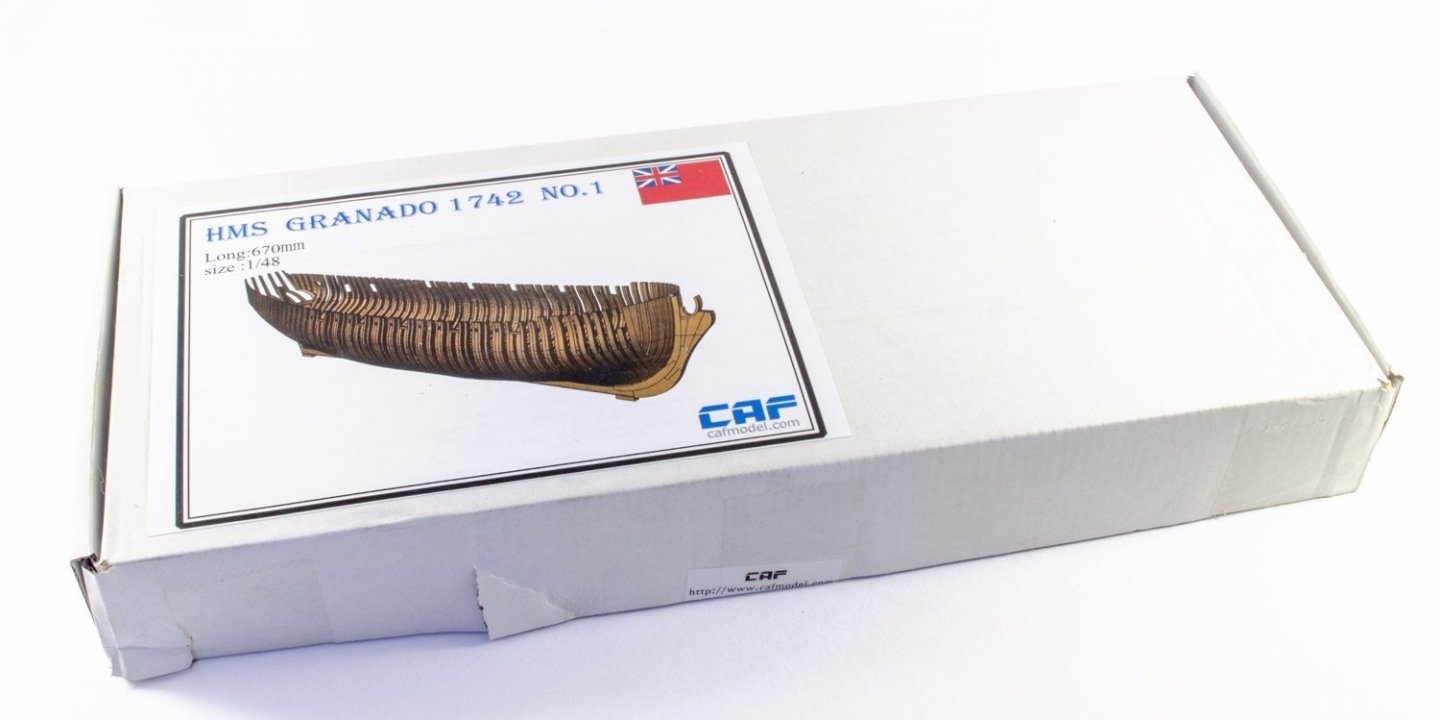
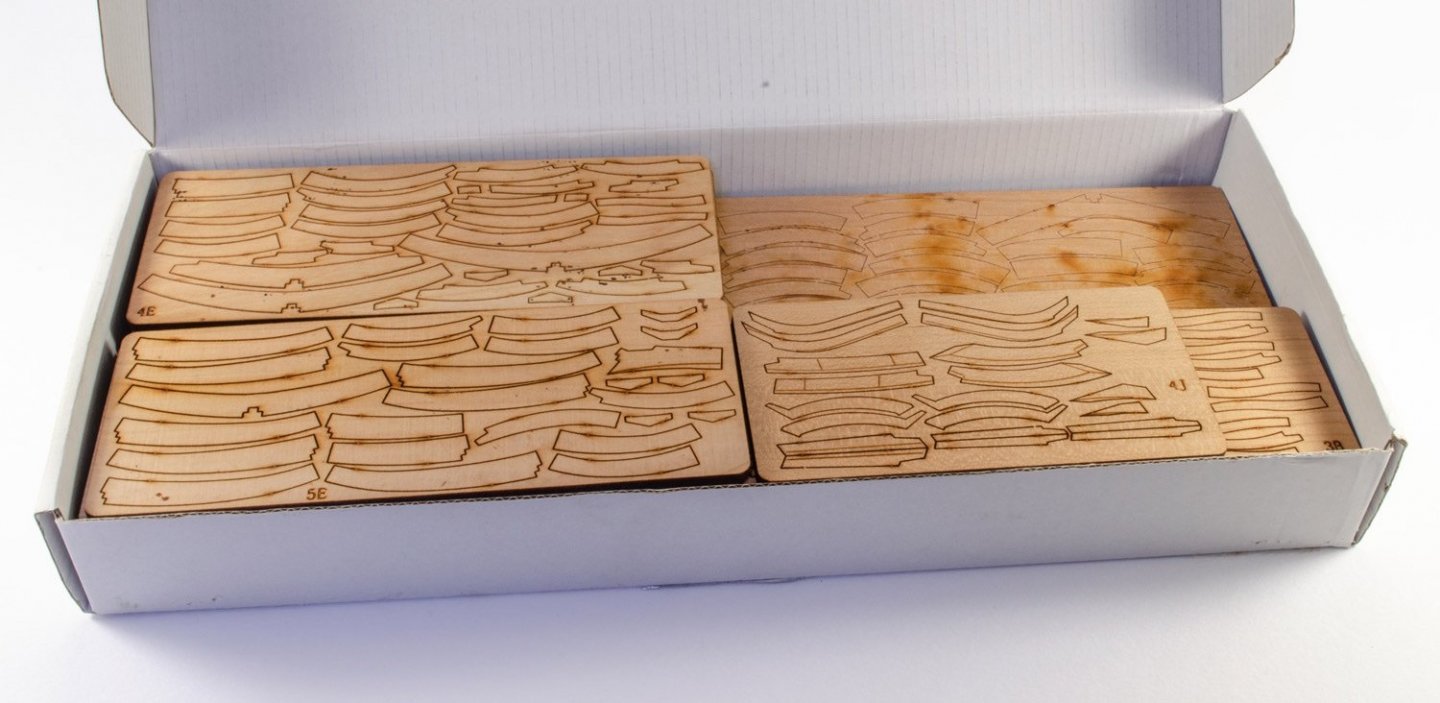
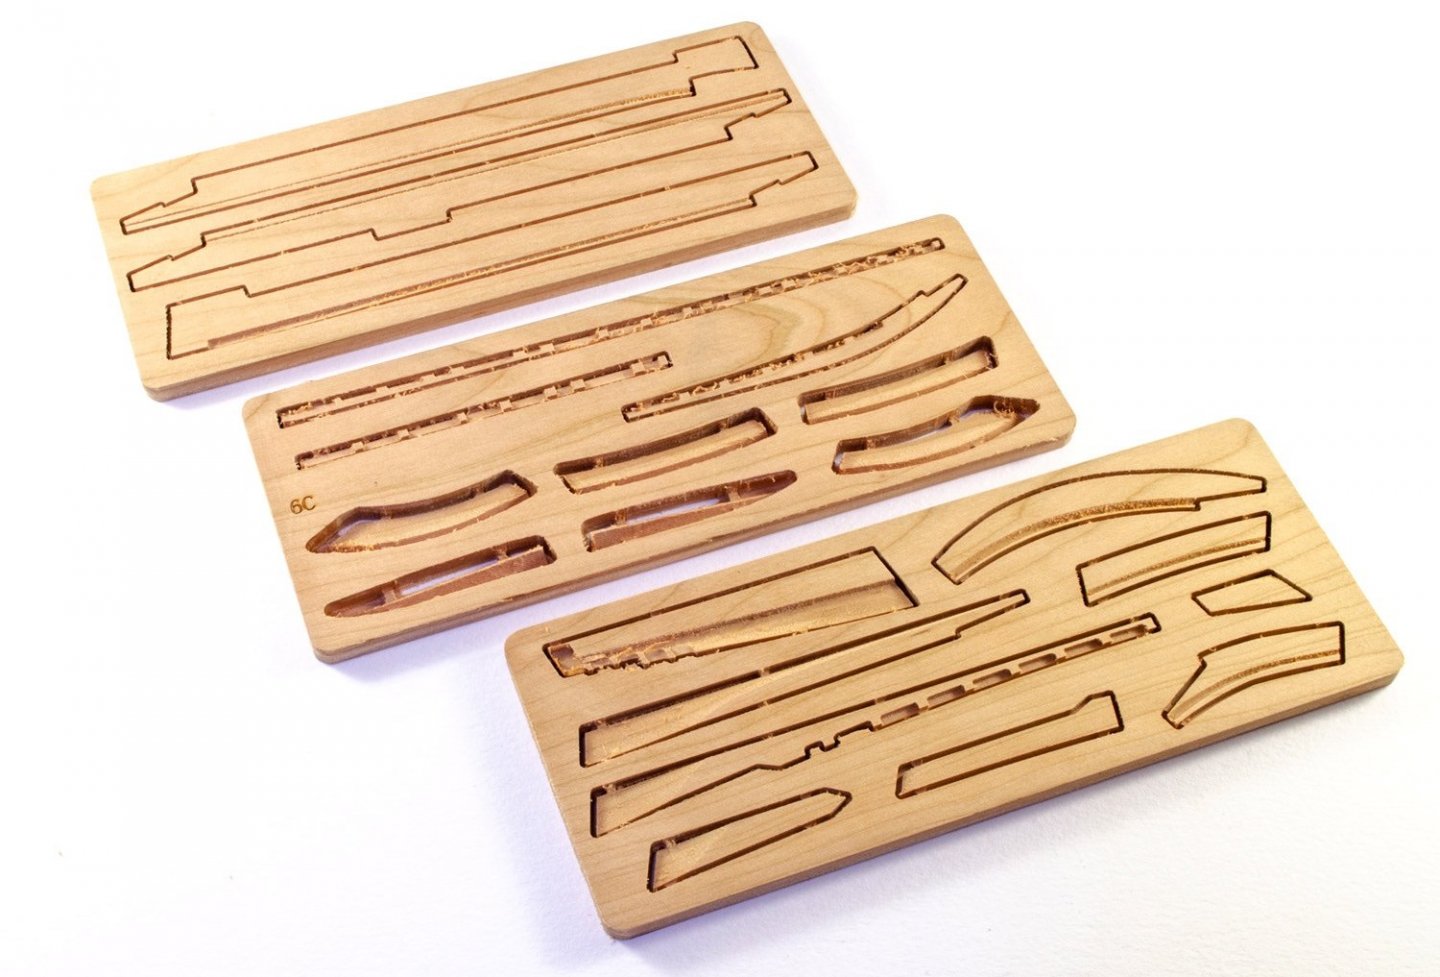
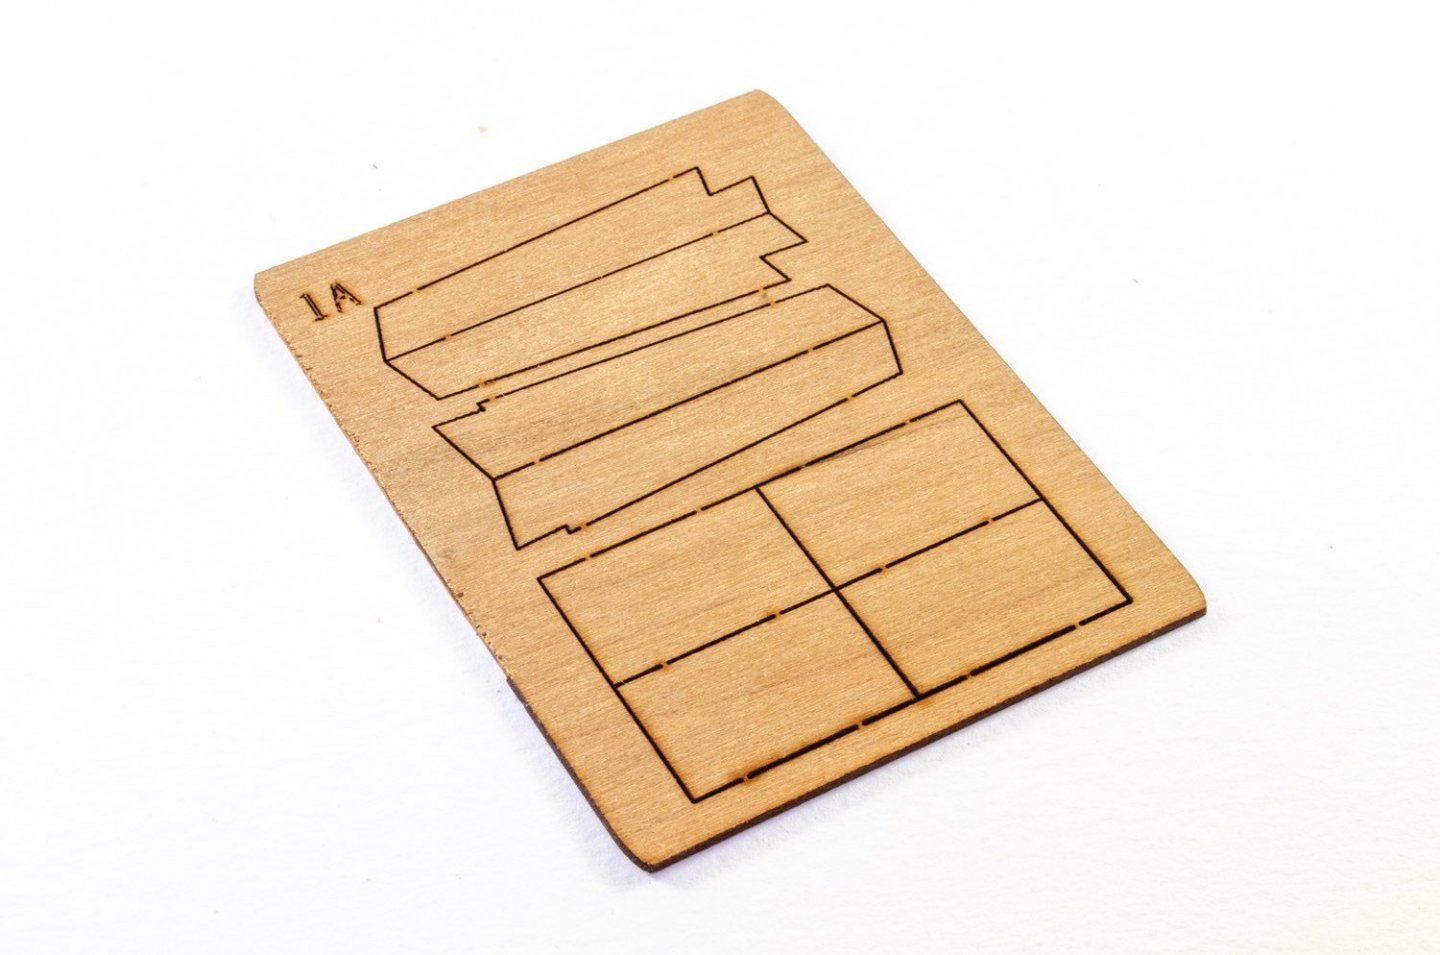
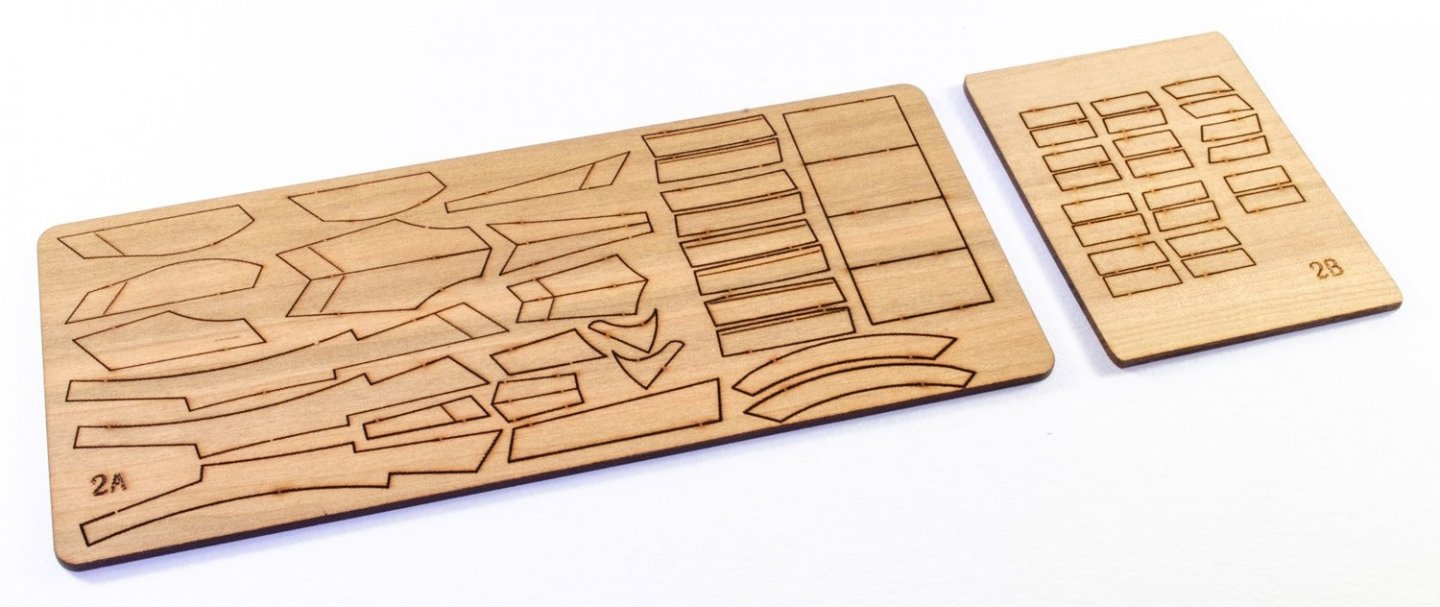
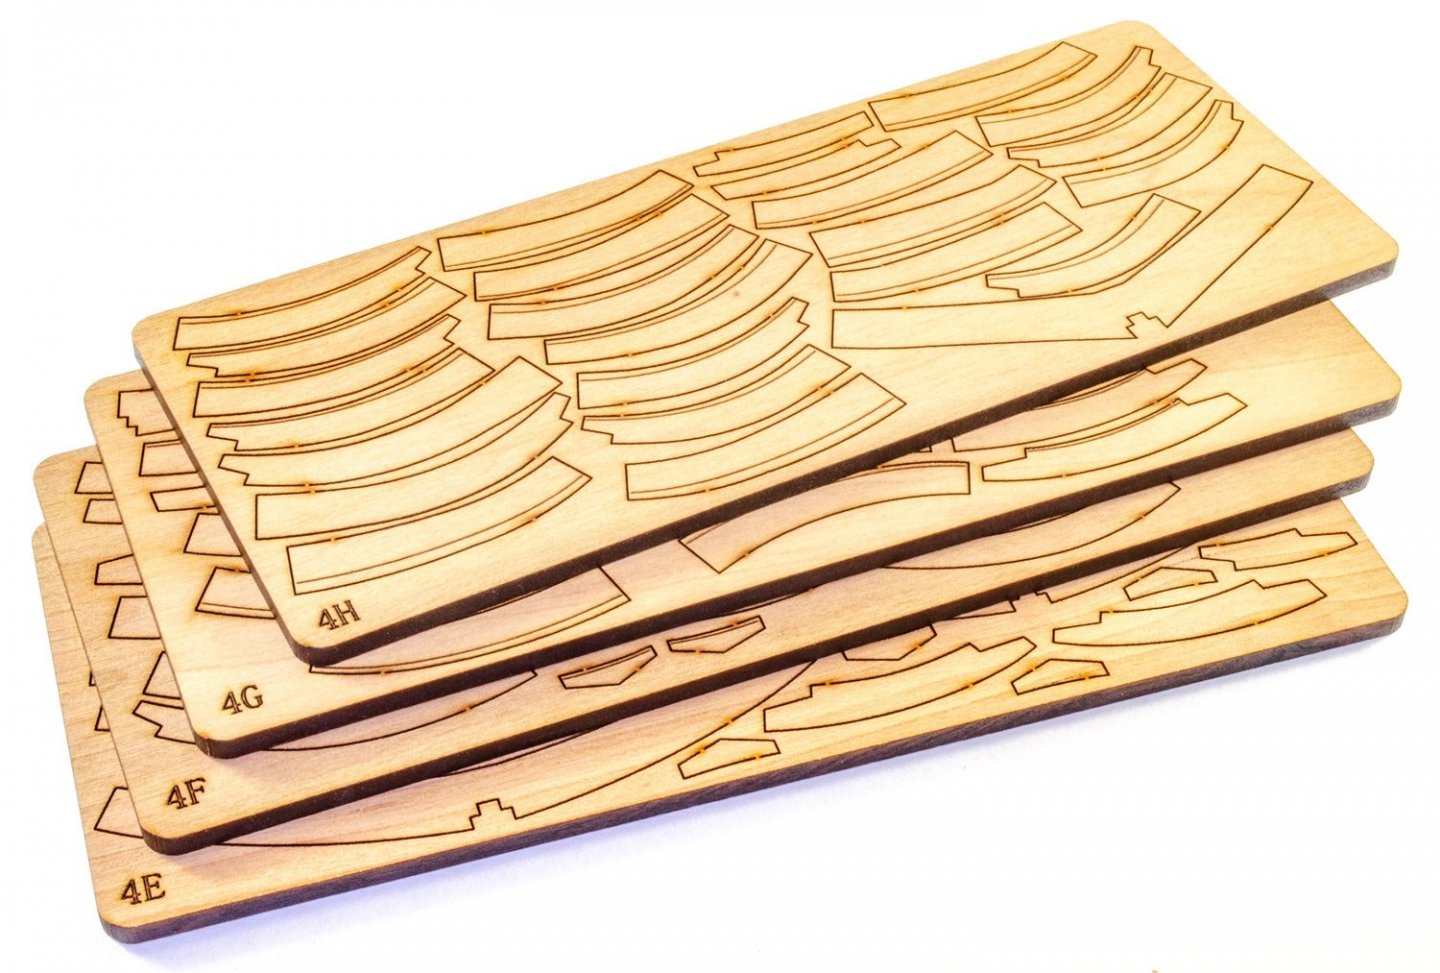
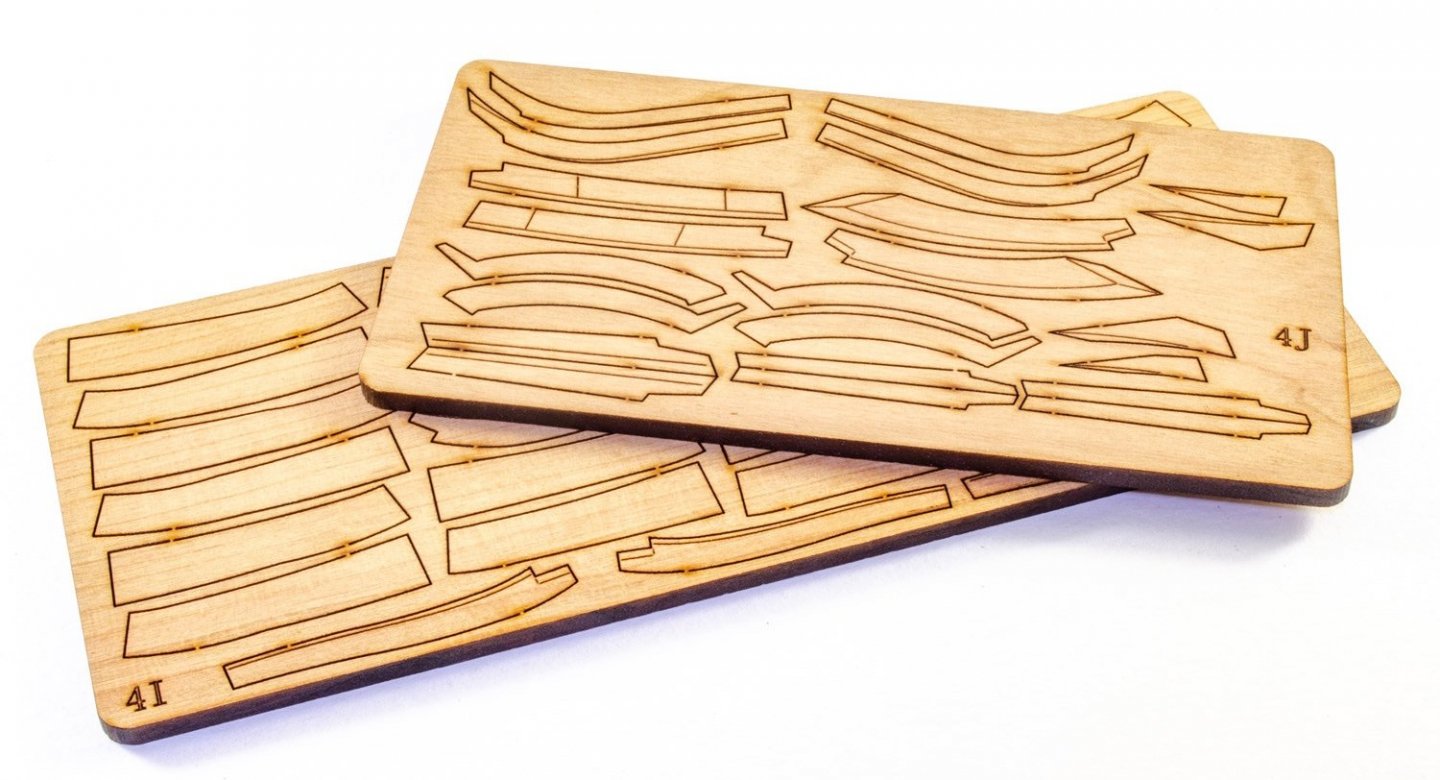
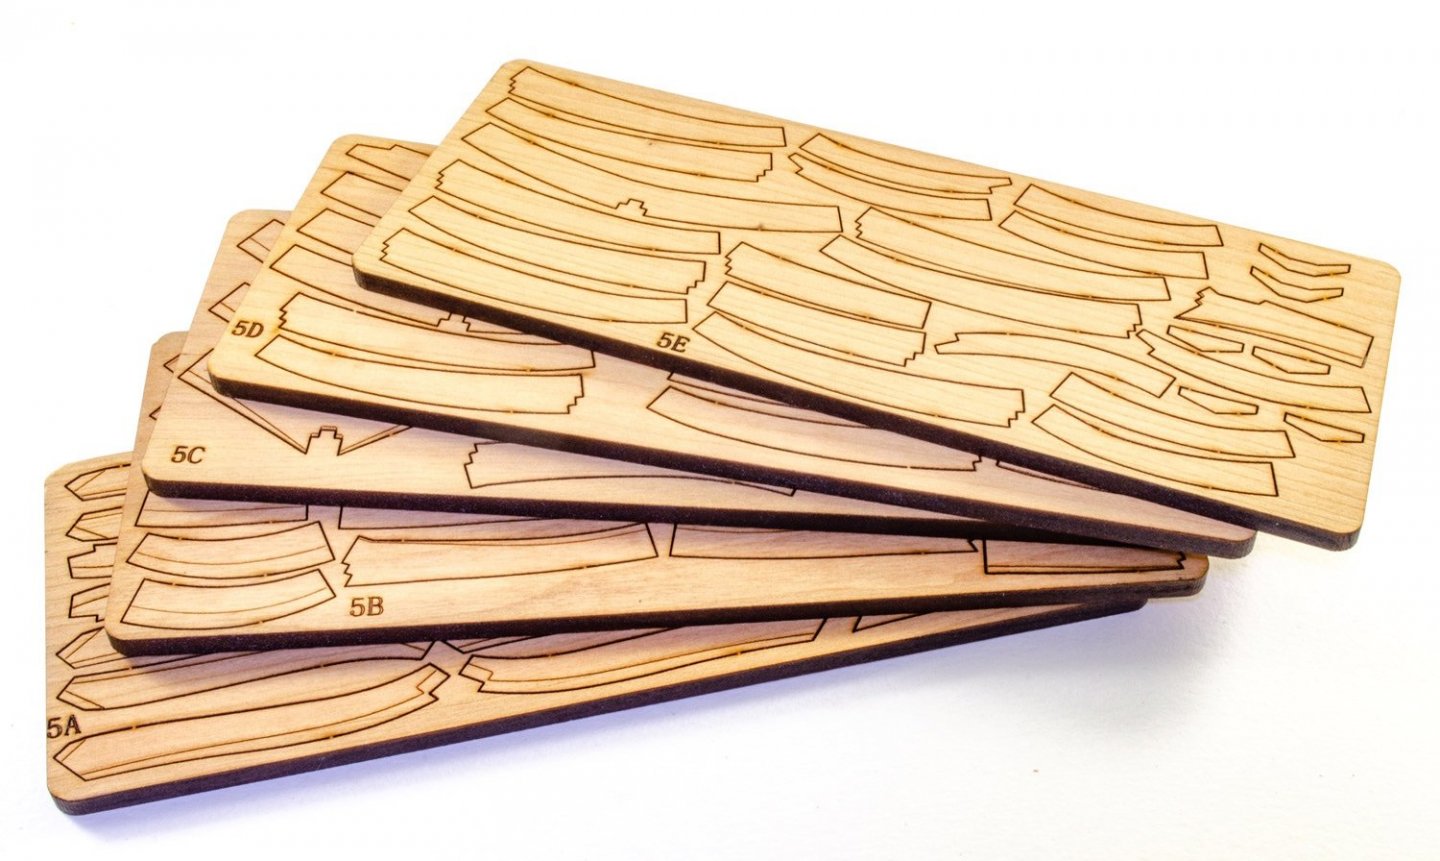
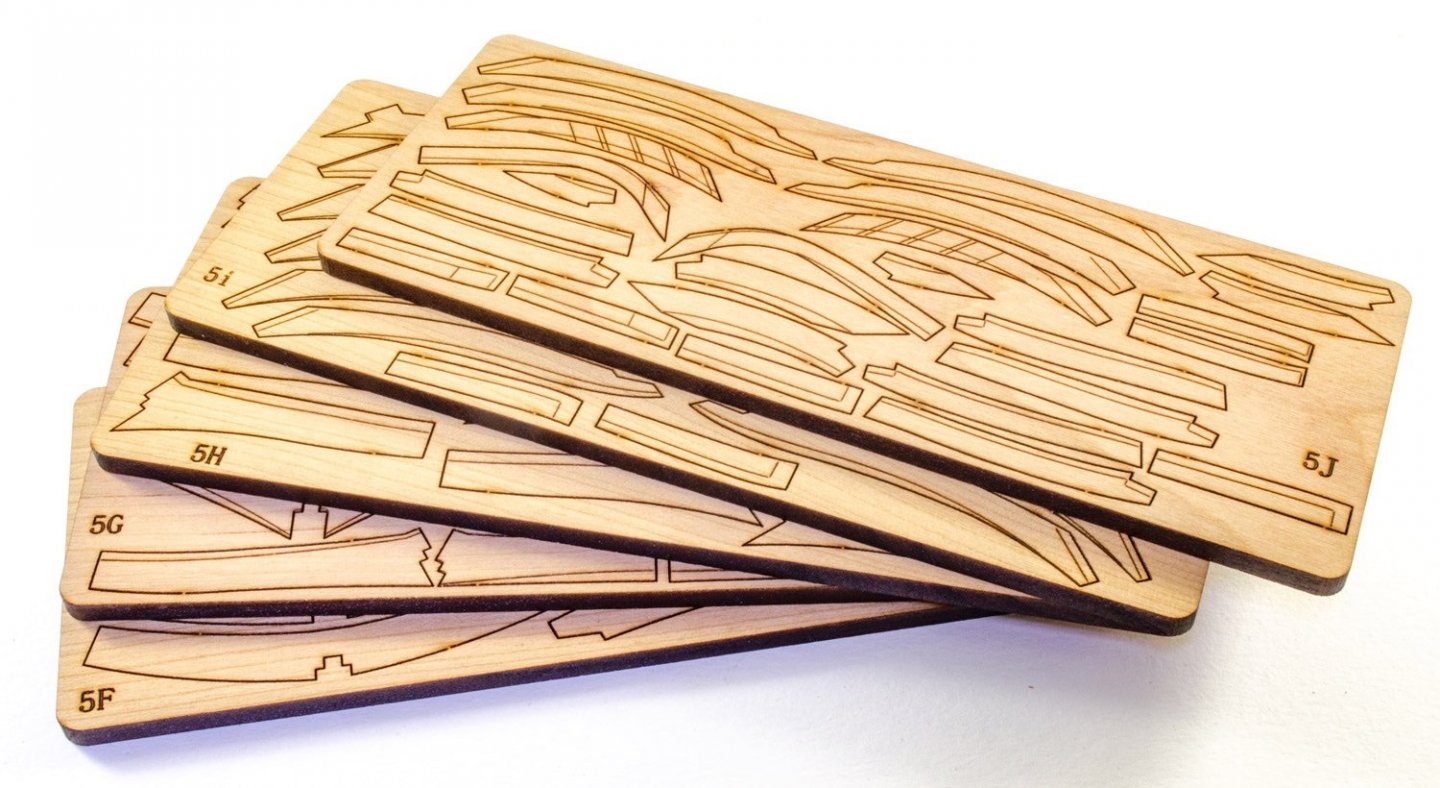
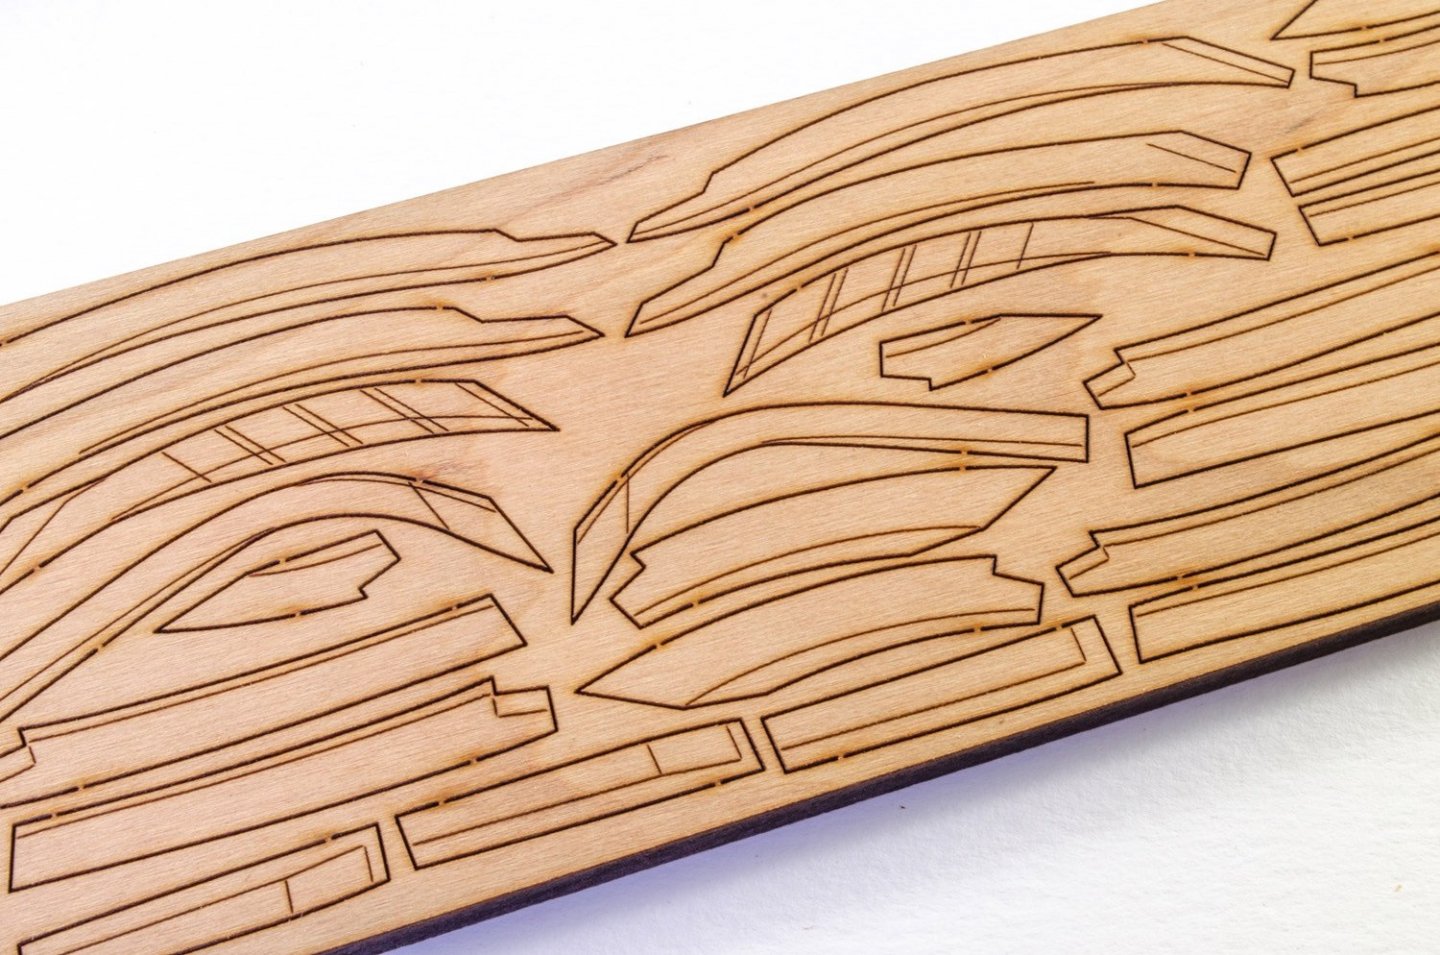
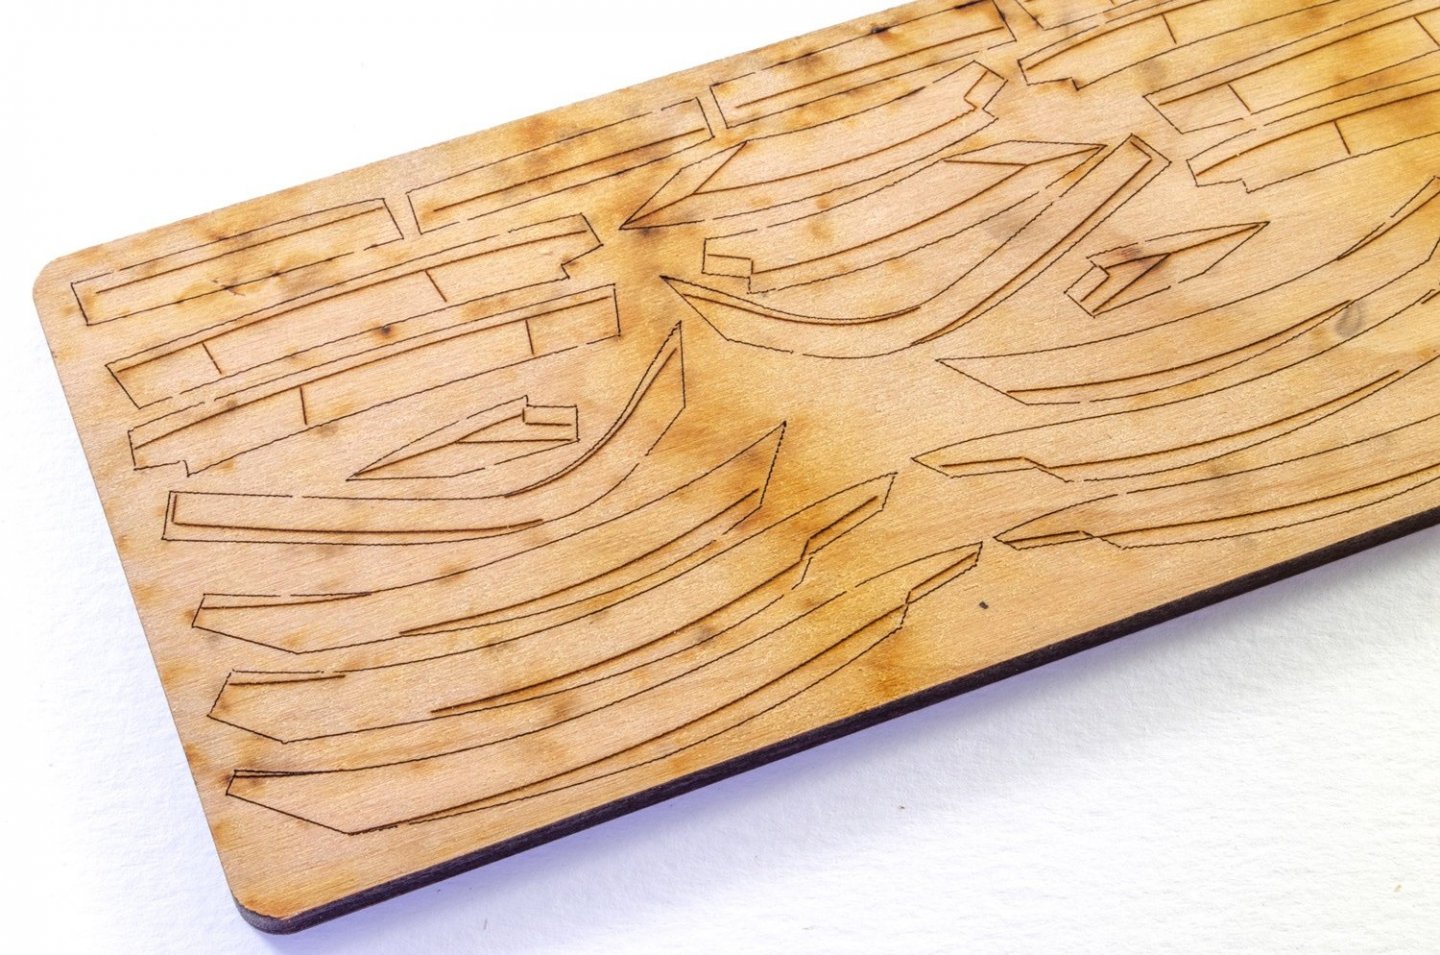
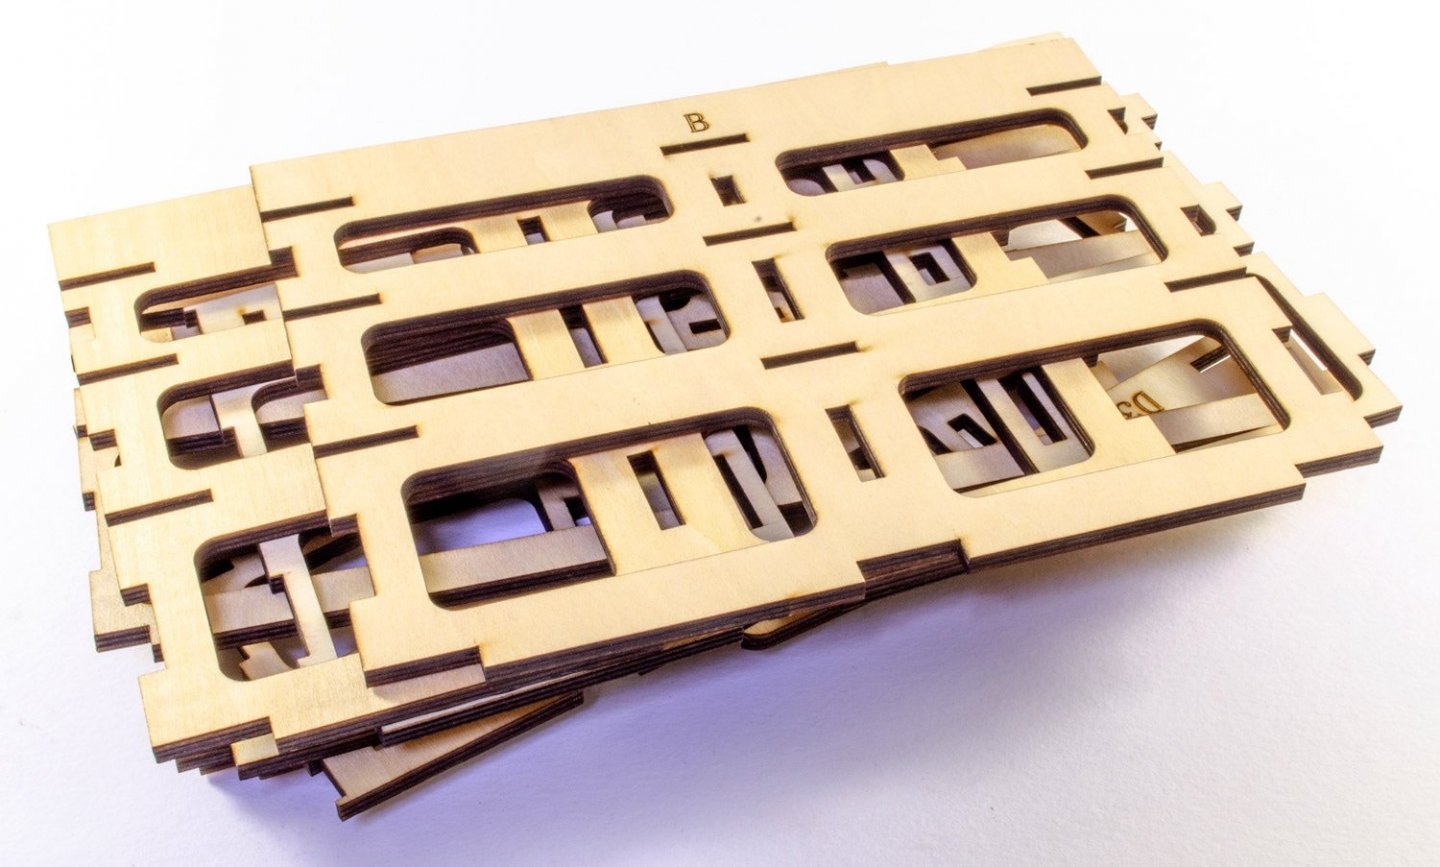
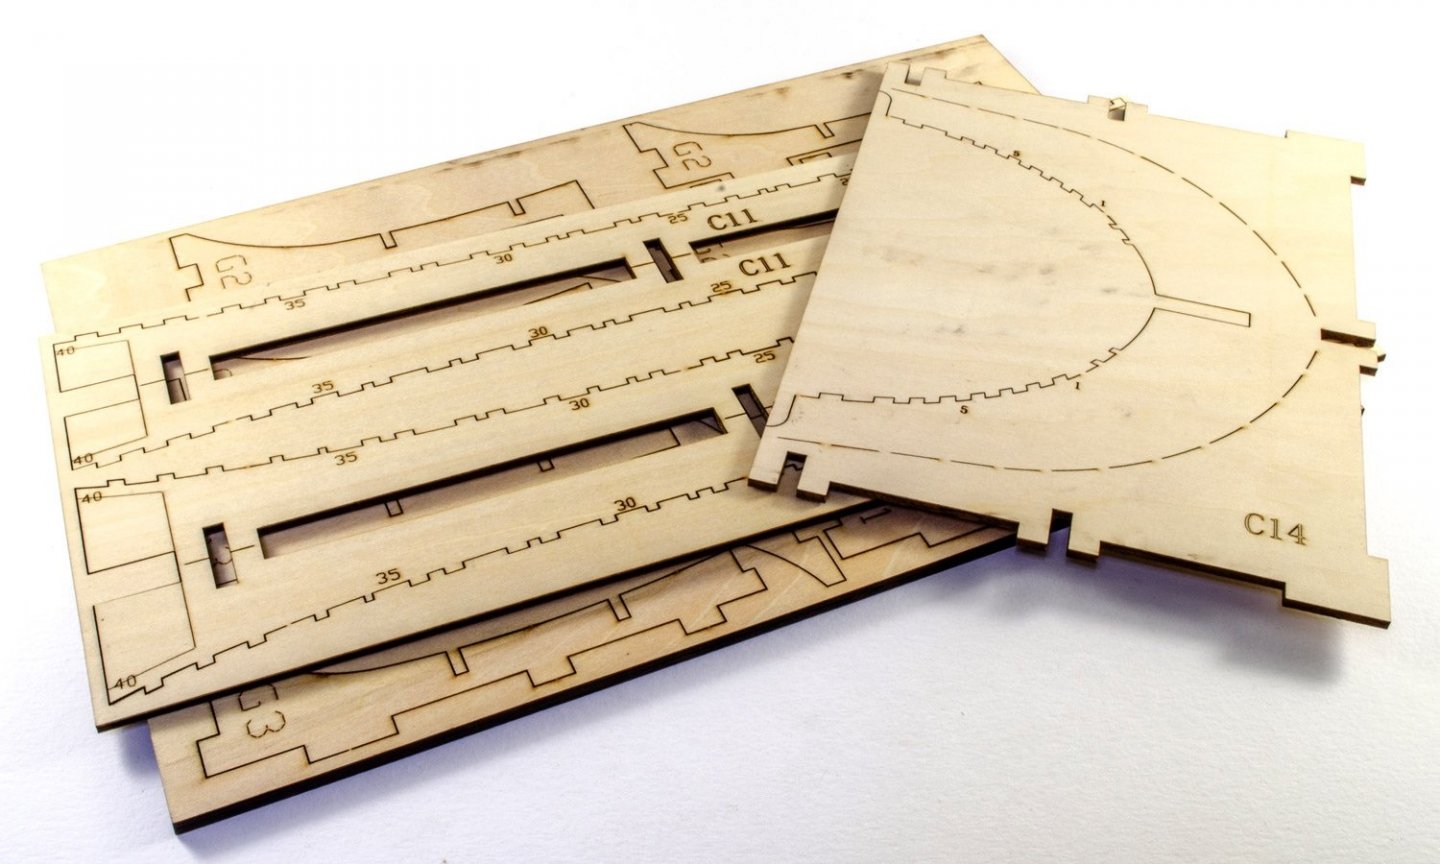
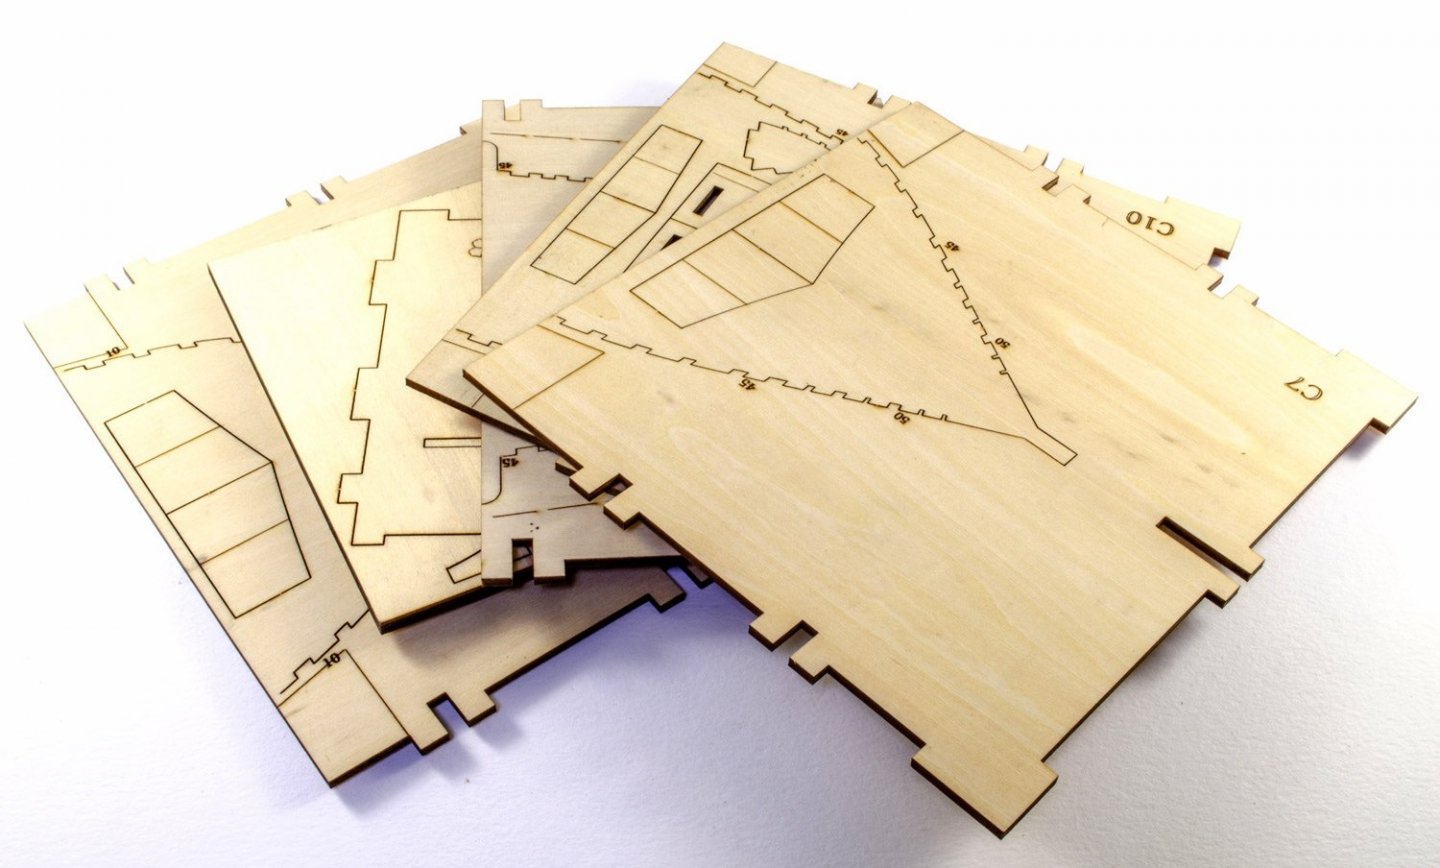
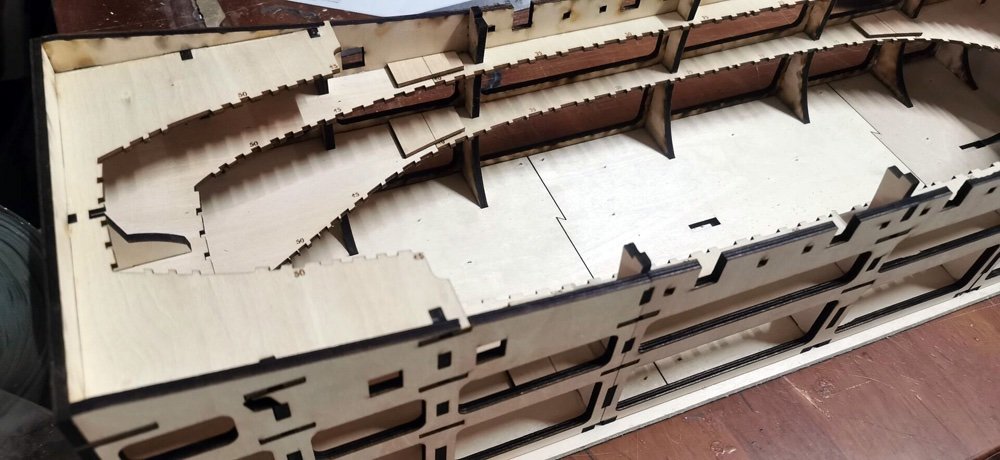
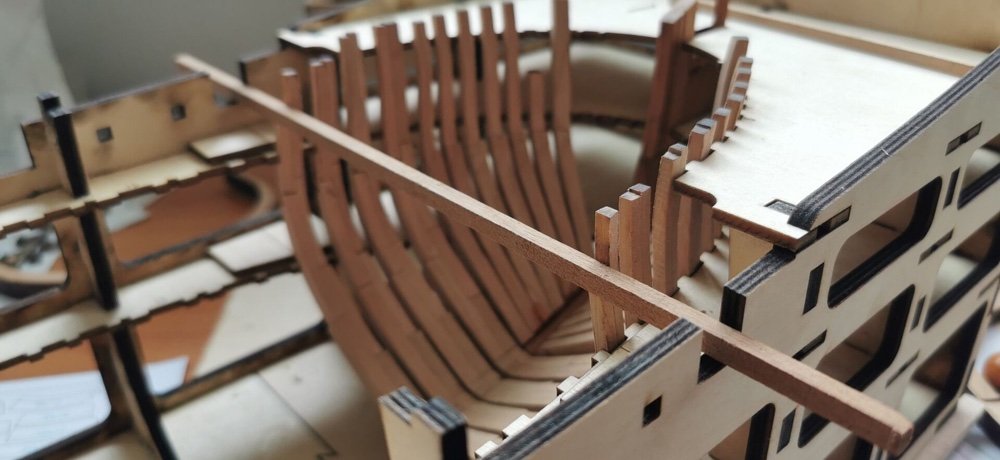
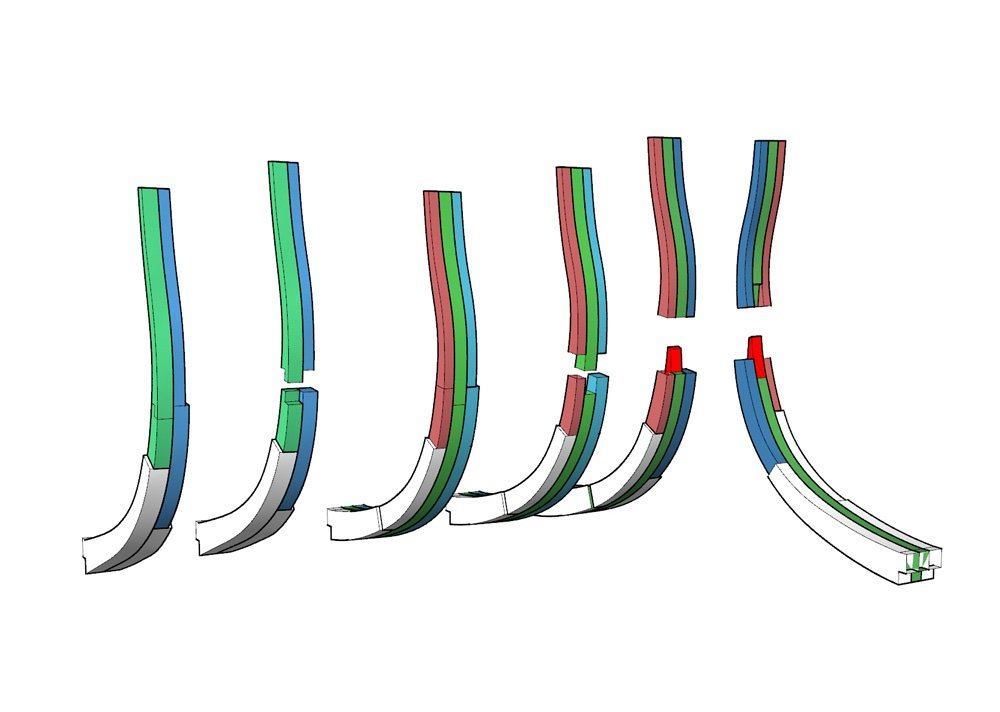
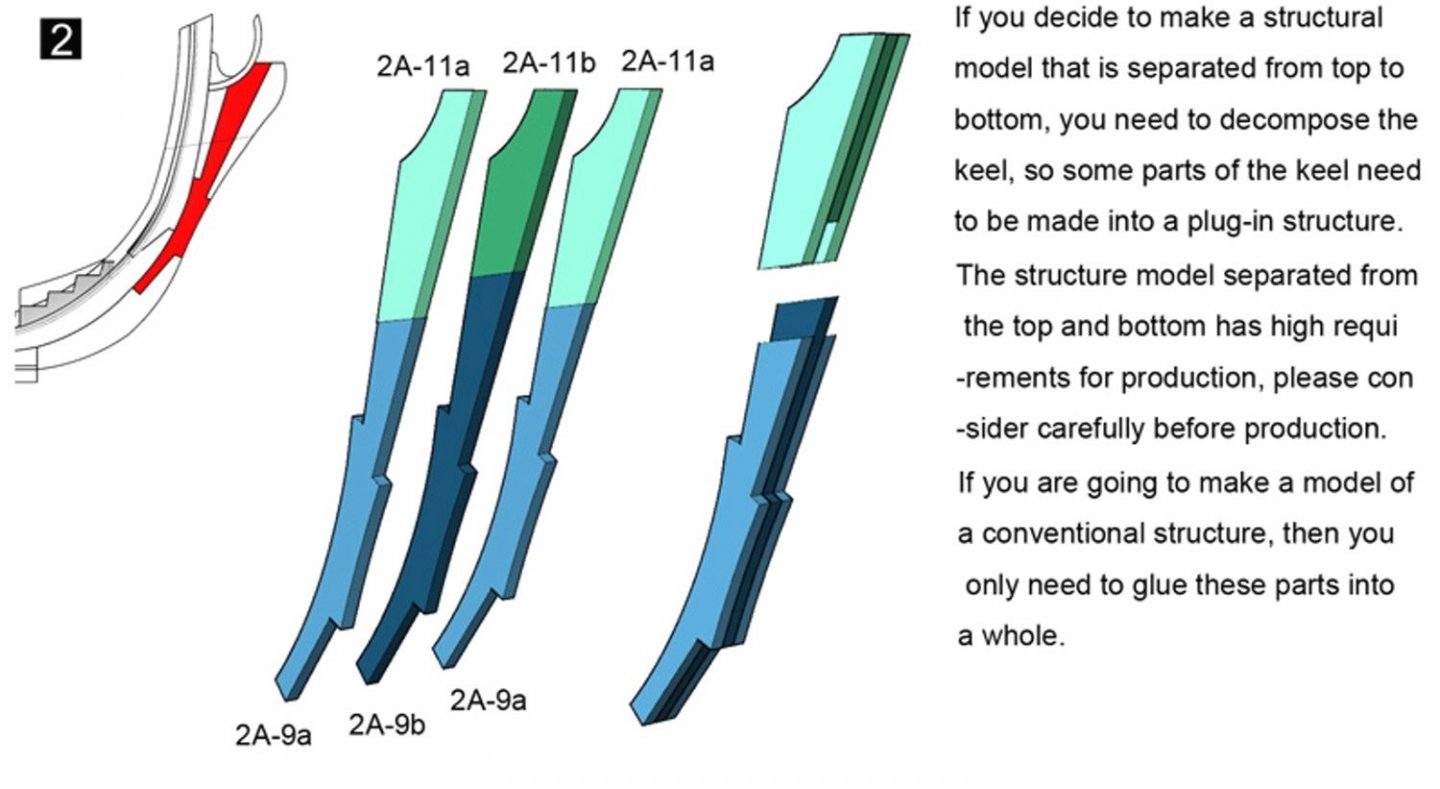
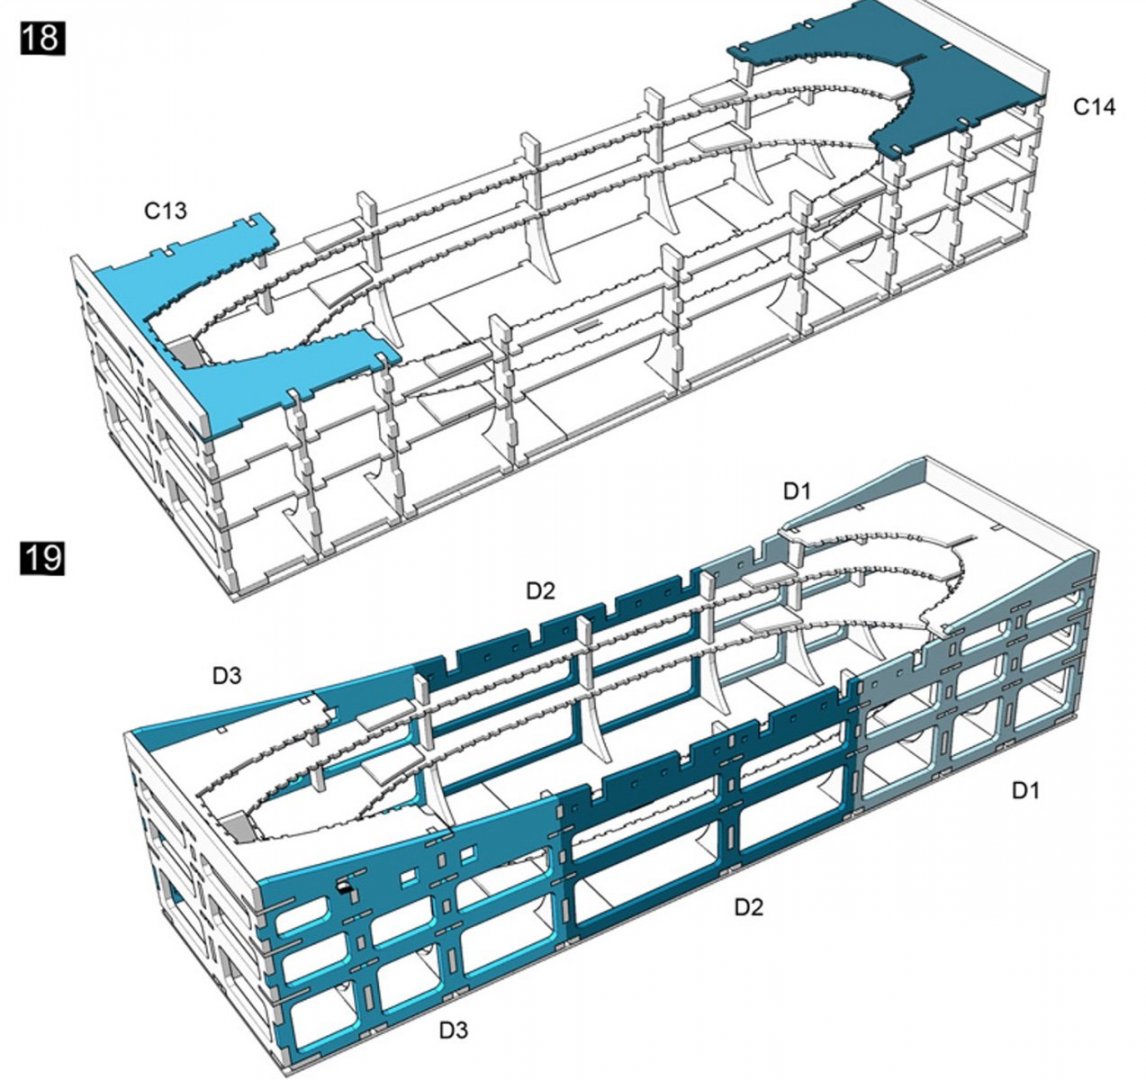
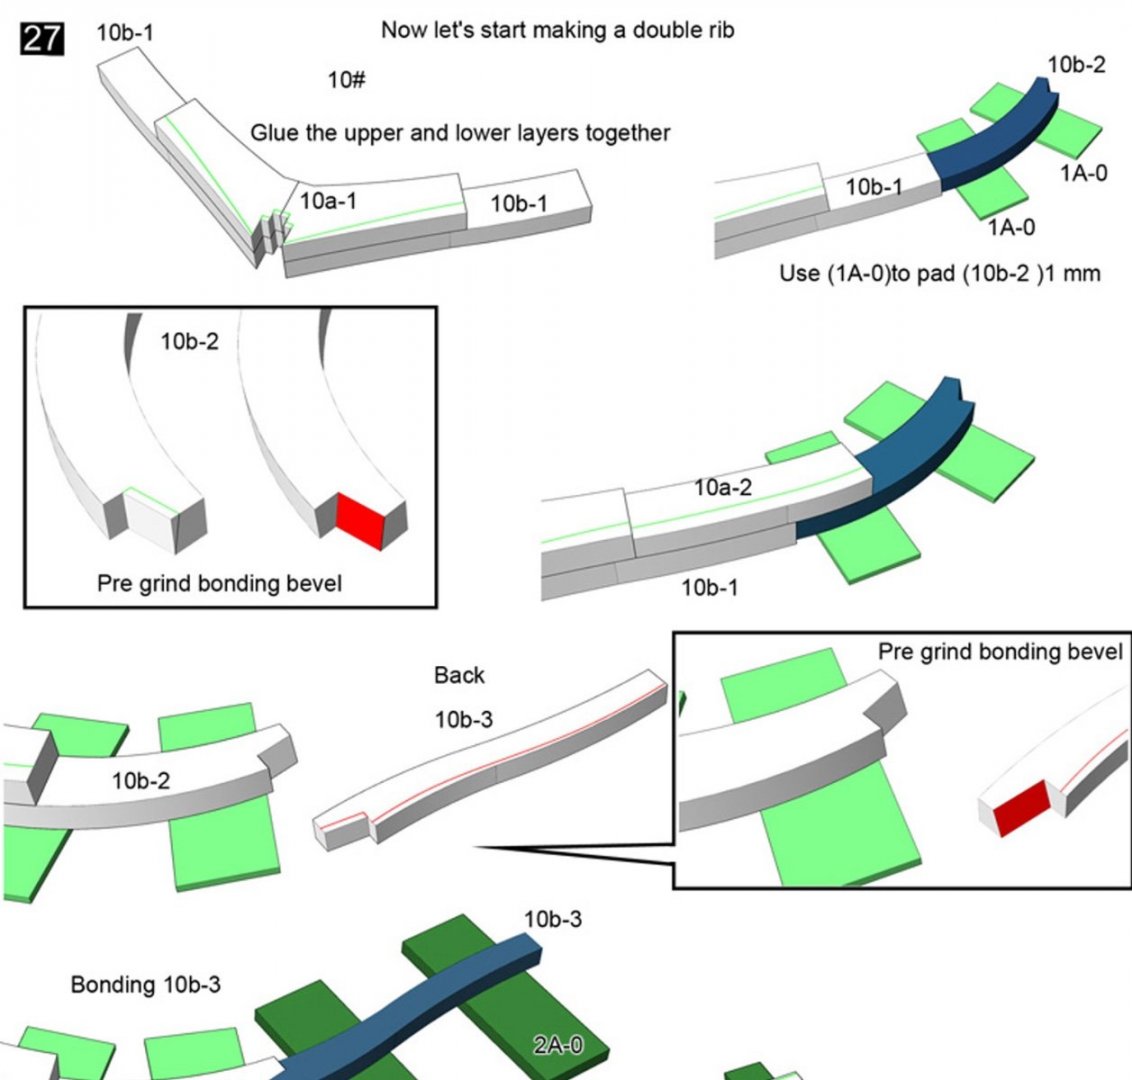
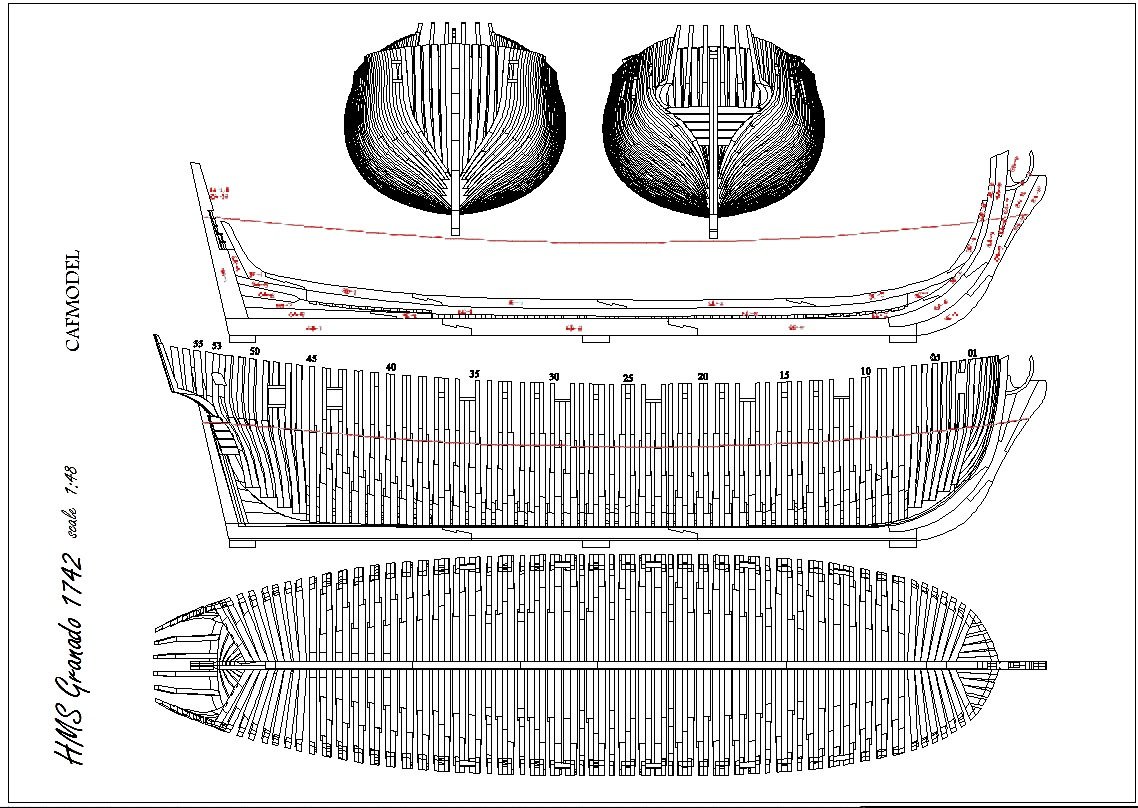
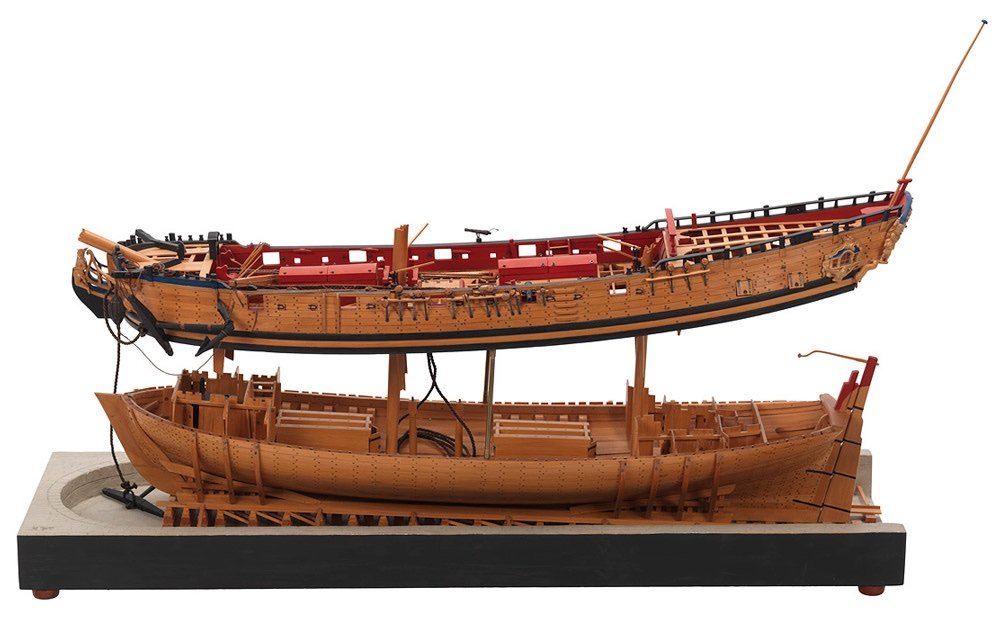
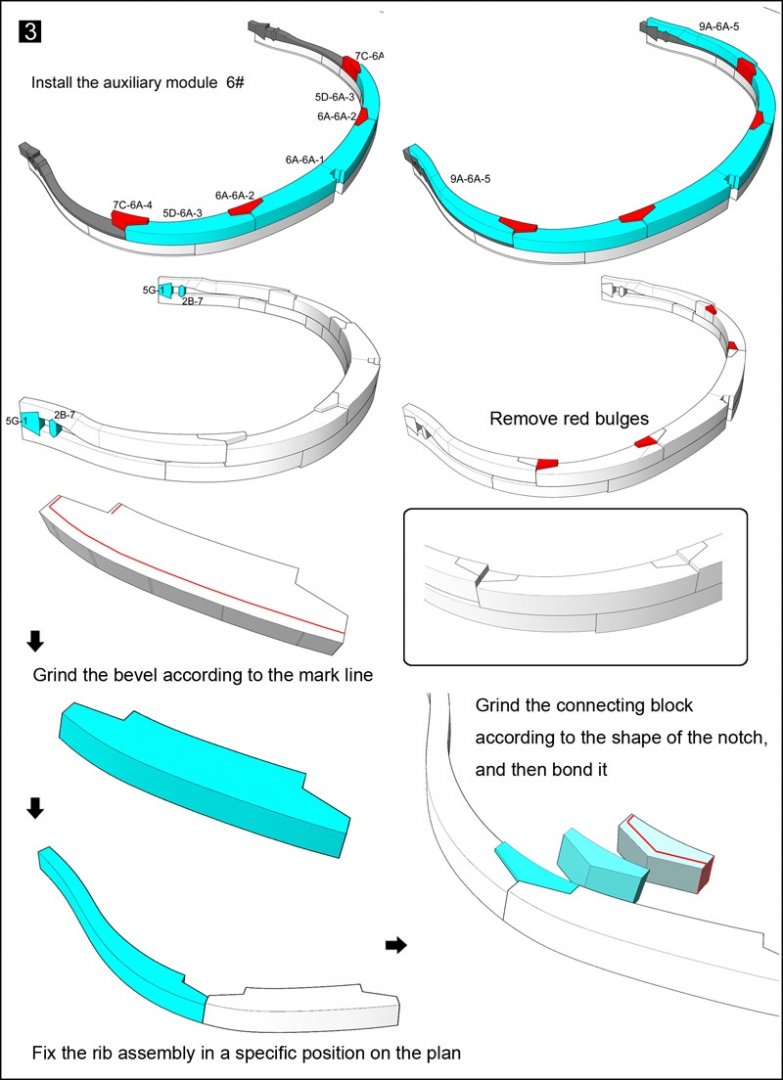
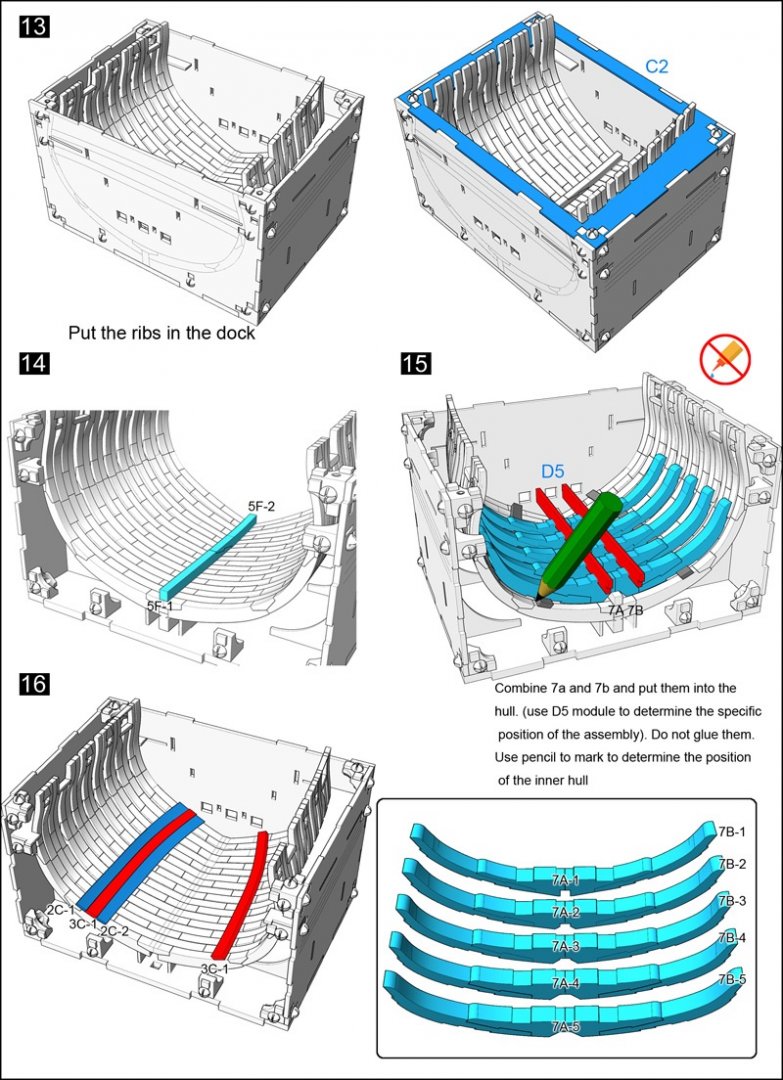
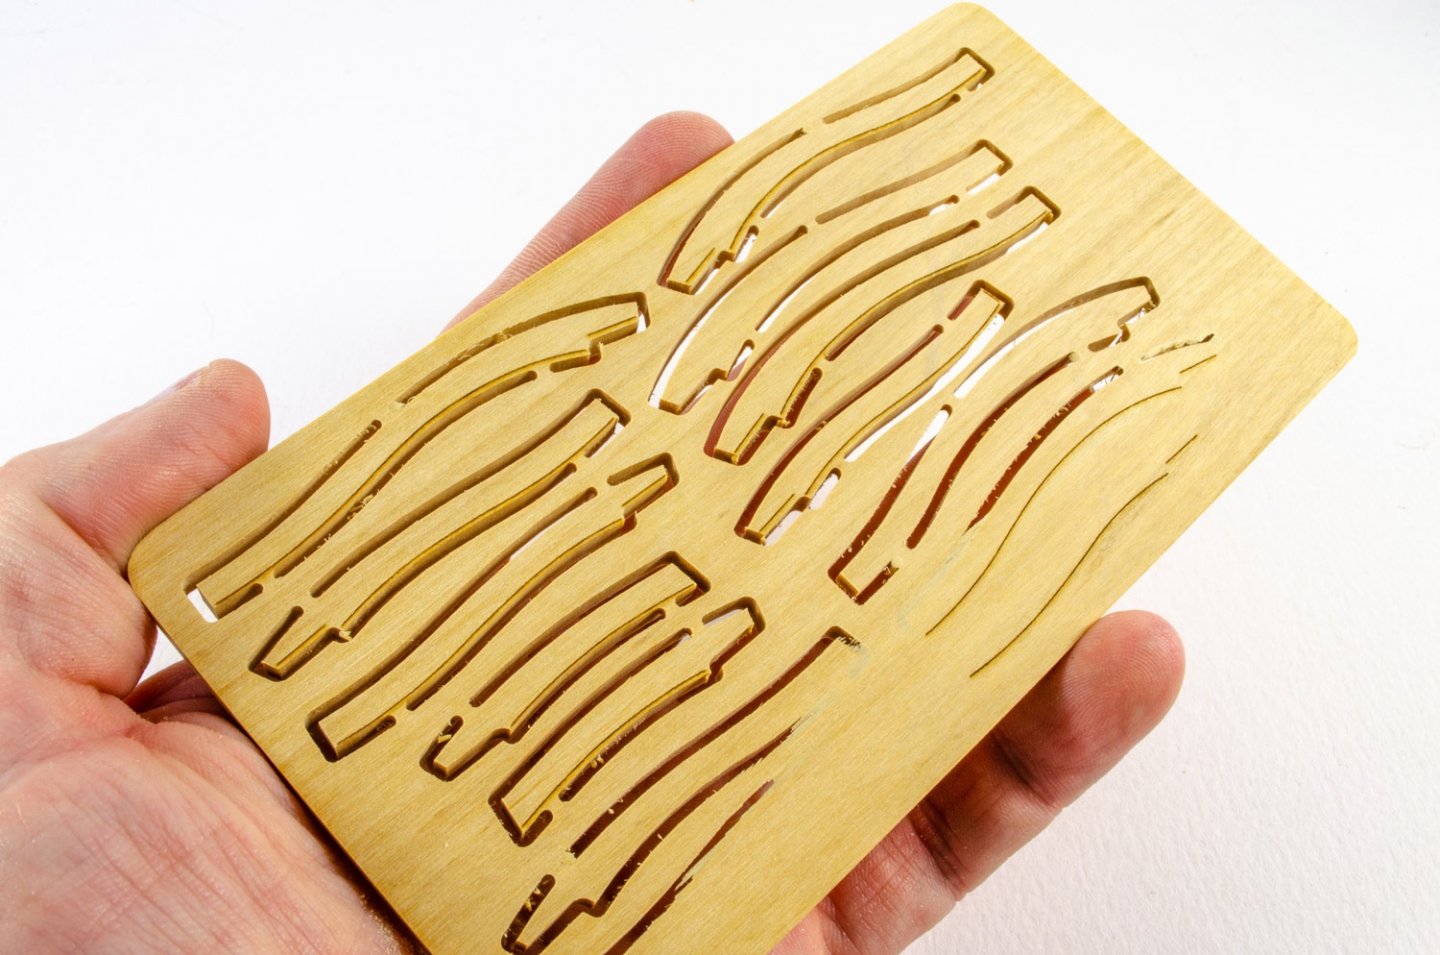
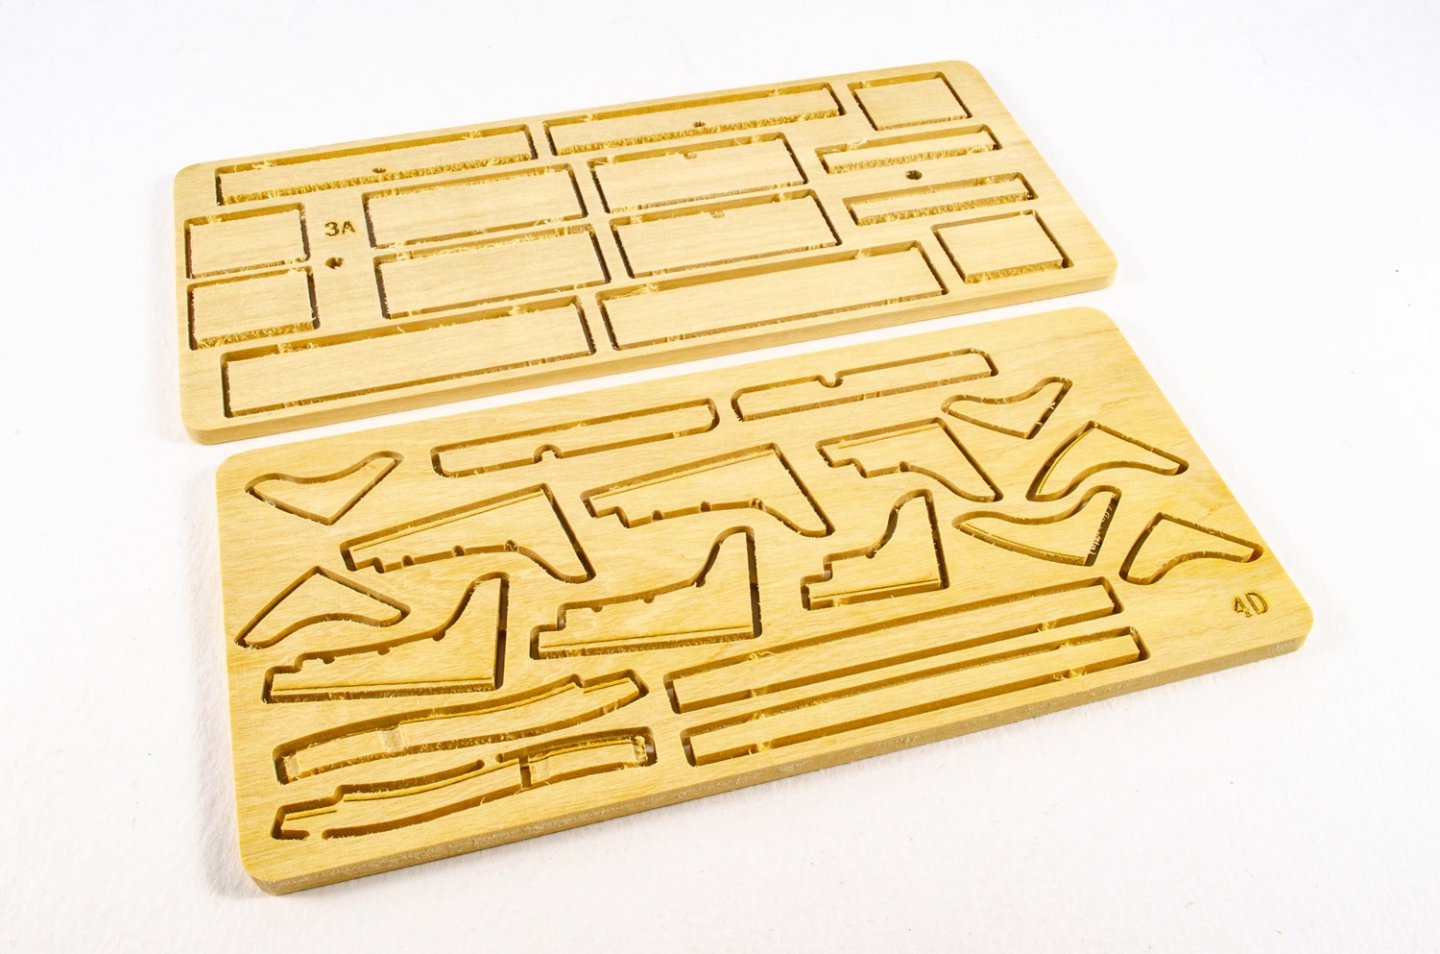
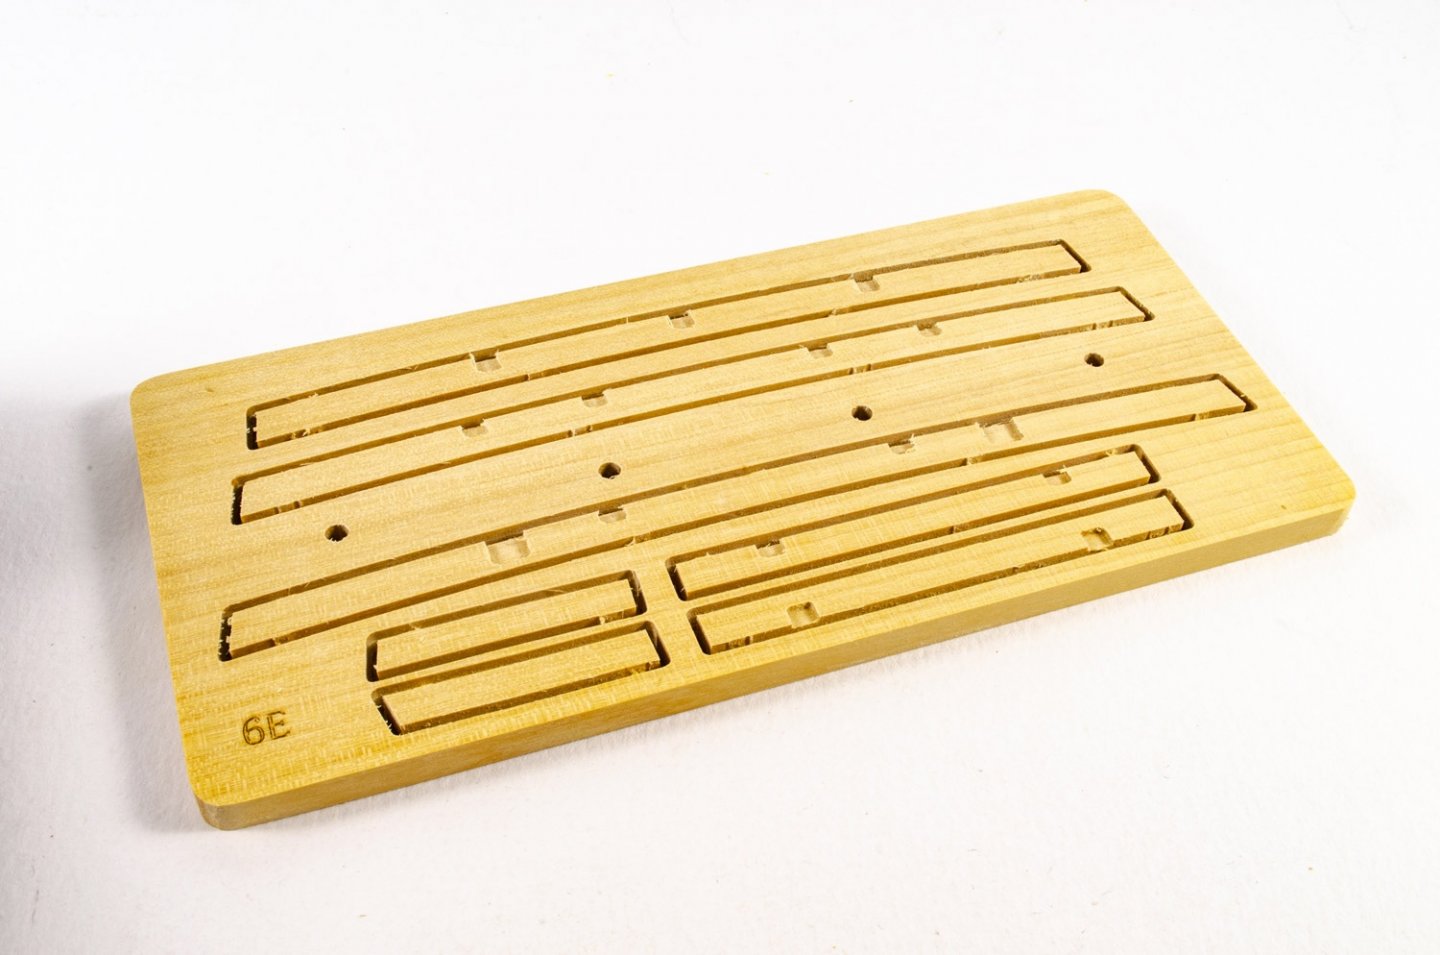
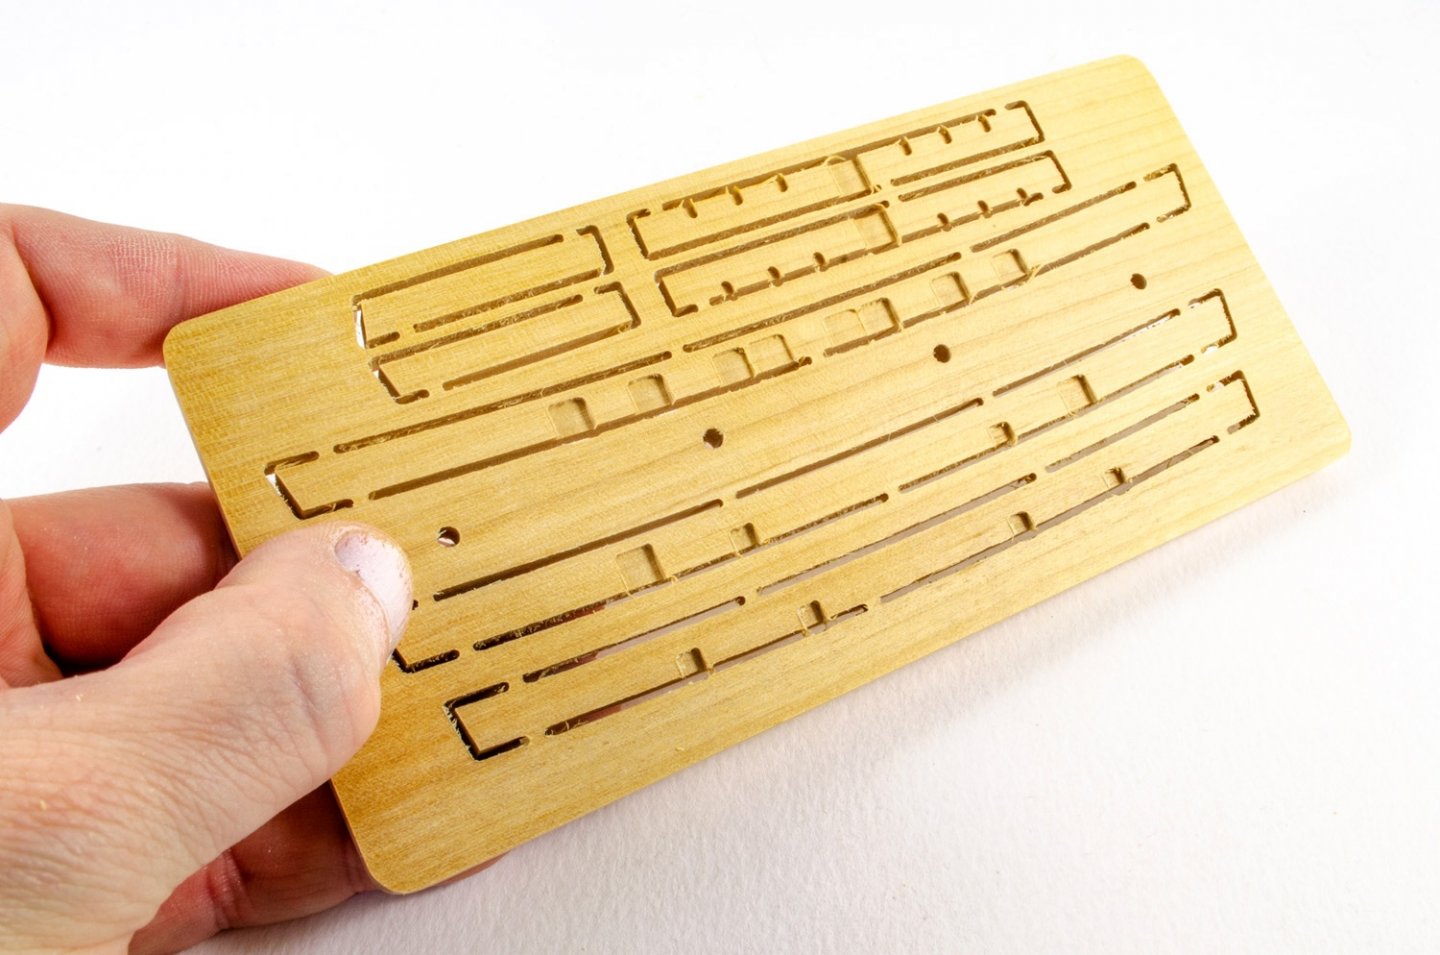
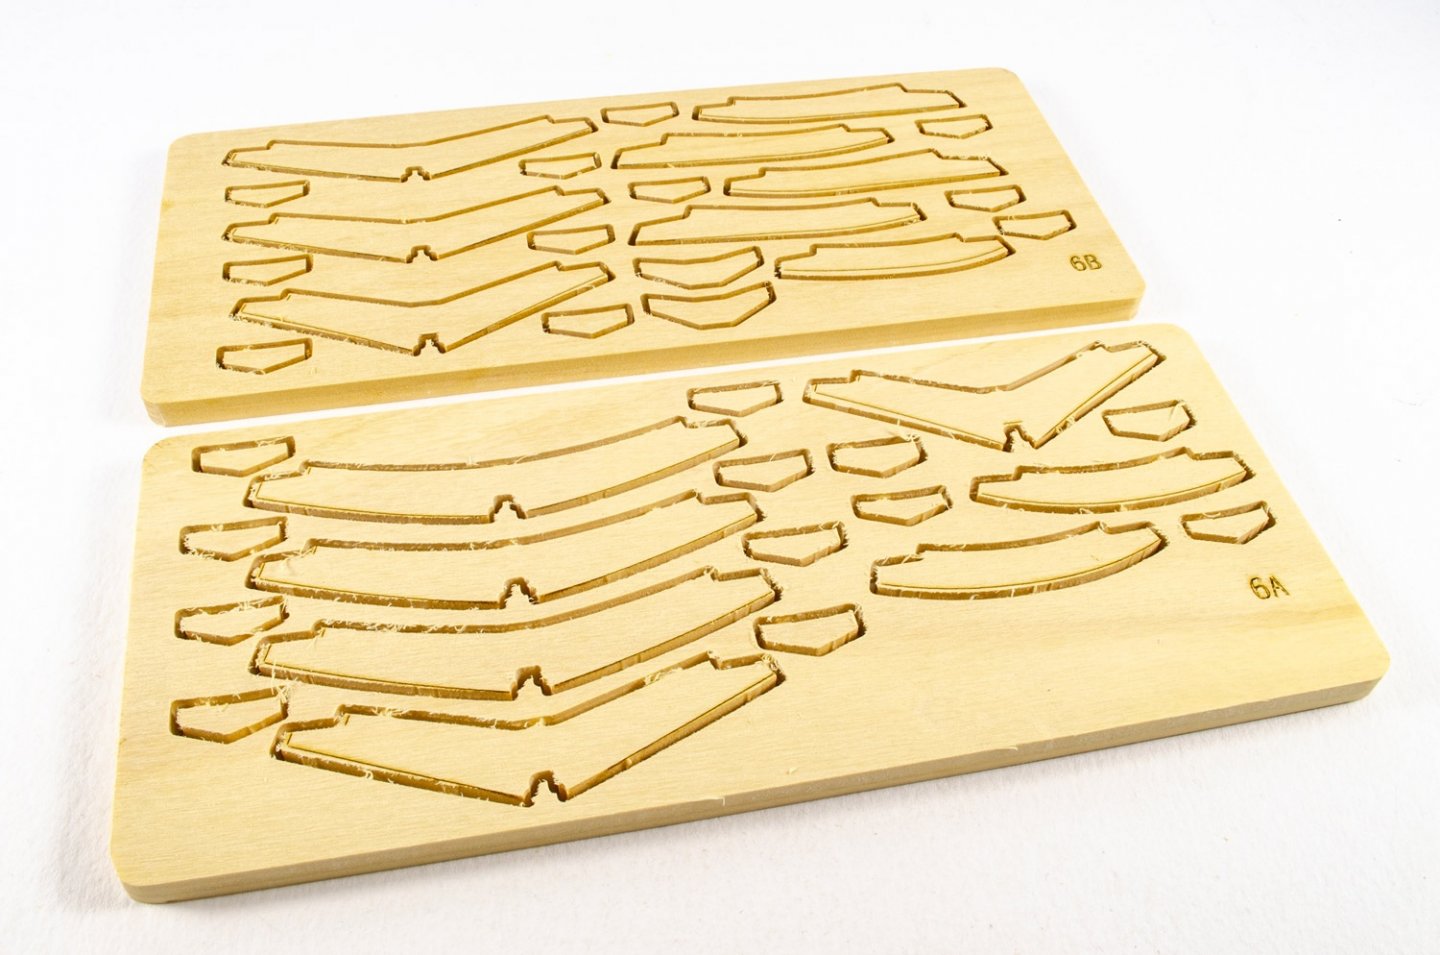
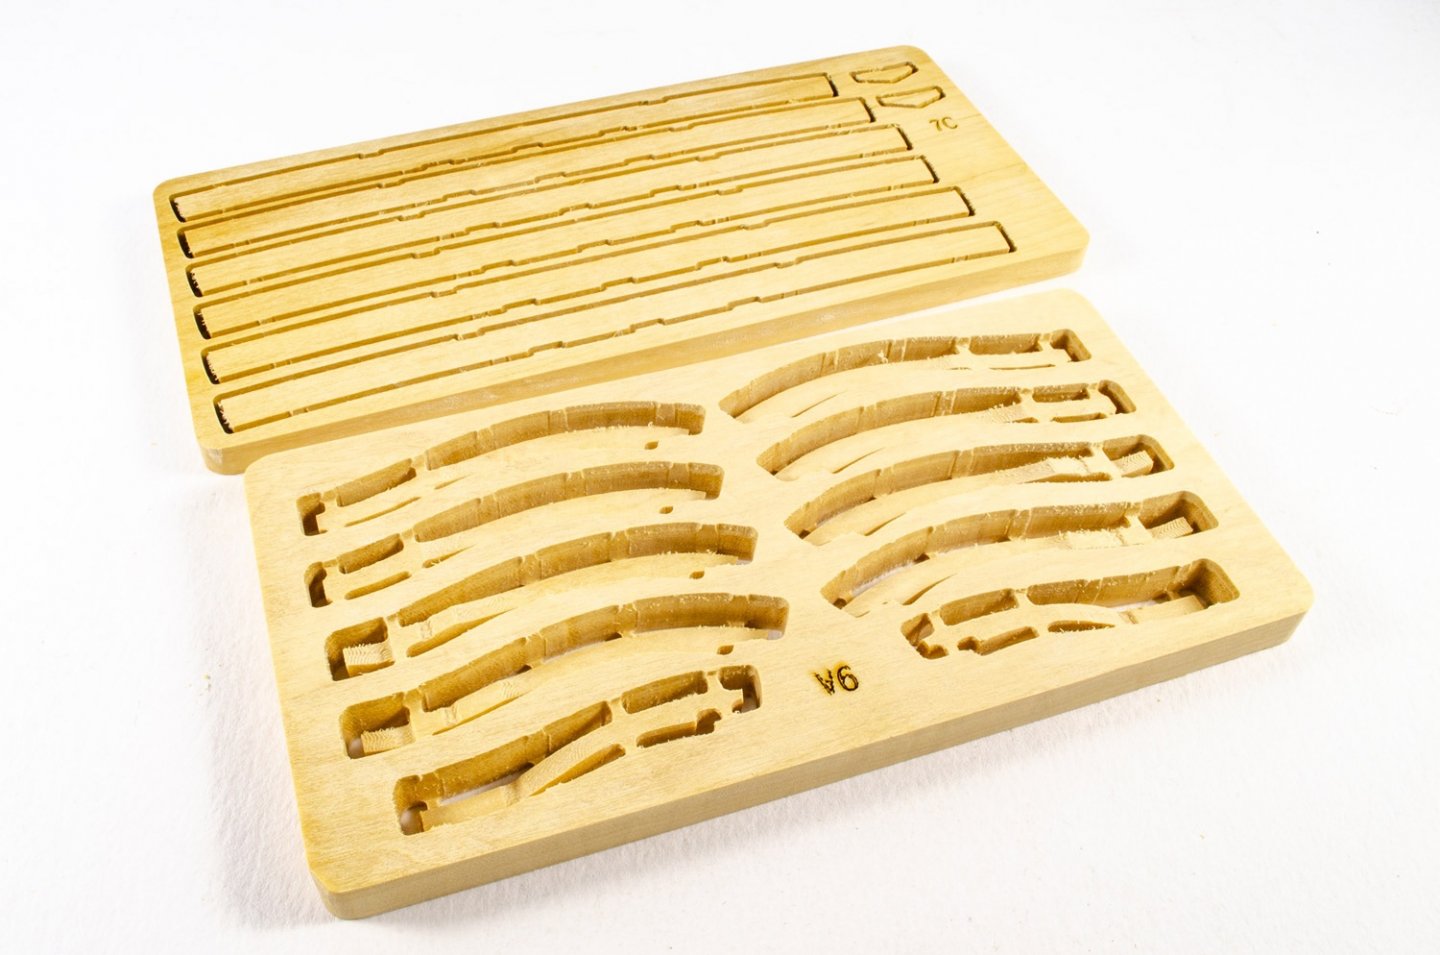
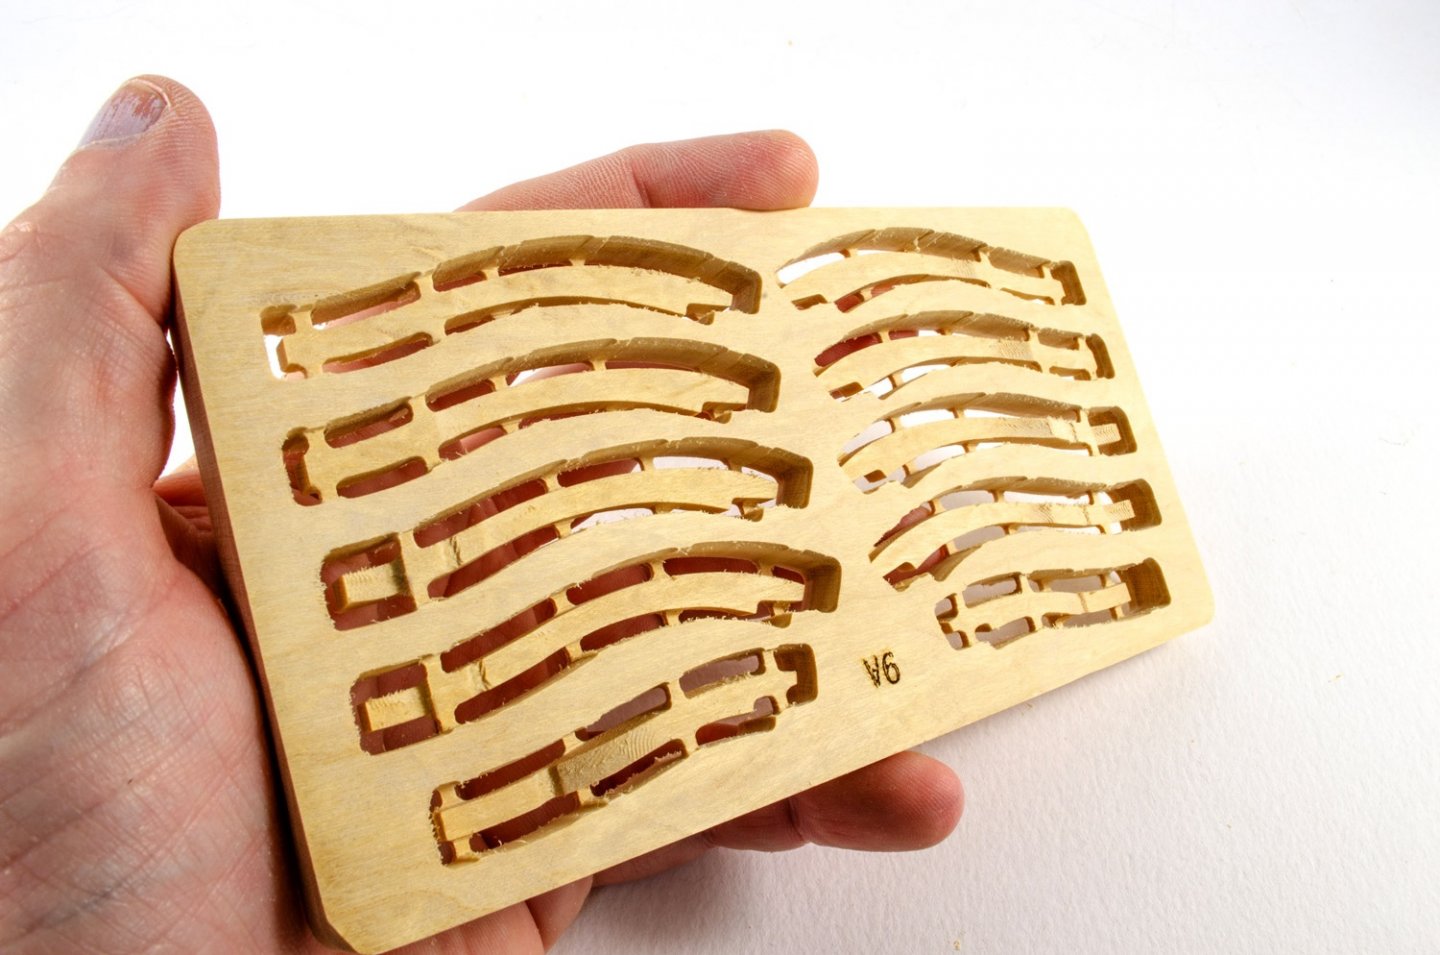
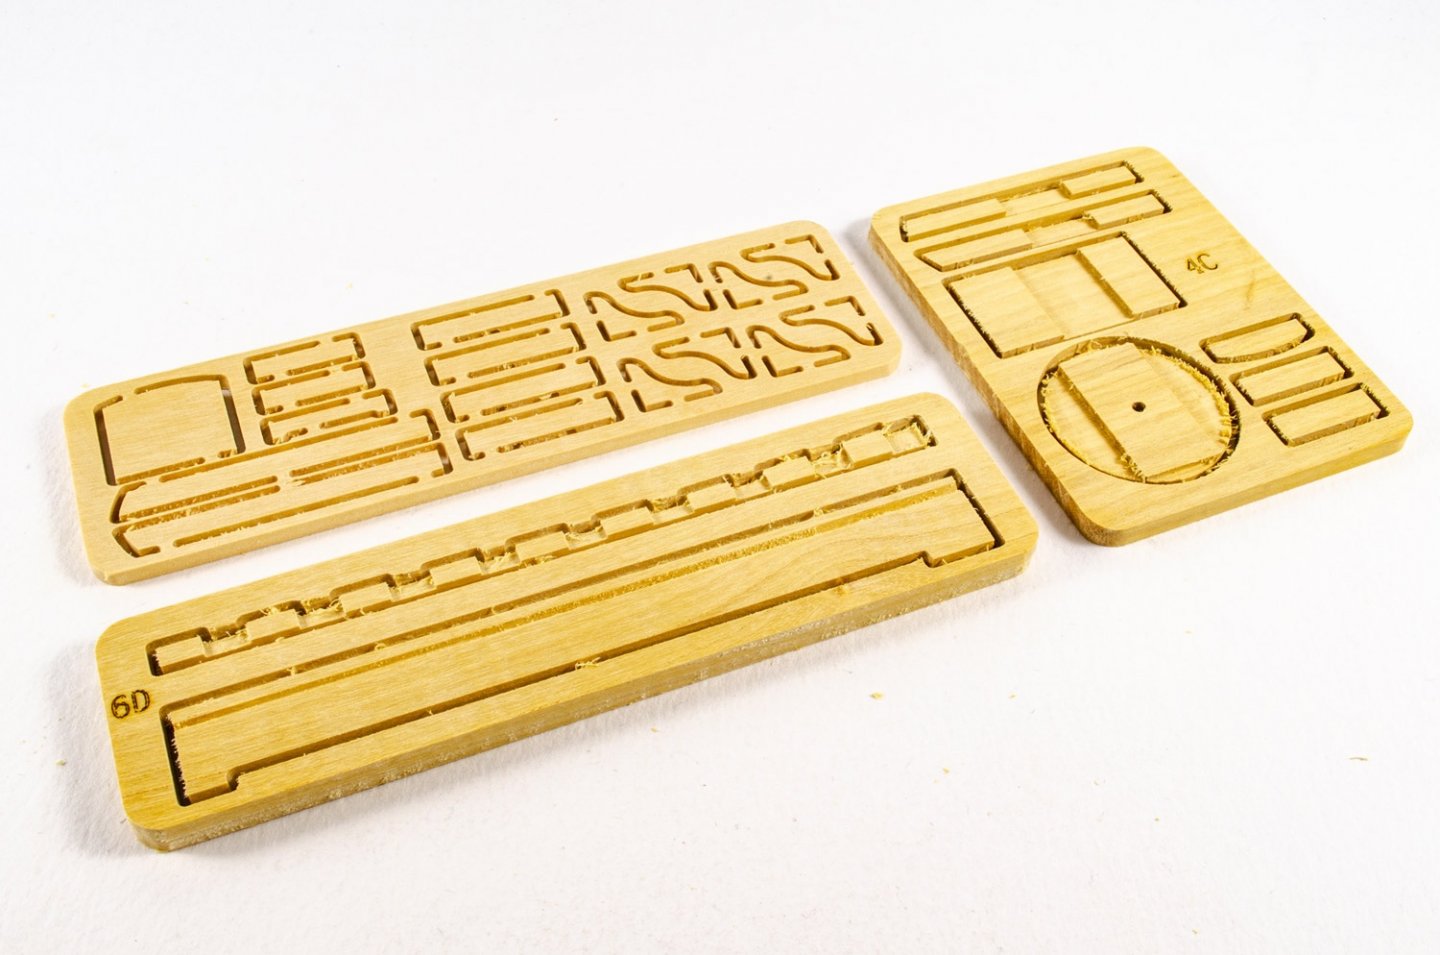
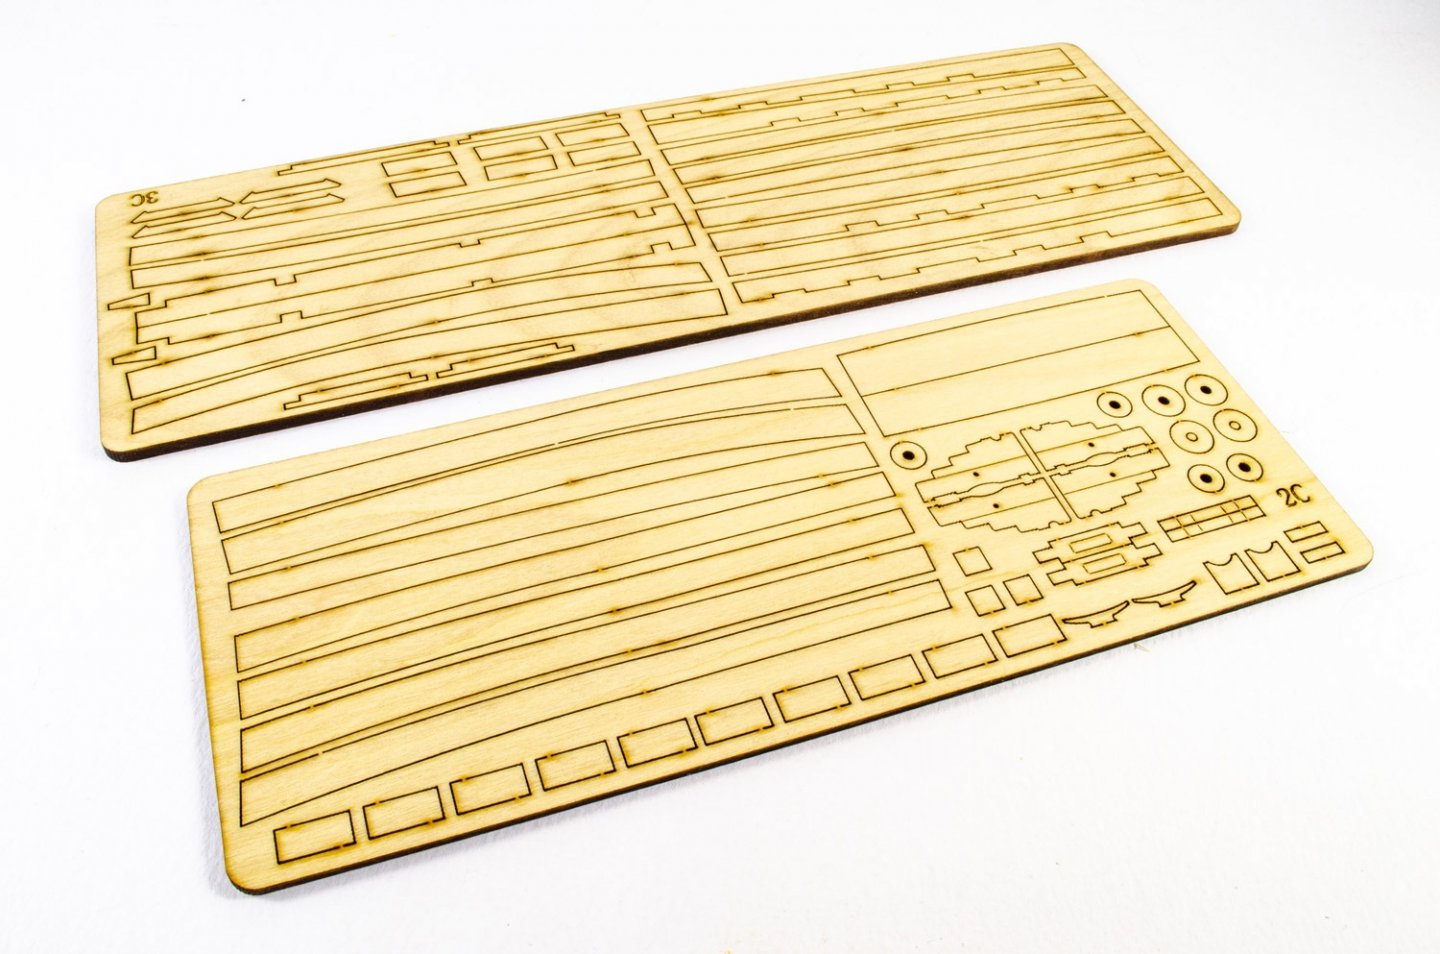
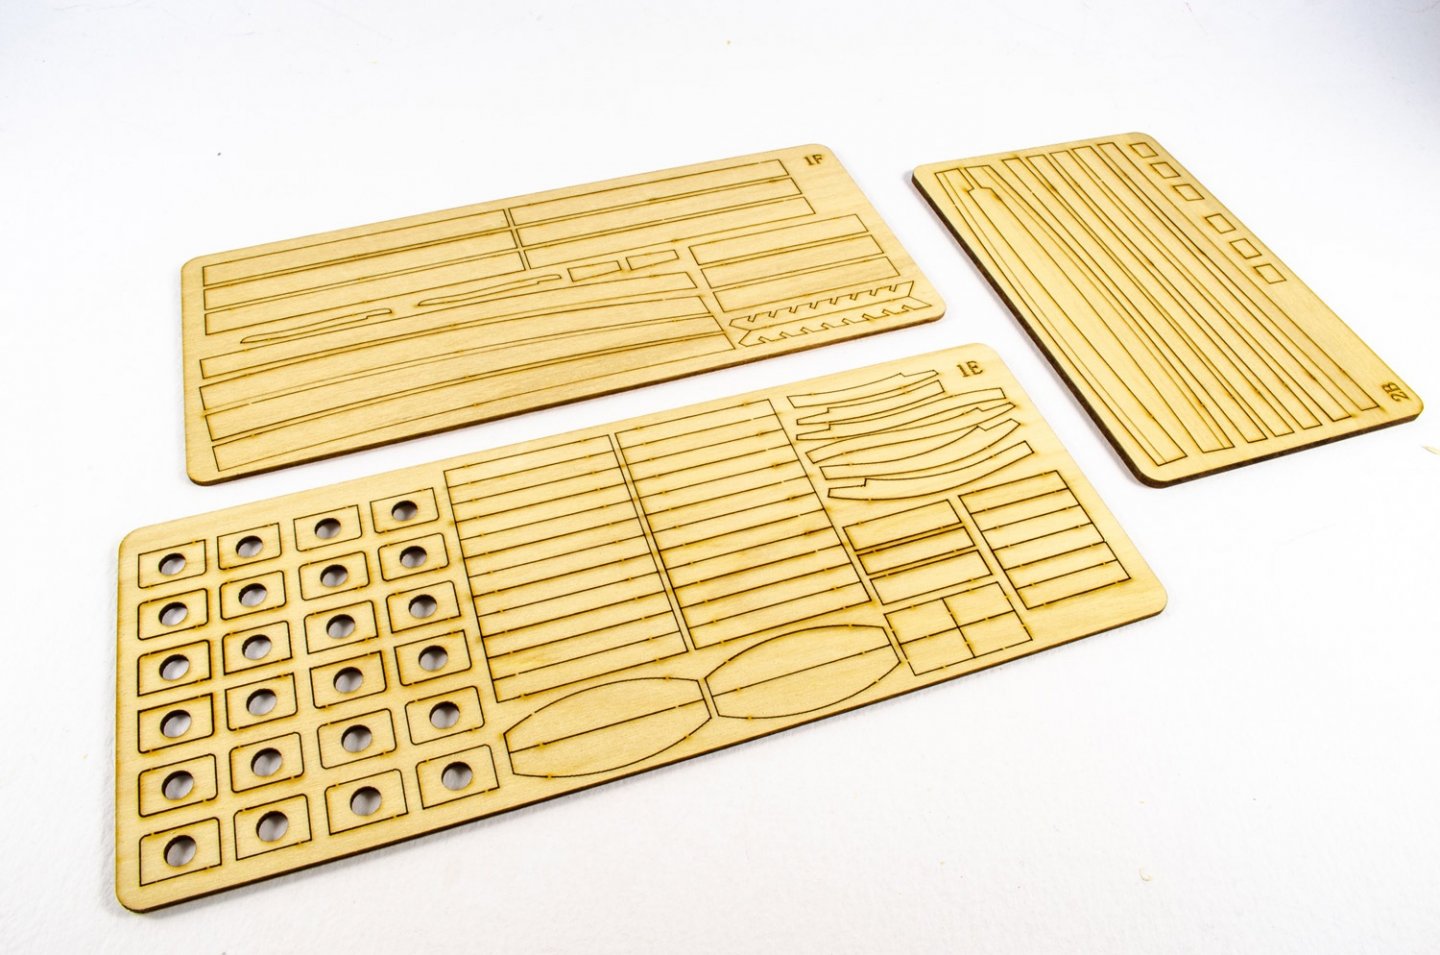
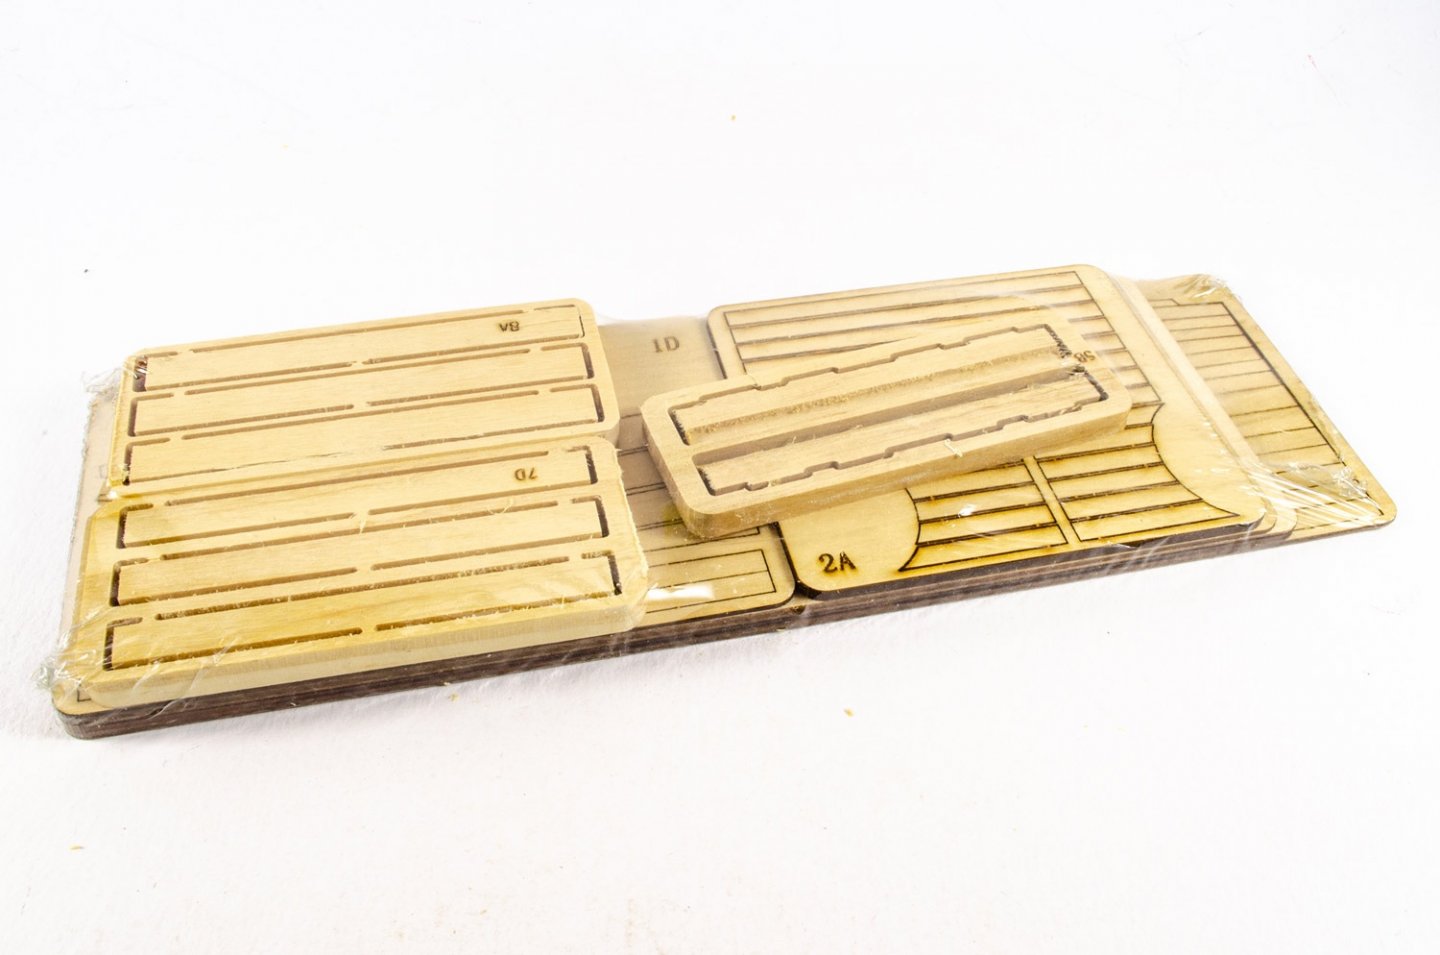
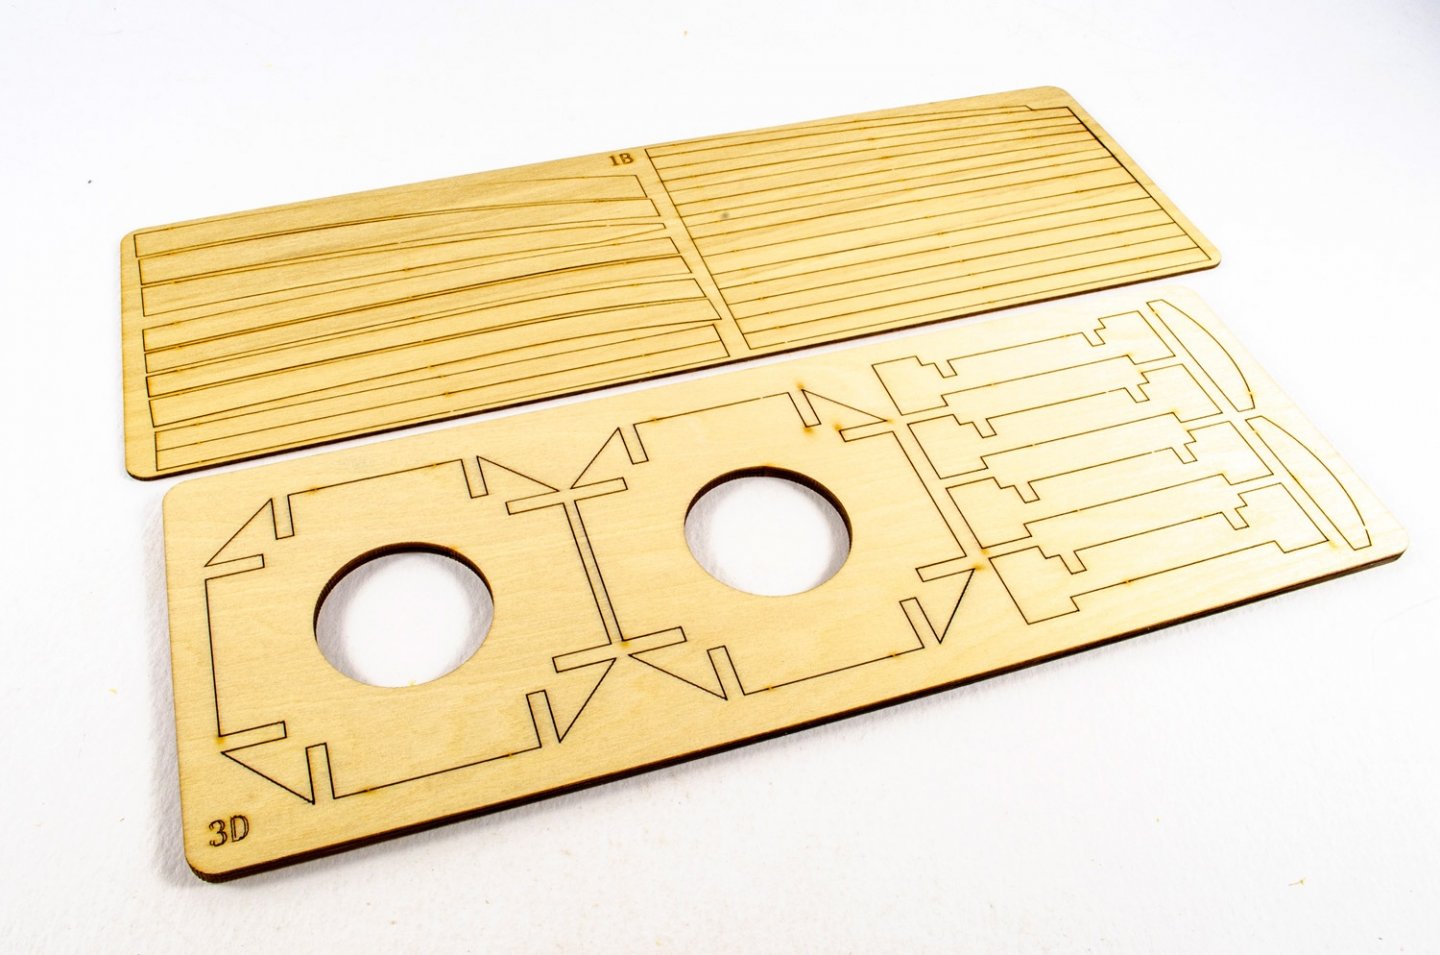
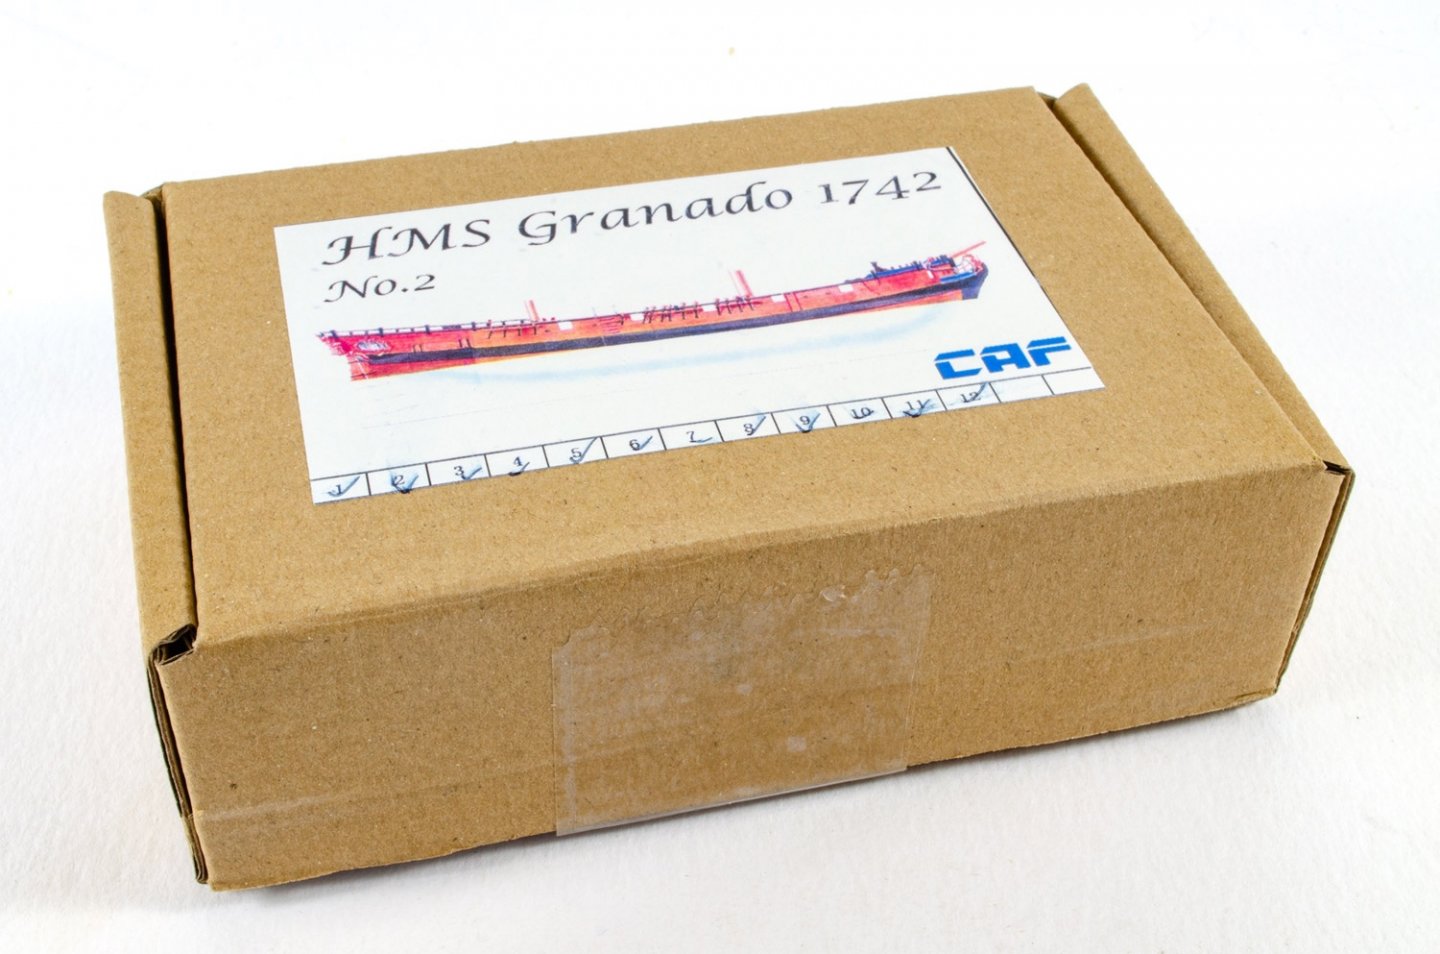
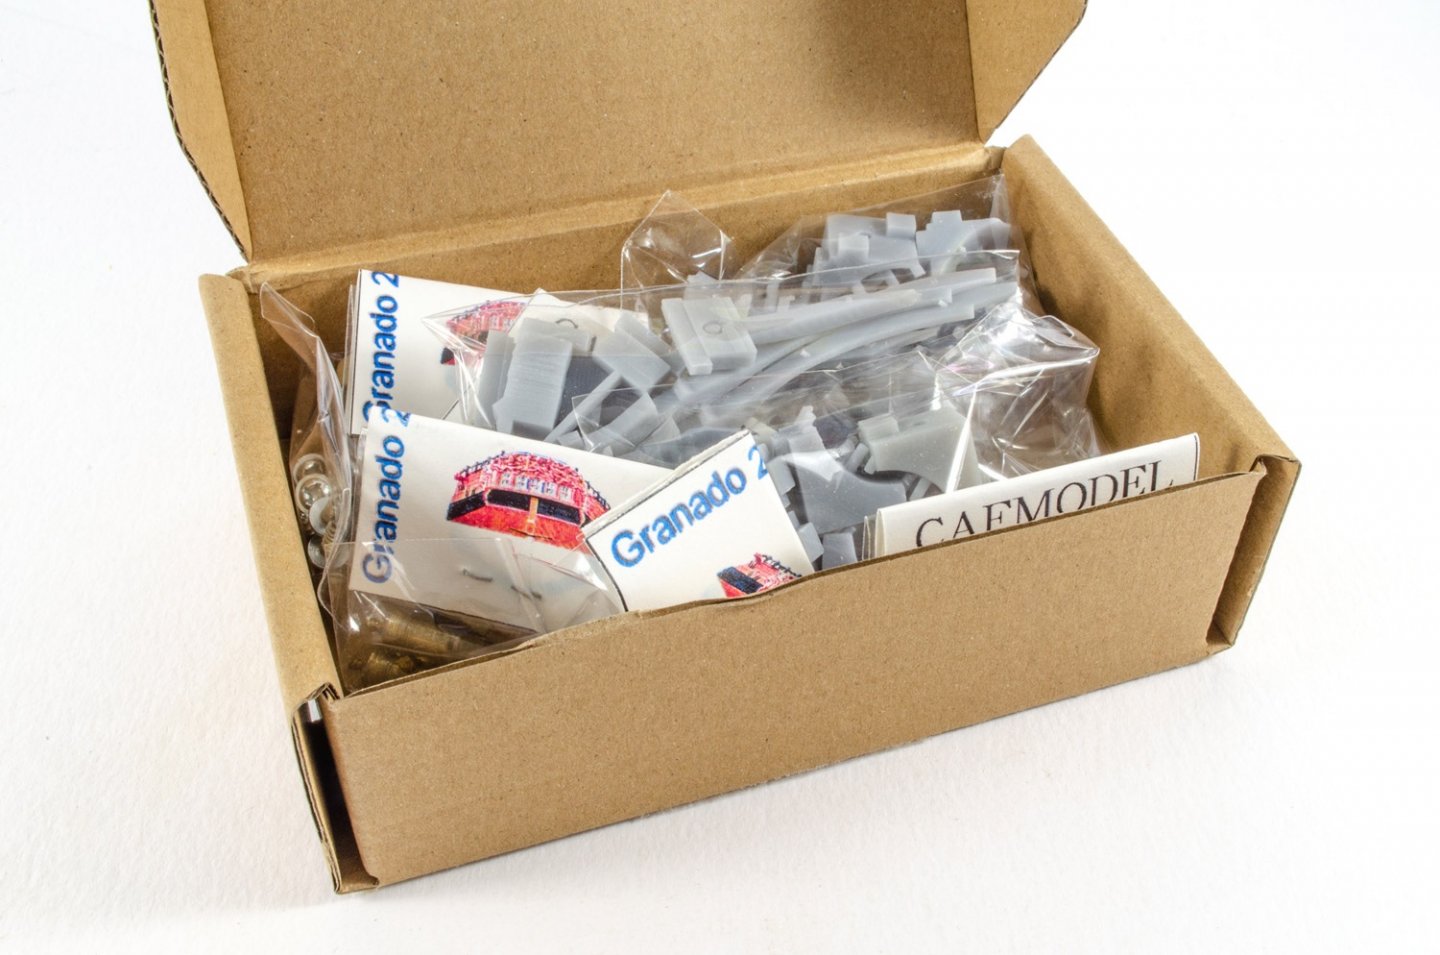
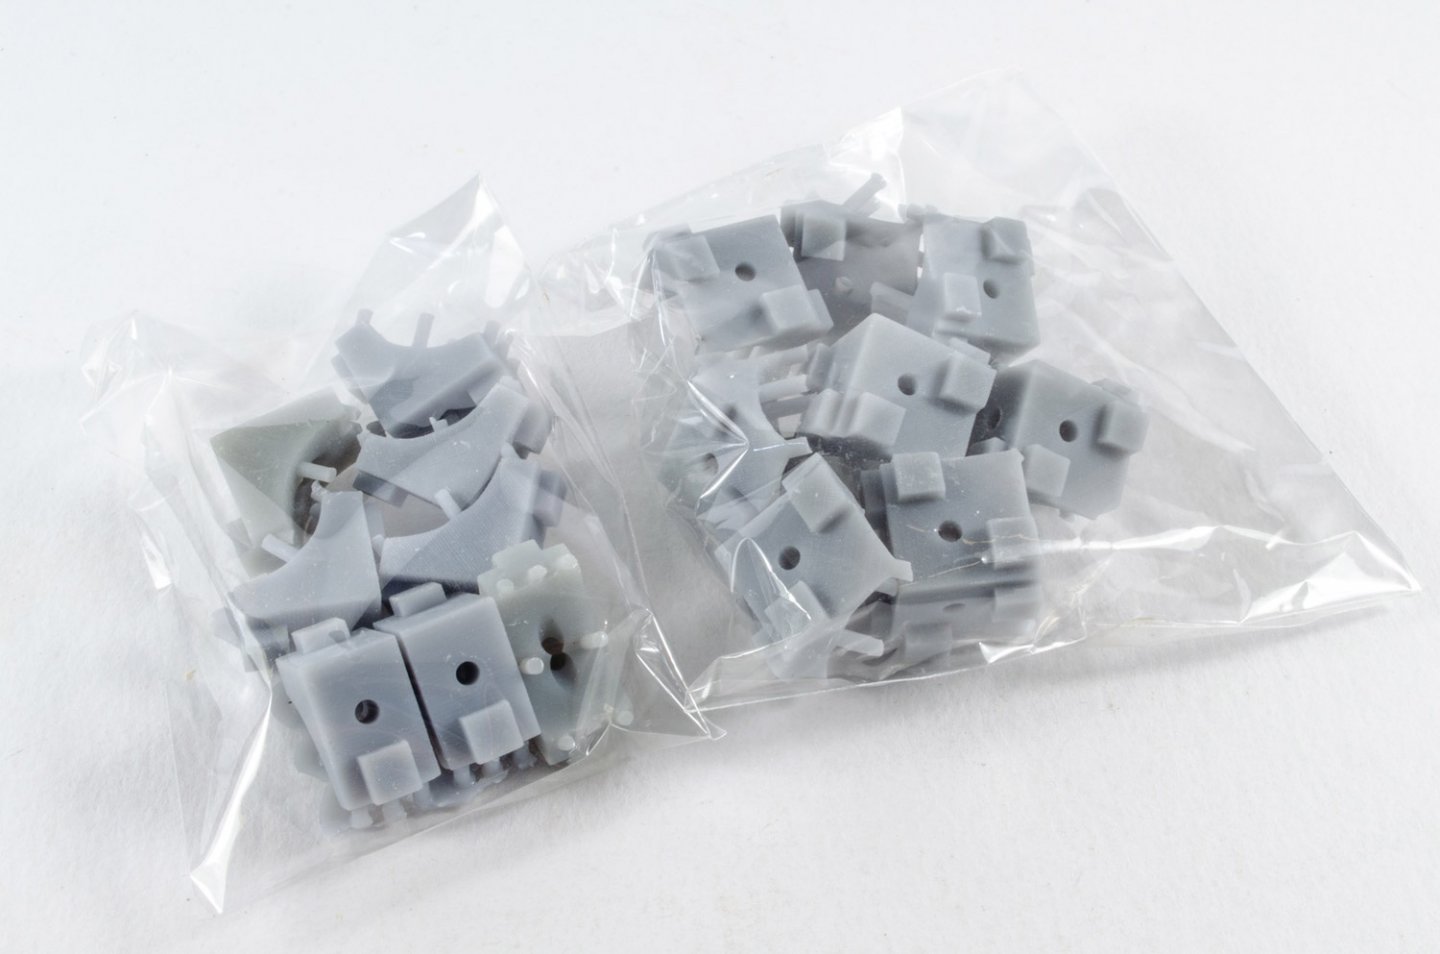
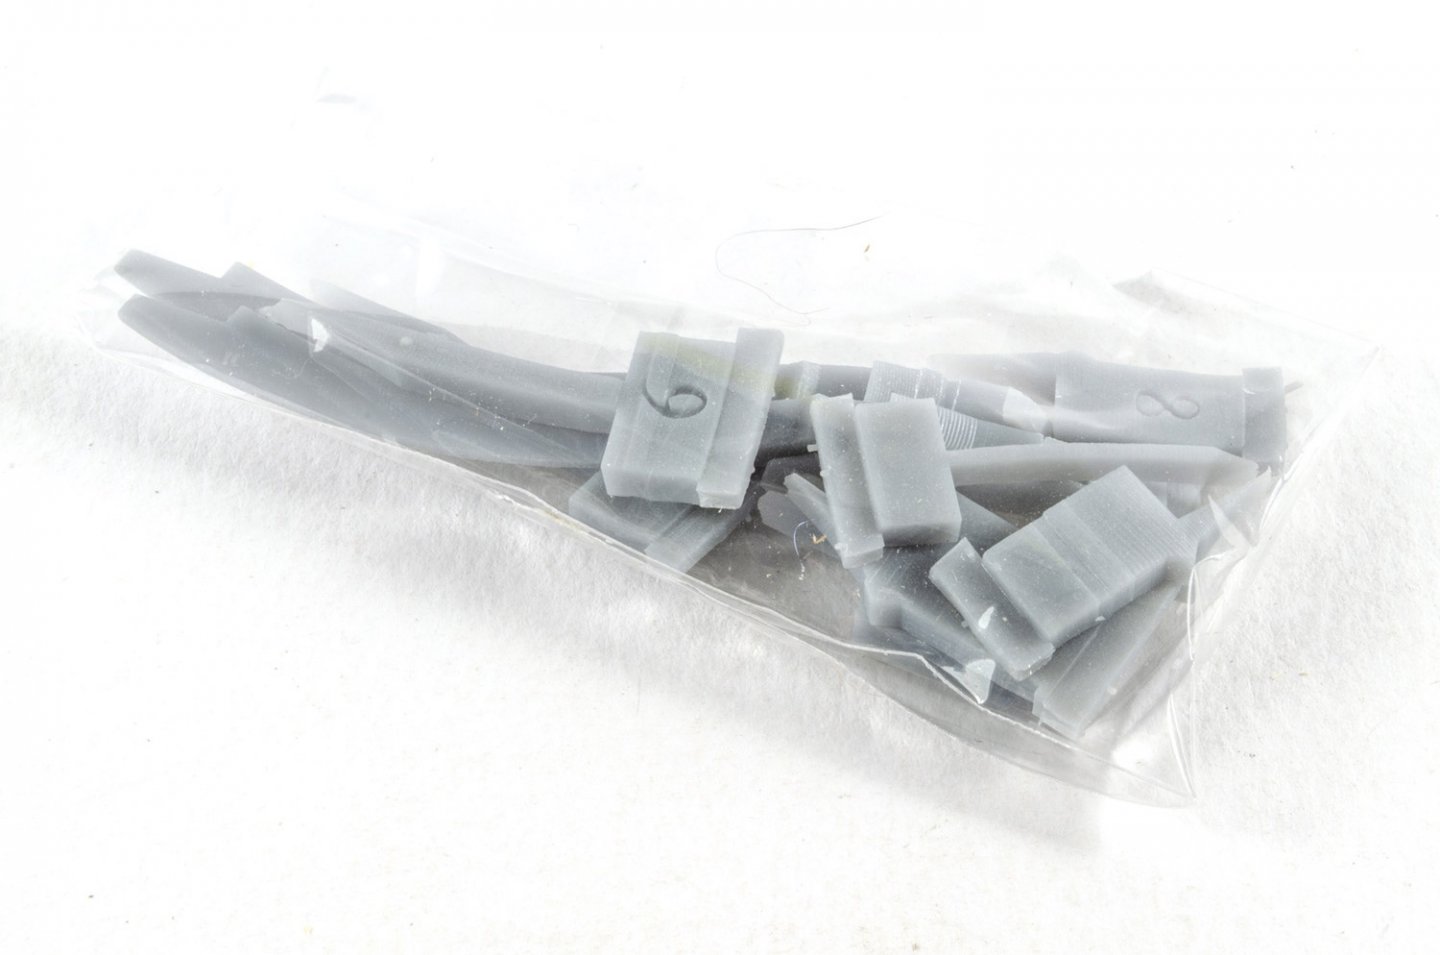
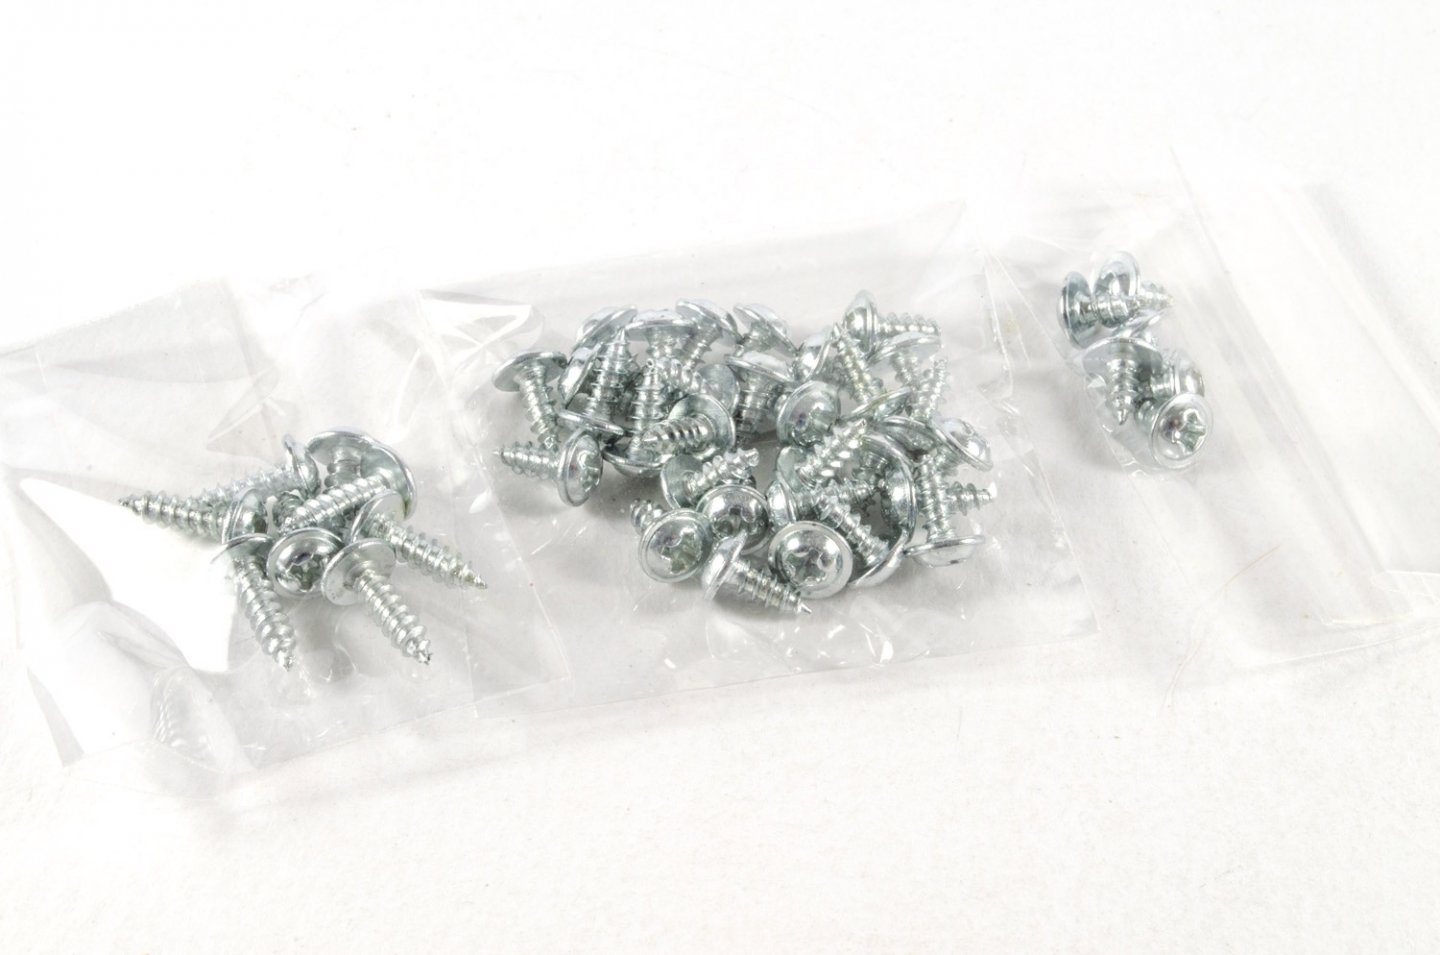
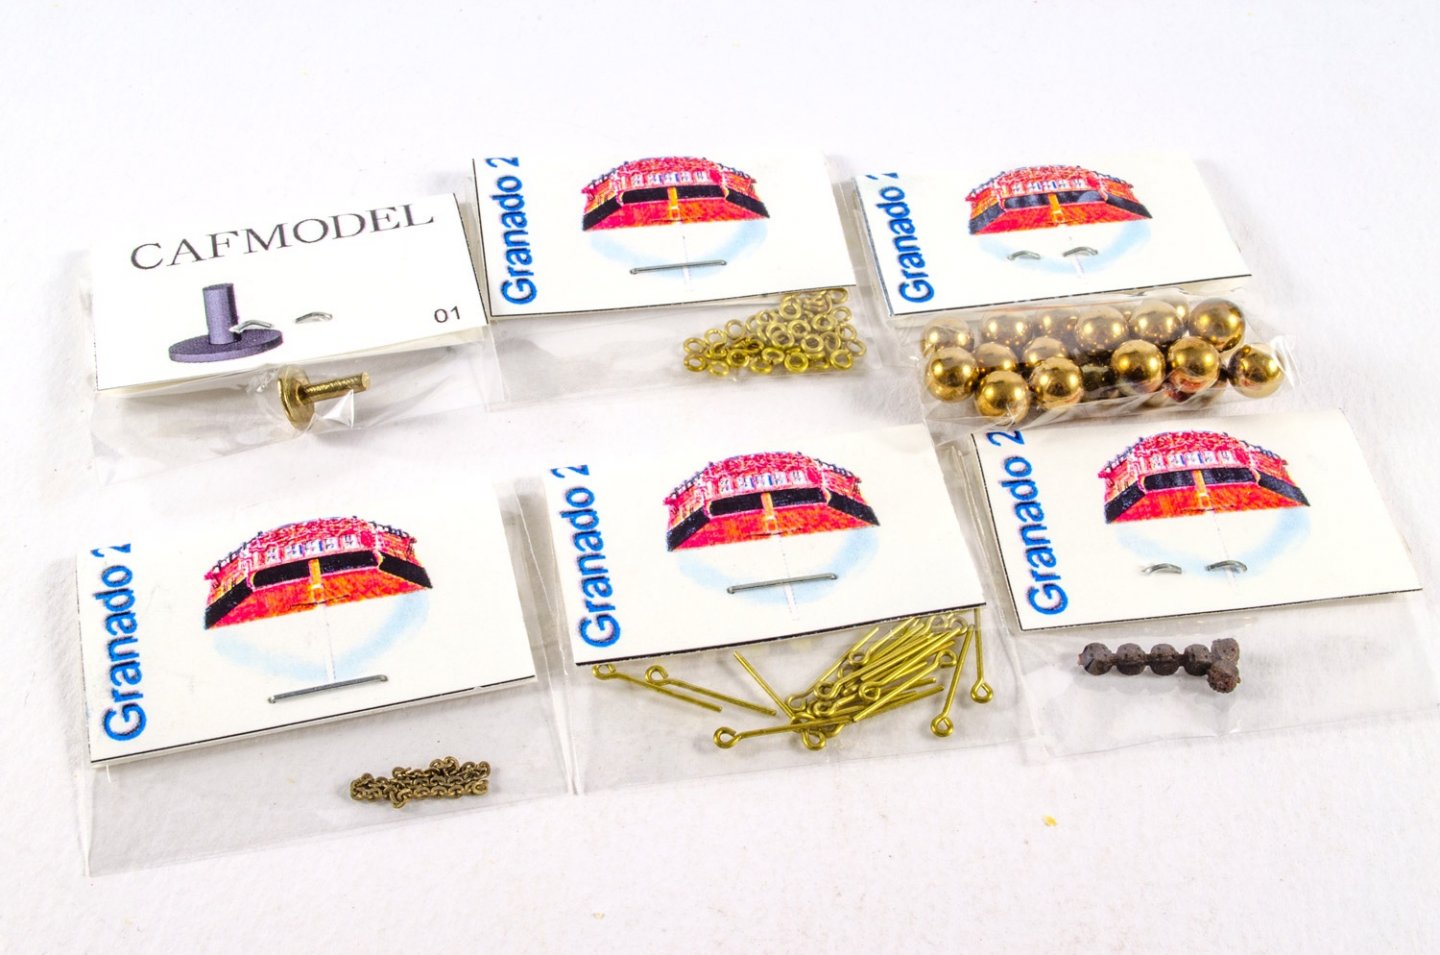
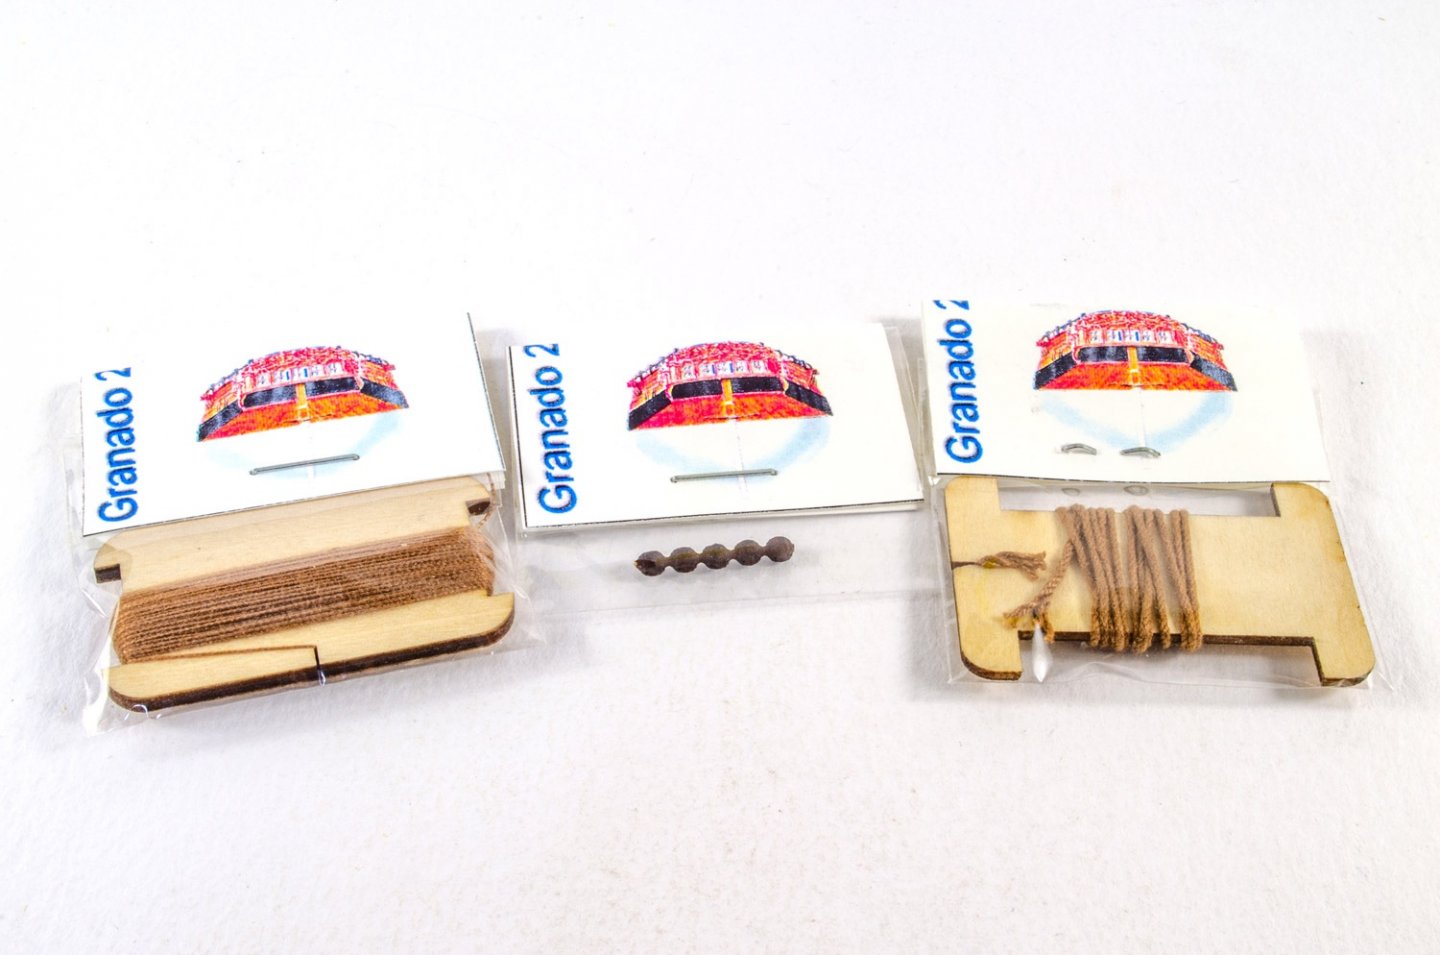
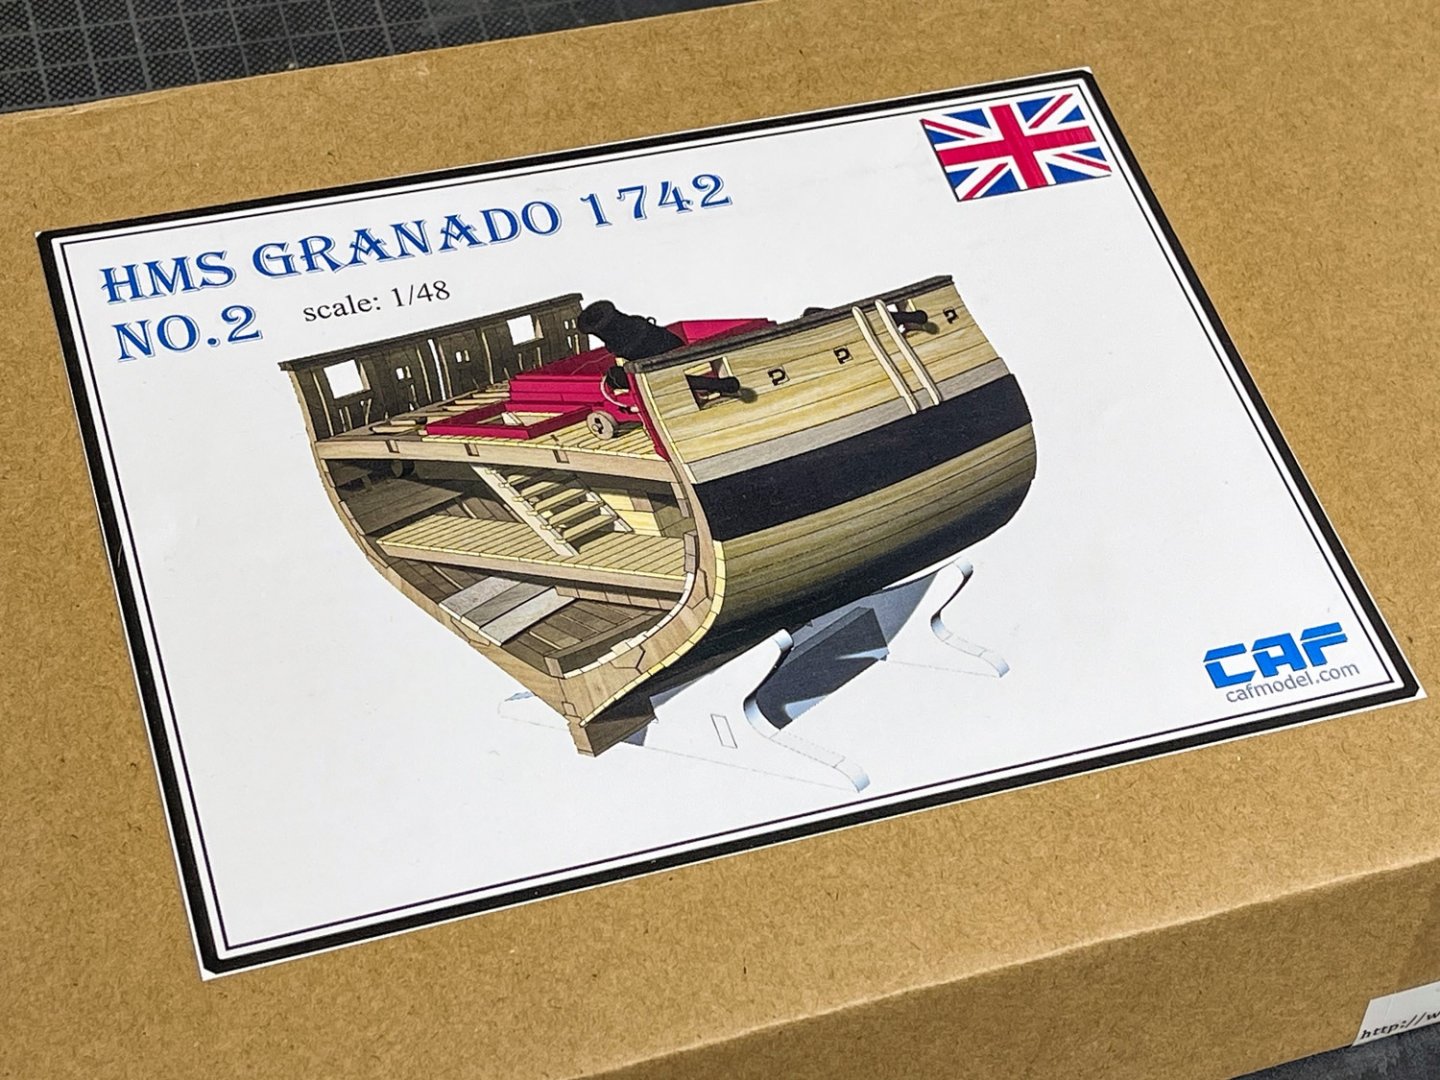
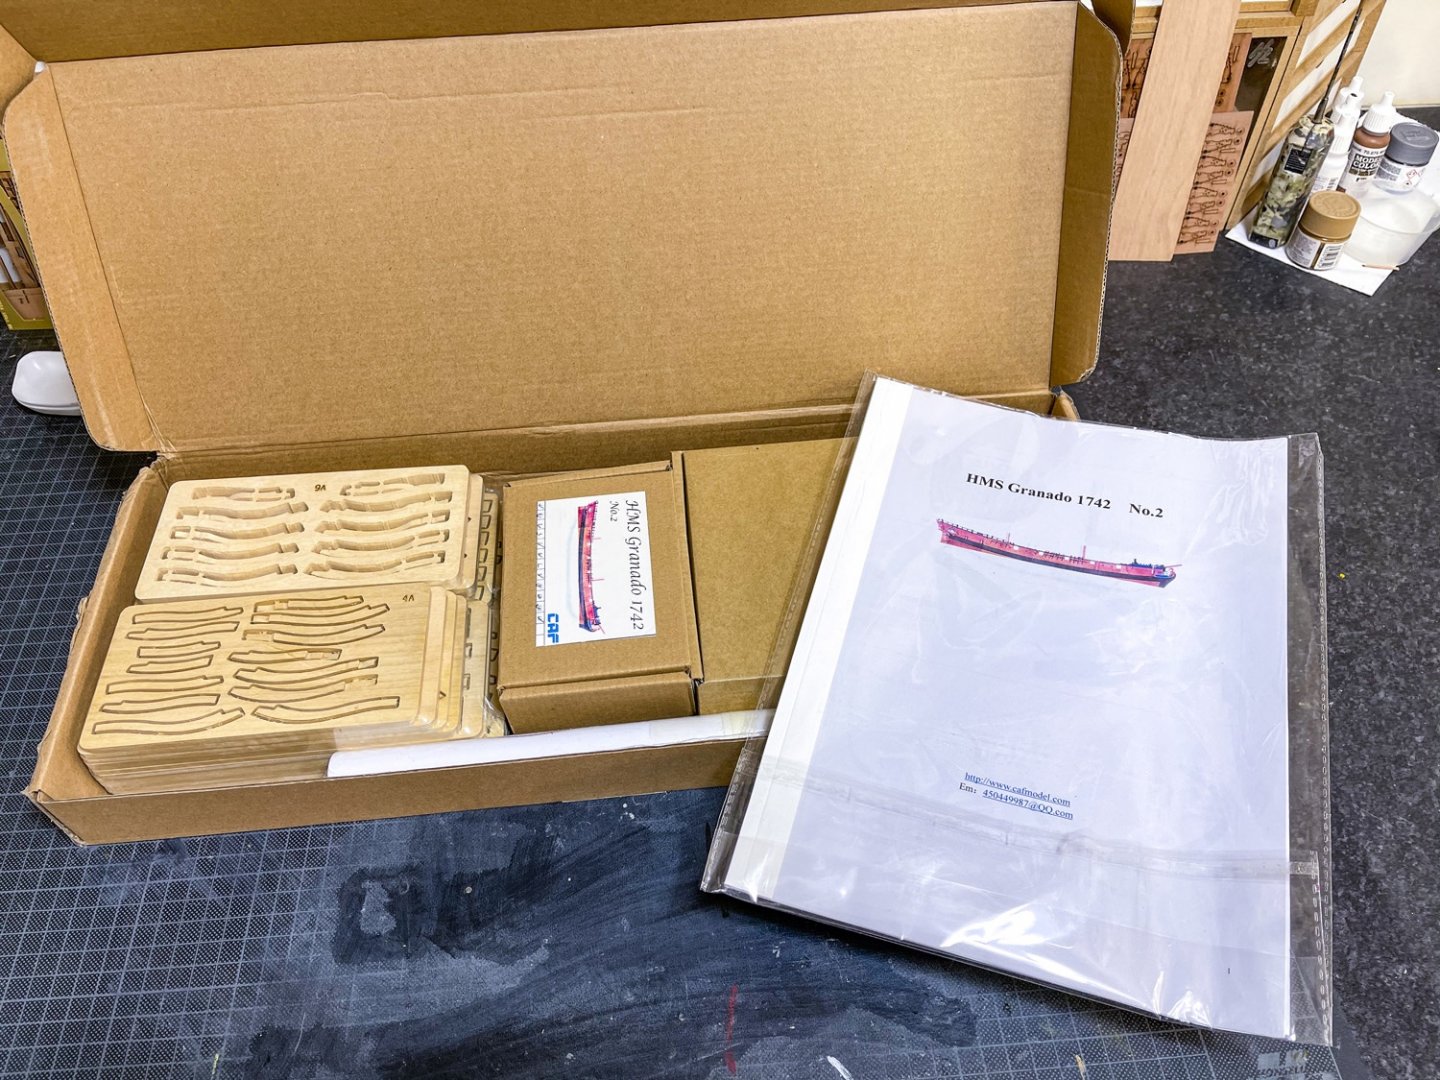
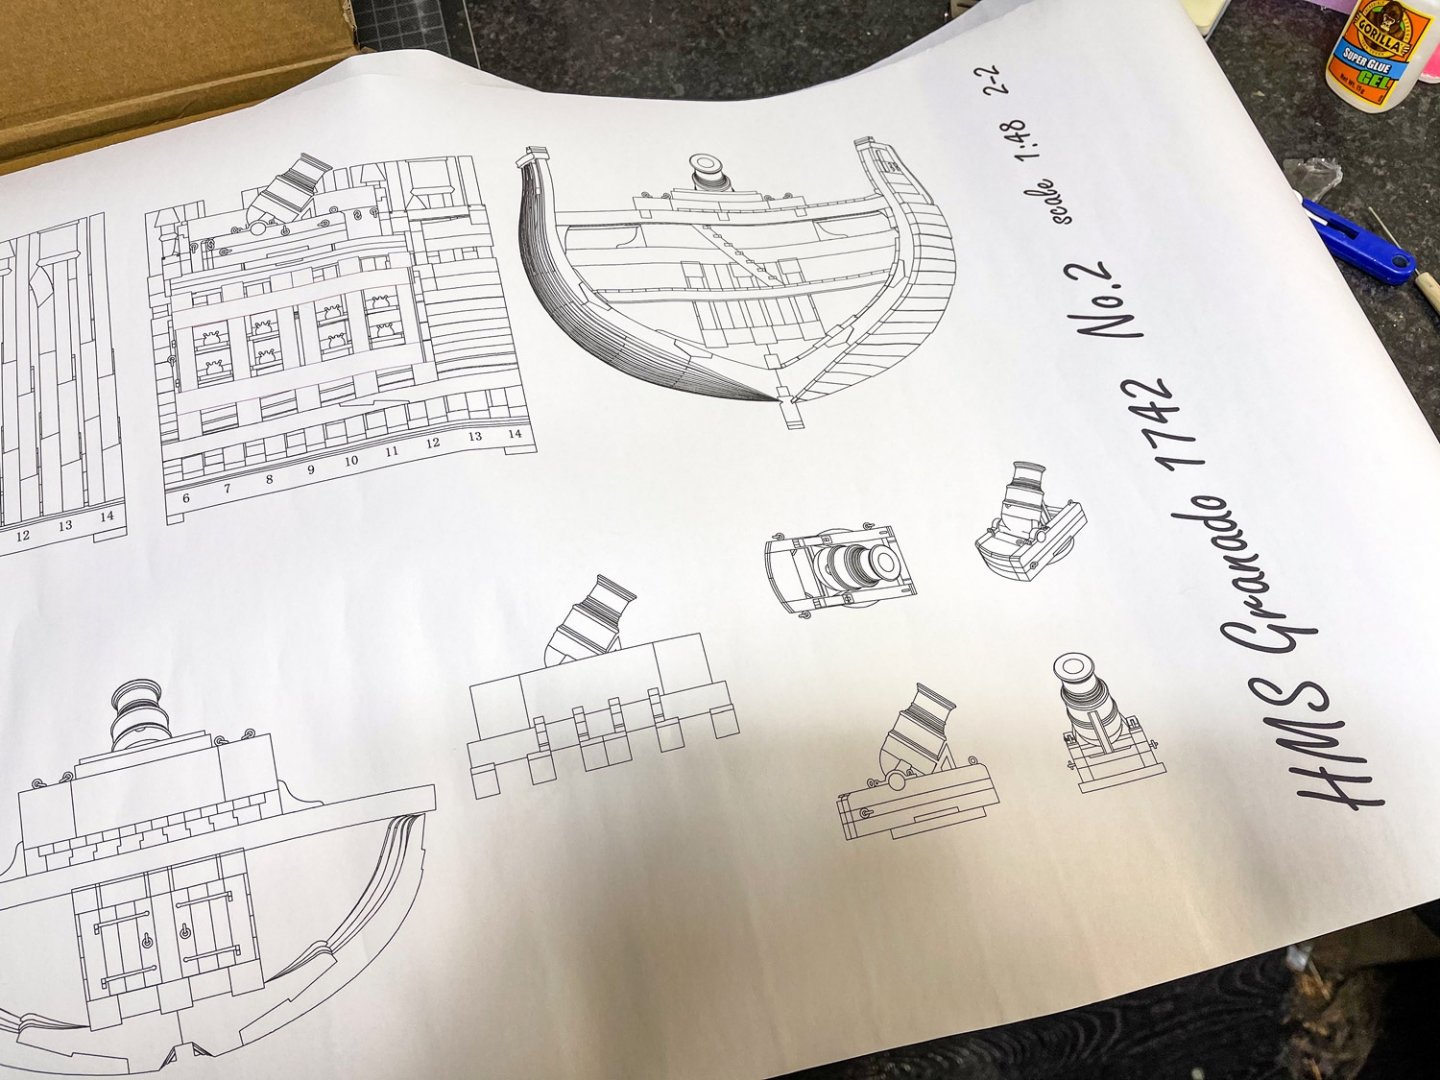
1:48 HMS Granado CAF Model Available from CAF Model. Check article for pack prices Lieutenant Thomas Elliot commissioned Granado in July 1742 as a sloop for the Channel and North Sea. HMS Granado was launched at Harwich in 1742, during the War of the Austrian Succession as a sloop-of-war. During this war she captured a French privateer. During the Seven Years' War she served both as a sloop and as a bomb vessel and participated in naval operations off the coast of France and in the West Indies. Granado was paid off in June 1763. She was surveyed on 6 July. The "Principal Officers and Commissioners of His Majesty's Navy" first offered Granado for sale at Woolwich on 23 August. She sold on 30 August at Portsmouth for £575.When the Navy sold her in 1763, she became the mercantile Prince Frederick. Around 1775 she became the northern fisheries whaler, Prudence. Around 1781 she became a government transport and was wrecked on 20 May 1782 on the coast of India. The kit: CAF have currently released their 1:48 HMS Granado (full hull kit) in two packs, and this first part of the review will look at Pack #1, comprising of TWO boxes of parts. The price for Pack #1 is $327.00USD, as is Pack 2 which consists of a single box. I'll look at that set in the second half of this article. There will be a Pack #3 released in the near future, which will fit this model out to the status of an Admiralty model, with guns on deck and all the various other features we would expect to see, such as the mortars themselves. HMS Granado Pack #1 Pack # contains everything you need to build the keel and hull framing for this famous bomb vessel. That means there is no interior at this stage, but don't think that you won't get a whole lot of timber. With all the boxes in this kit, once those parts are removed from their boxes, I simply find that I can't get them to fit back in again. When CAF originally sent this kit to us for review, a number of parts sheets had particularly bad scorch marks on the reverse. I highlighted this to Tom, and he was aware of the issue with a number of those that had shipped to customers, and he quickly replaced those and sent them out for this article. I also have to say that HMS Granado took about a week to reach the UK, from China. As with everything from CAF, the shipping package is totally robust, wrapped in thick corrugated card and sealed with about 1000 miles of tape! That would present a delicious headache for any custom's department! Nonetheless, it arrived intact. What you get in this pack will create the CAD image you see above. Oh, and of course, you also receive a large plywood jig into which you will add the many frames to your keel, once built. Remember, this model will not feature a bowsprit when complete, as is the nature of such models, so even though this is 1:48, you may be pleased to know that the full-length if Granado is actually only 670mm! Plus you don't have masts and spars to worry about. For displaying, she'll be far easier than most model ships. There is actually something else for you to consider with this model. You can either build her as a complete hull, or you can build her split into an upper and lower section, exactly like the well-known model at the UK's National Maritime Museum. Here you see what I mean: The plans make provision for all frames and keel to be split at the appropriate places, and you will see this in the instruction images further on in this article. I do feel that to do this presents some serious challenges and that is on top of this model only being suitable for very experienced builders. BUT.....if you want that challenge, then it's there for you. Inside the boxes, all parts are amazingly well packaged so that they fit the box, and they are also all shrink wrapped. As the shrink wrap is nice and tight, it's worth keeping the parts in that for a while after you receive the model so that the timber can normalise and risk of any warp is reduced when you open the parts. All part sheets are engraved with the sheet number, and you must then refer to the manuals for the part identification. This helps keep the sheets compact and the numbers of visible part faces. Timber-wise, the kit is made up of both laser cut and engraved parts, plus a good number of CNC cut parts sheets which feature slot milling on both sides, so that all you need to do is square of any joint corners which will inevitably be slightly rounded. A small number of parts are also CNC machined to shape, so you just need to clean them up. We've seen this on such kits before, and it saves the modeller a lot of guesswork in trying to think in 3D. I did say these packs were full of timber, and they are also quite heavy. The timber varies only very slightly in colour on the occasional sheet, but the quality of the wood is excellent, with no natural problems with grain banding or knots to be seen anywhere. As I said, all sheets are also perfectly flat. I'm not quite sure what the timber is for these sheets, but the grain is very tight and not particularly visible, which is a bonus for modelling in the scales we use. The timber sheets in the first box are numbered as sets, i.e. 1A, 1B, 1C, 2A, 2B, 2C etc. and the sets are of different thicknesses. You can also see on the sheets, just how fine the laser cutting is, and one image showing the reverse of one sheet so you can see the minimal scorch. In fact, that sheet is probably the worst of them all, so it's not bad at all! Many parts sheets are also engraved with bevelling lines, taking a lot of the hard guess work out of things. You can also see from that last image that not only is that scorch on this (the worst sheet!) isn't very bad, but CAF has also turned the sheets over to create engraved bevelling lines on the reverse. Box Number 2 of 2 All parts in these boxes have already been unwrapped so I could ensure everything was ok to proceed with this article. This larger box contains the many plywood parts for the hull jog, providing an accurate way to install and align the ribs to the keel. The jig itself will also serve to work into Part #2 of the kit set, when you come to fit out the hull interior. Here is an idea of what the jig will look like when complete: Here are the pictures of the cradle parts: This is a project in its own right. Even though everything is tabbed, proceed nice and slowly and use a metal square to make sure everything is upright and 90 degrees to adjacent parts. Ply quality is also very good with no warping on my same, and all laser cutting being nice and fine. There are also more timber parts for hull construction, provided as CNC-routed parts. Also a little strip material too. Manual and plans The manual for this set is an A4 production of 26 pages, incorporating the aforementioned part maps for part ID. The construction side of the manual is created from a series of CAD illustrations, shown in colour for ease of use, and with some good English notation. The manual clearly shows how to proceed with building the model as a split hull too, but I think to try and make this a removable section is a little too optimistic due to all those frames needing to key into each other simultaneously. Here are some images from the manual: And as for the included drawings, these show the hull elevations as shown below, and also the completed frames. I won't show the latter as it could be used as a copy to produce parts without buying the kit. It does show various lines in different colours, to help you align and identify the various frame sections. To give you a general idea of how the hull in constructed within the jig, here are some images from CAF: I will very shortly post the next box series #2 in this topic.
_bomb_vessel_RMG_J0387.thumb.jpg.08e3195819f5eb0b1256be4cff8b5537.jpg)


-
 Hi all, I'm actually waiting on a couple of small sheets of parts from CAF, and those should be here pretty soon, courier dependent. The kit itself landed last week in under 7 days from China, via TNT/FedEx. Pretty quick for these times we currently live in. If you haven't already checked out my review for this kit, please do so here: I still need to dump my photos from camera yet, and I'll wait until I have the first double frame complete. Give me a couple of days or so Jim
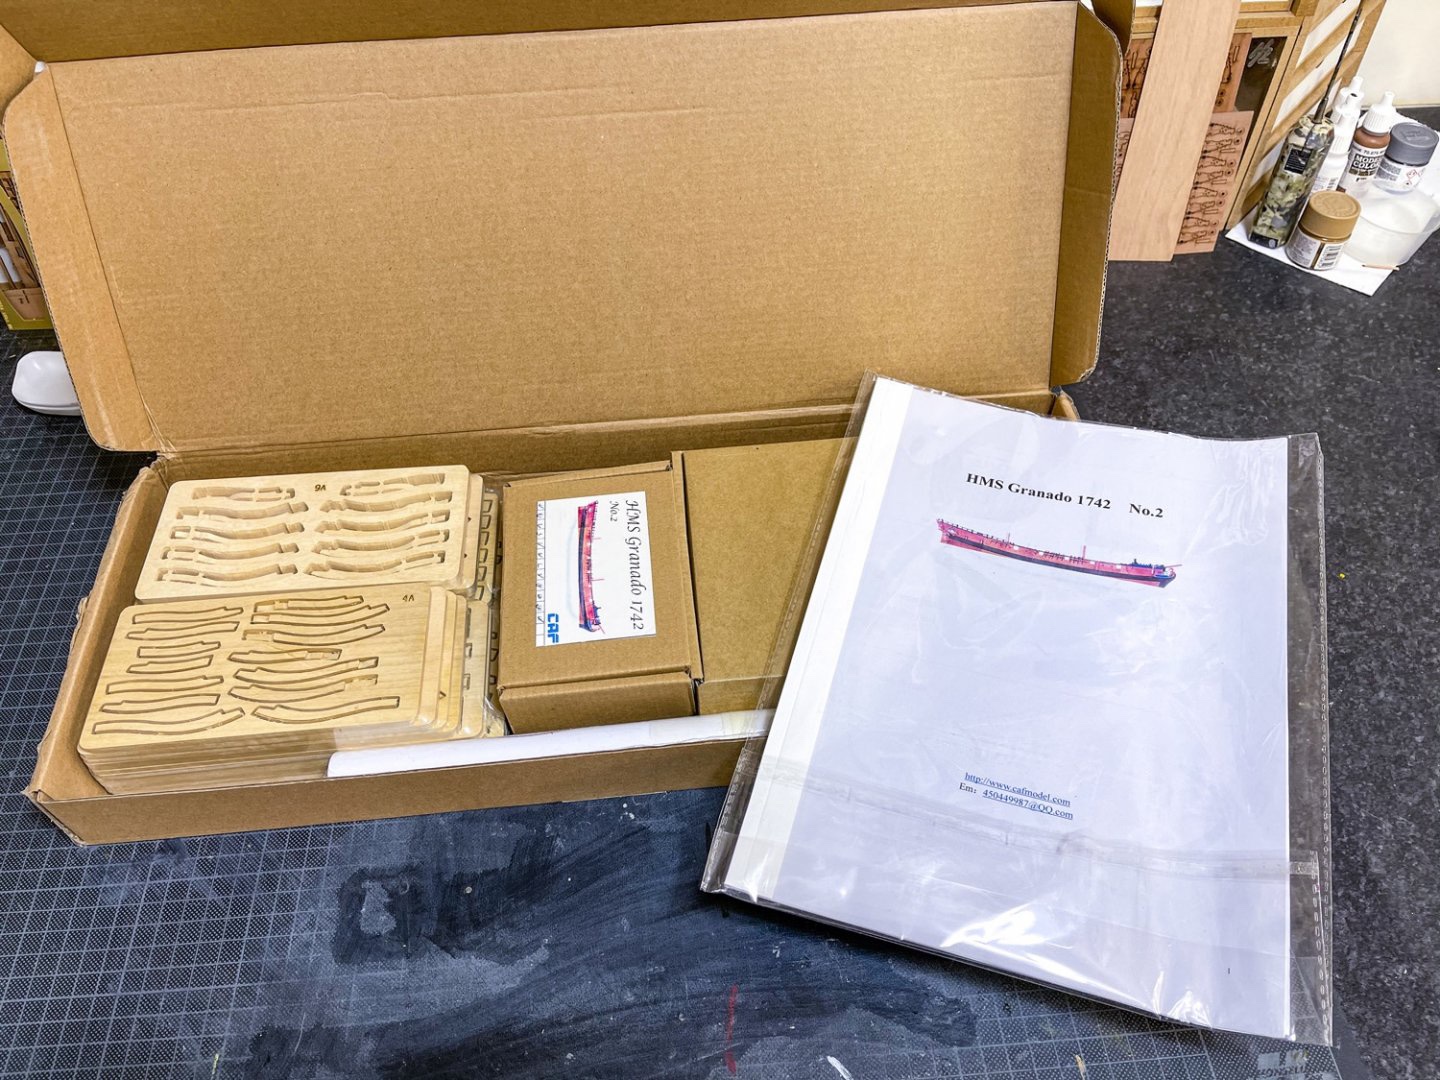
- 16 replies
-
- 8
-
-
- Granado
- cross section
- (and 2 more)
-
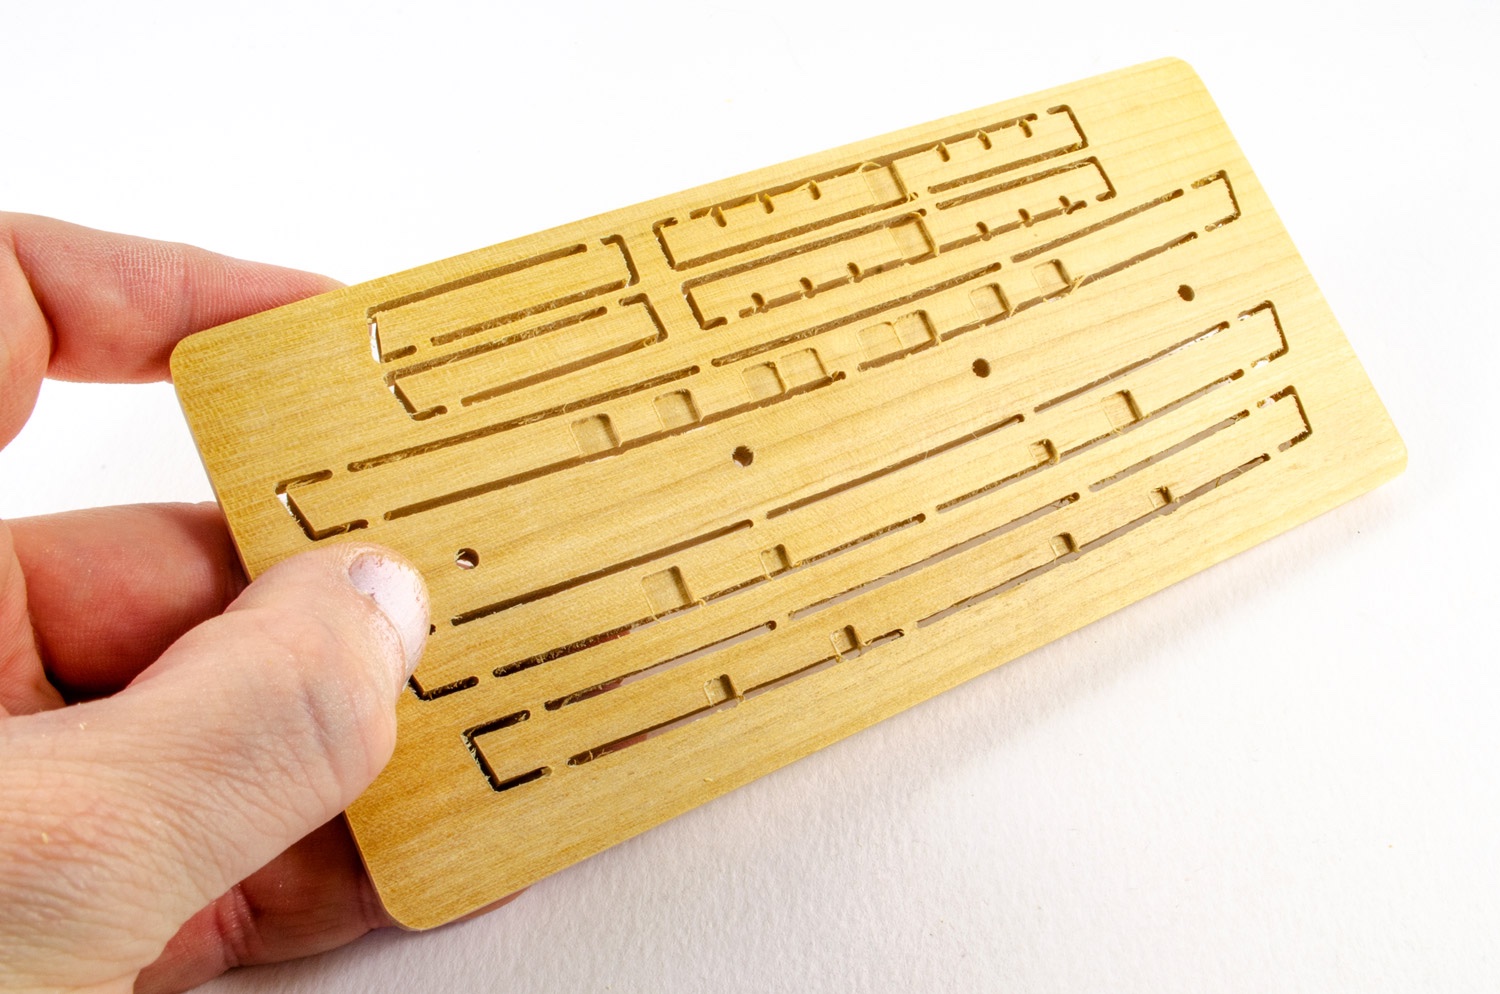
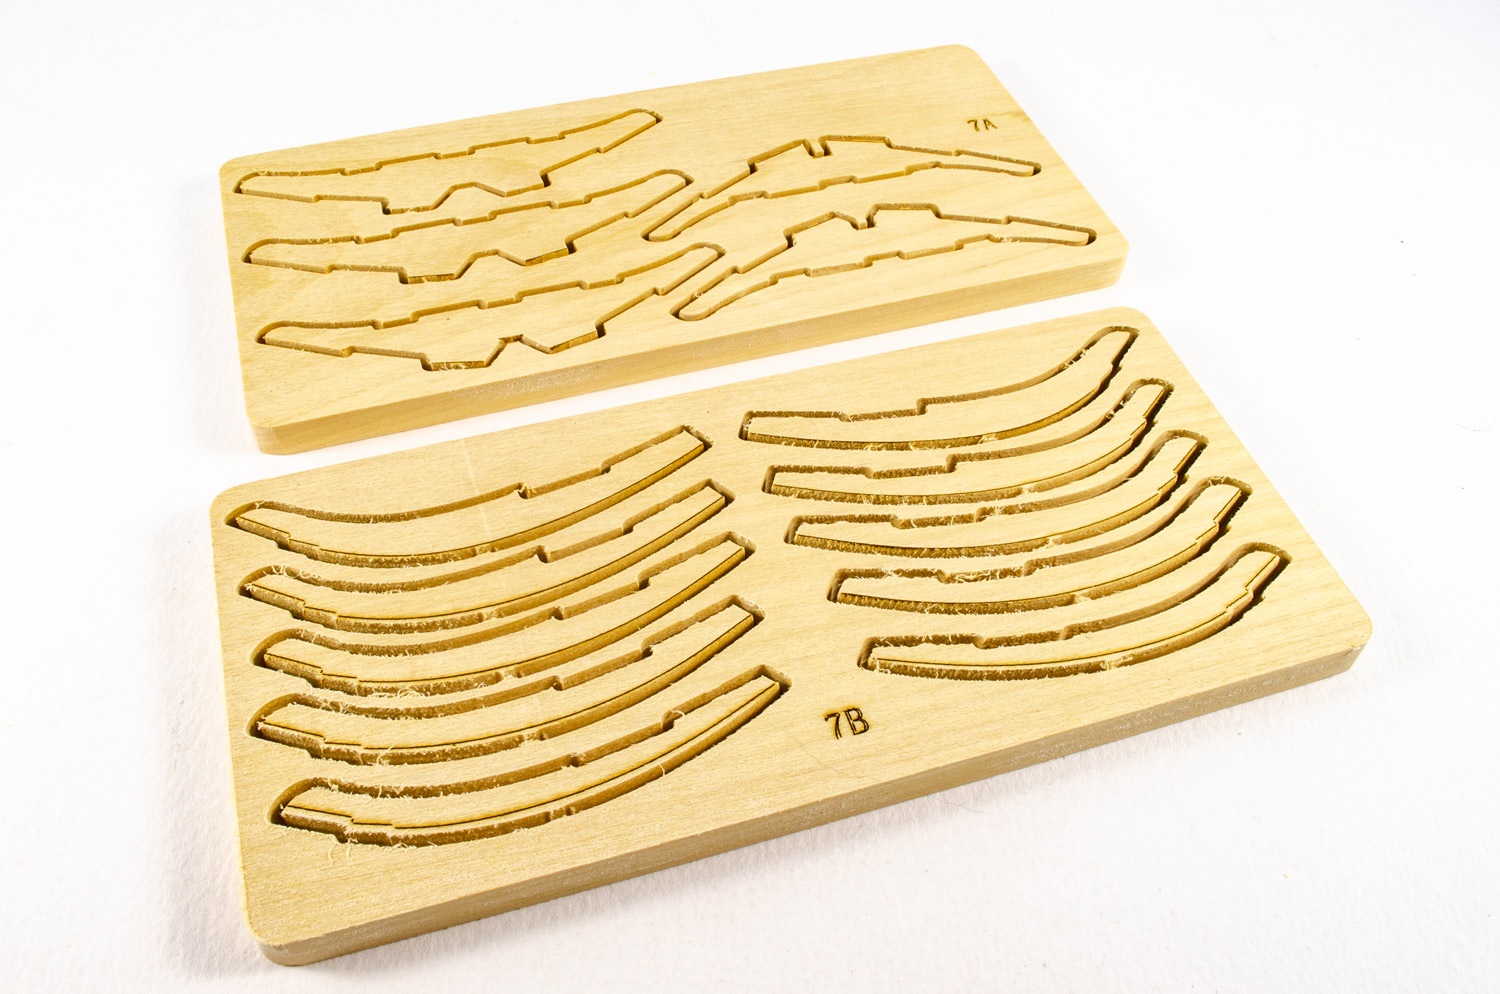
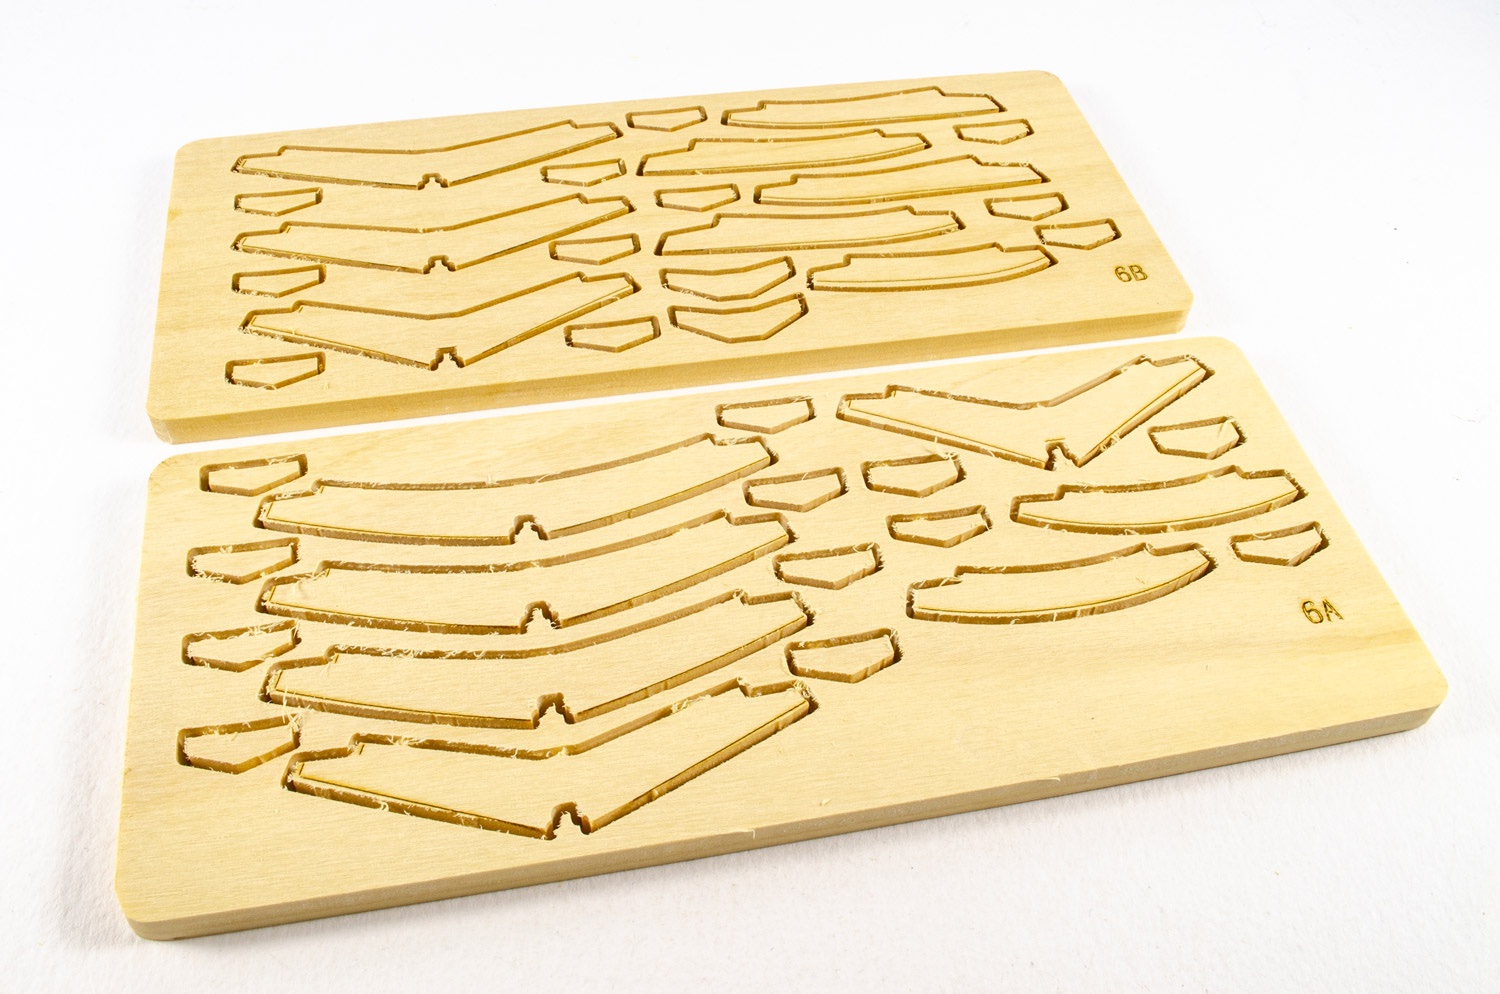
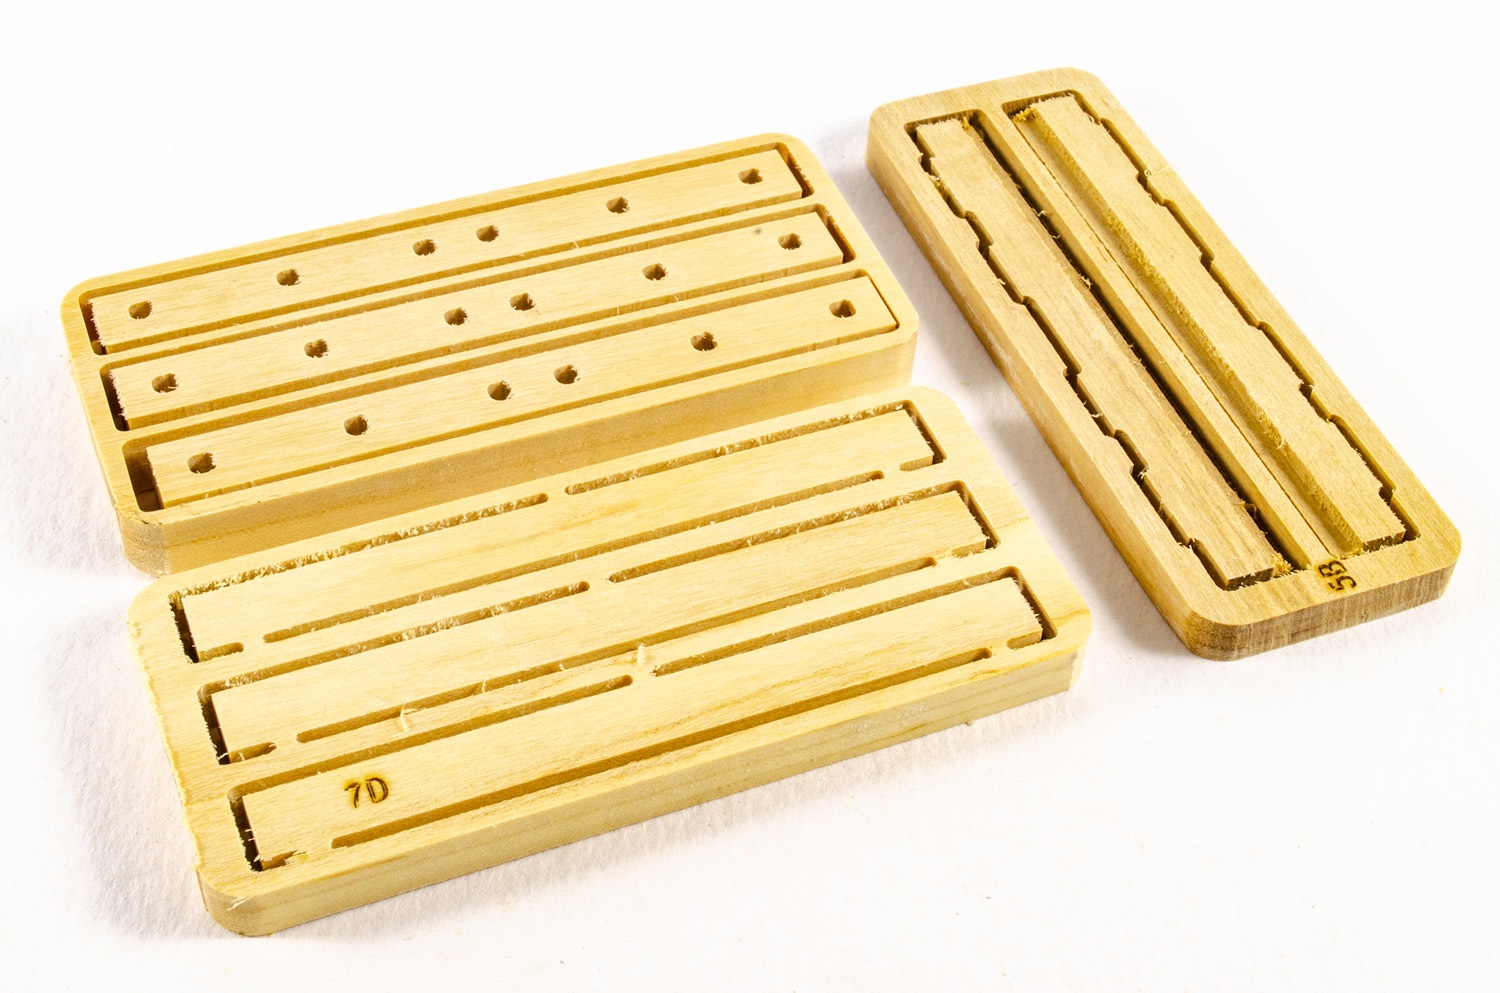
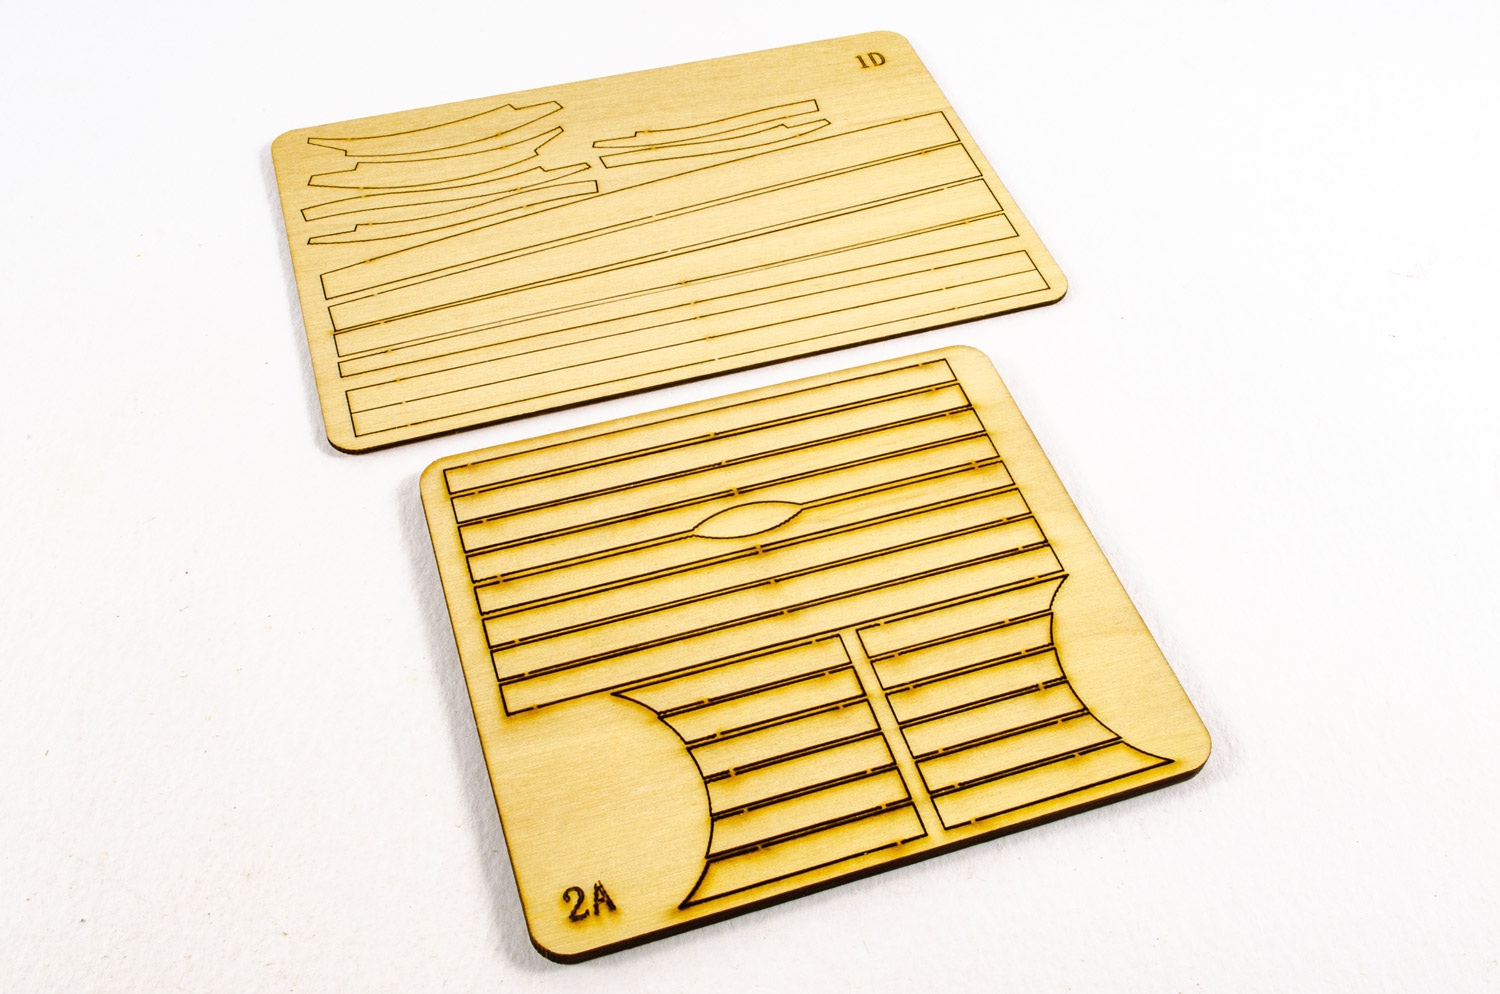
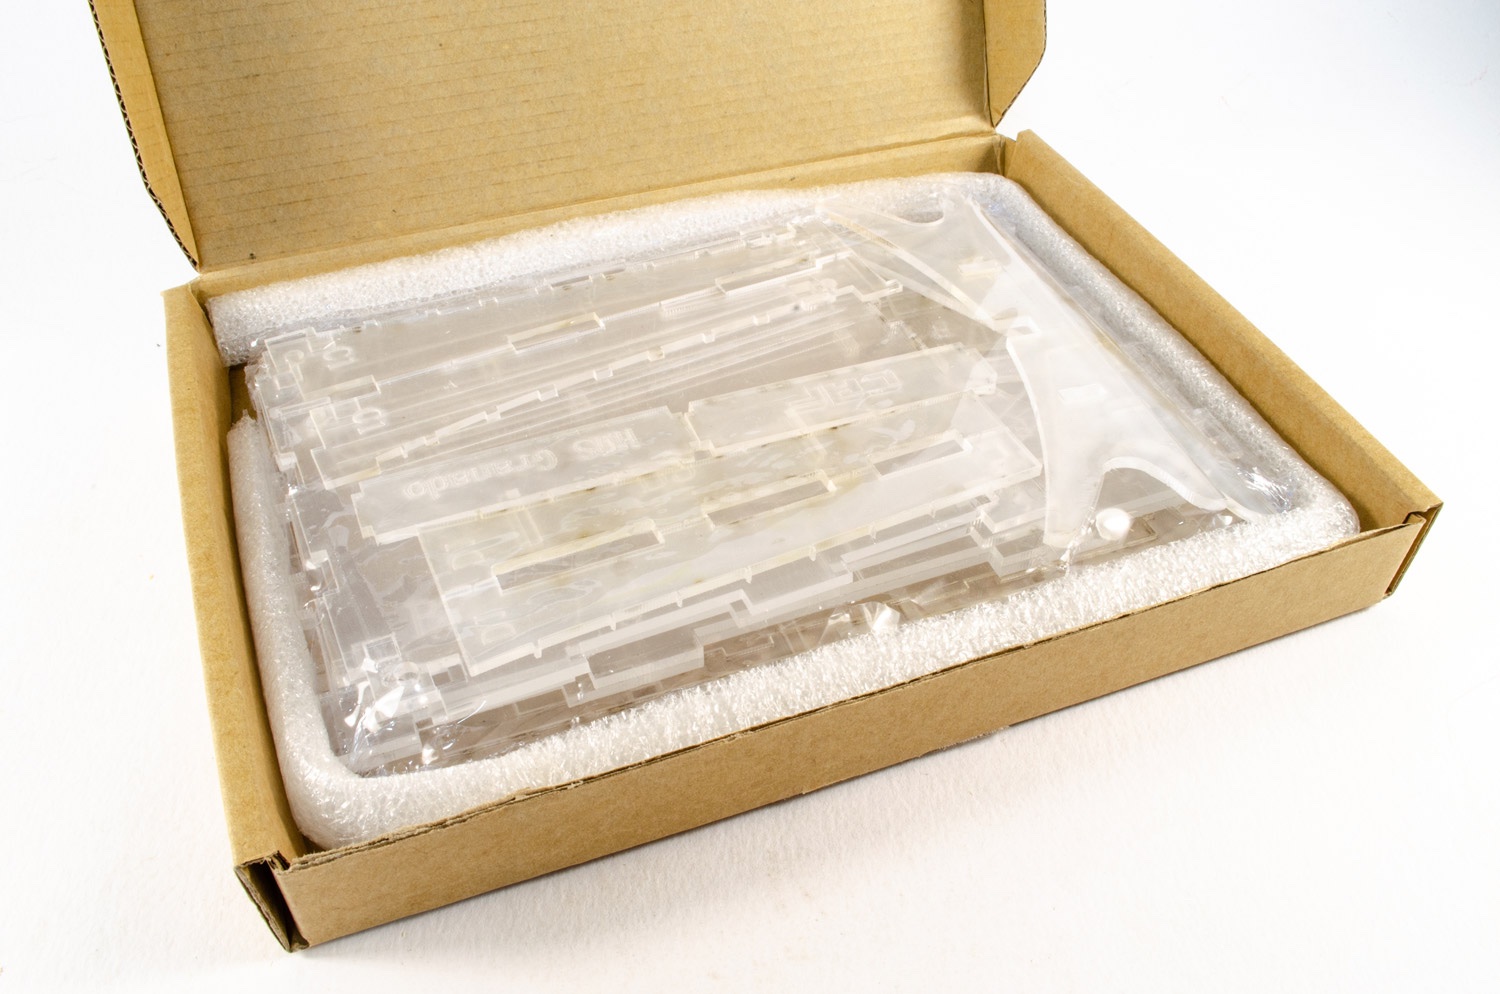
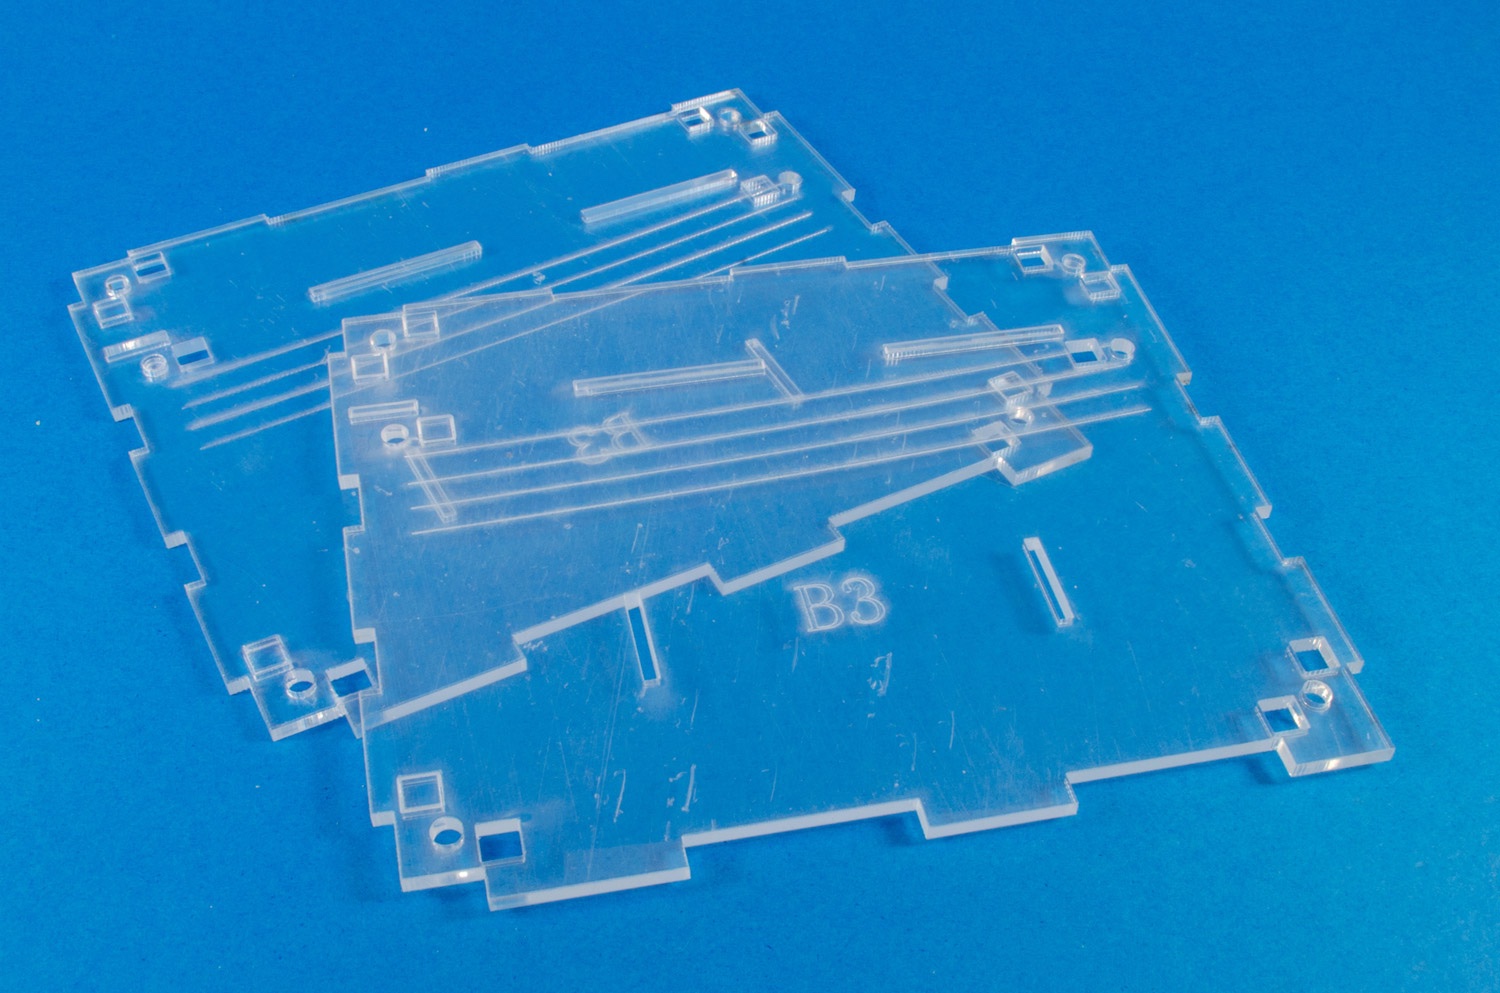
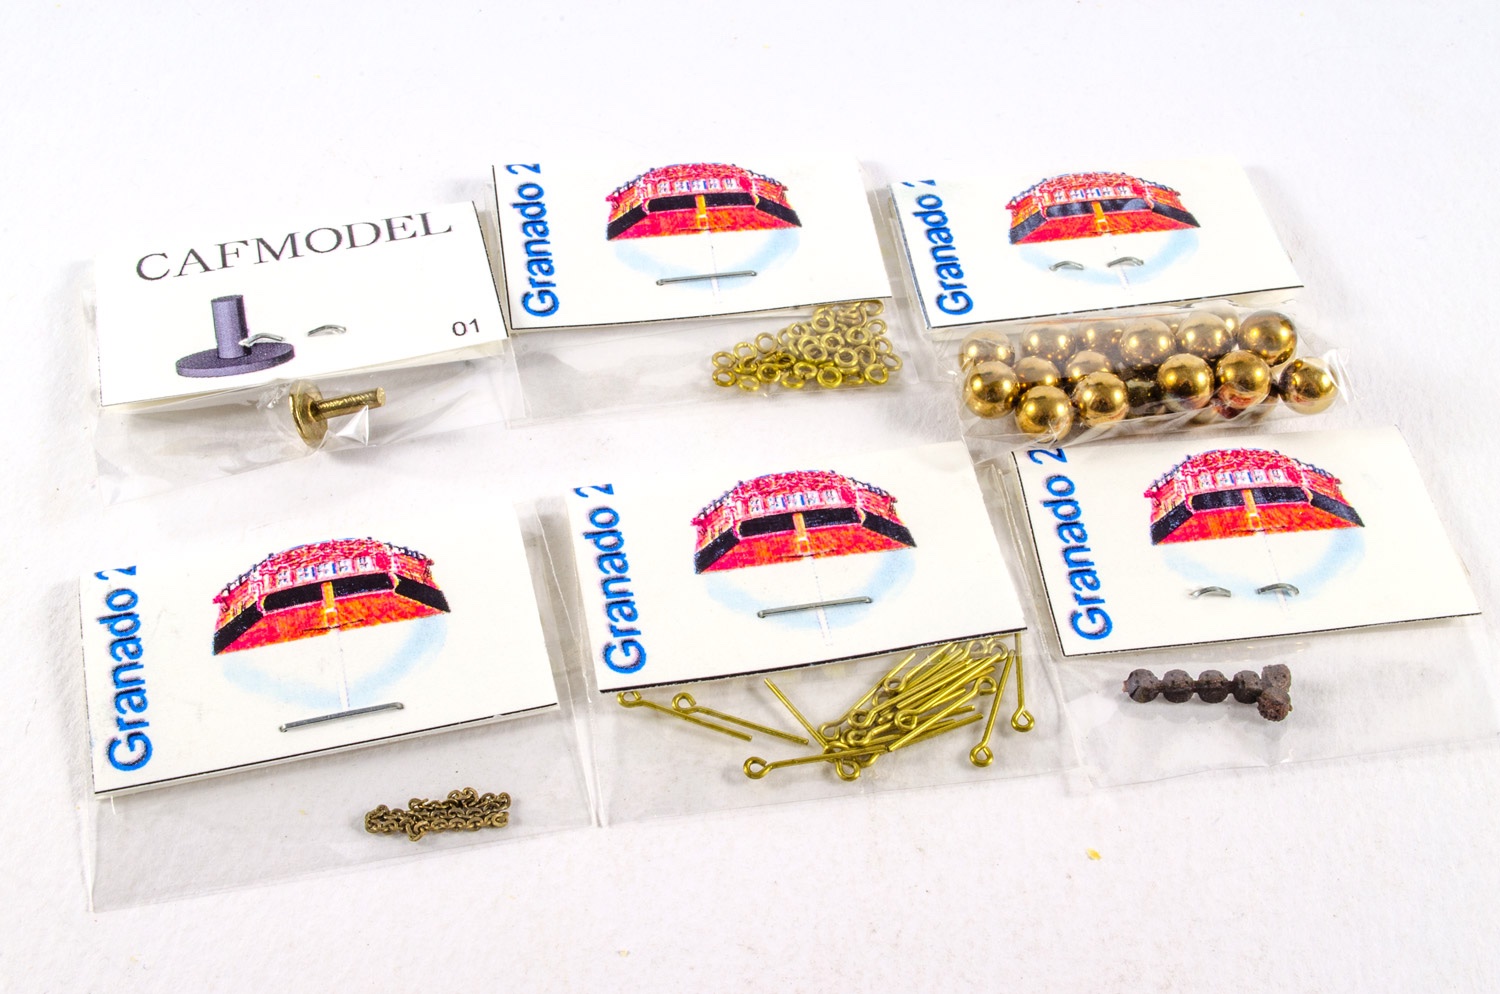
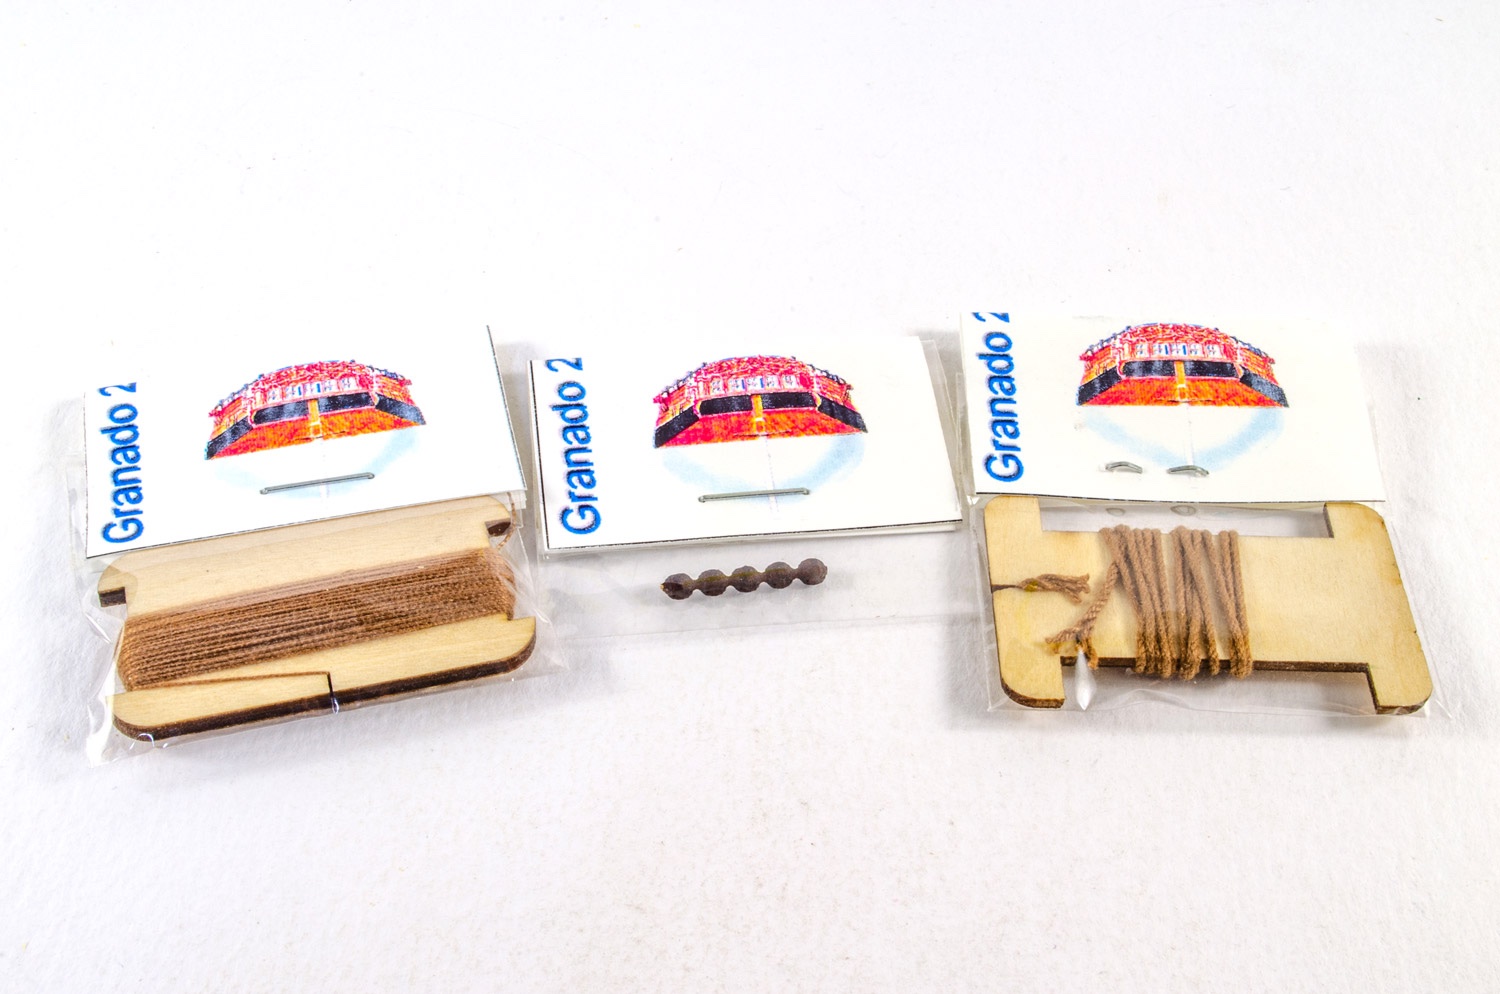
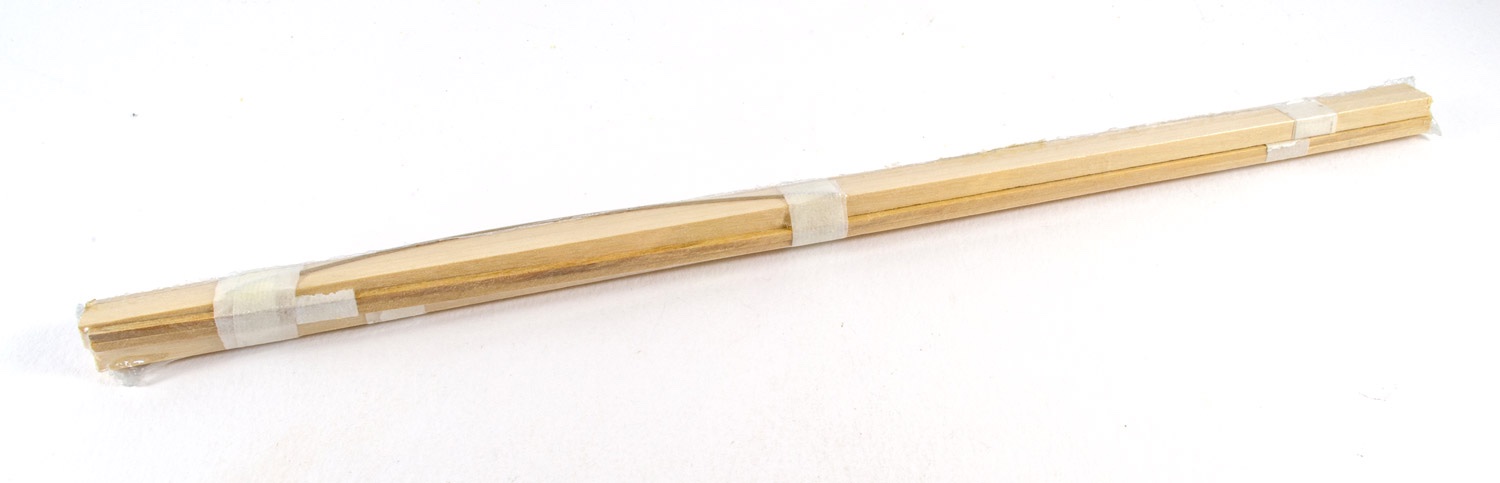
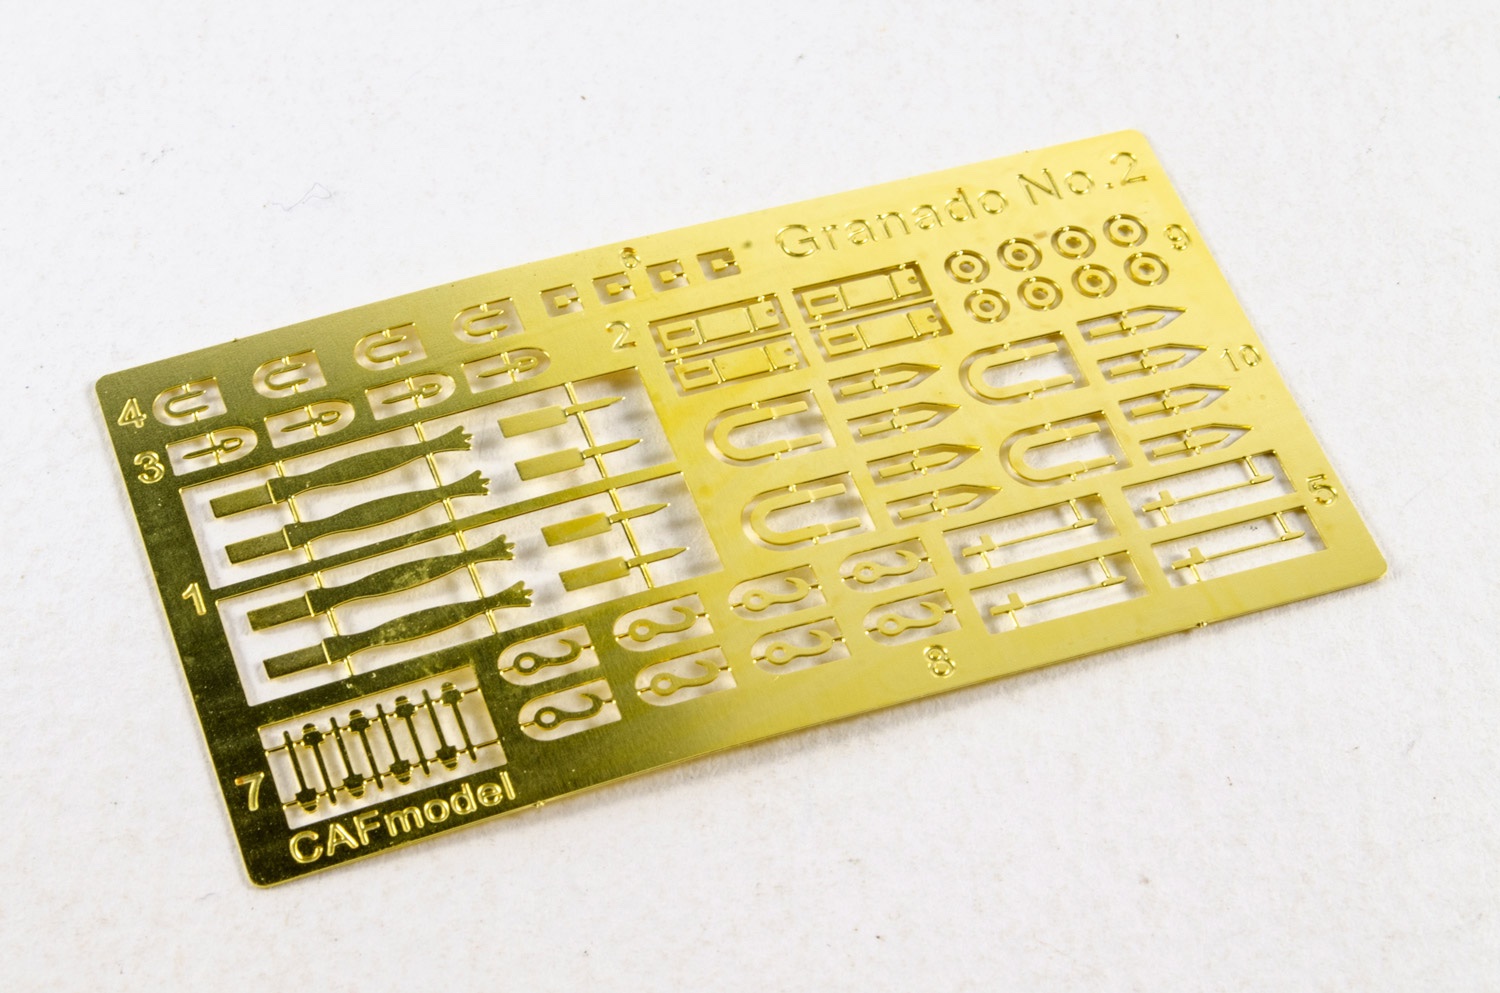
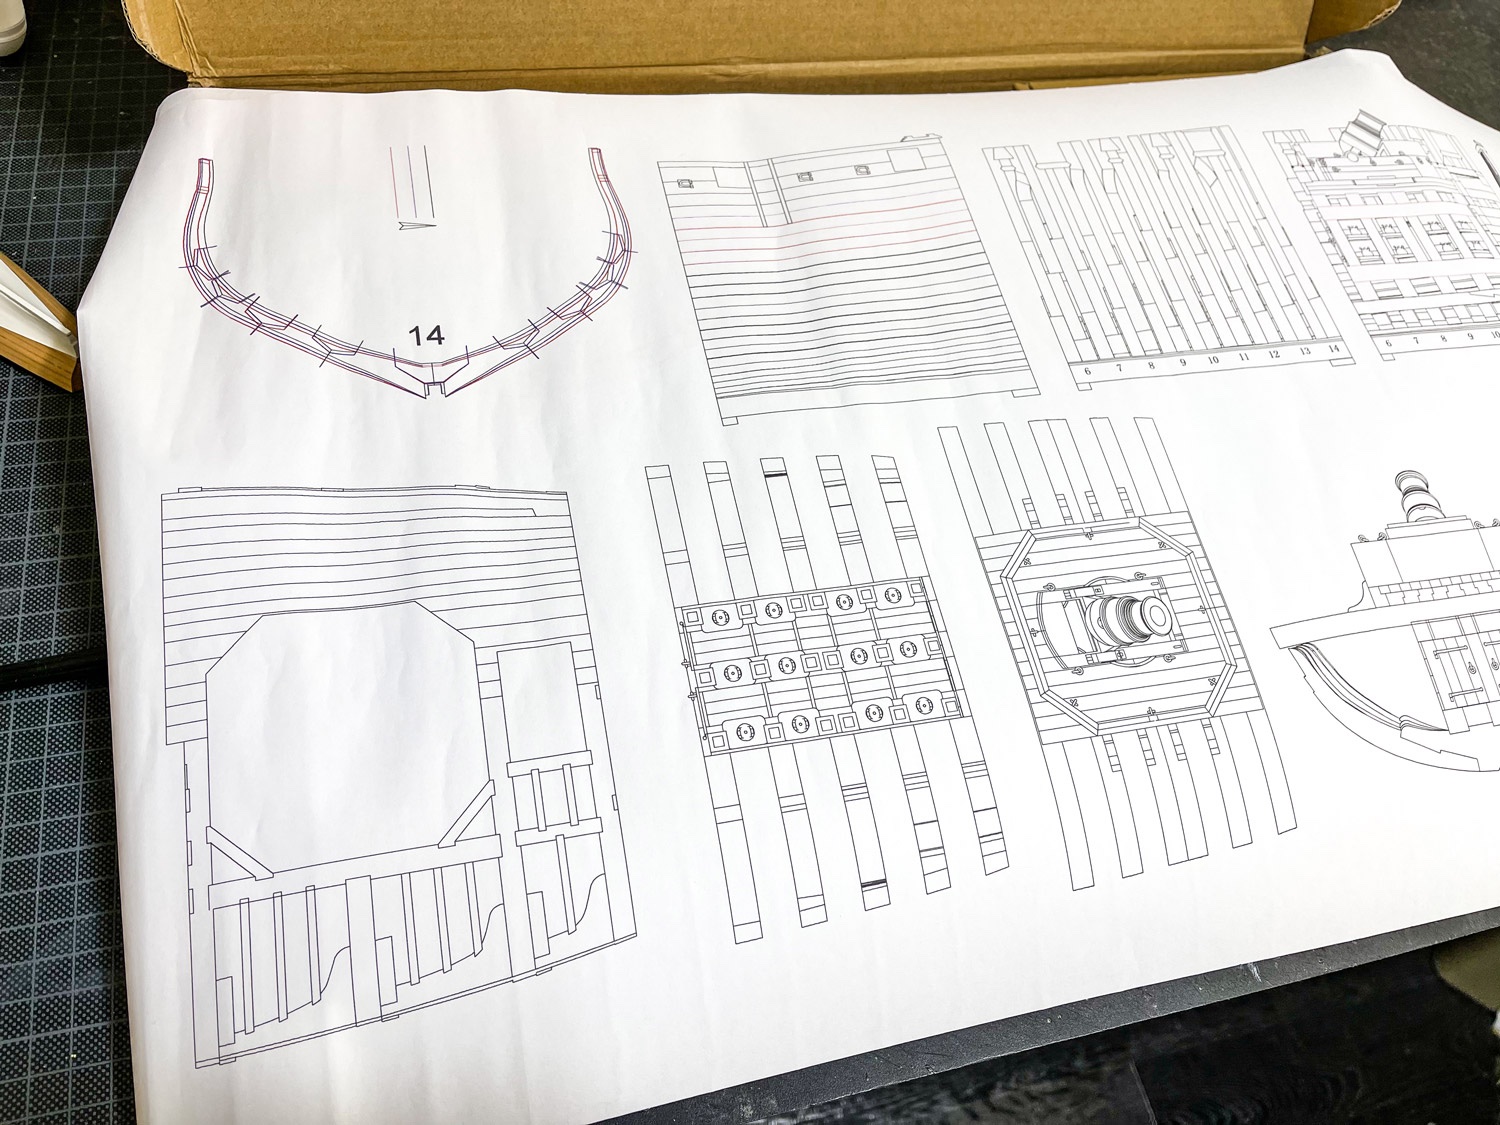
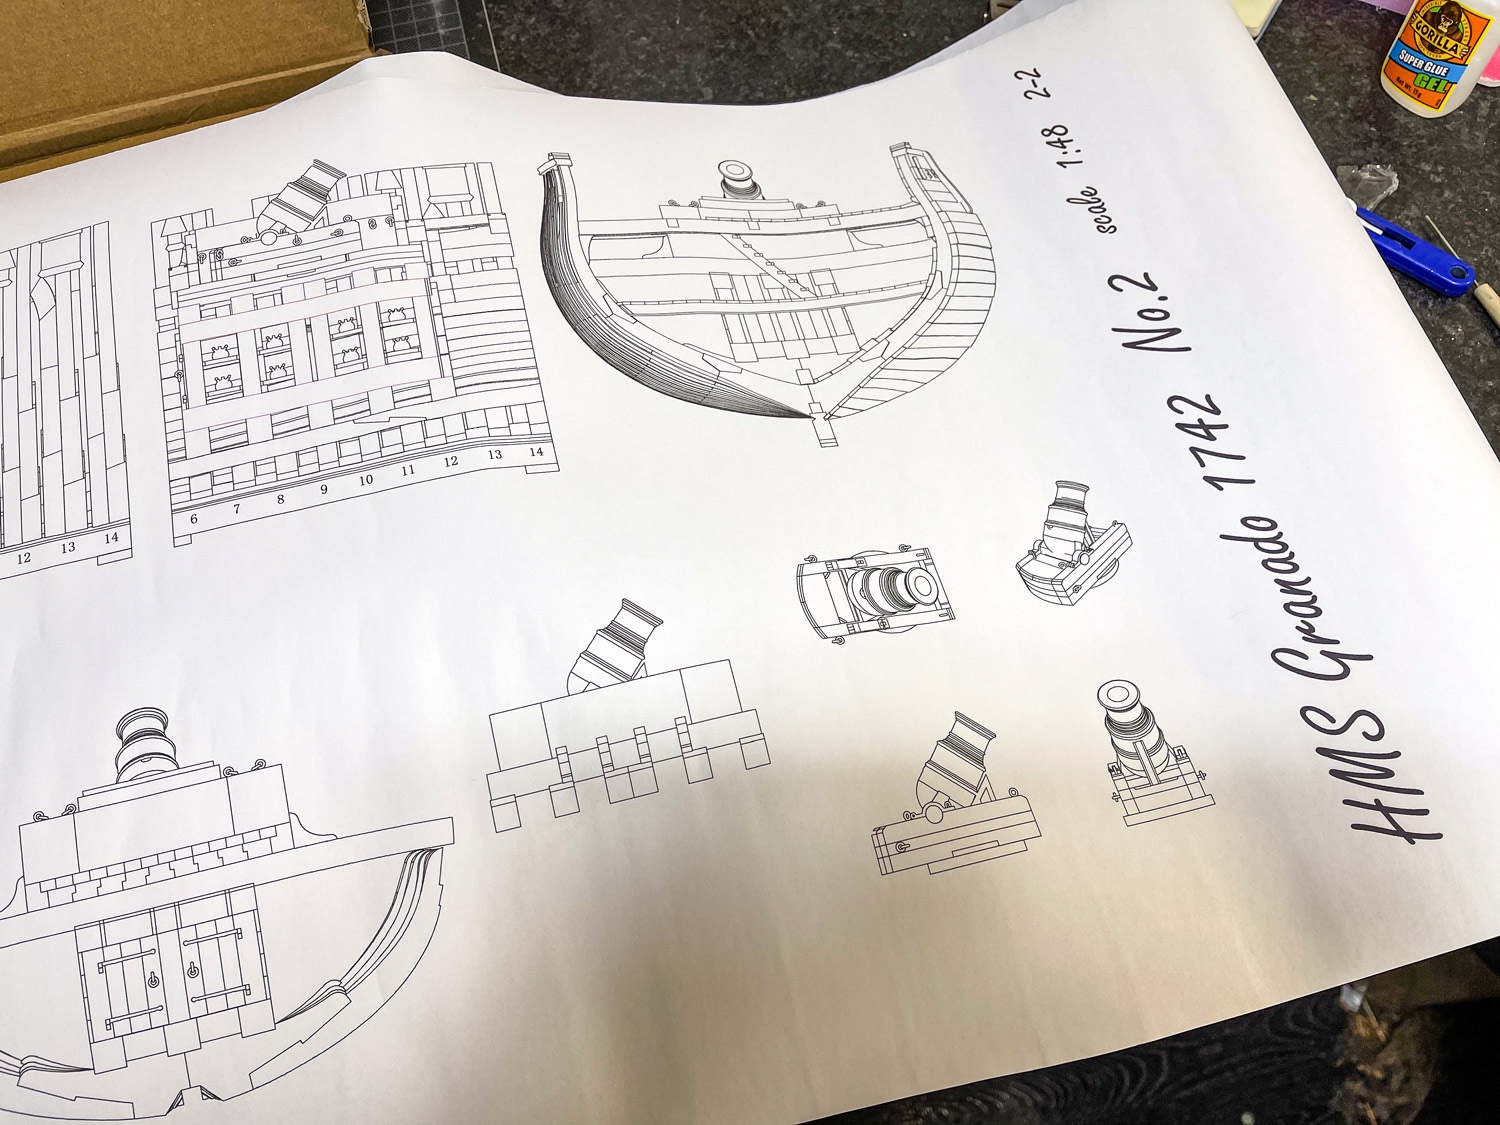
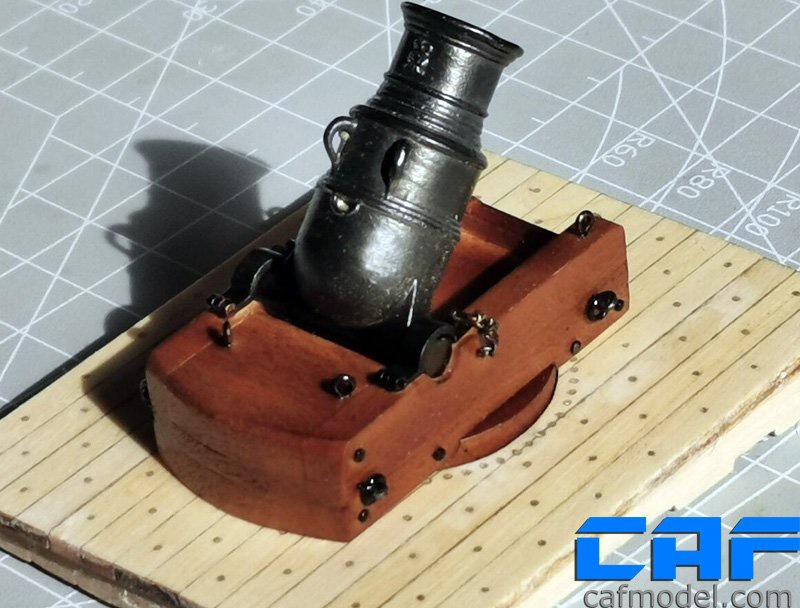
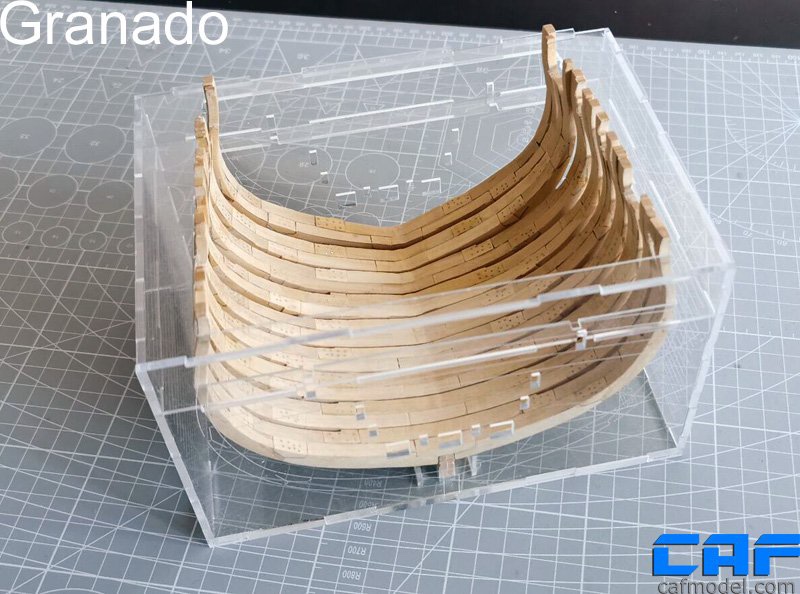
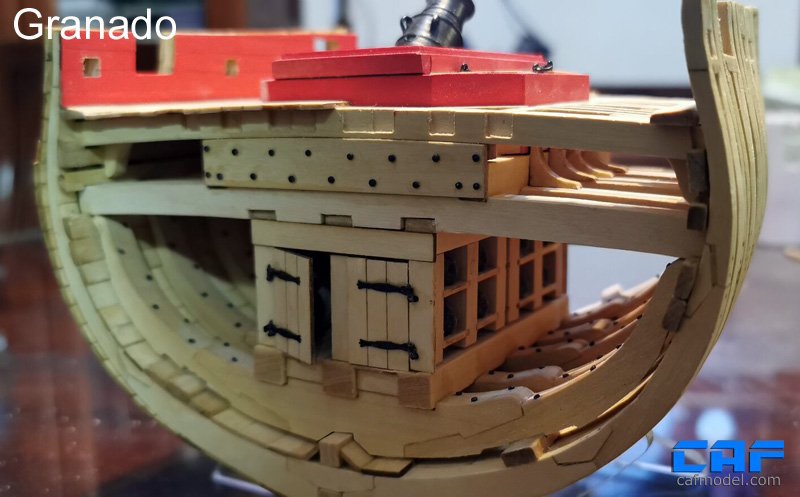
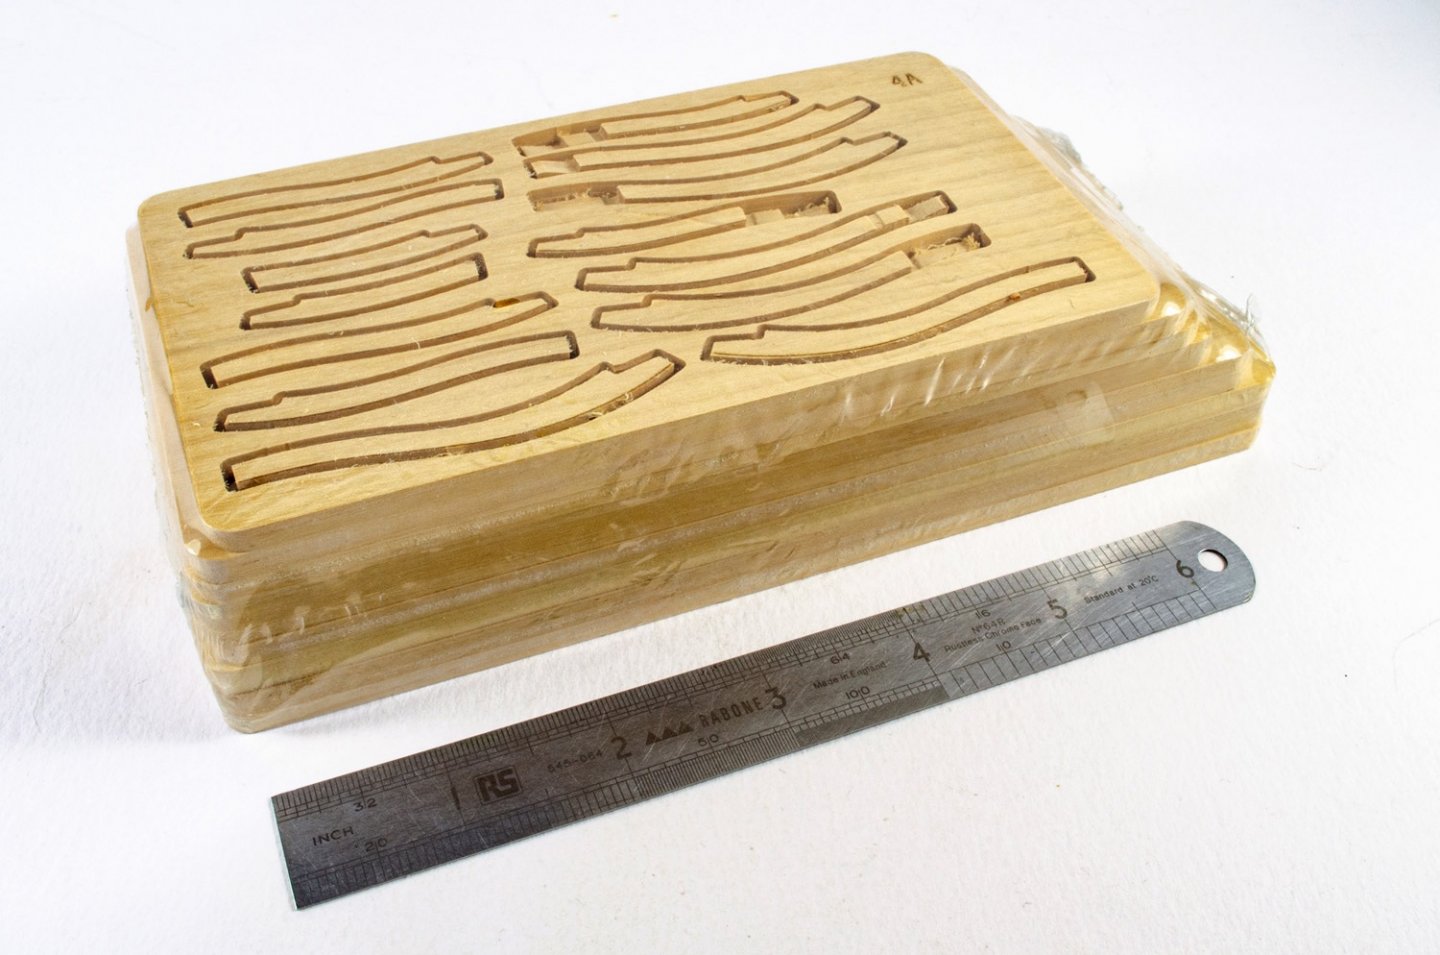
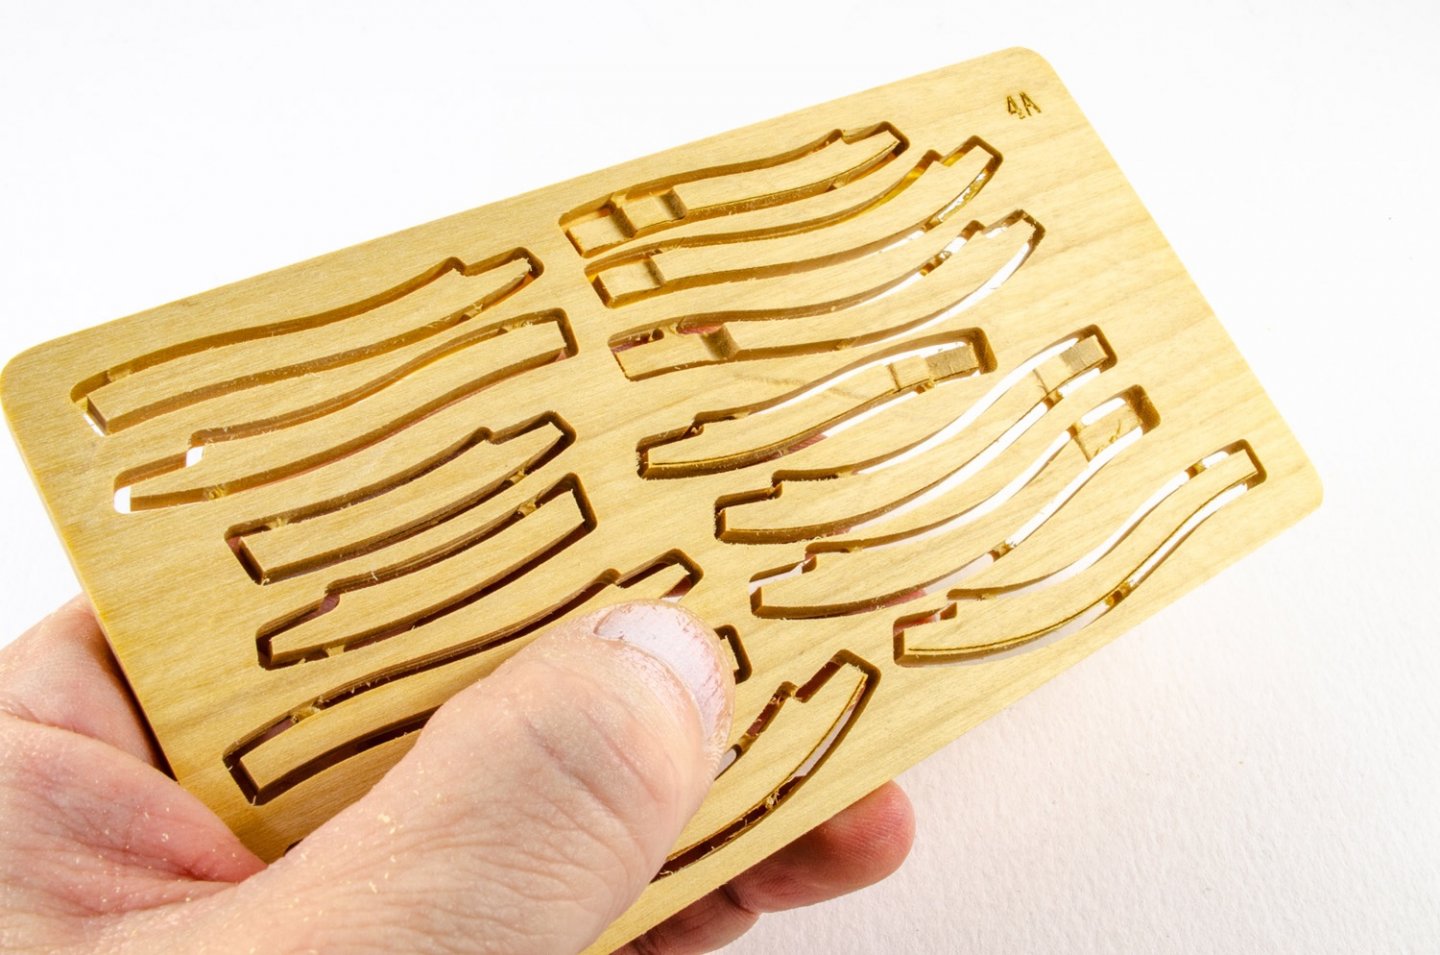
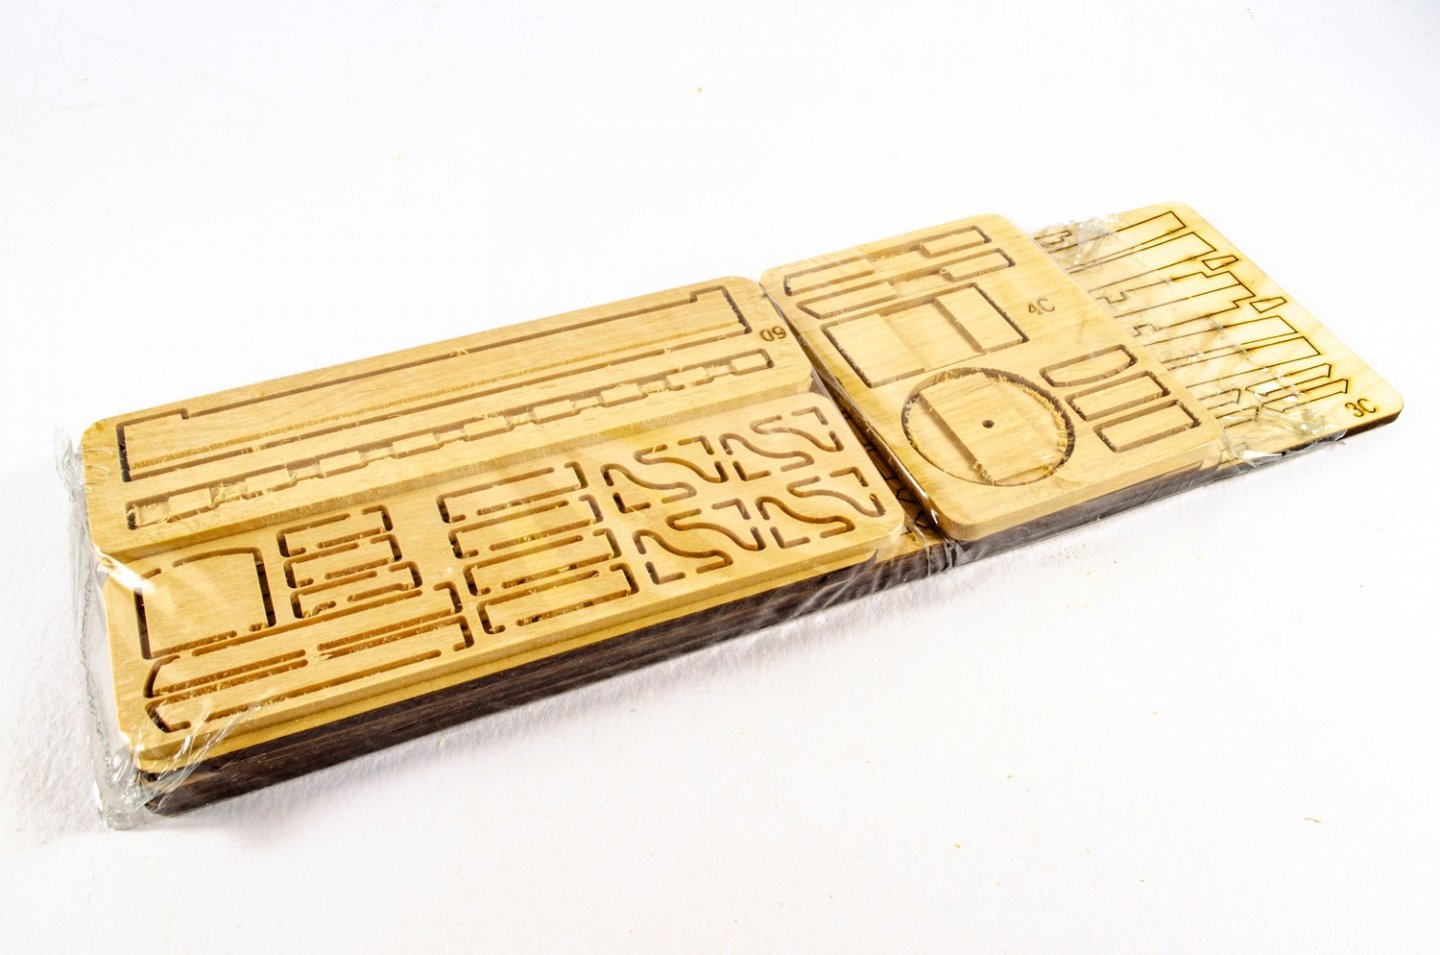
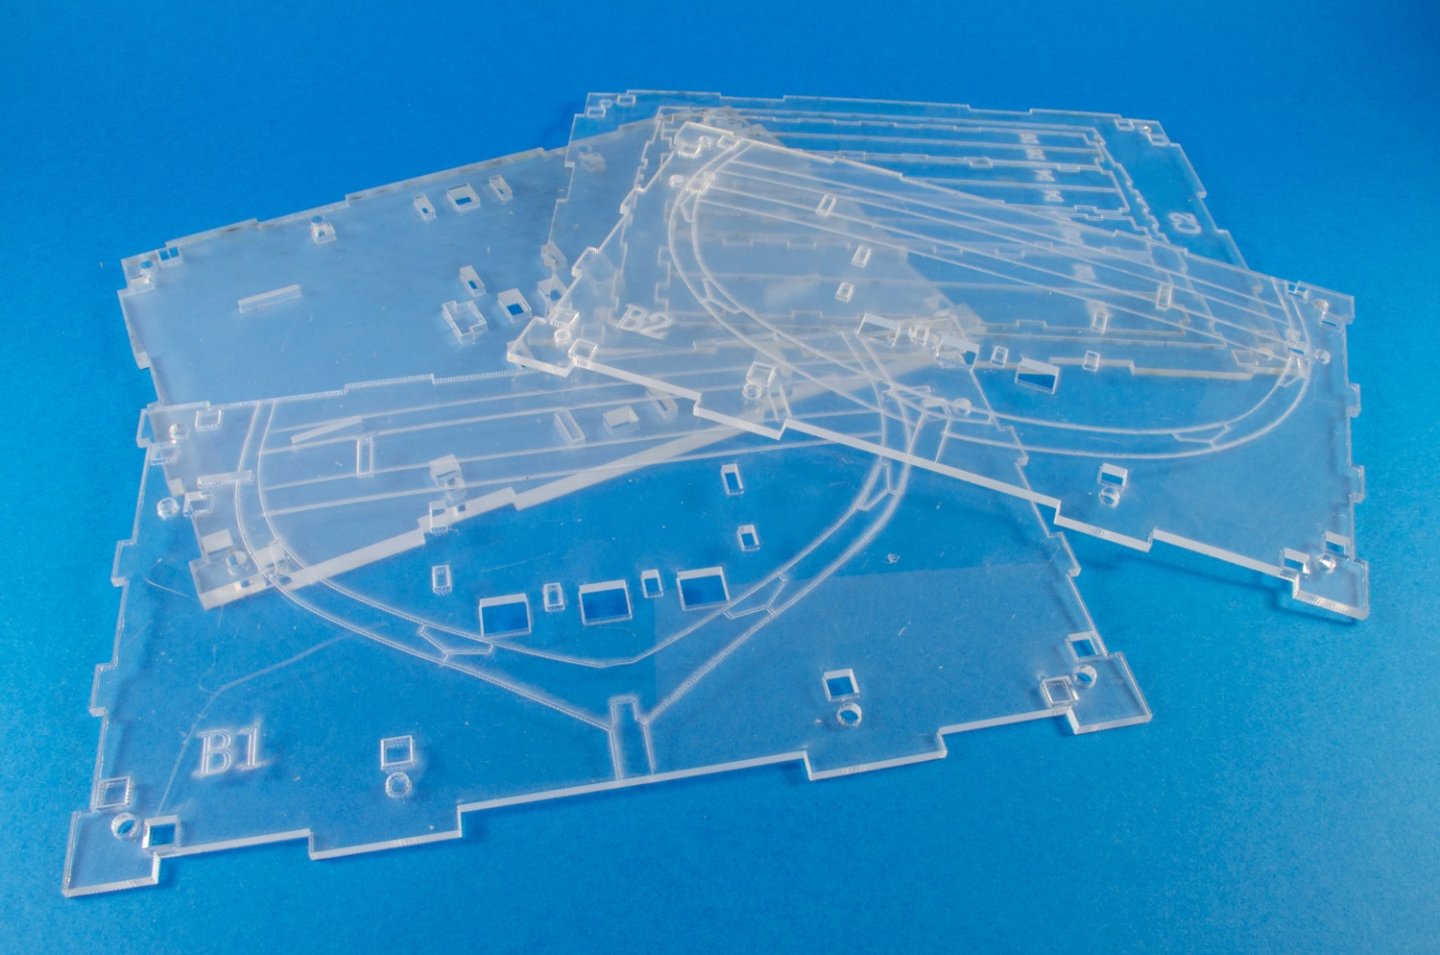
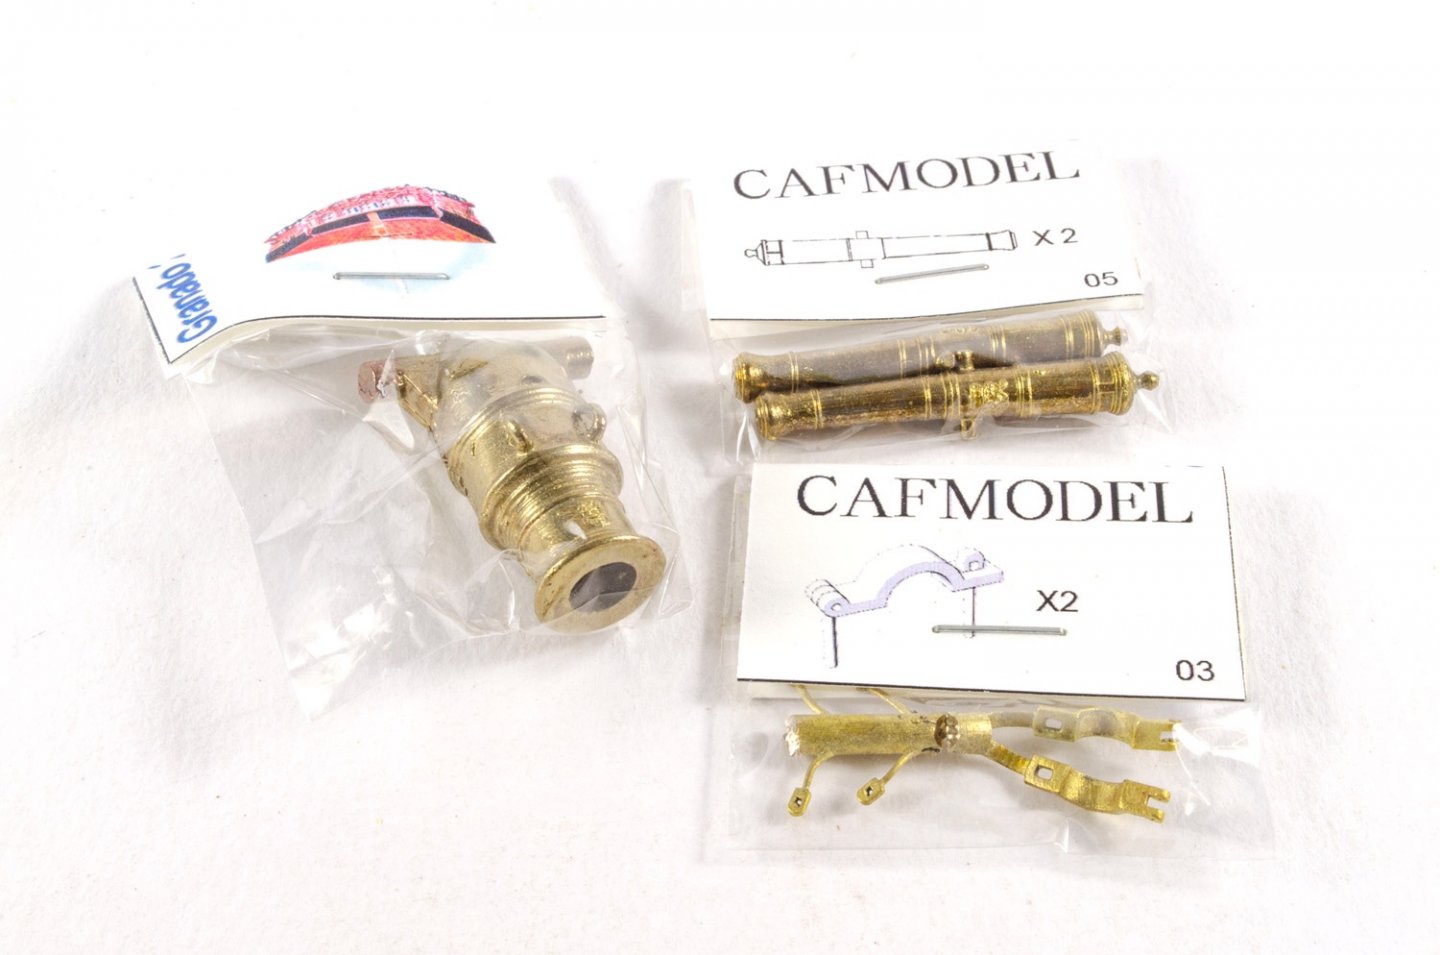
1:48 HMS Granado ‘Cross Section’ CAF Model Available from CAF Model for $325.00 The Granado, a bomb-vessel that was originally fitted out as a sloop (and ended her life as a sloop, also) was thought to have been designed by Thomas Slade. She is definitely a subject which has proven quite popular over the last 20yrs, with POB kits of this released by Amati etc. CAF Model’s intention to create a POF of this model was met with much interest, but before an eventual release of a full hull model, they have released a cross section kit in the same 1:48 scale. For only a section of a complete vessel, the box for this release is quite heavy and still of a reasonable size. Packed into a slimline corrugated box with a Granado label affixed to the lid, the kit reached me in the UK wrapped in a thick layer of extra card to protect it and reached me unscathed. Tom at CAF Model sent this kit minus two small sheets of parts which are now en-route to me, as he wanted MSW to be able to feature this as soon as possible. When those parts arrive, I’ll update this article with those extra photos. I quite like innovative features in model kits, and we’ve certainly got that here with the unique (at least I’m pretty sure!) building jig that accompanies Granado. Remember, that like all my reviews, this is an ‘in-box’ review and is designed to show you the contents of a kit as it comes, with any observations etc. How a model builds will be dependent on various other factors, but I will be featuring this as a build log on MSW in the coming days. CAF kits now have a break seal on them that needs to be cut through before opening, and when the lid is up, this quite heavy box can be seen to be totally chock-full of parts and other components. This kit has four heat-shrunk packs of timber in both laser and CNC cut types, a pack of strip wood, a box of detail components, a box containing the build jig, two sheets of rolled plans, and an instruction manual in a sleeve, also containing a small fret of photo-etch parts. I’m not too sure what timber this model is made from, but it has a nice pale-yellow hue and a very fine grain that’s certainly akin to some of the fruit timbers I’ve used over the years. As stated, all the parts sheets are sealed in shrink wrap. This is quite thick and needs a sharp knife to break through. Many of the parts sheets are just a few inches long, ranging from some quite thick sheets, to one which is just a veneer. Most are CNC cut and also pre-shaped on a multi-axis machine. Two similar packs to this are included in the parts total, and all contain exclusively CNC-cut/routed parts. The steel rule in the photo will give a good idea of the size of these sheets. Here you can clearly see the CNC routing and the extra shaping on some parts. Also note the laser engraving too, for the bevelling lines. These lines are also engraved on the rear of some of these sheets. All sheets are clearly numbered with laser-engraved marks too, but the actual parts numbers will be checked against a part plan in the manual. This helps to save precious production time as engraving the sheet would doubtless add extra expense to the modeller. The fames for the model (18 in total), are constructed in the same manner as their real counterparts, and also include the ‘bends’ in them that were typically seen in vessels of this period. This is where the CNC routing comes into effect, producing those complex shapes for the modeller, saving not just time but also the complications that result from recreating such parts by hand. To be able to position these frames against each other accurately, a series of temporary resin inserts are also included. We’ll see those shortly. Here you can see the breakdown of the frames into the various components including futtocks and chocks. A nice enhancement would be to use something that would represent fastenings in the complete frames…maybe black fishing line/filament which would look like nail heads. Deck beams are pre-cut to shape, including rebates for deck support timbers etc. More frame timbers with their engraved position/bevelling parts. Here you can also see the frame sections (top) which form the bottom of the frames that sit upon the keel. These photos give an excellent idea of the CNC shaping of the most complicated timbers, allowing this to be a nice introduction into POF modelling, whilst removing what would be the most frustrating elements. Two longer packs include more CNC-machined/routed parts, but also a series of laser-cut sheets. Clearly seen in this photo are keel parts, knees and parts for the gun mount. And now some laser-cut wood! One thing you won’t need to worry about is shaping any planks, especially internally, where that is a little more complicated. Granado is planked internally and externally, on one side only, giving the viewer the ability to see a complete hull on one side, and skeletal on the other. You will also see cannon carriage parts here too. This is the last pack of timber parts, again comprising both CNC and laser cut elements. More planking here, and also parts comprising the gun deck and hatch covers. Sheet 1A is a veneer. These appear to be facing parts for at least two frames. This is a highly prefabricated kit, making it perfect for that intro to POF, as can be seen from more pre-shaped planking etc. Whilst a gentle sanding of all laser parts is a good idea to remove any surface heat marks, you would need to see how the edges look when together as far as the char goes. Instead of using this for ‘caulk’, it could be a good idea to remove this char and simply use a pencil to represent caulk, as it’s less stark. The largest box inside this kit contains that unique feature I mentioned earlier. That is a clear acrylic building jig. Not only does this take over from the traditional ply jig we are used to seeing, but it’s also engraved so you can check alignment from every conceivable angle. This is assembled using short screws which also fasten into a series of specially cast resin blocks which keep everything square. The jig itself is a work of art. It’s a shame it’s disposable. However, more acrylic parts are included for a final display stand, engraved with the ship’s name. All acrylic parts are protected with a layer of peelable film. The second and last box contains all the various fittings etc. These are the resin blocks which are used to construct the clear assembly jig. I mentioned earlier about resin inserts which temporarily sit between twisted frames, to help with their positioning in relation to each other. These are those. When the frames are set, these are disposed of. Screws for assembling the acrylic building jig. These parts are very obvious. Here you see not only the main mortar with its beautiful detail including royal crest, but also the two cannon for the framed side of the hull. The other pack contains the capsquares for the mortar, and these are actually workable! Casting really is very nice and there’s minimal clean up. As these are brass, that aspect will be very simple with a nice set of files. More packs contain eyebolts, bombs, deadeyes, eyelets, swivel gun mount, rigging cord etc. There isn’t too much strip timber in this kit, but there really doesn’t need to be. A small length of brass wire is also included. A single fret of PE is included. Production is excellent, with small connecting tabs. You’ll find cannon and hull fittings here etc. Plans and instructions Two sheets of plans are included. One of those covers all the frame assemblies, whilst the other also has various illustrations of the completed hull to help with overall assembly. These are quite long sheets and need double rolling to remove the curl in the sheets as they are quite tightly rolled. The instructions are line drawing format but also contain colour. These look pretty easy to follow and the writing is clearly understandable. Conclusion As well as being an interesting subject of a popular vessel, this is going to be a perfect introduction to the world of POF. Being 1:48, this is also a nice size too without being too large for your shelf. I know some modellers would like to build in 1:48 but could find it restrictive when it comes to displays. This should alleviate that problem! Overall, this looks a very nicely designed and produced kit with some very nice and innovative features. Most importantly too, it looks to be real fun to build! Head over to CAF and snag yourself one. My sincere thanks to CAF Model for the review sample seen here.


-
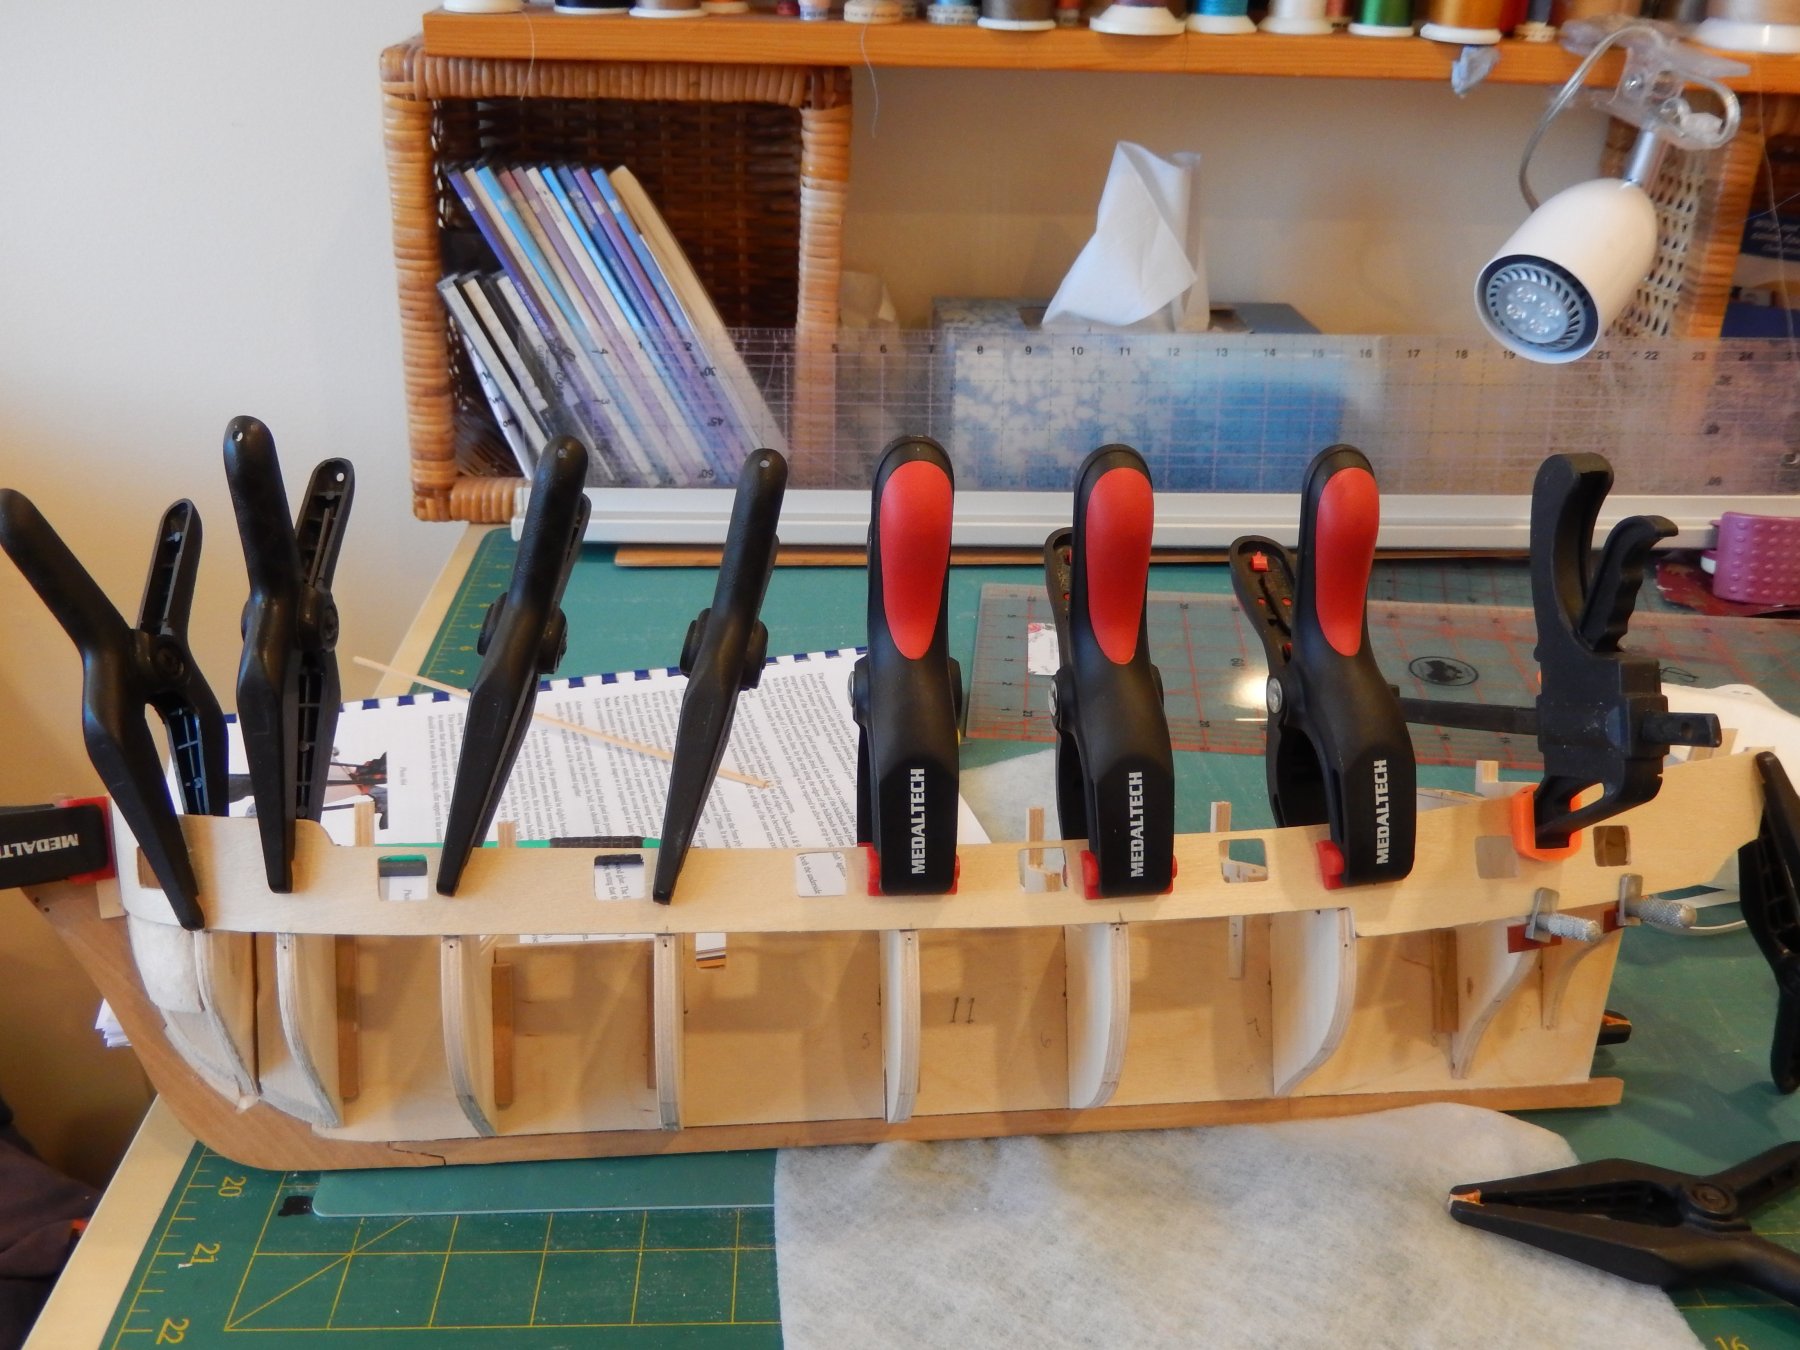
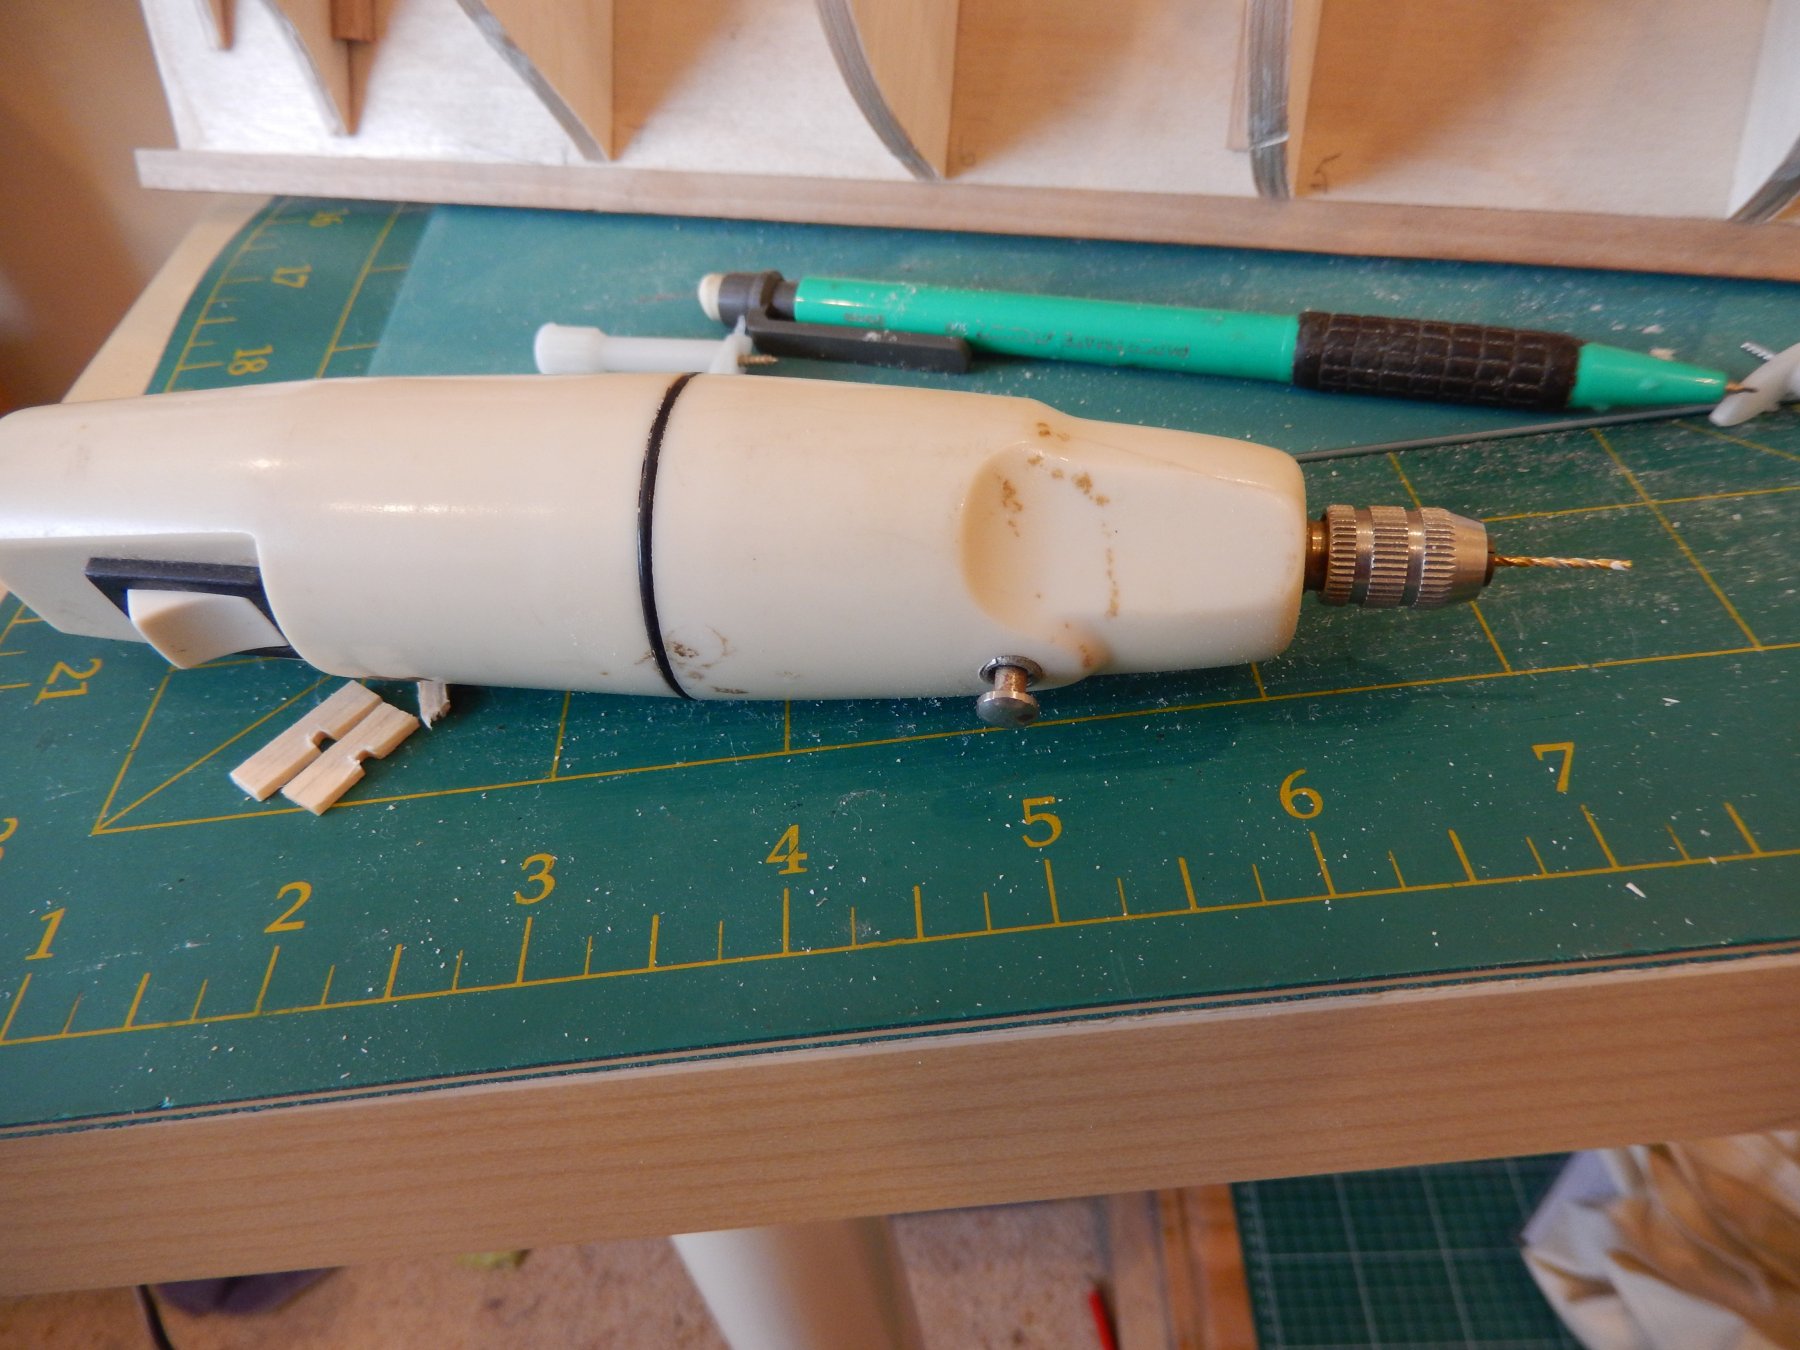
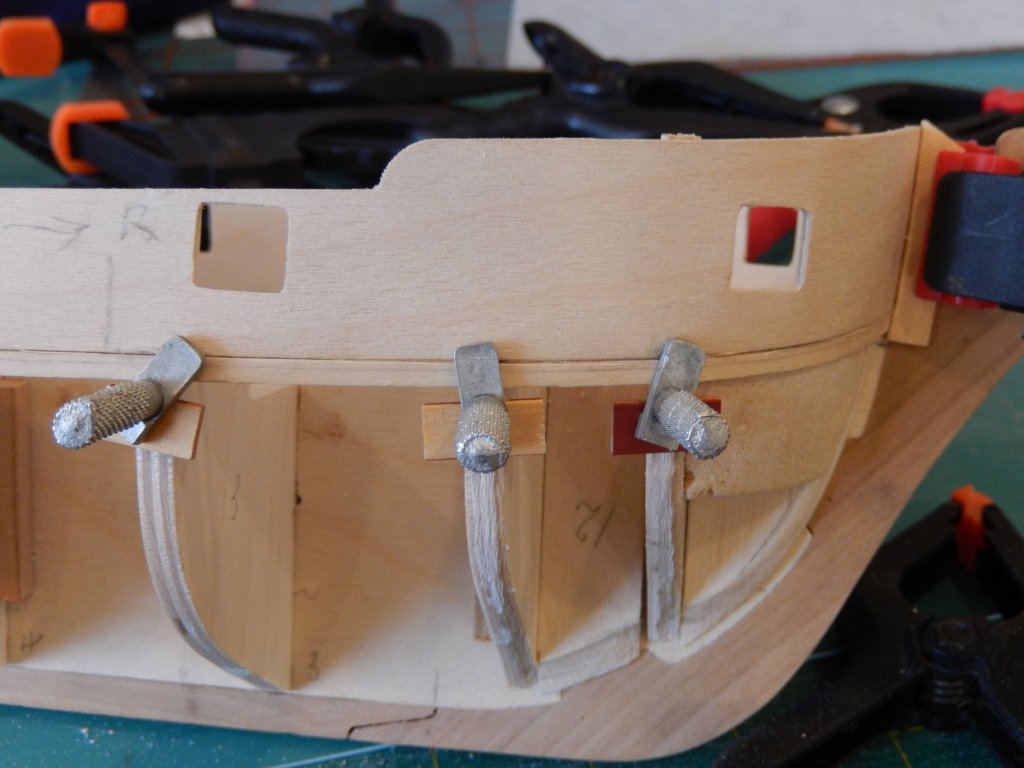
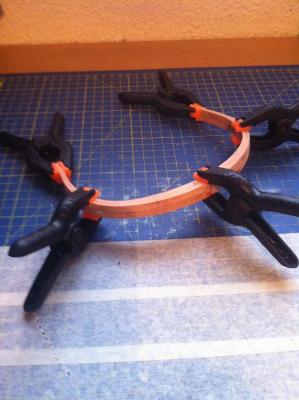
 Having just finished 5 years or so building Amati's Vangard, I have decided to do something quite different: the bomb vessel Granado. There are a number of good logs for Granado on this website and I don't know if I can add much to them, but you never know. Most of the materials in the kit seem to be of good quality, though I am working on the first planking now and have found the wood strip splintery and cross-grained. The gun carriages could be improved and consequently I have substituted Syren carriages which are excellent though rather fiddly to put together (photos in my vanguard log). Here a few photos of the very beginning of the building process. I hope to have something a little more interesting soon. Having I hope, installed the bulkheads squarely The gunport patterns are next having given then a good soaking in warm water. The red-handled clamps are particulary strong and were necessary to made the pattern conform with the curved bulkheads Bulkhead 10 is rather more complicated than the rest. It has 4 extensions, two of which are at an angle, and is best completed off the model. Here is the bow. I have installed a balsa guides to help shape the wood strip around the bow. The screw-in clamps I find a far better than nailing the strip to the bulkeads. I have tried to upload a couple of other shots, but for some reason the uploads failed. I find that I have photographed one of the small drills I use mostly in preference to my Dremel. I have two of them and they save time and annoyance switching tools. Also shown are couple of the small pieces of wood strip with notches which help position the screw in clamps.

- 421 replies
-
- 10
-
-
- caldercraft
- granado
- (and 1 more)
-
Click on the tags in the title above (shown in black) for an instant list of all the build logs for that kit subject.
-
- 2
-
-
- granado
- salamandre
- (and 7 more)
-
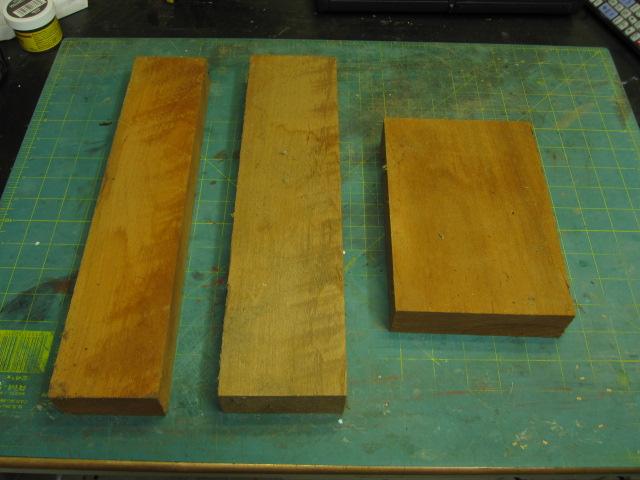
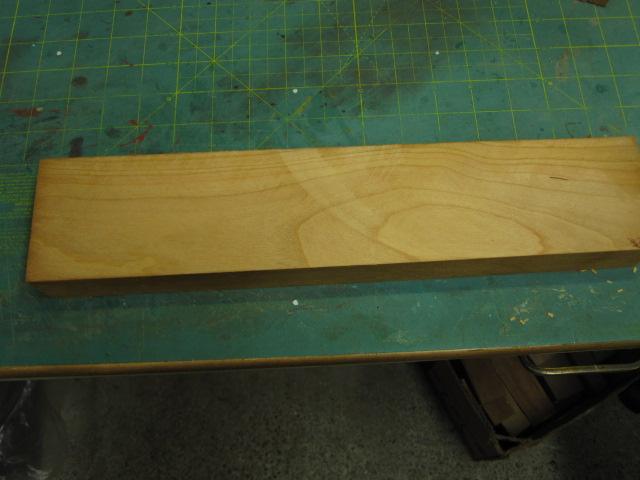
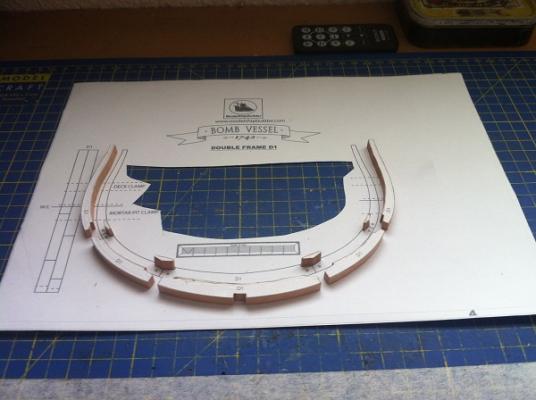
 Hi All, Well I’ve come across some interesting plans for a scratch built Bomb Vessel Granado Cross Section over on Model Ship Builders site. Now I’ve never been known to be impulsive, carry on more then one build at a time or unable to resist the urge to start another scratch build. Talk about going to the darkside! It’s so dark on this side I’m not sure I’ll ever see light again! The Bomb Vessel Cross Section has some interesting details both on and below the deck (i.e. mortar pit and shell room) The plans are based on "Anatomy of the Ship - Bomb Vessel Granado" by Peter Goodwin and original drawings by Thomas Slade. All plans were drawn by Jeff Staudt. In total there are 63 pages of drawings in the set and are very well done. The scale for this build is a whopping 1:24 (½” to 1’) so it will be interesting building something at this scale. The single frame pieces are ½” wide and a completed frame is approximately 13 ½’ wide by 9” high. The keel is ½” wide by 14 ½” long and over 1 ¼” high at its highest point. There are some frames that are doubled so they will be 1” wide! I have some Cherry cut offs from a furniture factory and I will be cutting them down to ½” billets for the frames. I’ll decide the other woods as I go. The main problem I see is turning the mortar and cannon as I do not have a lathe or mill. Oh well I’ll cross that bridge when I get there. So here is a look at a couple of sheets of plans to give you an idea of what it will look like. You also can go to www.modelshipbuilder.com to see more information. Here is a sample of some of the rough cut Cherry I have. You can see that the sides are rough cut so to start I shaved the sides on the saw to clean them and then ripped them. The below pictures show I ended up with two pieces of 1/2" x 3" x 14" and one piece at about 1/8" thick. I will have to run them through the thickness sander to get them to their finished size. This should be interesting and will take a good while to complete.
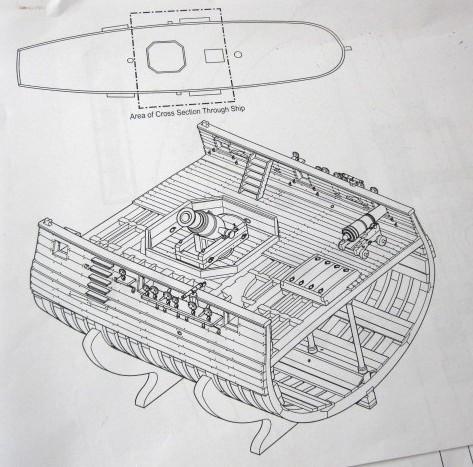

- 421 replies
-
- 5
-
-
- granado
- bomb ketch
- (and 2 more)
-
Click on the tags in the title above (shown in black) for an instant list of all the build logs for that kit subject.
-
 I have produced a video record of Caldercrafts HMS Granado comprising 47 individual films that run between 5 to 15 minutes. I hope you find them useful. This is the first. Once you tage follow ypu can access all the other videos. There are also a set of three videos on how to build the display case. The first is Finially there ar a few videos on Power tools
 -
 Hi Guys Starting a Granado build and thought a Build Log would be fun ... and helpful ! I've only built Panart models up to now ( Royal Caroline , Armed launch and the Open Whaler ) So a Victory model is my first kit away from Panart . I know there's been an awful lot of Granado builds on this forum, and from Modellers with an awful lot more skill than me, but really it's to get ongoing advice from you Guys and it just 'might' be of help to somebody in the future. Look forward to hearing from you Chaps and please if there is anything on my log that doesn't seem right I would welcome Advice . Panart "Armed Launch" Panart "Open Whaler" Panart "Royal Caroline"
 -
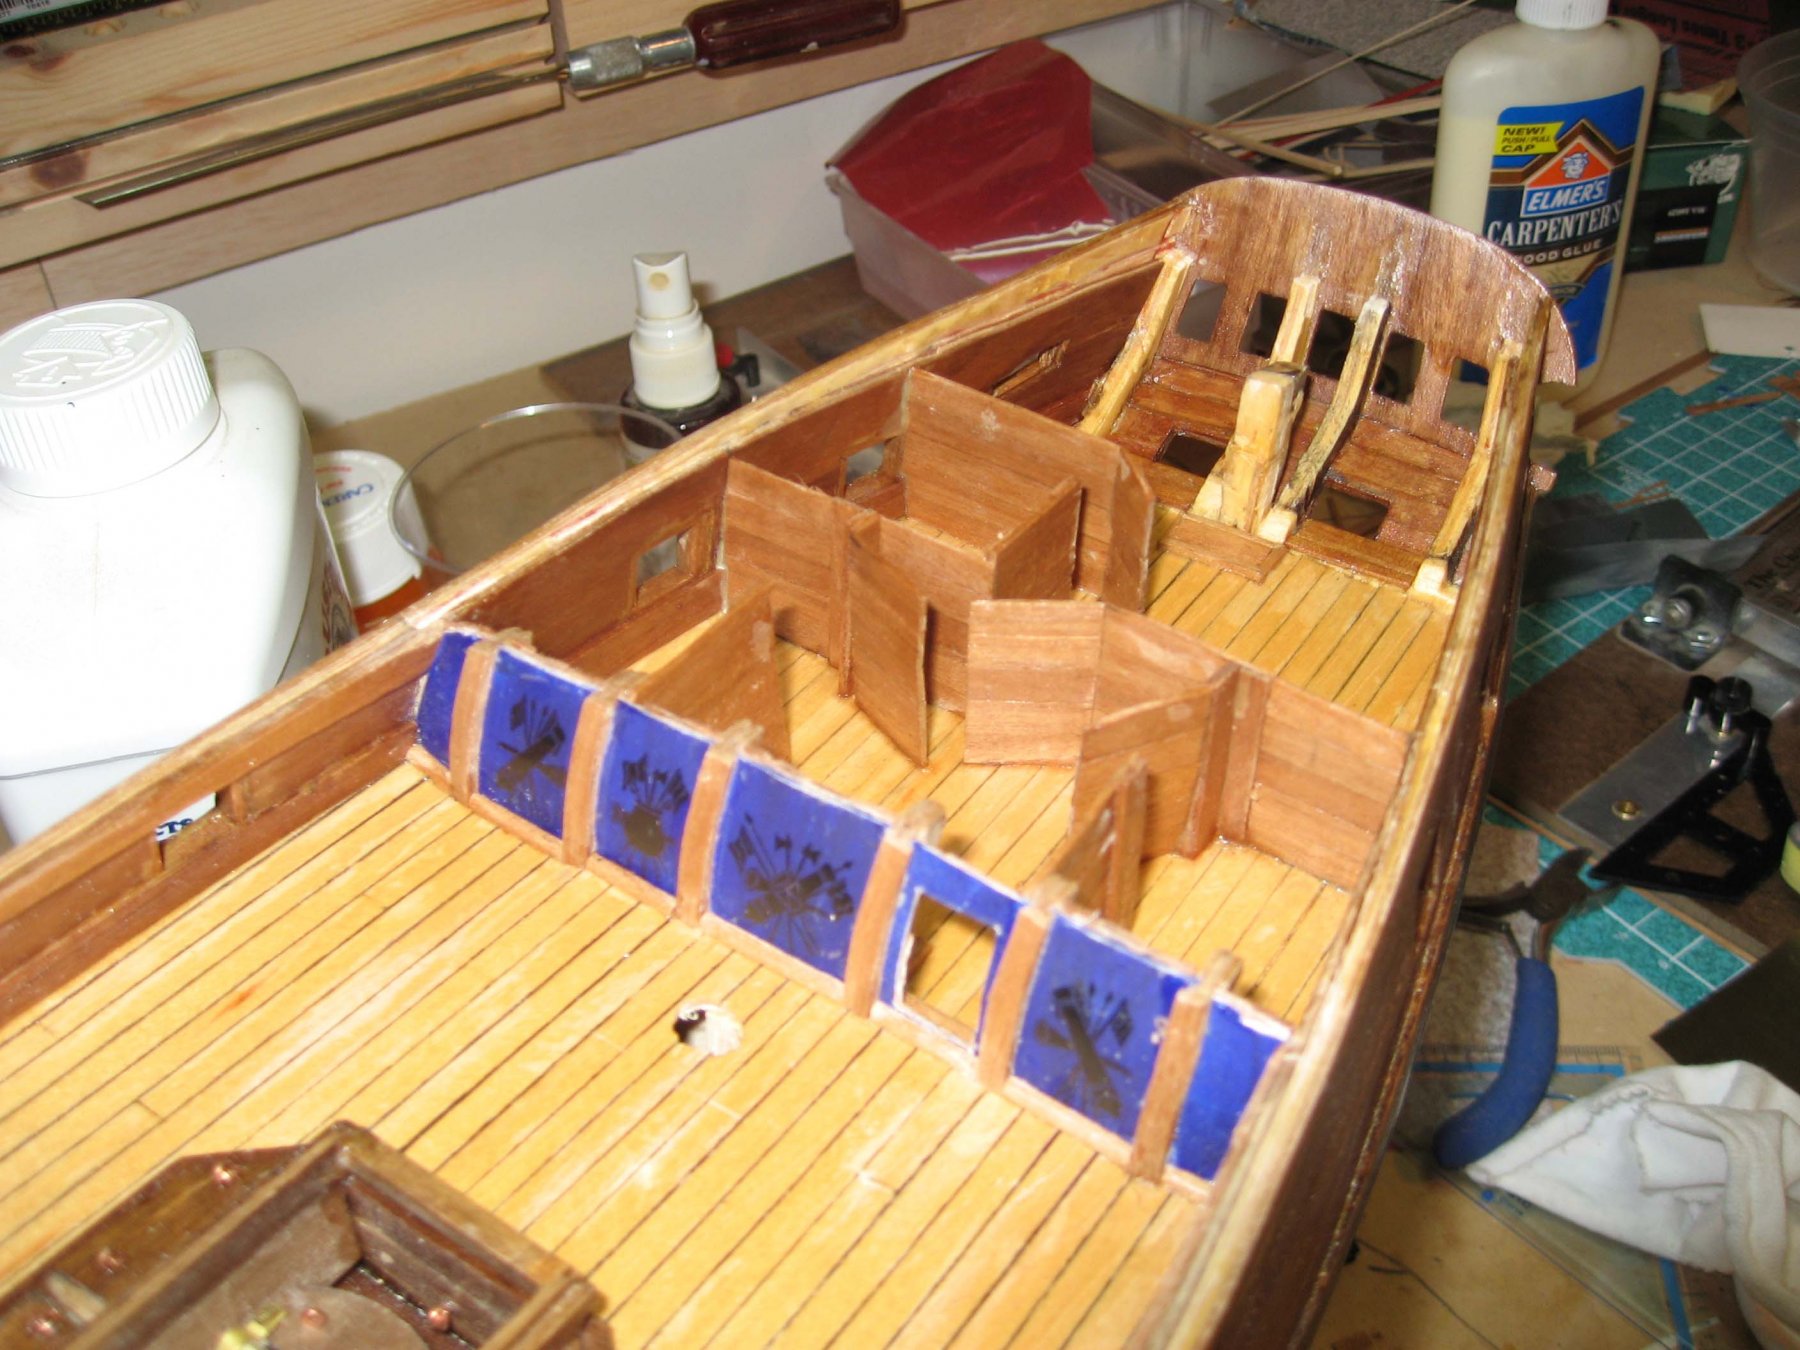
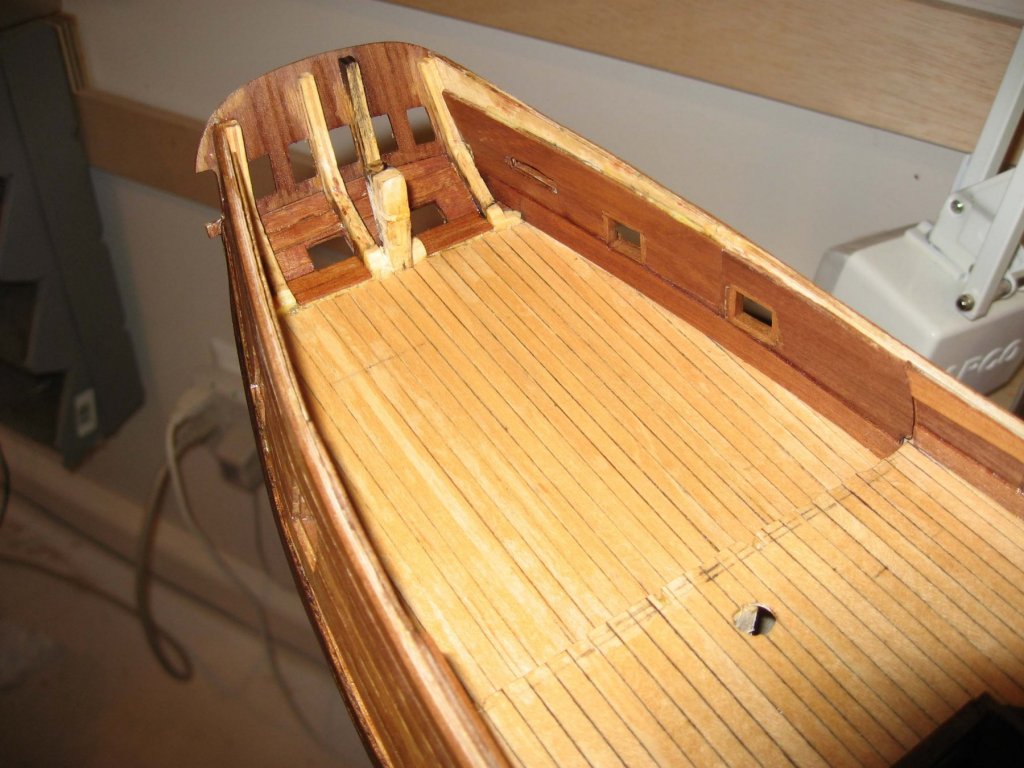
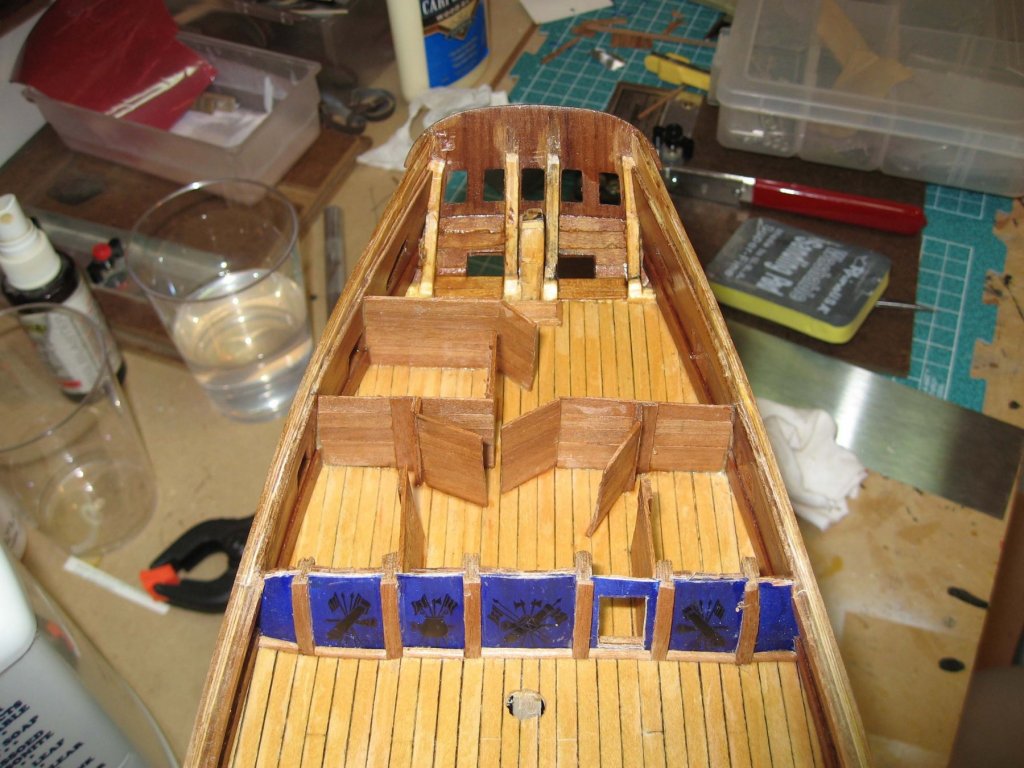
 First up, I have to state this is not a complete log. I started the Granado in 2005 in a Group Build whose name I have since forgot. Unfortunately the group build web site was hacked into oblivion and all files lost. I have recently found some of my old photos of my progress and thought I would share them. Notice that well into the build, late in 2006, I caught the “bashing” bug from Steve “Stu” Hall of Ontario and decided to cut out some of the stern bulkheads and detail the after cabins. See photos. Shortly after I started the build, my wife and I acquired a travel trailer and I did much of the subsequent build on the road. That ended once I started the masts. In the next week or so she will finally be finished. So save a seat for the big reveal. Ron Gove, Leesburg, Virginia


-
 I spent a good deal of time trying to decide what to do for my next project. The choices ranged through scratch builds and modified kits, cross sections and full ships, and even some thought about doing a plastic or resin warship. In the end, I quickly rejected the modern ships because I just don't think that at my age (76) with arthritic hands and diminishing eyesight, I could do justice to anything in those very small scales. A framed scratch build had strong appeal, but ,as I've explained in other logs, after doing the Triton cross section, I concluded that without power tools (I have nothing but a Dremel) a full framed model was just more than I wished to take on. That left the possibility of another cross section. I was drawn to the Admiralty Models Echo project and the Granado cross section project. The Granado held particular appeal, both because of it's unique subject and the wonderful models that had been turned out by Rusty, Grant and Mobbsie. I was almost set to do this when I realized, while doing the Cheerful rigging, just how much I enjoy rigging and would miss doing it on a cross section. All of that led me to look at the build logs and great models of Granado done by Joe V. and Timmo. I was really impressed at what could be done with the kit with some modifications. Thus, the choice was made. I now have the kit and the AOTS Granado book and I'm trying to figure out just what I'm going to do. I've not done a Caldercraft kit before or any kit with the ply gunport strips. Nor have I done any model with double planking in many years. Some things are clear: I will replace the kit wood with boxwood for the second upper hull planking and holly for the deck planking, as I've done on my recent builds. I'm still undecided as to what to do for the second lower hull planking. I'm inclined to use holly as I did on Fair American, rather than painting some other wood white, but this would also involve replacing the kit's stem, keel and sternpost parts with scratch built holly parts at the outset of the build. A quick decision is in order. I'm looking forward to getting started, and hope that you'll follow along with me. Bob
- 563 replies
-
- 31
-
-
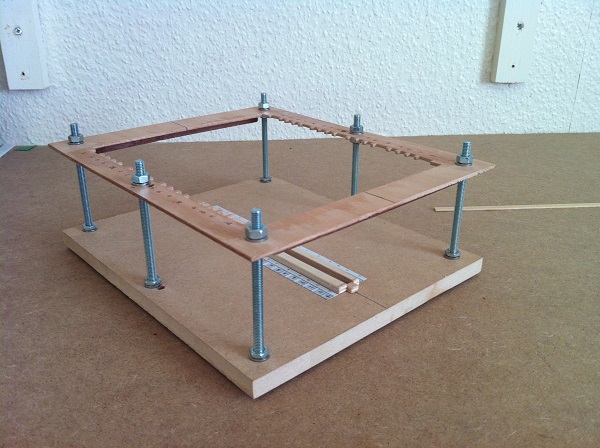
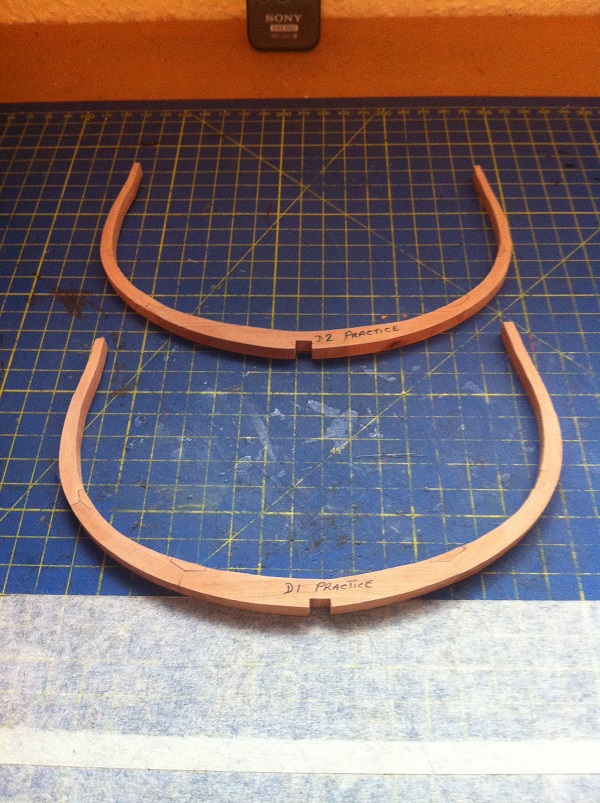
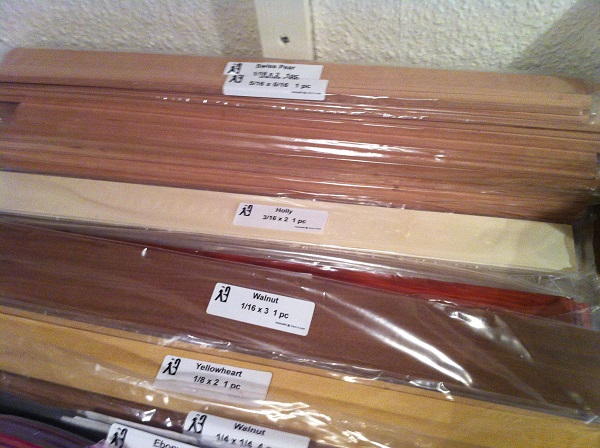
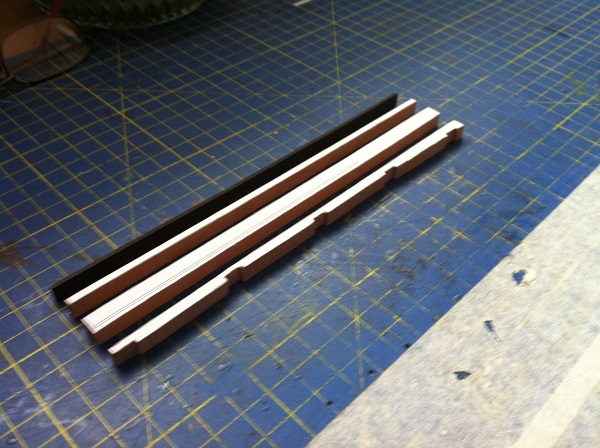
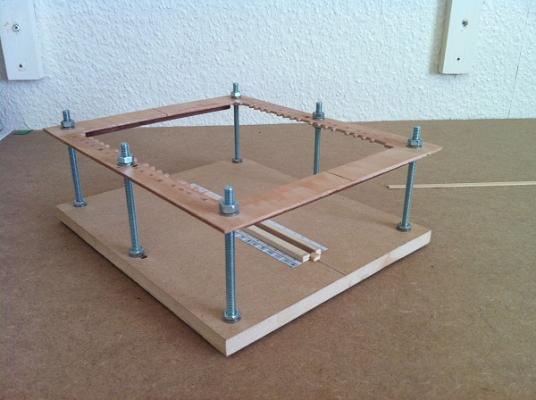
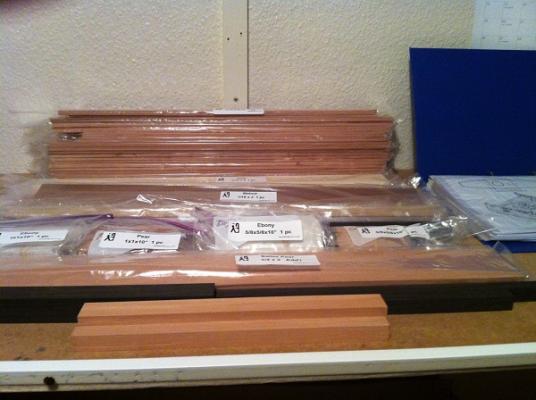
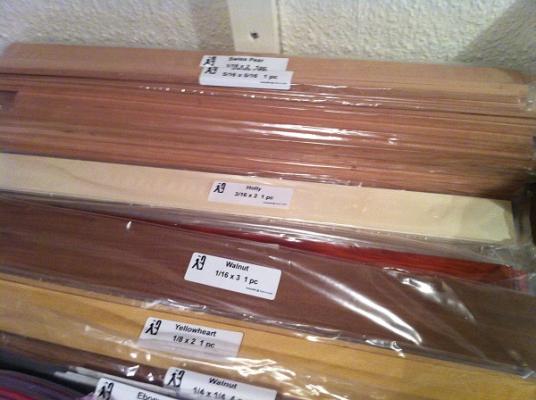
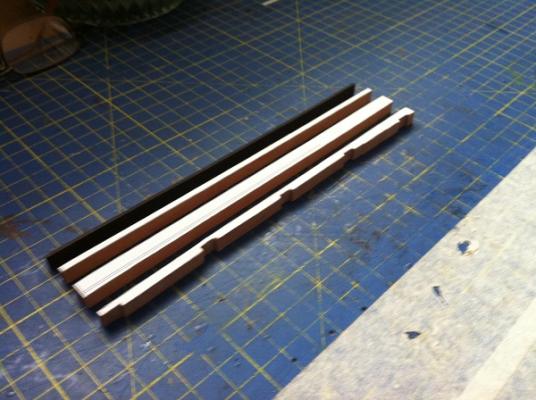
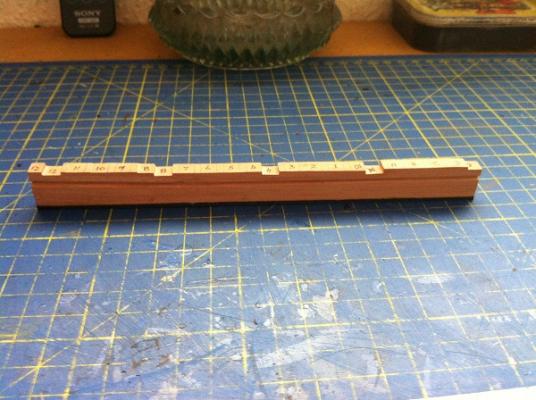
 First off let me say Hello to all the Lords of the Dark Side, your tolerance will be gratefully accepted. I would like to give plaudits to Jeff Hayes of Hobbymills for superb quality materials, the timber really is first class, also to Jeff Staudt for a fine set of drawings. A special thanks to Grant for all his hard work in working out the quantity of timber required and the different types, I just had to make some minor adjustments to the order. Below is a taster of the timber to be used. As you are probably aware this is a group project build with Grant, Jack and myself, ( at the moment ), this the first scratch build for all of us apart from prefabricating kits parts that were not happy with and I think we've all done that. It would be great if others wanted to join in. We will be working in unison and posting in our own logs and this is the start of my log. I started by practicing with my tools and would you believe it this framing jig appeared, as this was a practice piece and it didn't count towards the build but on investigation I found I hadn't got any more material I could use and so had to keep it. Following on from the jig, I started practicing on the frames themselves and I found out a few things I need to work on, 1st, Don't cut so close to the lines, give your self a bit of room. 2nd, Easy on the sanders, don't put so much pressure when sanding down and 3rd, It doesn't take much to remove the skin from the knuckles with a disc sander, this had been switched of and was slowing down, I helped it stop and found out how good my bandaids are. I made a double frame but will not be using it, I can and will do better. Following on from that I attempted the Keel, this is made up from 4 pieces, Ebony for the Keel, followed by Swiss Pear for the False Keel Upper and Lower and the Hog. This Keel looks difficult but in reality is quite simple, you just need to be accurate, a rabbet is cut into it when all the pieces are assembled. I was going to use my router for this but there is a deviation 2/3rds along it's length so this had to be cut by hand, I used my trusty Stanley knife carefully, (we have a history) and finished with a triangle file. Below is the completed practice keel So, that's the start of my new log, if anyone has any questions please don't be afraid to ask Grant !!!!!!!!!!!!!!!!!!! Be Good mobbsie
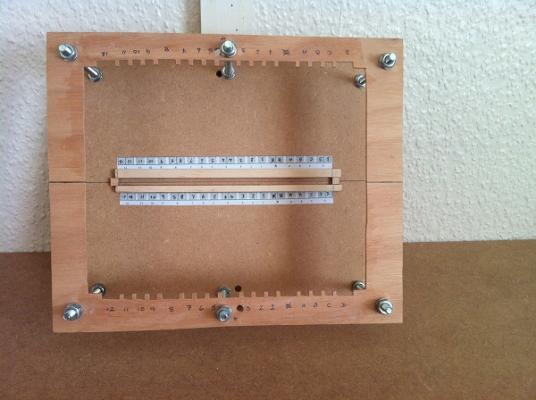
- 255 replies
-
- 25
-
-
- granado
- bomb ketch
- (and 2 more)


.jpg.668dea2f809628cc68f73f8e7d569bf8.jpg)
.jpg.2243b5d813accdae760a6174e0d196ec.jpg)


_bomb_vessel_RMG_J0387.jpg.af53eba1036bbbad25ca652bf3dfc731.jpg)