Search the Community
Showing results for tags 'harriet lane'.
Found 12 results
-
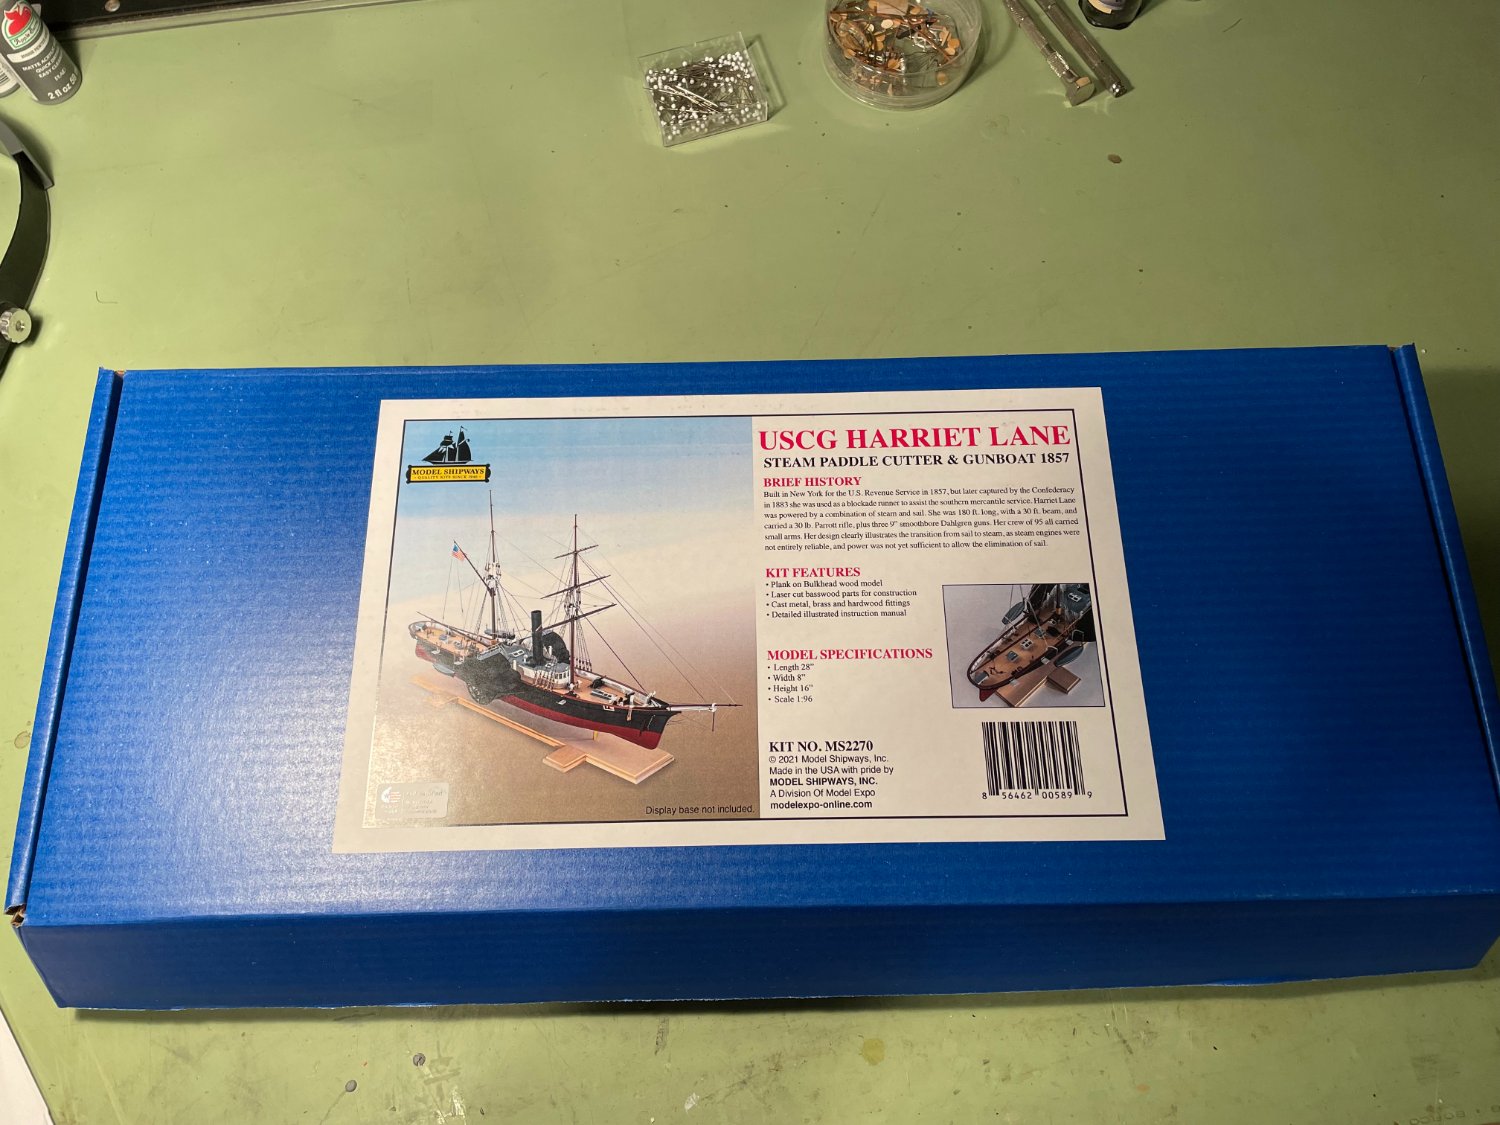
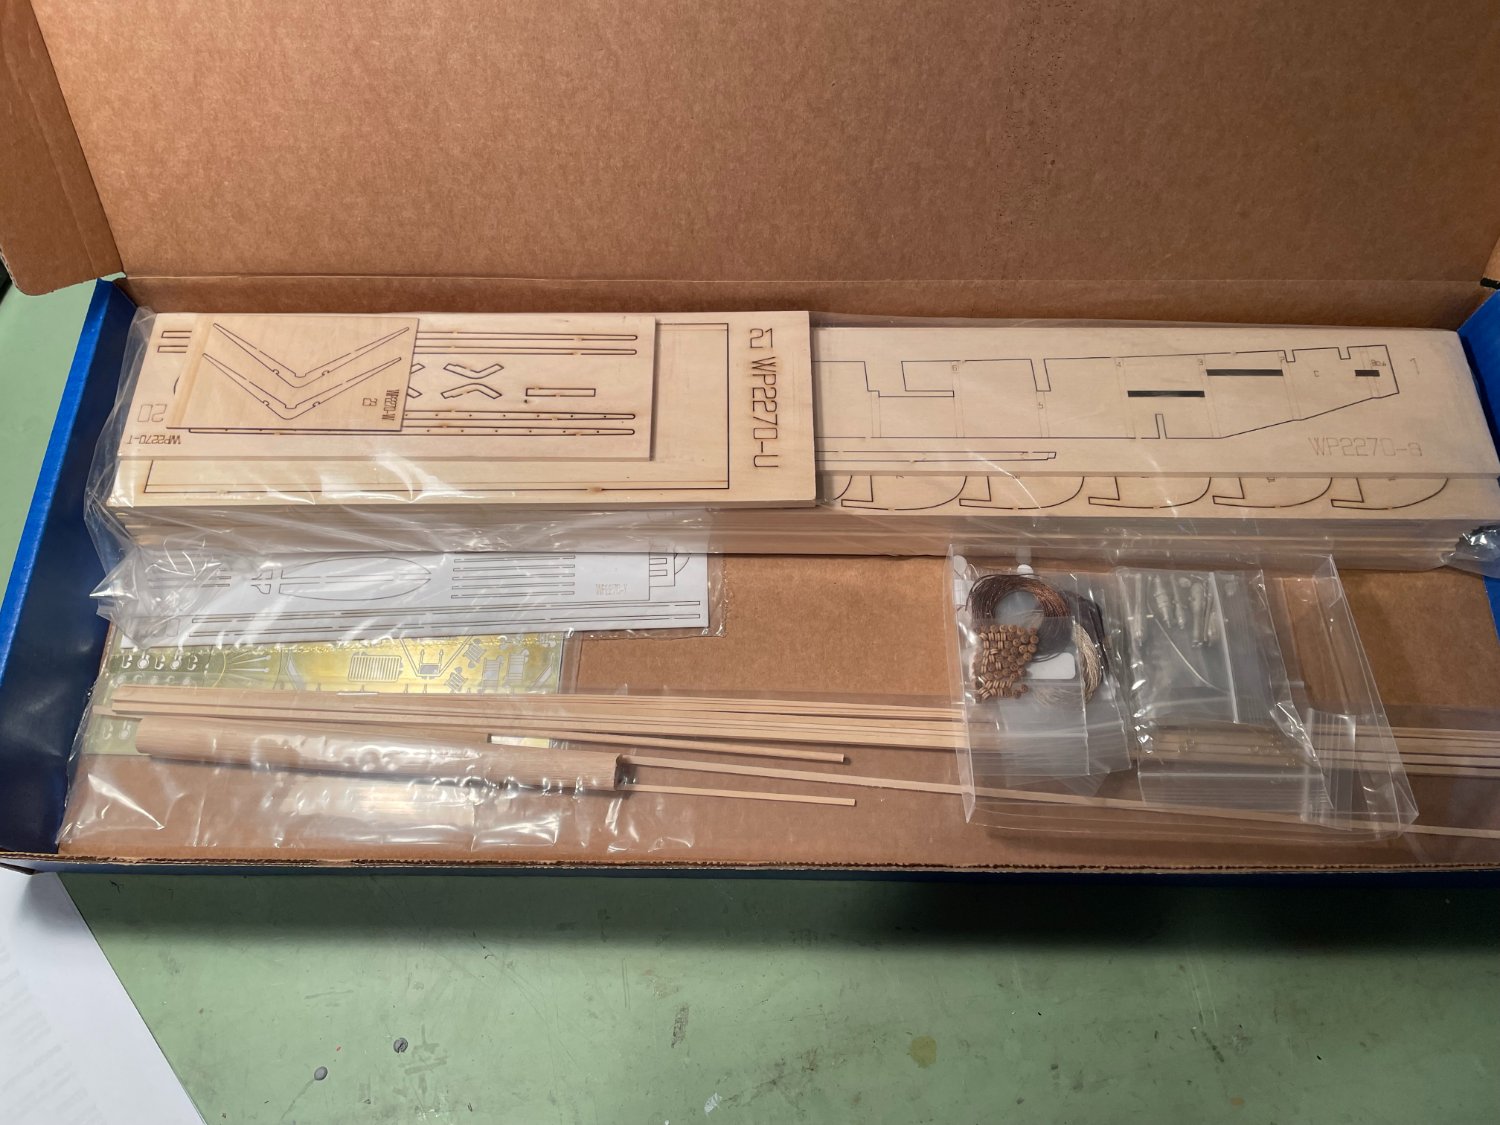
 Hello all. I have some time I my hands so I thought I would do a build log of the USCG HARRIET LANE that I got as a Christmas present (to myself). I wanted to try something a little different so the combination of paddlewheel and sails appealed to me. I’ve been away from MSW and the NRG for a few years and had always liked the forum discussions and model postings so I thought I would give it another go. The model’s scale is 1:96 (⅛" = 1' 0") and the overall length will be 28", width 8", height on base 16". The model was designed and instruction book was written by David Antscherl. The kit is from Model Shipways and was purchased from Model Expo. Description of the ship from the instruction book. The Harriet Lane was 177' 6" long and 30' 6" wide, with a 12' 0" depth in her hold. Her mode of power was provided by double marine steam engines driving two side paddles, as well as two masts for sailing. When launched, her armament was described as ‘light guns’. However, when she joined the West Gulf Squadron her firepower was increased. She was given a 4" rifled Parrott gun and a 9" Dahlgren forward, with two 8" Dahlgren Columbiads aft. Her full crew complement was 95. Launched in November 1859, she was named for the niece of President James Buchanan, who was unmarried. Harriet acted as his First Lady. Mandatory pictures of the box and contends.

-
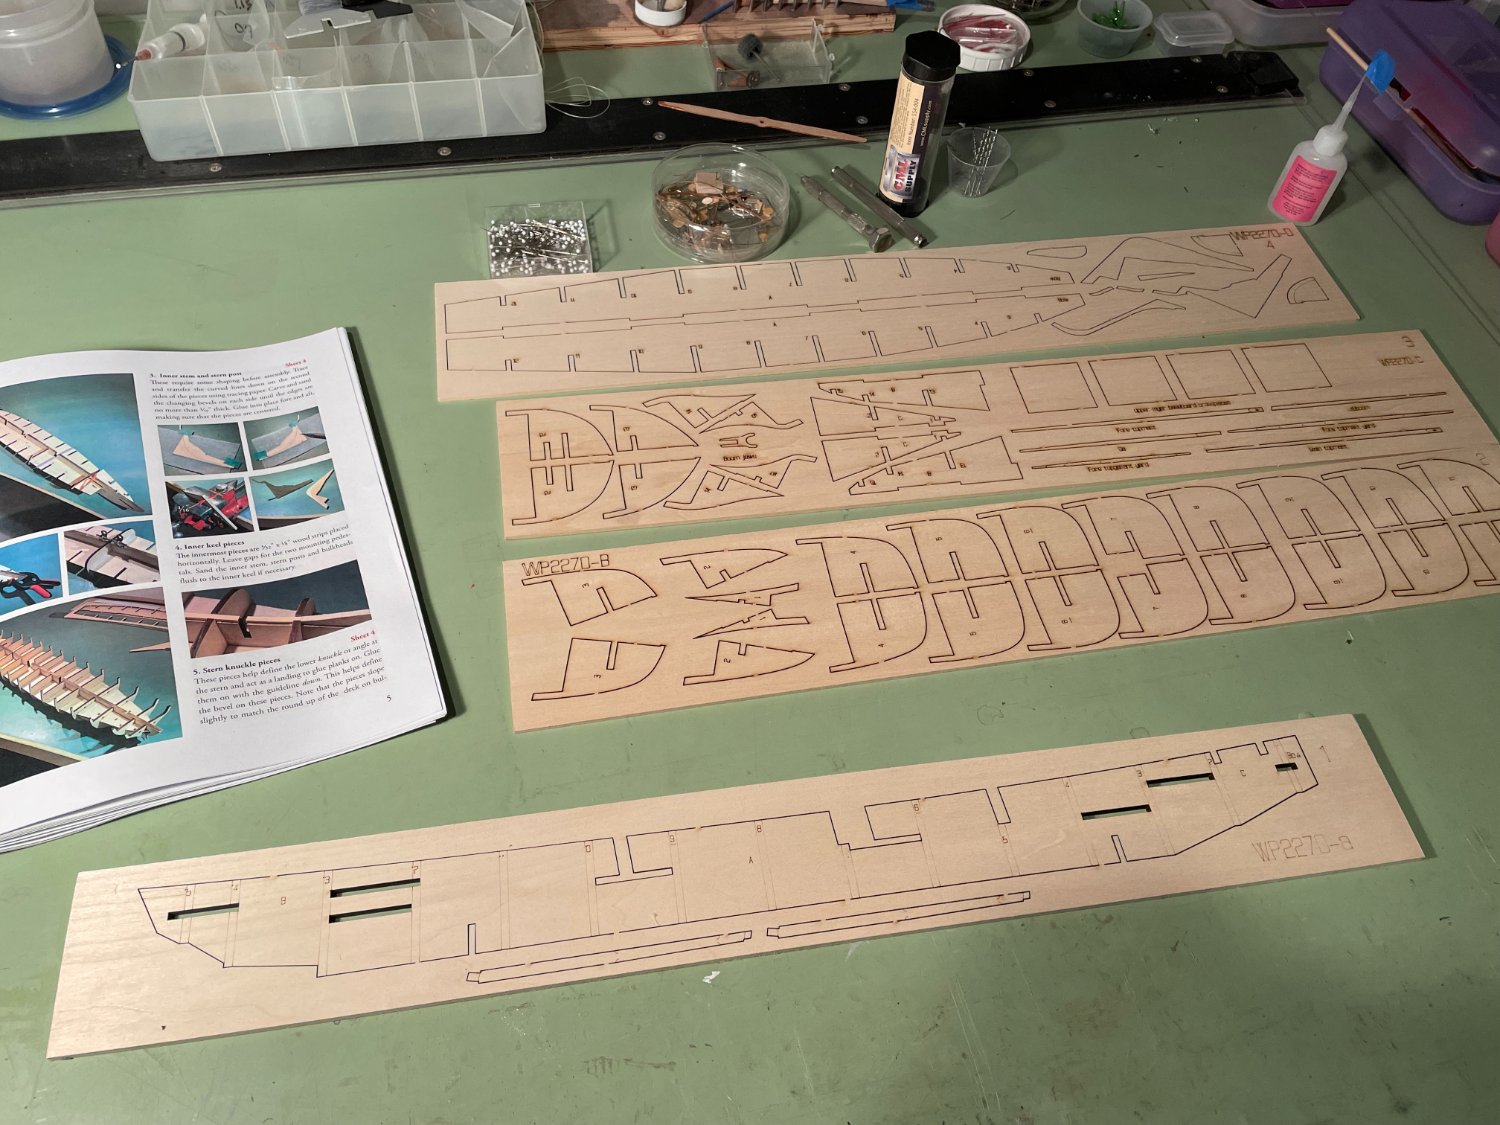
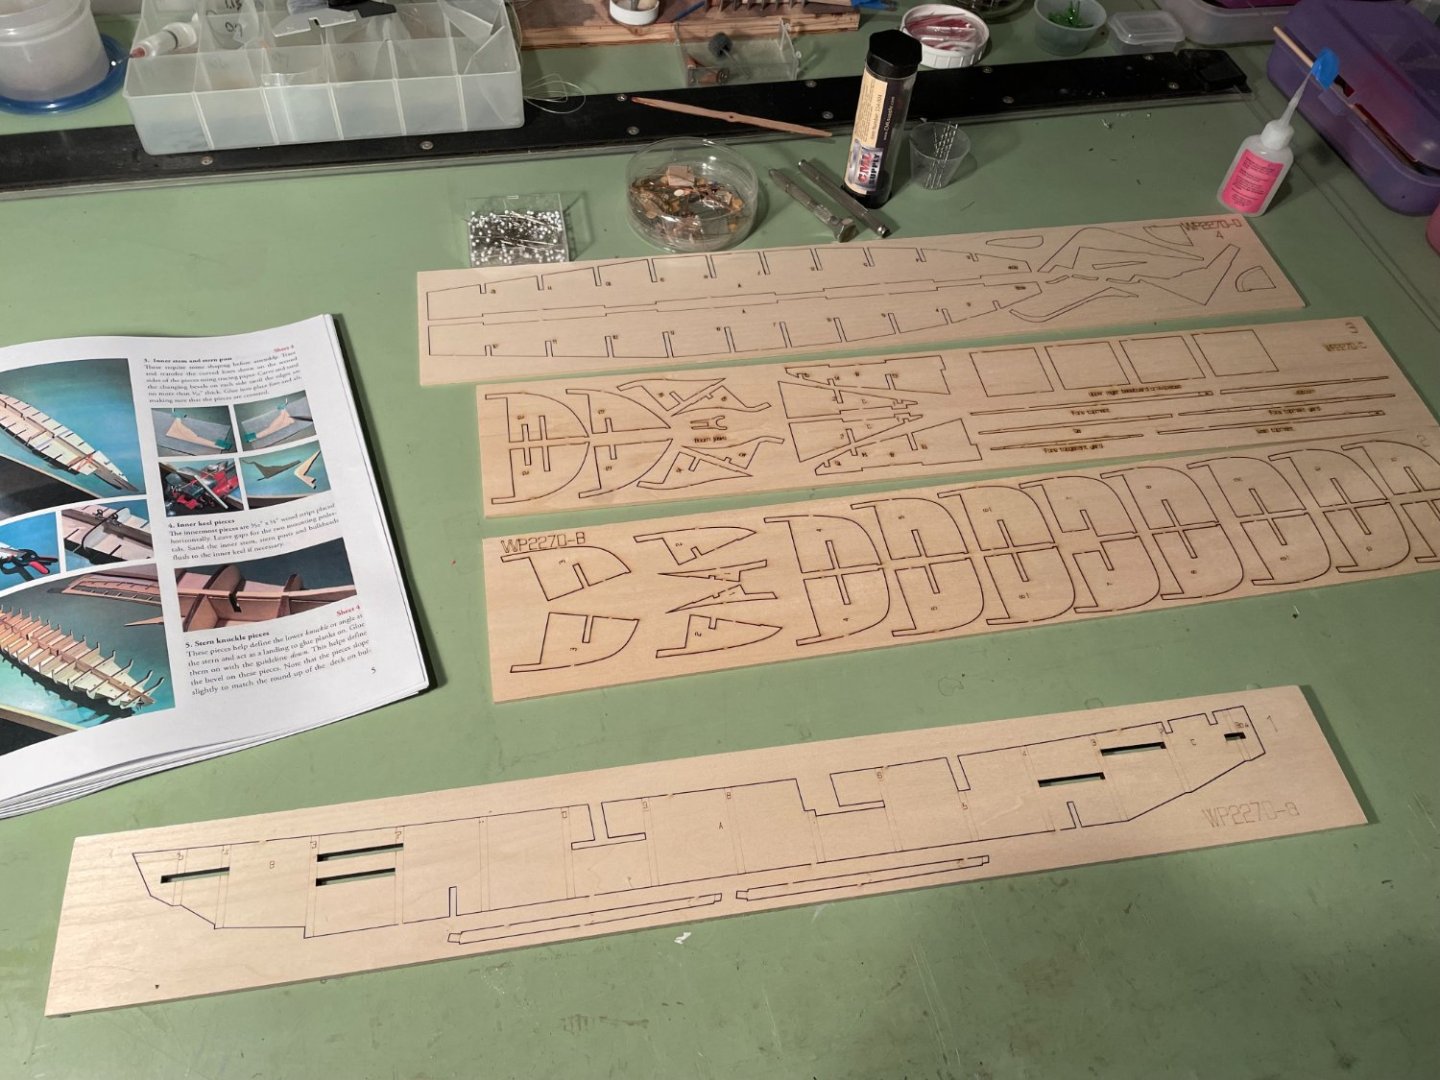
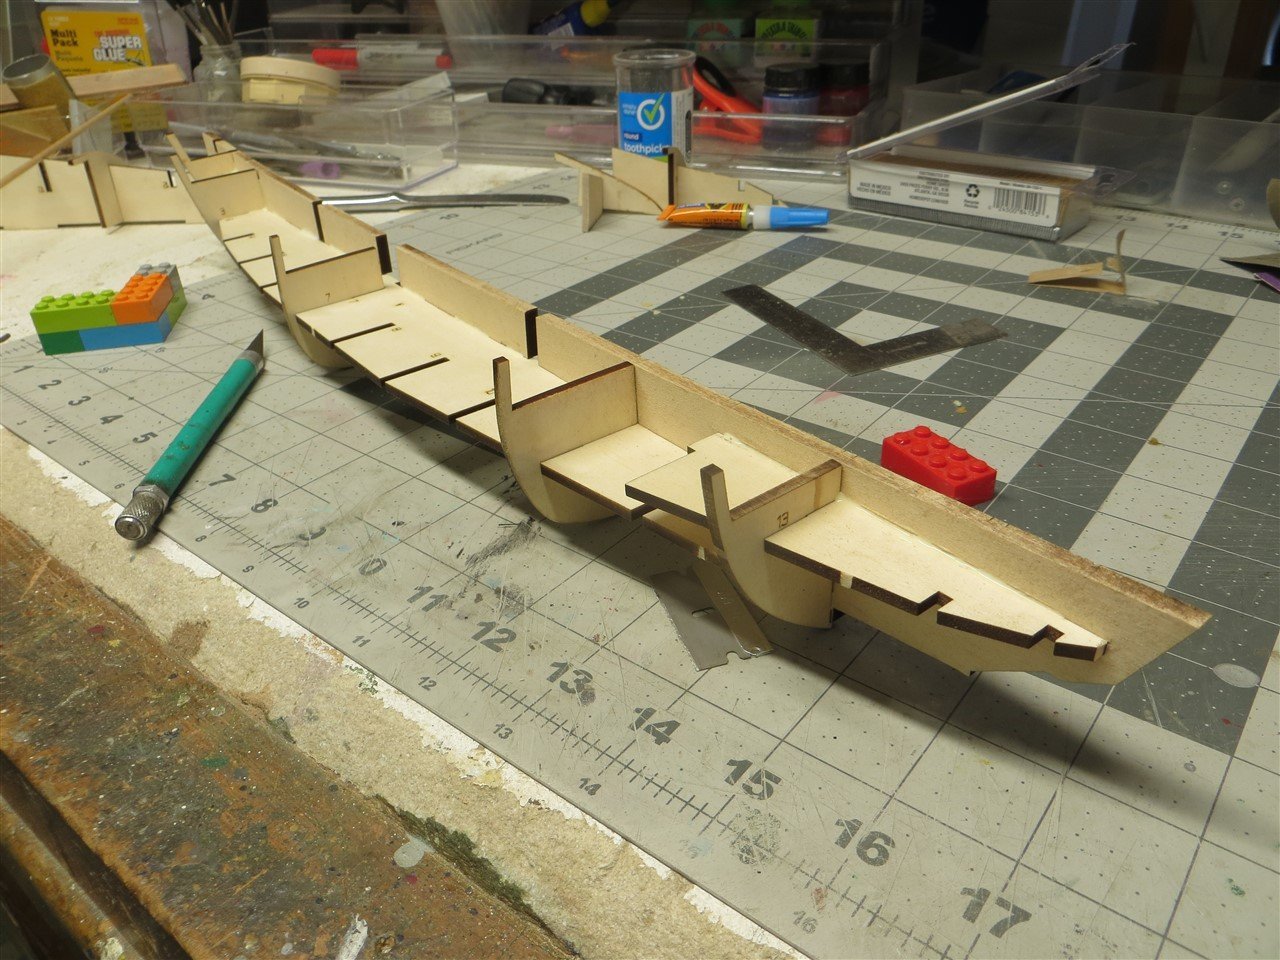
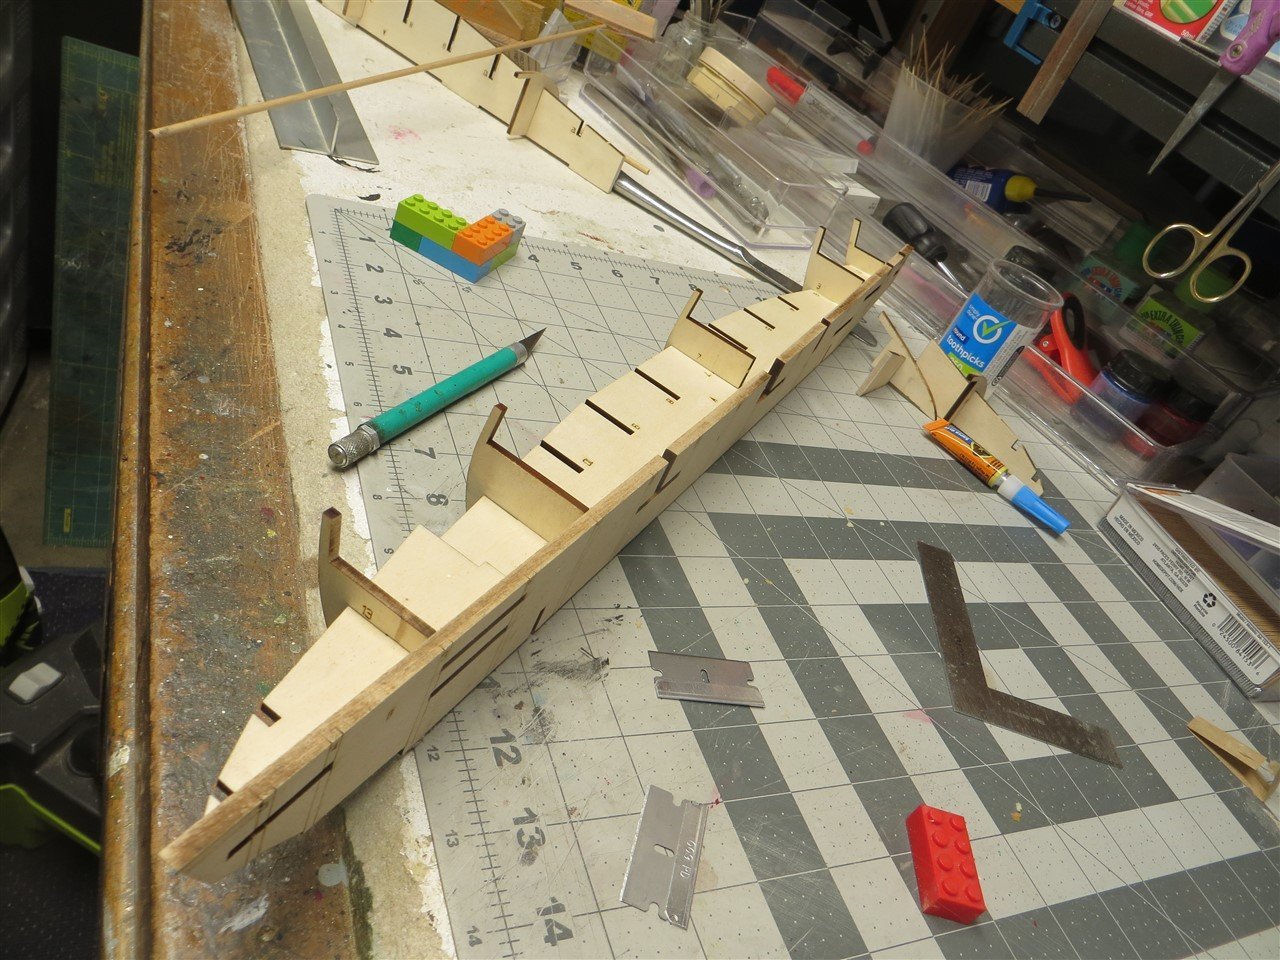
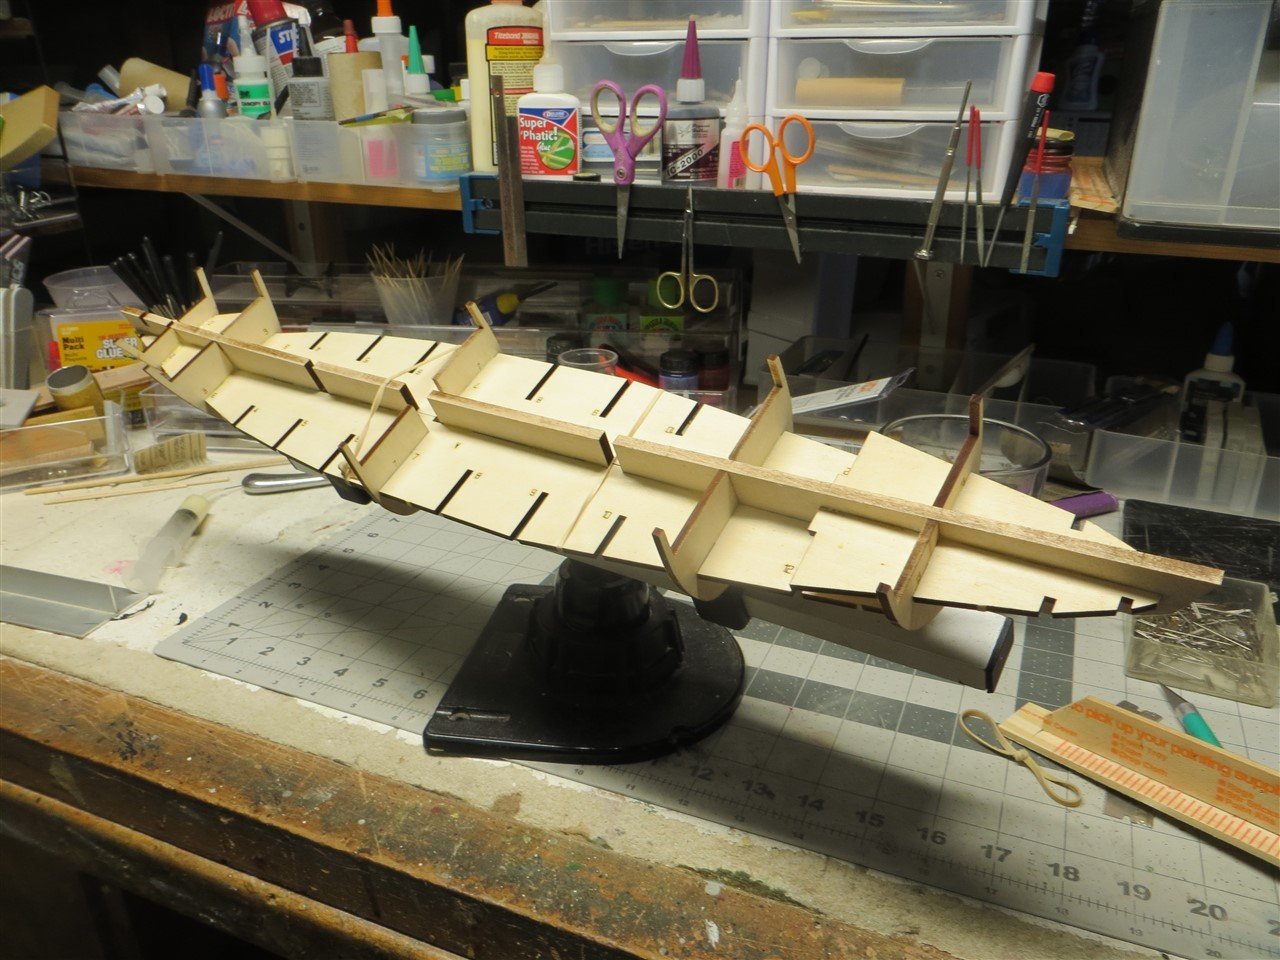
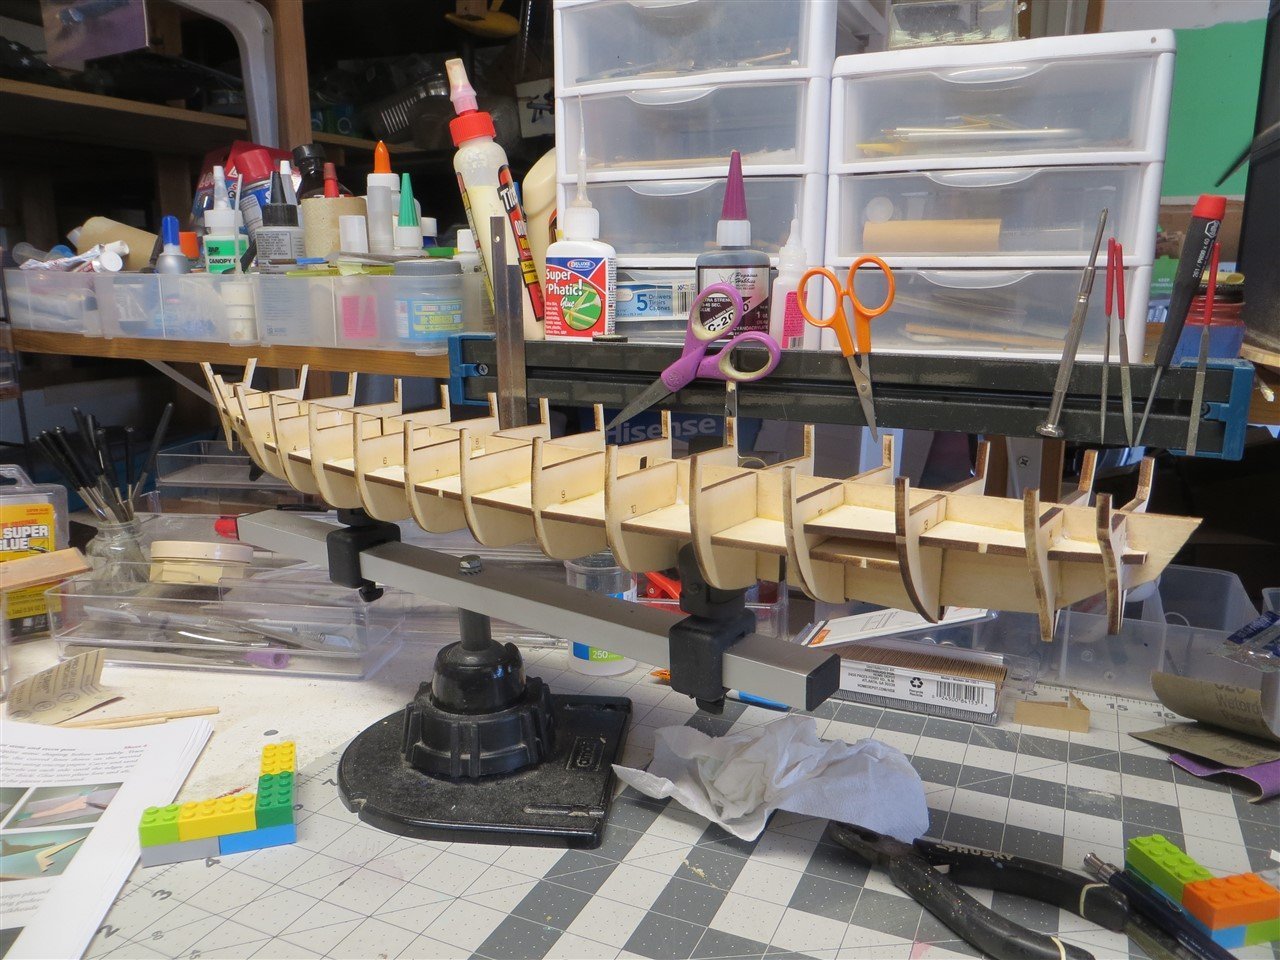
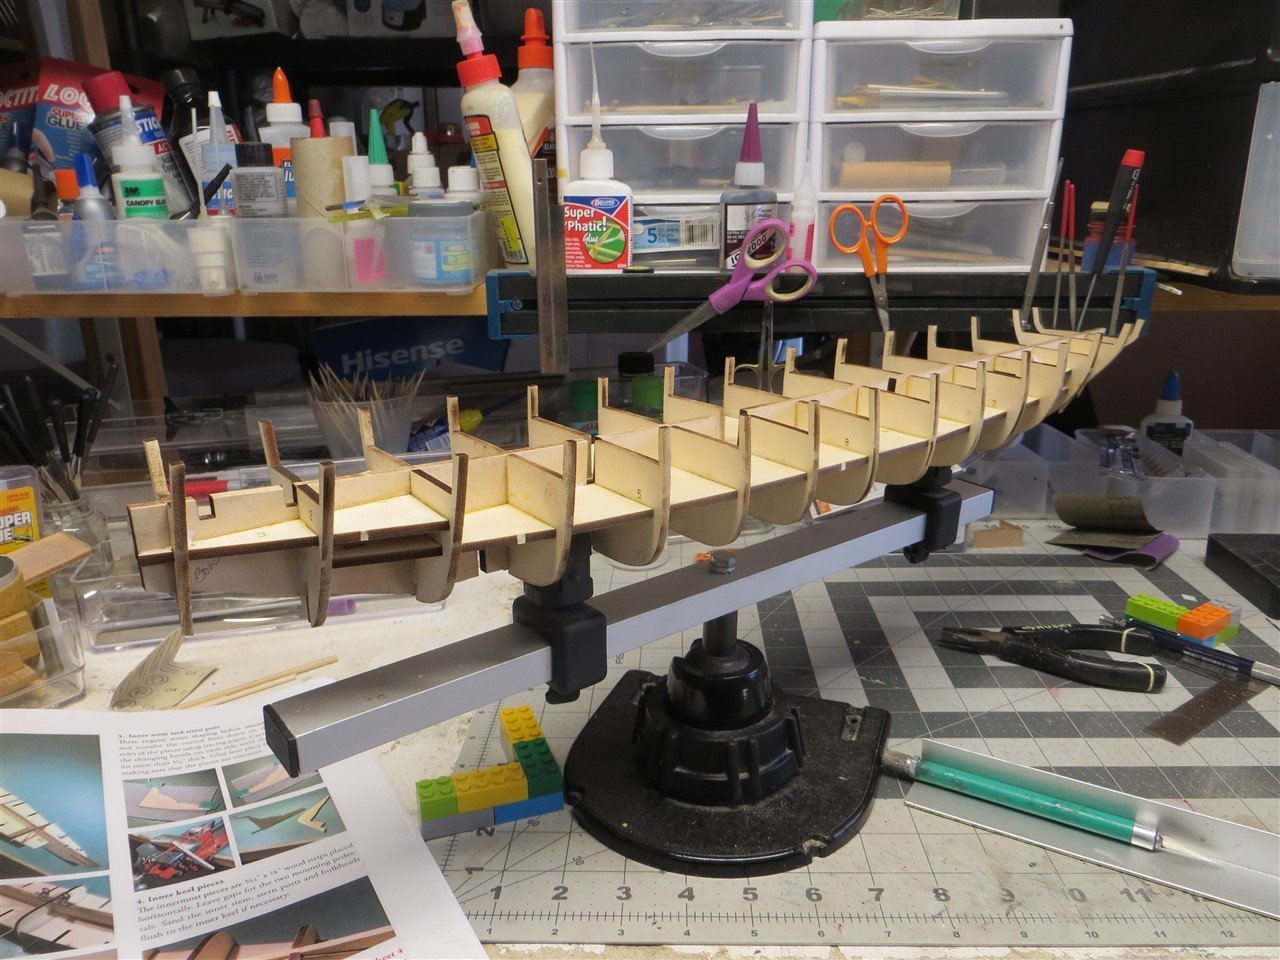
 I have completed my Moncongus Bay Lobster Smack and my Harriet Lane kit has arrived. I guess it is time to get started on a new build. The Harriet Lane has been a model I have eyed for quite awhile. Model Shipways had a small solid hull model of the Harriet years ago but it somehow disappeared before I could acquire it. The period when ships were evolving from wood and sail to metal and steam power has always intrigued me; so this should be an interesting build. I do not plan to provide tons of photos and detailed descriptions of my build. I will leave that for the more expert modellers and photographers. I will try to provide photos of my progress and comments regarding the build as it relates to a modeller of my skill level. This is advertised as an "advanced" kit and I am not an "advanced" builder; so I expect I will make a few (if not a lot) of screw-ups along the way. Hopefully, I will learn a few things and maybe alert other modellers of pitfalls. The kit came in a the familiar blue box and contained what looks to be a comprehensive instruction booklet and several plan sheets. All the wood was in good condition and there were no obvious warps, cracks or other defects. The laser cutting looks excellent. Of course the model begins with building the hull skeleton by gluing bulkheads to a center spine. The instructions do an excellent job of guiding the builder through this process. I dry fitted everything as I progressed. Only a little sanding was required to get tight fits. When positioning a bulkhead for gluing; I used lego blocks. They work great to help you align your parts. I tacked parts in place with CA and then went back over the structure with wood glue. All-in-all a couple of very enjoyable evenings with this model. A few more parts and I will begin the process of fairing the bulkheads.....a task I find intimidating.
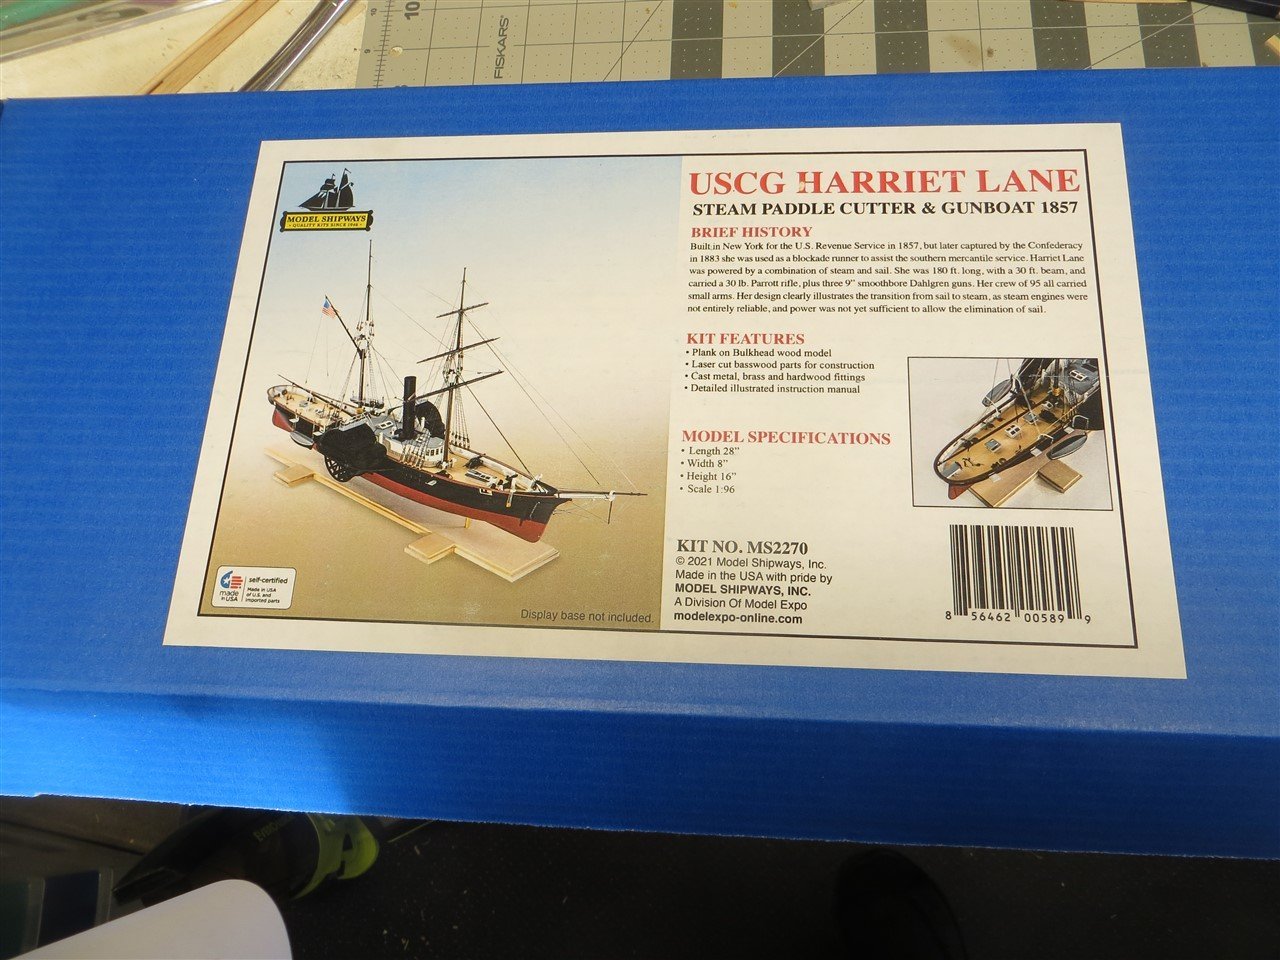

- 25 replies
-
- 8
-

-
- Harriet Lane
- Model Shipways
- (and 1 more)
-
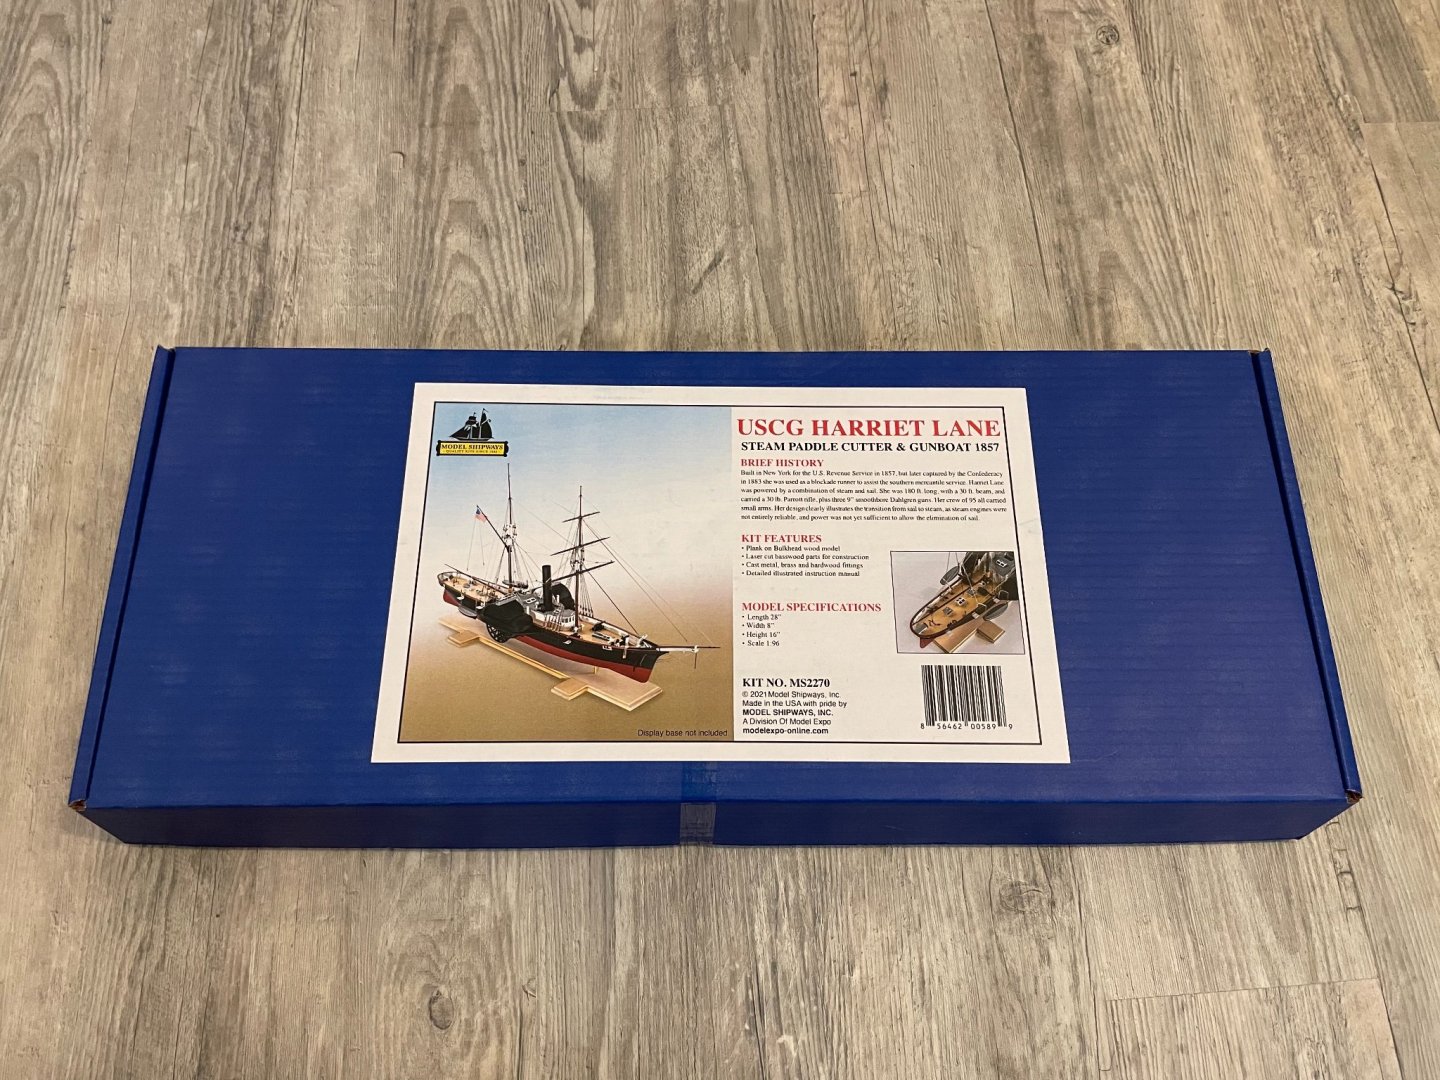
 I received this model yesterday and did an inventory this morning (all is there). Designed by David Antscherl, it is the fourth in the Shipwrights series of progressive tutorial models. @Joseph F. has posted a complete unboxing "review," so I will not post more than a picture of the box here. The only thing I might differ with in Joseph's excellent assessment of the kit: "Should be an excellent kit for the intermediate ship builder, and easy enough for beginners." This kit is marketed as an "Advanced" level kit, and it certainly strikes me as such. But of course our skill levels are all different. . . Josephs review: https://modelshipworld.com/topic/30239-196-uscg-harriet-lane-paddlewheel-gunboat-by-model-shipways/#comment-862352 I am currently building AL's King of the Mississippi, so posting here will be slow for a while, but given my propensity for jumping around I can see maybe painting some of the cast metal parts or doing other small tasks for Harriet Lane here and there. Otherwise I will follow David A's advice to keep to his suggested order of operations. Certainly I will be reading and re-reading the manual before doing anything! Very exciting!
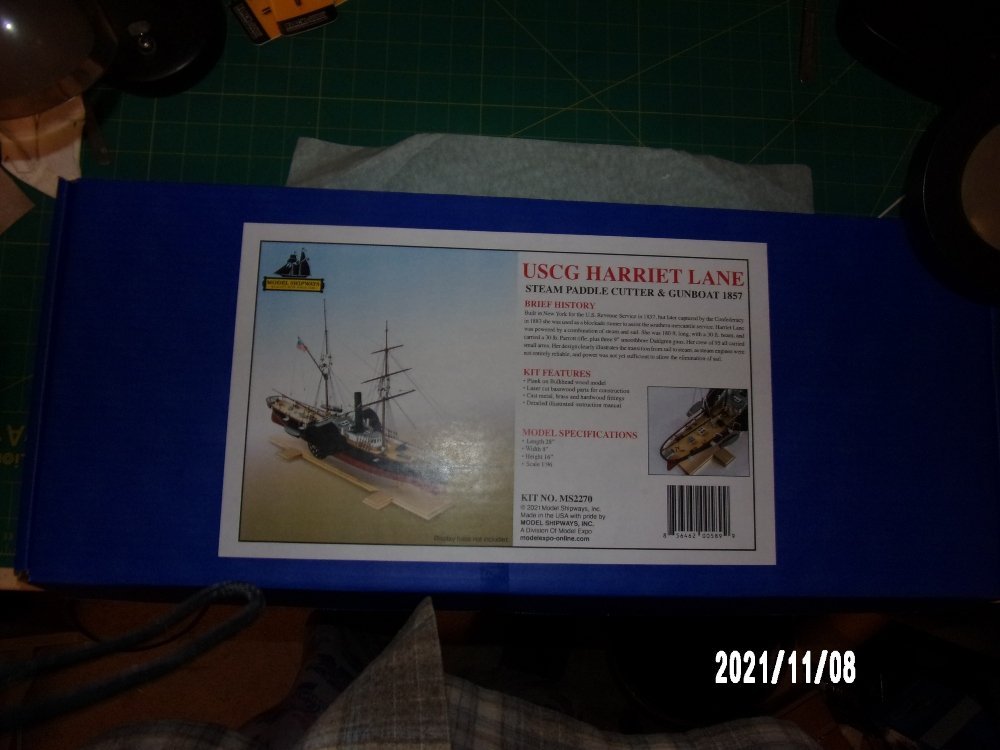
- 146 replies
-
- 4
-
-
- Harriet Lane
- Model Shipways
- (and 1 more)
-
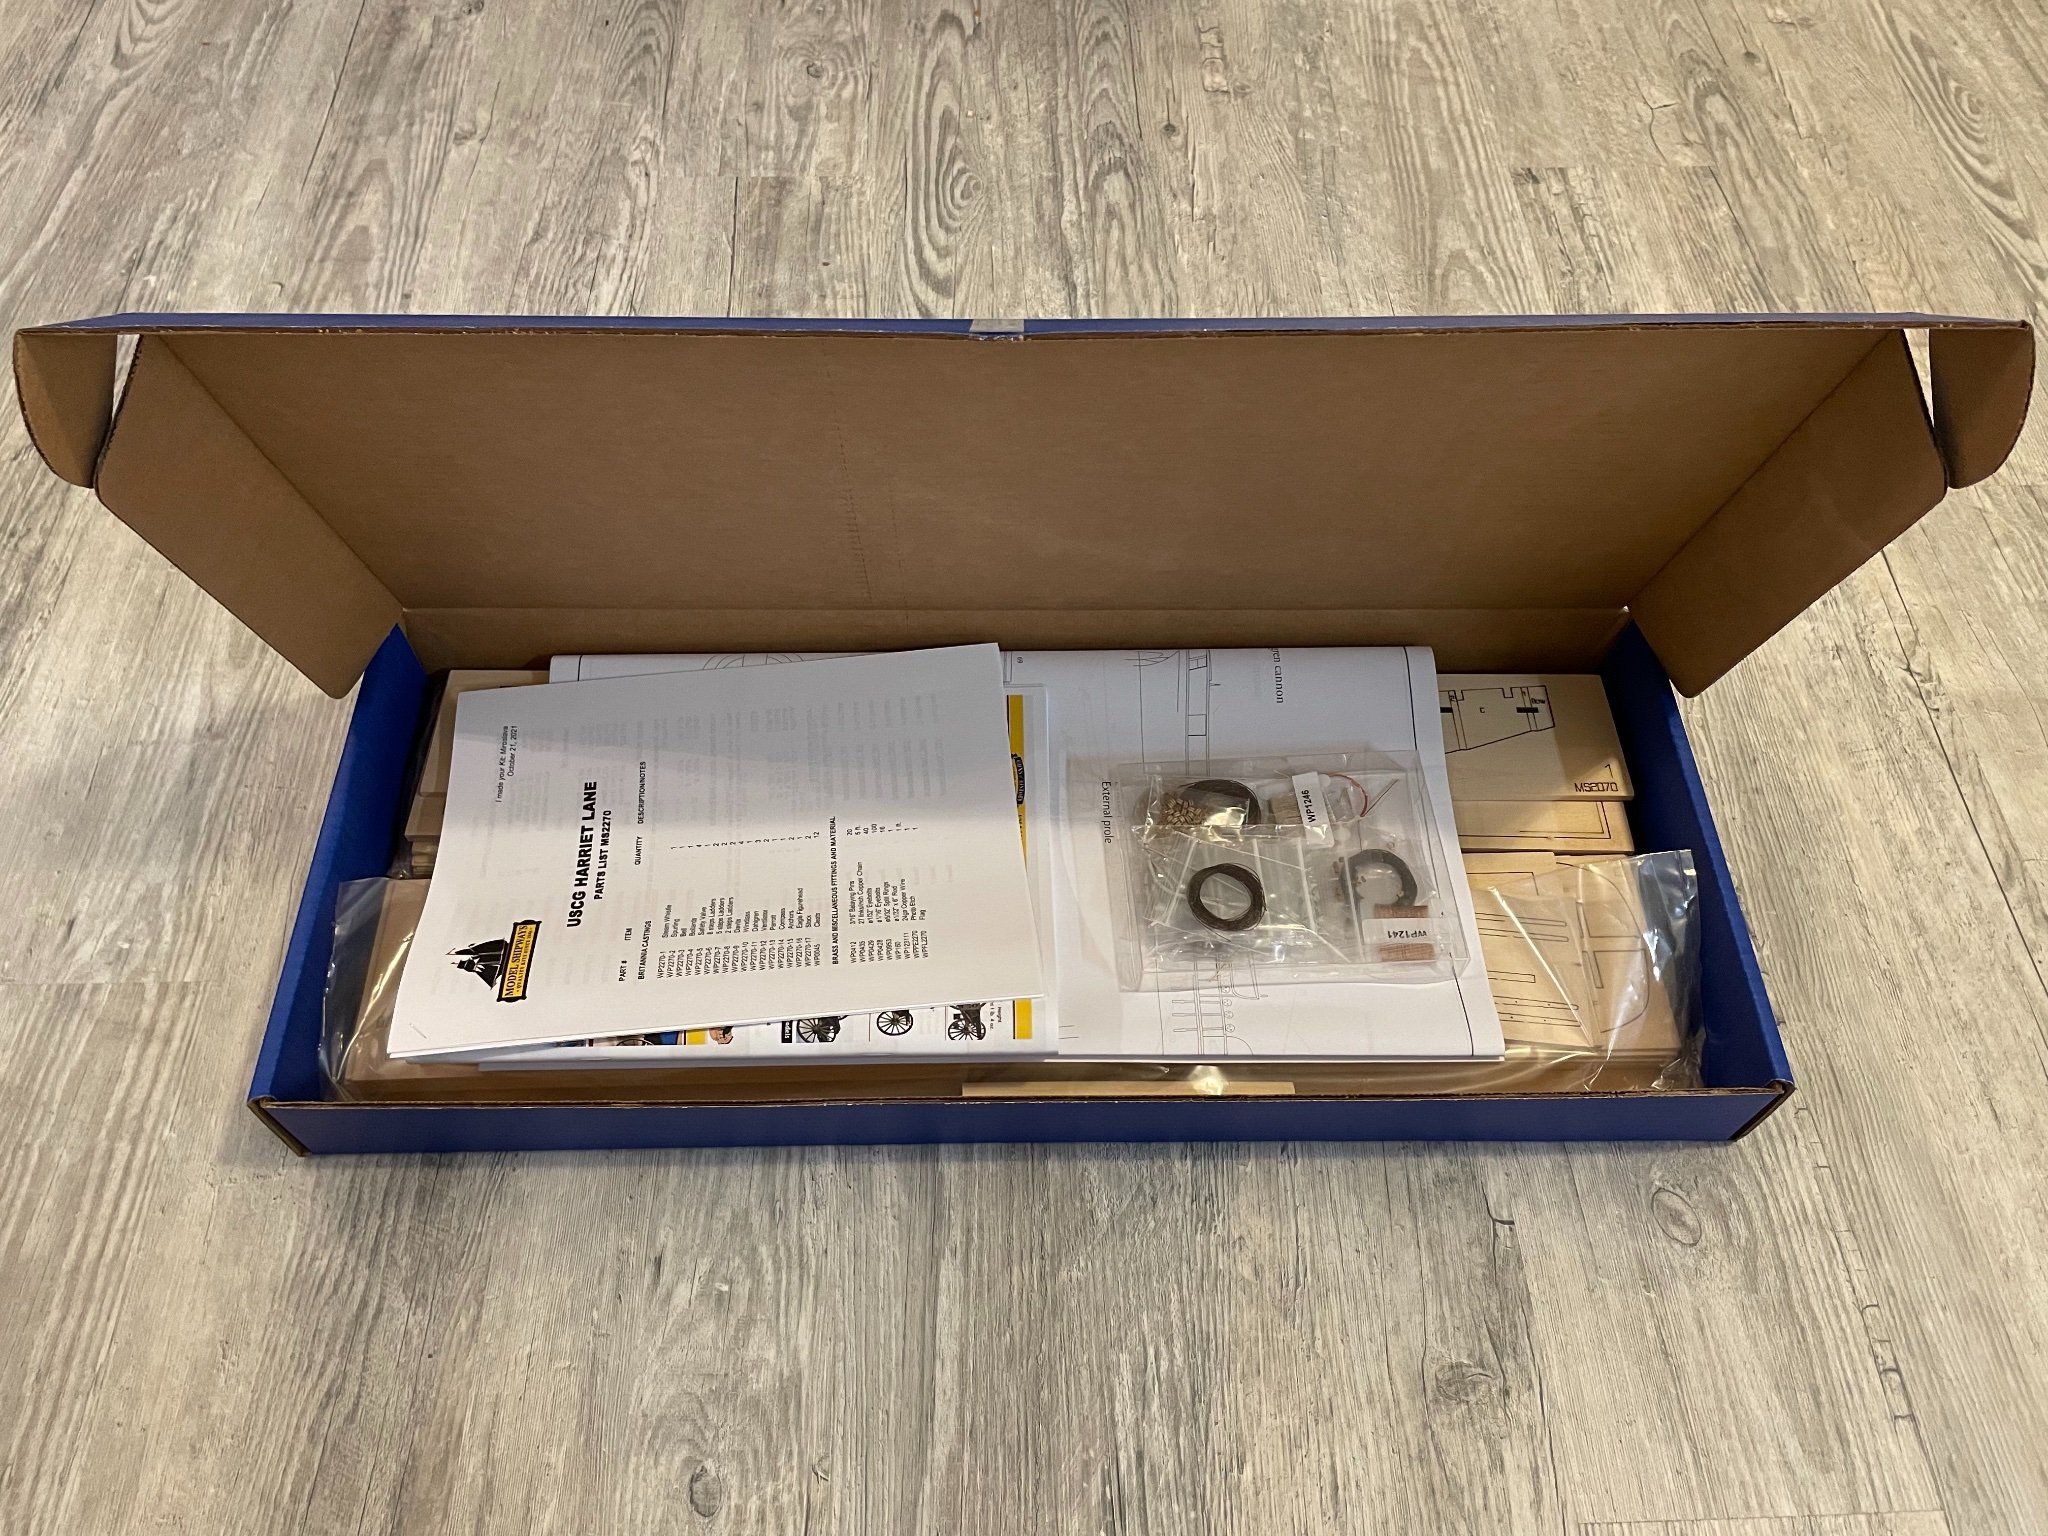
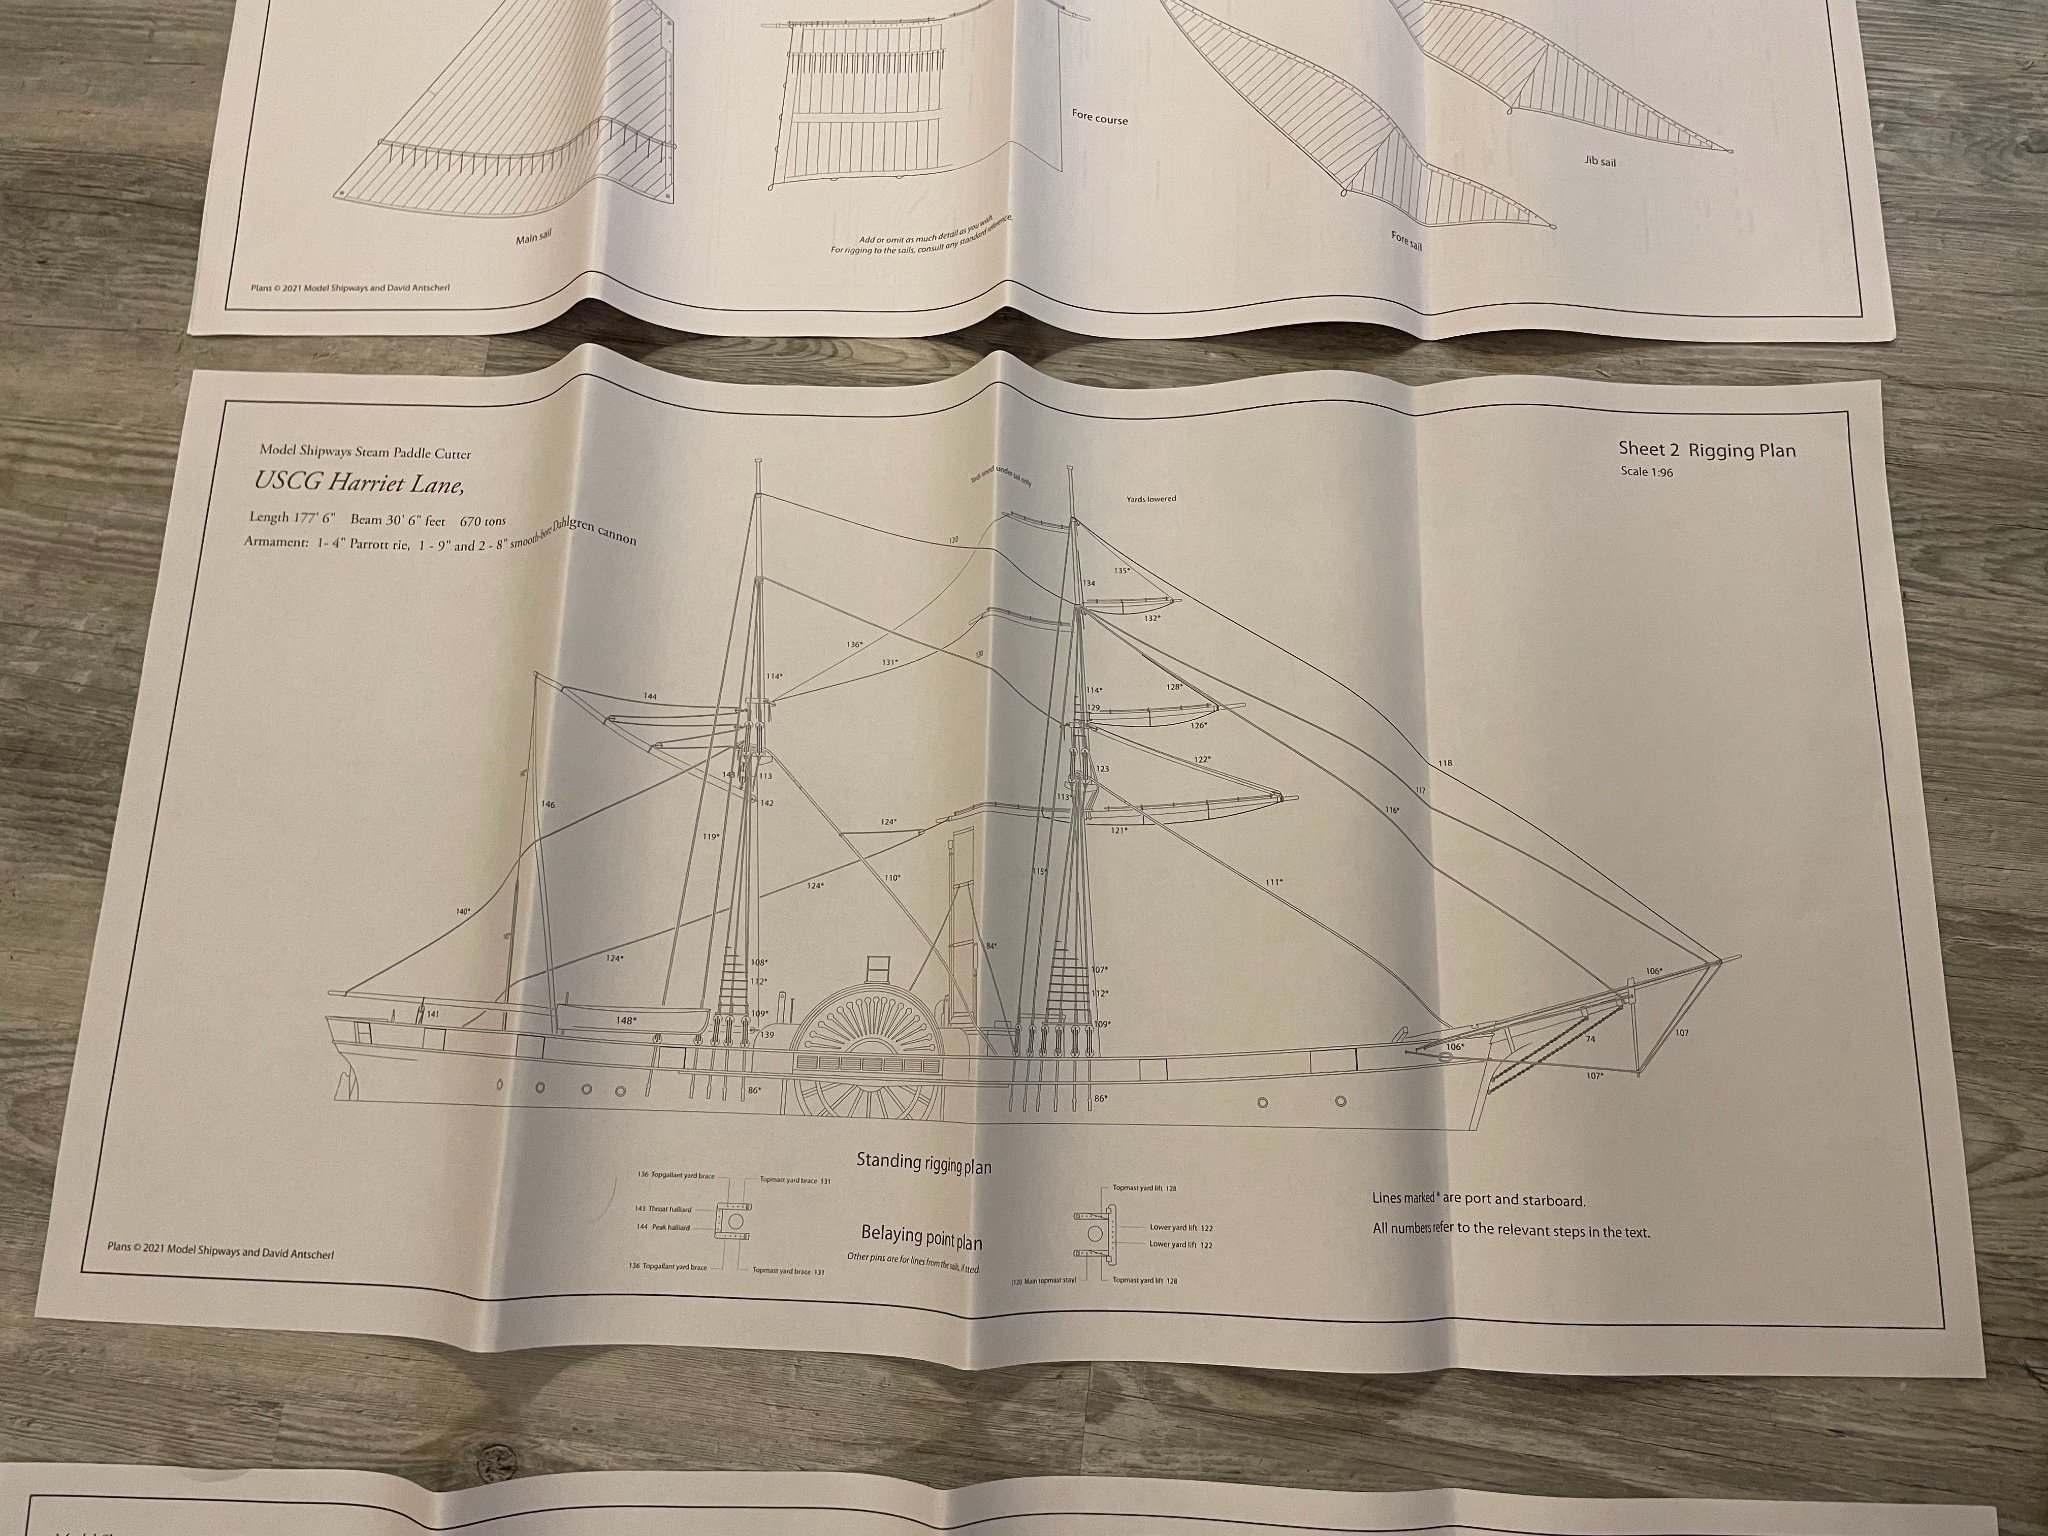
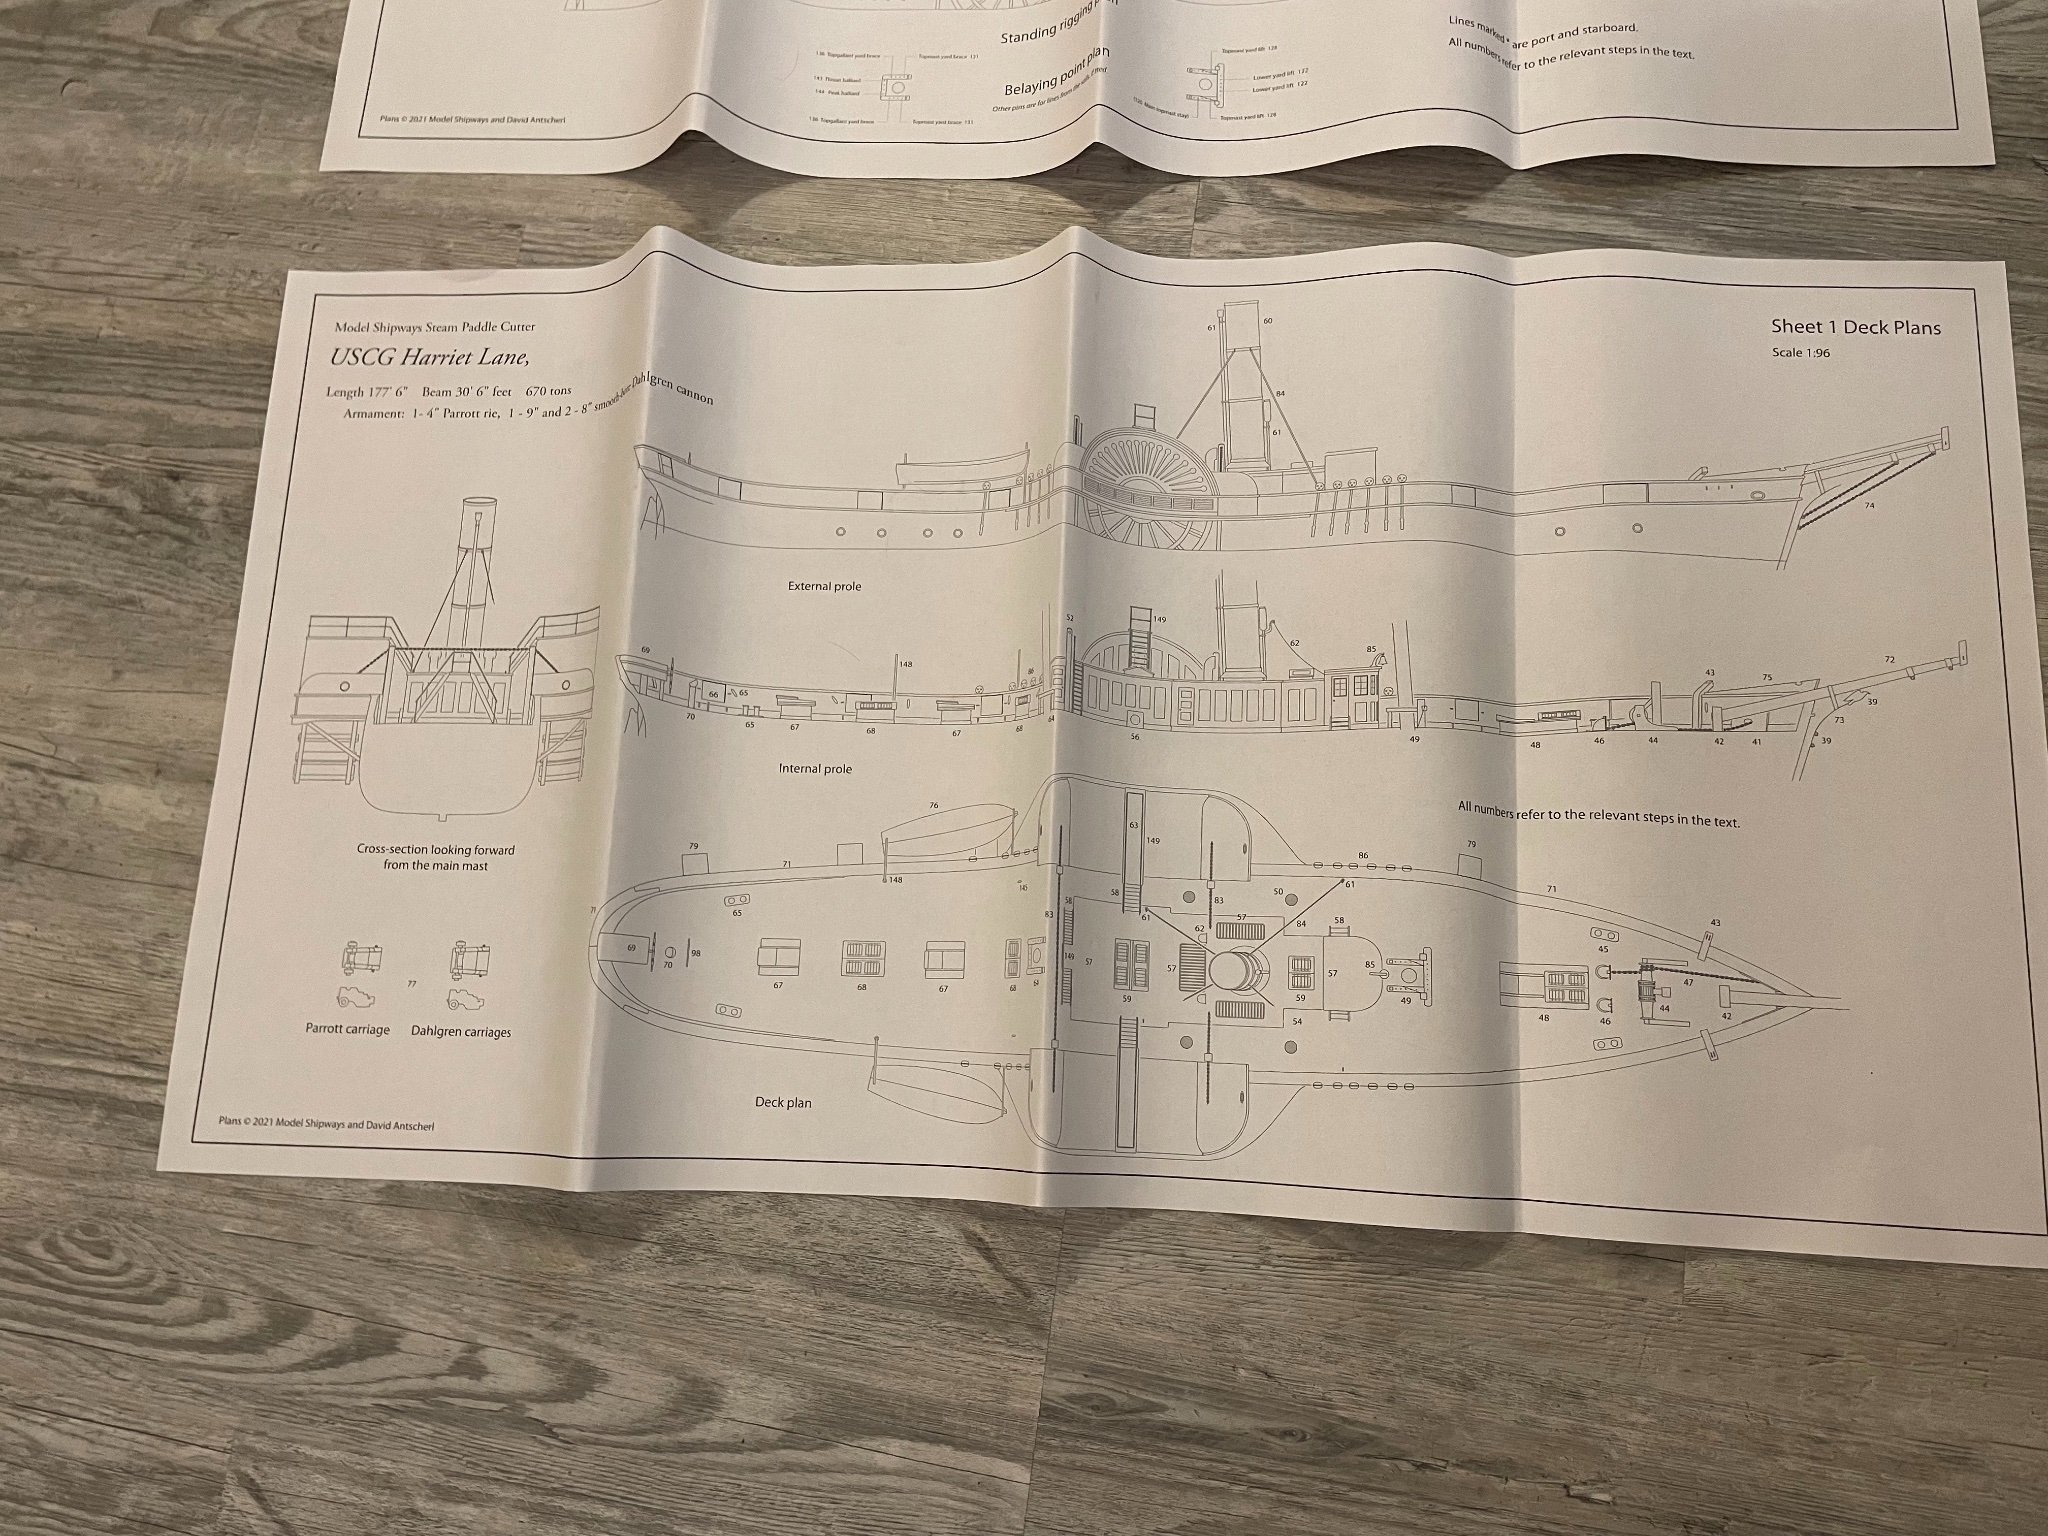
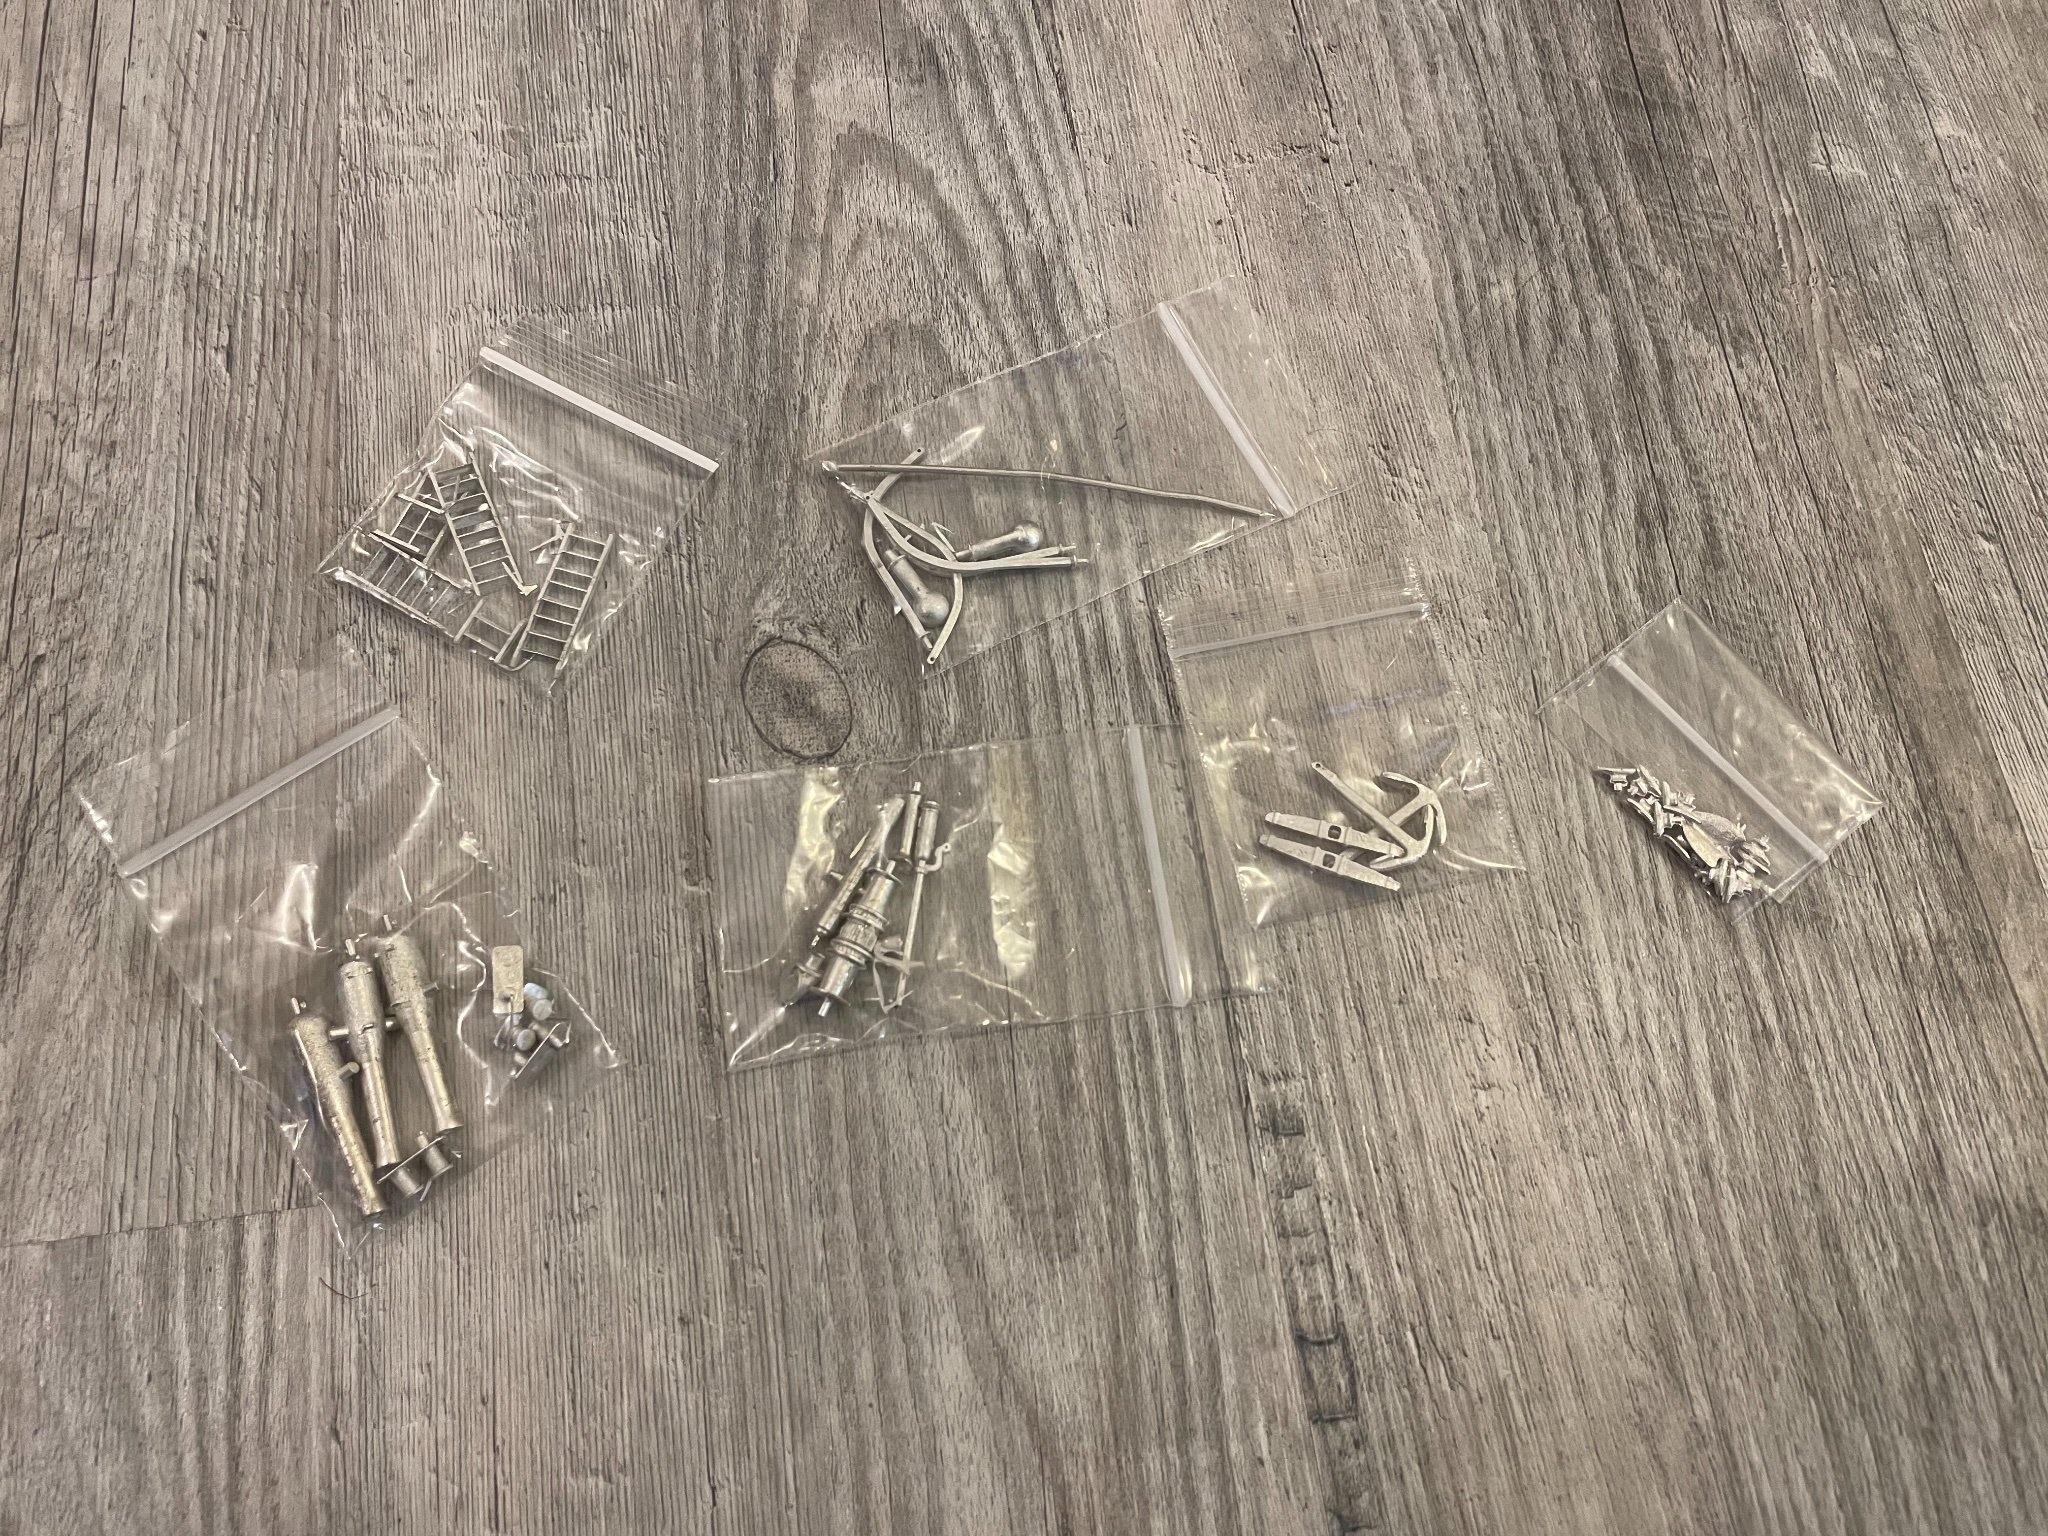
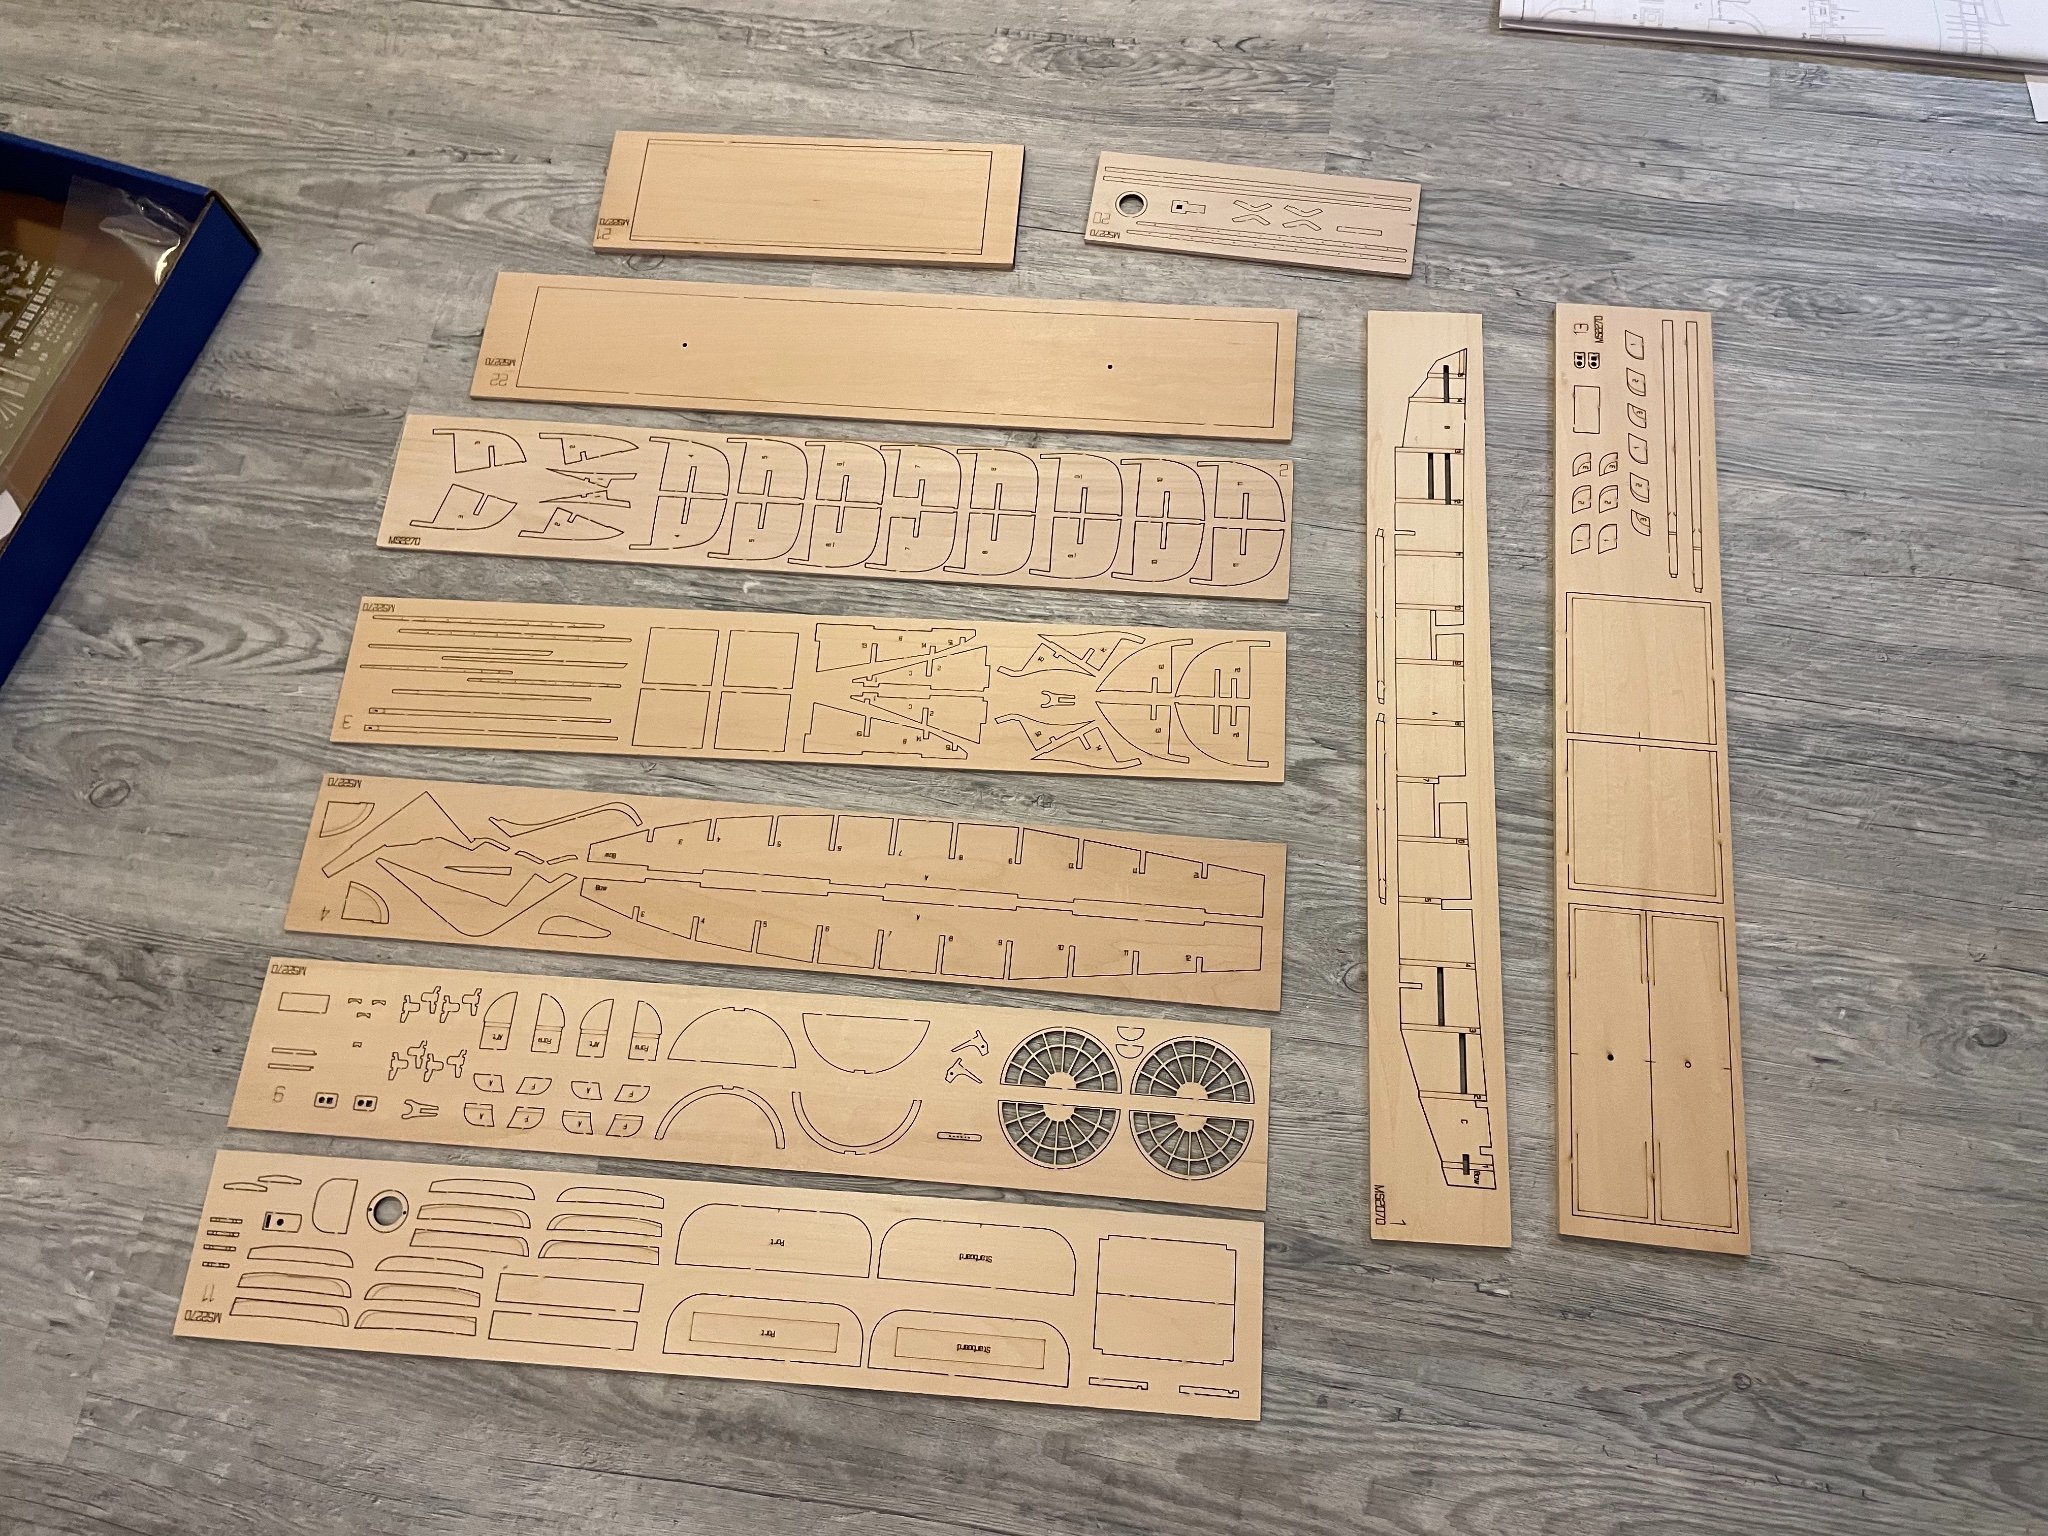
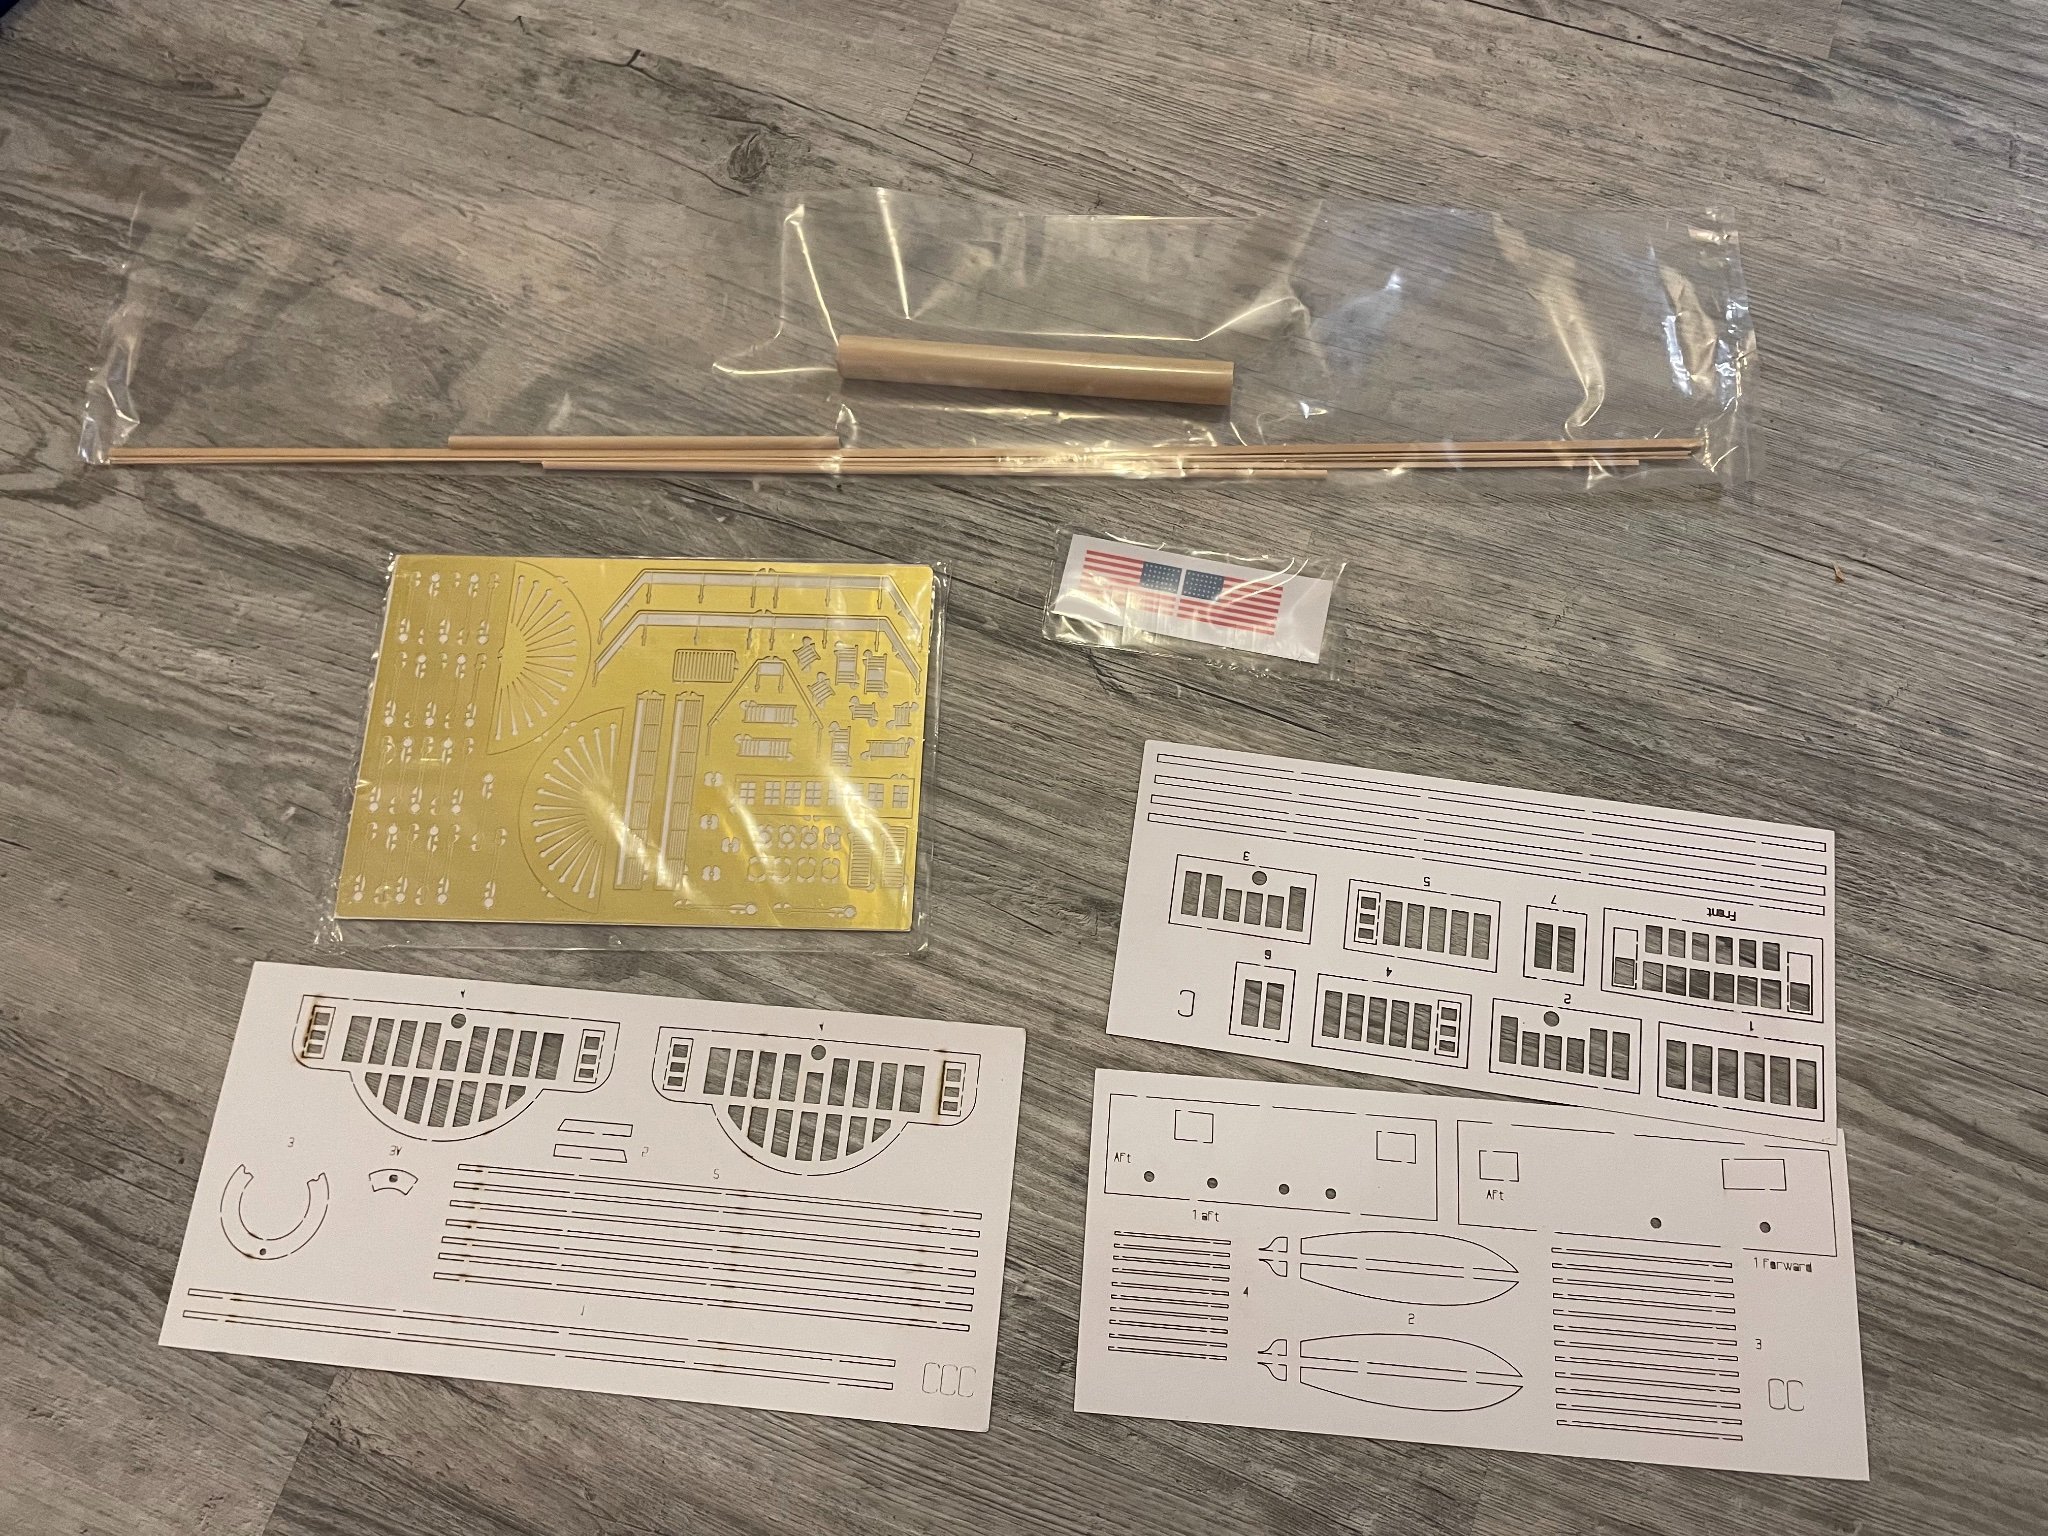
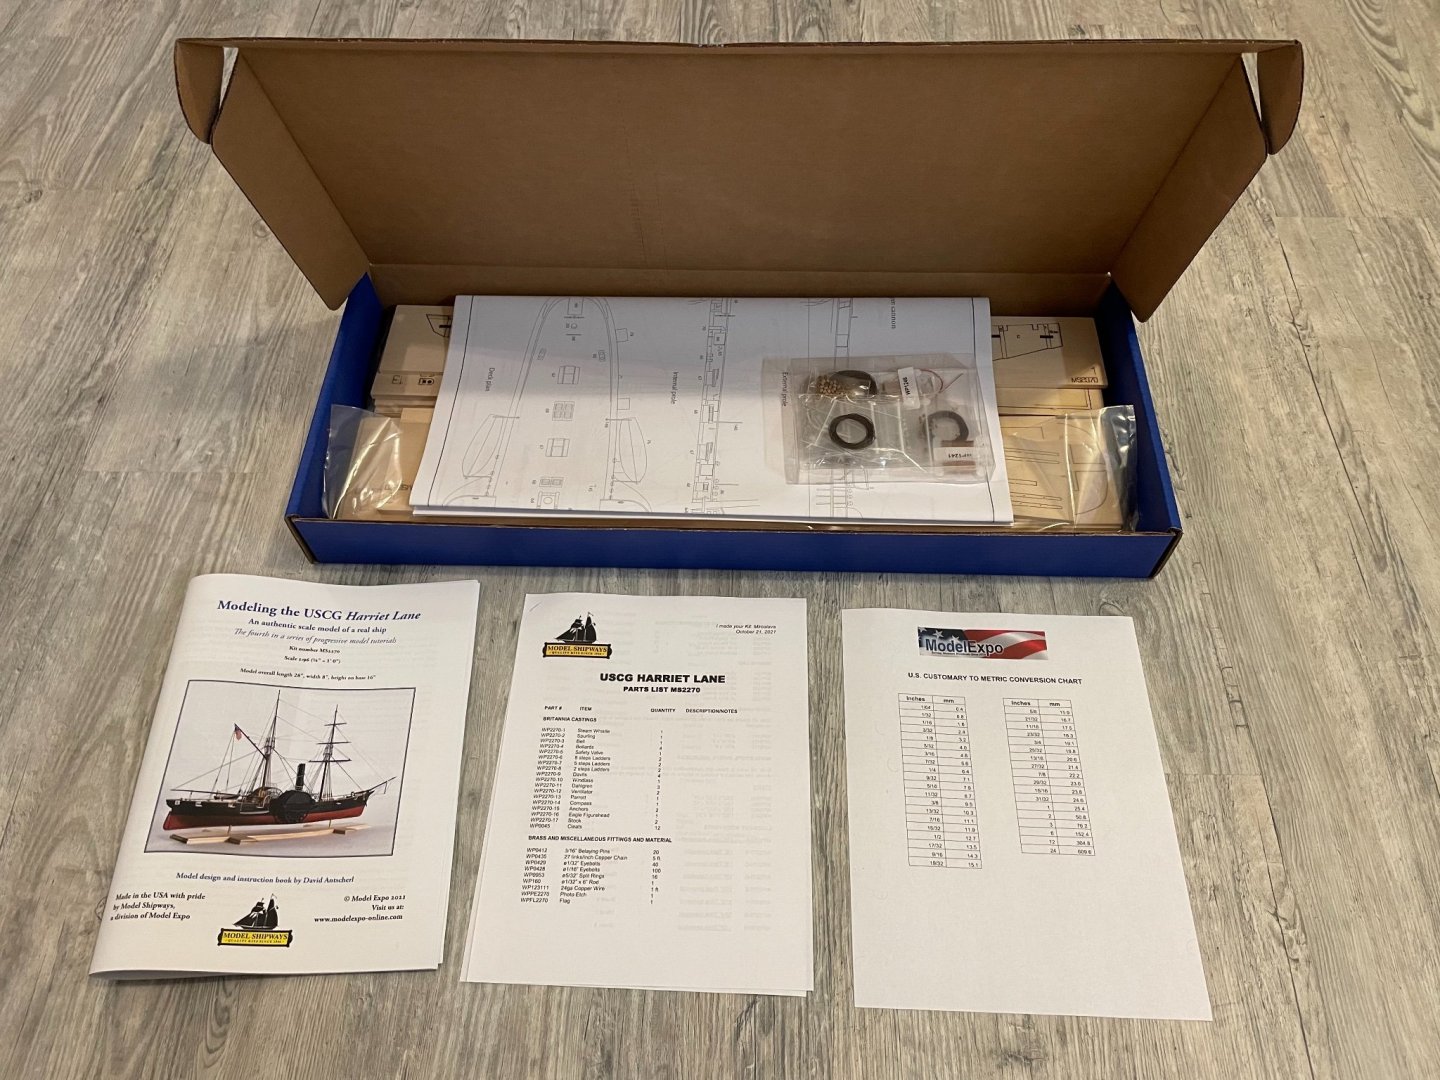
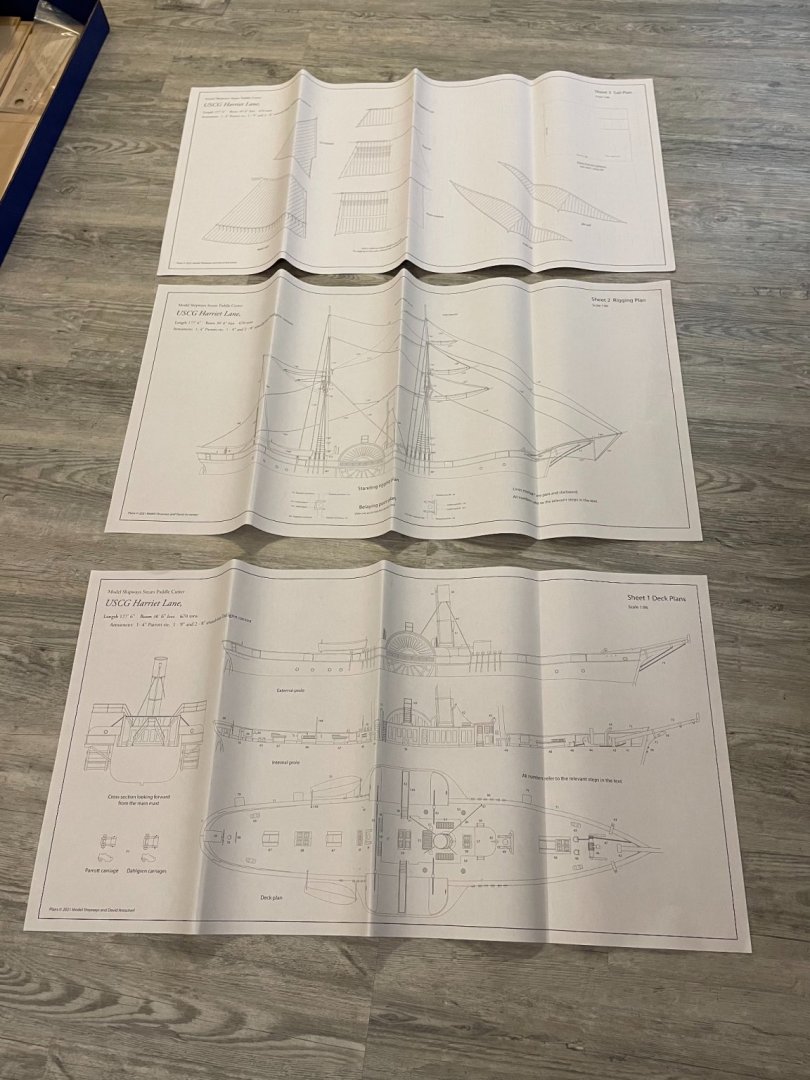
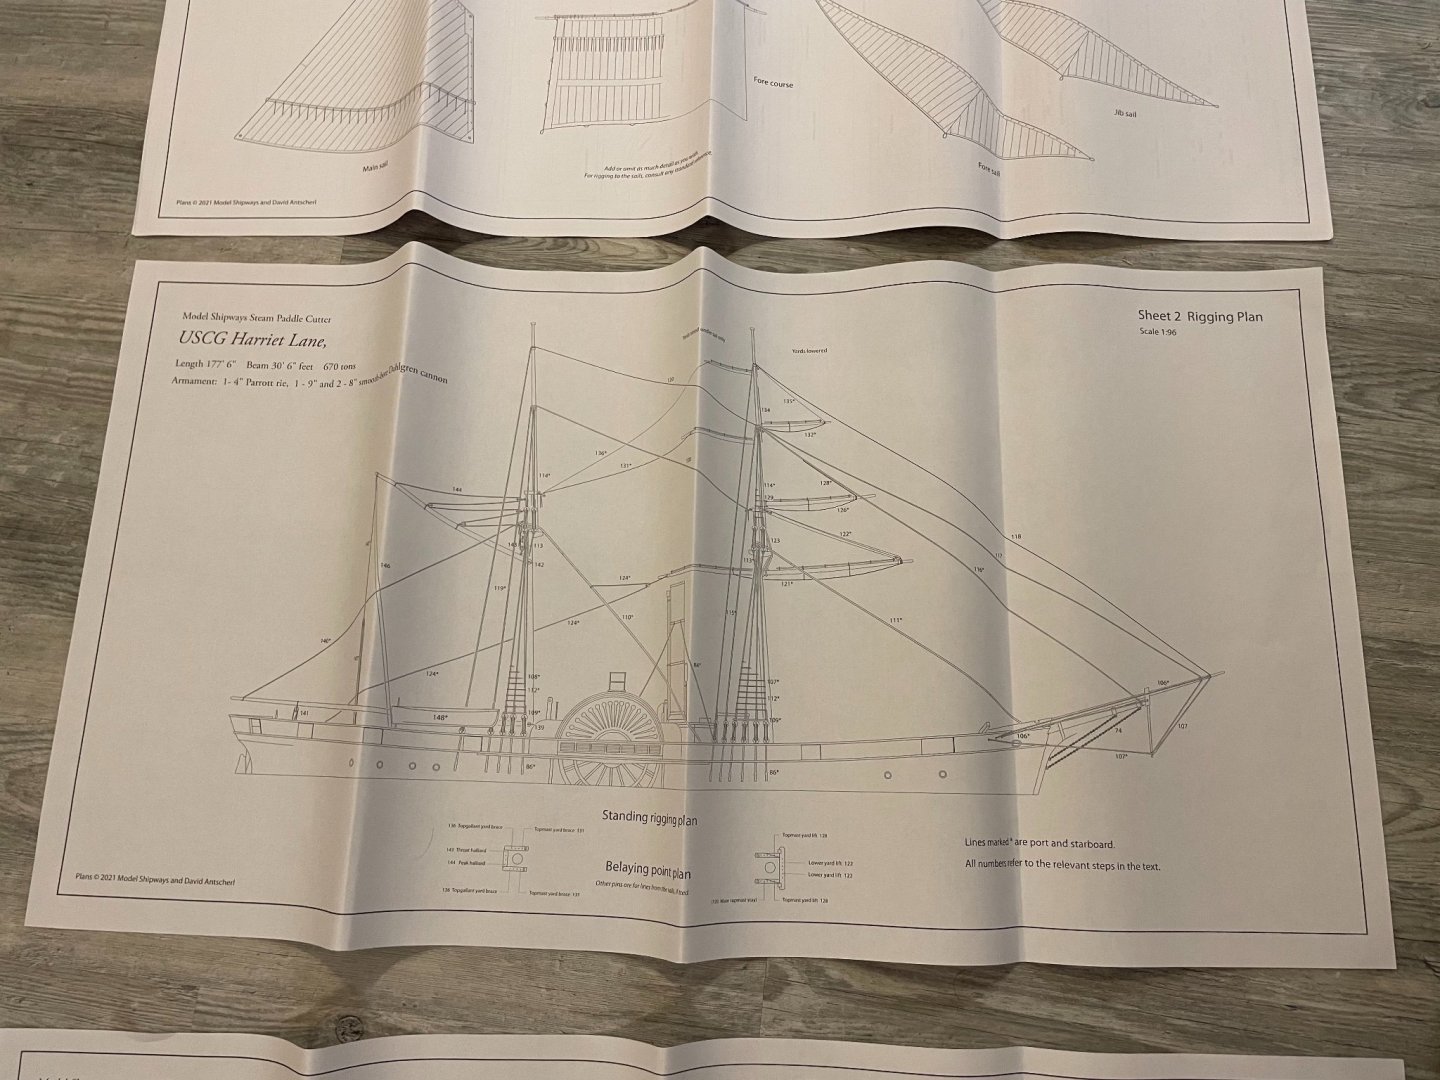
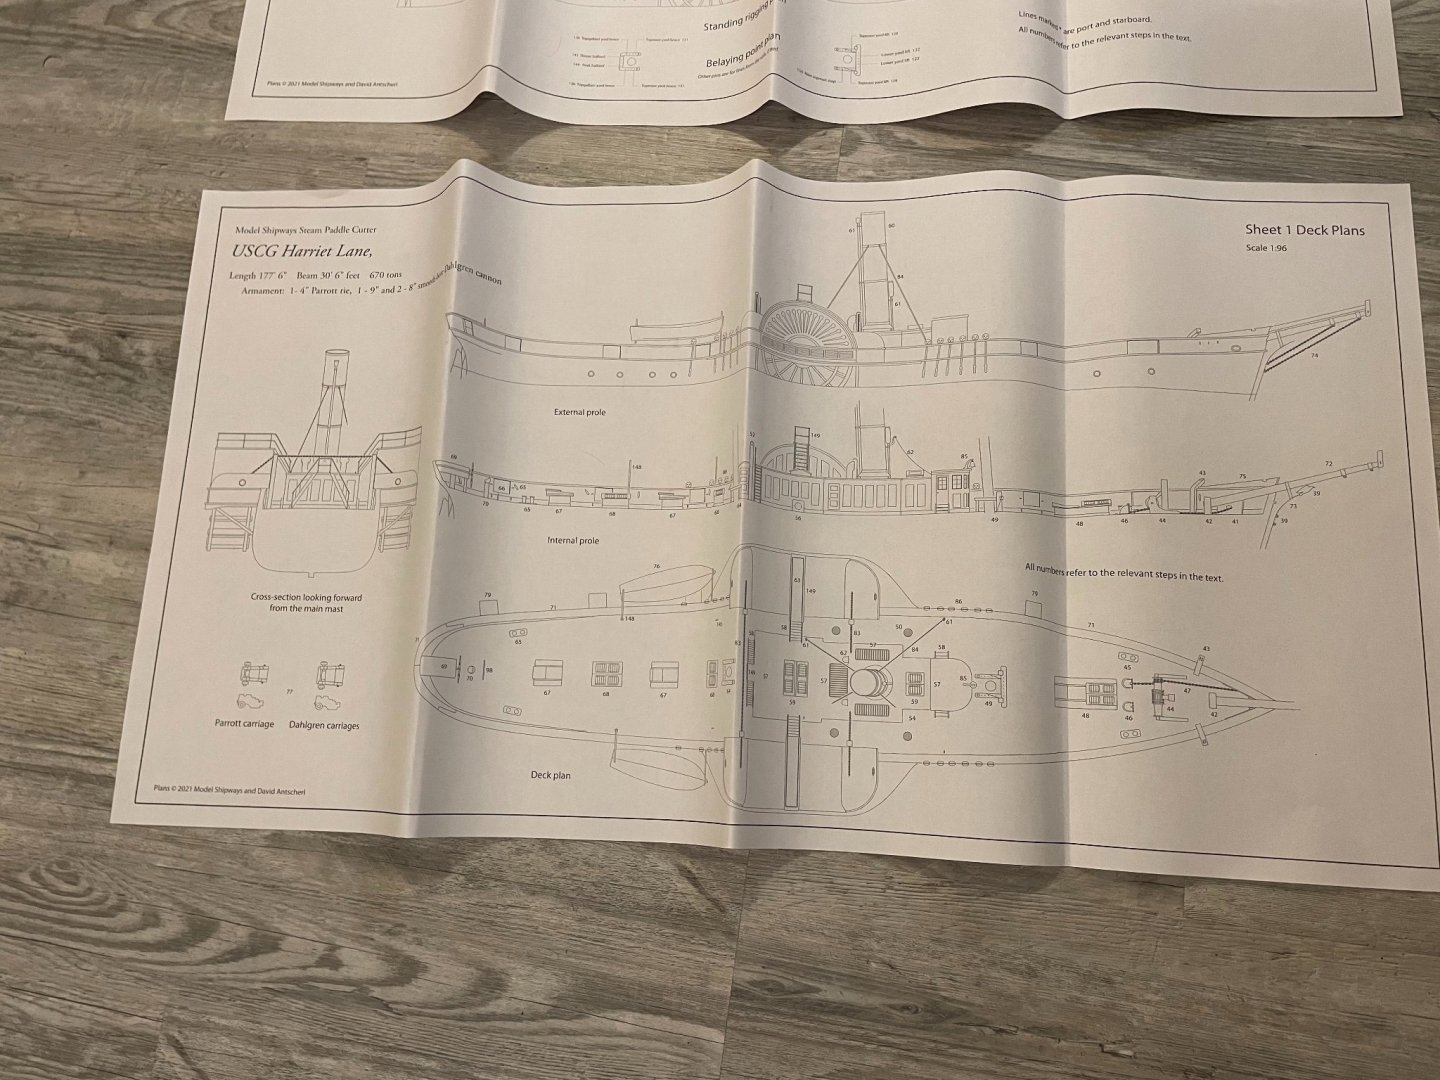
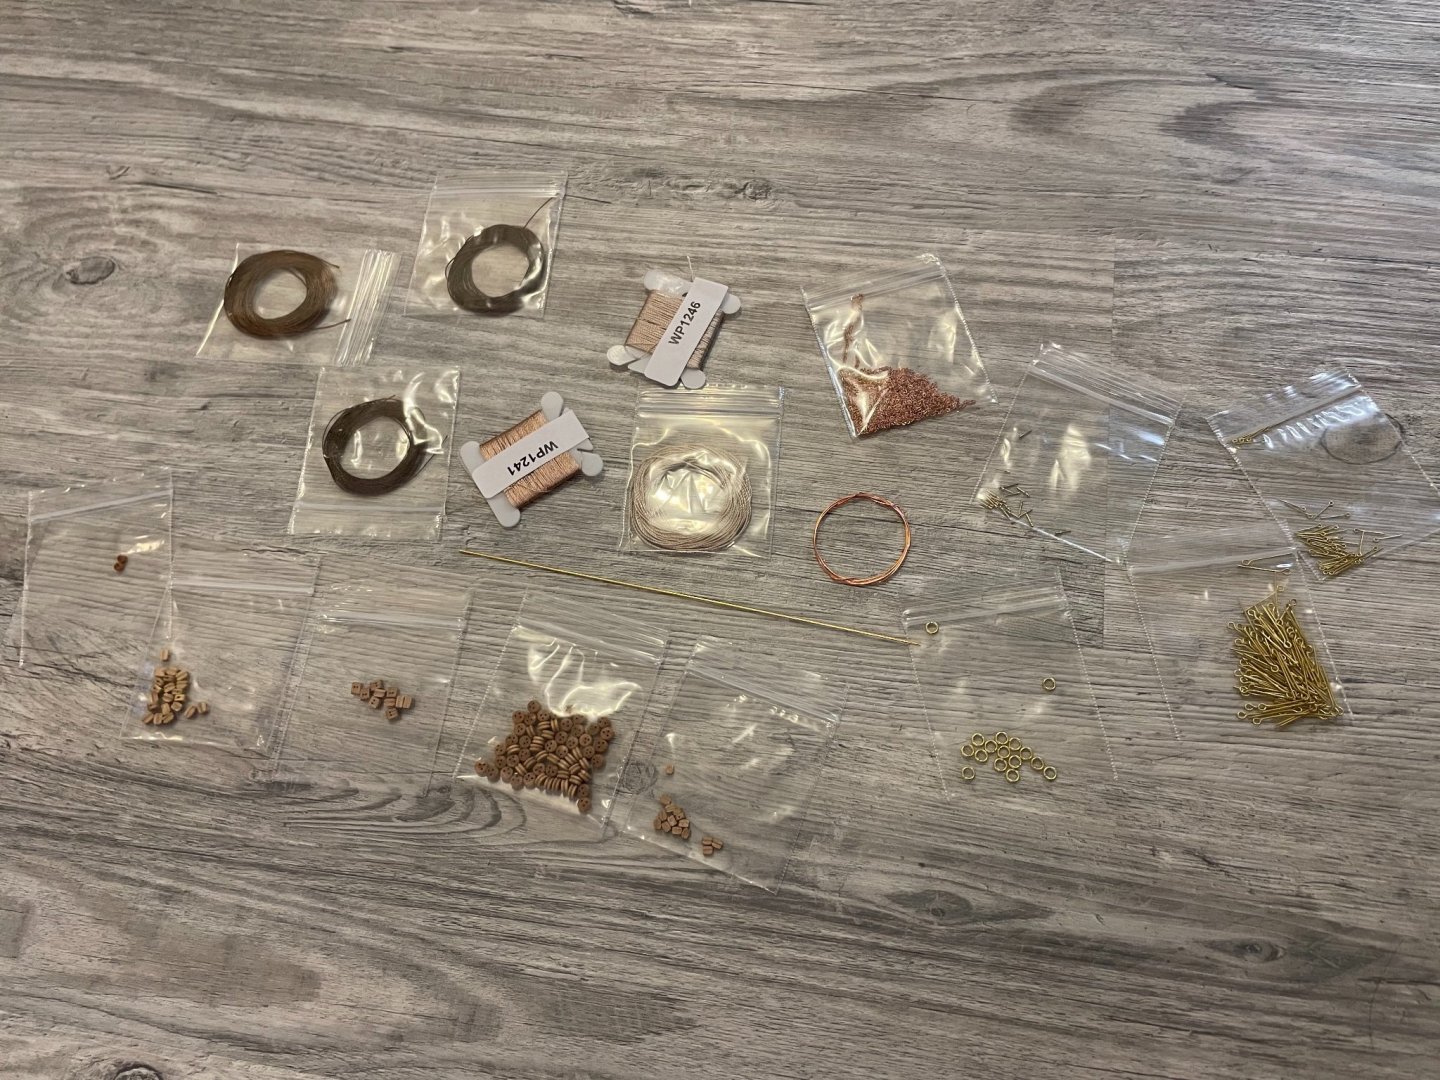
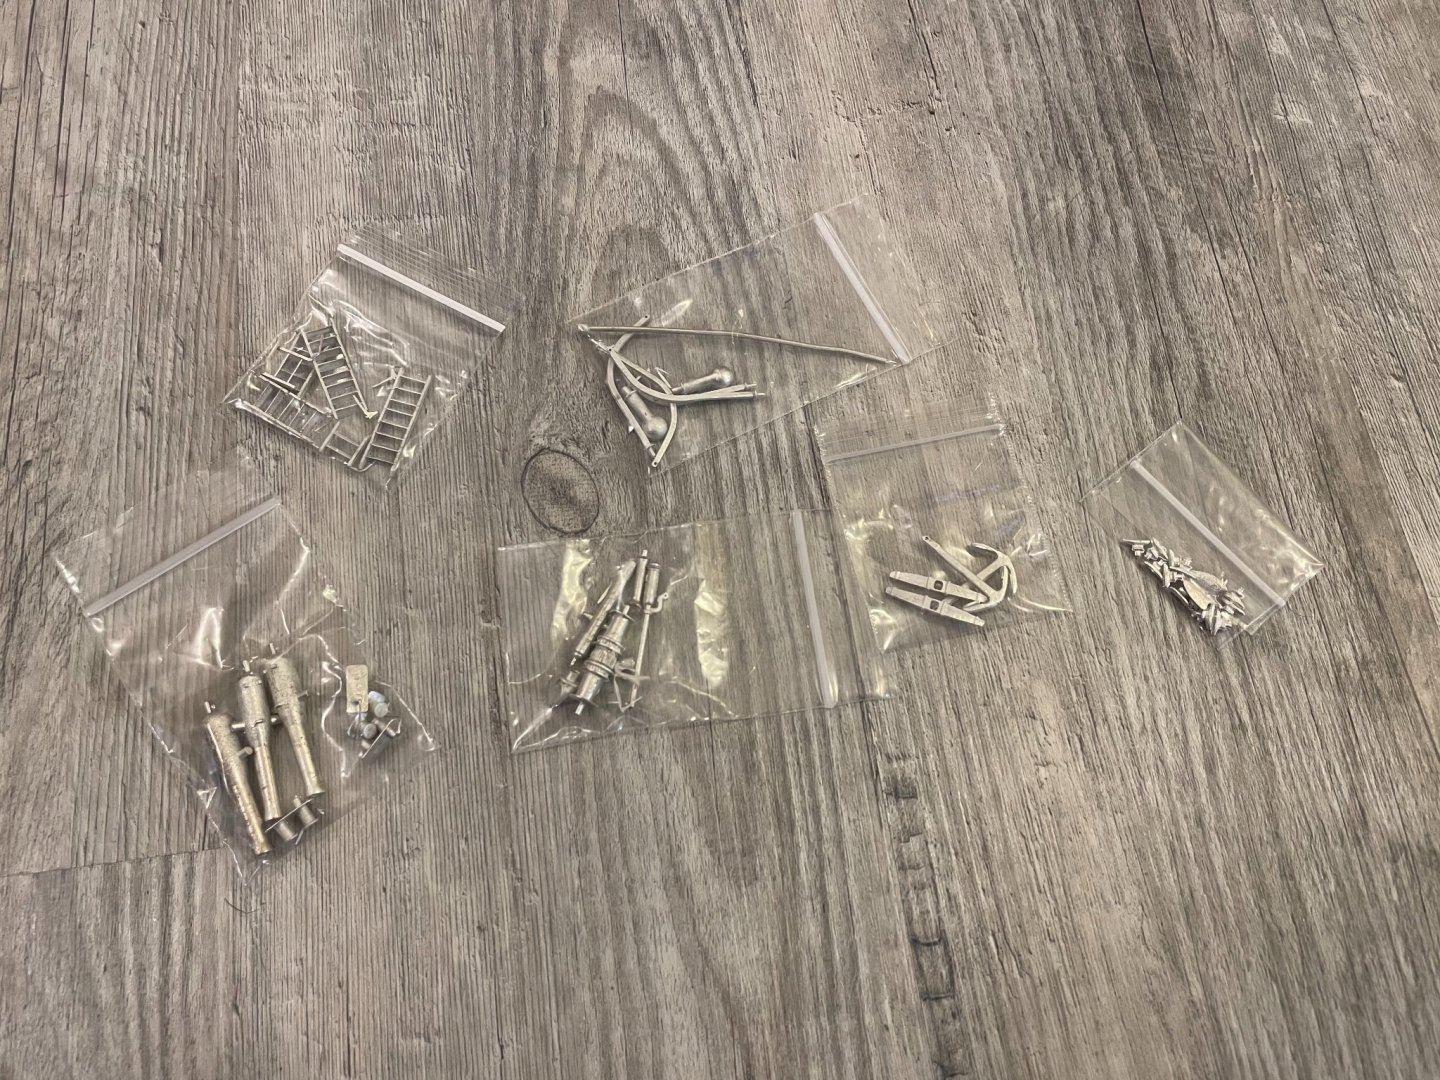
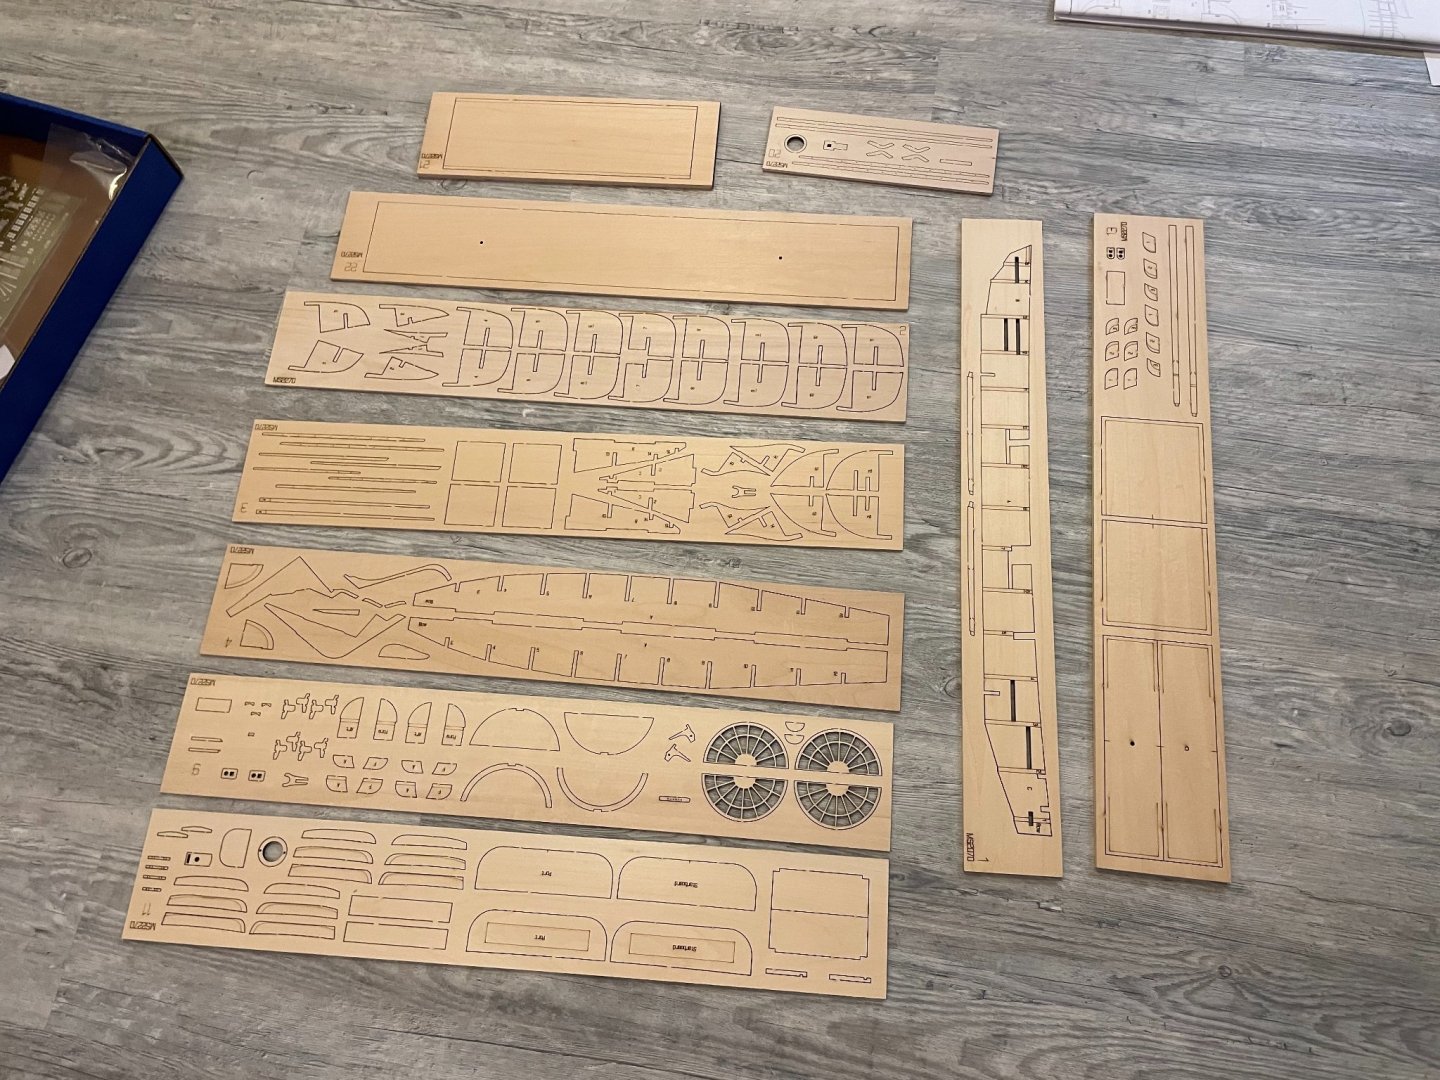
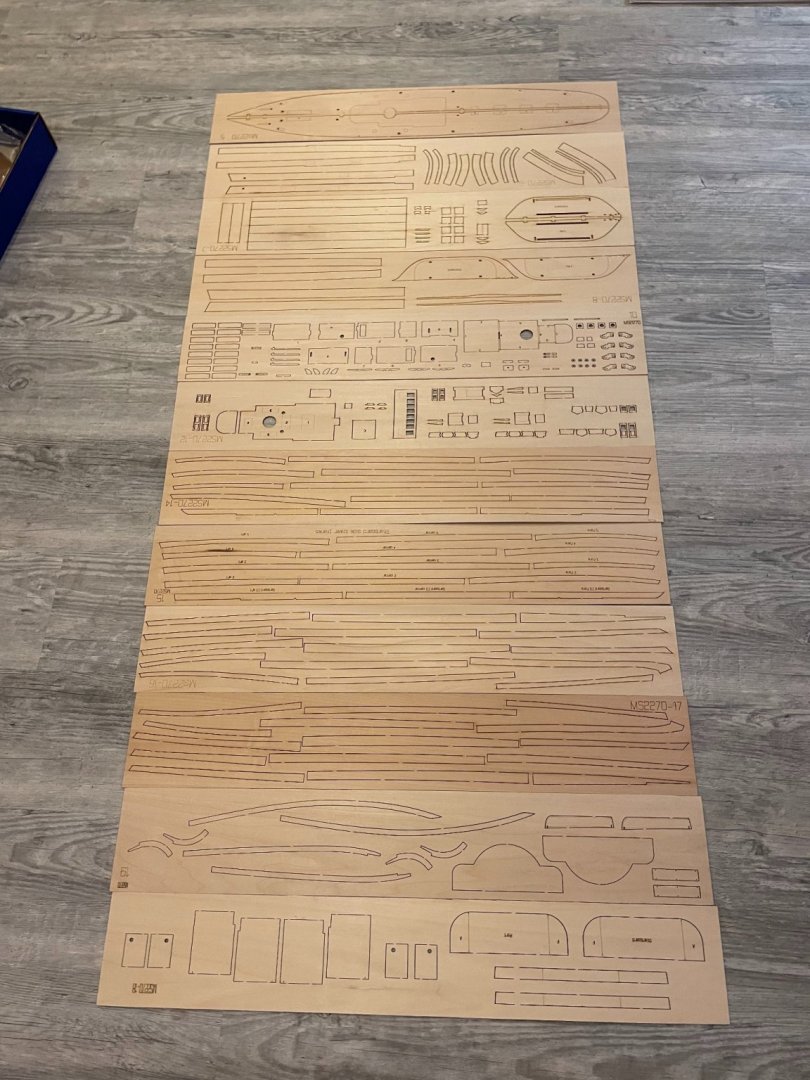
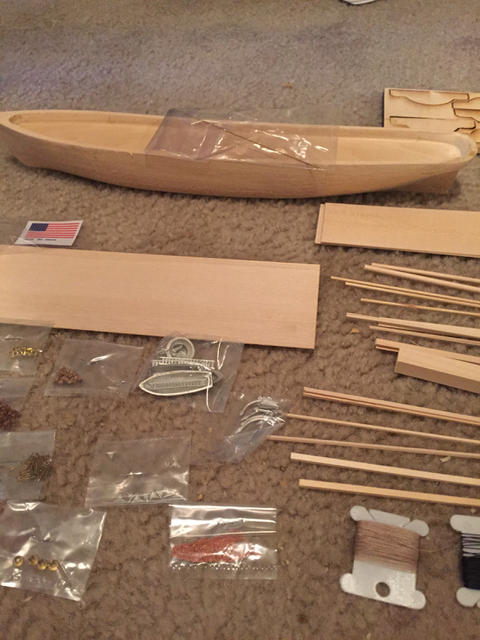
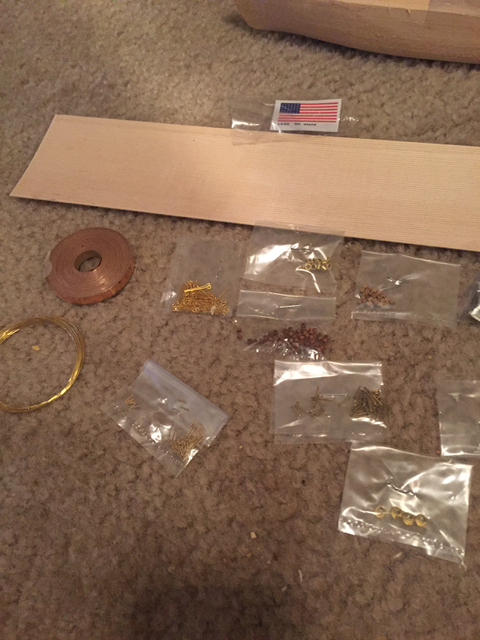
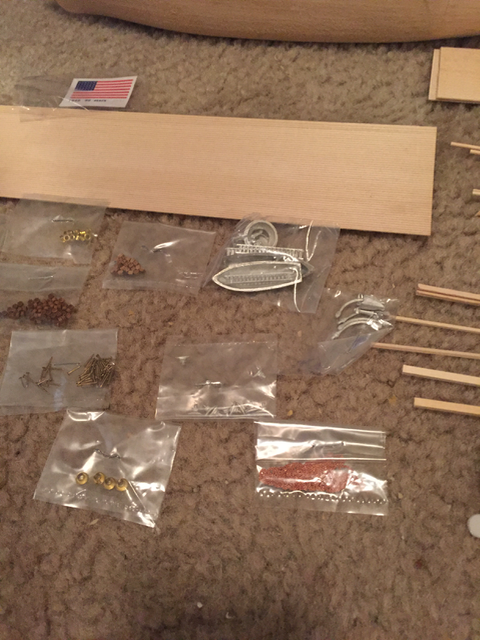
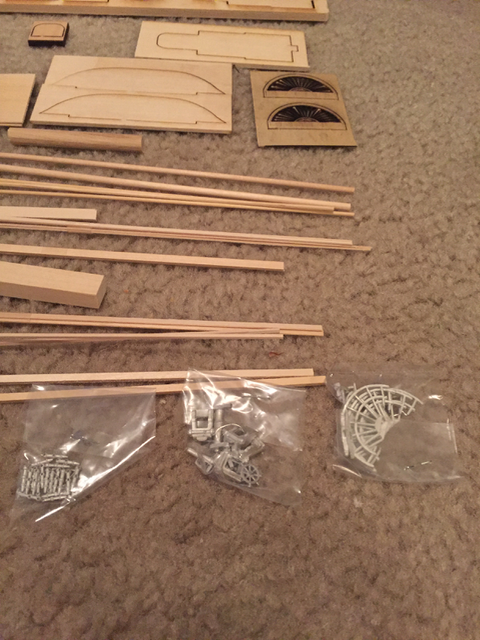
 This is the latest kit from Model Shipways, and the fourth in their Model Shipwrights series, designed by David Antscherl. They have previously released kits of Harriet Lane in 1/128 and 1/144 scale, but this new kit is in 1/96 and promises to be 28 inches long. I purchased this kit from Model Expo on Sunday during their Halloween sale, enticed by its ease of construction, and personally interested in ships of the Civil War Era. Kit comes with a 66 page, full color instruction manual, which also explains some of the ship’s history. Launched in 1859 as a Coast Guard Cutter, and named for President Buchanan’s niece, she served in the Civil War, first delivering supplies to a beleaguered Fort Sumter in 1861, then in the Gulf Squadron. She passed into Confederate hands during the Battle of Galveston in 1863, and served as a blockade runner thereafter. Interred in Cuba at the end of the war, she spent the rest of her career in civilian service. Kit comes with five full size plans, the three shown here and two more showing all the lasercut pieces. The rigging plan, as well as the sail plan above it. The deck plan, showing exact size. Rigging, chain, blocks, deadeyes, eyebolts, and tiny, tiny brass belaying pins. Very cleanly cast Britannia fittings, including cannon, stairs, anchors, windlass, and davits. The first set of laser-cut sheets, including keel and bulkheads. Almost every piece in this kit is precut. The second set of laser-cut, much thinner, including material for decking, deck furniture, and precut planks. A sheet of brass photo-etch, three sheets of fine detailed deck furniture parts cut from heavy paper, a tiny American flag of the Civil War Era, and a small bag of lumber, the only lumber supplied in the kit. I am personally very pleased with this kit, and excited to start it. Should be an excellent kit for the intermediate ship builder, and easy enough for beginners. Glad to see this in a larger scale, though 1/96 is still very small. I hope this review will inform your purchase, and please let me know if you want any closer pictures.

-
 Let me know if I am blogging in the correct place, after which, I will continue here or move to the correct place. Working so small, 1:144, is newly challenging to me. I am putting my 1st clumsy attempts in this log as doing this task in public will keep me on the straight and narrow certain trying doing my best work (inaccuracy will make an “attractive model” but will be just that). I welcome all comments and advice even though I can see the shortcomings in my work. I am making all the sub-assemblies (deck structure, masts, etc, first, as this is the new part to me. Carving the hull draws on my transferable skills, so I am doing it last, since I have made many orchestral violins (not fiddles) which requires carving, from a slab, the outside and inside of the top and back with precision. My college degrees are BS and MS in mechanical engineering. I currently build and service pipe organs and am a portrait artist. My very first task was stropping sesame sized rigging blocks (fail here, and I might as well quit). Nearly impossible for me with wire, but easy with thread. I work a few minutes per day on this model and stared a month or so ago. Some of my completed sub-assemblies will be pictured soon. I chose this model because I was initially looking for a Revel or Limburg model of a mid 19th century sidewheel mail packet, ships like the Cunard Persia, though none were available. While never a mail packet, the HL is very much like one, and is "good enough". I will add all of its warship elements to the model.
 -
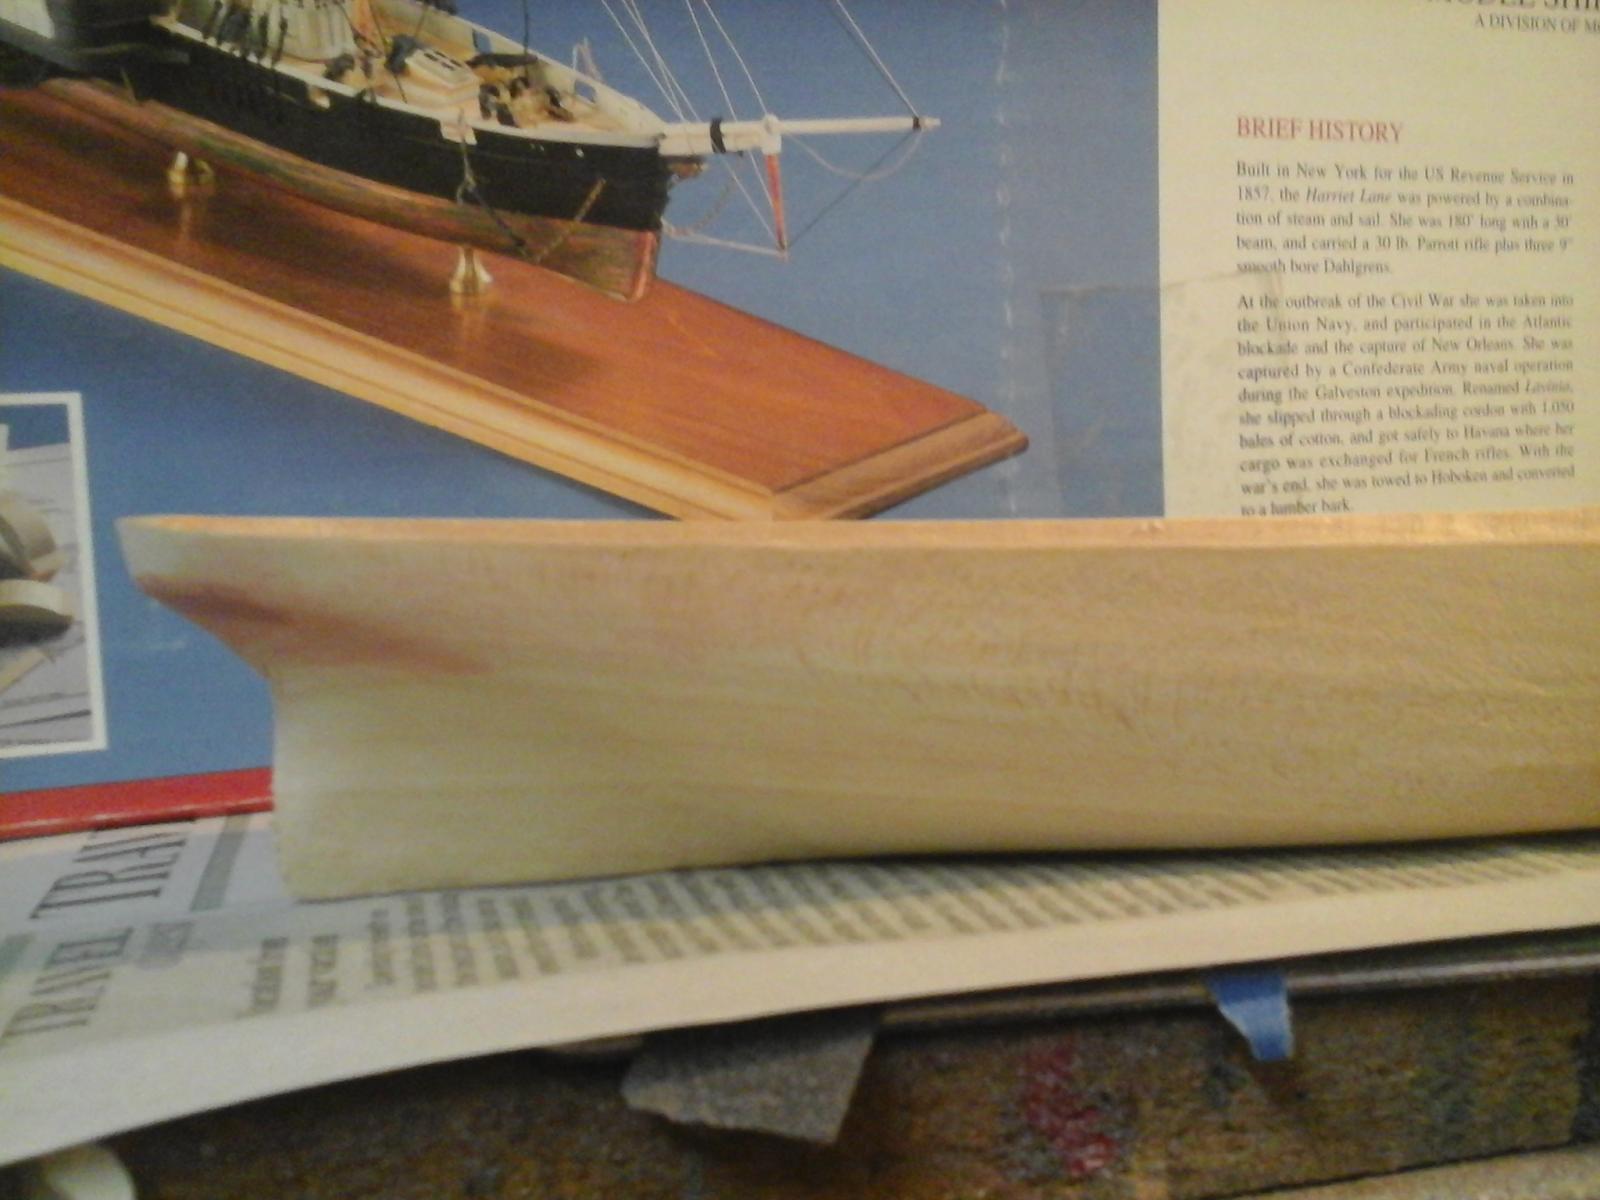
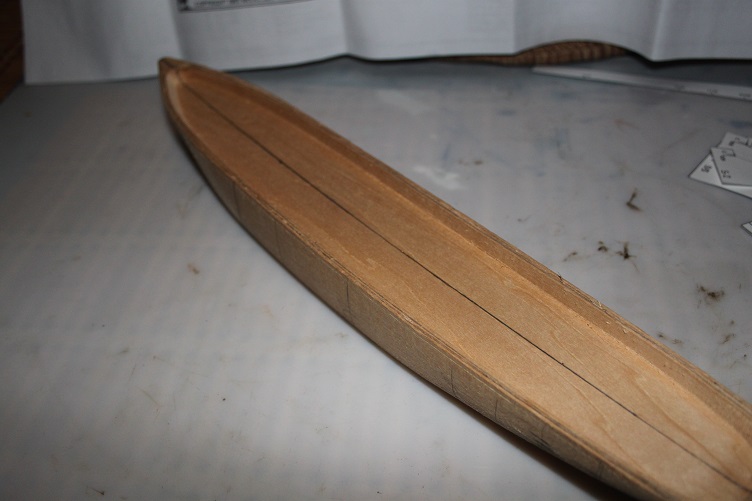
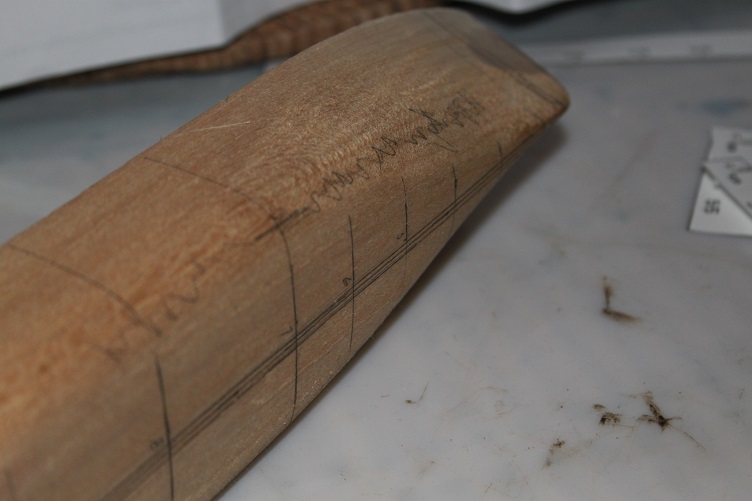
 Hello All, After a summer hiatus I'm back to the table with a new build. The Harriet Lane from Model Shipways, I've always been intrigued by these type of vessel with the mixture of paddle power and sails, not really sure how practical they were but they look cool on the shelf! Other builders here have done a fine job of inventorying the kit so I'll skip that and get right into the build. This kit is a solid hull, a first for me, and after cutting out the kit provide templates the hull was marked out at the appropriate sections and the center line established. I was surprised and pleased to see how close the rough hull was to the actual templates. At this time I marked out the high spots where material will be removed and also set the bulwark width using a compass, as I've described in my other builds. Next steps will be to get the rough hull into finished shape and dimension and thin the bulwarks down. Pics follow, as always thanks for your time and attention J
- 258 replies
-
- 11
-
-
- harriet lane
- model shipways
- (and 1 more)
-
 Just started the solid hull Harriet Lane,Shaped up the fan tail but I sanded a hole in the hull near the stern so I filled it with my trusty Bondo automotive spot putty.
- 67 replies
-
- 5
-
-
- harriet lane
- model shipways
- (and 1 more)
-
 Another build log that was eaten by the hard drive monster was my 1:144 Harriet Lane so I will attempt to recreate it here. Again, like my Bounty's Jolly Boat I will include some retrospective content in the attempt to help anyone who wants to try this ship in the future. Lets start at the beginning. I got this gift as a Christmas present from Santa (my husband still denies that he bought it). It is a model shipways boat and this model is from a solid hull. There are lots of little knick knacks that came with the ship too. The first step is to cut out the patterns for the shape of the hull. It was suggested to me (after the fact) that you should paste it to a card stock or cereal box to make the pattern more firm. That would have helped but it certainly wasn't necessary. The next step is measuring and placing the center line on the boat. I have a laser level so I used the laser to make sure my line was fully straight. I also marked the station lines on the ship. I measured from the centerline to the edges of the bulwarks based on the drawings and drew those lines on. Then I started shaping my hull. This was a slow process. I'd hone a station down until it was roughly right and then I'd move to the next, checking against the templates each tie to make sure I was taking the right amount away. Then I worked to get each station to flow nicely into the next. The toughest part there was where the hull didn't have enough material on it so I had to improvise a bit. The bulwarks need to be really thin, 3/32" and to keep the boat from breaking during shipping the manufacturer really makes it thicker than needed. They also made it significantly shallower than needed so I thinned the bulwarks and also dug out the floors. This was really difficult since I didn't have the right tools. Luckily my husband went to harbor freight and bought me a miniature hand planer. After it's blade was honed it worked like a charm. I applied wood putty to the hull to even out the couple dents that were too deep to sand out. The wood was so soft that if I wasn't careful it dented...even with just my little fingernails it would dent. It was truly annoying. But in a solid hull situation like this, putty is your friend. I also used grey primer between layers of fixing dents because it helped the dents show up better. I would have been even more diligent than I was with filling in dents and smoothing the hull but my primary concern was the hull's shape since I was planning on planking above the waterline and coppering below the waterline. Before I could get to that I needed to install the keel, stem, and sternpost. That required lots of measuring and tiny bits of cutting. The hardest part was dealing with the instructions. While this is a "beginners" kit it doesn't tell you where to get the parts from such as the figurehead stand on the bow. It really expects you to be able to figure a lot of that out for yourself...but then too they don't seem to include the optimum types of materials to craft your own pieces from. This kit is a lot closer to a scratch build than the jolly boat was - I'm finding myself creating more parts than the kit gives...so if you are a beginner and don't have much experience either in other types of modeling or woodworking then you should steer clear of this kit. In order to get a good shape for the stem I used a contour gauge against the hull. This was an old one my husband had lying around for ages, but it works just as well as a new one bought off of Amazon or from Harbor Freight. For creating my figurehead stand I traced the shape from the plans onto a piece of cooking parchment paper and then cut that out and stenciled it onto the wood I used. After all these careful measurements my pieces went together perfectly. Again it was time to play with the wood putty and smooth the transition between those new parts and the hull. I needed a break so I started working on the wheel covers for the paddle wheels. I was trying to make it so I wouldn't lose all the detail of these parts but with every layer of paint I lost more and more detail. I tried going back over the details with a knife to make them stand out more but they kinda looked horrible. So I went searching for something better. I came across an old Pyro plastic kit from the '50s for "the blockade runner Harriet Lane" and realized it was nearly identical of the one that I am building of wood. I looked at the sides of the paddle boxes and realized they were indented completely differently and that whole areas were indented with other whole areas sticking out. So I went about shaving off material to let me get that same effect. It looks better. Not perfect but much better. I wasn't ready to go back to my hull yet either so I decided to work on my deck that had "precut" decking. It was basically a piece of wood that had lengthwise slats cut down it to imitate the spots between boards on a deck. The problem was they were the full length of the ship which was about 180' long in real life so I figured they didn't use 180' lengths of timber for the deck so I added little cuts every so often which, once I stained, ended up looking darker and like they were separations in the planks. Much better if you ask me. Next was my intro to kit bashing. The kit supplied me with a figurehead about the size of a fingernail that was supposed to be an eagle perching. It looked like a tooth. It also showed on the plans all this beautiful detail on the side of the figurehead support that was not included in the kit. I'd read Chuck's practicums on the Sultana and Phantom based on someone's suggestion and Chuck explained how to create ship pieces out of Sculpy clay (or similar) so I tried my hand at making the scrollwork and a new figurehead. I also read in the instructions that they wanted me to put the pilothouse together and then paste on the computer printed sheet of pilothouse details and paint any spots that the paper didn't cover. I couldn't take the idea of having paper as the pilothouse so I made the details as I think they may have looked out of wood. I used 5 layers of transparency paper as window glass and leftover nails from my jolly boat as door knobs. I painted the sides white (as they would have been if made from paper) and the top grey as instructed. Then I went back to my hull. I planked the side with thin strips of wood and then at the waterline filed them down until they were as thin as I dared go. I didn't do much sanding on the other pieces as that would defeat the purpose of planking it. I would have just left it solid hull if I didn't want it to appear made of wood. I also put lines simulating breaks in the lengths of the planks and two tiny dabs of super glue to simulate rivets before painting. Then I went to start coppering my hull. I didn't want to just put long strips of the copper on it - again that would be like the idea of putting paper on my pilothouse. I sliced the copper in half then put fake rivets in it by first doing it one at a time with an awl and then I realized I could use my tweezers and put in two rivets at once. I was later told that I could have bought and used a pounce wheel. (Which would have saved me HOURS of work) Then I cut each small tiles from each strip and applied them starting at the waterline. After coppering was done I needed to cut the spots for the wheelhouses. That was scary. Measure once, measure twice, measure a couple more times, take a deep breath then cut was my formula. Then I cut my gunports using the same methodology. Next it was time to prepare my wheel houses. I put the four pieces together for each side, sanded thoroughly, shaped the sides per the drawings and painted it black. I made some railings out of sculpy and glued those on and also glued on my covers you saw earlier. I didn't like the idea of just painting everything black so I used blacken-it on the wheels and dark stain on the actual paddles. I decided that my eagle looked more like a bluebird so I tried just making the head of an eagle. I attached that and the scrolls at the bow. There had been some question of scale before the site died so here are also some shots to show the scale. Then I attached the sponsons to the hull and added on some decking and some trim to make them look more complete. I also added my decking to the rest of the boat at that time. Next I added all my waterway pieces. which I stained in dark walnut. Then I went about starting my railings for above the gun ports. This is as far as I got before the crash. Thanks for visiting and I'll have some actual updates soon! 'Till then feel free to check out my husband's swift.
- 160 replies
-
- 3
-
-
- harriet lane
- model shipways
- (and 1 more)
-
 I know it's been a while since I have built or started a ship and I know I said on my last blog that it would be the "Thermopylae", but I have been desiring the "Harriet Lane". I have never built a solid hull ship and it does seem intimidating to even start, but sitting in the box collecting dust isn't going to get it done by no means. I see there are a couple people tackling this project? I wish them luck and desire that they build to completion and it be well done. Been studying the plans and have decided that I will change a couple of details, even change some of the materials so that it will stand out more. Not sure if I am going to follow the painting detail or not, I really think not as certain stains and varnishes would be more ideal... I believe? This ship will be challenging as to a scratch built ship as there are parts to be made. I will succeed but this isn't a ship that will go by fast. I haven't any pictures yet as I have only cut my stations out, but when the time comes I will show my progress. Happy New Year Everyone
 -
 Wow! Compared to the Amati Adventure I am finishing up, the detailed instructions in this kit are overwhelming: ship plans, parts lists, hull profile templates, rigging plans(!). This looks like it is going to be a fun build! There are a LOT of cast metal bits compared to my three other builds, so I imagine I'm going to be honing my painting skills!
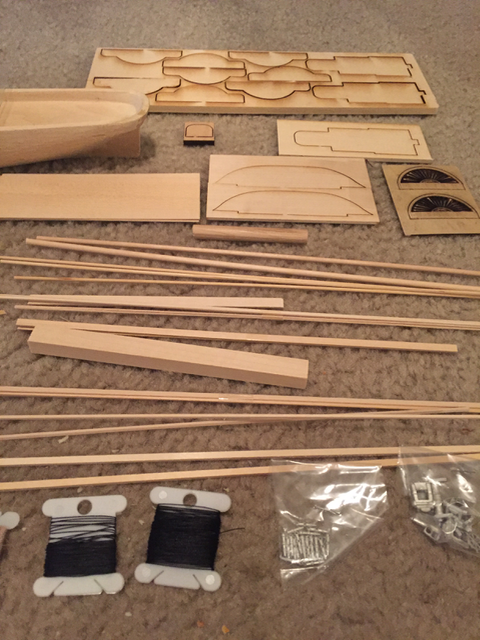
-
 Okay - so, was a little nervous about doing this. I recognize I need help but something about building these models is so enthralling to me it is hard to describe. With each of my other builds in varoius stages of stalled or slow going (Mayflower - waiting for me to be able to get some planking mats, Willie - spending some time learning how to solder and do metal work, Blue Shadow - planking going ever so slow) and the HL sitting in the closet calling to me and my resisting for MONTHS - I finally caved. Especially seeing Sarah's (slagoons) and Waynes (trippwj) wonderful work; I just had to crack it open. I know there is always the thoughts of orphaned kits along the way, but that isn't the case. Each will be done to completion. Mainly because I have the Syren and a couple others on my list but the Admiral has put the foot down and no new kits till the ones I have are cut down a bit . So, without further ado. I now toss my attempt at Model Shipways 1:128 scale USRC Harriet Lane into the mix. I only hope I can do close to as good as job as the others here. I definatel have inspiration. So, thank you to any and all who take interest, I am sure I am going to enjoy it and hopefully I can make it enjoyable along the way ON we go!!!
 -
 Greetings from the illustrious maritime state of Arkansas. I started work on the Revenue Cutter Harriet Lane in March, 2012. The following information is courtesy of the US Coast Guard: The Revenue Cutter Harriet Lane, built for the Treasury Department by William H. Webb, was launched in New York City in November 1857 and was named for the niece of lifelong bachelor United States President James Buchanan. The Harriet Lane served as a revenue cutter until temporarily transferred to the Navy late in 1858. Her new assignment took her to Paraguay with a squadron ordered to support the discussions of U.S. Special Commissioner James B. Bowlin with Dictator Carlos Antonio Lopez concerning reparations for damages incurred during an unprovoked attack on WATERWITCH by the Paraguayan forces 1 February 1855. This display of sea power quickly won the United States a prompt and respectful hearing which 4 years of diplomacy had failed to obtain. In his report Flag Officer W. B. Shubrick singled out Harriet Lane for special commendation on the invaluable service she rendered in extricating his other ships repeatedly running aground in the treacherous waters of the Parana River. Returning to the United States, Harriet Lane resumed her former duties as a revenue cutter. In September 1860 she embarked Edward Albert, the Prince of Wales, the first member of the British Royal Family to visit the United States, for passage to Mount Vernon where he planted a tree and placed a wreath on the tomb of George Washington. Harriet Lane again transferred to the Navy 30 March 1861 for service in the expedition sent to Charleston Harbor, S.C., to supply the Fort Sumter garrison. She departed New York 8 April and arrived off Charleston 11 April. The next day she fired a shot across the bow of NASHVILLE when that merchantman appeared with no colors flying. NASHVILLE avoided further attack by promptly hoisting the United States ensign, but 2 days later raised the Palmetto flag to begin her career as one of the most elusive Confederate privateers. When Major Anderson surrendered Fort Sumpter 13 April, Harriet Lane withdrew with her sister ships. Her next important service came the following summer when a task force was sent against Fort Clark and Fort Hatteras on the outer banks of North Carolina to check blockade running in the area, The ships sortied from Hampton Roads 26 August 1861 for this first important combined amphibious operation of the war. The next morning Harriet Lane, MONTICELLO, and PAWNEE slipped close inshore to provide direct support to the landings while heavier ships pounded the forts from deeper water. Harriet Lane ran aground while attempting to enter Pamlico Sound through Hatteras Inlet 29 August and suffered severe damage while fast on the shoal. She was refloated at the cost of her armament, rigging, stores, provisions, and everything else on board which could be heaved over the side to lighten ship. Temporary repairs completed 5 September, she proceeded to Hampton Roads, arriving 8 September 1861. Harriet Lane sailed 10 February 1862 to join Comdr. D. D. Porter's Mortar Flotilla at Key West, where units were assembling for an attack on Confederate forts In the Mississippi River Delta below New Orleans. Comdr. Porter embarked at Washington. During her passage to Hampton Roads, Harriet Lane was taken under fire by the Confederate battery at Shipping Point, Va., which inflicted such damage to her port wheel that her departure for Key West was delayed another 2 days. On 24 February, she captured the Confederate schooner JOANNA WARD off Florida. Following blockade duty in Mobile Bay, Harriet Lane sailed for Galveston, Tex., which she bombarded and captured with the aid of WESTFIELD, OSASCO, CLIFTON, and HENRY JAMES, 3 October 1862. She was in Galveston Harbor when the Confederates retook that base 1 January 1863 ; and, after a bitter contest in which her captain, Comdr. J. M. Wainwright and executive officer, Lt. Comdr. Edward Lea, were killed, she fell into Southern hands. After serving the Confederate Army's Marine Department of Texas, she was sold to T. W. House, who converted her into a blockade runner named LAVINIA. She finally escaped Galveston 30 April 1864 and sailed to Havana, where she was interred. In 1867, following the war, she was recovered from Cuba and was converted to a bark rig and renamed ELLIOTT RICHIE. She was abandoned off Pernambuco, Brazil, 13 May 1884. Harriet Lane measured 270 feet long, 22 feet wide and 12 feet from the bottom of the hull to the main deck. Her propulsion was a double-right-angled marine engine with two side paddles, supported by two masts; the entire ship was sheathed and fastened with copper. From stern to bow, the captain's cabin and stateroom sat above an aft magazine, forward of which was a second magazine with the officer quarters above. Forward of this, in the midships was the engine machinery and coal supply, and beyond this the quarters and galley for the non-commissioned ranks which sat above a third magazine.