Search the Community
Showing results for tags 'hobbyzone'.
Found 5 results
-
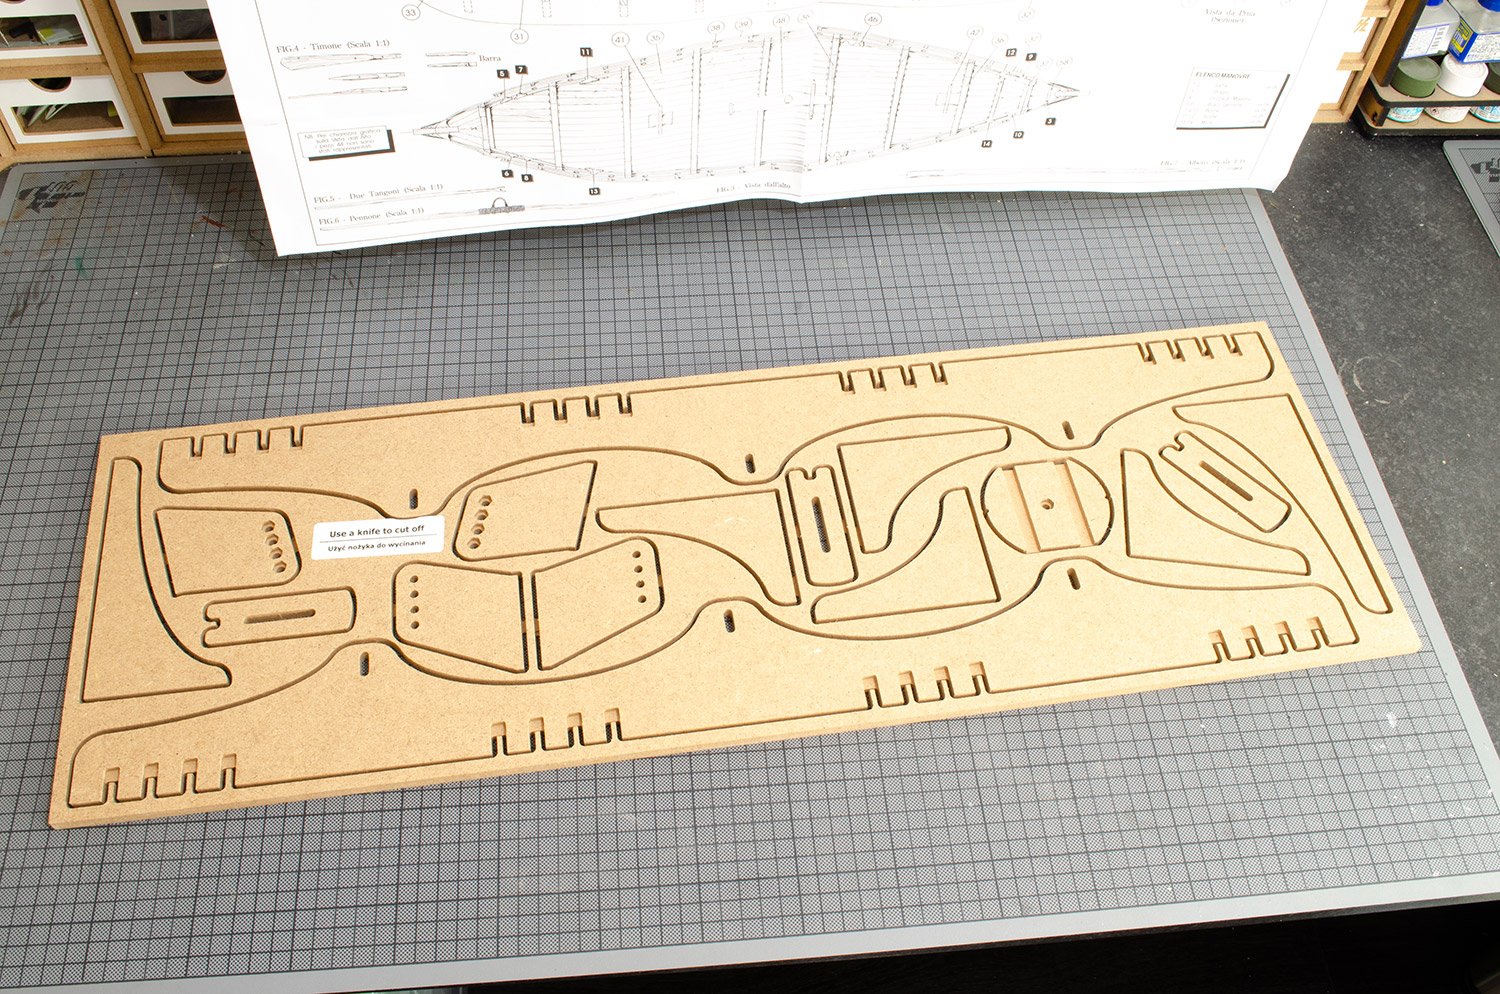
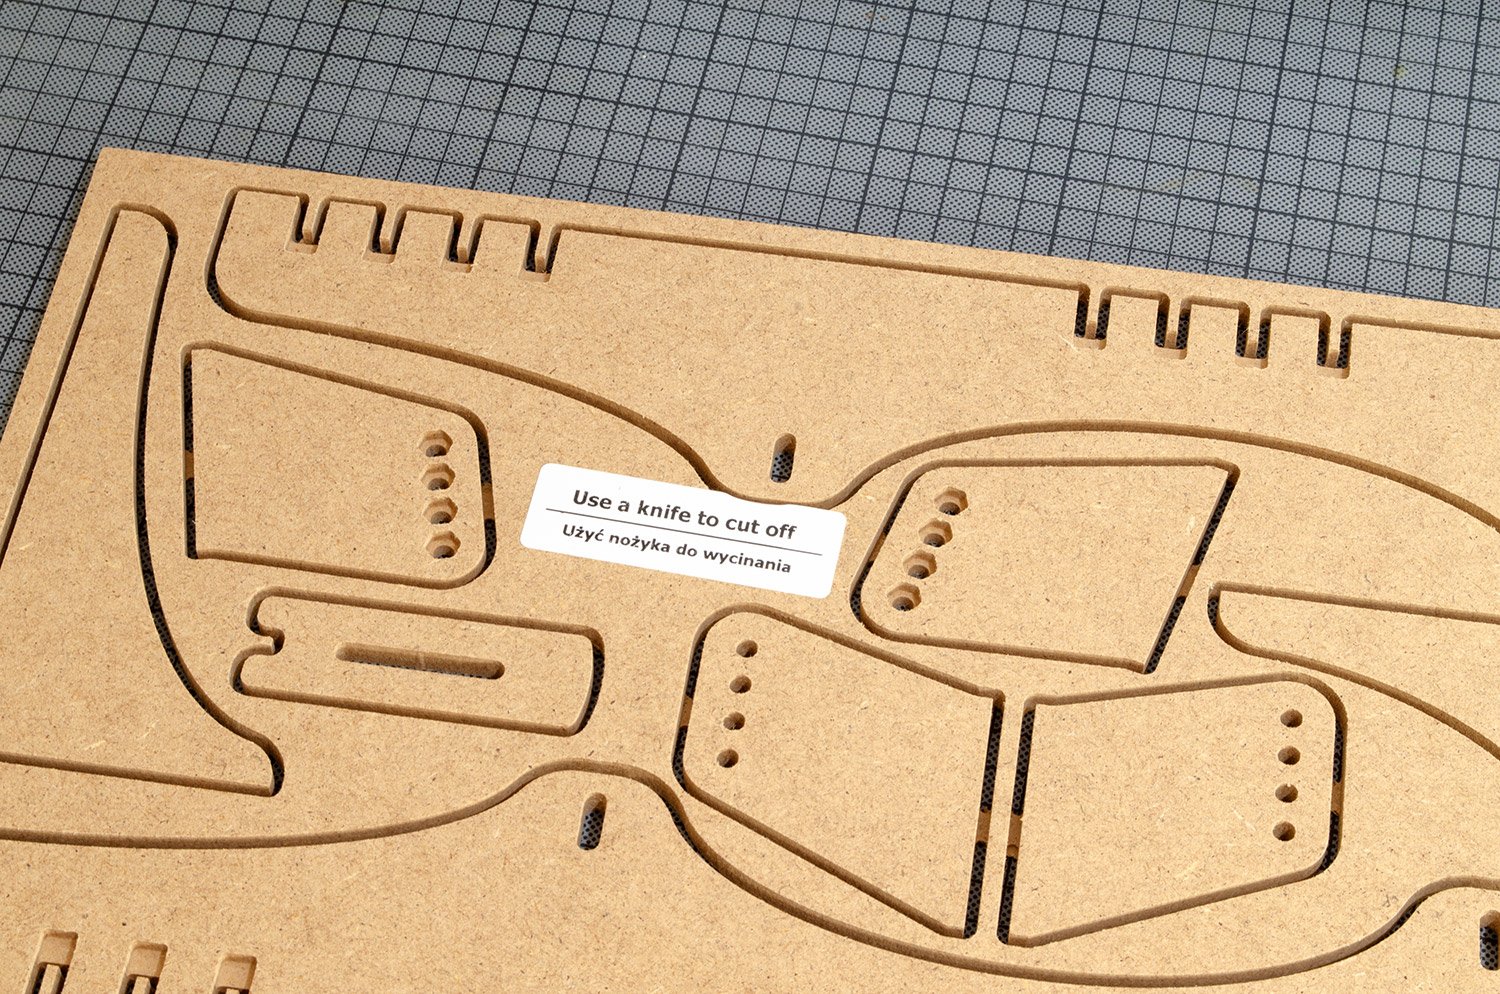
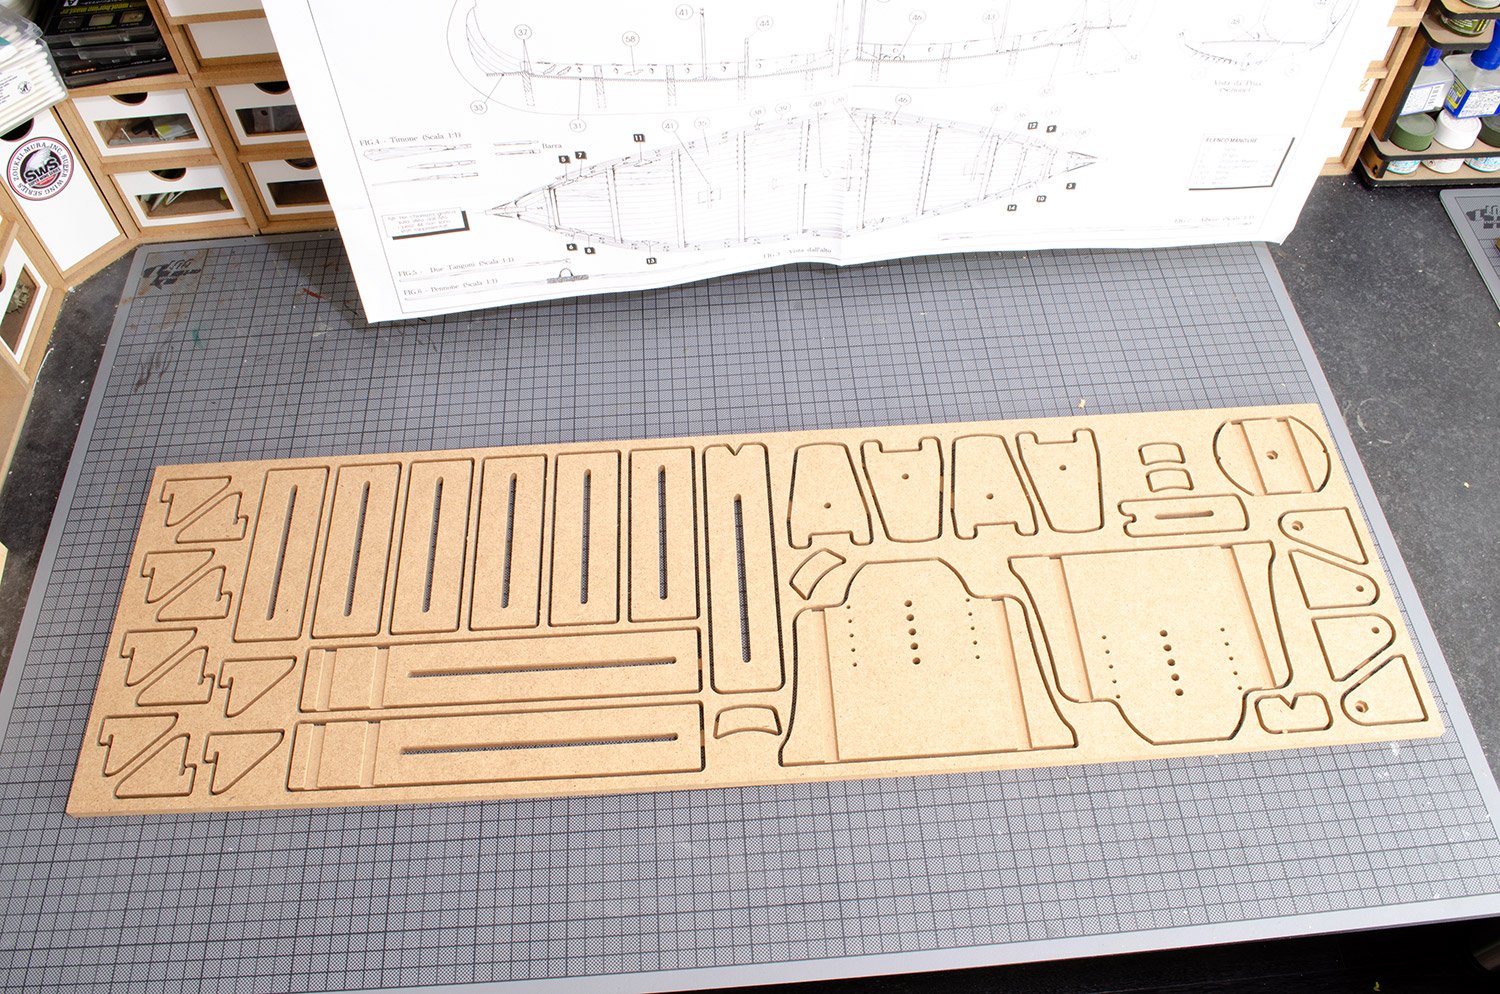
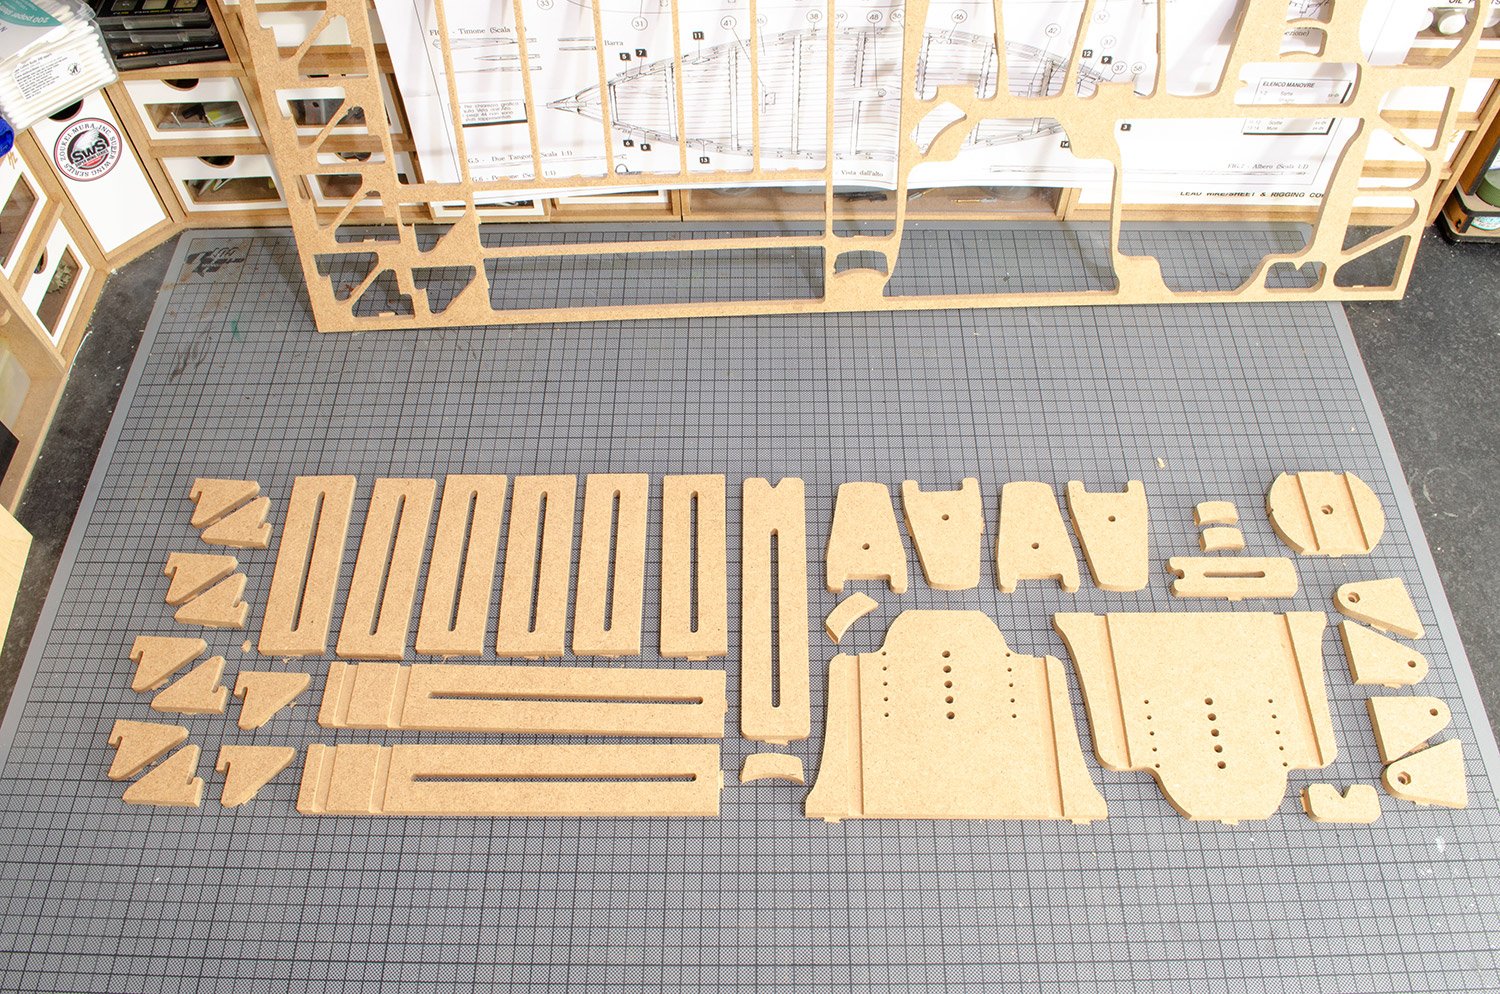
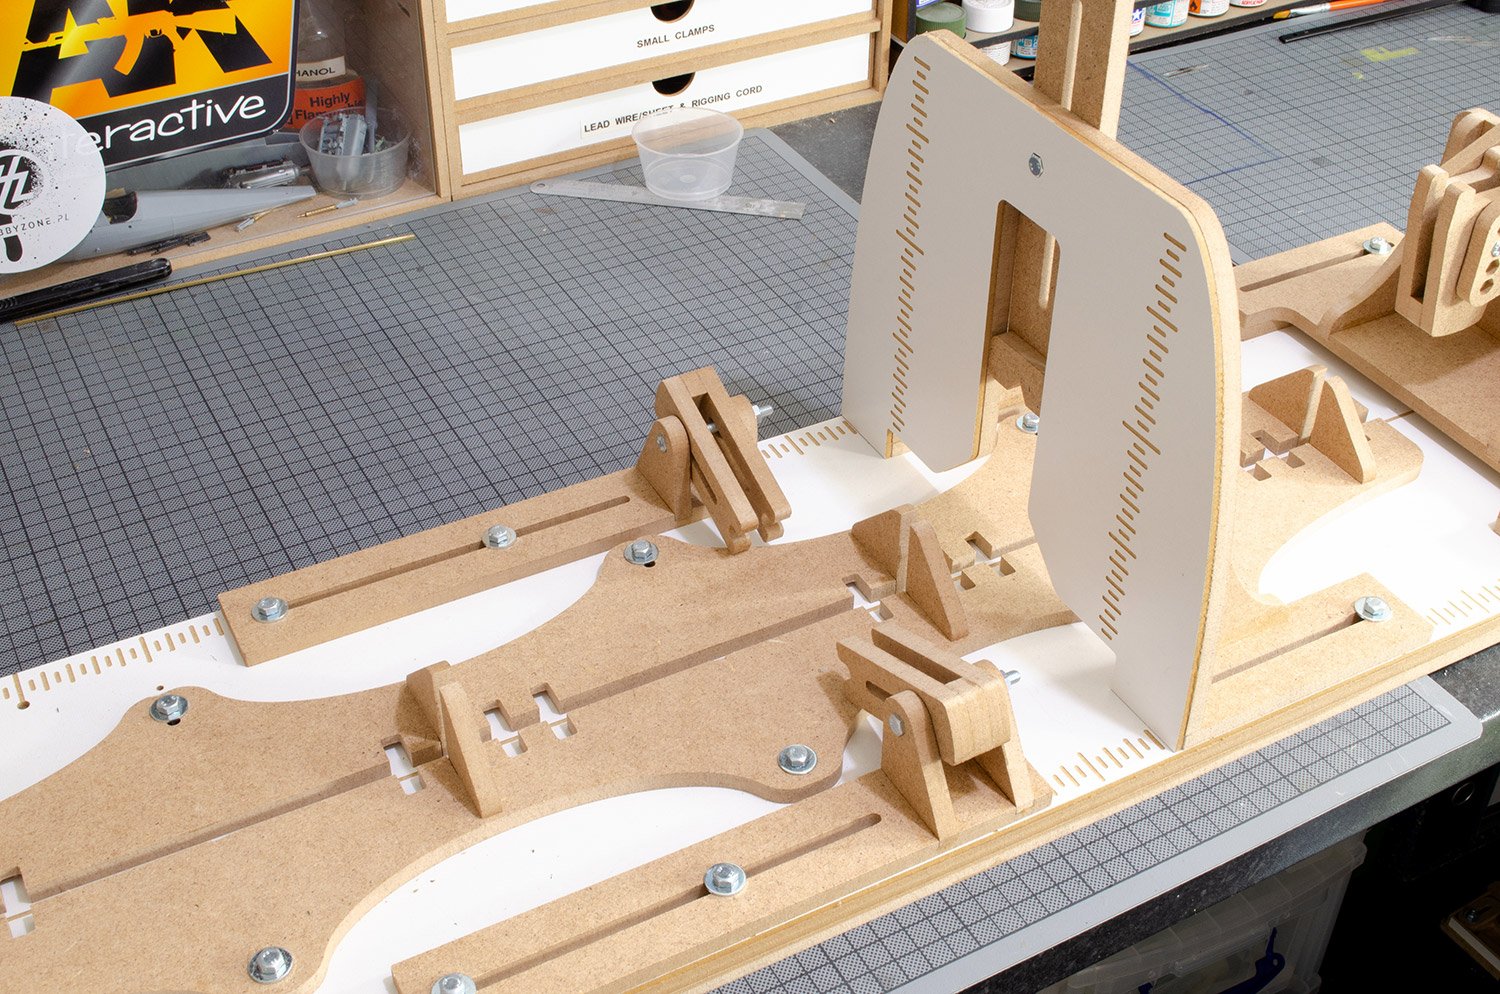
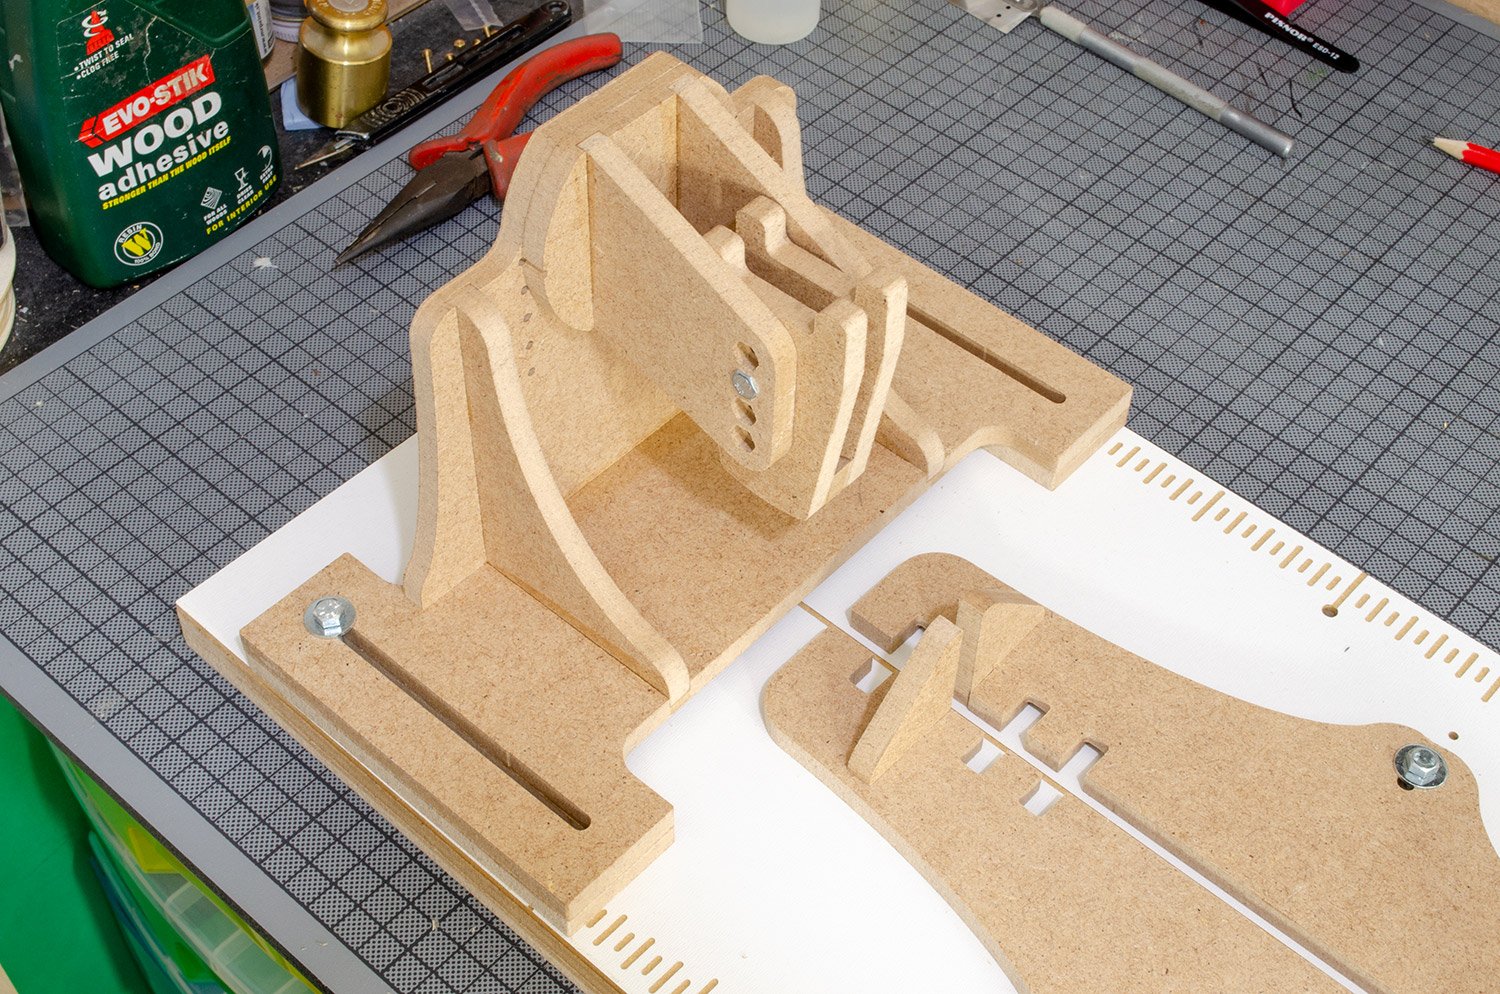
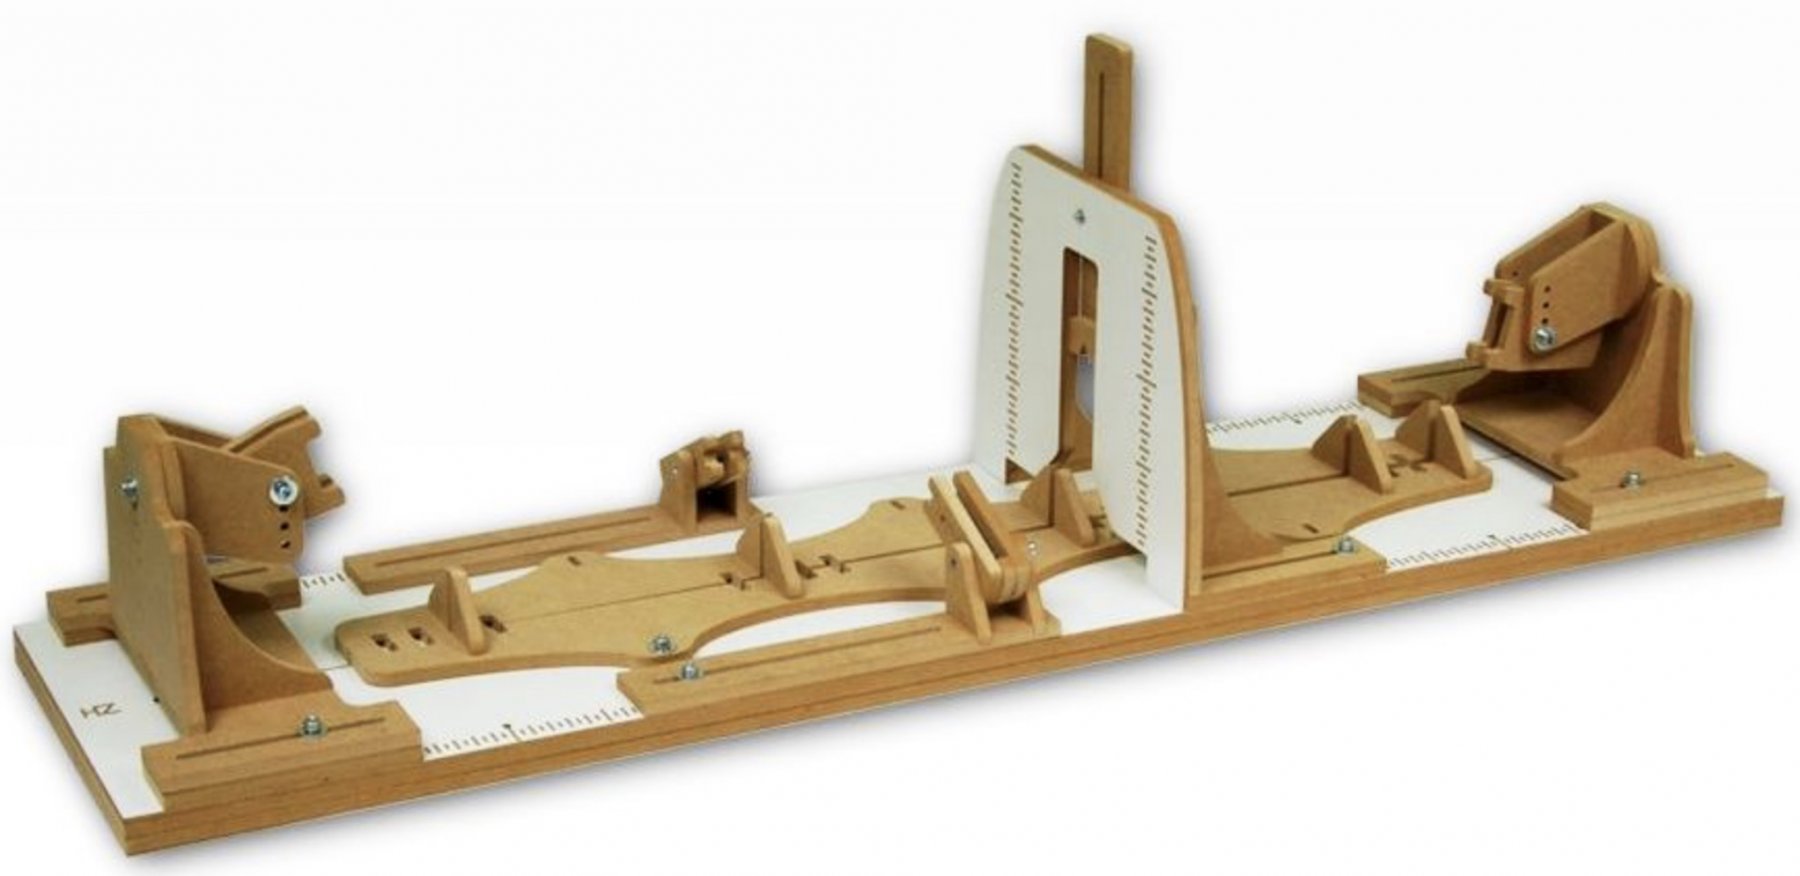
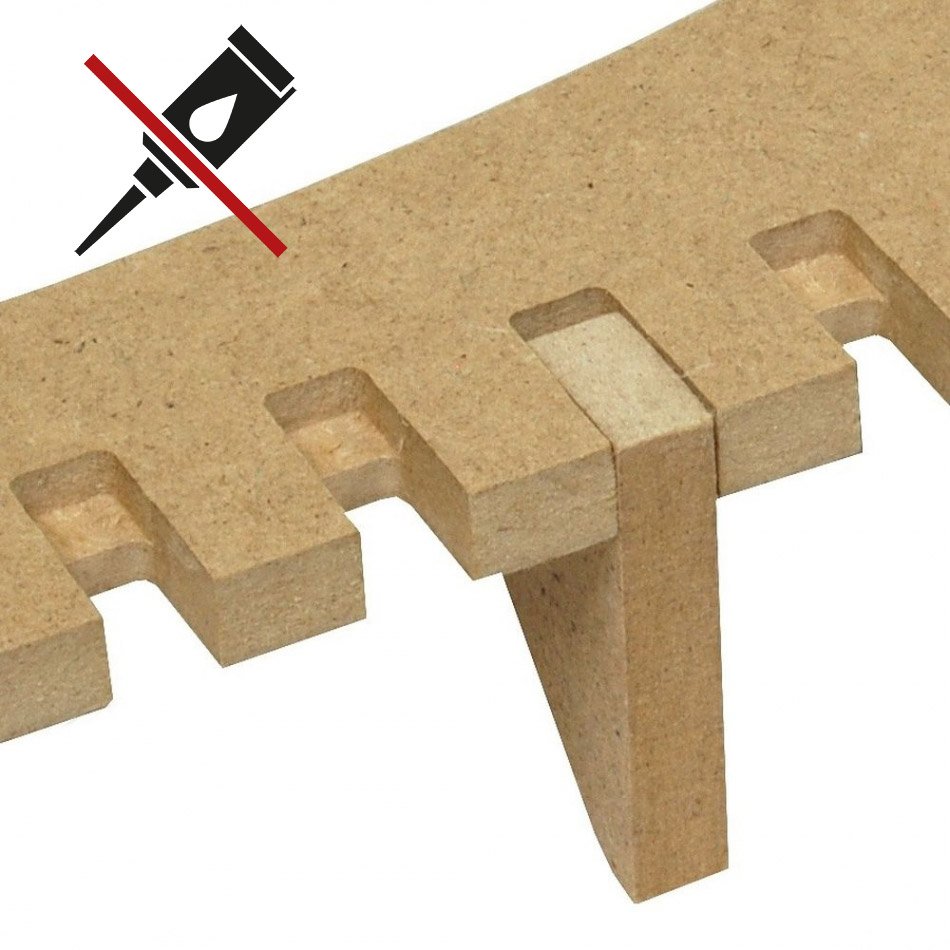
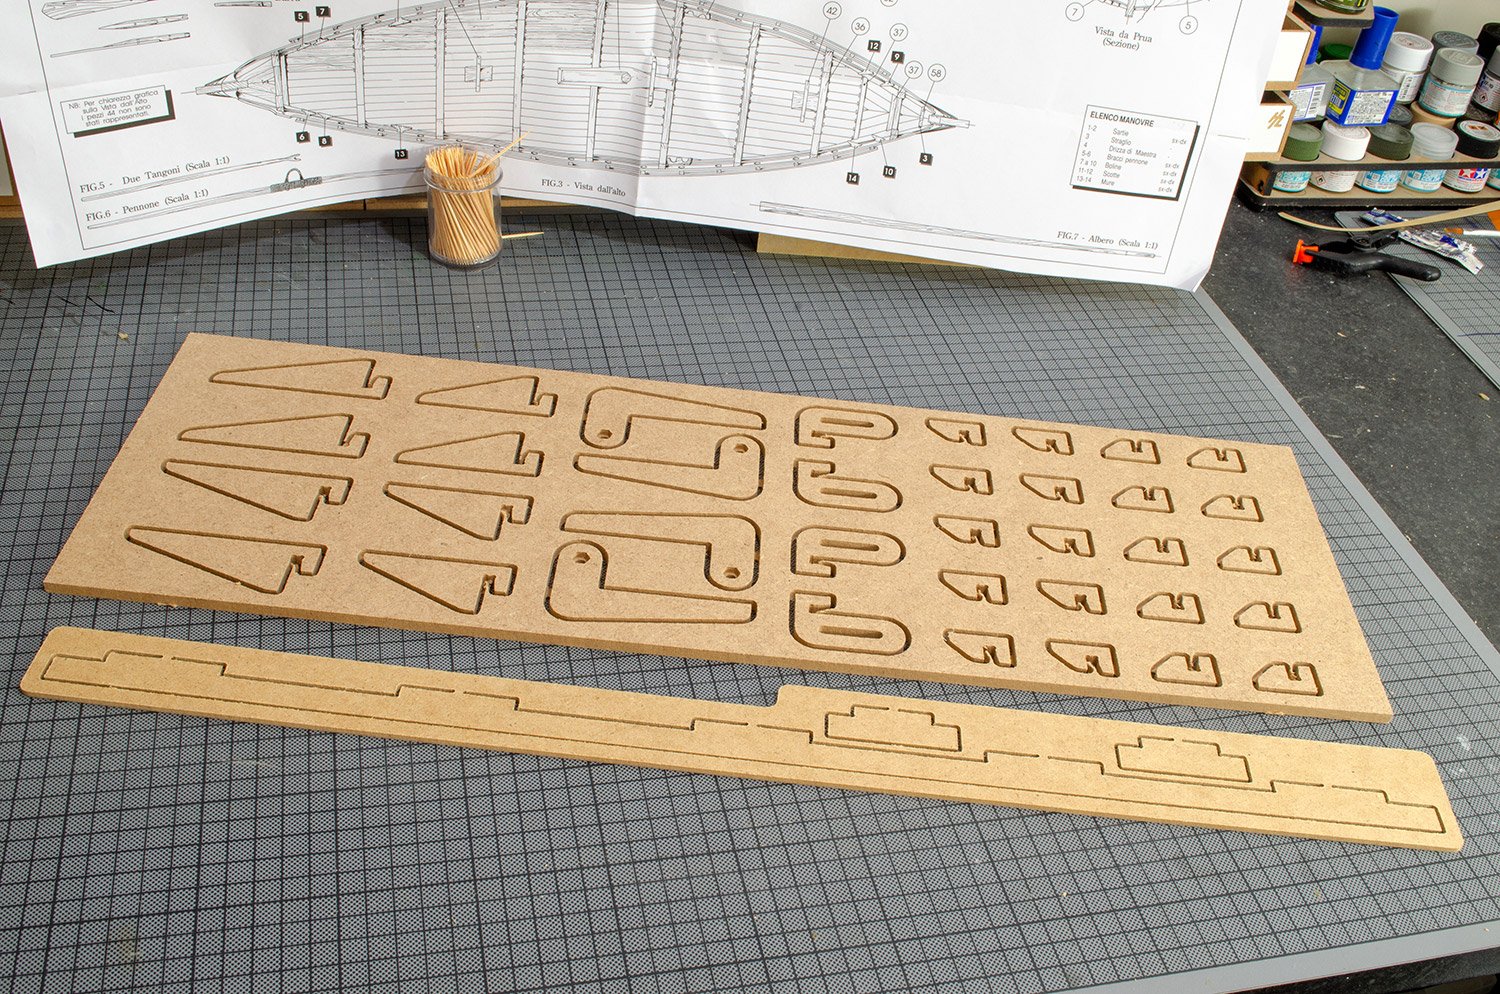
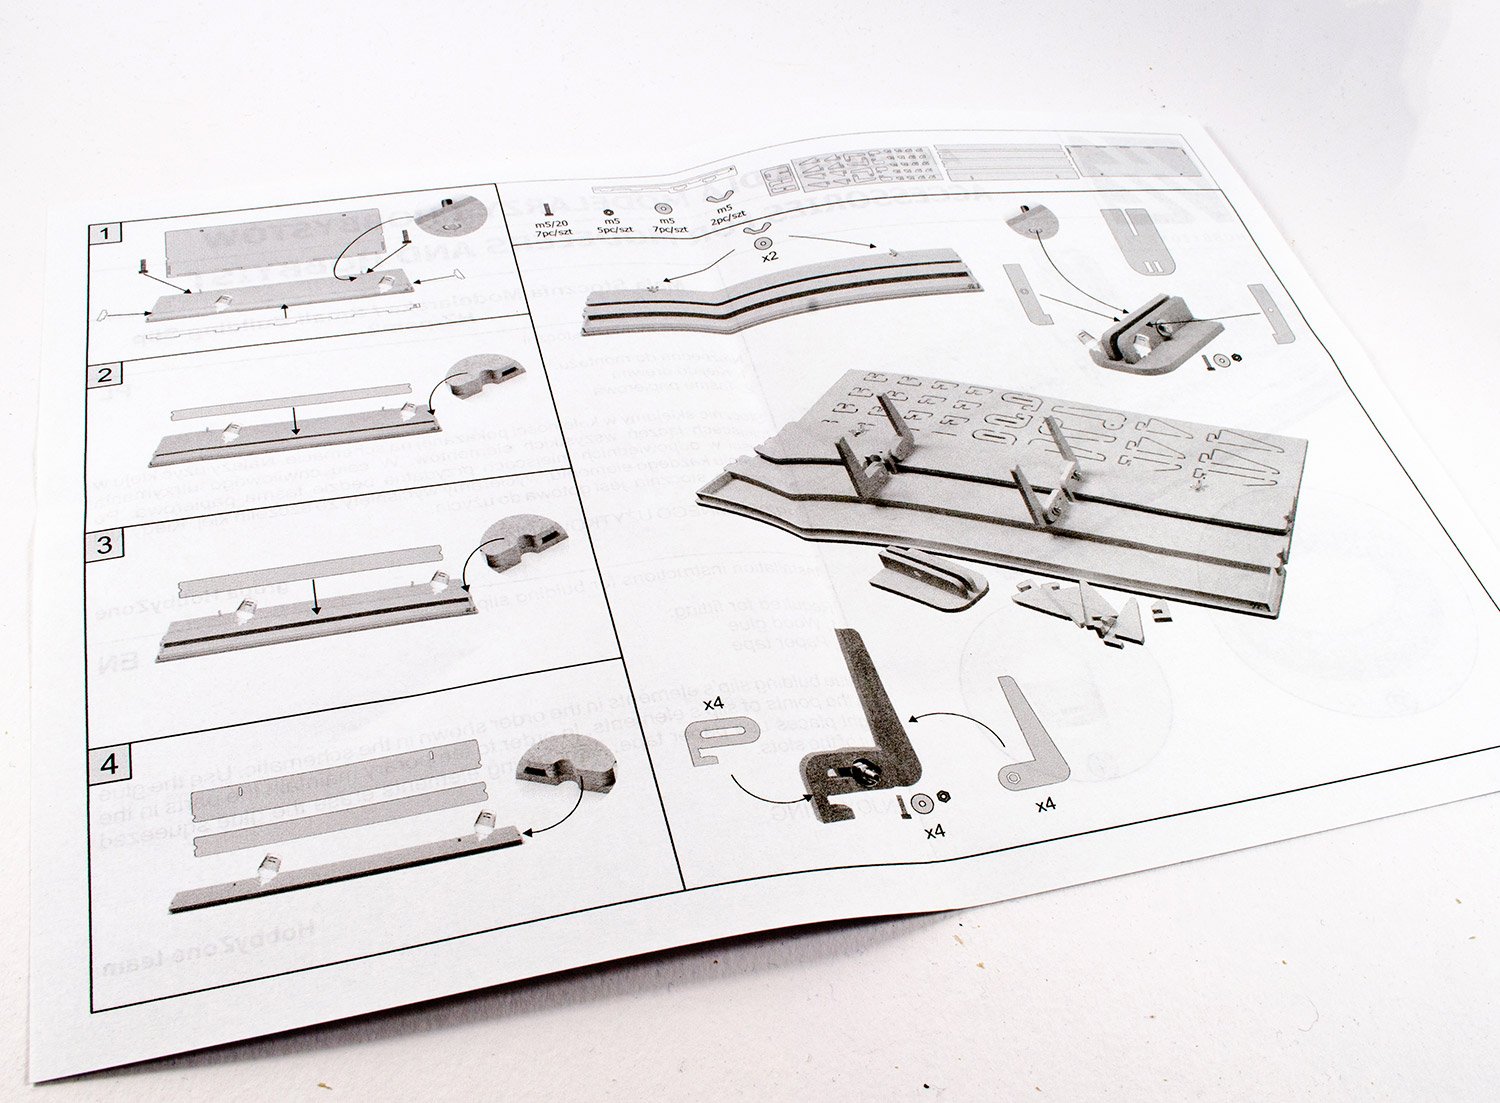
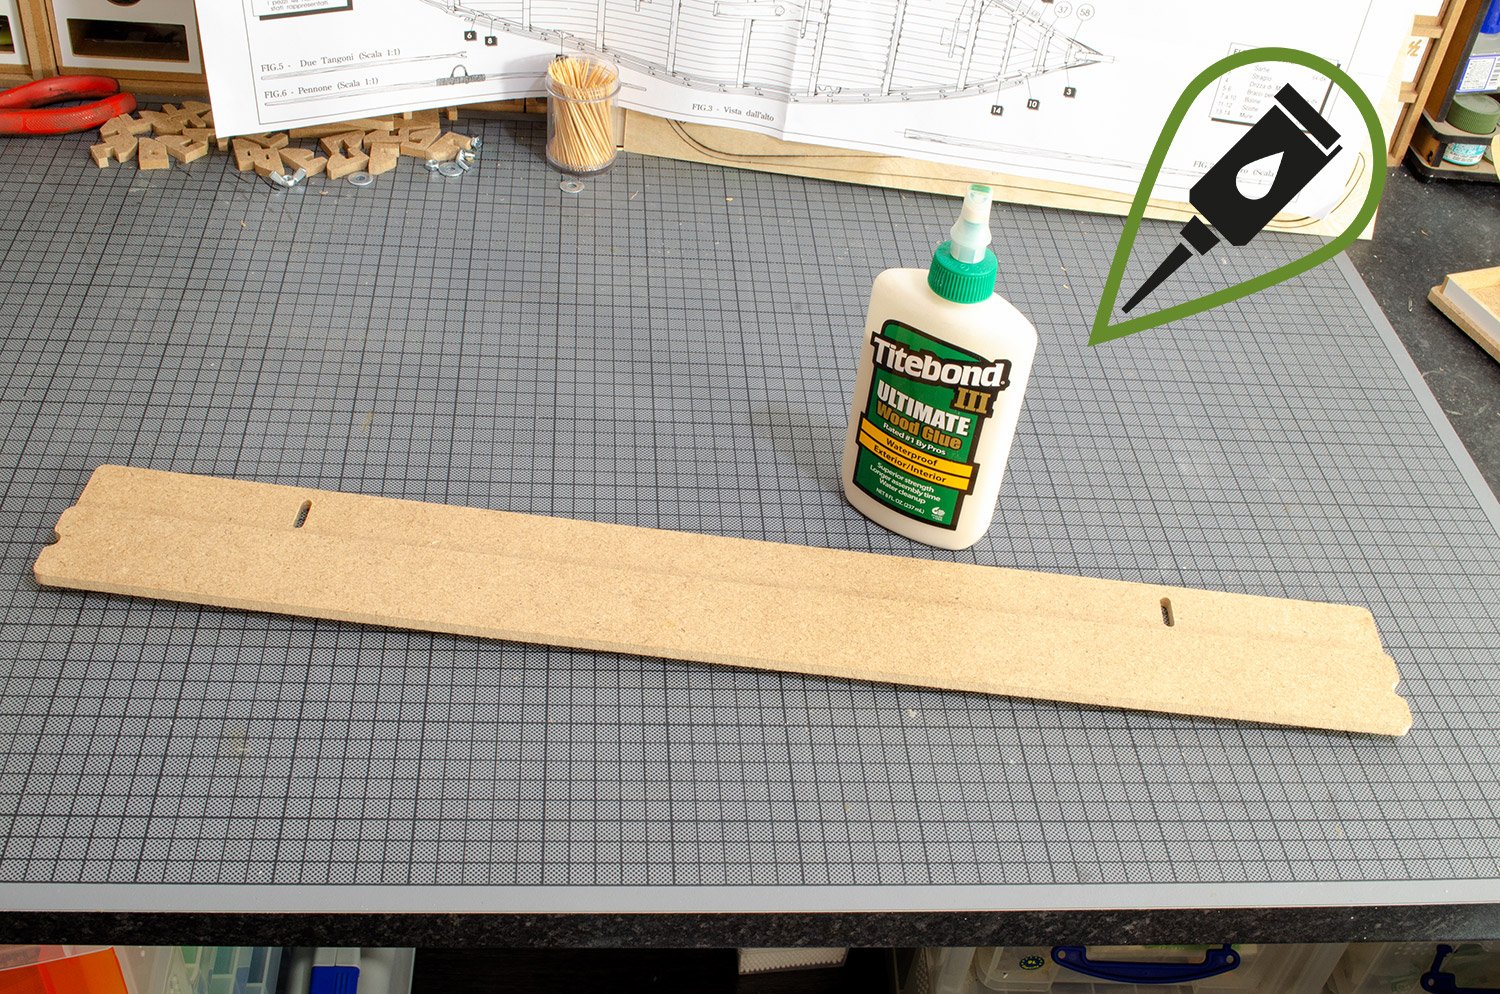
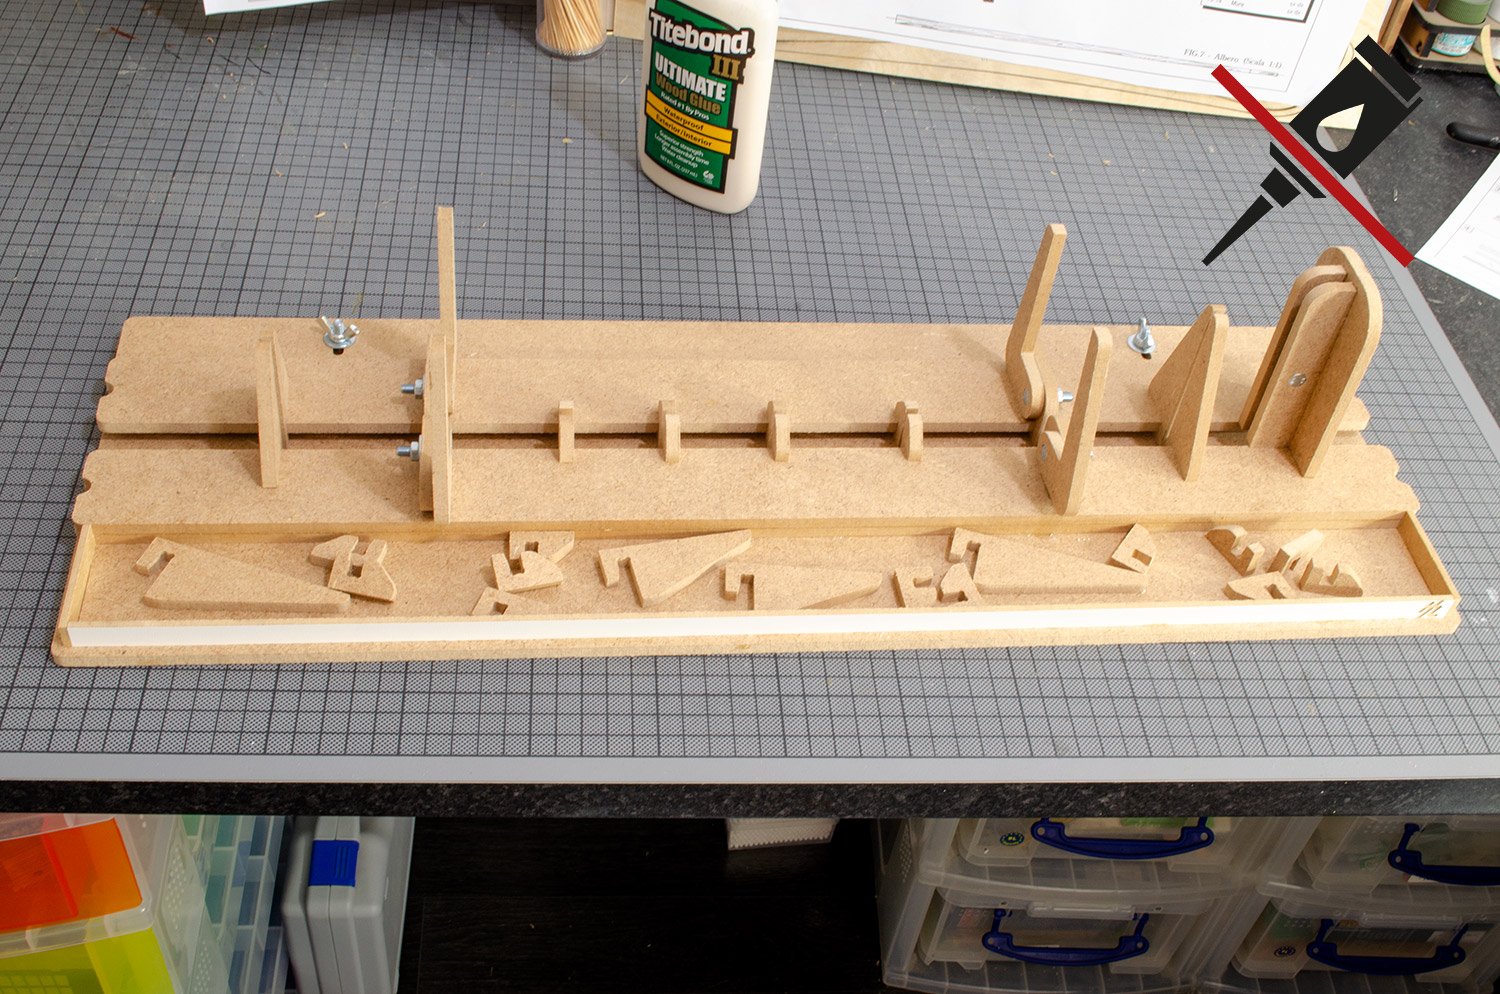
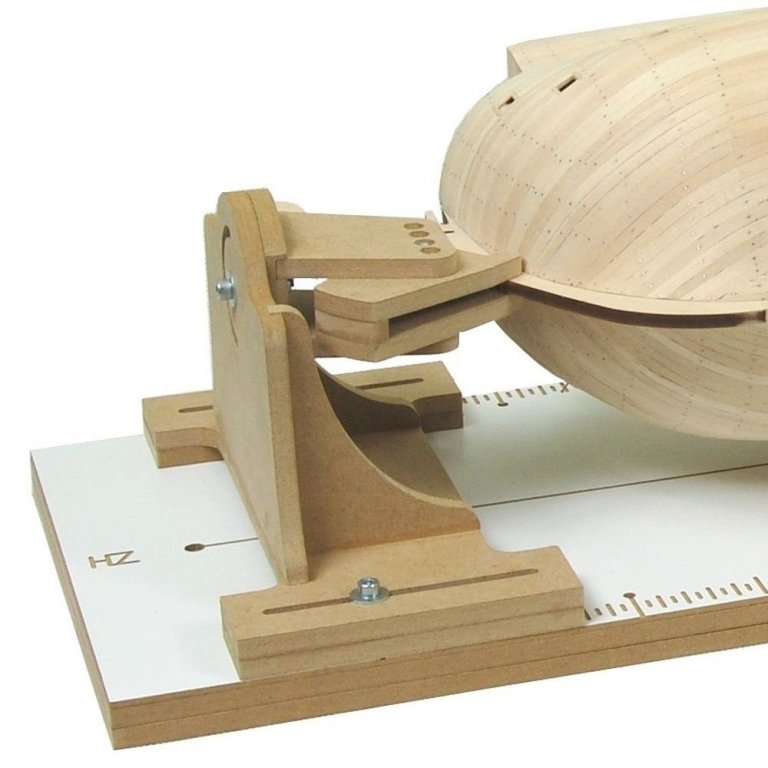
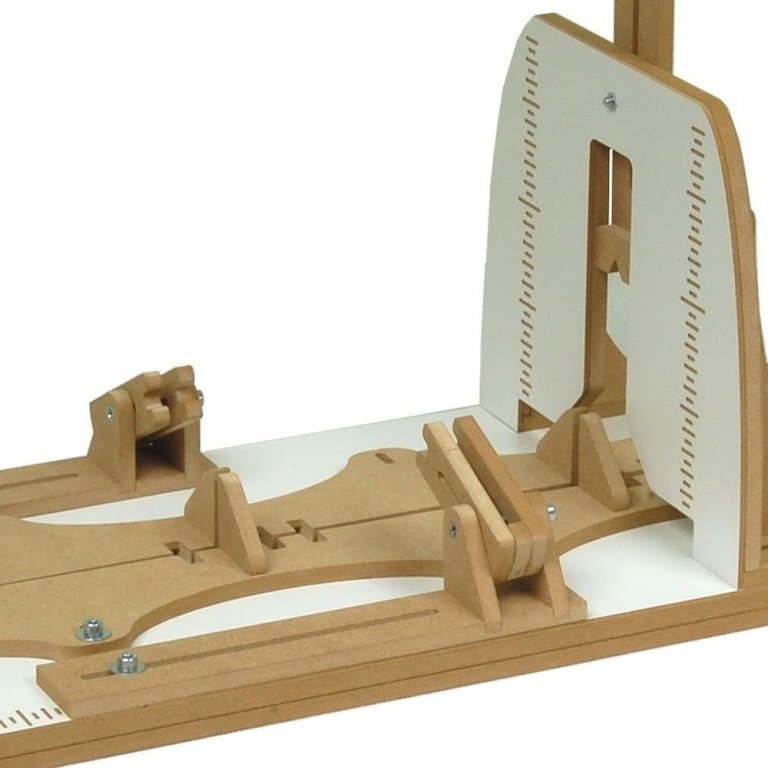
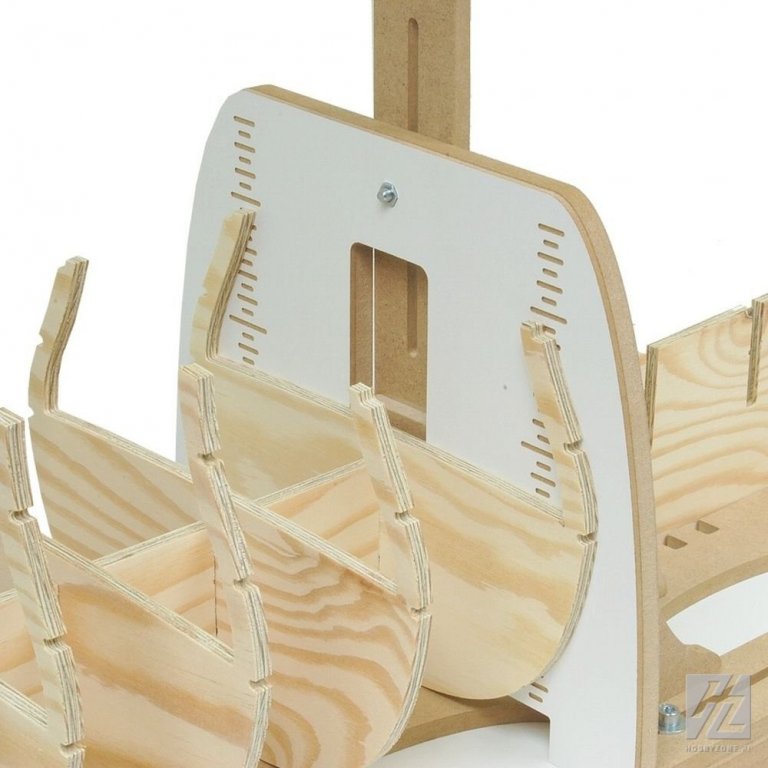
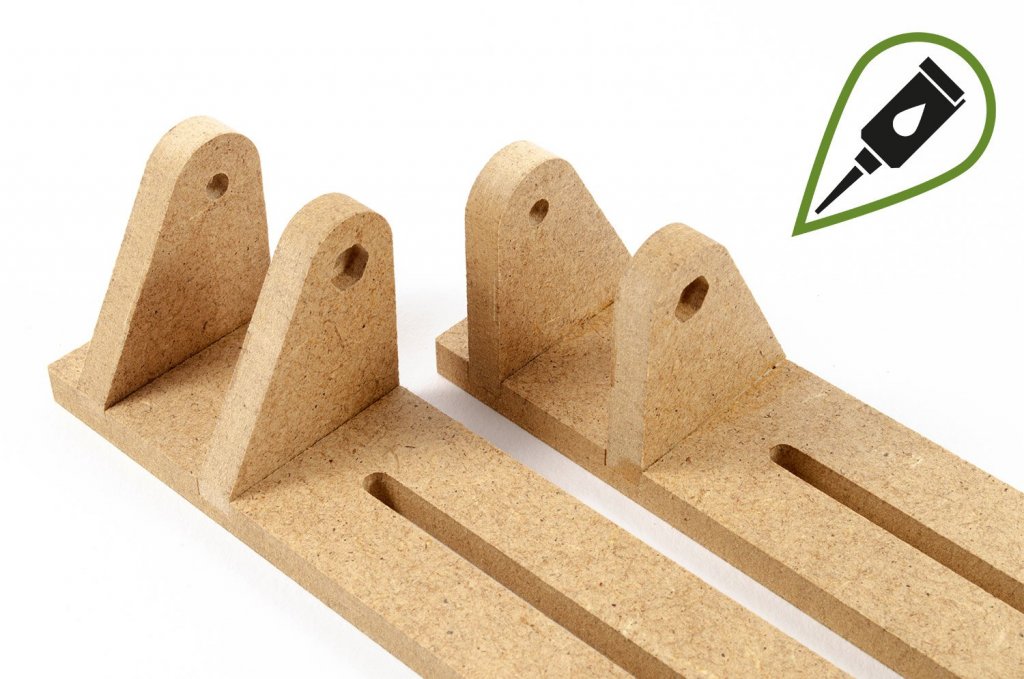
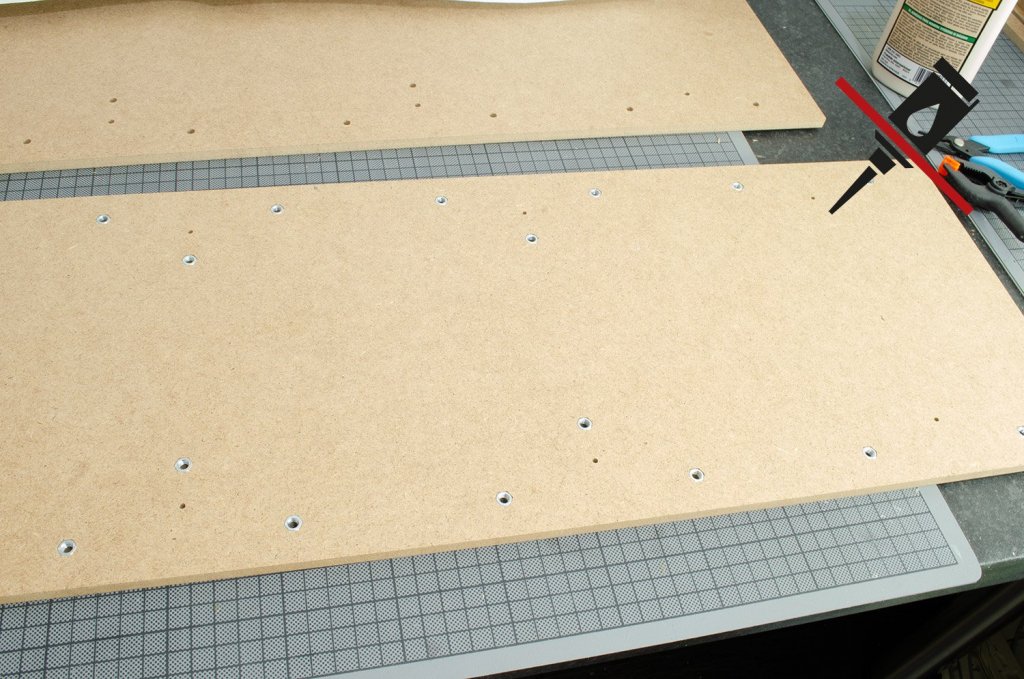
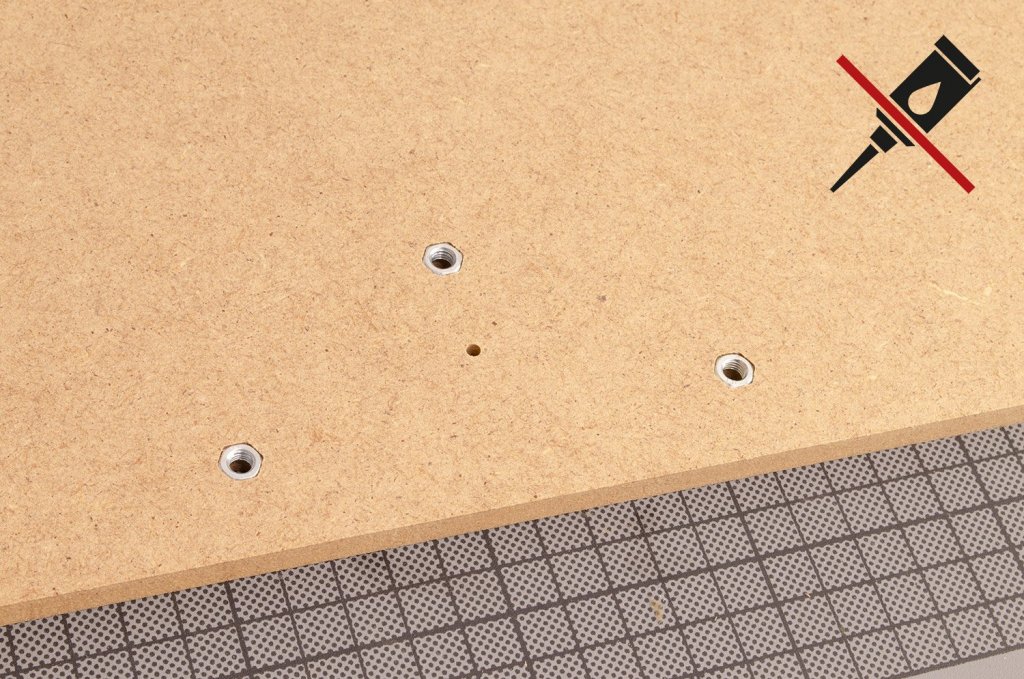
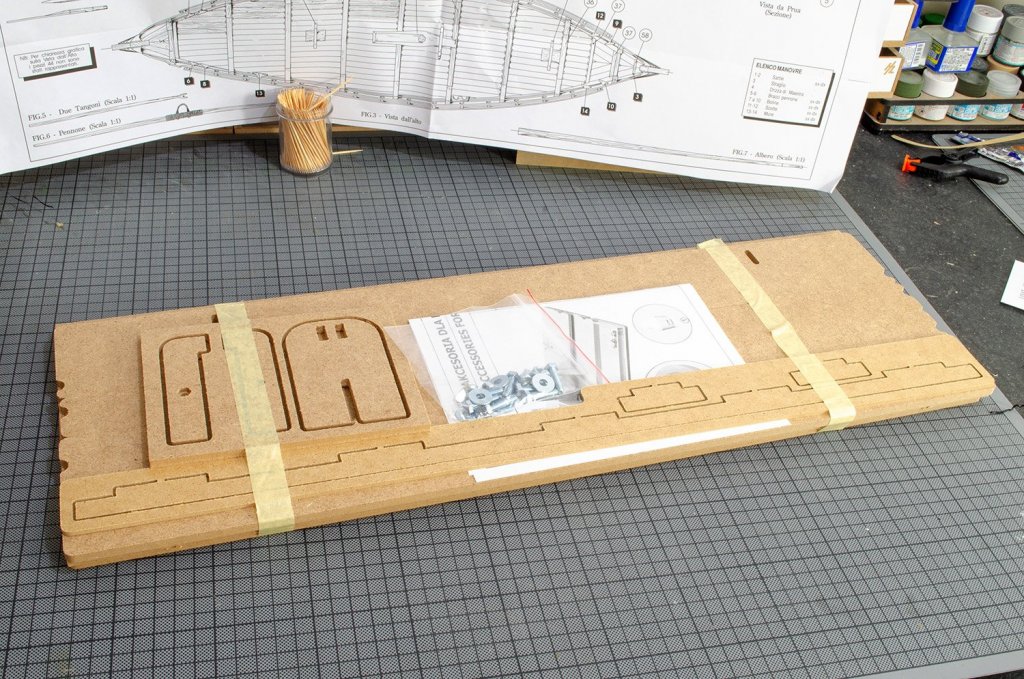
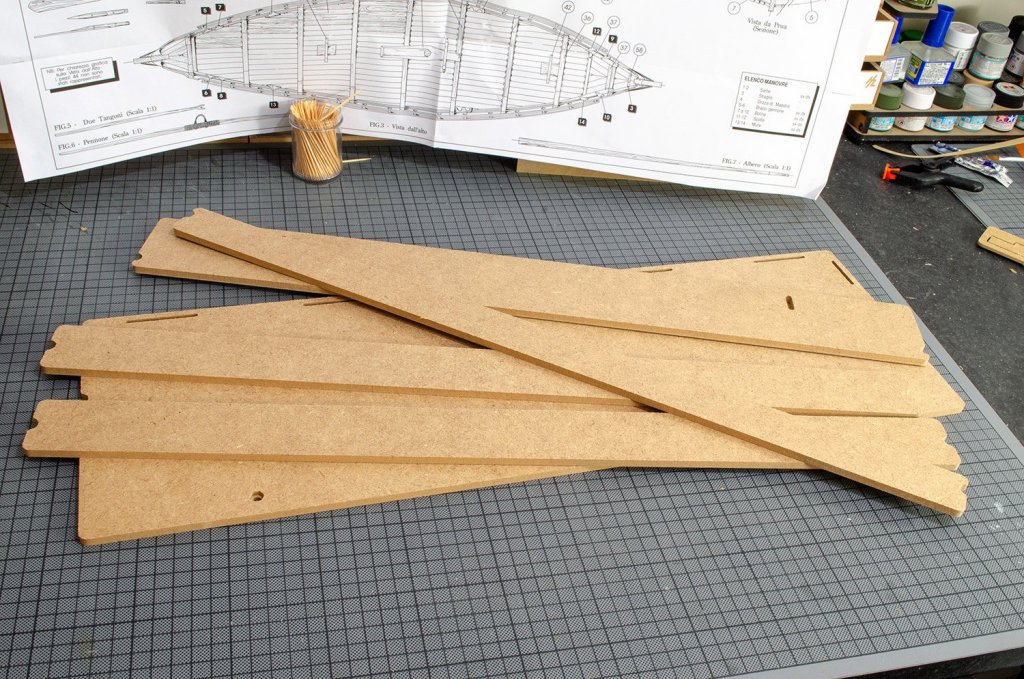
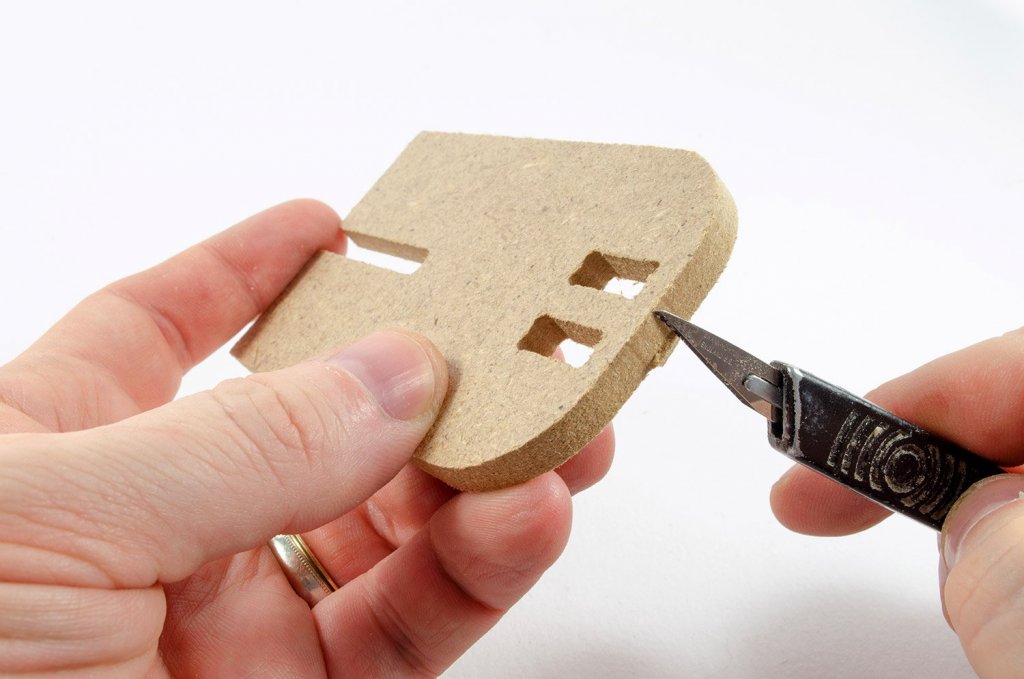
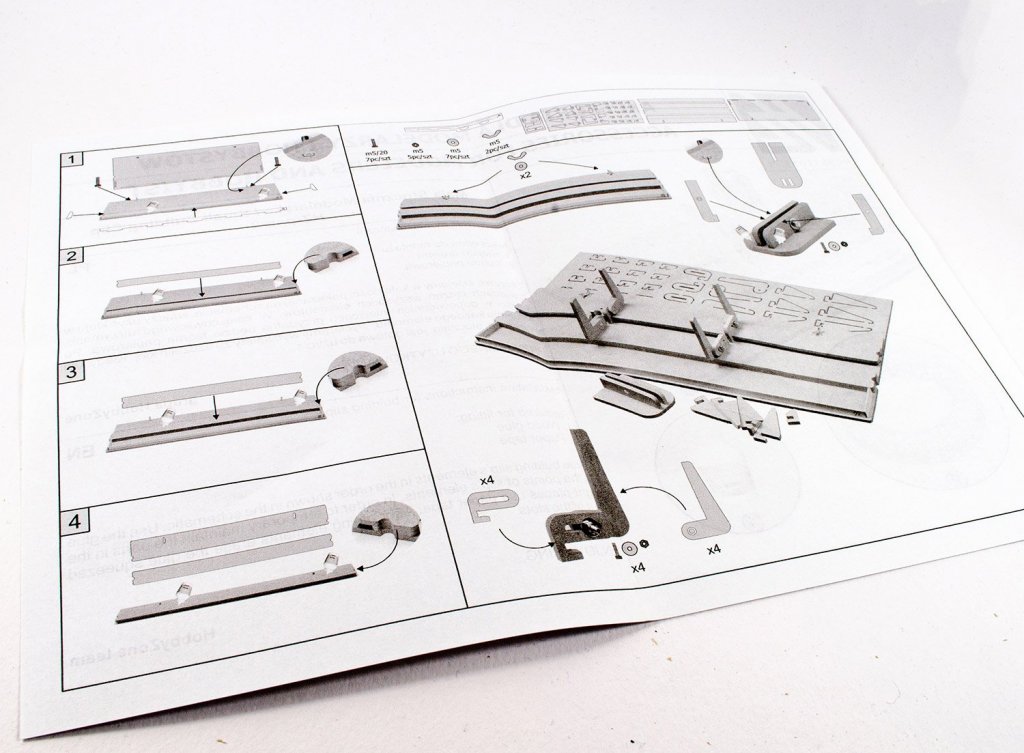
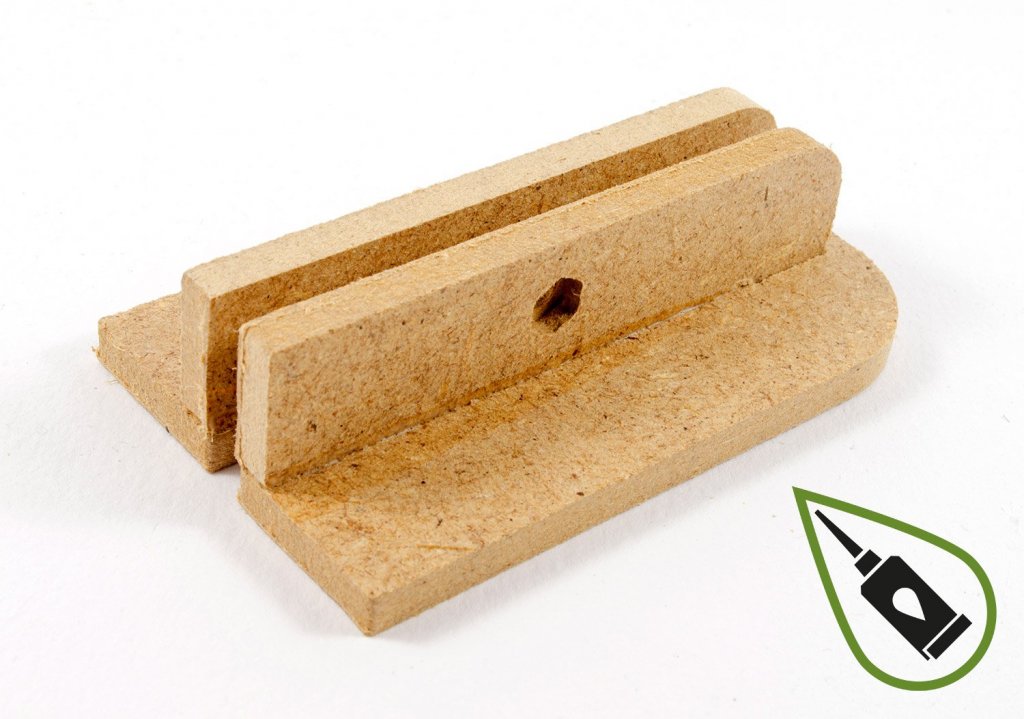
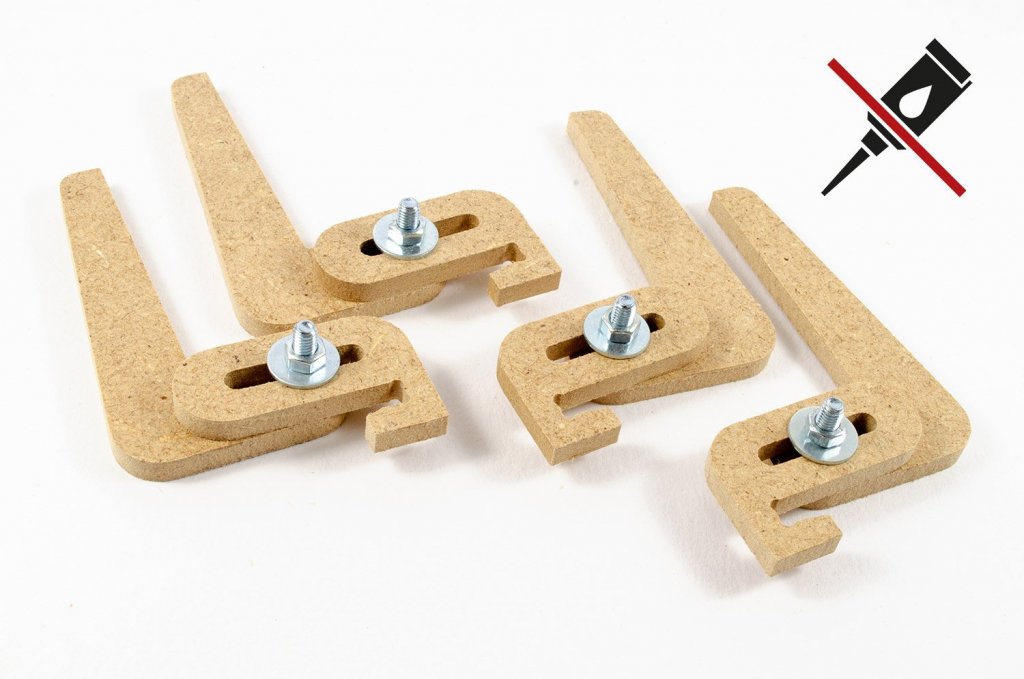
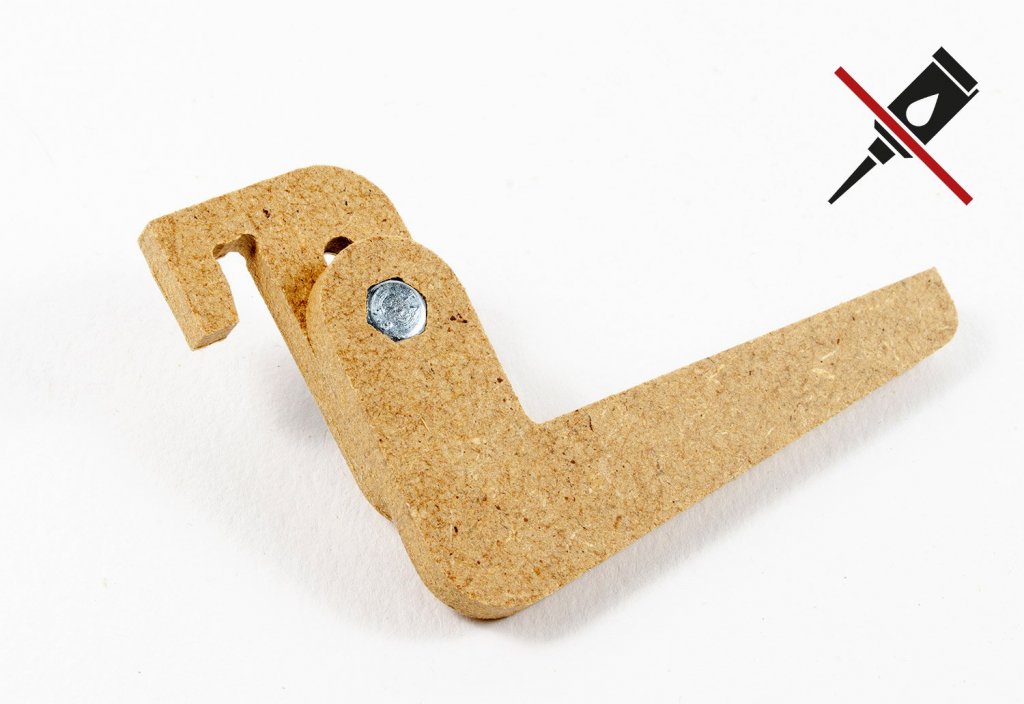
 Professional Building Slip Hobbyzone Catalogue # HZ-PSM1 Available from Hobbyzone for £50.00 We recently took a look at Hobbyzone's Small Building Slip, catering to hull lengths of an average of 600mm to 800mm maximum, but if you want something for larger hulls and with even more flexibility, then today, we take a look at the Professional Building Slip. Hobbyzone has asked me to build this as an assembly guide for them, to help to negate any incorrect assembly which has found its way into some completed slips, and they also intend to link this guide for general reference. Some errors that customers have made pertain to parts orientation, so with this guide, we hope to show you how to successfully complete this mini-project. First of all, the Professional Building Slip caters to hulls up to 100cm in length, so will obviously take in many of the larger kits in our hobby, plus those impressive POF scratch builds we aspire to. This product also varies from its smaller cousin by the ability to be able to rotate a fixed hull through 360°. Of course, the slip can be used for everything from laying the keel/false keel, through to erecting the formers/bulkheads, and then to simply hold and rotate a semi-assembled hull whilst you plank and even fit out the hull at advanced stages of assembly, as well as act as a simple cradle. The completed unit has a length of 100cm, a width of 25cm and will take a keel of out to 7mm in thickness. Packed into a card box, this HEAVY box has all parts within protected by many layers of bubblewrap. Construction is from MDF, with some parts being faced in plastic and engraved with the CNC router for measurements etc. A hefty hardware bag is also included. All you will need to assemble the Professional Building Slip is: Wood glue Craft knife Clamps Instructions are provided on a single sheet of paper, along with an amendment slip stating the use for some included nails. We'll mention this later in the build. CONSTRUCTING THE PROFESSIONAL BUILDING SLIP 1. Before we can start to assemble this project, all parts need to be released from the CNC-routed sheets. A couple of shallow tags are all that connect the parts to their sheets, and these can simply be cut through with a regular craft knife. 2. Once all parts are released, remove any traces of the MDF tags that held them onto the frames. A craft knife is all that is required for this. 3. I now construct the guide bars that sit either side of the slip, using Titebond III glue to secure. Please note the orientation of the vertical parts, and the hex nut head position. These items are mirrored. 4. Each of these guide bars will hold a clamp that will grip the various formers/bulkheads of your model. To begin their construction, I glue the following items together. 5. When these had set, I sat them on top of each other. DO NOT GLUE! 6. NOW, I may glue the other halves of the clamps into place. Sitting the two sections together merely ensures that the clamp faces are parallel to each other...nothing more. 7. With everything fully dry, the clamps are fitted to the guide bars that I previously made, using the nuts, bolts and washers in the hardware pack. Again, not the orientation of the clamps in the guide bars, and that their positions are mirrored. 8. Now I will construct the keel clamp holders that secure to the vertical platforms at each side of the Professional Building Slip. Here, we just push the two nuts firmly into position on the backplates. 9. Using wood glue, attach the keel clamp holder faces to the backplates. Please note the orientation with regard to the hex-head positions, and ensure that everything is square. 10. Now we can construct the keel clamps, in exactly the same way that we made them for the guide bars in the earlier stages. Firstly, glue the parts you see together, using wood glue. 11. Glue the opposite side to the two clamps, and use a bolt to ensure that the holes are aligned. Remember, these two keel clamps in the photo are only sat on top of each other to ensure that the jaws are equidistant. Do not glue them together, of course! 12. When all parts are set, fit the keel clamps to the clamp holders, using the nuts, bolts and washers. Please note that the positions of the bolts can be changed to suit the model you are building. 13. Each of the keel clamps we have just built, is secured to a moveable guide that sit at either side of the Professional Building Slip. To build the guides, I first glue the two supports in position on each of the guide faces. 14. Now, NOTING ORIENTATION of the baseplate, each in turn is glued to the vertical face and left to thoroughly set. 15. Glue the feet to the underside of each of the moveable guides. 16. Using the supplied nuts and bolts, fasten the keep clamps to the moveable guides. 17. We can now build the vertical face which helps us to ensure the model's bulkheads and frames are vertical and even in height on both sides. Firstly, glue the supports to the vertical face. 18. Now glue the feet. 19. At this point, I decide to glue the parts together for the guide which slides up and down this vertical plate. 20. Now I can bring this guide together with the main assembly and fit it with the nut and bolt, so it may be adjusted. I also glue the main white face to the vertical guide plate. 21. You need to clear some workbench space now as we start to assemble the baseboard. Start by pushing the nuts into the hex-head shaped holes. 22. Turn over the baseboard so the nuts are UNDERNEATH, and then apply glue to the top side. Fit the white plastic-faced panel onto this and clamp together until FULLY SET! 23. Un-clamp the glued boards and flip it over so the white face in on the bottom. Now, sit the remaining board on top of this, with the screw head indents facing upwards. Using the supplied screws, fit the board into position. 24.Using the supplied bolts and washers, fit the various assemblies to the baseboard, as thus. REMEMBER that the small edge clamps that you see fastened to the horizontal keel clamp halves are only PRESSED into position and they are NOT glued. This allows them to be repositioned to accommodate the positions of the frames/bulkheads of your model. *******NOTE******* A small number of nails are in included in the pack and there is an amendment sheet to indicate their use. These can be driven through the back end of the various clamps to strengthen them. Remember that these parts will bend as you tighten them, but for me, I would prefer to mostly use thin strips of packing if the keel and bulkheads are significantly thinner than the clamps, as this will remove most of the stress from them. That's it...your Professional Building Slip is COMPLETE! Here are some photos showing its use. My sincere thanks to Hobbyzone for sending this out for review on Model Ship World. To purchase, click the link at the top of the article.
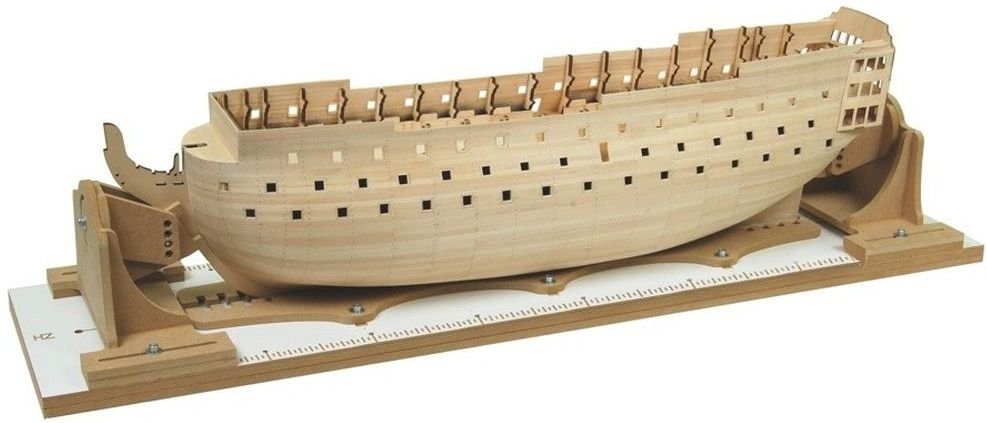


- 71 replies
-
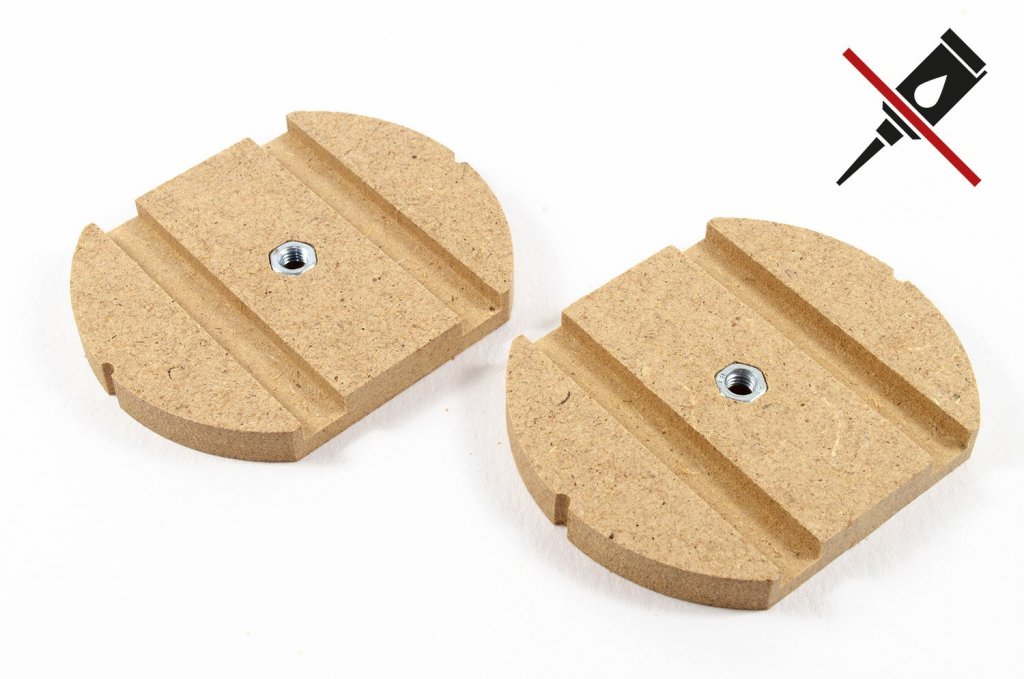
- 16
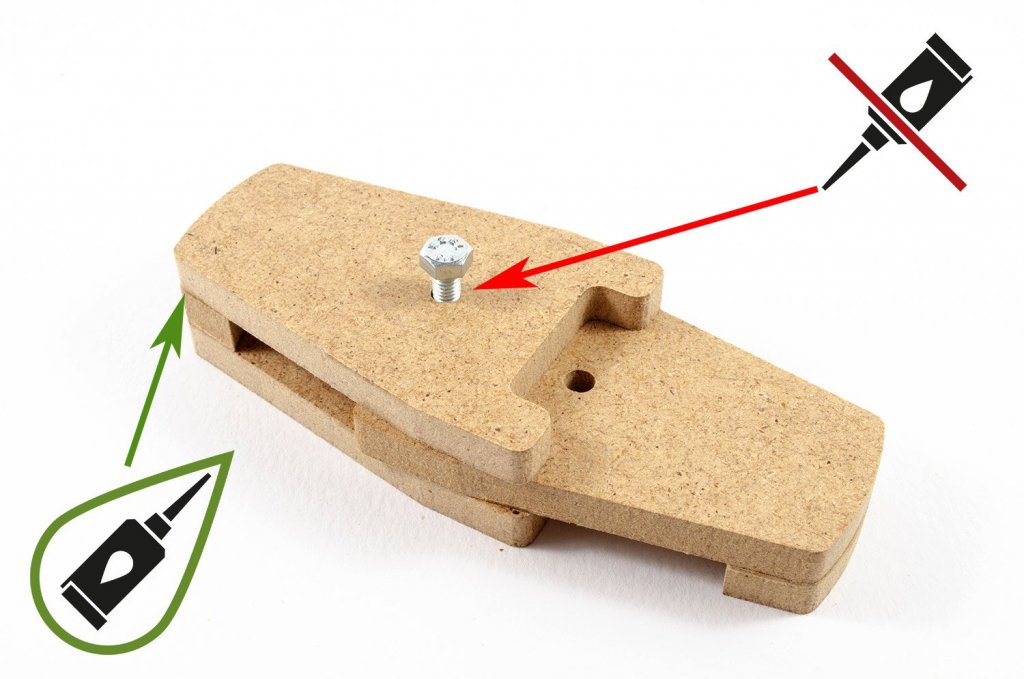
-

-

-
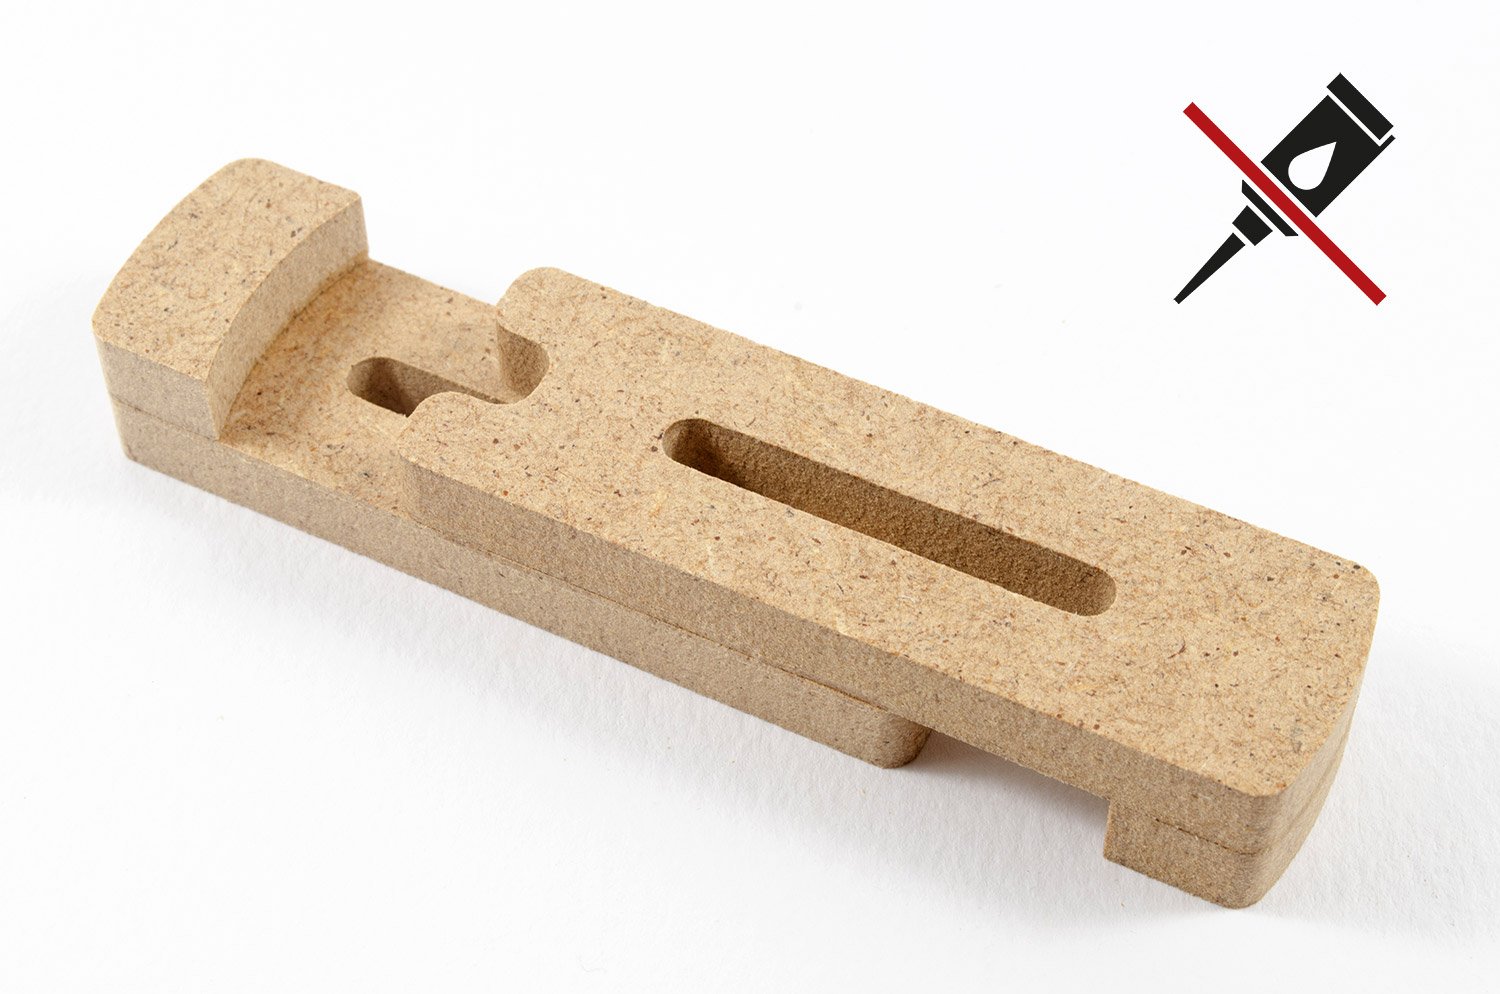
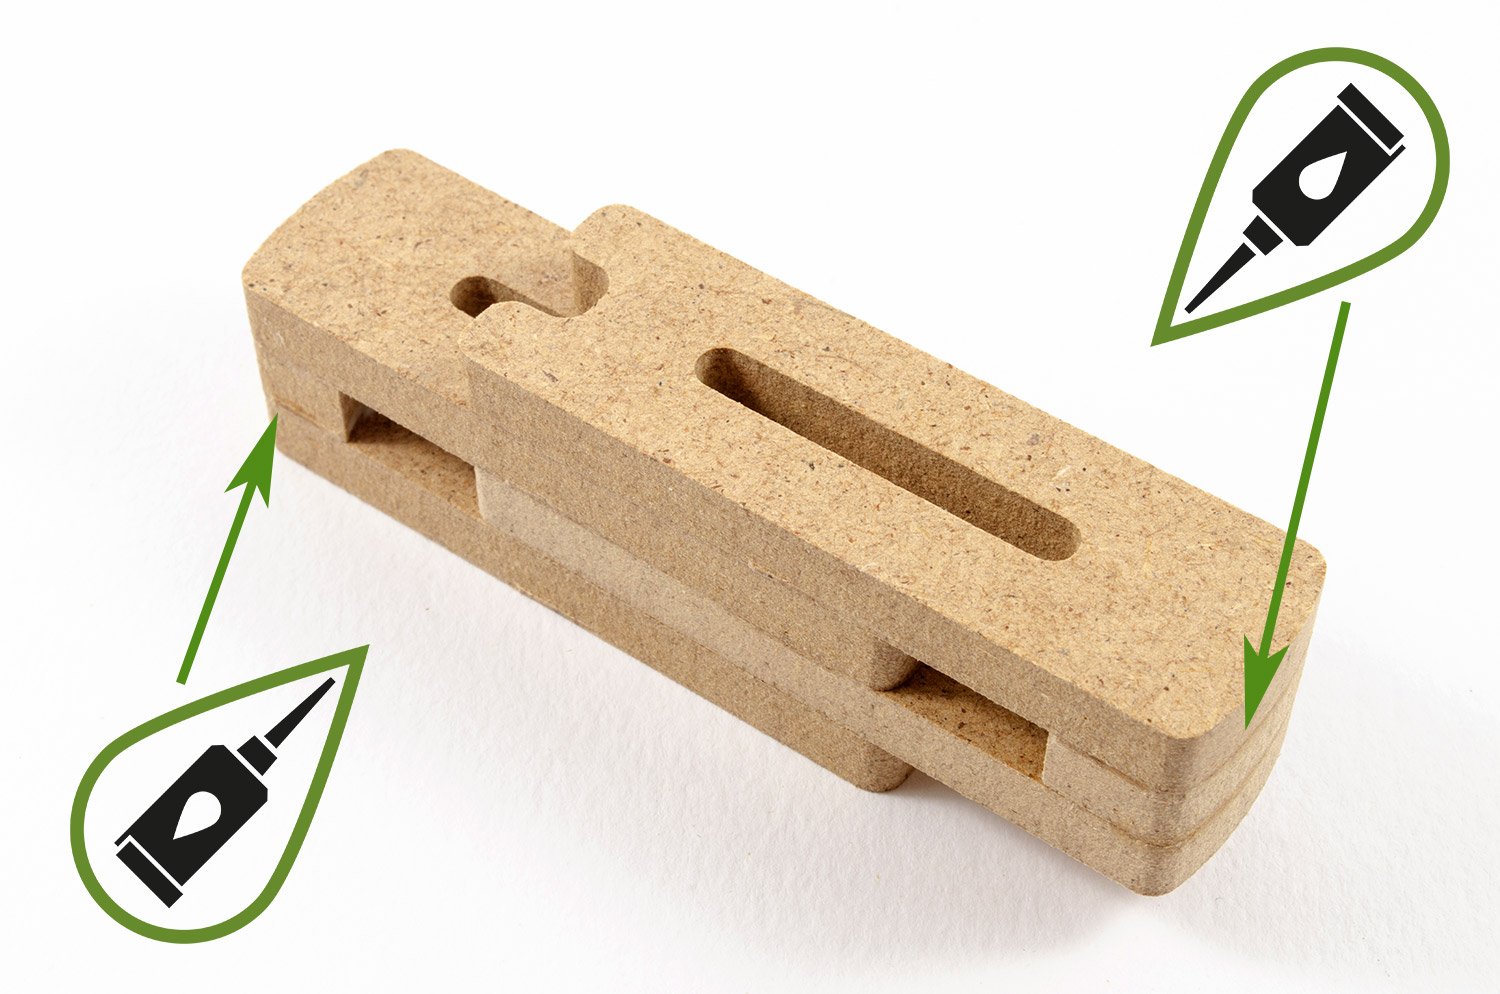
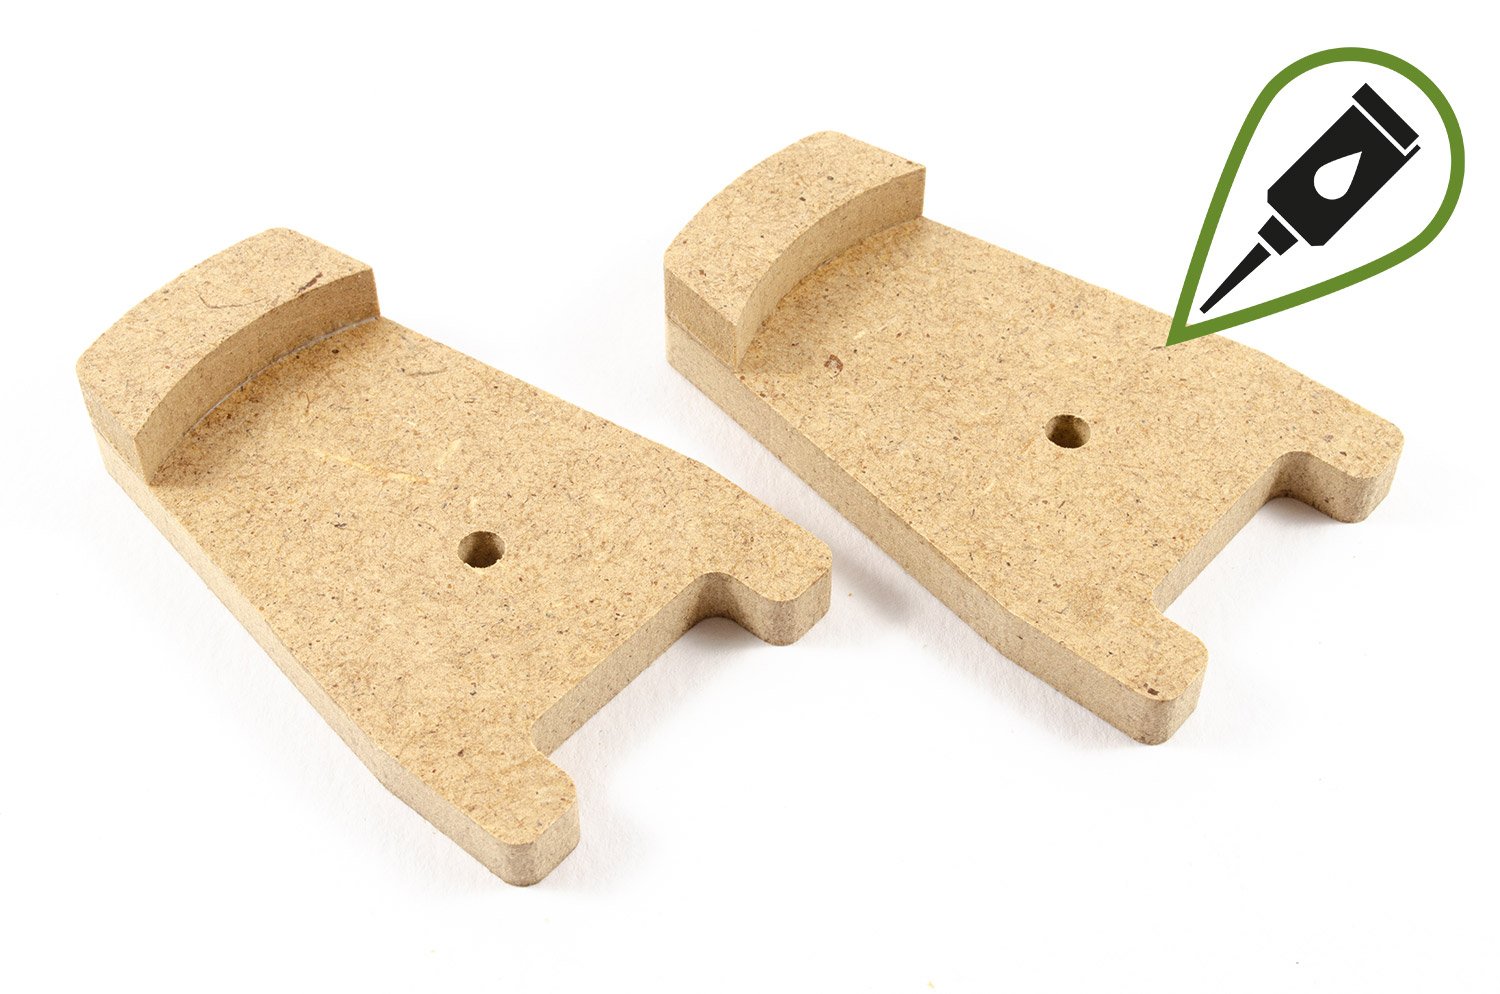
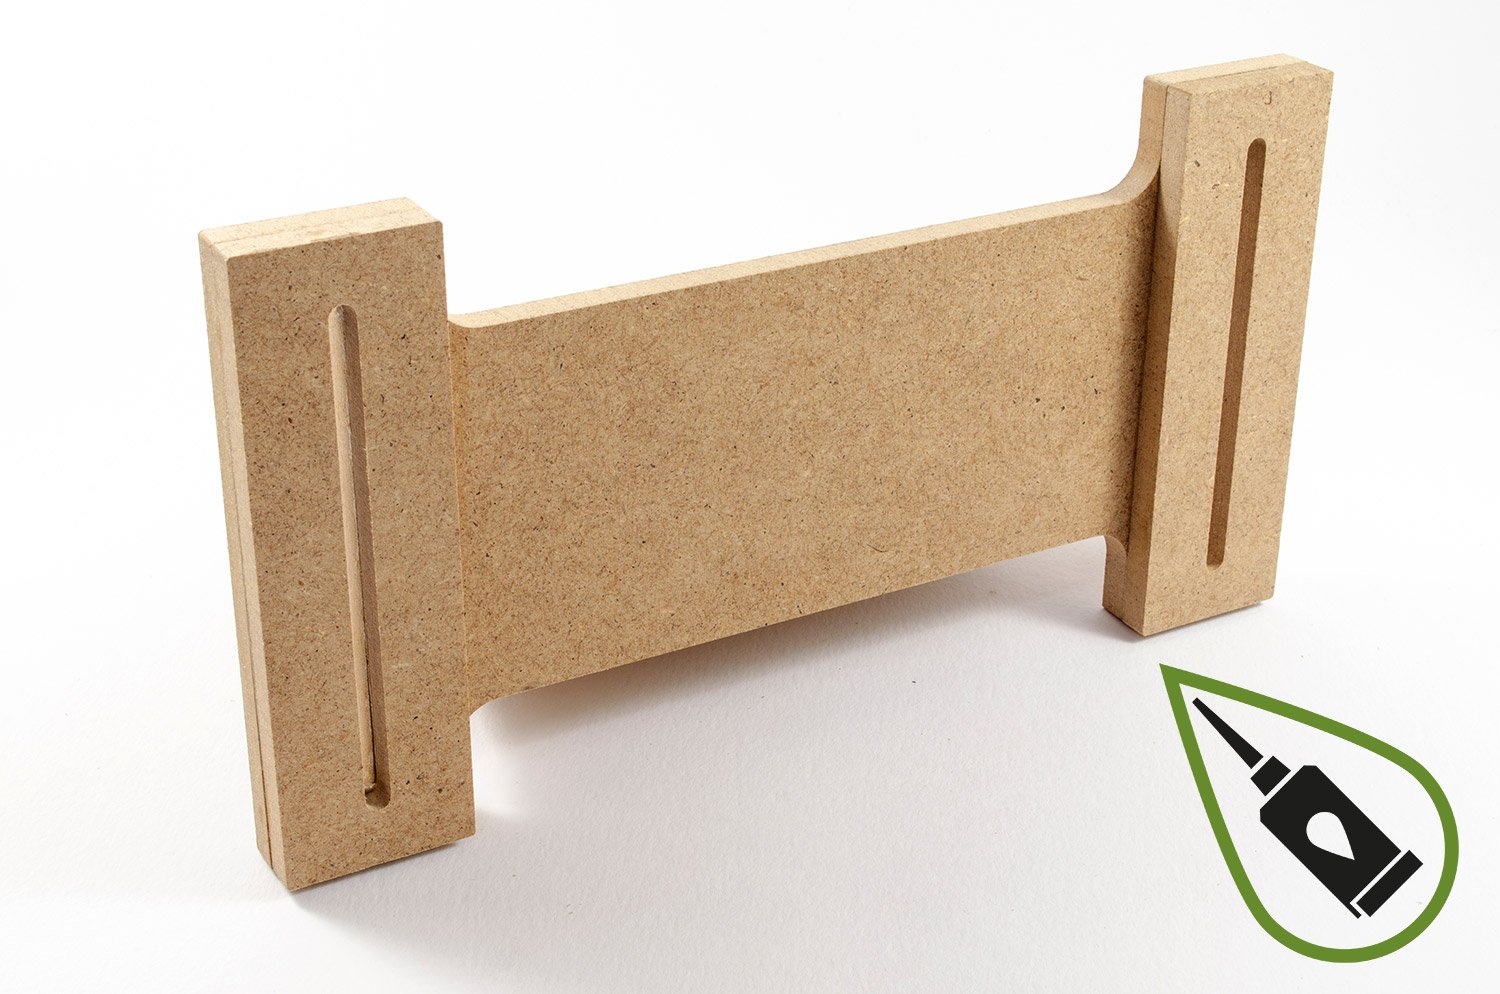
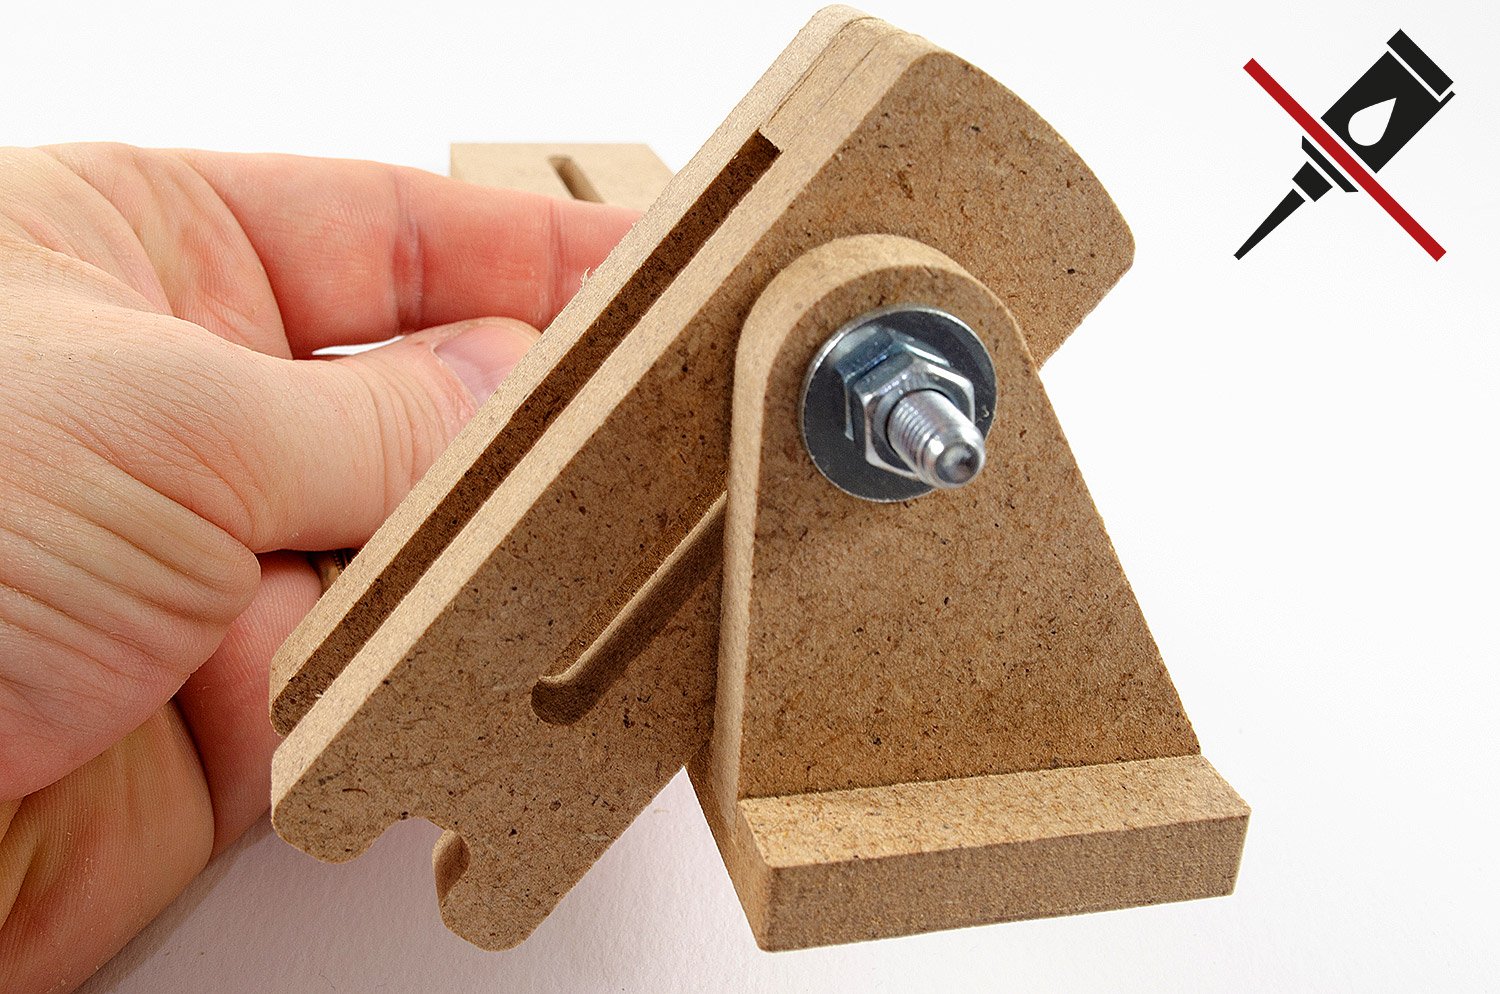
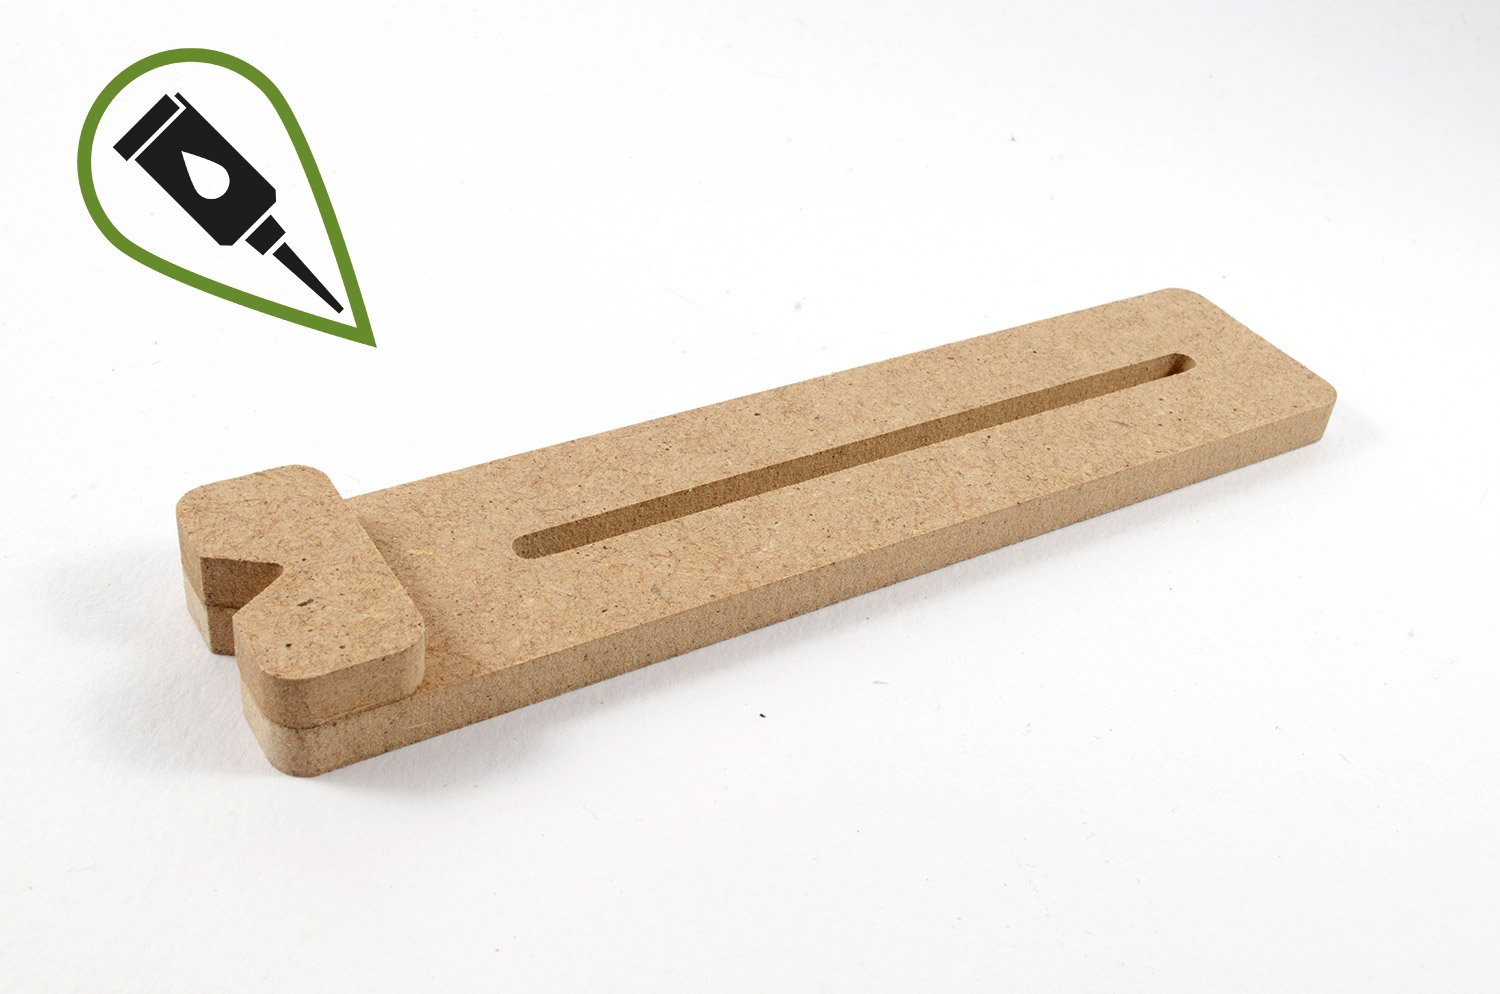
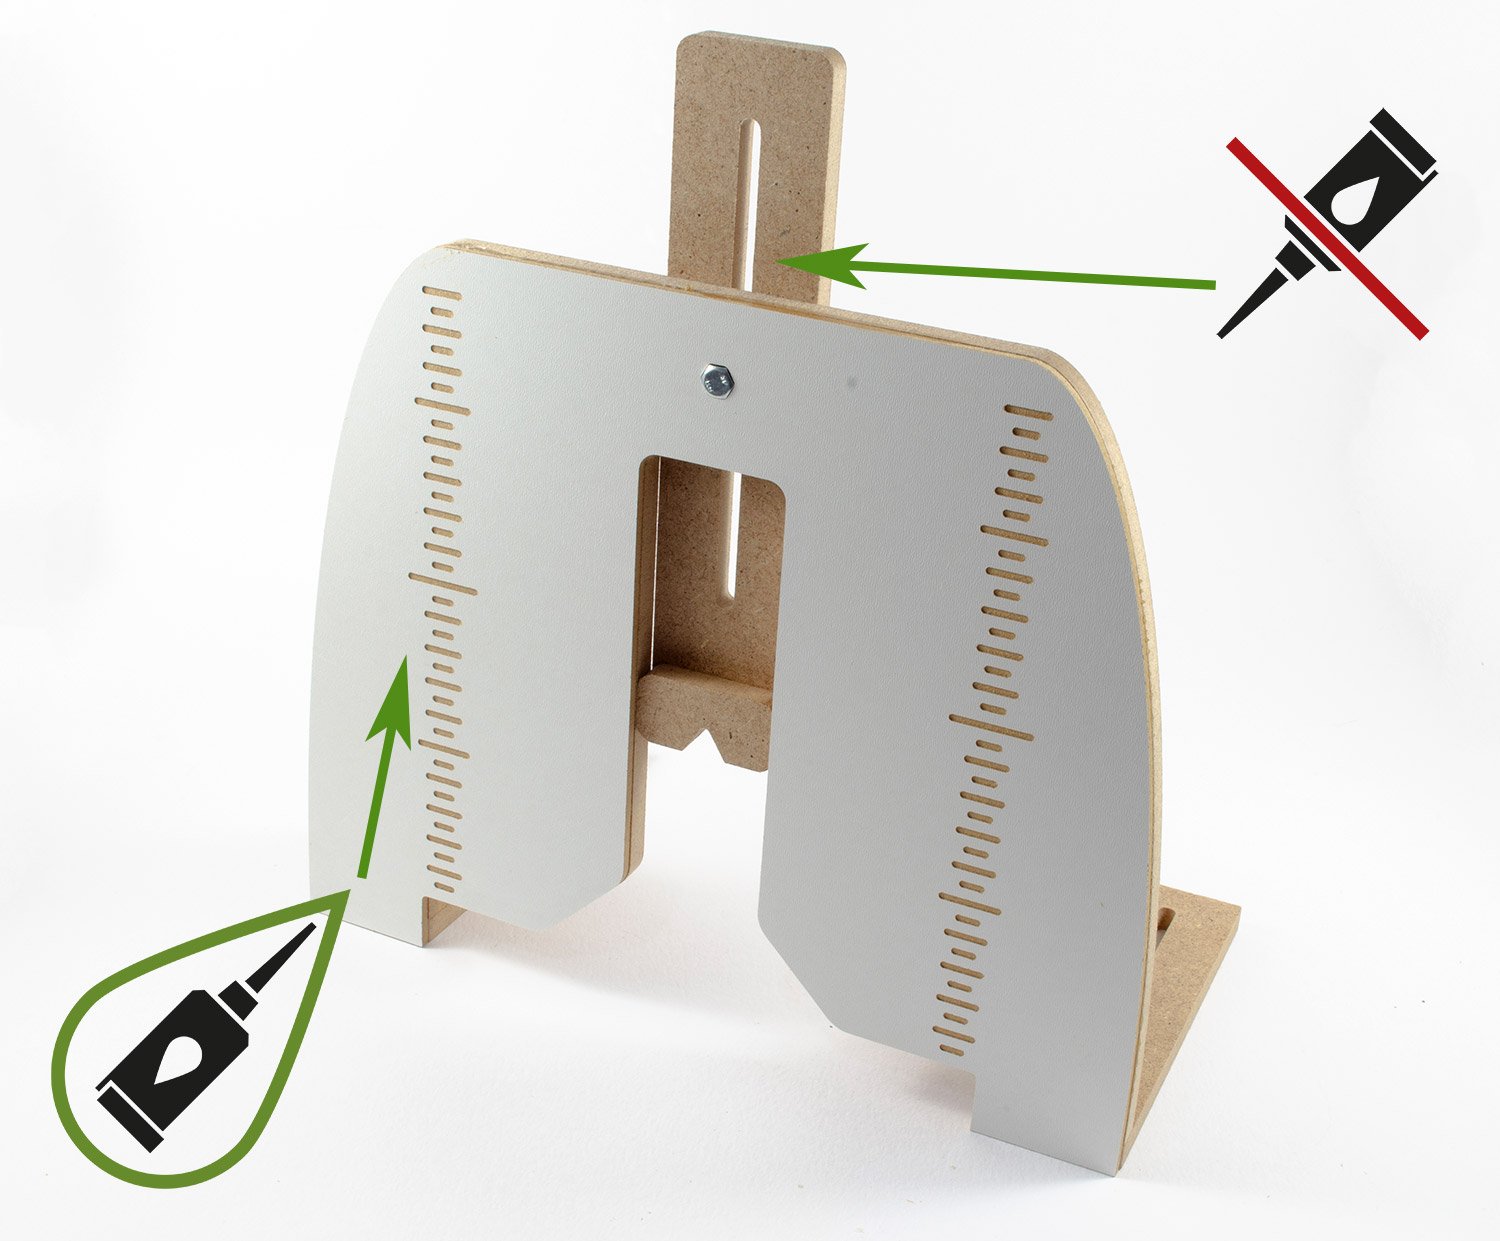
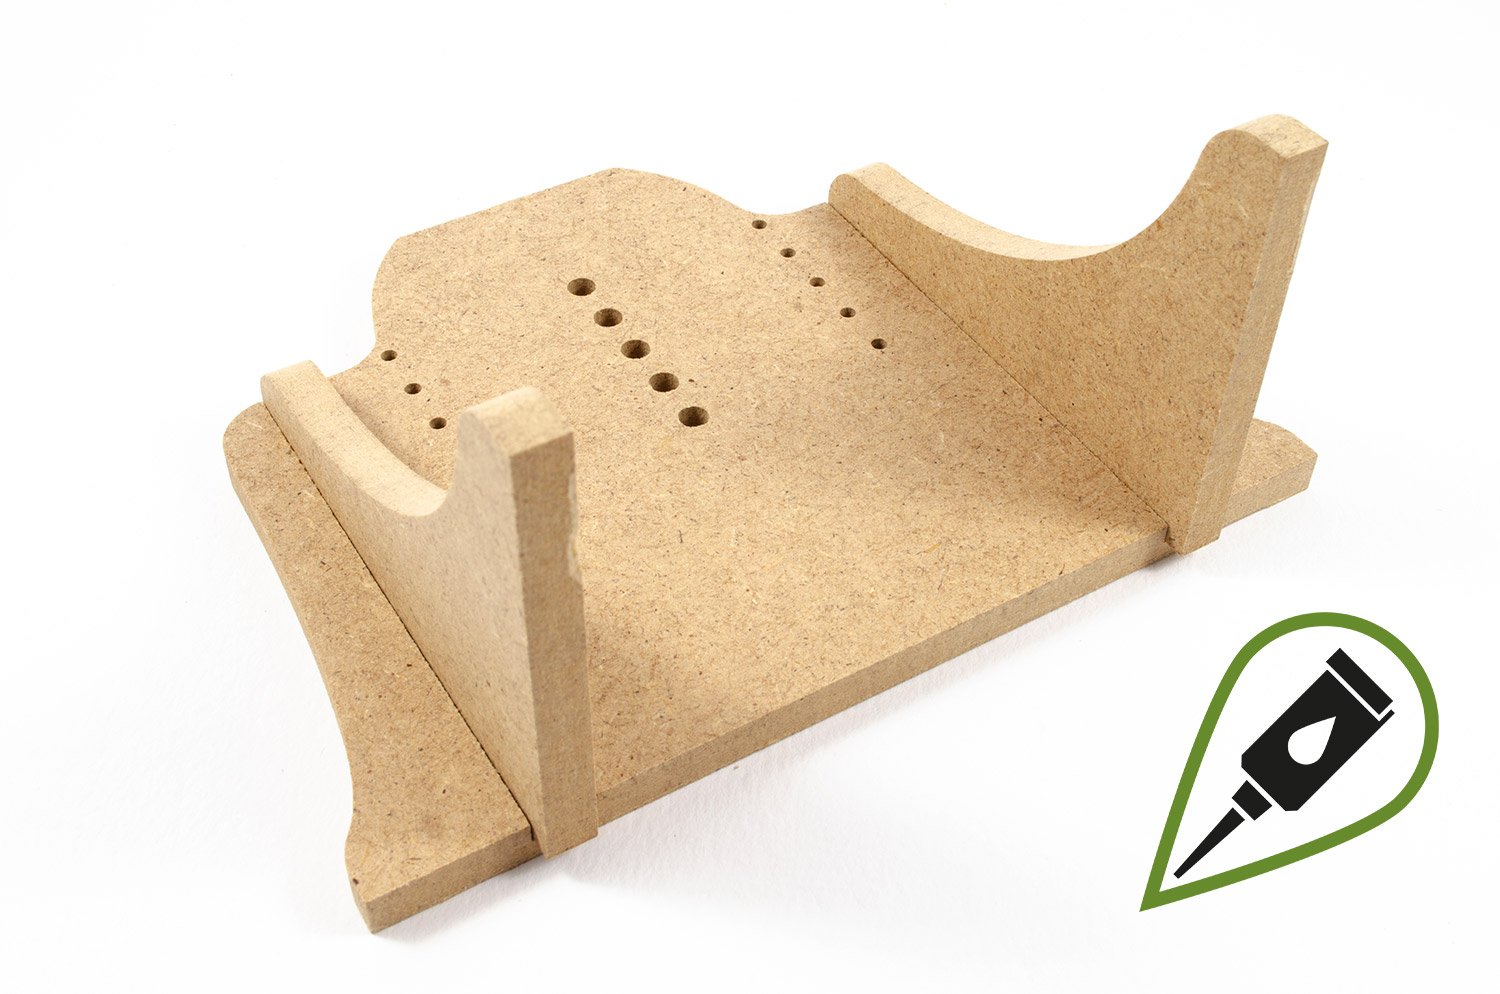
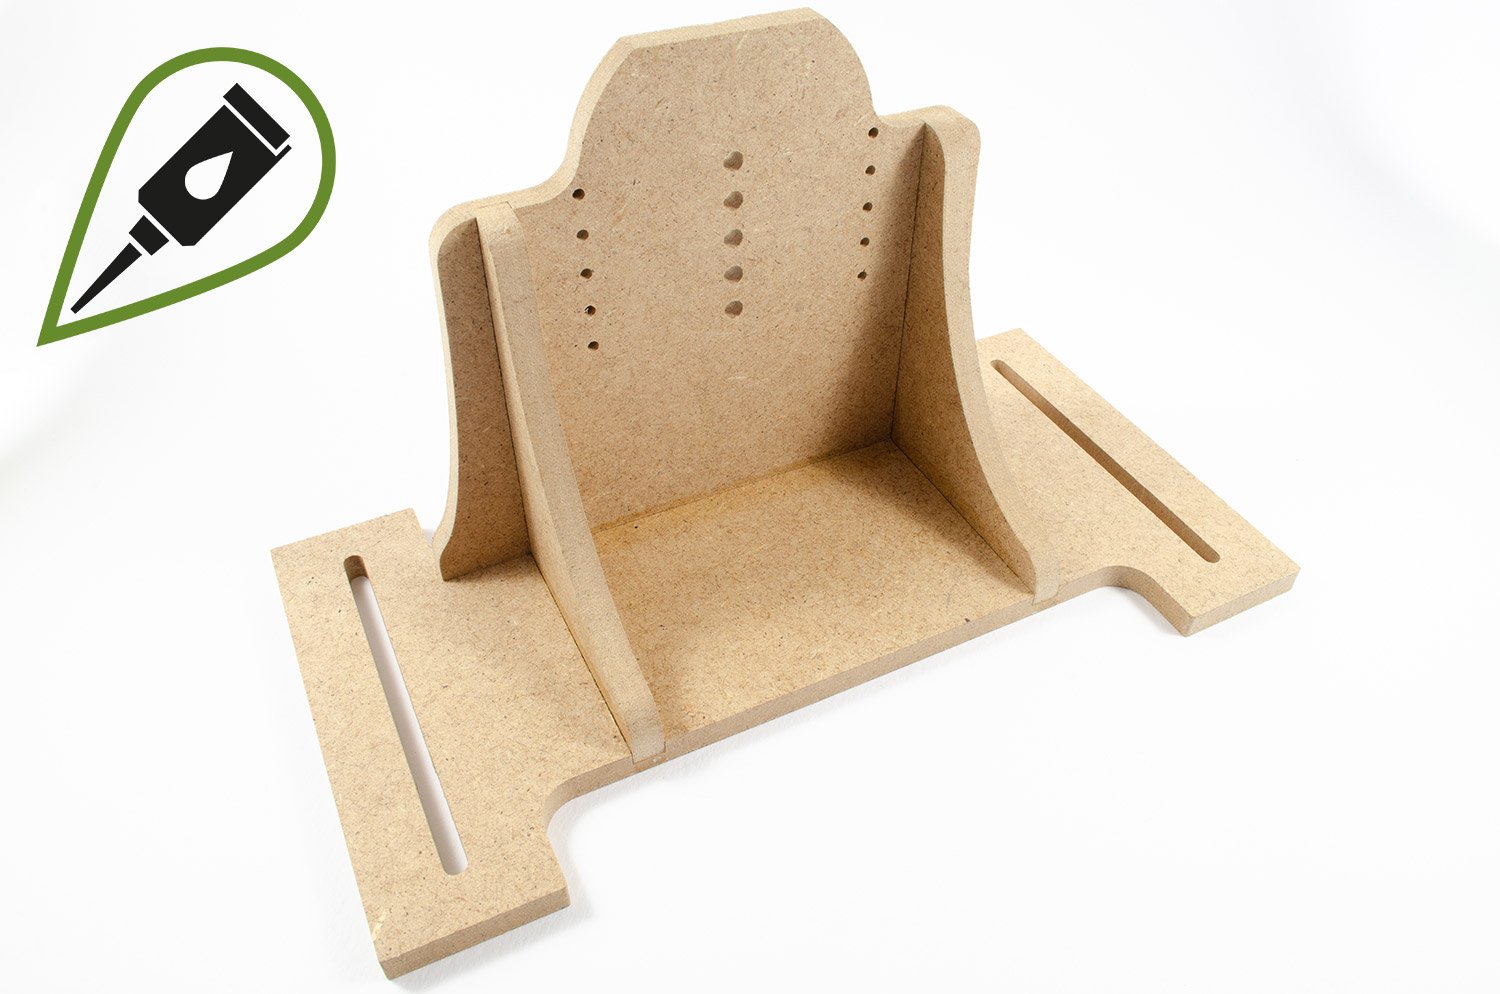
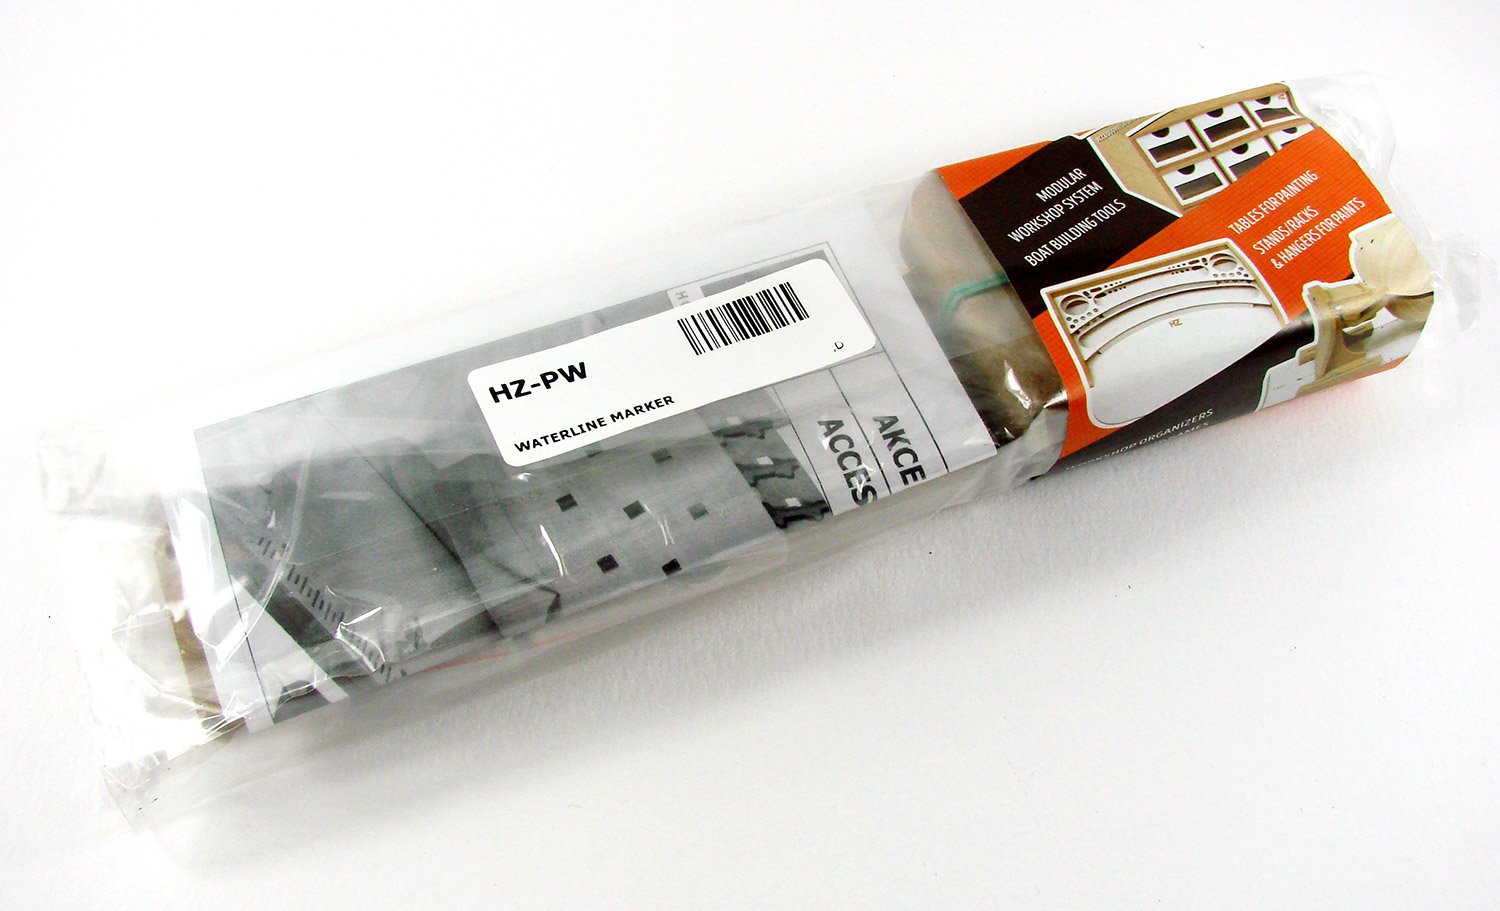
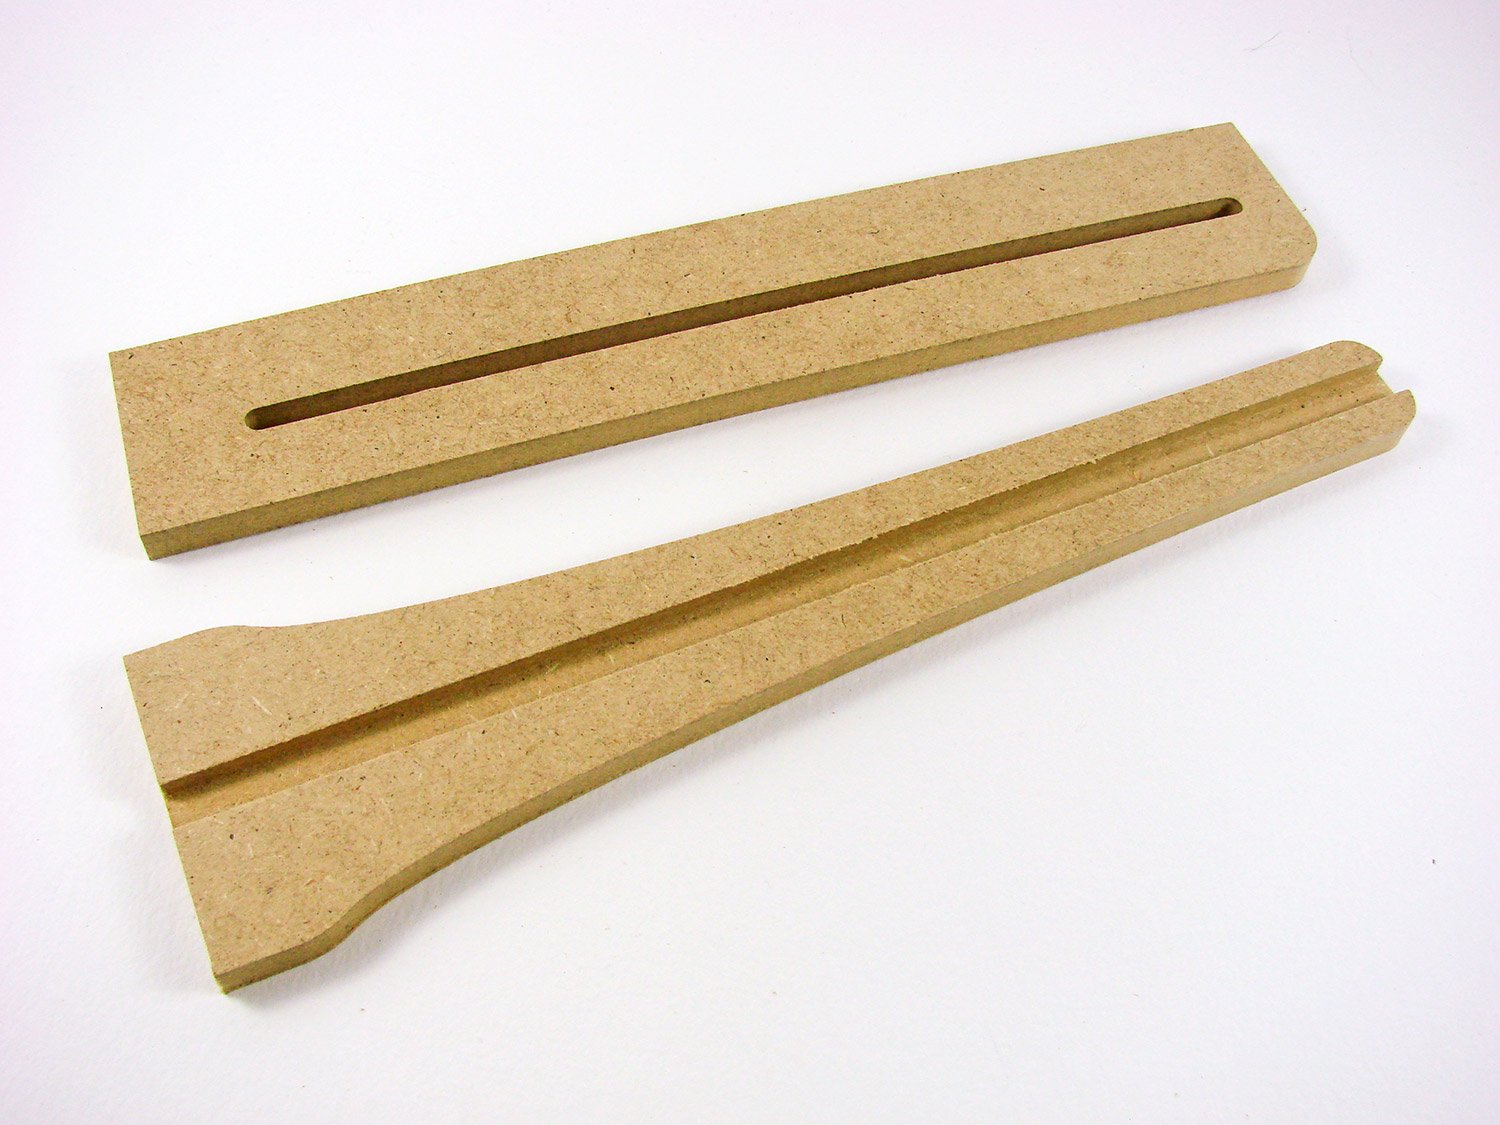
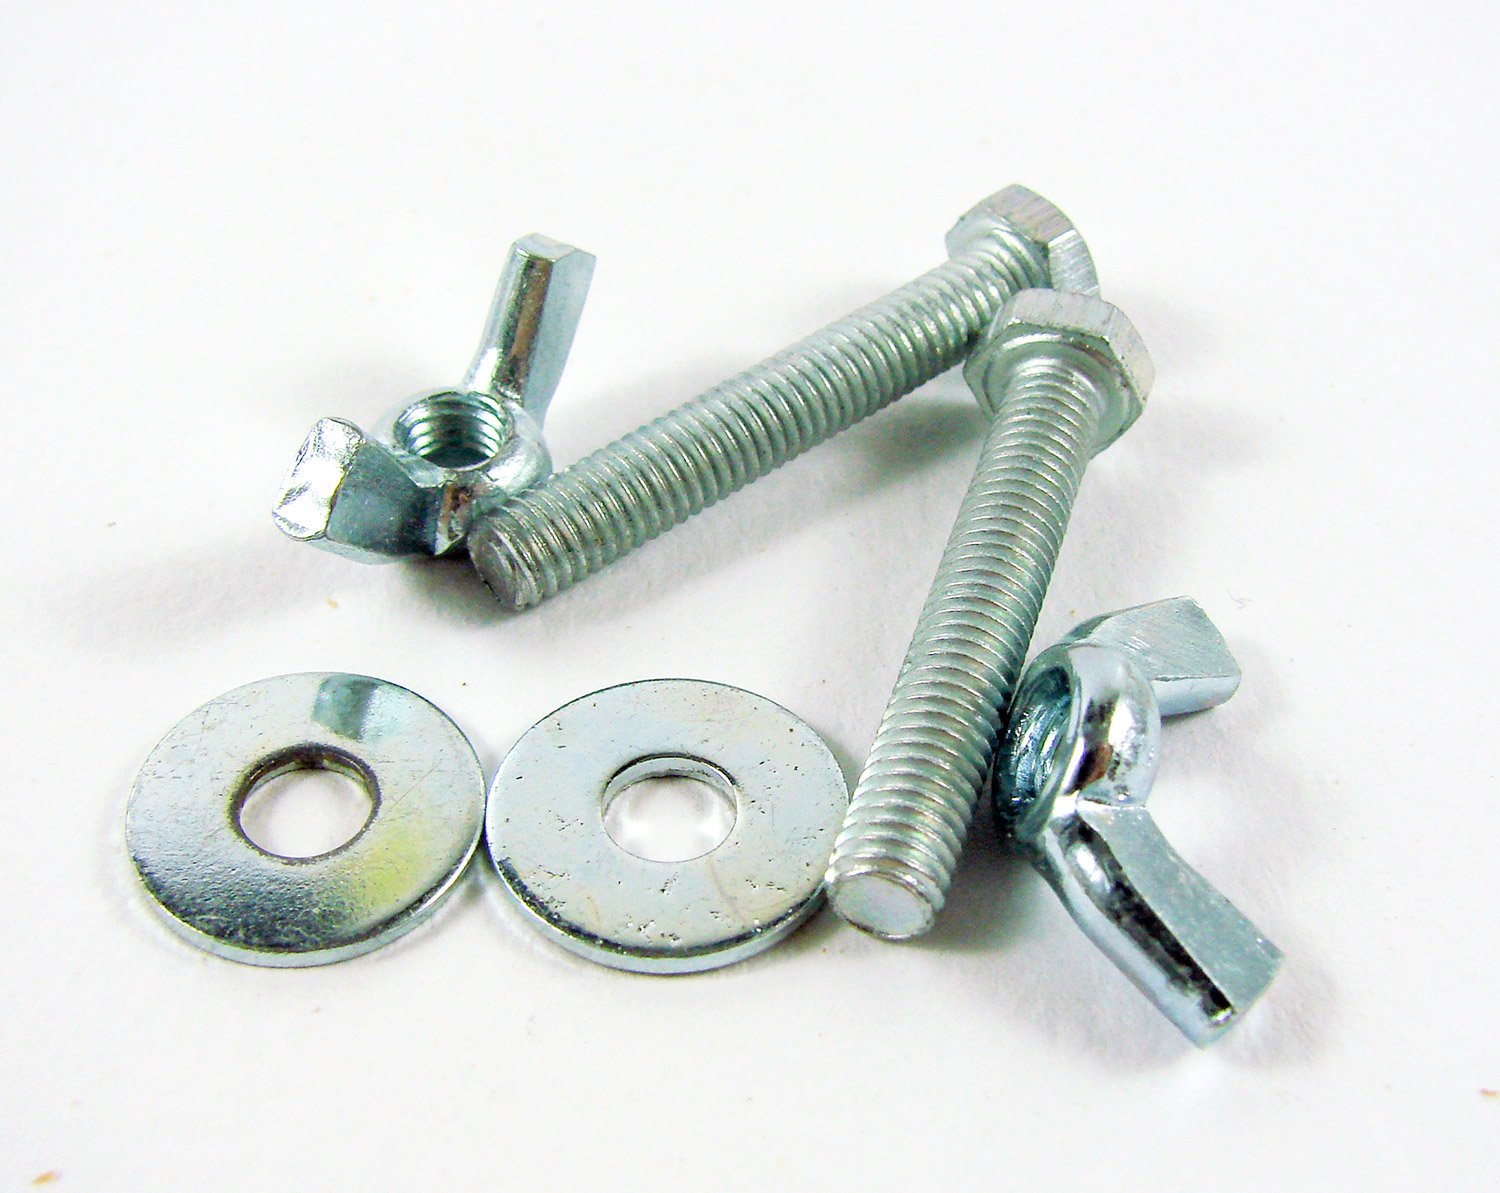
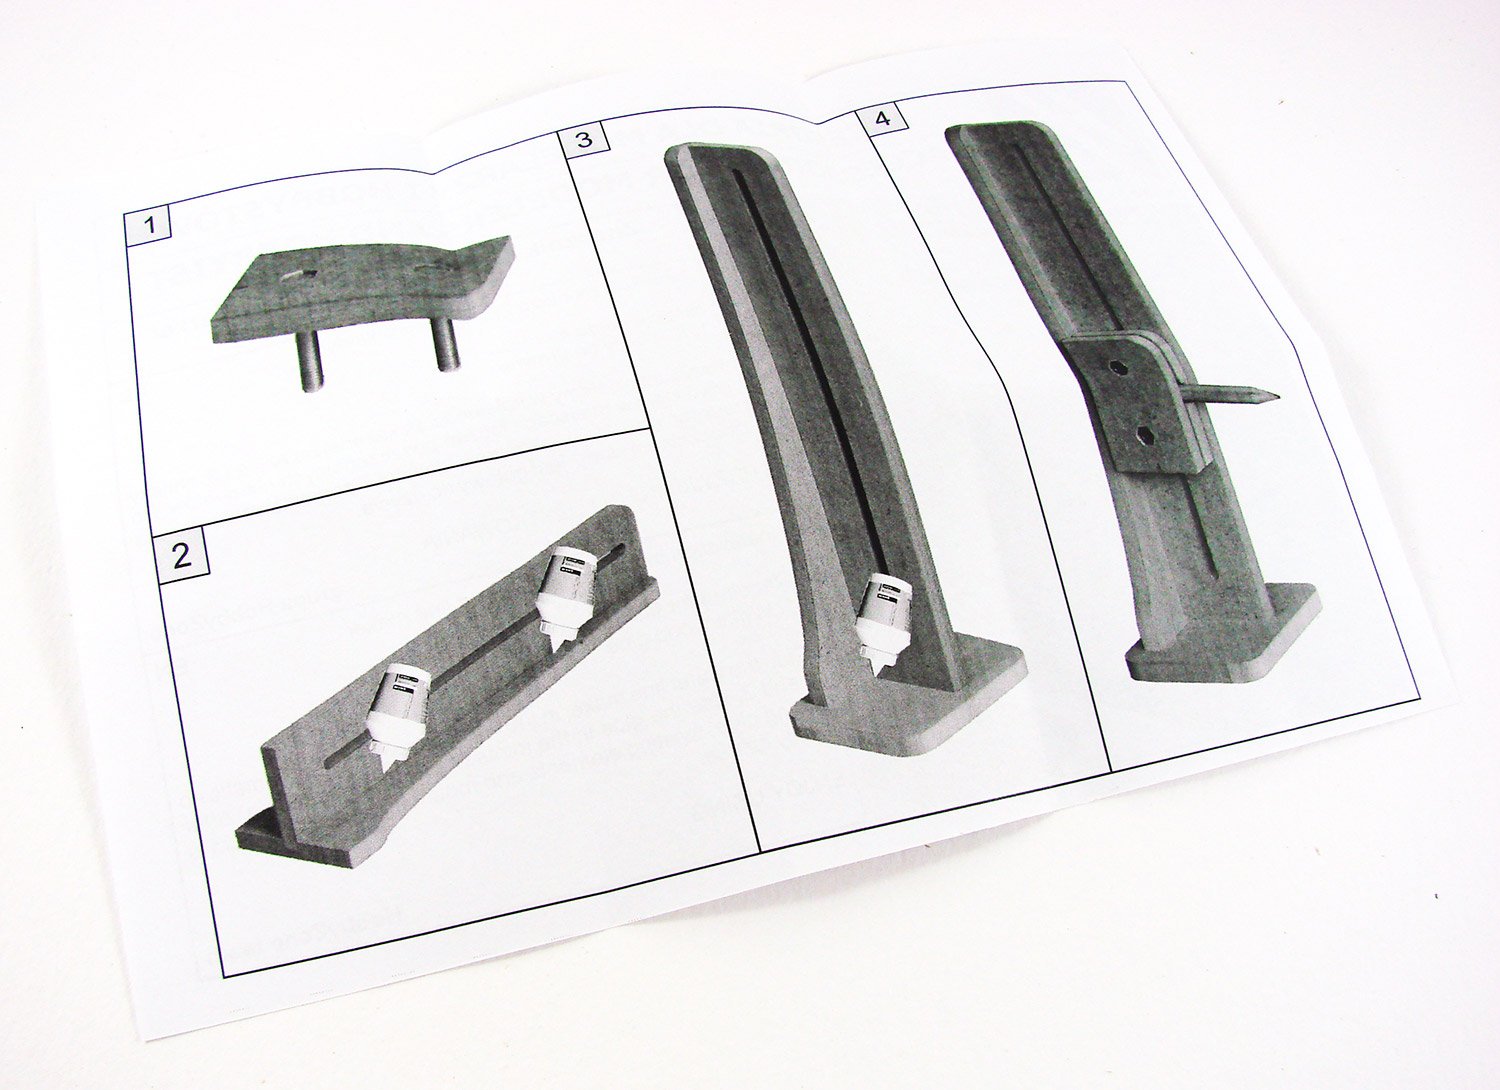
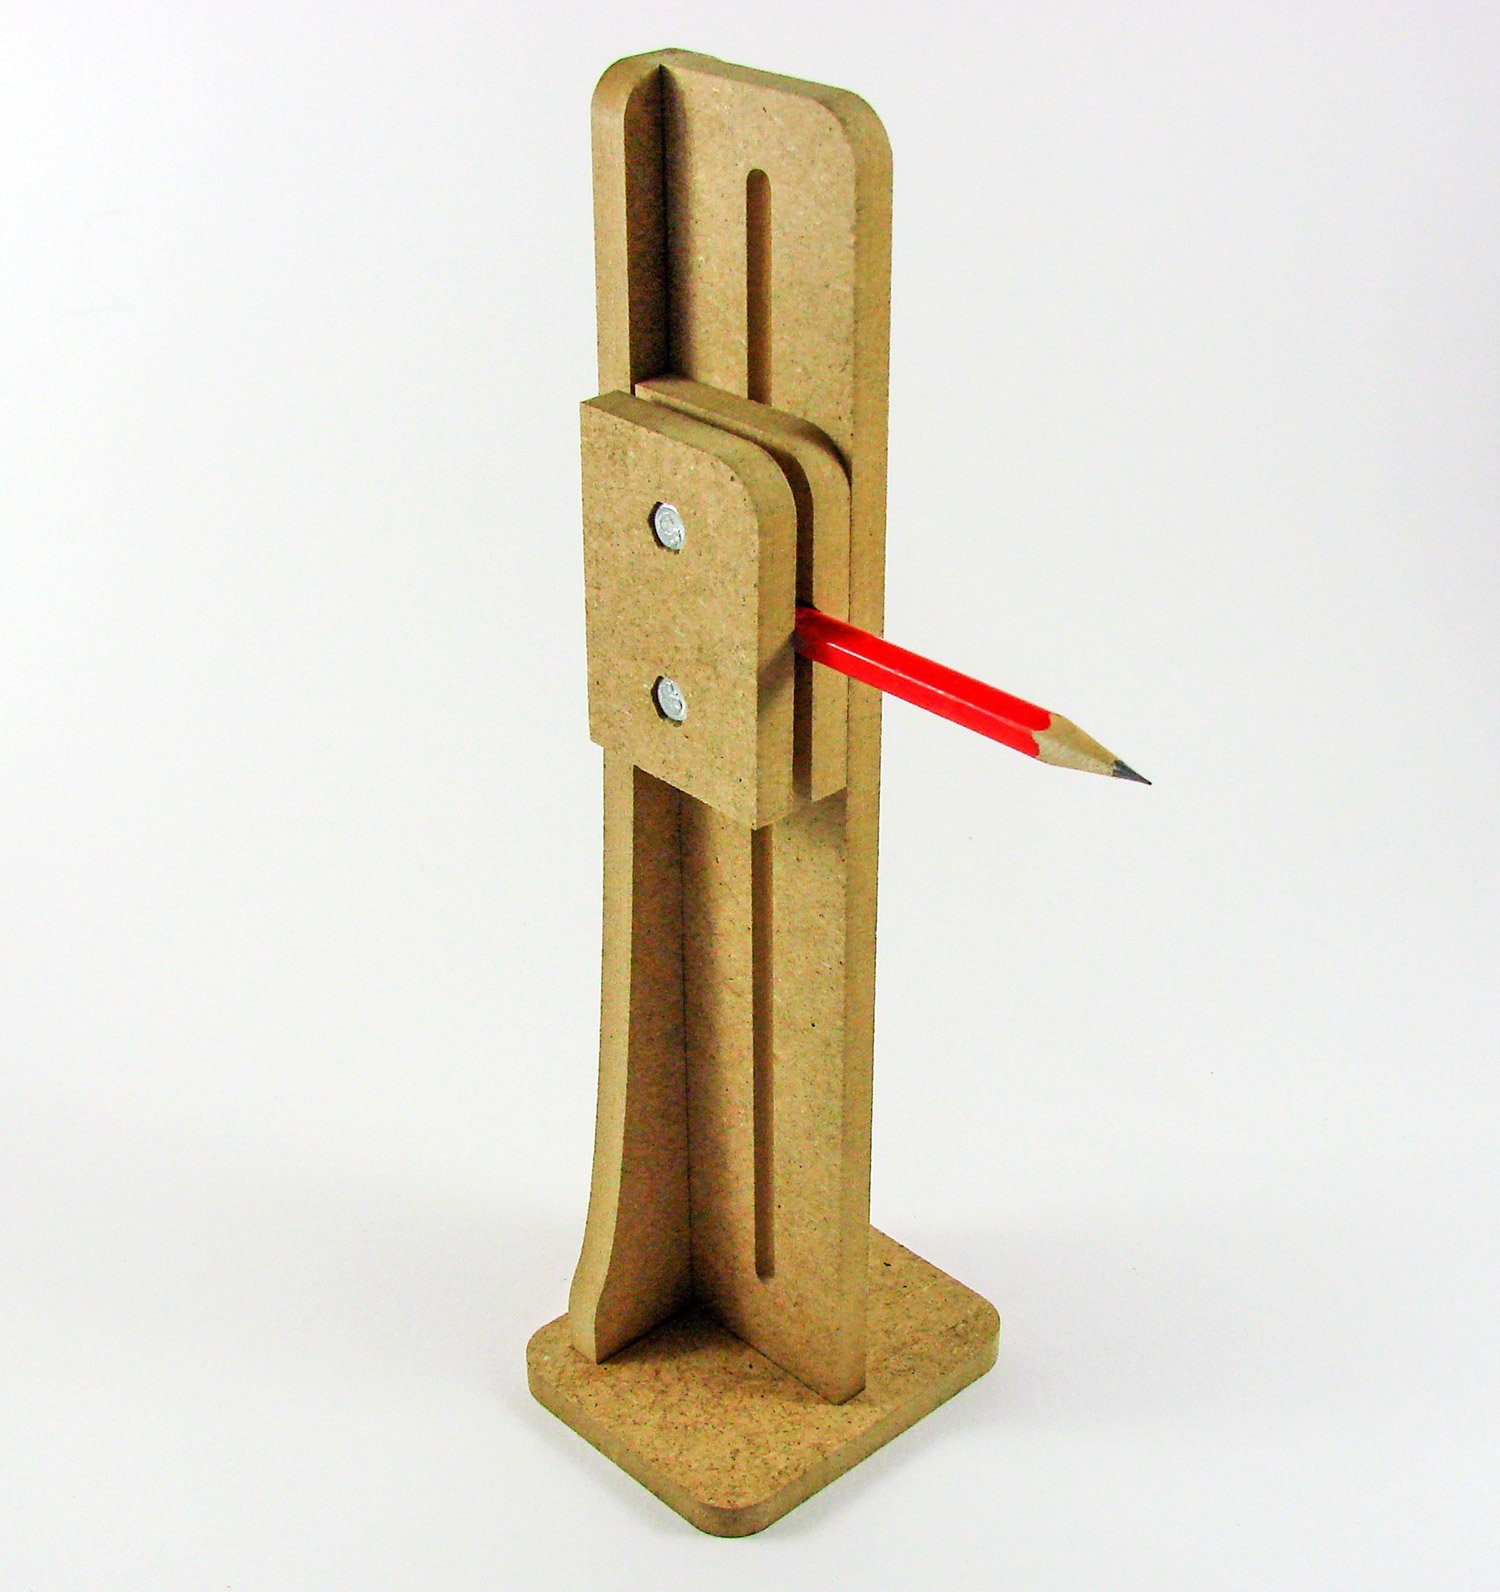
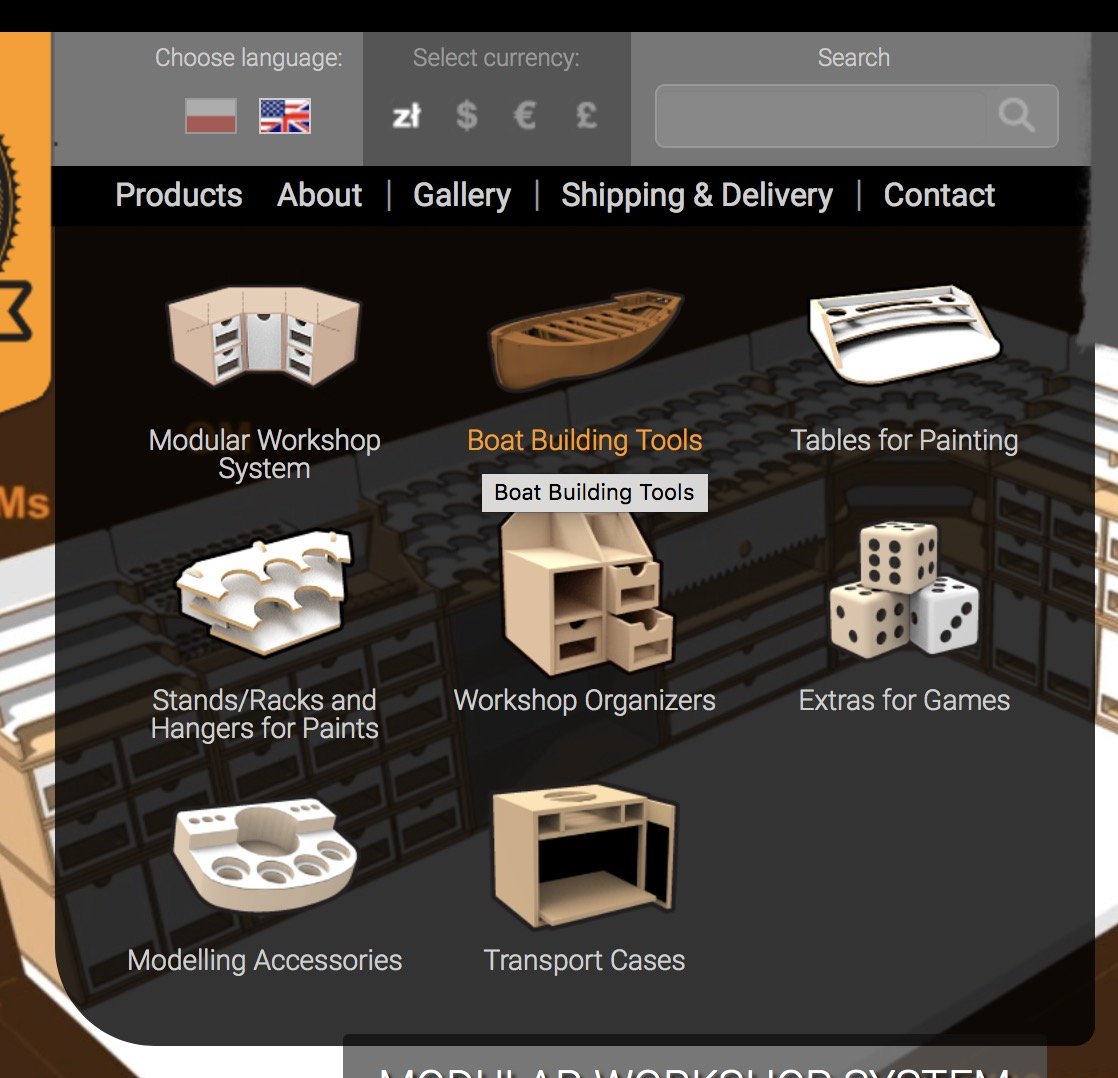
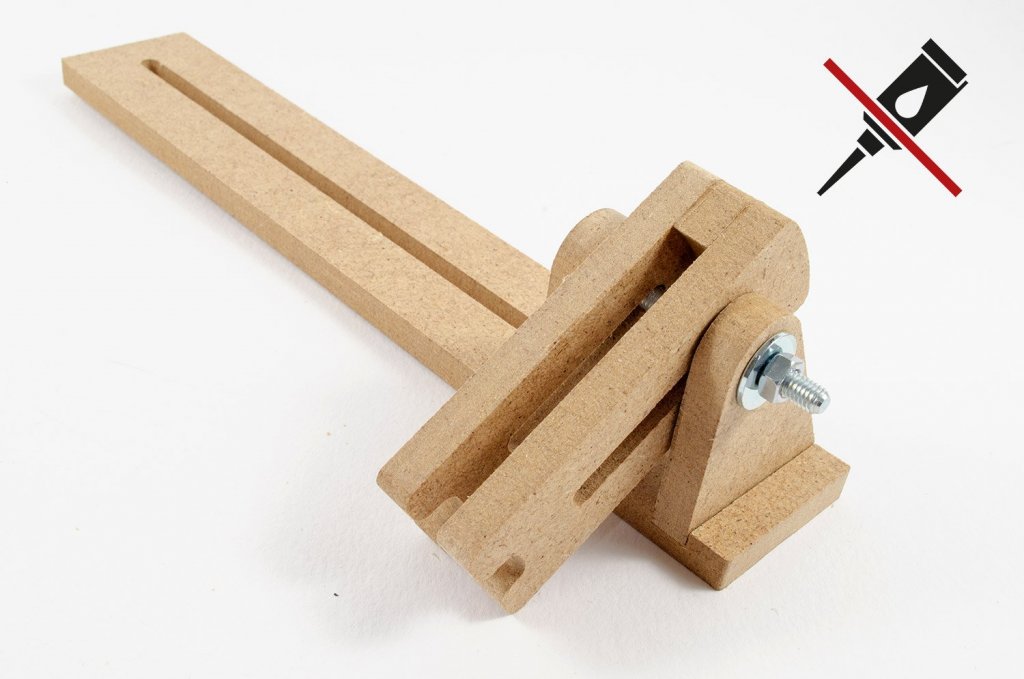
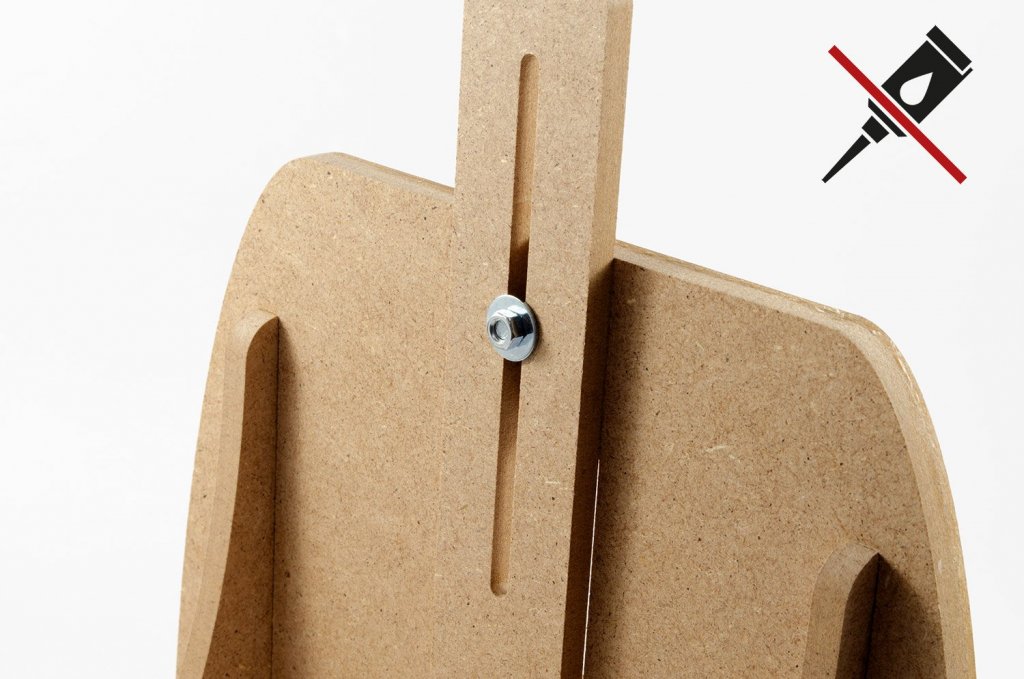
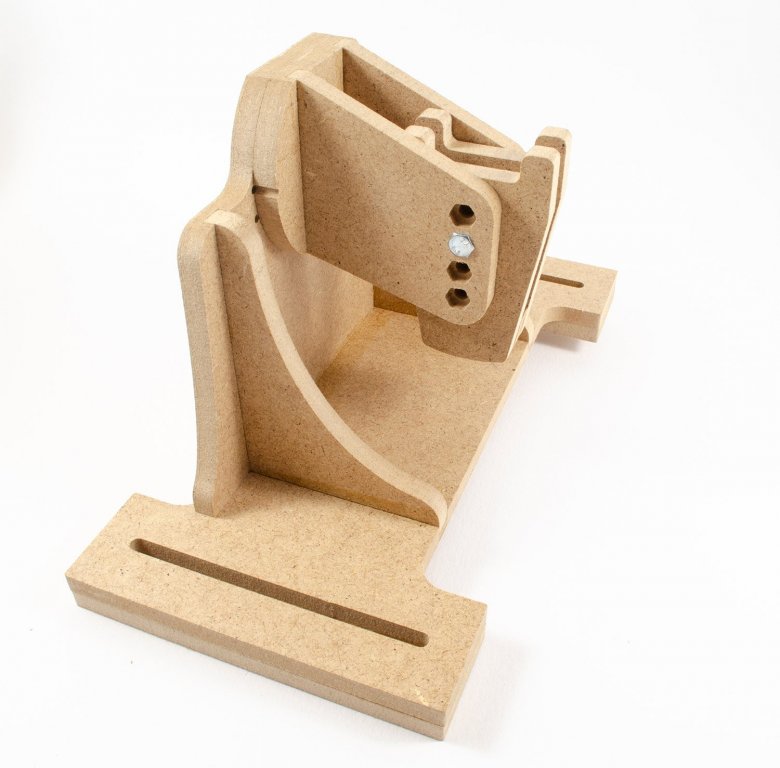
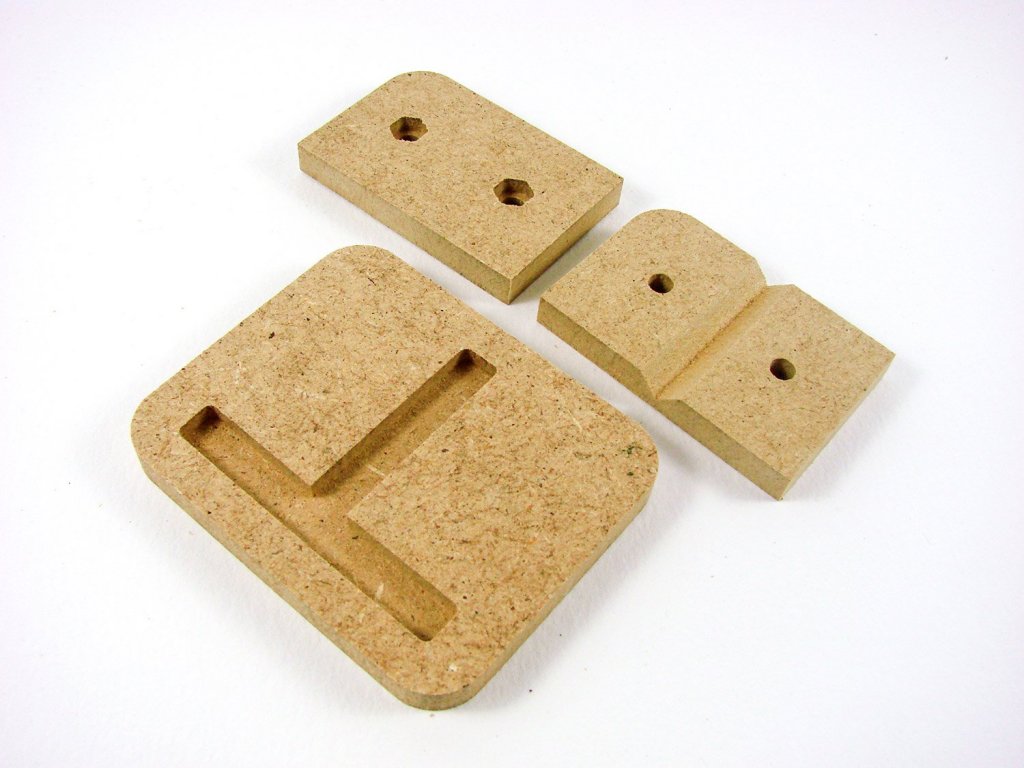
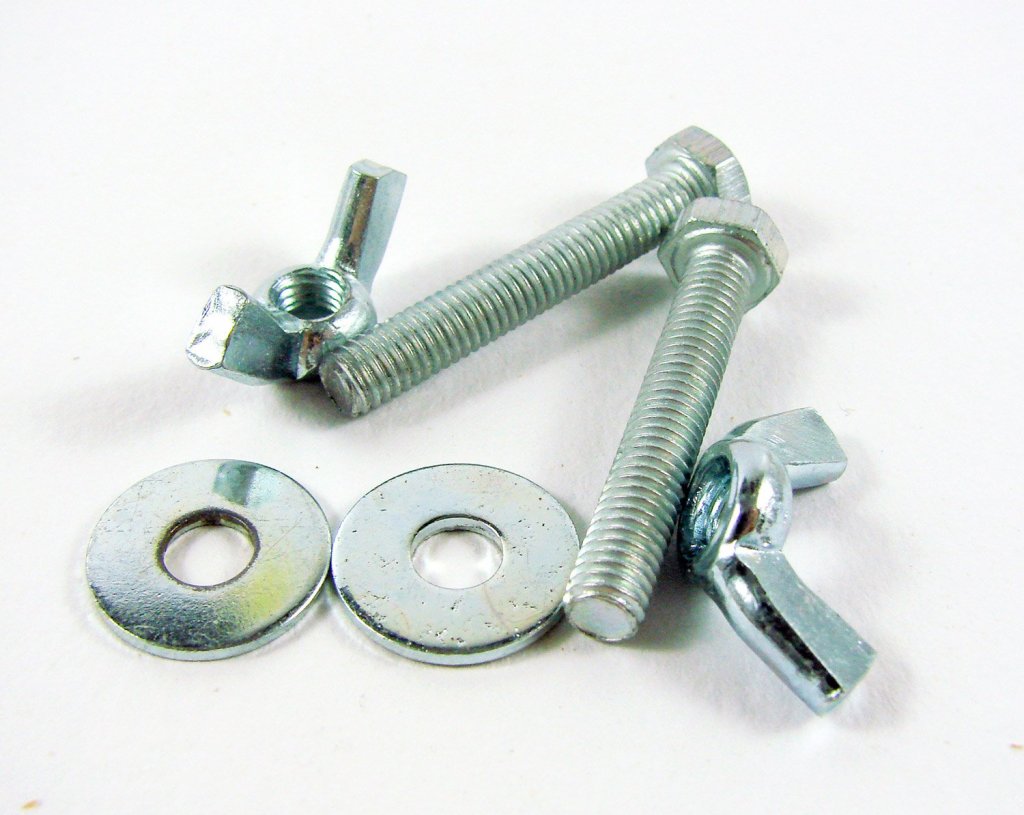
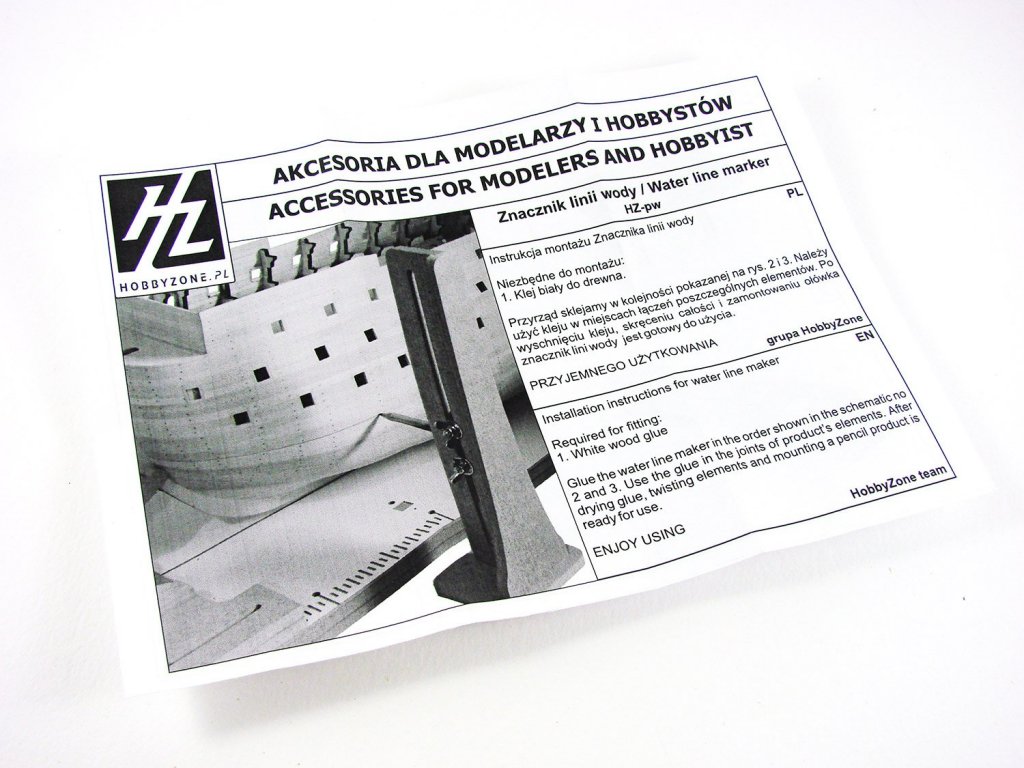
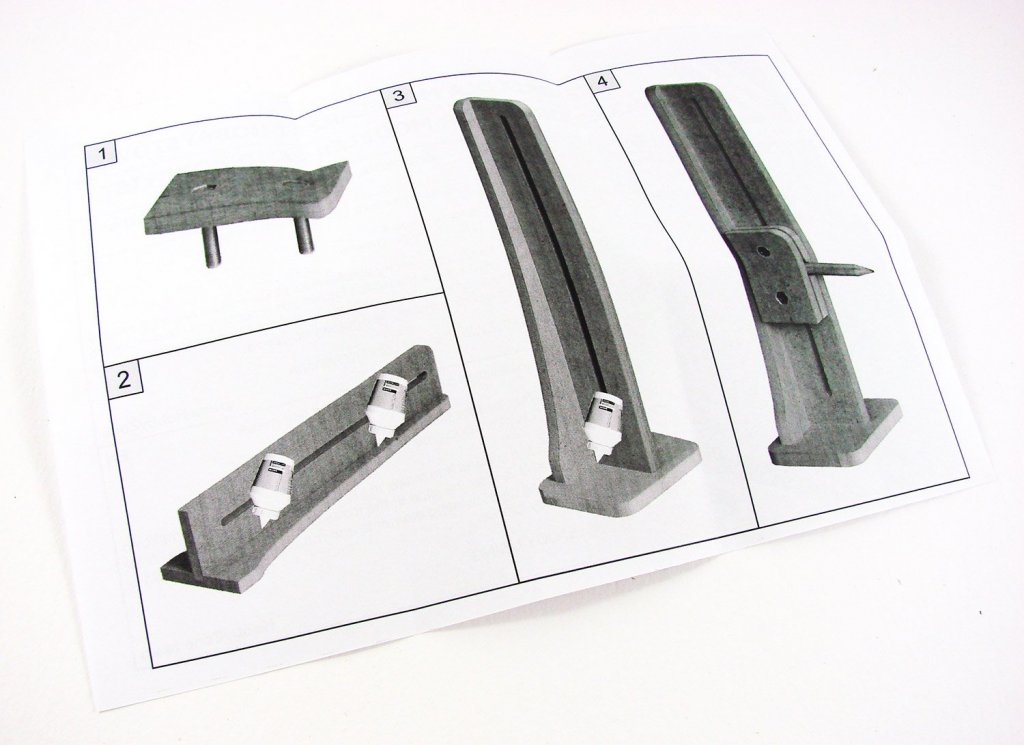
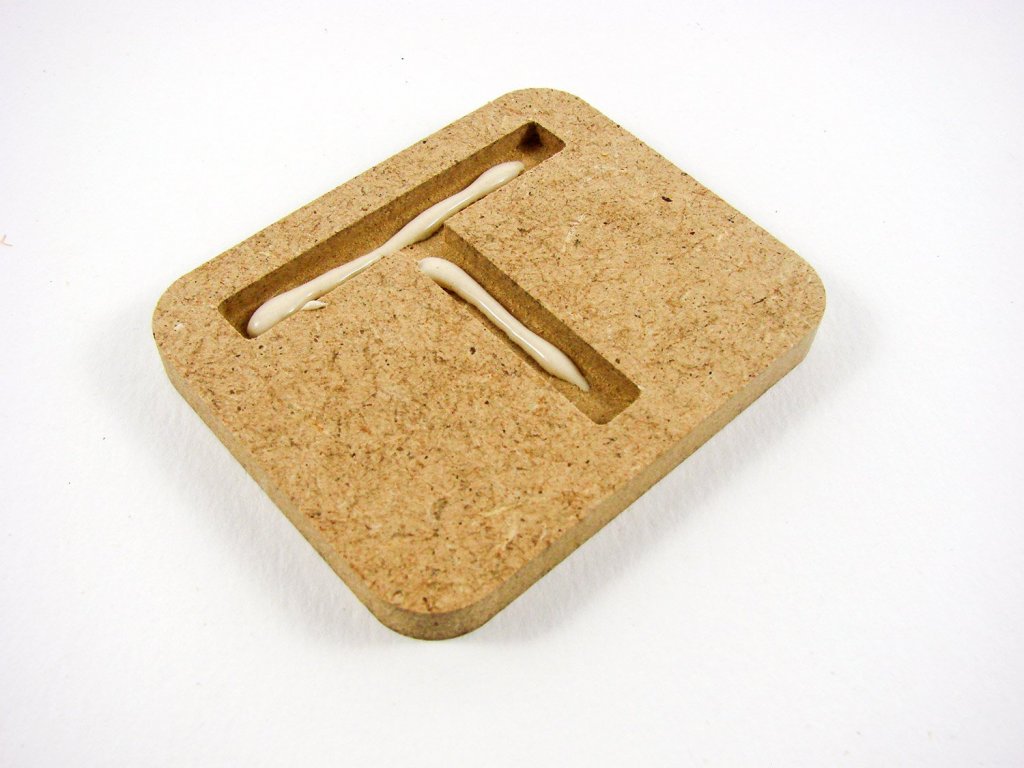
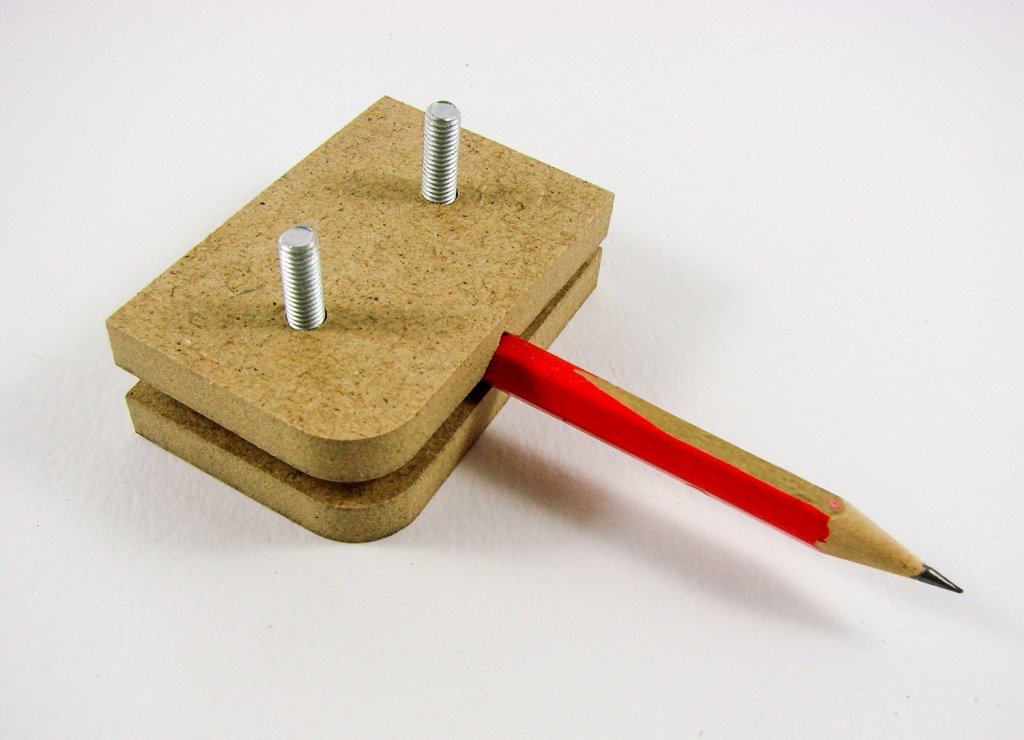
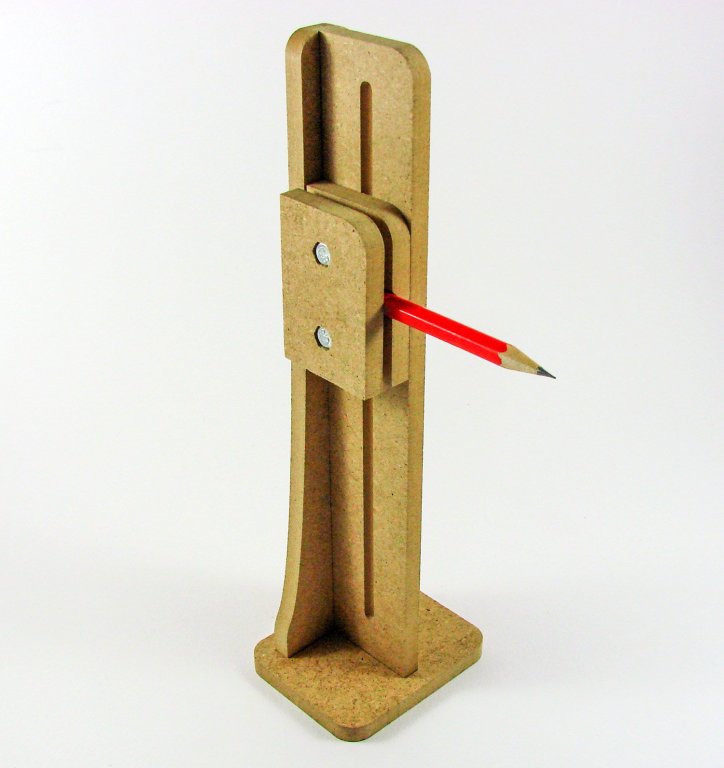
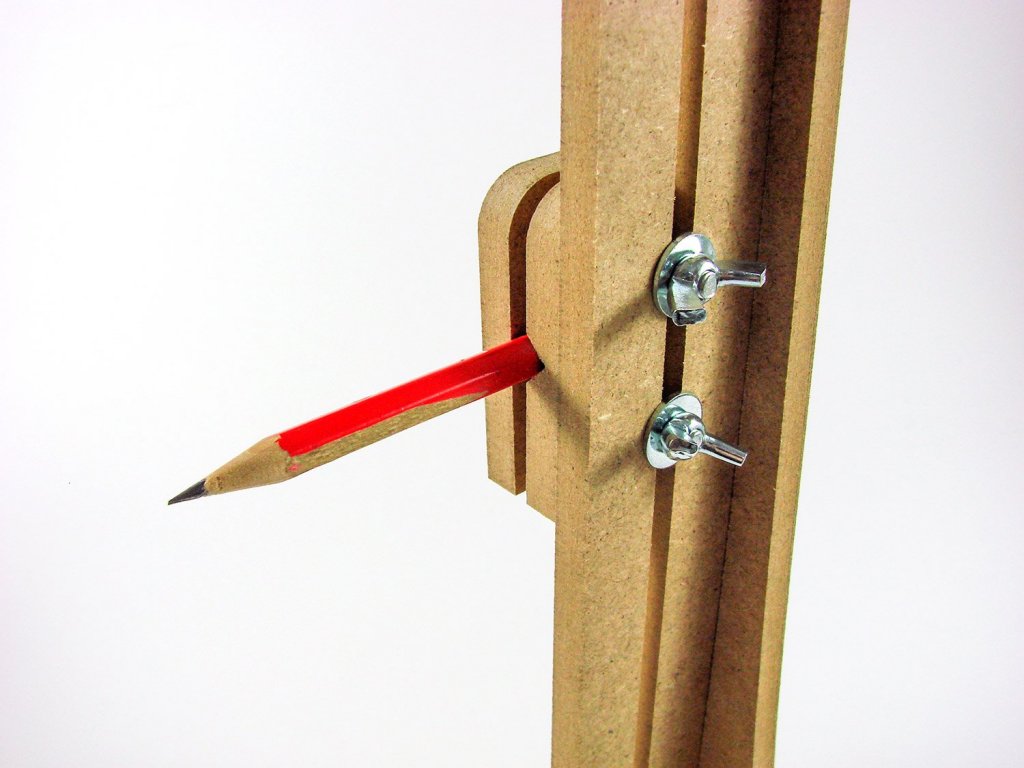
Waterline Marker Hobbyzone Catalogue # HZ-PW Available from Hobbyzonefor 25.00zł (£5.21 as of 6/6/2018) If you’re new to the hobby and setting up a list of essentials for purchase, or if you need to replace your current waterline marker for some reason, then Hobbyzone has a pretty inexpensive way of doing this. In case you’ve never heard of Hobbyzone, they are a Polish company who produce some excellent workshop workbench modules to store your tools and other items, all with magnets which lock the individual units together. This range is totally flexible and can grow as your own needs must. Maybe you have heard of Hobbyzone but didn’t realise that they now have a set of products aimed specifically at our hobby? For our first look at this range of tools, I thought the waterline marker was a good introduction. Hobbyzone products tend to be made from MDF parts, which are CNC routed to very fine tolerances, which fit superbly. I can say this because I have been a customer of them for about 3yrs now. The waterline marker is packed into a clear plastic sleeve wrap with a couple of product labels. Opening the packet, you’ll note that all MDF parts are held together with elastic bands. A packet of hardware is included, as is a single instruction sheet. No tools re needed for this except for clamps. Clean-up of parts isn’t necessary. A quick test fit of parts shows that everything does indeed fit snugly, with just a little playfor the glue joints. For glue, I use Titebond III which has a relatively quick grab time and sets with an amazingly strong joint. I first glue the two upright parts together and leave for 15 minutes before then gluing this assembly to the base. Any excess glue is removed with the corner of a steel rule. One of those upright parts has a channel milled into it for the pencil unit to slide along. Assembling the pencil holder is very simple indeed. Two MDF parts are supplied, and one of these has a V-channel machined into it for holding the pencil, and holes for the bolts. The other part has those holes, but the exterior is machined to accommodate the hex head of the bolts. The bolts are first slotted into this piece and the v-slot dropped into position. The two parts are now fitted to the slot on the upright assembly and the washers and wingnuts used to secure. Before tightening, a pencil is added to the unit, and the wingnuts tightened evenly. It’s a good idea to use a short pencil for this as you want to keep the waterline parker relatively close to your boat/ship so that there’s no flexing of the pencil. That’s it! This tool can be adjusted for heights between 45mm and 225mm, so certainly big enough for most applications. Another real bonus here is the price. At just over a Fiver sterling, then this can’t be beat! My sincere thanks to Hobbyzone for kindly sending out this item for review here on MSW. Hobbyzone products can be bought directly or through one of their global distributors. Tell them you saw this review on Model Ship World


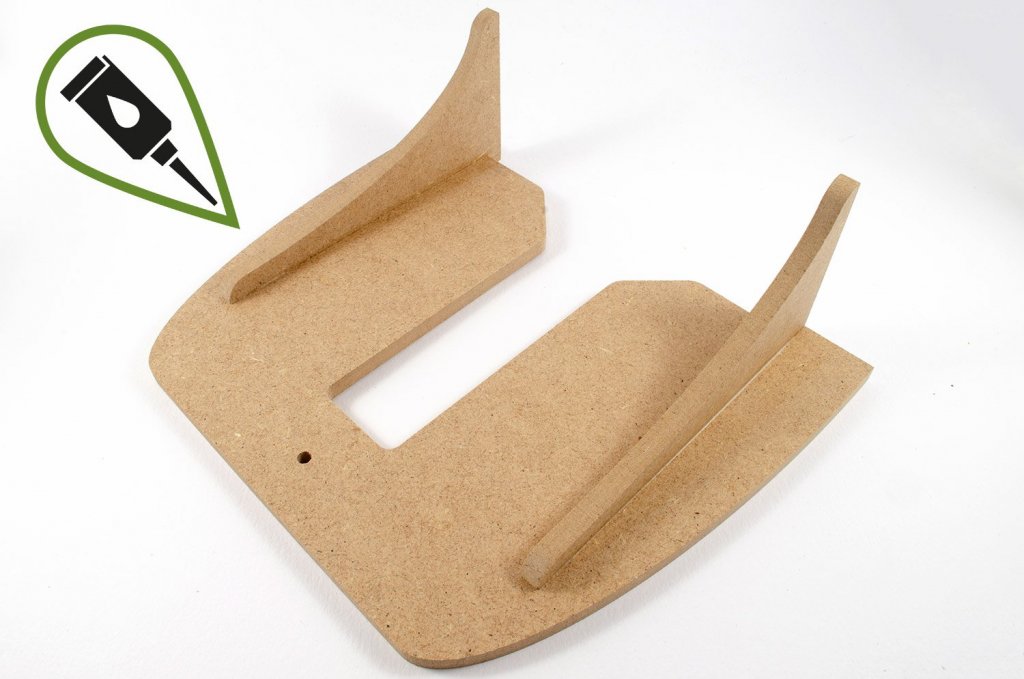
-
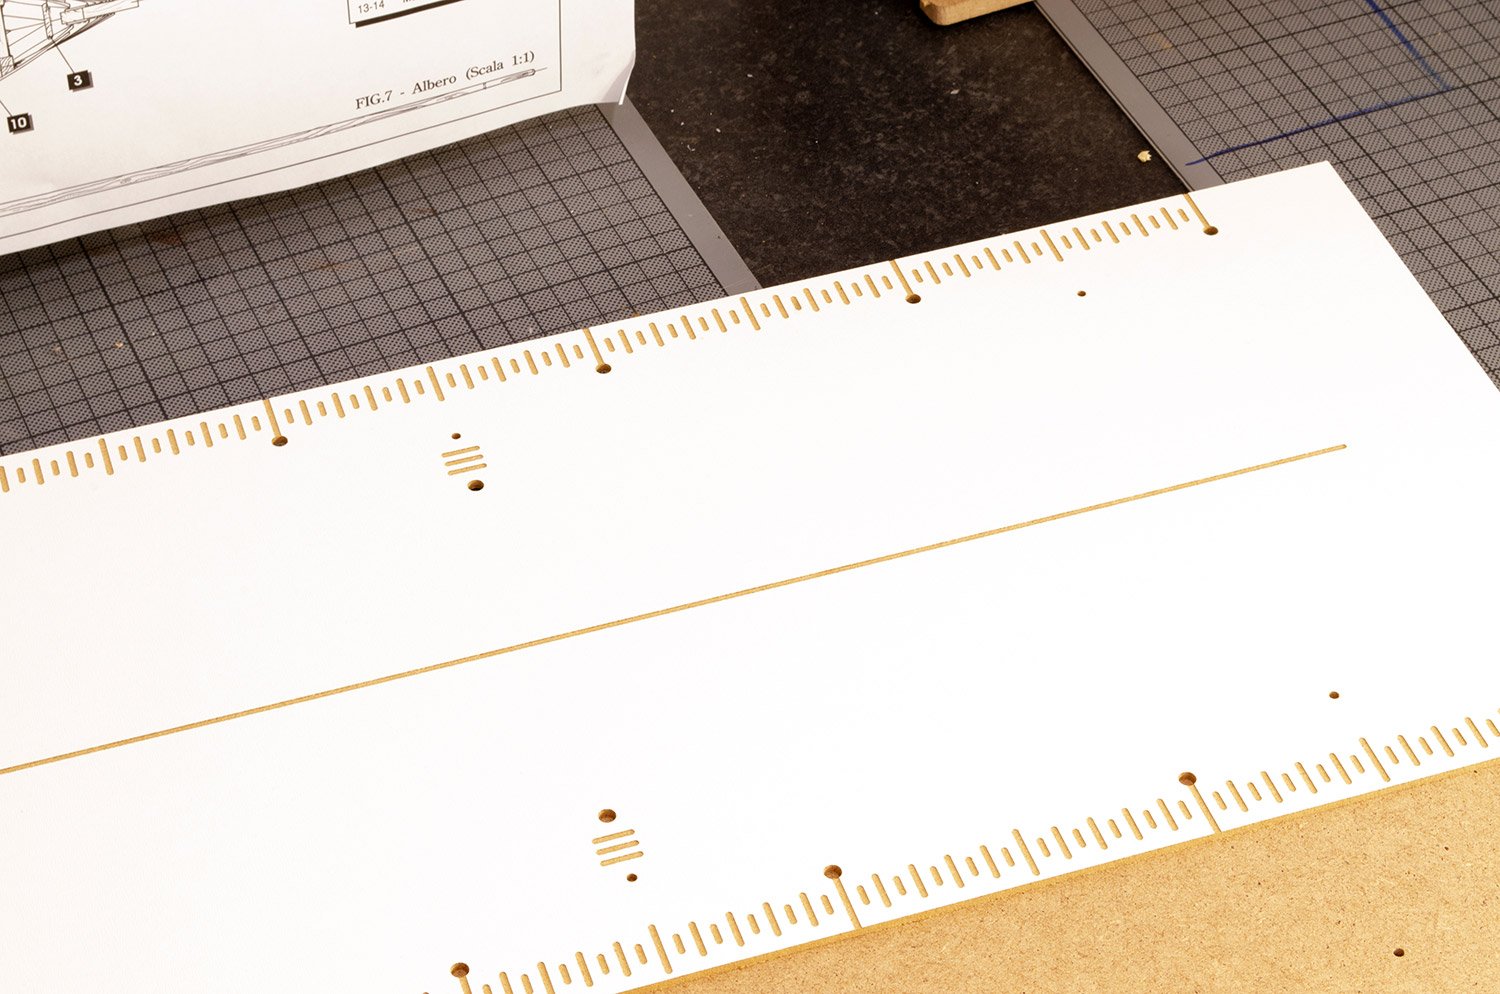
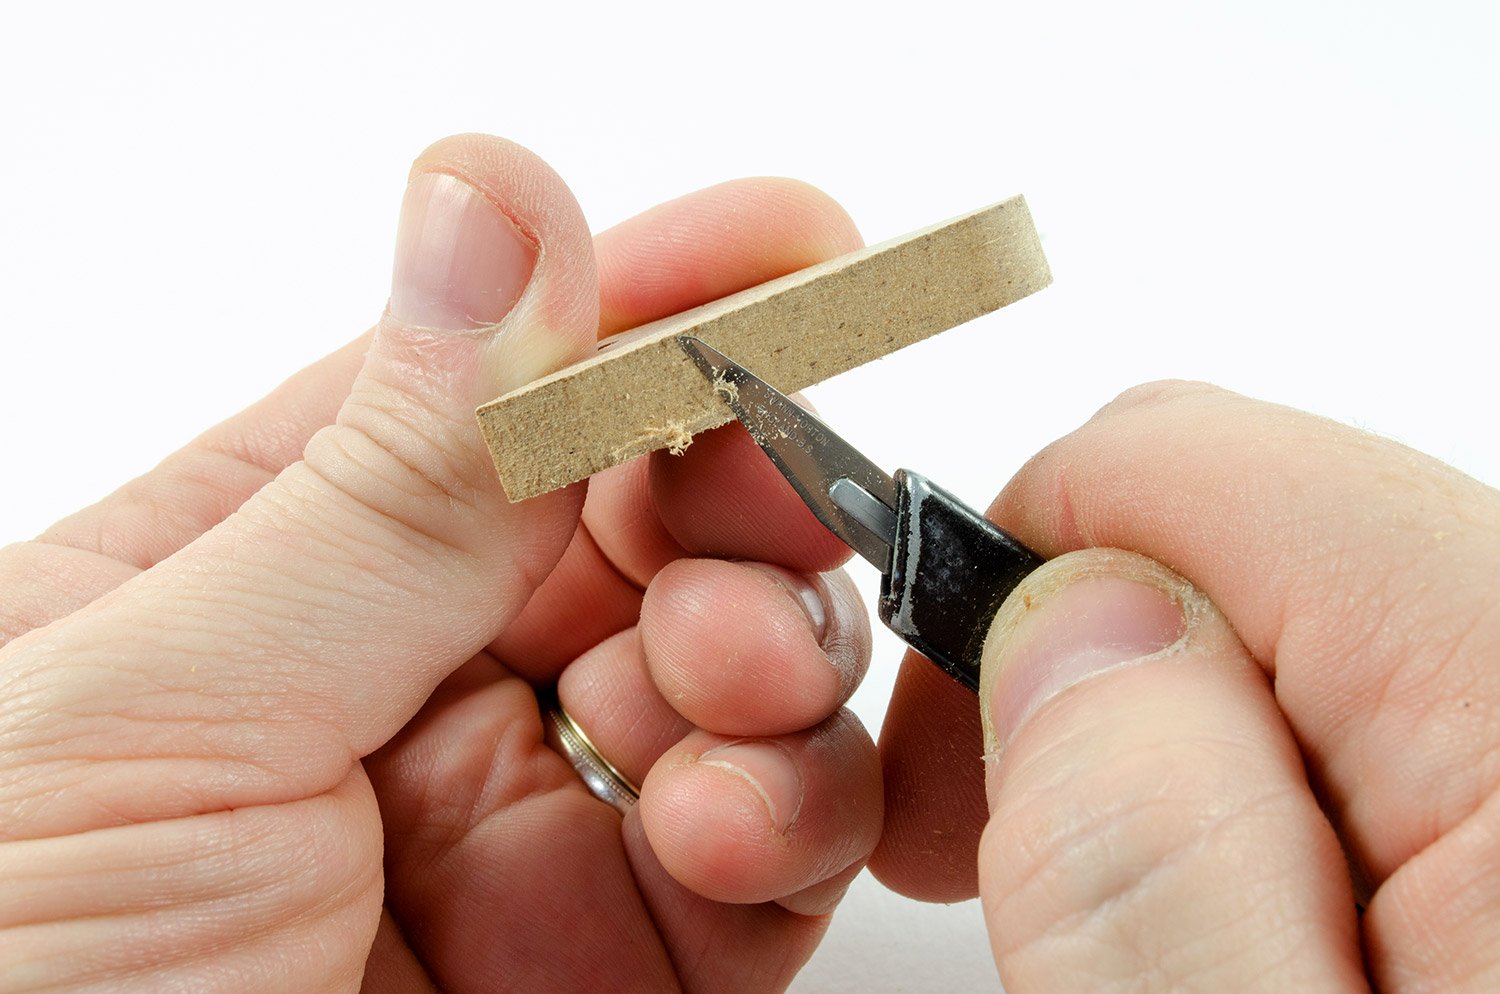
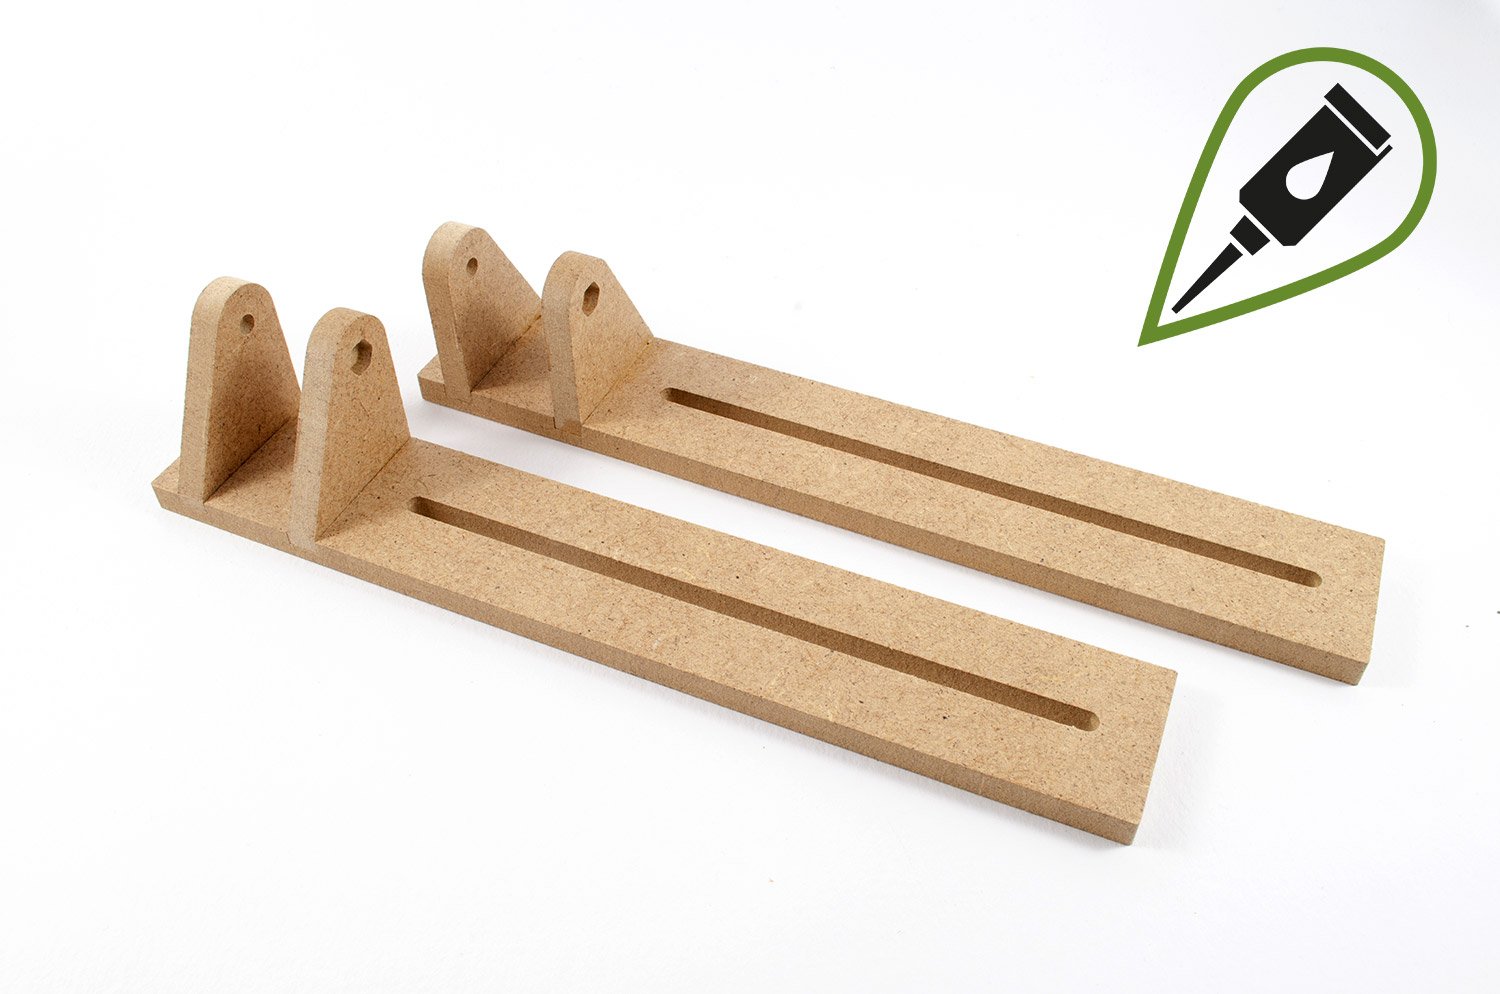
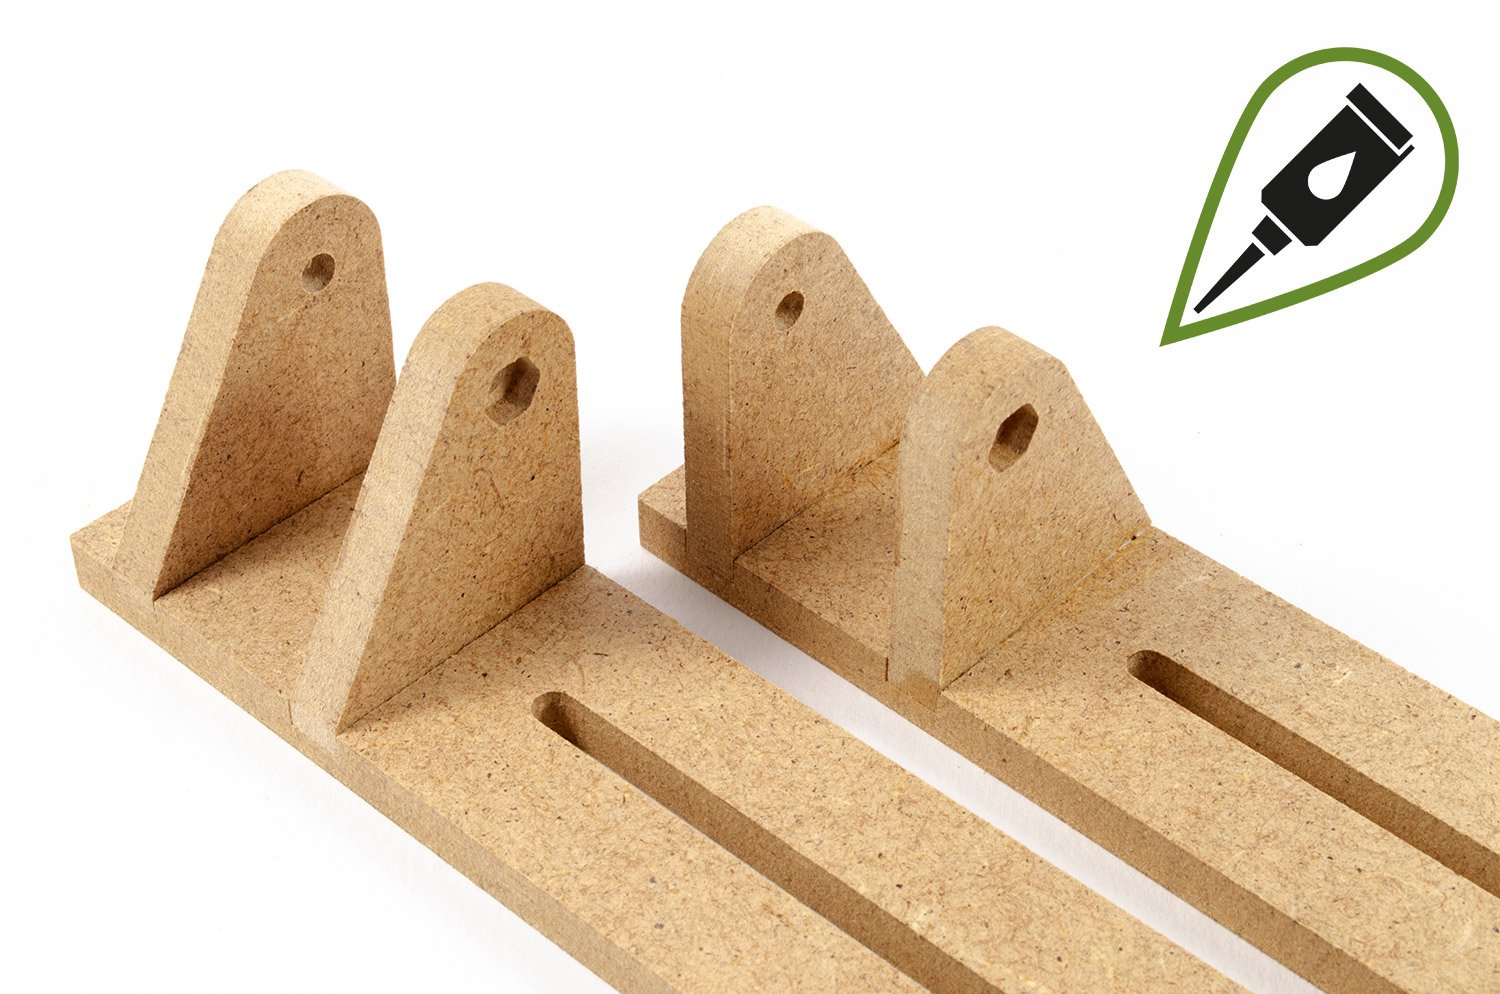
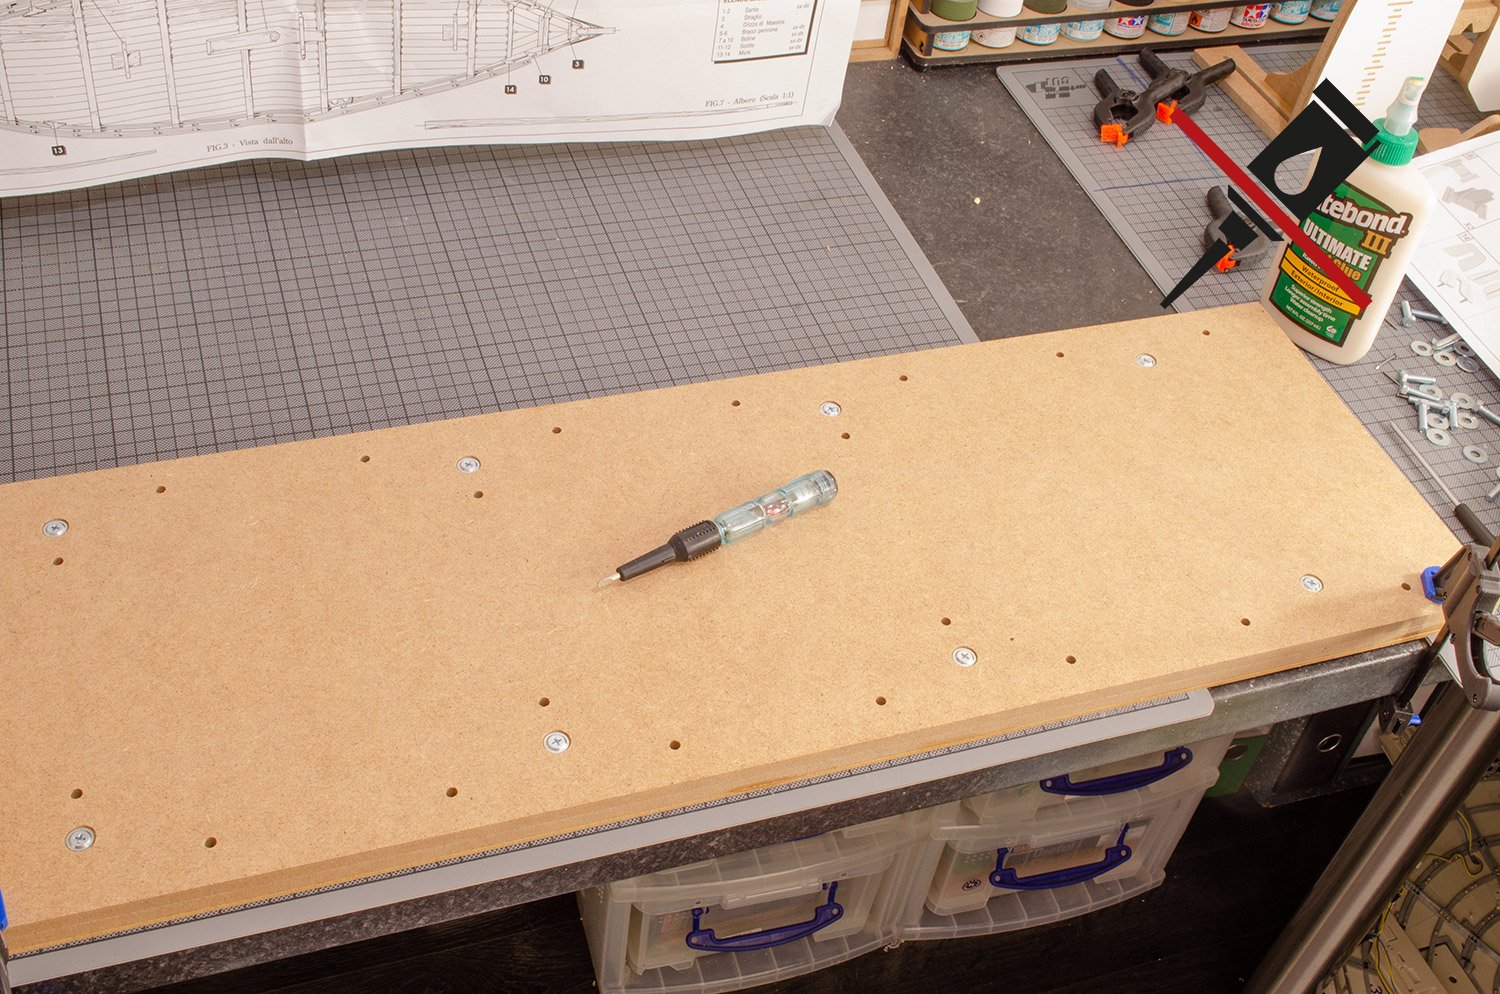
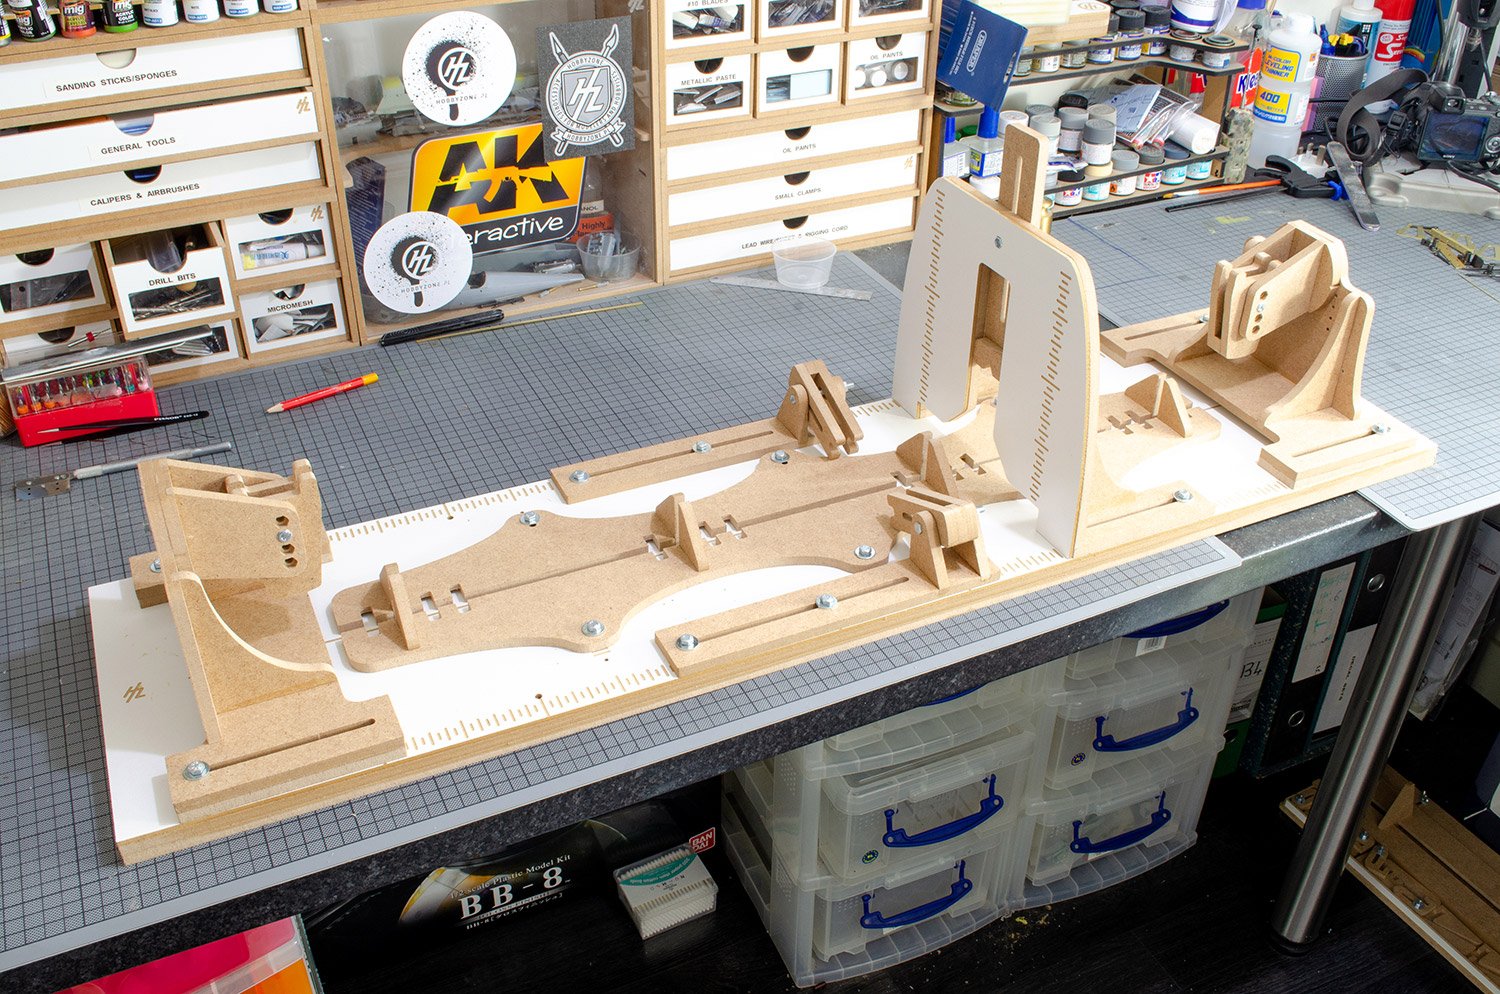
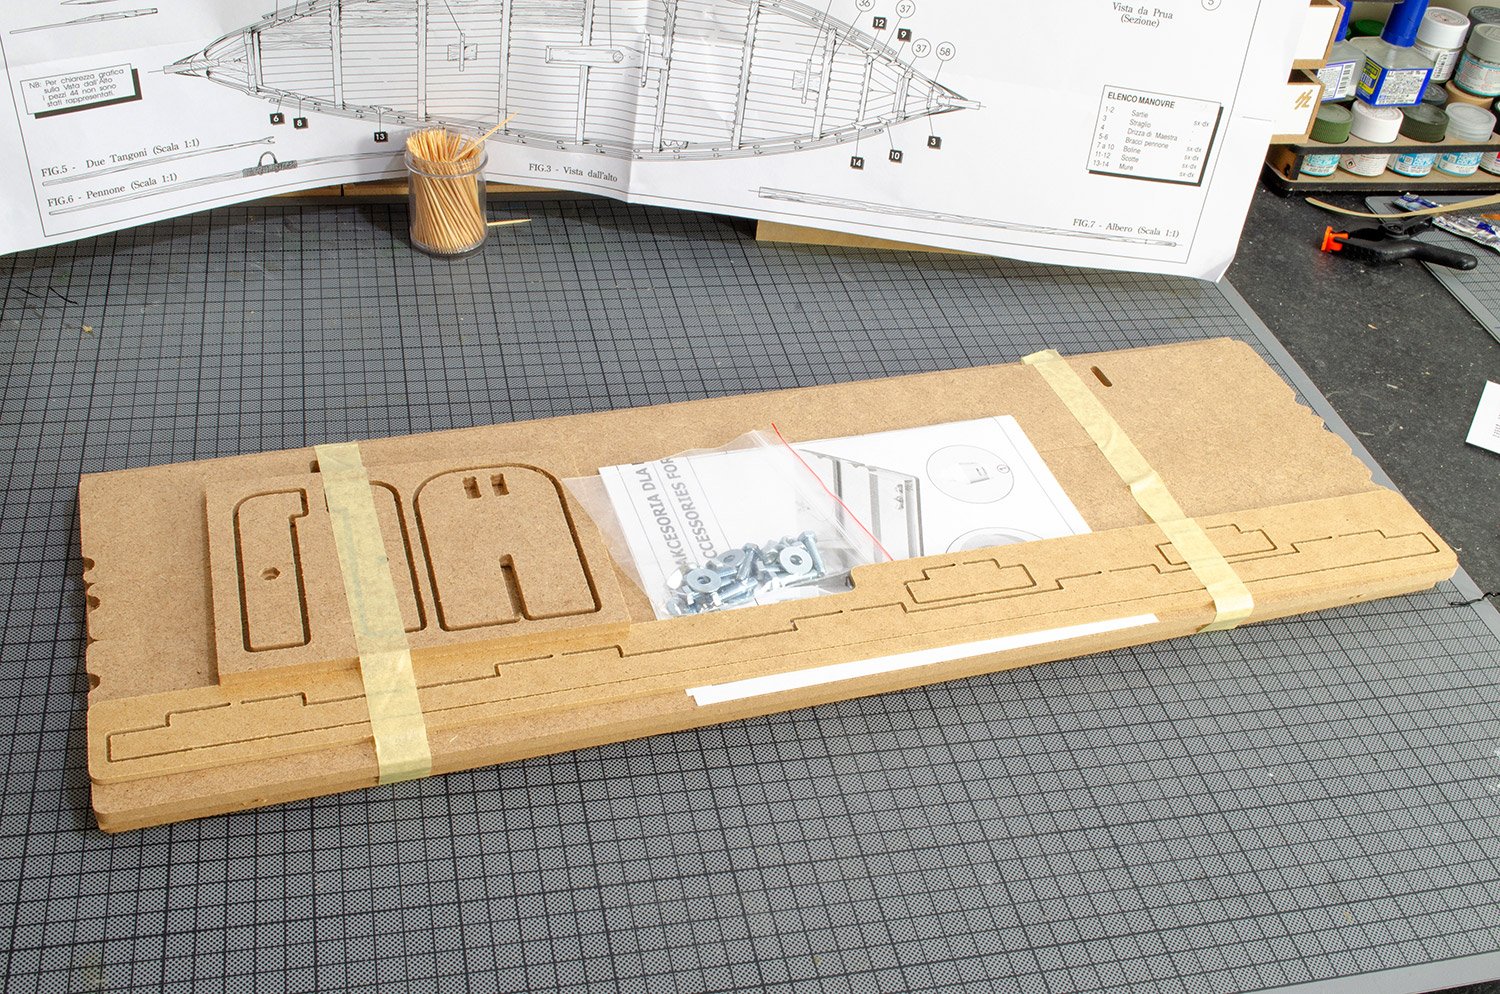
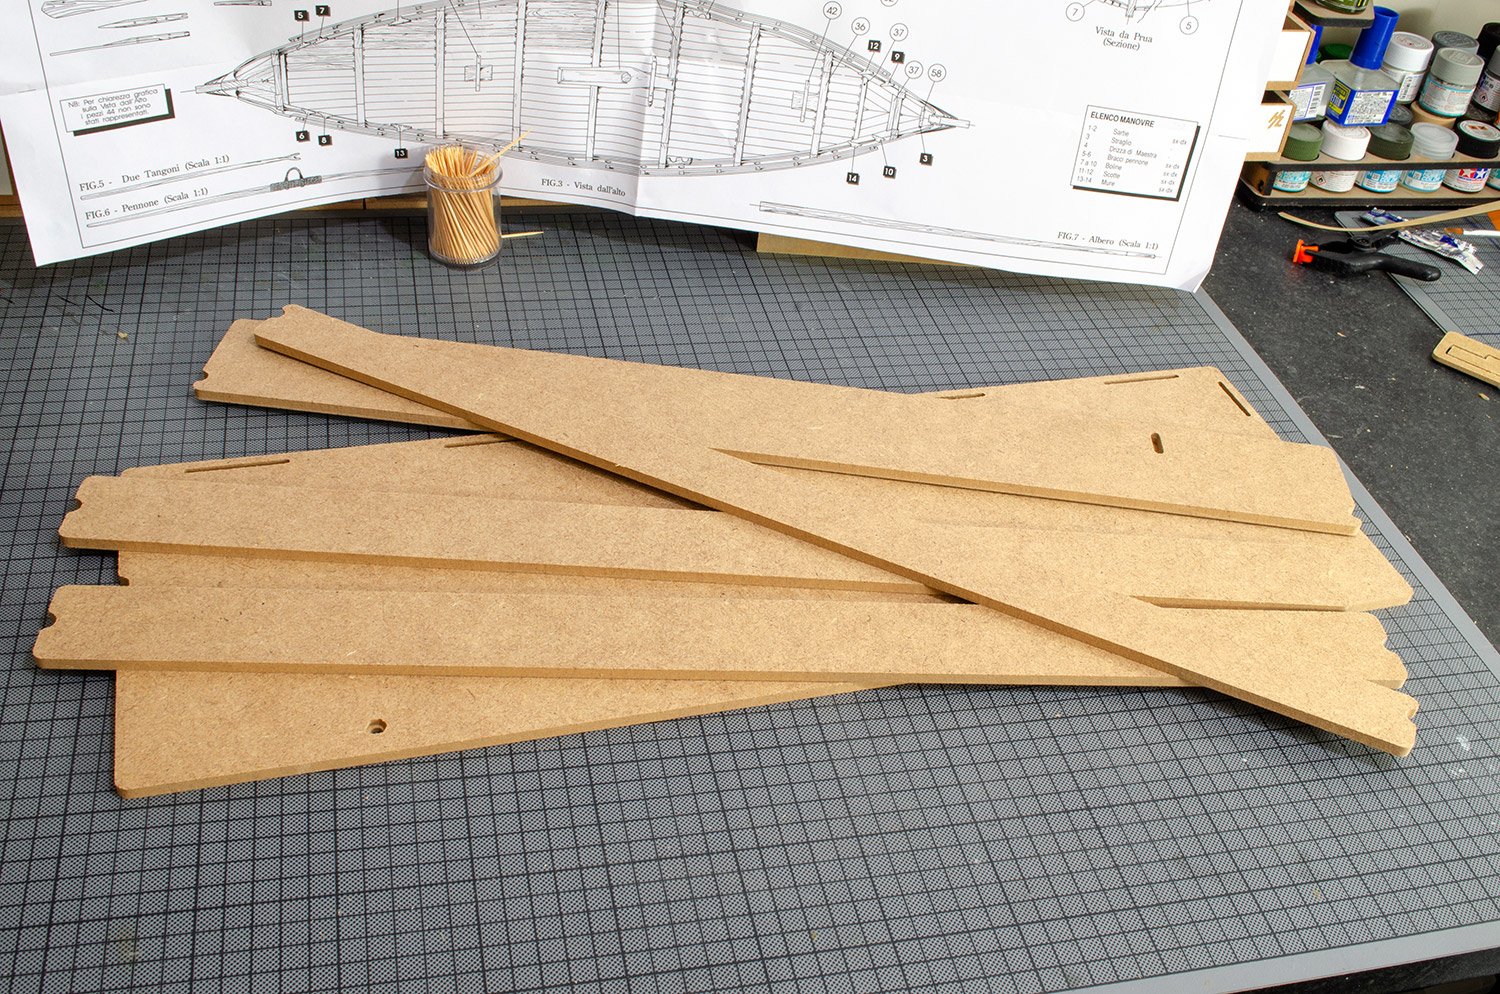
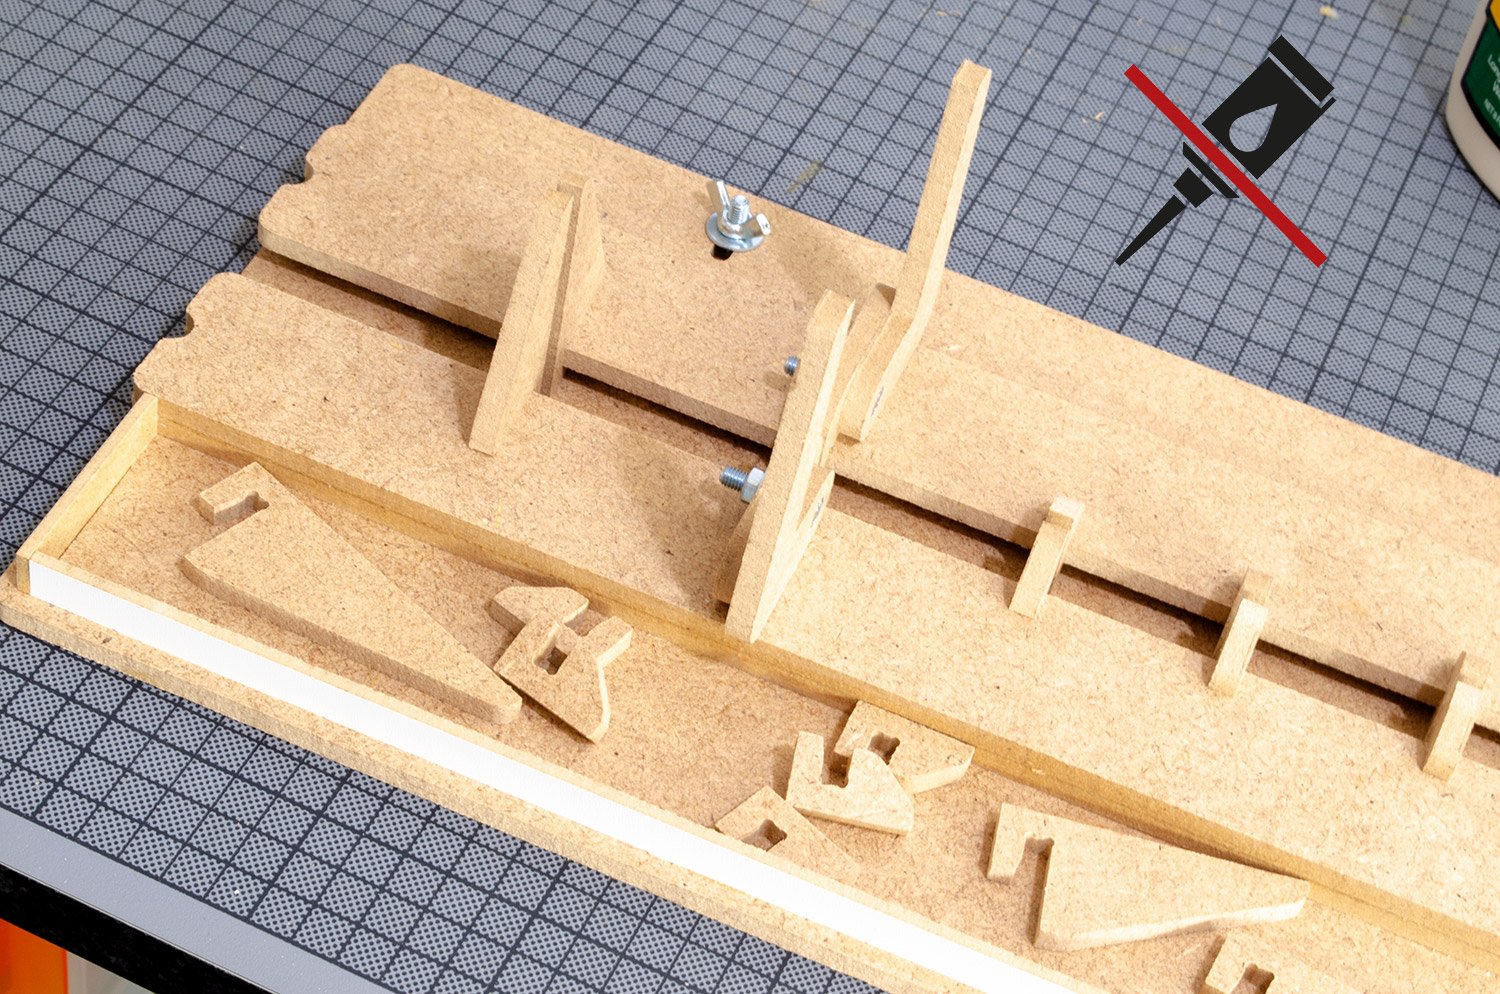
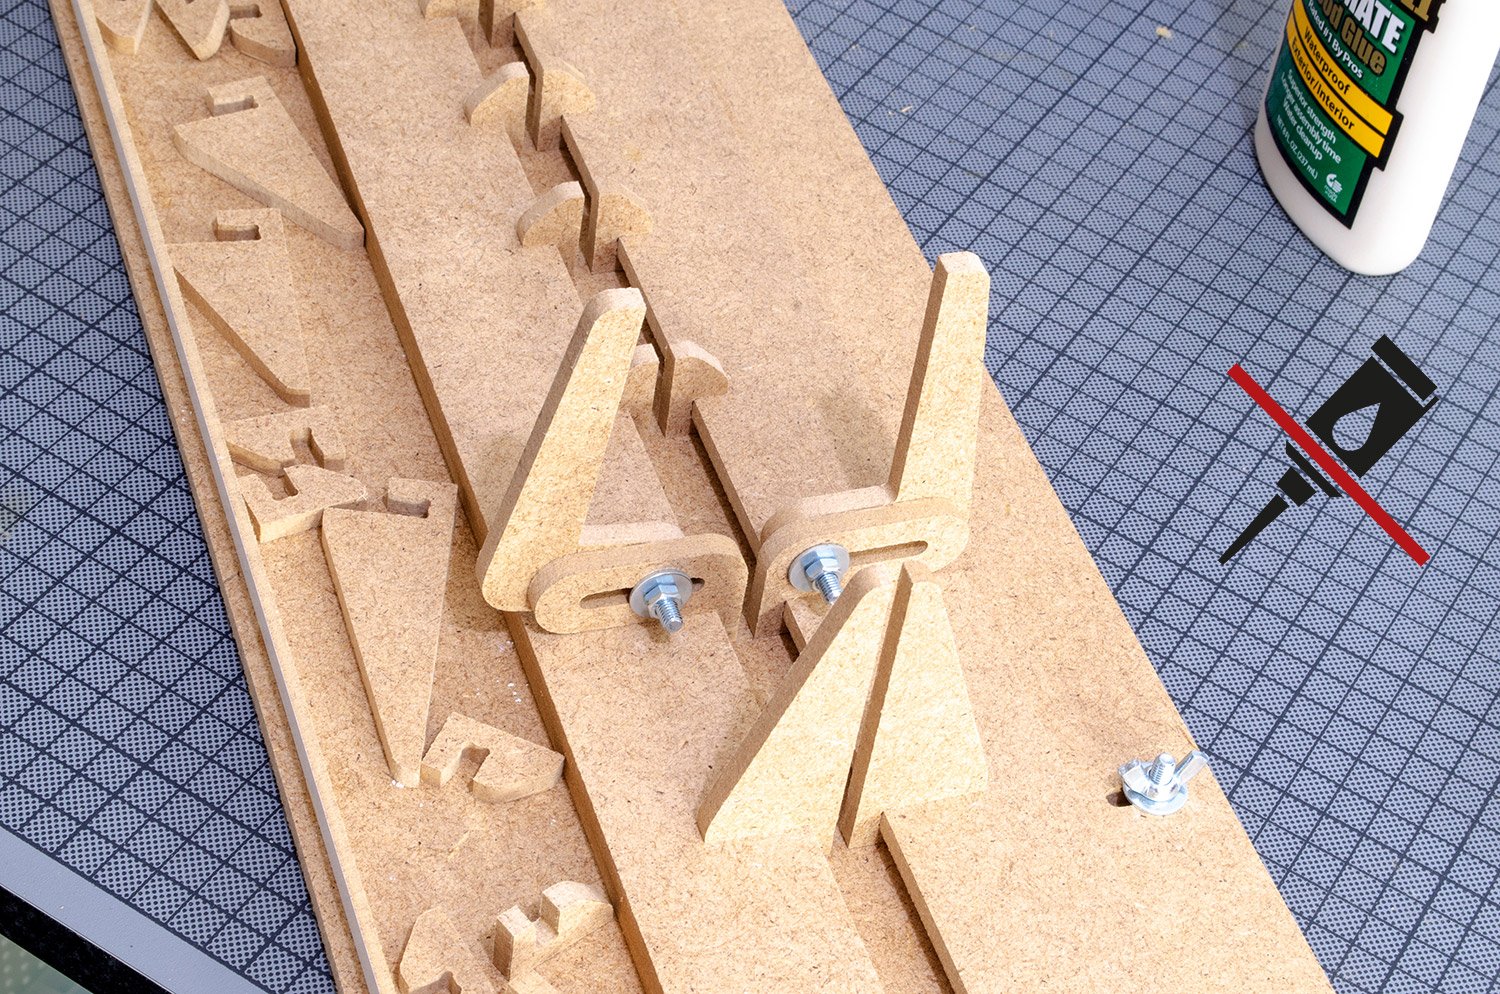
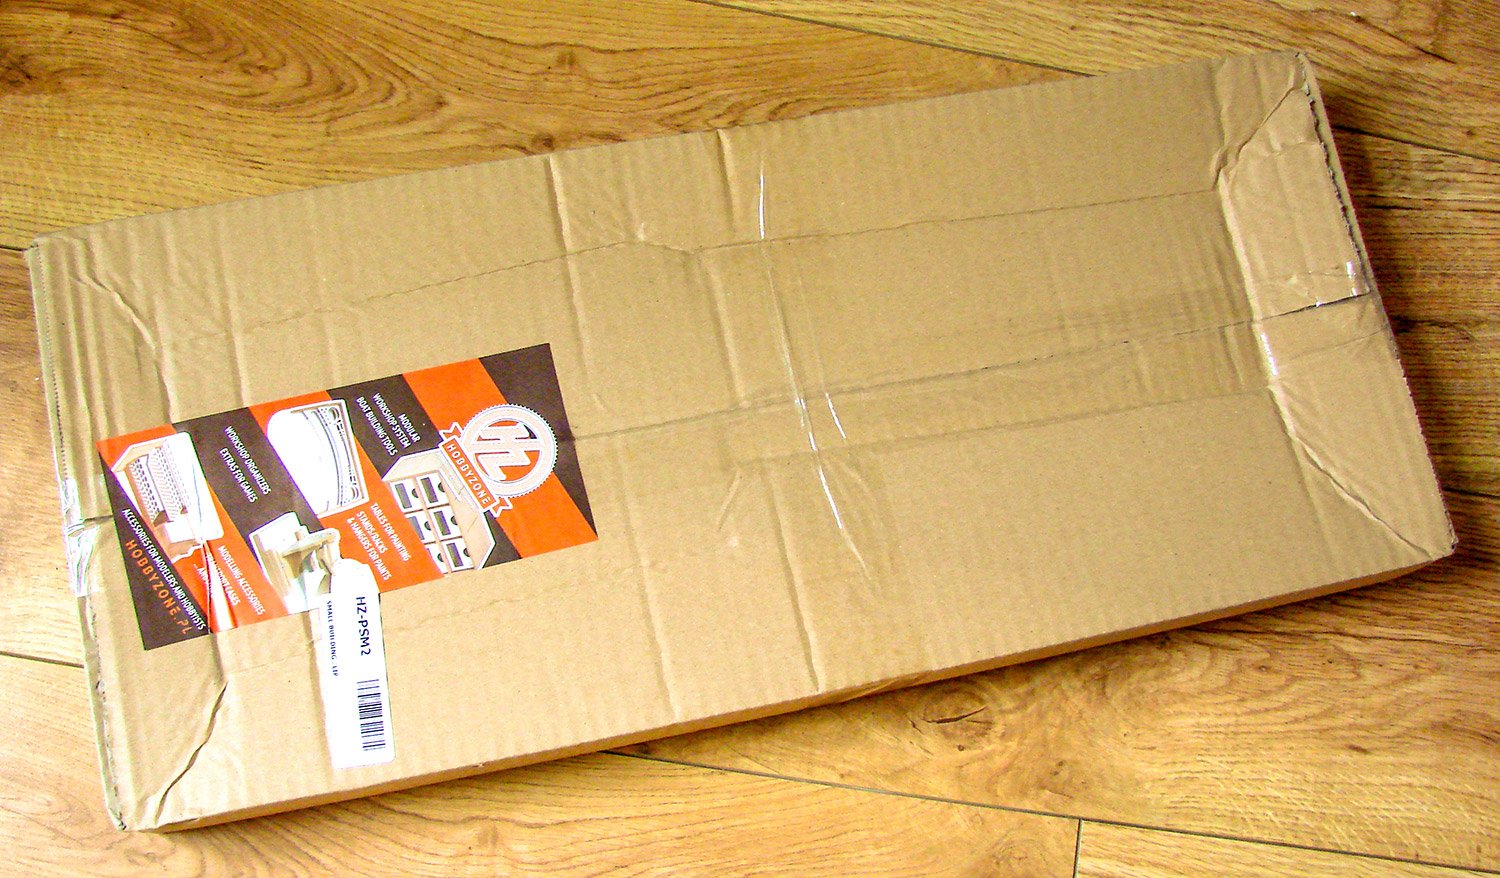
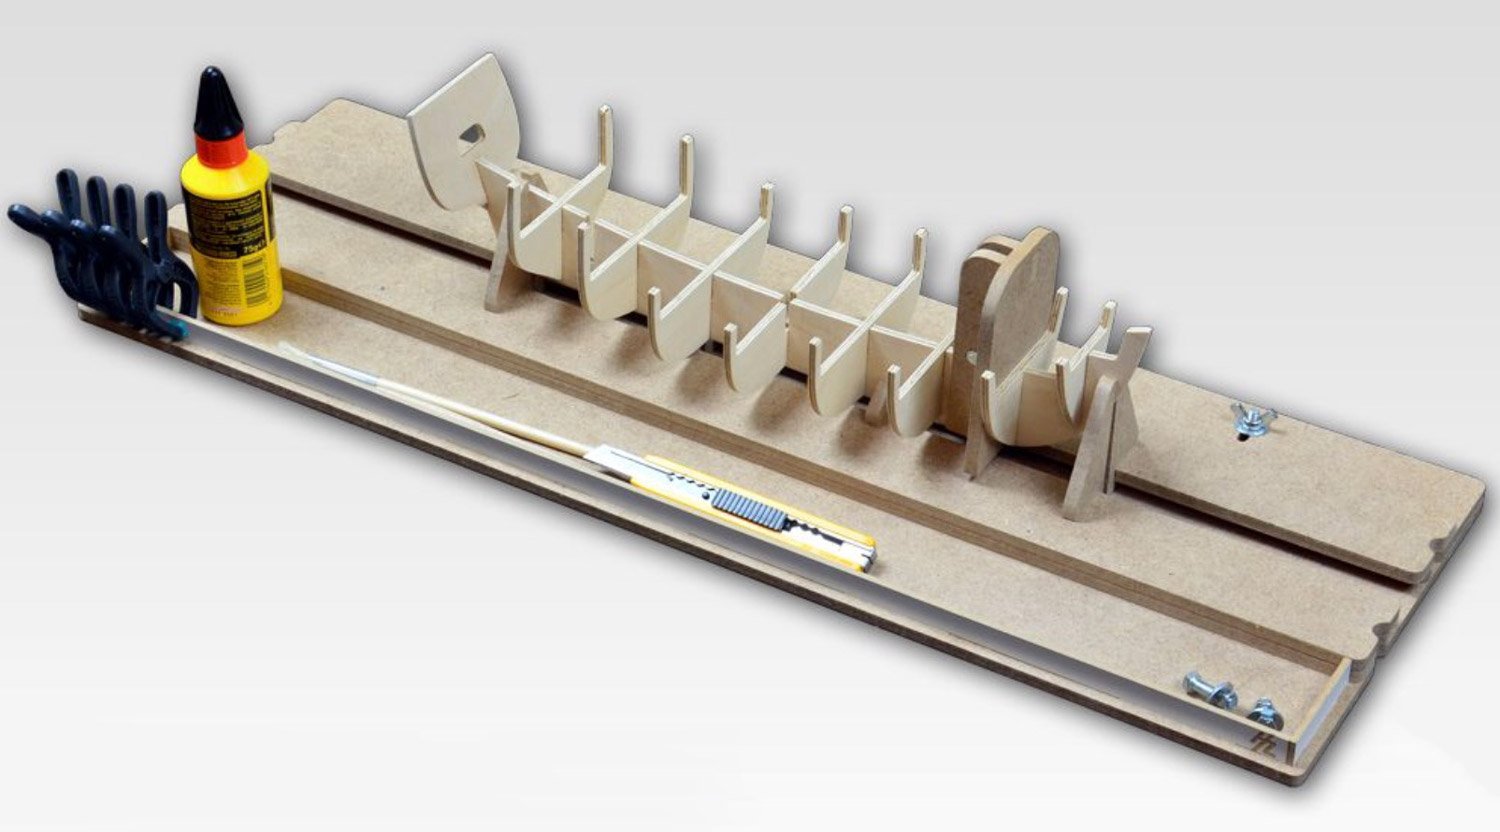
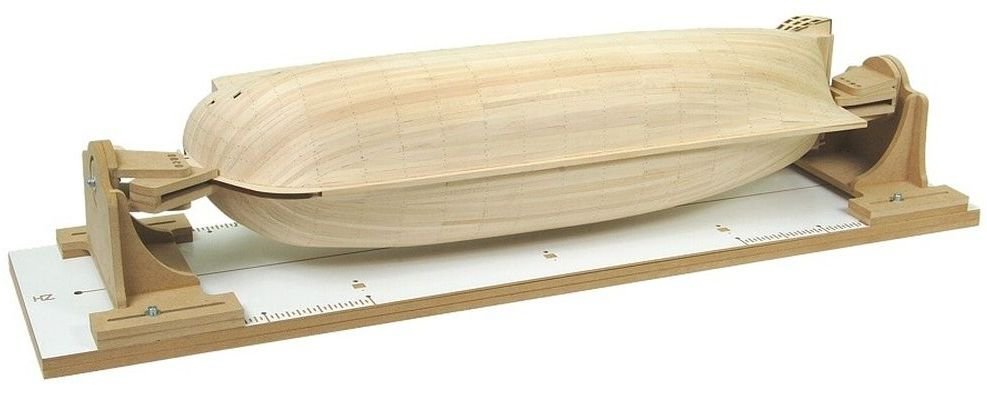
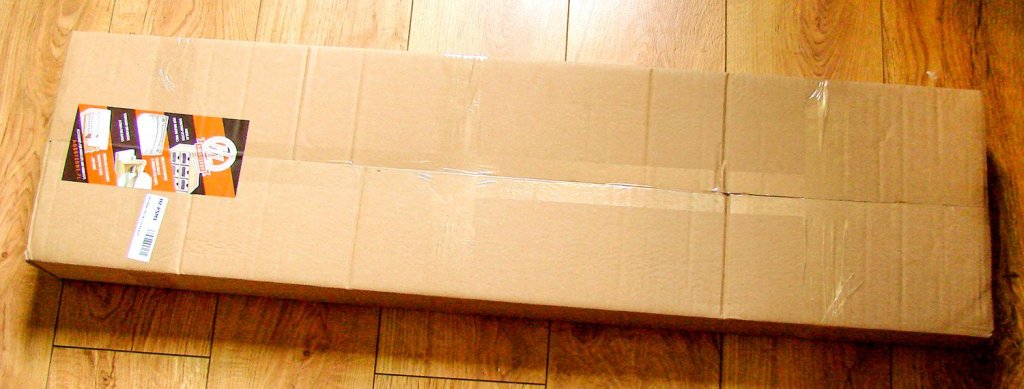
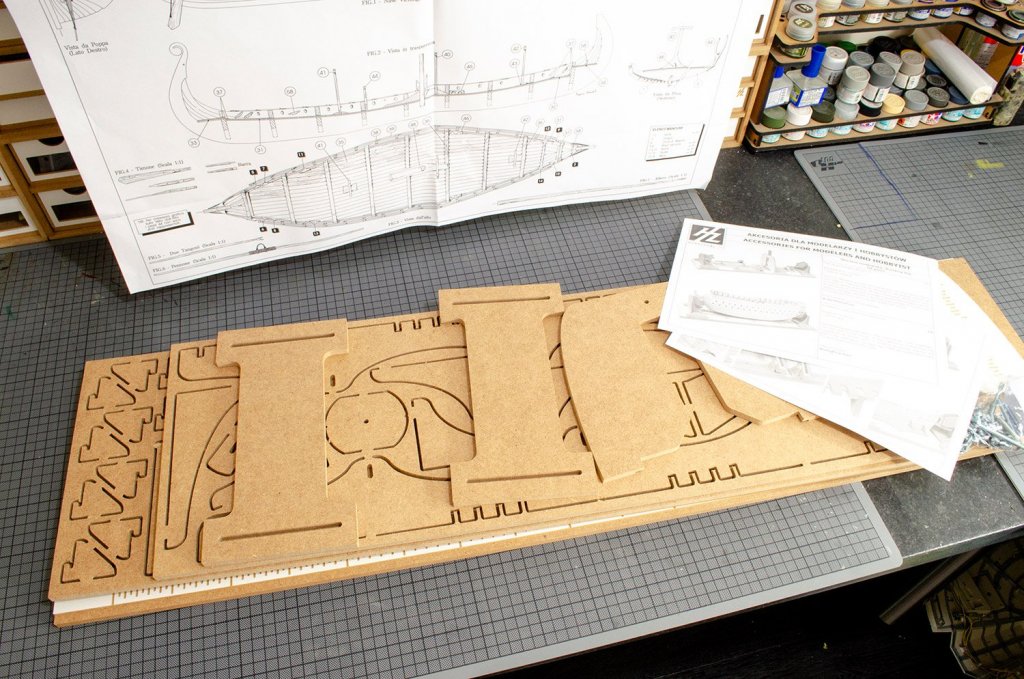
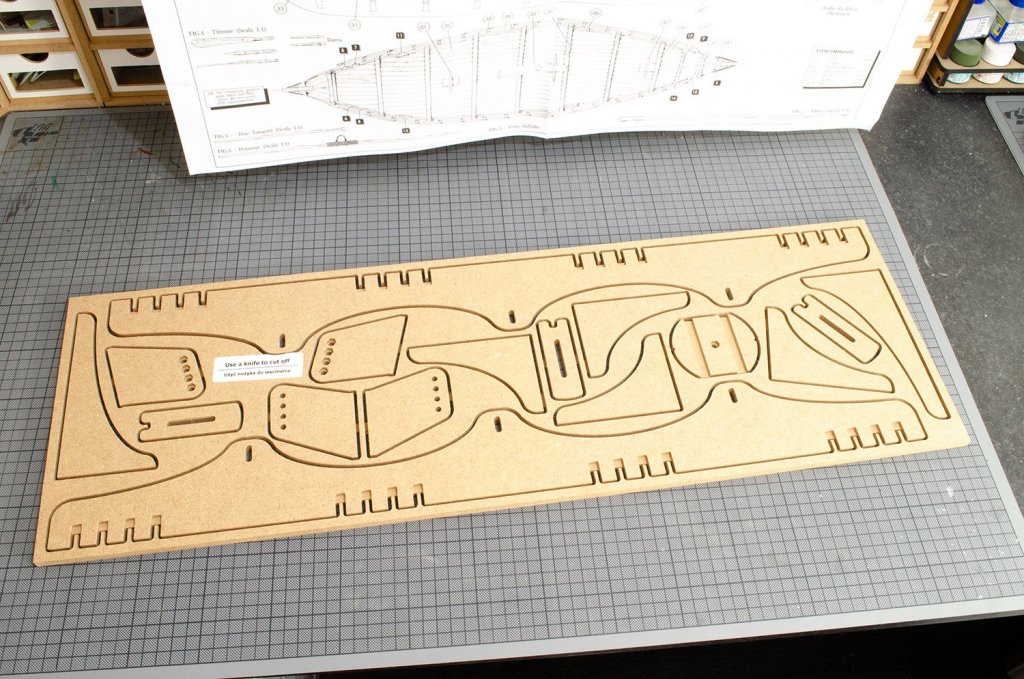
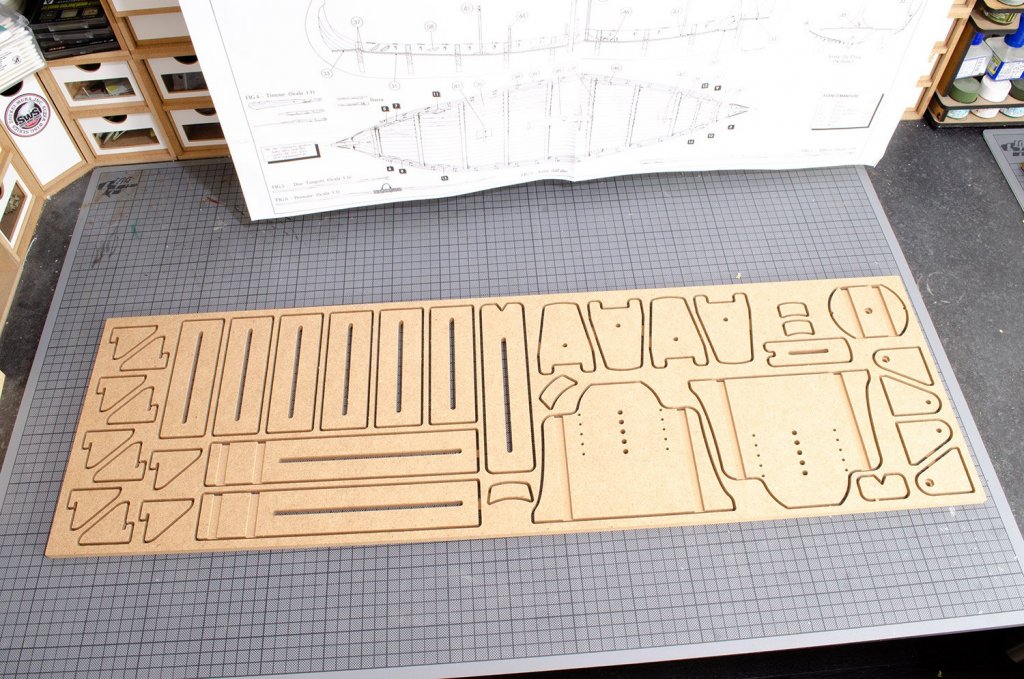
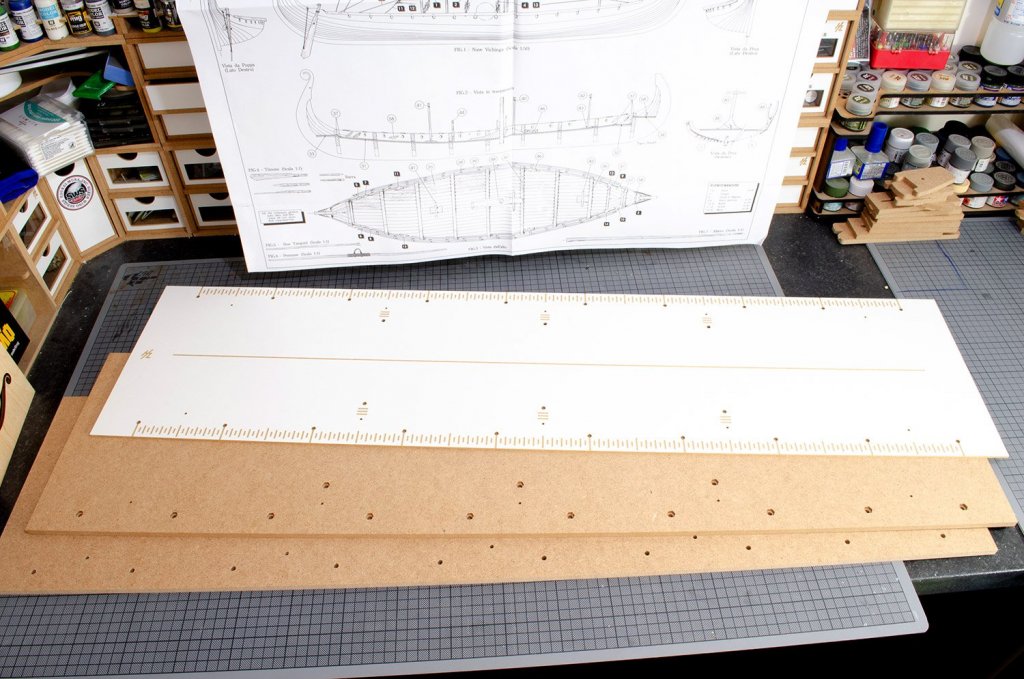
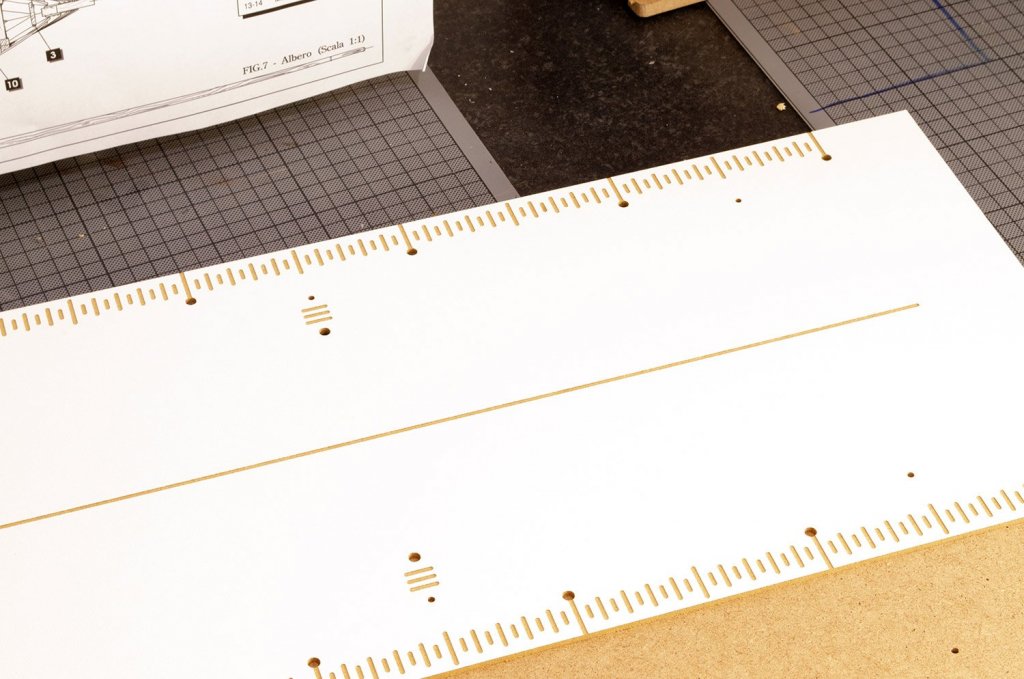
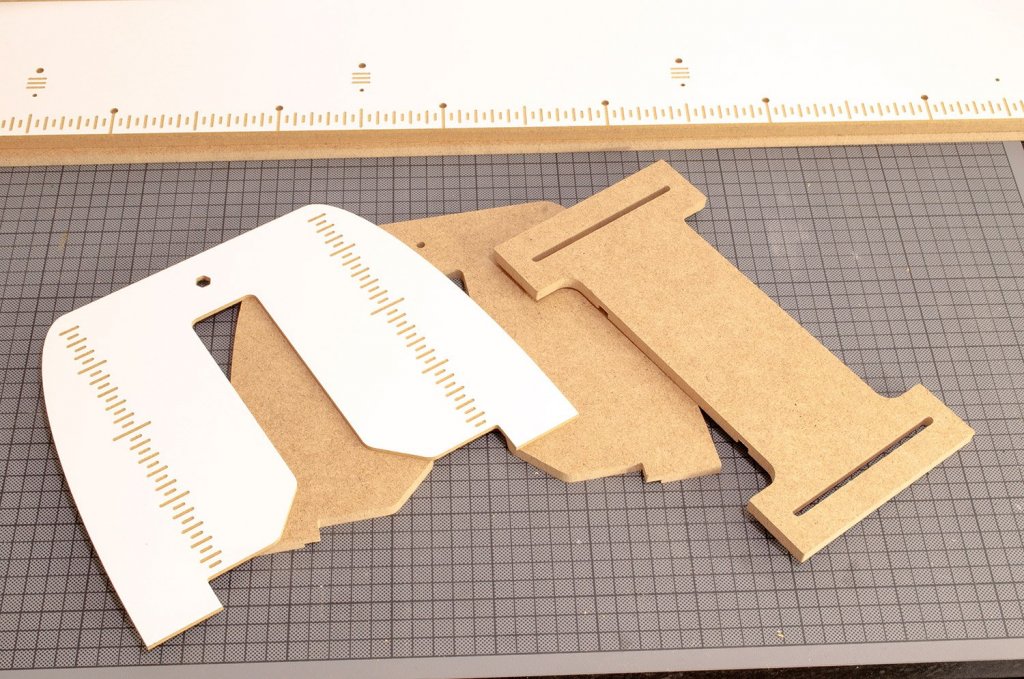
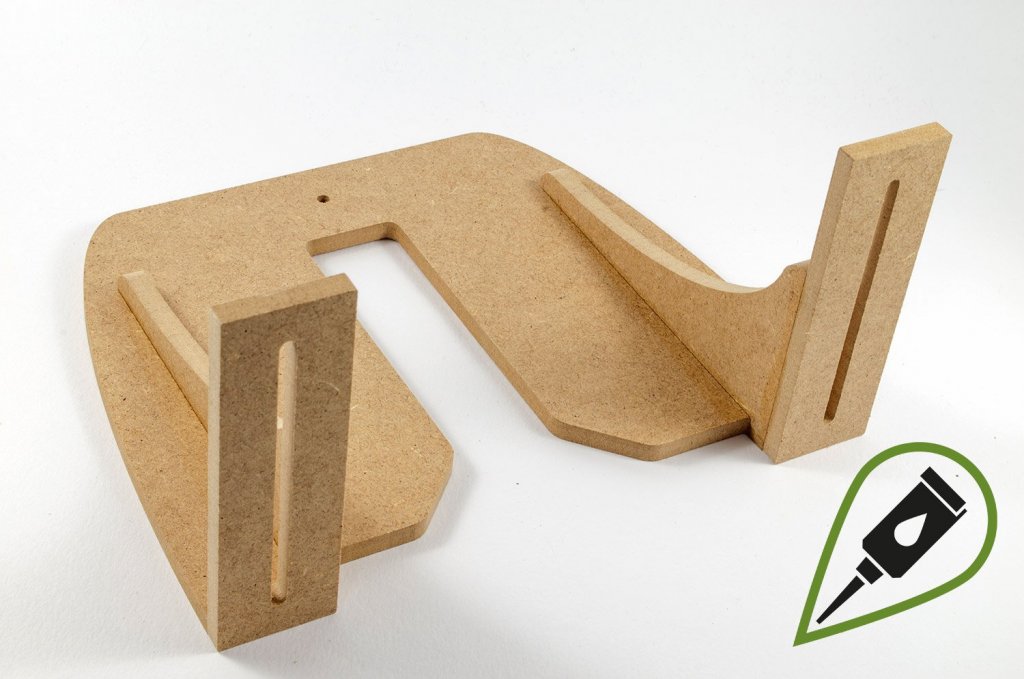
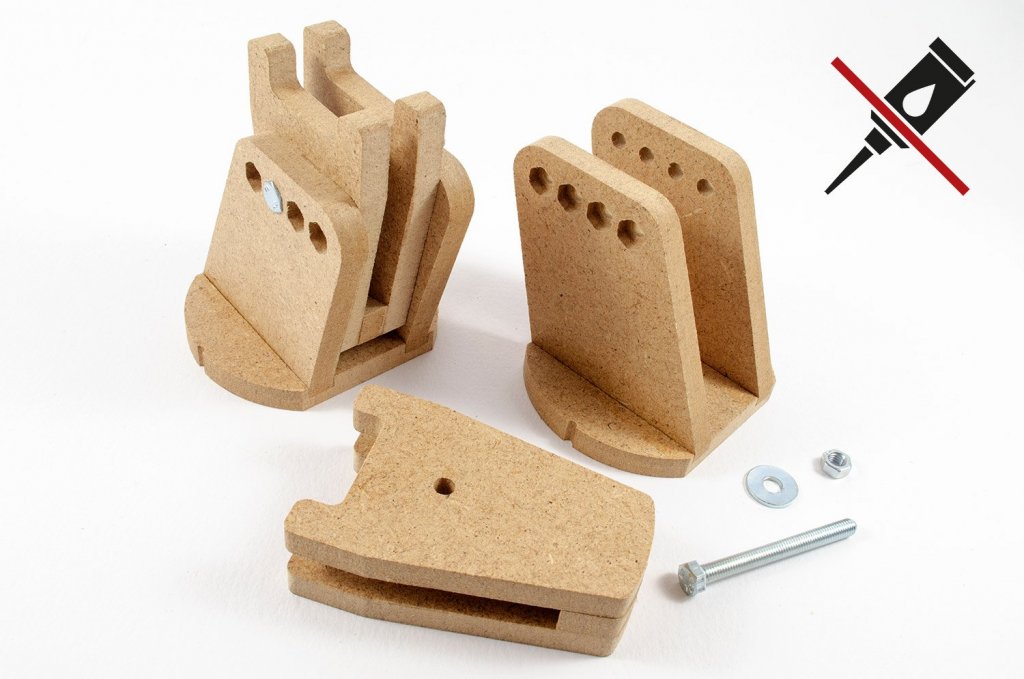
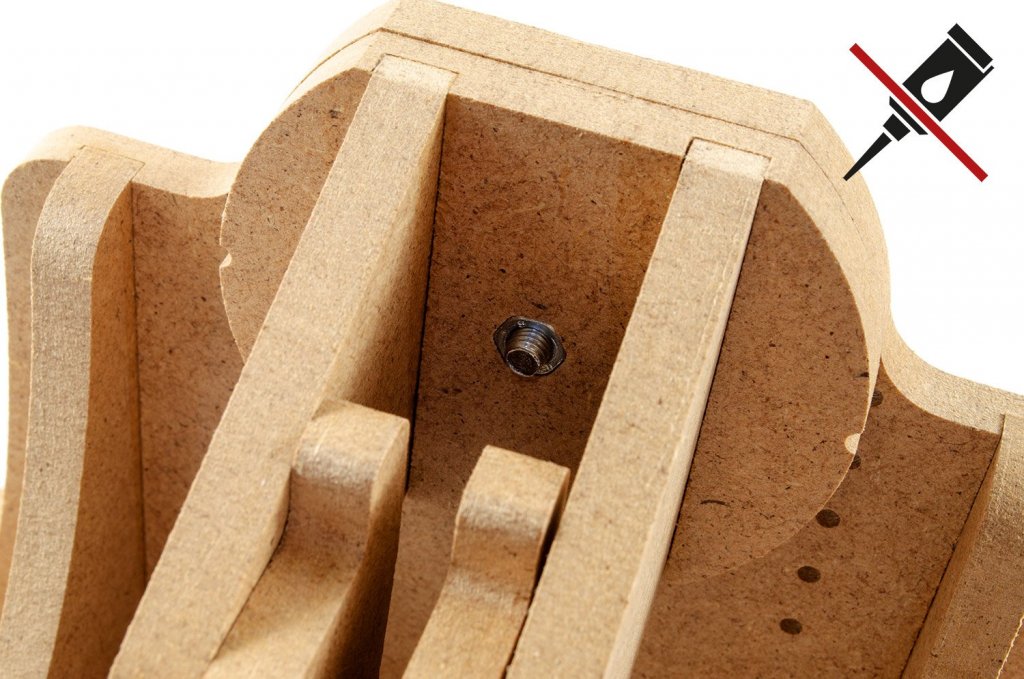
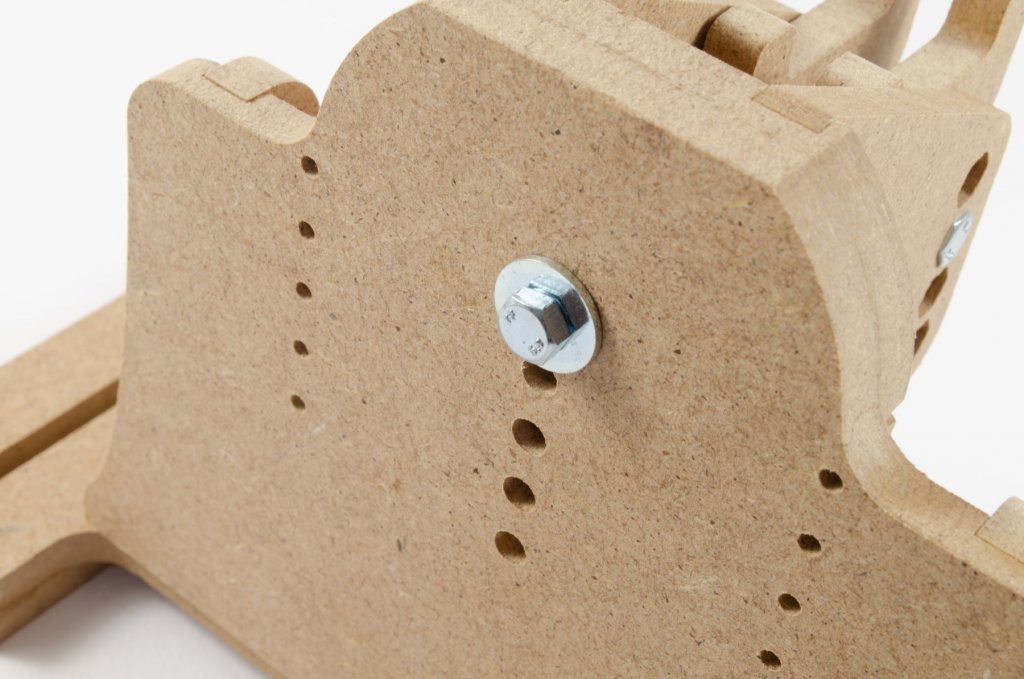
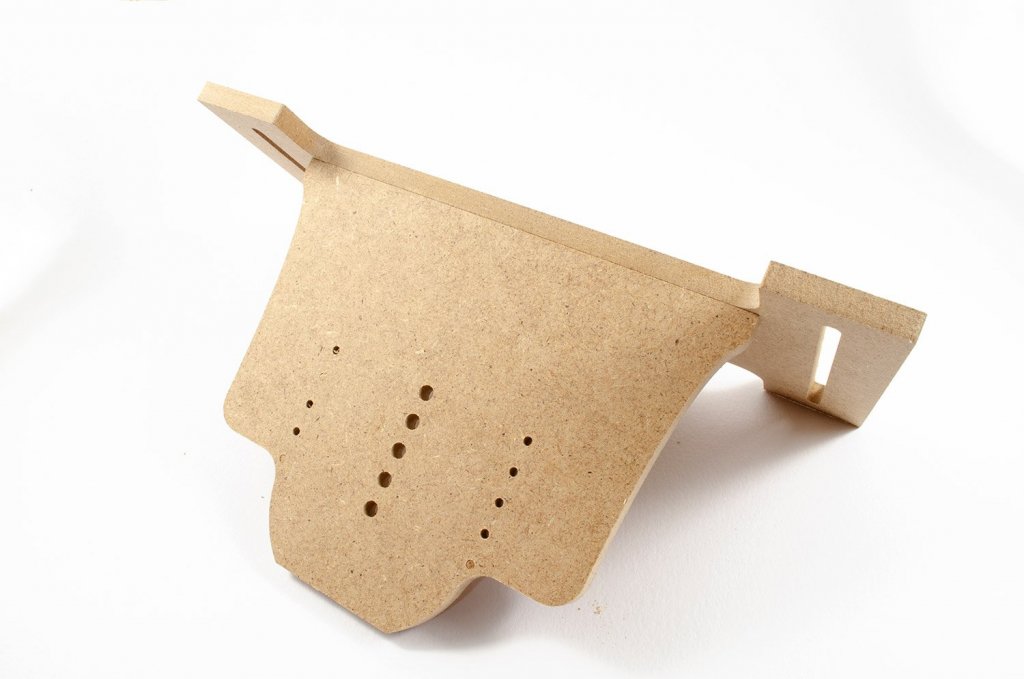
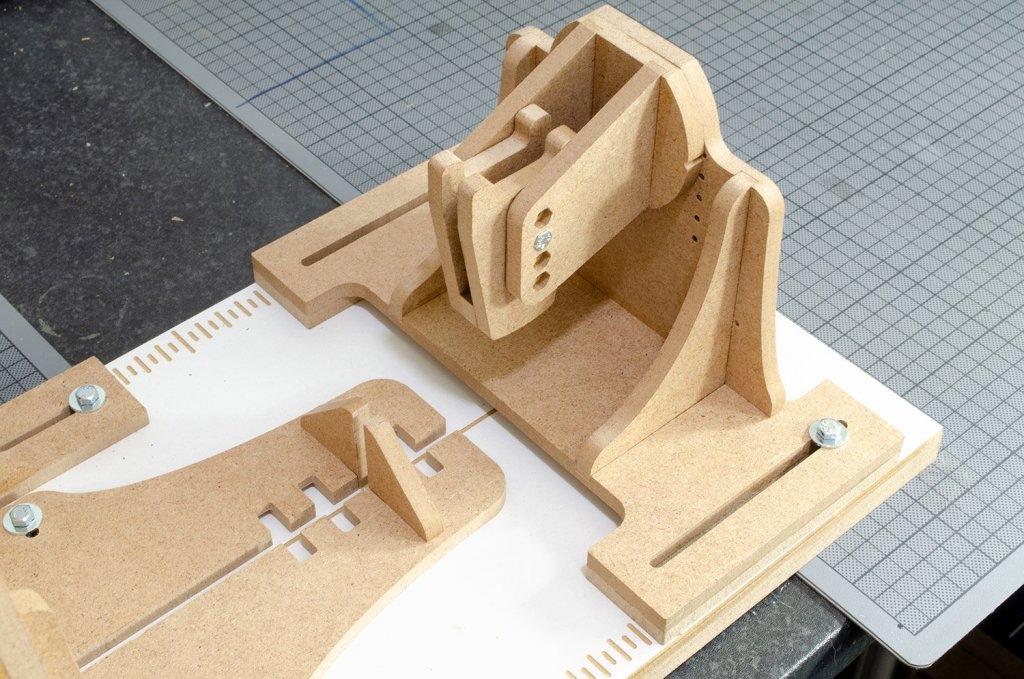
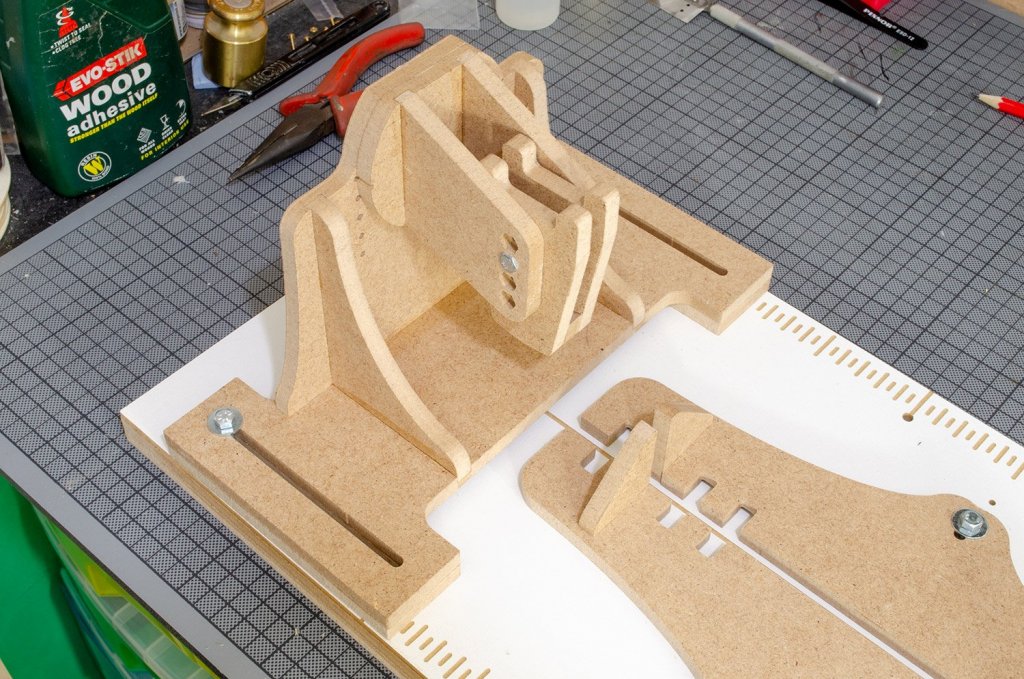
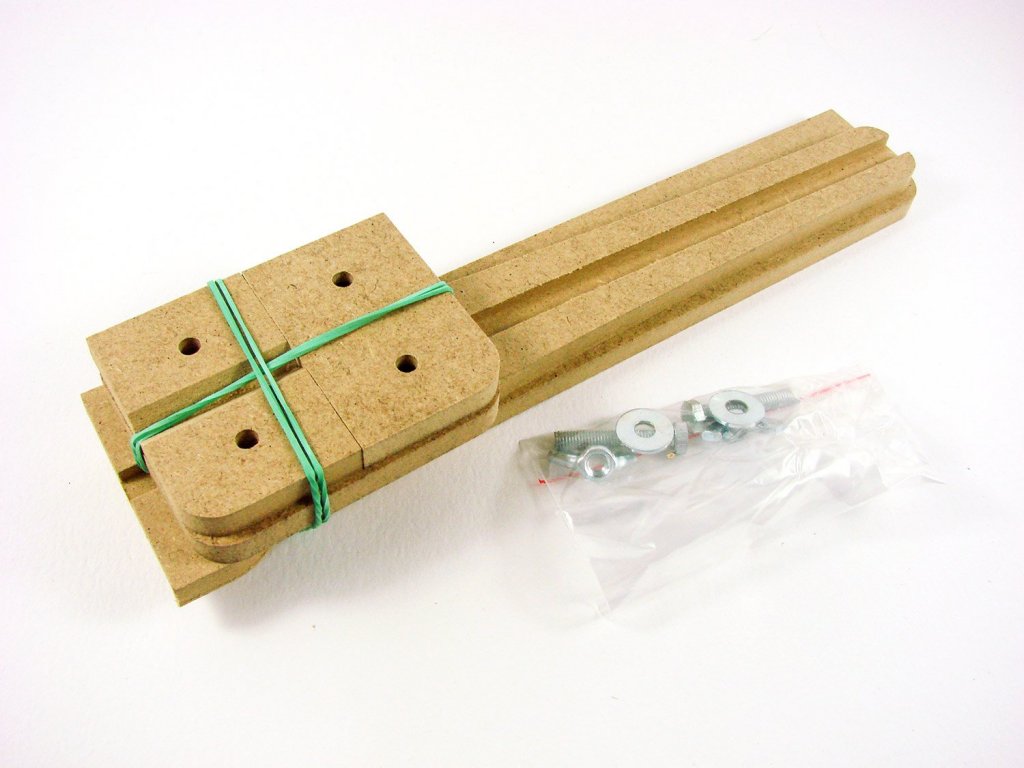
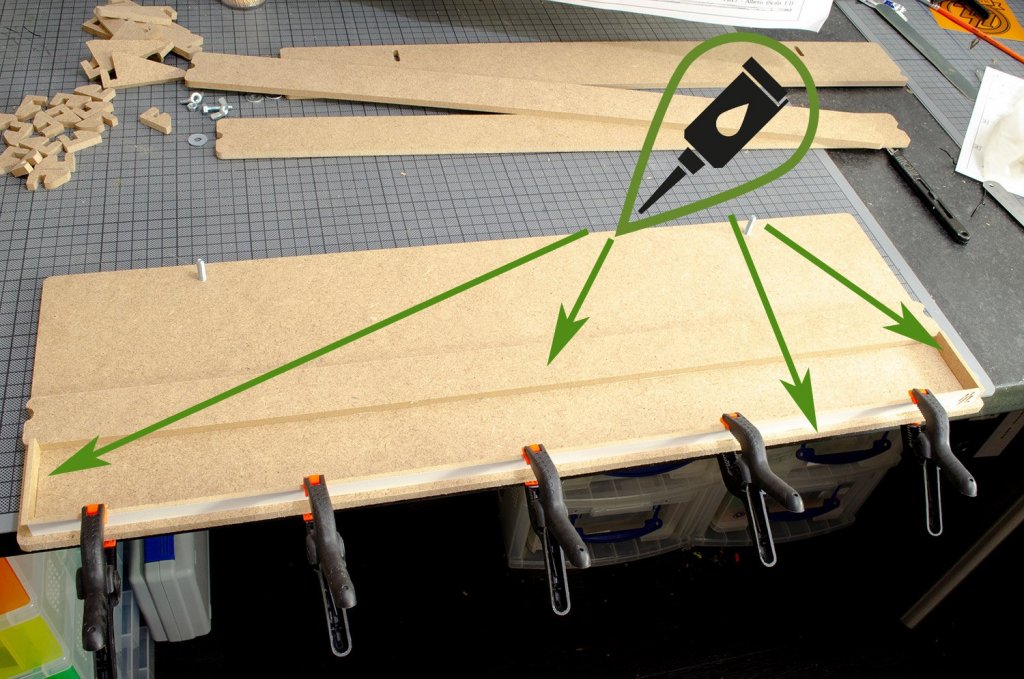
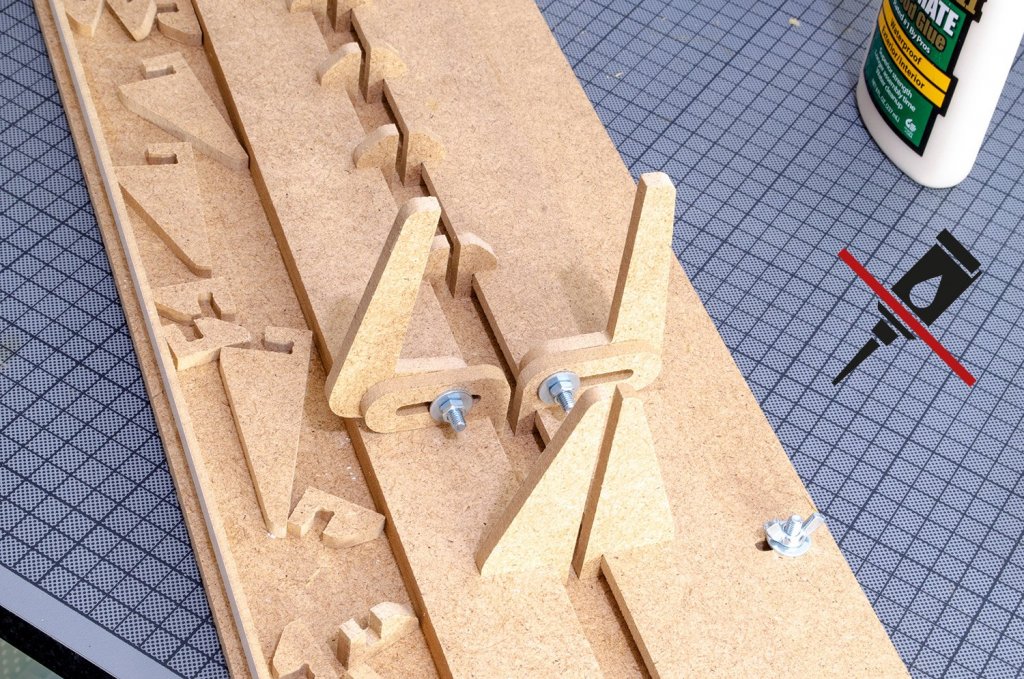
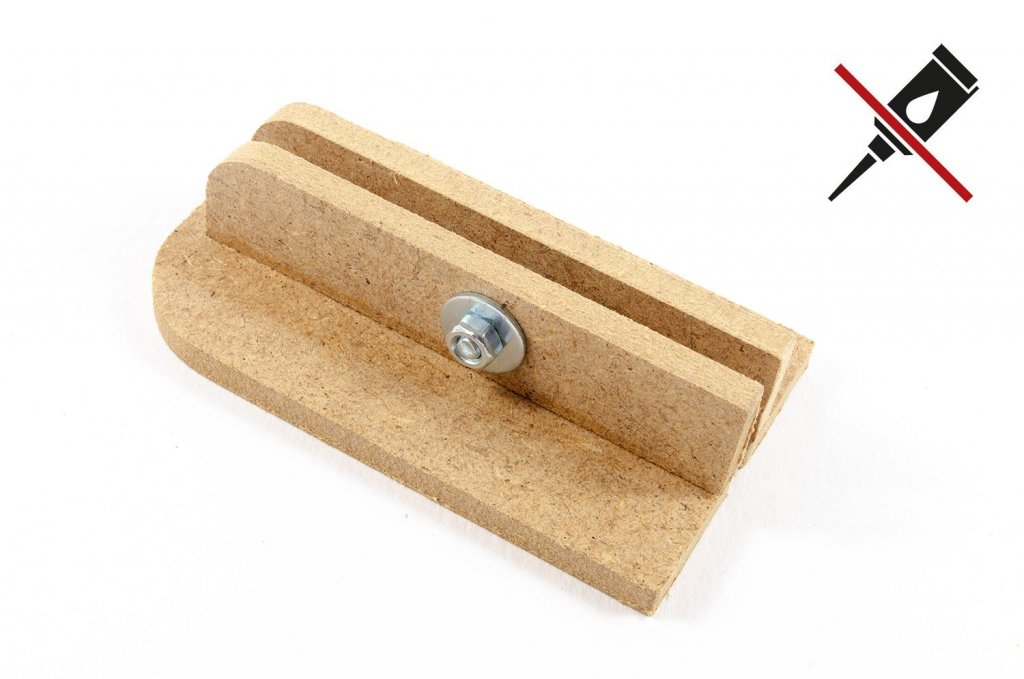
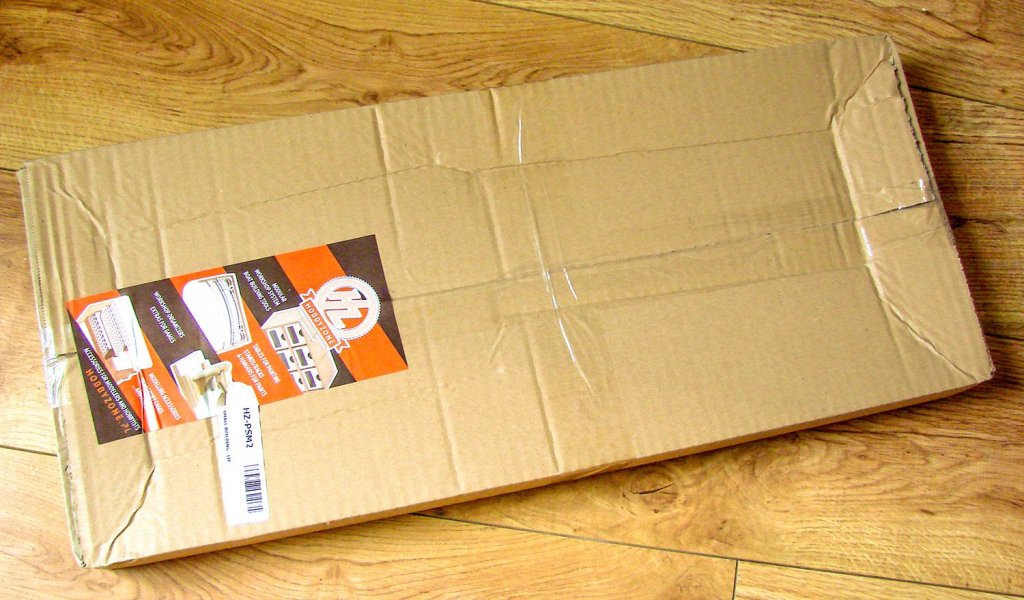
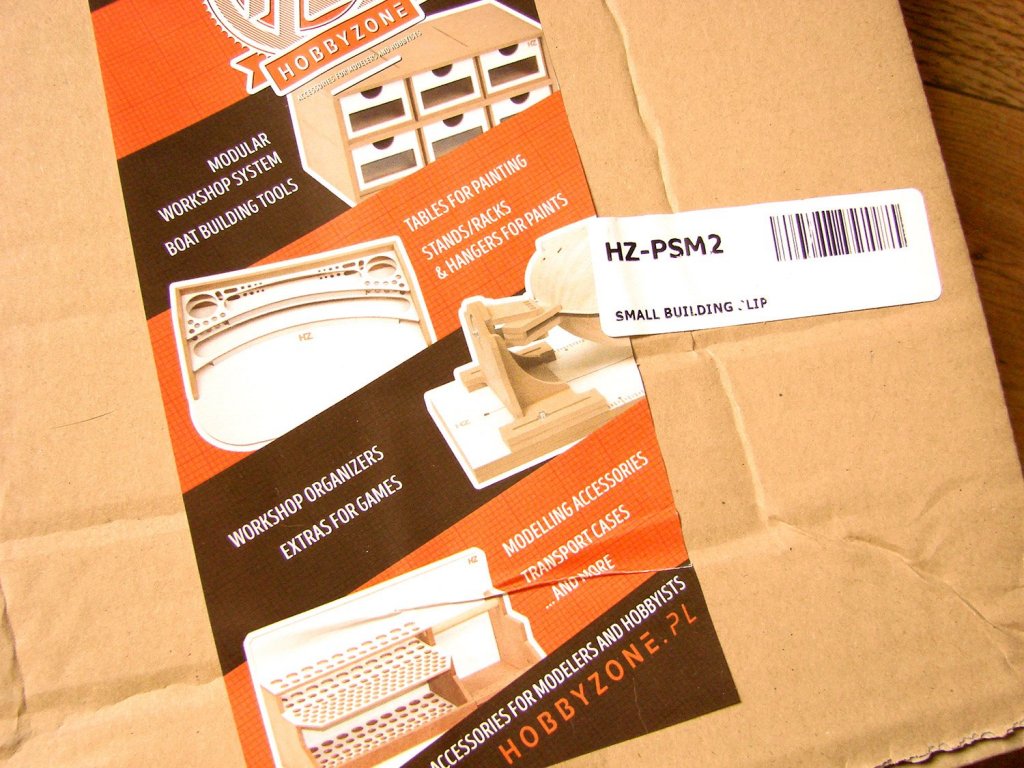
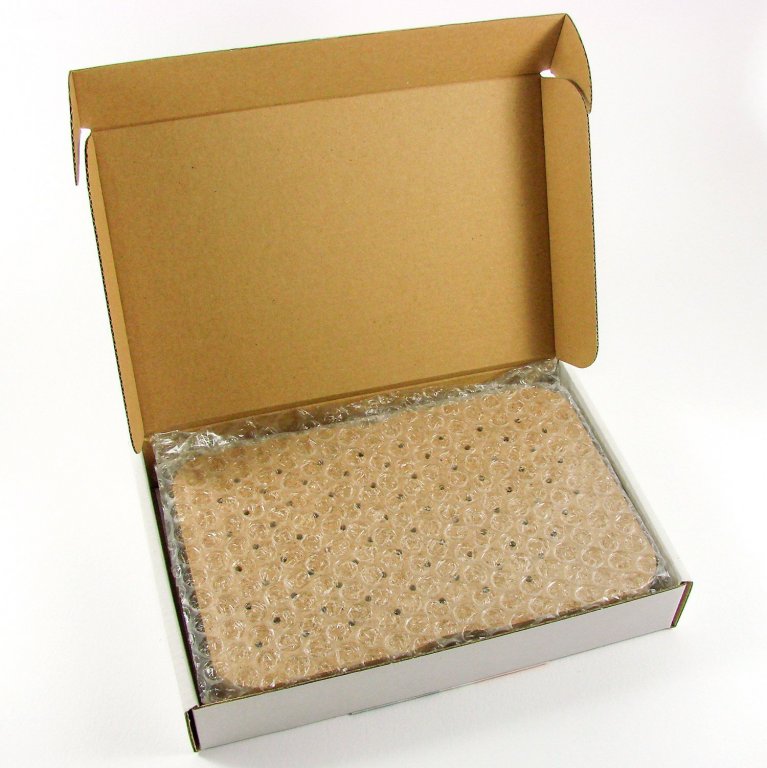
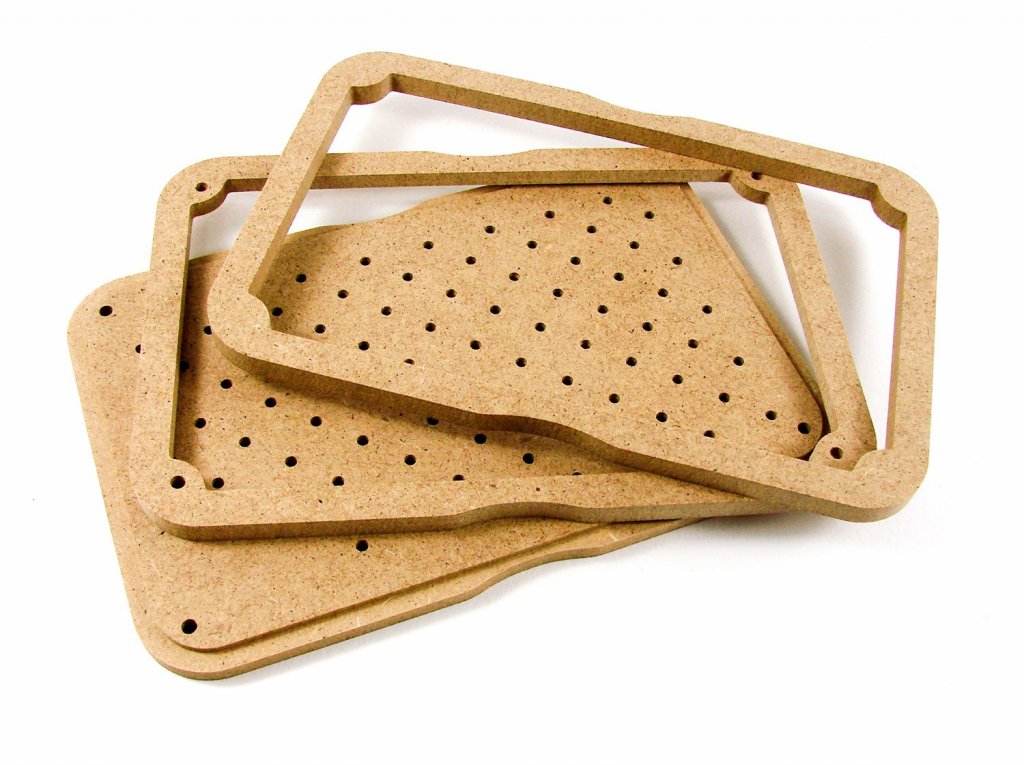
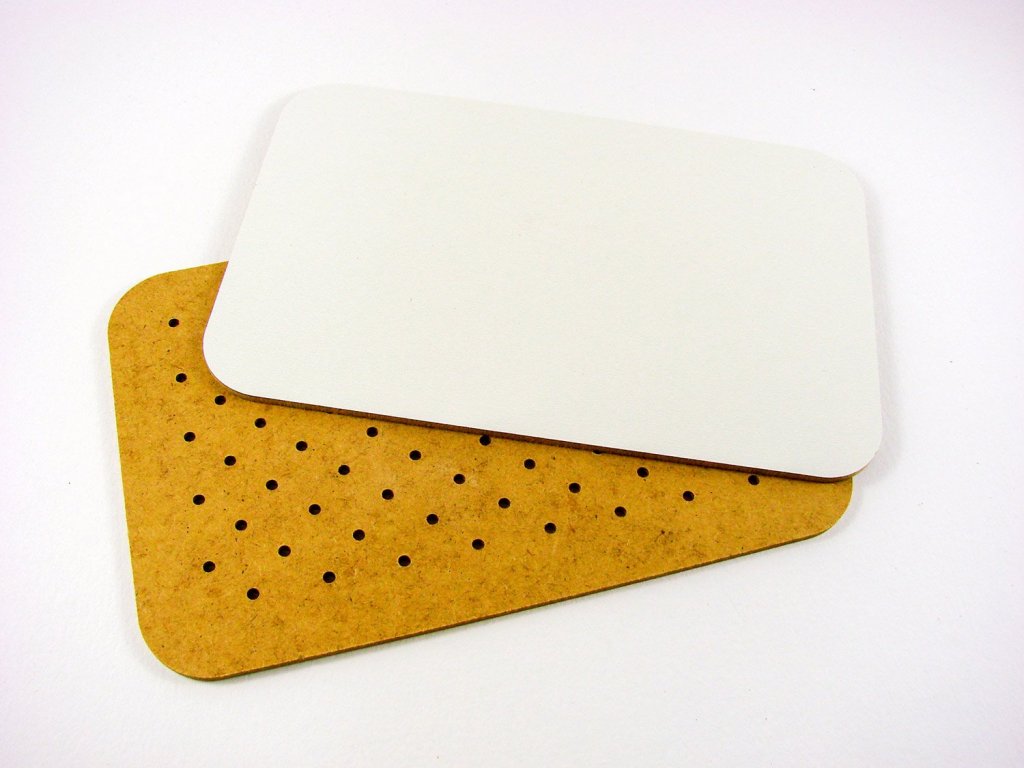
Small Building Slip Hobbyzone Catalogue # HZ-PSM2 Available from Hobbyzone for £25.79 (as of 11th July 2018) My original intention for this review was to do something in the style of the waterline marking tool, but as I've already been asked to create a building guide for the Professional Building Slip which I will publish next week, I thought I'd put the style to practice for this article so that Hobbyzone has something that they can use to refer their customers to. This will be a comprehensive build review...almost like a manual for assembling this product. The product itself is packaged into a cardboard box and the materials within are wrapped in a LOT of bubblewrap to protect further. Furthermore, the contents within are also bound by masking tape to prevent them joggling around in the box. All parts within are made from MDF which has been routed out, leaving only shall tags that can be cut through with nothing more than a craft knife. A number of parts have a white finish to one side. A small bag of hardware is also included. All you will need to assemble this is some wood glue, craft knife, and clamps. Onwards with the build.... 1. First of all, remove the MDF tags that held the parts into position on the boards. A craft knife is perfect for this. You won't need files etc. 2. Take two of the bolts and fit them in the main board. No glue is needed. Flip the board over and now glue the forward strip with the white edge, into the tabs at the front of the slip. Do the same with the small edge pieces. You may consider clamping these until set. Now, tale the narrow MDF slat which has the notches towards one end and glue this right up to the small edge pieces you just fitted. Those notches MUST line up with the ones on the baseboard. Again, clamp this until fully cured. 3. Take the remaining two strips and glue one on top of the other so that the notches line up. The parts will be stepped. Use a pencil to first mark the position and to make placement of glue more precise. When glued, clamp until set. 4. Take the parts shown here and glue them together. Please note the location of the hex indent. Clamp until set. 5. Fit the bolt, washer and nut into position. 6. Take the parts shown here and assemble in this orientation. Note that these are made as pairs, with the base fitting on one pair being opposite to the other pair. 7. Sit the moveable portion of the slip onto the baseboard and use the washers and wing nuts to secure. This portion of course is adjustable to the width of the keel. The other smaller parts, including the end stops and bulkhead clamps are fitted by simply pushing and twisting them onto the stepped edges of the keep clamp. You can use any of the features seen here in any way you like in order to assure yourself that everything is in alignment. A small tray at the front of the slip can be used for the unused parts, or modelling tools. Enjoy the build and your next project you build with it! In all, a nice and easy slip to build and one with quite a lot of flexibility when it comes to the shape of the vessels that can be constructed on it. The slip is designed for models with a keel length of 600mm, but 800mm can be built within it too. Maximum keel width is 5mm, according to Hobbyzone, but I'm sure you could squeeze another millimetre out of it. To give you an idea about keel thickness, the 1/72 HMS Vanguard from Amati/Victory Models has a 5mm thick keel, and that model is designed for a bigger slip than this! SO, in short, you should find this perfectly capable of handling just about every project up to a maximum of 800mm keel length. My sincere thanks to Hobbyzone for sending this out for review here on MSW. To purchase directly, click the link at the top of the article, or head over to your local Hobbyzone stockist.


-
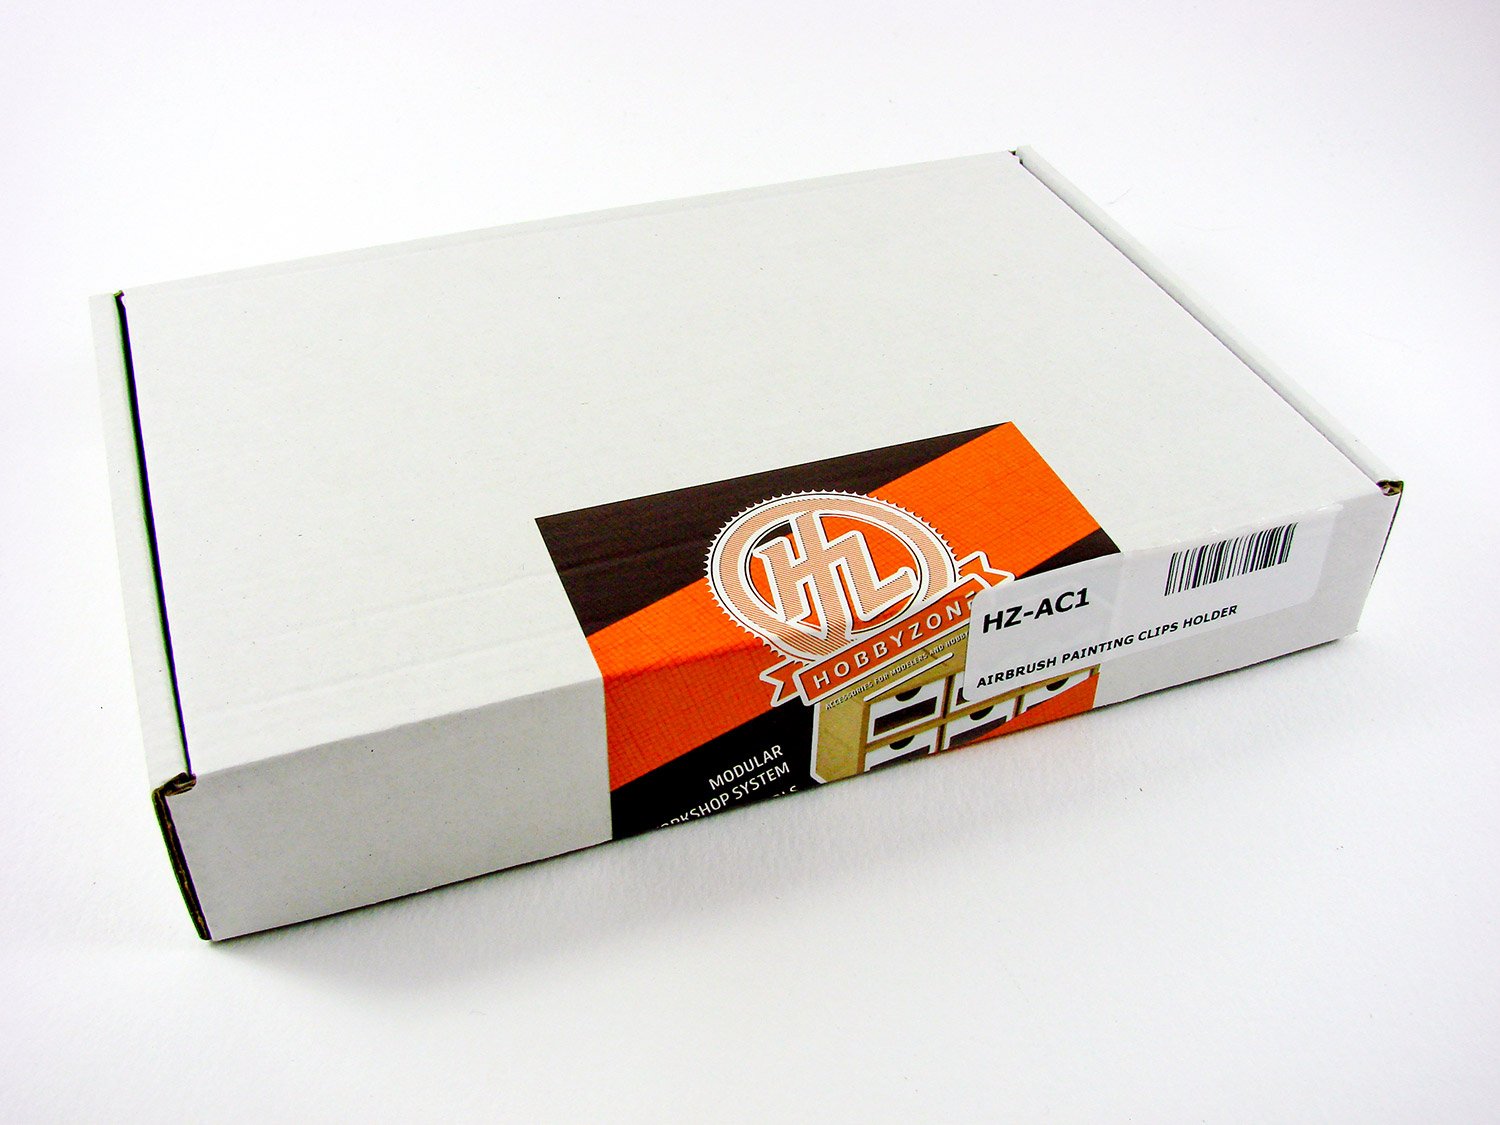
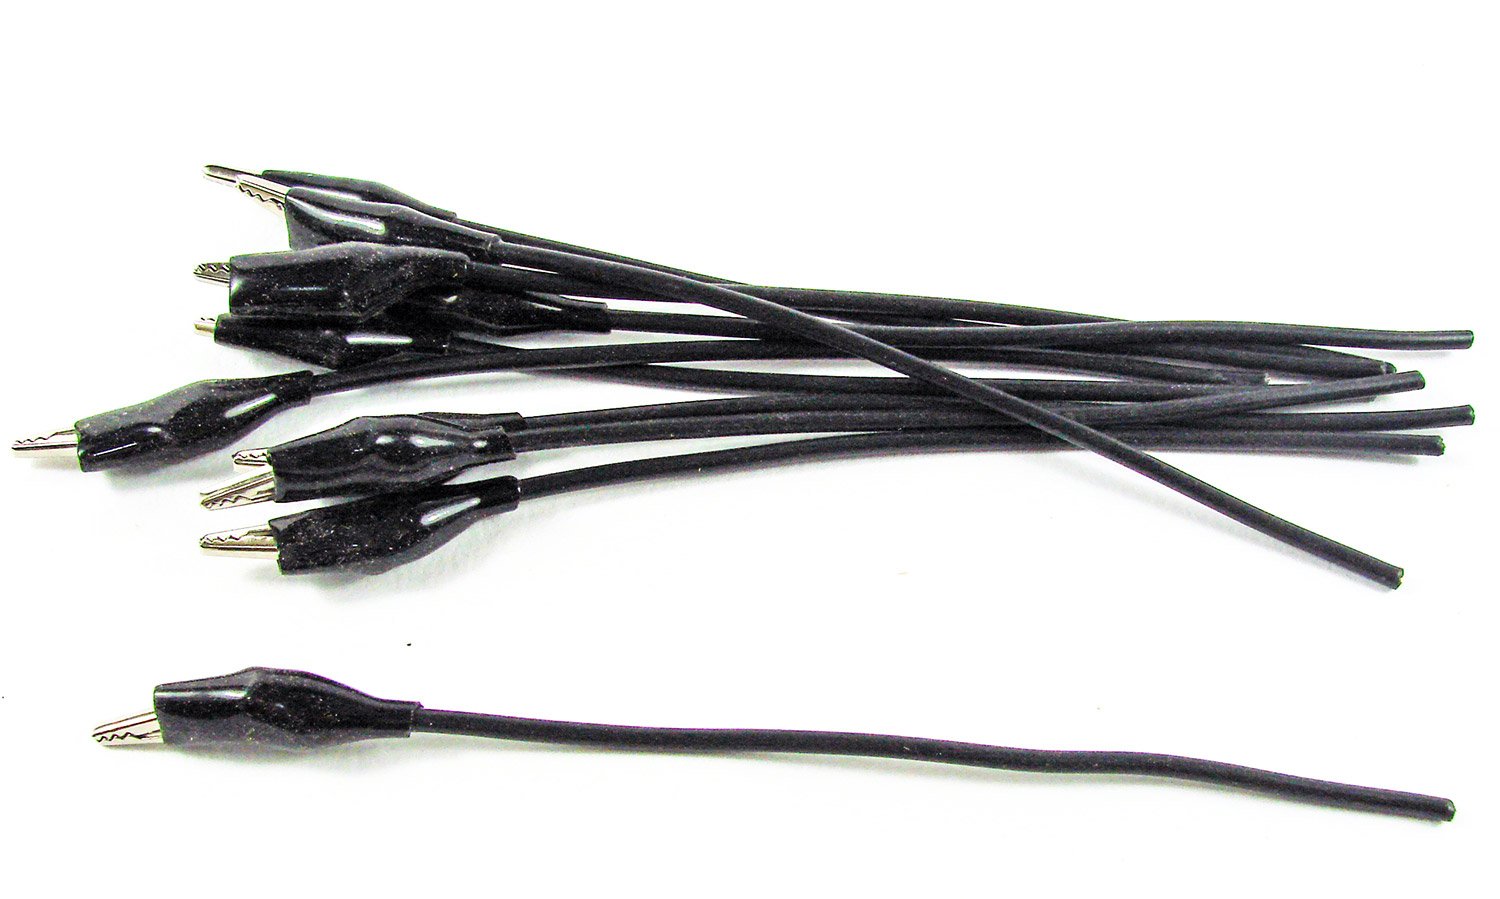
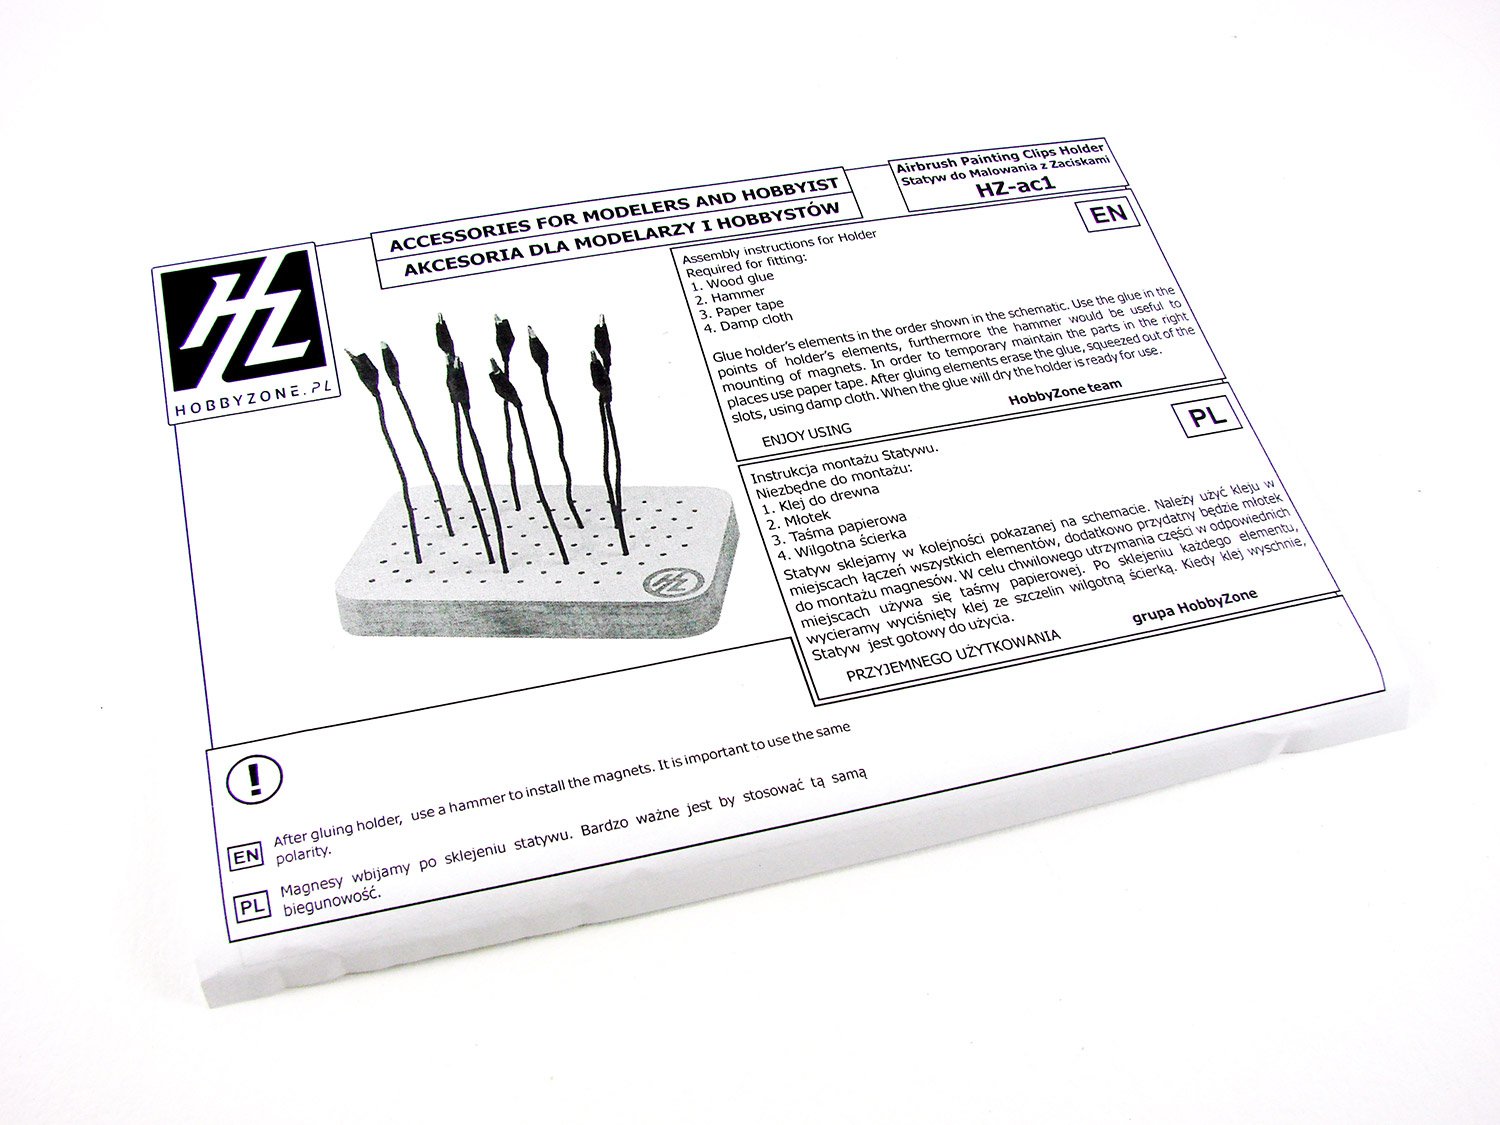
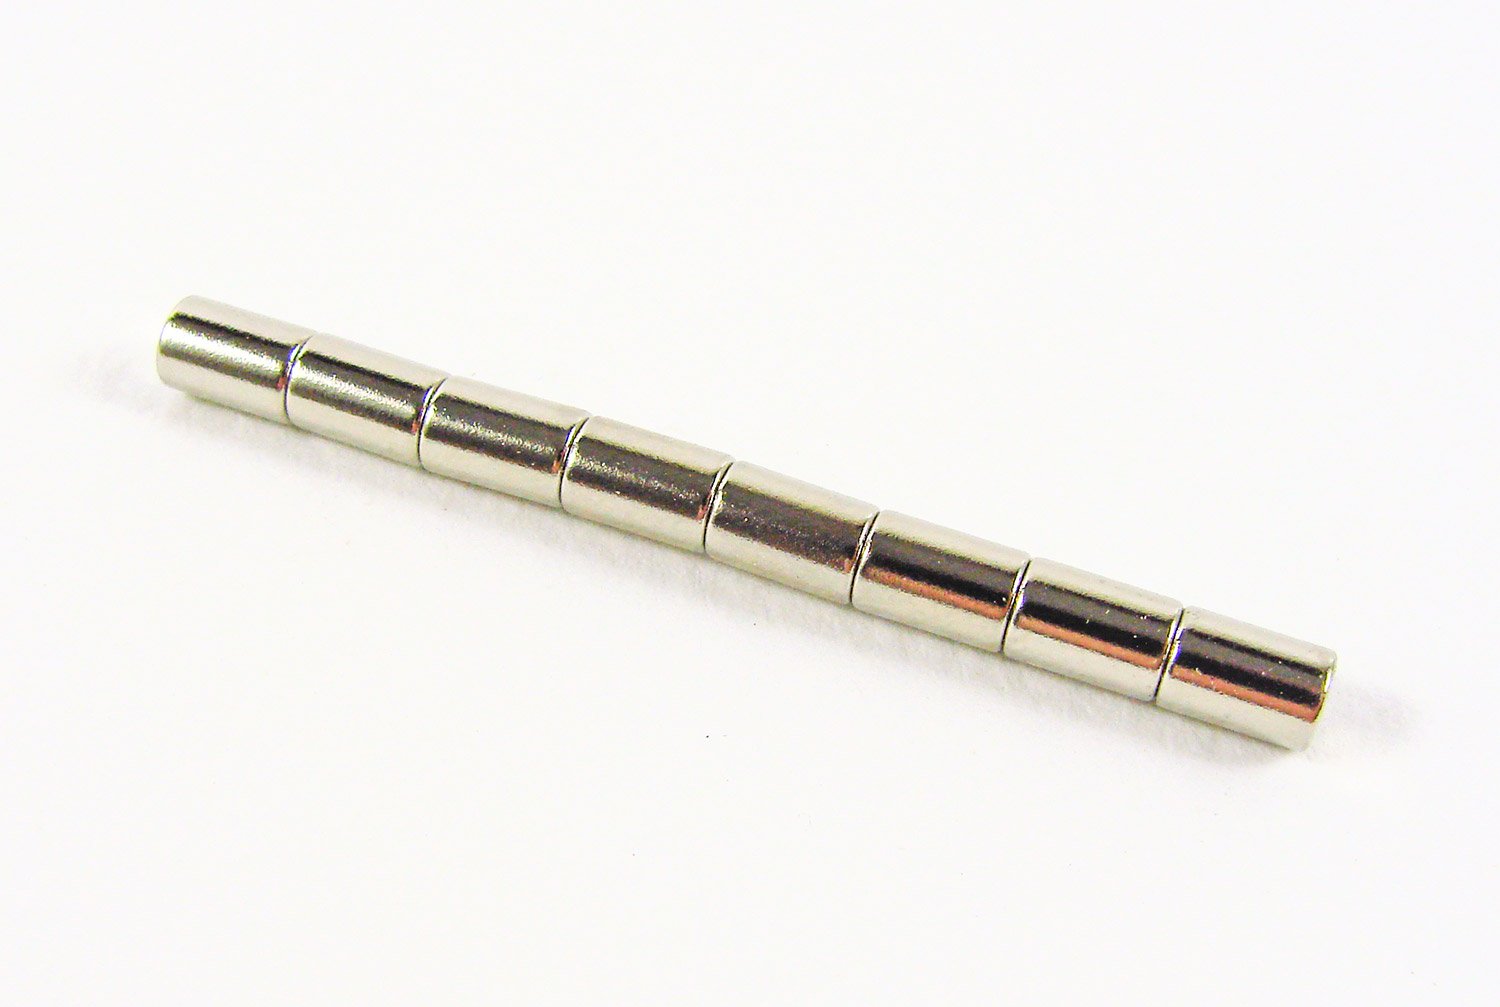
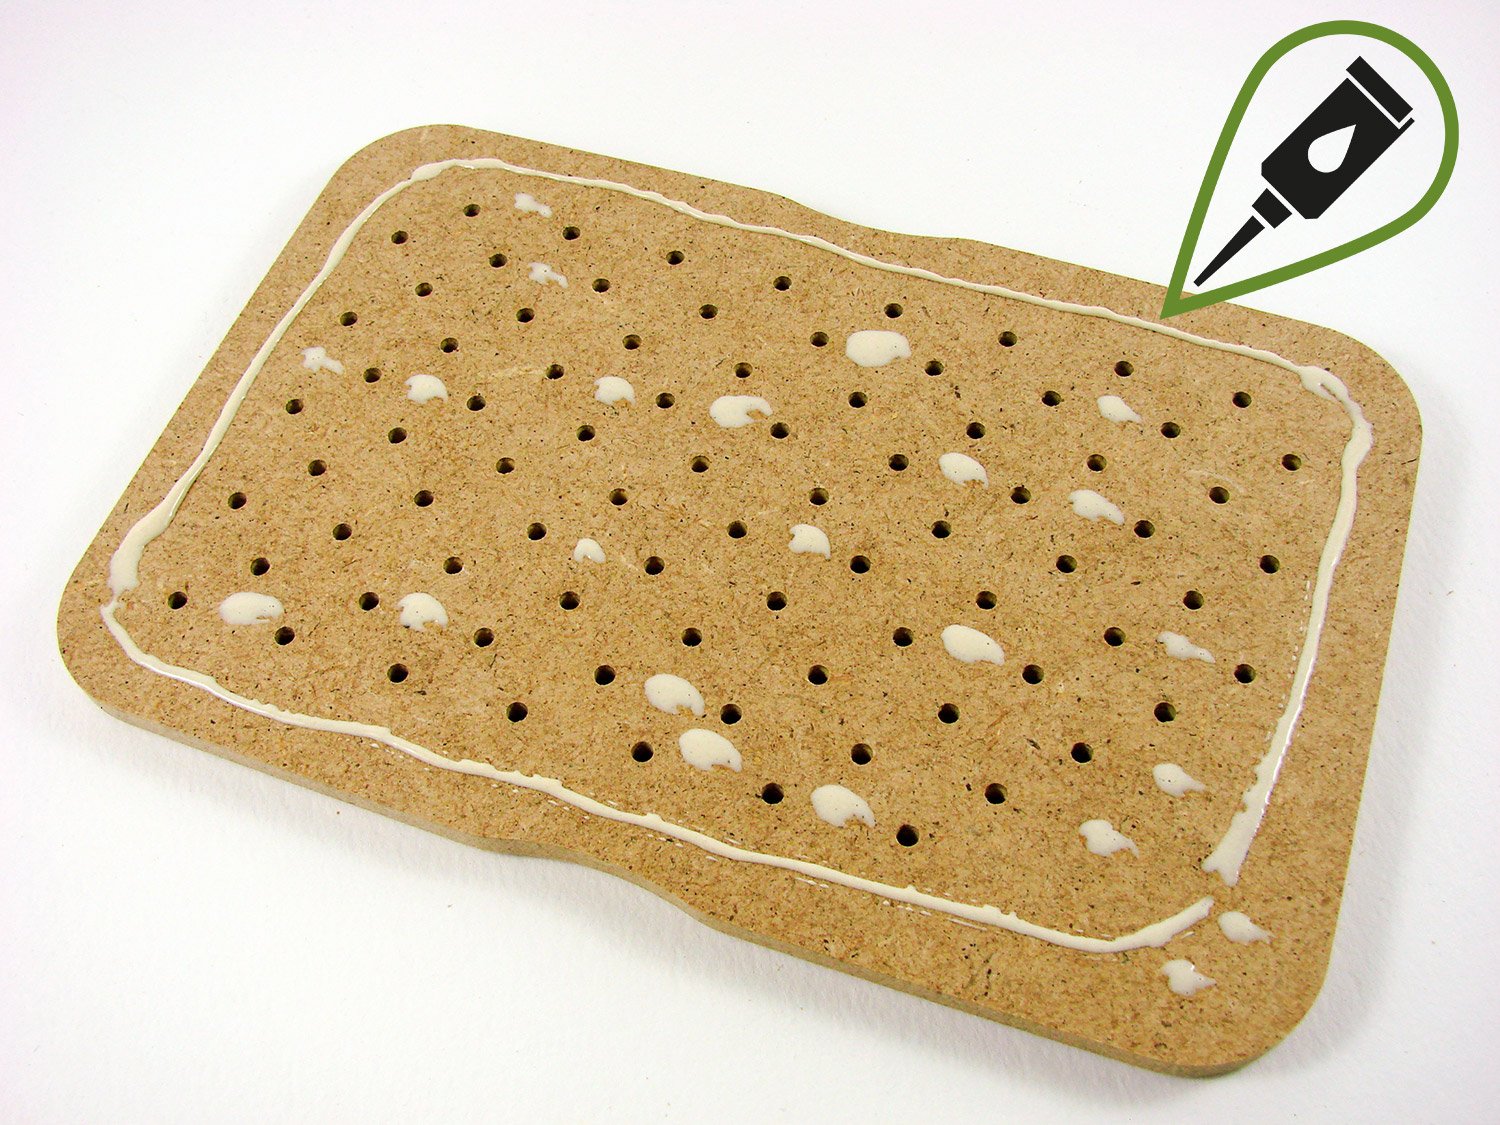
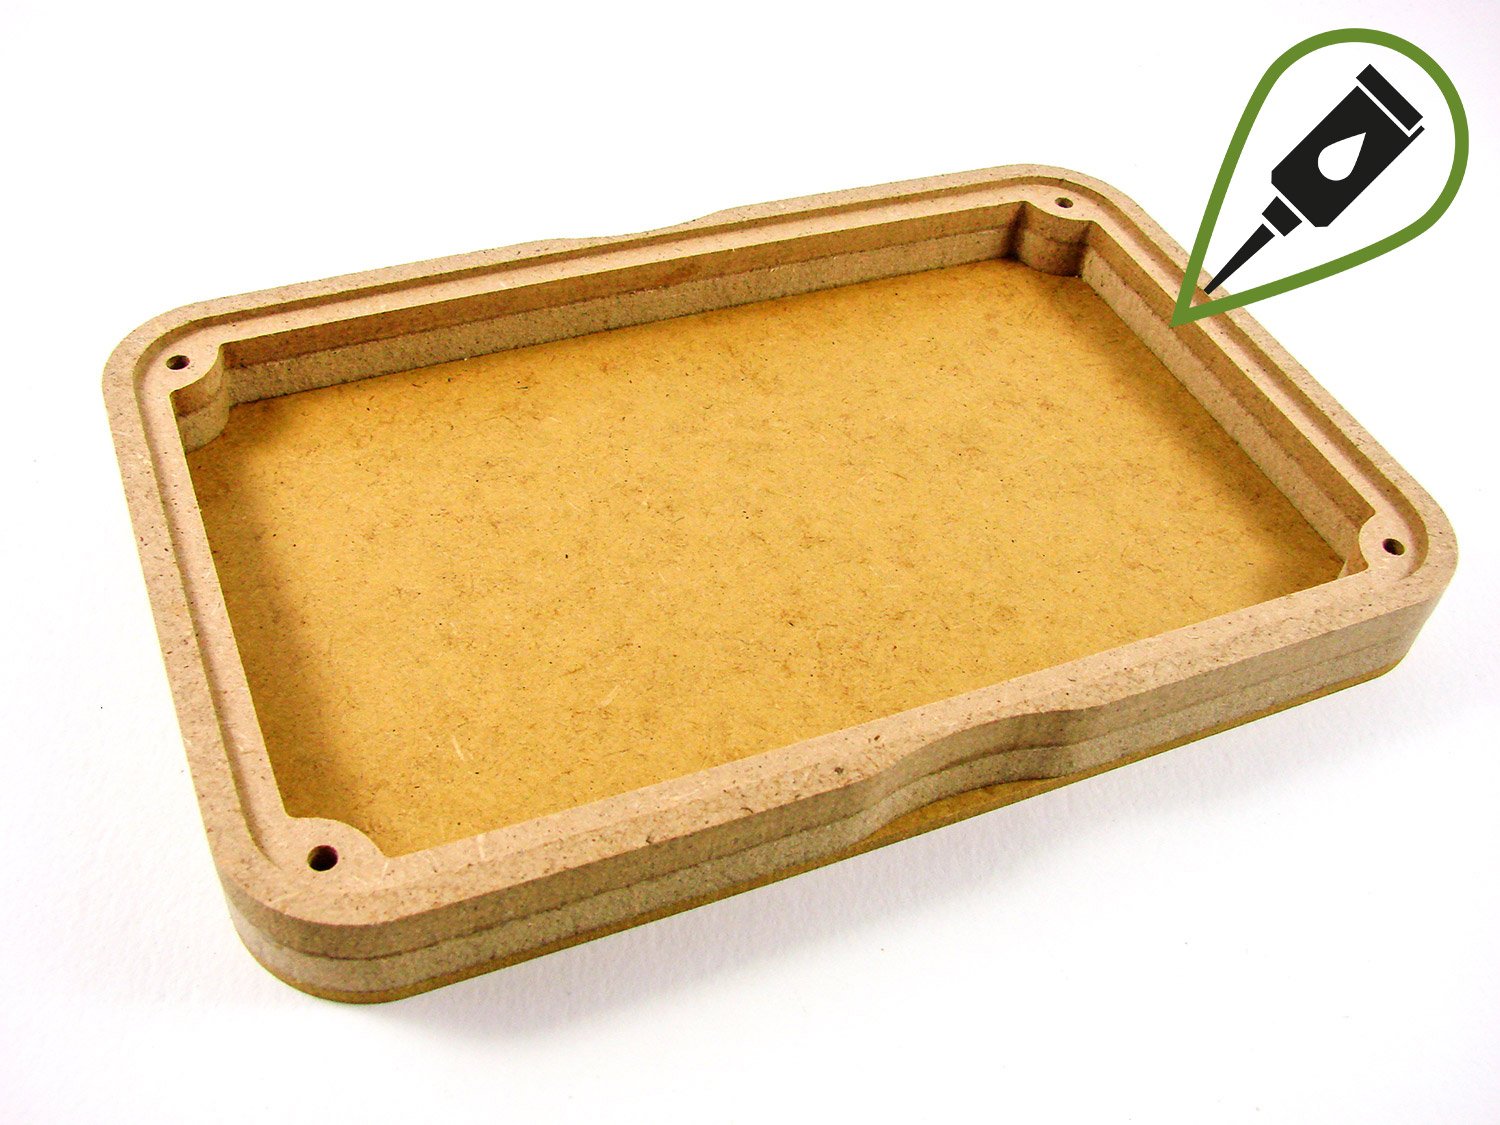
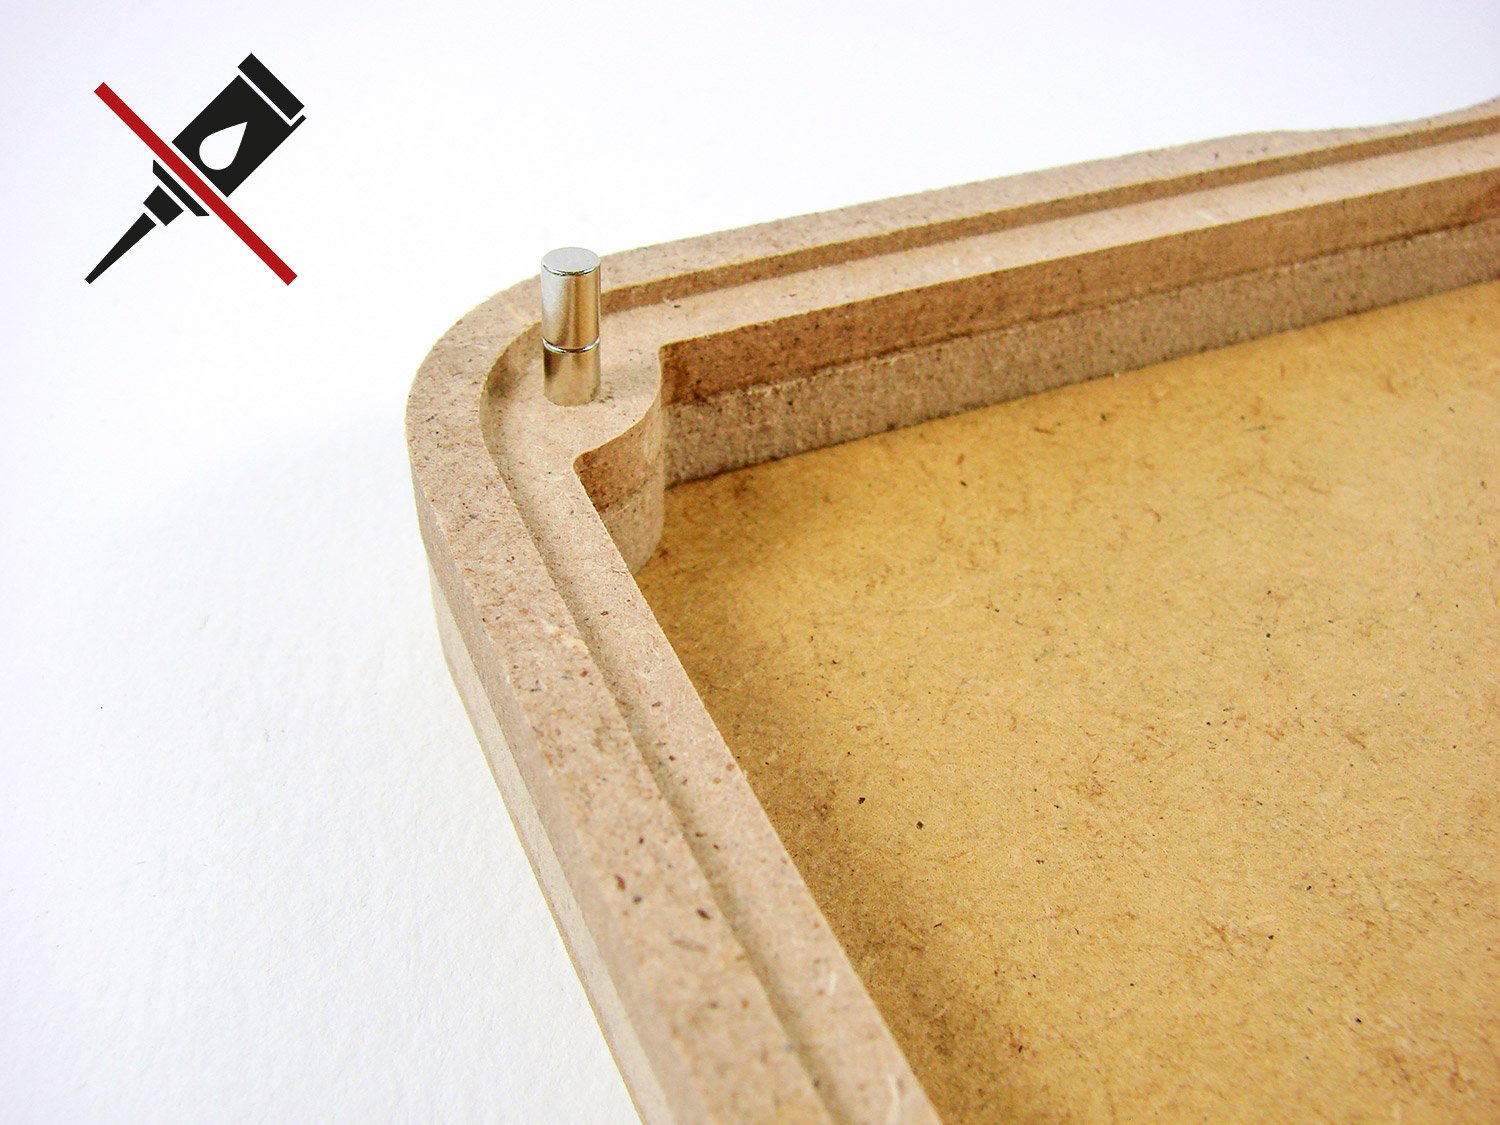
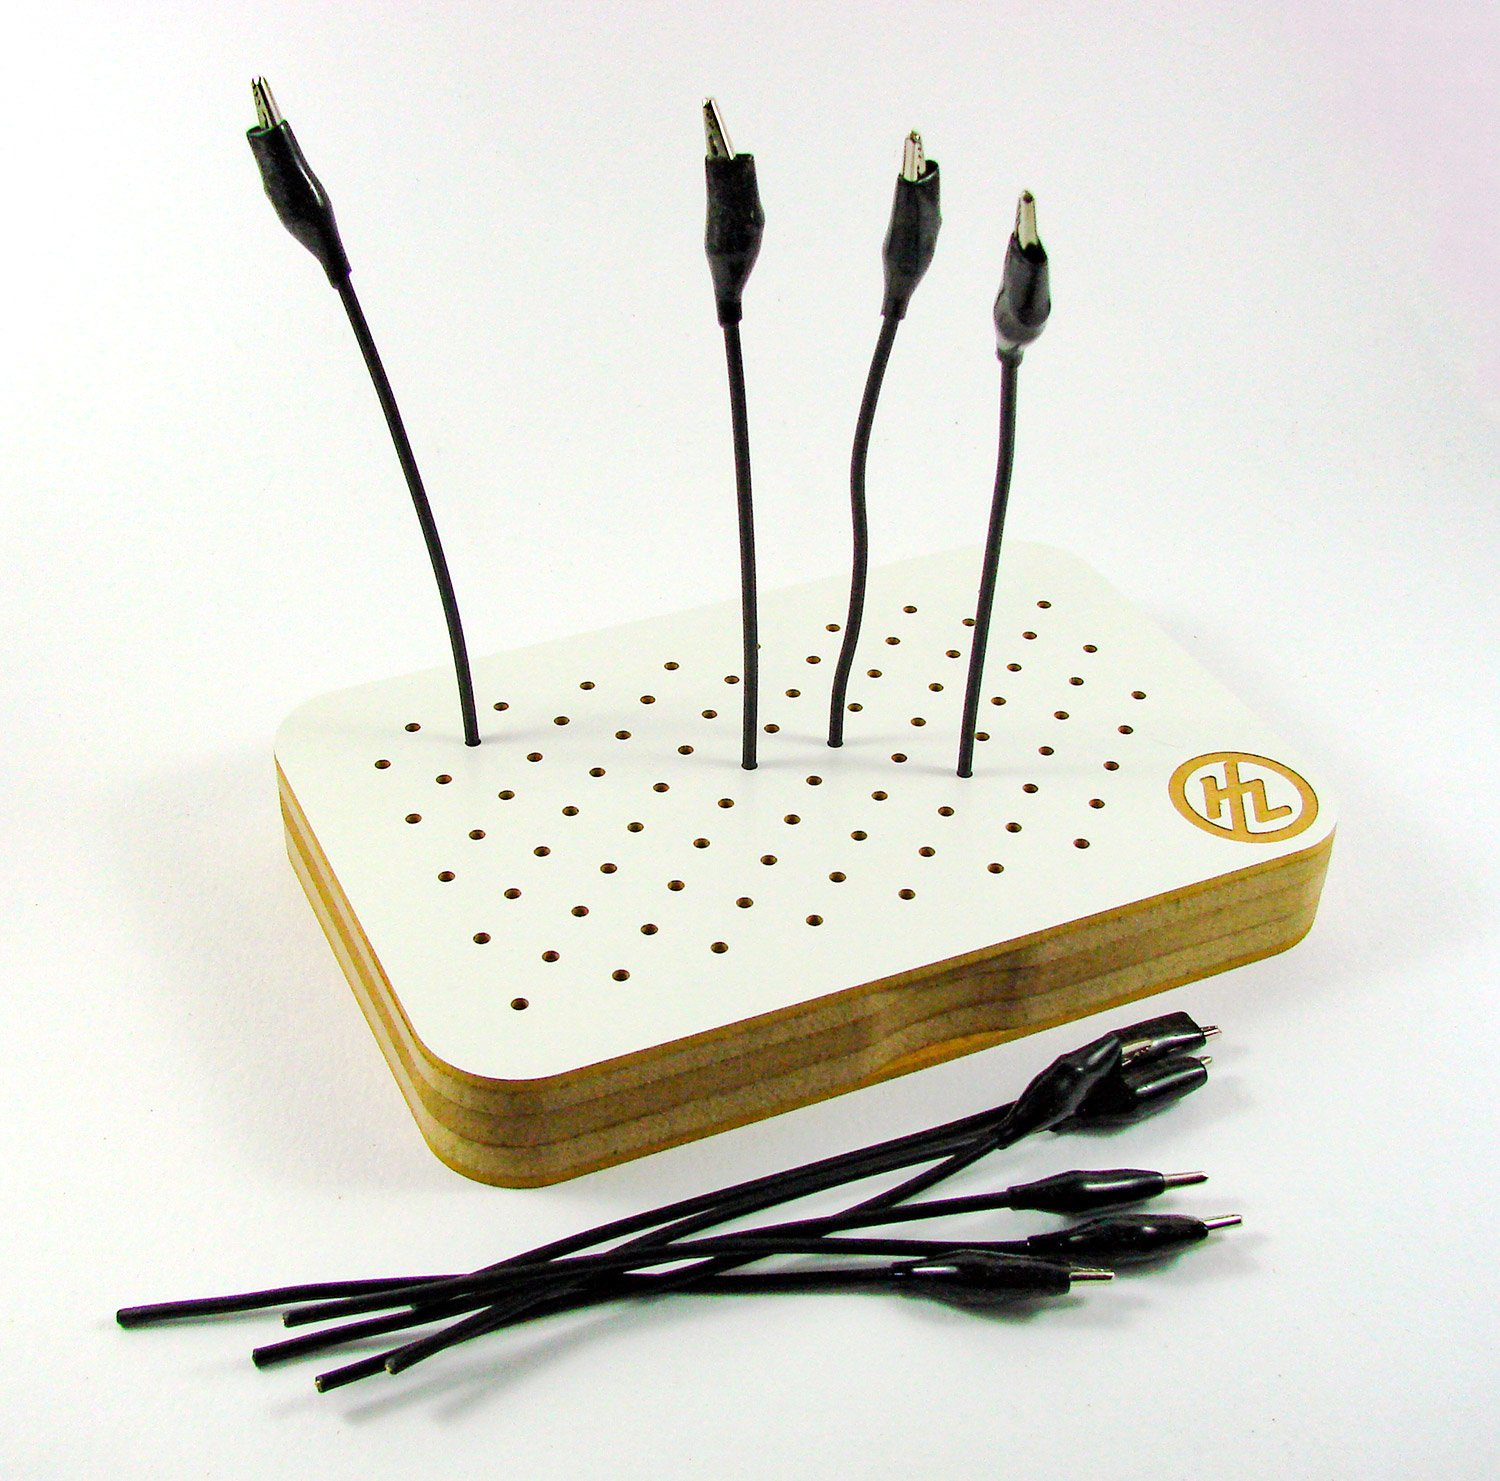
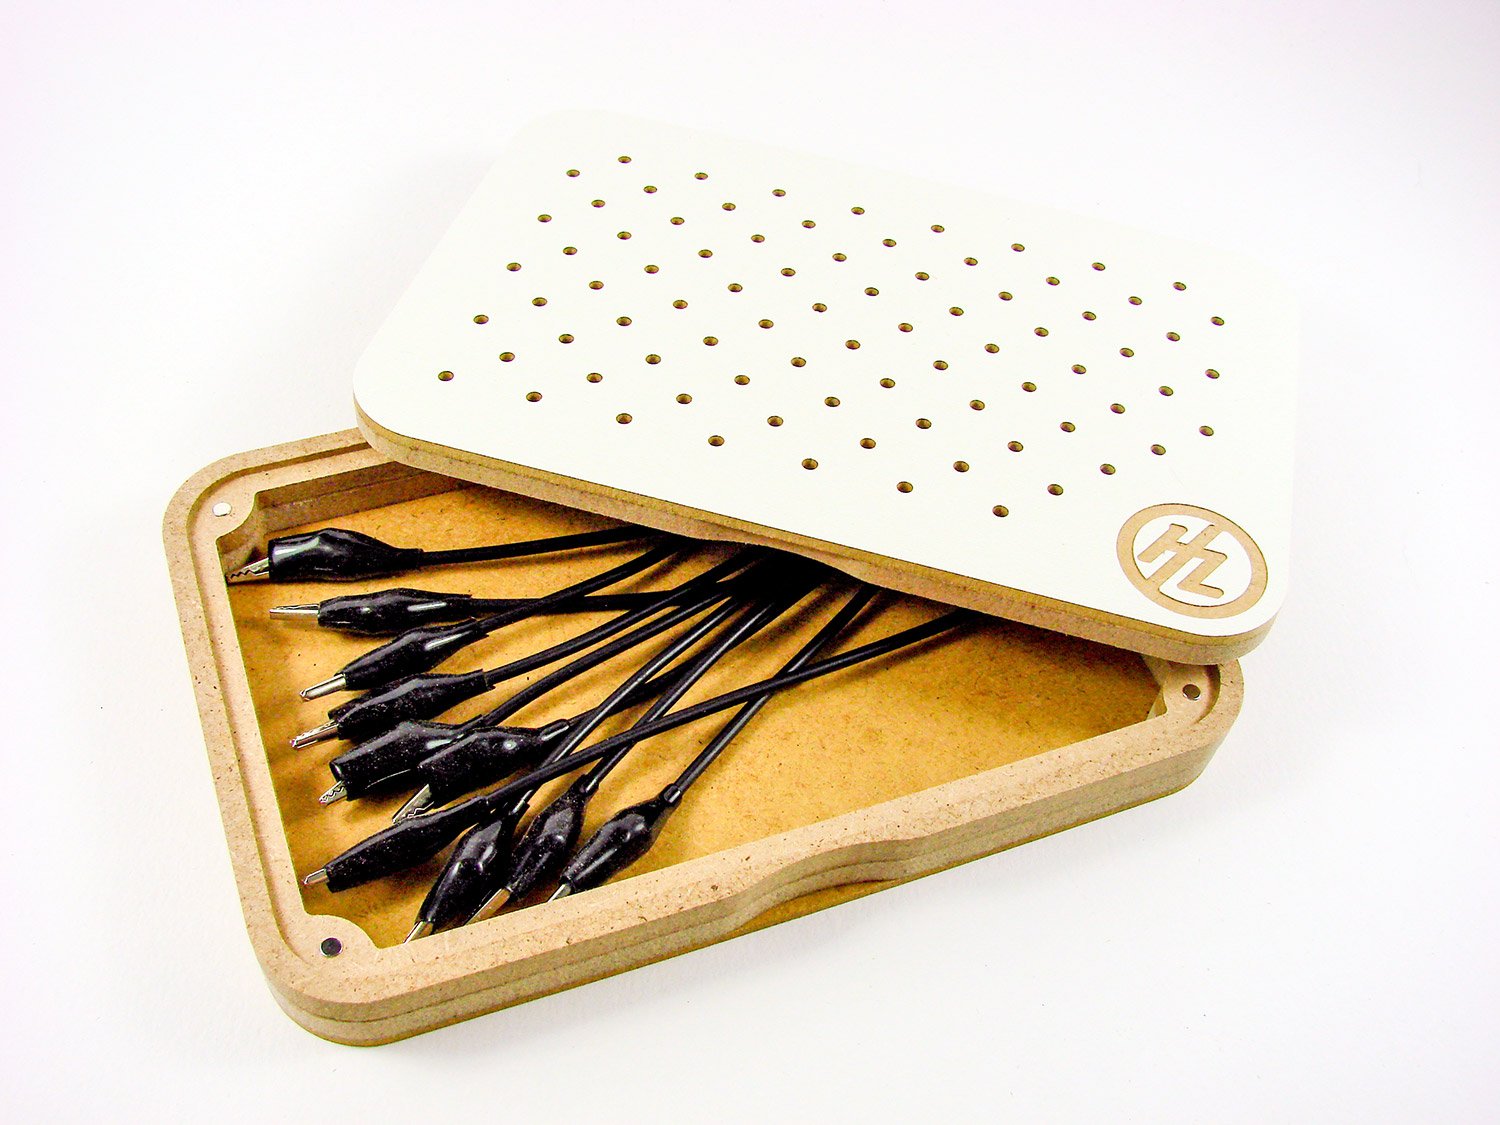
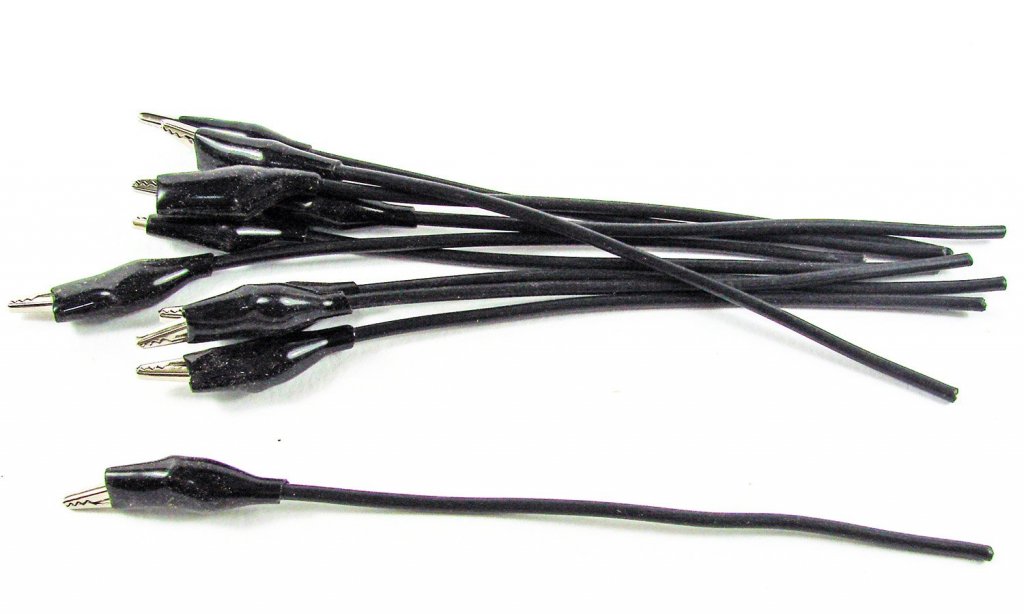
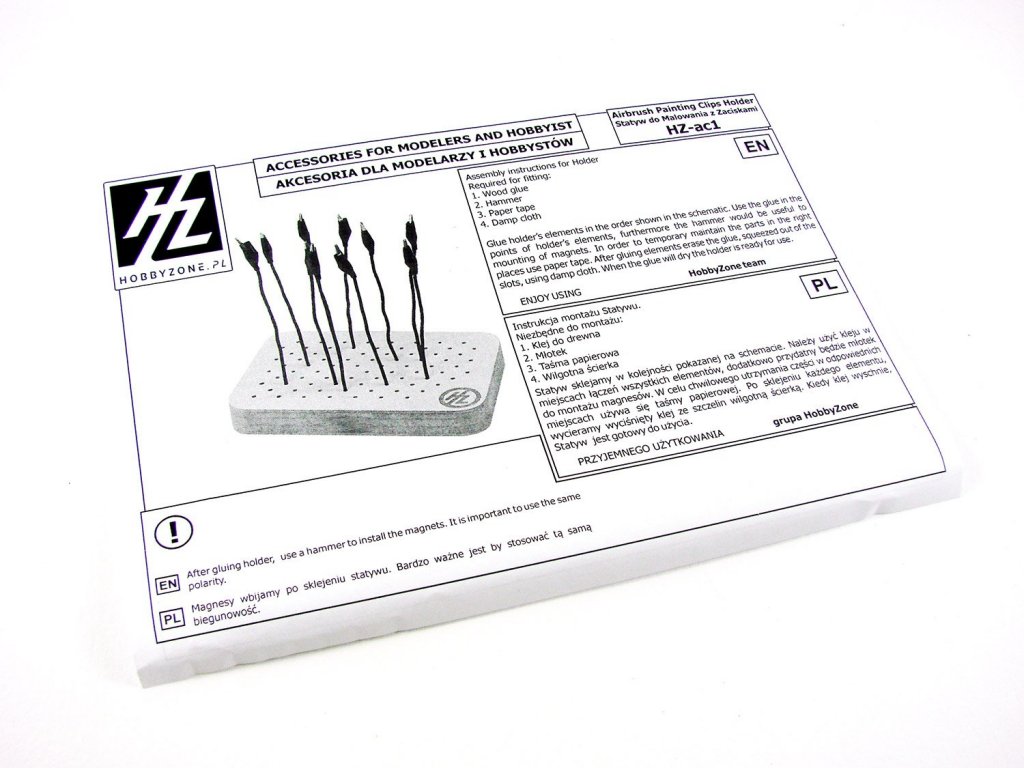
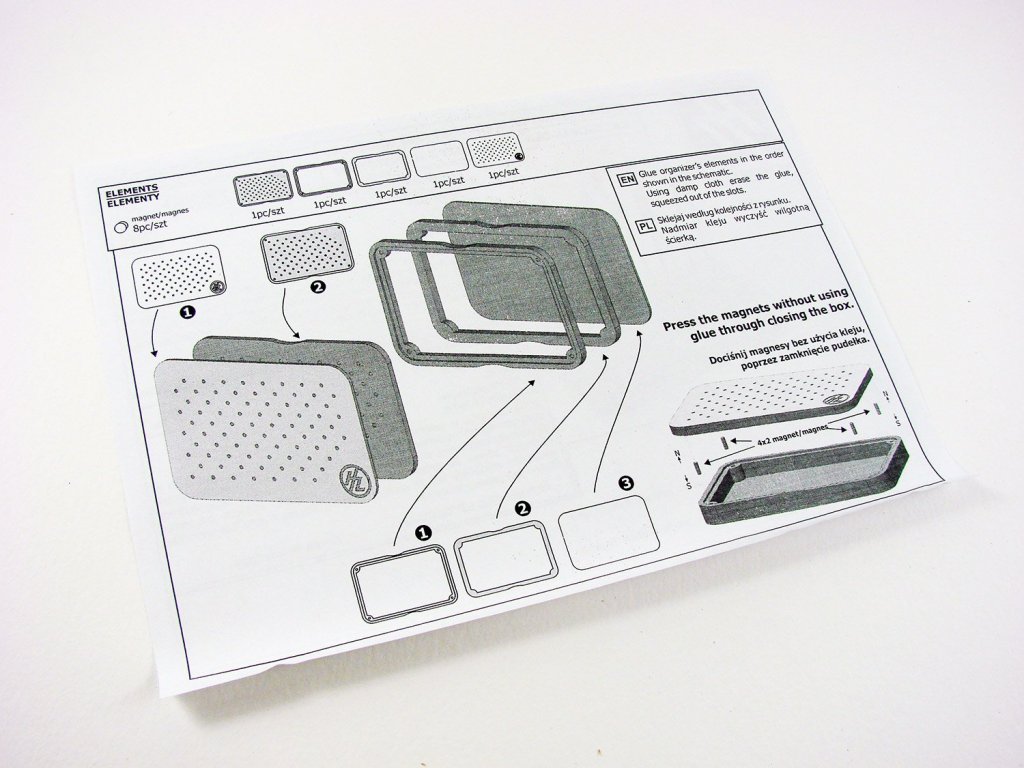
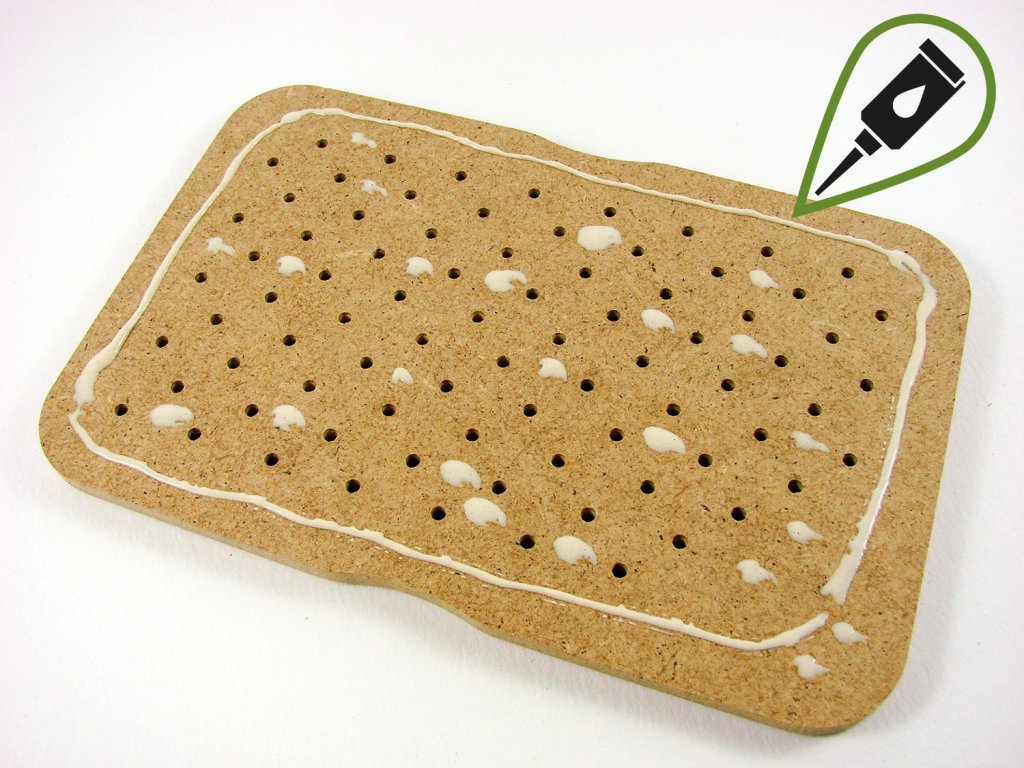
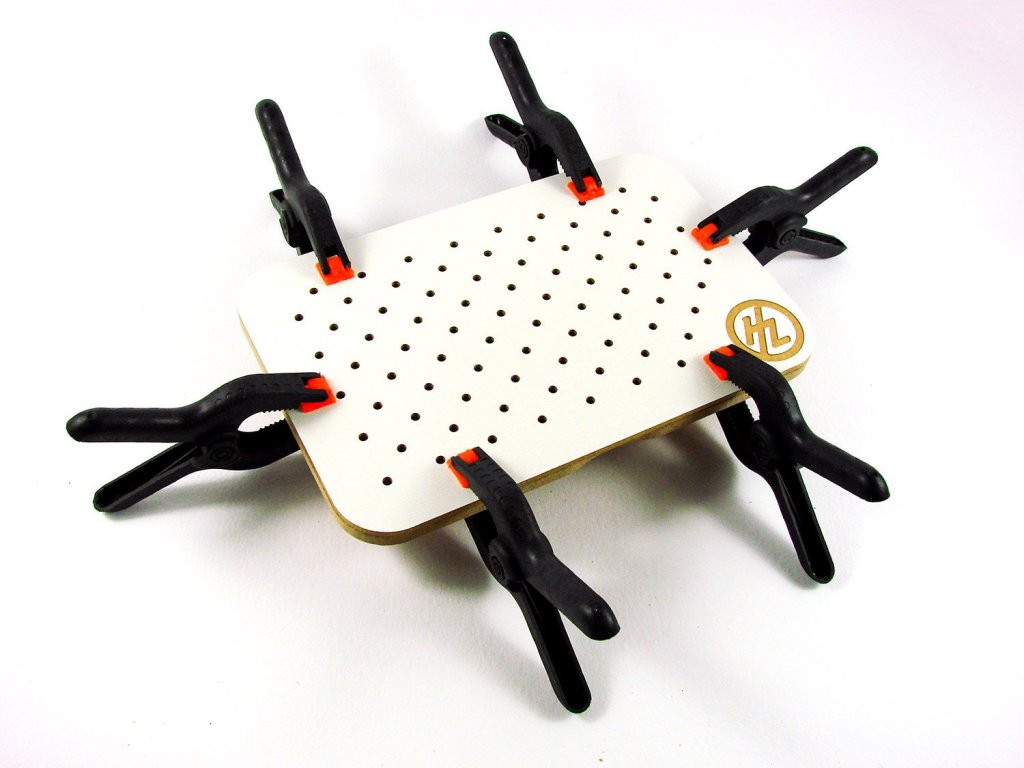
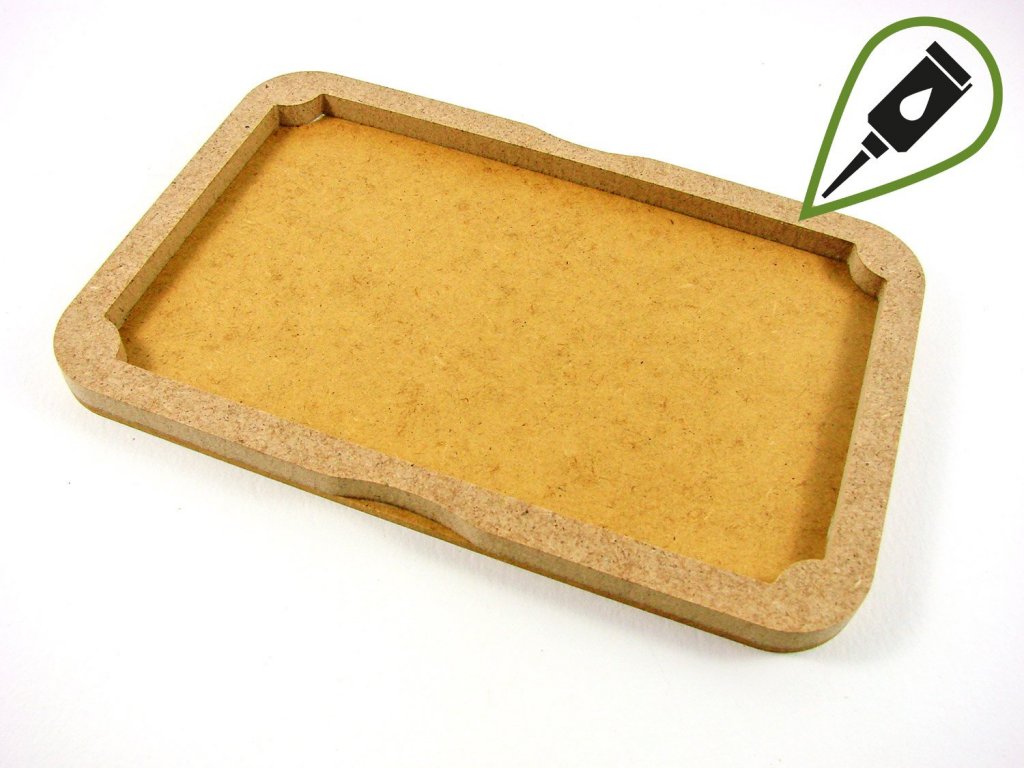
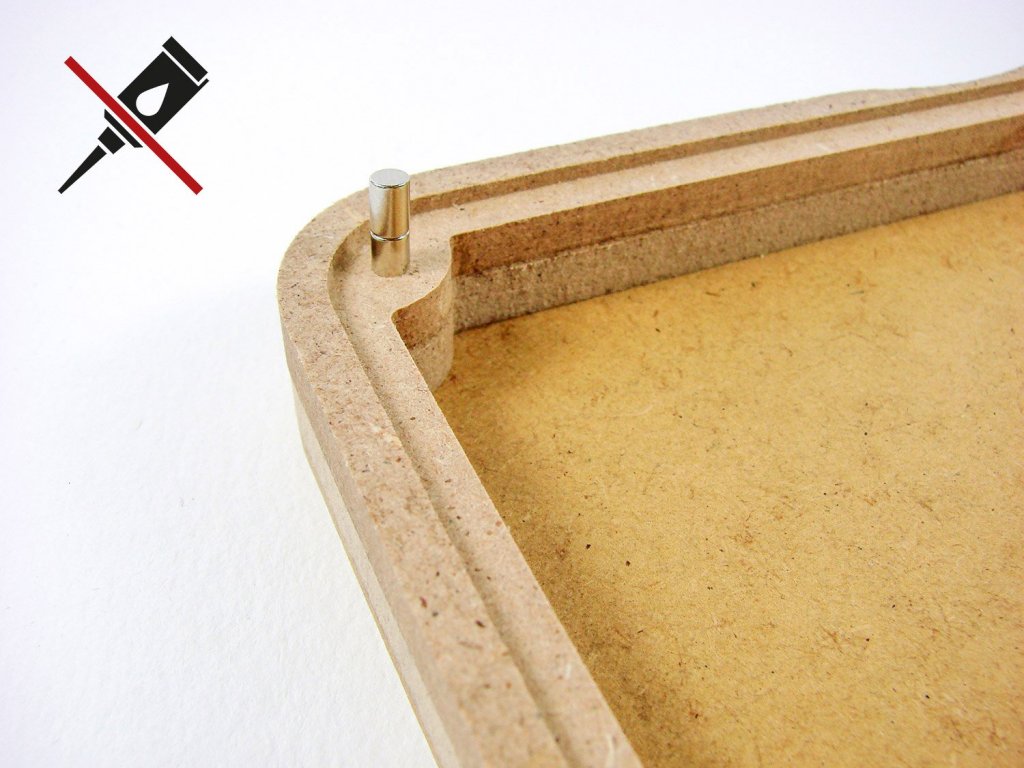
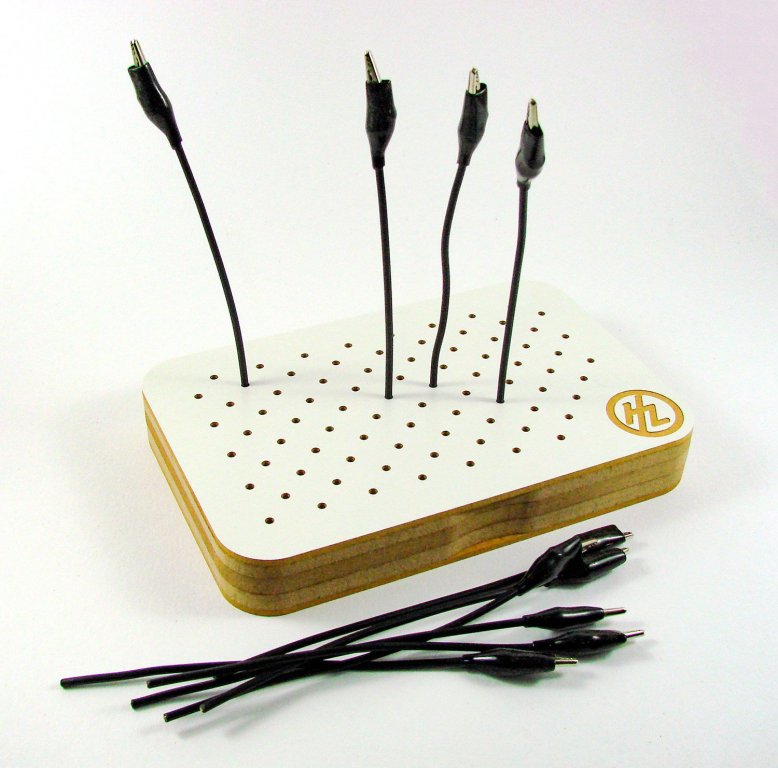
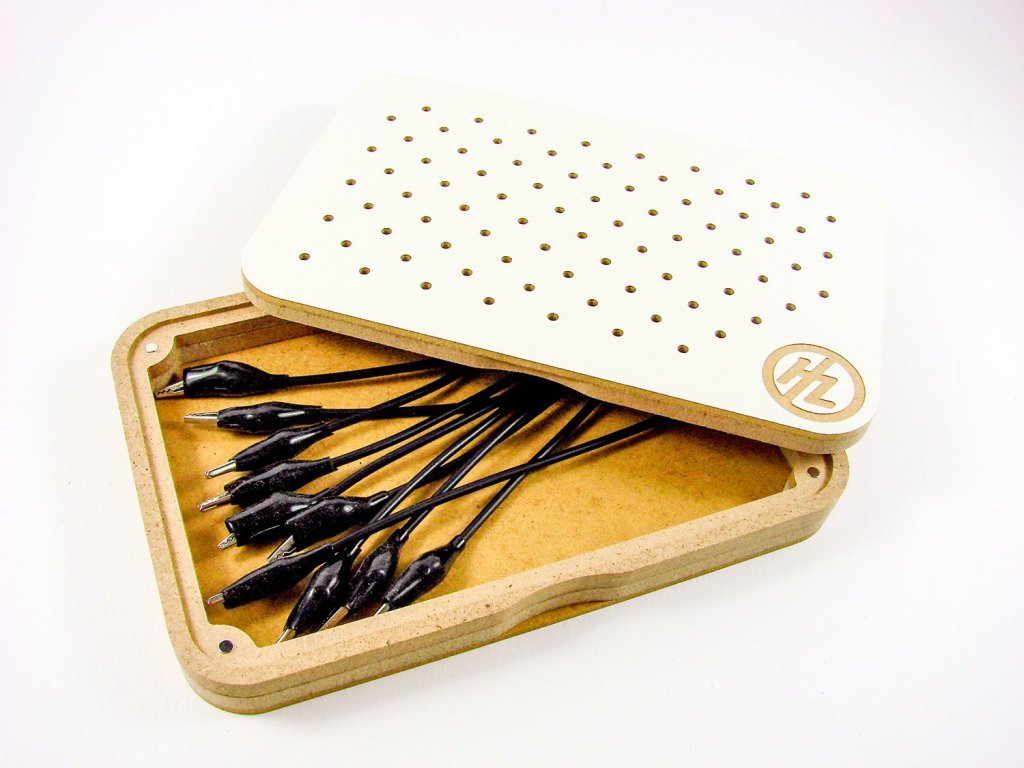
Airbrush Painting Clips Holder HobbyZone Catalogue # HZ-AC1 Available from HobbyZonefor £13.54 (at current rates) Modellers tend to be quite resourceful and innovative folks, from scratch-building parts, to fabricating things to make their hobby a little easier. One such fabrication, for me, is a polystyrene foam block with cocktail sticks to hold parts whilst I airbrush them. I also stick parts to steel rules that have been covered in masking tape, plus I’m always using bits of Blue-Tack to mount parts to whilst I paint. It just seems to be the way I’ve always worked. Doubtless, you do the same, or have your own bespoke solution. HobbyZone have quite a nice solution to this that you may just be interested in. I’ve actually been sitting on this review for a couple of months now, pending the release of this new product from HobbyZone. Today, they asked me to publish it for you. The concept is very simple. It’s essentially a magnetic box with a series of holes in the lid. Into these will fit stiff wires that are furnished with a shrouded crocodile clip on one end. You pop your model part into the jaws and then paint. Whilst drying, you can stand the wire upright in the lid. After your work, all the wires sit neatly in the box, out of the way. This product, like all those from HobbyZone, are machine cut from MDF, and require assembly. This one is packed into a sturdy corrugated box with a simple product label. Upon opening the box, you’ll note that all parts are protected with a covering of bubble-wrap. Upon removing that, you’ll note that the box itself is built up from five layers of MDF. These form the base with a white plastic outside coating, and two frame parts, one of which glues to the base, and another recessed frame which glues to the top of this. The two-part lid then sits in this and is held via magnets. To complete the package, a series of nine neodymium (rare earth) magnets are included, as are nine croc-clip wires and a set of instructions. The instructions are nice and simple to follow and I had no issue with understanding them at all, but for the ease of explaining this product to you, I’ve built this up as a guide for you. Here we go! 1. I start with the lid. Using TiteBond adhesive, I run a line of this around the non-recessed face of this part, and add some spots between the holes, being careful not to put too much glue there, or get too close to the holes. 2. The white, plastic-coated lid is now fitted to the previous part and held with clamps until fully cured. 3. The base is now clued to the lower frame section (the one without the holes) and clamped until fully set. 4. Now we can glue the upper frame in situ, being careful of alignment. Again, clamps hold this until filly set. Note the frames are slightly scalloped on each of the long edges. This is to give your fingers something to hold whilst you remove the lid. 5. Now, this part is VERY important. We need to ensure that the magnets all fit into the holes, so the same pole is facing upwards on each one. This is dead easy. Keeping the stack of magnets upright, and keeping the same orientation, remove two of them and push into the one of the corner holes. Do the same with the others, again, without changing the orientation of your stack of magnets. These push in quite easy, but you know they won’t come out afterwards! Now fit the lid to the box so that the magnets align with the holes in the lid. Push firmly down, and if necessary, gently tap the lid into place with a small hammer, being careful to protect the surface of the product. That’s it! The lid will now come off with magnets and will reattach in the same way. Job complete! 6. After your work, store the wires/clips in the box and replace the lid. There’s plenty of room in there for more, in case you want to make your own clip holders. Conclusion A superbly simple idea, carried off very nicely. As with all of HobbyZone’s products, this is designed to keep your workbench in tidy order, and of course, this has the functionality added to it. I’m quite a fan of HobbyZone, with my workshop being fitted out with all of their various storage modules, so I’m more than happy to stay true to the brand and its style/quality, with this addition. My sincere thanks to HobbyZone for the review sample seen here. To purchase directly, click the link at the top of the article.


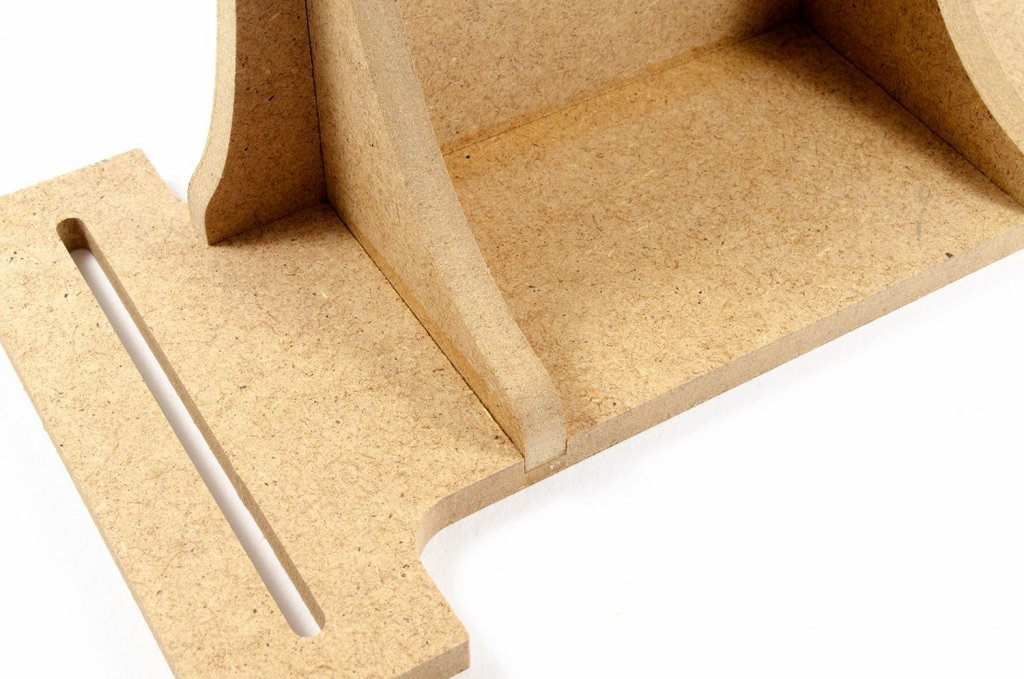
-
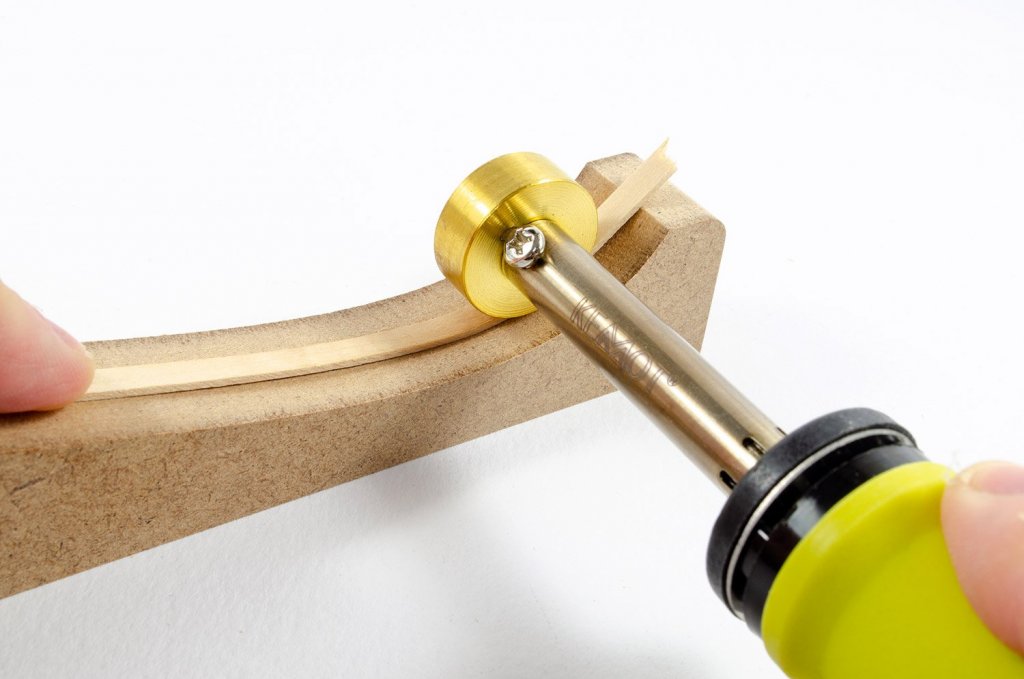
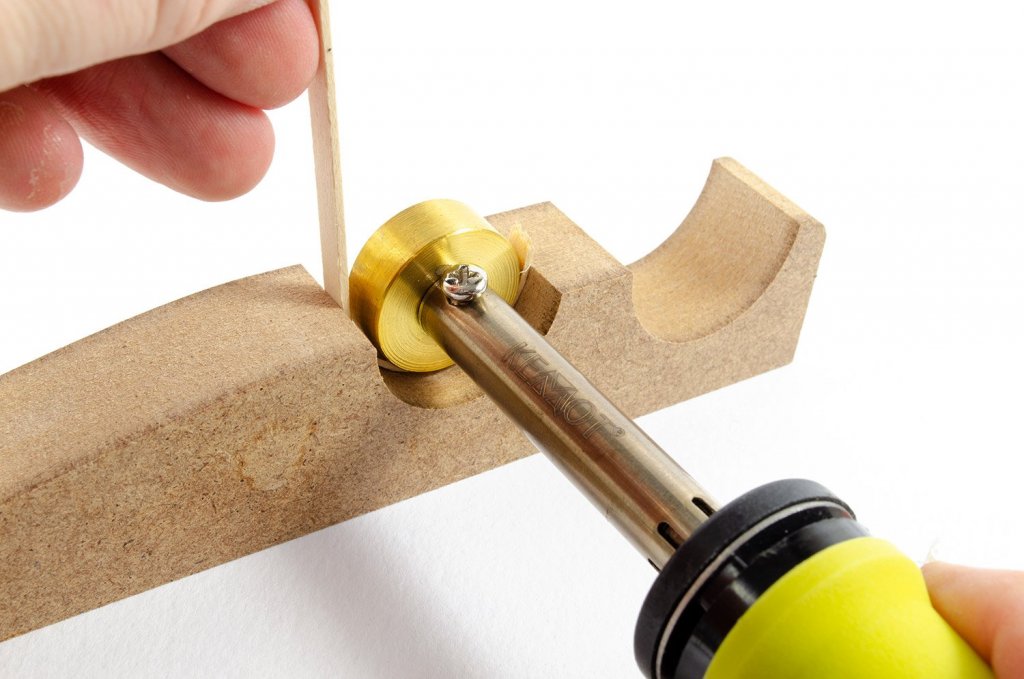
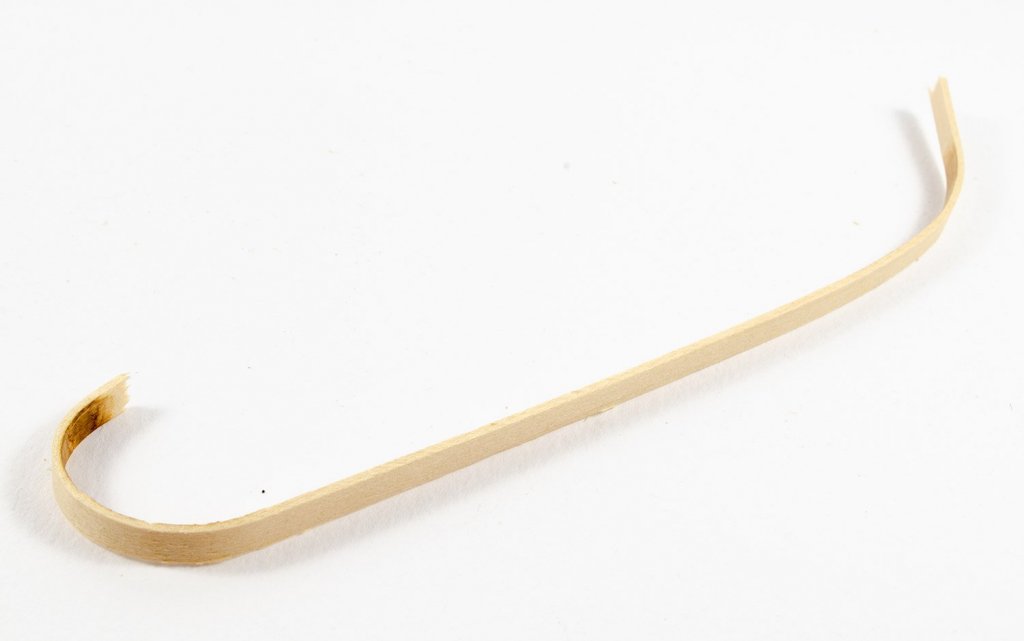
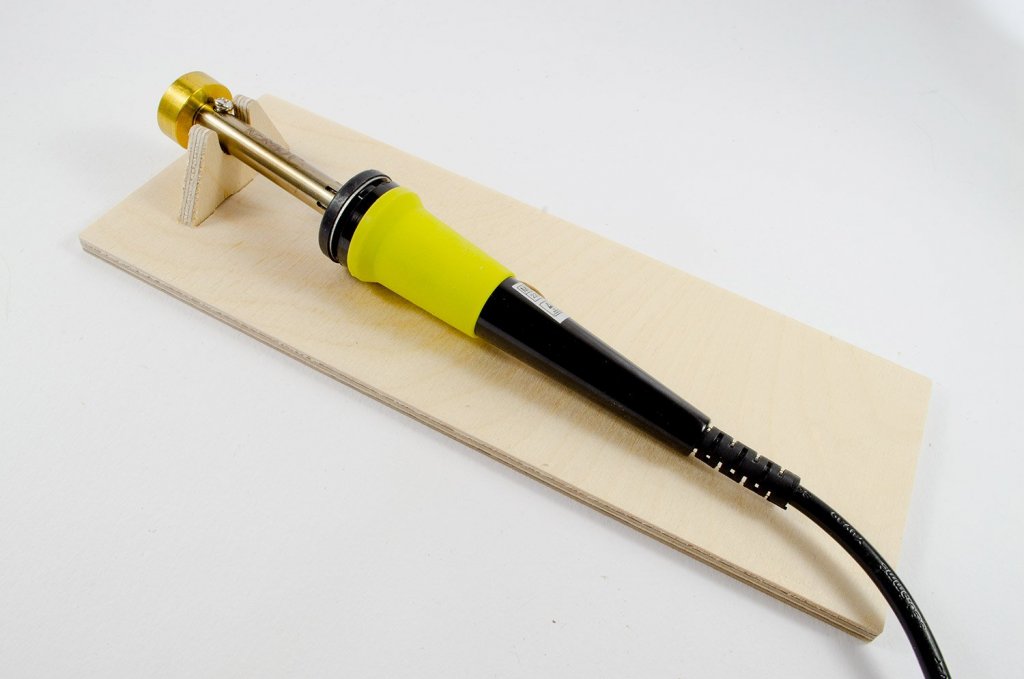
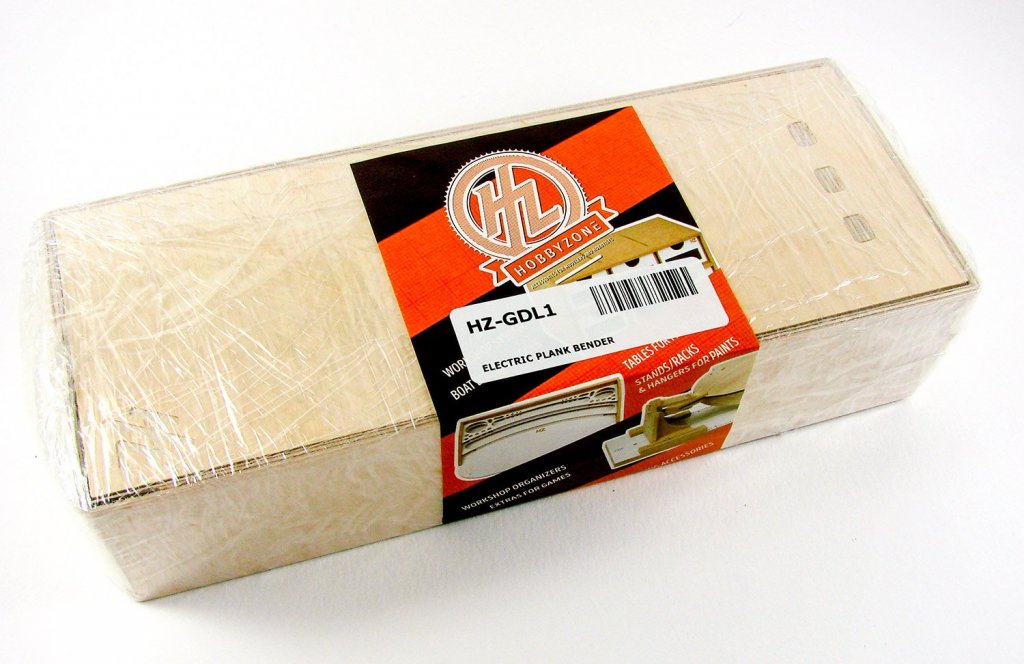
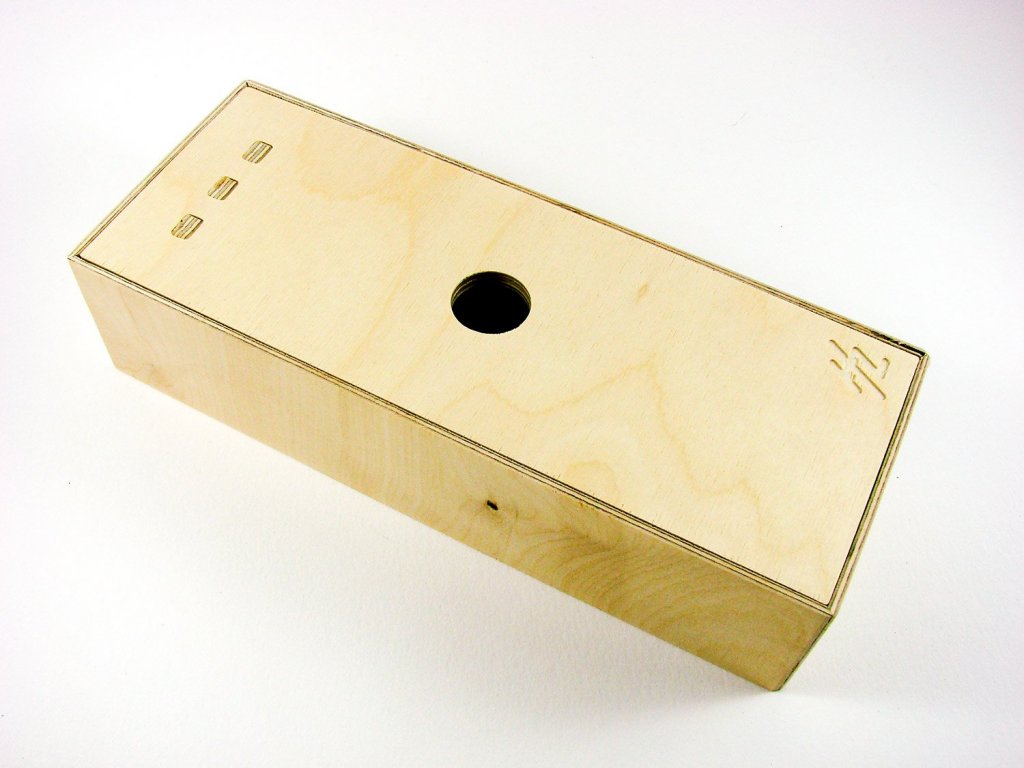
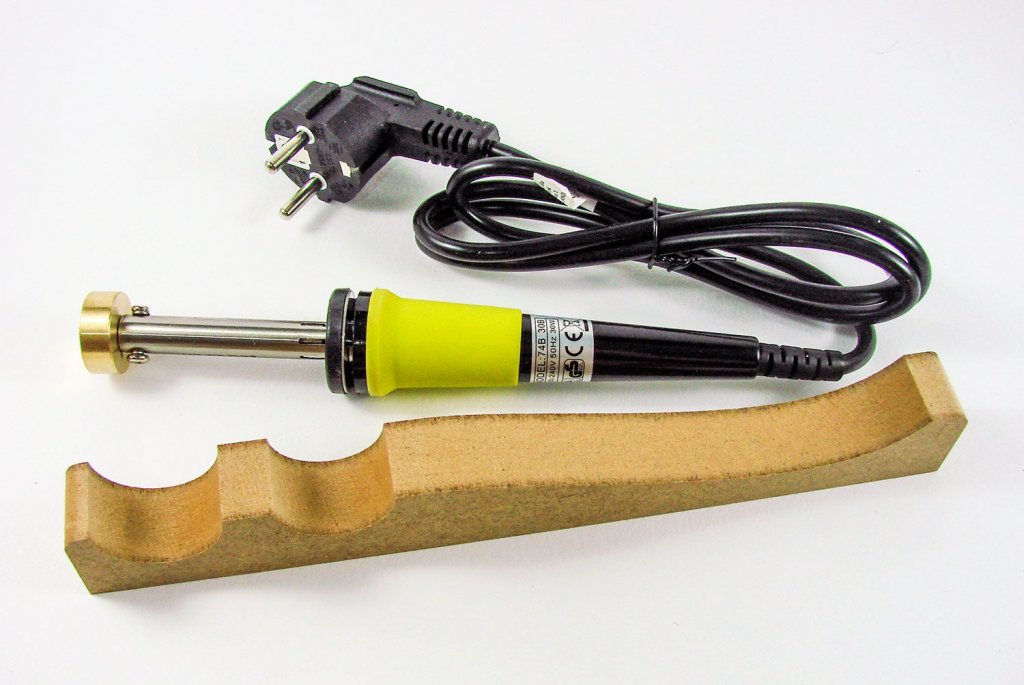
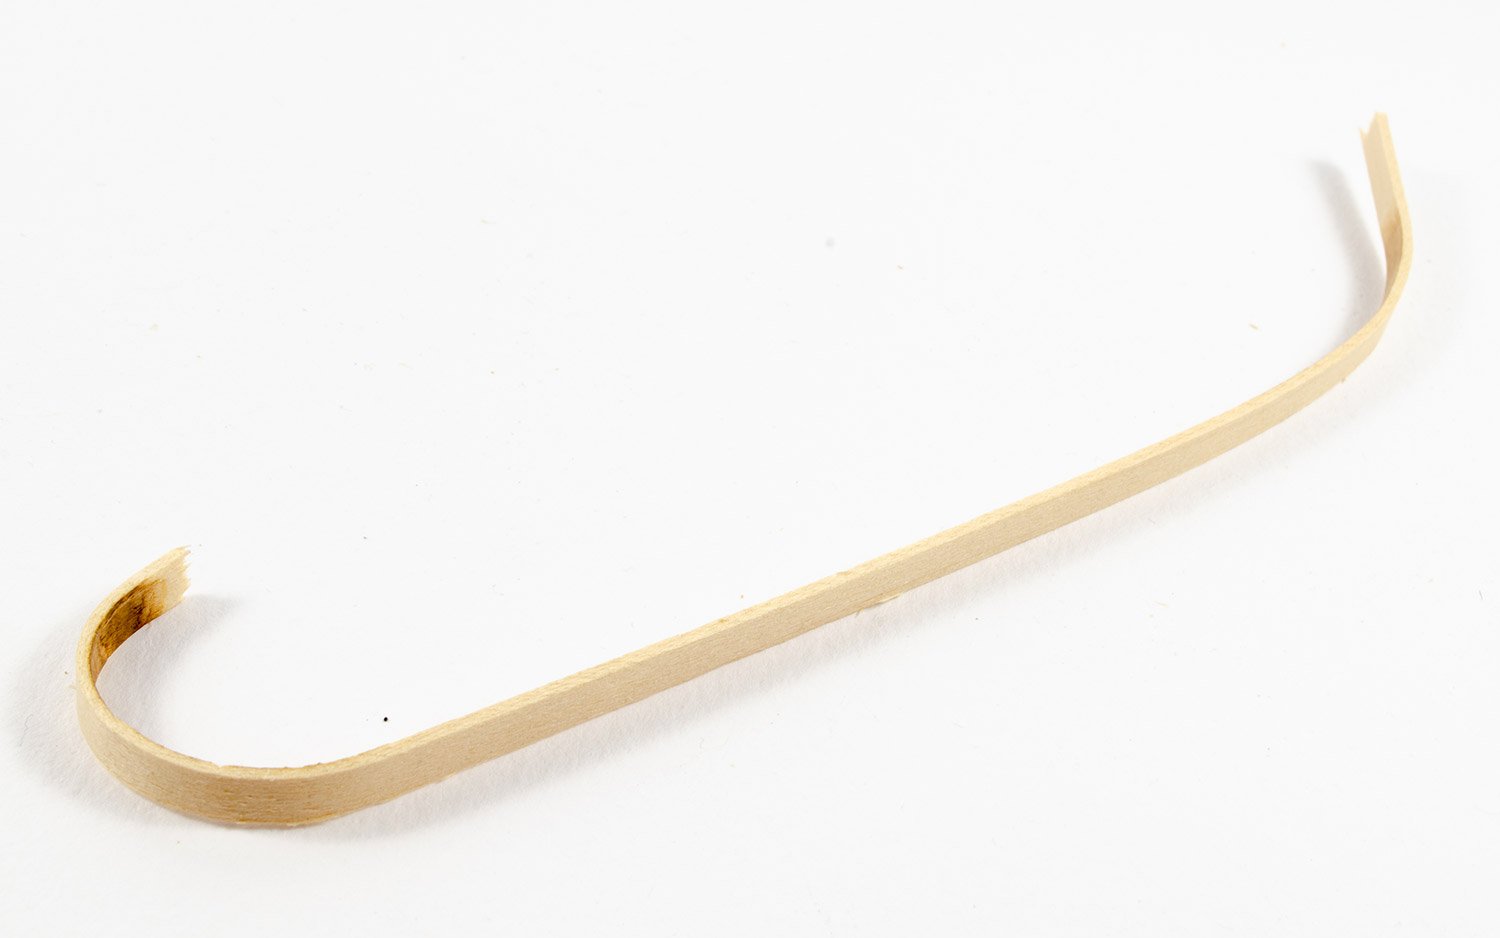
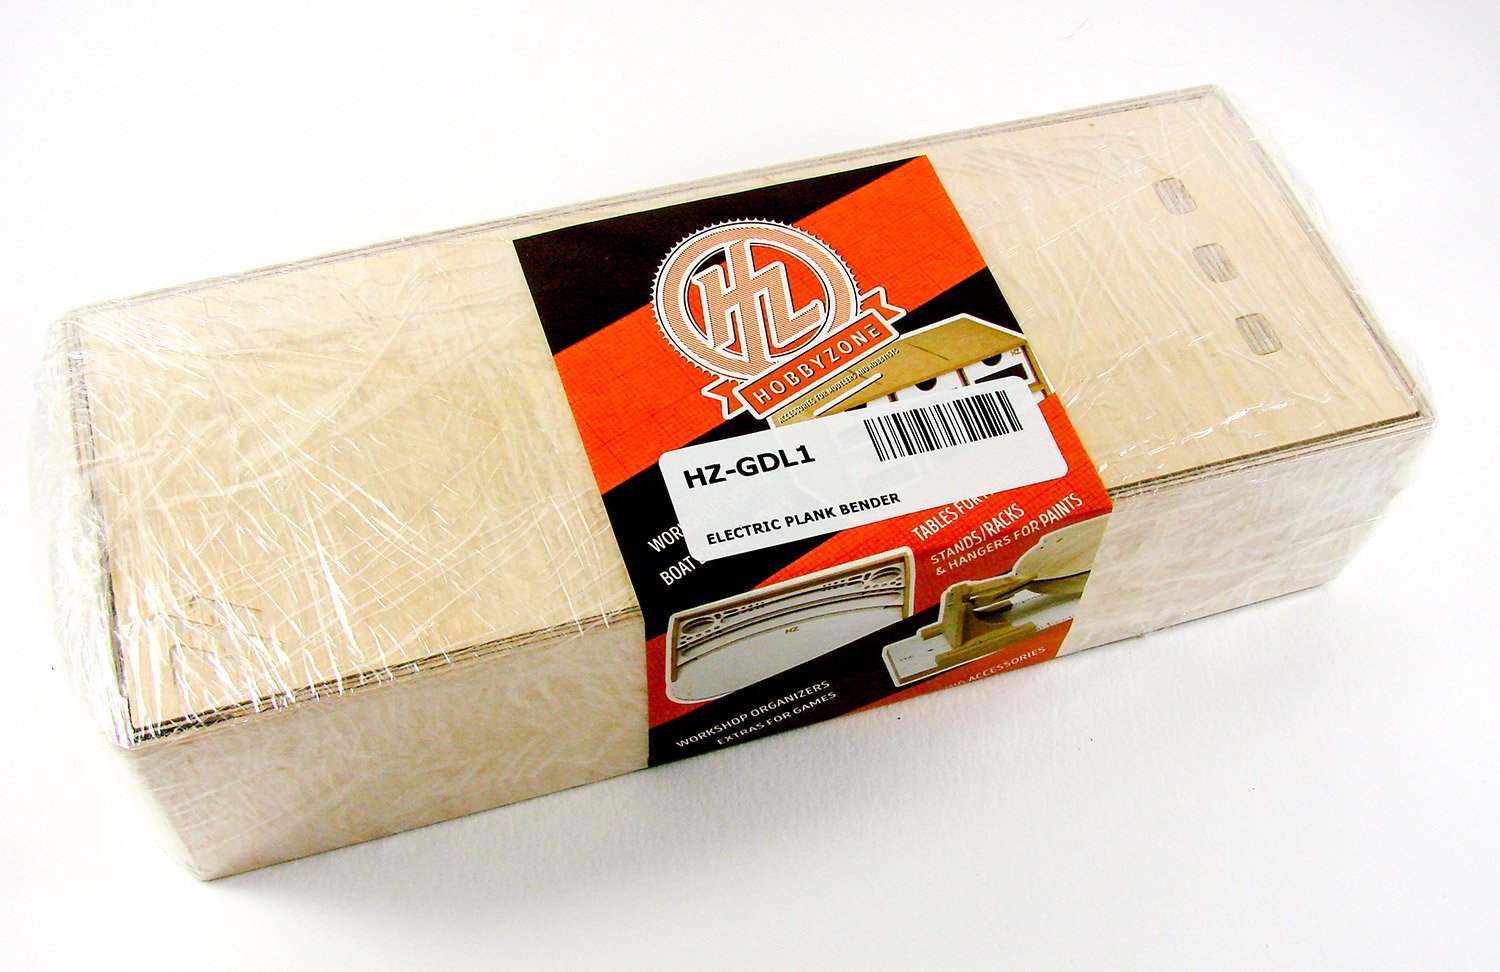
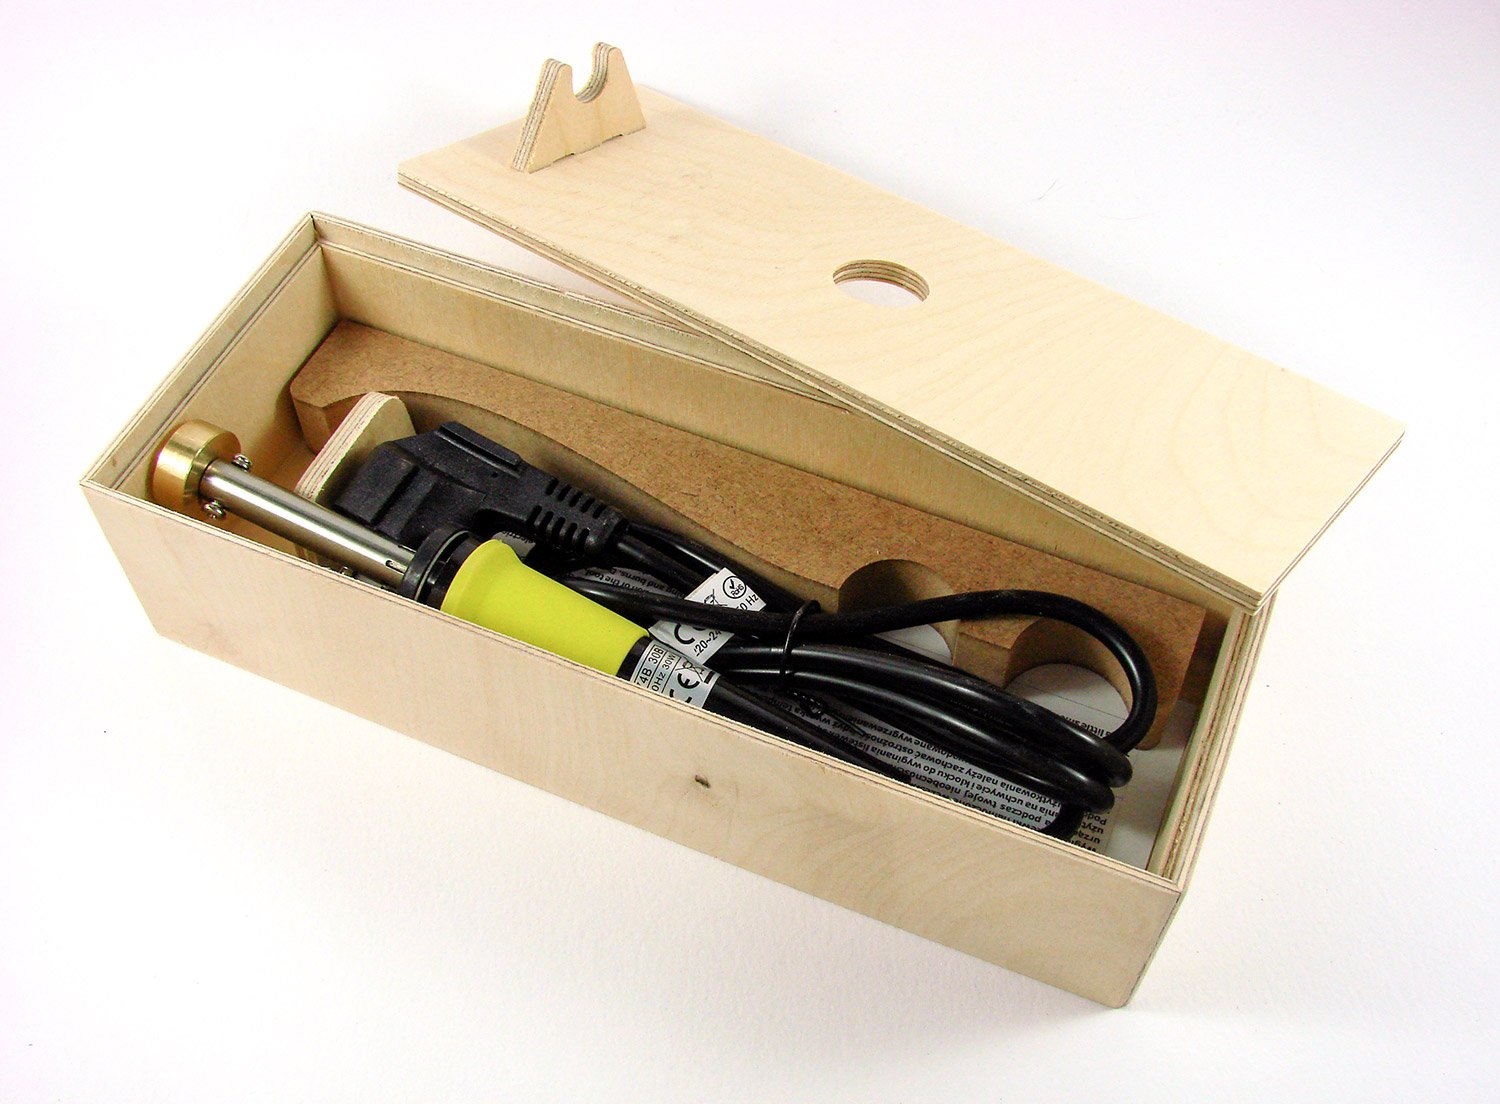
Electric Plank Bender Hobbyzone Catalogue # HX-GDL1 Available from Hobbyzone for £20.63 (as of 10-7-18) There are numerous ways of bending those awkward planks that we regularly see at stern and bow, including soaking in water/macerating fluid that breaks down fibres, and then twisting. You can of course use a plank nipper, such as that from Amati, drum roller such as the Mantua release, or you can use an electric plank bender. The latter isn’t exactly a new way of shaping your planks to the required curve, but this new release from Hobbyzone is certainly a quality and affordable way to achieve it. Hobbyzone’s electric plank bender is packed into a sturdy plywood box which is then heavily wrapped in plastic film onto which the product label is affixed. Once the packing is removed, the lid of the box is lifted via a finger hole in the centre of the lid. Inside, we have the electricplank bending tool itself, lying alongside the curved forming tool. The electric part of this is a 240v unit and comes with a European standard 2-pin plug. For my tests, I converted this with a 3-pin UK travel adapter. I think that the basis for the plank bender is possibly a soldering iron or similar, but instead of a pointed tip, this unit has been fitted with a circular brass head that is the correct size to roll around the smaller of the curves on the forming block. Inside the bottom of the box is a sheet that explains that your planks must first be soaked, and that you may well experience some smoke emanating from the unit for the first 10 minutes after the very first use. Note also that the underside of the lid has a rest for sitting the electric tool whilst not in use. *CAUTION* NEVER LEAVE THE PLANKIG TOOL UNATTENDED WHILST POWERED**….simple safety tip! The forming tool is made from very thick MDF and contains two different sized scoop profiles, plus a gentler curving sweep. You can of course use different sections of these profiles to greater or lesser degrees, and it does seem very similar to the formers in other manufacturer’s products. To test, I first soaked my limewood planks for about 30 to 40 mins in plain cold water, and then with the forming iron fully hot, the plank was laid across the shallow curve and the iron gradually rolled into it. The timber formed itself into the curve very quickly and with minimal physical effort for me to achieve it. The tool was gradually rolled until the wood dried out and the curve remained. For the deeper curves, I first placed only a short length of the timber into the former, and then rolled the iron, pushing the timber into the former a little extra each time until I had achieved the full curve. I did experience a little scorching on the internal area, but nothing too major. I think that longer soaking for more pronounced curved would minimise this even more, but the plank shaped superbly. Resting the iron, whilst hot, onto the stand, caused almost zero scorching from the iron, so I have no qualms about using the stand for just that. Conclusion A superb tool at a very reasonable price. This currently retails for just over £20, minus shipping, and is very easy to use. The whole lots packs neatly into that plywood box too, so no loose tools lying around. I couldn’t see a wattage listed on the unit, and I don’t think this is currently available in anything other than 220/240v, but it could be worthwhile approaching Hobbyzone to clarify that.