Search the Community
Showing results for tags 'junk'.
Found 8 results
-
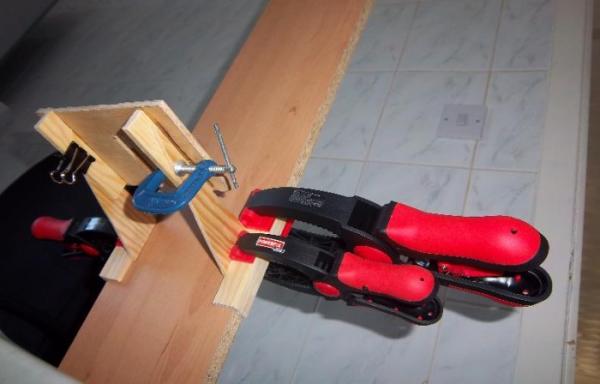
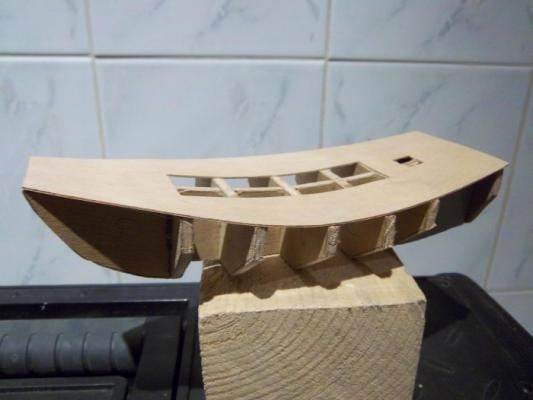
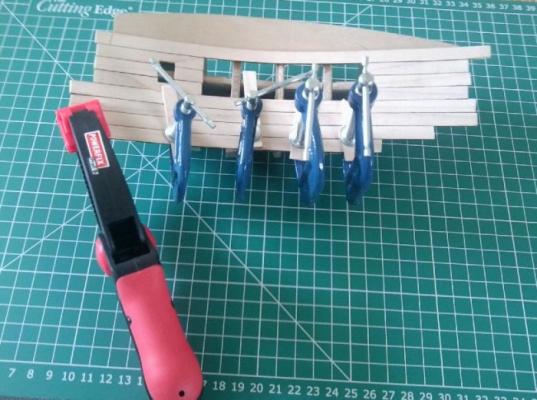
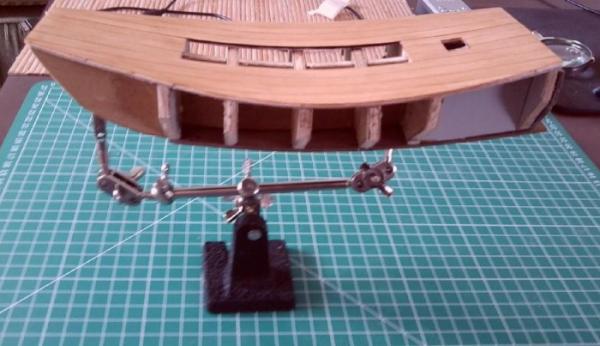
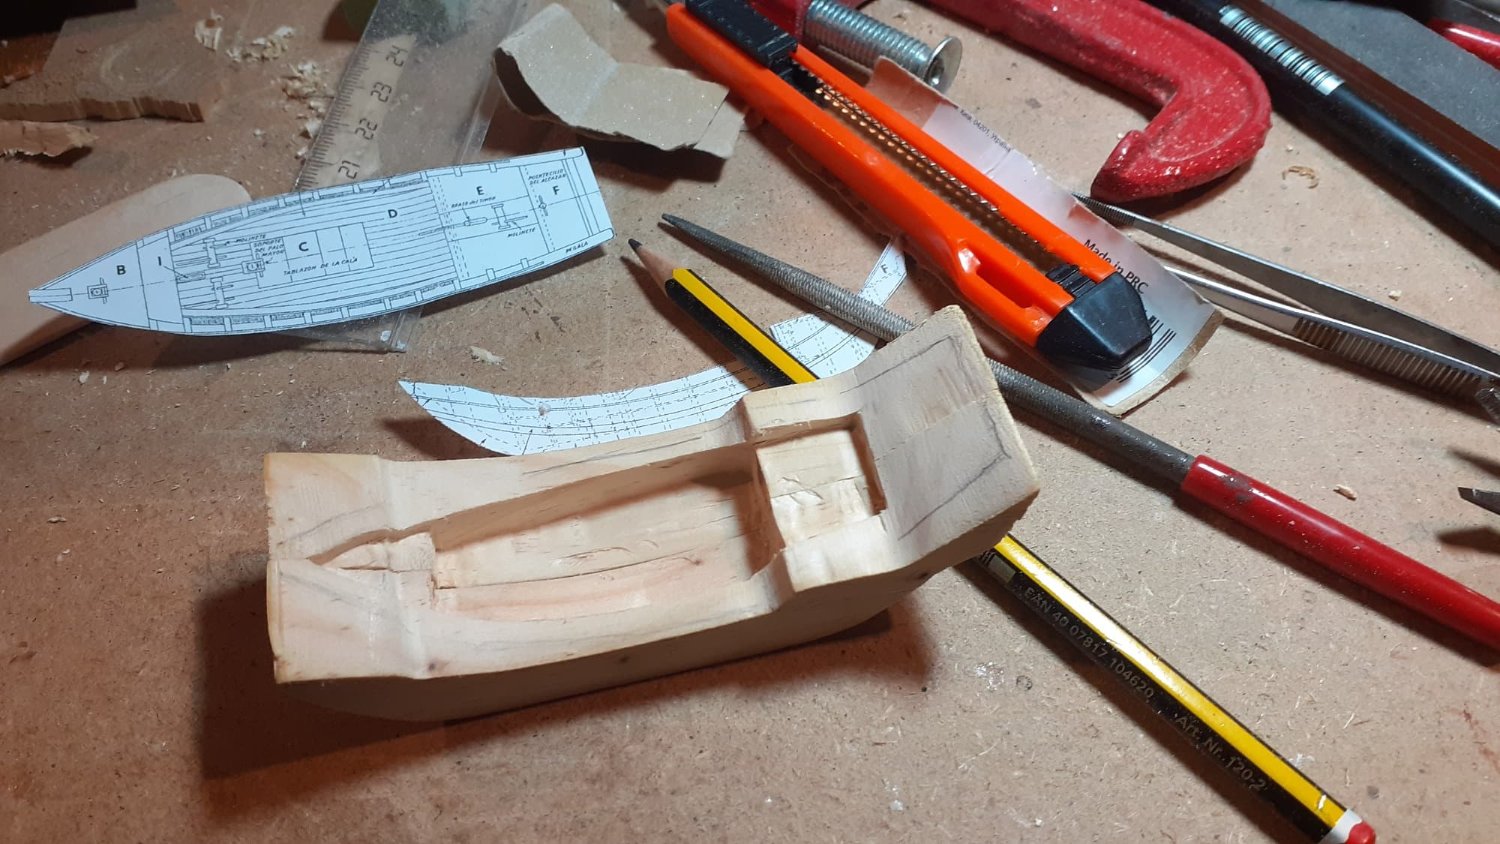
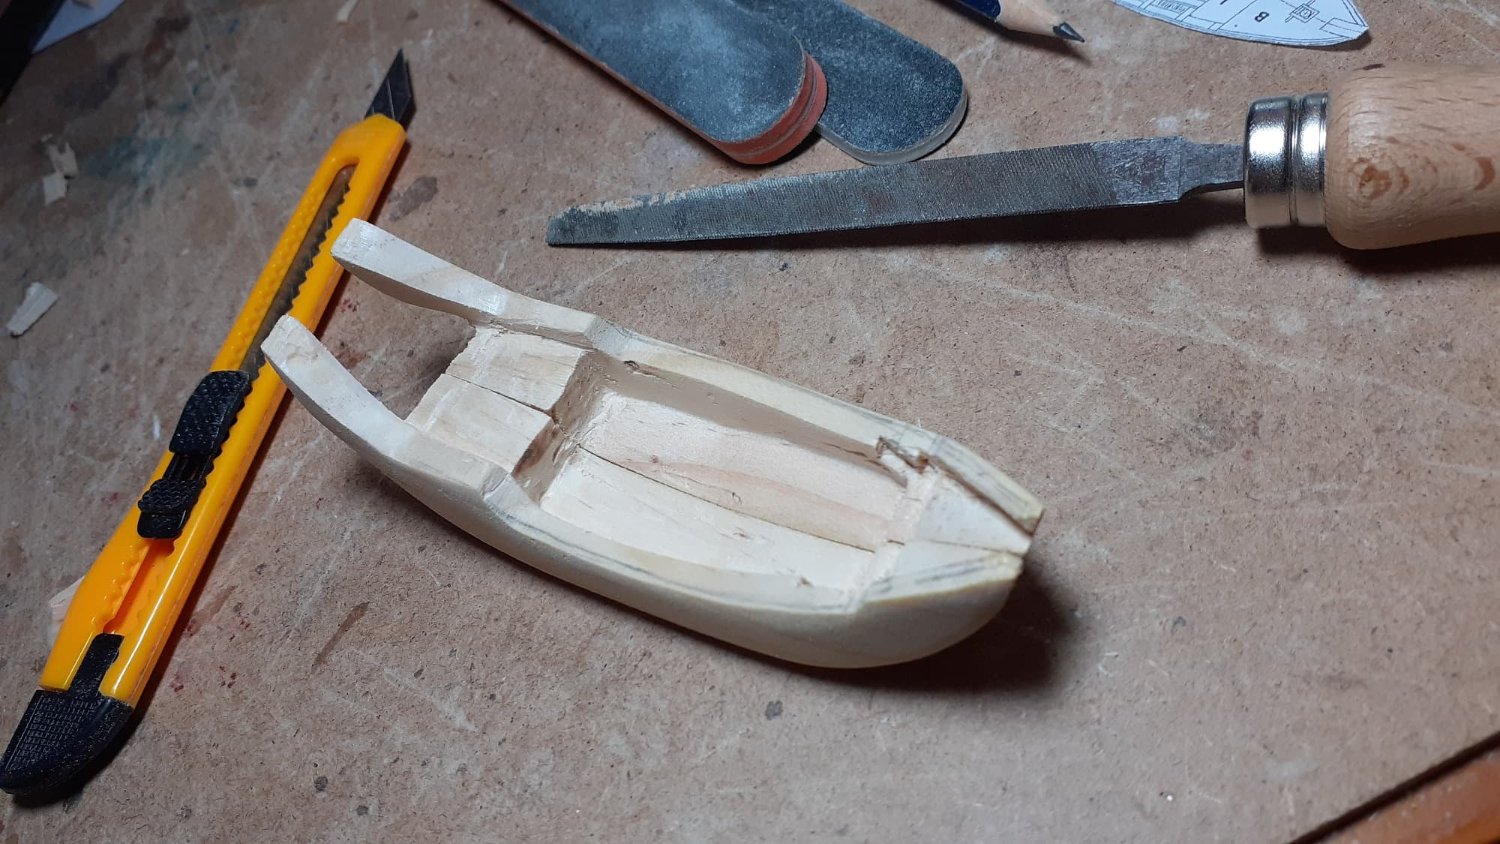
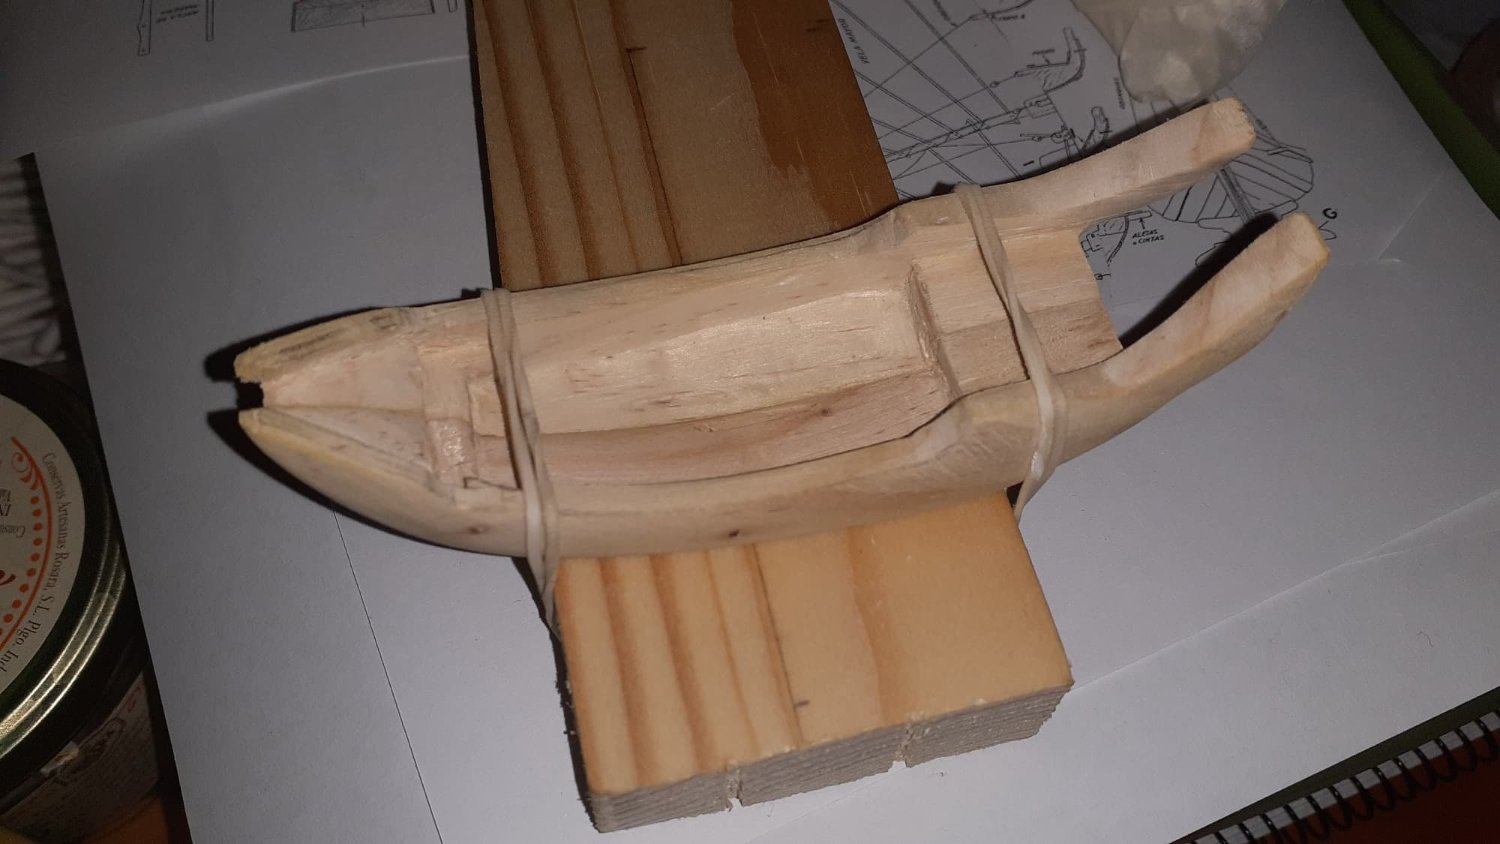
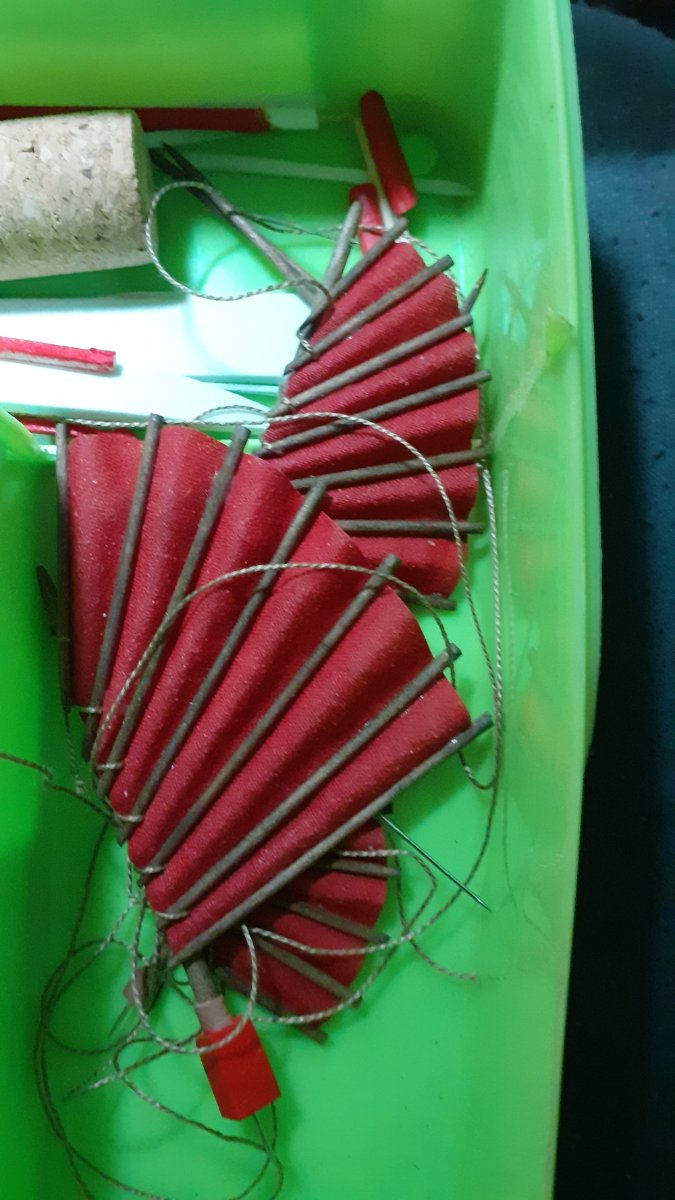
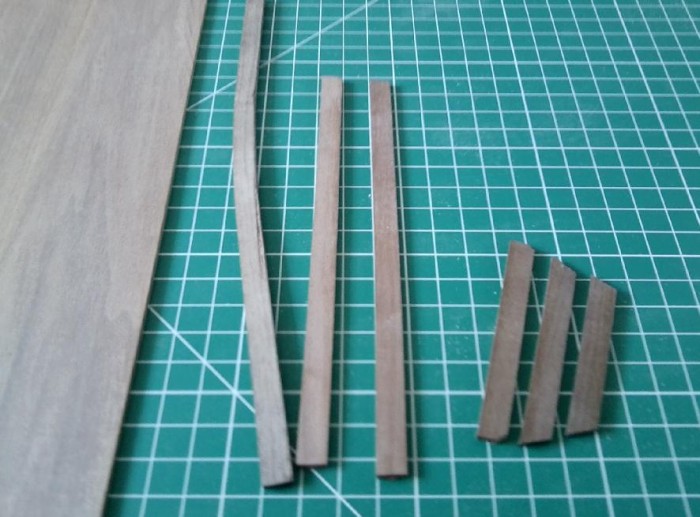
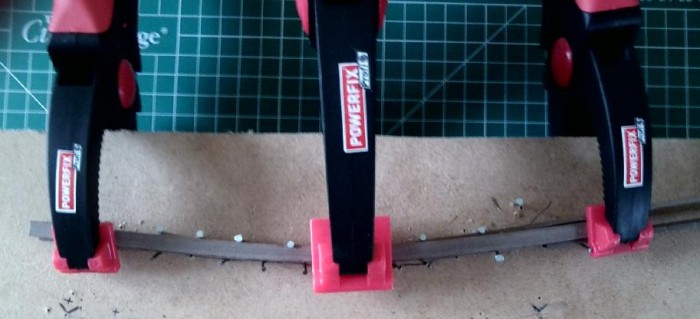
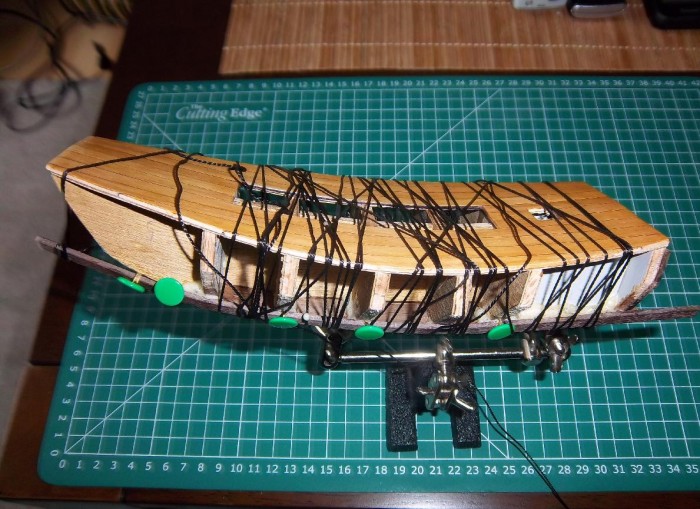
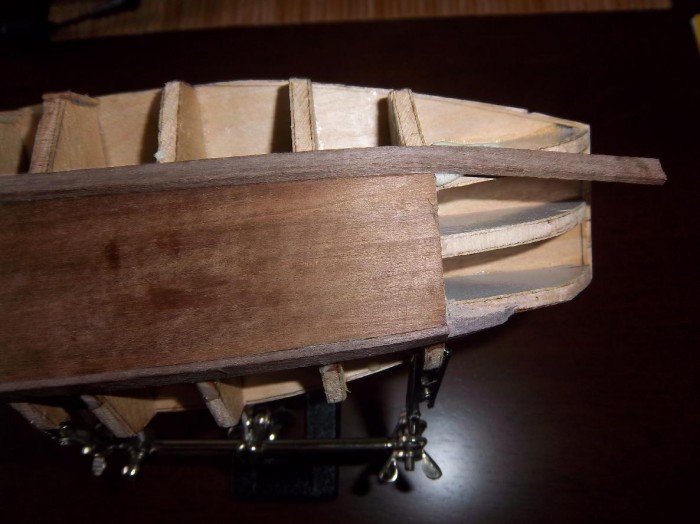
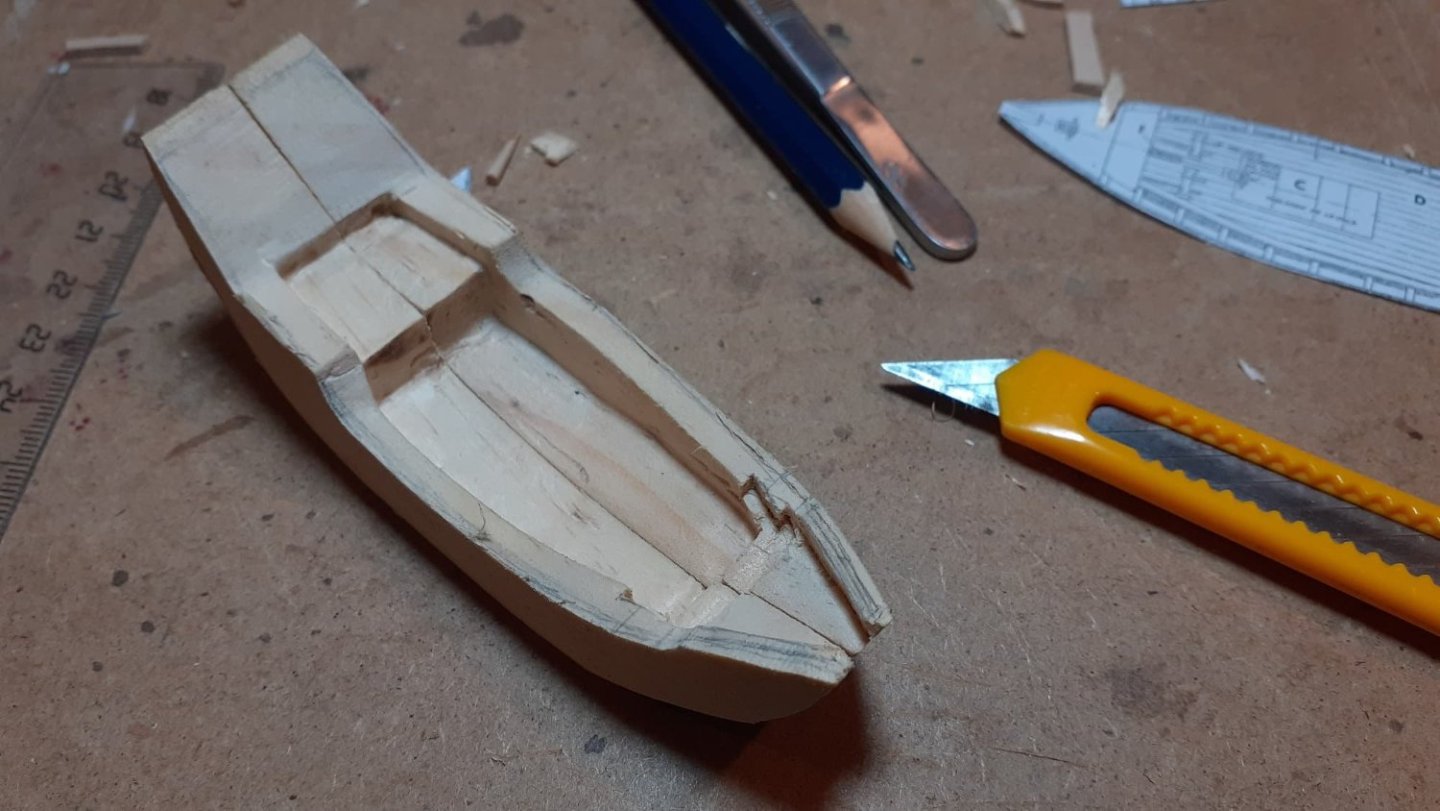
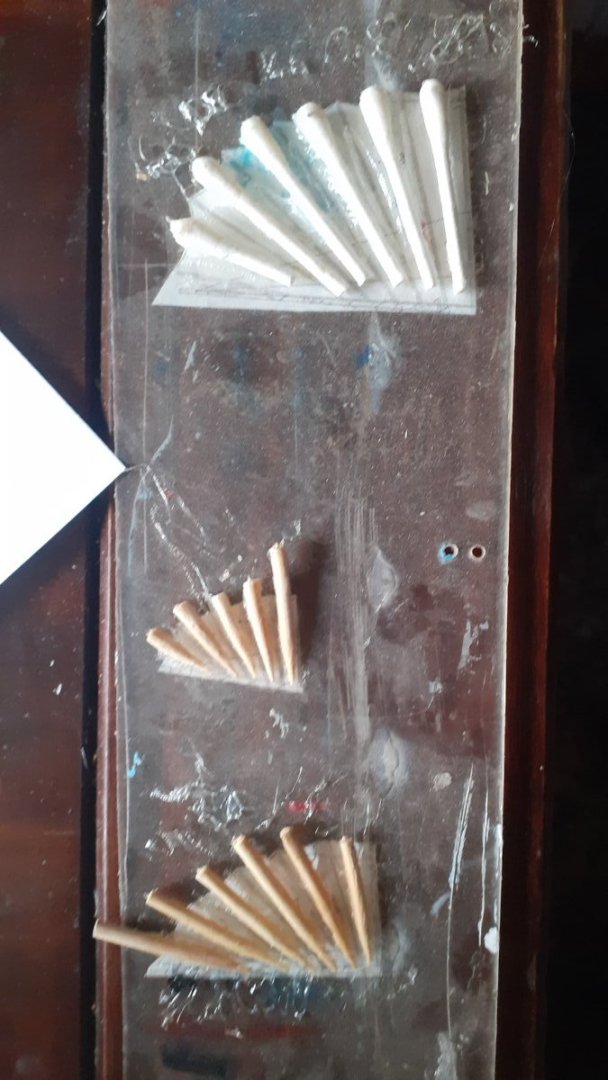
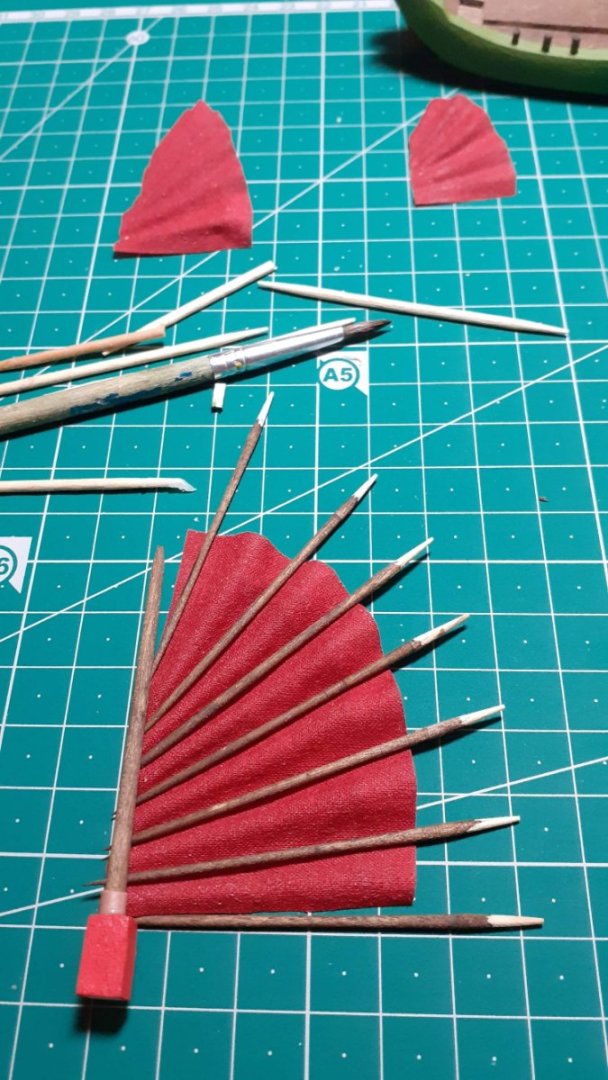
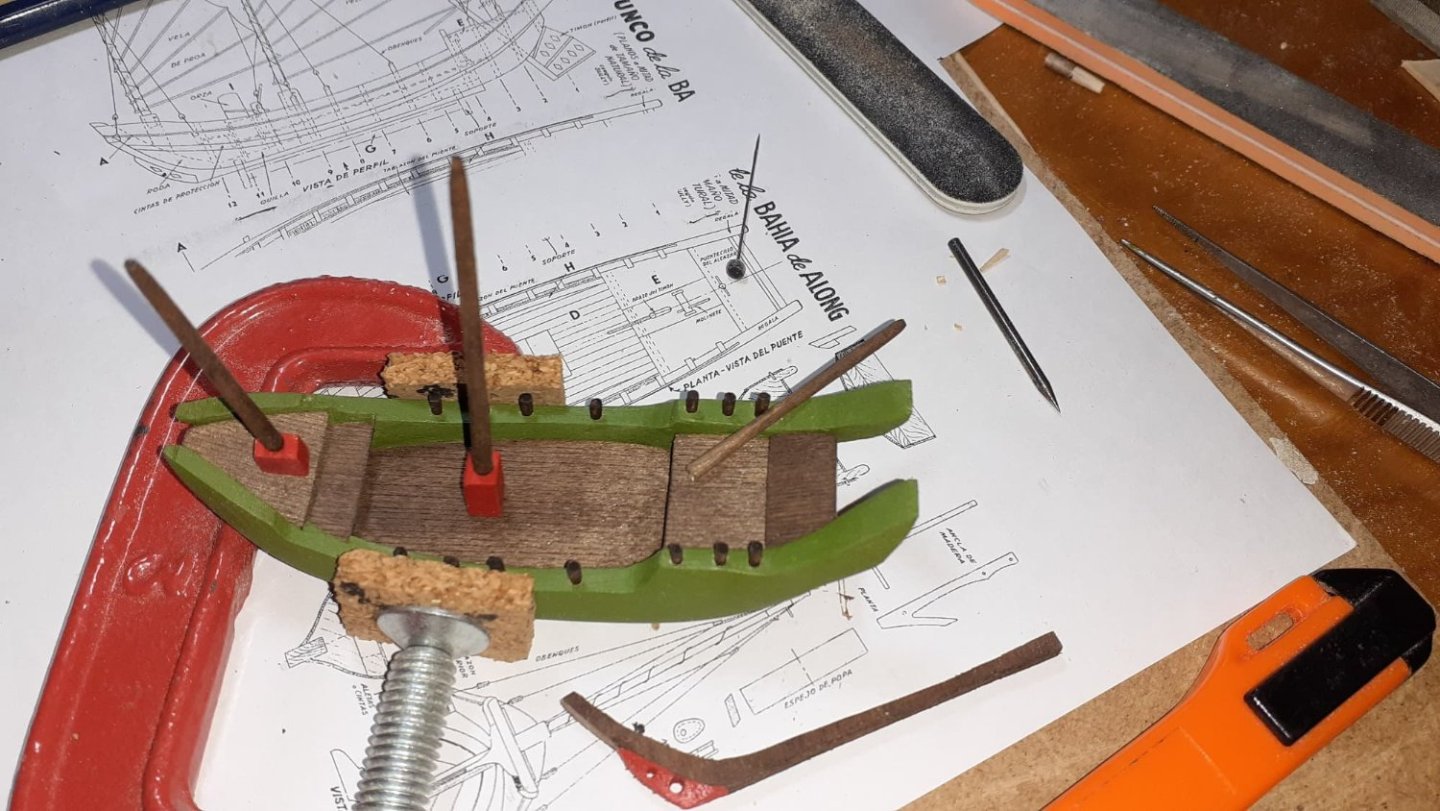
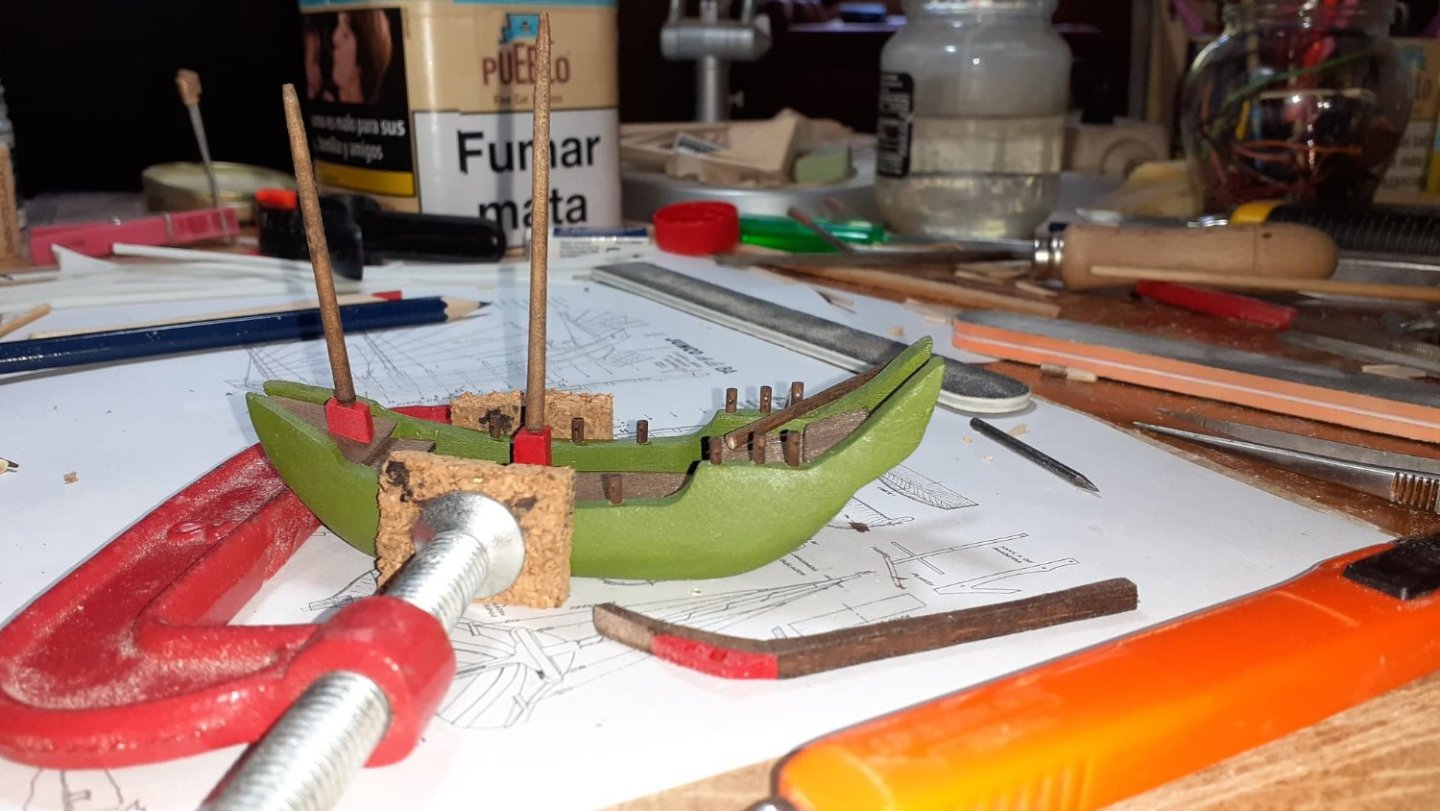
 Good afternoon: The first thing would be to apologize for having written in Spanish... but that would be a lie. I write in Spanish in Google translate, I copy the English translation and I always have it. Let's see if this tenth attempt goes well and if not don't blame me and see if someone with more knowledge in this tells me what can happen and how to solve it, thanks. I have already identified the problem every time I edit two or three paragraphs, I have to go image by image and click to edit, all of the above is passed from English to Spanish. I'm going to see if I can do it in one fell swoop, and if it doesn't work, I give up. Let's do it on an eleventh try. The junk is possibly one of the oldest known sailing ships, having been documented to appear in 600 BC and is still in use in many parts of Southeast Asia. The technique of manufacturing watertight compartments from Chinese junks. The hull has a short stern and no keel. They were the signature ships of the China Sea and were used by both Genghis Khan and Kublai Khan in their attempts to conquer Japan. It was produced both for war and for trade. In the 9th century AD. C., Chinese junks transported goods to Indonesia and India. Its sails are made of thick fabric joined with reeds, which gave it great stability and great thrust. The rudder was removable and higher than in common ships, which allowed it to navigate in shallow water. It was one of the favorite ships for piracy on those shores. They were typical throughout the Asian area, with subtle morphological differences between them, but the essence is the same in all of them. I was able to make this boat from plans, which was a real relief for me, because of the ease of having all the measurements, mast angles, deck accessories, etc. once its size has been adjusted to the bottle. It was my fourth boat and I hadn't officially finished it yet, so I hope to do it here. He met problems and challenges as they arose and relied on imagination and invention to get him through. They are missing because some images have been lost but I think the most important thing is. I'll try to explain the process as best I can, but don't forget to use Google translate. Thais is the plan I usted. The technique regarding the hull is the hull divided into two to be able to access the inside of the bottle. Solid hull, we cut the main shape with a fret saw, which we carve with knives, files and fine-tune with sandpaper. Scroll saw and try to get as close as possible to the shape and curves of the ship. There's a lot of work left on that hull, and pictures are missing but it's all razor and sandpaper work. The different forecastles and sterncastles are also well prepared following the plan. With some tinted and adjusted polo sticks we will make the tops and simulate the planking scratching the stick with a pointed tool, not sharp, I used a fine nail to improve the point. We have advanced in the hull, the decks and the masts, all following the dimensions of the plan, we have painted the hull inspired by a photo on the internet in which one appears with red sails. We also have the keel made The masts have pins at their base that penetrate their respective holes in the deck. It facilitates the work and at the time of assembly the ventral part will only be cut one or two millimeters so that it does not collide with the glass roof of the bottle and to be able to assemble them. Prepare a mold to give the sails a little curvature to simulate the effect of the wind, there are those who maintain that the sails of a junk or sampan do not bend due to the effect of the wind, If they are made of interlaced bamboo, you will not see the bulging effect of the air, if they are fabric, don't hesitate, they will bulge. Well, the mold is made from Chinese skewer tips and, for the most part, ear swabs. The fabric is adjusted, taking care to insert kitchen paper between the mold and the fabric. The fabric is soaked with water and pva in equal parts and adjusted to the mold, we will always cut more fabric than necessary after adjusting the cut. Once dry, the crossbars are made by sharpening toothpicks with sandpaper to sharpen them. The Sails are already configured to suit you, exactly the same as the plan, they are sewn to the mast, thread and needle and we reserve them for when they have to be finished. Cheers
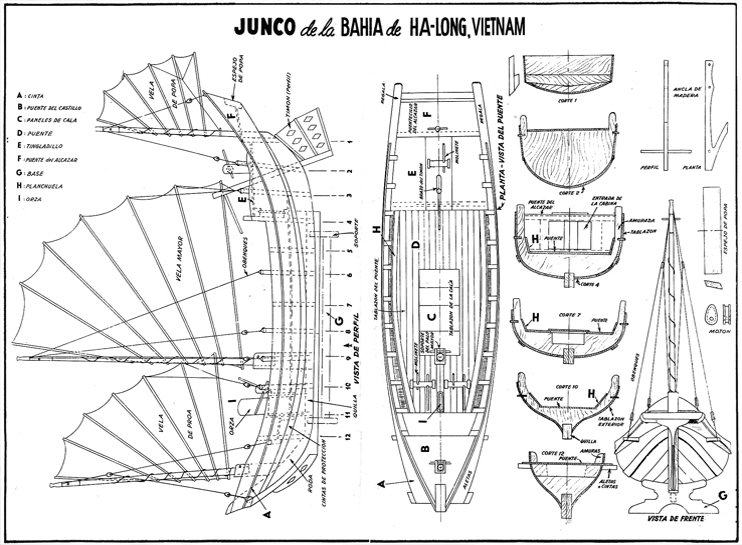


-
 As I was finishing the Independence build, my son who is a student of Asian history suggested that I do a Chinese junk ship in a bottle next. So when the Independence was done, I started playing around with what to do for the project. I came up with a few ideas for the display base, one being a sword holder, which my son particularly liked. We found one on Amazon for a samurai sword with a Chinese dragon carving. He really liked the design and I thought the shape would work well with the profile of a bottle - the neck would rest on the dragon’s head with the end of the bottle resting on the dragon’s tail.
- 194 replies
-
- 7
-

-
- Bottle
- Treasure Fleet
- (and 3 more)
-
 Click on the tags in the title above (shown in black) for an instant list of all the build logs for that kit subject.
 -
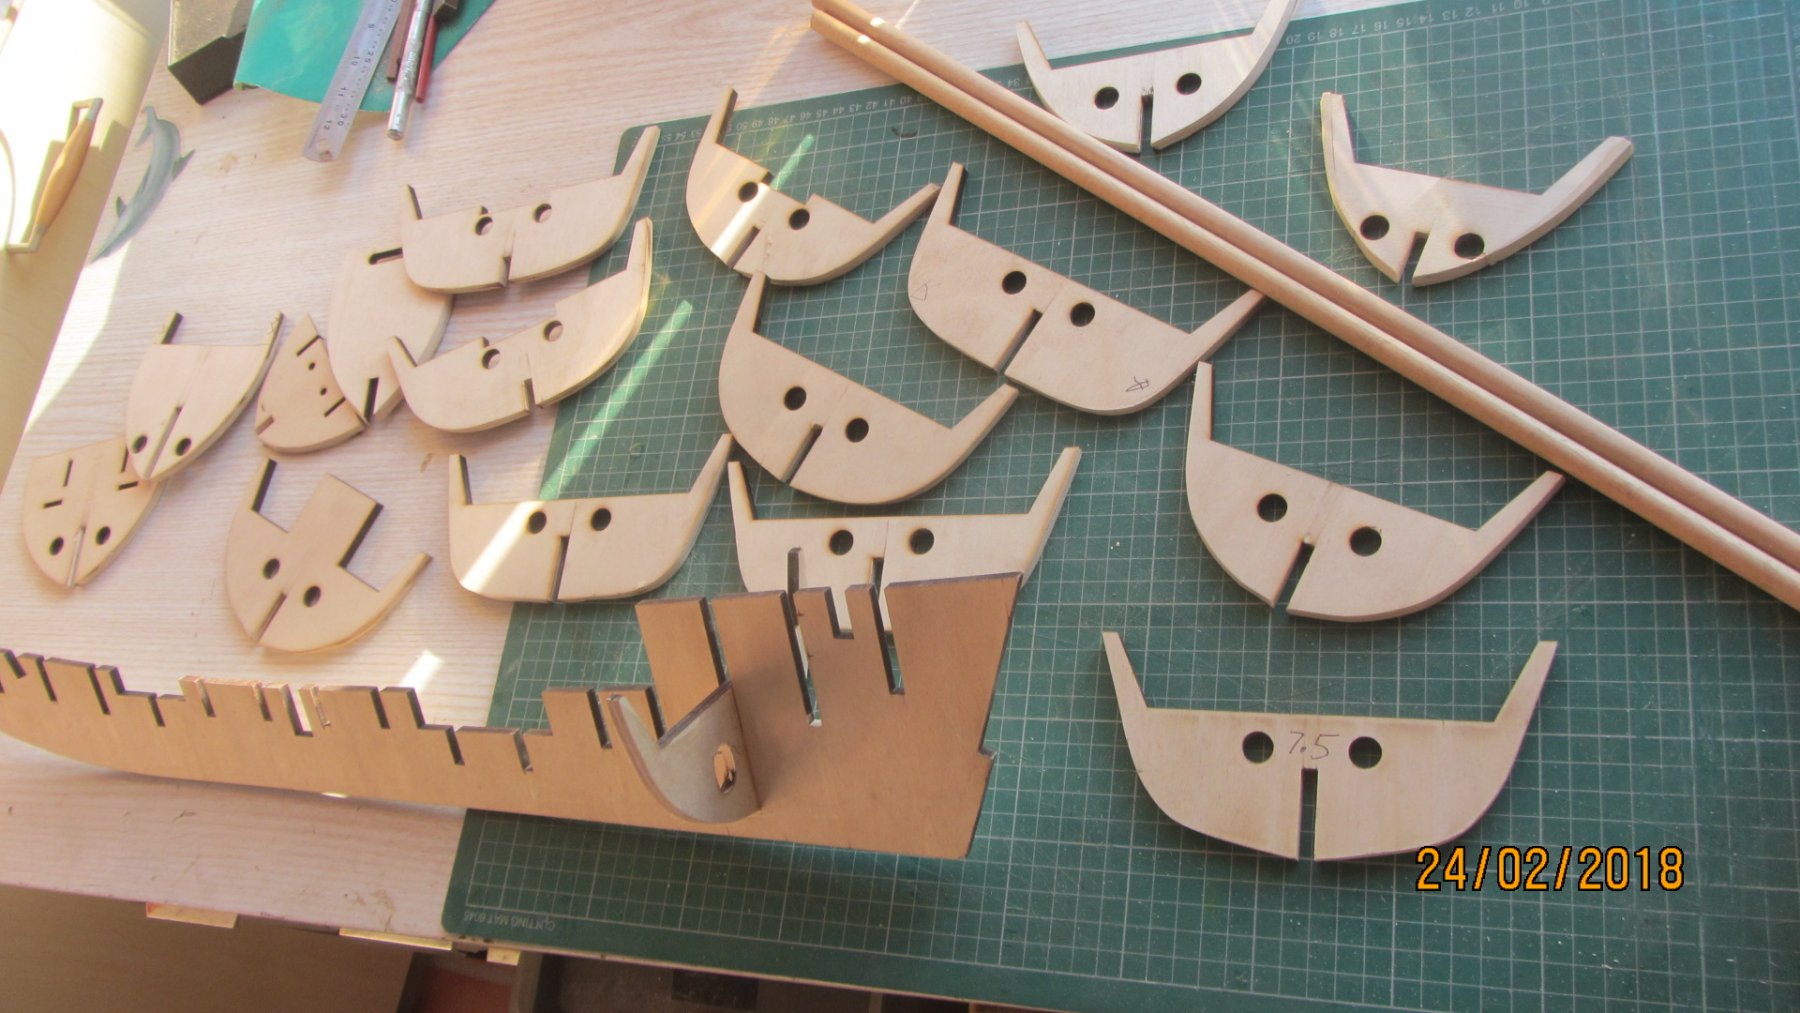
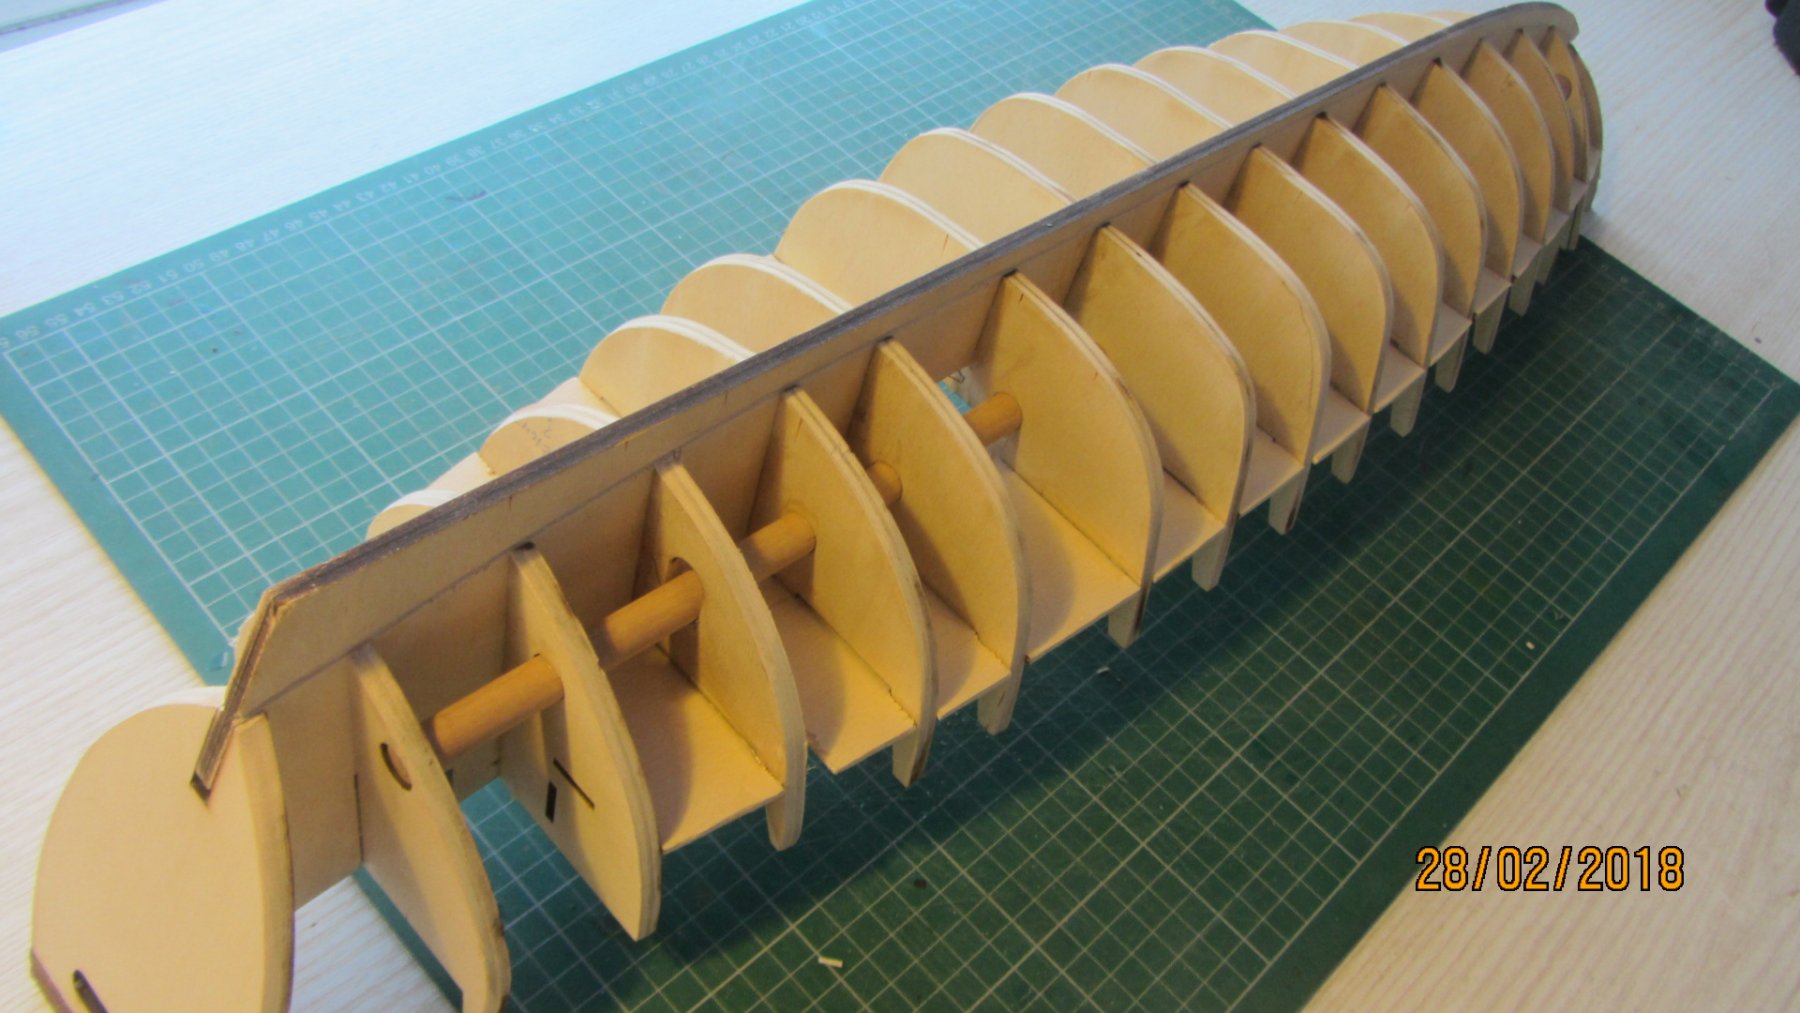
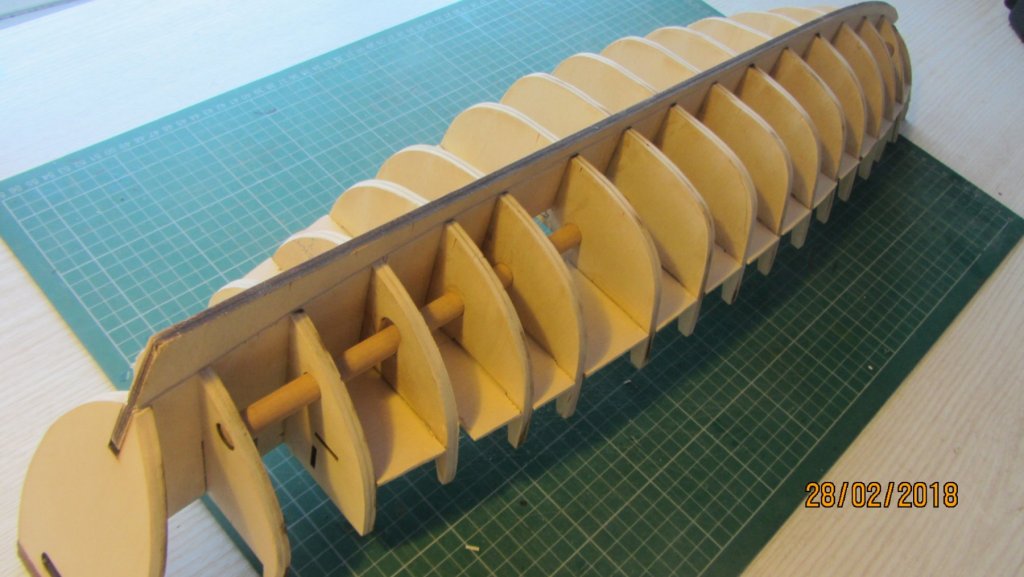
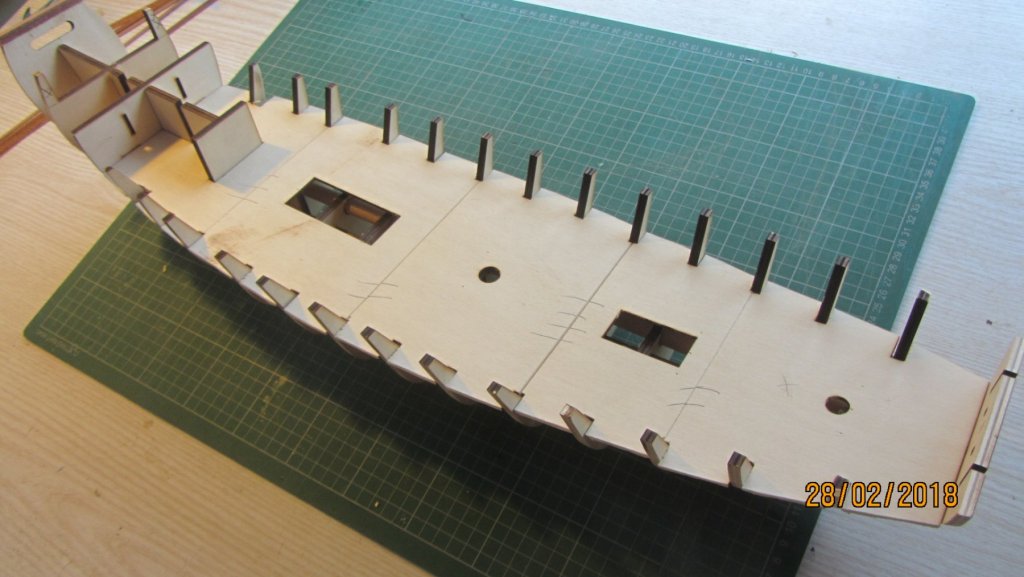
 Hi. Welcome to the Chinese Pirate Junk build. This is based on the Amati model and lines were taken from there plans.(with lots of modifications.) The plans were modified with Adobe Illustrator CS2 which is my chosen software. Extra bulkheads were added and some bulkheads were changed to match the lines that I wanted. Junk Antony.pdf My drawings converted into PDF. The 6mm and 3mm plywood used to the decks and bulkheads were cut by Laser cutting service http://www.pbmodelmaking.co.uk/laser-cutting-service/4588356832 The cost off the Laser cutting plywood and postage UK. was £32.00 + £7.50 postage Always wanted to make a Junk so here it is. It will be a build and modify as I go build as the drawings will need to be redone with each change of part size. 6mm plywood parts shown below. 3mm parts were of the same quality. The laser cutting was excellent and can recommend the supplier. Fitting the bulkheads to the keel needed just a little sanding for a tight fit. Parts assembled but Not glued yet as there are a lot of adjustments to be made. The dowel is not necessary but I like to include in to the design to hold the boat straight. The deck was made oversize for the laser cutting so it could be trimmed then the drawing updated. Will post more later on this a afternoon. Duty calls. Regards Antony.
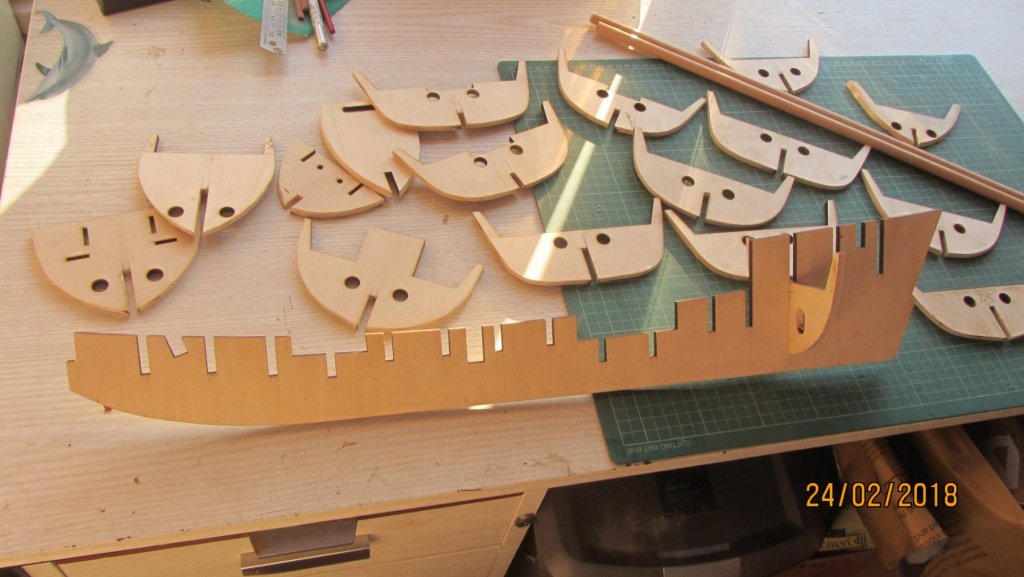


-
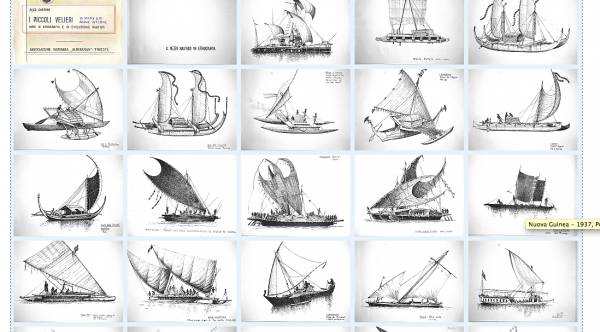
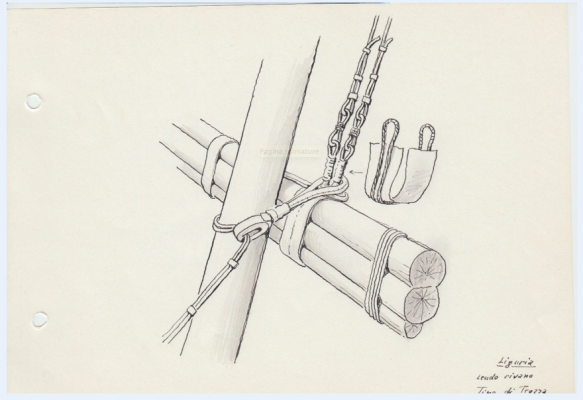
 Found this link on Reddit, looks like13 pages from a sketchbook have been reproduced. http://www.cherini.eu/etnografia/IND/index.html the root website doesn't translate to English but if you click on the hotlinks there is treasure: http://www.cherini.eu/and I do mean TREASURE, I have not seen so much information on delightful non-Western rigs before.
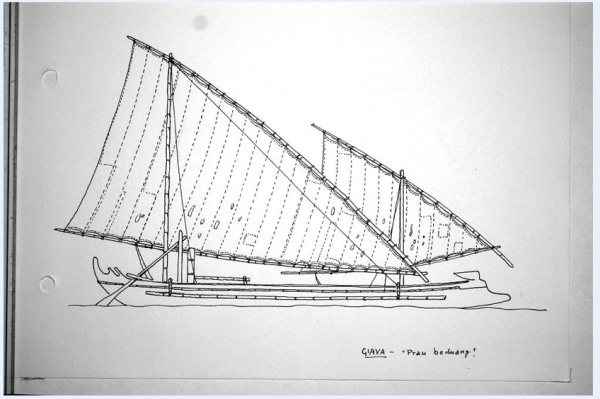

-
 As I say in introducing myself, I am trying tu build Chinese junk as my first model. I choos it because it seems simple to me (what a mistake), there is no bow, and different sails that looks not too complicate. Earlier, it passed few years I thinking about modelling, but always something happened, a job, some familiar things, and only spent a lot of time reading about it and collecting some free plans from net. We have not here possibility shops where can buy plans, specific wood for modelling and tools, and I know that have to improvize while building. Fortunatly, my grandfather was engraver, and left a lot of small hand tools for metal, specific knifes made before WWII for brass, copper, gold or silver, and I have to use it. I have great garage and workshop, but I decided to work in house, near my PC, also, there is wormer, and the winter is coming.. So, I have not kit complete, but I got lot of materials and Amati plans from one experienced expert here, and first choose very small corner in my room while my wife was very angry. I took the patrt from my office table and put it near the window with fantastic view to my flowers and trees. and.. I started in 21. may. First, I put the scellet without glue, just to watch how it looks like, is the laser cutting precisely. Even and me, nonexperiance amateur noticed that cutting was not good. Ribs 9, 10 and 11 were too deep, and going under the keel. But in plans there is just that dimensions, I compared? There is problem: So I started with improvisations. I Inserted small part a 5 mm long in slot 11, thinking what consequences will be at the end. But, I always have a little help from my assistent I do not know how many photos is limit to one post, and will be continue..
 -
 A long time ago in a Modelshipworld forum far, far away ...I started a scratch build based on Amati's pirate junk. All went well and I was enjoying the challenge of a first scratch build until, until.... I used 17th century furniture to support the upper deck railings. I actually thought they looked rather neat, especially as I spent an ice age ensuring they were equidistant. Not so, said my mentors. Take them off and do it again. So after 6 years or so of muttering, I've done the deed, ripped out the old and replaced them with something more vernacular. So here's the restart. All comments more than welcome.
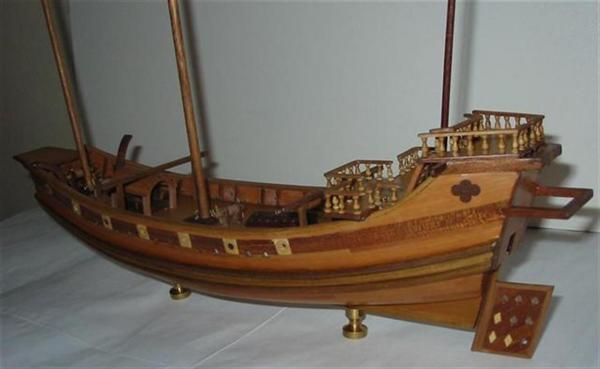
-
 Hello again. Just updating log with my little chinese boat.