Search the Community
Showing results for tags 'king of the mississippi'.
-
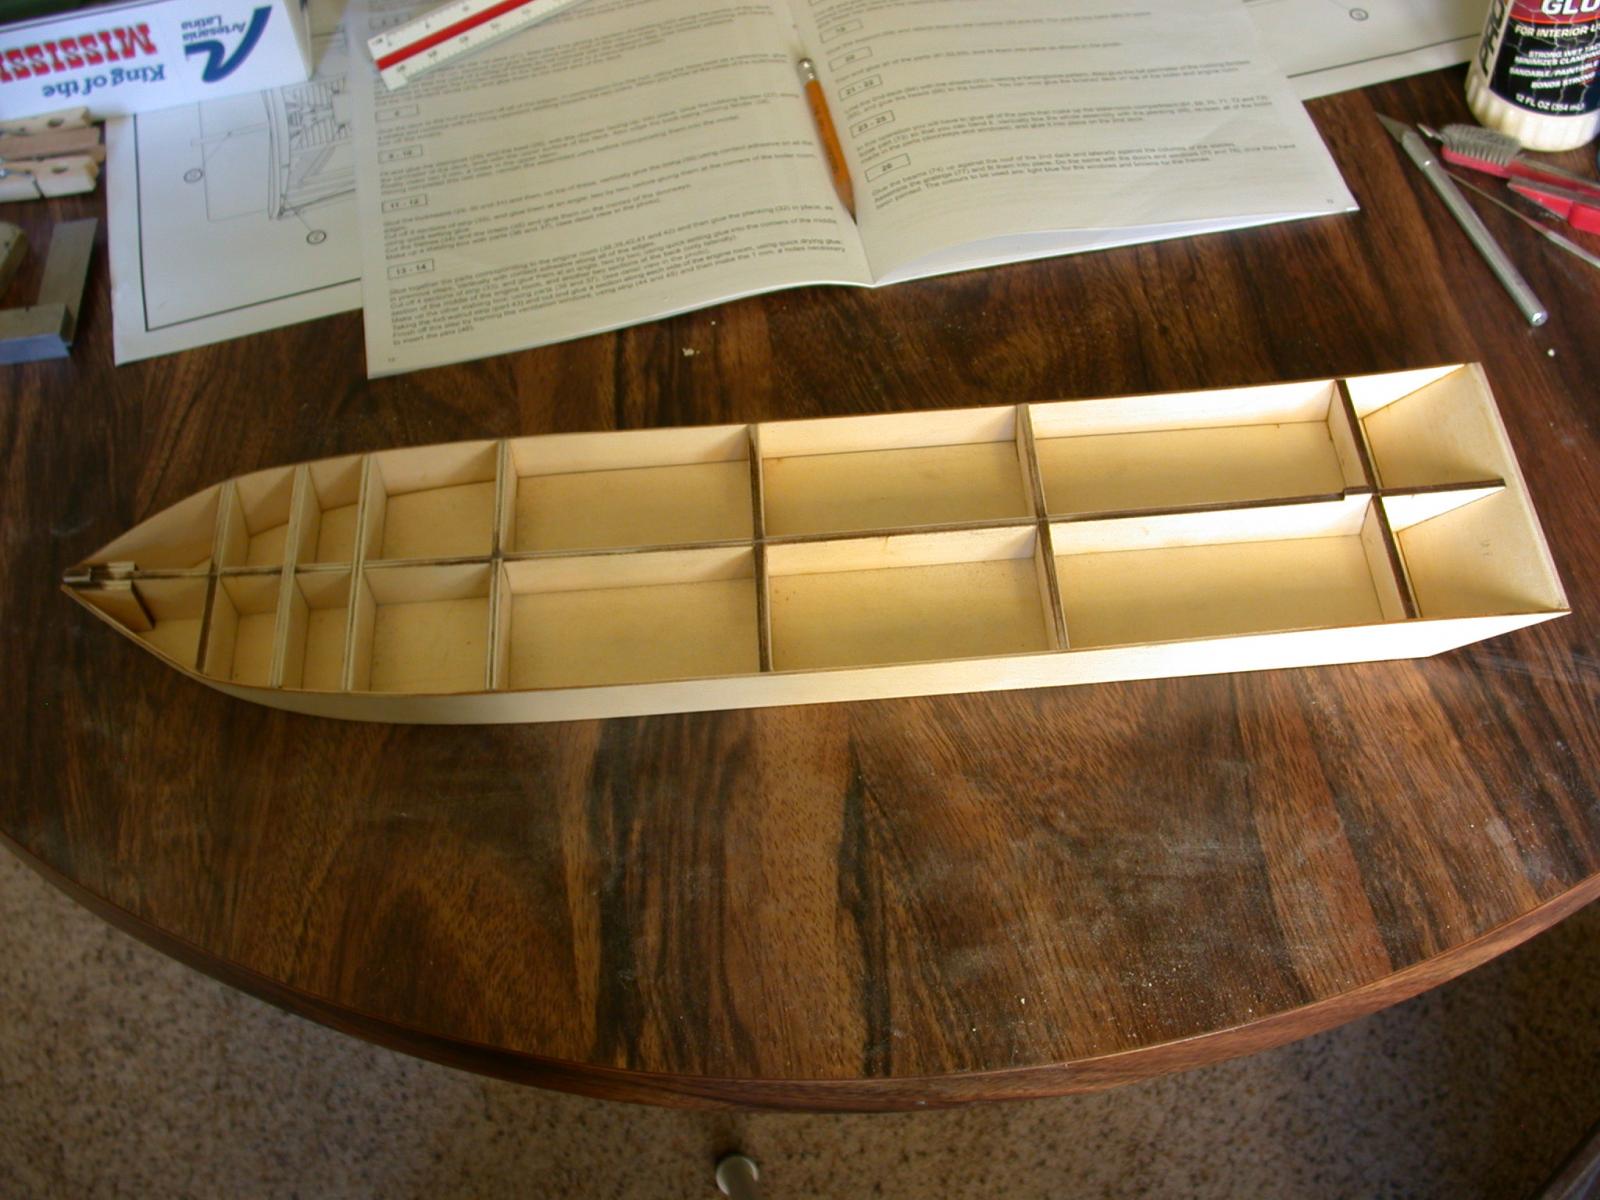
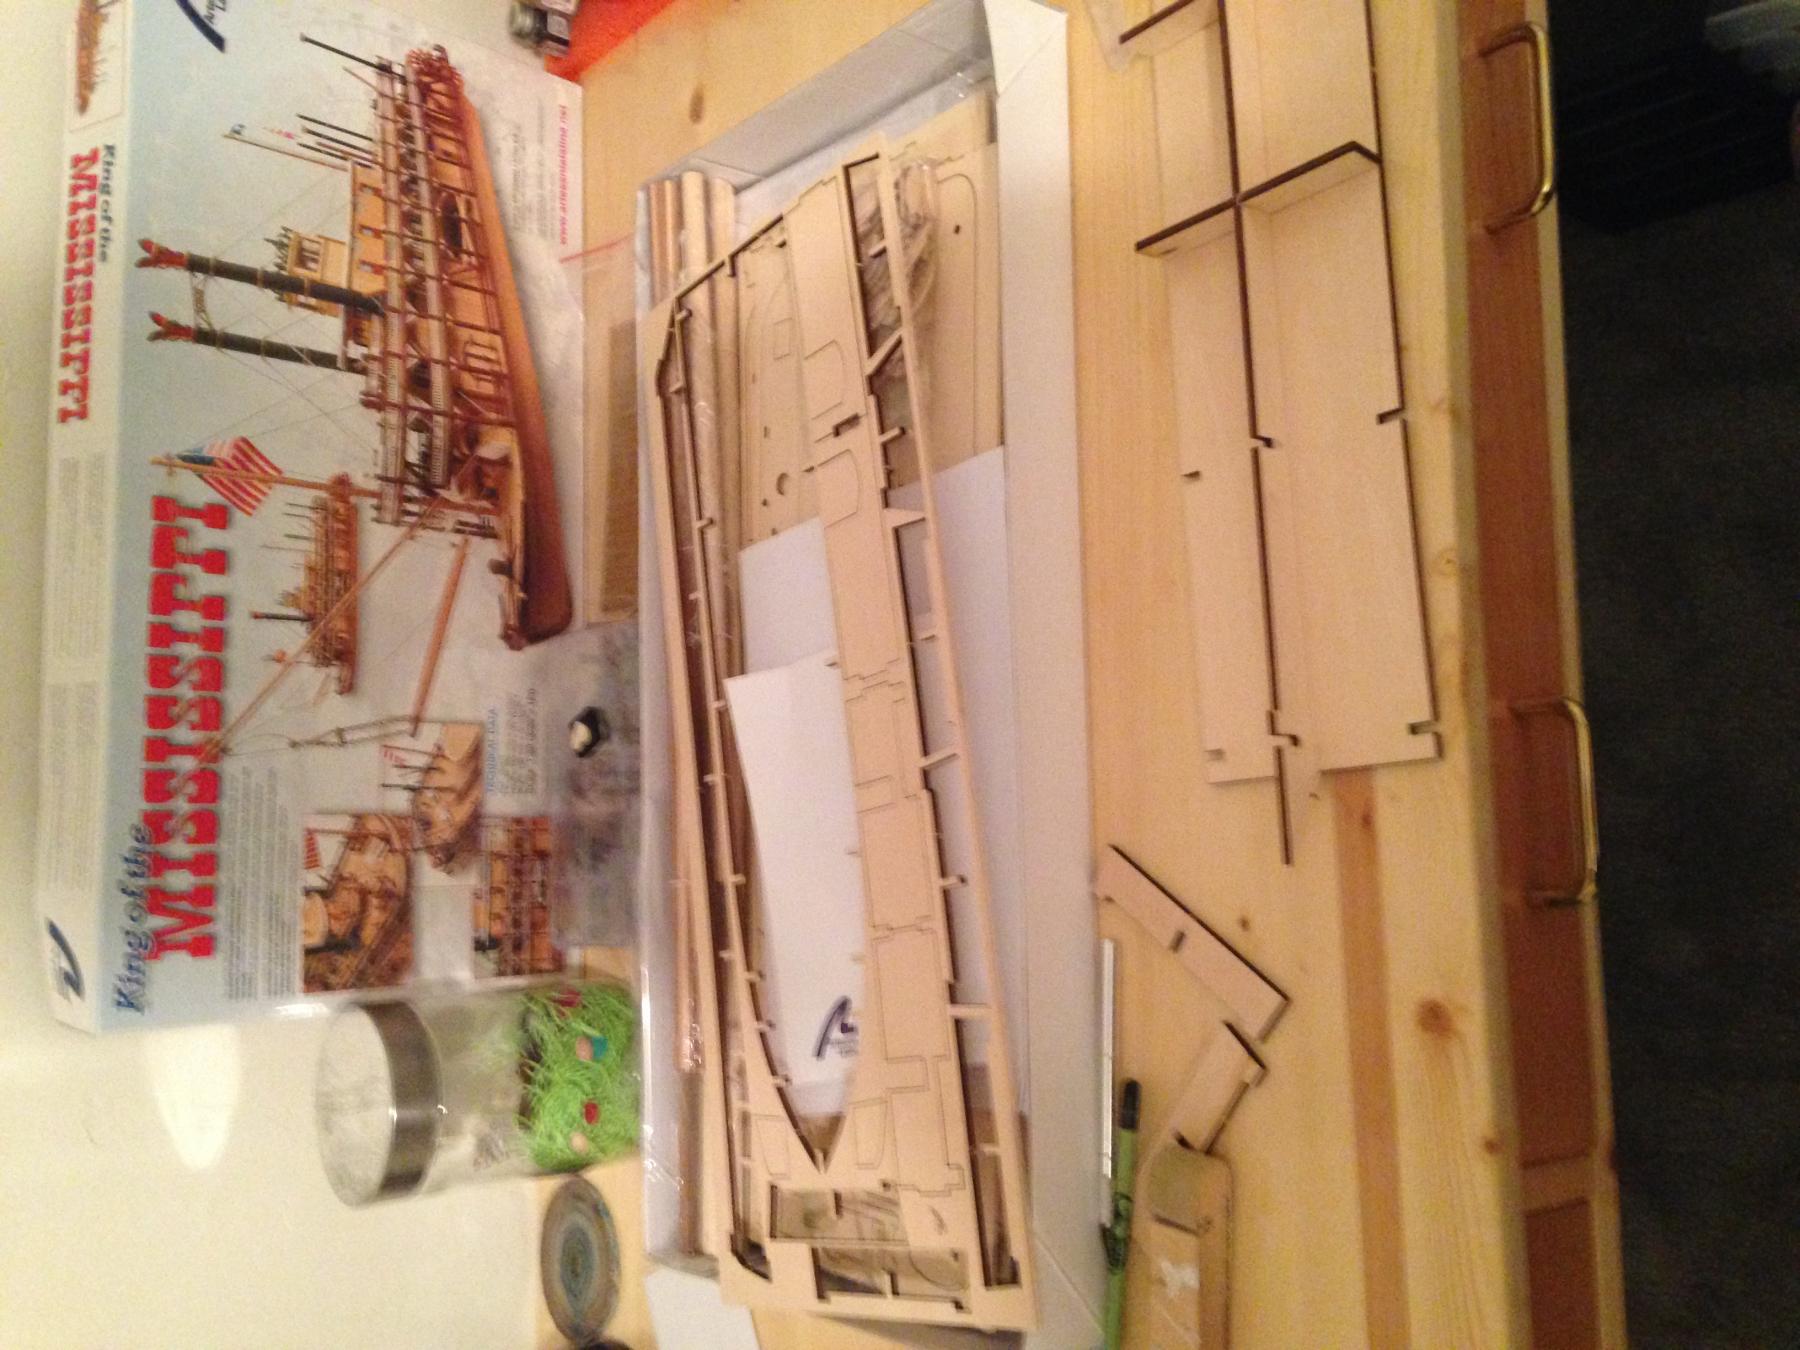
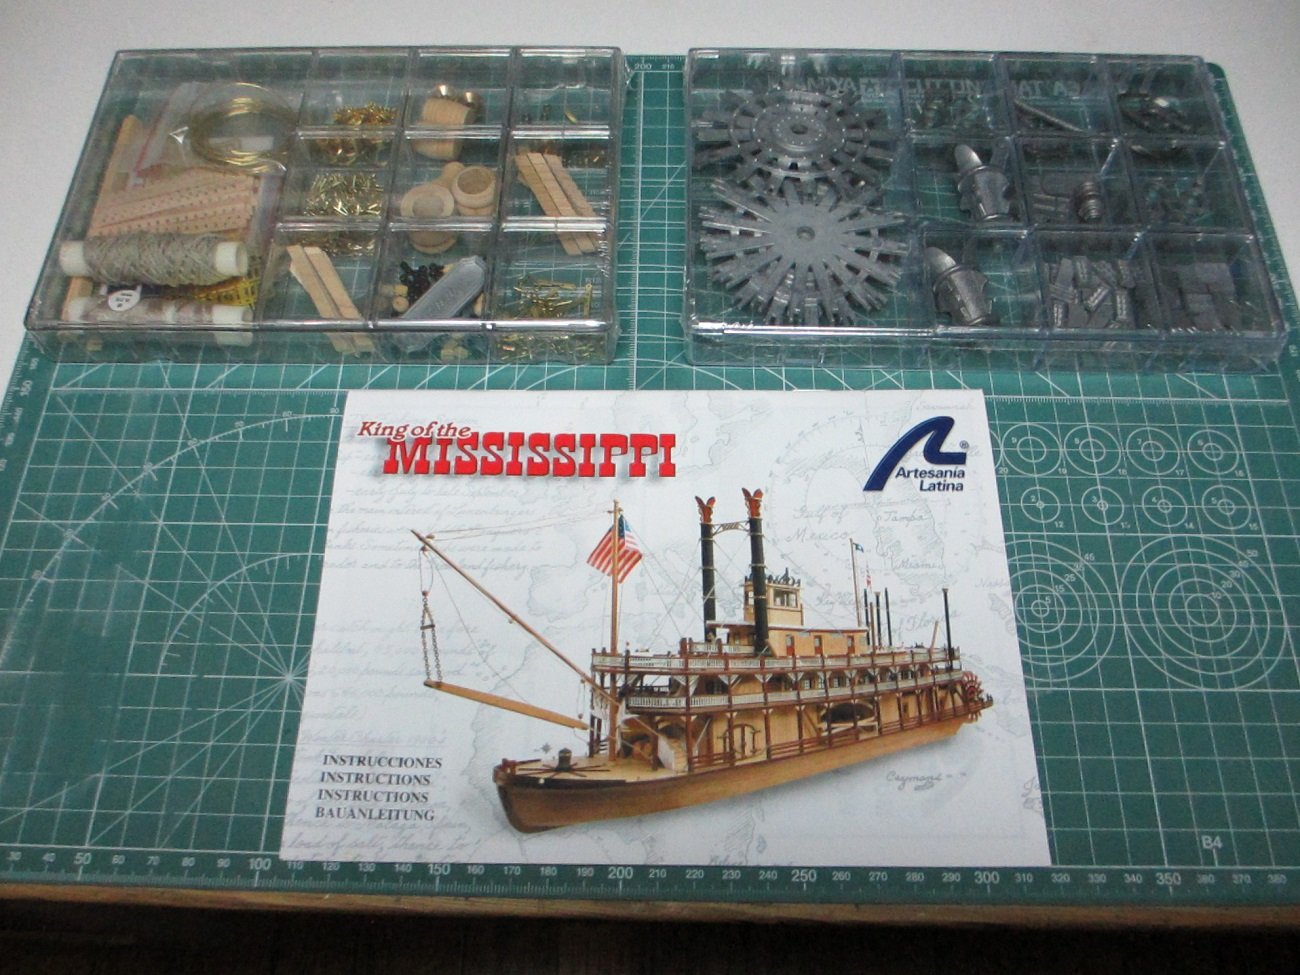
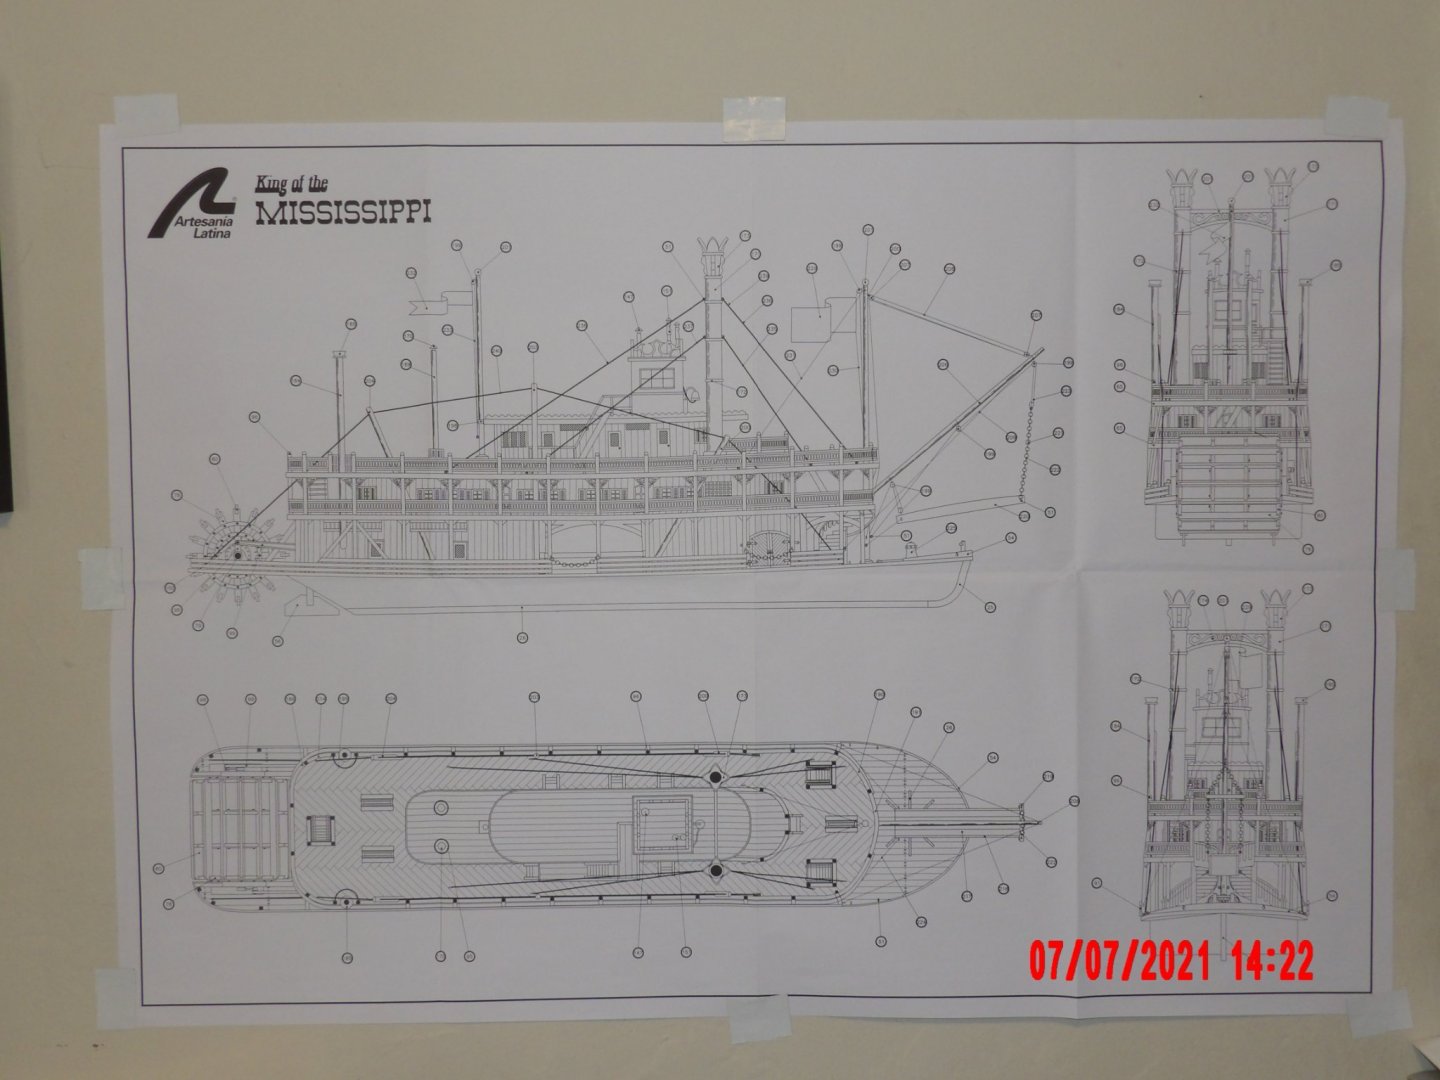
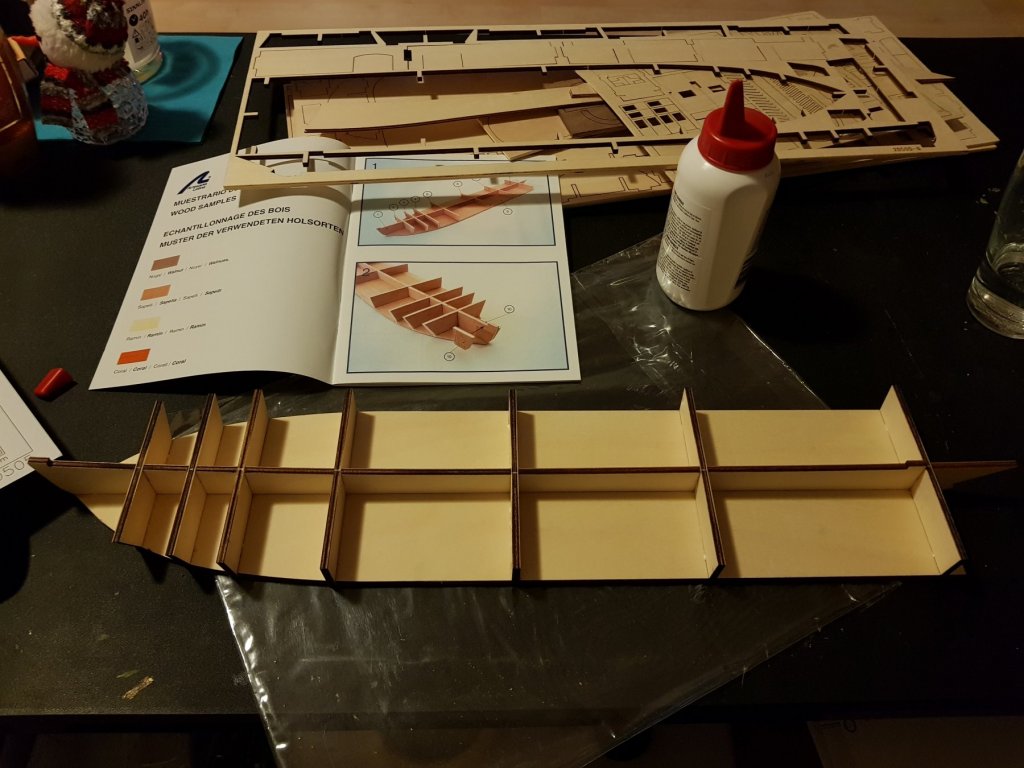
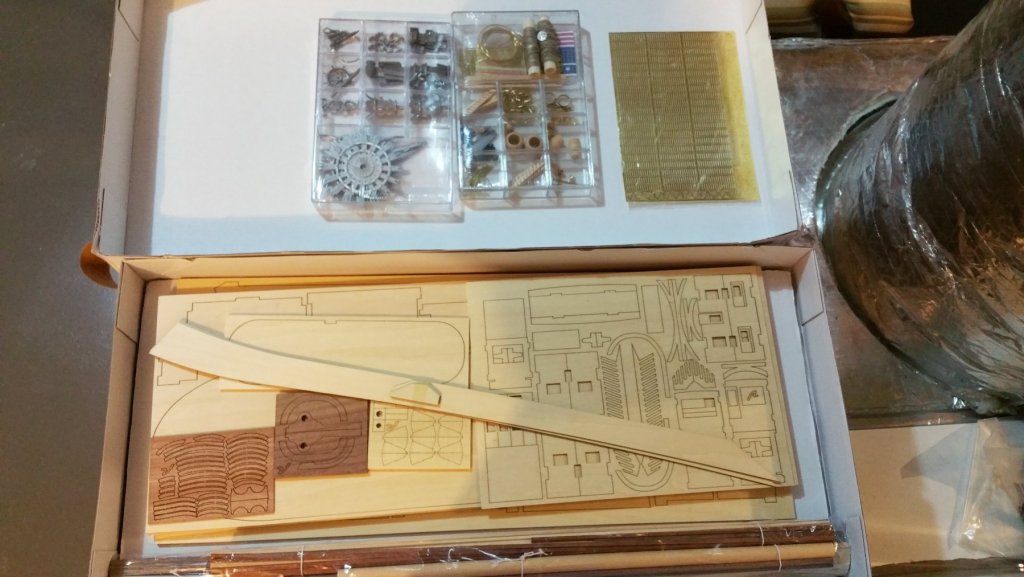
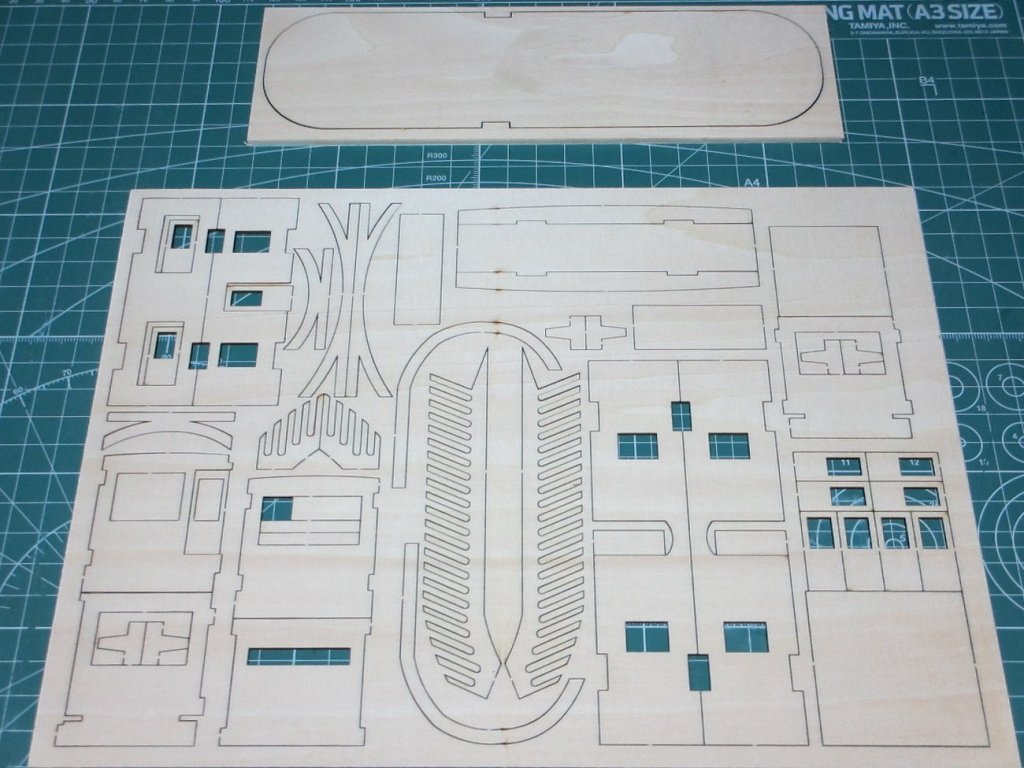
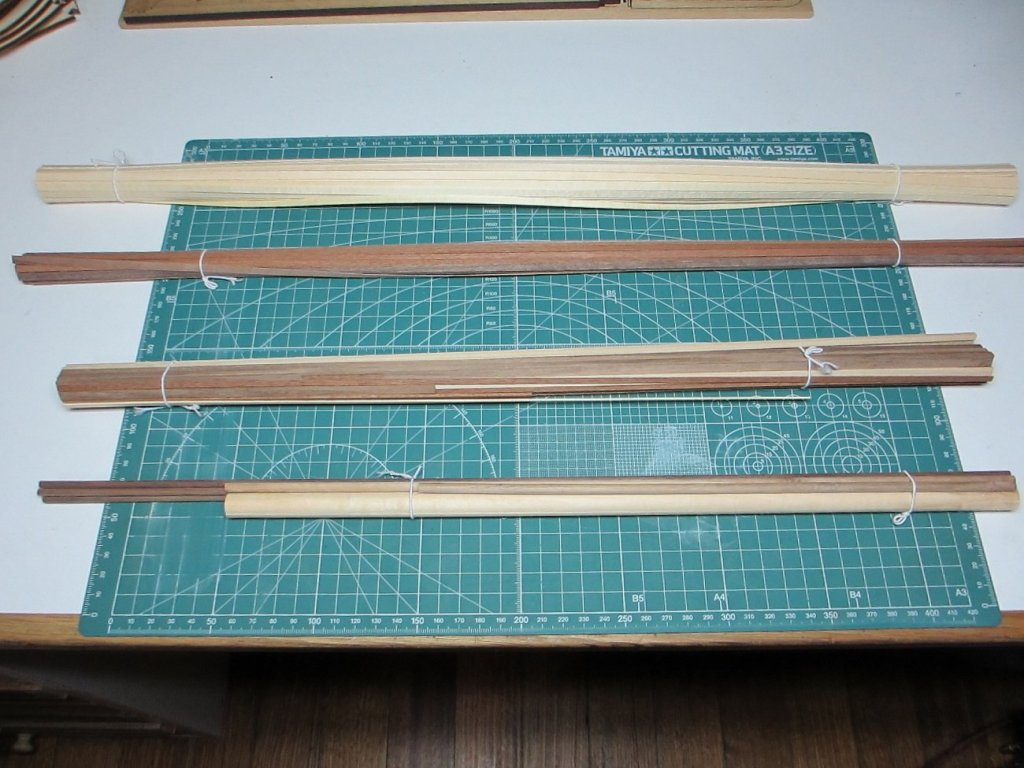
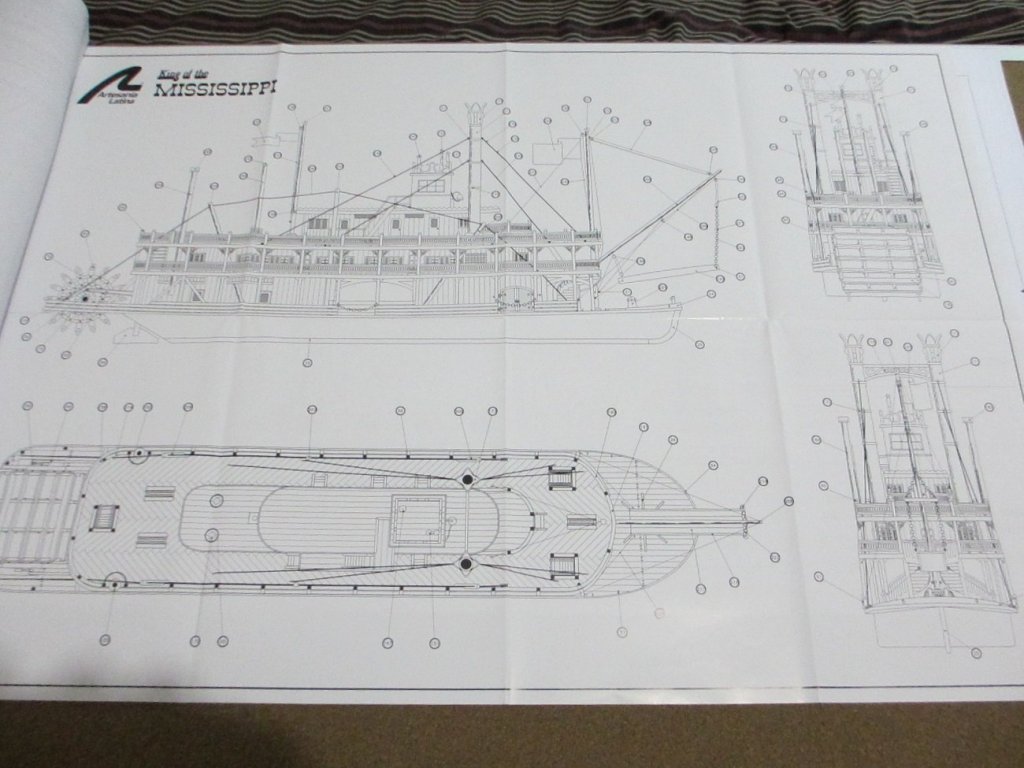
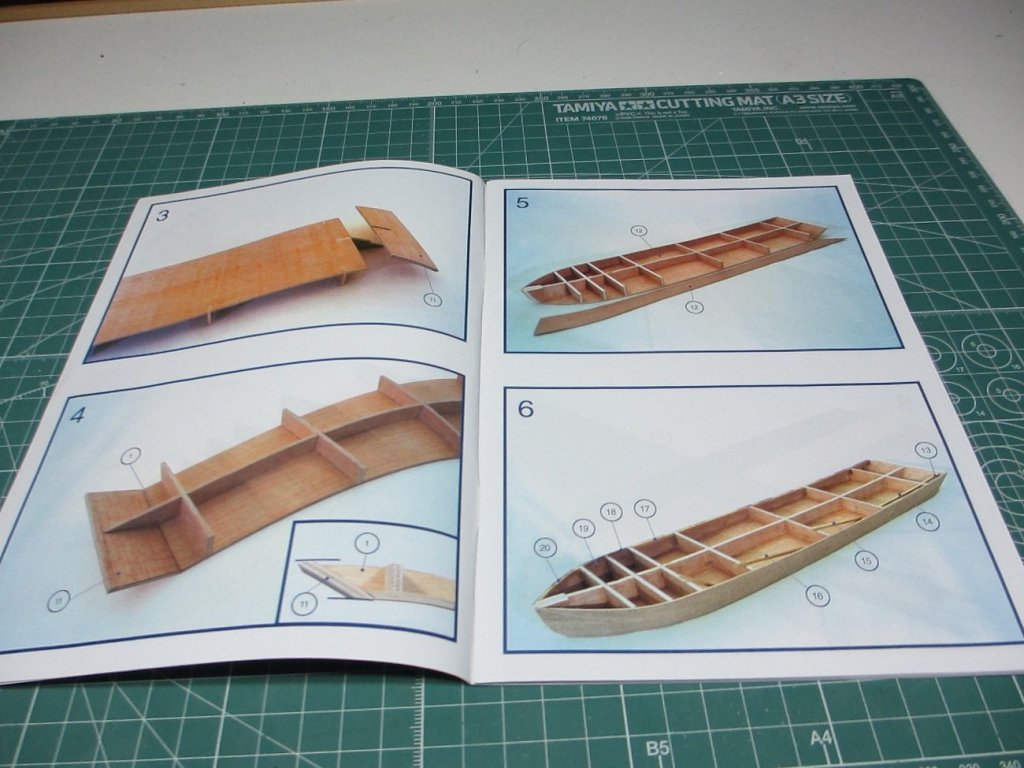
 I got the King of the Mississippi kit for my third build. I’ve reviewed several build logs for this kit to prepare for my build and I referred to many when I had questions, they are helpful. There are a lot build logs for this kit (popular kit). This kit includes several laser cut planks, small parts are in a plastic containers, and documentation. The documentation is pretty good, it includes a large drawing showing the completed boat with the part numbers identified, the part numbers are referenced in the instructions which includes a parts list. The instructions include a manual with color photographs showing various steps and a manual with text in four languages (the text is minimal but adequate when used with the pictures). I test fitted the frame pieces and I remembered that other build logs mentioned that frame pieces 4 & 5 were mislabeled (thanks for the heads up). The frame pieces fit very well, they fit snug and I could press them in place by hand.
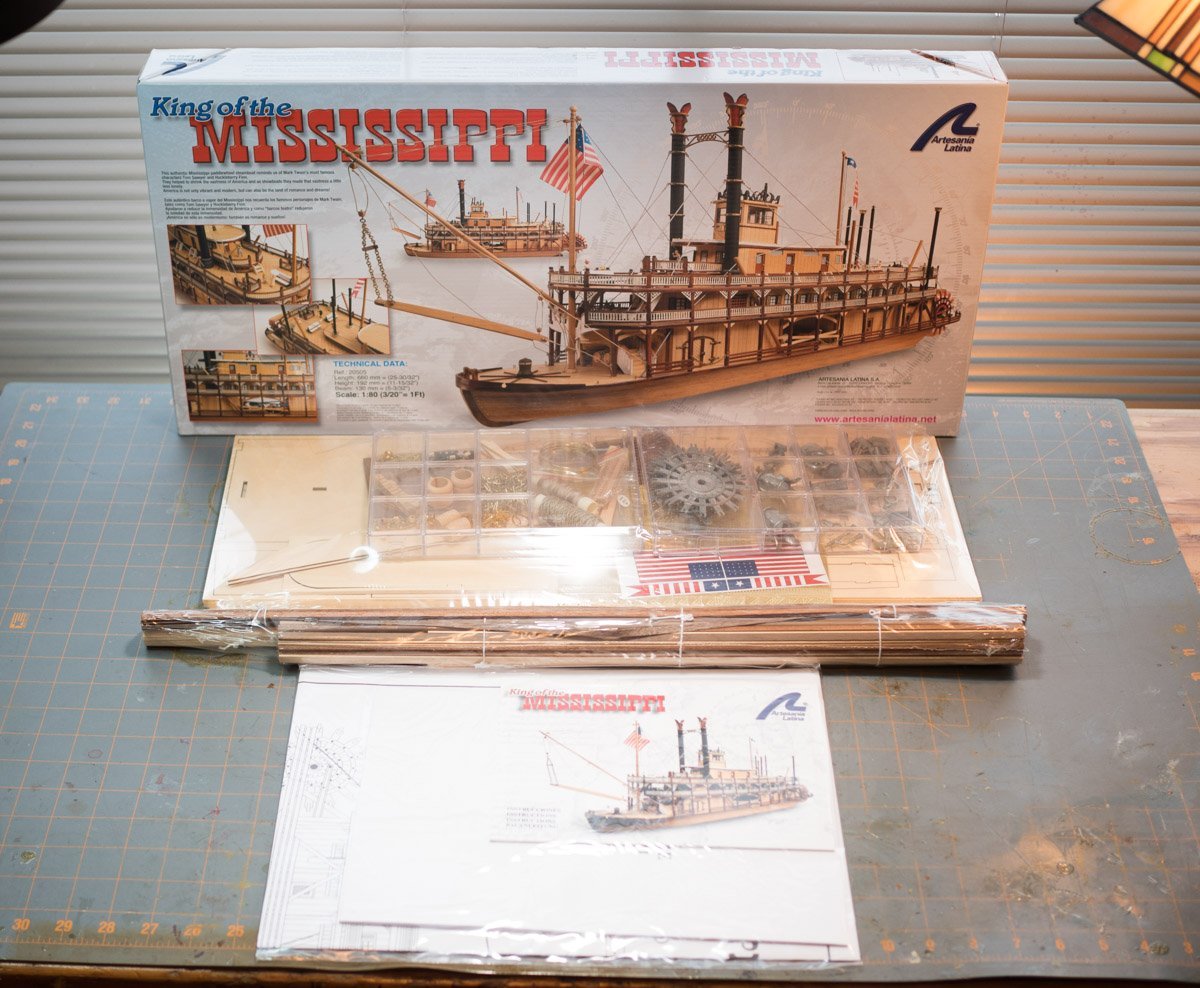
- 128 replies
-
- 3
-

-
- King of the Mississippi
- Artesania Latina
- (and 1 more)
-
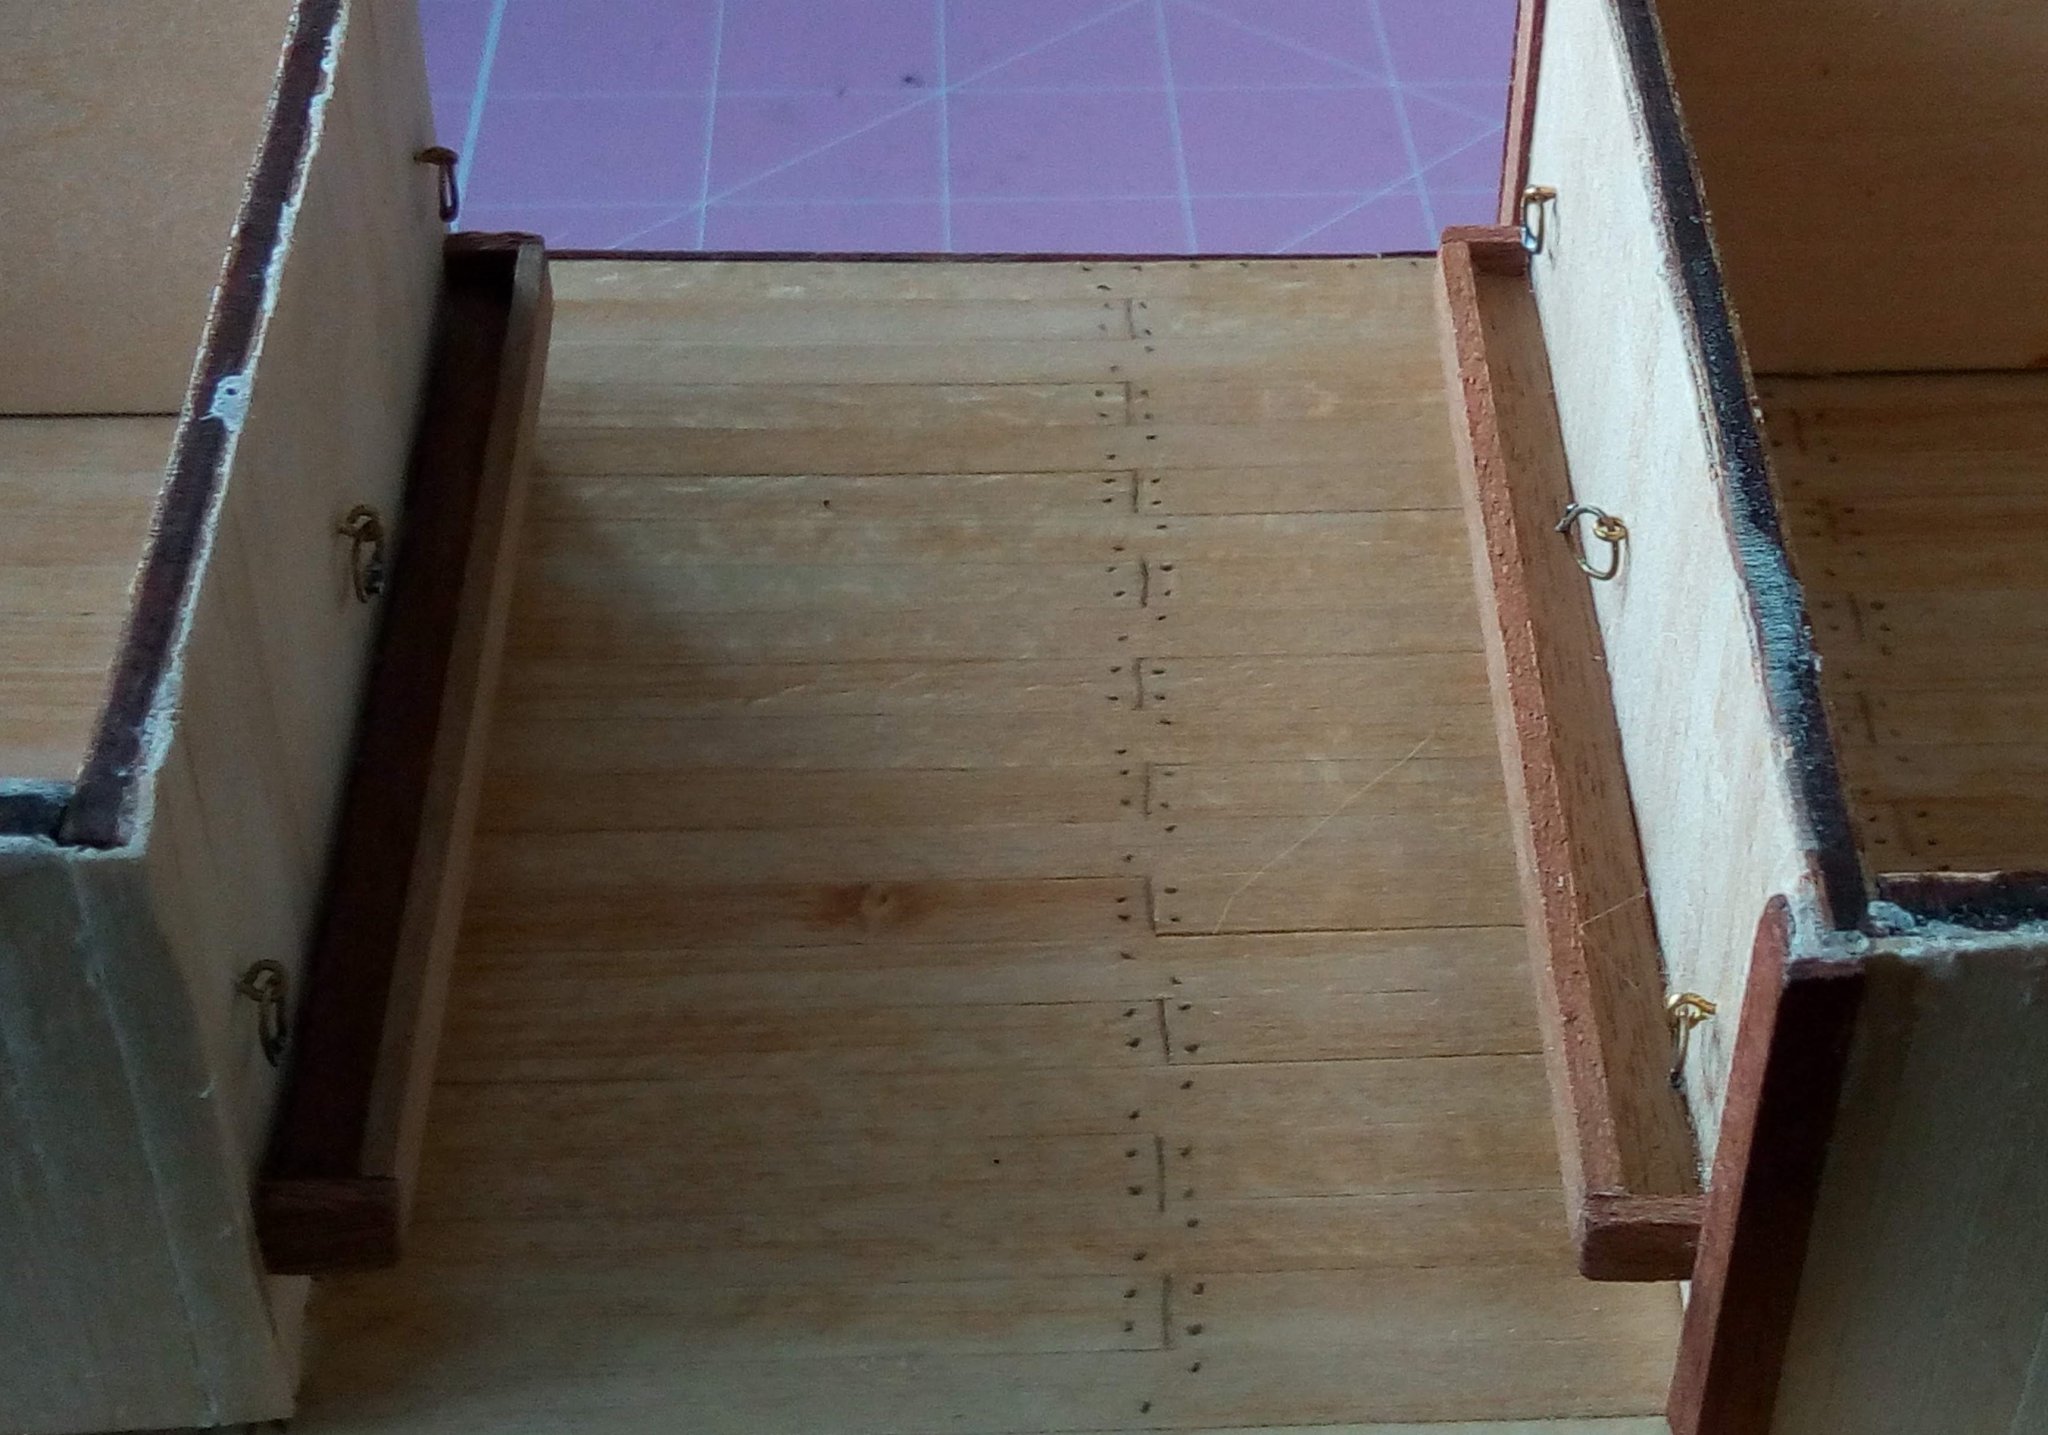
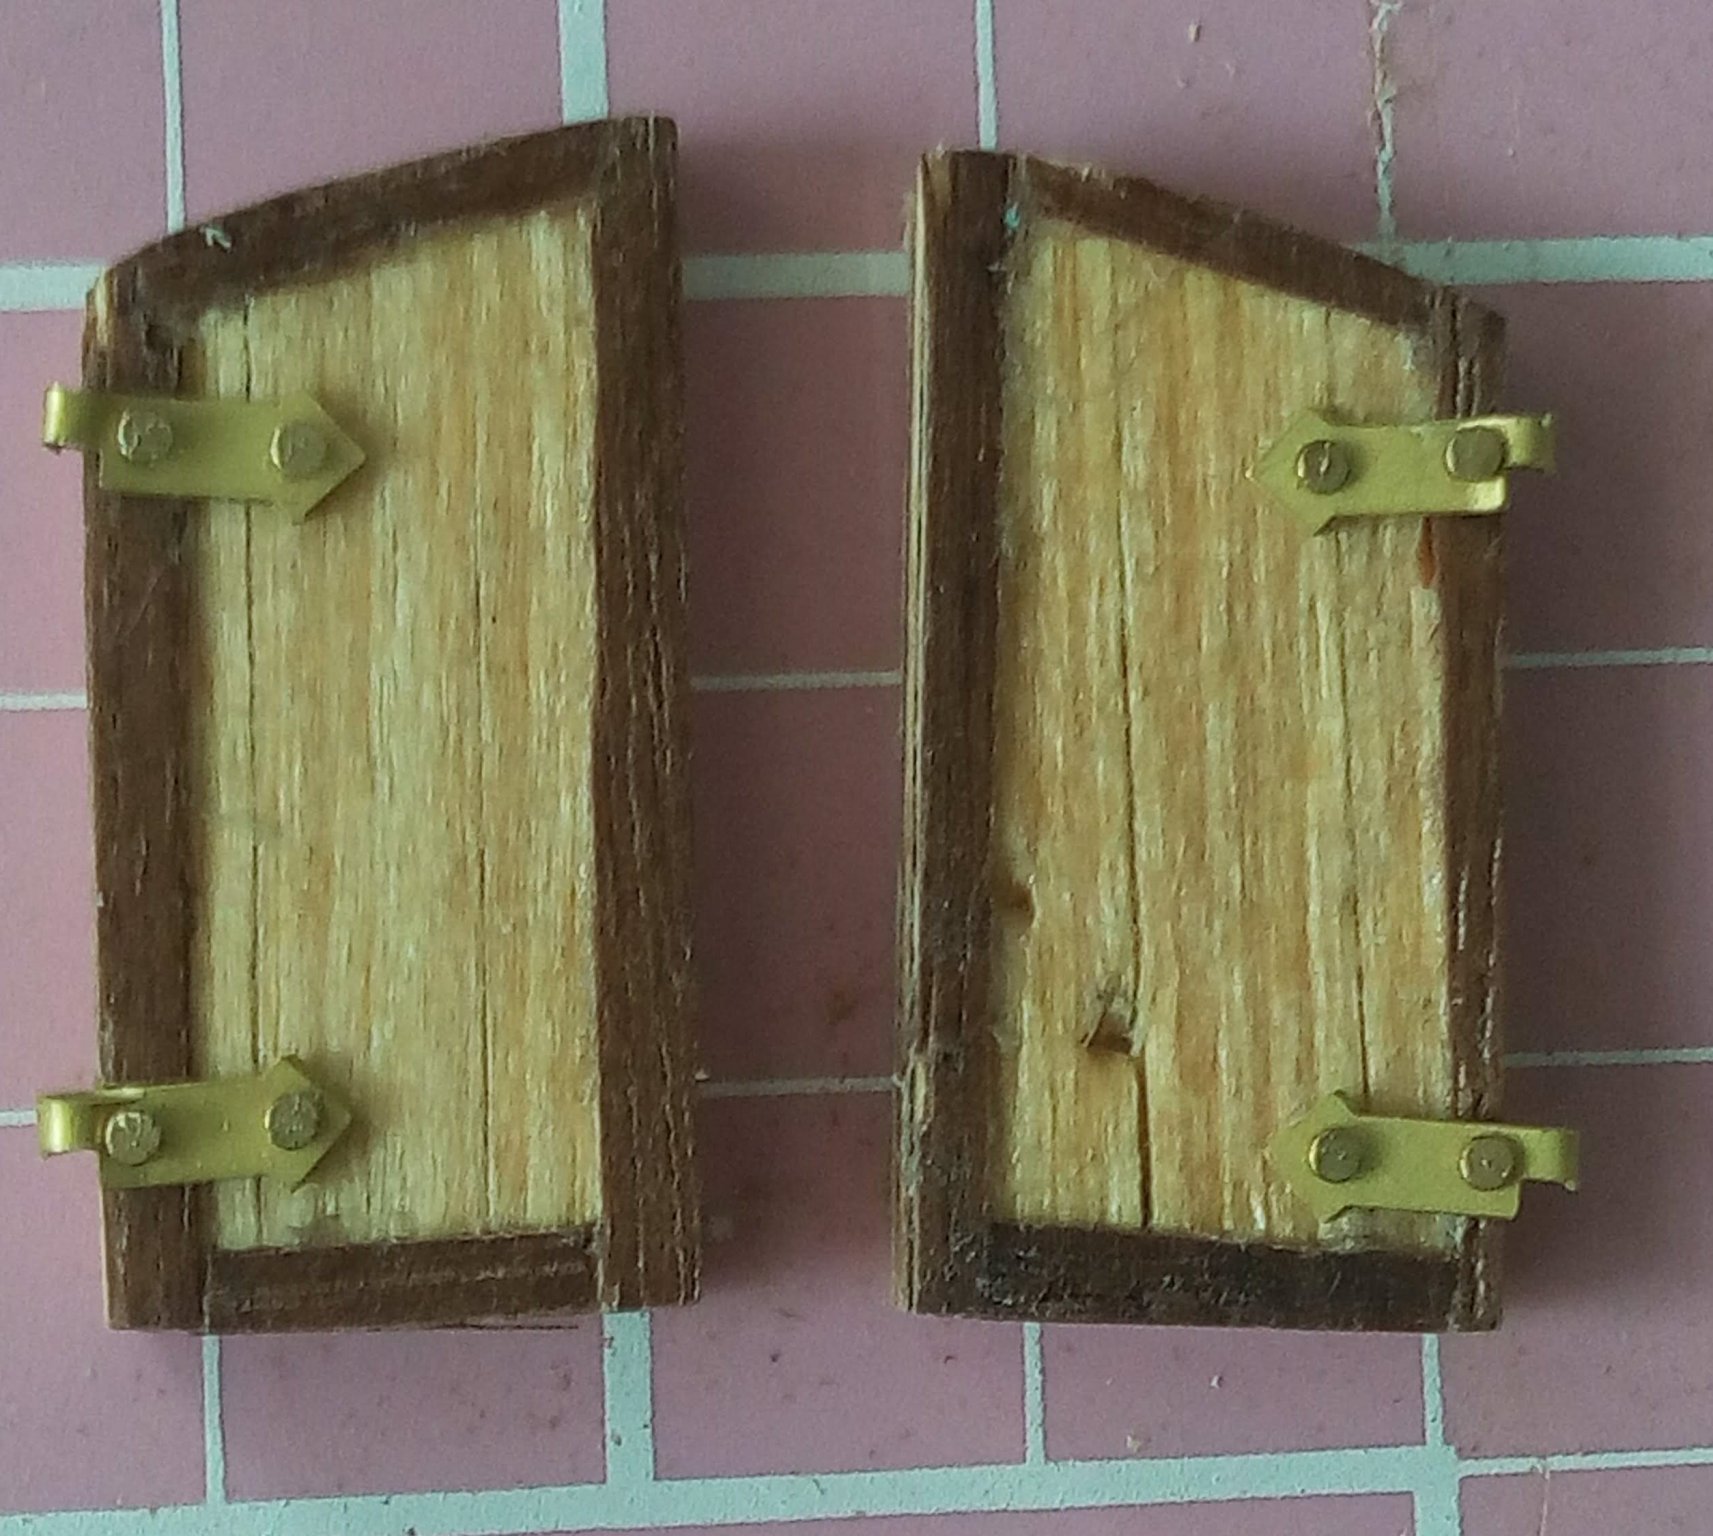
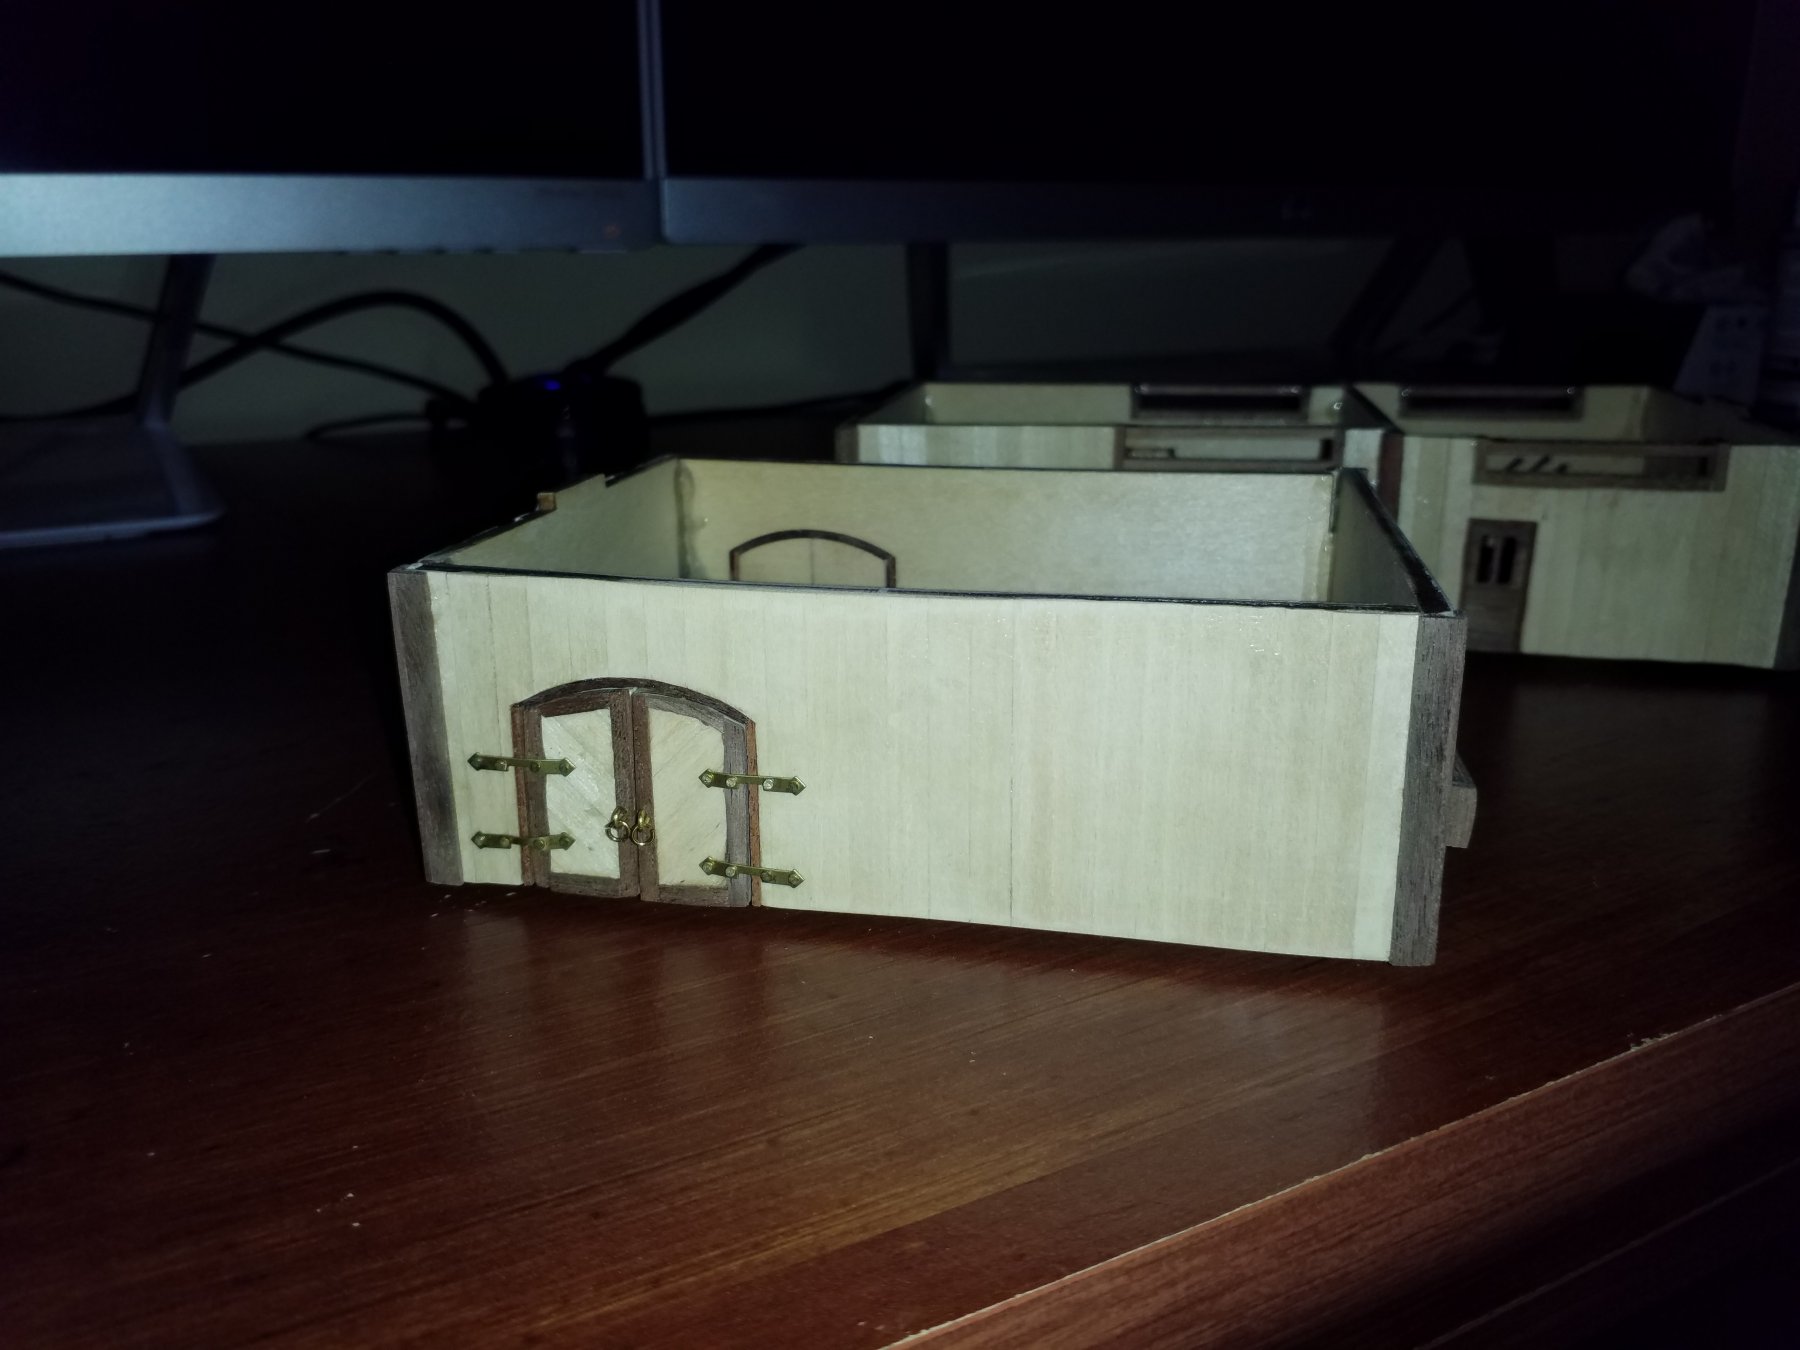
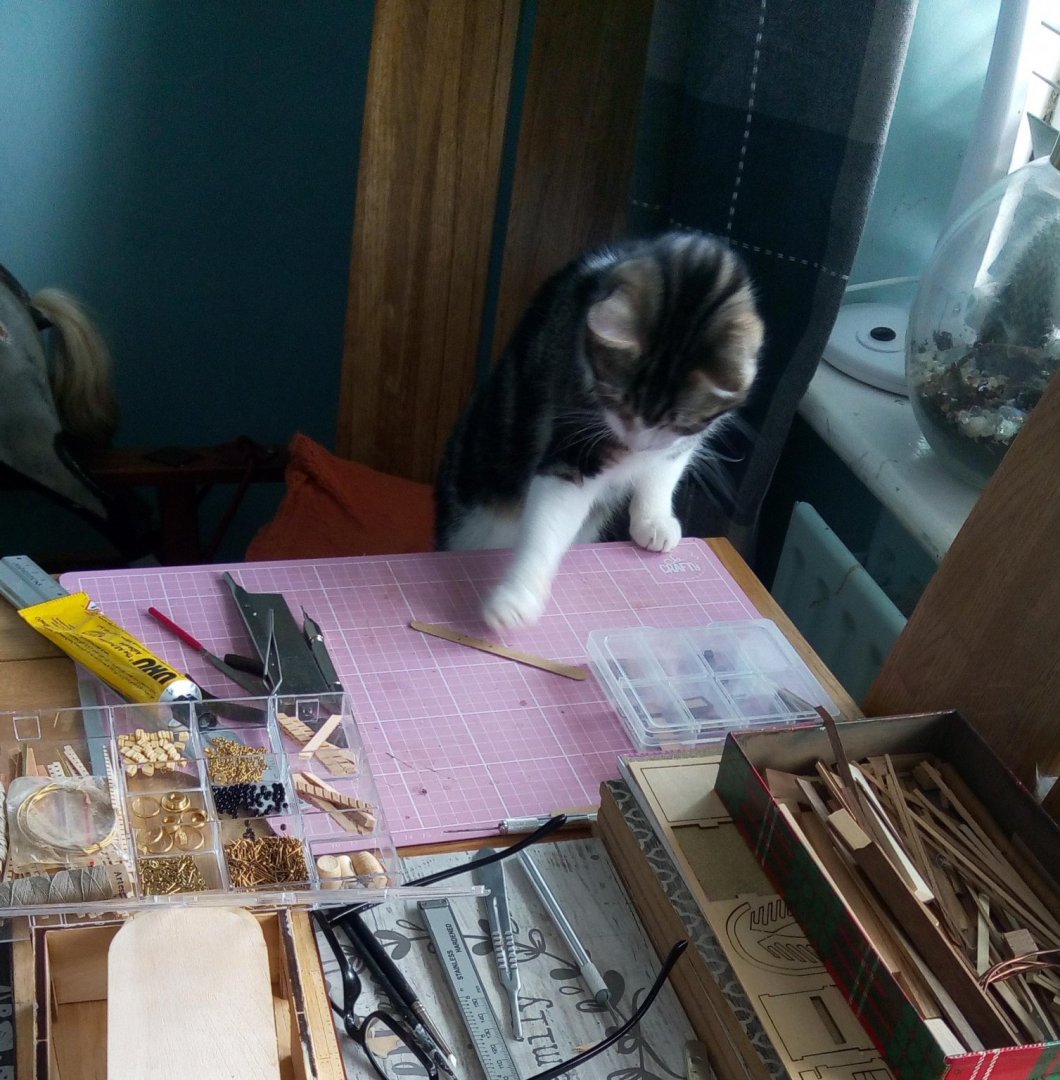
 Had this started 9 years ago, as usual life got in the way but managed to put a bit together here and there. Not worth starting a build log just to have it seem abandoned. Just started again the other day with a bit more time available. Building this for my Admiral who would love to travel on one, but because of her own issues barely leaves the house. Likeley to be a slow build so please bear with me. Progress so far. Hull built and planked Livestock area. I added tie rings to both side. You don't want animals fighting over the hay or running wild on deck! Hooks for the livestock area. Rounded tops so no animal injuries! Barn doors and hinge. Looks better from a normal viewing distance 🙂 And where would I be without my helper! Cheers for now, Bob
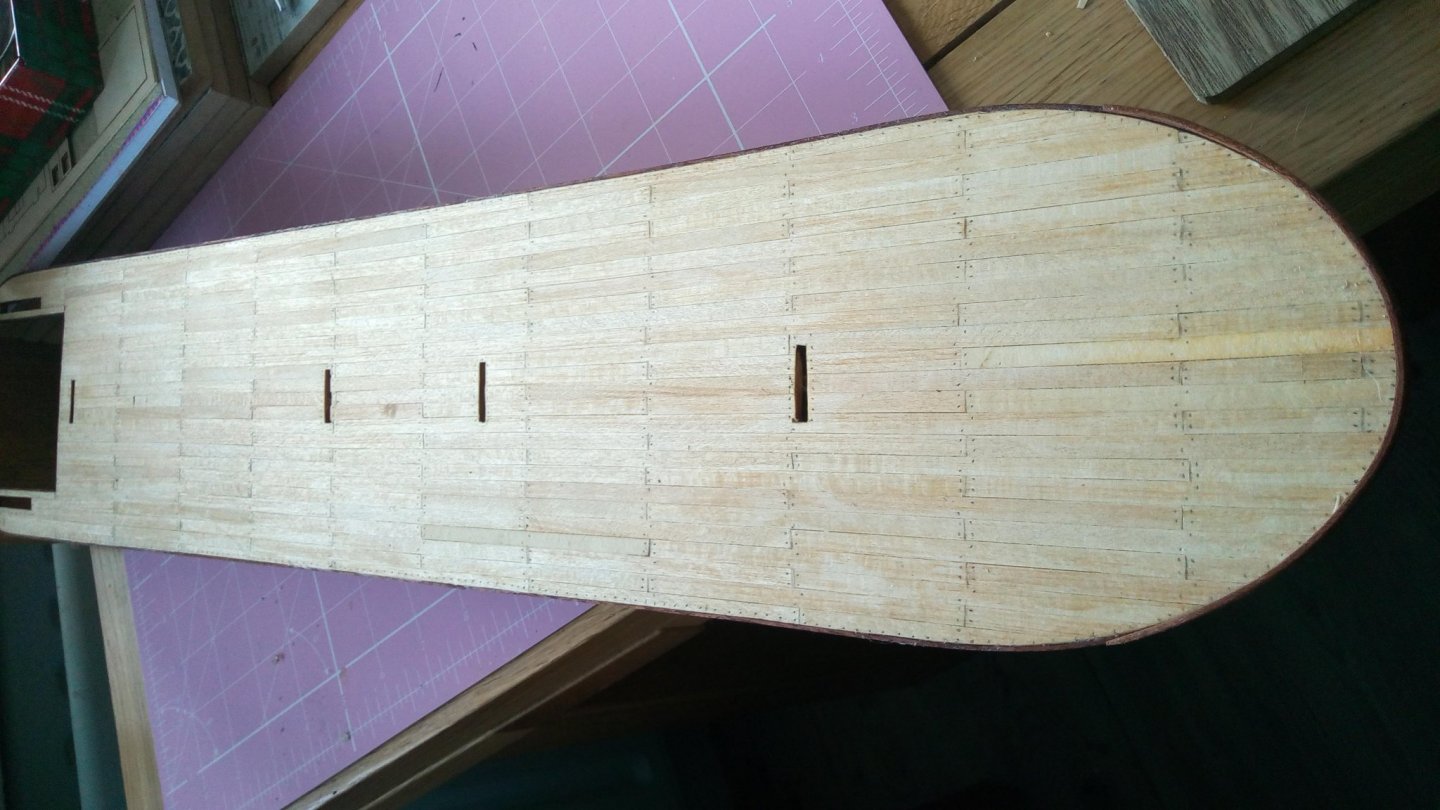


- 86 replies
-
- 9
-
-
- king of the mississippi
- artesania latina
- (and 2 more)
-
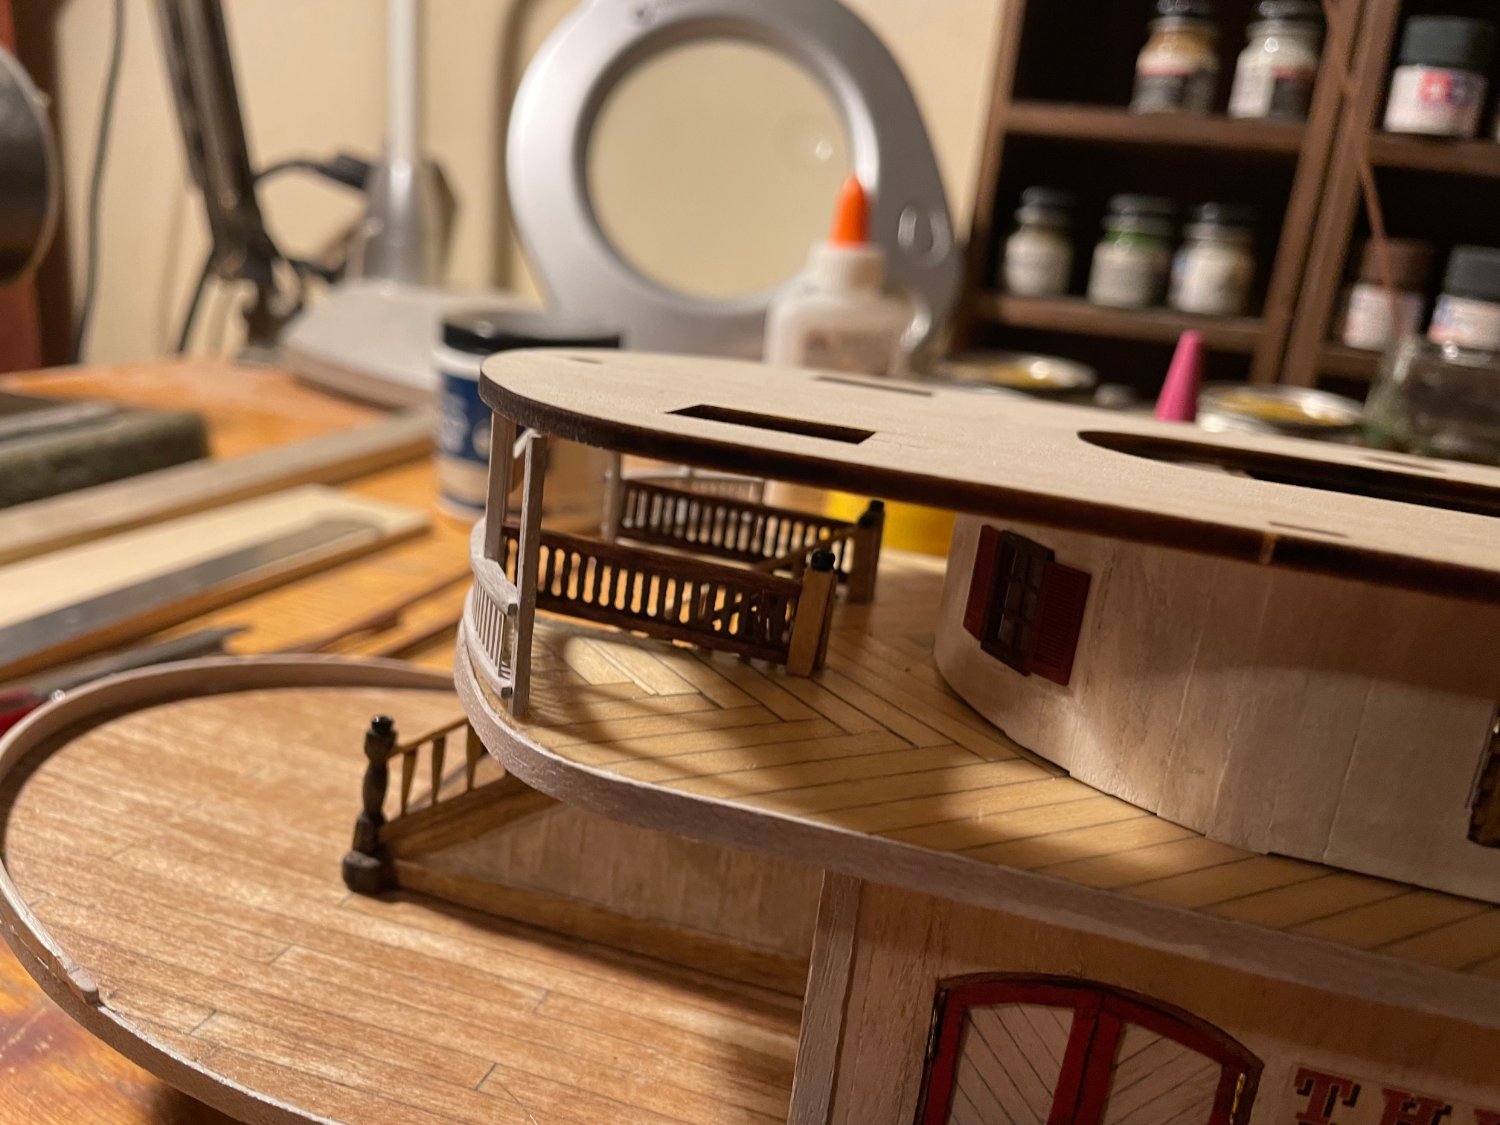
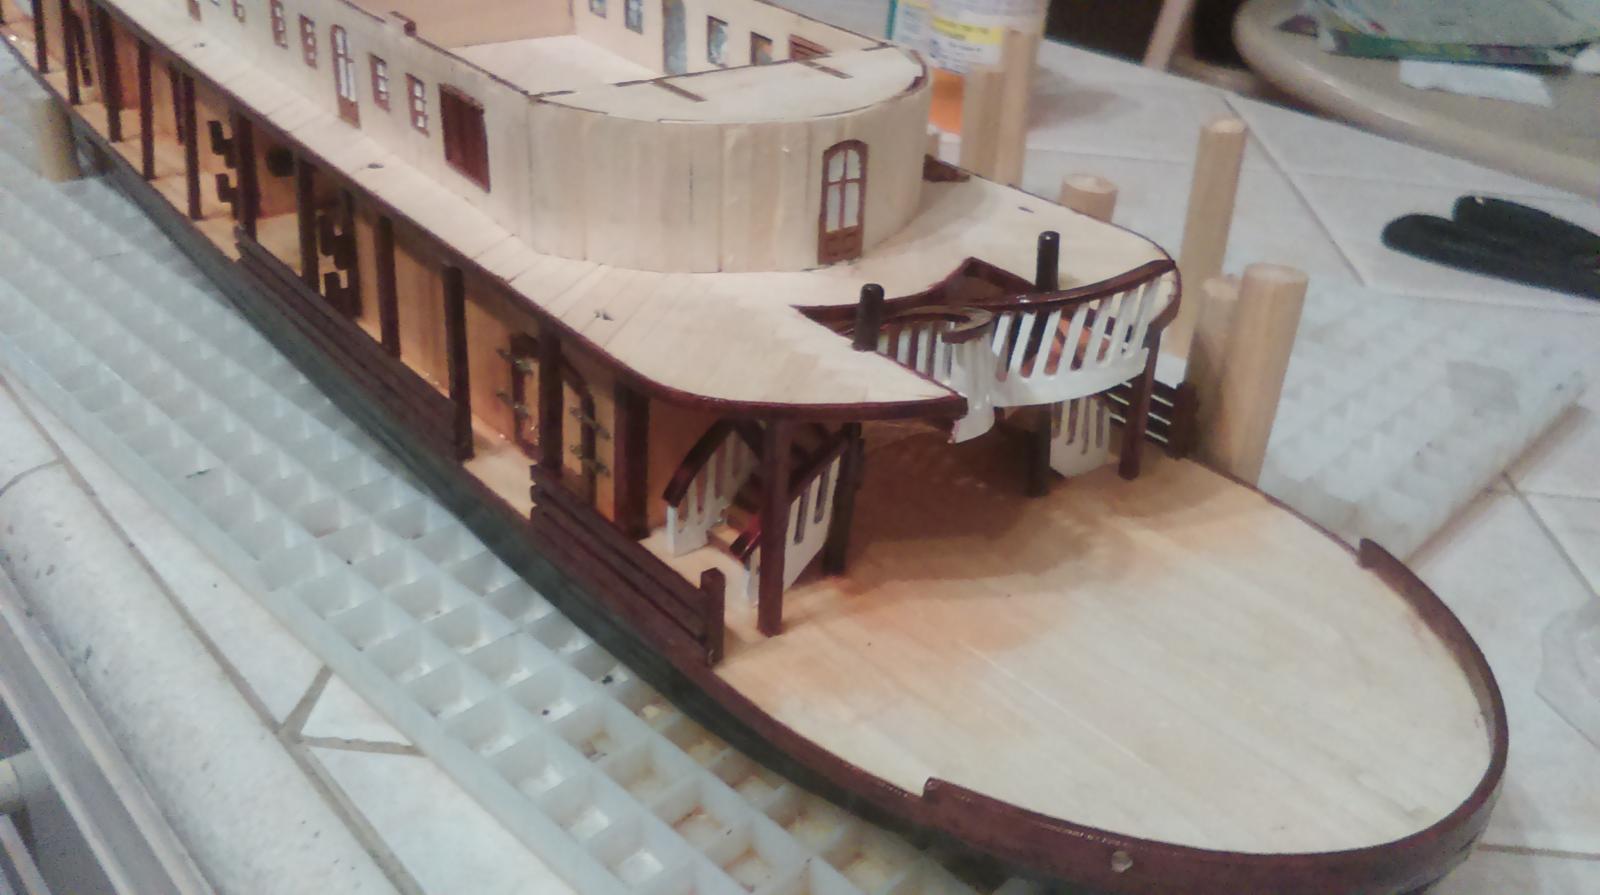
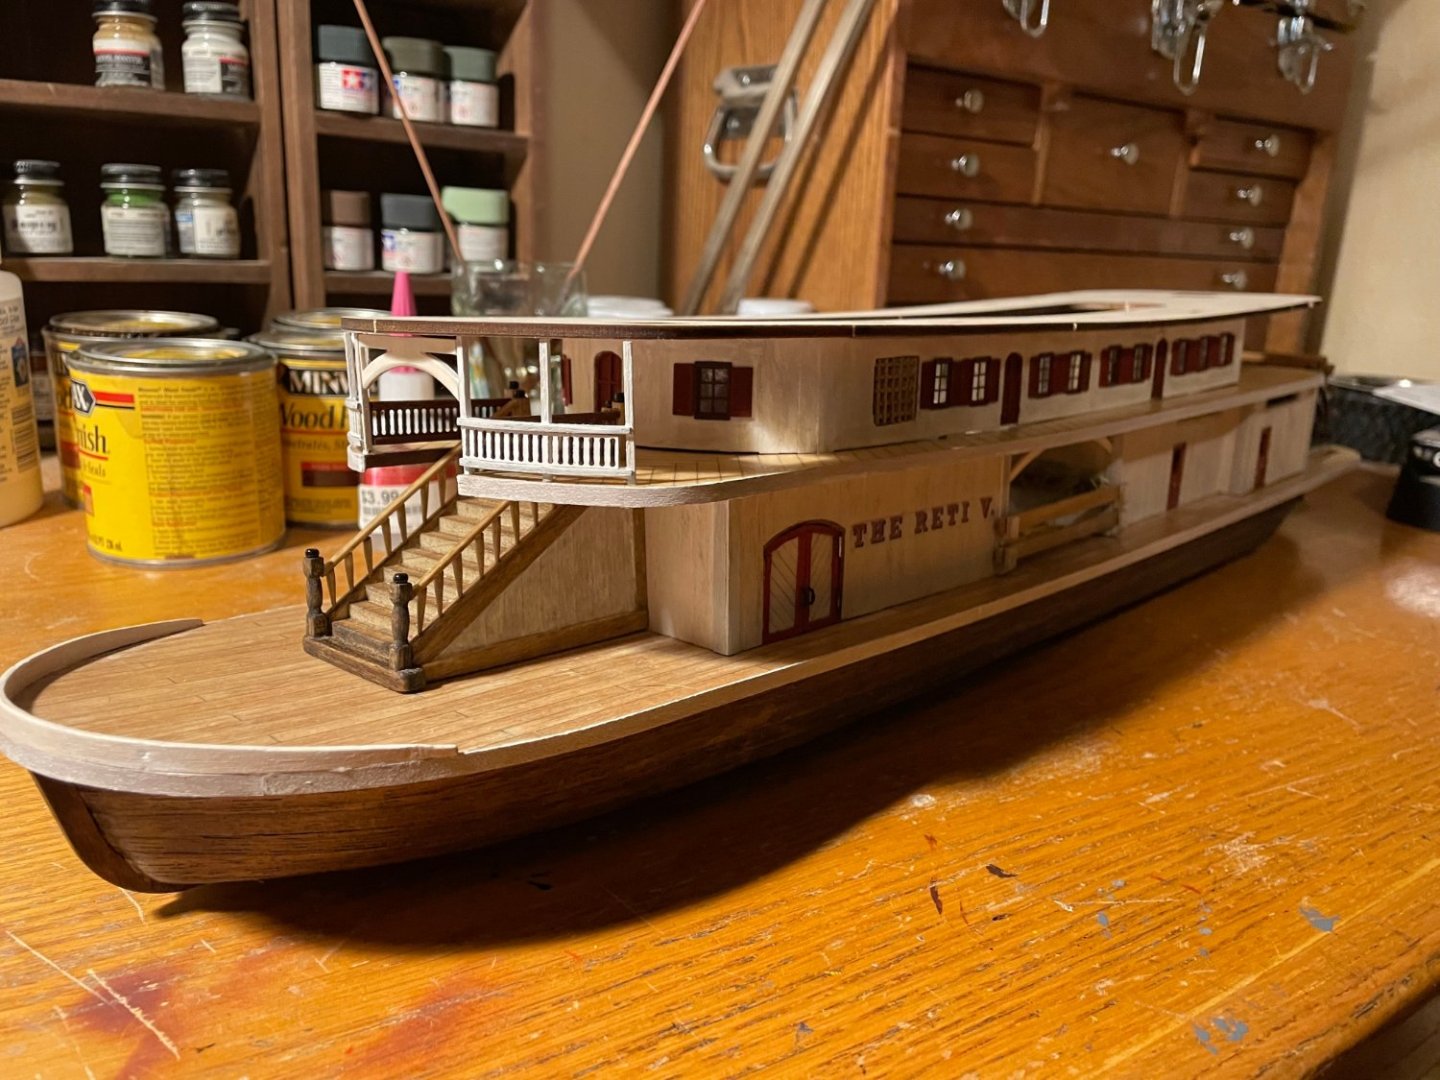
 At the beginning of the Pandemic it looked as though Art Lat might go out of business. Most of their models available in the US were sold out and the ones left were disappearing quickly. Having wanted to build this model for a long time I decided to buy one before they all disappeared. For Art Lat though, there are always missing parts, insufficient quantities of parts, or poorly cast parts. So, to combat this I bought two kits. It turned out to be a smart move. To this end, below are some pictures of the progress. There are many inaccuracies in this kit, things that are not scale, or just would not work when you try to fix the problems. So I am scratch building items as I go along. Additionally I did not like the spiral stairs so I changed them out to a more traditional staircase. Its worth noting that I built the stairs three different times to get them right. That alone took 2-1/2 weeks to get where I am now. The top deck, its roof, and the upper white railings are not glued in place yet but were placed there for pictures. Lots of sanding to do still. BTW, I purchased new windows and doors for the upper deck as the cast ones are not well done in my opinion. The white color I feel is more accurate. I used a white wash pickling stain from the hardware store to get the effect. It takes at least 7 coats on each piece you make to get this depth of color. I kept the red and brown colors for the doors and windows. I know that is inaccurate but it needed some color to match the lettering of the name. All in all it is a fun model to build and worth the effort. Oh, and the name of the ship is my wife's name "The Reti V." (pronounced Reetee) She was all flattered by it when I showed her what I had done. SaturnV
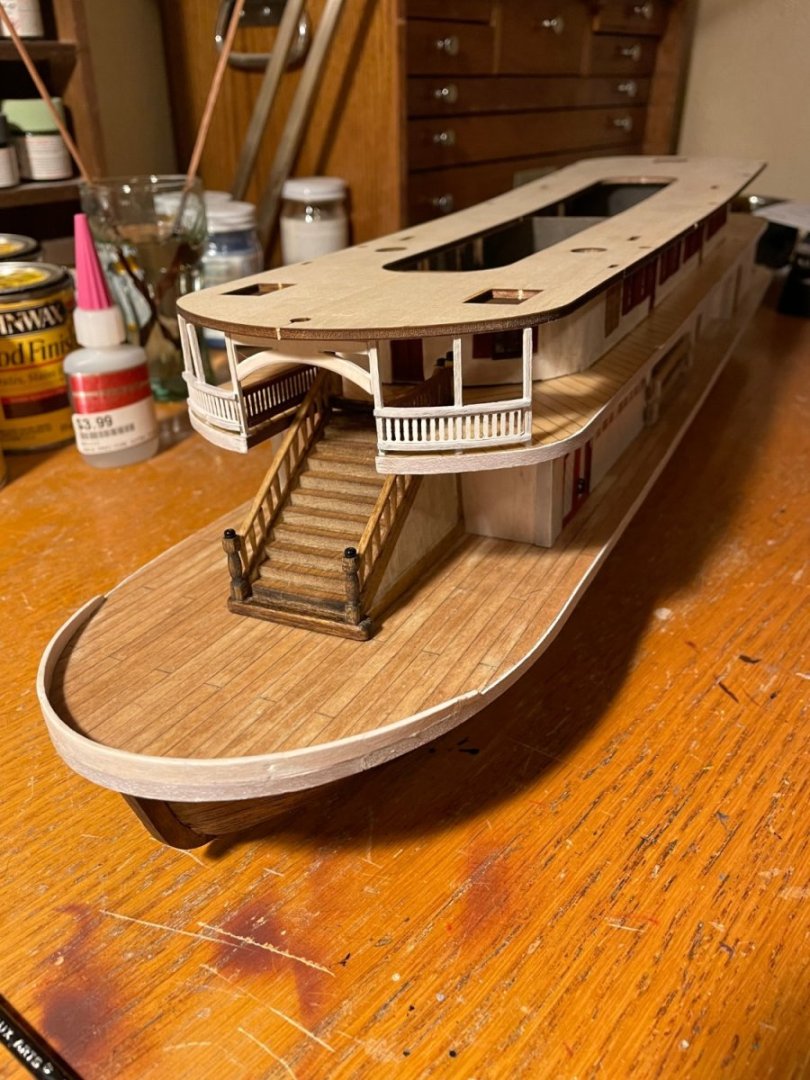

- 4 replies
-
- 3
-
-
- Reti V
- Artesania Latina
- (and 1 more)
-
 Greetings all, I am in the process of making my first attempt at building a wooden ship. The kit i have started on is the "King of the Mississippi" by Artesania Latina. I look forward to advice as I progress.

- 16 replies
-
- 4
-
-
- artesania latina
- king of the mississippi
- (and 1 more)
-
 As I've mentioned to others here, my girlfriend has been dropping hints about this model for quite some time. So while she's away at her parent's place this week, I took the opportunity to exercise my Amazon Prime rights to get a kit in hand ASAP. So without further delay...
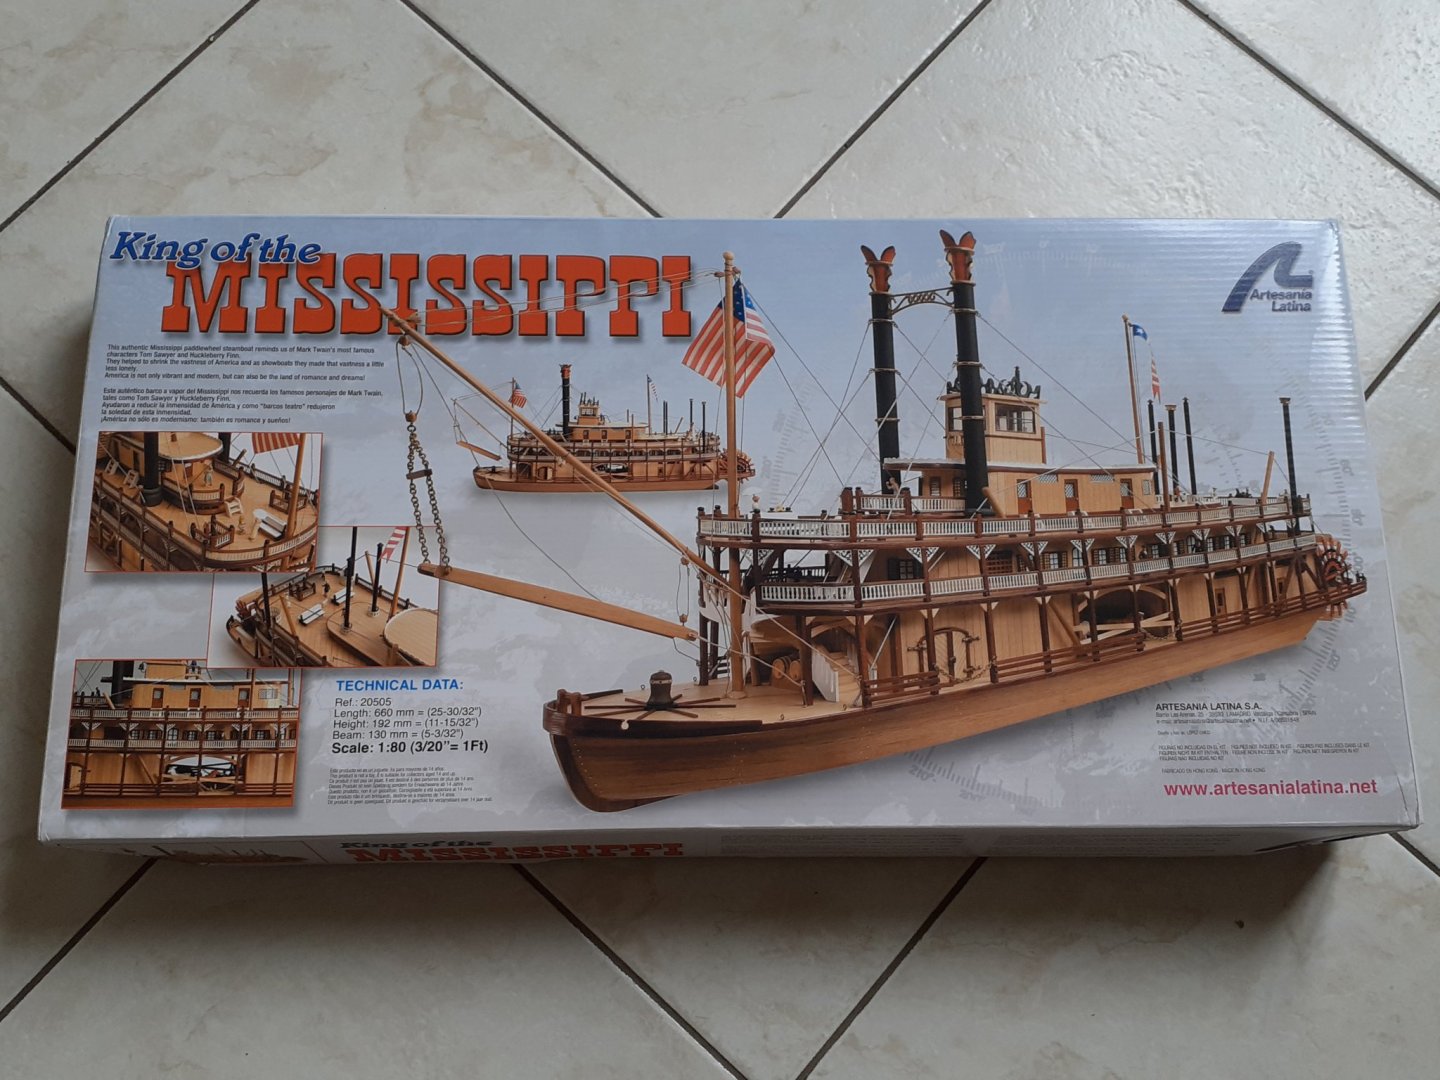
-
 After finishing my last build (link is in my profile) I started a ship in a bottle. I am still working with that, but I can only spend so much time working at such a tiny level, I prefer the larger models. So I will be tinkering with the ship in a bottle intermittently. I was pretty bummed when I found out Artesania Latina closed their doors, and one day I was speaking with my fiancé about it. The local hobby store in her hometown just happened to have one more AL model on the shelf and she picked it up for my anniversary gift. I was originally planning on starting a victory, but I am beyond excited to start a different style of ship. One thing that recently caught my interest while browsing other builds is the idea of opening up the doors and windows and finishing the interior as well. I am still in the planning stages for that, but as of now I am planning on adding a small casino room, a kitchen (if I can find the parts) and a couple of bedrooms.
-
 Just got the kit will see how this goes
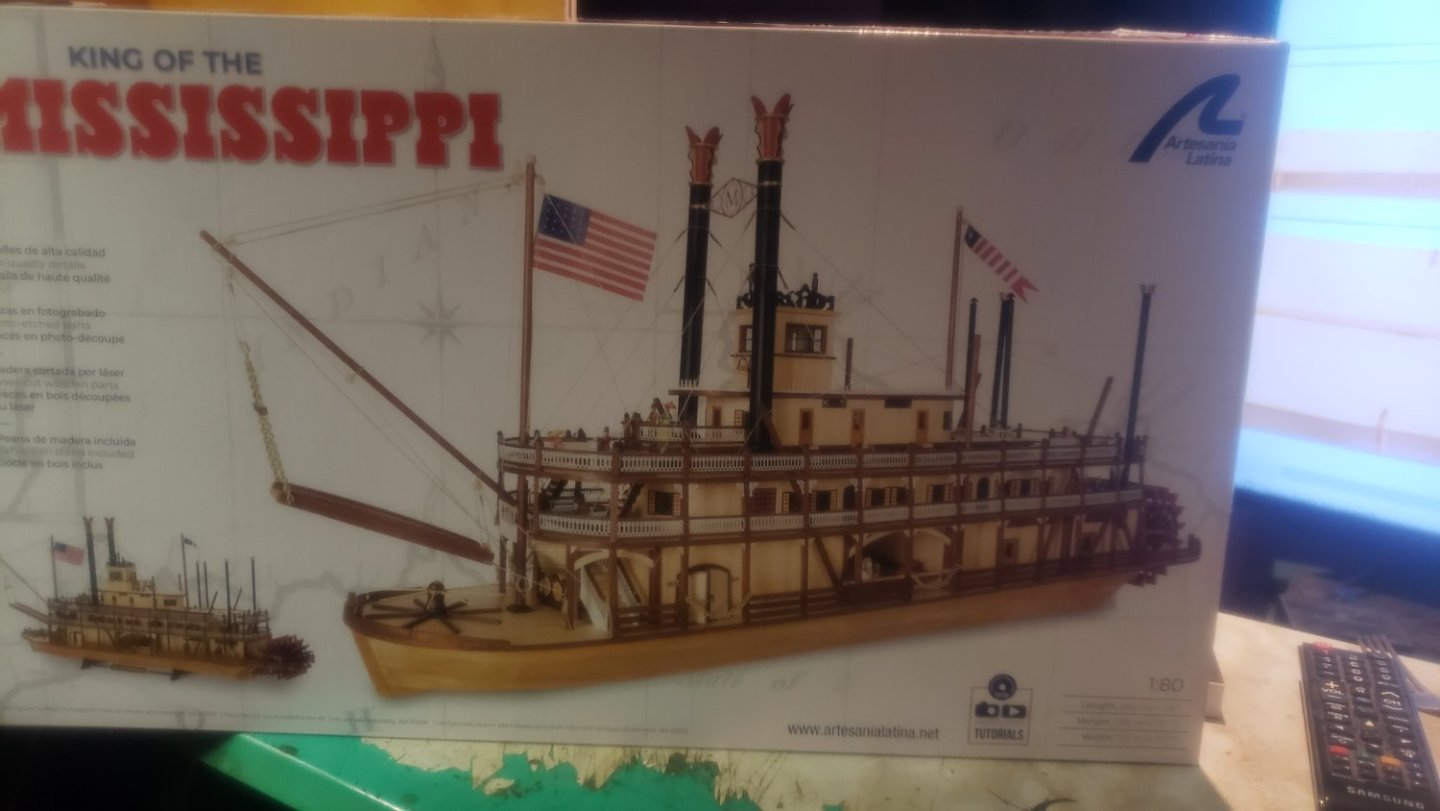
-
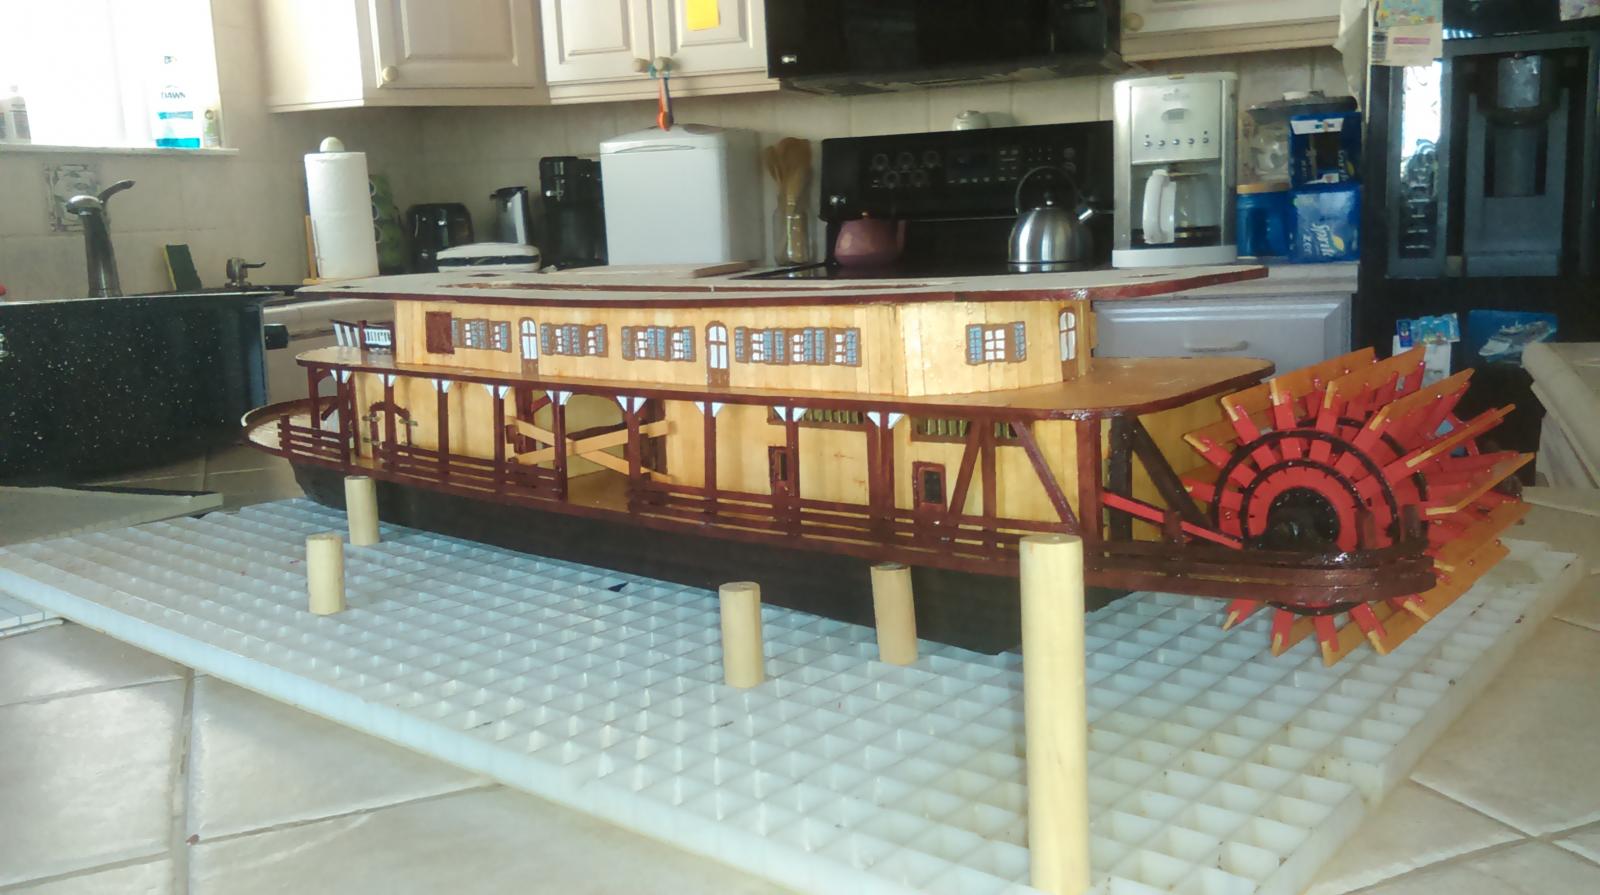
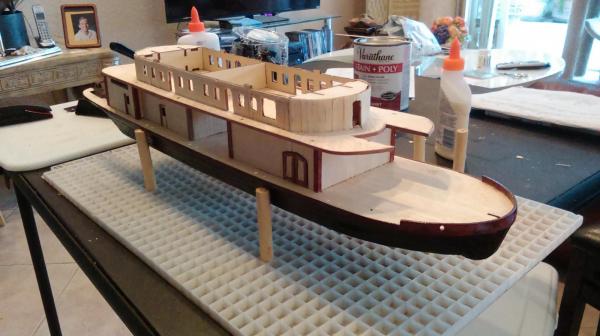
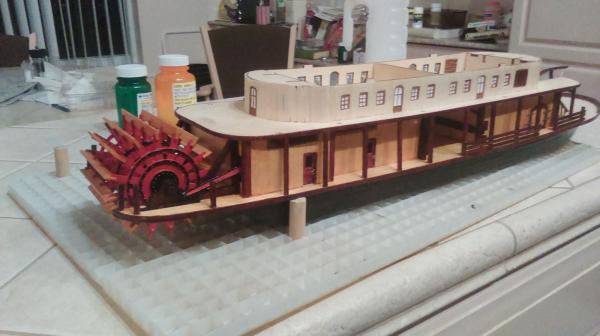
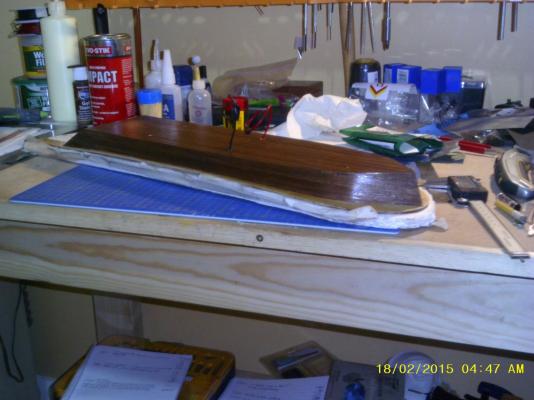
 I am posting a blog documenting my build of the Mississippi riverboat “King of the Mississippi “. I bought a kit of the older version of the boat and decided to motorize and electrify it. I modified the kit using plans I found on the internet for Artesania Latina’s new version of the riverboat which allows for a motor and LED wiring. I have previously posted and built 2 Bluejacket kits, USS Constitution and the Nantucket Lightship. I hope you find my blog interesting. Jerry
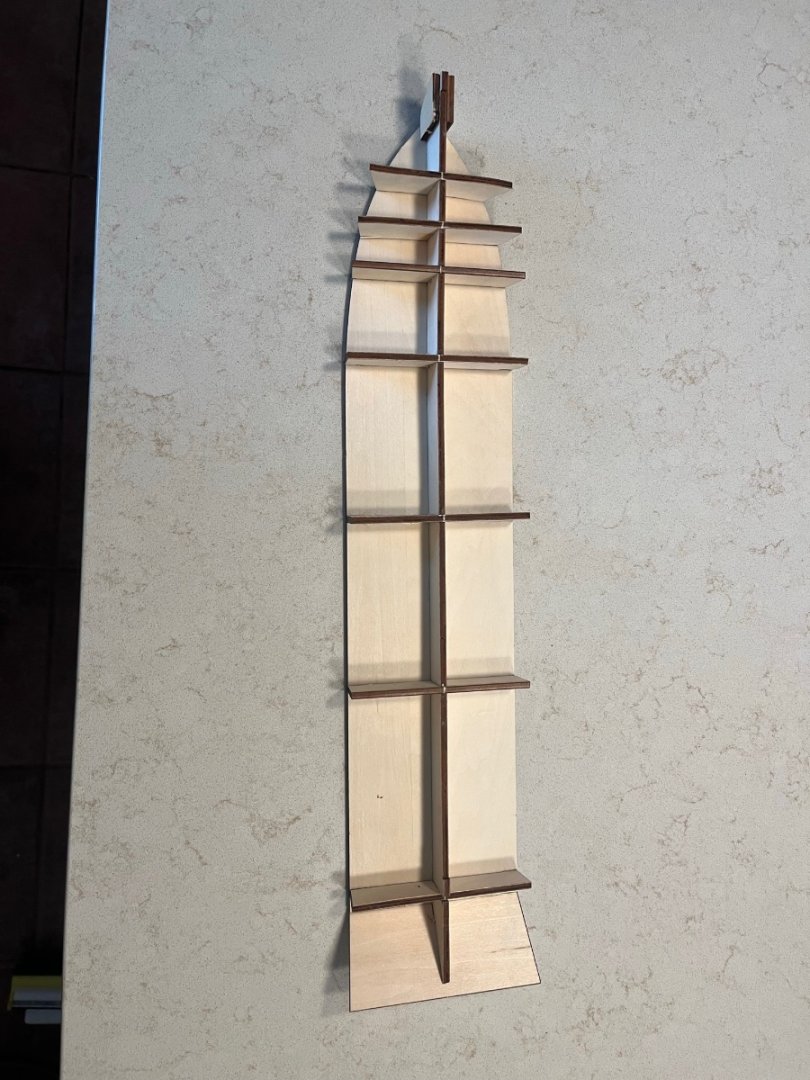

-
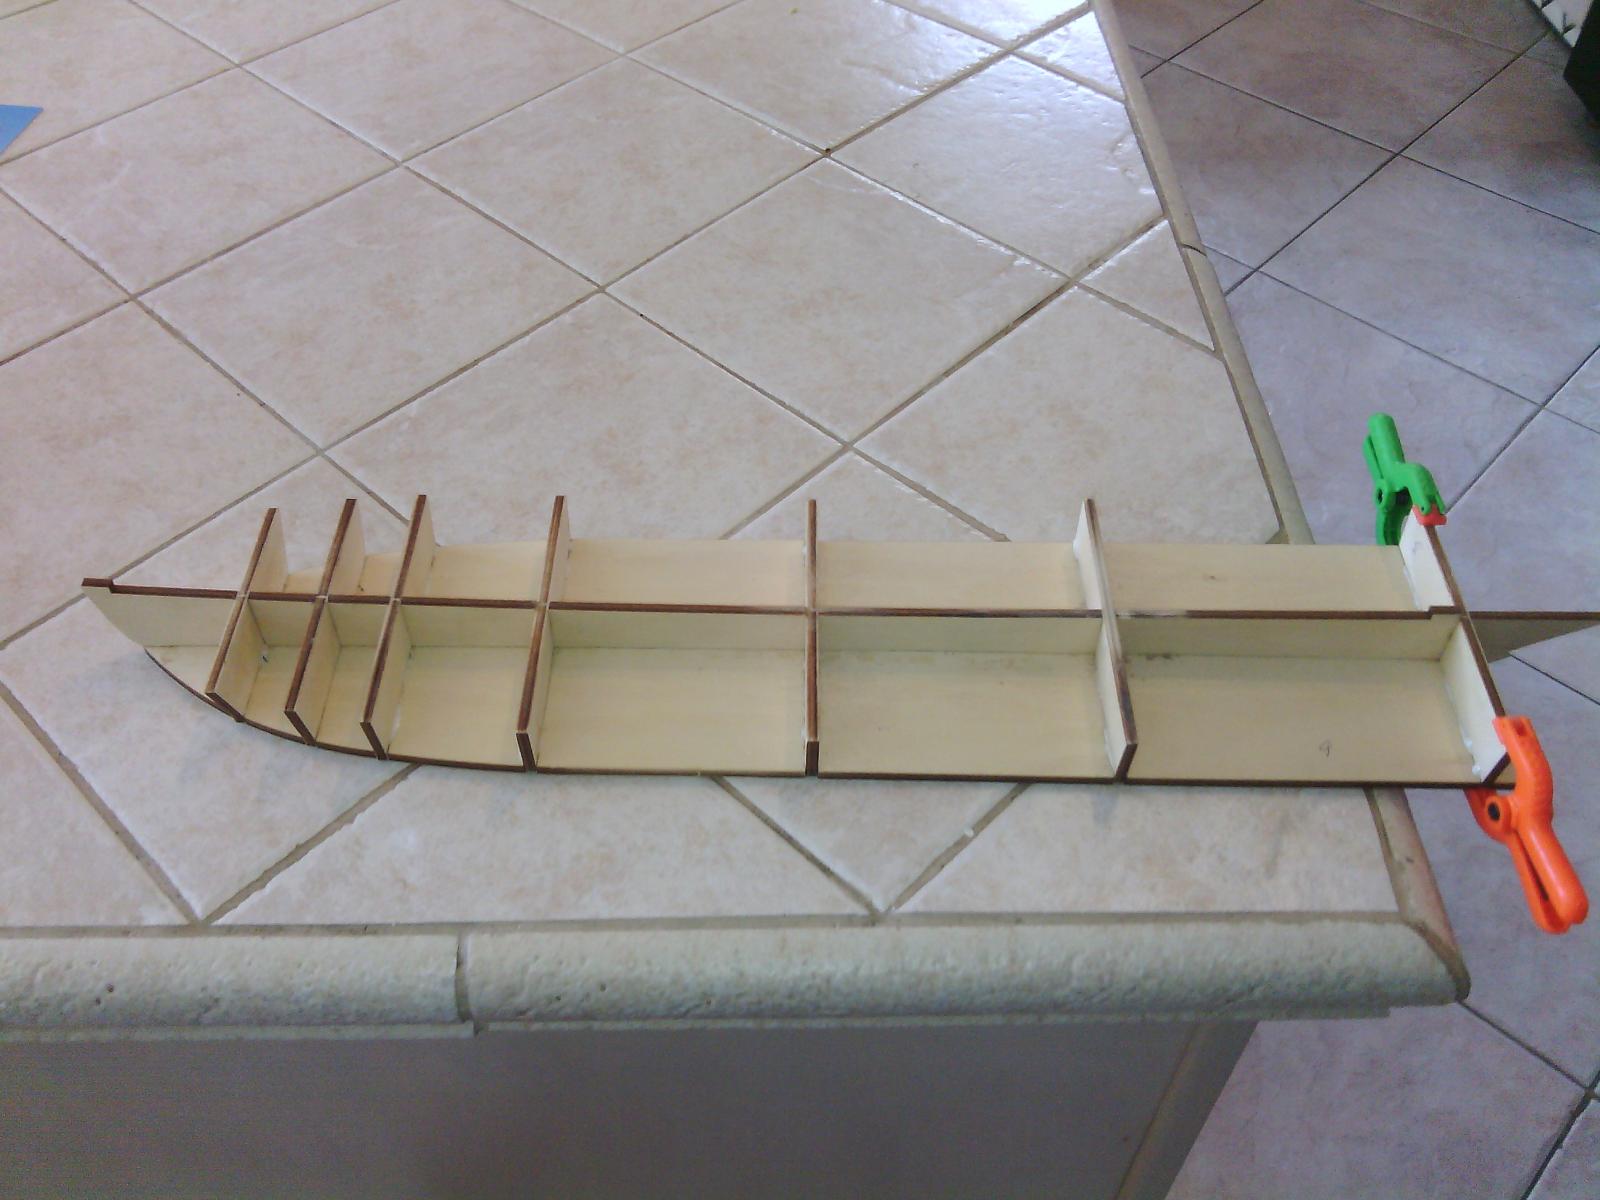
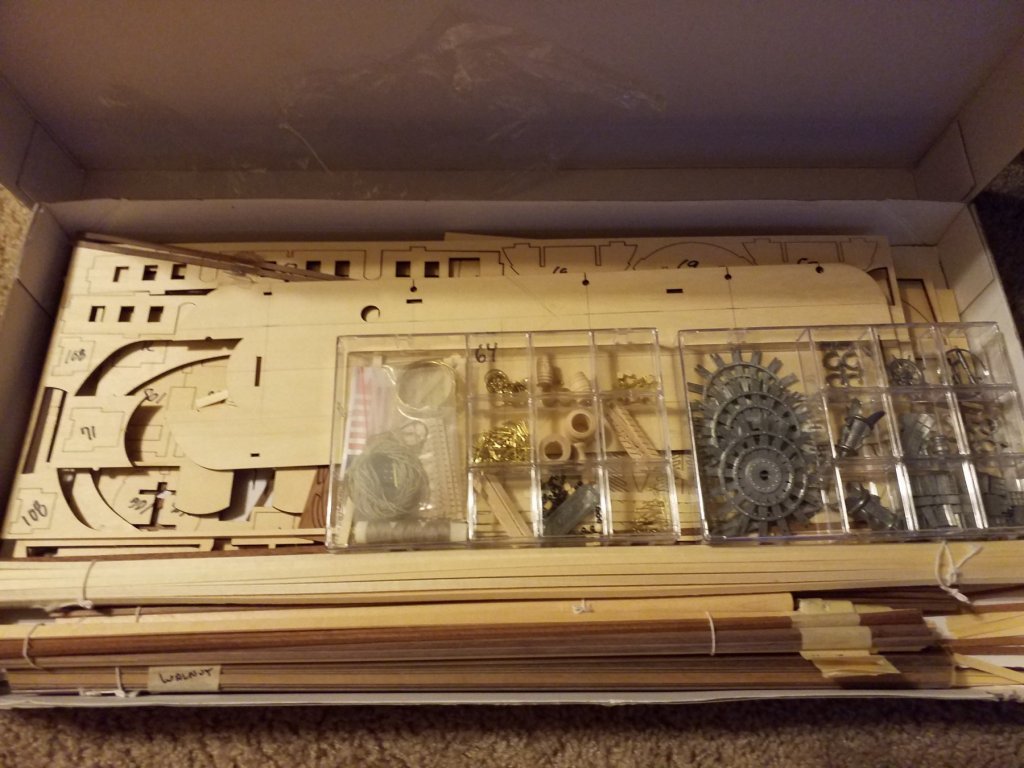
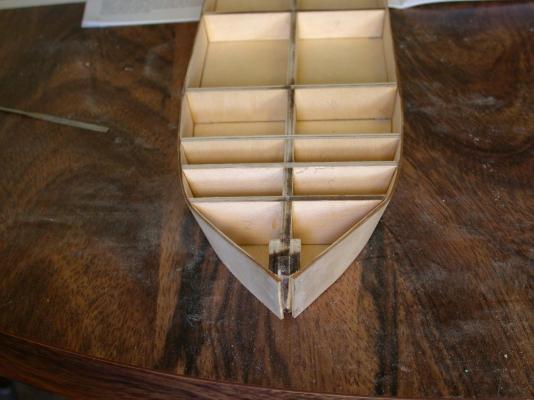
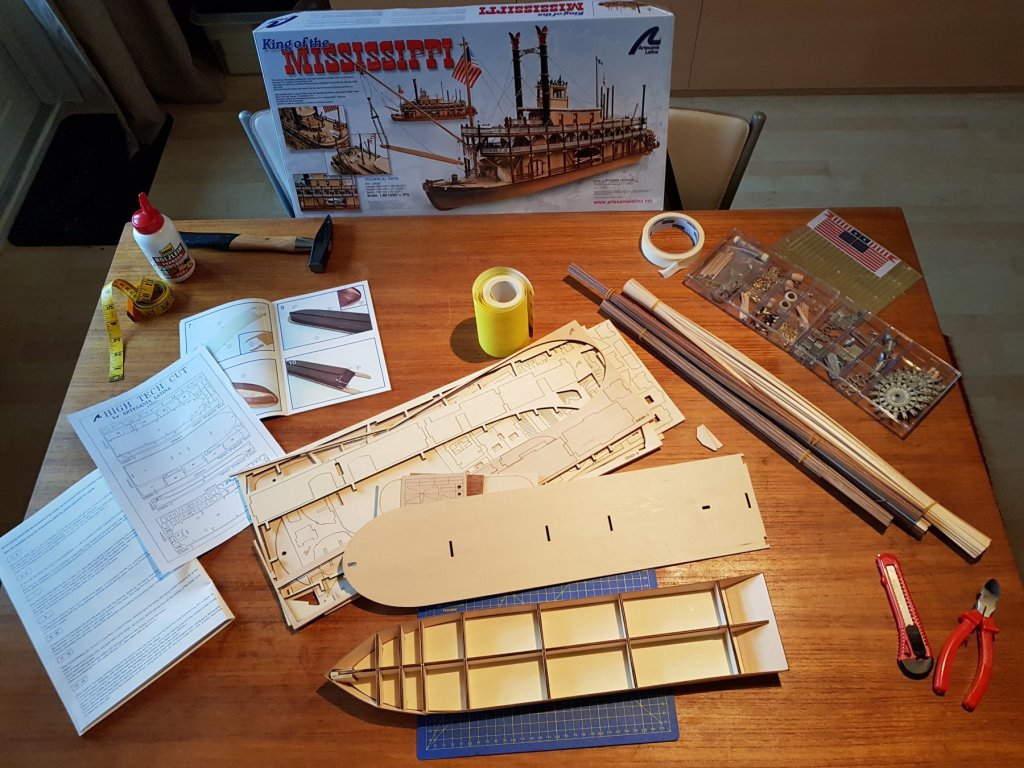
 I have been so impressed with the modeling on MSW that I decided to join in on the experience of building a wooden ship. I really like steamboats and saw somewhere that the AL King of the Mississippi is one of the better kits but as I am finding out they all have their problems. My kit arrived a few days ago and I am already needing the advice found here on this site. I have enjoyed and learned a lot by reading the build logs. Before stating my current problem, let me state my ambitions for my KoM. I like the exquisite models with varnish and polished brass but I want to try make it look like it has been "down the river" a few times. I love the interior lights so I am going to try that. Being familiar with 1:87 in model railroading (HO scale) I am going to shift many of the modeling details about 10% and use what is available from local model train hobby shops. And lastly, with great apprehension, I am going to motorize the paddlewheel. Starting with photos the full contents of the kit, followed by a couple of shots of the hull, a close look at the bow. The two side bulkheads don't want to meet a the point of the bow. More sanding seems to distort the bulkheads. What am I doing wrong here? What do I need to do before I start the hull planking? I can knock it apart if I have to but I would rather not if there is another way to do this. Any help will be appreciated, Rick
- 44 replies
-
- 1
-
-
- king of the mississippi
- artesania latina
- (and 2 more)
-
 I purchased this kit on EBay for what I thought was reasonable...
-
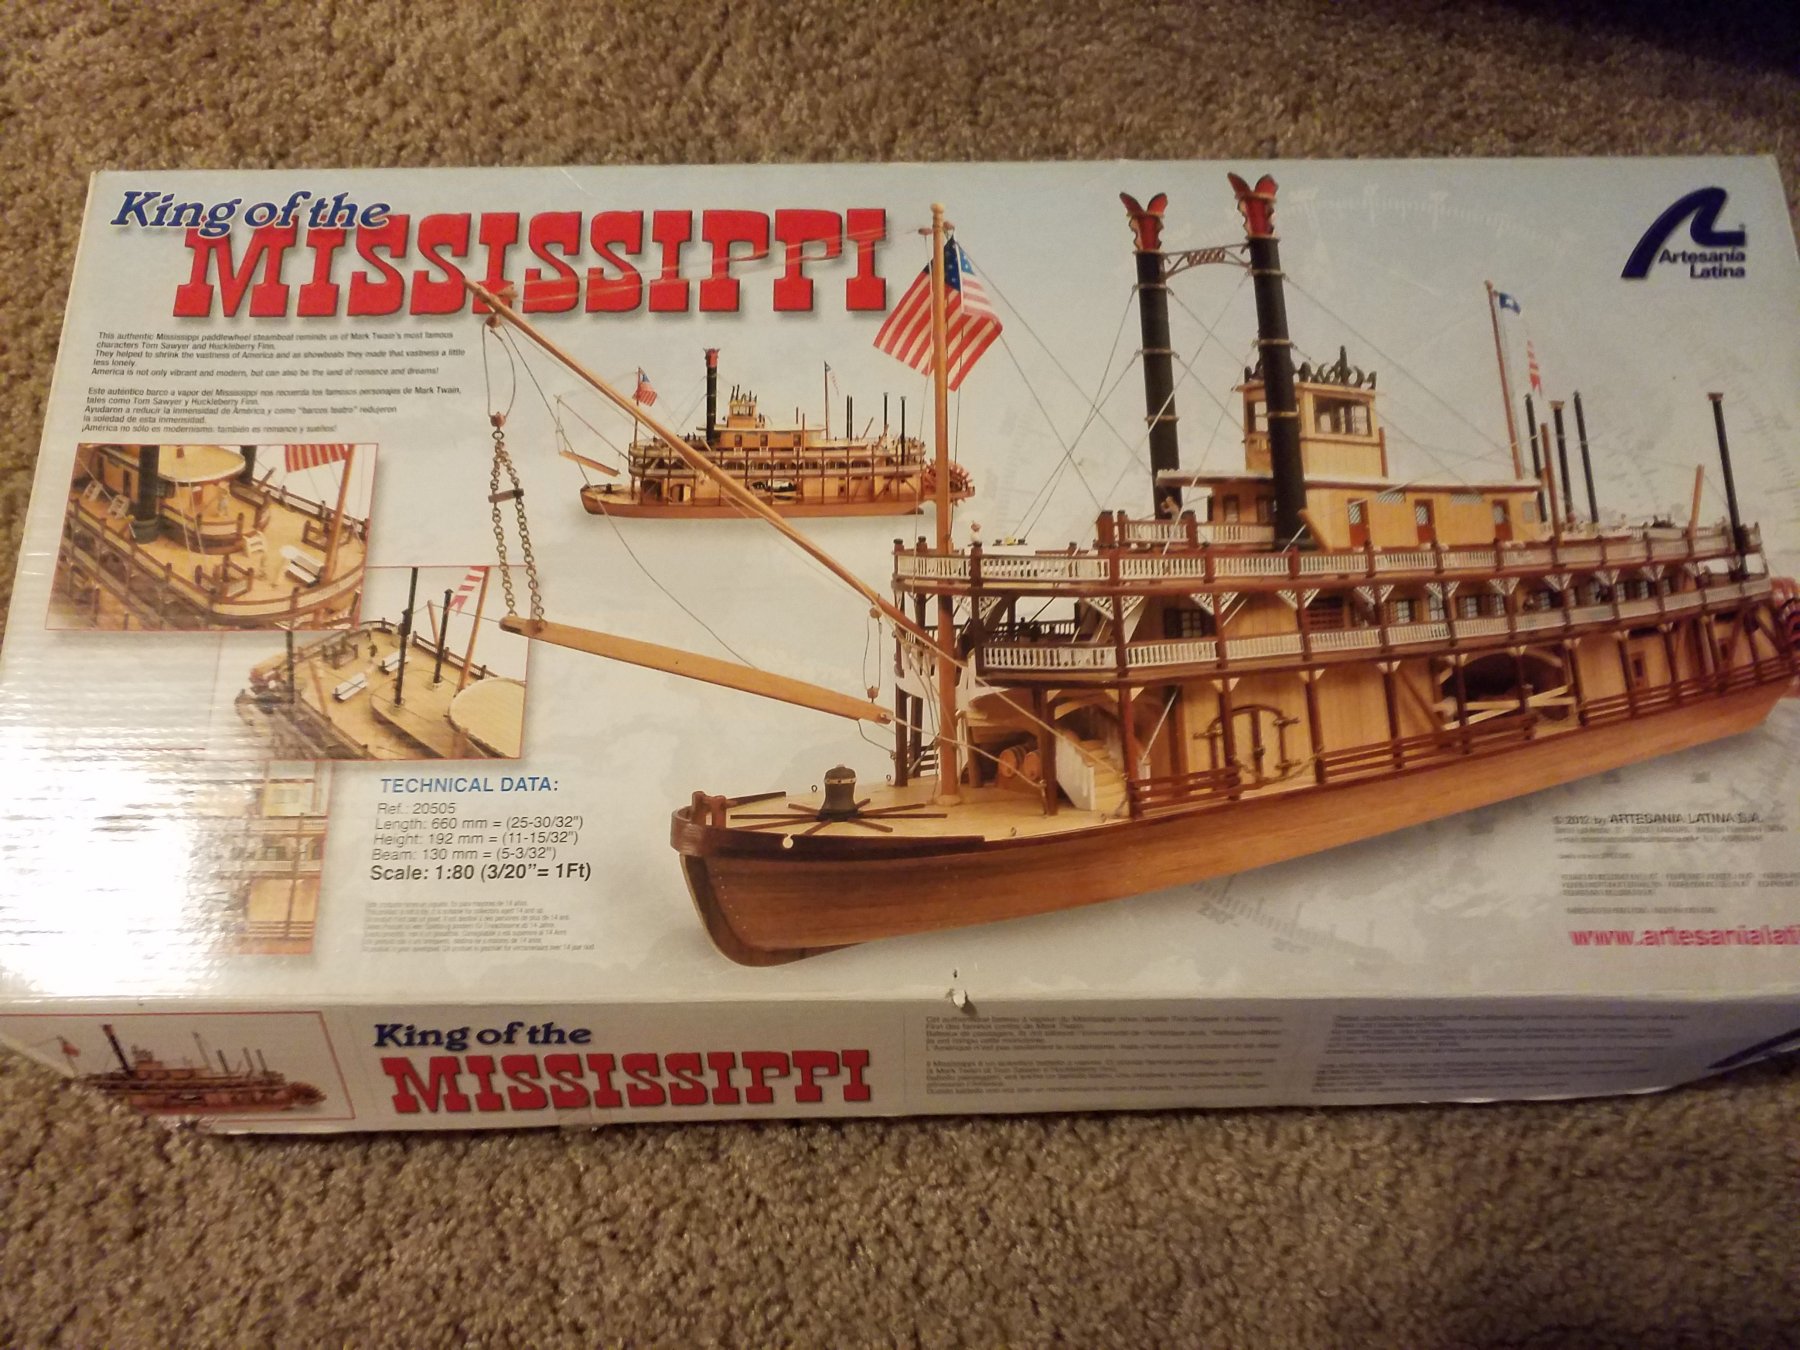
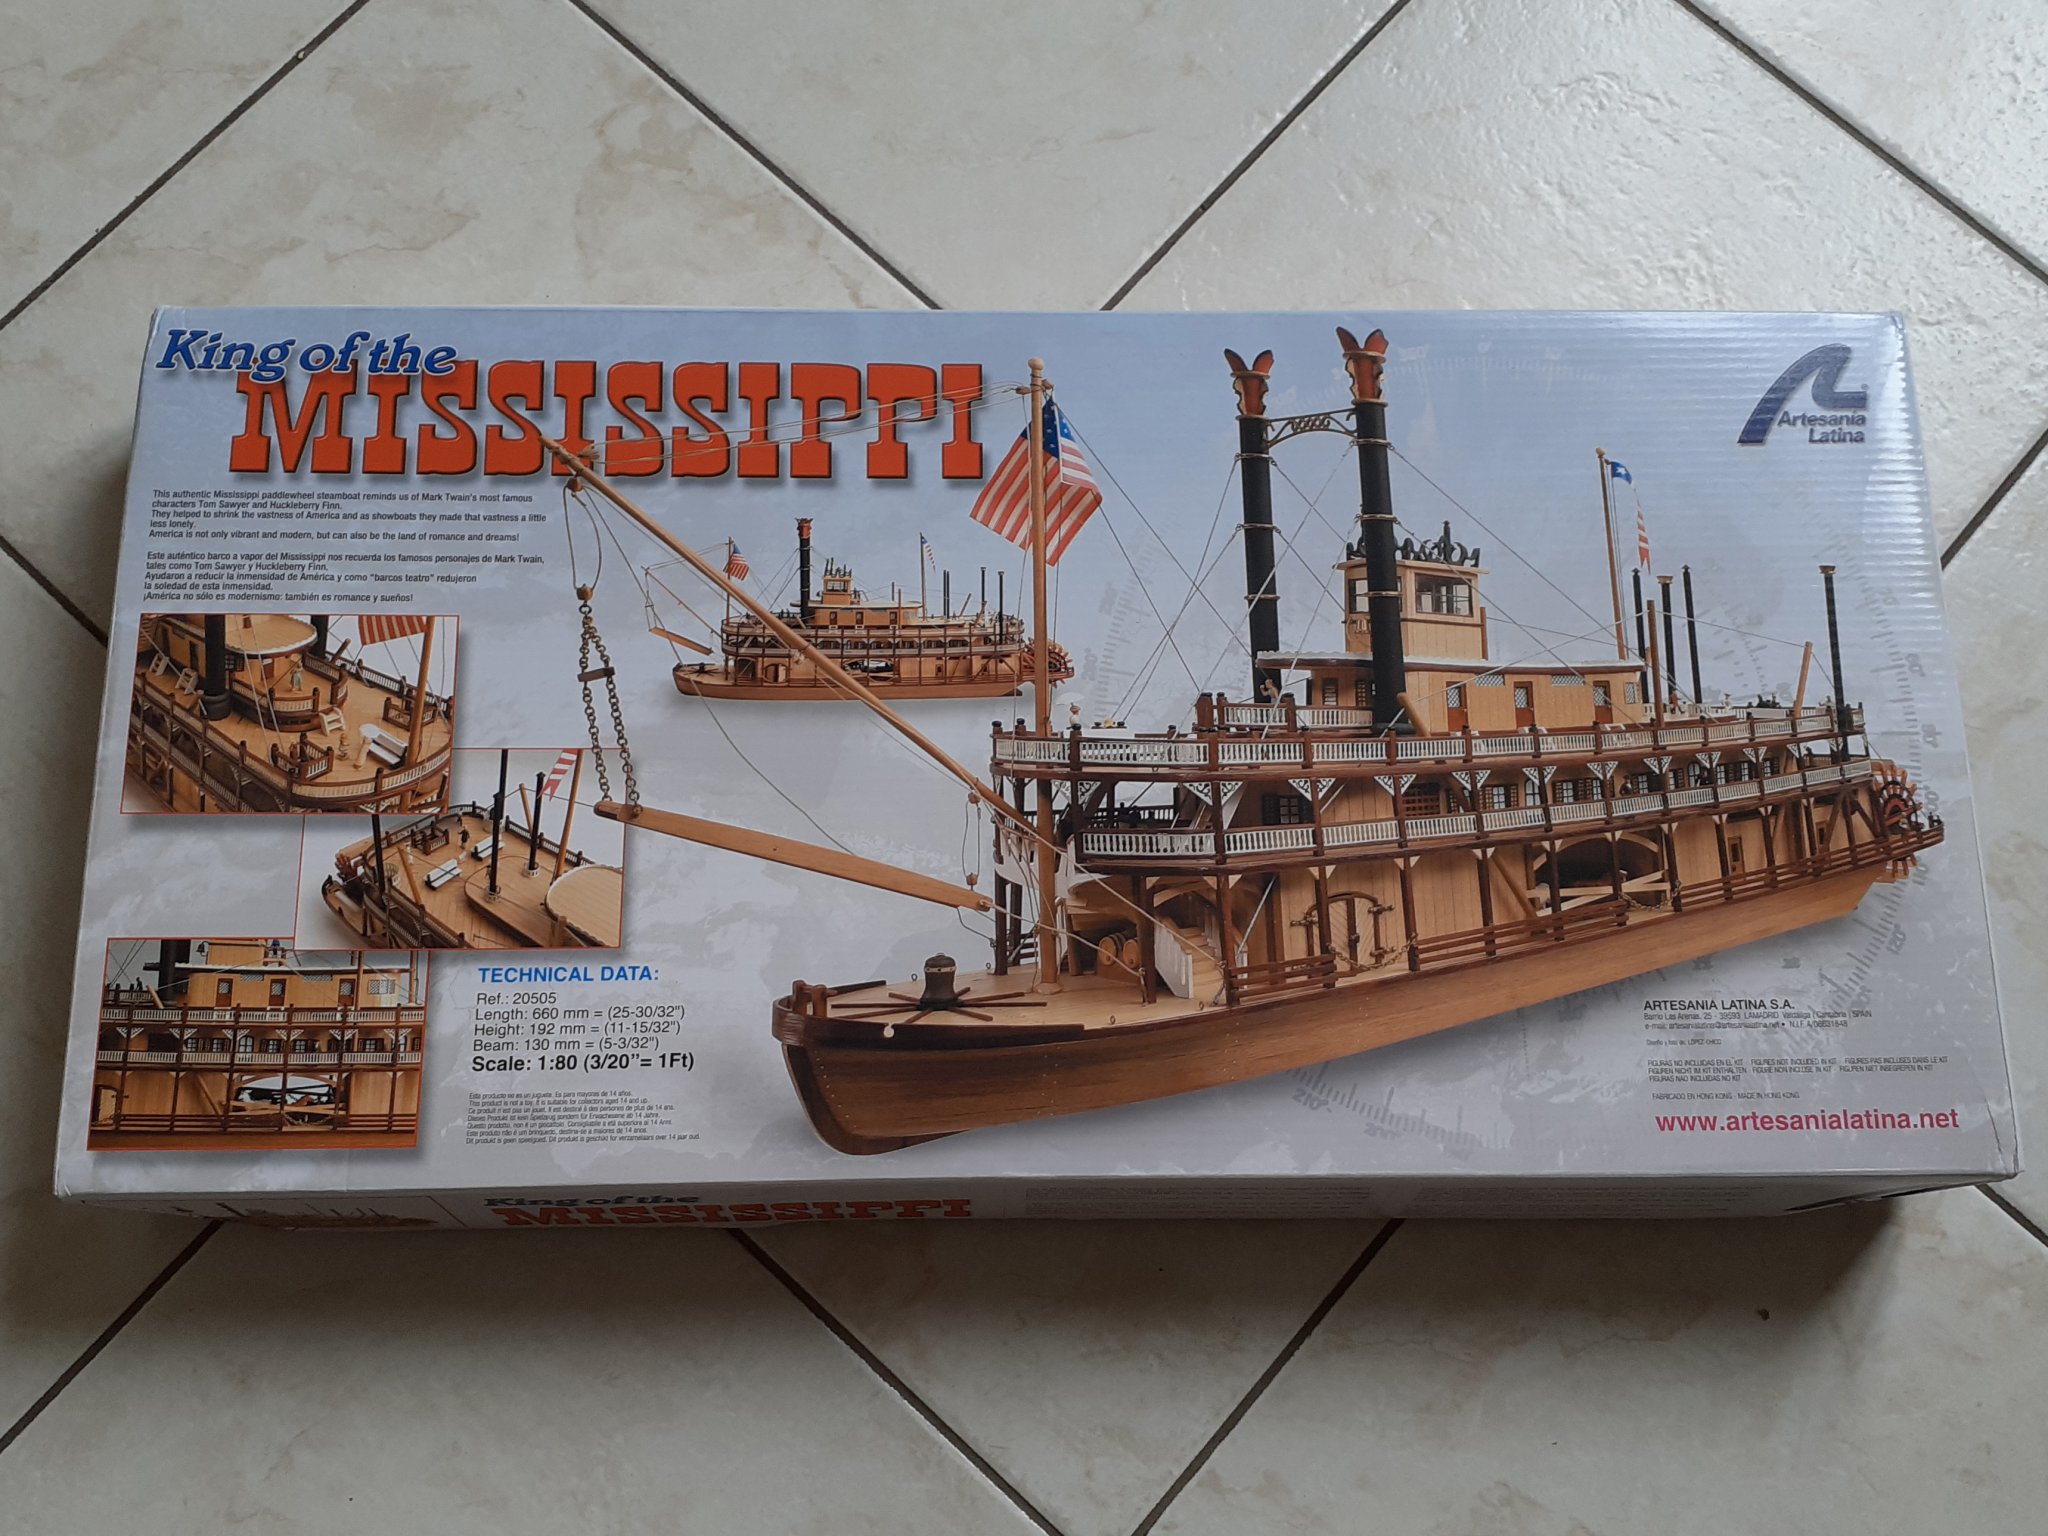
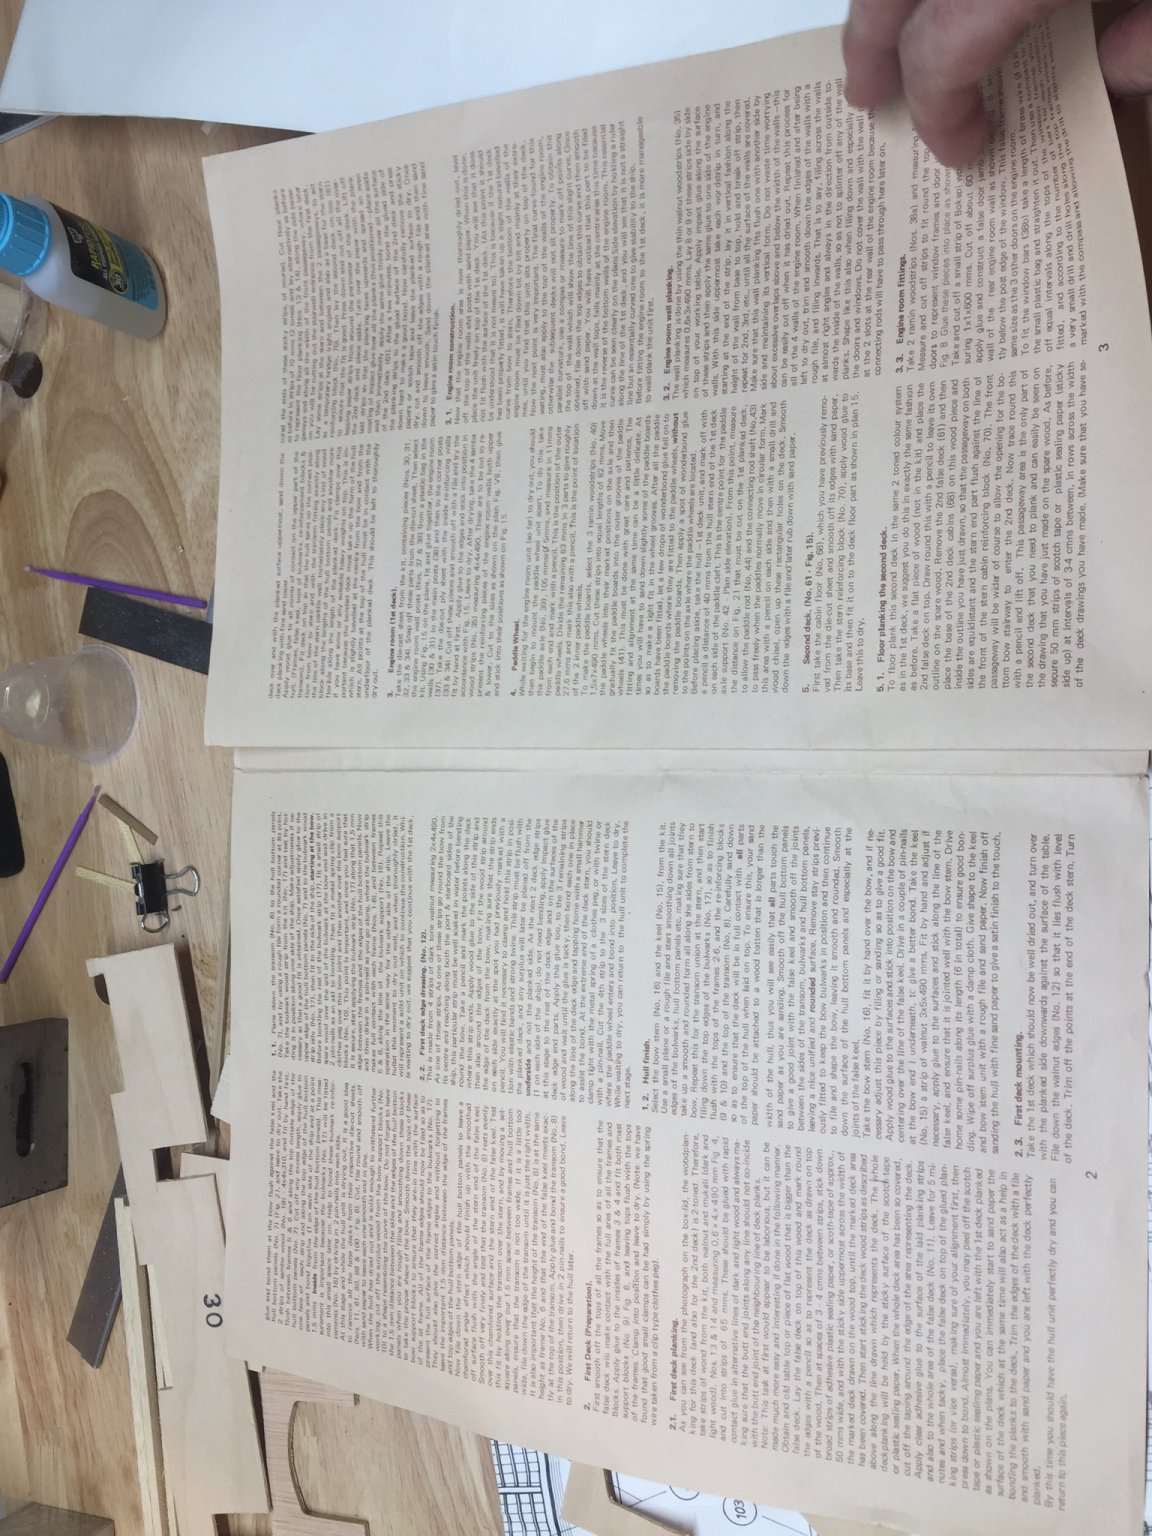
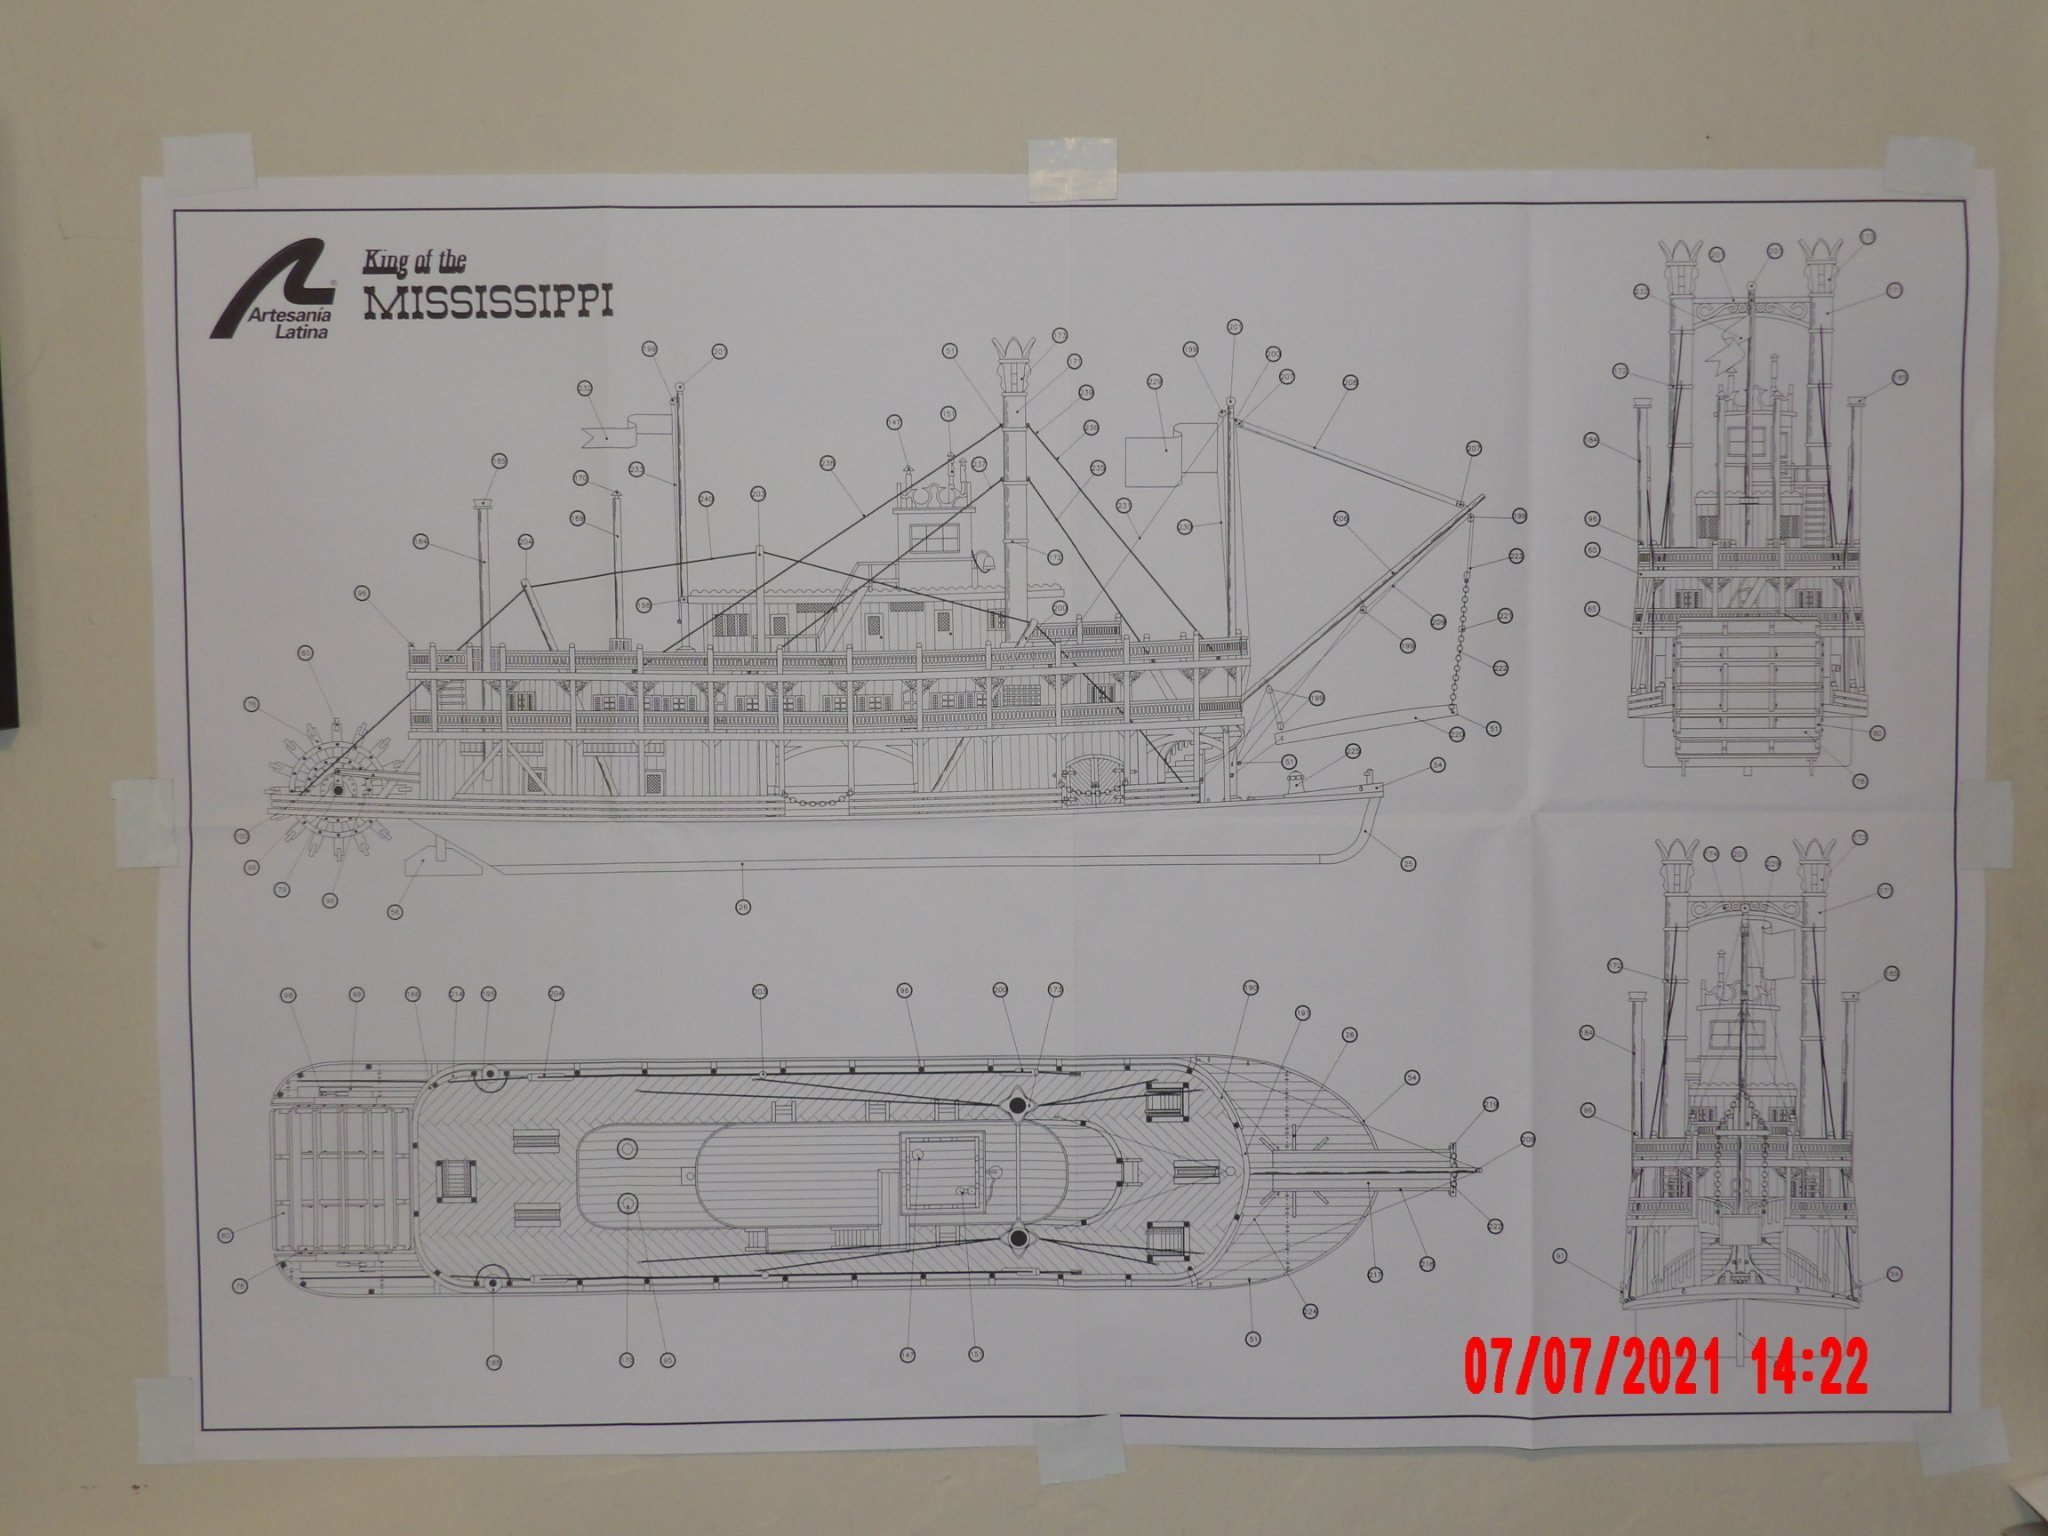
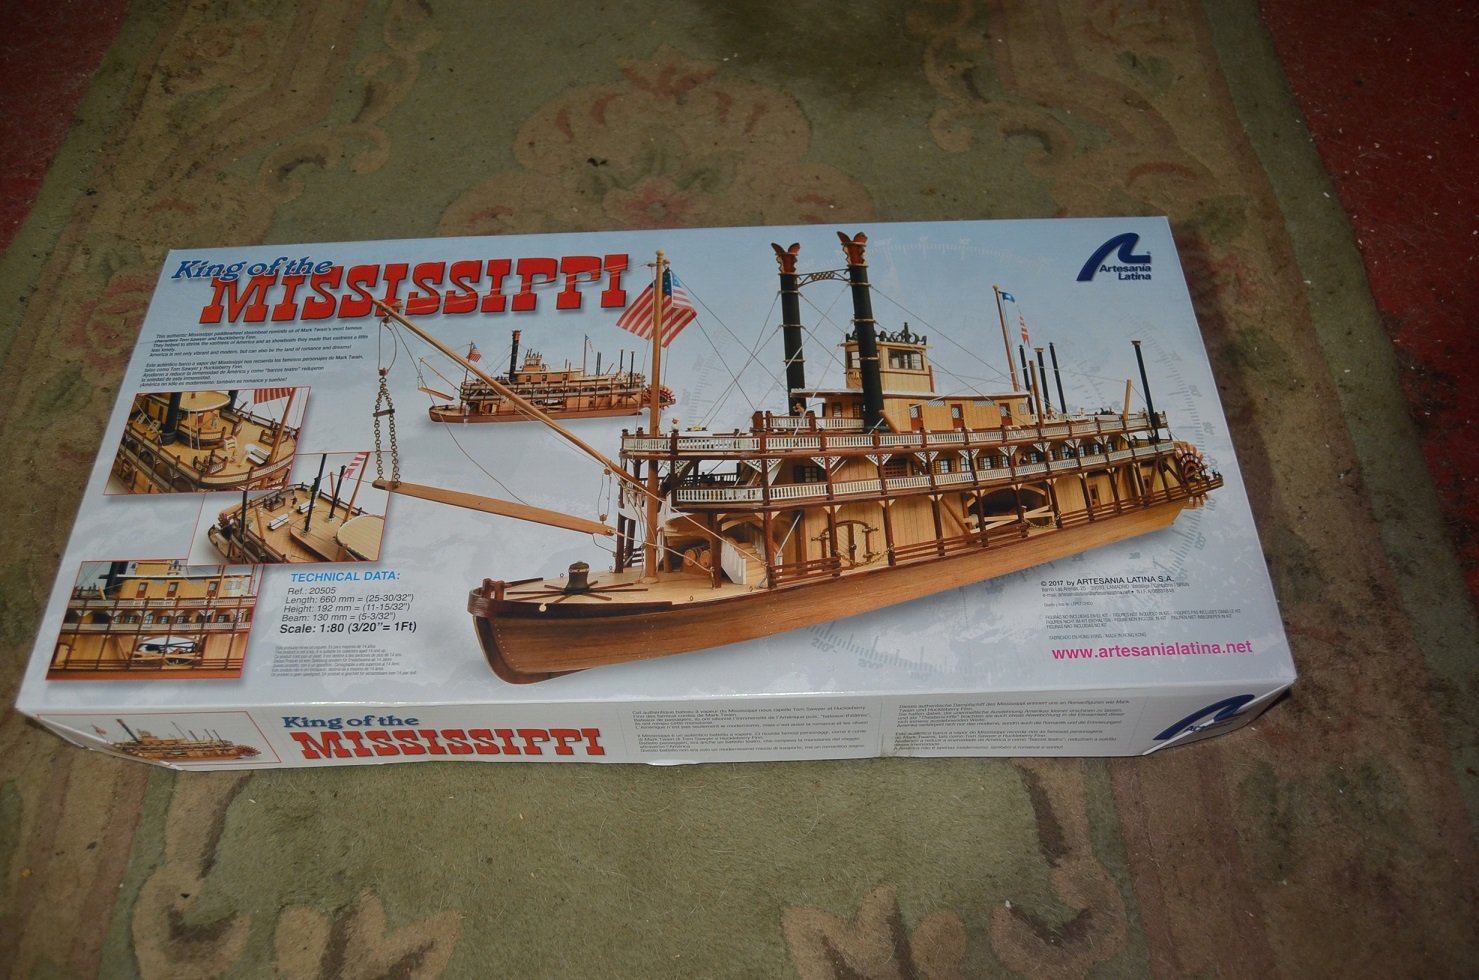
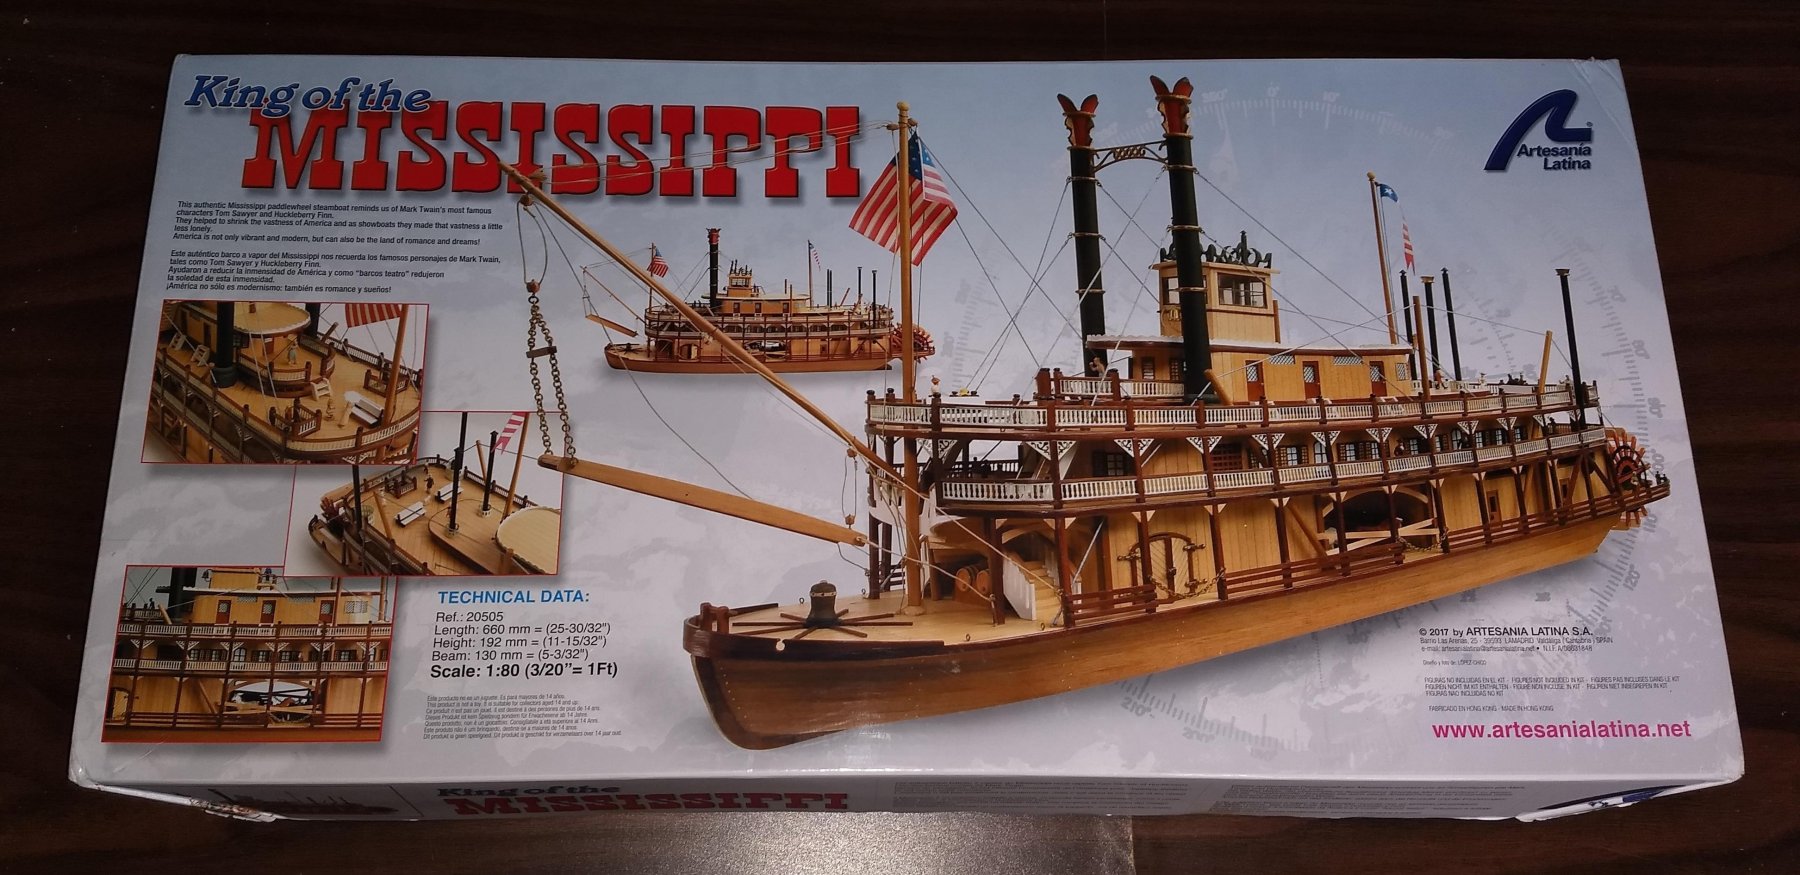
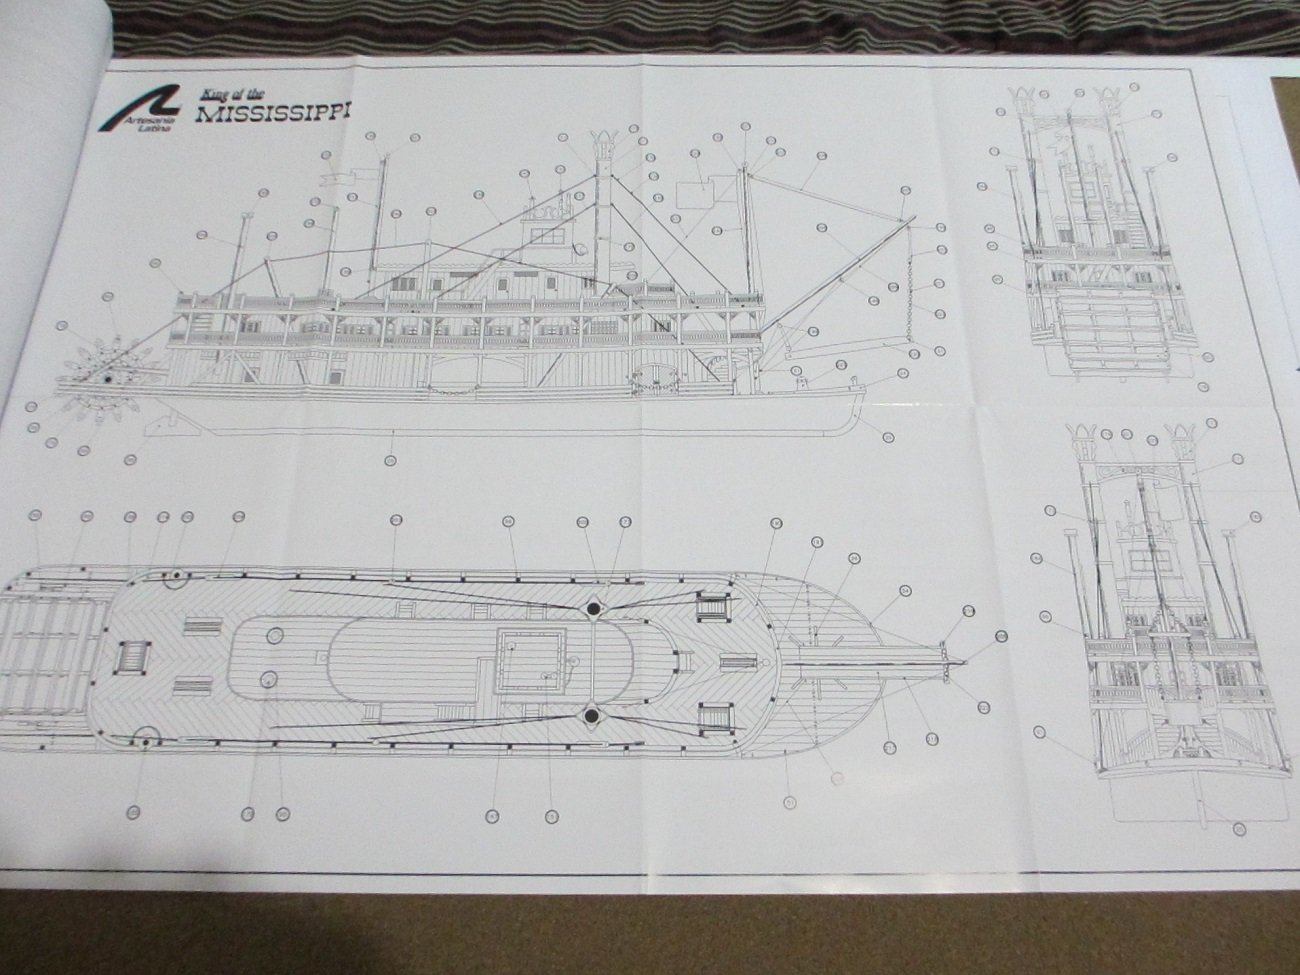
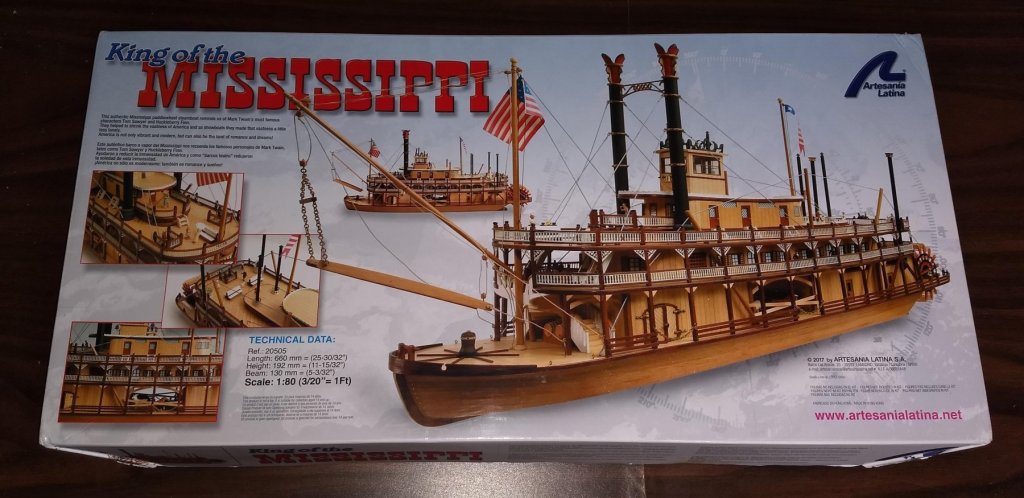
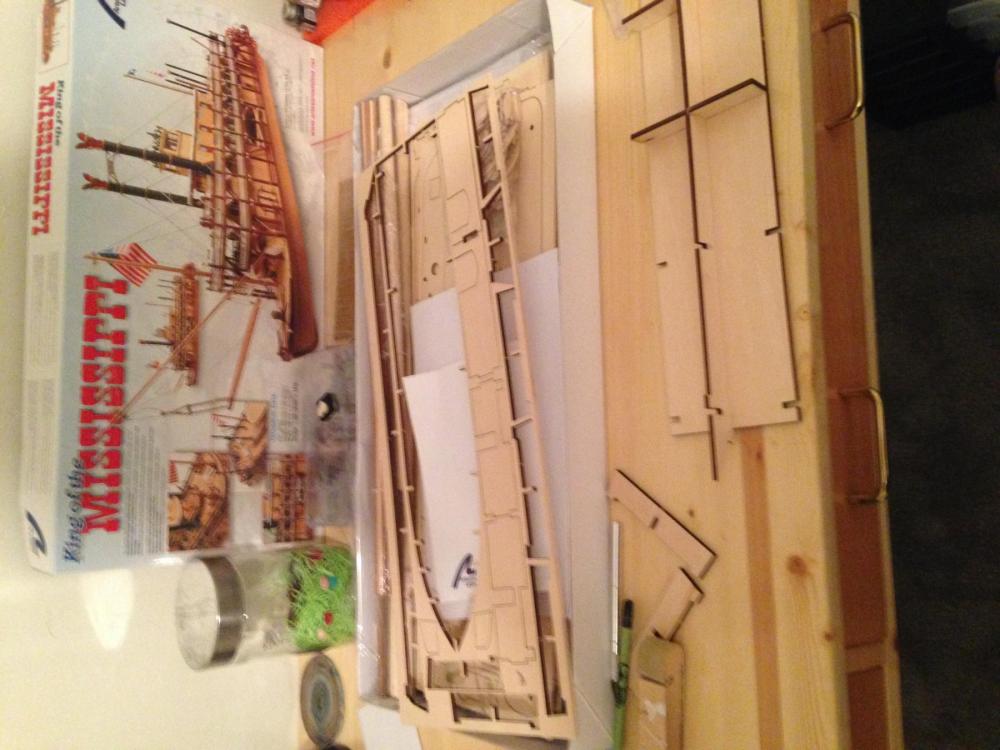
 This was my first purchase. After reading the instructions I realized that I did not have the skills necessary. So I built Model Shipways Shipwright series of three models, the last being the Muscongus Bay Lobster Smack. As a lifelong fan of Mark Twain, I found this model appealing. I found the false keel and bottom warped, and am attempting to straighten before starting assembly. In the meantime, I spent some time removing char from the plywood bulkheads. There are a quite a few logs on MSW for this kit, so I won't repeat posting more than the box cover and overall plan to start:
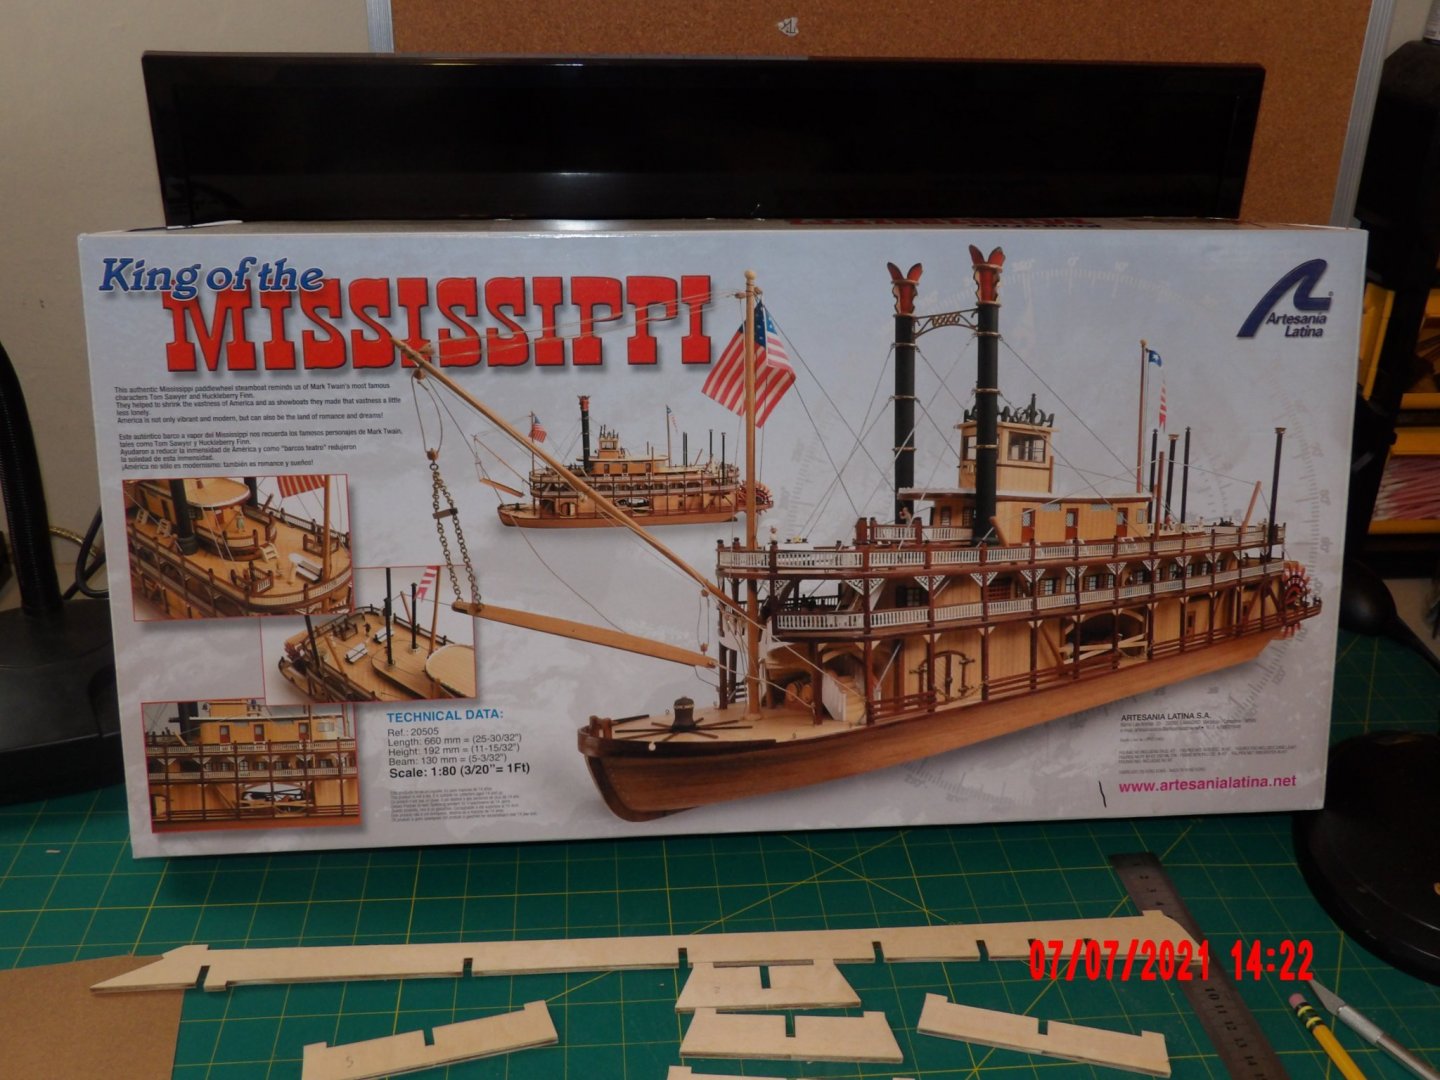
- 109 replies
-
- 4
-
-
- Finished
- Artesania Latina
- (and 1 more)
-
 Hi all, I am back after a long absence. I have now retired so have lots of time for my favourite hobby. I have started to build the AL King of the Mississippi. I like AL's kits. The instructions can be a bit vague at times, but the photo instructions are mostly easy to follow. Paul


-
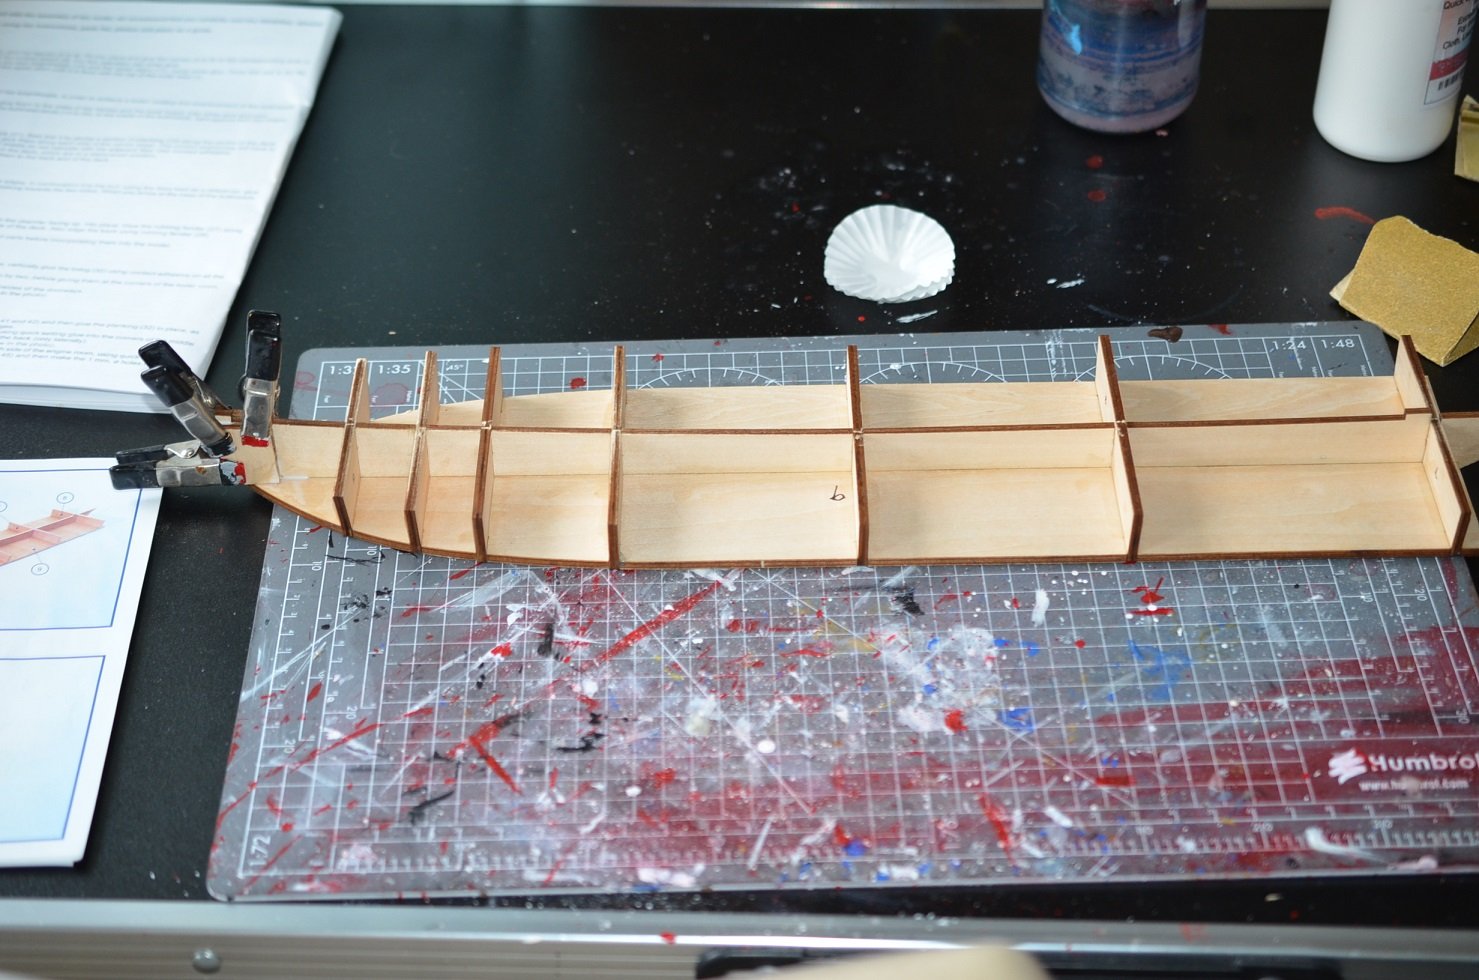
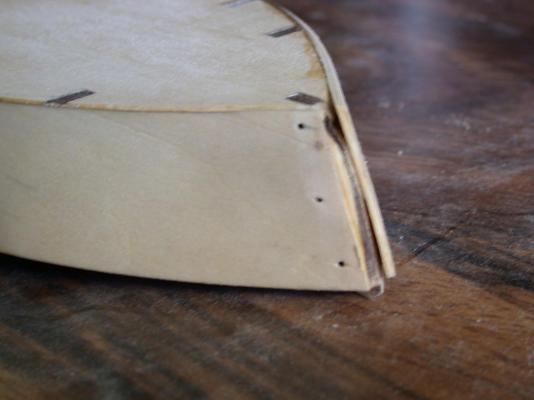
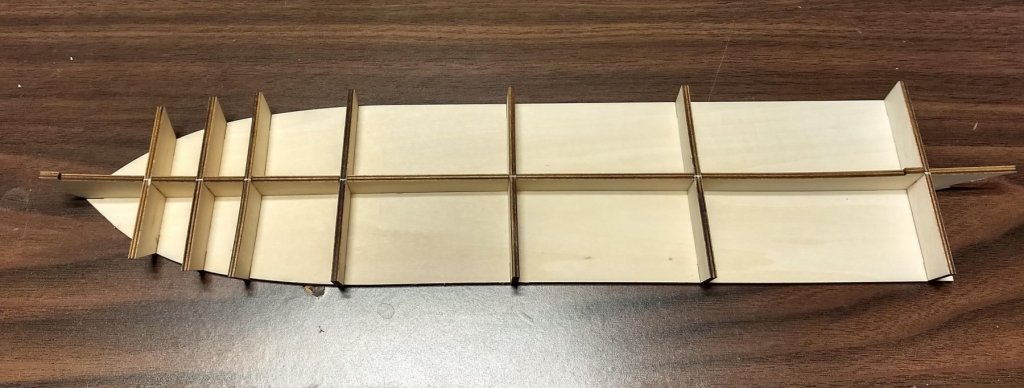
 I first saw a model steamboat being built over 35 years ago. I was impressed with the model but never thought that was something I could ever tackle. I was able to locate a kit after AL went out of business. I was not going to do a build log since it looked like this kit would no longer be produced. However, with AL new ownership this kit is available once again. The bulkheads fit snugly and squared easily. The only issue was that bulkheads 4 and 5 were mislabeled. Note that the sternboard was not put on at this time although the instructions indicate to do it. Gluing it on at this point can result in an incorrect angle as noted in other build logs.
-
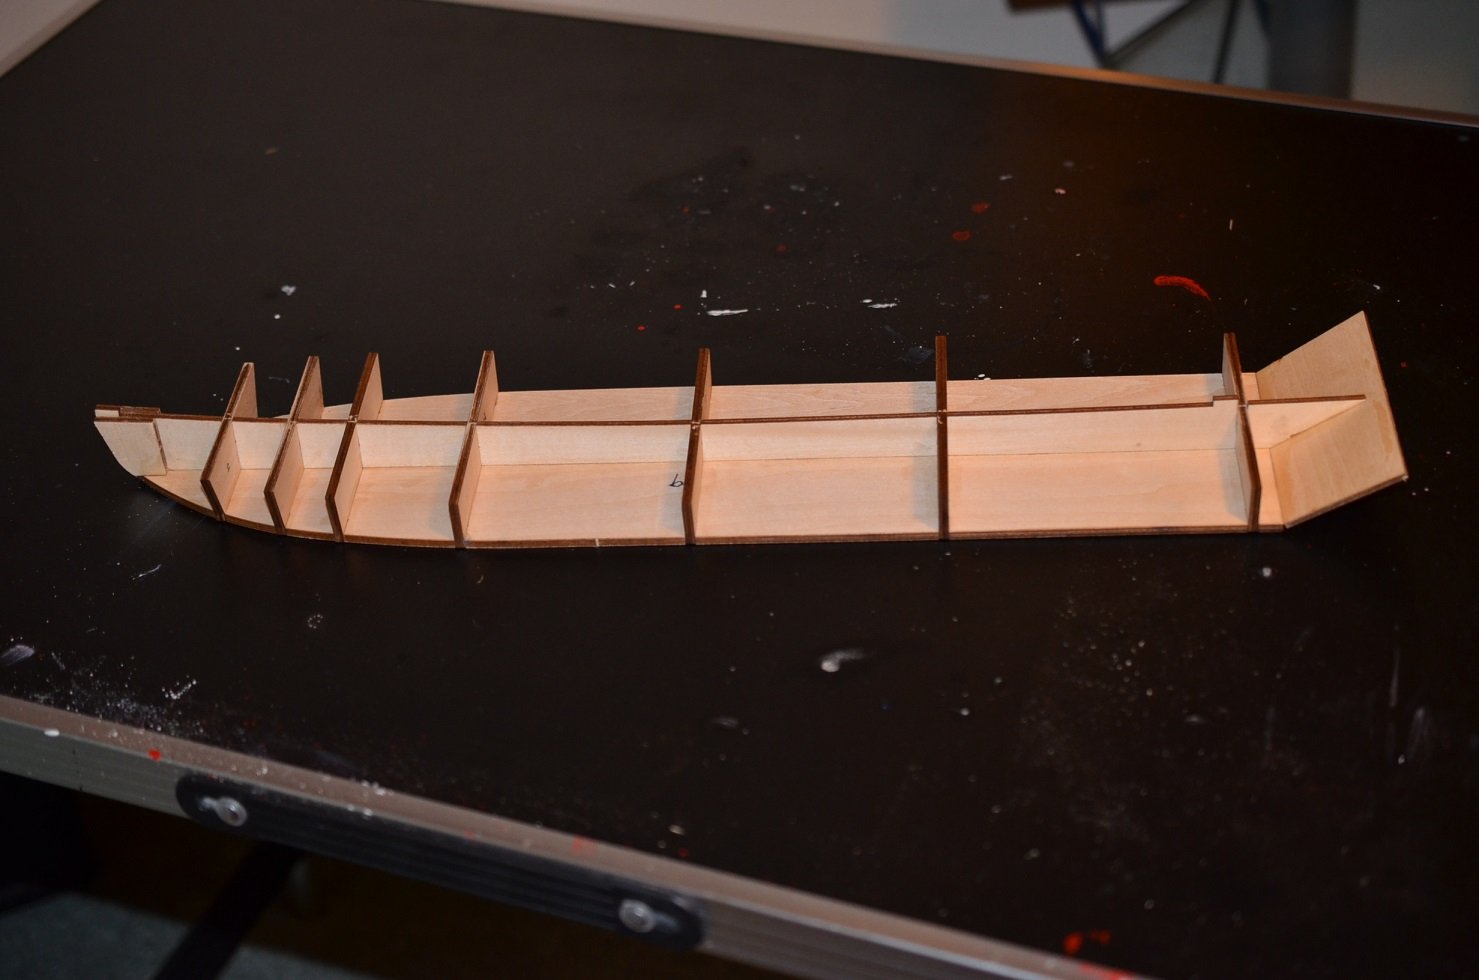
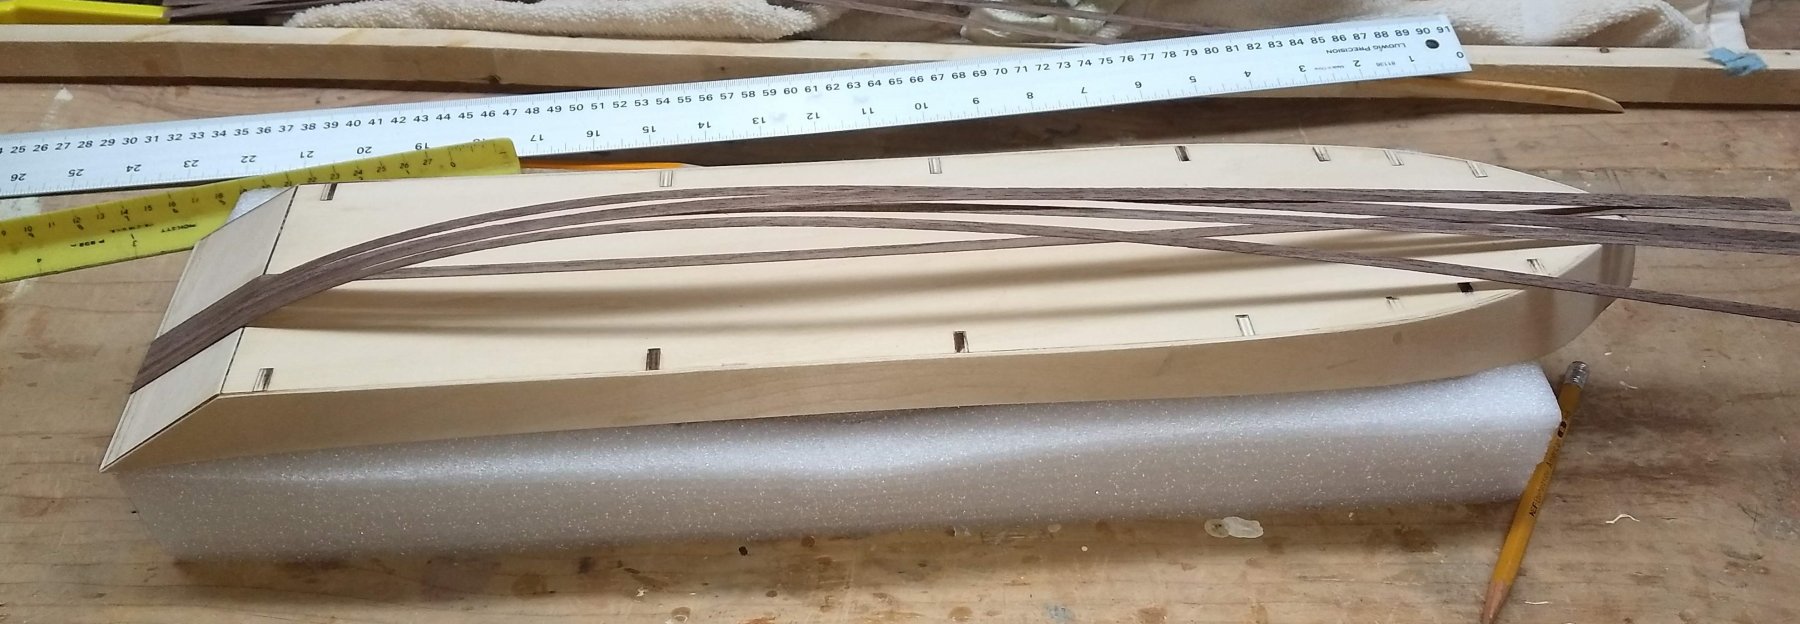
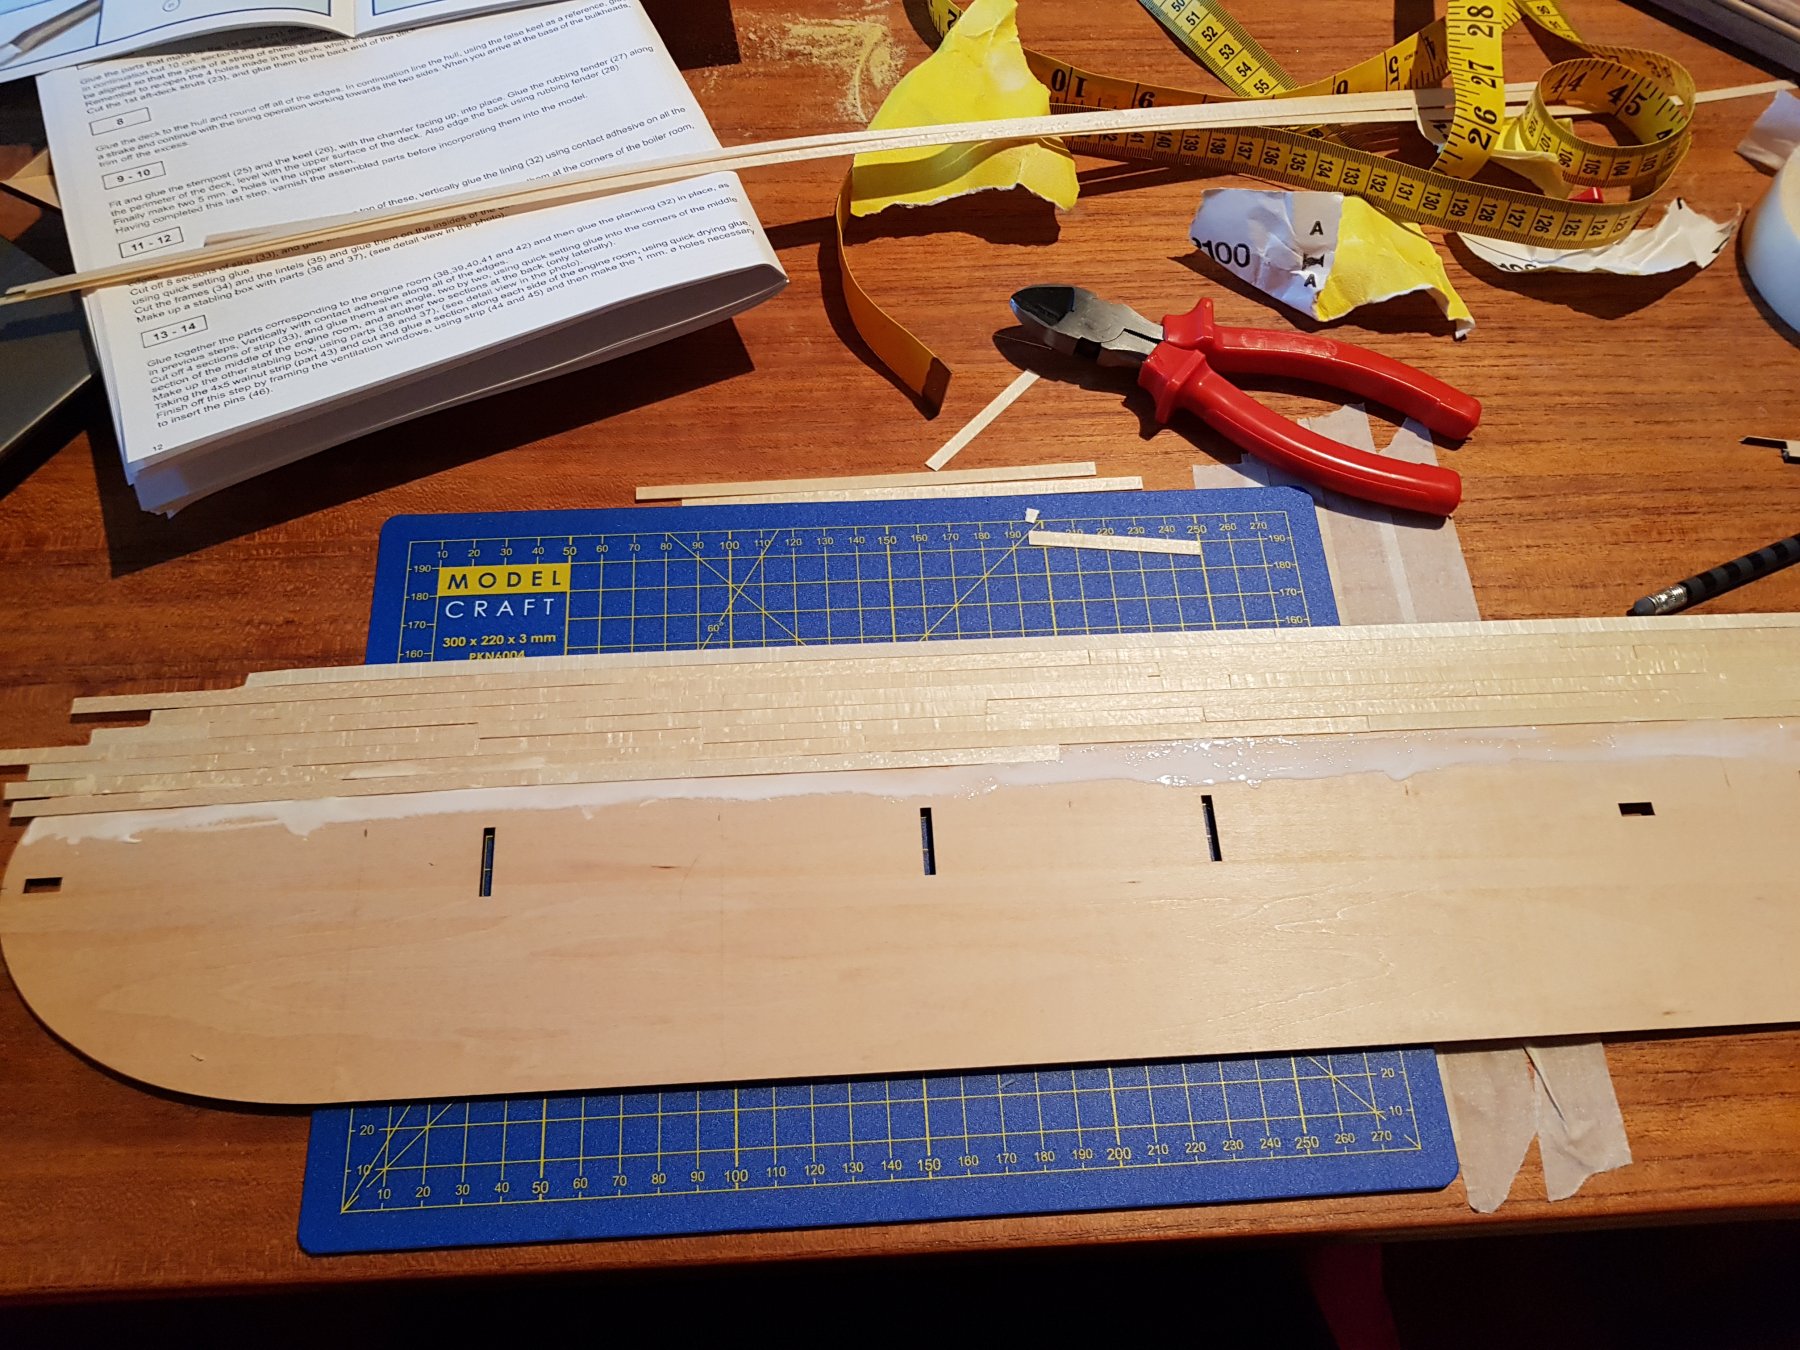
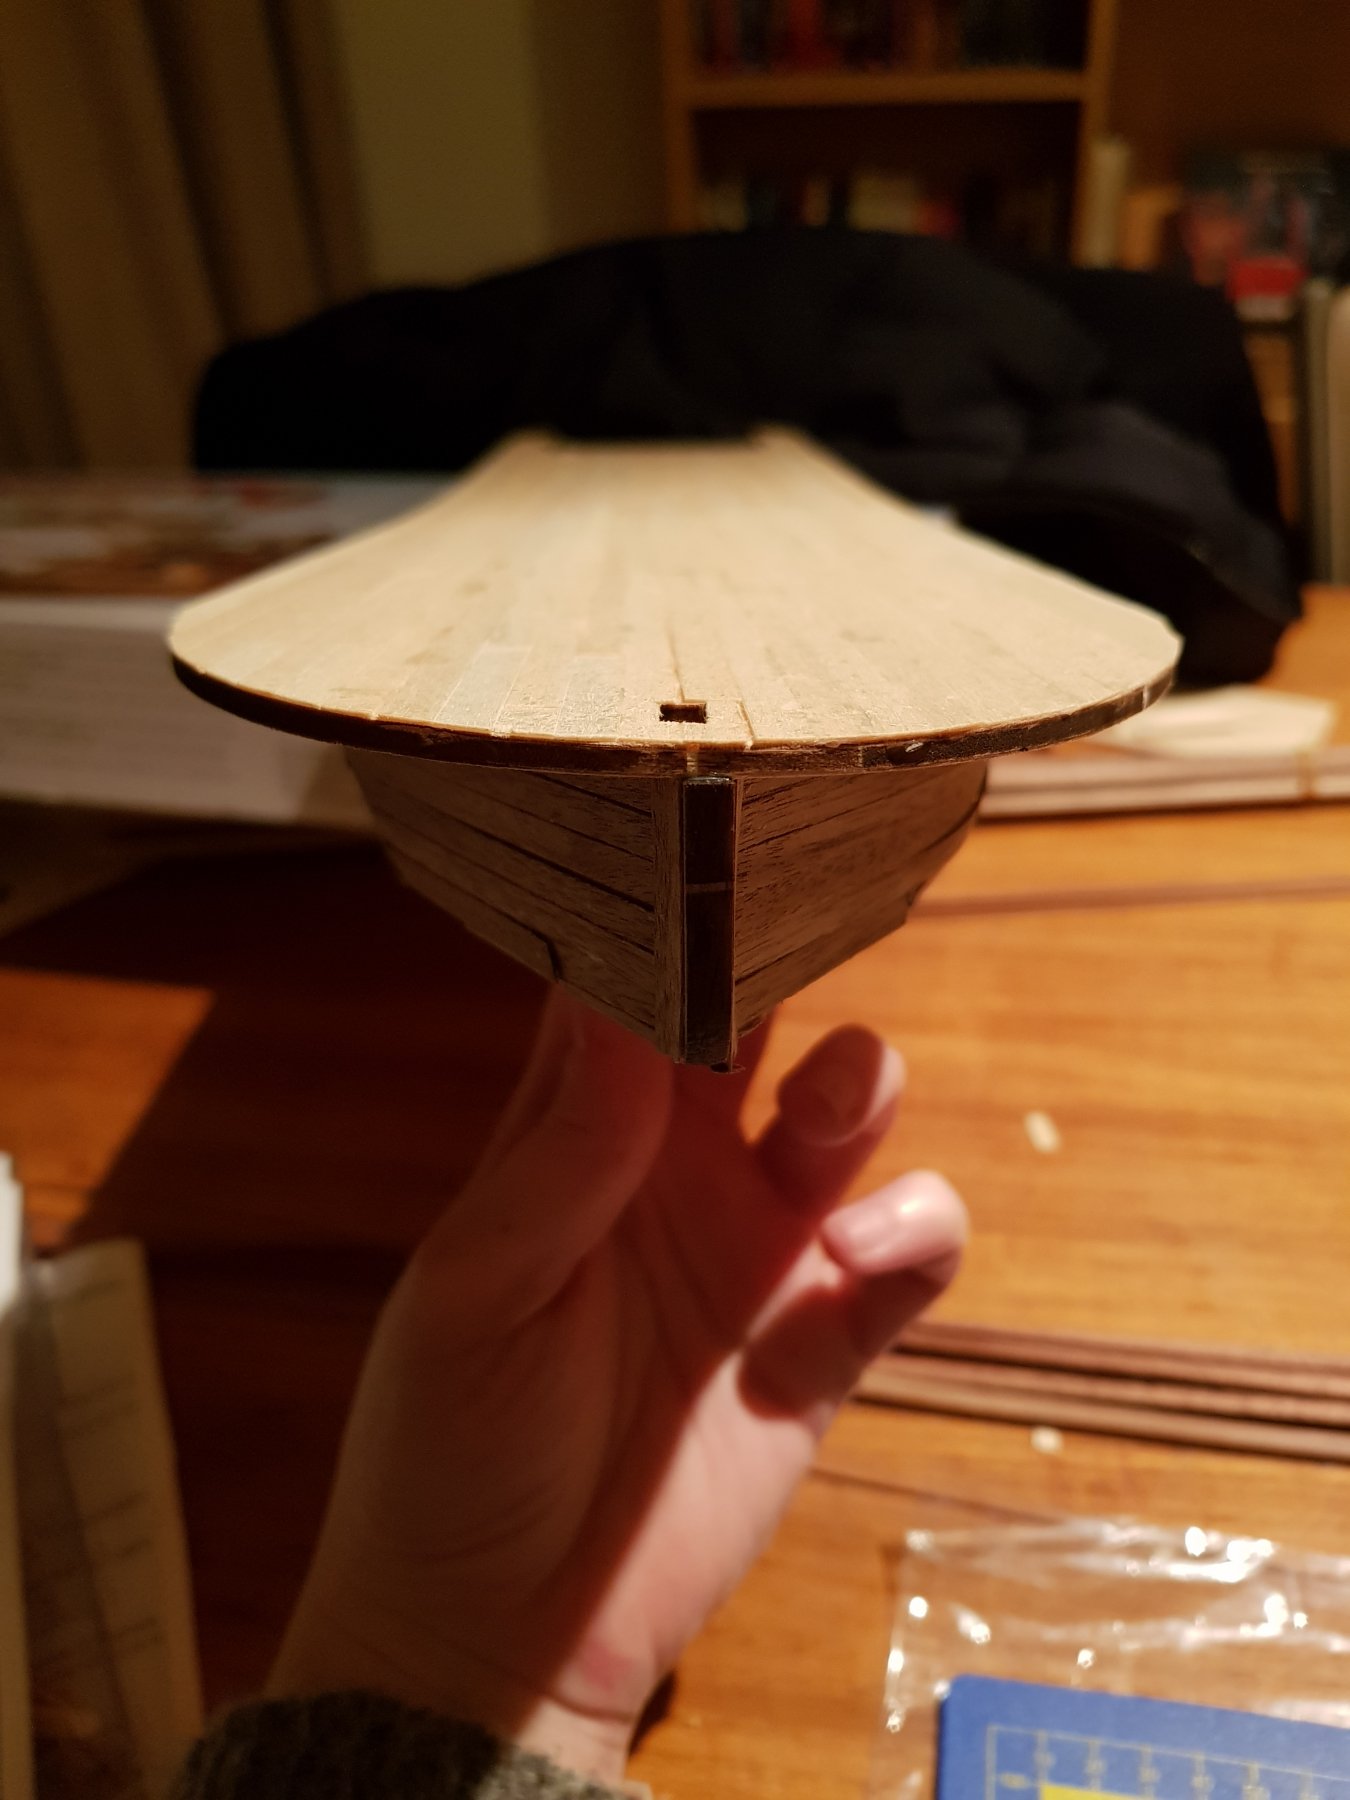
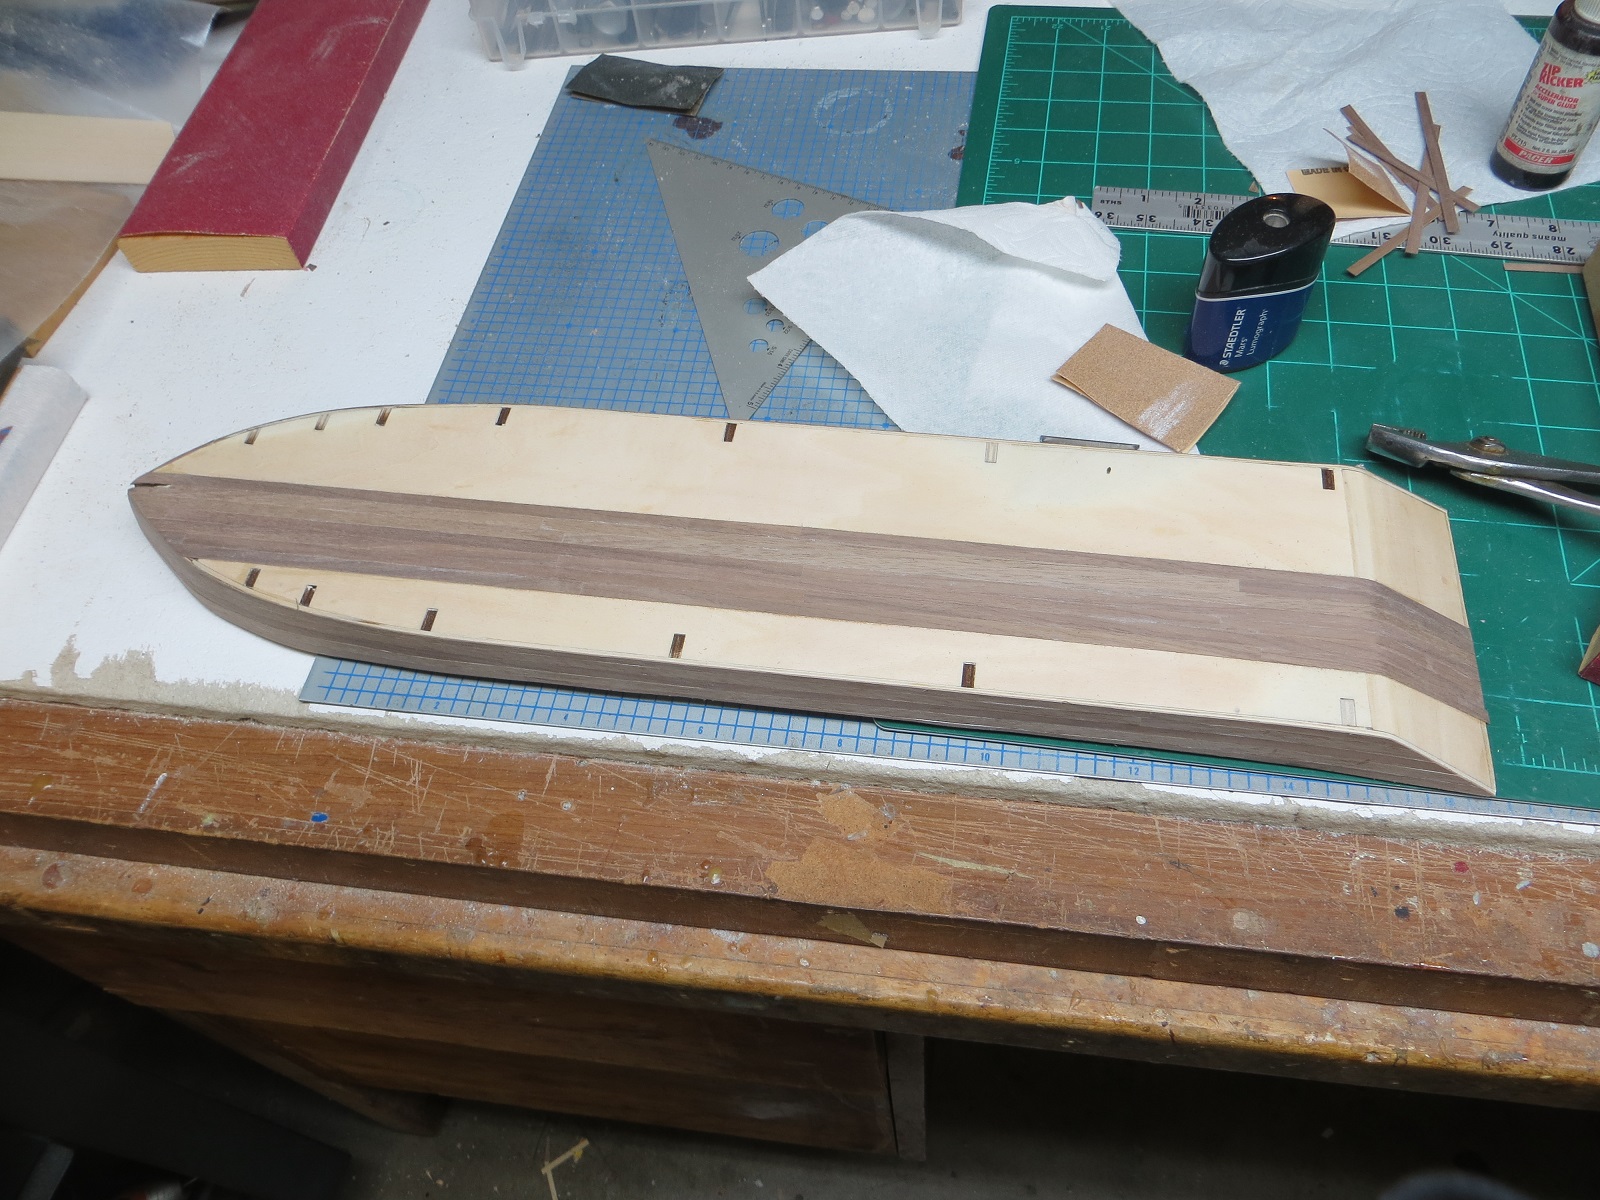
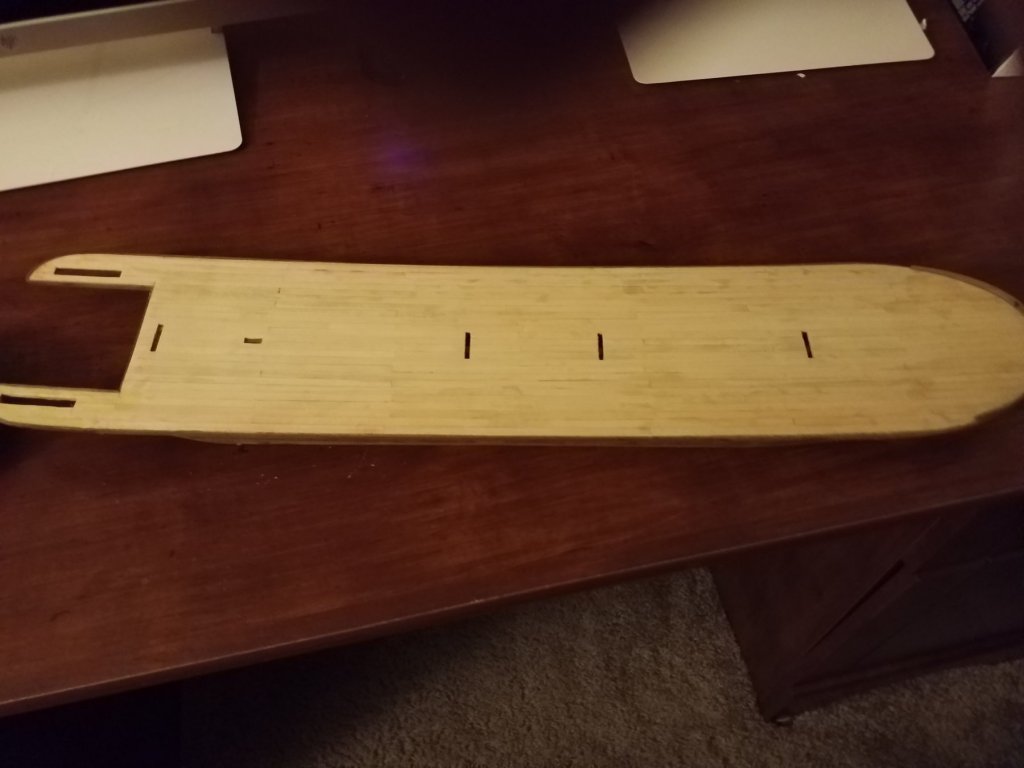
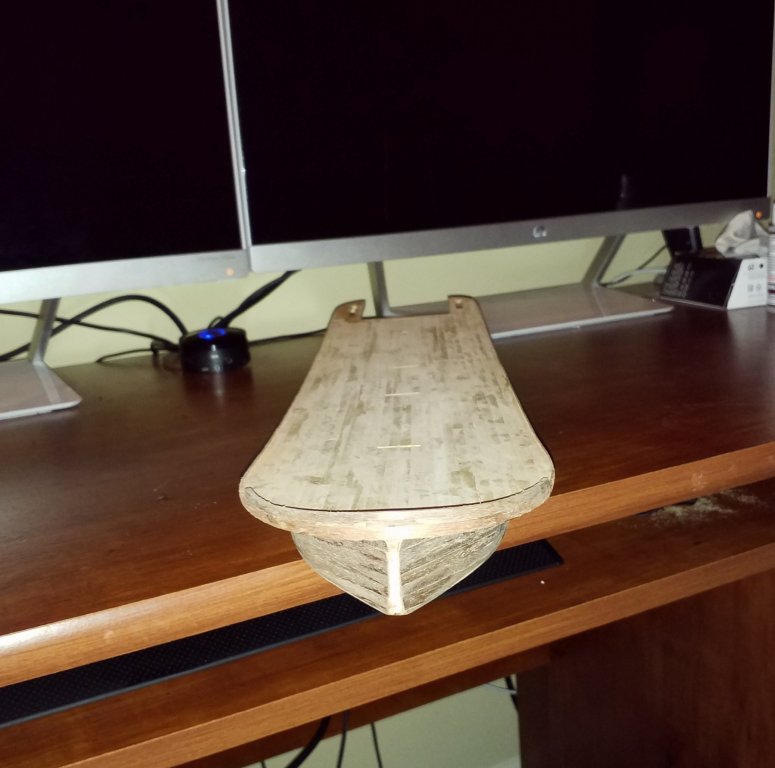
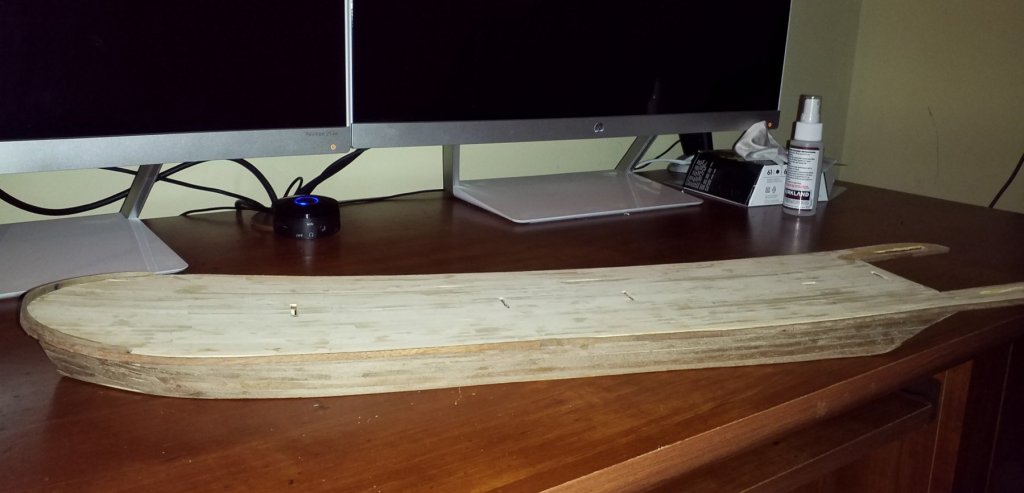
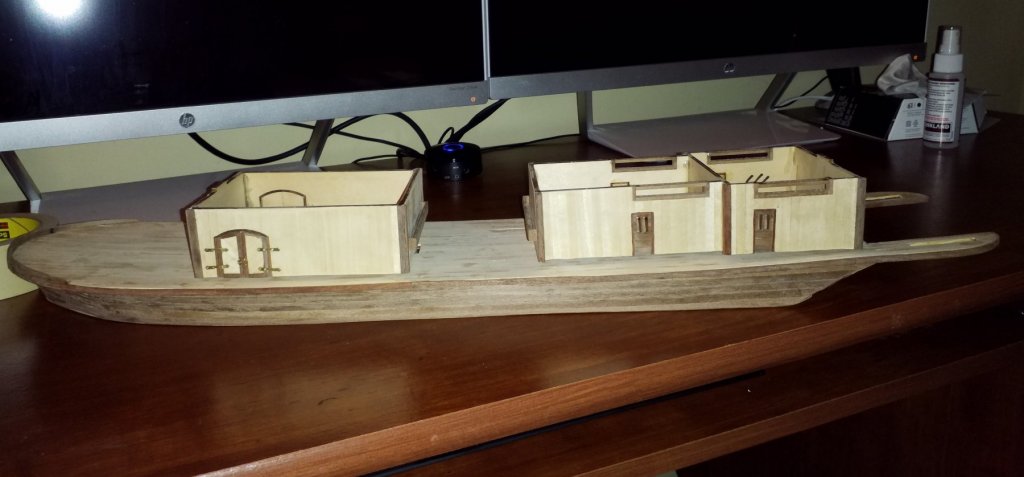
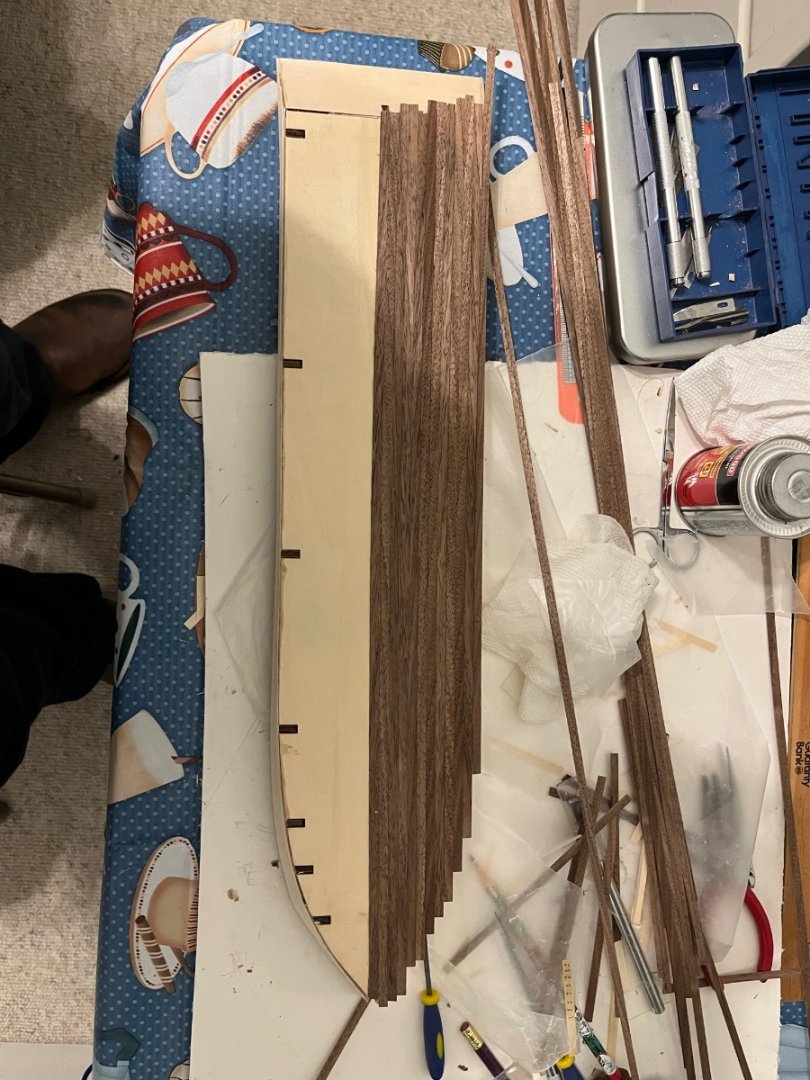
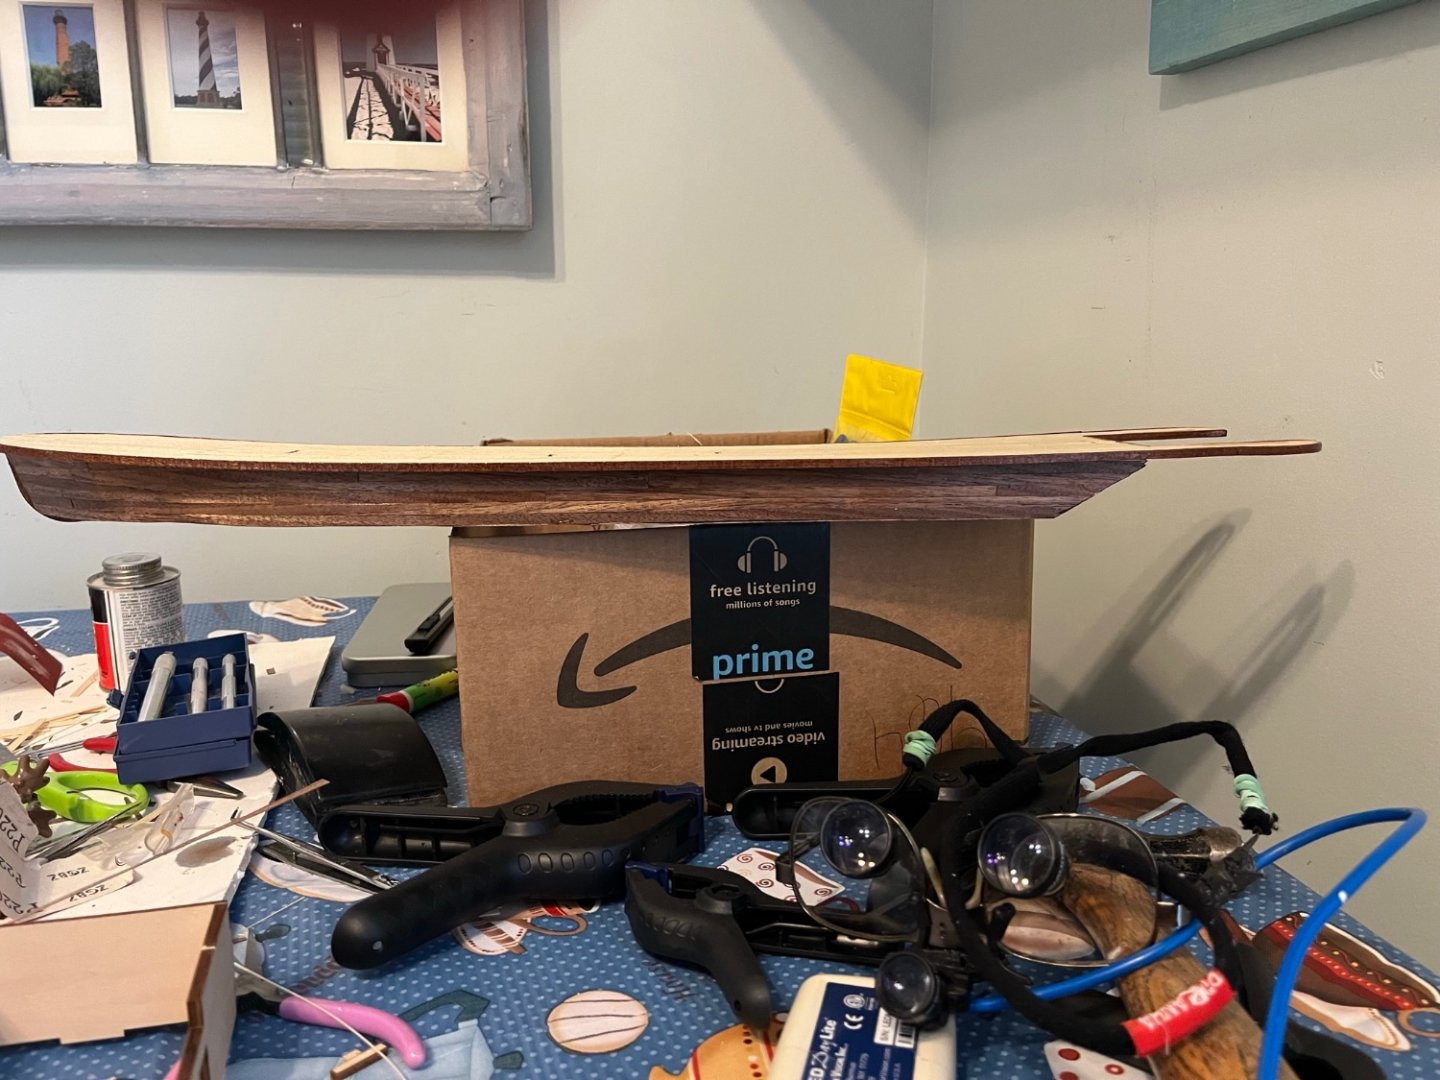
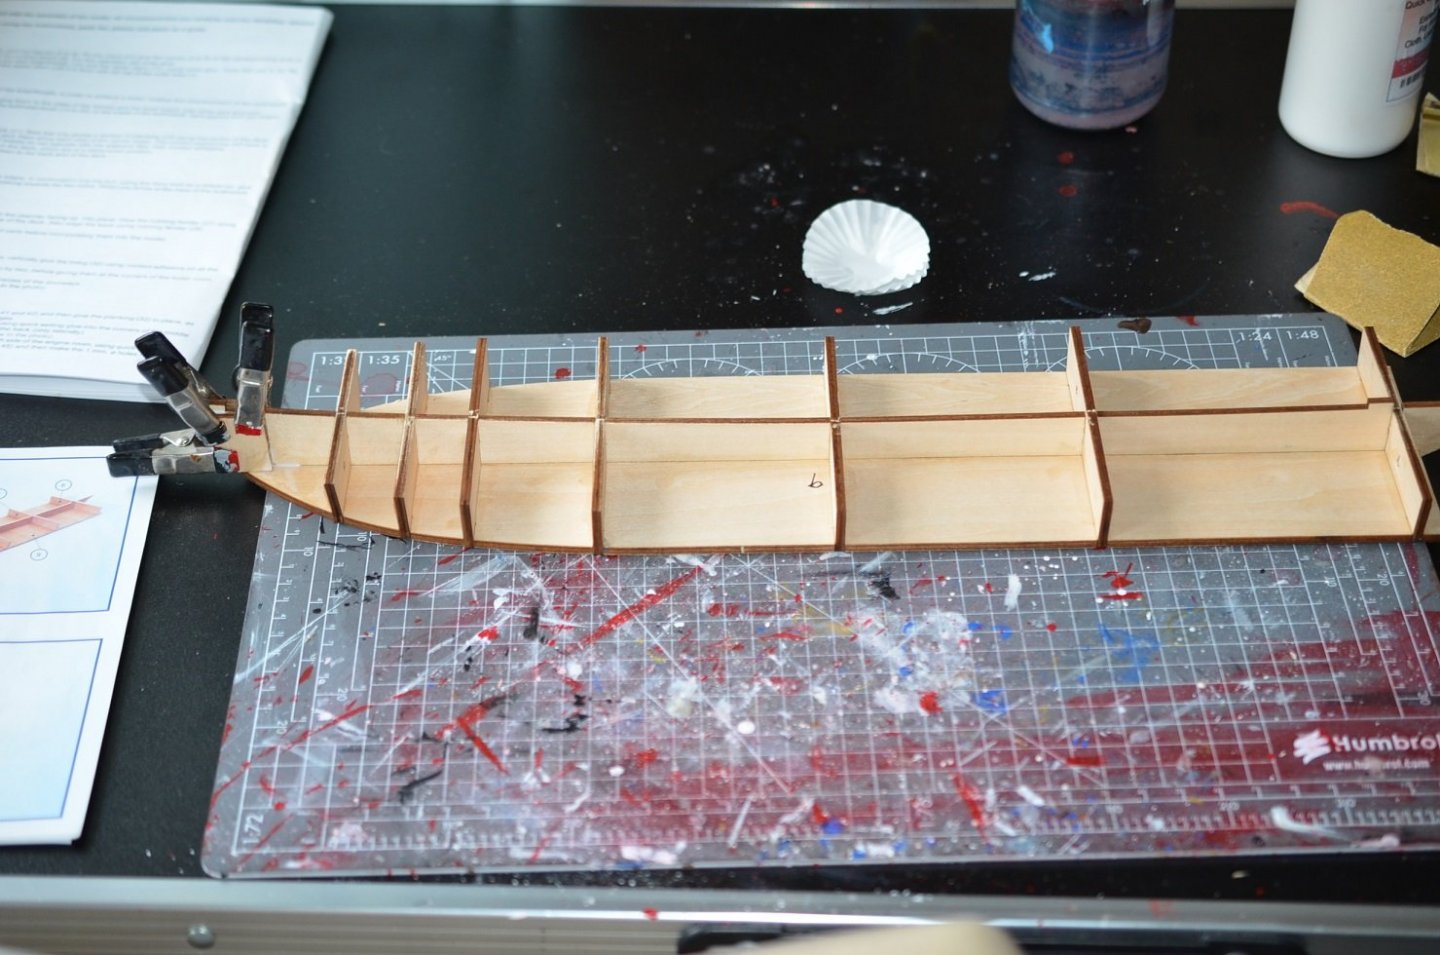
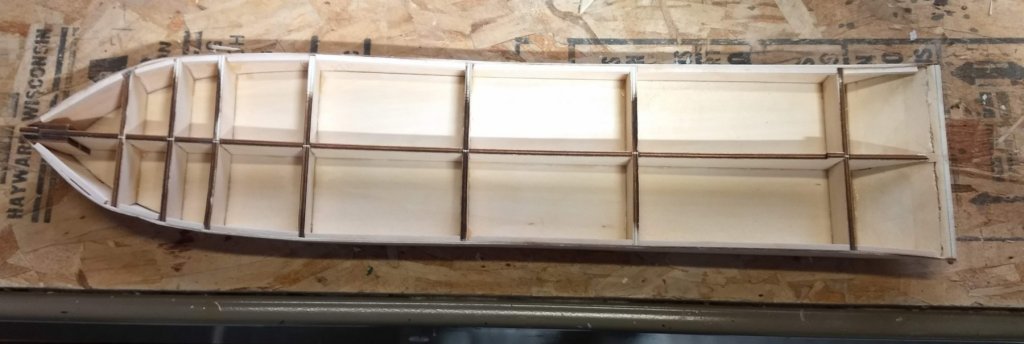
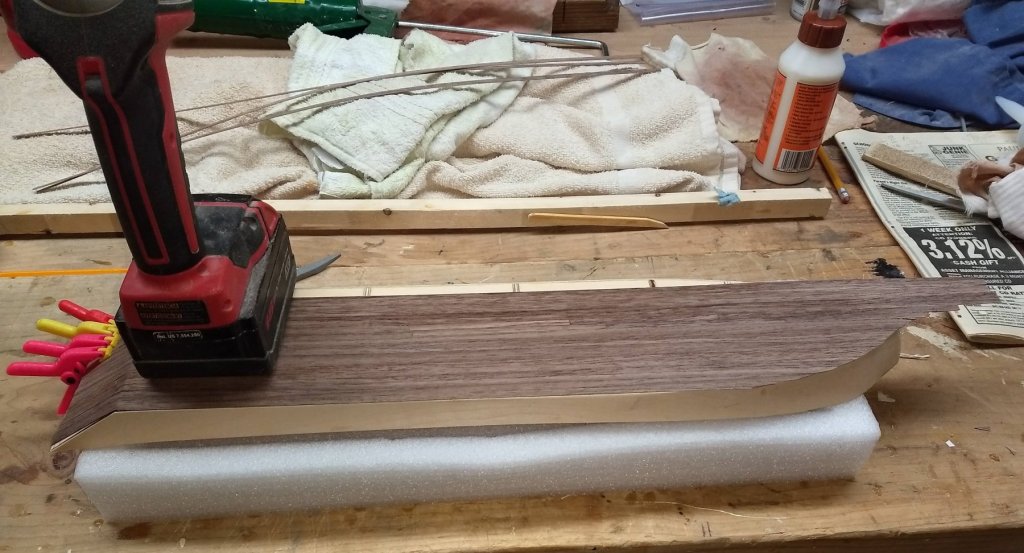
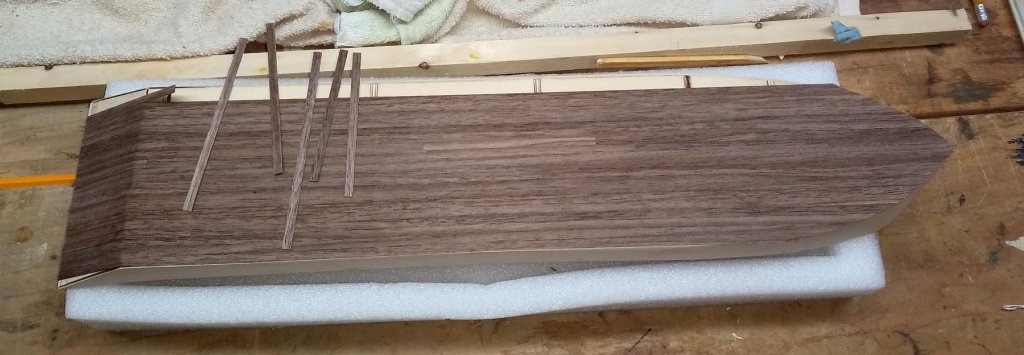
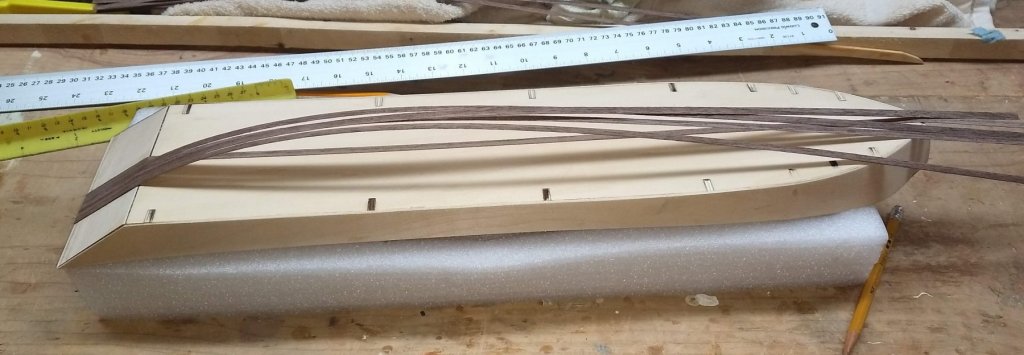
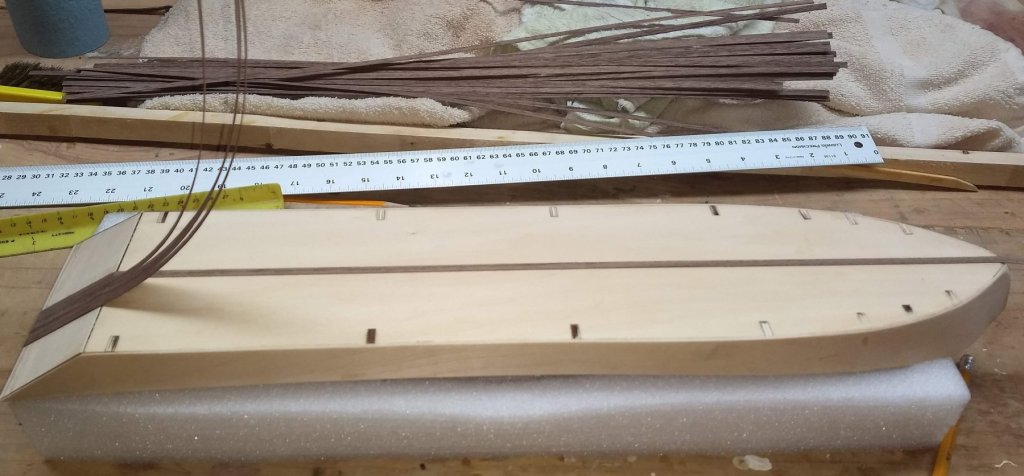
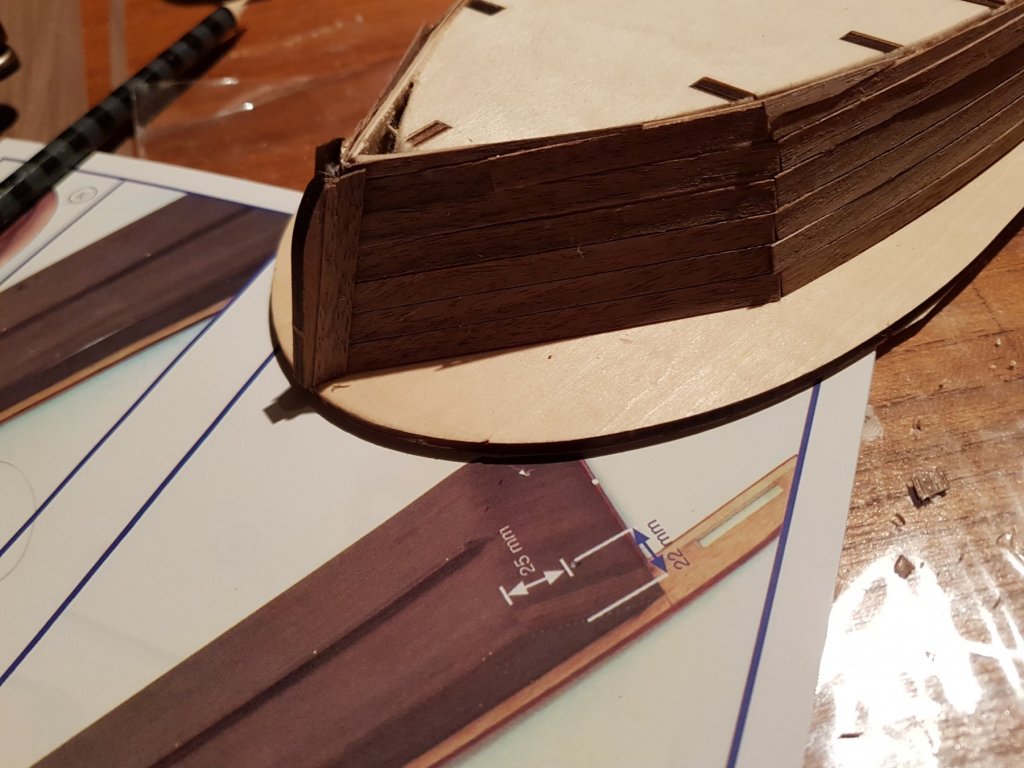
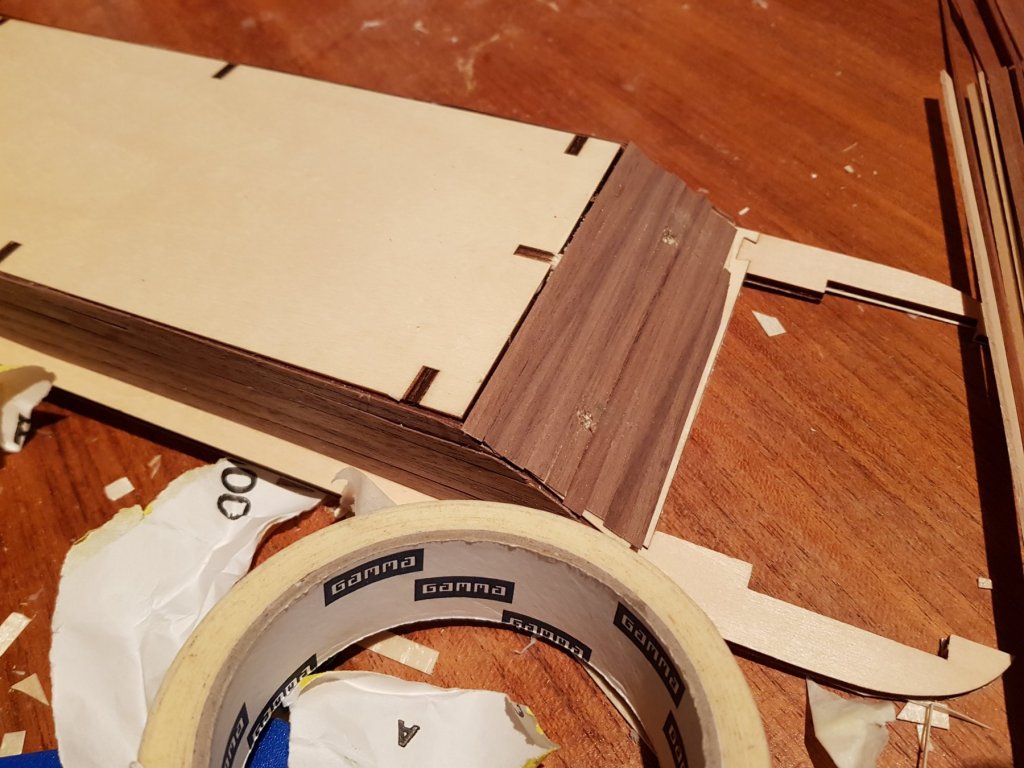
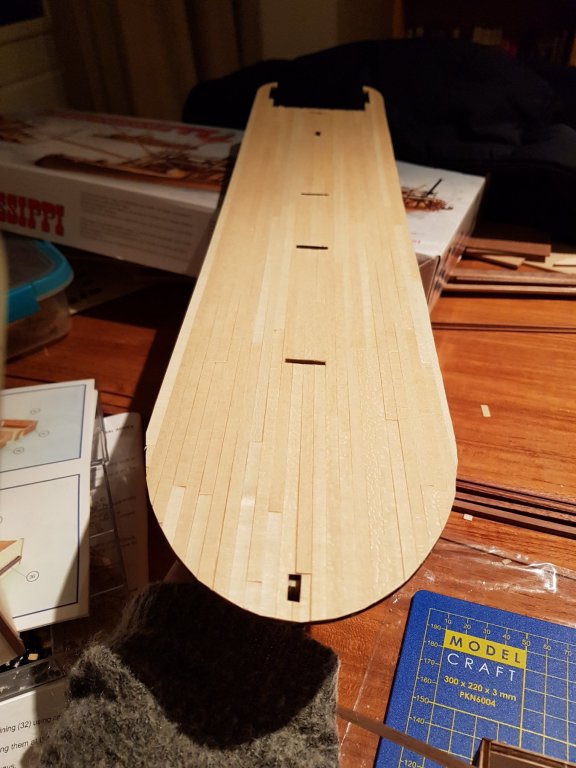
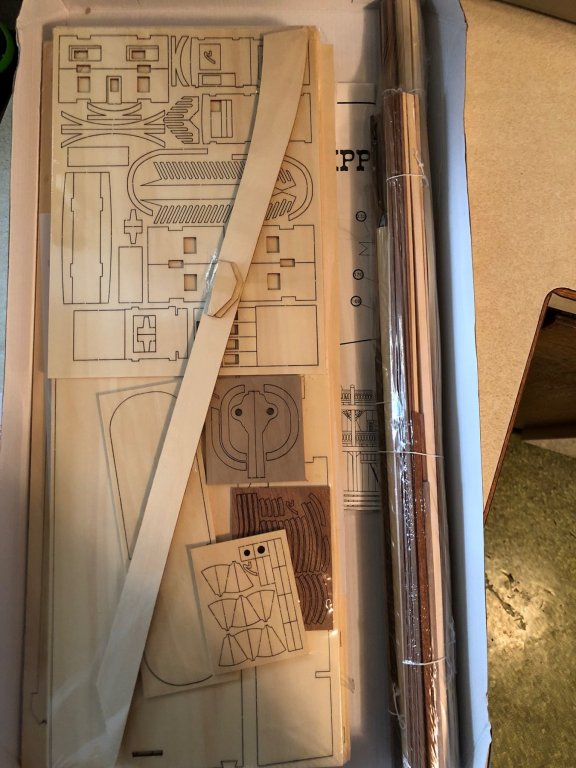
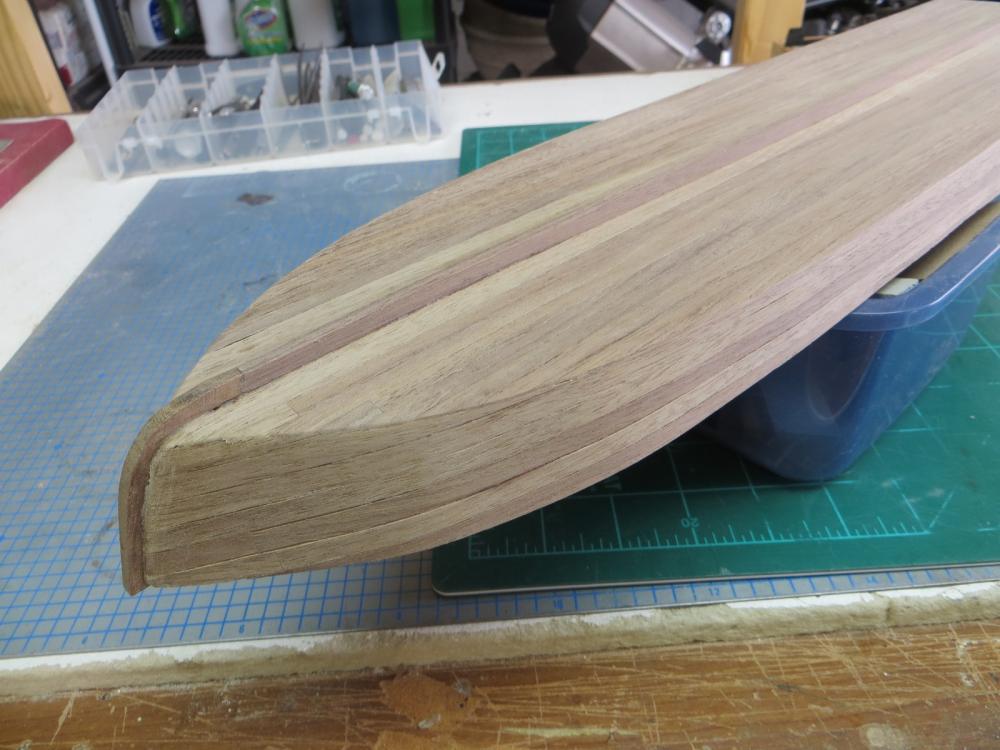
 I am a relatively new modeler and plan to take on the King Of The Mississippi. Main reason I am attempting this is due to the vast number of build logs on MSW. I have studied them all and have been intrigued by some of the ingenuity and customization that has been done by the various shipbuilders. Even the logs have have not been completed were invaluable showing various stages of the builds. Besides that,,,, the King Of The Mississippi just looks like a cool model. The version of "the King" I have is 2017.. Maybe some of the issues that earlier shipbuilders encountered have been corrected by Artesania.... But I guess that is probably too much to wish for,, So here we go... Note the date of 2017 Box contains three shrink wrapped items First part of hull structure is pretty straight forward. Parts fit nicely with only a little sanding to make the bulkheads seat better. The instructions call to glue in the upper stern board to the slanted portion of the false keel. Note below that I did not do that at this time. Turns out the slant in the slanted portion of the false keel does not match the slant in the bulkheads. Thus later on when you install the bulkheads the upper stern board does not match the bulkheads. Others have pointed out this issue and later had to "fiddle" to make the upper stern board match the bulkheads. Instead I decided to glue on the bulkheads and then make the upper stern board match the bulkheads Note the upper stern board not installed. I do not have a good picture, but below shows the bulkheads installed and the upper stern board lined up with the slant in the bulkheads. You have to insert a small piece of wood between the upper stern board and the slanted part of the false keep to take up the space, but this is a much easier way to deal with this issue than gluing in the upper stern board before the bulkheads. Ignore that extra piece of wood glued to the upper stern board... Initially I thought the upper stern board was too long so I cut it down,,,, Mistake on my part.. No big deal as the mistake will not show once the hull has been planked On to planking the hull Lay the first row of planking down the exact center of the hull and let this dry. Make this a straight as possible as it is the base for all the other planks Note the planks are paper thin and very easy to bend,, Should not be a problem bending the wood. No need to pre-heat or steam. Since there is a bend and it does take some time for the wood glue to dry, I choose to lay about 5-6 planks (at a time) in the stern part and later (about 20 min) bend them over and glue them to the hull. I could have used CA glue, but I am the world's worst CA glue'er and usually get it all over the model. However I have since found the the CA gel works great and much more forgiving,,, One note,,,,, There are supposed to be 30 hull planks - 6 mm in width... While there are 30 planks, they are only 5 mm in width. As such there are not enough planks to have full planks on both the bottom and hull sides. Since the hull planking on the bottom will never see the light of day on the completed model, that is where you want to have planks with joints. Basically take some of the planks that extend beyond the bow (picture above) and butt them together to make some of the planking on the bottom of the hull. In my case I ended up with three bottom planks that were made up of several smaller pieces. The pieces butt together very well and you can hardly see the joint. In theory you could do this on the side bulkheads but best to do this with the bottom hull planks that will never be seen. In the end I used 18 planks to cover the bottom and have 12 full planks to cover both side bulkheads Side Planking,,,


- 42 replies
-
- 6
-
-
- king of the mississippi
- artesania latina
- (and 1 more)
-
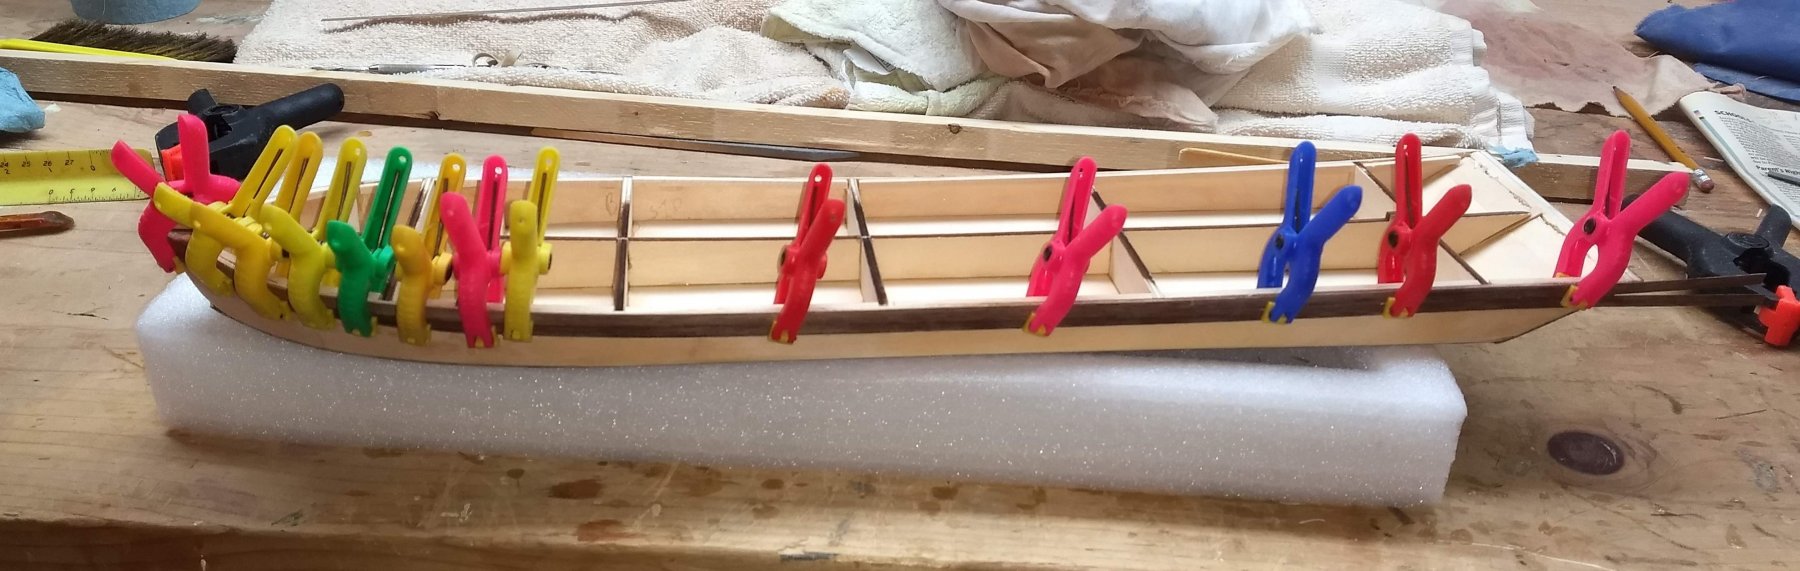
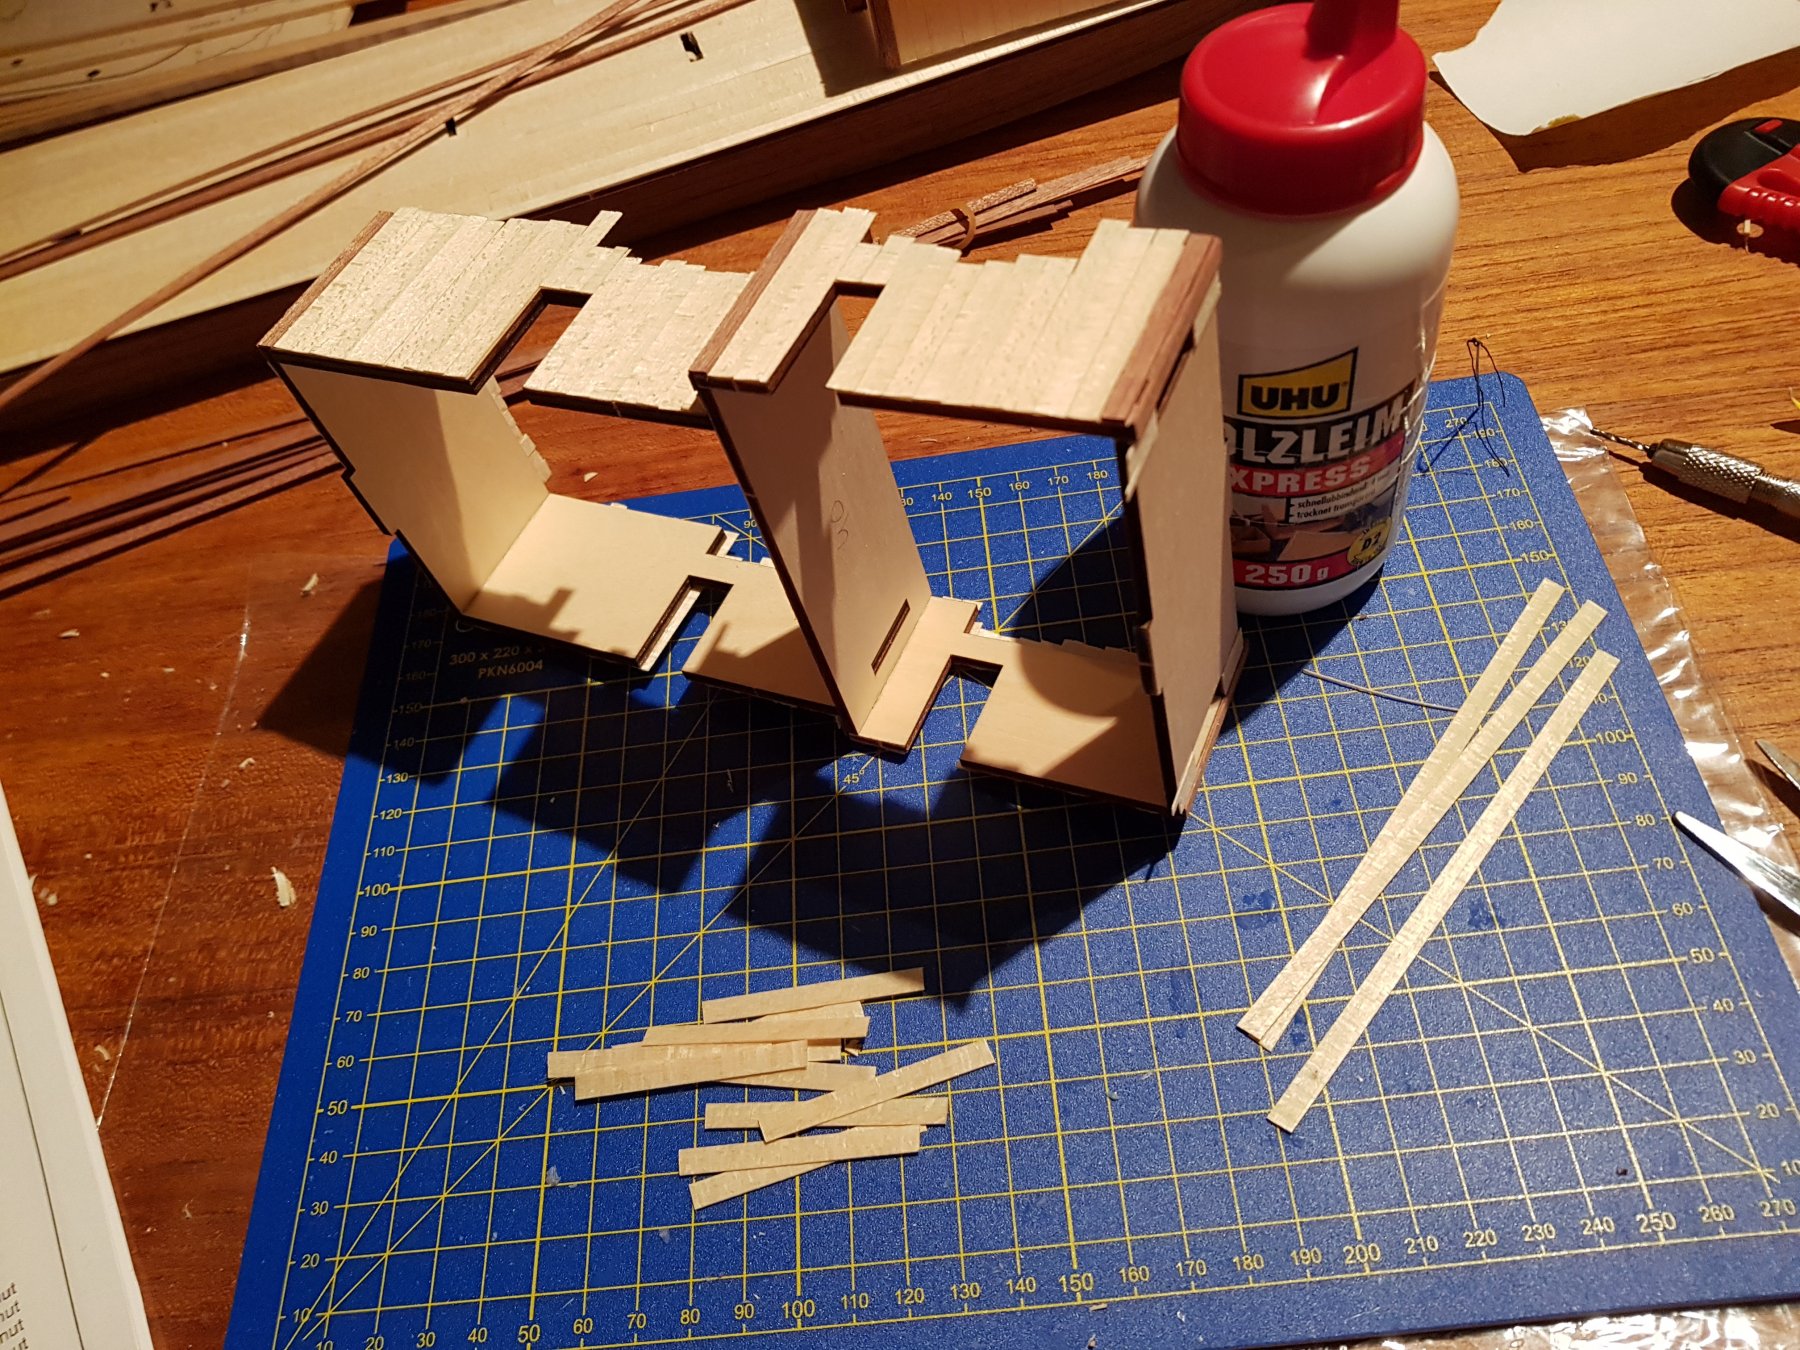
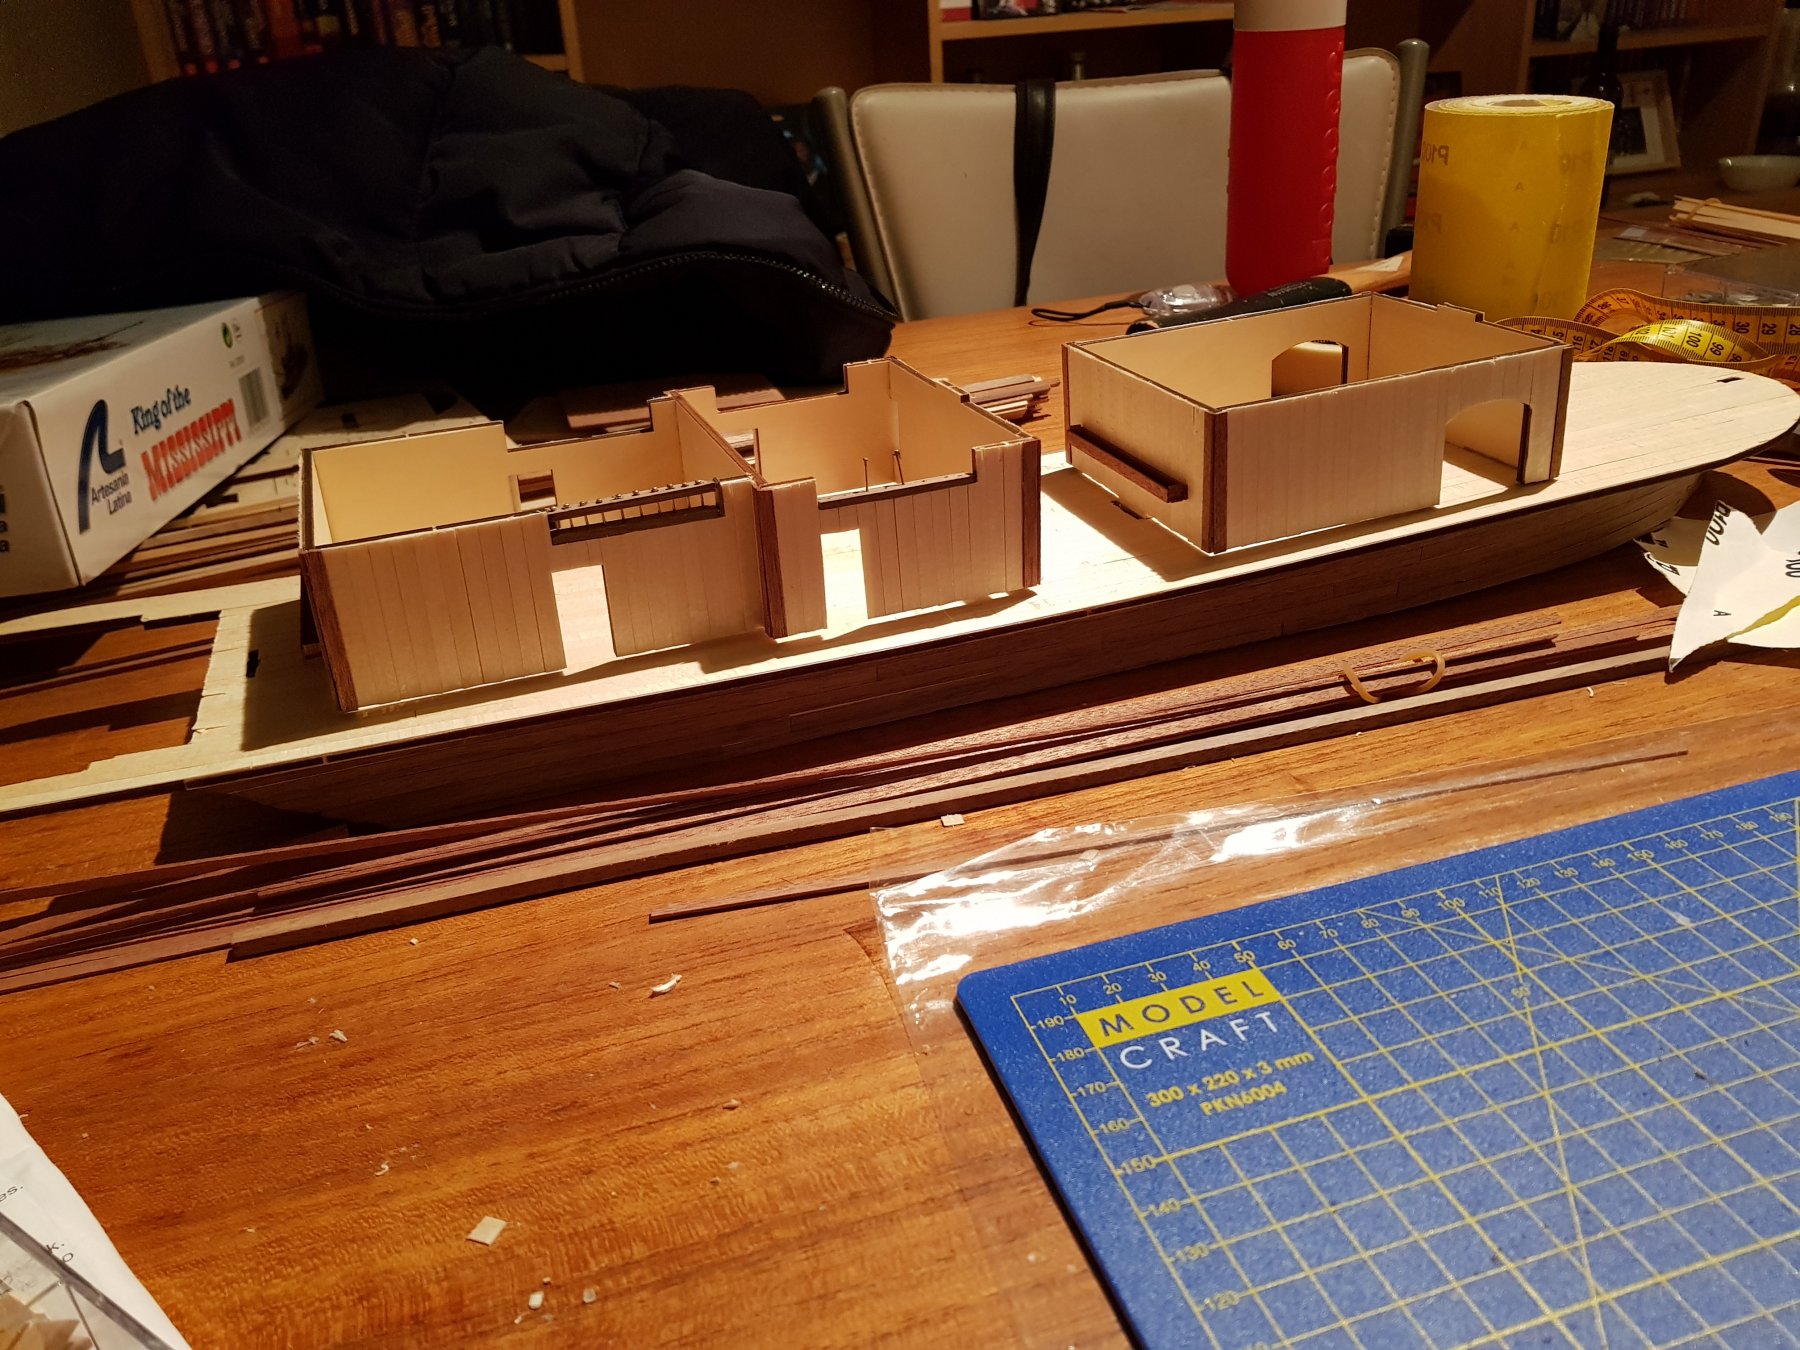
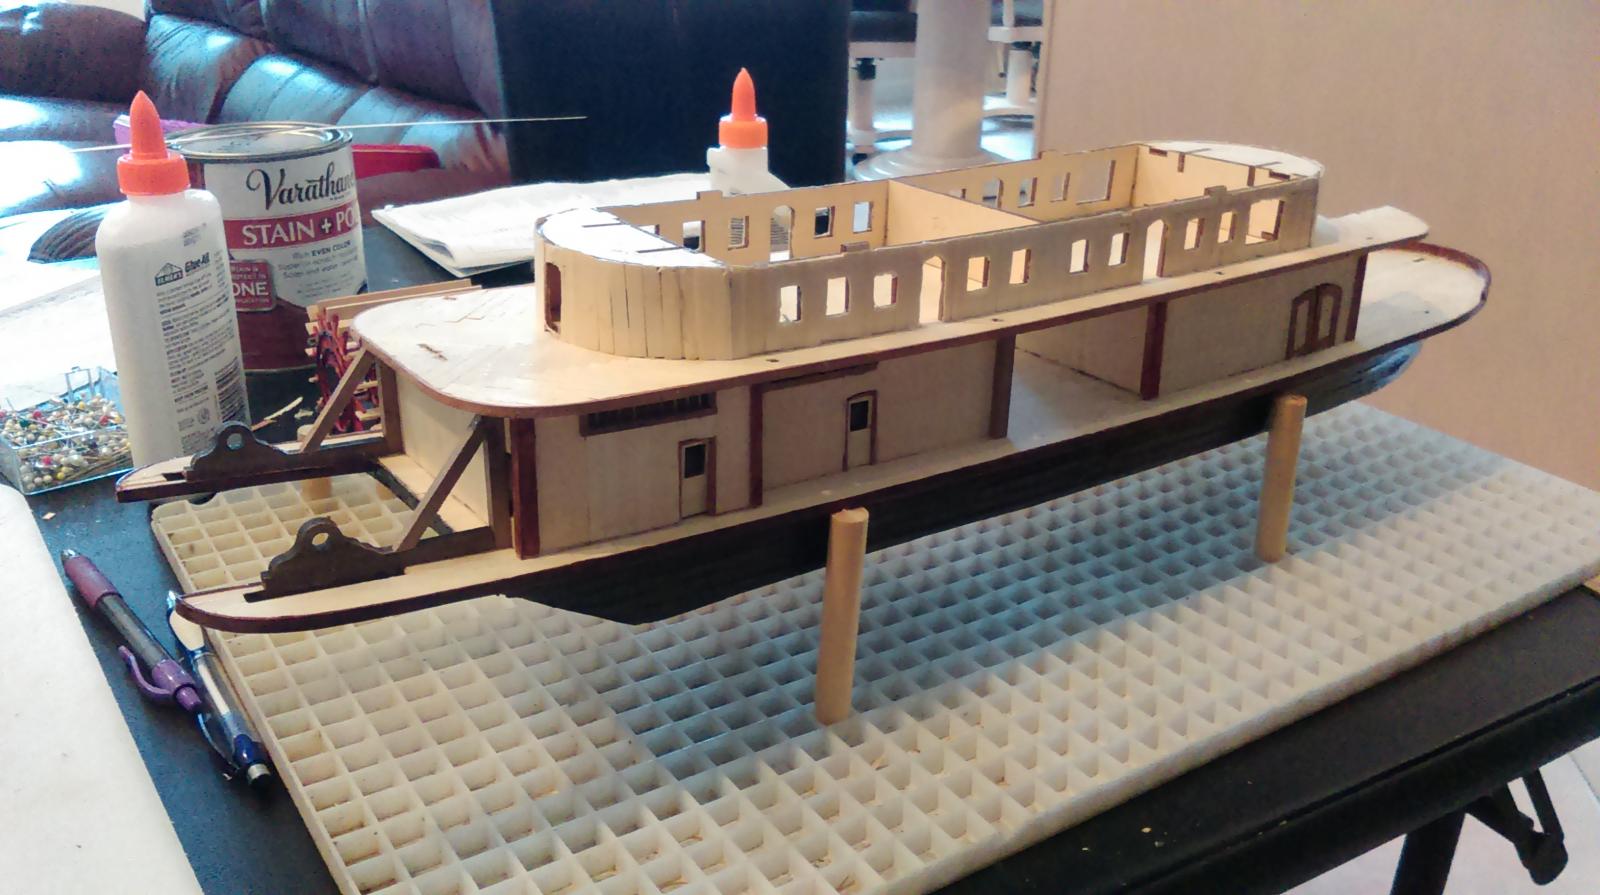
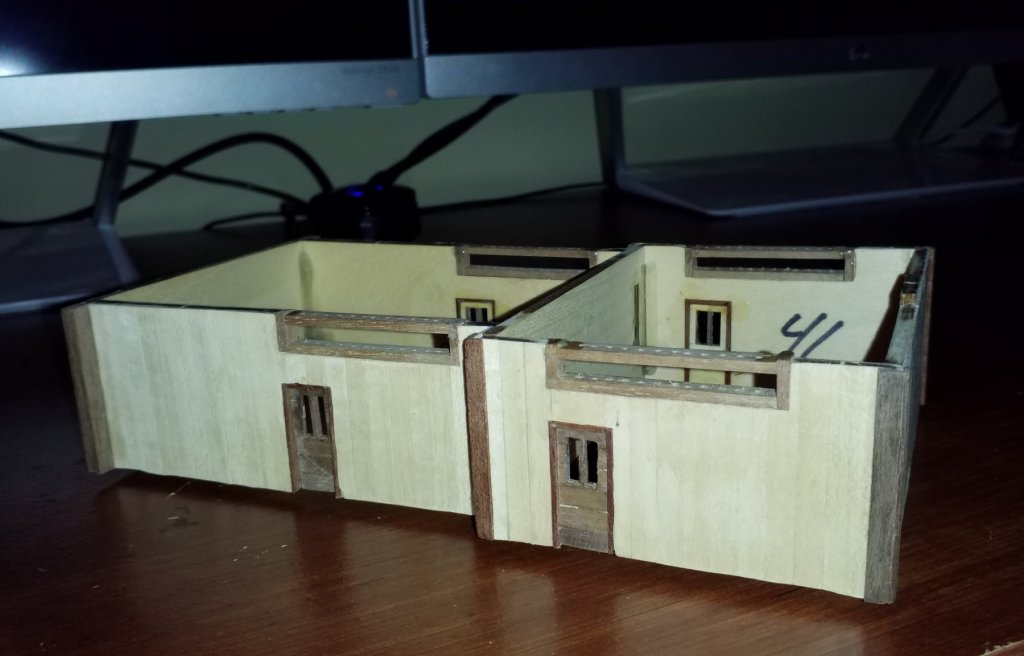
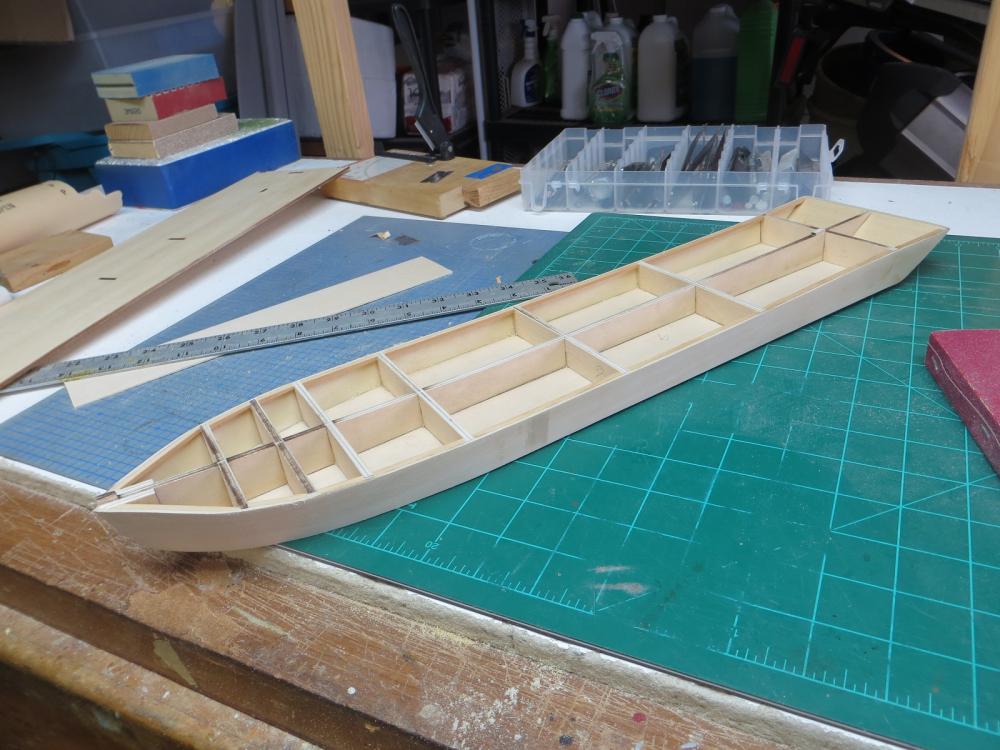
 Hi All, As promised in my introduction https://modelshipworld.com/index.php?/topic/19811-new-member-from-maastricht-the-netherlands/&tab=comments#comment-604408 here is my first build blog. Thank to other build blogs I found on MSW I was able to make a good start. Any tips/advice/things you notice are very welcome. The hardest thing about the instructions is the jargon. As English is not my first language and I'm not that familiar with ship terms like keel and stern. Right now I'm working on the first layer on the deck. These are the stables. As you see on the last picture I'm making the "windows" with bars. Also, should I use some kind of oil/paint for the keel and base where I made the "wooden floorboards"? Thanks in advance!! And I am looking forward sharing this adventure with all you guys! Anna
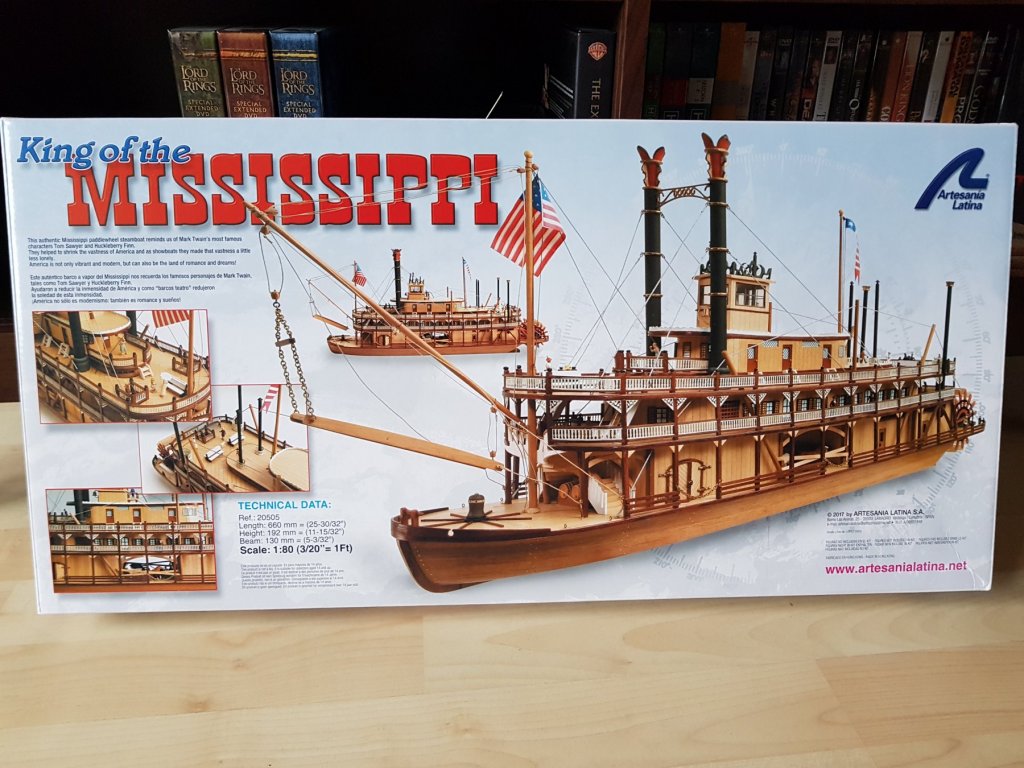


-
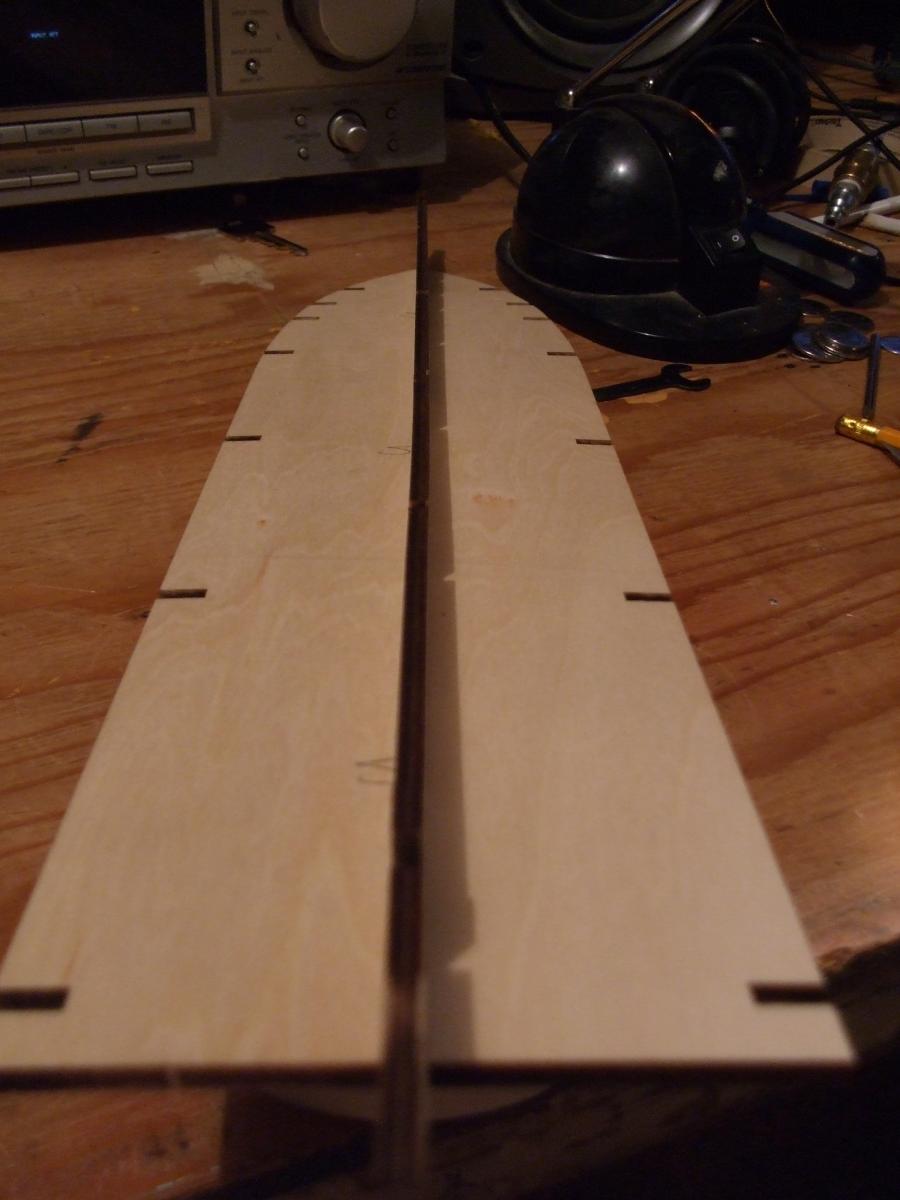
 this is my frist wood kit i know its a bit much for me but my dad got it for my brithday so here i go . i will need lots of help with this one . so far what i did is dry fit the keel nothing is glued yet .but in the pic u will see looks like to me that the keel is warped or is it just my bad eyes
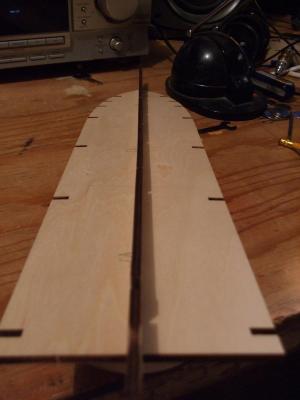
-
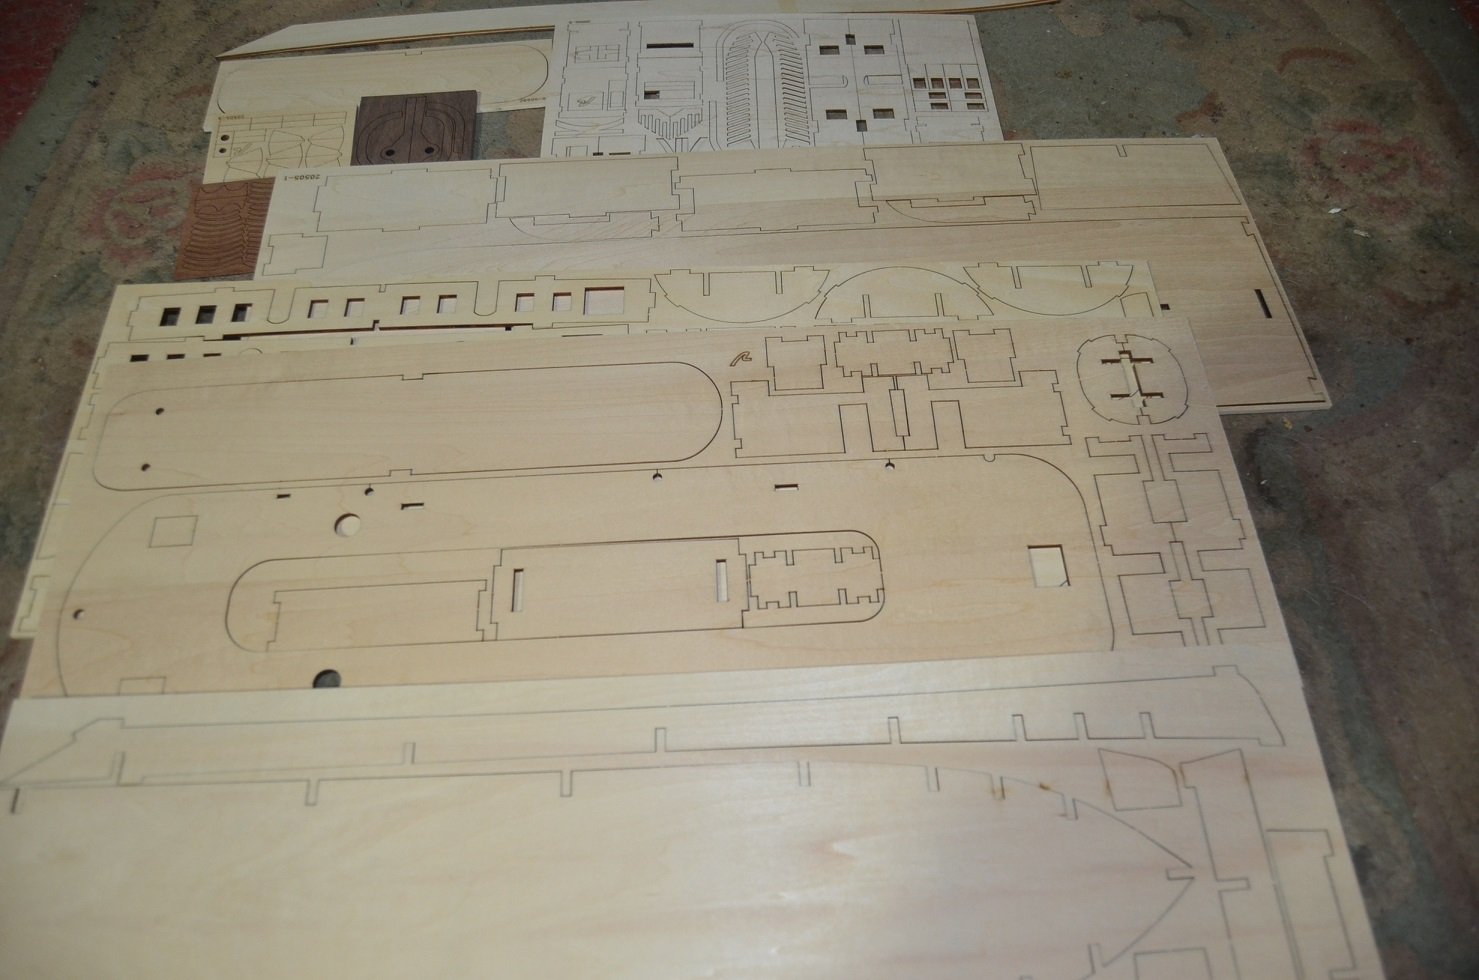
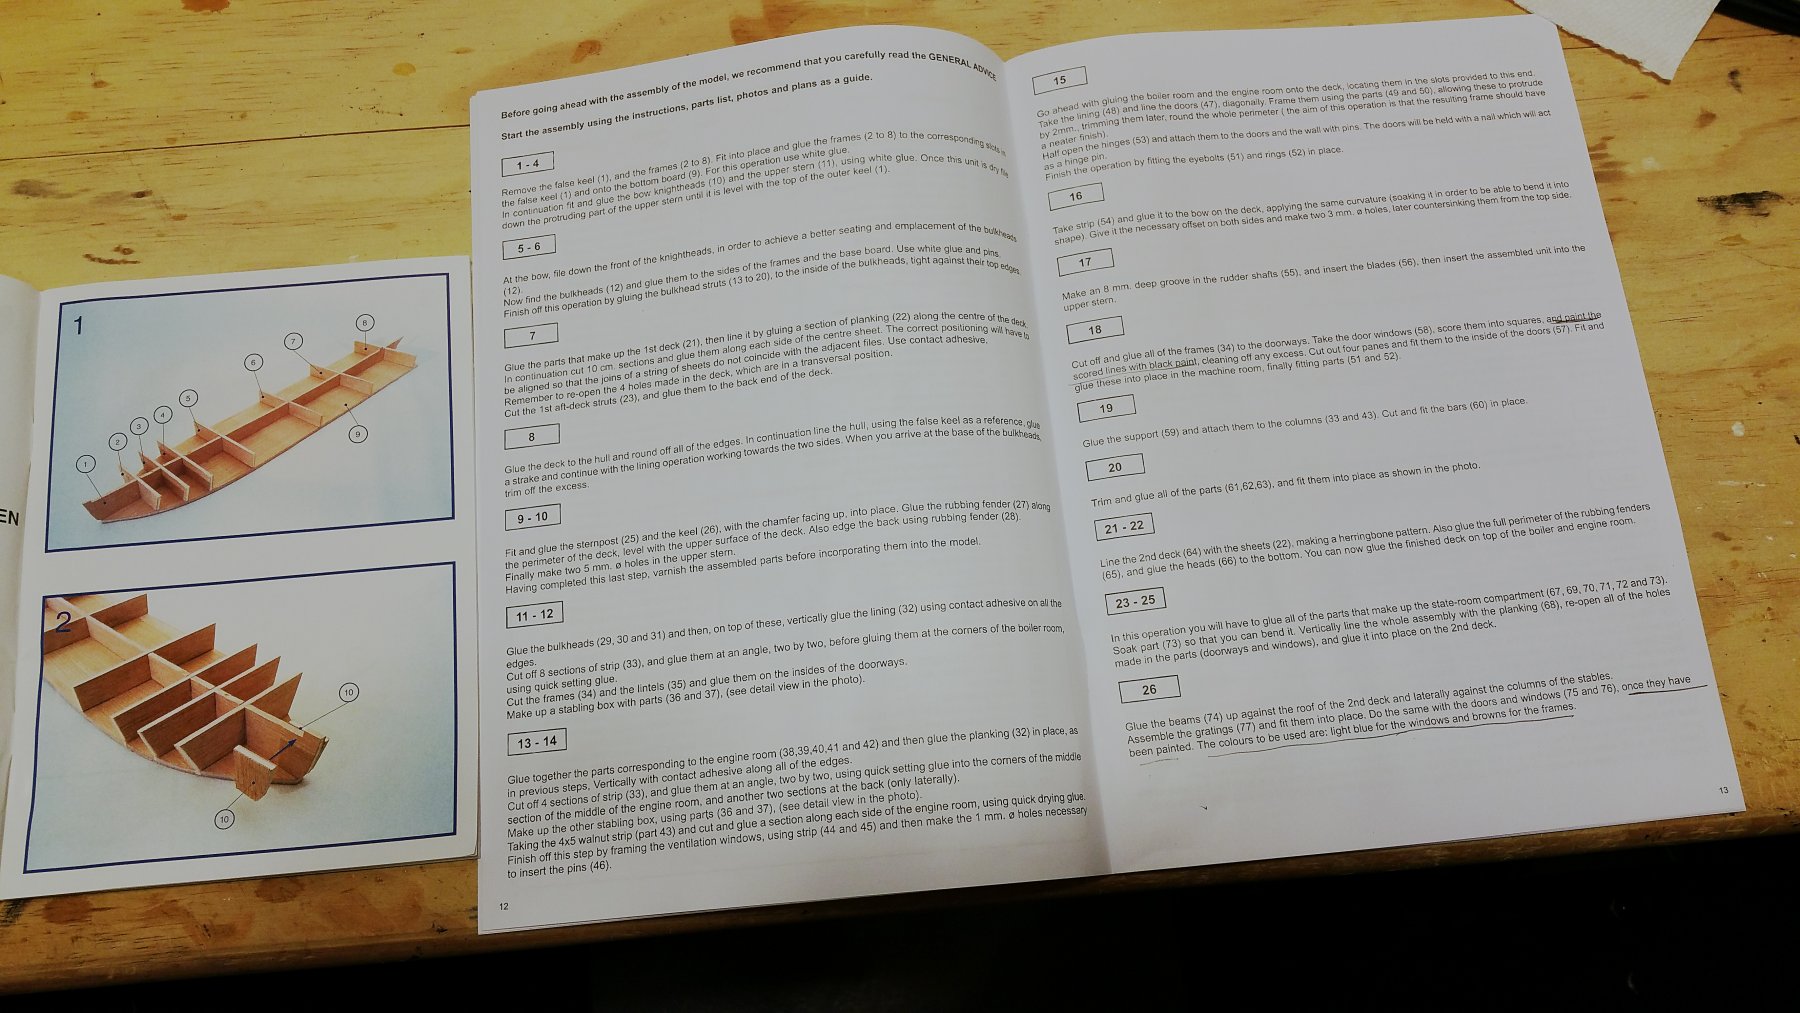
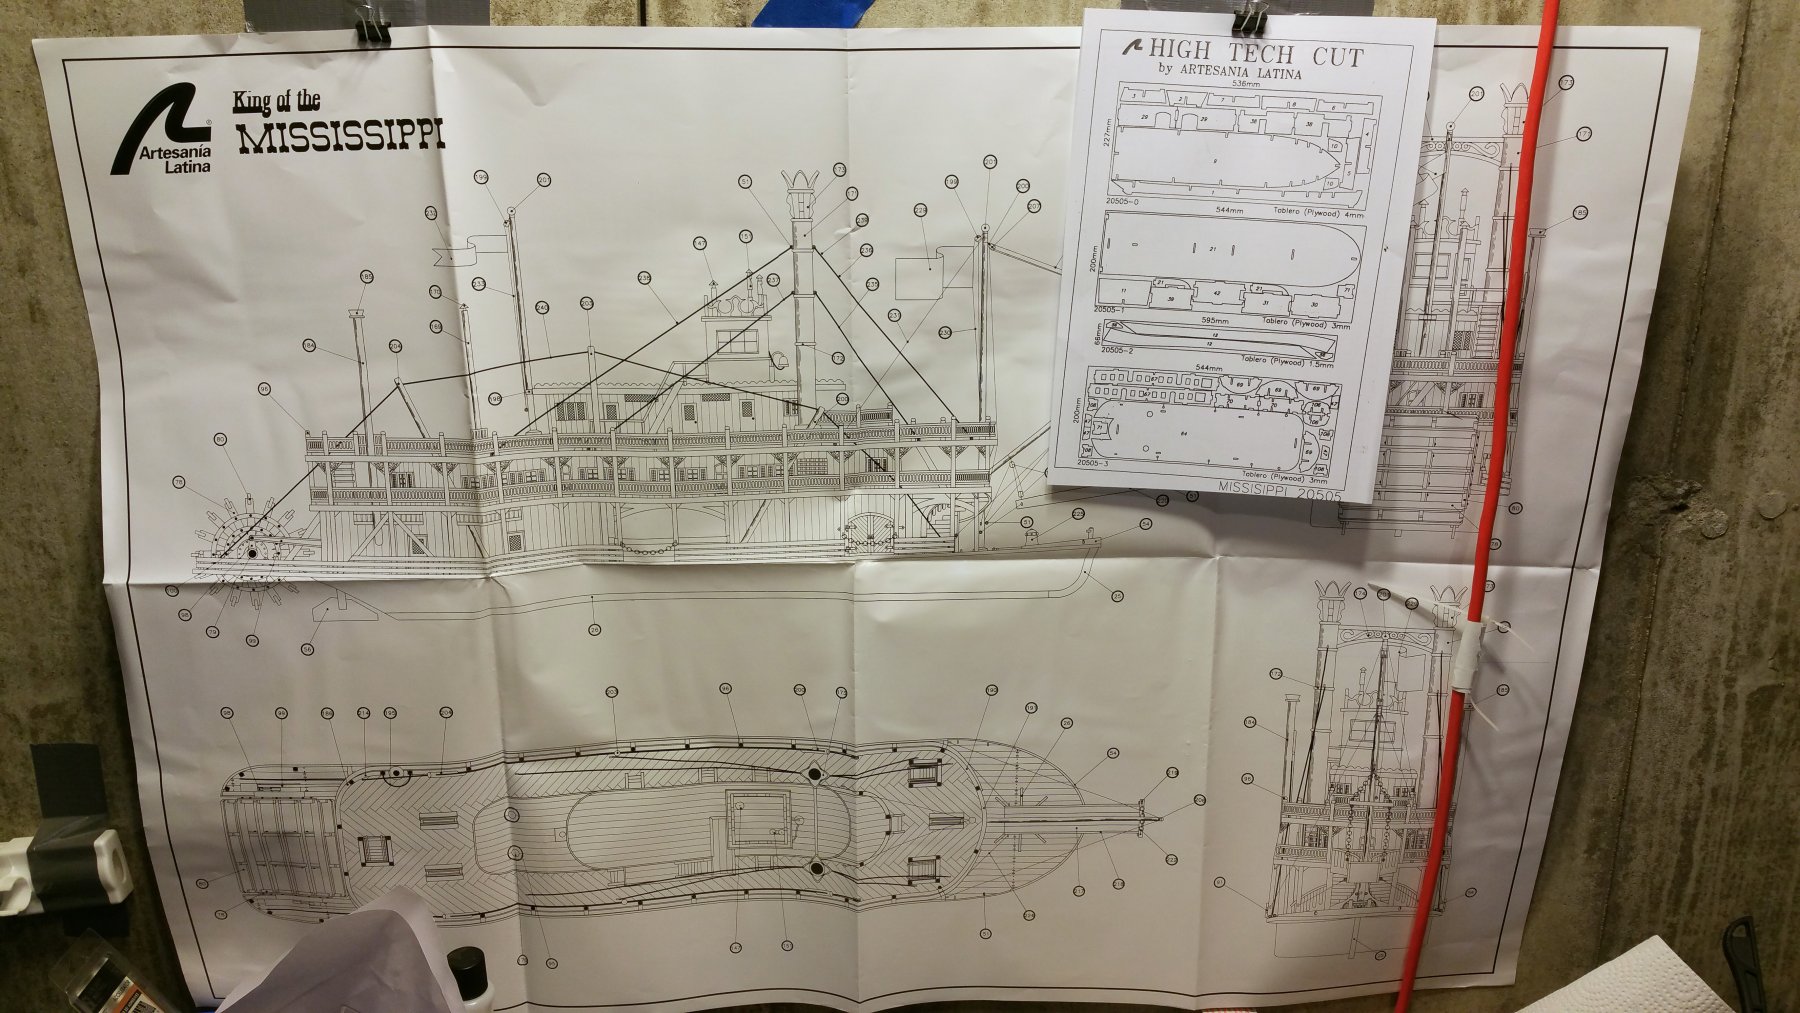
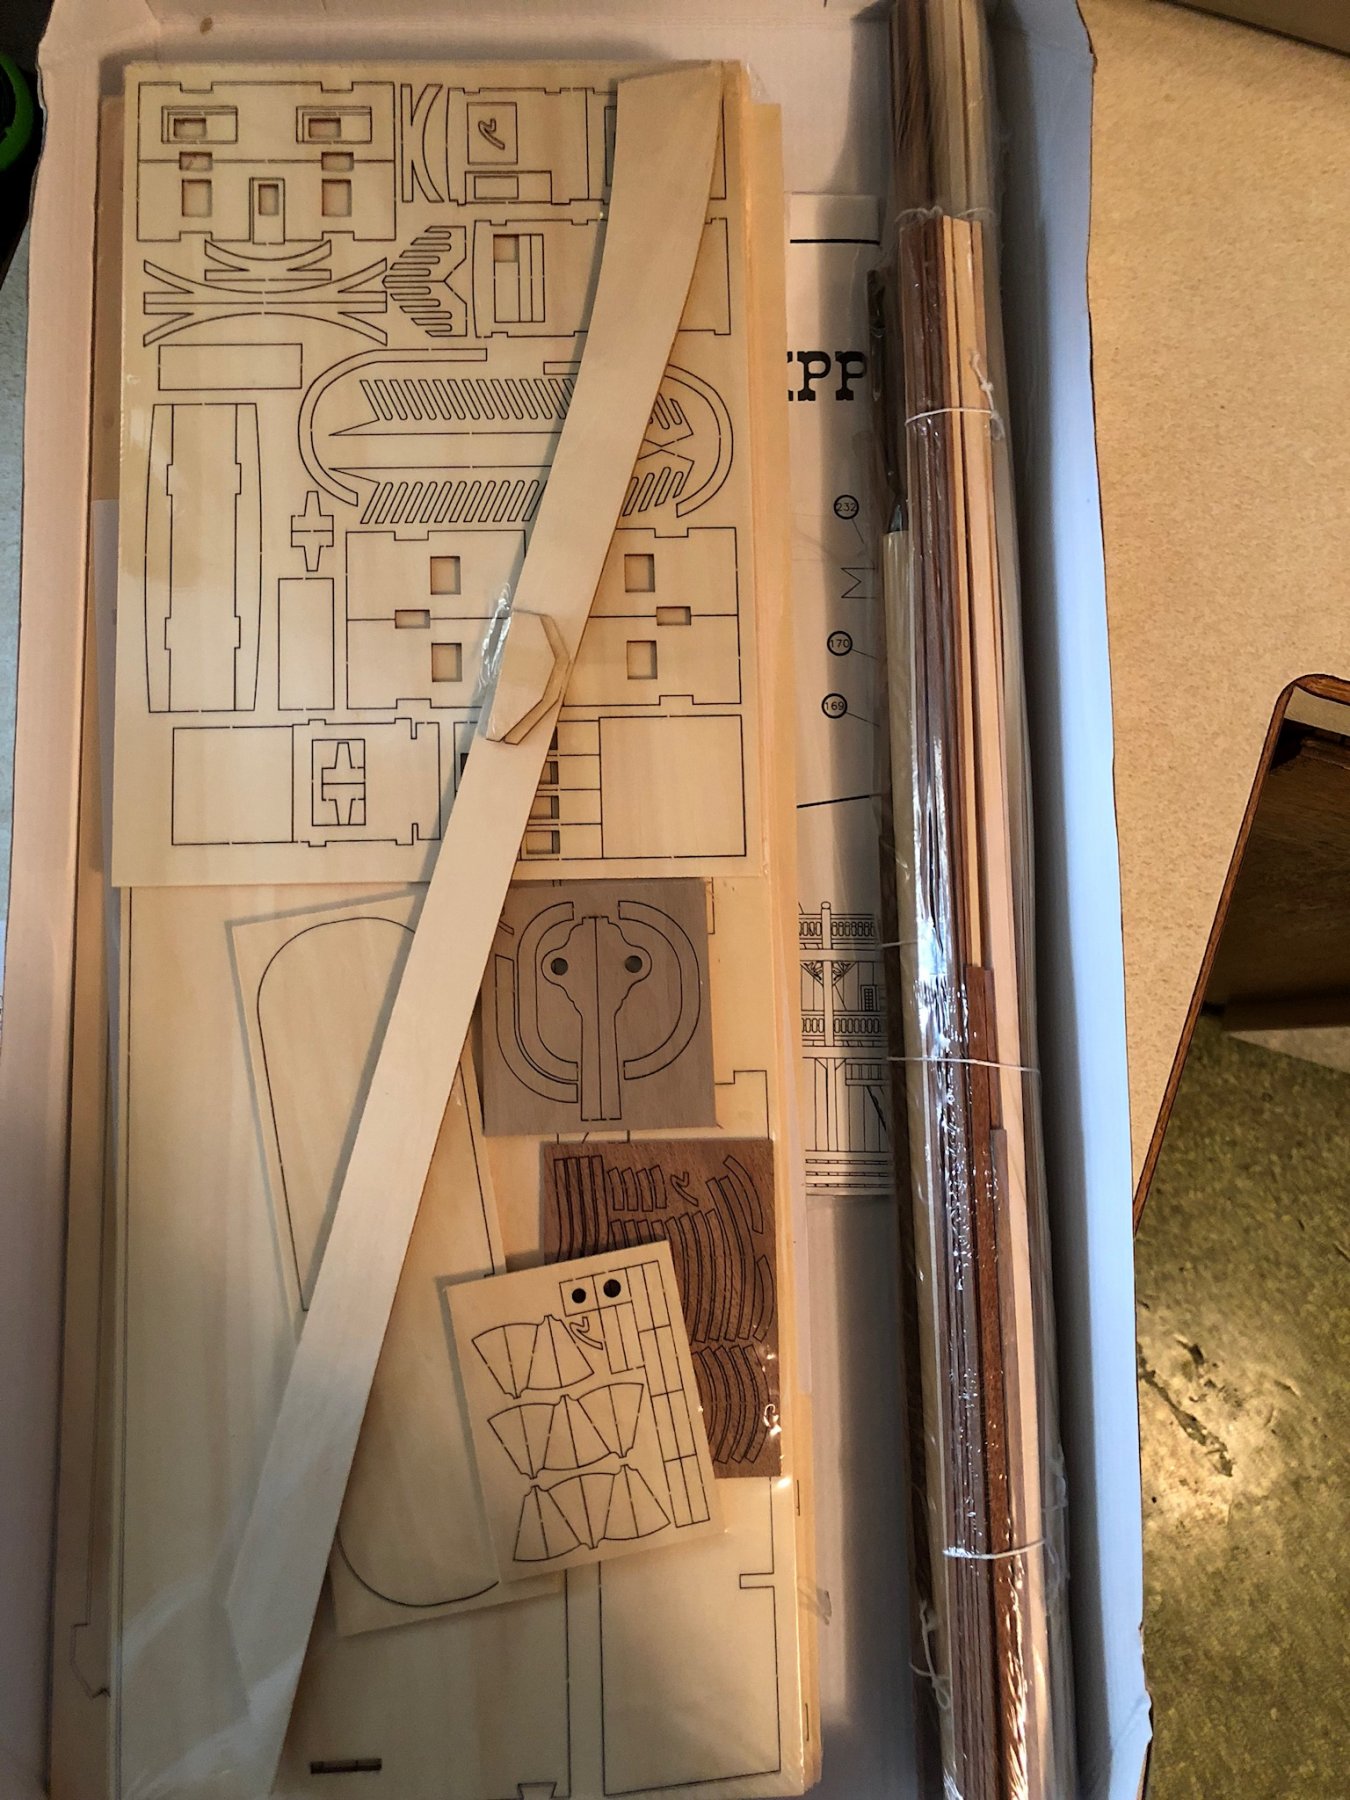
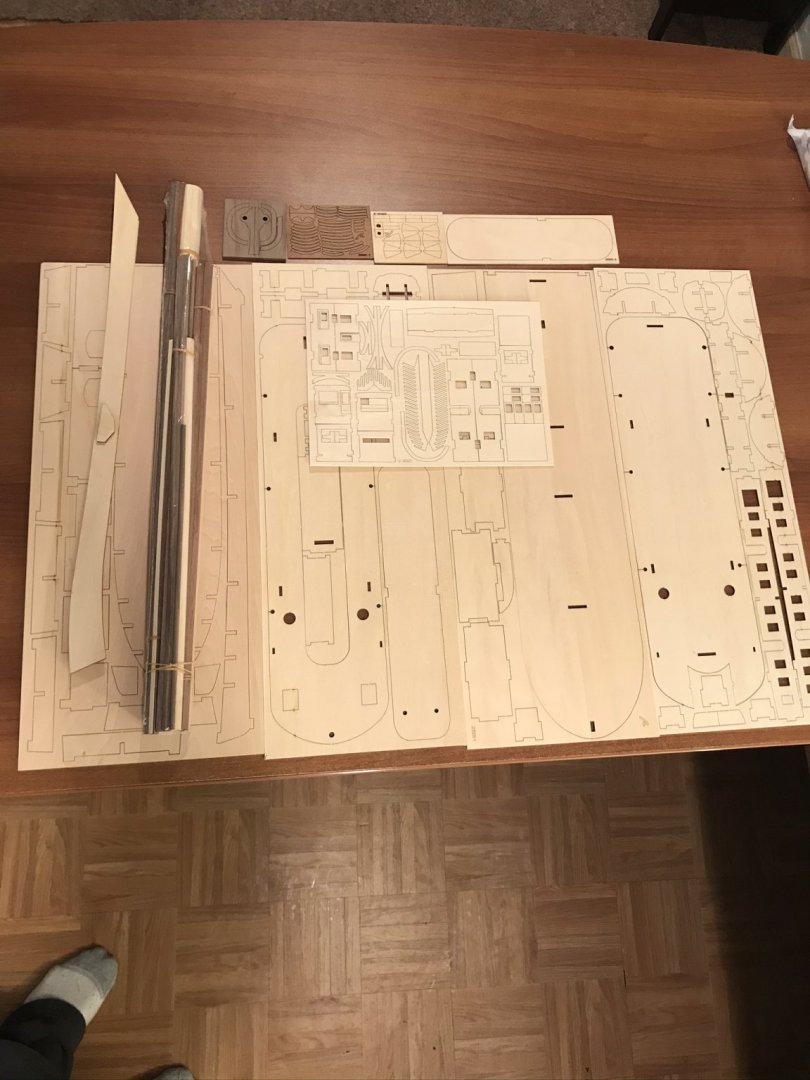
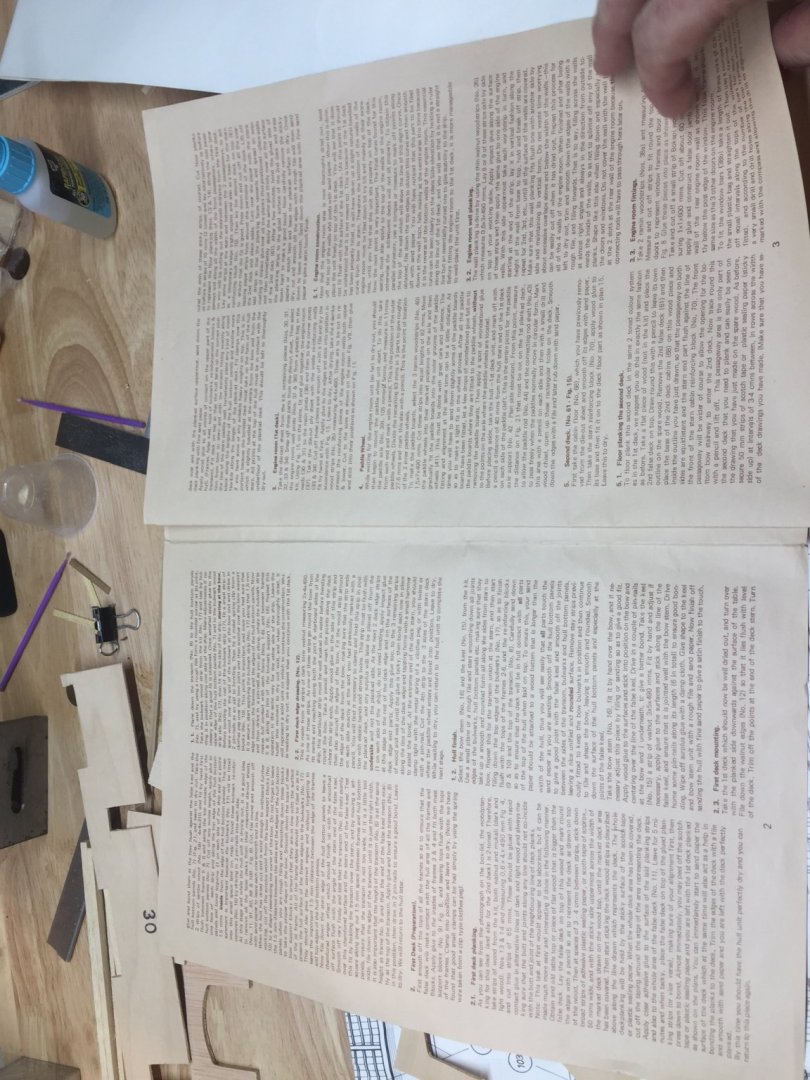
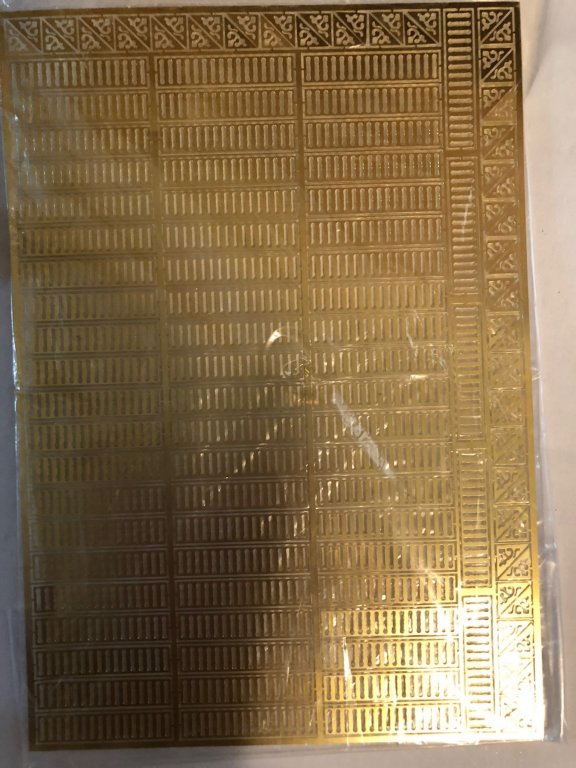
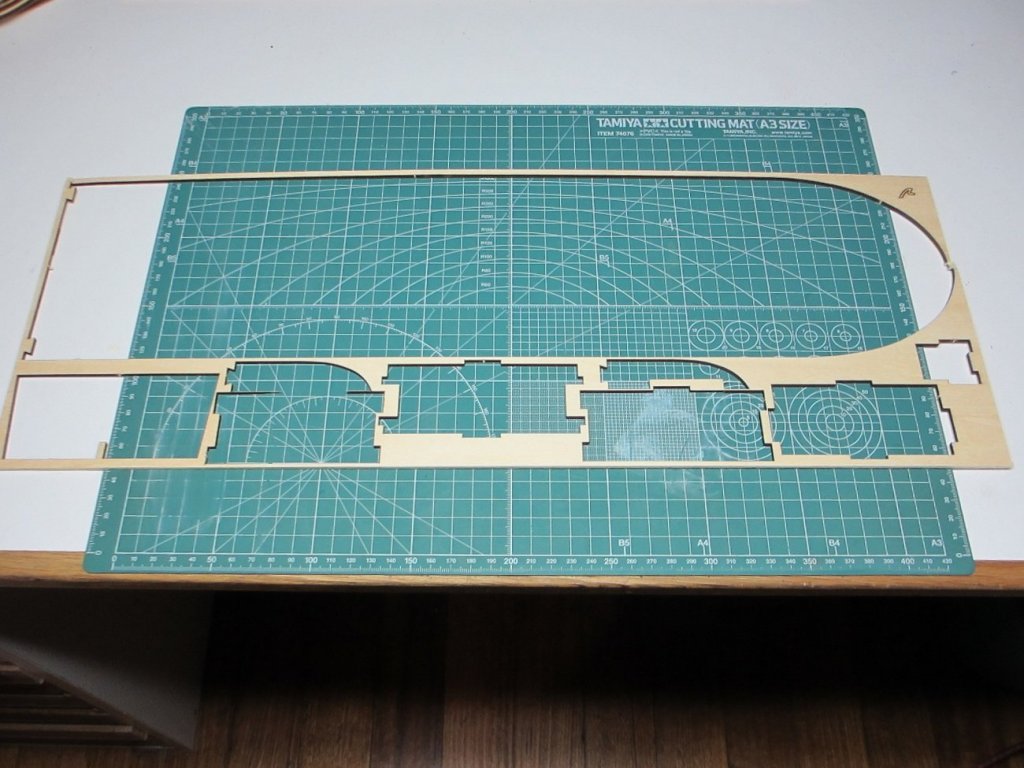
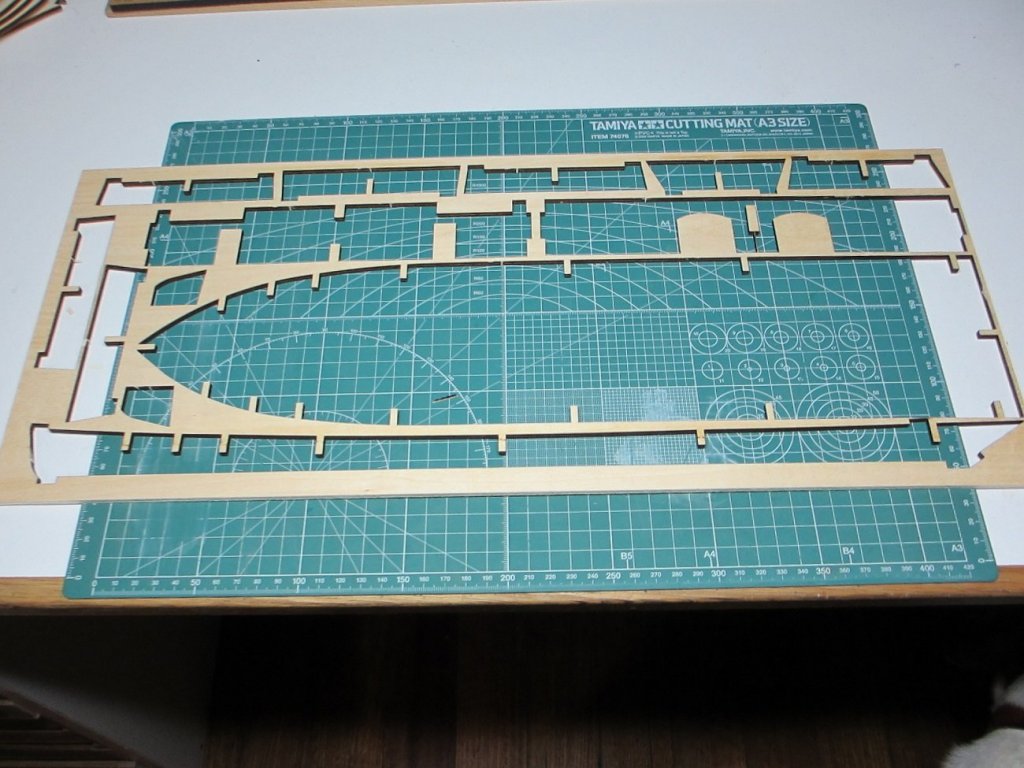
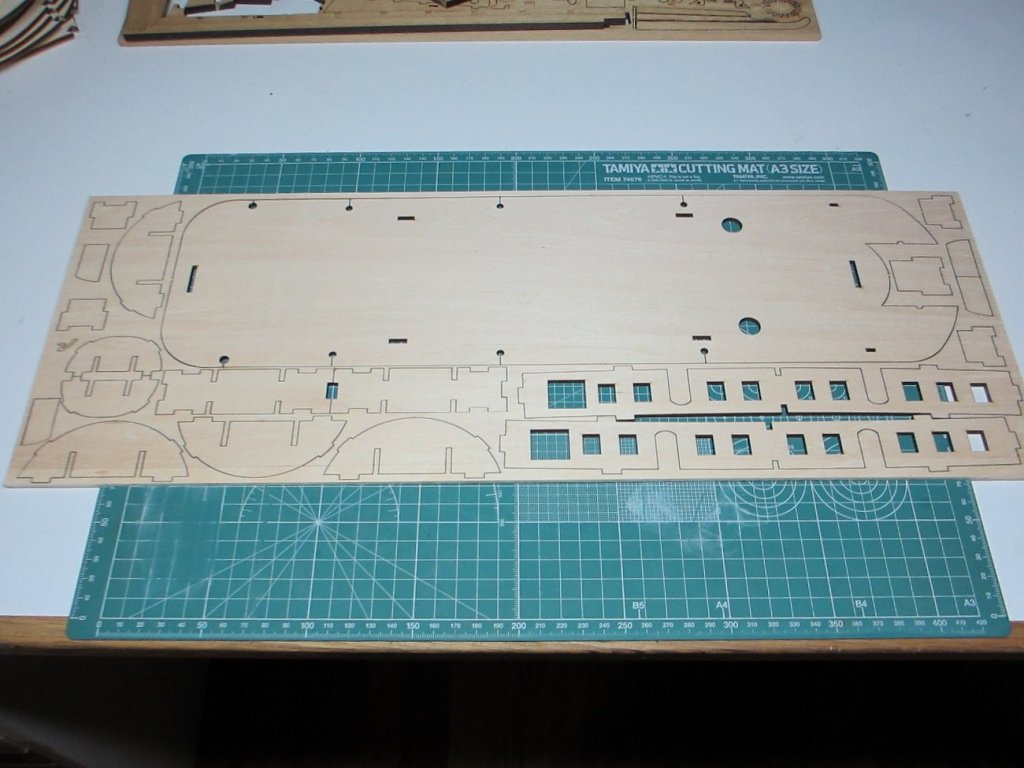
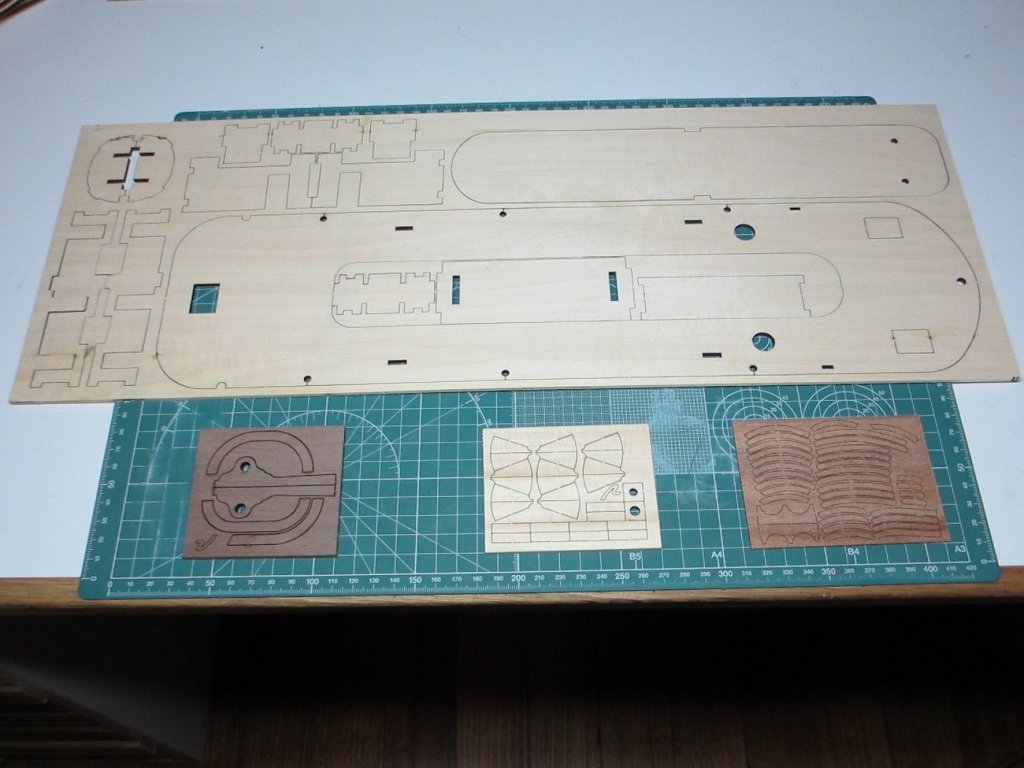
 Here's what comes in the box (see pics): Printed instructions with color photos One large plans sheet plus key to laser cut sheets Parts as shown I'll post progress as I go. Regards, David

- 104 replies
-
- 5
-
-
- king of the mississippi
- artesania latina
- (and 1 more)
-
 Well hello boys and girls. My wife mother in law father in law and daughter all chipped in to get my my next project It is something I have been looking at for a year I know it's not the biggest grandest or most impressive model out there but I do believe she will be beautiful never the less I am proud to be building this rendition of a true American antiquity And now the unveiling of the King of the Mississippi Hope you all enjoy
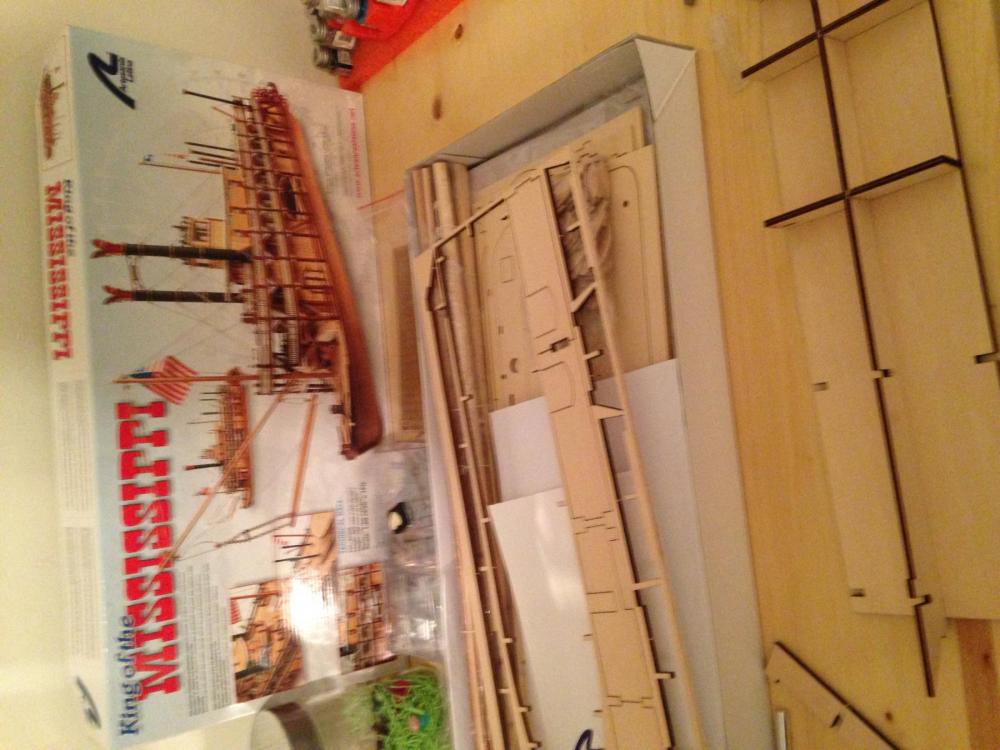

- 60 replies
-
- 8
-
-
- king of the mississippi
- artesania latina
- (and 1 more)
-
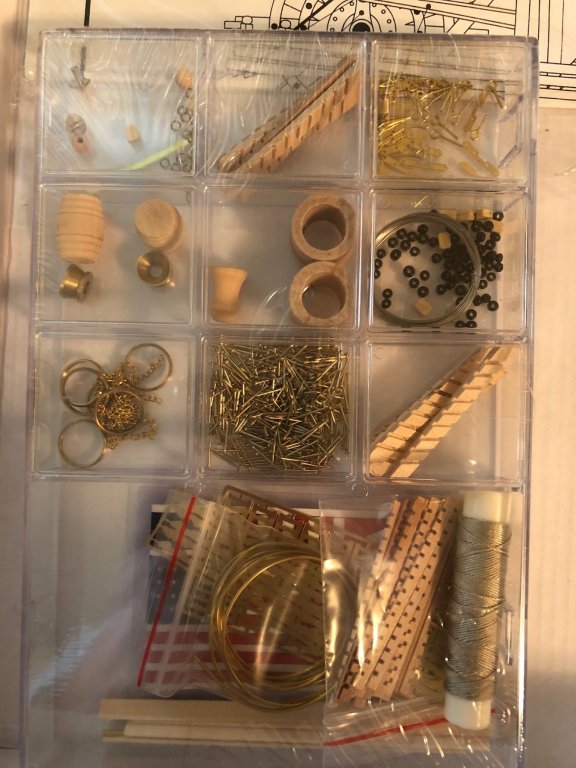
 So, as promised in my post introducing myself, I’m starting on this kit as a resurgence of my ship-building gene. Last build was HMS Bounty by Billing Boats back in 1983 which only took me about 20 years to finish! Before I start I want to thank all those members who have posted build logs of this kit before me - your experiences and photos have been enormously helpful and clearly I have a great deal to live up to! Hope I’m up to the challenge. I’m expecting to spend around 500 hours or so on this build, so this will, I think, take me around 18 months or so - although I’m retired, there always seems to be something to do; today for example was switching out the dishwasher and humping the old one over to the MIL. And, once the winter is over I’ll have a lot to do in the garden (my Admiral’s pride and joy) as well as a potential kitchen remodel... I won’t be lighting it or doing any major alterations; my skills aren’t anywhere near good enough (yet). The kit arrived a couple of days ago; so far all I’ve done is inventorying the metal parts. Everything OK so far except I don’t see the piece that’s meant to thread the steering wheel to its supports. Tomorrow afternoon I hope to check the supplied wood, having noticed other builders’ difficulties with over/undersized wood. That said, the kit box has a 2017 copyright mark and I’ve testing the brass smokestack rings on the smokestack wood, and they do fit, if very tightly, so perhaps AL have fixed a few issues. Anyway, enough text, here’s the obligatory pix of the box and its contents. Hugh

-
 Hey howya goin all, this is my second build log of a ship. Length: 660mm = (25-30/32") Height: 192mm = (11-15/32") Beam: 130mm = (5-3/32") Scale: 1:80 (3/20" = 1Ft) Heres a look at whats inside. I got a little impatient and started to build her before I took pics.
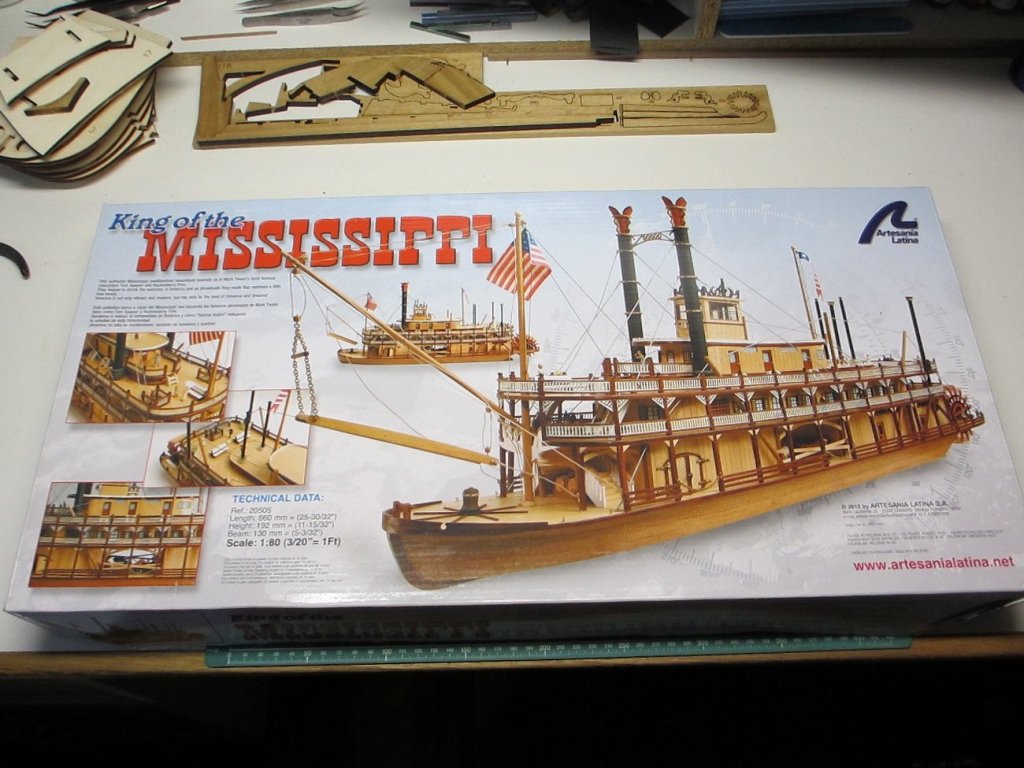


-
 Hi model friends,I have just` finished the HMS Endeavour and half way along with the Soveriegn of the Seas I have decided to build the King of the Mississippi for a change.
- 36 replies
-
- 4
-
-
- artesania latina
- king of the mississippi
- (and 1 more)
-
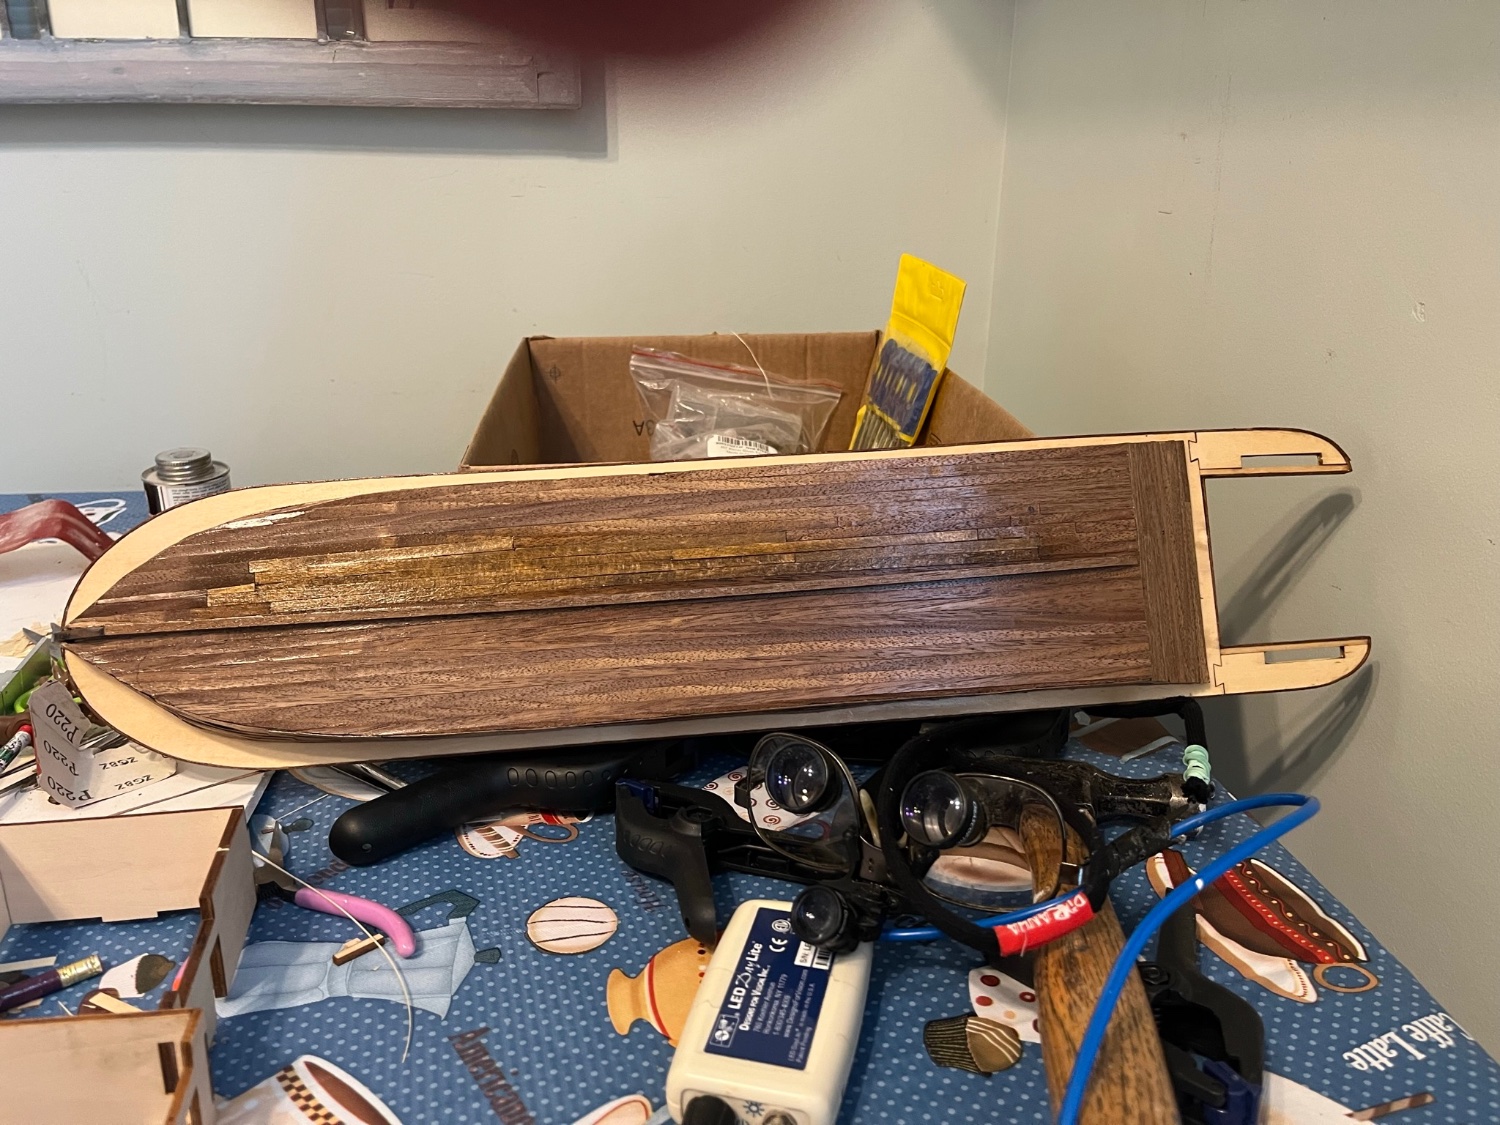
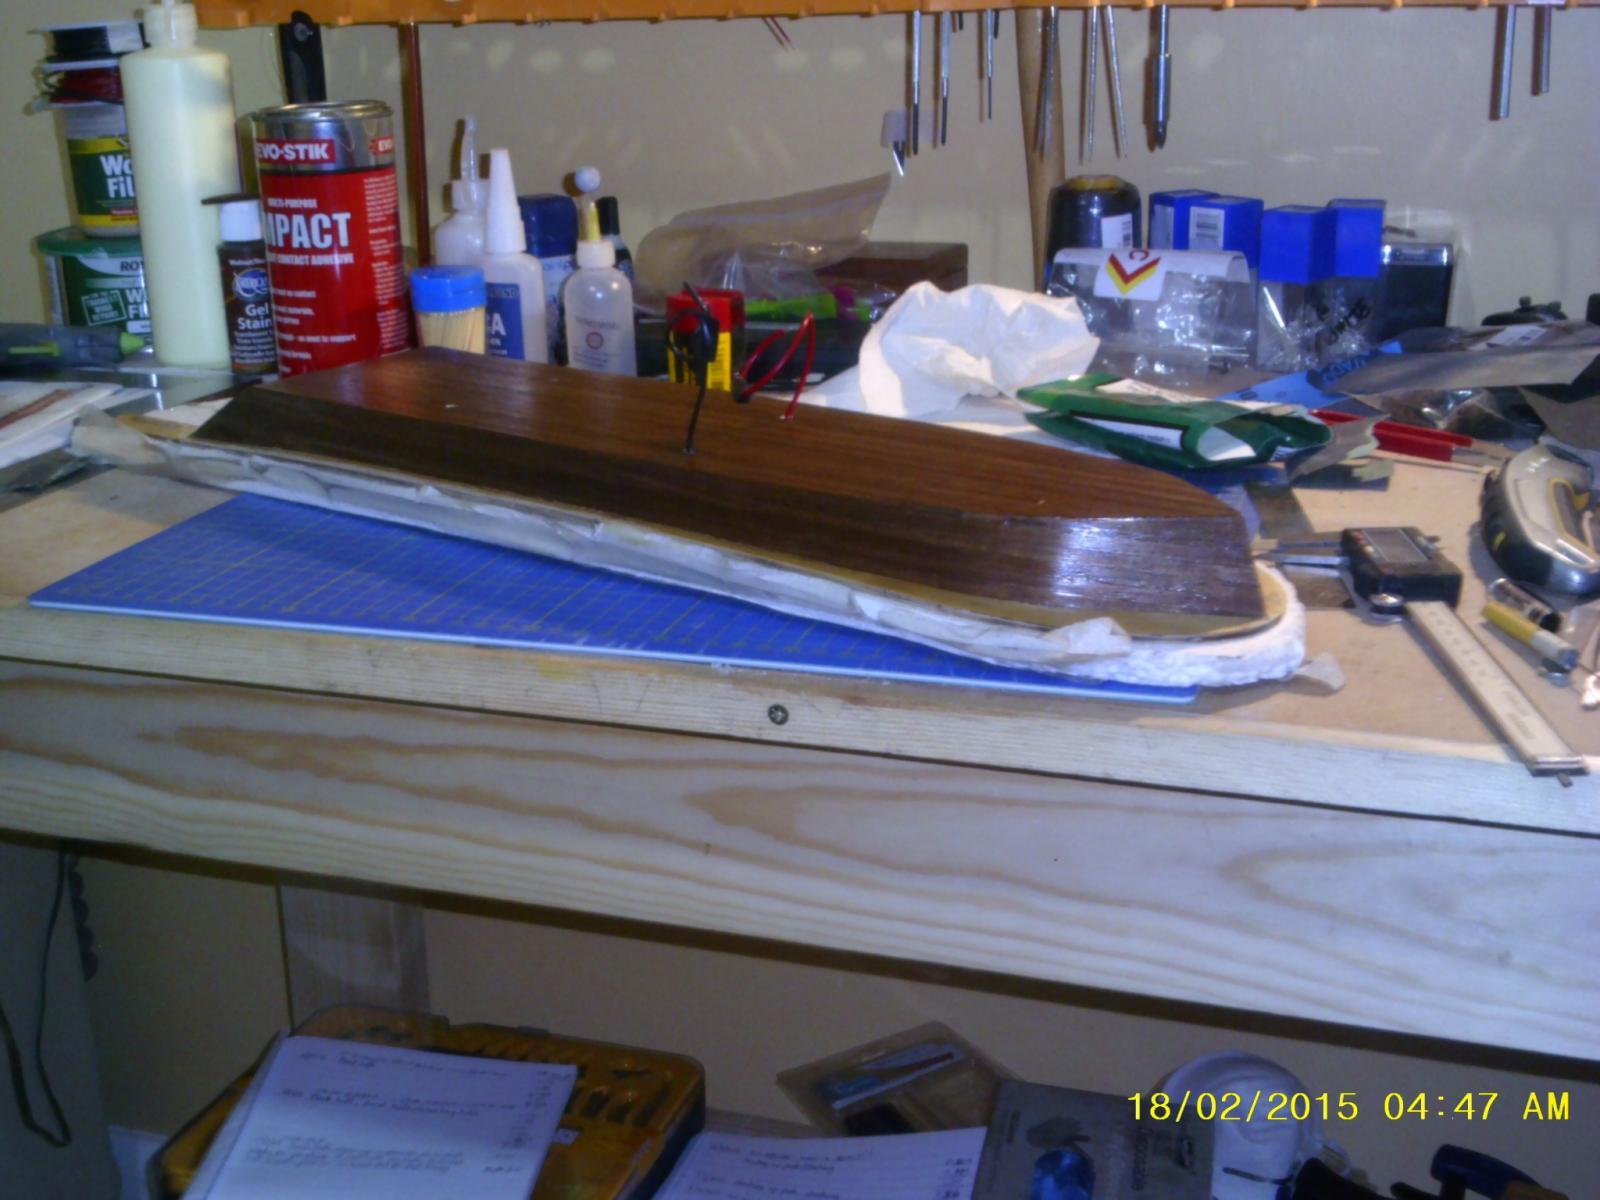
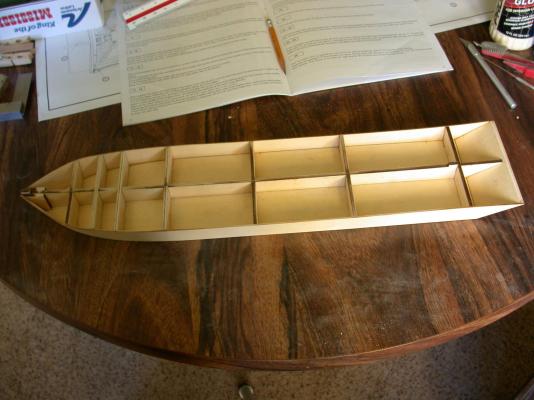
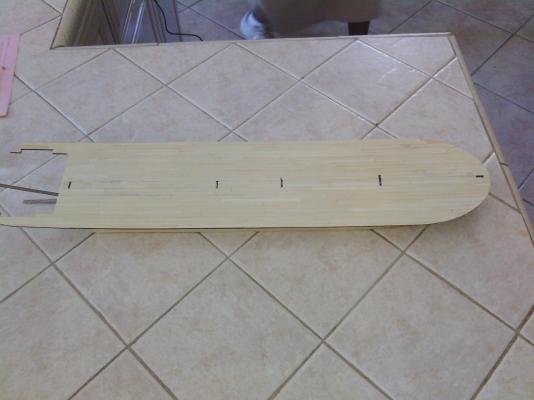
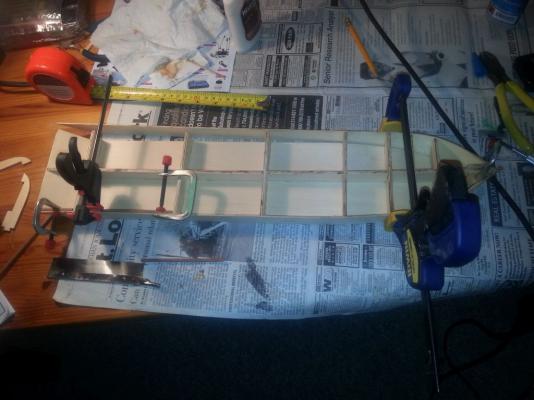
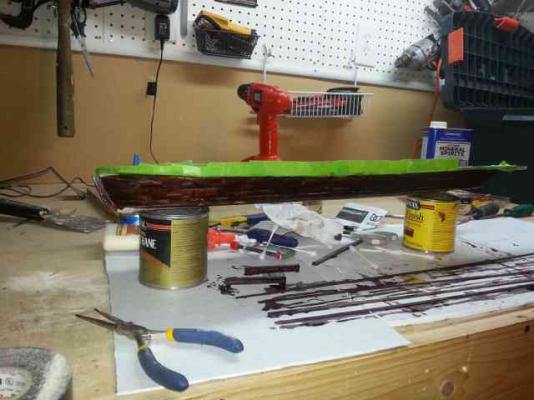
 I have been away from the build logs for a while. Had to have some work done to the old ticker but I am back to the workshop. Decided to try a model of a ship that lacks sails. Spent a little time looking at kits and build logs on this site and decided that King of the Mississippi looked interesting and a fun build. So I invested a few bucks and purchased the kit. The first step, of course, is the hull. I was impressed with the fit of the die-cut pieces. This was one of the easiest hulls to build. First step was gluing the keel and formers to a flat bottom. Next came some thin plywood sides (which took a little care in bending) followed by planking with thin walnut strips.
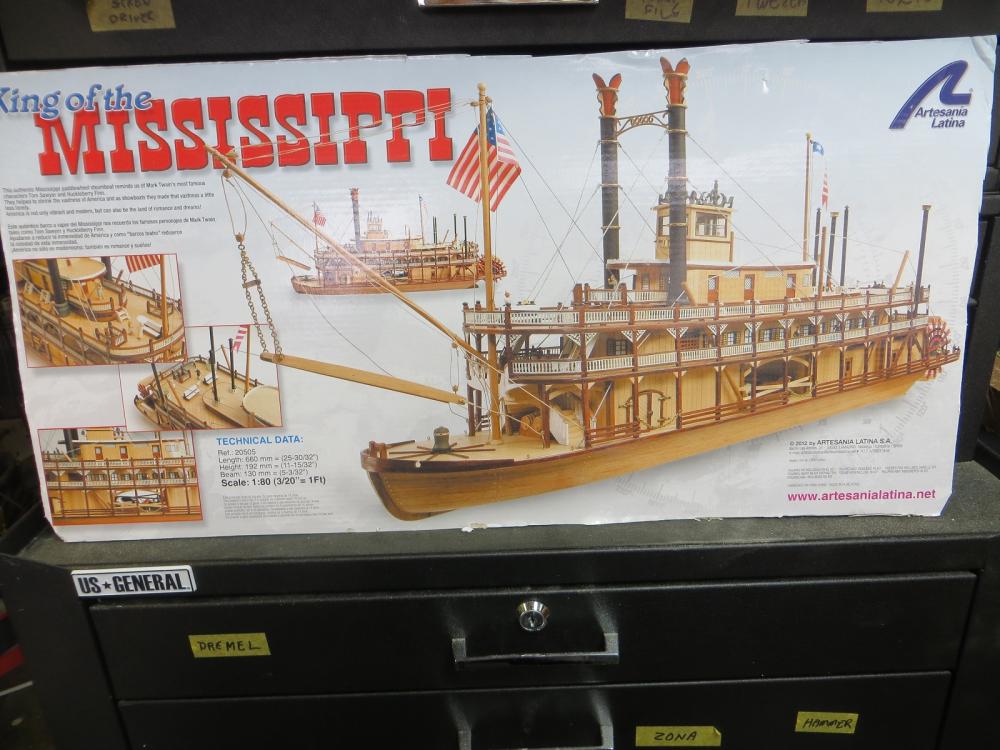

- 44 replies
-
- 7
-
-
- king of the mississippi
- artesania latina
- (and 1 more)
-
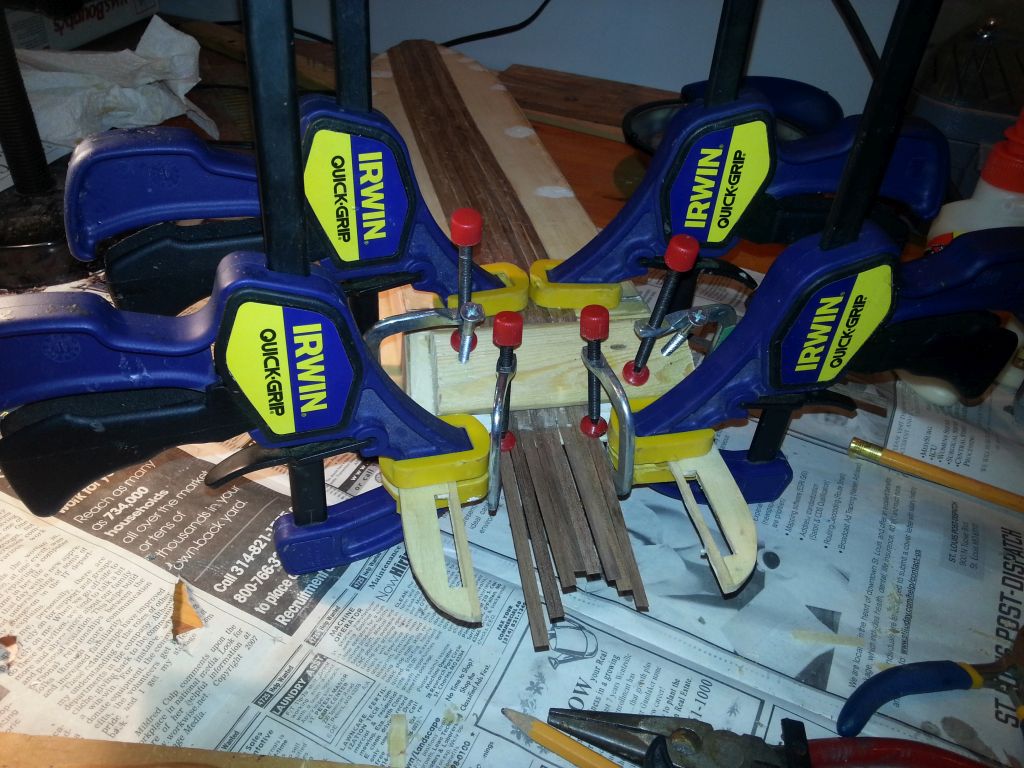
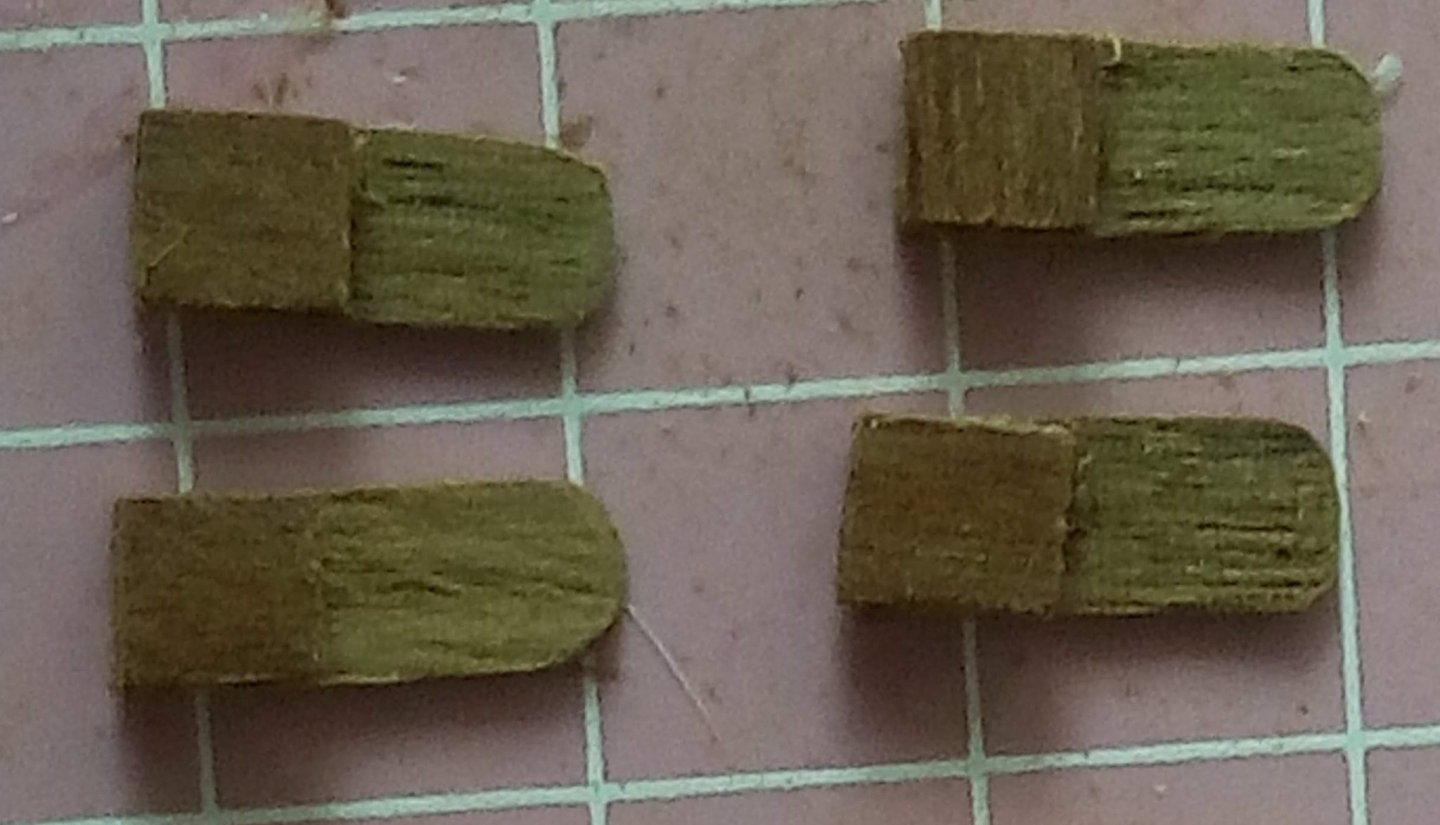
 Hi Folks... This is my first project. I sort of fell into it, because I started caring for my elderly father at home, and his hands have become unsteady to the point that the project is now mine. As a result, I am probably doing a project that is WAY over my head, but I'm stubborn to the point that I WILL NOT let it defeat me and have been slowly coming along with the project for the past six months. To date, I have (1) Assembled the hull (Dad mostly did that part) (2) Planked the hull (3) Stained the hull (4) Planked the first, second and third decks (Dad did most of that part with me.) (4) Assembled the circular stairs going between the first and second decks (YIKES! That was frustrating) (5) Did the trim work to finish off the first deck (6) Did all of the trim work to the main section of the second deck (the engine room cage and the painting of the shutters were particularly challenging) (7) Placed the third deck onto the model (8) Re-drilled all of of the holes since my Dad's impatience early on led to slight misalignment between the first, second and third decks. Now, I have a problem, and I'm calling out for help... I want to assemble and install the stairs at the fore and aft that go between the second and third decks, as described and pictured in step 48, but I can't find part #123, the bulkheads. In the parts list, it says that these parts are "pref". The other part that is wood that I "pref" was the itty bitty toothpicks I had to fabricate for the engine room grating. Does that mean I have to just kind of "figure out" what wood to use for these things? Lee Oh... and here are some pics of the project thus far


-
 It's about 25 years since I last built a model ship so time for a new one, or in actual fact two - I will be doing a concurrent build of Billing Boats' HMS Victory 1:75 scale - this will be covered in a separate build log. OK, back to the plot ... My plan is to have yellow LED lighting in the buildings on all three decks and in the pilot house then red/green navigation lights at the prow. Power comes from a 9V battery concealed in a plinth I build from MDF and standard moulding. The wiring comes up through a pillar from the plinth, passes through the hull and 1st deck then connects to a distribution board in the boiler room on the 1st deck. I calculated that a 100 Ohm resistor will handle 4 x 2.2V/20Ma LEDS and with these in parallel the distribution board supports up to 20 LEDs (5 x 4). I have tested it with 16 LEDs (14yellow, 1 red, 1 green) and it works fine so 20 should be no problem. Now some pics, I need to figure out how to post these with individual commentaries but for now the descriptions are in the file names.
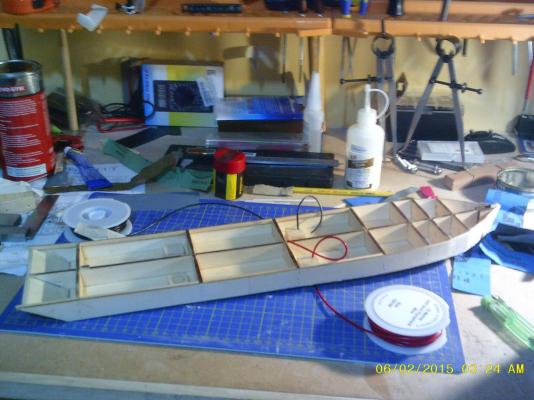
- 65 replies
-
- 4
-
-
- artesania latina
- king of the mississippi
- (and 1 more)
-
 This is my last completed project: HMS Bounty's Jolly boat by Artesenia Latina. I am now working on the King of the Mississippi by the same company. Figured out low res mods so the pics aren't so huge. I've been working on the hull for a while now. It's a time consuming process! Does anyone have any closeups of the "stabling boxes"? The pics in the instructions are very unclear!
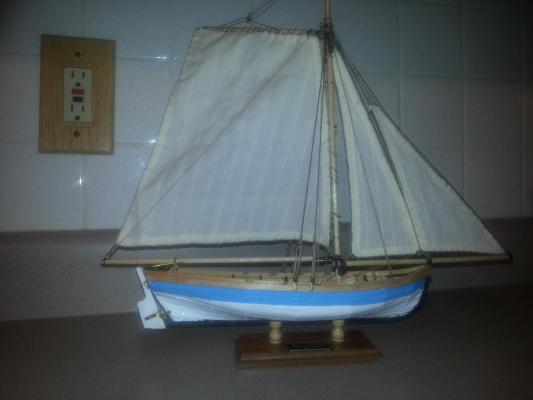

- 12 replies
-
- 2
-
-
- king of the mississippi
- artesania latina
- (and 1 more)