Search the Community
Showing results for tags 'lady nelson'.
-
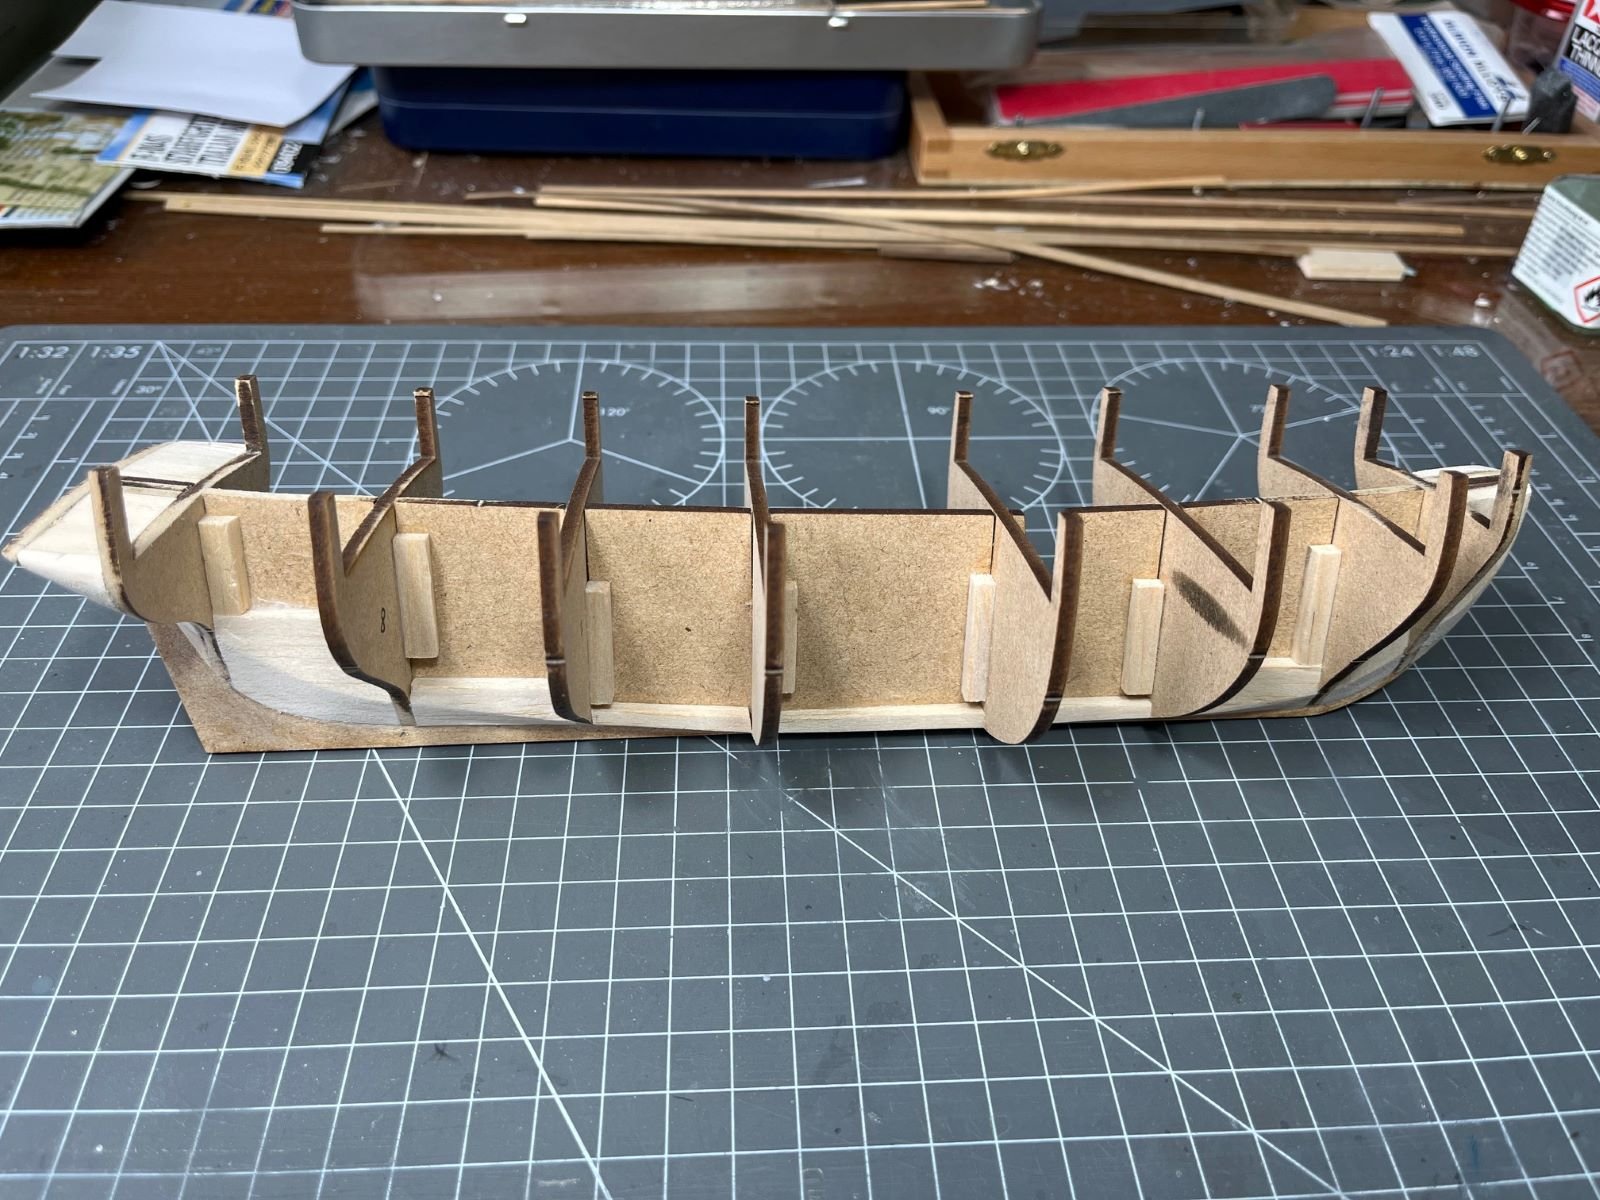
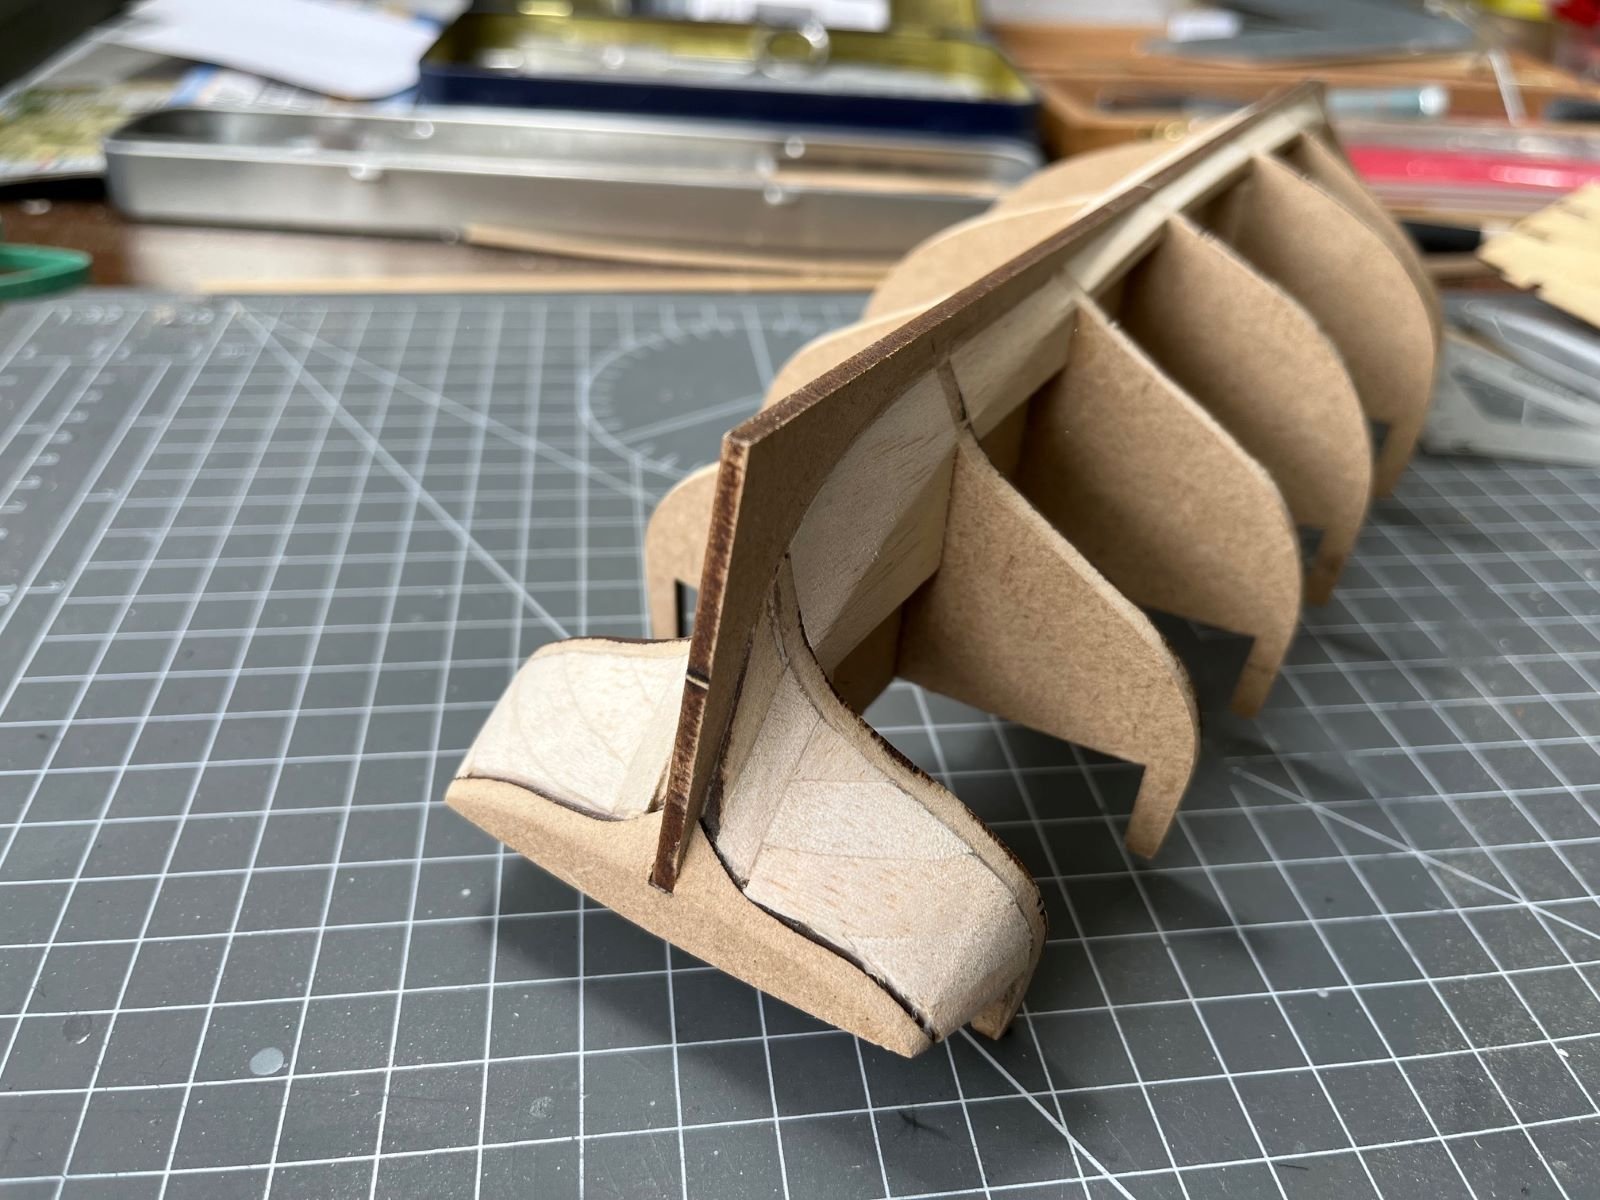
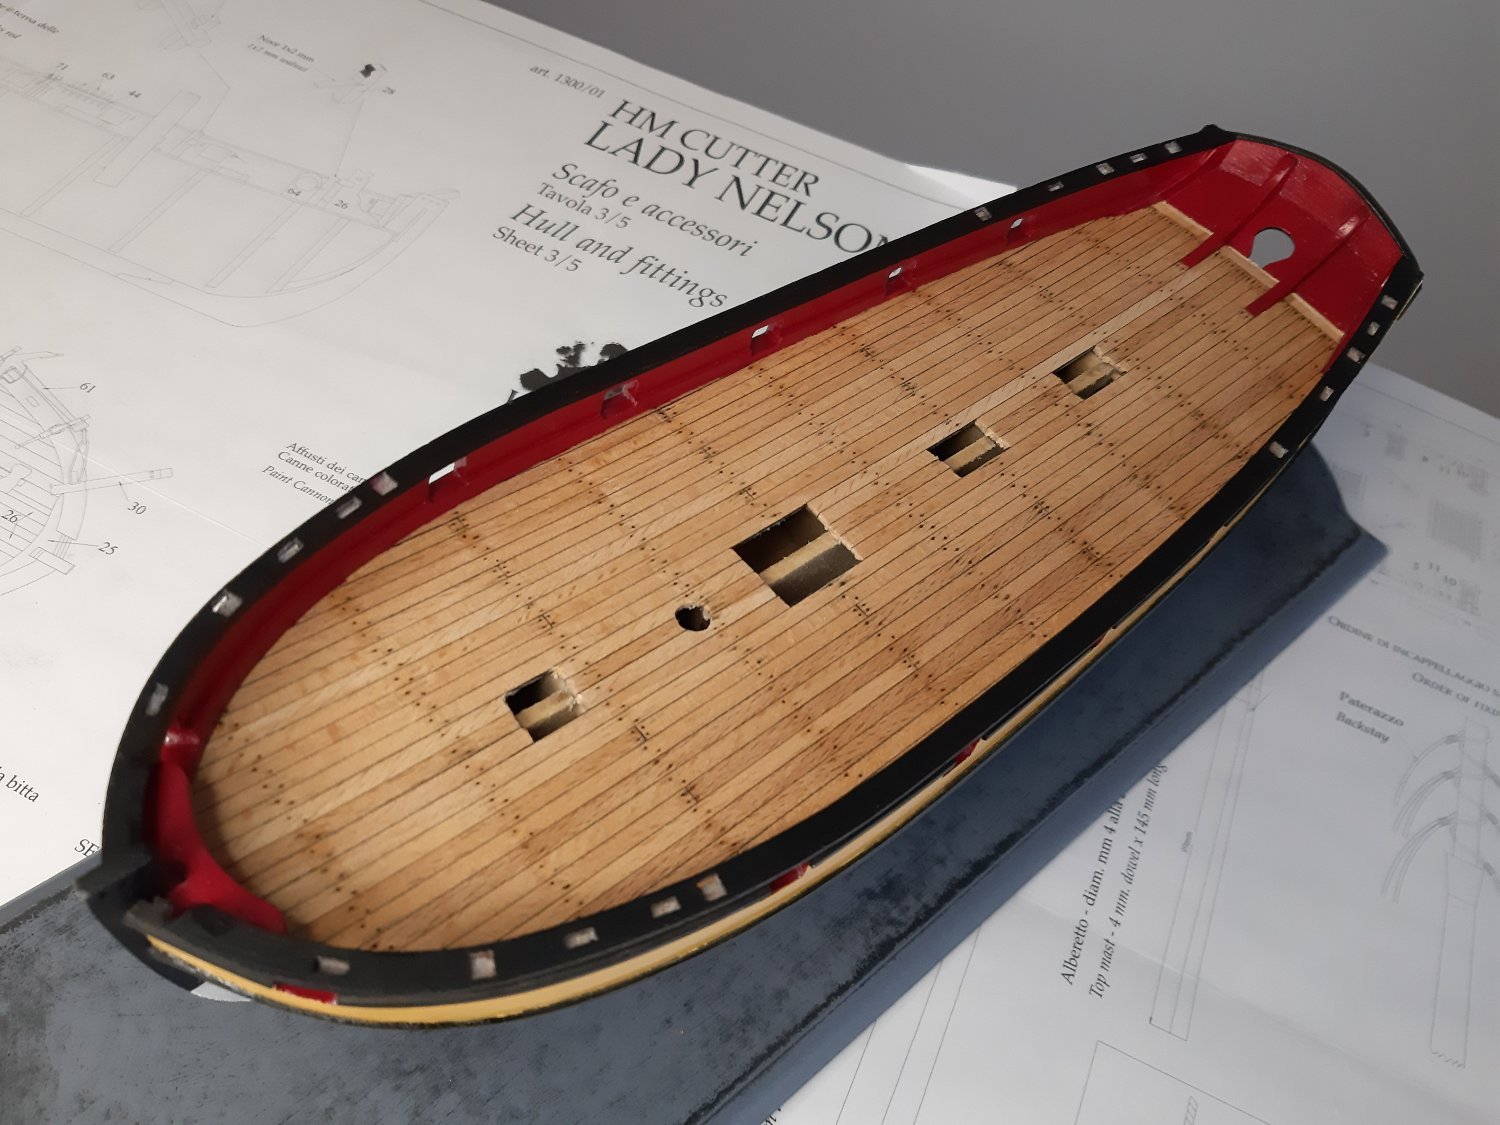
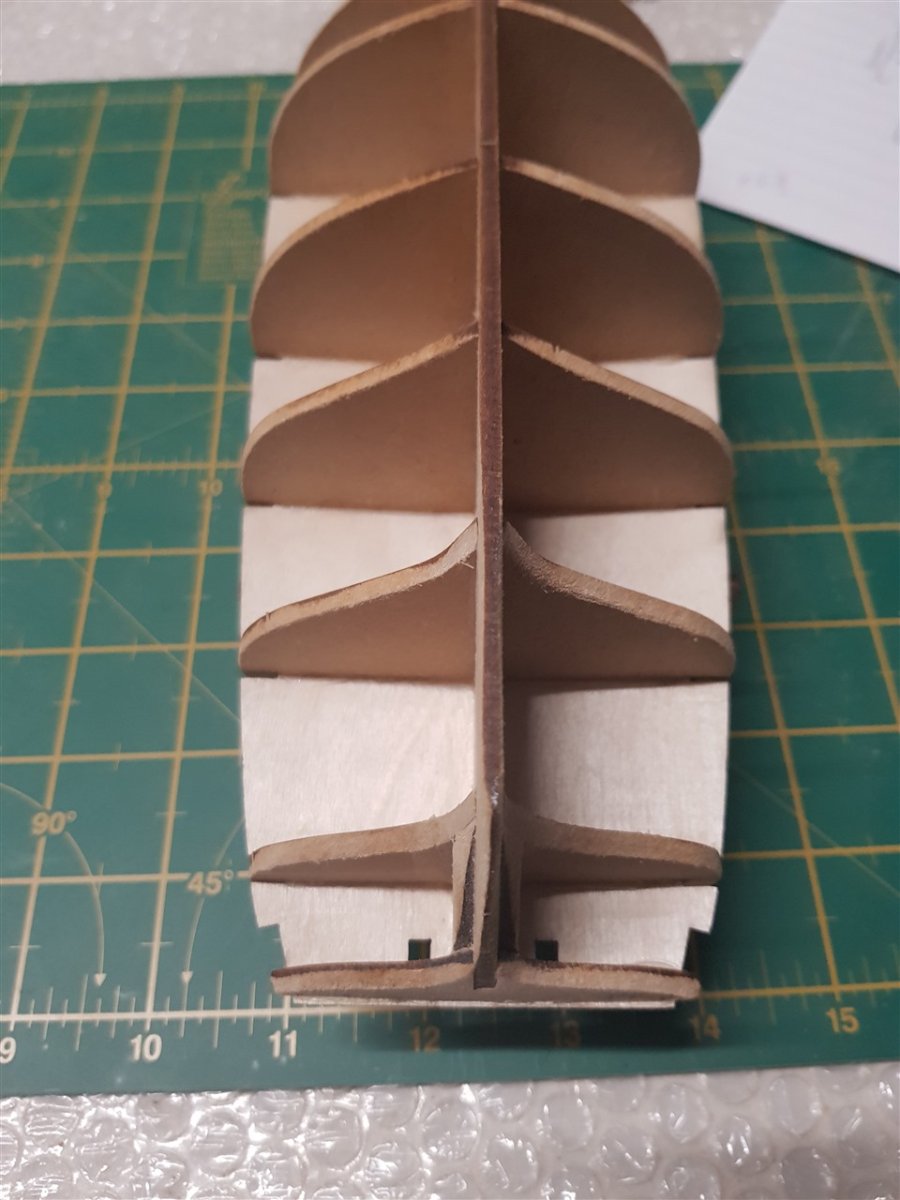
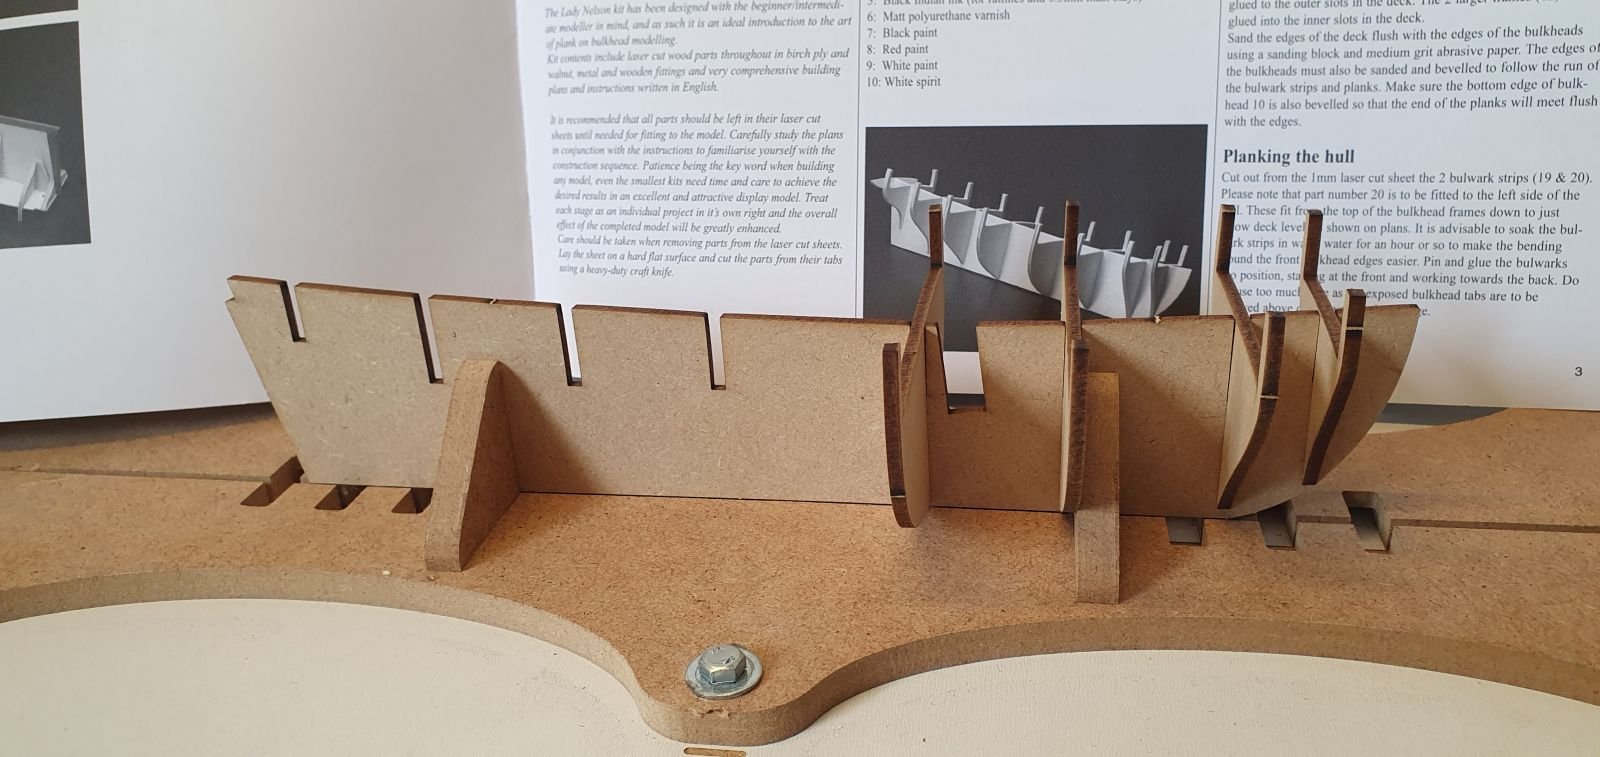
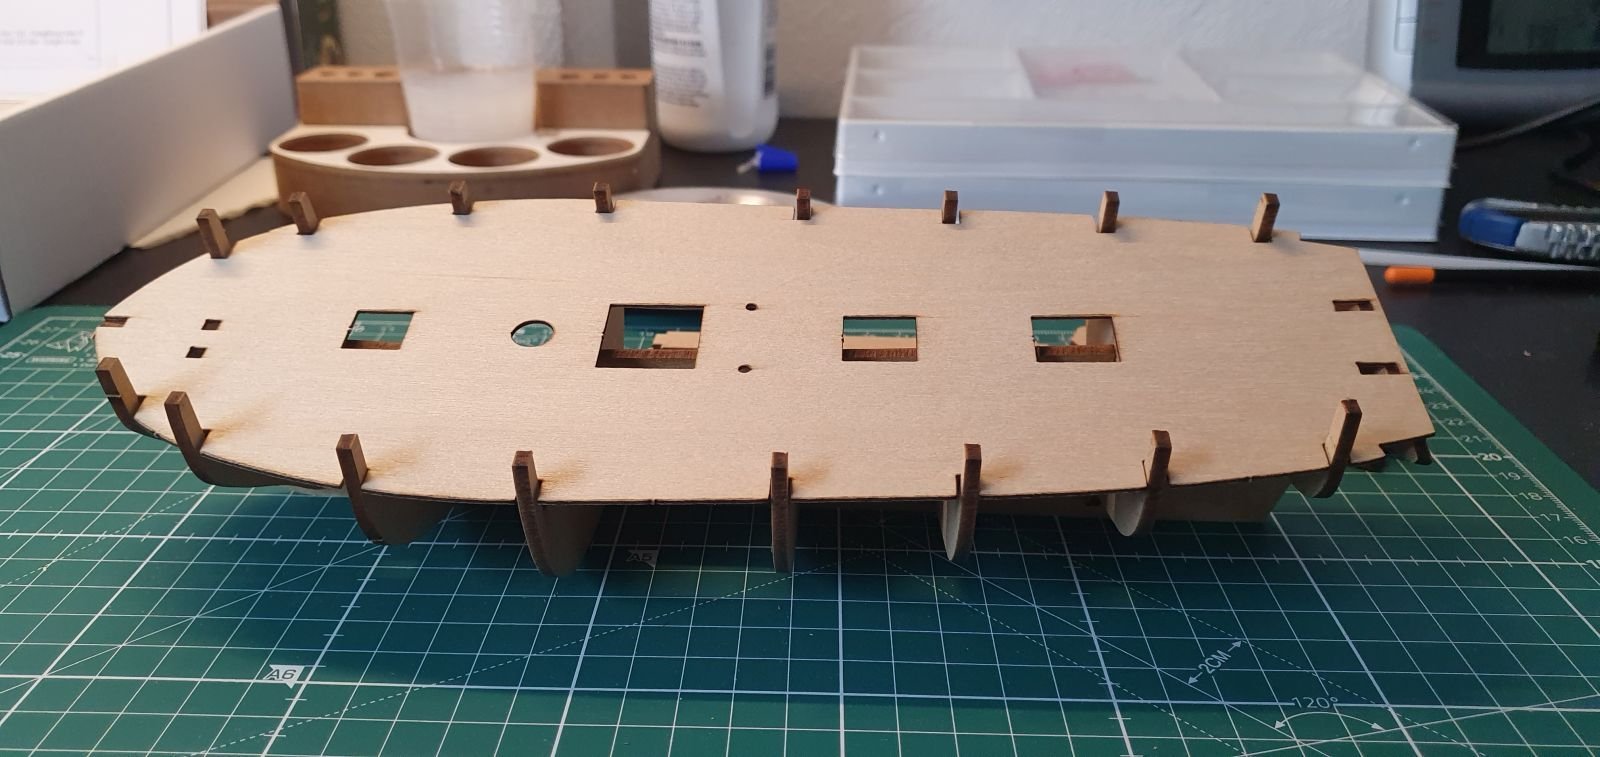
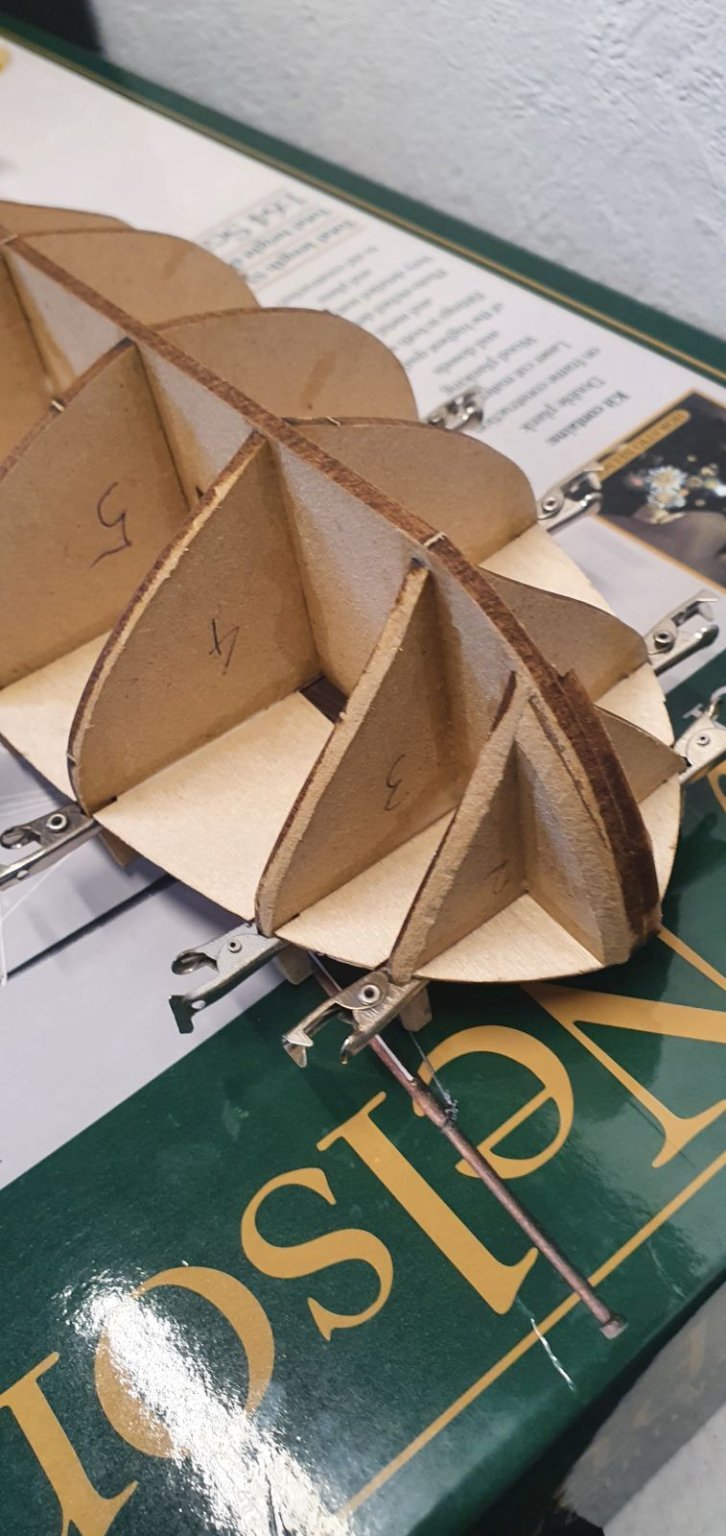
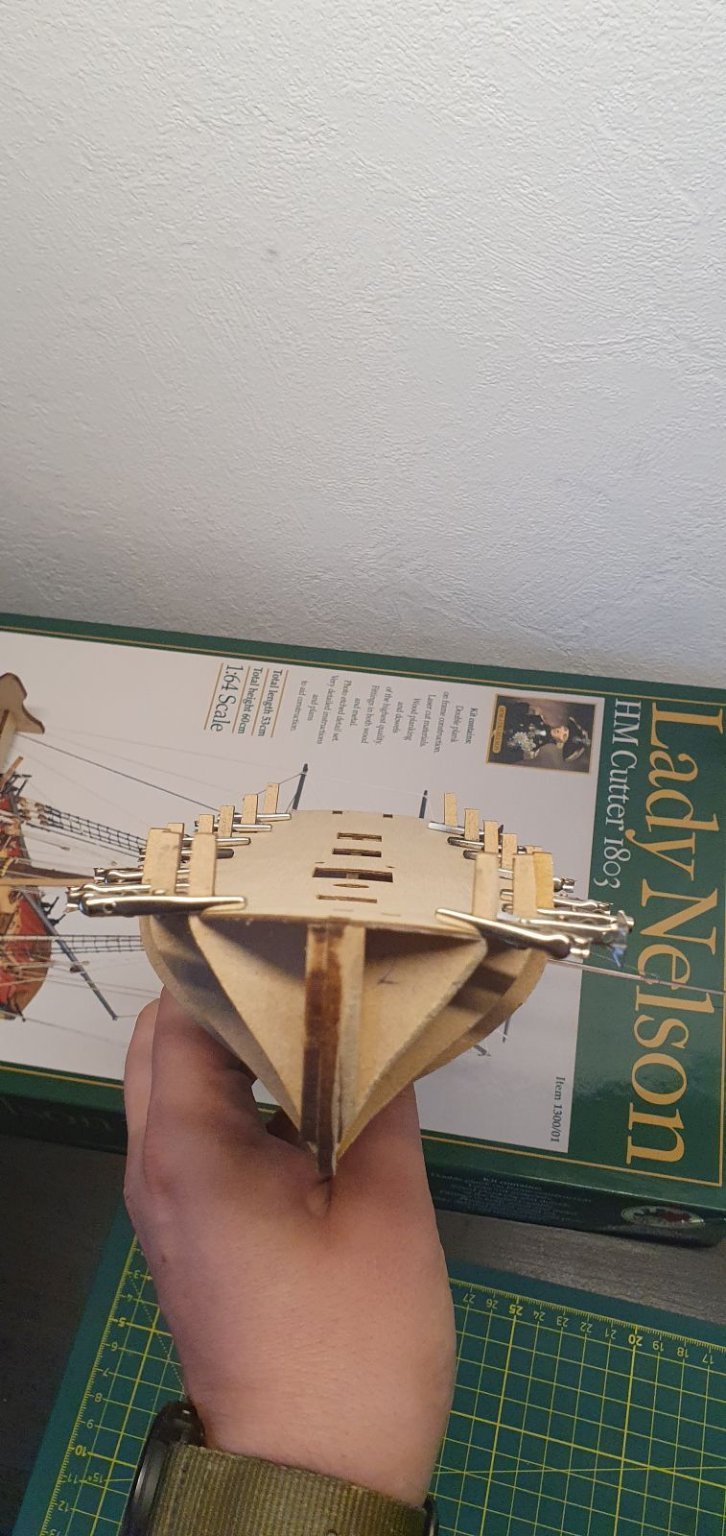
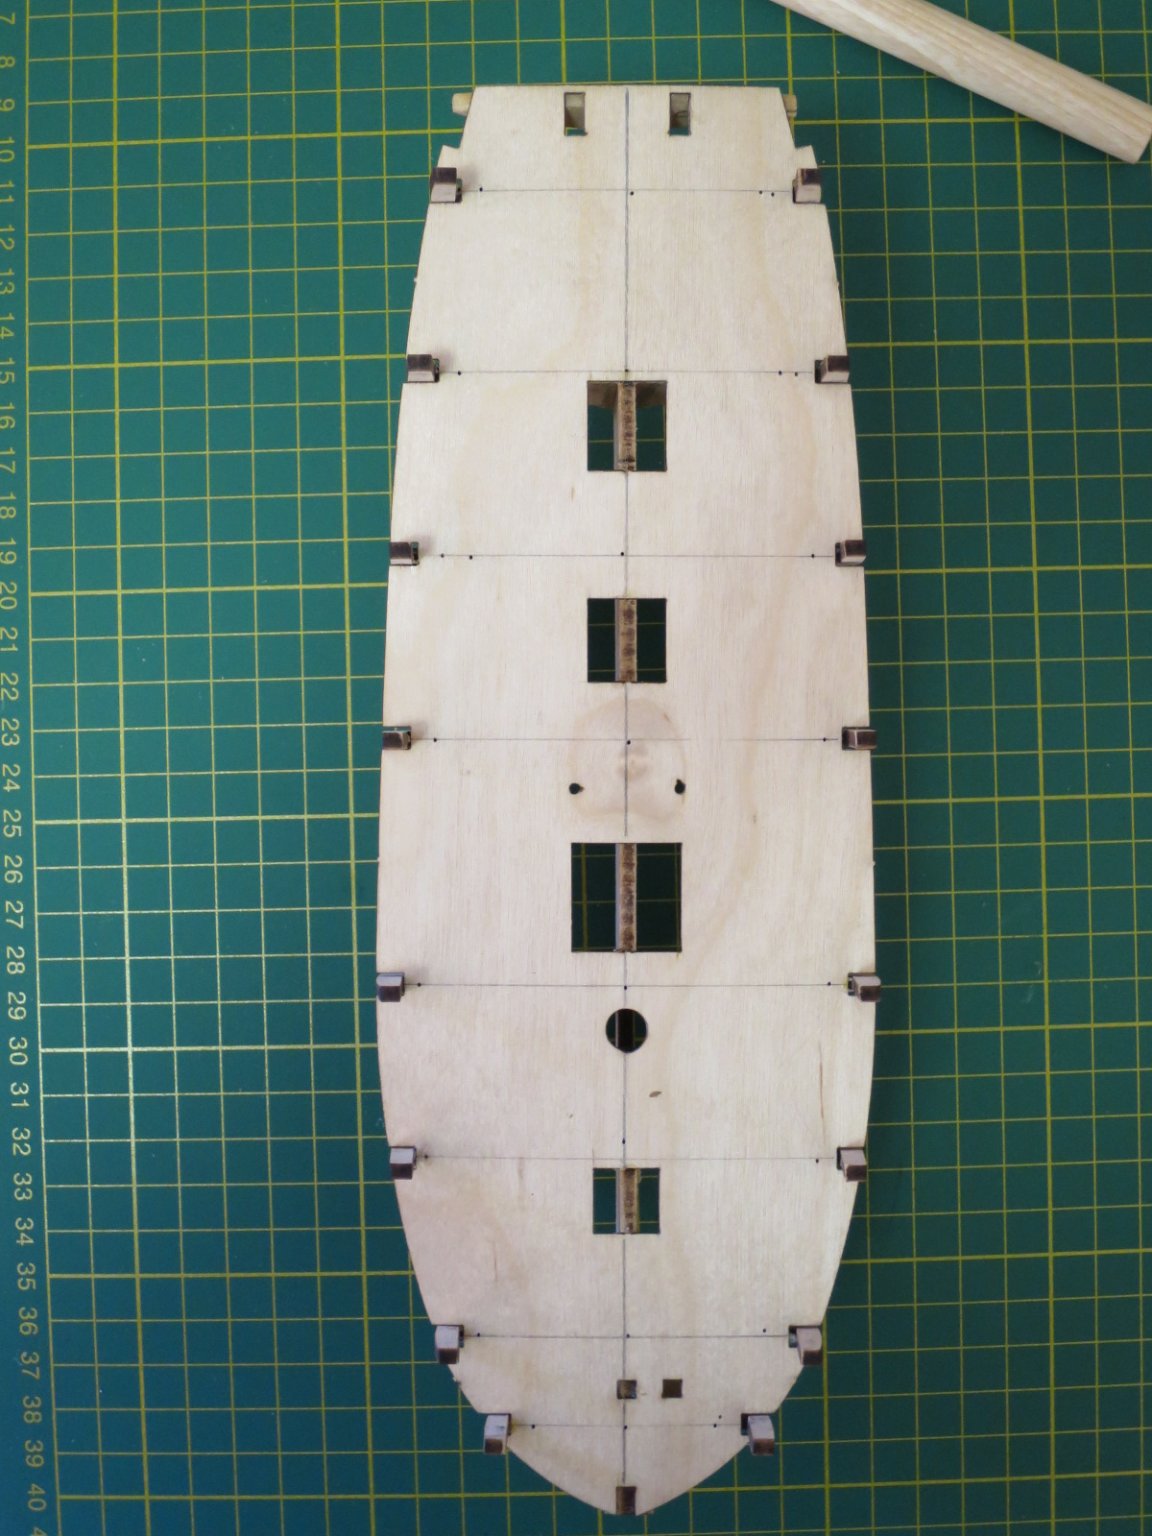
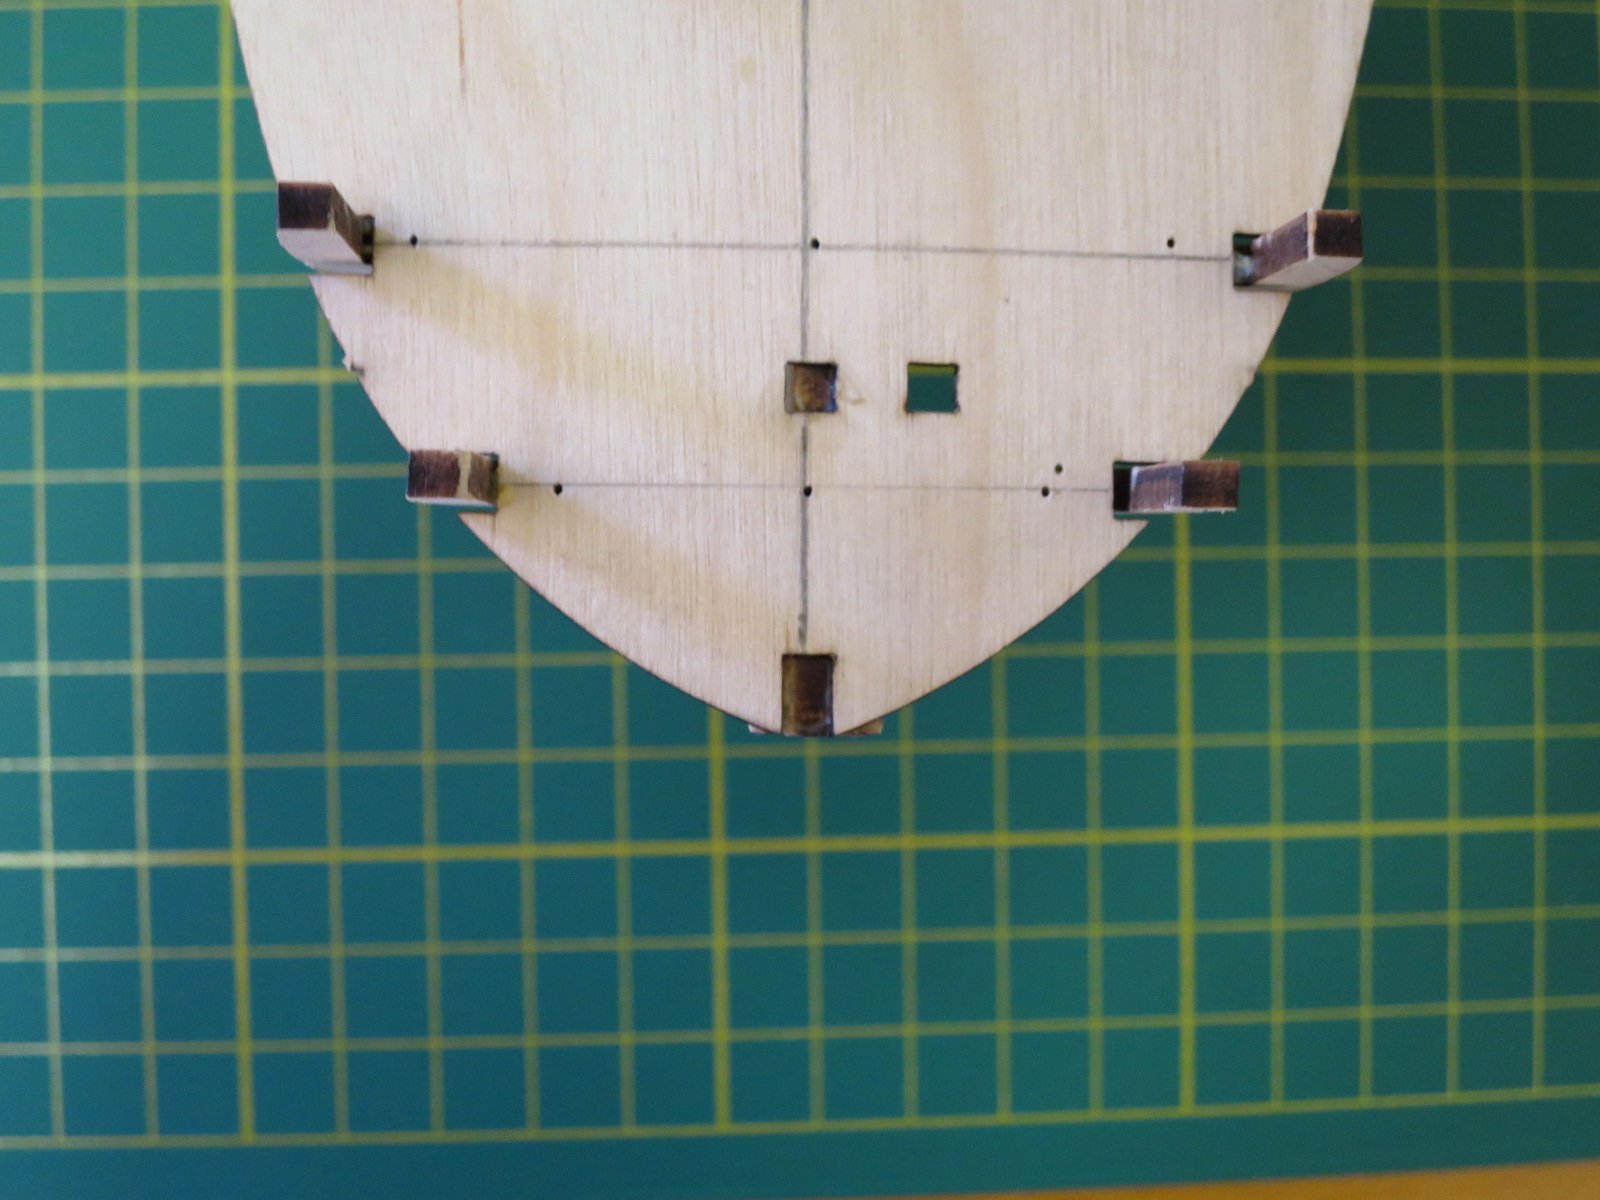
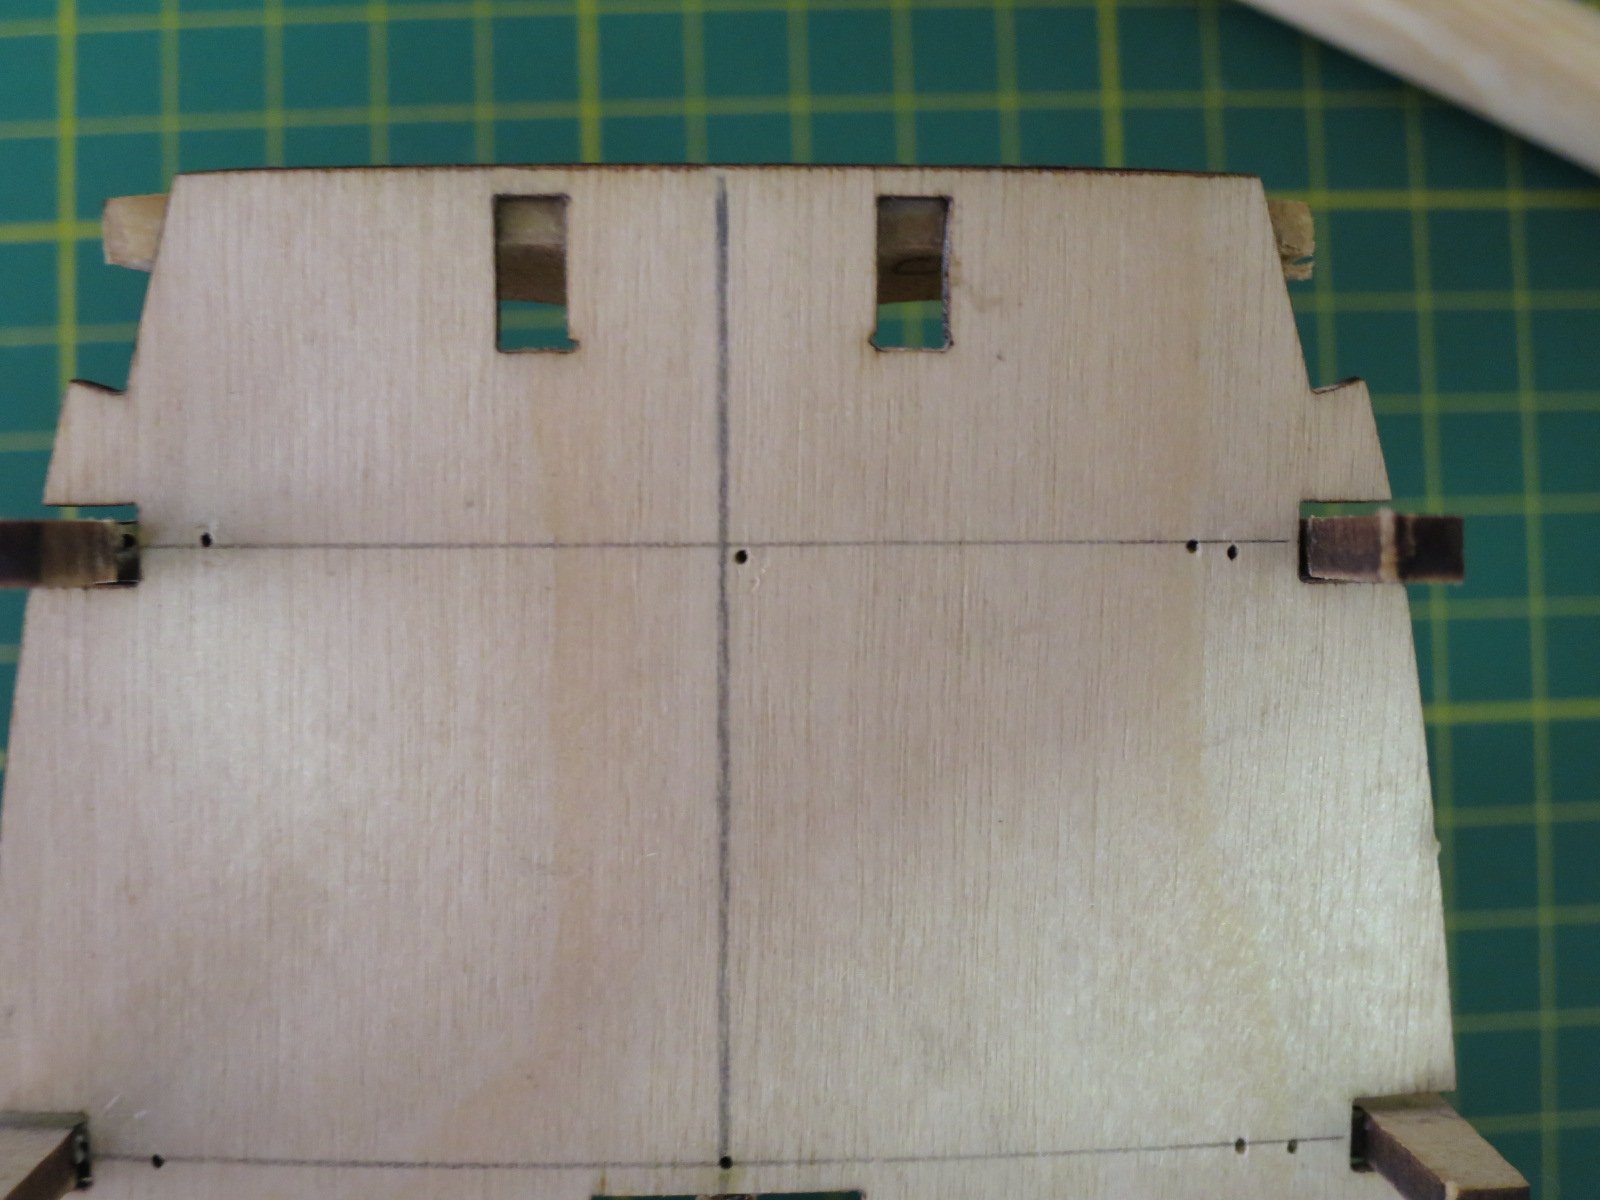
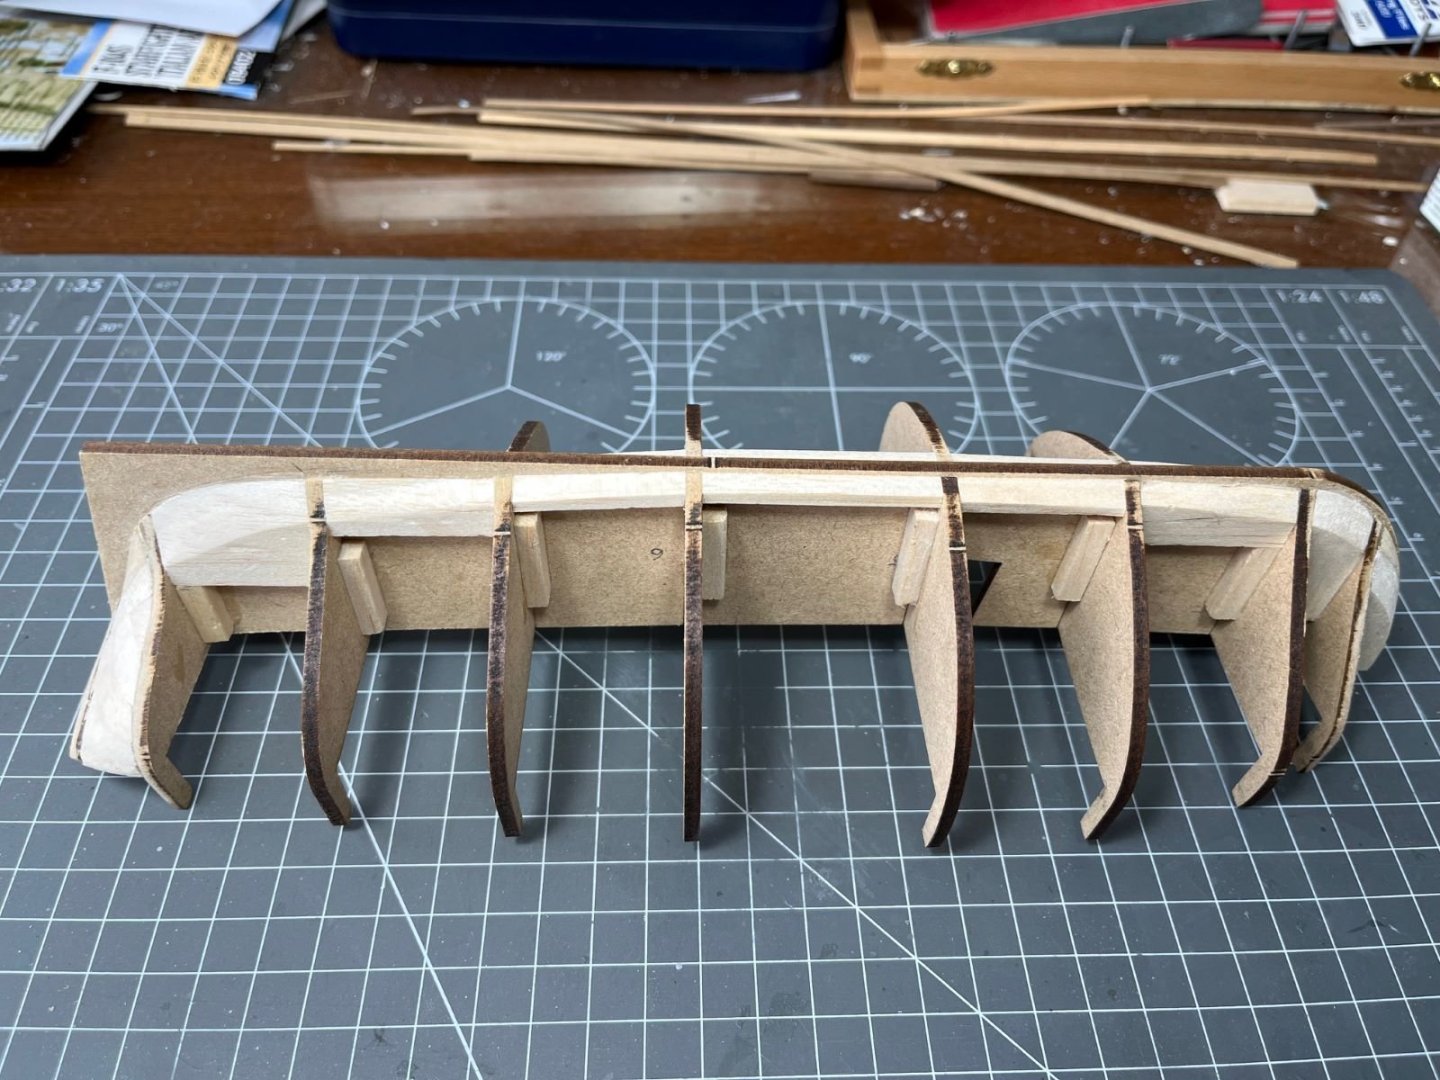
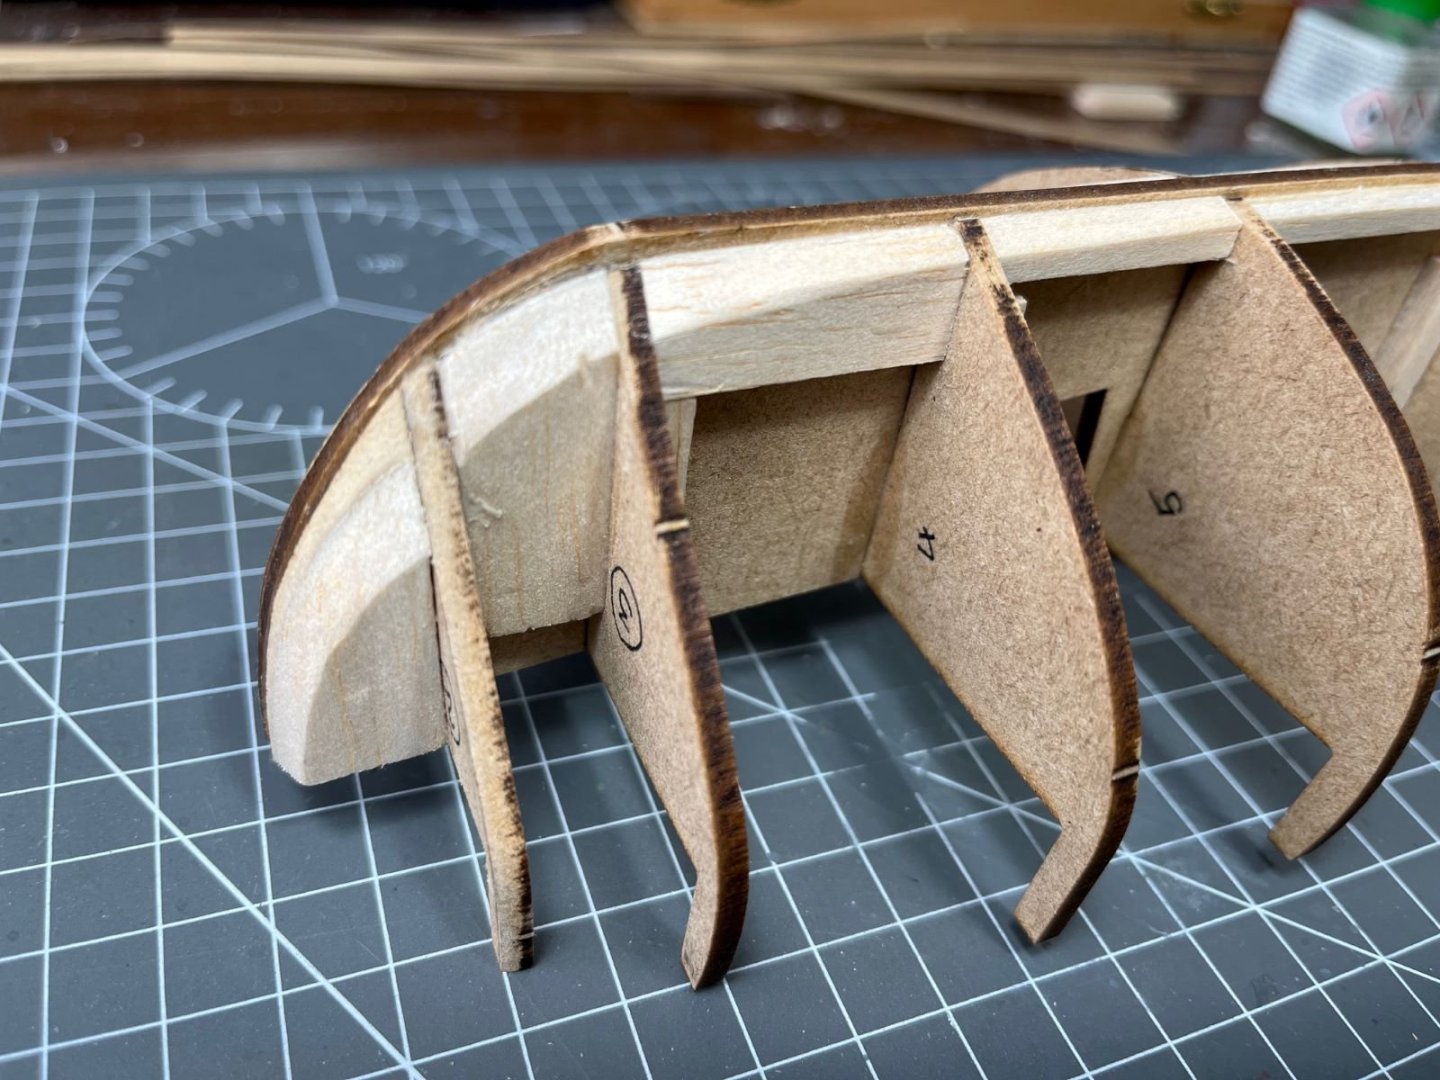
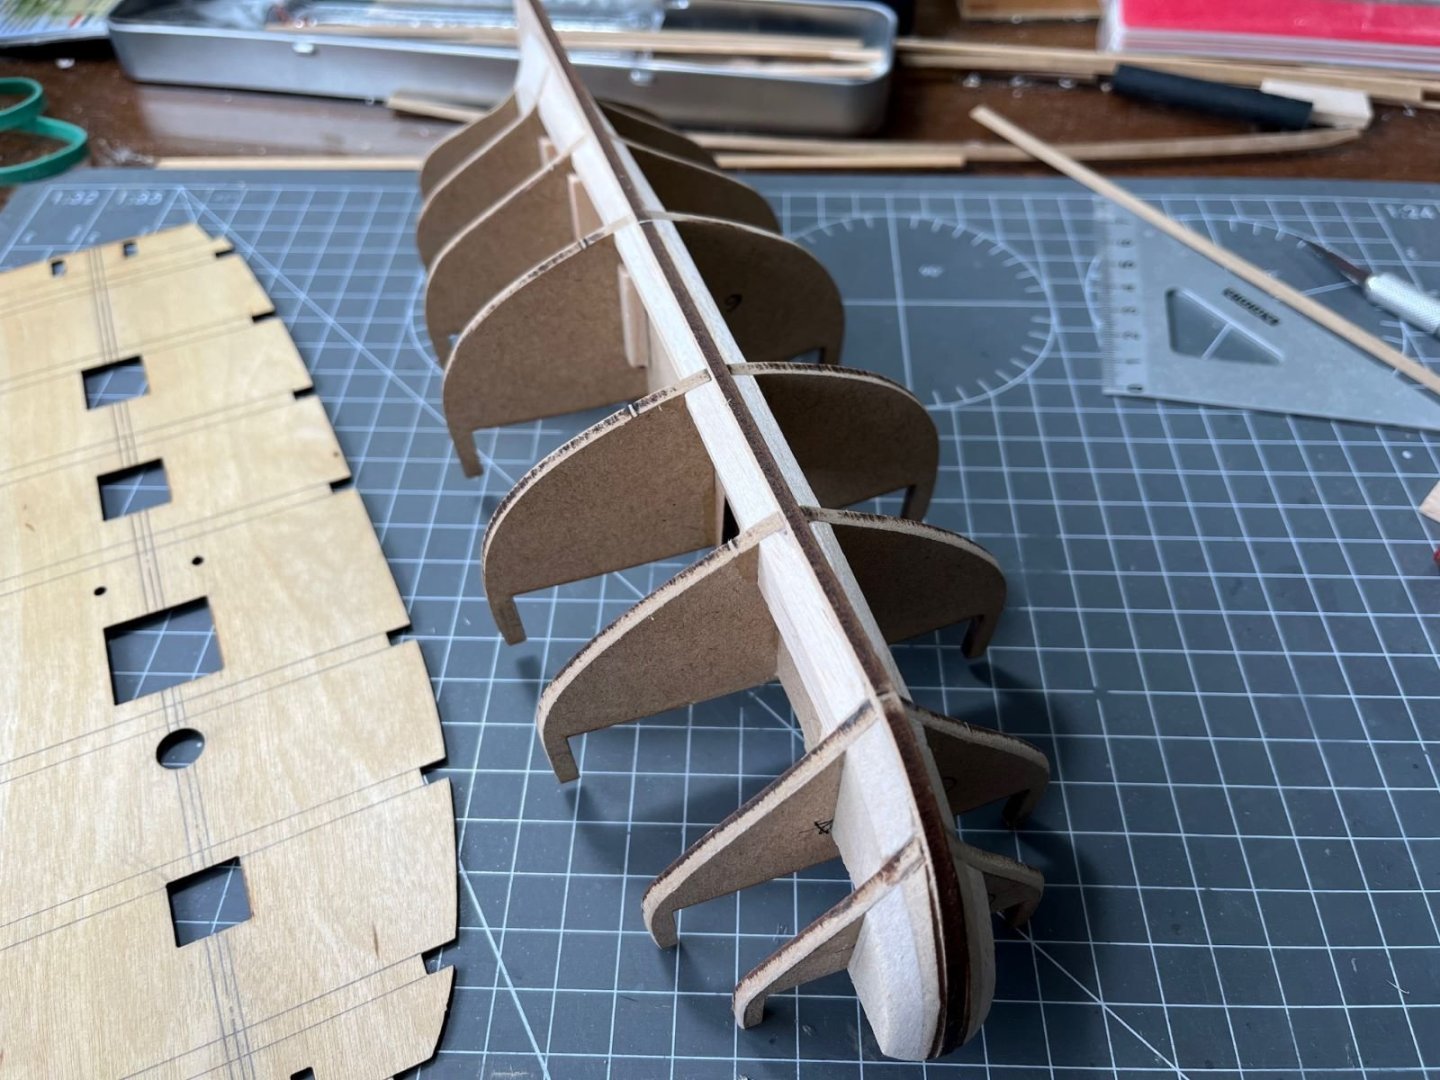
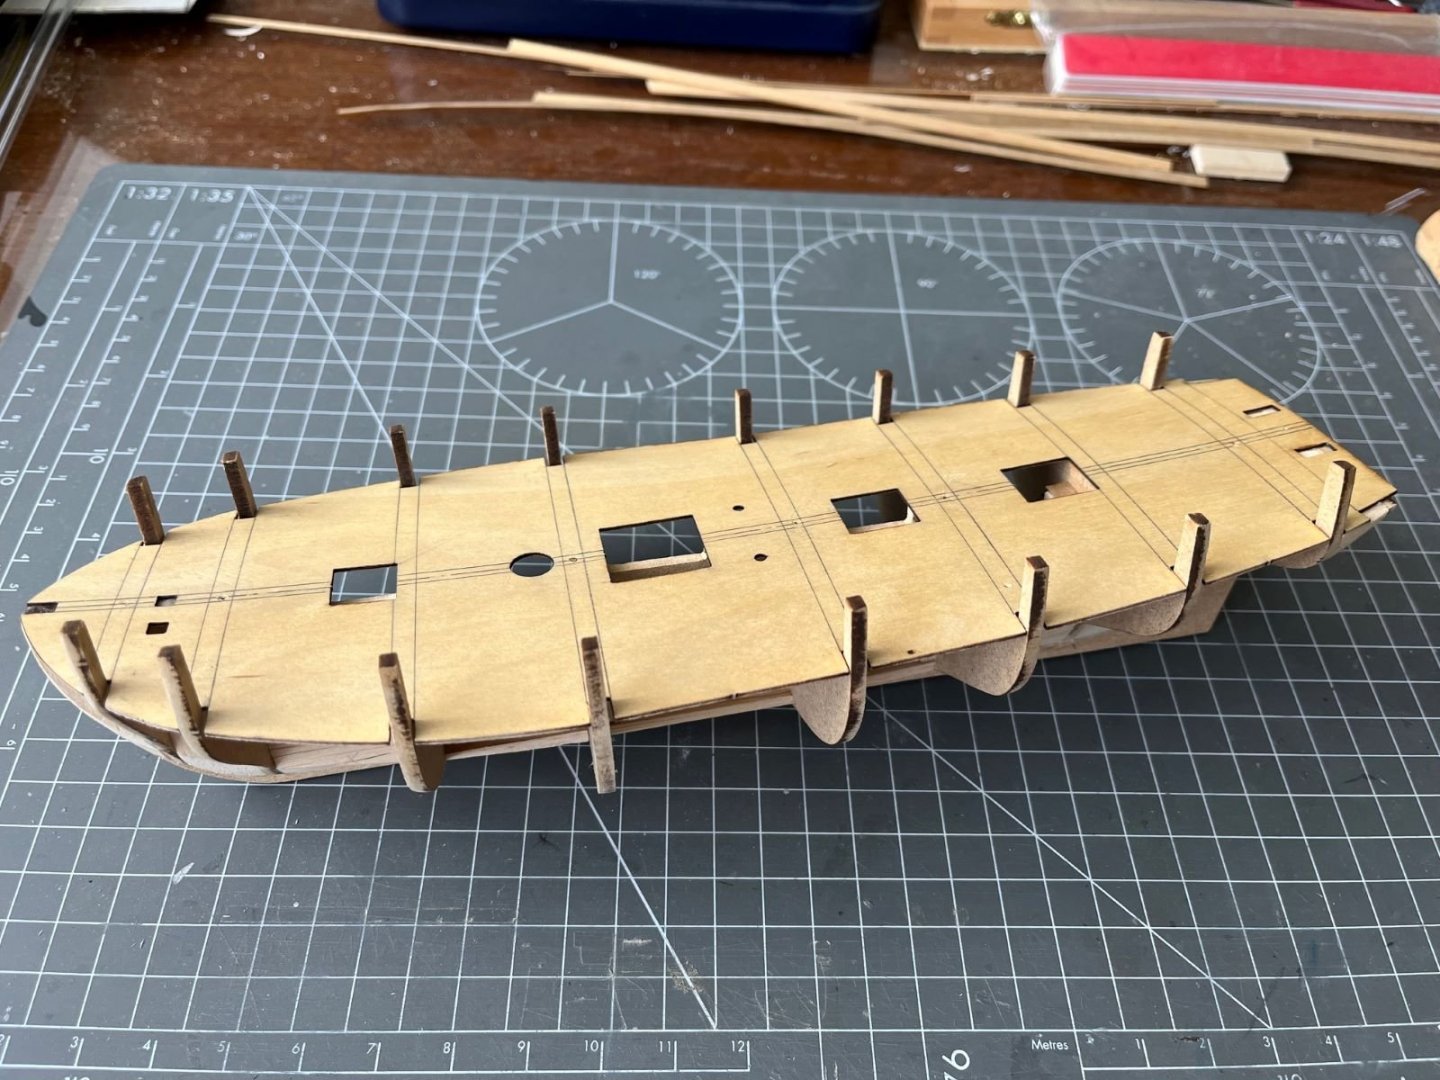
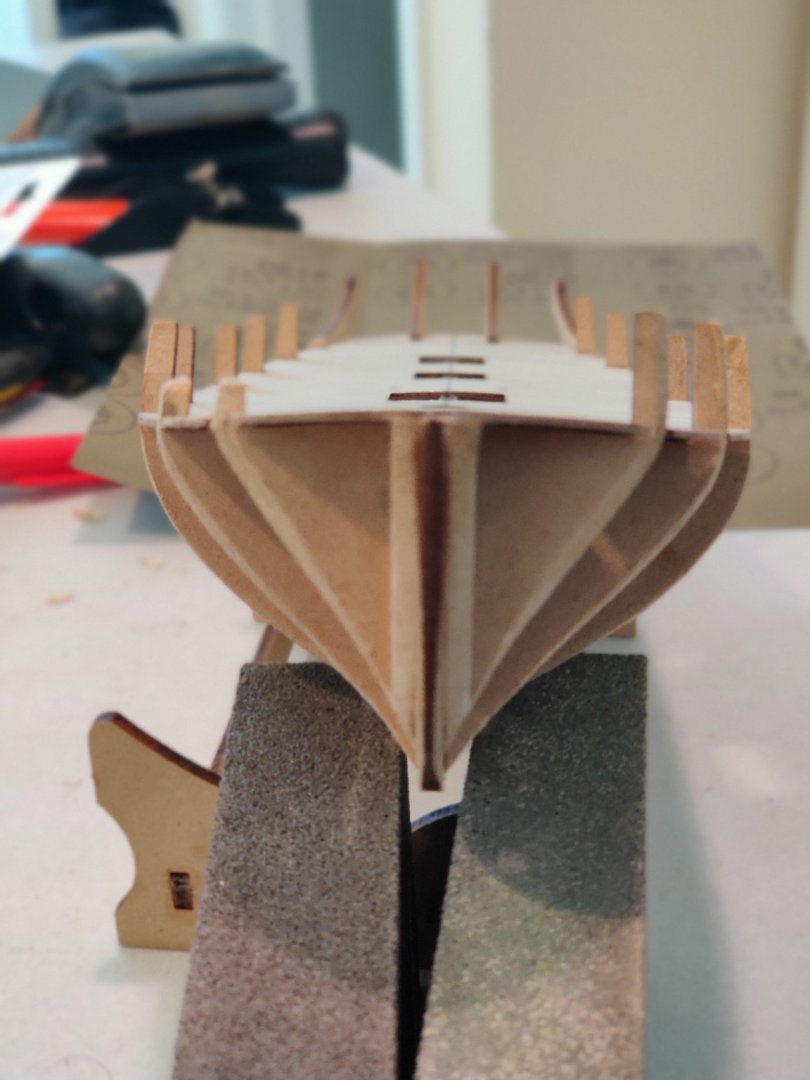
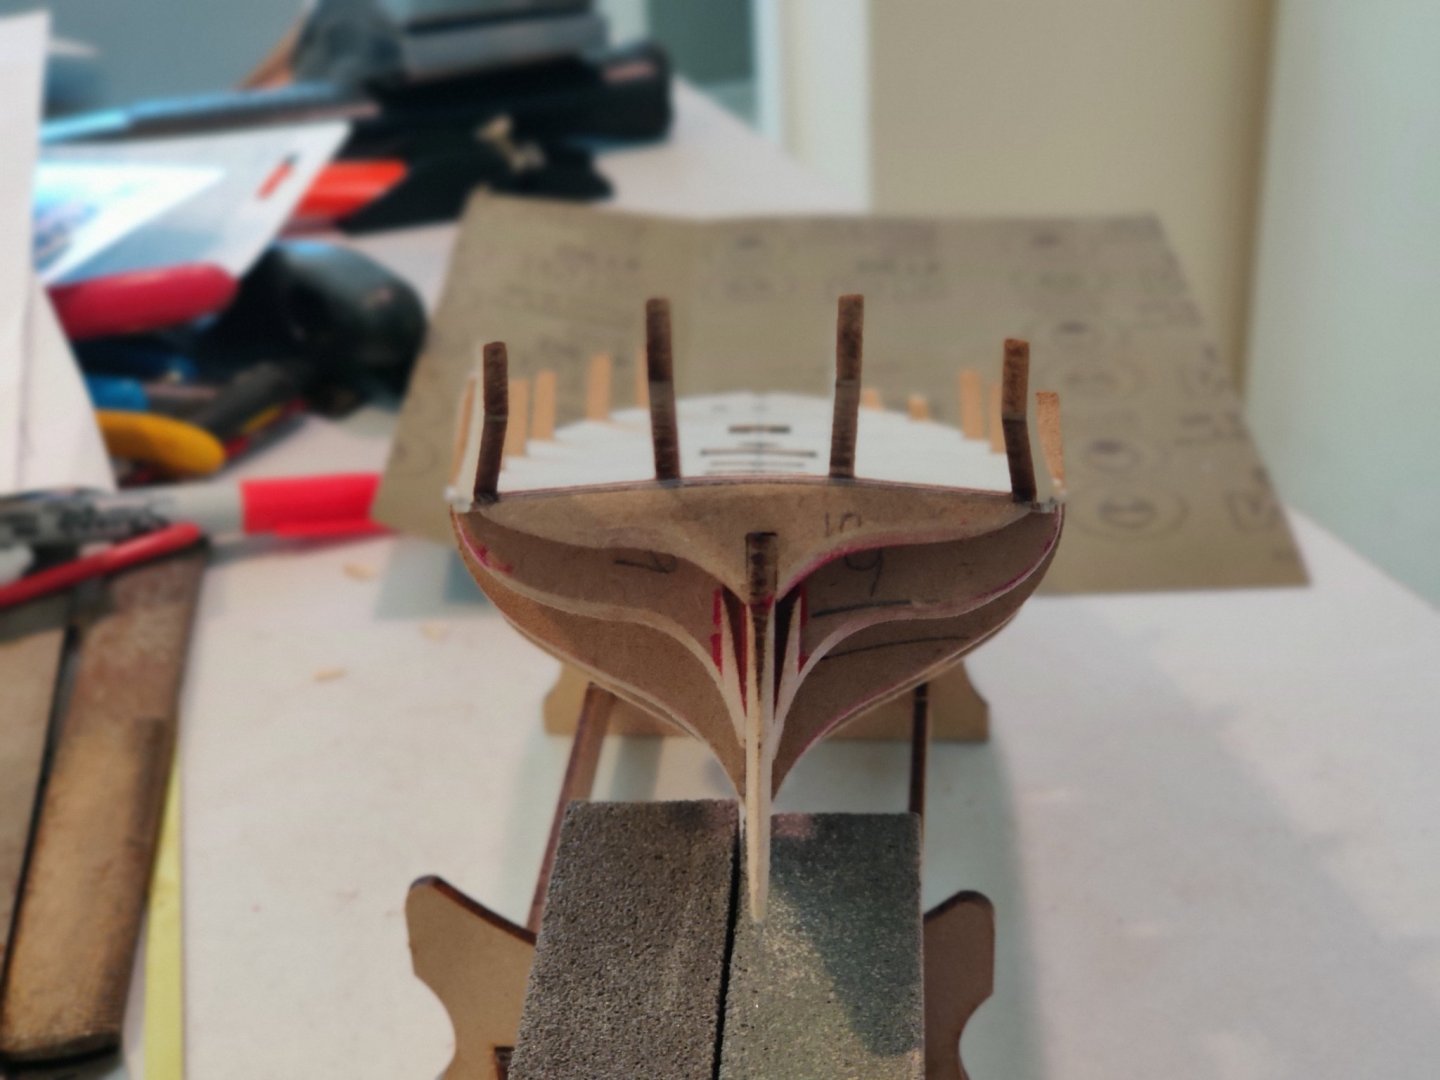
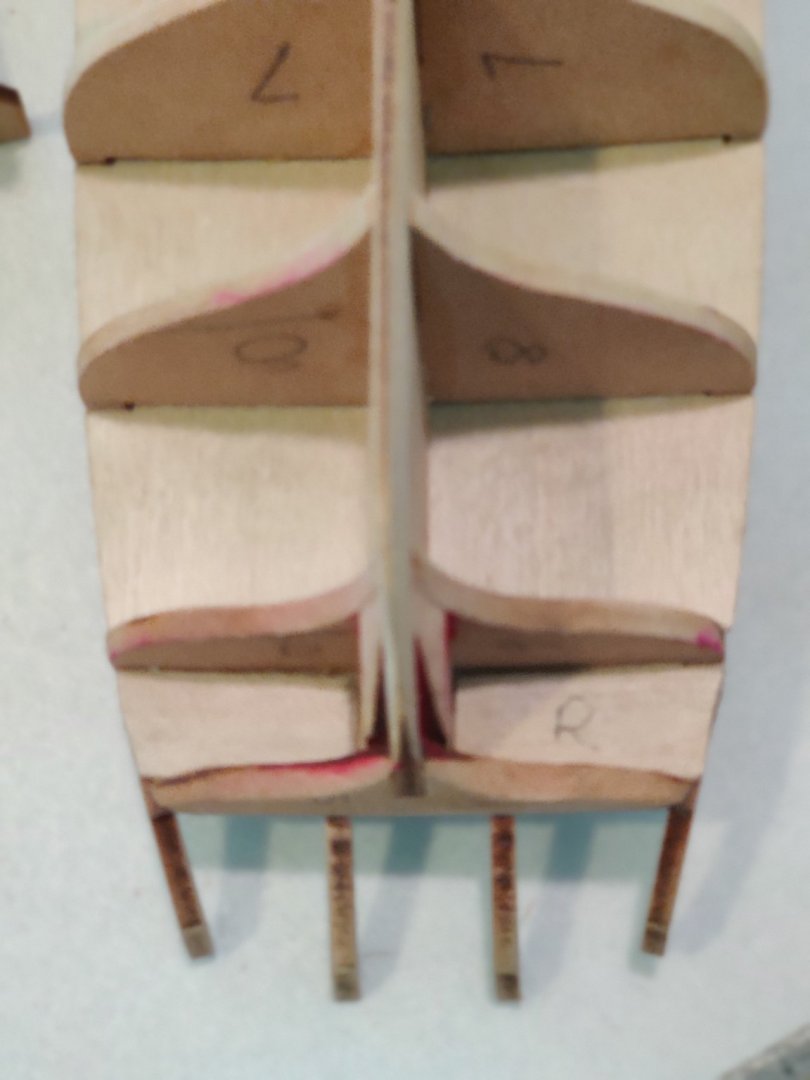
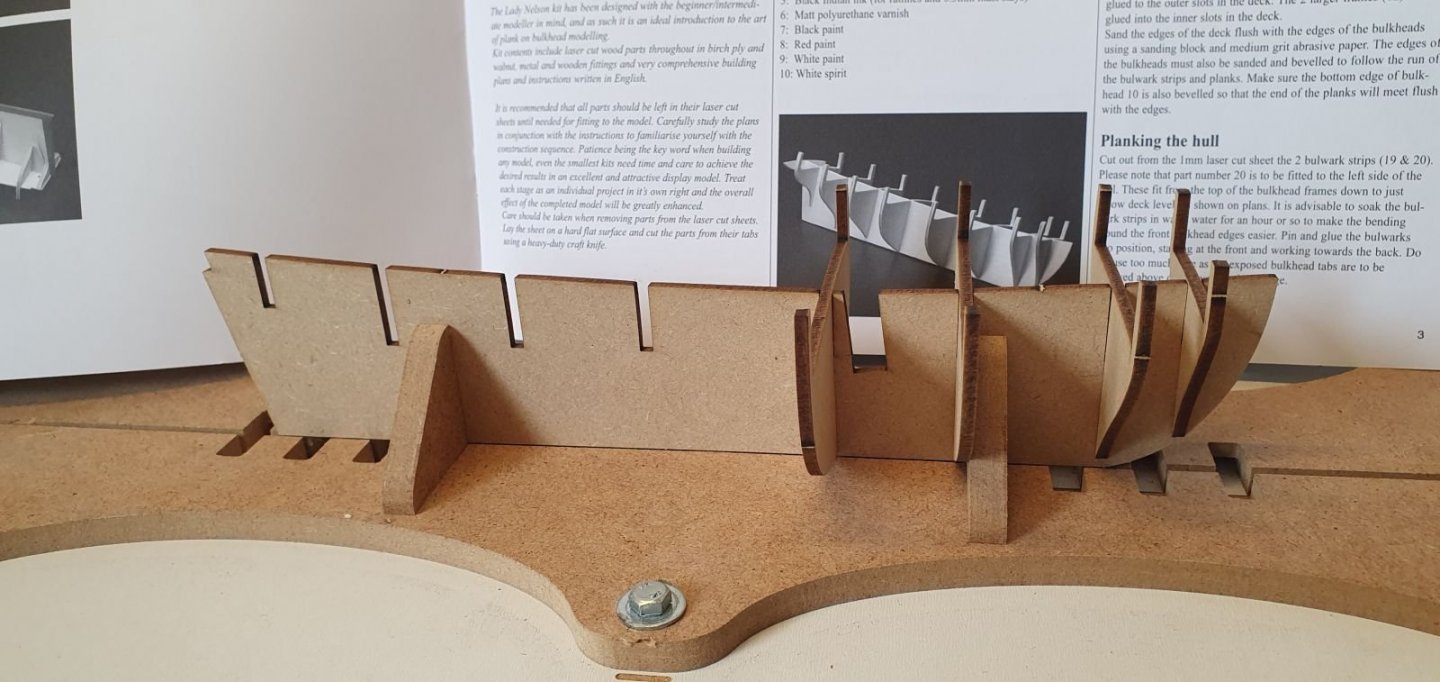
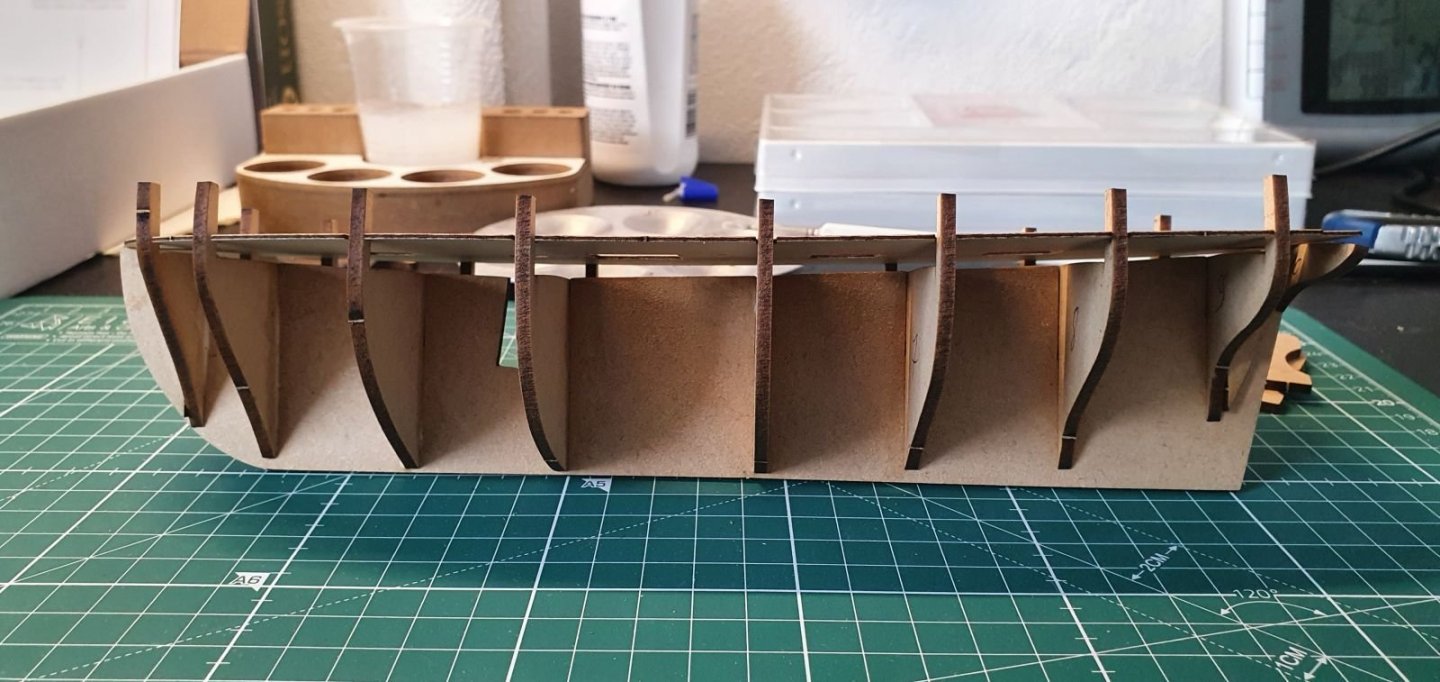
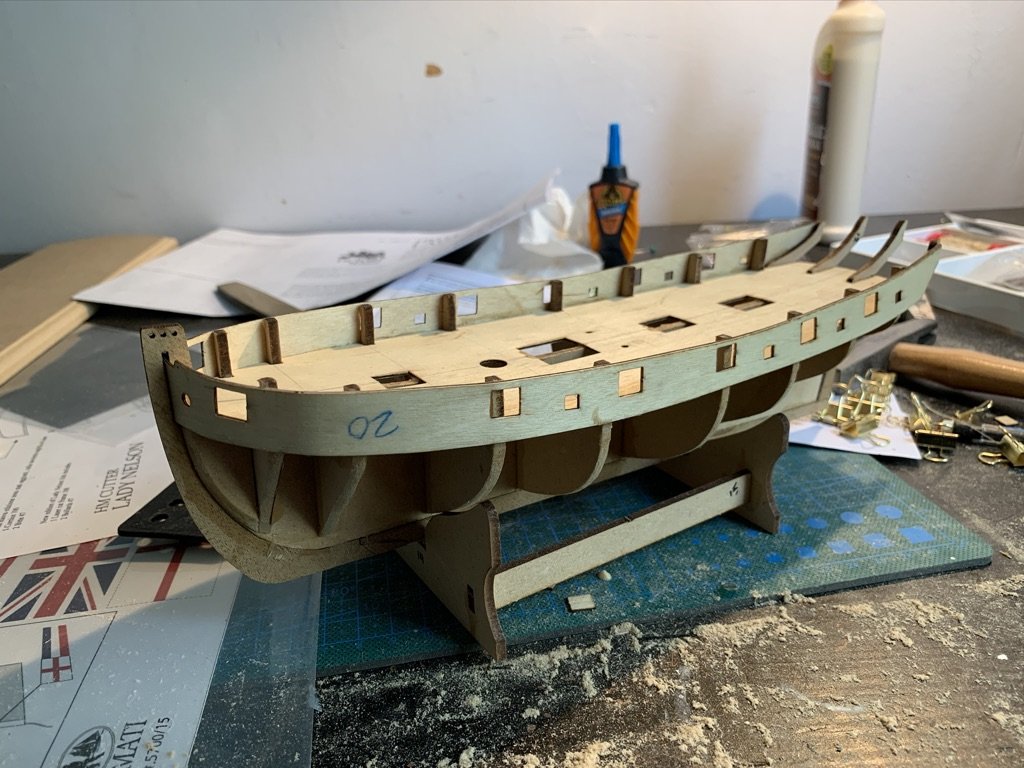
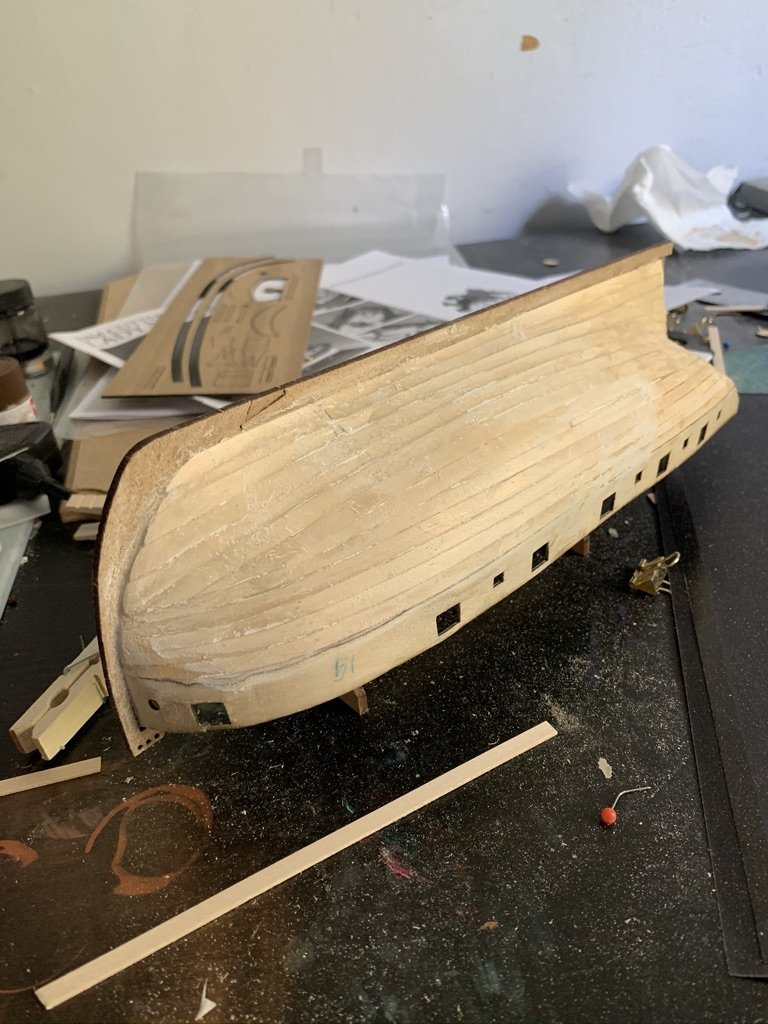
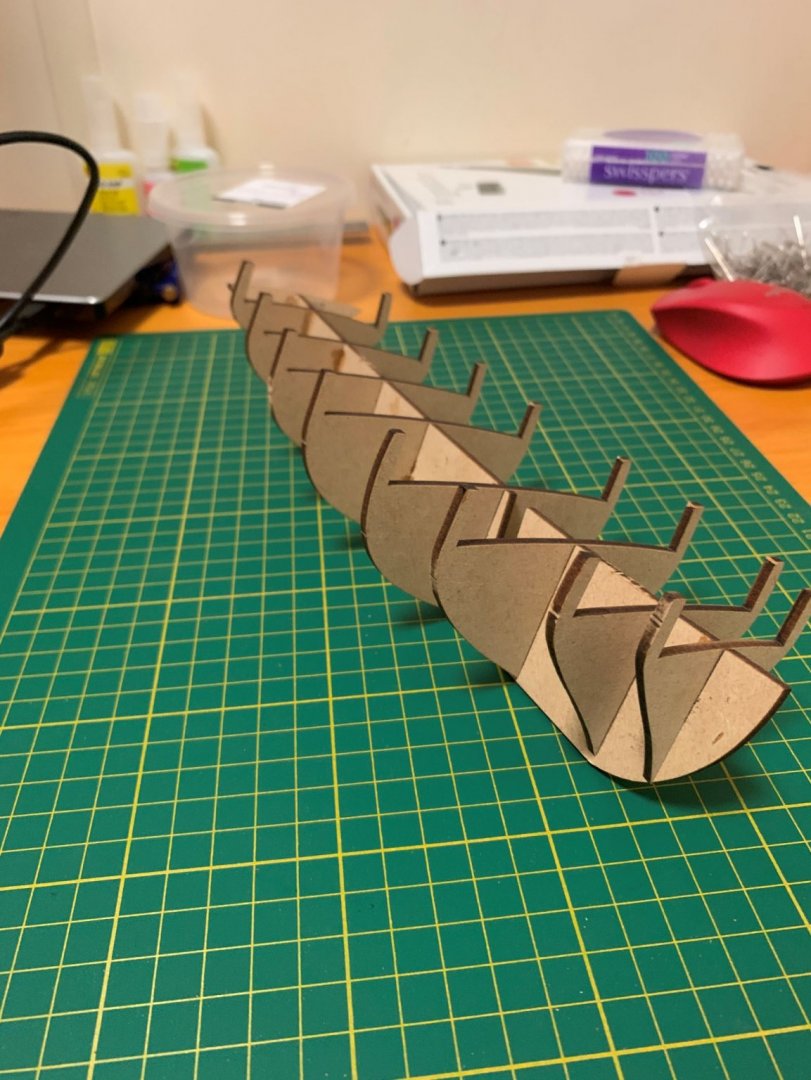
.thumb.jpg.c459ce4140b54c12eddb8eedfd446df3.jpg) Dear all, I am starting a new model and I would like to share it here to get advices and comments. I momentarily put on hold my previous long standing model of the Mayflower by A.L. because I got a bit tired of it and I wanted to start a smaller model that I could build and progress quicker with and I chose the ‘Lady Nelson’ by Amati for that. I noticed that this is quite a popular model and I could find many several WIPs of this model here. Indeed, this is small a model and it should be rather quick to build. The kit is quite well known and documented here, so I am not reporting any unboxing picture. The initial assembling of the hull structure is relatively obvious, so I proceeded without taking pictures and I am directly posting some pictures of the assembled keel with the bulkheads. As others have noted, the various parts have a loose fit, hence I added balsa square strips to locate them better and provide some support. In addition, I added balsa gussets in addition to the MDF parts supplied by the kit to support the strakes at the bow and along the keel where the garboard will sit. I did that also in my previous build and it worked quite well. I also filled with balsa the last bay at the stern. I used balsa plates 5 mm thick for that because when filed they provide sort of ‘waterlines’ that might be used as reference to check the shape and the symmetry during the sanding process. At the stern, after some sanding, I ended up with this configuration where the last frame was mostly filed down and its fillets were mostly removed when I tried to fair it with the rest of the hull. It seems that other modelers have left some of the fillets instead. This is the complete hull after that most of fairing job was done. At this point, before finalizing the fairing, the instructions call for attaching the false deck. This part is made of very thin plywood and it complied with the double curved shape without problems. Finally, this is the hull completed with its false deck. Just to create a bit of a recess in correspondence of the deck hatches, I cut shallow notches into the false keel piece. Next, according to the instructions, the bulwarks pieces need to be formed and glued in place together with the keel extensions. In connection with that, I note that the instructions do not mention any need for implementing a rabbet and the details of how the strakes and the garboard strake join the keel are quite obscure. That is all for now, best regards, Dan
Dear all, I am starting a new model and I would like to share it here to get advices and comments. I momentarily put on hold my previous long standing model of the Mayflower by A.L. because I got a bit tired of it and I wanted to start a smaller model that I could build and progress quicker with and I chose the ‘Lady Nelson’ by Amati for that. I noticed that this is quite a popular model and I could find many several WIPs of this model here. Indeed, this is small a model and it should be rather quick to build. The kit is quite well known and documented here, so I am not reporting any unboxing picture. The initial assembling of the hull structure is relatively obvious, so I proceeded without taking pictures and I am directly posting some pictures of the assembled keel with the bulkheads. As others have noted, the various parts have a loose fit, hence I added balsa square strips to locate them better and provide some support. In addition, I added balsa gussets in addition to the MDF parts supplied by the kit to support the strakes at the bow and along the keel where the garboard will sit. I did that also in my previous build and it worked quite well. I also filled with balsa the last bay at the stern. I used balsa plates 5 mm thick for that because when filed they provide sort of ‘waterlines’ that might be used as reference to check the shape and the symmetry during the sanding process. At the stern, after some sanding, I ended up with this configuration where the last frame was mostly filed down and its fillets were mostly removed when I tried to fair it with the rest of the hull. It seems that other modelers have left some of the fillets instead. This is the complete hull after that most of fairing job was done. At this point, before finalizing the fairing, the instructions call for attaching the false deck. This part is made of very thin plywood and it complied with the double curved shape without problems. Finally, this is the hull completed with its false deck. Just to create a bit of a recess in correspondence of the deck hatches, I cut shallow notches into the false keel piece. Next, according to the instructions, the bulwarks pieces need to be formed and glued in place together with the keel extensions. In connection with that, I note that the instructions do not mention any need for implementing a rabbet and the details of how the strakes and the garboard strake join the keel are quite obscure. That is all for now, best regards, Dan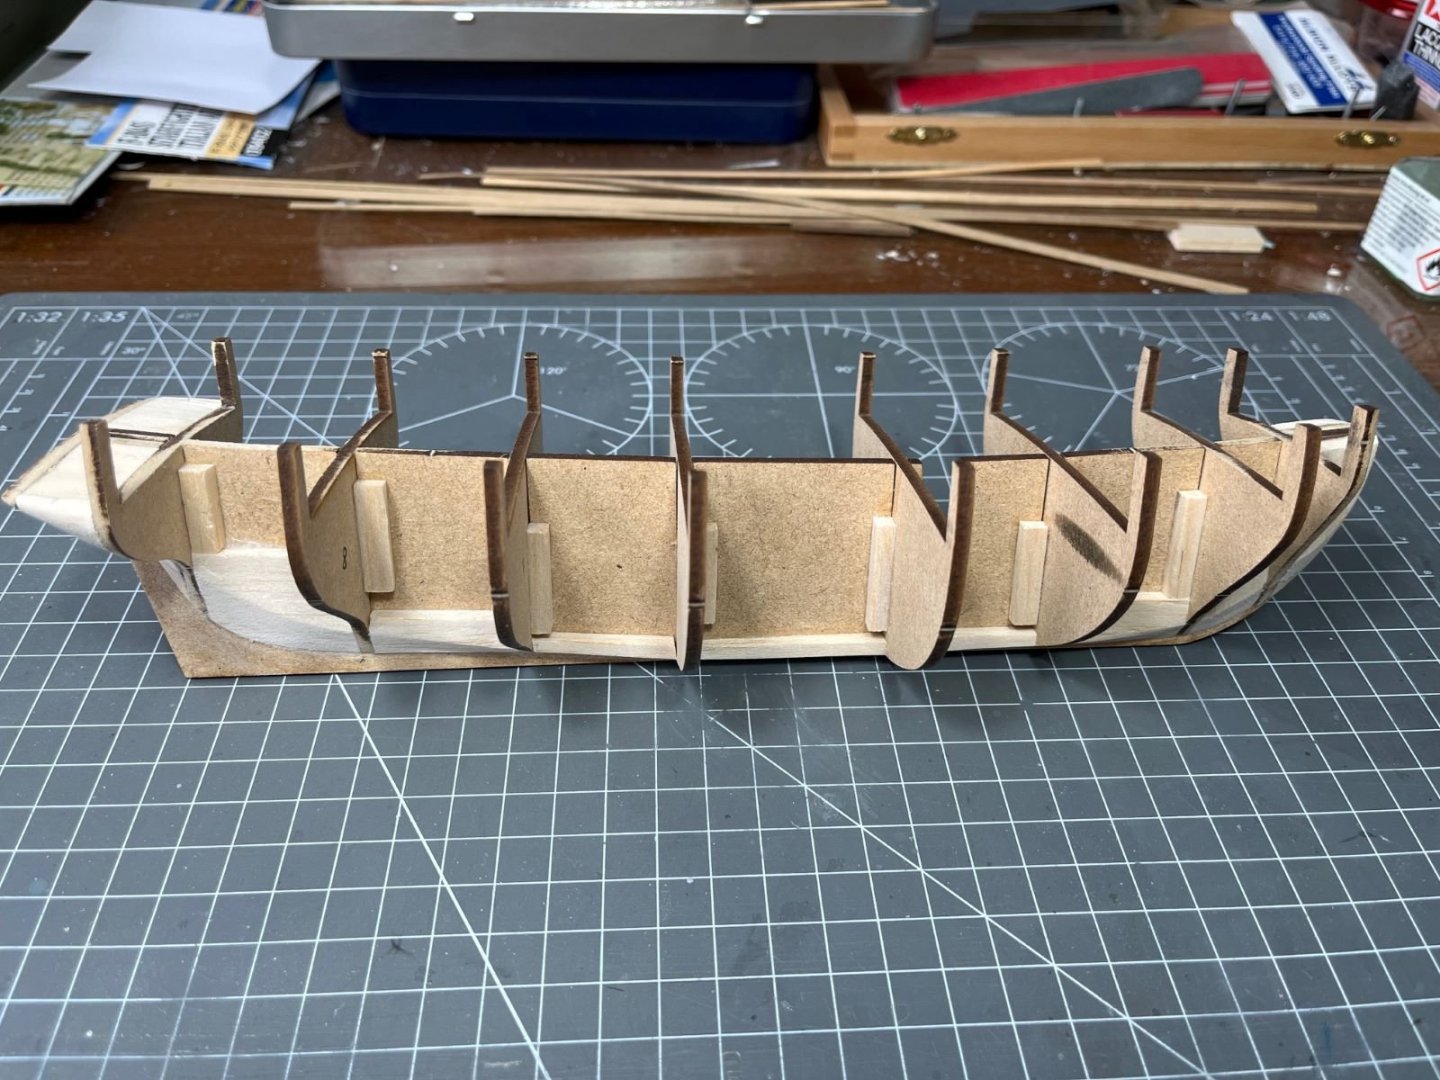

-
- 7
-

-

-
- Lady Nelson
- Amati
- (and 1 more)
-
 Hello all! After reading through several posts and build logs, I decided to start my modeling adventure with the Lady Nelson. I have no carpentry/wood-working experience or with many of the very practical things that go into ship modeling, but I do look forward to this craft which so many seem to have found stimulating as well as satisfying. I think my first encounter with ship modeling was through my high school band director 20 years ago, and if I’m not mistaken, his first model was the HMS Victory. Now that I have started reading through build logs and such, I am mightily curious which model kit he started with and what scale he completed! Incidentally, he also got me started reading both C.S. Forester and Patrick O’Brian, so this interest in nautical history and ship modeling has been a little ambition of mine for a long time, which I am finally starting to make good on. Reading many of the logs available on the Lady Nelson, so many folks have made different improvements along the way to the kit, and I have been having this little debate in my head as to what I might improve and whether or not I will work to elevate the model in a particular way or in several ways. In one sense, there is just the hurdle of the first build (and planking!) to surmount, and then adding various bits to the model can seem daunting when I’m not even so sure that my bulkheads are installed properly! I also understand the need to plan ahead for those improvements should I decide to make them. But all in all, I have decided to try and have fun, take on the problems as they come and let the next step be the next step. I’ll post some of my initial issues and current progress soon. Cheers!
- 41 replies
-
- 4
-
-
- Lady Nelson
- Amati
- (and 2 more)
-
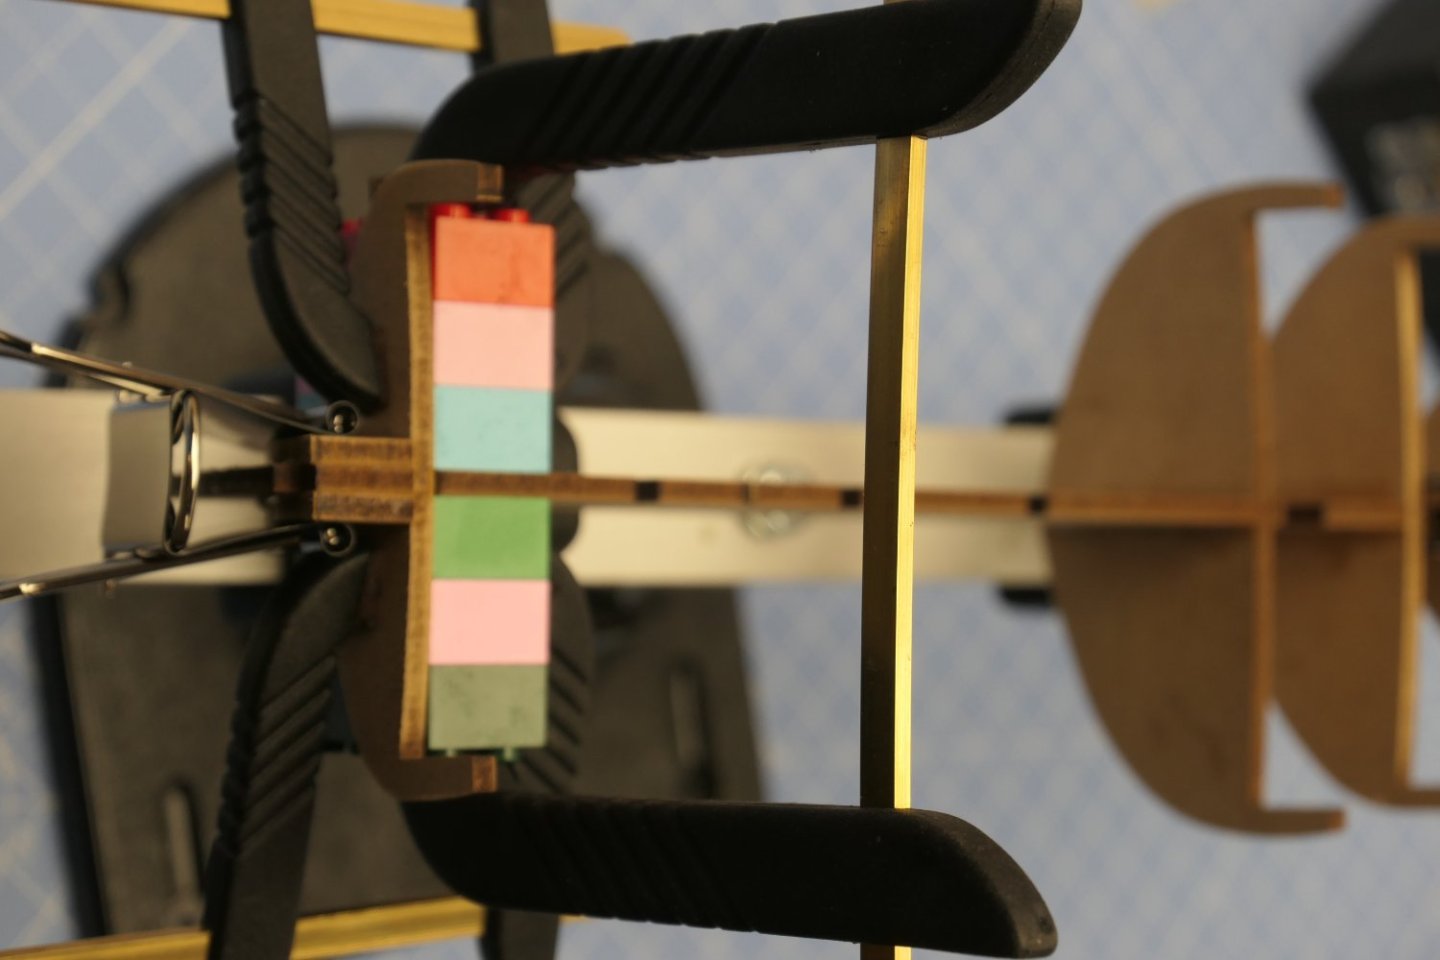
 Finally made a start, after getting the work area cosy. Good to read through the instructions, as recommended, as found a few errors in the bulkhead and other pieces indentification. Also found the bulkheads were a little loose in the keel piece. One of the many videos I've watched suggested Lego blocks for a perfect right angle. And they have worked a treat. False deck just gone on. Again, from watching many videos I wont be putting the stern and bow posts, or keel piece until first planking complete. Im sure there are many mistakes already, but I'm quite happy, so far, for this first attempt.
- 3 replies
-
- 3
-
-
- Lady Nelson
- Amati
- (and 2 more)
-
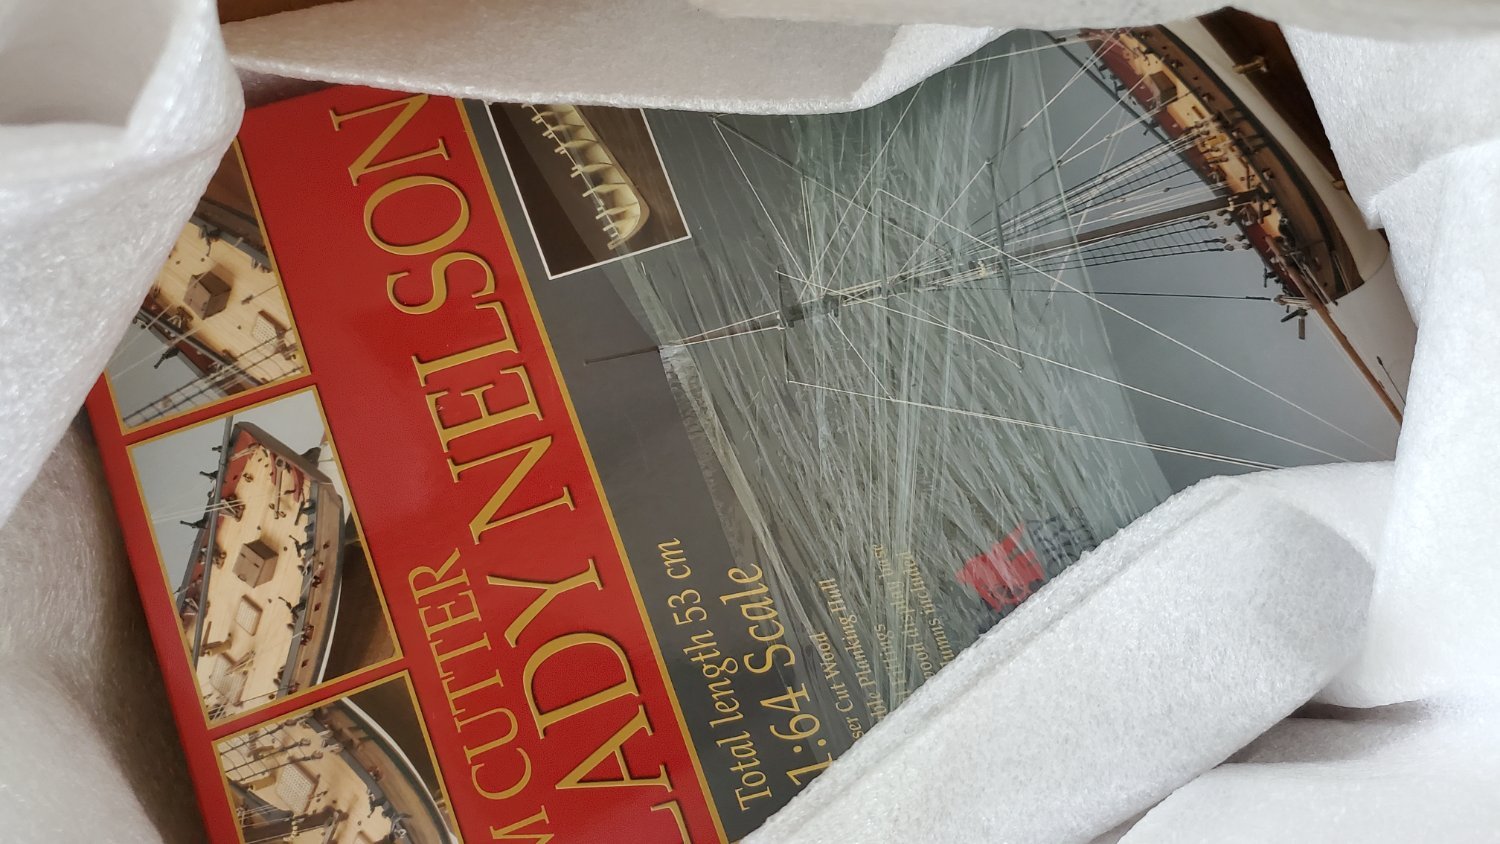
 Hello, I was absolutely amazed by Lady Nelson build video "in motion" and I wanted this model kit for a long time now. I guess that it took me way too long to buy this kit myself so I got it as a gift Time for a new adventure! (the background is... another "model" that I am building as well)
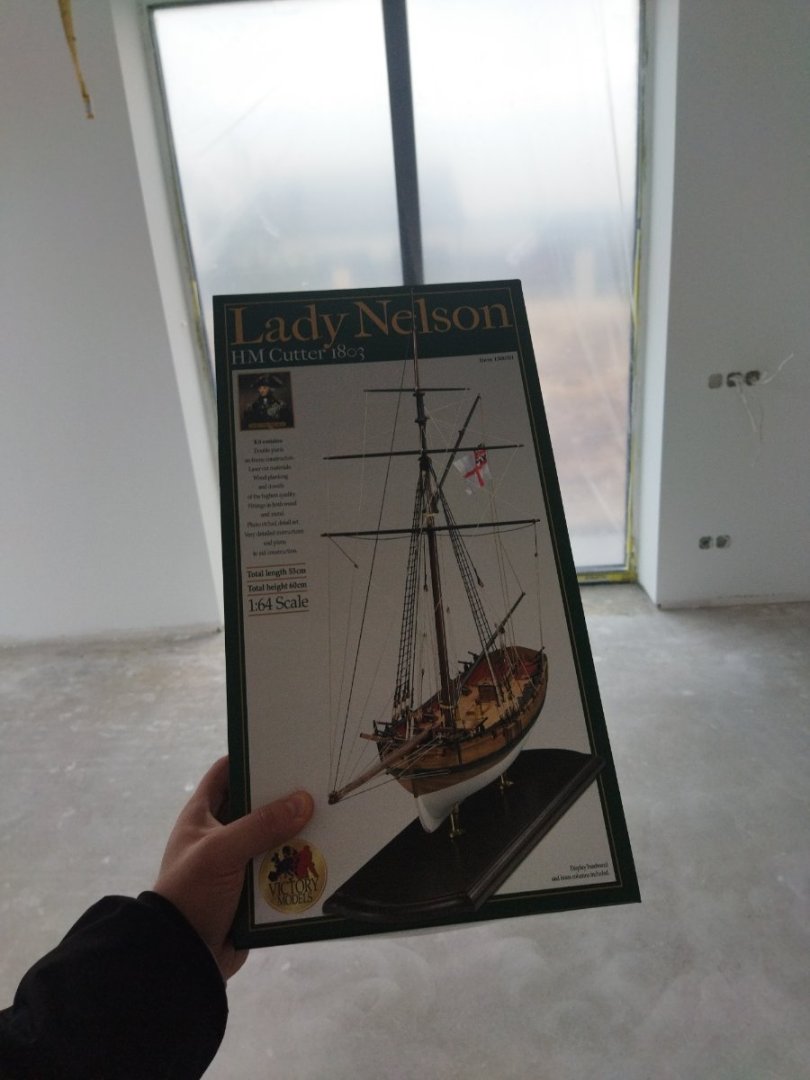
- 1 reply
-
- 7
-
-
- Lady Nelson
- Amati
- (and 1 more)
-
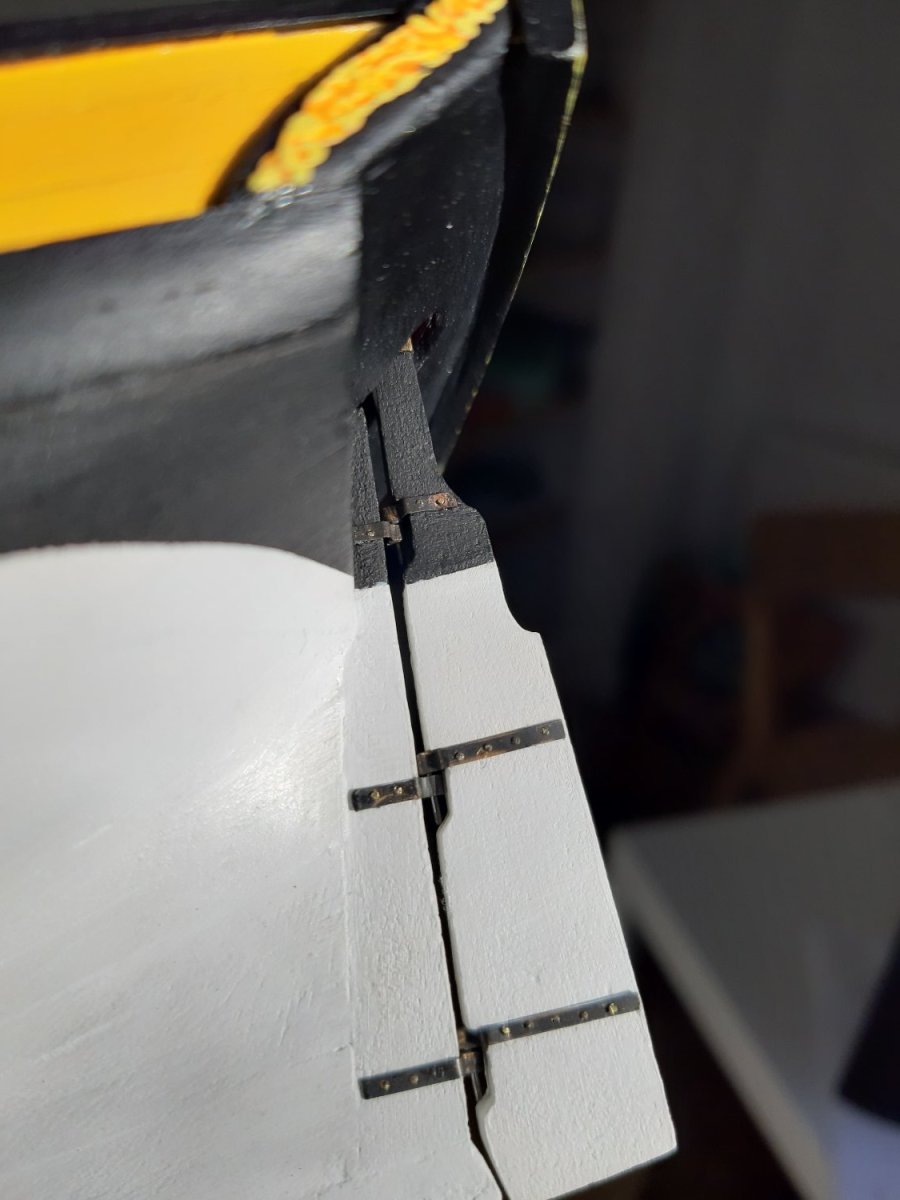
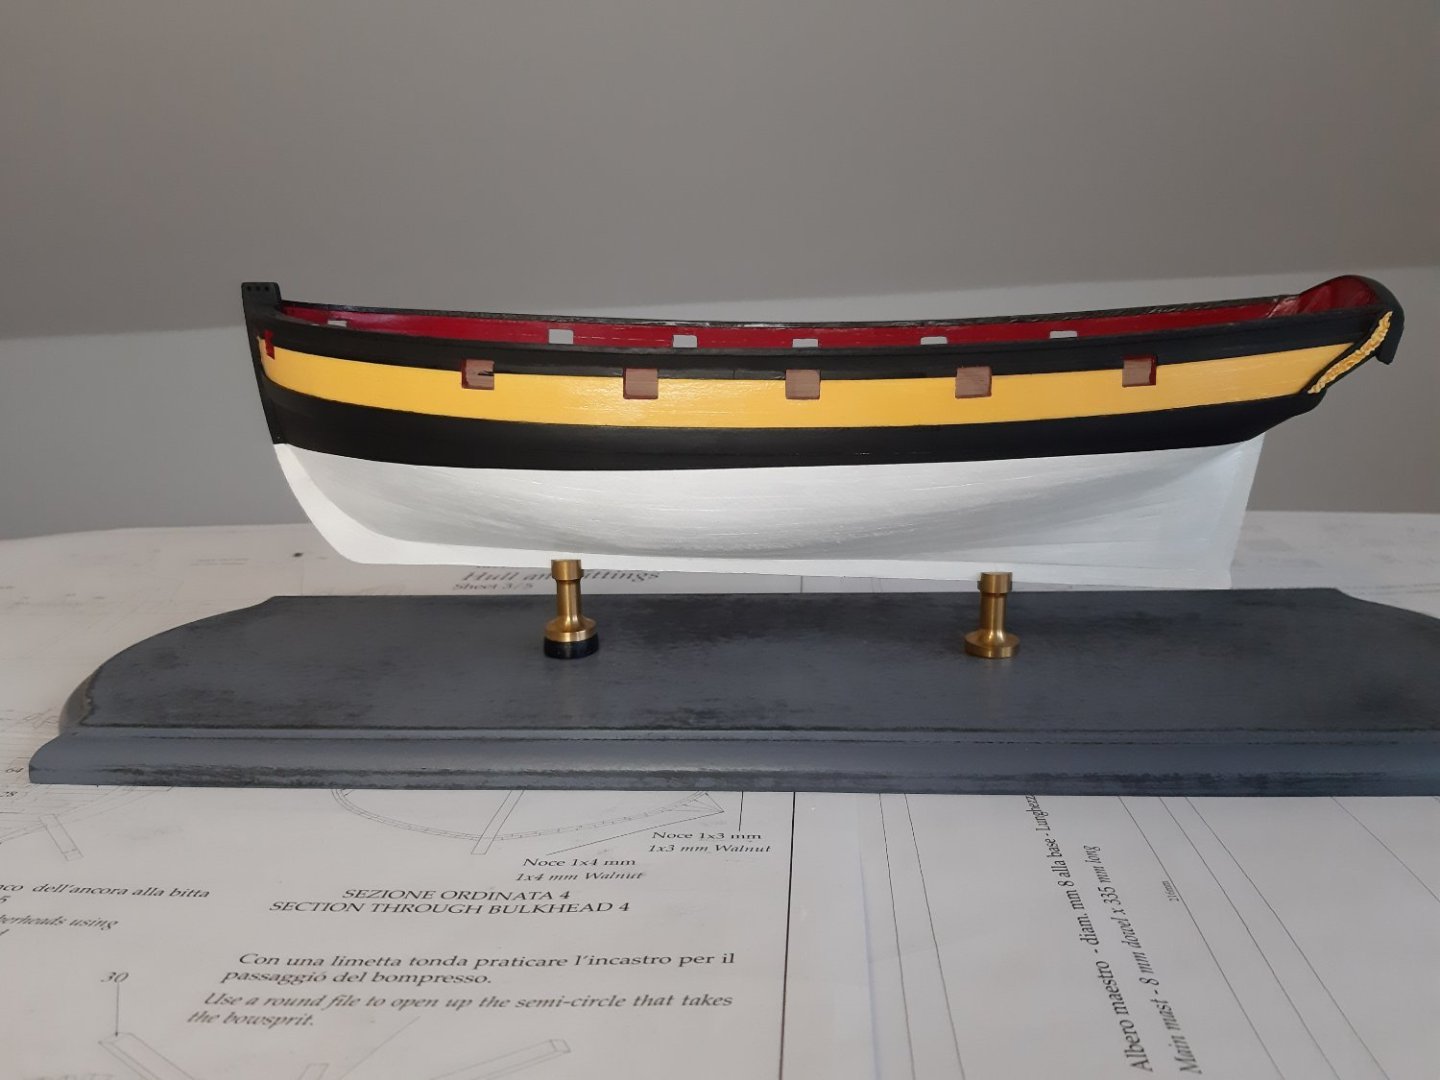
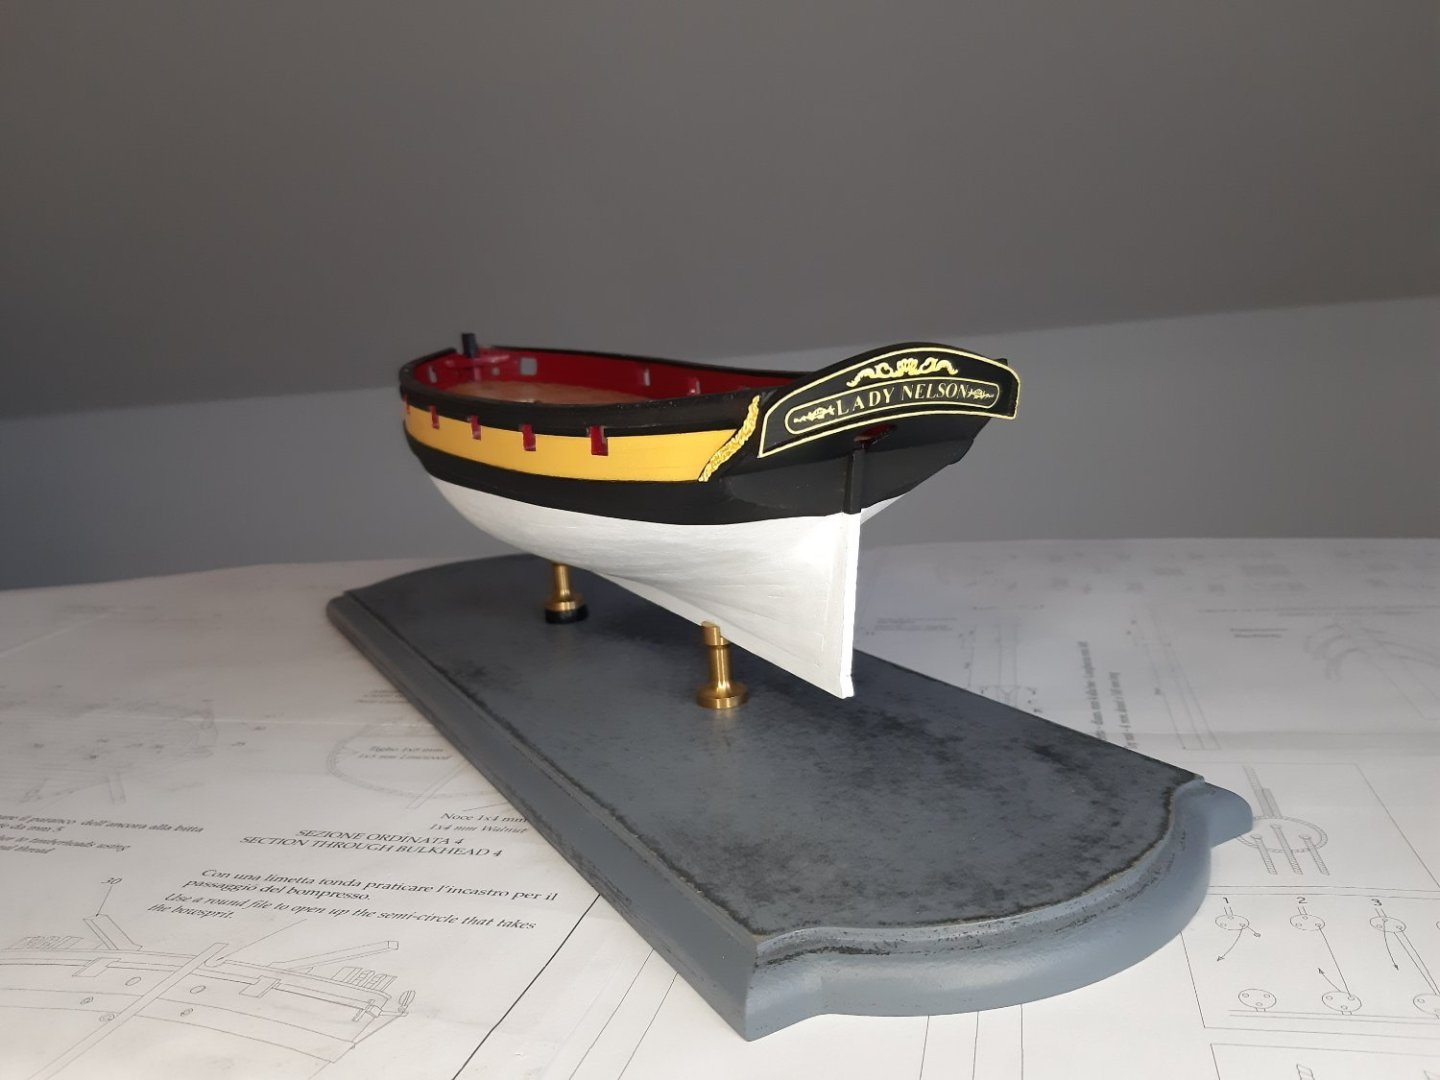
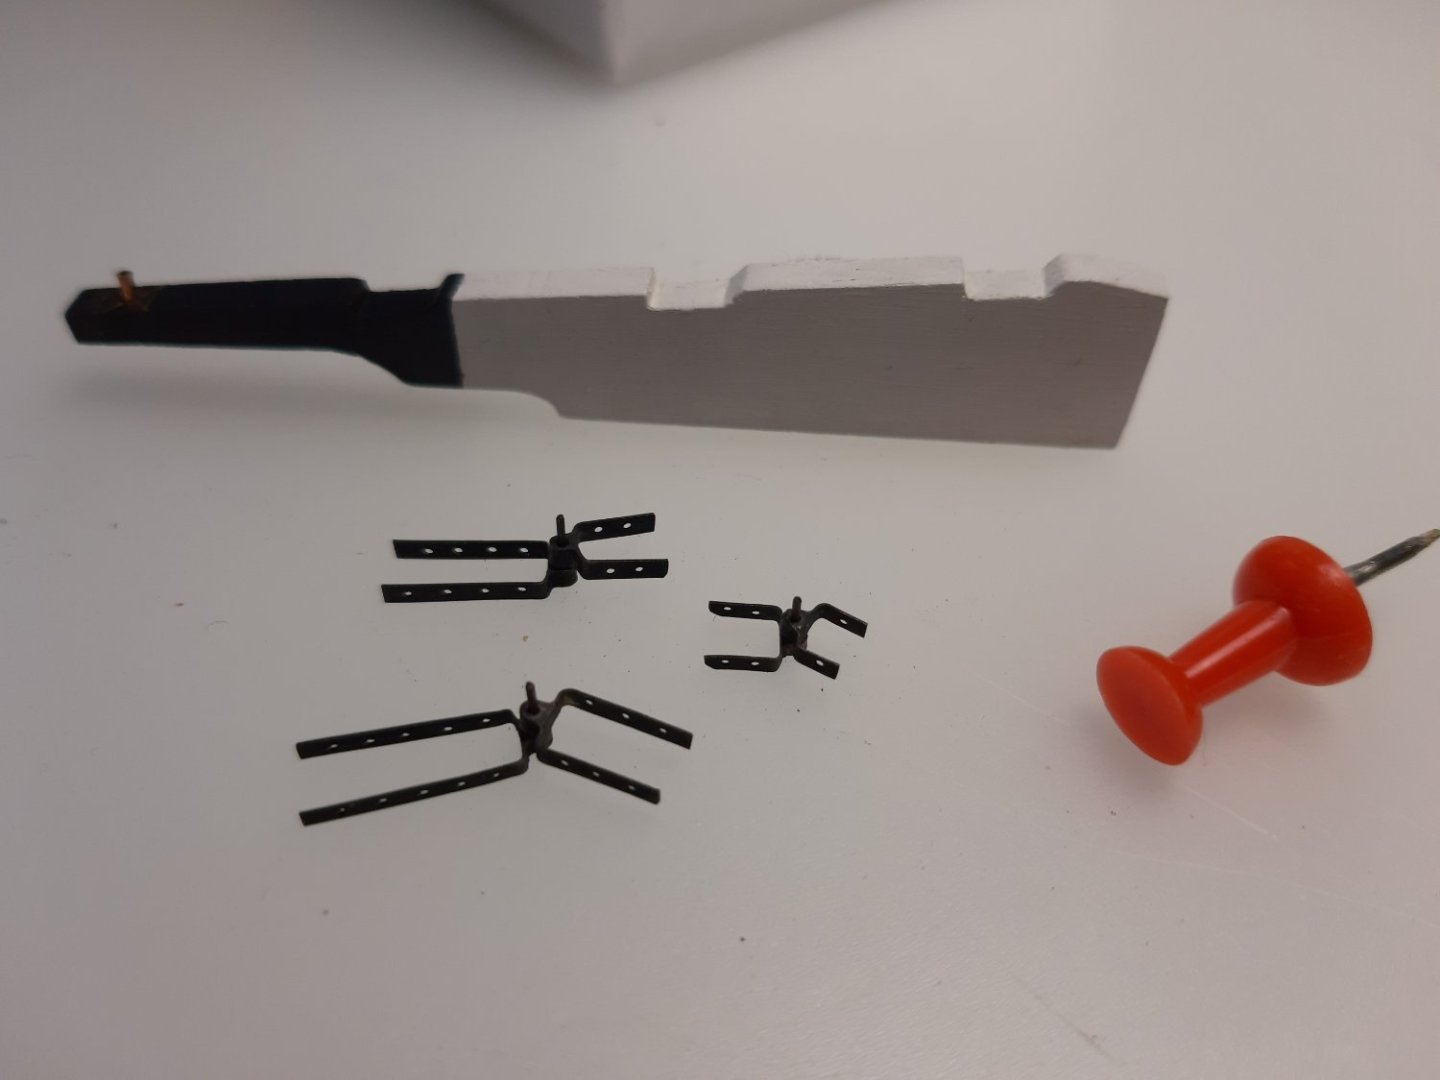
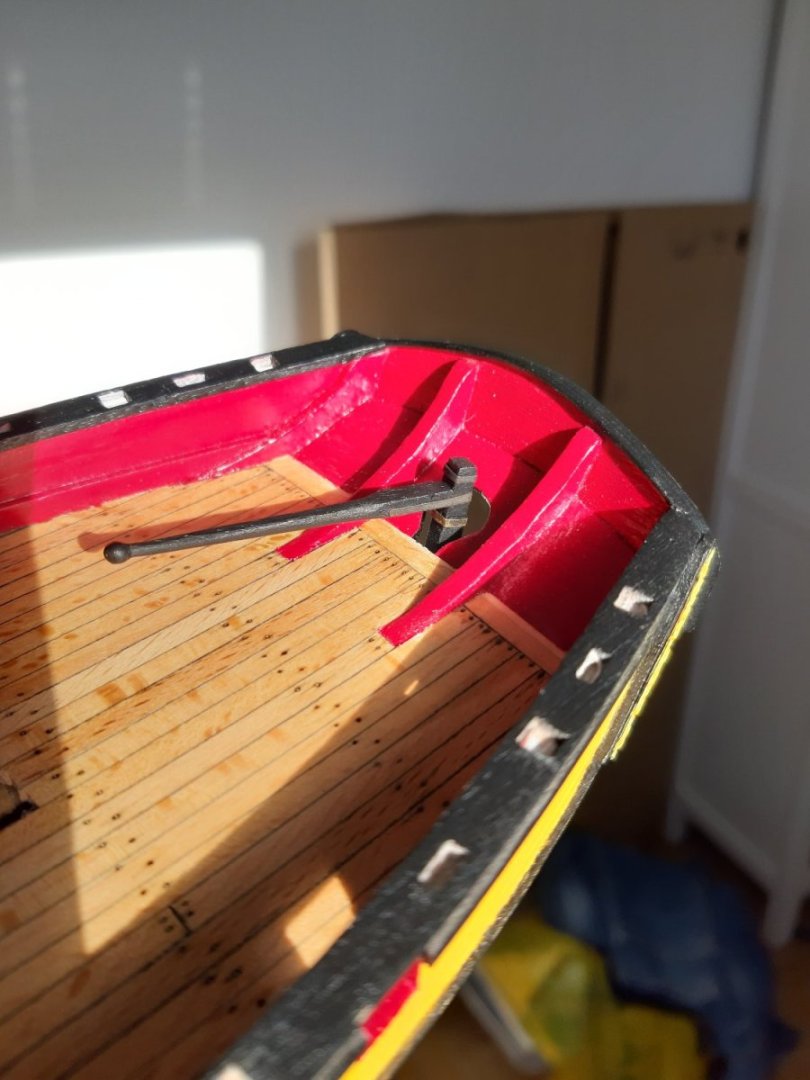
 Welcome to my first building log! Over a year ago i started building Lady Nelson from Amati. It is my second attempt to build wooden ship. Bit late but anyway I decided to share building progress with You. Unfortunately I haven't documented early stages of construction. First photos I made below. The hull is ready and painted. I like detail so first of them that I have made to this stage: rudder Maciek
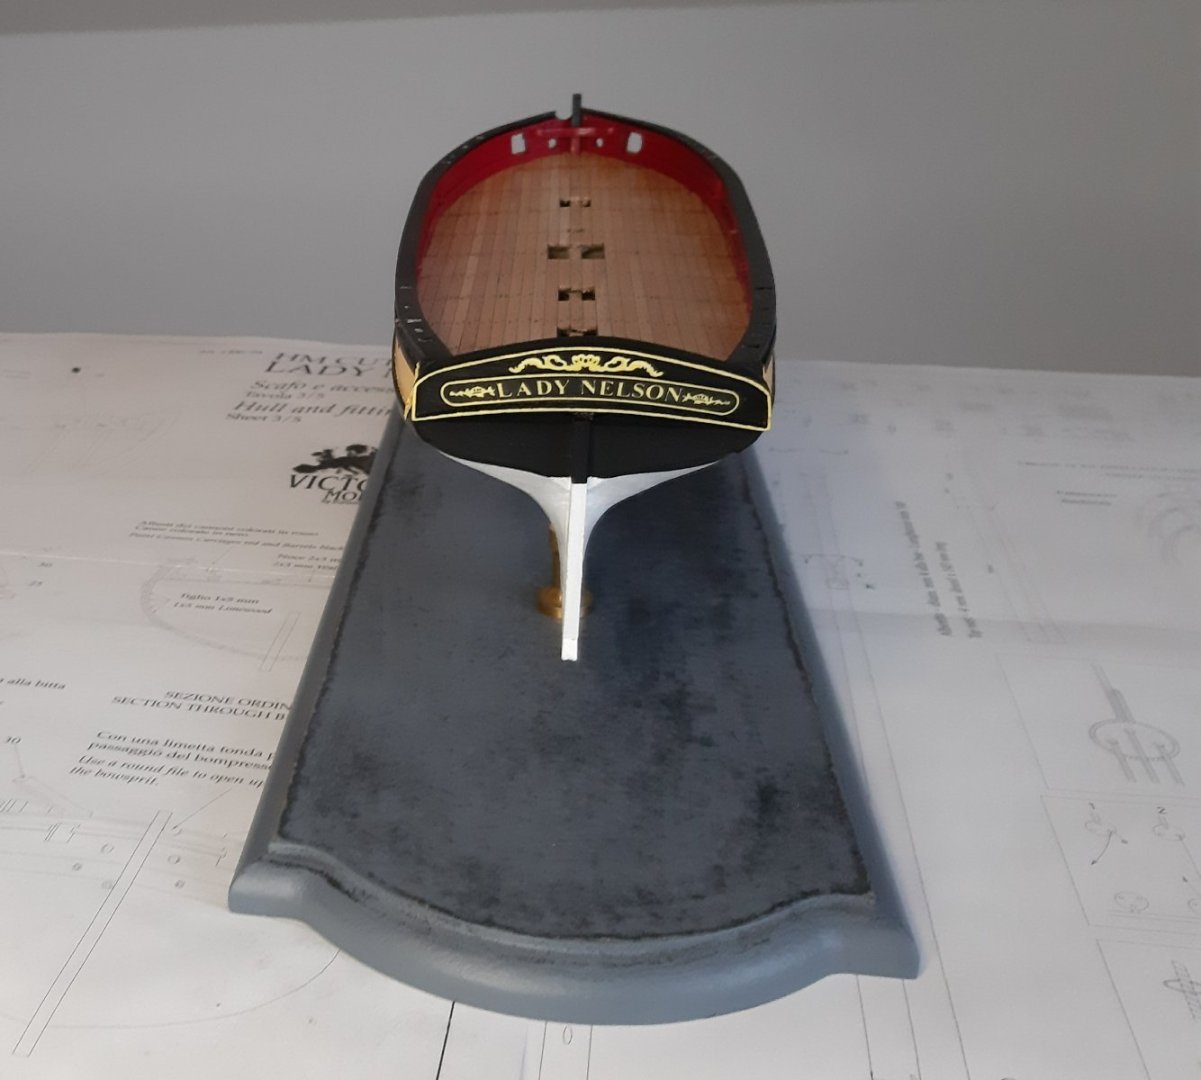


- 23 replies
-
- 5
-
-
- Lady Nelson
- Amati
- (and 2 more)
-
 I'm going to slowly re-create my build log on Lady Nelson I published on another forum. I've left that forum never to return so I'd like to have an active version of the build log I completed there. The rest of this post and this log is my posting my off-line copy of that build log. I hope perhaps it might help someone new to modeling. For me this simple kit was a reintroduction after and extended absence. I'll throw a few [NOTES] in it as I go, the log was started originally in January 2020. So here goes: ------------------- I started all my ship builds with a purpose; I learned the process with the AVS practicum, developed technique and accuracy with the Granado, painted with exotic woods to achieve color differentiation with the fully framed Fair American, achieved what I could of historical accuracy with Pegasus with plans from the Maritime museum and Antscherl's books, built a “74” with Vanguard. After 8 models I was done, finishing the last in 2017. Ultimately though I missed the building part so I recently purchased the Lady Nelson. It’s a small ship but the process is the same, it’s a nice model to spend time with, without spending a LONG time building it. My detailed build logs for the Fair American, Pegasus, and Granado were lost due to infamous system crash on Model Ship World, though the somewhat abbreviated Vanguard log is still there. Sadly I wasn’t smart enough to keep offline copies then. So, in the hopes of providing some entertainment, help with building models, or demonstrating how not too depending on your viewpoint here’s my log for the Amati Lady Nelson. The kit, despite the small craft, is another well designed Victory model series designed by Chris Watton, although he informs me it was 30 years ago. The material, parts, plans, are all of good quality. I [then] only build from kits by Amati or Caldercraft, I am confident I’ll have a good start when I open the box. [NOTE: I'm since a bigger fan of Vanguard Models and Syren Ship Model company. My current build is the HM Cutter Cheerful, link below.] I’ve reached the point where I’m far more dependent on the plans than instructions. That’s good in this case because the plans are well done and the instructions are surprisingly brief. I’m not sure a beginning modeler would get what they need with them, so then the importance of a website like Model Ship World to seek additional help. Without being overly critical the MDF in my kit is a bit soft and the walnut laser cut part sheets are too brittle, I’ve already broken and repaired a few parts despite being careful in removing them from the sheets. I would still buy the kit, maybe my wasn’t stored in the best place at the store I purchased it from. It doesn’t deter my recommendation for Amati Victory series models. I have a kit and now a job to do, who says retirement is boring.
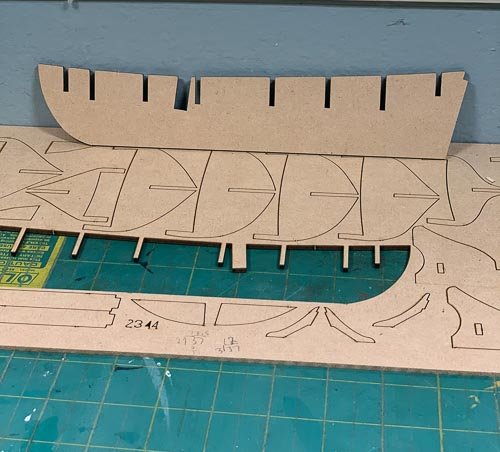
- 55 replies
-
- 12
-
-
- lady nelson
- victory models
- (and 2 more)
-
 Hi all and welcome to my first ever build log. I was gifted the lady Nelson kit as a birthday present and I’m super excited to get started. It’s my first wooden ship kit so this is all new to me. I have been building model kits since I can remember but nothing like this before. as the instructions are a bit vague for a beginner like myself I’m reading through other posts first. are there any video instructions for this particular kit ? thanks all
- 19 replies
-
- 5
-
-
- Lady Nelson
- Amati
- (and 2 more)
-
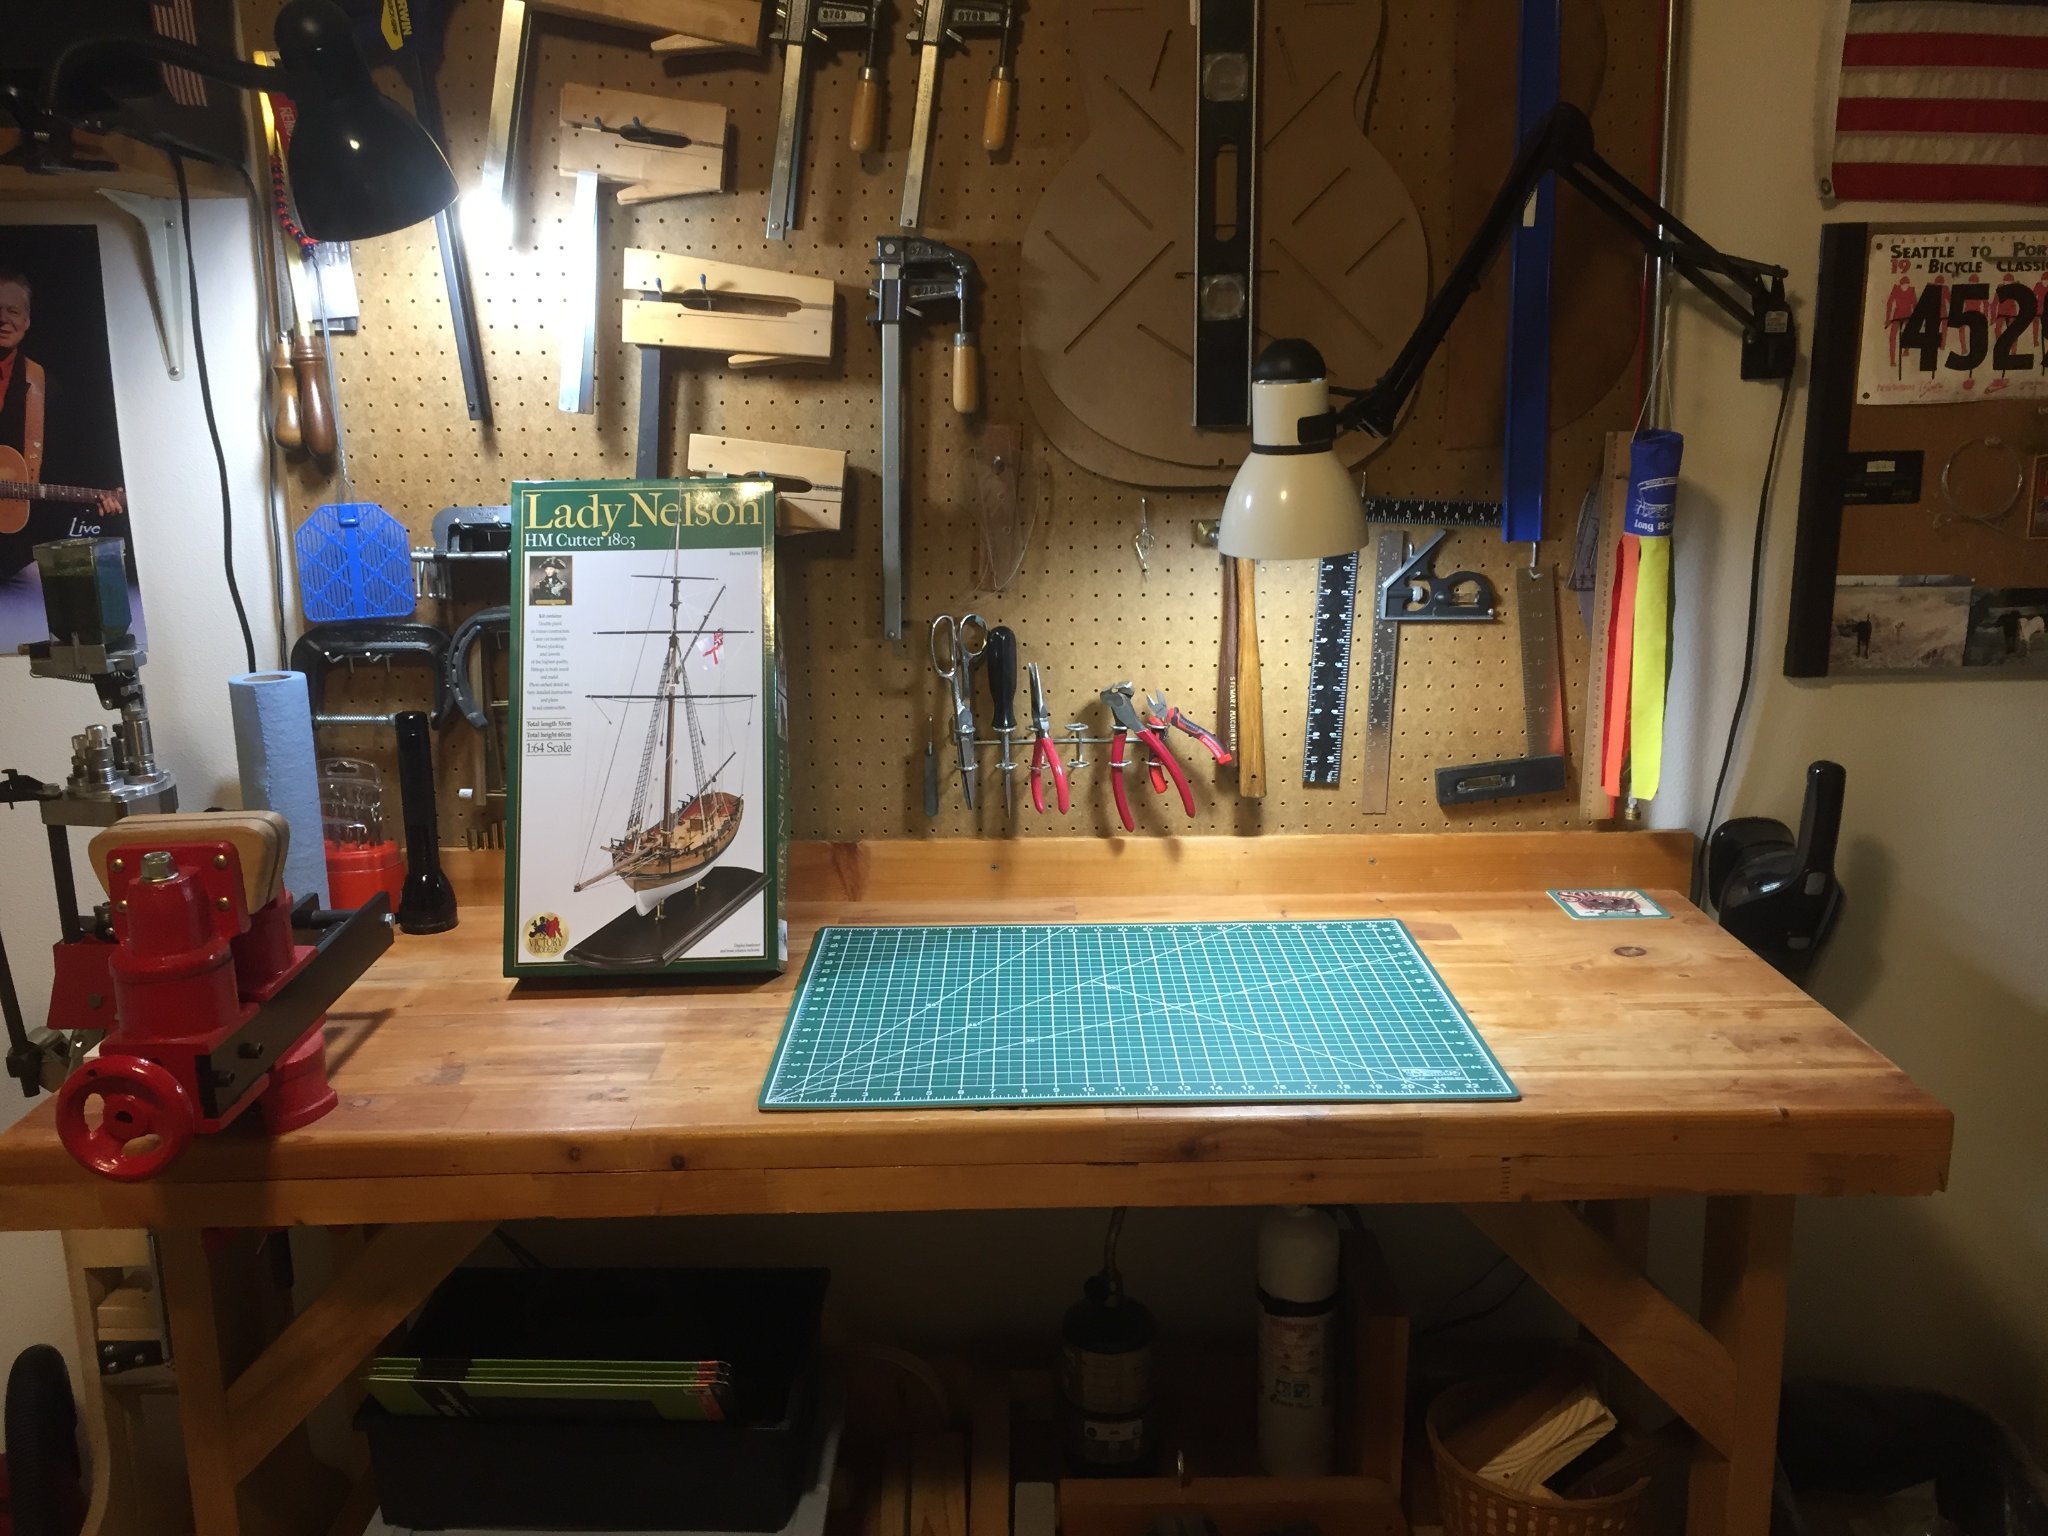
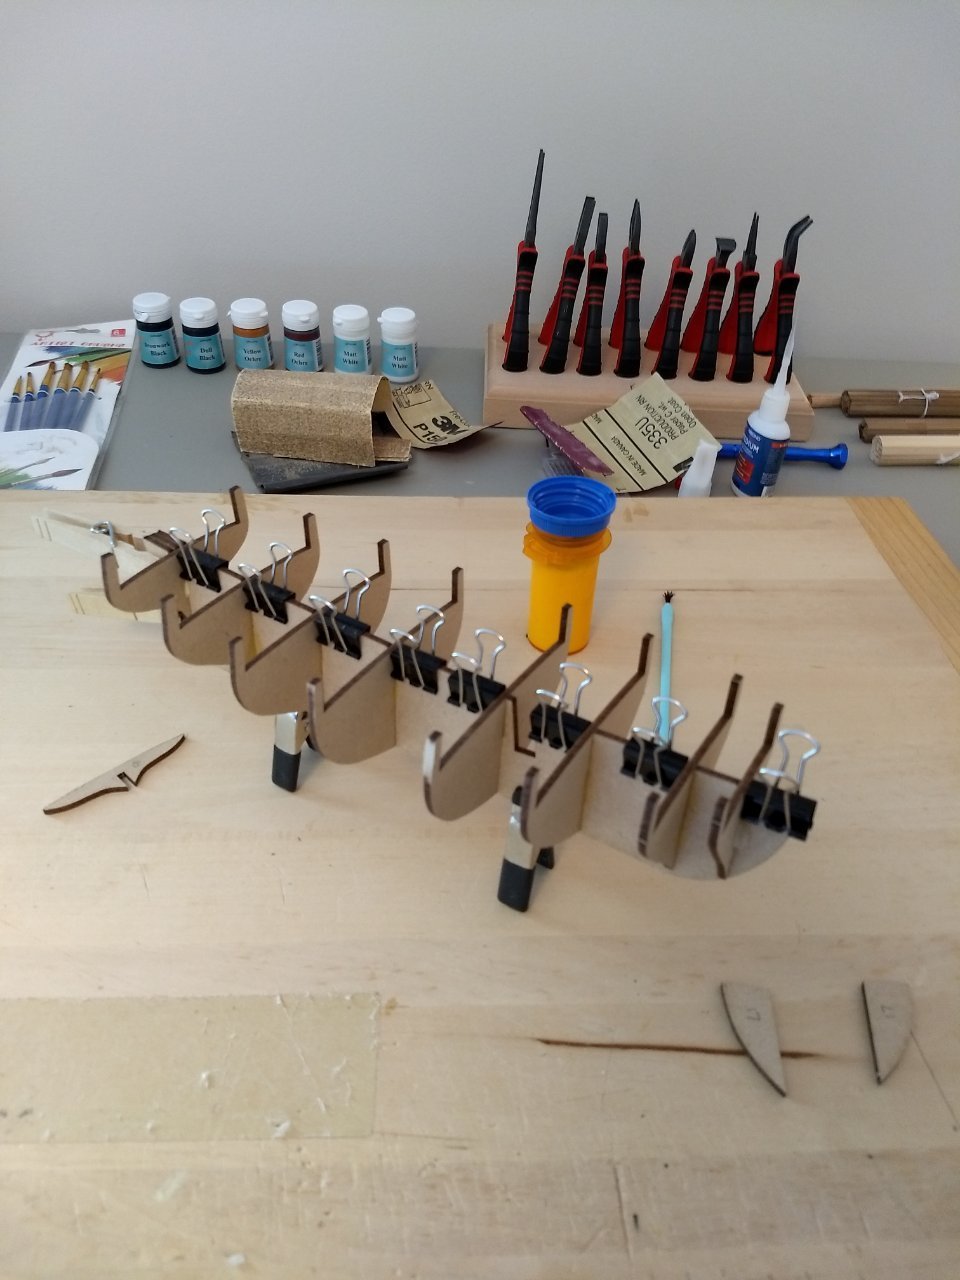
 Greetings Everyone, The Lady arrived a few days ago. I've been picking up ship building tools, doing lots of research and got the work bench turned into a ship yard. You may notice the tools on the peg board don't look like model ship building tools... I have built 6 classical and 4 acoustic guitars. The bench was also an RC helicopter and airplane hanger for a few years, and now it's being converted to a shipyard. I retire in 19 days and will get at it. 🙂
- 362 replies
-
- 14
-
-
- Amati
- Lady Nelson
- (and 2 more)
-
 Hello! Just ordered my first build, the Lady Nelson by Amati. I spent quite a bit of time researching a good first build, and heavily debated going with the 3-ship kit from Model Shipways. I certainly see the value of scaffolding your skills with different levels of practice, but at the end of the day none of the builds excited me. I'm also a competent woodworker and figured I could handle a bit more on the first go. The history behind the Lady Nelson was the final tipping point for me, as I love the stories behind a ship just as much as I love looking at them. I've seen many build logs have already been completed, and I plan to start taking notes on these throughout the next few days as I wait for my order to arrive. As far as tools, I was wondering if there were any other woodworkers out there who then went into model building. My wood shop is adequately equipped, both power and hand tools, but are there model specific tools that I'd likely not have? Thanks for reading and thanks in advanced for your support! This forum was a big factor in taking the plunge!
- 8 replies
-
- 3
-
-
- Lady Nelson
- Amati
- (and 2 more)
-
 So the journey begins. I'd been planning on getting into building model ships and what better excuse than the quarantine to start? After some online research, I picked the Amati Lady Nelson. Then I needed tools. I basically had nothing since I had downsized into a small cottage from a 4-bedroom house and had to sell/giveaway most every tool I had accumulated over 30 years. Boy, it wasn't cheap to restock and I included a starter airbrushing kit from Master Airbrush and a spray booth. Was not willing to brush paint all what needed to be painted. Also, it was a scramble to get tools; most of the modeling sites had a lot of out-of-stock for items. Guess a lot of folks are doing the same as me. Then it was looking for help. This site was fairly easy to find and has a lot of good stuff, especially the Build Logs. I also looked for build video logs. Those on Modelers Central were way too expensive. But I did find that Amati released free video build logs of the their Lady Nelson by Models Shipyard. There are 20 of them on Facebook, starting here: https://www.facebook.com/search/top/?q=Amati Modellismo lady nelson&epa=SEARCH_BOX . The builder takes some different paths from the Amati instructions, such as beveling the bulkheads AFTER adding them to the false keel. After comparing his approach to what I found in the build logs and other tutorials here, I decided to follow his process, supplemented with tips from the MSW logs. The most comprehensive MSW log I found for this ship was by vossiewulf. Wow, he is one master builder! Anybody know why he didn't finish it? Too bad; I would have loved to see the final product. Anyway, as to my build. Below is where I am. One issue I ran into was while beveling the bulkheads: the false deck popped up at the edges, not by much, but it did flatten the deck somewhat. When I first glued the deck, it had a bigger curve to it, port to starboard. I didn't see a problem with that. After it popped up, I decided to leave it. It still had the curve, just not as pronounced. I looked at the the MS logs and he had the same gaps at the edges that I had, so I don't seem too worried. Here's the bow: And the stern: The MS builder used a marker to highlight the filler blocks and the deadwood before beveling to show what had to be taken off. I also had to take some of the deck off here since it overhung the last bulkhead. I guessed that was needed based from what I saw from the MS logs. The only issue I had at this point was supporting the gluing of the outside stern counter frames into their slots. With the bulkhead beveling, I had removed most of what those frames would stick to. So I glued 2 x pieces of the 1mm plywood sheet underneath the deck between the last two bulkheads. See below. Those frames are not going to move. So I'm off to attach the 3 x keel pieces and then move onto the first planking. Some observations: The MS builder avoided using balsa bulkhead filler blocks between the bow and stern bulwarks. When I saw that technique in the MSW logs, I did think that was a bit overkill for this small ship. I figured two sets of hull planking would eliminate having to deal with the thick filler blocks. Surprised vossiewulf went there. Also, he and others had the tools to easily make those blocks; I don't. Comments anybody? The MS builder's plan for tapering the planks involves calculating how much to take off on either end based on mathematical formulae which I found easy to comprehend. When I looked at planking guidelines here, it appeared to involve drawing lines on the bulwark edges or lines, bow to stern, on a fully filler-block loaded hulls and then taking measurements. That seemed a little tedious so I'm planning on following the MS builder's plan. Also, he planes off what needs to go . Some of the MSW log techniques appear to draw a line on the planks and then utilize a craft knife to remove the excess. I'm going with planing the edge off a plank held in a vise. Final painting scheme is still fluid. My current thinking is (comments welcome): Hull: White paint from the bottom to the waterline. (Maybe tinged with a little green or maybe grey.) Walnut paint from the waterline to the main whale (maybe walnut stain) Black paint main wale Walnut paint from top of main wale to the top of the hull, including the upper wale (Again, maybe walnut stain) Black paint for capping rail. (Any reason I shouldn't paint the rails before attaching them? Obliviously need to deal with the pin holes, but not a big deal compared to painting the rails in place.) Deck: Carriage red for the bulwark side planks. Same for hatches and the frames walnut (flipped from what I see on the MSW logs, but the Italian version of MSW showed that and I thought it had a better look.) Red for the gun carriage, flat black for the guns. As for the rigging of these, I see vossiewulf tried but then abandoned to rig with them with 2 x side tackles and 2 x train tackles and went with just 1 x centered train tackle because there was no room on the deck for all that rigging. I will follow his lead on that. Natural for the deck, no paint. The MS builder used, as a deck scraper, a piece of thick glass and that gave it a nice look. I'm trying to find a piece of glass; may break a window! Off I go; wish me luck...John
- 26 replies
-
- 11
-
-
- First Build
- lady nelson
- (and 2 more)
-
 All, My model showed up two days early, and I felt like Ralphie's dad when the leg lamp showed up. Needless to say it was exciting, so, thanks to the support and motivation of others who have produced some beautiful HM Cutters on this site, here's the start to my first build log and what I imagine will be a great learning curve. May not have time to get deep today, and that's okay! Still waiting on some supplies. ⚓️ Anchors Aweigh, Chris


- 16 replies
-
- 5
-
-
- Lady Nelson
- Victory Models
- (and 1 more)
-
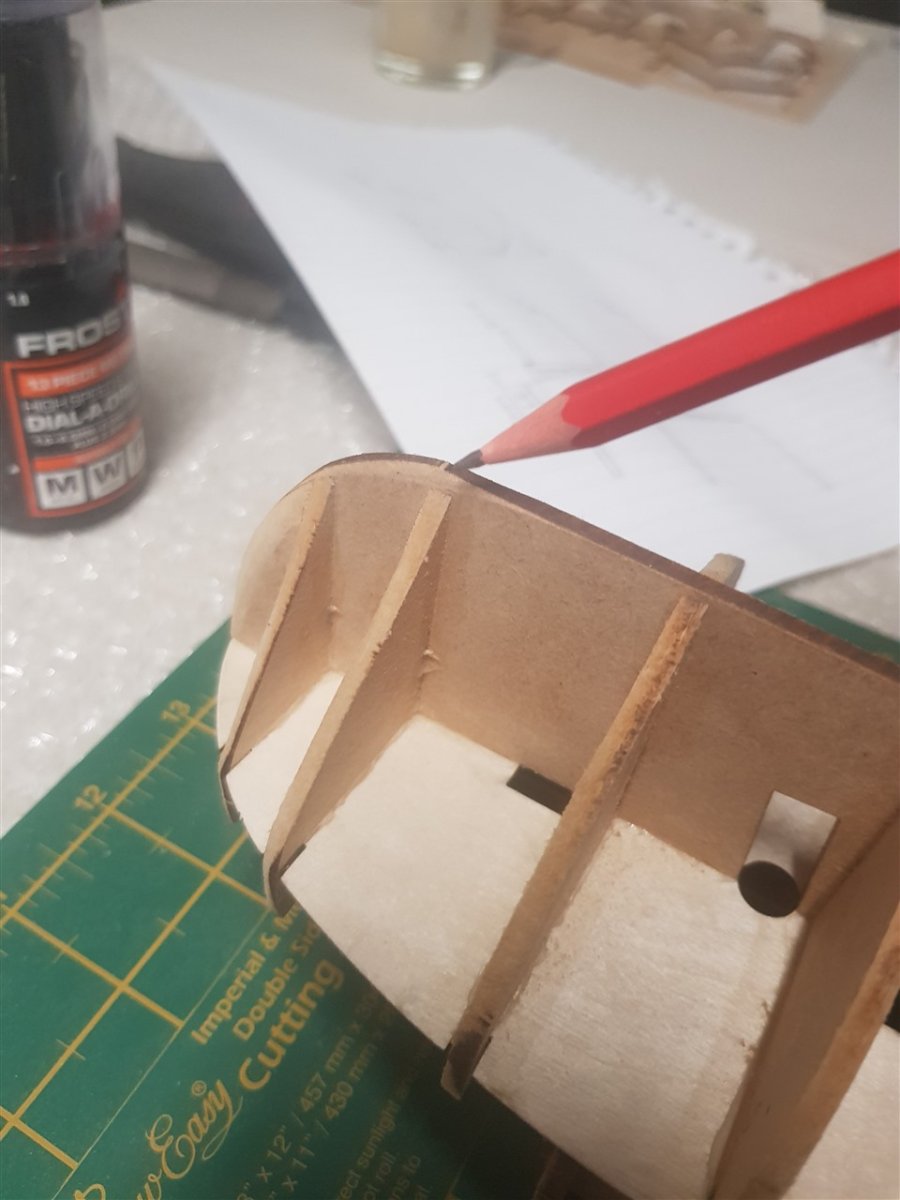
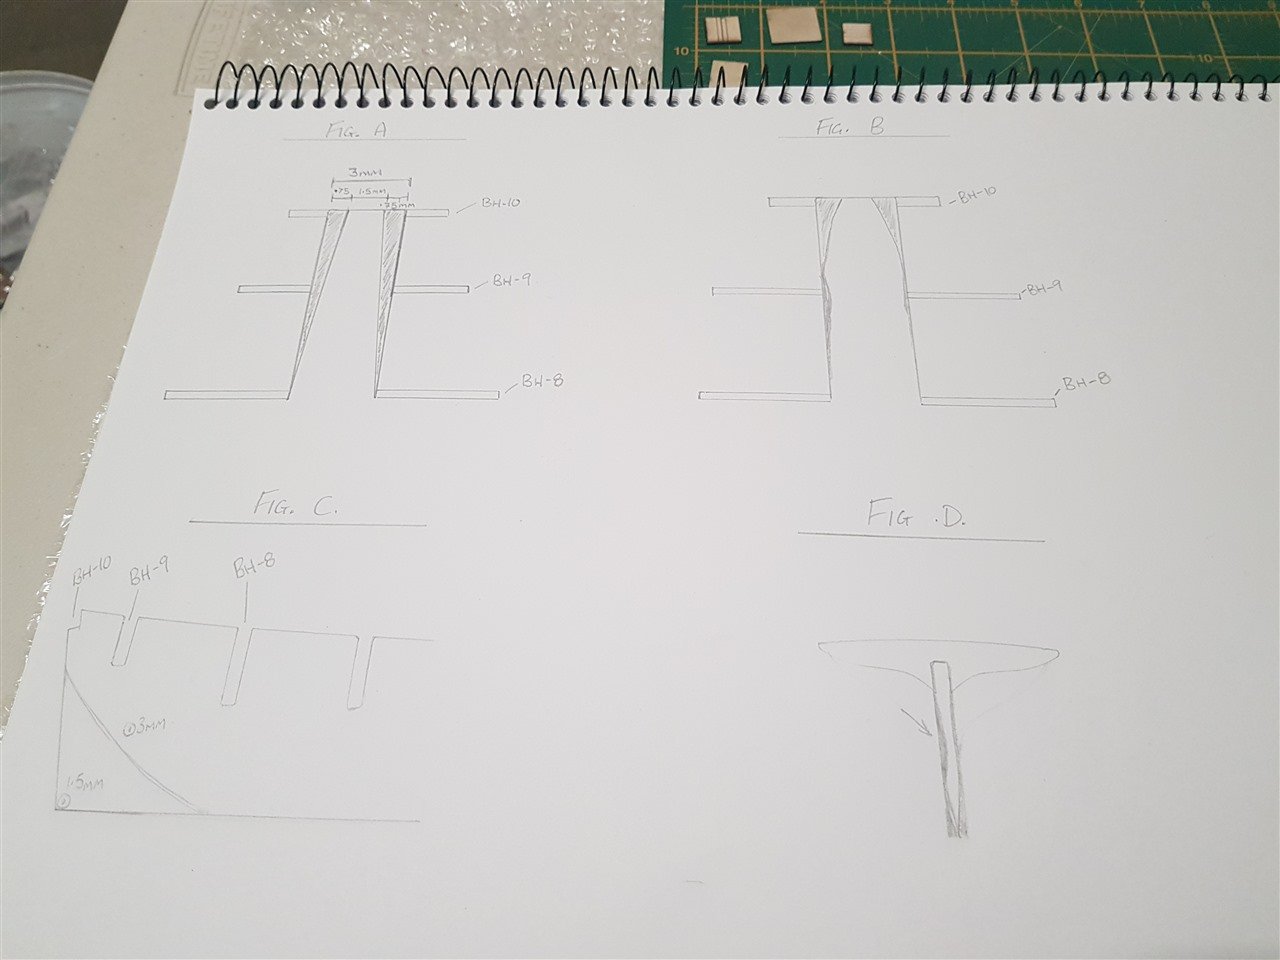
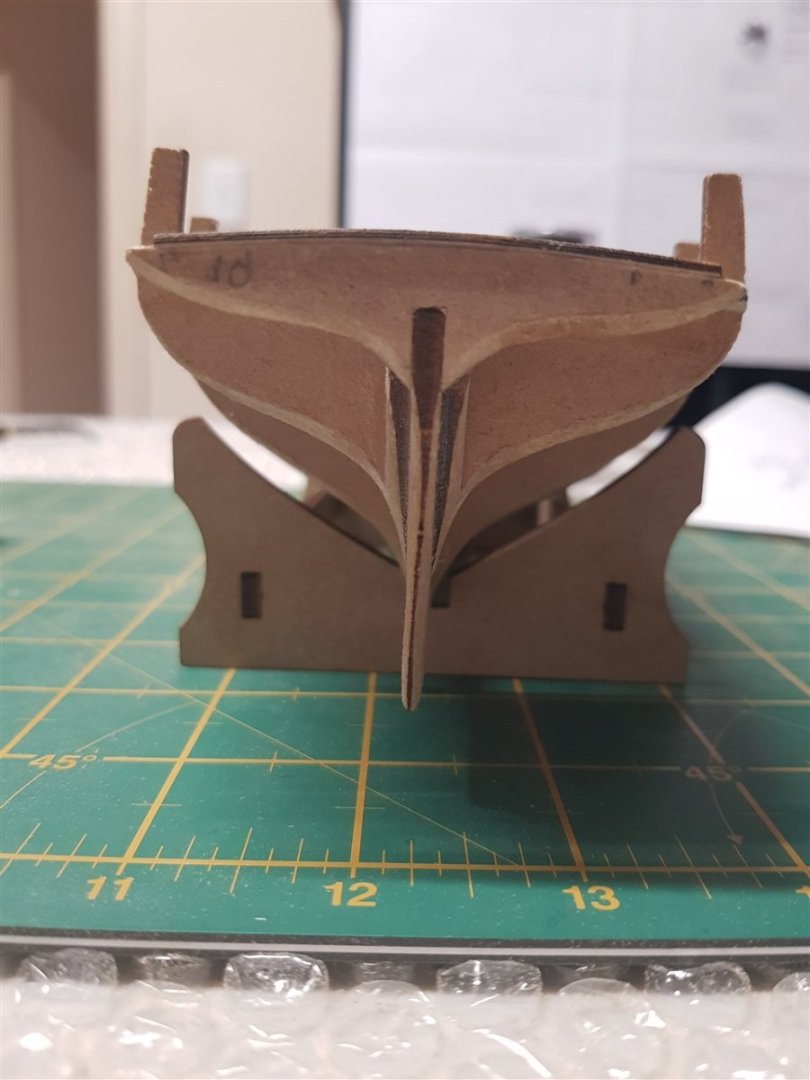
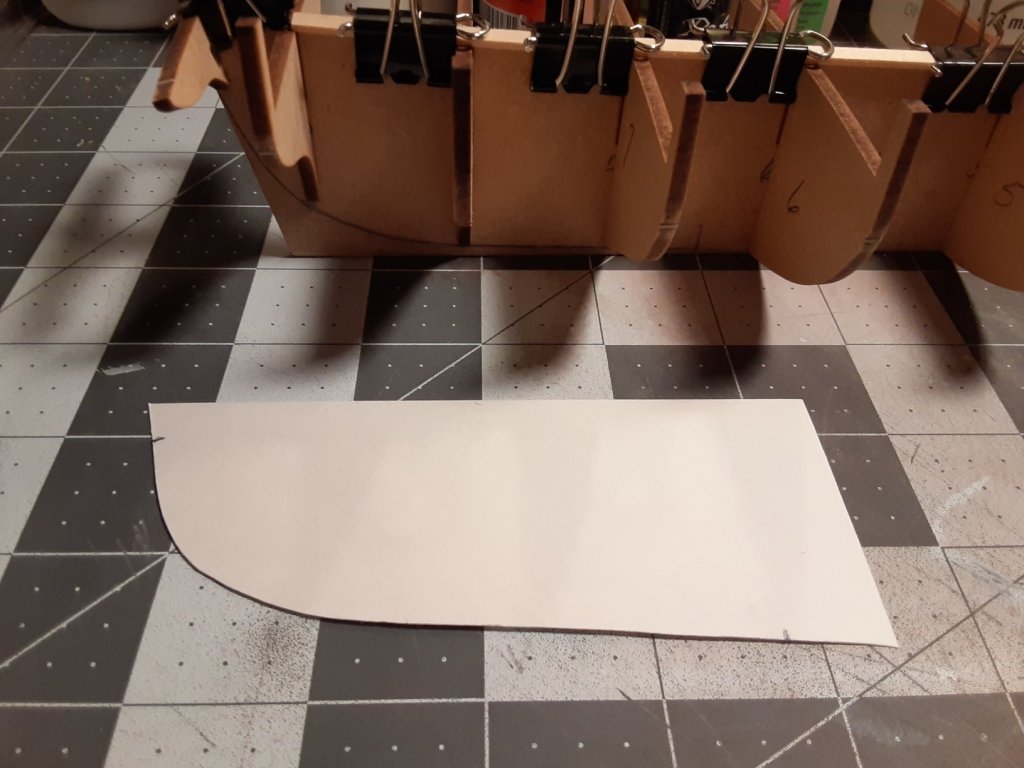
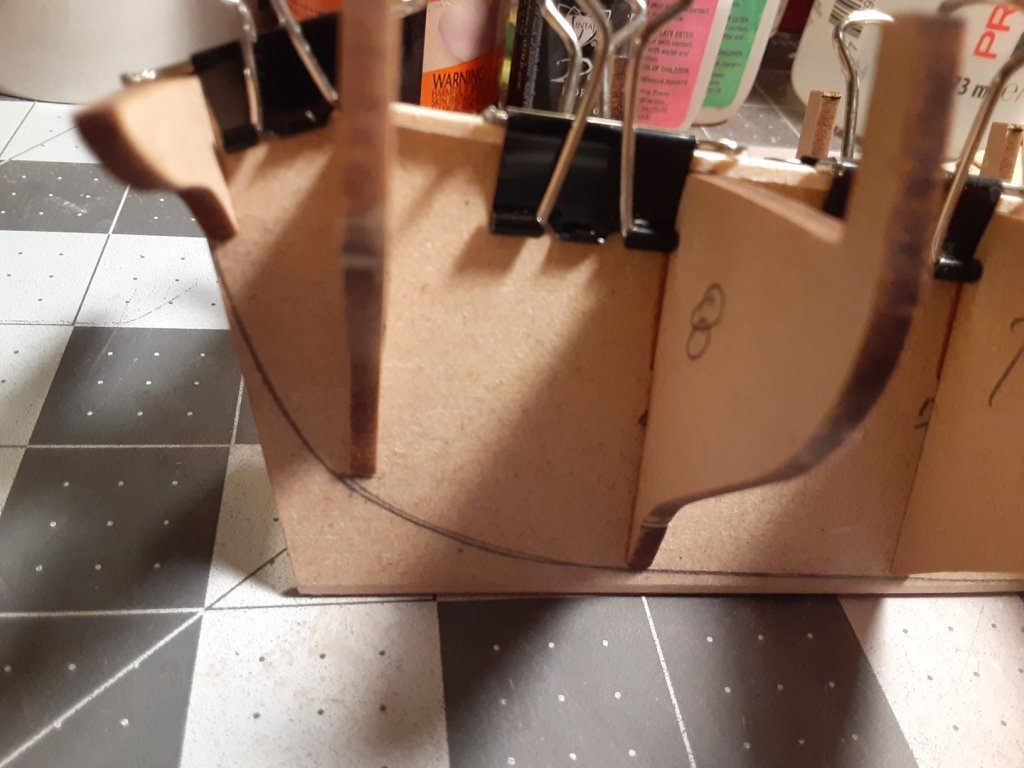
 Hi all, This is my first build and wanted a touch of help, to document my progress and keep a record of my issues so I can avoid them in future builds. I'm coming up on the tail end of the faring process and just trying to get these deadwood areas fared down to the right angle/dimensions. Below, Fig. A is what I assume is the correct faring angle judging by the documents/videos I've read and watched, which say to bring the deadwood down to "about half width". Fig. B and Fig. D is roughly what my model currently looks like (slightly exaggerated in drawings). Notice in Fig. D where I drew that arrow, a slip of the tool while faring the port side termination pattern caused me to create a bit of a depression into the keel. In Fig. C I assume the correct tapering angle between the 3mm section and the (eventual) 1.5mm section would ideally be the same as the straight lines I drew in Fig A, just along the sides of the keel. As you can see in Fig D. I've already taken off material that will complicate that a bit. So questions currently; 1) How do people go about making sure they fare down these deadwood sections evenly on each side. 2) When you already have some wonky angles like I do, how do you continue to work the area to end up even (like I drew in Fig A.), in all the various directions. Without continuing to remove materials from the sections that are probably sitting pretty close to where they should be. (Currently the plan is just slow and careful sanding. I don't think I've taken them down so far that I would need to glue strips and sand down again). The MSY tutorials say to focus on one side at a time (which is great for the bulkhead faring) but I found that to be somewhat misleading advice for the deadwood. If I was to do this again from the start I would make about 5 passes with the file, then swap to the other side for 5 passes then repeat, to keep things nice and even. Below photo of Fig B. Below photo of Fig. D (note the slight depression right at the end of the keel on the port side) MSY mentioned this area near the bow also had some deadwood that needed to be fared. I used the technique of an equal number of passes on each side to keep it symmetrical and found that to work pretty well. Does this need to taper down to about half width as well? I haven't done this before so I find myself wondering if I'm being a bit to pedantic or over thinking. I'm pretty confident I can work through all this without much help but any criticism/advice on the above would be greatly appreciated. Cheers, Mango.


- 17 replies
-
- 2
-
-
- first build
- Lady Nelson
- (and 2 more)
-
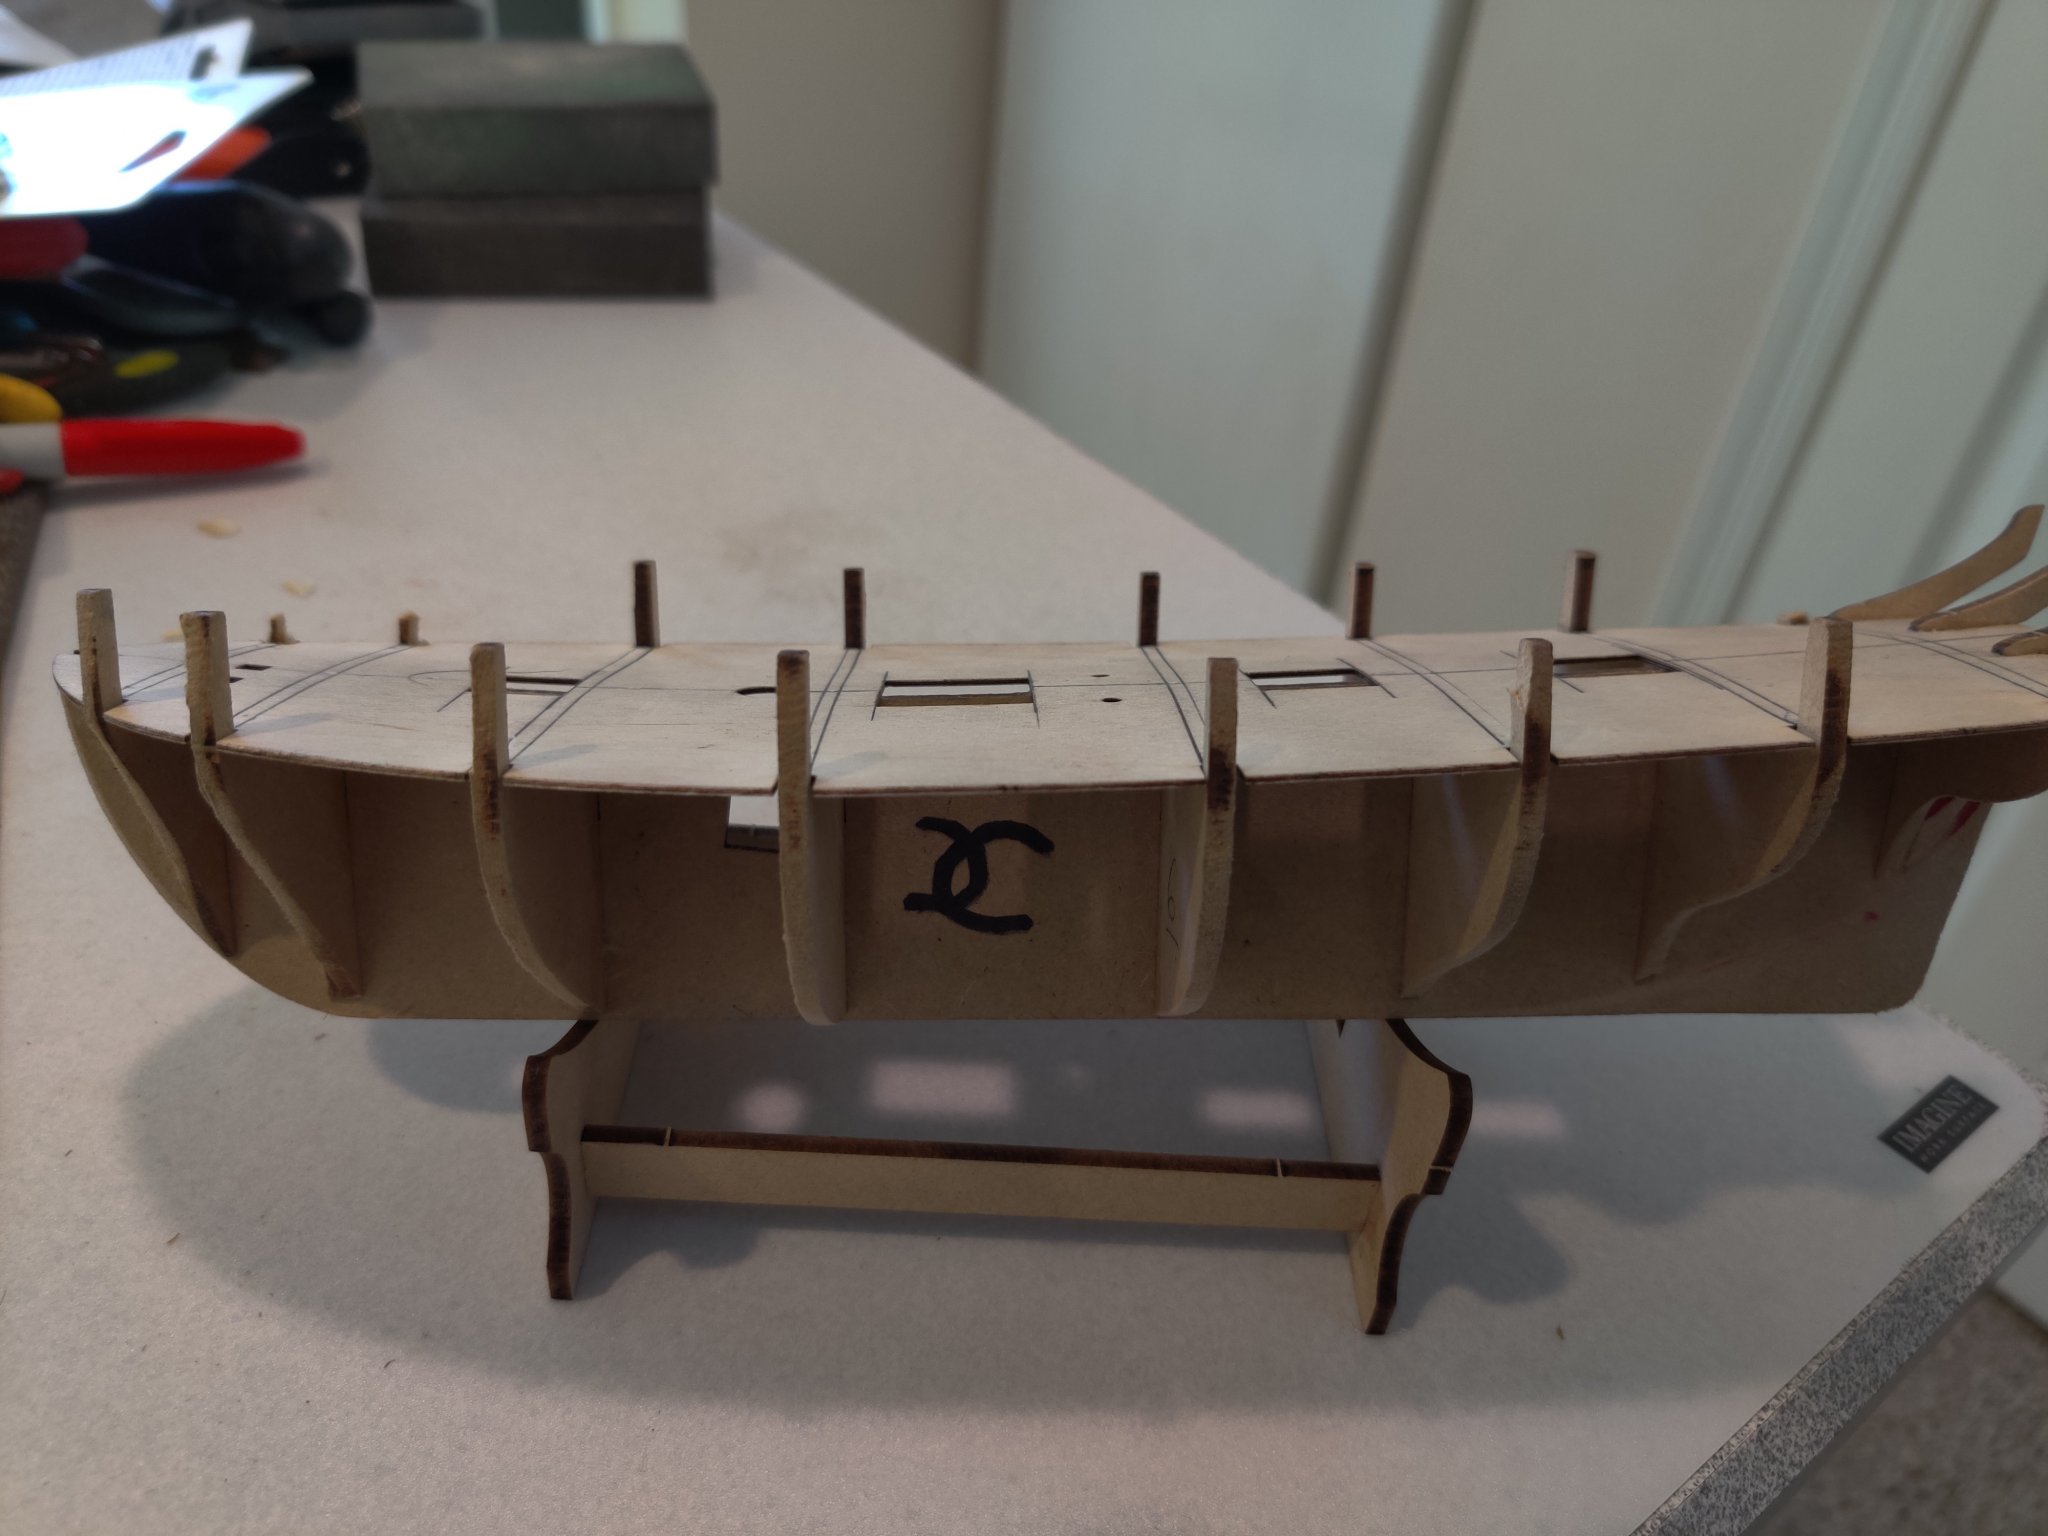
 So, after 1 mostly successful and 2 unsuccessful builds in the past, i decided to get my hands on something smaller and easier. Now that i have the space and prospect of not moving anywhere for the next few years at lest, i decided to try this little cutter. Some bits in the Box were damaged during transport (the laser-cuts of the Stern counter and the thingies which are used to attach the booms to the mast, i will post pics later when i come to it but i think i can fix them with veneer). So, started on the HZ Slip i have and found out it's too big for the Cutter No big Deal tho, managed to fit all frames and the False deck: Frames Squared: And started sanding them down: I think i did damage the front Bulkhead a bit with the file so now i am waiting for my Wife to get home so i can make a quick trip to the Model Shop to pick up better files (i dont really want to take my Kid to the Model Shop - i would be able to leave without more toys for him :P) Let's hope this build will not suffer the fate of the last
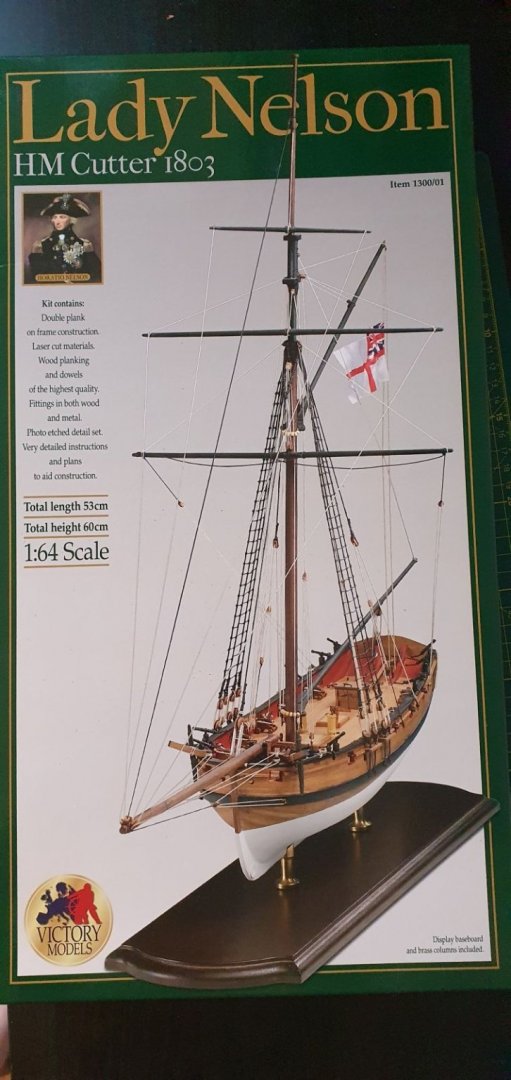


- 71 replies
-
- 6
-
-
- Lady Nelson
- Amati
- (and 1 more)
-
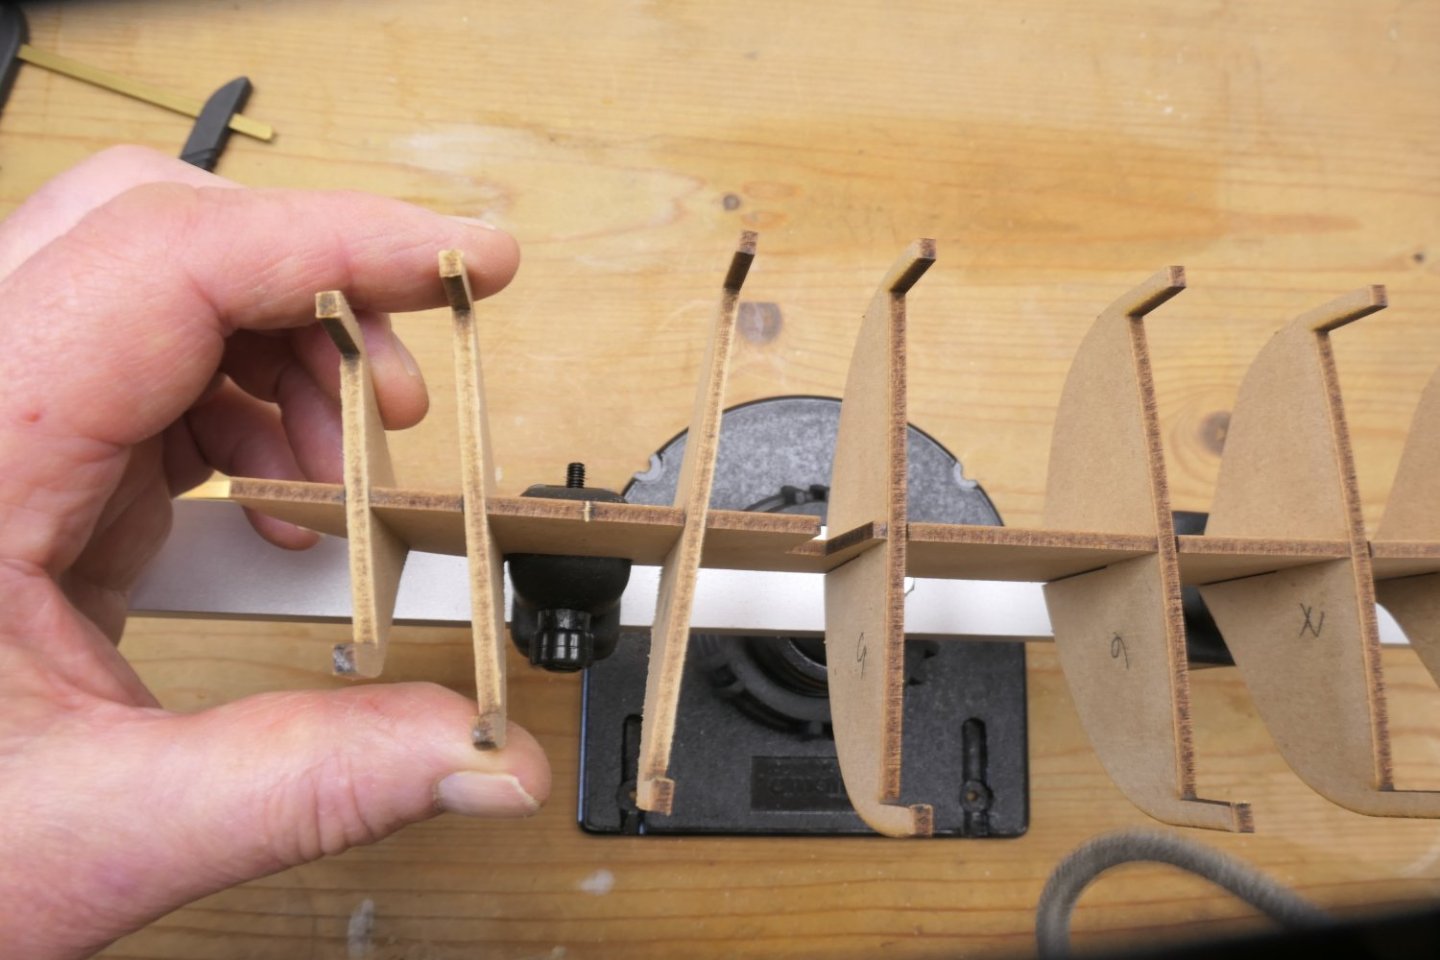
 Seems to be a required rite of passage to publicly flail your way through a first build. For introductions, name is Jay and I'm director of production support for the MAP division at Visa that includes Cybersource and Authorize.net. That means I'm on call 24/7. So, no stress or anything. When it comes to the subject at hand I'm something of a ringer though, as I have extensive experience making small precise stuff in many materials, and I have two entire rooms dedicated to workshop. One is for medium-sized power tools and a small scale machine shop (mini-lathe, mini-mill, etc.), other is primarily a woodworking area for hand tool work (this is where ships will be set up). Well three rooms because the semi-finished "bonus room" has my full-sized table saw and I have plans for a Laguna bandsaw to go in there too. And I've already spent a couple years reading extensively on the ships and the building techniques while working on my game, which also needs to continue to make progress, called Line of Battle. Anyway, I have a crapton of tools and my home is arranged around my workshop areas, so you can assume I am divorced and have no constraints The plan for now, and I already have all the kits, is to go Lady Nelson -> brig Syren -> MS Constitution -> Victory HMS Revenge -> Caldercraft Victory. But I also want to do some very small scale also, we'll see. Since this part is uninteresting, only a couple photos - one of squaring up the transom bulkhead and the assembled frame. In case you're wondering, all my little brass flat sanders that are used with PSA paper were machined perfectly square so I don't need to fiddle with heavy machinist's squares except for outside 90s. In case you're wondering, it's being held in a GRS engraver's block. But anyway all clean and straight and square and ready to go to next steps. Planned next step is balsa filler blocks at bow and stern, and to make things super easy on myself I'm probably going to fill in the first three gaps on both ends, so everywhere significant bending is occurring I'll have a surface to work against. However, need some advice on wood. I bought the Crown Timber boxwood package for this, so I have a bunch of boxwood coming. However, I have my own wood and don't want to do it 100% in boxwood, whatever I don't use will get used later in something else. Right now what I'm thinking of is cocobolo for the keel, wales, and rails, lightly stained boxwood planking, and a holly deck. BTW these 1x1x12 American holly turning blanks are available at Woodcraft for $10, good deal if you can resaw to scale timber. However, I'm not sure about the cocobolo, the color of course is great but it has pretty strong grain and figure and may not look good in this small build. Also I'm not sure about the idea of having a keel/stem darker than the main planking. Anyway, advice appreciated, as I'll have this ready for the keel and planking soon. I know, I'll plank it in snakewood. Cut this into 4mm strips, cut in half (it's 5/16" thick) and then plank both sides with strips in the exact order we see here Just kidding of course. That's a $150 guitar fingerboard blank and will be used for that purpose in the future.
- 624 replies
-
- 10
-
-
- lady nelson
- victory models
- (and 1 more)
-
 I have been watching you guys build for awhile now and thanks to Santa I have my first kit to give this a try. I asked for the Lady Nelson after watching a stop motion film by Tom Grigat building the same kit. I figured if he could stop motion film the build, surely I can fumble through it myself.
- 133 replies
-
- 4
-
-
- Lady Nelson
- Amati
- (and 2 more)
-
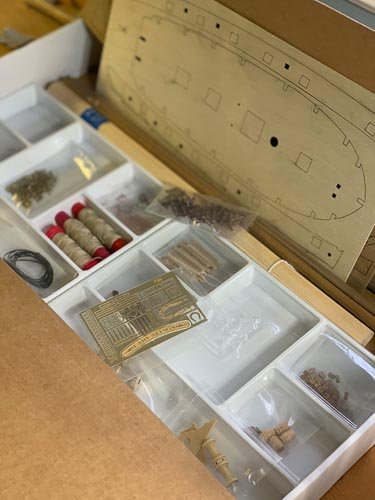
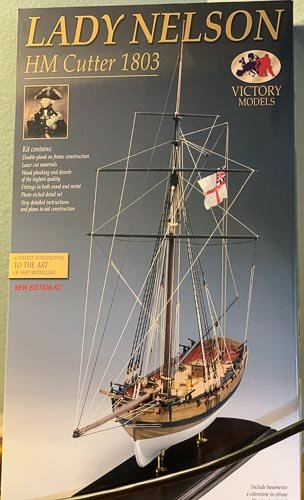
 Hi Hopefully i've set my title correctly. First time doing a build log of anything online before, hoping it will be itneresting to others and me. I've made a few plastic models of various things over the years but am using my incalculable time sat on my own at home to take up a new hobby, building boats out of wood and string. I started a few weeks ago with an 18th century longboat and was genuinely surprised at how well it turned out, so i've moved onwards and upwards and am now tackling The HM Cutter Lady Nelson by Victory Models. I've seen quite a few logs of this ship by new builders so hopefully it was a good one to chose, the box says 'A perfect introduction' so maybe it won;t scare me off I believe it is customary to show some pictures of the box and the contents It honestly looks like a pile of not very much at the moment and the instructions just say stuff like 'Using the drawings make up the bowsprit, bits and belaying racks' and if i'm honest i don't really know what any of those things are but i plan to follow the order of things from the Longboat and hopefully i'll figure out the other stuff as i go along
- 50 replies
-
- 6
-
-
- lady nelson
- victory models
- (and 2 more)
-
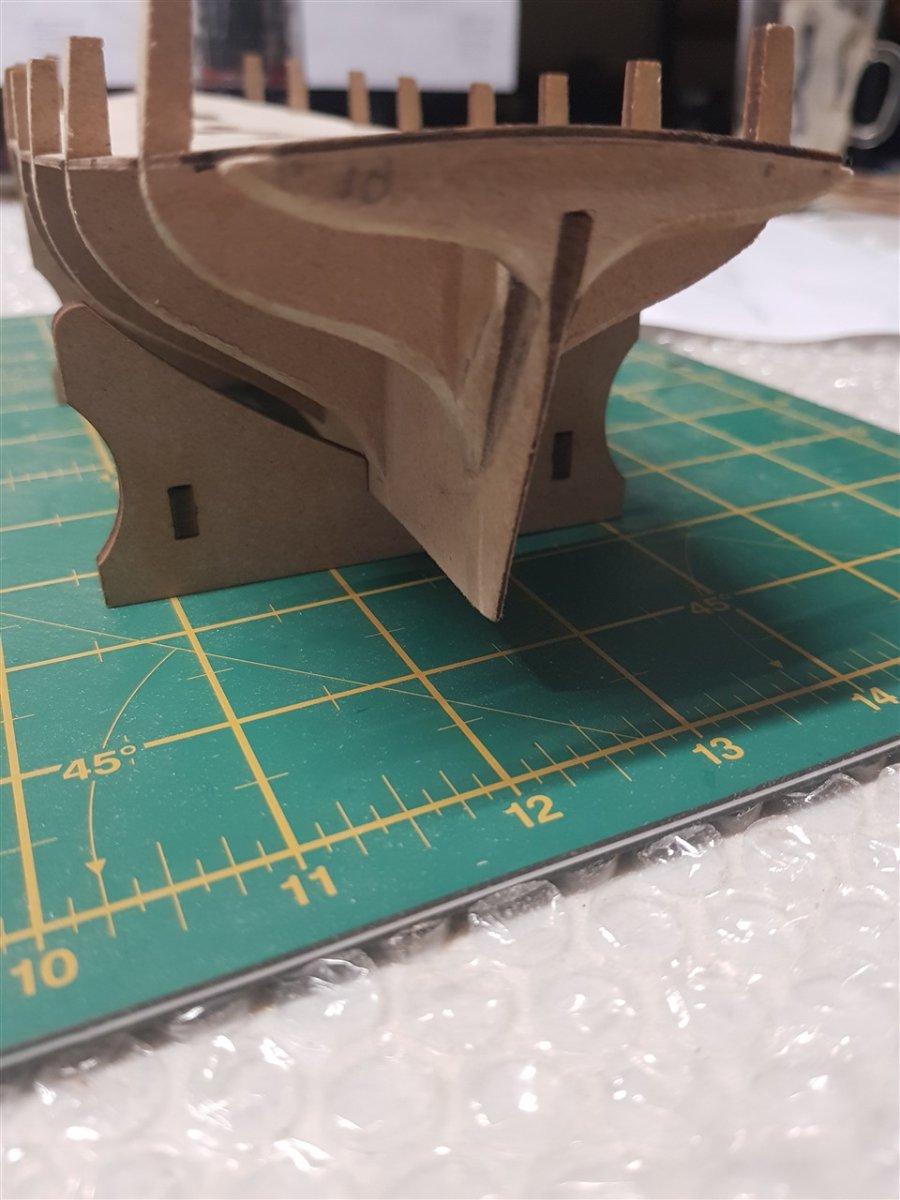
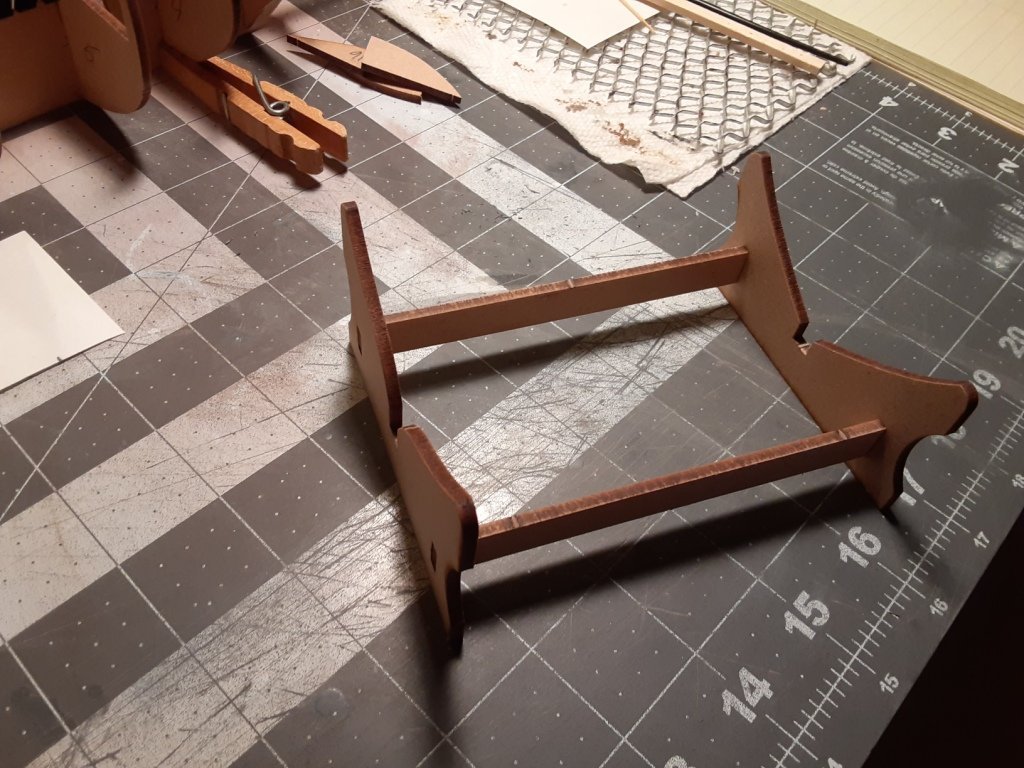
 Well, I'm back again. This is my third planked hull and hopefully I can do this one as it should be done." I say third hull because my second has not been finished. I paused it after planking the Occre Polaris so that I can transfer it to the Southern Yard (see below for view from the window...). For those unfamiliar with the package, here's the obligatory box photo. I successfully inventoried the contents to ascertain all parts are as specified...took me three passes to get a complete, correct count (might have been the rum!) After rigorously studying the two pages of instructions and poring over the first two drawings I liberated the false keel, the bulkheads, the "plank termination patterns," and the temporary construction stand. Next up was some gentle sanding to remove all of the sprues. First success was a few nights back...I assembled the construction stand.... I'm now in the process of preparing the false keel to accept the bulkheads. I'm preparing a rabbet to accept the planks forward and the garboard planks along the keel. It will simply be a shallow bevel (not all the way to a point) deep enough to accept both planking layers. Now the tricky part for me...because I've never done this part before...and I'd like some guidance on this...the plans do not include a bearding line. What I've done so far is to clamp the bulkheads in place and mark the bottom of the last 3 bulkheads on the false keel. I then used a set of French curves to draw what I think is a fairly smooth curve on one side of the keel. I then transferred the curve to tracing paper. Placing the tracing paper on cardstock I used my knife to cut the curve templet in the cardstock. After matching up the templet on the original curve I then used it to trace the curve on the opposite side. If this sounds like a good approach, my next step will be to sand the beard to a point at the stern and then move forward with installing the bulkheads and then the stem and keel. Stem and keel will be glued into position, and then drilled and pegged with 24 gauge wire. That's it for tonight...my updates are random but usually after a notable milestone or encountering a potential trouble spot. I look forward to your thoughts and inspiration....
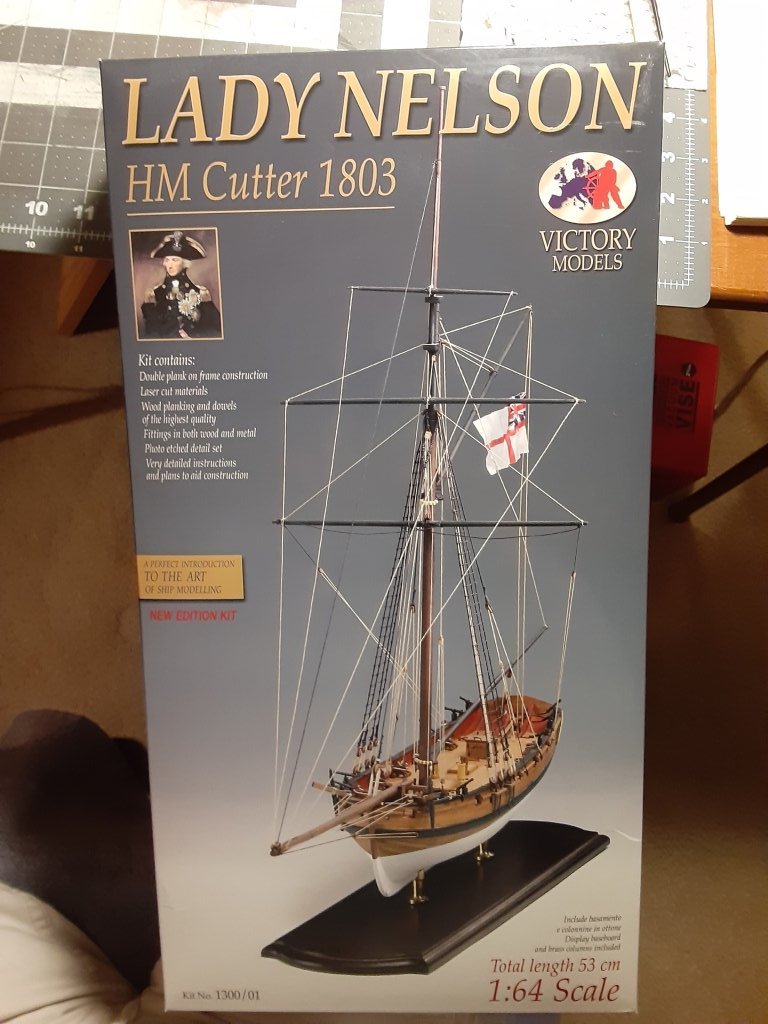


- 20 replies
-
- 1
-
-
- Amati
- lady nelson
- (and 1 more)
-
(1)(1)(1)(2).thumb.jpg.792ad774561d3d4f35888704cde27a8e.jpg) This is my second build and learned a lot from here and building my Bluenose II. Decided to tackle this as it comes highly recommended for beginners and will try to do the best I can and take it slow. The kit is very nice and the supplied wood and fittings look good and also the plans are excellent. The instructions are pretty sparse but there are a lot of build logs here to answer any questions. So let's get to it.
This is my second build and learned a lot from here and building my Bluenose II. Decided to tackle this as it comes highly recommended for beginners and will try to do the best I can and take it slow. The kit is very nice and the supplied wood and fittings look good and also the plans are excellent. The instructions are pretty sparse but there are a lot of build logs here to answer any questions. So let's get to it.- 28 replies
-
- 1
-
-
- Amati
- Lady Nelson
- (and 2 more)
-
.thumb.jpg.51663d40cf48bd5949e06628da9d07ad.jpg) Here goes my attempt at a build log. I just finished the Artesania Swift, and looking back, I wish I kept a log for that build. Better late than never. As expected, the Lady Nelson kit seems to be very good quality, and the five detailed sheets of visual instructions are fantastic. Following the advice on another build log, I numbered each piece with pencil, and am only removing parts as I need them. The keel looks to be nice and straight, so I glued on the bulkheads using Titebond wood glue, which I put in an empty medicine bottle and applied with a cheap artist's brush. For now I left off the sternmost bulkhead. The instructions recommend fairing the first and last bulkheads and the "plank termination patterns" (they need to come up with a simpler name for those) before glueing them on. I was going to, but had a hard time visualizing where and how much to sand off them ahead of time. I may have made more work for myself, but it will be easier for me to see what to remove if I can see the entire structure. I think. These pics were with my phone, but I'll switch to a real camera for the rest. Hopefully they'll come out better. Now if the glue would just dry faster...
Here goes my attempt at a build log. I just finished the Artesania Swift, and looking back, I wish I kept a log for that build. Better late than never. As expected, the Lady Nelson kit seems to be very good quality, and the five detailed sheets of visual instructions are fantastic. Following the advice on another build log, I numbered each piece with pencil, and am only removing parts as I need them. The keel looks to be nice and straight, so I glued on the bulkheads using Titebond wood glue, which I put in an empty medicine bottle and applied with a cheap artist's brush. For now I left off the sternmost bulkhead. The instructions recommend fairing the first and last bulkheads and the "plank termination patterns" (they need to come up with a simpler name for those) before glueing them on. I was going to, but had a hard time visualizing where and how much to sand off them ahead of time. I may have made more work for myself, but it will be easier for me to see what to remove if I can see the entire structure. I think. These pics were with my phone, but I'll switch to a real camera for the rest. Hopefully they'll come out better. Now if the glue would just dry faster...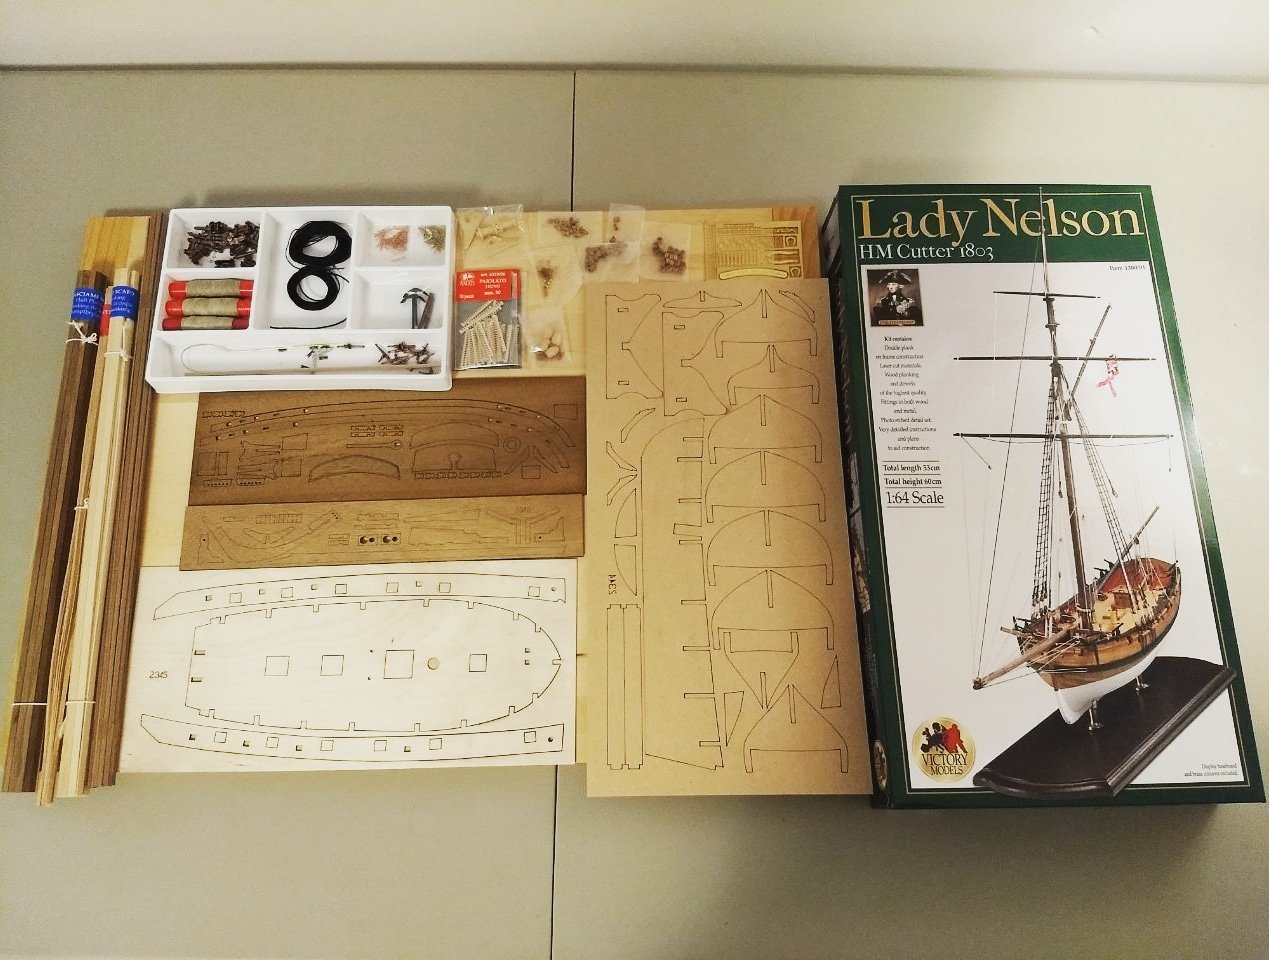

- 114 replies
-
- 1
-
-
- Lady Nelson
- amati
- (and 1 more)
-
 The Lady Nelson will be my very first ship build. A few months ago I built a plastic model ship and had a lot of fun doing it, however it was very straight forward and didn't provide much of a challenge. After doing some research I found this website, and after reading some of the posts I decided on this to be my first build. It just arrived today! I was very excited and wanted to get started straight away. However I calmed myself down and made sure to go through all of the plans and instructions. After not being able to understand the instructions completely I decided to hold off on starting and doing some more research, as well as getting some more tool/materials that I will need as I progress. I am very excited to be joining this community and look forward to learning, messing up, but most of all to enjoy myself! I would appreciate any help and advice you guys could give, and I will be updating this log once I'm comfortable enough to begin my build.
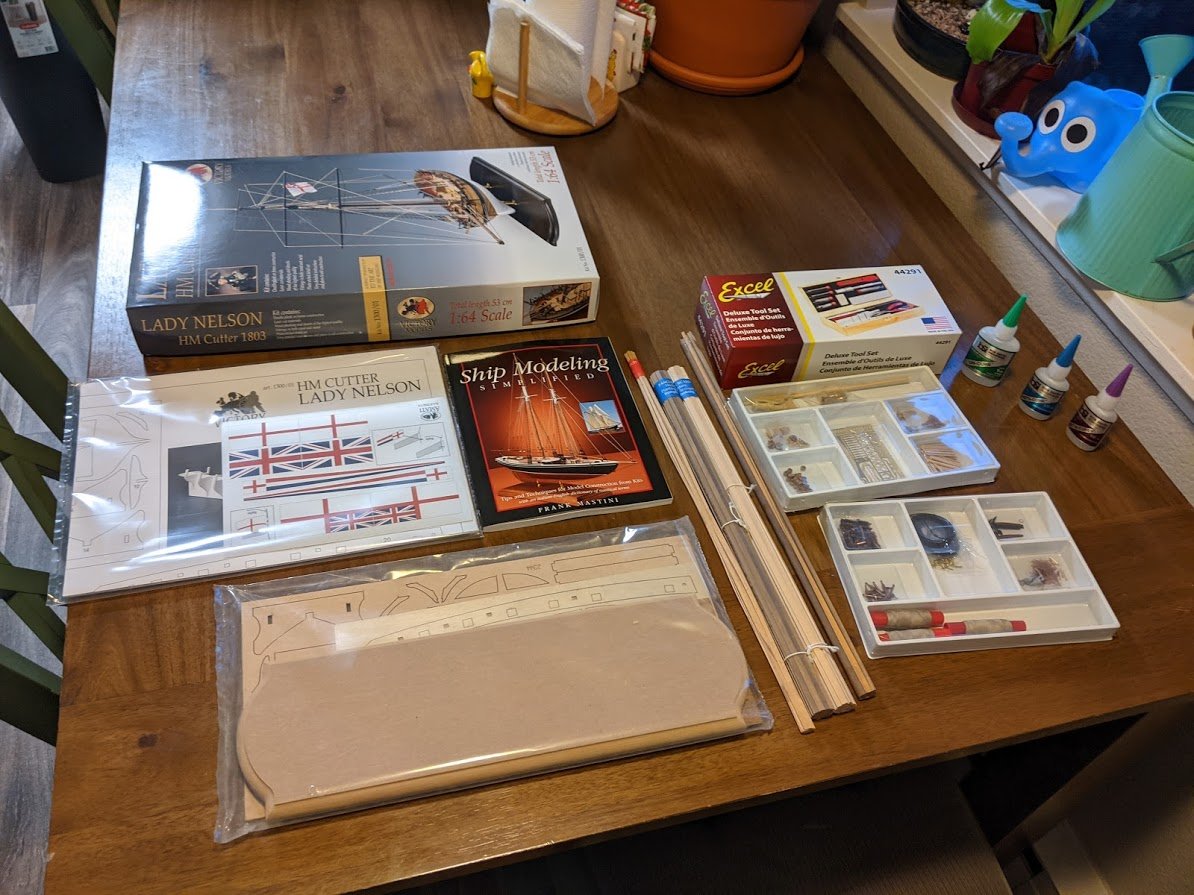
- 8 replies
-
- 7
-
-
- first build
- lady nelson
- (and 2 more)
-
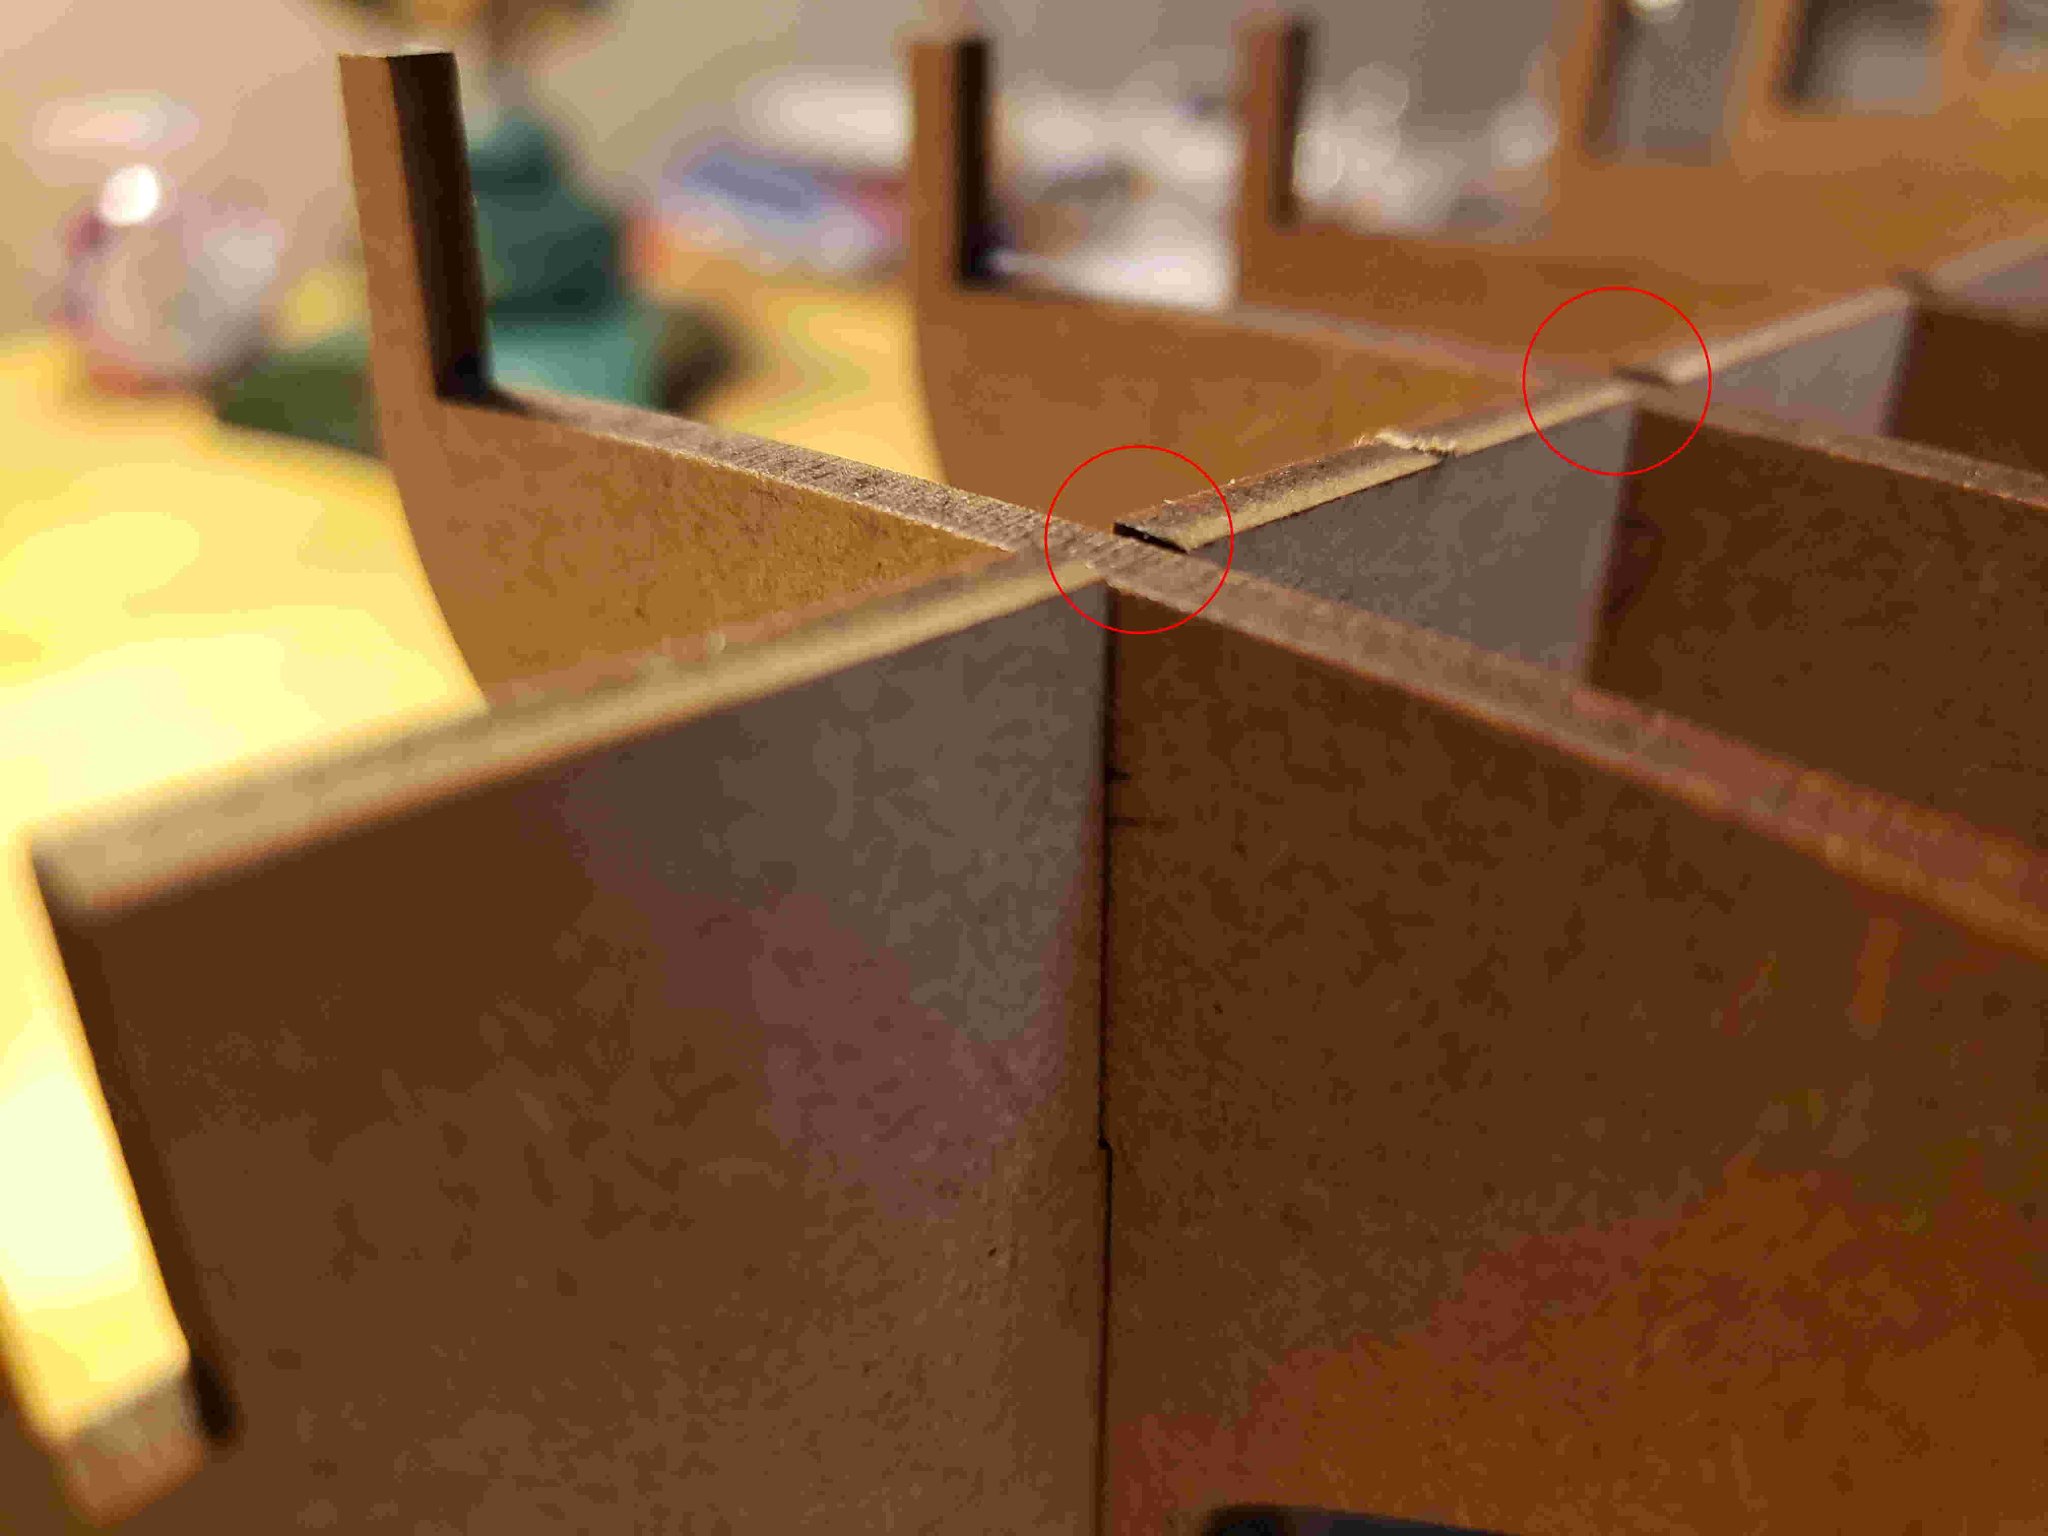
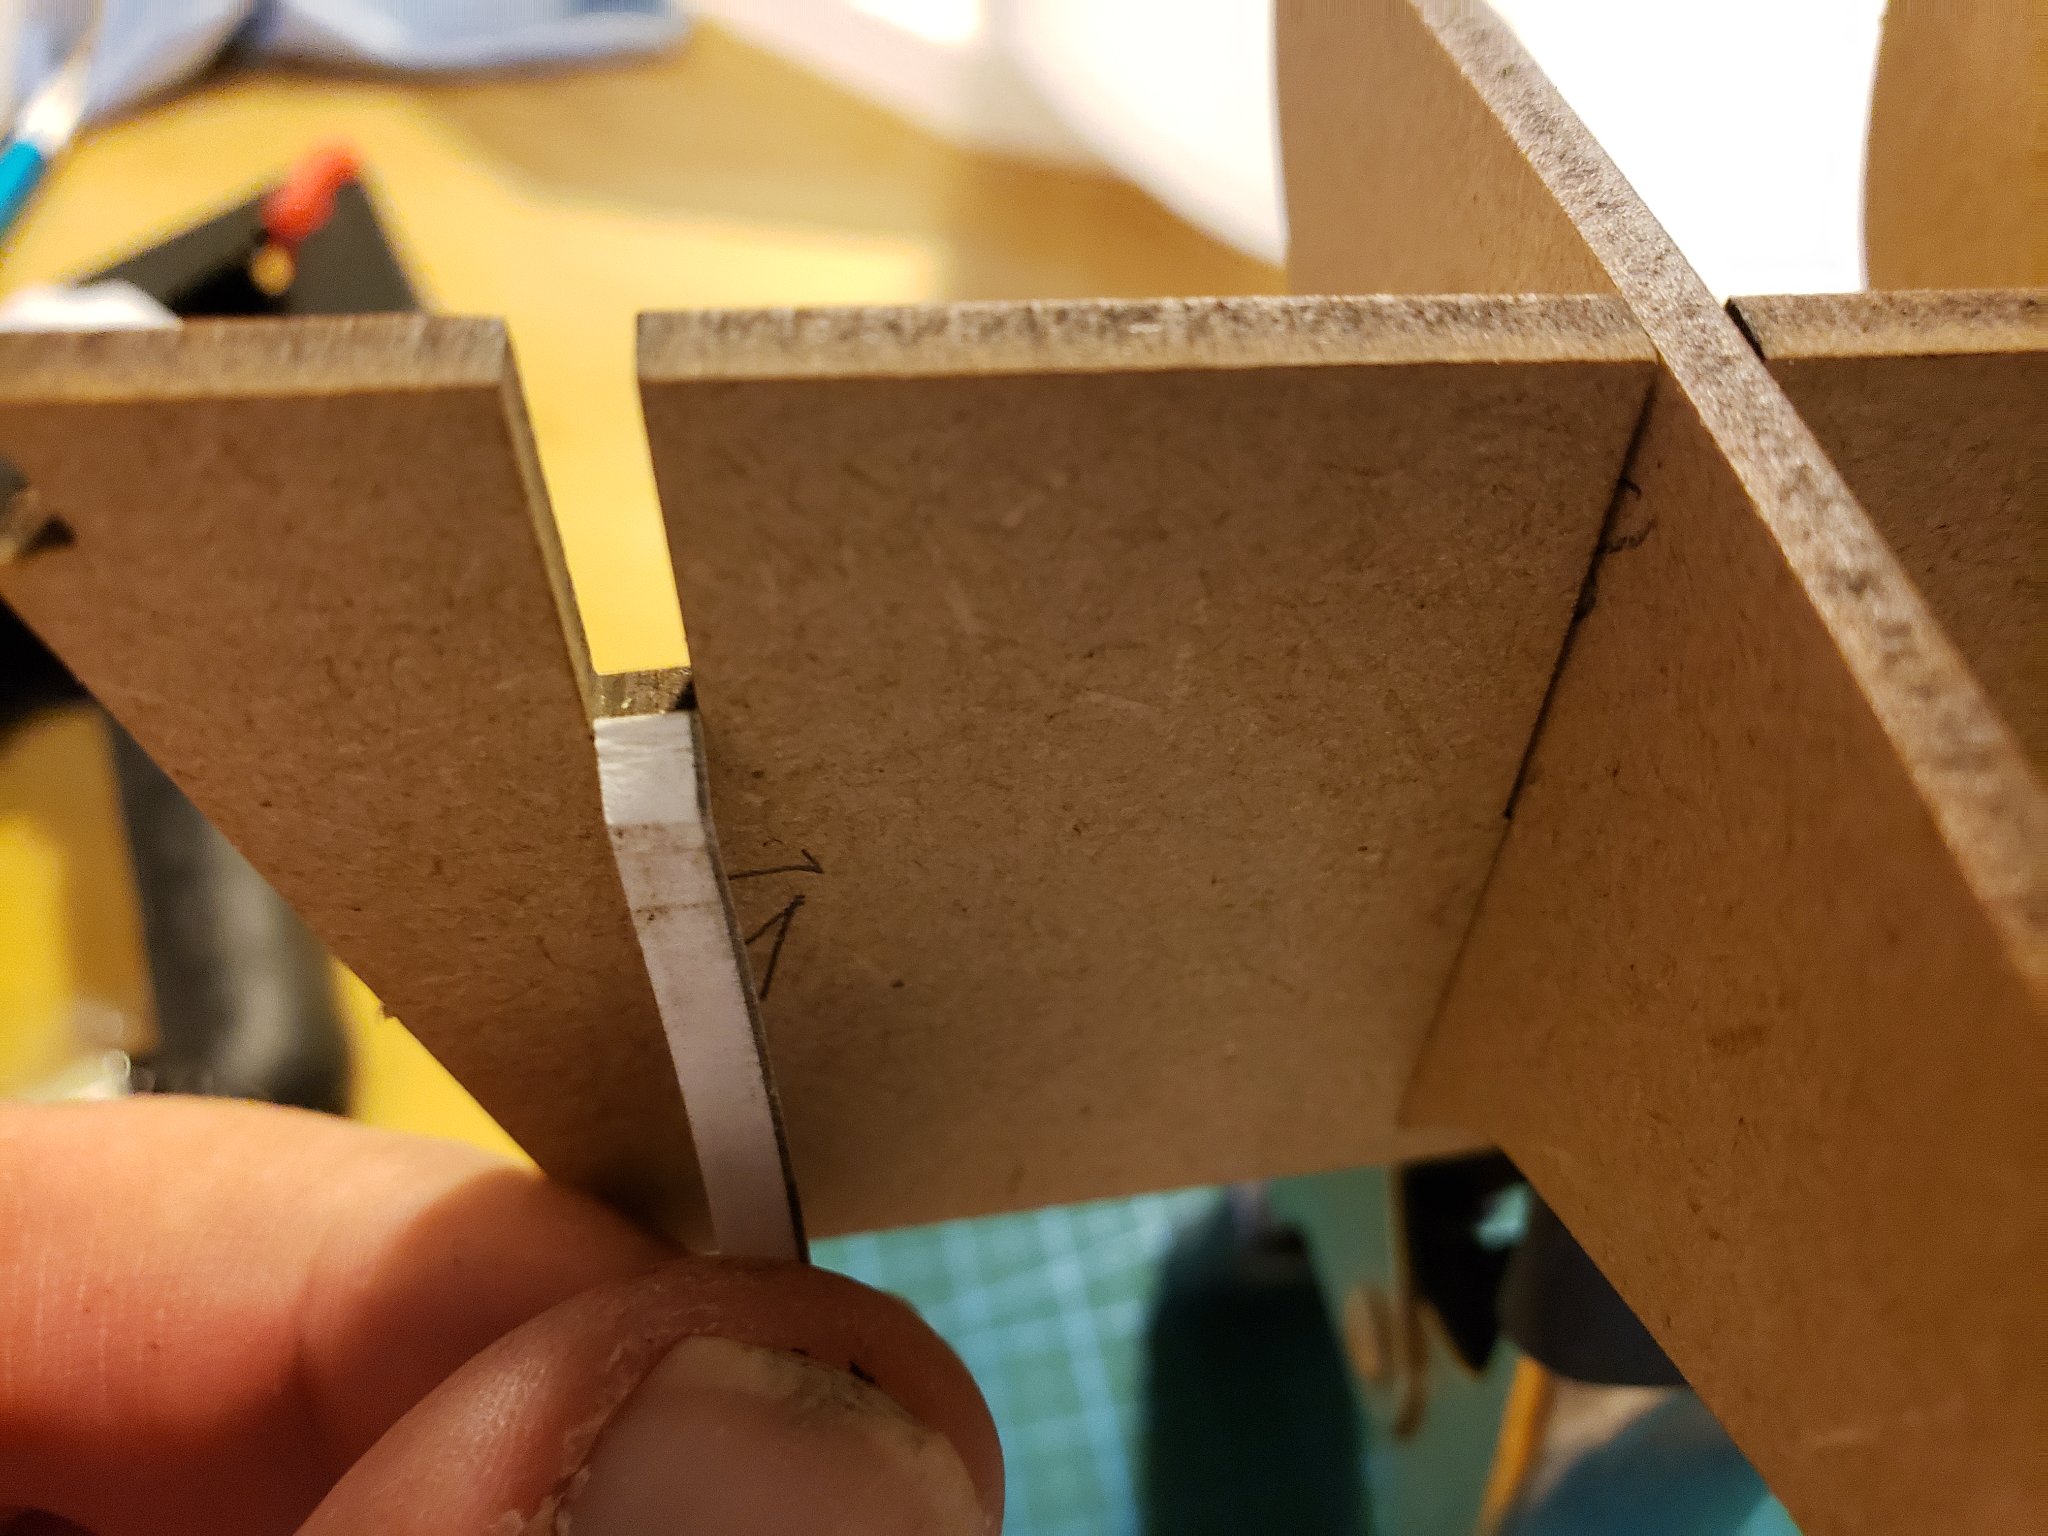
 Hi Folks This will be my first build log and also my first ship build. I chose the Lady Nelson because as @ccoyle mentions, "it has the "three nots" needed for beginners, i.e. not a lot of planking, not a lot of guns, and not a lot of rigging". I am new to woodworking as well so this will be quite a learning experience. I will appreciate any guidance you all can offer in regards to shipbuilding as well posting on this forum. I have put together the keel and bulkheads. I noticed that the bulkheads fitted loosely and also low, so I shimmed the bottom and one side with index card stock.
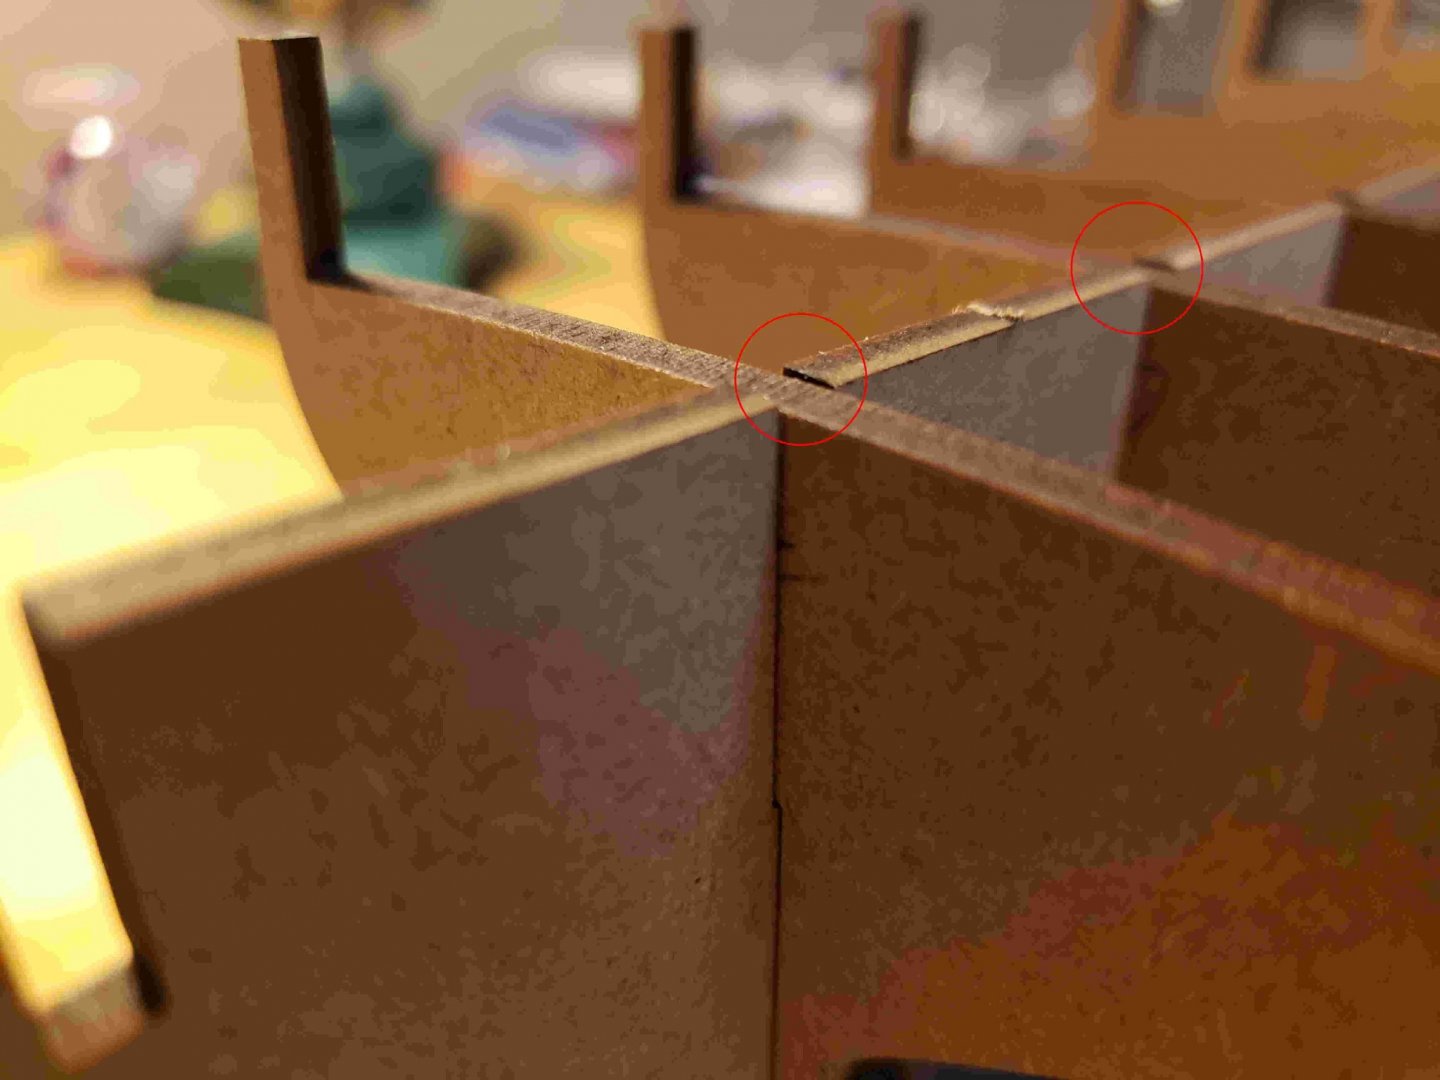

- 18 replies
-
- 2
-
-
- Lady Nelson
- Amati
- (and 2 more)
-
Anyone out there follow Tom's Modelling in Motion on youtube? For the first time he has done a wooden ship build...Amati's Lady Nelson. Most of the prior build videos are airplanes. The videos are incredible. It must drastically increase the effort to build the model and do the stop motion video at the same time. Definitely worth the 9 minutes to check it out. I have no association with him...just follow him on youtube. Hope this has not already been posted elsewhere here....I did a search and did not find it.
-
 After completing some plastic model kits, I decided I needed to try a wooden model. Internet research pointed me to the Lady Nelson by Amati and I'm really happy with the quality of materials and clarity of instructions. Much better than the plastic model kits! This was a challenge for me also because I have no real woodworking experience at all, but I'm really loving it so far. I started this several weeks ago and only recently decided to join the forum, so most of the woodworking, finishing, and painting is out of the way, but to catch you up: I mostly followed the Modeler's Shipyard DVD that Amati has put online on their Facebook page. I found it to be a really helpful resource. I feel okay about the fairing job on the hull, but knowing now how planks lie I'm sure I'd take a bit more time and care with my next ship. One of the biggest mistakes I made was tapering the first layer planks from the wrong bulkheads, so there's a little bulge towards the bow. It didn't end up causing too much of a problem after sanding and filling. Not very proud of the first layer of planking, but it was sufficient in providing a solid smooth base for the second layer, which I took much more time and care with. The second layer went on like a dream. I was more careful with the tapering and also set up a rather crude jig to edge bend the planks with steam. I simply soaked the planks for a half hour and then used an electric iron as I bent them around the jig to steam the water out and lock the curve into place. I was a bit sloppy with the first two planks above the garboard plank (shoving splinters instead of spiling properly). I used wood glue/sawdust for filler, but WAY overfilled without removing excess and ended up sanding a layer of hard dried glue off the hull for a whole day. IMG_3090.HEIC I finished the hull with Tung oil, which was satisfying to say the least. IMG_3079.HEICIMG_3086.HEIC Here she is today, with most of the deck furnishings painted or stained and ready to be glued on. The masts and yards (which I had to taper and shape by hand) are finished and painted. What I want to do differently next time: 1. Find better ways to make sure the false deck lies at the proper curve against the bulkheads. I tried pins but they were extremely difficult to get through the deck, and many of them came out while the glue dried. So the deck is less curved than I'd like, and the gunports don't sit at an even distance from the deck. 2. Tapering the planks from the proper location on the first layer of planking 3. Not overdoing the filler that I used between the planks on the second layer of planking (or just making the planks fit tighter), so as not to leave glue on the surface of the hull. I sanded most of it off, but the tung oil revealed some missed spots. 3. I used CA glue with the second layer, which was fast and convenient as I didn't have to do as much shaping of the planks. It was an okay situation, but next time I'll try using wood glue and pins, which will help me get a tighter fit between planks. 4. Break up the deck planking into realistic lengths instead of having them run the full length of the ship. There's a lot more to add to this list, but those are the main issues I've run into so far. That, and just not having money or a car to go out and buy the tools that make things easier! Any constructive criticism or advice moving forward is more than welcome. Thanks for reading!
- 11 replies
-
- 5
-
-
- lady nelson
- amati
- (and 1 more)
-
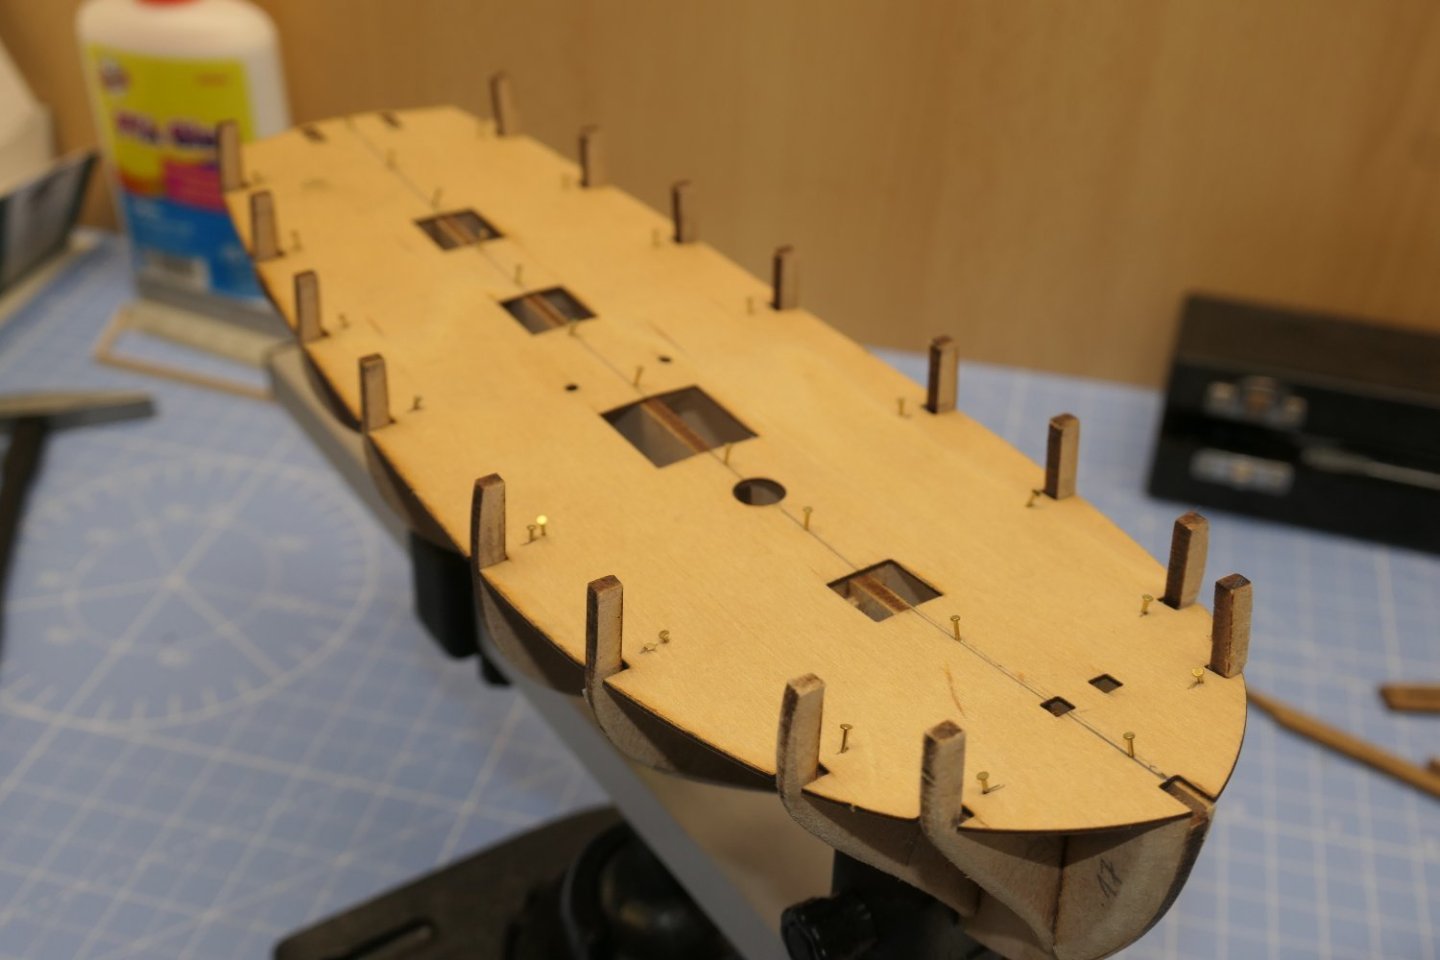
 I've just joined up and introduced myself here You've probably seen it all a bunch it times, but here's the frame. I shimmed up the bulkheads with some thin card and they are all in nice a square. I used thick CA for gluing the bulkheads onto the false keel. It does look a little rough, but you won't see it. I glued the deck on with PVA, let it dry overnight and removed the pins. I used the pins in the kit with a nailer. The accuracy with the nailer was a bit hit and miss and I had a couple of goes with some of them. I think I would prefer some map pins or similar - maybe hold/push them in with nose pliers and tap them down... On inspection, I skewed the deck to starboard at the bow and to port at the stern, which was a little disappointing, but I think I can correct this with the deck planking. Off to port by a mm or so at the stern. So far so good (ish). I need to work a bit neater and take more care. Cheers, Stu
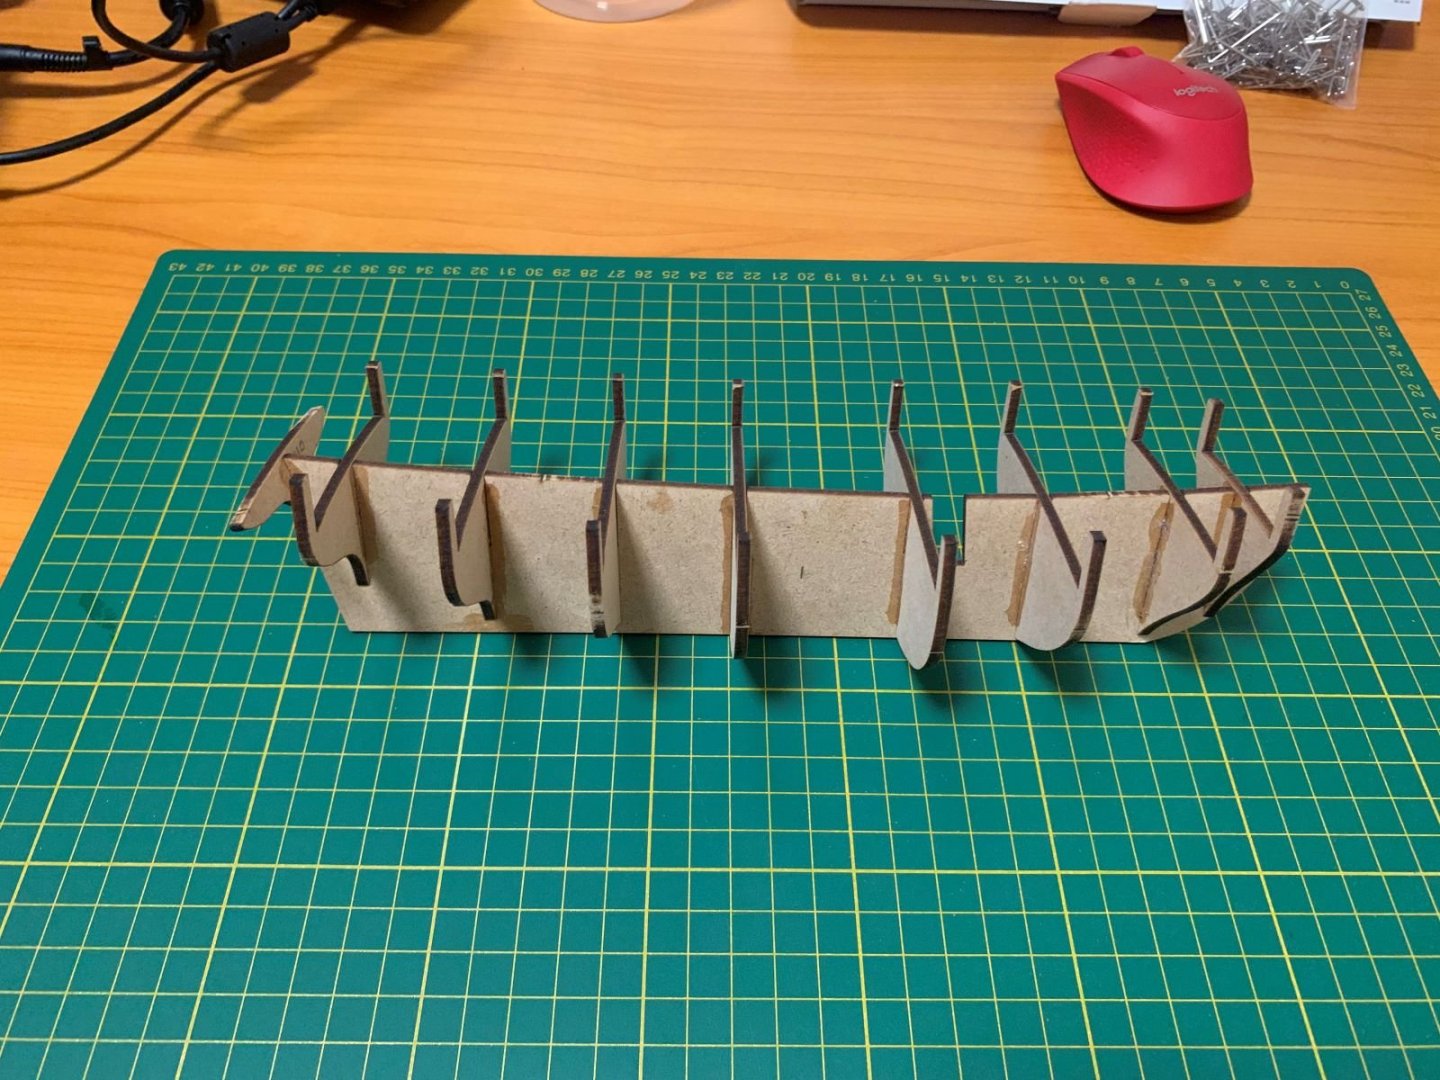


- 34 replies
-
- 4
-
-
- lady nelson
- victory models
- (and 1 more)
-
 Click on the tags in the title above (shown in black) for an instant list of all the build logs for that kit subject.