Search the Community
Showing results for tags 'model shipways'.
-
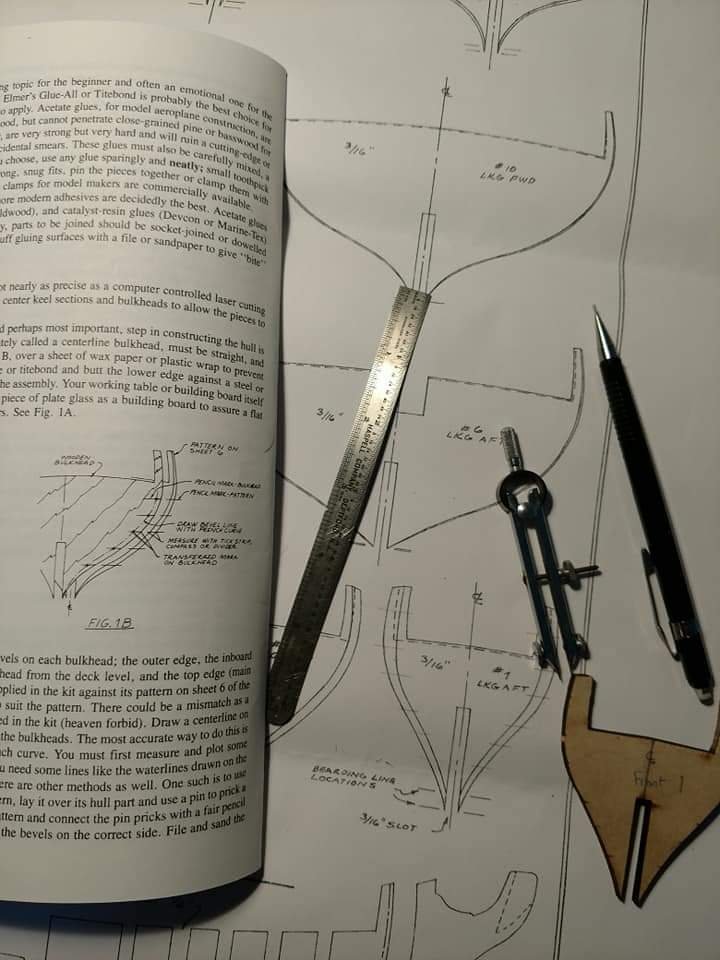
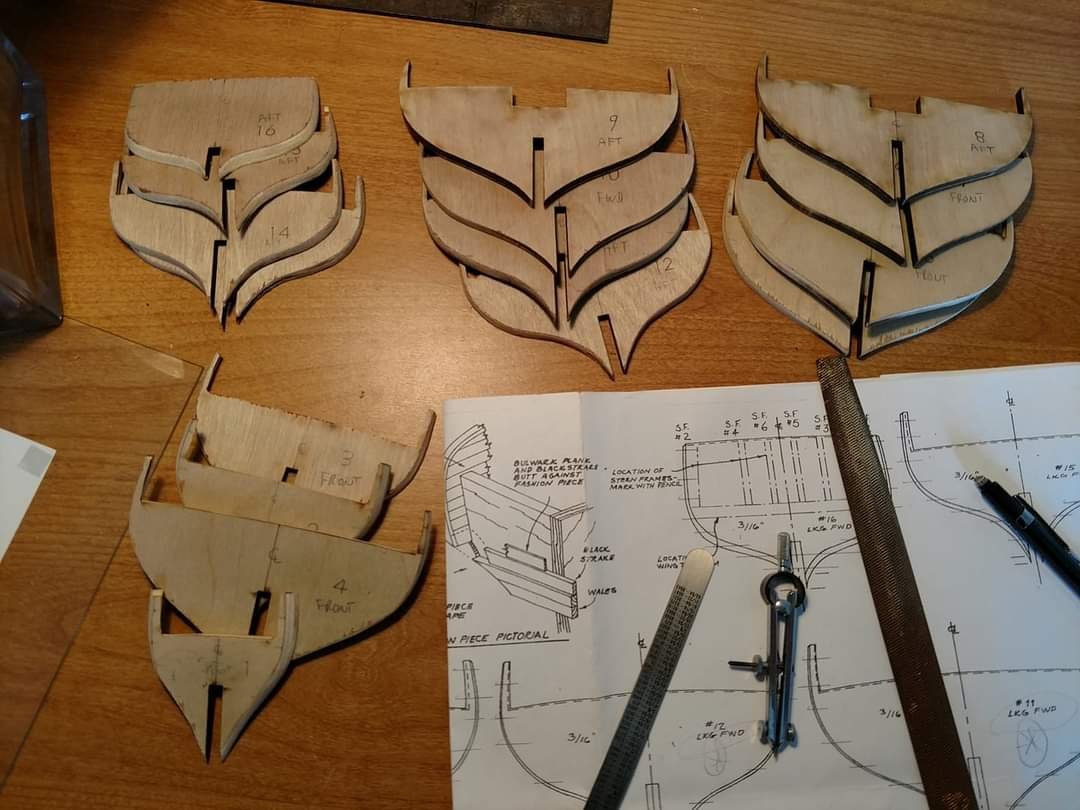
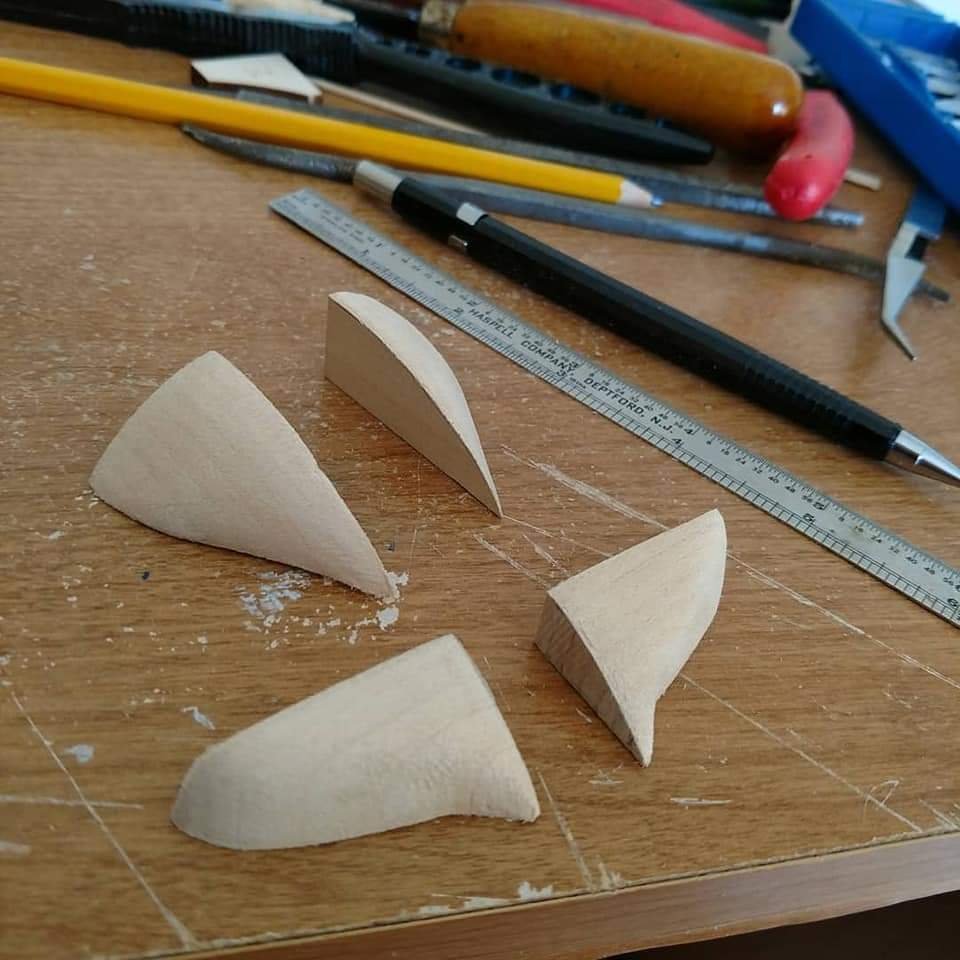
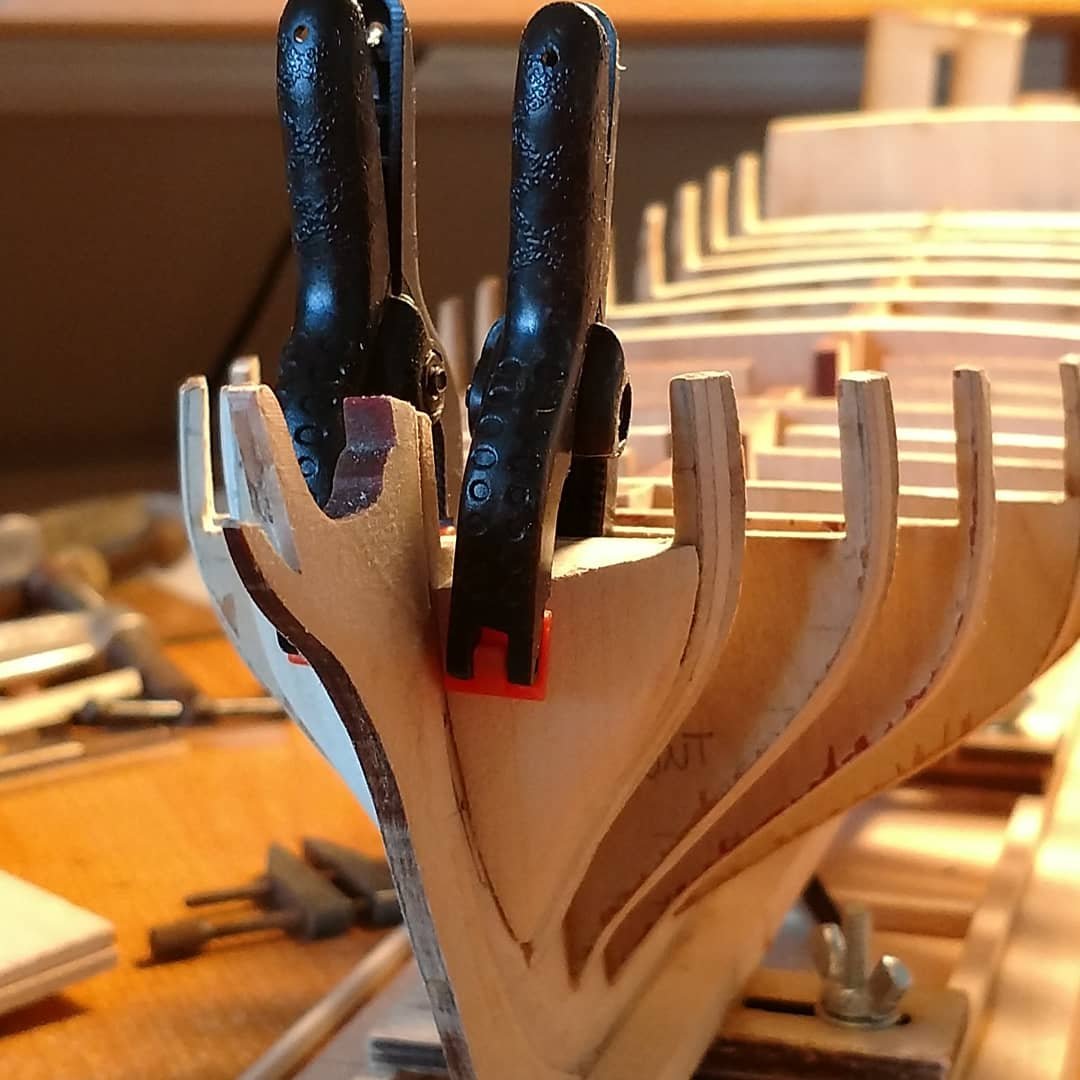
 I have been reading with interest the blogs about buildings Model Shipways Flying Fish. This is opportune for me as I have been building the solid hull version of this model for over 40 years. I have been particularly interested in other builders interpretation of the aft cabin and stem of the Flying Fish. I have been fortunate in that I was able to observe and photograph the china trade painting of the Flying Fish when it was up for auction in 2005(?) at Northeast Auctions.. Since then we have all benefited from the pictures of the Flying Fish painting by James Buttersworth that is now available to view online. Both these paintings have cleared up questions about the ship such as mast and bowsprit colors aft cabin face and to some degree, the figurehead. While I think I am the only builder building the solid haul version, I will attempt to relate my own experience building this model and the results of my own research and thoughts. I hope you did this interesting.
- 171 replies
-
- 4
-

-
- Flying Fish
- Model Shipways
- (and 1 more)
-
 A new project for my daughter. She started Kindergarten. I am planning on giving this build to the Elementary School around thanksgiving. I know I am starting a bit late. I might be over my head...🤔
 -
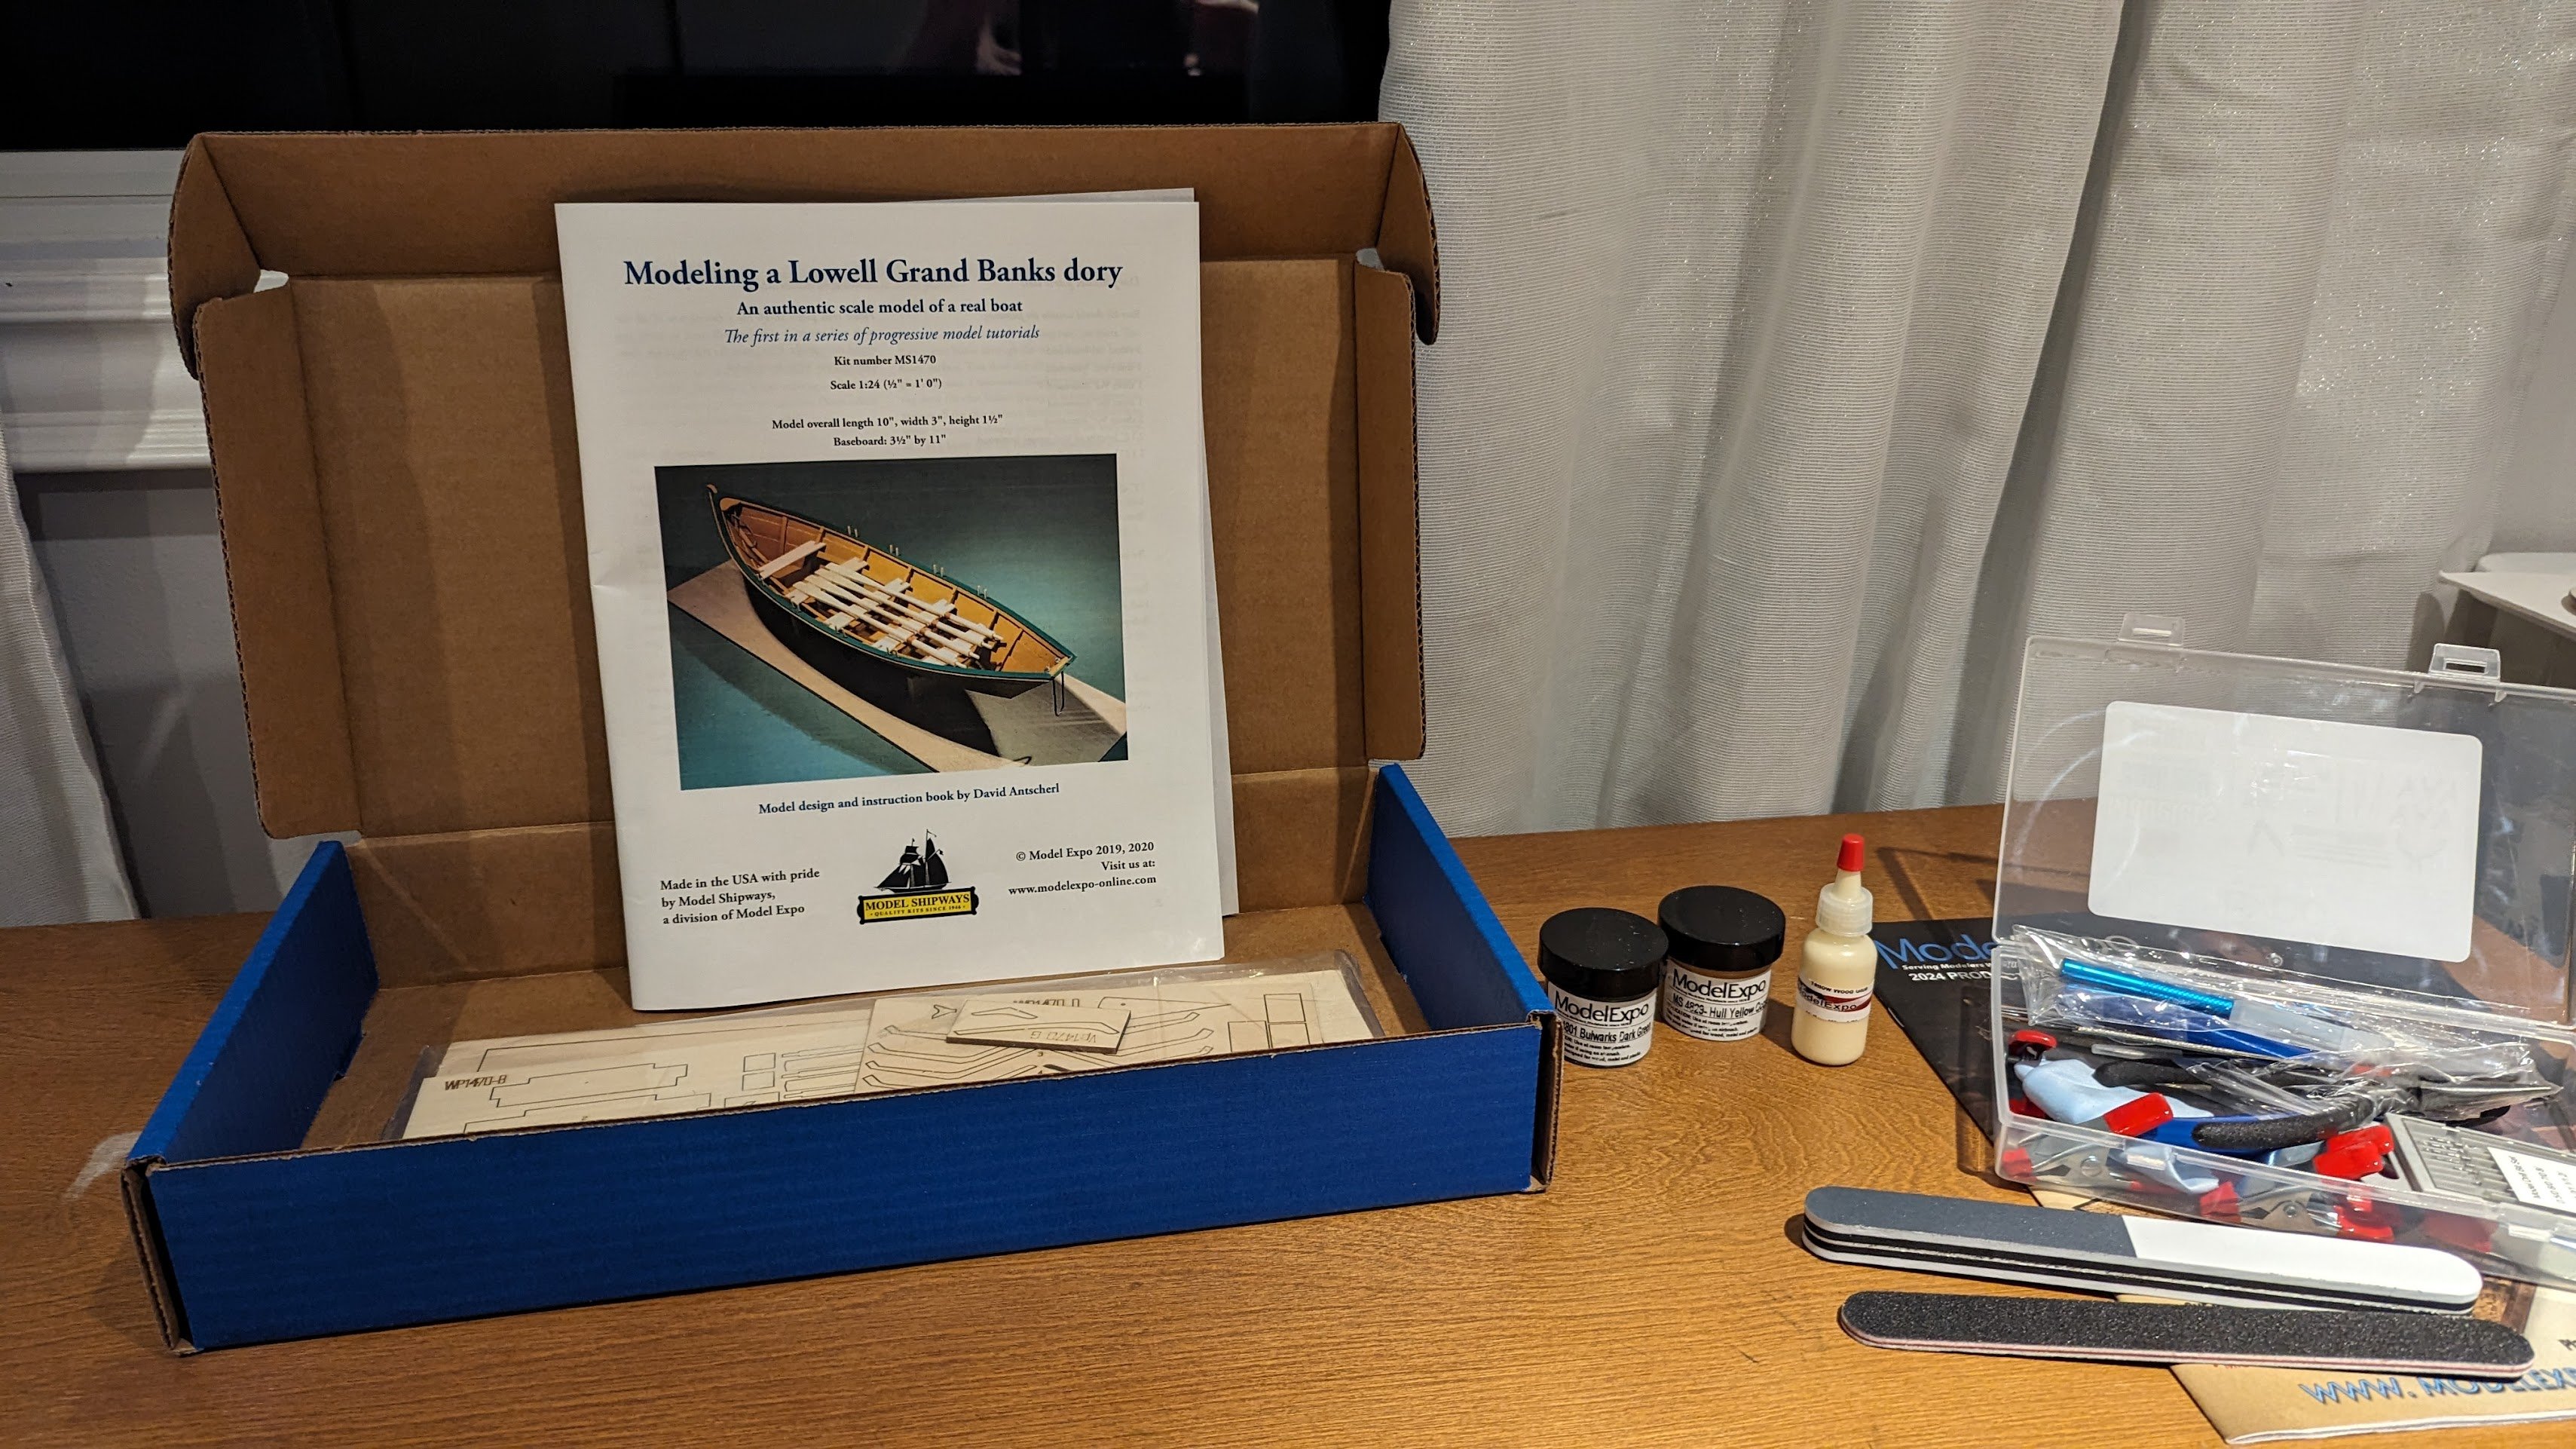
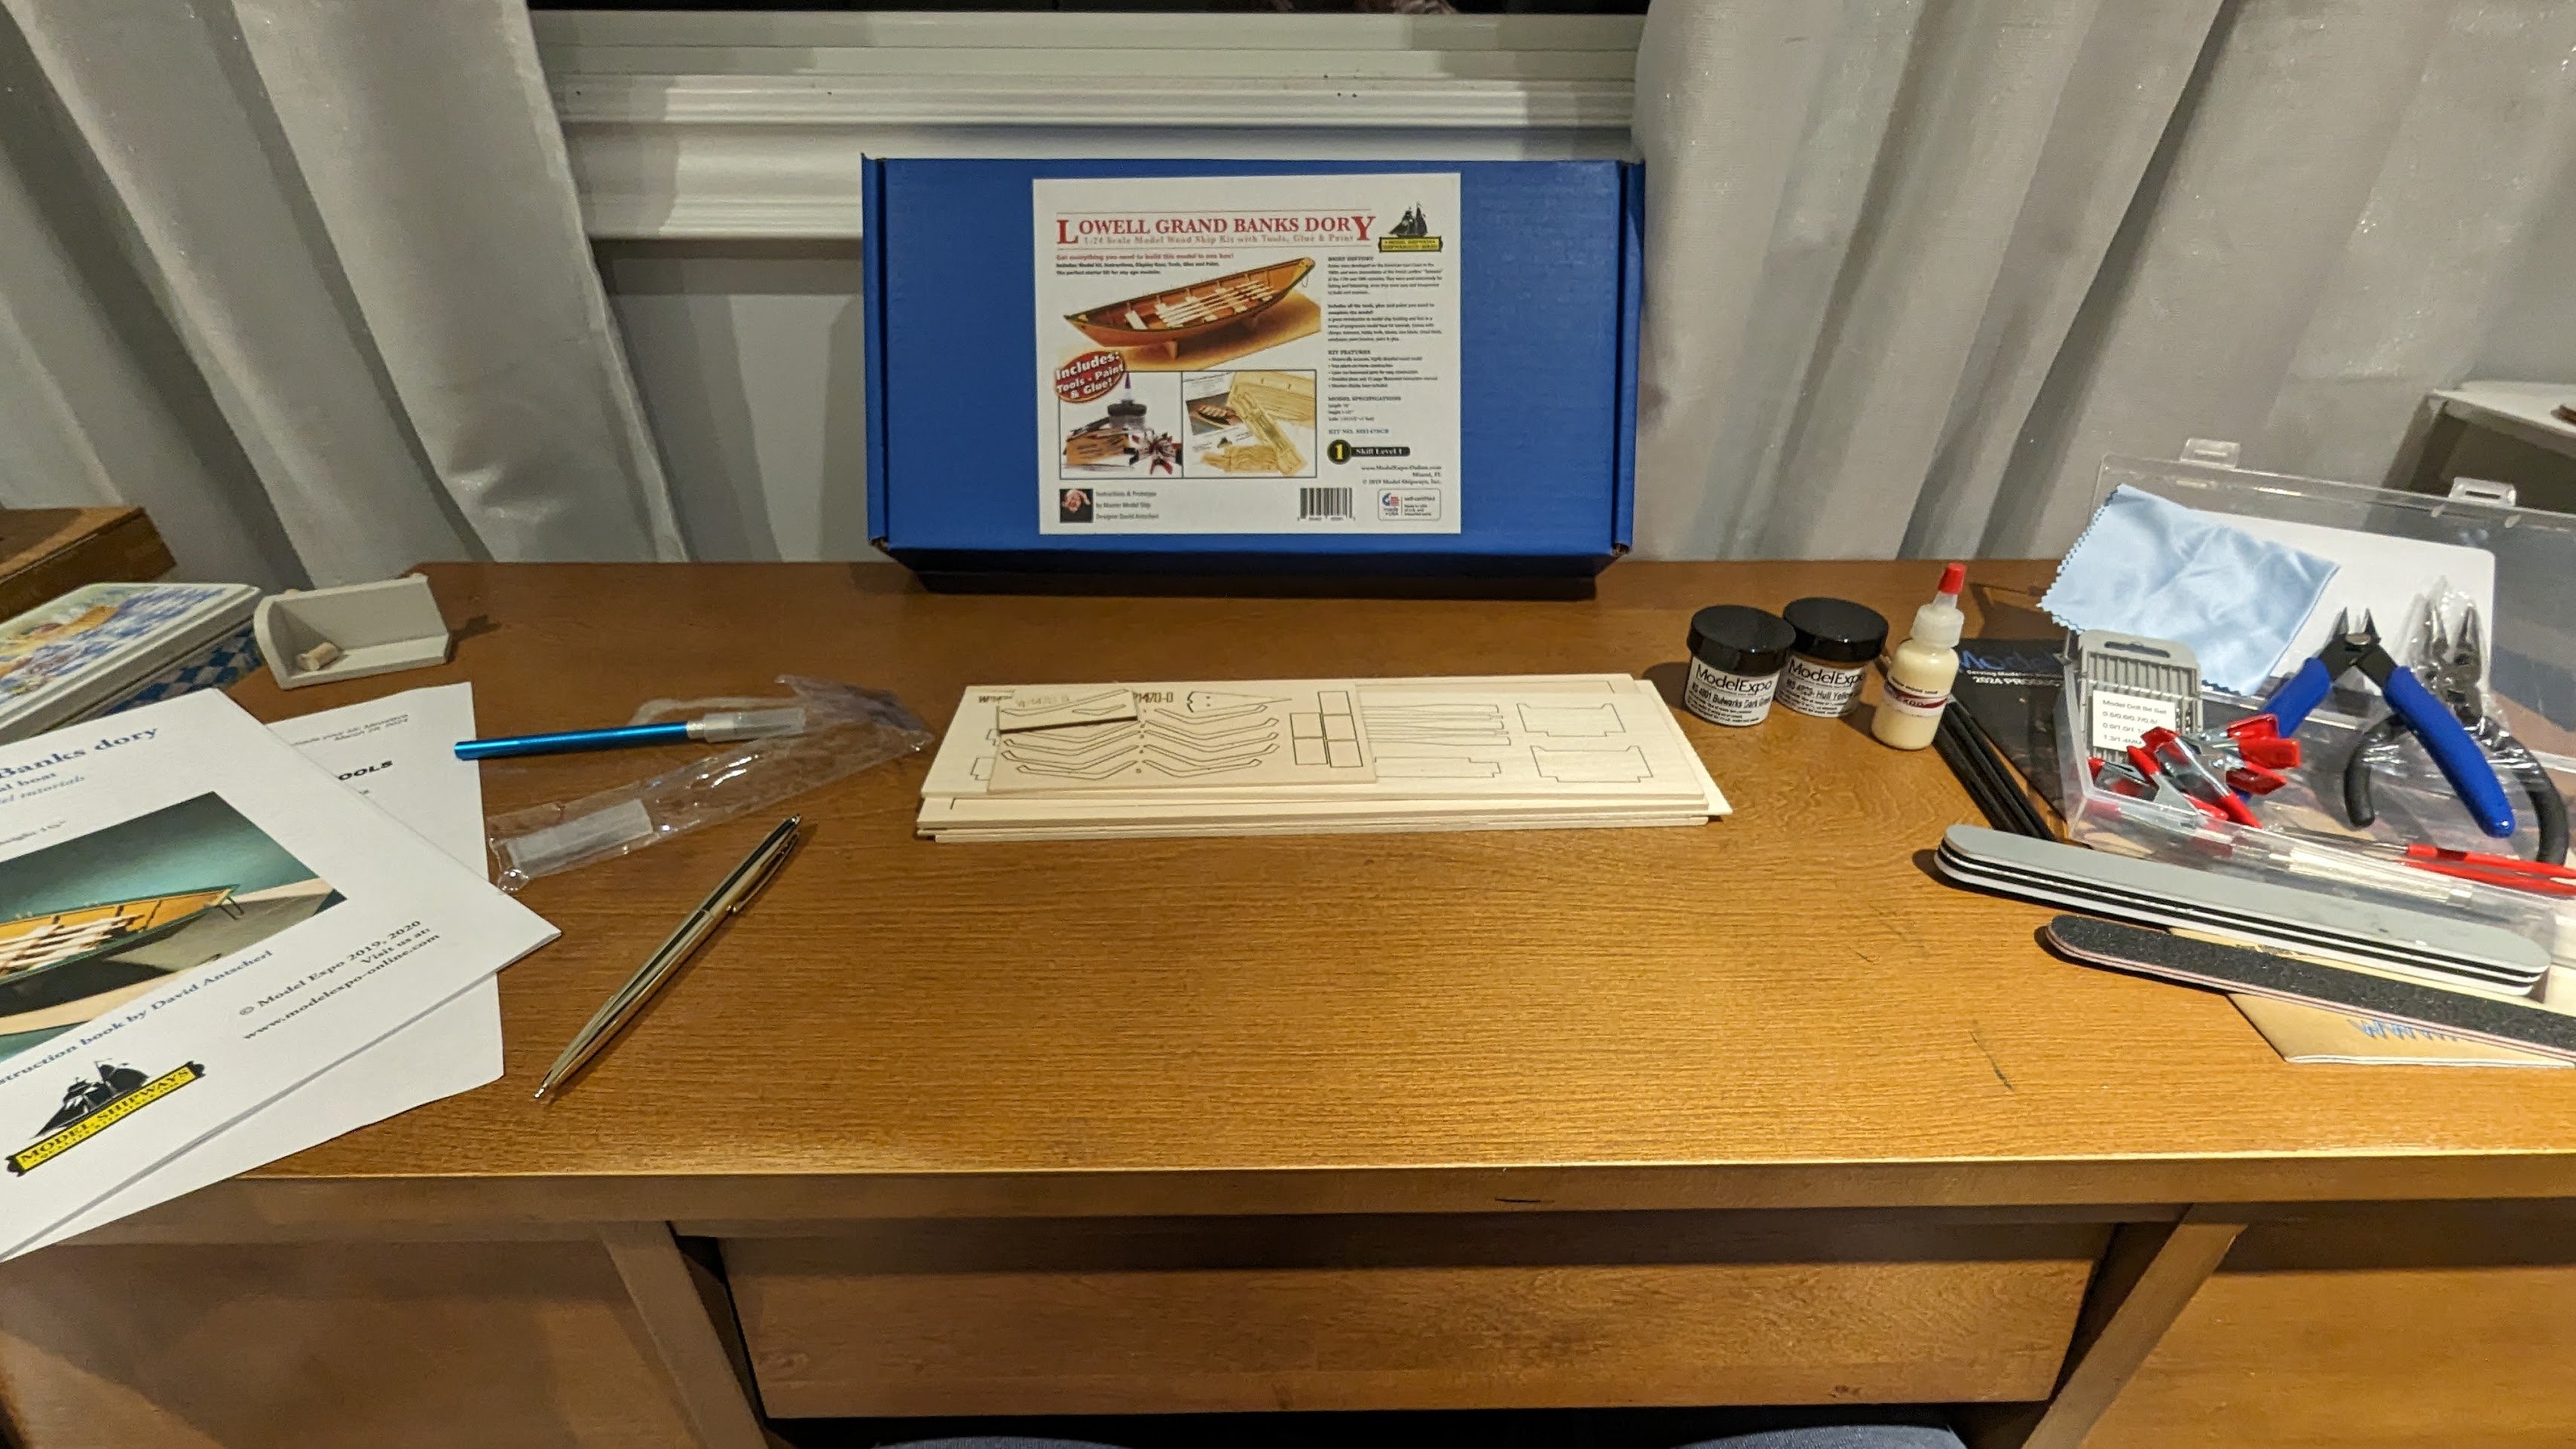
 My first kit arrived yesterday. Not the greatest timing since I have a lot going on, but I decided to check things out tonight. I got a little temporary work space set up topnight, and since I have a biopsy early in the morning tomorrow, I didn't get into anything serious. I did open it up and took inventory of all the parts & tools, and started reading into the instruction book. I've been eagerly awaiting this since I ordered it sometime last week. I'll also be getting an OcCre Polaris expecting tomorrow which will come with a cutting board and some other tools this Dory kit didn't come with so I should be in a good spot to start. I'm very excited and a little nervous to get into it, but my mind is a little occupied with my procedure tomorrow. I'll be pretty drugged up; but if it wears off quick enough I may be able to take the first step or two tomorrow evening. If not, I expect to get into it Thursday. I'm not going to list them all, but I appreciate all the other build logs I've read through, they've been incredibly helpful. I may have gotten a little obsessive about going through them and psyched myself out a little bit when it comes to certain steps though! Thaty may not be a terrible thing since I'll be extra aware of common issues. I'm already starting to remind myself that this is my first model and is not going to be perfect, however I still like to take care in what I do.

-
 Yikes, I goofed. I don't know how I set this build log up in the wrong era. I couldn't see a way to move from one era to another, so I deleted everything I could. I'll try setting up the build log again tomorrow - hopefully in the right place. sorry...
 -
 So I've had Model Expo's Constitution on the self for over two years now. I had been waiting until I finish my last build (HMS Victory Bow Section) before I start. Well I just finished The Vic and am wasting no time in jumping right into this one. It will be good to get away from tying knots and back to wood working. I've been following some of the other Constitution builds (UsedtoSail, CaptainSteve and others.. and getting inspired!) And I'll be shamelessly borrowing ideas from their logs to apply to my own build. So I'll start with the typical early decisions to be made when doing a Connie build :-) --Aiming for a 1812 version or reasonable proximity (of course) --Open waist --5 window stern --White stripe (not the yellow) --Gun deck with deck and real cannons. (Not the dummy barrels.). That's all I got for now, but I'll be posting pics soon as I start to assemble the frame and bulkheads. K.
 -
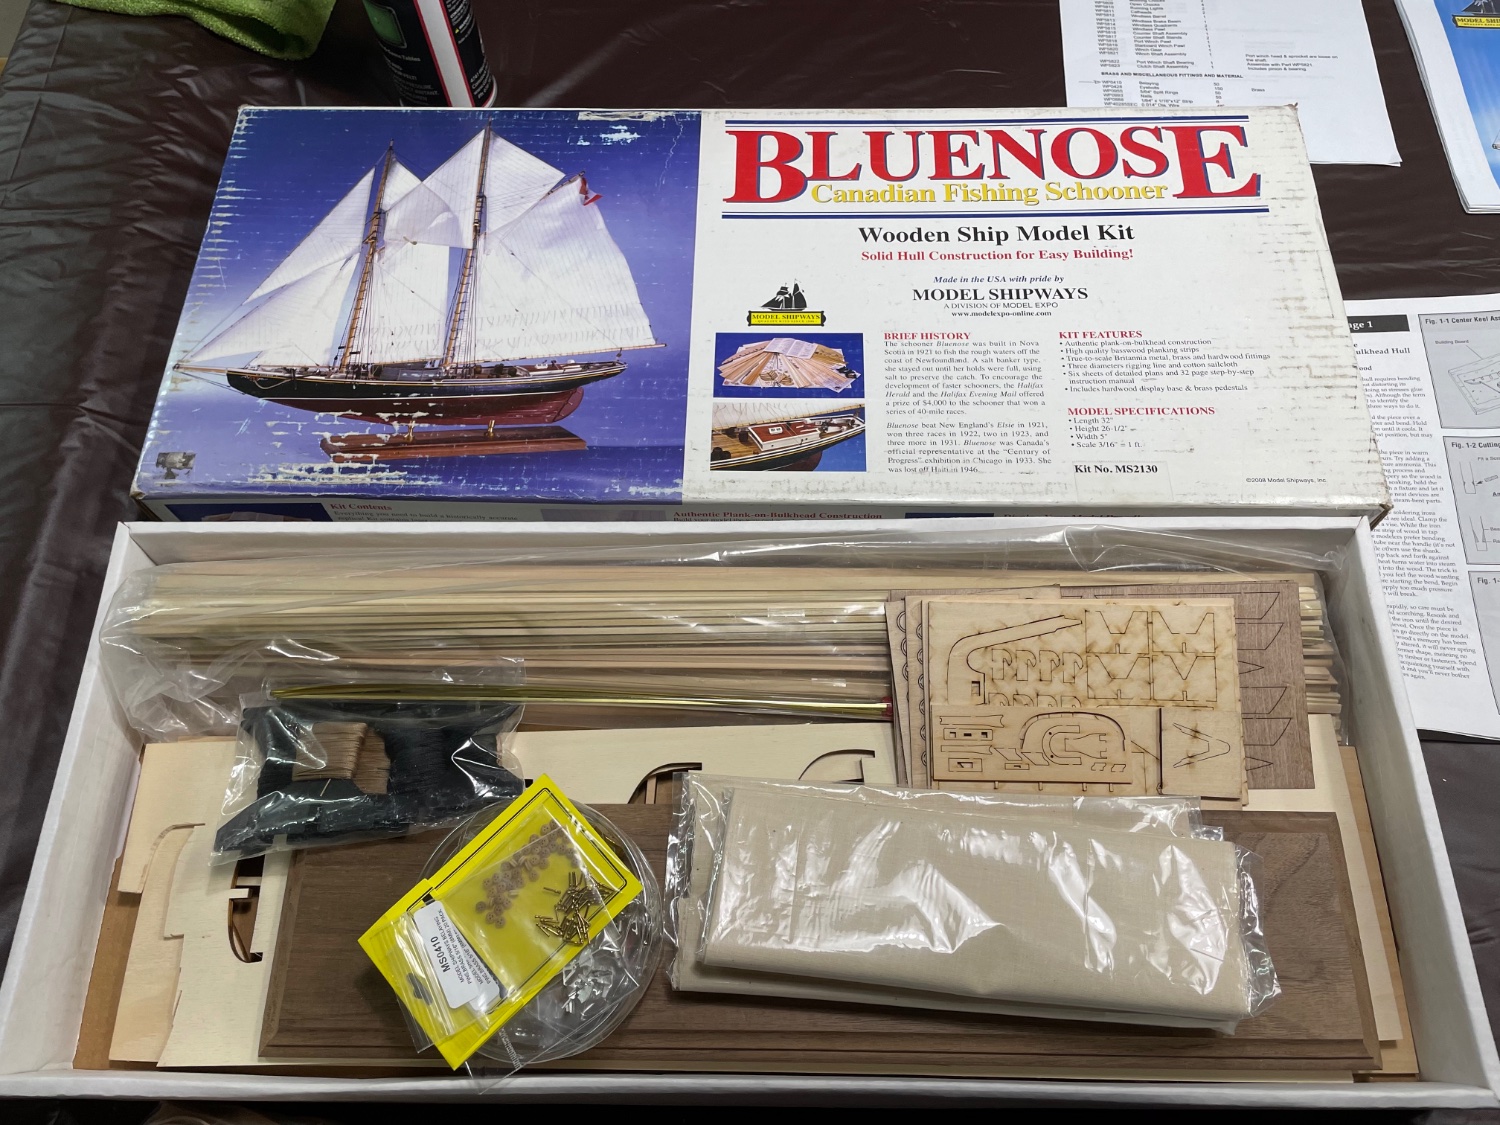
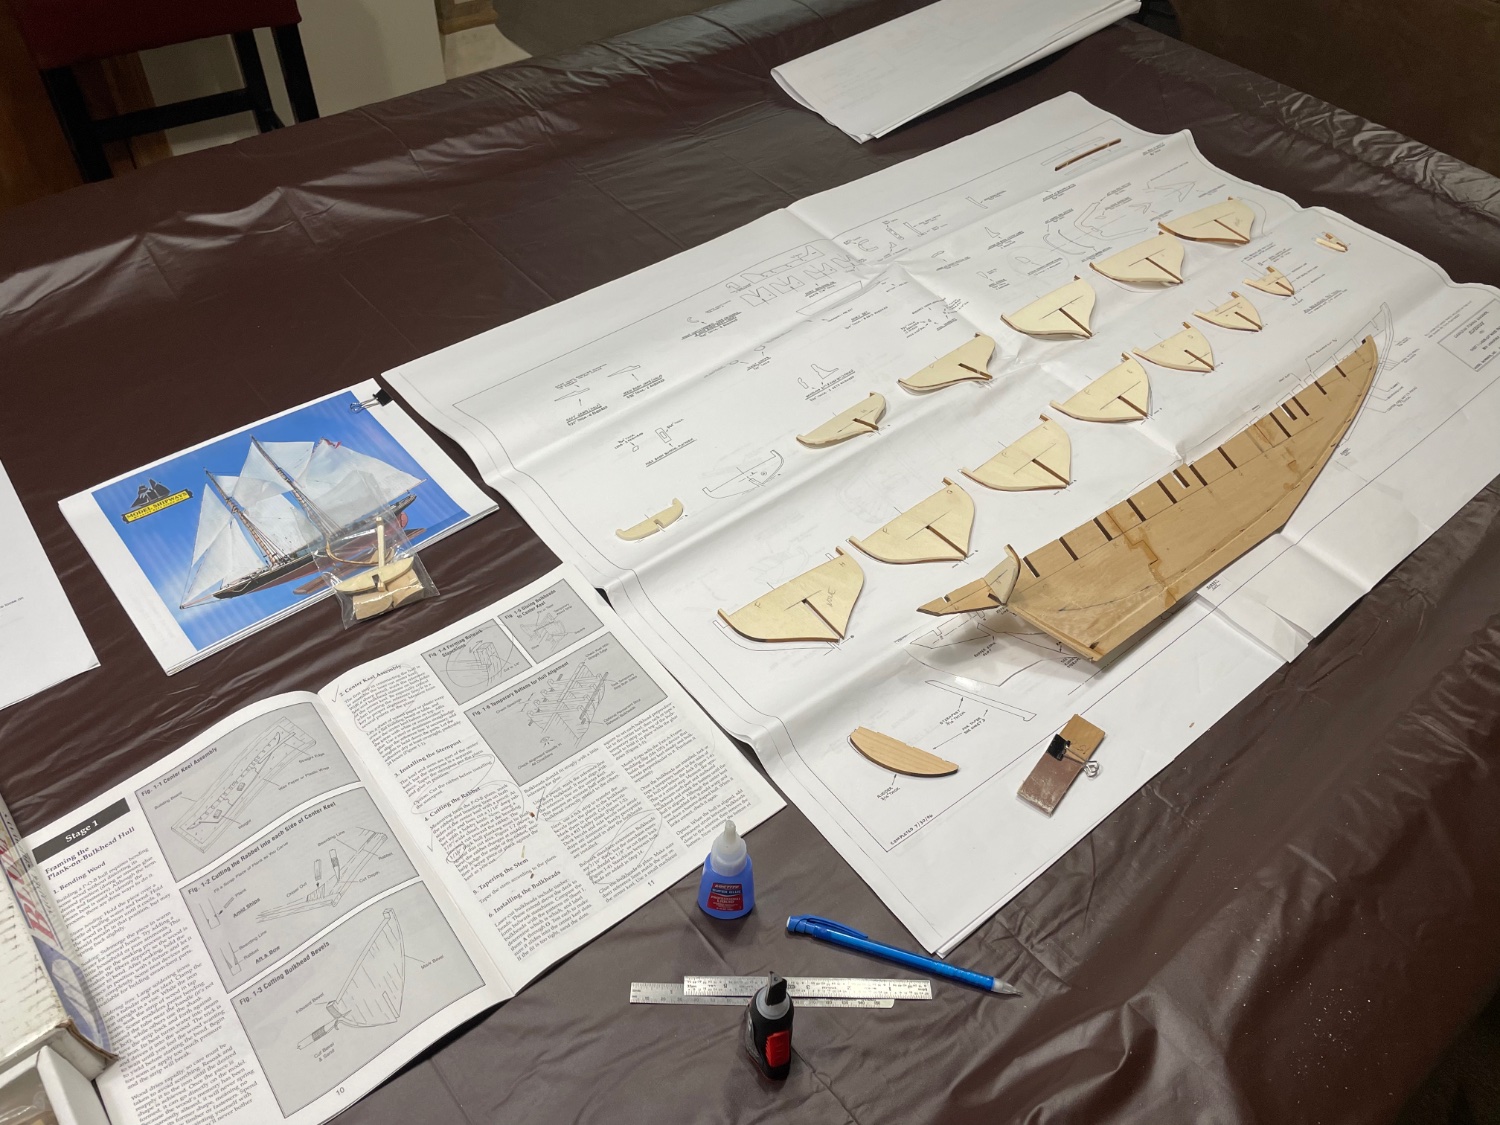
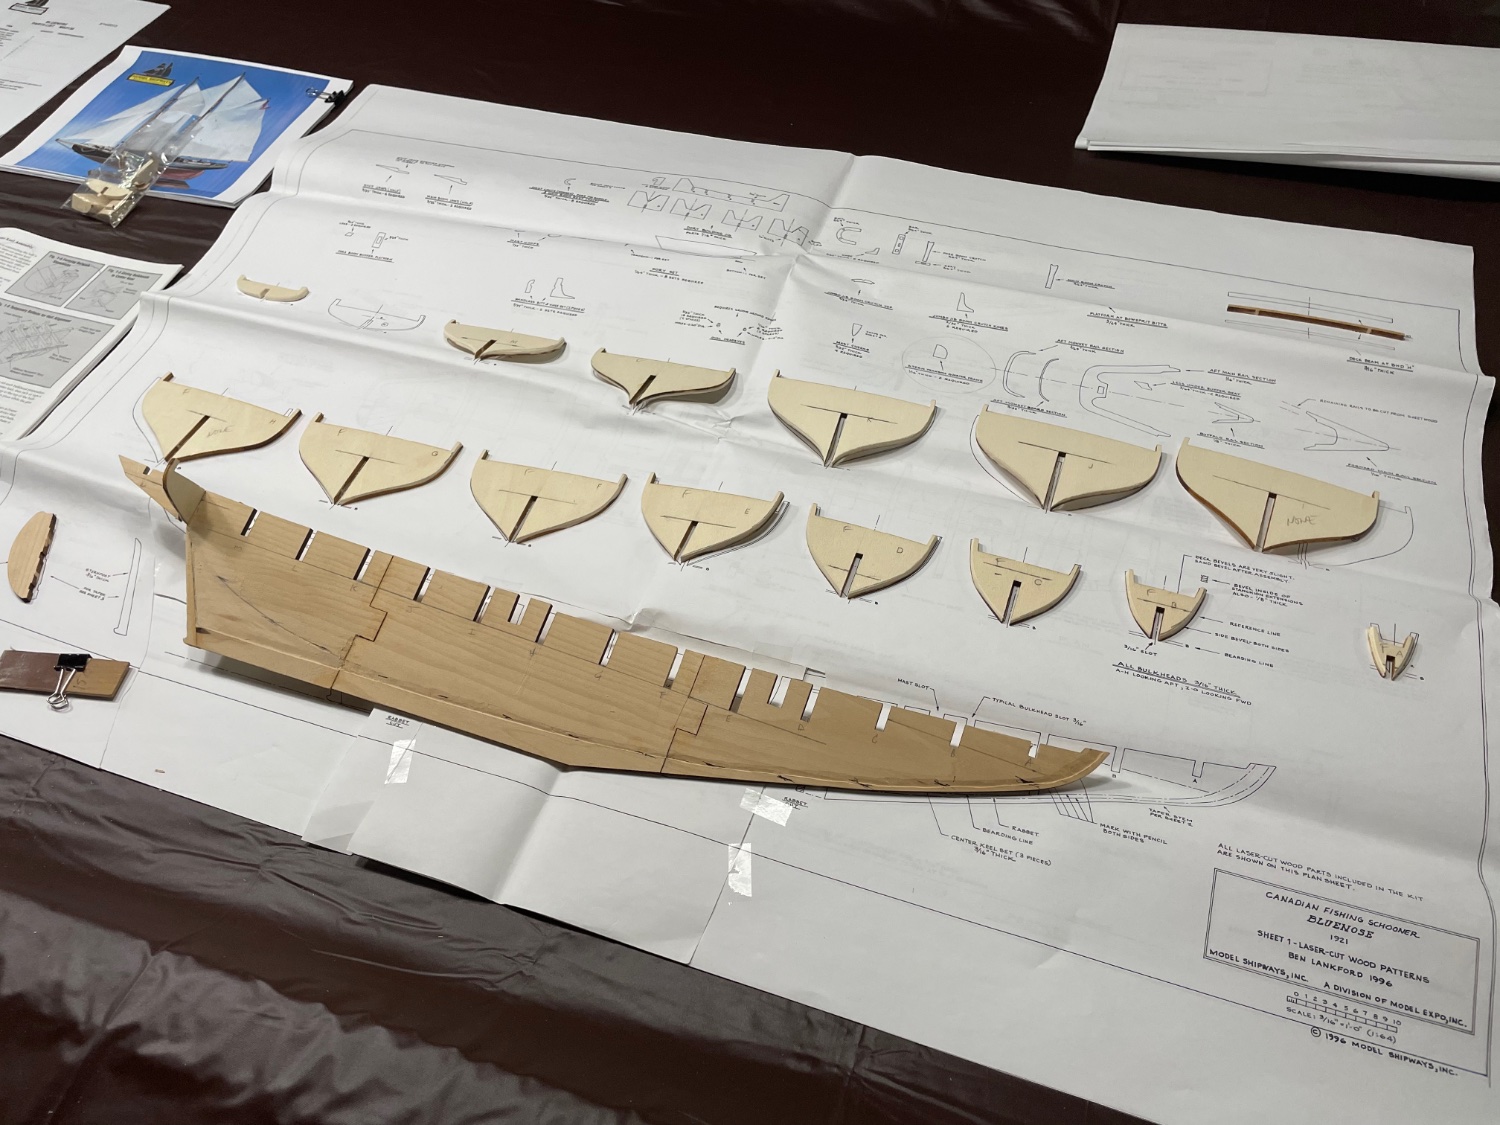
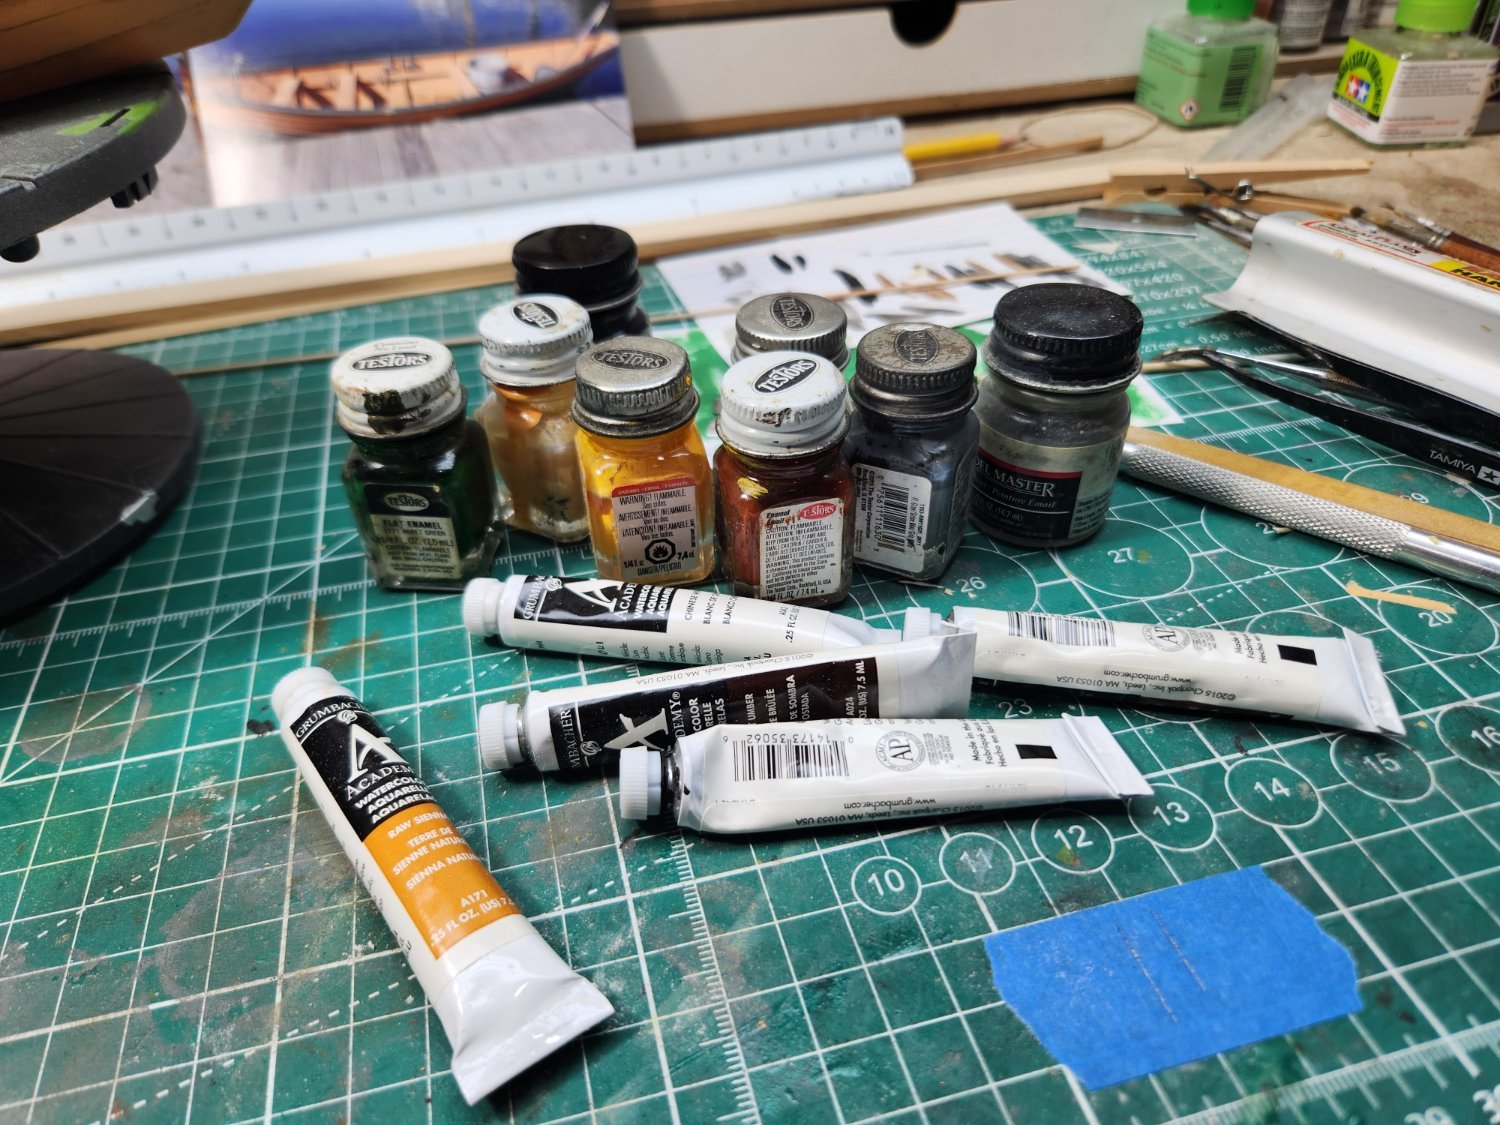
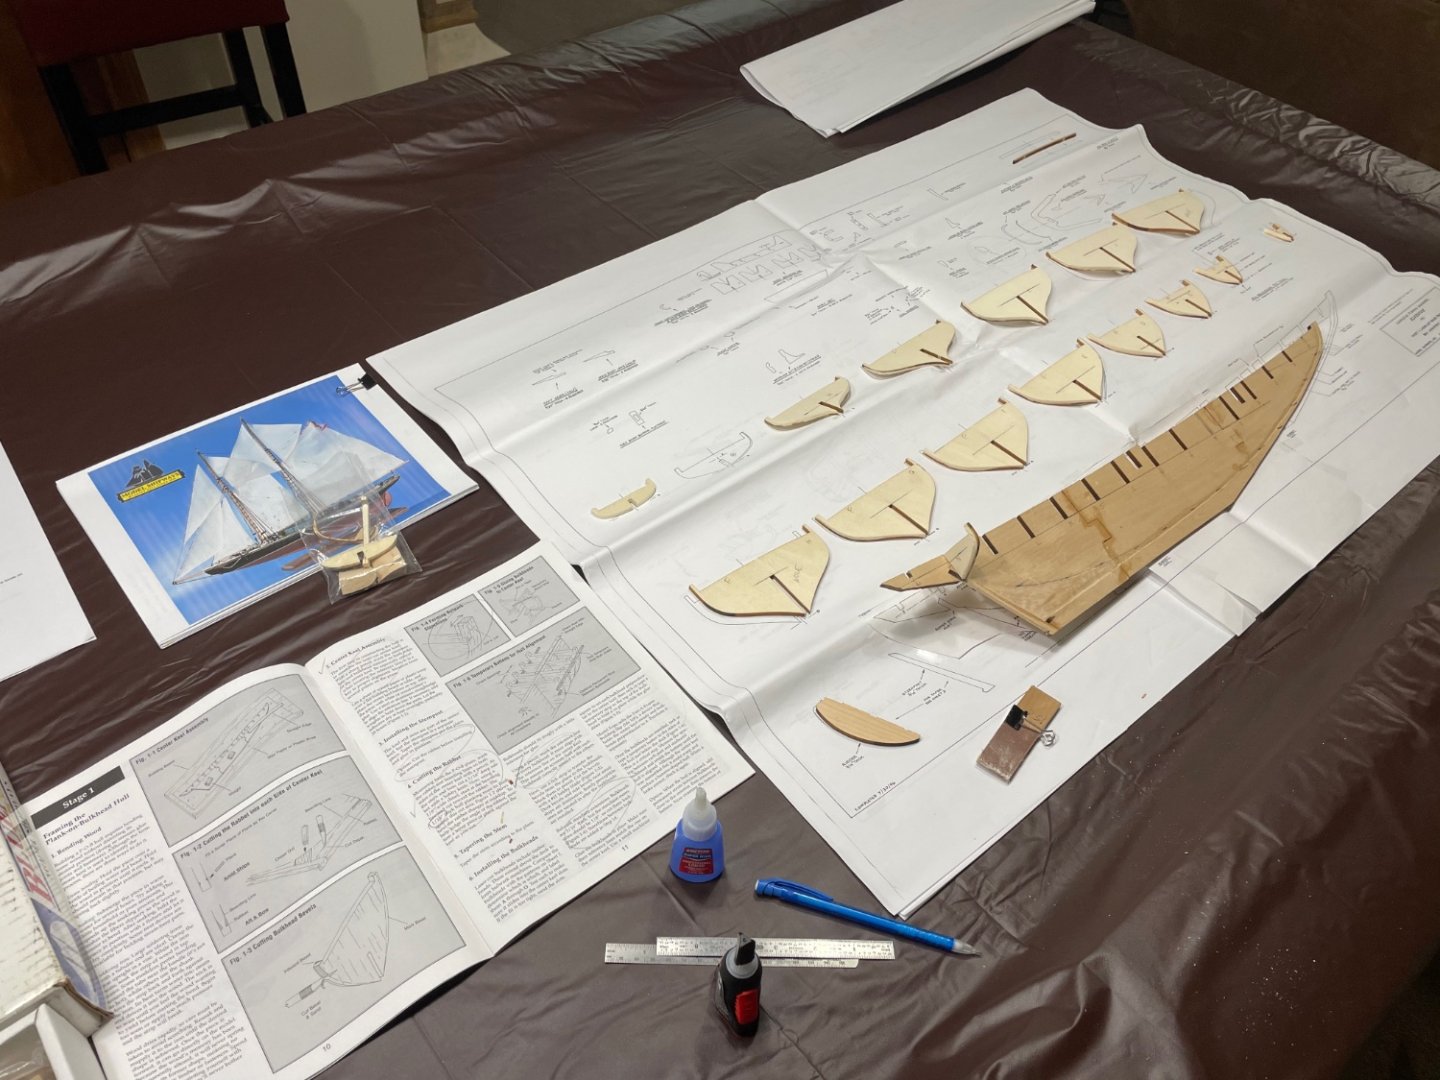
 One of my eBay finds out of my stash. I have decided to break up the marathon task of building railings on the Robert E Lee. I will continue building those railings in the evening as I wind down the day. Here is a link to my Robert E Lee Build My new day job will be the Bluenose Canadian Fishing Schooner by Model Shipways. This kit was purchased for just 78.00 including shipping on eBay. The previous owner had started this kit. The kit was only missing some of the deadeyes and belaying pins. Those were easily sourced from Model Expo and are on order. Today I have laid her out to determine what has been started, the work is salvageable. Previous owner had only progressed to step 5. I have also assembled the 3 piece Keel and started the work of smoothing out the bulk head tapers and Rabbit Joints cut by my predecessor. I have been wanting to build the beautiful schooner since I first saw a model of her in the Bluenose Hotel in Bar Harbor, Maine. Plan to visit Nova Scotia next summer and see The Bluenose II among other things Canadian. Wish me luck, I am hoping my skills are now up to the task of doing her justice. Cheers 🍻

-
 Well, no rest for the weary, as they say... Finished the Ballahoo and have three more ships waiting for shipyard clearance. As I had indicated in my signature section previously, my son gave me the Bluenose as a gift some 16-17 years ago, when I had never thought about doing shipbuilding as a hobby, and had way too busy of a working life to devote time to this hobby. I opened the box, read some of the instructions, and pretty much thought "Nope, looks too complicated. I'll put it away for another day." So, here we are 16-17 years later and I have found model shipbuilding as a fun and rewarding hobby after all. After three completed ships, it is now time to work on the Bluenose. I think I have learned enough skills in my three previous builds to make my Bluenose looking good. Time will tell. There are plenty of really good build logs for the Bluenose that should help guide me on my way. I look forward to digging into them and doing as much research and observations as I can. Since there have already been plenty of prior build logs, I won't post the obligatory "open the box and look at the contents" picture and post. But, I will point out the difference in the box covers from what it looked like 16-17 years ago (shown in my pic below) and how Model Shipways box cover looks like today. Thought that was interesting. In doing a quick comparison of the instructions included in my Bluenose box to the online pdf instructions available on Model Shipways' website, they look the same, so it doesn't appear the build process has changed much, if at all. So... here we go with another build log! Appreciate all the follows, likes, comments and criticisms that this build log will generate. Thanks!
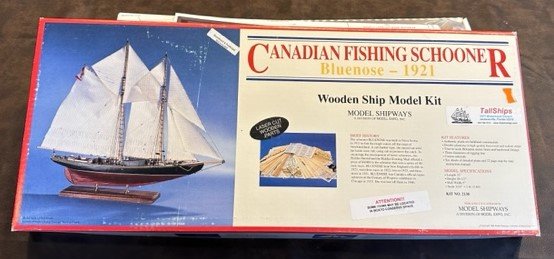
-
 Welcome to my USS Constitution build log. This is my second wooden ship model. I completed the Artesania Latina 1808 Swift model a little over a year ago (which just reminded me to close out that build log). My first attempt was going to be this USS Constitution (1:76 MS2040) kit. Fortunately it was backordered (Christmas gift from my pop), because after previewing the somewhat limited pages of instructions available online - I realized that the build would need to be based almost entirely on the 8 or so architect style giant plan sheets. That was out of my league, so I thought it prudent to start with something a bit easier. I chose the Swift 1805. Having completed the Swift, I took some months to complete a "Mayberry Street Miniatures" doll house project with my daughter. And then it was time to begin the Constitution. To set the stage, I am an extremely novice woodworker. I had gotten in a bit over my head with my Swift project (especially the rigging), but was quickly able to work my way out of any problems with a lot of thought, creativity, and help from the great modelers on this site. For me, this hobby is a series of challenges to be solved, often requiring the learning of a new skill - and new tools 🙂. This build log will be of most interest to newer modelers, but may offer a few chuckles or familiar memories for the old(er) salts. Given the complexity of the model, the sparse instructive guide, and the 8 detailed build sheets, I chose to follow Bob Hunt's practicum (fancy term for instructions). I ordered Mr Hunt's "Sophomore Course: USF Constitution" (a CD with 12 Chapters), with a photo CD add on (about 1,000 pictures of all stages of the build). The practicum was exactly what I needed, unfortunately, it didn't contain anything pertaining to masting and rigging. So if you think you'll need help with anything above the deck, you should consider ordering Mr. Hunt's "Sophomore Course: USF Constitution, Masting & Rigging" (6 chapters and an additional photo CD). I've printed the first 3 chapters so that I'm able to look ahead. I also refer often to the sheet plans, as well as the supplied kit guide. The kit itself is chock full of goodies. Though I'm a bit surprised at how small some of the cannons and rigging parts are - they seem to be significantly below scale. I inventoried the entire kit for parts, but found the effort to be surprisingly helpful in familiarizing myself with nautical terminology. I'm not going to provide a run-through of the kit, but suffice it to say, I found it worth the money (even though it was a gift!). There are very few things you can buy today that will provide years of challenge, entertainment, and a beautiful result for under $600 (retirement is a long ways off, so I'm working on this after work, and between sports and school events). I'll be updating as time permits, which means my updates will usually be backfilling my progress. I look forward to any comments and suggestions! Cheers! Andre
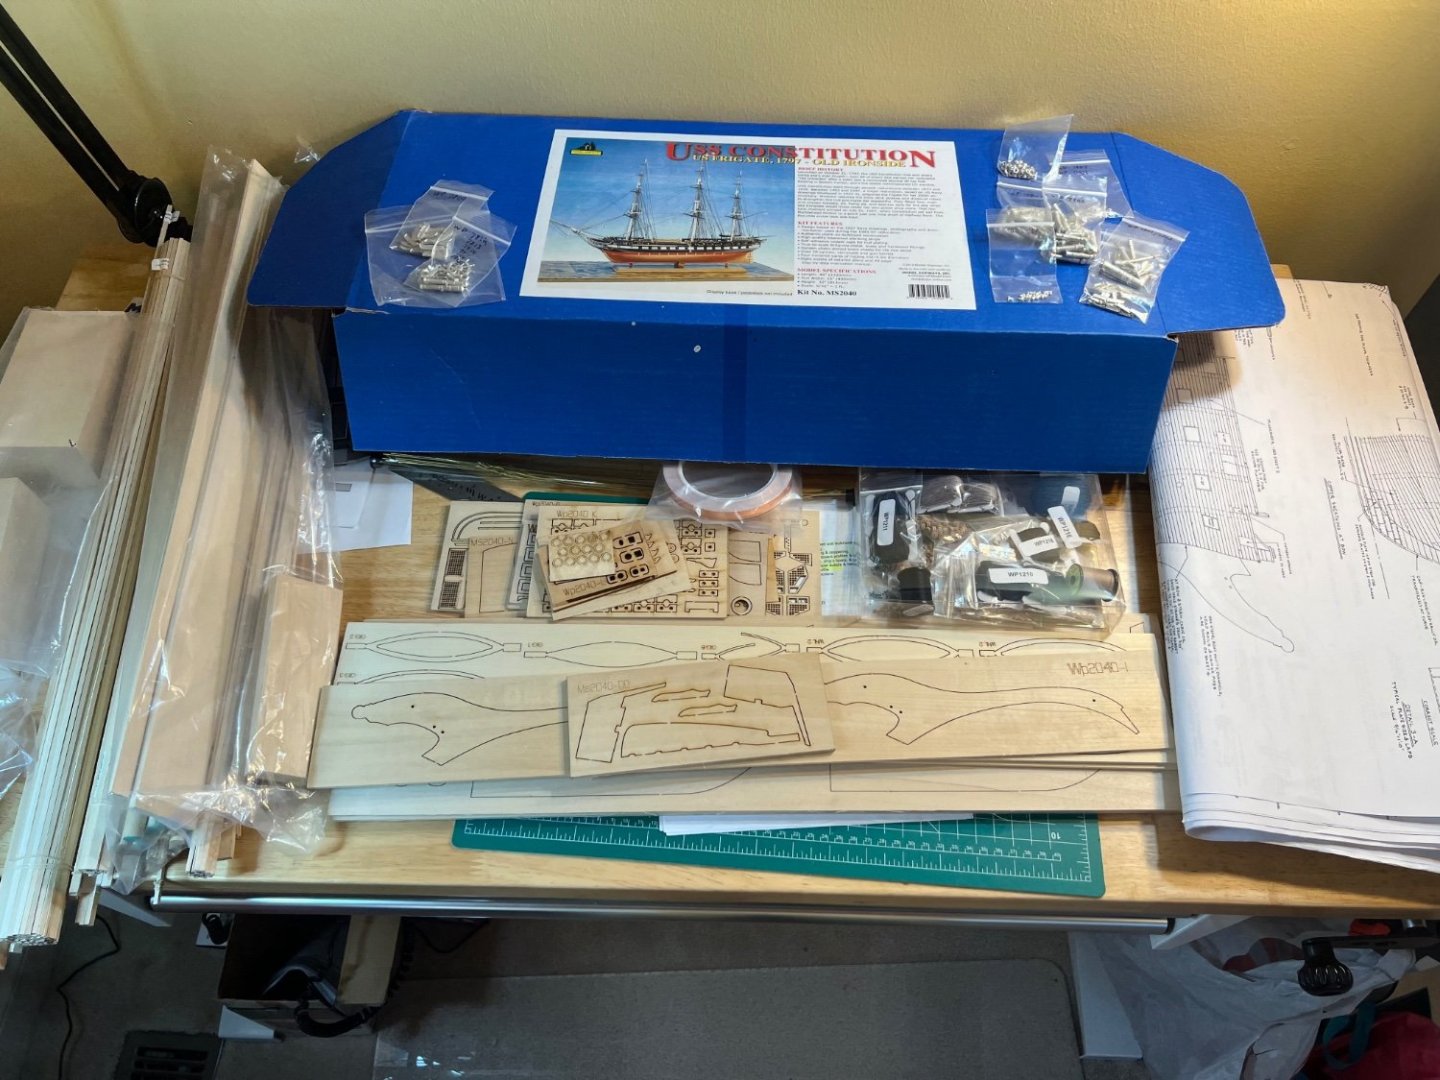
-
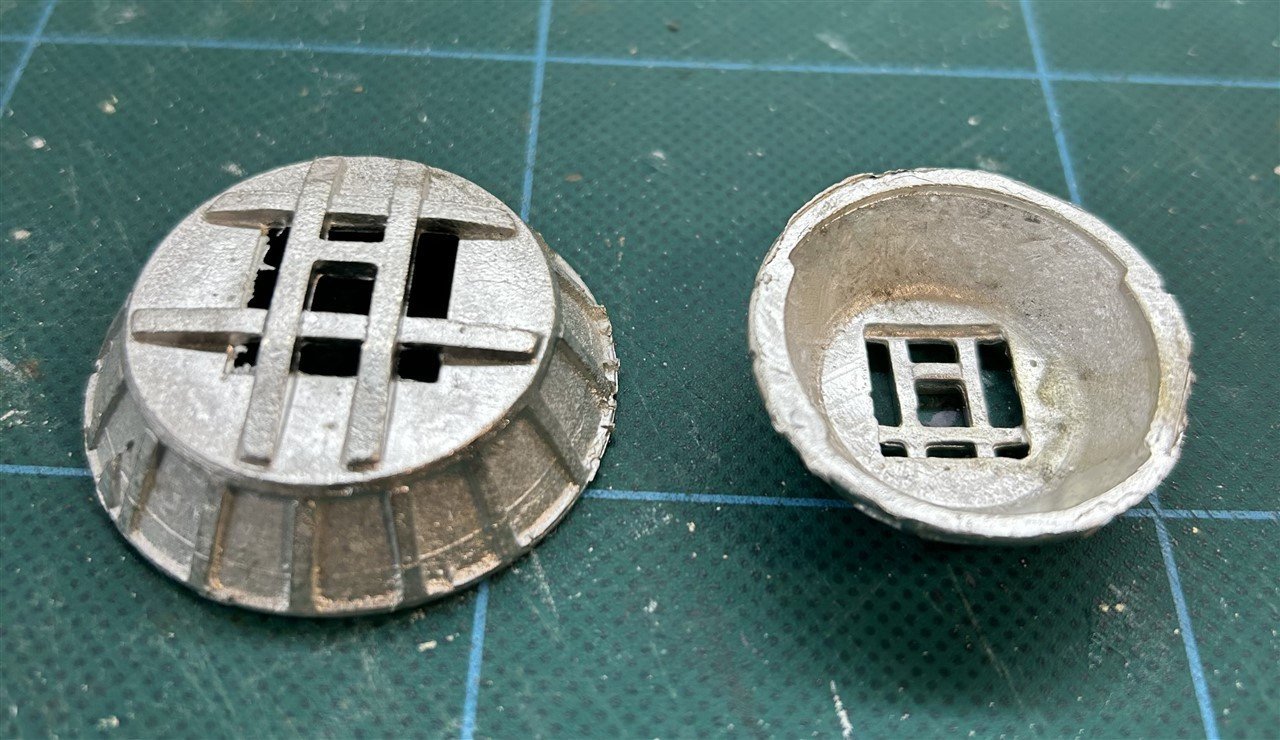
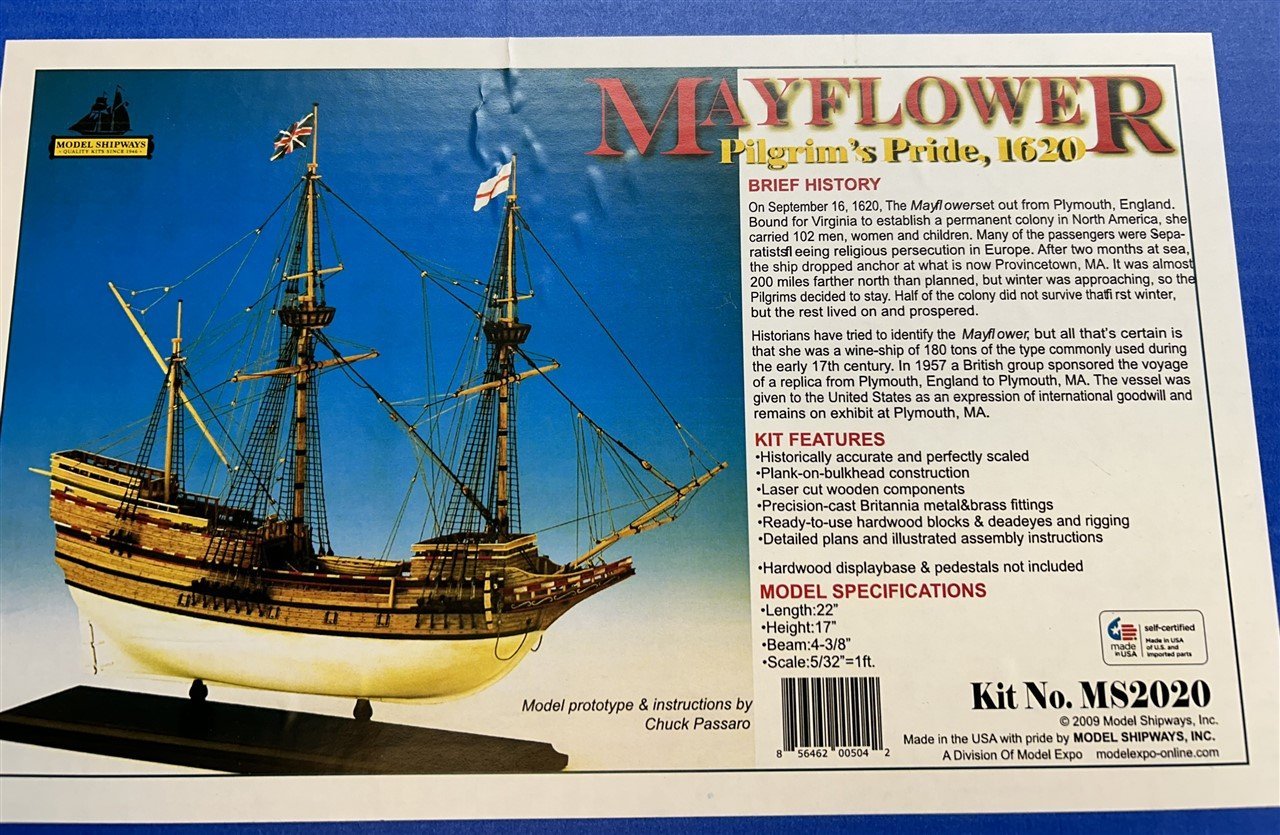
 My next build will be the the Model Shipways Mayflower 1620, MS2020. To be a little pedantic, this is really a model of the Mayflower II replica of 1956, based on research of William Baker and the best knowledge of what Mayflower of 1620 might have looked like. The replica ship was sailed from the UK to the US in 1957 where it was gifted to us and exists today as a floating museum. It has recently been undergoing a new restoration, where the color scheme has changed from the original Baker scheme as depicted on the box cover shown below. At some point I will need to decide if I want the designed scheme or to follow the changes of its current incarnation. This is not a terribly complex kit, parts wise. There are 4 sheets of plywood parts for the framing, and 4 others of assorted parts, plus the usual strips, dowels and other bits. I will make just a few observations of the contents quality here. Firstly, the keelson piece (bulkhead former) was quite warped. As this forms the whole basis of hull alignment, that was a disappointment. Got to get this bit straight or else you end up with a banana boat! More on this later. Also the cutting on the plywood could be better. Several parts were not cut all the way through, so there was some work to do to finish the cuts. The plywood in my kit was quite "splintery" at the edges and tended to get a good bit of delamination when cutting or sanding. That's going to present some challenges while fairing. One thing I tend to fuss about is Britannia metal parts and how badly they tend to be made. I was pleasantly surprised in this kit because as these things go (low expectations, I know) , these are not too bad. Even the crows nests might be usable, though there is a good chance I might want to scratch build new ones when I get there. The blocks and "rope" provided are typical MS fare, which is to say not very good. I will be making an order to Syren to get proper materials.
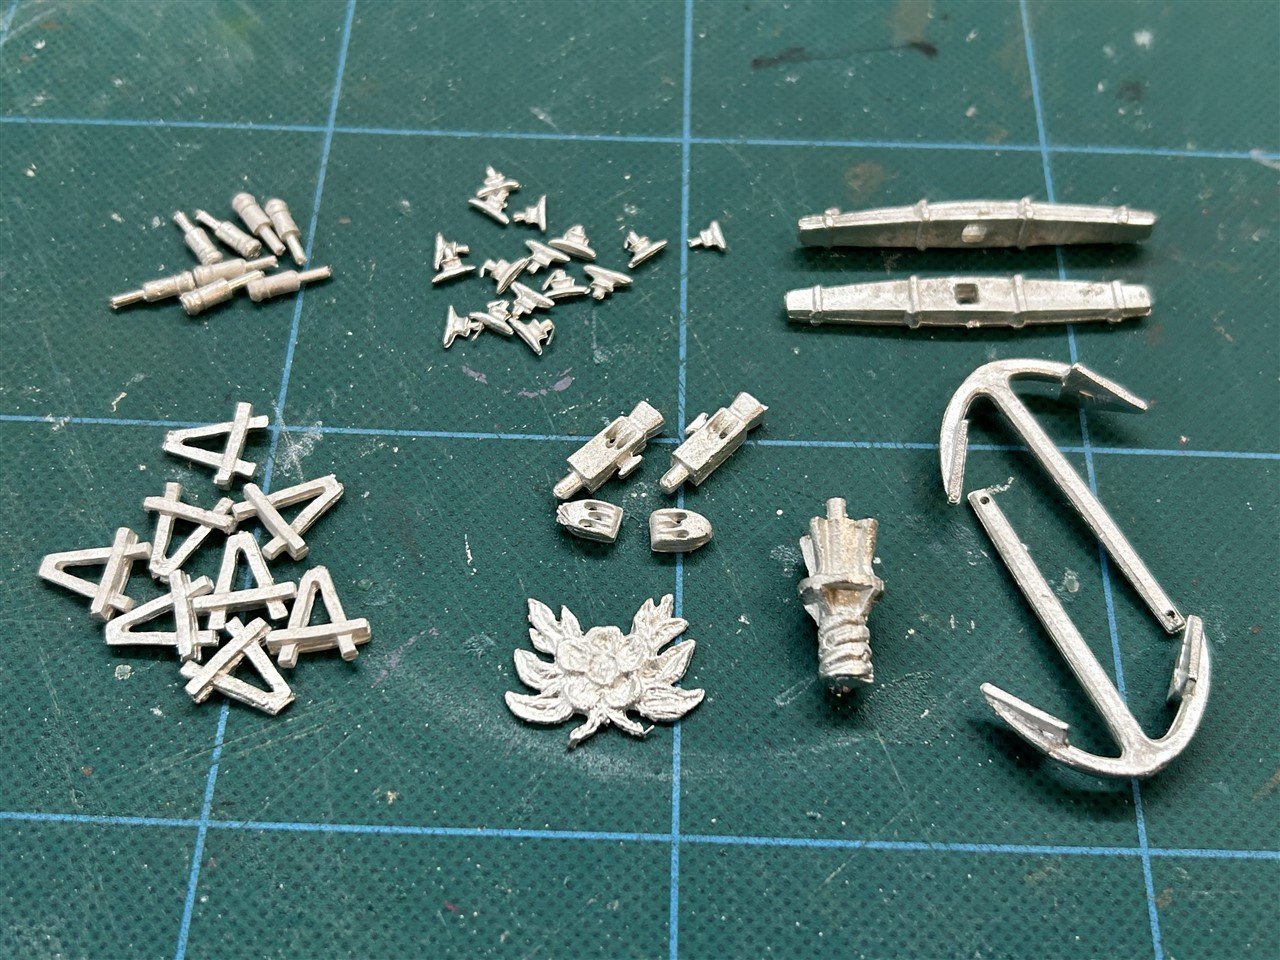
-
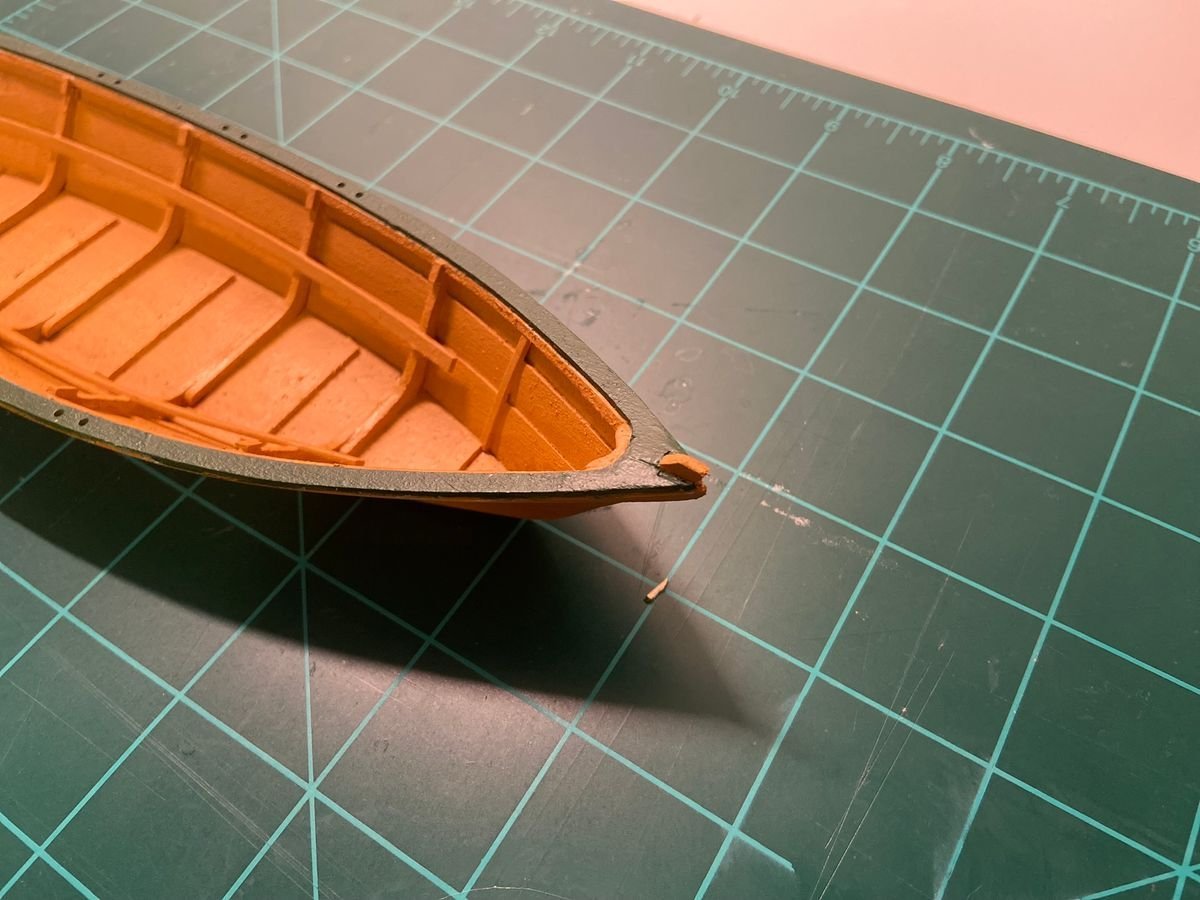
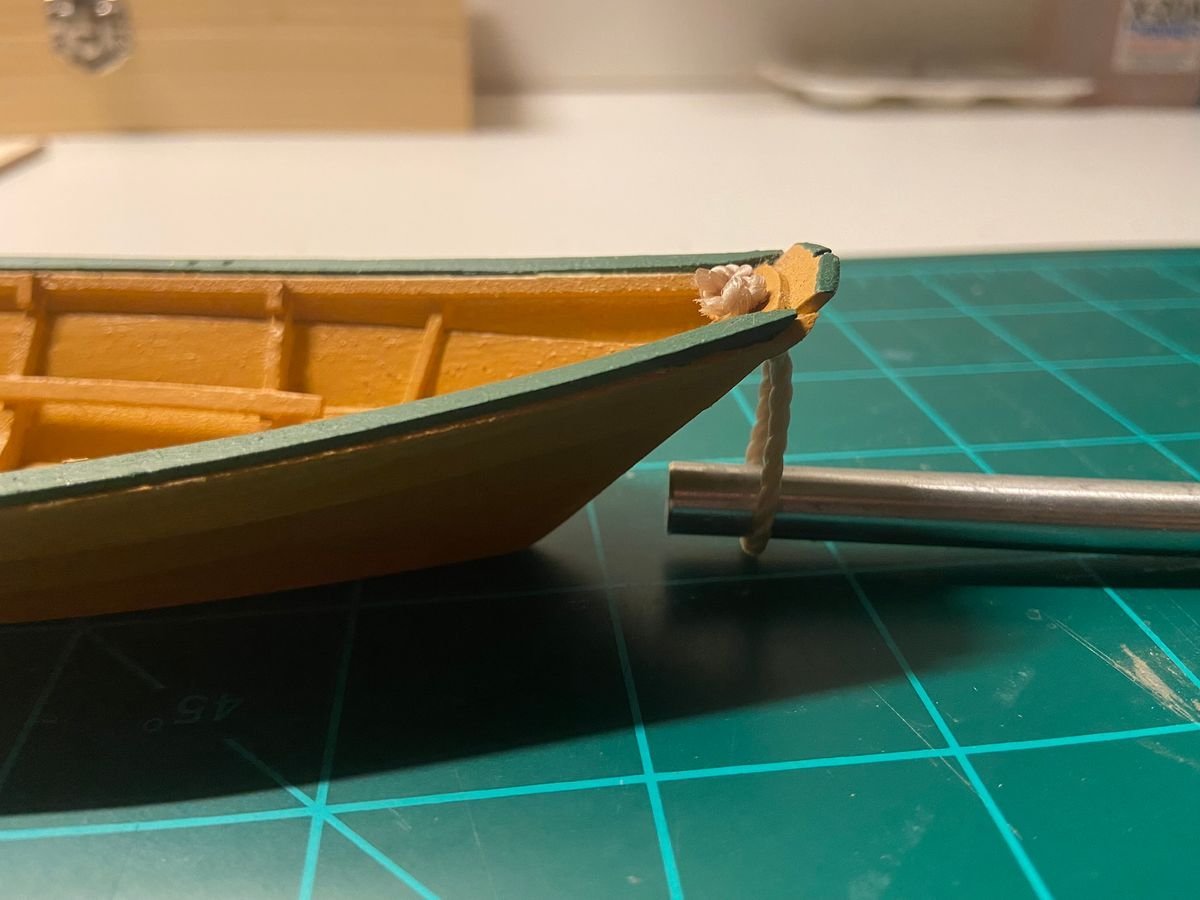
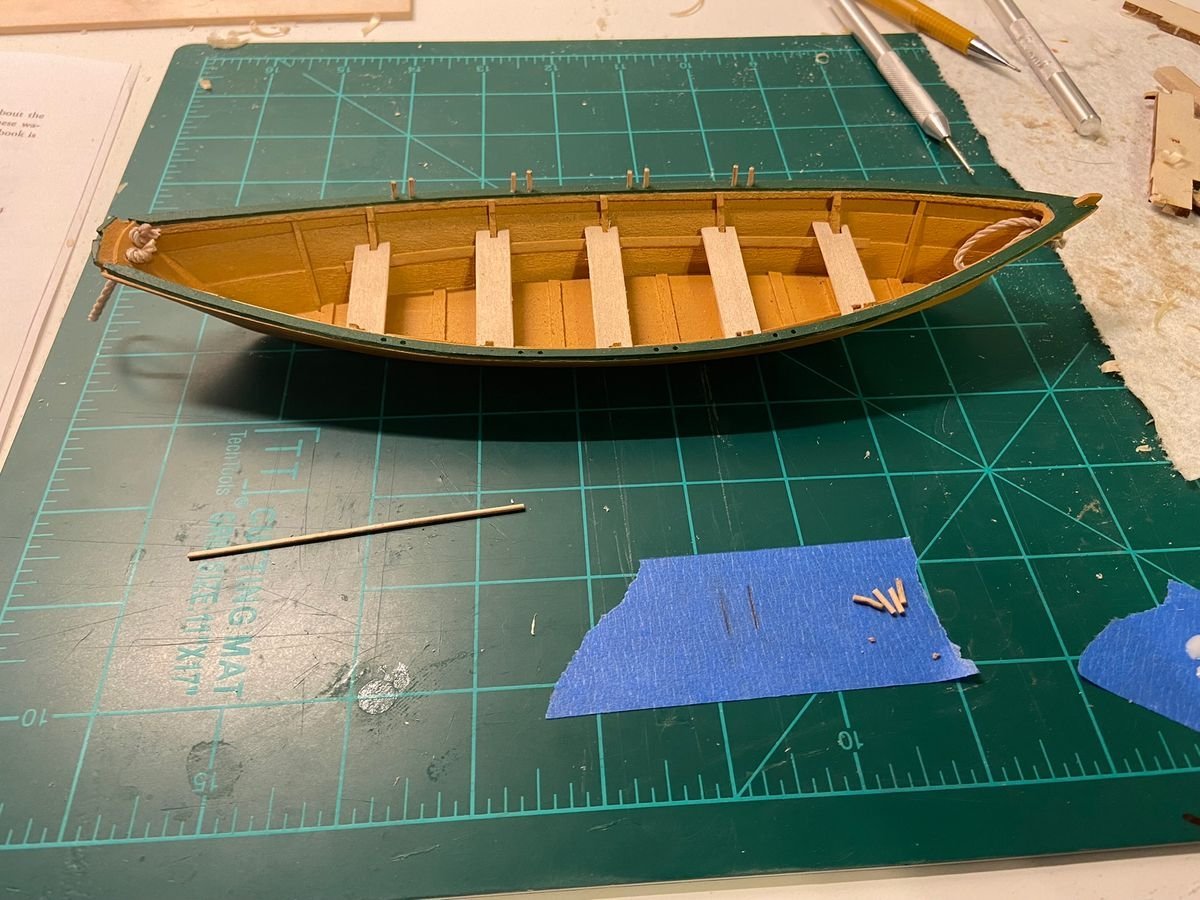
 Let’s start with some background. I stumbled onto the Modelships Reddit a couple years ago while doom scrolling in the middle of the night trying to get my infant daughter to sleep. I became pretty fascinated by the intricacy of some of those builds but didn’t have the time to even think about getting started back then. A few months back I started toying with the idea of giving this a shot and ultimately couldn’t shake it. I don’t have any prior experience building models, but for someone with a desk job, I’m moderately handy and have done a fair amount of work on my house over the last 8 years. After some research and deal hunting, I ended up selecting this kit, along with some tools and supplies to get started. I was already pretty well into this build when I found my way to this site, so the rest of this post will primarily be a reflection on the first half of my first build, and I’ll try to transition to more of a true build log once I’m caught up. So far, my impression of the kit is that it is exactly as advertised. It’s very approachable for a beginner. The instructions are pretty clear and easy to follow, minus a step or two where the text got scrambled somehow. There are even some tips and contextual narratives mixed in for good measure. The first dozen or so steps were straight forward and probably don’t need to be rehashed here. The first real lesson for me came when I had to attach the knee to the transom. Despite the instructions calling for slow CA, I used quick CA as that was all I had on hand at the time. I proceeded to nearly glue my fingers together and ended up with quite a bit of excess, which you can see in the second photo. I now have slow CA as well. The other problem was that the transom ended up slightly off center, which led to a lot of sanding later on, though I managed to adjust for it. I was also slightly off center with 1 of the 8 frames, though now that I’ve gotten the side planks on, I don’t think it hurt me too much. Attaching the side planks to the frames ended up being not as bad as I thought it might be. At first I had some difficulty at the stem since it’s not easily clamped, but I managed to find a way to grip it and drip enough fast CA to get it secured while the slow CA set up. The rest of the side planks were affixed with white glue and clamped. Several rounds of sanding later brings me to the last two photos for this post. I’ve already made a bit of progress from when these were taken, so I should be ready for another post in a few days. Thanks for reading!
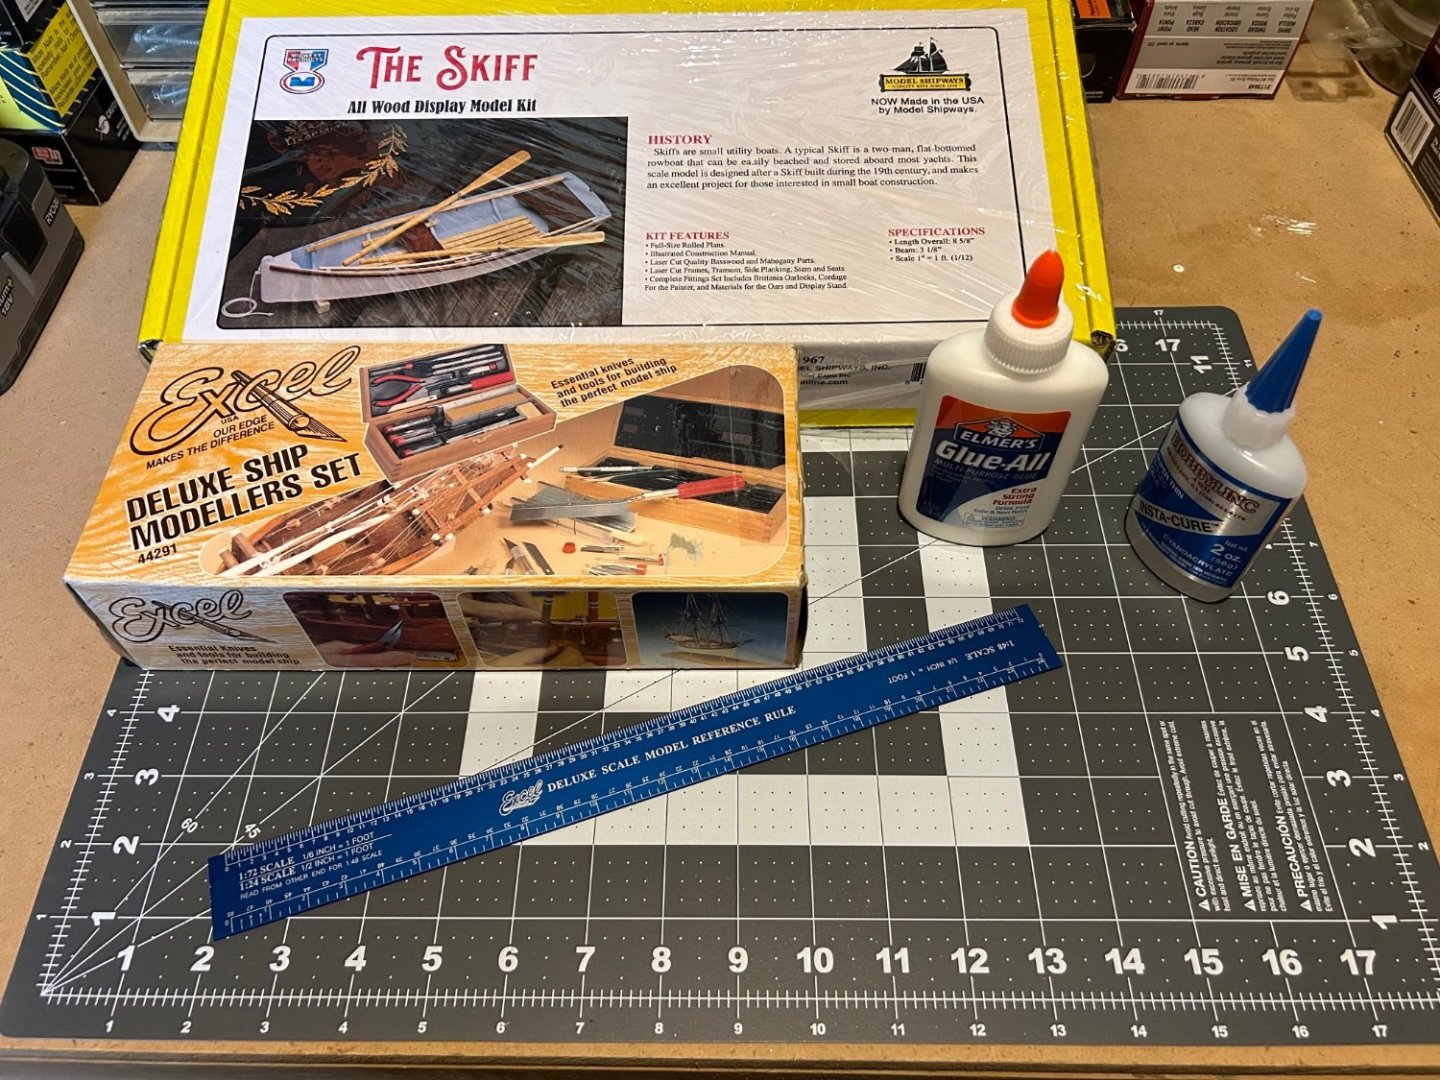
- 8 replies
-
- 5
-
-
- Skiff
- Midwest Products
- (and 1 more)
-
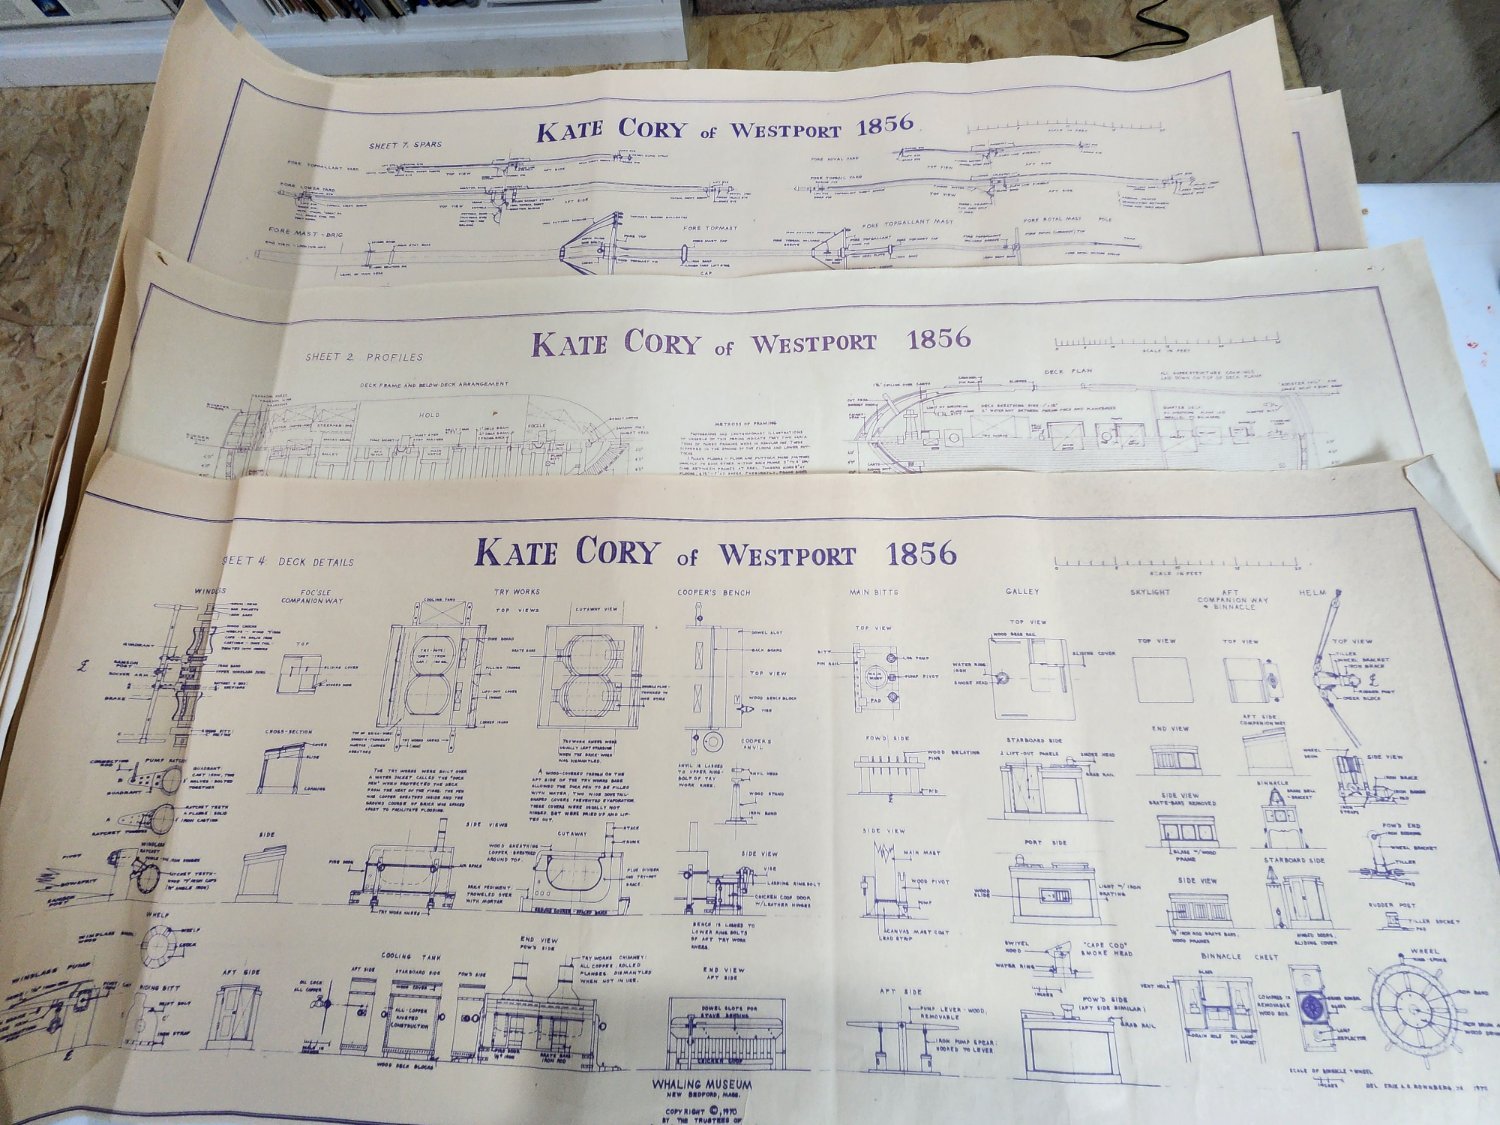
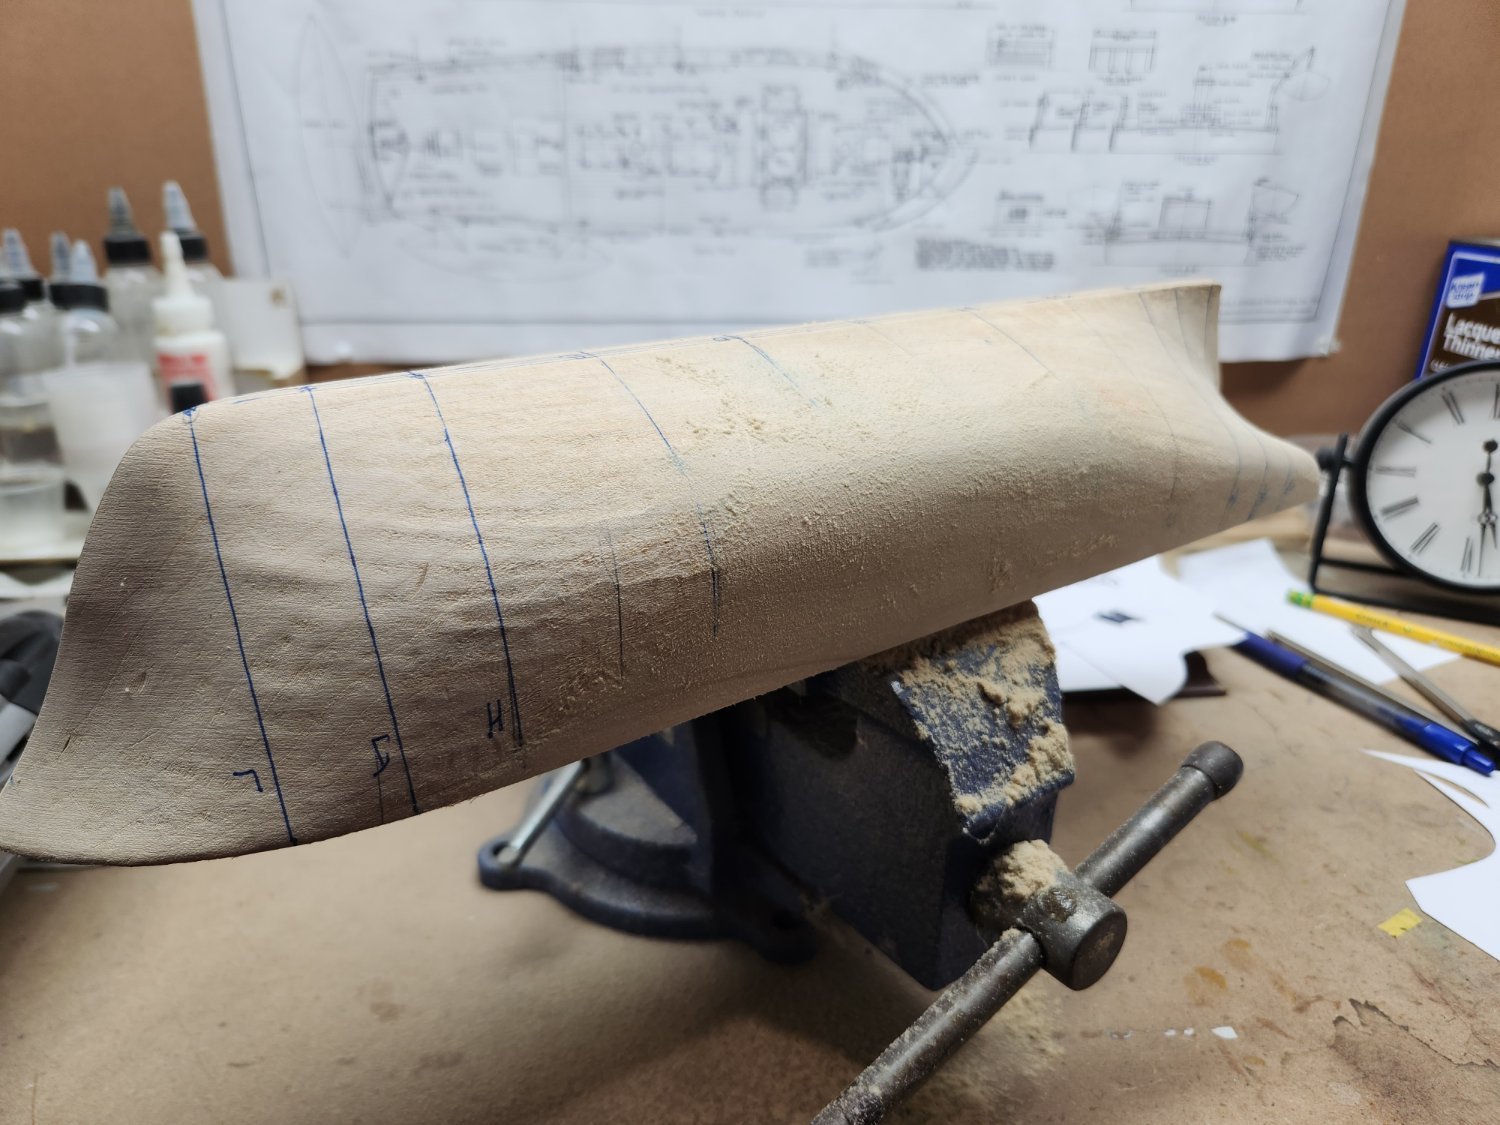
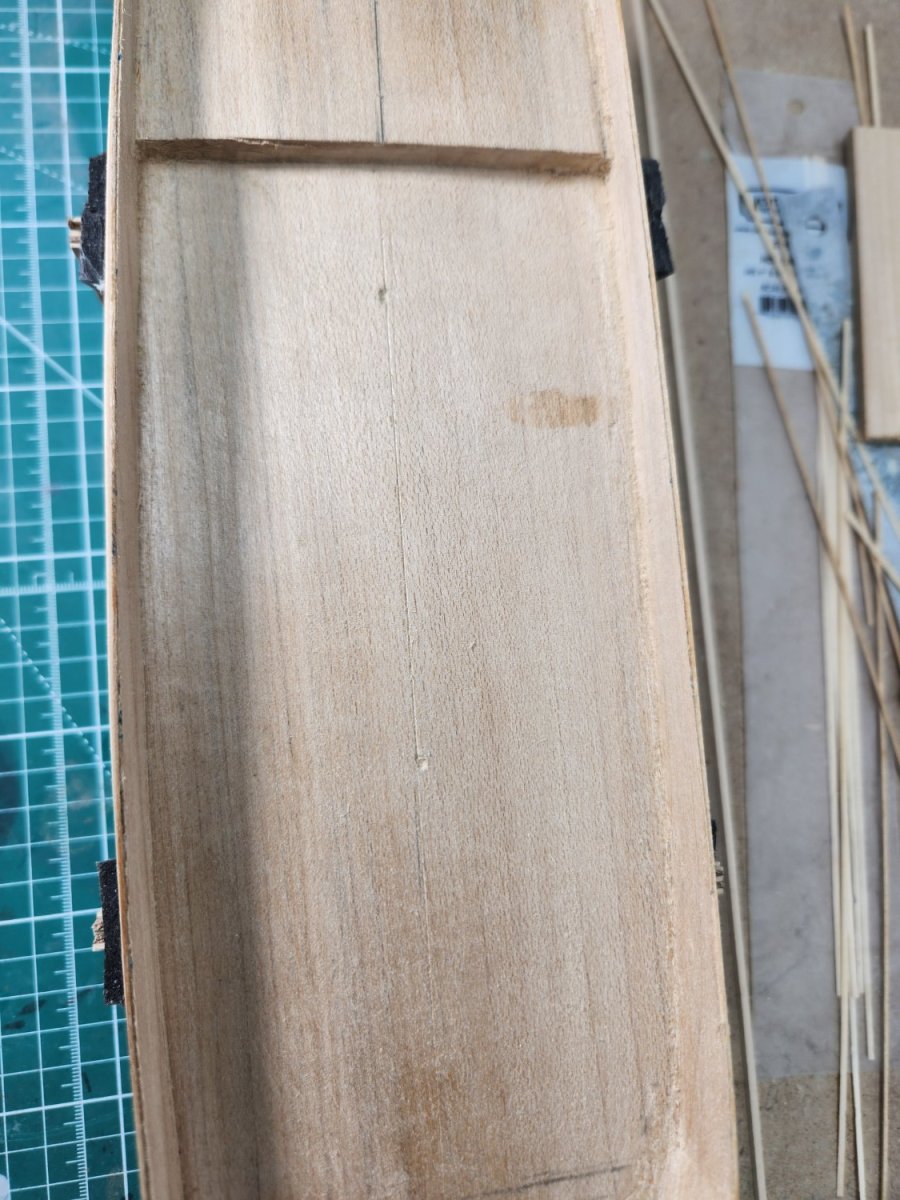
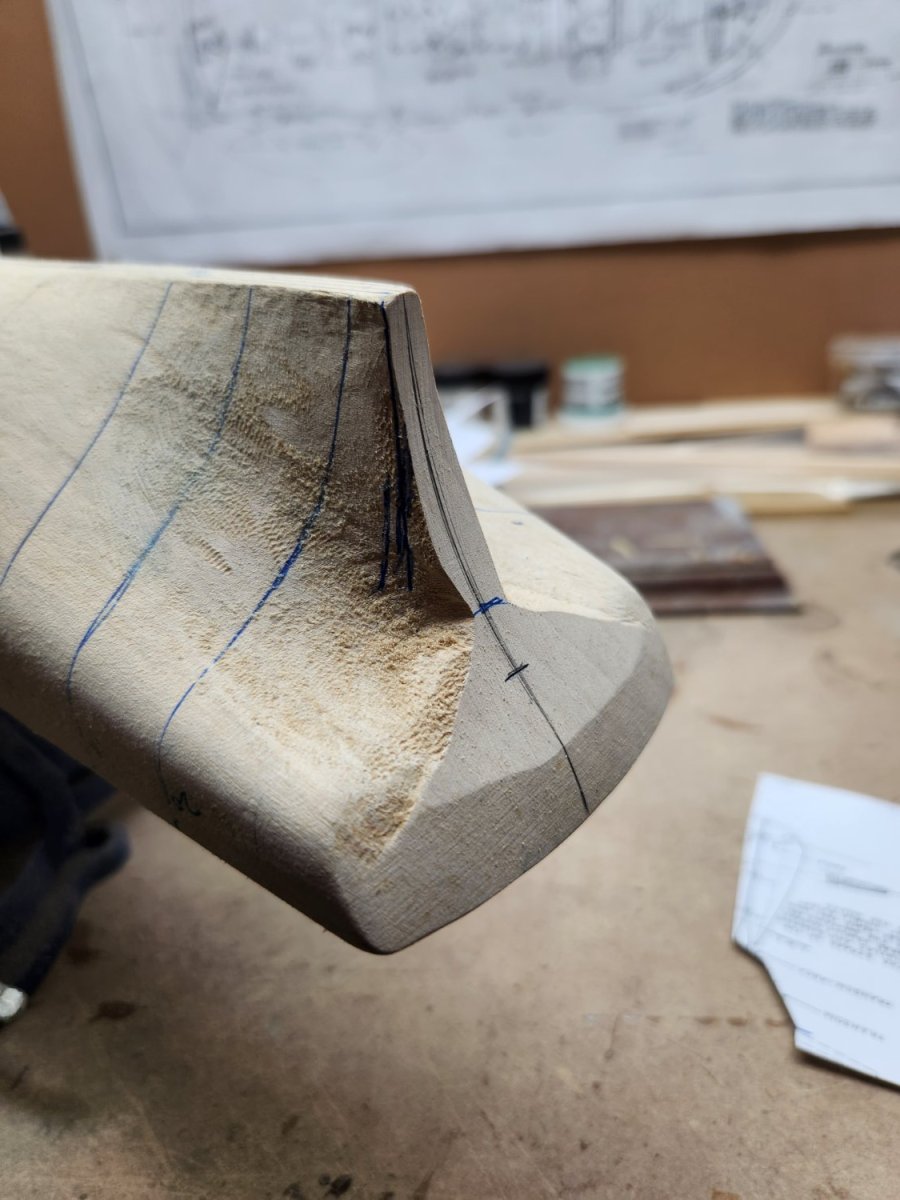
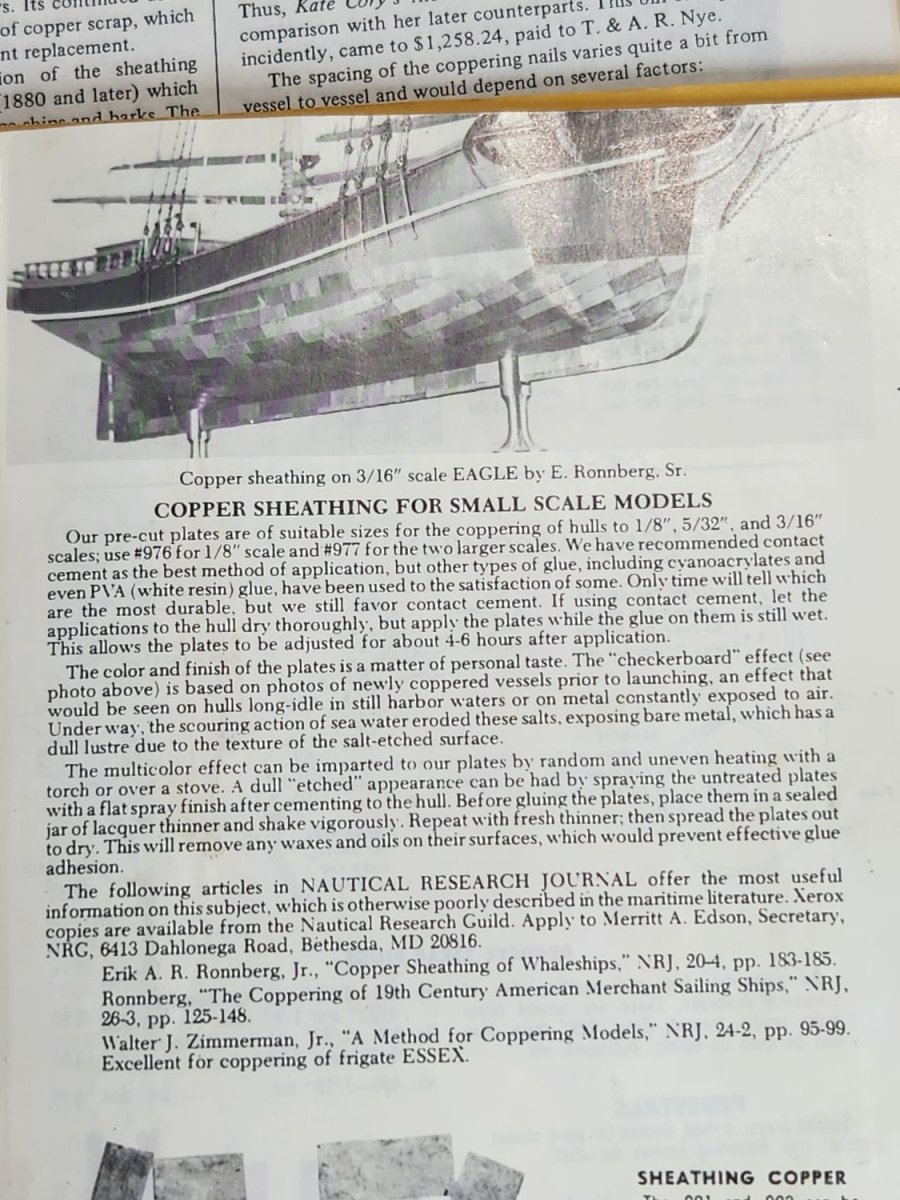
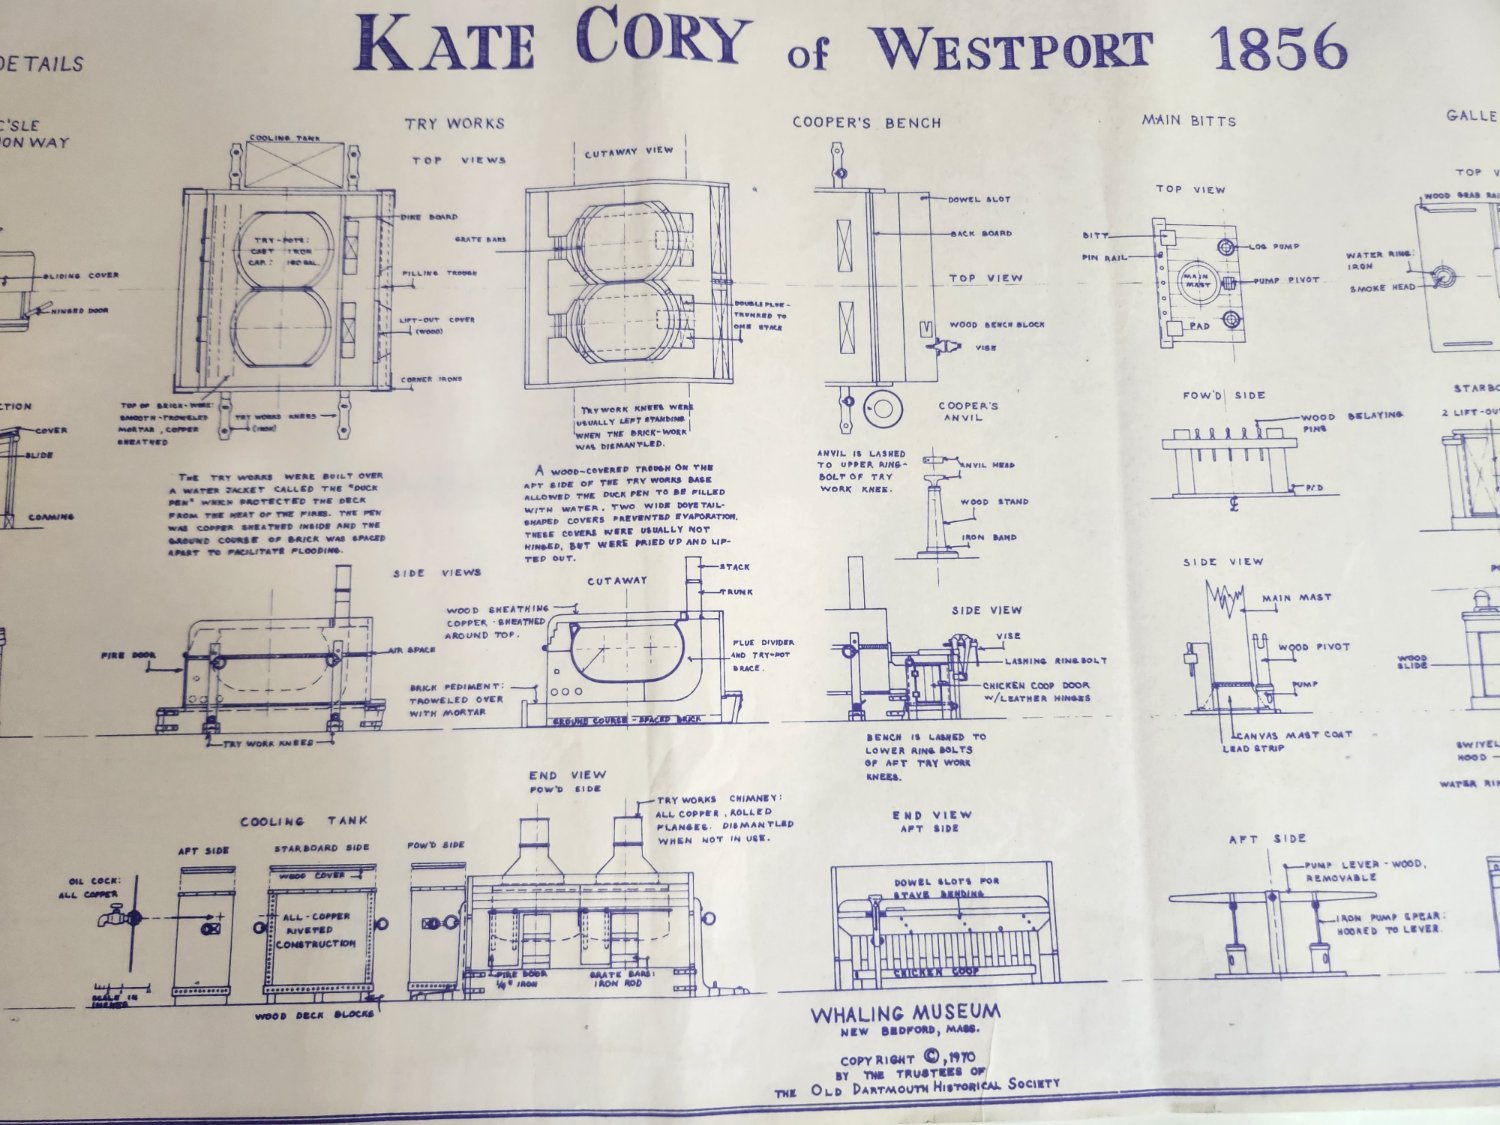
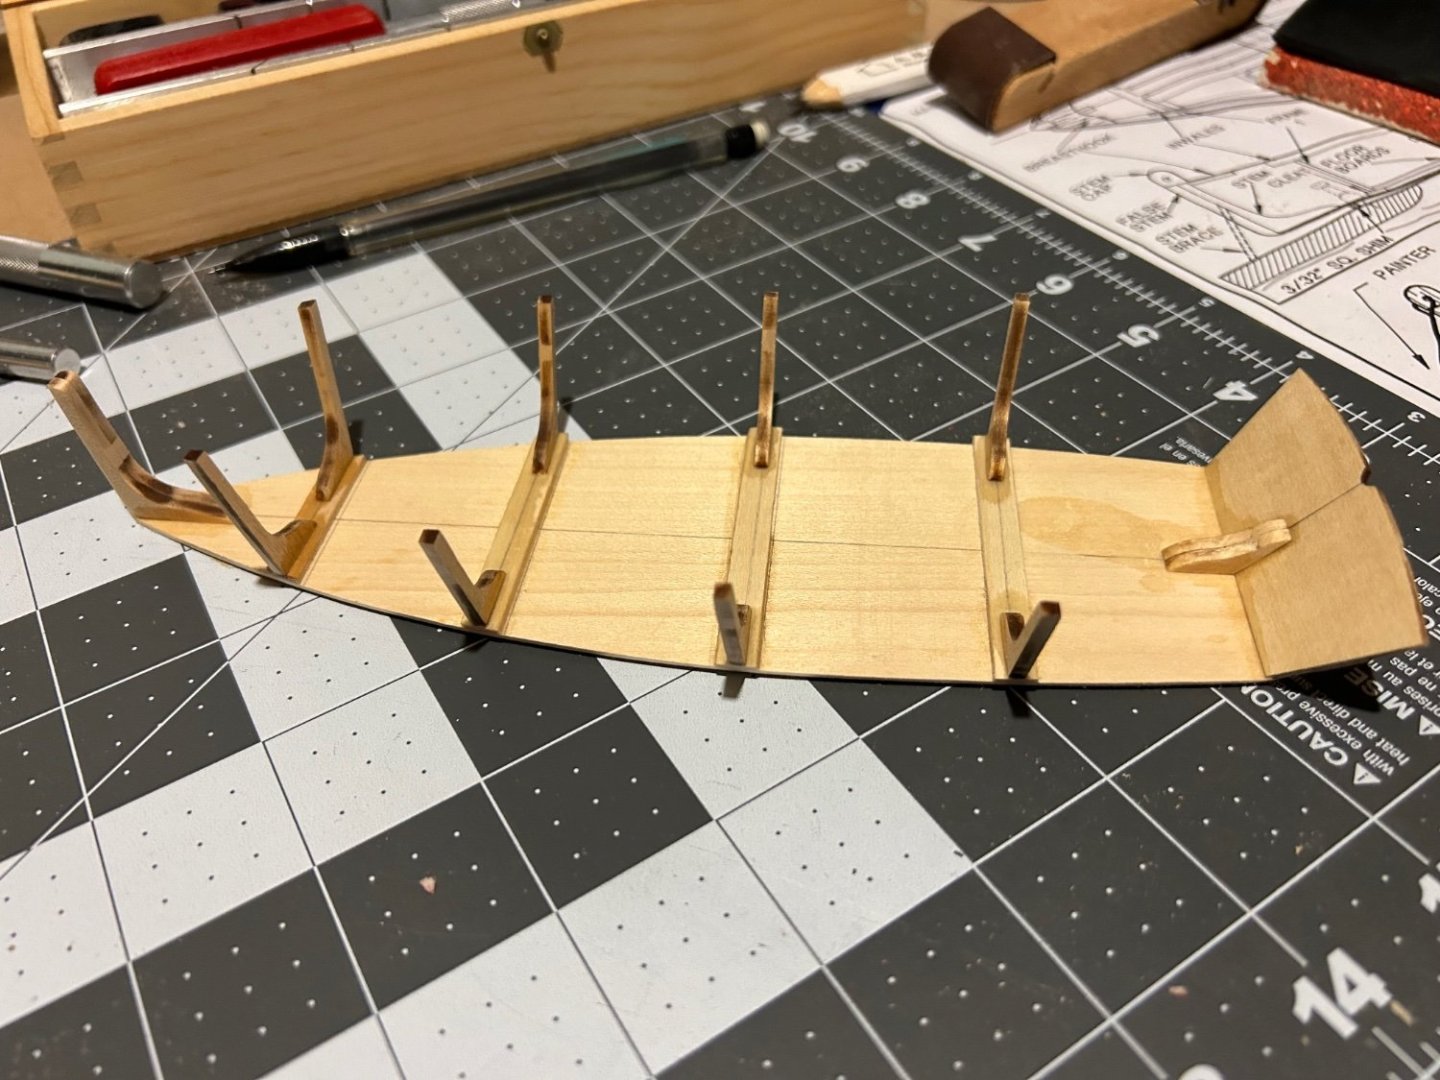
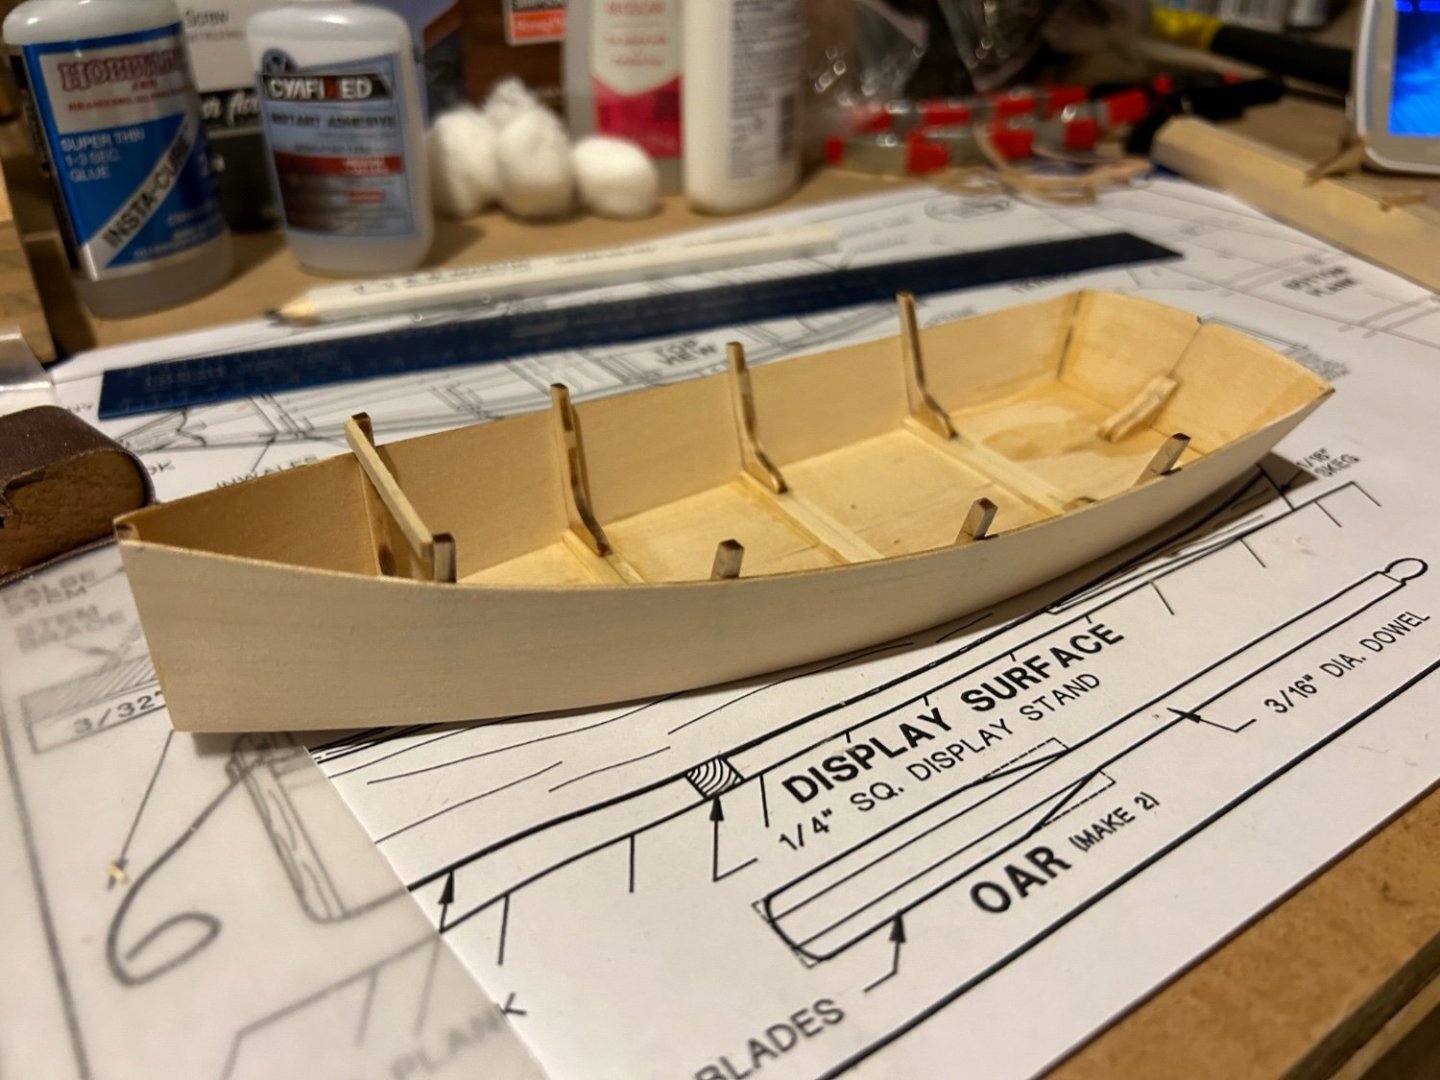
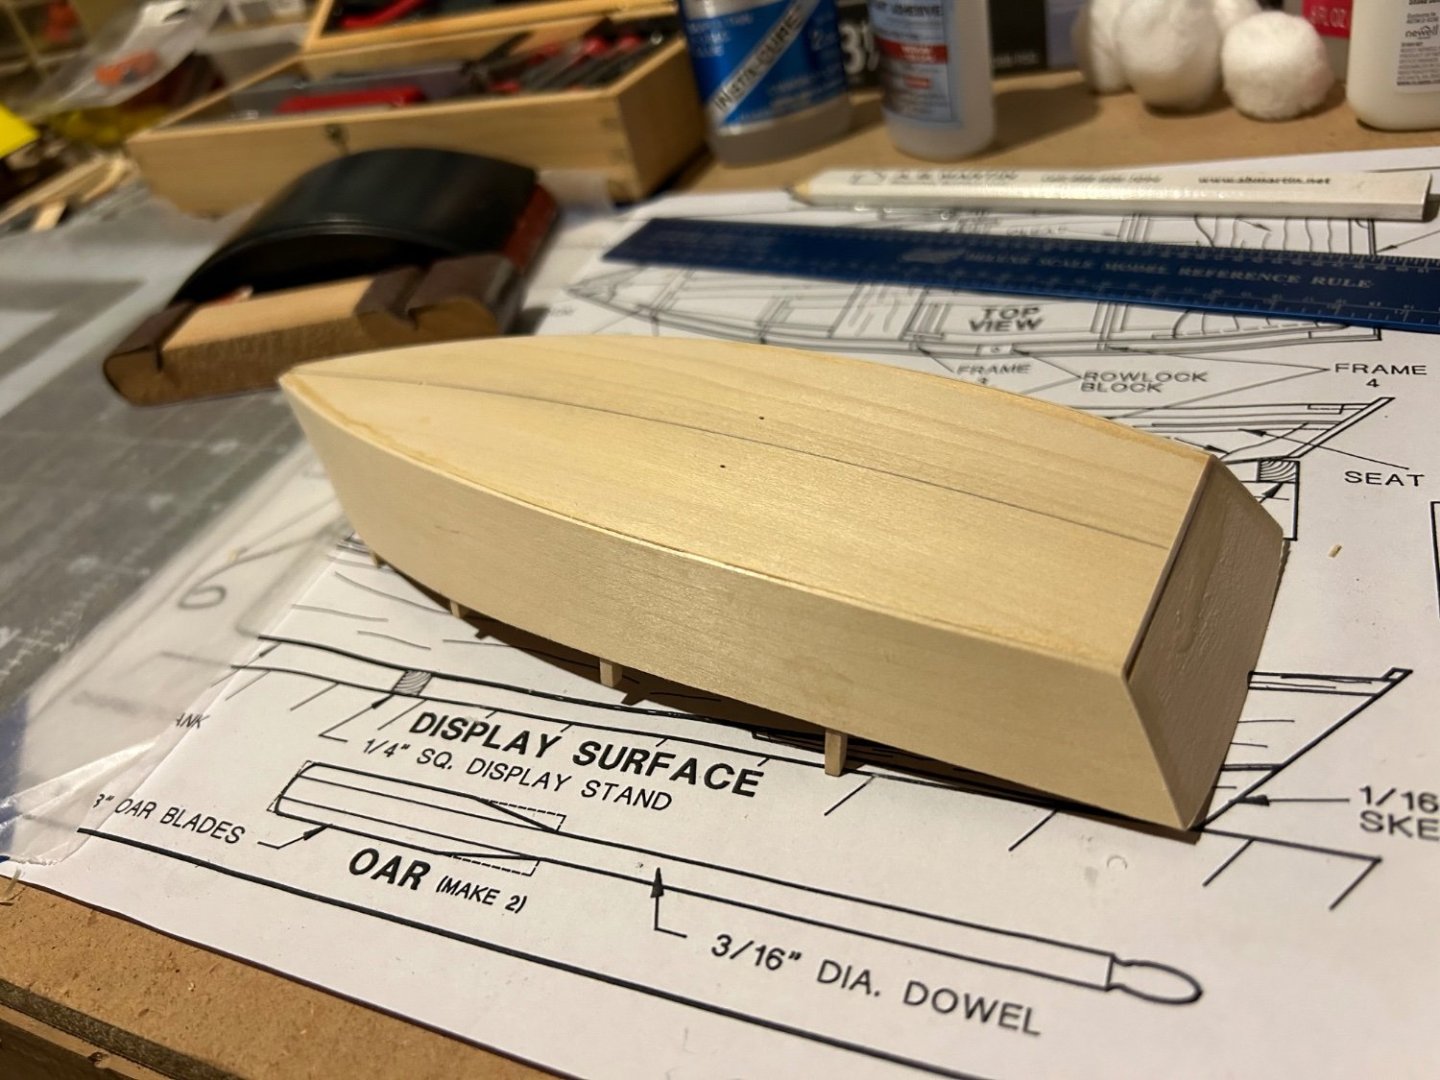
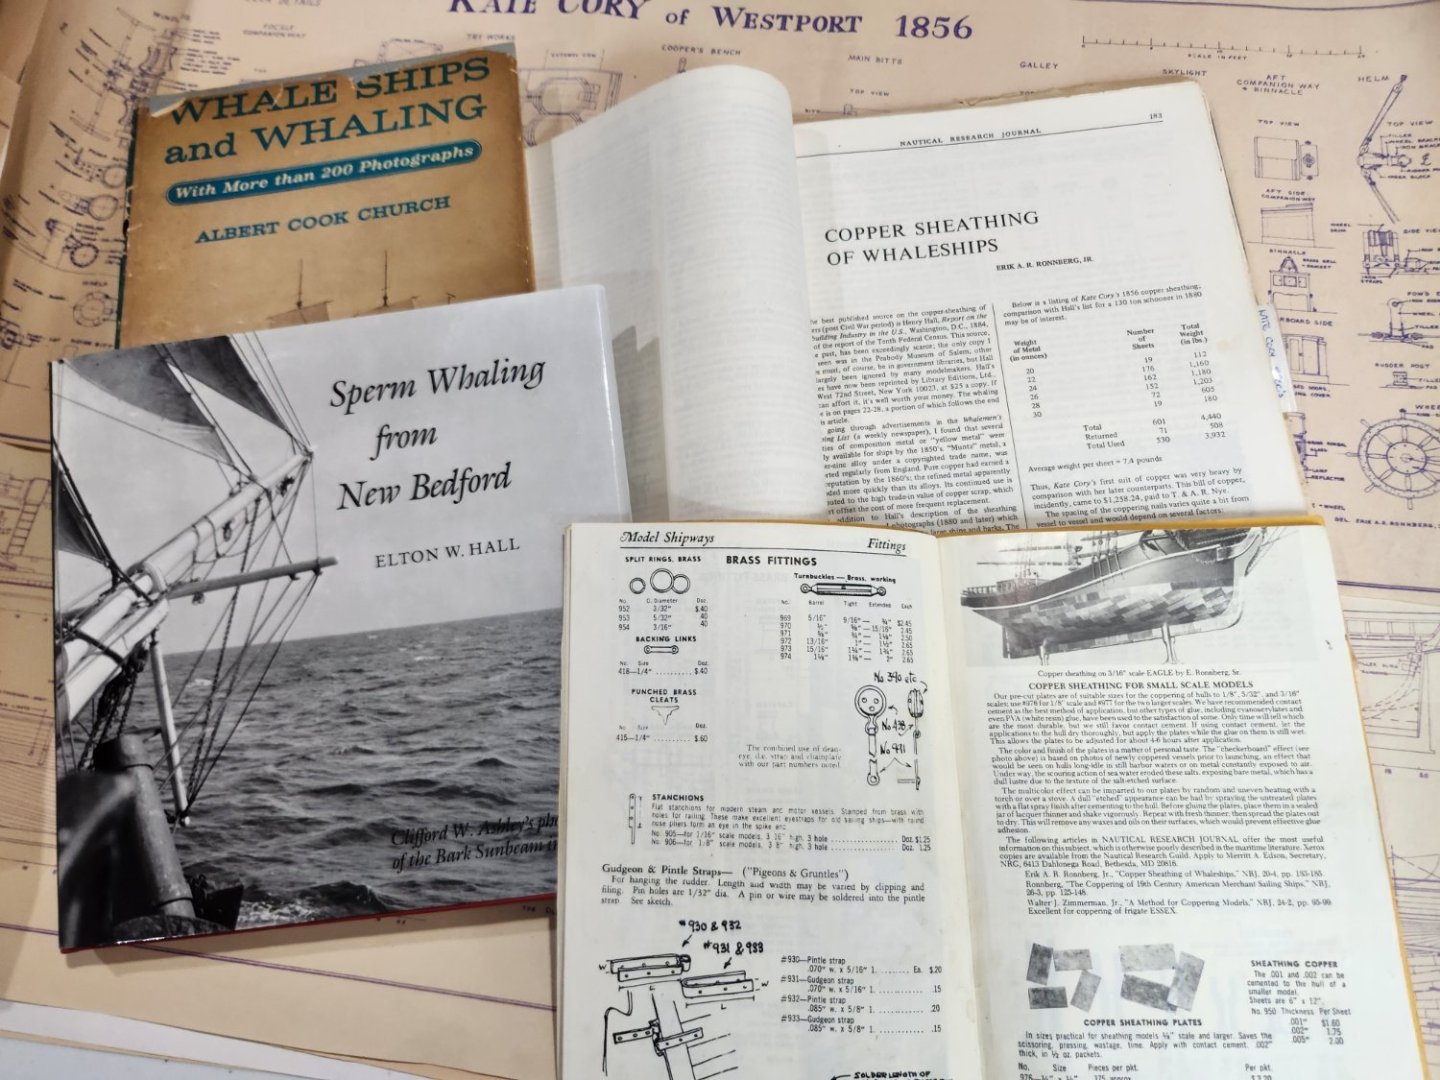
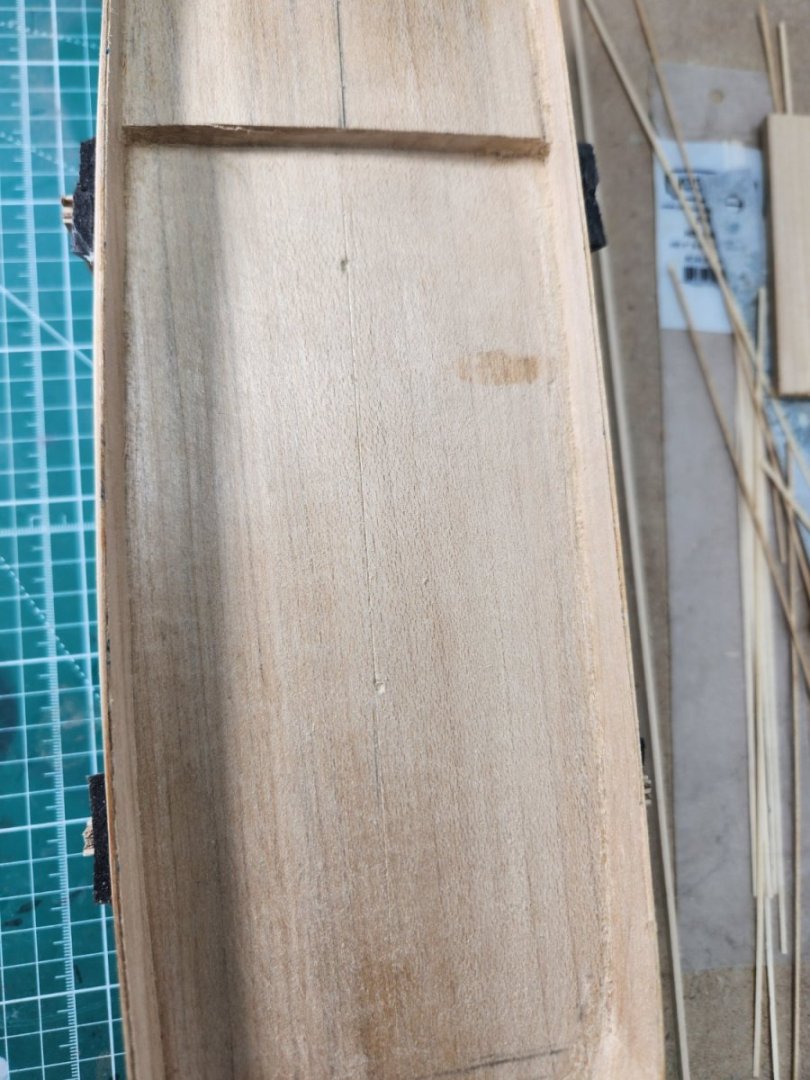
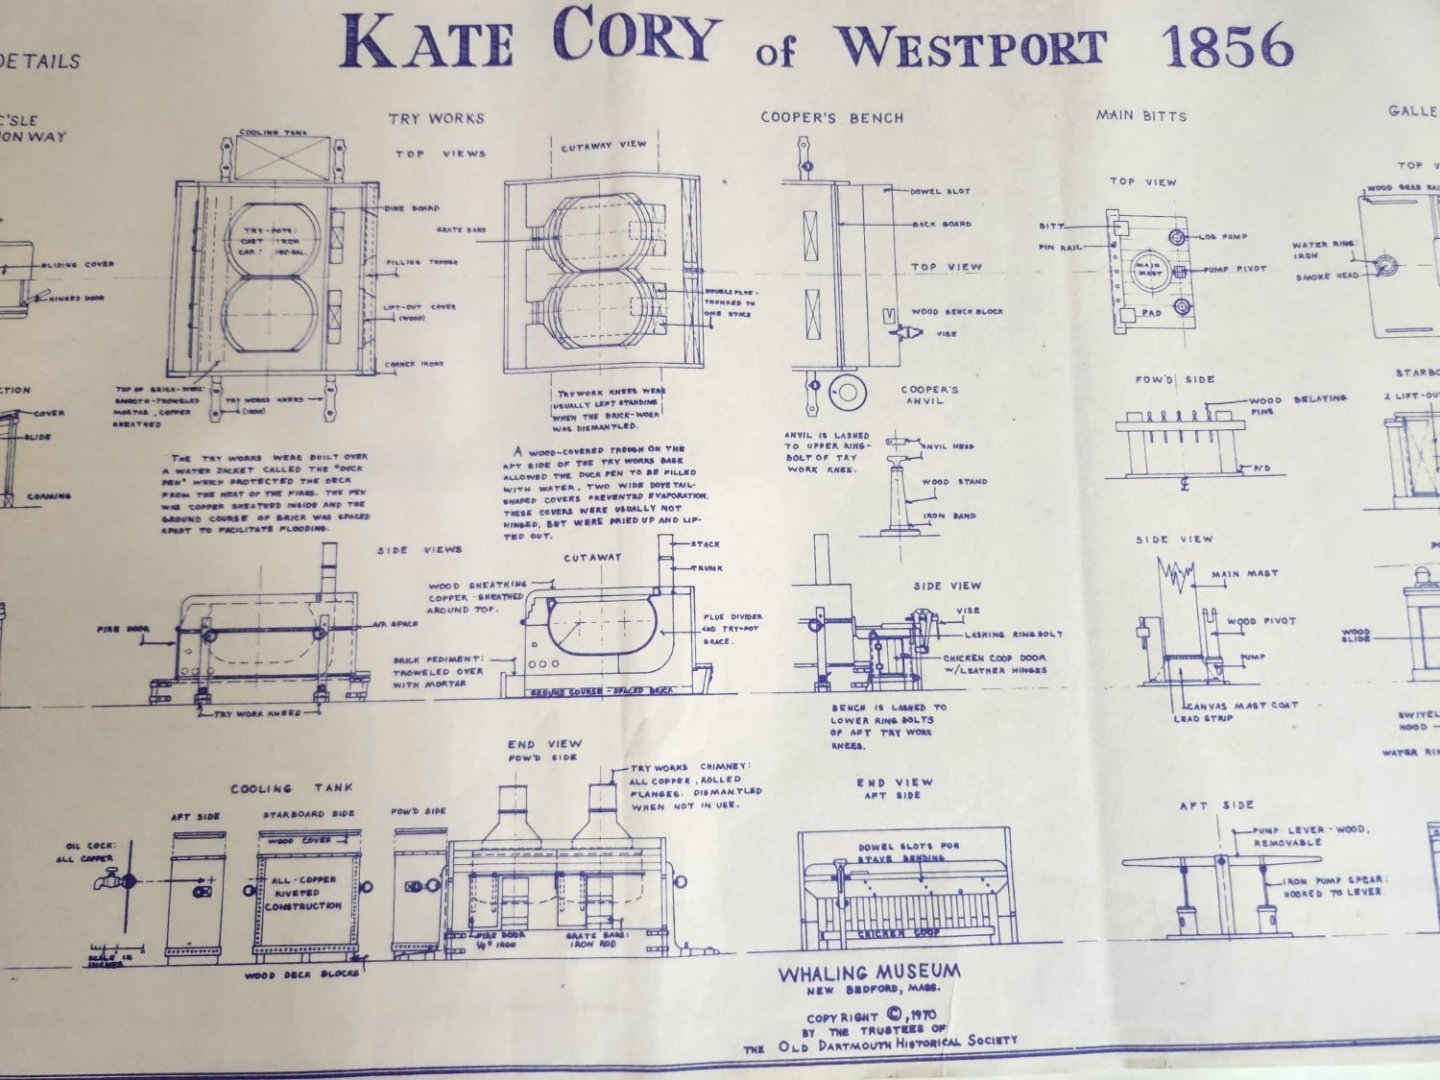
 Bought this kit along with a set of plans from New Bedford Whaling Museum many years ago and finally decided to build it. I saw the kit listed in the first Model Shipways catalog I received in 1986 when I was considering the hobby. I decided on a starting with their KATY, 1/4" scale Virginia Pilot Boat. Since then, I have built several other kits along with my other hobby interests. However, completing the Kate Cory has always been one of my primary ship modeling goals. Unlike the Charles W. Morgan, there is not a great deal of historical documentation available regarding this specific ship. The New Bedford Whaling Museum, New Bedford, Ma. (USA) is the only resource I could find that offered credible documentation. This is where I obtained plans by Erik Ronnberg, Jr. which provide significantly more details and views then the kit plans. Additionally, I obtained copies of the Nautical Research Journals referenced in the Model Shipways Catalog regarding Coppering techniques, i.e., "Copper Sheathing of Whaleships", etc. I coppered two other kits using this technique and feel it provides a more realistic appearance. However, one could argue using this process without some weathering of the rest of the model is inconsistent. Despite all the research and obtaining all the documentation I could find, I still felt I needed a good visual representation of the ship. Finally, a key motivating factor for me to starting the project was the 1/4" scratch-built model by Thomas J. Lauria, (https://tjlauria.com/gallery/whaling-schooner-kate-cory/). Tom has many other excellent builds and has been helpful answering my questions. This will be a planked solid hull model. I've never built a plank on frame kit other than a small Dory. Then only other change from the kit is to swap out the solid wood whale boats for a set of updated laser cut boats.
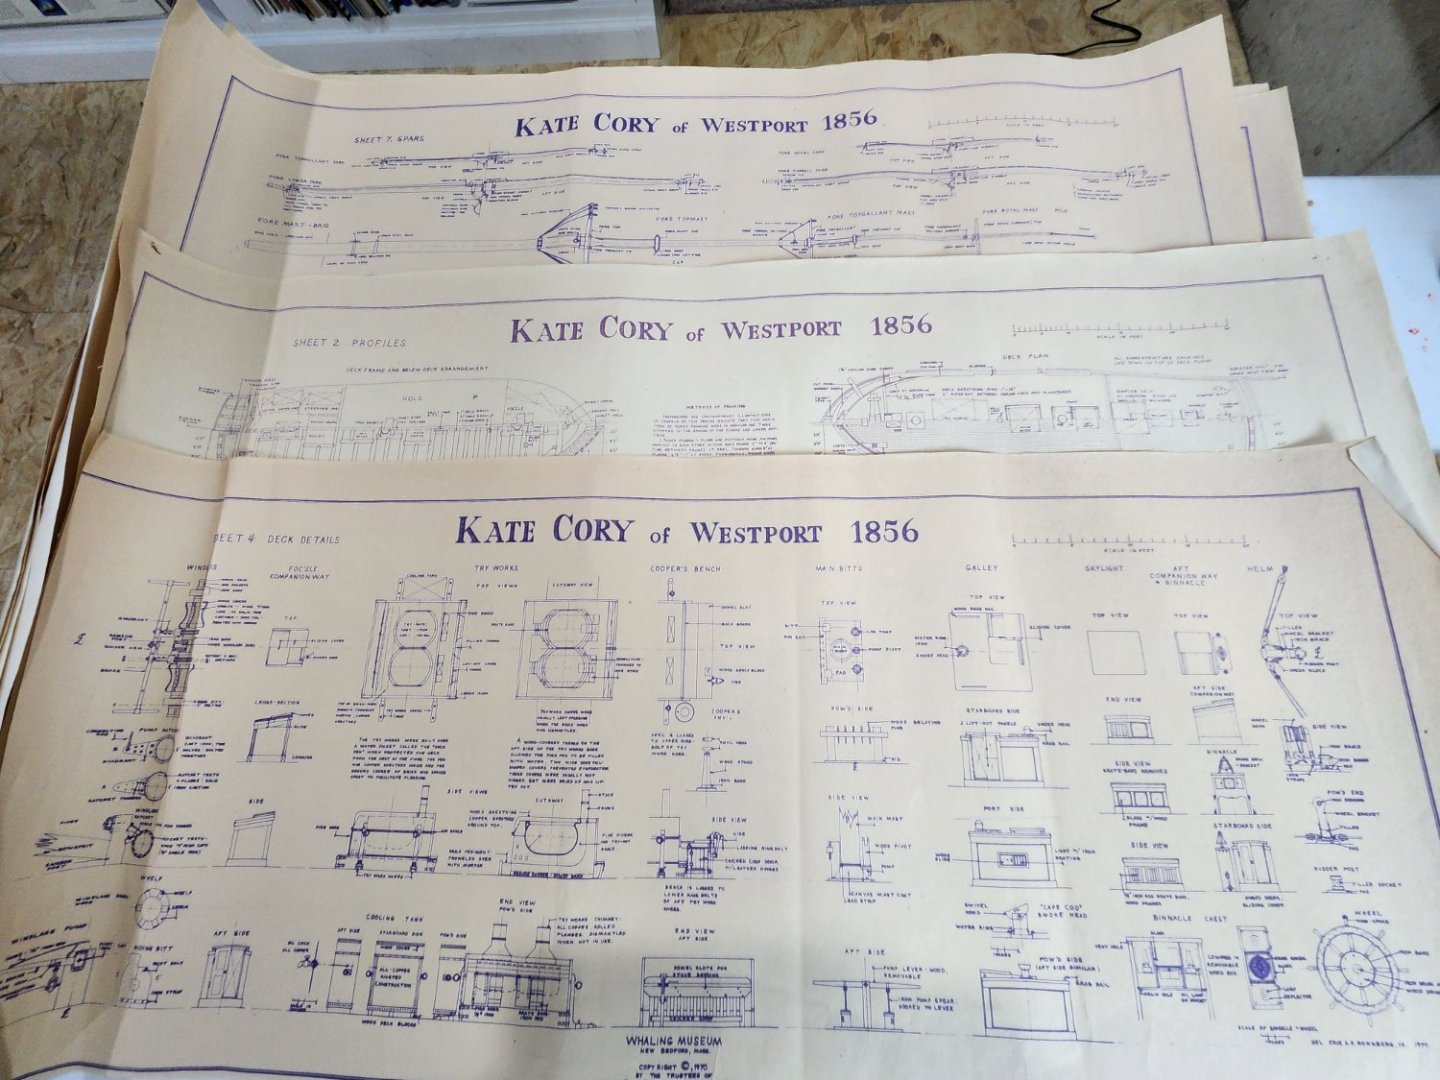


-
 Good day! This build log will cover the second wooden model ship I am tackling, after the Drakkar Amati. Unlike the Drakkar I decided to do a build log of this. Why the Niagara - two reasons: My wife is from Erie PA where the reconstructed Niagara can be found, and thought that this should be my next build - who am I to disagree especially as she purchased the kit! I like the lines of the ship and it is simpler than other multi deck models out there Pictures of in progress build to follow - I have been working on it for a few weeks now making steady progress as work and other things allow - happy for all comments/suggestions Stuart
 -
 After having finished the Grand Banks Dory (link to build log in signature), I'm trying my hand at the next model in the series. I expect updates for this log are going to be more sporadic than I would like, because I'm slated to be sailing for most of the time from March through October, but I'll work on this when I can. Started with unboxing and getting a sense of the parts. I can't help but feel a little intimidated, but then the dory looked scary before I started it too.
 -
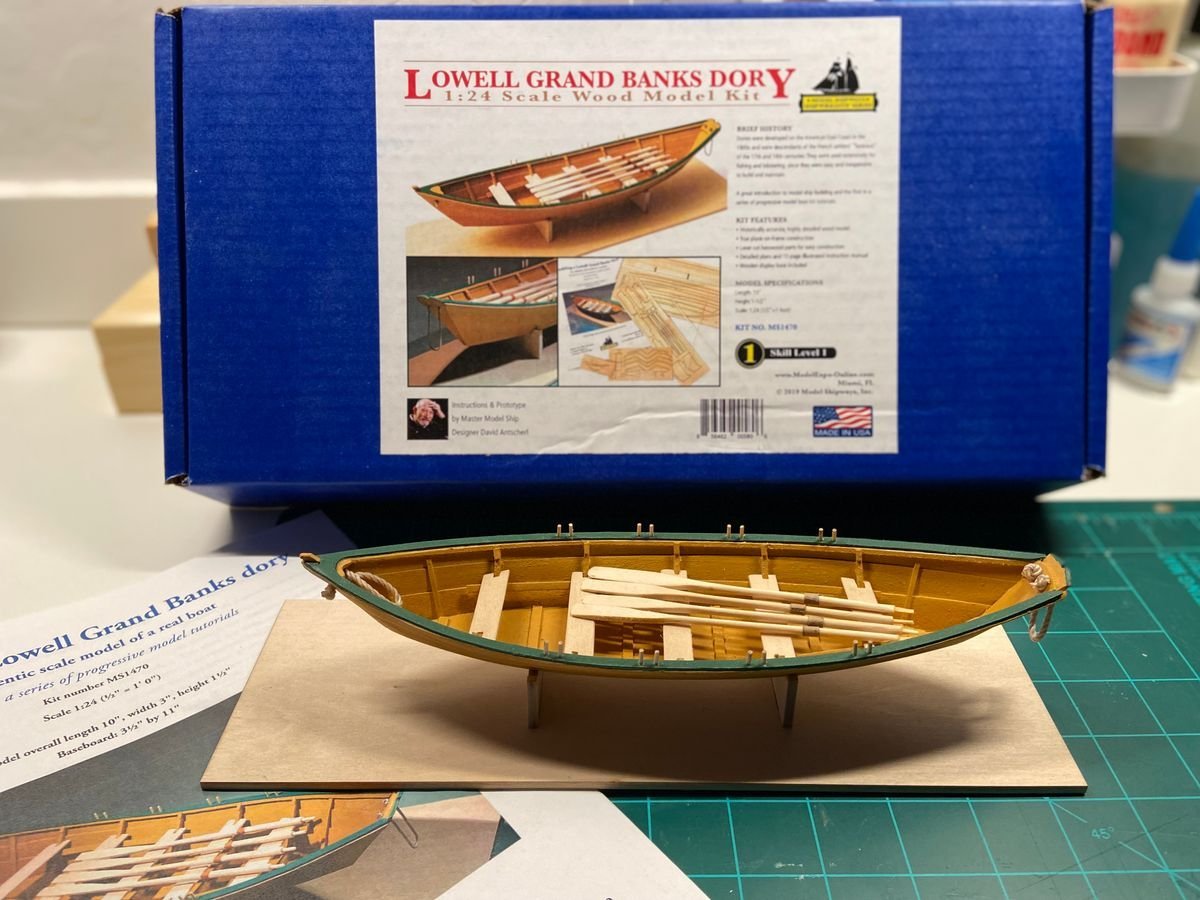
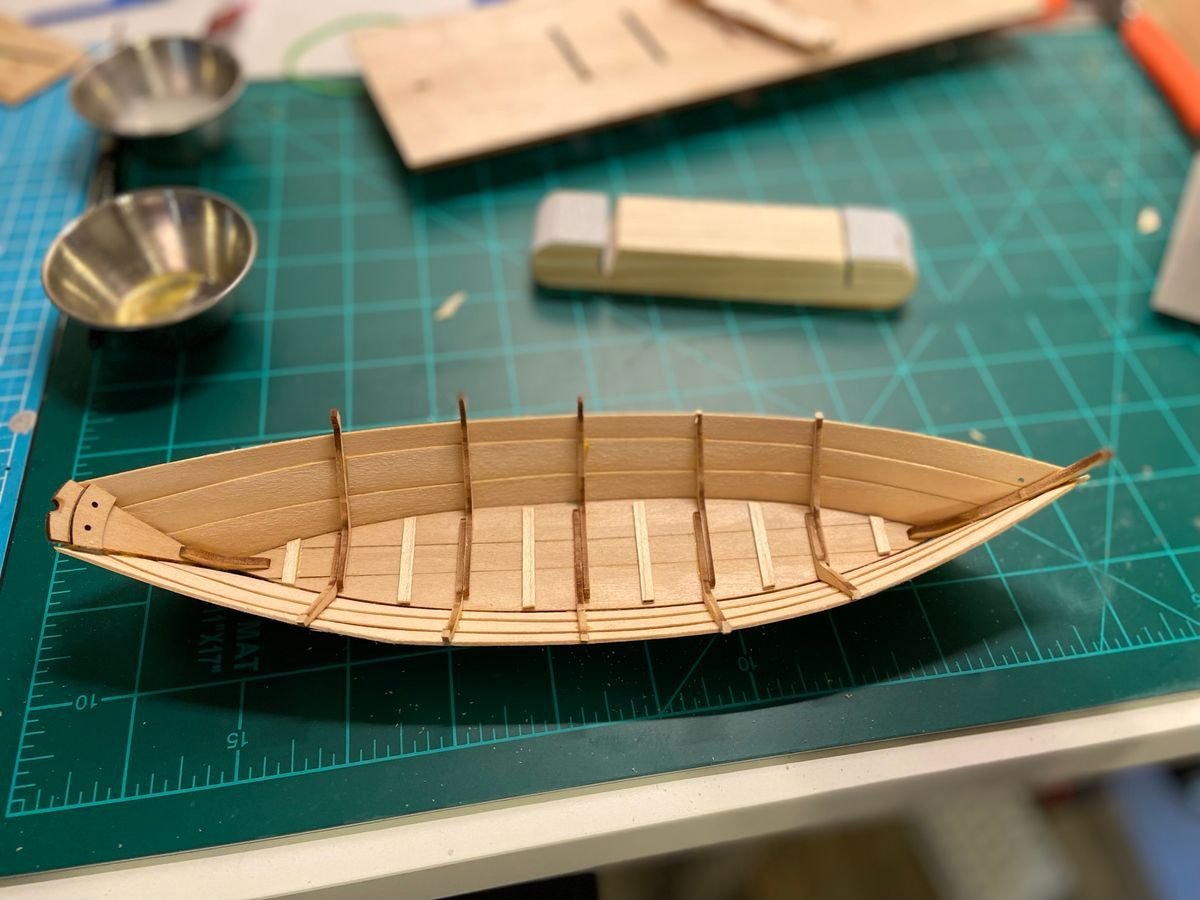
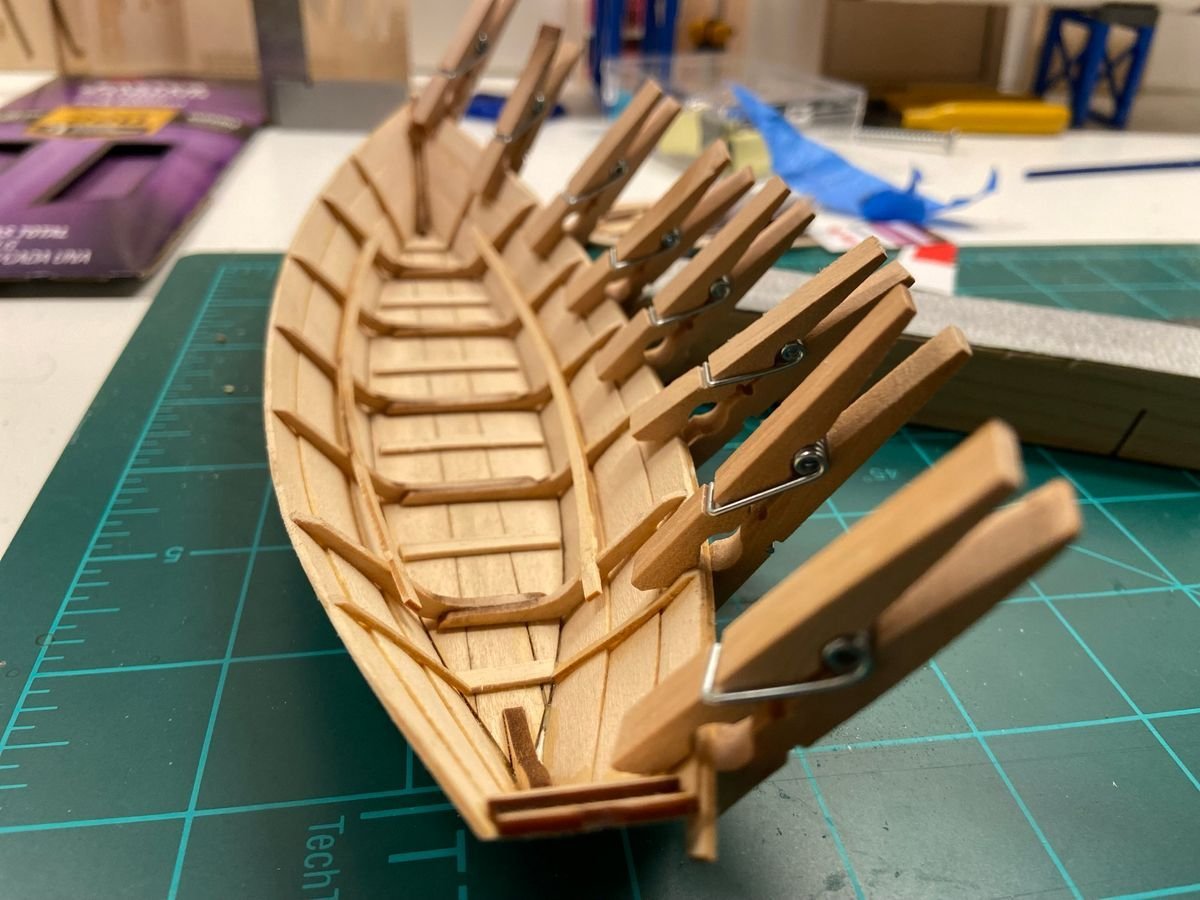
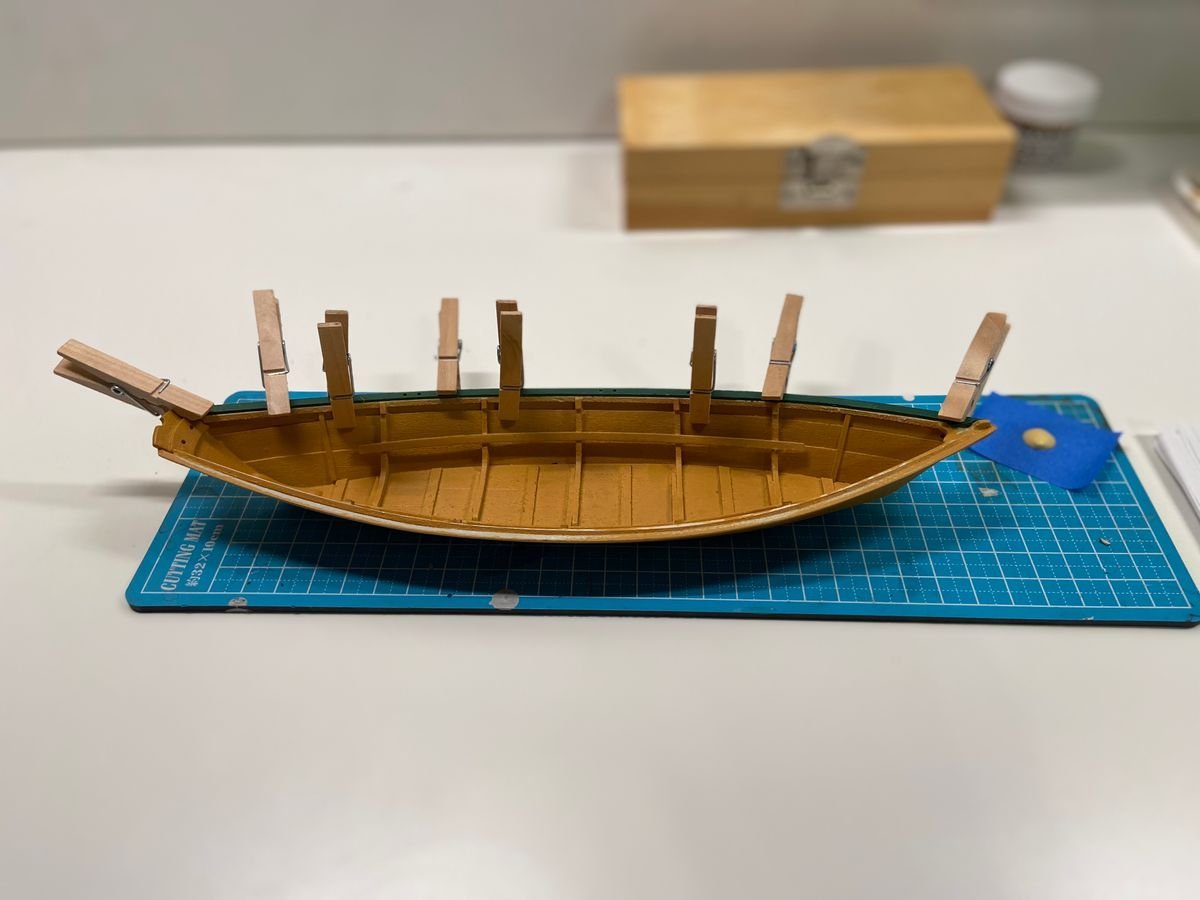
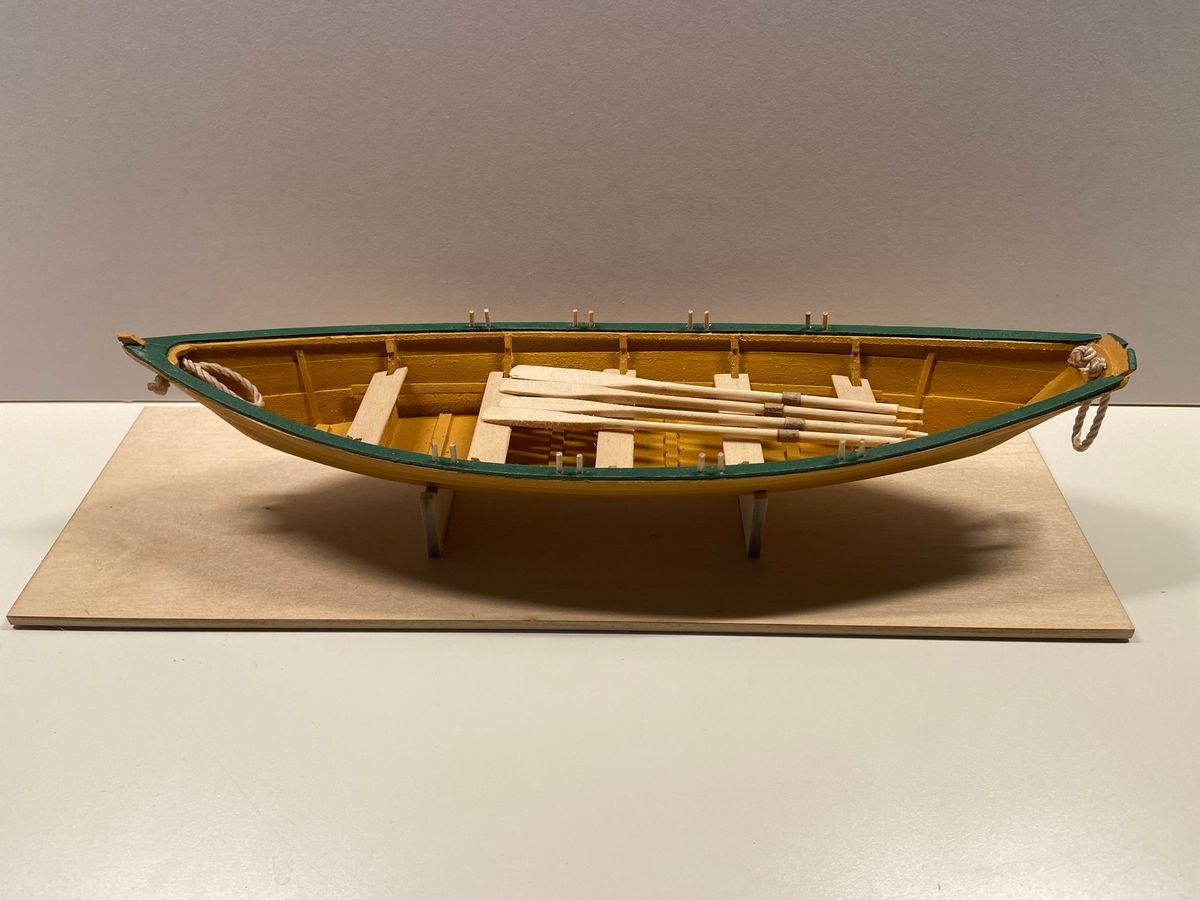
 Hello Model Ship World members. I’m Reece and I'm a new boat modeler. I decided to start my start my journey with the Model Shipways Shipwright Series. The first build is the Lowell Grand Banks Dory. I don’t have all the pictures from this build but I have a fair amount and wanted to post this for those that may be looking for references in the future. I thought this was a great introduction to ship modelling and thoroughly enjoyed my time spent on the project. I definitely learned a thing or two and look forward to applying those to my next build in the series. Here are some of the steps I struggled with on this build and how I corrected them: I had trouble aligning the bottom/stem/transom assembly with the frames and building board. This is something I should have spent much more time on because it ultimately affected the outcome of the planking. I should have spent some more time getting the stem and transom holders securely placed. Some slop here caused the transom to not be exactly perpendicular to base of the building board and resulted in the planks being slight asymmetric when viewed from the bow. I ended up just sanding this as best I could and the planks are slightly uneven. Lesson learned for next time for sure. My seat risers were slightly off and had to be removed and reattached as it made the thwarts out of level. I tried to thread the beckets without applying CA to the tips first. This caused me to waste an entire section as it unraveled before my eyes. I was able to salvage this step with the remaining pieces by dividing the remaining rope in half and giving myself extra material to work with beyond the recommended 4" section. I think in the end the pieces ended being about 5 1/2" each. I had just enough and was able to trim the excess to match the pictures in the instructions. The oars. I was too heavy handed when sanding the oars and completely lost one when it snapped in my hands. Yikes. Luckily the kit includes an extra laser cut piece probably for this very reason. I ended up snapping the hand holds on several of the oars as well and had to glue some little pieces of balsa I had left over to make them look somewhat like the pictures. Not my finest moment but I’ve definitely learned a lesson here that I can use on future models. I’m not totally satisfied with the shape and look of the oars. I might try to revisit in the future if I’m looking for something to do. Other Notes: I found the section on the thole pins was slightly different. In the instructions it mentions using a 3/64" dowel and cutting the pins to length. I spent some time looking for this until I realized that a dowel was actually not provided but was replaced in the kit by a strip of 3/64" balsa. I ended up cutting this in half and shaping it on a drill press. I inserted the balsa half way into the chuck, set the speed on the lowest I had available (approx. 500 rpm), and then proceeded to very lightly apply sandpaper to the strip as it spun. I flipped the balsa piece in the chuck and repeated. It made short work of creating the dowel. Overall I had a great time with this kit and would definitely recommend anyone who’s curious about building it to give it a go. Its a great model to learn some basic ship modelling skills on. The completed Lowell Grand Banks Dory. Attaching the sheer plank. The Dory right side up and about to clean the frame tops. Gluing on the starboard gunwale. Attaching the cap rail after painting the model using the recommend Hull Yellow Occre and Bulwarks Dark Green. Close up of the bow after rebuilding the stem top so that it was aligned better with the cap rails. This was a result of poor original alignment of the bottom/stem/and building board before planking. Using the handle of a model knife to force the becket into place after applying the watered down PVA glue. Cutting and installing the thole pins. Attempting to fix the oar handles. Another shot of the completed Lowell Grand Banks Dory.
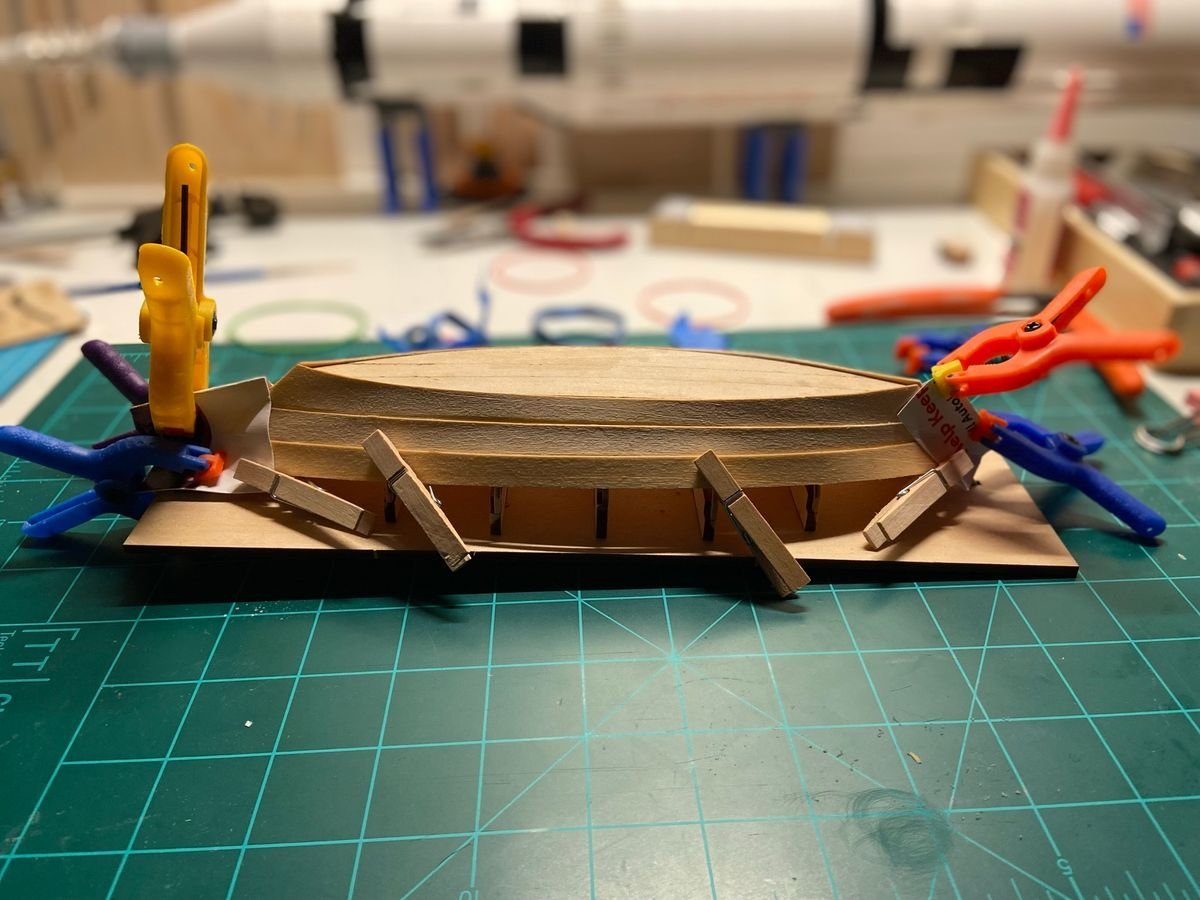
- 9 replies
-
- 12
-
-
- Model Shipways
- Lowell Grand Banks Dory
- (and 2 more)
-
 This will be my third kit. I hope I learned enough from the first two. 18th Century Longboat (1750-1760) - Jerry Sturdivant - Model - Shipways Scale 1:48 Sloup Sloup Coquillier (1912+) - Jerry Sturdivant - Corel Scale 125
-
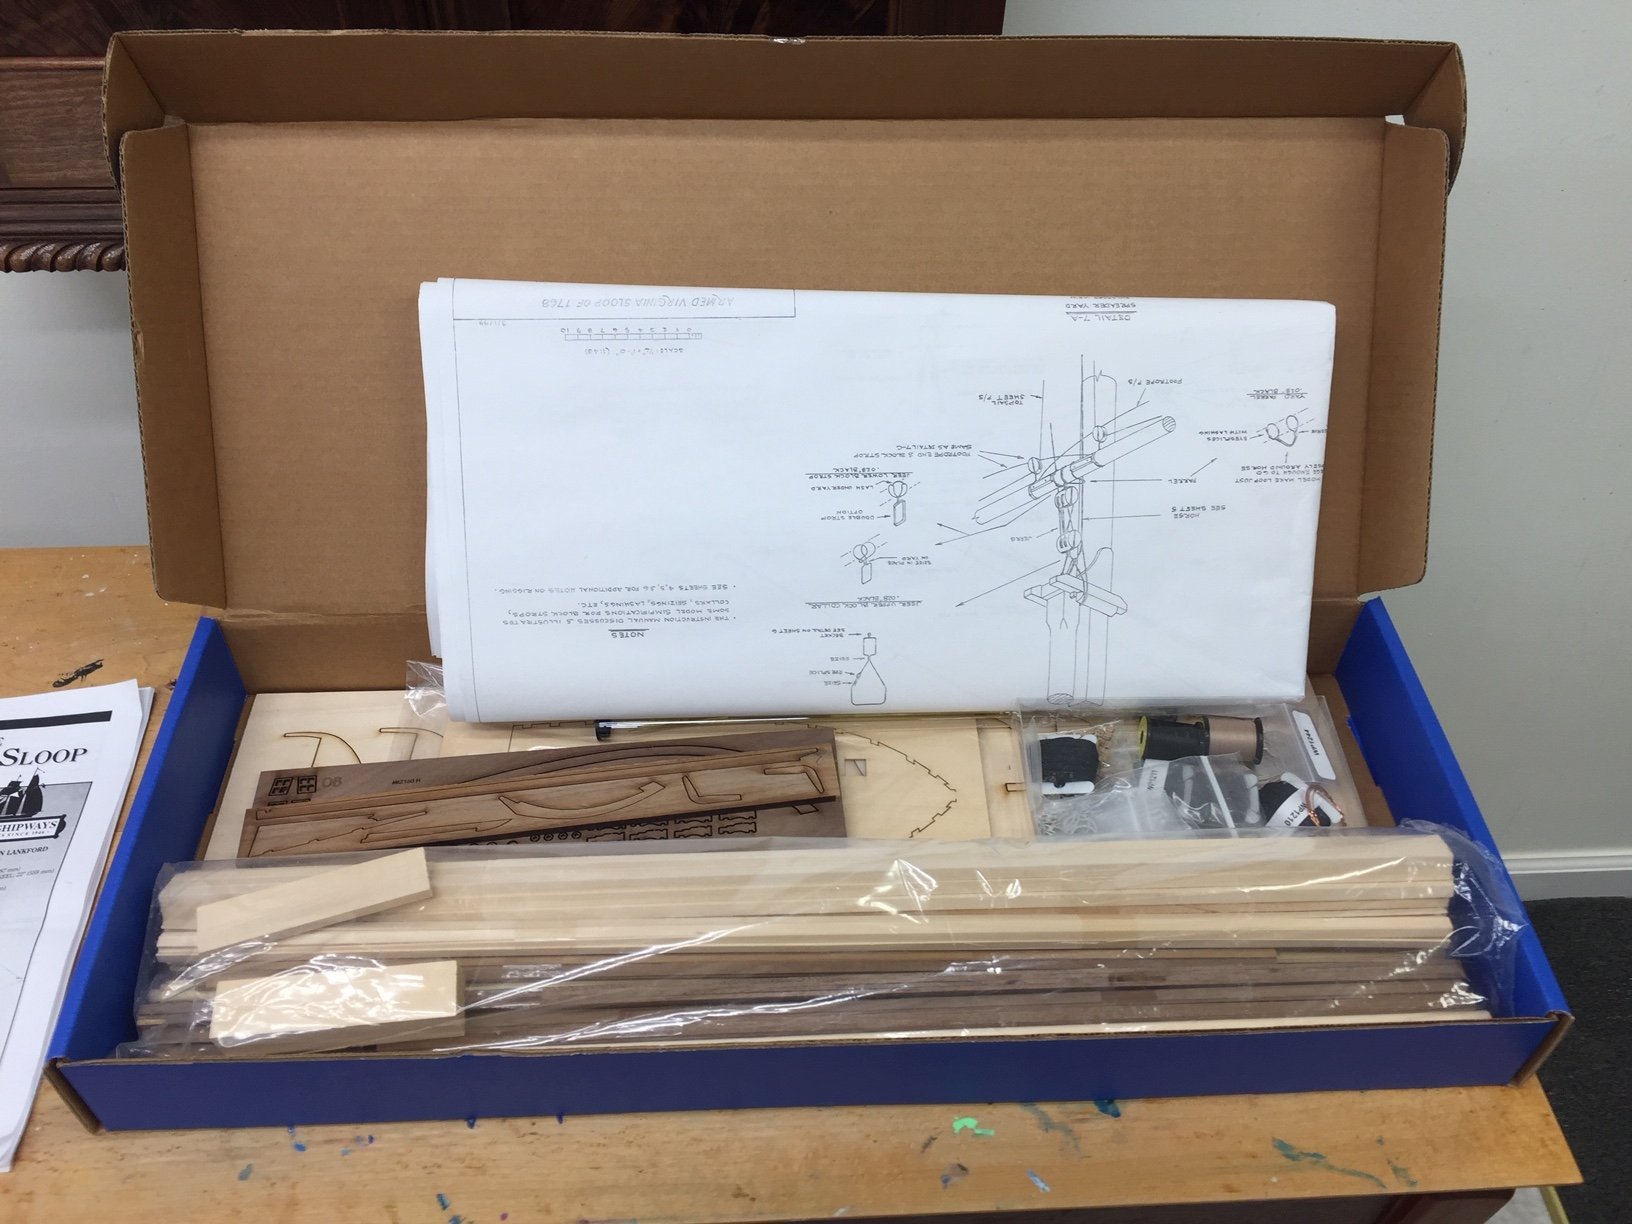
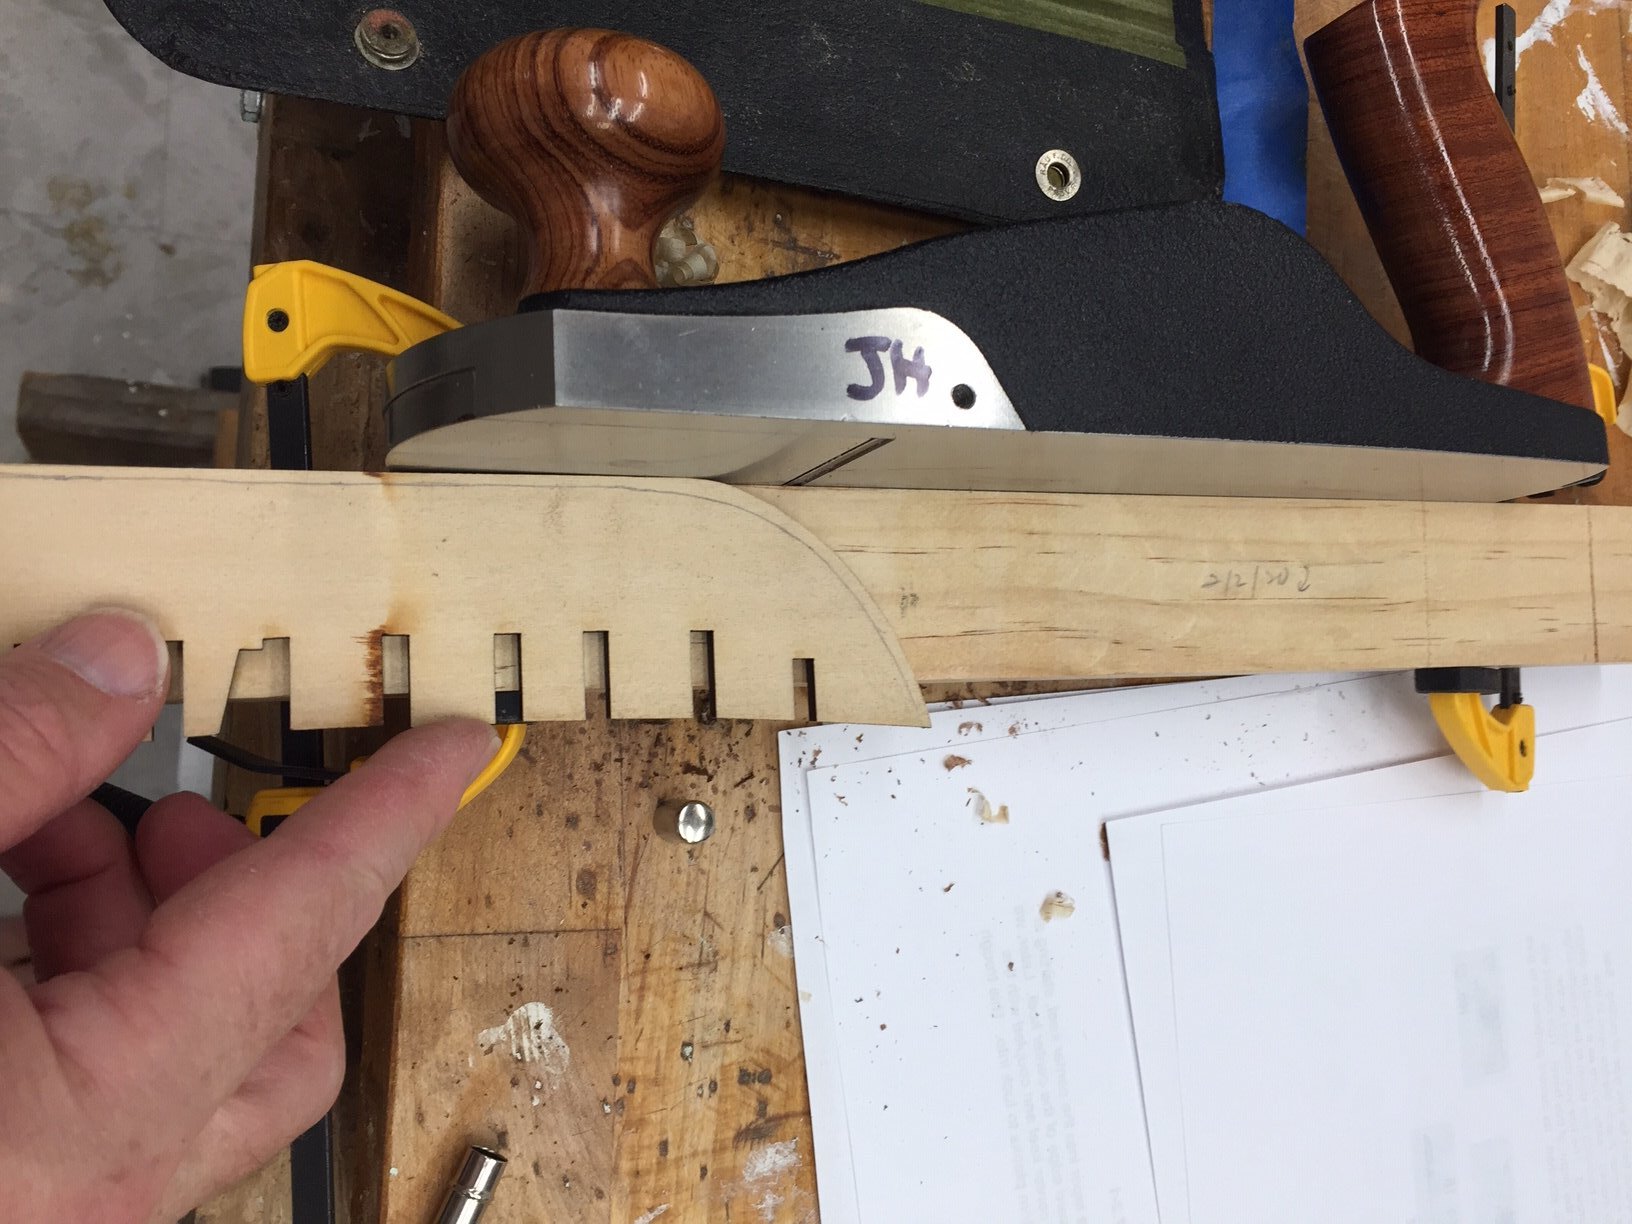
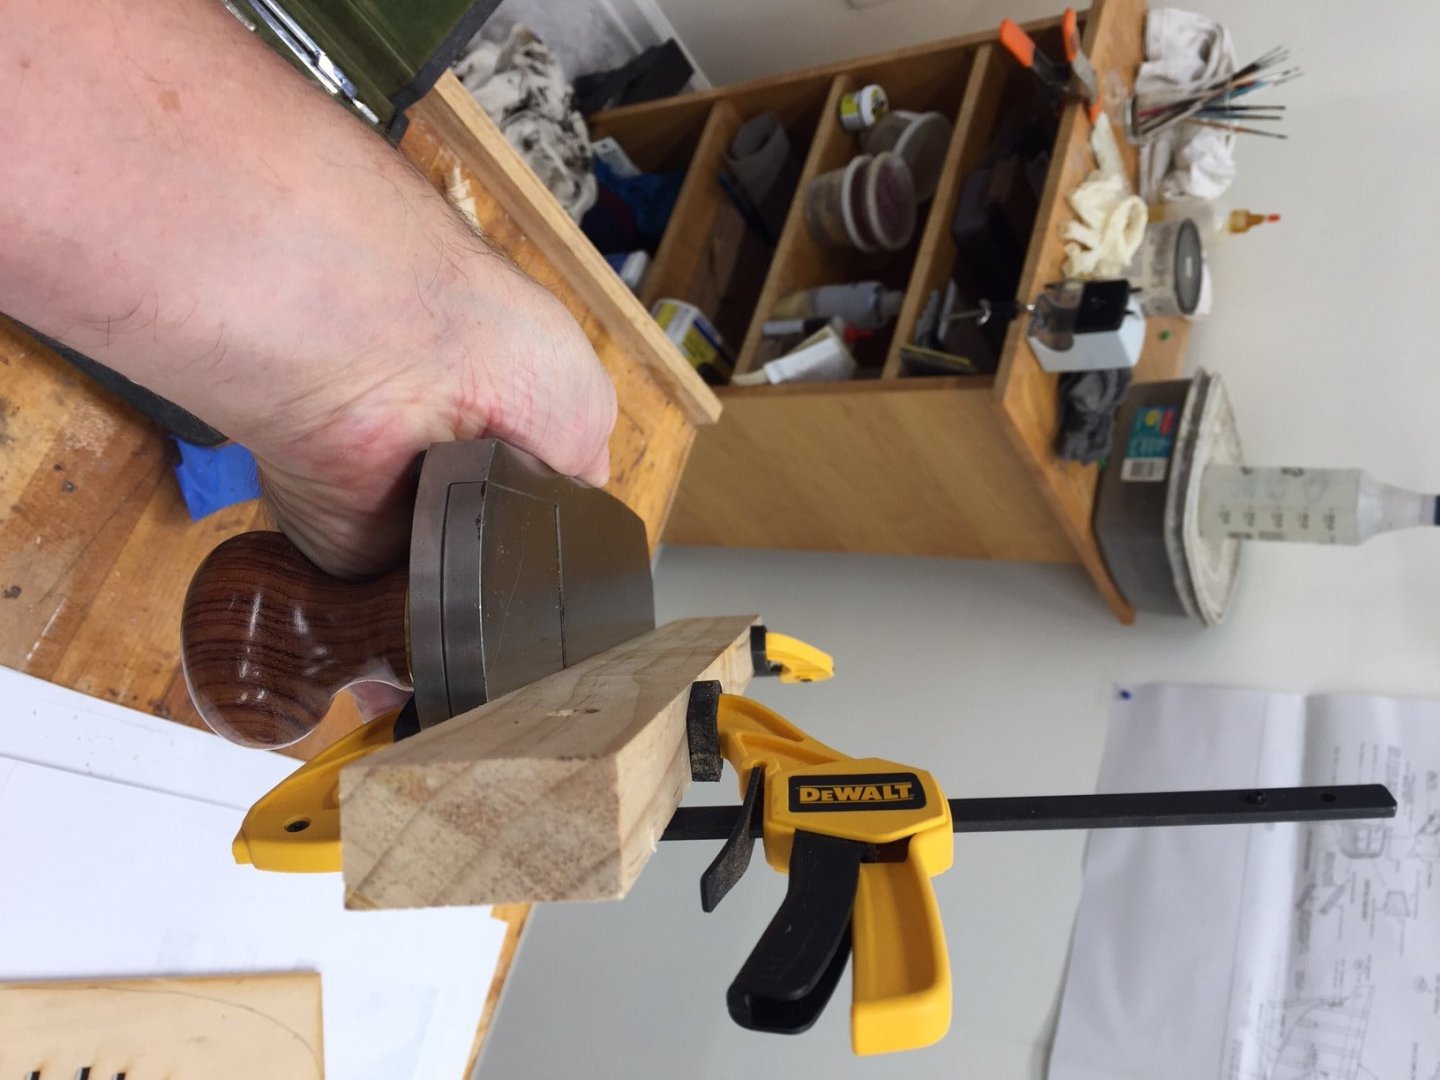
 Alright its time to stop watching other people's builds and contribute something. This is my second model ship and I am following in what seems to me to be the Traditional Pathway. I started with Model Shipway's/Chuck's 18th Century longboat which took a LOT longer than I had planned but turned out ok; I will post a few pics soon. Bending the planking was challenging. Now I am starting on the AVS. I also purchased Robert Hunt's practicum and have been following its directions somewhat. Chuck's Cheerful directions are also very helpful. First the obligatory picture of the box I read a comment a while ago on this forum where it was stated that dark woods made the ships look like Old Furniture. And I completely agree. So I am trying to make the second layer of planking on my AVS in Holly. The first layer of basswood will be good practice in planking. First step was removing the laser char on the center keel. I tried using a fence attached to my hand plane which made sure it was square. But I found it somewhat awkward. Also I couldn't get the picture to not be turned sideways, sorry I'll keep working on that.

-
.thumb.JPG.33e8fc9704bbb01f03cf31c187b62df9.JPG) Hi, Just join this site and what a great site it is 👍 I see that a lot of people (most from Canada) build the Canadian fishing schooner Bluenose 1921 and so happens I am building this too, hope this is not to many do like the shape and lines of this schooner. When I bought this model I also purchased the Fair-A-Frame from Model Shipways as well, while building I did modify it so that head stock would slide in a grove this makes it more ridged and keeps everything nice and square, also they show that the adjusting rail which moves to clamp the keel was at a different height than the one you glue down, so I notched the rail to allow both rails to be the same height, these are small changes which I found really helped. Did not take any pictures of the start when I joined three parts to the center keel once that was dried I took some tracing paper and traced the beading lines and rabbet lines onto the center keel. Next up was to remove 1/16 from bulwark stanchions just below the deck then took some tracing paper and traced each bulkhead so that I could mark out how much beveling I had to do all these bevels were done before gluing to center keel, also bevel inboard bulwark stanchions, once this was done I did a trial fit to see how it all fit. Regards Richard
Hi, Just join this site and what a great site it is 👍 I see that a lot of people (most from Canada) build the Canadian fishing schooner Bluenose 1921 and so happens I am building this too, hope this is not to many do like the shape and lines of this schooner. When I bought this model I also purchased the Fair-A-Frame from Model Shipways as well, while building I did modify it so that head stock would slide in a grove this makes it more ridged and keeps everything nice and square, also they show that the adjusting rail which moves to clamp the keel was at a different height than the one you glue down, so I notched the rail to allow both rails to be the same height, these are small changes which I found really helped. Did not take any pictures of the start when I joined three parts to the center keel once that was dried I took some tracing paper and traced the beading lines and rabbet lines onto the center keel. Next up was to remove 1/16 from bulwark stanchions just below the deck then took some tracing paper and traced each bulkhead so that I could mark out how much beveling I had to do all these bevels were done before gluing to center keel, also bevel inboard bulwark stanchions, once this was done I did a trial fit to see how it all fit. Regards Richard -
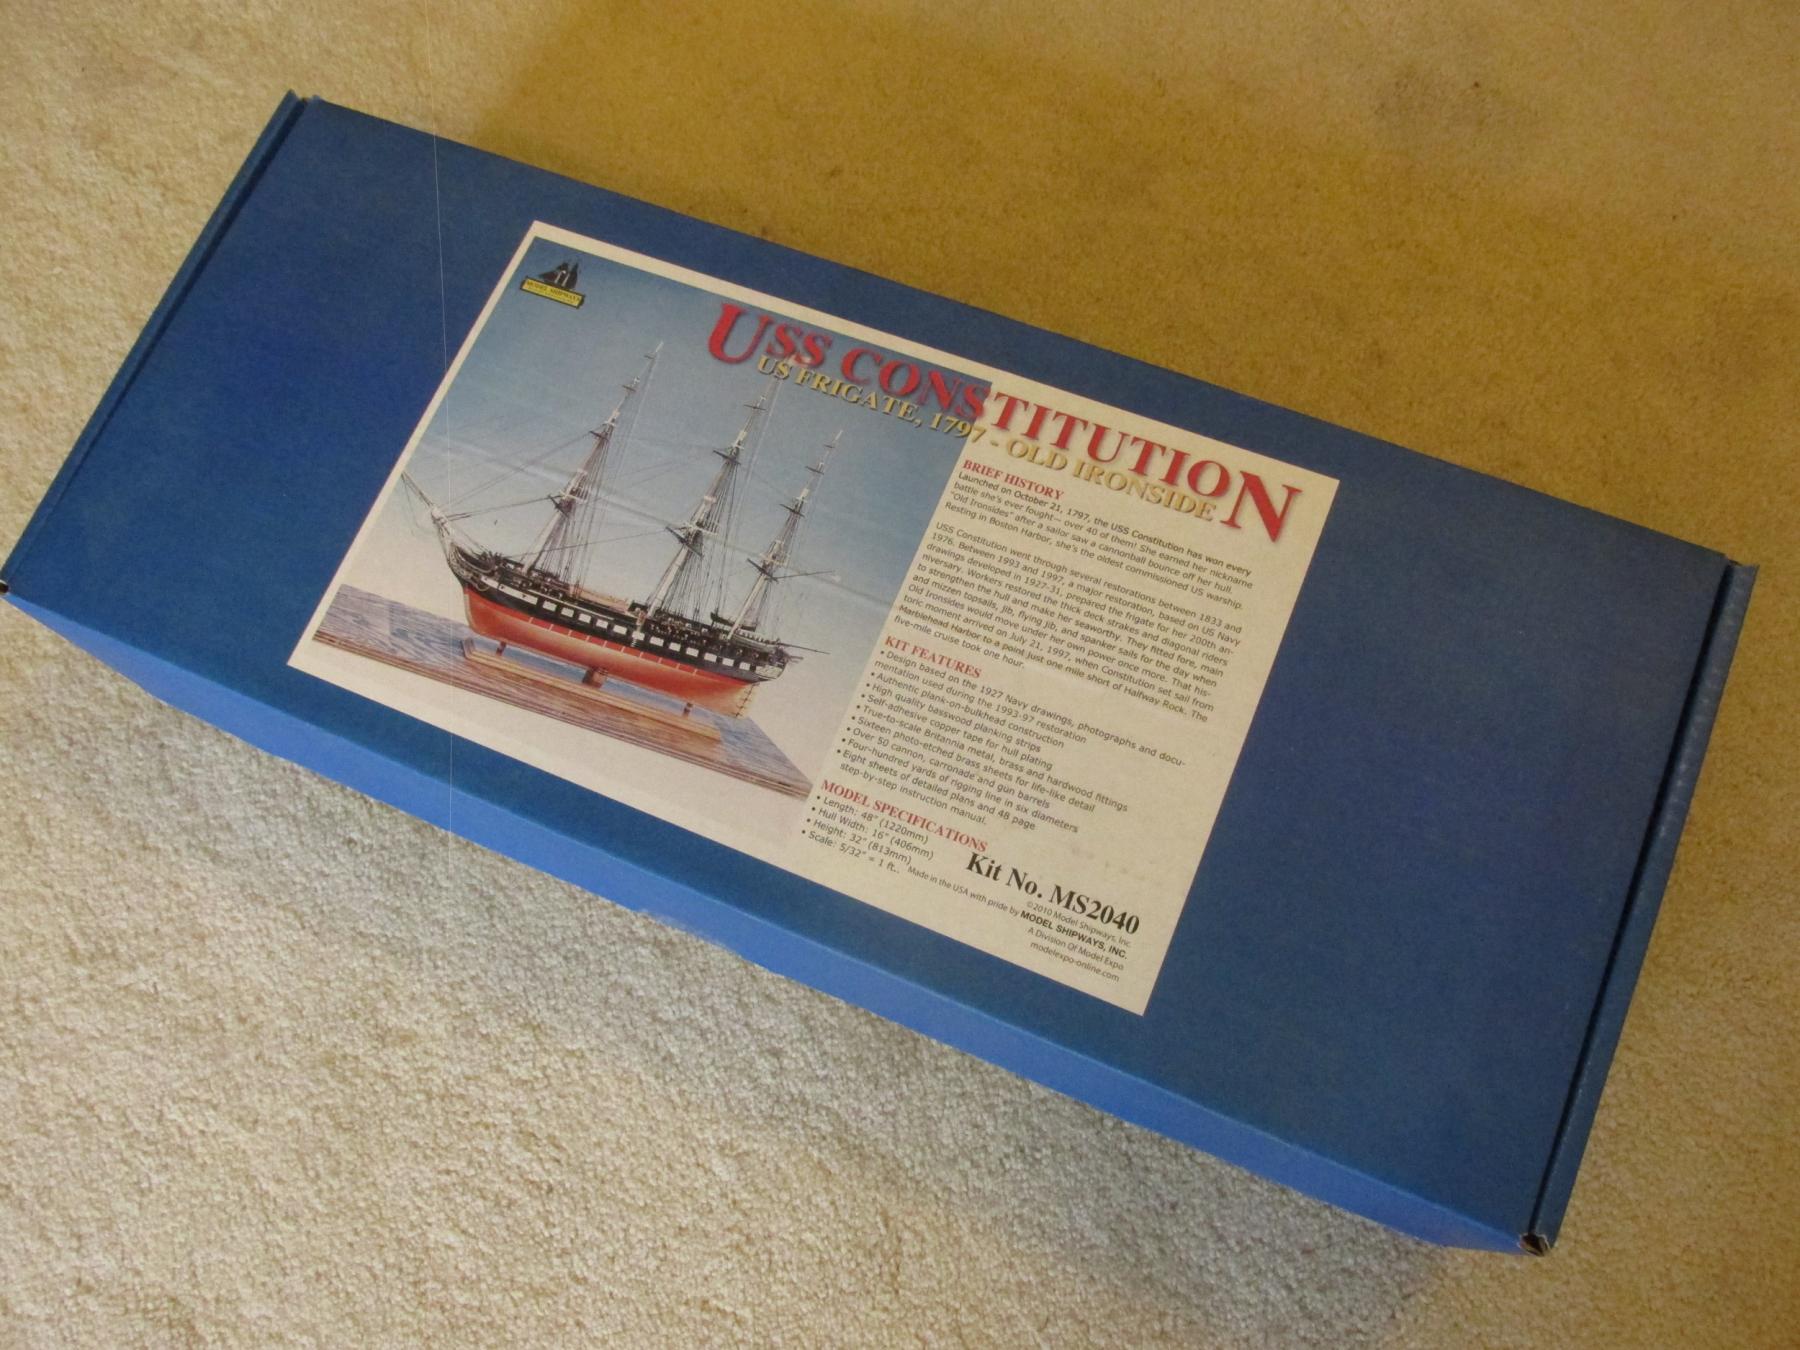
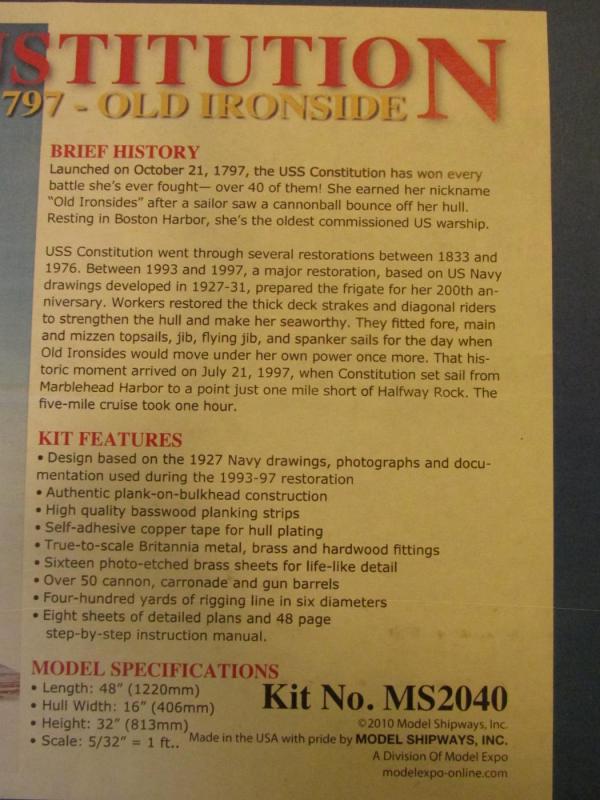
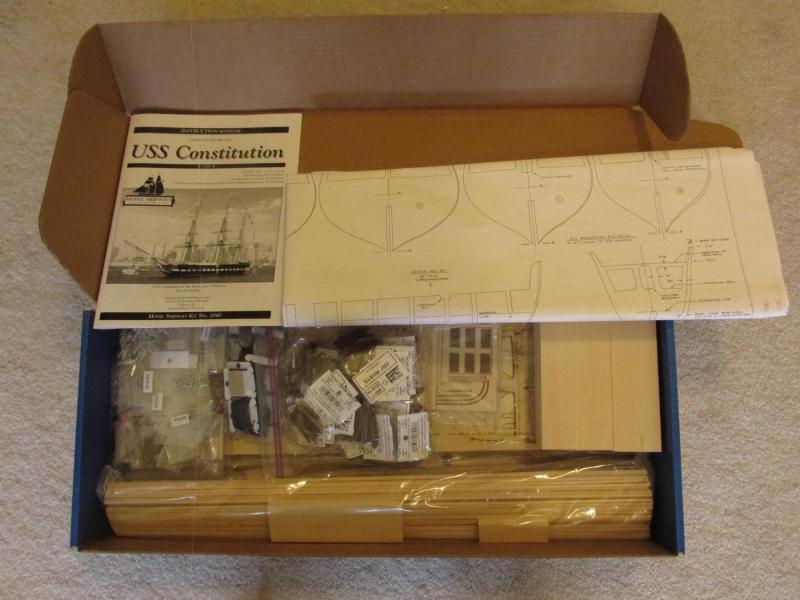
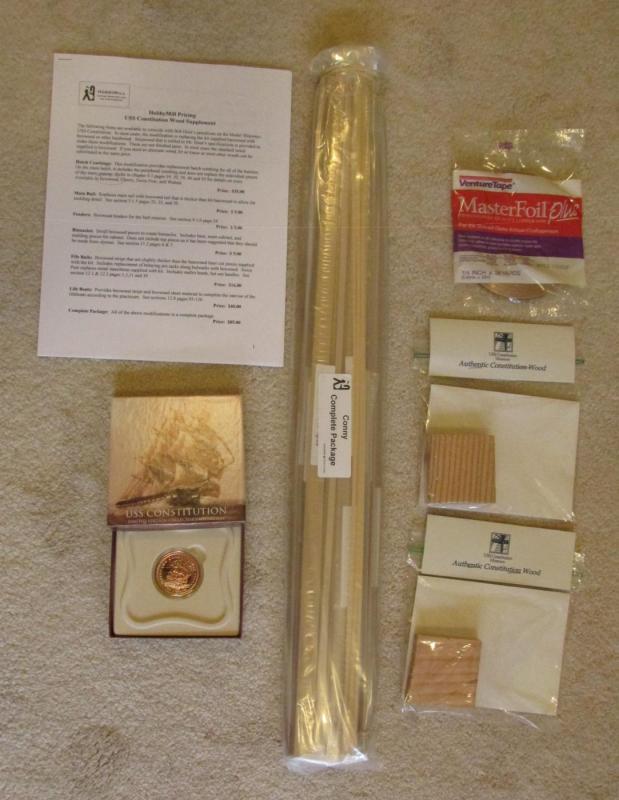
 USS Constitution - Model Shipway’s Kit No.: MS2040 “Old Ironsides” 1797 Frigate Scale: 5/32” = 1 ft. (1:76.8) This is my second POB square rigged ship; I spent about seven years building my first, Mamoli’s Rattlesnake. Like the first one, I will be following Robert Hunt’s practicum, but unlike the first, I have a multitude of excellent build logs and books to supplement it and help guide me through the inevitable pitfalls that are sure to raise their ugly heads. Hopefully, based on this and my hard-earned experience with the Rattlesnake, it won’t take another half a lifetime to build. Now for the obligatory part. Below is the kit box and contents. I won’t bore you with showing all the little packets that are stuffed in the box, that has been done very well by numerous other builders. I will state that in addition to what came with the kit, I purchased a few more items: · Robert Hunt’s practicum · Hobby Mill’s wood supplement package (based on Hunt’s practicum) * · Additional copper plate tape (as I understand it, the kit was a bit too frugal with their supply) · 2 - 2½” x 2½” x ¾” genuine pieces of USS Constitution wood ** · Medallion made from genuine USS Constitution copper plate. Not sure yet how or if it will be used. * Wood package purchased before HobbyMills closed shop. The supplement package was derived by HobbyMills where Mr. Hunt made his substitutions in the practicum. It was not identified as a package that could be purchased in the practicum. I have the original price list which describes what the wood is being substituted for and where in the practicum it is being described. If anyone wants a copy of the supplement wood list, please send me a PM. ** Constitution wood was purchased from the museum just before the ship went into drydock, December 2014. I have since tried to get a larger size for the keel or nameplate but accordioning to popeye2sea (who as I understand it volunteers on the ship), the US Navy is withholding any more wood from the public for now for reasons unknown. The museum told me, maybe in the Spring sometime. This will be my third attempt at constructing this model. The first attempt was done when I was a child building Revell’s small plastic model which I really botched. I hadn’t yet learned to read and follow instructions, but just dove into assembling the parts with expected results. My second attempt was as a young teenager and when the wounds of that failed build had waned, went a bit better. This time I got the larger plastic model. I did follow instructions and even painted the parts but had absolutely no idea how a rigged ship worked let alone how the lines were attached or what they were for. It looked decent to my young ignorant eyes at the time. Both models met their demise at my hand with firecrackers; usual method of disposing such items This time I expect a glorious finish…I hope.
-
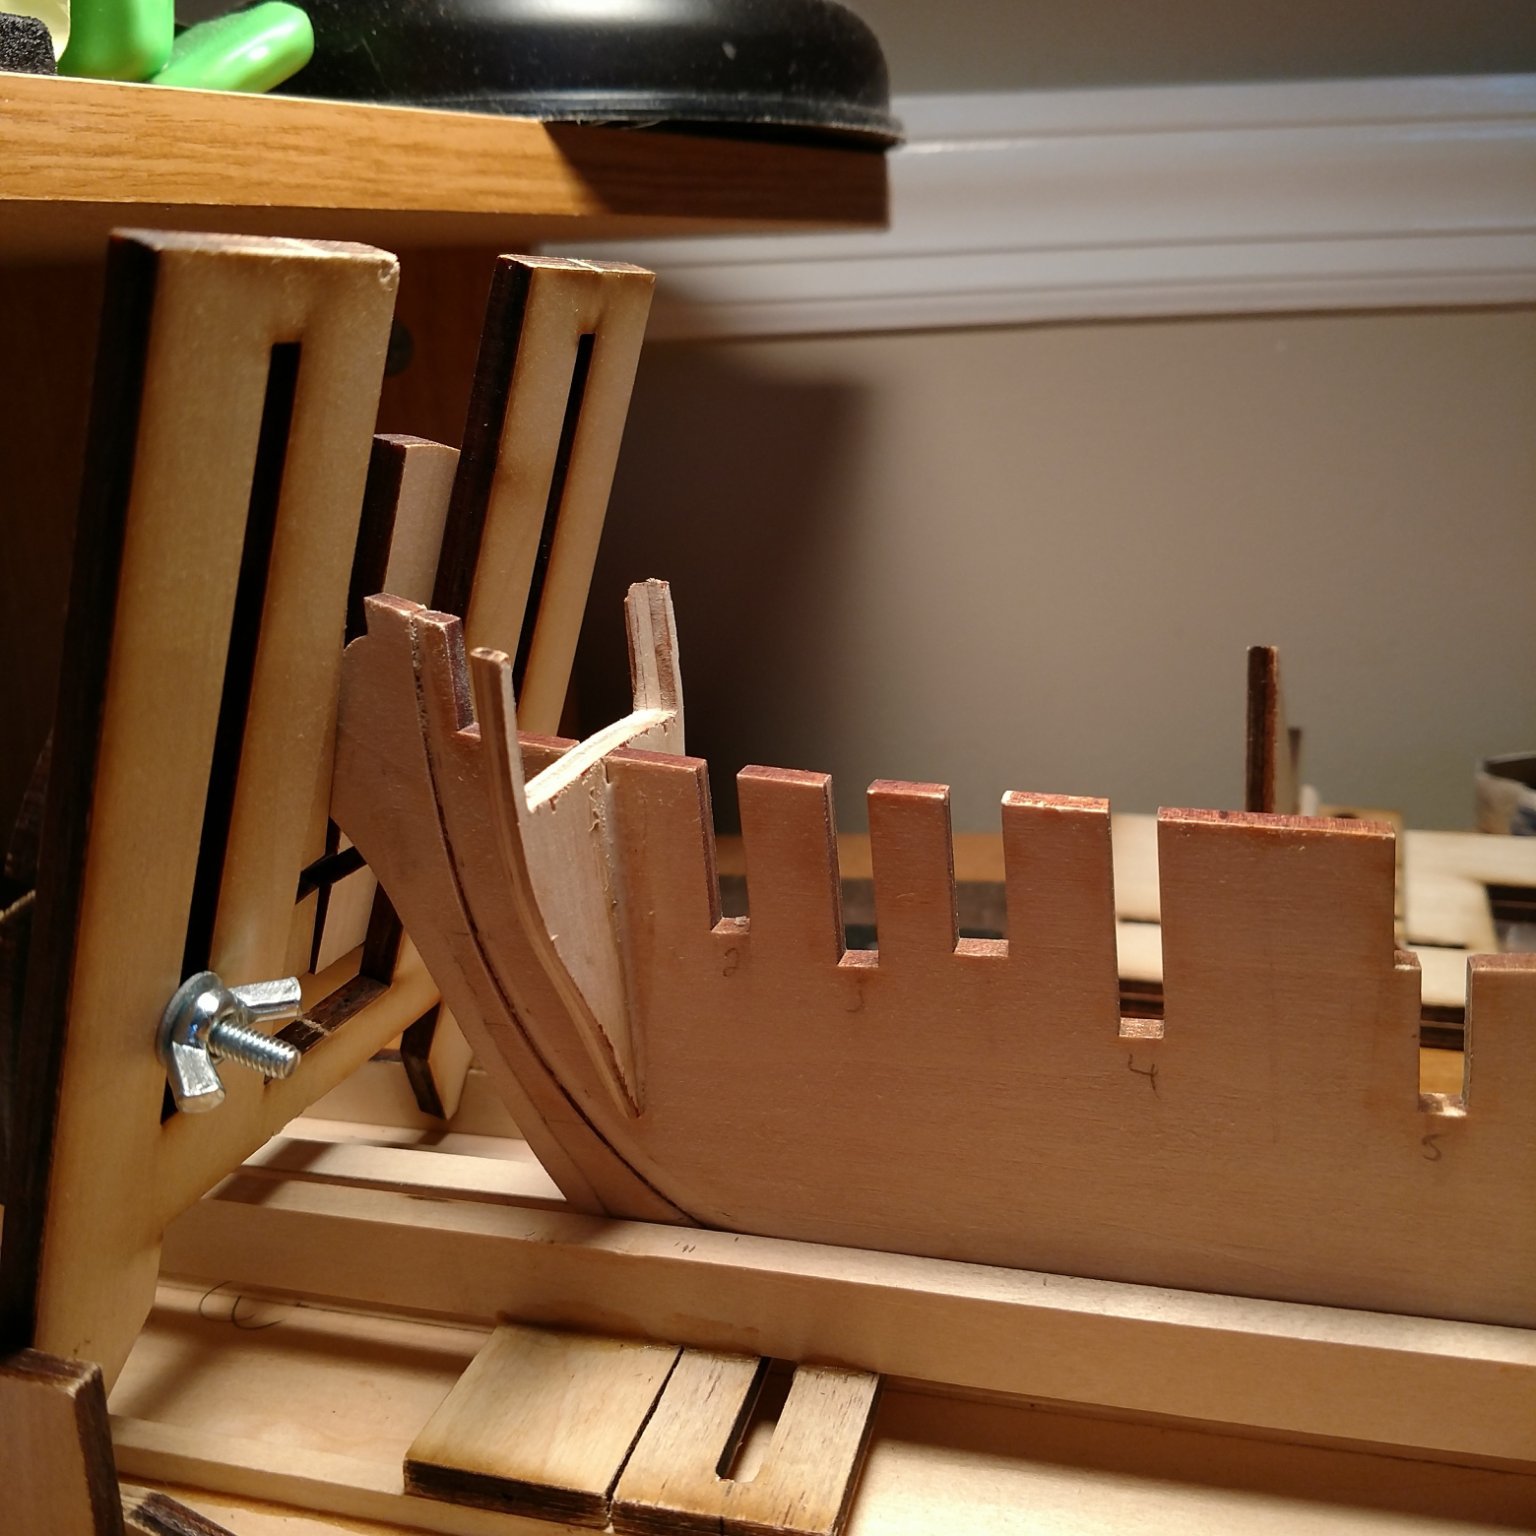
 This will be my first wooden ship model; I completed a Revell HMS Victory plastic model ship a few years ago, and I really liked it. It sparked my interest in wooden model ships, and I wanted to build one of my own. My father bought this kit for Christmas in 2019, and I really like the overall shape of the hull. Even though this is my first wooden model and the kit doesn't have them, I'd like to add sails. It will be a challenge, especially the rigging, but I believe I can do it. I started this model at the end of December 2019, and am currently working on the bow section, so maybe ~1/2 way done. I will share photos and construction details up to this point, and then continue to post progress as I go. I work full time during the day, so I only have a few hours a week to dedicate to the build, so my progress after a year and a half is SLOW. I have seen a lot of other builds/ships with high quality planking. I hope that mine will be good enough to leave unpainted, since I really like the look of the hull planking As with other builders of the MSW's kit, the keel is short ~1/4". I used a piece of extra wood to shape and glue the missing portion. Not awesome, but acceptable. I also purchased a Bulkhead Mounting Kit from a local hobby shop. After reviewing the plans, I cut the bulkhead frames loose, sanded and transferred the bevels with a compass. The rabbet was a pain....chiseling didn't do well, so I ended up sanding. A lot of sanding. In hindsight later on, I should have sanded deeper. I shaped the bulkheads and glued to the frame using the Mounting Kit. I squared them to the model with C-clamps on each end, and slowly tightened until I measured the distance between bulkheads was the same on both sides. The Filler blocks took a while to shape right, and even after they were glued, they needed more sanding to get blended with the bulkheads. Next time I might leave the bulkhead bevels ''thick'' and sand together with the blocks for a better transition. More photos and progress tomorrow -Jason-


-
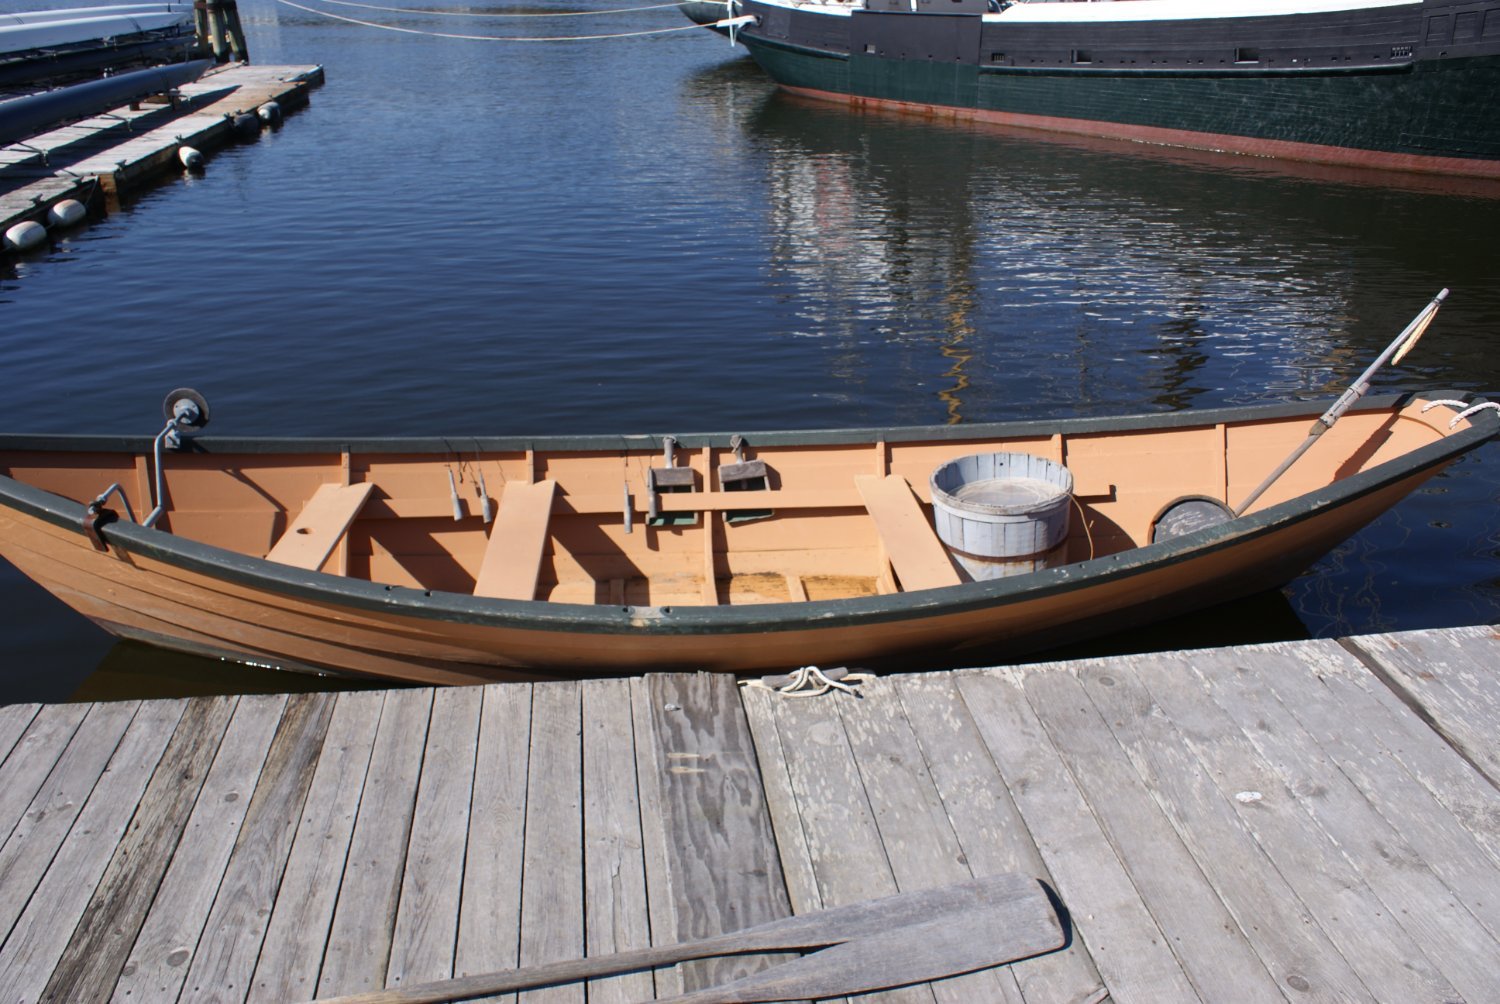
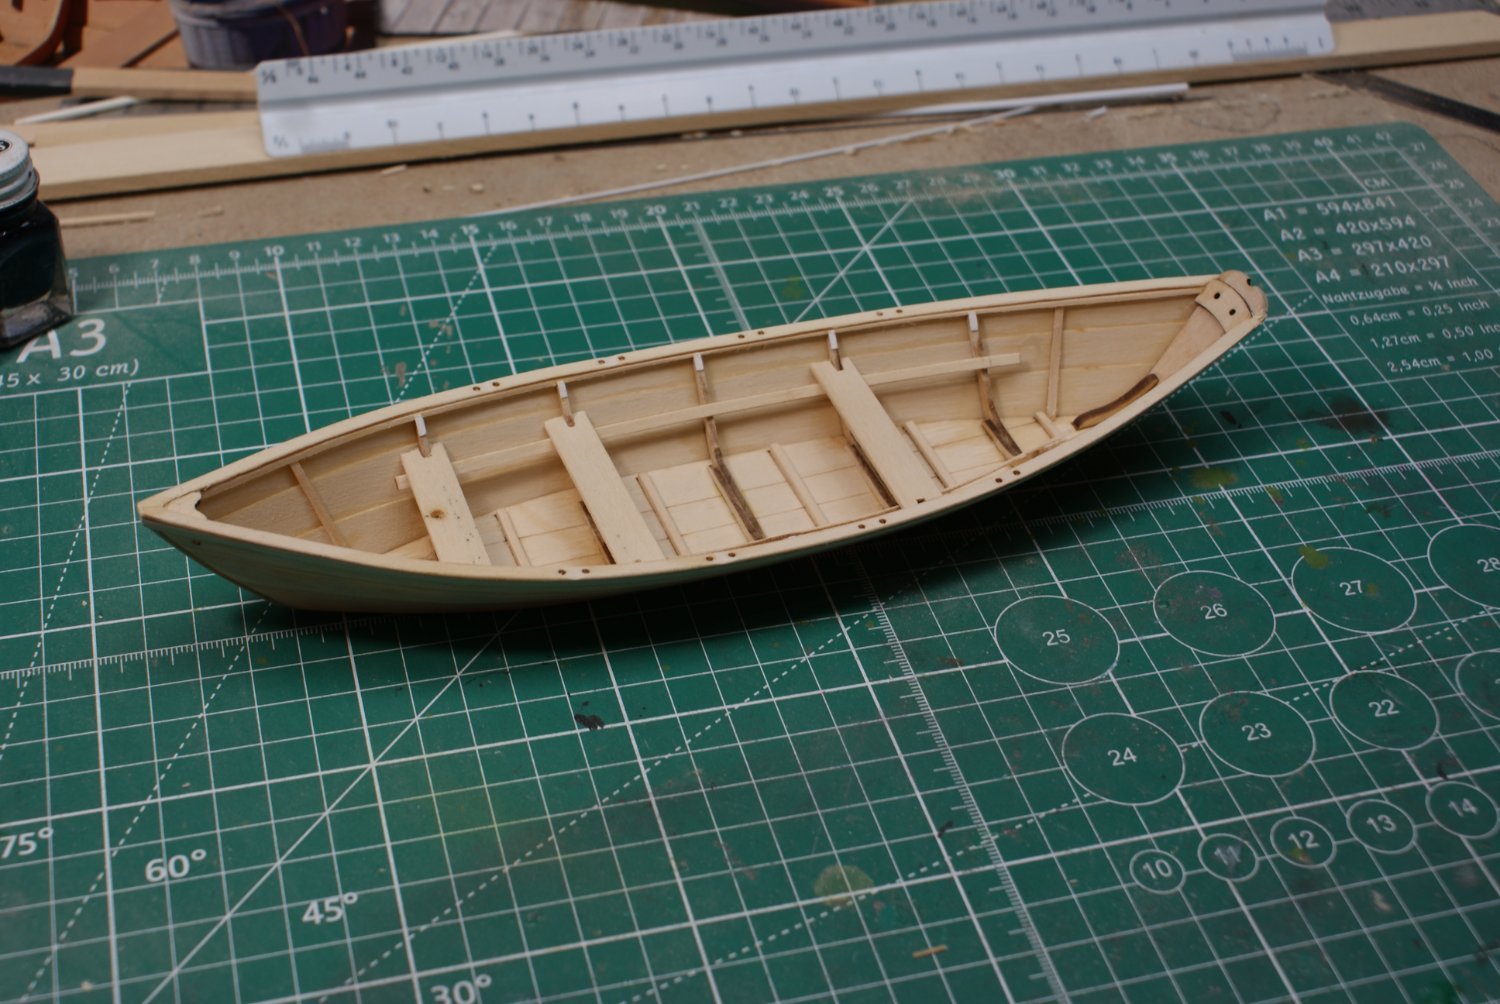
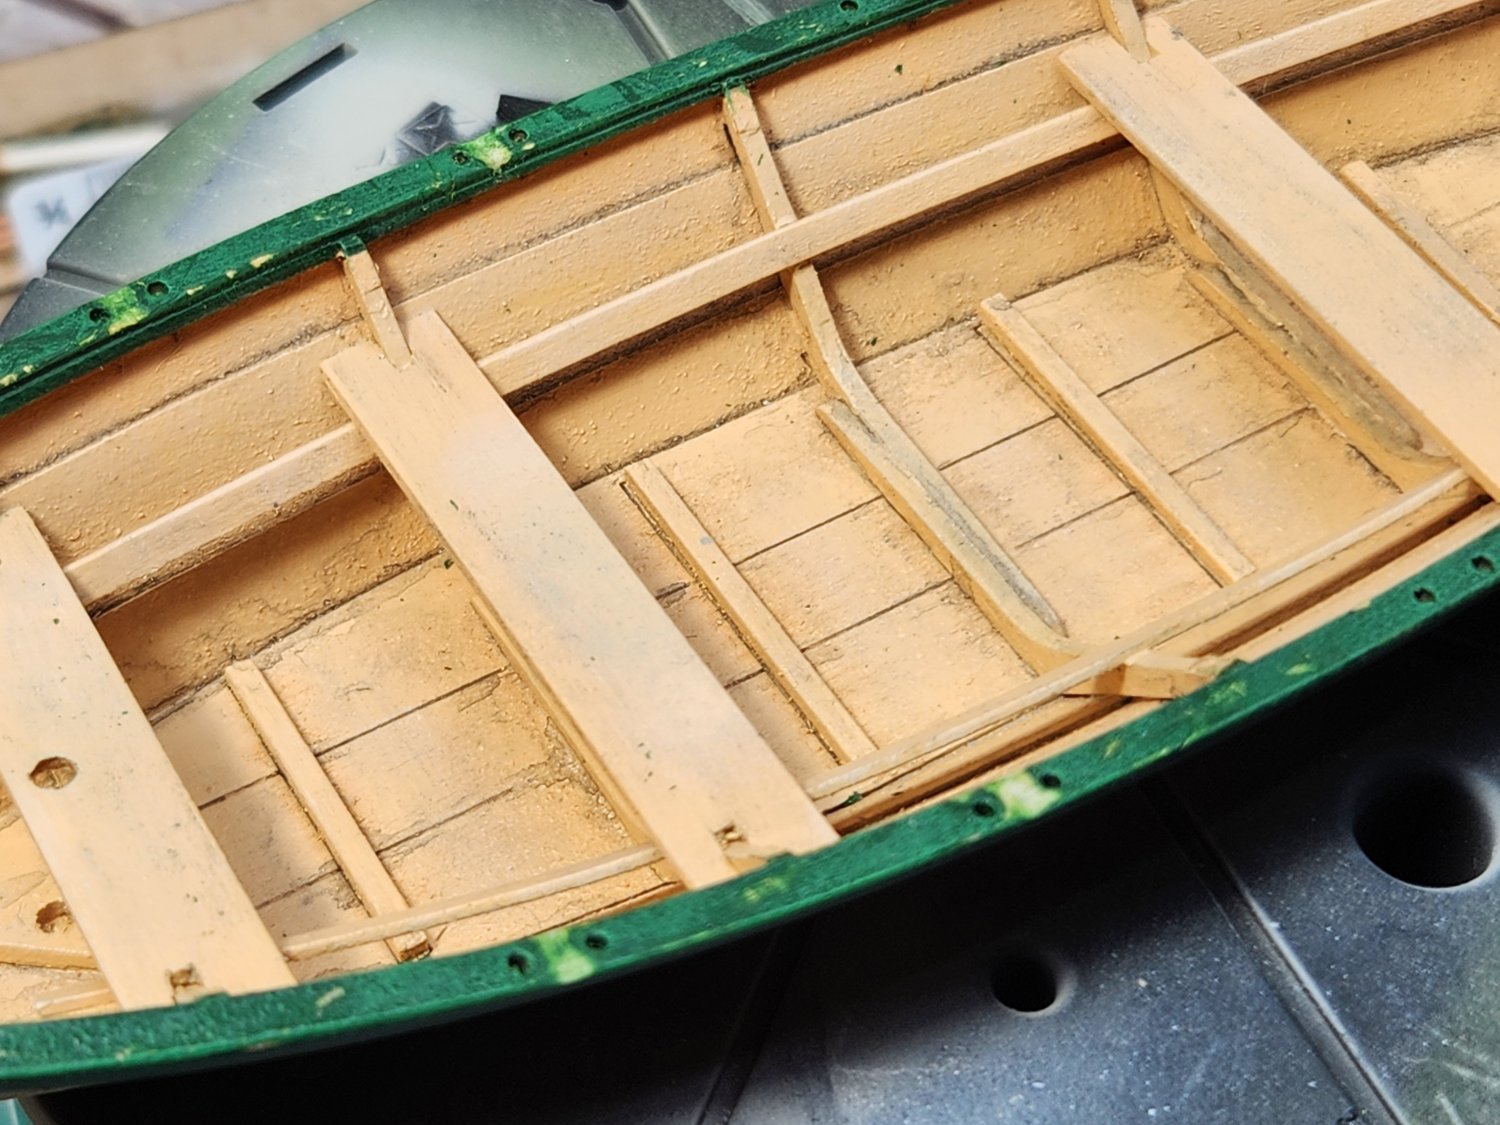
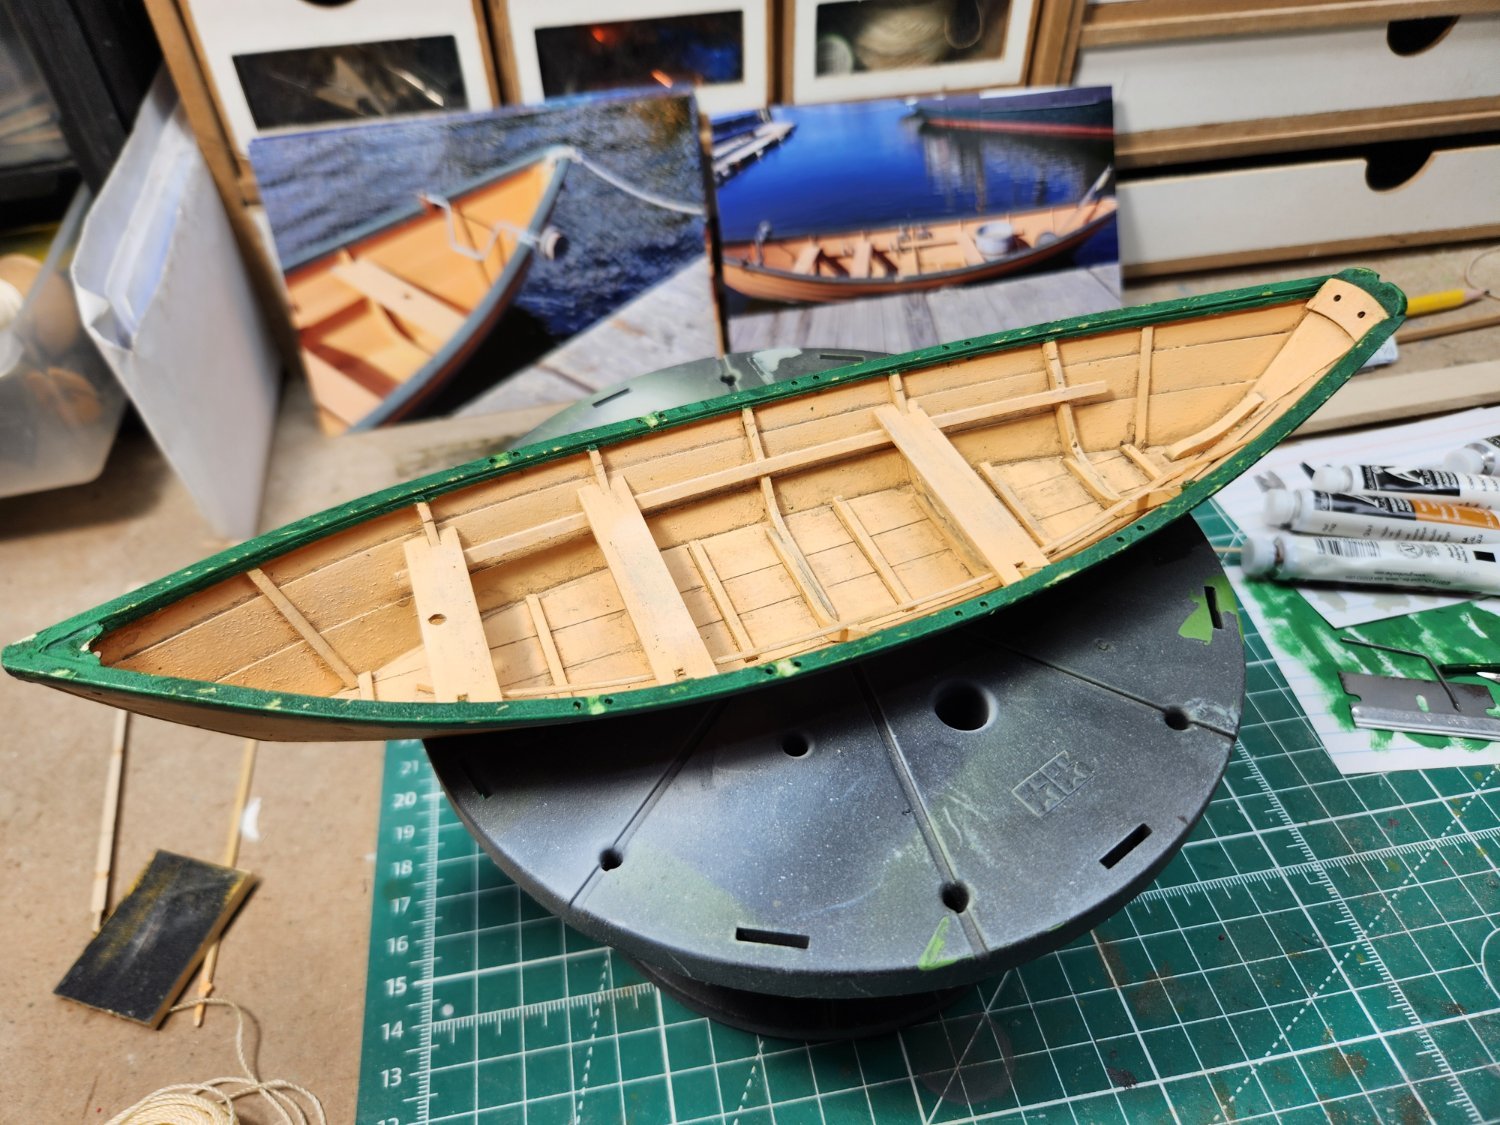
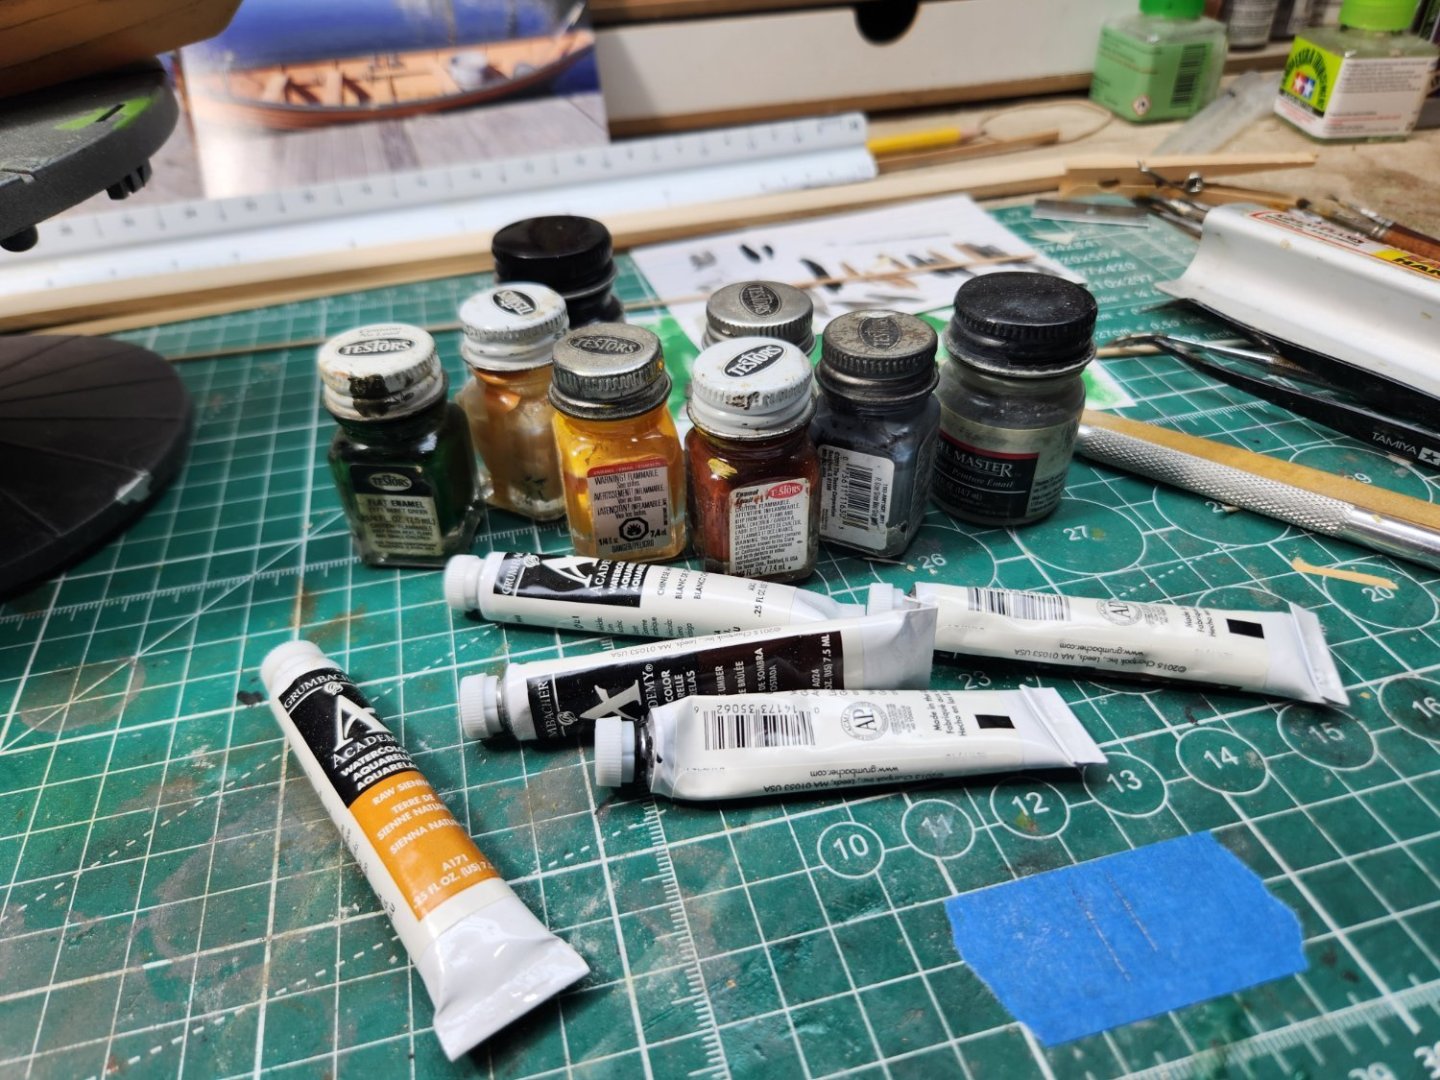
Started this build approximately six weeks ago, it's my first build log. As a volunteer at Mystic Seaport Museum, I regularly pass a Dory exhibit and I thought it would make an interesting subject for a Diorama. My original thought was to recreate the scene in the photo, the boat tied to the dock. However, my biggest concern was modelling the water. If I mess that up, the project fails! Another option I considered was to build a scene of a Dory on a Schooner. So, that's my plan. Decided the base would be a section of deck, the last Dory being prepared for launch from the L. A. Dunton Gloucester Fishing Schooner, circa 1923 (currently undergoing full restoration at Mystic Seaport Museum) for daily fishing. The Dunton carried 10 Dory's stacked five high, port and starboard. She had a crew of 24, Captain, 3 crew, and 20 fisherman (2 per Dory). Dories could carry several tubs of longline trawl that would be set away from the schooner. Each tub could carry as much as 1,800 feet of line with a hook every fathom, or six feet. If a commercially viable fish was found on 50 of those three hundred hooks it was considered a decent haul. Dory's were painted a buff color which would show up in the fog and in bright sunlight, the same color the spars on the mother ship would carry and the dory might have a small rope on the bung, should the boat overturn. There's lots of small detail that can be added, line tubs, dory fog horn, trawl anchor, trawl buoy, bailer's, sail, etc... Fortunately, I found some 1/24 scale figures I think I can modify. To start with, build the Dory! The Kit is the Model Shipways Lowell Banks Dory, "a beginner kit is not just for beginners"! No need to document the build, there are many Dory Build logs. So, fast forward, after few minor kit modifications, base painting, I started the weathering is a work in process in process. I mixed my own batch of base colors using enamel paints. For washes I use "only" watercolor paints". Not acrylic paints. Watercolor paints are much more forgiving, if you make a mistake, just wipe off with a damp cloth or paint brush. I never weathered a ship model; I'm having fun with this! Some dark grey wash, dry brushing and paint chipping, the detail starts to develop.


- 11 replies
-
- 10
-
-
- Model Shipways
- Finished
- (and 2 more)
-
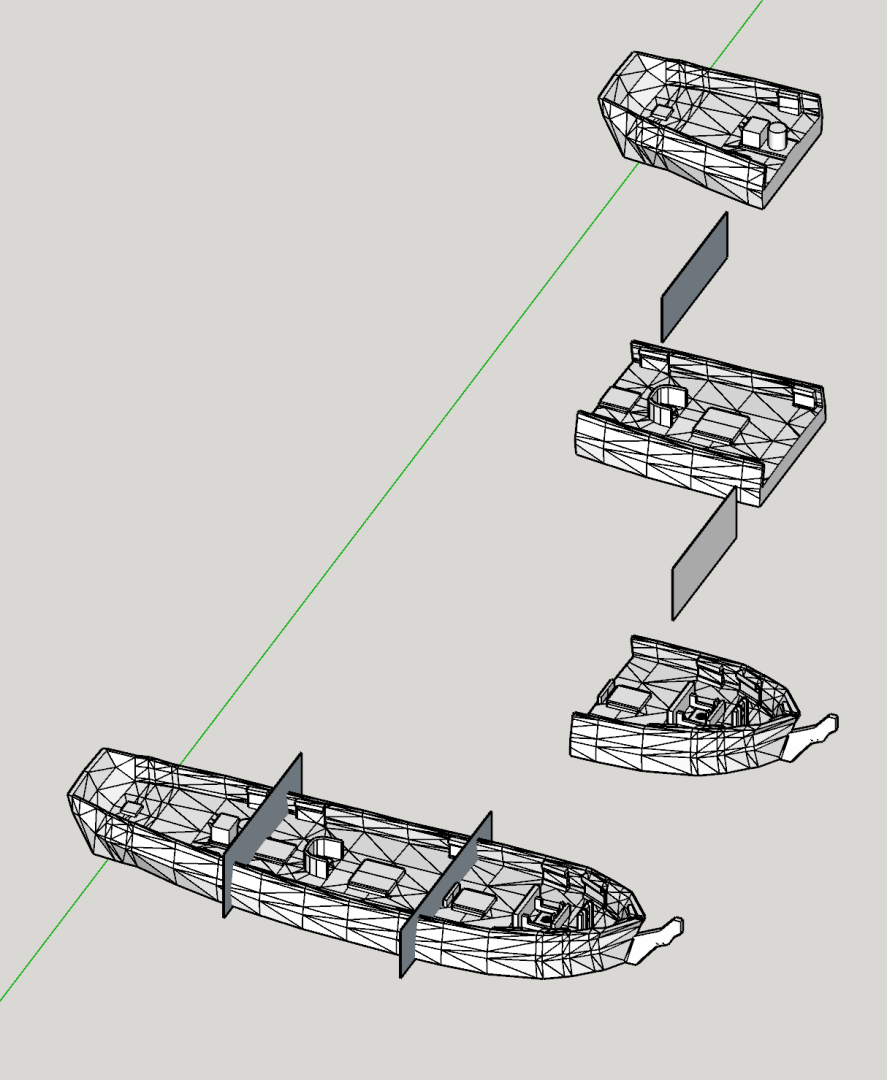
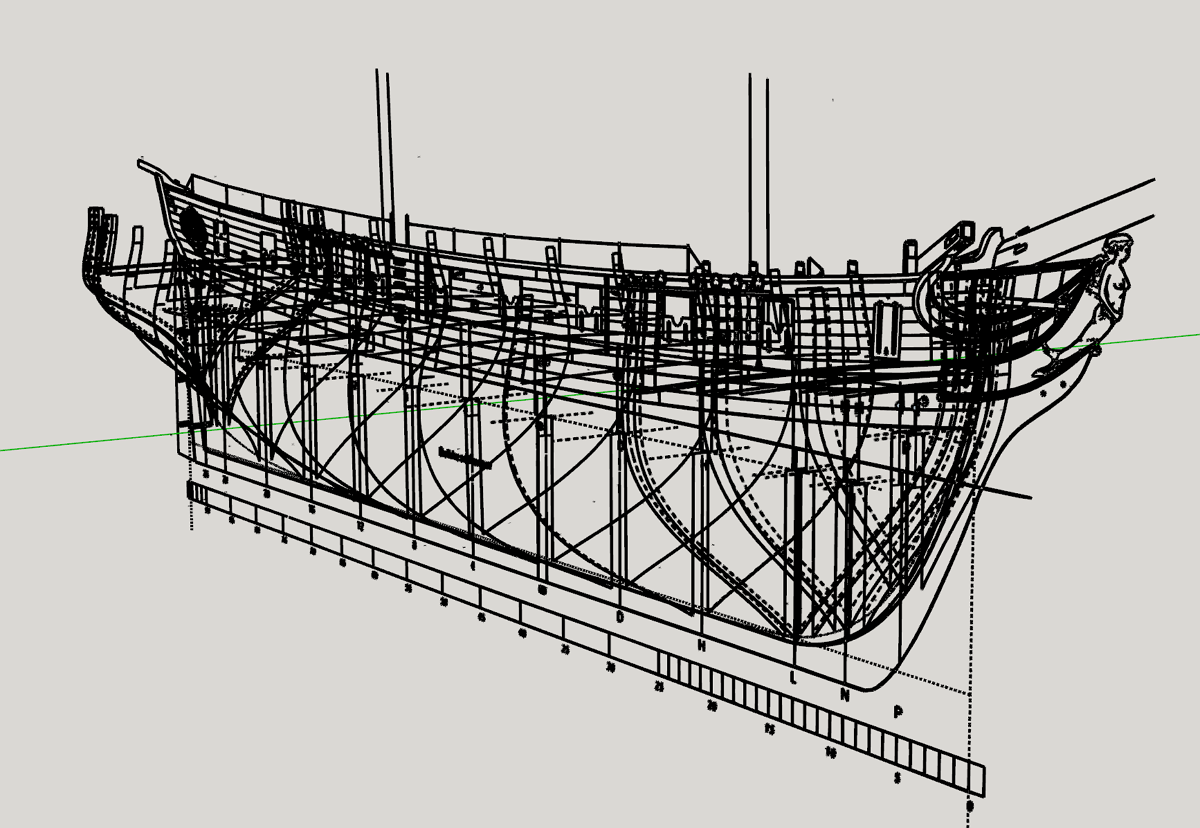
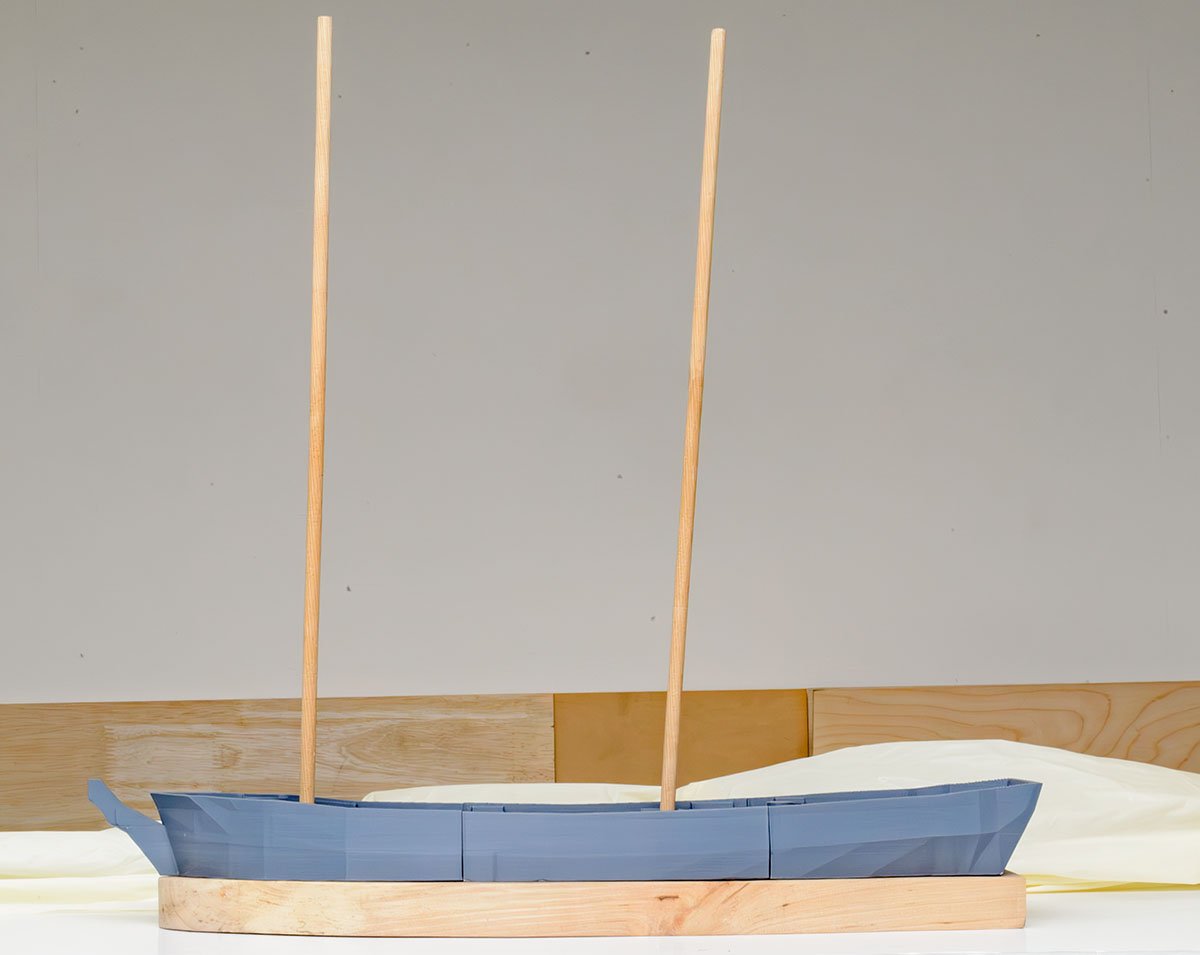
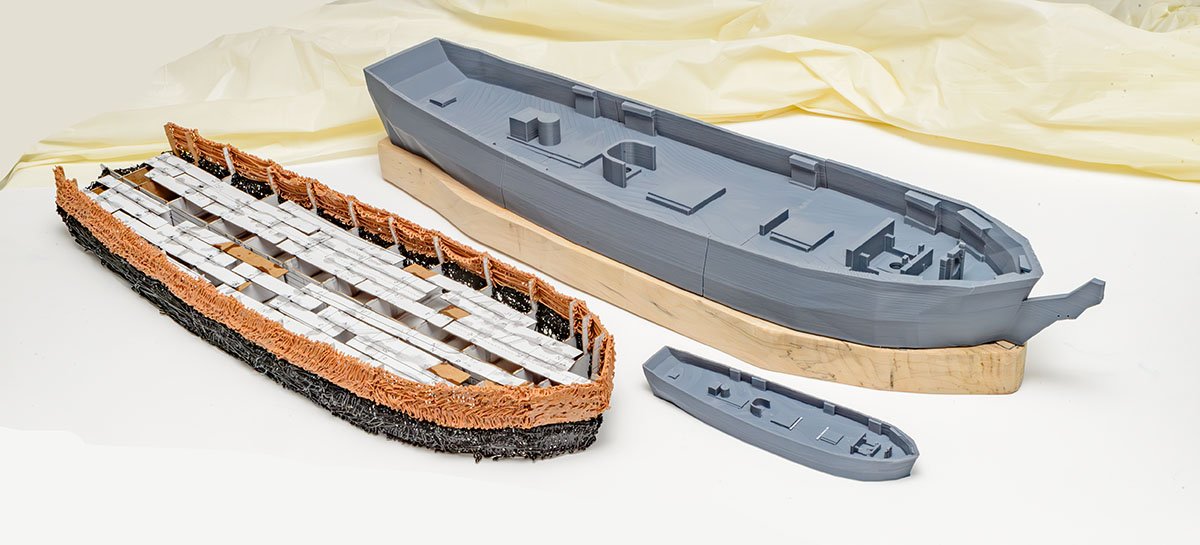
 I made a 3D printed hull before I started to glue the wooden keel and frames. I scanned the original plan and made 3D models to print the hull. Due to copyright reasons, I can't share my modelling files. I wanted to find a new way to enjoy the kit. I skip all the processes before rigging. I tried several different methods to build copied hulls. For example, I tried a 3D pen to draw hull planking. Unfortunately, it was boring and tough work. After several attempts, straight 3D modelling was the best answer. The small ship is 1/210 scale version. I'm going to build a wooden hull with the 3D printed hull for rigging together. The second hull for rigging will be my trial and error test bed for the main mission.
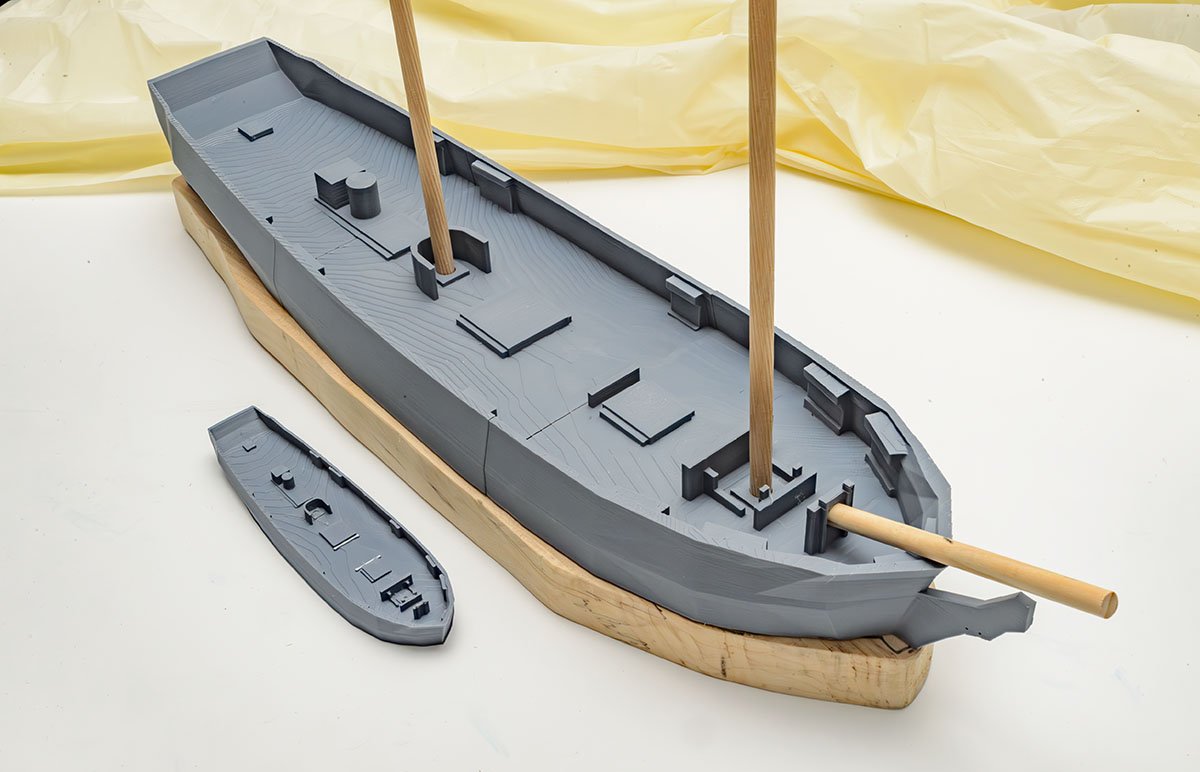


-
 Hi All! Well, as promised, I decided to start my next ship after a brief hiatus following the launch of my HMS Sultana. But...I decided to follow other folks who jumped into the USS Syren! It really seemed like the best choice for a number of reasons. - The Sultana gave me a good base for my skill set, but the Syren will expand on it in a step wise manner (Gaff rigged schooner to a more complex Brig) - The Syren and Sultana are built at the same scale, giving me a bit more confidence in applying what I learned building the Sultana - The Syren will be my first plank on bulkhead (POB), and represents a new skillset I have yet to really develop - namely planking - There are a lot fo great completed build logs on the Syren here...so lots of immediate knowledge from other modelers just a click away - The practicum written Chuck Passaro for the USS Syren is priceless! I work a lot, and during my Sultana build the various 'breathers' I took did not slow me down, since the practicum gave me a mental placeholder and seamless way to pick up where I left off without breaking stride. (In other words, the practicum I think really aids those modelers who often need to step away for weeks or months occasionally!) So...it's from here that I will start my new Syren build. Moving on...
 -
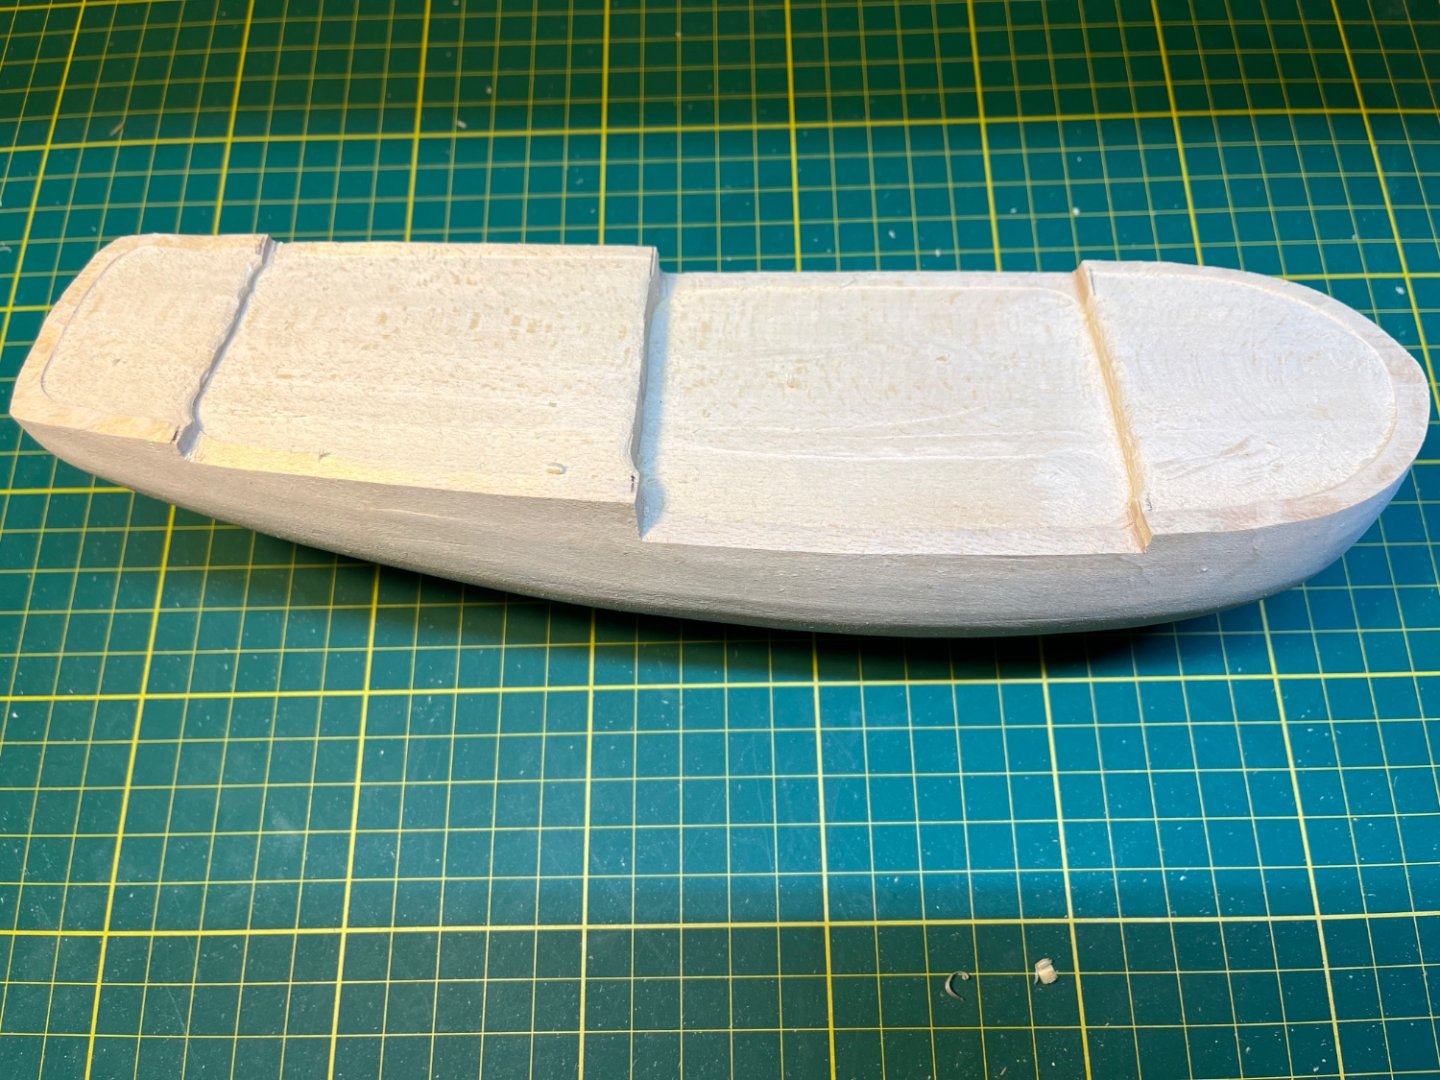
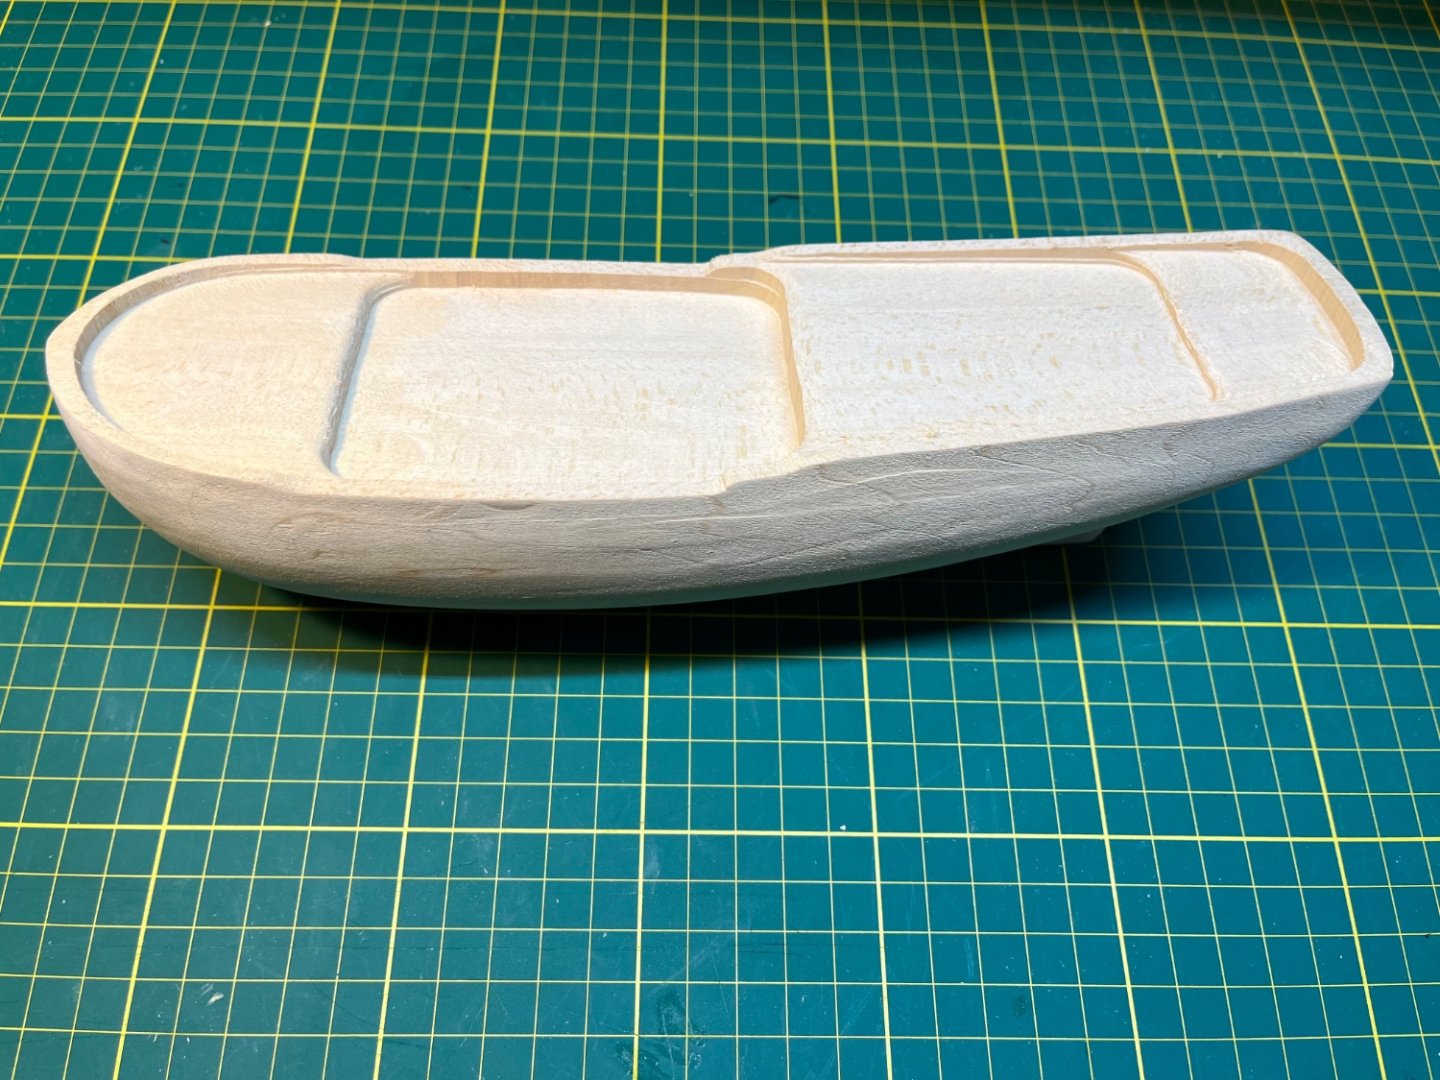
 I am moving on to this ship after finishing the NRG half hull planking project. I was looking for my next ship when I was finishing the MS Lobster Smack and found Chuck Passaro’s very detailed shop notes for this model. I kept looking at those instructions wondering if I could follow them. I finally decided to order the kit, but after about 6 weeks, Model Expo told me that they had stopped making it. So I did the half hull project next to work on my planking skills. While I was working on it I found a Sultana kit on EBay. I think it’s pretty old. The shop notes give detailed instructions for modifying the kit and doing some scratch building. Some parts of it look pretty difficult. I am especially worried about the fun with Sculpy parts that involve sculpting a new quarter badges and a figure head, but they are a long way off, and I can always wimp out and just use the cast ones that come with the kit. The hull is supposed be planked above the waterline, and the planking replaces the carved bulwarks so the first step is to modify the solid hull. This is the hull as it comes out of the box: This is after slowly shaving off the bulwarks. I am glad I bought a big pack of number 11 blades for this one.! I think there is more to take off, but decided to finalize it when the time comes to sand and shape the decks: I cut out the hull profile templates and started shaping the stern. It needs a lot of wood removed! Chuck recommend a rotary tool. I did that for a bit. It made quite a mess and made me nervous I was going to take off too much wood. I switched to sand paper wrapped around a dowel to take away more wood for the concave curve at the stern. The profile template says there is more to take off. This is my first solid hull model, and I think the challenge is going to be using the templates to get the hull shape correct. I seem to work pretty slowly, and I think this one is going to take me a quite while!
-
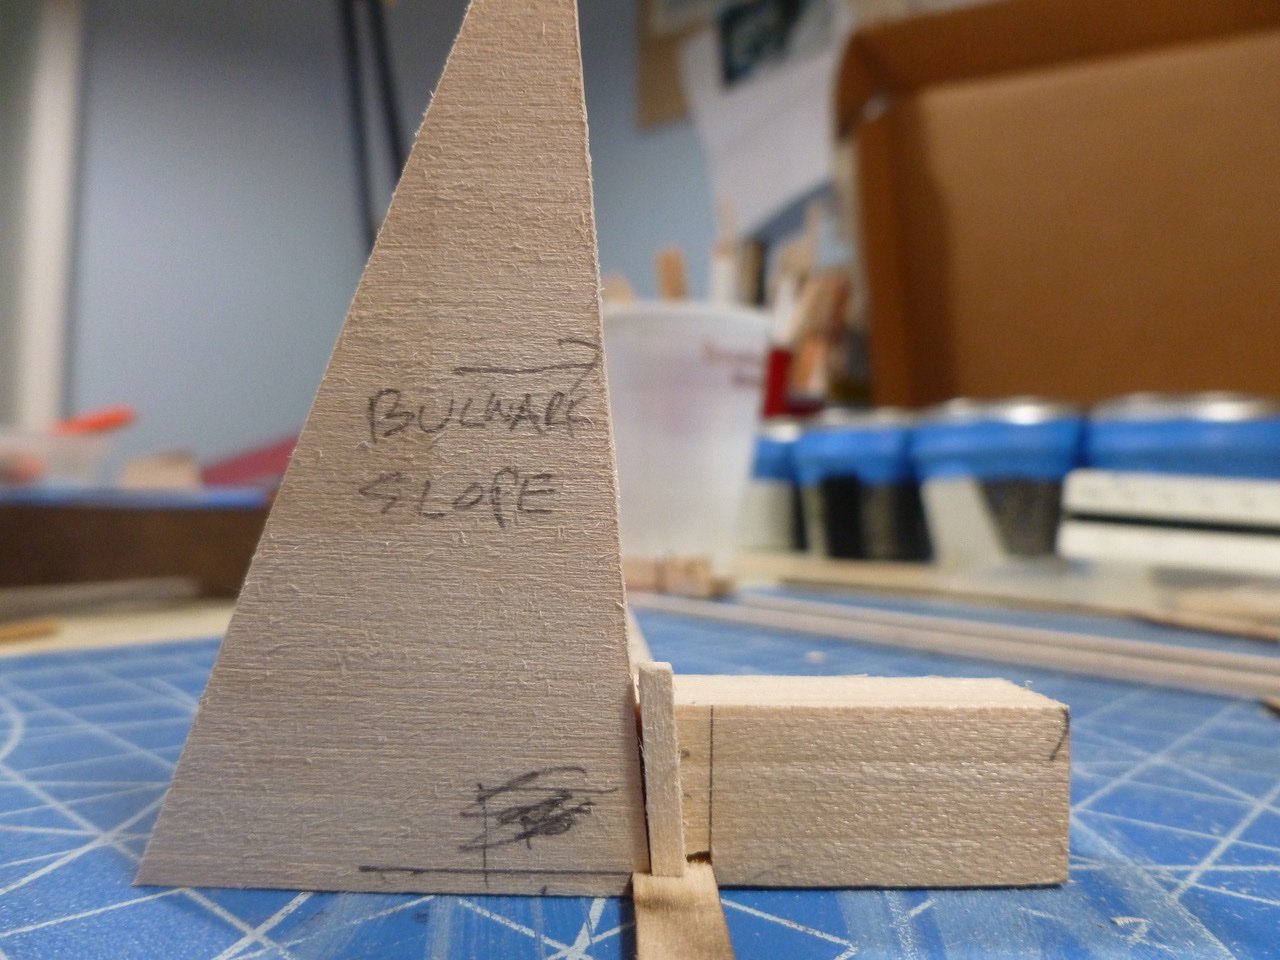
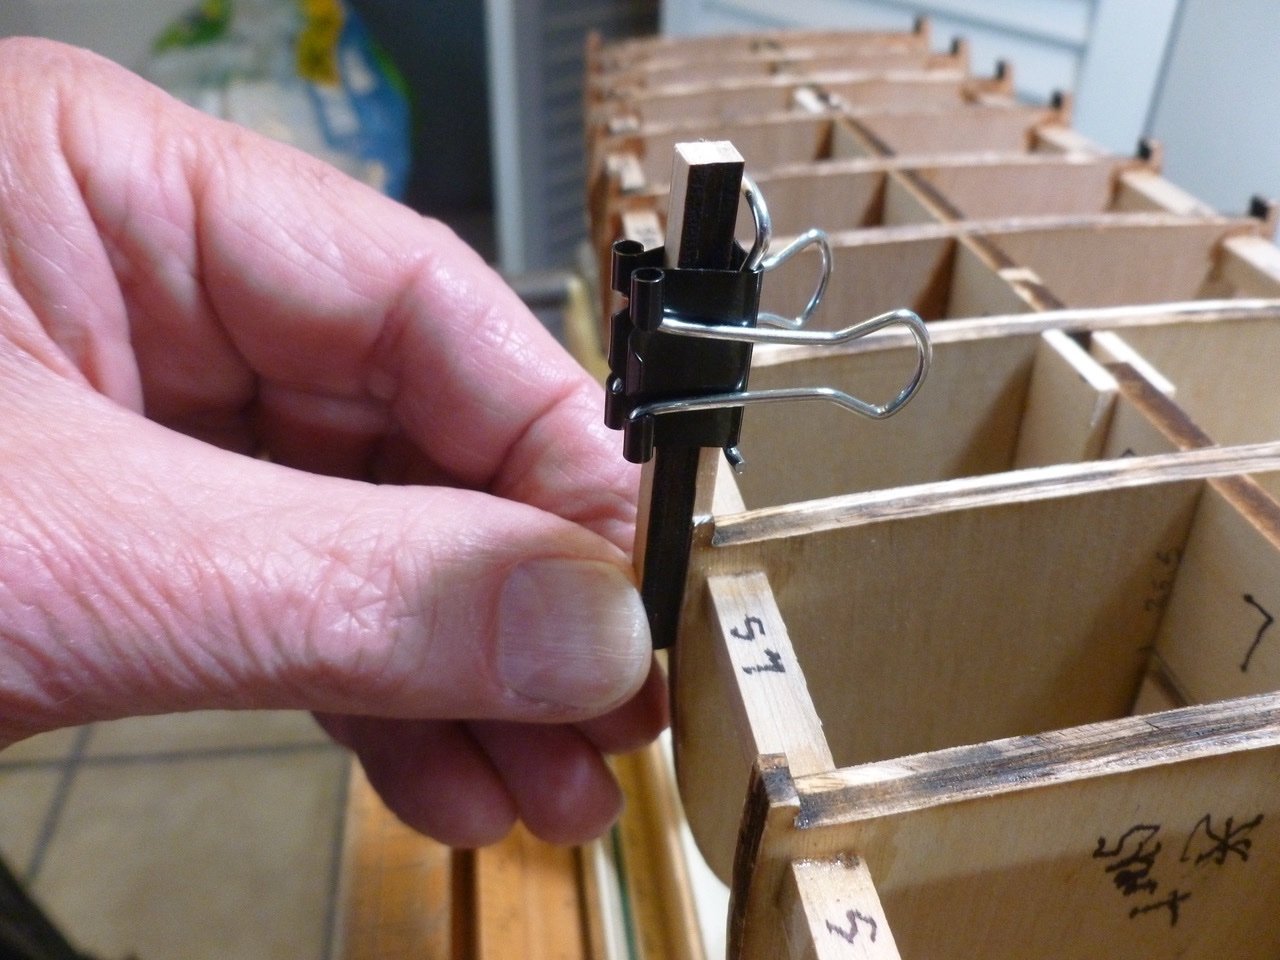
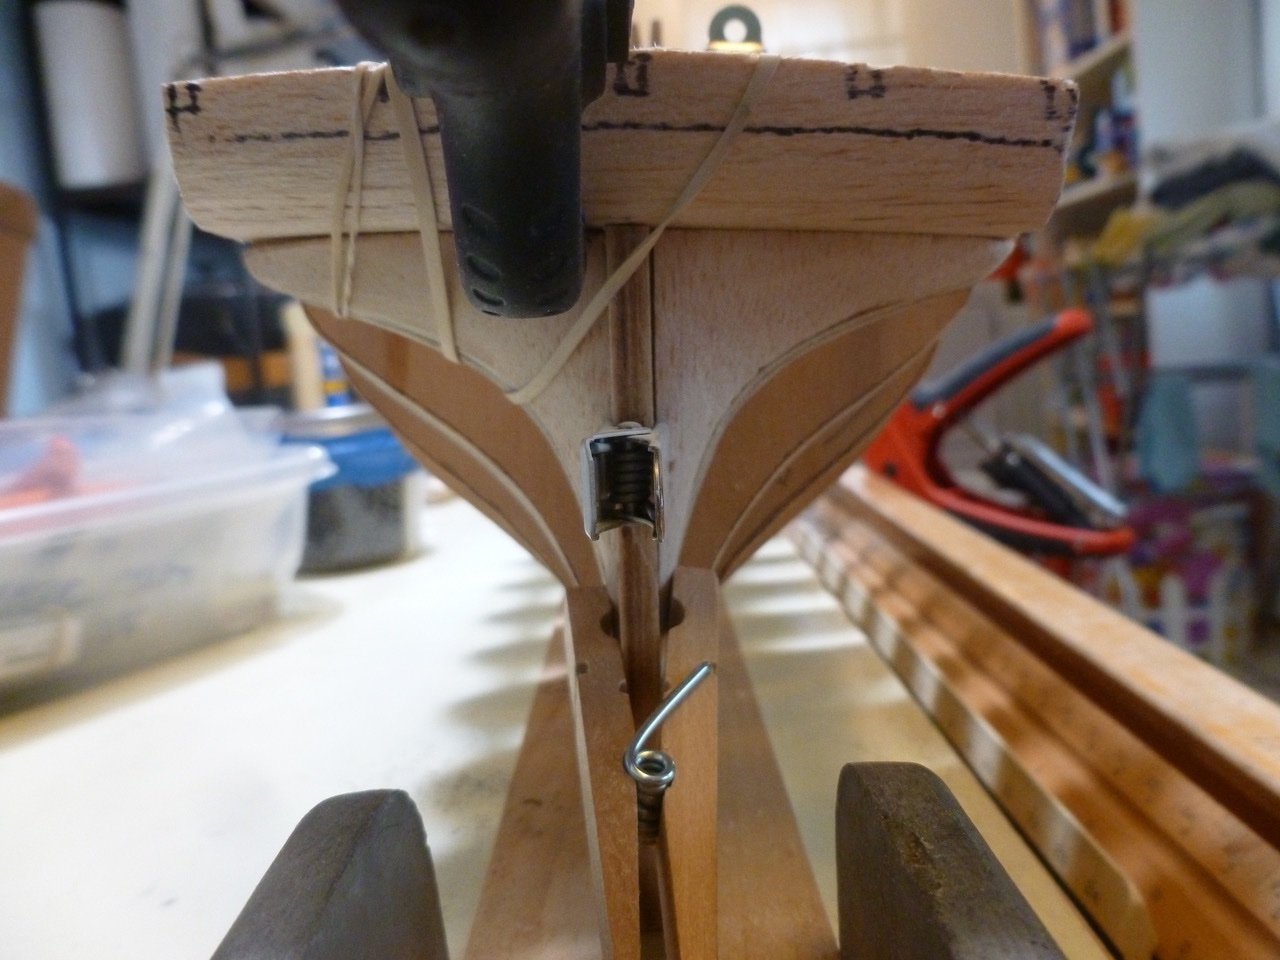
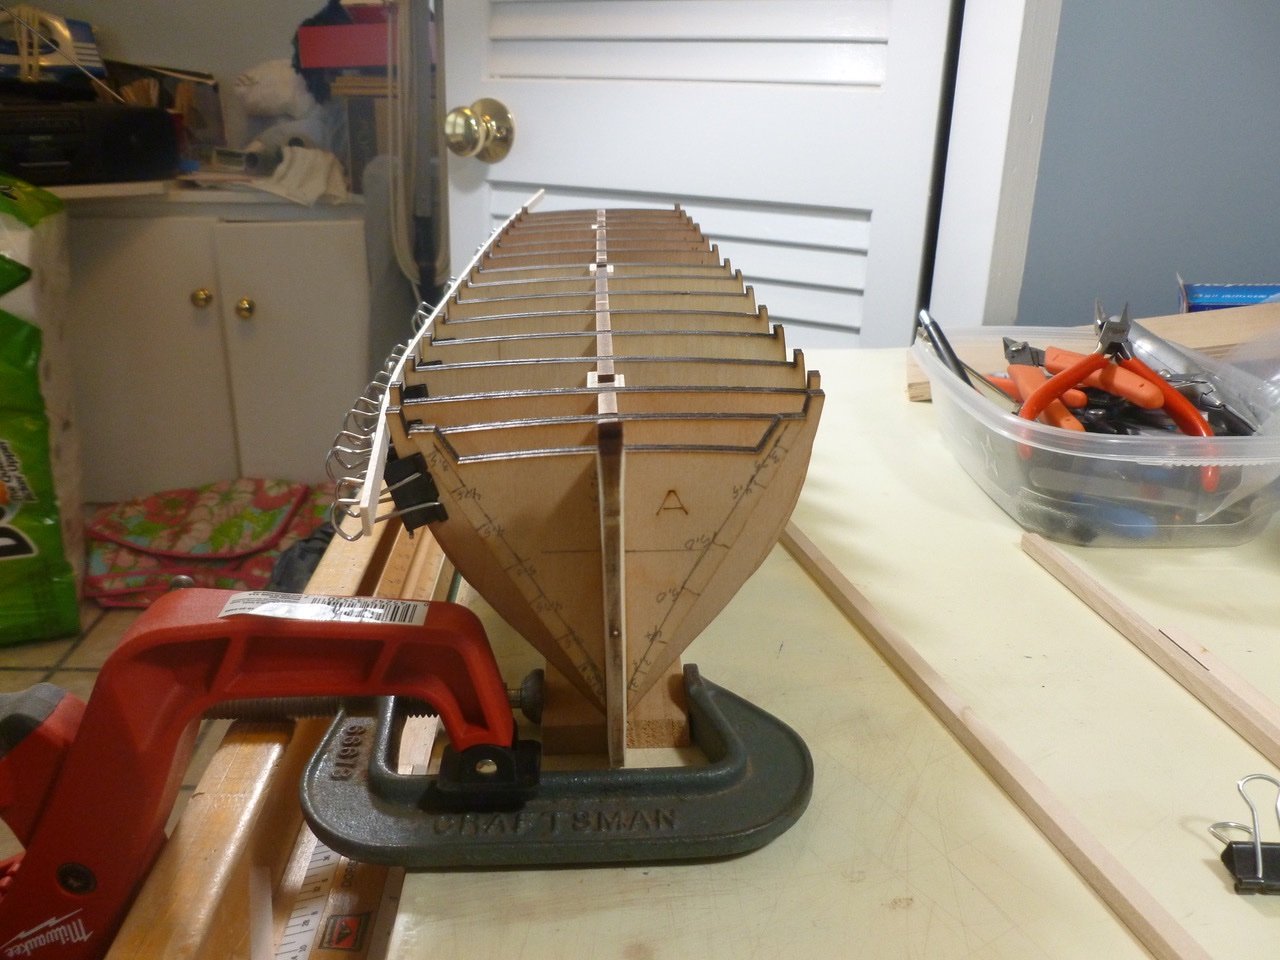
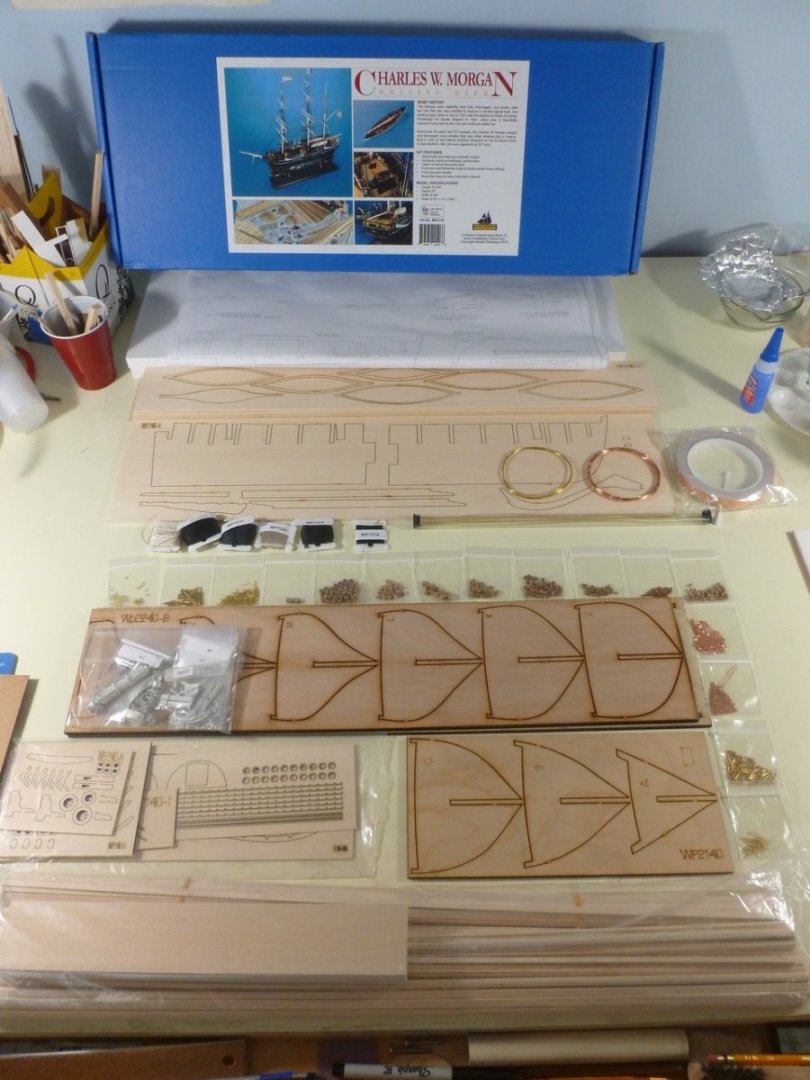
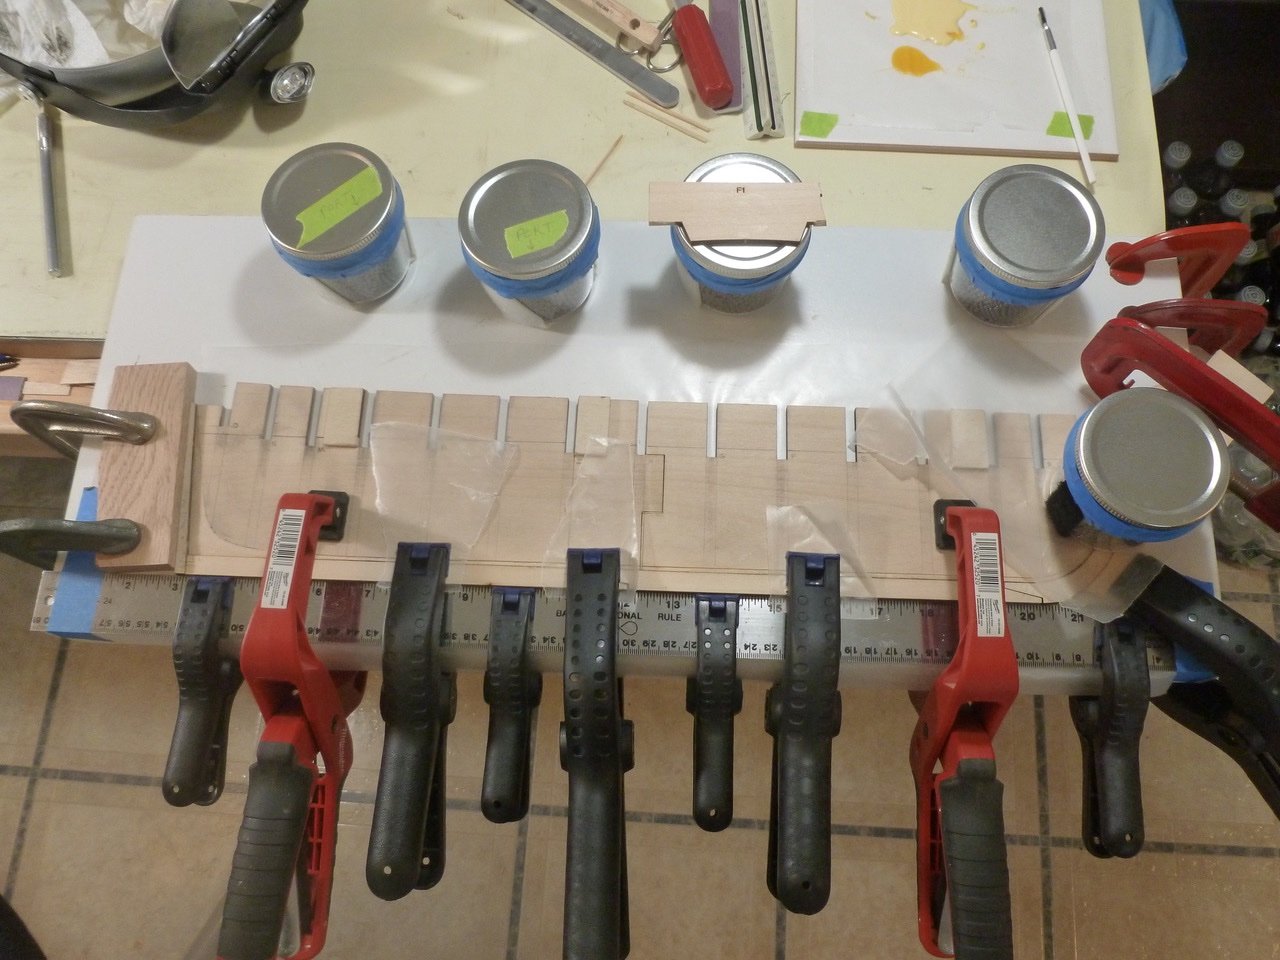
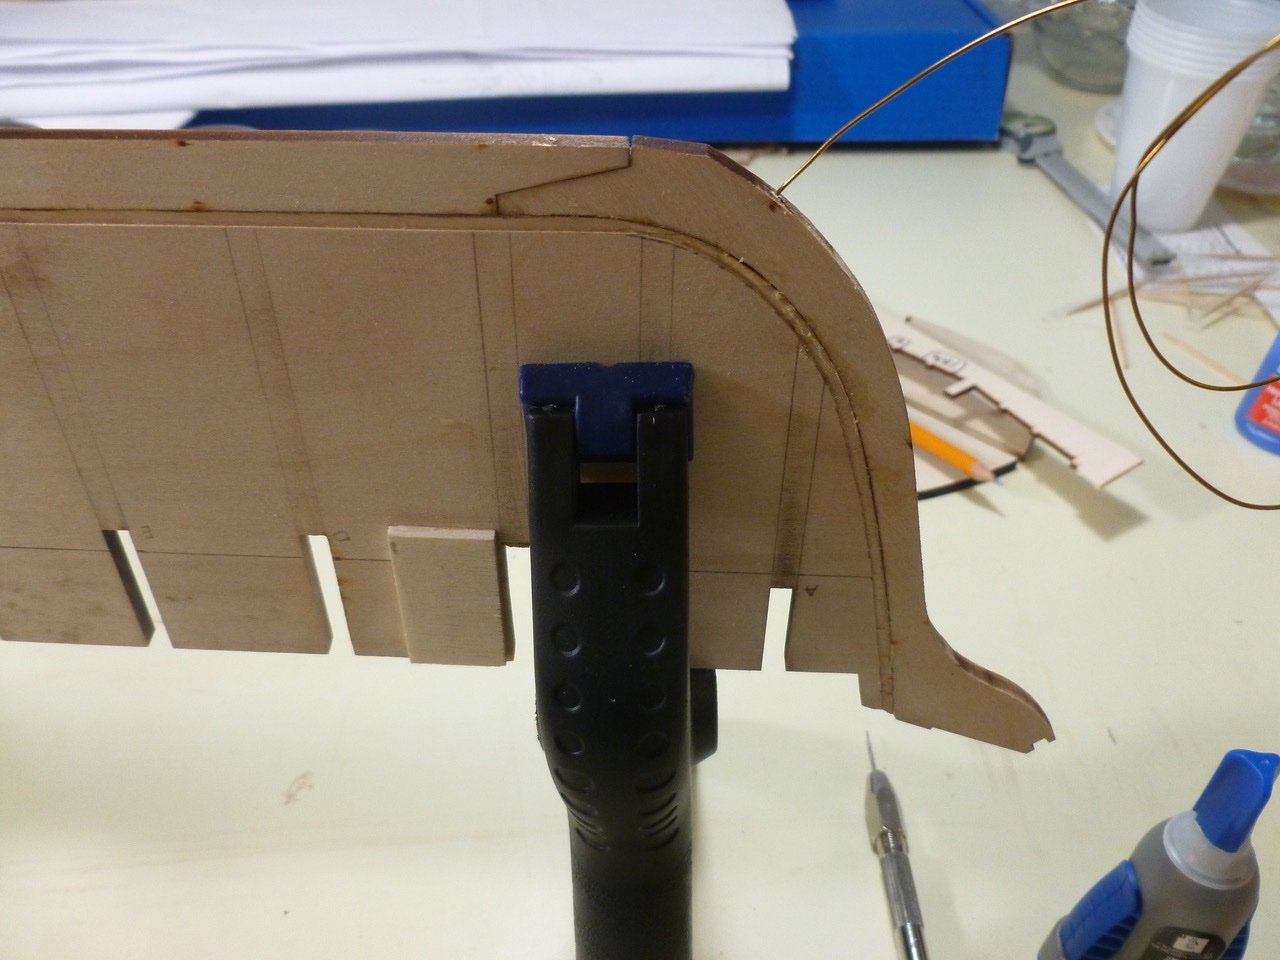
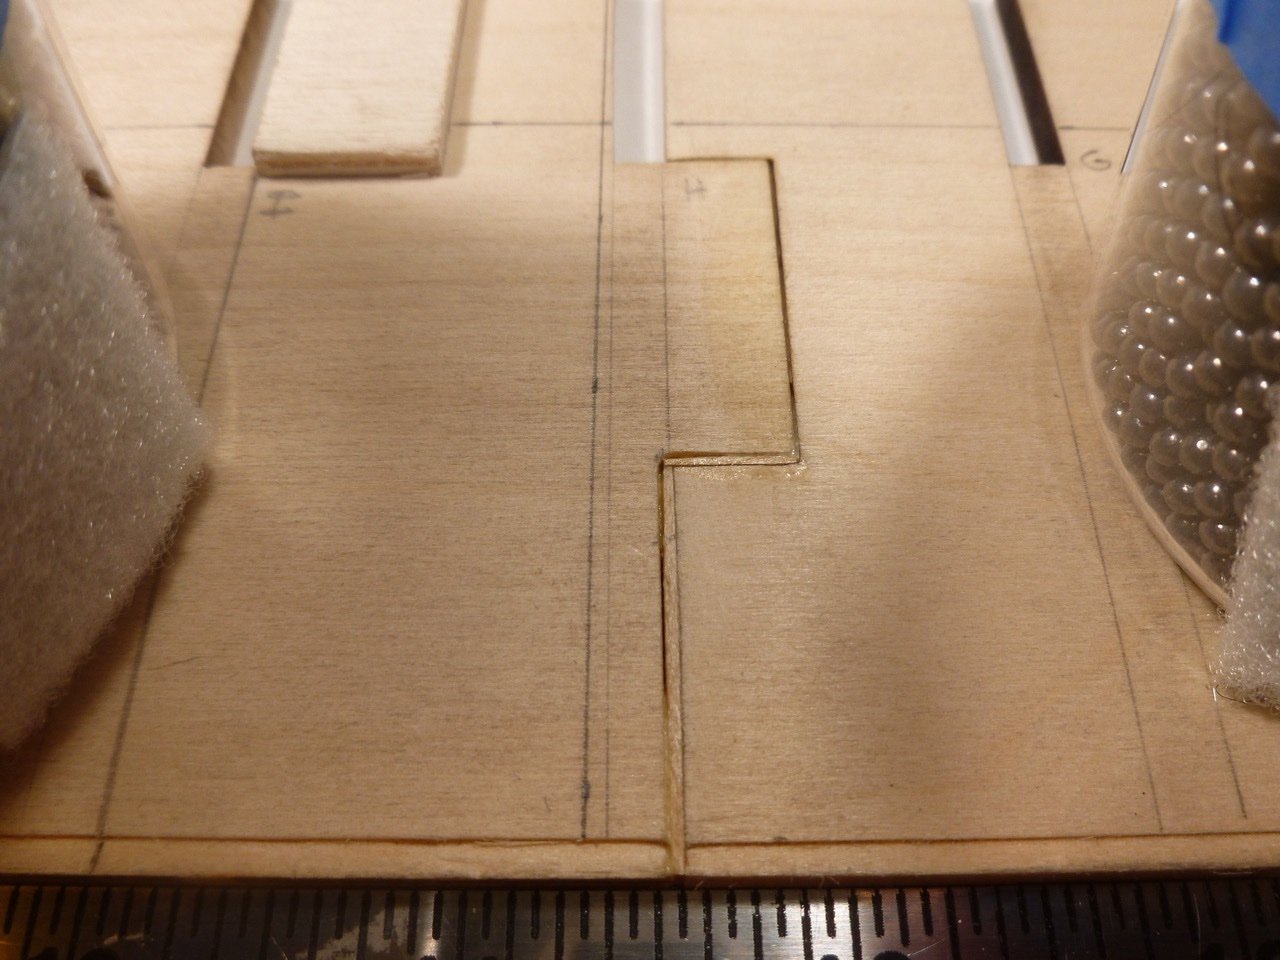
 This is a log of the Charles W. Morgan, chosen as an opportunity to expand my modeling horizons, and for no other reason than the Admiral and I took the kiddies to Mystic Seaport over 30 years ago and spent a cold day traipsing around the ship. First, a thank you to those who have gone before. I have learned a lot, seen build quality I can only dream about, and thoroughly enjoyed the consistent thread that combines abject misery with the sheer joy of each challenge met. My goal is maintaining the discipline to go the full journey, which apparently is by no means assured. I’ll skip the unboxing comments other than to say everything was there except for the ship’s bell, which was forwarded in short order following my request to Model Expo. I chose to cut the rabbet prior to assembling the keel parts. An X-acto no. 17 chisel blade was helpful in tight areas. The jars of shotgun pellets, which served as ballast on a prior RC build, came off the shelf as a counterbalance to allow extending my work board over the edge of the desk. This gave clearance for clamps. The laser cut joint required shims. Brass wire and medium CA pinned the parts together after the glue set. The keel clamp is two wood strips anchored at one end by an old saw vice, and at the other by C-clamps. While massaging the bulkhead slots I discovered that all the keel slots were cut with what appeared to be an out of alignment laser (?) which prevented the bulkheads from fully engaging the keel slots and which twisted the alignment. If left un-filed this could have resulted in bulkheads out of square with the keel. To help maintain alignment I filled the outboard bulkhead spaces with 1/4 inch square strips of lengths to match the bulkhead spacing along the keel centerline. Bulkhead setting was assisted by a small framing square, age unknown. A test fit showed a reasonably straight start. Reading ahead the instructions indicated that the bulwark stanchions should be installed with a slight tilt per a detail drawing. This looked to be a roadblock so I cut a bunch of stanchions and punched out a piece of the plank sheer to review options. The first issue was that the 3/32 inch stanchions didn’t fit the 3/32 inch holes in the plank sheer. Each stanchion needed a slight trim (28 passes) on two sides at the sanding block. Now, how to set a tiny stanchion vertical in one dimension and angled in the other. My first thought was to push a scrap of wood up against the bulkhead, and align the stanchion with that. But that only works at a bulkhead and is awkward at best. The current thinking is an alignment jig (the stanchion is not yet glued in the photo). It fits over the plank sheer, has one surface for vertical alignment, and an edge set at the stanchion angle. Once the stanchion bottom end is trimmed and the stanchion hole is filed at one side, the stanchion is placed in the hole. After setting the jig the stanchion is secured with CA. Using this method it appears that the large majority of stanchions could be pre-set before the plank sheer is installed. Exceptions would be at the bow and stern where the plank sheer rises. Seems like a plan but we’ll see how reality and the CWM rabbit hole impact it. If you see any deal killers please chime in. Then the stem broke. Actually it wasn’t the first break, which occurred when I breathed on one of the mast slots in the keel. That was fixed with cover plates on both sides of the mast slot, along with plates on the other mast locations. While mucking about with the stanchions an errant elbow trashed the stem. Part one of the fix, after gluing the parts, involved more pins drilled as deep as the little bit could reach. Part two will be the supplemental support provided by the bow filler blocks which are being fabricated. I’m hoping there will not be too much tension on the stem during rigging, but I have no experience with long bowsprits so we’ll see how it goes. The counter and stern support blocks are installed. Reminds me of my first day in high school. After we were dismissed one of the school’s finest demanded that four of us climb into his convertible and squeeze down on the floor. He passed over one newbie who had a head full of shaving cream (“I ain’t gettin’ no lanolin on my tuck and roll!”) He then chauffeured us about 10 miles out of town and onto a deserted road in the woods where he dropped us off. When we asked which way was home he said “You’ll figure it out.” Thanks for viewing. Steve
-
 I recently completed the US Brig Syren. In my last post of the Syren log, I indicated that my next build might be the Constitution. However, after seeing the scale of the Constitution (48") and looking ahead to the size display case that would be required to display her, I decided against it. Instead, I am now embarking on my fourth build, the US Brig Niagara. The Niagara is a little shorter (43"), so I think the display case for it would be more manageable. And, based on some logs I have reviewed, the Niagara build is very similar to the Syren in many aspects. So, here I go. I ordered the kit from Model Shipways (see photo). As is typical, I checked the parts list against the contents and found that the ships bell was not included and I was short some blocks and nails. Everything else was in order. I labeled the size of the various bundled wood strips for quick reference. The kit comes with 6 detailed plan sheets and an instruction manual which I gave a precursory review before getting started on the build. I also jotted down a few notes that I thought would be helpful from my review of a few Niagara build logs. I decided to deviate from the instructions and start with the quarter boats and stern boat. I glued the various laser-cut lifts together and secured them. While waiting for them to dry, I turned my attention to the one-piece keel. Right out of the box Murphy’s Law crept up. The center keel fell off the work bench and the bow at bulkhead A and stern at bulkhead Q broke off – clumsy me. I glued the pieces and allowed the keel to dry overnight. To mix things up, switching to the center keel, I decided to make the rabbet before attaching the keel, stem, and sternpost. I marked the bearding line on the center keel with a pencil. For the stern bearding line, I made a copy of the plan, cut it along the bearding line, placed it on the keel and traced the bearding line. For the rabbet depth, I laid a strip of 1/16” thick plank flush against the bottom of the center keel and traced a line along the keel. I flipped the keel over and repeated the process. This gave me a good line to follow when bearding the keel. I used an x-acto knife to carefully cut the rabbet. The rabbet was then evened out with a sanding block and flat file. I checked the depth of the rabbet repeatedly by placing a piece of planking against the keel stem. Next, I glued the keel and stem together and allowed it to dry overnight. Continuing, I marked the location of dowels to secure the keel and pre-drilled holes in keel and stem. Also, I pre-drilled pilot holes for the pedestal mounting screws. The pedestal location is a matter of preference, but I typically locate them 1/3 of the way from the stern and the bow stem. I applied carpenters glue to the keel and secured to the center keel with brass pins inserted into the predrilled holes and applied clamps to hold the keel in-place while drying overnight. Before adding the stern post, I deepened the rabbet. The stern post was then glued and pinned. I cleaned out the rabbet of some glue with a flat file. I’m glad that I created the rabbet before adding the keel – it was much easier. Sanded the exterior and interior of the quarter boats and the stern boat to a rough finish with sand paper and a Dremel. I will apply some wood filler to even things out. I won’t spend much more time on the interior because once all the thwarts, seats, gratings, etc. are added much of the interior will not be readily visible. Also, I'm afraid to make them too thin. There’s a lot more to be done on these. I plan to jump back in forth between the boats and the ship while glue is drying and to break the monotony. Moving on to the bulkheads. I beveled bulkhead A. I took the advice of some other build logs and assembled bulkhead A and the bow filler pieces, knightsheads, timberheads, and support pieces before permanently installing the bulkhead on center keel. The filler blocks were made from the kit suppled 3/4"x1"x1" basswood blocks - they're a little harder to shape than balsa wood. It took quite a lot of sanding and filing to get the right shape. Once that was done, I made a copy of the filler block top from plan sheet 2 and used it to mark the cut outs for the knightsheads and timberheads. The cut outs were notched with x-acto knife and evened out with a flat file. Next, I cut (from 1/8" x1/8" basswood), test fit, assembled, and glued the knightheads, timberheads, and laser cut top stiffeners. A added a little CA at the joints to further secure the pieces. I did some final filing to further shape the assembly. Next up, bulkhead Q and the stern blocks. Stay tuned.
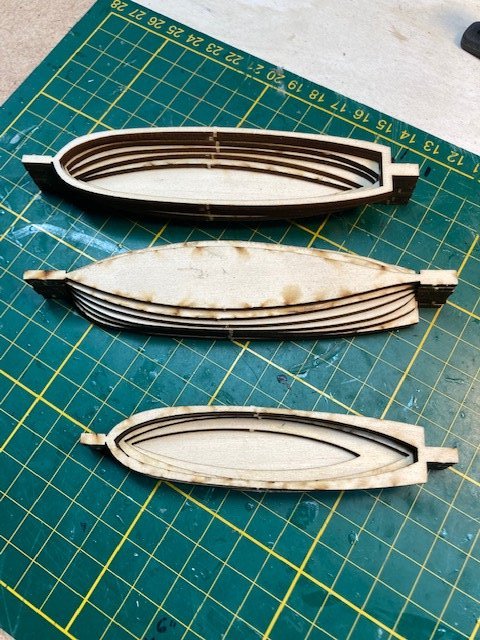
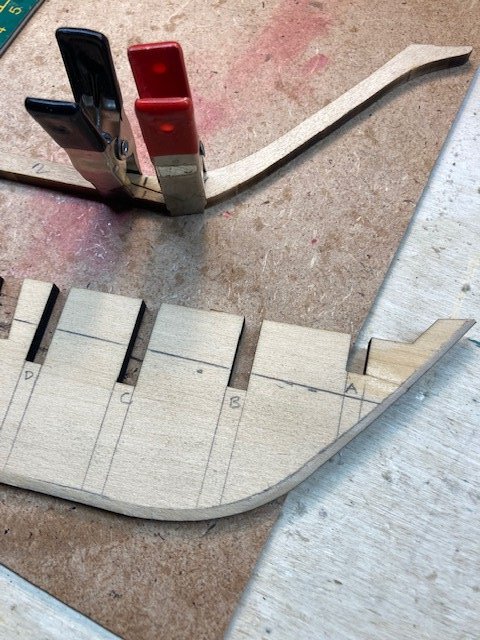
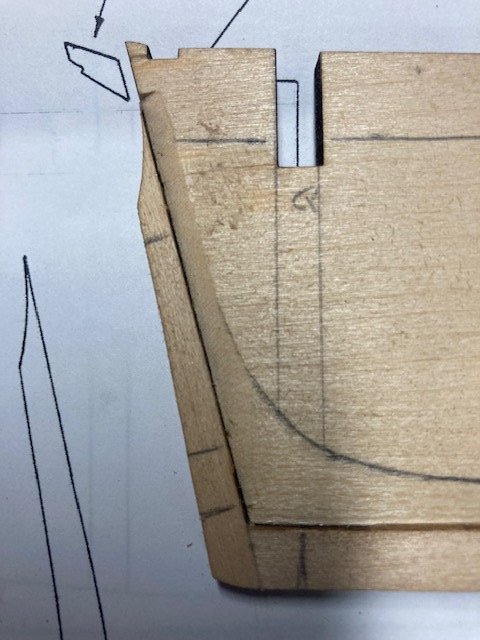
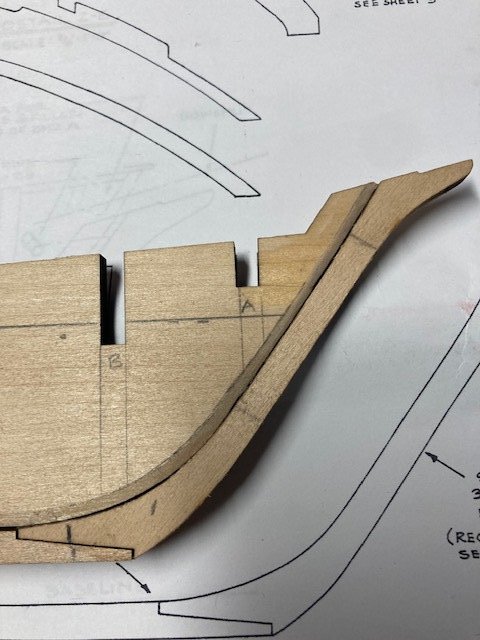
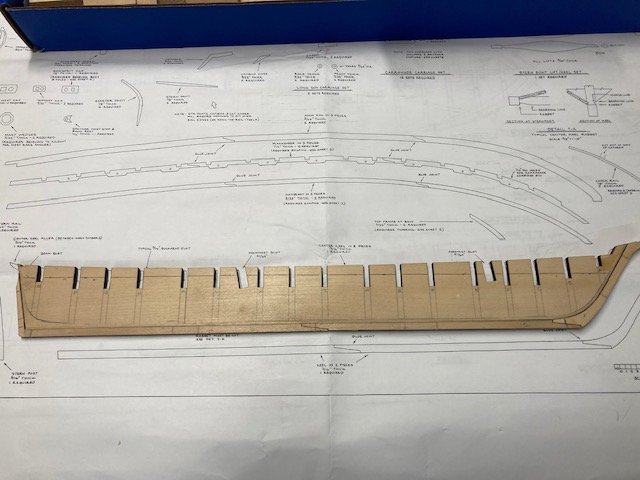
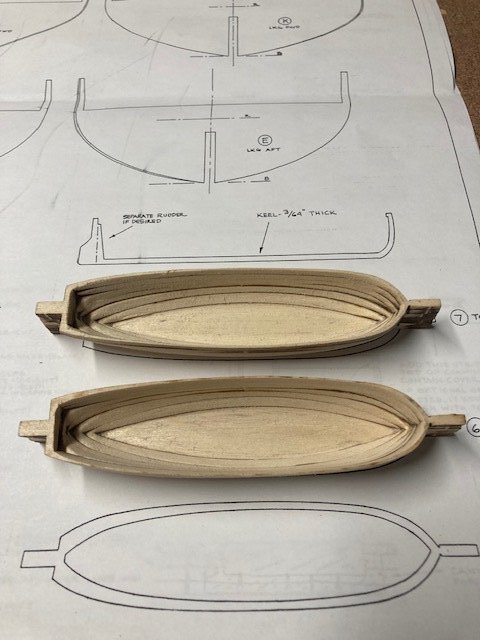
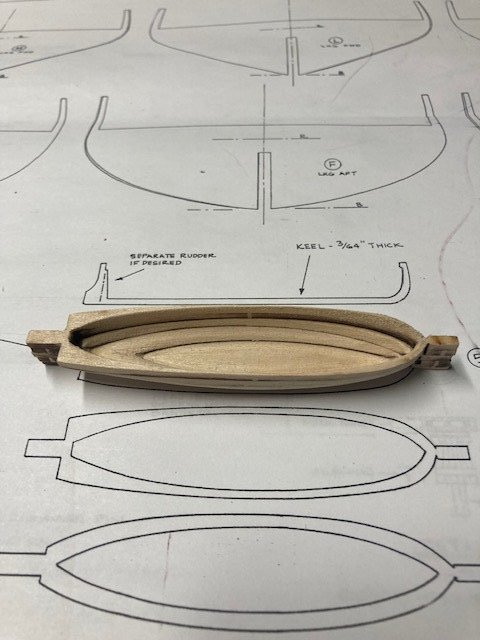
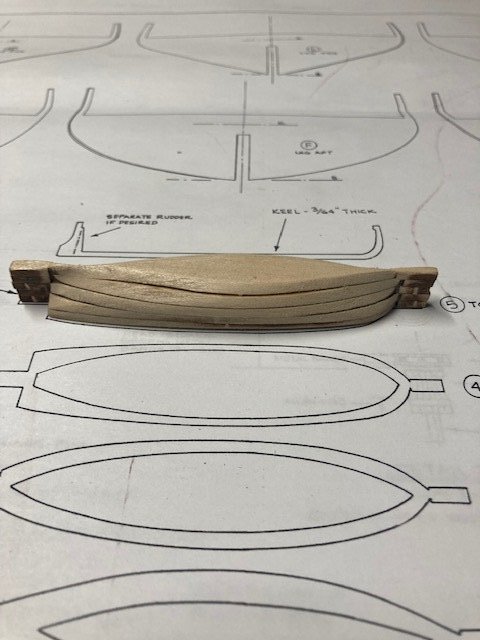
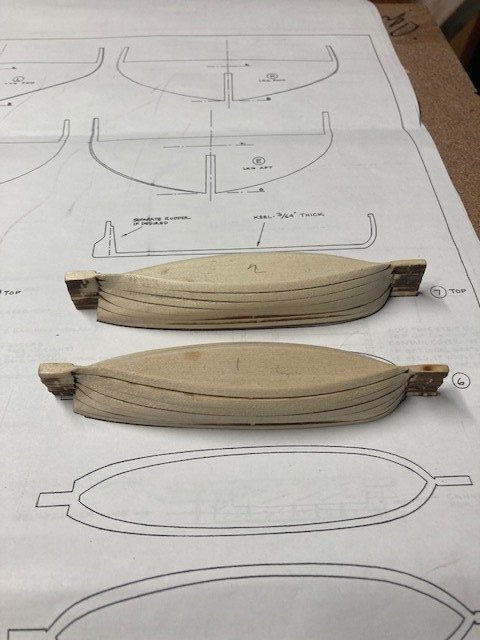
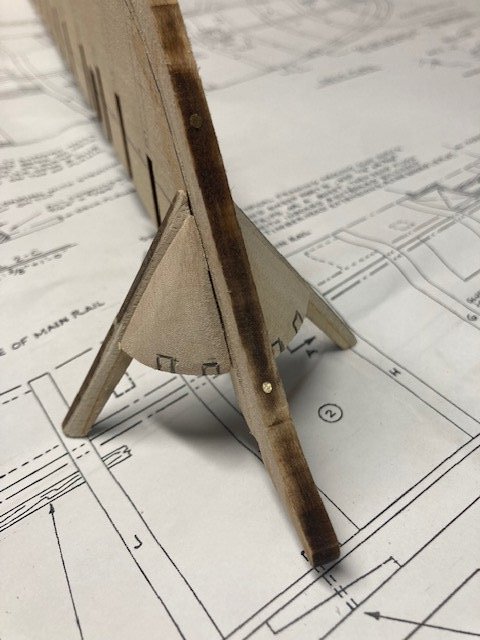
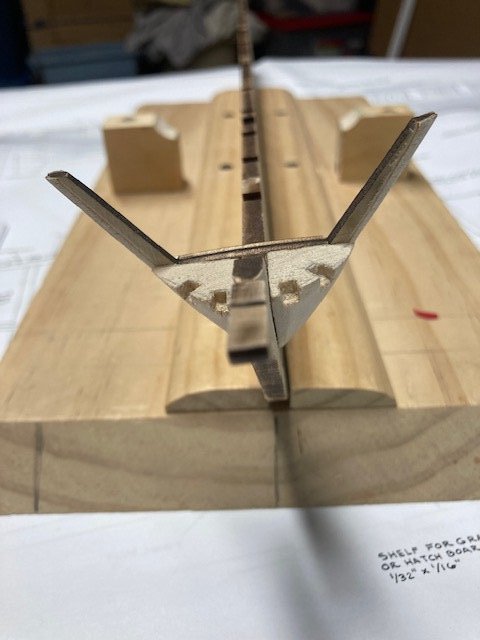
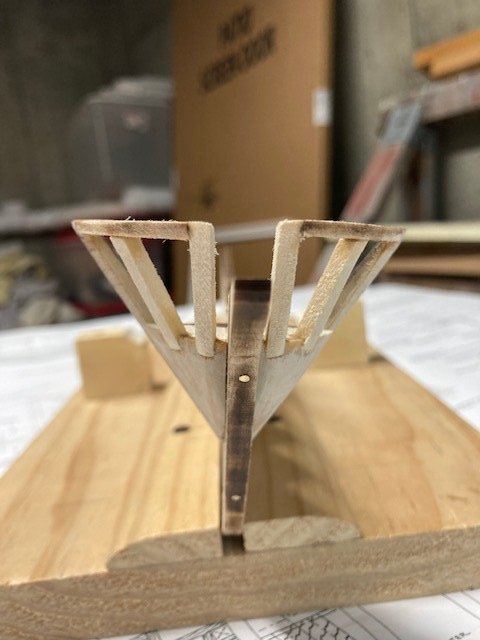
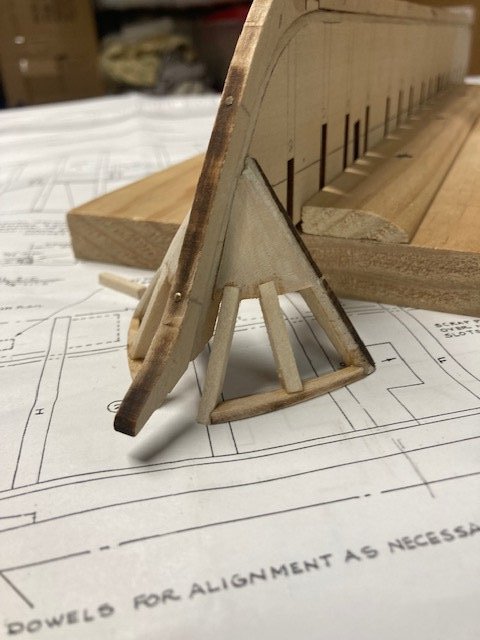
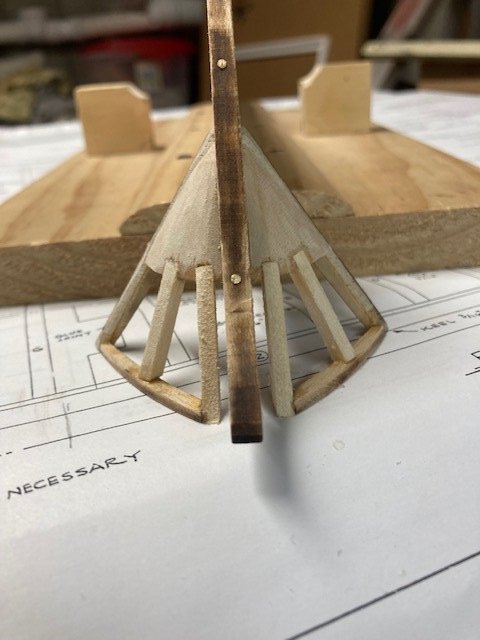
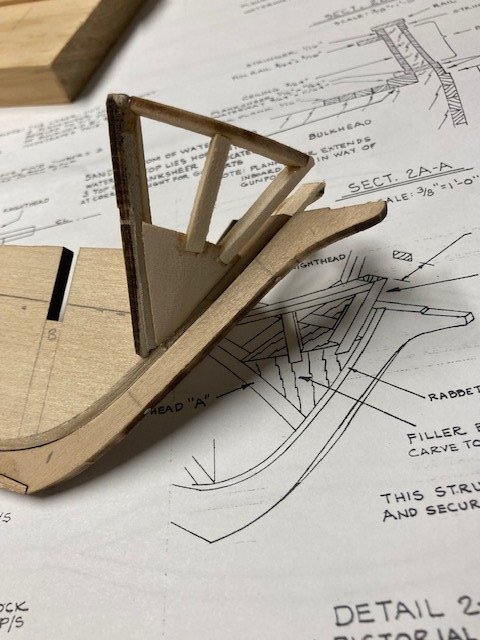
.jpg.01106b7d1bbbcbebe22e25f802c31a94.jpg)
.jpg.9f6eafbbc0c8b29bde6952ce8a169e29.jpg)