Search the Community
Showing results for tags 'monitor'.
Found 4 results
-
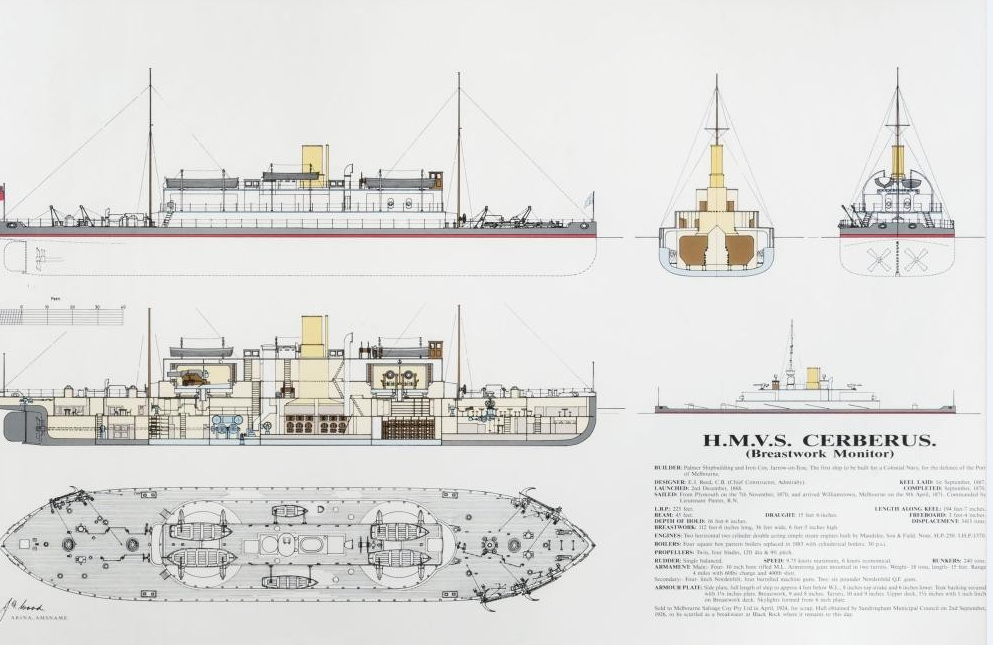
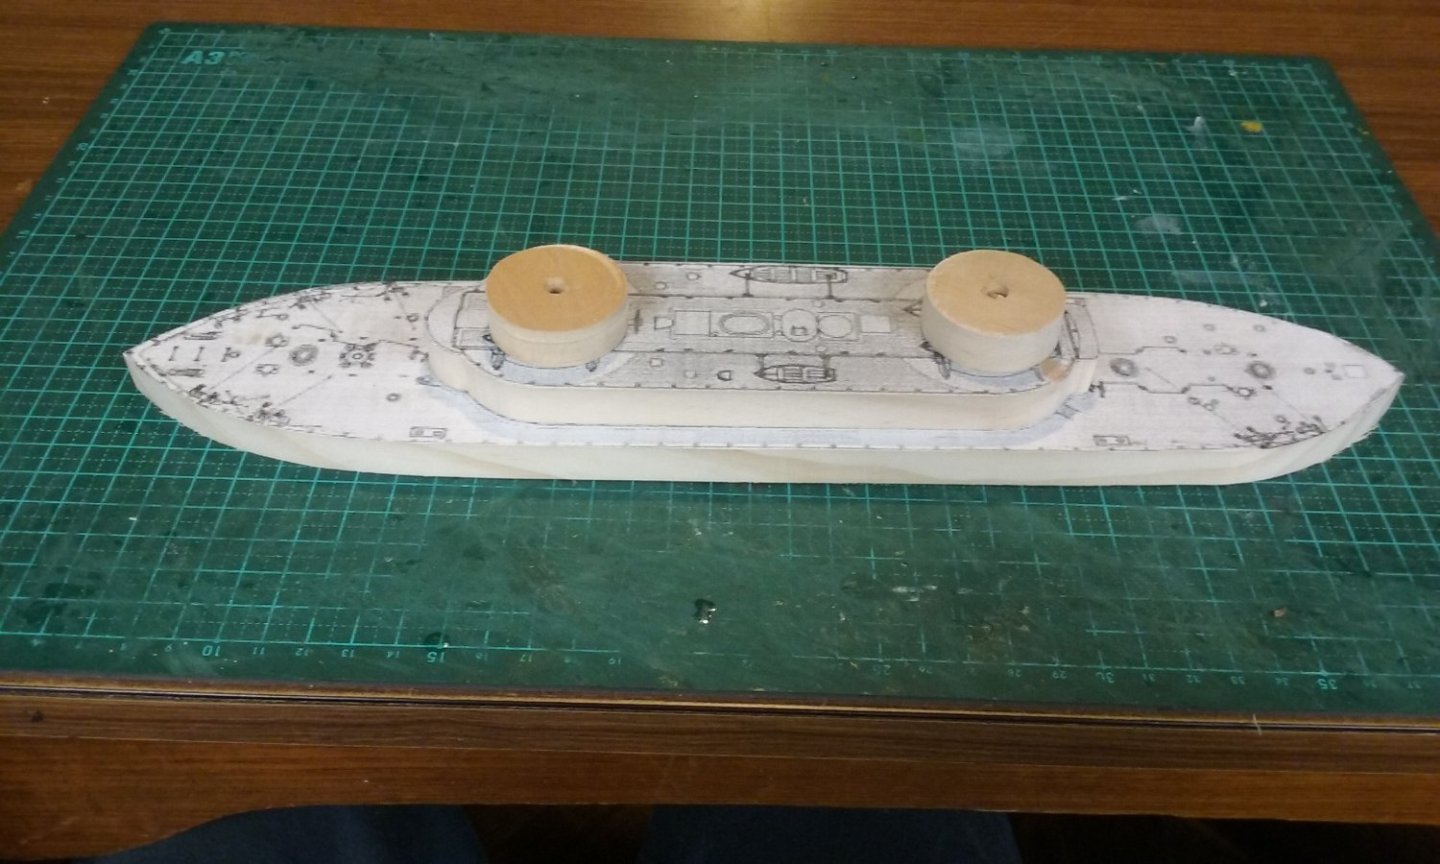
 I just joined the local Men's Shed - this is a common set-up in Oz, where men can get together, talk about men's stuff, tell a lot of lies, and make stuff. The local one is in the woodworking section of a local high school which has now been converted to a community centre, and has an amazing array of equipment and facilities - carpenters' benches, planes, chisels, drill presses, bench and drop-saws, lathes of various sizes, thicknessers, disc sanders (my current favourite!) etc etc. As it's a fairly informal community group they're always short of funds and they make things to sell, to fund their activities - timber cutting boards (bread-boards), birdhouses, that kind of thing. It occurred to me that (not really wanting to make bird-houses, though I might be persuaded to make possum-boxes to put in trees to provide homes for the local wild-life), I should do something more in line with my own interests. Which led to the HMVS Cerberus, a coastal monitor built in England in 1870 for the fledgling navy of the colony of Victoria, Australia. https://www.navy.gov.au/hmas-cerberus-hmvs Fortunately, I was able to find this on-line: Looking at the plans, I realised she could be made quite simply as a "bread and butter" model, cut from 10mm sheets of pine with my new Precious (scroll saw), with only a little fiddly work to do the additional bits of pieces - the masts and skylights etc (which I will probably make out of bamboo kitchen skewers of various sizes.) I blew the plan view up on the photocopier, and glued the copy onto a bit of pine I had lying around. So, off I went, and here is the beginning of the build. The turrets were cut from the same sheet of pine, using a hole saw attached to my electric drill. More to come. Steven PS: Dan Vadas (sadly missed) made a model of the Cerberus out of card - you can see the build log if you do a search).
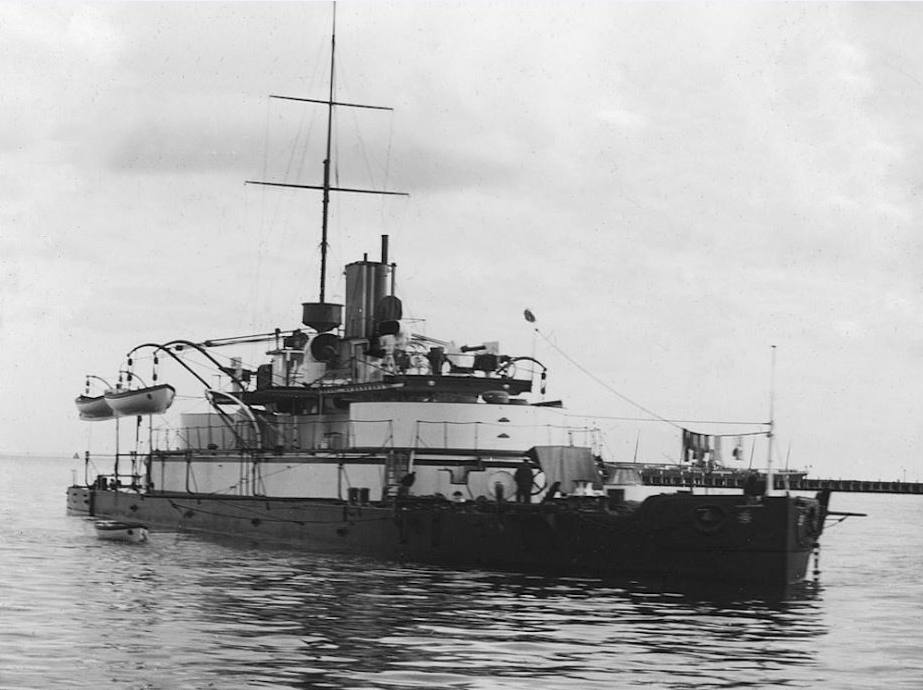

- 28 replies
-
- 12
-

-
 As I write this, contractors work downstairs doing a kitchen and living room renovation. Since I have to stay out of the way, I decided to work on a model. This is my first build log. I intended to use another model for that. However, we some times have to go with the flow. This will let me get my feet wet in the process of logs. I have an unconventional workspace for this project since so much stuff is in storage during the reno work. I am working on an end table while sitting on the floor or bent over from a chair. I find it hard to work on the model for very long. However, the steps are relatively short. The model I chose comes from Metal Earth (Link). They produce models of many items, genres, and scales. They have a few ship models in their portfolio. When I bought the kit that includes the Monitor and the Merrimack, I thought the model an interesting interpretation and concept. The number of tools needed for their models is minimal: cutters, needle nosed pliers, and tweezers. Add in some form of work magnifier and good lighting. And while the packaging says, “no glue required,” the key word is ‘required’ but with a caveat. (More on this later.) That answers the question, why this model at this time, which is good question to ask yourself before a building project. Additionally, I had assembled a previous model (Golden Hind) from Metal Earth. That process went well with decent results. I also want to point out that while the models have a sense of authenticity, I am building it for display over historical accuracy. As a point of interest to some: I paid $25.00 (US) at a game/hobby shop for this model of the Monitor and Merrimac. As I start posting I am up to step 9 of 29 steps outlined in the instructions. So, I will have some hindsight and previews of upcoming parts. I will 'post' with logical breaks in the flow so it's not one long thread. This is such a stop point.
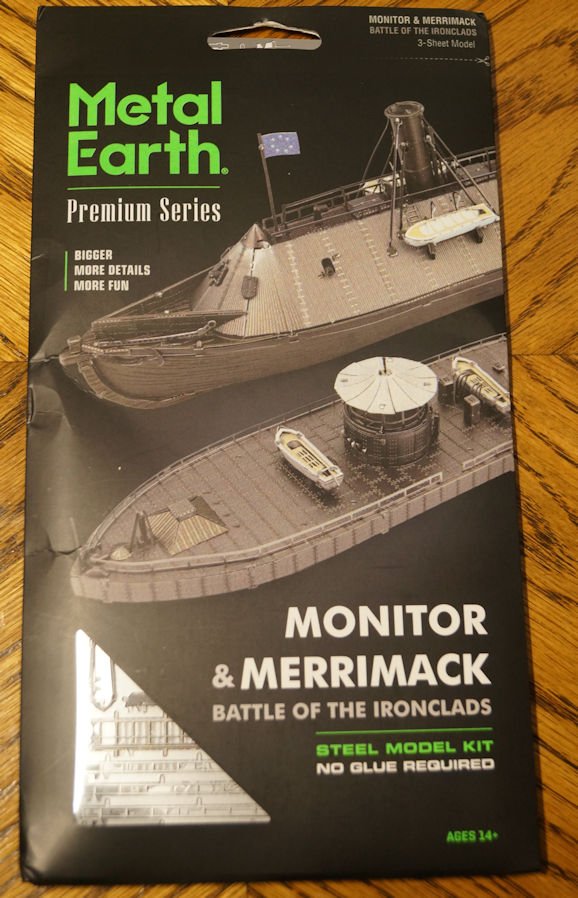
- 42 replies
-
- 10
-
-
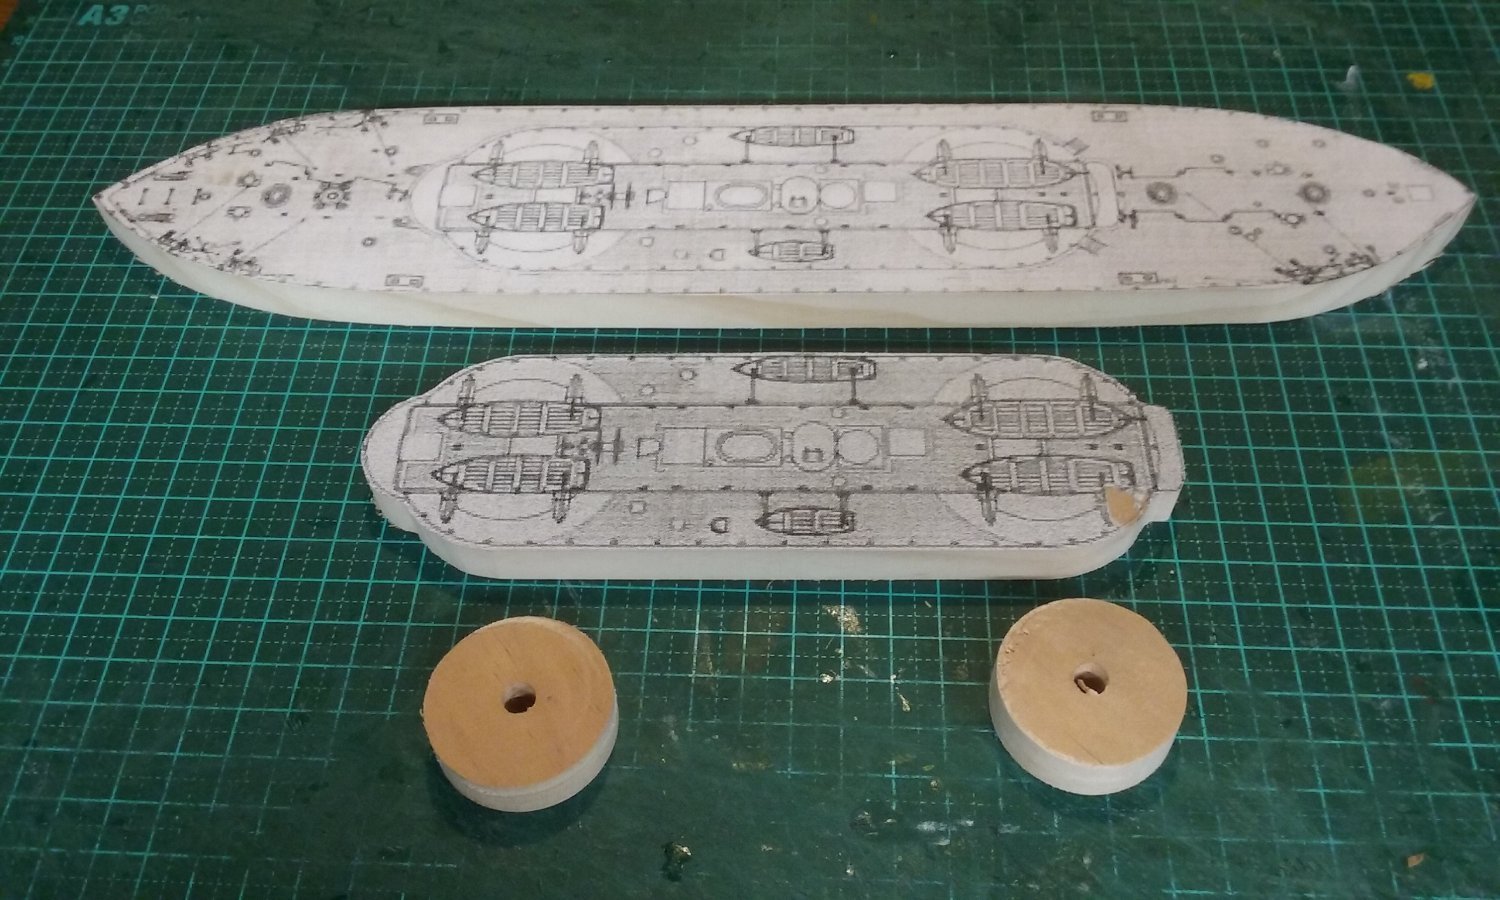
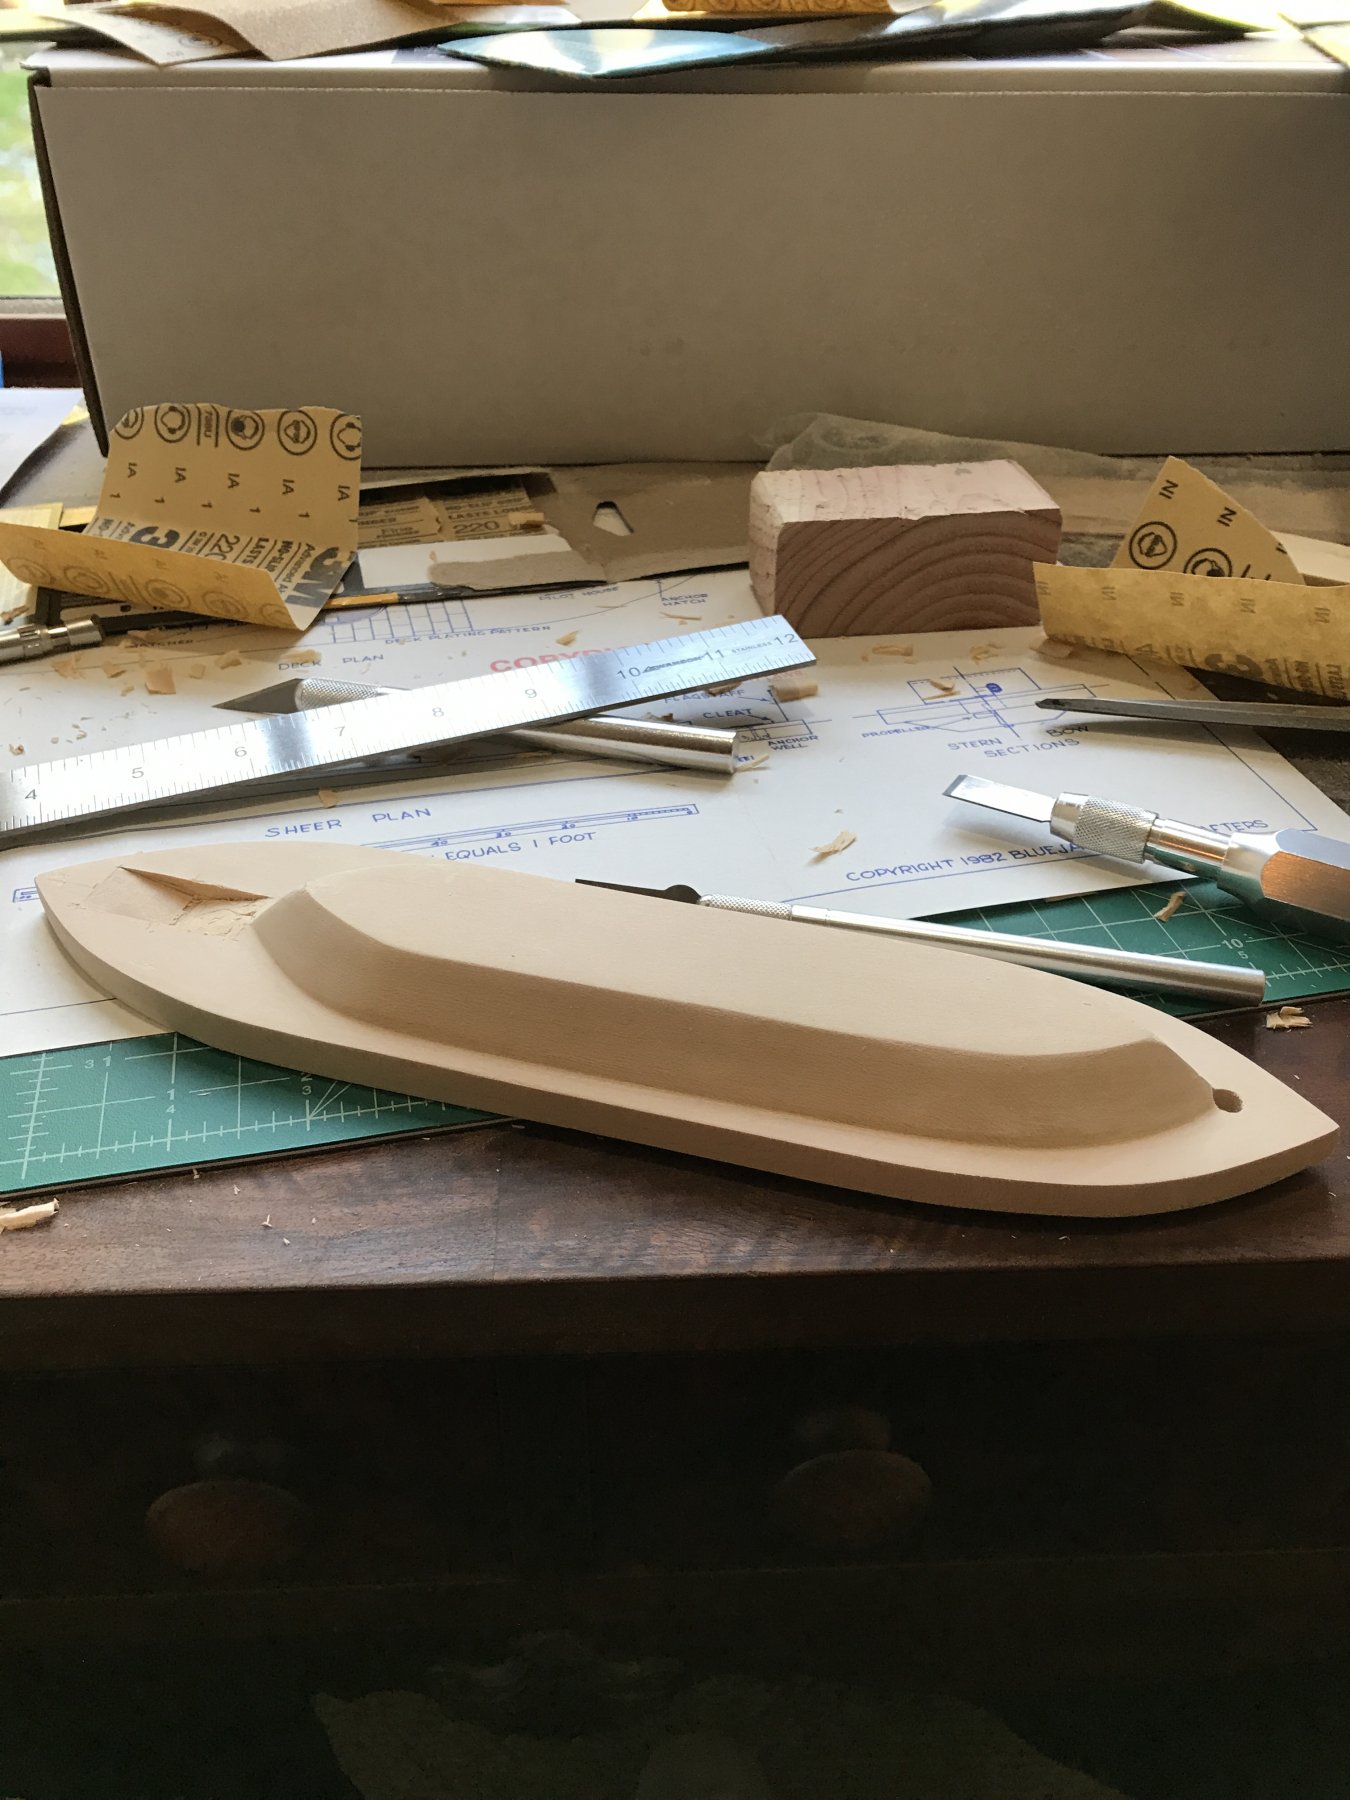
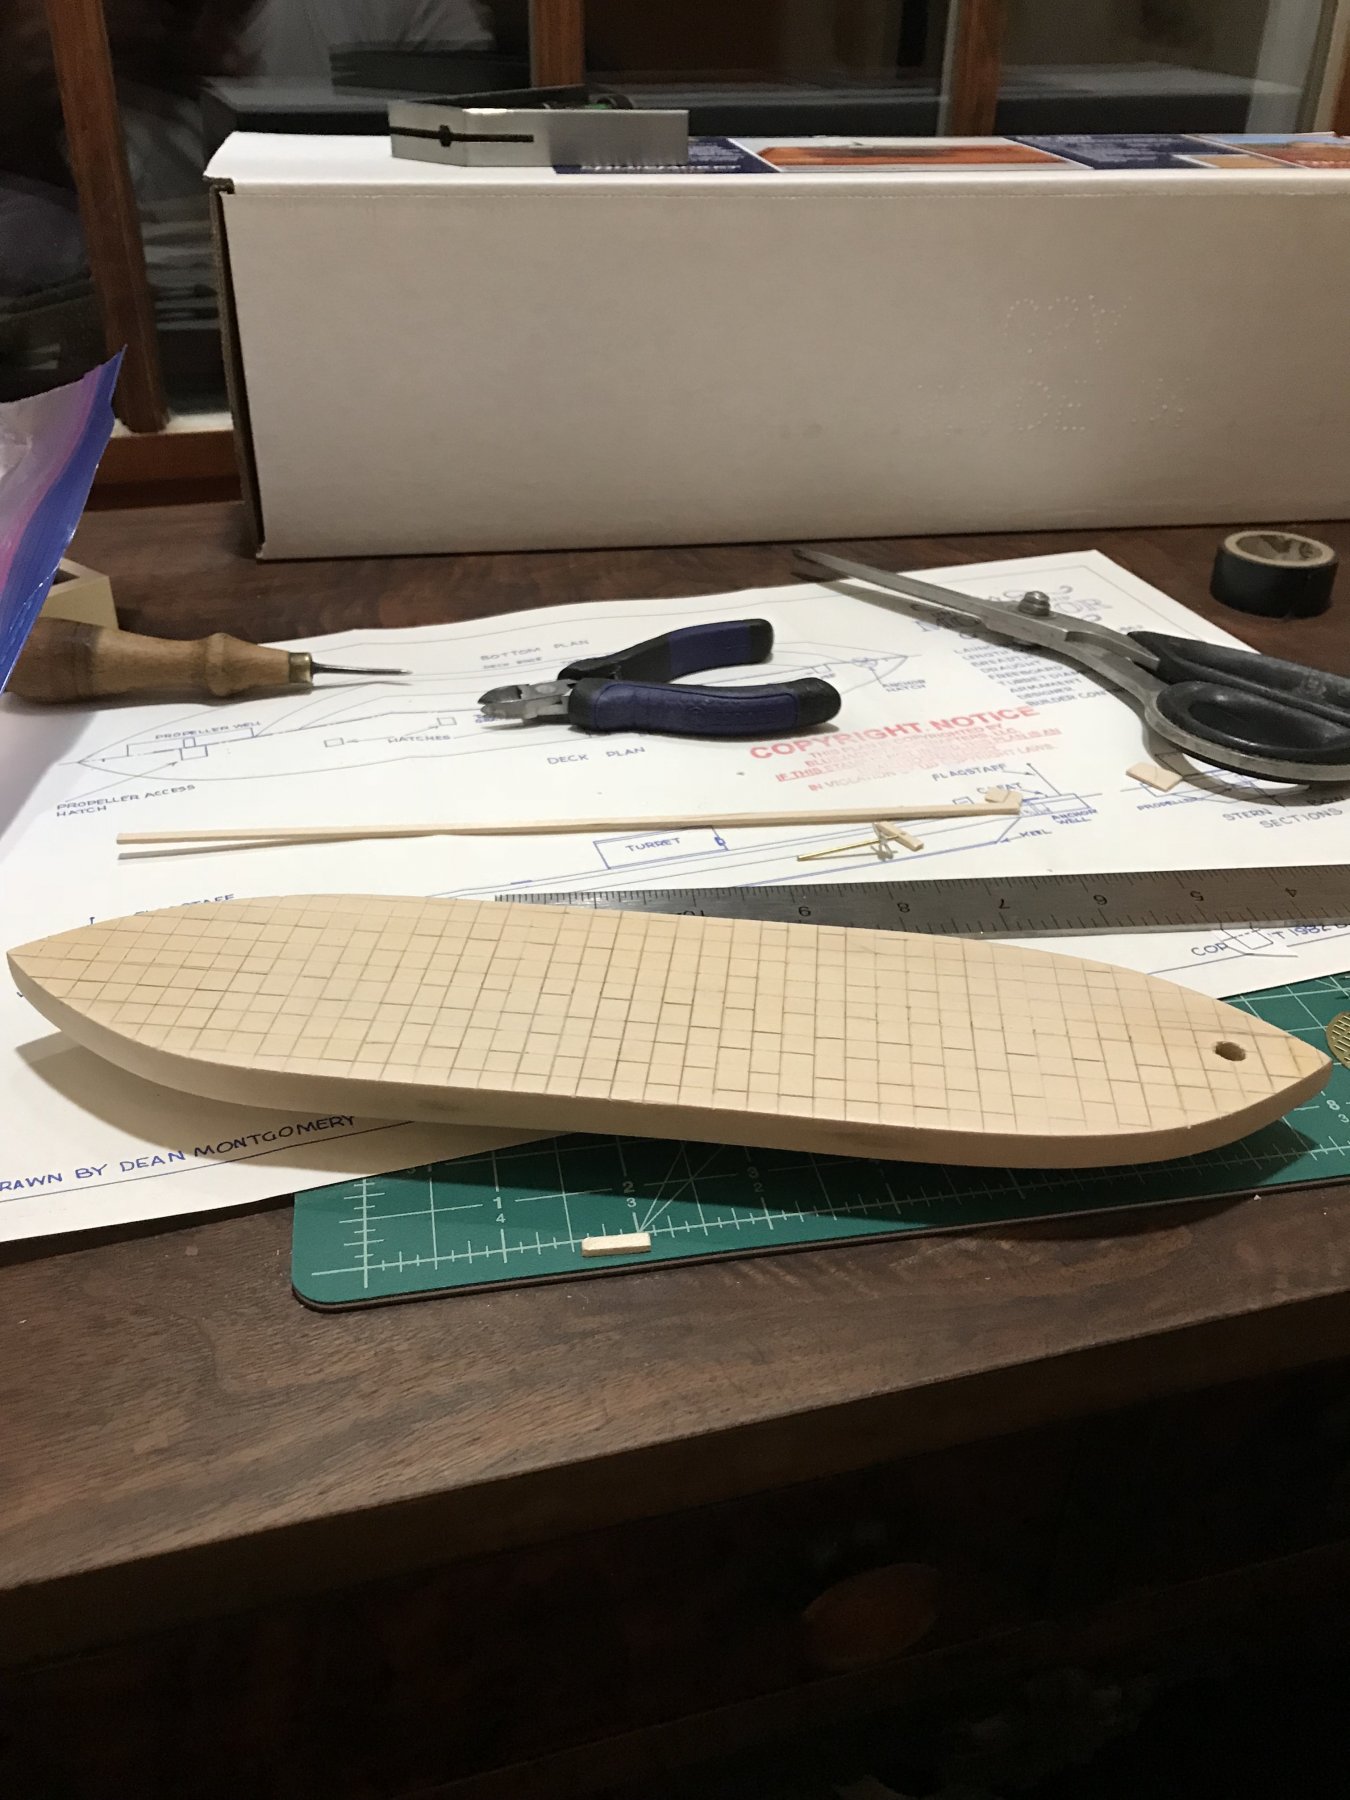
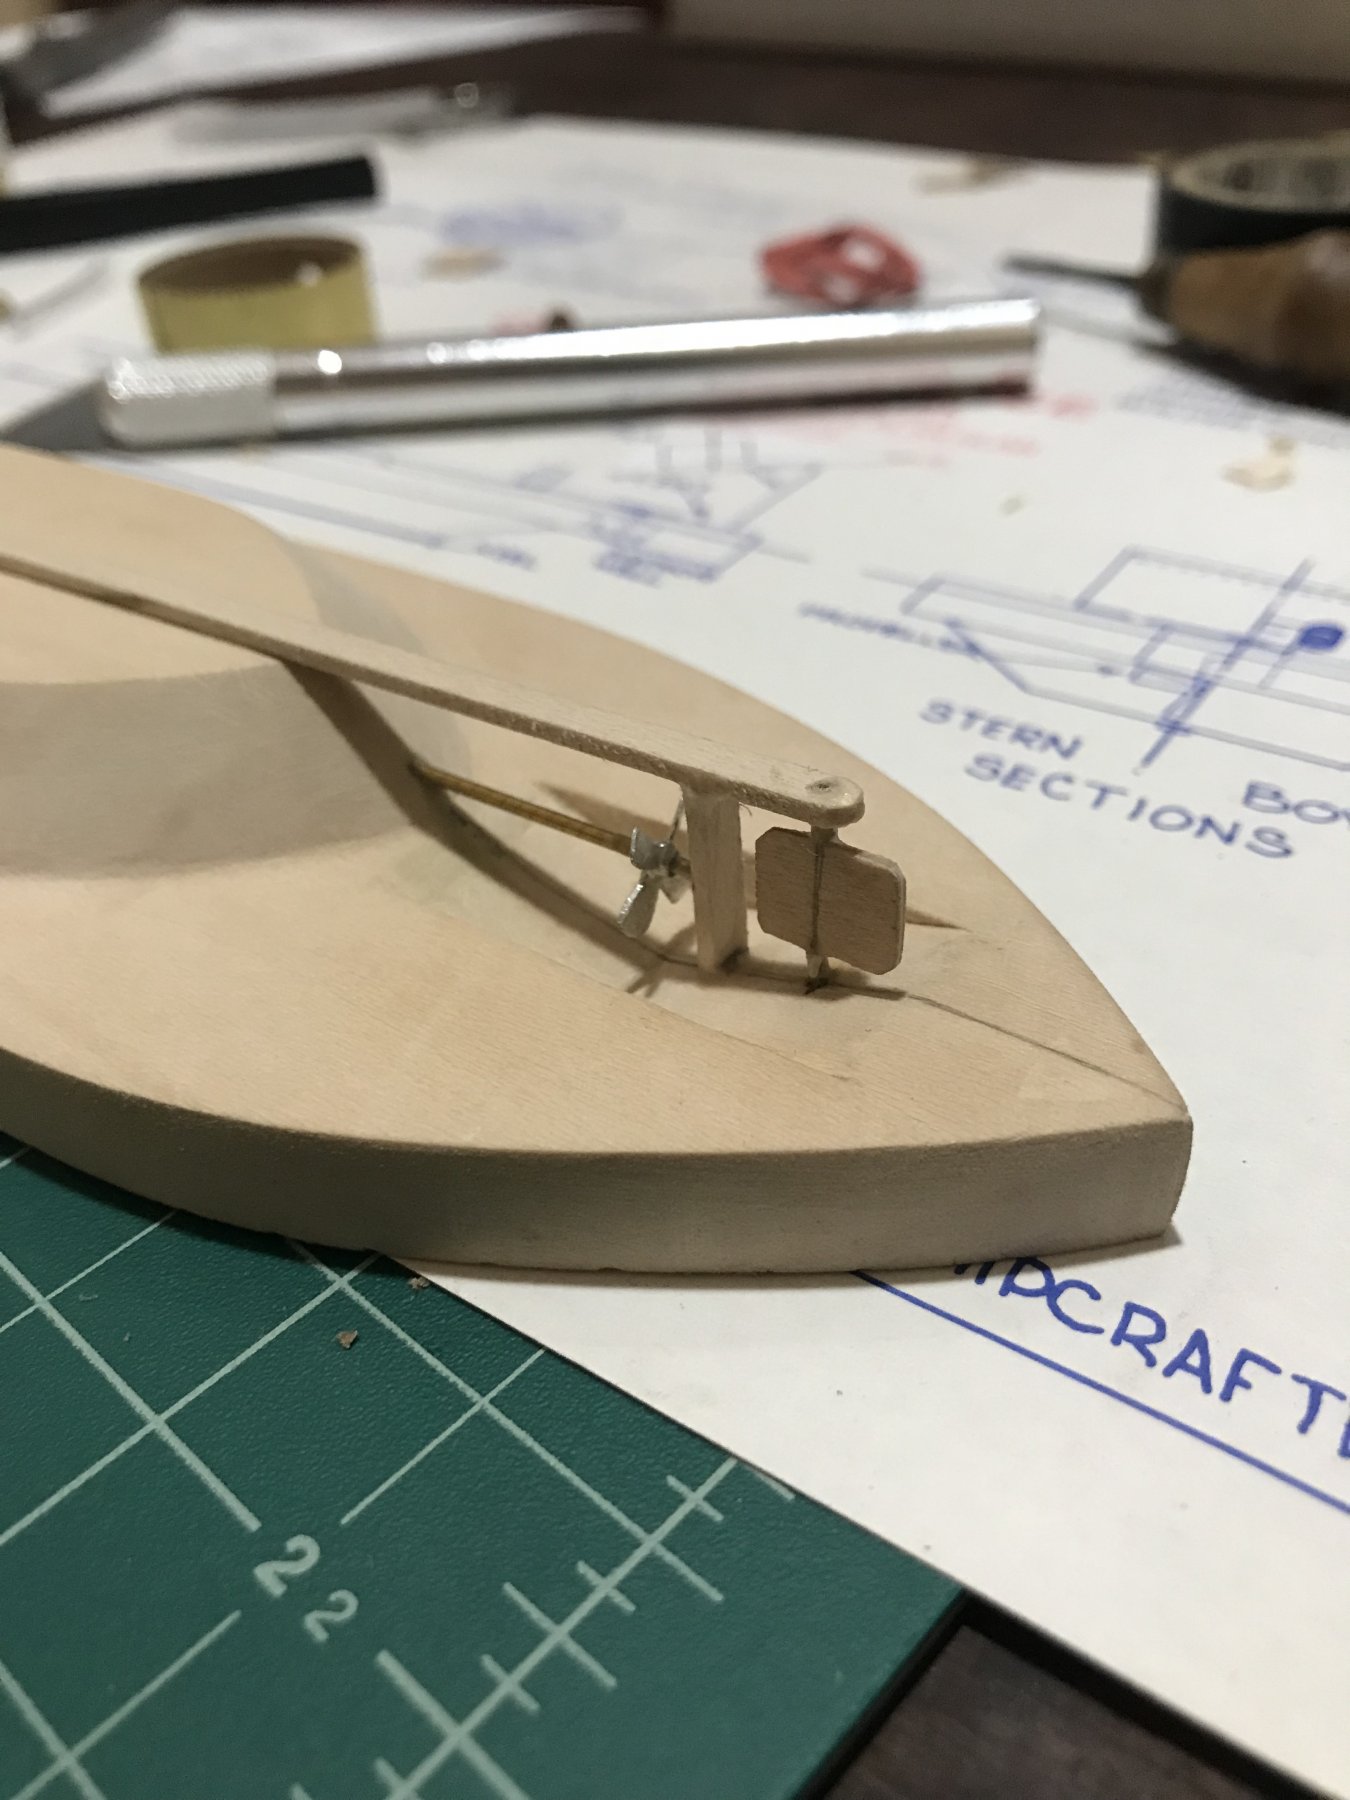
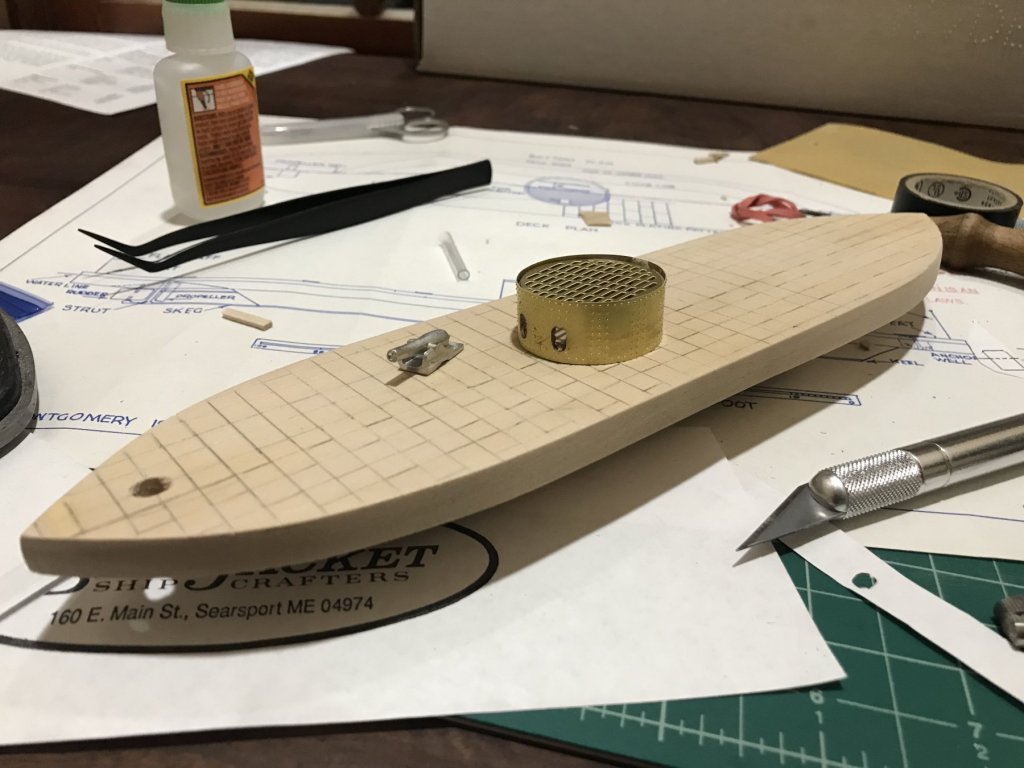
 Hi All, recently got back into the hobby after a number of years and purchased the combined USS Monitor and CSS Virginia kits from BlueJacket. This build log will cover the Monitor portion. I emailed BlueJacket with some questions on the kit and MrBlueJacket answered them quite promptly and also pointed me to this awesome website - so consequently this first entry in the build log is a bit retroactive on my progress. Will continue posting after this as I continue with progress. Started off by sanding and forming the hull taking as much care to maintain the required sharp edges. Made a small mistake while carving out the propeller well which was easy enough to fix with some wood spackle. Next up for the main work on the hull was scribing the deck tiles. Began by drawing the tiles with a ruler and pencil to be sure I was getting the shape I wanted and then scribing them. Recently primed the hull and will post a picture of the scribe lines post prime to see a reference without the pencil marks. Next up was installing the propeller and rudder assembly. This didn't take too much time but required a bit of fineness on my part to make it all square. In retrospect I probably should have cut a jig or something to help me hold it in place. Any tips on this? Next up was rolling the turret photo etched brass. Probably on account of my low skill level, but it took me a bit of time to get the turret to look truly round. This photo is before trimming the cardboard on the interior of the gun ports though. The turret seriously looks gorgeous in person though, a little sad I will have to paint it. So far I have been having a seriously awesome time with this kit and look forward to continuing on it. Once again I am recently back in the hobby (was never that good at it years ago) and would love any feedback or tips and tricks people have Also, huge thanks to MrBlueJacket for pointing me to this site.
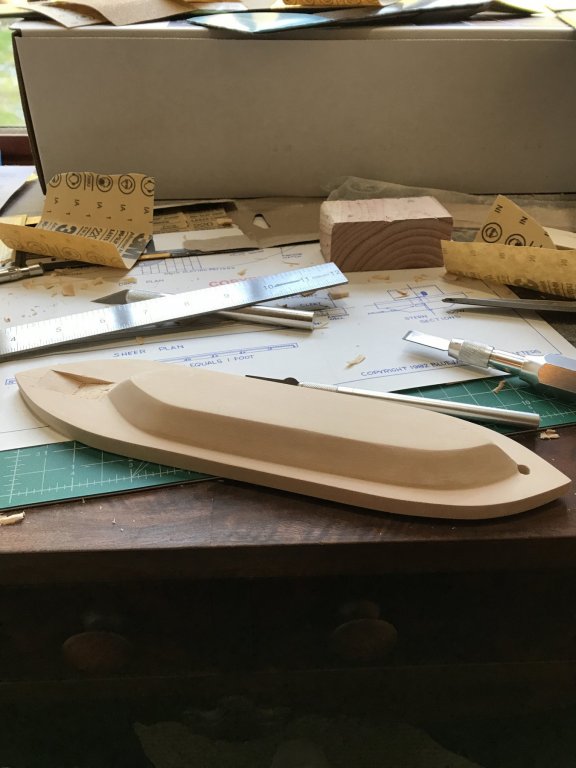


-
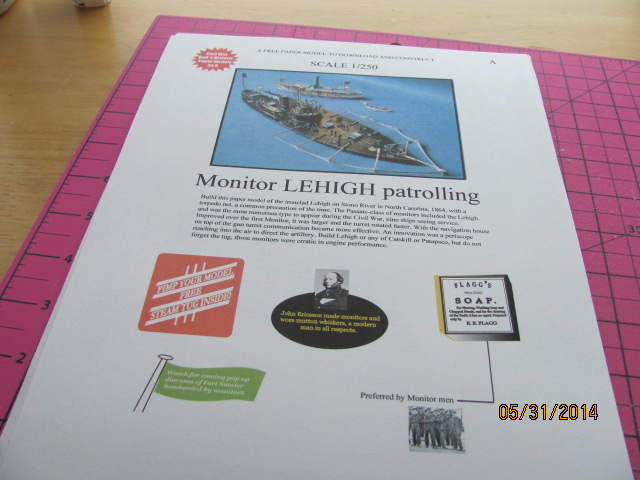
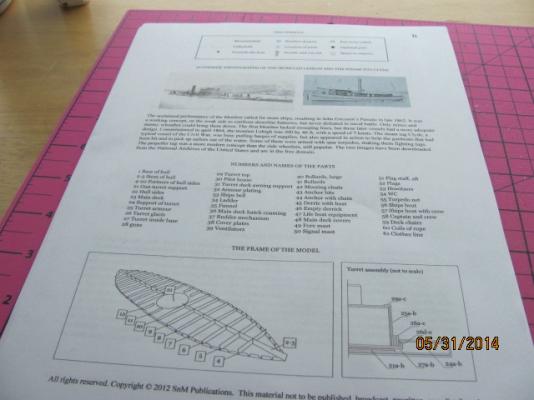
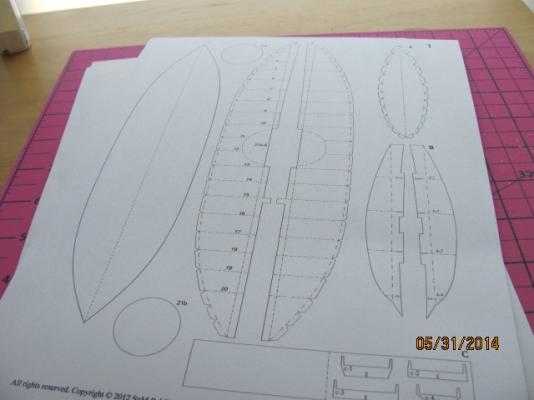
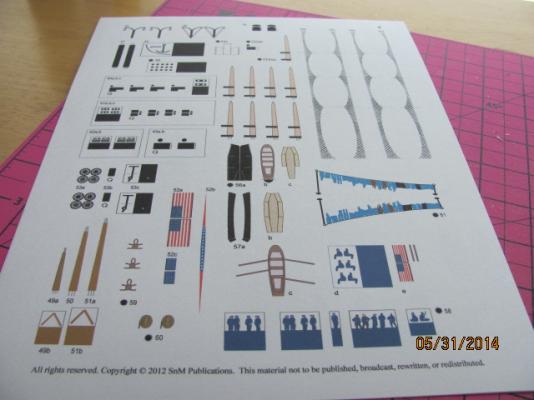
 I have decided to work on another civil war model. The main reason for this is of course cost of the plans and I like the way they look. The one I have in mind is the Lehigh. The Lehigh was a Passaic Class monitor that was commissioned in 1863. The Lehigh served in the navy off and on until 1898 untill it was decommissioned and sold in 1904. This model seems it might be fun. David B
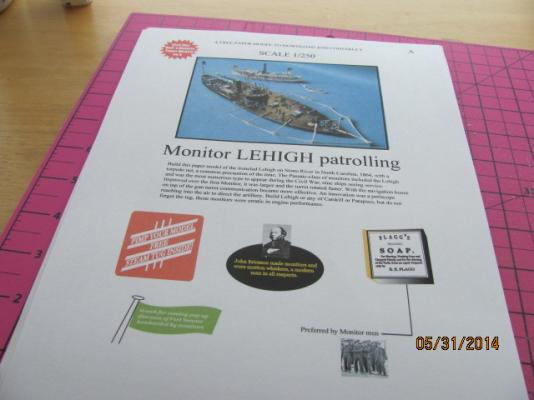
- 39 replies
-
- 5
-
-
- lehigh
- papercraft square
- (and 3 more)