Search the Community
Showing results for tags 'paper shipwright'.
Found 11 results
-
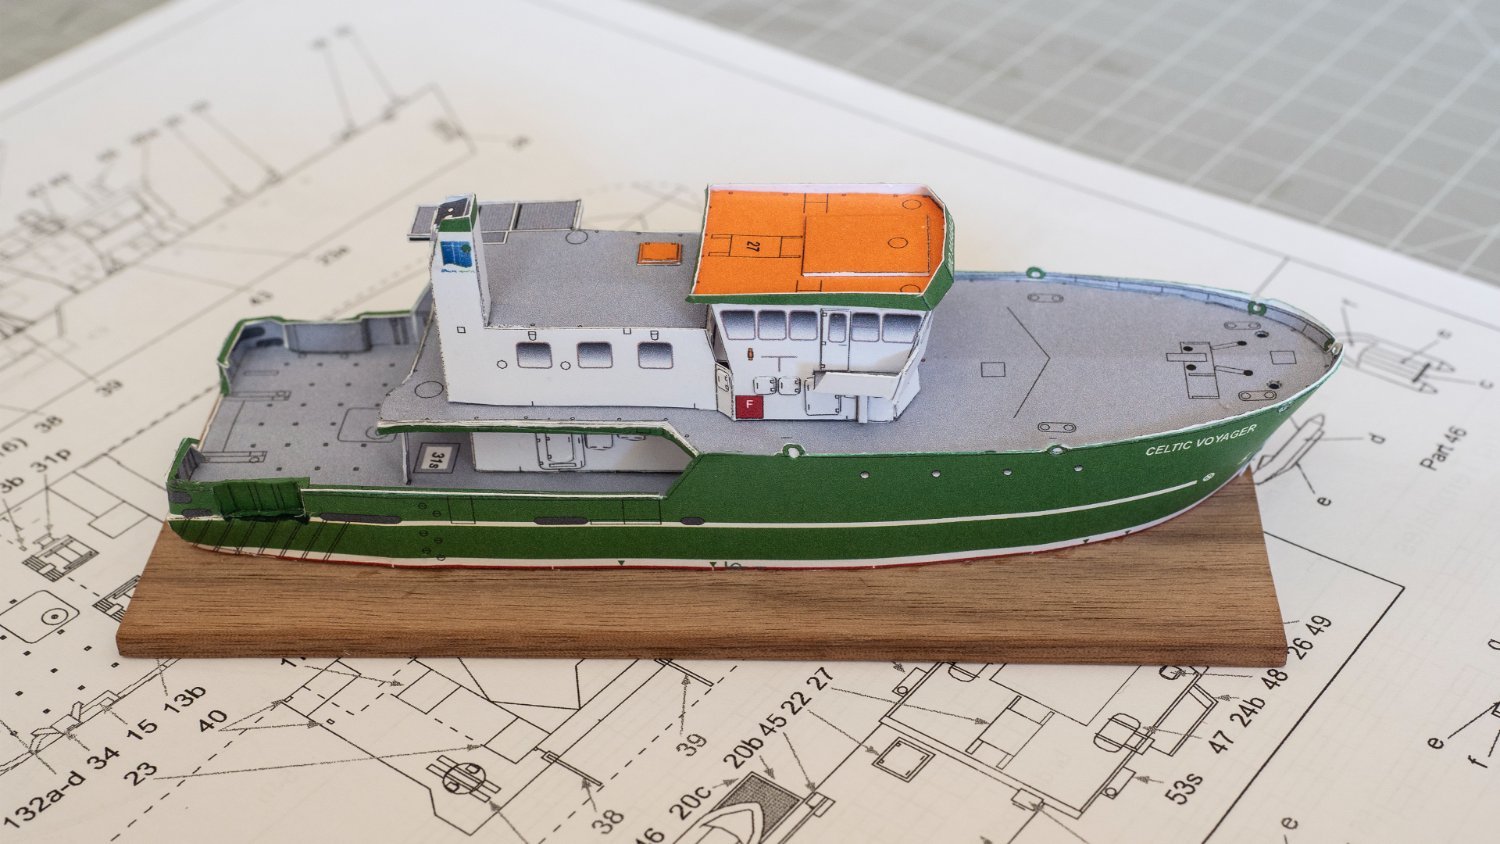
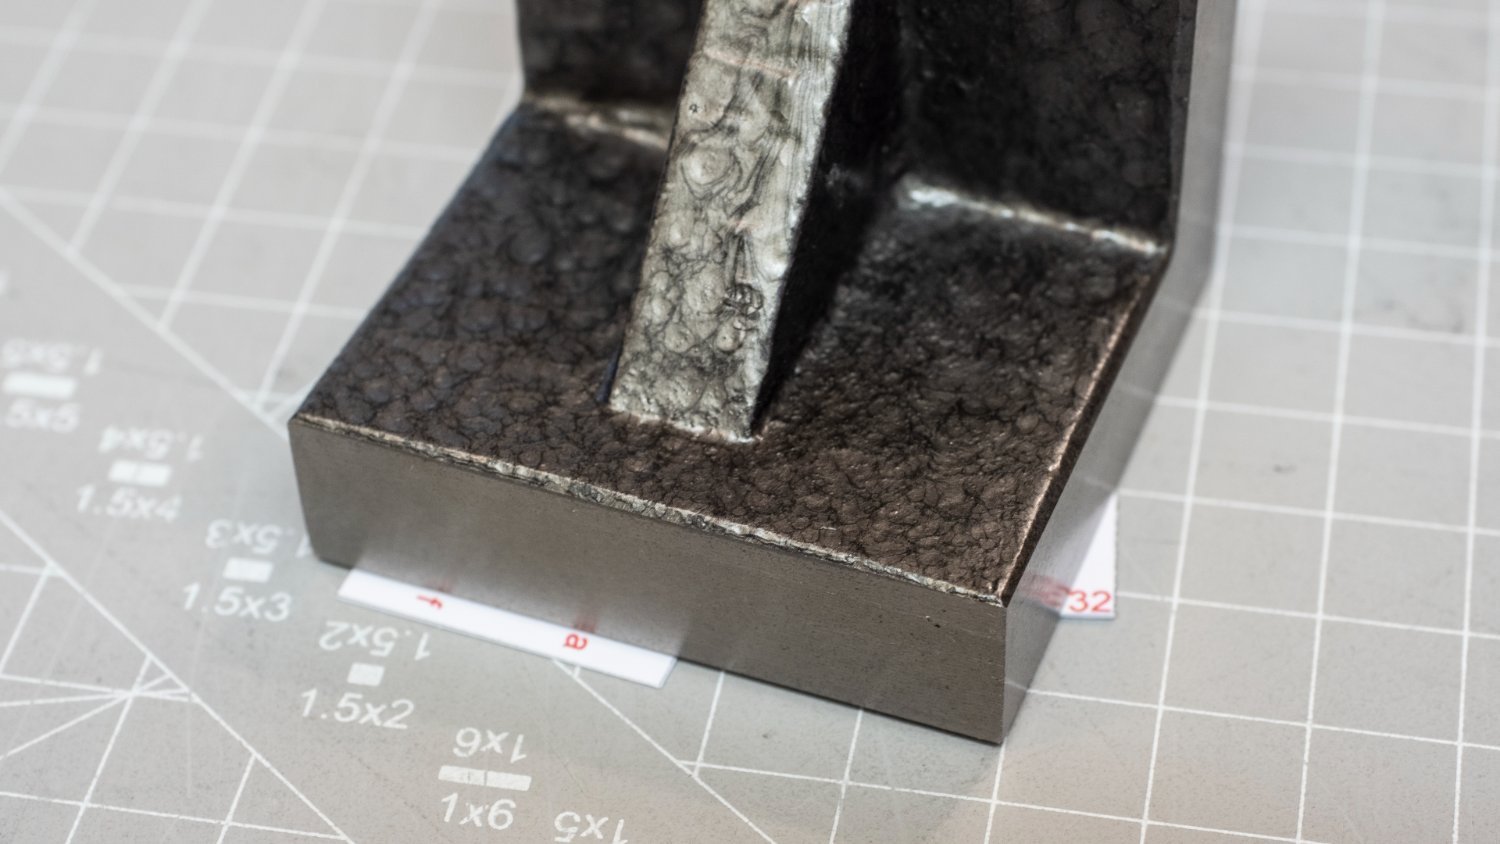
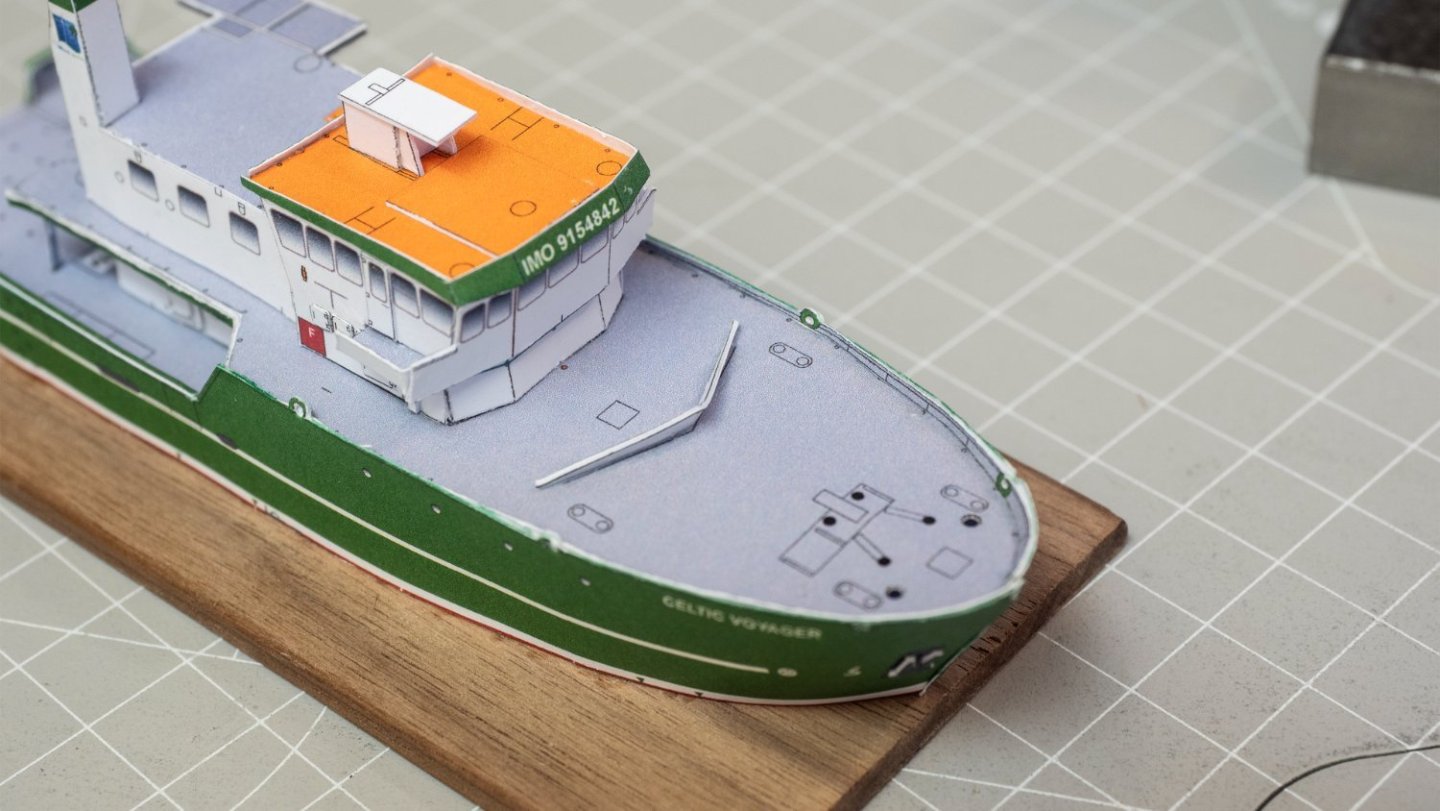
 I started the project in the middle of another one and due to limited space I wanted to not have sandpapering and etc for a while. The kit is excellent and very cheap to start with paper models although not the easiest perhaps. In the photo below, the first 26 steps have been completed. In step 27 the mast base and radar platform was cut and glued in place. Next the anchors and breakwater was cut and glued in place. Assembled and glued in place the the escape two hatches Finally for today I prepared and double glued the pieces for the steps 32-23. To keep them straight I placed them under a heavy 2" angle plate.


- 26 replies
-
- 8
-

-
- Celtic Voyager
- Paper Shipwright
- (and 2 more)
-
 After reading the review by @ccoyle about Paper Shipwright Card models:- I bought a few to have a dabble, so far I have I made Flamborough Lighthouse and the Puffer "Starlight" from their range. I wasn't thinking in terms of doing another until I had completed one or two other sadly neglected projects; my Caldercraft Bounty being the most neglected! 🤫, but a leak in the loft has turned the house a bit upside down and many items from the house have filled up the garage (my workshop). So while we dry out and await the builders to arrive, I can only build something small that fits in my mobile model station and a small card model fits the bill perfectly until I need to do re-decorating in the house! I won't go into the model too much as Chris has covered what you get in his review, but here are a few initial pictures of what you get.
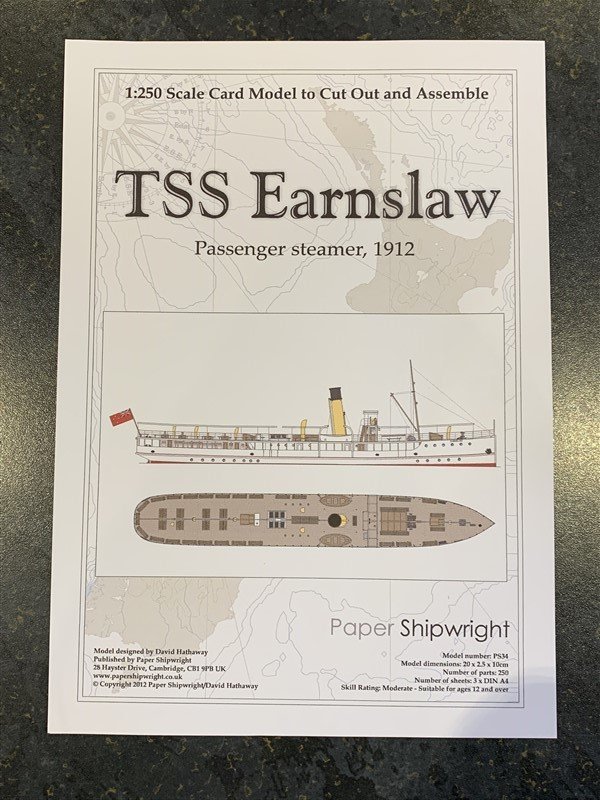
- 45 replies
-
- 8
-
-
- Earnslaw
- Paper Shipwright
- (and 2 more)
-
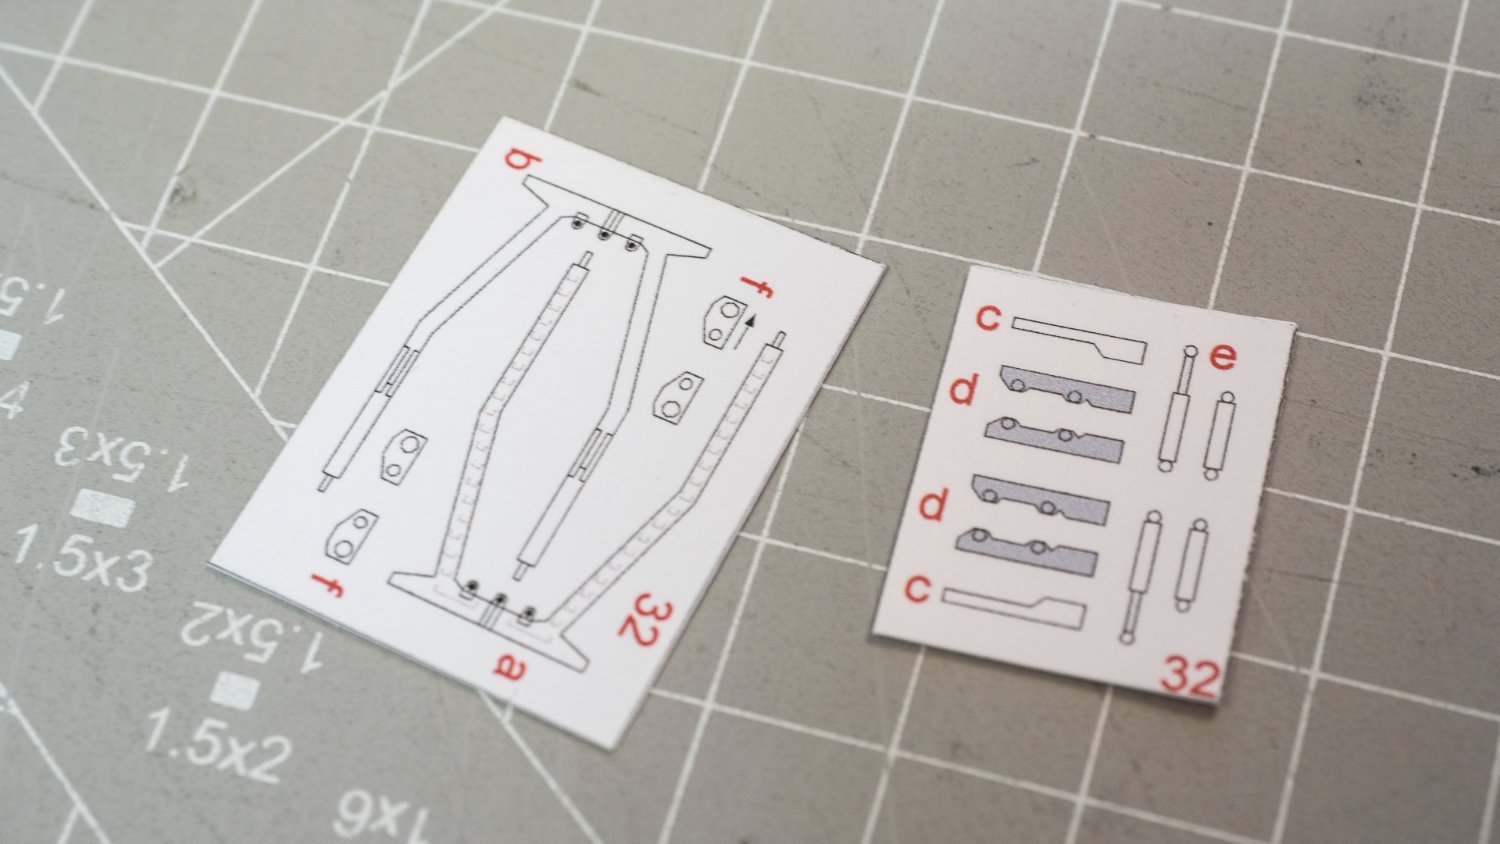
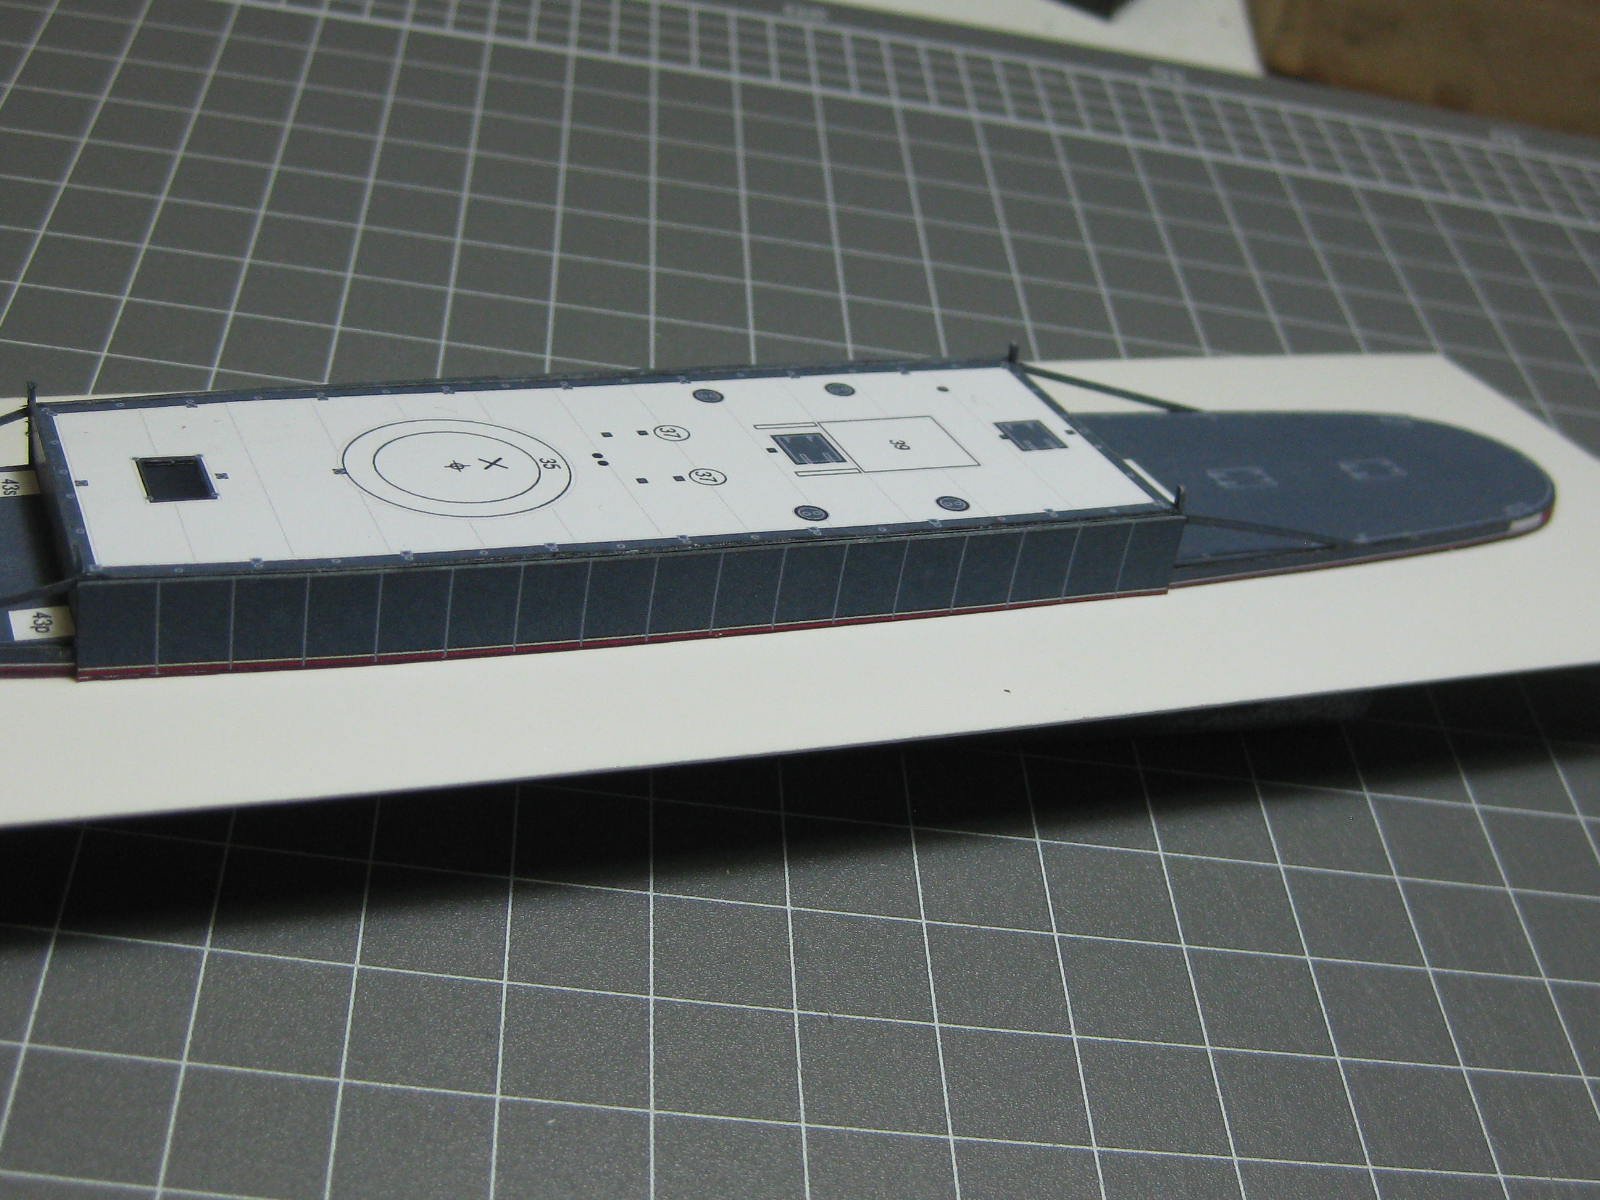
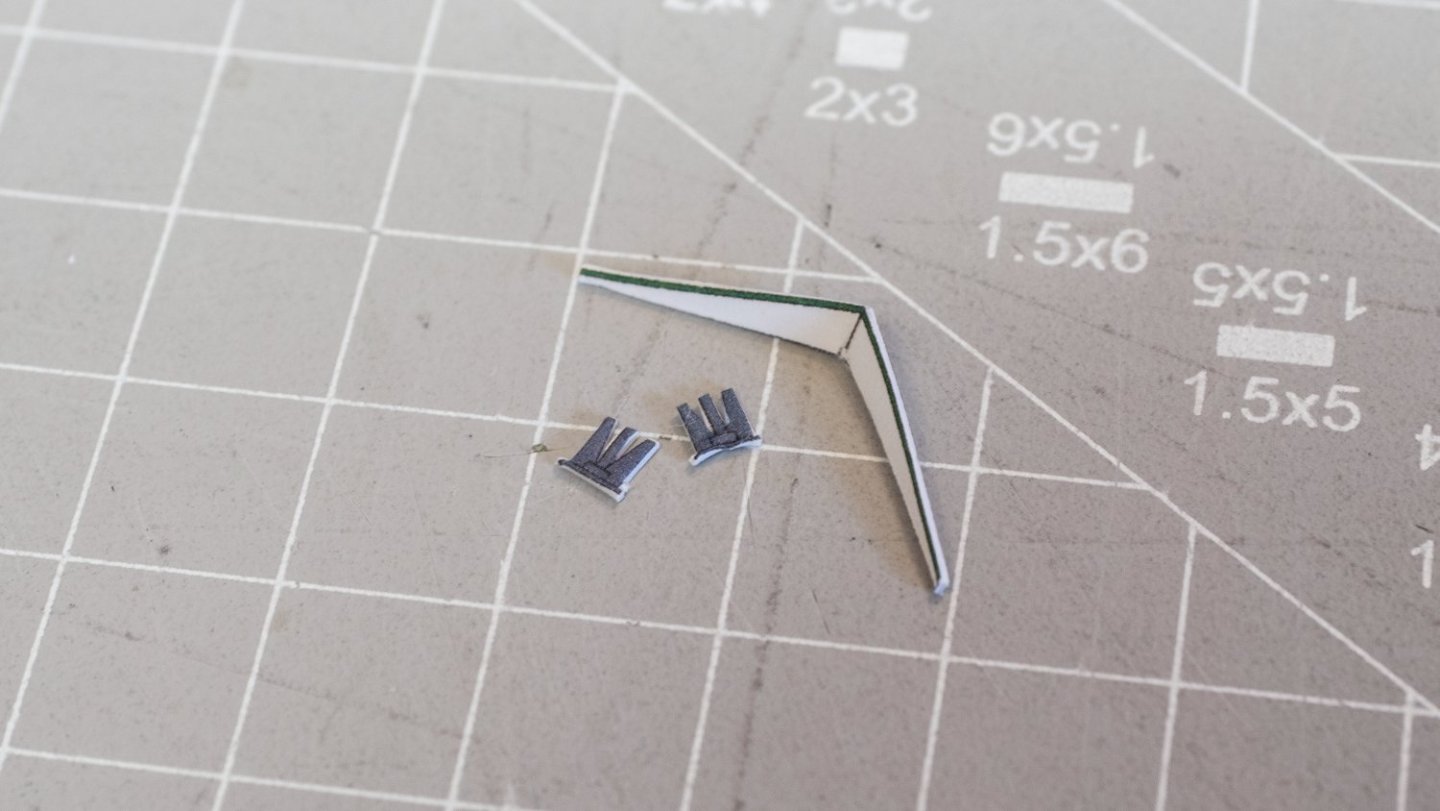
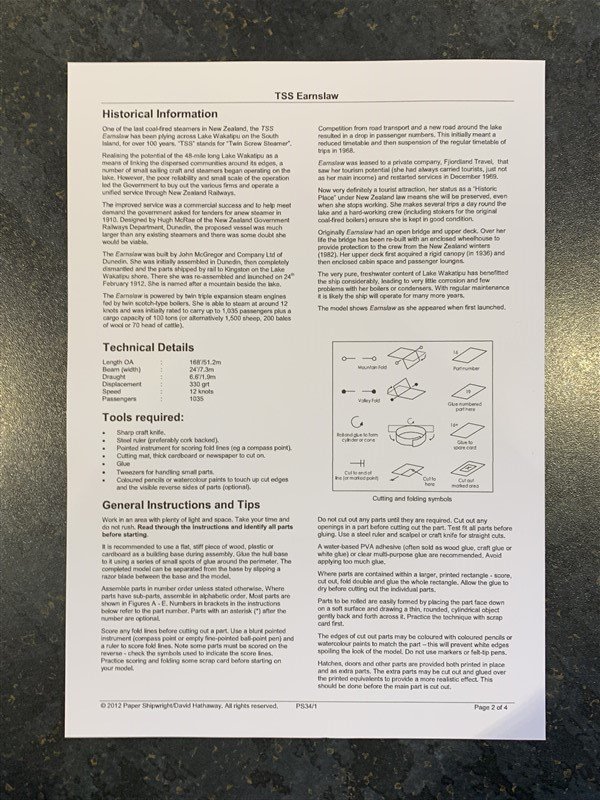
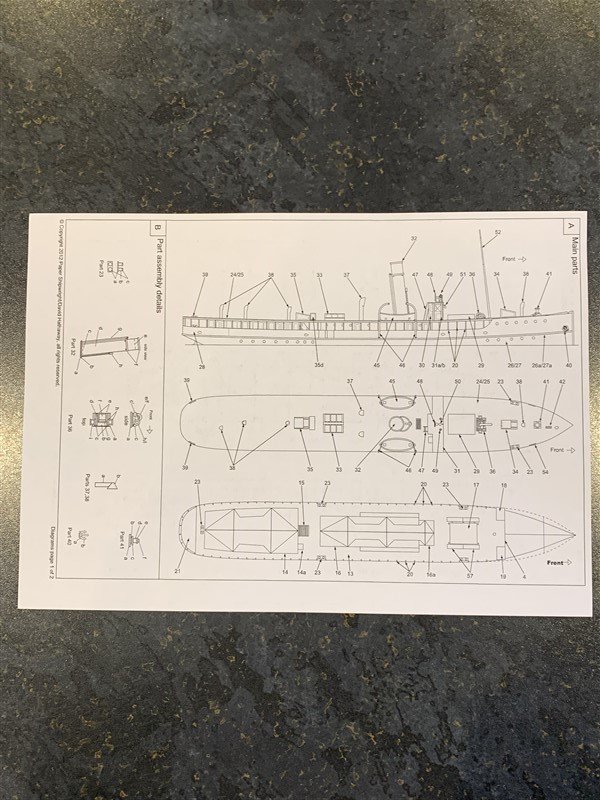
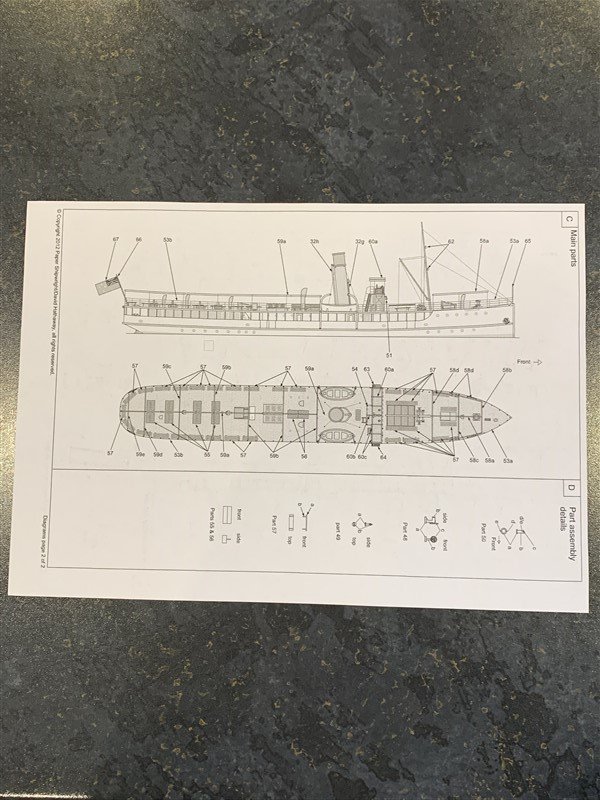
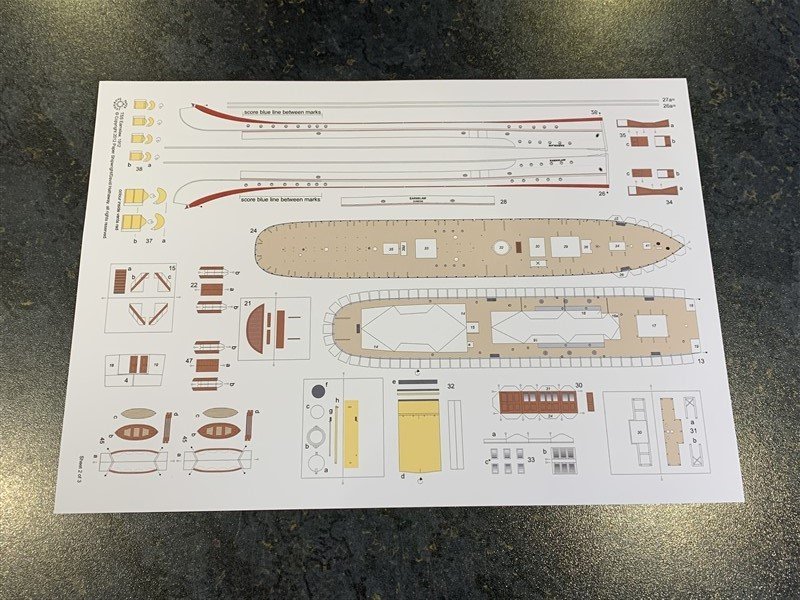
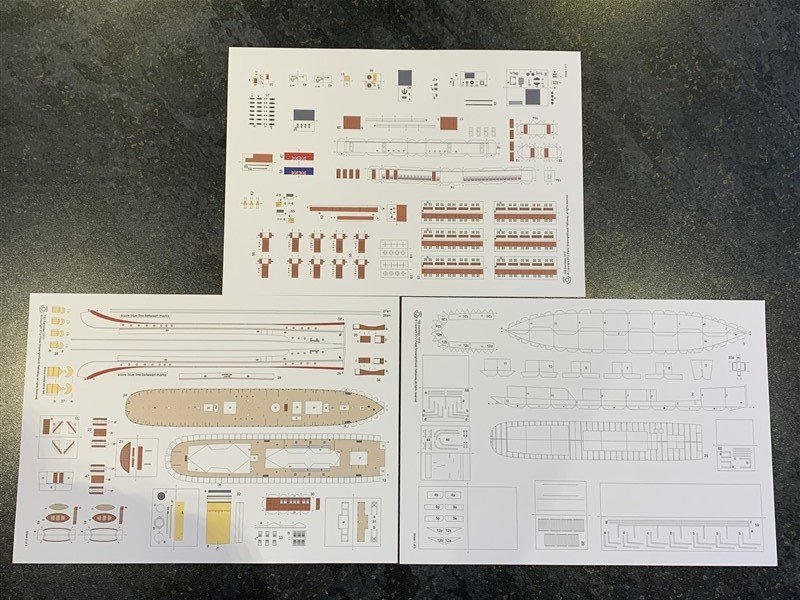
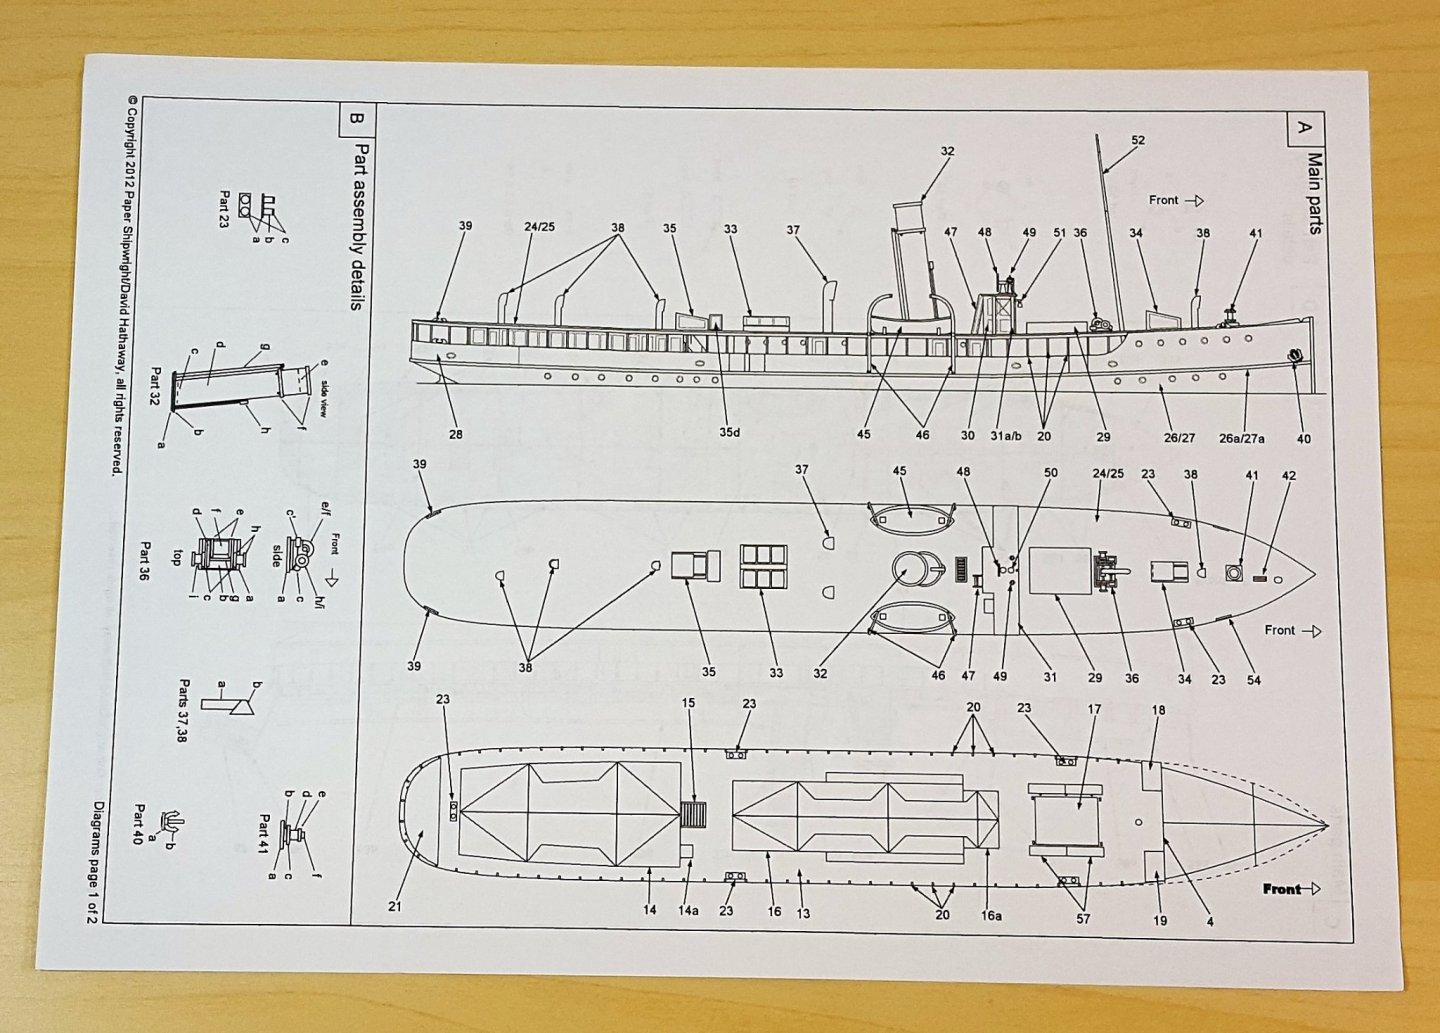
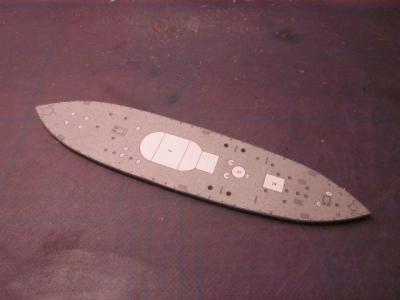
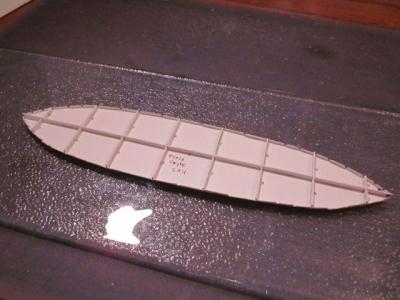
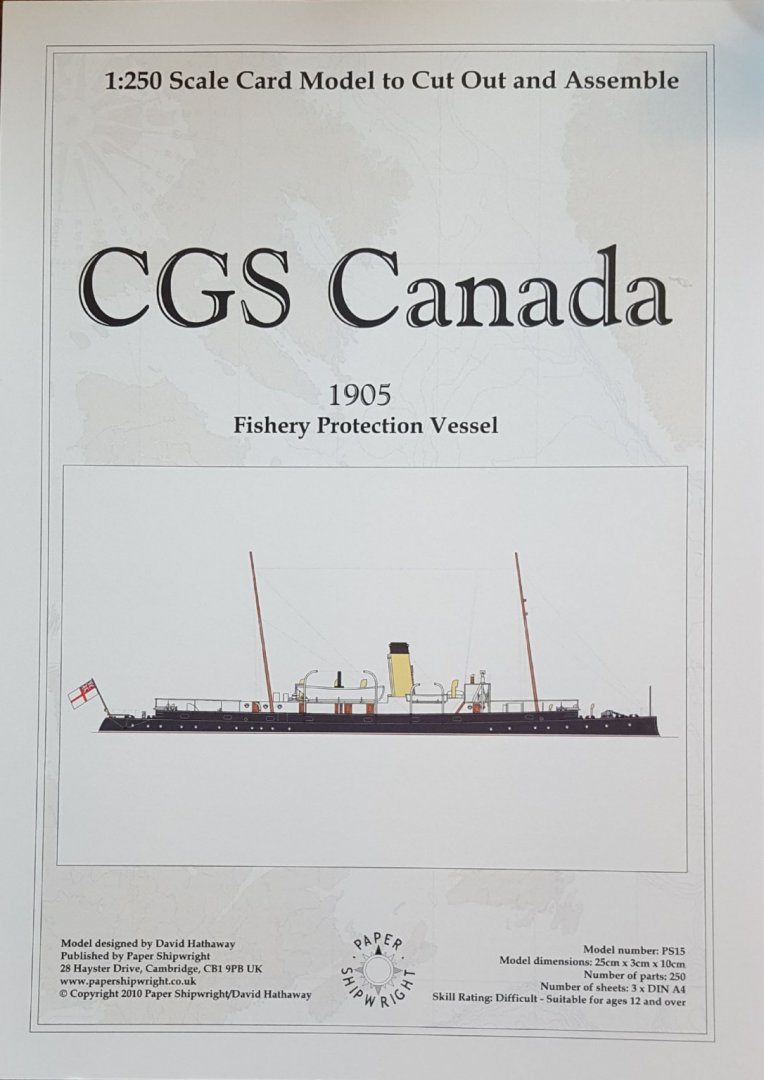
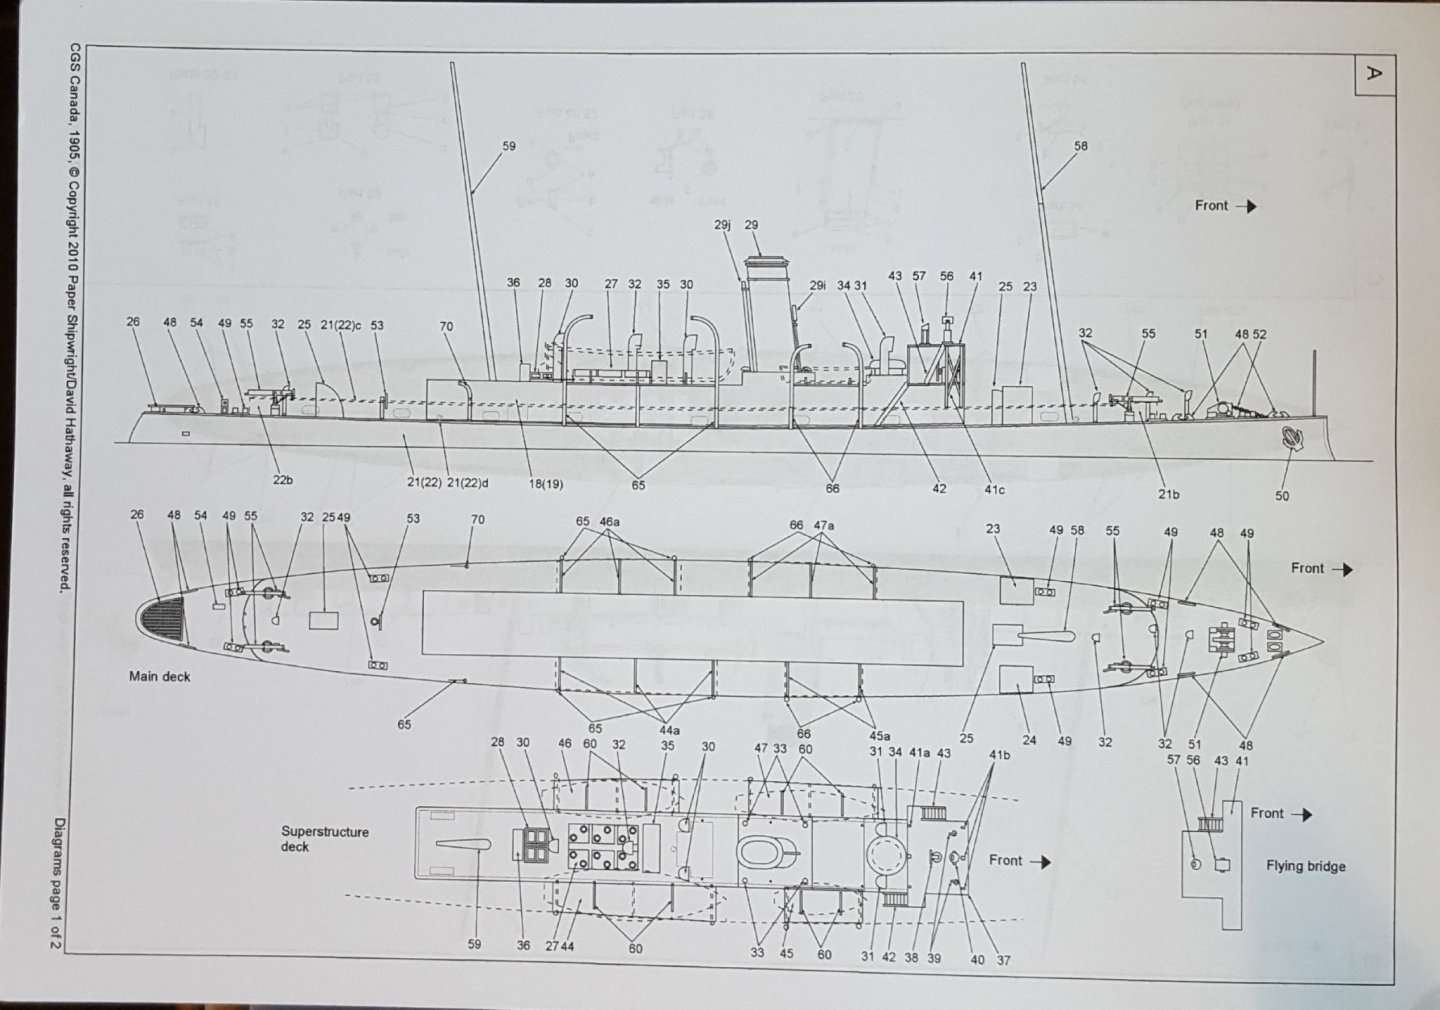
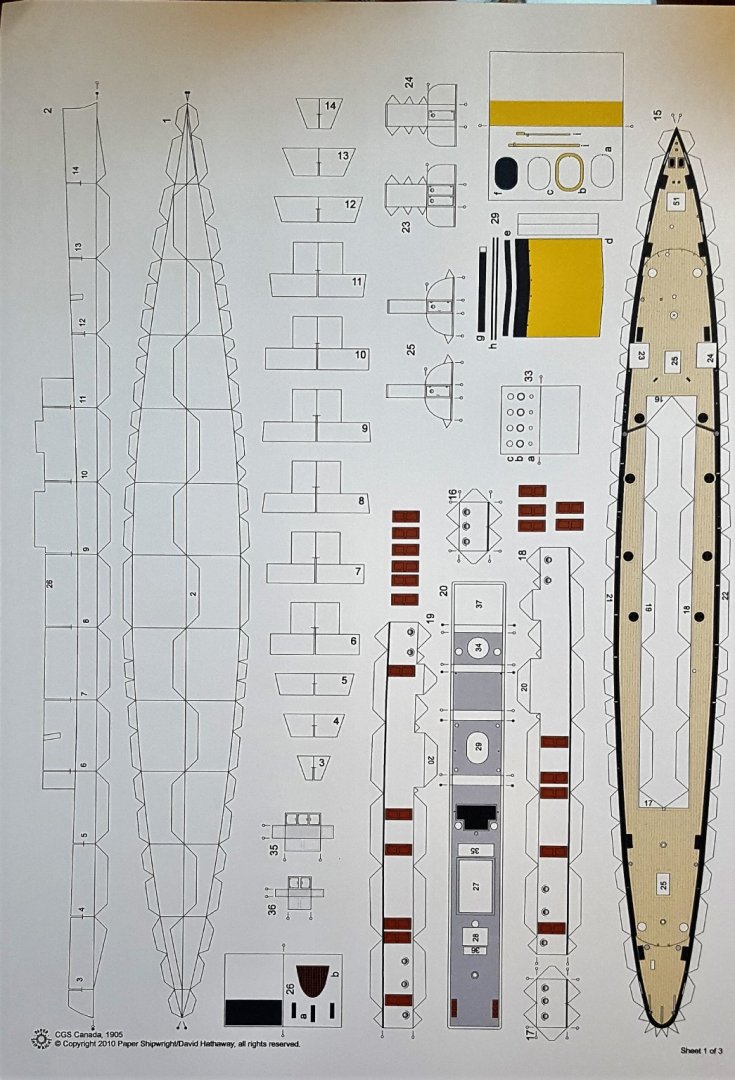
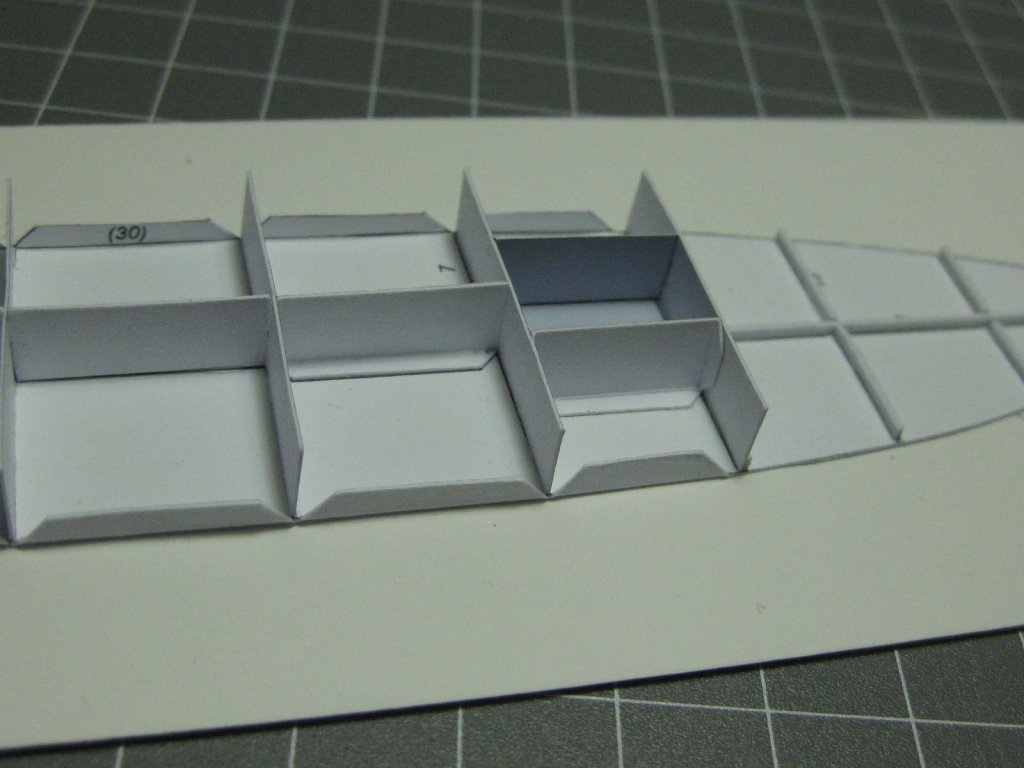
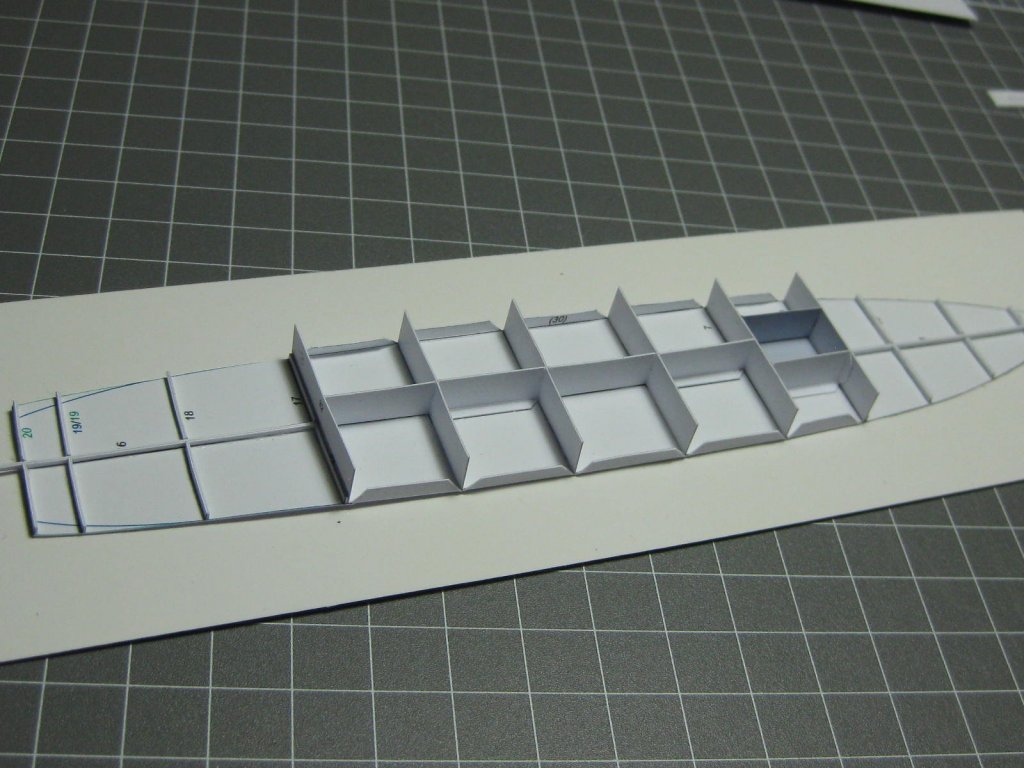
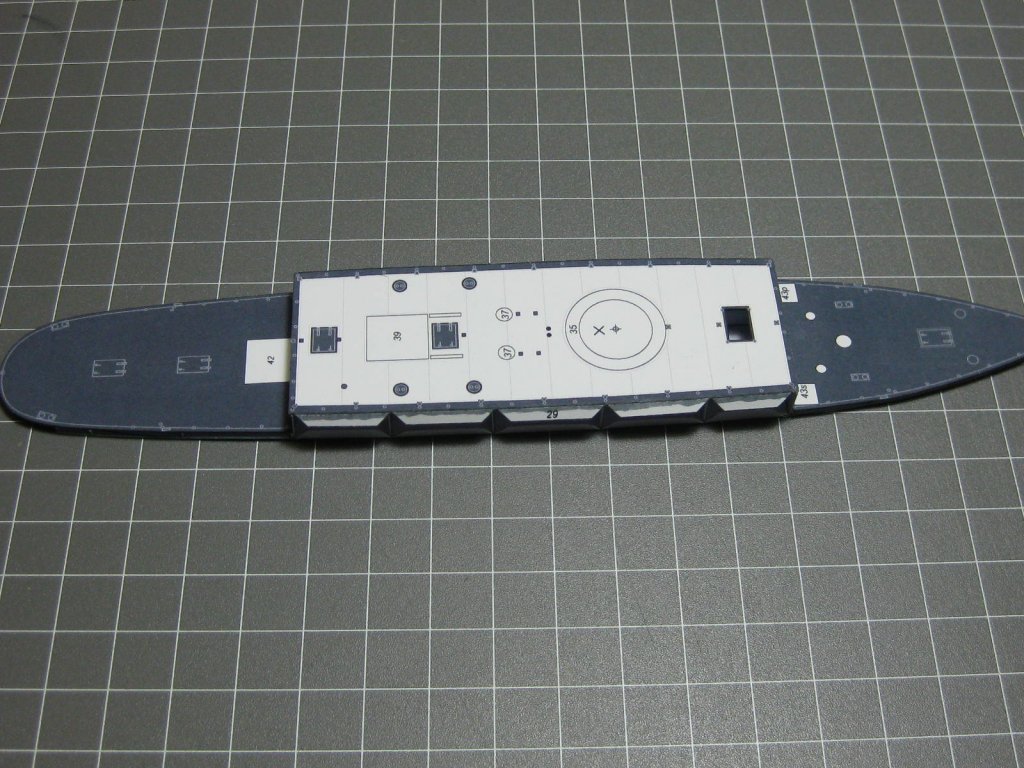
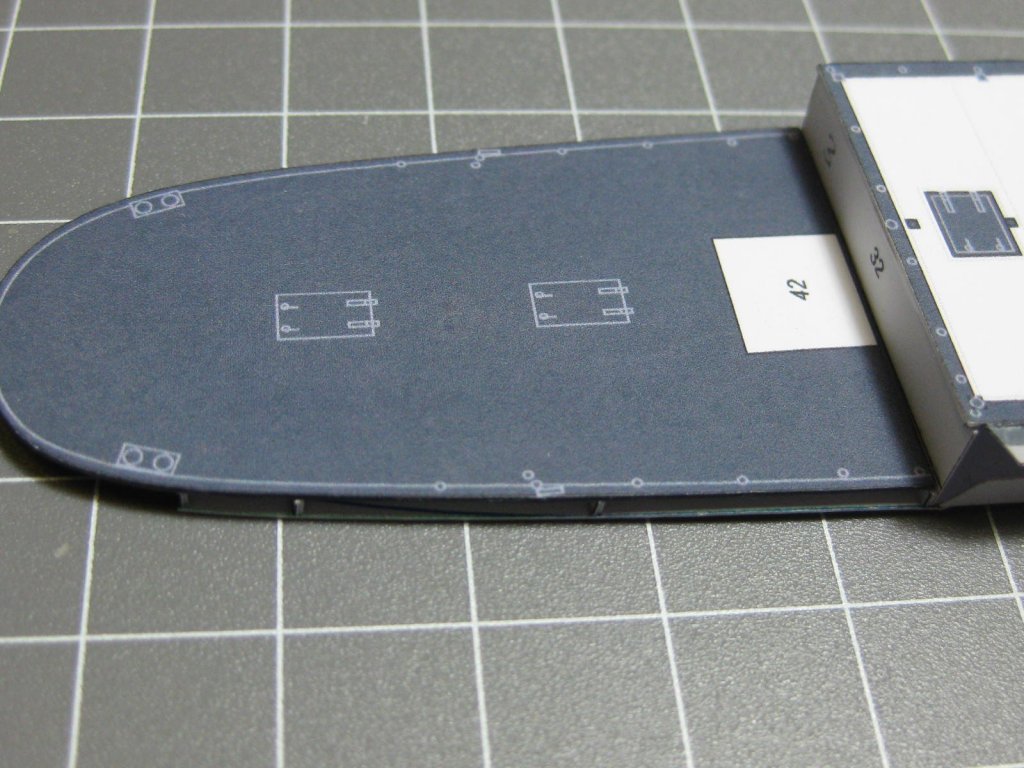
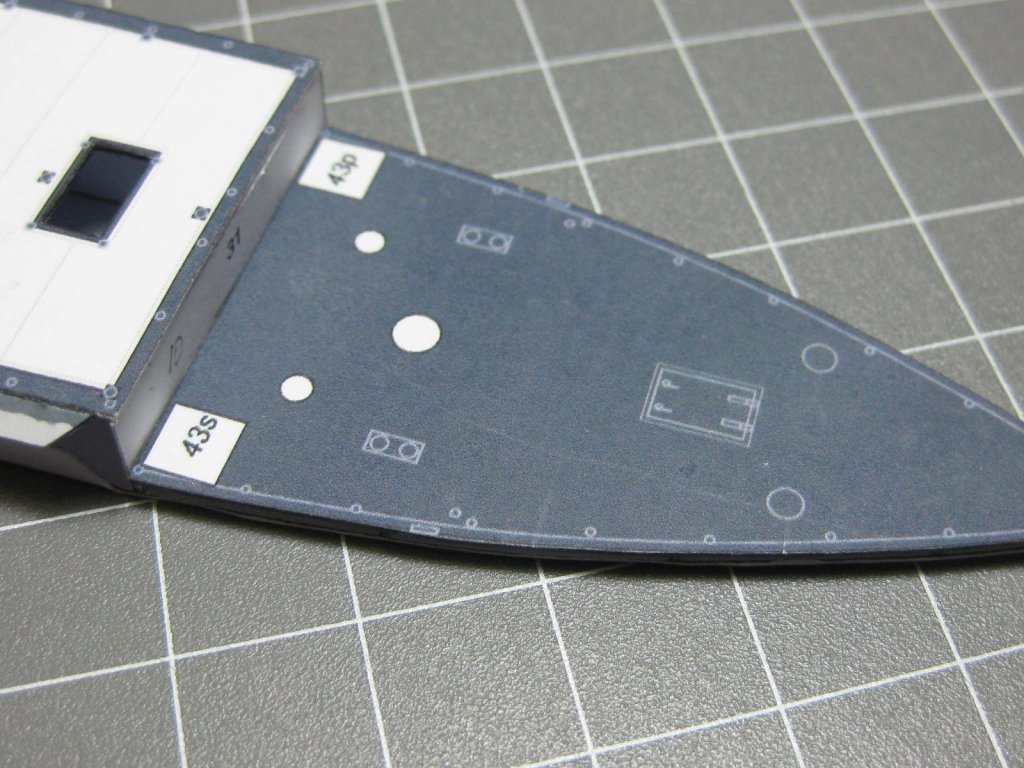
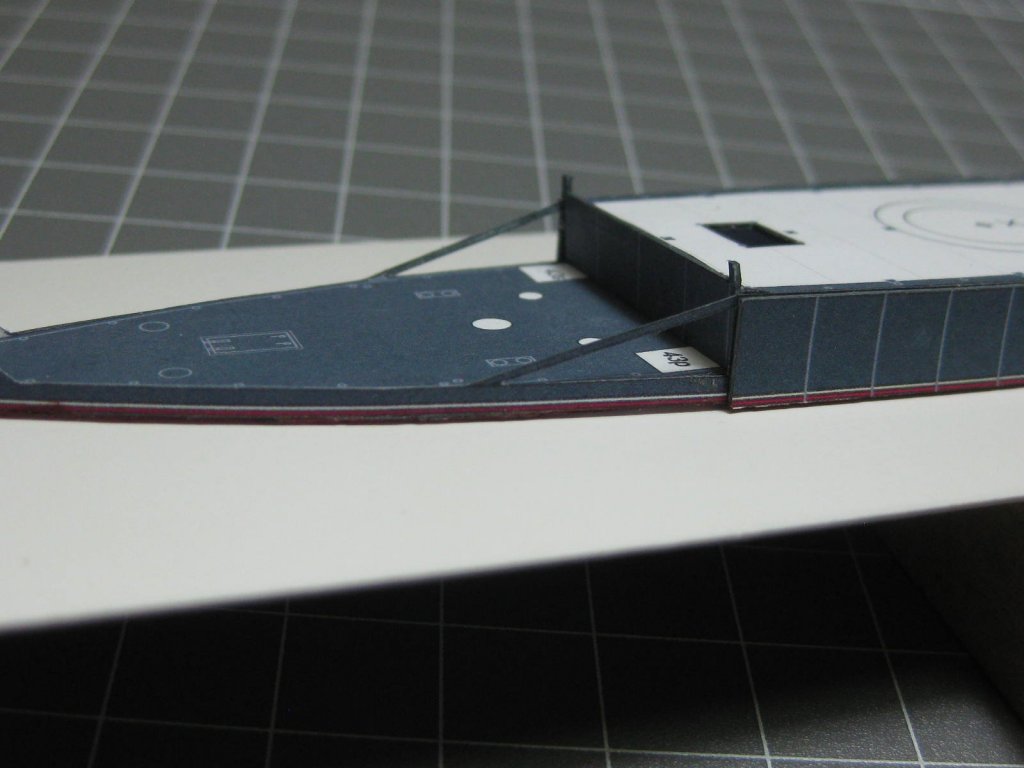
Evening All, Here we go with my next card model, another 1/250 offering from Paper Shipwright, after cutting my teeth on their model of Flamborough Head Lighthouse. I did think of starting this one first but quickly changed my mind after looking at all the small parts and the diminutive size of this one and promptly changed my mind! 😲 - I have since read the front and it says Skill rating 'Difficult' and part count #250. So I can't promise this build log will ever get re-titled with the word "Finished" tagged on the end, we shall see, but the blurb also says suitable for "ages over 12 and over" so on that count I am well over qualified! 😂 The first few pictures show what you get, six sheets of instructions and one A4 sized card of parts. Hold tight folks I'm diving in! First couple of evenings have been cutting out the base; gluing with tiny dots of PVA onto my building base and laminating and then cutting out "ribs" to form the hull. I completed adding these tonight, all seems to be going okay so far, but can see some of my cutting needs to be more precise, as I might need to add small 'shims' to level one or two of the ribs. Think next up I shall need to sort out some paint mixing for the cut edges for the cream coloured deck, and various reds and yellows, as pretty soon I am going to need those to progress beyond laying on the decks. Now time to make another sacrifice to the "Card Gods" 🔥 for guidance, until next time....
.JPG.7998ef23148f0bff3551bc281eaf78b6.JPG)
.JPG.253c718f2c371ecaee61150384d060a5.JPG)
.JPG.77e9c3628f79fb5e33e4b2f76b467756.JPG)
.JPG.f902ffbe491653f2cbf0aaaca117610b.JPG)
.JPG.a54abcd4e0ba17f6f737be36a6bacde2.JPG)
.JPG.a3f4fade08df2ff336ac3a7ad0c6daaf.JPG)
.JPG.bfa27f45da77adc51e8a11f5a2f8f0c8.JPG)
.JPG.2fbd4eafcabbb5408e44dc73cf0eb0cb.JPG)
.JPG.c334c31b8dd9ad468ecb9eae919e3a6a.JPG)
.JPG.c321e8d70beb8f6bd4fc3e4a3210da61.JPG)
- 53 replies
-
- 14
-
-
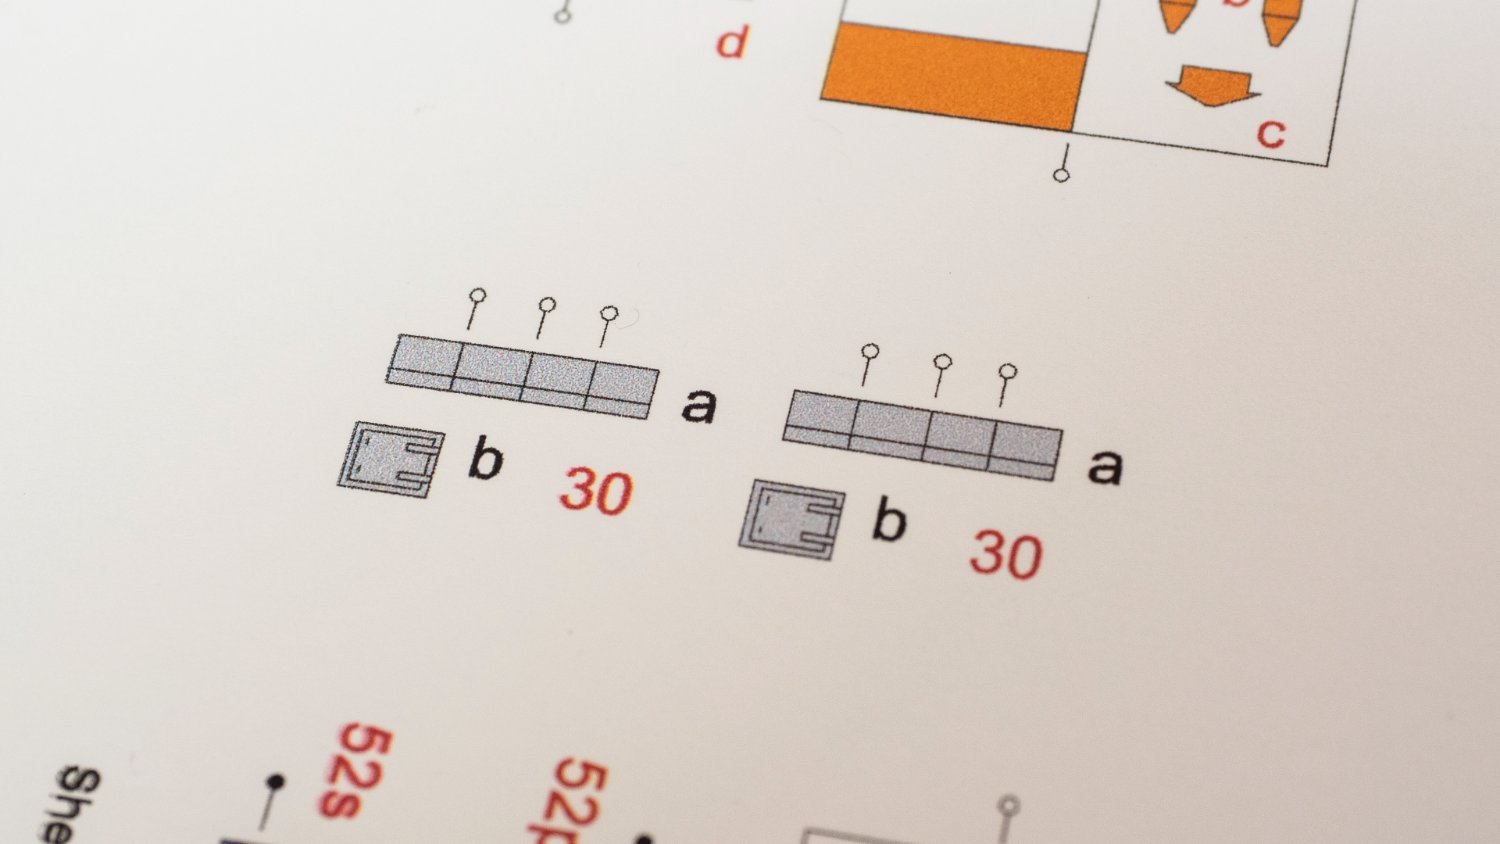
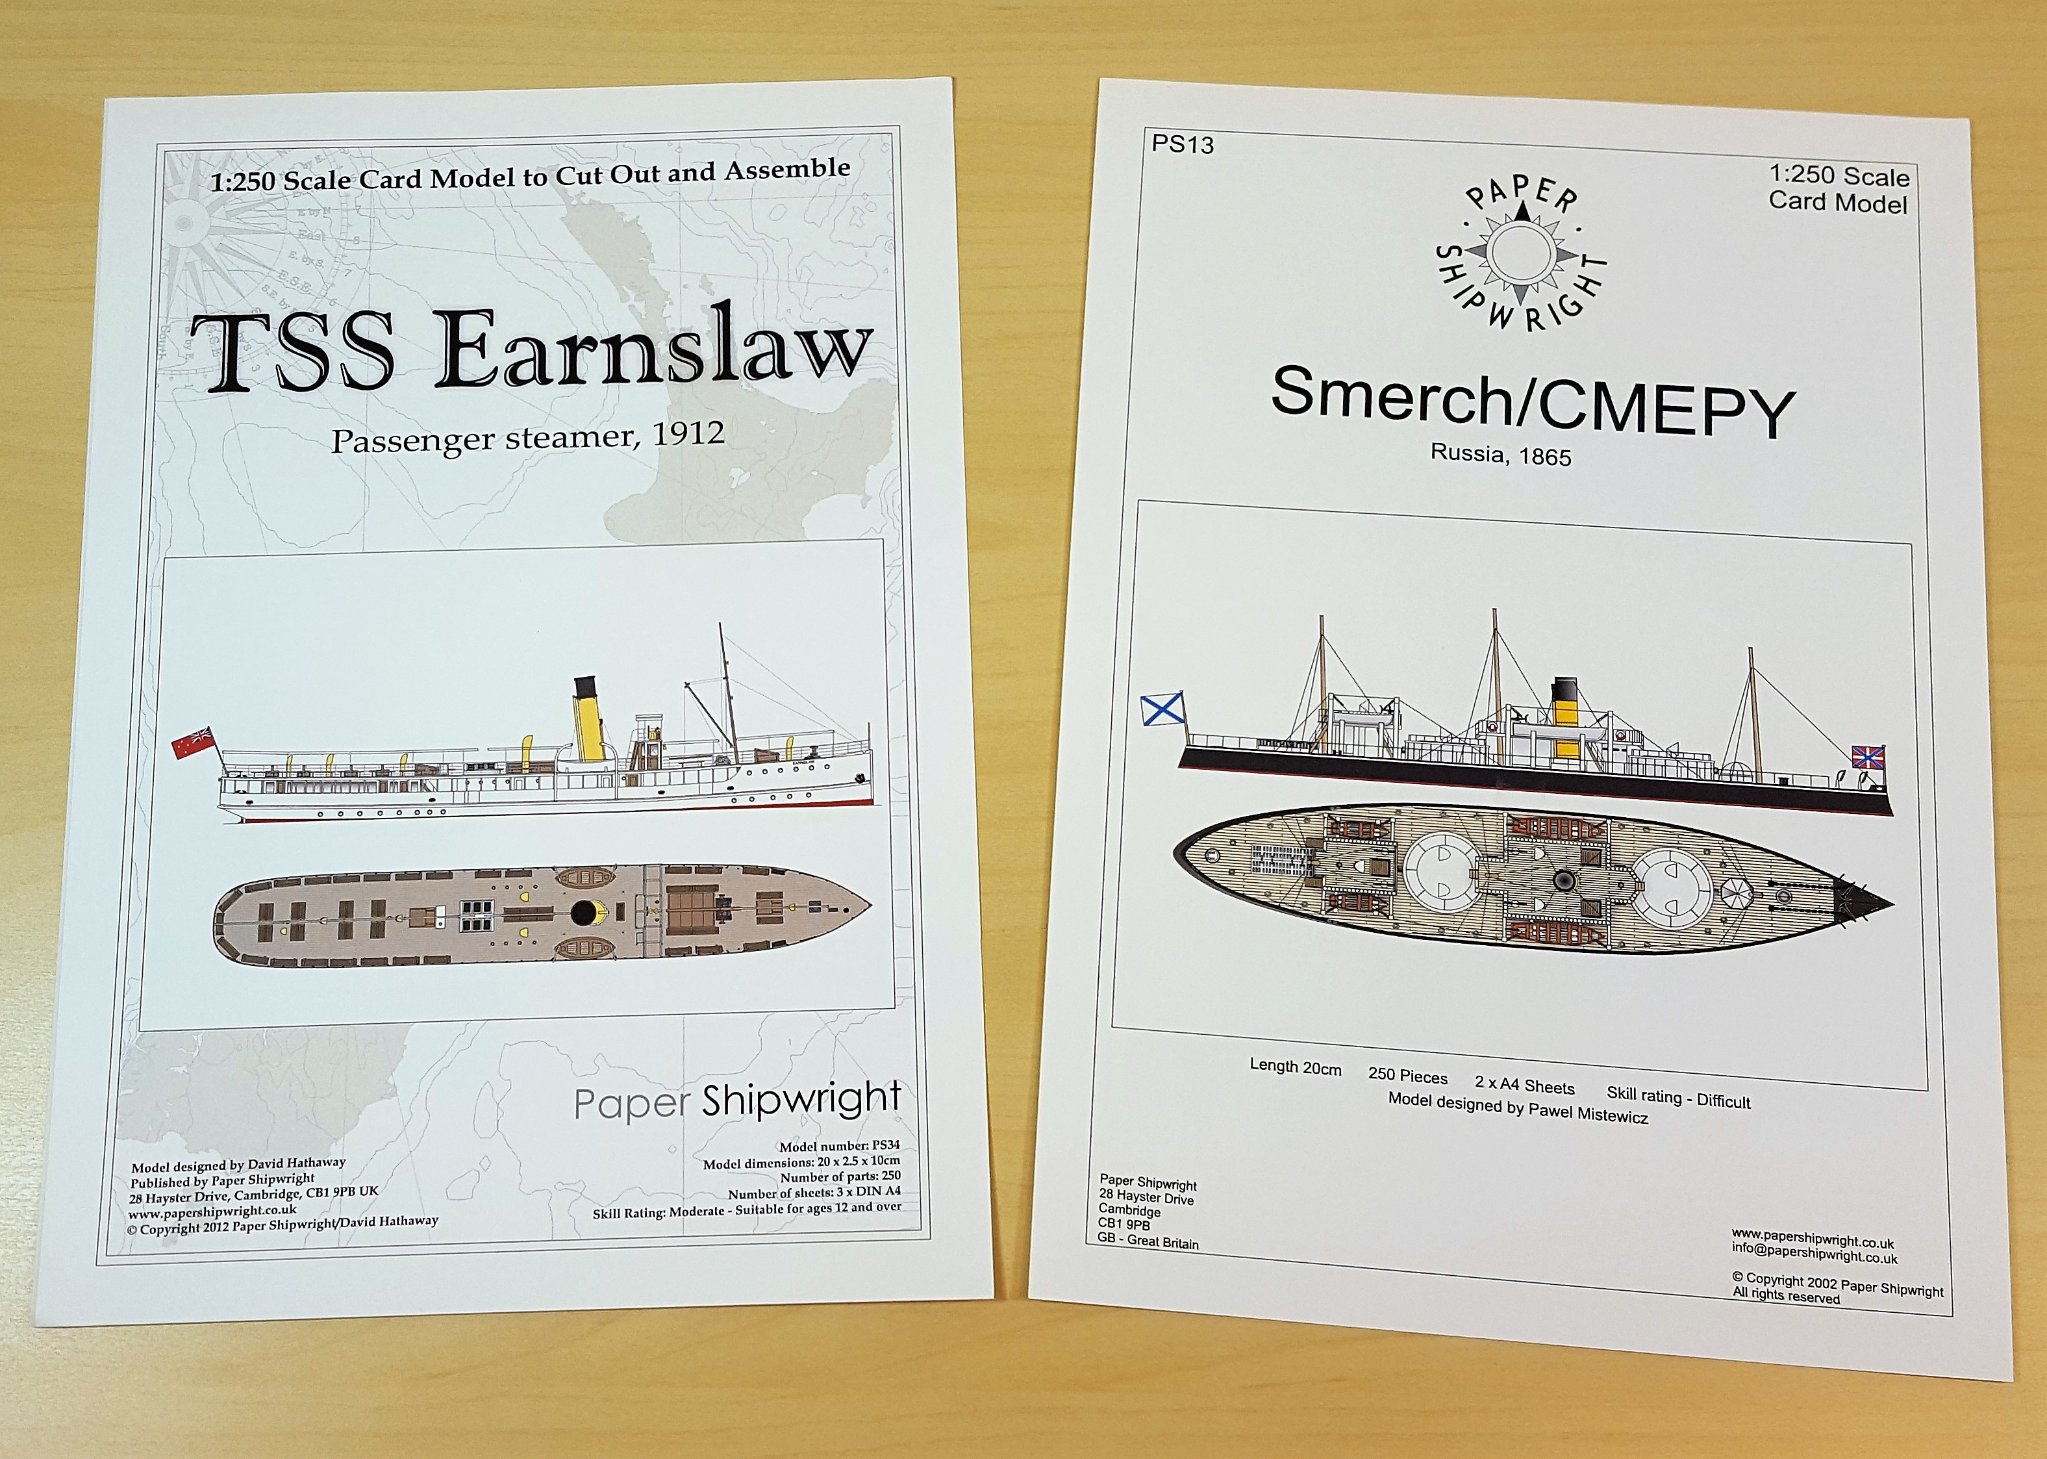
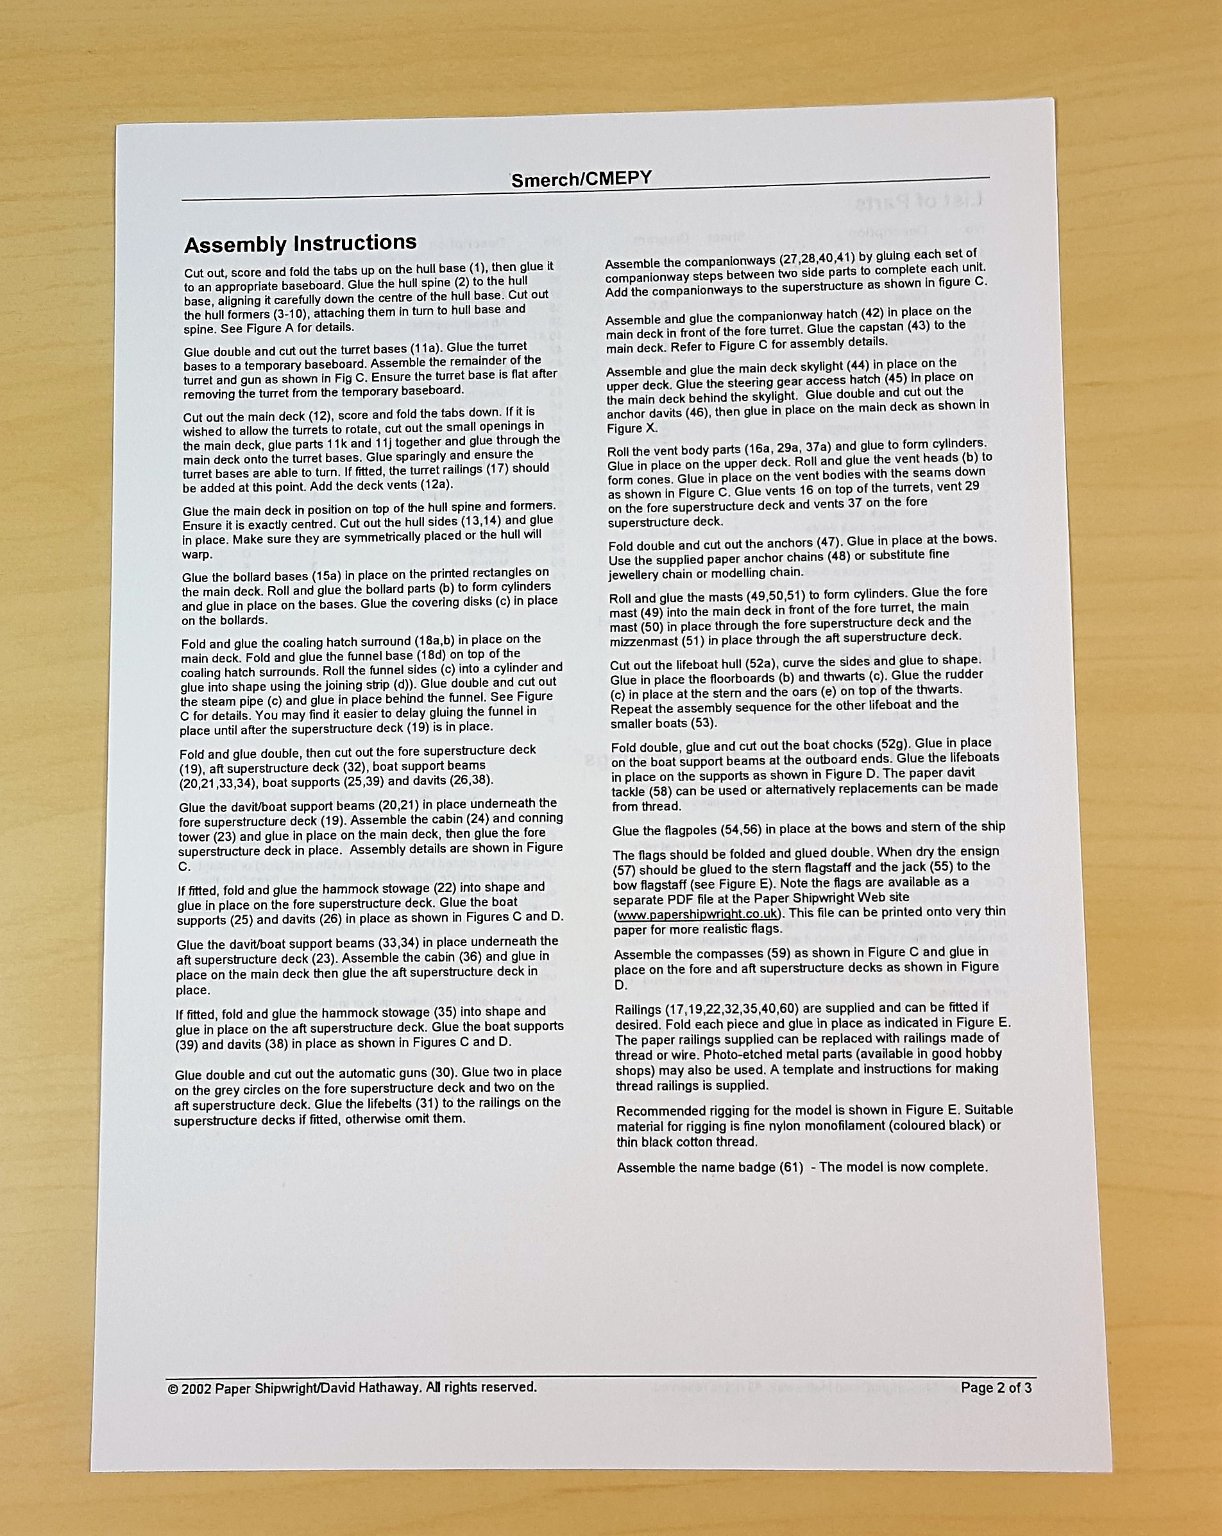
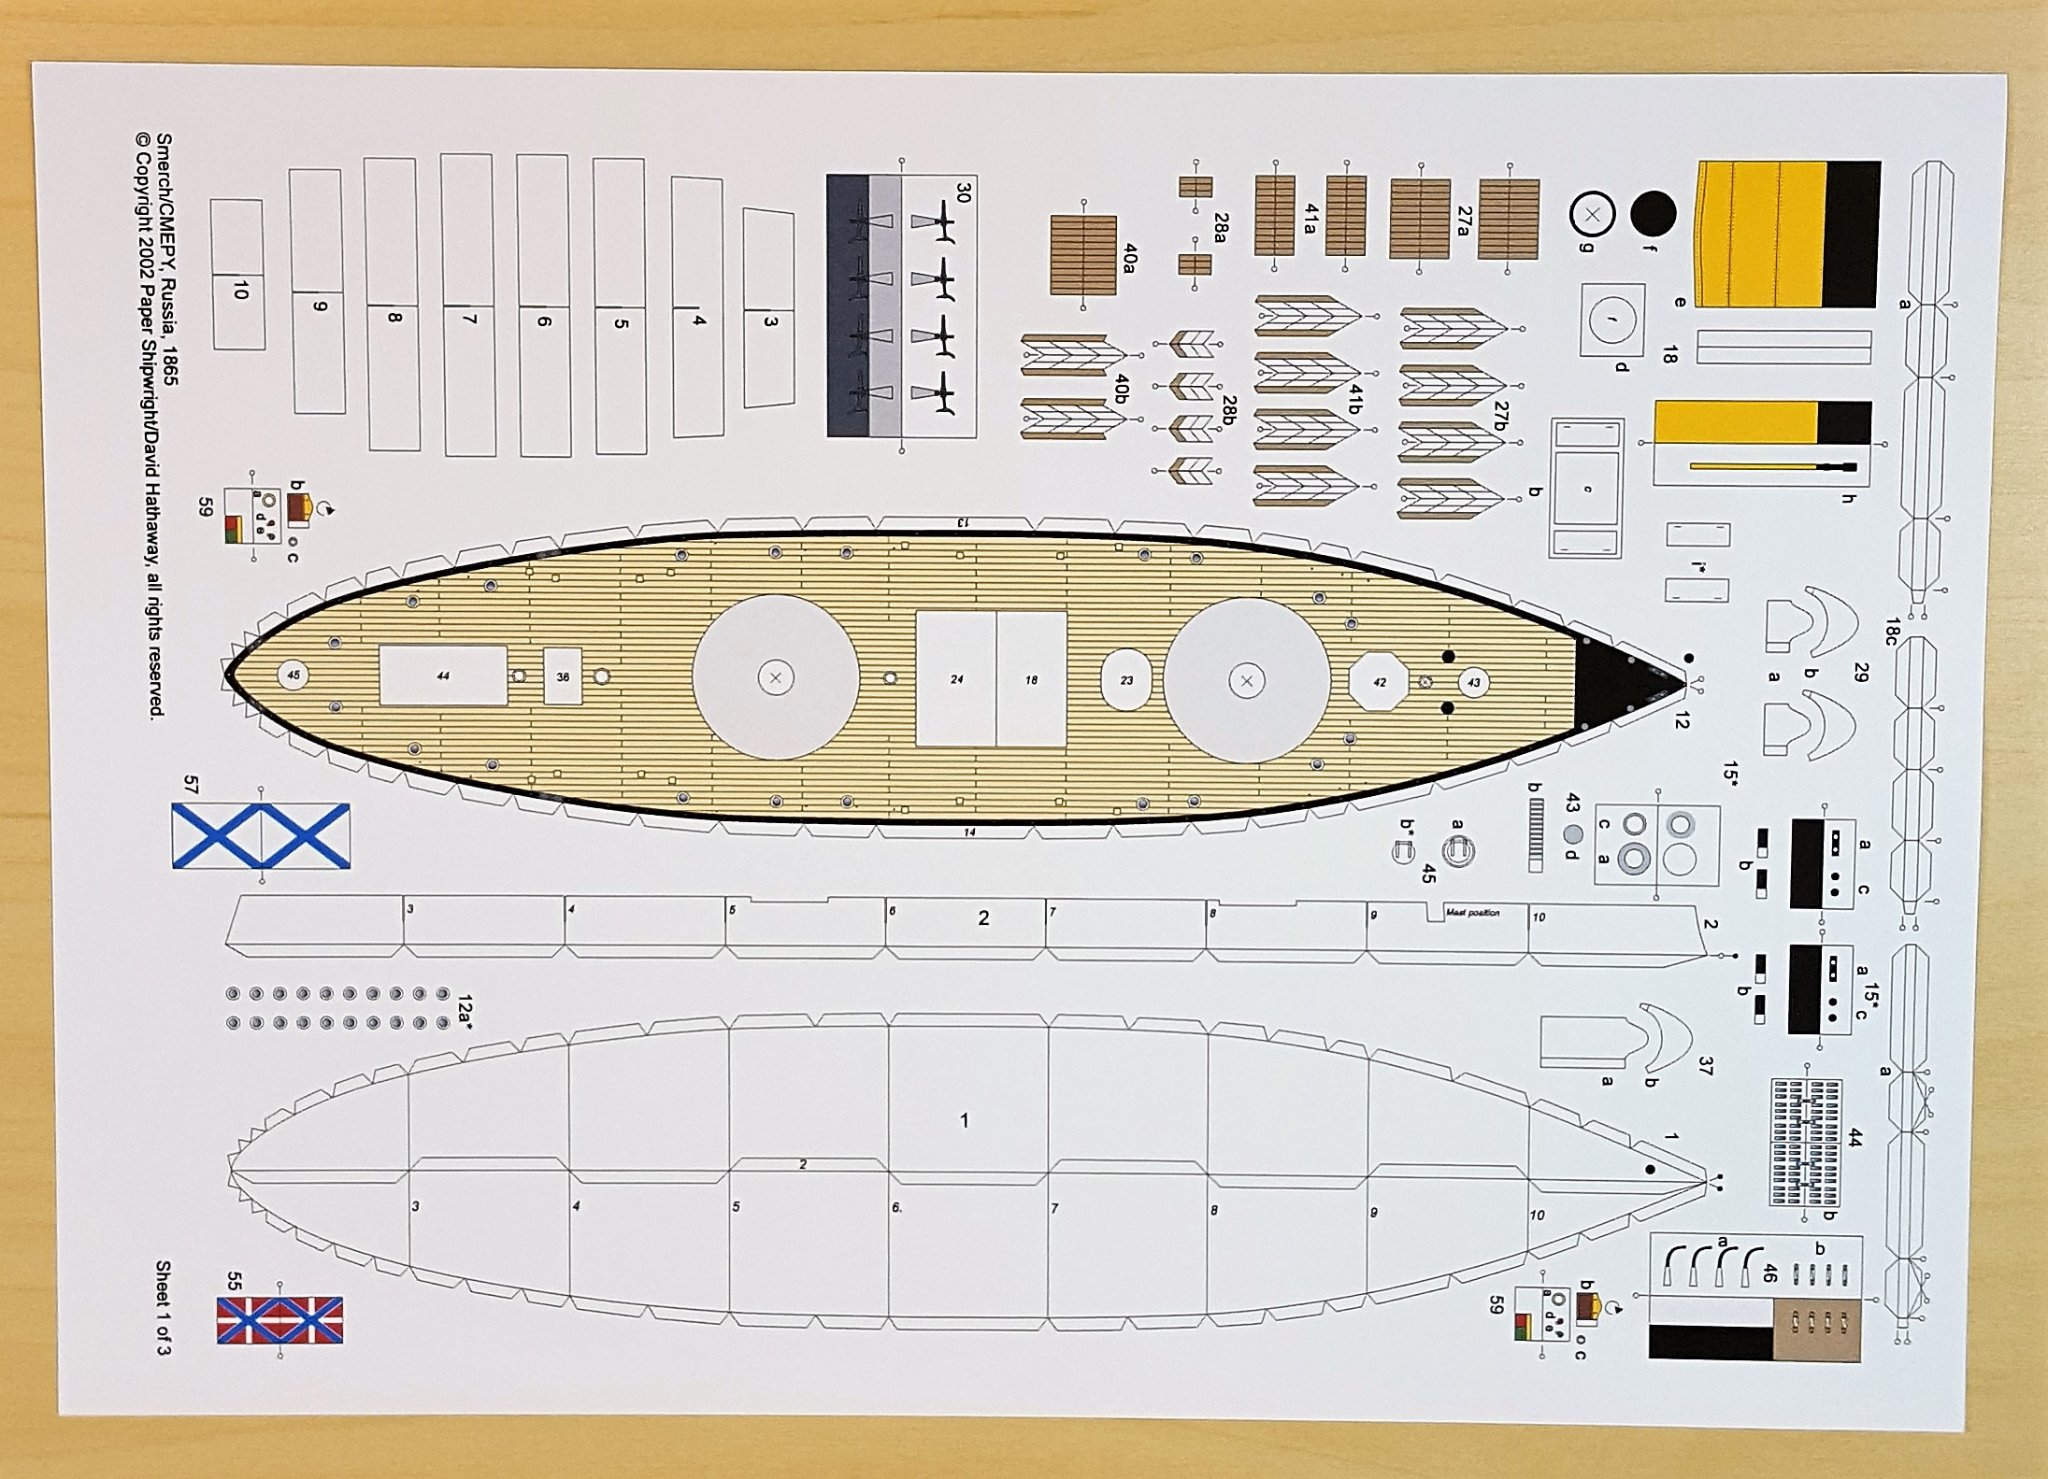
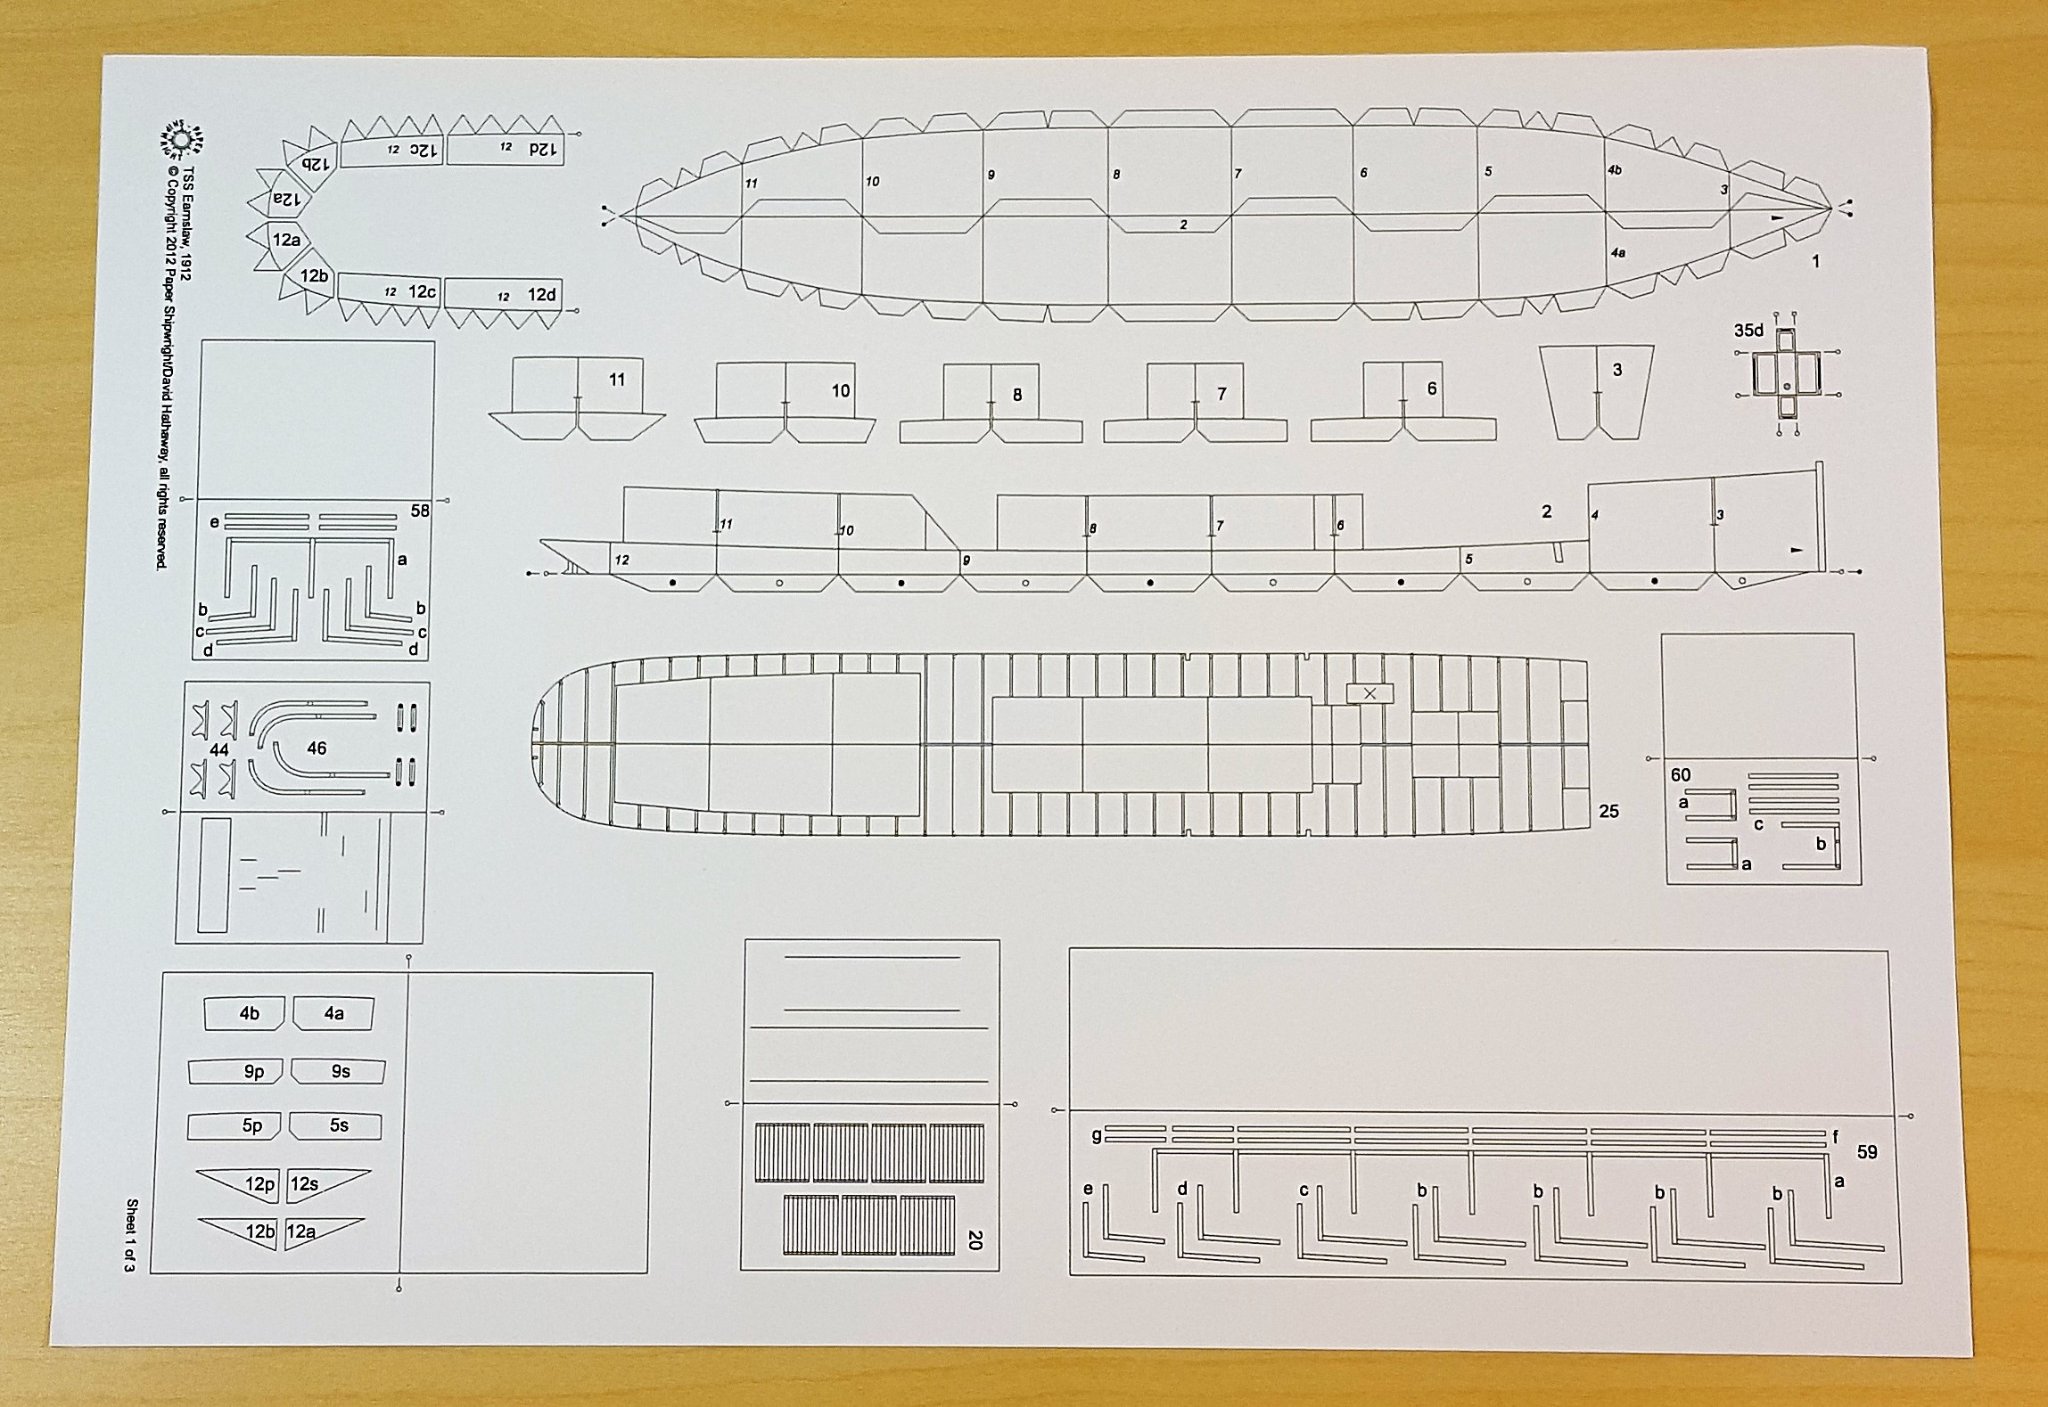
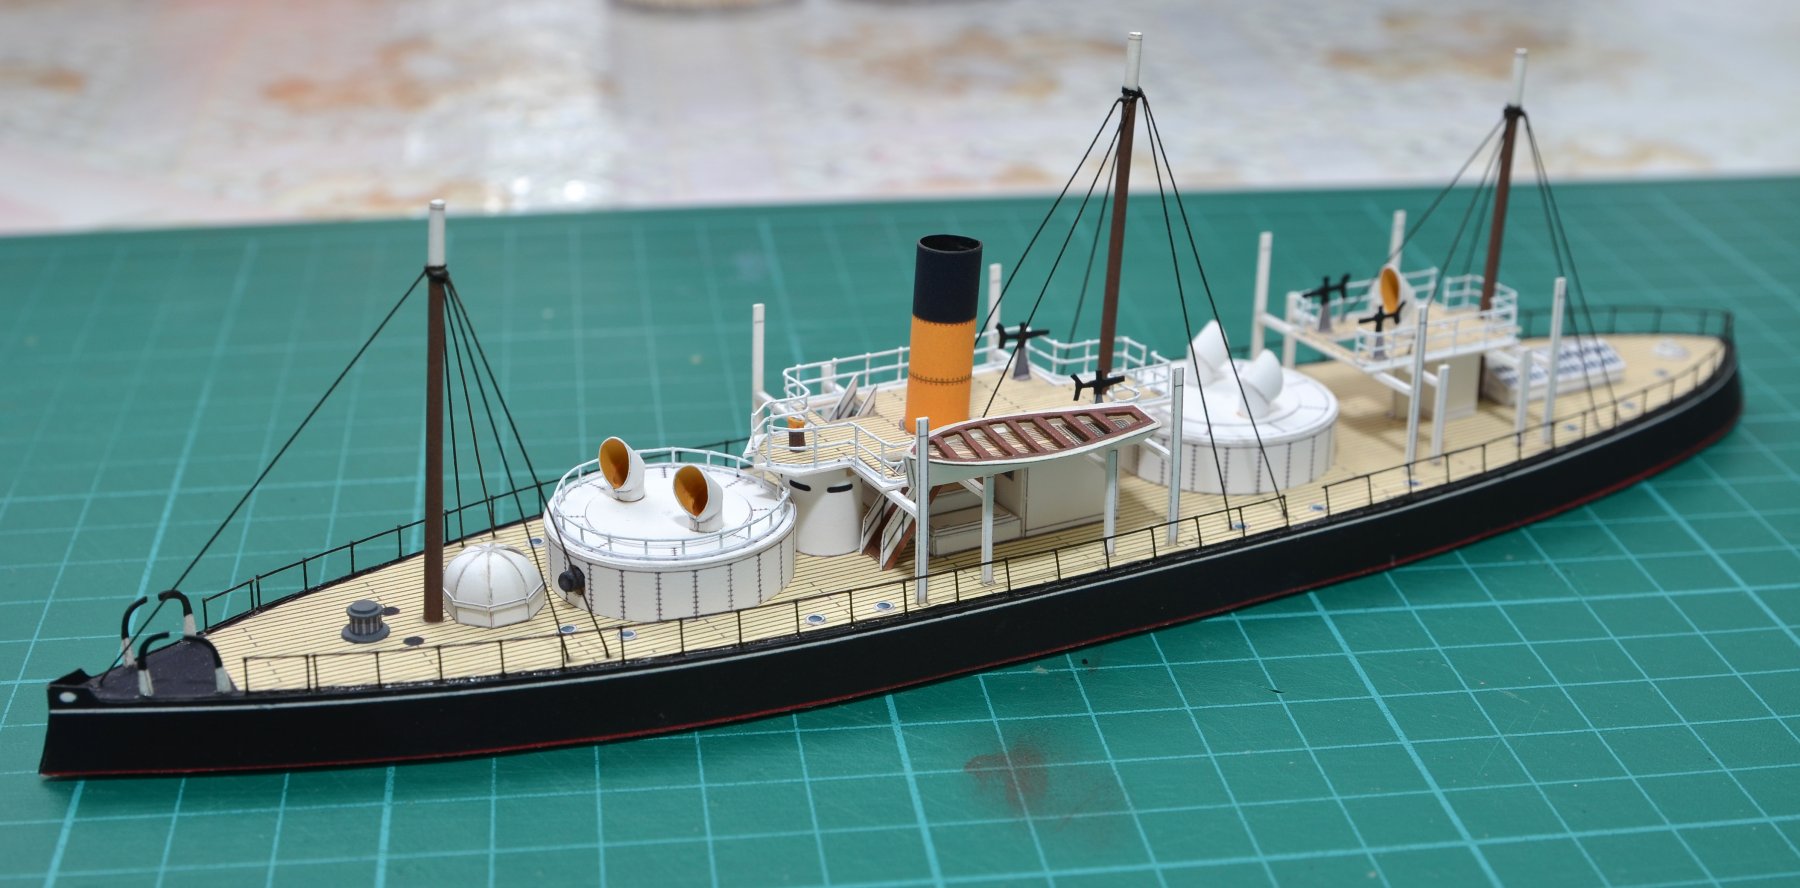
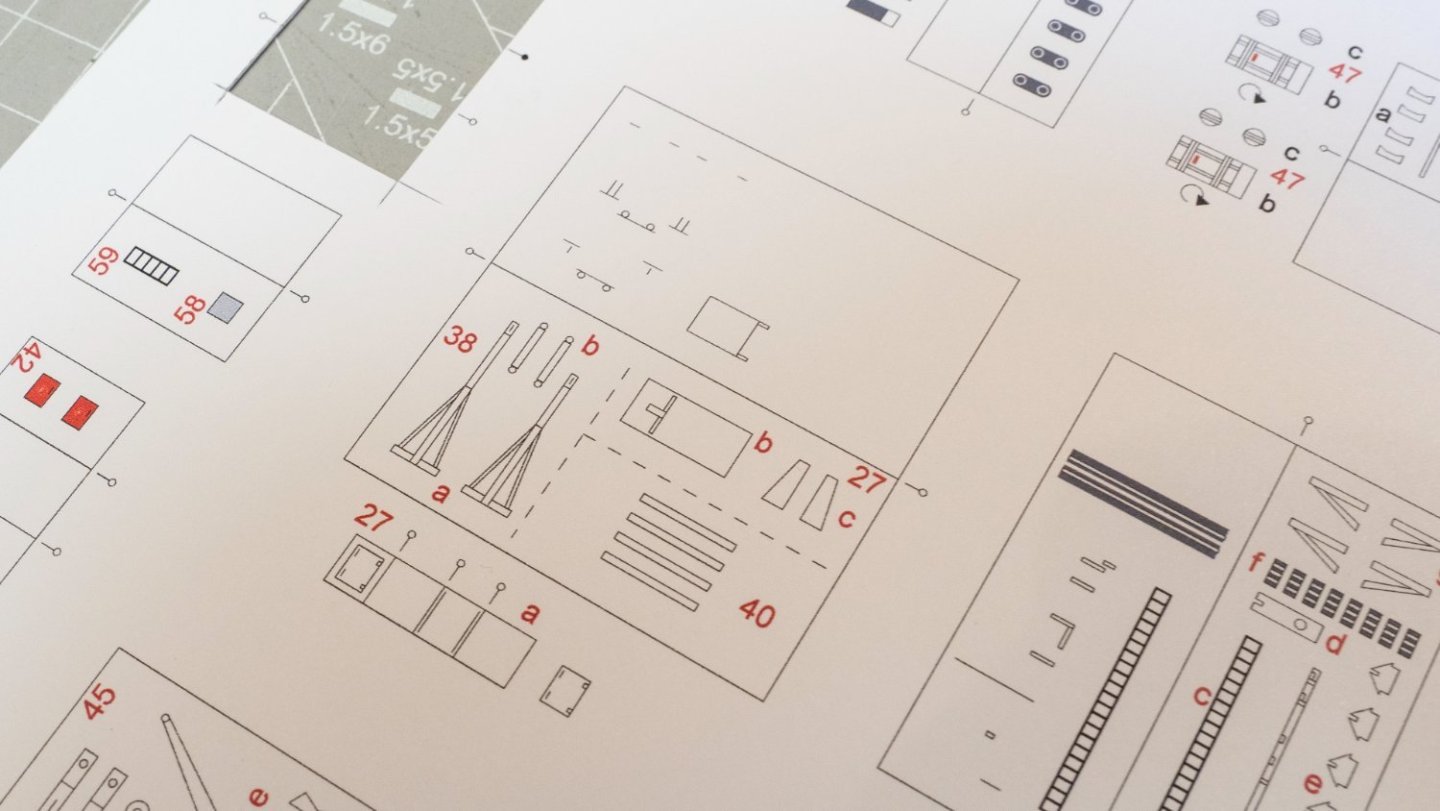
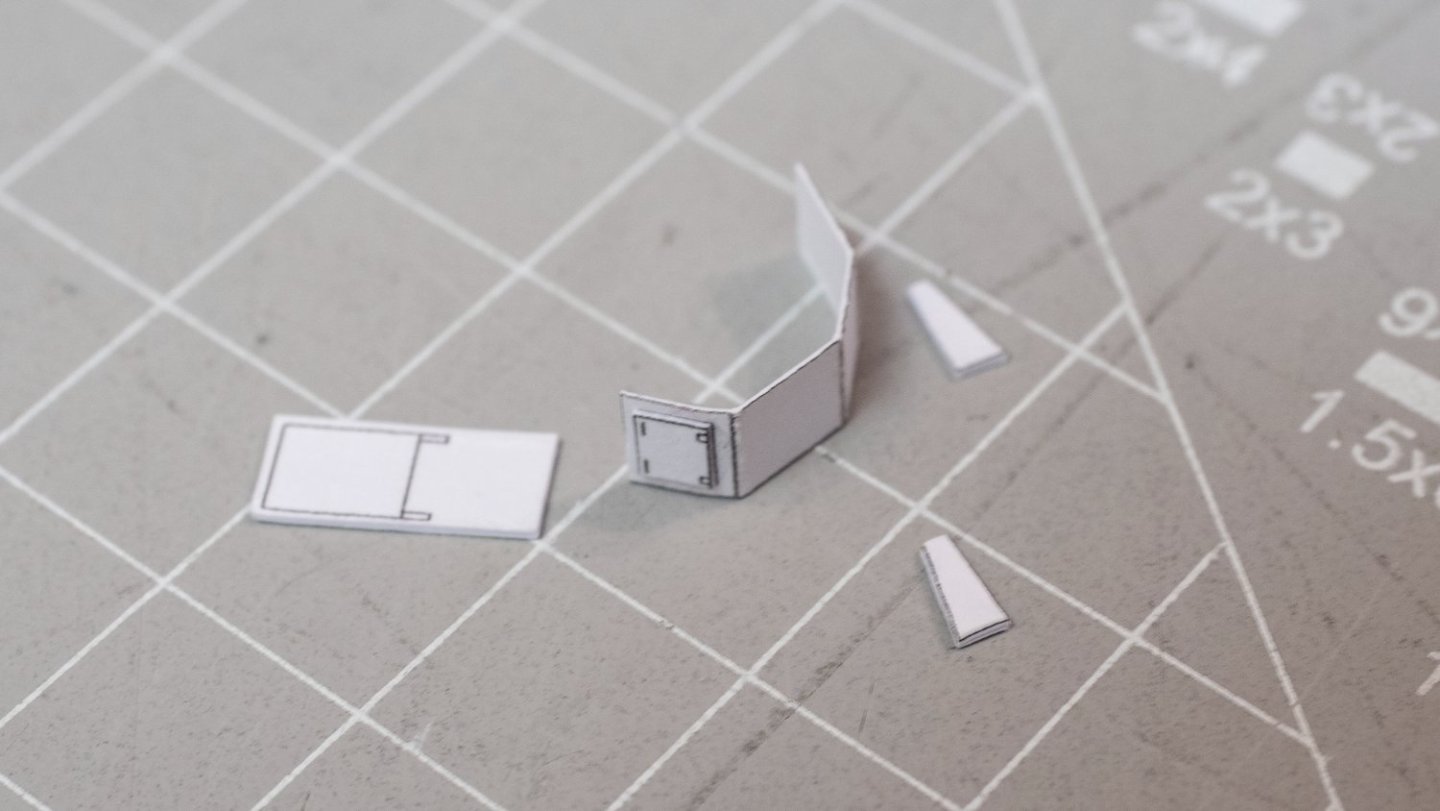
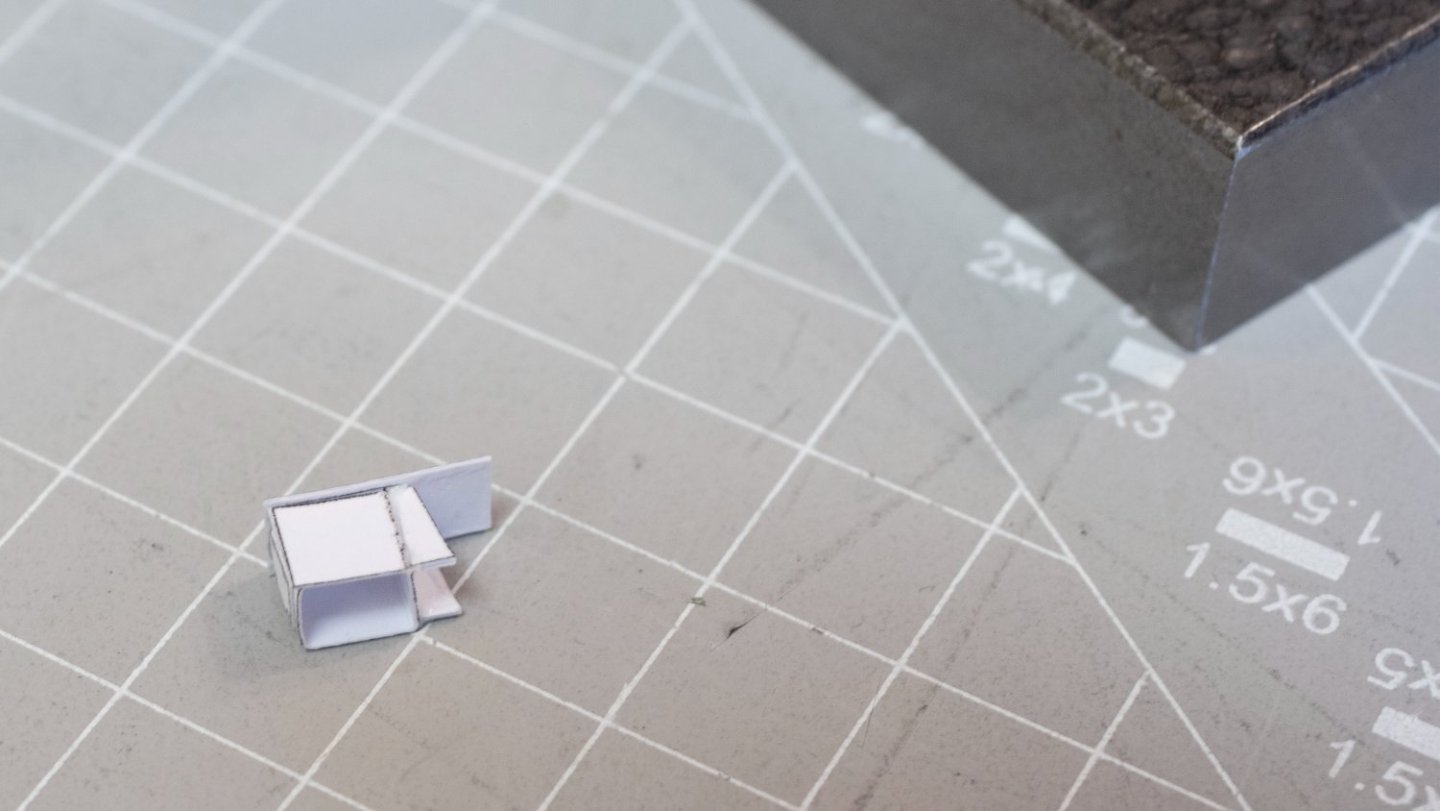
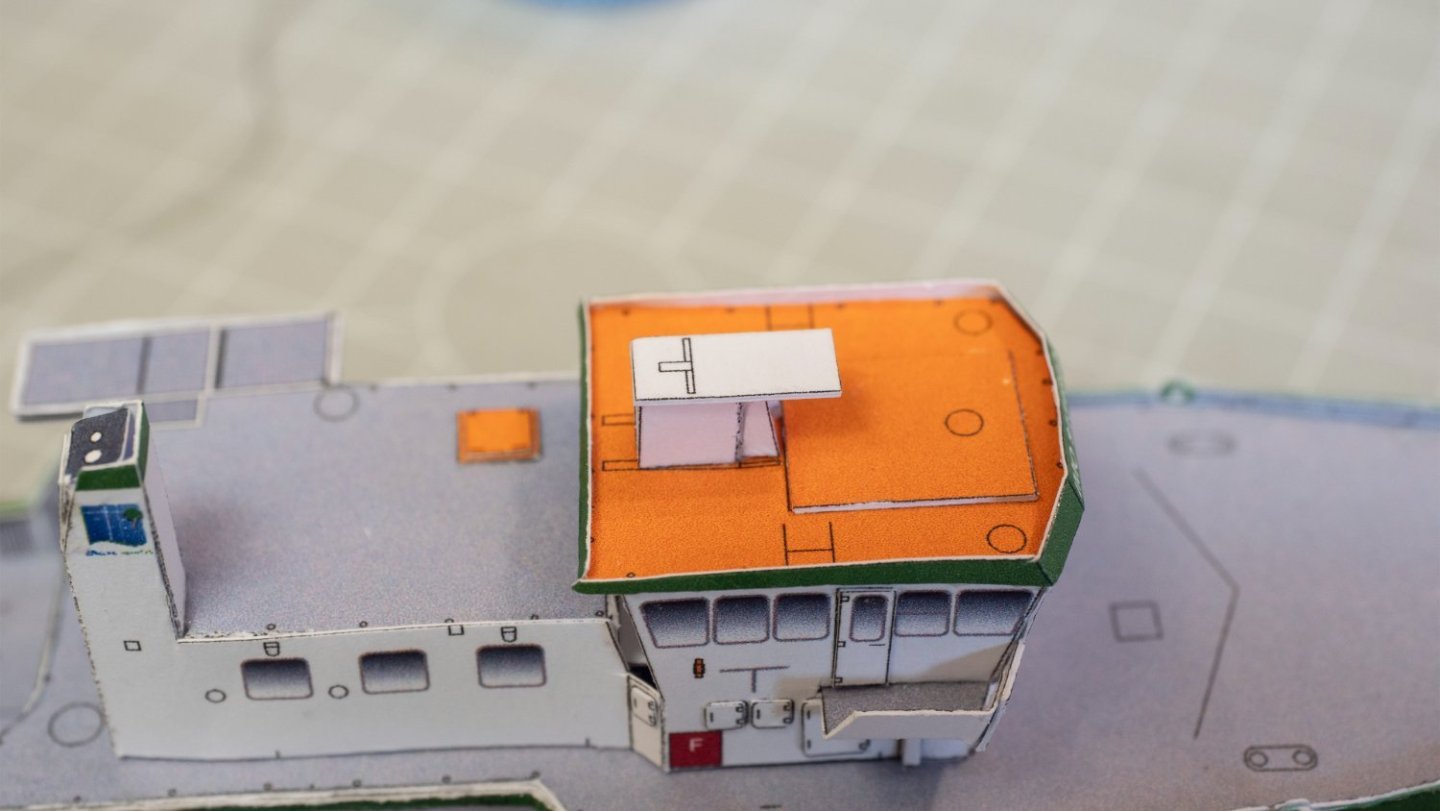
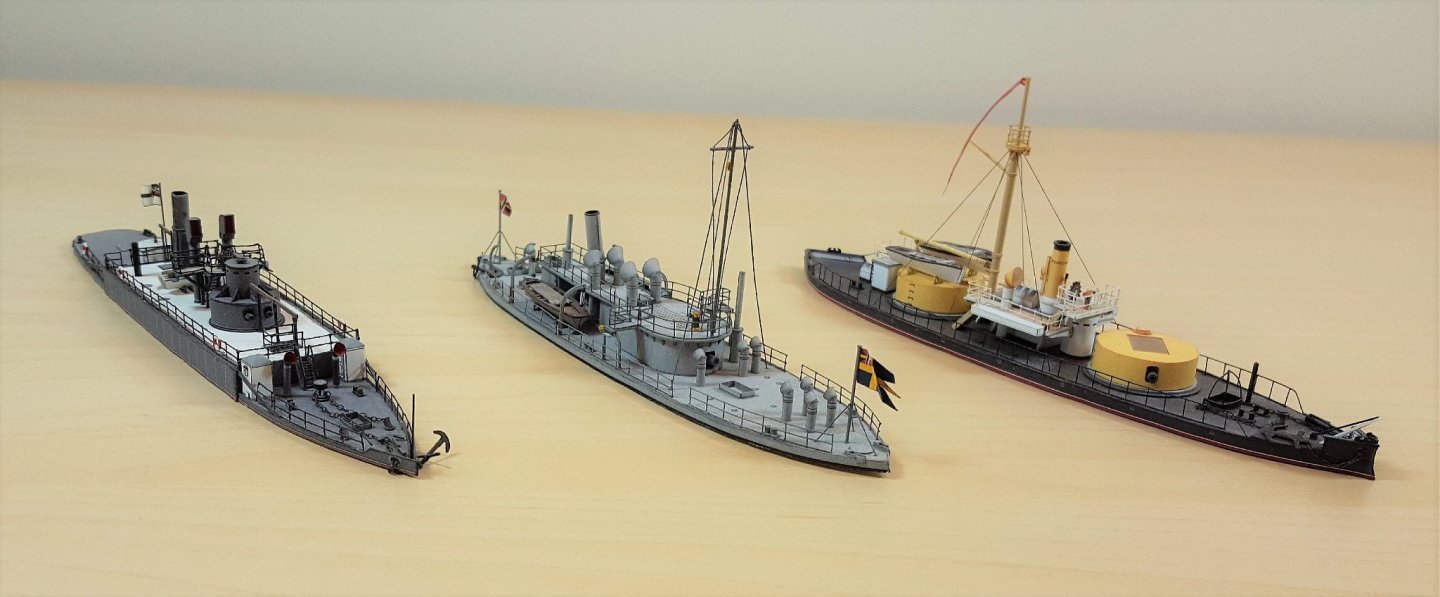
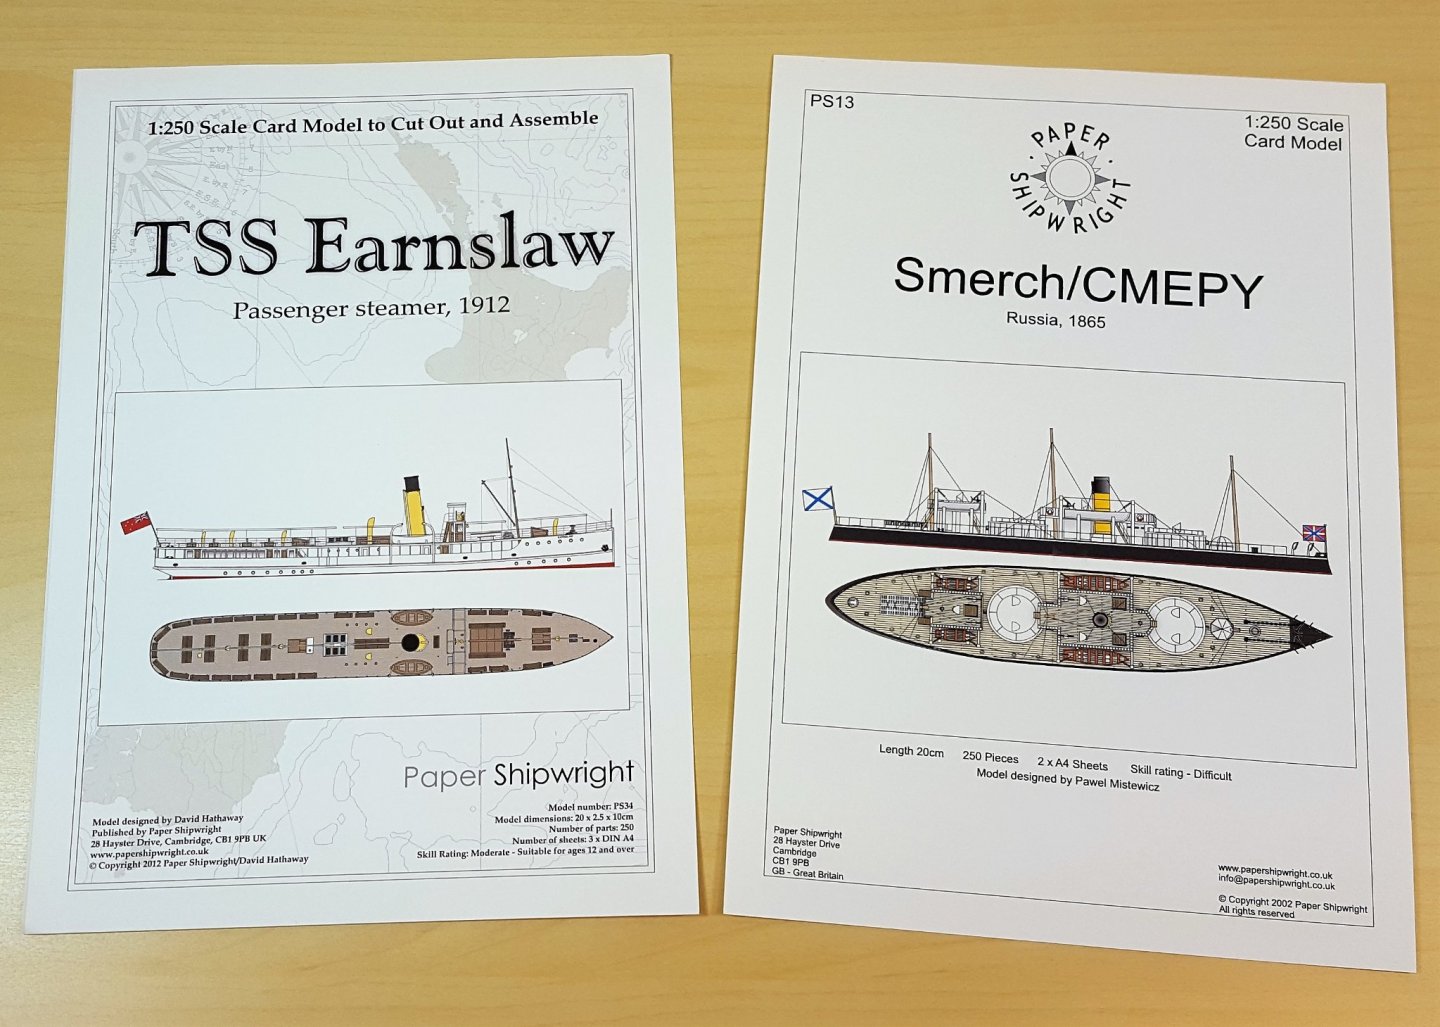
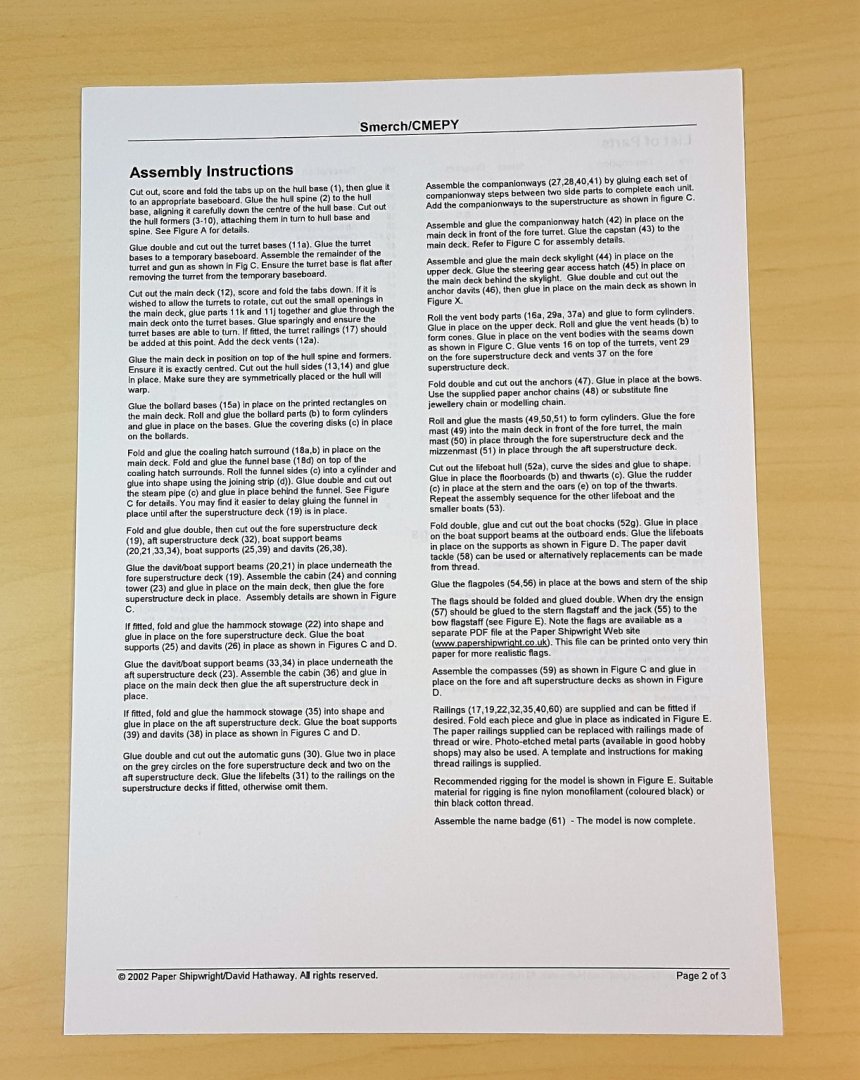
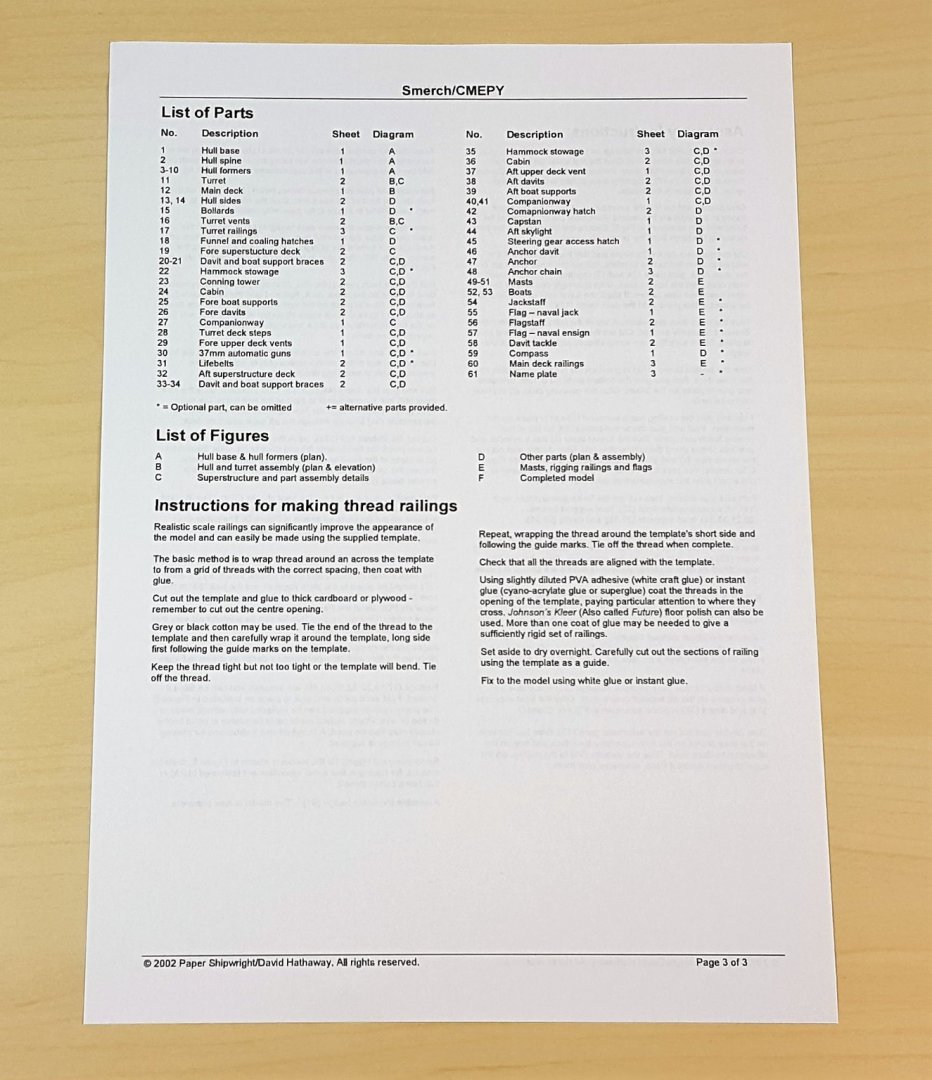
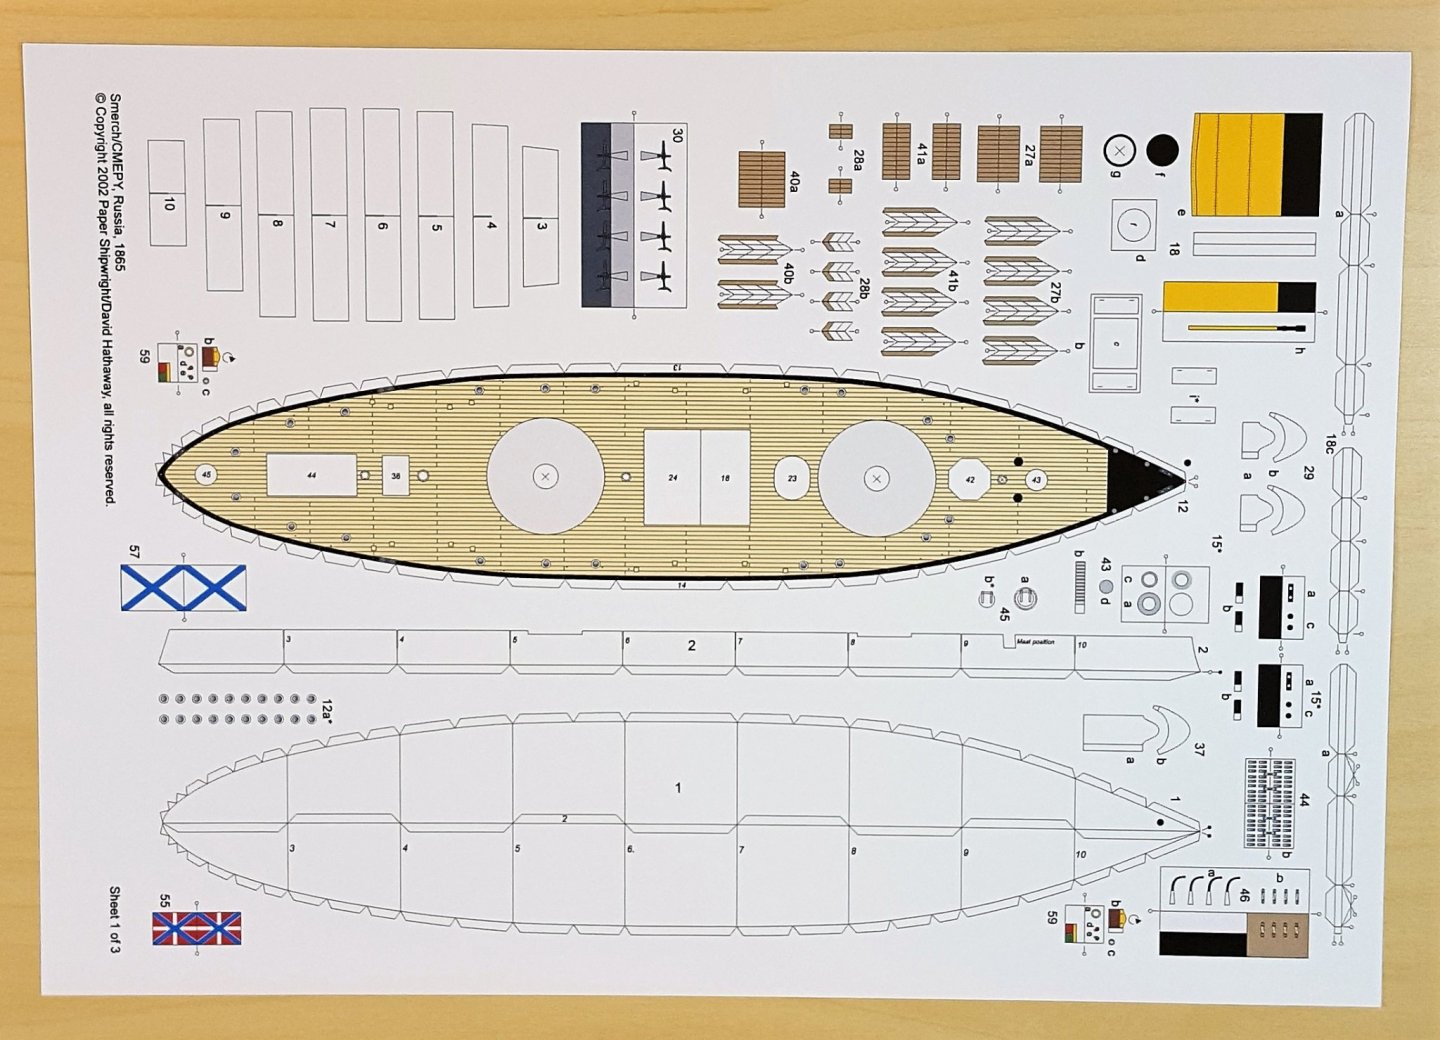
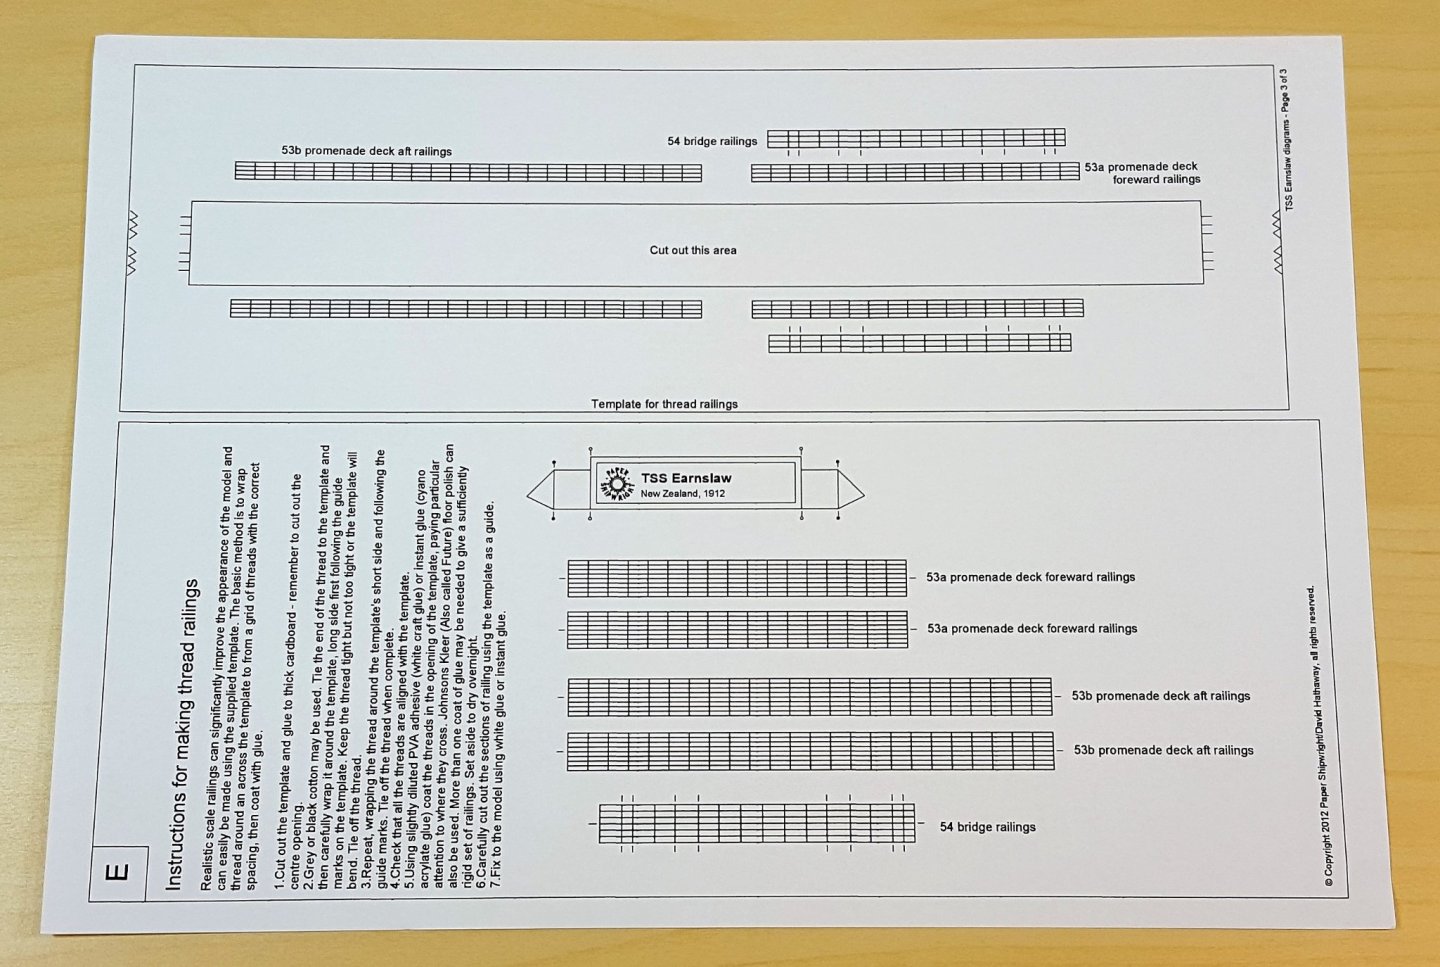
Hello! I have mentioned Paper Shipwright (https://www.papershipwright.co.uk/) in other content strands, so I considered it appropriate to do a review. This will be slightly different than a normal review in which a single kit is examined. Because of designer David Hathaway's consistent design philosophy, what is written about one of his kits is generally applicable to all of them. So we will look at two of them for this review: the ferry TSS Earnslaw and the Russian turret monitor Smerch. First, a couple of words about Paper Shipwright in general. David has been designing kits for as long as I have known about card models, which means that he is now in at least his third decade of doing business. His kits are done in 1/250 scale, waterline only, lean towards somewhat small and obscure subjects, and are typically moderately difficult, with good levels of detail and relatively small parts counts. His catalog contains both civilian types and warships with diversity enough such that just about anyone should find at least one subject they consider tempting enough to try. I recommend that those who are sufficiently intrigued should have at least some experience with working in card; our V108 tutorial is an excellent introduction to the basic skills and techniques for working in this medium. Each Paper Shipwright kit is self-published by David and is a high-quality laser print on good-quality paper. The cover typically has full-color plan and profile views of the kit subject. The instructions are minimal due to low parts counts, often consisting of a single sheet, but they are adequate for completing the model. A parts list is included, along with instructions for making thread railings (more on the railings later). Good diagrams are essential for card modeling, especially when the builder doesn't speak the publisher's language. Happily, this isn't an issue with Paper Shipwright for us English-speakers, but non-English-speakers should also find the diagrams clear and thorough. The printing on Paper Shipwrights kits is sharp and reasonably detailed. There is no printed weathering, but naturally that shouldn't impede anyone who wishes to attempt weathering with non-water-based media such as weathering chalk. As for the laser printing, I have never had any issues with the ink cracking or flaking. Because David designs in 1/250, that means that the simplified elements in each kit, e.g. ladders and railings, can be replaced by readily available laser-cut or PE after-market detail parts if the modeler wishes. As you can see, David uses interlocking profile and bulkhead formers, a design technique we card modelers refer to as an "egg crate hull." This is a technique that does not require major hull structural components to be laminated onto thicker card; kits from Hamburger Modellbaubogen Verlag (HMV), which are in most cases larger, more detailed, and more expensive than a comparable Paper Shipwright kit, are also built in this fashion. Some detail parts may be doubled, and each kit typically includes parts to double things like doors and skylights to give the model an extra bit of three-dimensional depth. In the image below, parts to be doubled are printed on rectangles meant to be scored down the midline, folded, and glued, creating parts that are twice the original thickness of the cardstock. Reverse-side printing is included, where necessary. A unique feature in Paper Shipwright kits is the inclusion of a template for making optional thread railings. The template is glued to a stiff piece of cardboard, then thread is wrapped onto the template to create rails and stanchions; afterwards these are stiffened with glue, then painted. The template is unique to each kit, because of course each subject has a unique railing configuration. The finished railings can be very convincing. David also offers a free, downloadable generic template at his website. A printed nameplate is included with each kit. A Paper Shipwright model, thanks to its size, does not entail a lot of time investment. I have built one in as little as two weeks, which is a blistering pace for me. The finished models are small jewels. Another great thing about Paper Shipwright kits is that they are inexpensive, costing anywhere from £4.50 to £15.00. At that price you can buy several kits, booger one of them, and not be greatly troubled by it (ask me how I know). These are charming little kits, very well designed, and the finished products are worthy of a spot or two (or more) on any card modeler's shelf -- also a great step up from relatively simple models like V108. Get one or two of these under your belt, and you'll be well-prepared prior to tackling something larger and more complex. Highly recommended! CDC

-
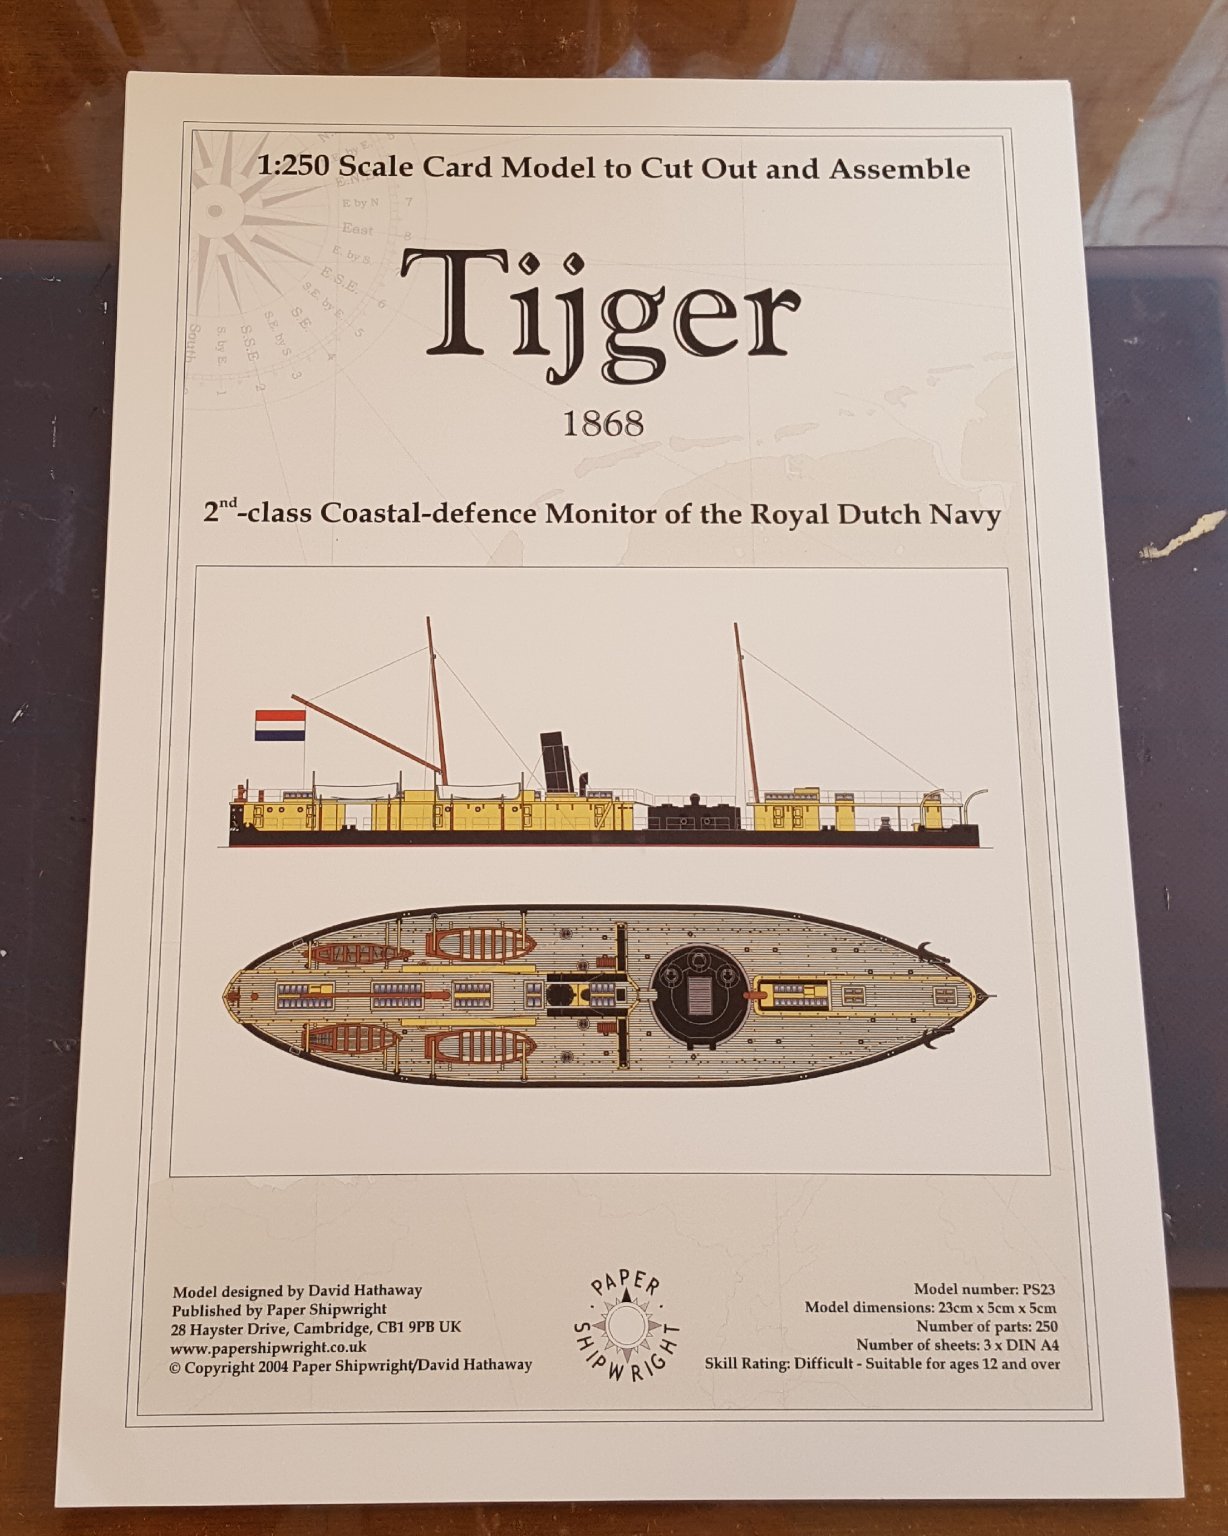
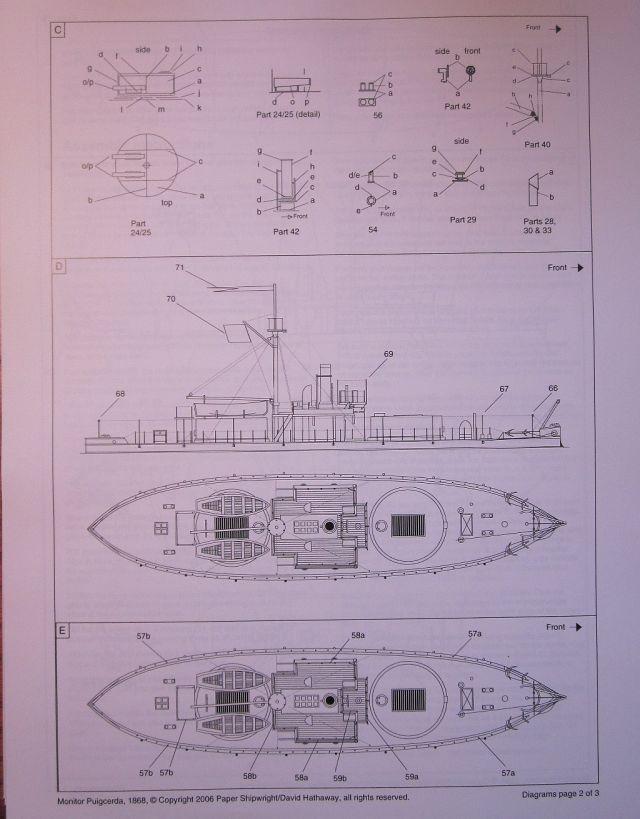
 Well, not resting on my laurels here -- moving right along to the next project. I wanted to get back to ships and do something not terribly difficult. Tijger fits the bill, so off we go. Tijger was one of five Heiligerlee-class monitors laid down for the Dutch navy in 1867. Roughly 192 ft in length with a beam of 44 ft, they had a draft of only 9 ft 9 in, displaced 1555 long tons, and carried a pair of 23 cm guns in a single turret. Tijger was auctioned off in 1895. At 1/250 scale the finished model will be 23 cm long. In the second photo you can see one of my earlier models, the Spanish monitor Puigcerda, sitting atop Tijger's deck for a size comparison. Build pics to follow soon. Maybe. P.S. My understanding is that HNLMS (His/Her Netherlands Majesty's Ship) is an international prefix for Dutch ships, and that internally the Royal Netherlands Navy uses the prefixes Zr./Hr. Ms. (Zijner/Harer Majesteit's). Here in the American Deep South we would probably just call them "Y'All's Ship," as in, "Y'all's ship is blockin' muh party barge."
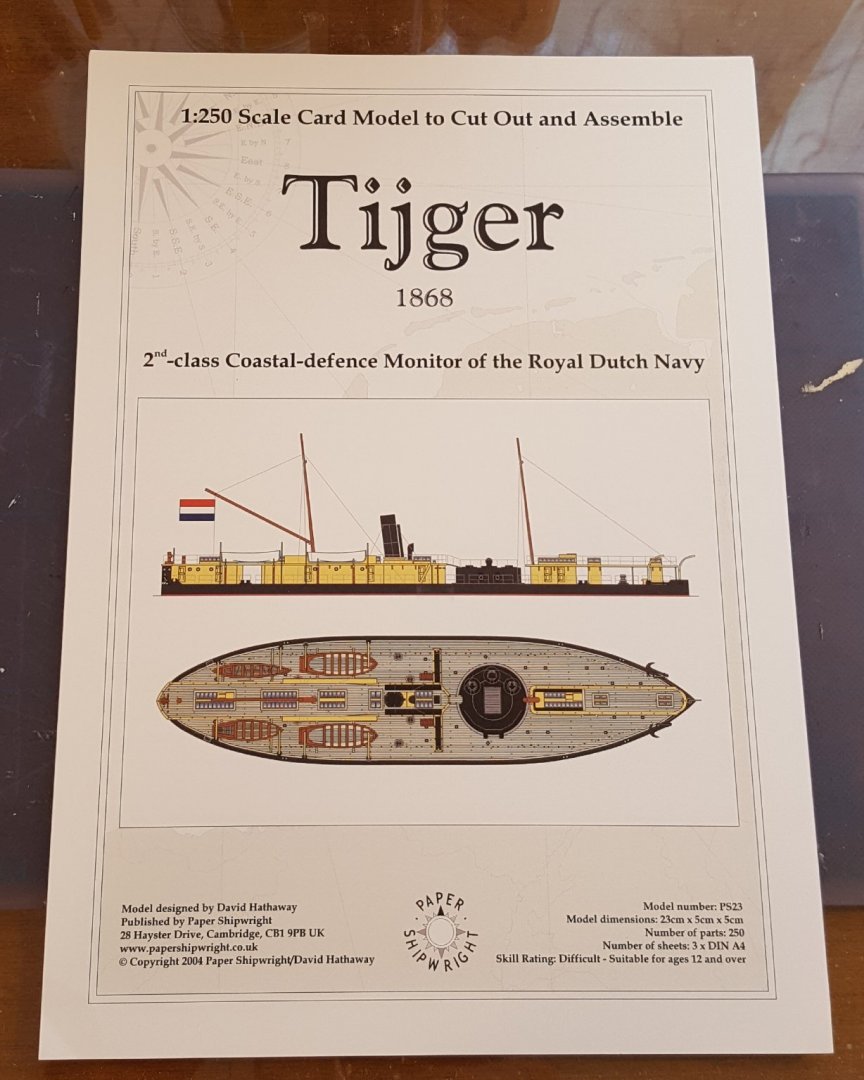
- 45 replies
-
- 10
-
-
- Tijger
- Paper Shipwright
- (and 2 more)
-
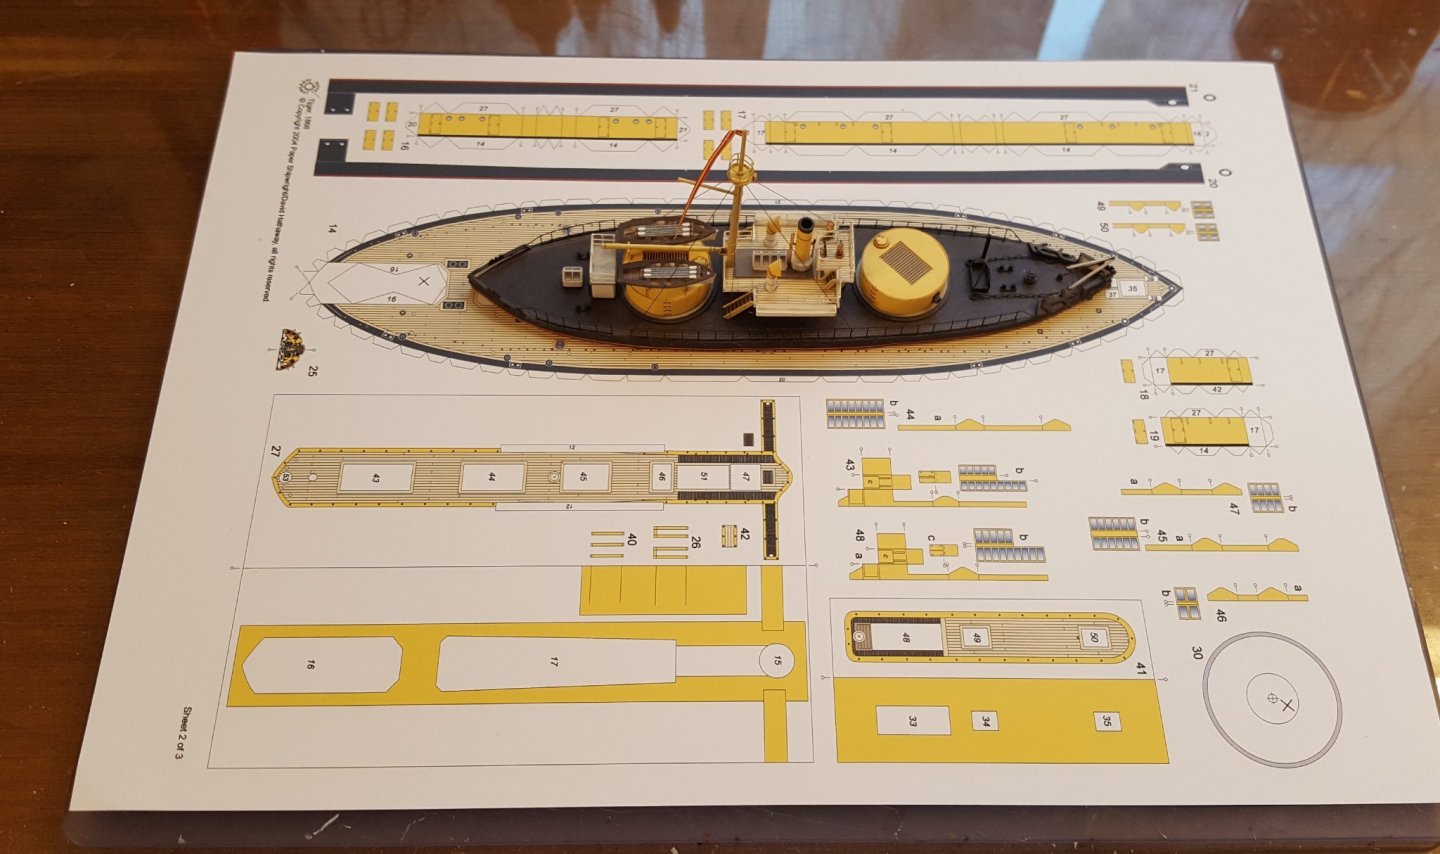
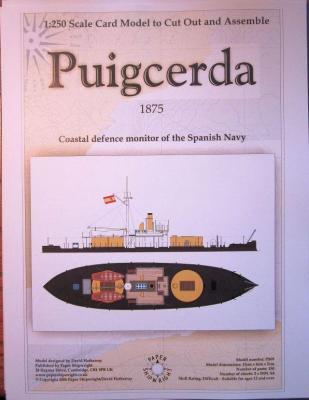
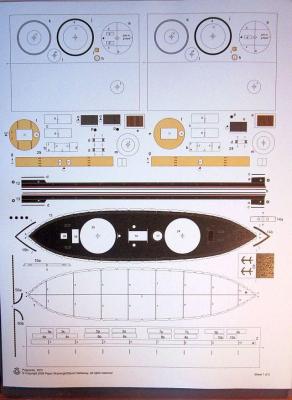
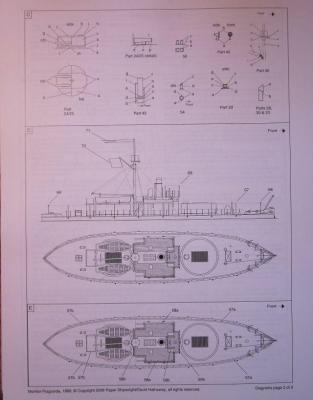
The Spanish monitor Puigcerda (named for the city in Catalan and the only monitor ever to serve in the Spanish navy) was commissioned in 1875. She displaced 553 tons and carried three bronze muzzle-loaders, one of 12 cm and two of 10 cm. After brief service during the Third Carlist War, she was laid up until the Spanish-American War in 1898. Re-armed with two 16 cm guns and two 12 cm guns, she patrolled the Vigo River during that conflict. She was sold out of the service in 1900 and converted to a civilian steamer. Puigcerda is another of the excellent offerings from Paper Shipwright. Designer David Hathaway's models are well regarded for their fit and detail. Despite their small size and relatively low parts count, builders should have some experience working with card due to the number of very small parts. My kit was a laser reprint sold by Paper Models International; their website is still up, but hasn't been updated in ages. The kit includes several pages of parts, instructions, diagrams, and railing jigs.
- 10 replies
-
- 3
-
-
- puigcerda
- paper shipwright
- (and 2 more)
-
I built this model in the spring of 2011. Folke was one of a small class of monitors built for the Swedish navy. Alone among her sisters, she carried her main gun facing aft, the idea being that she could cover a flotilla in the event of a withdrawal. My particular kit is the laser reprint sold by Paper Models International, but the model can also be purchased directly from Paper Shipwright. Owner David Hathaway has designed a number of monitor kits, as well as a variety of working craft. These kits are well-regarded in the card modeling community for their fit and detail. The kit includes the printed parts on two sheets, instructions, diagrams, and railing templates. Step one is to build up the egg-crate style hull skeleton and attach the deck and sides, all temporarily affixed to a sheet of glass to prevent warpage.
- 6 replies
-
- 1
-
-
- paper shipwright
- folke
- (and 1 more)
-
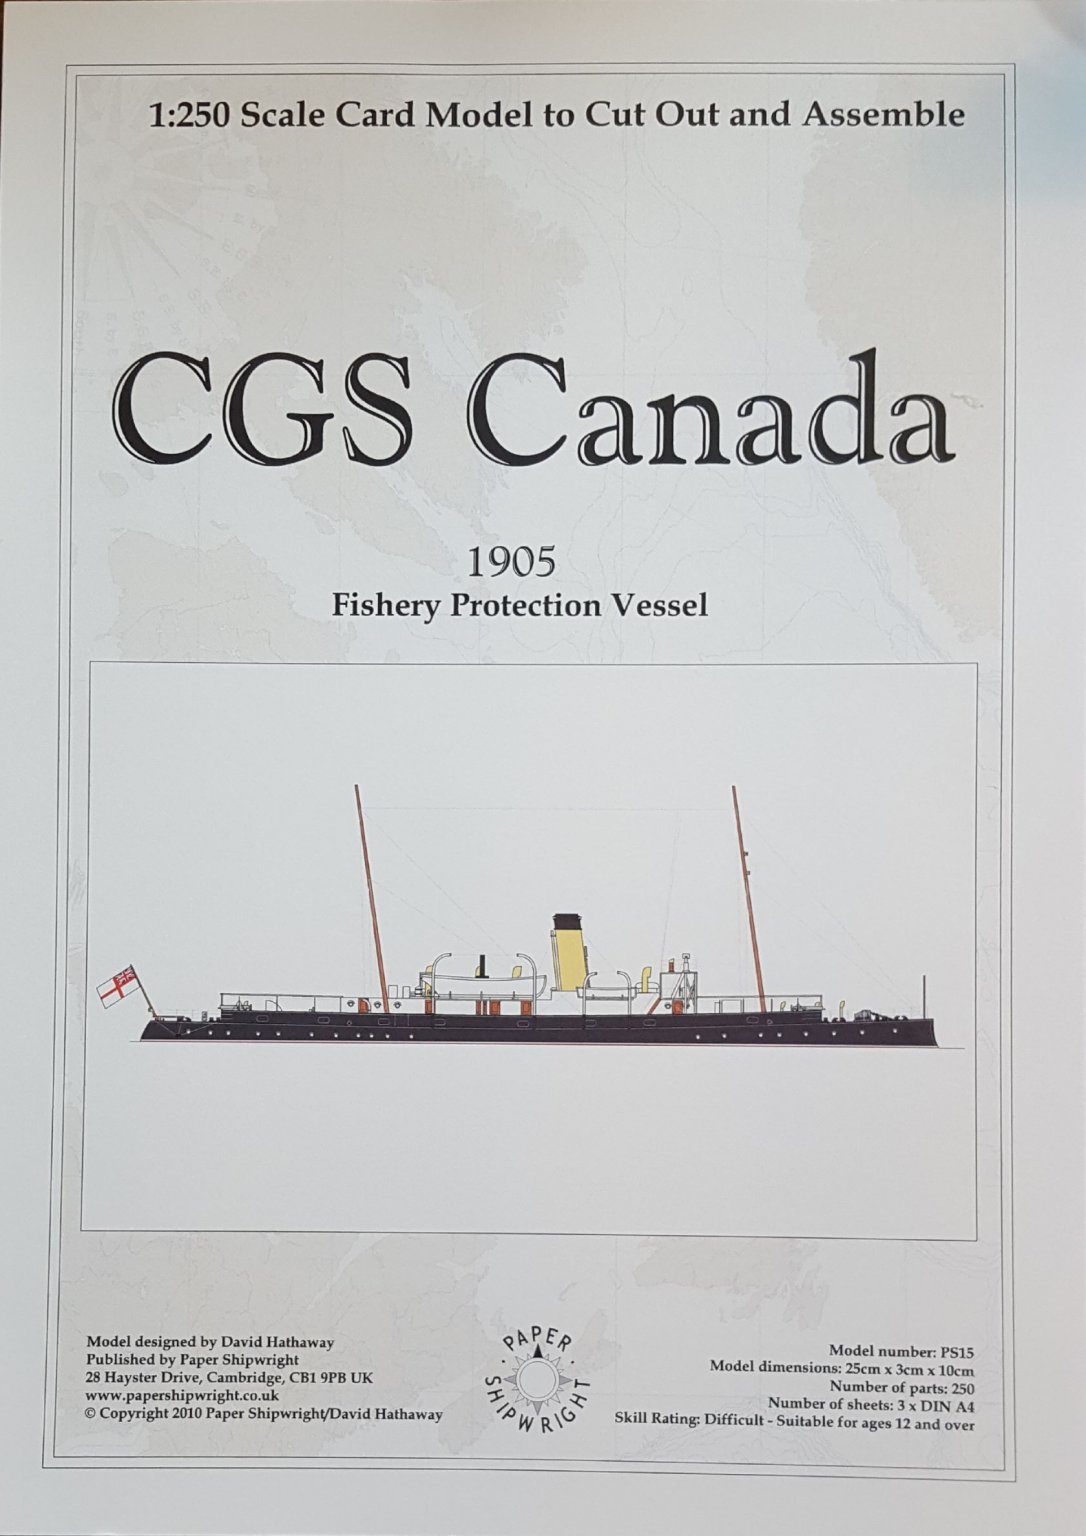
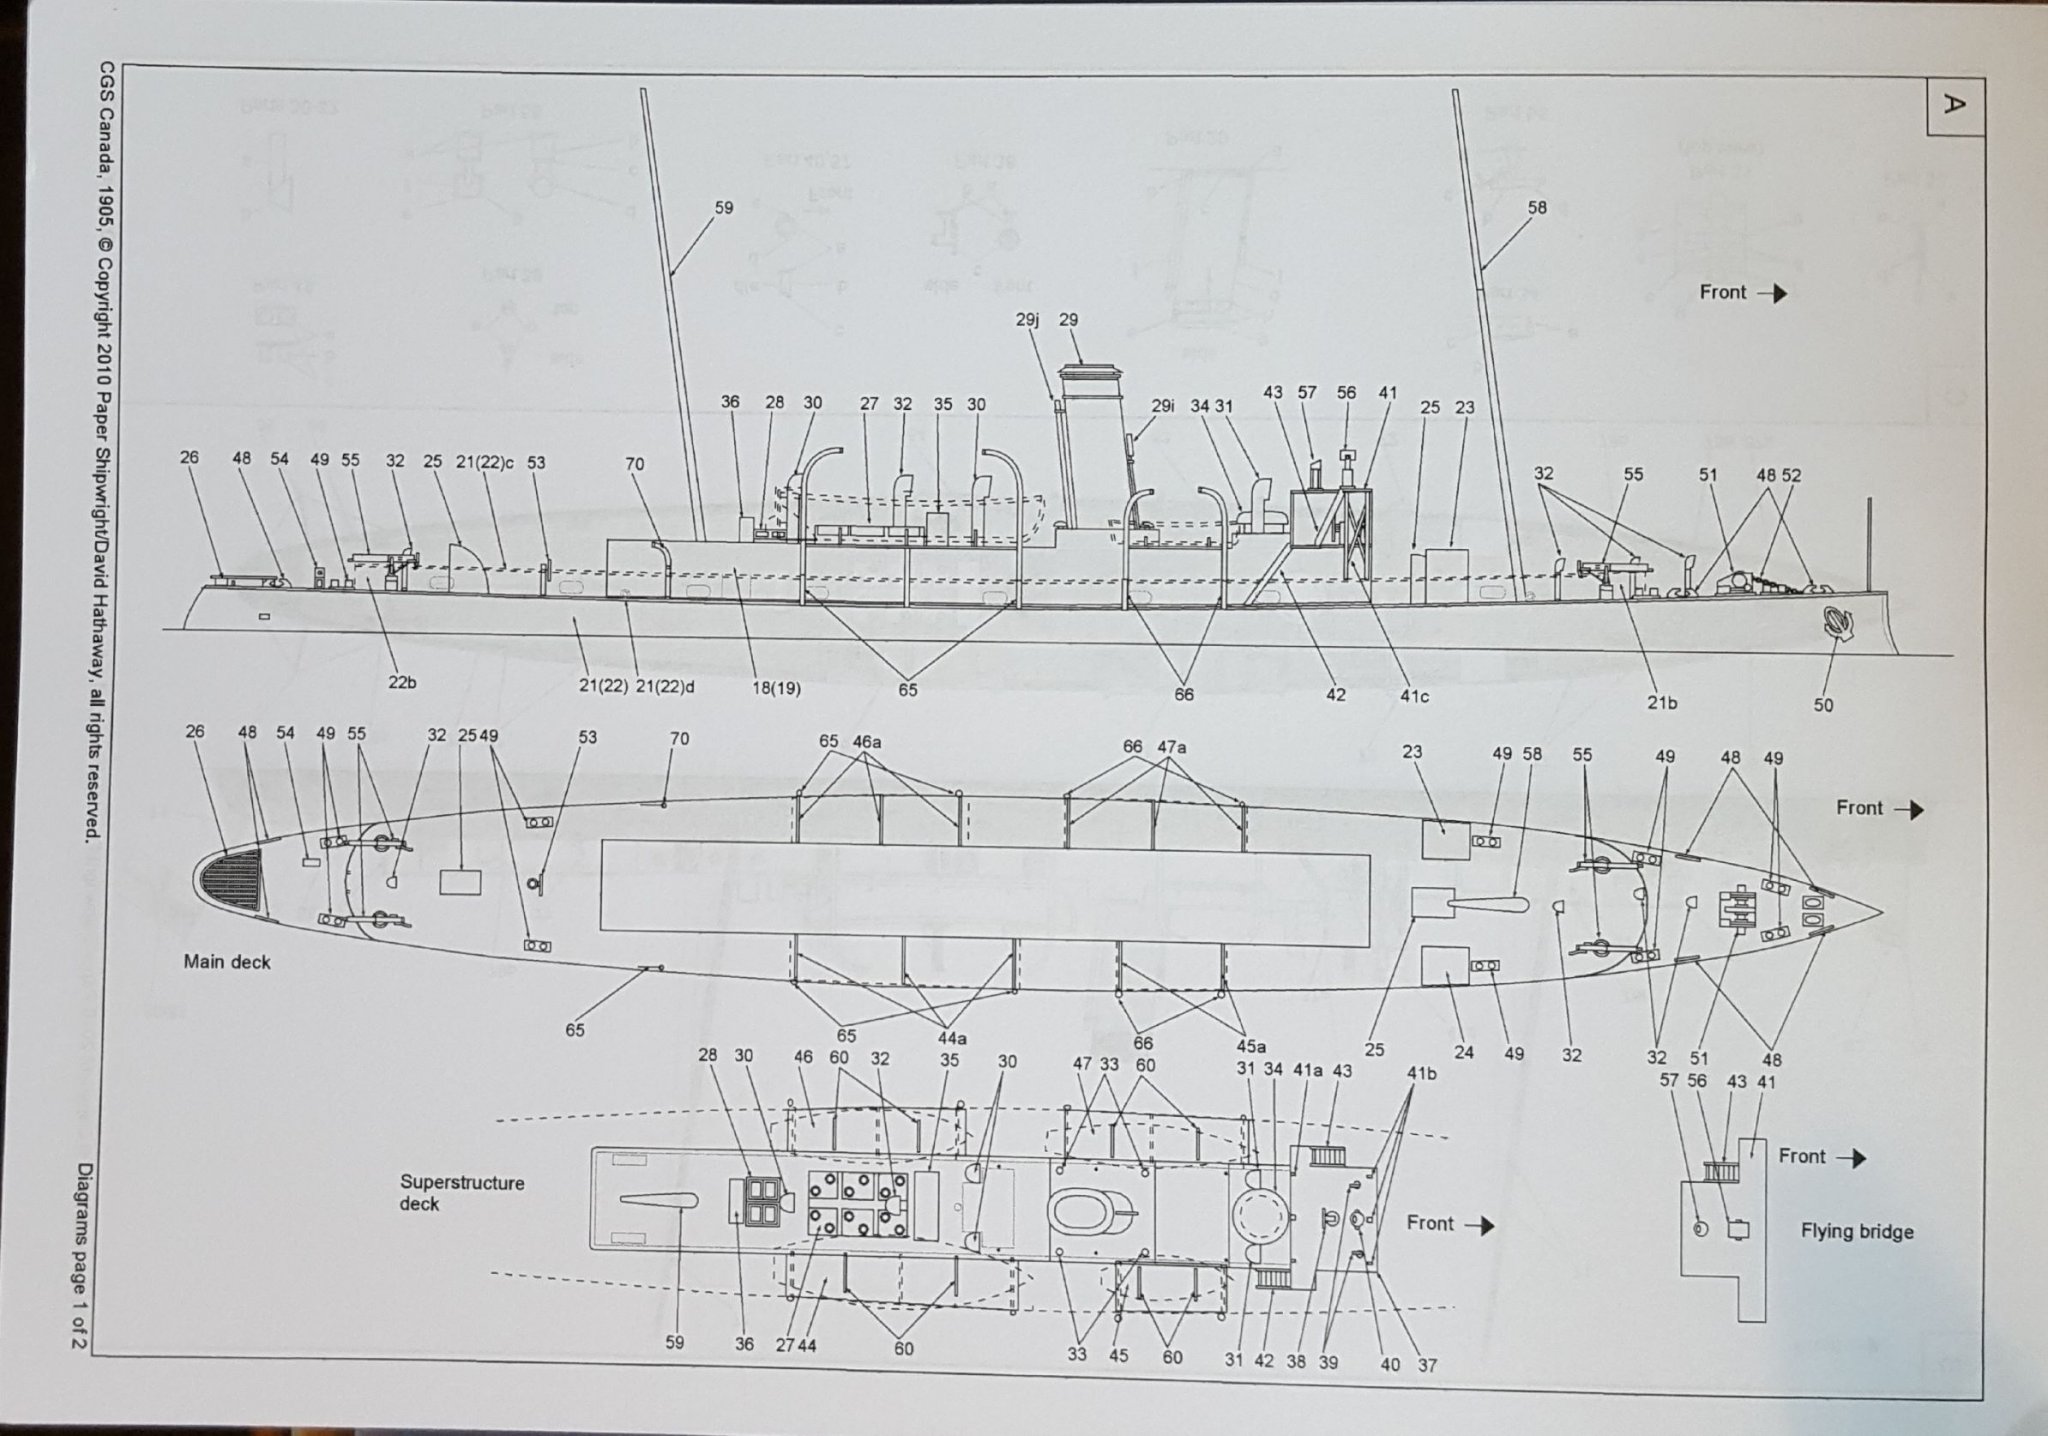
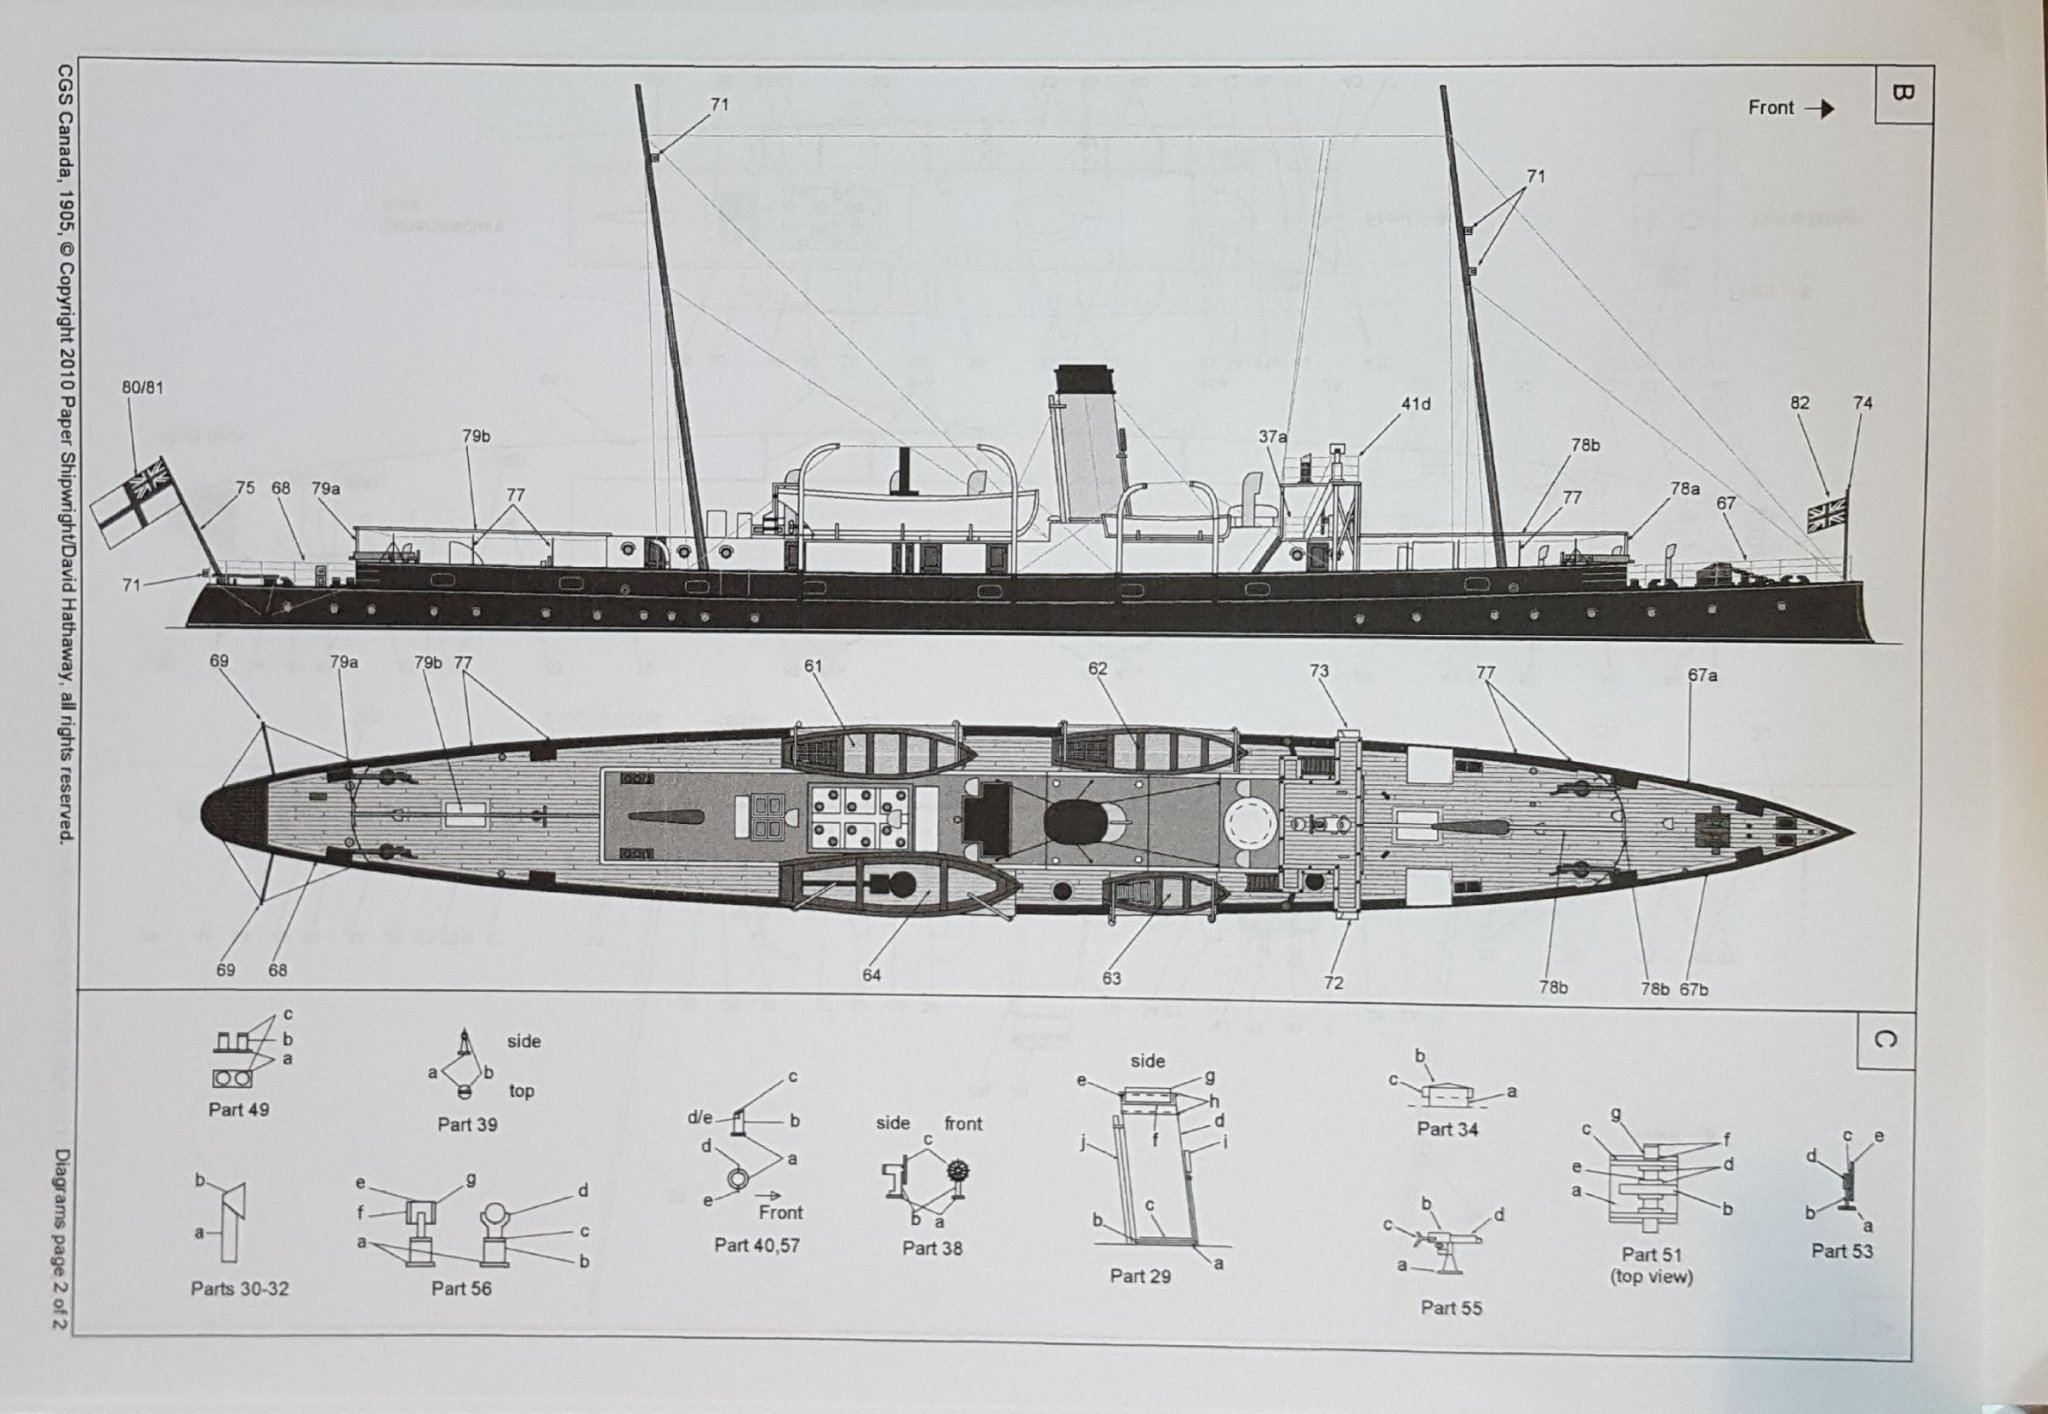
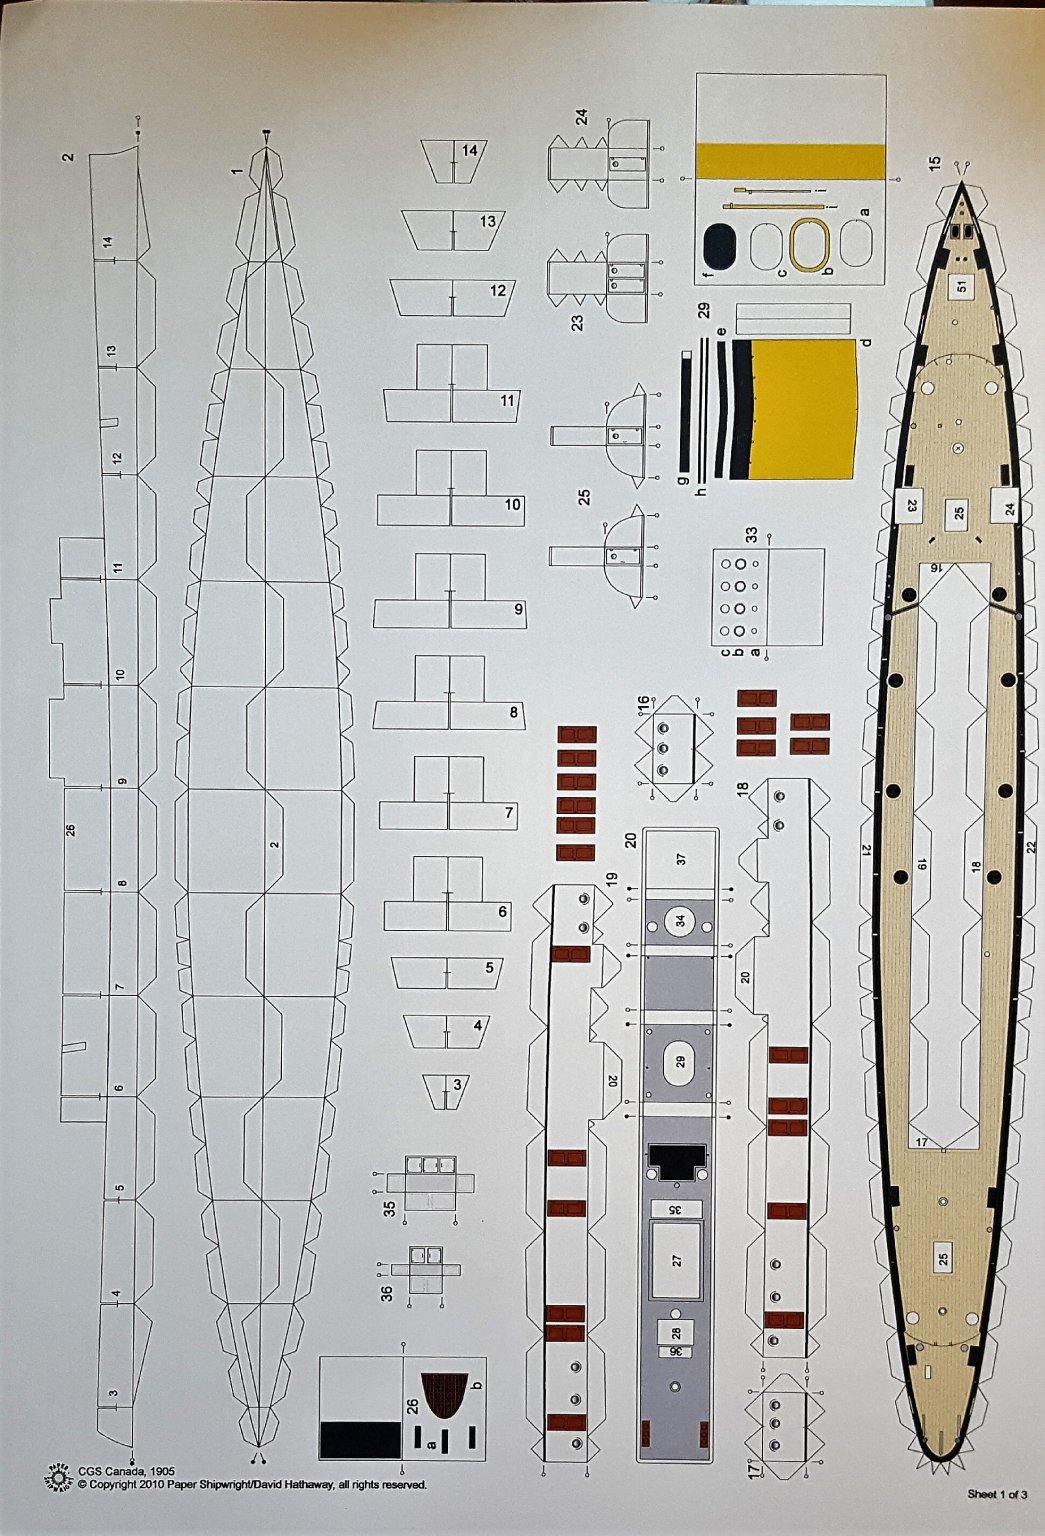
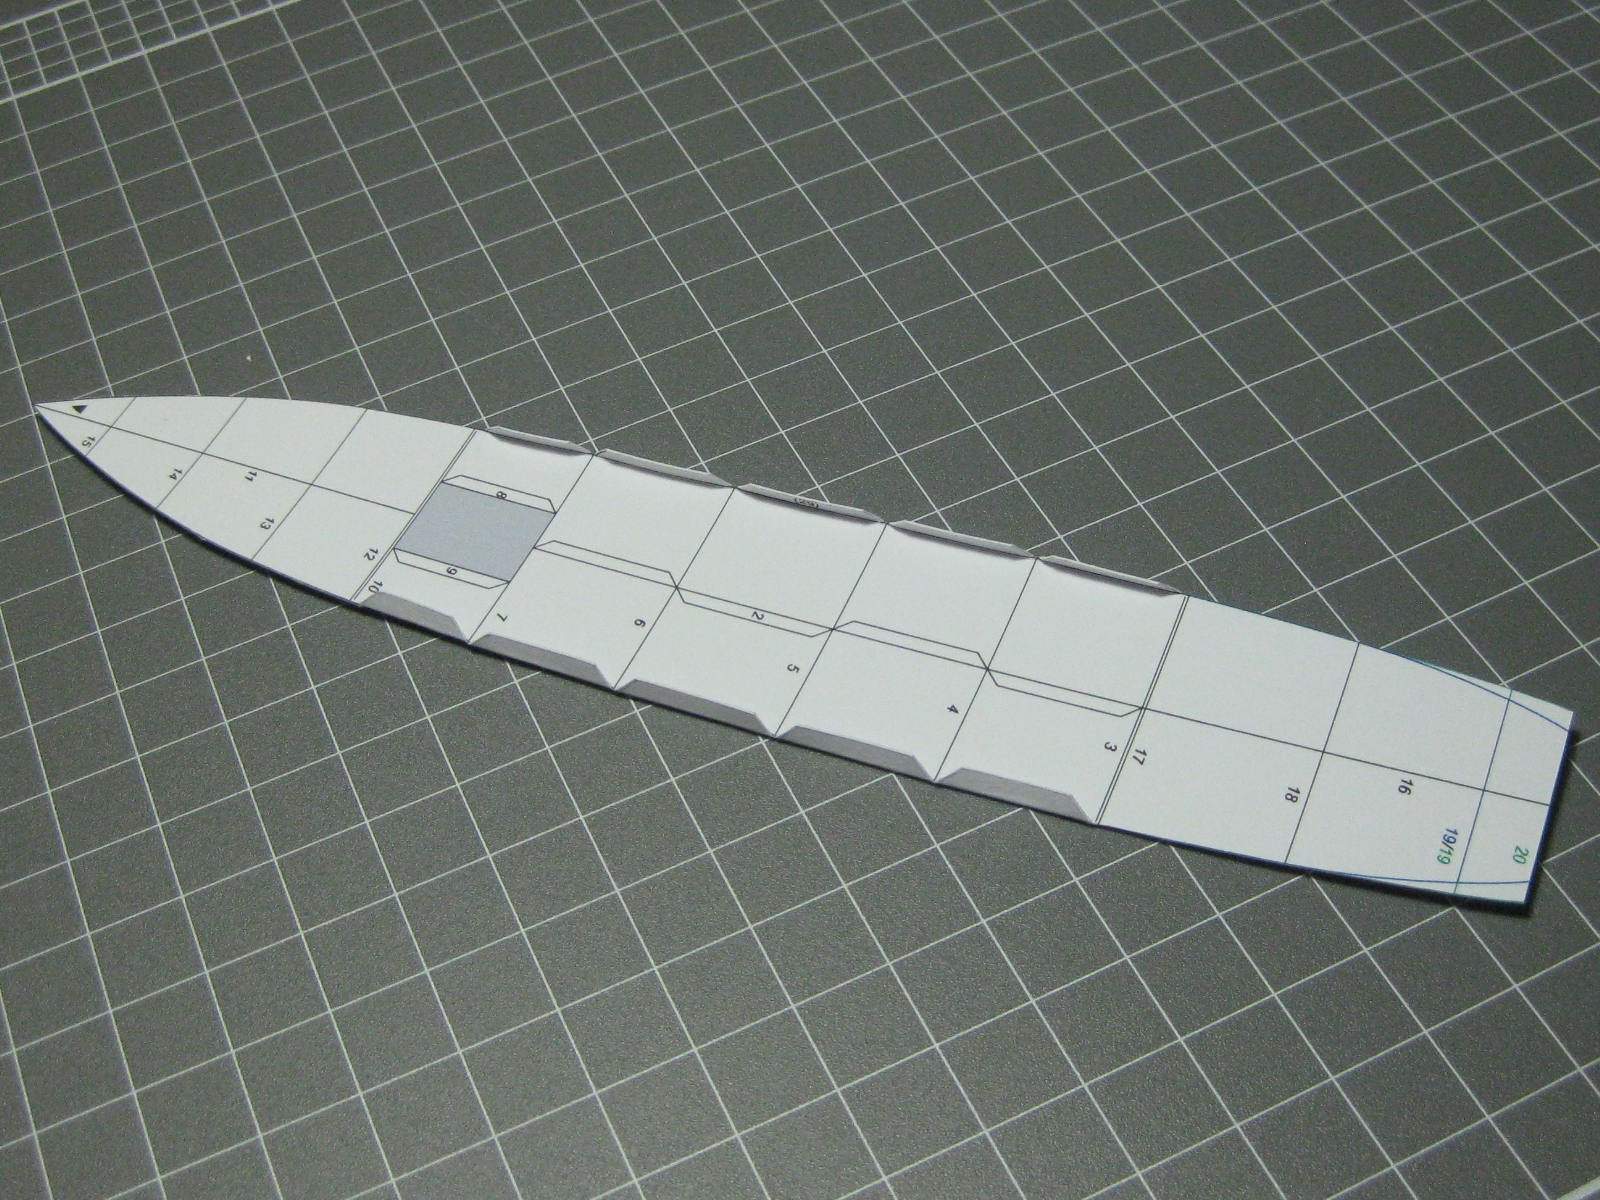
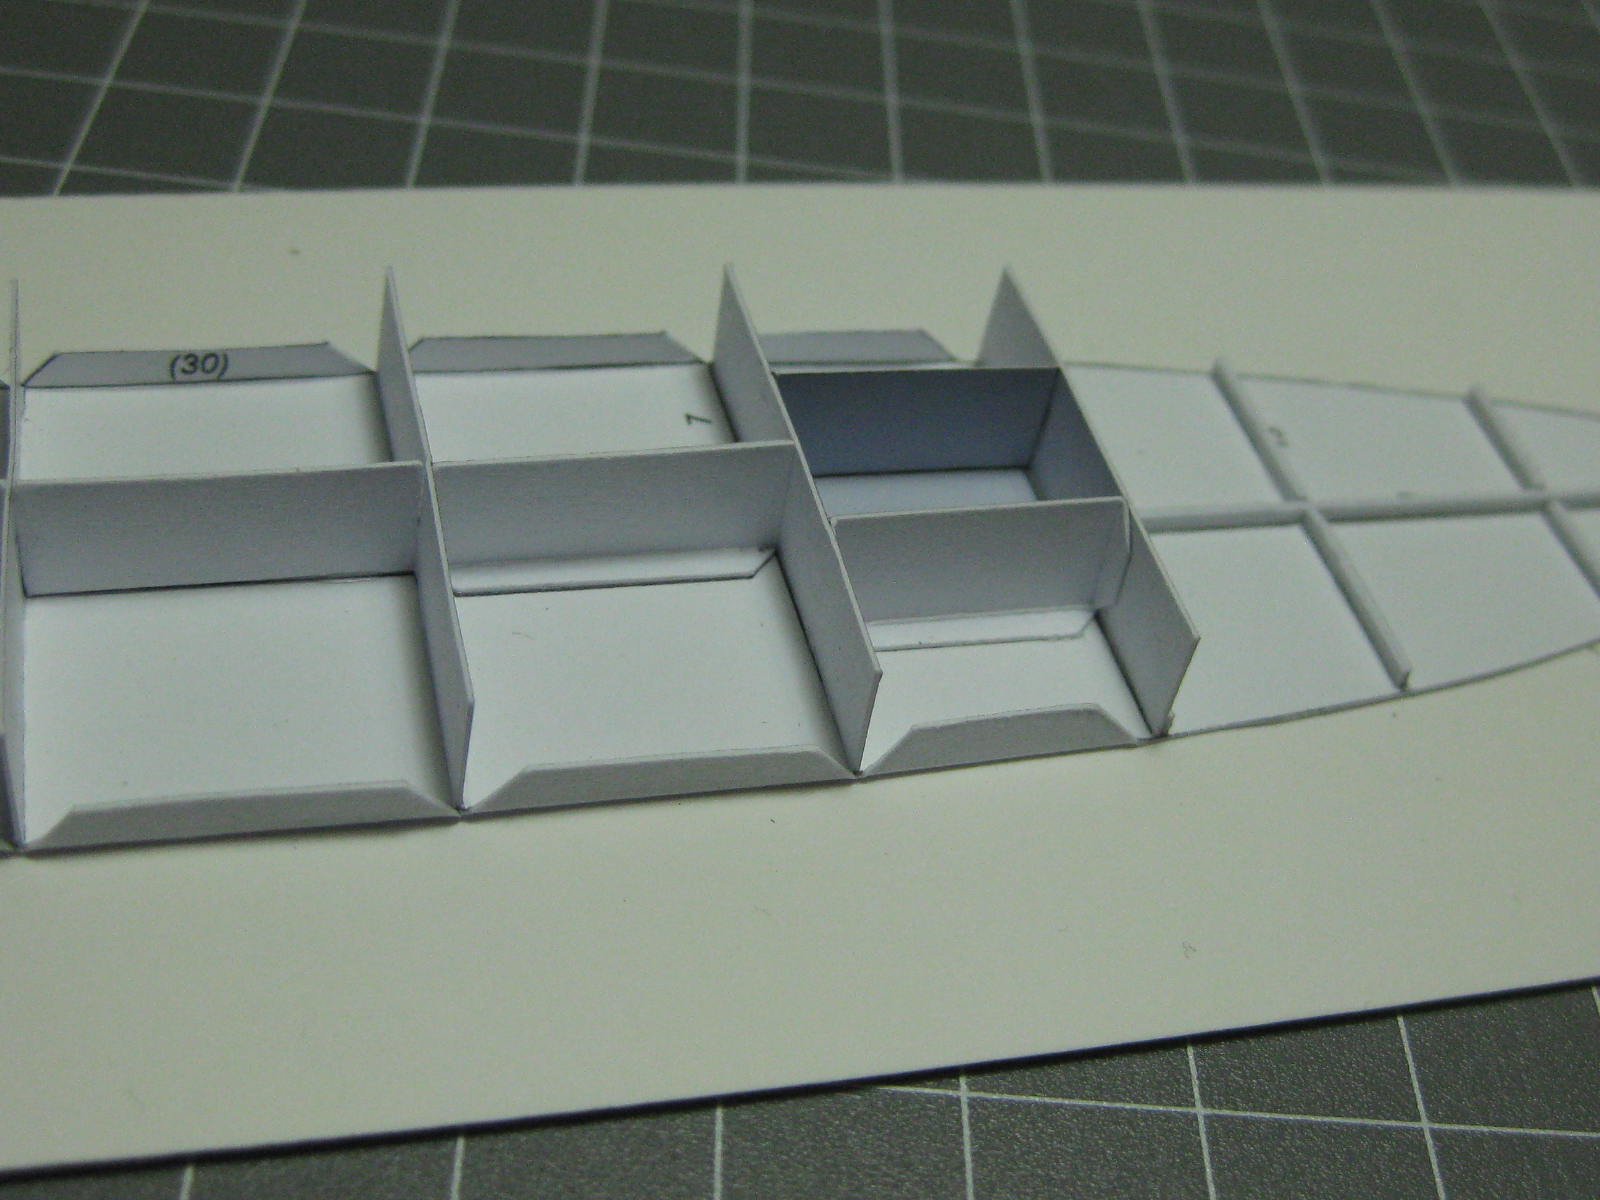
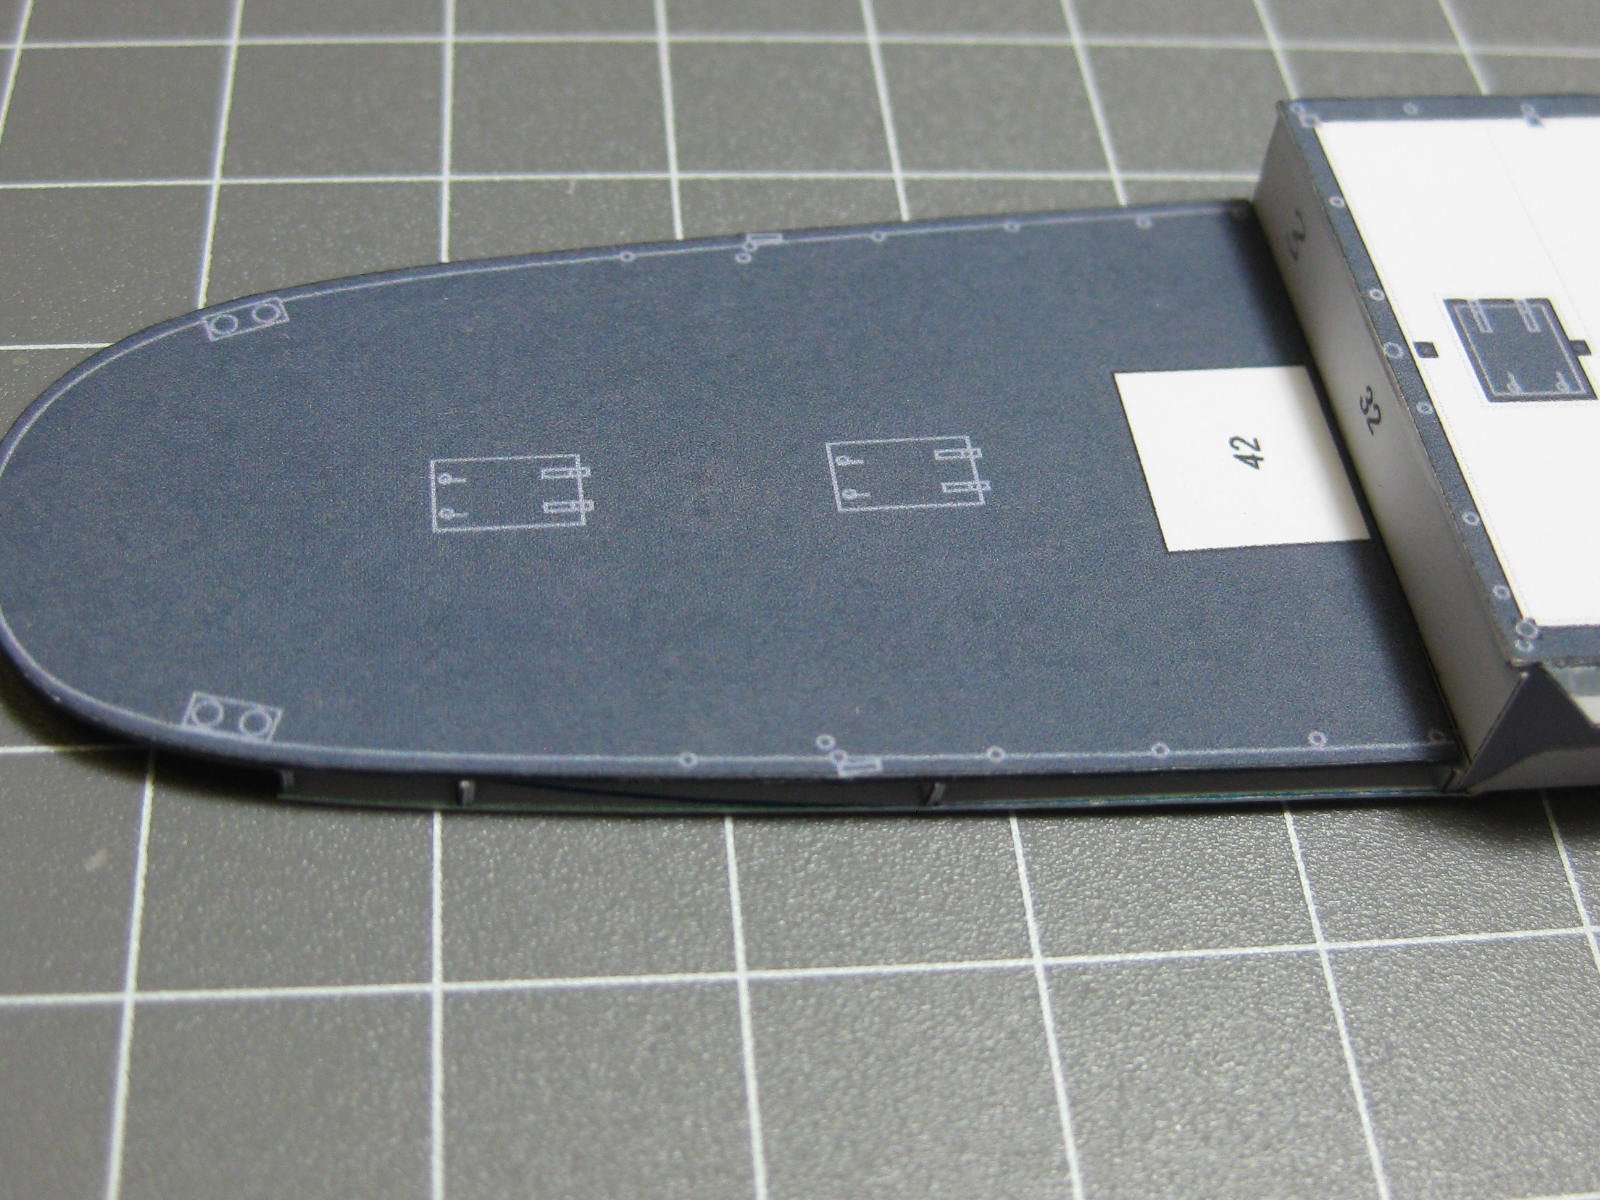
I've got some issues with the other kit I'm working on at the moment, and I'm also going to need some work done on the AC at my new house before I can work in my new "man cave" in comfort. While I'm waiting on these matters, I decided I'd dig out one of the card models in my stash and poke around with it. This one is CGS Canada, a Canadian fisheries protection ship built in 1904 that did service in the Great War and later, after being sold off to private interests, sank off the coast of Florida in 235 feet (70 m) of water. You can read more about her history here. The kit is designed by David Hathaway of Paper Shipwright in the UK. I have enjoyed building several other Paper Shipwright kits, including SMS Rhein, the Swedish monitor Folke, and the Spanish monitor Puigcerda; all of these are in the gallery. Like many Paper Shipwright kits, this is a comparatively simple model consisting of three sheets of parts, two pages of diagrams, two pages of English instructions, and a cover sheet. At £6.50, it's a sweet little deal. I chose this particular kit because I like the look of it, but also because it has a minimum of railings that will need to be built. David includes a template in each of his kits that allows the railings to be made from thread. It's a nifty method, but not my favorite task, so the less the better. Another reason why I chose this kit is because one of the main challenges for me with card ships is getting a nice-looking hull without arriving at the "starving cow" look that card hulls sometimes get. David's kits use the "egg crate" style of hull construction, as do for example kits from HMV (Hamburger Modellbaubogen Verlag). I will be trying out some new methods to try and get the "perfect hull". We'll see how that goes. The finished hull will be about 10 inches long. Here's some photos of the kit elements. Since it's a card kit, all of the elements are on (surprise!) paper or card stock. Ciao!

- 10 replies
-
- 12
-
-
- paper shipwright
- canada
- (and 1 more)
-
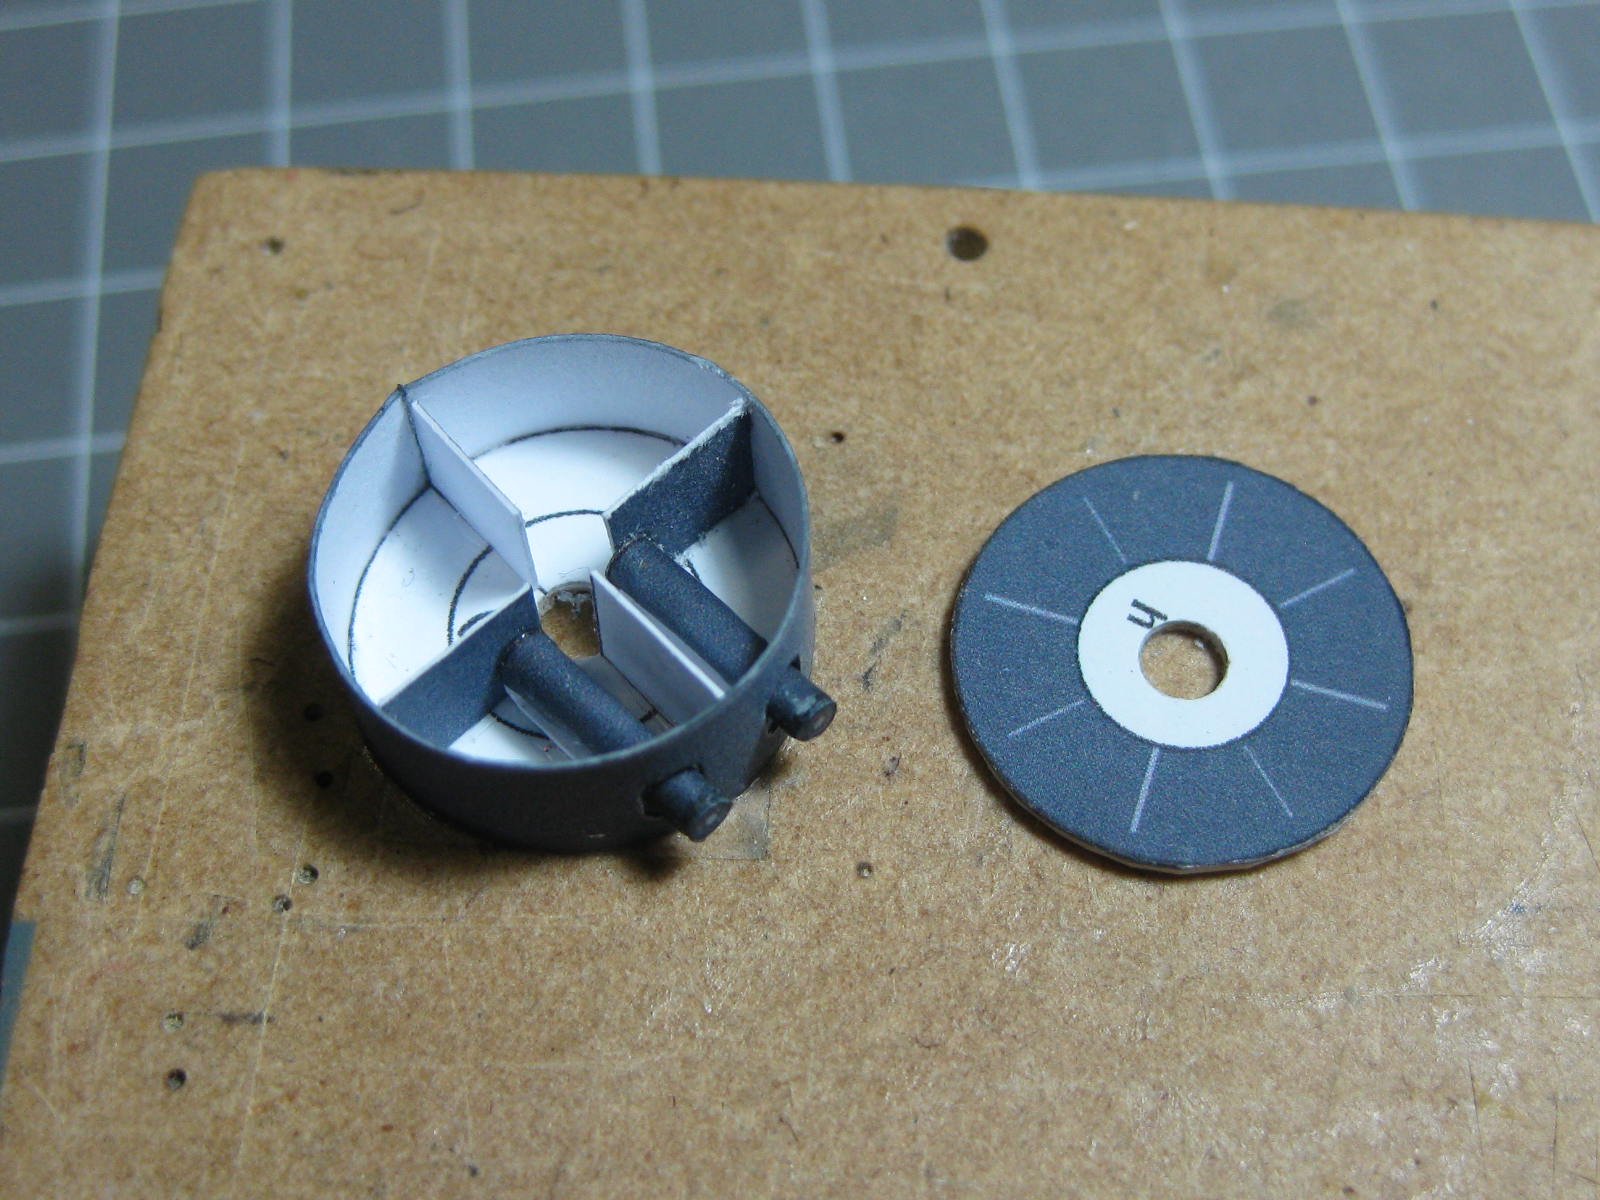
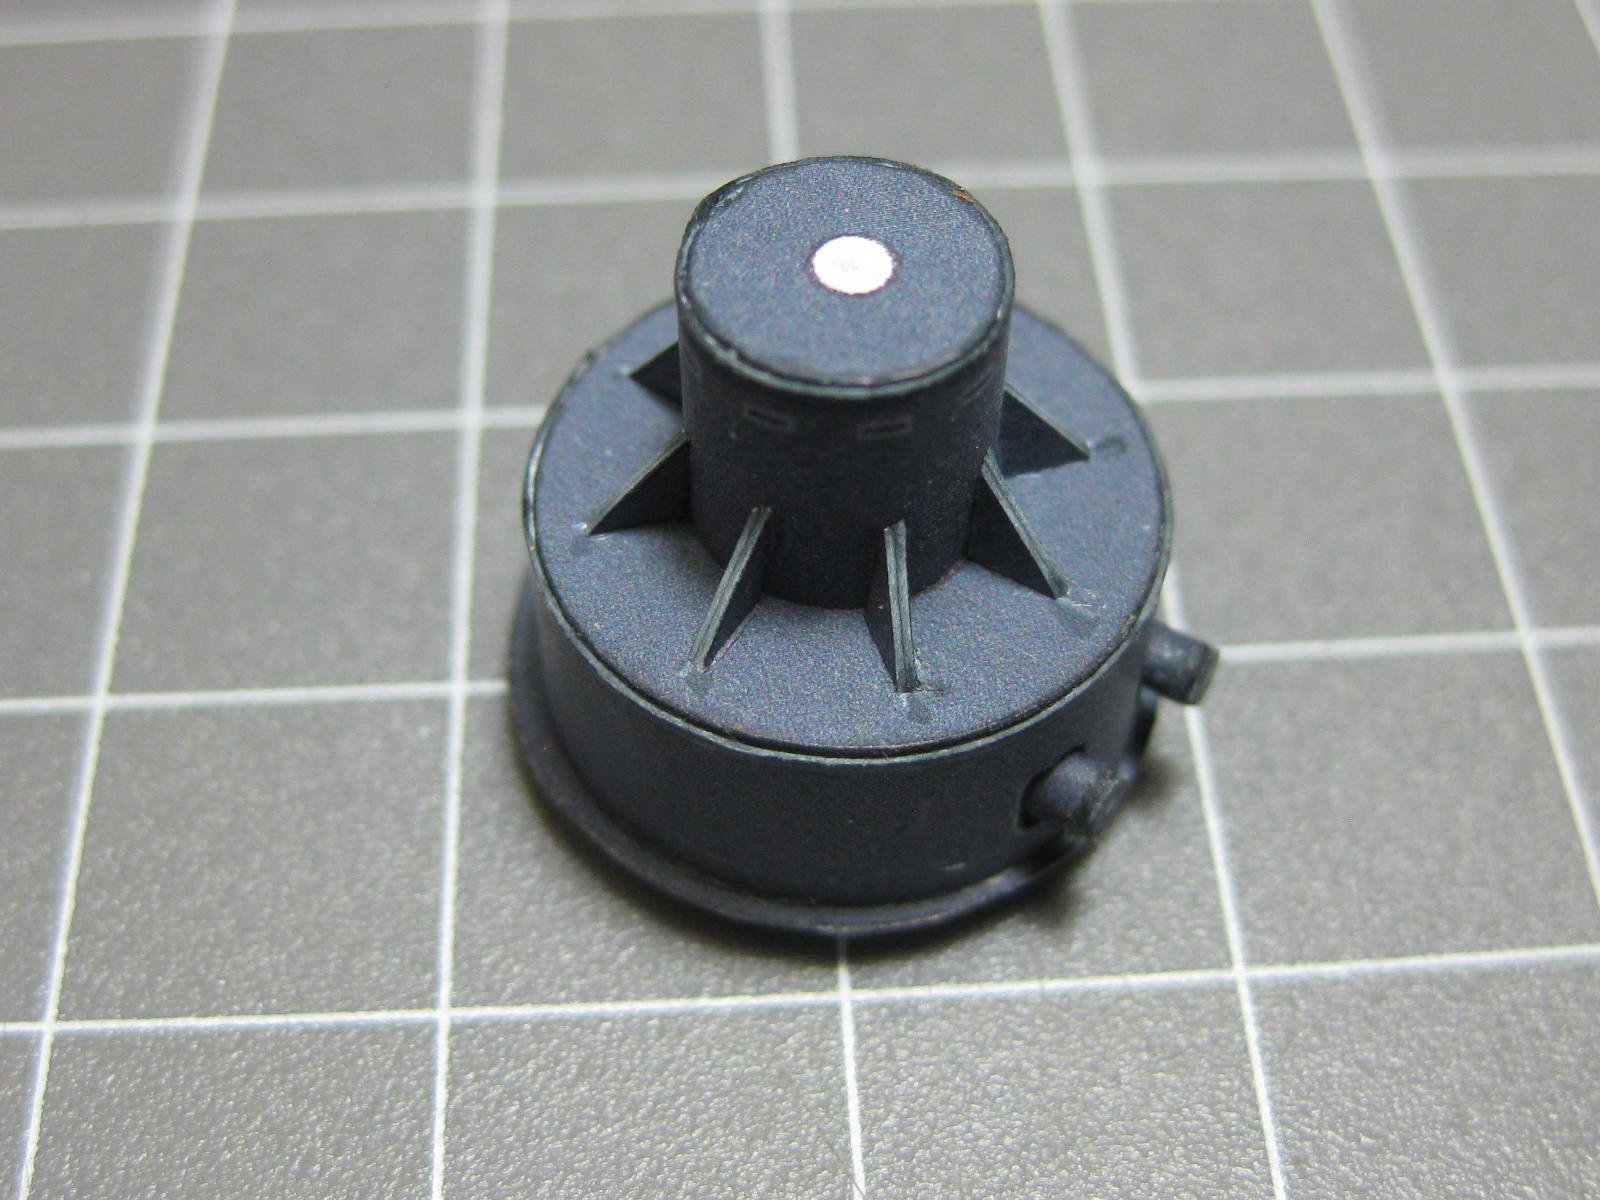
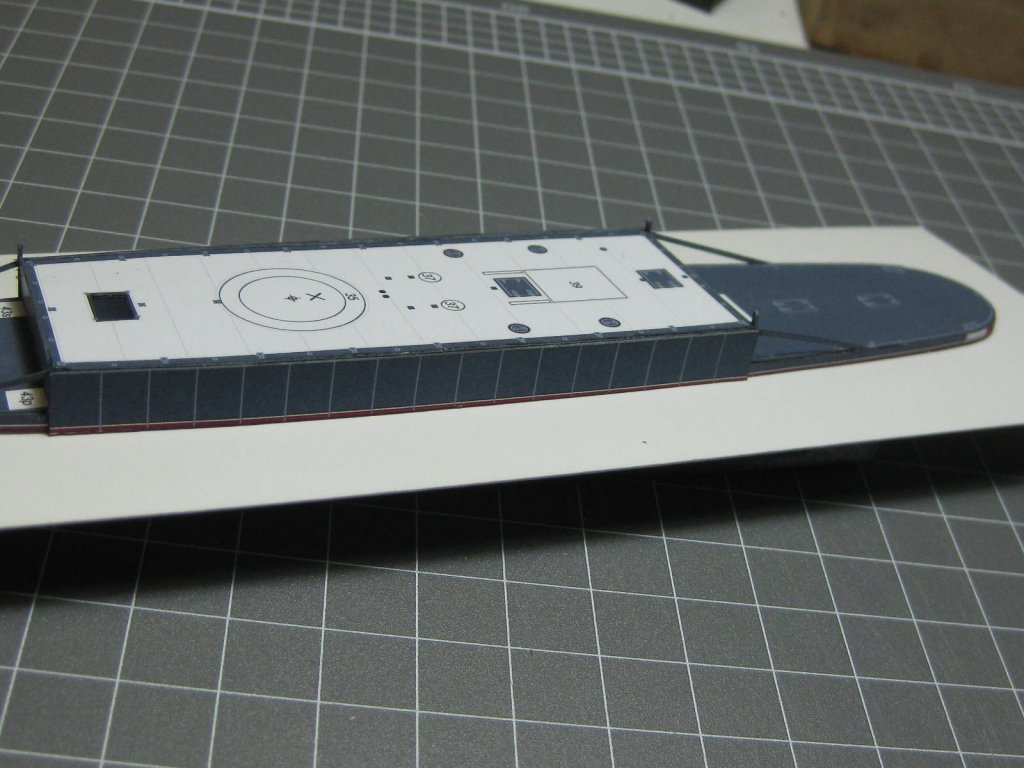
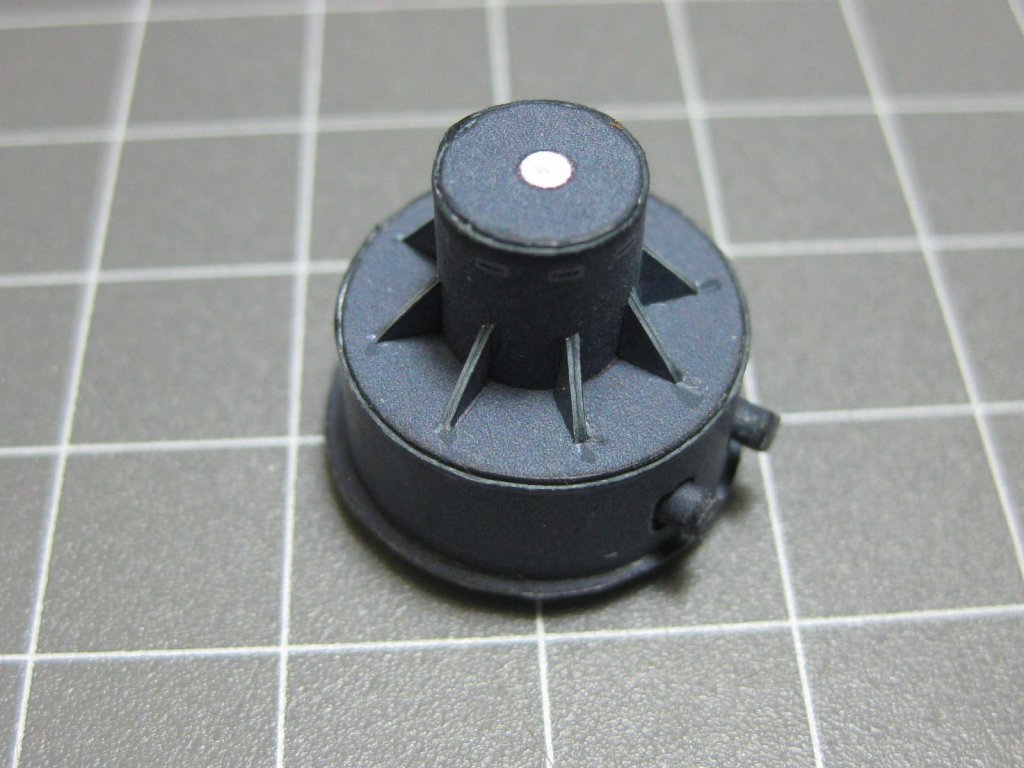
 Hi all, here's a simple free download from Papershipwright of a German Monitor named Mosel. I'm building this while waiting for my next "real" model. It should only take me less than a week to build this one. Work starts with the bottom of the hull. This is a Waterline model, which simplifies everything a lot . There are five tabs on either side in the almost straight midsection : The internal bulkheads were fitted next : Then the three decks were laminated to 0.3mm card and fitted to the hull : Next the model was attached to a piece of heavy card as a "building board" using double-sided tape, and the sides were fitted. The support struts were rather flimsy until I glued a second piece inside them : I've made the Turret "turnable" : So far it's taken me 3 days to get to this stage. Danny
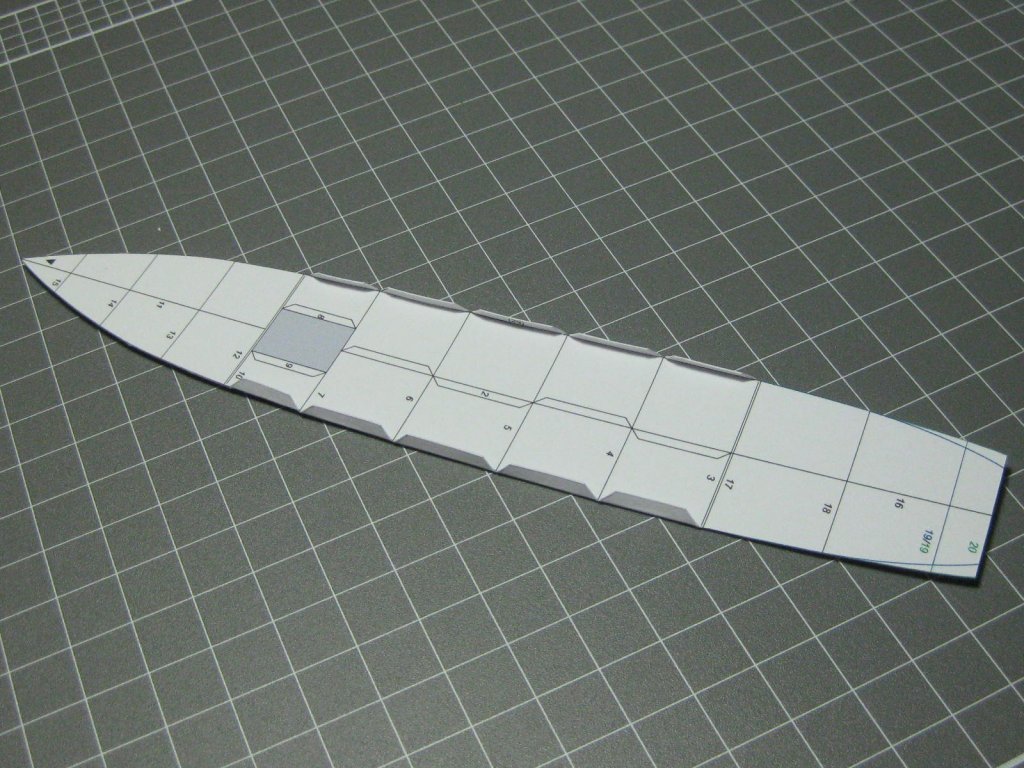


-
 Peace I photographed a model I built seven years ago from paper, the model is very detailed, but unfortunately I did not mark it completely at the time, today I switched to a wooden model that delighted me more.
-
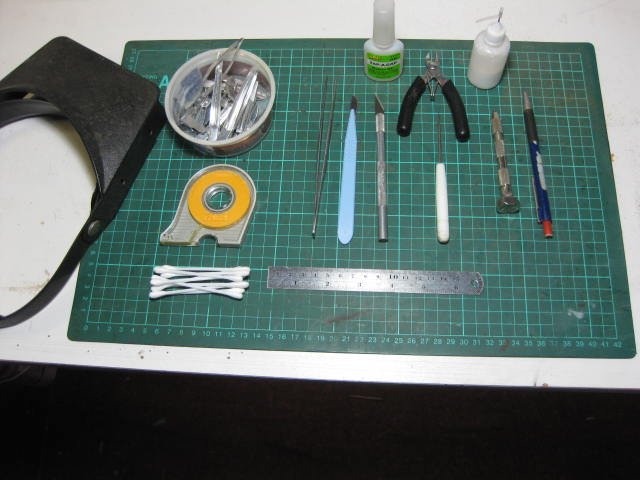
Hi all, With my small distraction (the Concord Stagecoach) finished and out of the way, it's time to get back into SHIP modelling . I've decided to go in a new direction, both in the Period of the Ship and in it's Construction. I've decided to try my hand at Card Modelling, something I haven't done since I was in my early teens when I built a number of Card models of buildings for my model railway. It was fun at the time, the models turned out OK, and it will hopefully be the same again . For my first I've downloaded a freebie from Paper Shipwrights of the HMVS (Her Majesty's Victorian Ship) Cerberus. A pre-printed version is available for £8.50 plus p&h, but I had mine done at a local Photocopy shop for around the same price. They used the equivalent thicknesses of paper needed, and I got two copies of each page to cover the inevitable Oopsies. I also have a Swann-Morton scalpel handle and 100 blades on it's way. The rest of the tools needed I already have : A small steel rule, a cutting mat (although i might update that, I bought it 10 years ago and it's seen a bit of work ), good tweezers, Q-tips, a glue bottle of PVA, CA Glue for the PE, small side-cutters, pin-vices and micro-drills, a mechanical pencil, hairclip clamps, headband magnifier, a small awl and Tamiya masking tape : Beats the hell out of the thousands of dollars worth of tools and machines I've accumulated over the years for Wooden Ship Modelling. And .... there's NO sawdust . If I make a success of this one, I might try my hand at something a little more difficult - either a Bismark or a Yamato . The Build Log starts in the next Post. Danny
- 193 replies
-
- 13
-
-
- cerberus
- paper shipwright
- (and 1 more)