Search the Community
Showing results for tags 'planking'.
-
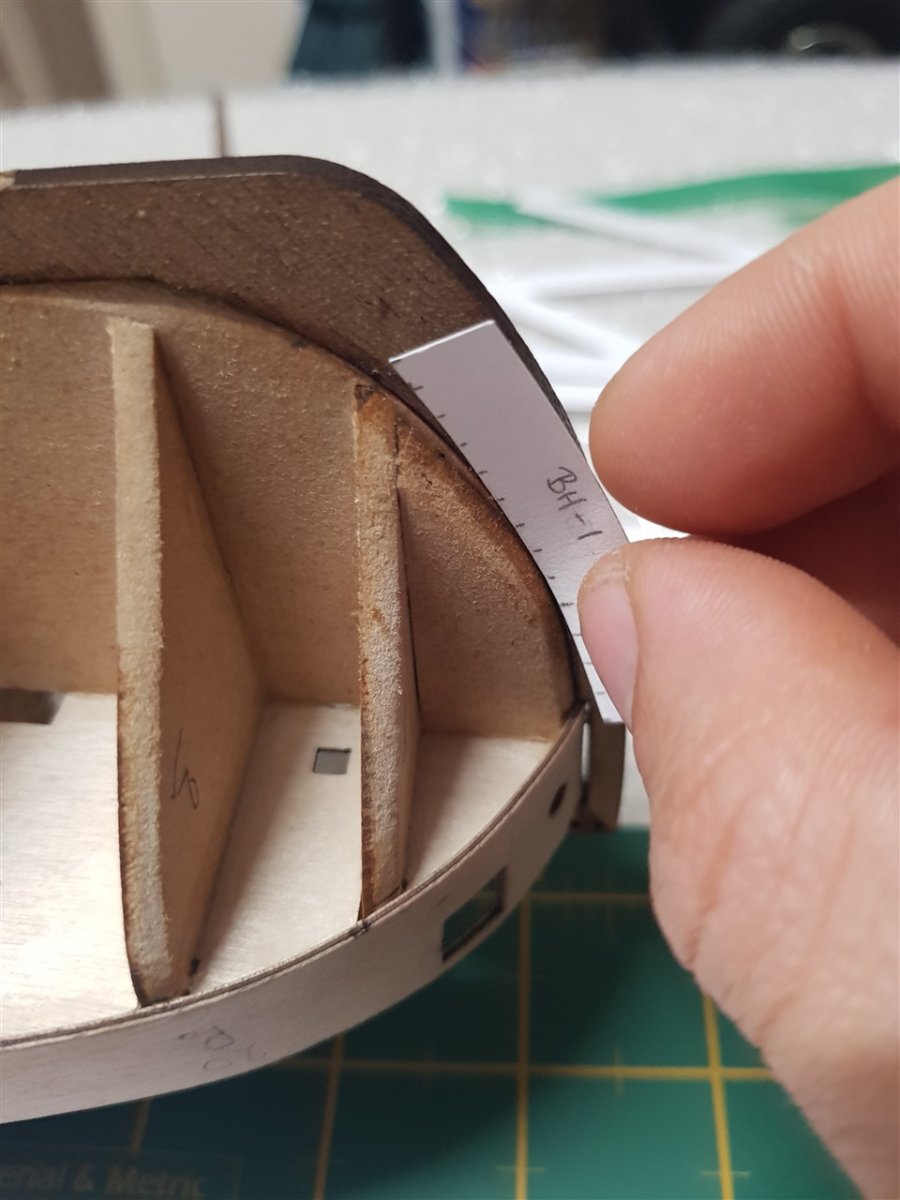
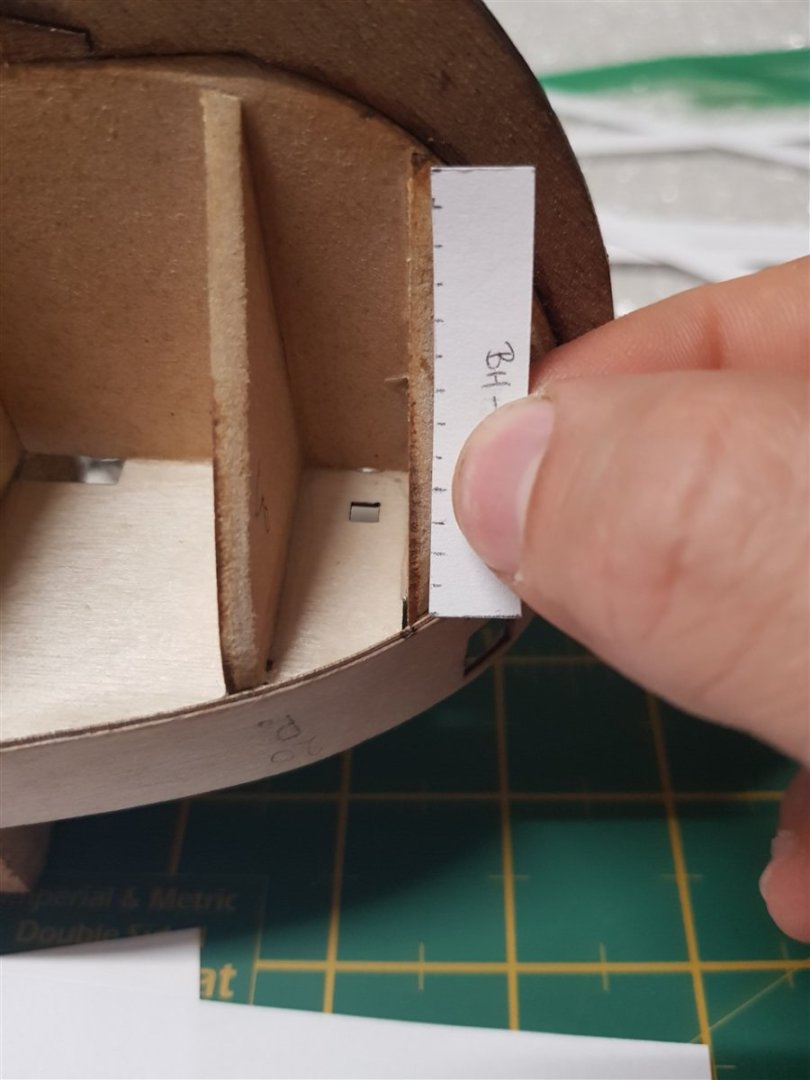
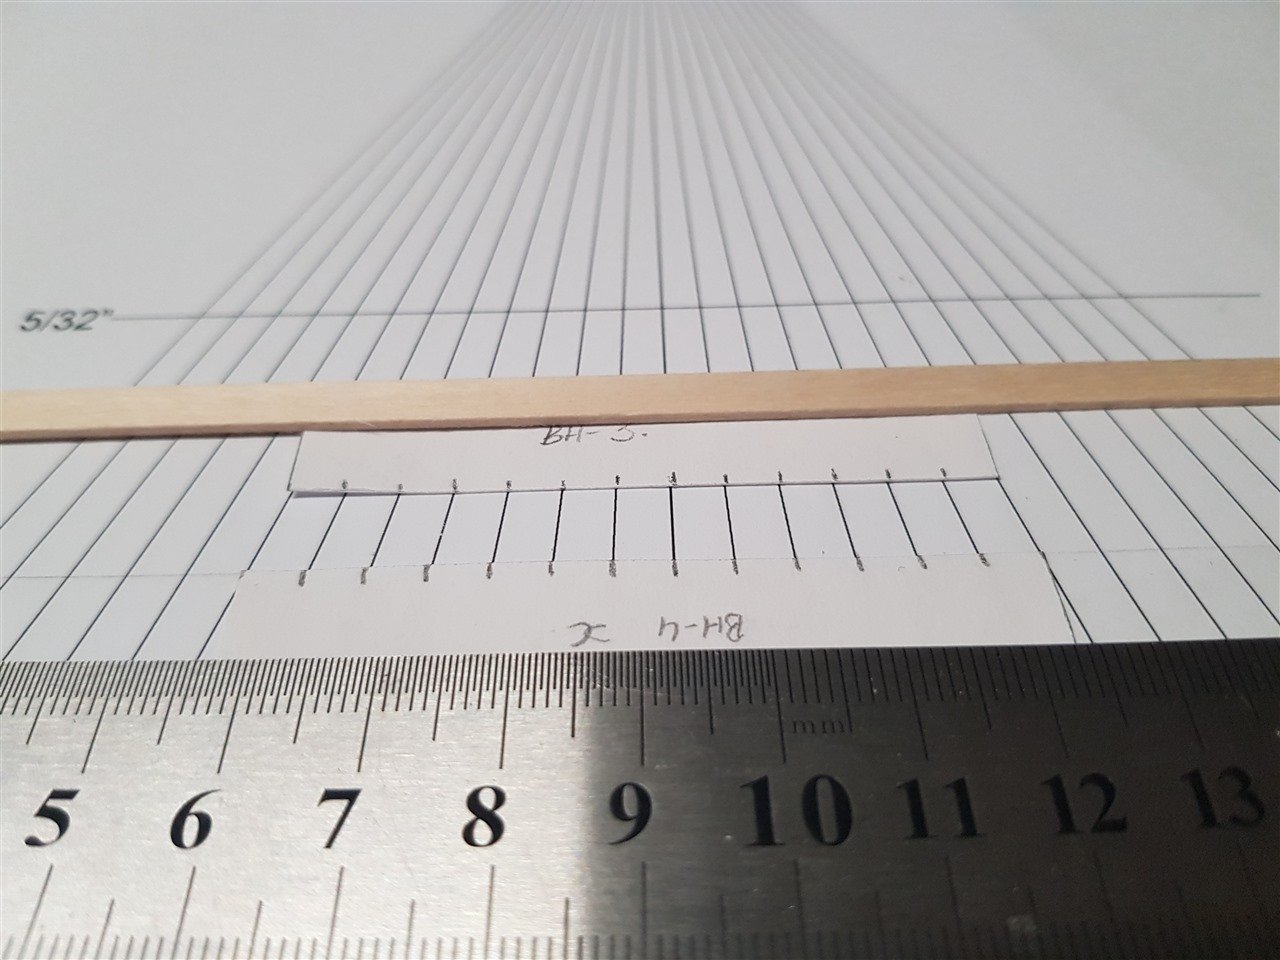
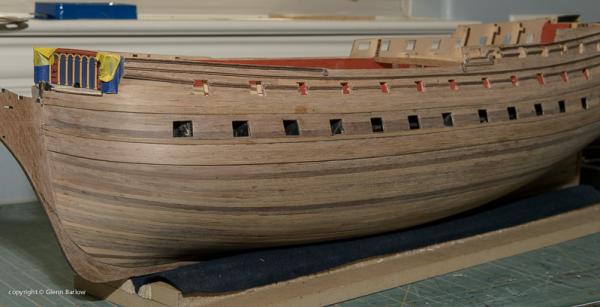
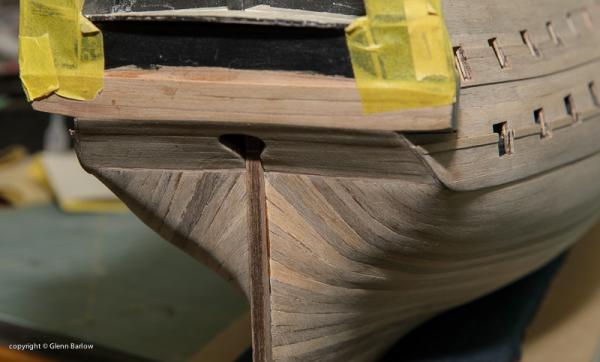
 Hi all, I'm about to start first planking on my first model, the HMS lady nelson. I'm a bit stuck on a few points, I've been reading and watching a bunch of material, but everything I learn seems to add another question. So first, I know I will need 13.2 planks at midship. I measured all the other bulkheads, cut out some strips of paper to their sizes and laid them on the planking fan (pictured below) so that 13 planks fit into them, then marked them off. (ruler and plank was just to hold down the strips while I took the picture). Is this how the planking fan should be used or did I miss something entirely? What is the significance of 5/32" ? After completing all these strips I noticed something was wrong with the stern measurements. I re-watched the Modellers Shipyard video. On this final bulkhead the guy got "41mm" (without showing you where he measured between). All the other bulkheads are measured from the base of the gun port pattern to the base of the false keel. I measured from the base of the false keel up 41mm at landed the lower part of the bulkhead, pictured below (so I guess this is the measurement the MSY guy got). I'm not sure why he didn't also measure the bulkhead. I'm missing something about how this area is divided/lined off. (I measured with the seamstress tape in the background, just used the callipers for the photo) How do you account for the rest of the final bulkhead / tick it off correctly? If I'm tapering down from midship (full plank width) to the widths required at the first and final bulkheads; are the measurements/tick strips for the bulkheads in-between just a guide for when you lay your plank? Finally, I created a trick strip for the forward most bulkhead (using the planking fan as I mentioned before). To mark off the bow termination pattern, do I transfer the marks to that first bulkhead (picture below), then use the same measurements for the termination pattern? (2nd picture below) I considered dividing the hull into bands, but its a small model and I haven't got my head around the finer points of that process either. (i.e. making sure the bands are in the right spot at both the bow and the stern). Plus, as this is my first ship, I currently have no spare planks laying around. Just an FYI, I'm new to modelling, new to woodwork, and new to ship terminology, so I'm learning at lot all at once here. Please be gentle, and I may have some follow up questions. Cheers, Mango.
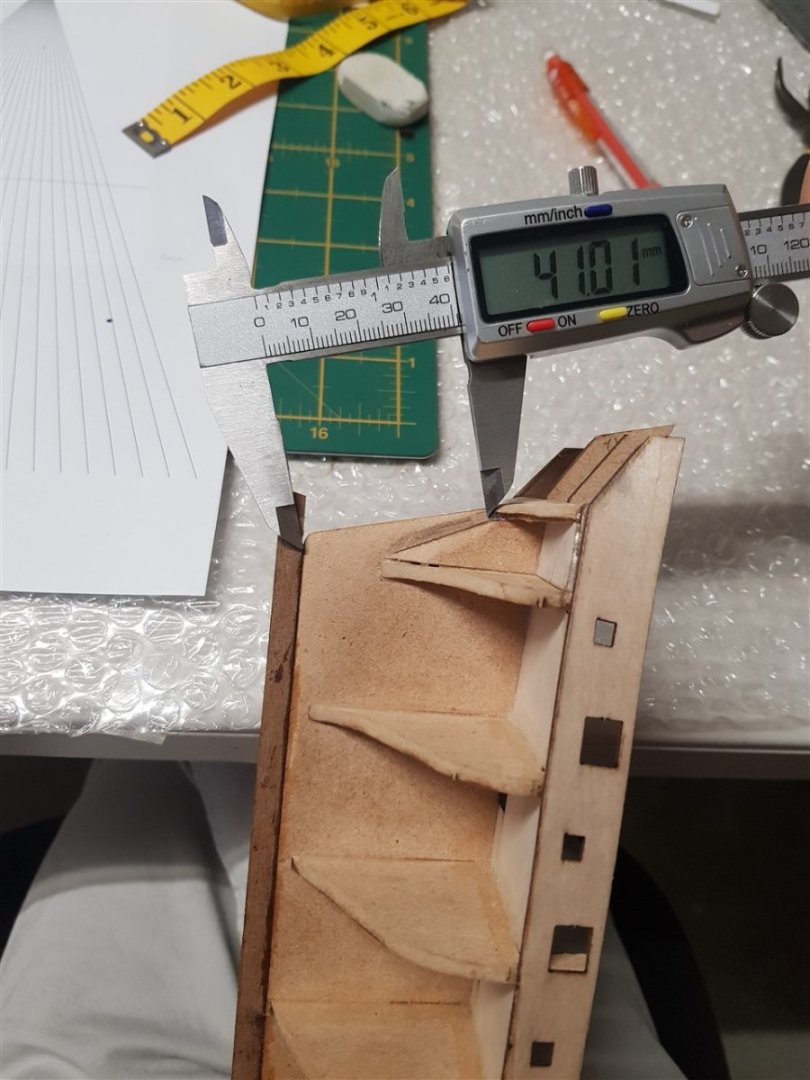


- 20 replies
-
- 3
-

-
- Planking
- Lining out
- (and 2 more)
-
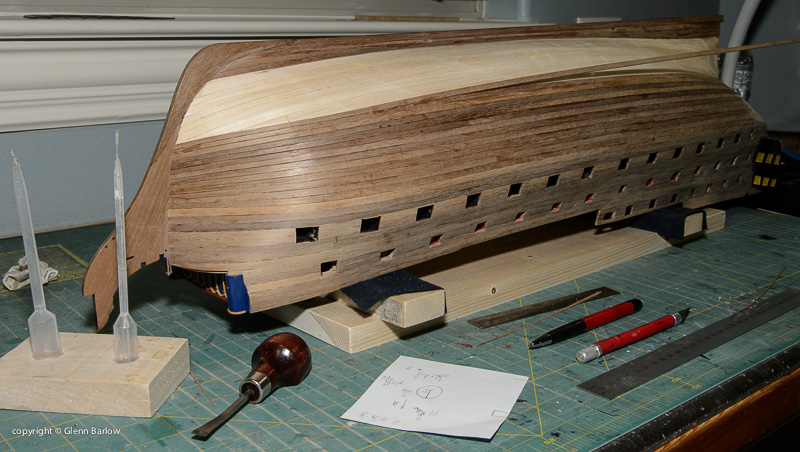
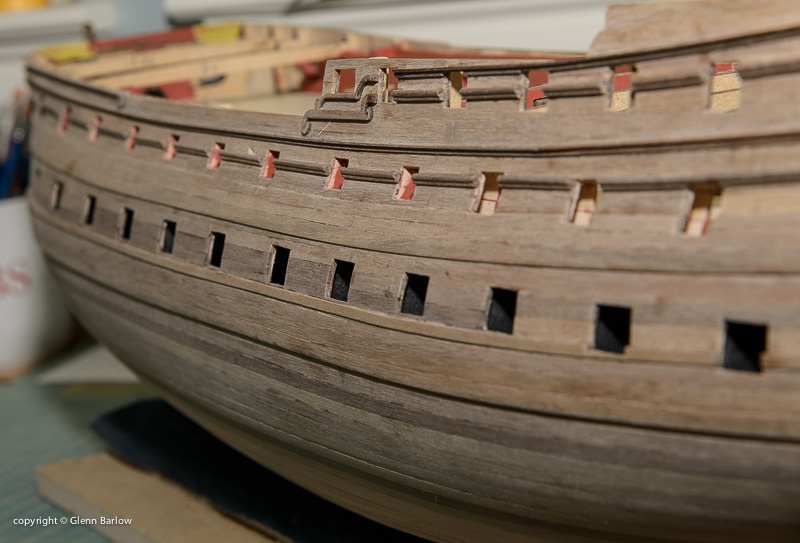
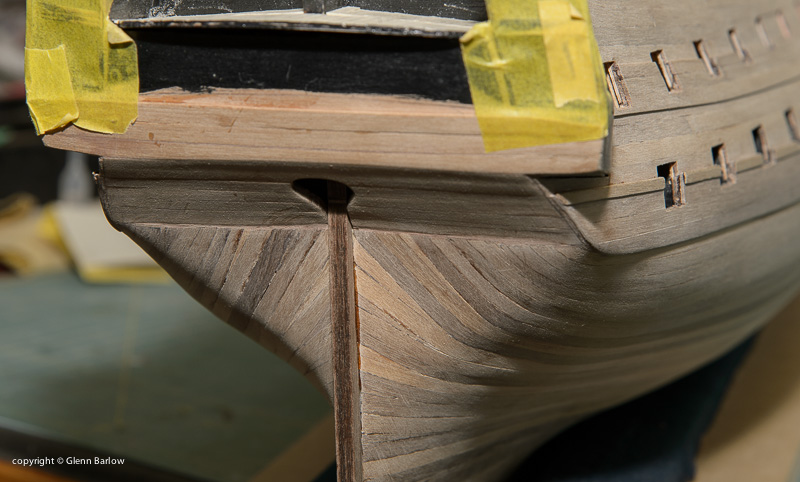
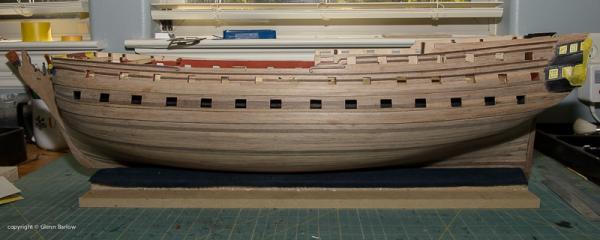
 I see there is a pinned posting from David Antscherl at the top of this forum. I'm not him, he's the expert. I have and love his books on building the Swan. Therefore I post this with some trepidation. My thoughts on 2nd planking: Spiling, or tapering, to fit a flat strip of wood on a surface that curves both front to back and top bottom is no small feat. It defies the grain and natural tendency of the wood and is one of the more fascinating, though perhaps tedious, aspects of shipbuilding. There are whole books written on this topic by modelers far more expert than me using precise methods that are far more exacting than what I do. Nonetheless, I thought I’d share my process. I did this for the lost log of the Pegasus and got some nice responses, so here it is again. It's the result of the practice I've gained from completing 14 hull plankings (ok, 7 models twice planked:-) First and foremost for the 2nd planking to look work you have to have had a good first planking, more than structure and shape it is the surface for the 2nd planking. If it’s wrong you aren’t going to make up for it with the 2nd planking. The first planking doesn’t need to look pretty, but it has to be shaped and sanded to be the hull you want the 2nd planking to become. The photo shows my pretty simple set of tools used for planking. For a strip of planking to reach from the bow to the stern, the bow portion (and in some cases the stern) has to be splined or tapered. In order to have the same number of strips at the wider waist as you have at the narrower bow. The key is how to make the math work and how to achieve the double twist to accommodate both curves, deck to keel, bow to waist to stern. I don’t do scarfing or lay battens, I’m too lazy for the first and don’t find a need for the second. With most ships as with the Vanguard the planks closest to the deck will fit full width, the key is not to take too much advantage of this, you pay for it later by not being able to get the lower planks to work out right. I first set the planks for the main wale as full width (actually the base, the wale is achieved by doubling up on those planks after sanding the fully planked hull), below that I tapered, above it I went full width. I chose to go up from the wale first and then down, but either way works. I cut and overlap lengths above the wale to show the butt joints similar to the decking, but choose to go the full length of the ship below the wale, just my choice. The second thing I do is the garboard, a full width plank along the keel. I usually cheat a bit and put a second plank here, tapering the bow side only slightly. The garboard is historically accurate, but in the case of modeling ensures you have a good base and a consistent point to measure from for tapering the planks below the wale The color differences are due to variation in the planks provided with the kit, since I'm painting the hull it's just the one I picked up next. Measure what? I use a piece of paper and measure the distance from the bottom of the wale to the top of the garboard at the waist and divide by 5. Since I’m using 5mm wide planks I then know me how many planks I’ll need to cover the ship. So if the measurement is 100mm, then I need twenty 5mm planks to cover the waist. I do that same measurement at the bow and divide that number by the number of planks above. If the length was 60mm I know the plank width at the bow has to be 3 mm to get those same 20 planks to fit to the stem of the bow. Pretty simple. All I have to do is use my Exacto knife with a really sharp blade (I change blades a lot) and cut the plank from 5 to 3 mm wide. Here’s the trick though, where to start the cut to begin the taper. I’m sure there are much more methodical and mathematical ways to do this, but I just let the plank tell me. I cut the angle required at stem, bevel it, then matching the end of the plank to the bow, lay the plank along the length of the one above it. It fits snug along the waist and for most of the length of the ship, where it crosses the plank above as it closes in on the bow stem is where I mark with a pencil to start the taper. I mark a 3 mm width at the stem end, lay my heavy steel rule across the two marks I’ve now made, and cut the taper. If the taper start point is too close to the stem, it will be very hard to get the plank to lay flat, if it is two far from the stem a S-curve will begin to develop with the distance between the last laid plank not being proportionately equal at the waist and bow. If this happens I can adjust by where I cut the next plank or if I see it happening soon enough, toss that plank and cut a new one. As long as I carefully locate my marks it doesn’t happen, its just when I get rushed or bored. I re-take the measurements every 5 planks or so to make sure I’m still on target, it doesn’t vary much but its worth checking to avoid very narrow stem plank widths as you reach the garboard. Measuring in this way gives me a good looking bow, doesn’t require battens, is simple enough to do, and is made possible by using cyano, not PVA glue. The cyano can be a bit messy, I may be a little over generous with its use, but this comes off easily with sanding and allows the process to move along more quickly. I’d be more careful with the cyano to avoid staining if I was leaving the hull natural (as I did using cherry wood with the Pegasus) but since I’m painting, smooth is all that’s required. This same process applies to the stern for some but generally not the majority of planks. Here is more important to let the plank follow its natural flow. This will create triangular gaps that are filled with stealers. Simply cut triangles cut to fit the length and width of those gaps unless you want to go all out and scarp them in. Again, I’m painting and scarping the hull, this would be wasted effort for me (unless you enjoy knowing and doing it then by all means). I do all this knowing that no matter how careful I am, I have always had to fill in some area at the waist with partial and oddly cut planks that don’t reach stem to stern. This fill is on the bottom and won’t be seen once its on the stand so I don’t worry about it, the perfectionist in me adjusts and accepts. So that’s my two cents. I’m sure as always there are better, more precise, and more expert ways to plank and several of those are included in this forum. But this way works for me and the speed and pace I chose to work. For what its worth I share it with you.

-
 After some consideration David and I have decided that the topic of next year's workshop will be on clinker style planking. To me there is nothing lovelier than a clinker planked hull but they are a bit more difficult to successfully execute than the traditional carvel planking. For this workshop the participants will be provided with a laser cut hull section (to be assembled prior to the workshop). The principles of clinker planking will be taught and the participants will be doing their own planking over the course of the 1 1/2 day workshop. The workshop will take place in Baltimore, MD, probably towards the end of May'2022. We will also be taking a trip to Prebble Hall the day before (or after) in order to view the magnificent Rogers collection. Now that Grant Walker is back a guided tour is always awesome. As with everything else in the past two years all depends on the Covid rates at that time but life goes on and we are making plans. If you are interested in attending this workshop please send a PM or e-mail to me at dvm27@comcast.net so that I can add you to our e-mail group list. Also, please indicate whether a mid-week workshop might work for you. Hotels, workshop space and restaurants are generally easier mid-week than weekends and a trip to the Naval Academy could be incorporated on the second afternoon. Alert, clinker hull by Roger Cole
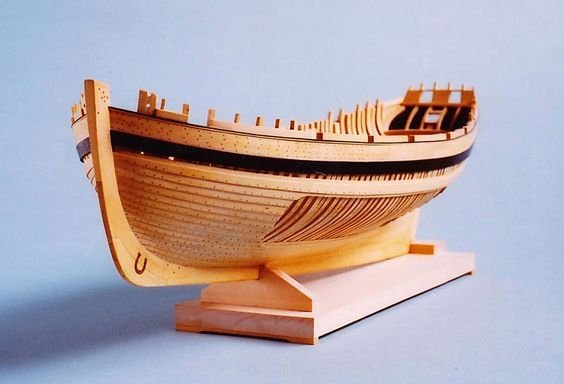
-
- 10
-
-

-
- plank on frame
- workshop
- (and 1 more)
-
 I have come across some very informative videos on YouTube which have been posted by Olha Batchvarov who is a professional model boat builder. The first video covers the first planking - First Planking Video There is a nice section where a drop planks are added. There is also a video which shows the sanding process afterward - Sanding The Hull This video also covers fitted the stem and stern posts There are several more videos on her YouTube channel
 -
 I am a relative newcomer to the Forum and hope that this topic hasn't been discussed to death. In the time that I have been on the Forum, I have searched hundreds of threads, but have not seen this particular question discussed. First, I have seen and appreciated all of the opinions about preferred woods, like boxwood, pear, apple and others. But some discussion about why, and discussions of preferred attributes would really be appreciated. However, what I would like to get everyone's opinion on is this: Are there preferred woods for 1. Keel and framing 2 Planking 3. Masts and yards 4. Decoration and ornamentation 5. Carriages and other structures It is apparent that woods with natural colors are often used to highlight particular parts or sections as appropriate. Especially important are opinions about what qualities certain woods have that make each type stand out in exception to another.
 -
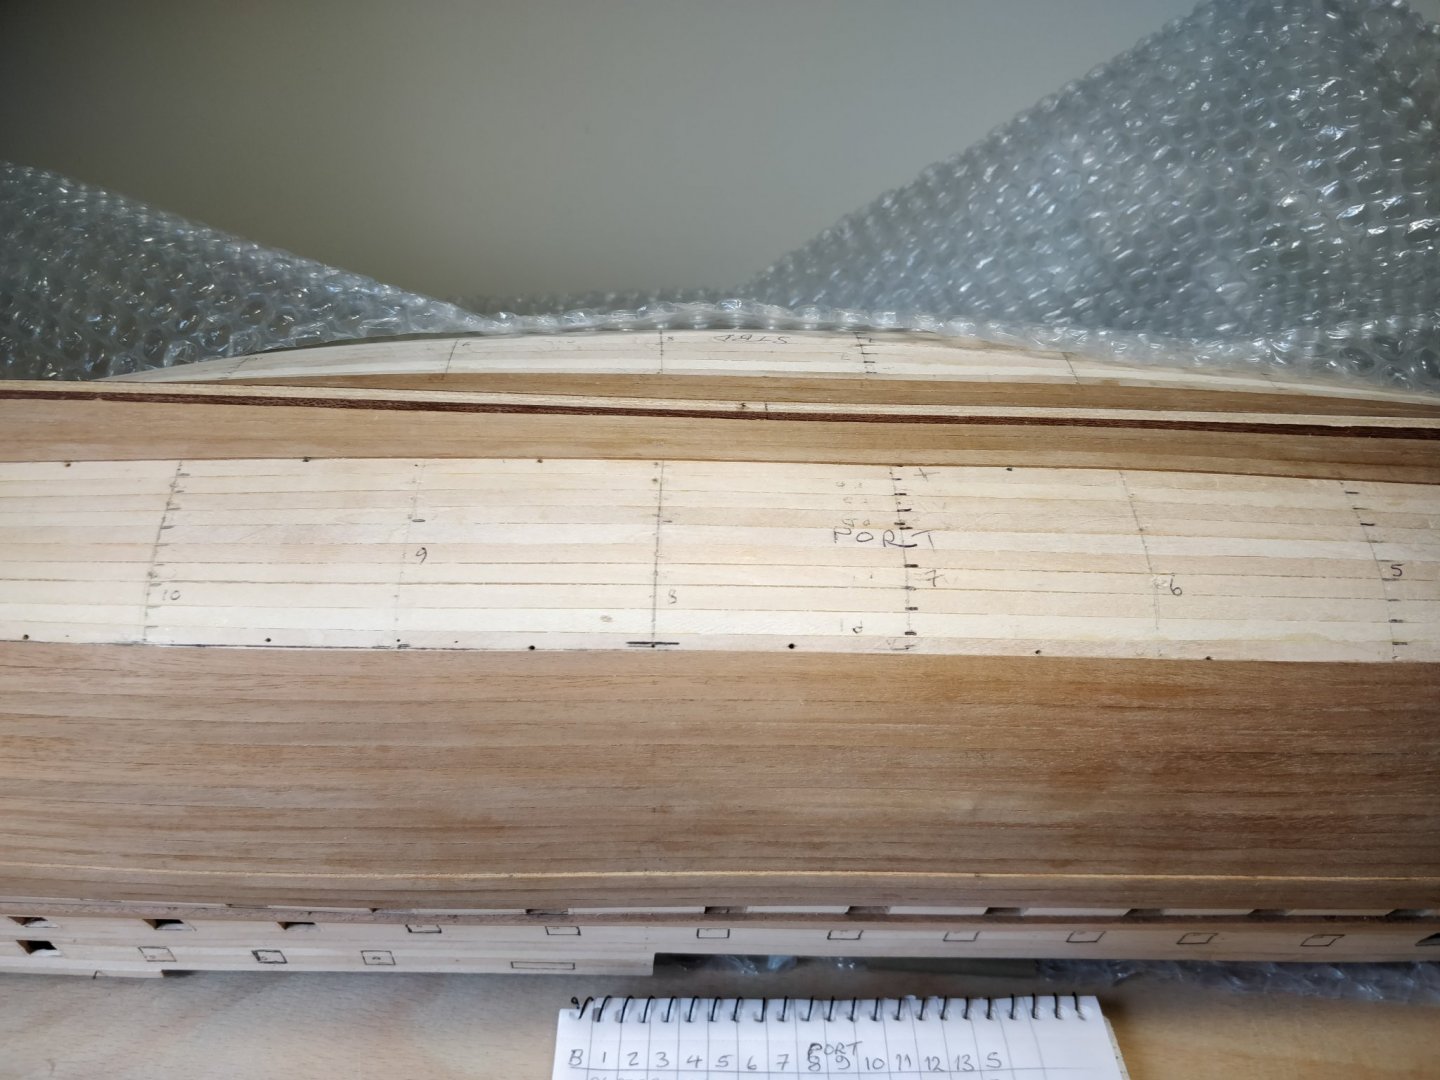
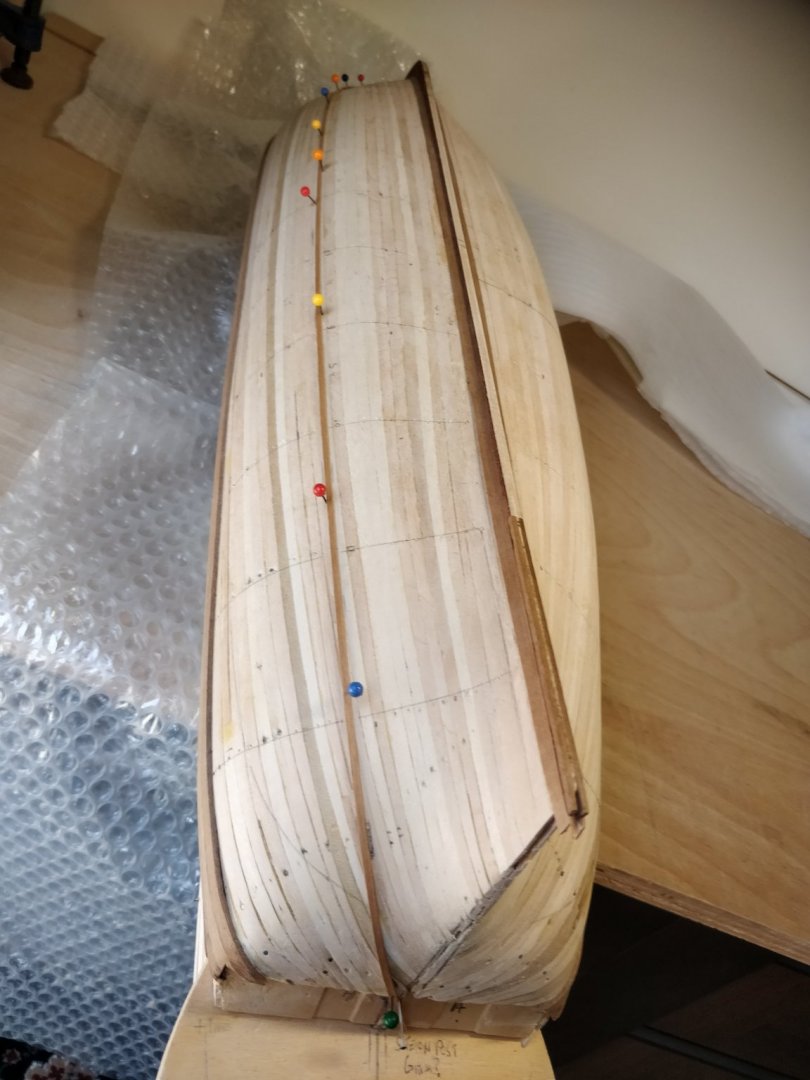
Hello again! I have started second planking but am undecided how to proceed beyond this point. Photos show that midships I need 10 more planks @5mm or a fraction less. At the stern post I have 70mm to fill. I'm minded to put in four stealers, probably half stealers so I don't cut into two adjacent planks. These would be quite short not going much further than frame 13 as marked. The only alternative I can see is to narrow the planks at midships and fan them out towards the stern to gain width. I would need to get more material to do this. I've already got one stealer above the garboard ( which I should have thickened) so I would have a total of 5 stealers at the stern. I would really like just to varnish finish otherwise wouldn't be asking. Is five stealers too many? Would it be better to buy sheet and spile them or would that make them look a bit wide compared to the rest? All opinion valued! 😀


- 22 replies
-
- 6
-
-
- hms victory
- corel
- (and 1 more)
-
 Building Arkit Uncle Sam Tug. Fairly simple hull lines, but kit offers only minimal instruction on planking.( which I have never tried before) Have looked at tutorials here and the job seem quite complex. Test fitting of planks gives me pause about results I can achieve. would it be foolish to employ monocoque construction technique regularly used by model aircraft builders? . This would involve roughly fitting various size balsa plates to the forms, filling gaps and easily sanding to desired form — and then laying covering material ( in the case of the tug, mahogany planks) over the completed form. I have done this on airplane models. It is quick and easy and satisfactory, and @age 86, I am looking for that. eureka, or crazy?
 -
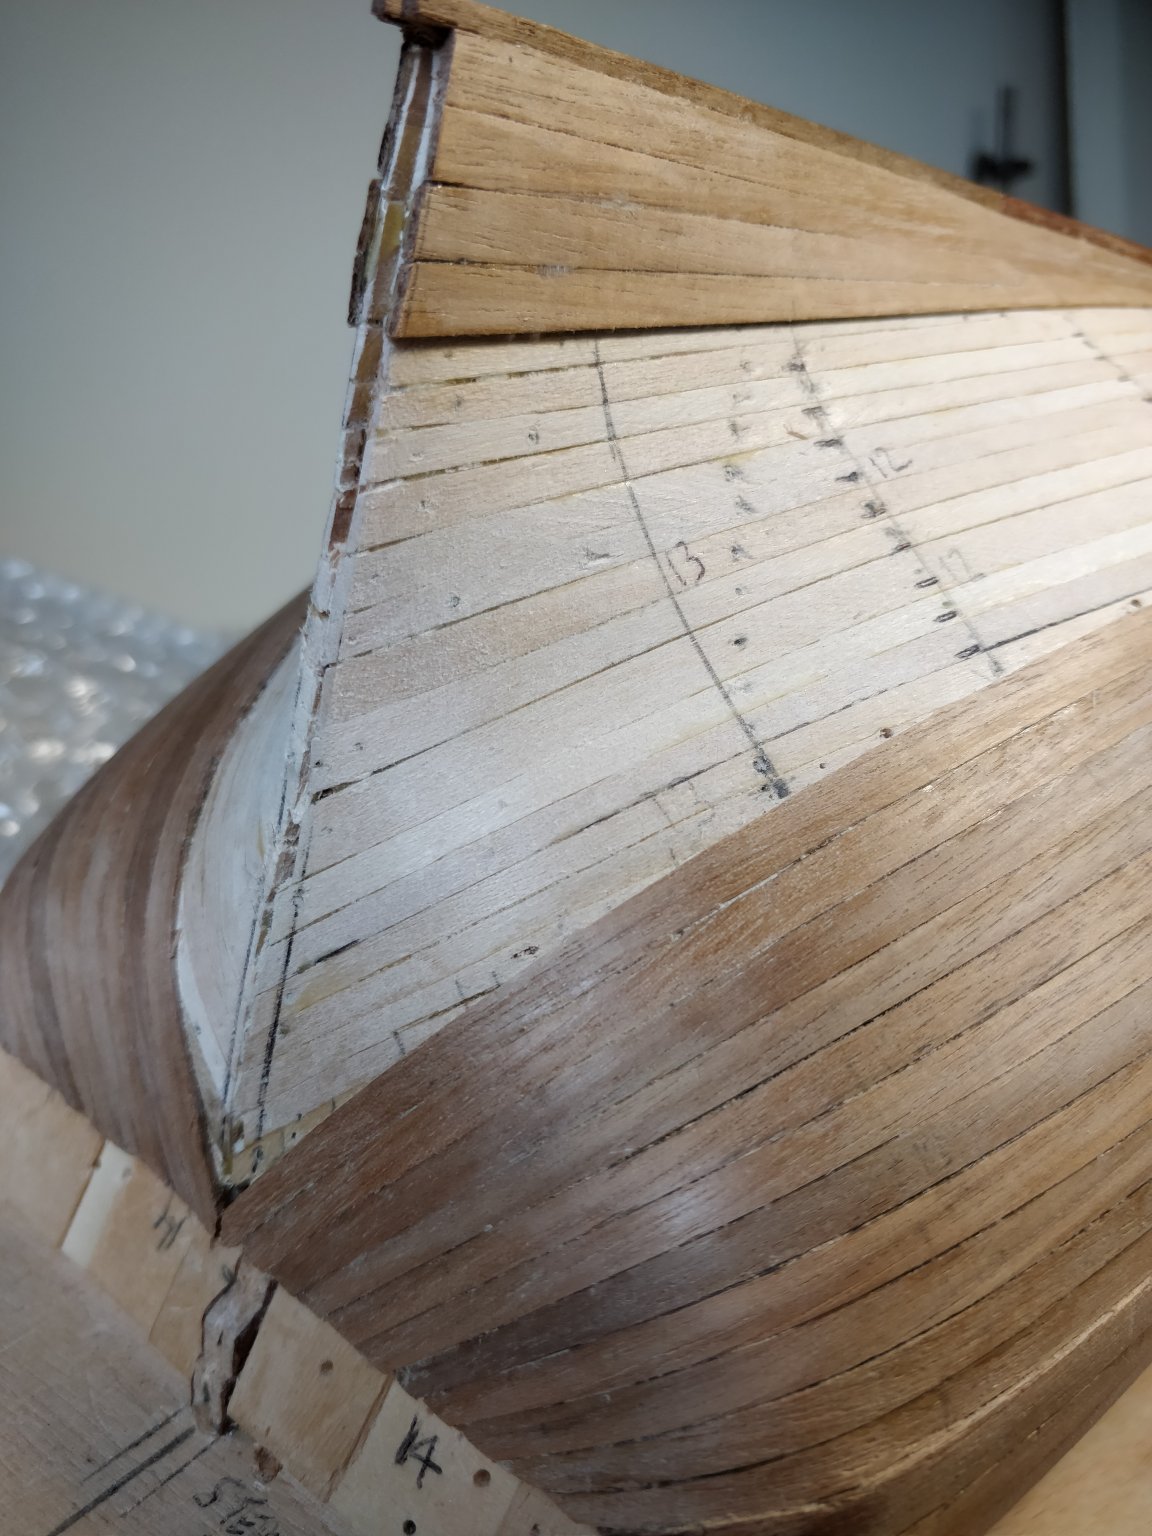
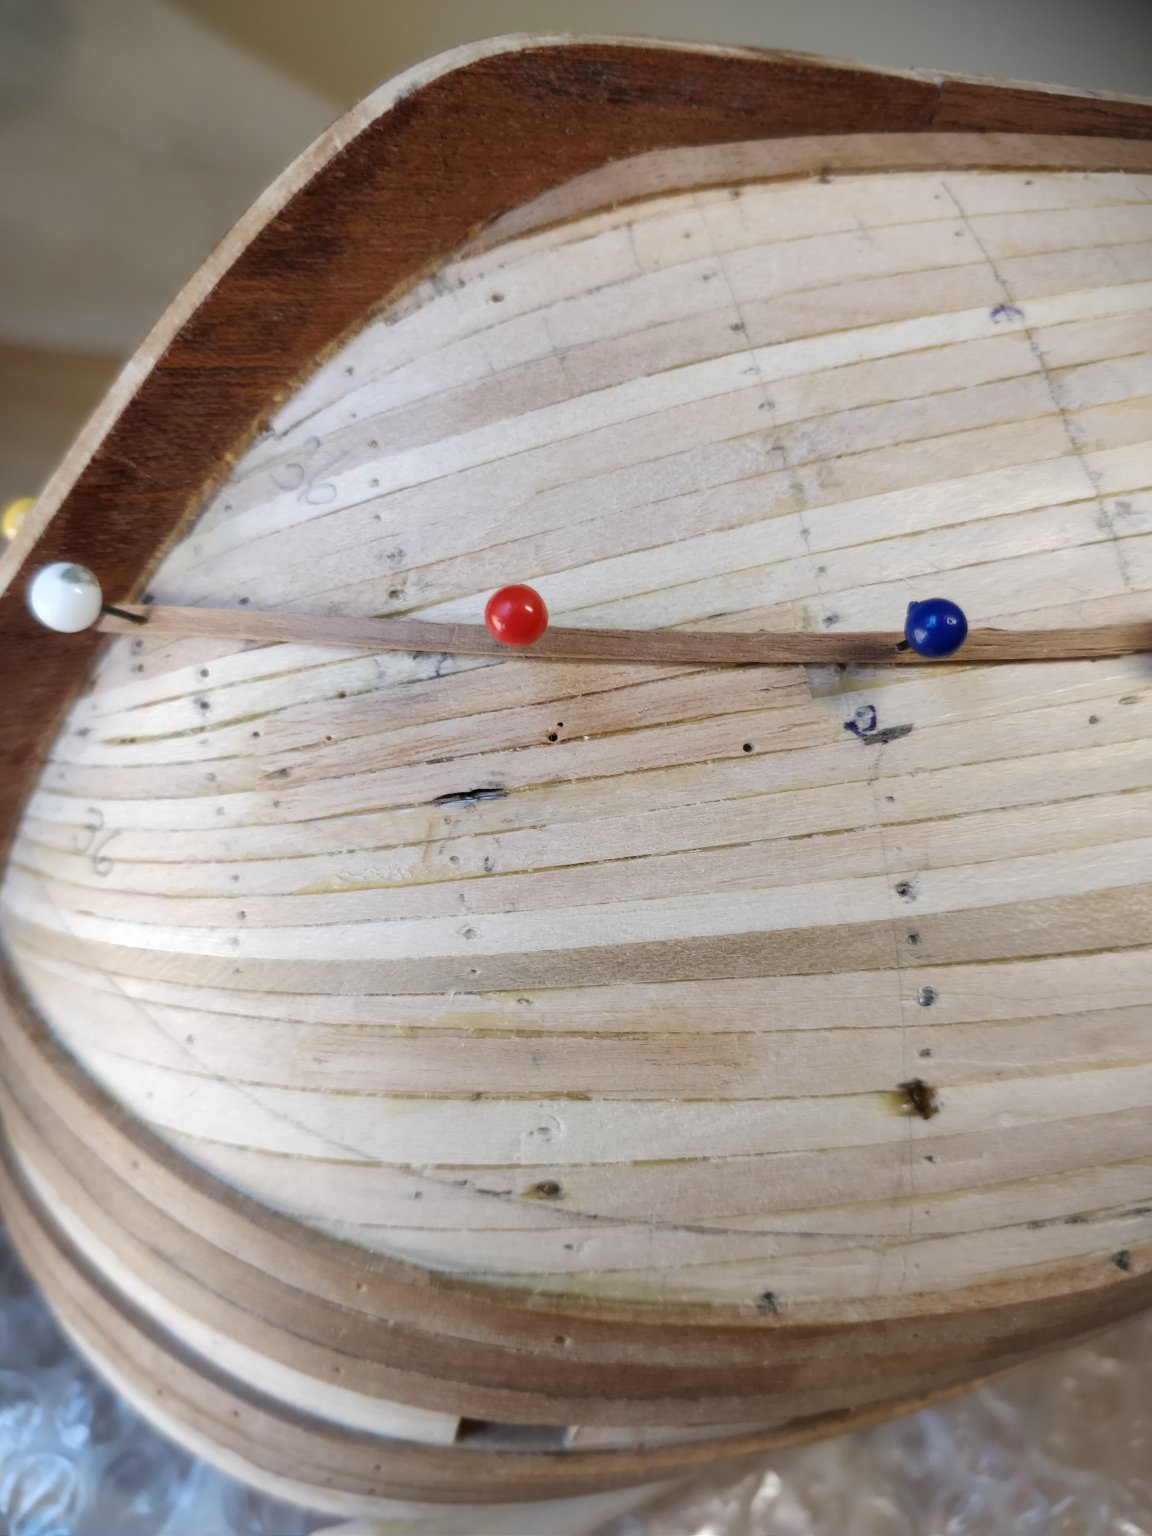
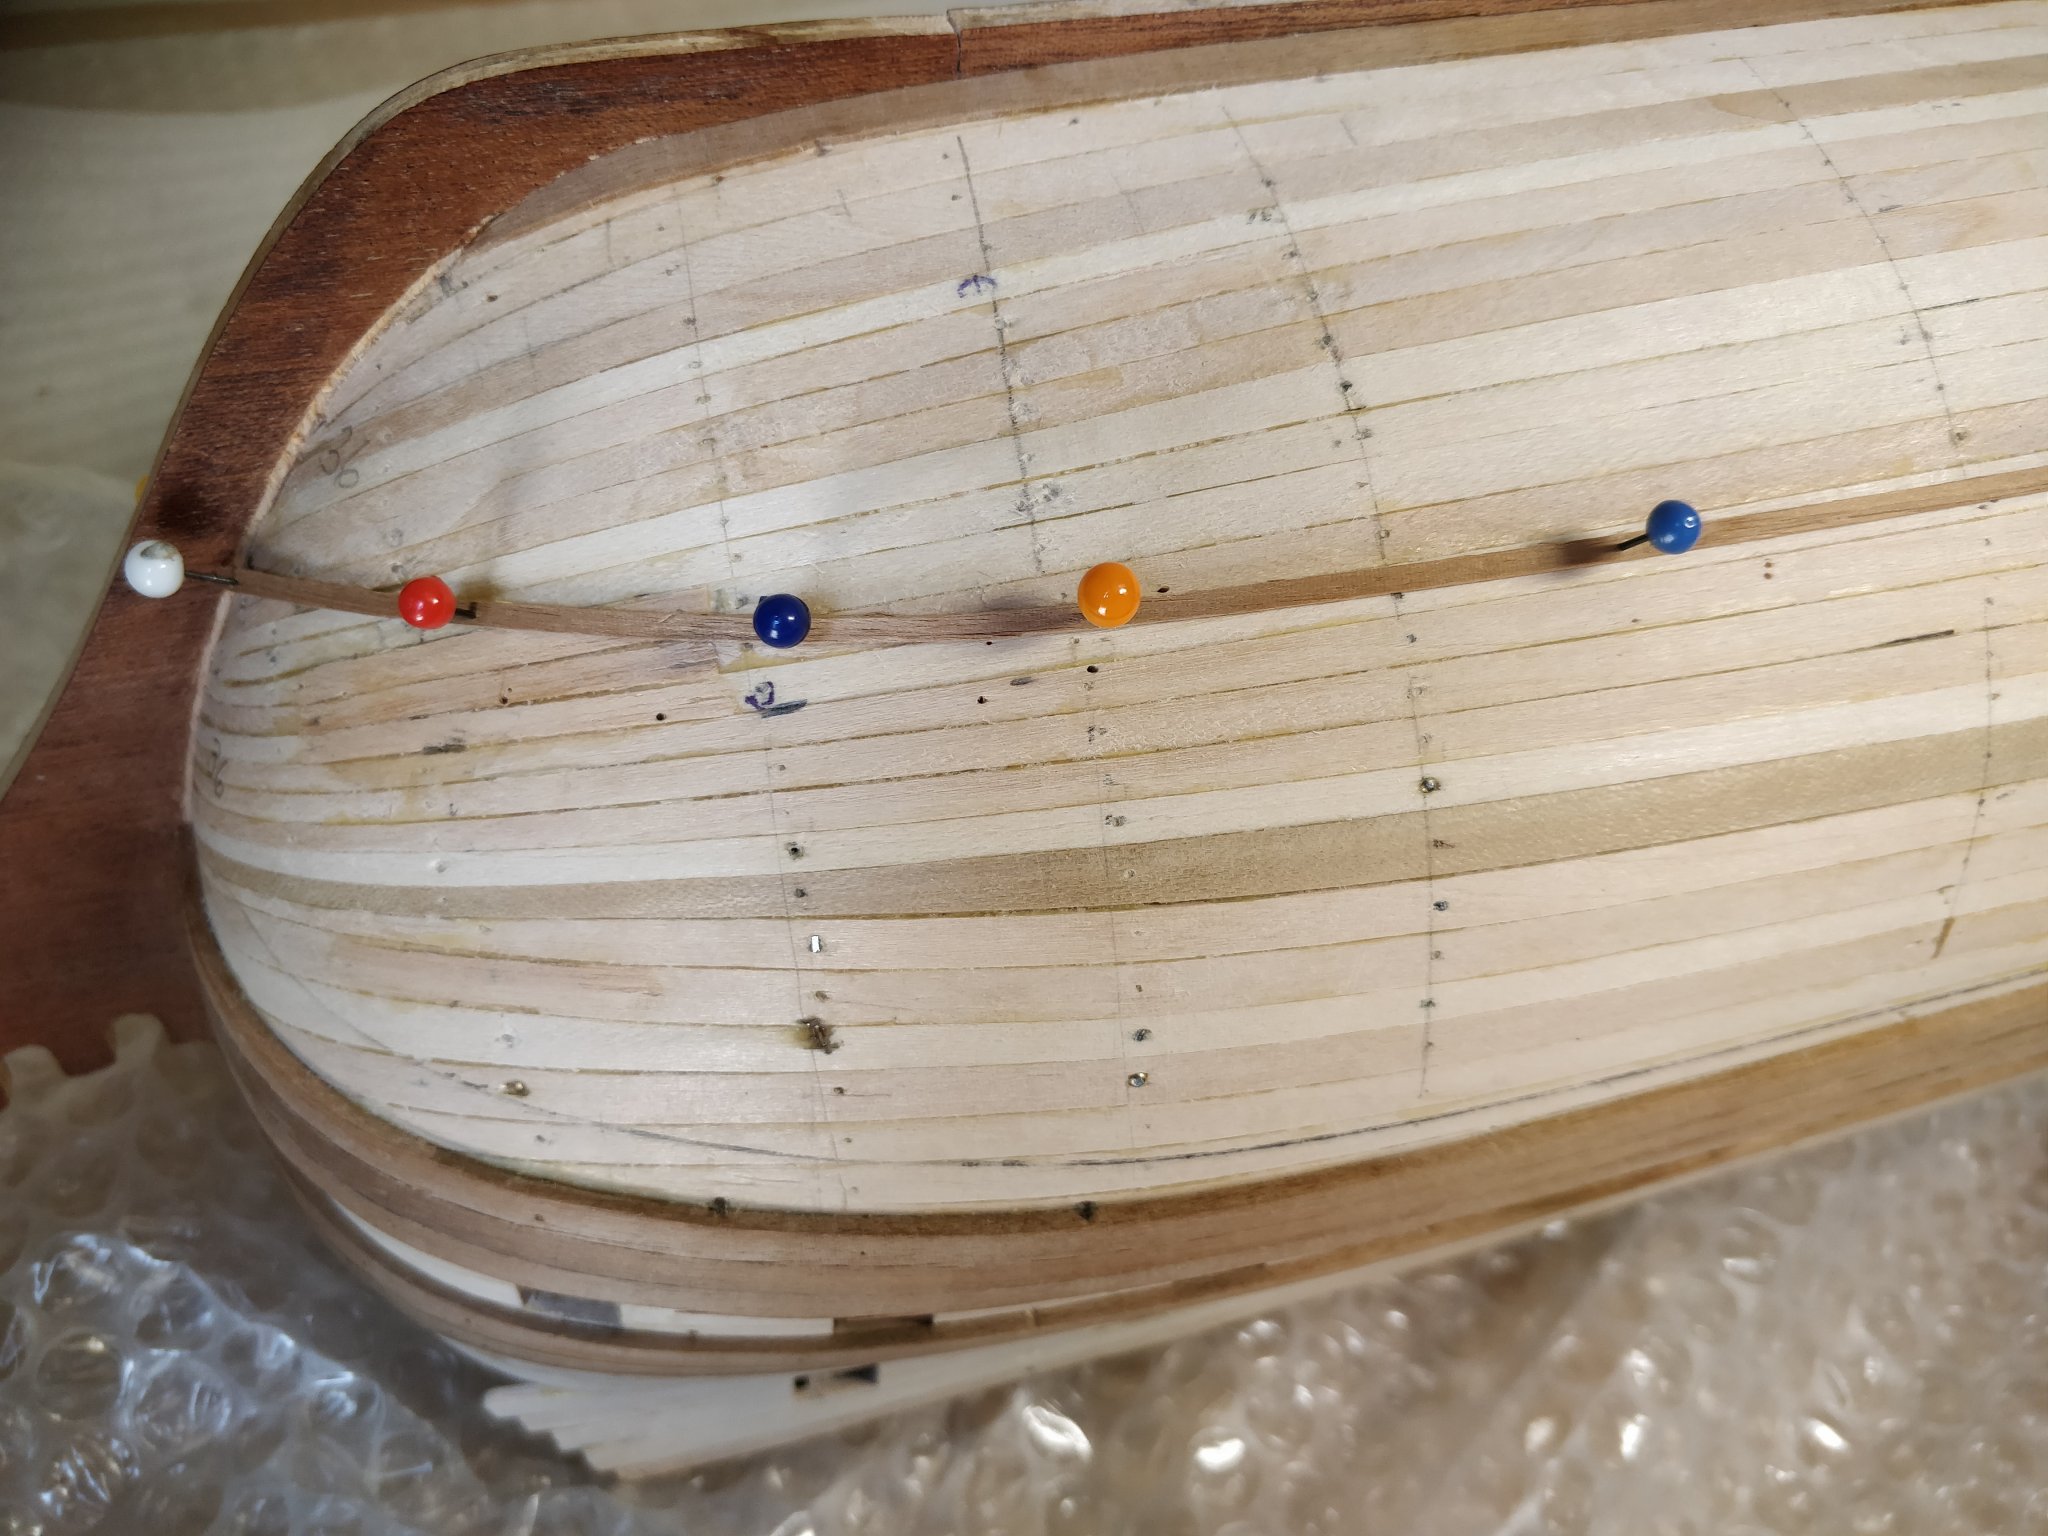
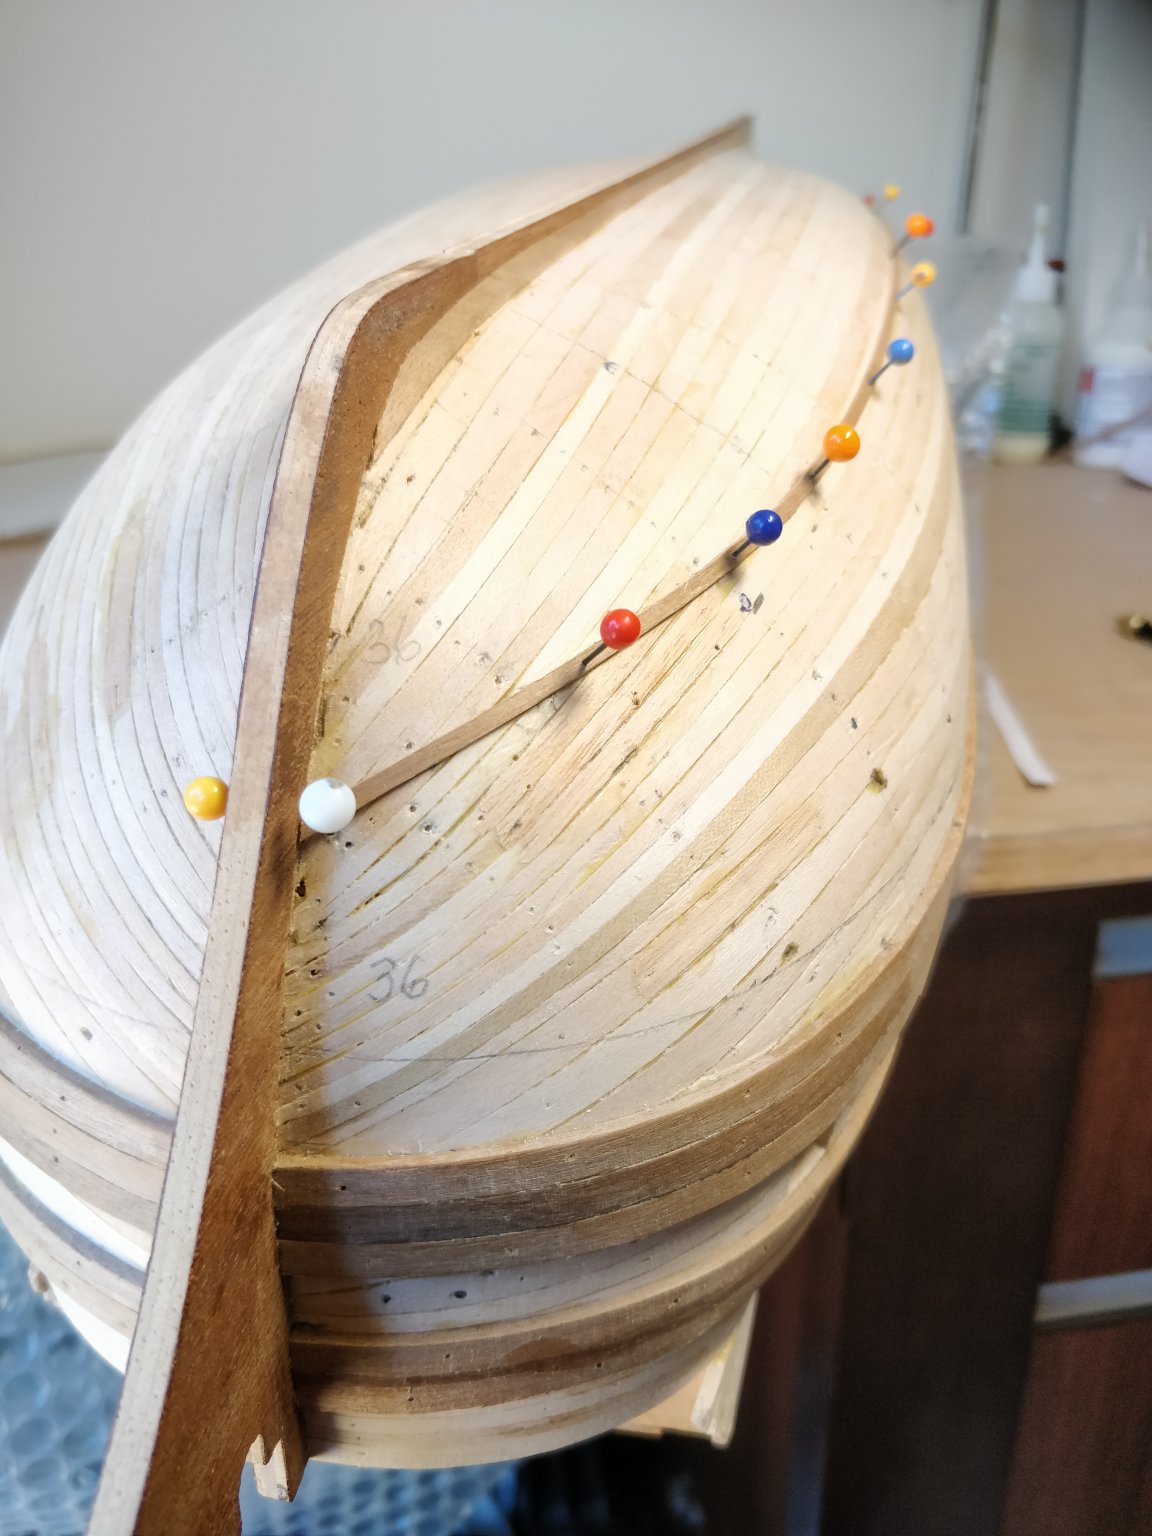
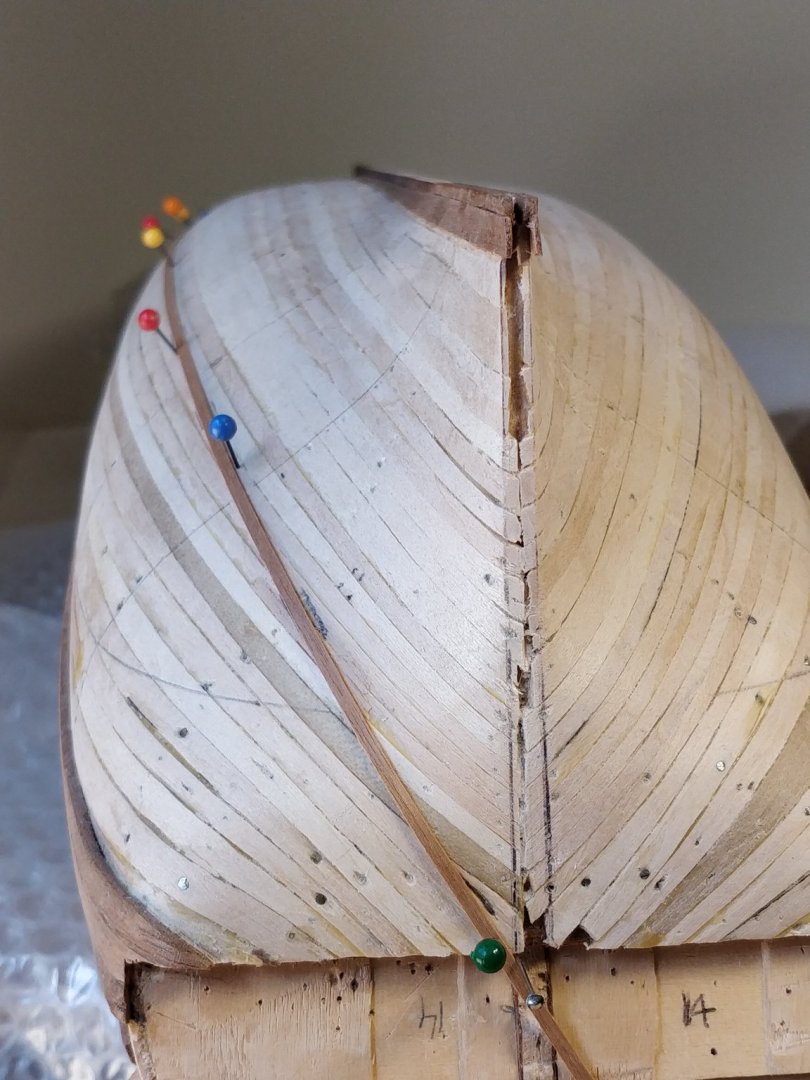
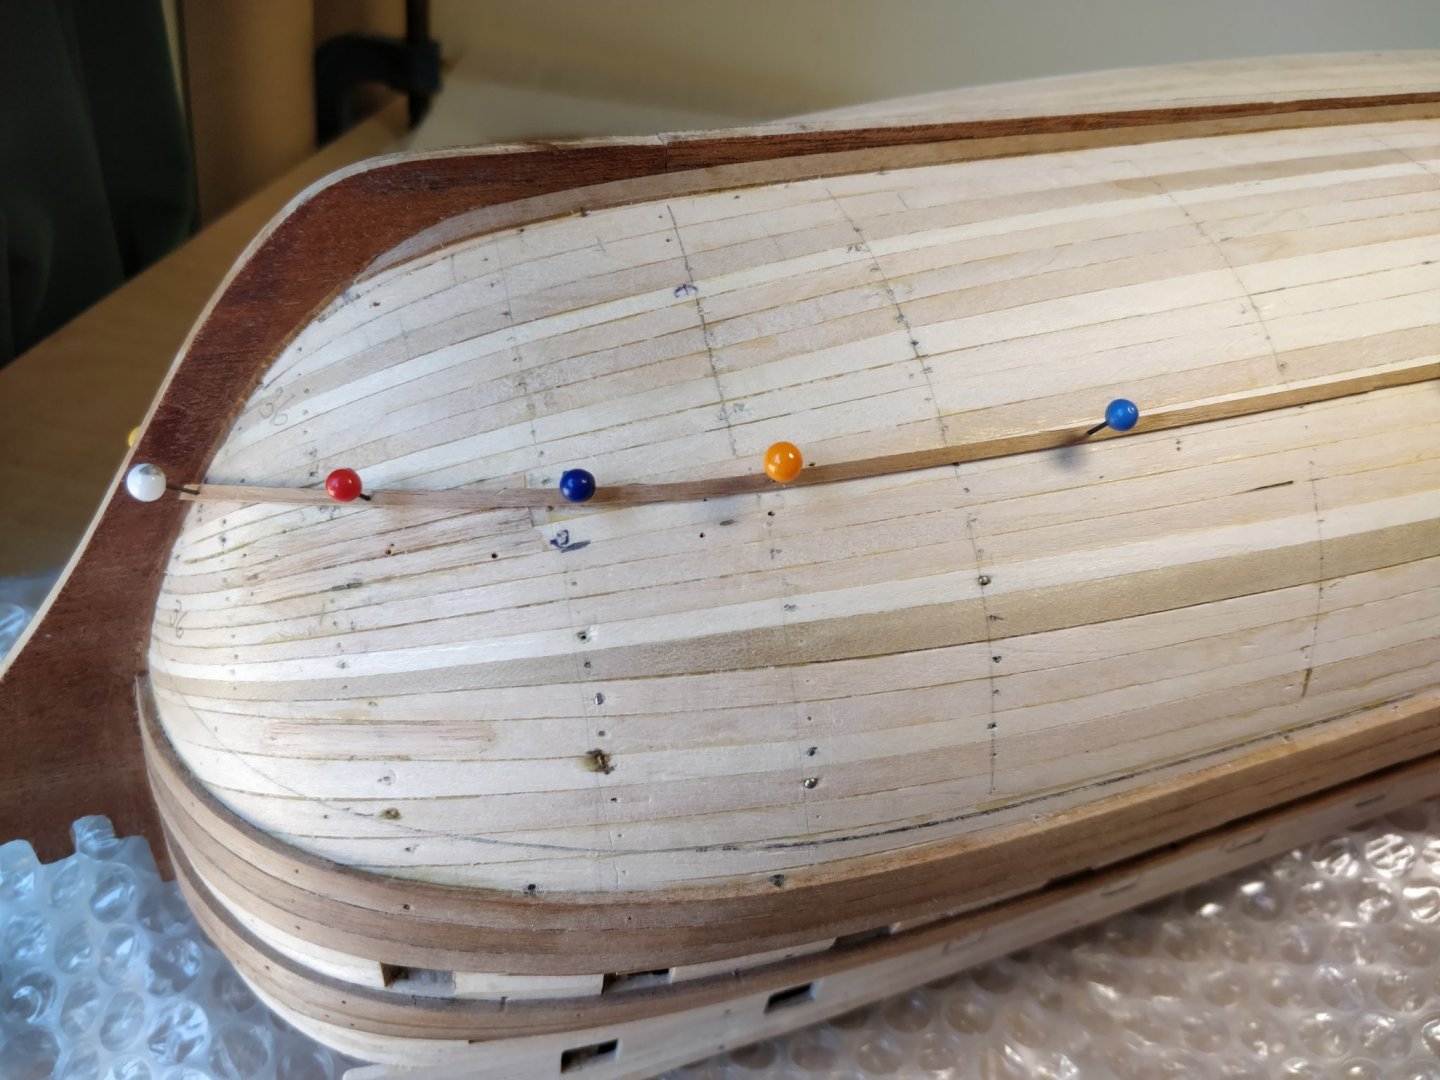
 Hello! I am seeking help with my second planking having made a few errors on the first which I managed to get away with. It was touch and go trying to avoid crowding at the bow. I'm lining the hull with strakes to work out the best runs this time. I've read and think I understand the tutorials but still have a doubt at the bow section. Between the front tip of the garboard strake and the marking strake is 36mm (along the rabbet) but between the tip and red push pin is only 30mm. Should I fit a drop strake around this point I wonder? I tried wetting and bending a previous marker strake but the pull down on it made the run look a bit wobbly elsewhere back along the hull and it was a really tight bend. I know I will have to fit Steelers at the stern but the bow has confounded me for the moment. The two pen marks fwd show where the centre lines fall. I hope the photos give the idea. TIA.😃
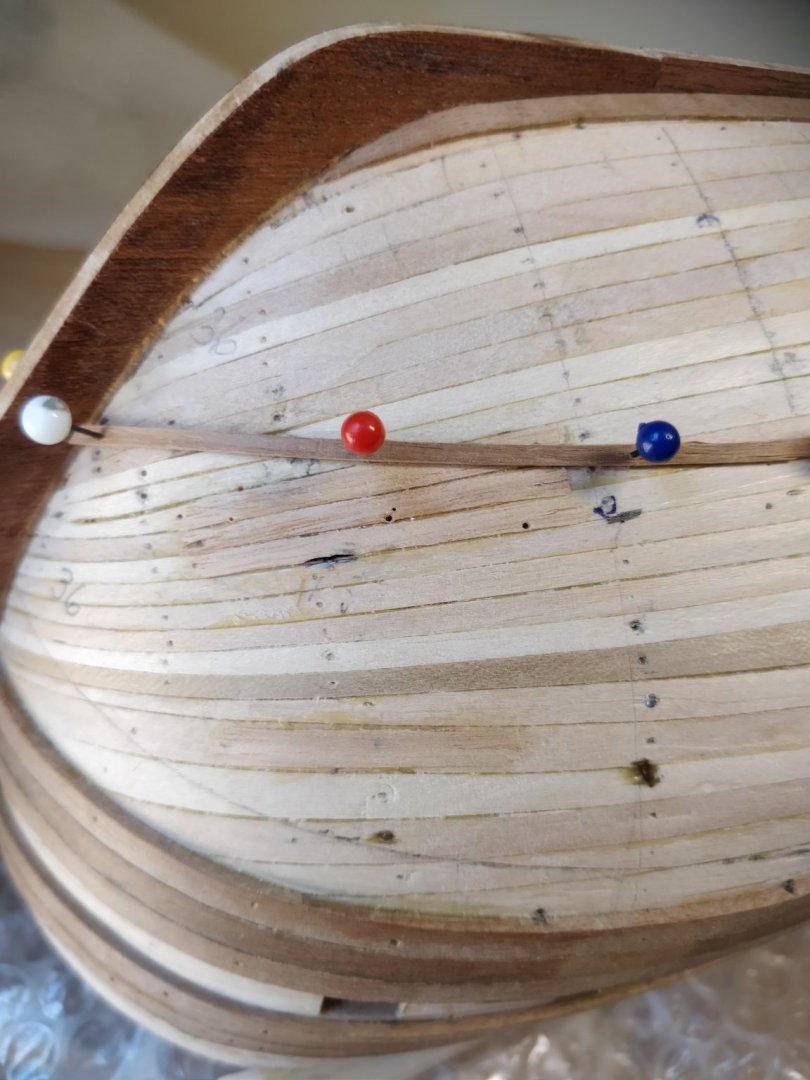


-
 Well, I'm almost ready to start planking below the waterline on the Great Harry. I've only ever done one previous pair of garboard strakes, and they weren't all that successful. I've read the tutorials and looked at various builds but I just can't figure out - I know the garboard strake is different widths at different points along its run; but is it the same as the widths of the adjoining planks, (the only difference being that the garboard has one edge that is straight)? For example, if there are (say) 15 strakes between the keel and the other reference point you're measuring to, is the width of the garboard at any given frame 1/15th of the distance measured along that frame ? This has always been a puzzle to me , and I don't want to start planking before I'm sure I know what I'm doing. Thanks, Steven
 -
 This will be my first attempt at planking “correctly”. I did complete AL Bounty Jolly which was planked, but in a strange way (I followed the instructions). I have quite a few projects in the shipyard that are POB and POF so I’d rather start with a less expensive kit and fail then ruin the kits I have already purchased in hopes of learning this hobby. I will be taking this build slow as I have other logs going on, as well as a stressful job and a four year old that I chase around on the weekends. My plan will be to finish this half hull with a stained hull...I’m also contemplating coppering the hull as a learning experience as well.
 -
 Any ideas how i should cover that cap? In the picture you can see that my lover planks are ending too soon. Can you come up with somekind solution. Frame, copper plates or somethin what covers that part in the end. 😅 Im going to do the rest like it should but i dont know what would be best choice to cover that mistake Kit is from korabel so all planks are precut, if all hope is lost then the last choice is to order new set of planks from korabel span widget
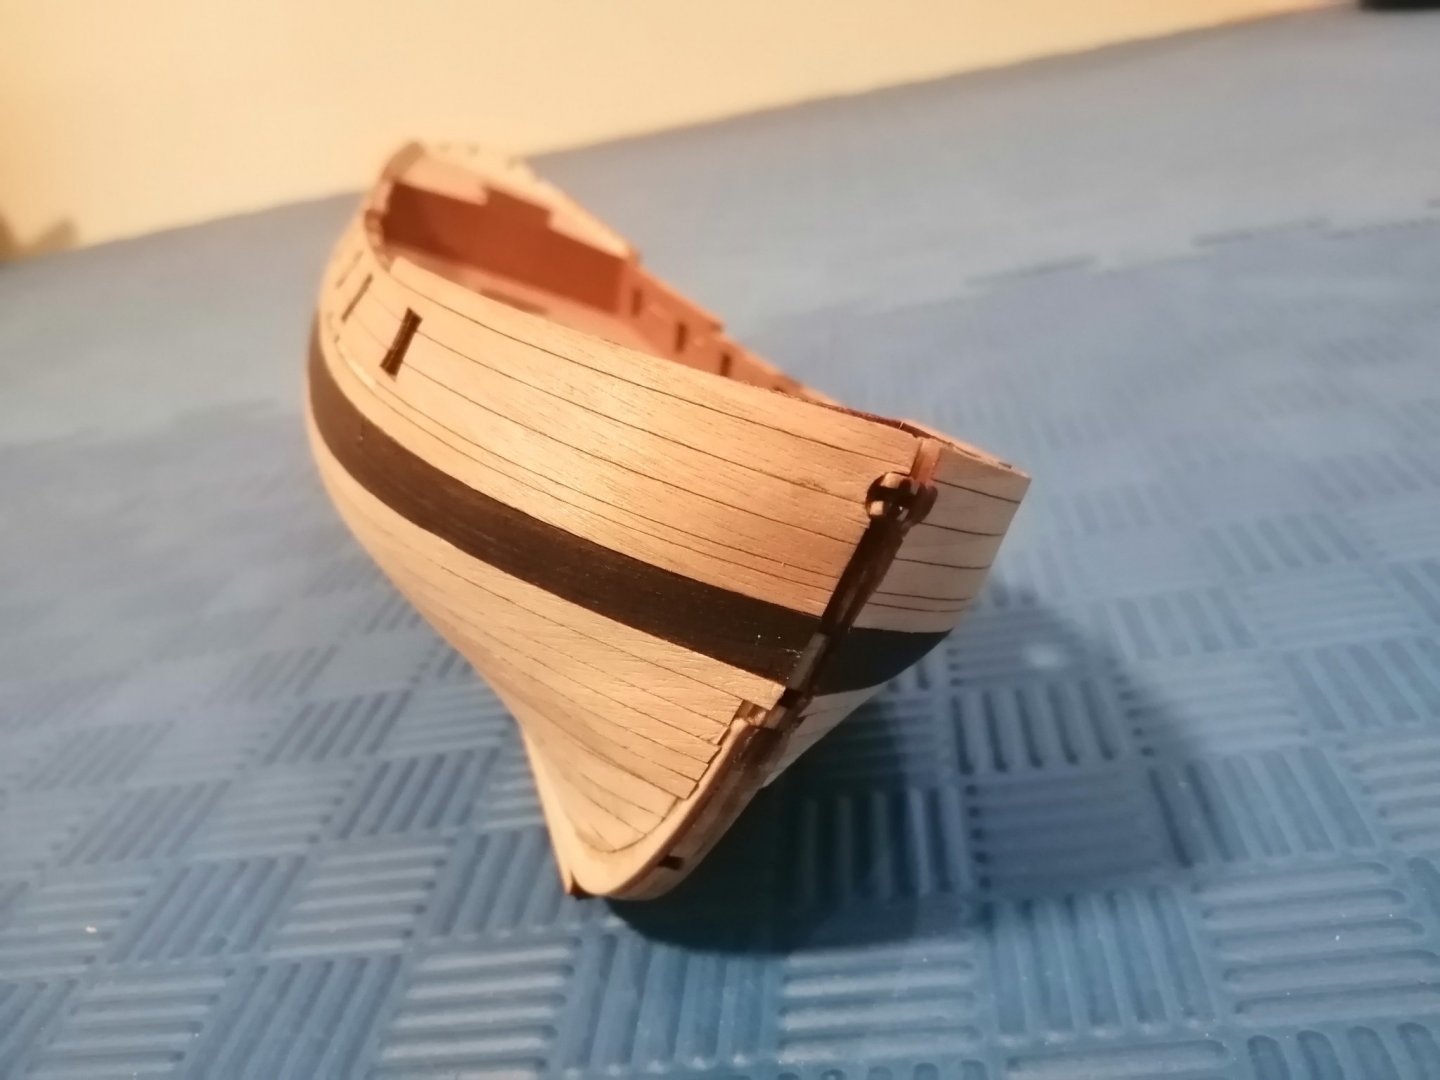
-
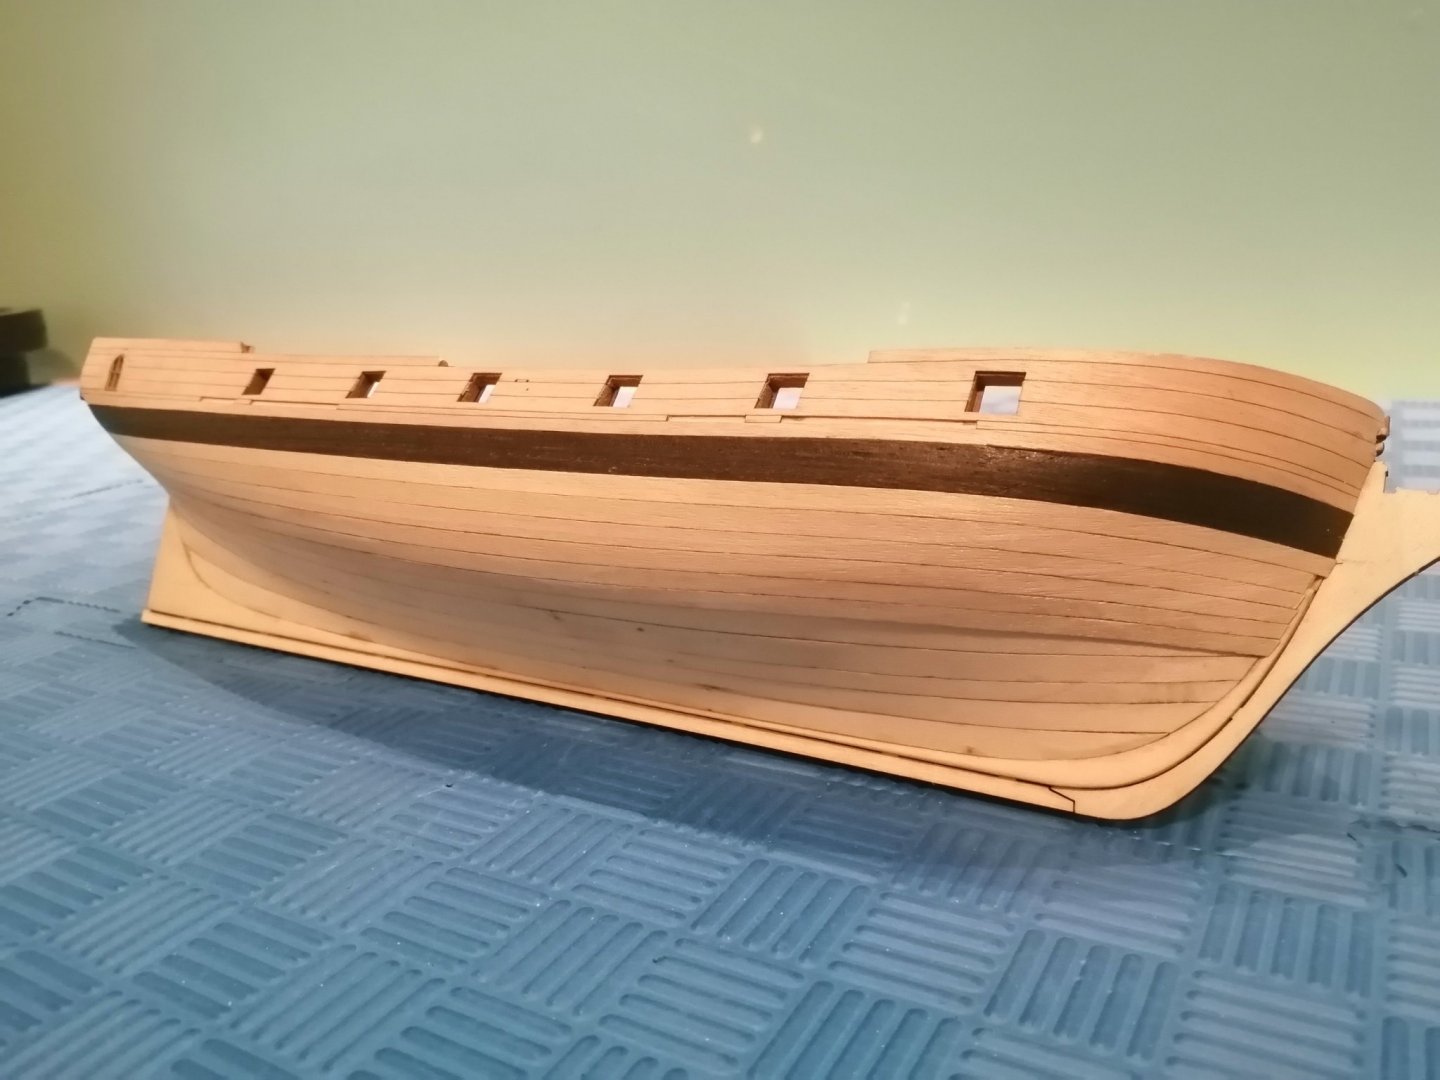
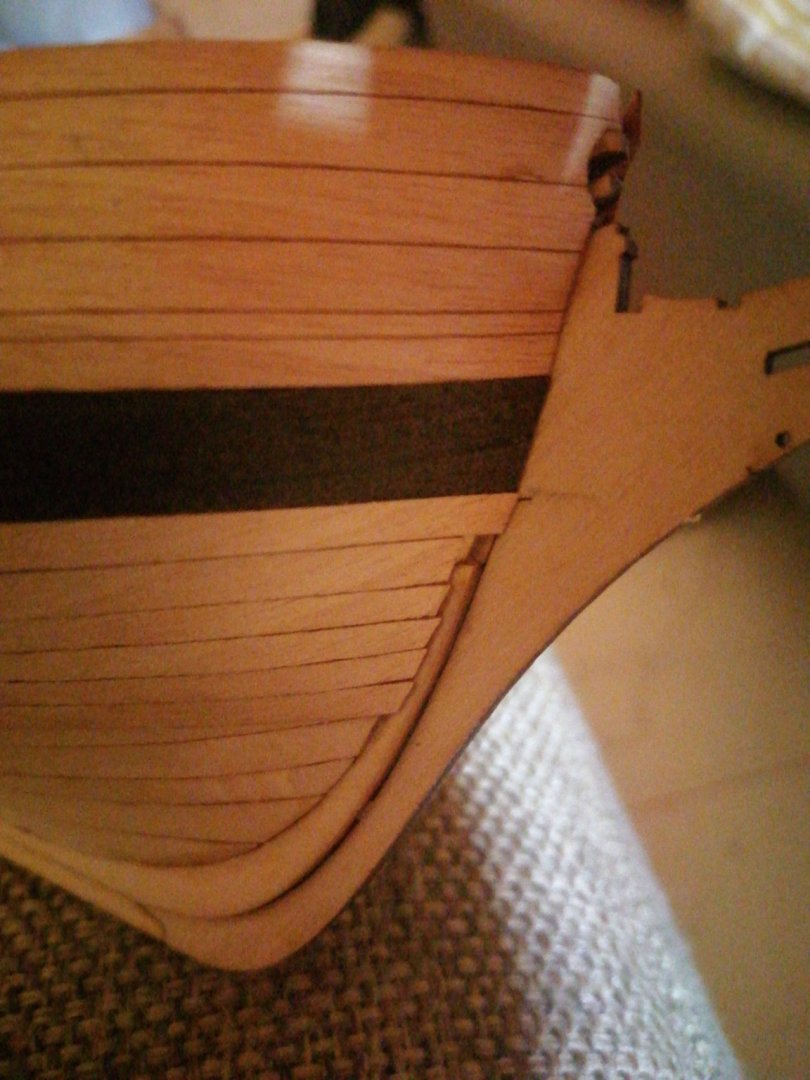
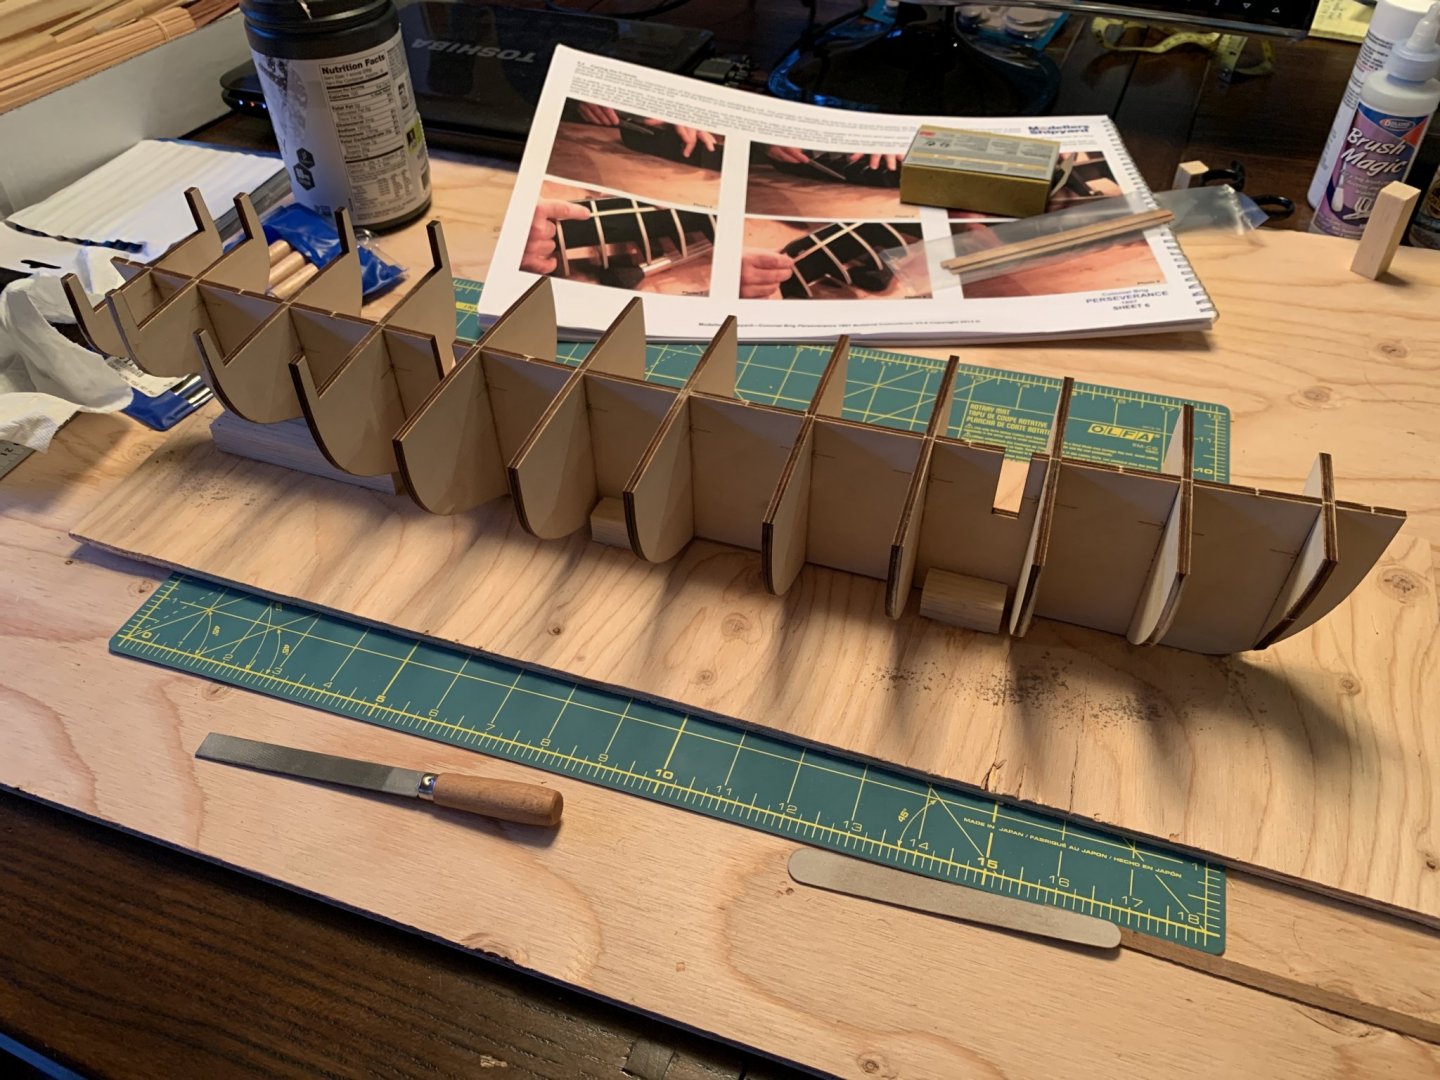
New member in Washington state. Received my first model for Xmas after many years of hints. I’m working on the Perseverance and finished laying the keel a few days ago. Starting the process of hull fairing this evening....
- 6 replies
-
- 6
-
-
- fairing
- hull fairing
- (and 2 more)
-
 Here's a link to a really neat youtube channel called Tips from a Shipwright. One of the things I particularly enjoy about model shipmaking is the extent to which many aspects of the modelling process resemble actual ship building. Planking in particular. I wonder if any aspects of the techniques shown above can be adapted to the modeller's scale...
 -
 Just out of curiosity, I was wondering how kit makers are able to provide pre-spiled planking. I have just received one such Russian kit for a longboat in card, and have seen others (such as Chuck's longboat) with laser-cut pre-spiled planks. Is this done with some computer software, or is it that when making a pre-production model the spiled planks are carefully traced, or that paper is laid on the frames or shell to achieve the same outlines? Tony
 -
 Hello to this great group. I am new to ship modelling, and I have been doing some online research before tackling my first model. I have looked at several tutorials and forums, trying to get as much information as I can before I tackle my next few steps. I would like to start by thanking you all for your contributions, pictures and videos. It certainly helps. I have started on my first build, a Billings Norden 603, plank on bulkhead construction. I am about to start the framing, and have a bunch of questions and some comments, so I thought I would ask them all in one posting. Planking Gluing . I have decided to use CA type glue (medium or thick). Hopefully this will avoid pins or clamps but I will have to work fairly fast. I will practise a bit before working on the model. Plank Bending. I have a Hot Shot Steam Cleaner and tried bending some planks. It seems to work fairly well, but will have to experiment a bit more. Broke one board already, and I notice some separation of the wood fibres in the ones that did bend. Maybe I am trying to bend it too quickly. Plank Cutting. I can cut planks to rough length before mounting, using a scalpel or Exacto type knife. But how do you trim planks once they are installed? Let’s say that you need to trim 1/8” at the stern after installing a plank. What is the best way to do that? I imagine using a knife would be difficult. Is there a fine saw that you use? Dremmel? Keel Gluing. This particular ship comes with the keel split in 2 halves. Instructions say to plank first, then glue the keel together. However some people have posted that they glue the keel halves together first, then plank. I think the latter would be more difficult, but planking each half individually might lead to warping. Comments? Hull Finishing. The hull will be a single layer of planking, and will be painted, so I will need to fill in the cracks. I have seen various methods including wood filler and glue & sawdust. Has anyone used gyproc (sheet rock) filler? This works great for nail holes, baseboard joints, etc. so why not for a model? I want to get the hull as smooth as possible – this model scale is 1:30, so a scratch of 1/32” (0.8 mm) equals a gouge of almost 1” (2.5 cm). Ouch. Decking Glue. I have seen several tutorials on how to lay out the wood decking strips. But I haven’t seen anything that tells me what sort of glue to use, or how to fasten the decking in place. I plan to stain this decking to look like a teak deck, so I don’t want any glue residue which will not absorb stain or finish. How do you guys fasten the decking? Scuppers. I plan to add scuppers to this boat. A real boat would have provisions for quick drainage of water from nets, rain, or spray in rough weather. So I will endeavour to cut some scuppers in the perimeter bulwarks. Sorry for all the long winded questions, but I thought it easier to post once vs a whole bunch of individual posts. Thank you in advance for any help and suggestions. Cheers, Gary
 -
I realize that this question cannot be answered with absolute uniformity, but I am curious how long you cut your planks for the outer layer of the hull. Looking at photos it seems like many who are working in the common scales, 1:48/1:64/1:80 have planks that are about 6 inches in length, with the width about 3/8 inch and the thickness about 1/16 inch; close to 1 x 5 x 150mm. Is this close to what some of you use?
-
 Hi there folks Does any one know what kind of wood is best for the outer skin of planking if I want a slightly exaggerated (raised) surface grain. I intend painting my model (Lynx) black above the water but don't want it too smooth. The Lynx was hiding in the Chesapeake waterways when she was captured and I doubt she was done up like a show boat. Perhaps there might be ways of raising the grain a little after sanding??? Thanking you all in anticipation Don
 -
Hi. I have finally begun building wooden ship models after years of gathering tools, resources, watching and learning, practicing on plastic aircraft models etc. I have many models in my collection but opted to build the most expensive one to begin with. Crazy I know, but hear my reason why. My choice is the weekly part Endeavour from magazines from Newsagents. Because it came in weekly parts, it ended up being a very expensive model. BUT...It had comprehensive, step-by-step, fully illustrated build instructions. Because it was published weekly, some parts of the build required waiting for the next week's issue to continue, and therein lay my problem. The deck comes in several sections, and the instructions required you to place deck planks on that section, and have some overlay awaiting the next deck section. Now, I did wait till I had ALL the weekly parts, and COULD have continued on immediately, but I chose to compartmentalise the build into weekly build sessions for personal reasons. So the overhanging deck planks interspaced with empty decking areas that will have deck planks placed in the next issue or build session got a bit dry I suppose, and when gluing the next section of planks, the planks tended to "rise" up a bit and not sit flat. I hope the attached photo illustrates the planks sitting off the deck, and not quite glued down correctly. So that's my problem...how do I fix this? I thought perhaps I'd water down some white glue until it was very watery, suck it up into a syringe with a needle, then try to carefully squirt it under the lifting planks and place some kind of weight on it to help it "sit down" properly. Does any experienced ship builder have any other ideas? Any help will be gratefully received. I am really at a loss, and that solution seems like it might work, but I don't want to mess it up. Sure, I have enough planking (and better good quality stuff too) but I want to build this first model out of the box, no scratch building. Can anyone provide a solution? Any suggestions for a better way? Or helpful suggestions for my method. What sort of weight can I use that will not stick to the deck without damaging it? Can I just squirt on a thin layer of white glue and hope it will seep in under the planks? As I said, any help at all will be gratefully accepted. Thanks in advance Steve
-
 Hi everyone - I am relatively new to ship building and have run into a problem/question. I am building Artesania Latina HMS Bounty Jolly Boat and am confused how to incorporate the Keel. I've attached some pictures of my progress. I have already decided that I will do a second layer of planking and therefore decided to use some putty to fill in some gaps in the planking rather than additional small pieces of wood. As I was sanding down the bow, I decided to test the fit of the keel piece and noticed that the inner curve of the keel does not match the curve of the hull-- at all! Since I already was going to second plank, should i fill this huge gap with putty? should I do something else? I am really confused and would love some guidance. Thanks, Erin
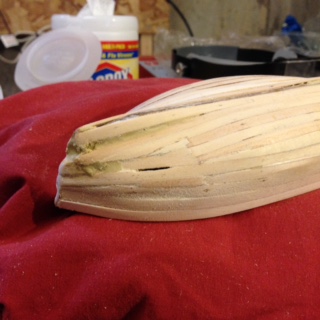
-
Probably a dumb question but how do you use this tool? http://shop.excelblades.com/p/nail-setter Wife and I are still trying to figure out how to use this in getting nails in planks. More accurately, into planks and then frame.
-
 My Tugboat is Developing Leaks! I planked my Anteo tug boat in February of 2015 and completed the model in August. Here's the build log: Anteo Harbour Tug (Panart) This was my first double planked hull, and I was pretty proud of it. And now, less than two years later, the planking is separating at the glue joints due to seasonal movement of the wood. Of course I soaked the basswood planks before gluing them down to make them pliable, so they would have swelled to their maximum width when installed. Now it's winter, the air is dry, and the wood has shrunk. Is this a common problem? Is there any way to avoid it?

- 19 replies
-
- 4
-
-
- separation
- wood movement
- (and 1 more)
-
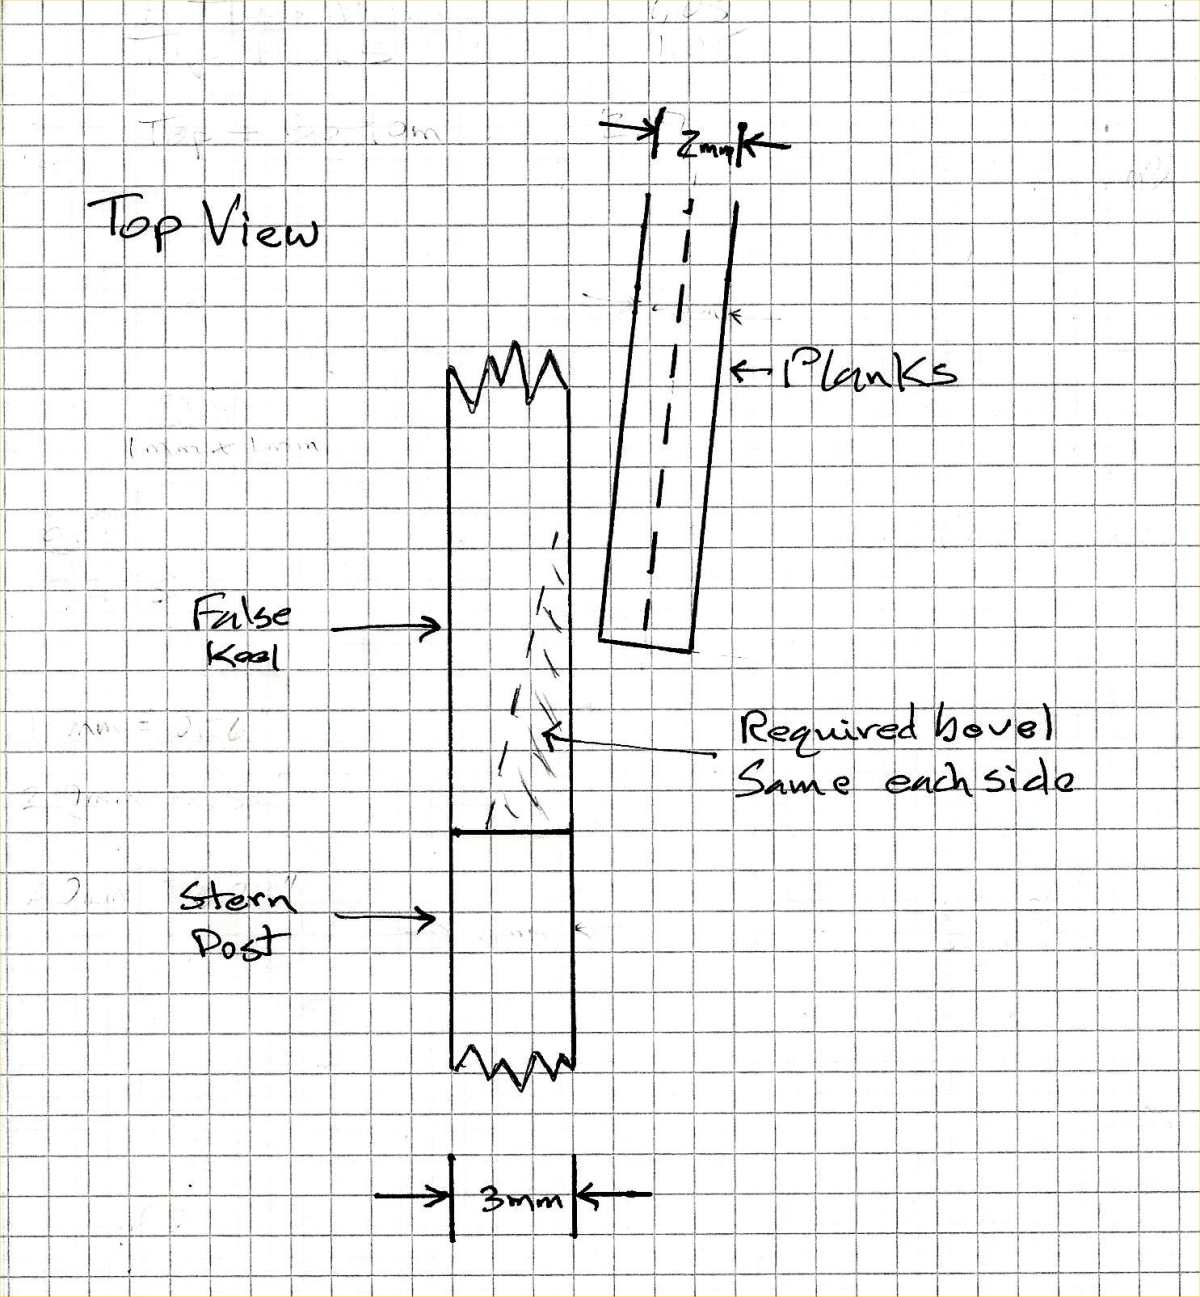
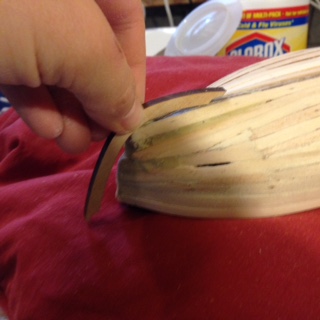
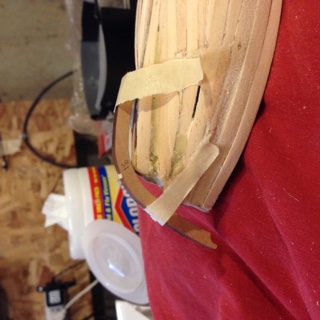
 Now that I am largely retired, I have the time and inclination to get back to my long-neglected in-progress models. I am working on the Victory Models' Lady Nelson. I am nearly done fairing the hull but have encounterd a problem I could use some advice on. The LN is double-planked and the kit includes 1 mm X 4 mm limewood strips for the first layer and 1 mm X 4 mm walnut strips for the second. I am at the point in the fairing for drawing a bearding line at the stern and tapering the false keel to create a rebate (correct term?) for the plank ends to rest in. The problem is that the false keel and the sternpost are both 3 mm thick, but the thickness of two layers of planking is 2 mm on each side. Obviously, 2 mm of rebate on both sides is not possible. The sketch shown below illustrates the problem. I'm a bit stymied on what to do. I do intend to replace the kit's 2nd plank walnut strips with boxwood which I wll cut myself. One possible solution would be to replace both the limewood and walnut with thinner strips, say 0.5 mm. That would allow me to carve a proper rebate and still leave 1 mm of thickness in the false keep (and have the added benefit of making the strips easier to bend). My concern with this is, would losing 1 mm of planking thickness on each side of the hull degrade the accuracy of the hull shape? (Assuming the kit was designed with such accuracy.) Has anyone else encountered this problem? Suggested solutions for addressing it would be most welcome.
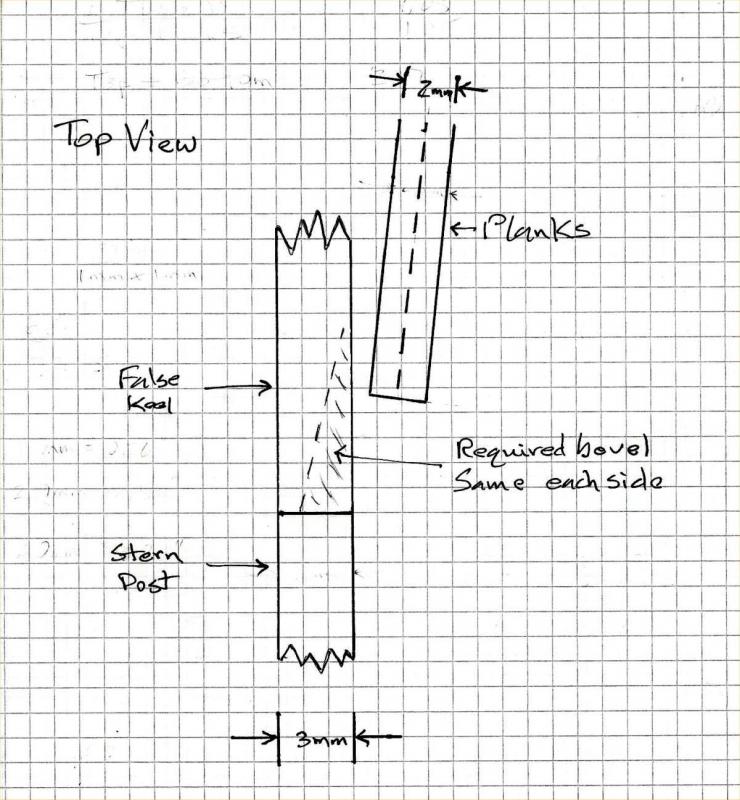
-
 Hello, everyone! I've been taking some time to read up on all the planking tutorials offered here, and I'm trying to conceptually apply the techniques that I'm learning to my first build, which will begin in a week or two. I believe I understand the planking process in theory, but I've noticed that, with the exception of the "Hull Planking Techniques for Beginners" guide (http://modelshipworldforum.com/resources/Framing_and_Planking/plankingprojectbeginners.pdf), most of the guides seem to describe a technique in which each individual plank is spiled to fit the lined-off sections on the bulkheads. While this method seems easy to understand and certainly appears to provide a beautiful fit and a great-looking hull in the end, it requires you to use your own wood, as the spiled planks you cut out require stock that is wider than the planks that are included with the kit. This method seems ideal to me, as it puts less stress on the planks, and seems to make for an easier planking process, as long as you take your time cutting out each plank as perfectly as possible. However, I'd like to strengthen my understanding of the process used if one were to plank using the strips of wood included with the kit itself (for the sake of clarity, I've written my questions in bold). Based on the guide, it would appear that, in this case, you are to use the measurements of your lined-off bulkheads to plot a curve along the top side of each plank (i.e., the upper edge of the plank when the model is upright, with the keel on the bottom, as if the ship were sitting in the water). The top edge of the plank is then tapered along this curve (without ever tapering the bottom edge of the plank), minor adjustments are made, and the plank is moistened and heated, then bent over the bulkheads and clamped, where it is allowed to dry in order to take the shape of the hull. Once dry, the plank can be adhered to the bulkheads. Is this correct? From what I have read, the only plank to which this method does not apply is the garboard strake, which is tapered along its bottom edge to match the curve formed by the bottom edges of the bulkhead where they meet the keel. The top edge of the garboard strake (when the hull is positioned upright) is not tapered. Do I have that right? Finally, I'm curious about the wale. Is this where most people start planking, working down to the keel? Is this plank tapered at all? If so, which edge is tapered -- top or bottom? While I had originally assumed that I would simply plank my hull using the strips that come with the kit, I've become quite interested in the spiling technique, as the hulls I've seen that result from the use of this technique look amazing. My kit has not arrived yet, so I do not yet know the thickness of the planks that are included with it. If I were to acquire some 1/16"-thick sheets of basswood, would this thickness be comparable to the thickness of most first-layer planks that come with these kits, or is 1/16" too thick? I appreciate the help, guys!
 -
I'm about to start planking the hull of the Amati/Victory Models Lady Nelson, and I was hoping to get some feedback on the lines of my proposed planking bands. I basically just divided up the plank widths on my tick strips for each bulkhead by 3 (4 top planks, 5 middle planks, and 4 bottom planks), then tweaked the lines at the bow to be a little more aesthetically pleasing. I'm still considering lowering both lines at the bow to give me a little more space for the upper planks and tighten up the area around the garboard strake. Any and all comments are appreciated! Thanks!
-
In all the tutorials that I have read on planking, there is much talk of marking the widths of the planks on the bulkheads to guide you when you start laying your battens. However, there is generally very little discussion of what to do at the bow and stern deadwood. When taking the measurements of each bulkhead, do we also include the deadwood area, following the line of the bulkhead down into this area? Should we mark the widths of the planks at the stem and on the deadwood area, as well? It makes sense to me that this would the correct way to proceed. Is that right?