Search the Community
Showing results for tags 'pride of baltimore ii'.
Found 18 results
-
 After taking a few weeks off after building the Calypso I'm off on a new build! I'm going to tackle building the plank on bulkhead model of the Pride of Baltimore (POB) II by Model Shipways, inc. In preparation of this build, I read the book Pride of the Sea by Tom Waldron. This book gave me insight into how the original Pride of Baltimore was conceived and built by the city of Baltimore, and the tragic sinking during a sudden squall on May 14, 1986. More to follow! Fuji
-
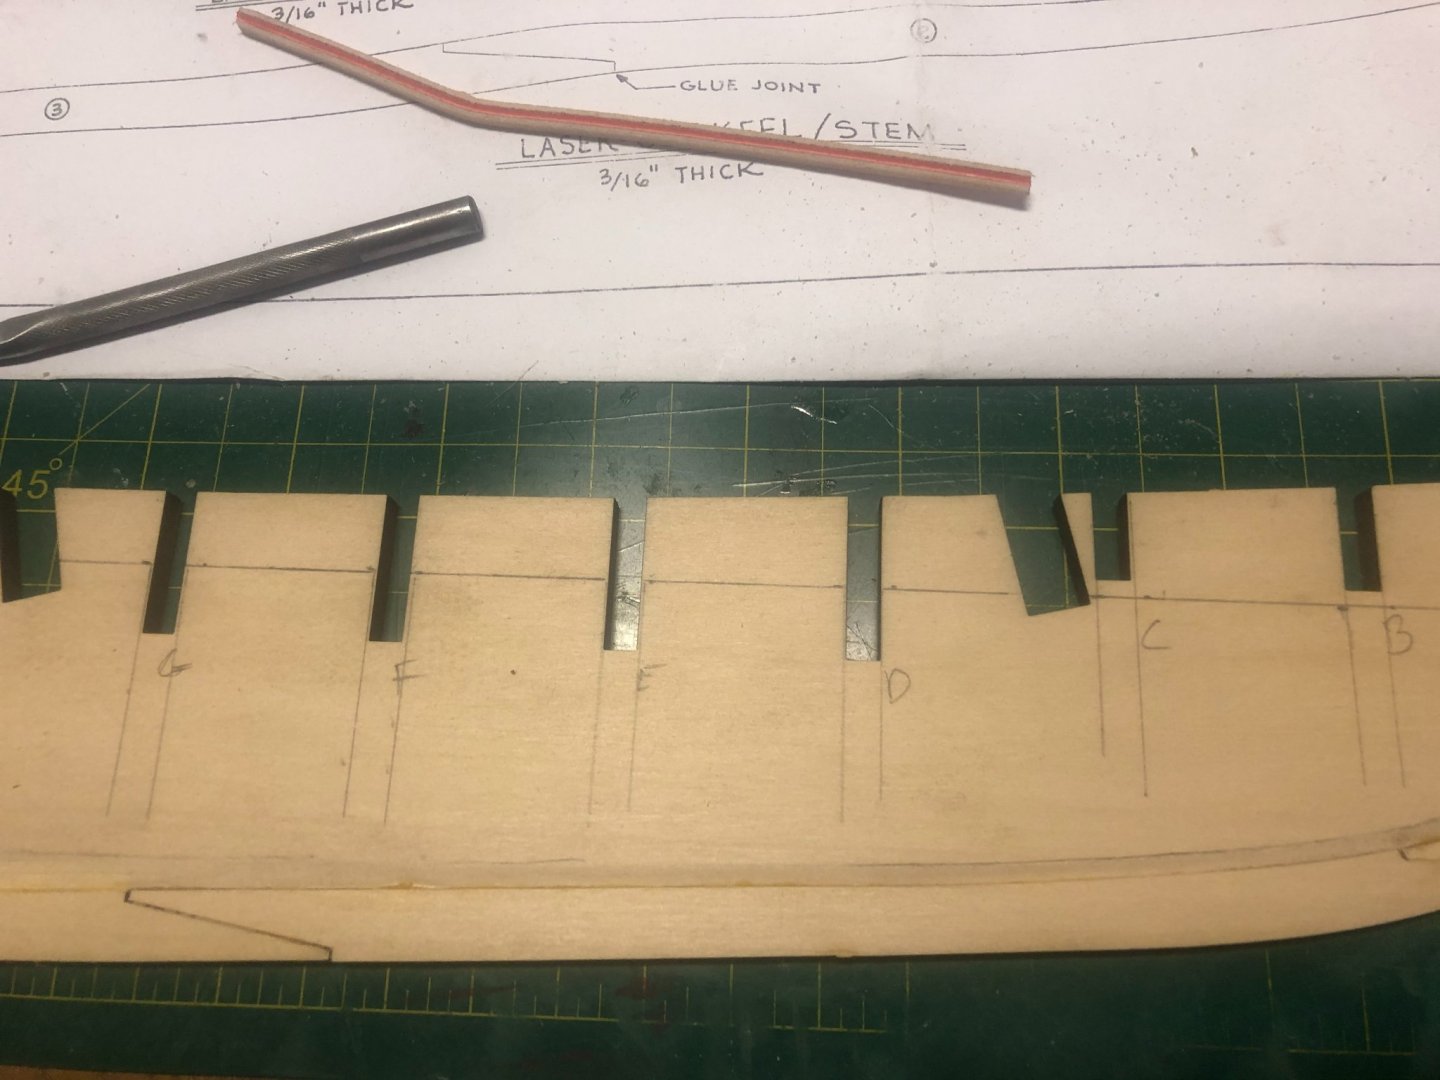
 I've decided on the POB2 as my next build. I'll save the rigging of the Medway Longboat for that inevitable time when I get a little tired of this ship. I've chose this model for a few reasons. Lots of interesting deck work Lots of available resources Love the lines of this ship, and really like the way it looks under sail. That's the plan going in...To make this my first attempt at sails. ..And last but not least, while I was contemplating what to make next, the POB2 showed up in a MS email for 50% off. 🤑 I've been looking at the first chapter of Robert Hunt's practicum that is available on line, and I'm torn about ordering the package. It's a bit pricey, IMO, and there's a wealth of free info here in the MSW forums. That said, I really like the idea of step by step instruction, since I'm still quite the novice. Reading through the instruction manual that comes with the kit, I can pretty much say they're almost useless. The plans, on the other hand, look good and very detailed. I've got plenty to do before I would need chapter two of the practicum, since I tend to move at a snail's pace with this hobby. And I'm sure this build won't go any faster. The kit arrived and the parts all seem to be in order. The dowels for the masts resemble the letter "U" and will certainly not be used. Maybe I'll try rounding off square stock, or at least get some kind of hardwood dowels that are better than the horrible pine dowels supplied. Rigging and blocks will have to upgraded as well, as I've already been spoiled after using Siren line and blocks on the Kate Cory. I'll decide as I go how many of the cast metal fittings will be used. Either because they are out of scale, or because I'm going to leave some of the modern touches off this model, such as propellers, or just because they're just plain horrible. Anyway, the project has begun. Bearding line drawn in using a template that I cut from cardstock, followed by cutting a rabbet. Stern, keel, and bow glued into position and drying. reference lines have been drawn on the center keel, Next up will be cutting out, marking up, and fitting the bulkheads.
- 45 replies
-
- 5
-

-
- Model Shipways
- Baltimore Clipper
- (and 1 more)
-
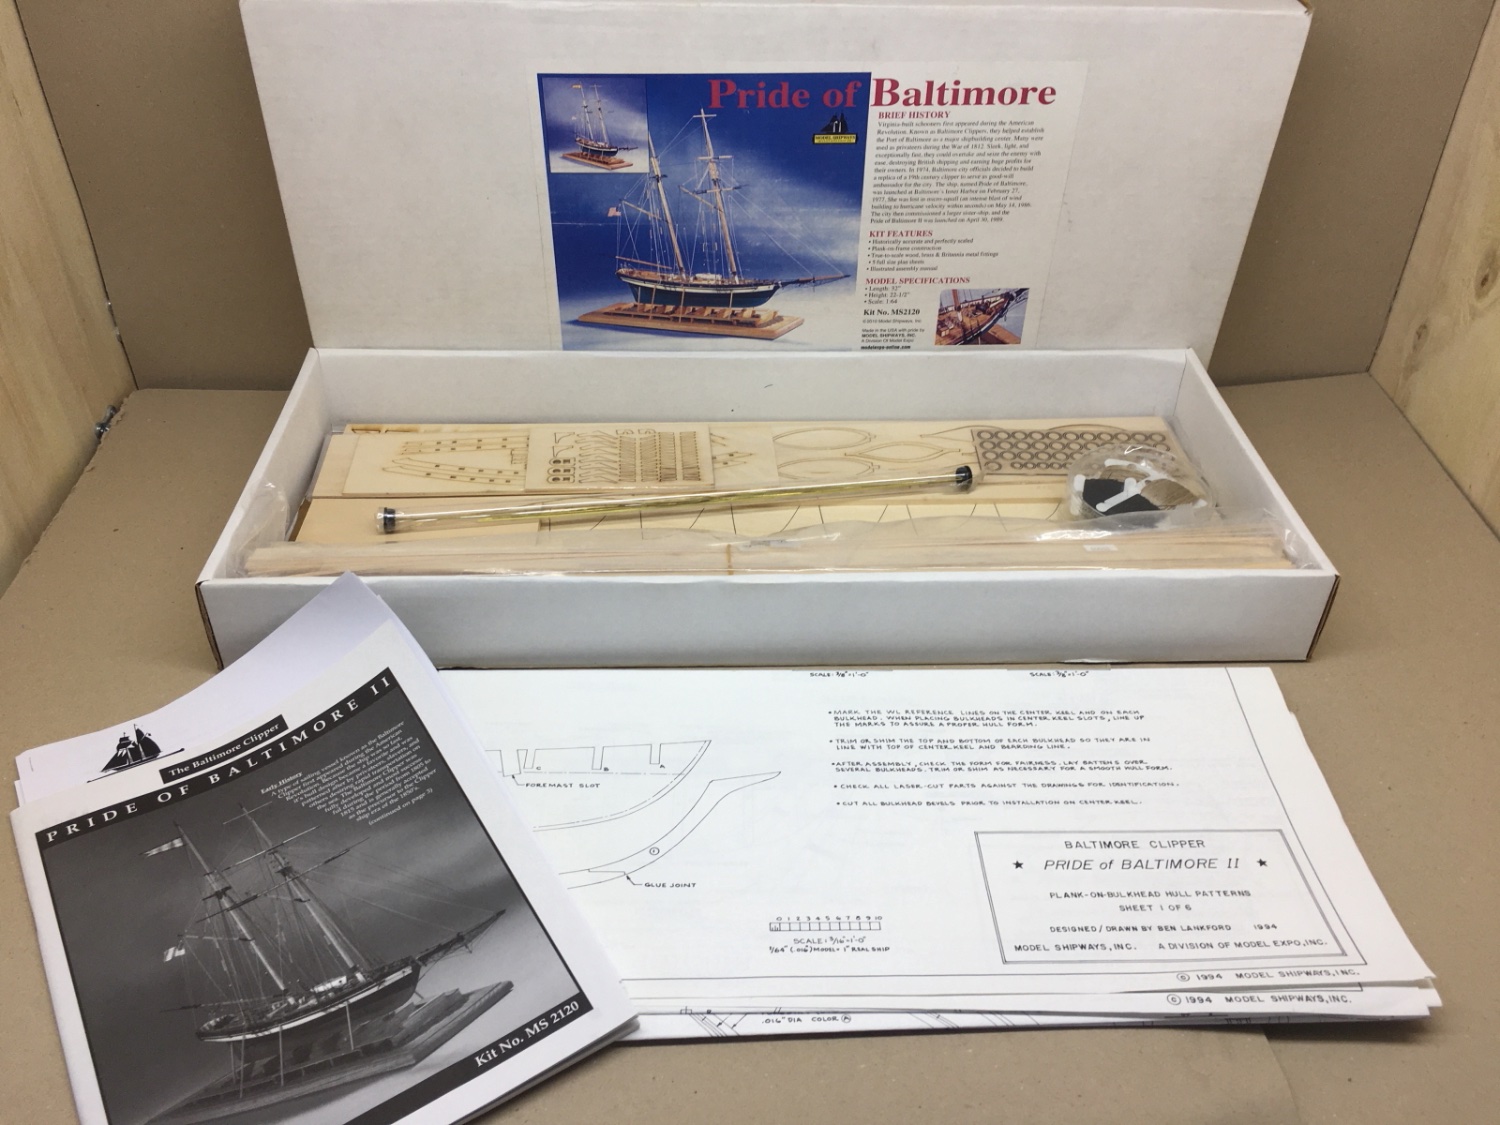
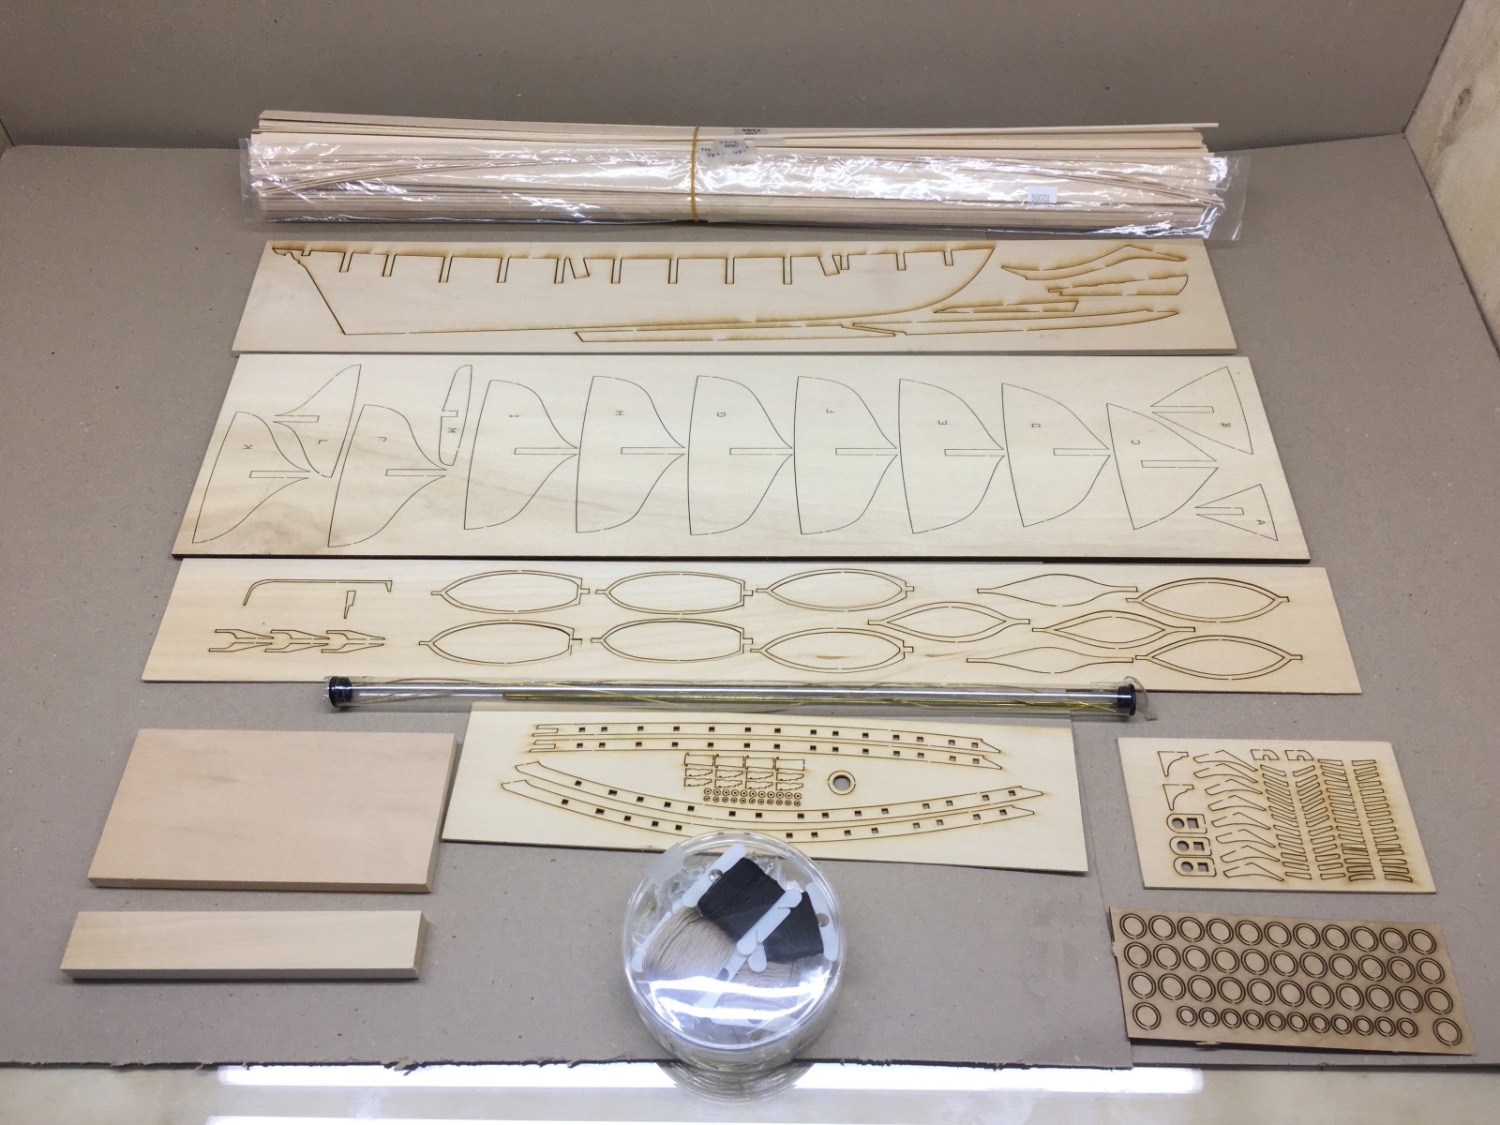
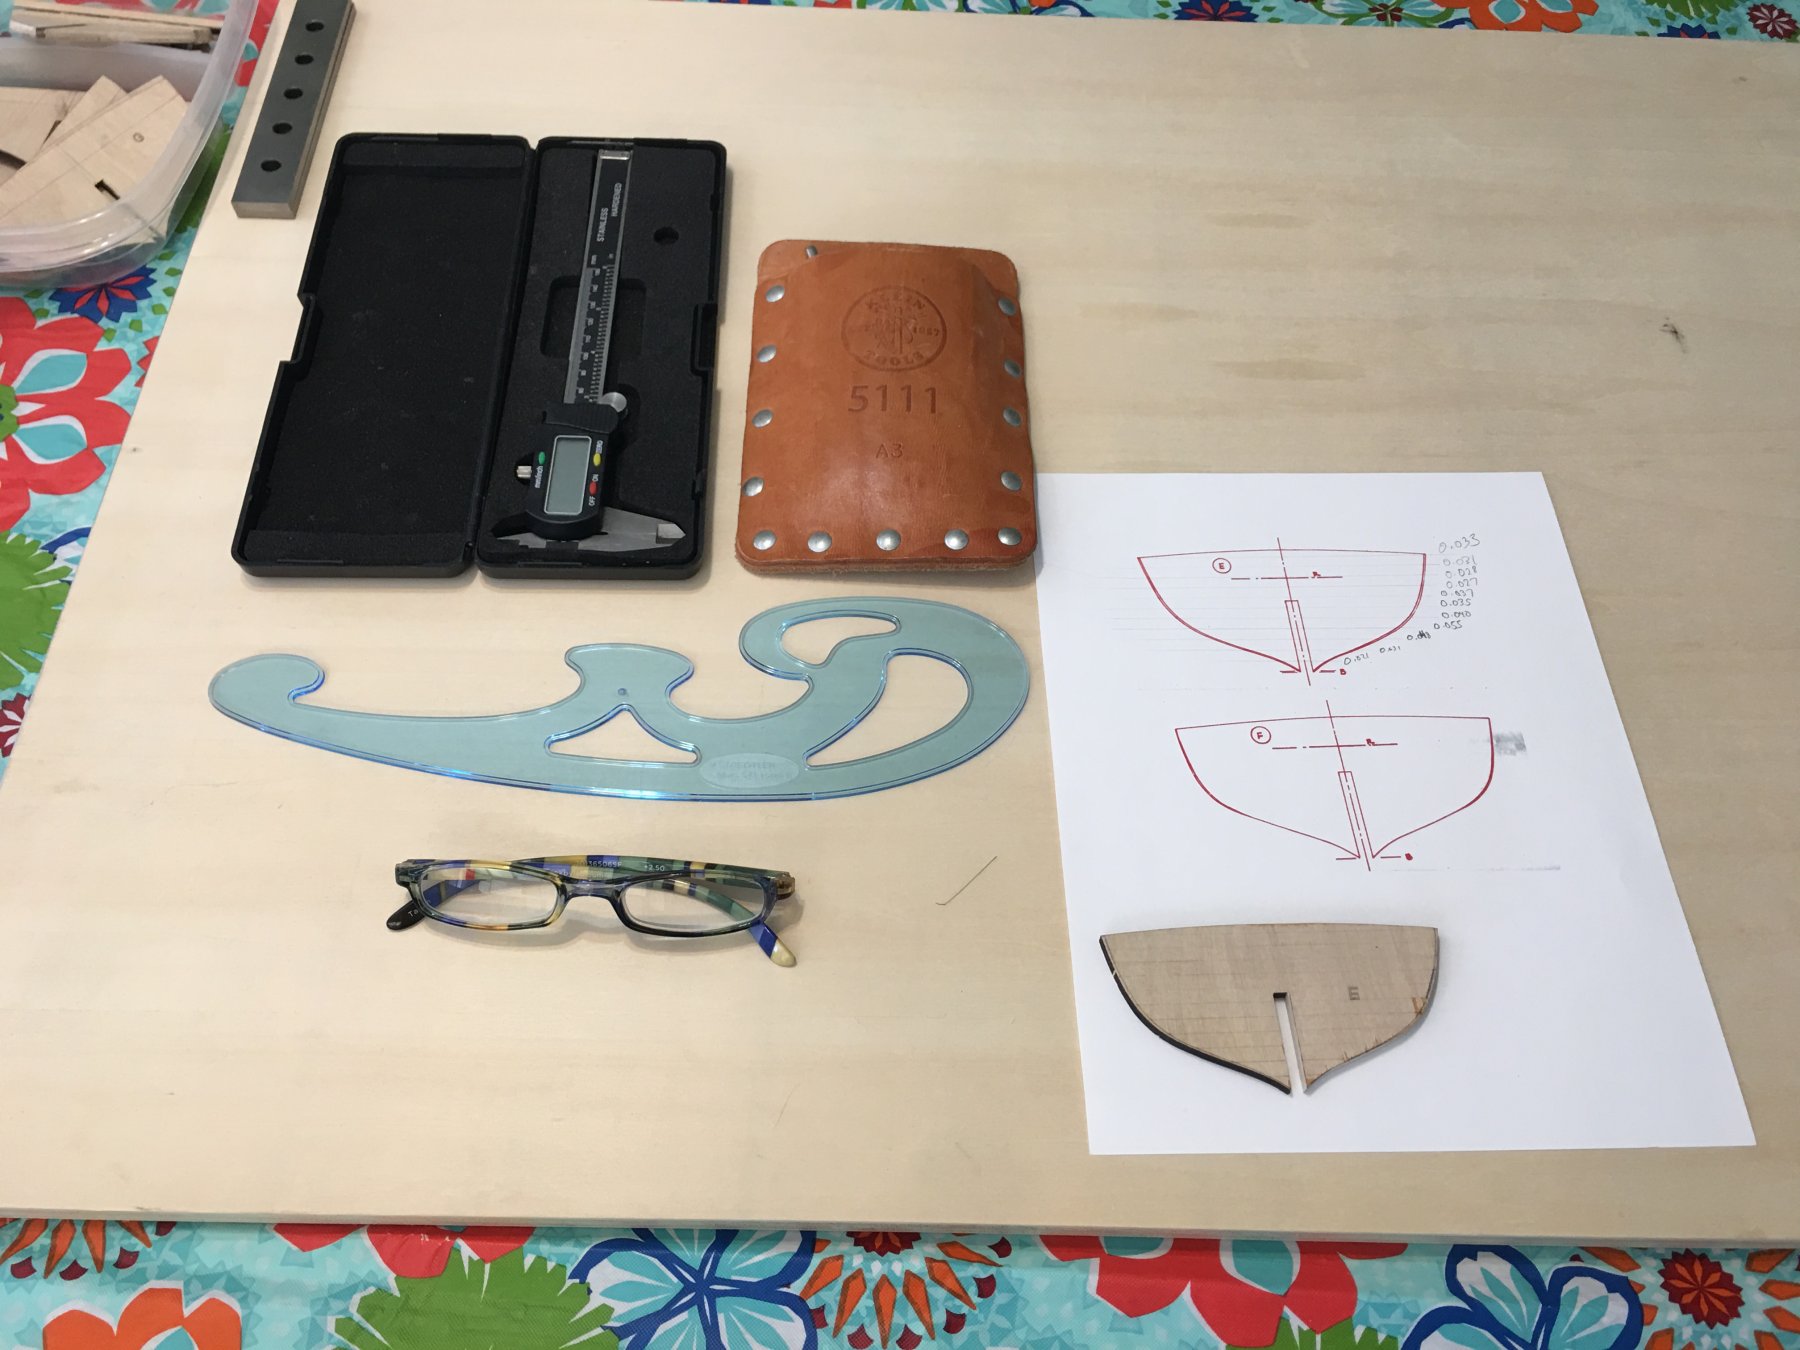
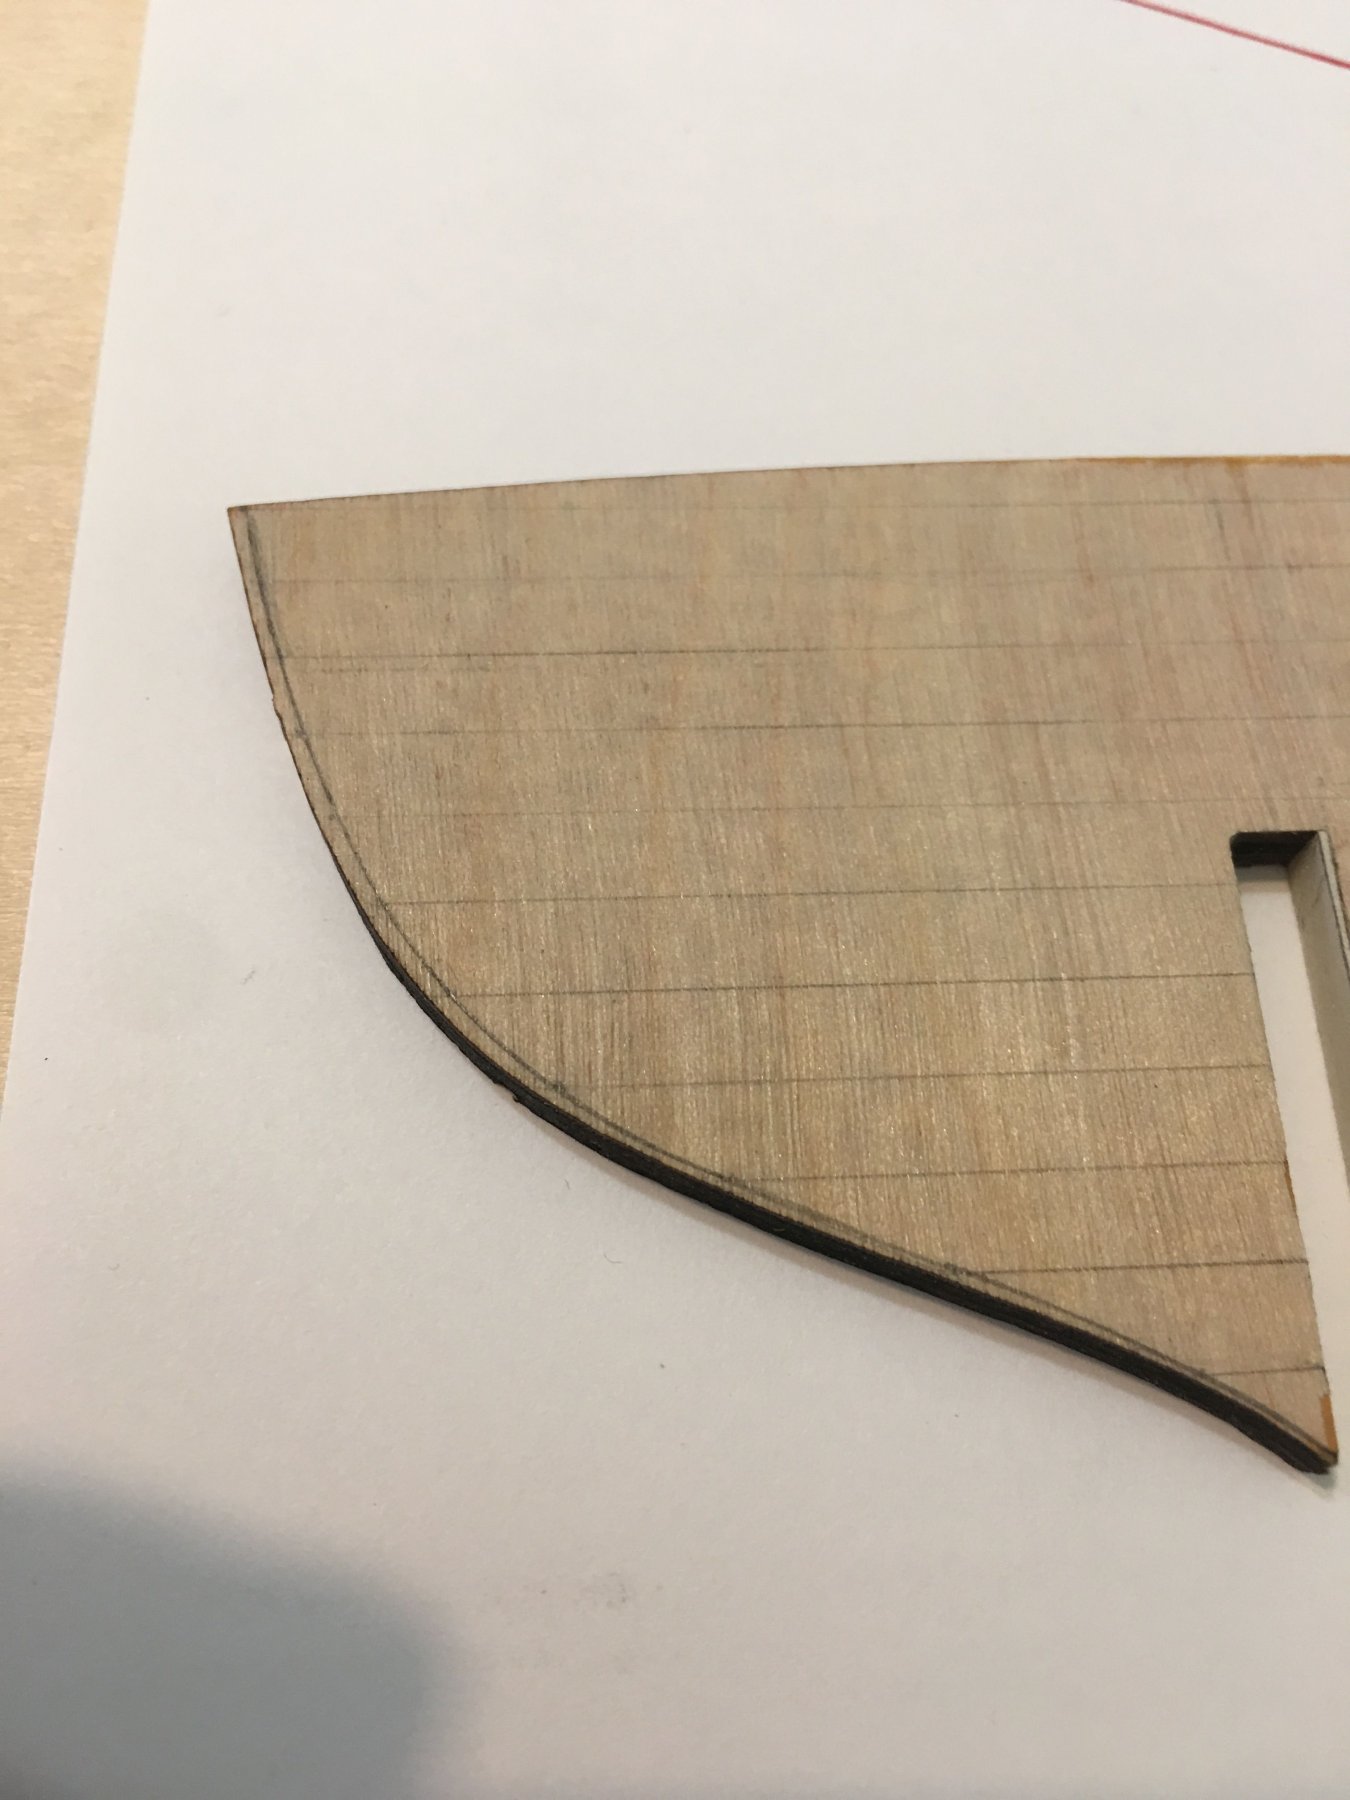
 Hello Modeler Friends, This will be my first build blog posted in the forum. It will be a retrospective one as the model is already finished and finished photos are posted in the gallery under the same title as this blog's. I am a retired Otolaryngology surgeon and from Turkey as I have stated in my introduction post to the forum. Many of you probably wonder about the reason of the choice of this particular model. Here is the short story. In 2013 I was planning to start scale modeling after a gap of nearly three decades . At that time my son was living in Cliffside Park, NJ and a graduate student for his Phd studies in Rutgers Business School. Before visiting him I made some internet research and came across a hobby shop named Hobbymasters located in Red Bank, NJ. On one of his free days he took me to the shop. This kit was the only one on the shelf without a ready solid hull and I jumped at it at once. I was very happy with a yellow bag filled with a wooden ship model and some extras as paints, knife sets and brushes. I even asked my son to take a picture of me in front of the shop. I still keep the yellow plastic bag, shop's business card and even the receipt and credit card slip, all in the kit's box. After returning to home in Ankara, I studied the contents , especially the instruction booklet and the plans. I was a bit demoralized and overwhelmed by the number of parts and detailed plans . At that time I was building plastic model of Golden Hind by Airfix models and when compared to the kit I bought it was very easy. So after I completed Golden Hind, POB II stayed in the shelf until August 2020. Between 2013 and 2020 I build many models of wood horse drawn vehicles such as Civil War Coffee Wagon, Doctor's Buggy, Buckboard Wagon and Conestoga Wagon from Model Trailways, Stagecoach and Cavalry Wagon from Artesania Latina plus two ship models ( a Maine Lobster Boat and Bandirma ' Panderma ' by Turkmodel ) which are both local productions. This building sequence probably boosted my self-confidence and POB II travelled to workshop table from its resting place in the shelf on August 21st, 2020. Although it has been nearly 7 years after its purchase, the Modelexpo company quickly provided the missing and damaged parts without any questions asked . Here are contents of the kit. At the printing shop I got 3 copies of the plans printed and the owner provided me tiff pictures of them also. I used the copies of the plans throughout build and rarely consulted the original ones. I pinned one of the plans to the large cork panel on the wall in front of me in order to have a constant view. One of the plans was used for cutting out particular parts of it and keeping them on the worktable for to reach easily for measurements, calculations and transferring plans to wood. And one was kept for backup. Tiff pictures were uploaded to iPad and iPhone as well as to a computer for quick referring when I was away from the workshop. Before starting the build I researched a lot about the POB II build. There are a quite number of builds in the forum but many of them were unfortunately unfinished for various reasons. I am grateful to the modelers who finished them, mainly to Jdbondy, Karleop and David Lester. As I was accustomed to present my work, thanks to professional as a teaching professor of medicine as well as a practicing surgeon, I believe shared experiences are valuable whether successful or not. With your failed work, at least you can warn others and alert them about what not to do !. This is the main reason I am starting this blog. There will be a lot steps you will disagree and probably are wrong. But keeping in mind the phrase ' there are many ways to skin a cat' and as I did finished the model , I hope my journey will be helpful to the future builders of this beautiful model. I will try to post daily and preparation of the false keel, stem, sternpost and rudder will be on the next one. The link to the photos of the finished model can be viewed at gallery https://modelshipworld.com/gallery/album/2633-pride-of-baltimore-ii-by-halituzun-model-shipways-164/ Index of the post topics (with page number/post number/topic subject/s). This index is in the order of the real build time (95 %). Topics are linked directly to their post. Clicking the underlined words opens the post page. 1/1 Introduction 1/4 False keel, keel, sternpost, stem and rudder 1/7 Bulkheads, stern blocks 1/10 Bulkhead and stern block beveling First hull planks Wale planks 1/13 Zone A hull planking 1/14 Zone B hull planking 1/15 Zone D hull planking 1/16 Zone C hull planking 1/17 Counter planking Completed hull planking 1/21 Hull sanding 1/22 Planksheers, Stern knees 1/23 Transom planking Hawse timbers 1/24 Coamings Preparation for deck planking 1/25 Painting of plank sheers, stern knees and coamings 1/26 Deck planking Choosing stain color for deck planks 1/29 Bulwark construction 1/30 Staining deck planks 2/32 Pintle and gudgeon brackets 2/33 Hull, deck and bulwarks sanding sealer 2/35 Final painting of sheer planks, stern knees, transom inboard and coamings Bulwark painting 2/36 Drilling holes on the deck and bulwarks inboards Construction of bulwarks inboard structures ( cavels, mooring chocks, wood cleats) 2/37 Fore deck second layer planking Matt clear coat for deck Bulwark inboard structures installation Ship's name at bow 2/40 Fancy piece, Fashion piece, Transom mouldings 2/41 Bulwark installation Drilling Hawse pipe holes Inboard and outboard stringers 2/42 Propeller, support brackets, shaft and shaft log 2/43 Transom lettering 2/44 Primer paint coats for hull 2/45 Load Water Line (LWL) drawing 2/46 Hull painting below LWL (green) 2/47 Hull painting, yellow and black Transom and depth gauge lettering Gloss coat for hull 2/50 Main rail production and installation 2/51 Main salon production 2/52 After Cabin production 2/53 Engine room top production 2/54 Crew berthing/galley access top production Fire hyrant, hose and nozzle production 2/55 Hatch, wheel, wheel box and binnacle production 2/58 Ventilation boxes and deck lockers production 2/59 Windlass 2/60 Fife rails, pin rails 3/66 Bow fairlead, Fore deck steel hatch, Pin and cleat platform at bow Channel platforms, Anchors, Catheads, Gunport lids, Steps, Wood bits, Swivel Guns,Propeller system, Bilge pump hose and nozzle productions 3/67 Building-ways 3/69 Ship's boat 3/70 Cannons 3/71 Life rings 3/72 Mast and spar construction and painting 3/73 Bowsprit construction and painting 3/74 Blocks, deadeyes, metal thimbles, metal turnbuckles, lower yard sling baggy wrinkles, preparation and productions 3/75 Final satin coats of the hull Installation of the all finished deck structures except the the ones around the mast insertion holes. 3/78 Rigging preparation and plan Structures related to rigging on masts and spars Rigging lines and blocks preparation and bagging them with tags 3/79 Bowsprit Rigging 3/80 Bowsprit safety netting 3/83 Sail preparation 3/87 Fore Topgallant Sail 3/88 Fore Topsail 3/89 Main Gaff Topsail 3/90 Main Sail 4/91 Fore Sail 4/94 Installation of the fore mast yards 4/95 Installation of the masts to the deck 4/96 Running rigging of the lines belaying at the bases of the masts Running rigging of main boom at aft deck 4/97 Forestay Sail, Jib and Jib Topsail 4/98 Rigging II 4/99 Coiled ropes 4/105 Shrouds, Ratlines, Topmast Stays and Running lights 4/107 Weathering of sails and coiled ropes 4/108 Life lines, Swivel Guns, Shroud cleats and Main Stay Hauling Tackles 4/110 Flags, preparation and installation


- 114 replies
-
- 9
-
-
- Pride of Baltimore II
- Model Shipways
- (and 1 more)
-
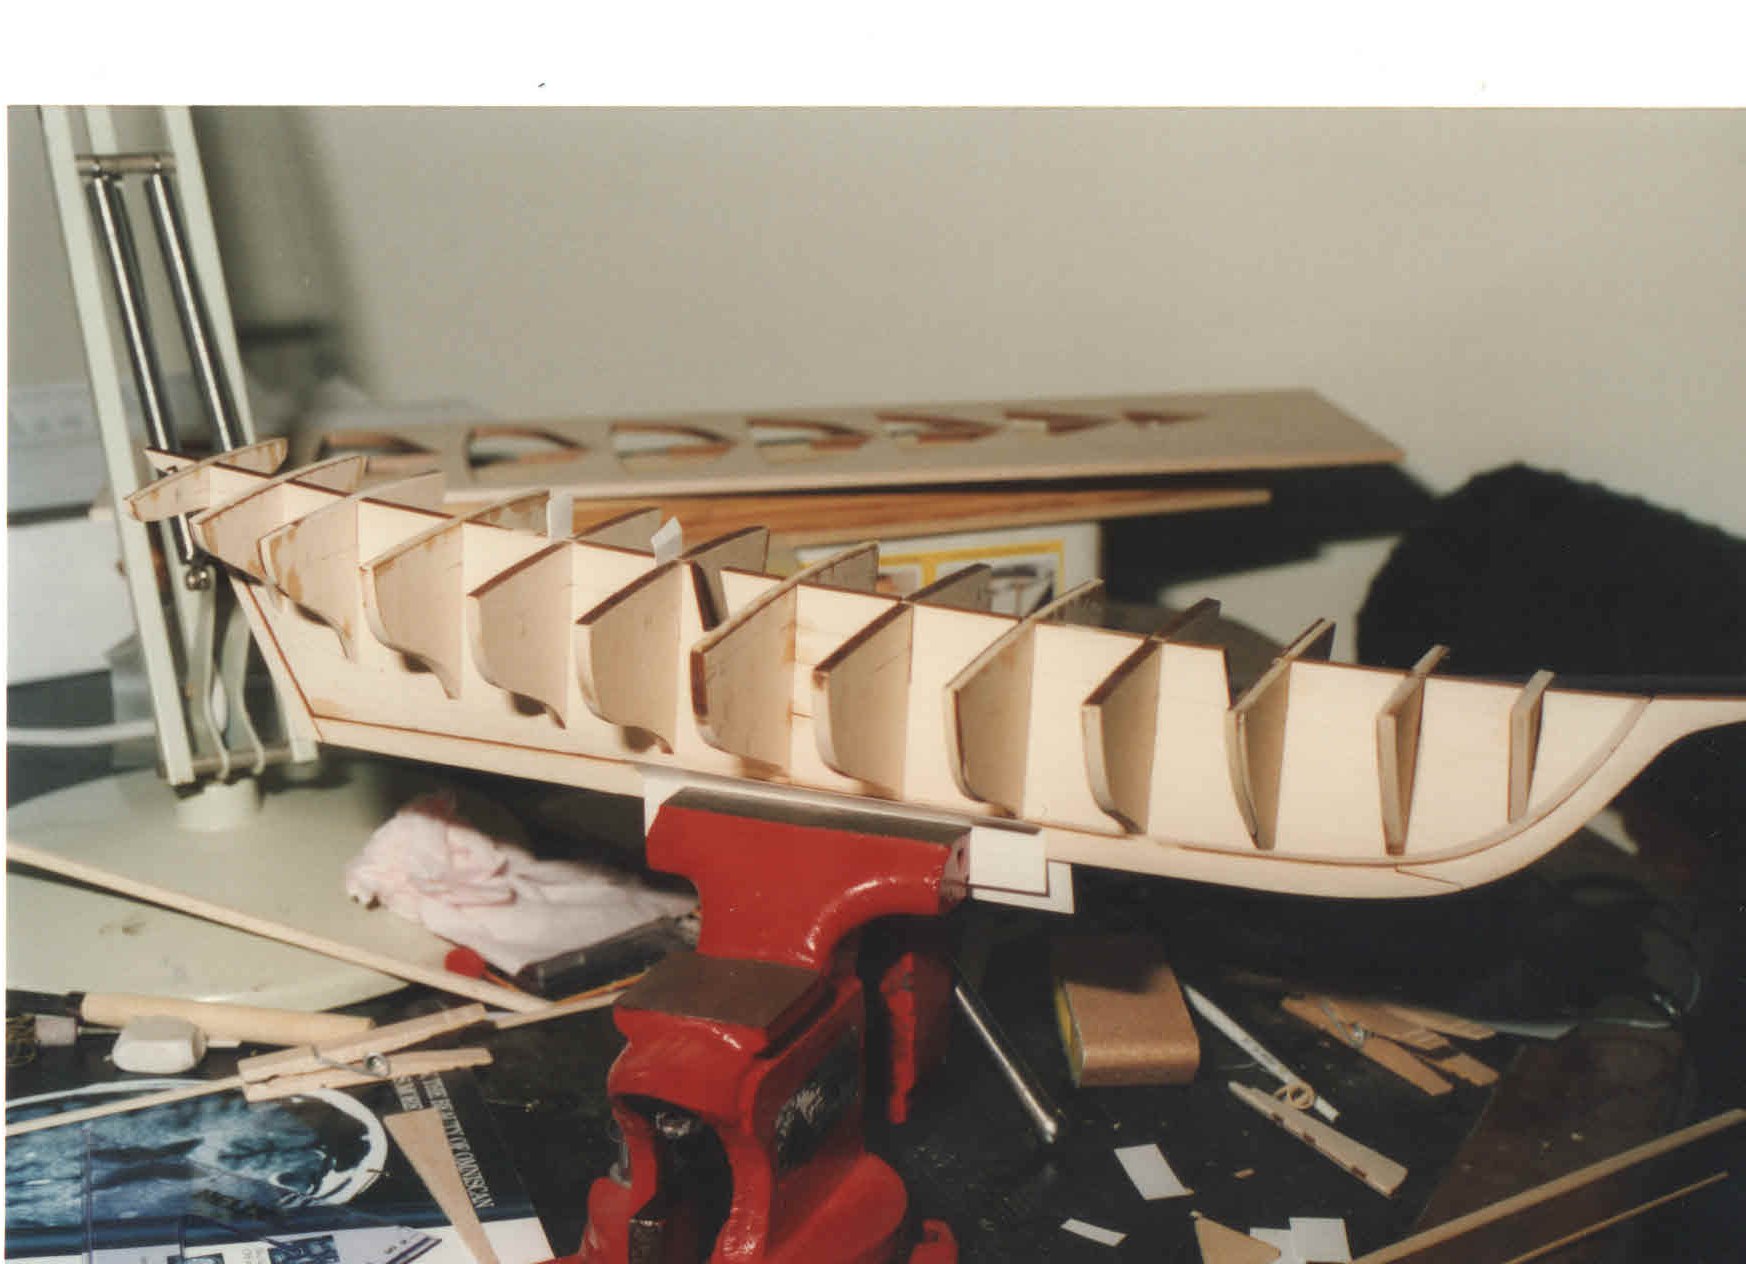
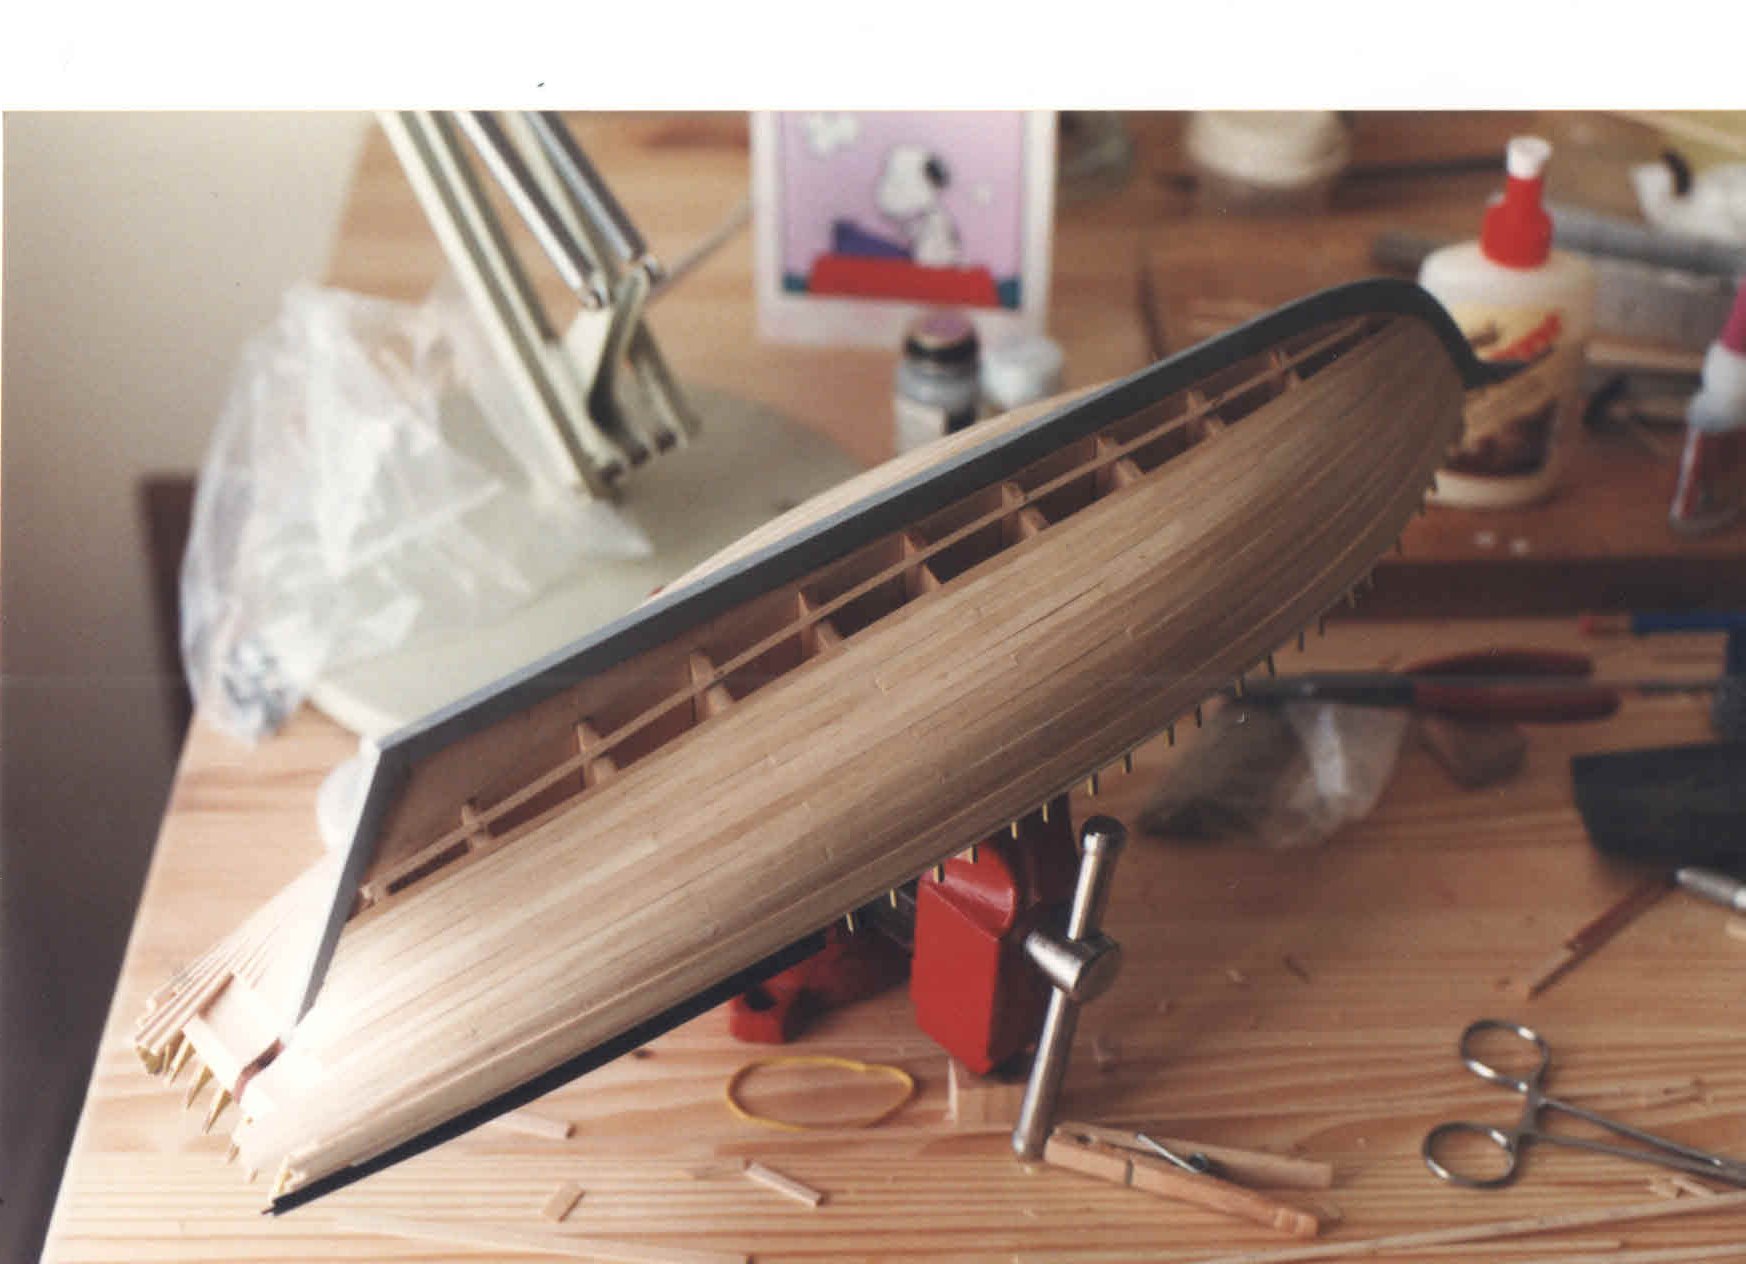
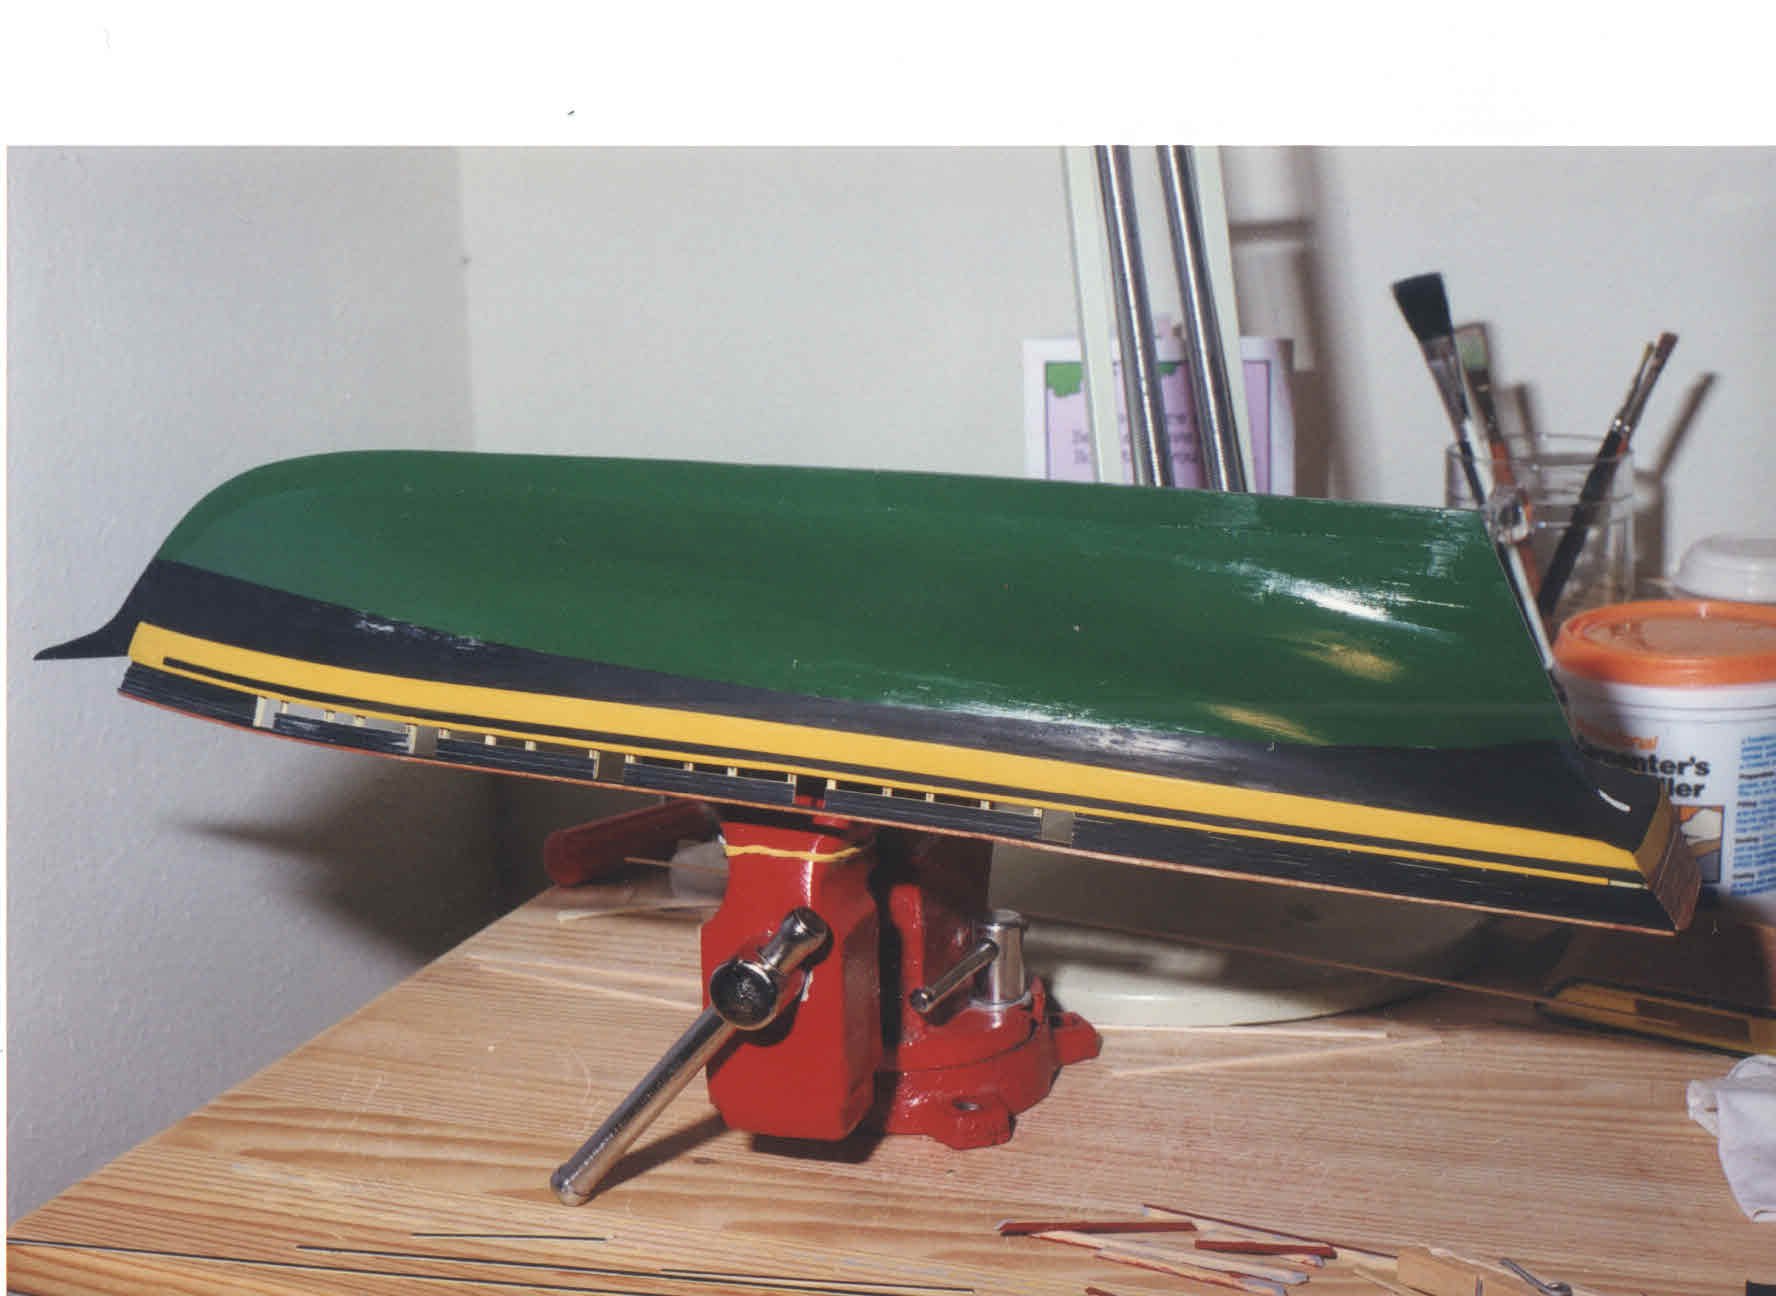
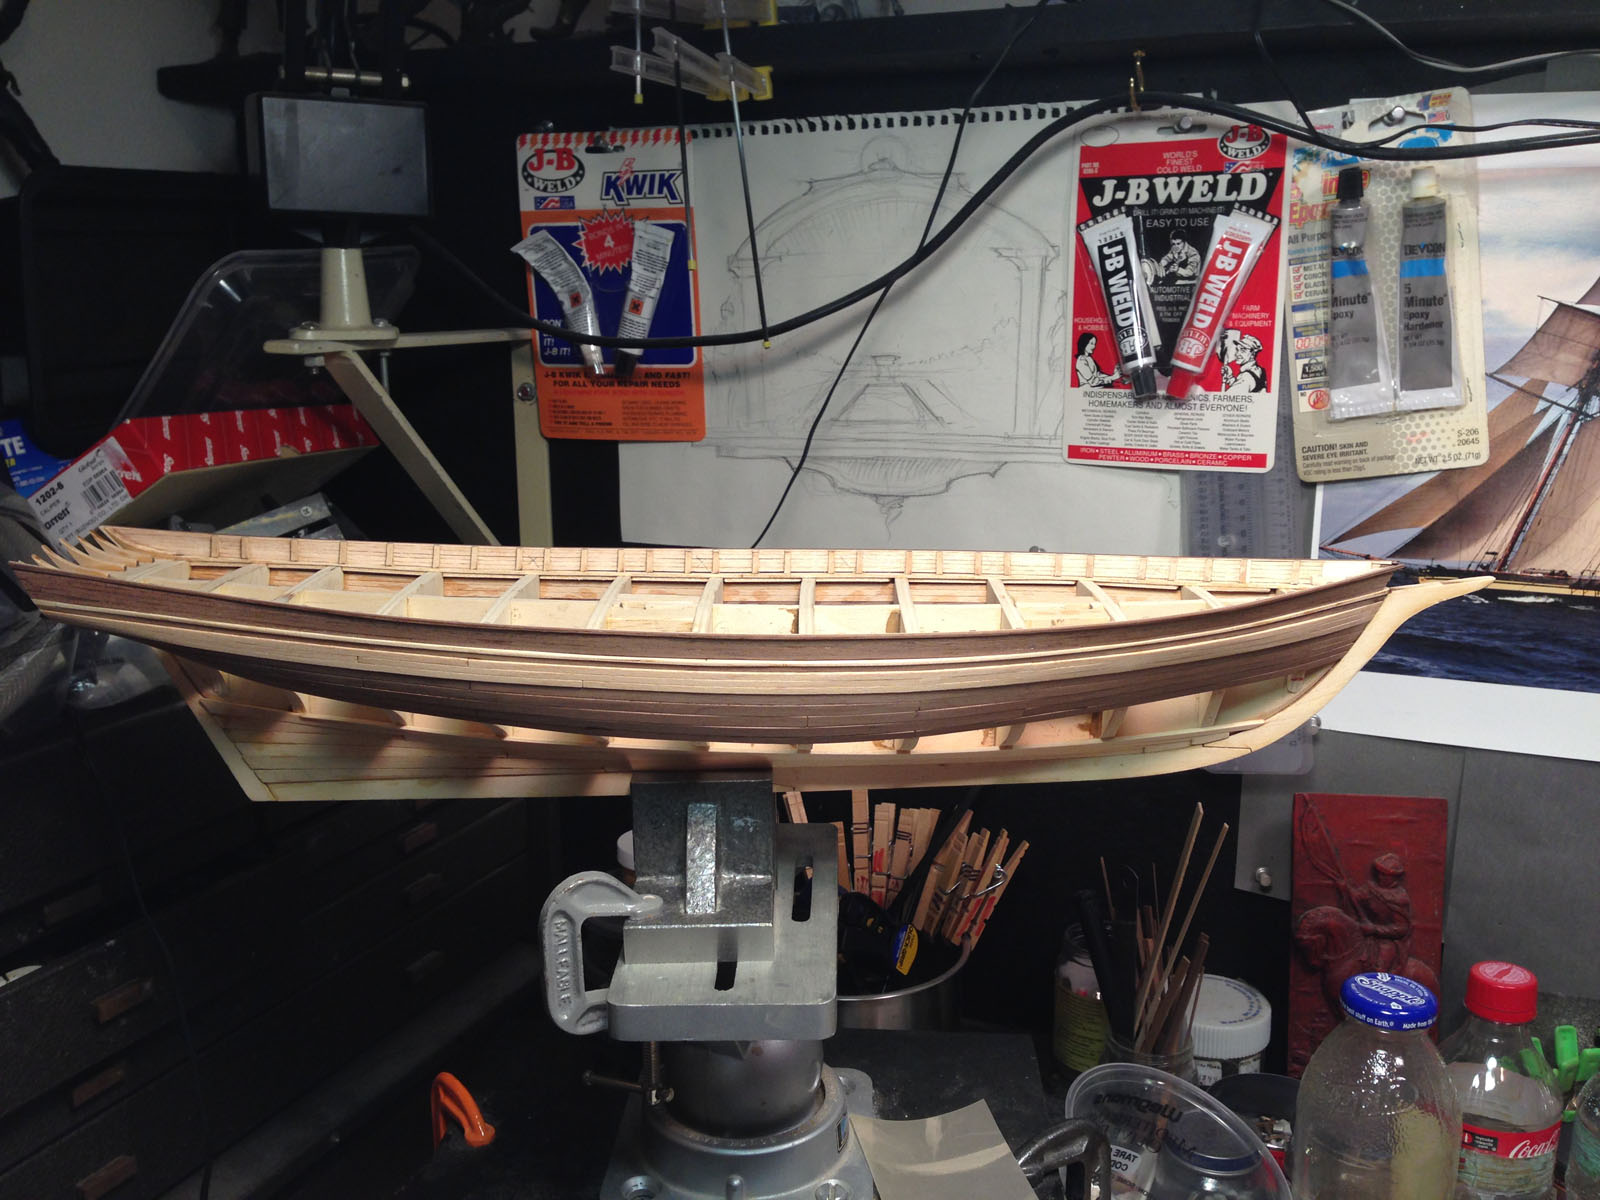
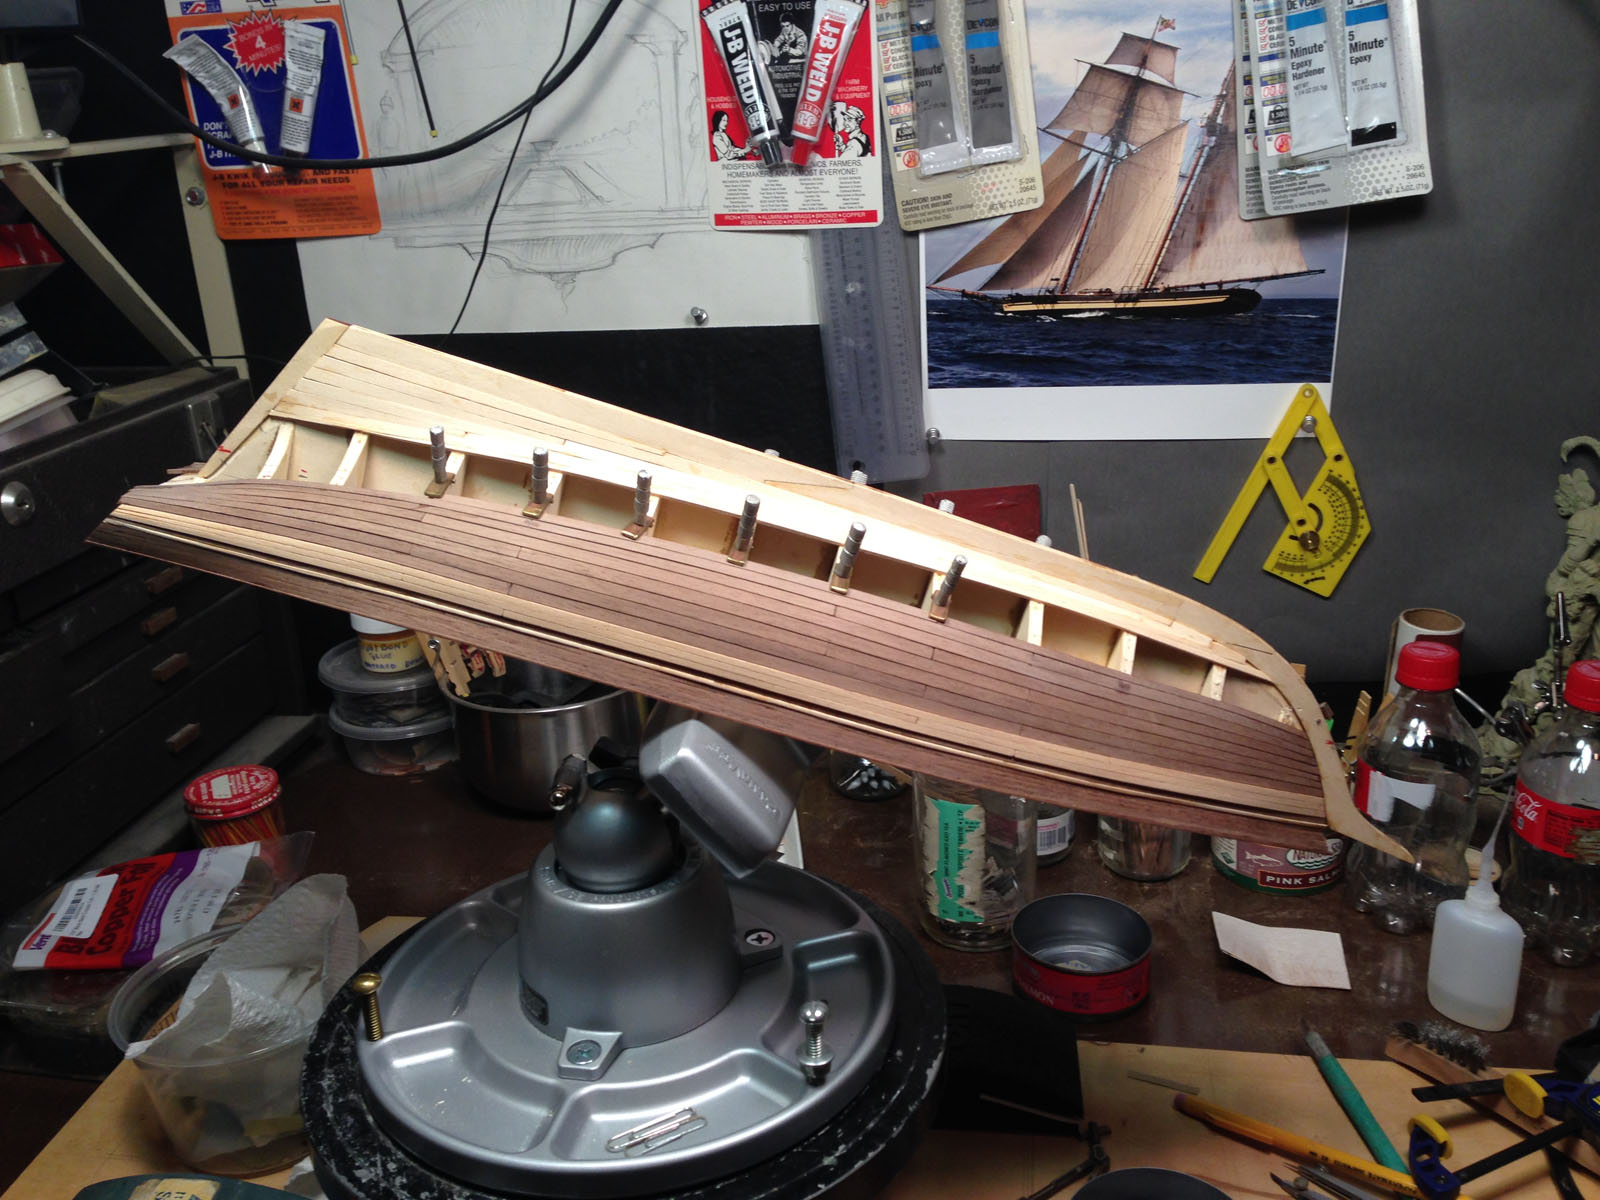
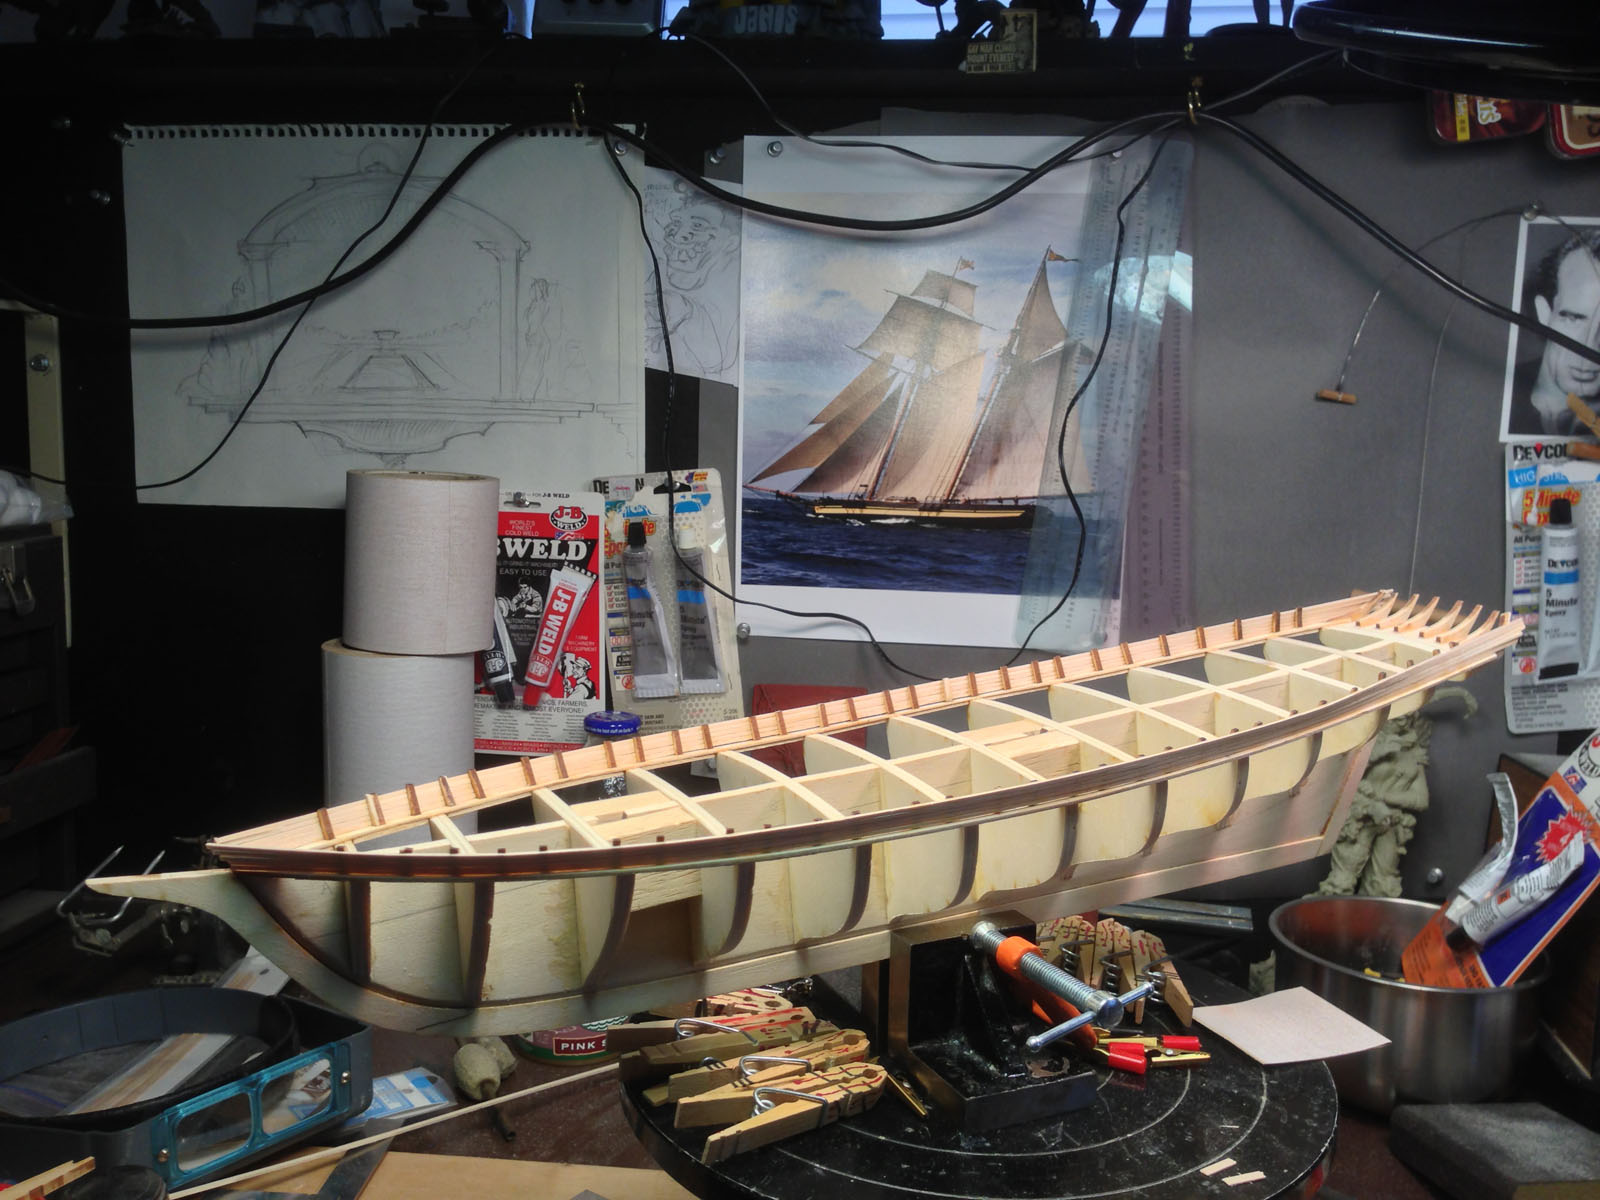
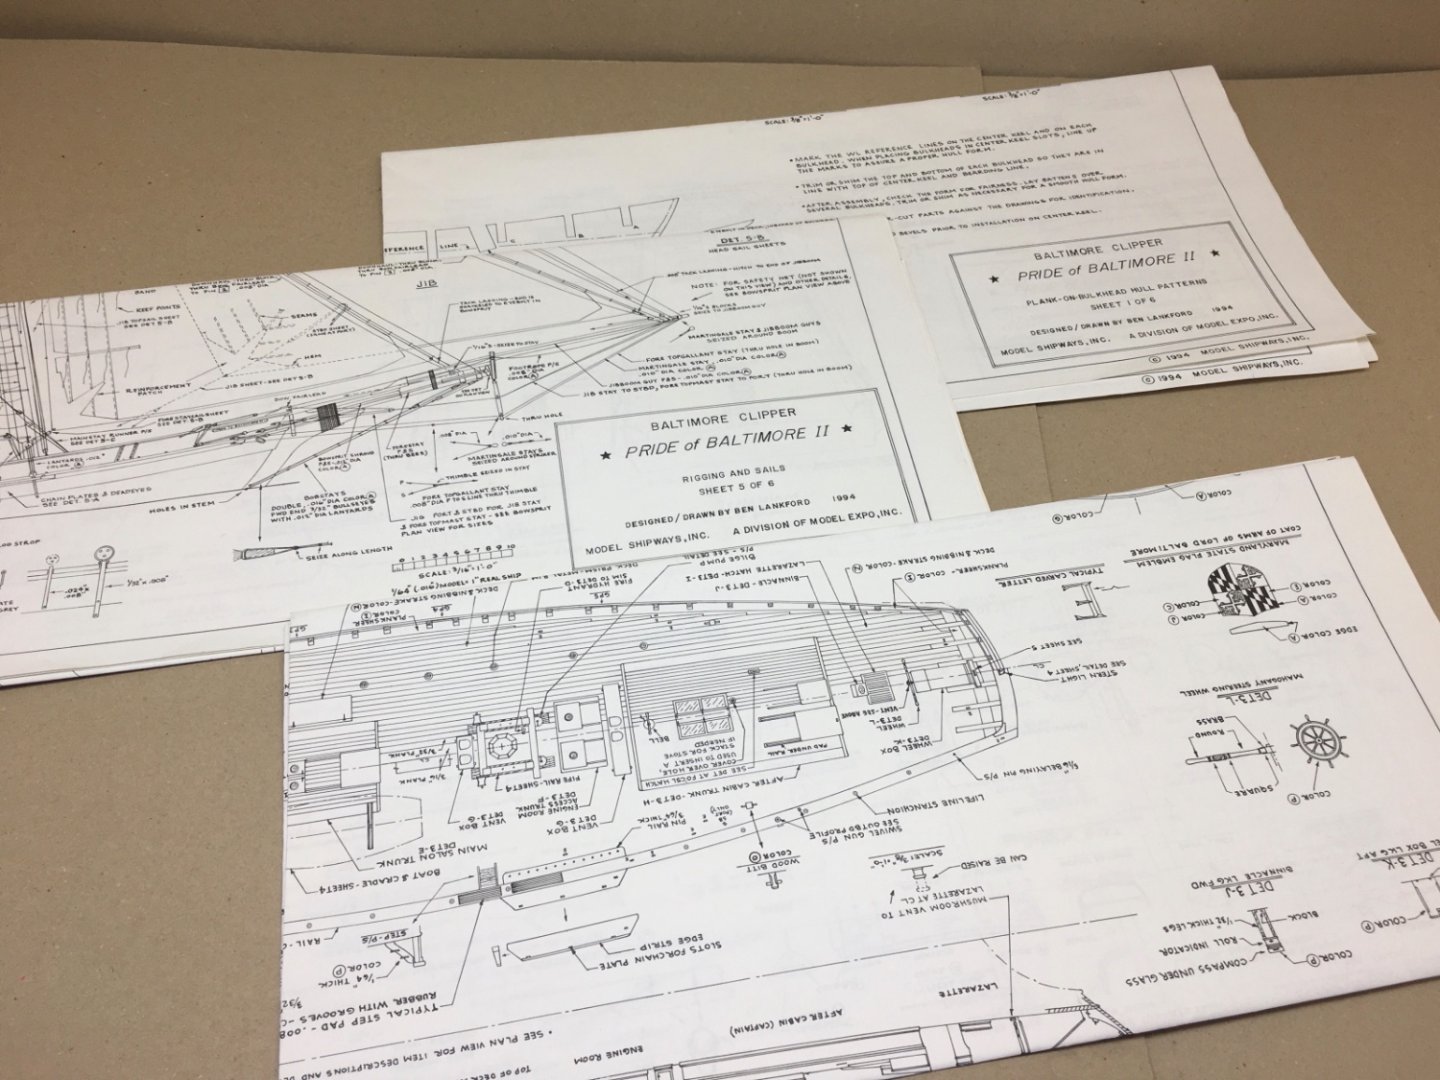
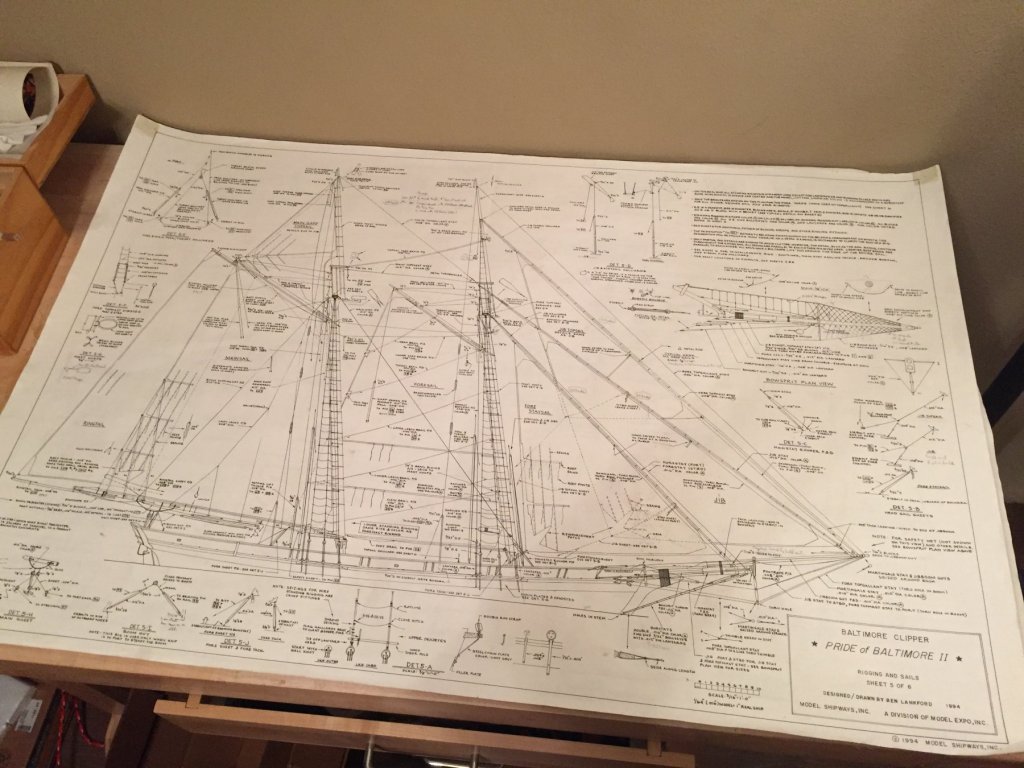
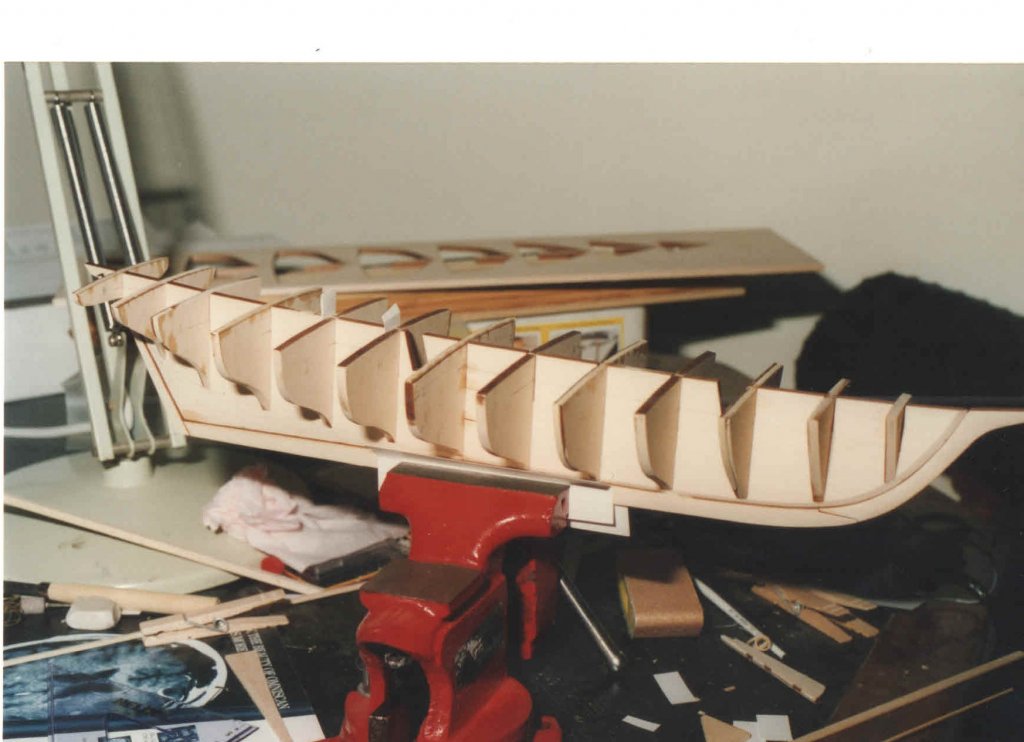
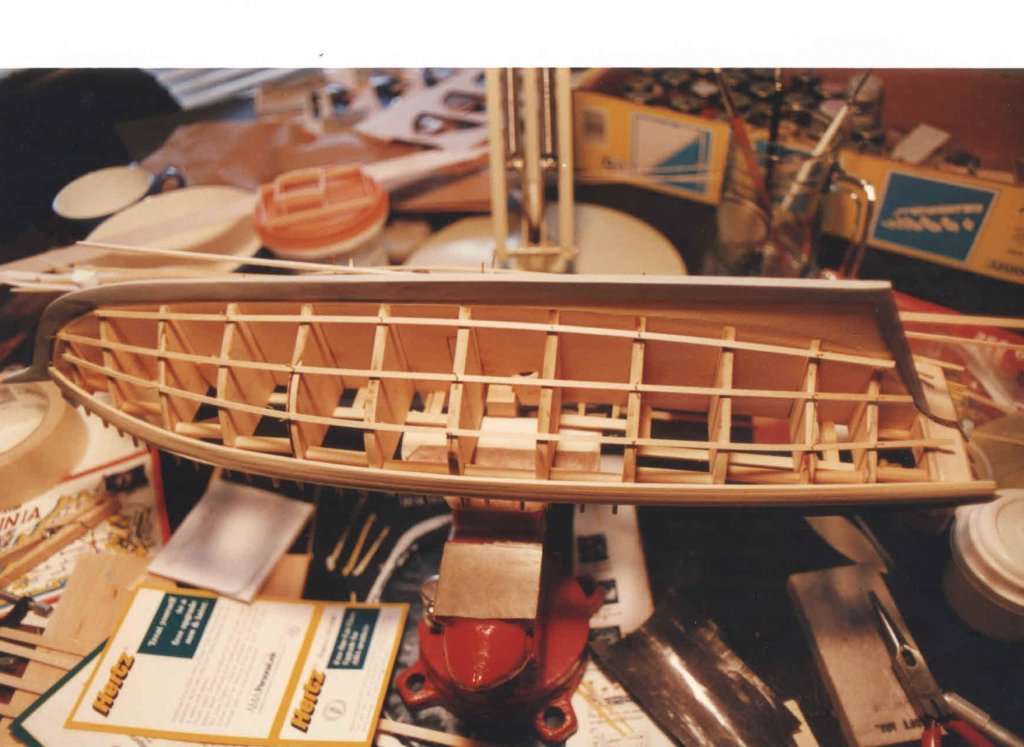
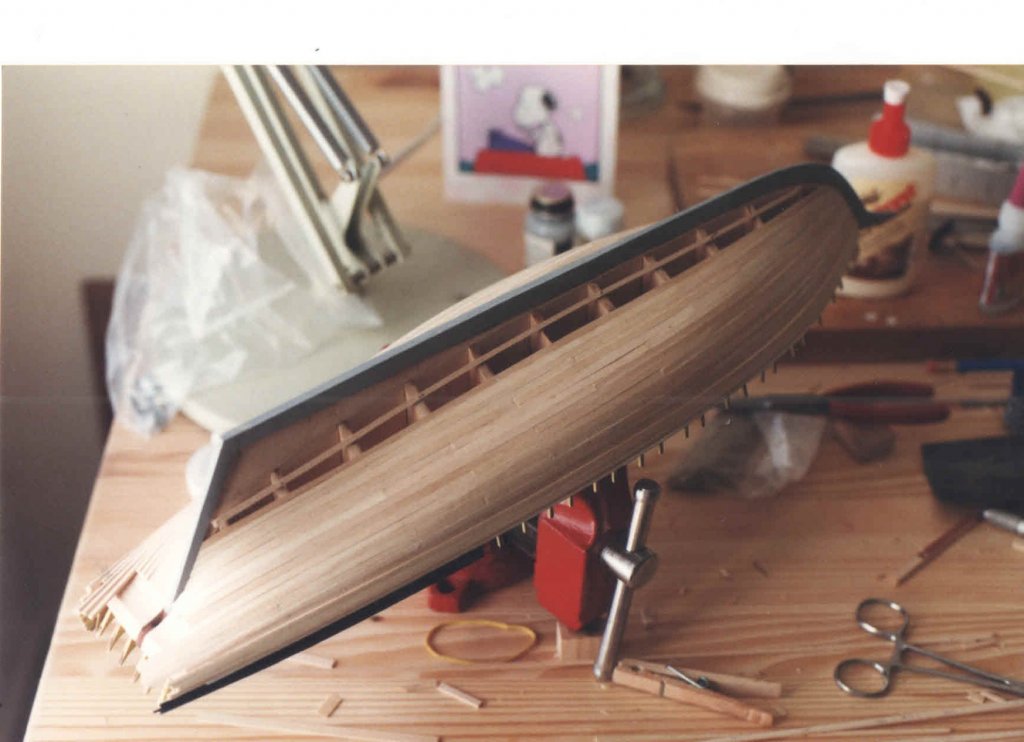
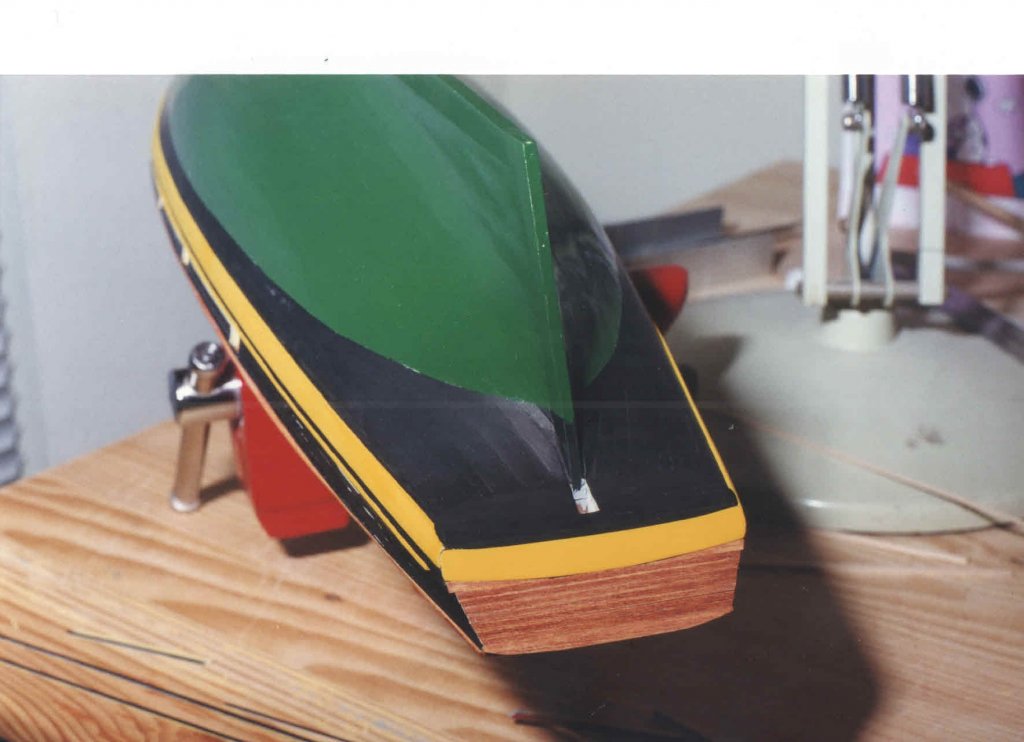
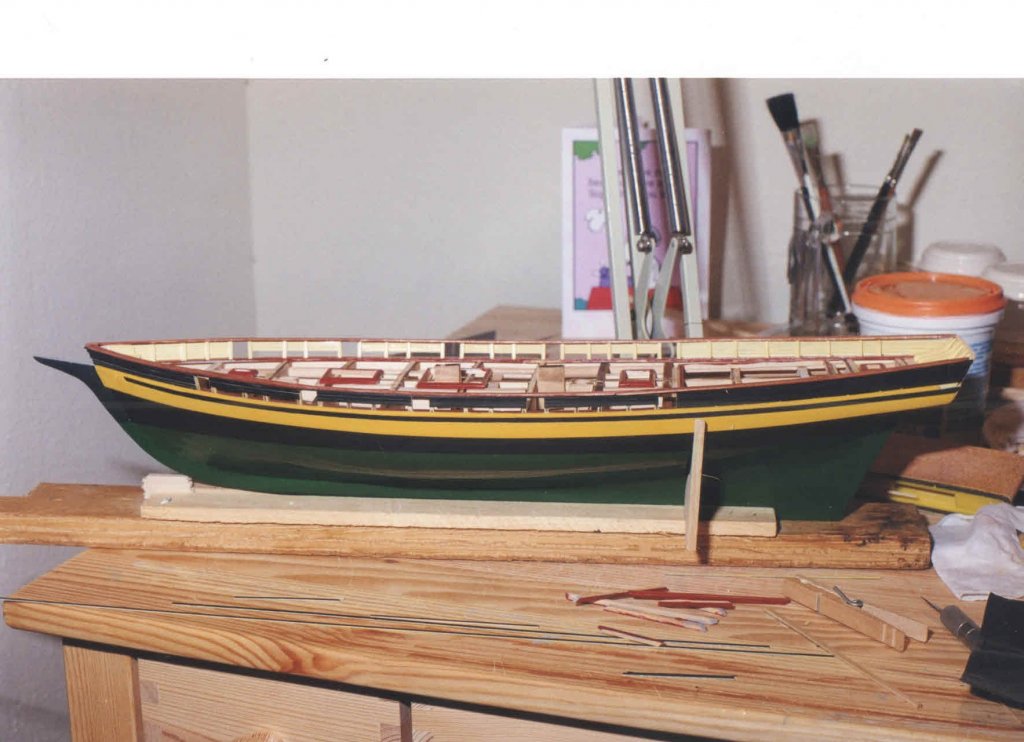
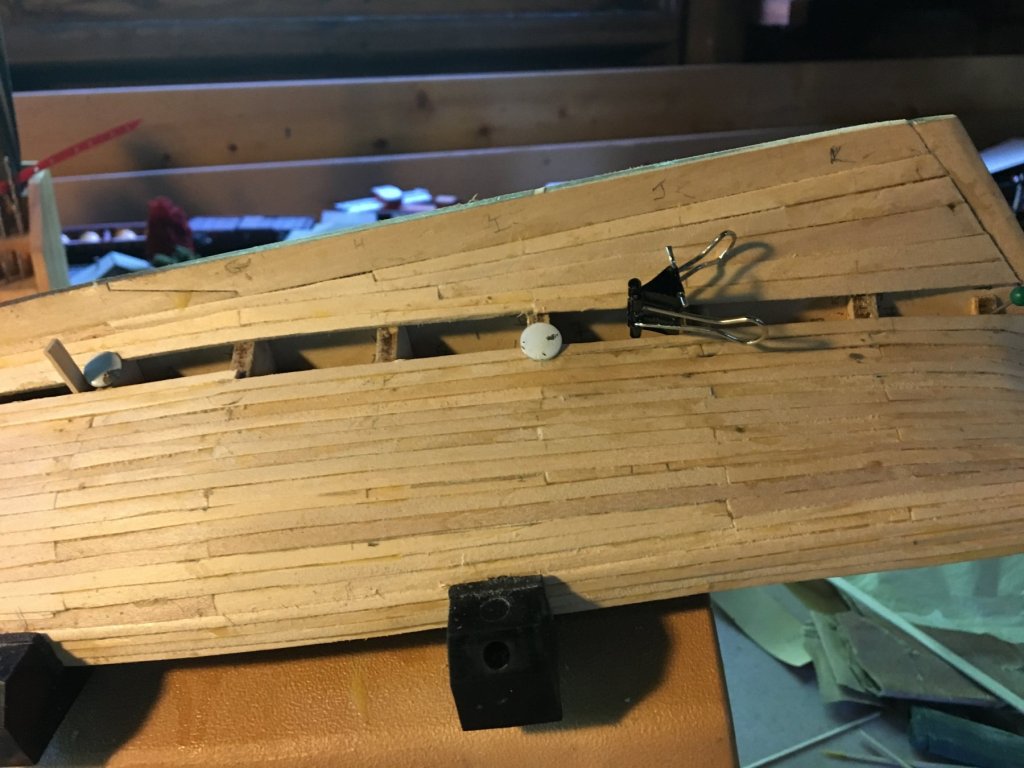
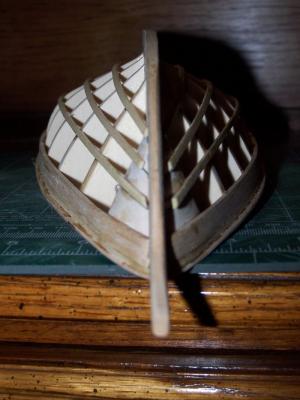
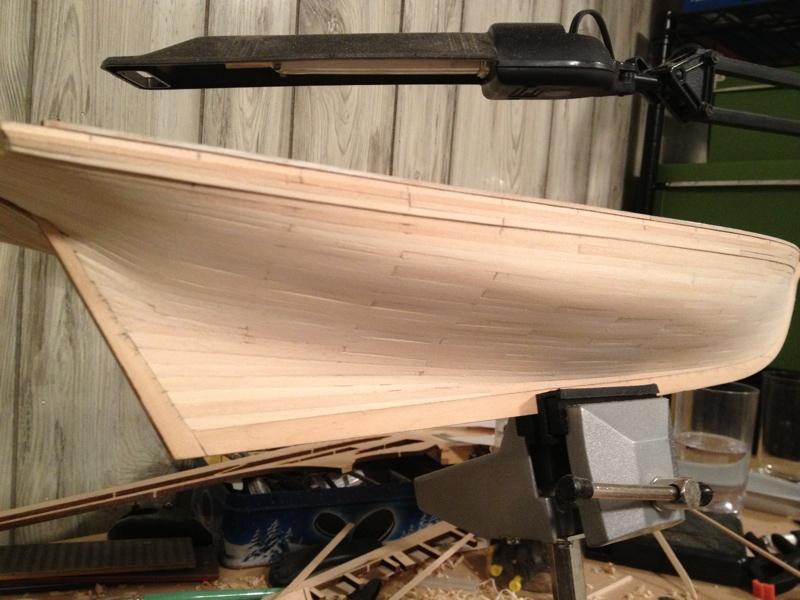
 Ladies and gentlemen, there is no more postponing it. Time to start my building log. About 20 years late, but hey, better late than never. I am taking great pains to make sure I properly title this log, ccoyle, and I hope to do you proud. In 1995, when I was beginning my residency training, I invested about $130 in the Model Shipways kit for the Pride of Baltimore 2. I had built some simpler models and would complete at least one other before cracking open the Pride 2 box. But it was exciting to know that it was there waiting for me to wrap up my other projects. It would be the first serious fully rigged model I would build. Looking at the 6 sheets of plans really got the imagination going. Exciting, yes, but also terrifying for a young model builder to look at. The details are overwhelming. Just the bowsprit netting seemed to suggest that I would never be able to complete it! It is now 2017. My wife and I now have two boys who are 15 and 17 years old. Since 1995, the internet has come into existence and so has Model Ship World. So this building log will involve a lot of “retrospective” posts. At the current time, the foremast is installed and rigging of the foremast and bowsprit is proceeding. But I figured it is never too late to begin a builders log even if it is retrospective. I am doing pretty good photo documentation as of a couple of years ago; the documentation of the early phases of building the model is more scant. I actually started building the hull in 1997, and worked on it feverishly leading up to the arrival of our first son in 2000. Once he arrived, the hull got put away, relegated to the top shelf of a closet. There was just no time. But fortunately, I did think to take some pictures of the hull as it was being built. I recently uncovered these prints, and had to scan them into the computer in order to be able to attach them. How far we have come… These pictures date from about 1998-1999, when we were still living in an apartment during my training. In retrospect, I am amazed by how intuitive the planking process was. About 8 years later, when I went to my first model building symposium, I listened to a talk about planking technique and remember thinking, “Hey, that’s the way I did it!”. I wish I could remember how many weeks it took me to plank the hull. But I wasn’t keeping track of the time I spent on the model. I don’t remember what source I used to learn about nibbing planks and stealer planks. I think they were described in the kit’s instruction manual. This wasn’t my first planked hull, but it was the first time I applied those techniques. There is a gap in photo documentation between finishing the planking and painting the hull. The bulwarks planking and rail also get added during that time. The transom was also planked, but that would get pulled off later in favor of a sheet of basswood with the ship's name engraved in it. I built a cradle out of scrap wood to stabilize the hull for the process of planking the deck. I have no picture documentation of that process, but it proceeded very logically, even more easily than the hull planking. The coamings for the cabintops and hatches were installed prior to planking. Better hurry, that baby’s coming! No more modeling for a while after he gets here… But before it got put away, I was fortunately able to install the foc’s’le hatch and the aft cabintop. I also installed the deck hatch aft of the cabintop. The last of the attached images is how things looked once the model got placed in cryogenic storage on the top shelf of the closet in the house we moved into when I finished training. Hey, I got a lot done, in retrospect! Next post: the model gets resurrected after a long hibernation...
.jpg.04d82f9c7ebd45ff80505314095691e1.jpg)

- 60 replies
-
- 15
-
-
- pride of baltimore ii
- Model Shipways
- (and 1 more)
-
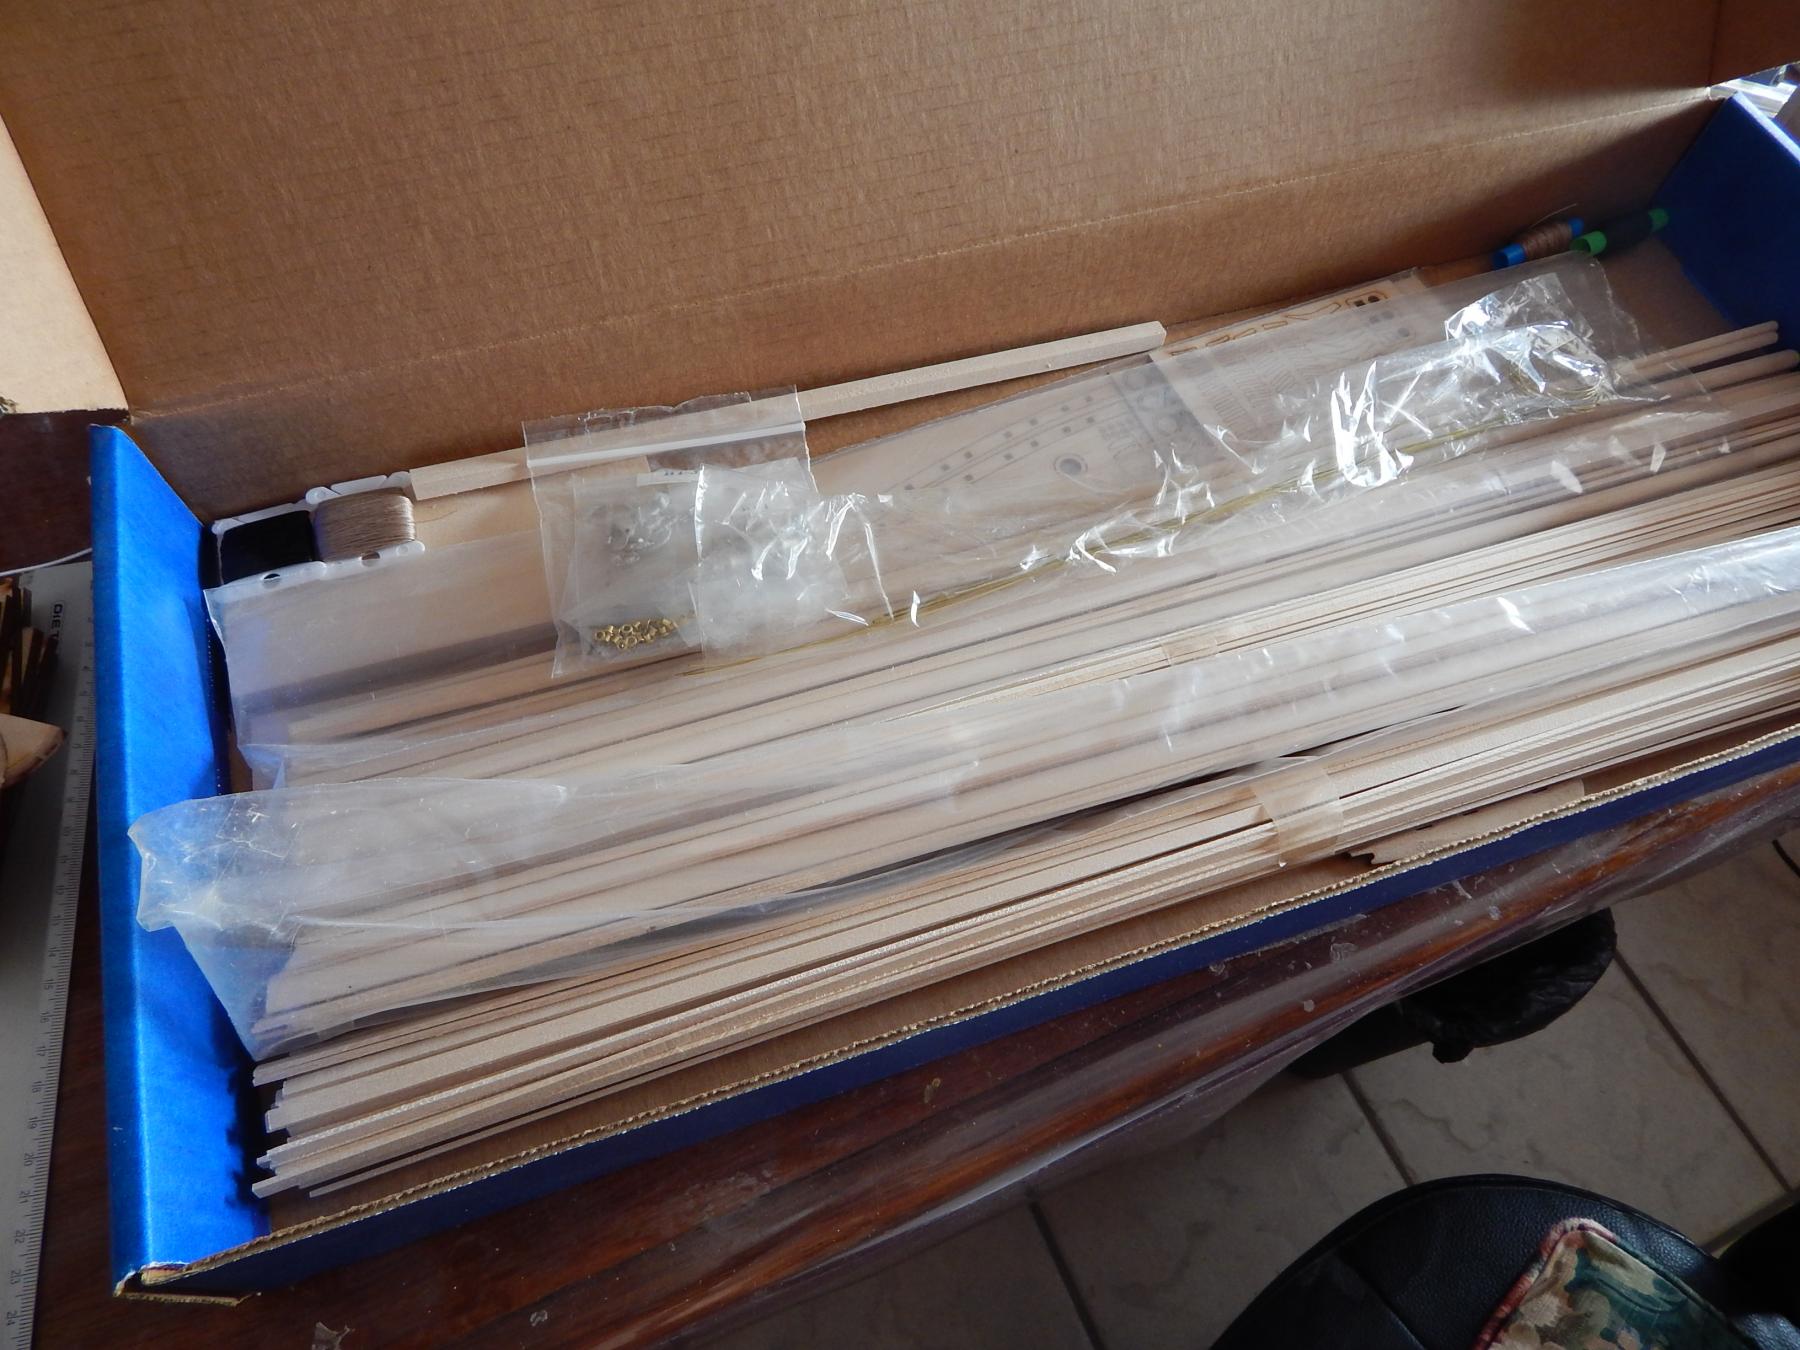
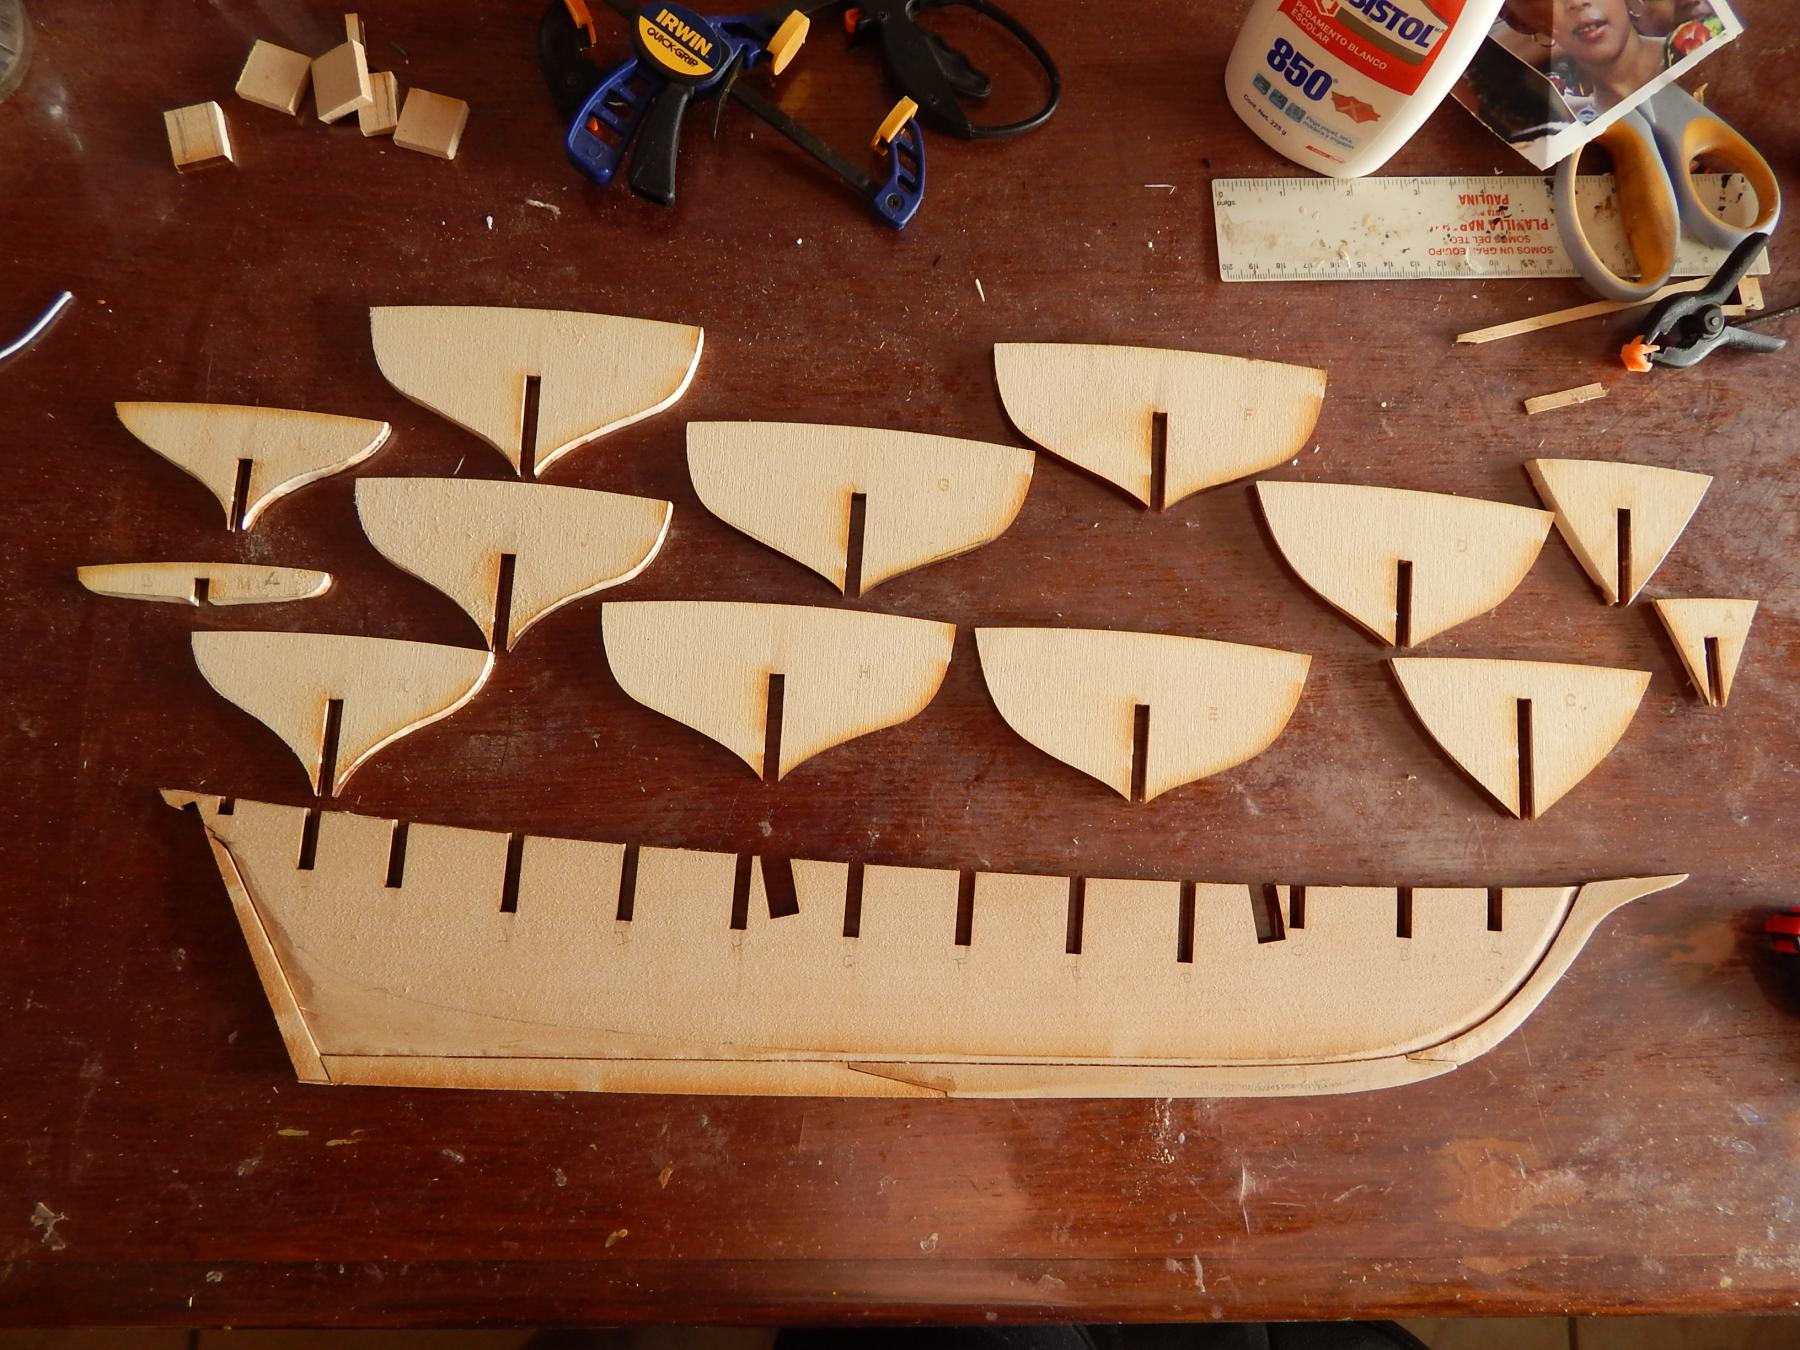
 Hola amigos: Little more than year and a half I finished model VASA (Billing Boats) and after spending time with my other hobby (oil painting, which I do during the temperate months) I started with the Pride of Baltimore II. It must be admitted that this delay is due in part to my wife always makes me the comment: And where are you going to put this new ship? In principle, this model seems much simpler than the Vasa, especially because the Vasa came with practically no instructions at all and only a couple of blueprints while the POB seems to overdo indications and blueprints (6). However, like all the models that I have built so far, there are some missing or unclear indications and it is necessary to use your own judgment and imagination, a situation that makes it more interesting the construction of these kits. Also it is important to mention the great help and tips obtained in Forums like MSW. For this particular case I follow with interest the topics of jcoby, Mark (Blue Pilot) and Andy (Andymech). I begun the POB around a month ago and here can you find some advances: At this point it is important to mention that is better to make a light beveled and give the finished when placing the planks Saludos, Karl
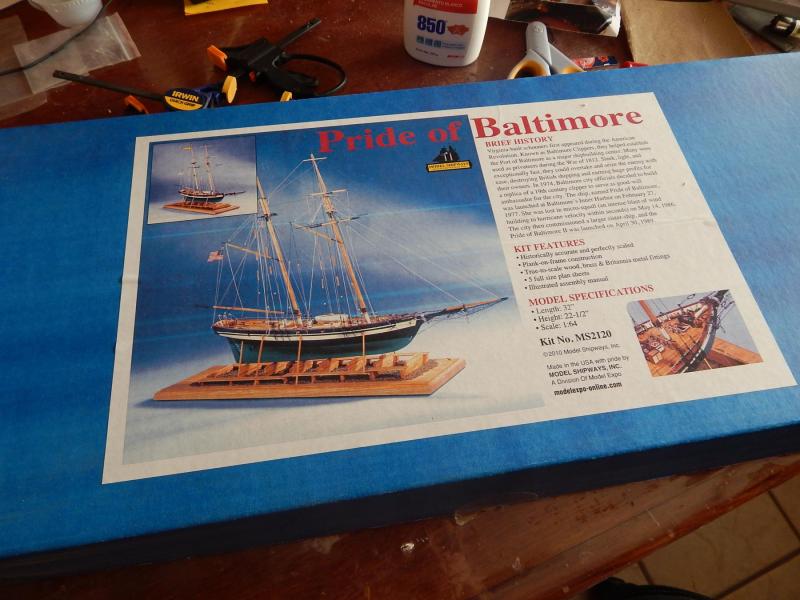


- 164 replies
-
- 7
-
-
- Model Shipways
- Finished
- (and 1 more)
-
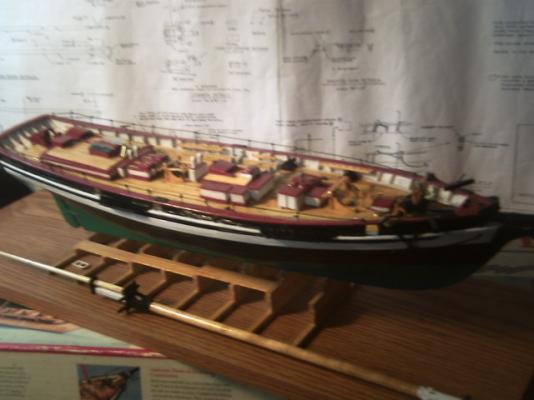
 Found some photos of my POB build .Going on 4 years...with about a year's hiatus after mc accident, rehab etc. The build doesn't compare with others on this site, but it's ok for an old guy.. I'll try to attach the pix...
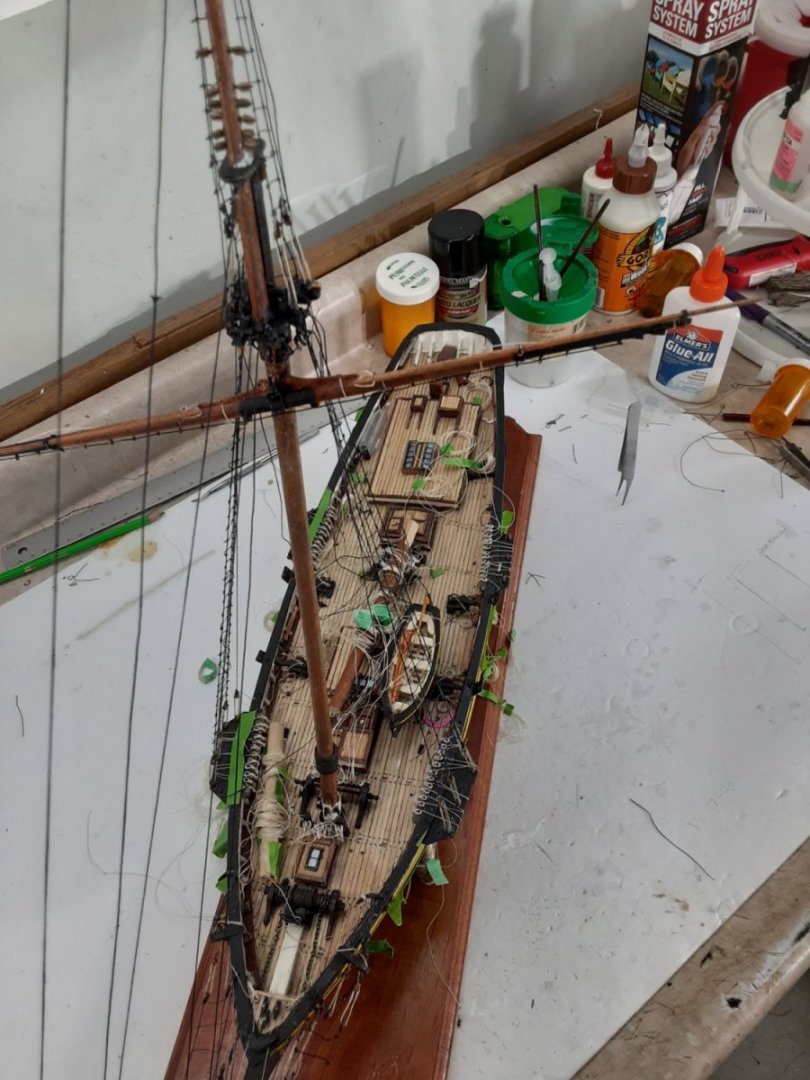


-
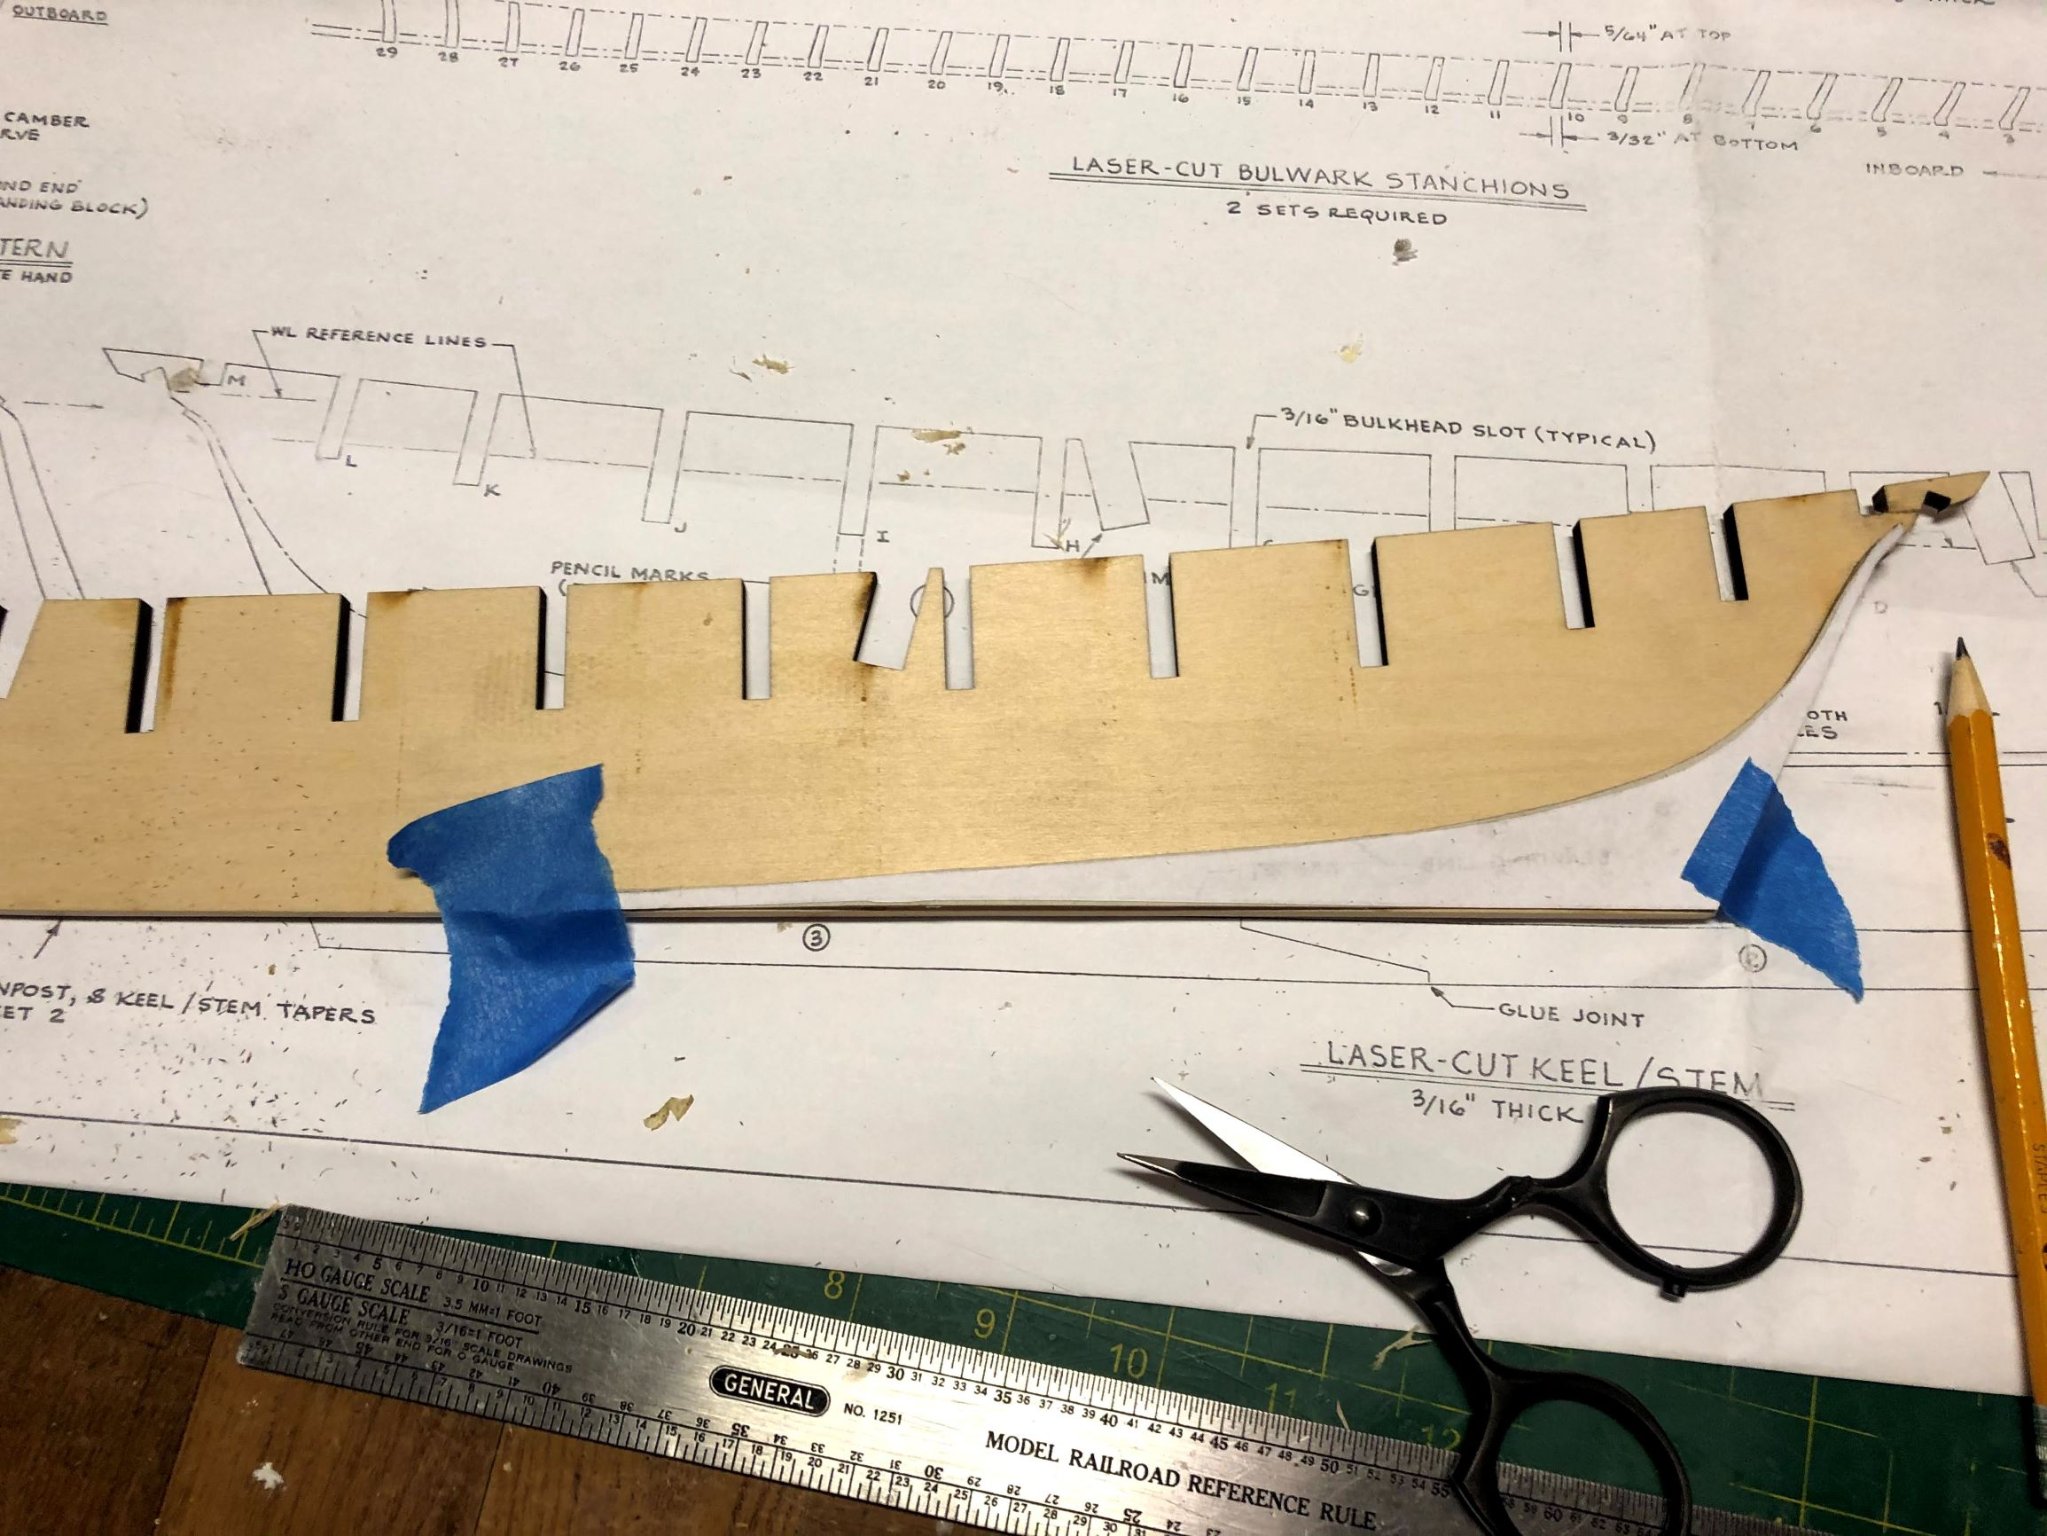
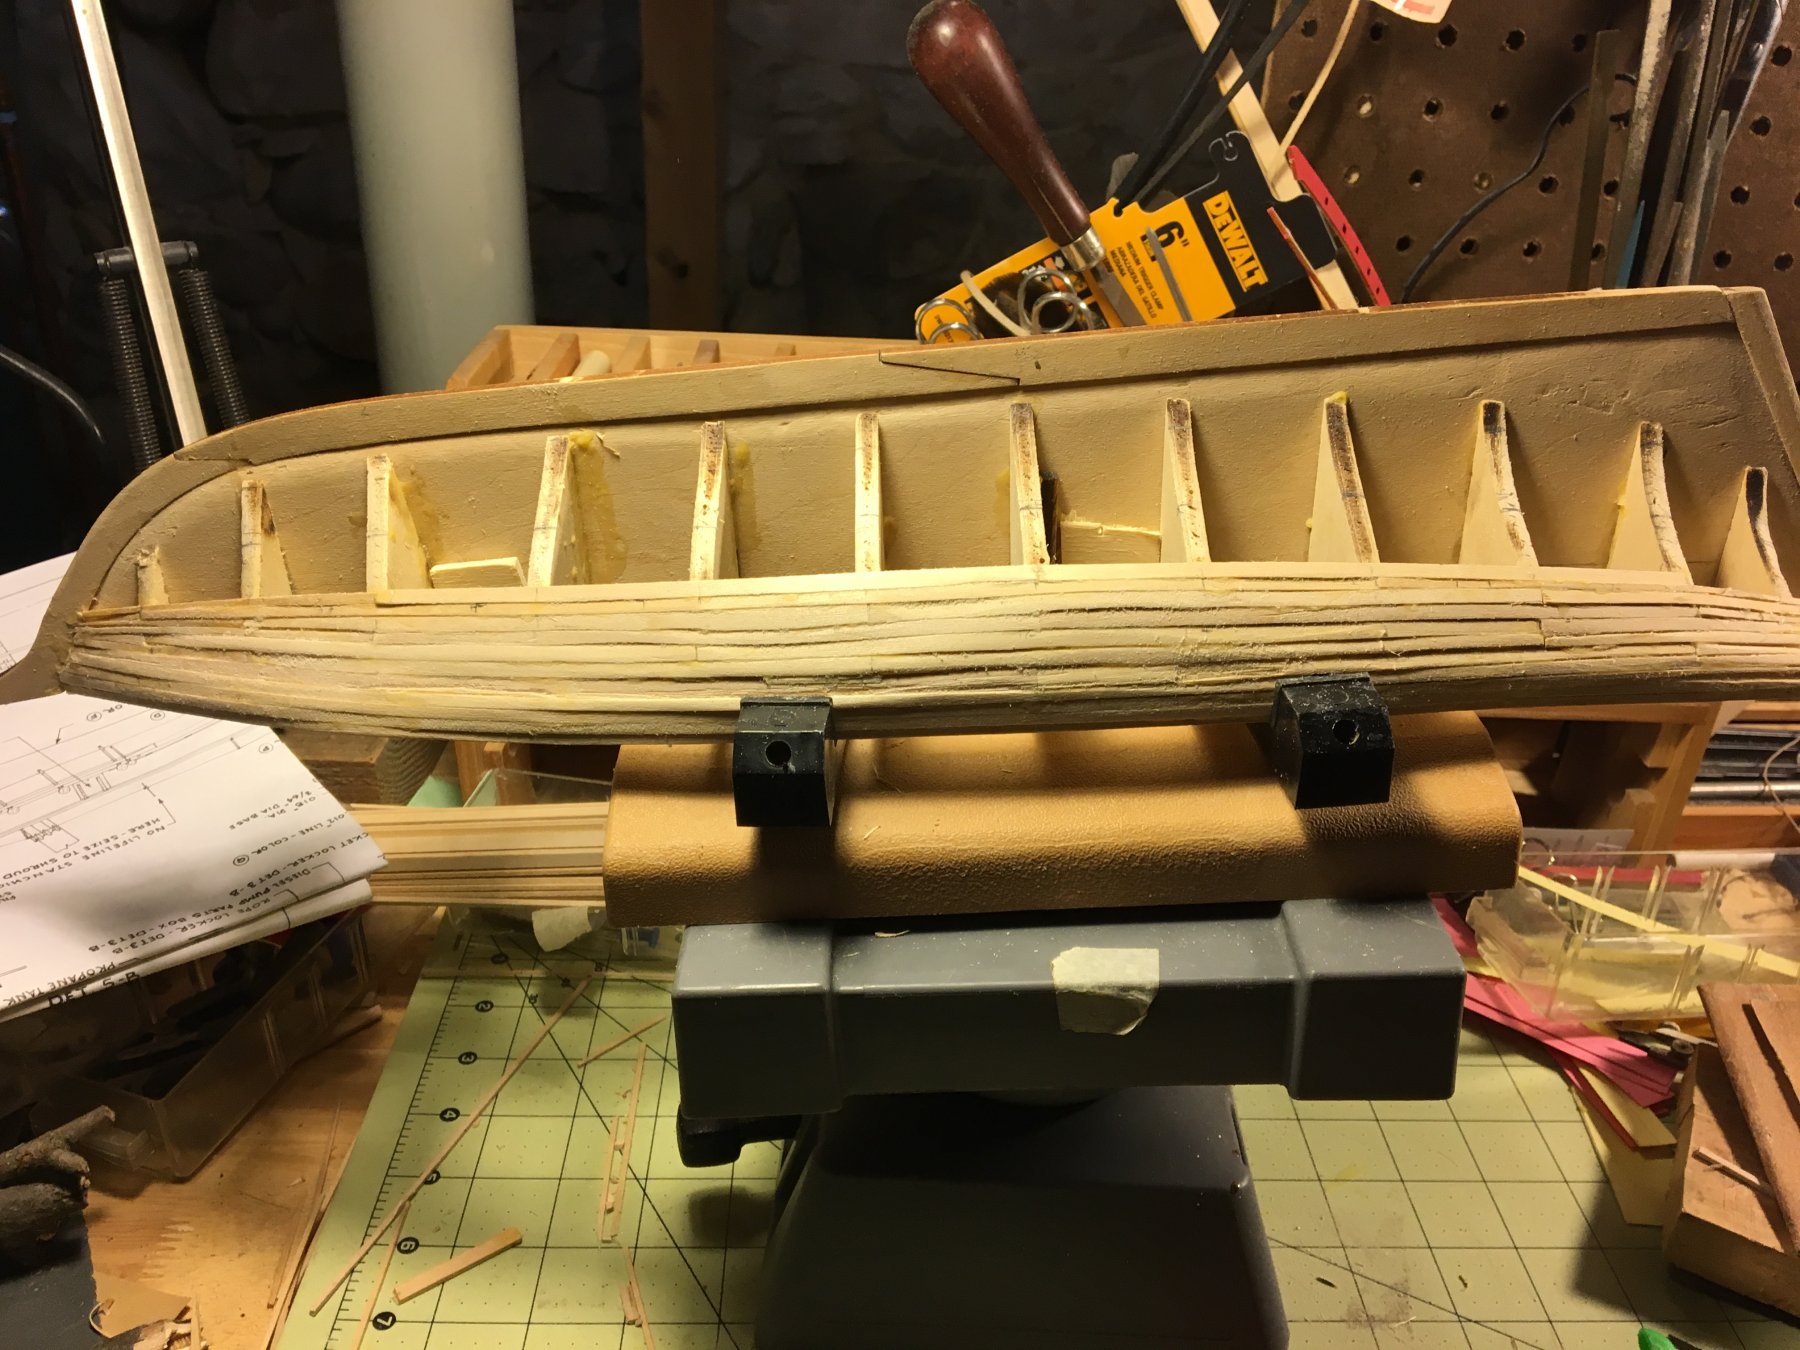
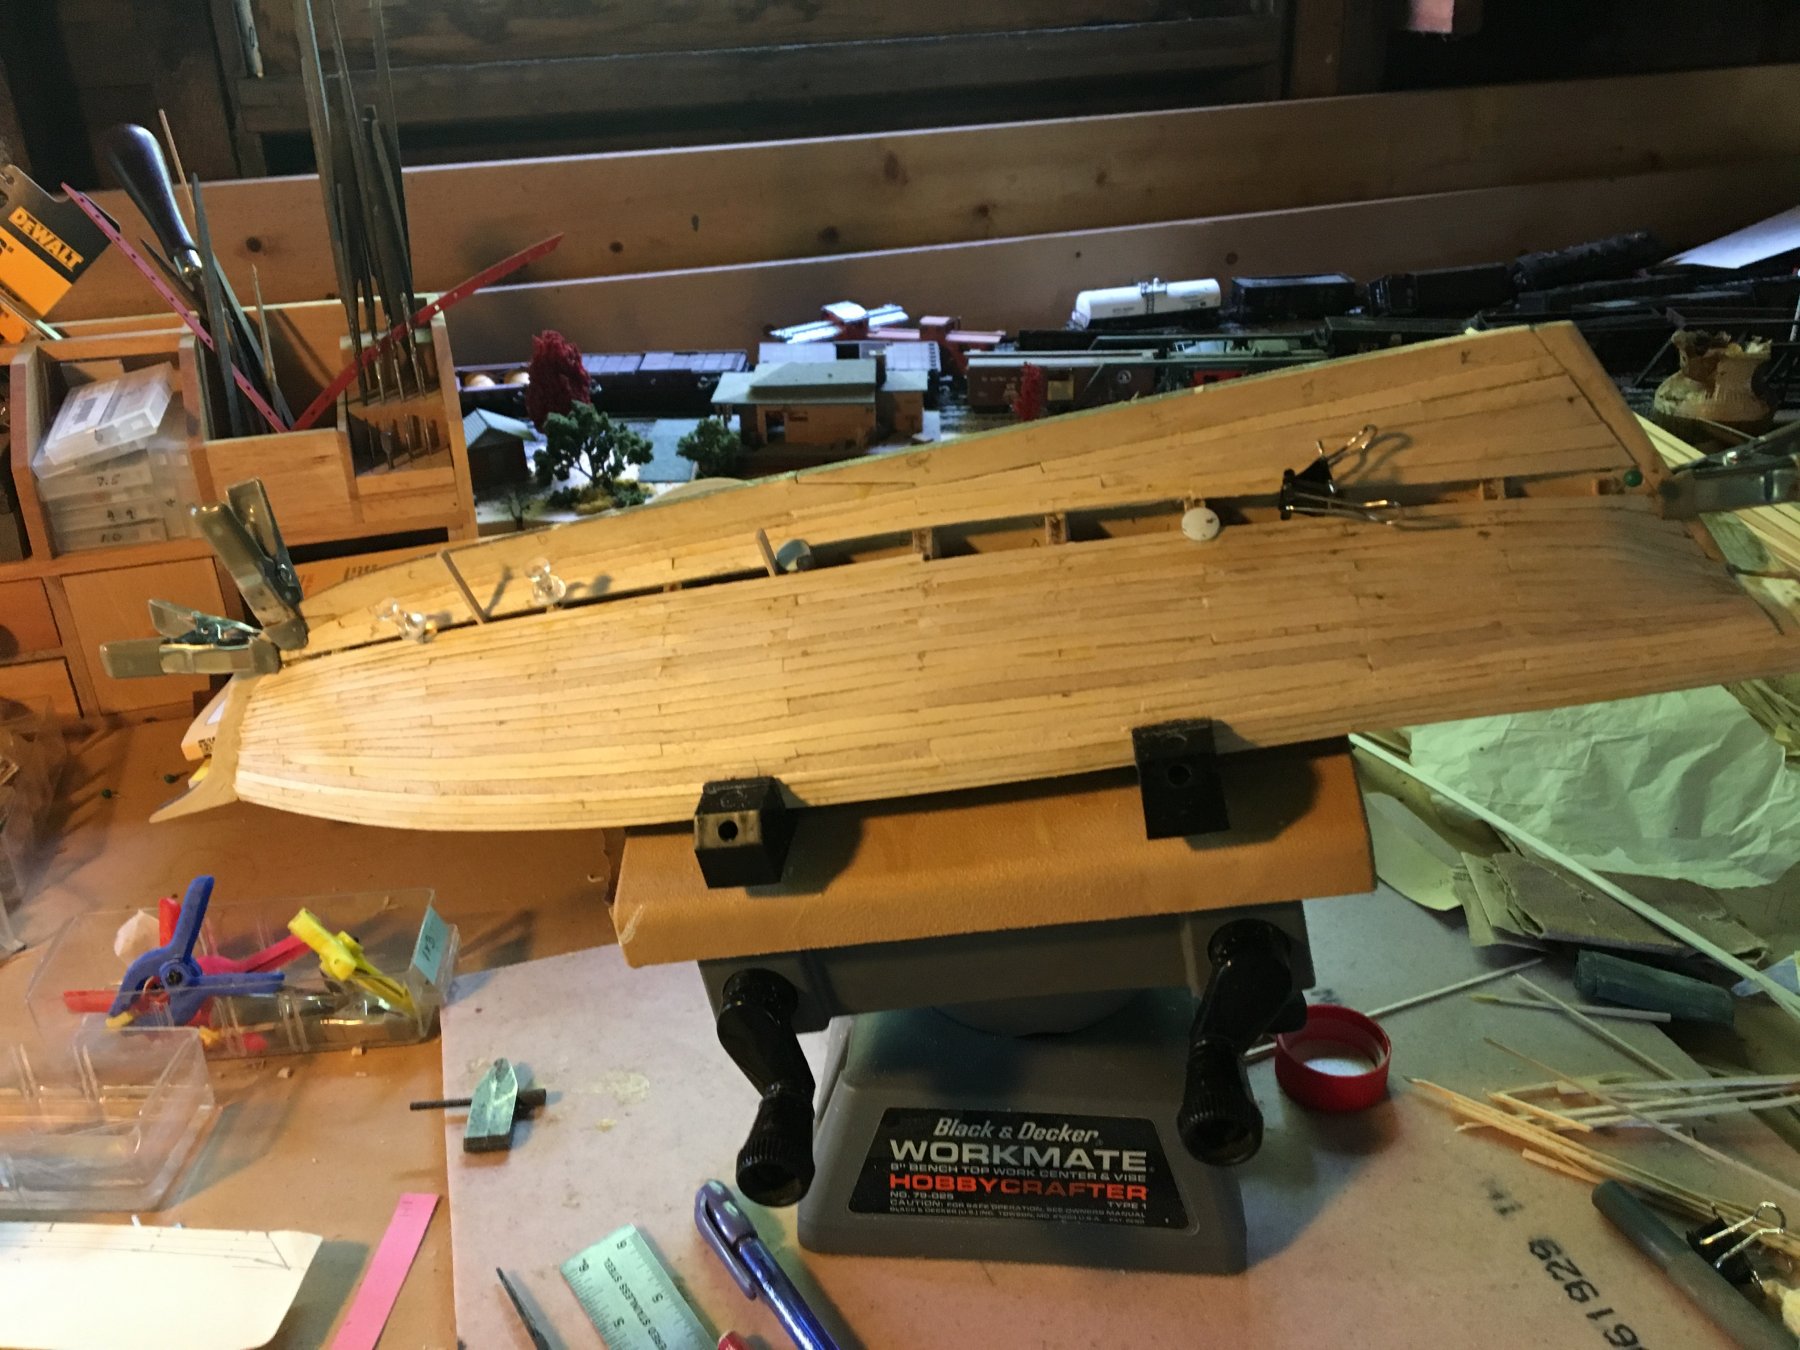
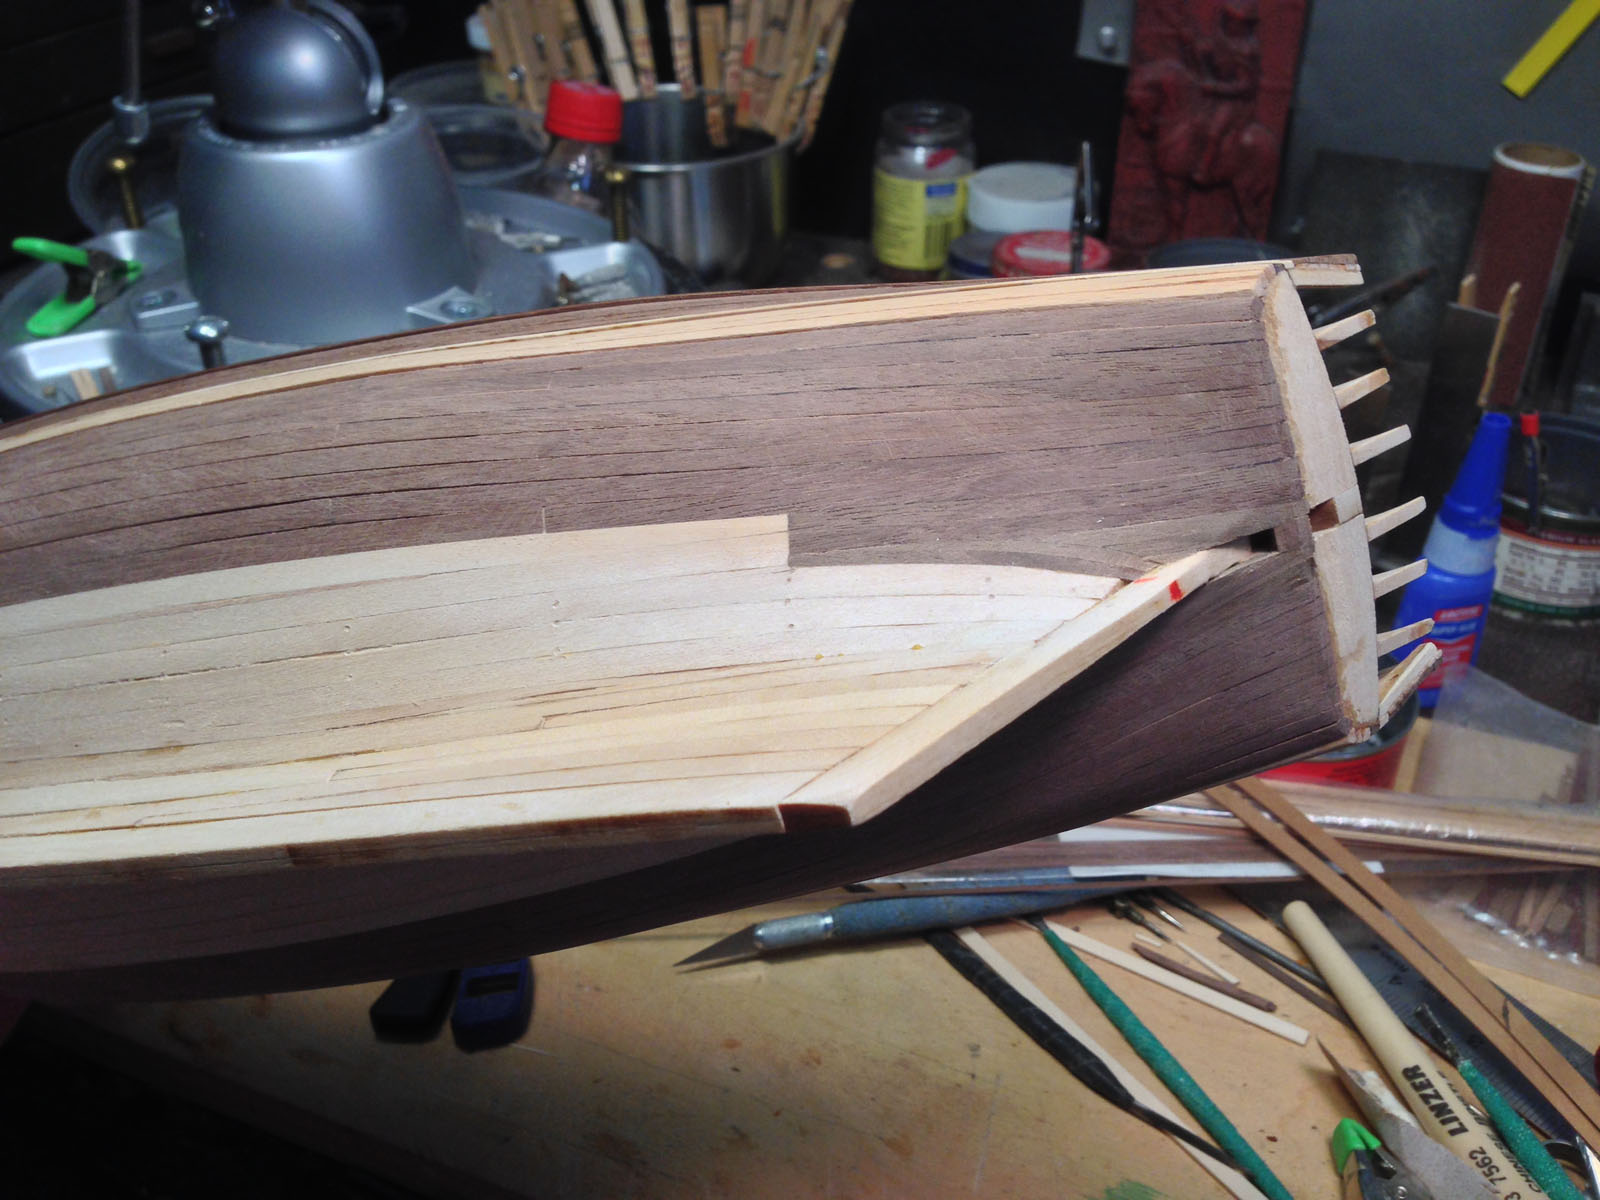
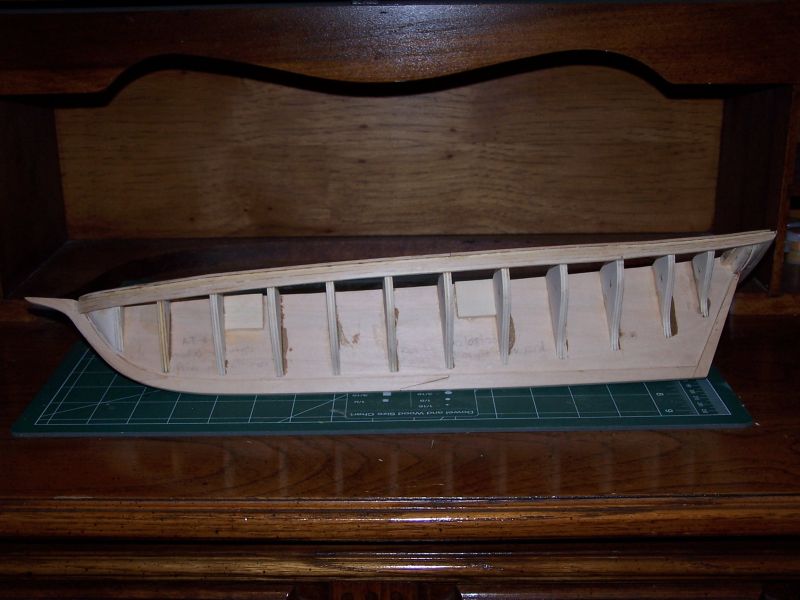
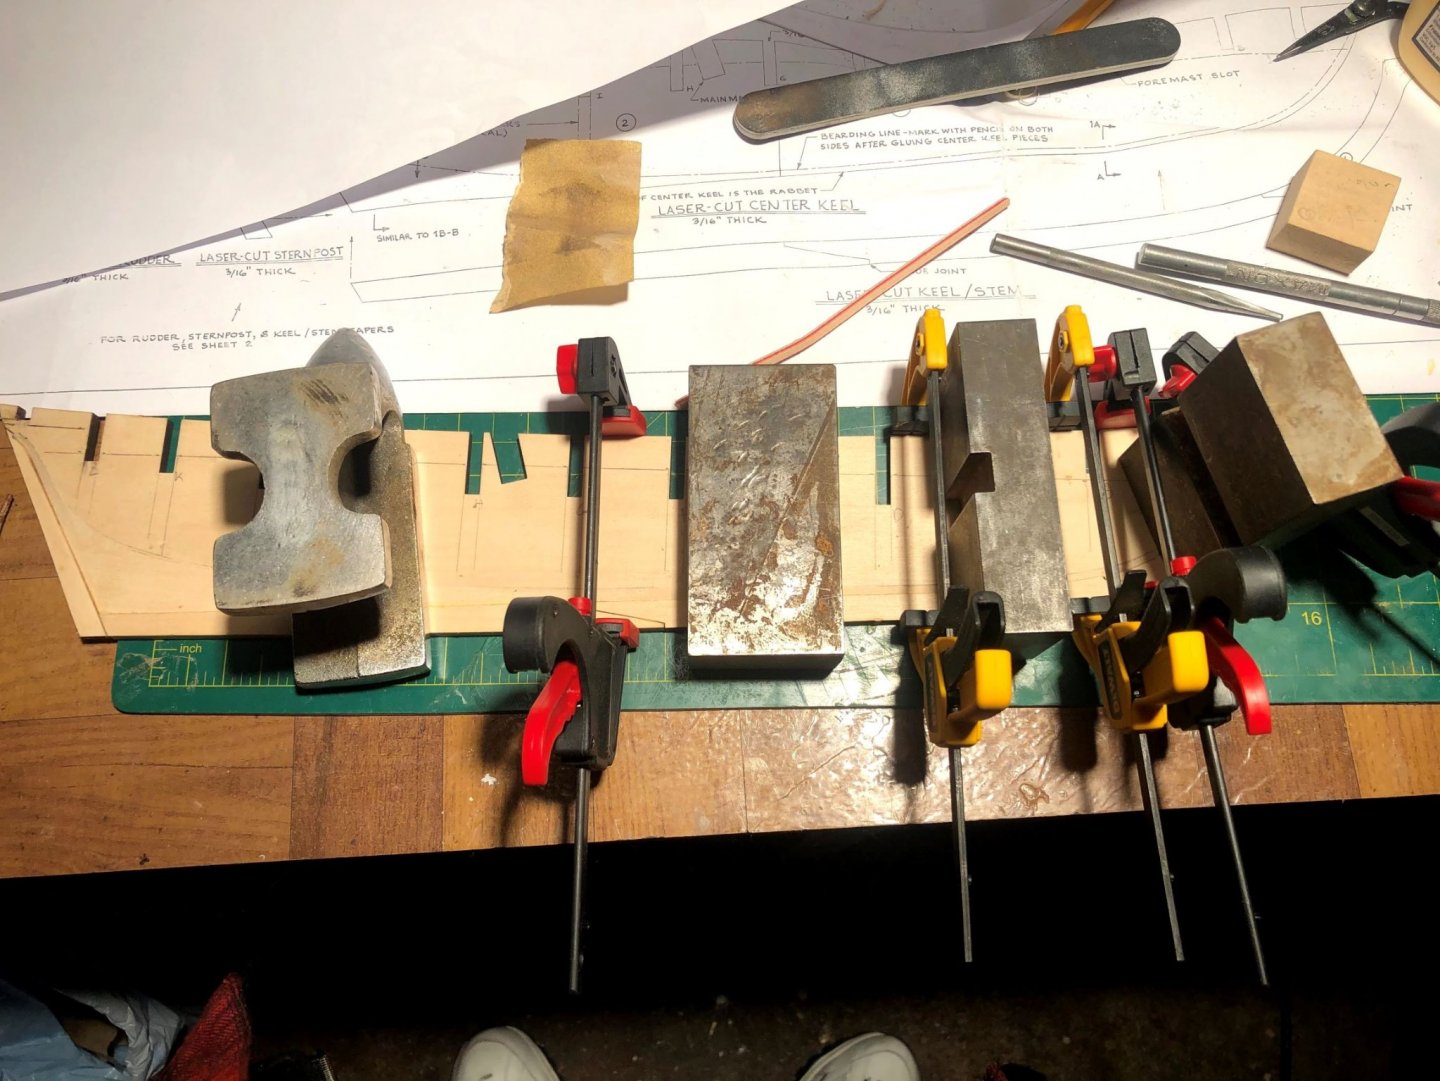
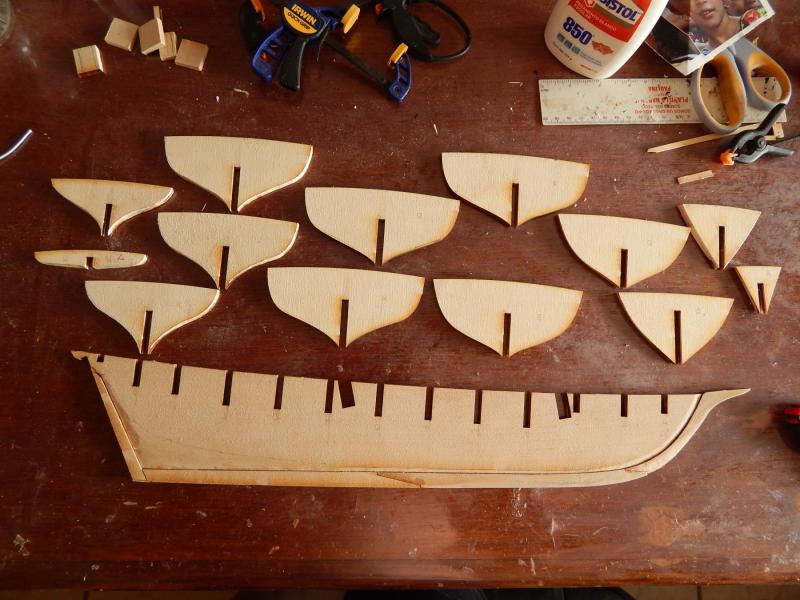
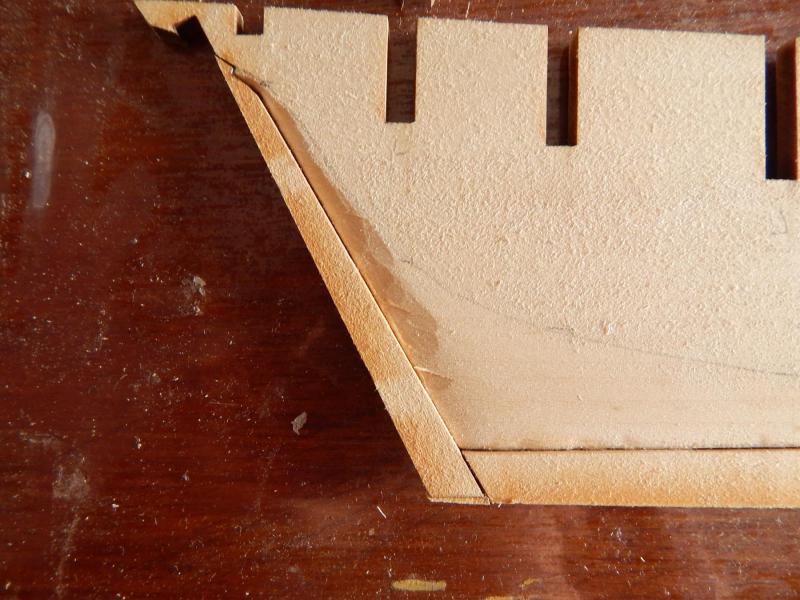
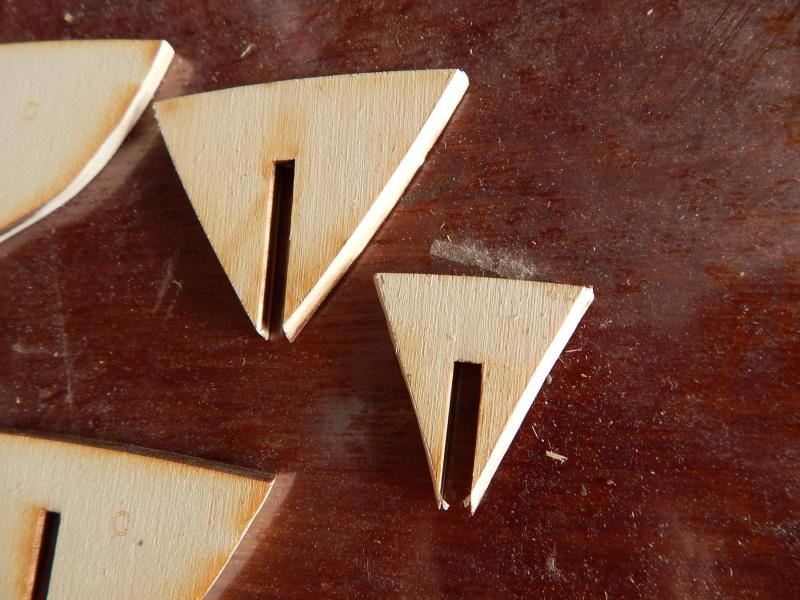
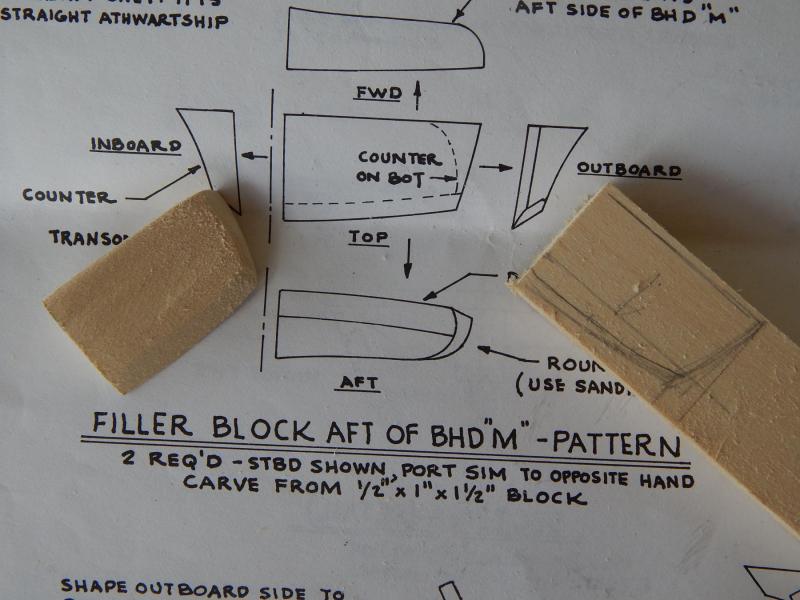
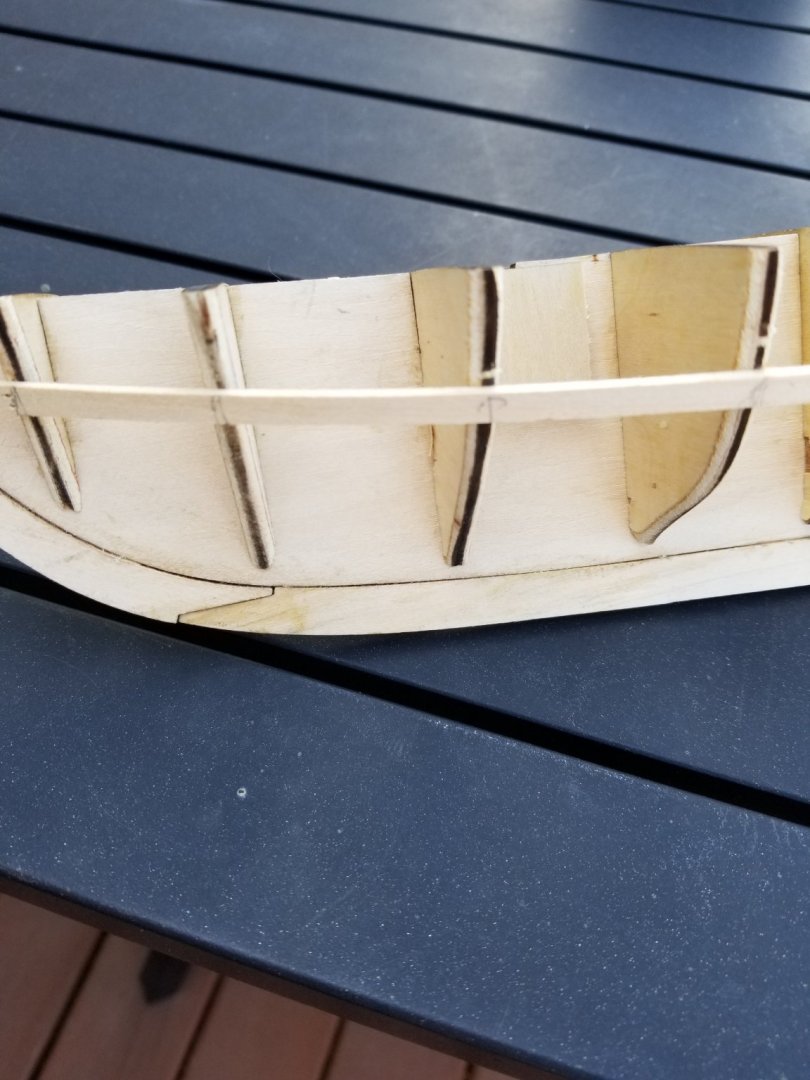
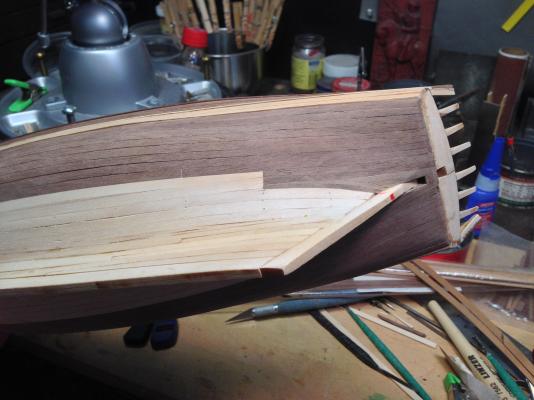
 Welcome to my shipyard! Pull up a chair, 'cause I'll be asking for a LOT of advice as the build goes on I got this kit on eBay for $75 including shipping. Being retired, I have to be a bit frugal, plus I know that this kit will end up costing more in terms of paint,glue and tools. Here's the thing of it; the kit was started by the person I bought it from .You can see the extent from the pictures. The bulkheads seem pretty straight but if I understand it's purpose correctly, I'm not sure the rabbet is well done,particularly where it widens near the sternpost. It doesn't seem deep enough and should have been thinned down more at that wide stern area. It basically needs to be deep enough so that a plank sits flush with the surface of the keel,right? If that's correct, I'll have to modify the rabbet but that seems like it would be difficult to do without damaging the adjacent keel extension. Think I ought to cut that and the sternpost off and then reglue them after I modify the rabbet? The person who started the kit didn't add the waterline reference marks. From what I've read in the kit manual, those are basically for getting the bulkheads to the correct depth on the keel. Mine appear to be OK, so will I need those marks for anything else later on? There's a piece of plank or batten attached, although I don't know why. Any ideas? I'll probably just remove it and add those as needed. Does it look like there's enough "meat" left on the stern filler blocks to shape them properly? Thanks in advance for any and all advice and suggestions. I've bookmarked several other builders' logs and will refer to those often.

-
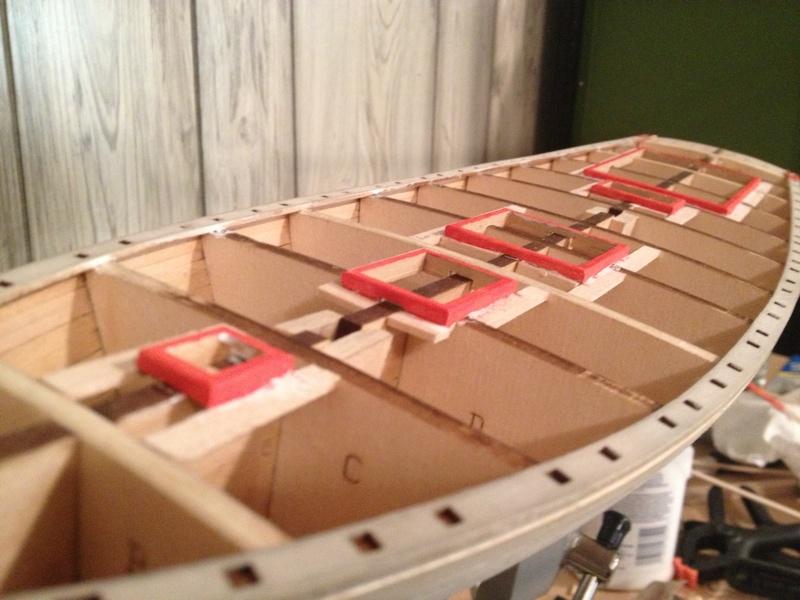
 Having finished my slightly kit-bashed cross section of the Constitution, which I really enjoyed doing and swore that's the only life for me... I thought I should still learn how to plank a hull. I had already purchased this kit and figured I could learn much and then either go on the more full ships or find more cross sections to build. As soon as I started the mistakes began and continued to pile up, which is why, even though the project started last winter, the build-log did not. But now that the planking is a real mess I figured I'd reveal all and, if nothing else, provide a greatest hits of what not to do. And prove the old adage correct - when all else fails, read the directions (or at least read others' books, practicums, instruction manuals)

- 21 replies
-
- 4
-
-
- model shipways
- Finished
- (and 1 more)
-
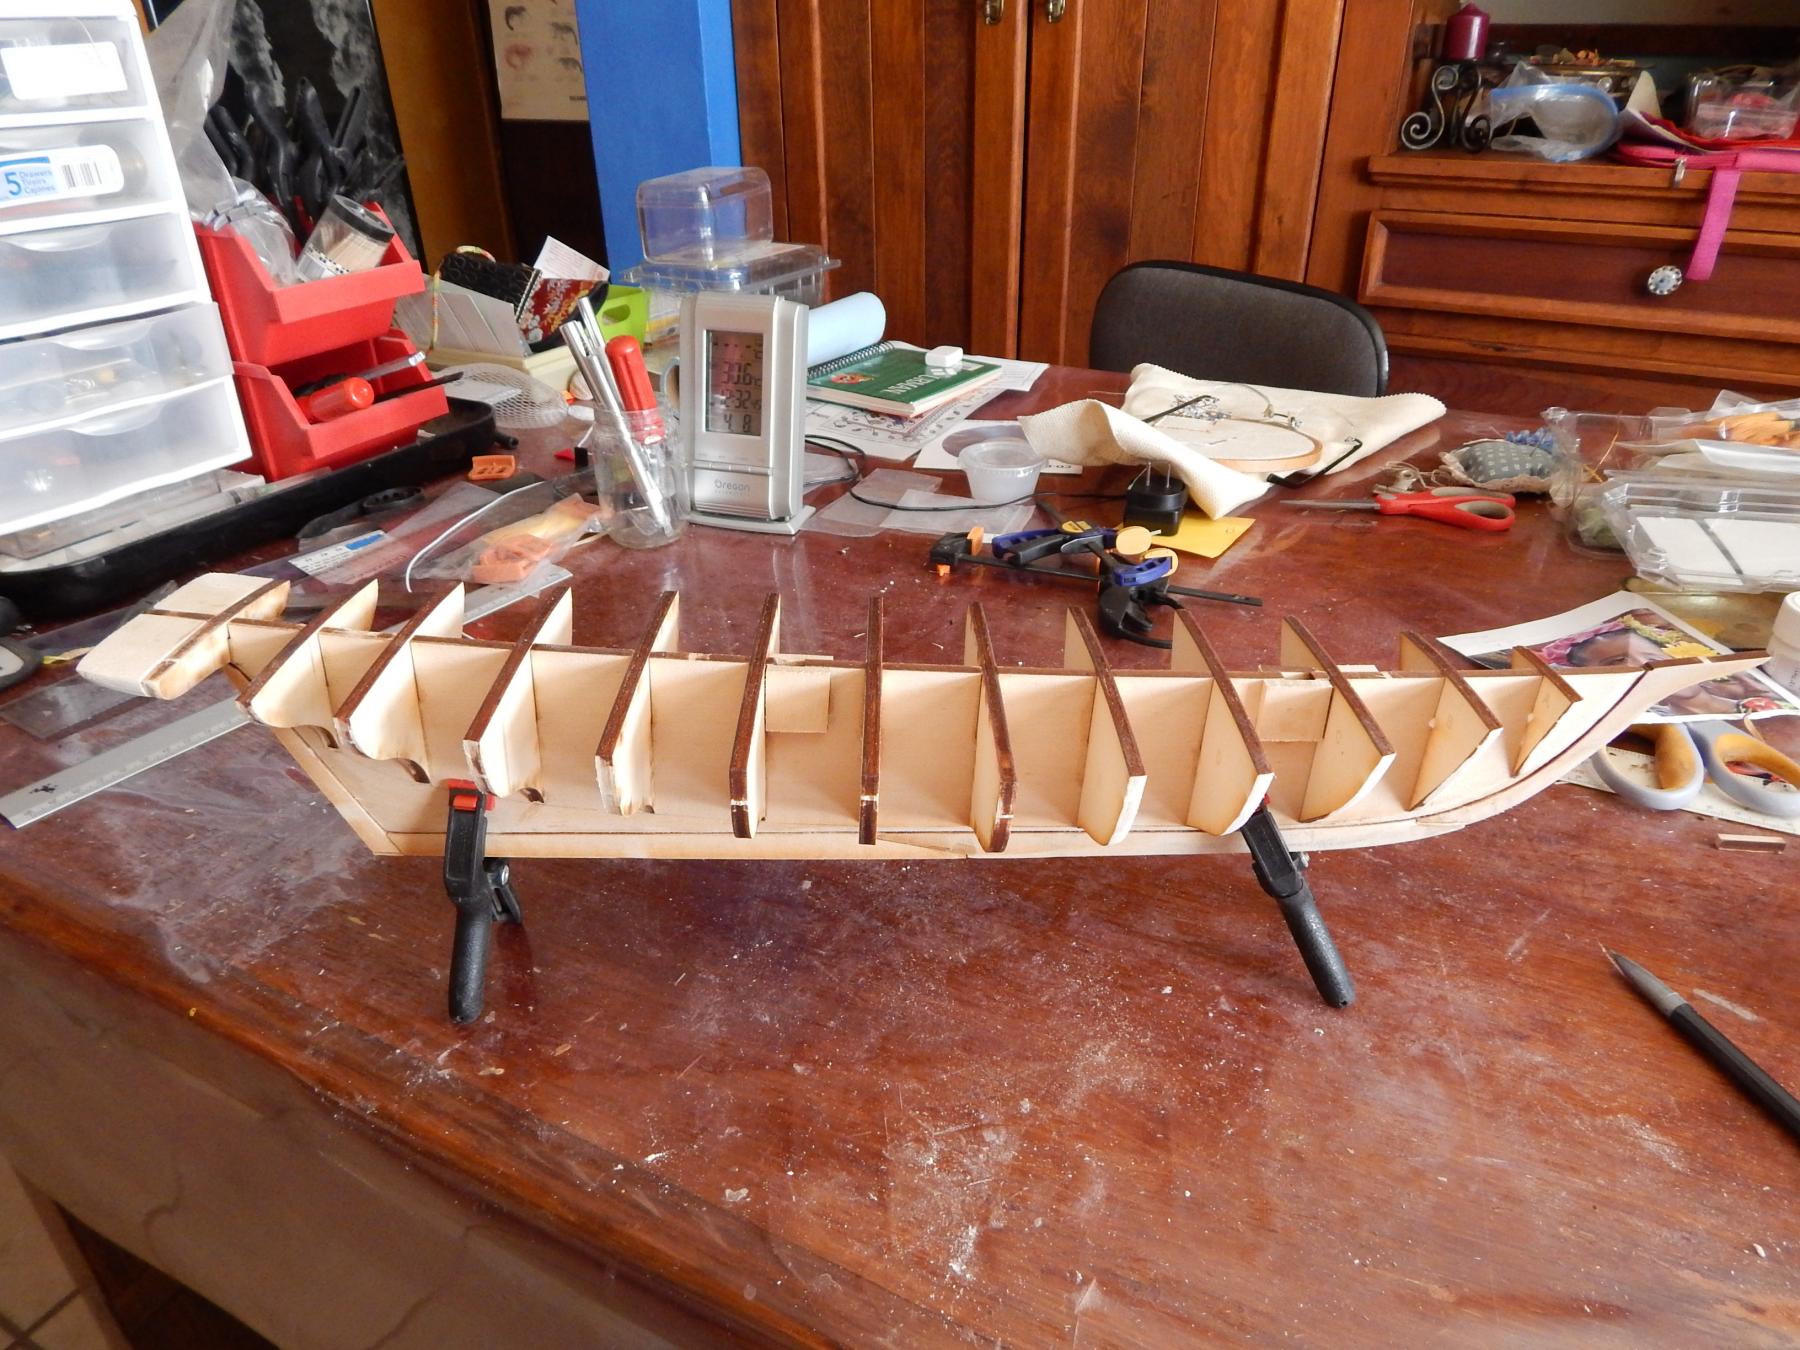
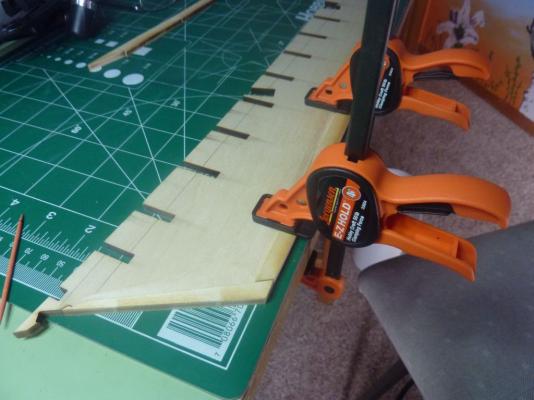
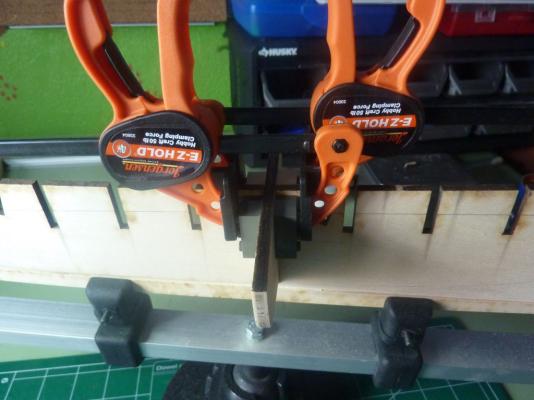
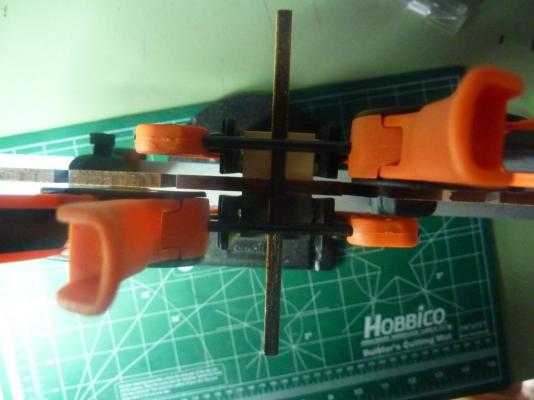
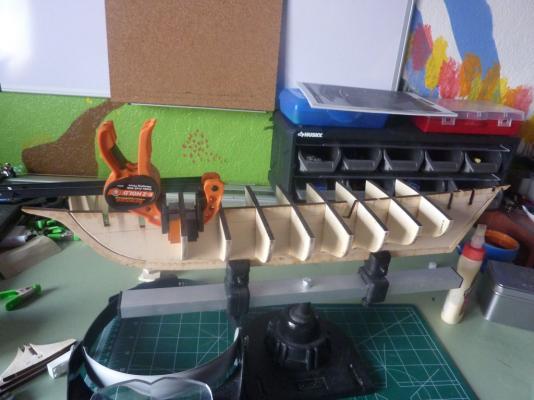
 This is the start of my build log for the Model Shipways kit Pride Of Baltimore II. A little history before getting into the details. I finished my last kit, the Mamoli USS Constitution cross section right at the beginning of the year. After that ship, my first wood model, I wanted to do a complete, planked, hulled ship and the Pride of Baltimore fit the bill nicely. A larger scale than my previous efforts (1:64 vs 1:96), plank-on-bulkhead, but not quite as large or complex as a full wood Constitution or Syren. As I've mentioned before, I have a Syren waiting in the wings as my next build, so the Pride of Baltimore is a very nice transition model. For anyone who's followed my previous ships, I do slow, but hopefully steady work. I try to get a few hours in each weekend day and not let it sit for months at a time. So, I'll typically update the log late on a Sunday. The other thing I hope to accomplish with this log is getting answers to questions as I go along. I've not done a plank-on-bulkhead model before, and while I've read a bunch of logs on the site here, doing one myself will undoubtedly be a different experience. I'm already leery of planking, for example. (Which is probably not unique) Anyway, on to the build: First, the latest Model Shipways kit does NOT have the keel in 2 pieces - it's a single formed piece and mine was perfectly flat and true (Yay!) Here, I've cut the rabbett as best I could using a #11 blade and sandpaper: Next, the keel is attached in a few pieces: After that, the bulkheads were added. Now, my bulkheads were all too thick to fit in the slots - the bulkheads were 3/16" thick, and the slots were about 5/32" wide. So, I had to sand each bulkhead at the center so they would slid into the slots. I used clamps and Legos to get a square fitting, as well as measuring the distance between bulkheads once the center bulkhead was glued. This shows all the bulkheads glued in place. I also added some side supports for the mast slots. My next step is to fair (bevel) all the bulkheads. I did not do this prior to gluing (perhaps I should have?), so I expect this to be time consuming. Any advice on proper fairing techniques would be appreciated. Andy.
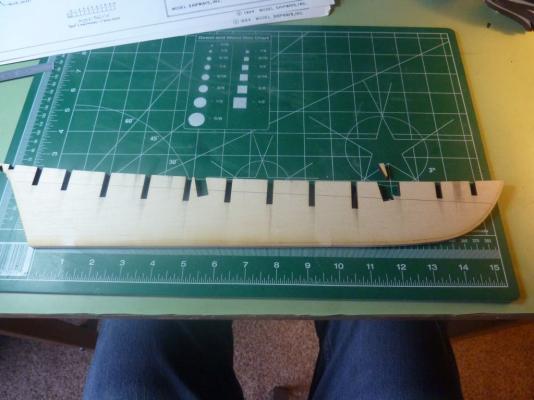

-
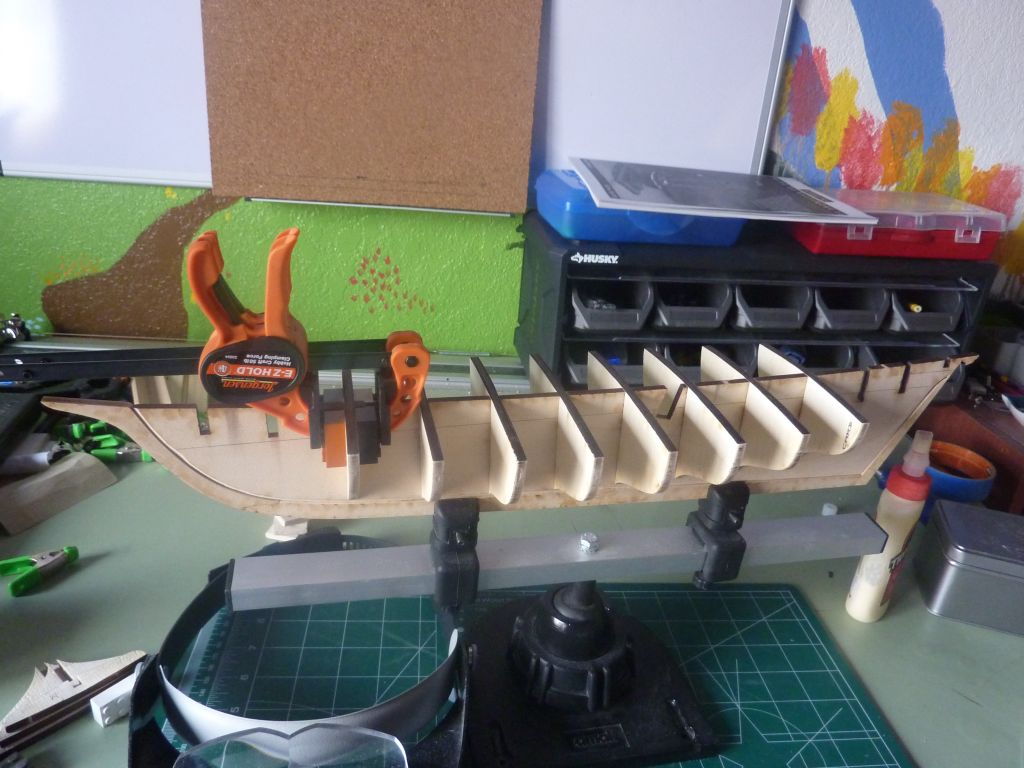
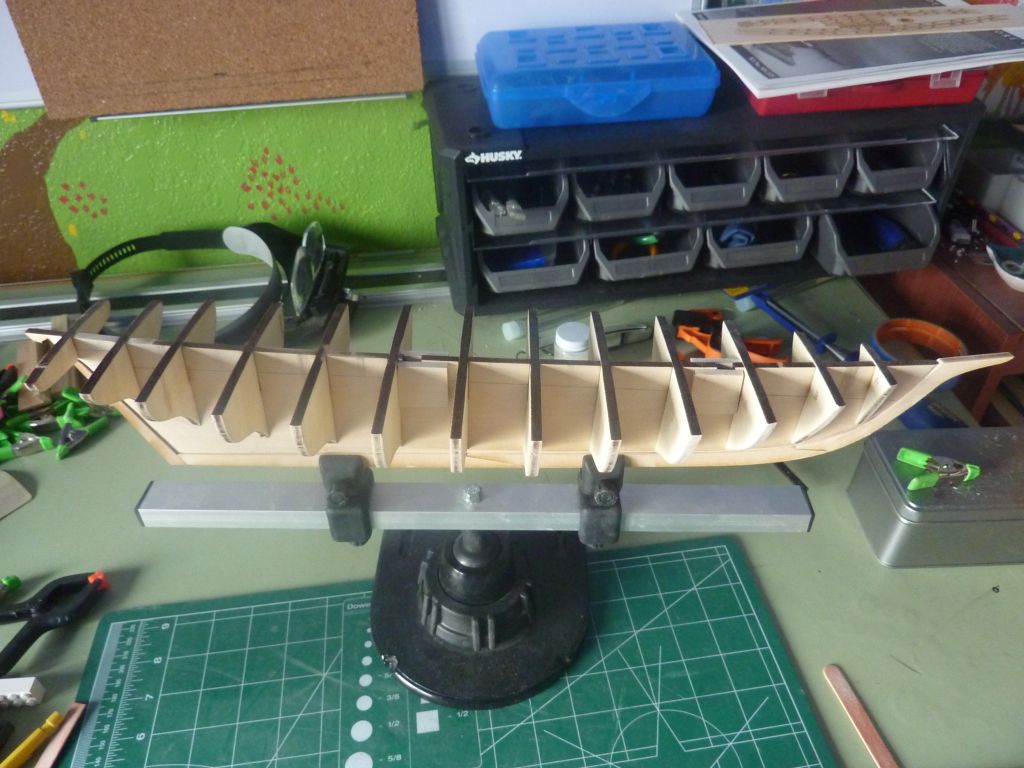
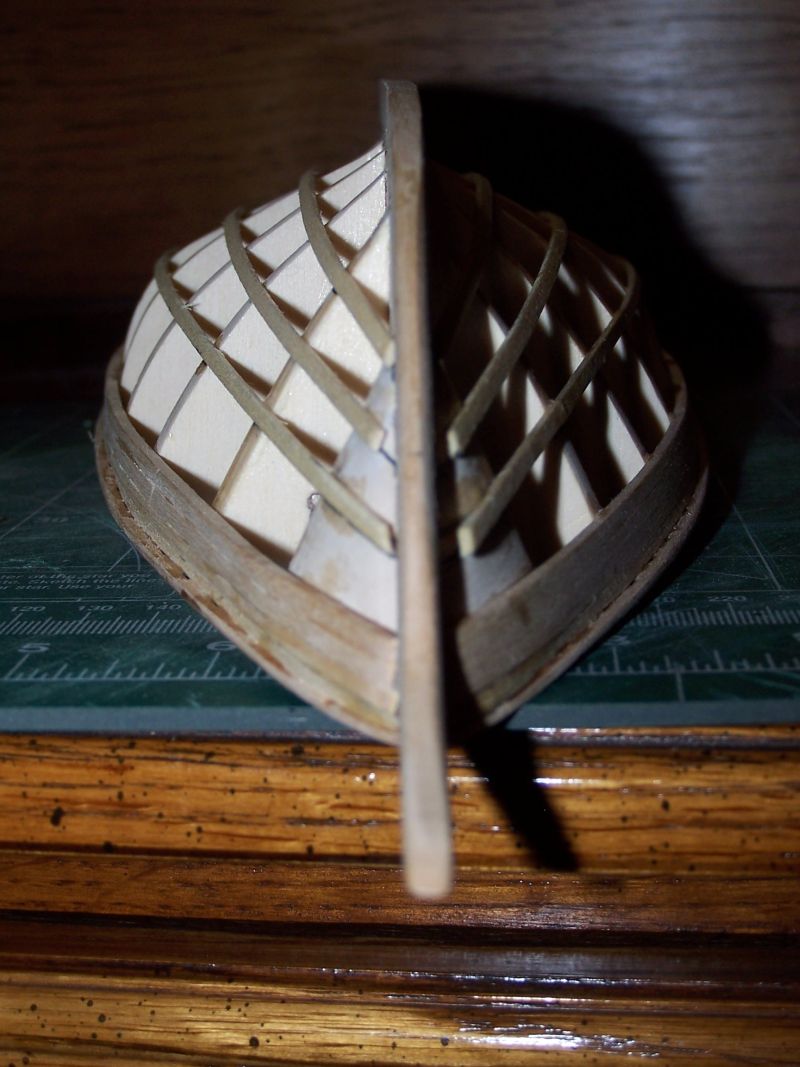
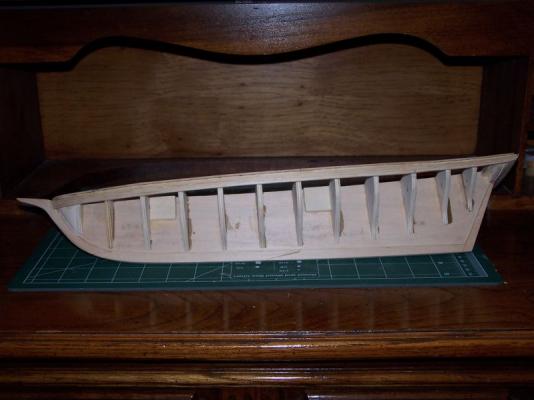
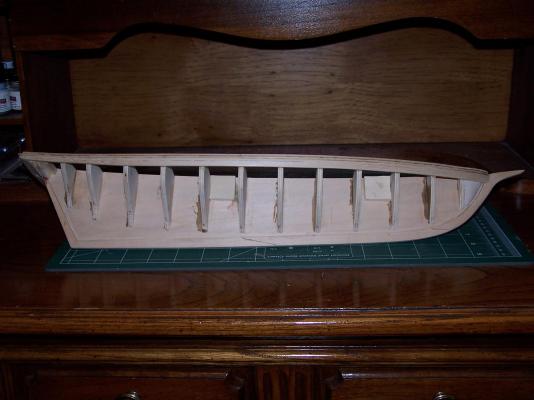
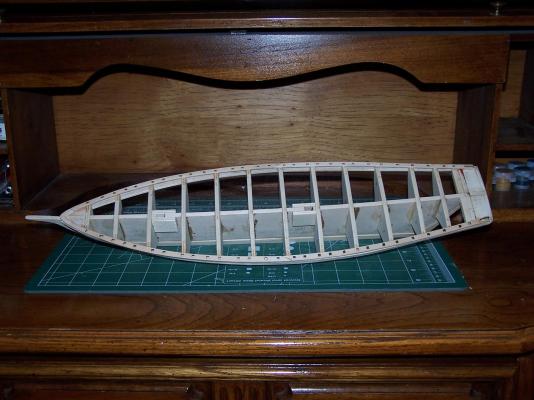
 As there is no rest for the wicked, I am now launched into my next project - the Pobpob! - (plank on bulkhead Pride of Baltimore.) Actually two projects, as I'm doing something I've never done before and am building two kits at the same time, the other being the Artesania Latina Titanic lifeboat. On the POB, I have the bearding line cut and the bulkheads in place. These are the best fitting bulkheads I've run across yet; they lined up perfectly with the top of the keel and the bearding line/rabbet at the bottom. Not sure how they will all line up when I start fairing, but at a glance they look like they will be pretty good. This doesn't look like it will be too hard a planking job either. David
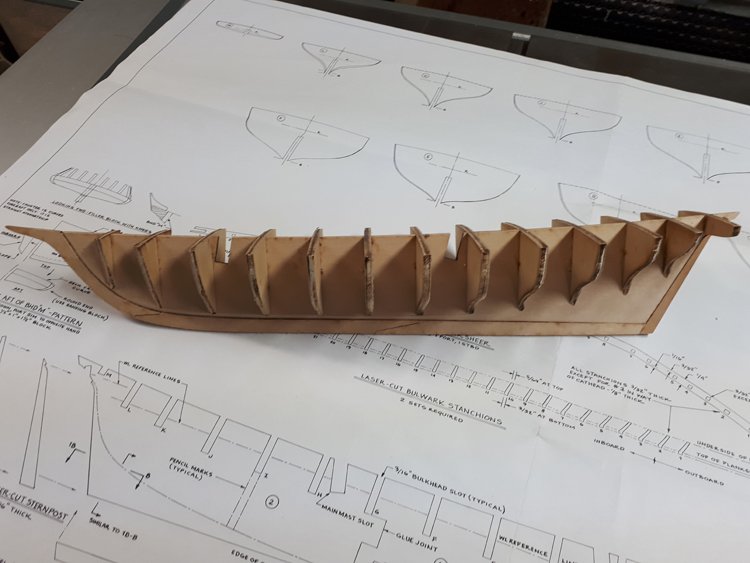
- 23 replies
-
- 7
-
-
- pride of baltimore ii
- model shipways
- (and 1 more)
-
 Hello all. I am about to embark on the build of the pride of Baltimore II. This will be my first attempt at ship modeling and plan on taking it step by step. I will be using the Bob Hunt practicum and refer to it throughout the build. I chose this ship since my daughter lives in Baltimore and I actually saw it in person and fell in love with it. Wish me luck. I’m going to need it. Sincerely Tony
- 45 replies
-
- 5
-
-
- first model
- pride of baltimore ii
- (and 1 more)
-
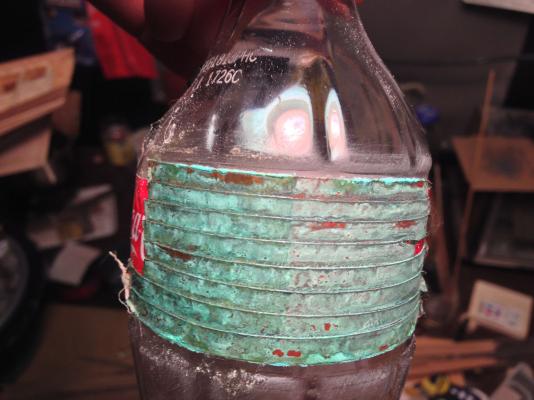
 I’ve decided to start this build log even though it might take me a long long time to complete. This is the Pride of Baltimore from MS, but I am substituting some fine woods I’ve gotten from Hobby Mill and will be adding more guns to the deck. I’d like to make a ship that could have been an 1812 privateer. As this ship is just so beautiful under sail – I intend to make sails and also experiment with coppering the hull with a green patina. I discovered early on that I made a big mistake with the hull. A few of the bulkheads were not symmetrical and I didn’t catch it until I started to plank. I almost ditched the project- anyone who knows ships or modeling would catch it, but I figured that most people wouldn’t so I’m continuing. I missed figuring out how to plank the counter properly also, but will keep it going. This is such an addictive hobby and it is so much fun to be a part of MSW. I have so much to learn from you all!


-
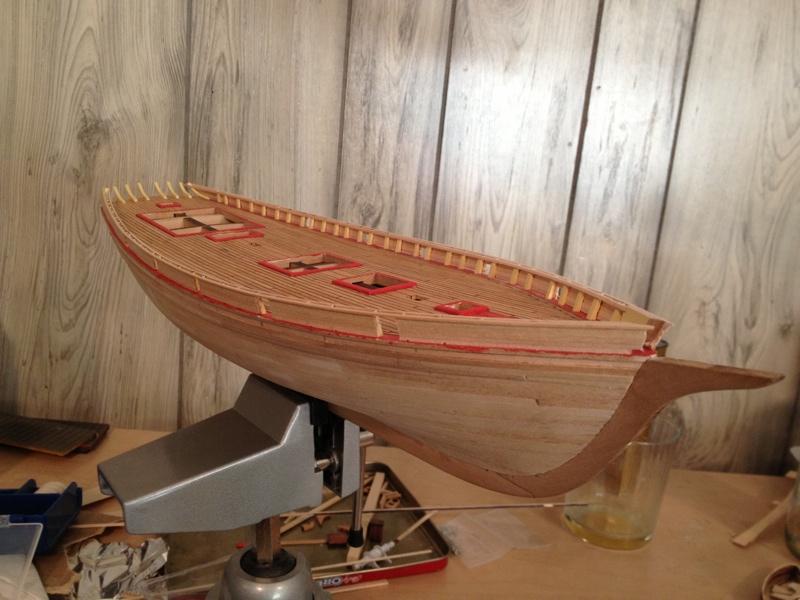
 This will be my third model ship and second plank on bulkhead ship. In addition to this web site I will be building the Pride of Baltimore II (POB II) with the assistance of Robert Hunts Sophomore course practicum, and of course all of you here at MSW. I thank you all in advance for your help and input along the way. I must confess I am hesitant to start this log as there are already three magnificent build logs under way for this ship. I fear that I may have little to offer as I am very much a beginner and I do not posses any great skill, but I do have a desire to strive for perfection and like all of you a love and fascination with these beautiful tall ships that are reminders of our past. So with some trepidation and having being inspired by the craftsmanship of others here I have decided to take the plunge. I chose the POB II for many reasons not the least of which is she is a beautiful ship, but also as I think she offers a great deal as a way to learn and improve as a model shipwright. She presents some new challenges compared to the AVS but in a way that is a natural progression for new builders. The keel was first laid December 08, 2012 shortly after completing my Armed Virginia Sloop. Work progressed to the point where I had begun the process of planking the hull and had completed the first 6 rows below the wales. Some of the photos from early construction are posted below. Then life took me away and the poor ship has sat idle until recently. Like many others this hobby has a way of always pulling me back and the pride as waited patiently for my return.
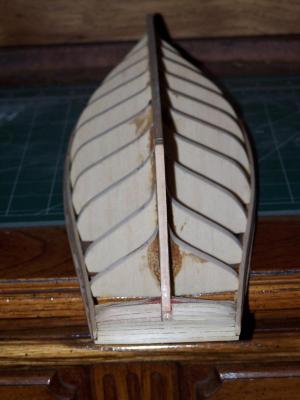

-
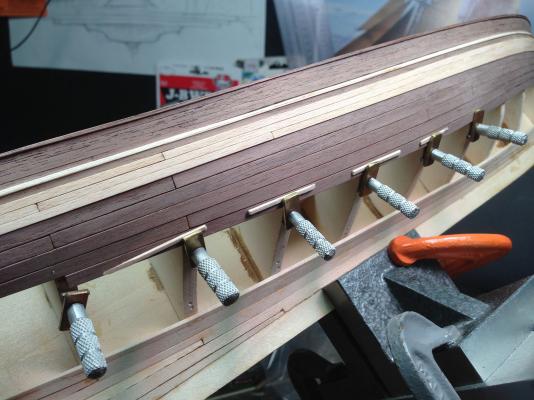
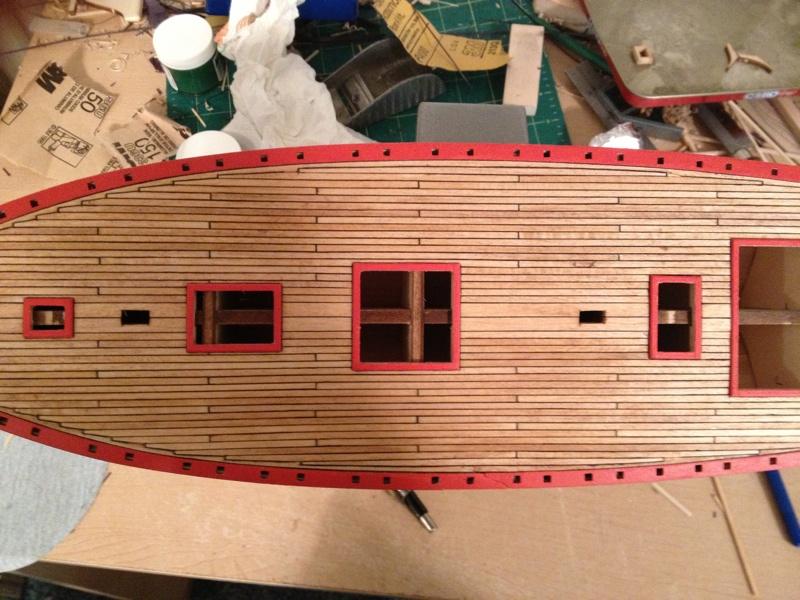
 This is the third time posting this build log here. Hopefully this one doesn't get deleted :mellow: I started the build Jan 2 2013. I have 40-50 hours in it at this point. planking begins planking completed. unsanded. coamings installed and painted. deck planking begins deck planking completed bulwark stanchions installed bulwark completed
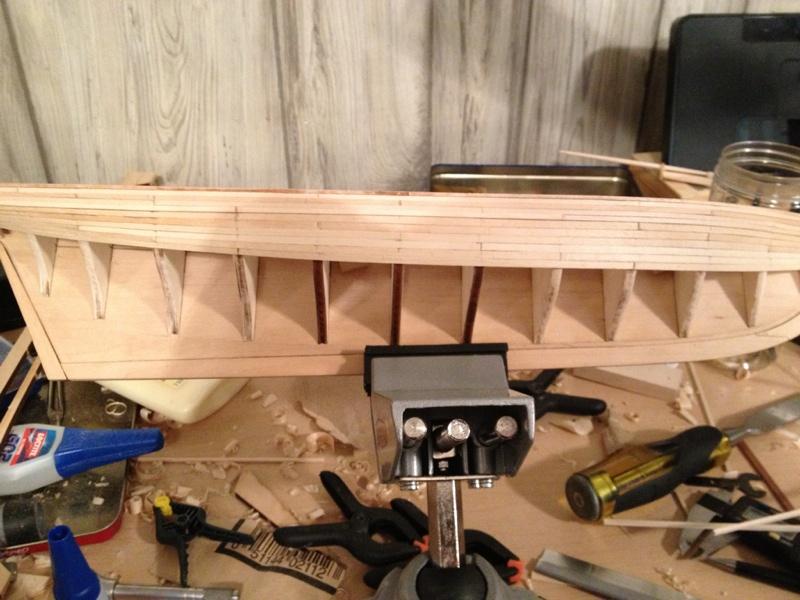

-
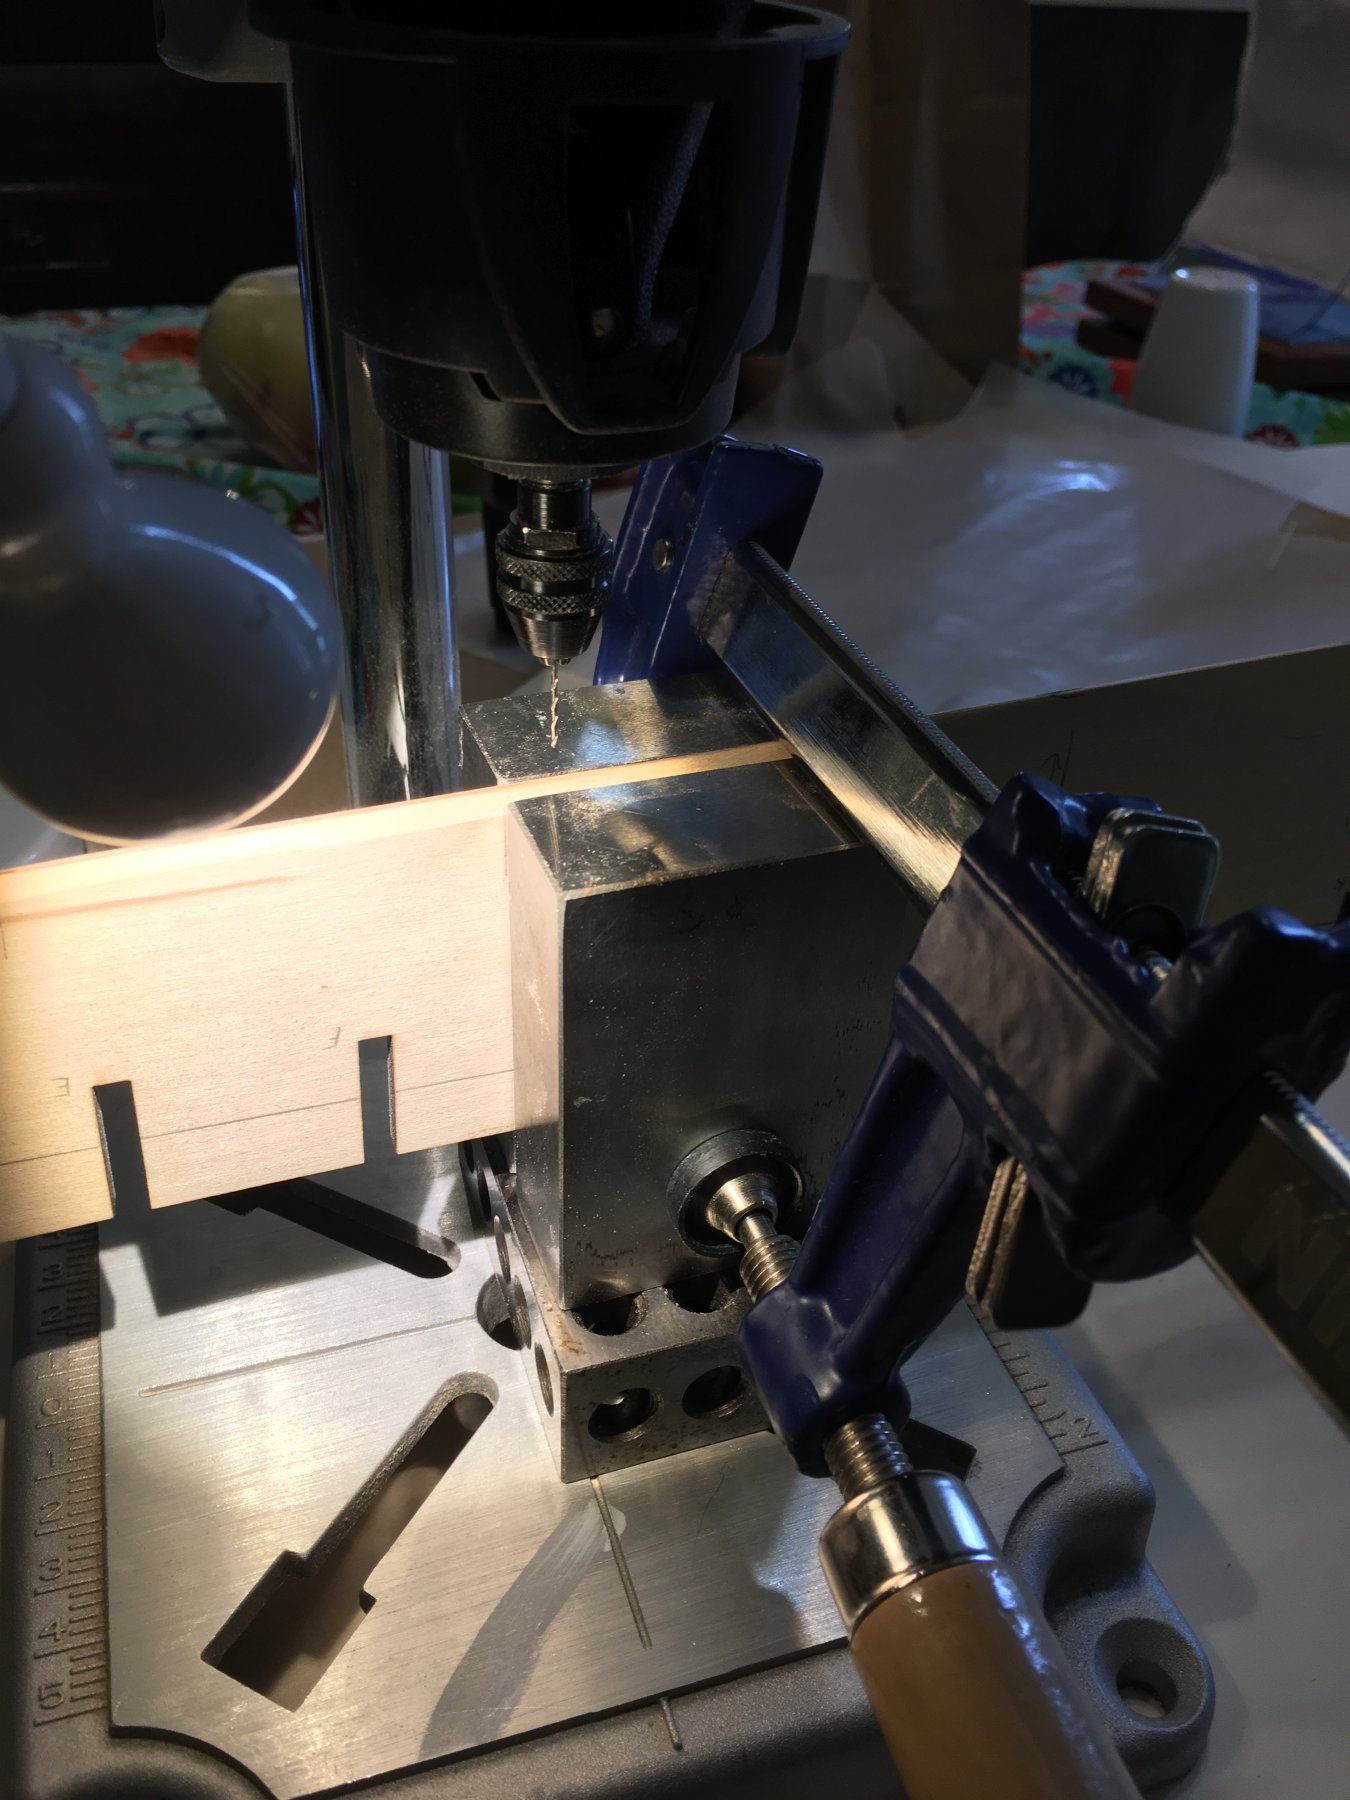
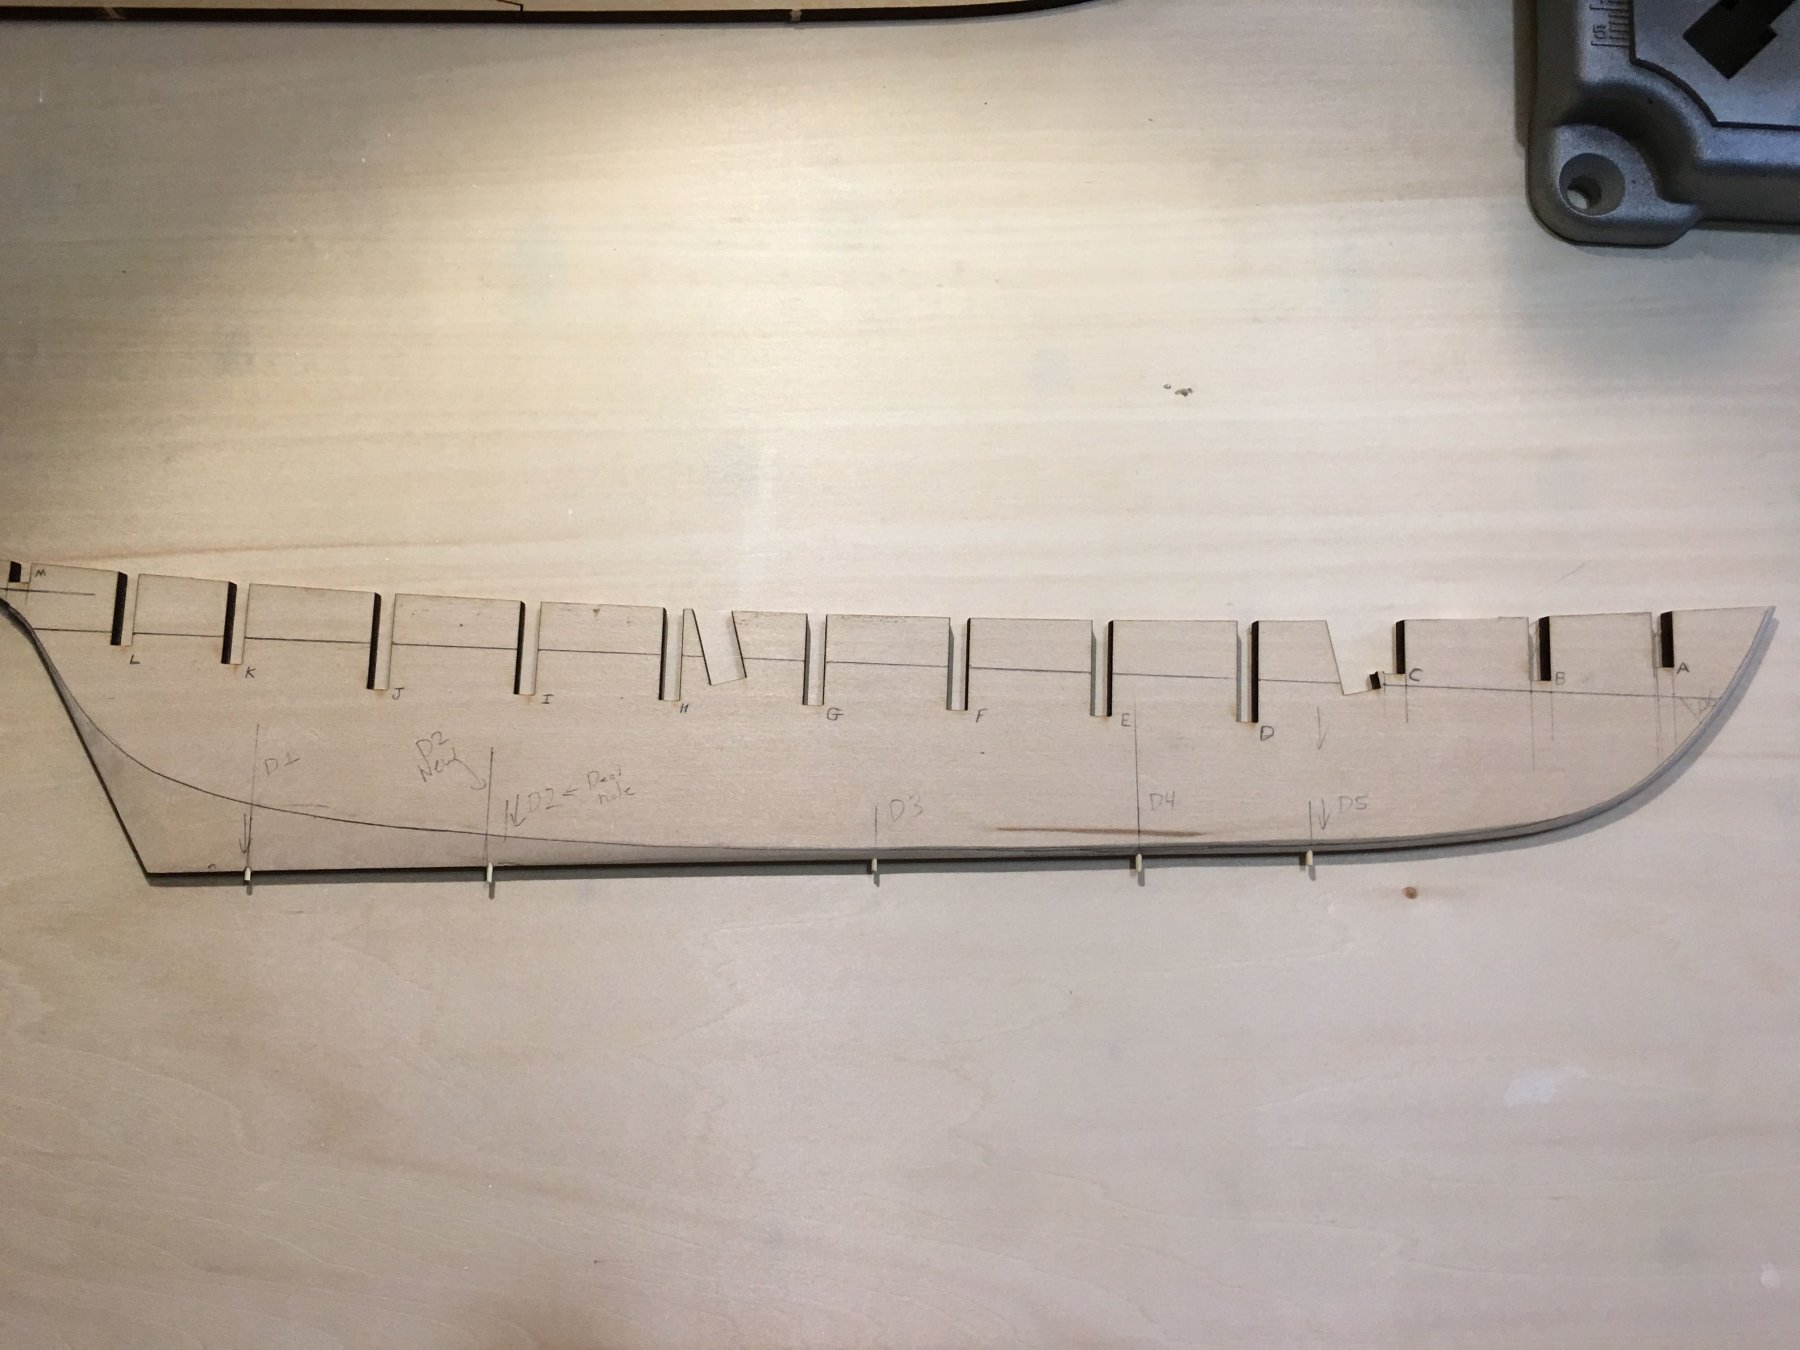
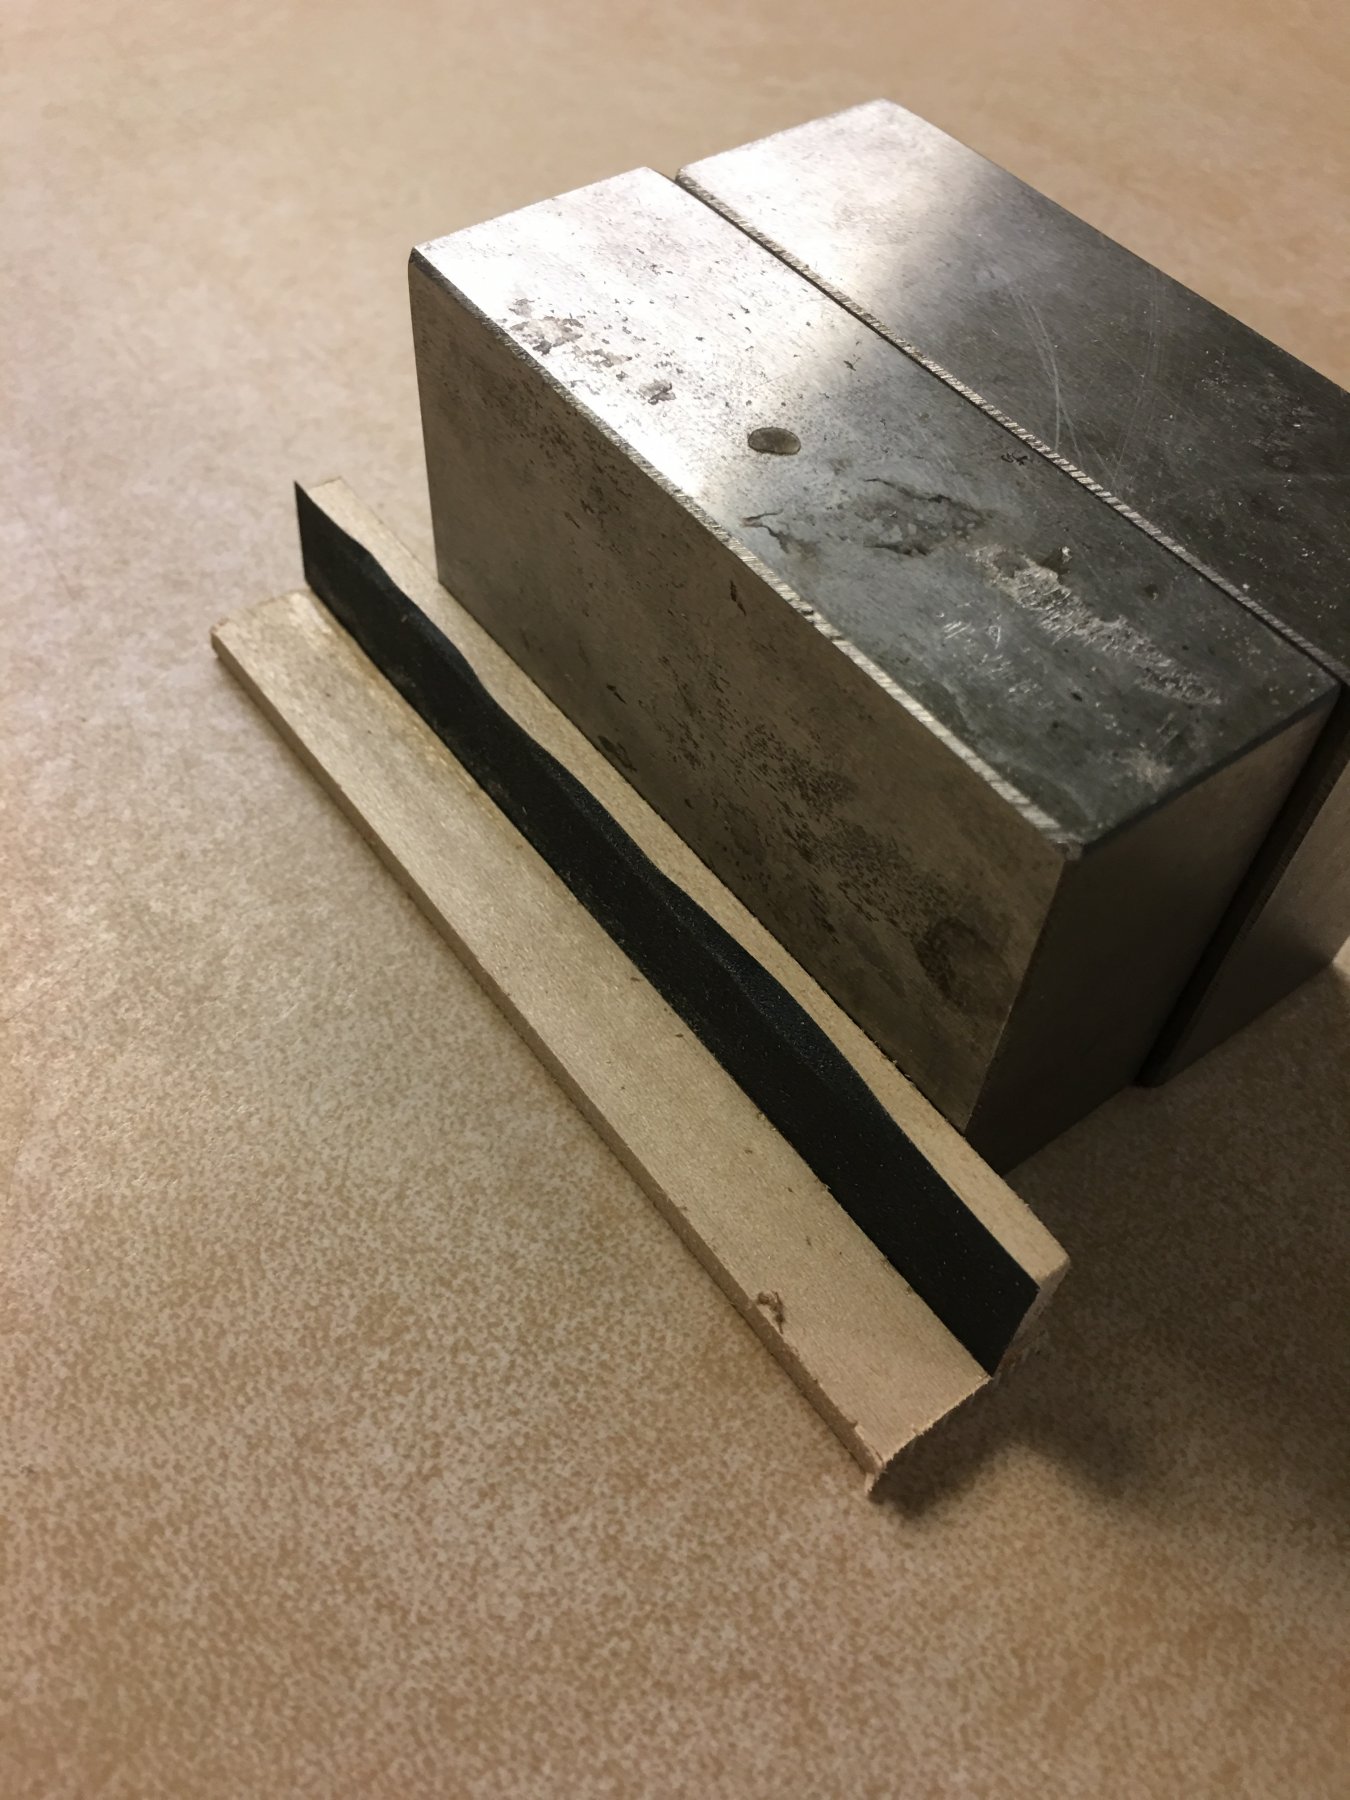
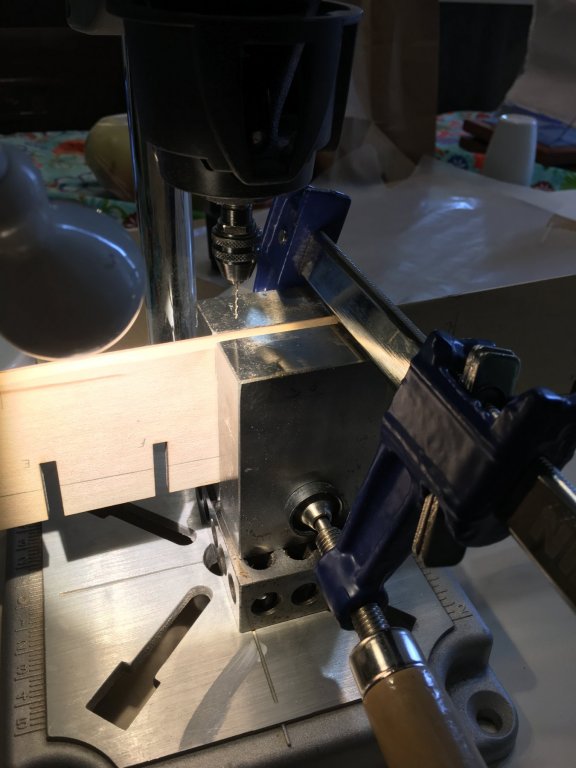
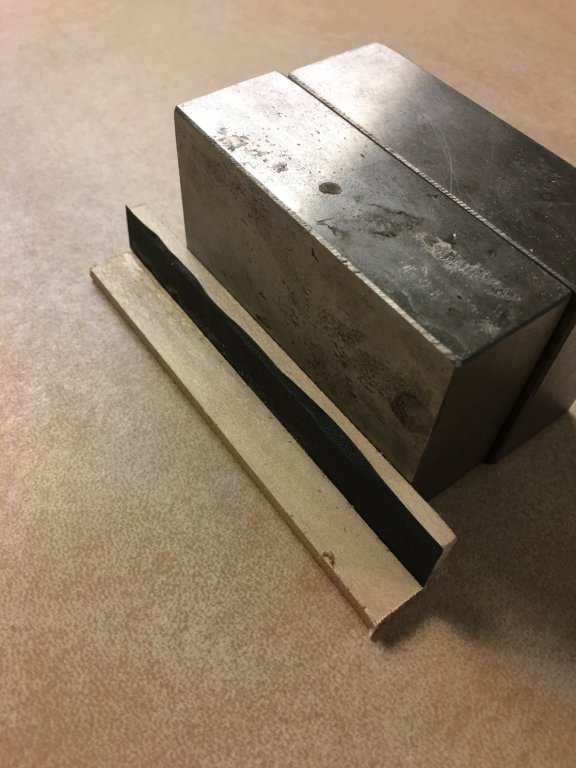
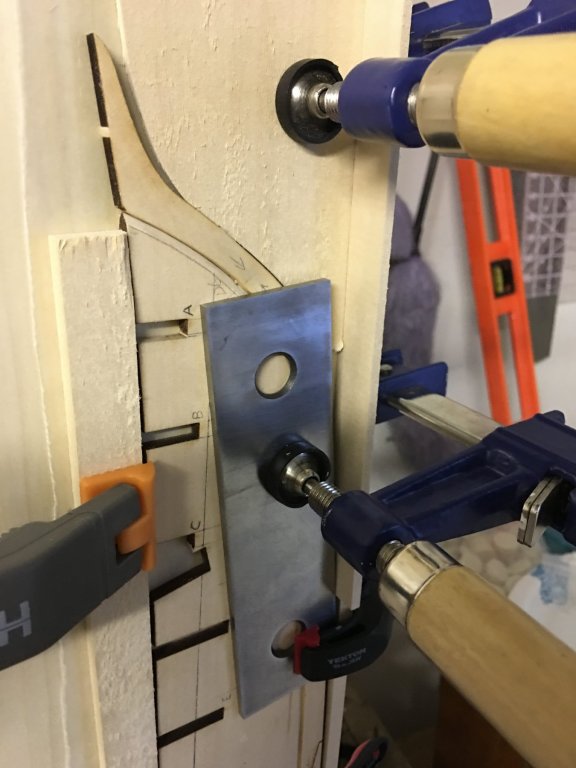
 Greetings to all fellow model shipwrights. I am working on Model Shipways Pride of Baltimore II. I have done a few previous kits from Dumas and MidWest, with some rather nice results and have decided to make this a lifetime hobby. I'm throwing this build log up to get some help as I go along and provide some inspiration to others starting out. I am thinking that I am a younger member here (43) and love that this hobby is still going on. A little about me, so that all other readers can get where I am coming from. I am a nuclear physicist. I grew up on the chesapeake bay and my father had a Morgan 28' outisland that I learned to sail on. I'm a bit of a perfectionist and love how this hobby combines the meticulous nature of a technical build with the final result of a beautiful piece of what I would call architectural art. Here is where I am at... early stages. I got the kit and set out to getting started. One thing that struck me was the imperfections of the cuts and plans... A lot is off by ~ 1/16th". I know that this is art, not technical designs, but my machinists would have kittens if I provided parts this far off. That being said, I have been consulting a great book that my wife gave me; "Ship[ Modeling Simplified" by Frank Mastini. So far, it has been crucial in getting the bulkheads symmetric and centered. Here are the current pictures. I have tapered the false keel and used machinist blocks to get dowels (I filed down tooth picks) centered. I glued the keel/stem assembly to the false keel. Also, I have marked (the now centered and symmetric) bulkheads for tapering. One extra note that makes this build a little more difficult and unique. I have a 2 y.o. son who thinks that the most important thing in his life his to get his hands on the parts and 'help.' My wife is a NICU nurse who works nights so I have a lot of parenting time, and building this model is a little harder with a toddler trying to crawl up your leg.
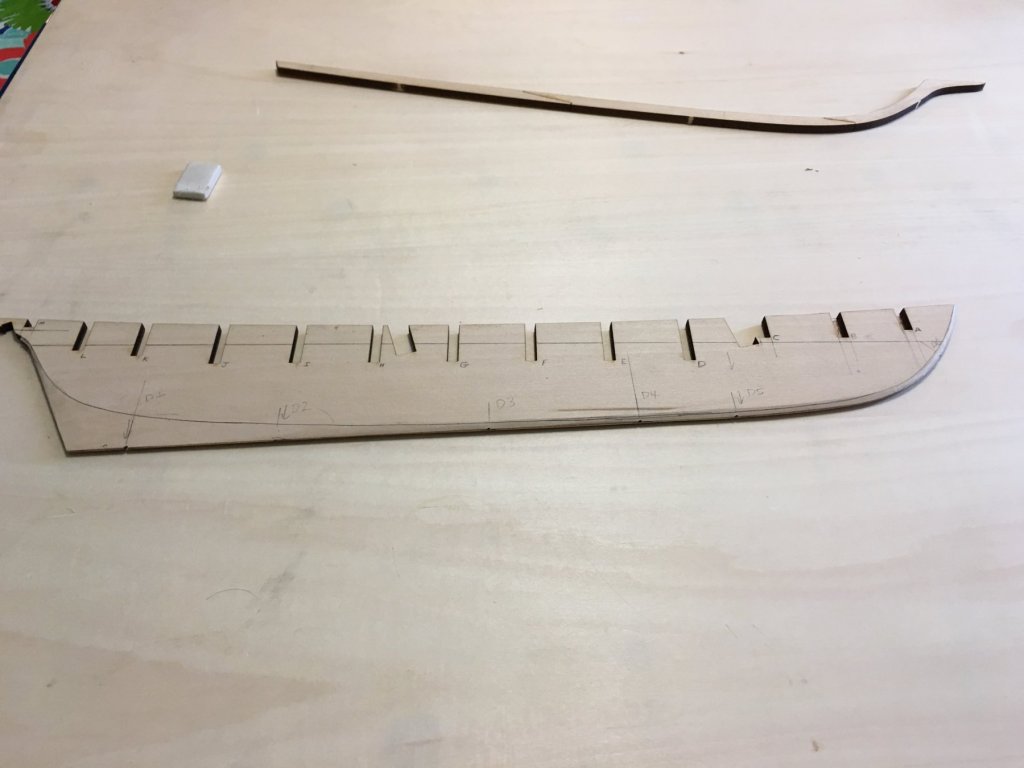

- 17 replies
-
- 6
-
-
- pride of baltimore ii
- model shipways
- (and 1 more)
-
Just started this kit-- Question: in cutting the rabbet,do you cut from the bearding line to the edge of the false keel on the stern half as per MS plans? (It's a pretty big rabbet ) I cut it per plans,but the hull shape has me baffled as to how to plank. I'd like to be able to make sense of it before proceeding w bulkheads etc. Any suggestions will be appreciated.
-
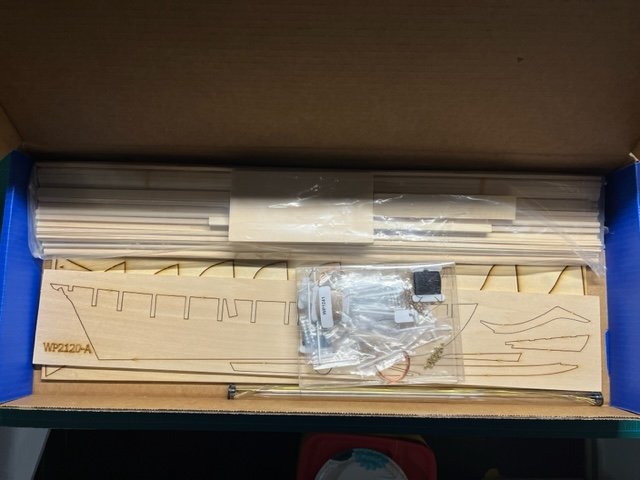
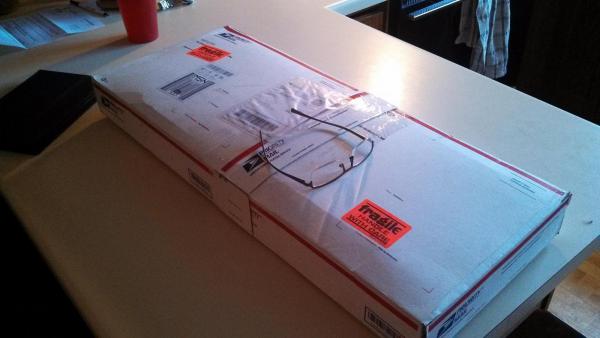
 Wow, FINALLY!!! It's here! I chose the Pride of Baltimore as my side build while building the USF Confederacy. I'm waiting to see if the Confed might be marked down during the holiday shopping season. So I ordered the Pride so I can dig in and get the doors of the C.W. Hime Shipyard open for business. Today's the day! This is a Model Shipways kit. I ordered it through ebay from a wholesale hobby outlet. As advertised, everything remains in it's original packaging. It even had an enclosed invoice dated 1999. Tonight the Admiral and I are taking inventory of the kit. I'm also paying close attention to the integrity of the wood since this kit has been sitting since 1999. I'm already planning on replacing the Basswood planking/decking with Boxwood. as of now, I do not plan on painting the Pride except for her mast where black is noted. I have built cabinets of the highest grade. I have done historical restoration in libraries, manor homes and more. But I do not kid myself for a moment, this is a very different endeavor. Here, among all of you, I find myself once again an apprentice. I look forward to the challenge and most of all learning, adding to my skill set, and perusing what has beckoned me my entire life, building tall ships. I welcome all of you to pick up a chisel, choose your favorite mortise and set a peg! Warm Regards, Bill Hime
-
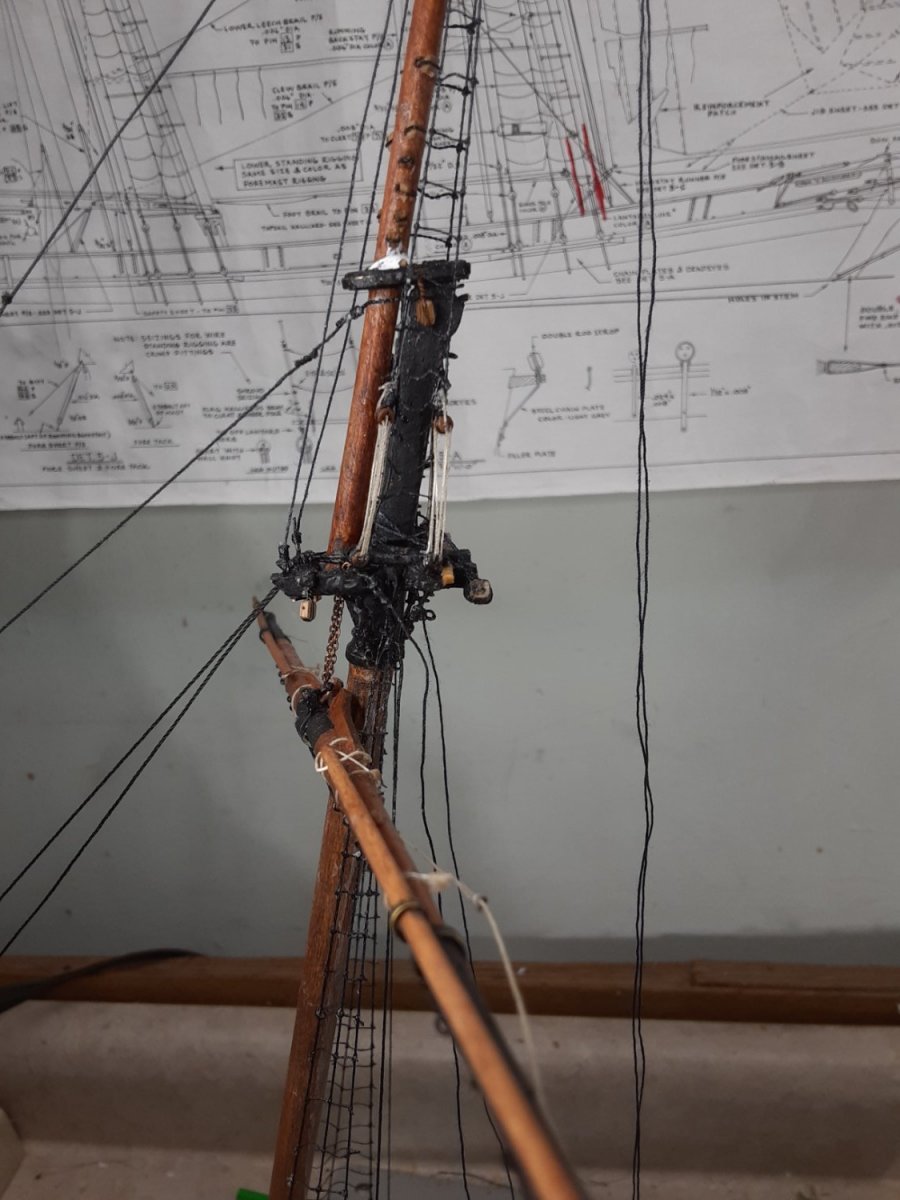
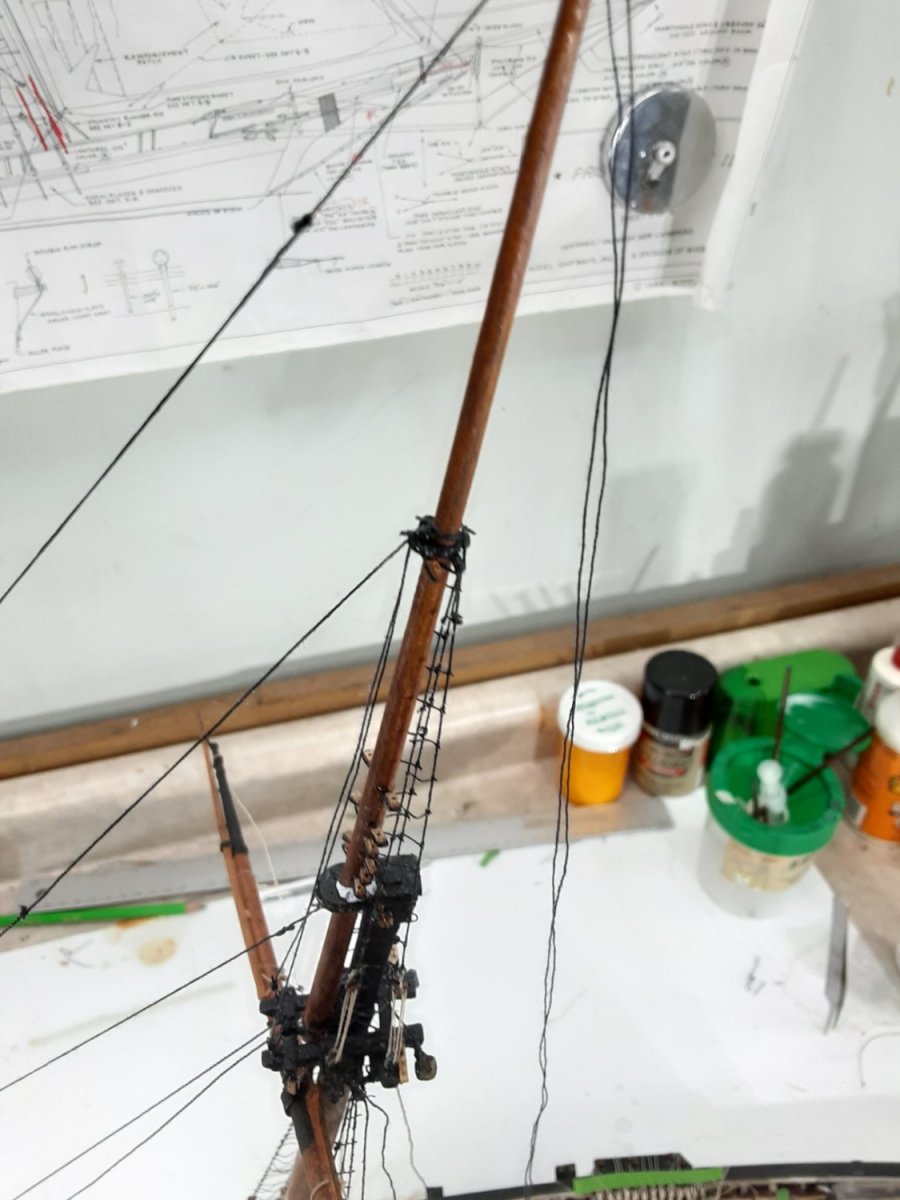
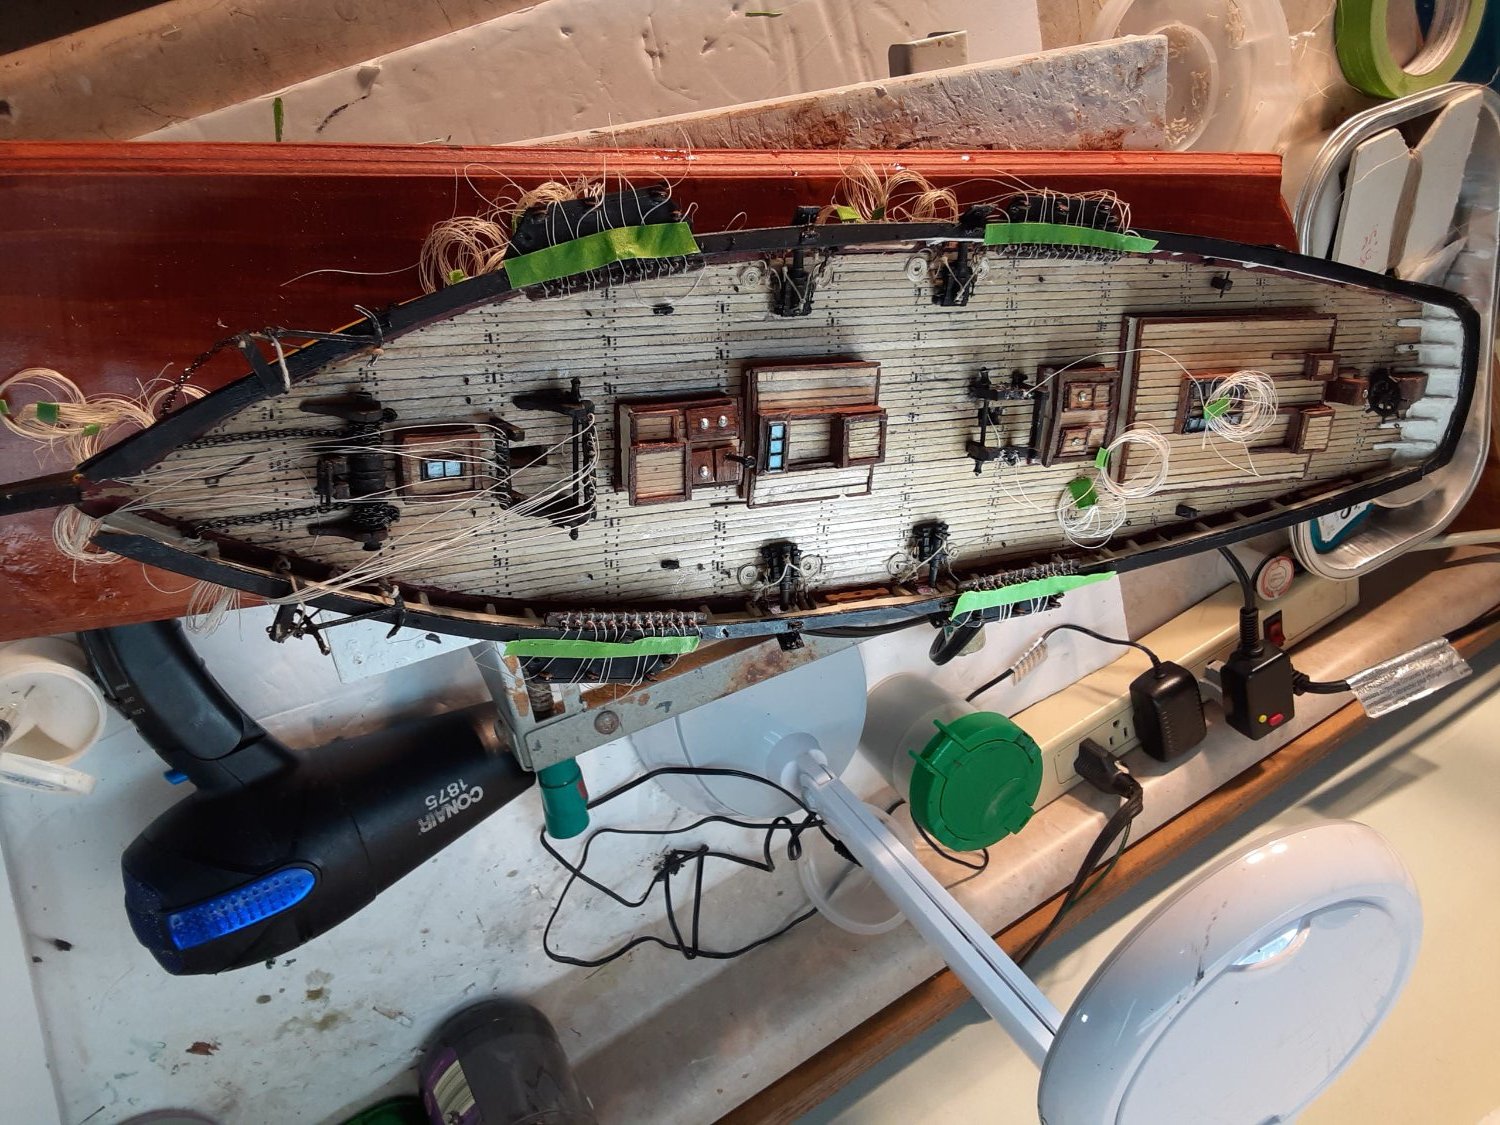
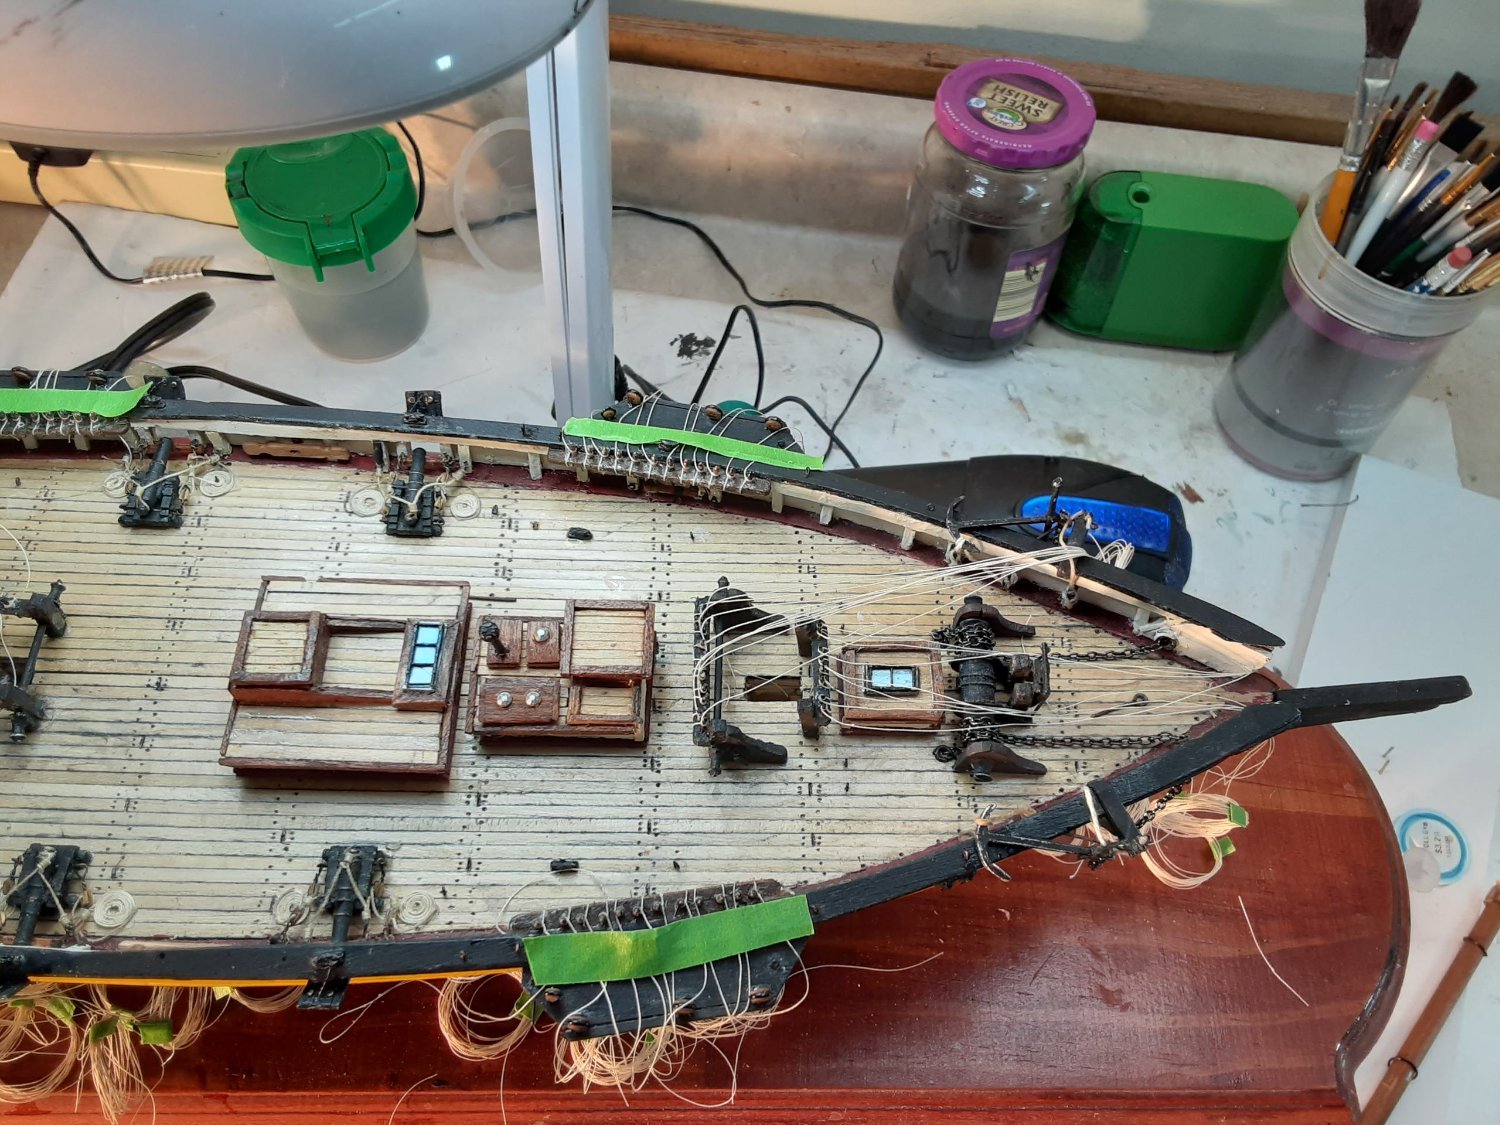
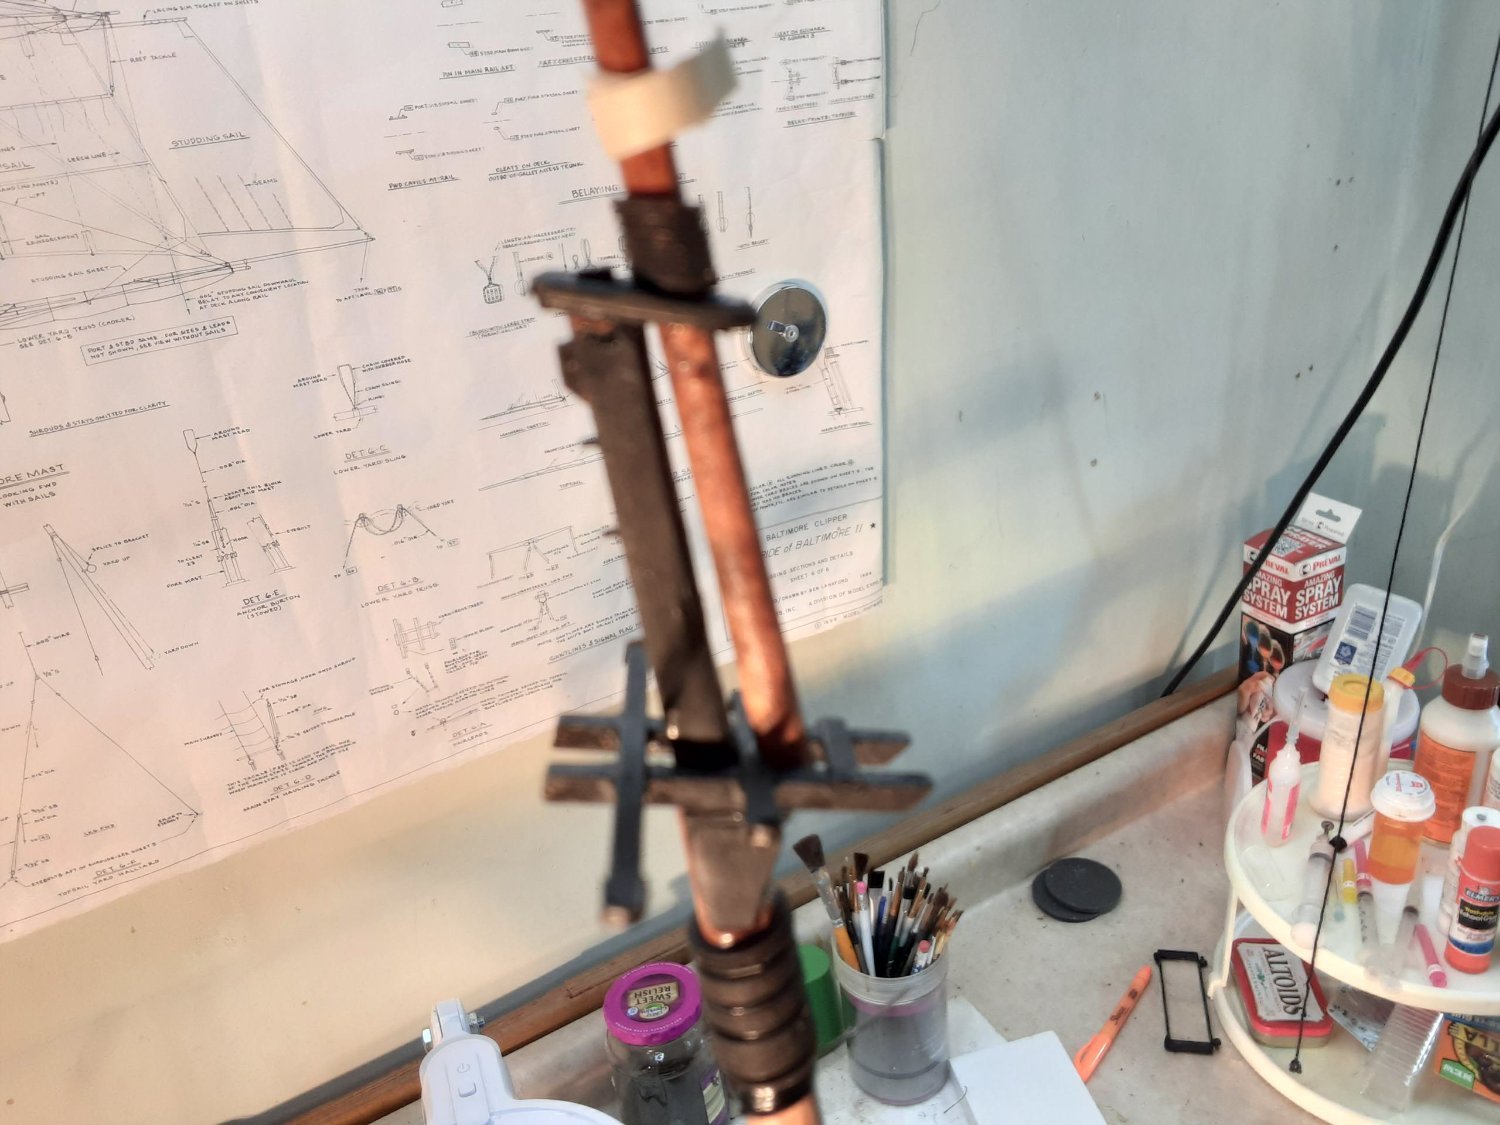
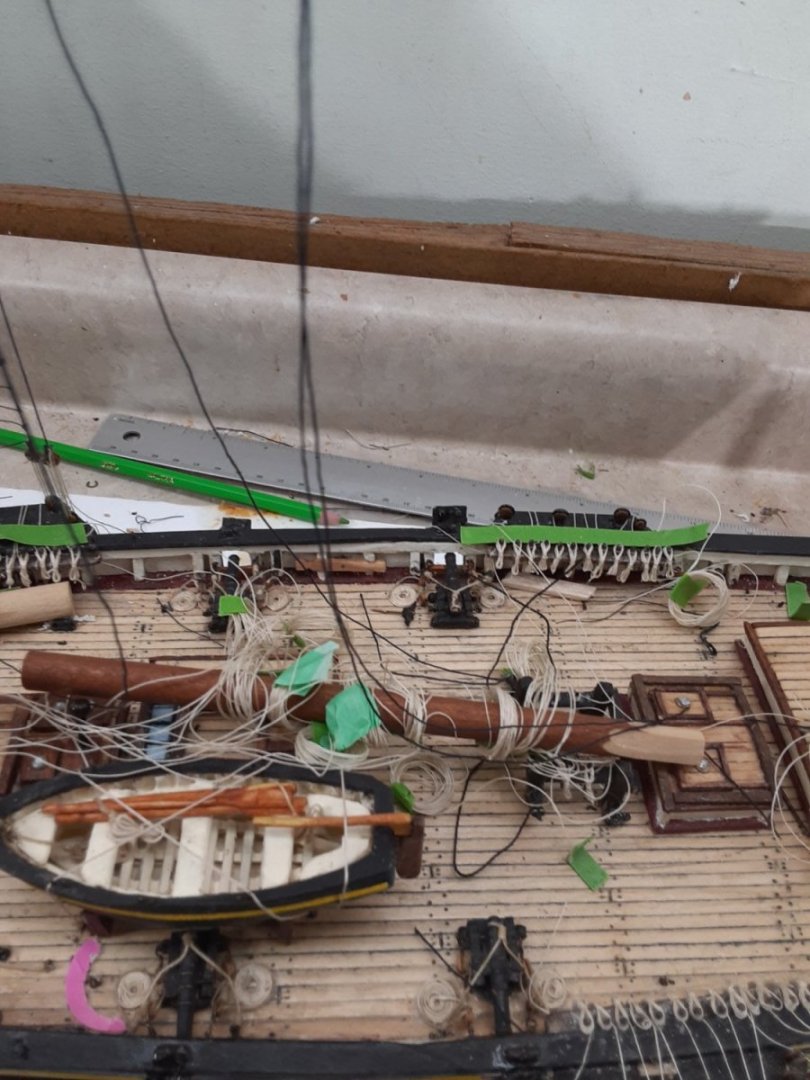
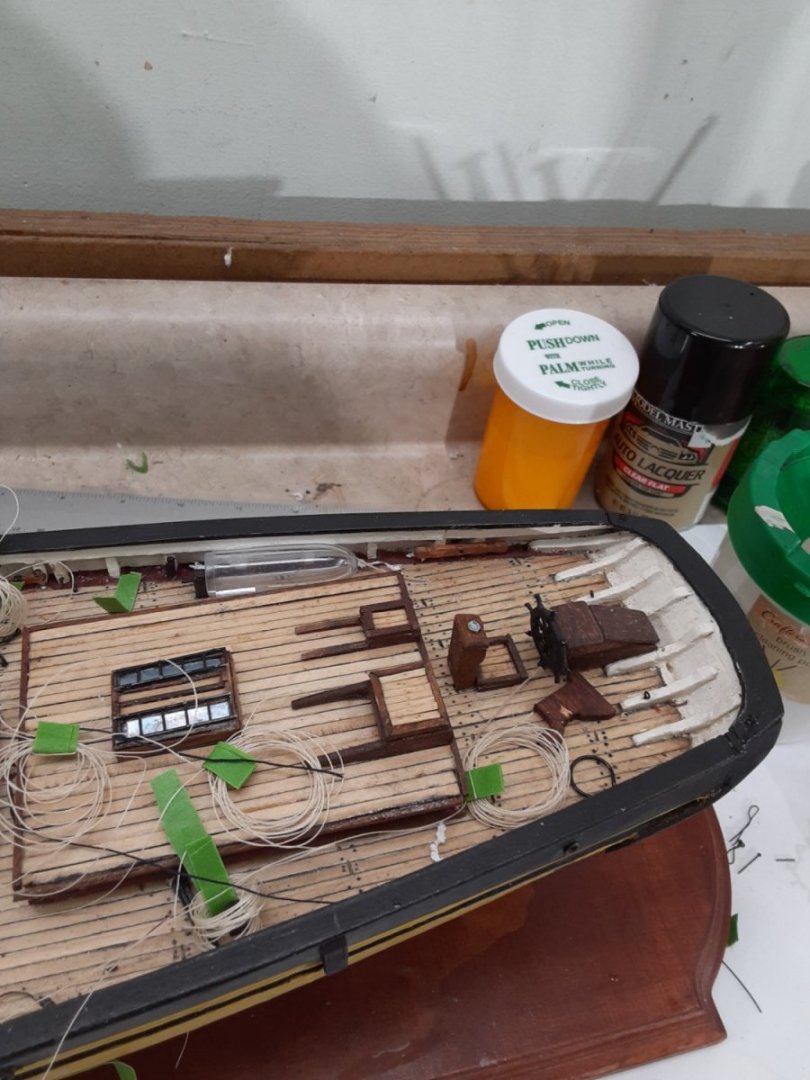
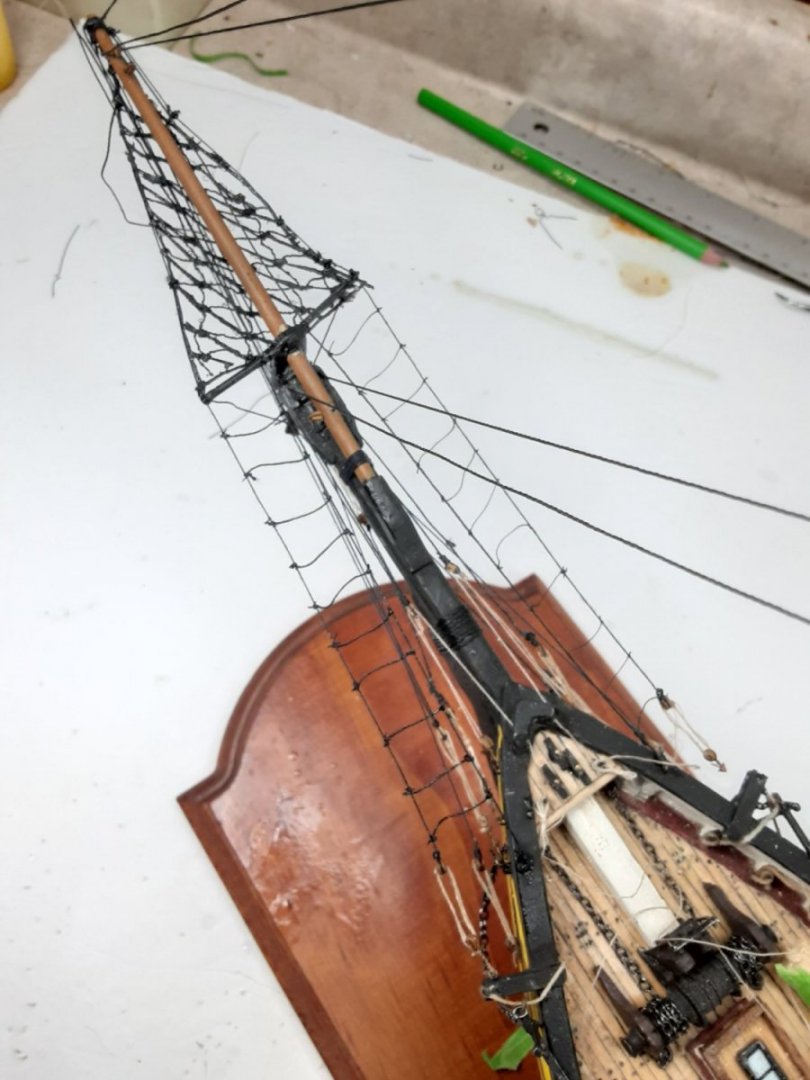
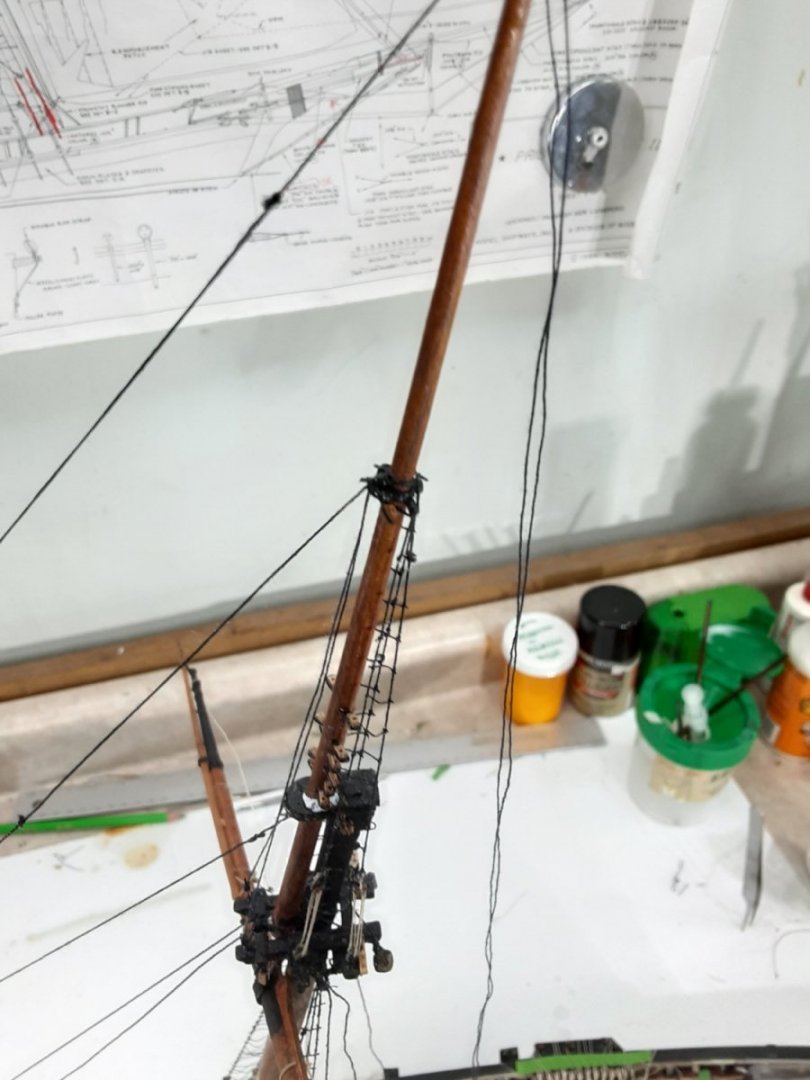
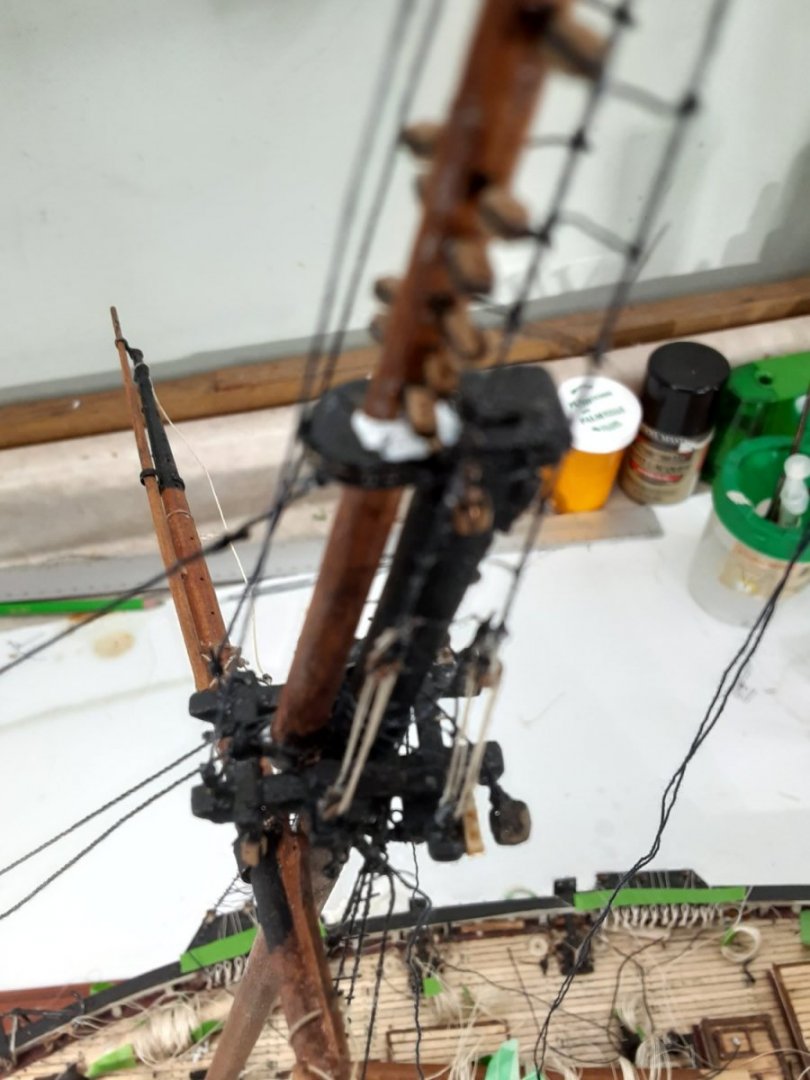
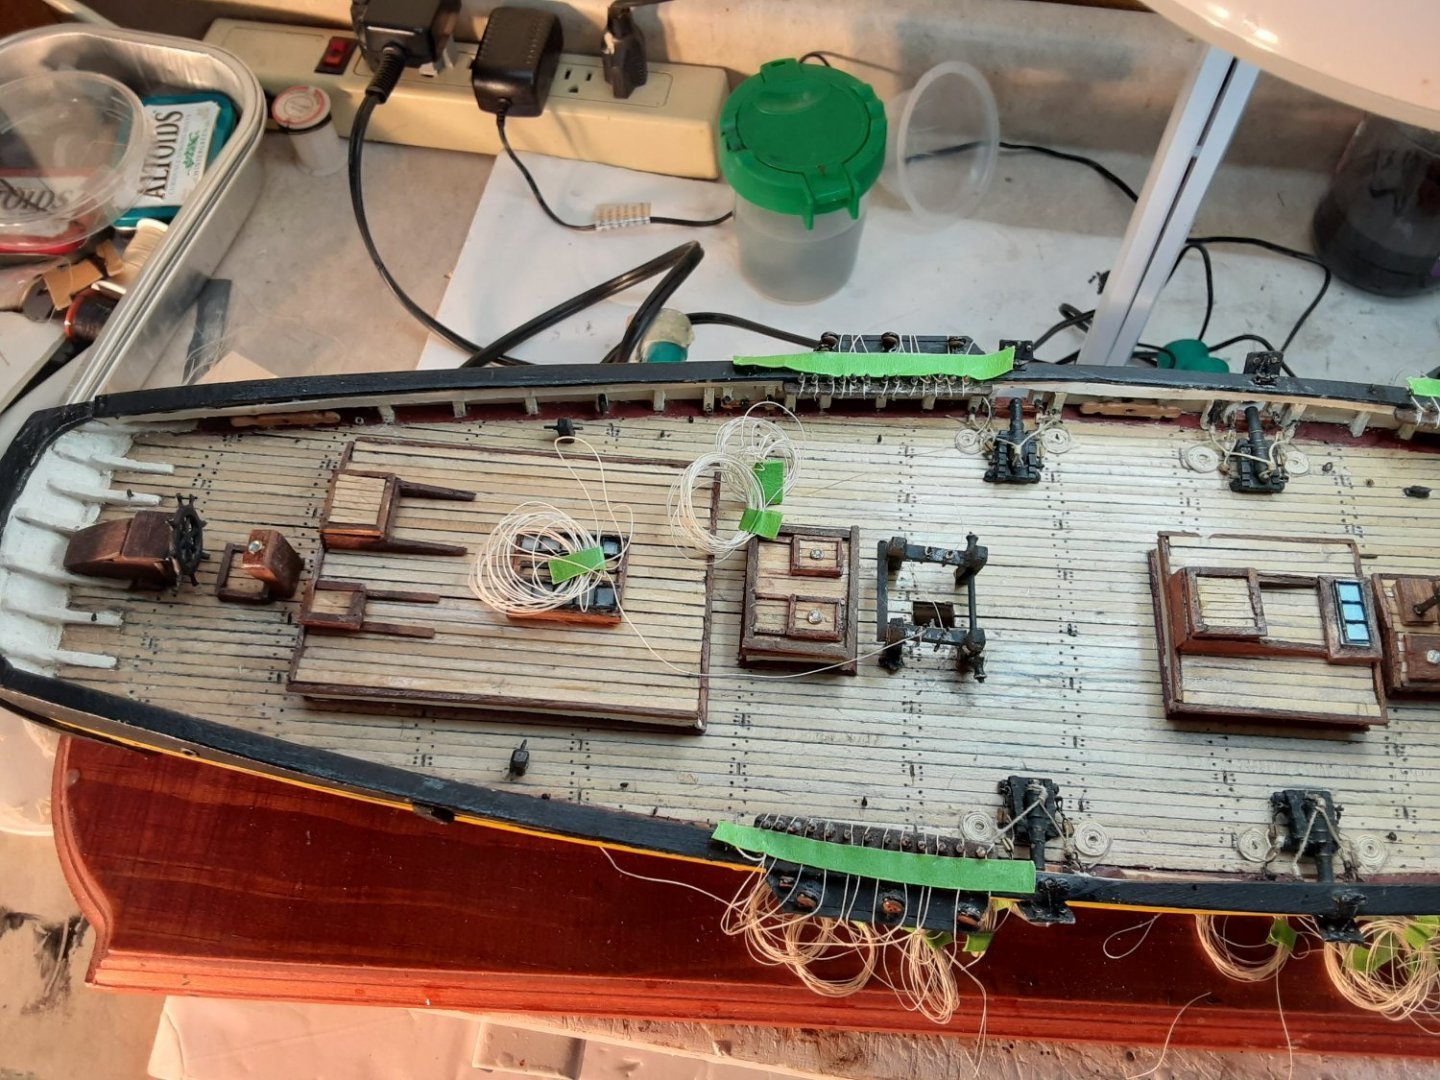
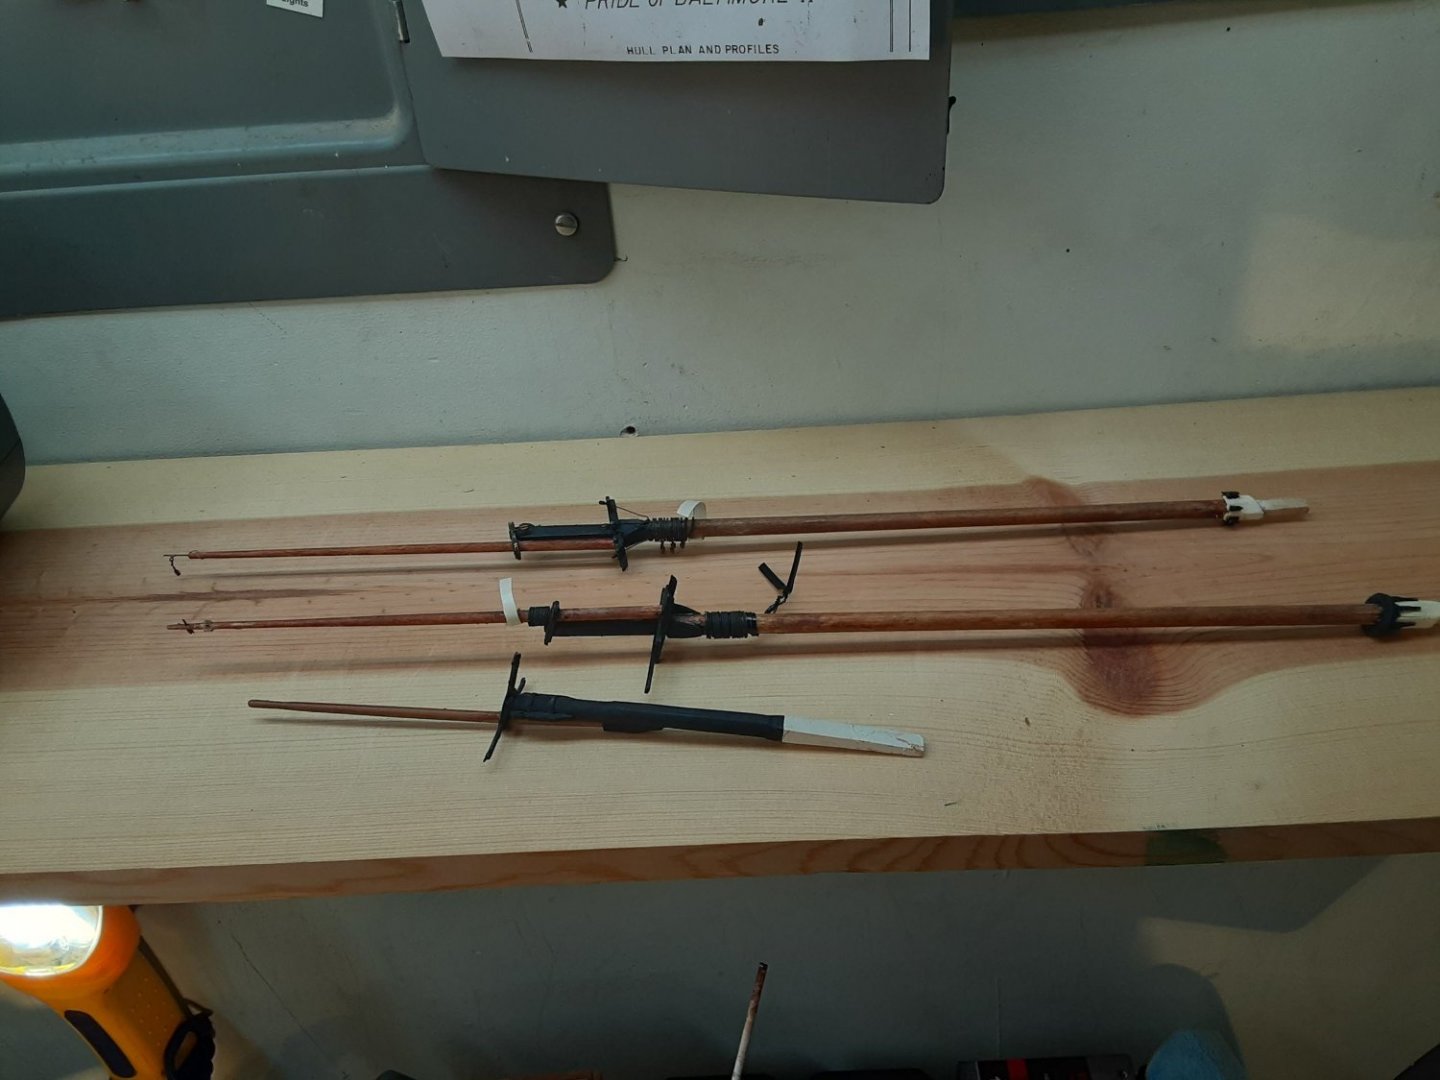
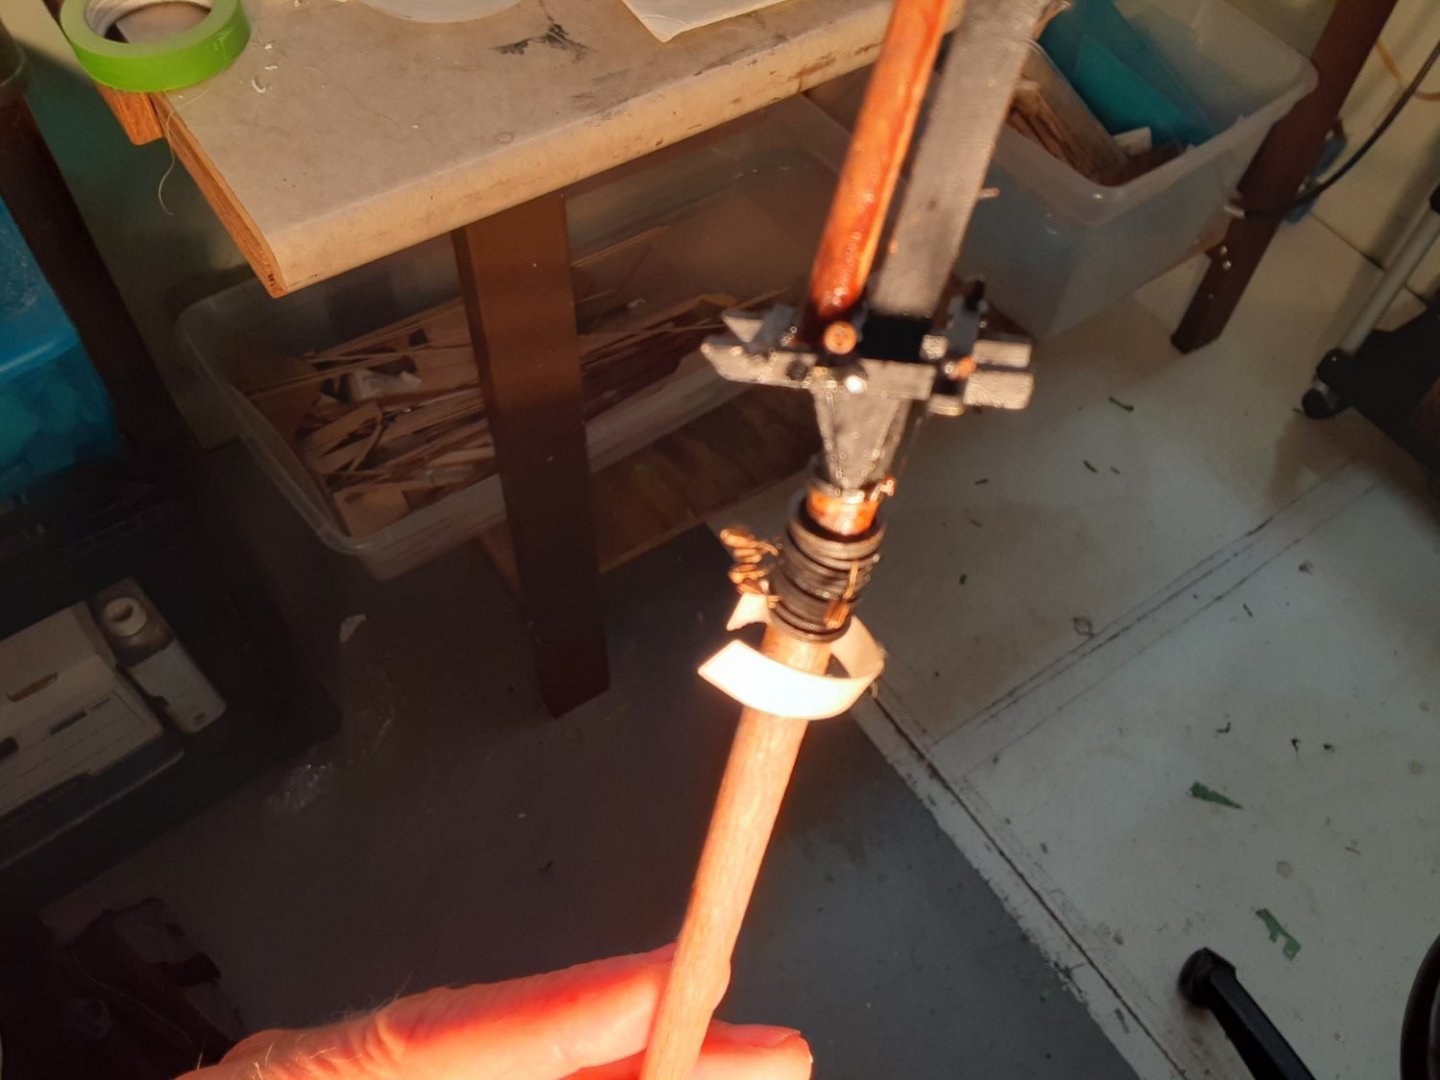
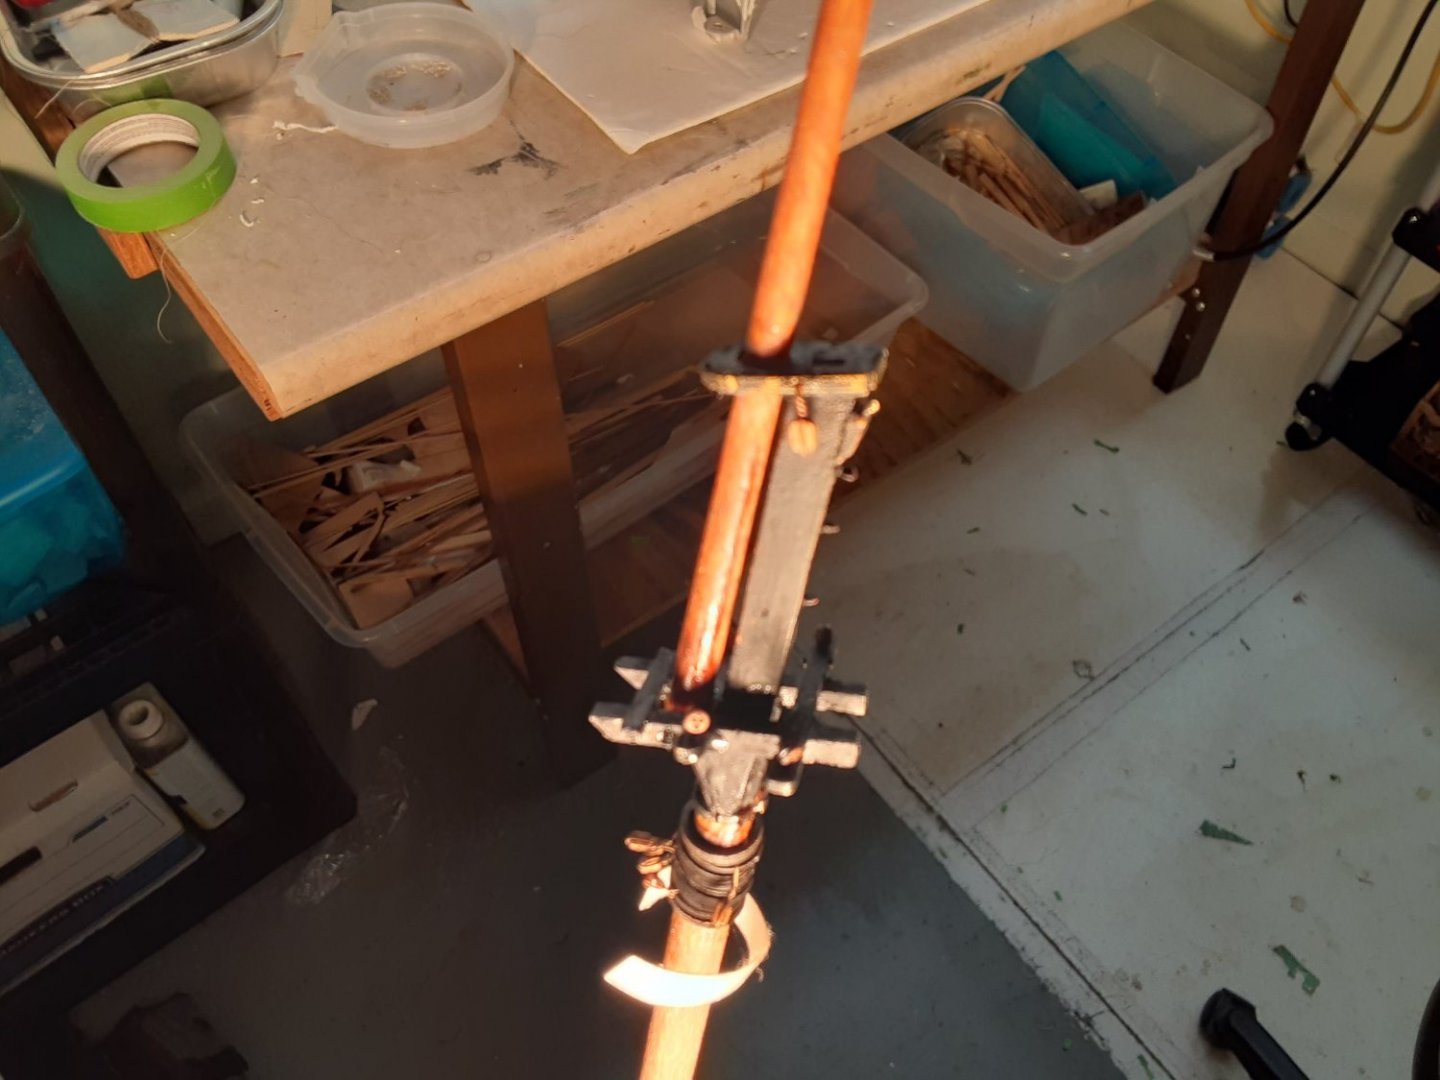
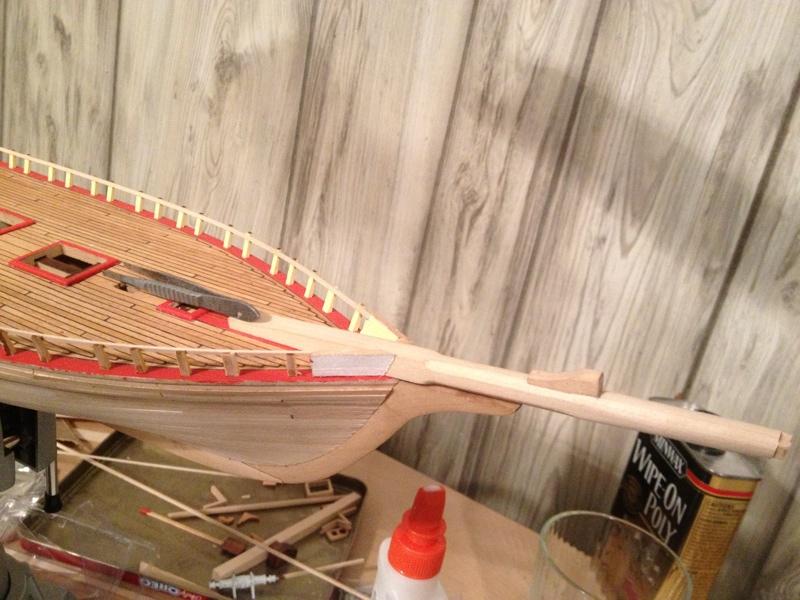
 Ahoy I ma working on this one next to my Charles Morgan whale Ship back to back builds Matter of fact I am working on 7 of these ships of sail. I got this kit for my 64th birthday 10 years ago looked like a great kit to build this is the first time I had seen a plank on bulkhead construction usually they are all solid hulls. As of now I am working on the main mast and the channels and chain plates will follow next and she to will be ready for the standing rigging. Boats