Search the Community
Showing results for tags 'process'.
Found 2 results
-
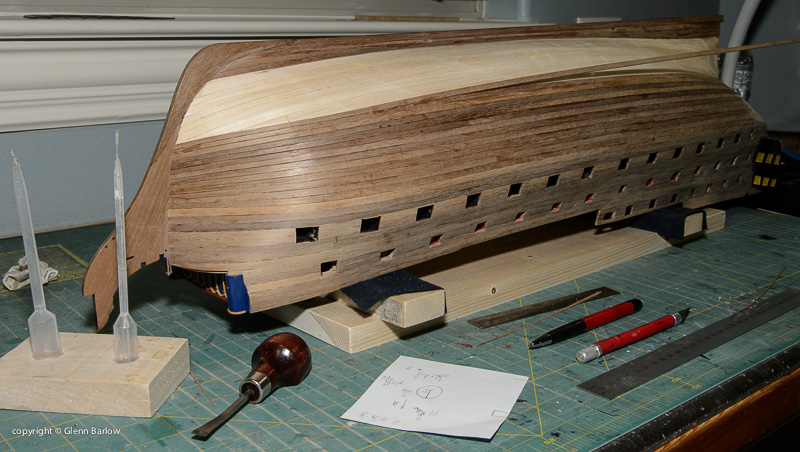
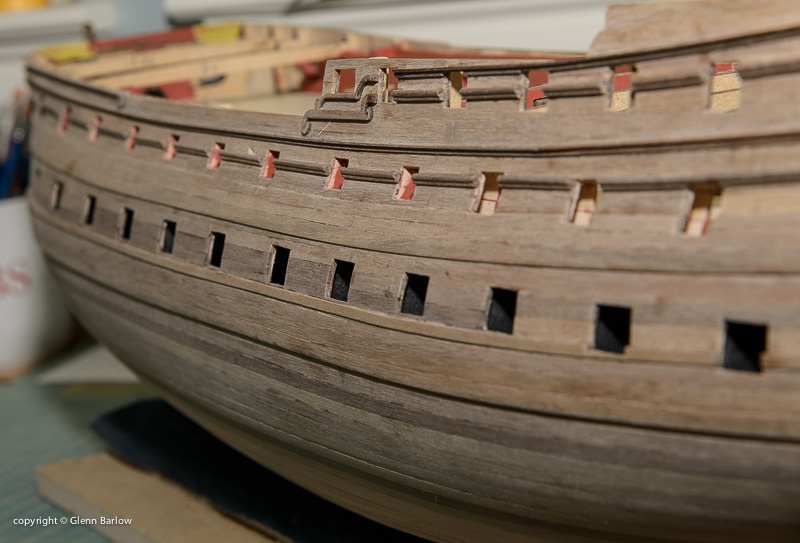
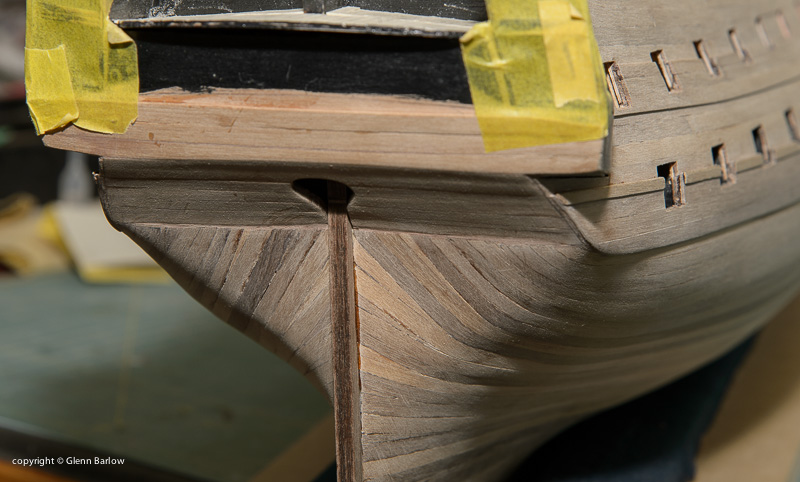
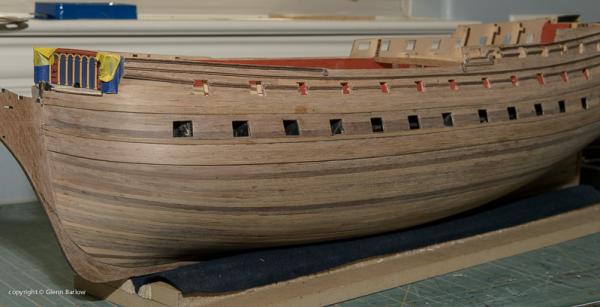
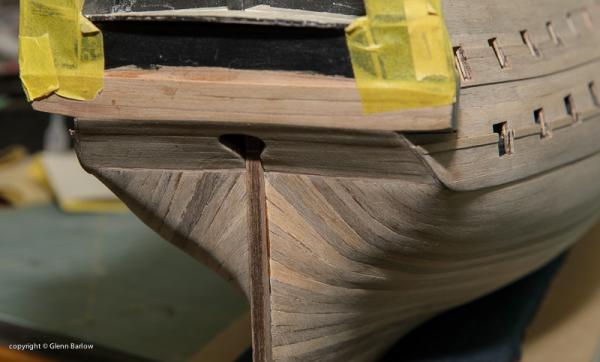
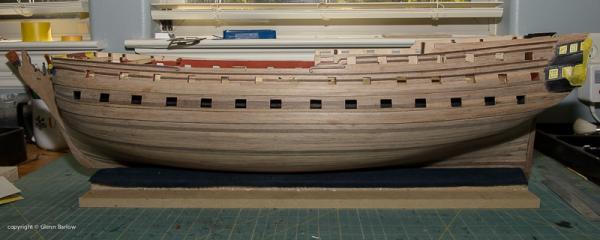
 I see there is a pinned posting from David Antscherl at the top of this forum. I'm not him, he's the expert. I have and love his books on building the Swan. Therefore I post this with some trepidation. My thoughts on 2nd planking: Spiling, or tapering, to fit a flat strip of wood on a surface that curves both front to back and top bottom is no small feat. It defies the grain and natural tendency of the wood and is one of the more fascinating, though perhaps tedious, aspects of shipbuilding. There are whole books written on this topic by modelers far more expert than me using precise methods that are far more exacting than what I do. Nonetheless, I thought I’d share my process. I did this for the lost log of the Pegasus and got some nice responses, so here it is again. It's the result of the practice I've gained from completing 14 hull plankings (ok, 7 models twice planked:-) First and foremost for the 2nd planking to look work you have to have had a good first planking, more than structure and shape it is the surface for the 2nd planking. If it’s wrong you aren’t going to make up for it with the 2nd planking. The first planking doesn’t need to look pretty, but it has to be shaped and sanded to be the hull you want the 2nd planking to become. The photo shows my pretty simple set of tools used for planking. For a strip of planking to reach from the bow to the stern, the bow portion (and in some cases the stern) has to be splined or tapered. In order to have the same number of strips at the wider waist as you have at the narrower bow. The key is how to make the math work and how to achieve the double twist to accommodate both curves, deck to keel, bow to waist to stern. I don’t do scarfing or lay battens, I’m too lazy for the first and don’t find a need for the second. With most ships as with the Vanguard the planks closest to the deck will fit full width, the key is not to take too much advantage of this, you pay for it later by not being able to get the lower planks to work out right. I first set the planks for the main wale as full width (actually the base, the wale is achieved by doubling up on those planks after sanding the fully planked hull), below that I tapered, above it I went full width. I chose to go up from the wale first and then down, but either way works. I cut and overlap lengths above the wale to show the butt joints similar to the decking, but choose to go the full length of the ship below the wale, just my choice. The second thing I do is the garboard, a full width plank along the keel. I usually cheat a bit and put a second plank here, tapering the bow side only slightly. The garboard is historically accurate, but in the case of modeling ensures you have a good base and a consistent point to measure from for tapering the planks below the wale The color differences are due to variation in the planks provided with the kit, since I'm painting the hull it's just the one I picked up next. Measure what? I use a piece of paper and measure the distance from the bottom of the wale to the top of the garboard at the waist and divide by 5. Since I’m using 5mm wide planks I then know me how many planks I’ll need to cover the ship. So if the measurement is 100mm, then I need twenty 5mm planks to cover the waist. I do that same measurement at the bow and divide that number by the number of planks above. If the length was 60mm I know the plank width at the bow has to be 3 mm to get those same 20 planks to fit to the stem of the bow. Pretty simple. All I have to do is use my Exacto knife with a really sharp blade (I change blades a lot) and cut the plank from 5 to 3 mm wide. Here’s the trick though, where to start the cut to begin the taper. I’m sure there are much more methodical and mathematical ways to do this, but I just let the plank tell me. I cut the angle required at stem, bevel it, then matching the end of the plank to the bow, lay the plank along the length of the one above it. It fits snug along the waist and for most of the length of the ship, where it crosses the plank above as it closes in on the bow stem is where I mark with a pencil to start the taper. I mark a 3 mm width at the stem end, lay my heavy steel rule across the two marks I’ve now made, and cut the taper. If the taper start point is too close to the stem, it will be very hard to get the plank to lay flat, if it is two far from the stem a S-curve will begin to develop with the distance between the last laid plank not being proportionately equal at the waist and bow. If this happens I can adjust by where I cut the next plank or if I see it happening soon enough, toss that plank and cut a new one. As long as I carefully locate my marks it doesn’t happen, its just when I get rushed or bored. I re-take the measurements every 5 planks or so to make sure I’m still on target, it doesn’t vary much but its worth checking to avoid very narrow stem plank widths as you reach the garboard. Measuring in this way gives me a good looking bow, doesn’t require battens, is simple enough to do, and is made possible by using cyano, not PVA glue. The cyano can be a bit messy, I may be a little over generous with its use, but this comes off easily with sanding and allows the process to move along more quickly. I’d be more careful with the cyano to avoid staining if I was leaving the hull natural (as I did using cherry wood with the Pegasus) but since I’m painting, smooth is all that’s required. This same process applies to the stern for some but generally not the majority of planks. Here is more important to let the plank follow its natural flow. This will create triangular gaps that are filled with stealers. Simply cut triangles cut to fit the length and width of those gaps unless you want to go all out and scarp them in. Again, I’m painting and scarping the hull, this would be wasted effort for me (unless you enjoy knowing and doing it then by all means). I do all this knowing that no matter how careful I am, I have always had to fill in some area at the waist with partial and oddly cut planks that don’t reach stem to stern. This fill is on the bottom and won’t be seen once its on the stand so I don’t worry about it, the perfectionist in me adjusts and accepts. So that’s my two cents. I’m sure as always there are better, more precise, and more expert ways to plank and several of those are included in this forum. But this way works for me and the speed and pace I chose to work. For what its worth I share it with you.

-
 I am working on my first boat. A Mamoli Constitution. Does anyone have any advice as to how to position and drill the hole to put the cathead through? I have reviewed all the plans, looked at the photos, and reviewed the angles in Marquardt's "The Anatomy of a 44 Gun Frigate". It just makes me really nervous to drill holes through the hull. I know it has to be done, I just want to make sure I do it correctly to minimize issues. Once I have correctly located the hole, what is the best procedure to actually drill the hole. I have everything from a hand drill to a floor standing drill press. That or I could use the Foredom rotary tool. Any advice is appreciated. Thanks Bill