Search the Community
Showing results for tags 'queen anne barge'.
Found 17 results
-
 It has been a couple of years since my last log but now that I am settled in my new place it's time to start a new project.
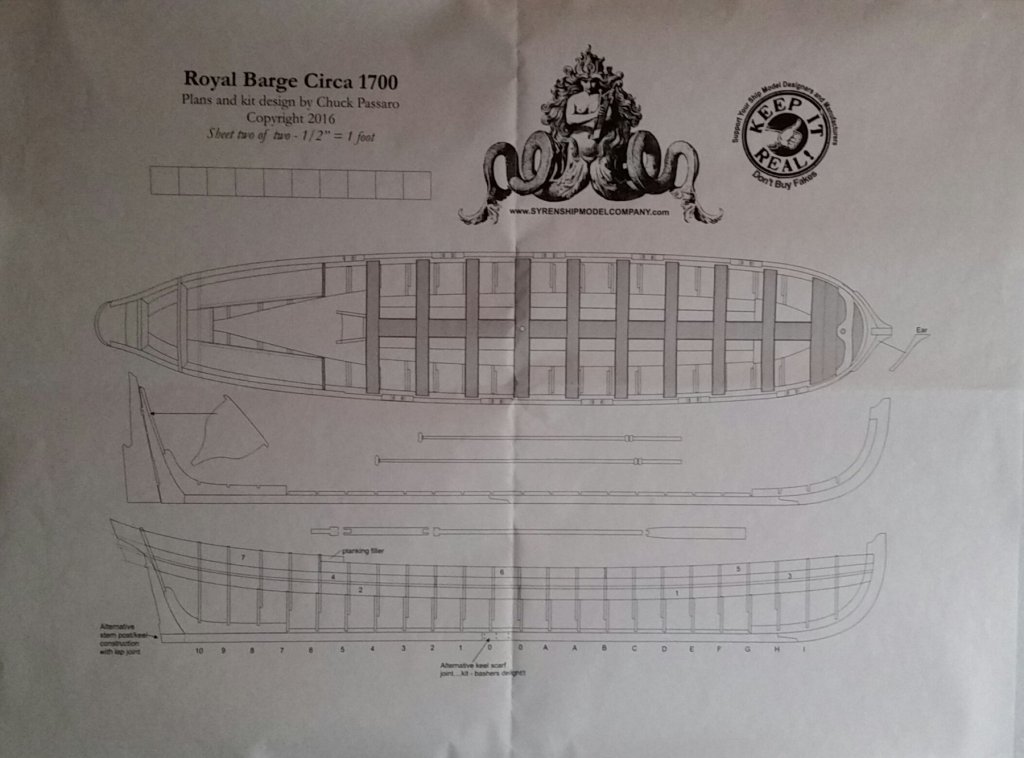
-
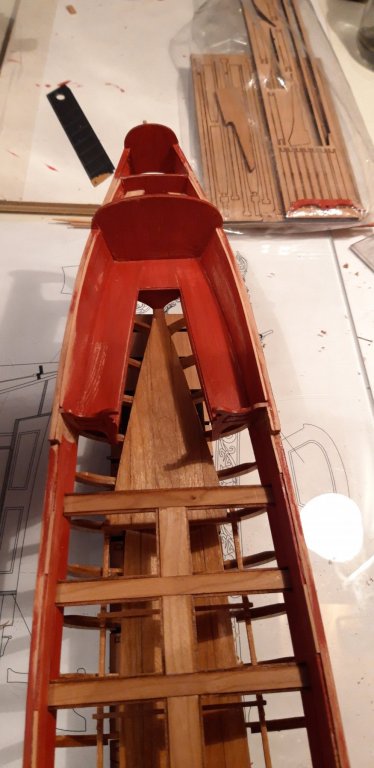
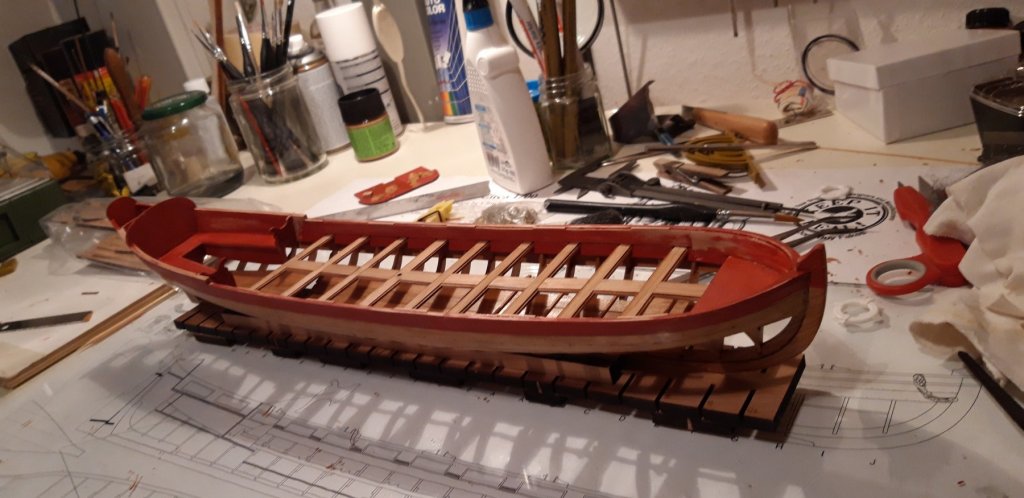
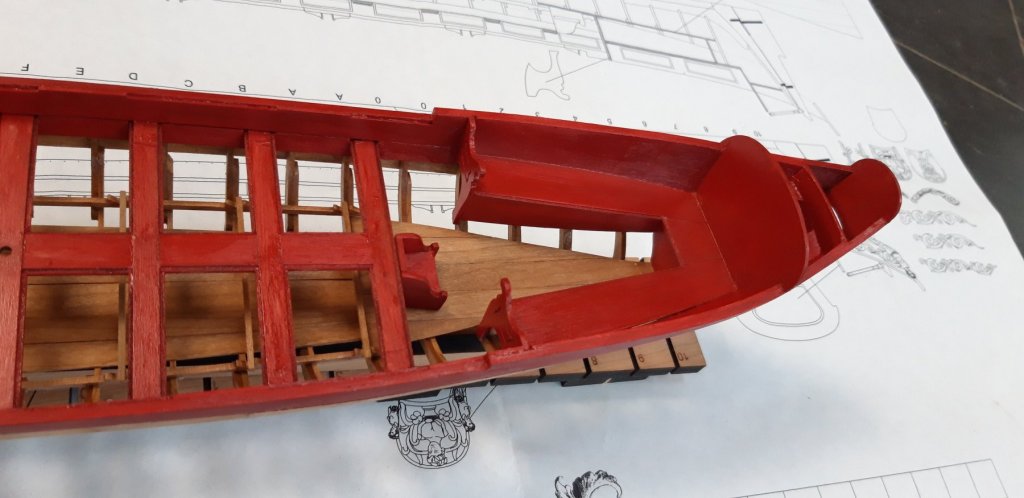
 It has been About 6 weeks now, that I startet building the Queen Anne Barge, I purchased in 2018 from Chuck Passaro. It is a very special and beautiful model kit he created. The instructions are excellent. For those of us, who are still curious about new techniques and challenges. there can be learned a lot. I don't start my build log right from the beginning, because I somehow missed taking photos at the early stages. It is probably not too interesting anyway for there are other and better build logs about this model. At the moment I am at the point to deal with varnish and colour, so things get difficult, because one can ruin a model at this stage very easily. For now just some images. Matthias


-
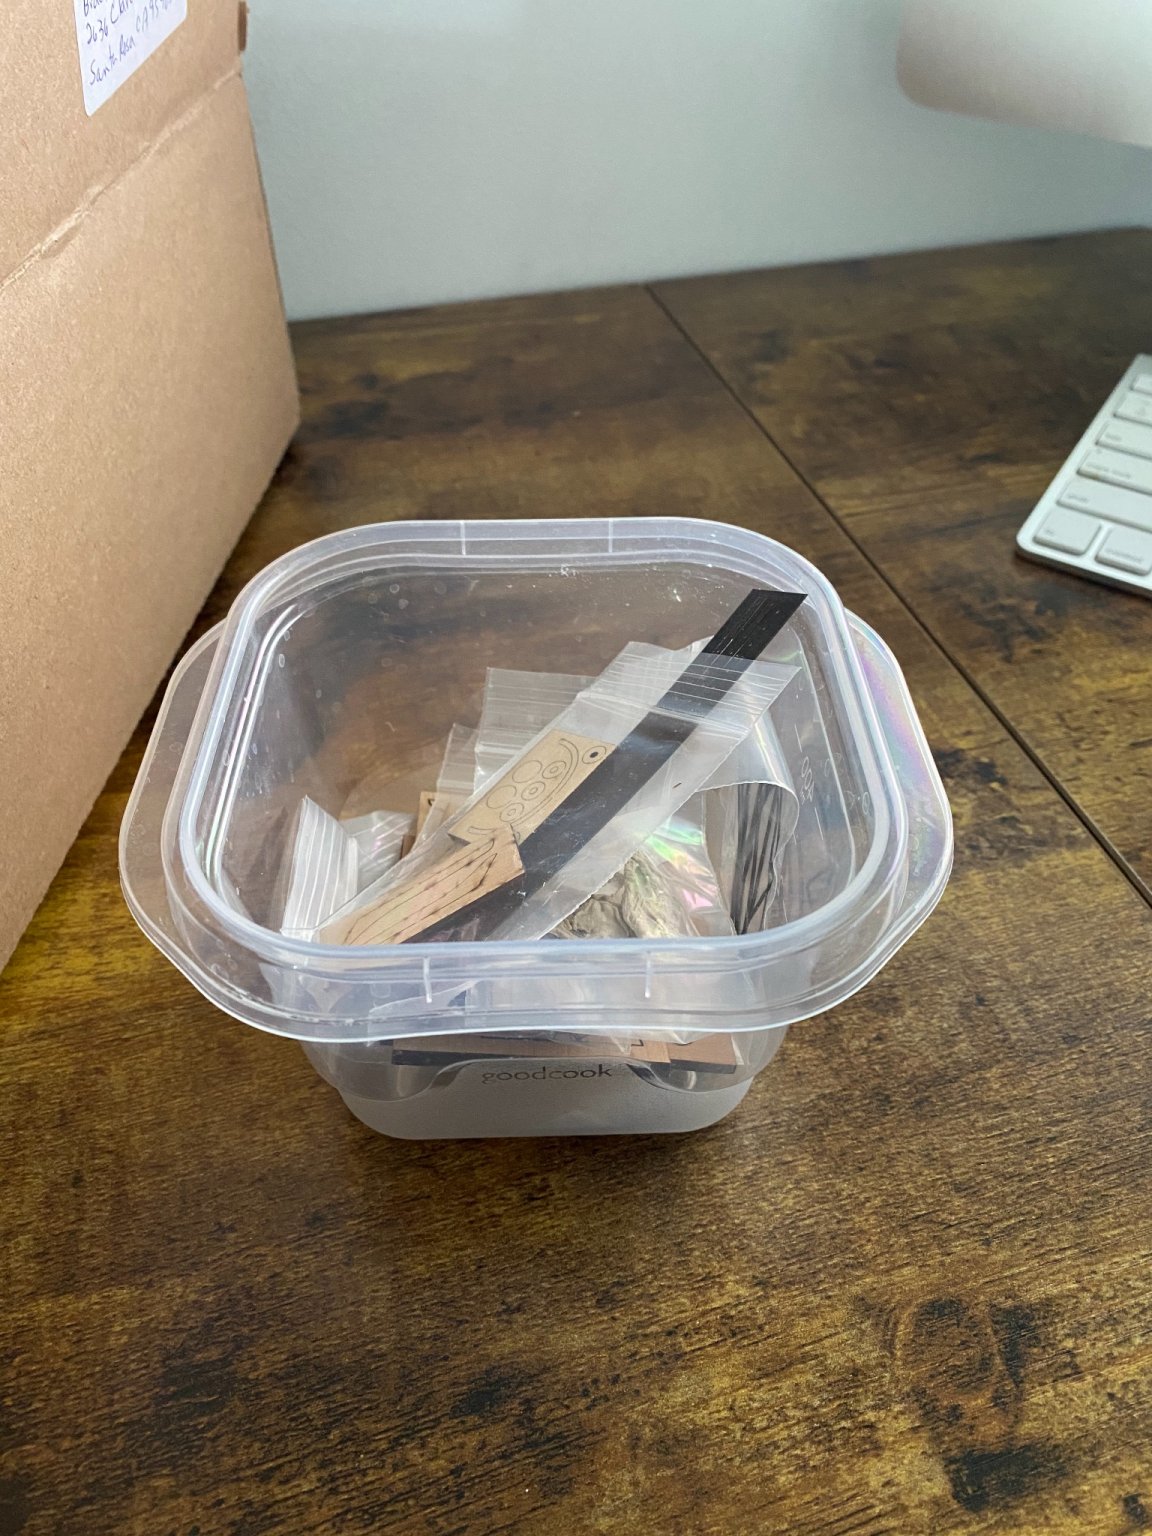
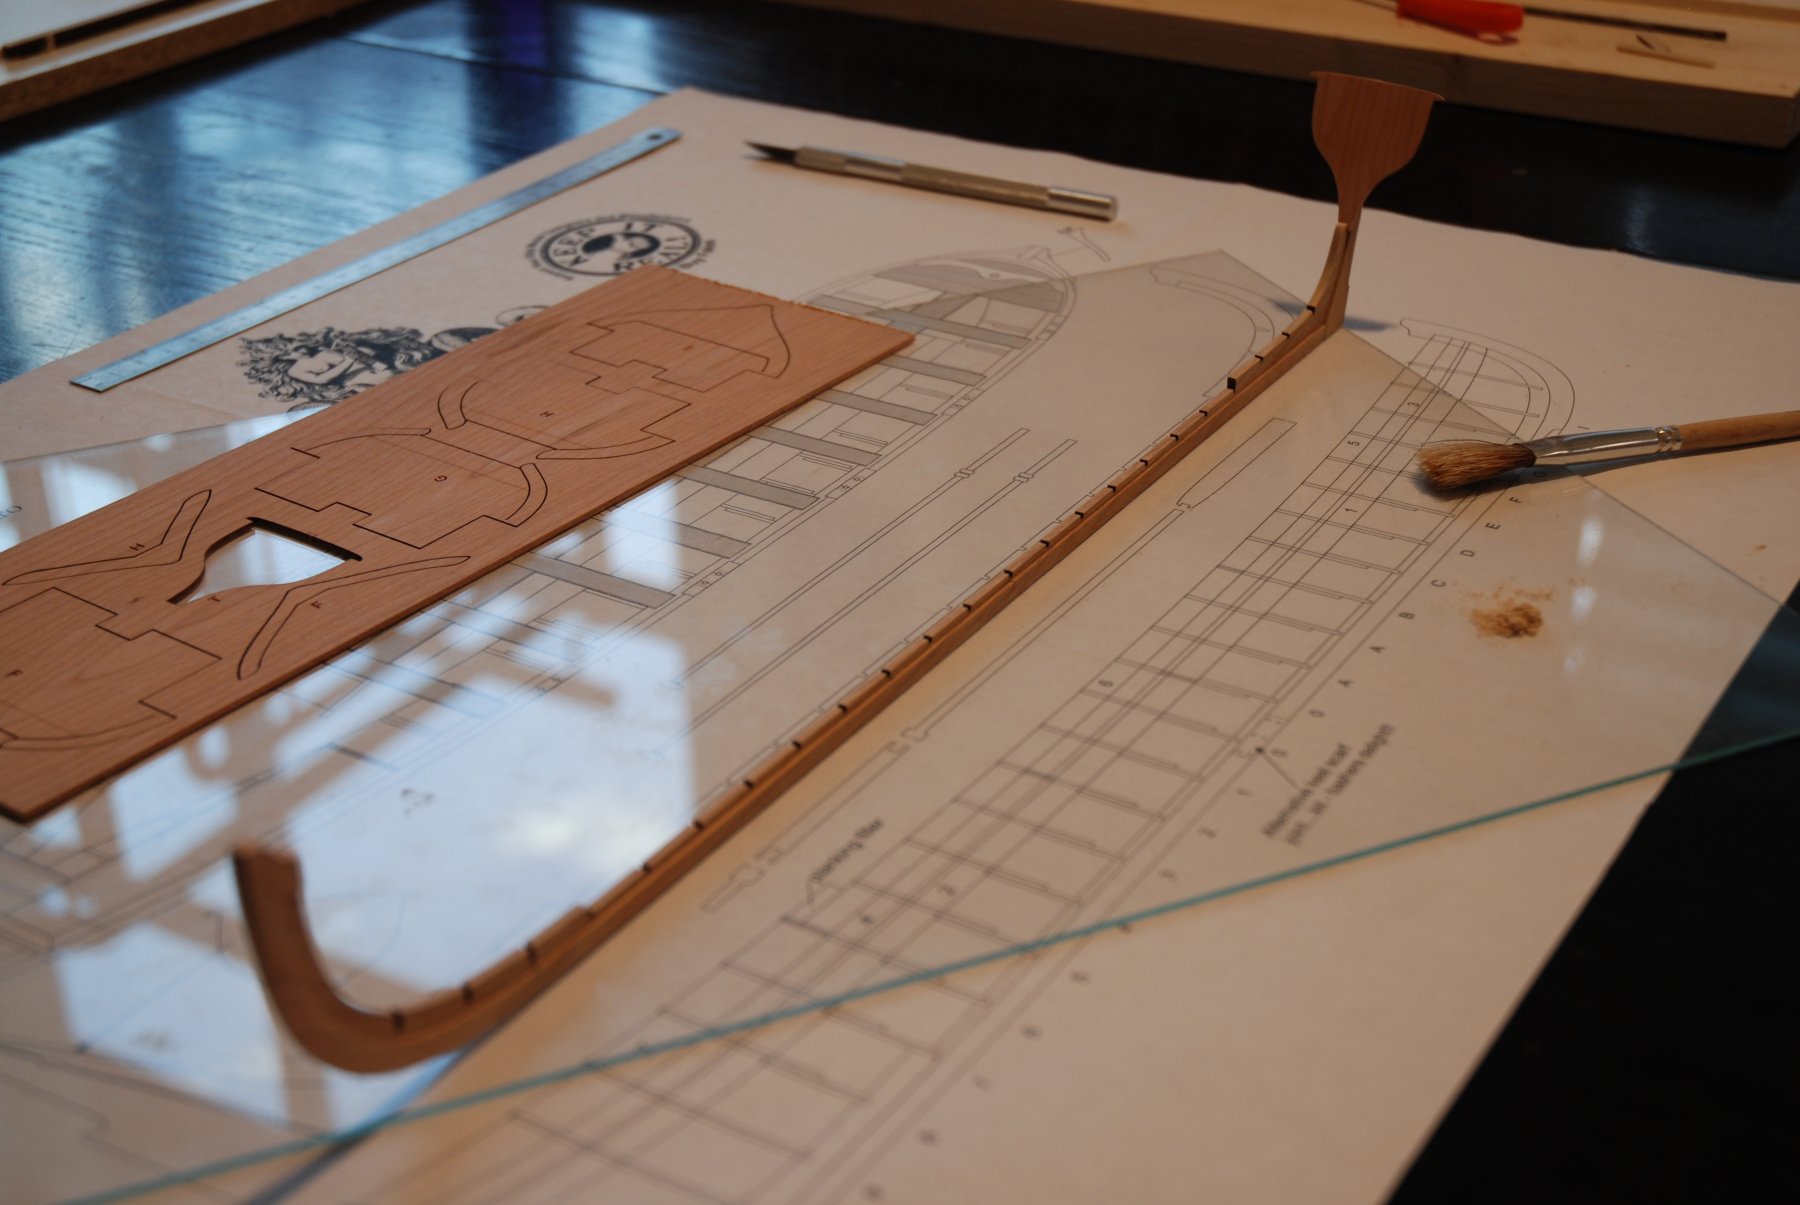
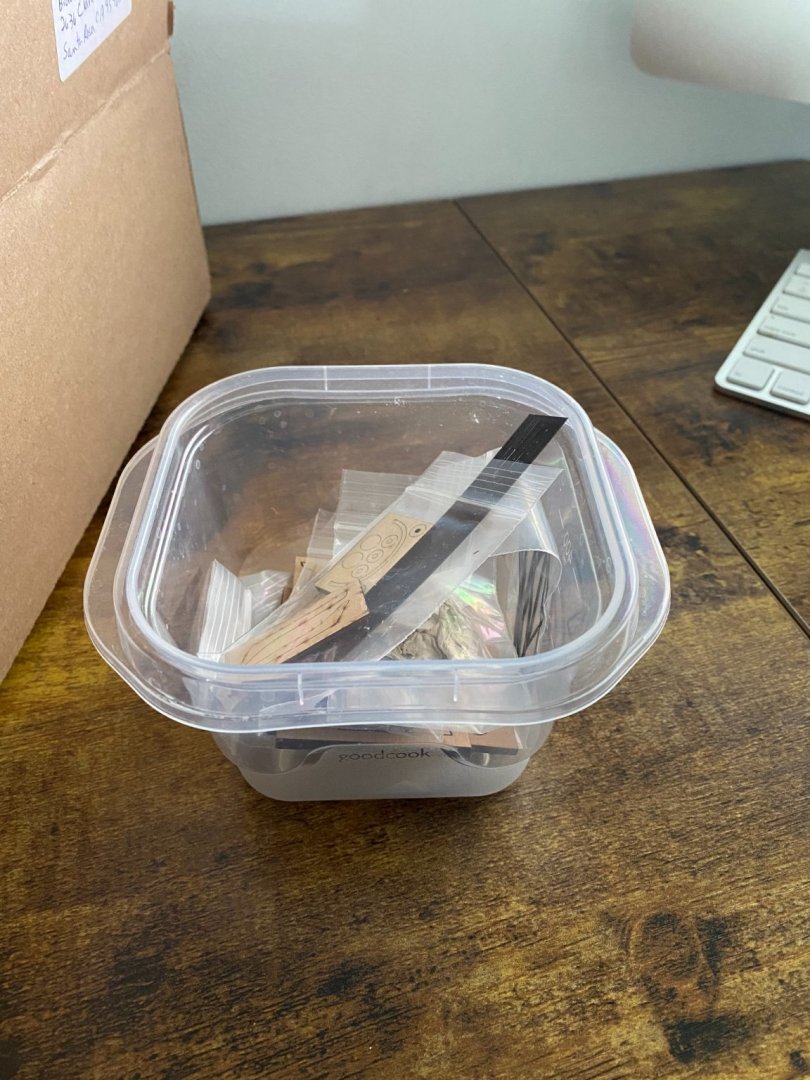
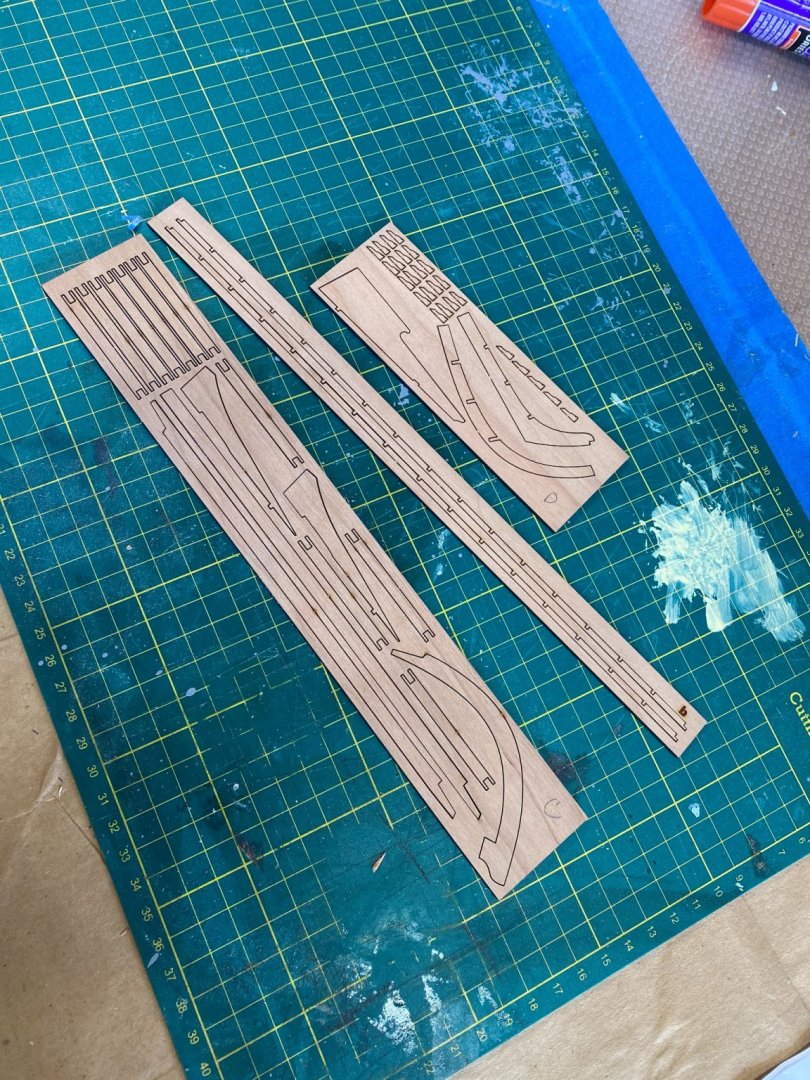
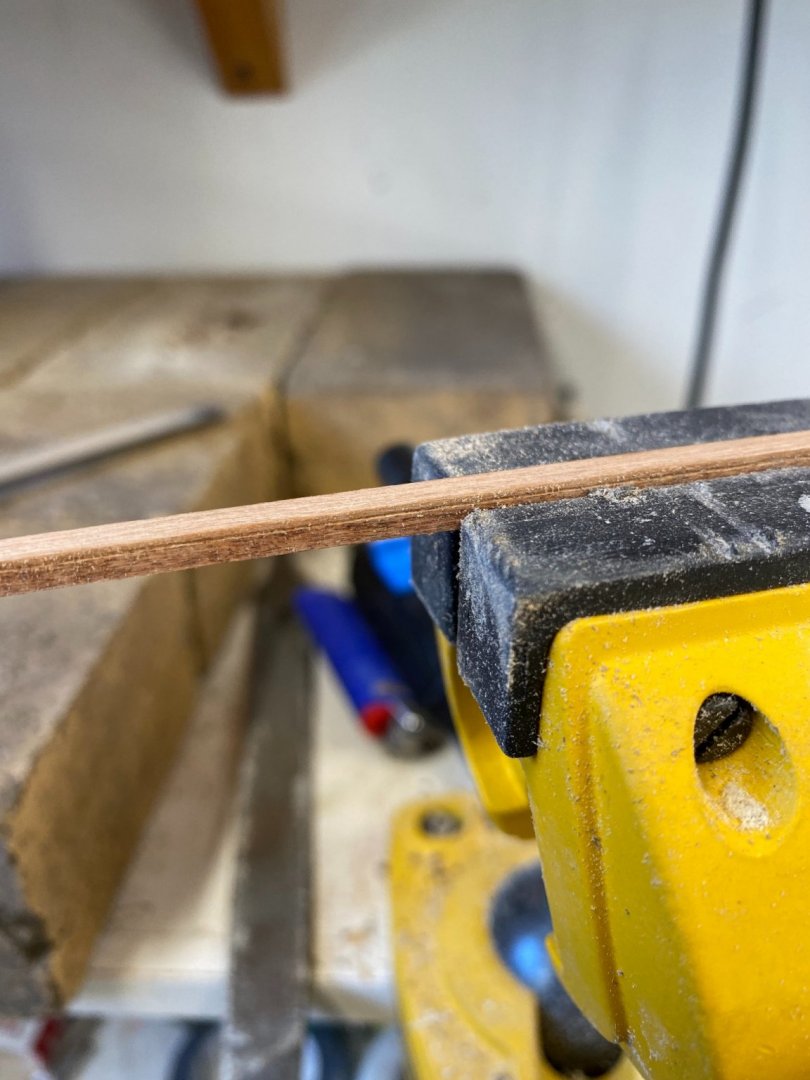
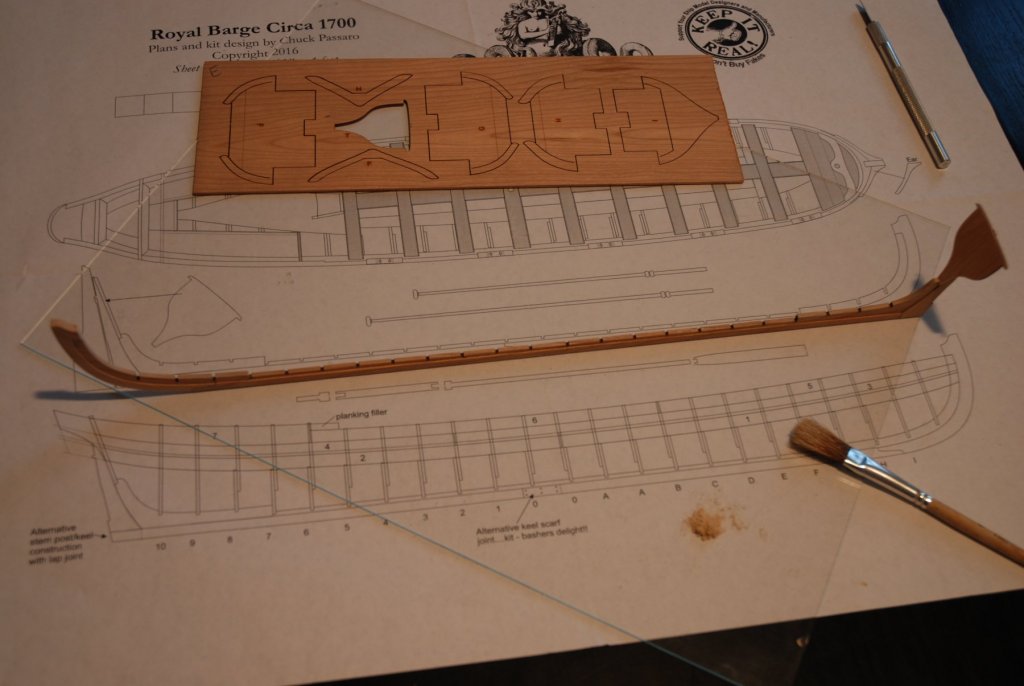
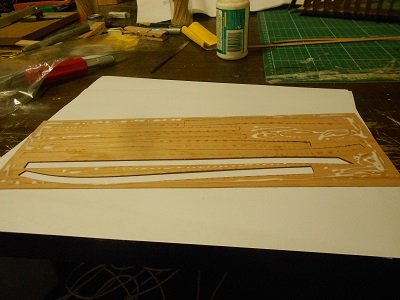
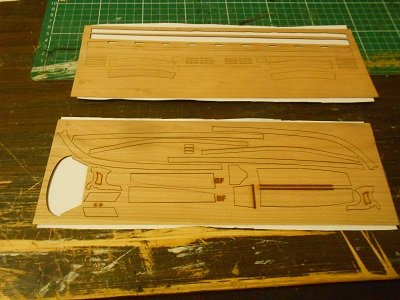
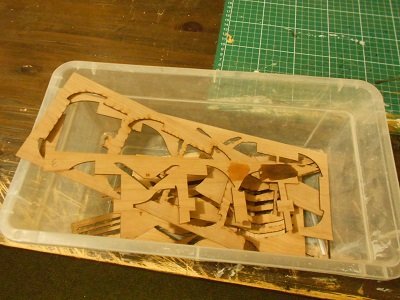
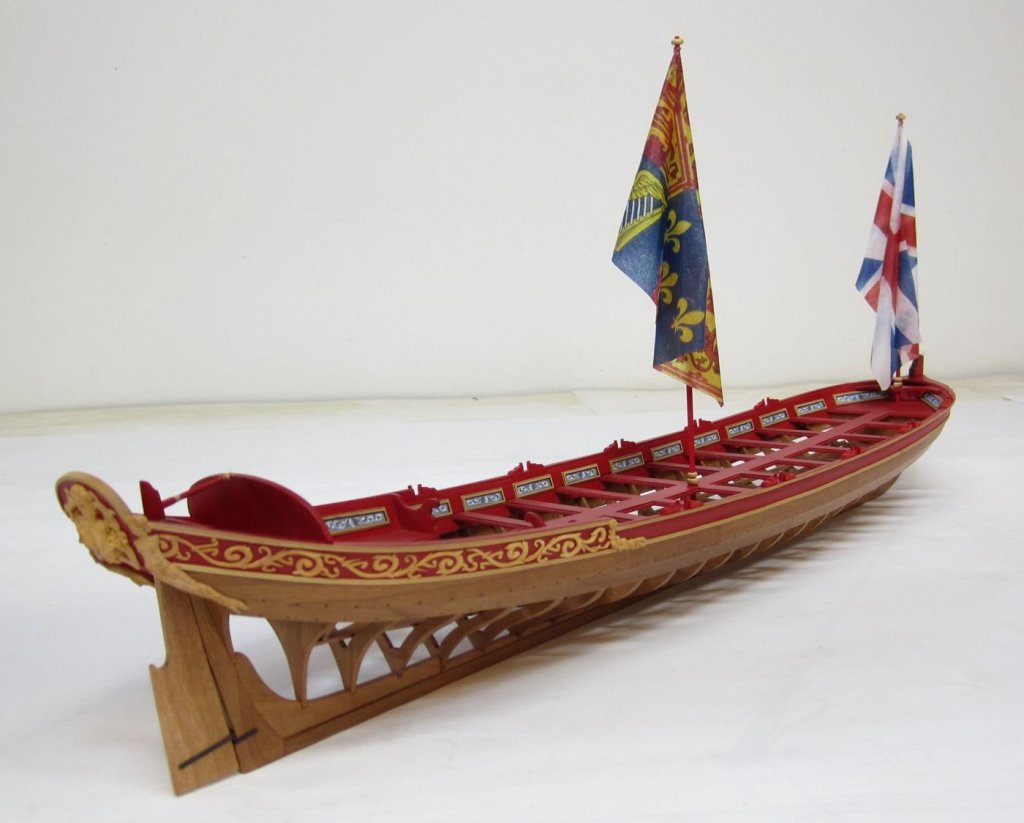
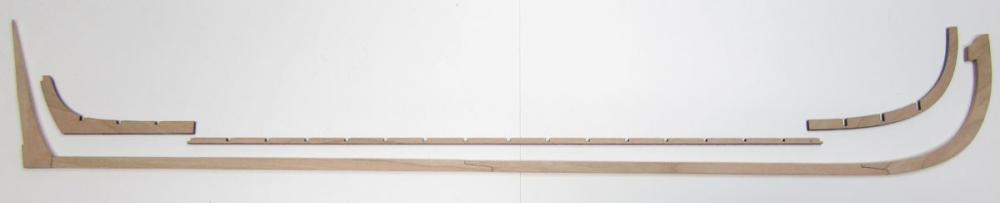
 Hello everyone, I decided to start another kit, this time it will be the Queen Anne Style Royal Barge by Syren Ship Model Company. This was the first time I had ordered anything from Chuck, and have never seen customer service or products like his, I ordered this kit and some deadeyes for my Flying Fish build on Monday and got them early Wednesday. The kit itself is very nice, the laser cut cherry wood is very precise and probably the best I have ever seen. I chose this kit because I really want to build POF models, but don’t really have time to do all the research and prep work that goes into a proper scratch build. I am also working on another model as I mentioned before, but sometimes I get a little burnt out if I only have one thing to work on, and this picture specifically sold me on this kit: I had to wait until this morning to really look at the kit. While I rummaged through every thing I took some of the more delicate laser cut sheets and put them in a plastic container, I then took that container and put it on a separate shelf in my garage, that way my clumsy hands wont destroy them by accident! Really the only thing I got done today on this build is some sanding, I started with the laser cut sheet with the 4 pieces that make up the keel, I used 220 grit sand paper and lightly sanded both sides of the entire sheet to remove all the laser cut char. I then used a #11 blade and cut each of the 4 pieces out, followed by another sanding along the edges to remove any more char. I made sure not to touch the scarf joints, these are laser cut to exact dimensions so I will leave them alone for now. The next step was to taper the keel from 5/32” to 3/32”, I used my calipers to mark a line along the bottom of the keel 1/32” from the edge on both sides, which acts as a nice guide when tapering. Well thats all I got done today, the Admiral and I decided to paint the interior of our house, so I will probably have to wait a few more days before real progress can begin! Thanks for reading. Bradley
-
 Queen Anne Royal Barge circa 1700 –1:24 scale. This build has been waiting in the wings for three years, long overdue to get stuck into Chuck’s wonderful creation of this early18thc Royal Barge. I can only hope that I do justice to this high-end kit as indicated above. I am fortunate that there are around a dozen recorded builds on MSW at various stages. Half of them are completed, so I will have the benefit of a wealth of experience from those who have gone before. My first step will be to read through Chuck’s comprehensive build manual and the logs of my fellow members to get a feel for the build. B.E. 24/02/2021
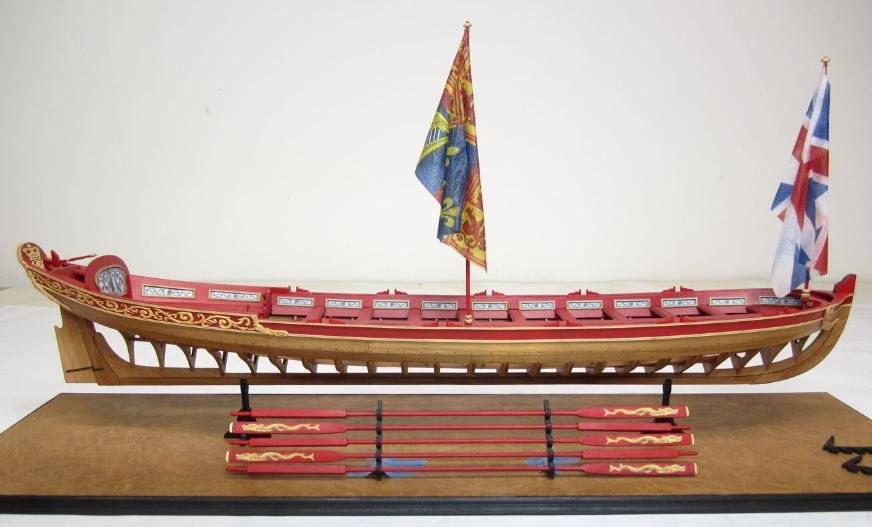
- 185 replies
-
- 15
-

-
- queen anne barge
- syren ship model
- (and 1 more)
-
 As my first planking on my Armed Virginia Sloop build fill my time since two weeks, I decided to begin a new build. It allow me to practice a new type of work during this repetitive phase on the AVS build. When I began in this hobby, I was attracted at once by barges. Quickly, my choice was reduced to three models: the 18th Century Longboat from Model Shipways, the english pinnace, an another Model Shipways model and the Queen Anne Barge from Syren Ship Model Company. You will notice that this three models were designed by the same developer : the great master Chuck Passaro. It quickly seemed that the most appropriate choice lived in the Queen Anne Barge. And this for many reasons. At first, this model seem more suited to a modeler having not many experience. Chuck has designed a wonderful kit which contains all the elements necessary to simplify the work of the builder. The barge has only three strakes of planking. Furthermore, all oft he outboard planking has been pre-spiled and two sheets of laser cut planks are supplied, one fort he port and the second fort he starboard side. The second reason form y choice, is the quality of the manual of instructions. Chuck must have been teacher and writer in a previous life… The manual is read as a novel and numerous photos illustrate the very precise explanations. You have only to follow the instructions and all will be fine. The last reason is the quality oft he model. As with his previous model, the Cheerful cutter, Chuck has again designed a ´must to have´ kit. The quality of the laser cut is one of the best currently and the concept of the kit is innovative. Everything is thought to simplify the work of the modelist. The Syren Ship Model Company is, for me, one of the leader in this market and I look forward to the next model… It will be mine too. I have the great fortune to be connected on this forum when Chuck announced the release of the first set of eleven Barge kits. I was lucky because within half an hour everything was sold… One week later, my precious was at home. Another indication of the seriousness of the Syren Ship Model Company. But now it's time for the build You just notice that I used a piece of scrap 1/32" basswood to help me to center the two pieces on the top of the keel. So I have better luck that these two pieces have a regular 1/32" lip on both sides. For the rest, I just follow carefully the Chuck instructions... It will be time to prepare the frames.

- 103 replies
-
- 15
-
-
- queen anne barge
- syren ship model
- (and 1 more)
-
 I really have no excuse for buying, let alone starting this kit as I have plenty going on I my current builds. However, everytime I wandered over to the Syren Ship Model website to buy sundery items, this kit stared back longingly at me, and sadly up to now was 'out of stock'. Fortuitously on the last visit, there was one in stock and I just couldn't resist, after all, it couldn't hurt could it? Well, the package has arrived and despite my best efforts to leave the box closed (about 5 minutes), the genie is out of the bottle. This will most definitely be a side project, and it will finally be nice to be able to follow some very good instructions and build a very nice looking model out of the box. Hopefully this will be a nice diversion to 'Jason' which seems to be anything but. I hope that I'm up to this challenge, I can certainly appreciate the reasons why this is classified as a more advanced kit. Progress will be slow. I'm not planning on this being the most extensive build log, but will likely post progress pictures and ask questions as I go...
- 11 replies
-
- 7
-
-
- queen anne barge
- royal barge
- (and 1 more)
-
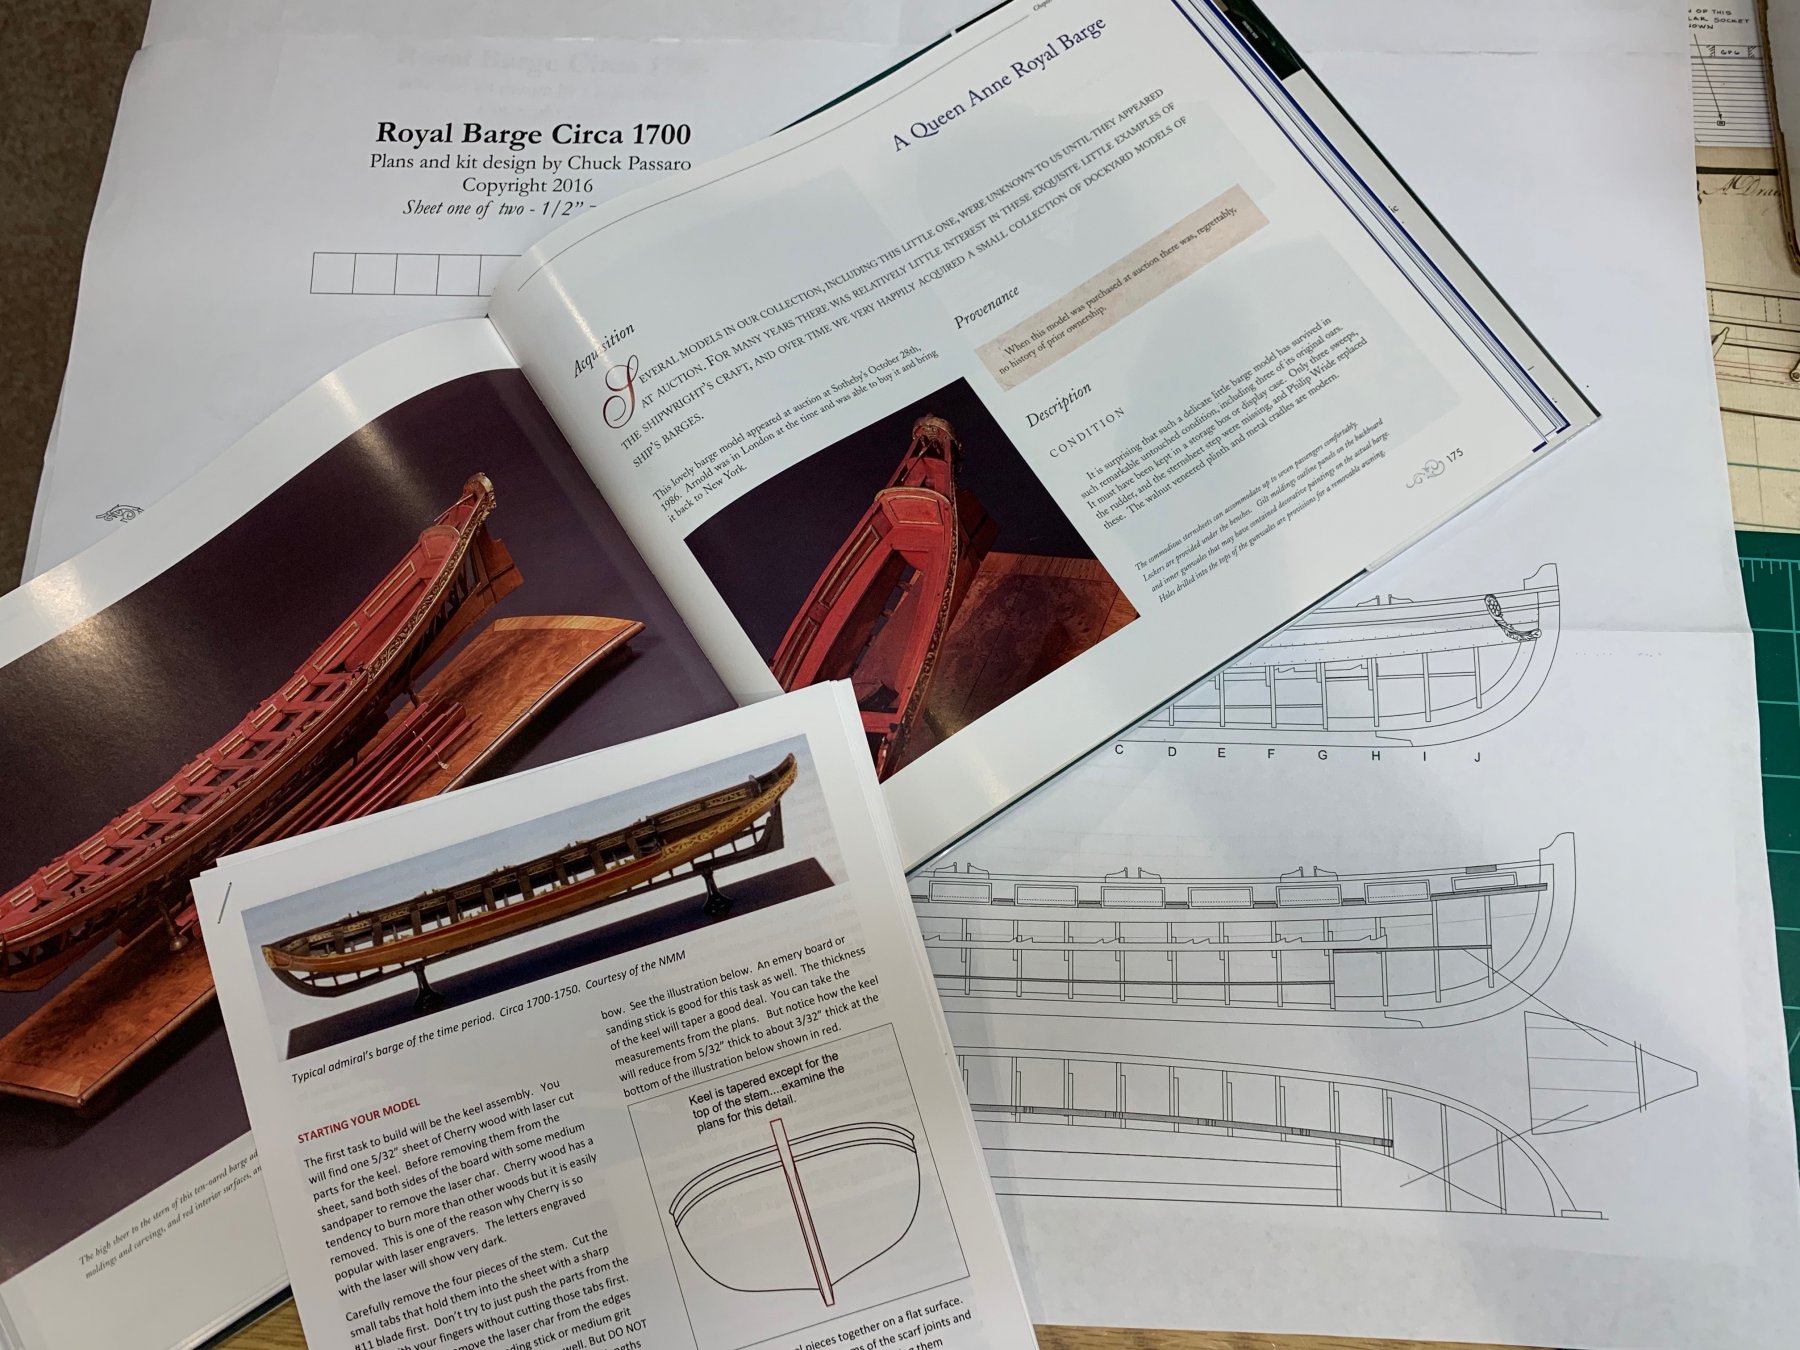
 After seeing Chucks Queen Anne Barge at the NRG conference in St Petersburg (2017) I knew that I wanted to build this one. I have always been drawn to the so called dockyard or admiralty style models. I really like the exposed frames and the ability to see into the ship/boat to see the architectural details. After learning quite a bit on the last build I am moving on to this more complicated kit. The kit was packaged well and has 2 pages of plans and pdf instructions form the website. I do like having paper instructions so printed the pdf's (now I know why Chuck doesn't include them) for a cost yikes. The instructions seem very nice and comprehensive. I also have a few books which talk about this type of craft The Boats of Men of War by W E May, as well as the 17th and 18th Century Ship Models from the Kriegstein Collection. One of the things I thought was interesting was the size of this model. The Pinnace is also 1:24 scale and is much smaller. Now on to sanding the char. Remarkable little on the face so that was a nice find.
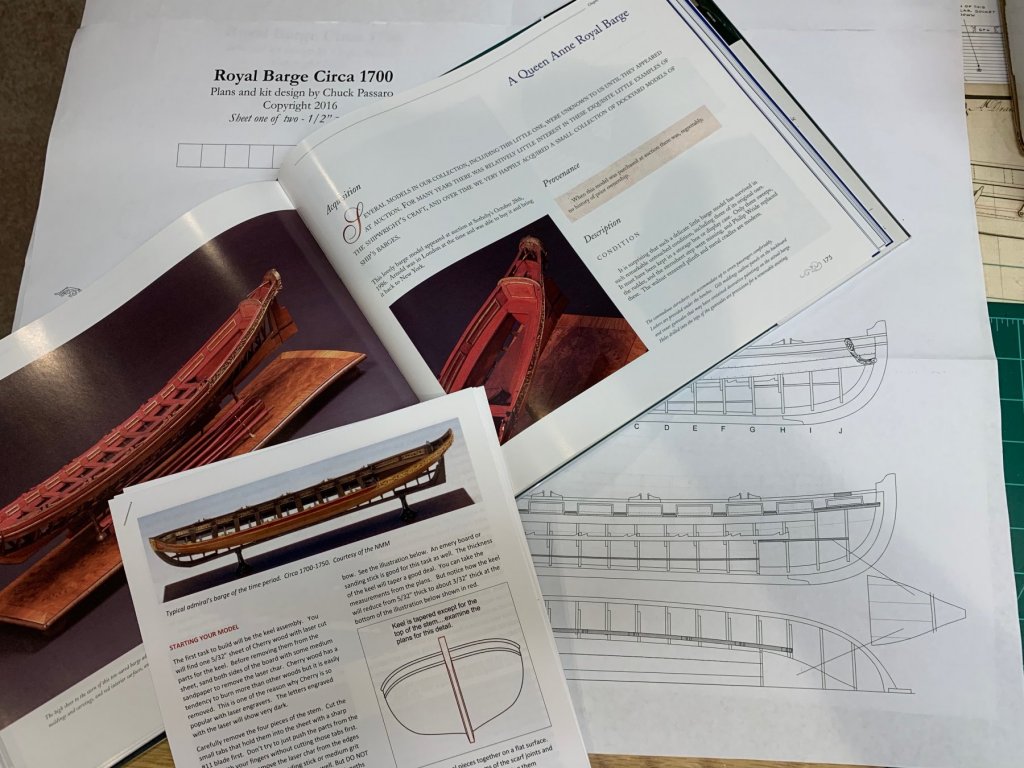

- 221 replies
-
- 11
-
-
- syren ship model
- queen anne barge
- (and 1 more)
-
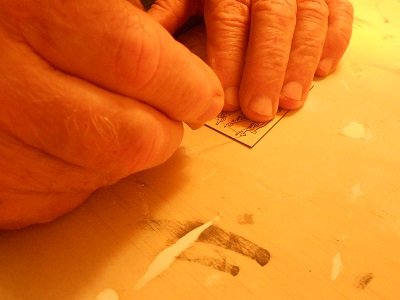
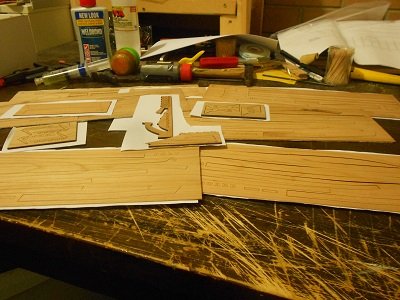
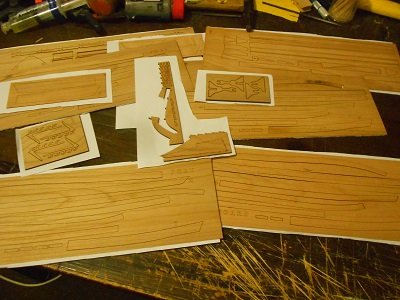
 QUEEN ANNE BARGE (An Build Log by-eth CaptainSteve) – SYREN SHIP MODEL COMPANY – 1 parteth to 24 Directed, produced and writ-eth by Capta… (“Hey-eth !! They get-eth the idea !! Can we jus’ be a-movin’ along already ??”) Some time back, CaptainSteve didst purchase one o’ Chuck’s fine Queen Anne Barge kits. “I didst buy-eth it,” Our Hero started, “wi’ the intention o’ giving it to me Dad to construct-eth.” Indeed-eth, CaptainSteve’s father didst make-eth good beginnings unto his Barge. The futtock pieces hadst all been fixed most properly in place to the bulkhead frameworks, and the keel piece hadst been-eth constructed. “Except-eth,” Our Hero was to begin-eth this log, “the keel pieces were most incorrect.” ‘Twouldst seemeth that the keelson were not aligned most properly along the centre of the keel pieces, as intended by Mr Passaro. Thusly, the rabbet be non-existent in parts, un-centred in some, and too big in others. And so he had to commence-eth by applying copious amounts o’ Isopropyl. “The keel didst need to be re-done-eth !!”, CaptainSteve exclaim-ethed. Fortunately, his father had saved-eth all o’ the various bits and pieces and didst collect-eth them. “And so”, as always, Our Hero were to go-eth on, “thence I didst take-eth steps to be assuring that all o’ the pieces were-eth on-hand.” To do so, Our Hero didst spot-glue-eth the various delicate lasering sheets unto pages o’ printer paper fer safe-keeping. Whilst CaptainSteve was able to find almost all of the pieces to filleth the blank spaces, there were some gaps … “I be a-hopin’ that those missing pieces be not all that important”, he didst say-eth. But, secretly, Our Hero were a-crossing his fingers most furtively. Meanwhile, since this kit were originally be meant for his father to build-eth, CaptainSteve didst return-eth the carving pieces from the kit … “That be me Dad, CaptainBruce,” he didst state-eth most proudly. “At the least, they be-eth his four score year old hands a-wielding a tool to carve-eth out the scrollwork pieces fer his Barge.” Indeed-eth, Our Hero and his father have already devised a plan for the scrollwork. “It be a most spectacular plan o’ our own design,” CaptainSteve were to state-eth. “But there be more on that latterly,” he didst concludeth, most conspiratorially.
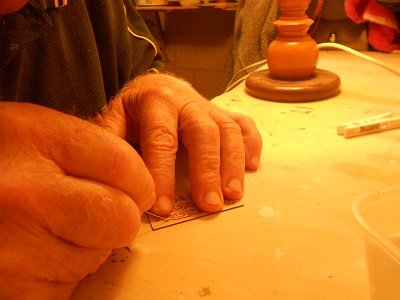
- 48 replies
-
- 7
-
-
- syren ship model
- queen anne barge
- (and 1 more)
-
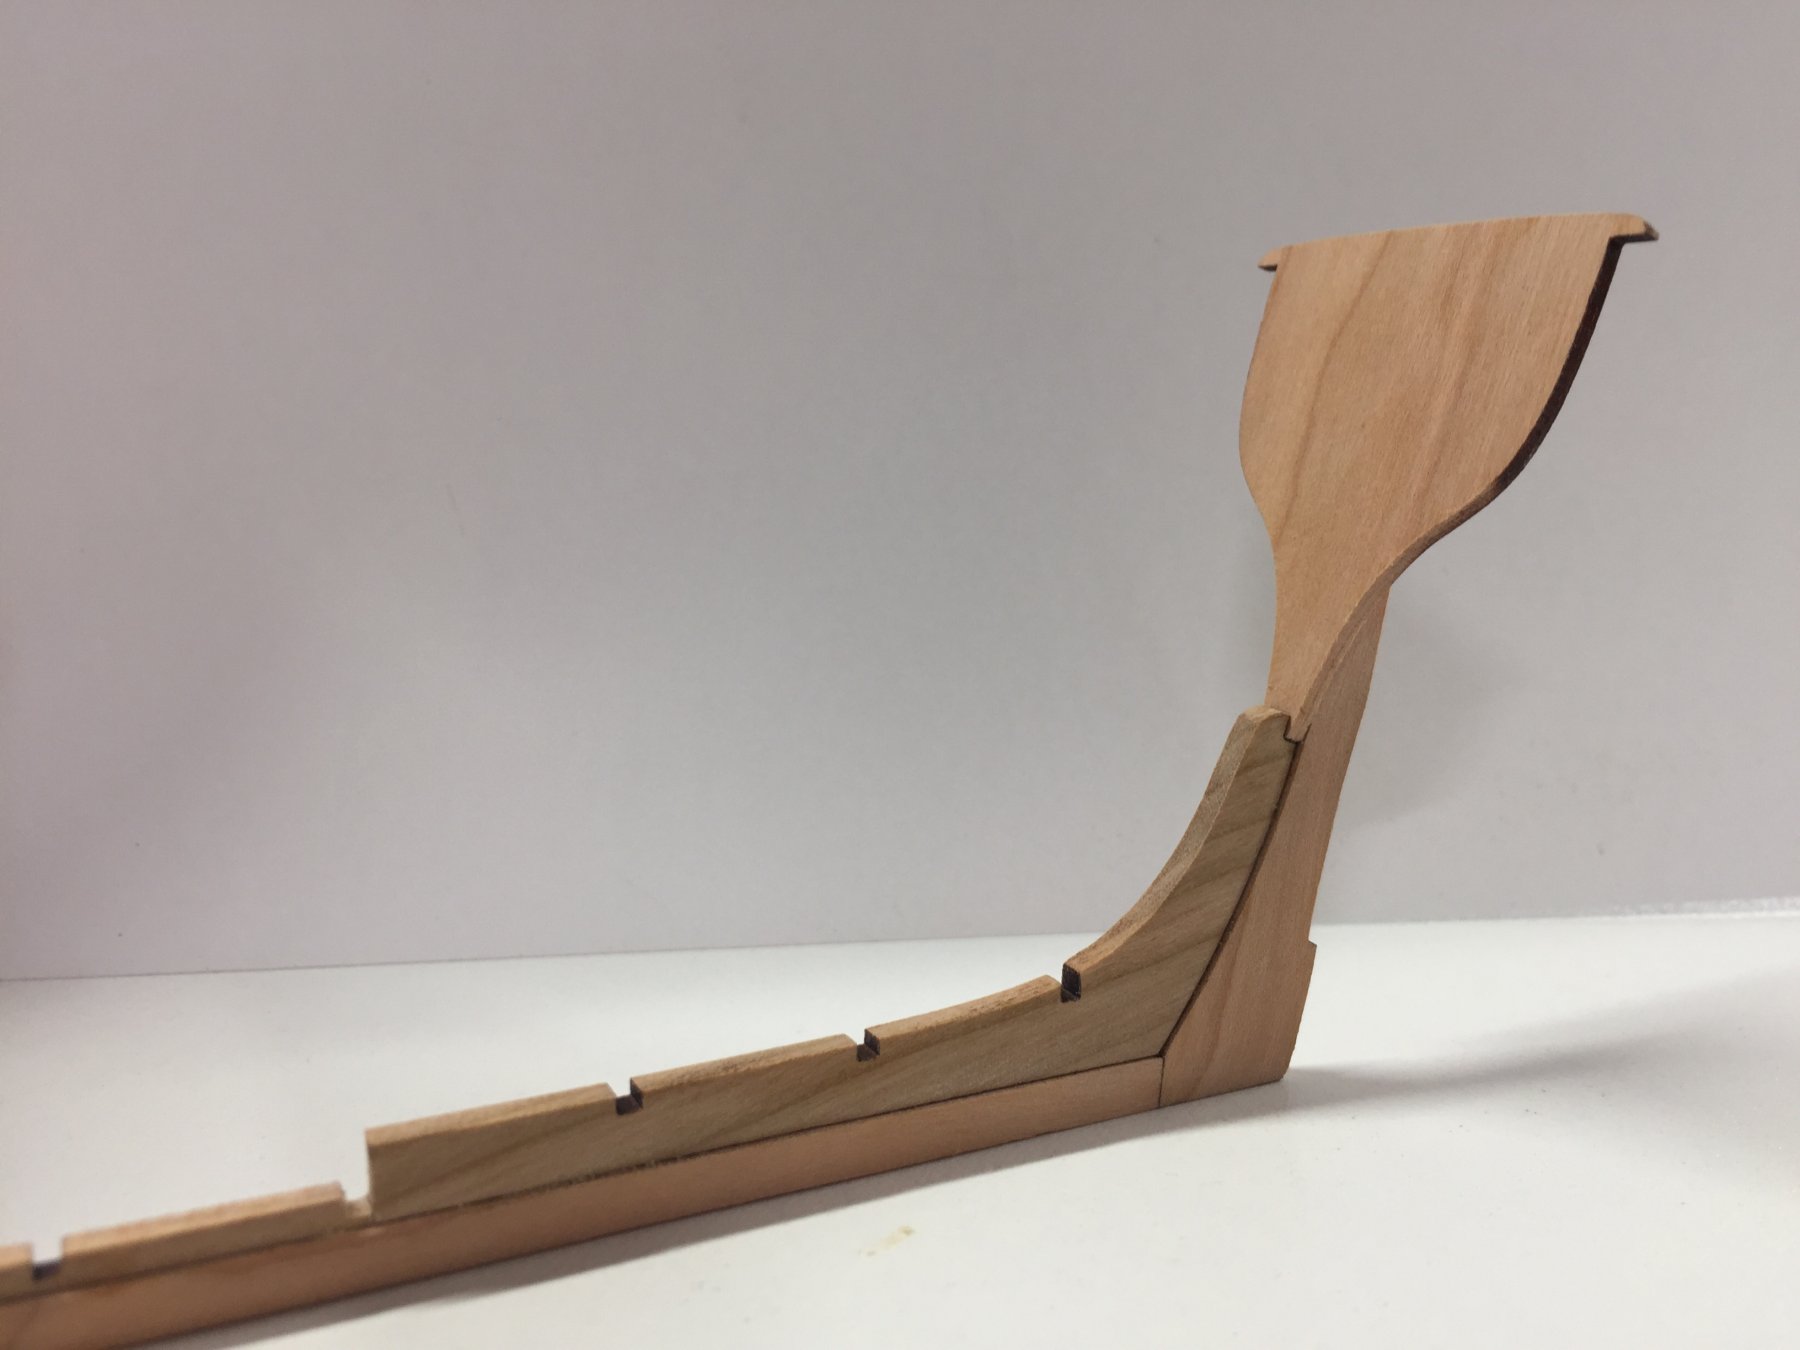
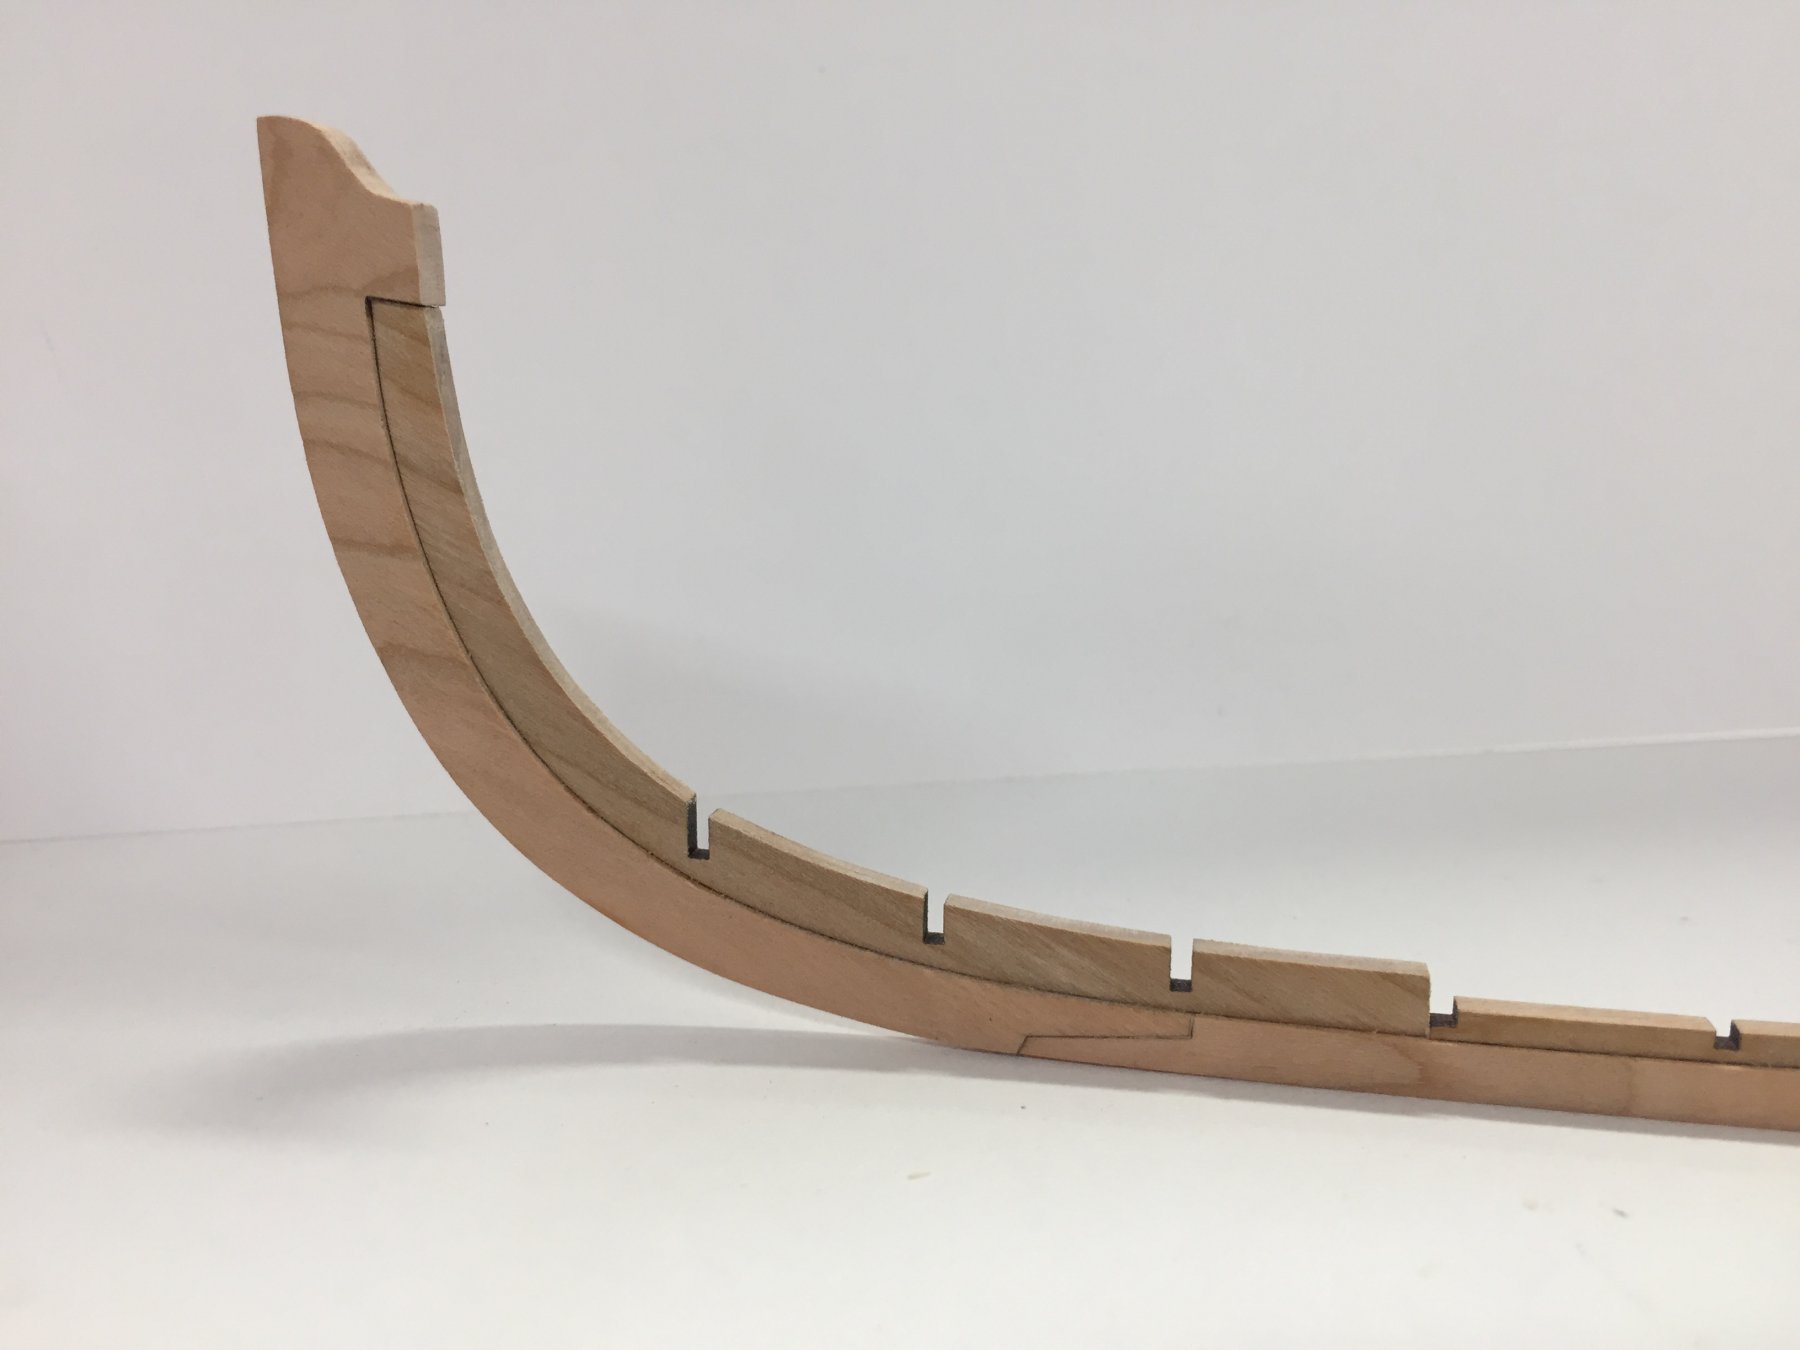
 Today I glued the parts of the keel of my little model together. To glue the apron, the rising wood and the deadwood centrally on the keel I build a simple jig.
 -
 Click on the tags in the title above (shown in black) for an instant list of all the build logs for that kit subject.
- 1 reply
-
- 1
-
-
- queen anne barge
- medway longboat
- (and 2 more)
-
 Greetings from San Diego! I am building Chuck Passaro's QUEEN ANNE BARGE and I figured I would do a build log. If you are reading this, it means I am half finished. I wanted to wait until I had significant progress before I published. My past efforts at logs usually turned out poorly. I get bogged down trying to document the build and end up getting distracted from actually building. Today is 08 July 2018. (Your calendar is different.) A grueling 7 months at work has come to an end (the grueling part, not the work) and I figured I would celebrate by getting back into building. I chose the QAB for a couple reasons. I really like Chuck's instructions. I have made or am in the process of several models which Chuck has written practica for. I also have used his "stuff" (line, blocks, windlass, etc). Top notch material. I wanted to do the MEDWAY LONGBOAT he is working on, but that will not be available for awhile. I couldn't wait that long. I decided to give QAB a try because of the quality and because many of the processes he uses for it will be found in the LONGBOAT. Another reason, although minor is a family connection I found with the Queen Anne period while doing ancestry research. I won't go into detail unless somebody is interested. I ordered the kit about 2.5 weeks ago. As usual, Chuck shipped it to me immediately and I have been studying the plans and instructions since (as well as other build logs). The build is finally underway.
 -
 Hi, Ive decided to start a build log of the Syren Ship model, Queen Anne Barge at 1:24 scale that I managed to purchase from Chuck. The kit was purchased as a nice diversion away from my build of the Pegasus which has been slogging away for several years now and I wanted something that I could finish reasonably quickly. As of all things designed and produced by Chuck, I was not surprised on opening the box to be greeted by top quality components and plans, instructions were downloaded from his site. I shall not post pics of all the items as another builder ( Sam ) has already done that. I have started by completing the keel, all parts fitted together perfectly with no issues being seen so far, I will start putting together the frames and see how this unique approach that Chuck has devised for floor and futtock framing works. Ben


- 74 replies
-
- 26
-
-
- queen anne barge
- syren ship model
- (and 1 more)
-
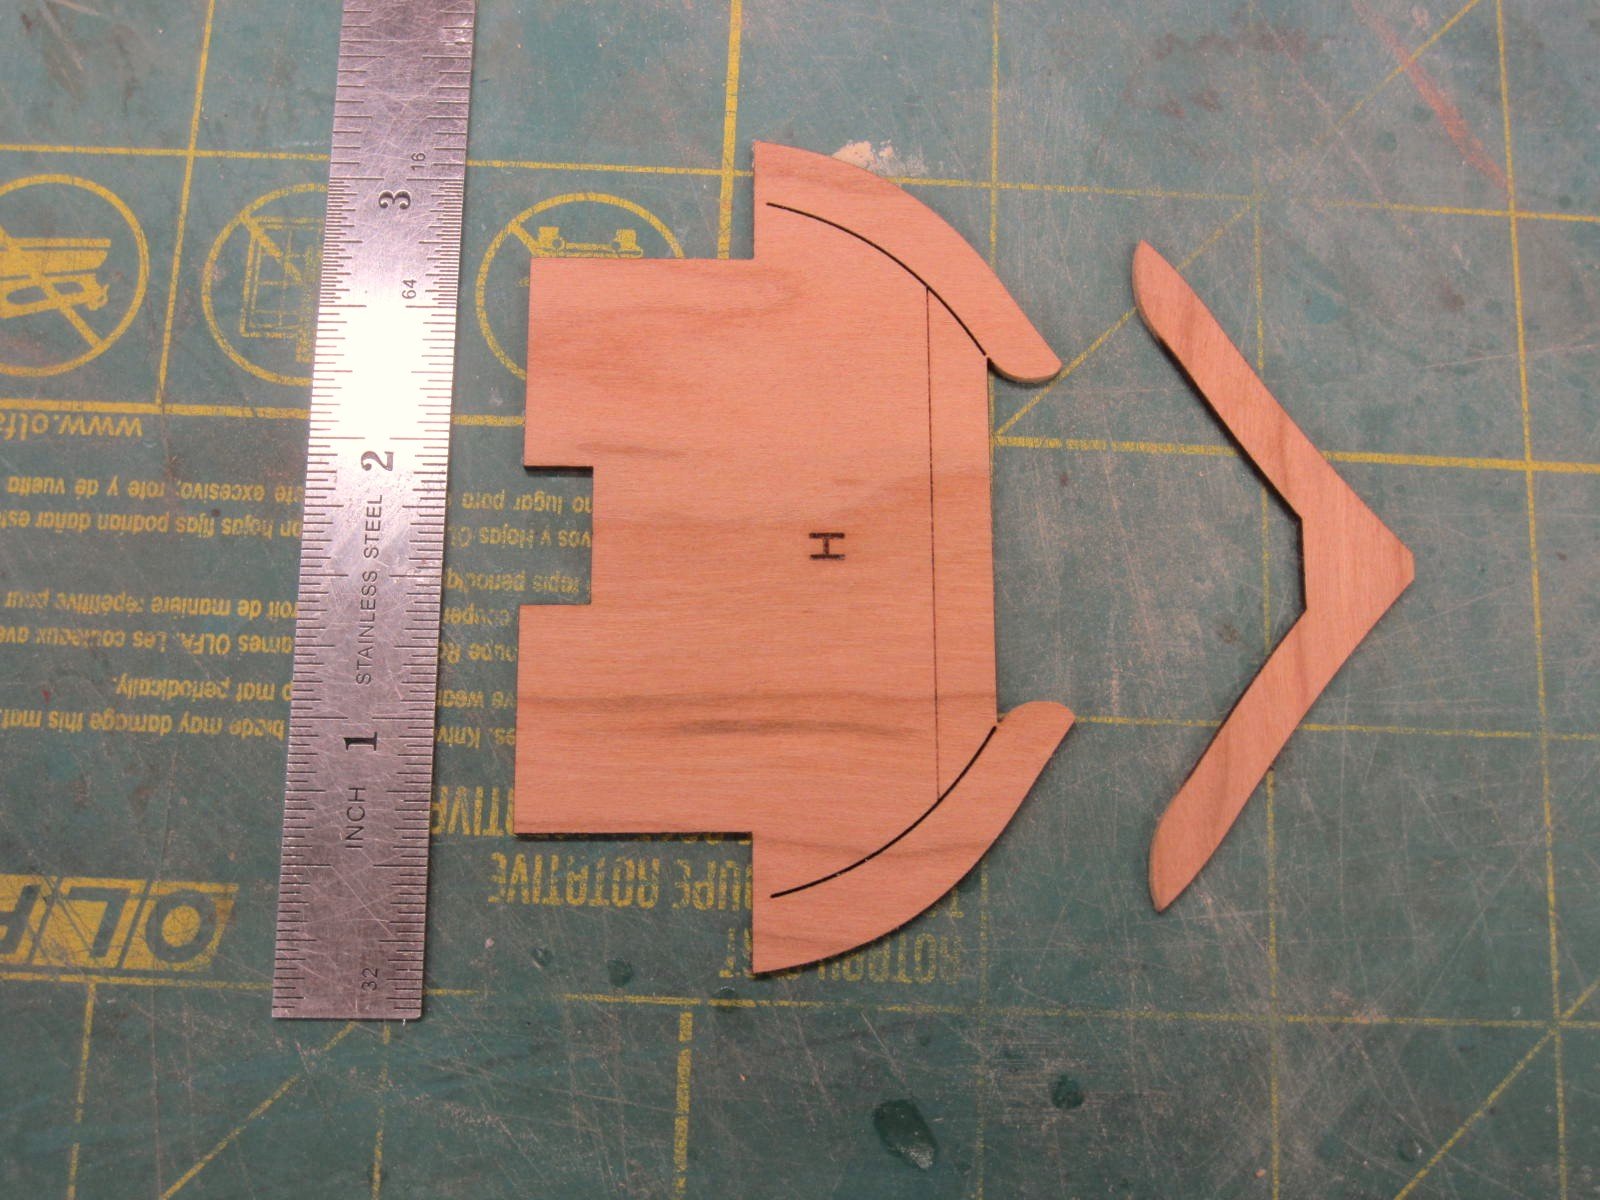
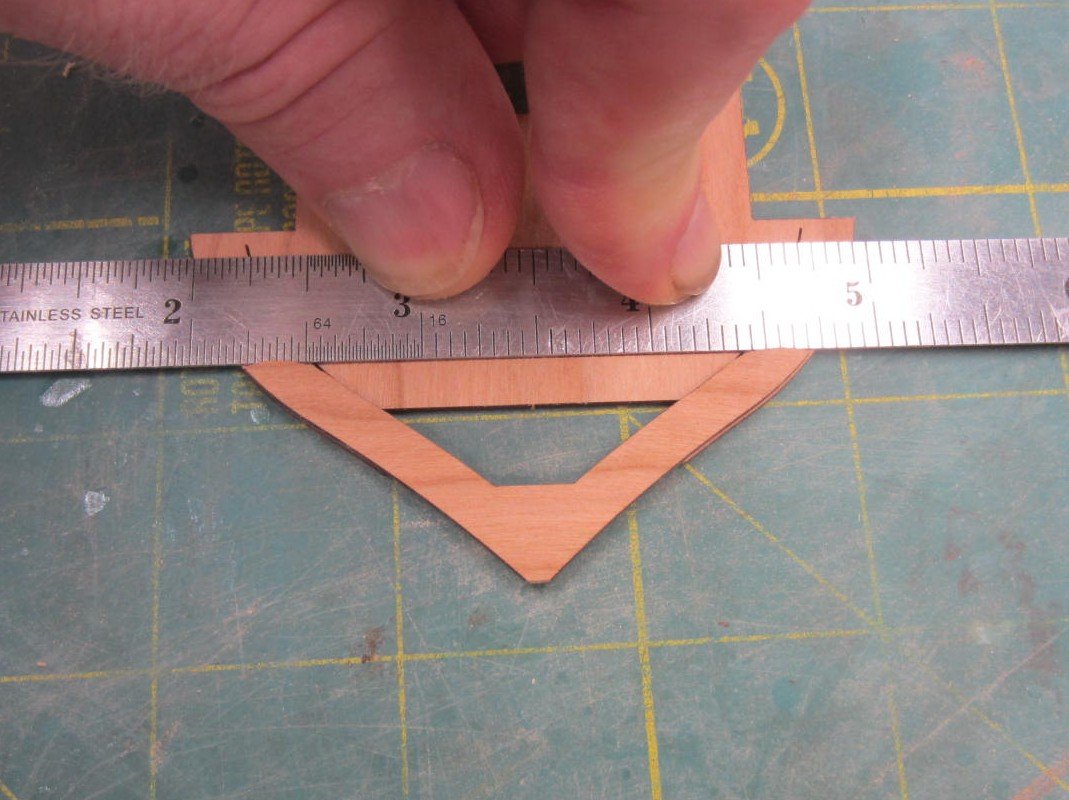
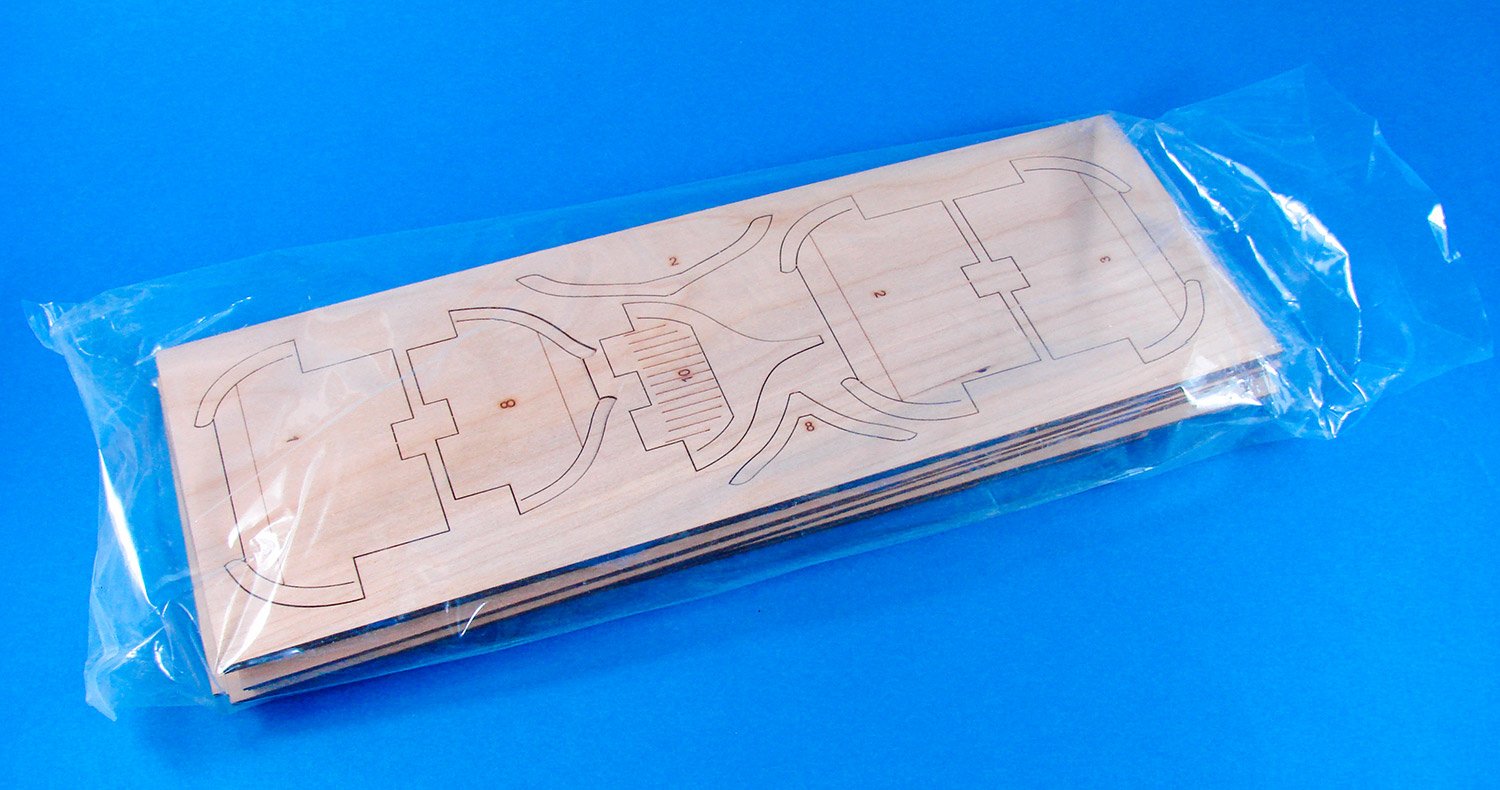
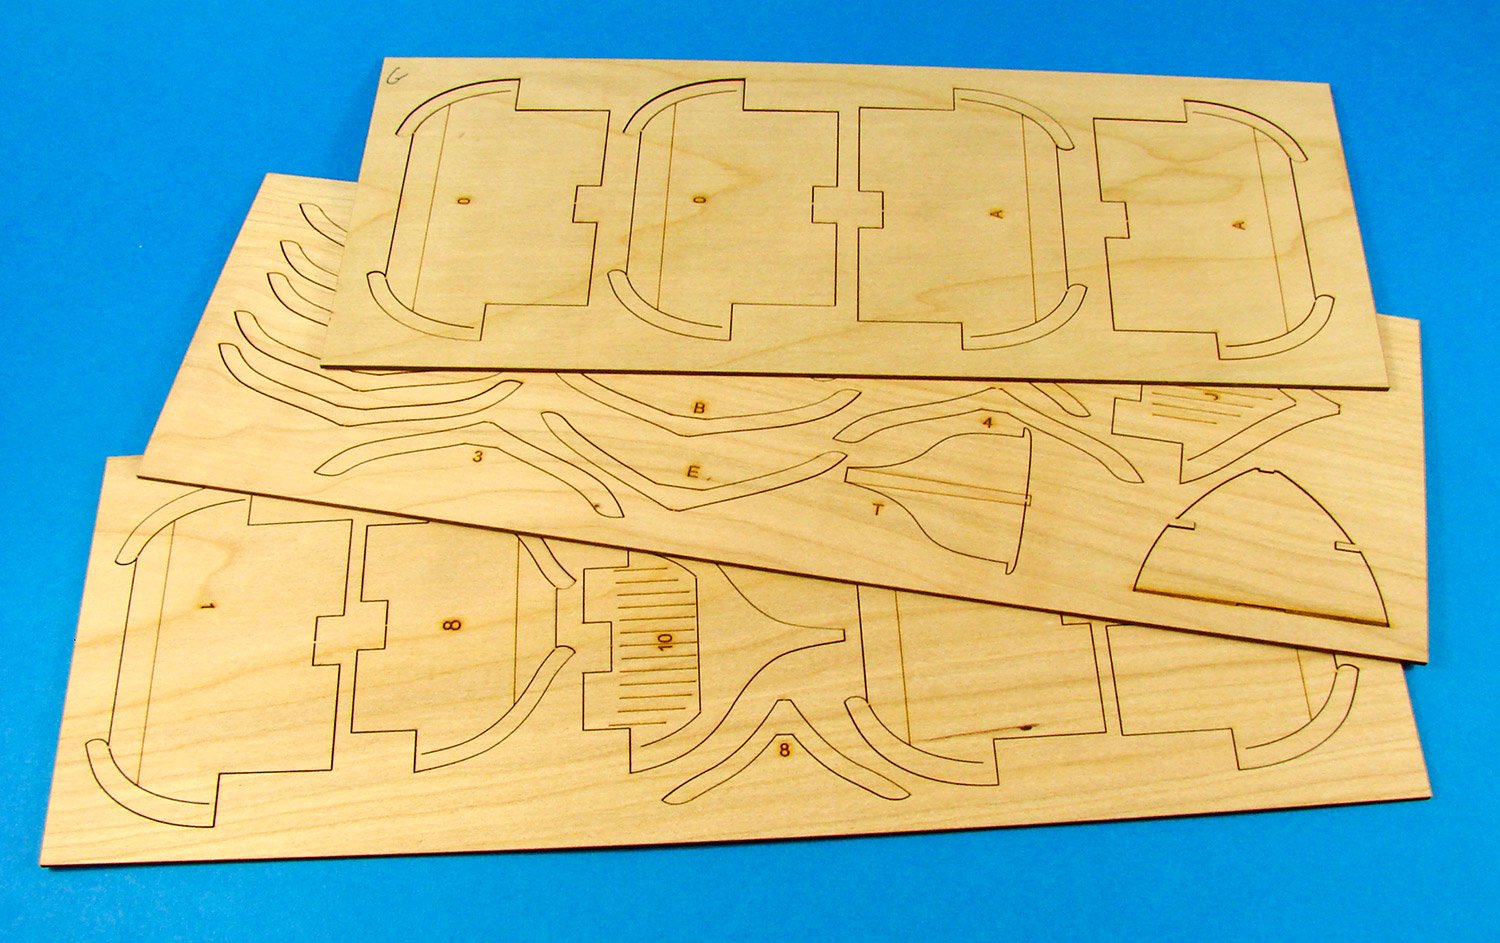
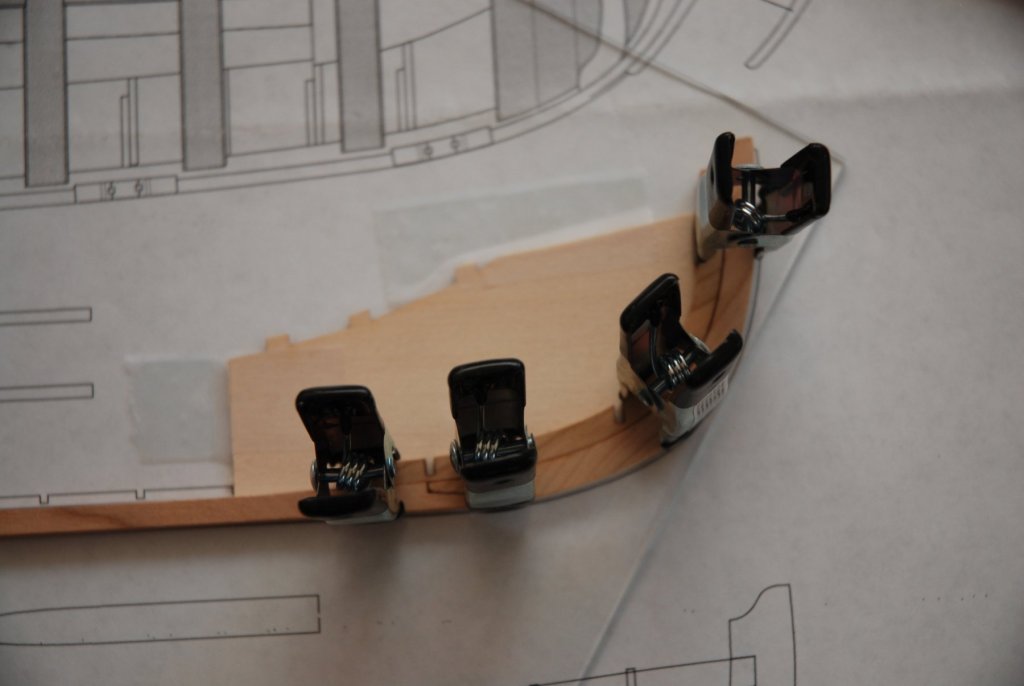
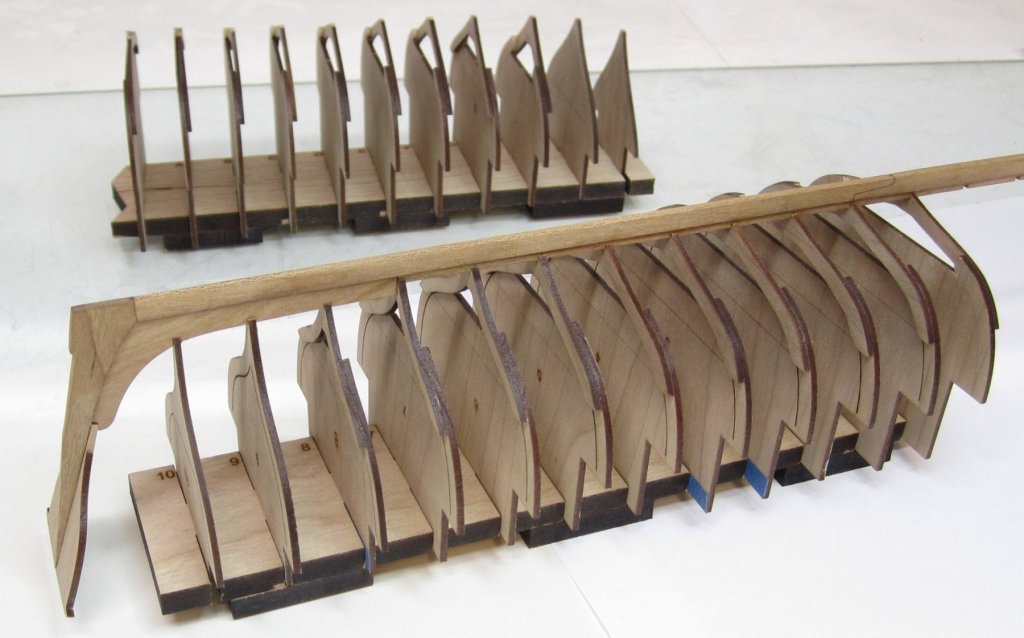
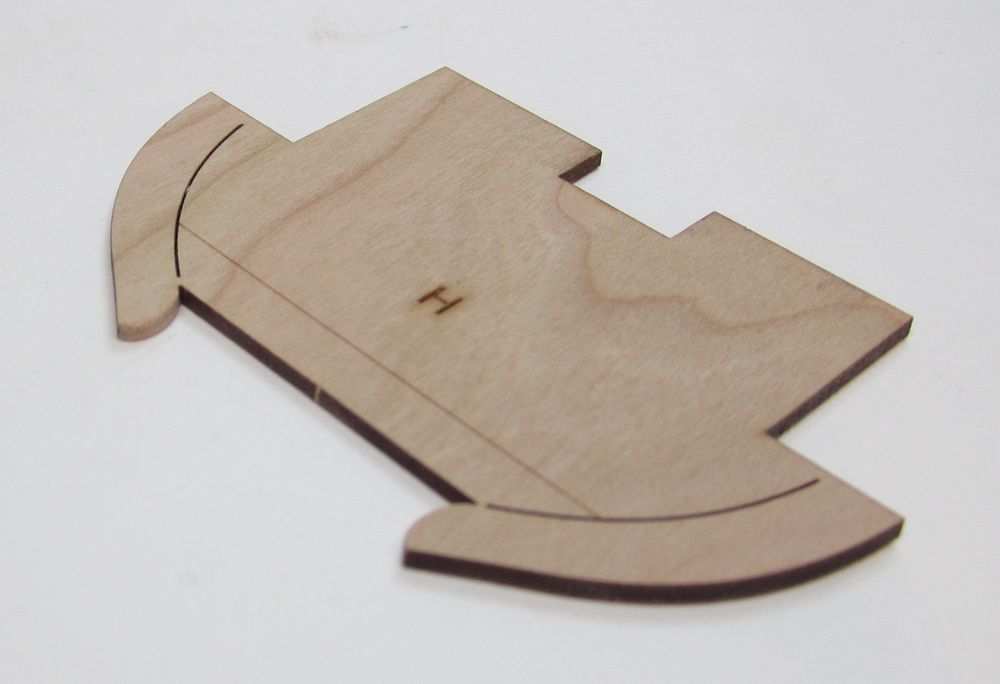
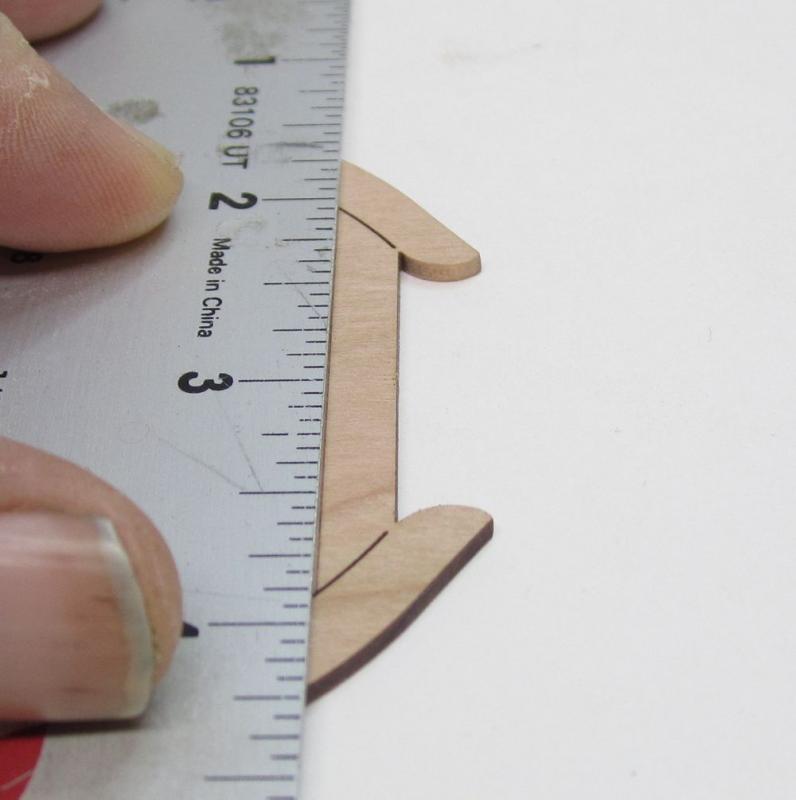
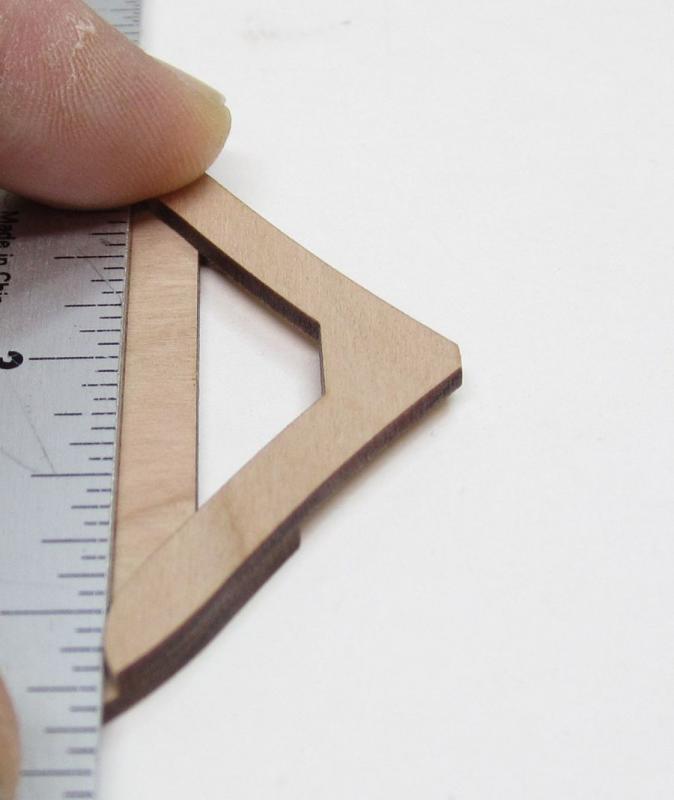
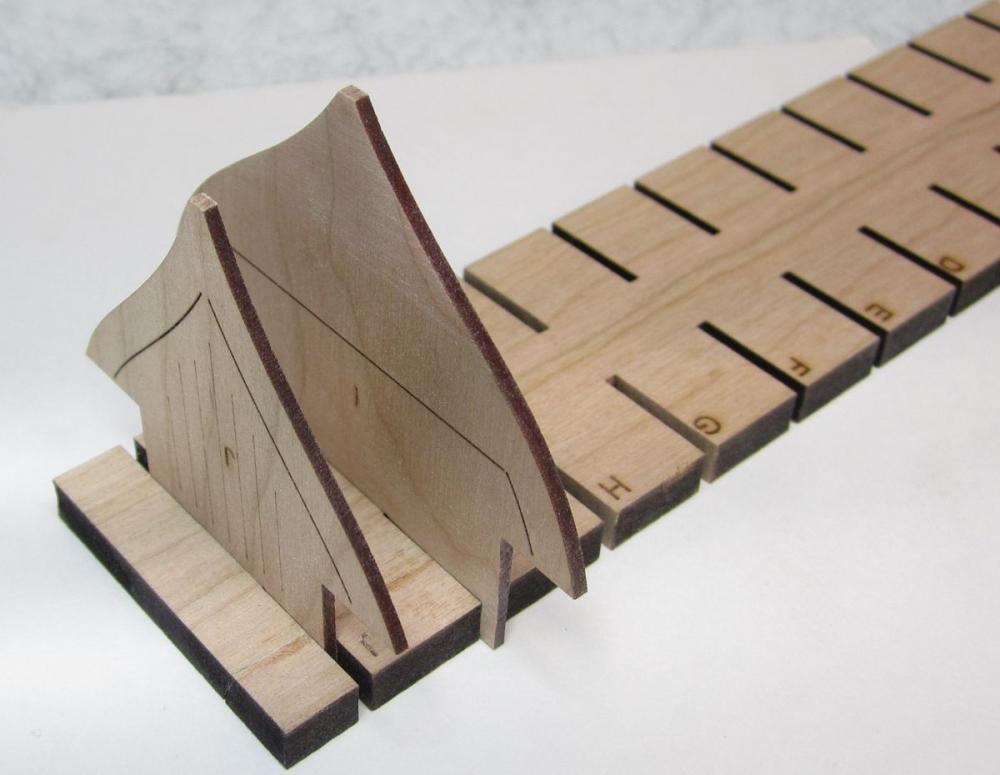
 Hi All, I had the good fortune to obtain one of the Queen Ann Royal Barge's from Syren Ship Model Company. I've decided to start doing some of the building while working on the Syren re-rigging. It will make a pleasant break from redoing the yards and the running rigging. The kit comes with two sheets of plans and numerous sheets of laser cut parts. As expected all were in perfect condition upon their arrival. First I started on making the frames. You can see a faint laser line across the futtock frame. This is a reference line for placement of the frame floor. Using this reference line insures uniform placement of all the floors. The futtock and the floor. A straight edge is placed along the line. I clamped the straight edge on the frame, applied glue to the frame floor and then butt it against the straight edge and waited for it to dry. A small weight was placed on the floor while it was drying.I can do two frames at a time. Hopefully care was used to not use too much glue so I can later remove the center away from the futtock. There are a total of 23 frames. 19 that have a separate futtock and floor that need to be assembled. While they are drying I'll work on the keel. The fun has begun!
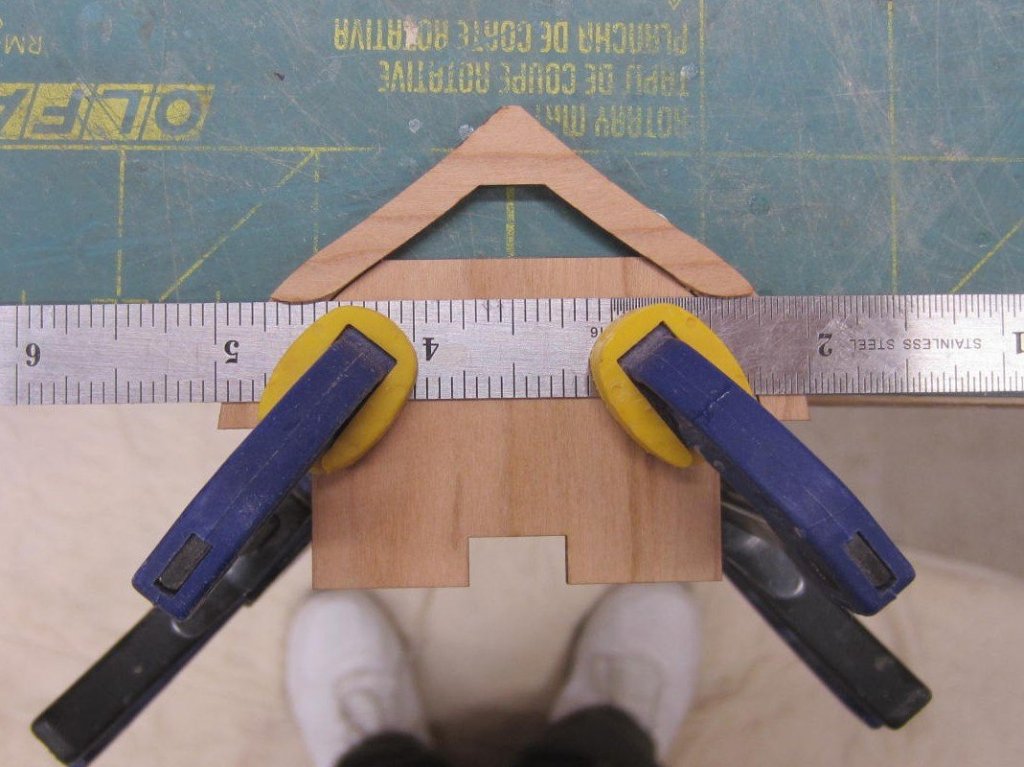


-
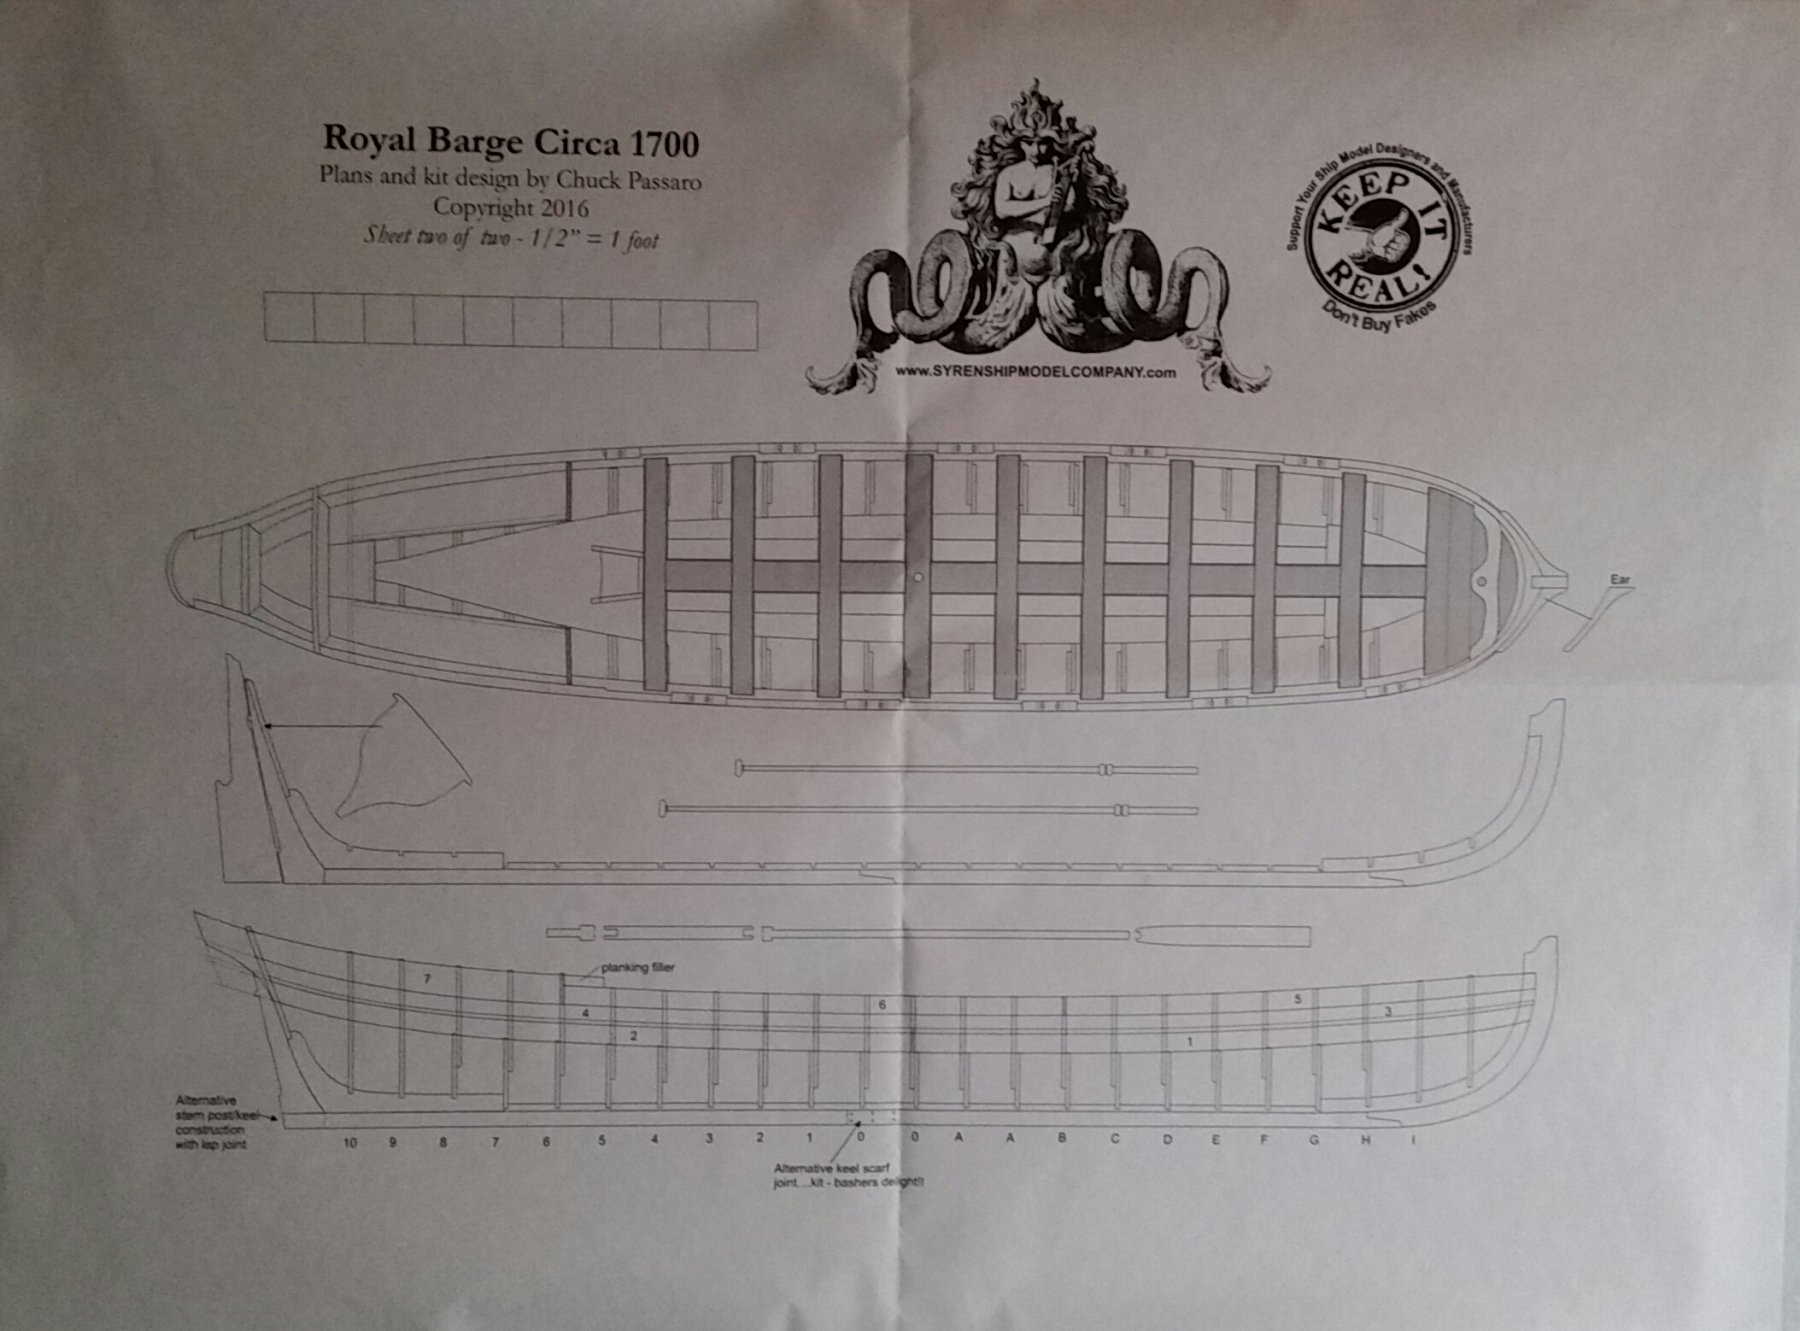
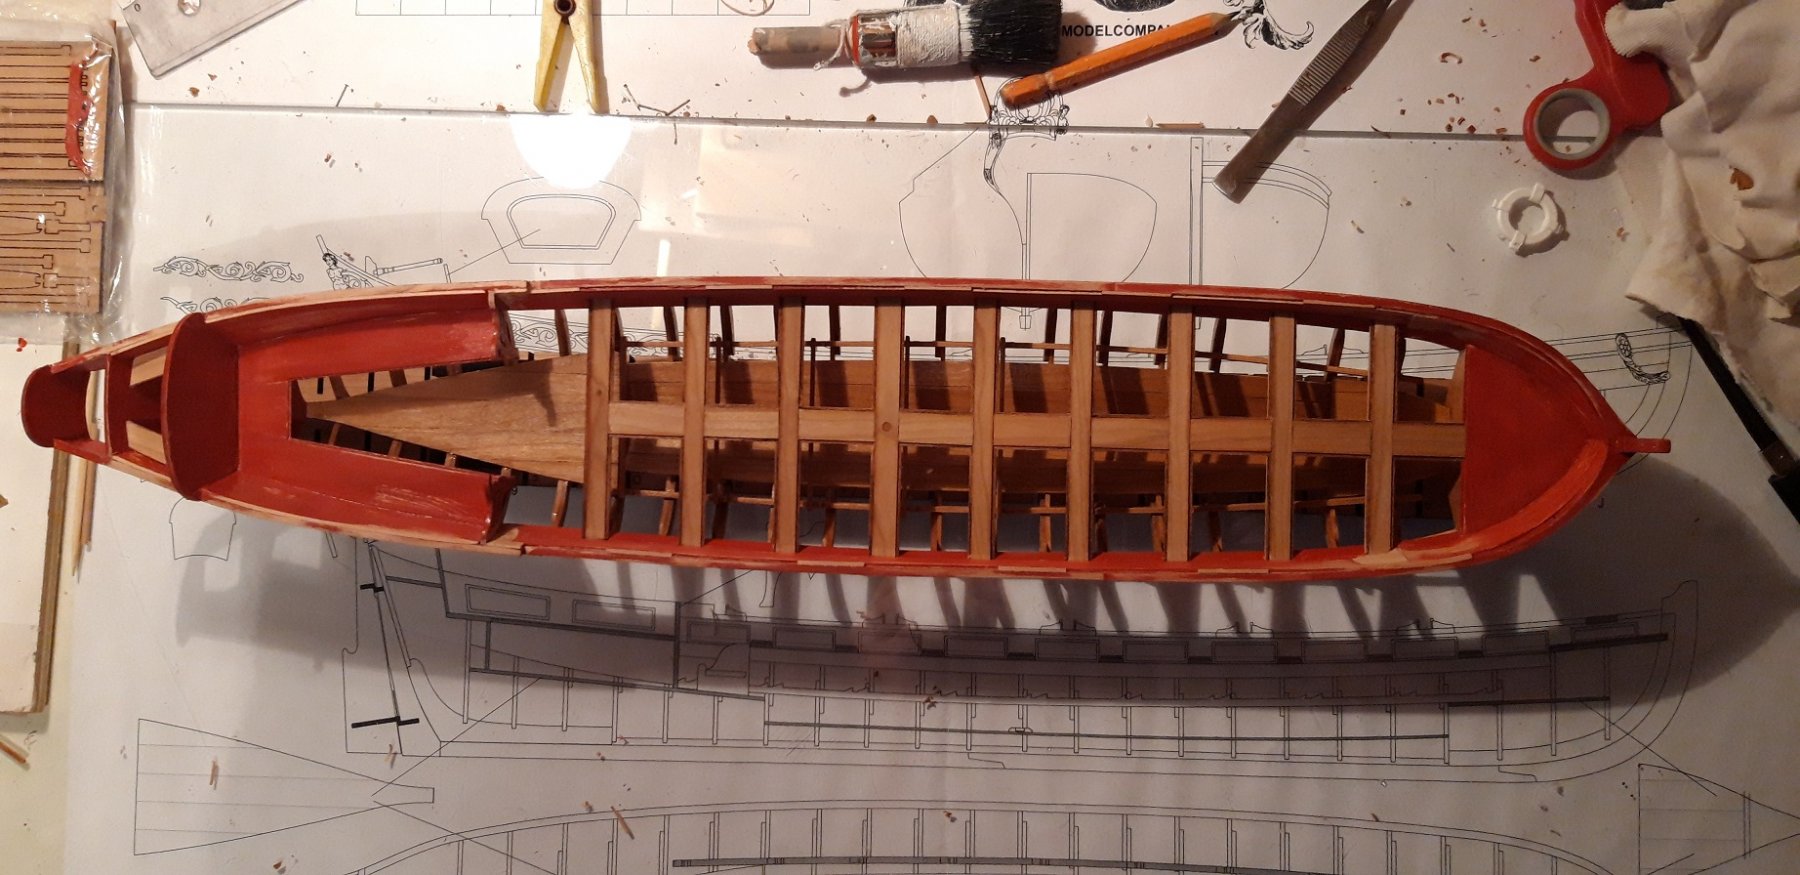
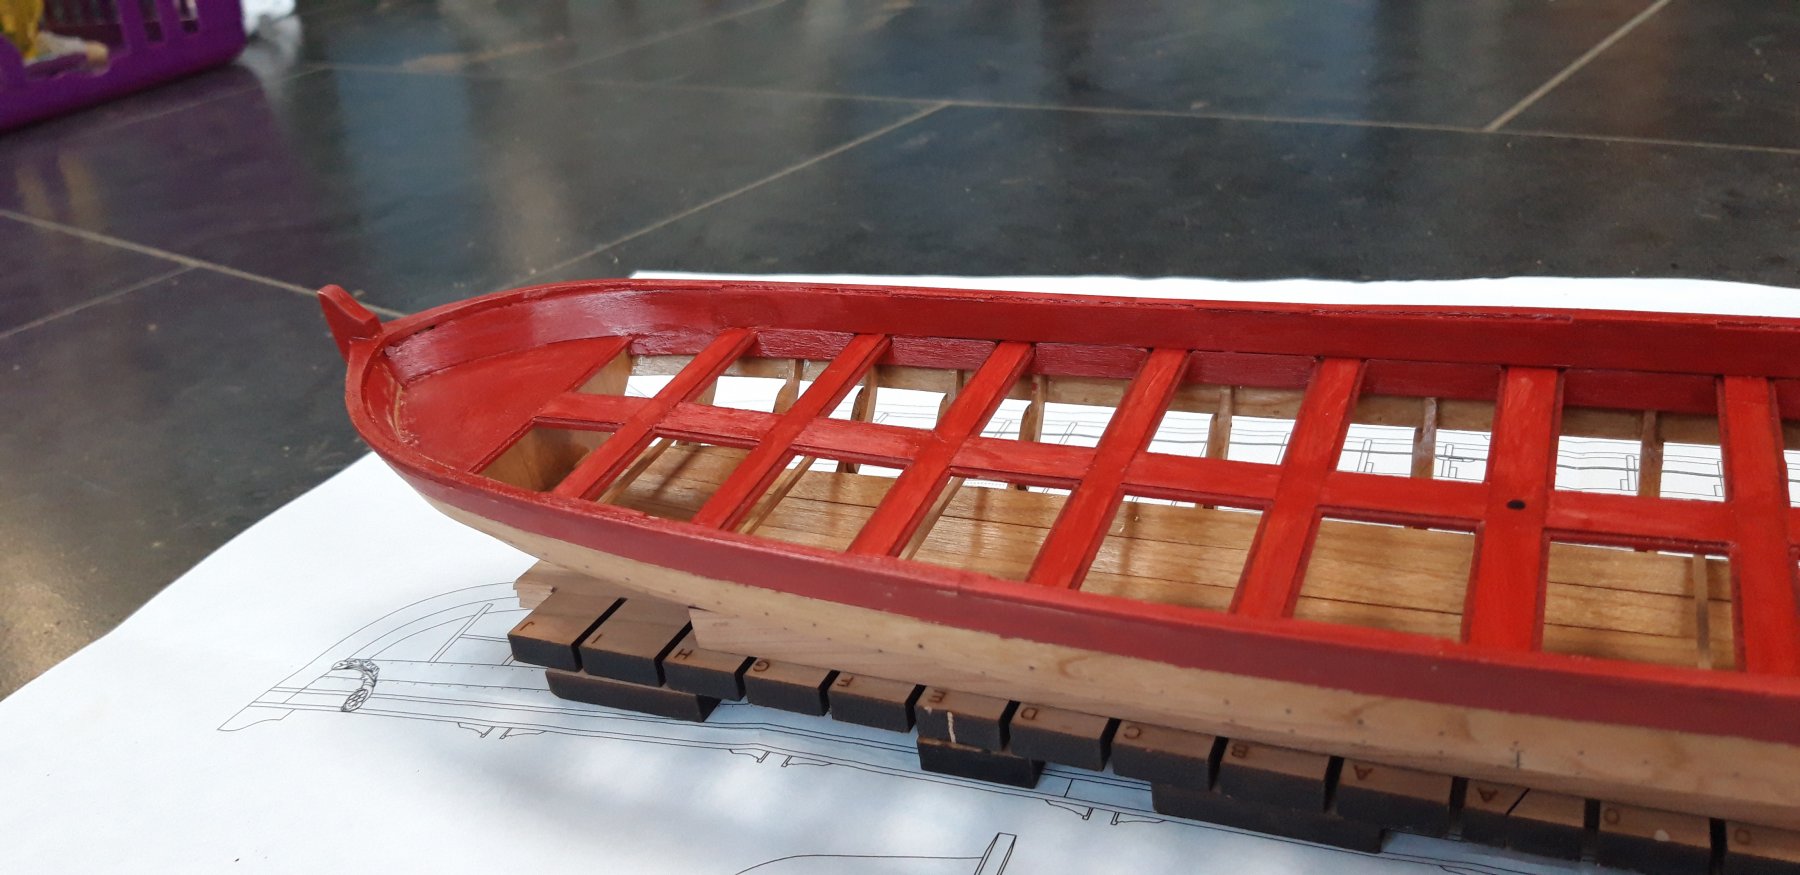
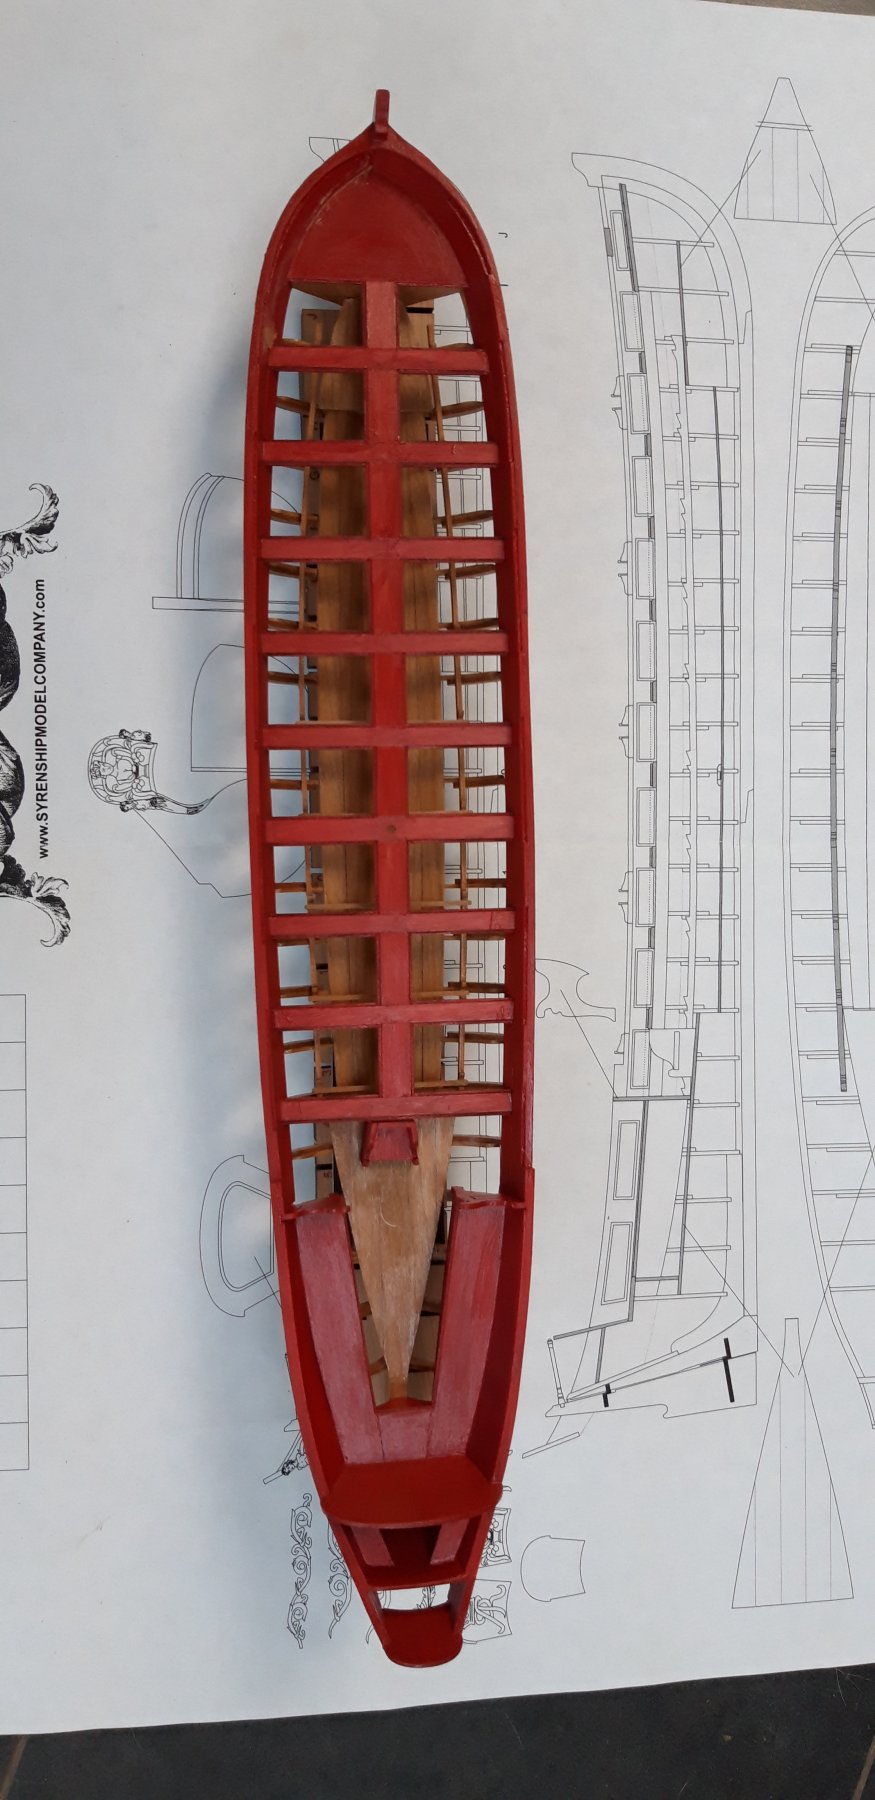
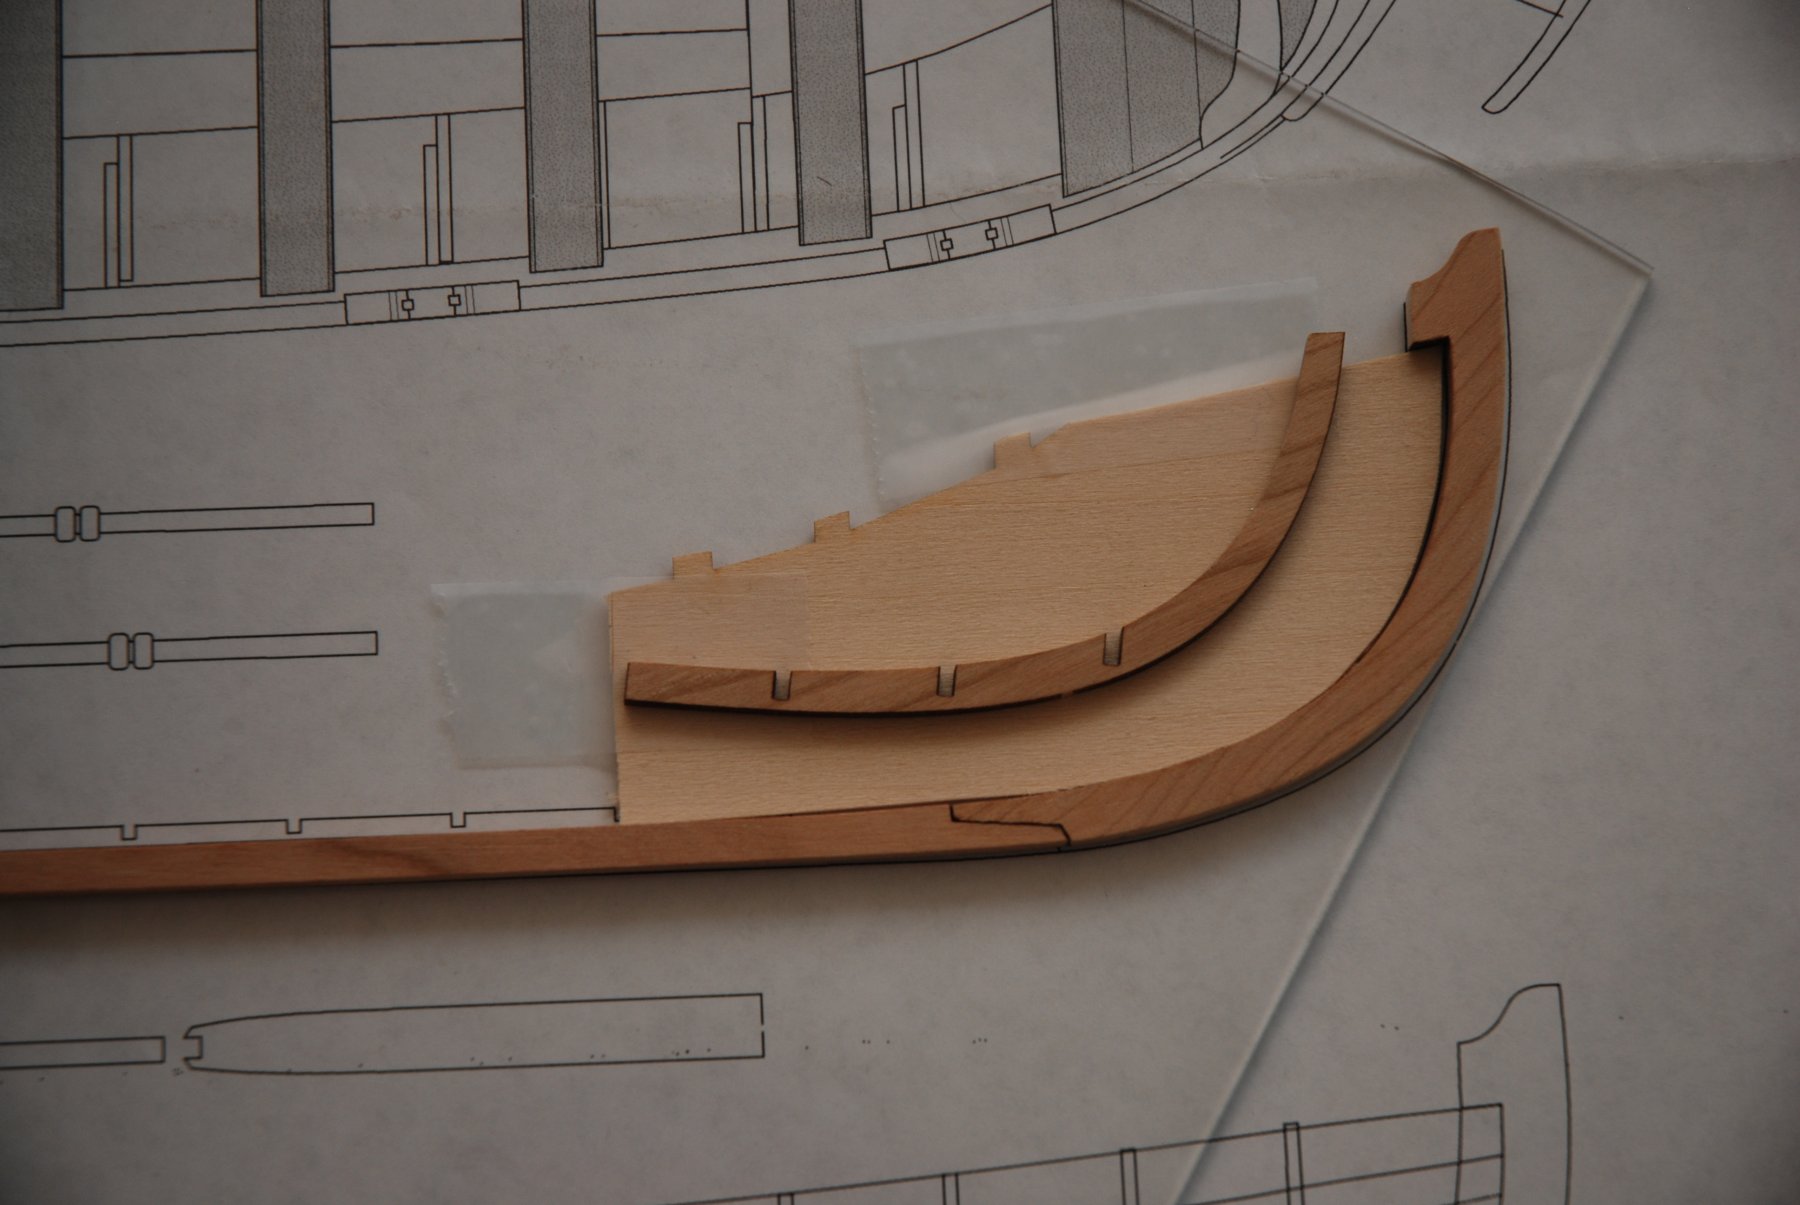
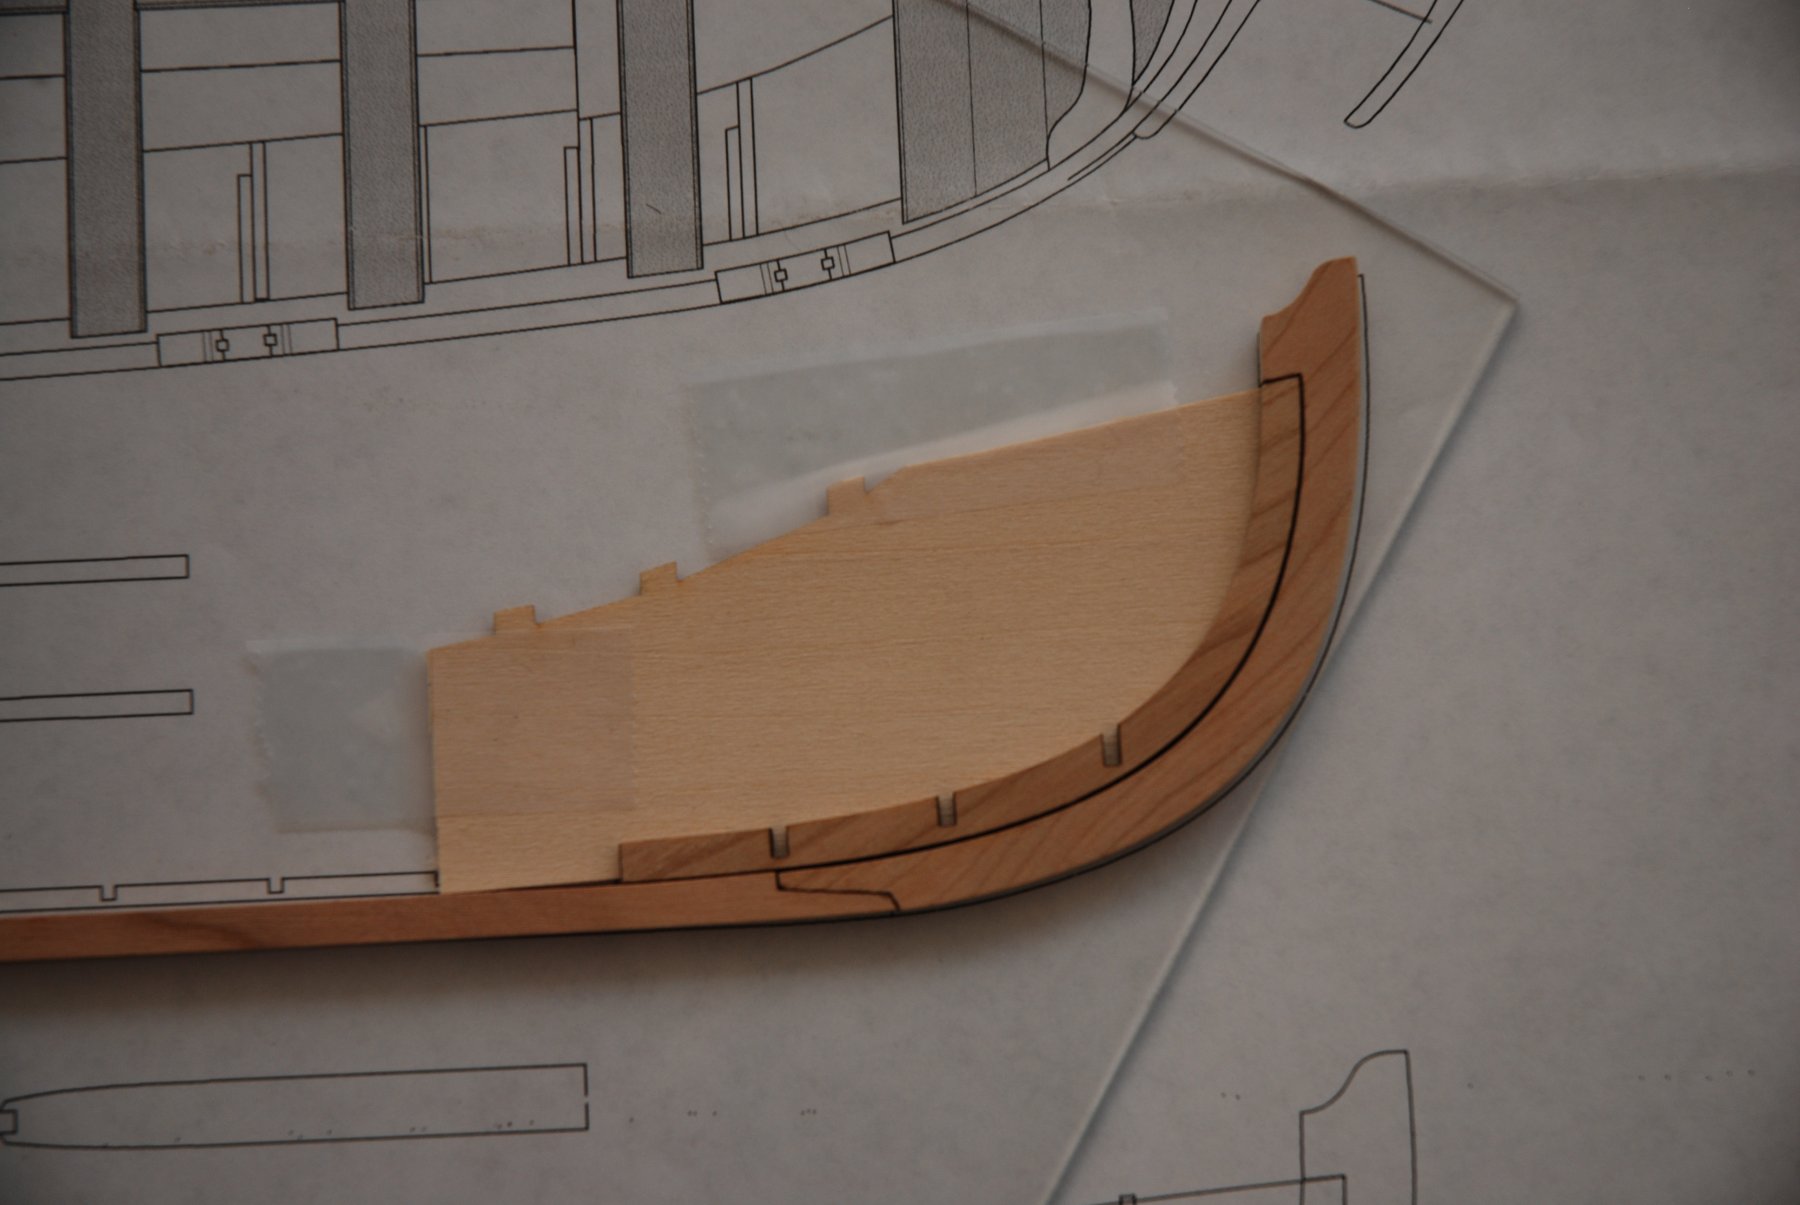
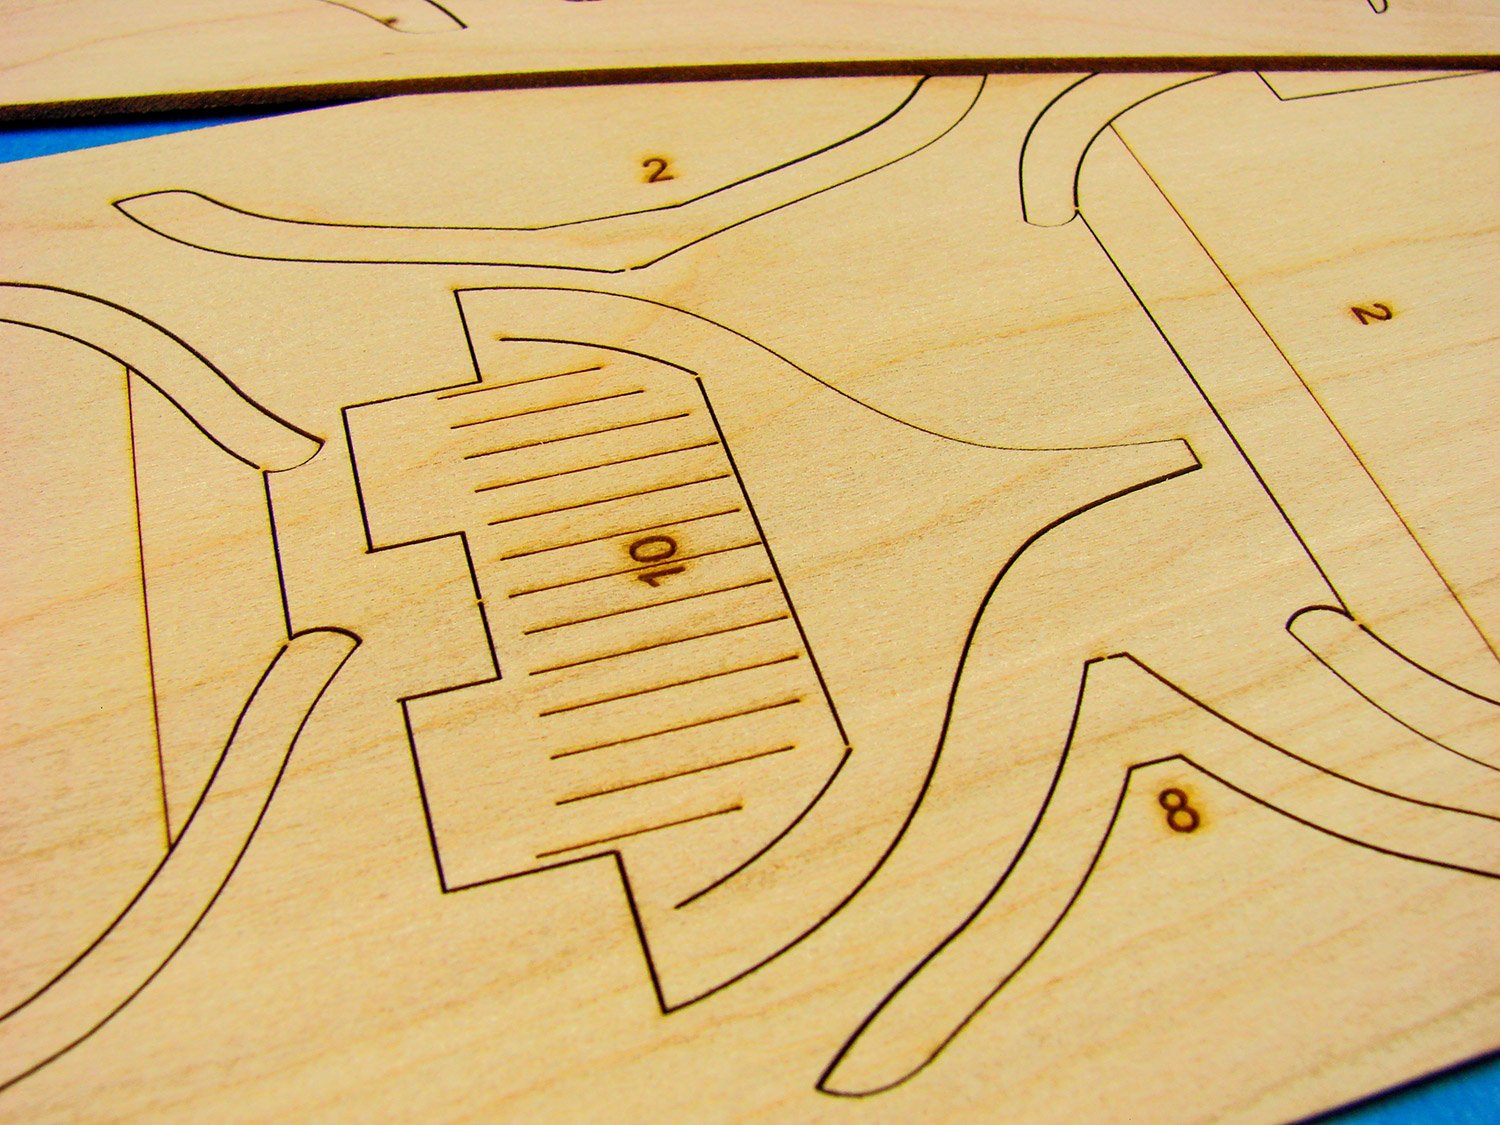
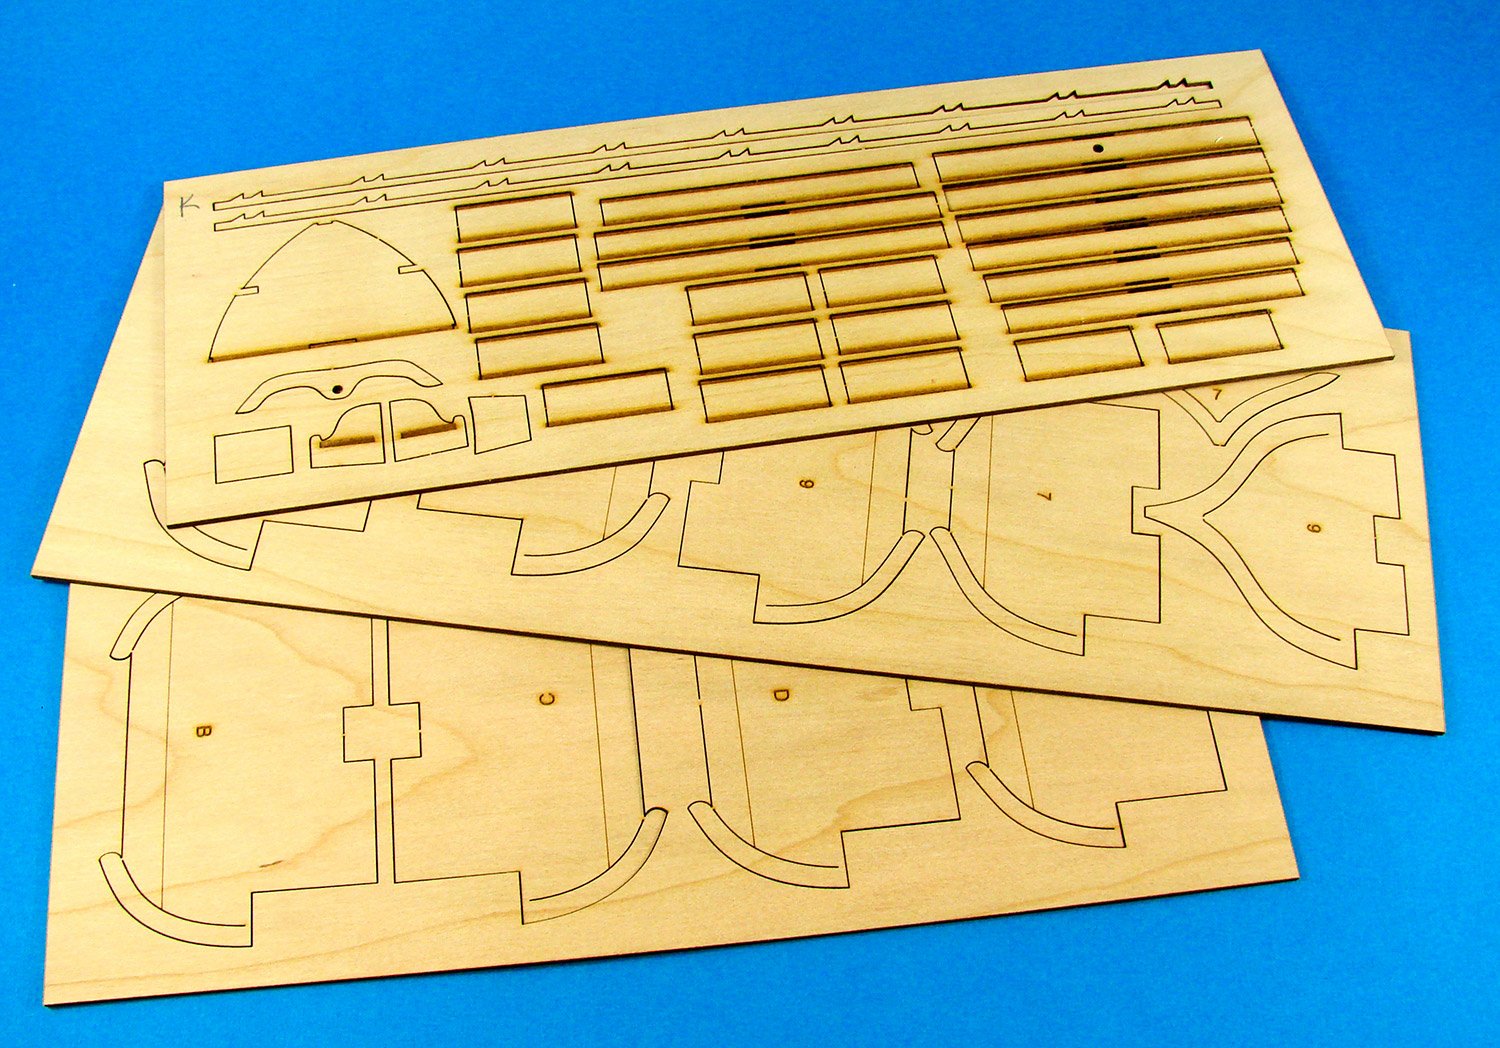
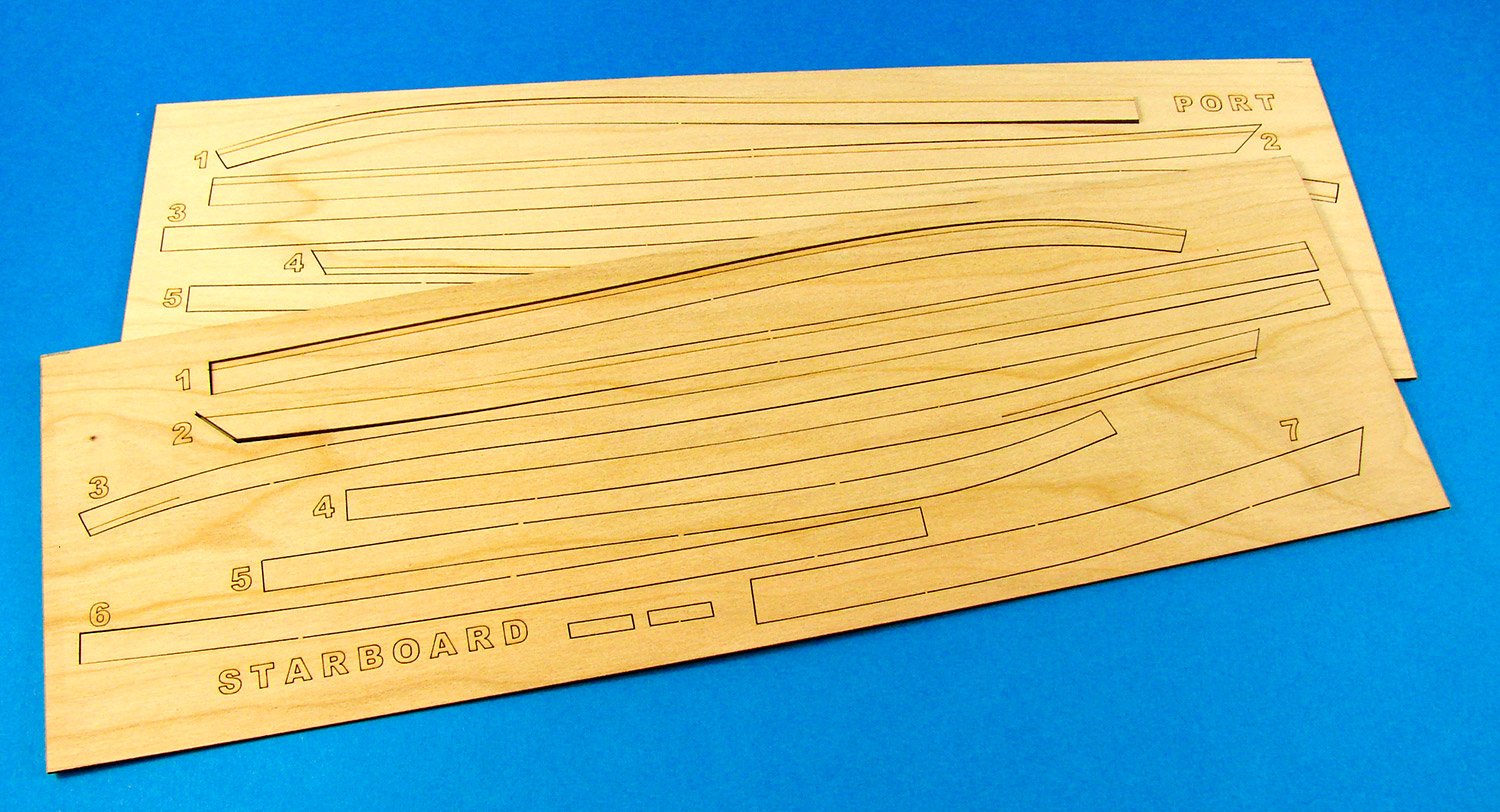
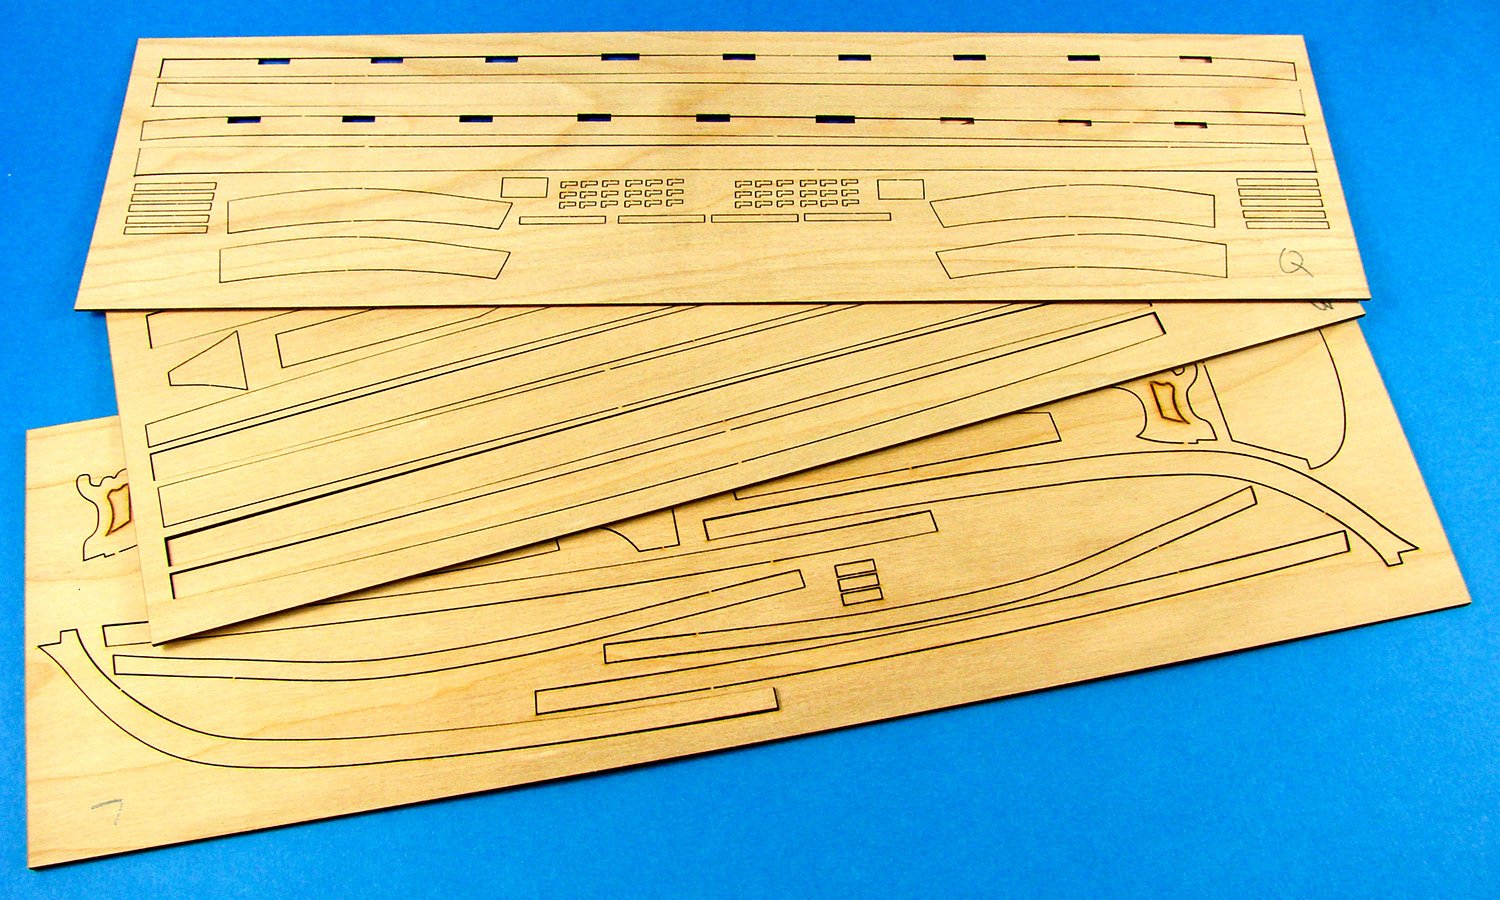
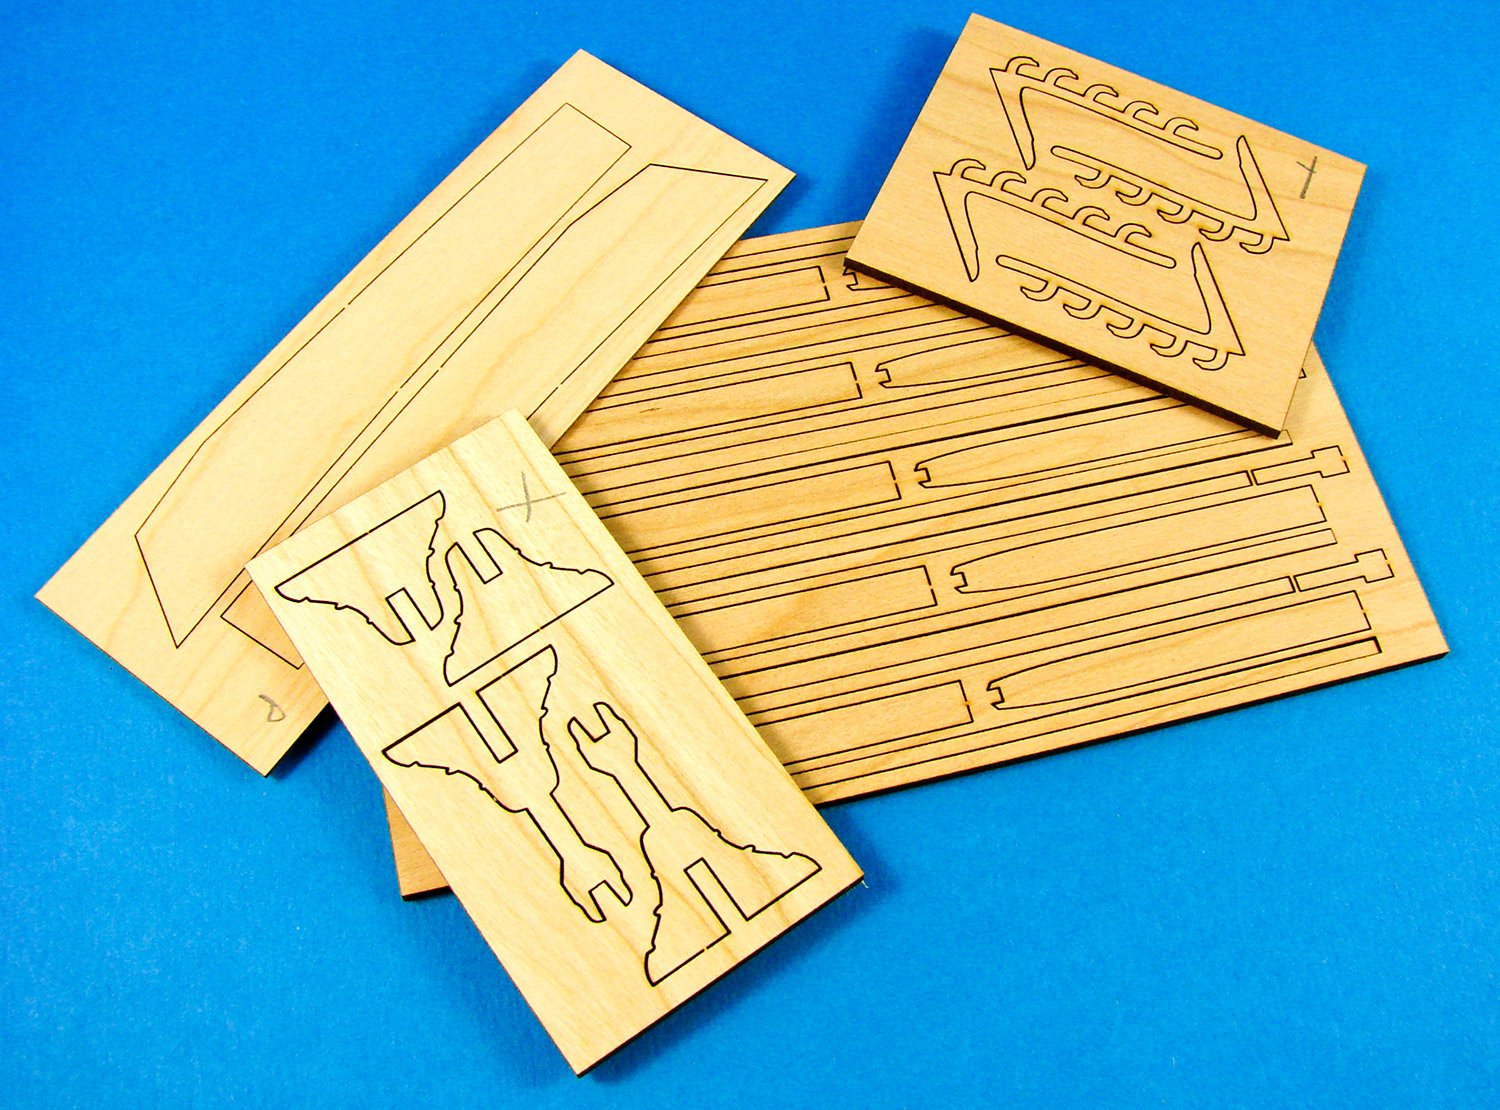
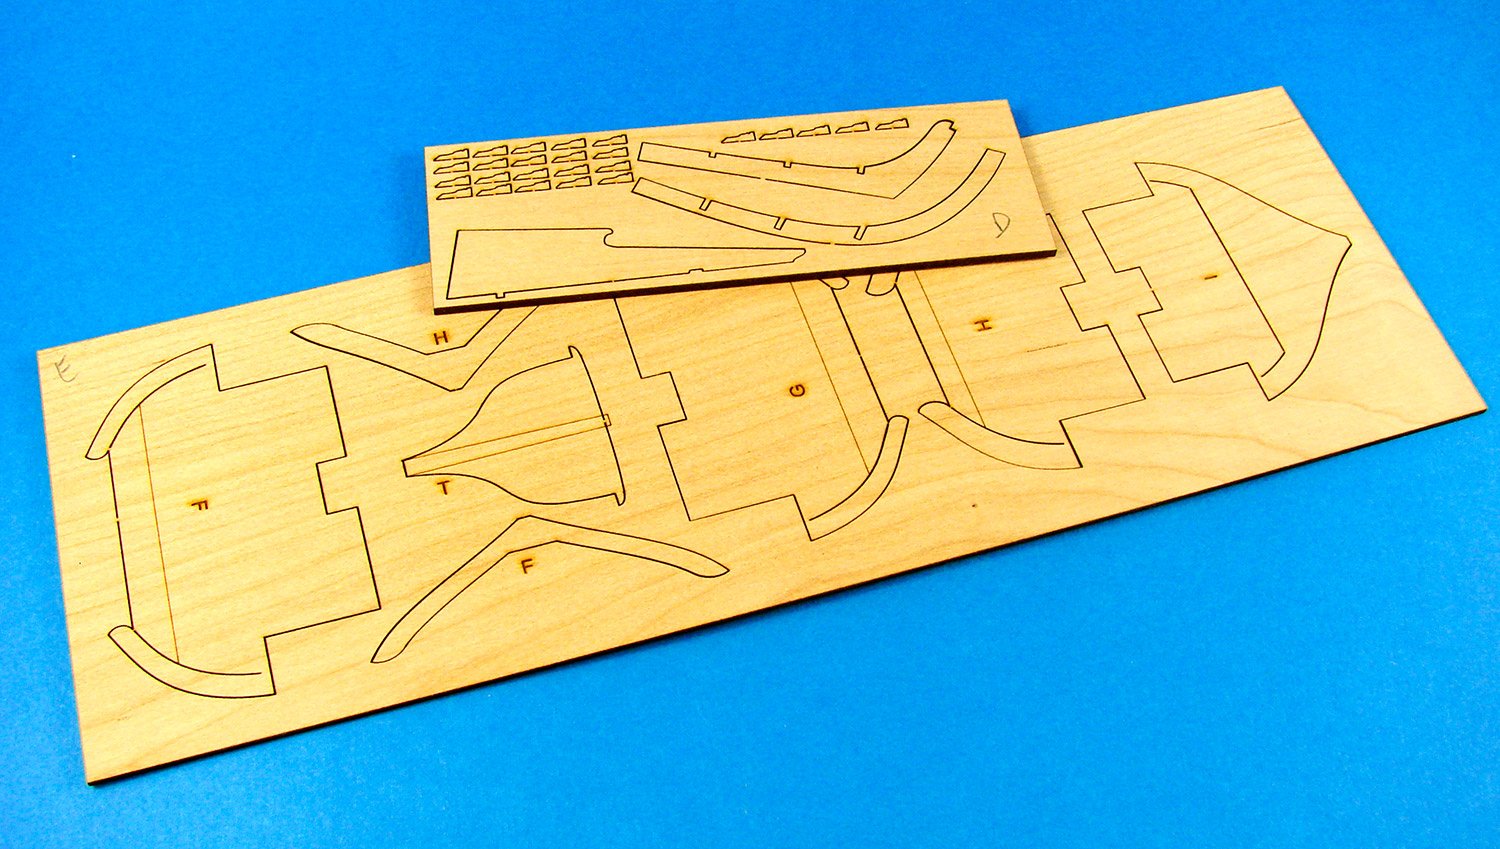
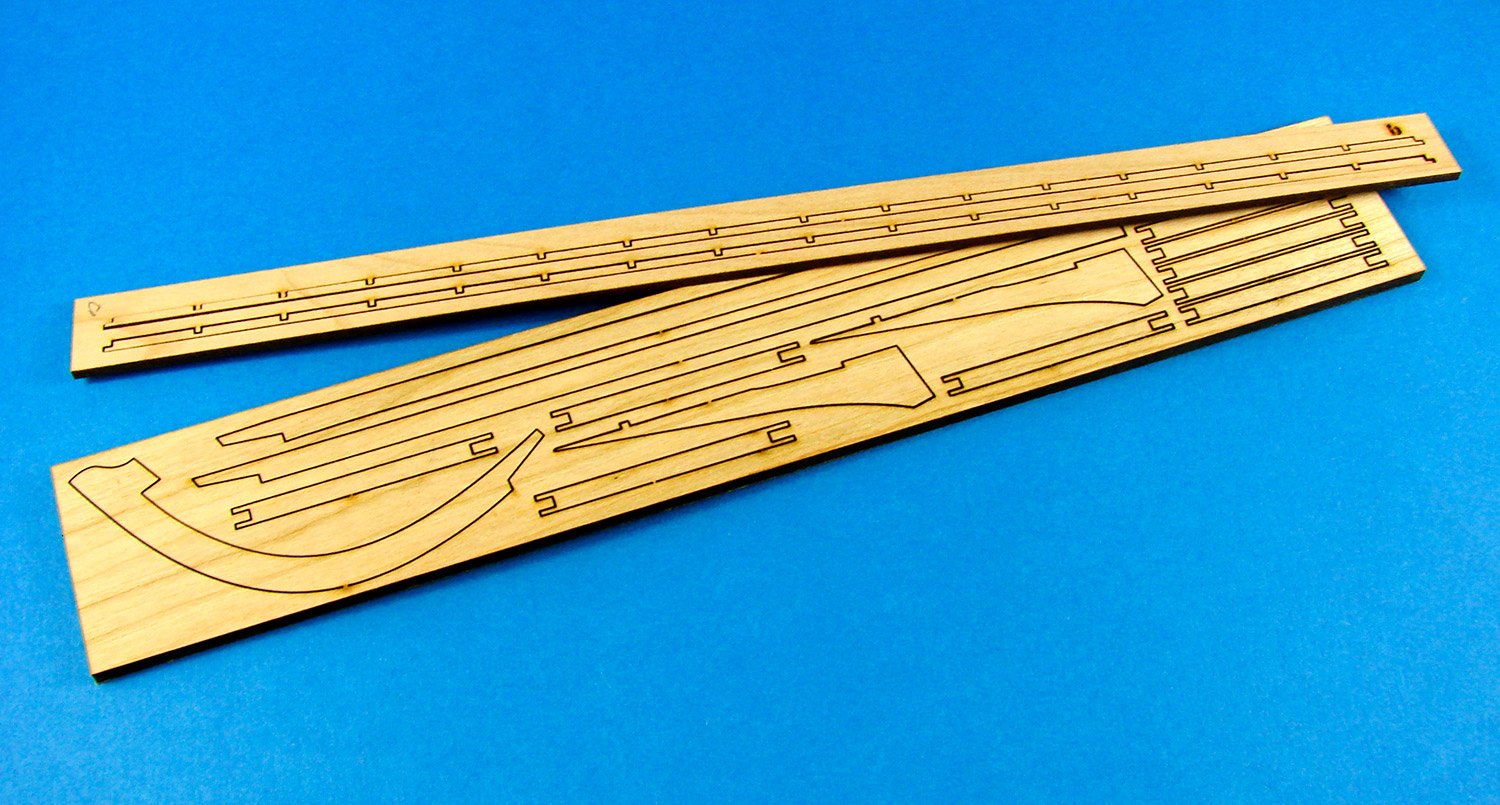
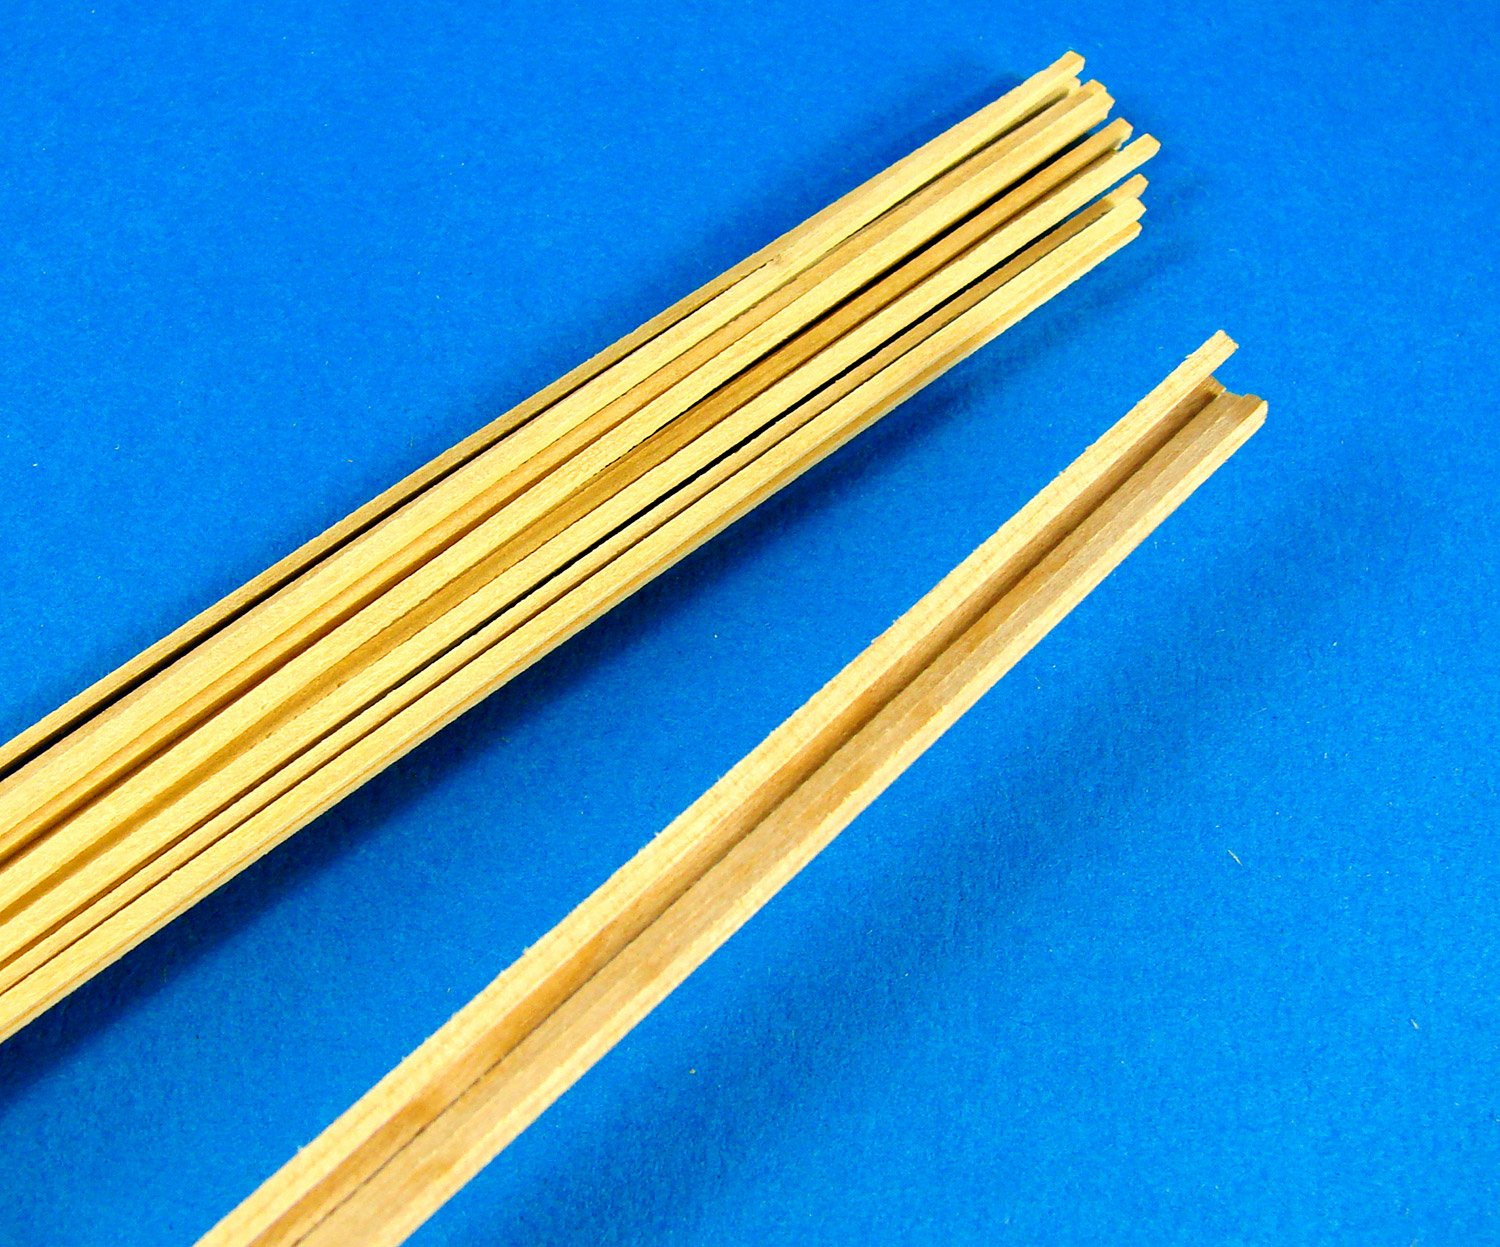
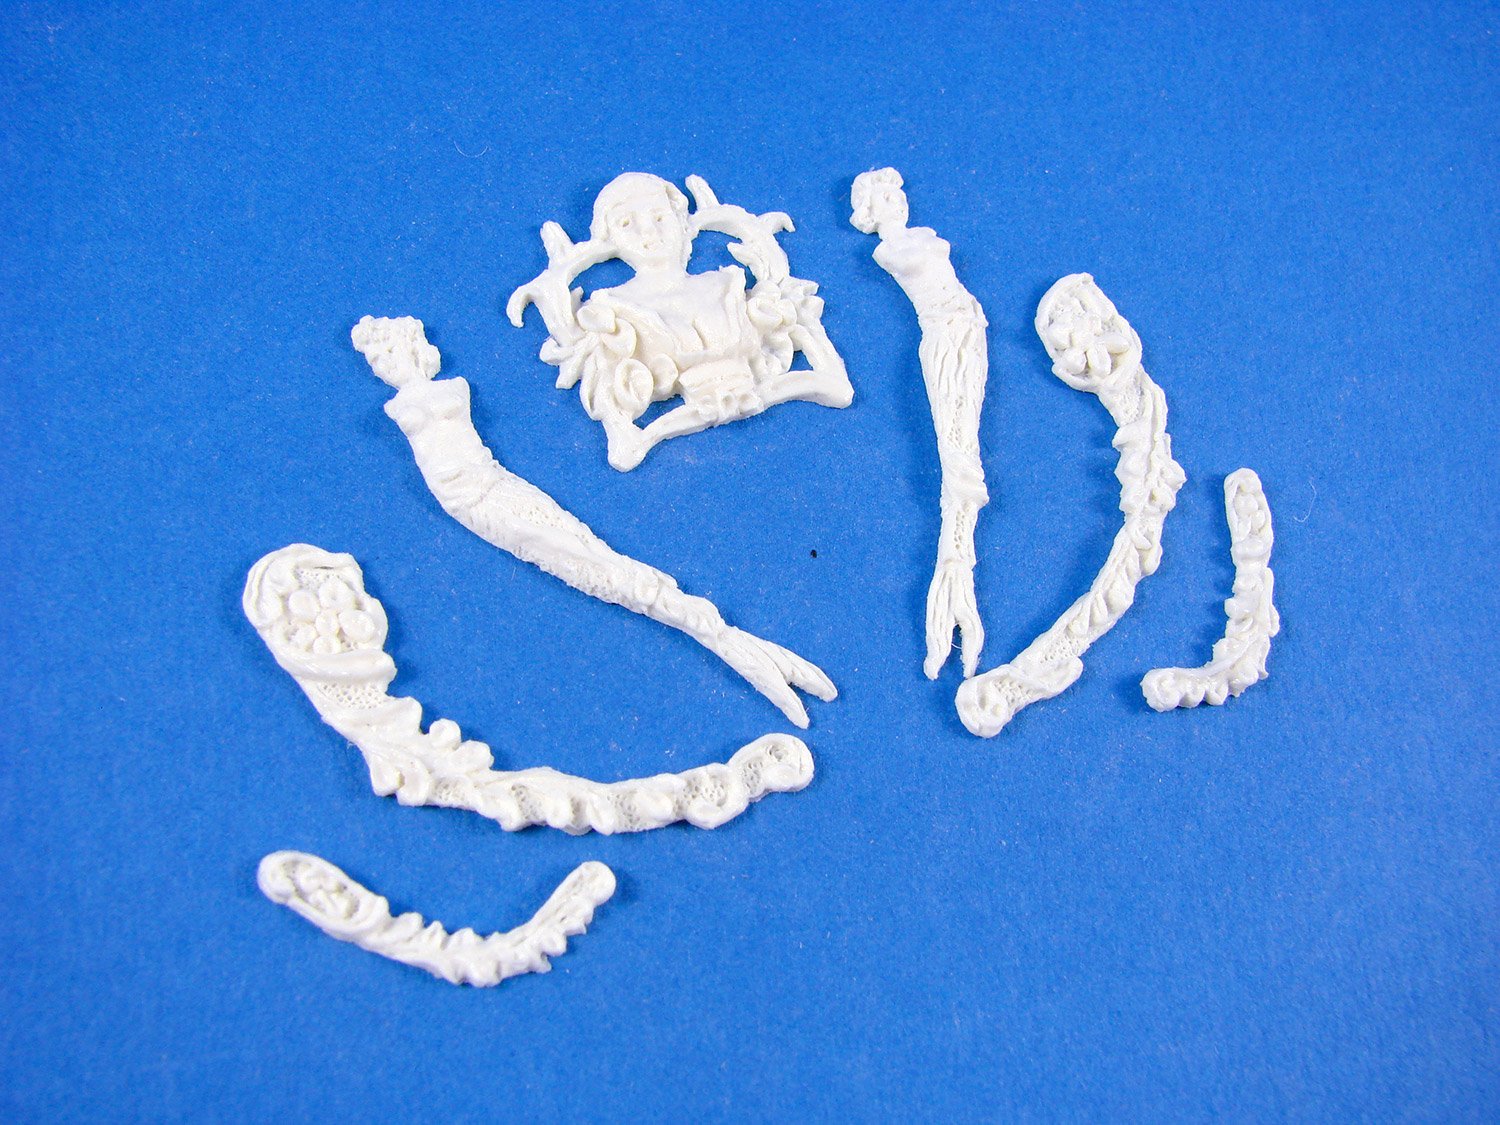
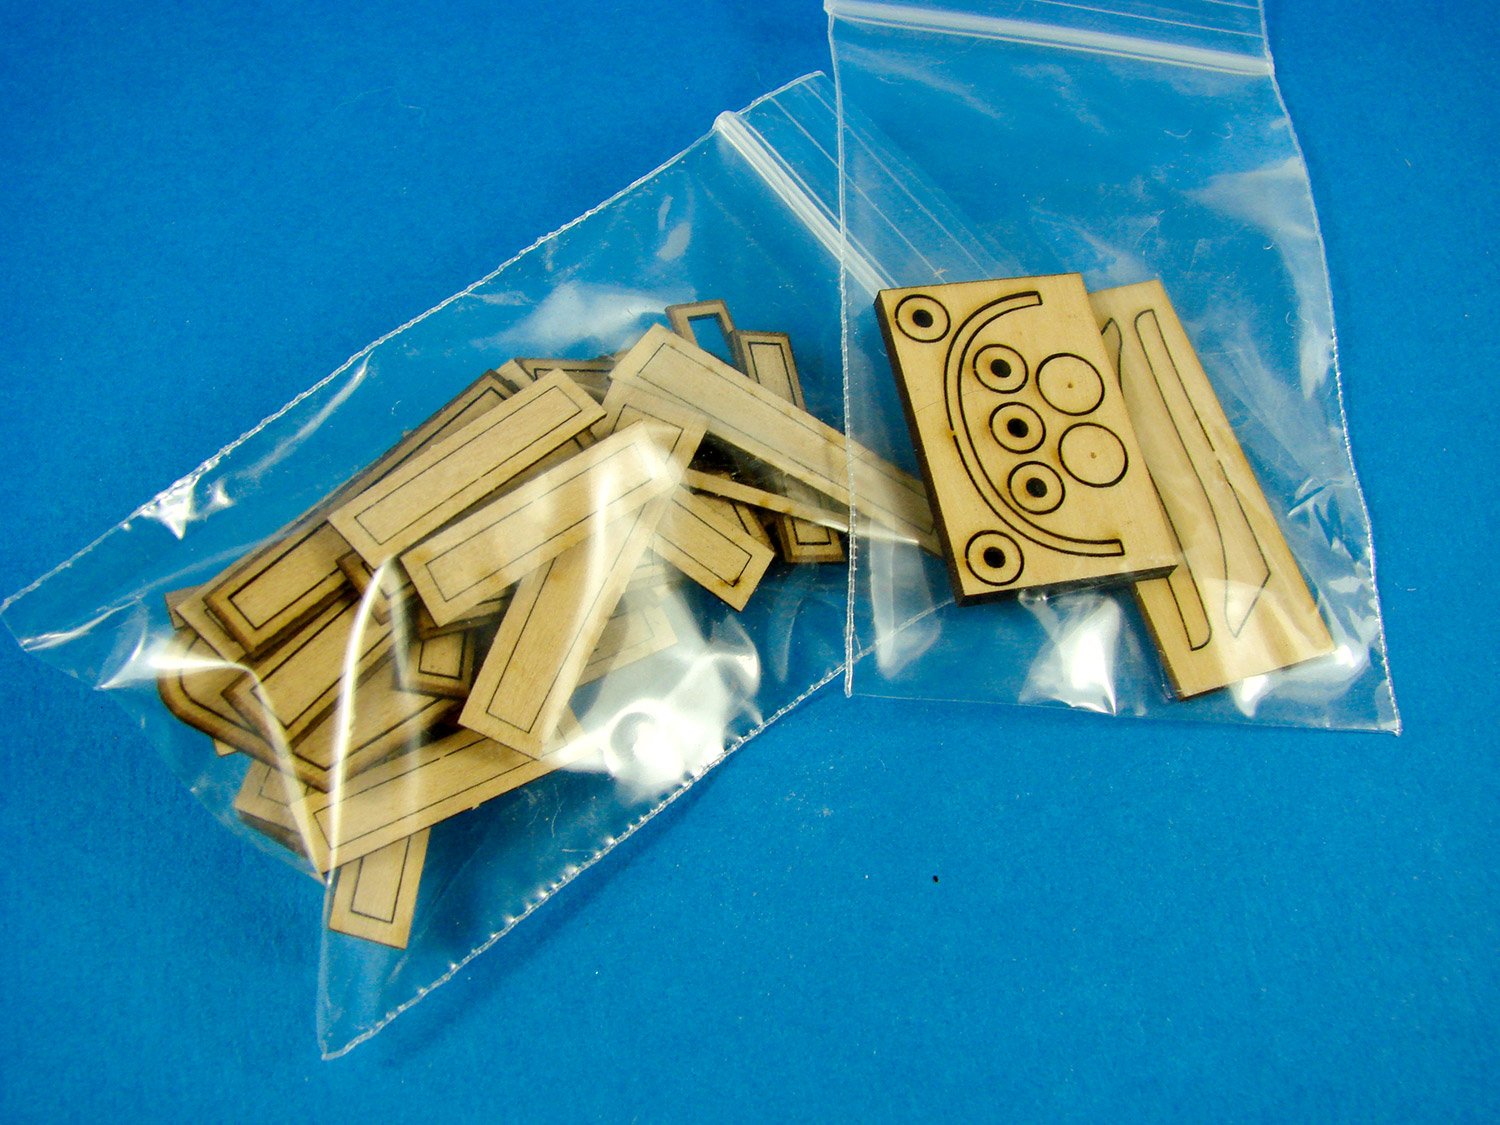
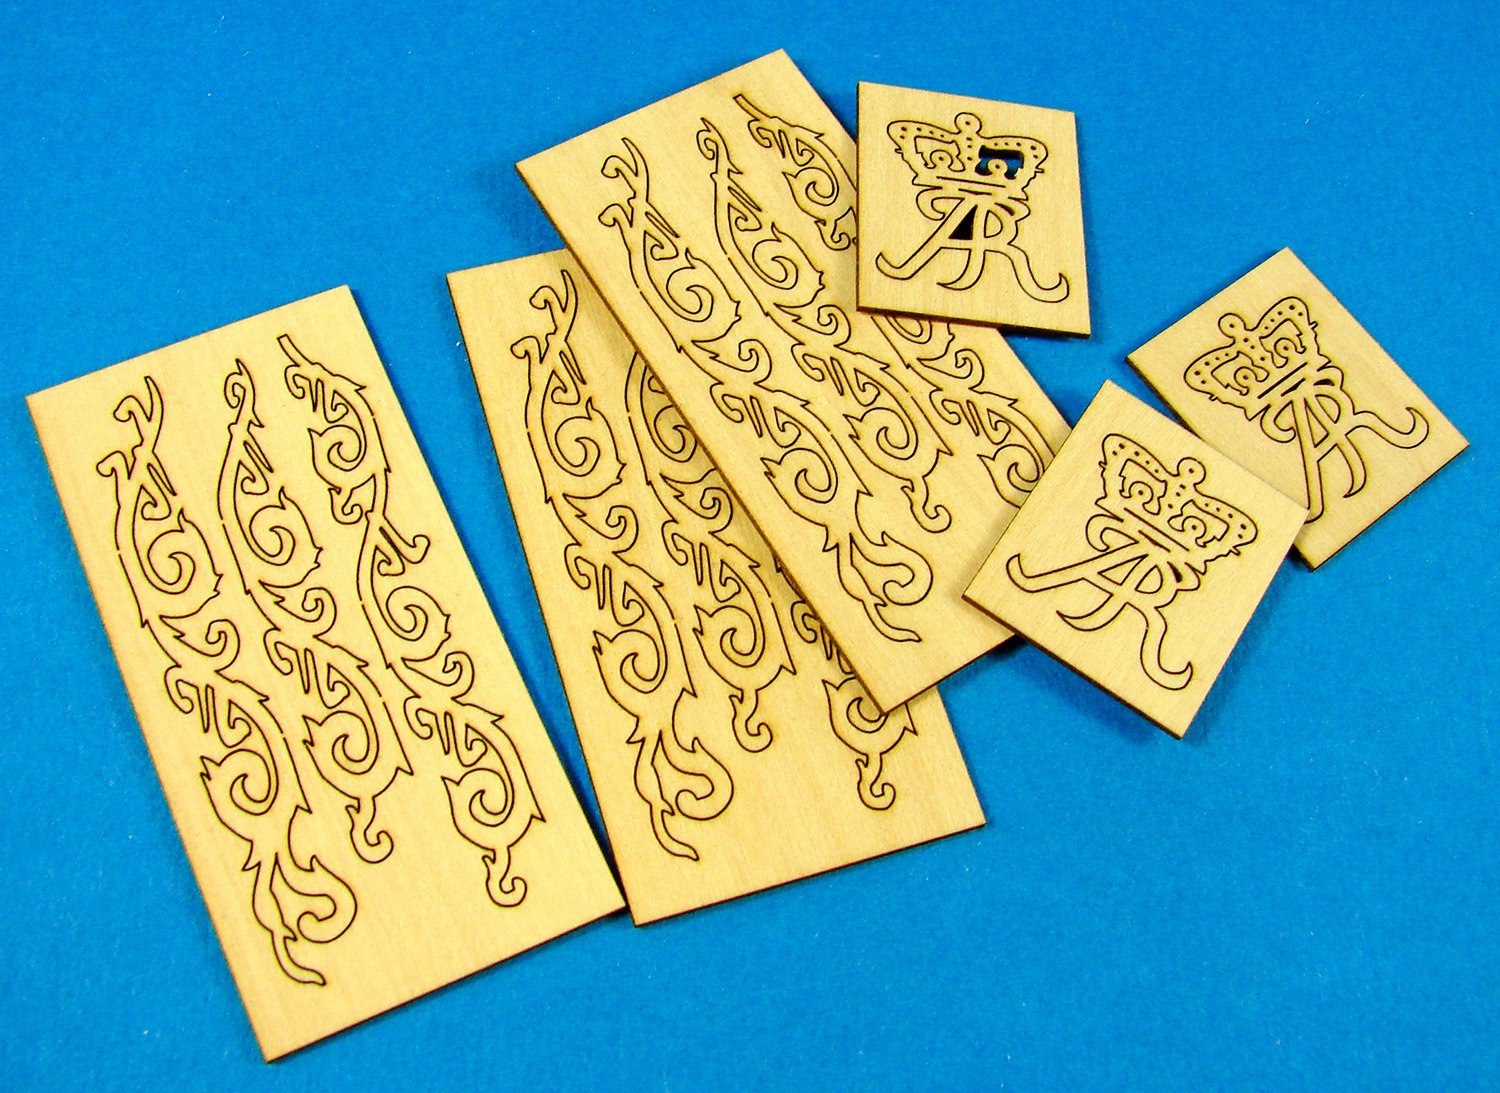
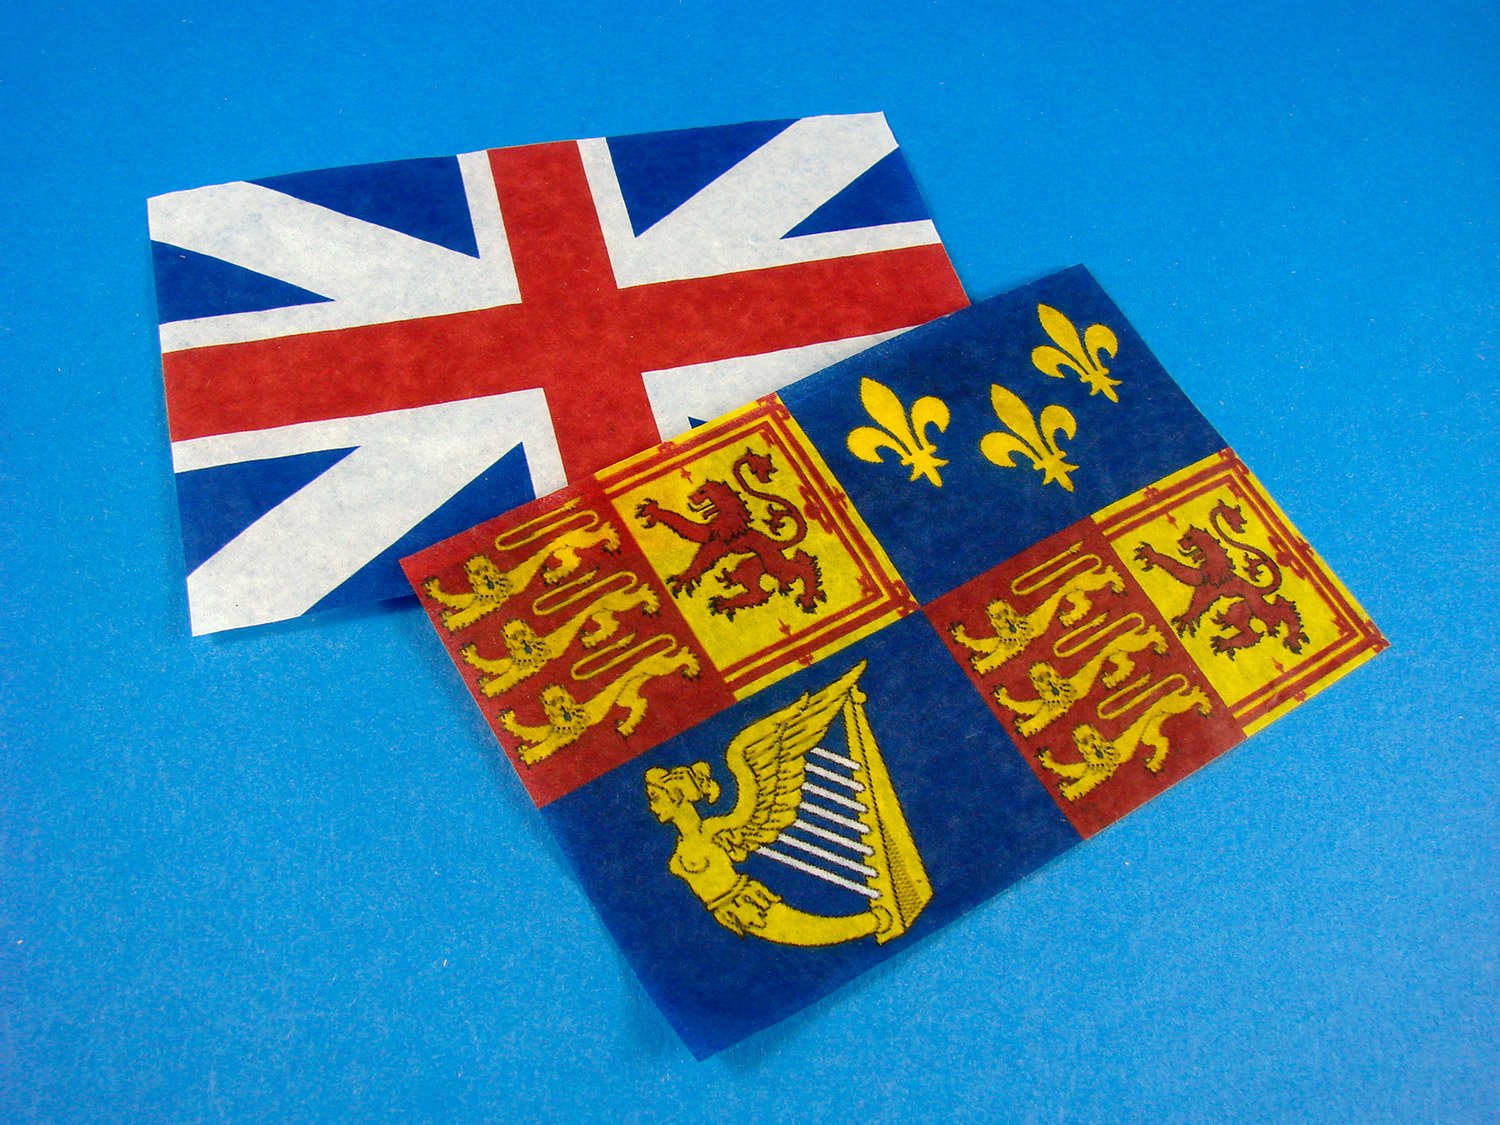
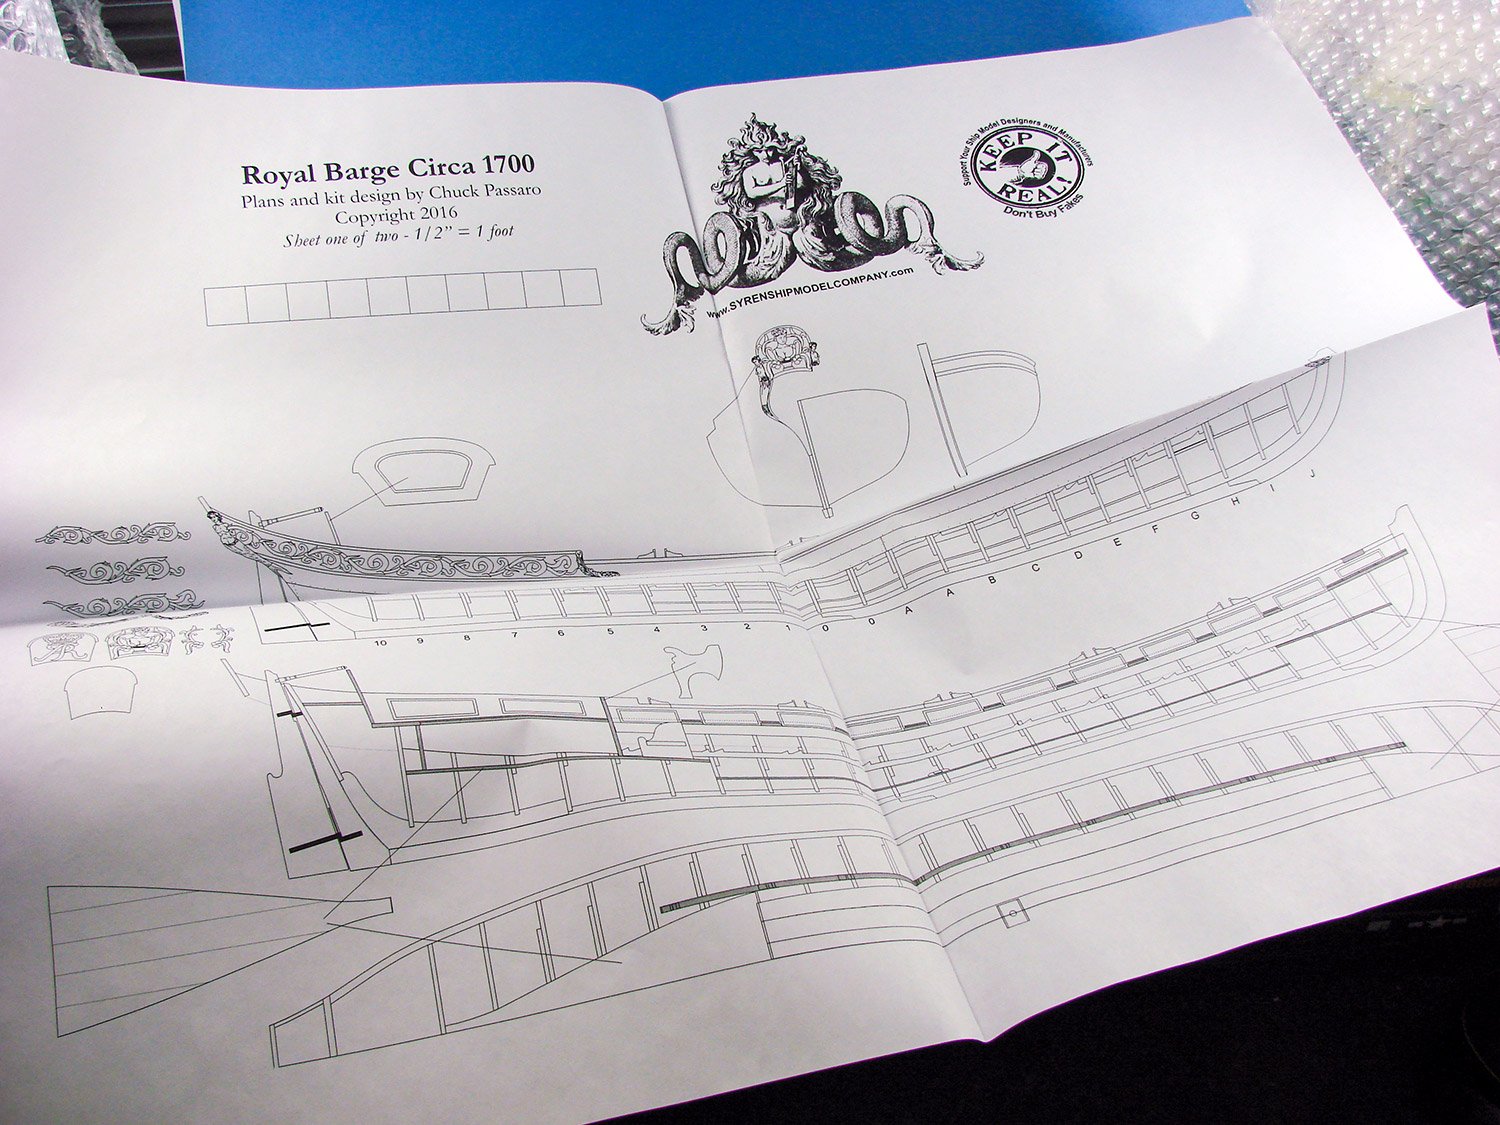
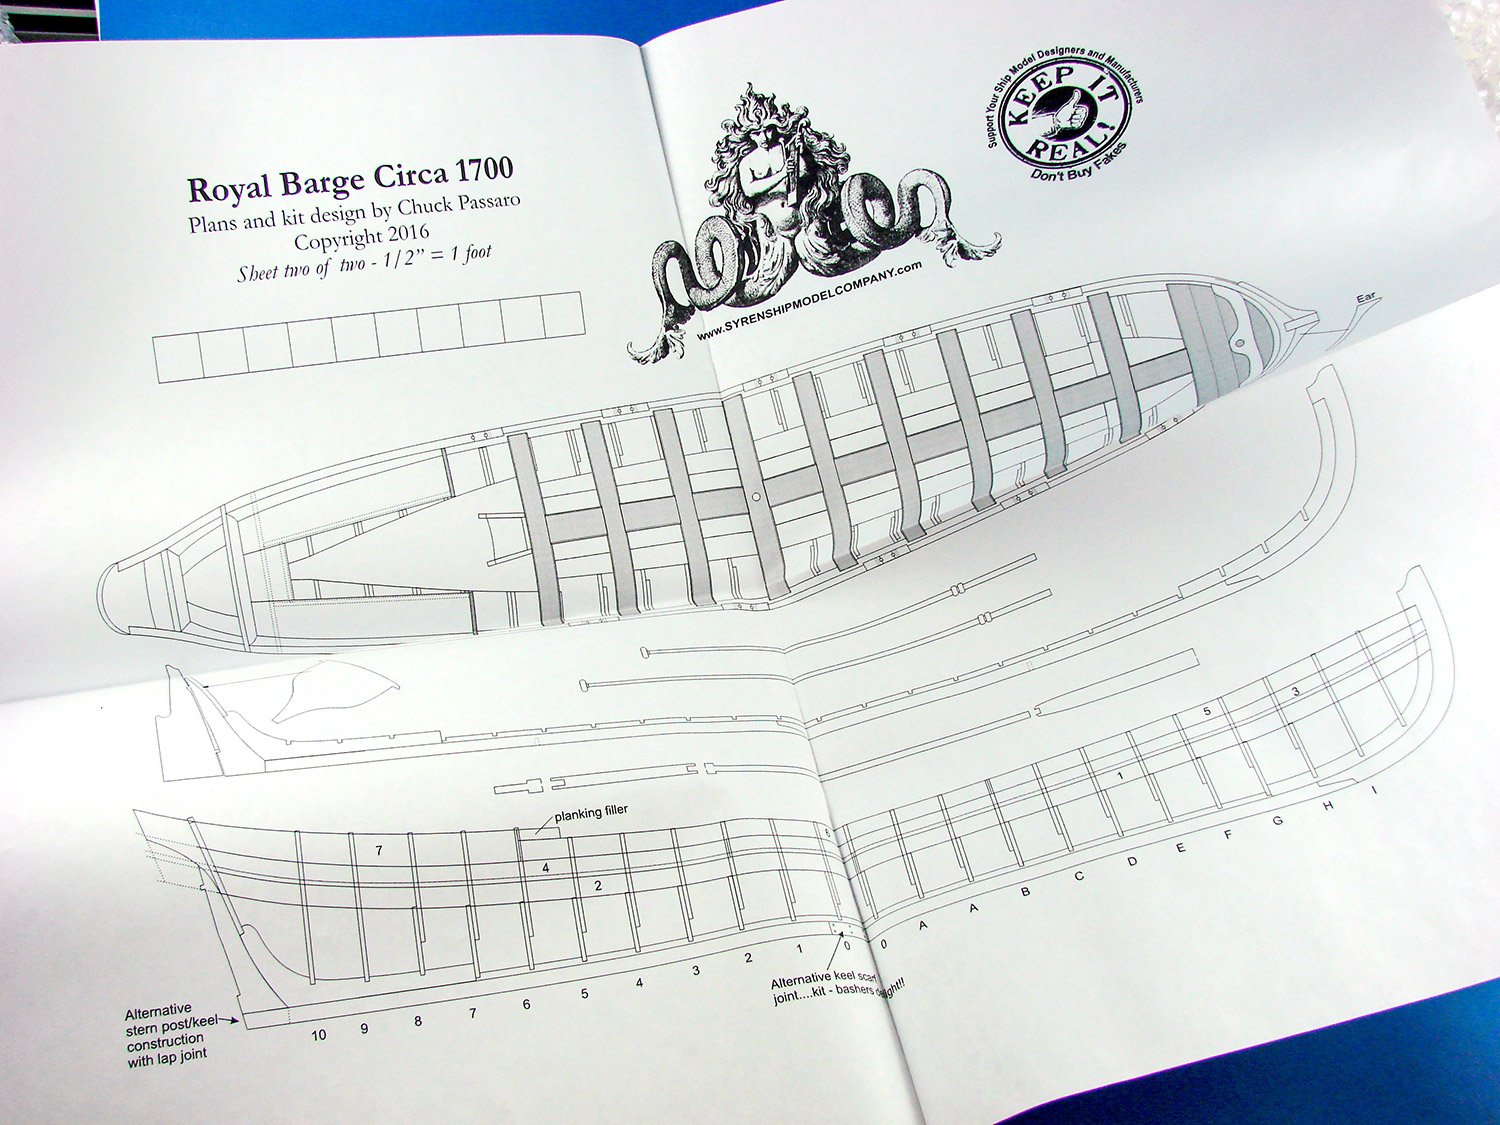
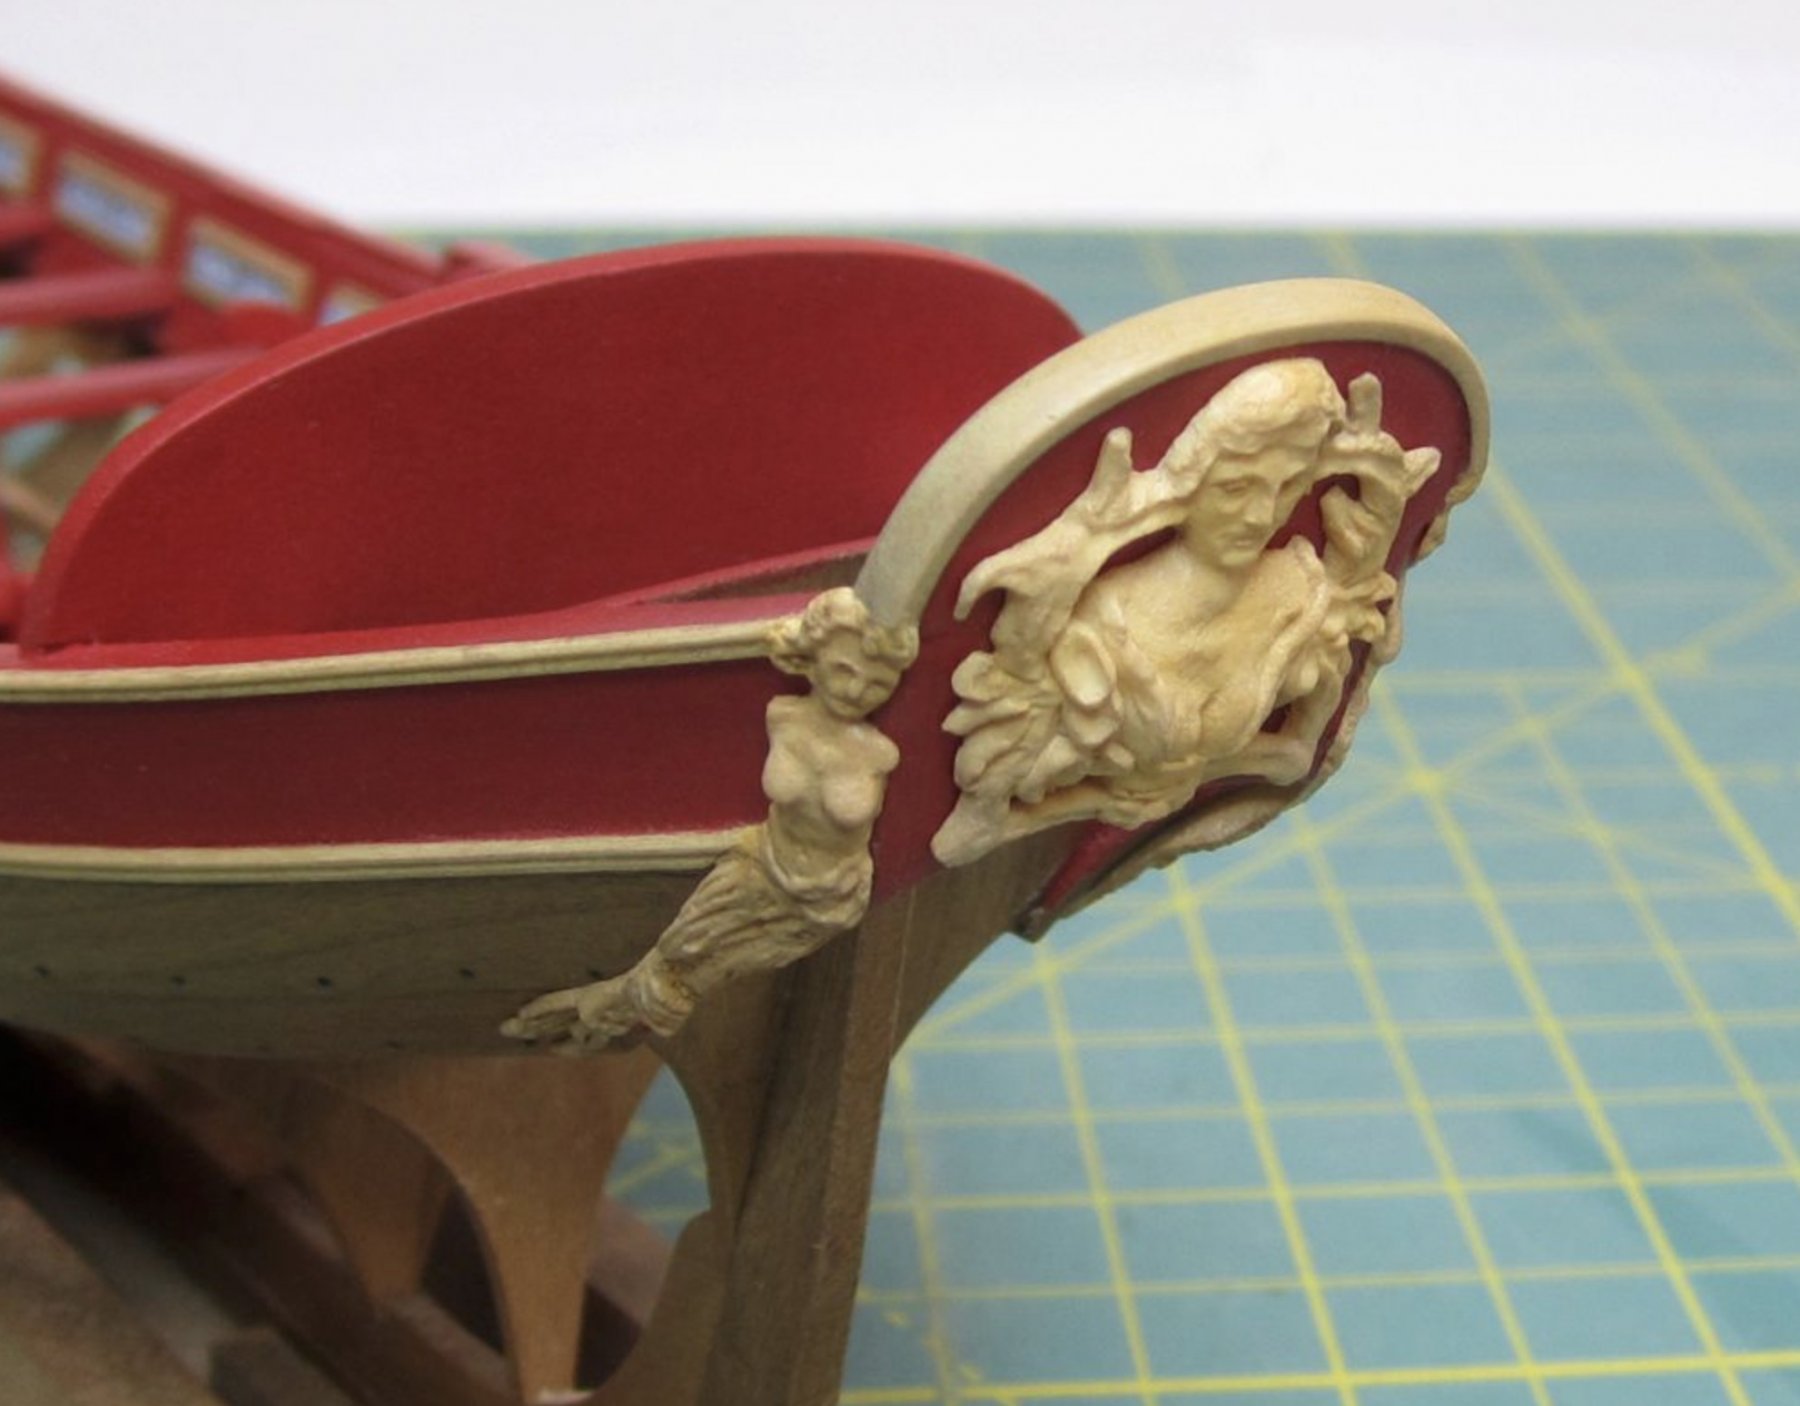
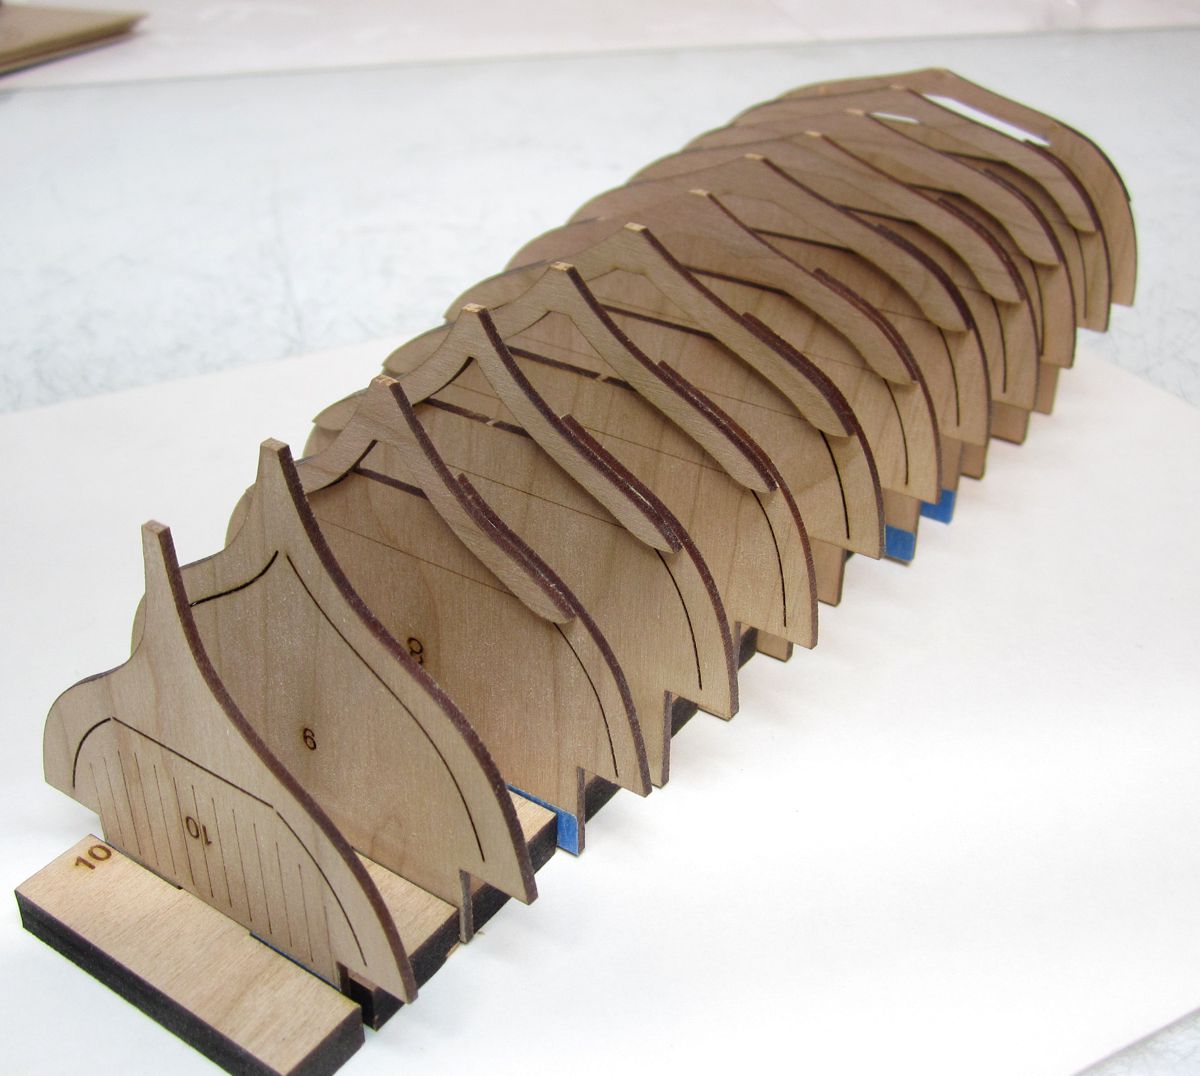
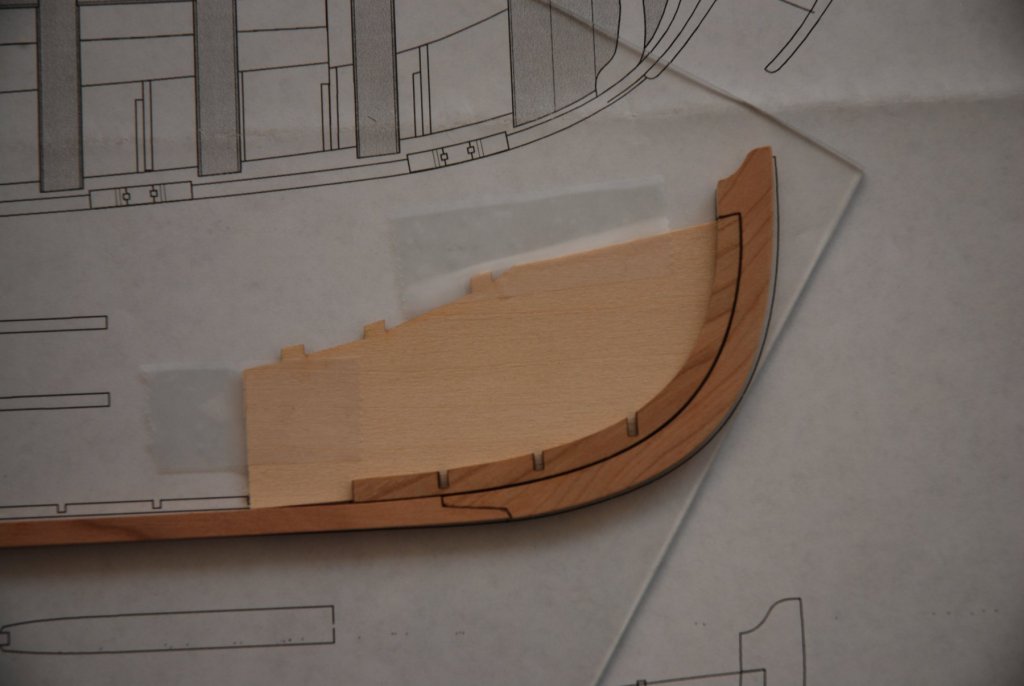
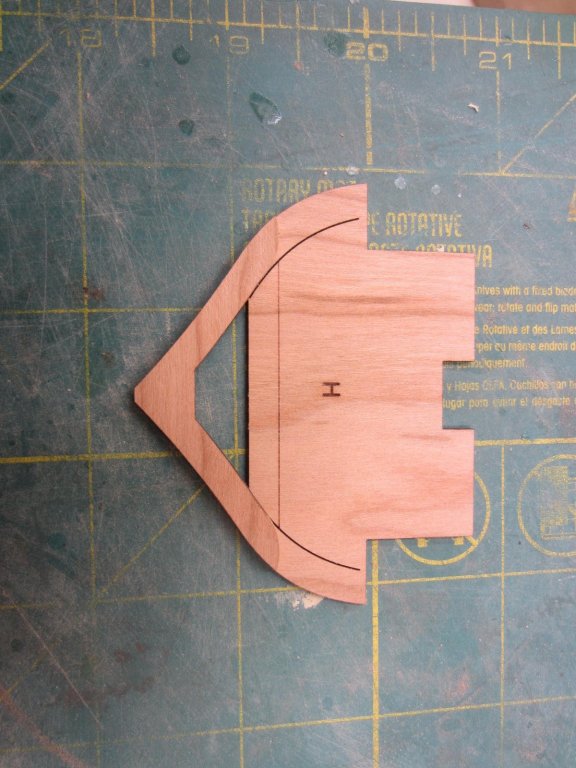
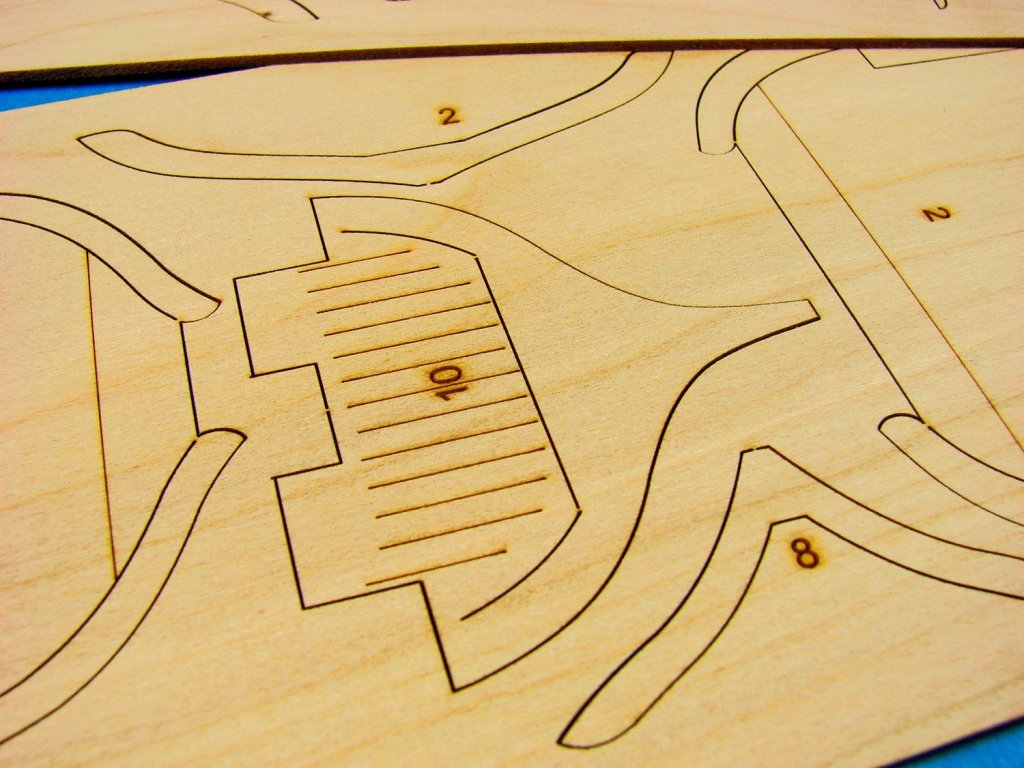
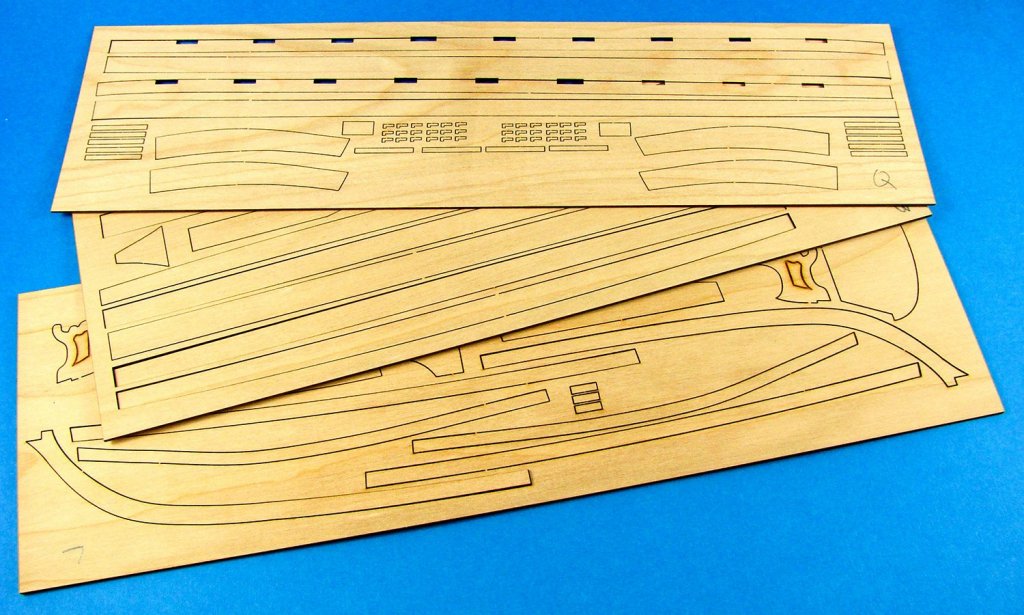
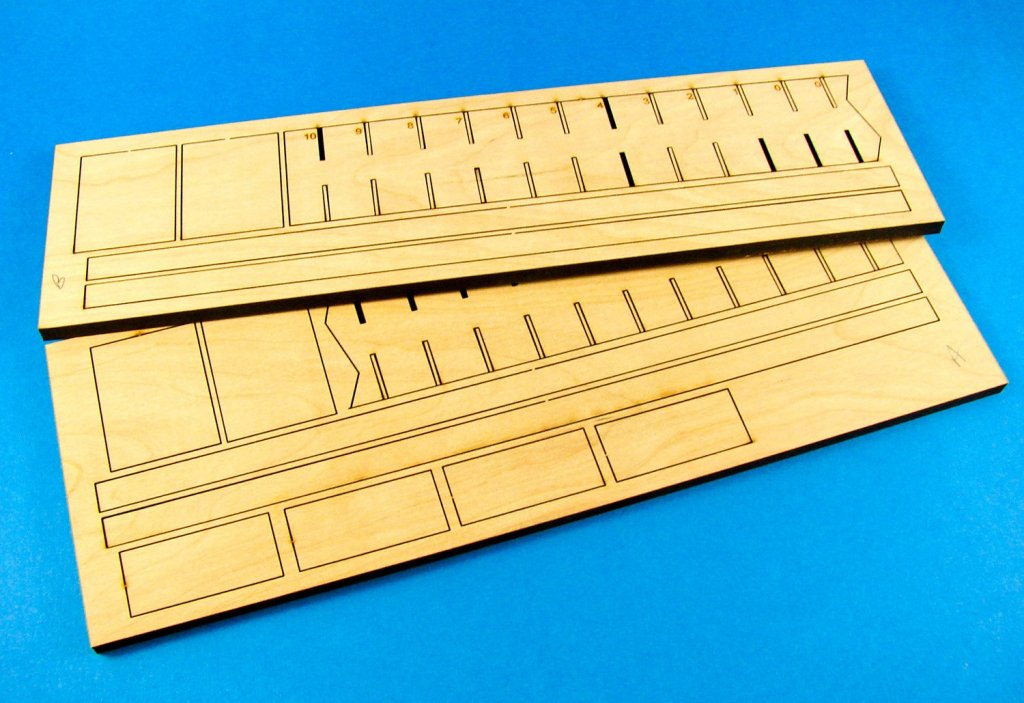
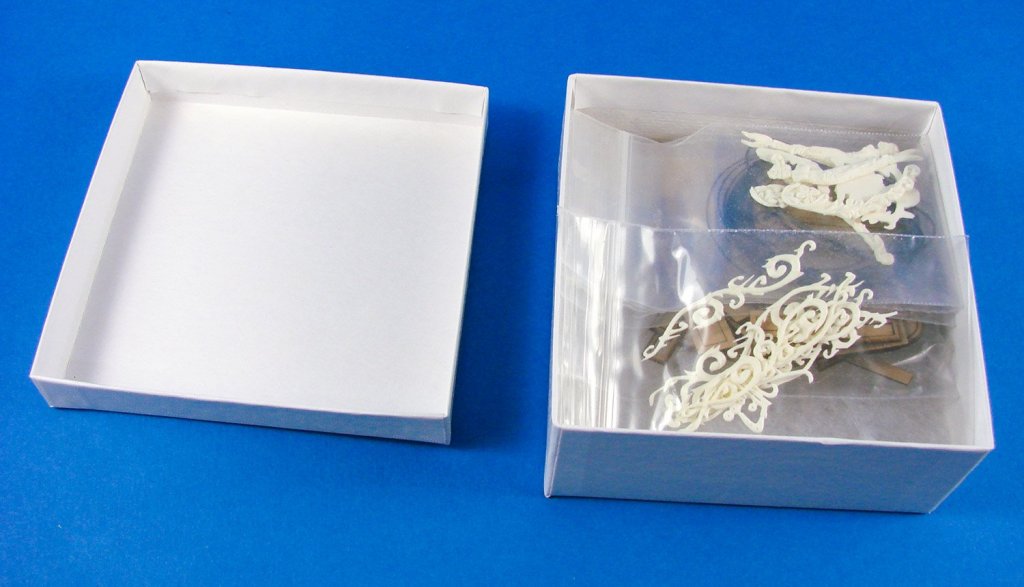
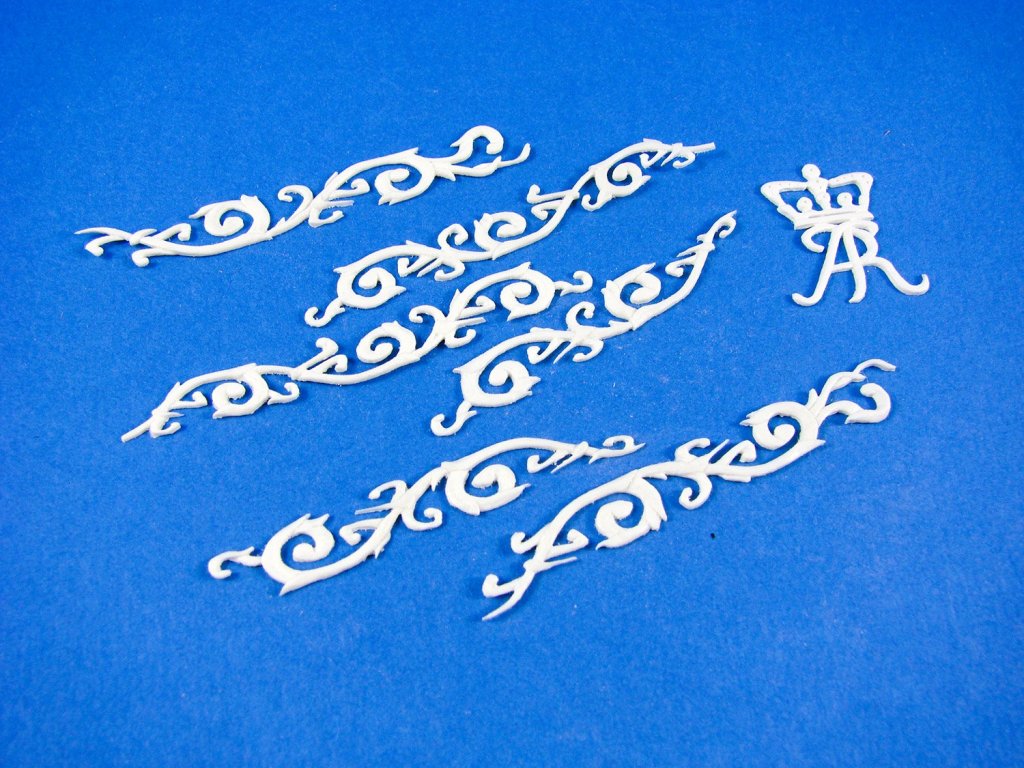
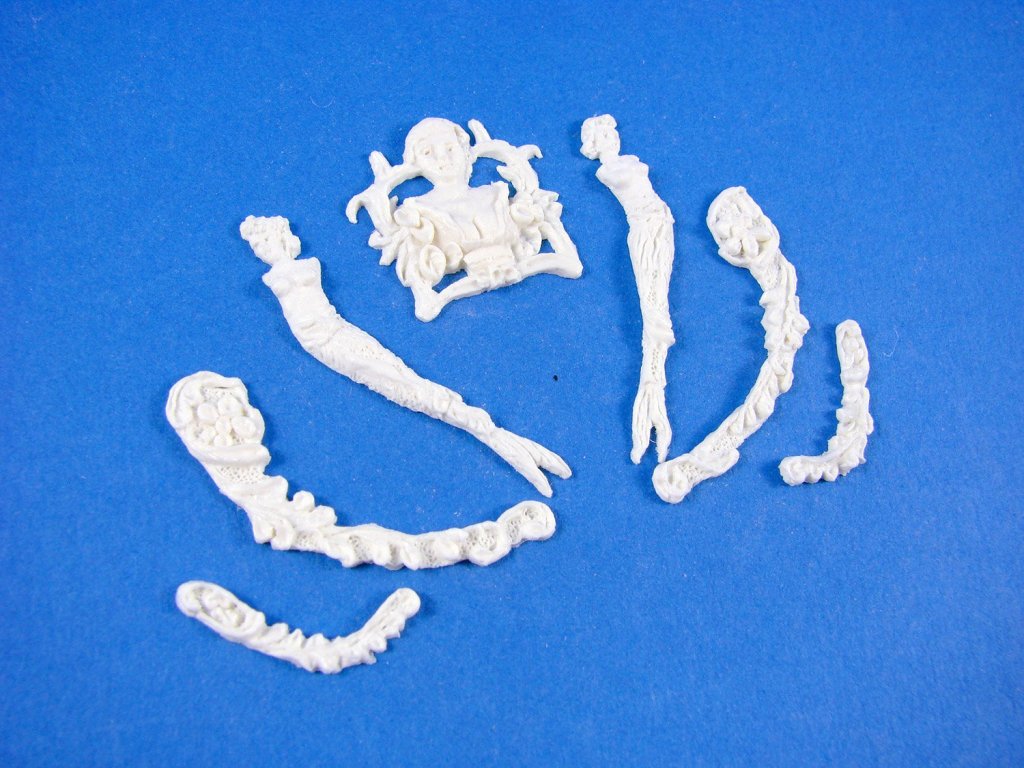
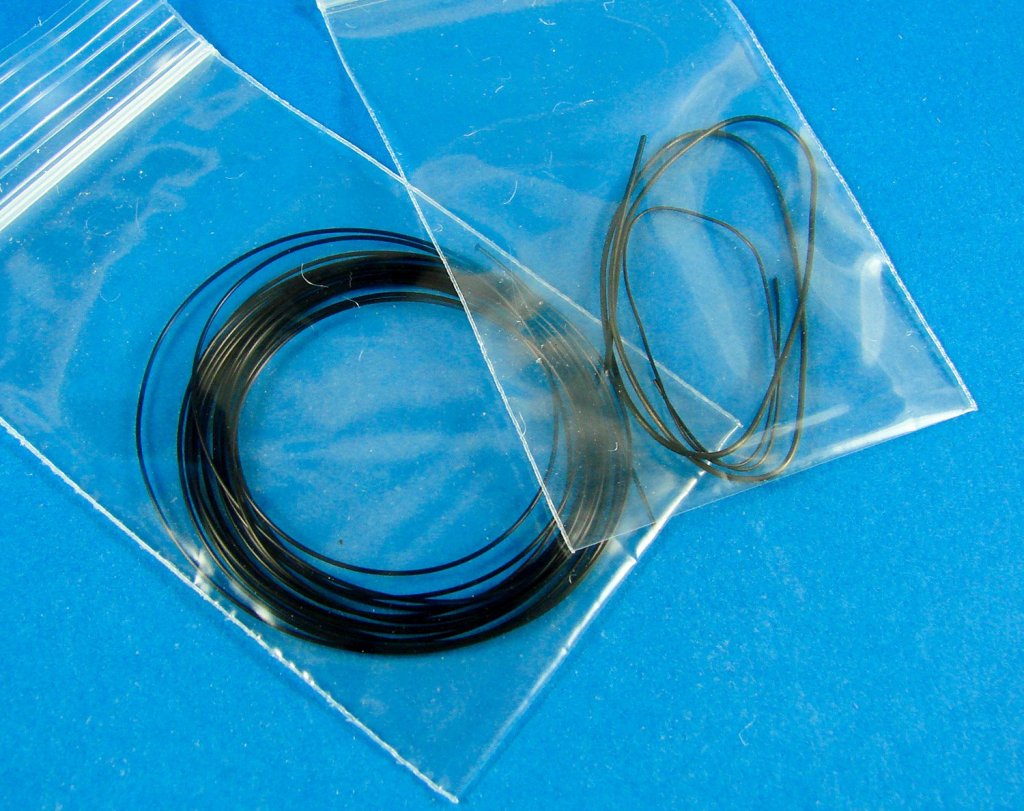
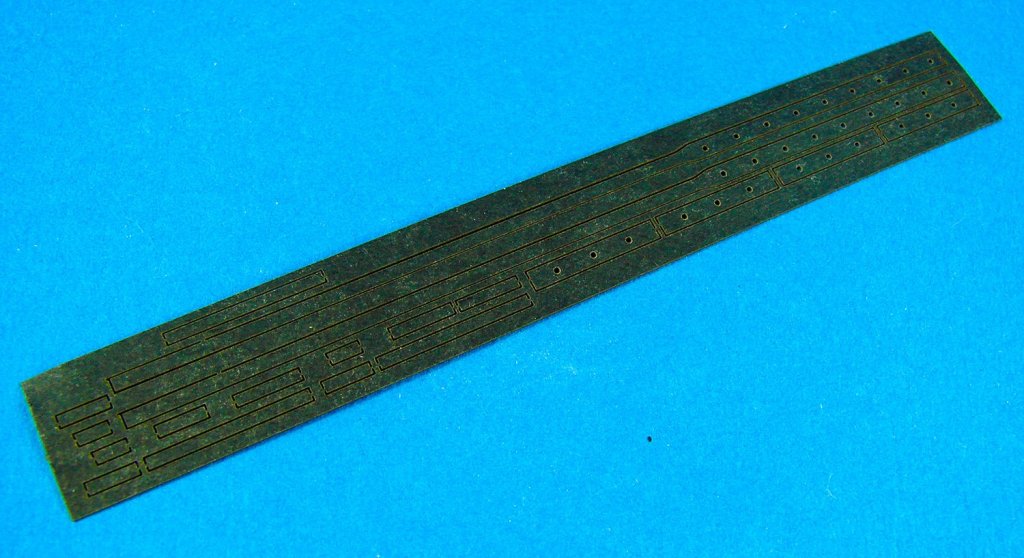
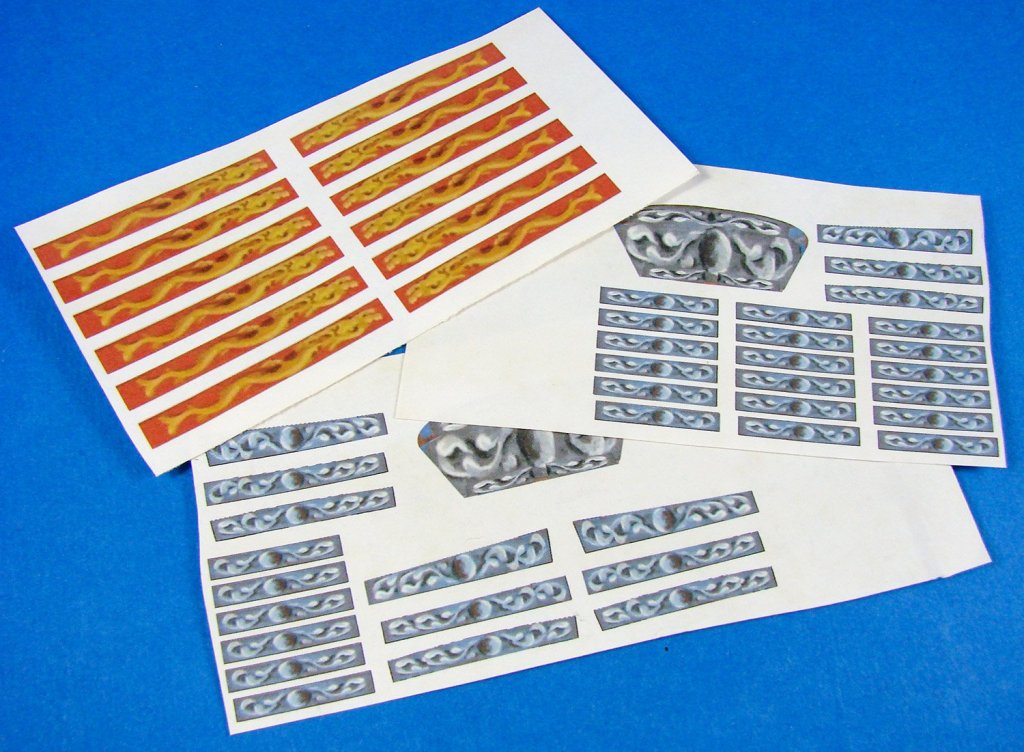
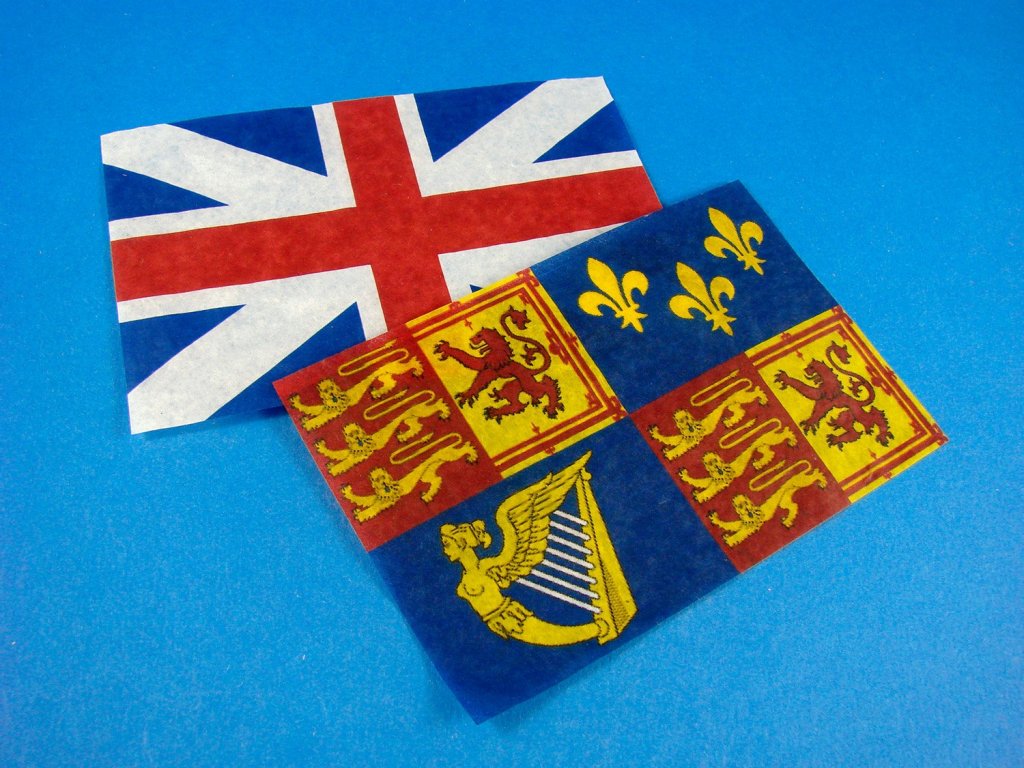
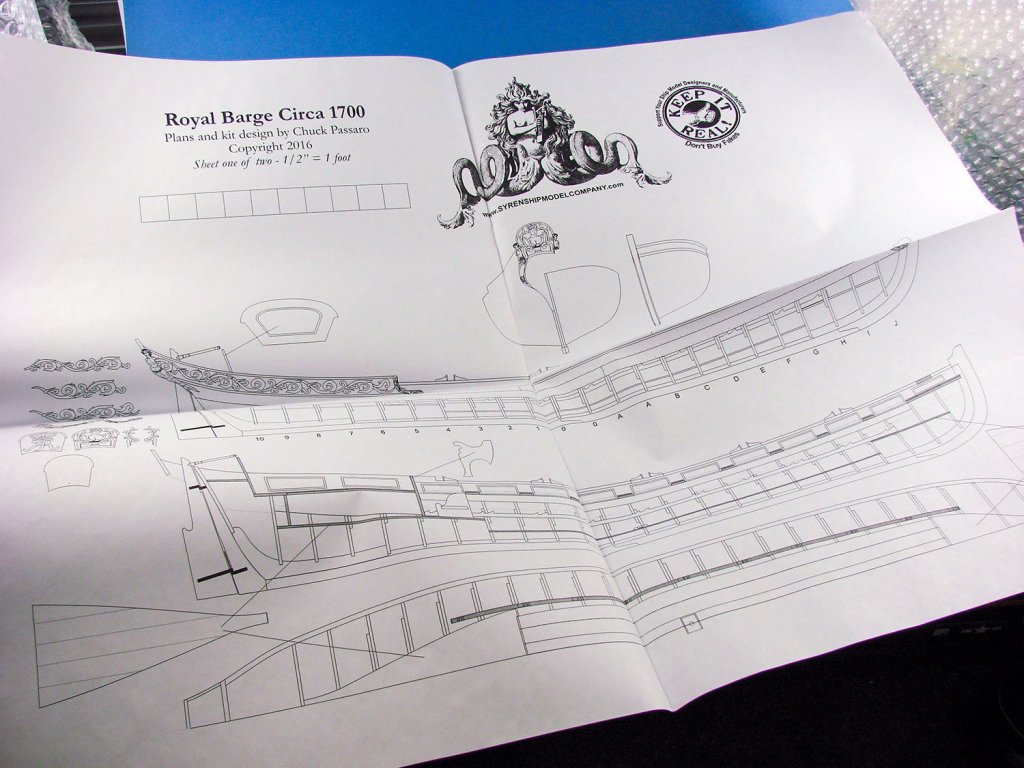
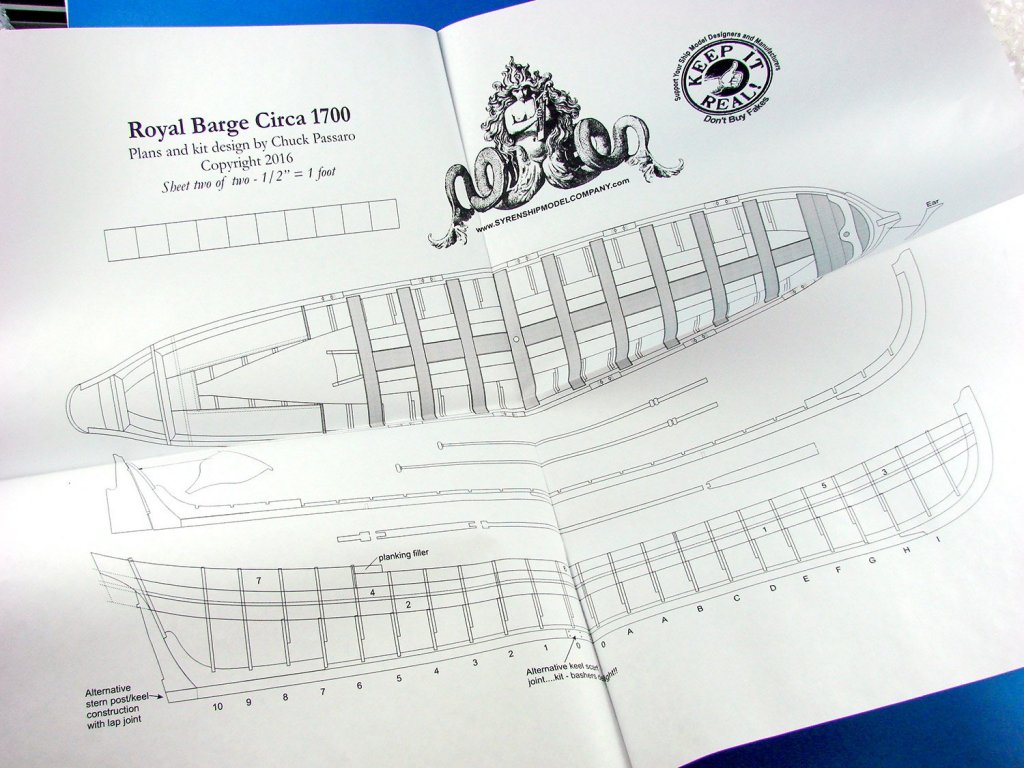
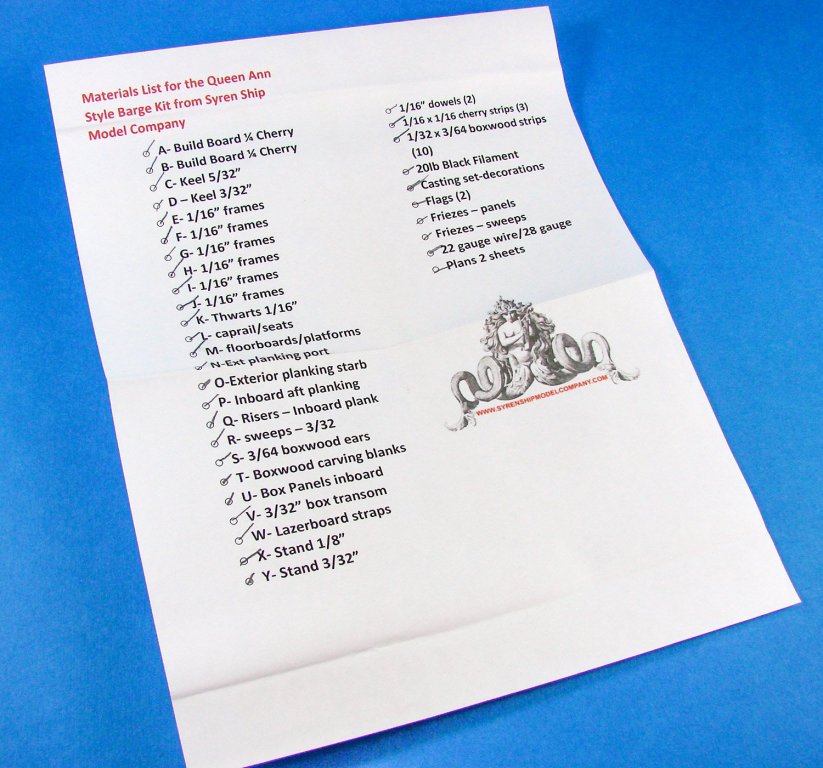
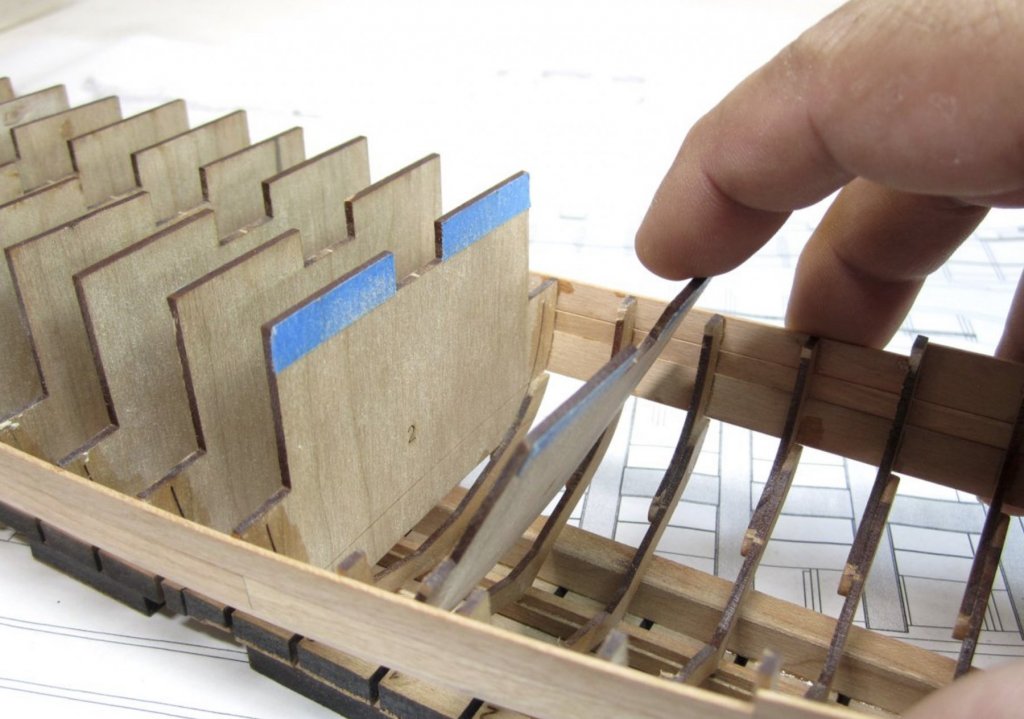
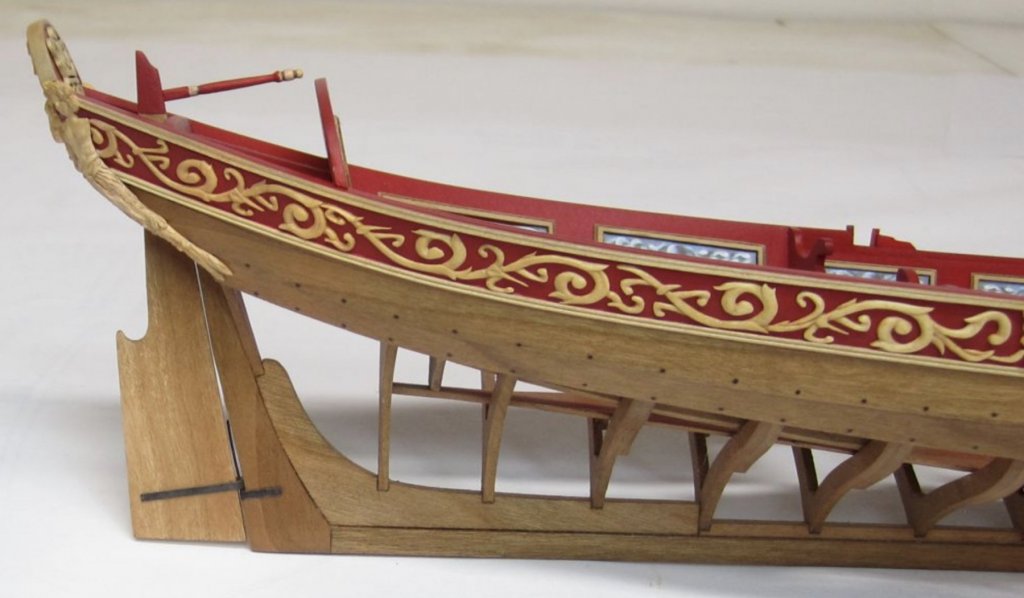
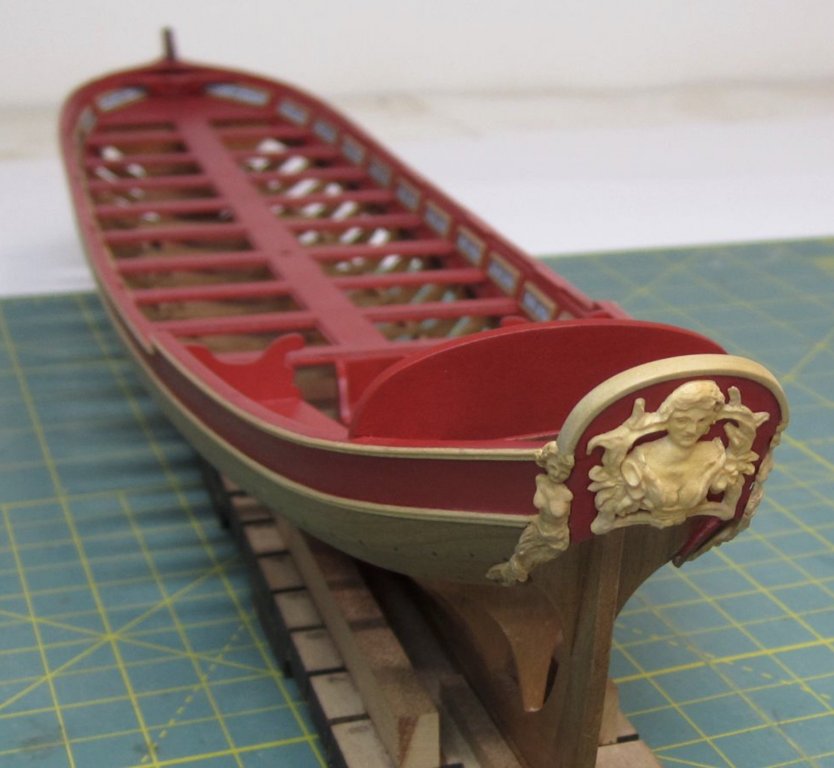
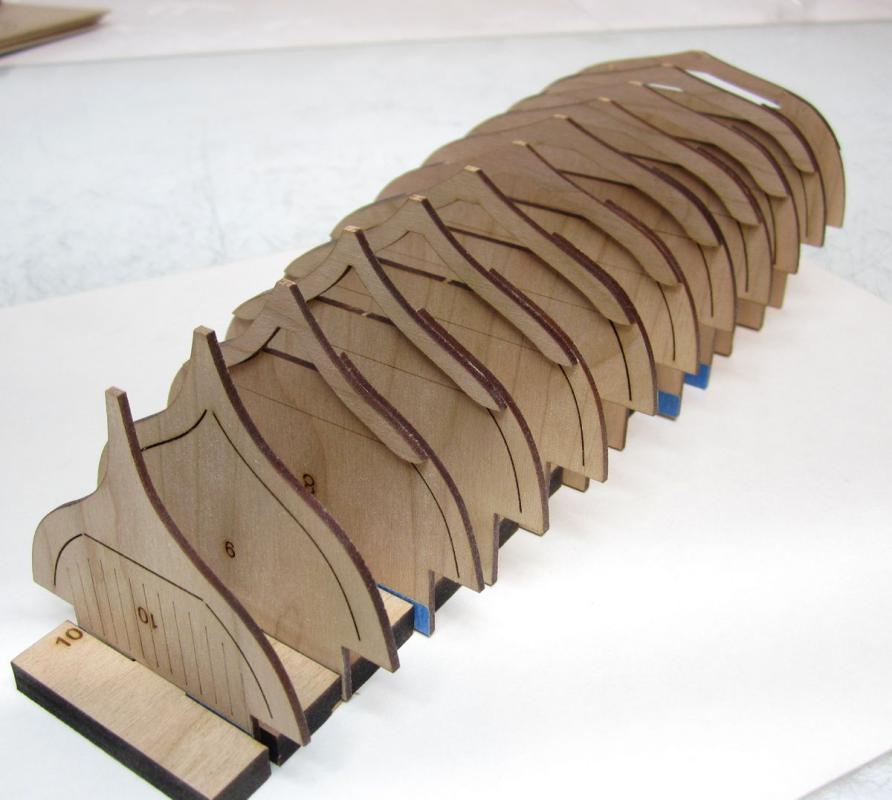
 1/2” Scale Queen Anne Style Royal Barge 1705 Syren Ship Model Company Catalogue # SKU QABK01 Available from Syren Ship Model Company for $225.00 A royal barge is a ceremonial barge that is used by a monarch for processions and transport on a body of water. Royal barges are currently used in monarchies such as the United Kingdom, Sweden and Thailand. Traditionally the use of royal barges was of high importance in southeast Asian monarchies such as Siam, Burma, Brunei, Riau and Cambodia. The River Thames in London was a regular thoroughfare for the Sovereign until the middle of the 19th century, on state occasions or between the Royal Palaces of Windsor, Westminster, Hampton Court, Greenwich and the Tower of London. In the UK, there is currently no State Barge in active service, but until 2017 the Royal Nore, owned and maintained by the Port of London Authority, was used whenever a member of the Royal Family travelled on the river Thames for an official engagement. Royal barges are typically elegant in style, and those built in the period of Queen Anne were still striking, despite their relative simplicity in relation to other vessels of the same stature. Resplendent in ornate carvings and decorative panels, these barges provided a comfortable and stylish method for the monarch to move between their residences and their courts. Edit courtesy of Wikipedia The kit This is my first experience of dealing with Syren Ship Model Company, and of course, the Royal Barge kit is designed and produced by them. My kit took around 9 days to reach UK shores from New Jersey, via USPS and Royal Mail. Of course, I got hit by the obligatory import duty, but it wasn’t too bad. After paying their ransom, I picked up the package a couple of days ago and now spent some time flicking through the contents. The kit itself is packaged into an extremely sturdy corrugated cardboard box with tabs that release so you can flip up the lid. With the lid open, the plans are the first thing seen, and these are gently curved over the components underneath, along with a contents checklist which has been manually marked to show the contents are indeed in there. A nice system that gives peace of mind to the buyer. I’ll look at the plans further down the review. With these lifted out, some very soft packing foam is included so stop the contents rattling about. Inside the box, there are two robust clear sleeves which contain all of the timber planks, three narrower sleeves with strip and dowel, a card box with resin, wood, wire and black fishing line, a length of thick black cartridge paper with laser-cut elements, a packet with friezes for the interior of the barge plus some decorations for the sweeps, and two flags. Onto the sheet timber. Syren has produced all of the main parts from a superbly milled cherry wood, and the finish is silky smooth. The quality of the wood is also amongst some of the best I’ve seen since I started in this hobby almost 20yrs ago. The colour, which I hope I’ve captured in most of my photos, is a very pale golden colour which looks quite muted. The grain, as you would expect, is very fine. Laser-cutting quality is also on a par with the best kits I’ve seen, with almost zero heat effect, and small tags that only just hold the parts in position. Edge scorching is also very minimal, and it’ll only take a few swipes with some sandpaper to remove them totally. You will of course need to do that thoroughly as this model is only partially planked, as it the style of barge models of the era Circa 1700. Cherry was also chosen because it best replicates the colour of the wood used on these models and allows the kit to be affordable too. Also among the thicker sheets of cherry wood is a two-part building jig which needs to be assembled. The zig-zag edging of this will make the job easier. Each frame slot is also numbered so there’s less chance of human error. When the model is later released from this jig, it will be modified to accept the keel for the remaining construction, using more supplied parts. This is probably the time to explain roughly how this model actually does assemble, and I’ll add a few images here to illustrate things. Each of the frames has an infill piece still attached, and this is what will slot into the building jig. When the outside planks are added, this can later be carefully cut away to reveal the interior of the barge which then needs to be fitted out. Before slotting those frames to the jig though, you will need to add the floor frames. The position for these is finely engraved onto the waste material within each frame. You can use a straight edge along this and then fit the floor frame up to this mark. This way there’s no reason to use pencil on the parts faces themselves. This technique is superbly illustrated here by Rusty, in his MSW build log: https://modelshipworld.com/index.php?/topic/17889-queen-anne-barge-by-rustyj-syren-ship-model-124/ Looking at the timber, you can see that just about every shape is either cut with laser or engraved for reference. All planks for this are supplied spiled, need bevelling from the laser-etched line. These planks are supplied in suitably thin sheets of cherry, and for extra clarity, each sheet is labelled PORT or STARBOARD. The keel is built up from scarfed sections, as the real thing would be. Very impressive. The rabbet is created my inserting thinner keel parts on the inner edge of the keel, creating a recess into which the limited planking will sit. When it comes to the thwarts, these are also laser-engraved to create the stepped edges to them. Also included with the laser-cut parts are the mounting pedestals (you just need a nice piece of polished/varnished timber to use as plinth), and also the sweep (oar) racks so those can be decoratively mounted on the plinth, adjacent to the barge. Now, this model has some ornate and intricate carvings adorning it and these are provided as laser-cut items for which you can try your hand at carving. Does that sound scary? If so, don’t worry because also available for this kit is a set of resin-cast carvings which are more or less all ready to be attached and provided as an upgrade set which you can buy either at the same time as the kit, or later if you struggle with the boxwood blanks. The resin parts are supplied in a small white box to protect them. With this sample, they were supplied directly in that small box that sits within the main package, and the extremely delicate filigree parts were packed into two zip-lock wallets. Very little clean-up is required with these, and to give them a nice natural appearance, weathering powders are suggested. You can also airbrush them and apply an enamel-based wash which would bring out the details superbly. It’s all a matter of preference. These carvings include the scrollwork for the port and starboard side, the quarter-based figurines and the Royal monograph. They really are superb to look at. Other parts were included inside this box. These include some extra boxwood parts for things like the internal panelling that the friezes will sit within. Extras are included in case you screw up. There is a length of wire and also some black 20lb fishing line that you will use to simulate the black nail heads on the planking. A length of resin-impregnated black card is also to be found in this kit, and like the timber, all parts are laser-cut. Parts here are provided for the keel banding and rudder straps etc. Three sheets of colour-printed paper are included that hold the parts for the friezes and the ornate decorations for the sweeps. These will need to be carefully cut out with a fresh blade and then attached to the model using a very dilute PVA or children’s glue stick. Two period flags are also included, printed on thin tissue paper and with good colour definition. Note the union flag, minus the diagonal red cross, which is of course accurate for 1705. I’m presuming the quadrant flag is either of the period or even related to the monarch of the period. It should be quite easy to make these drape realistically due to the thinness of the paper. Certainly easier than some of the materials some companies use for their flags. Two large plan sheets are included, clearly depicting construction in clean line drawings, and of course, the images are at full scale for any measurements you need to take. Please note that no instruction manual is included with this release as it helps to cut down on price. It also helps reduce weight for shipping. There are three manuals for this, in full colour PDF format, and these can be downloaded from the Syren Ship Model Company’s website. These are extremely comprehensive and beautifully describe the whole build process, including hints and tips for your project. Conclusion I’m not usually the sort of guy who gets enthused by barges and narrow/longboats etc. but the sheer beauty and ingenuity of this kit appealed to me instantly and I followed the kit development here on MSW. The kit is just exquisite, with beautifully milled timber and laser-cut parts, printed materials etc. The construction process has been made as easy as possible at every stage of construction with such things as the laser-shaped thwarts and planks that have been spiled ready for you to shape. An amazing kit, intelligently designed, and with the very best in materials. Syren has this model on sale for $225.00 and I think that represents excellent value for money for what will give many hours of building pleasure and a real ornate stunner for the display shelf! My sincere thanks to Syren Ship Model Company for sending this kit out for review on Model Ship World. To purchase directly, click the link at the top of this article.
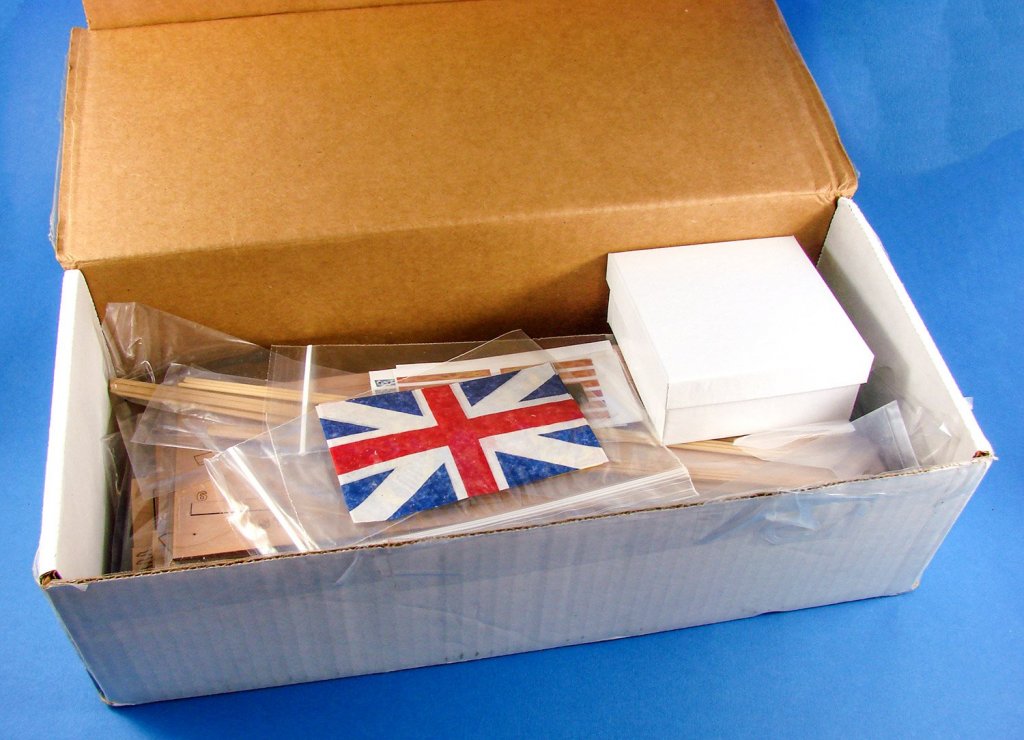


- 1 reply
-
- 9
-
-
- syren ship model
- queen anne barge
- (and 1 more)
-
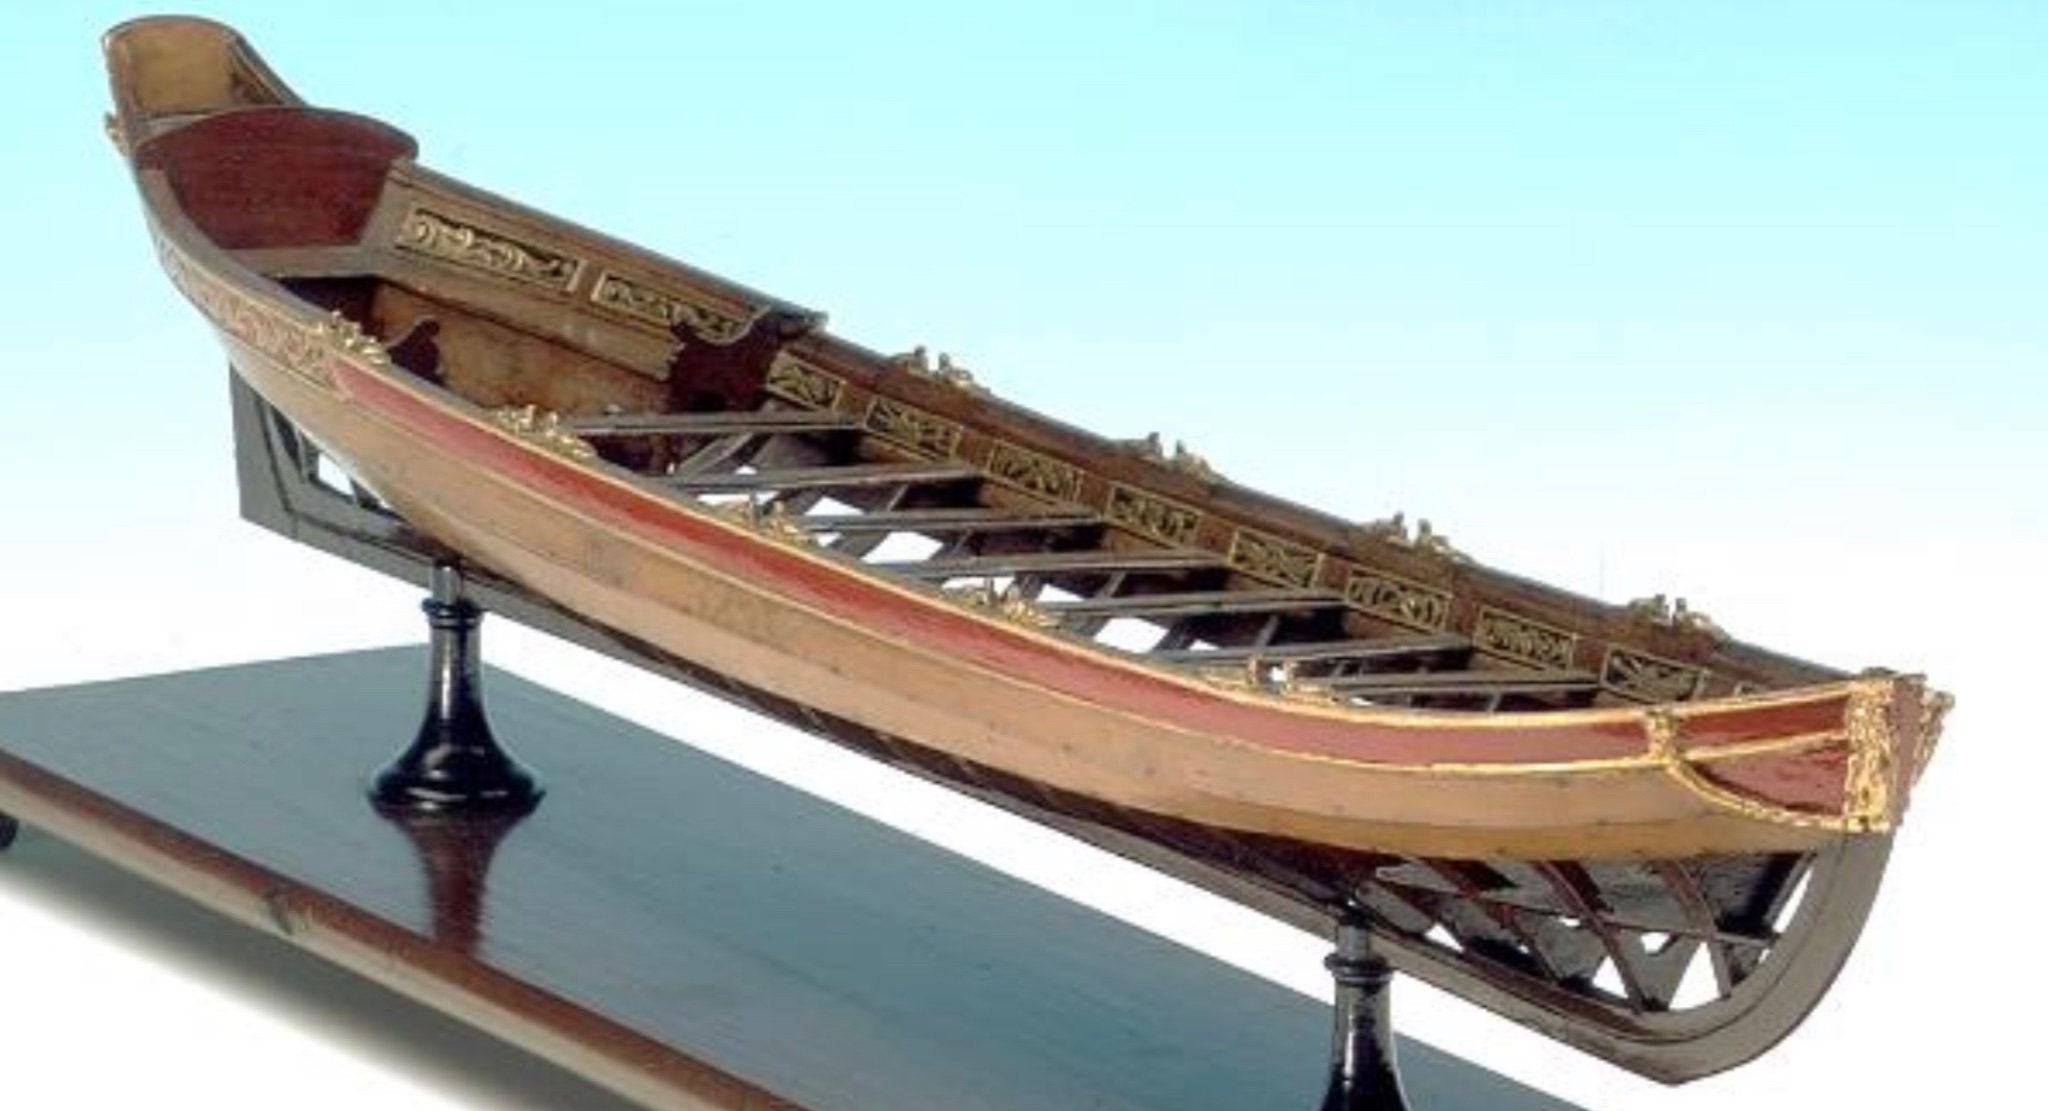
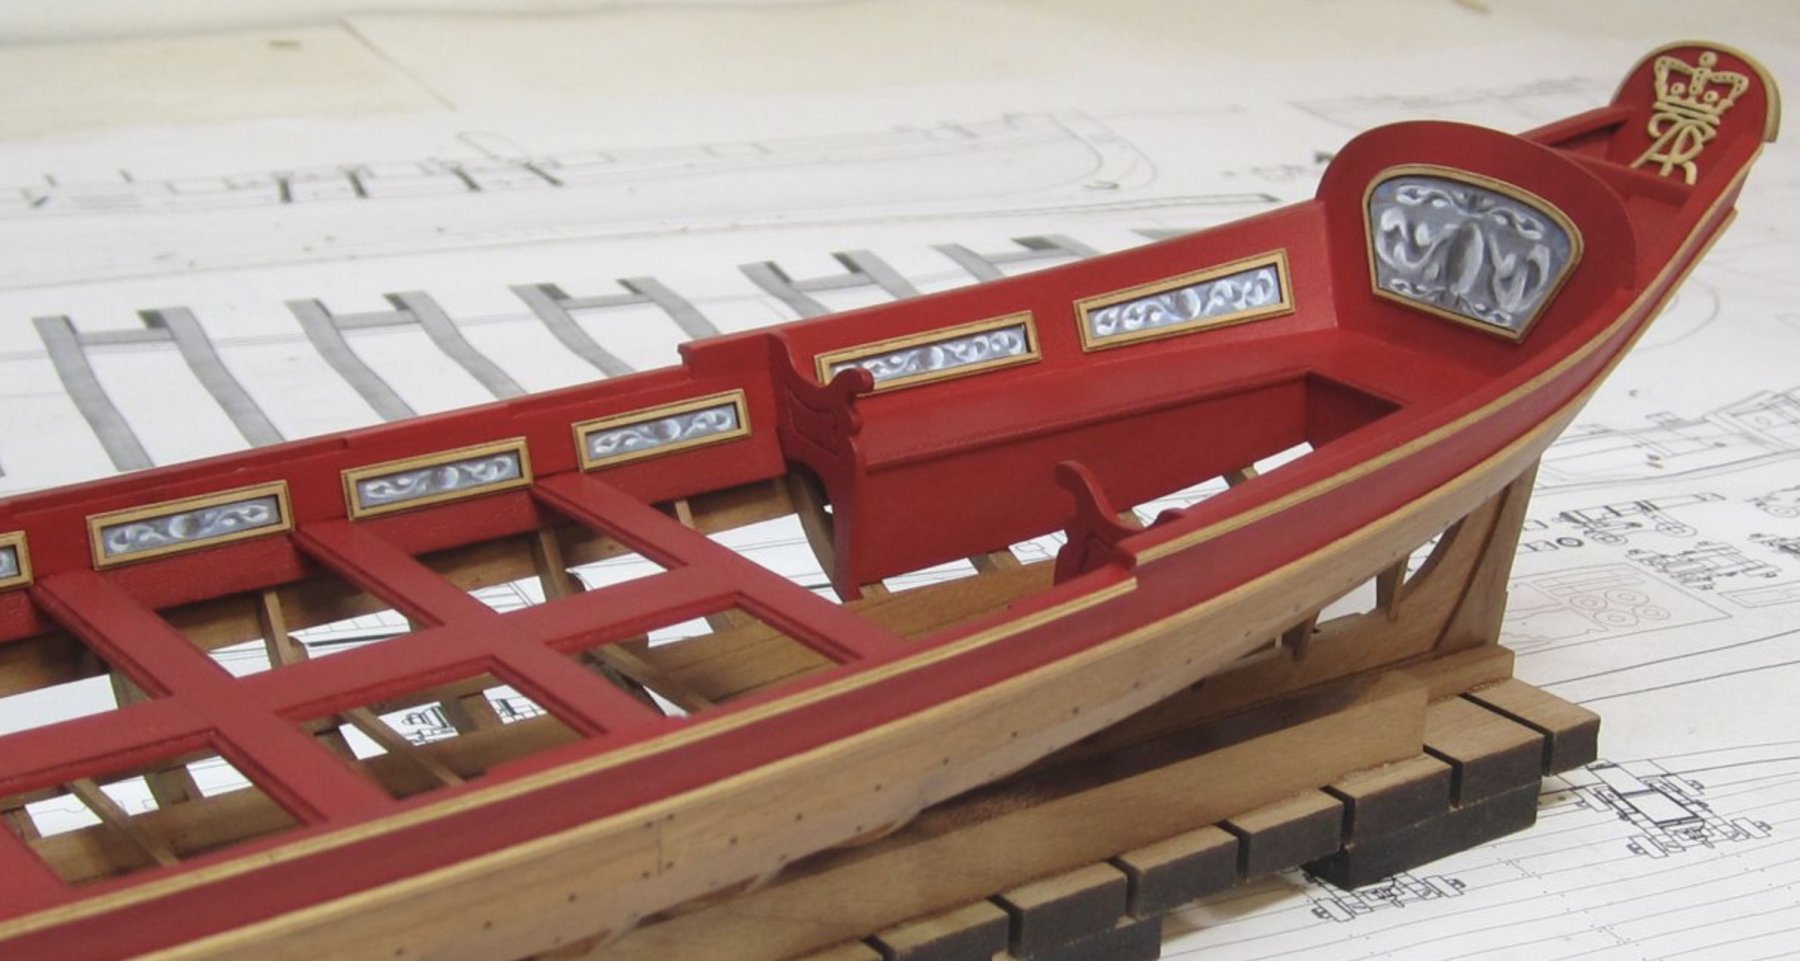
I thought I would give a little status update on this side project. As some of you know I am working on two new complete kits for Syren... One is of a 1/2" scale Royal navy barge circa 1700. I am trying to push the envelope a bit with my design concepts and the laser cutter. It will look like the contemporary model below but actually be almost exactly like the Queen Anne style barge shown in the Kriegstein collection. Those that have the Seawatch book should check it out. This will be a fully framed little model and I am very excited about it. I am building off of the design concept I used for the long boat and pinnace but taking it a bit farther. I hope these photos will give you a sufficient idea about the scope/concept of the project. This is a big barge model at over 20" long. I am fortunate to have found someone who is an excellent model builder who will build the prototype for me as it is designed. Unfortunately there is just not enough time in the day for me to build everything I design. He will be starting a build log shortly as I get a little further with the design. Many of you know him and will enjoy his build log as you have enjoyed his others. This project is a long, long way from being released but I thought I would show you what we are working on in addition to the many other projects. It also shows you how Syren will bring new projects to market without having to wait for me to build the entire model. I will be concentrating on finishing the Cheerful and then continuing with the Winchelsea. At the same time I will be collaborating with others to bring you folks additional stuff!!! There are no deadlines for these projects...they will get done when they get done. It is more important that these projects are the best possible within my limits of experience and expertise and they will never be rushed to market. I will however keep you guys updated. The last thing the hobby needs are more sub-par ship model projects and kits. I apologize for the longer development times compared to others. I hope its not too frustrating.

- 269 replies
-
- 30
-
-
- Queen Anne Barge
- Syren Ship Model
- (and 1 more)
-
 This is Syren Ship Model's soon to be released kit. It is plank on frame and will be built admiralty style with frames showing. Chuck has come up with an ingenious way of constructing frames with floors and futtocks that uses laser cut parts. The kit uses cherry for most of the parts but some embellishments will be in boxwood. This is a photo of a similar model from the National Maritime Museum
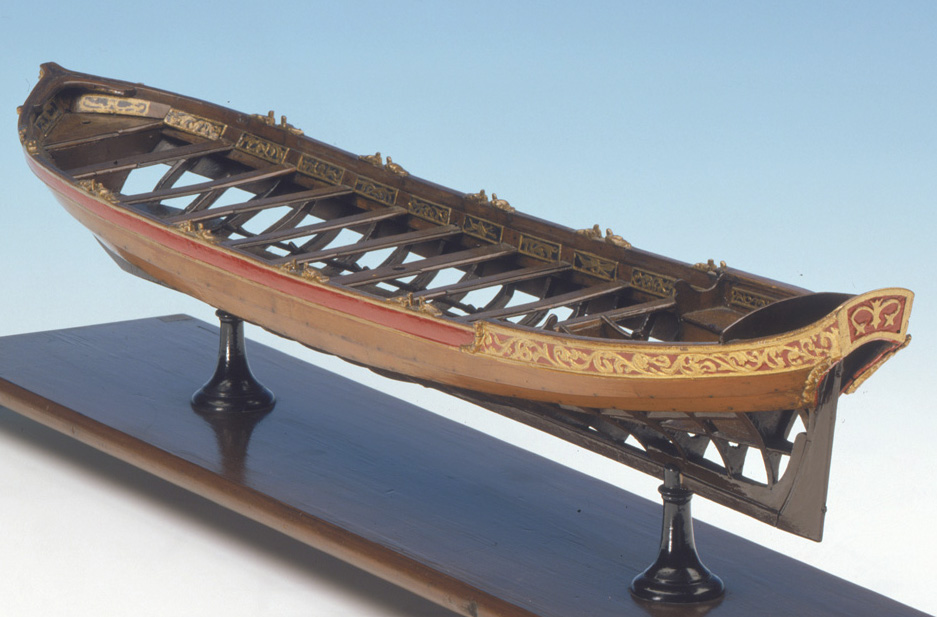
- 2 replies
-
- 9
-
-
- queen anne barge
- royal barge
- (and 1 more)