Search the Community
Showing results for tags 'ropewalk'.
Found 14 results
-
Who needs a ropewalk when you can use a marlinespike.
-
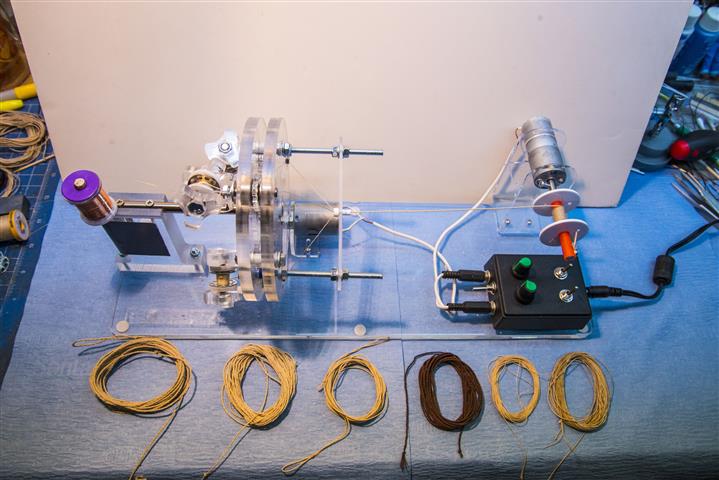
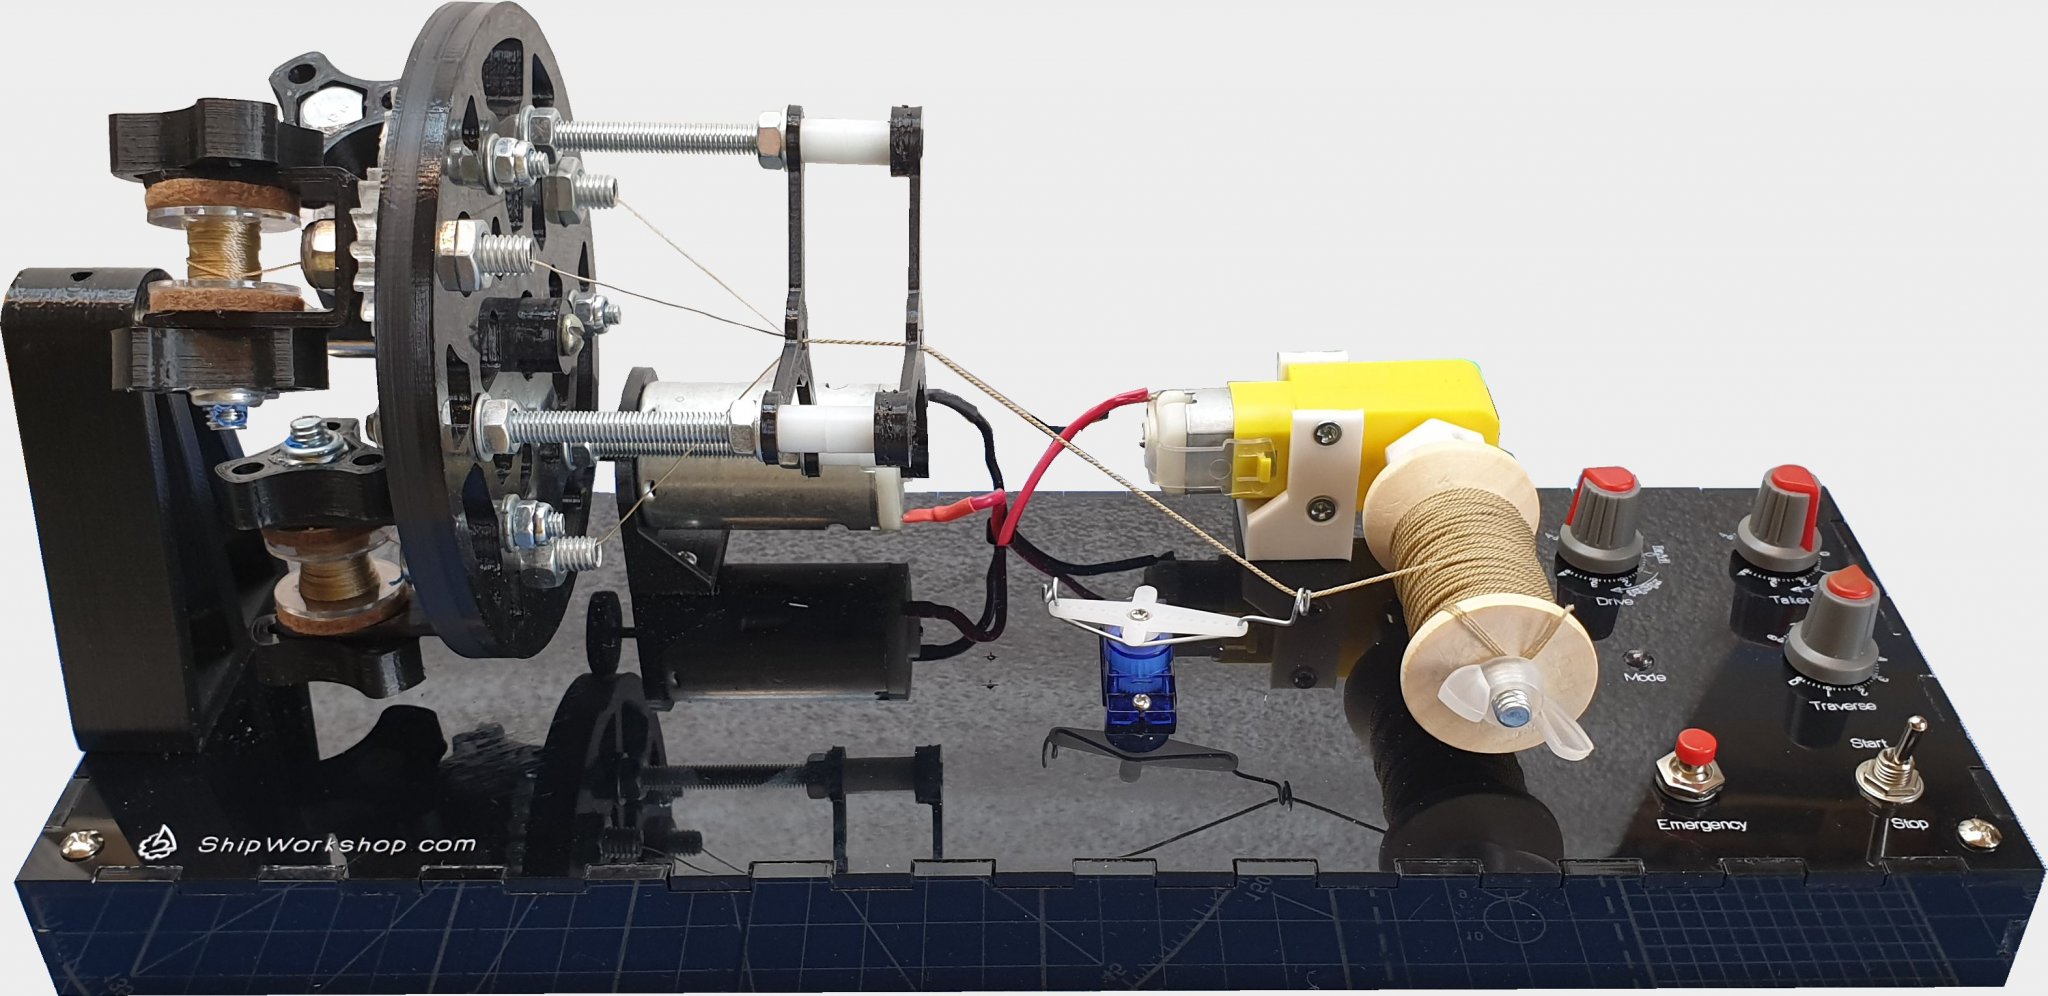
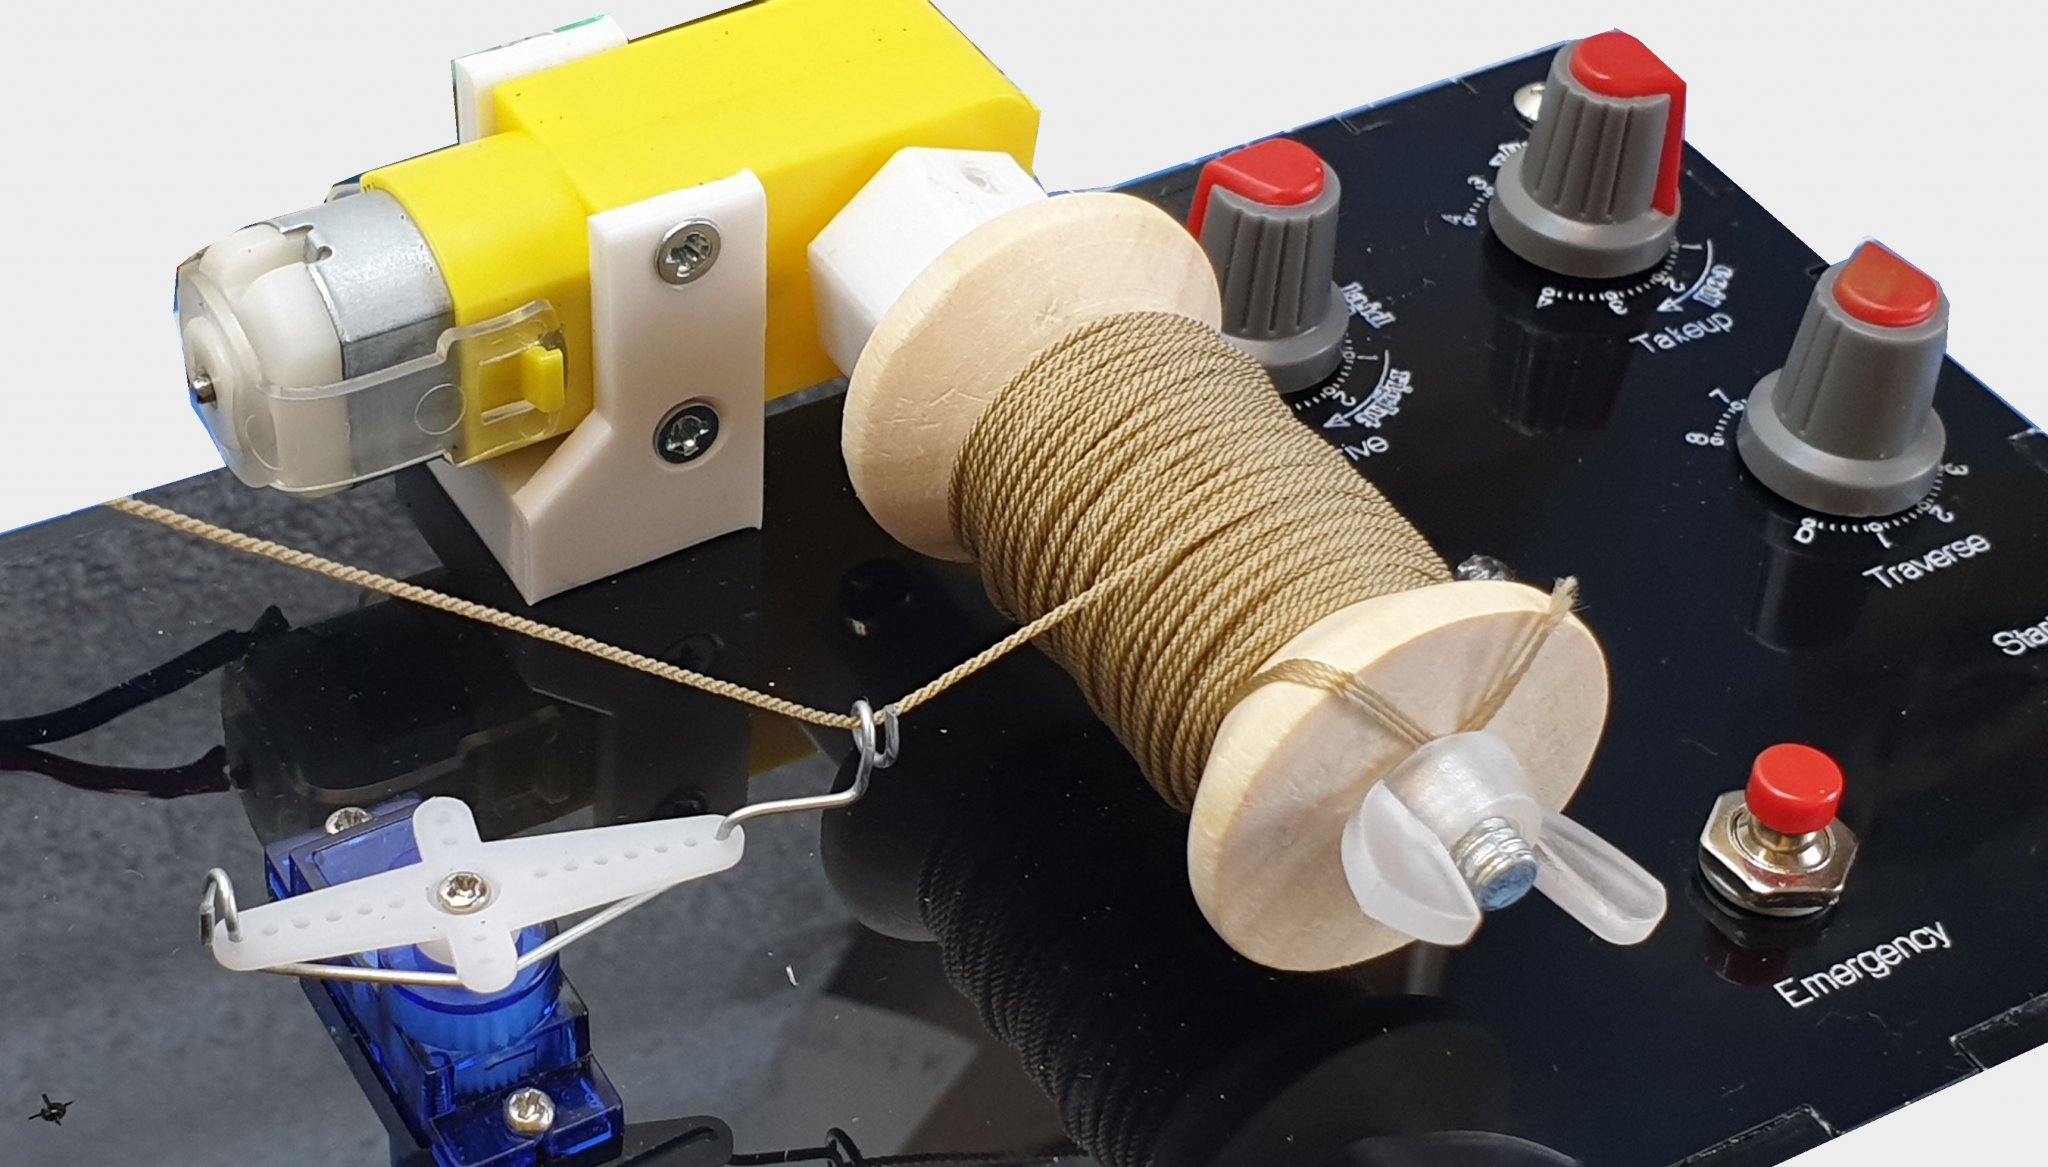
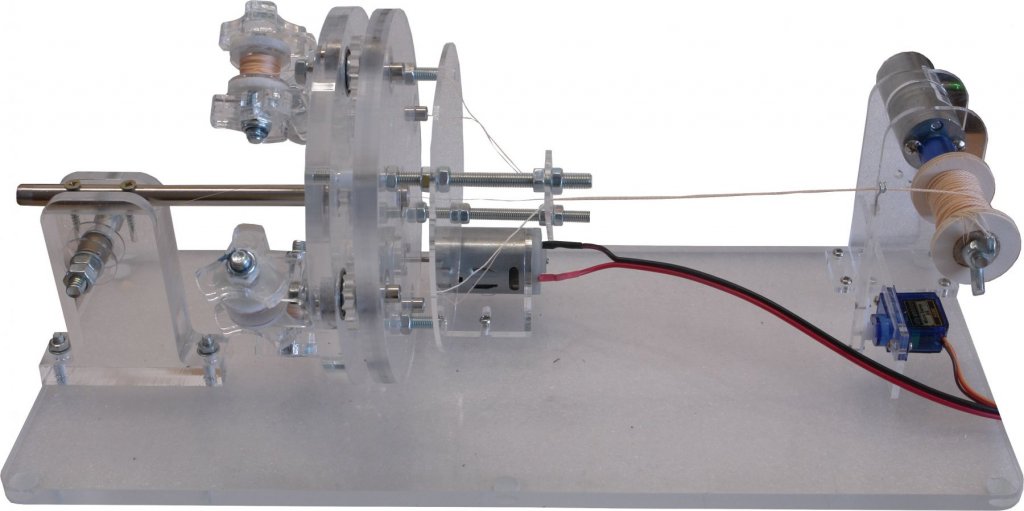
 This is a mini review of Alexey Domanoff's Planetary Ropewalk. First, let me say I'm very pleased with the ropewalk and how well it works. I've made a few changes that suite my needs, more on them later. Mine took about a month to arrive from Belarus. Alexey said that normal shipping is seven to ten days, I think the X-mas holidays slowed it down. The machine comes in a flat pack and is to be assembled. I spent about an hour on the assembly of the machine, wanted to be sure not to mess it up. The machine consists of a base plate that is 15 1/2" long, 5" wide, and 5/16" thick, made of Plexiglas. A Plexiglas pedestal 1 1/2" long, 3/4" thick, and 3 1/2" high. The pedestal supports the main shaft which is fixed and is of steel 1/4" diameter by 5" long. Two 'Solar' discs 5 1/8" in diameter, and 5/16" thick are mounted to the main shaft with ball bearing races. They trap the gears between them and are the heart of the machine. A 'Sun' gear is pre-pressed onto the main shaft and does not move. This 'Sun' gear has three 'Planet' gears that mesh with it. They act as idler gears that then mesh with the 'Moon' gears. The 'Moon' gears are pressed onto the hollow whorl shafts that support the bobbin holders. The whorls rotate twice in the direction of twist for each rotation of the 'Solar' discs. Depending on thread size and the speed of the take-up spool, the thread moves from the bobbins to the guide bar in about ten rotations. Two all-thread rods, 4mm X 10cm pass through both "Solar' discs and support the guide bar which is made of 3/4" wide, 4" long, and 3/16" thick Plexiglas. A 12v variable speed motor with a rubber drive button spins the discs via contact with the outside diameter. The take-up is by a 12v variable speed motor with a gear reduction head, Both motors are independently controlled. A steel shaft is fitted to the take-up motor shaft, on which a take-up spool slides, and is fixed with a set screw. The control box has a main power on/off switch, an input for the wall mounted transformer, adjustable speed pots for each motor as well as a direction switch for each. The first photo is a overall view of the machine and a few samples of the early attempts of spinning thread into rope. these samples are of cotton and linen that was on hand. They started as "Z" or right twist. So they were spun into a "S" or left twist and wound onto bobbins to then be spun into a "Z" twist rope. Bob Wescott To Be Continued
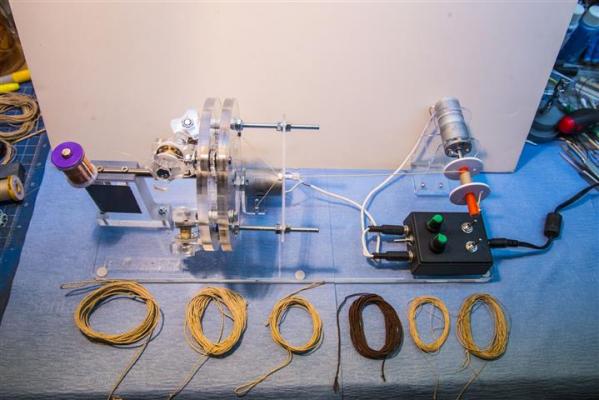
- 24 replies
-
- 4
-

-
- Ropewalk
- Linen Thread
- (and 1 more)
-
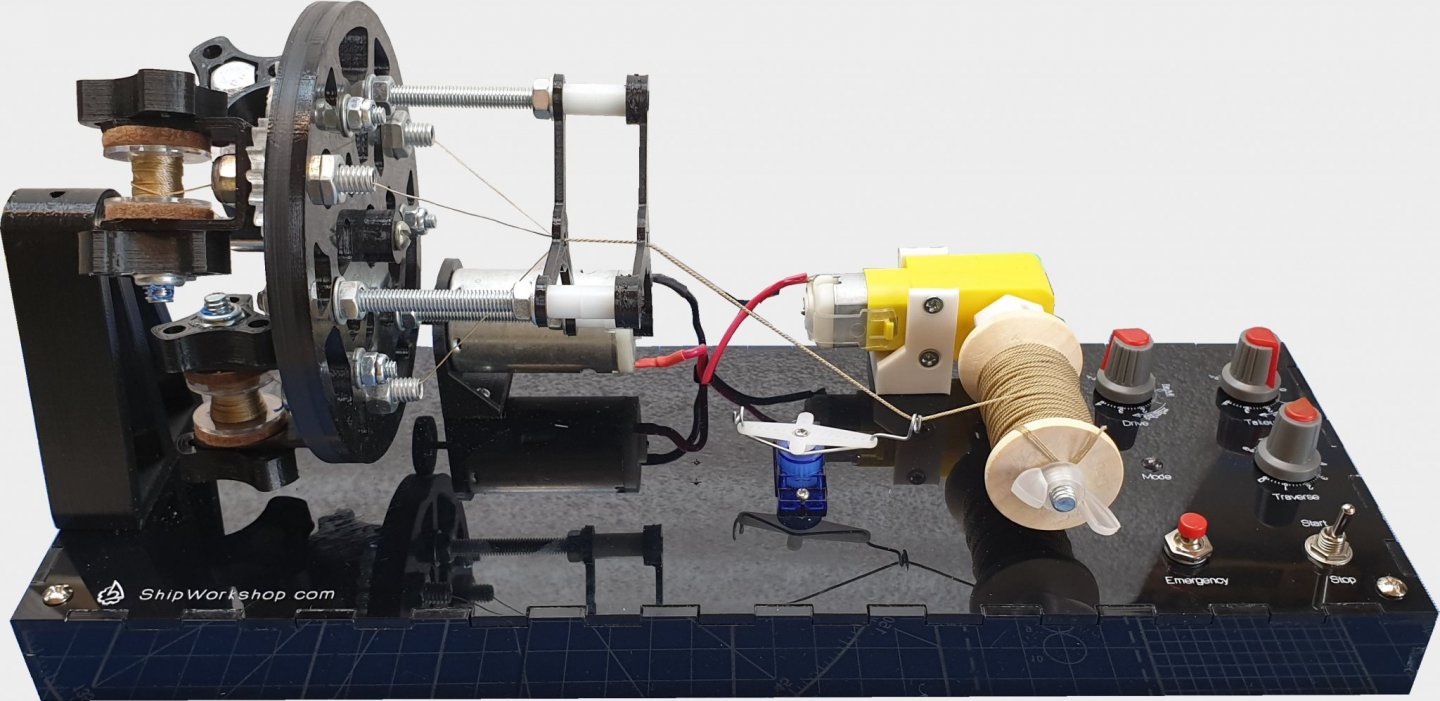
 Dear friends, I proud to let you know that we are completely renewed and run new version of our site - ShipWorkshop.com Whats new: Redesigned "Shop" with credit/debit card processing as well as payments via PayPal; Our "News" implemented as blog where we can communicate with our customers showing them product design changes as well as just put some useful info in; Redesigned "Downloads" section where you may find printed/video guides how to assemble and use our tools. We still provide some services for modelers like: Complete ship reconstruction, Design the hull, Model construction and custom tools design for your need. You may "Contact" us filling the form or just drop us email.
 -
.thumb.jpg.5a33ce11c7bd2c0f448734dd2e7ea95b.jpg) Hi everyone With me getting more and more into this hobby i find myself not liking the ropes that usually come with the kits. Thats why i have been looking into purchasing one of Domanoff's rope walking machines. My only question, if anyone in here already has one, is: do they already sell the strands in those spools, or do we need to rewind them in the same ones that come with the machine? Also if anyone has any photos of how do the finished product look using those machines, i would gladly like to see them! Thank you very much
Hi everyone With me getting more and more into this hobby i find myself not liking the ropes that usually come with the kits. Thats why i have been looking into purchasing one of Domanoff's rope walking machines. My only question, if anyone in here already has one, is: do they already sell the strands in those spools, or do we need to rewind them in the same ones that come with the machine? Also if anyone has any photos of how do the finished product look using those machines, i would gladly like to see them! Thank you very much -
Hi everyone! After making a few kits myself, i found out that the ropes that come with the kits usually are not as good as i would want them. I have researched a bit and found out about ropewalks, even found the Domanoff PL4 and Prosak. Still, i dont have the money right now, and i would like to make a ropewalk myself. I have looked into it and found this post: Which is exactly what i was looking for. However, i have seen other designs in which the moving part also twists the rope in the oposite side. My question is, if anyone has tried both, is it worth it to add a motor to the other side? Thank you all
-
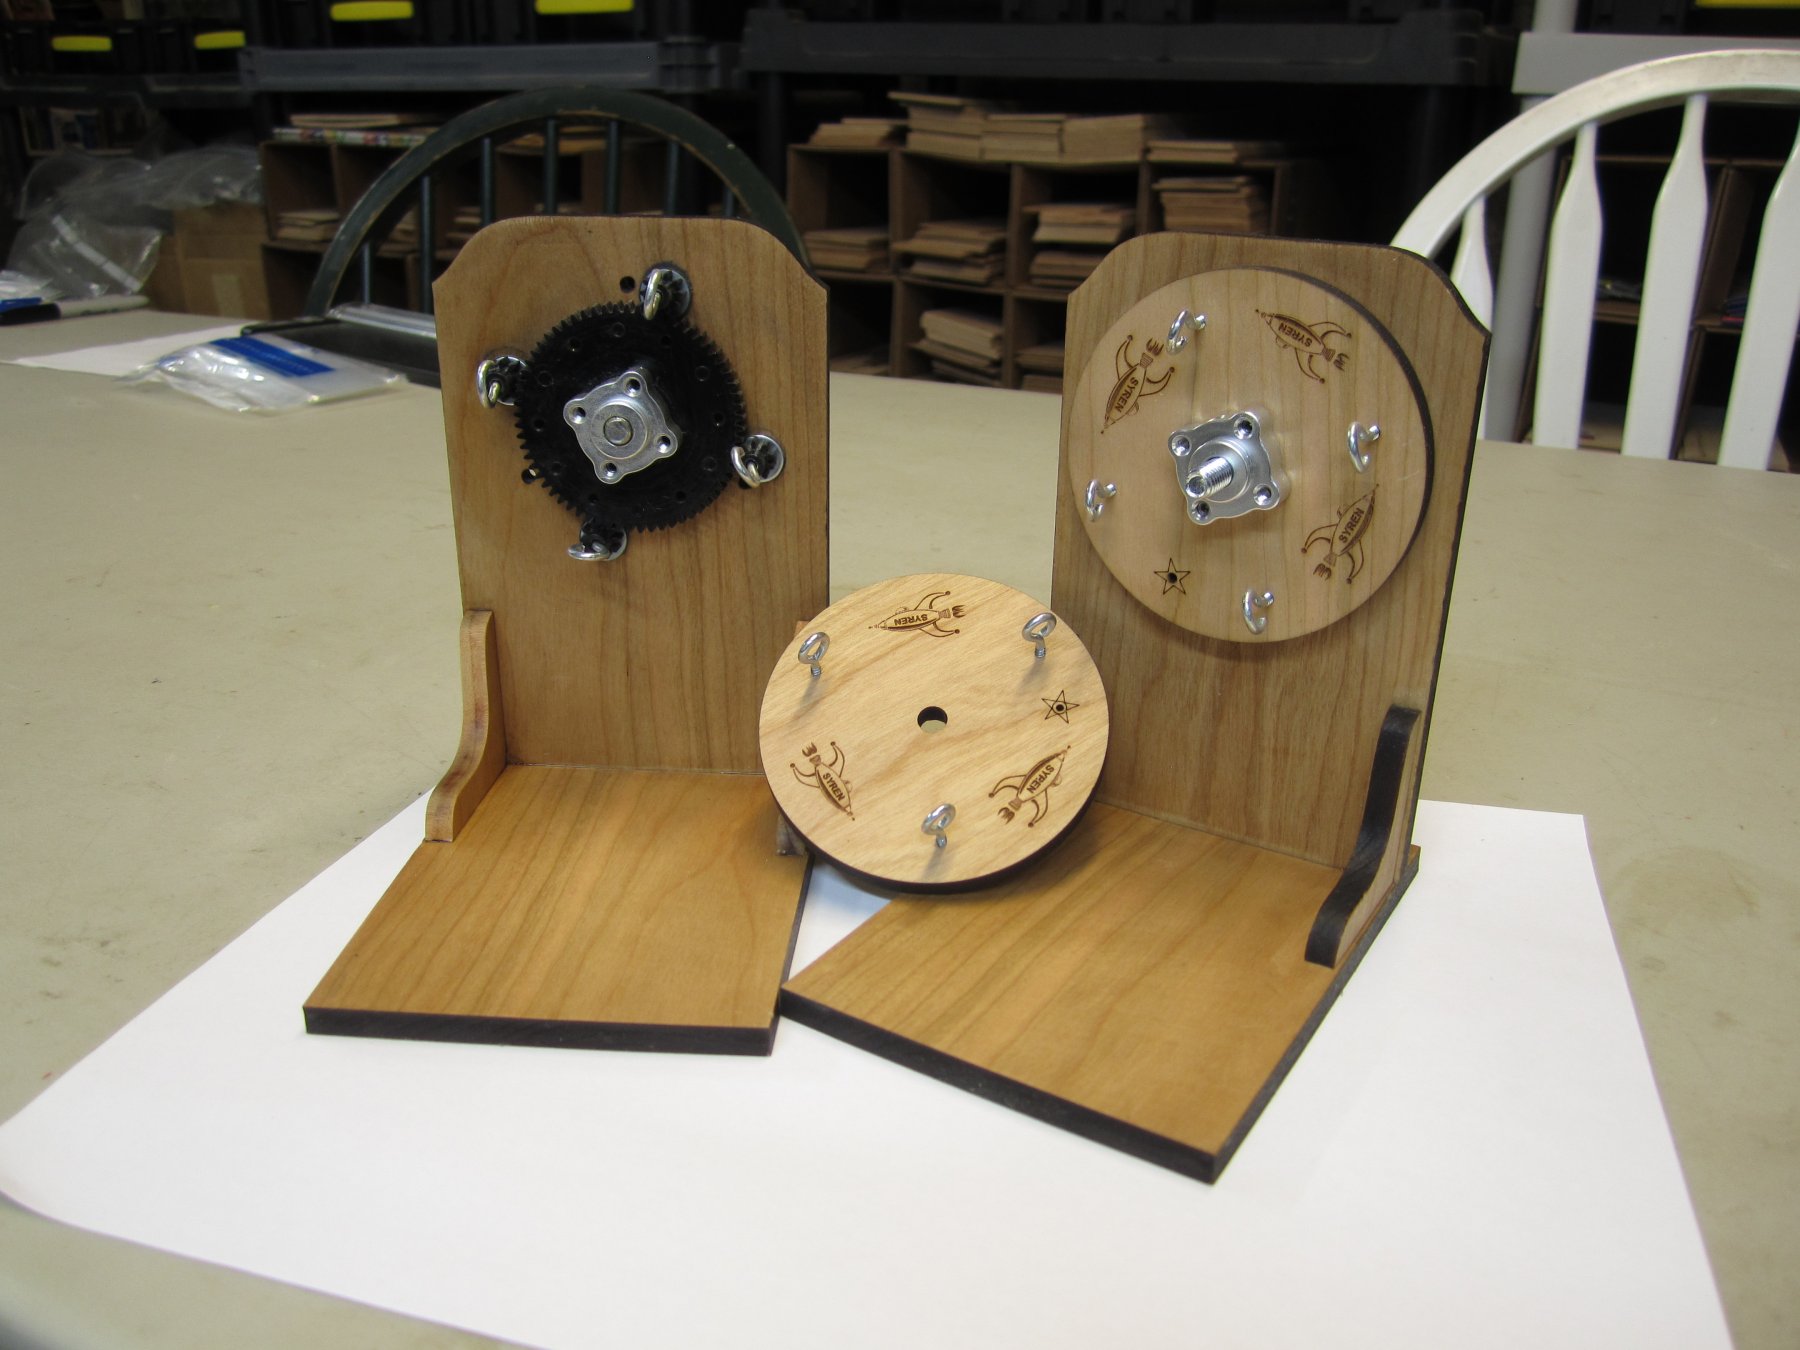
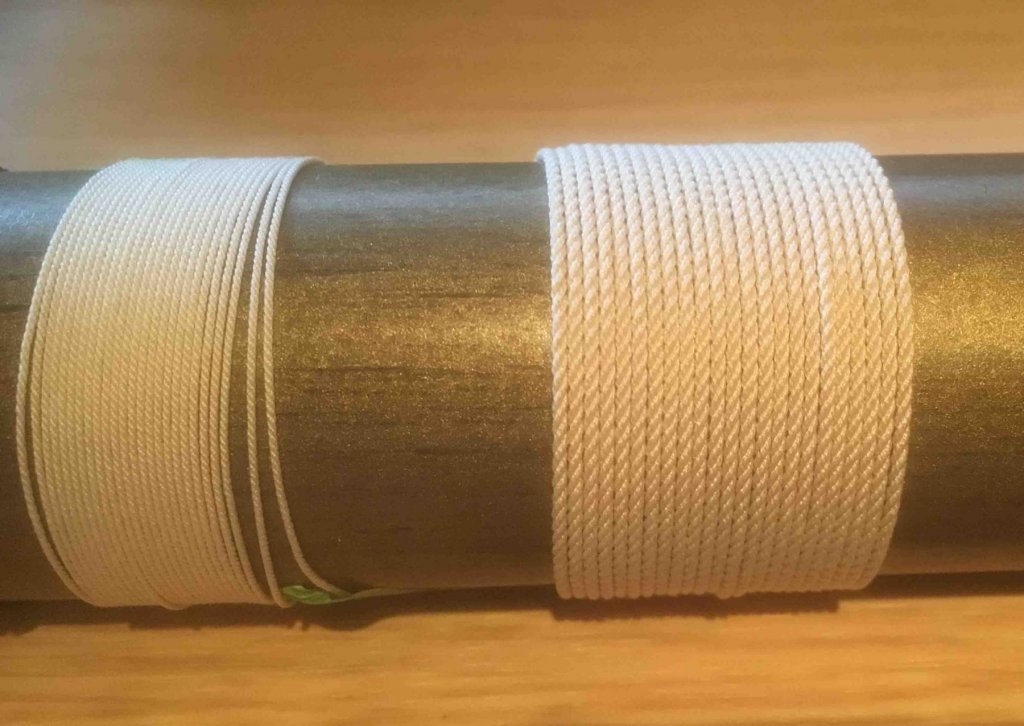
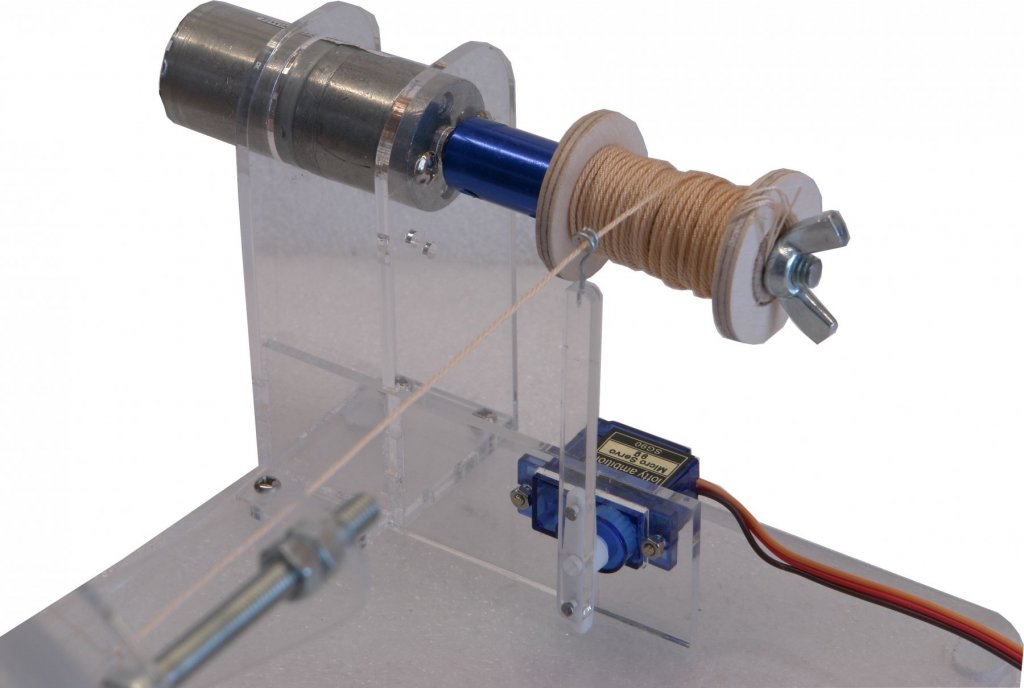
 I've just made my first rope on my new Syren Rope Rocket and thought I'd share my experiences. First thing to say is that I was delighted with the result. I'd had a little previous experience with the more basic 'handraulic' version from Model Expo so I had some idea how to make rope, but even so I was surprised just how well my first efforts turned out. The line on the left was my first effort - three single strands of the thread Chuck supplied with the kit producing 10' of 0.67mm/0.026" rope. The one on the right has 9 strands of the same thread. You can put multiple strands on the Rope Rocket, so I tried 3 strands between each pair of hooks. Apart from a minute or two more to set up, it takes no longer to produce 9 strand than 3 strand material. The resulting rope was just over 1.2mm/0.047". A few suggested Do's & Dont's from my experience so far: Do watch Chuck's videos (on the Syren website and YouTube). They're excellent, and I learned more from them than umpteen written descriptions of rope making. Do take the time to clean off the laser char and varnish the headstock and tailstock. The cherry is a fine wood and it would be a shame not to bring out the best in it. Don't do what I did, and varnish the ropewalk after assembly. I did this, and despite my best efforts I gummed up some of the moving parts. Easily sorted, but avoidable. It would have also been much easier to varnish the parts before assembly, but I was too impatient! Also don't get varnish on the underside of the assemblies, or if you do clean it off. I've found a lot of the art of rope making lies in getting a feel for how the headstock or tailstock wants to 'walk' along the table as you spin up the ropewalk, and to do that they need to be able to slide freely. Do make sure you've got some very small hex keys (aka allen keys). I struggled to find one for the very smallest set screws. Until I eventually found one (1.3mm) I had to make do with a jeweller's screwdriver (the size used for adjusting the tiny screws in spectacles) but I wouldn't recommend that as it might distort the set screws. Do follow Chuck's advice in the instructions and use a strong epoxy or a CA with good gap filling properties to stick the eye screws into the brass tubes in the headstock. This is the only part of the construction that makes me a bit nervous, as the fit is quite loose and the eye screws come under considerable tension. I've had no problems so far, but eventually I might replace the tube/eye screw arrangement with a single length of solid brass, with one end fashioned into a hook. Incidentally, like Chuck I opened up the eye screws slightly, making it much easier to set up the thread. However unlike Chuck I opened them before fixing them in place, as I was worried that too much twisting with pliers might weaken the glue joint. Do check that everything spins freely when assembled. I found that the big central gear in the headstock tended to rub slightly against the washers under the smaller gears. This might be a result of some mistake on my part, but its something others might want to check for themselves. I found that an appropriately sized washer glued to the face of the headstock brought the big gear out just far enough to engage nicely with the small gears. Do watch Chuck's videos again! In summary, I'm delighted with the Rope Rocket and the rope it produces and would highly recommend it. I'm off now to experiment with different threads, 4-ply rope & etc. I've also got Chuck's Serv-o-Matic and am lookking forward to my first foray into serving. Derek
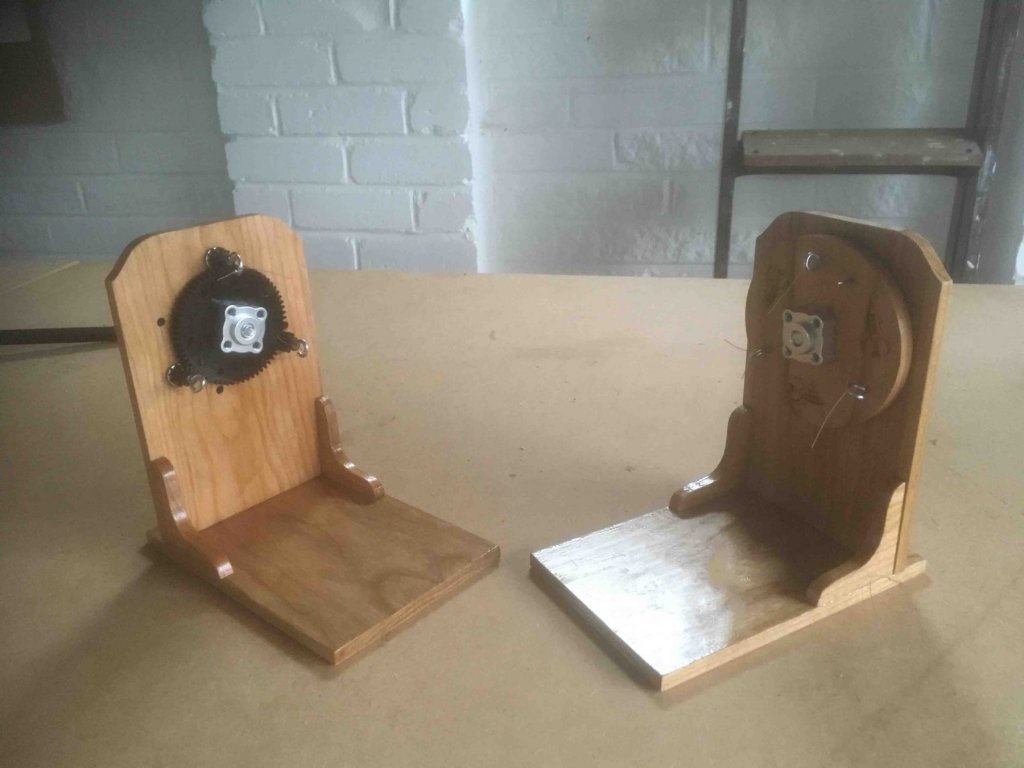
- 42 replies
-
- 18
-
-
- rope rocket
- ropewalk
- (and 1 more)
-
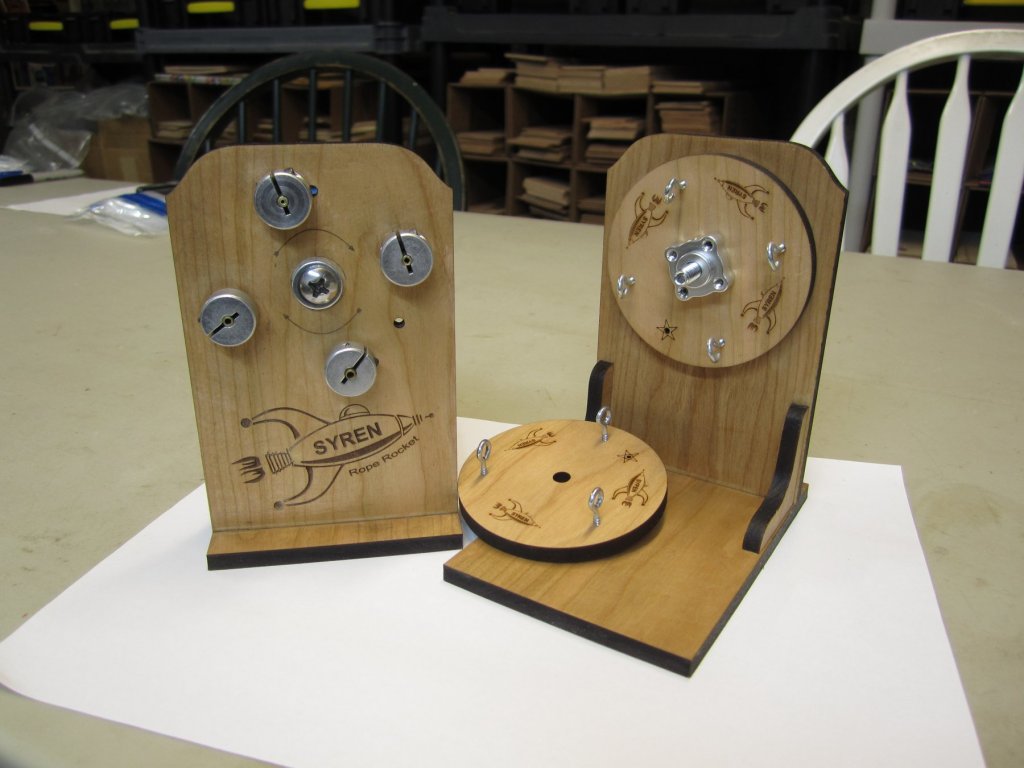
Dear All, I proud to present my new PL4 series rope making machines. How to operate on YouTube Full details on ShipWorkshop.com Basic features 2-, 3- or 4-stranded; With/without the core; Plain laid or cable laid; Left or right lay. Series members PL4-3: 2, 3 strands, no core; PL4-4: 2-4 strands, with core. PL3.2 successor; Choosing the right machine Please consider followings choosing the machine: PL4-3 makes 3-strand ropes and cables little bit better and easier than PL4-4. 4-strand ropes are rarely used on models and can be made using another tool like our VR series rope making machines. BR, Alexey

- 4 replies
-
- 13
-
-
- ropewalk
- rigging tools
- (and 1 more)
-
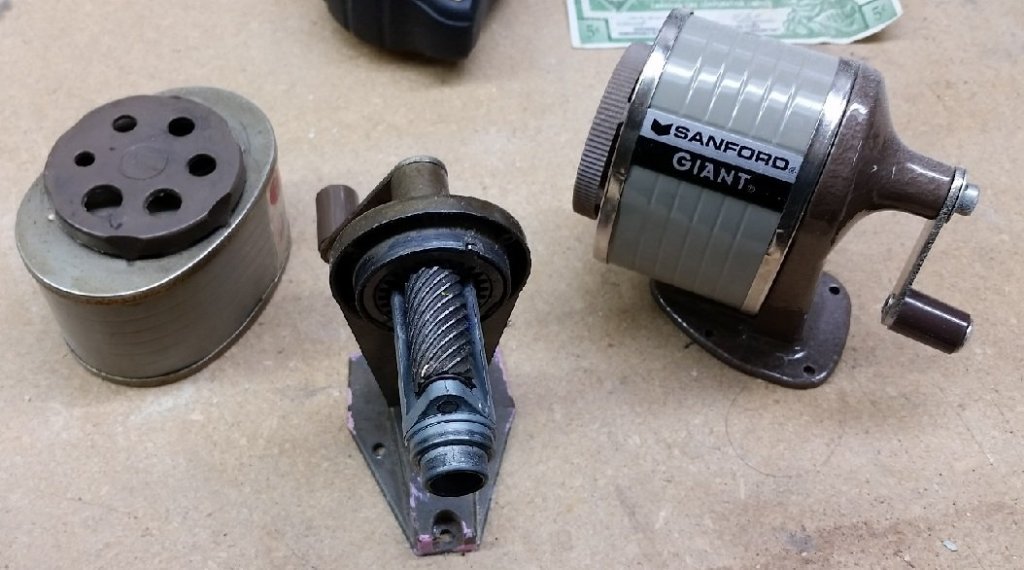
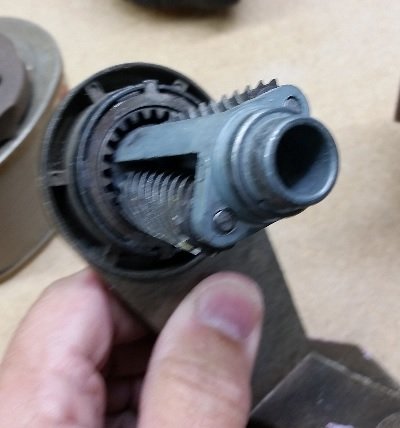
I acquired two old pencil sharpeners and while looking them over I suddenly saw a ropewalk conversion project in my future. Seems all it needs is an addition to the hub end to connect the three lines. This will not be for some time but thought I'd share the idea and would appreciate any comments. pencil_sharpener_1.mp4
-
Dear friends, I proud to present next version of endless rope making machine (video to come soon): https://shipworkshop.com/products/tools/pl-3.2-endless-rope-making-machine PL 3.2 Endless rope making machine with traverse Fully automated ropewalk with traverse (rope making machine). Minimal control is needed. Basic features PL Endless rope making machine with traverse ("PL machine") is intended for making professional model ropes: 2-, 3- or 4-stranded; With/without the core; Plain laid or cable laid; Left or right lay. What's new: PL = Planetary ropewalk. New version of former ropewalk "Planetary". New traverse unit. New Smart Control Unit v3.0 Endless means extra long result ropes. User manuals: PL Endless rope making machine Smart Control Unit v.3.0
-
Dear friends, I proud to present next version of rope making machine (video to come soon): https://shipworkshop.com/products/tools/vr-31-rope-making-machine VR 3.1 Rope making machine (HD adaptable rope making machine. Former Ropewalk "Prosak") What's new: VR = Vertical ropewalk. New version of former ropewalk "Prosak". No need to reassemble for 3- or 4-stranded ropes. Can be secured on both horizontal and vertical surfaces. HD adaptable. Can be transformed into HD (Horizontal Design) machine. Not yet available. There are notches on the machine that will help to mark screw holes for securing the machine. Here is user's manual: VR31.pdf

-
 The Syren Rope Rocket is now in stock.... Make your own rope!!! This is the very same machine we make all of our rope with at Syren Ship Model Company. This ropewalk makes rope virtually any length. You can make 3 strand and 4 strand rope. Make left or right hand rope. The Syren Rope Rocket can quickly make tightly laid up rope. Each ropewalk kit comes with one ball of thread you can use while following our online video lessons. Made of sturdy laser cut Cherry wood and steel and stainless steel parts. The rope rocket comes with Delrin gears for a long life. US patent 5232168-28 - With registration in China pending just in case!!! Don't buy Chinese fakes, support your hobby and buy the original. Click here to view the ropewalk page on the Syren website and download the assembly instructions. Online video rope-making lessons will be uploaded very soon!
- 22 replies
-
- 20
-
-
- ropewalk
- syren ship model
- (and 1 more)
-
Dear friends, would like to present Ultimate Rigging Tool kit which includes my rigging tools but for the special price. This kit includes (click the links for more details): Ropewalk Planetary 3.1 Serving Machine 2.6 + "endless" option ropewalk Prosak 3.0 - free bonus What you could do with this kit: -make different authentic rigging lines for you models: 2-, 3- or 4-stranded, with/without the core, plain laid or cable laid, left or right lay. -serve ropes, make beckets, strop blocks, make eye-splices, lay seizings, make stay mouse (diamond knot) and do other jobs where one rope is to be wound round the other. Why there are two ropewalks? -Planetary and Prosak complement each other. Planetrary is very useful for making long 0.2-1.2mm regular ropes which are many on a model. Prosak is super tool for making special ropes like thick cables. Free shipping. For more details on pricing - please contact me directly I have also special offer for returned customers. regards, Alexey
-
I'm really new to the hobby and just in the first stages or my model (Syren) and I have been getting the specialized tools needed for the hobby. I have noticed that several people on the site say that they have and use a ropewalk; but what's the point? The kit I have looks like it has nice "rope" (string) so why would I need a ropewalk?
-
Hi, I'm confused by the talk of Z or S twist. I understand the differences, direction. What I don't understand is why? Especially after looking at some pictures of the Victory which I'm about to start. As there are clearly several ropes of each kind same size and same sorts of use. So when would which be used? Or was it a question of which way they ran the machine that day? Or would it normally be one for ropes under a certain diameter and the other for cables? Any help would be gladly received. Izzy