Search the Community
Showing results for tags 'shallop'.
Found 4 results
-
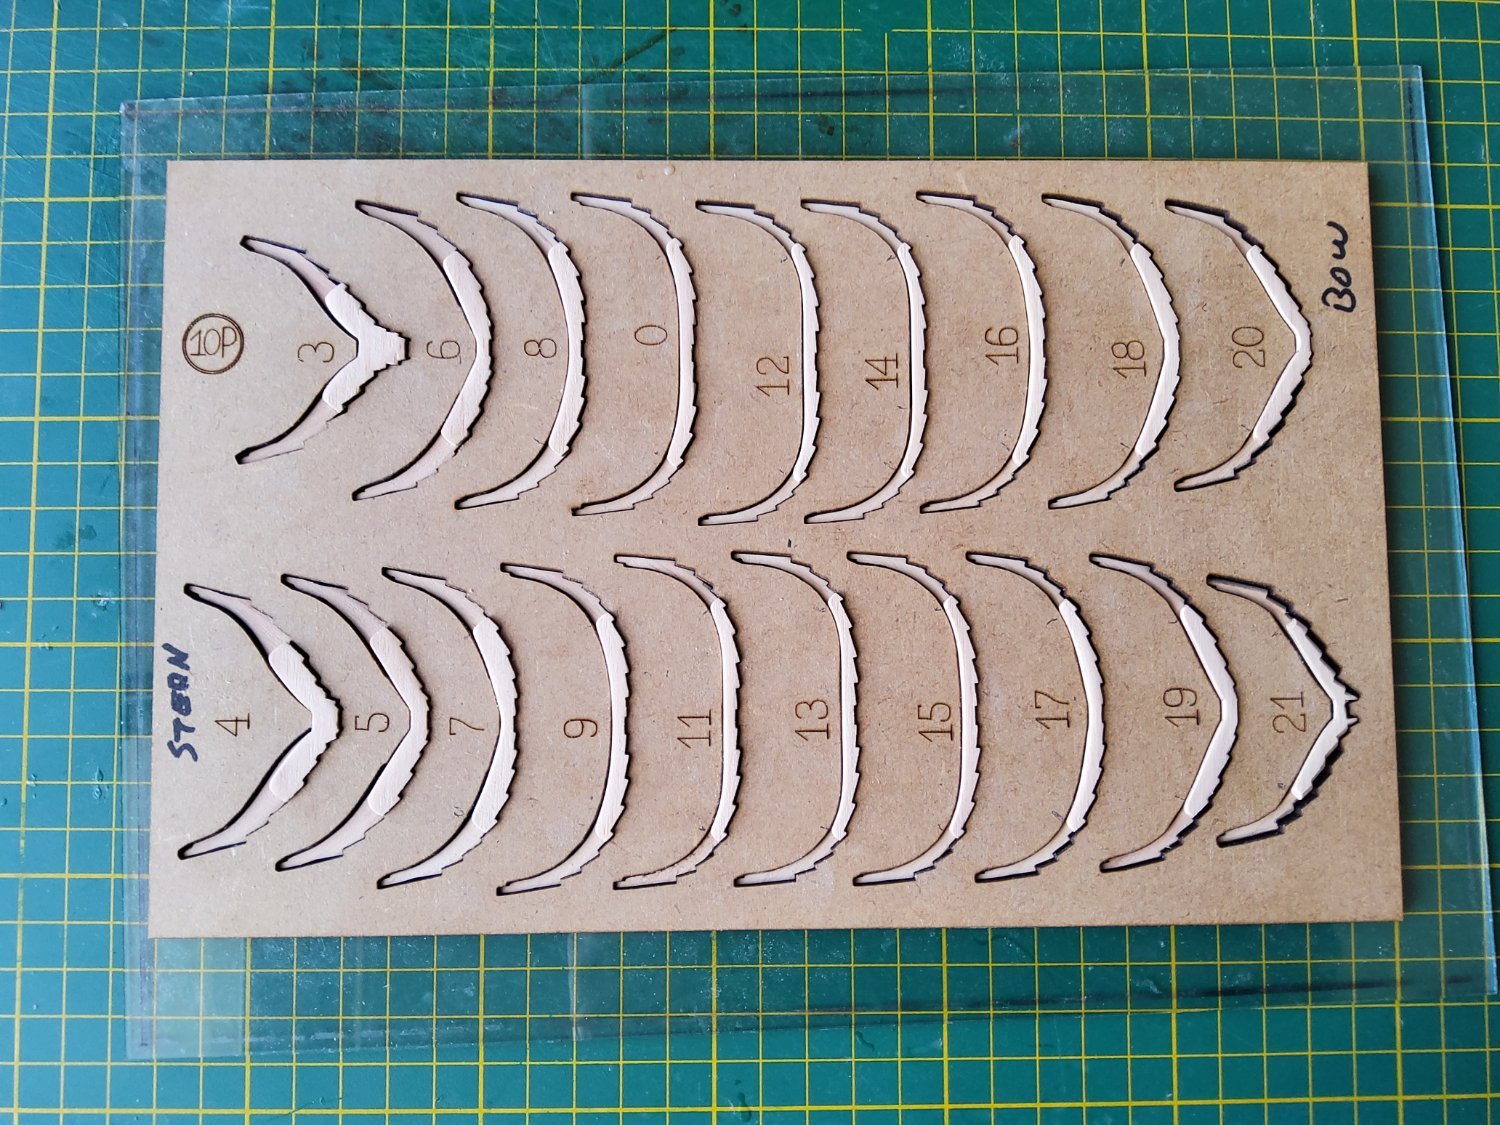
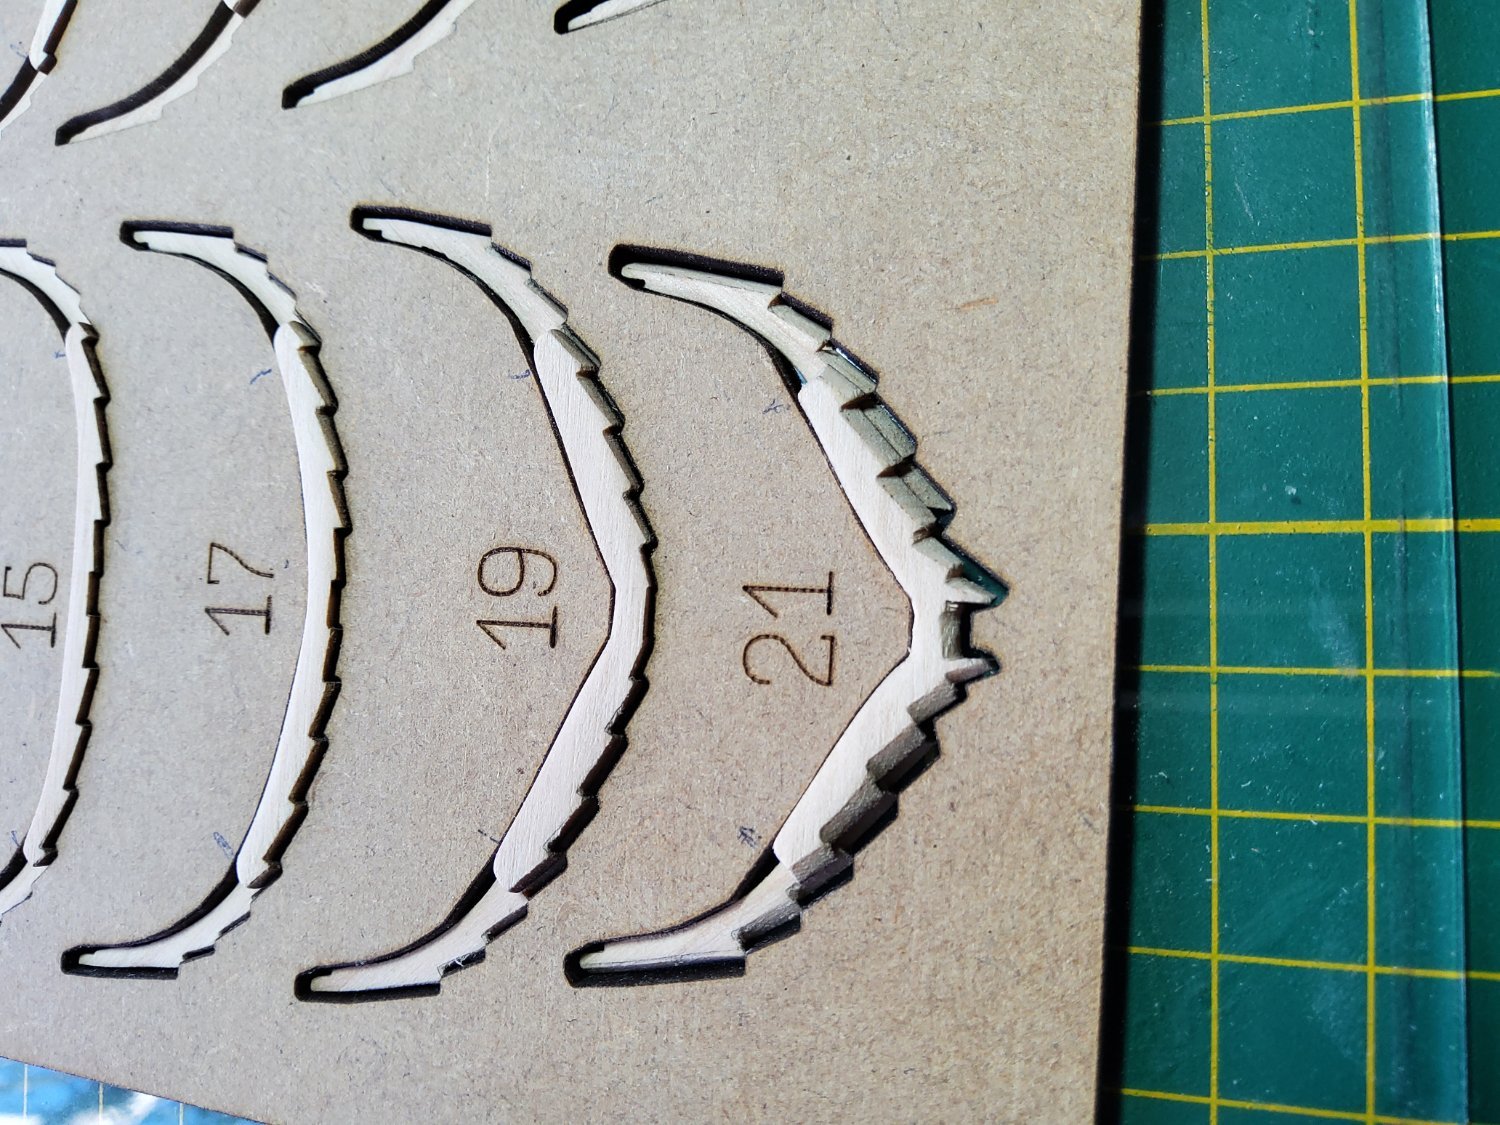
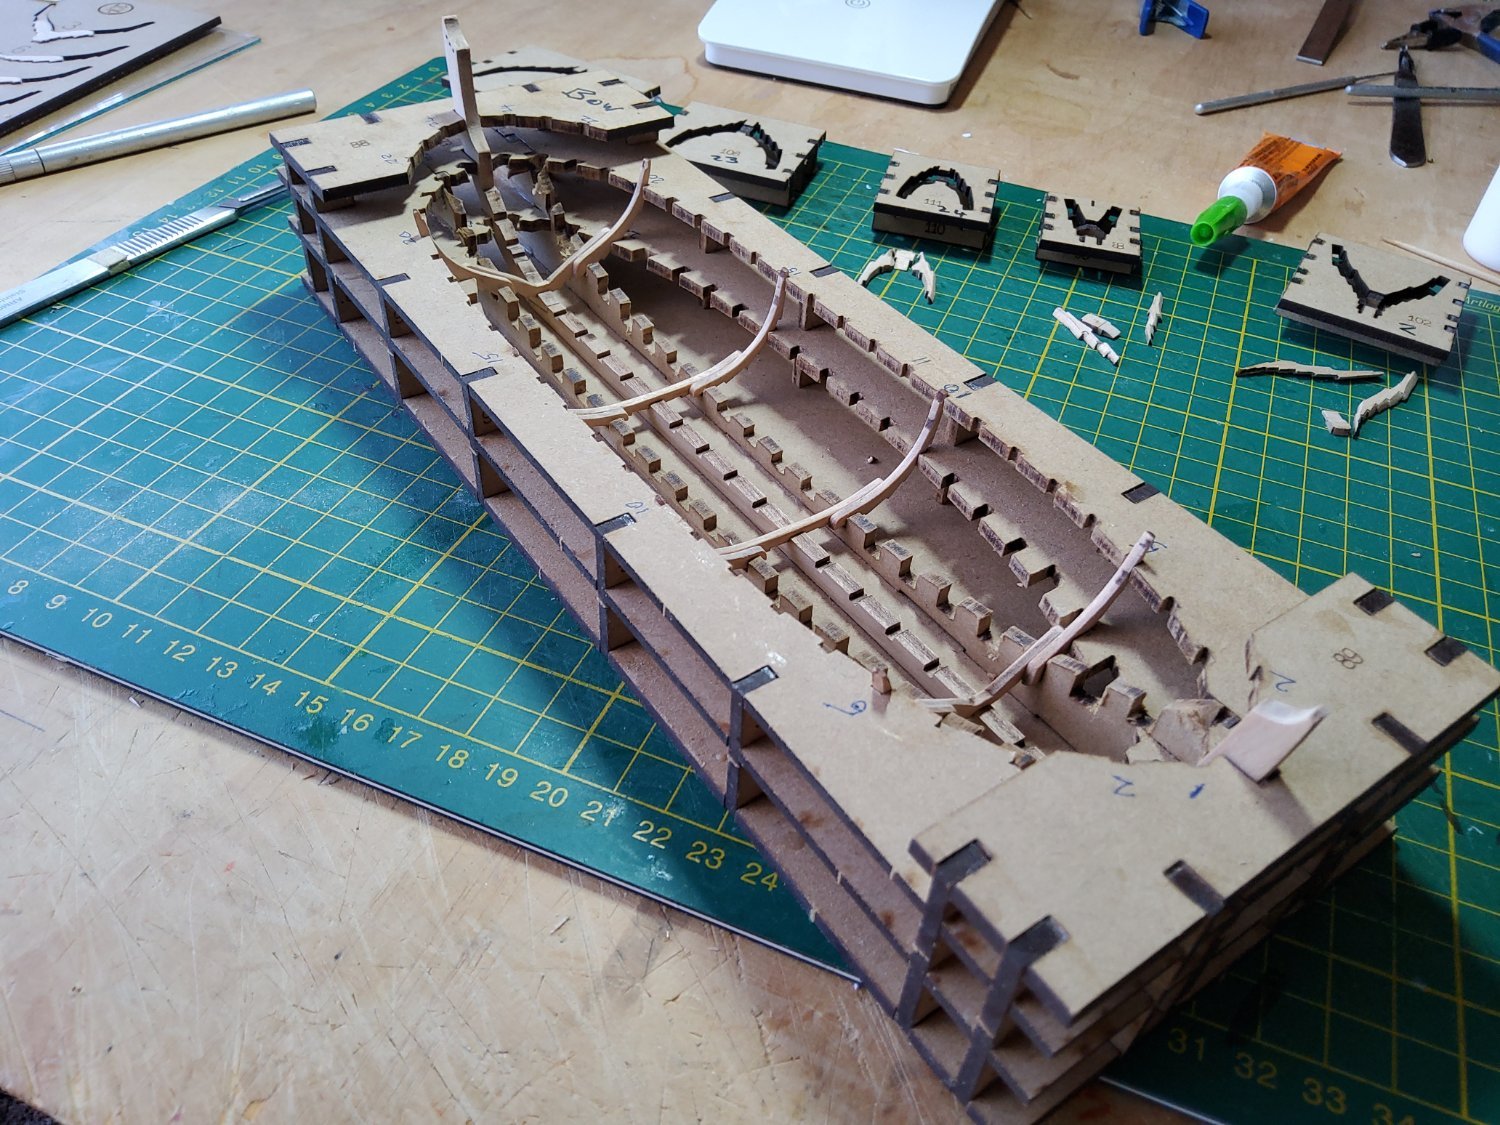
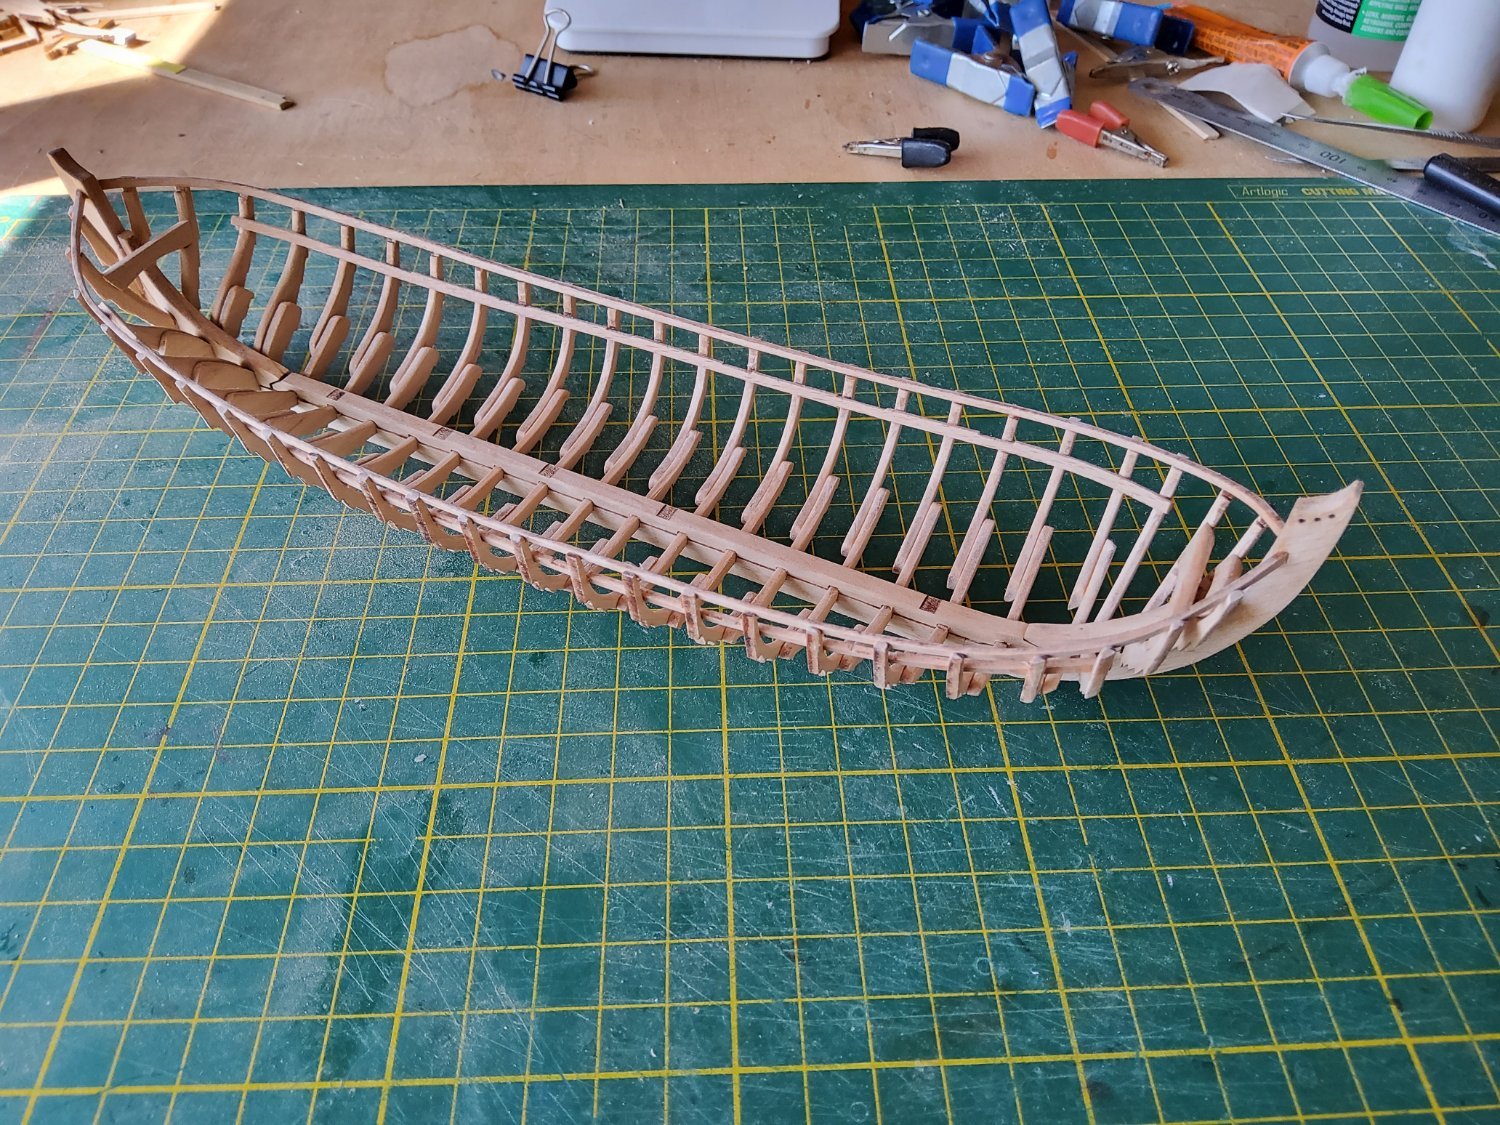
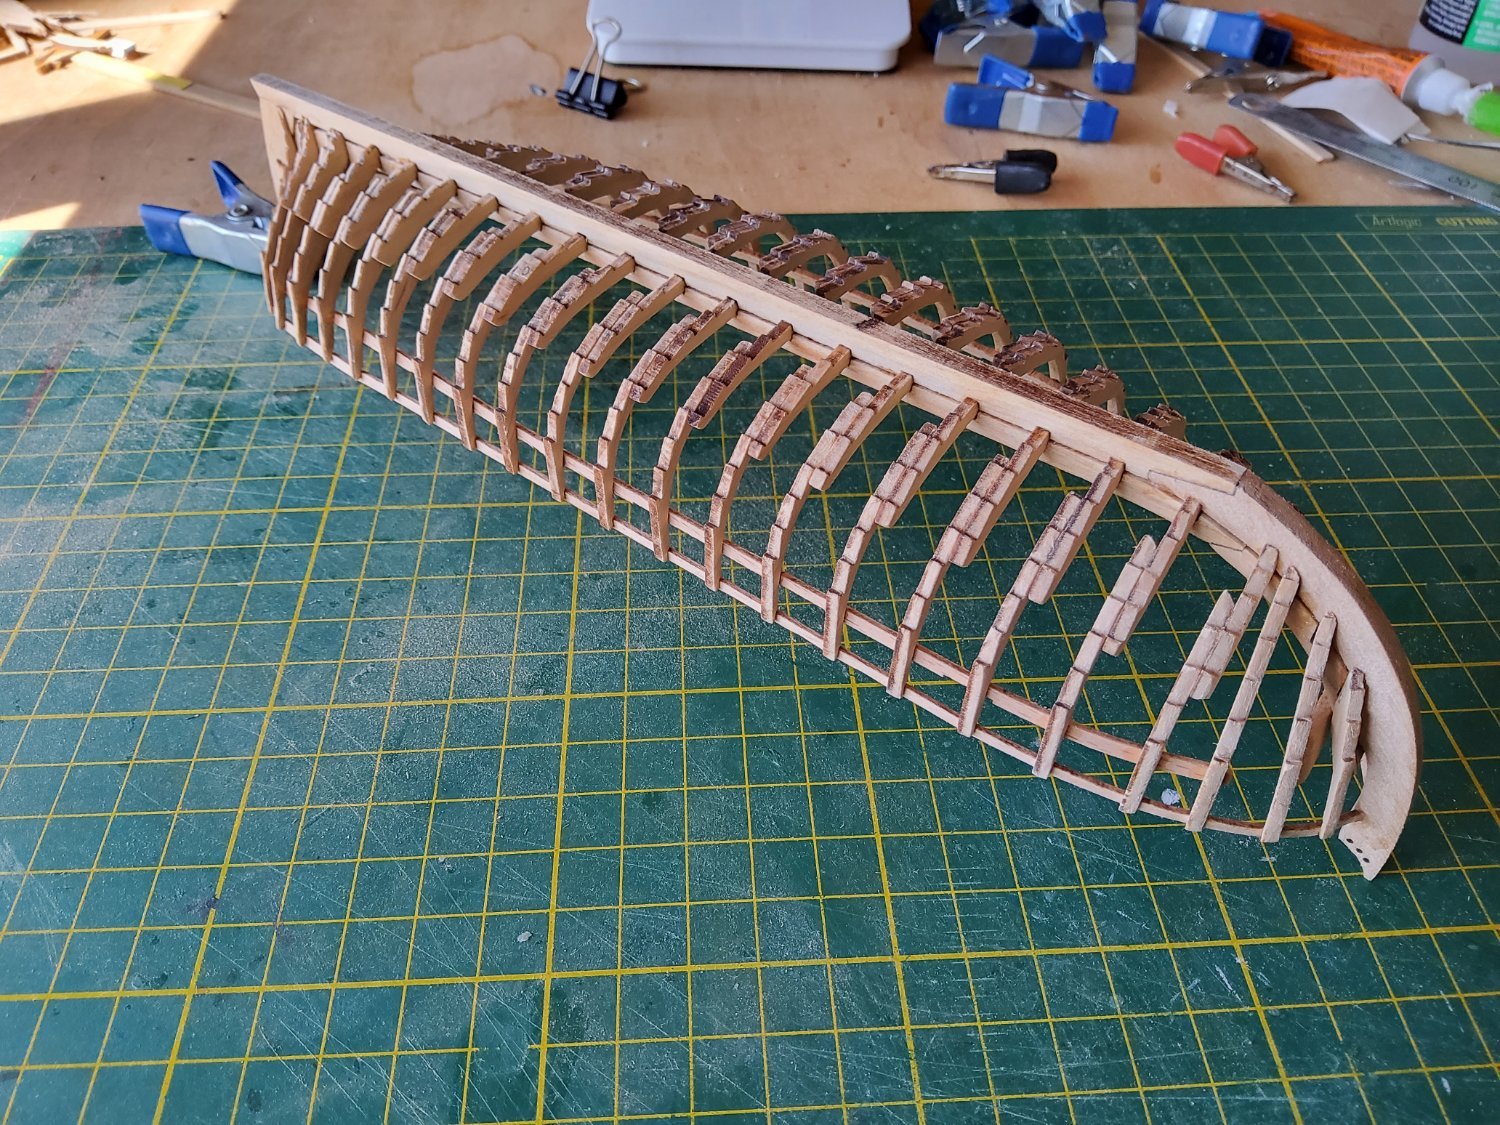
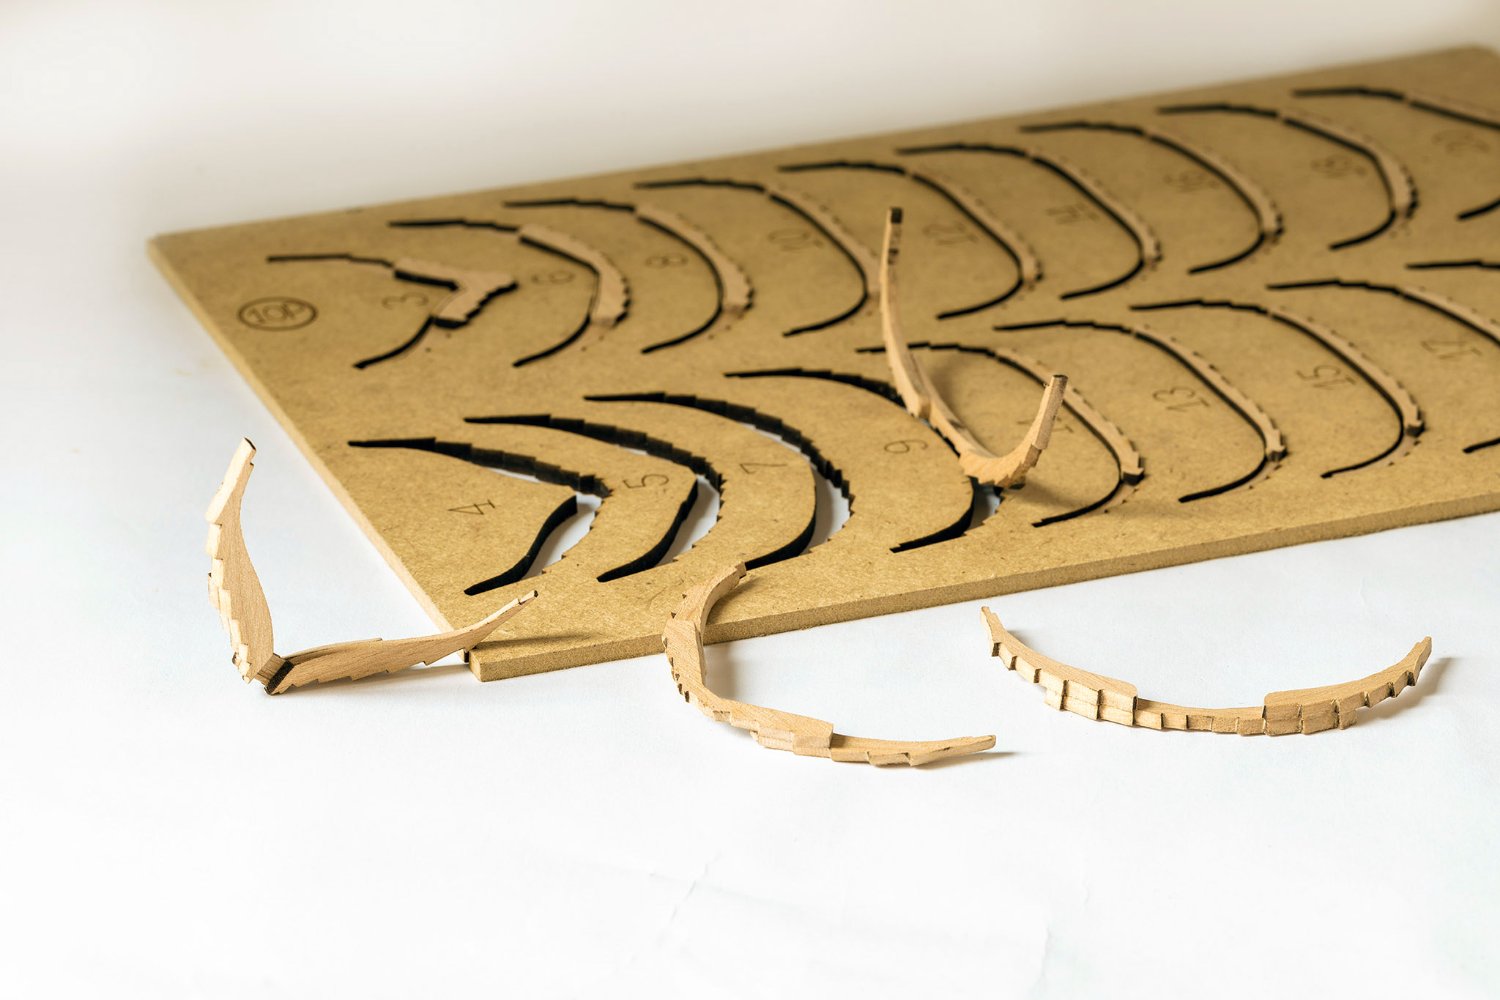
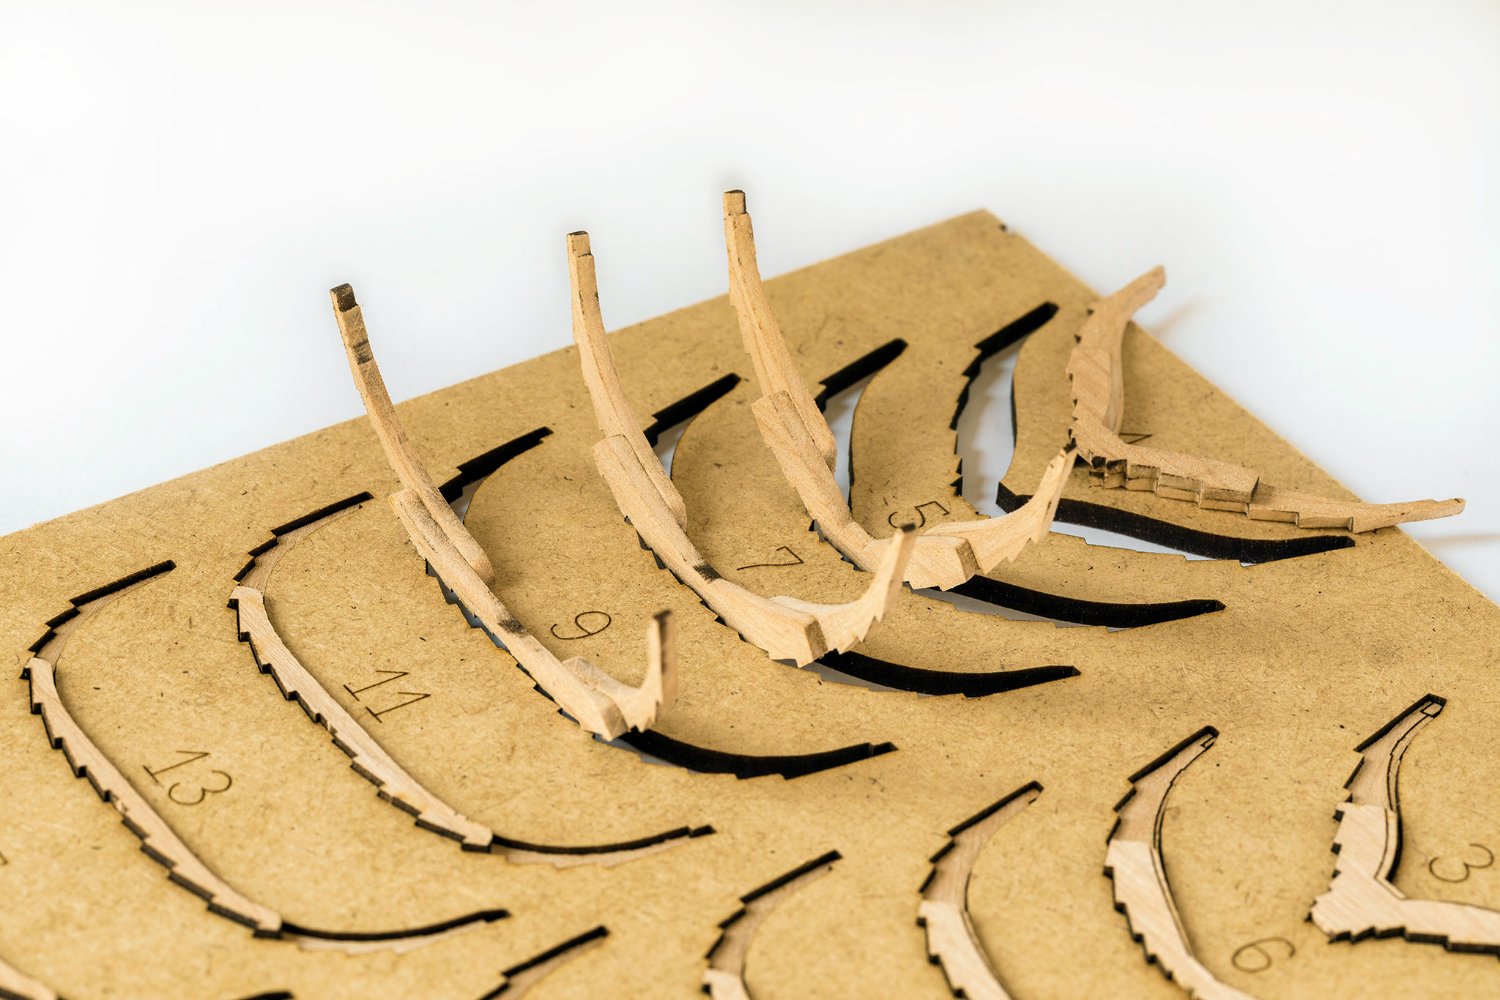
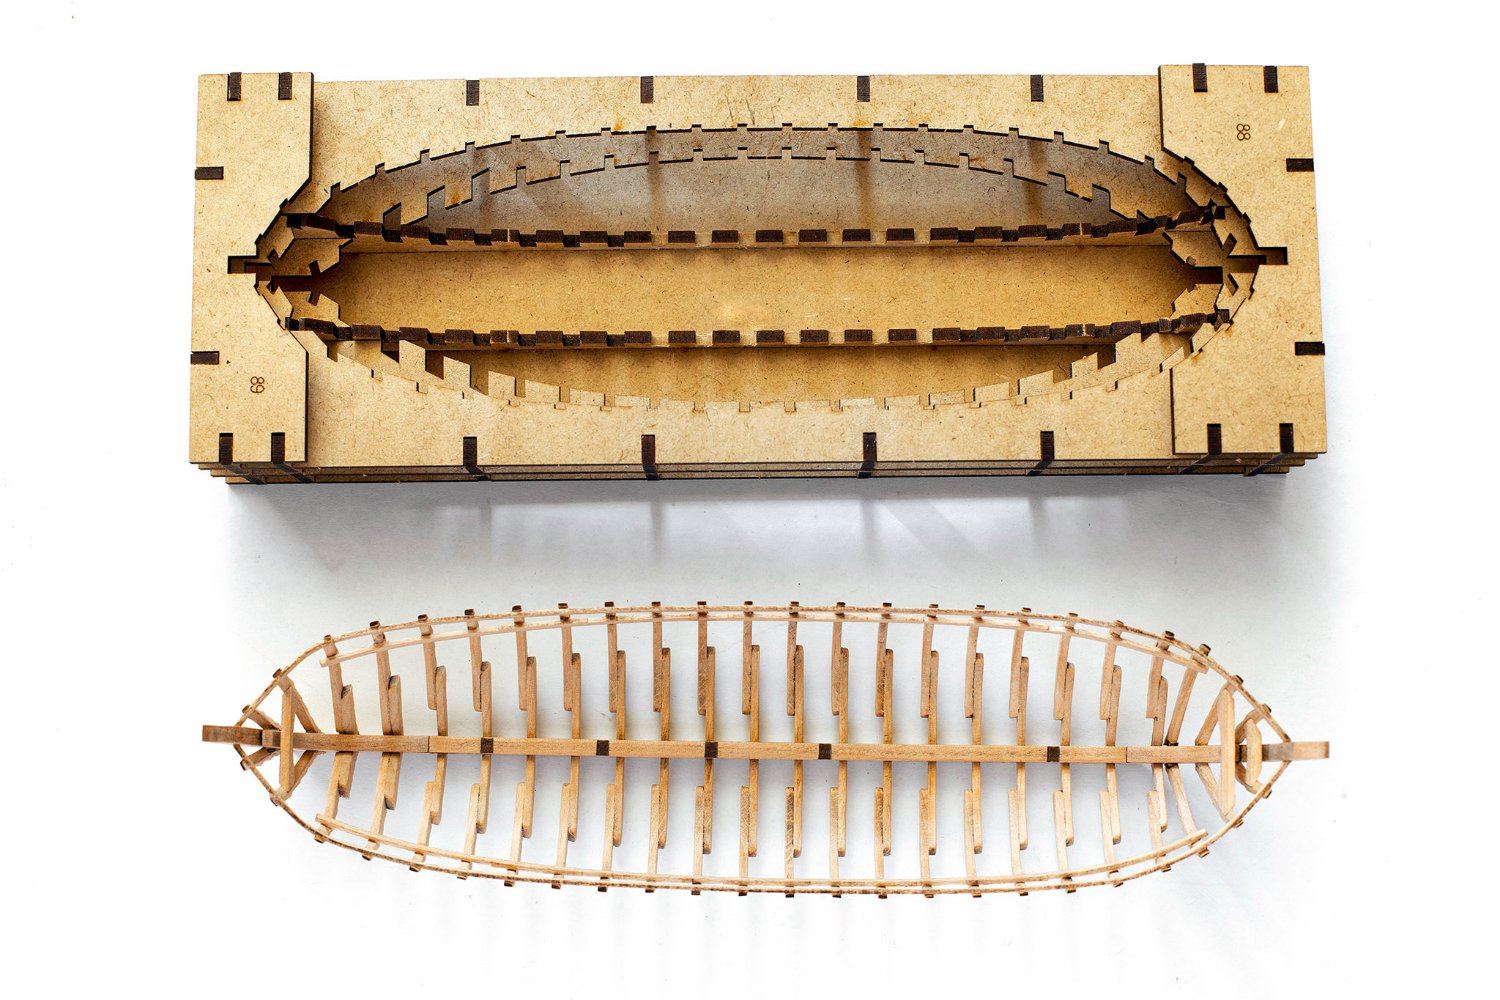
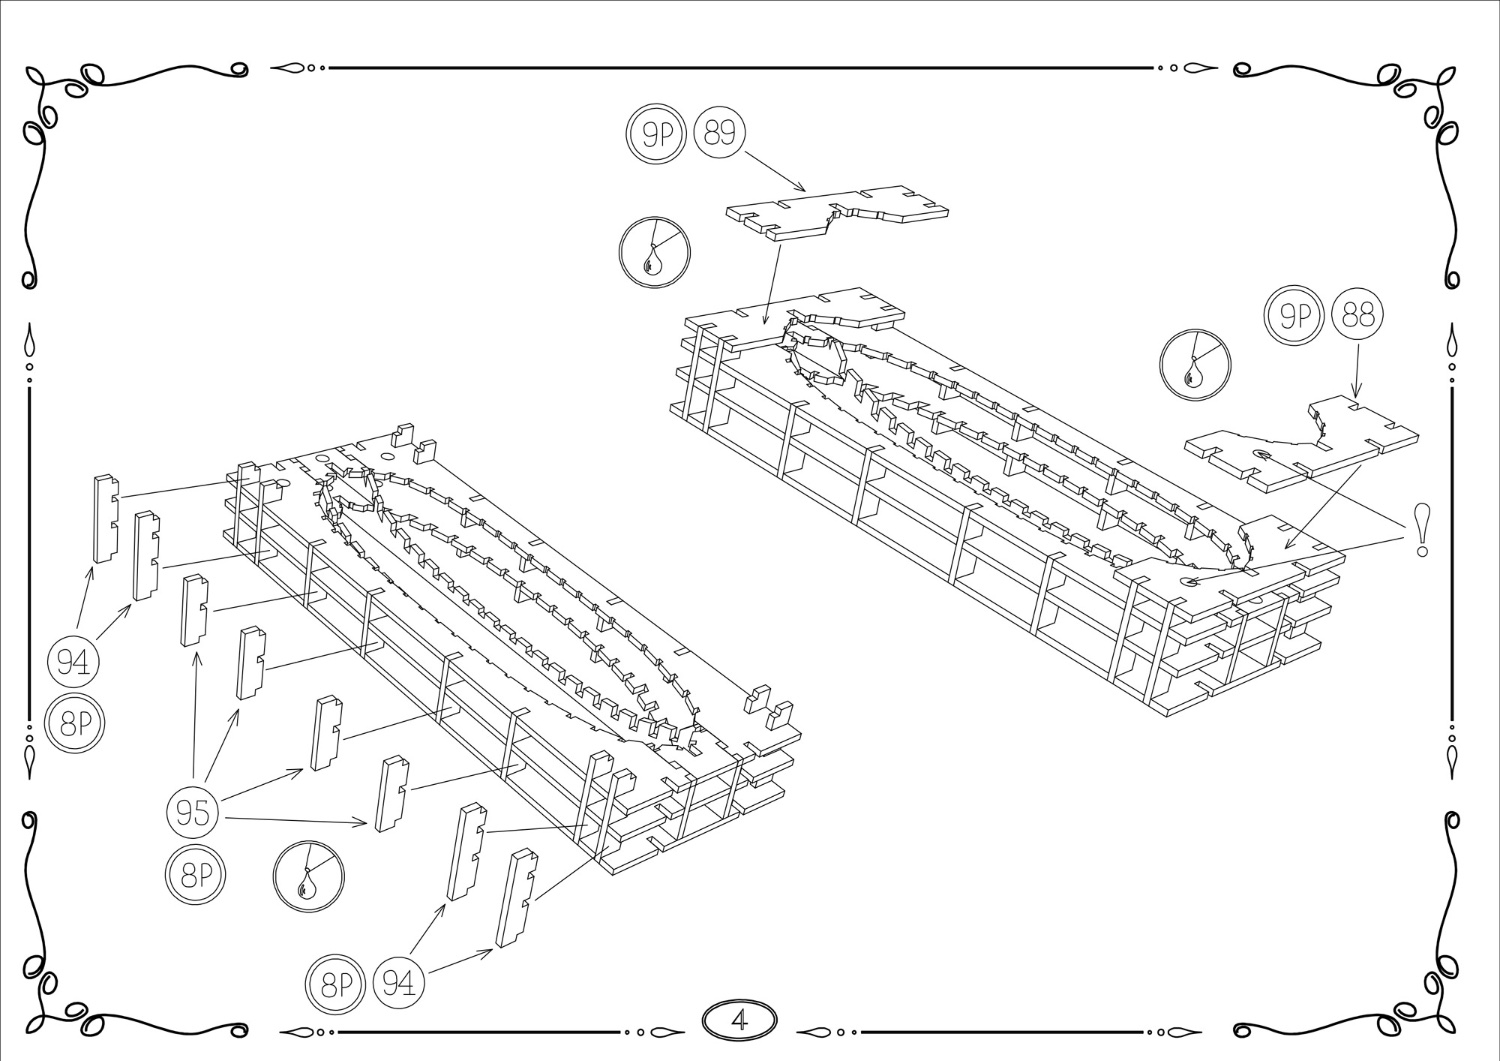
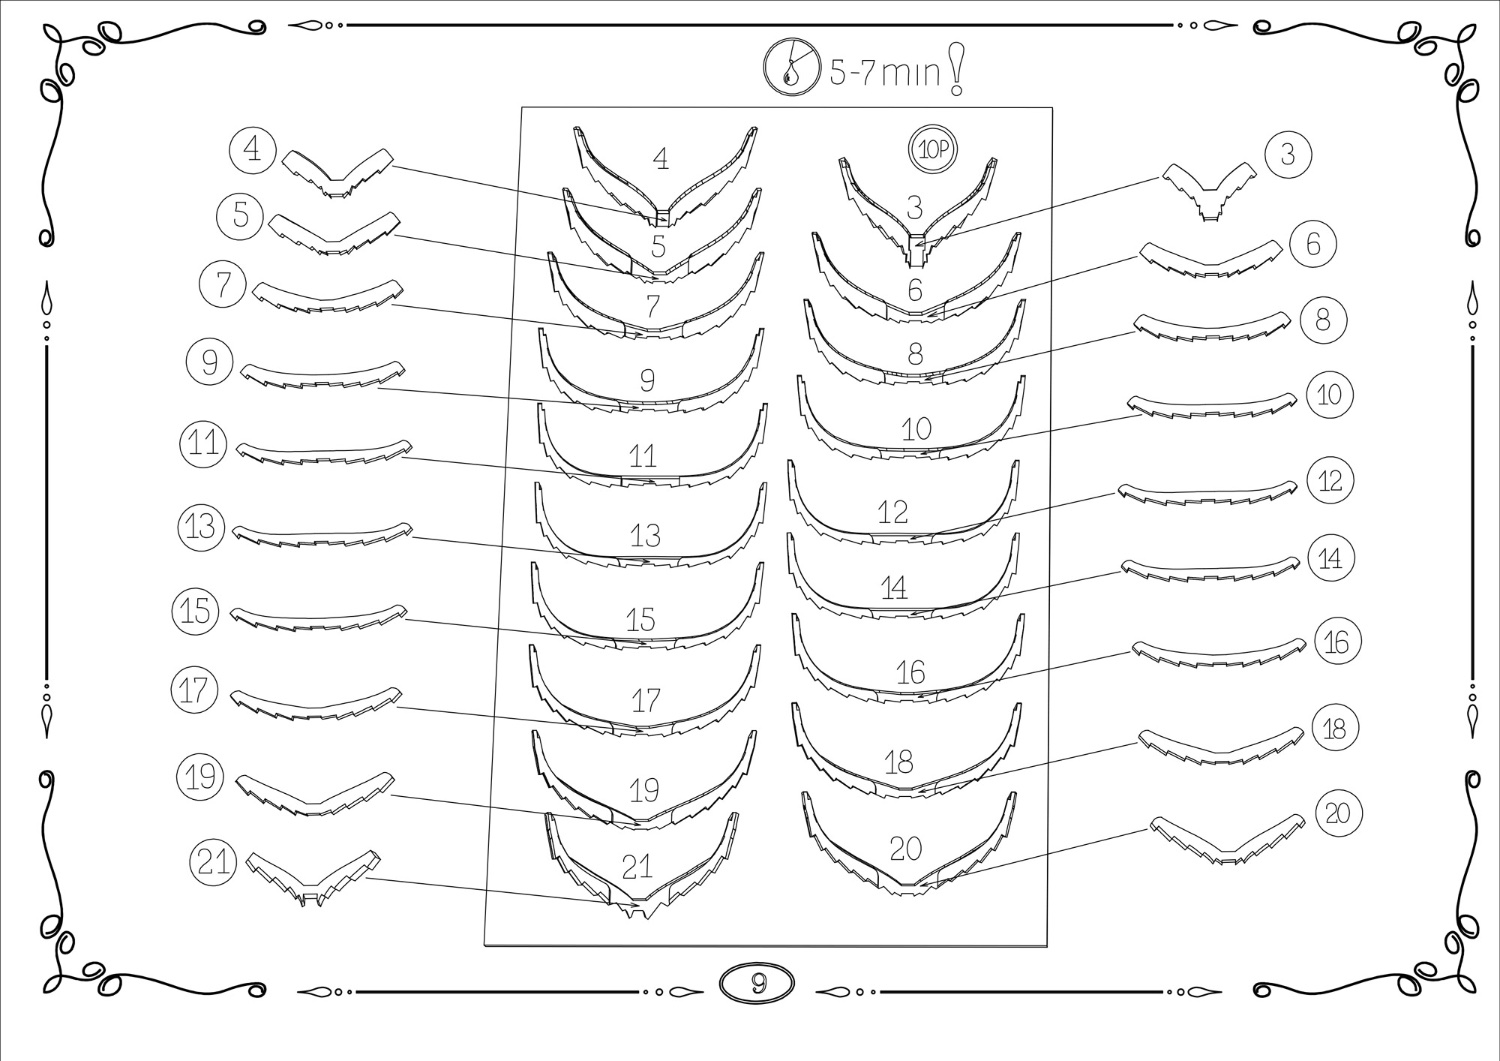
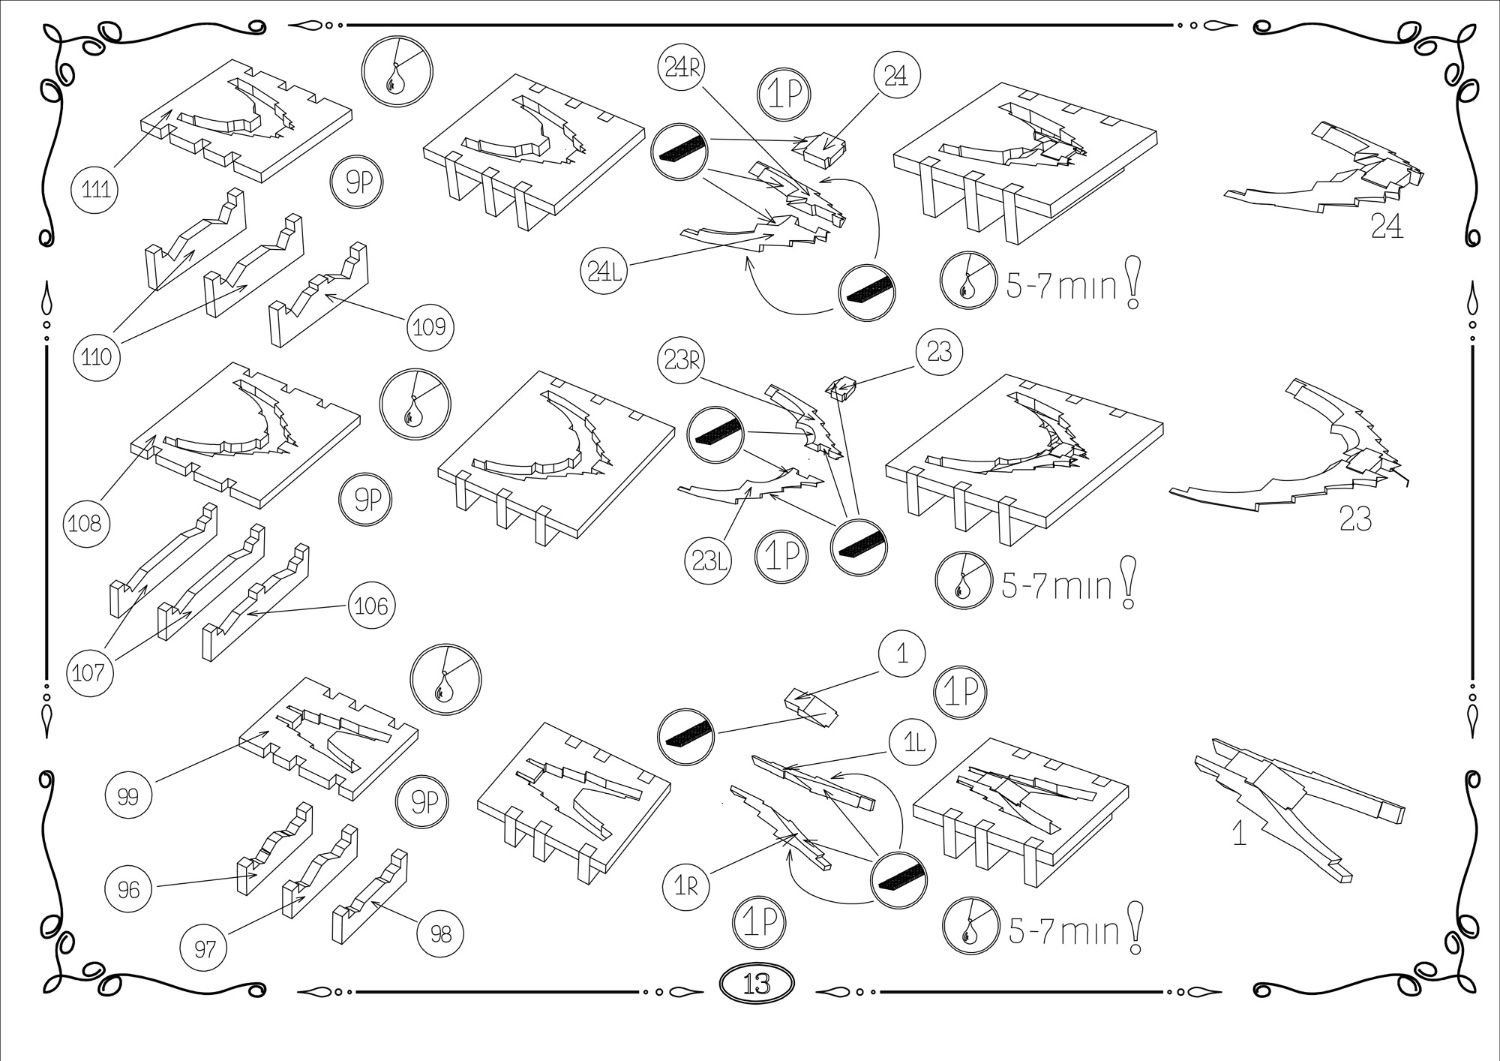
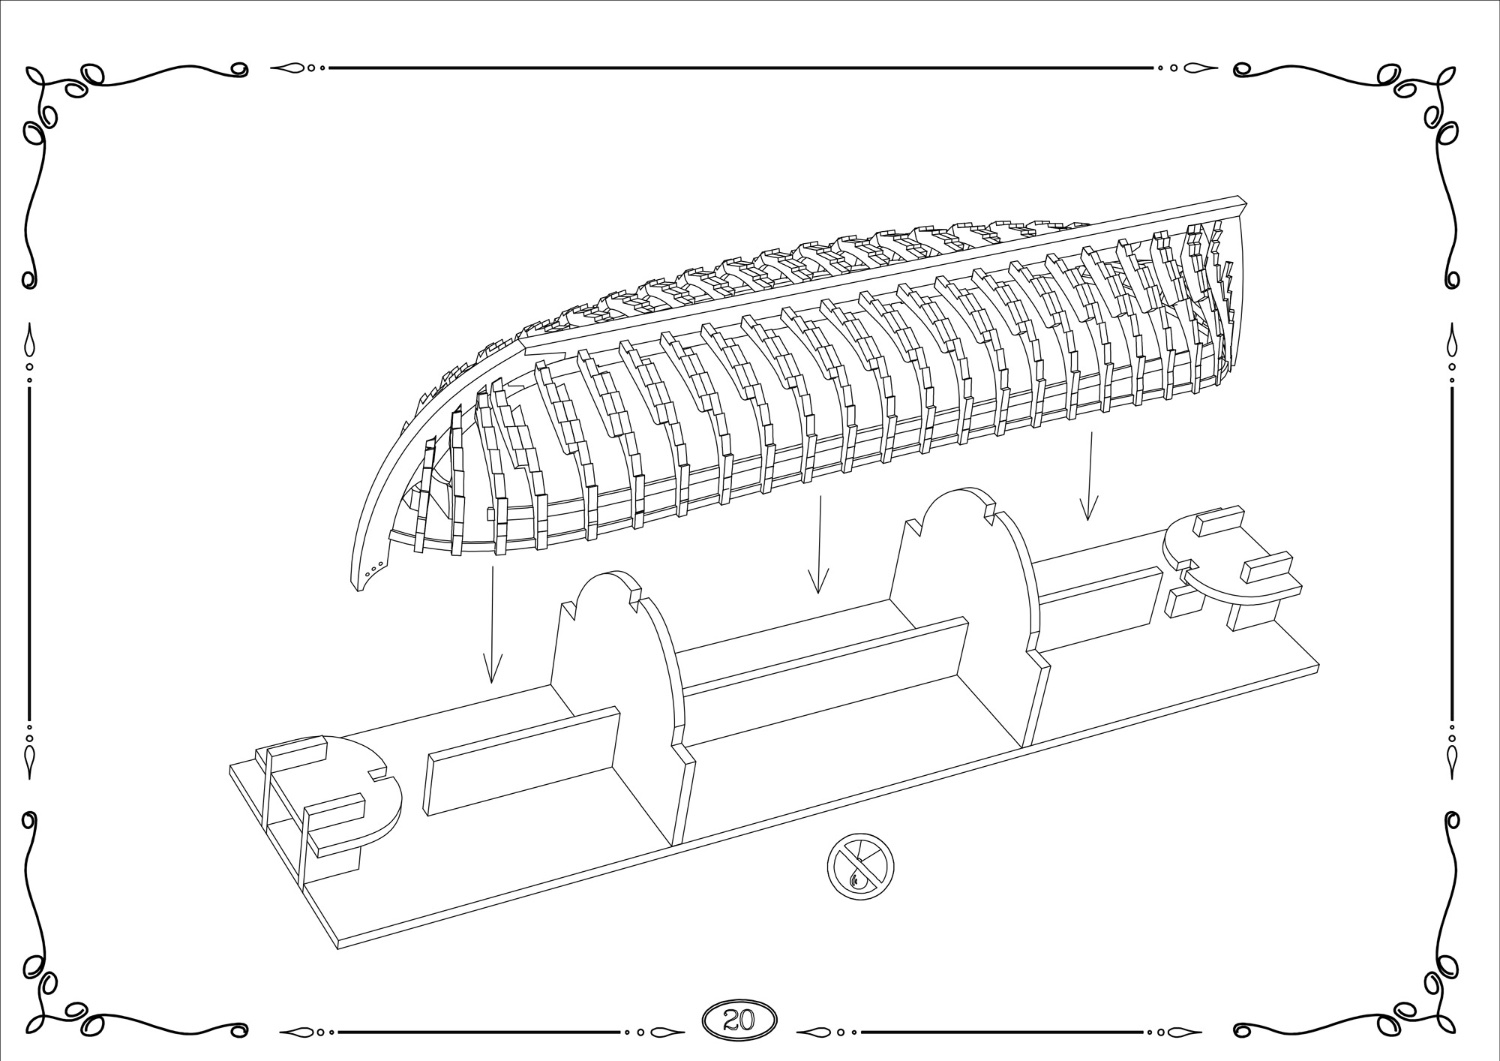
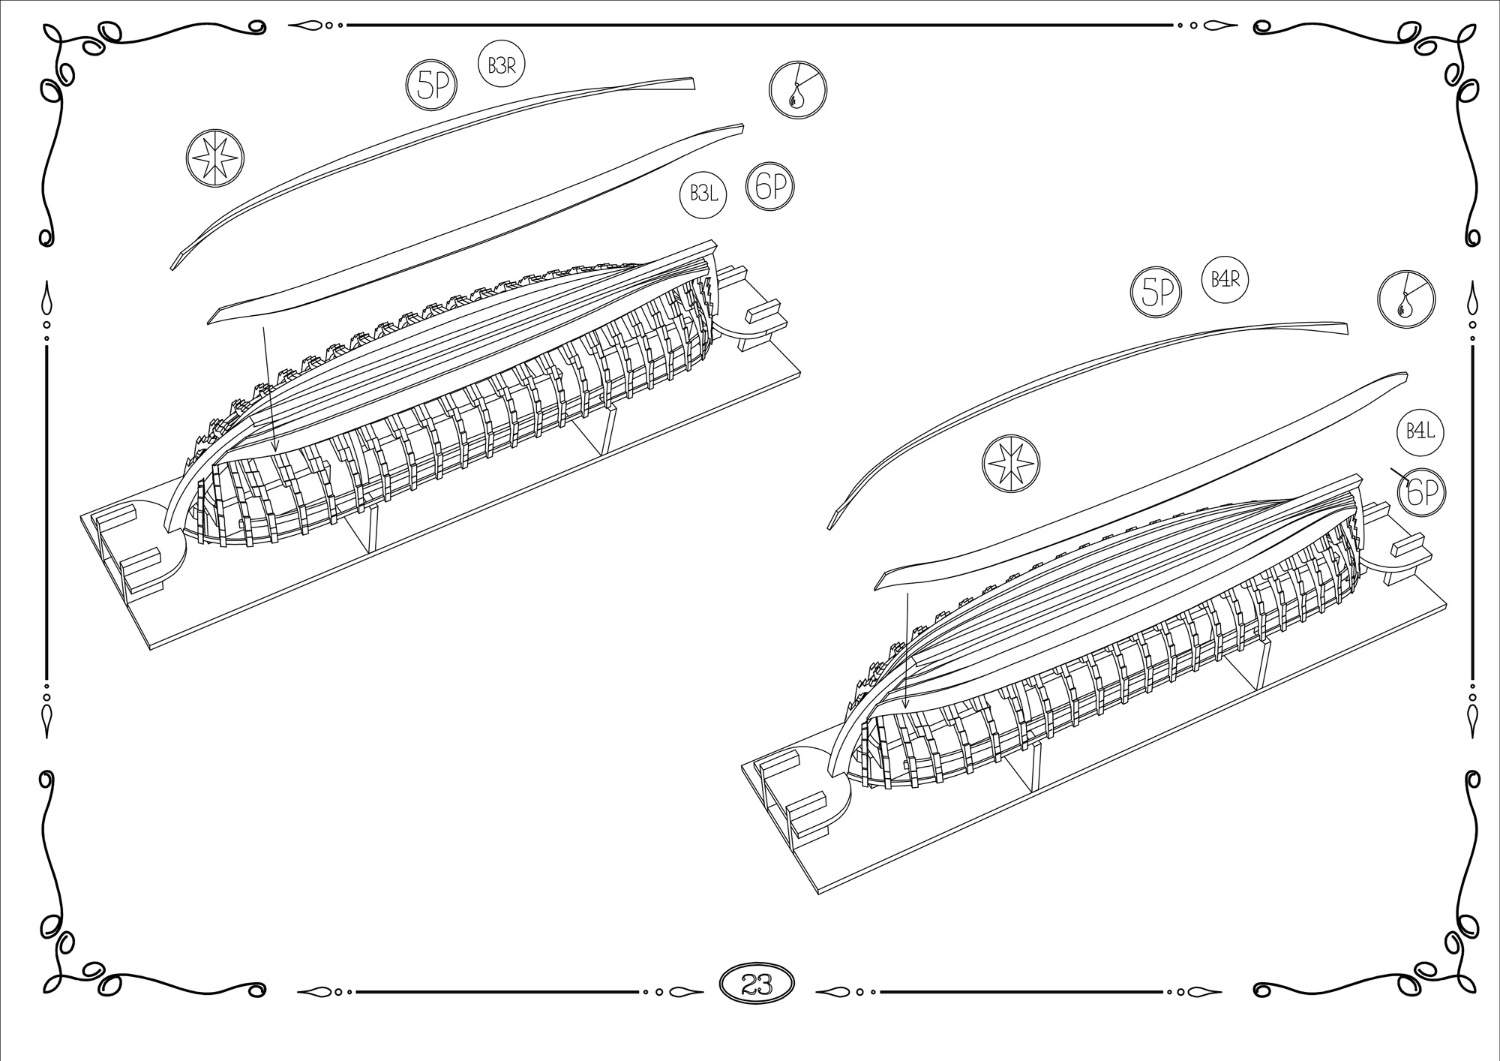
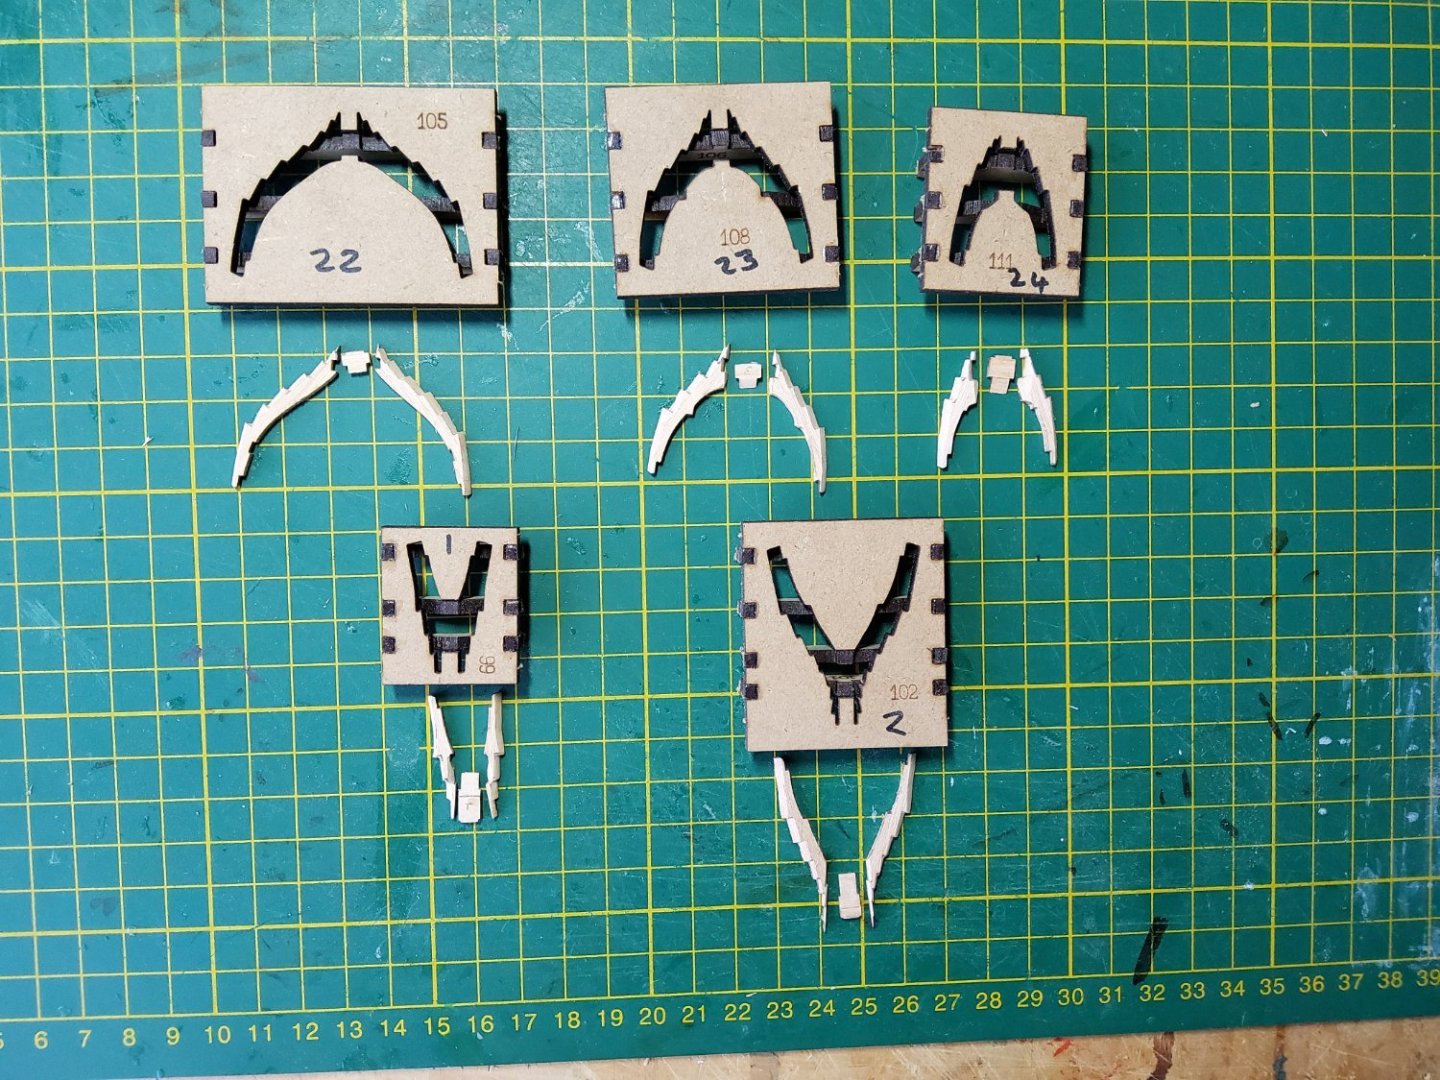
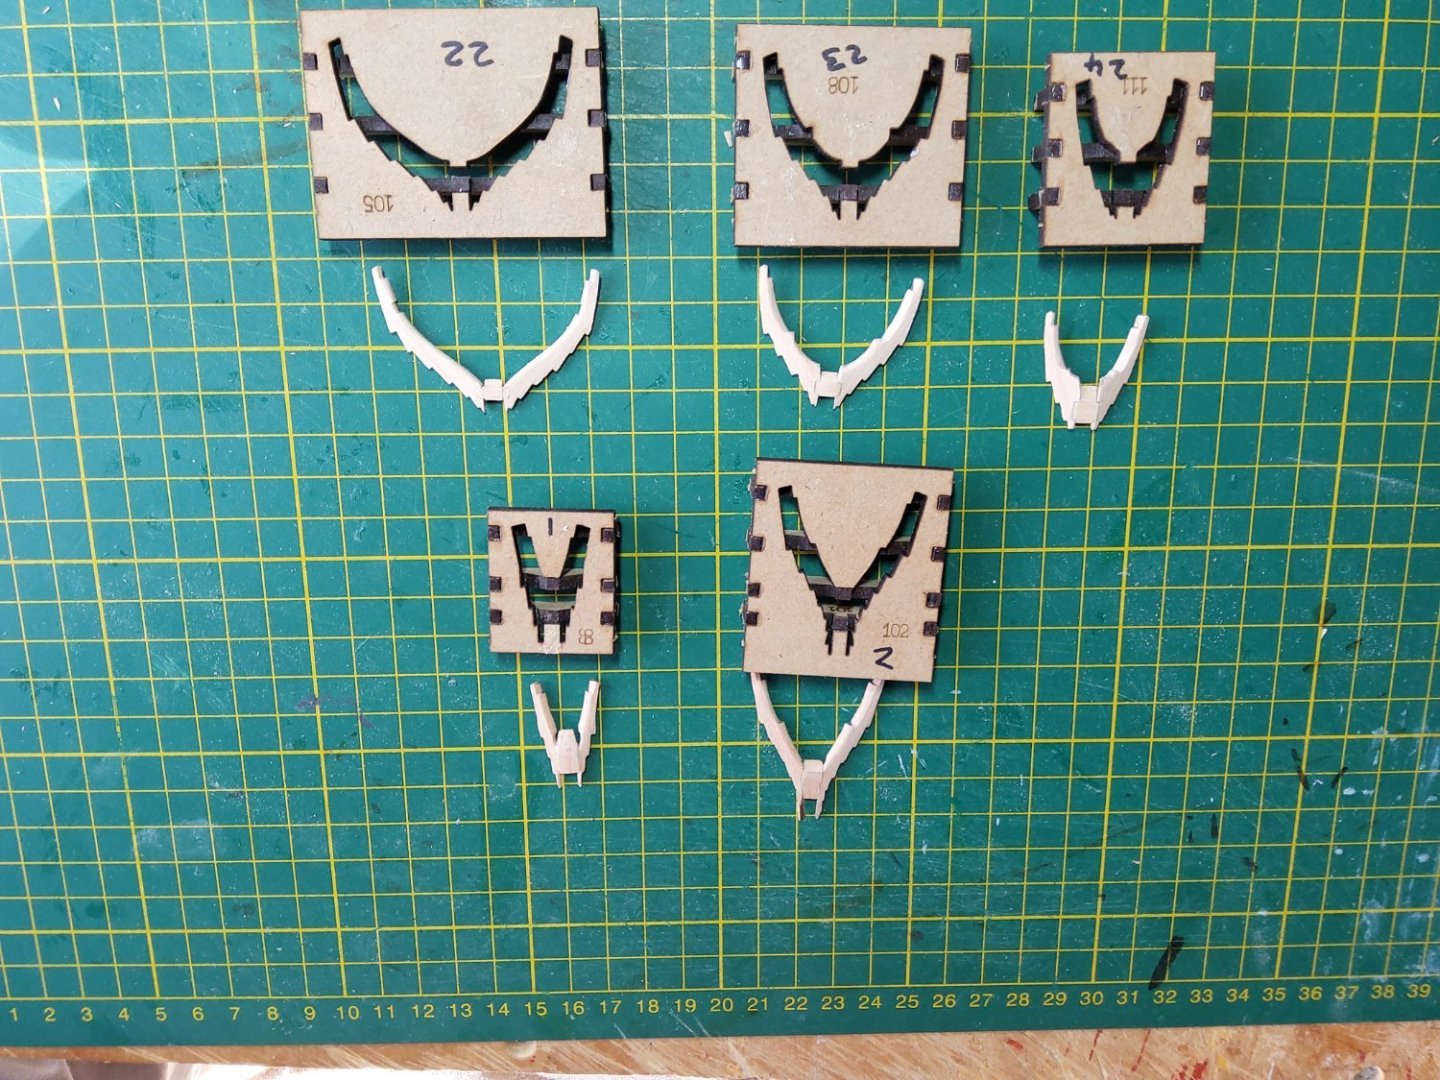
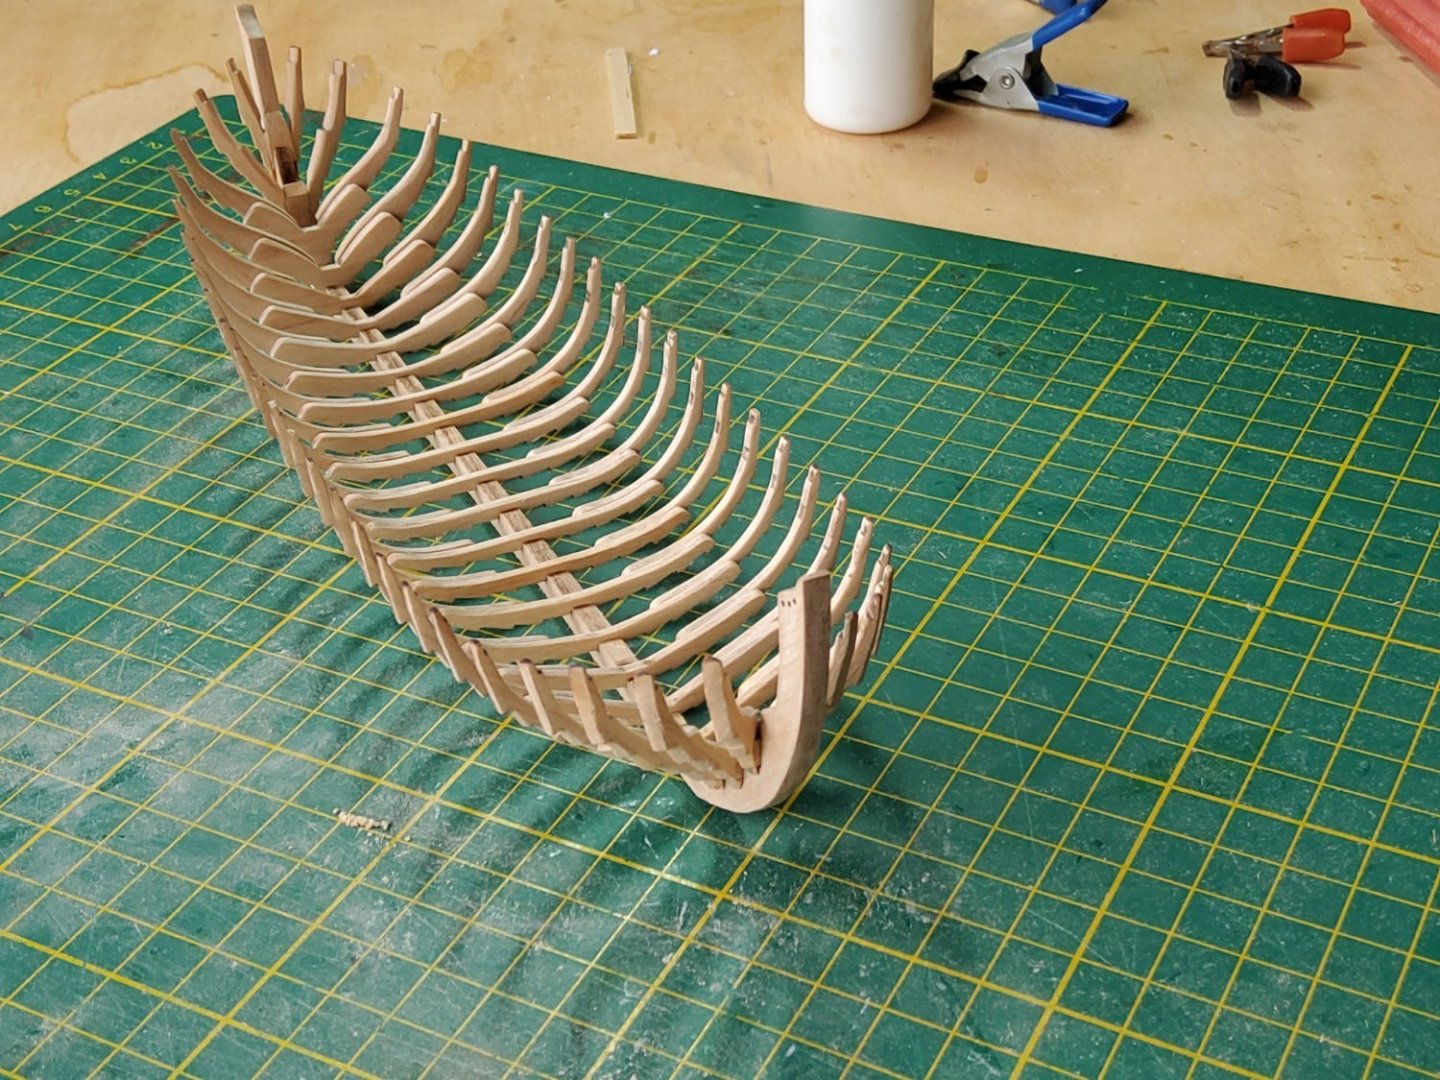
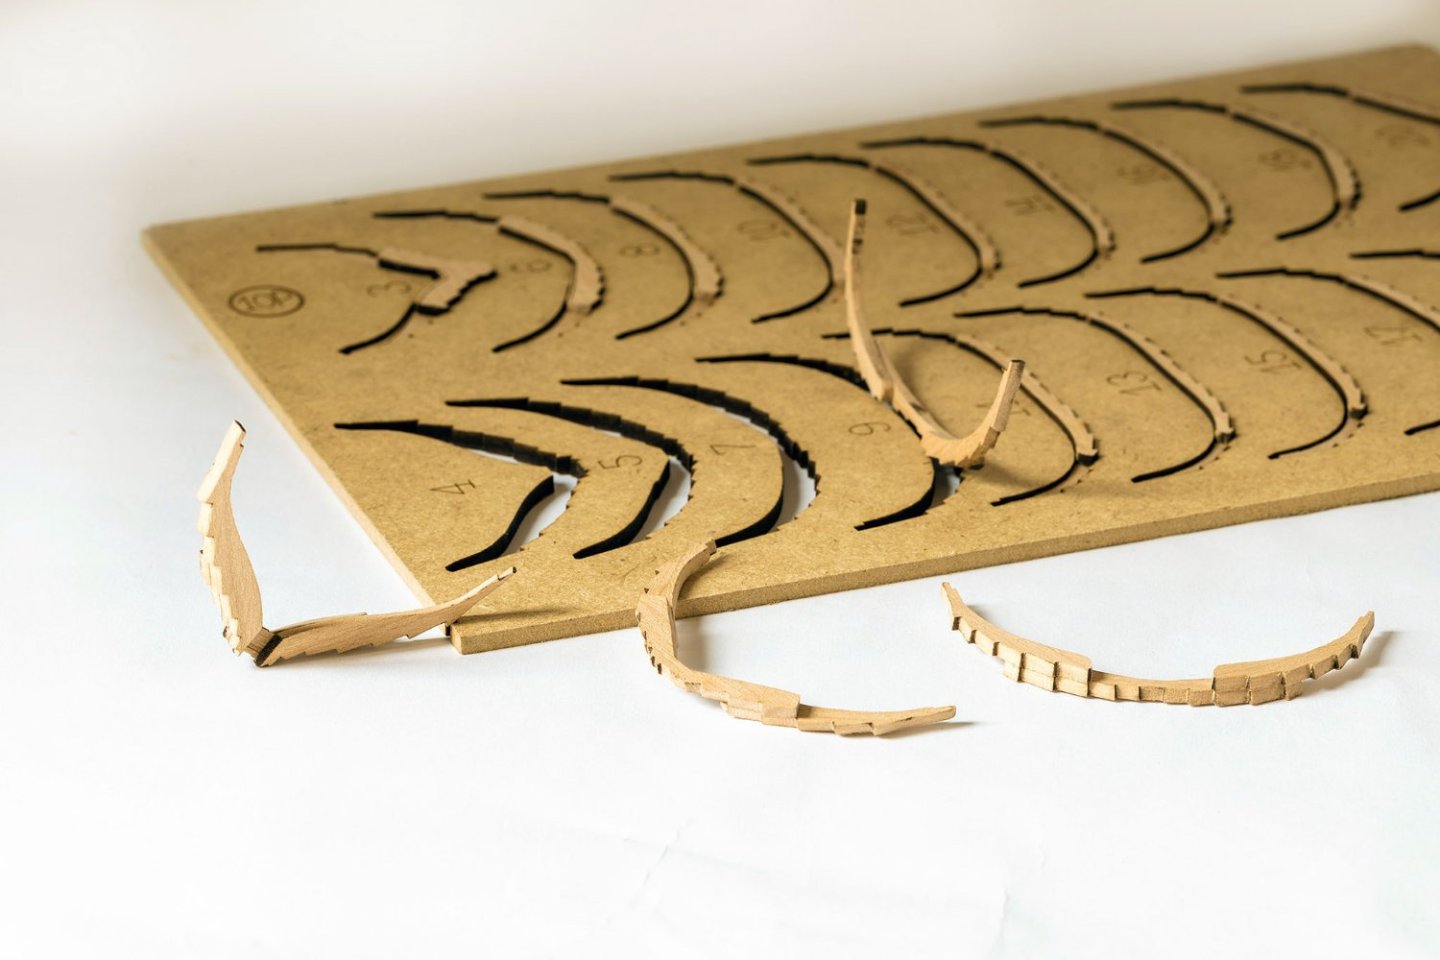
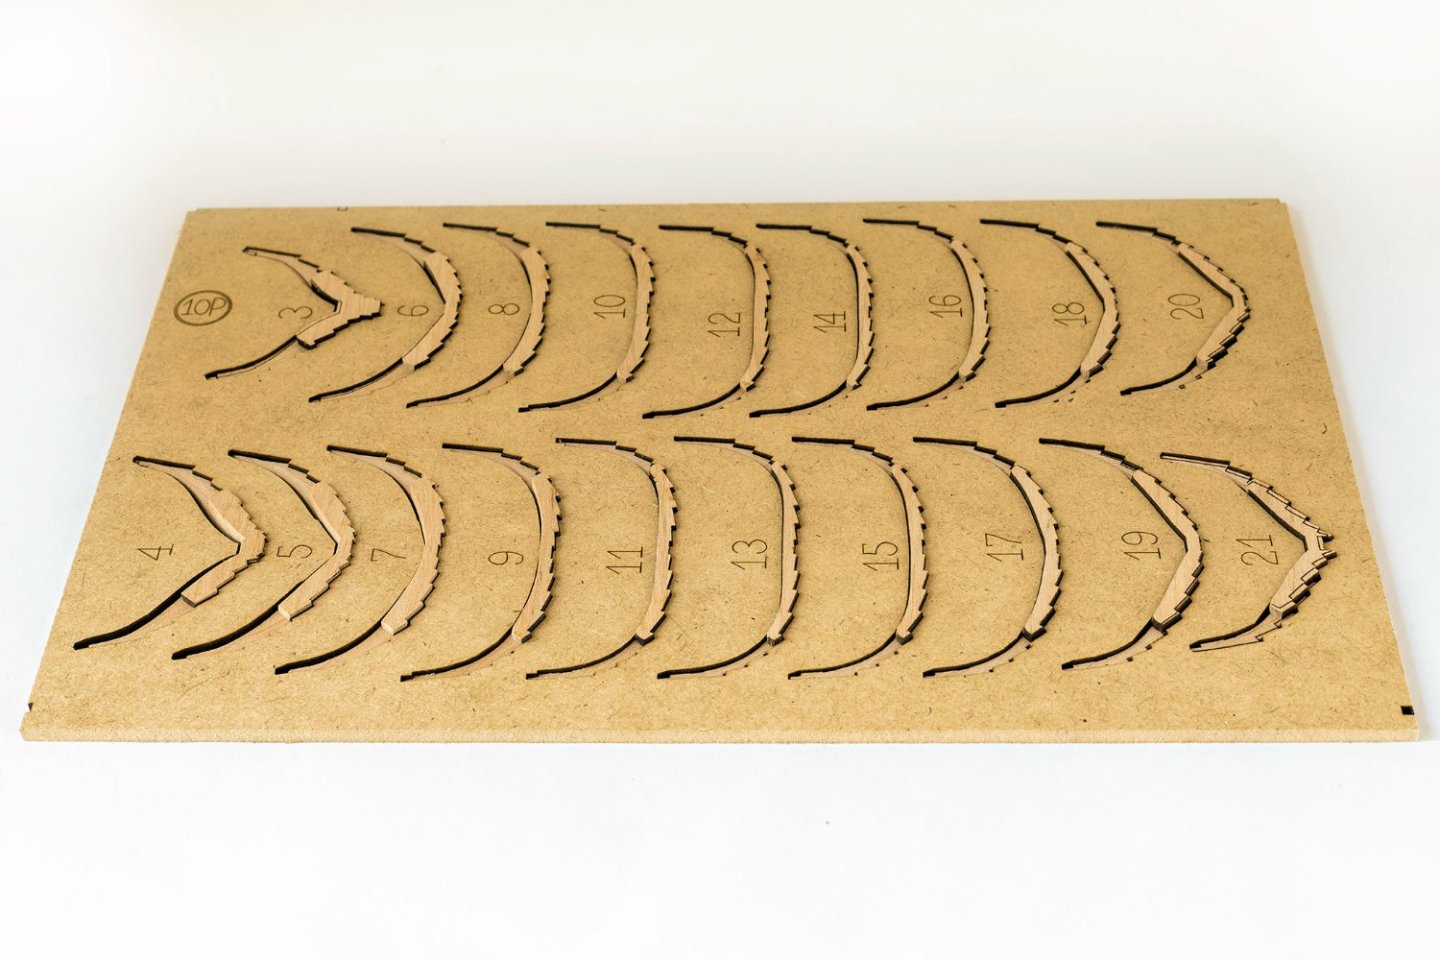
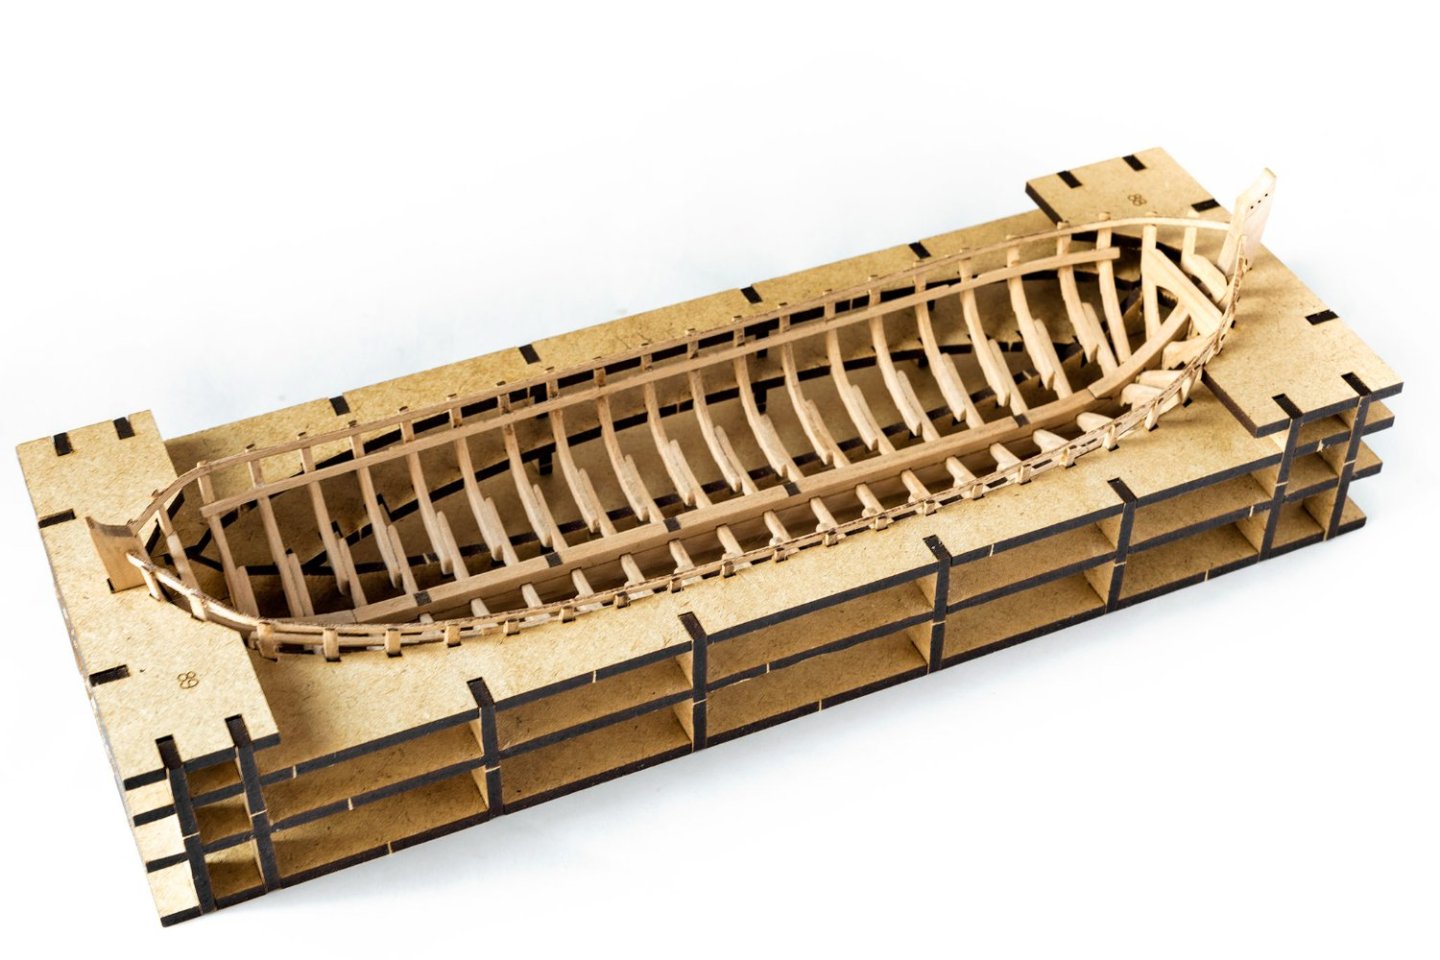
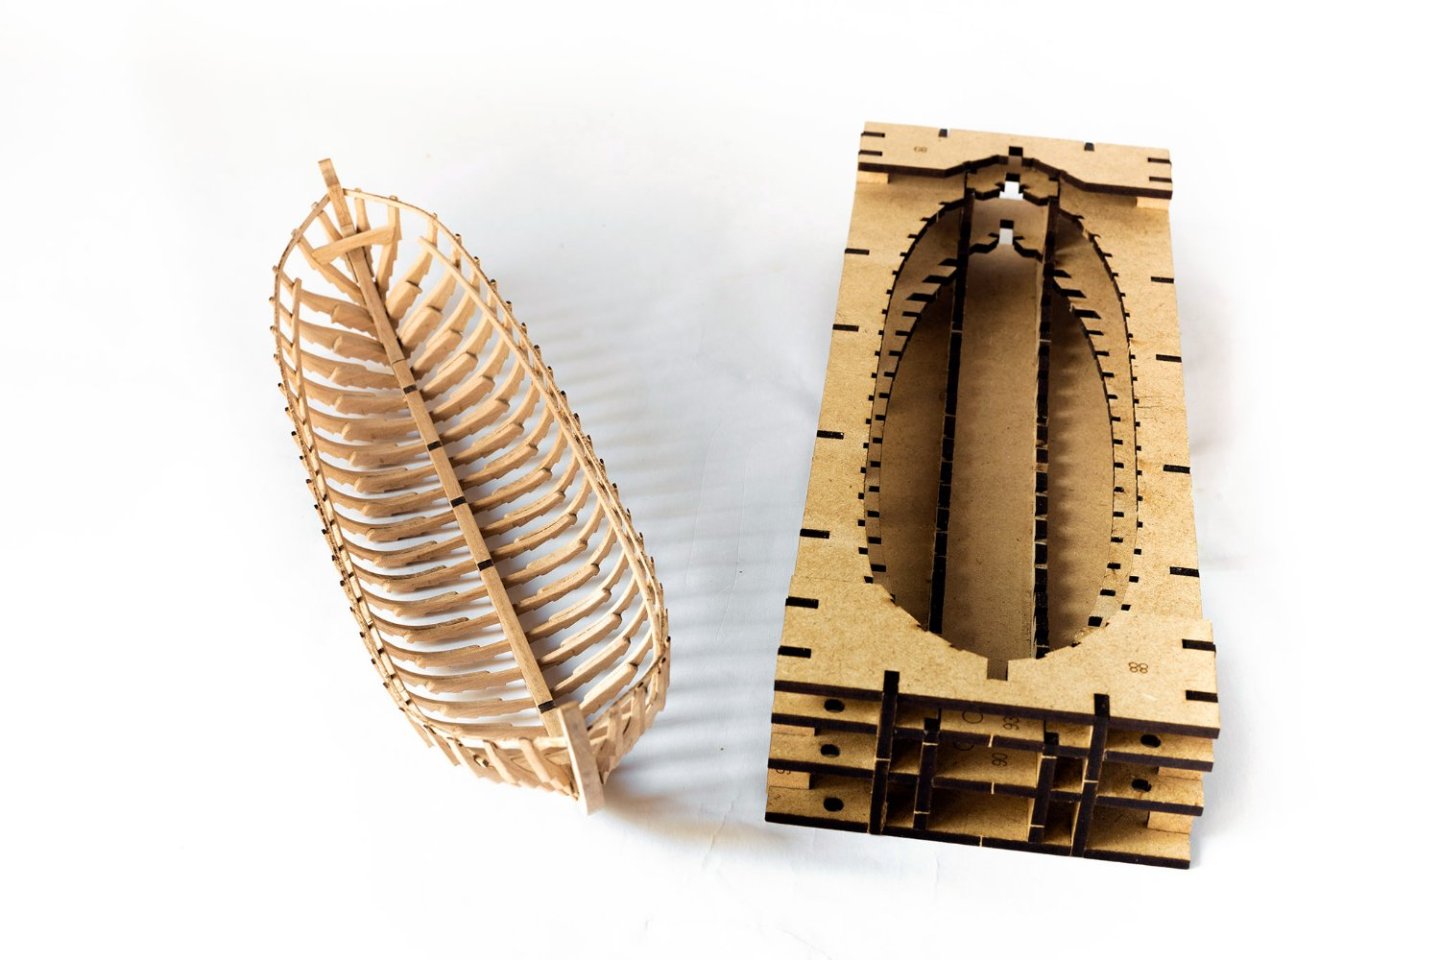
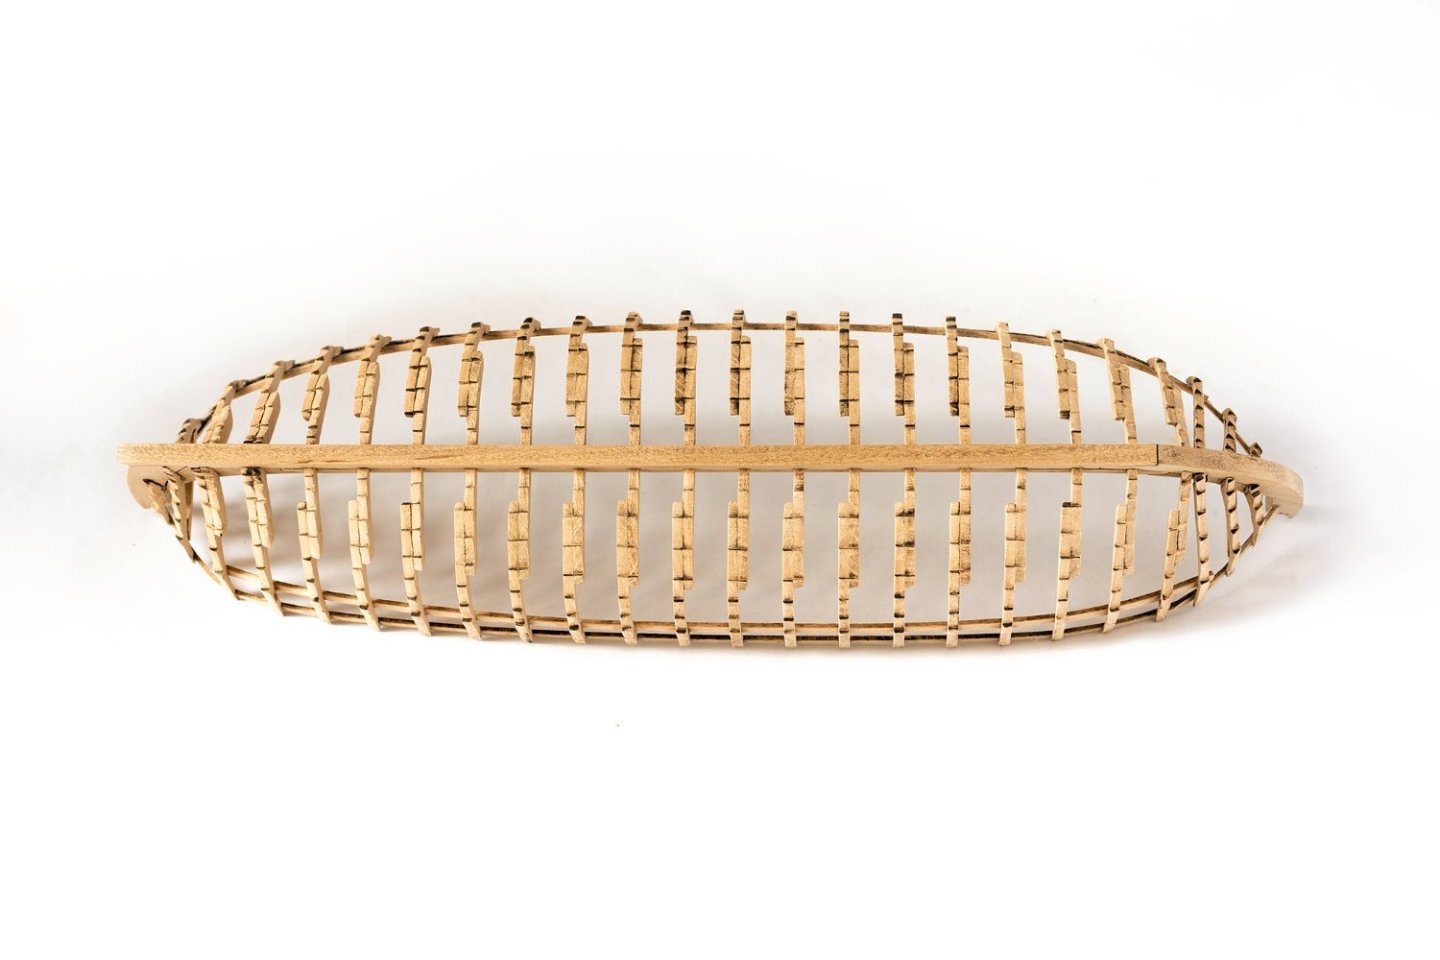
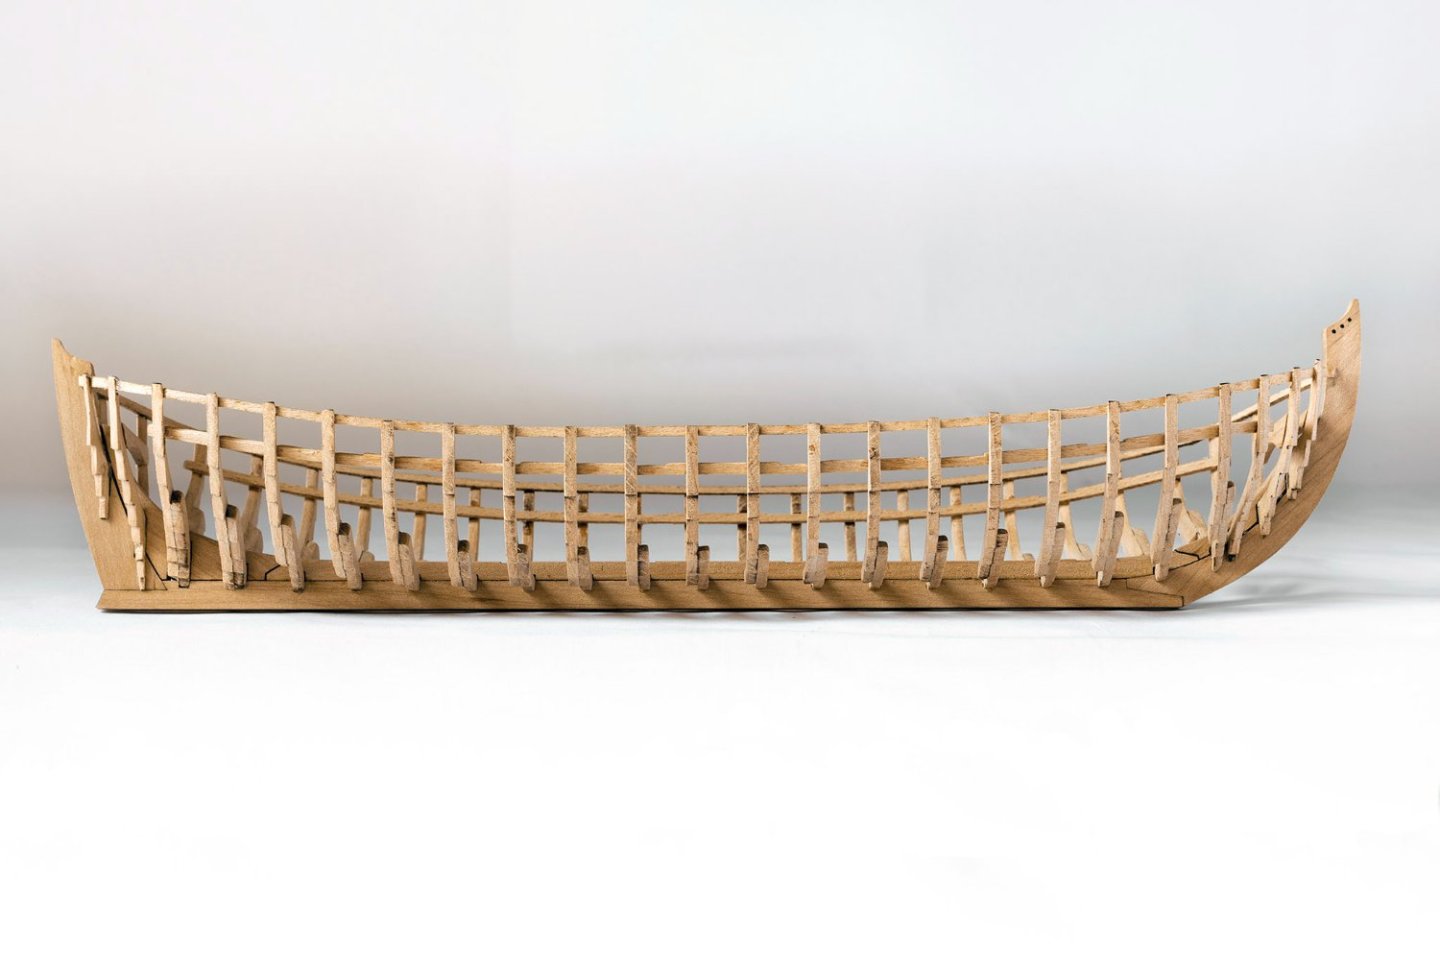
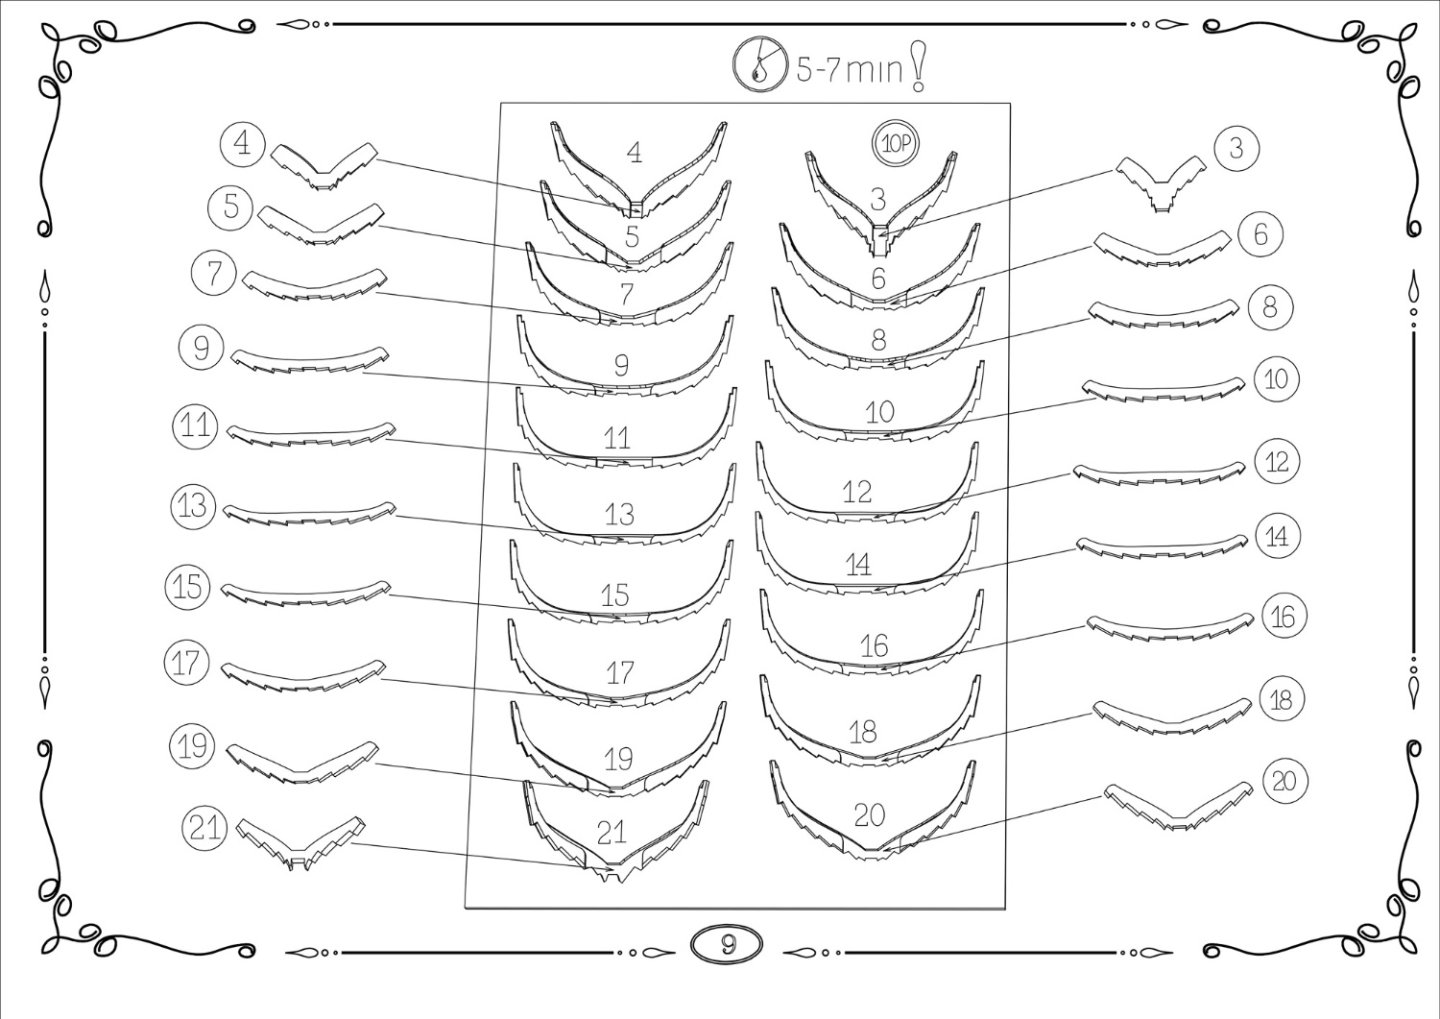
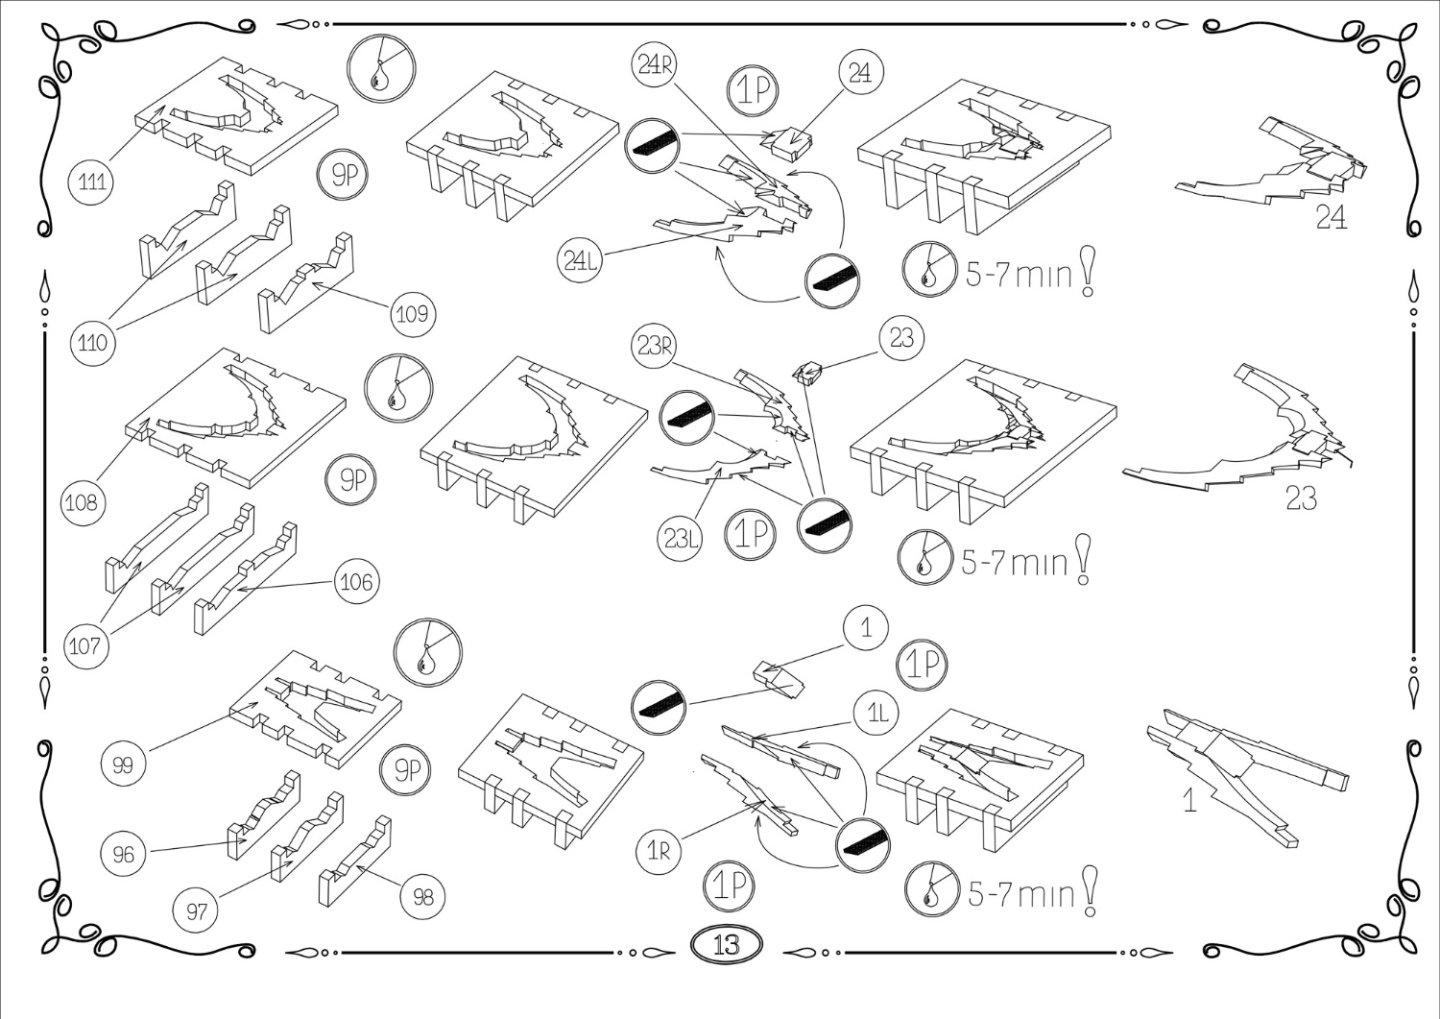
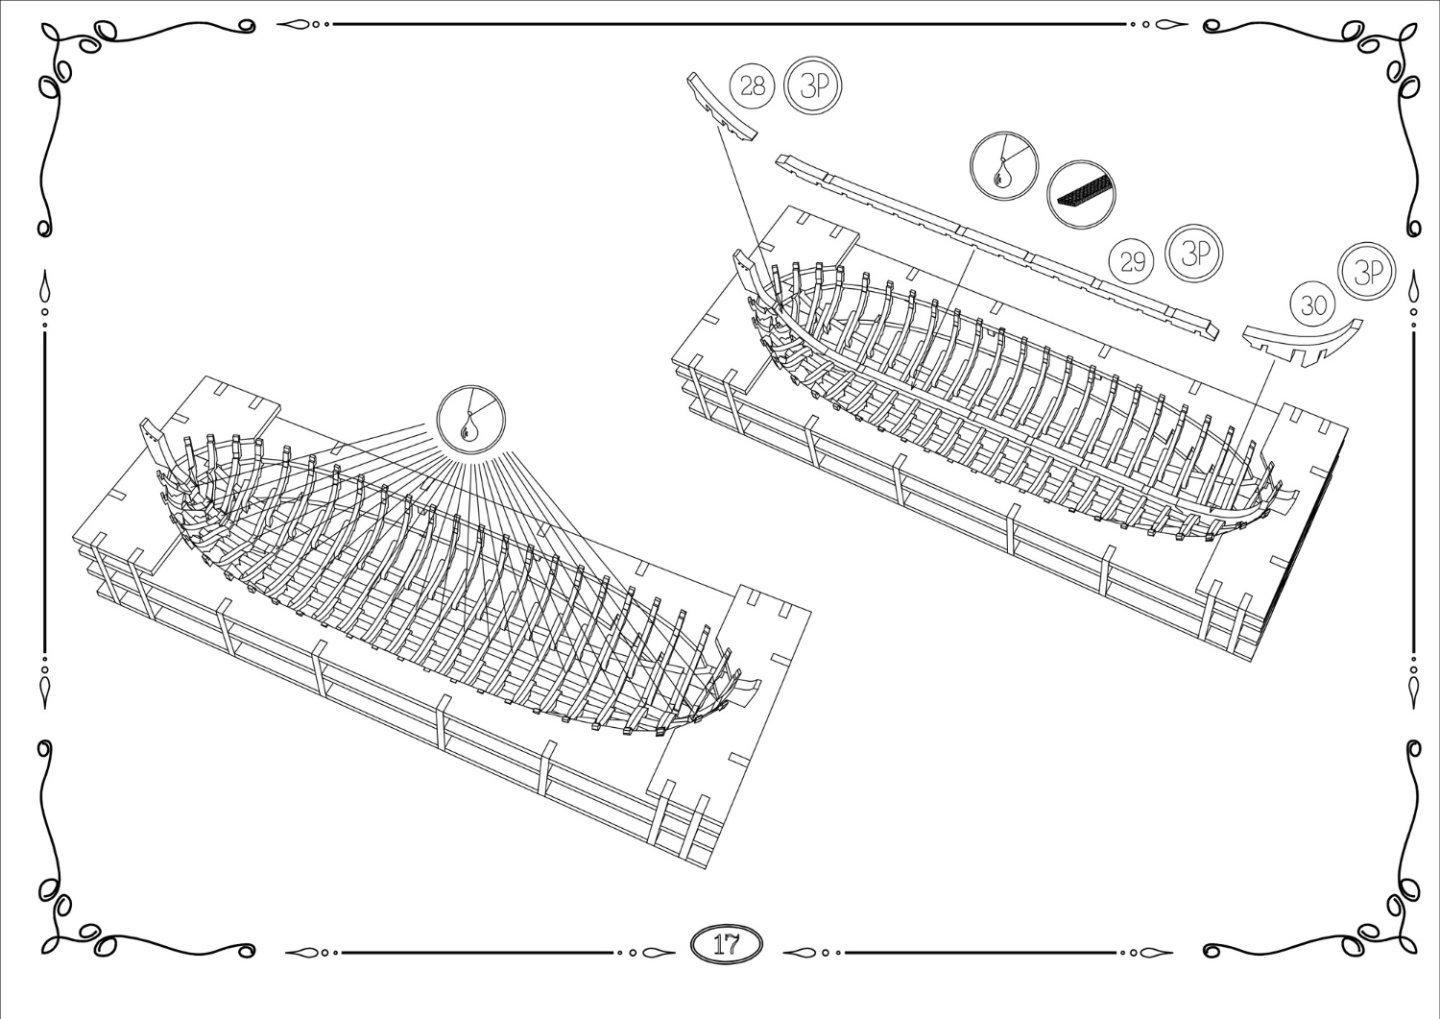
 After seeing JamesH's review of this kit (here) I decided it would be a good one for me to build. Small, as I have limited space, only one mast and no rat lines 😁. I then found the videos by Olha Batchvarov (here), and she made it look so easy. There are a few members on MSW who have mentioned the shallop, but as far as I am aware, there is no actual build log. There are three main jigs to be used at various times, all of which were easy enough to assemble, though some easing of slots was required. The first jig is used to build the 20 main frames, plus there are five cant frames (each with its own jig), three at the bow and two at the stern. The latter consist of two futtocks (I assume that’s what they're called) joined by a cross piece (chock), while the former have two futtocks and a floor that overlaps them. All pieces have laser etch marks to show how much fairing is required to allow a fair run of the planks. The boat is clinker-built, so all frames are notched for the planks. The illustrations on how to assemble the main frames were somewhat confusing (there are no written instructions), but after some thinking and doing a couple of dry fits, it became obvious that frames 3-12 (towards the stern) had to have the futtocks and the floor placed with the etch marks downwards, while the other frames (towards the bow) needed to be placed with etch marks upwards. The floors were always placed on top of the futtocks. The frames in the jig, and a close-up of frame 21, showing the fairing. I faired the futtocks and the floors before assembly. The cant frames were difficult as some fairly precise sanding of angles was required to get the three pieces of each frame assembled correctly in its little jig. Again, thinking before glueing was definitely needed. The parts for the cant frames and their jigs…. ….and assembled. The keel, stem and sternpost were glued together, let dry, and placed in jig 2. As there was a small amount of sideplay, four completed frames were carefully glued in position, making sure that they and the keel were correctly centred on each other and in the jig. By doing this, the keel was kept firmly in place. All other frames were then glued to the keel. Two stringers were soaked, bent, then glued to the frames. The keelson and some other pieces were added. Next up, planking. Cheers


- 36 replies
-
- 7
-

-
- Shallop
- Pavel Nitikin
- (and 1 more)
-
 I'm starting a little project again to keep my hands busy while I'm on vacation. This time it's a boat based on Captain John Smith's Shallop (1608) from the Ukrainian manufacturer and my friend Pavel Nikitin. He designed this kit during the first month of the war and already sent the first batches to warehouses in Germany and Bulgaria. In order to ensure the operation of the store and not get into such trouble with orders, as happened with his store in Kyiv, which had just opened on the eve of the war... I will be building exclusively with hand tools in a shipyard that fits on a coffee table... On my YouTube channel, in the description under the video, you can find a promo-code for a discount on all products in Pavel Nikitin's store and on this specific KIT.
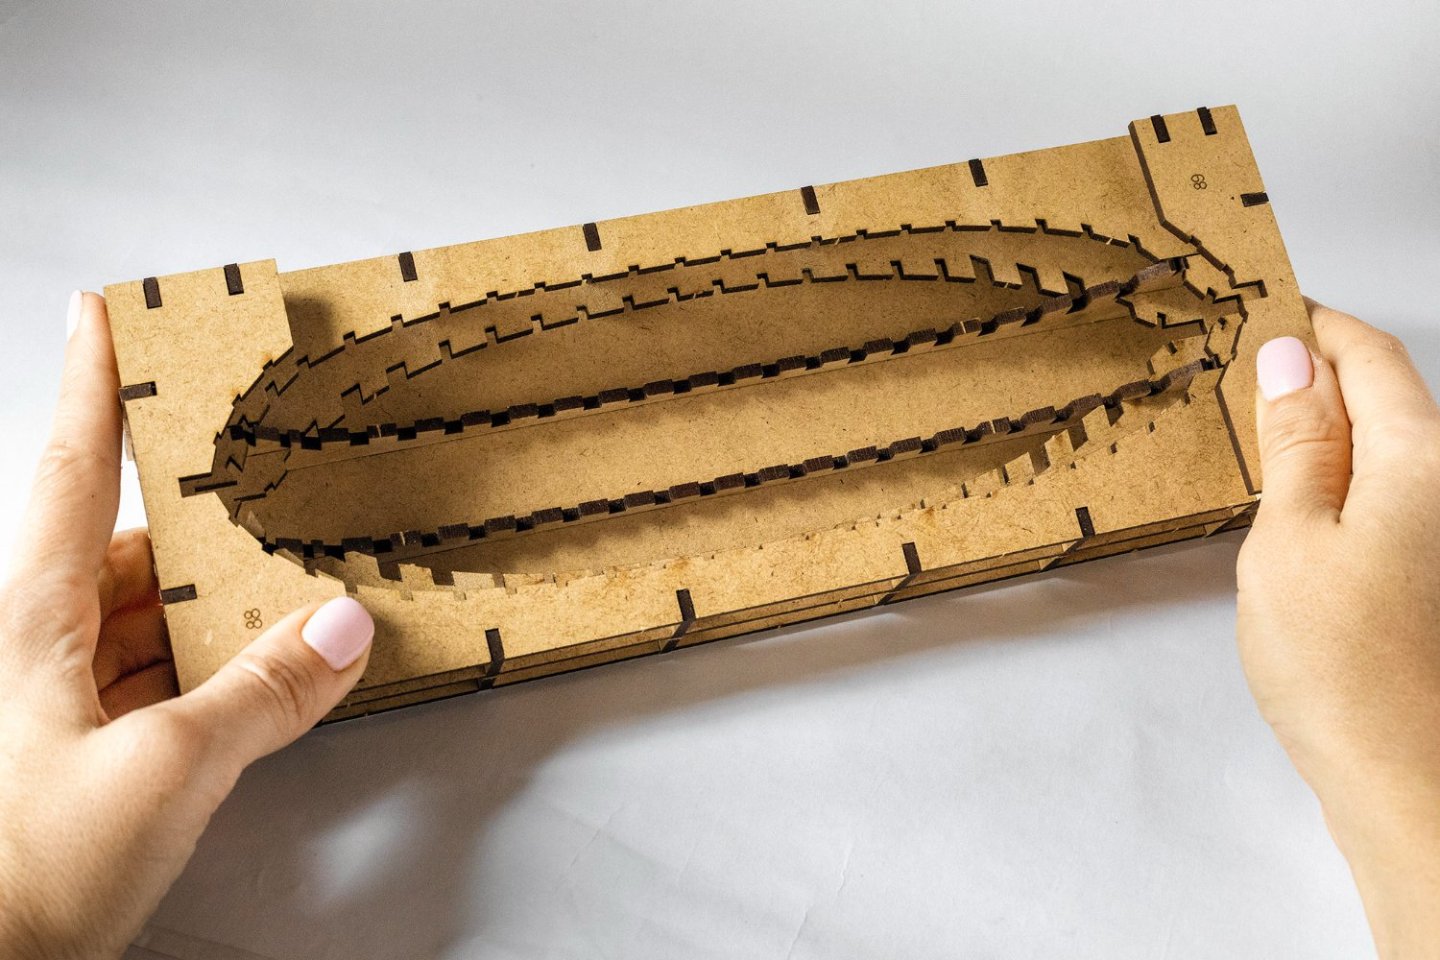


-
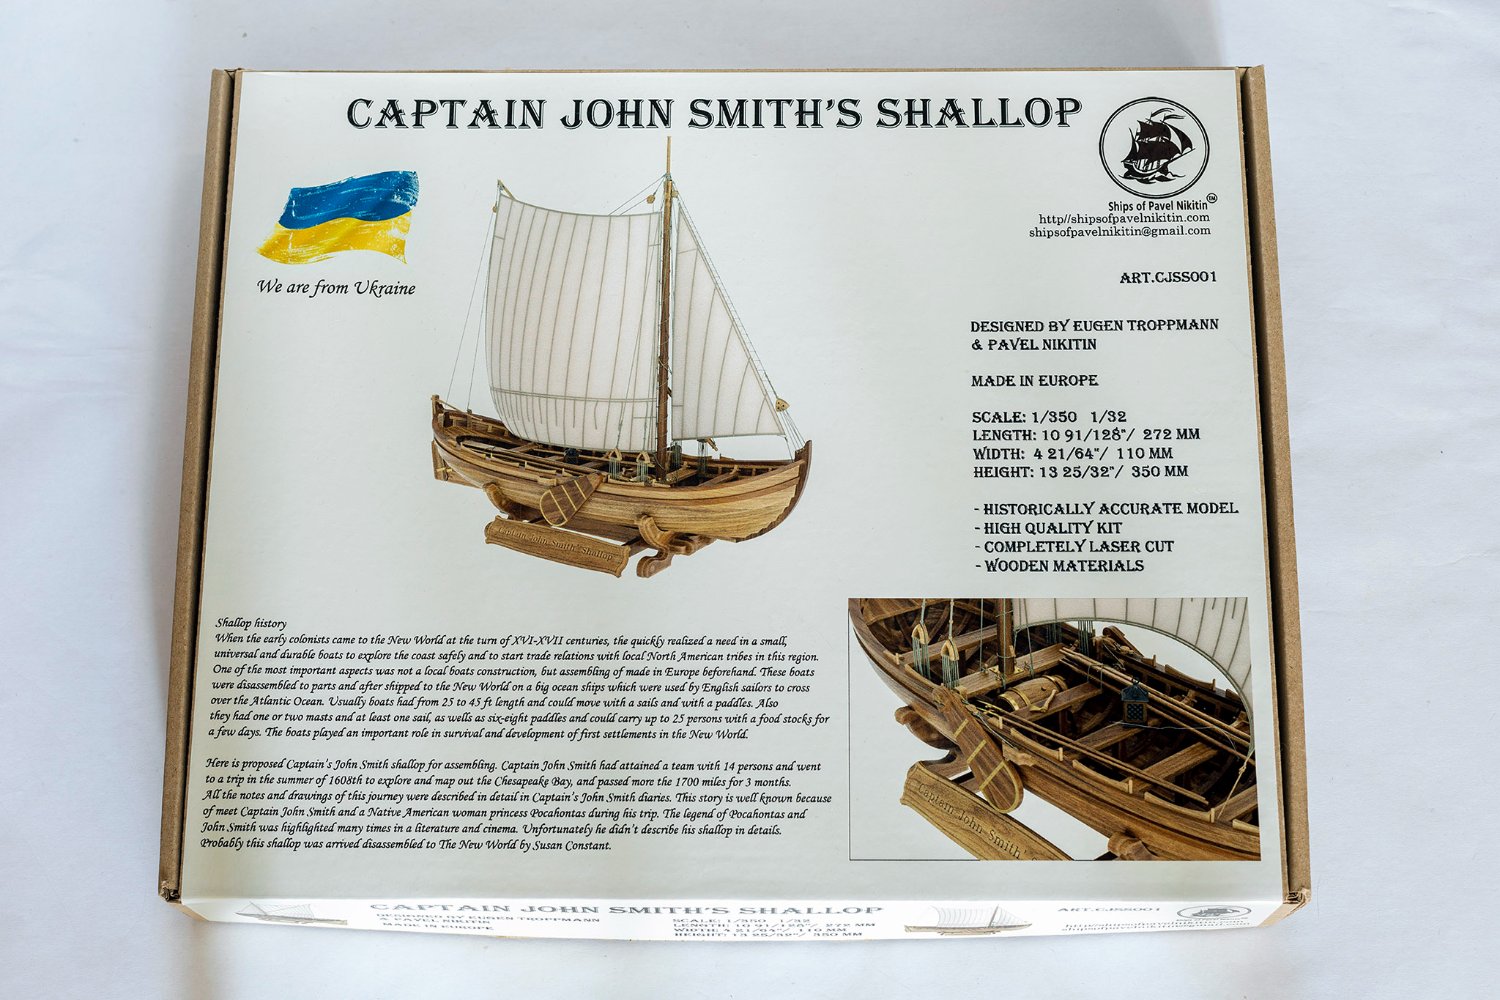
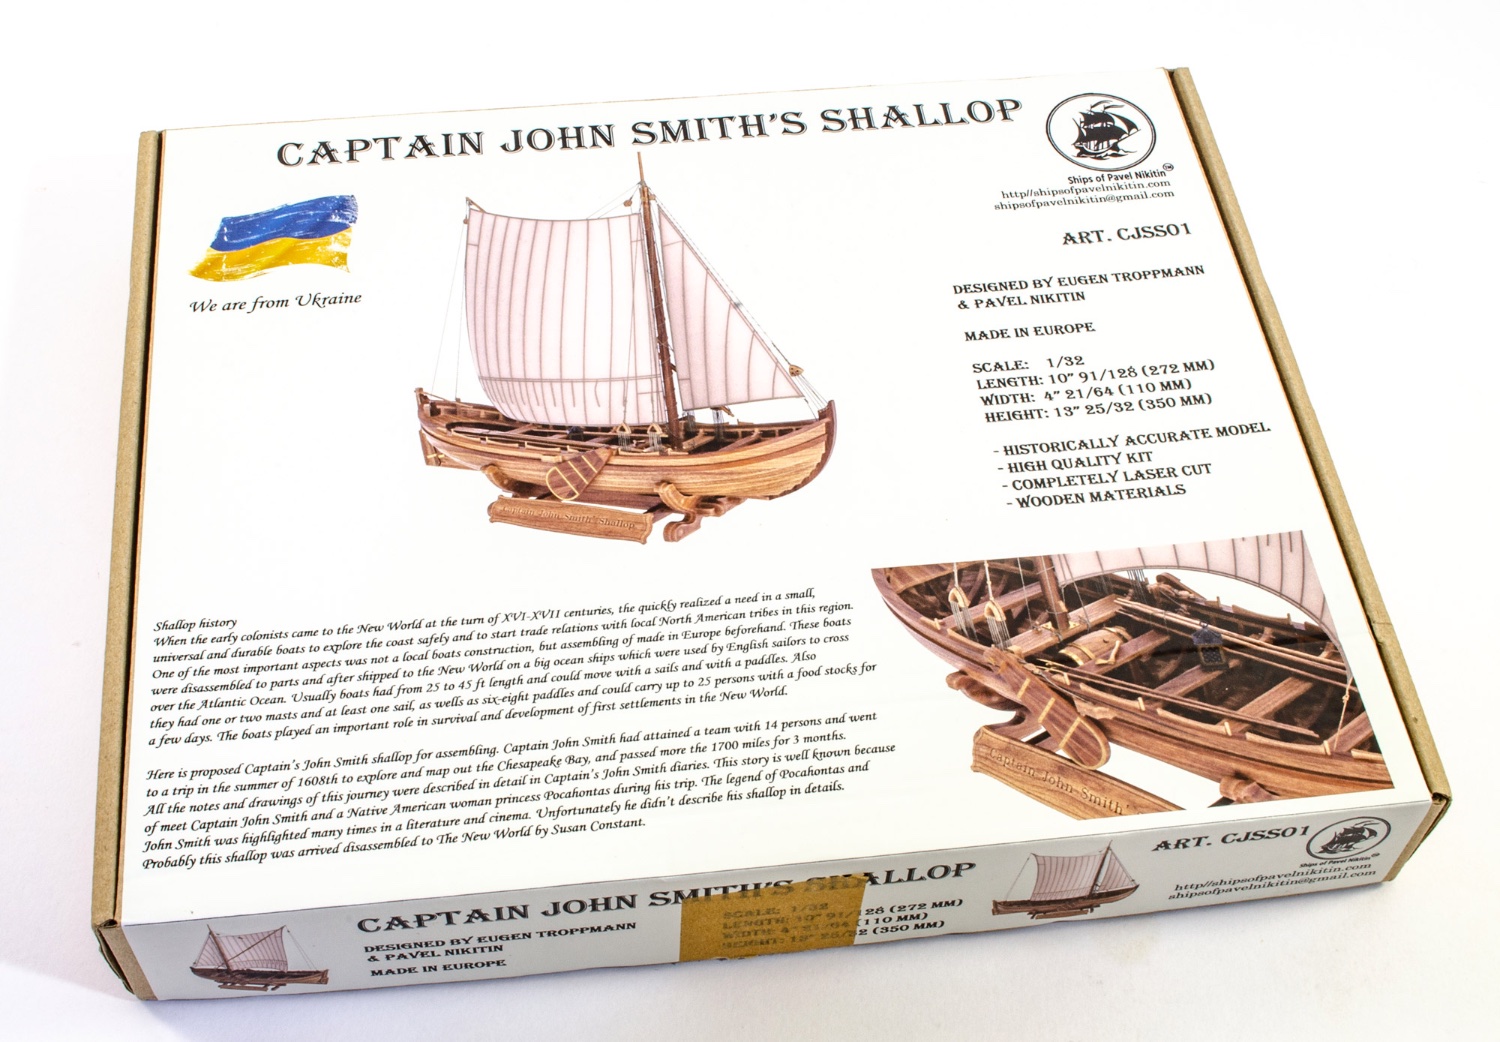
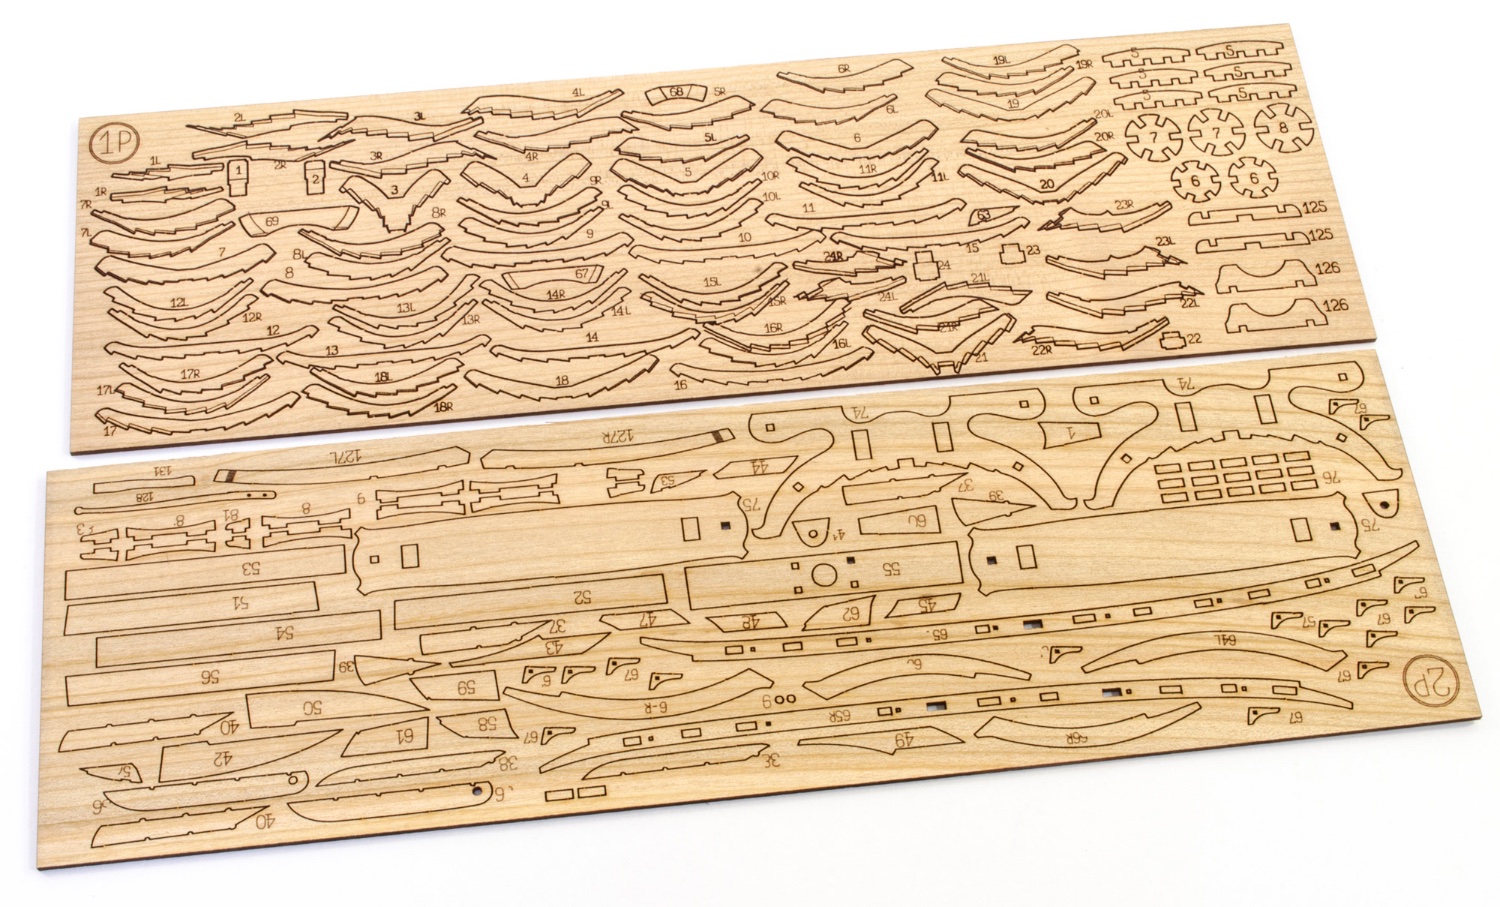
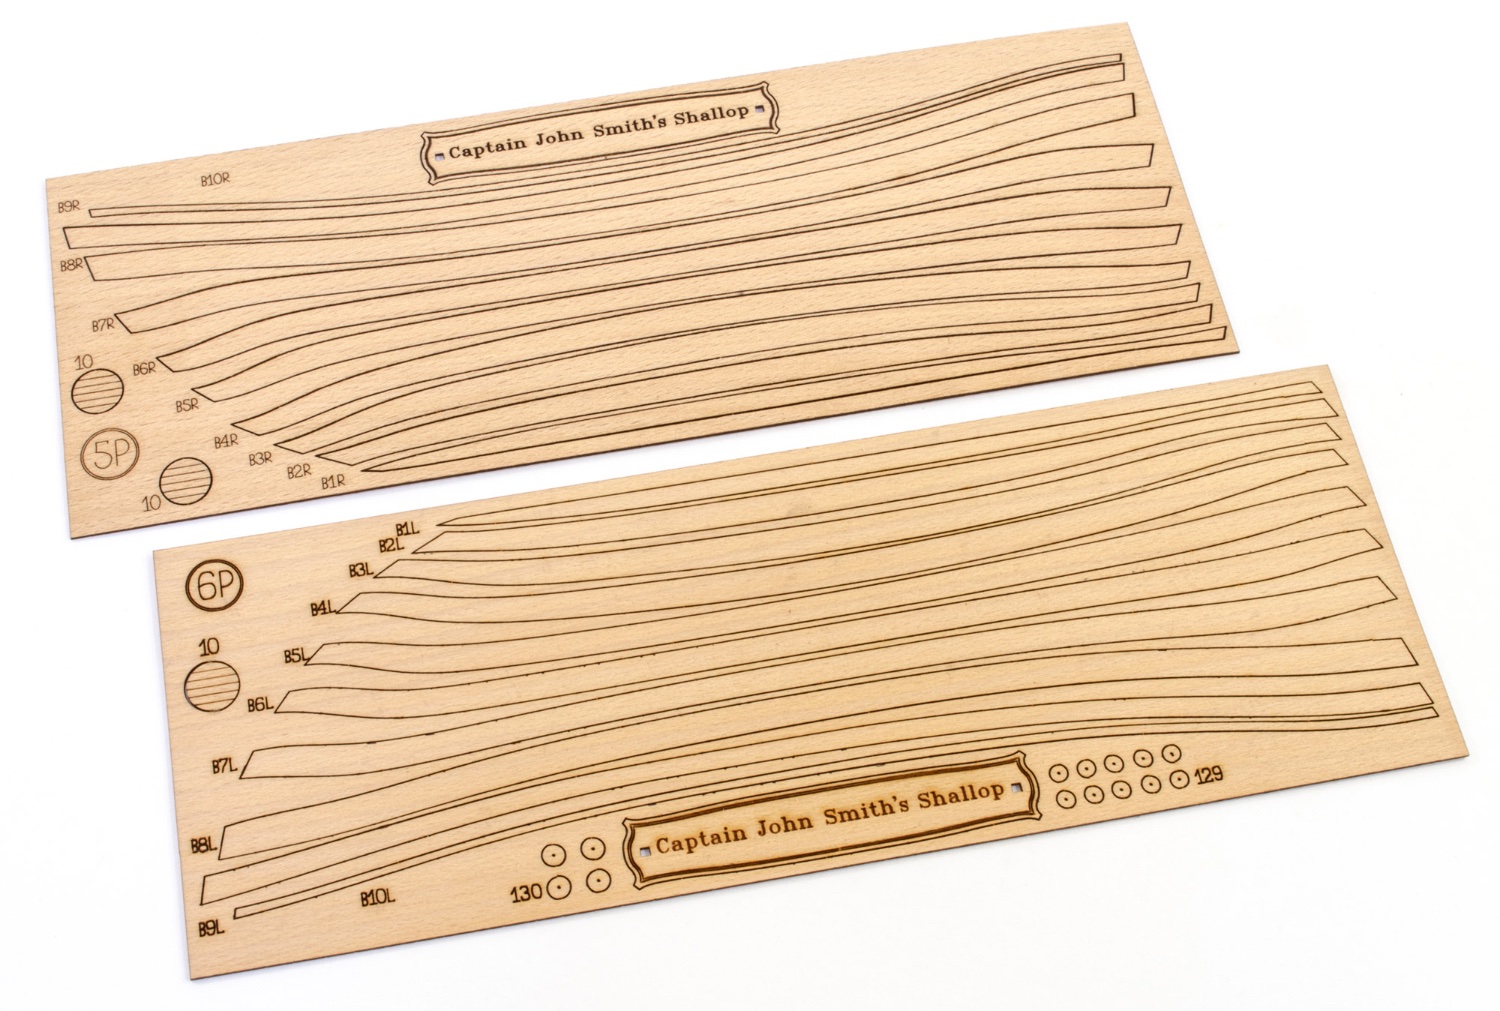
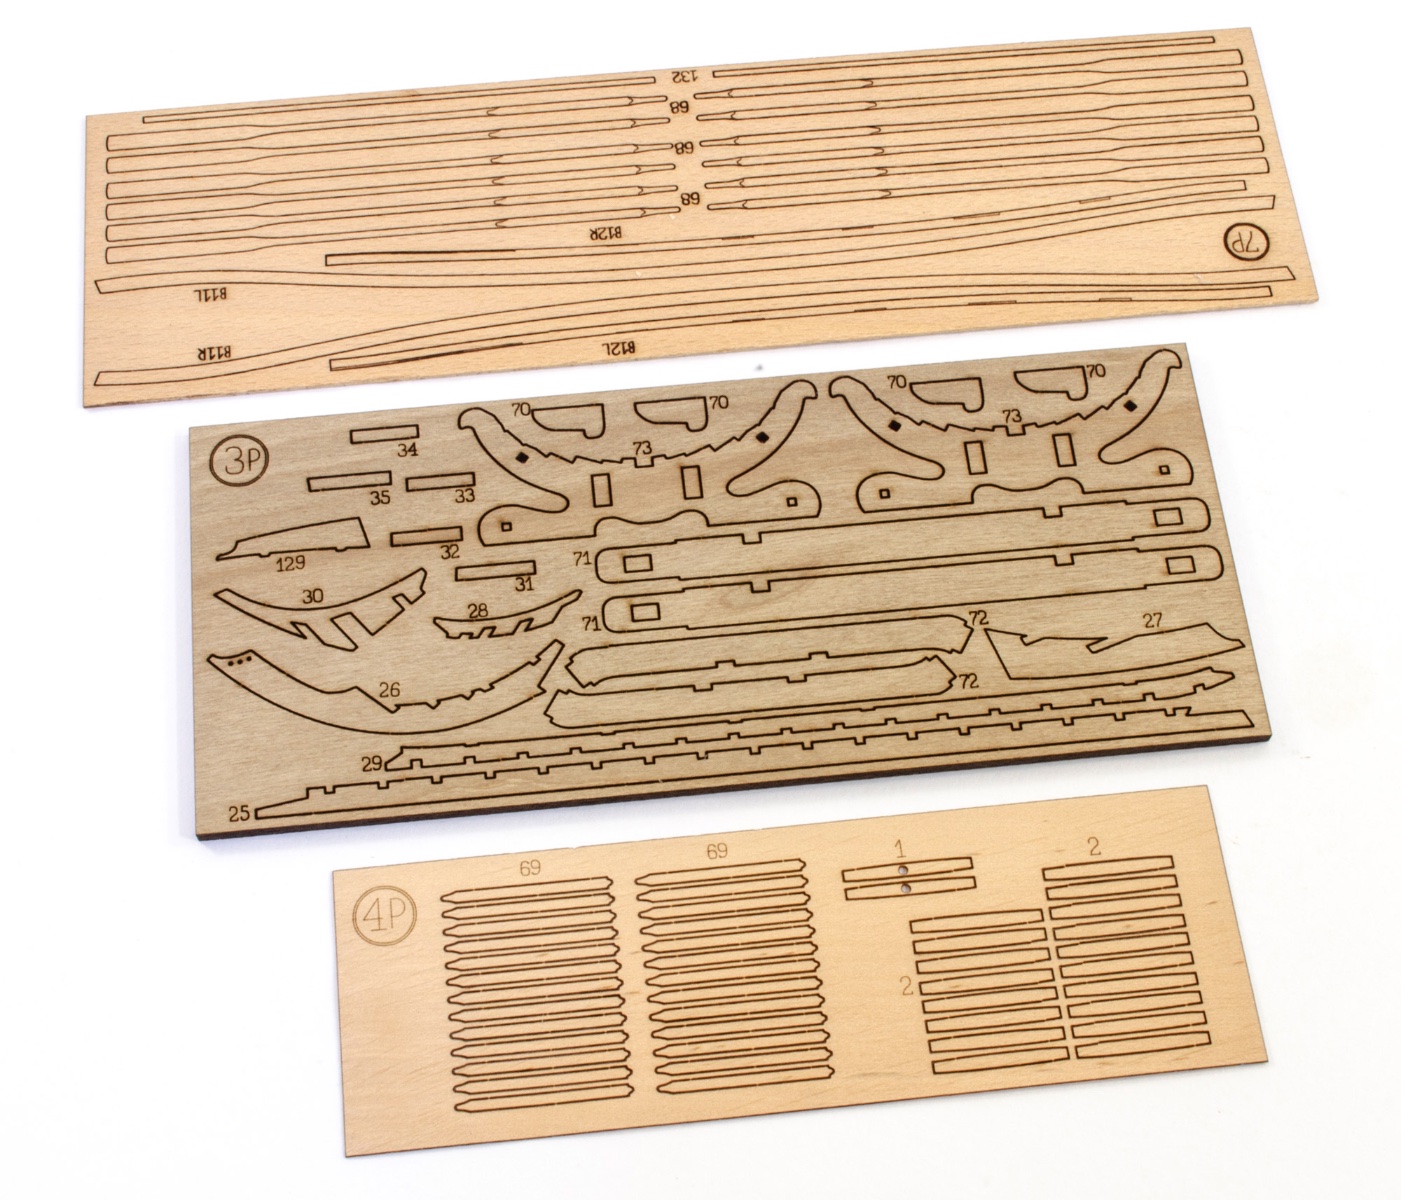
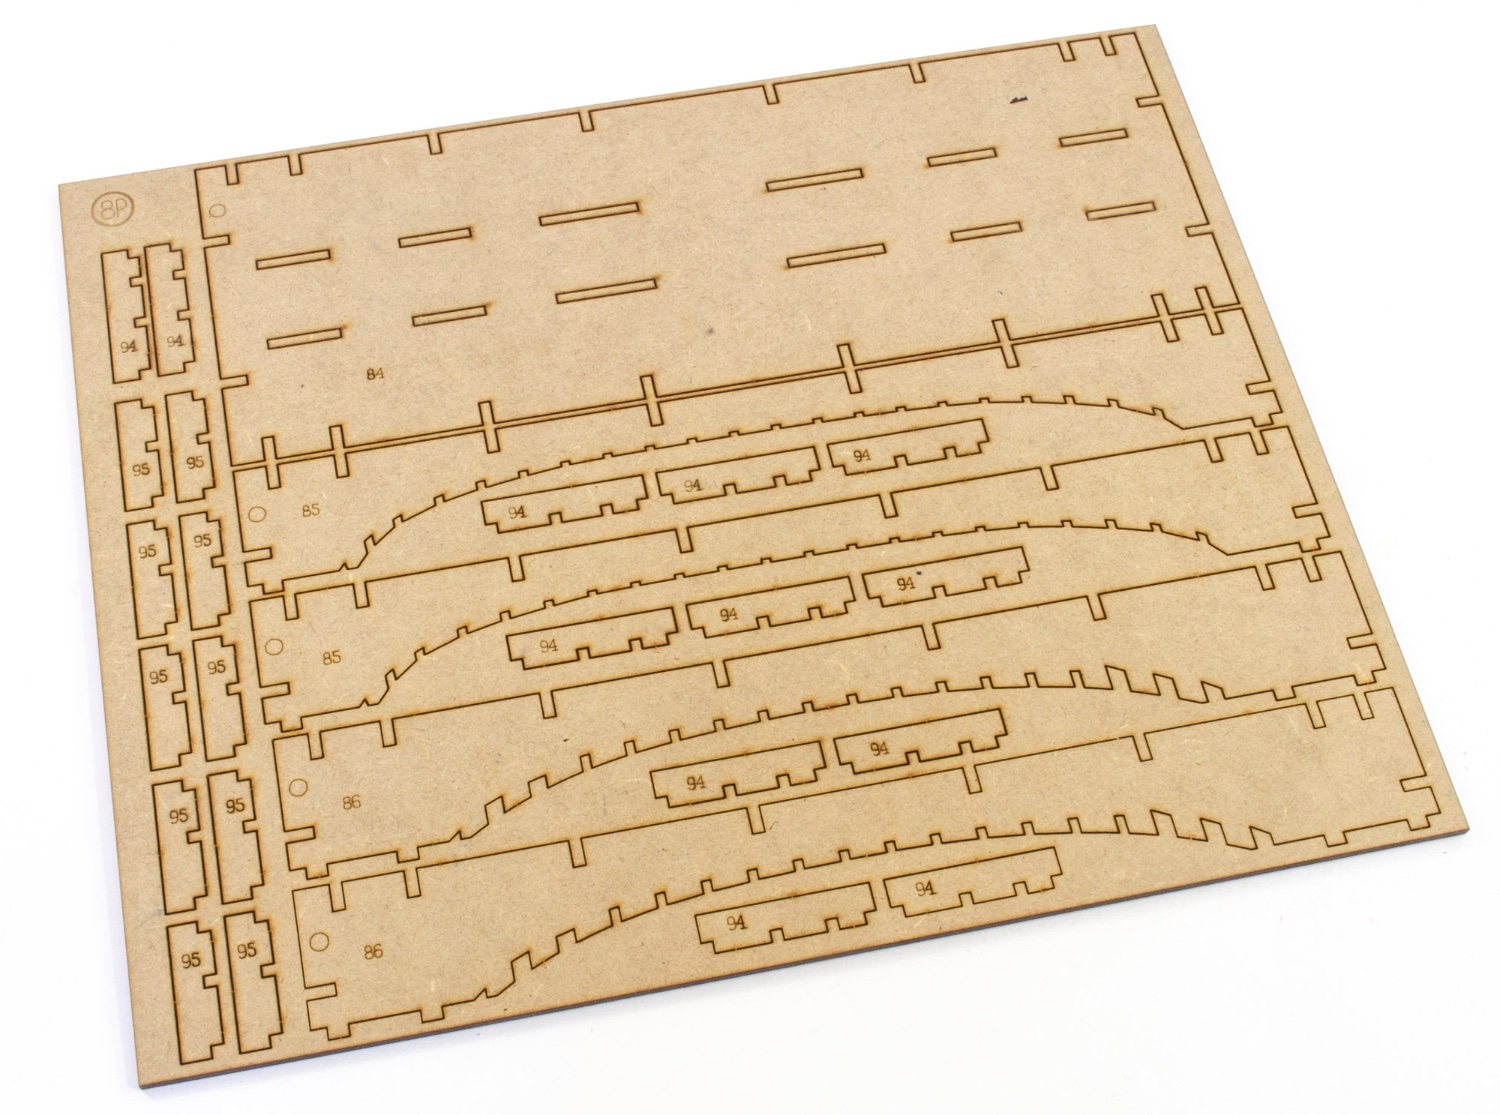
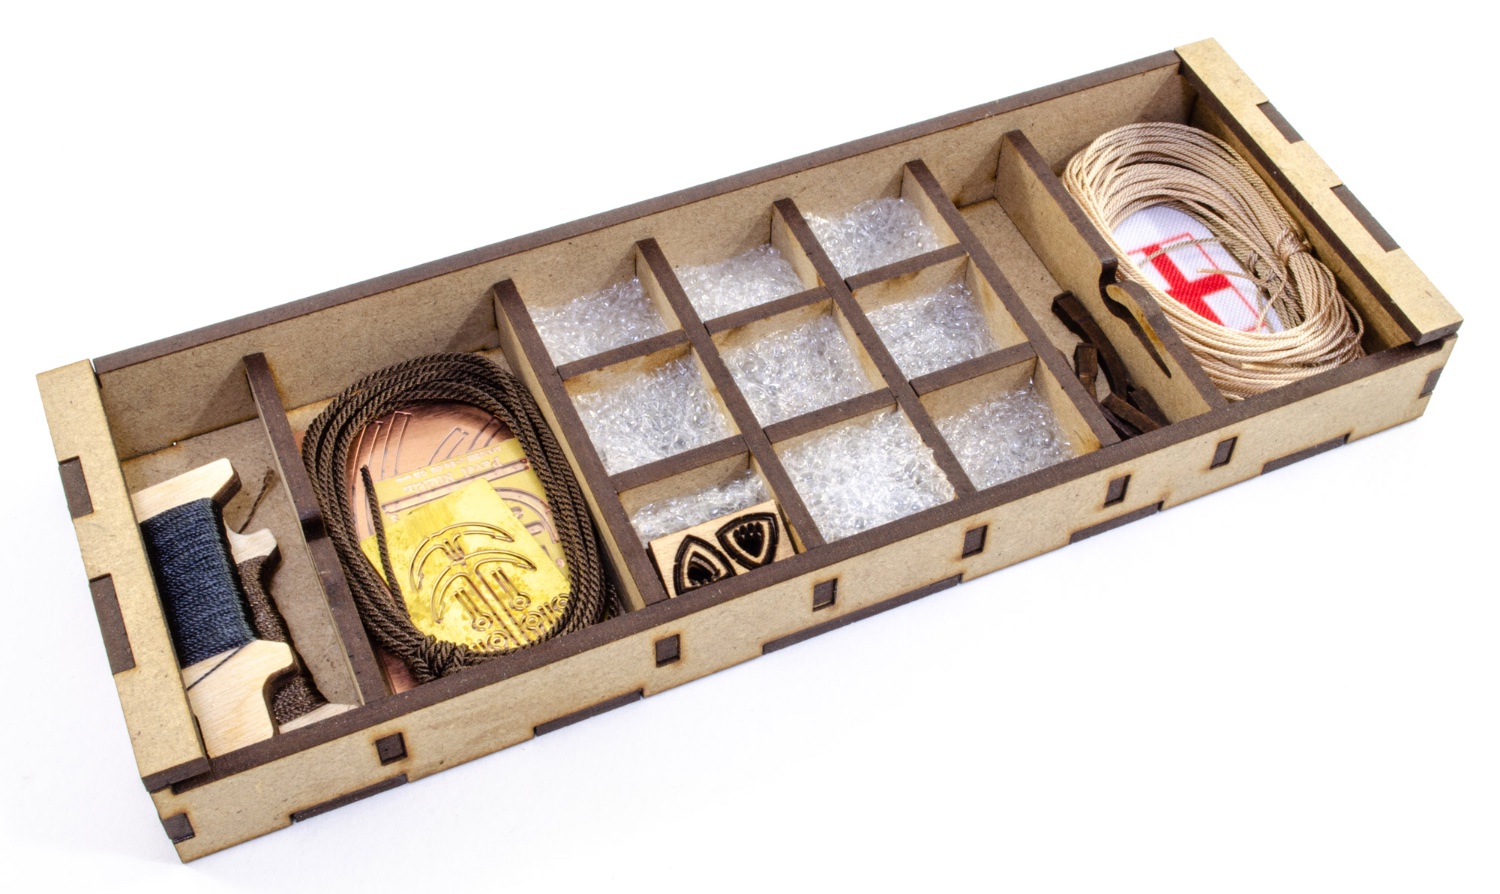
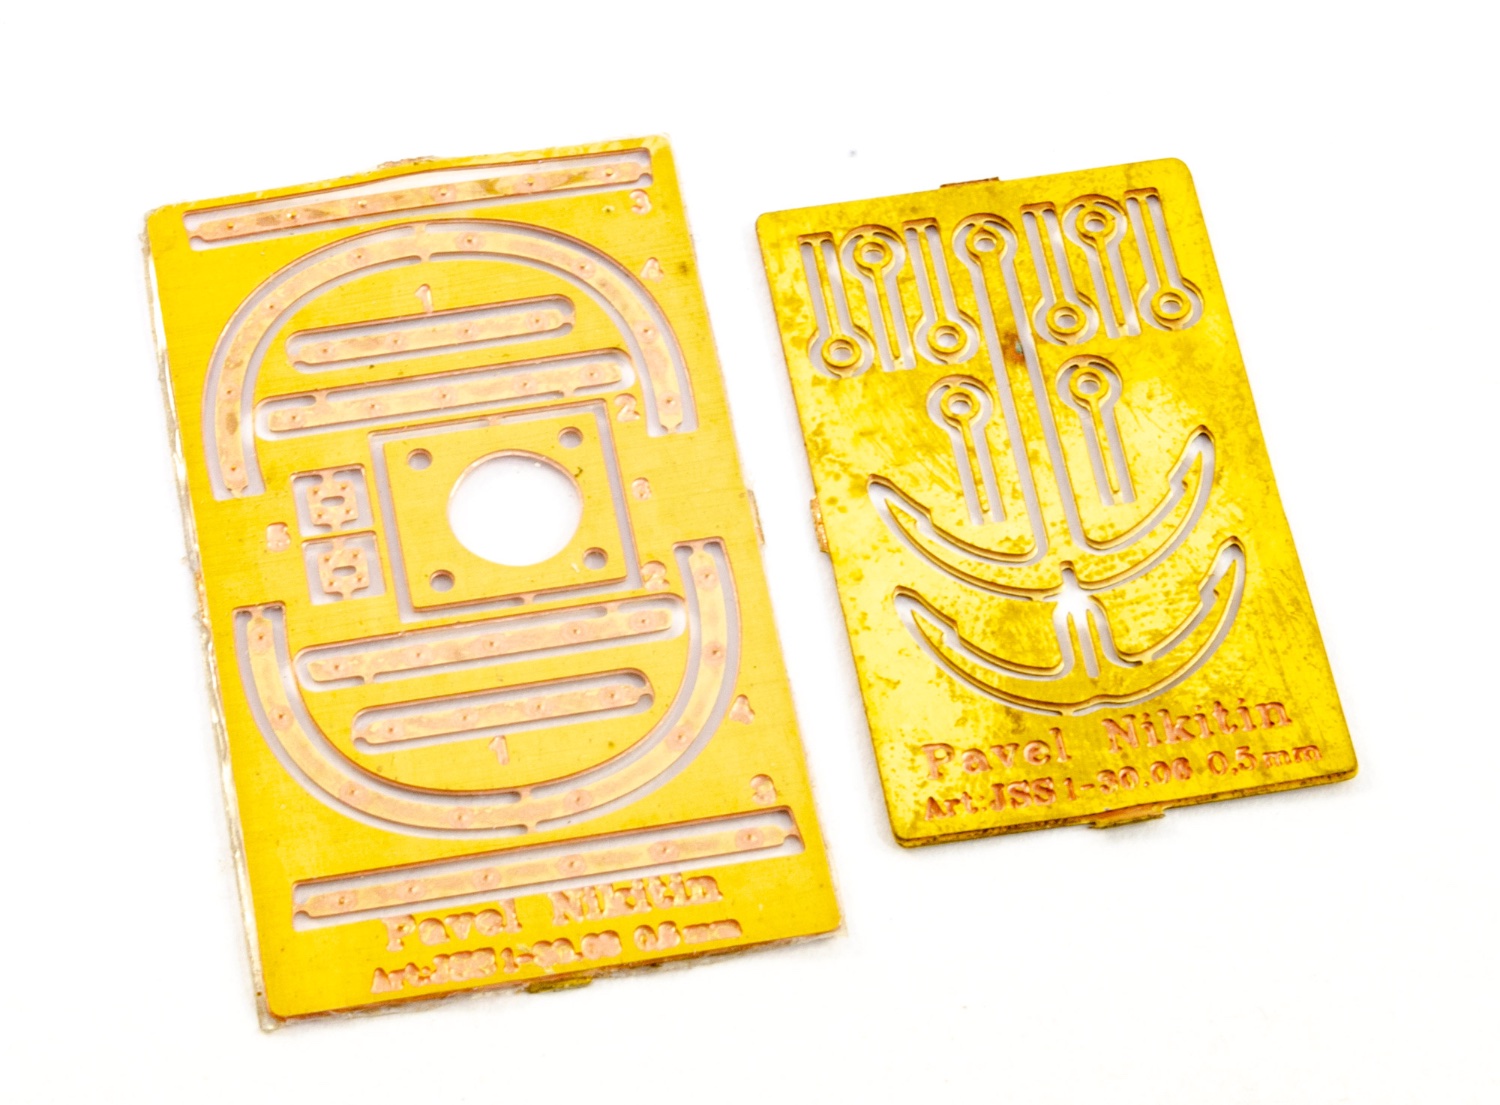
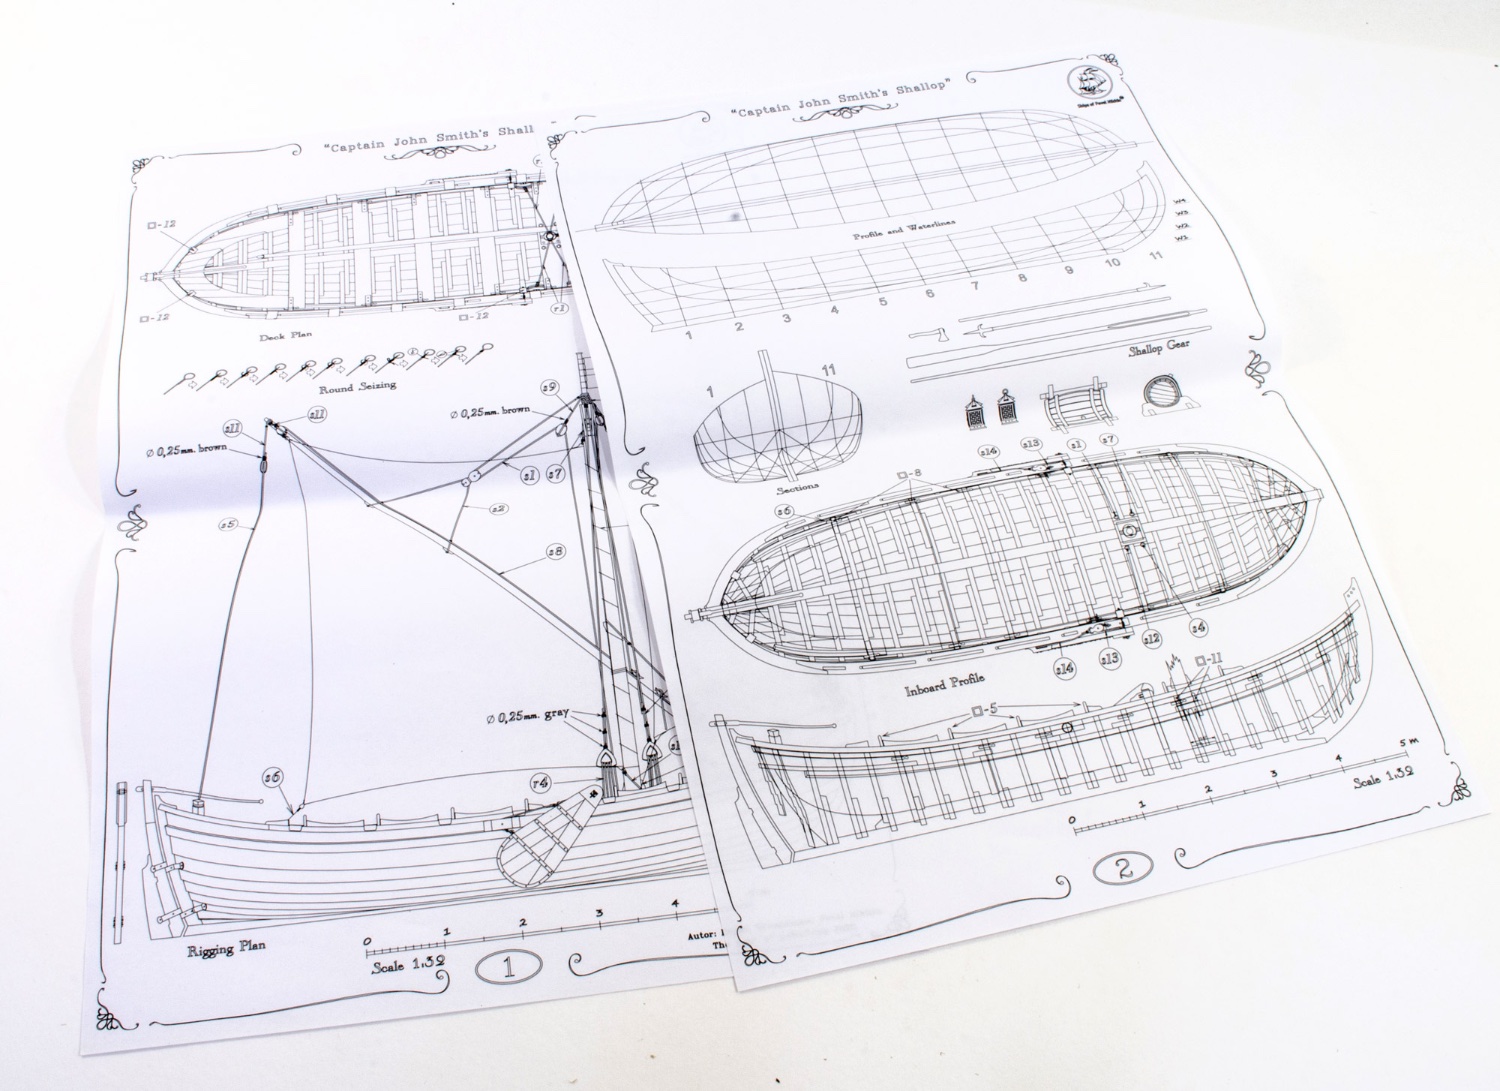
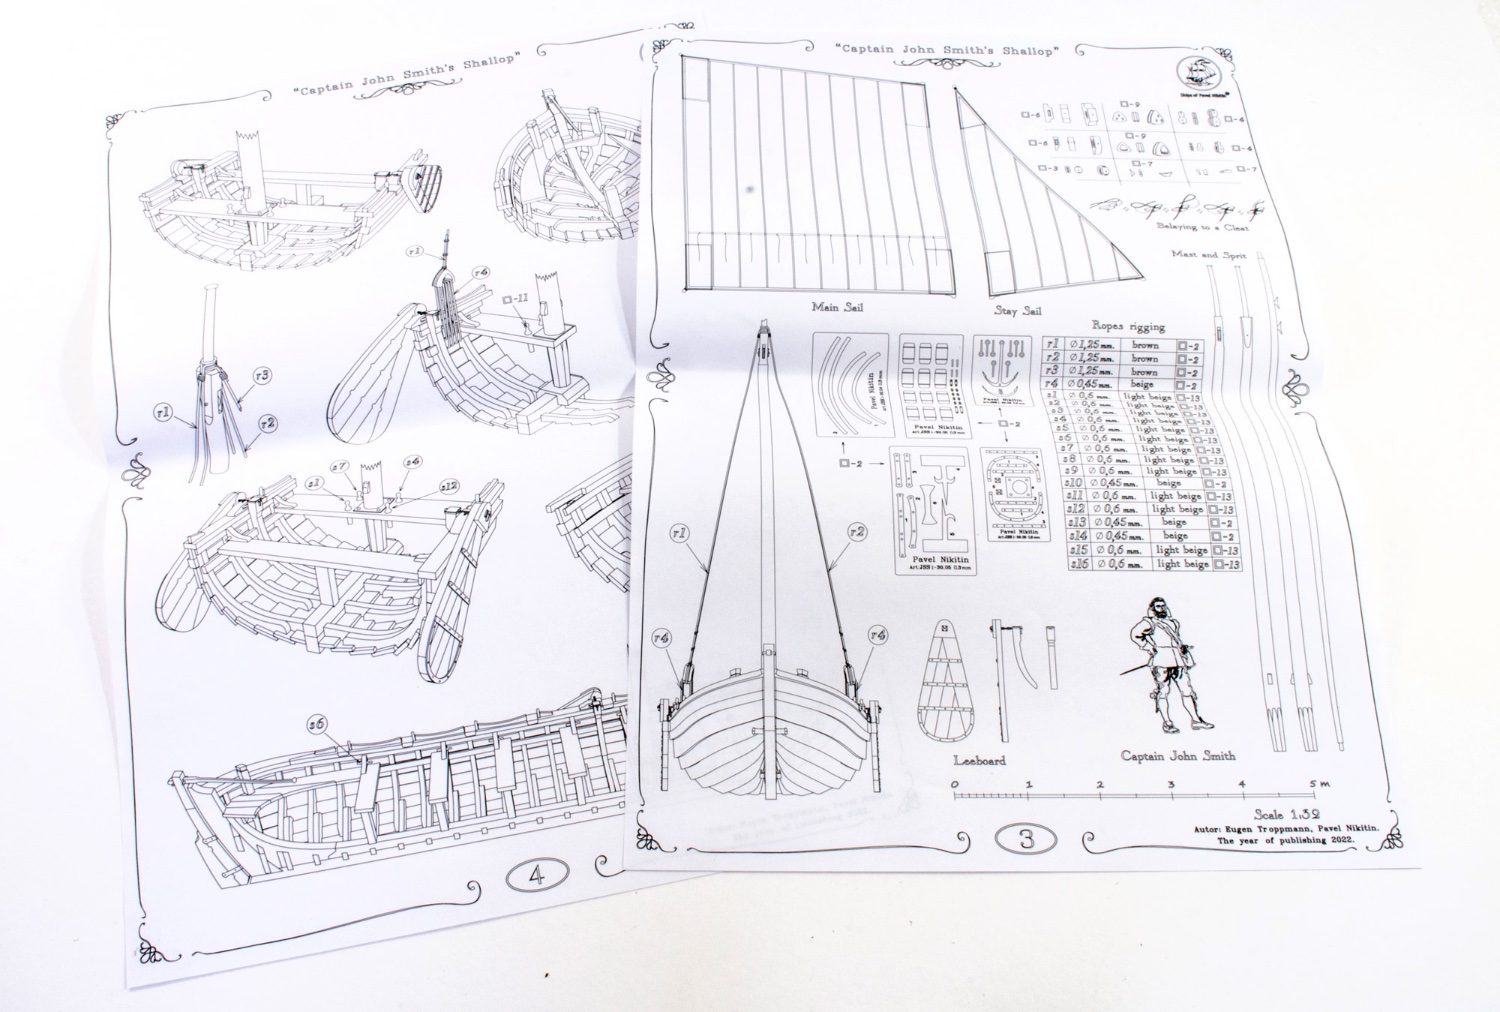
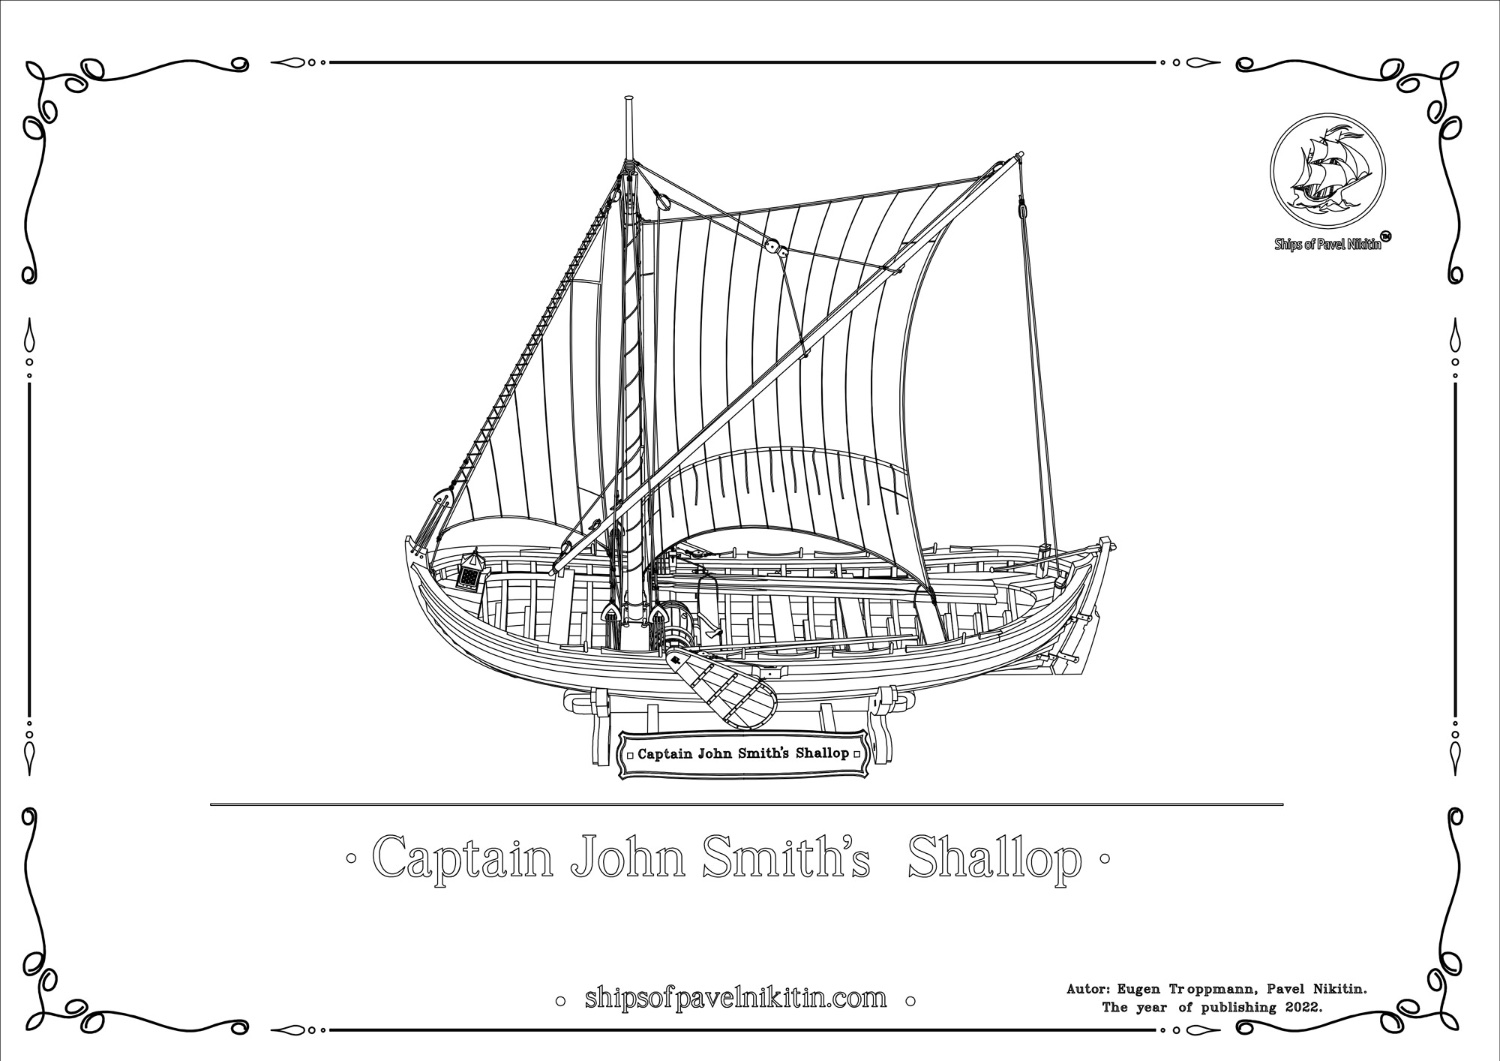
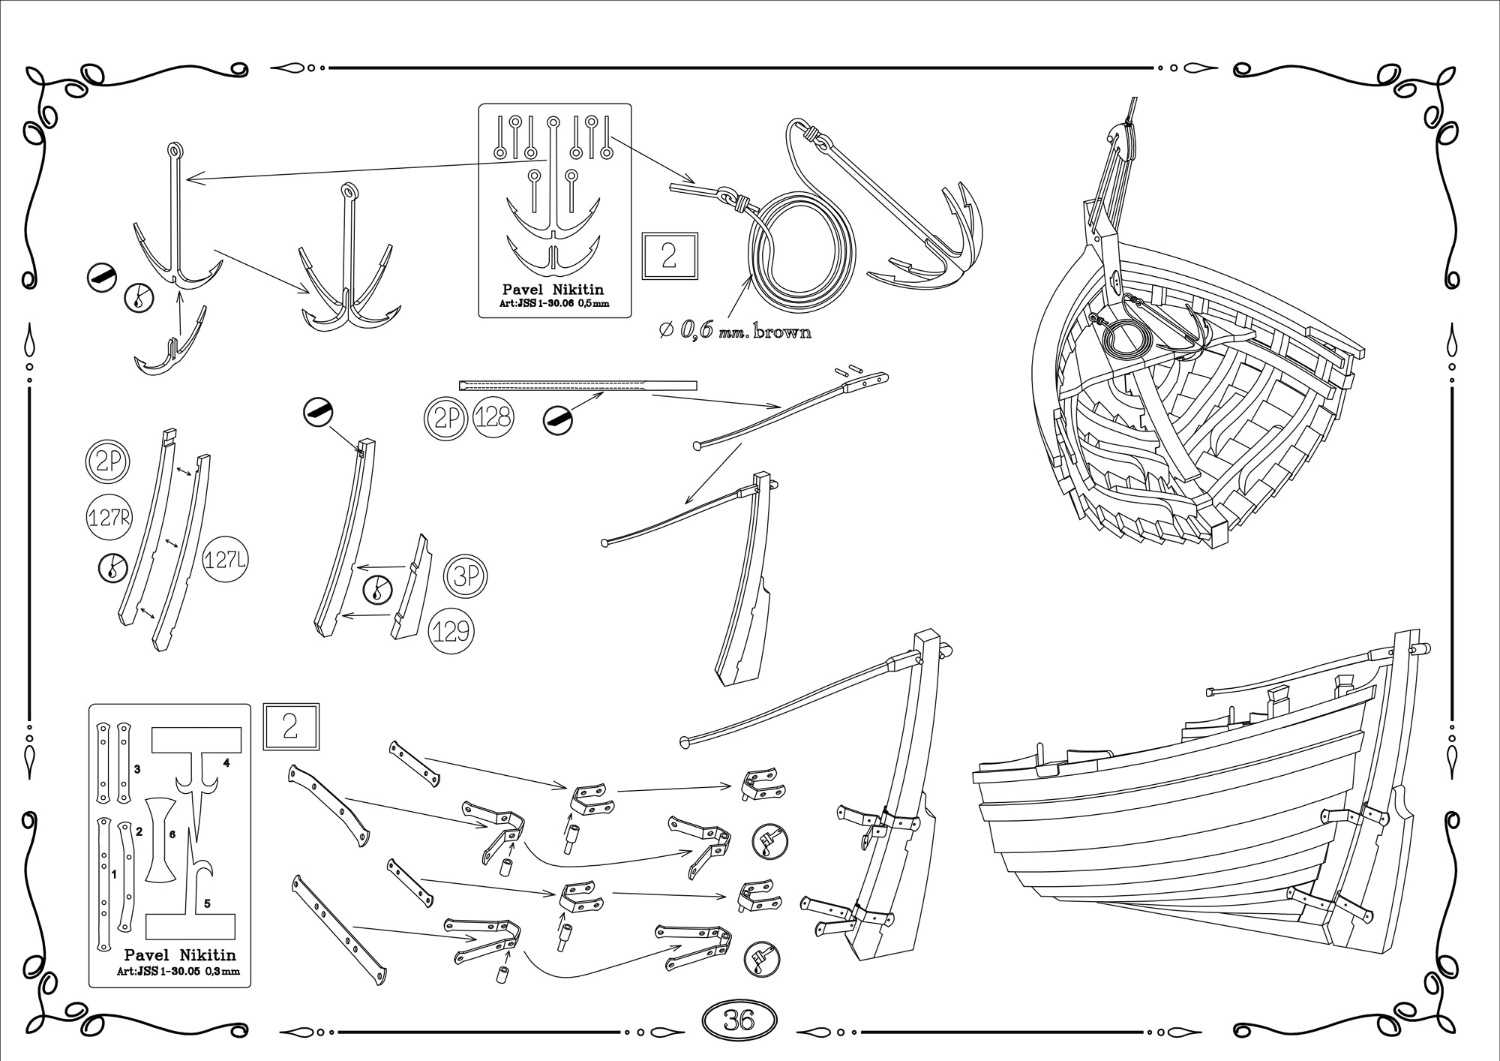
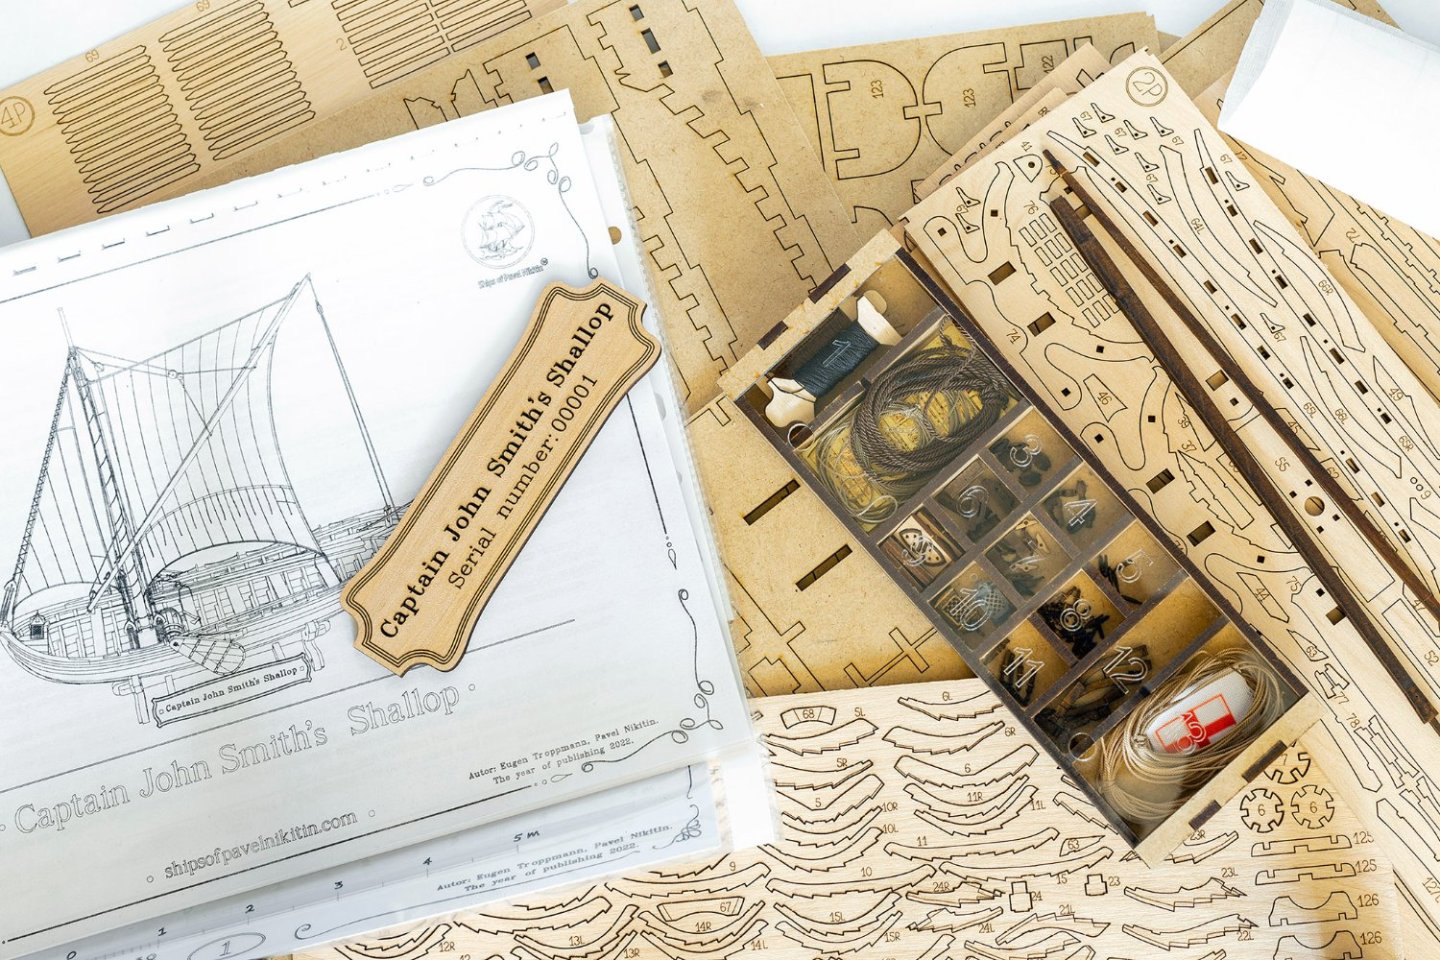
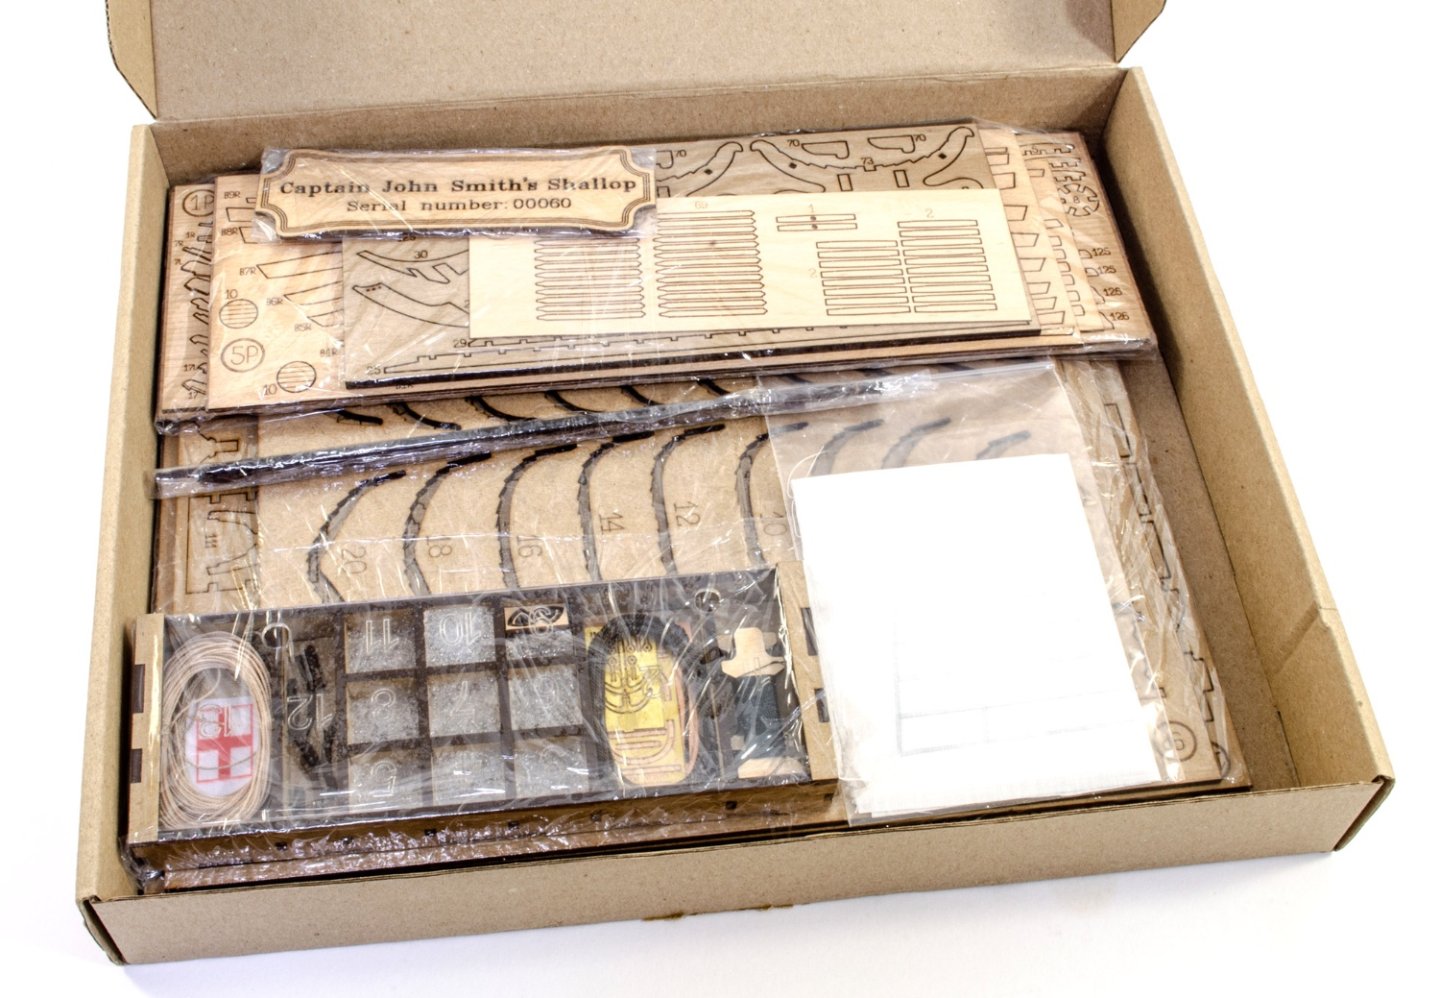
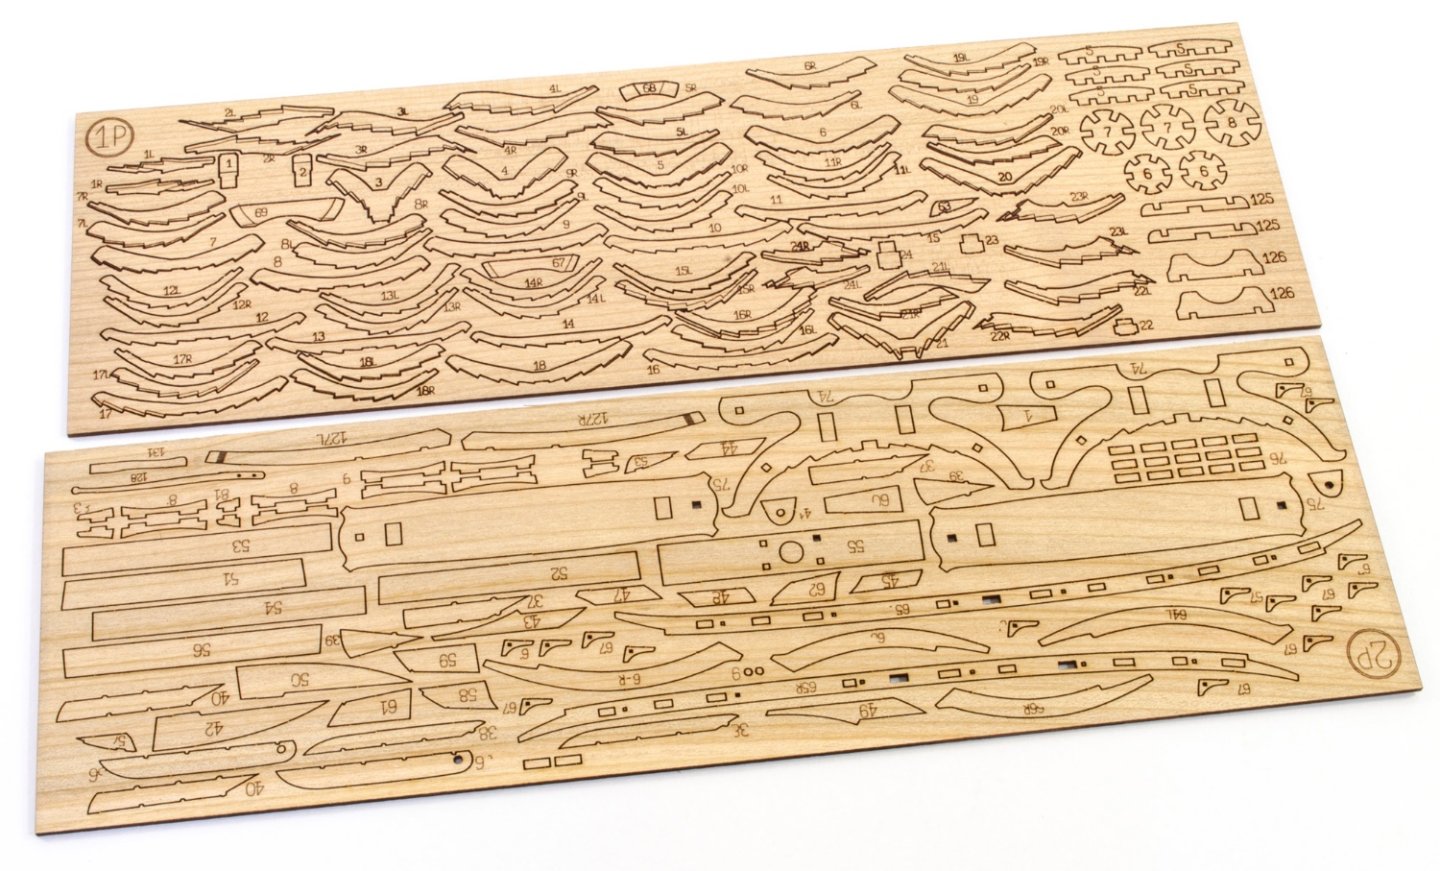
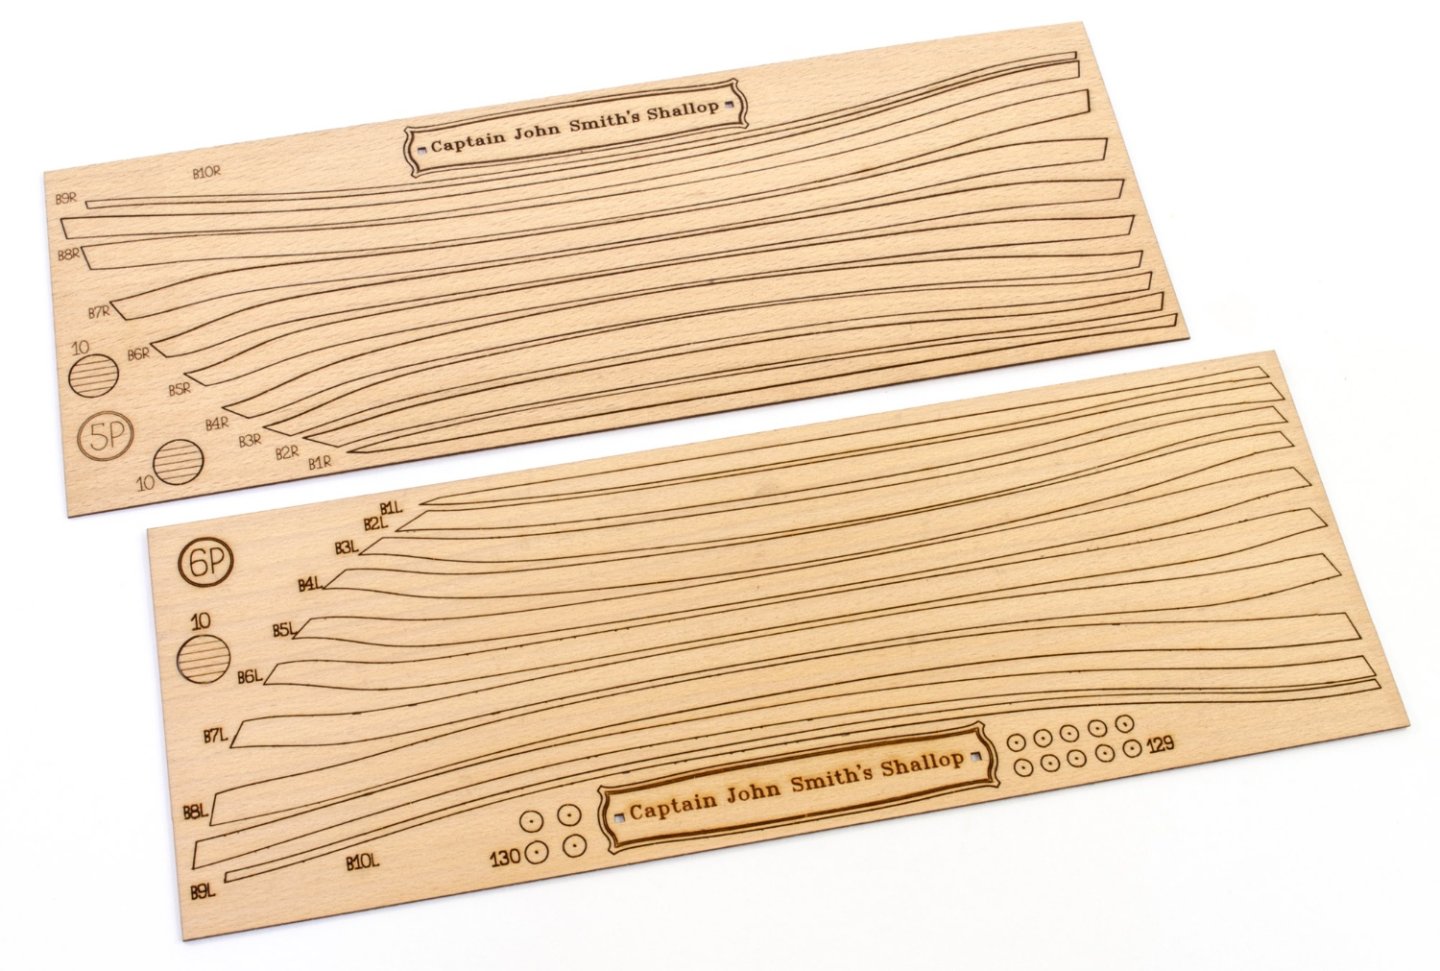
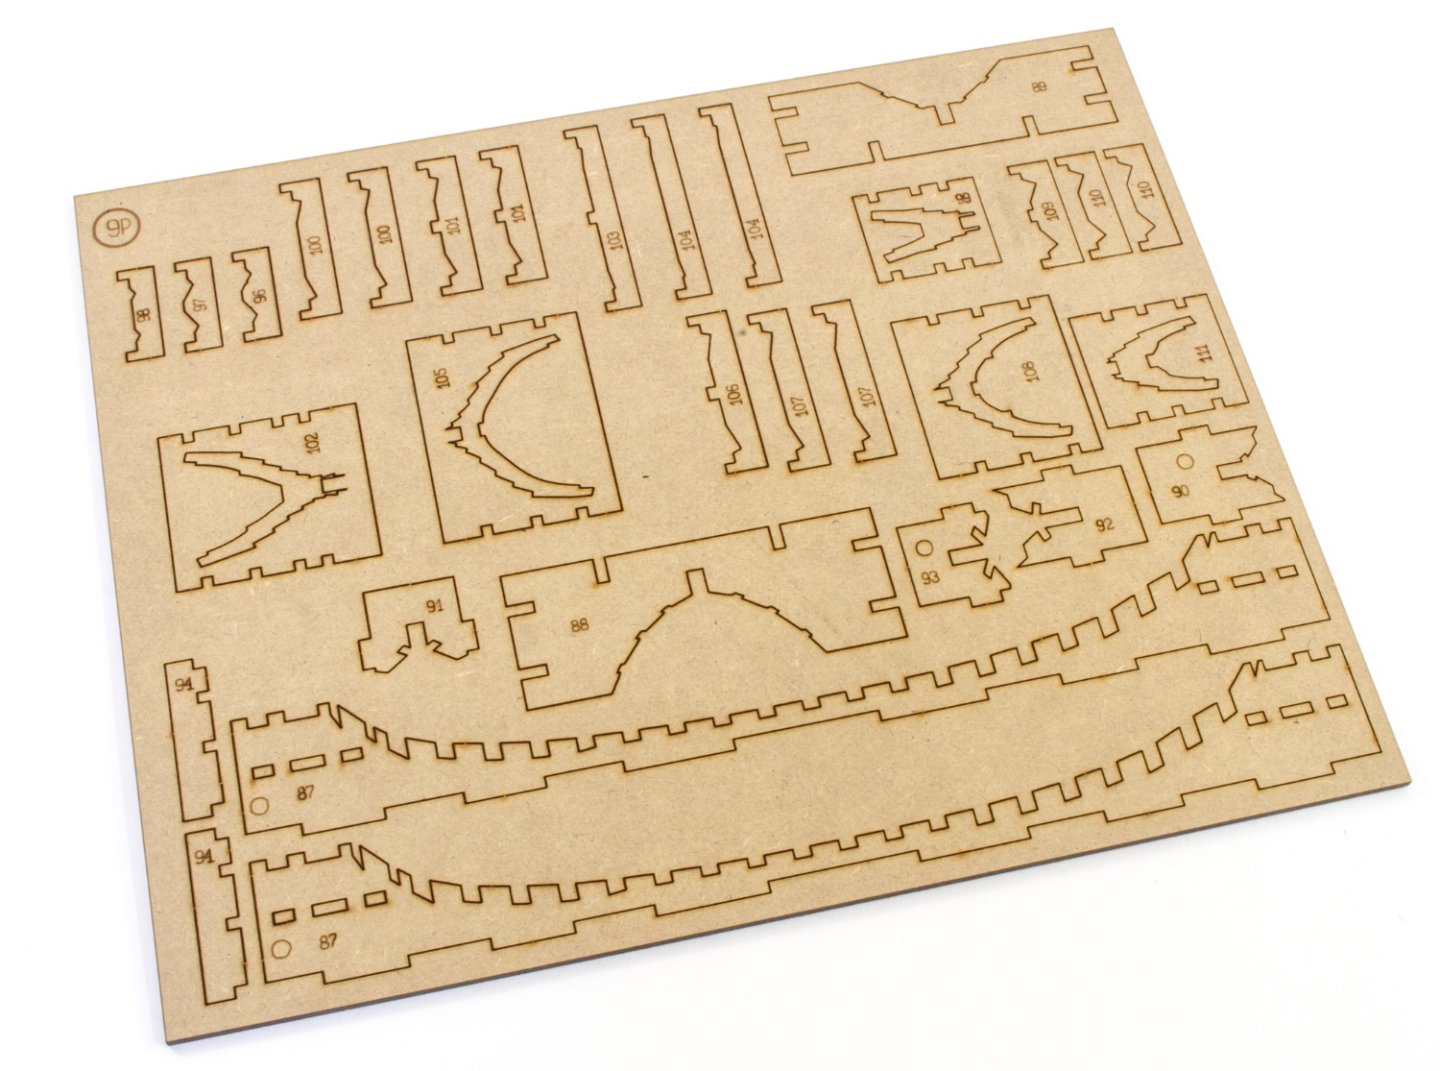
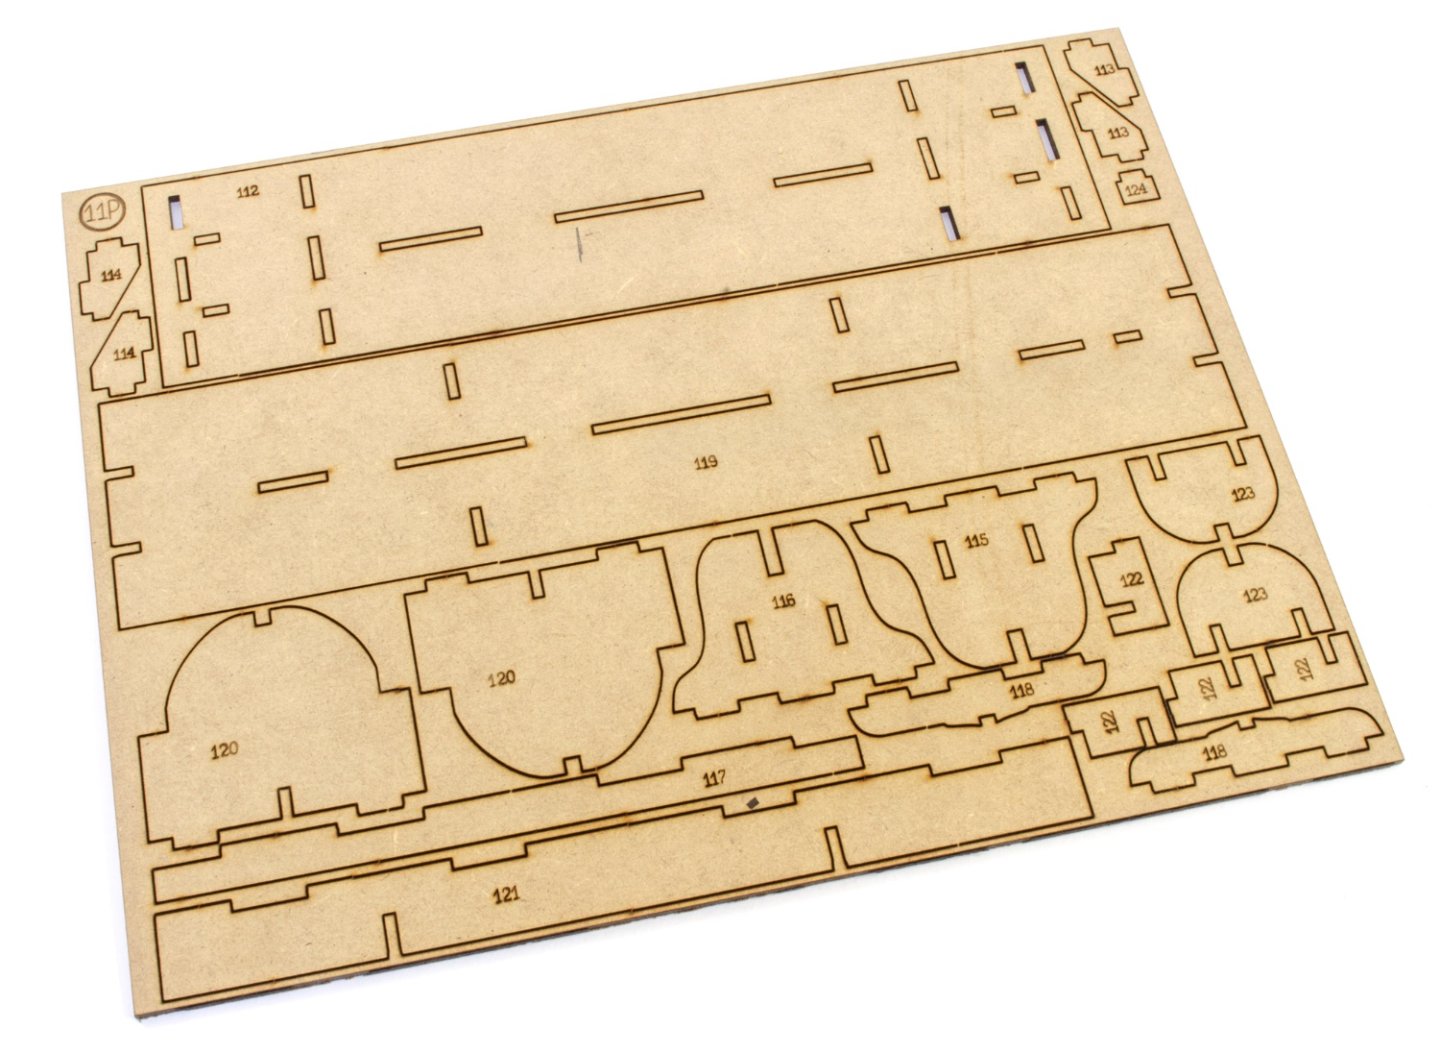
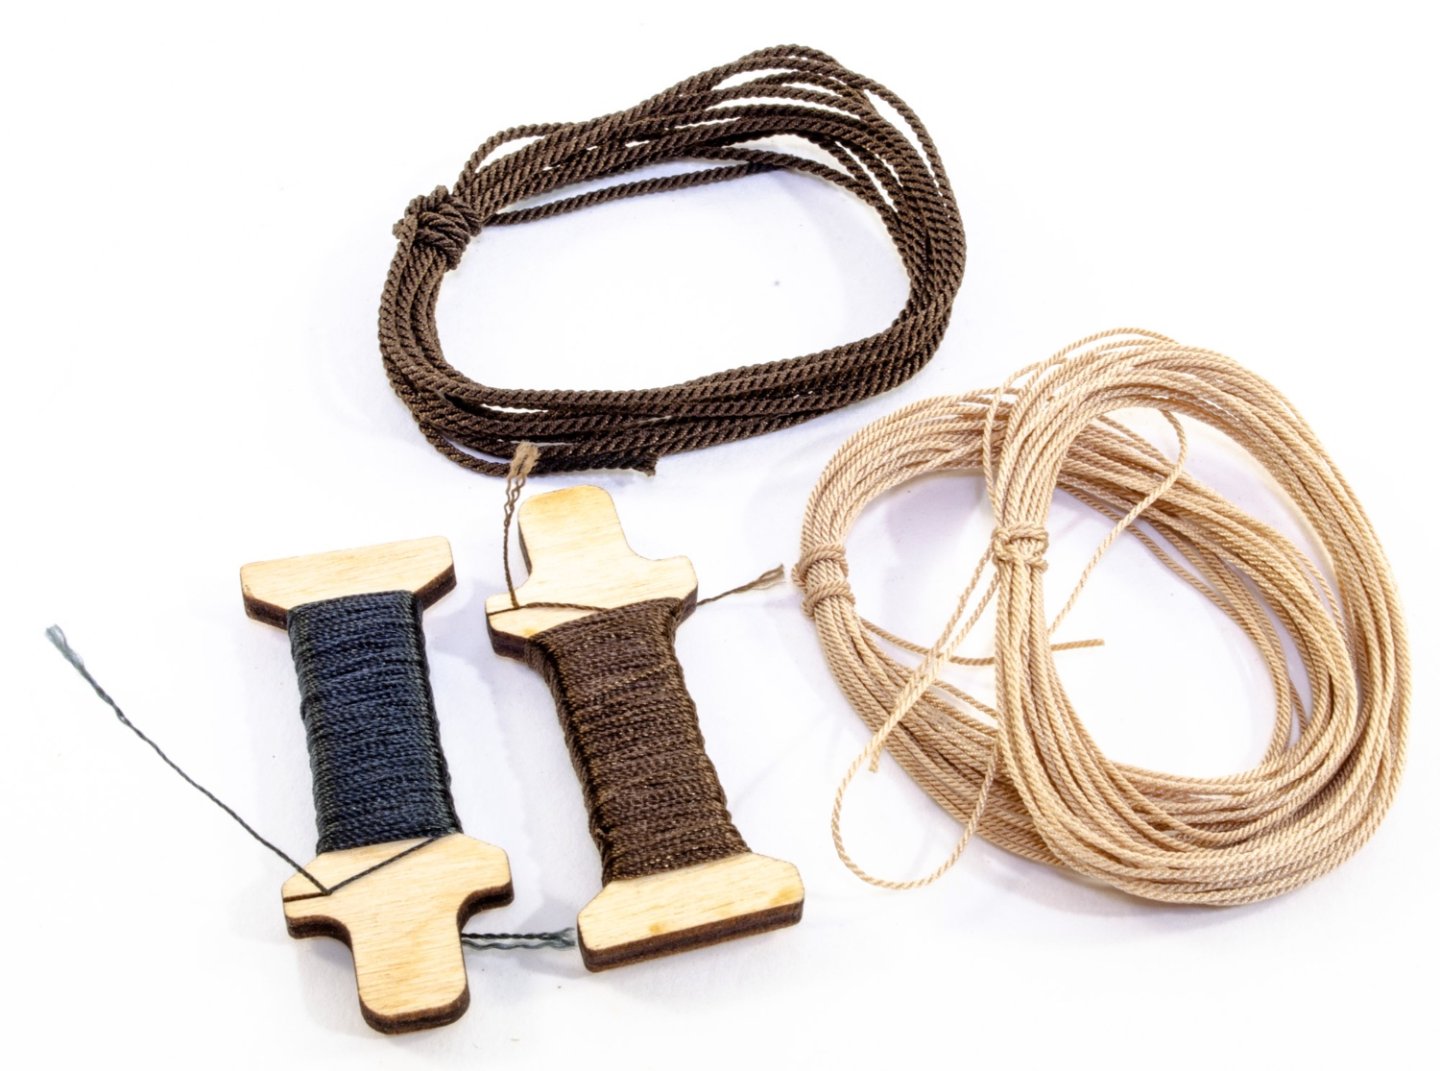
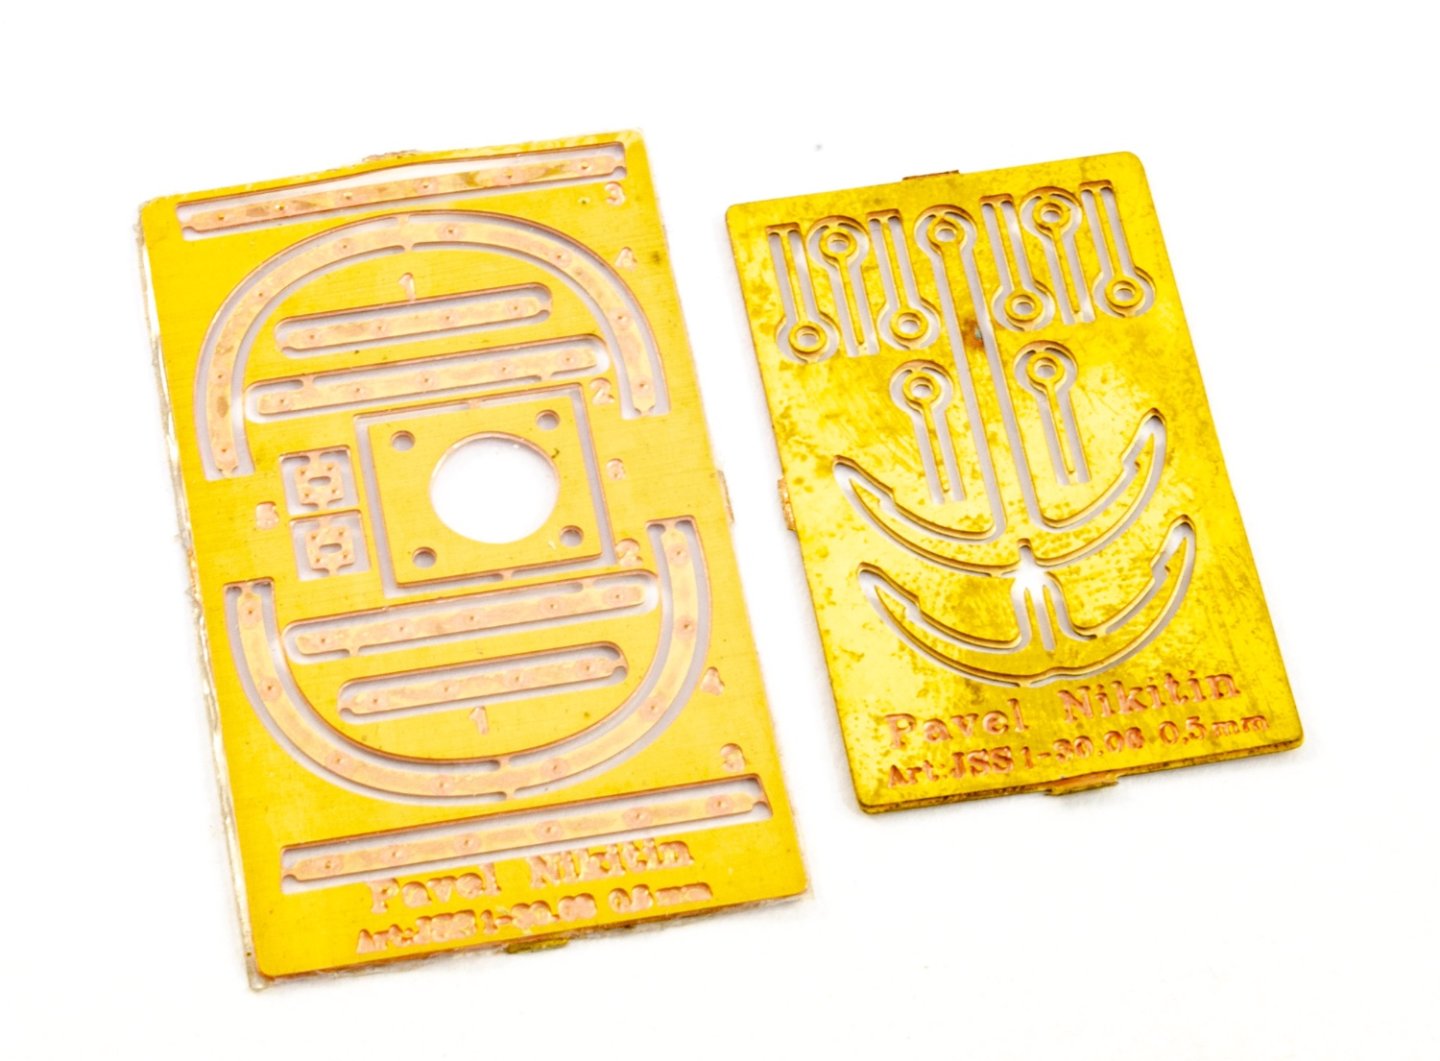
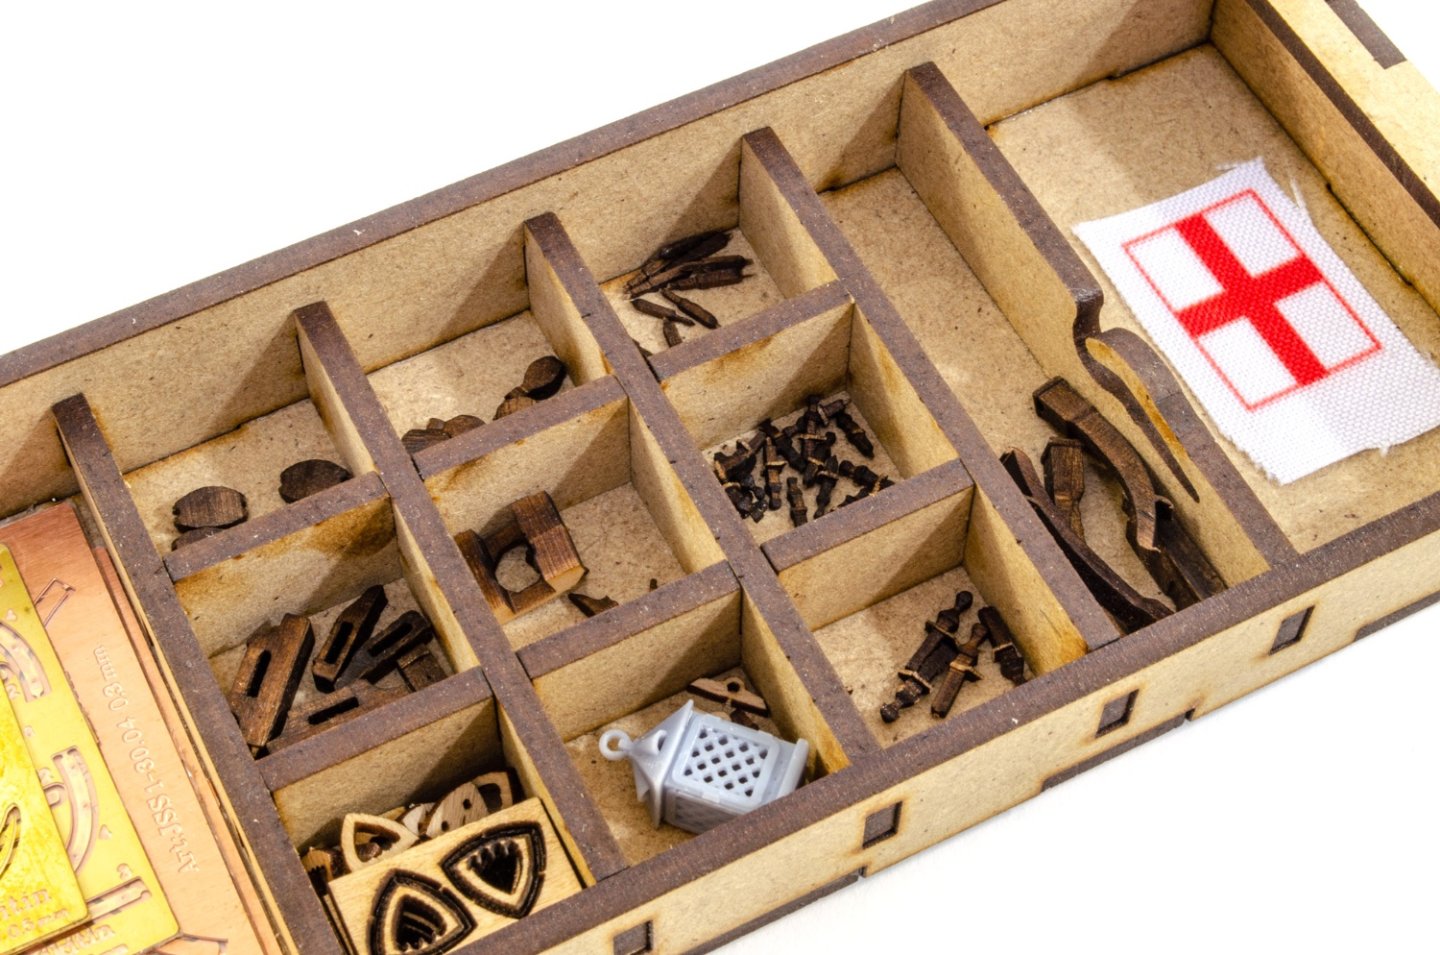
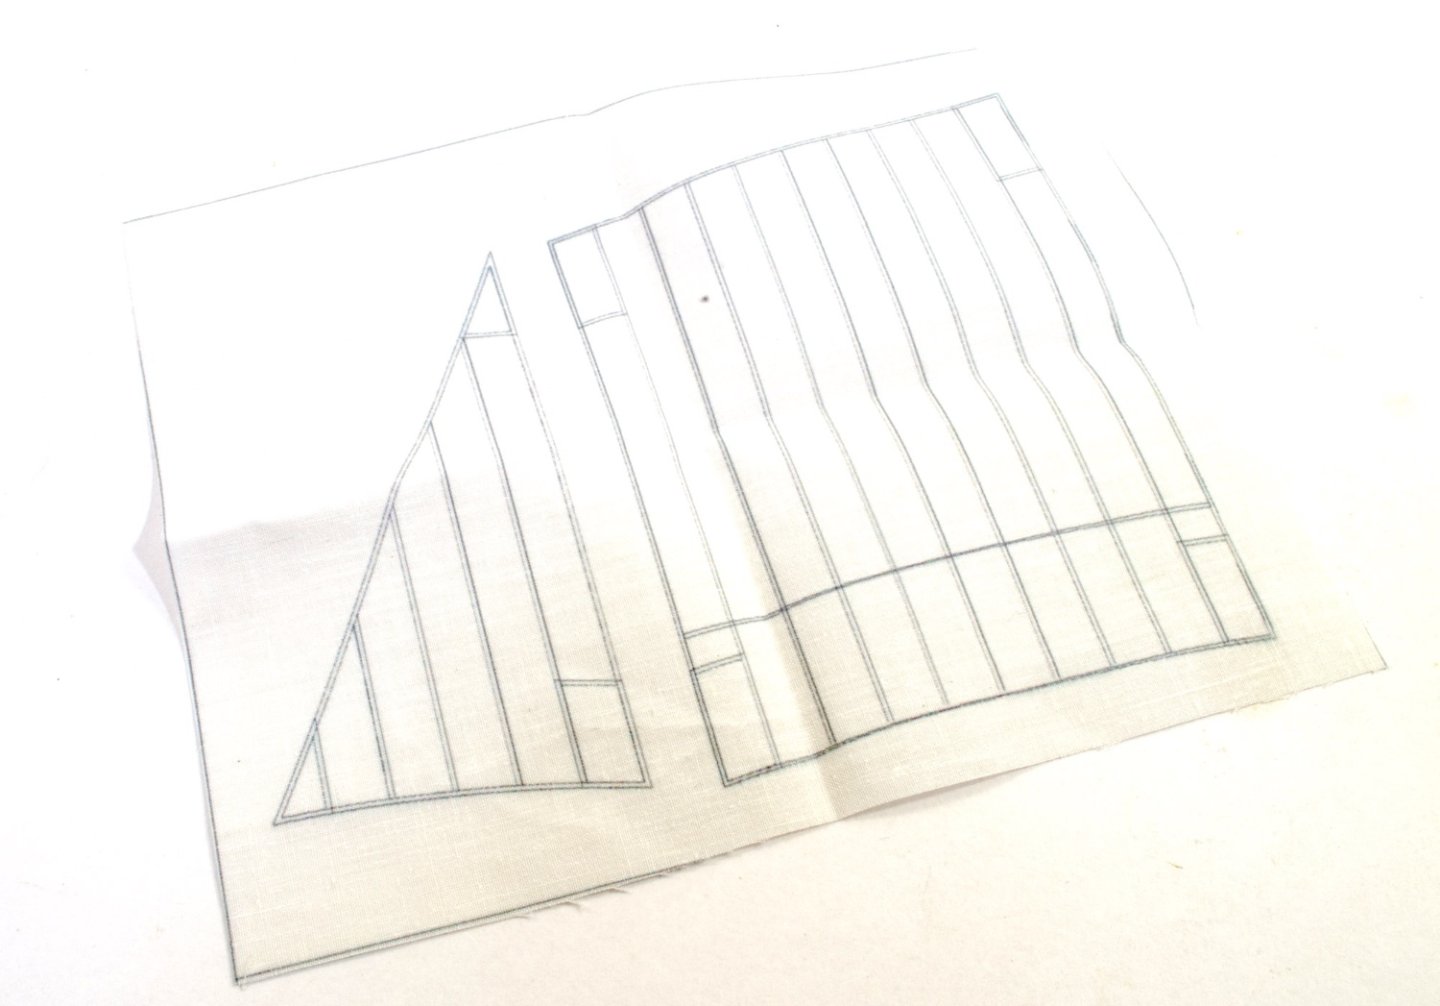
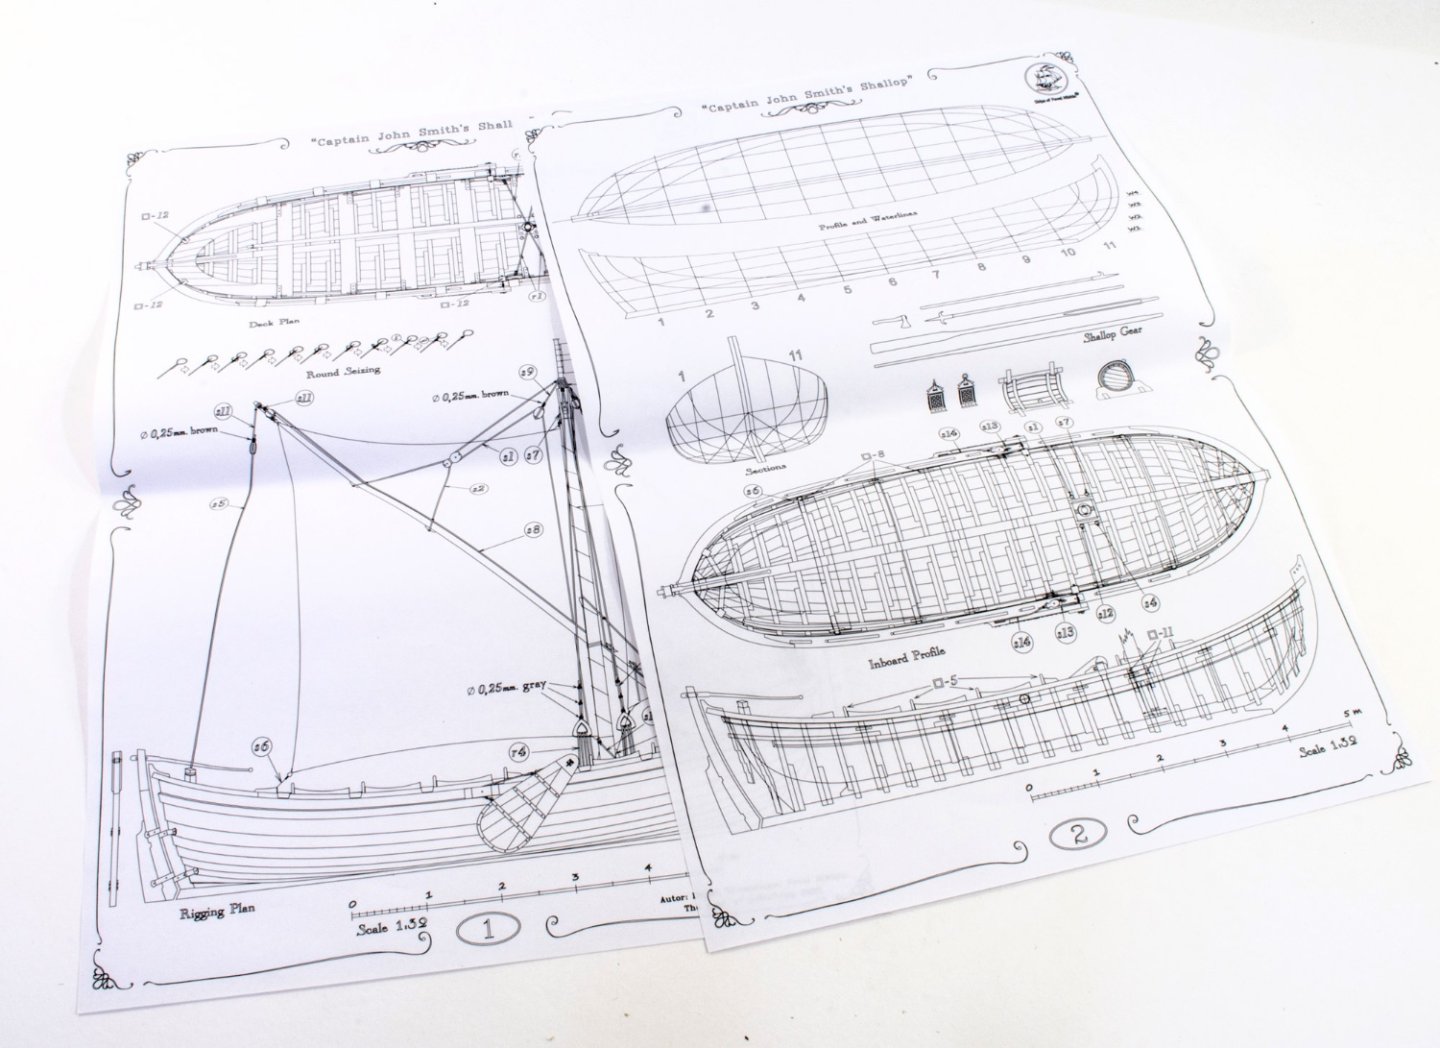
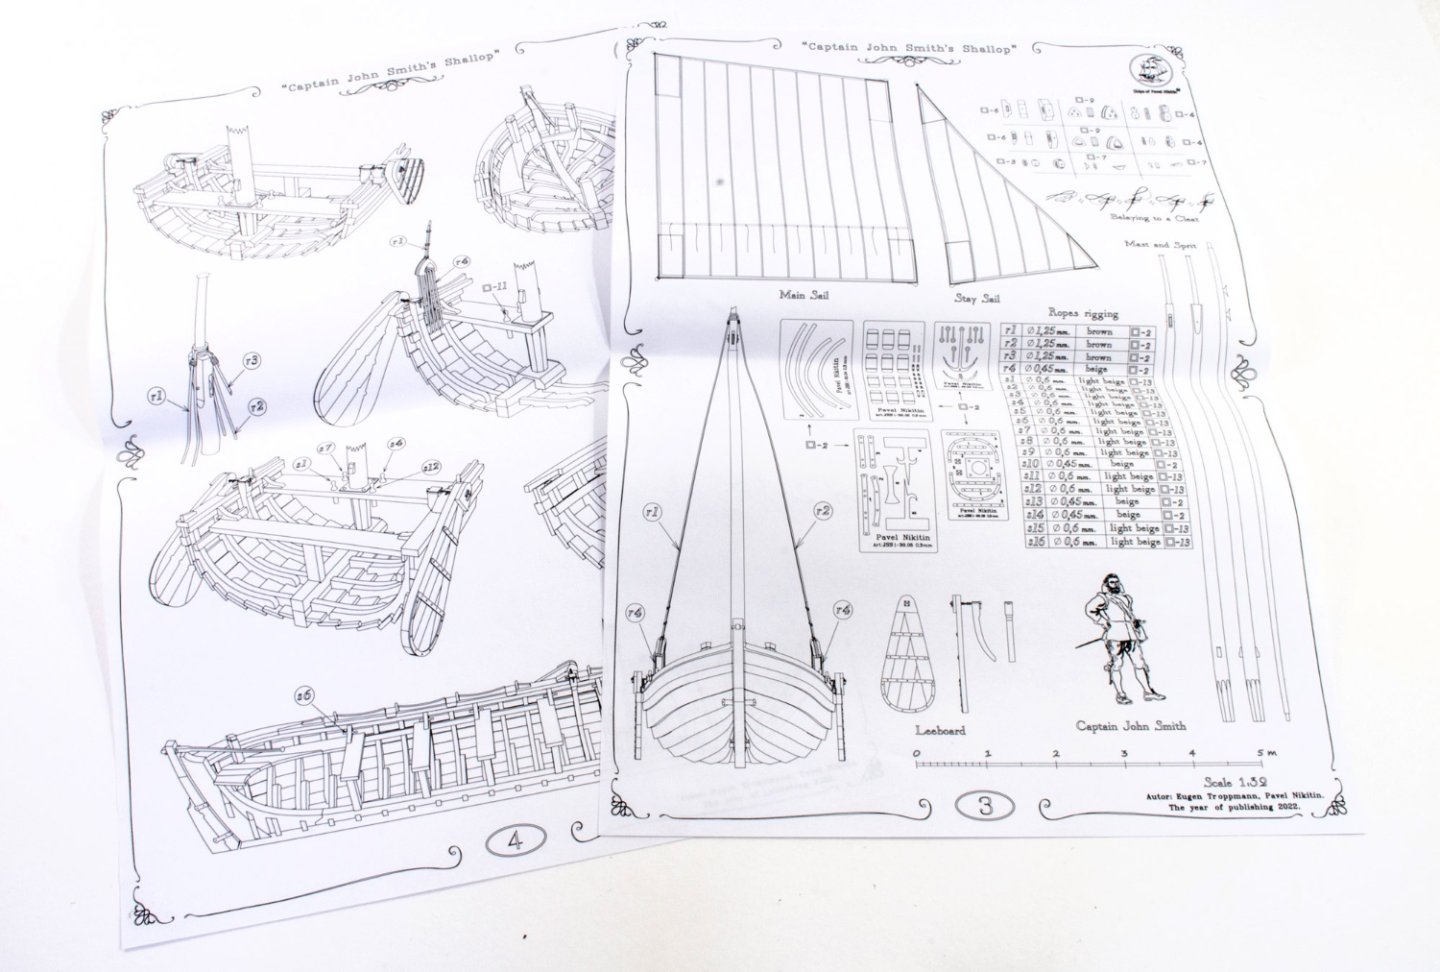
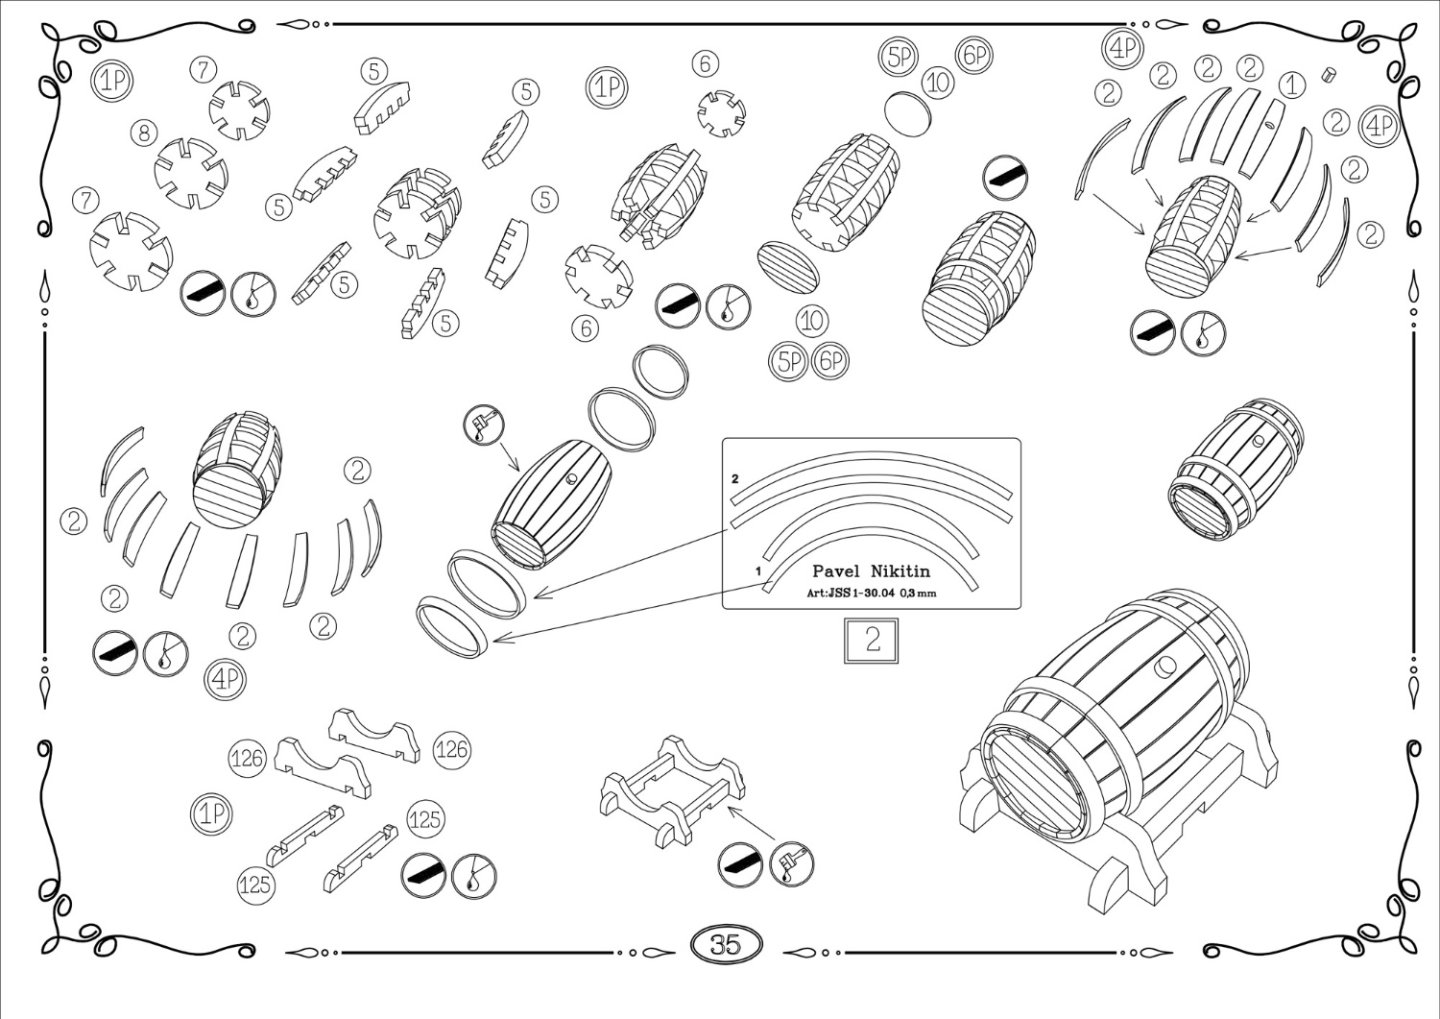
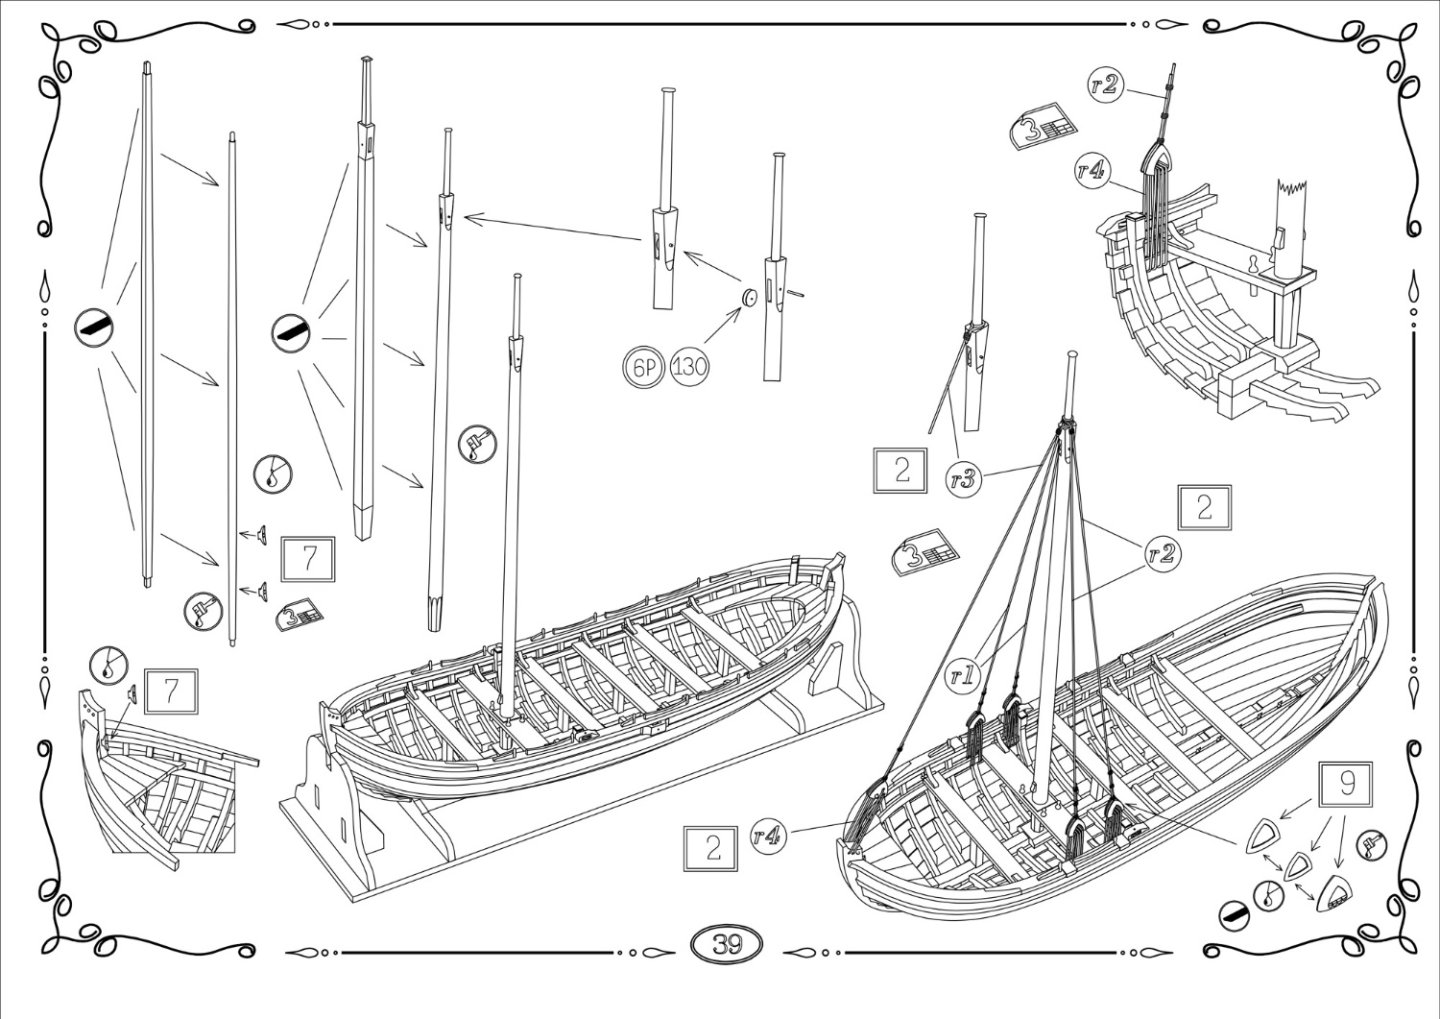
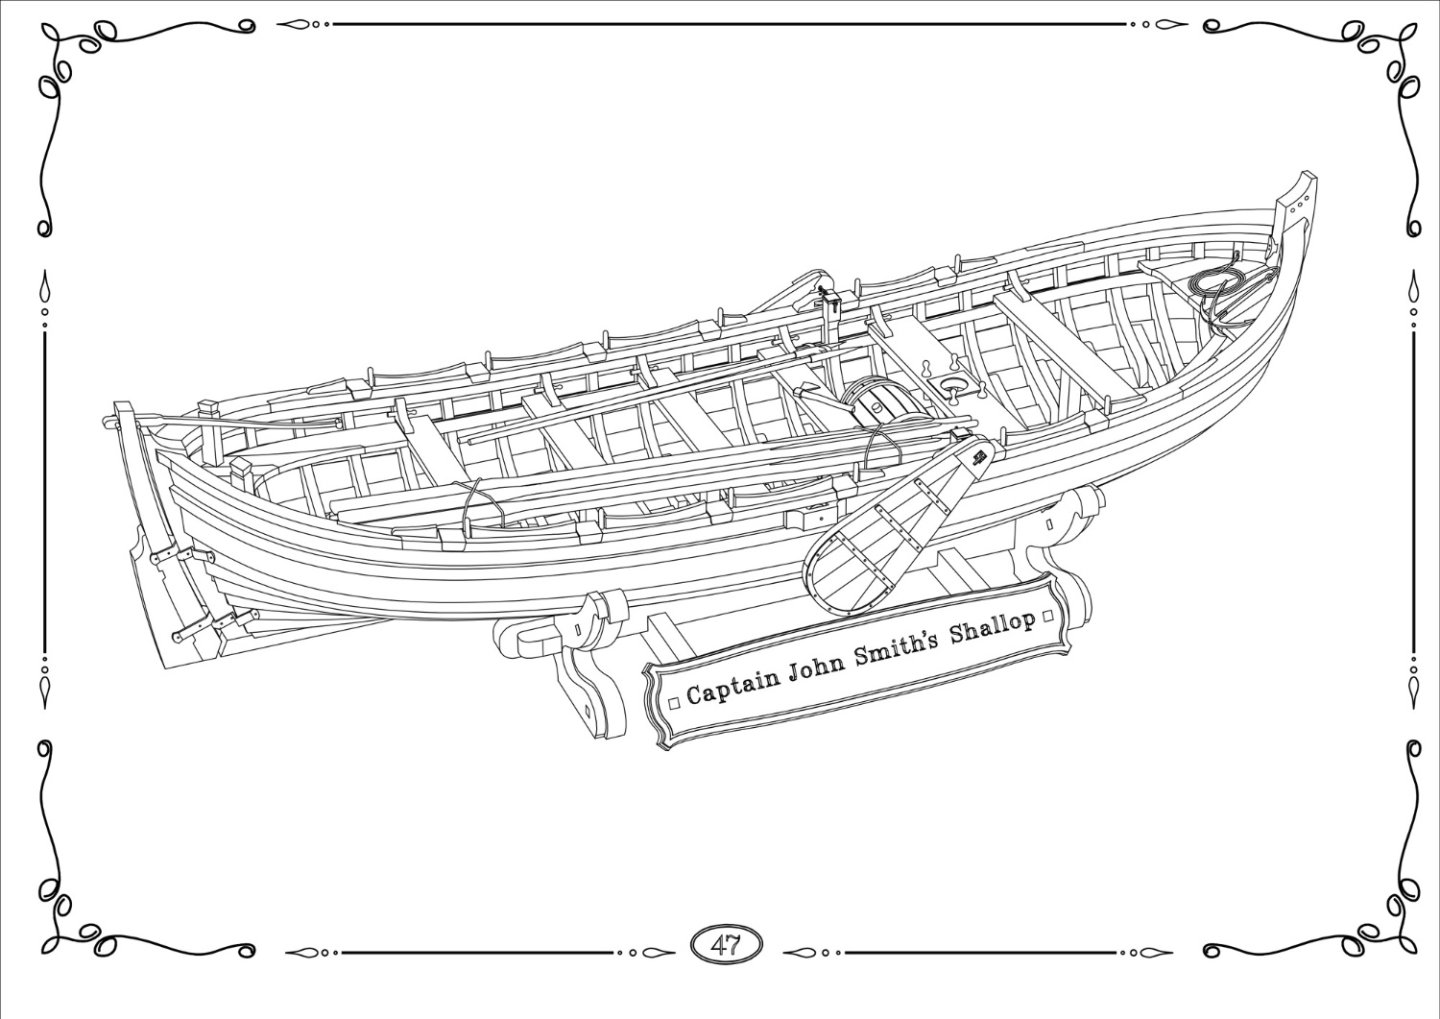
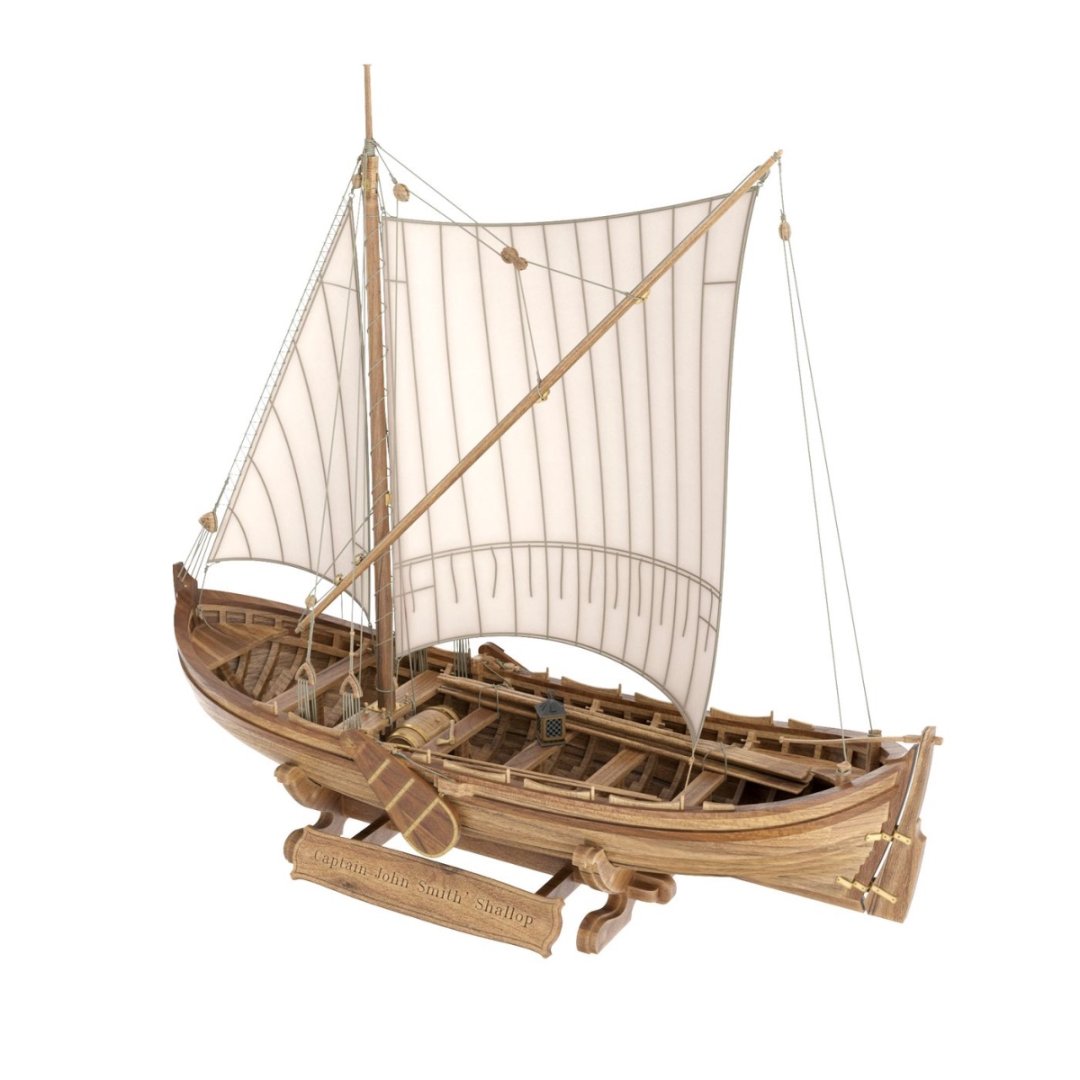
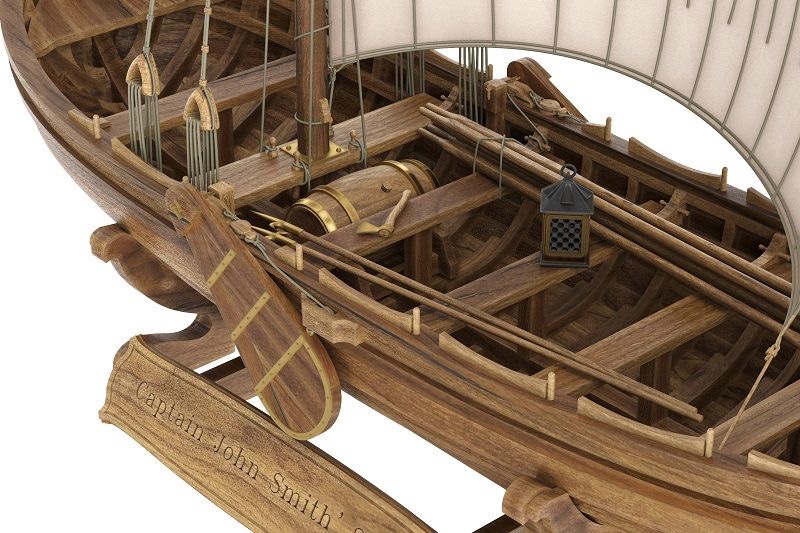
 1:32 Captain John Smith's Shallop Catalogue # CJSS01 Ships of Pavel Nikitin Available directly for €98.56 When the early colonists came to the New World at the turn of 16th-17th centuries, they quickly realised a need in small, universal, and durable boats to explore the coast safely and to start trade relations with local North American tribes. One of the most important aspects was not local boat construction, but the assembling Europe-built vessels beforehand. These boats were disassembled and shipped to the New World on the larger vessels used by English sailors to cross the Atlantic Ocean. Boats were usually between 25ft to 45ft in length, and utilised both sail and oars. They tended to have either one or two masts and at least one sail, as wells as six to eight oars. They could carry up to 25 persons with a food enough for a few days. The boats played an important role in survival and the development of the first settlements in the New World. Captain John Smith sailed with a crew of 14 persons and set out to explore and map out the Chesapeake Bay in the summer of 1608. The crew sailed more 1700 miles over just three months. This story is well known because of the meeting that Captain John Smith had with a Native American princess, Pocahontas, during his trip. The legend of Pocahontas and John Smith has been highlighted many times in a literature and cinema. All the notes and drawings of this journey were described in detail in Captain John Smith’s diaries. Unfortunately, he didn’t describe his shallop in detail, and all we really know is that it arrived in The New World, disassembled aboard the "Susan Constant". The kit Pavel Nikitin is probably not a name you’ve heard of before, or at least much. Pavel is a Ukraine-based designer, designing and producing model kits with the assistance of Eugen Troppmann. This is a typical cottage-industry operation, as are many other contemporary companies, but the current situation in Ukraine means that these guys are working under the hardest of conditions in order to fulfil the kit orders they’re currently getting. From being sent, the packages I received took only around 10-12 days to arrive here in the UK, after an understandable holdup in Kiev. Captain John Smith's Shallop comes in a relatively large-sized box that weighs around 2kg. That seems quite heavy for a 1:32 shallop, but the reasons for that will soon become evident. The box label depicts the finished model in two photos, showing the boat with deployed sails and also a lovely interior detail shot. For your own info, this little boat in 1:32 has these dimensions: · Length: 272mm · Width: 110mm · Height: 350mm All kit parts are laser-cut, as you would generally expect for a modern kit, and all the sheets supplied in this kit come wrapped in numerous sheets of cellophane to protect them. Here you can see exactly what you get when the box is opened, minus the plans and instructions that I moved for clarity. The kit itself is manufactured in several types of timber, namely walnut, cherry, alder and beech. All sheets are nicely clean cut all the way through, and the grain lends itself to the scale of the model. You’ll see here that the hull frames are provided in sections, with the clinker plank elements clear to see. There are also bevel marks to make sure the hull is properly faired for later fitting the pre-cut planks. And here you see those planks, but from 0.6mm wood, so they’ll be nice and easy to manipulate into place. How do I know? I’ve been watching Olha Batchvarov’s series of videos on YouTube, clearly showing how this model is put together. I’ve included a link to her series of Shallop videos in this article. Other parts on here include components for the barrels. The inner seating at bow and stern comprises of individual planks that make up the whole part, as per the real boat. Even the side paddles are built in the same manner, adding to the finished realism. Here you see parts for the keel and display stand on the middle, thicker sheet while the other sheets contain inner strakes, oars and barrel staves. Now, that kit weight. There are numerous sheets of MDF in this kit which go to assist the building of this little boat, and this one is very useful. Those hull frames you need to assemble are assembled inside the cut-outs in this sheet. This will ensure you get 100% correct alignment of all the parts. This MDF sheet contains parts for one of the THREE jigs that are supplied to help you build the boat. The first jig concerns the initial framing onto the multipart keel. This setup is very common with plank on frame model kits. Another sheet contains more frame assembly parts and also more parts for the framing jig. Now, this jig is what you sit the hull onto so that you can plank it. The hull sits on this upside down, making the jig a sort of assembly buck. Being clinker of course, planking starts with the garboard and works upwards (or downwards on this jig!) to the gunwales. A third jig is included which the planked hull sits into so it may easily be fitted out. The jig materials far exceed those to build the boat, hence that 2kg kit weight. This is a feature which isn’t normally included in a kit, and that’s a pre-cut, slotted mast and gaff. These are assembled from sections that have been glued together by the company. They are pre-tapered and you just need to round the parts off to complete. These guys also make their own fittings boxes out of laser cut MDF, with a sliding Perspex lid that’s engraved with the part number of each compartment. Small foam pieces are pushed into some compartments to stop the smaller, more fragile parts from rattling around. This box contains rig cord which is actually quite nice in quality and not shop-standard as in many kits. Three frets of copper photo etch are included, as well as two brass ones for the many detail parts within the hull and for masting. Here you can see various rigging blocks, 3D-printed lantern and other laser-cut, shaped parts. A small flag is also included. A good quality sail material is supplied too, printed. This will need some work in adding the boltrope etc. FOUR sheets of large plans are supplied, showing the hull detail, masting, rigging, fitting out, etc. Instructions A 47 page A4 manual is also supplied, ring-bound with clear plastic covers. The type of illustration is a beautifully detailed line-drawing style that clearly illustrates every aspect of the project, and with all parts numbered clearly. No drawing is ambiguous and everything looks very simple to build. Conclusion This is such a wonderful and beautiful little kit of a significant boat. It won’t take up much display space despite the scale, and the price is very attractive too. This certainly isn’t a long-term project but the finish certainly seems to belie that fact. Head over to Pavel’s website and support this young company, especially at such a difficult time. I’m very sure you’ll not be disappointed with the package you receive. My sincere thanks to Pavel Nikitin for sending the kit that we’ve reviewed here on MSW. Click on the website link to buy yourself one of these kits.


-
 This is my first attempt at scratch building, having kit-bashed a number of models. I work as a Museum Guide at Plimoth Plantation, which includes Mayflower II. During the off-season, I work in the Marine shop, doing routine yearly maintenance. As such, I have access to the Mayflower as well as her shallop. I will be using plans by William Baker, the original Naval Architect of the Mayflower II in 1955. The scale is 1/24. The vessel was a 33 foot work boat that could be rowed or sailed and was common in the17th century. The Pilgrims cut the vessel into four pieces and stowed them on the orlop deck, where the passengers lived. Upon arrival in Provincetown, the shallop was re-assembled and used to explore the inner arm of Cape Cod, eventually landing in Plimoth. The pics show the plans and a building board. In the background is the almost finished mast. At this point I'm waiting on wood from HobbyMill, due at the end of the month, so, that's all for now!