Search the Community
Showing results for tags 'skiff'.
Found 13 results
-
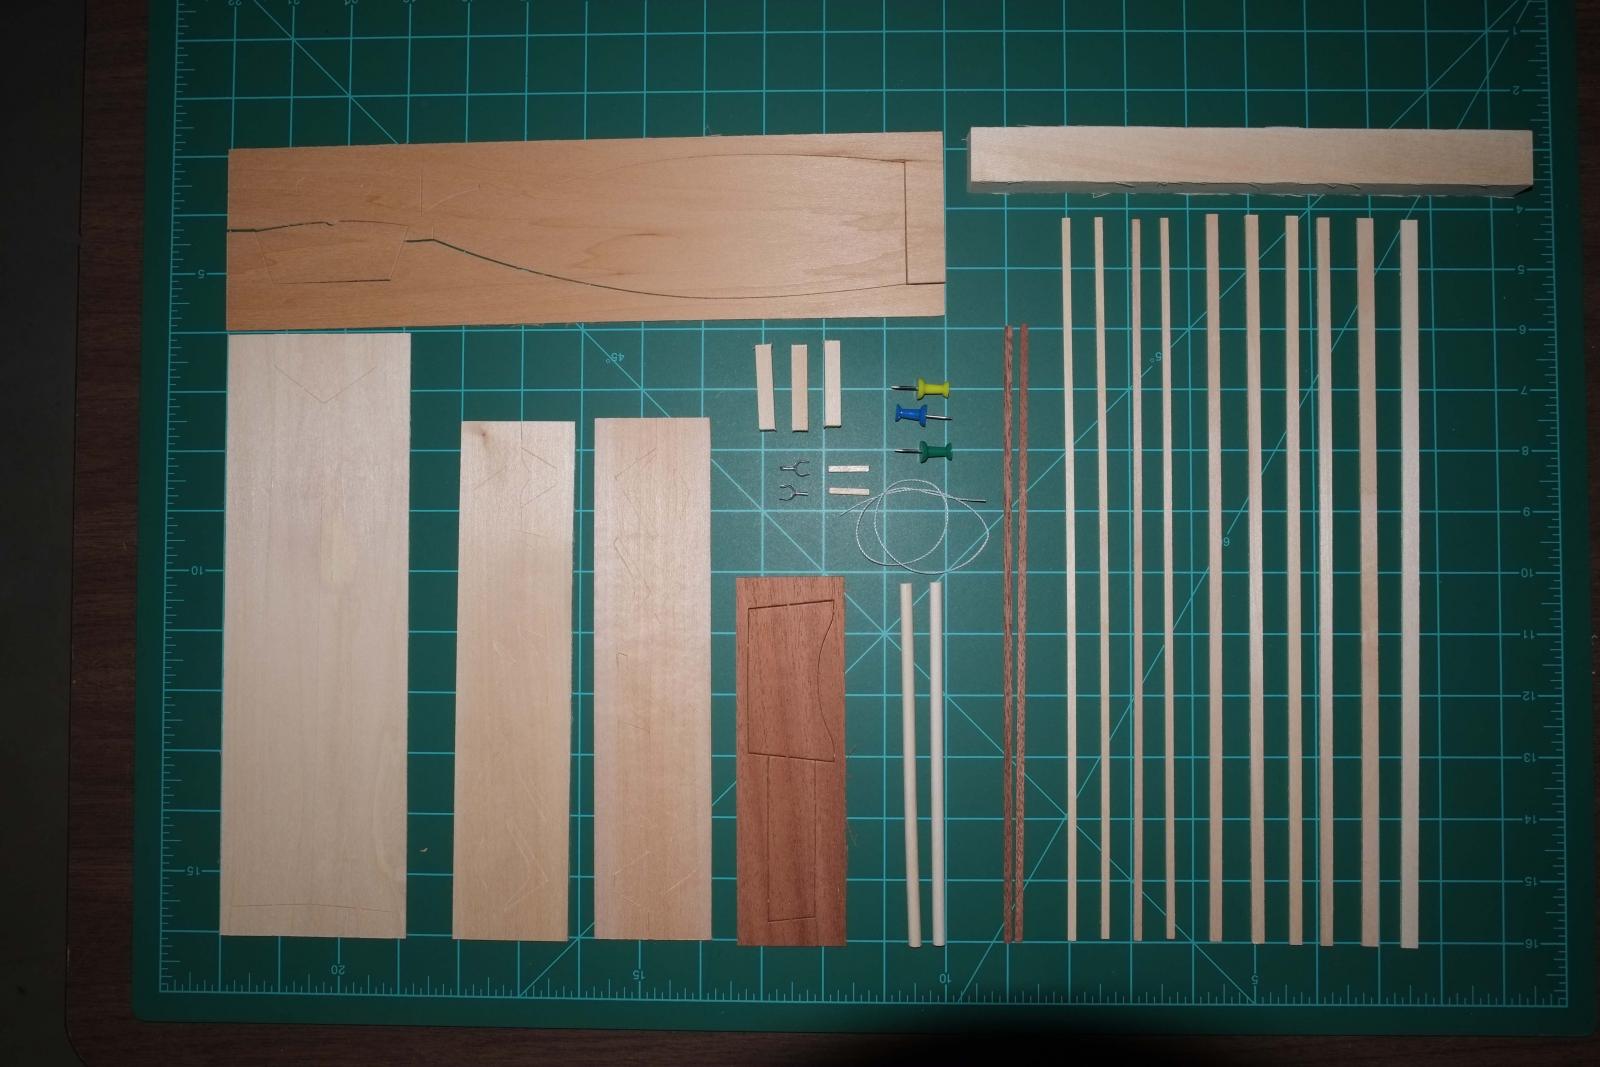
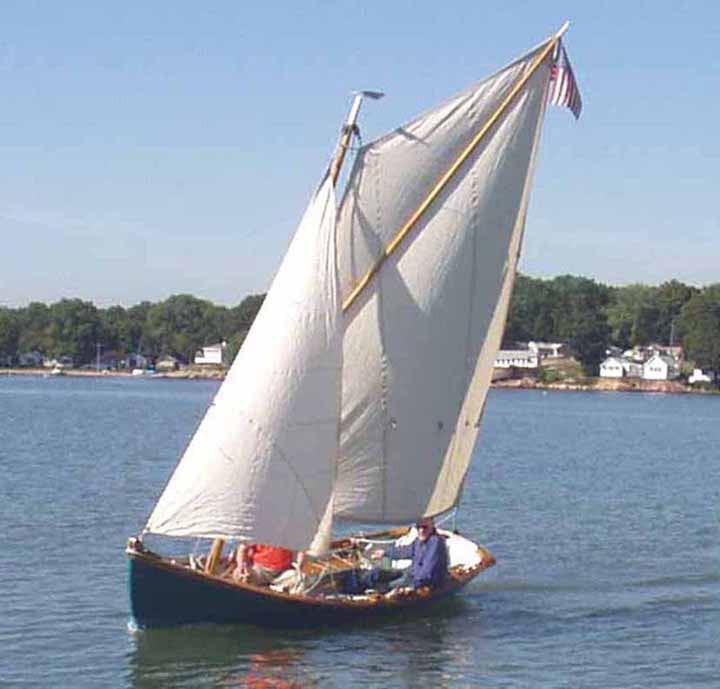
 Back in summer 2017 I scored a serious modelling injury - a deep cut in my left index finger that severed the nerves and nicked a tendon. The results were not only the immediate physical damage (despite surgery and physio I still have only very limited use of that finger and it still causes physical discomfort to bend the last knuckle), but also that my focus on modelling drifted in the extreme - a psychological barrier that I have found it much more difficult to overcome than the injury itself! My modelling hasn't stopped entirely, but the model I was working on when the injury happened has languished (I think I've spent maybe half a dozen days on it since the injury), and I have not been able to make much progress on the other project I have on the go - a 1:64 scale Bluenose scratch-built from the MS plans. I hope to finish both of these models one day, but I felt like I needed a smaller project just to get me back into the swing of modelling. I did not want to break open a new kit (I have quite a few on the shelf waiting) so I started looking for a good small project that I could dive into. Then last summer I stumbled across a site that I imagine some of the MSW crew are aware of - Off Centre Harbor out of Brooklin, Maine. OCH came up in a search for small boat kits (full size) and I discovered this great video series that follows the construction of a 14' rowing skiff, designed by Havilah Hawkins. The build was conducted by an OCH instructor and a group of what look like 7-12 year old kids. It was watching the kids build it that I think inspired me to have a go at modelling this and as an entry back into ship modelling. Here is a link to the first video in the series - the full set of videos is available only to OCH members - I joined and discovered quite a few useful and interesting resources, but am otherwise unaffiliated with them. https://www.offcenterharbor.com/videos/how-to-build-a-beautiful-skiff-part-1-introduction/ OCH makes the plans for this kit available at a reasonable price (40$) - and the 5 sheets (of varying scales but with all necessary offsets included) are accompanied by a wood list for the full scale boat that also serves as reference for modelling the skiff at scale. The video series shows an adaptation of the skiff for sail, but no plans for this are currently available. So in essence this build serves a couple of purposes - first (hopefully) to bootstrap me back into modelling and second to give a sense of how easy or difficult it might be to build one of these things full size at some point in the future. I'll be building the model at 1:12 (1" = 1') scale and following as much as possible, the process as outlined for the construction of the full sized boat - with some modifications. I'll close out this post with an image (cropped) of the profile and plan views of the skiff. Enjoy! hamilton
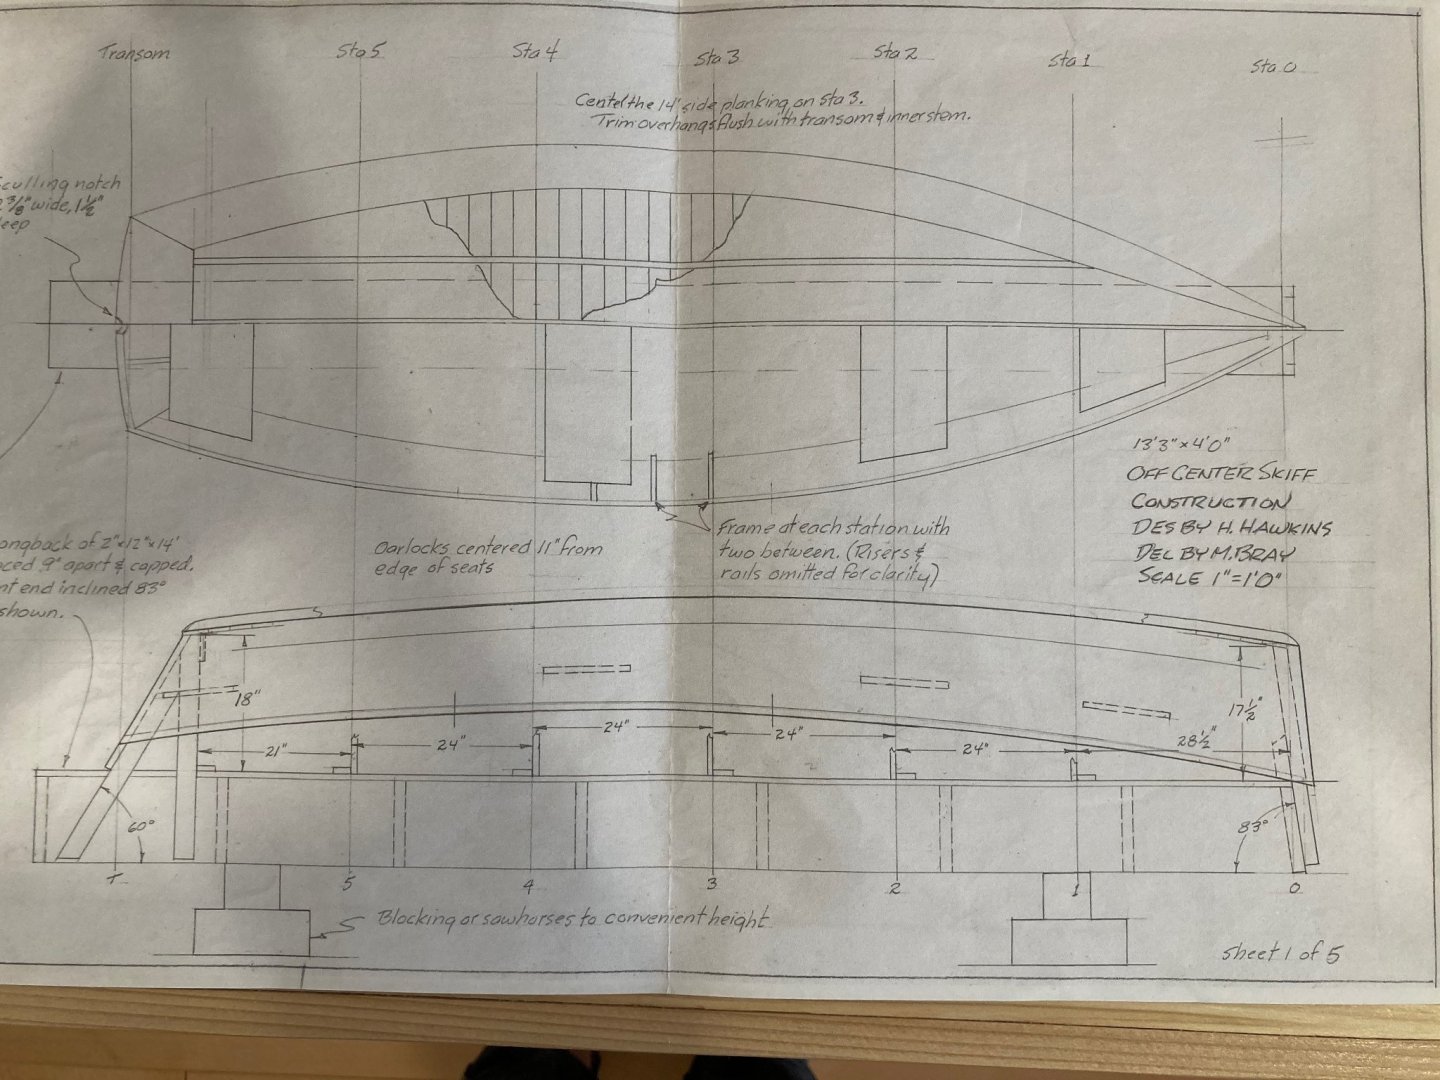
-
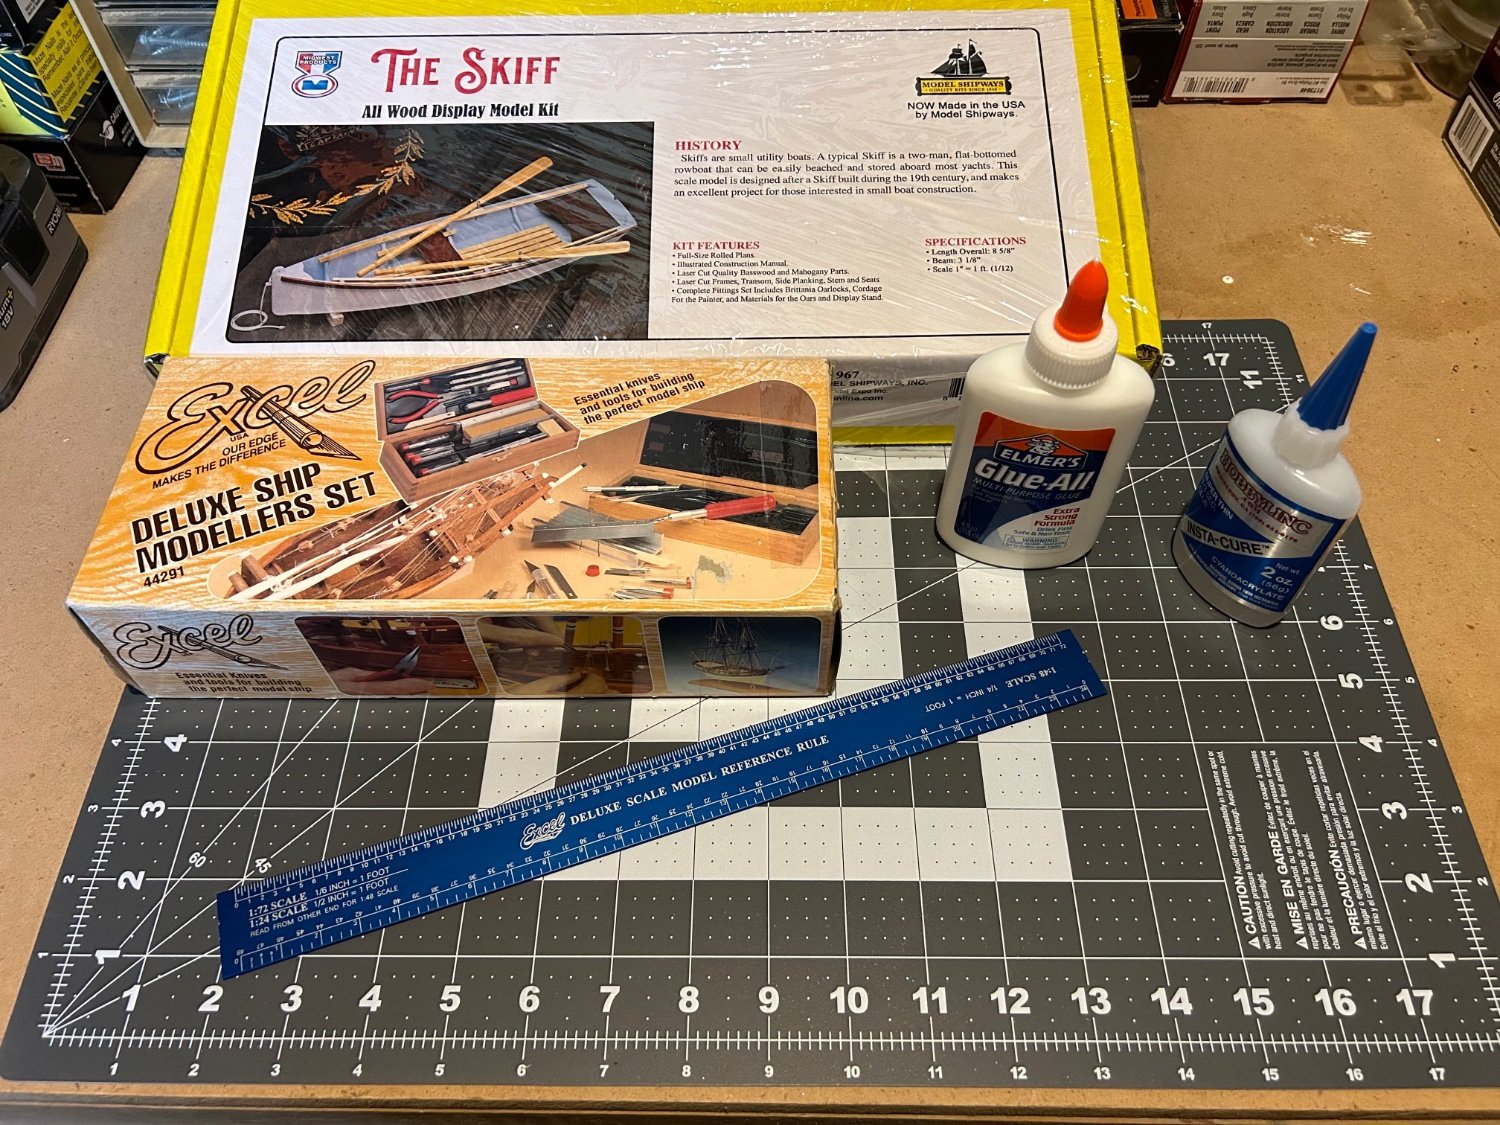
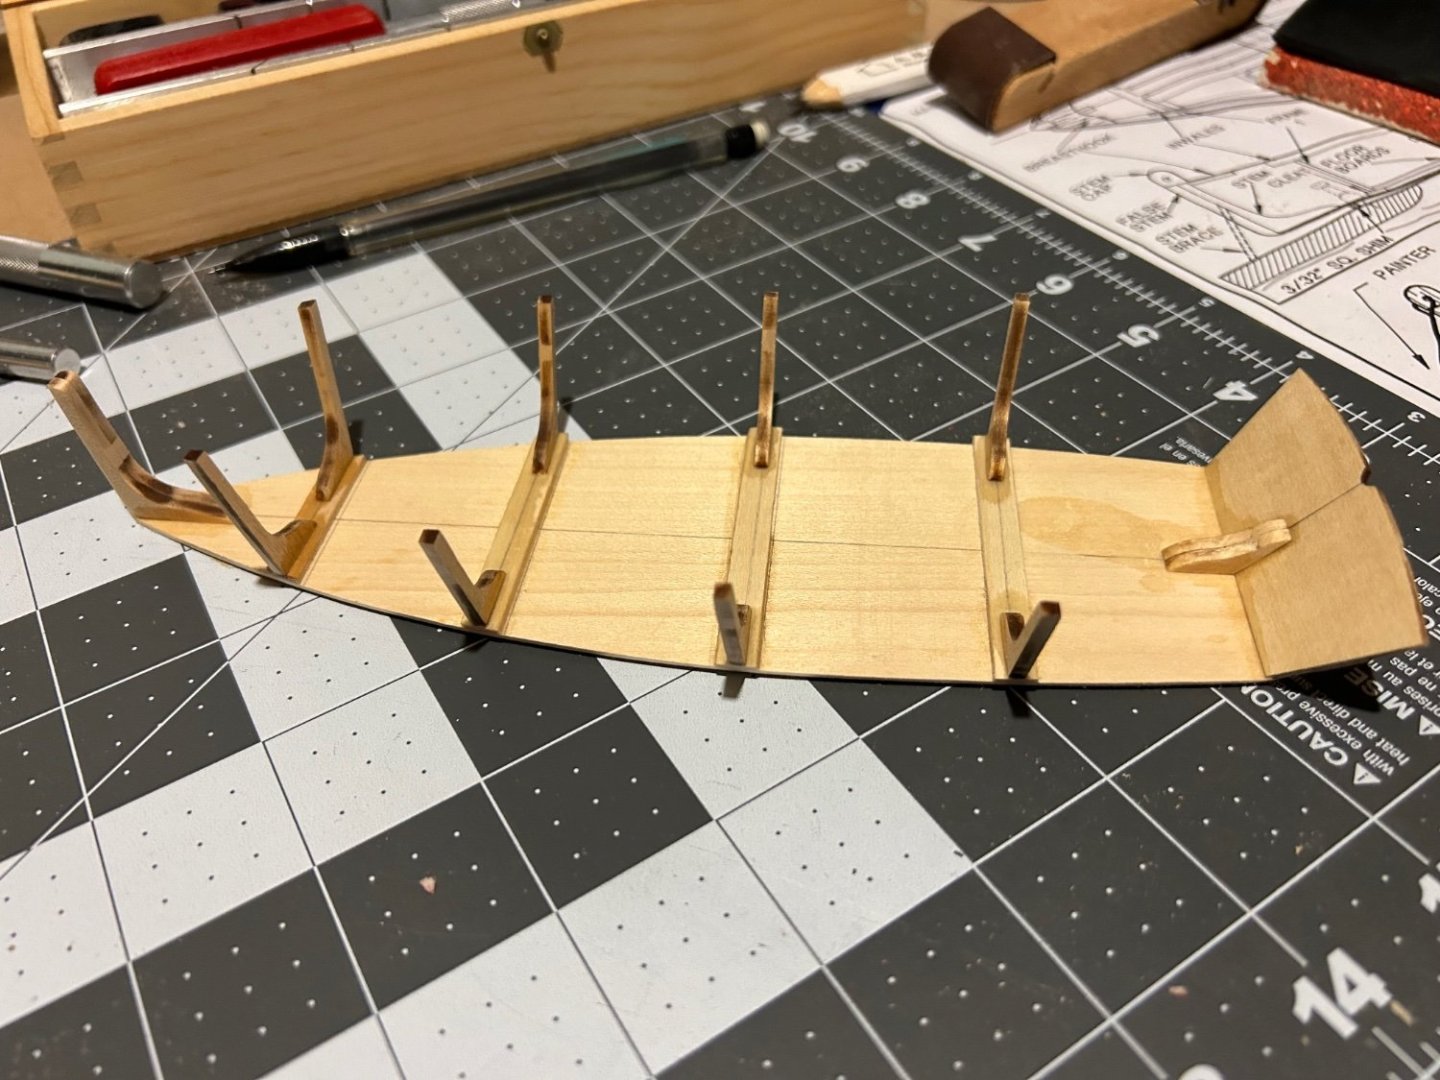
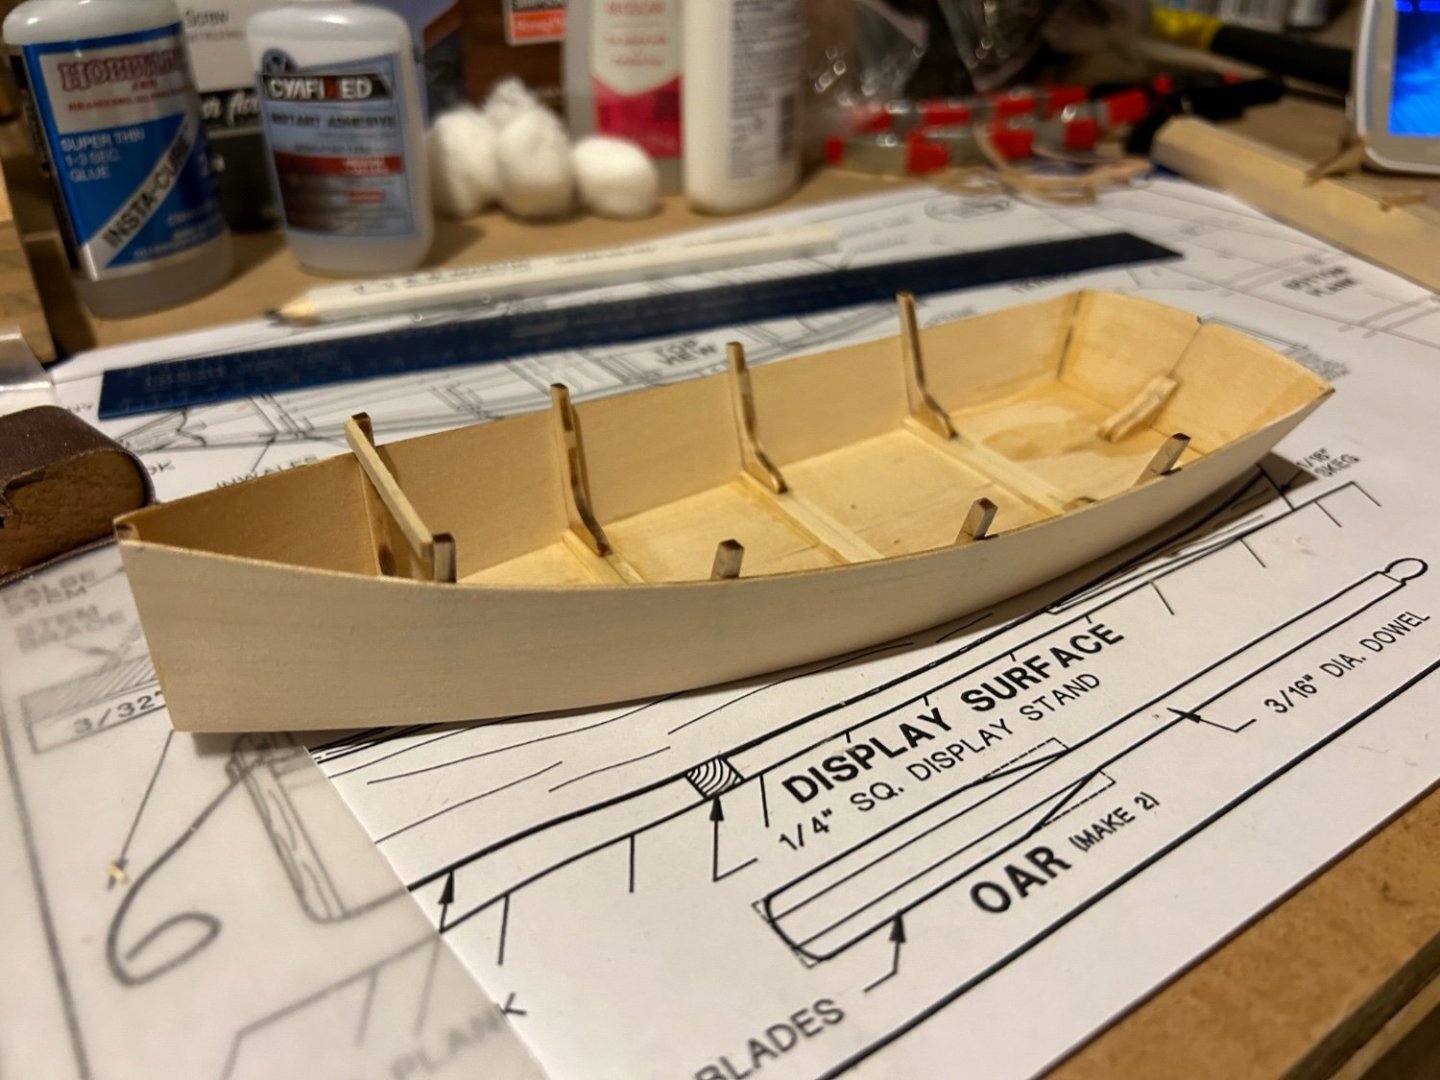
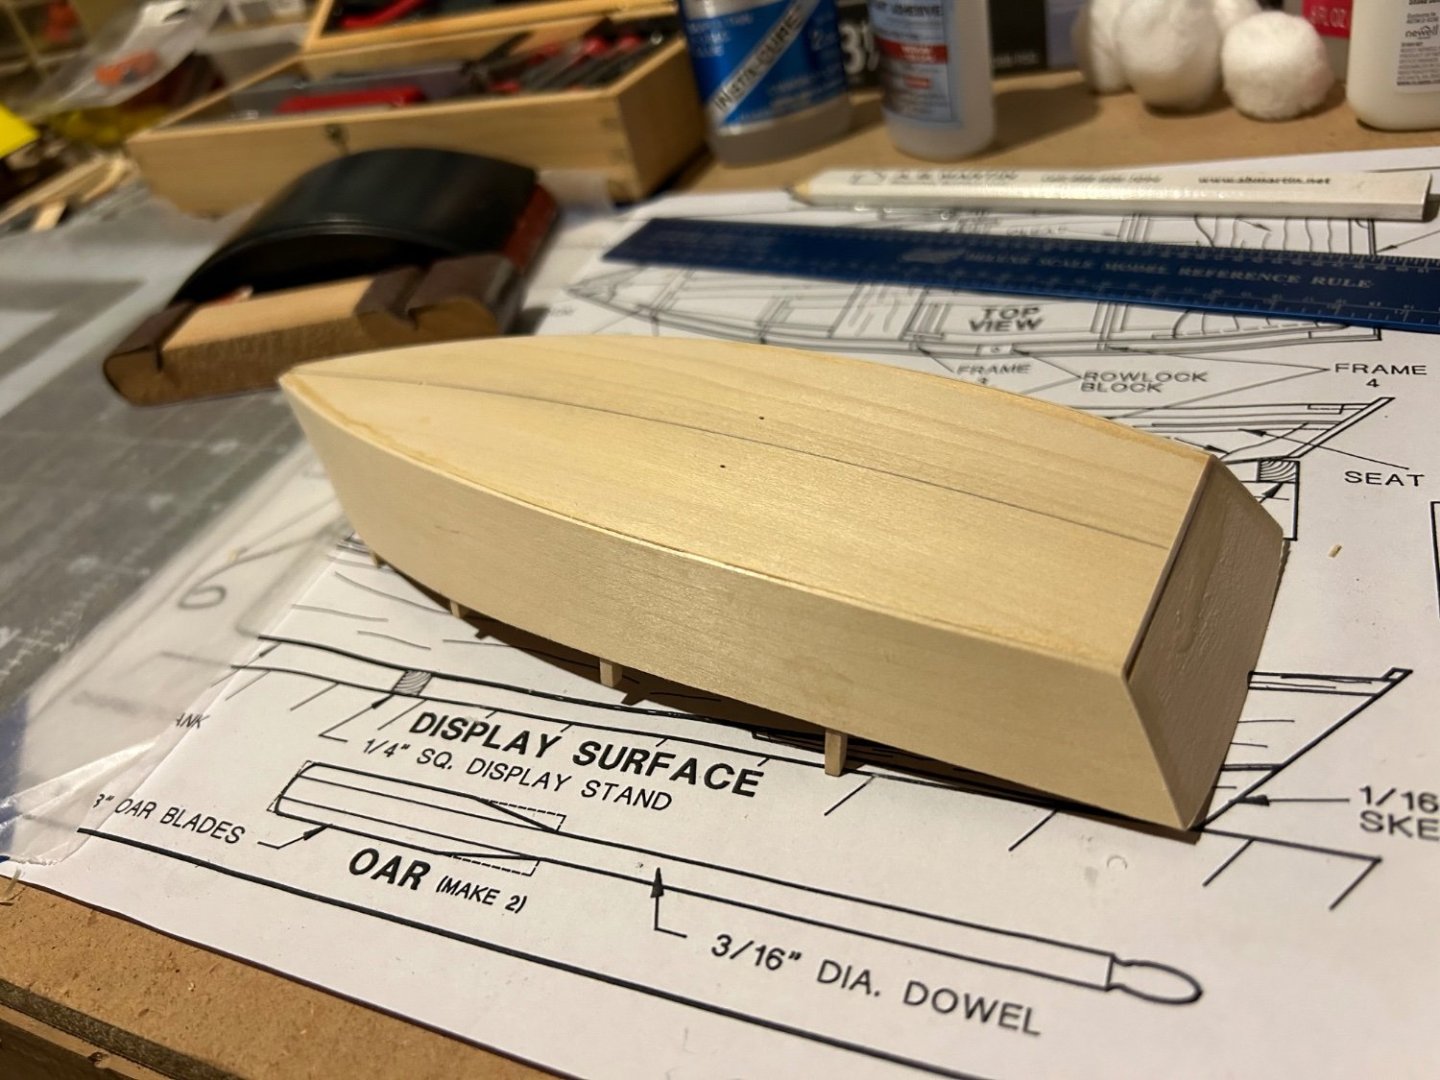
 Let’s start with some background. I stumbled onto the Modelships Reddit a couple years ago while doom scrolling in the middle of the night trying to get my infant daughter to sleep. I became pretty fascinated by the intricacy of some of those builds but didn’t have the time to even think about getting started back then. A few months back I started toying with the idea of giving this a shot and ultimately couldn’t shake it. I don’t have any prior experience building models, but for someone with a desk job, I’m moderately handy and have done a fair amount of work on my house over the last 8 years. After some research and deal hunting, I ended up selecting this kit, along with some tools and supplies to get started. I was already pretty well into this build when I found my way to this site, so the rest of this post will primarily be a reflection on the first half of my first build, and I’ll try to transition to more of a true build log once I’m caught up. So far, my impression of the kit is that it is exactly as advertised. It’s very approachable for a beginner. The instructions are pretty clear and easy to follow, minus a step or two where the text got scrambled somehow. There are even some tips and contextual narratives mixed in for good measure. The first dozen or so steps were straight forward and probably don’t need to be rehashed here. The first real lesson for me came when I had to attach the knee to the transom. Despite the instructions calling for slow CA, I used quick CA as that was all I had on hand at the time. I proceeded to nearly glue my fingers together and ended up with quite a bit of excess, which you can see in the second photo. I now have slow CA as well. The other problem was that the transom ended up slightly off center, which led to a lot of sanding later on, though I managed to adjust for it. I was also slightly off center with 1 of the 8 frames, though now that I’ve gotten the side planks on, I don’t think it hurt me too much. Attaching the side planks to the frames ended up being not as bad as I thought it might be. At first I had some difficulty at the stem since it’s not easily clamped, but I managed to find a way to grip it and drip enough fast CA to get it secured while the slow CA set up. The rest of the side planks were affixed with white glue and clamped. Several rounds of sanding later brings me to the last two photos for this post. I’ve already made a bit of progress from when these were taken, so I should be ready for another post in a few days. Thanks for reading!
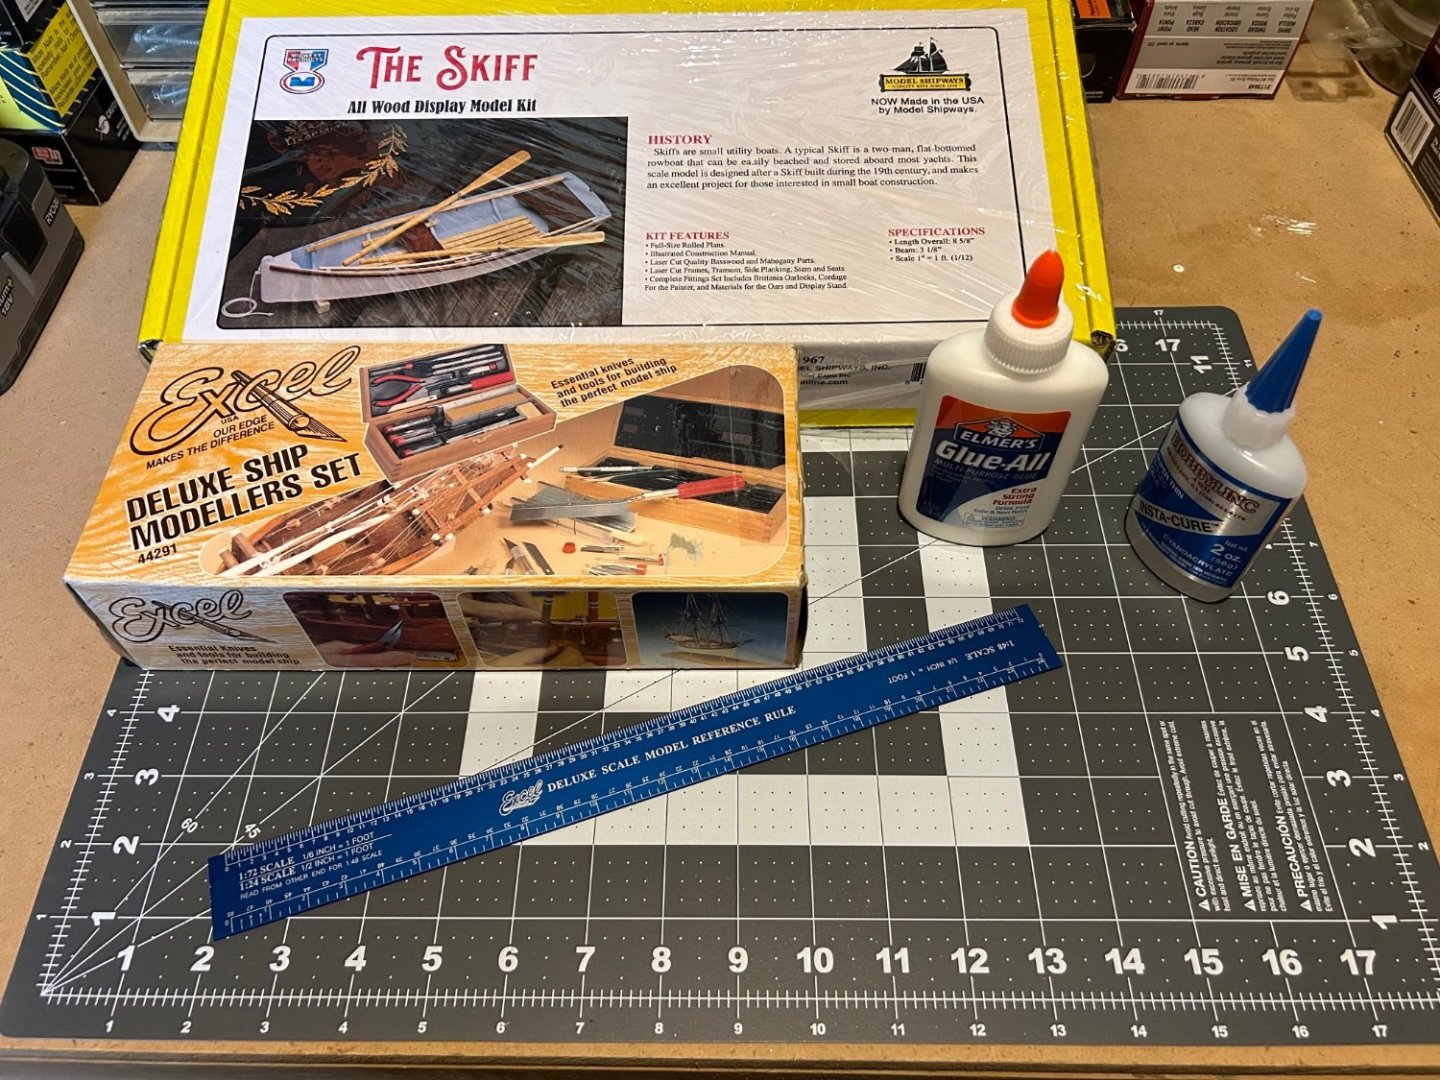
- 8 replies
-
- 5
-

-
- Skiff
- Midwest Products
- (and 1 more)
-
 While showing my grandson the Zebulon B. Vance progress I gave him my magnifiers and let him trim a PE stanchion. Since he's a first rate Lego constructor he did an admirable job of trimming, but finished with a question about whether anyone makes a kit with bigger pieces for beginners. I jumped onto Bluejacket's web page after he left and found the perfect answer, the Skiff wooden kit. Big, with not too many pieces to help ensure a timely and successful finish. When I revealed it to him he said a great idea would be for us to have a blog(!) to see if anyone is interested and to see where and how far away the other shipbuilders live. So this will be an on again, off again build dependent upon how often we can steal him from Mom and Dad for an overnight visit. The goal is to have Legodude (his choice) do the building with guidance limited to explaining the instructions and how to read a drawing.
- 18 replies
-
- 4
-
-
- skiff
- BlueJacket Shipcrafters
- (and 1 more)
-
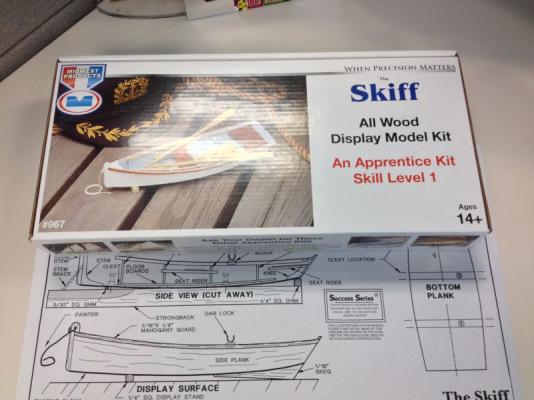
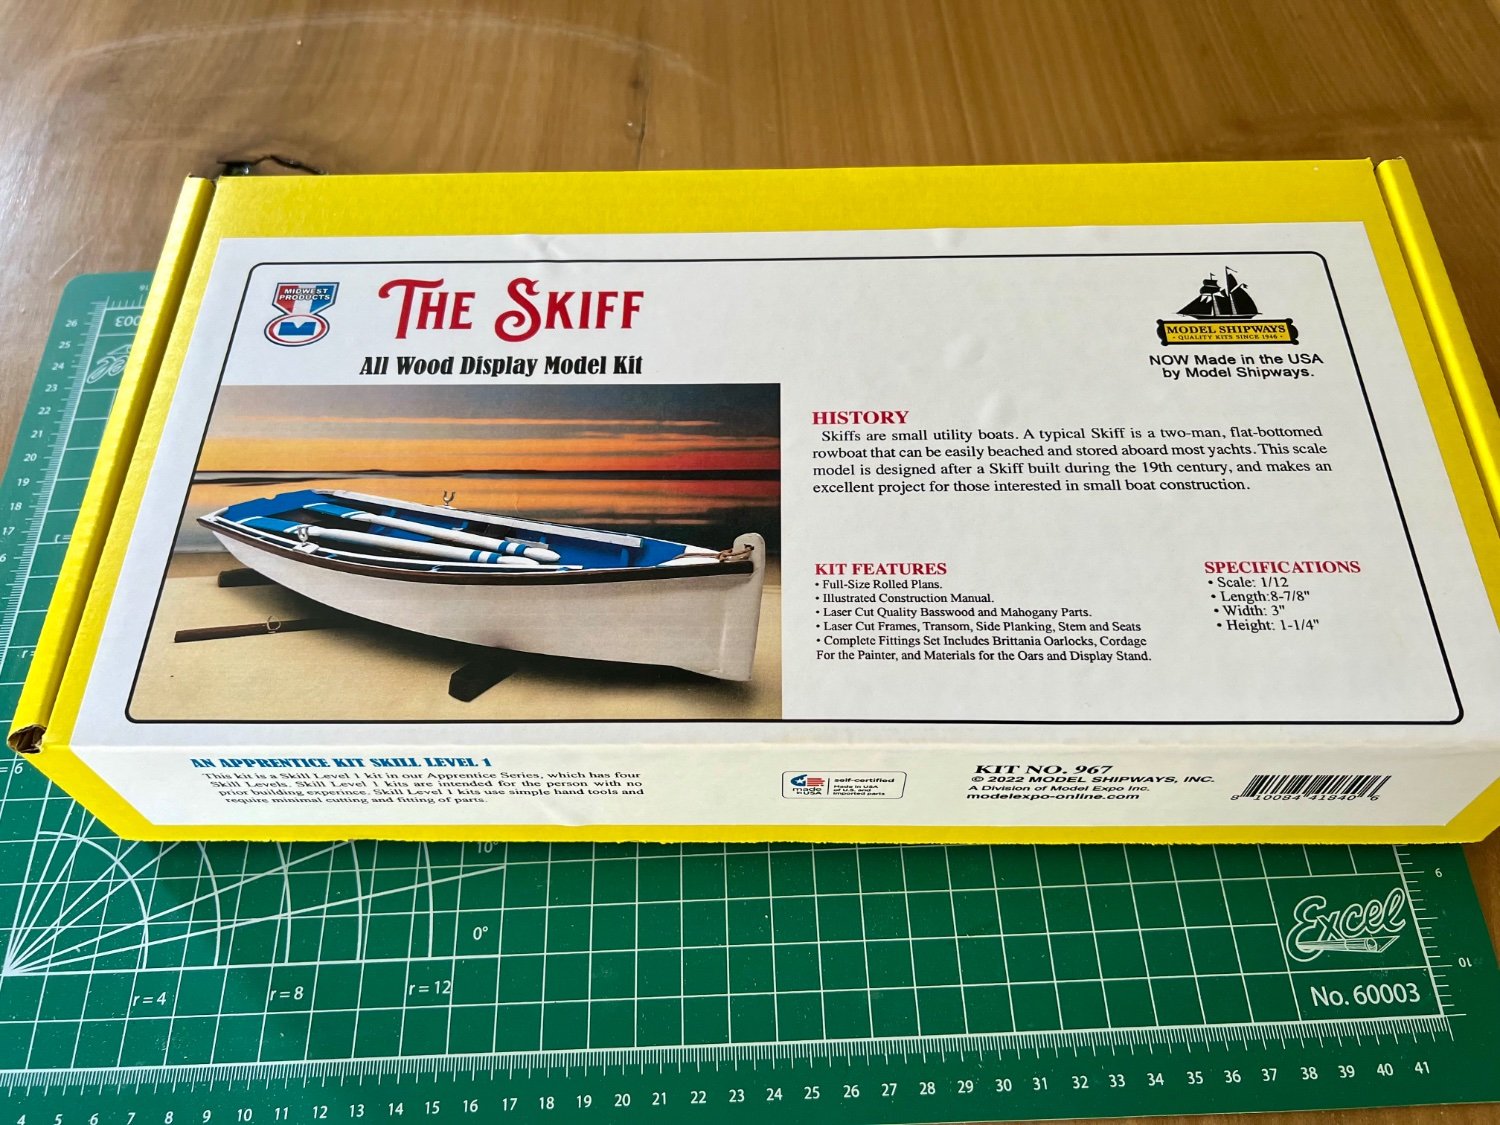
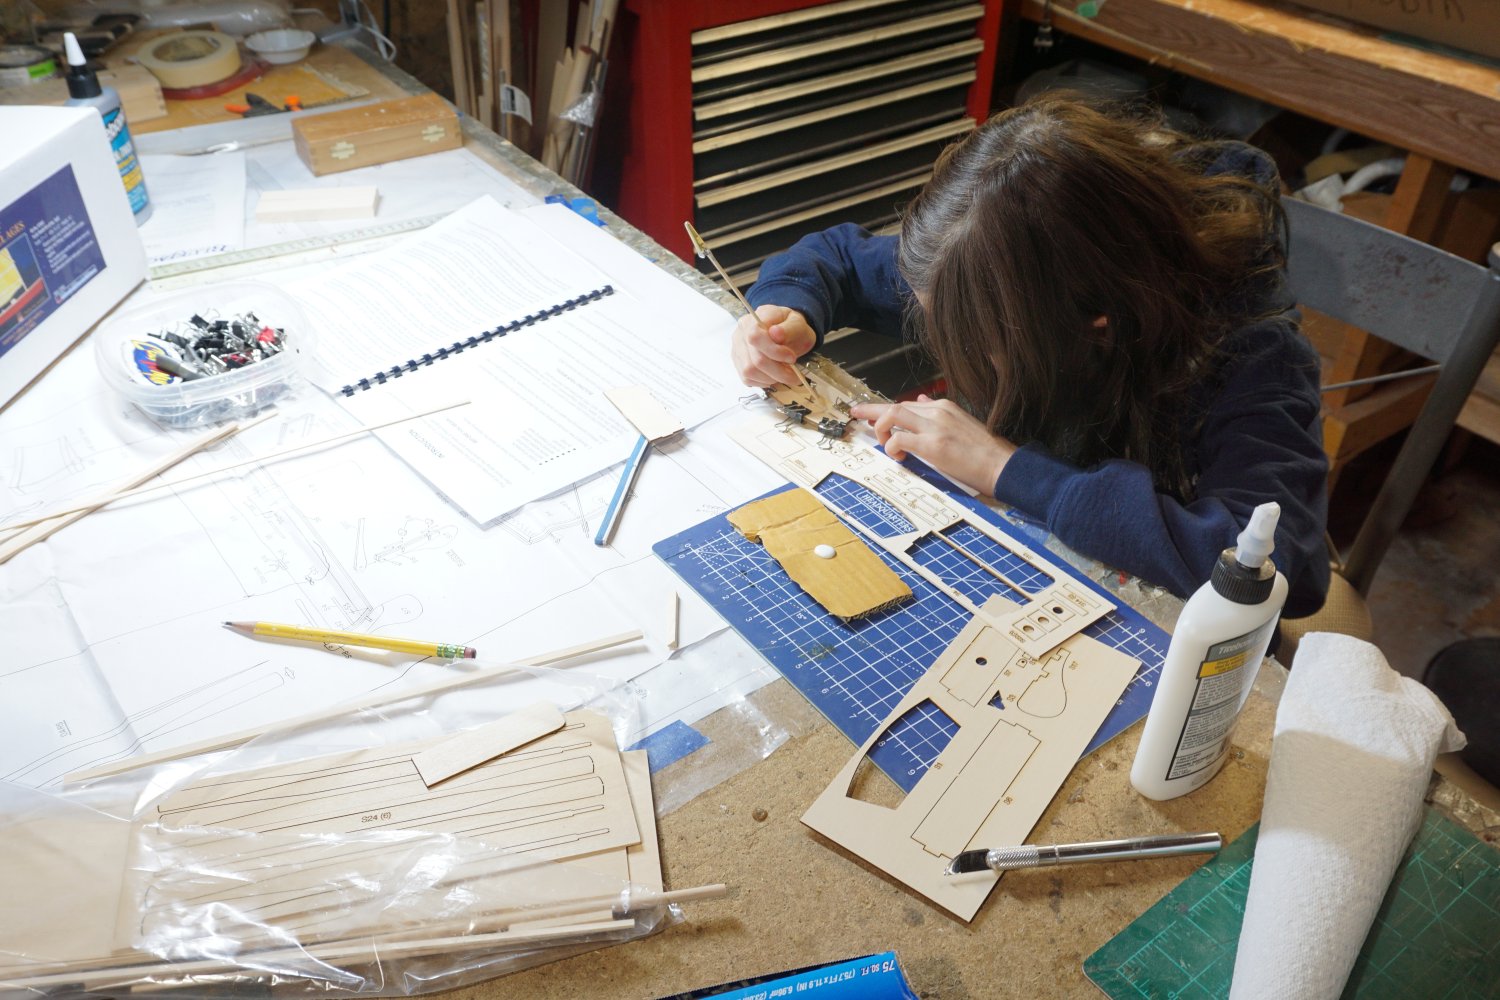
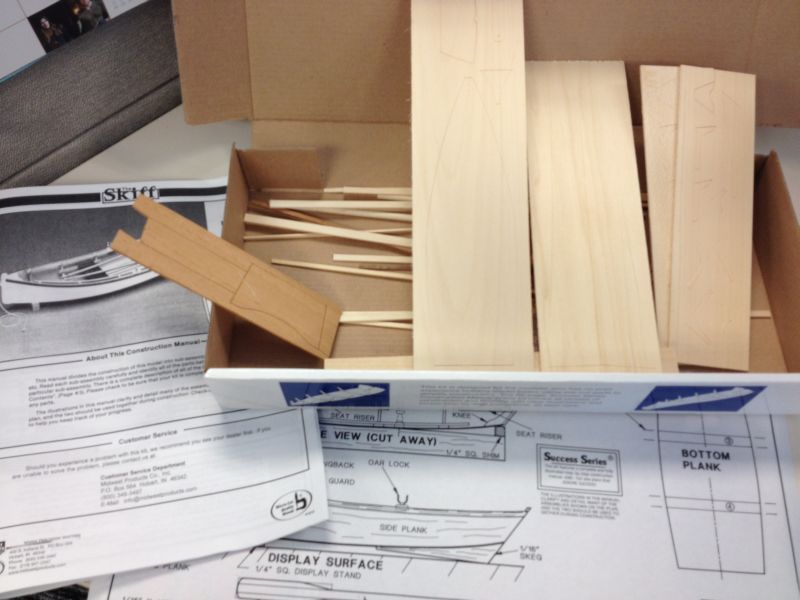
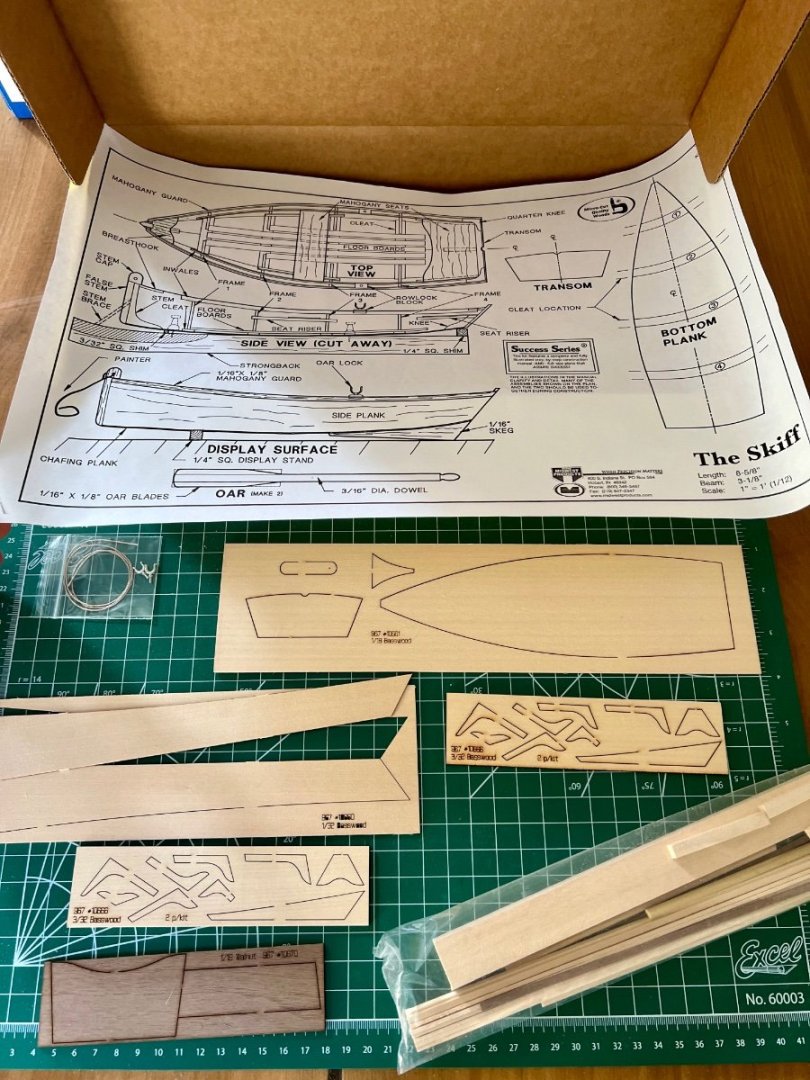
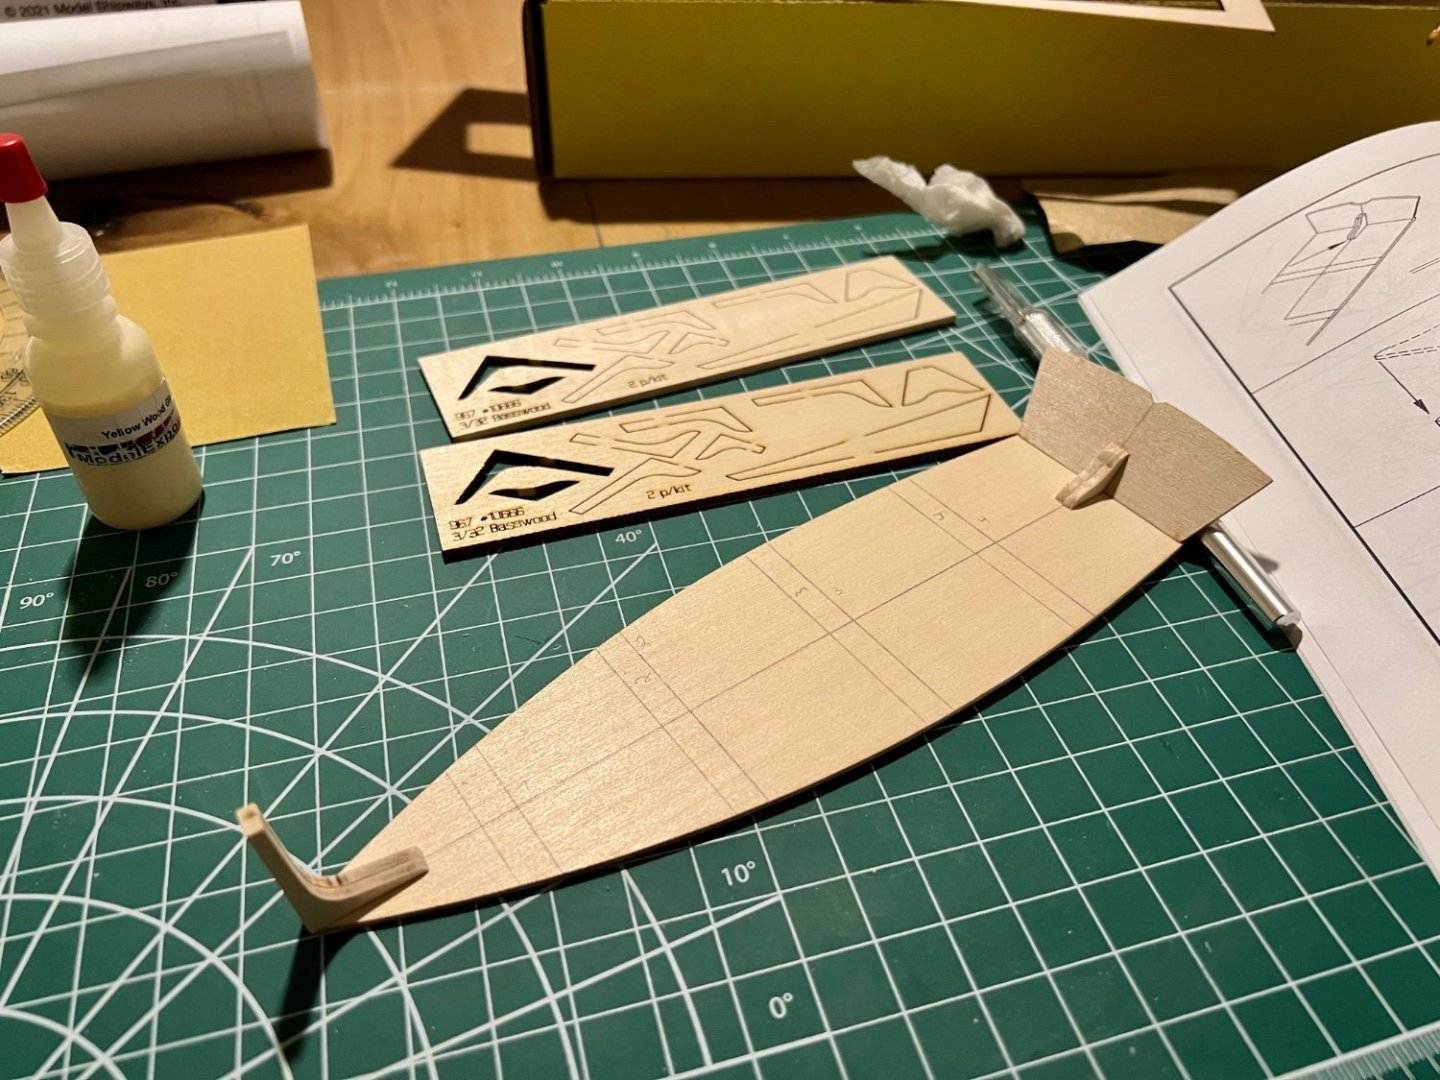
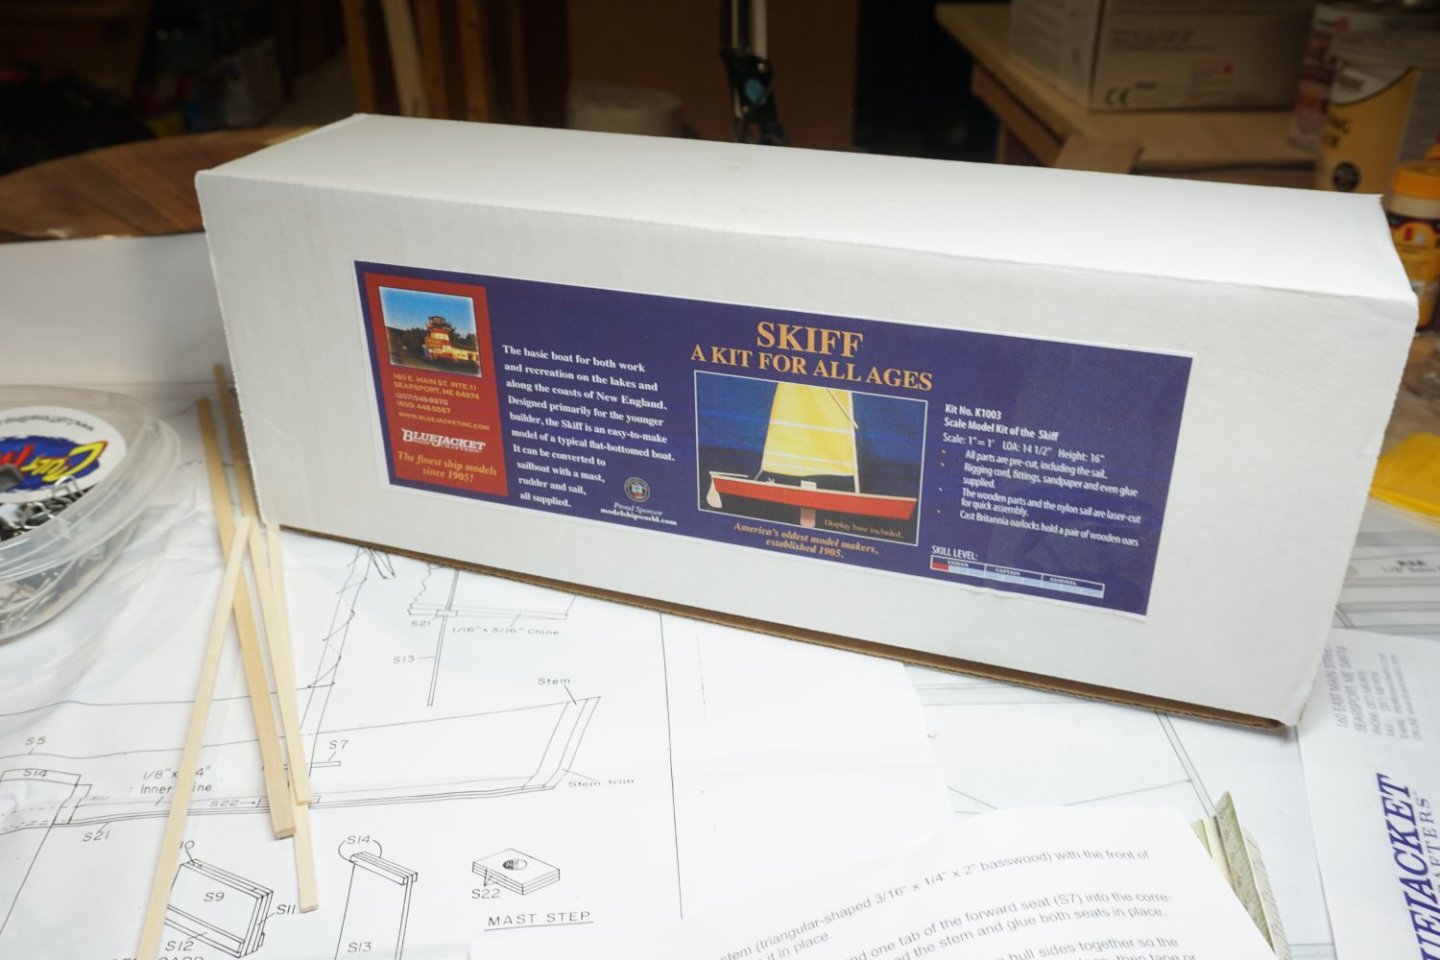
 Greetings! Having completed my first build last month, the MS Grand Banks Dory from the introductory Shipwright Series, I said I was going to practice on another model before moving up in skill level. I am excited that MS/ME has acquired and began reproducing many Midwest kits of the past, as they appear to be perfect for beginners like myself. I chose this Skiff kit with the goal of improving my basic skills, and building on lessons & mistakes I made on the previous model. I've also done some research on the older Midwest kits, so I will try to point out some differences on this Model Shipways rerelease as I notice them. I would skip over the box, but as I haven't seen any build logs for this MS produced Skiff I'll take a moment to show it. First major difference with the box is the picture of the model has an entirely new paint scheme compared to the old Midwest colors. I think the deep blue is attractive and will plan to follow this paint job when the time comes. The box does appear to have a hybrid branding - the old Midwest logo is featured, but also clearly has MS branding added as well. As a result I've titled this build as an MS-Midwest build to help clarify that this is a rerelease version. From the box description and learning about skiffs for this build, later 19th century seems like an appropriate era for this build log. The side of the box has MS '22 trademarks, but interestingly it keeps the original Midwest kit number of 967. When doing some research of the old Midwest produced kits they made two different scales for the Skiff - kit #947: a 1:6 scale model advertised as a "Yacht Skiff." And kit #967: simply titled "The Skiff" in 1:12 scale. As of right now only this single Skiff model appears on the ME/MS website, which is this 1:12 model. Opening the box the contents appeared as expected - same standard as MS laser cut wood. As shown in the picture - one of the side planks was already free but thankfully no damage. Everything appeared to be in order, however the instruction manual had some strange printing errors. I won't go into detail out of respect for ME/MS, as they replied within hours of my email and sent a new instruction manual right away, and said they would check other kits. Starting off with the bottom plank - markings needed to be measured and penciled in. In contrast to the Dory I just built that had guide markings, having to make simple markings like this made me feel more engaged in the build. I then installed the stem, knee, and transom. I took time to make sure everything was square, perhaps more so then my last build, and definitely used less glue as I learned from last time to gauge how much is needed. Next I'll finish getting the cleats ready, and attach the frames in the coming days. So far I'm enjoying the rereleased kit and think it is a great complement to the Dory build.
- 3 replies
-
- 6
-
-
- Model Shipways
- skiff
- (and 1 more)
-
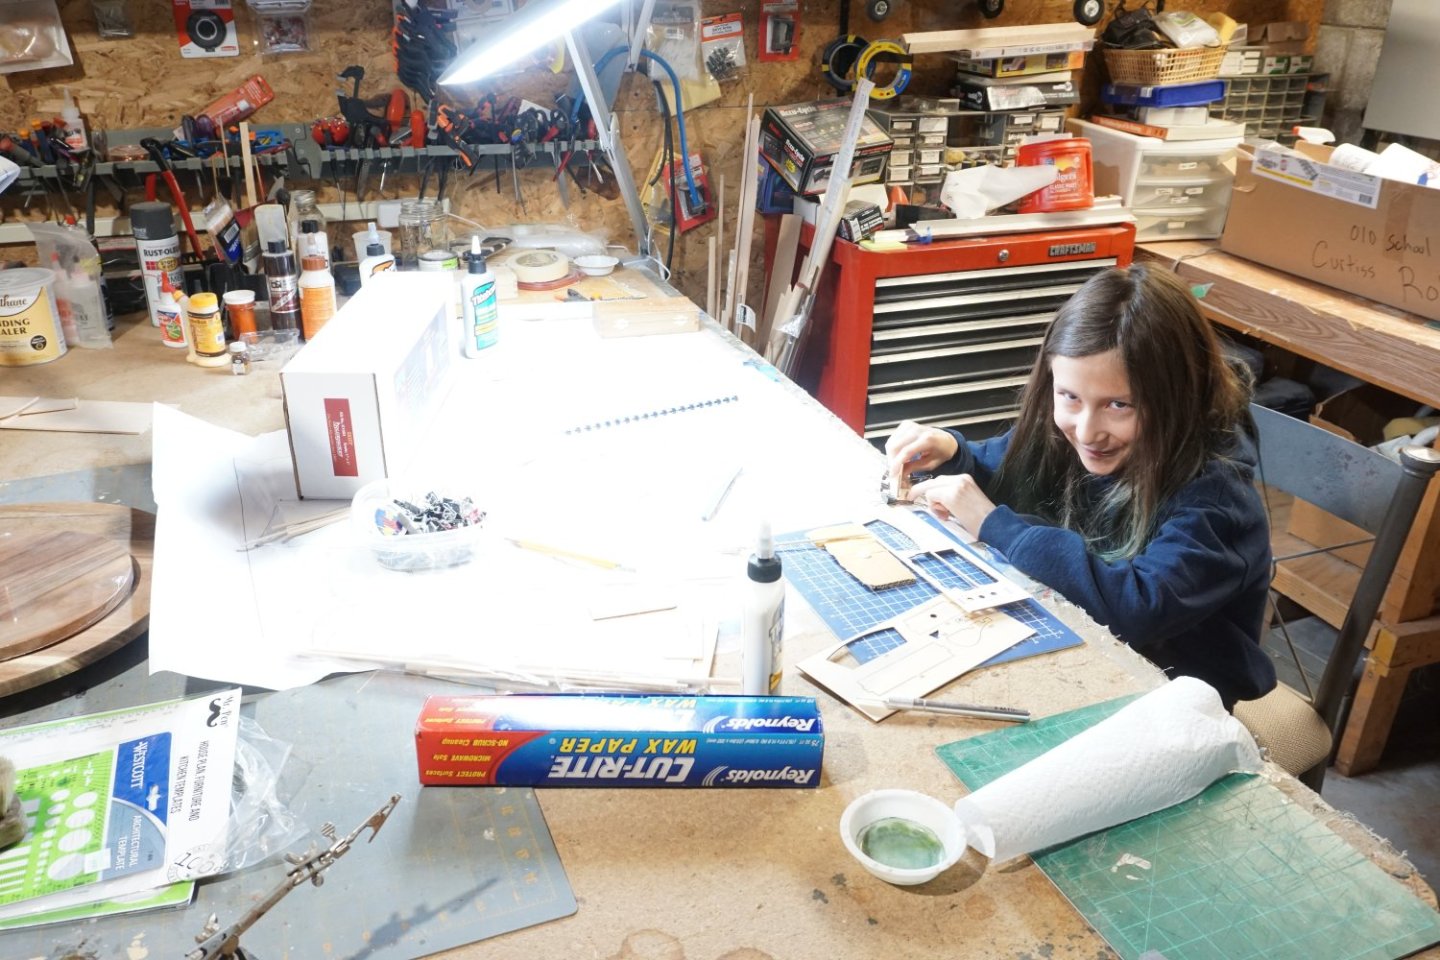
 My daughter Lia and I have decided to start are 1st build. This typical rowboat with sail often found along lakeshores and rivers of New england.(History taken from Bluejacket build manual).

-
 In 2018, I bought three Bluejacket Skiff kits. The kids’ art teacher had suggested I might teach a model boat building class for her students. Nothing ever came of that and the kits went into my stash. I was feeling some COVID fatigue a few months ago and, wanting to work on something that wasn’t going to take a great deal of mental energy the skiff came out of the stash and onto the workbench. Here’s the finished model.
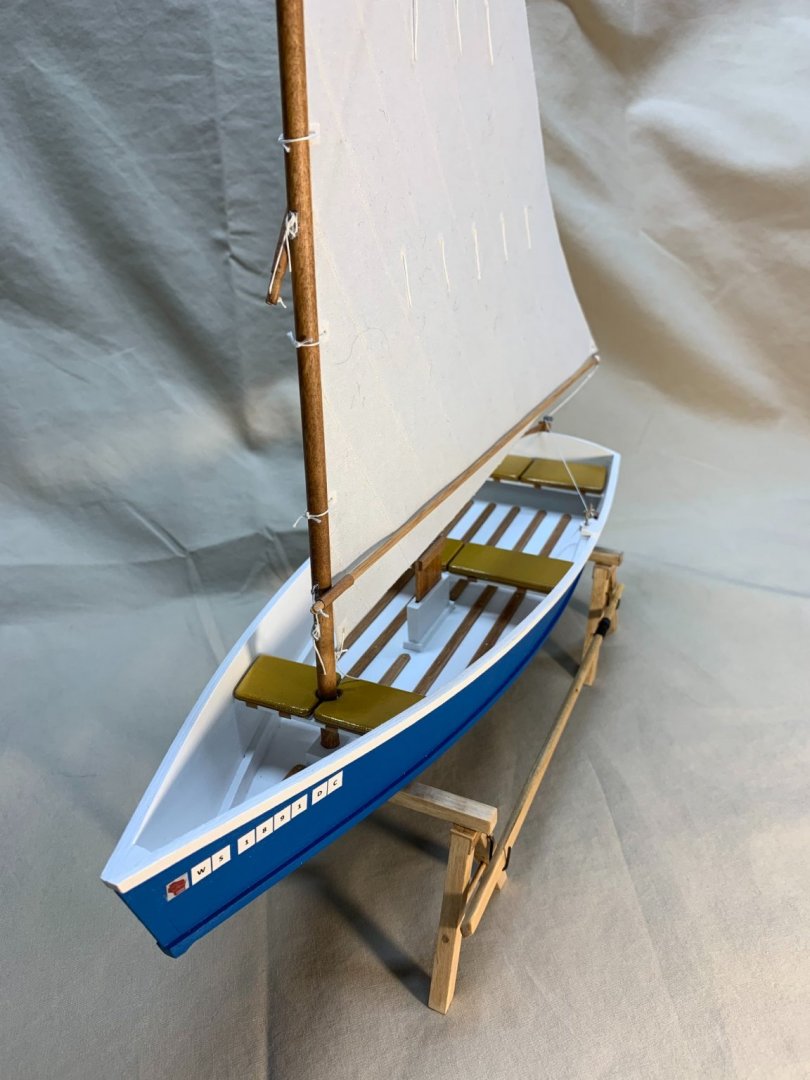
- 24 replies
-
- 3
-
-
- Bluejacket Shipcrafters
- Finished
- (and 1 more)
-
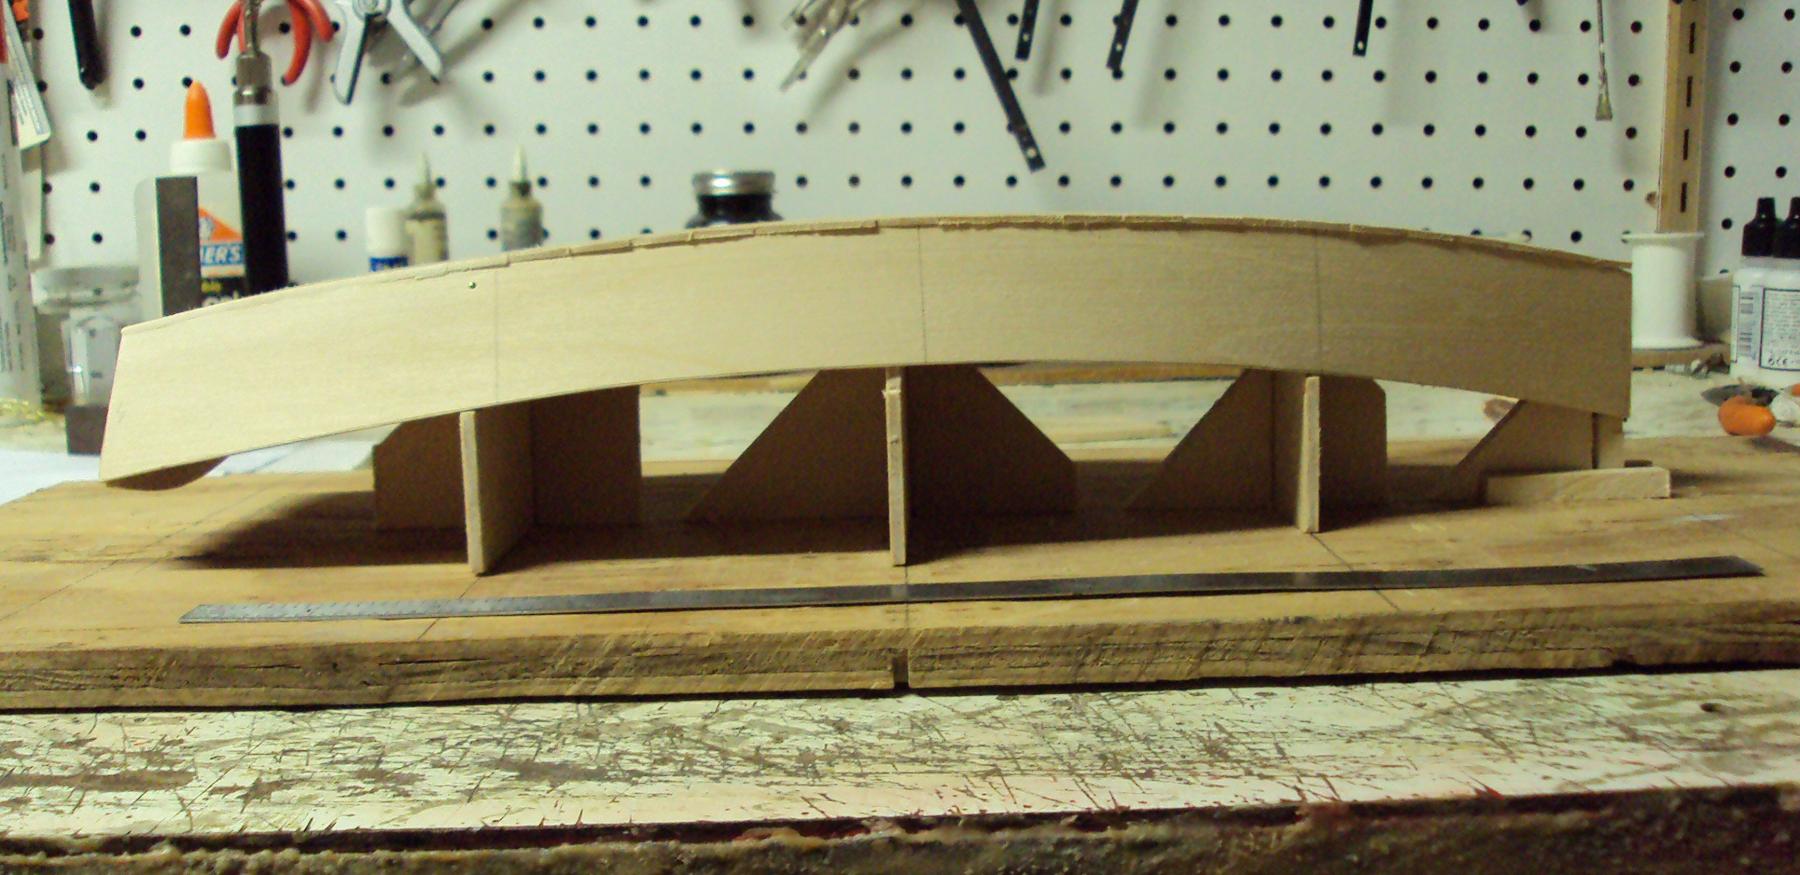
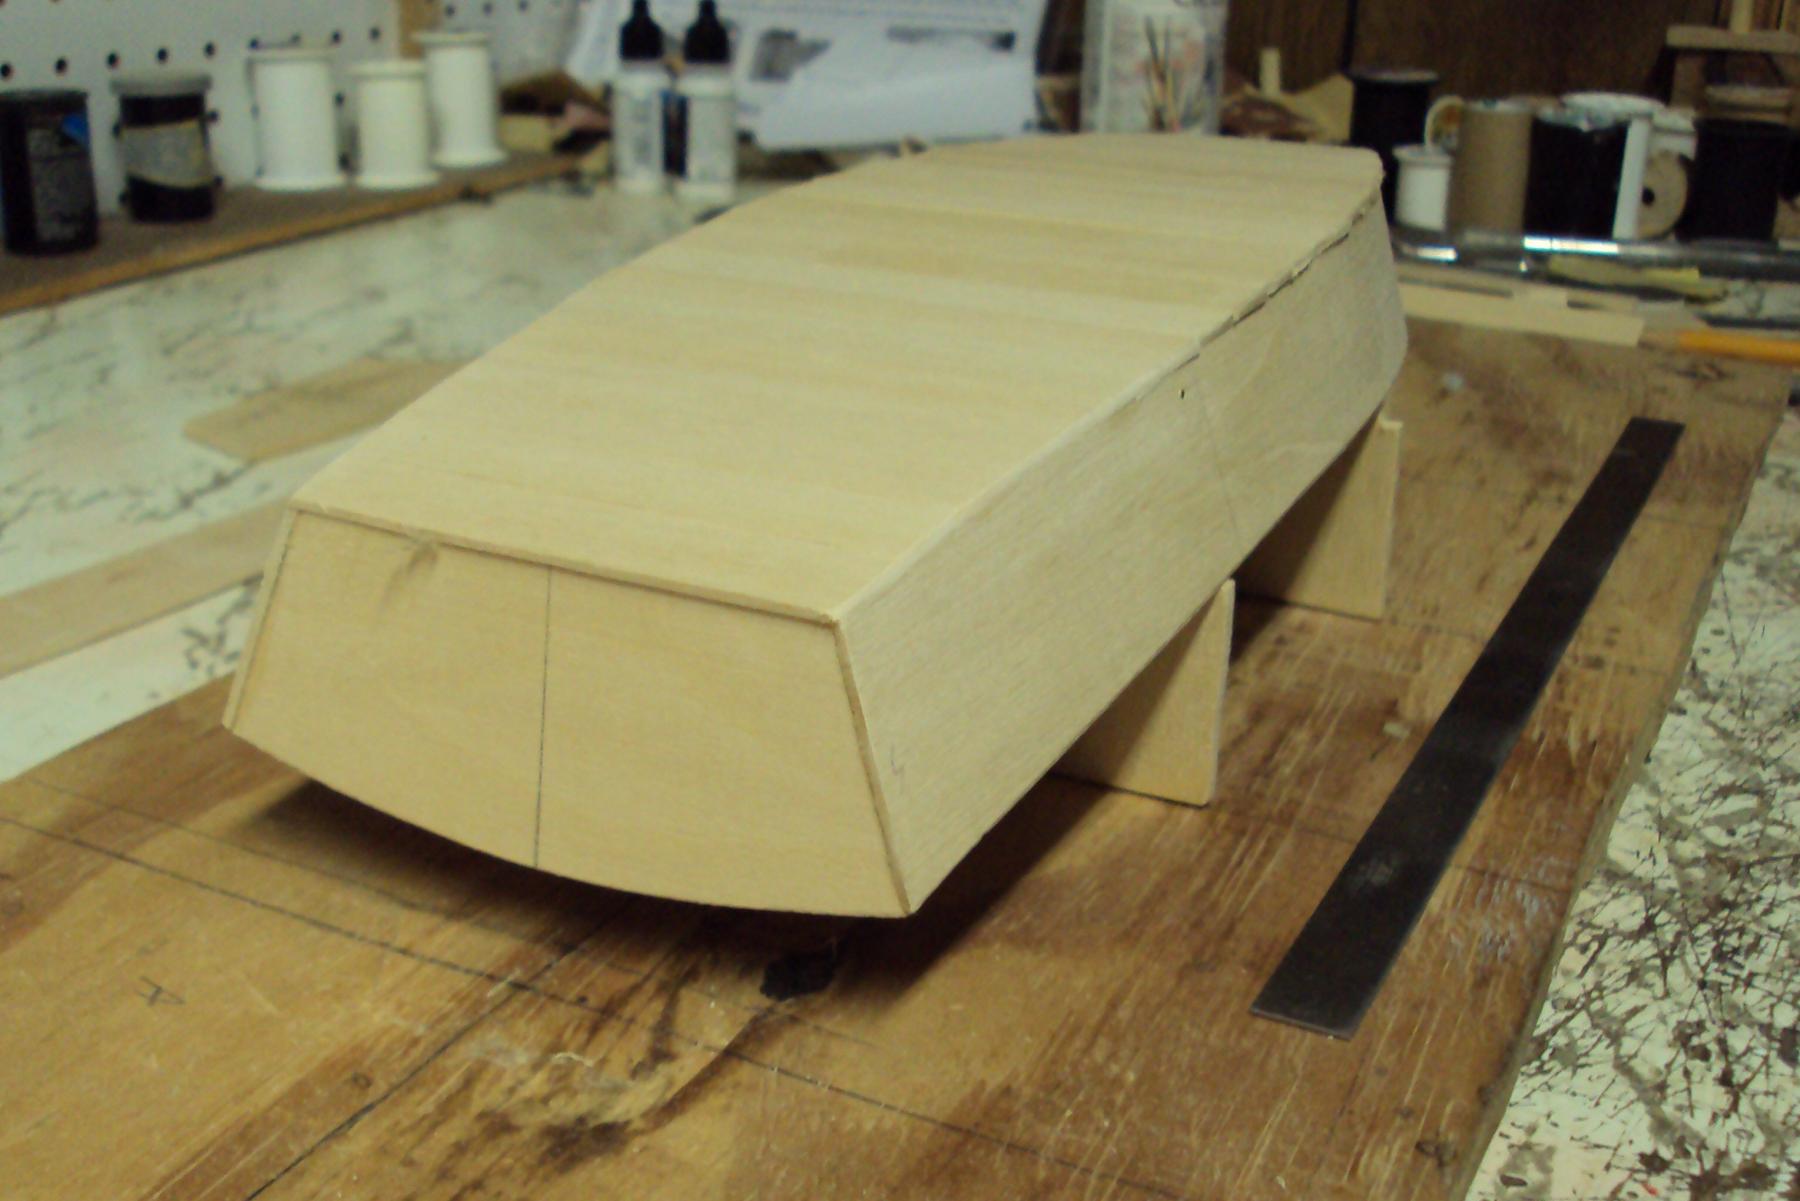
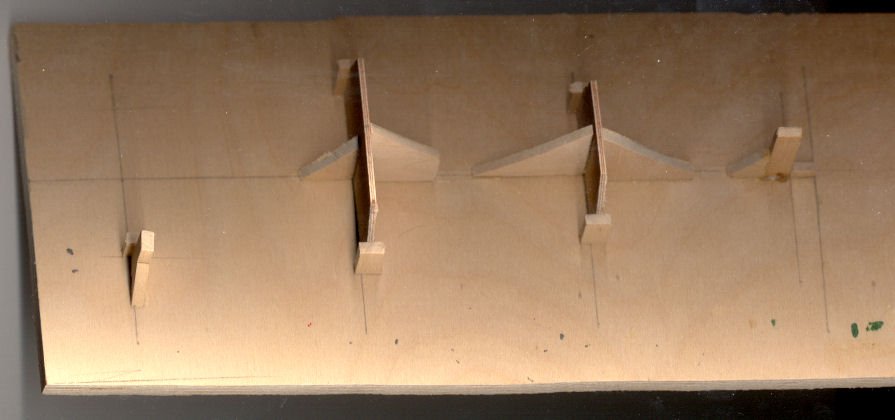
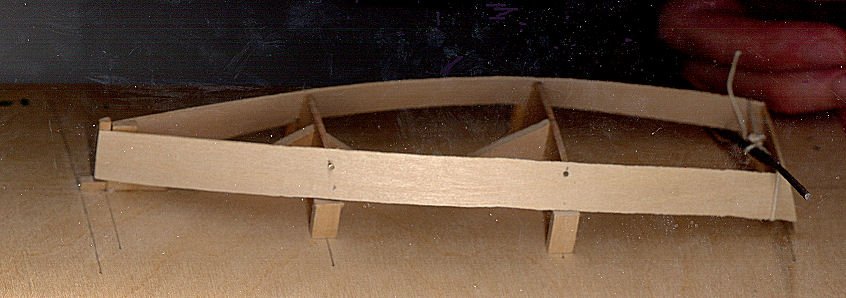
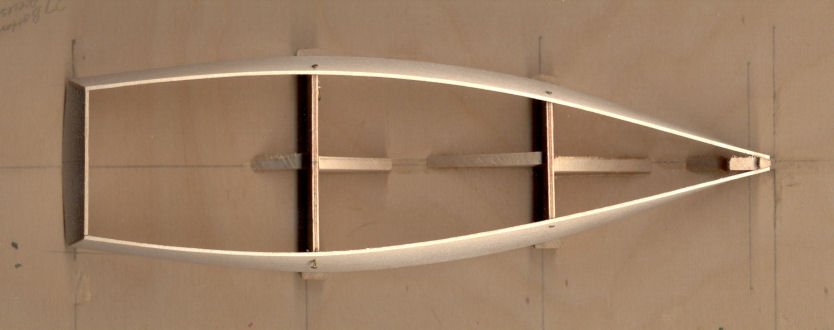
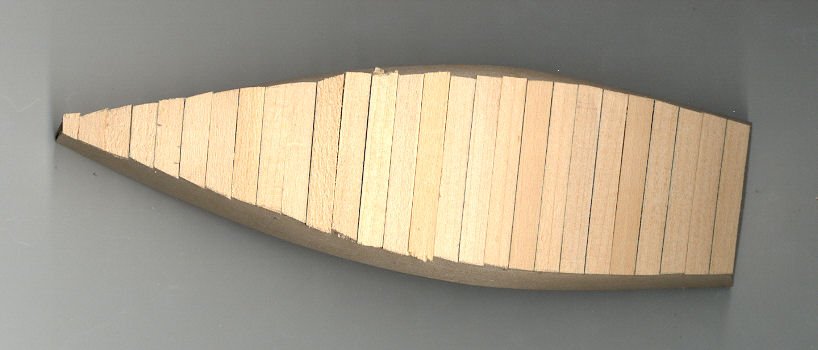
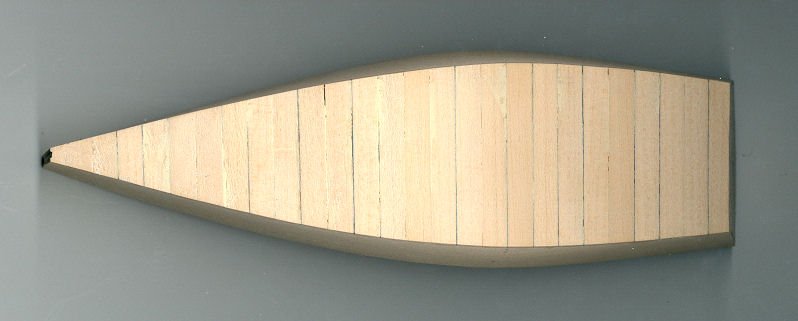
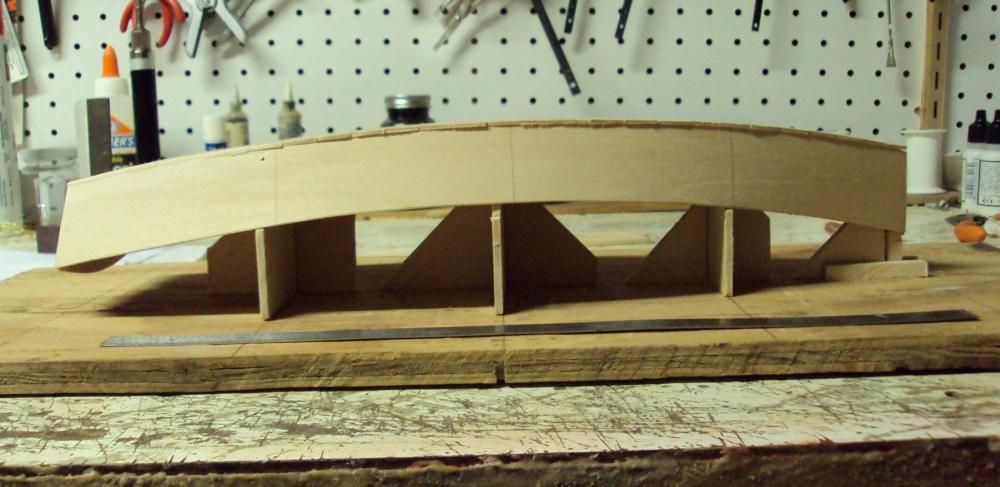
 Here are some photos of my oyster skiff build. This is an easy project for a first time scratch builder. The entire build is in store bought basswood and the only tools are readily available hand tools. Anyone can do this. Here are some photos of the templates, the building jig, and the initial construction of the shell. More to come. Questions and comments welcomed. Russ
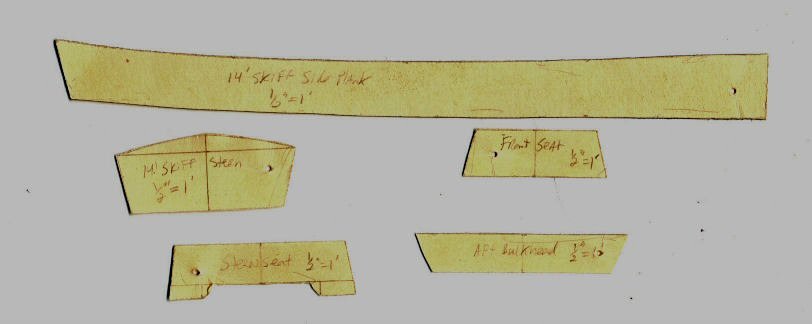
- 38 replies
-
- 1
-
-
- biloxi oyster
- skiff
- (and 1 more)
-
I am in the process of building a series of large scale skiff models for some friends. I thought I would share with you the first one. This is a very simple model, somewhat similar to the smaller 1/24 scale skiffs I have built for the past several years. This skiff design is compilation of my skiff research from about 15 years ago. One really neat feature is I can build several skiffs off the same design and then fit and finish them in different ways. No two can or will be alike. Hope you find this interesting. Russ

-
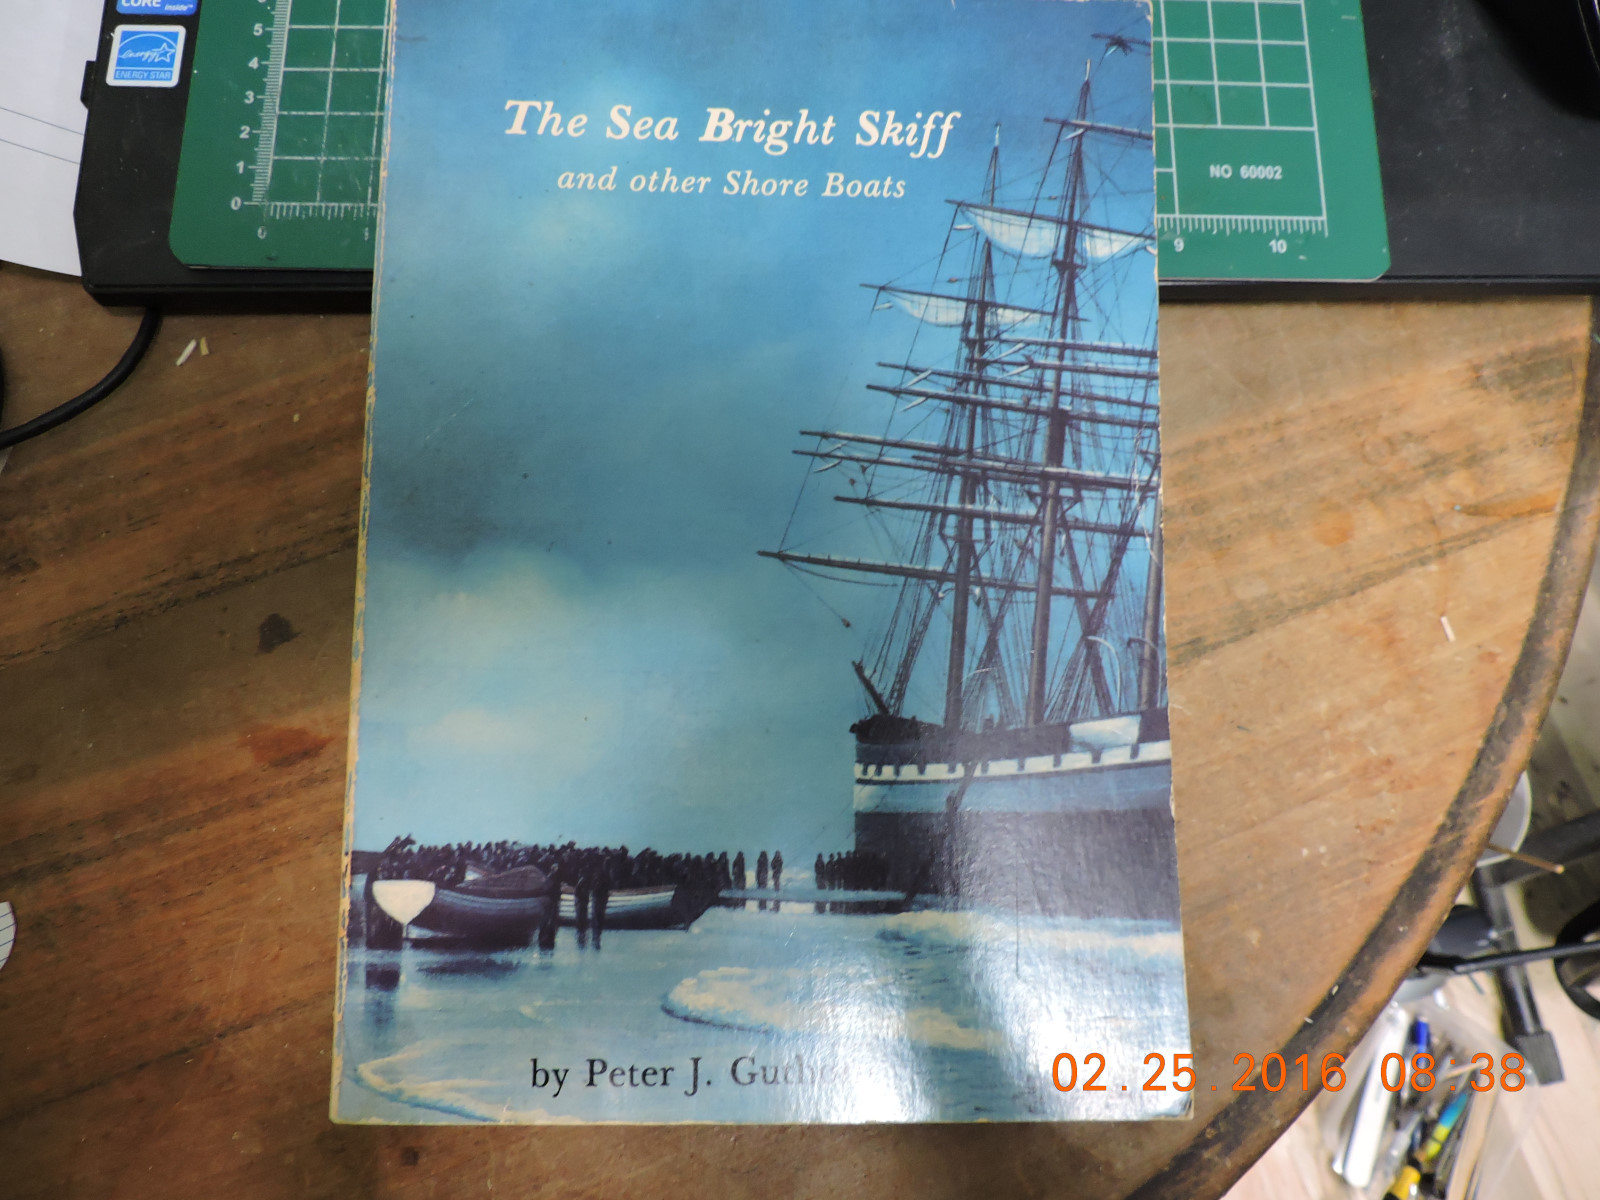
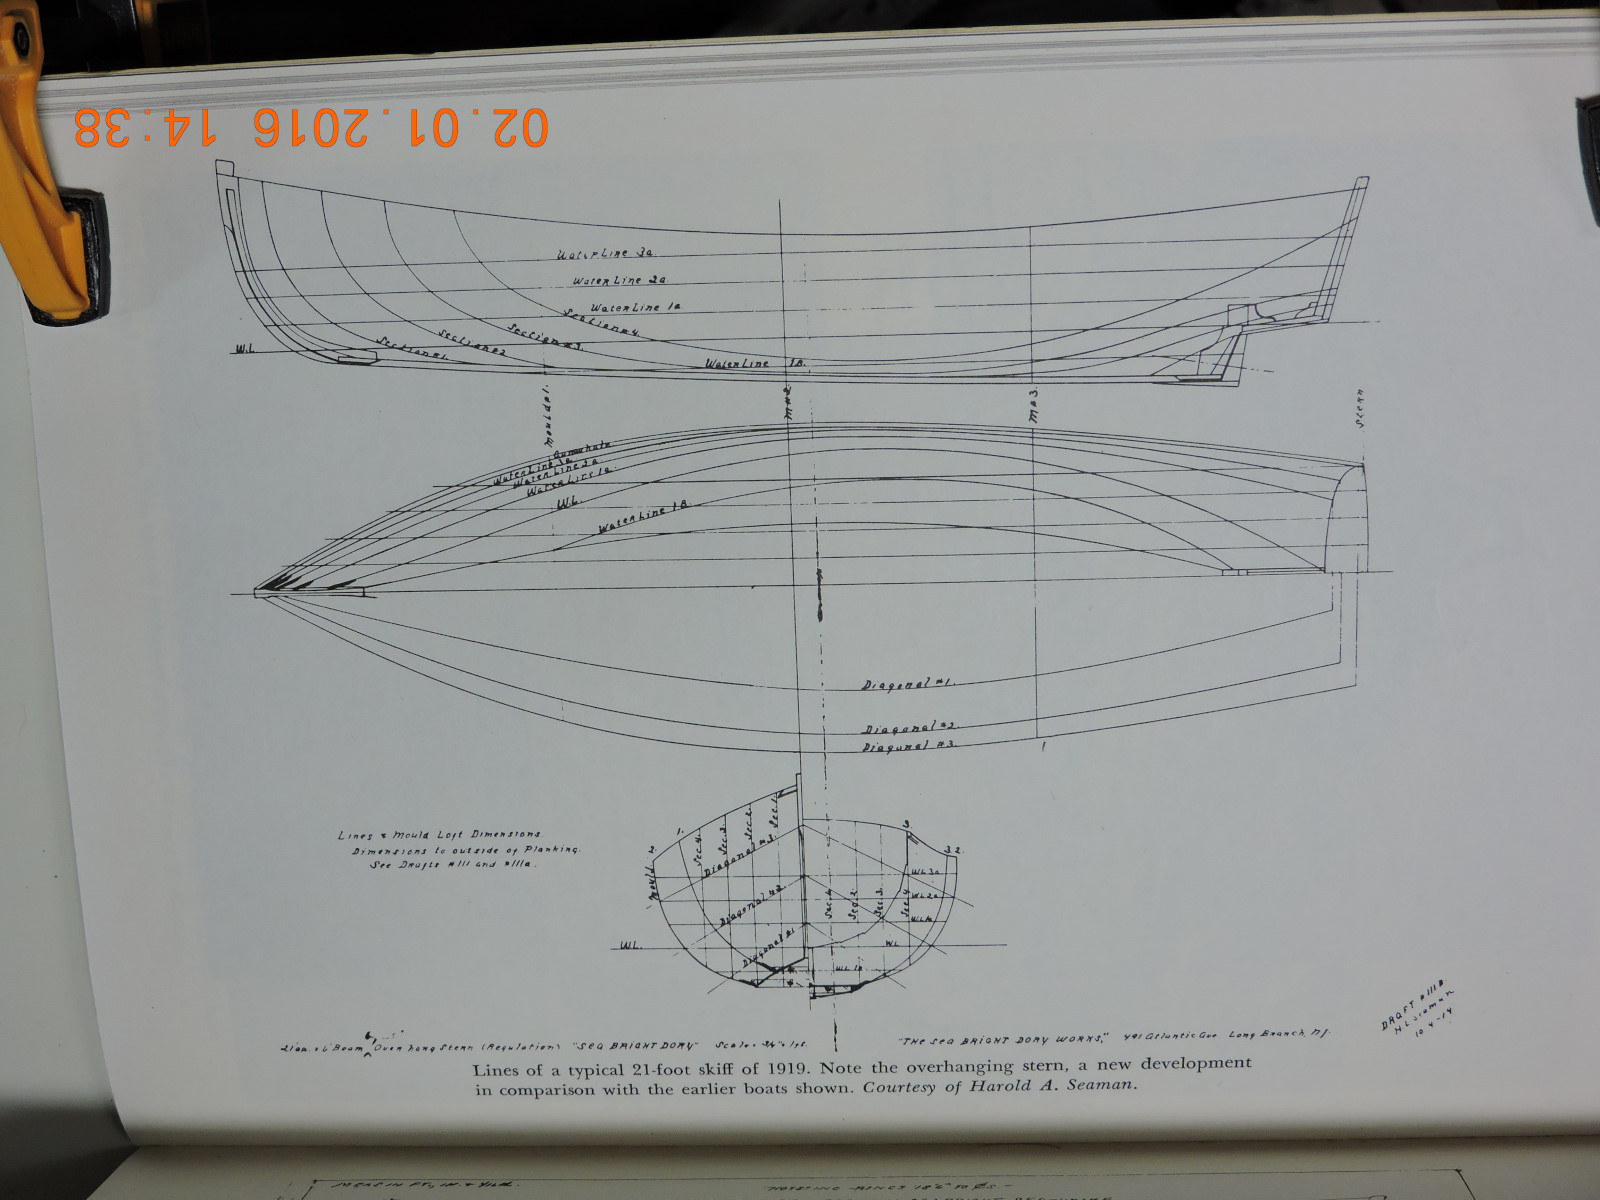
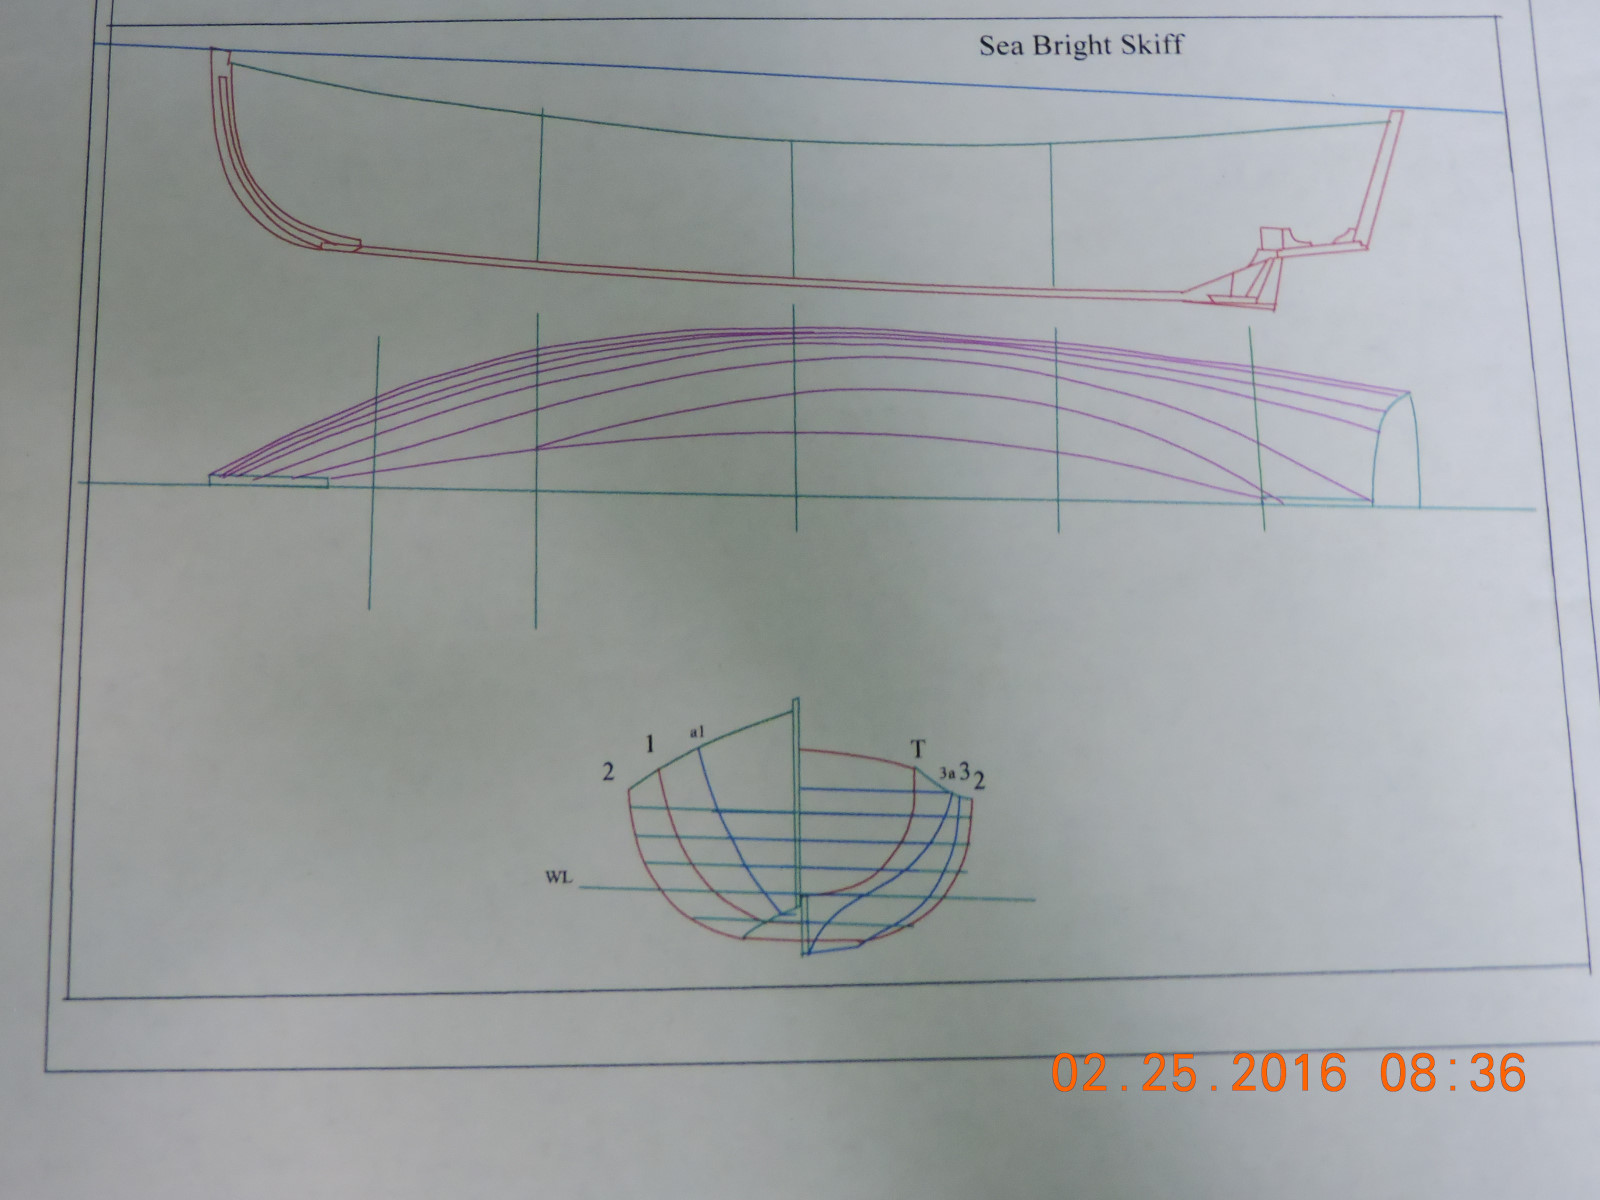
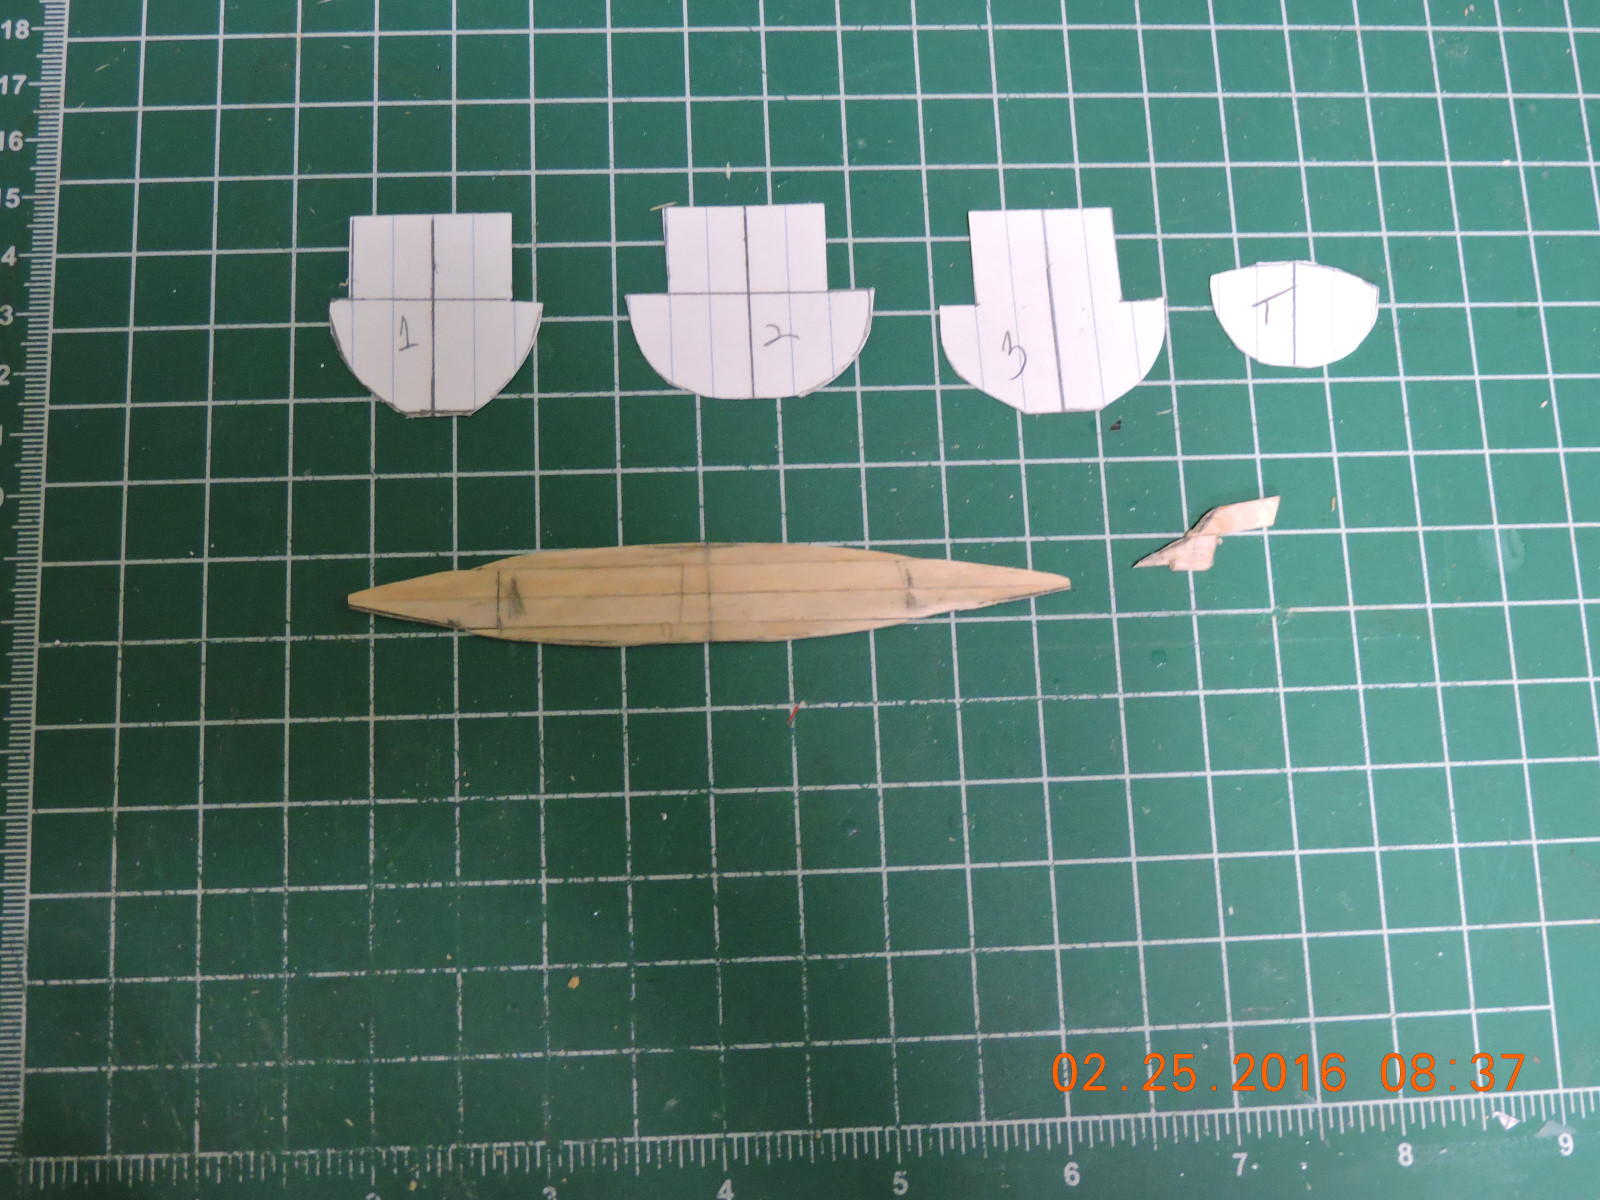
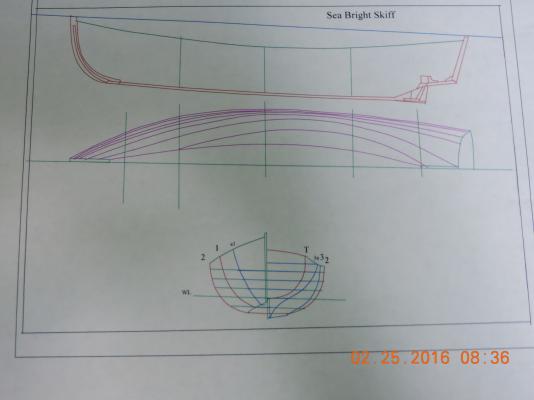
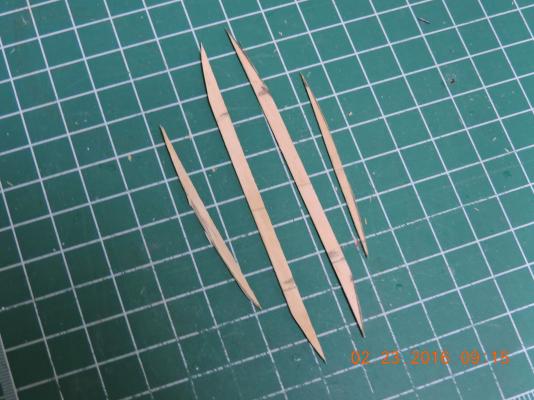
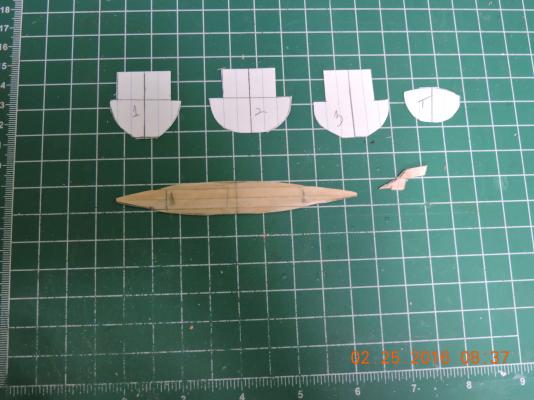
 The subject of this build is the Sea Bright Skiff. The plans are from the book From “The Sea Bright Skiff and Other Shore Boats” by Peter J. Guthorn. This is a 1919 skiff and the plans were created by Harold A Seaman. This boat will be built with coffee sticks. After importing the plans into a cad program a working set was made. The keel has been started and templates for the molds have been made. Walter

- 9 replies
-
- 2
-
-
- sea bright
- skiff
- (and 1 more)
-
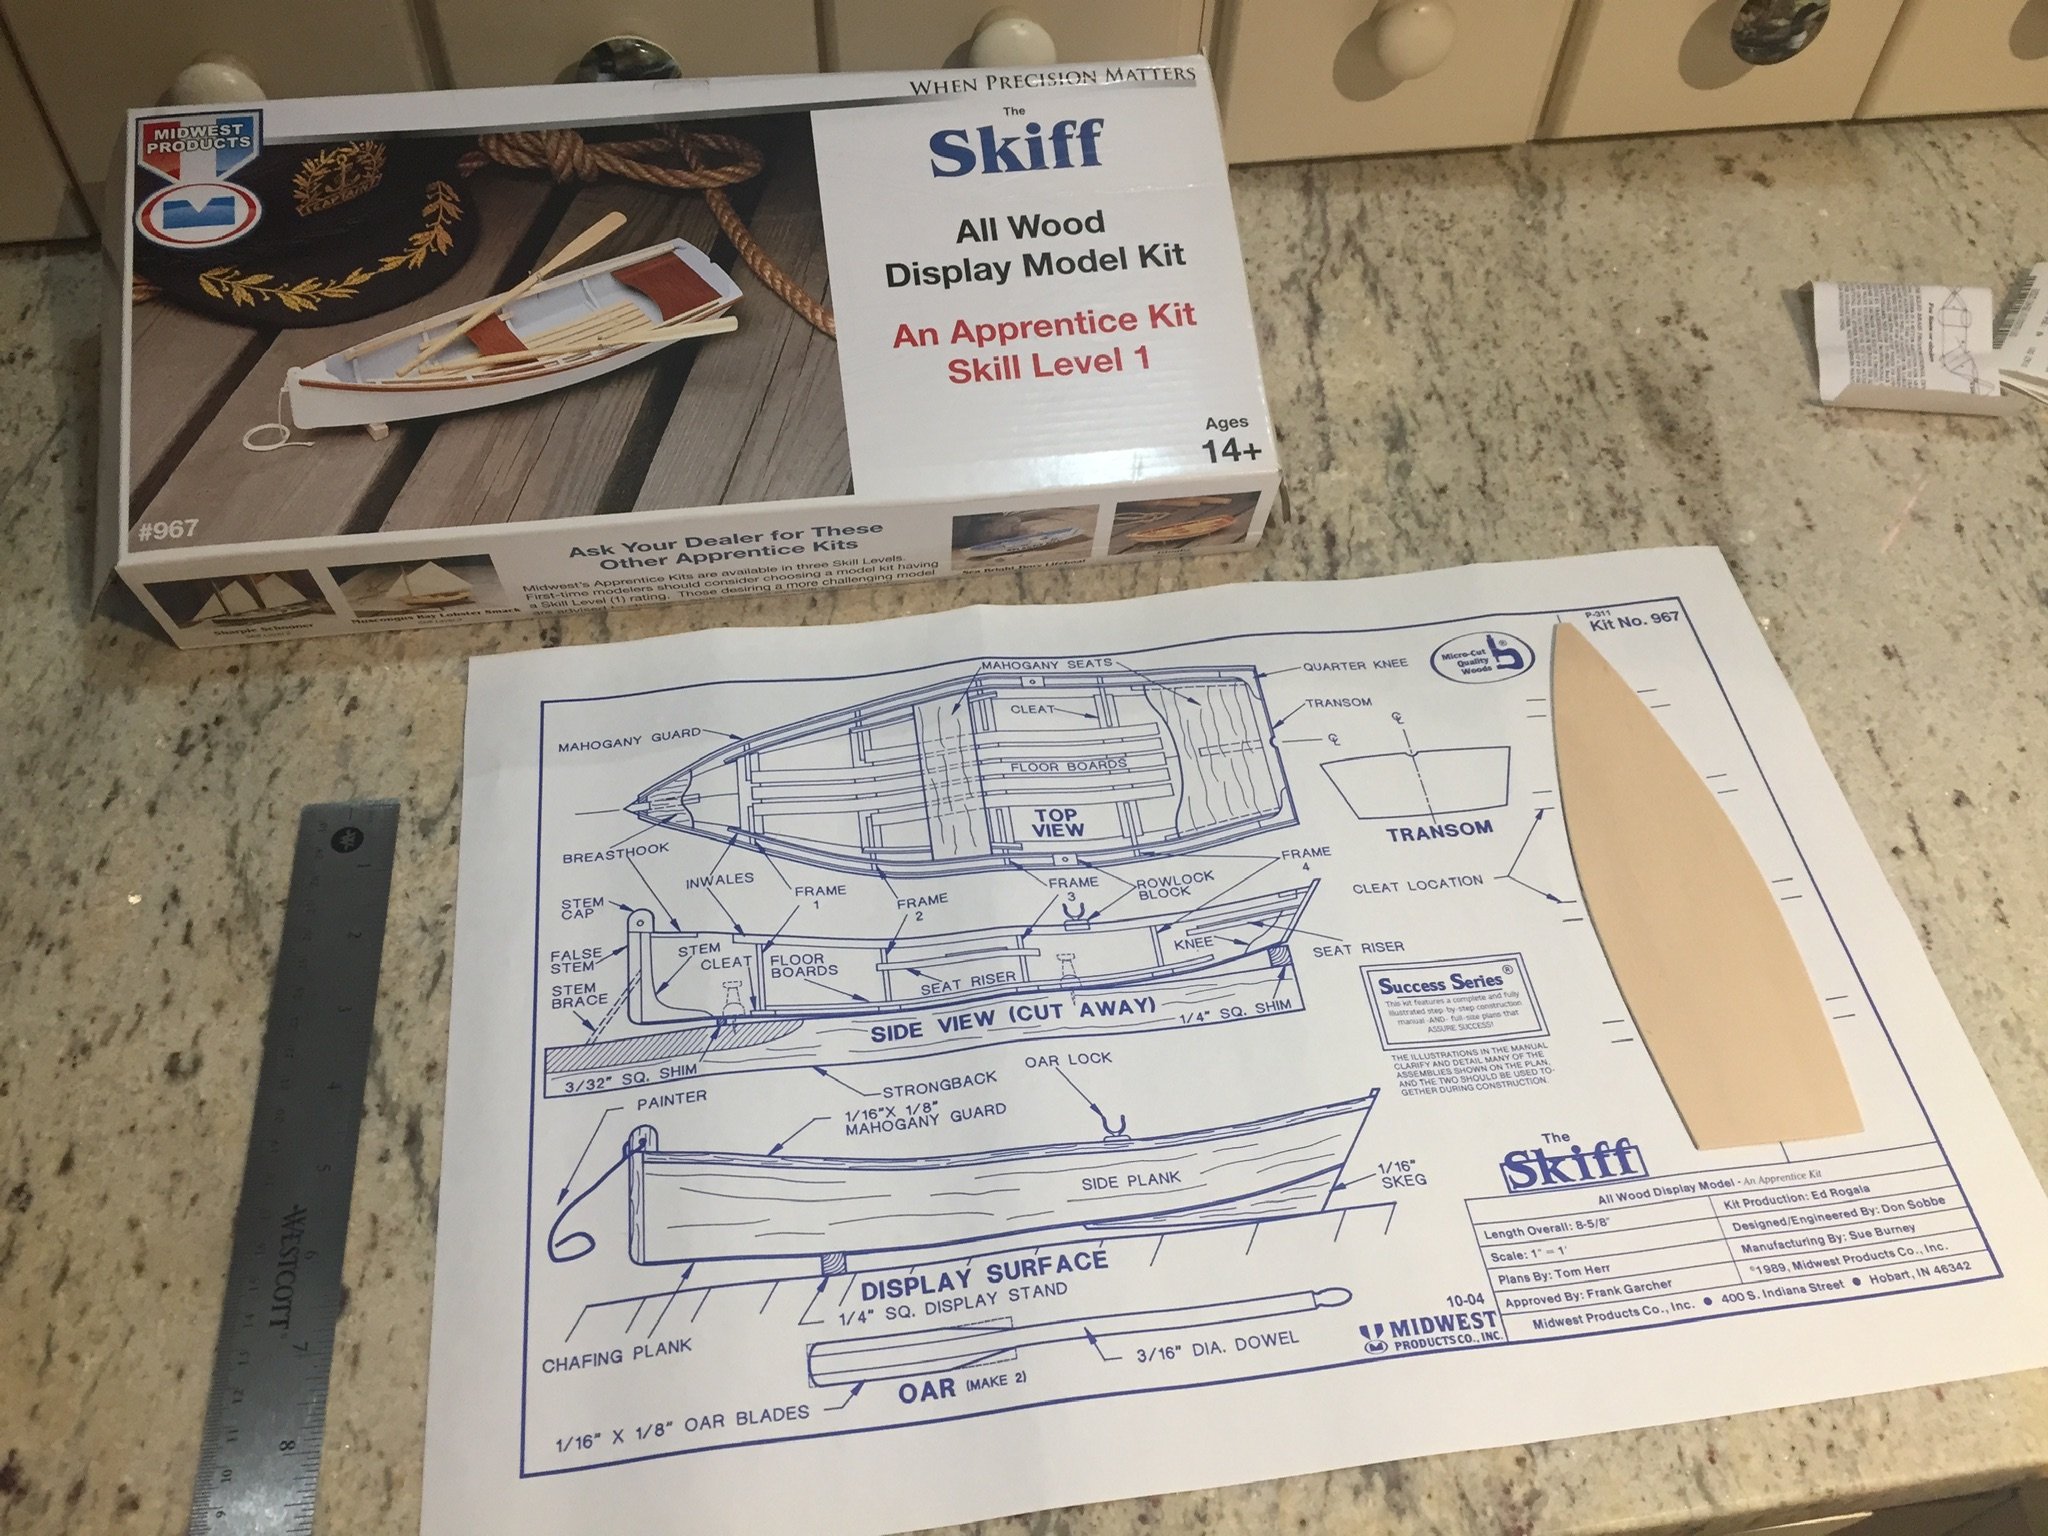
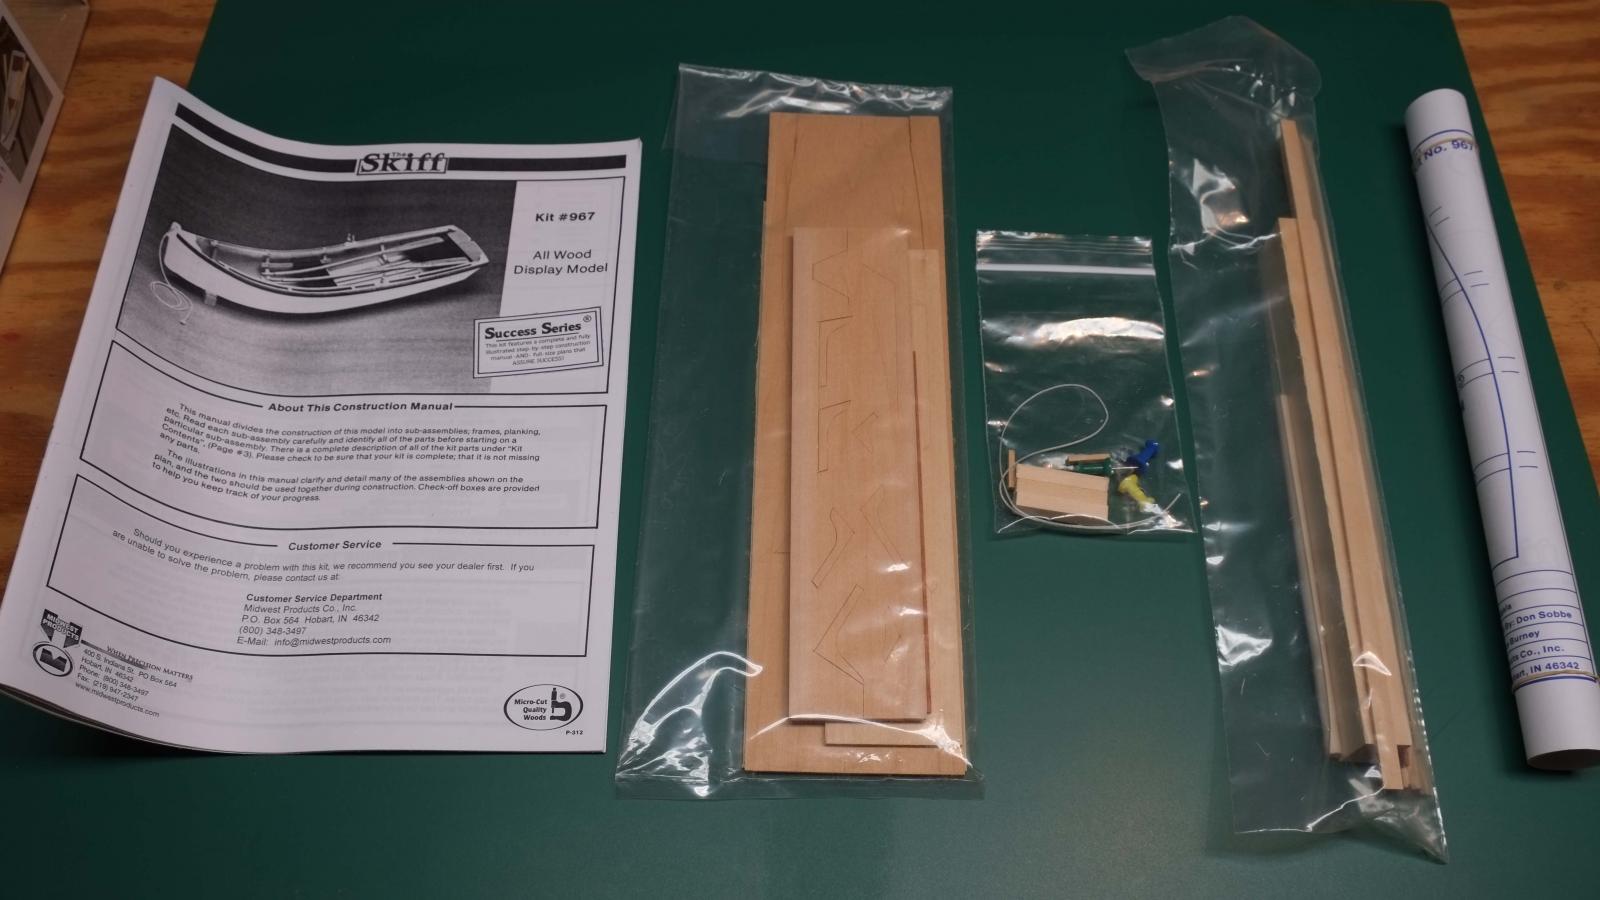
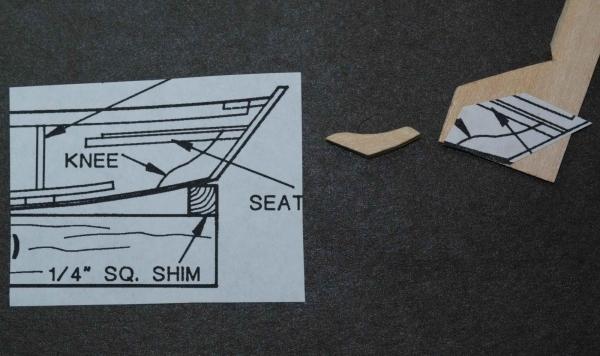
 I have my first kit, Midwest Products Skiff. I inventoried the parts, and all are present. One of the first steps was to remove two pieces from the wood sheet and glue them together to create the skiff's knee. After sanding I discovered that I had removed too much material and my part was now too small. I decided to make a replacement. I scanned the portion of the plans that showed the part and printed it. I cut out the relevant portion out of the printed copy as a template. I glued it to a piece scrap with rubber cement. I then cut out replacement parts and glued the halves together. I now have a proper knee. Illustration shows (left to right) relevant part from plans, undersize part, scrap wood with template. I am now wondering if the rubber cement I used to attach the paper template will leave a residue on the wood that will be a problem when I get to the finishing phase. Do you think it will keep paint from adhering?
- 19 replies
-
- 4
-
-
- skiff
- Midwest Products
- (and 2 more)
-
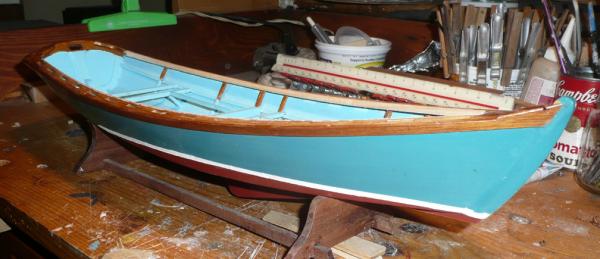
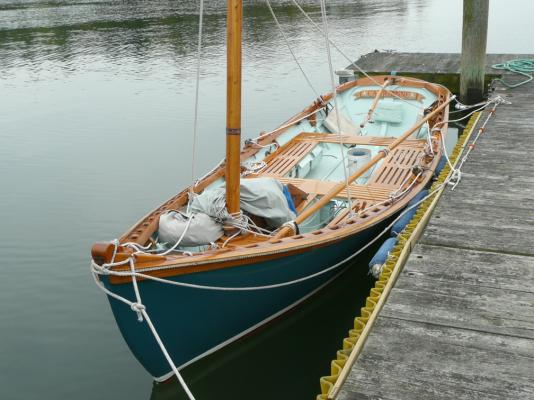
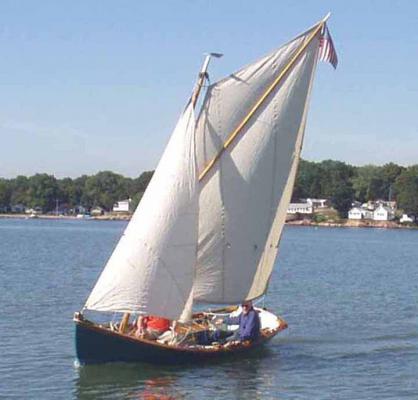
 The pictured model is of 18' sprit sail skiff I have since full size build some 20 years ago. She is still sailing, the boat that is. I have since made many alterations gained by experience sailing the boat. The model has never been up dated since her initial bath tub and real sea trials. So I think it's time to make the model look like the actual boat. This image shows the inside painted , ) model was bright)some supports for thwarts a new inwale etc. In building the real boat I made the side planking merge with the stem in a continuous line . Not so the model. My present problem is to perhaps fill in the void shown in the stem area. Anybody here ever do this and if so what filler did you use? Also pictured is the real boat inside and another sailing. Thanks for any input. S.os
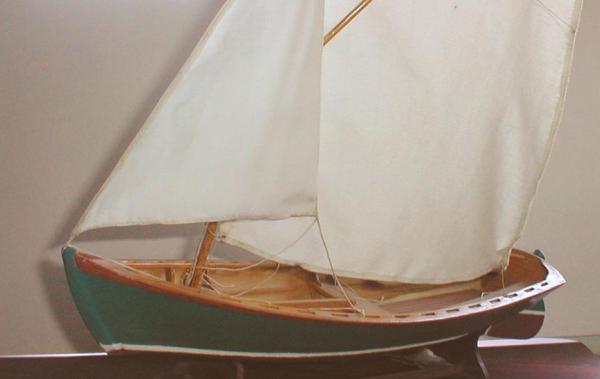
-
 Well, the hiatus on my Niagara continues.... The story goes something like this: One day I am walking around Hobby Lobby with my seven year old, Eva, and we stumble upon the section of the store containing dollhouses. Well, they had this monstrosity there in the color red and her eyes got as big as dinner plates and I watched as her face lit up like few times I have seen before. With Christmas and then her birthday right around the corner, it was a no-brainer. Needless to say, I was back the next week with a coupon for 40% off and I made the purchase of a dollhouse KIT (I stress the kit part which means massive and painstaking assembly required). Soooo.... My plans to cut some rigging out of the Niagara and re-rig her were quickly put to rest to imagining my youngest daughter's delight. While there I did spot the Midwest Products Skiff kit on clearance for $12.00. Why not buy it and put to rest some of the questions at work about how scale model ships and boats are made? This kit is great for work as my desk measures an impressive four feet wide (LMAO) and is dominated by two large flat screen monitors. A few tools and the kit and I would have onlookers galore! The Midwest kit is a great kit for beginners and is wonderful for fulfilling my model ship sickness until the dollhouse at home is complete. The scale is 1/12th and I will be replacing the plywood pieces with extra strips of planking I had from an old AL kit. I am doing this in the hopes of recreating an old skiff (before plywood was all the rage) that has been beaten and worn down. I will be painting it and stressing the paint and will place my creating in a shadowbox to hang on the wall next to some pictures of lighthouses. My saga begins....