Search the Community
Showing results for tags 'slip'.
Found 2 results
-
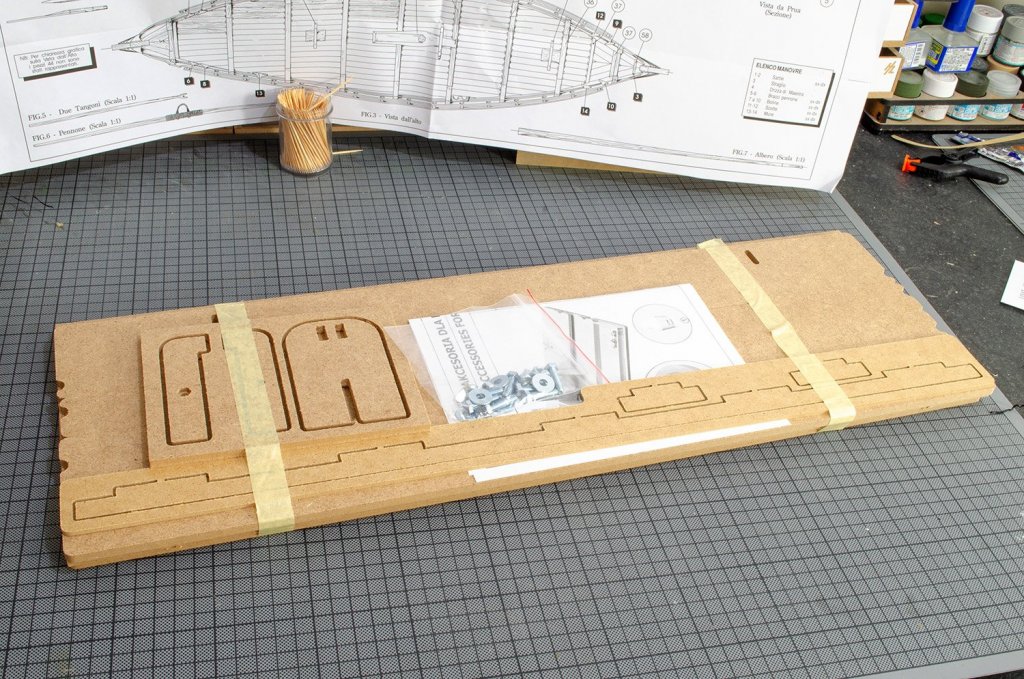
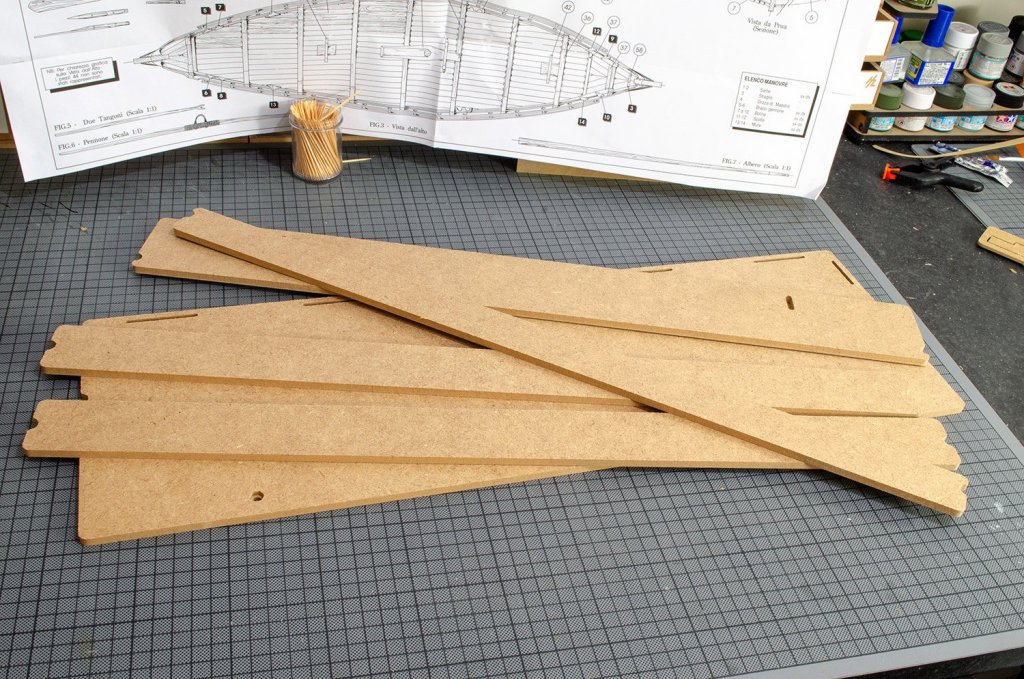
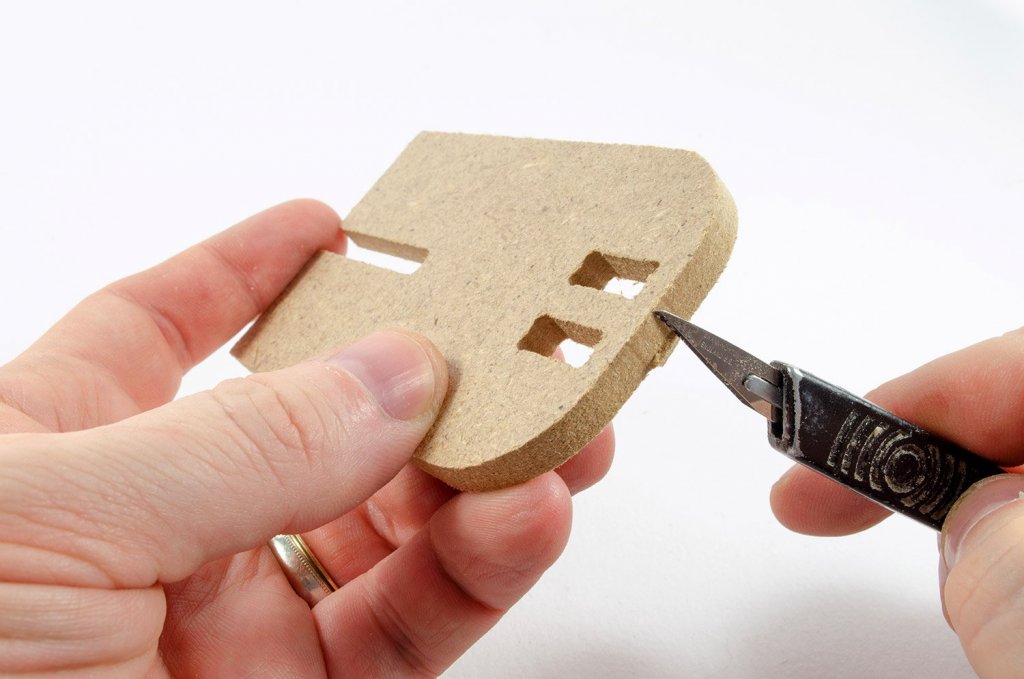
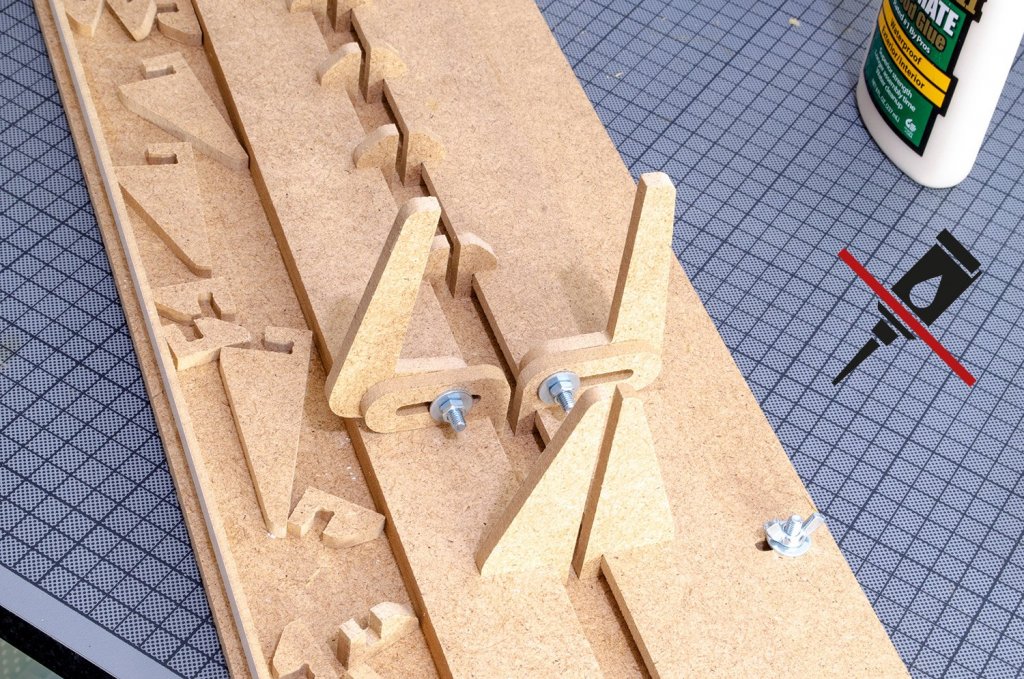
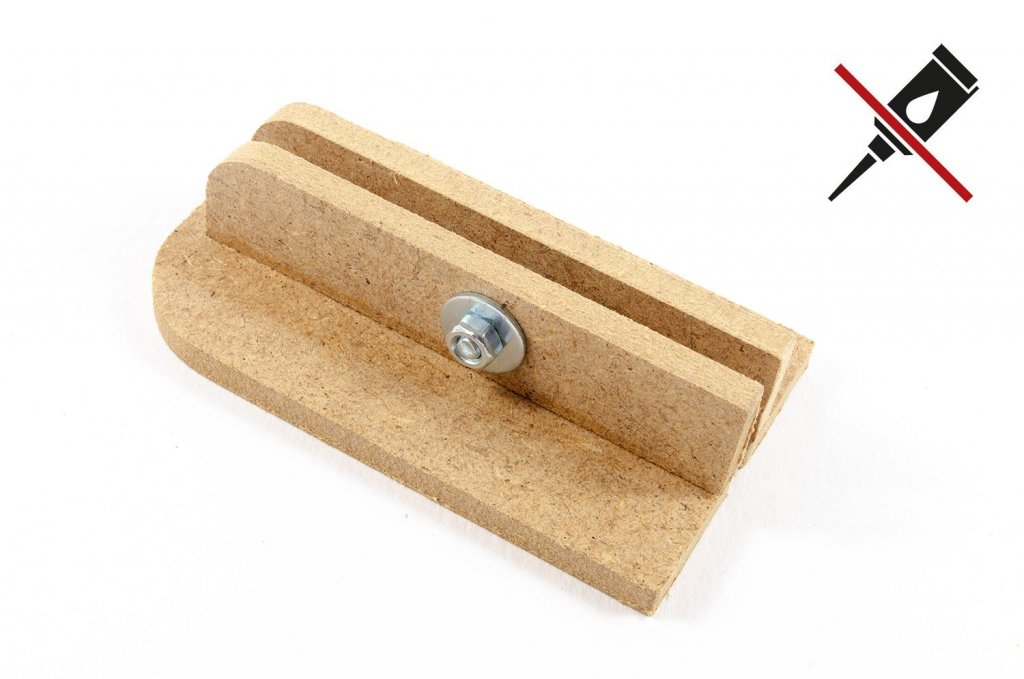
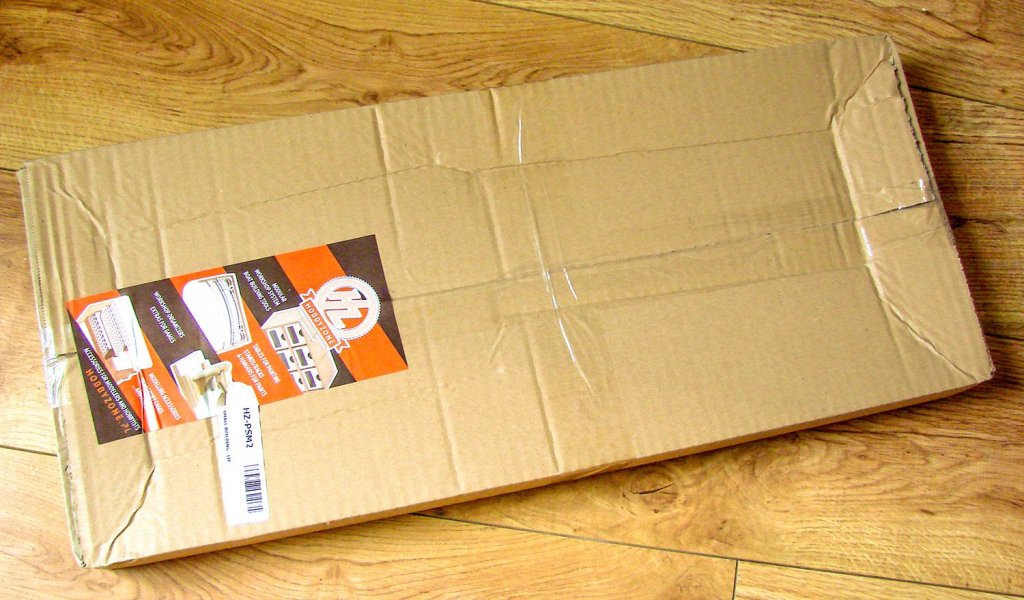
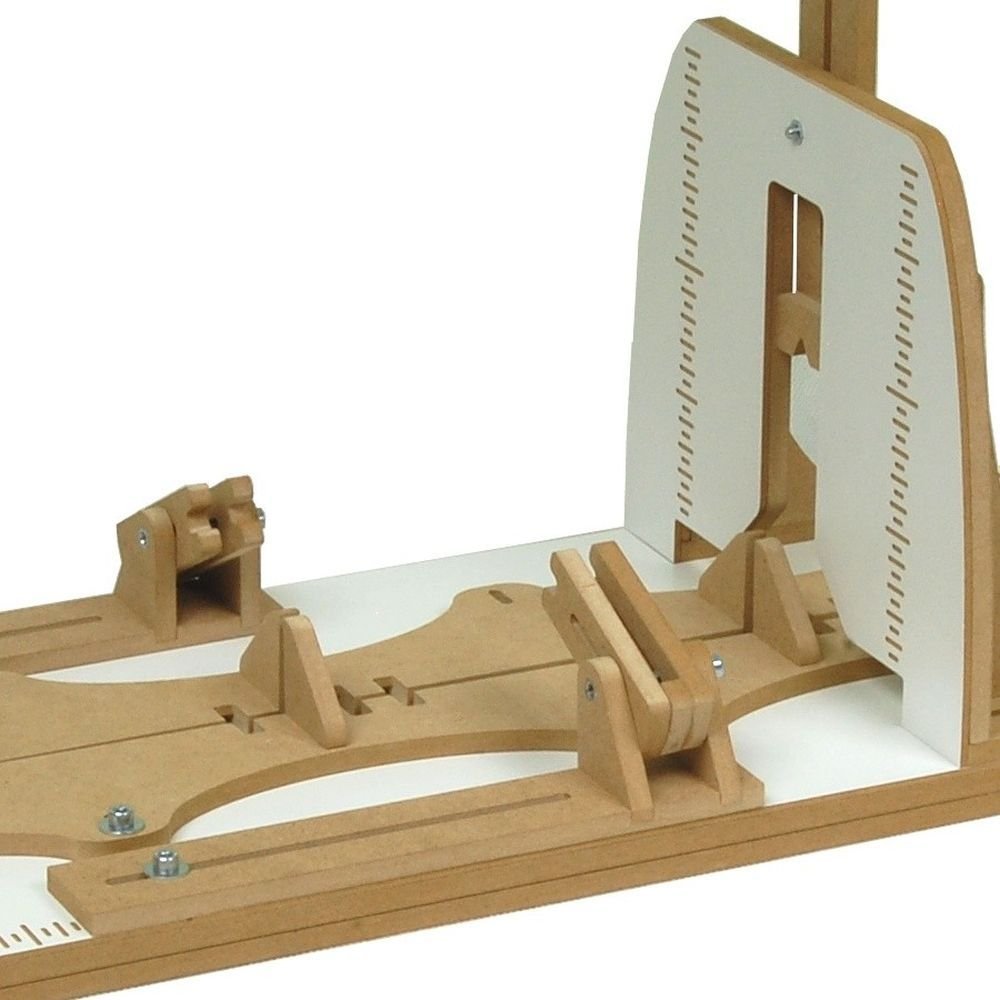
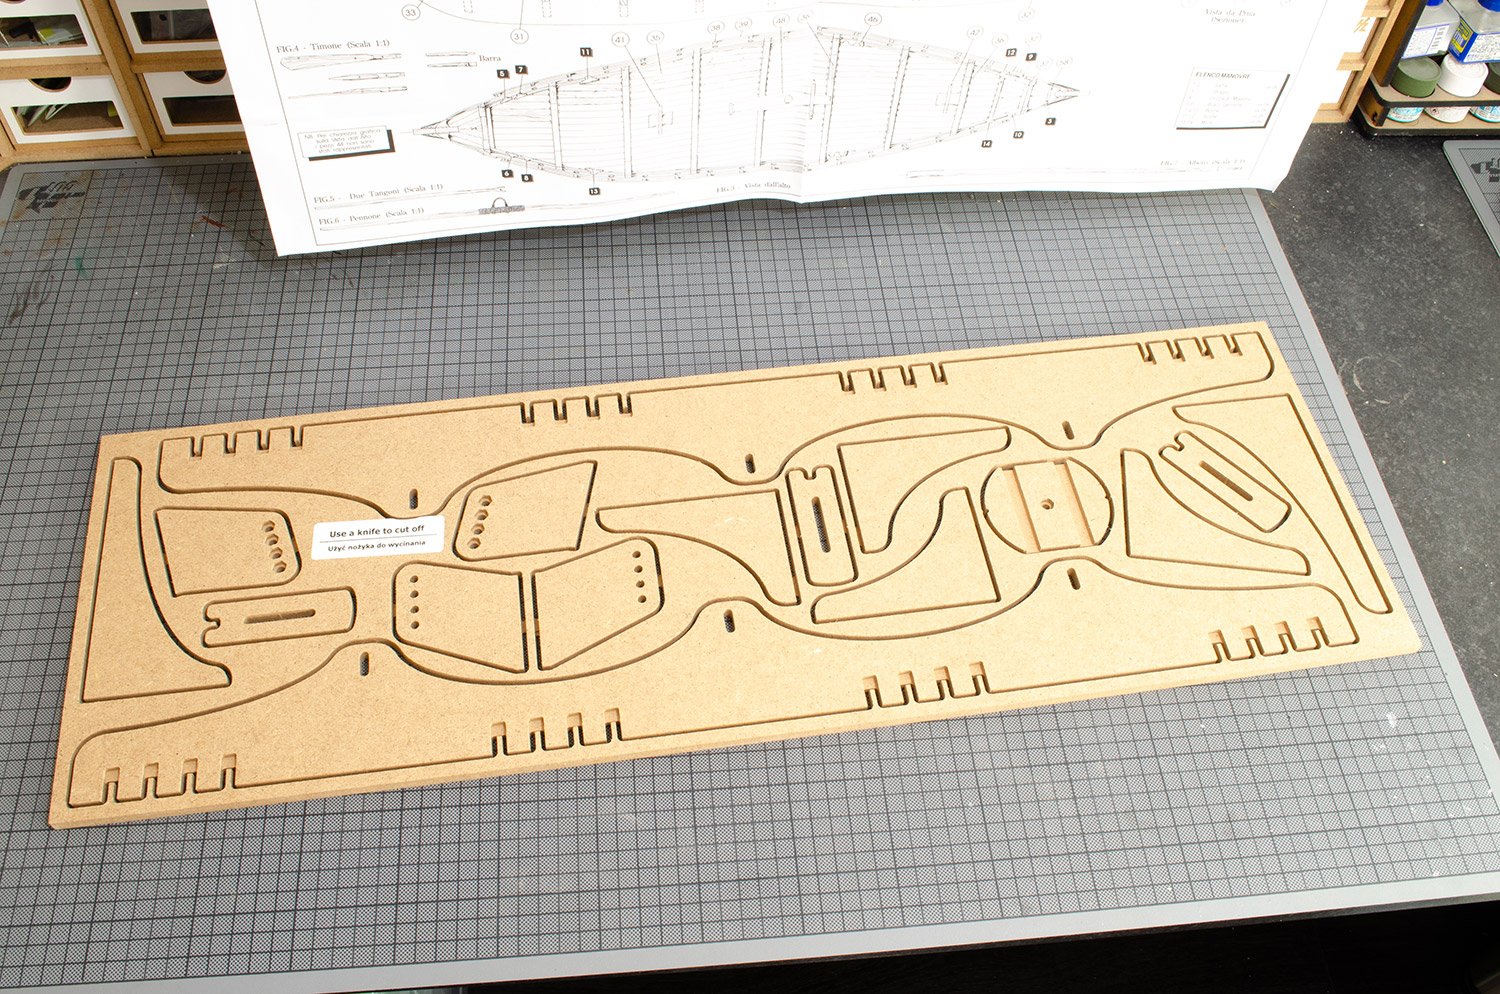
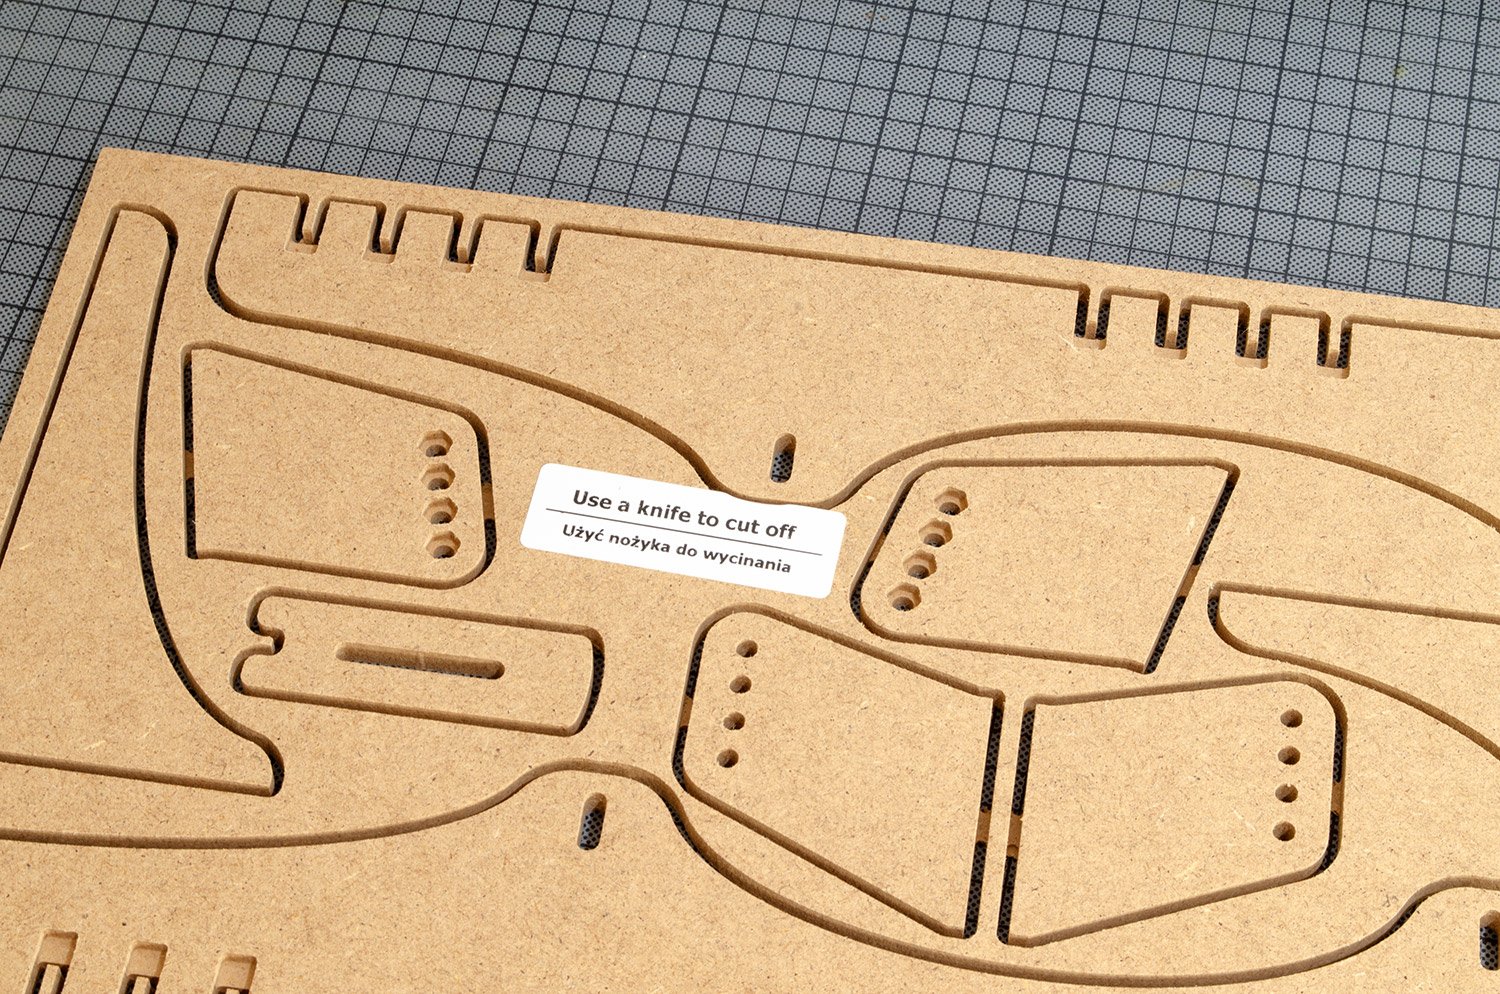
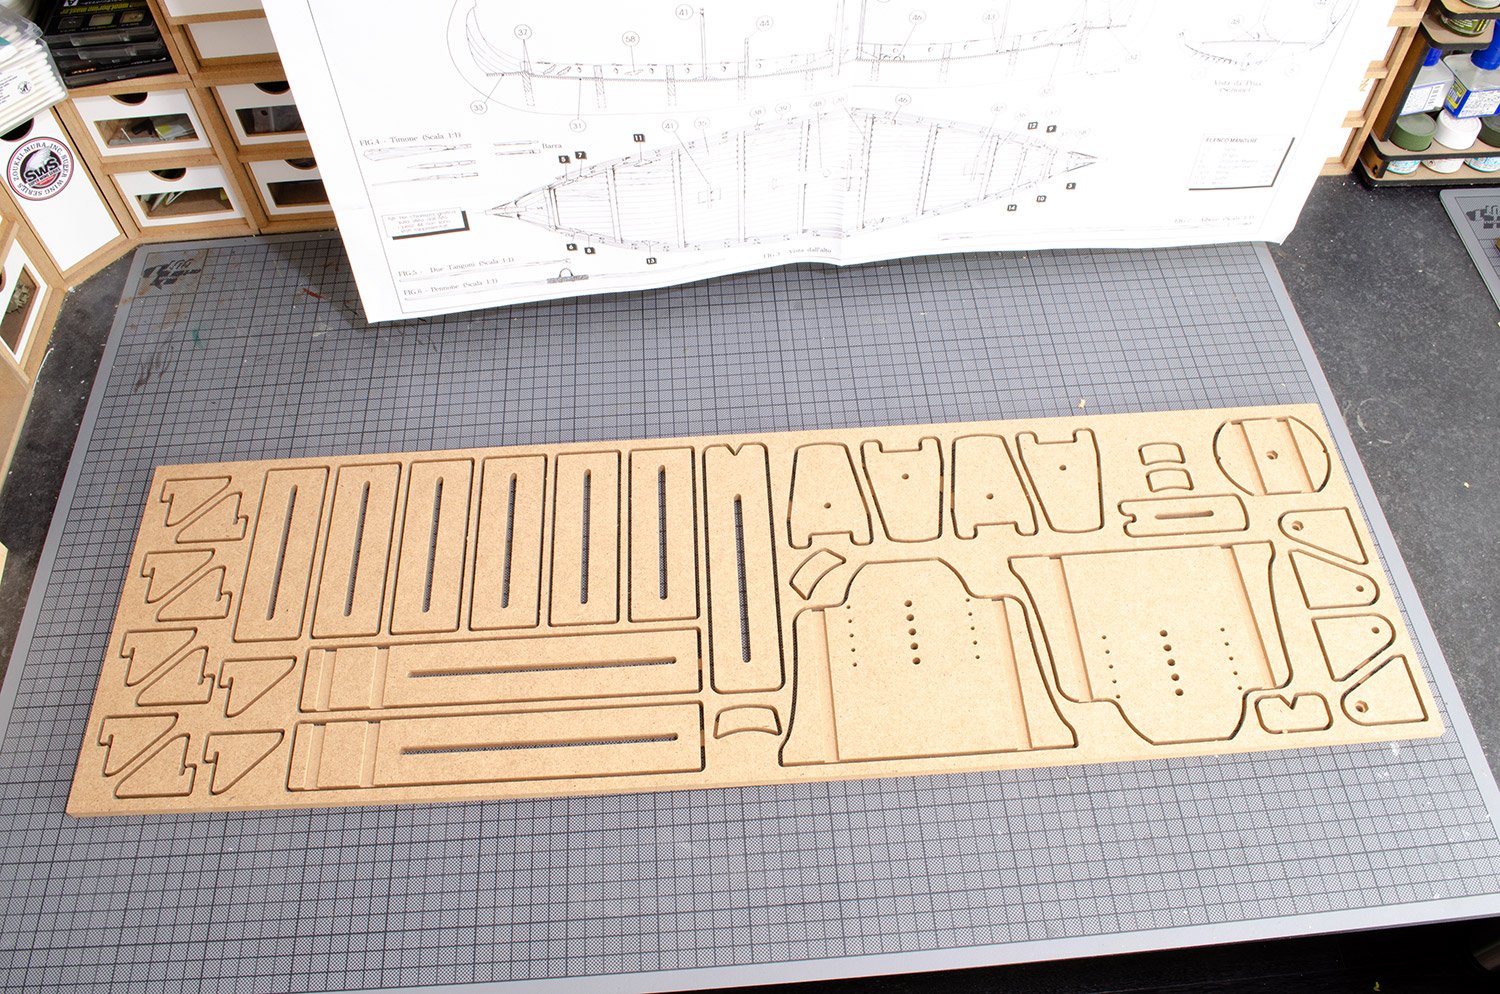
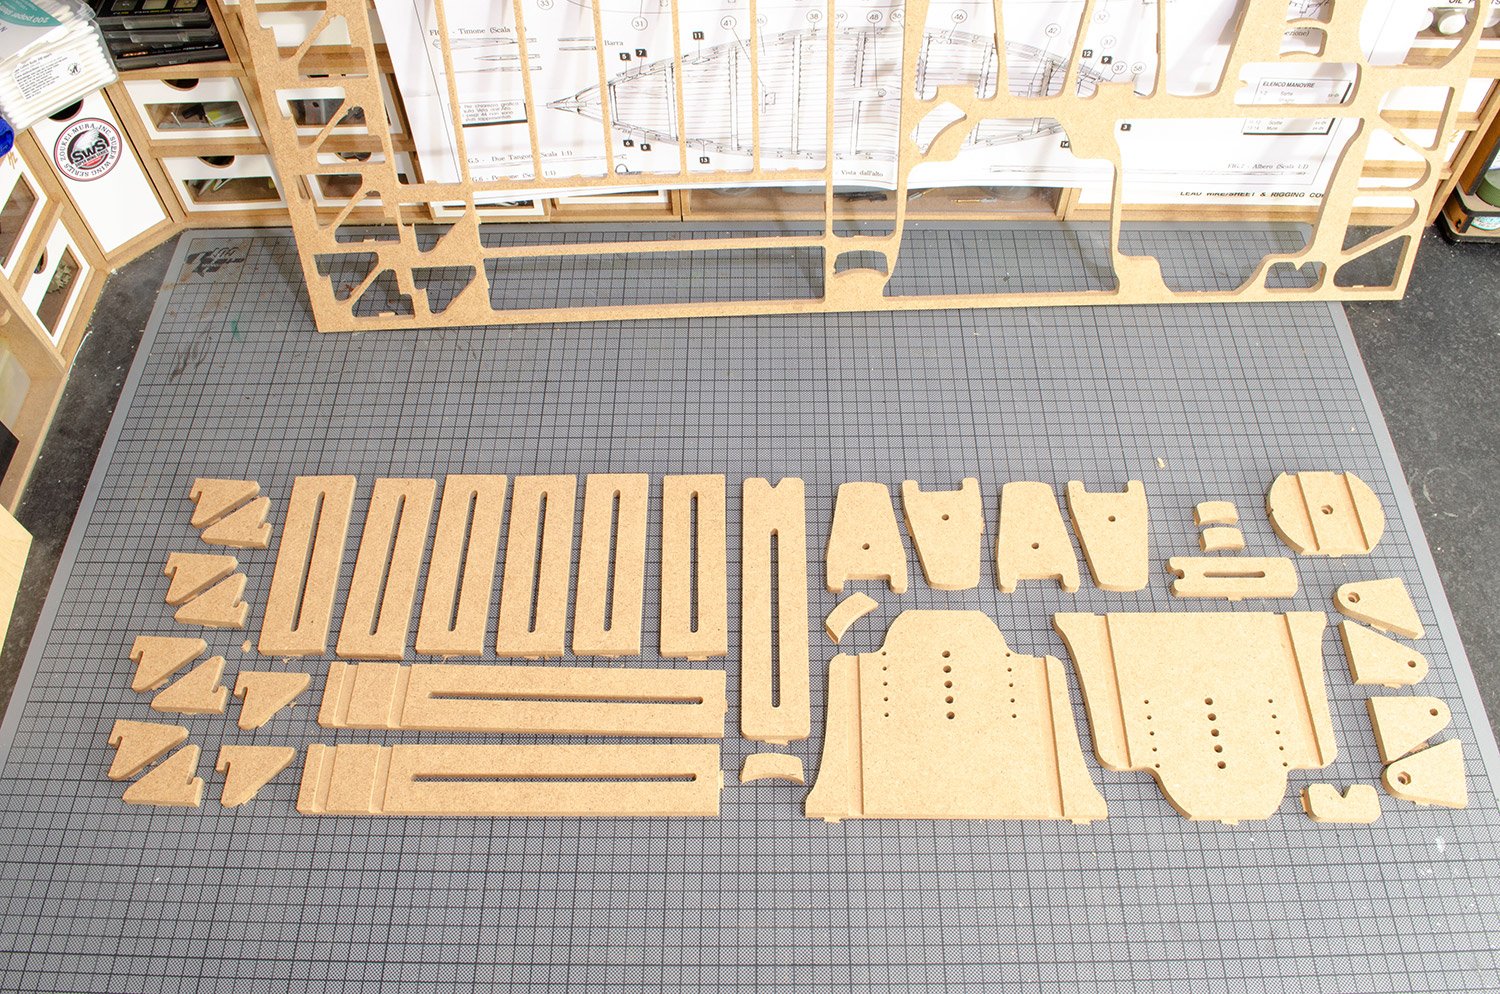
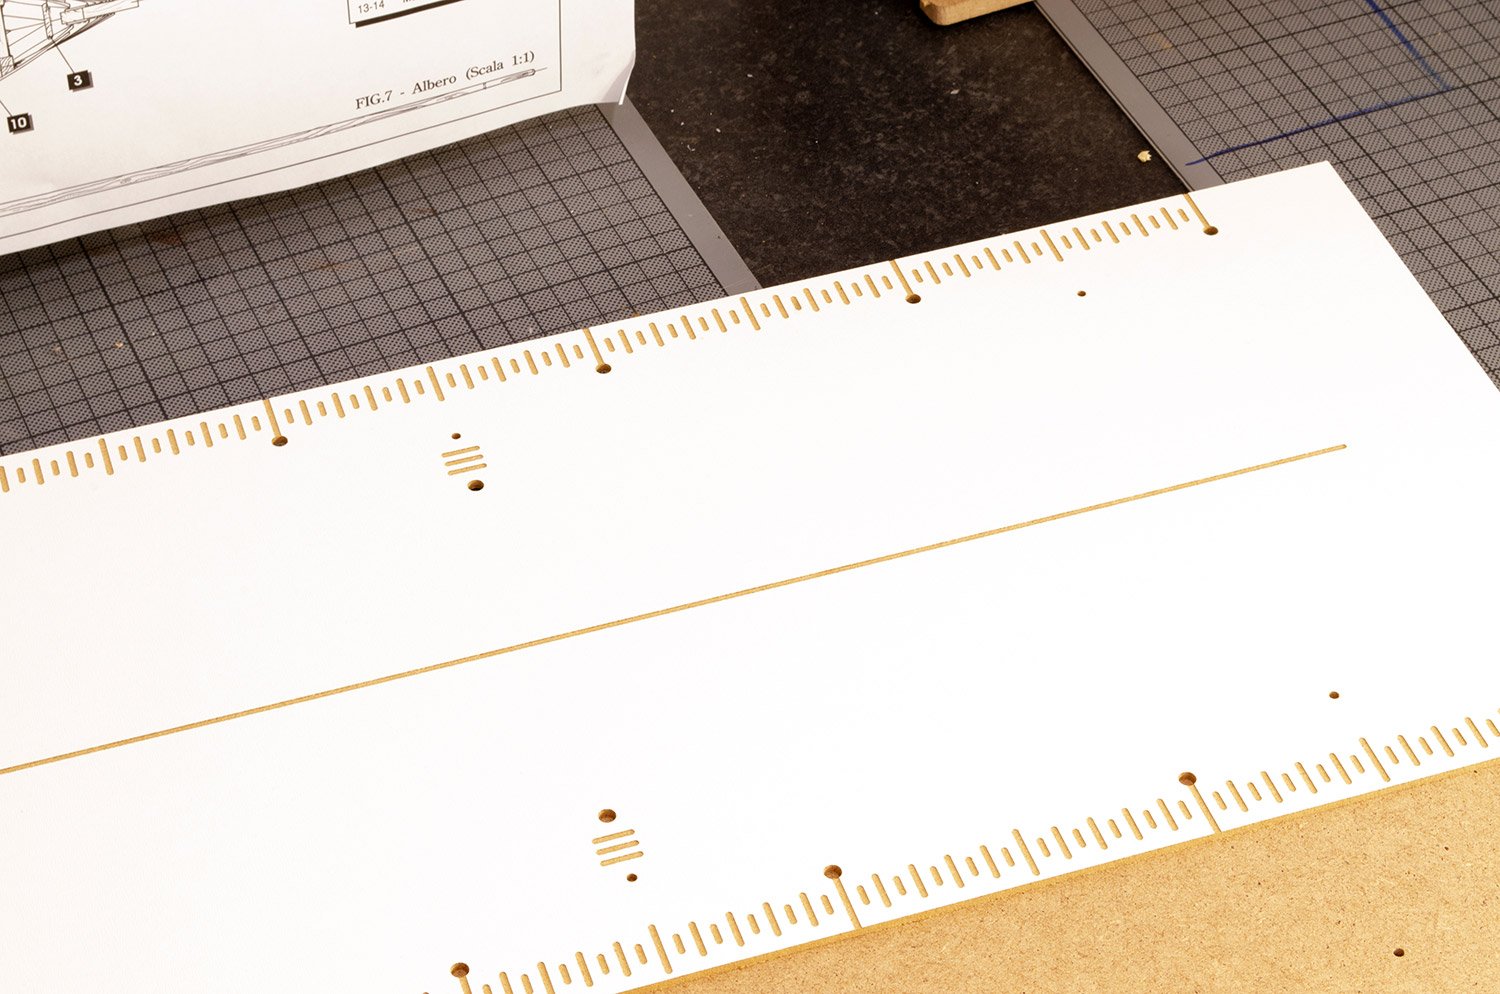
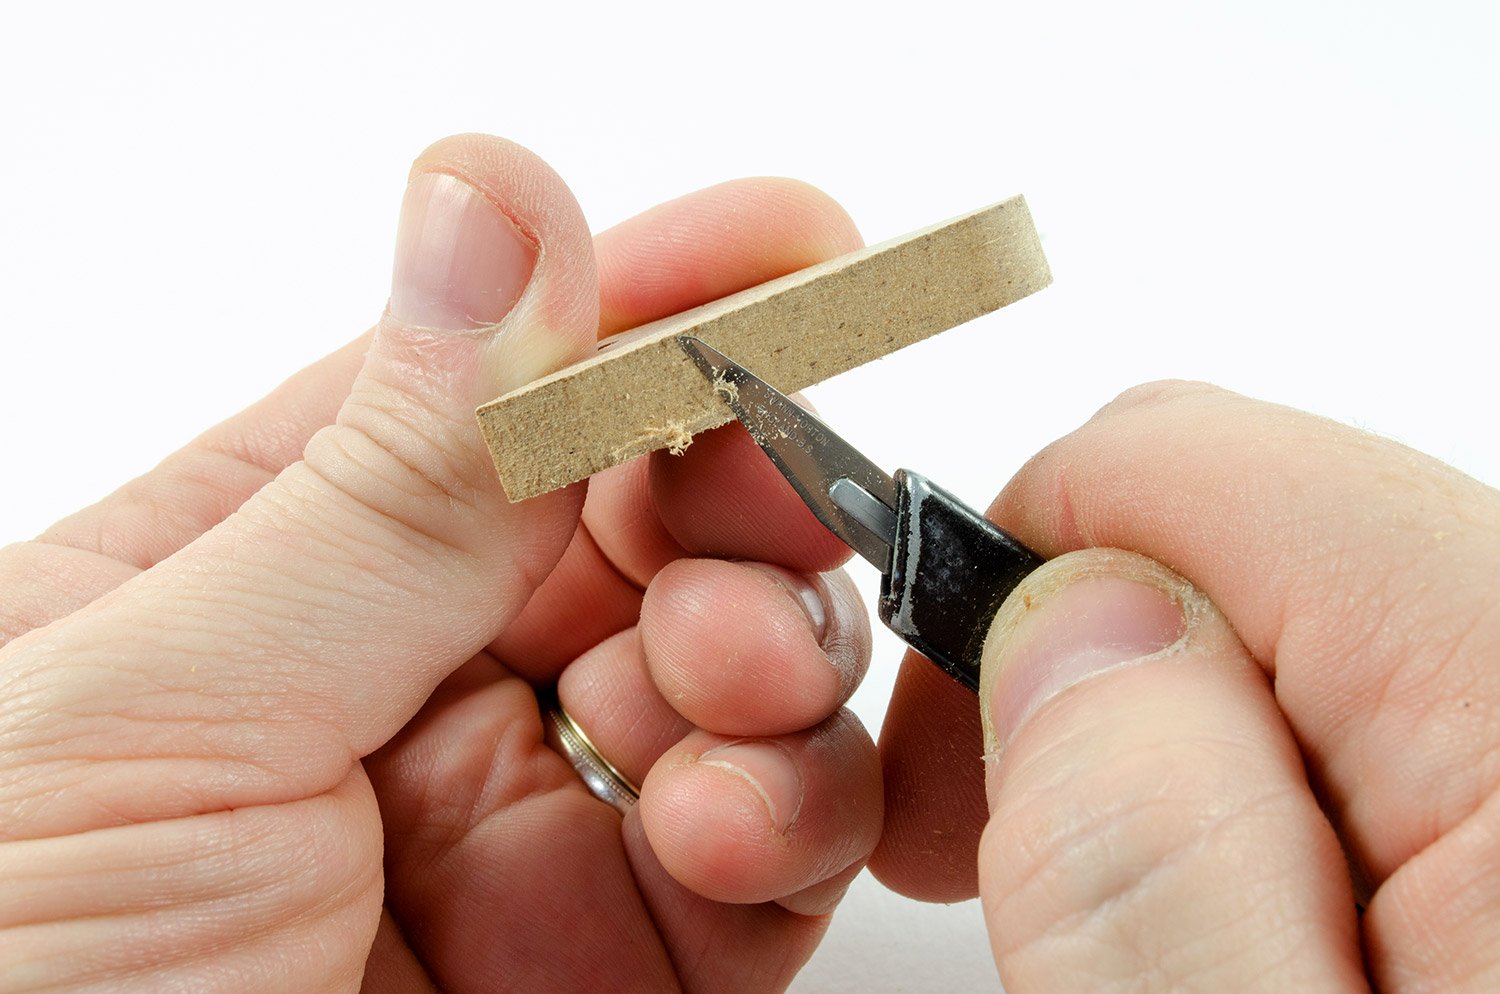
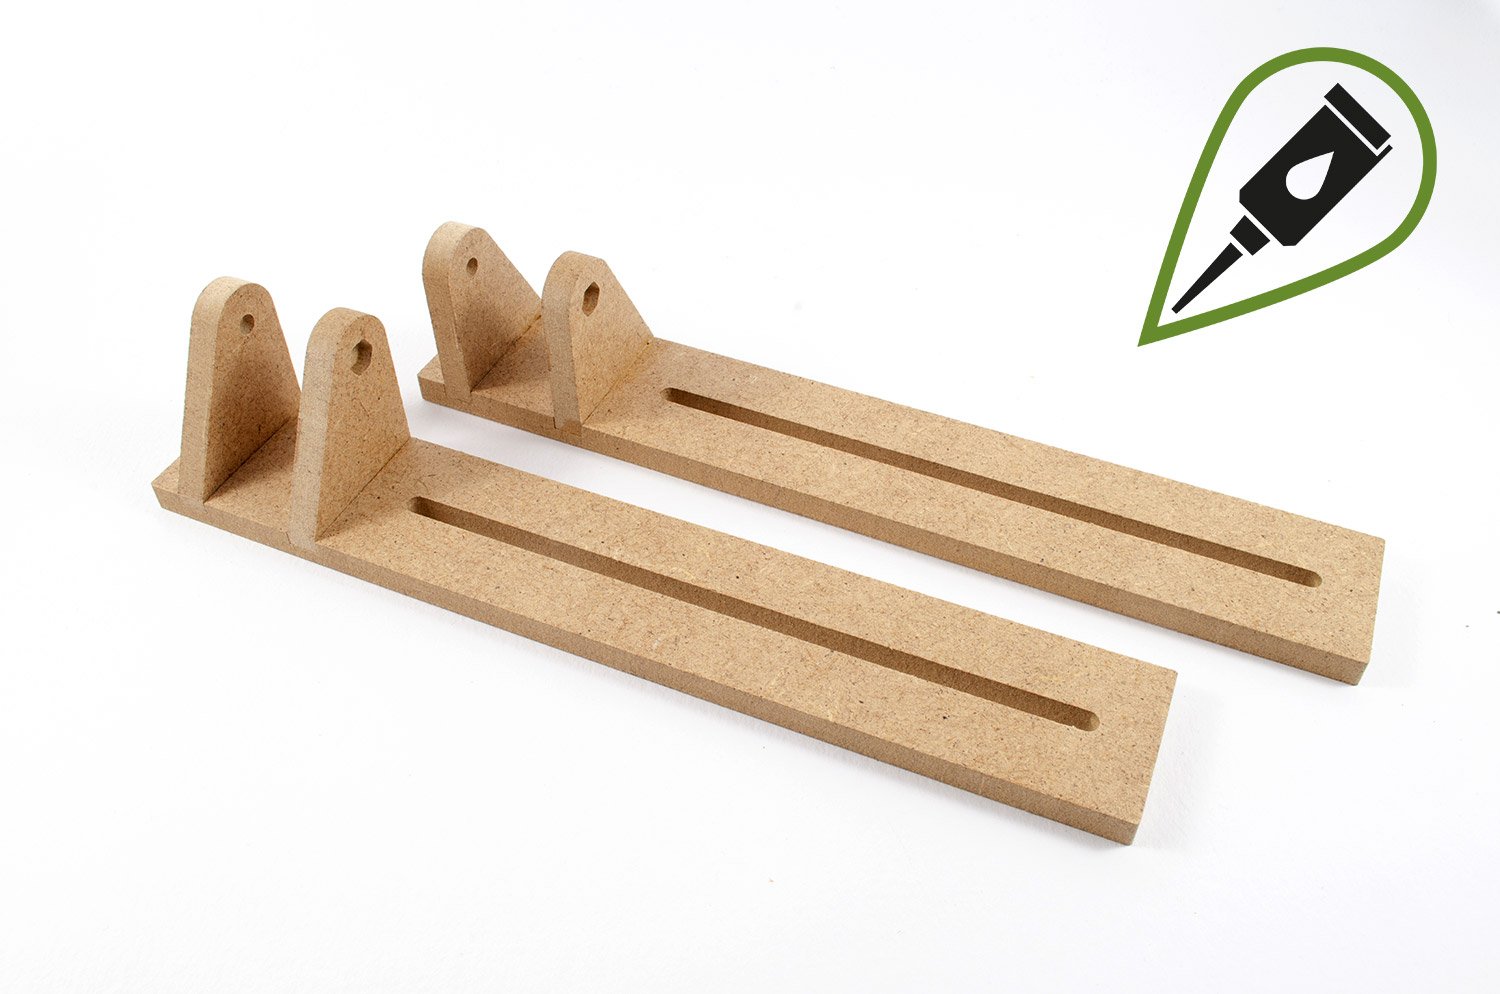
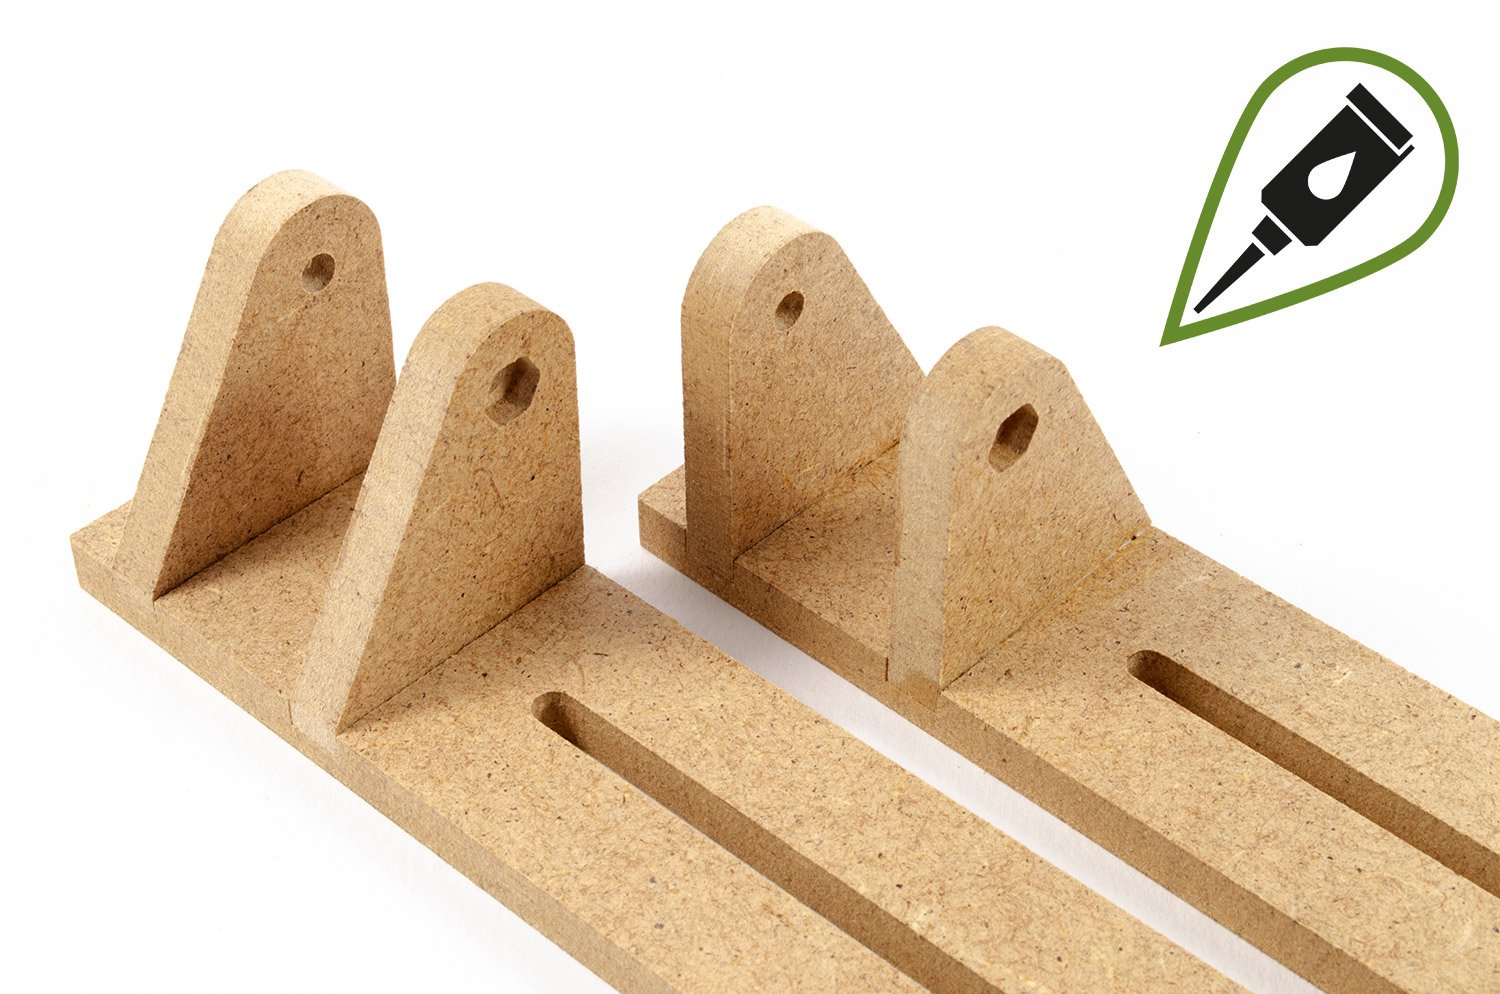
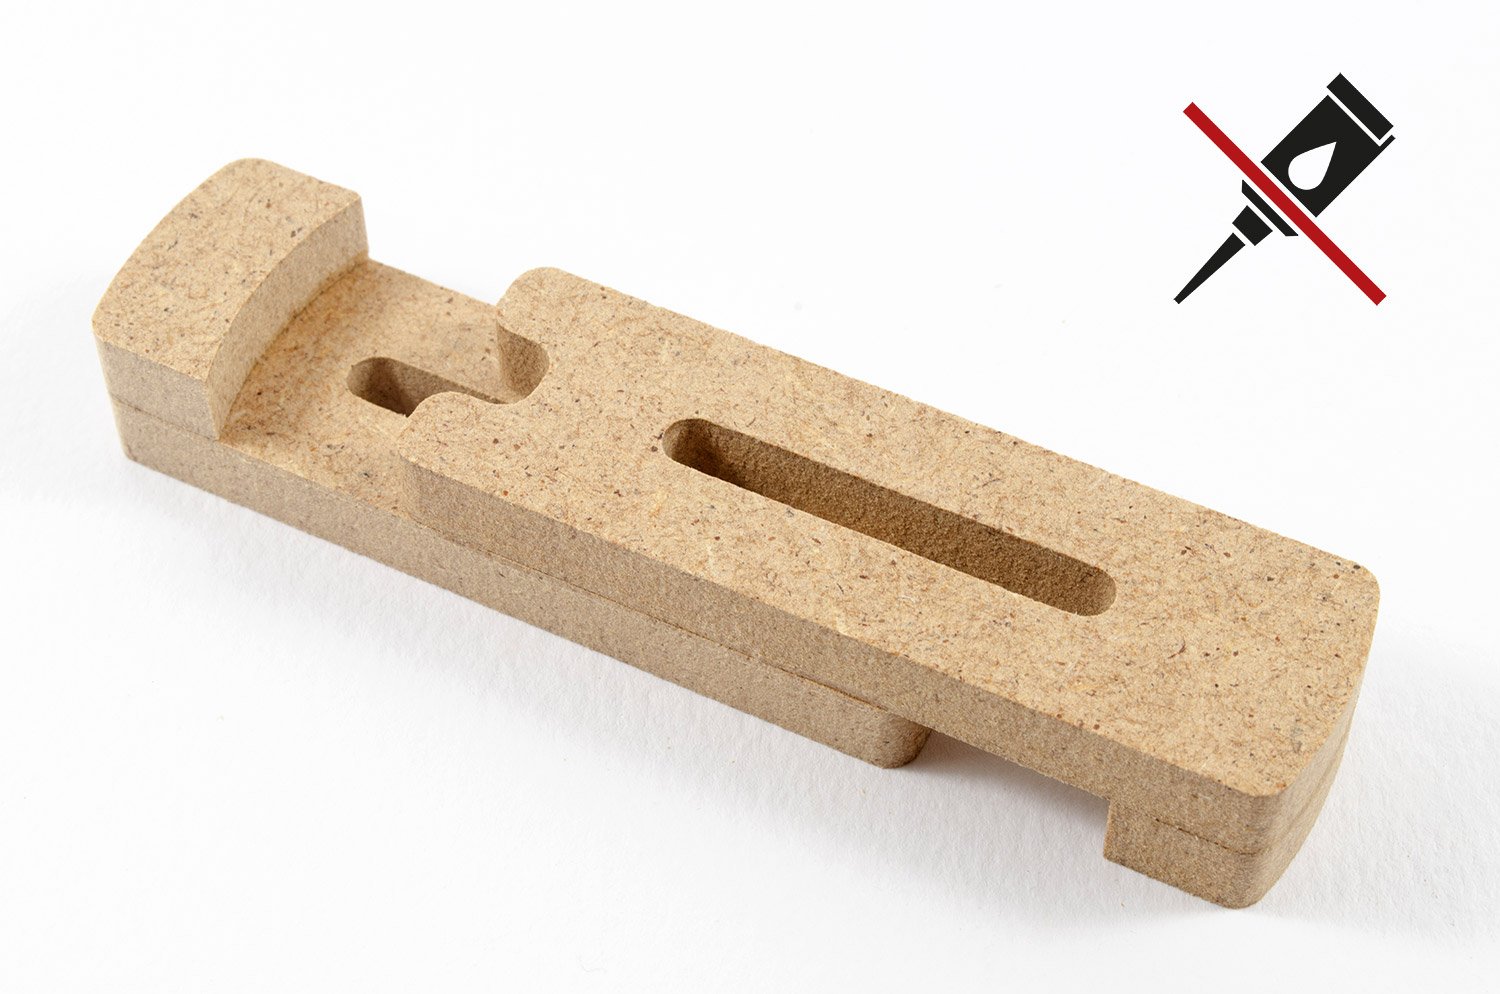
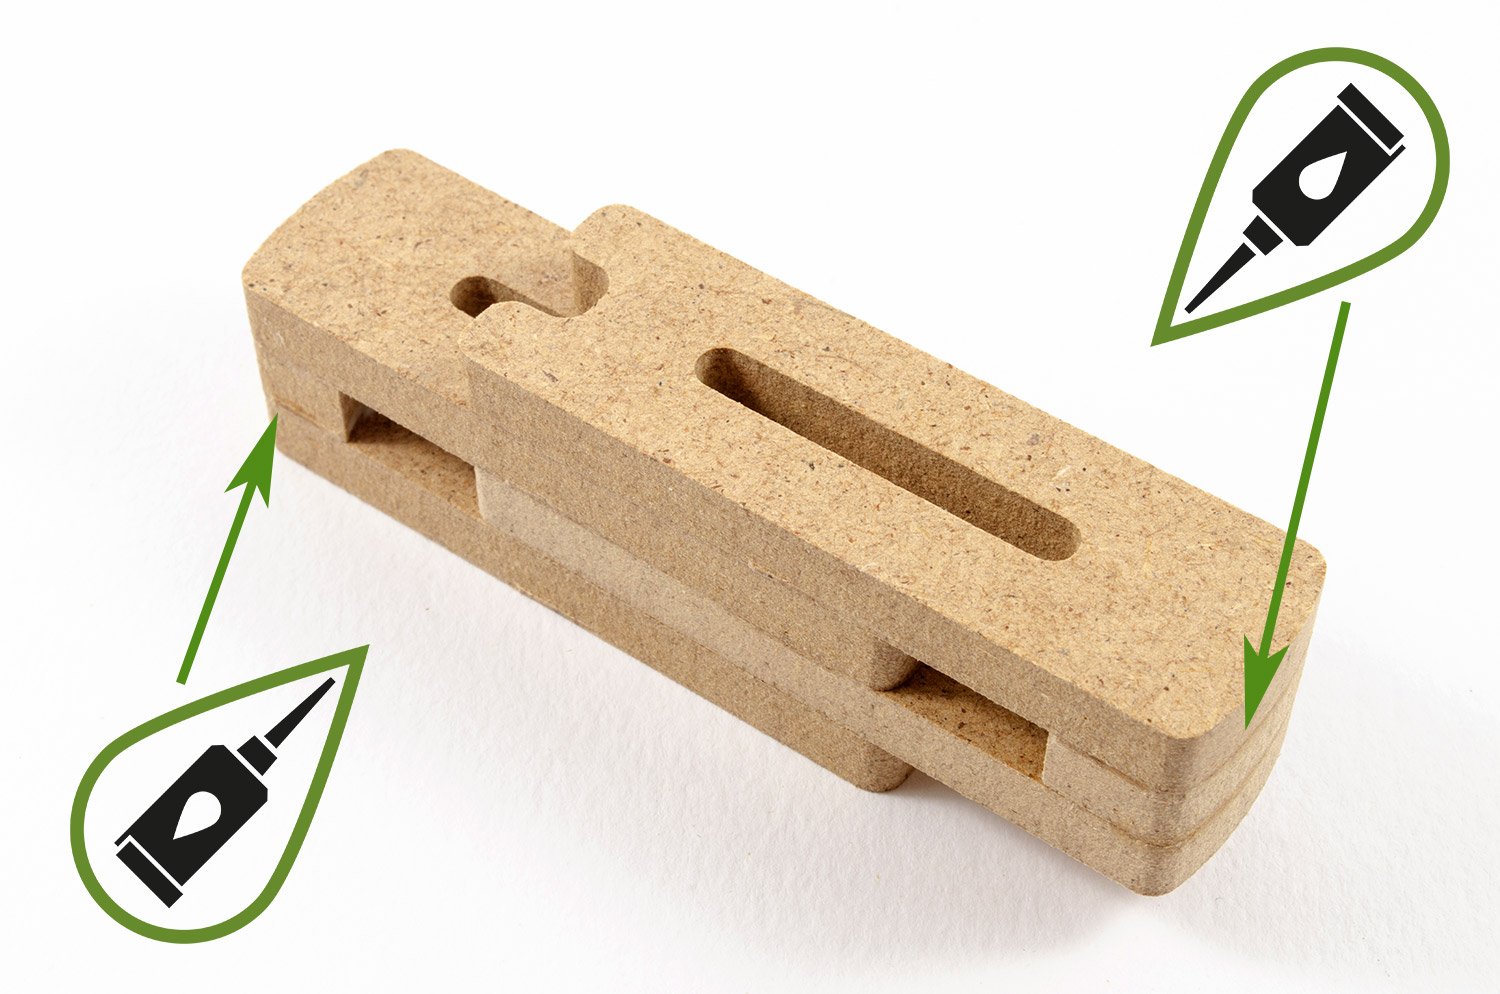
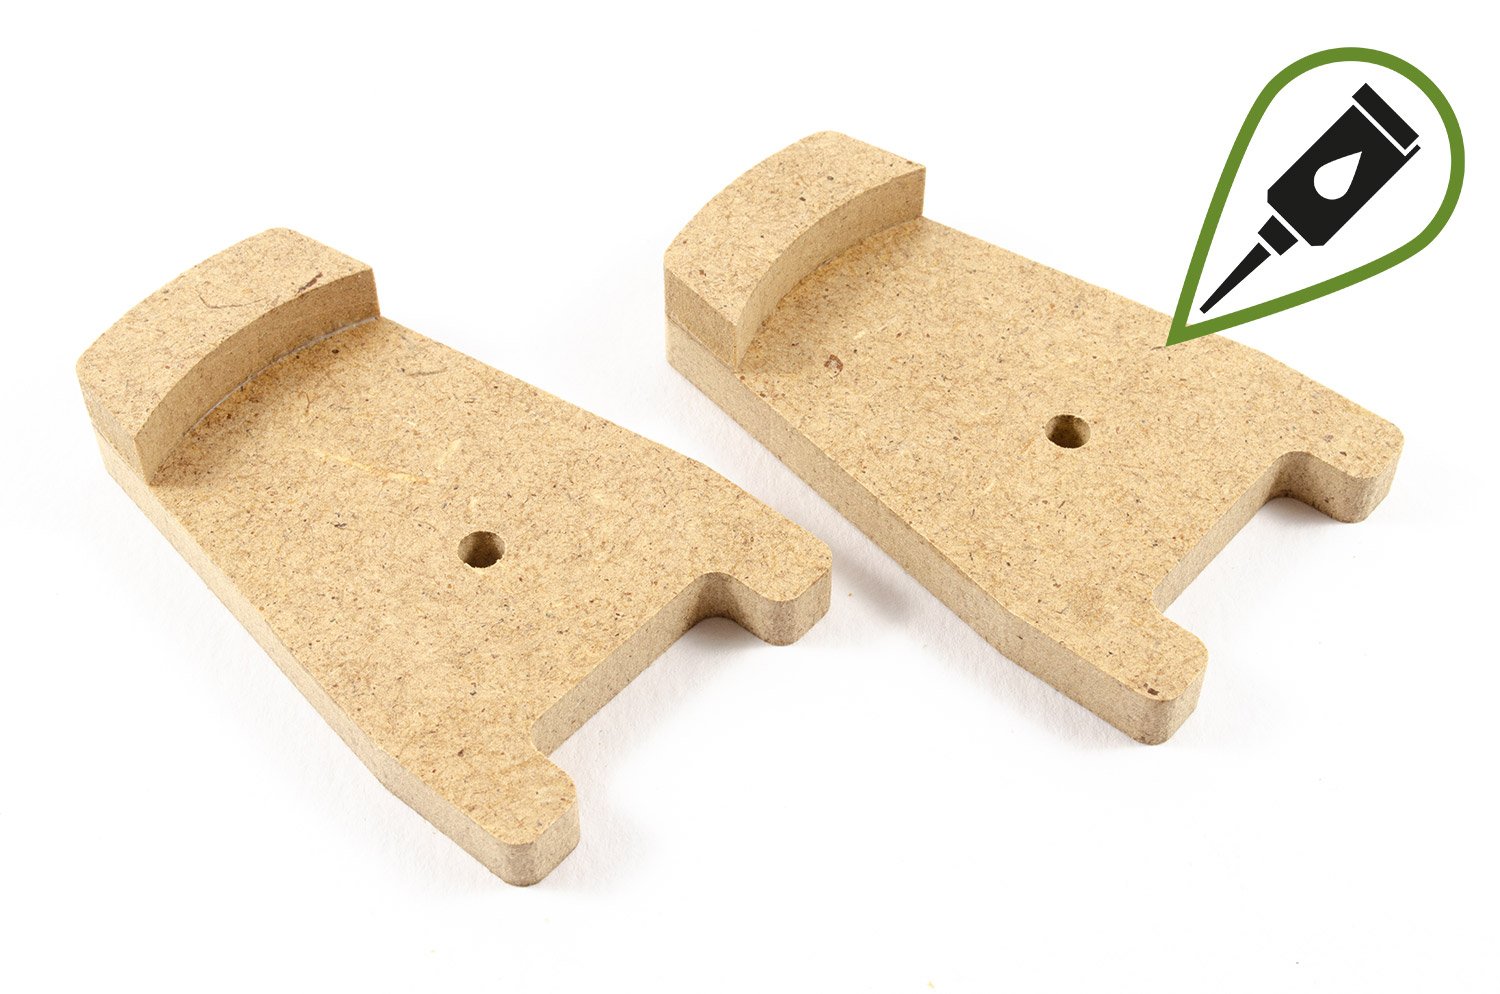
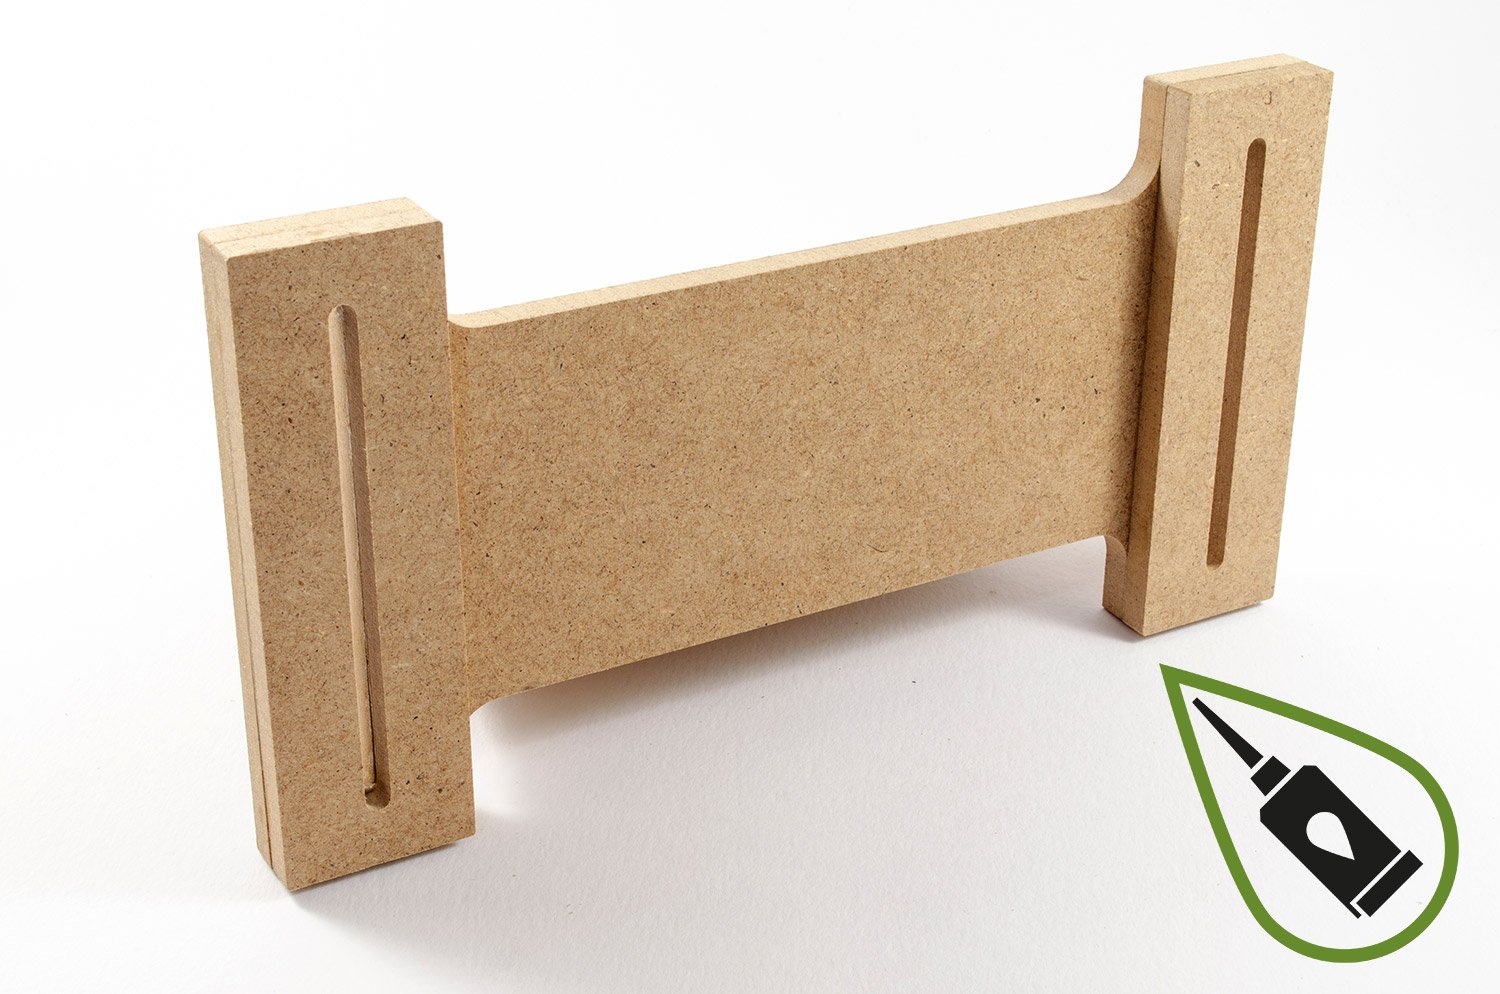
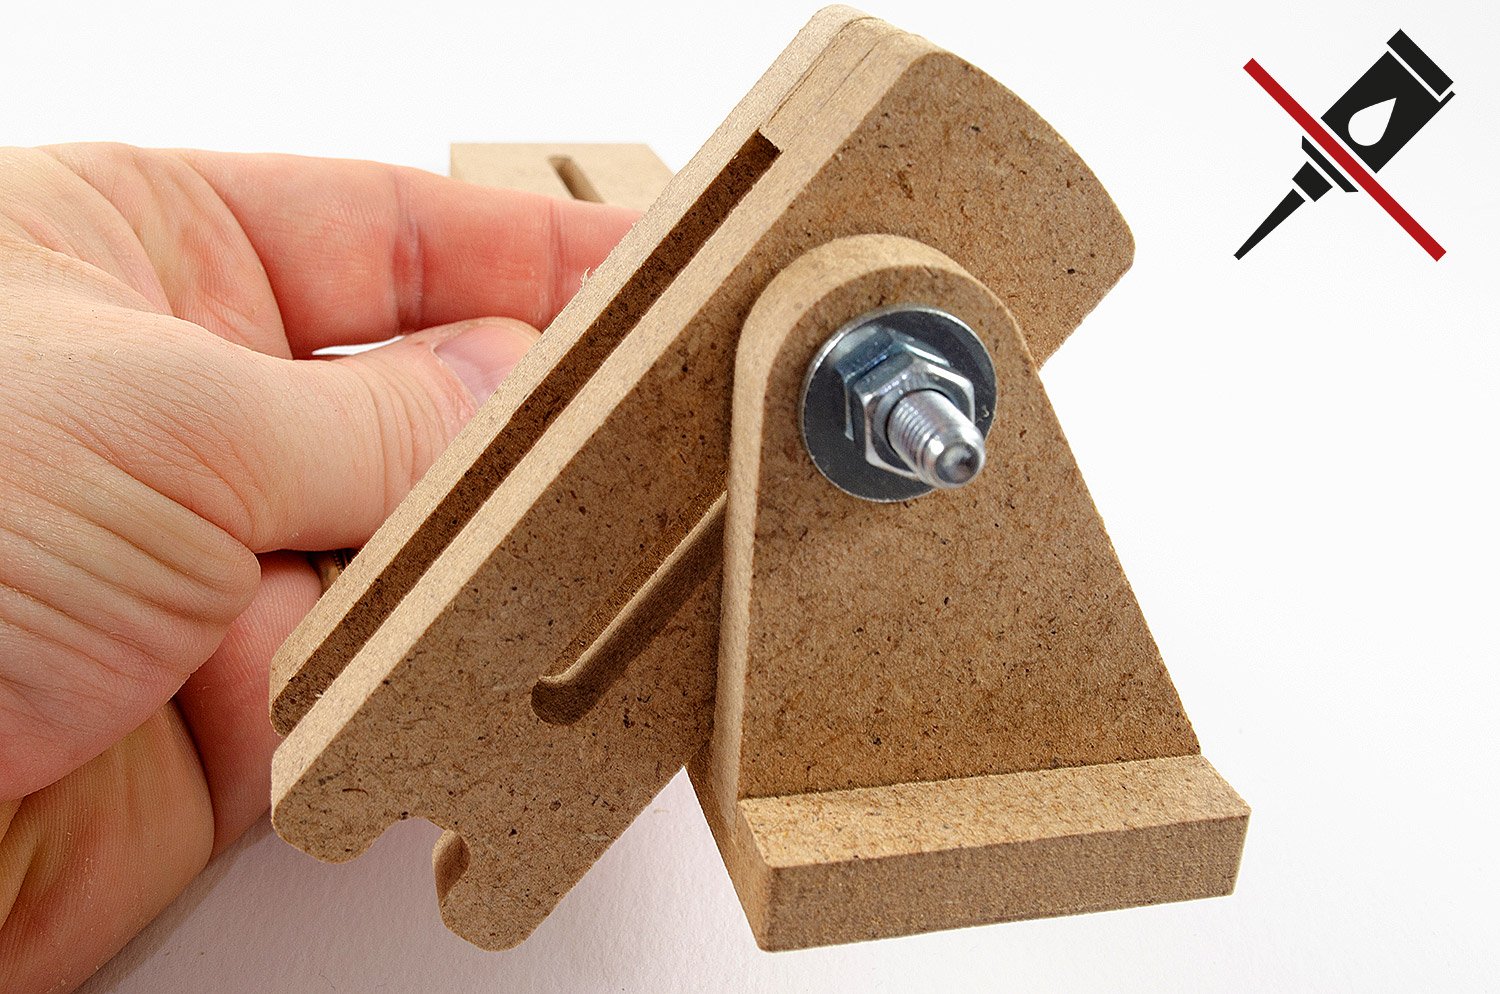
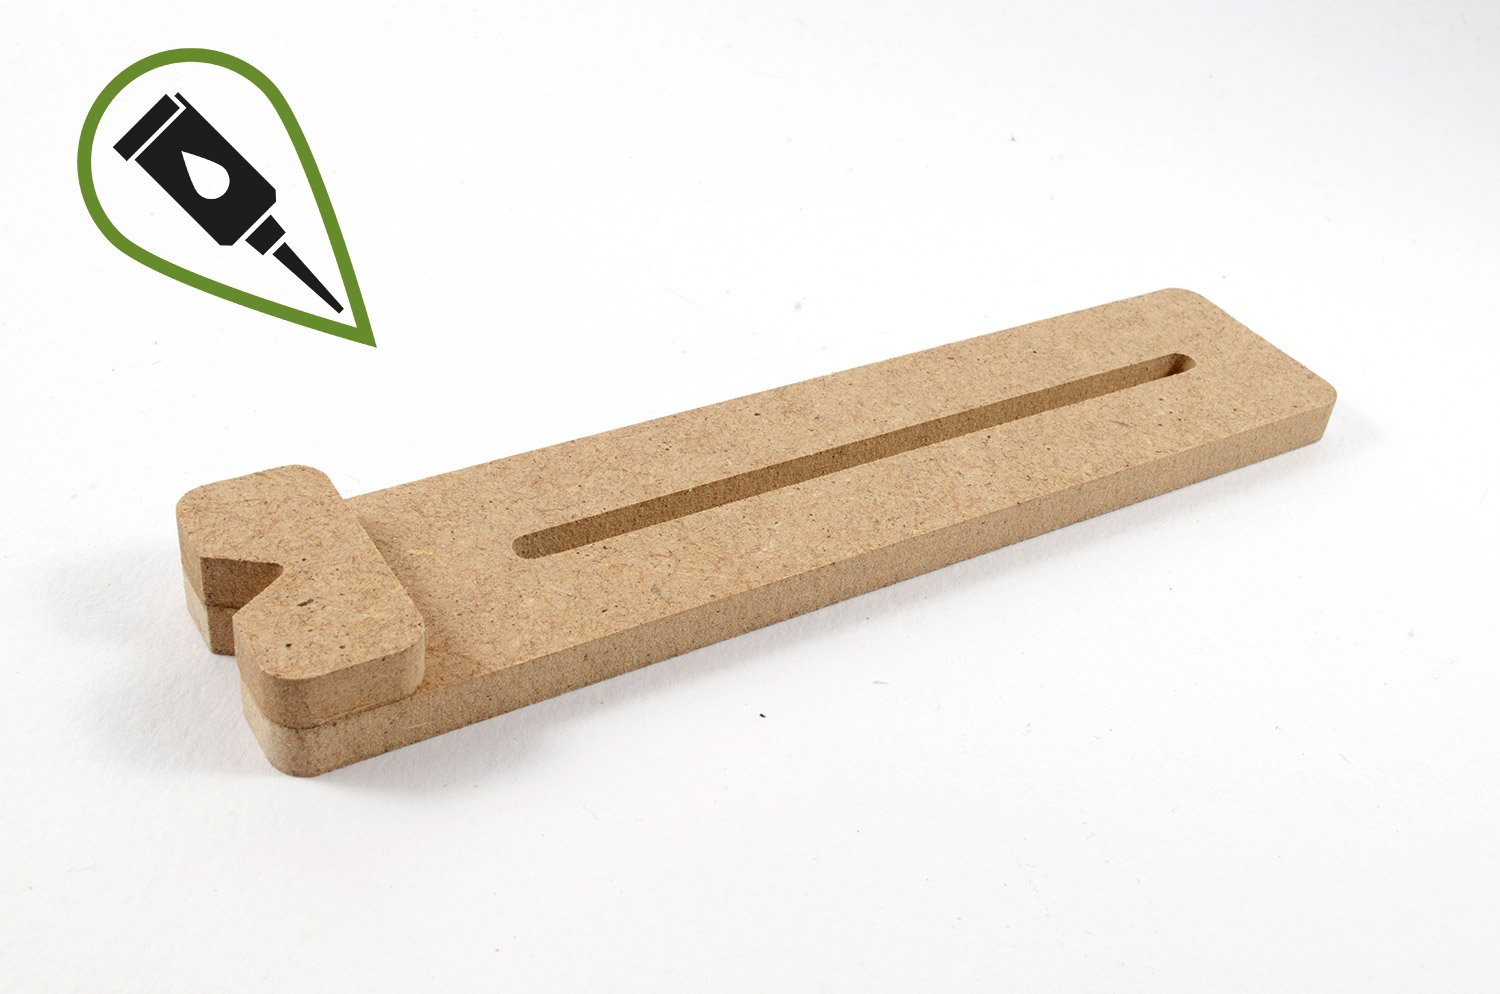
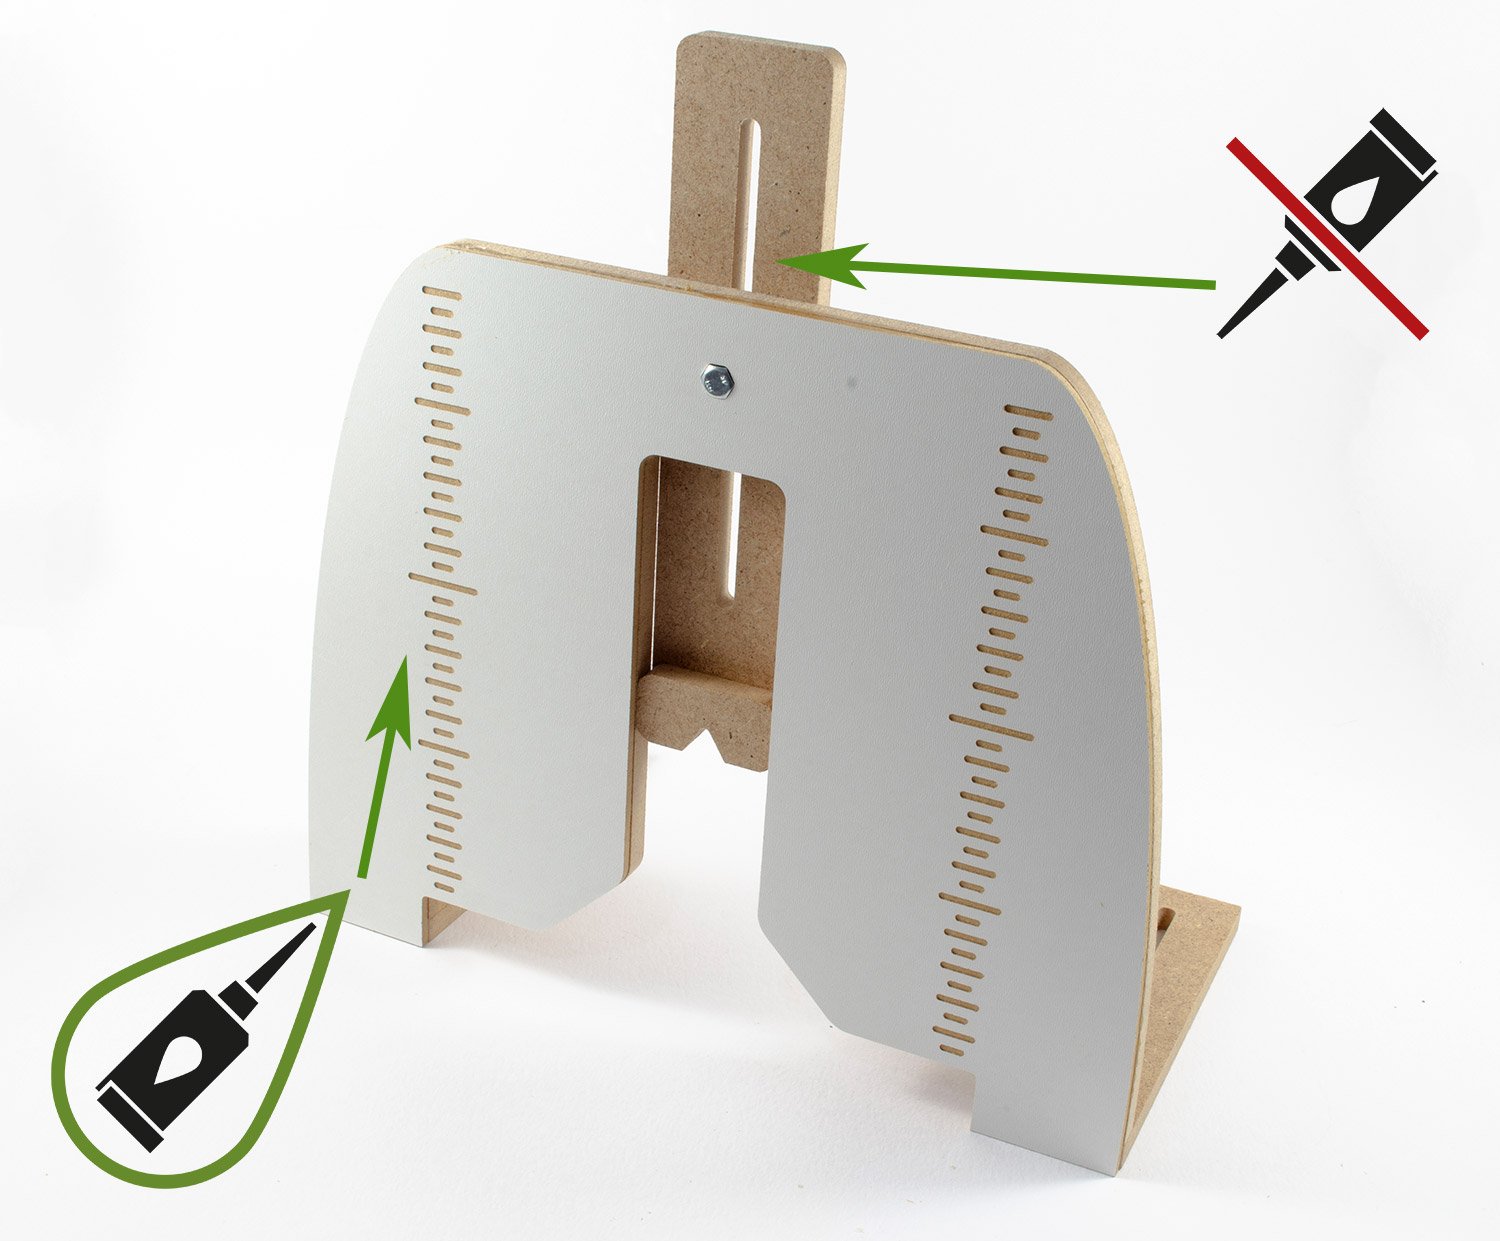
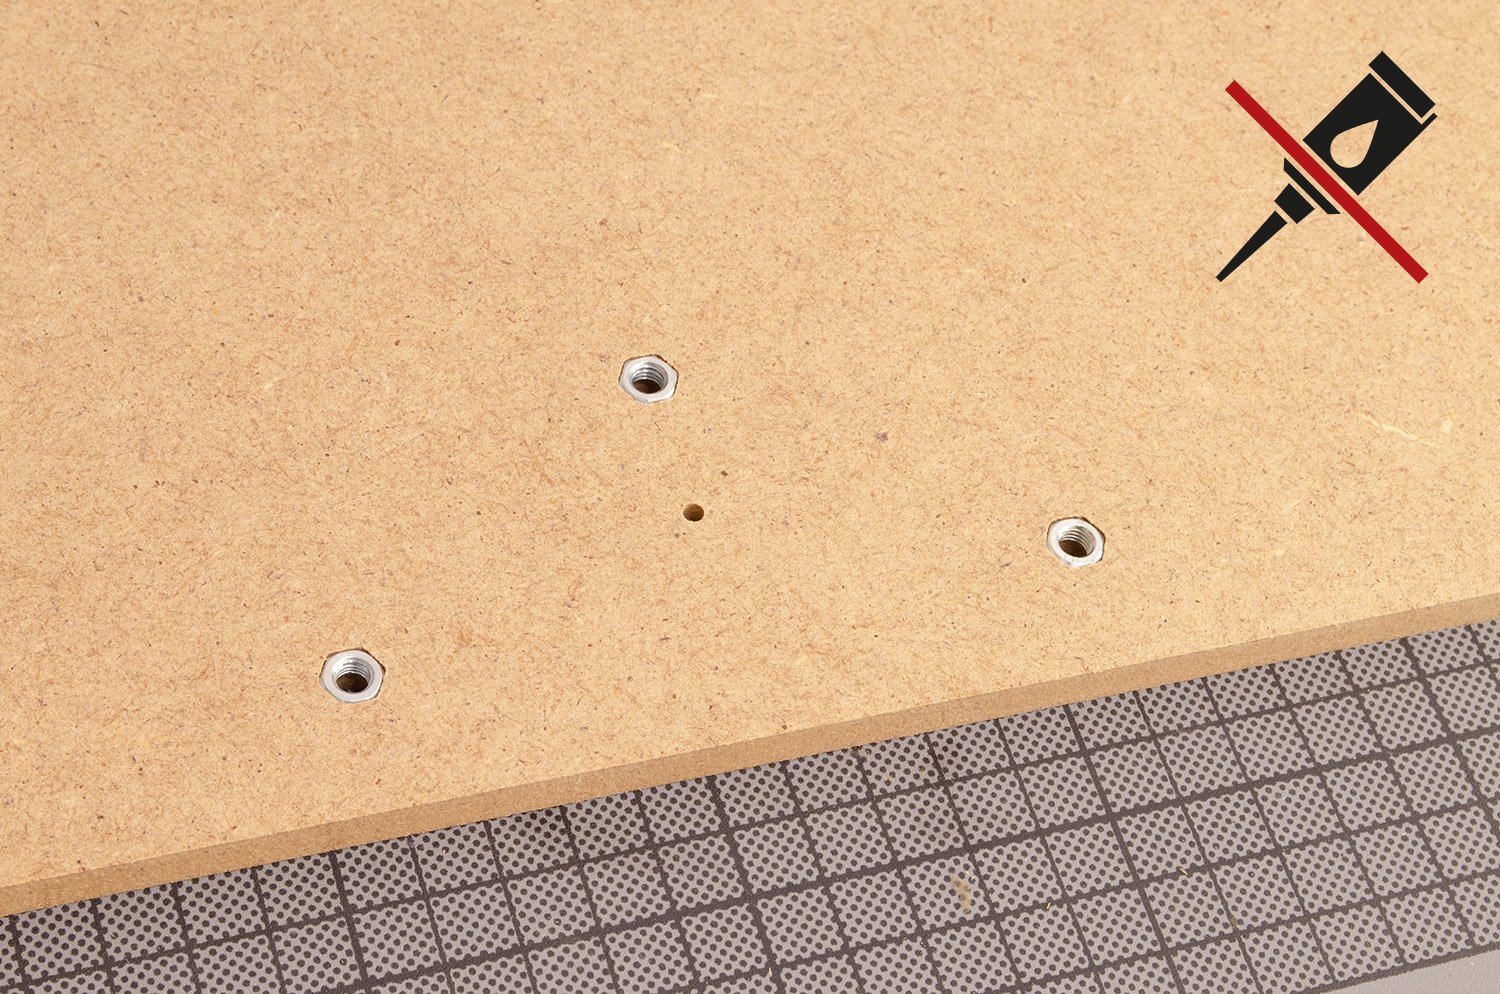
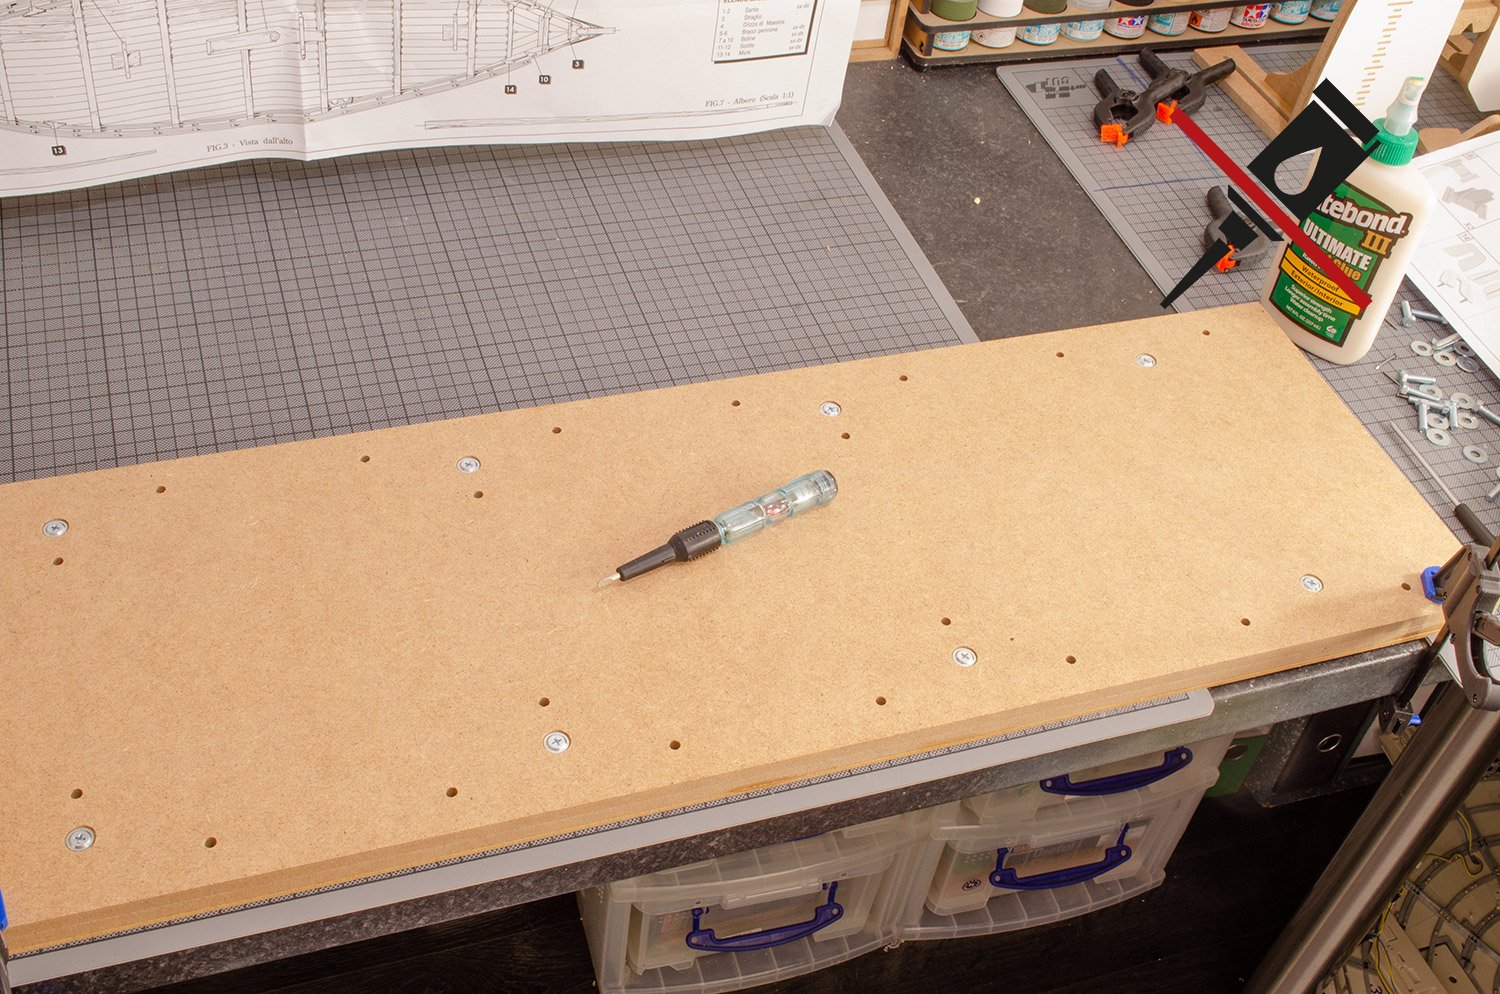
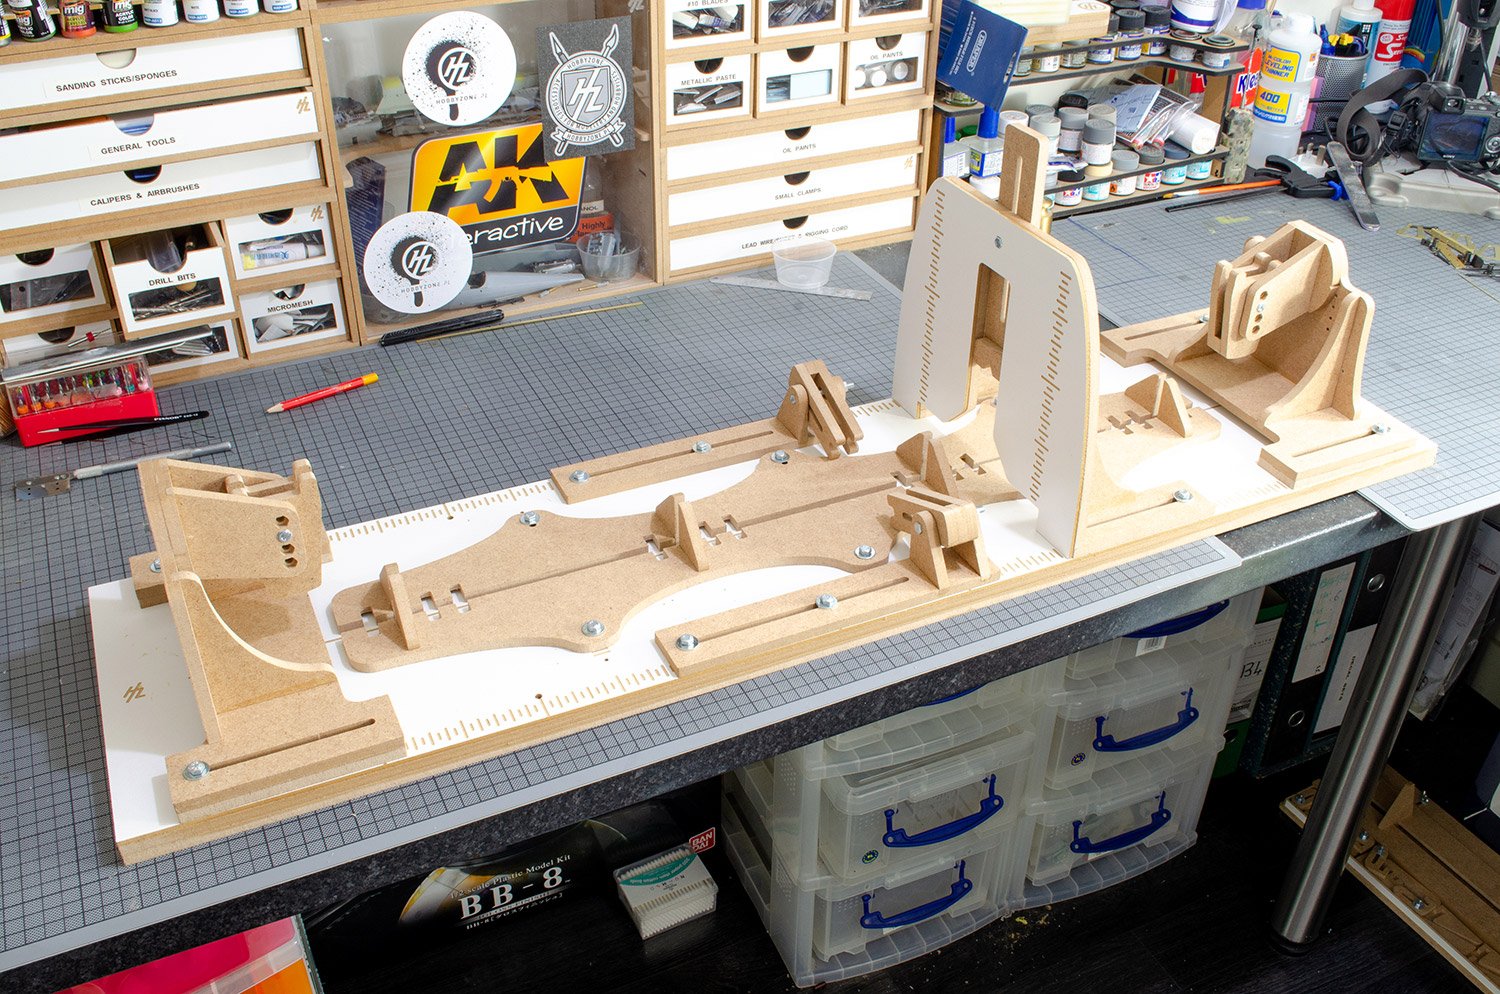
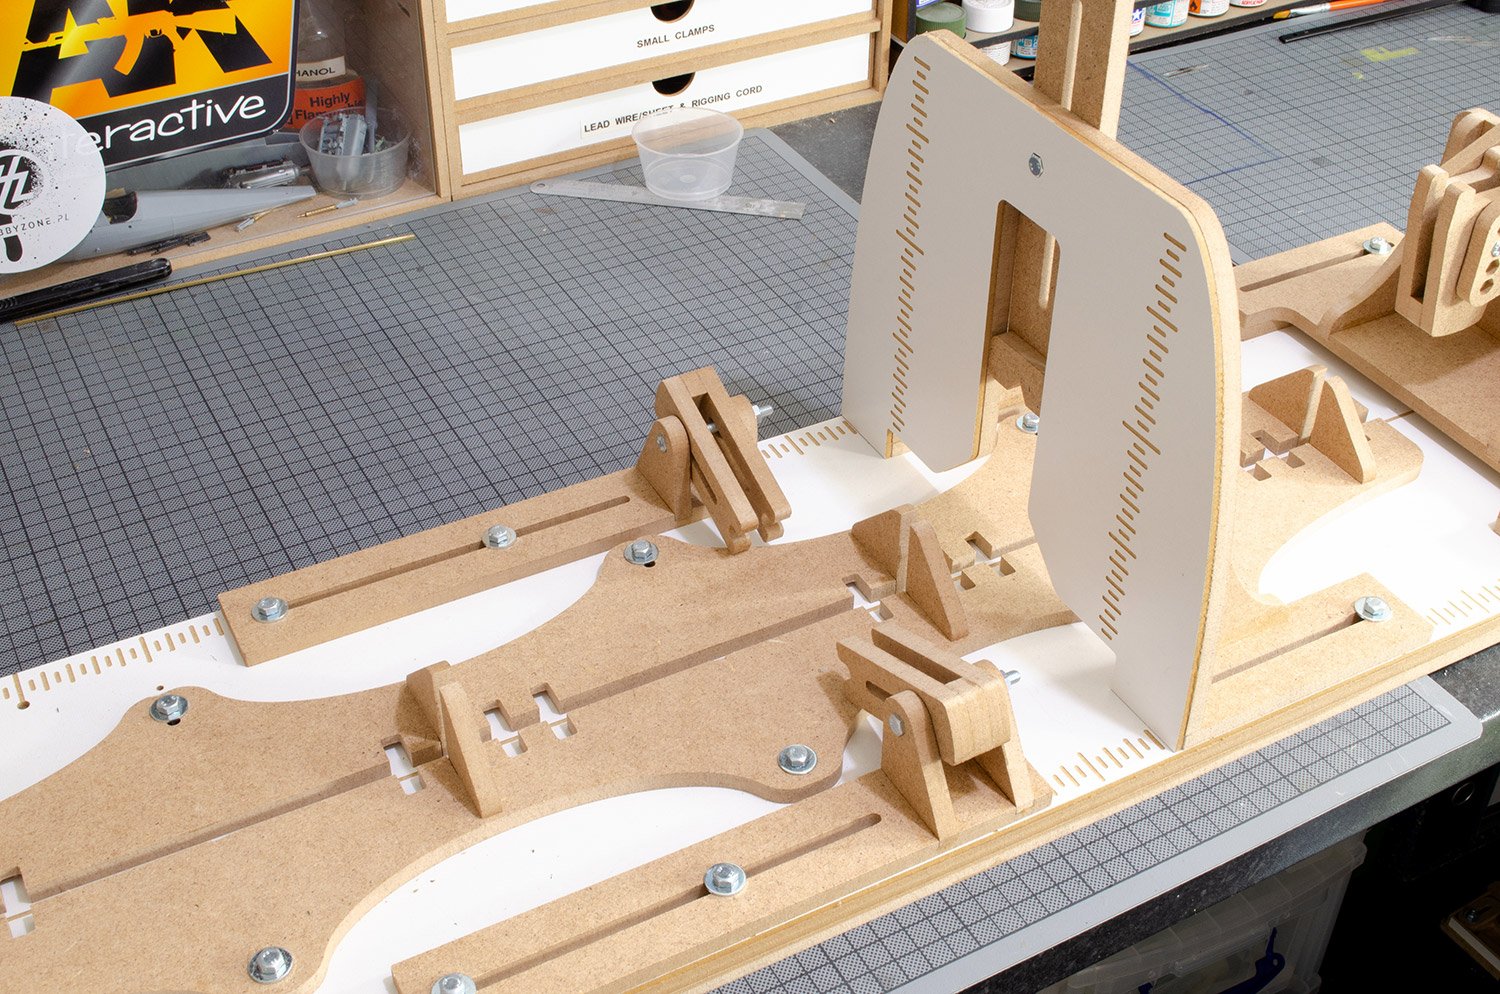
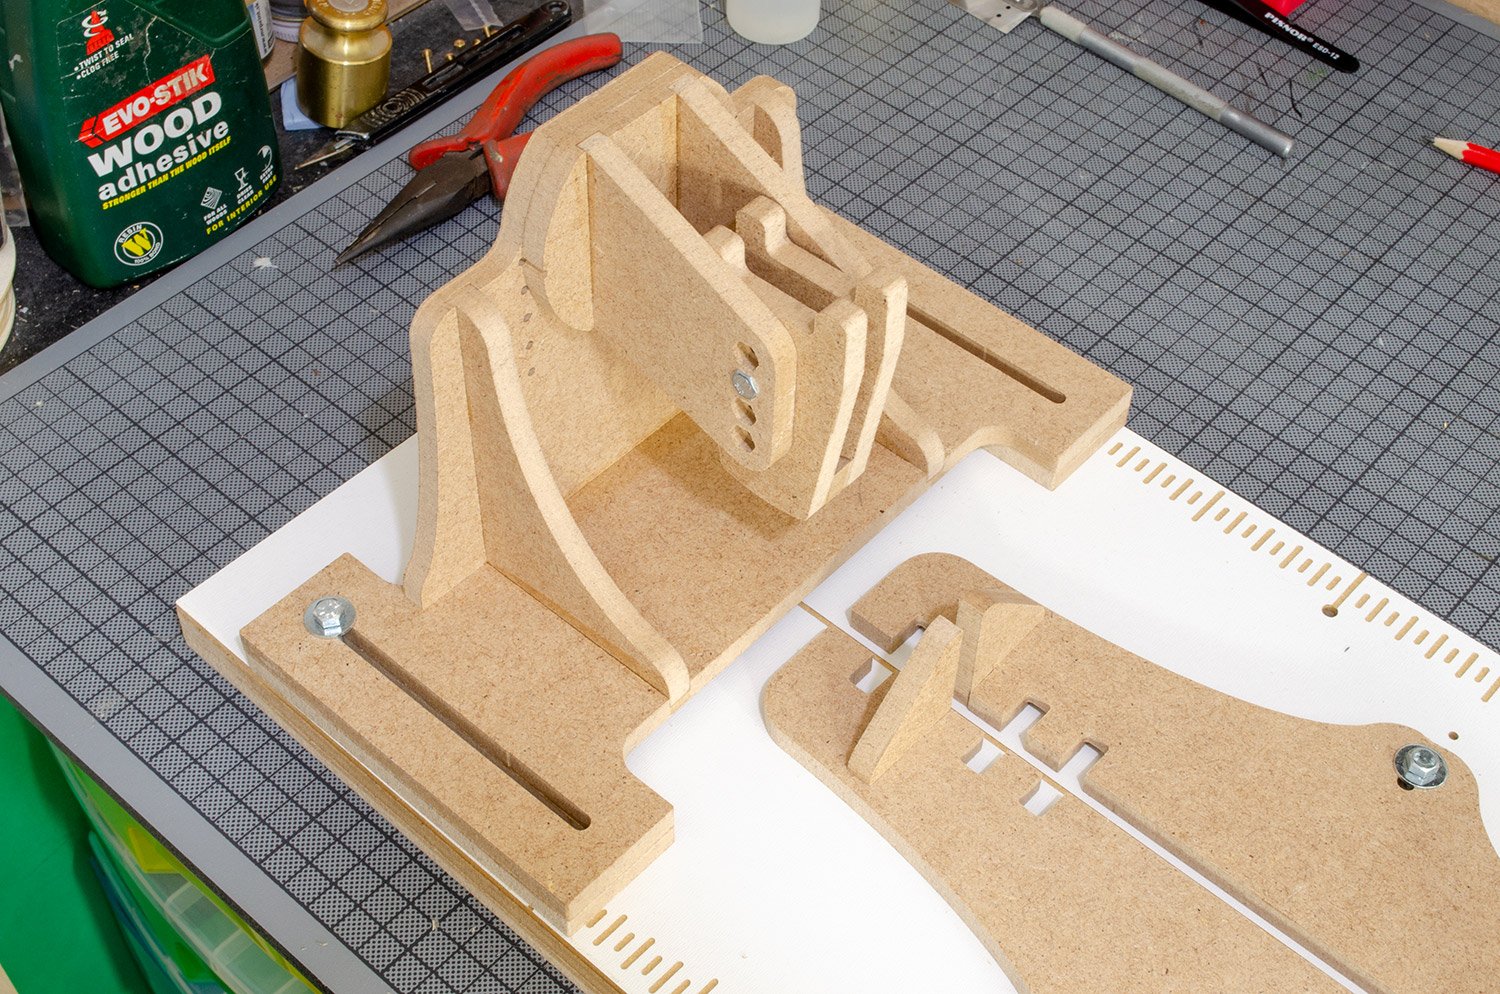
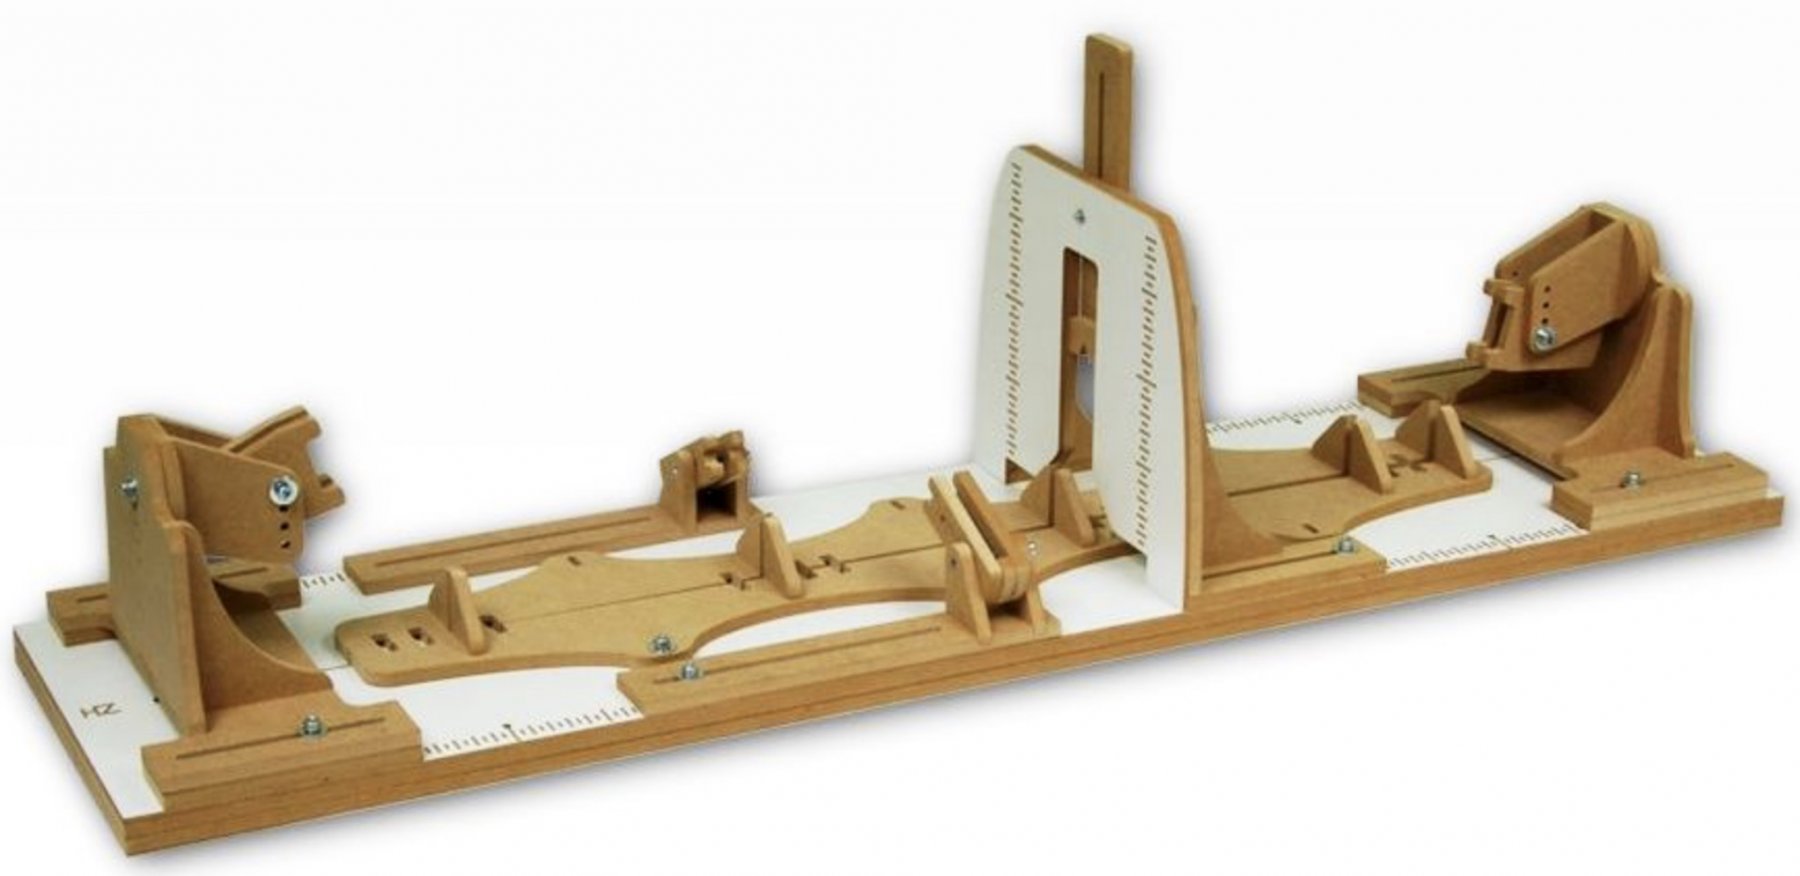
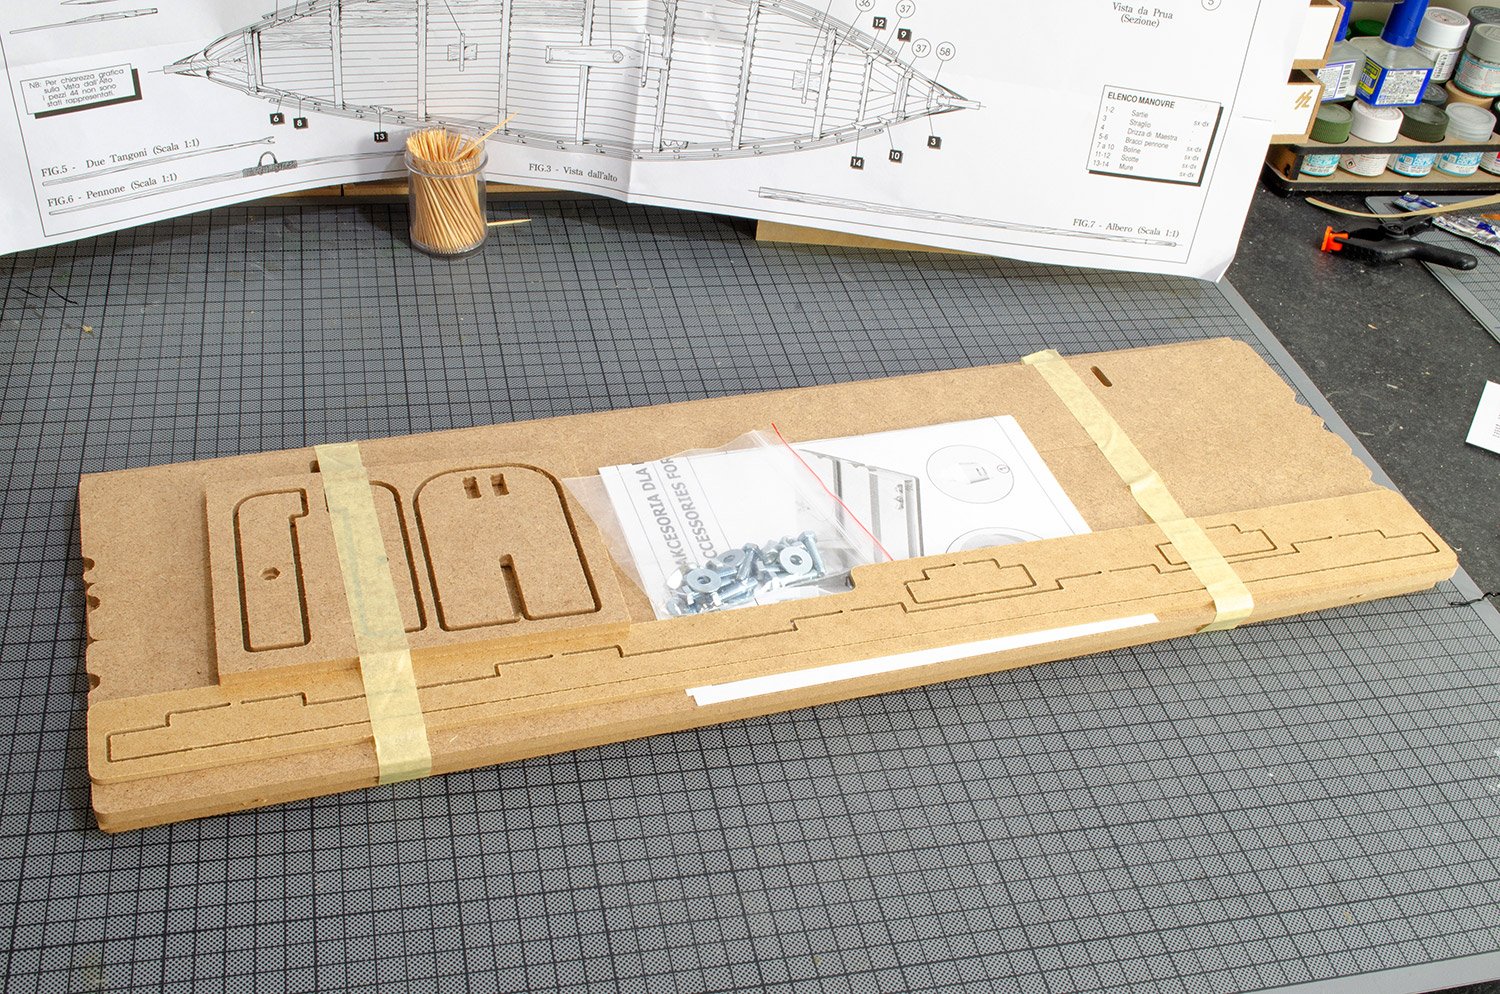
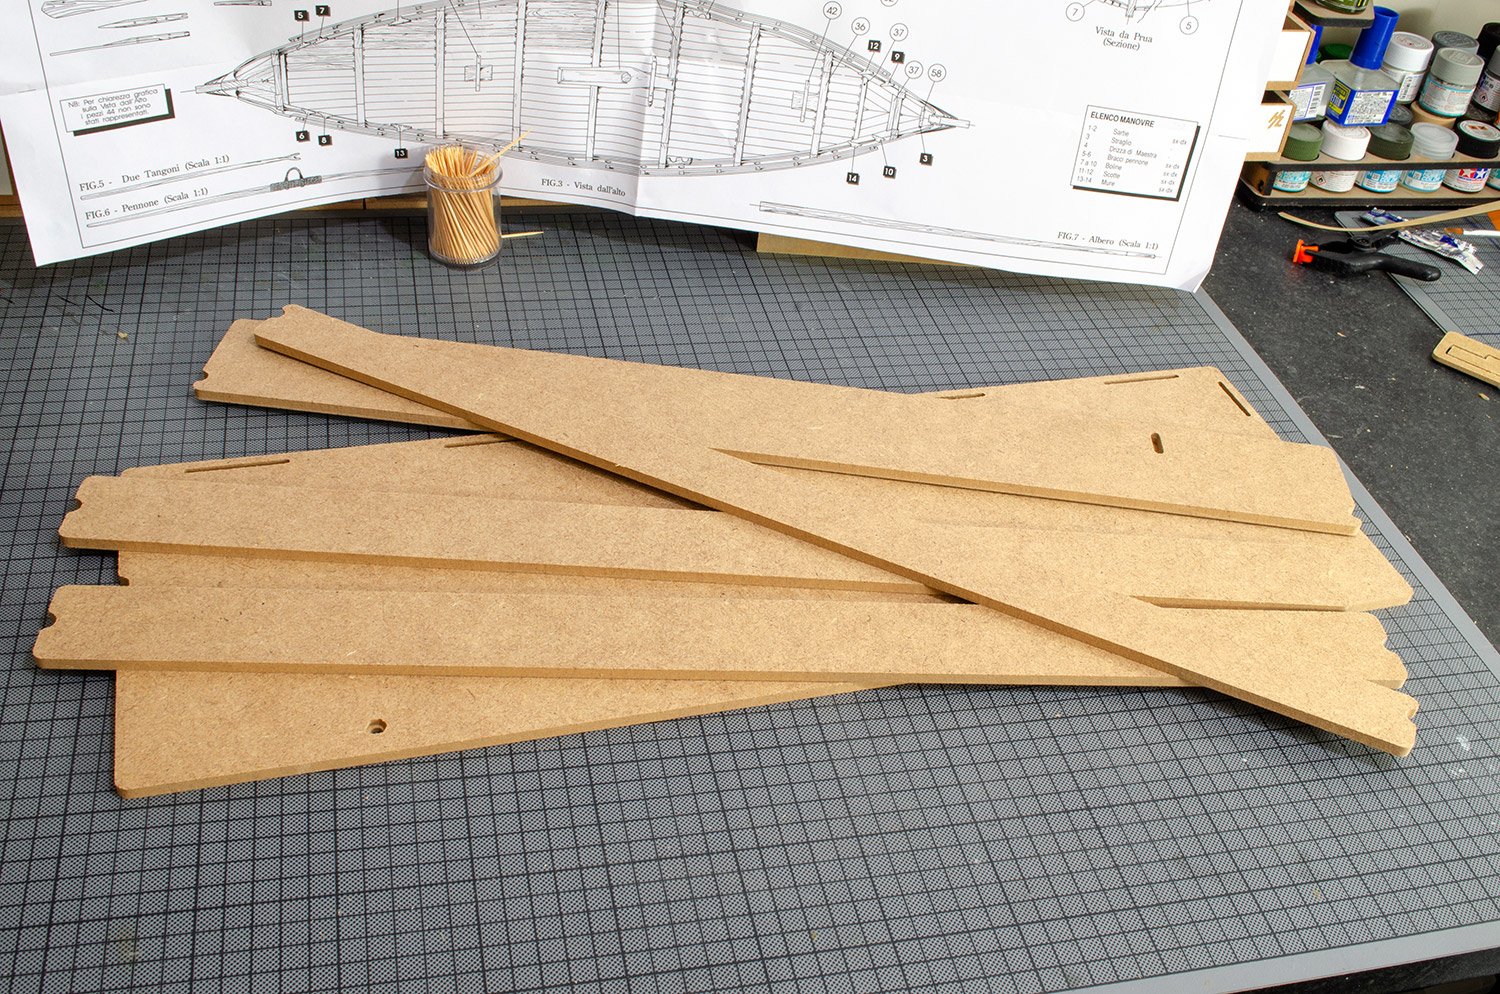
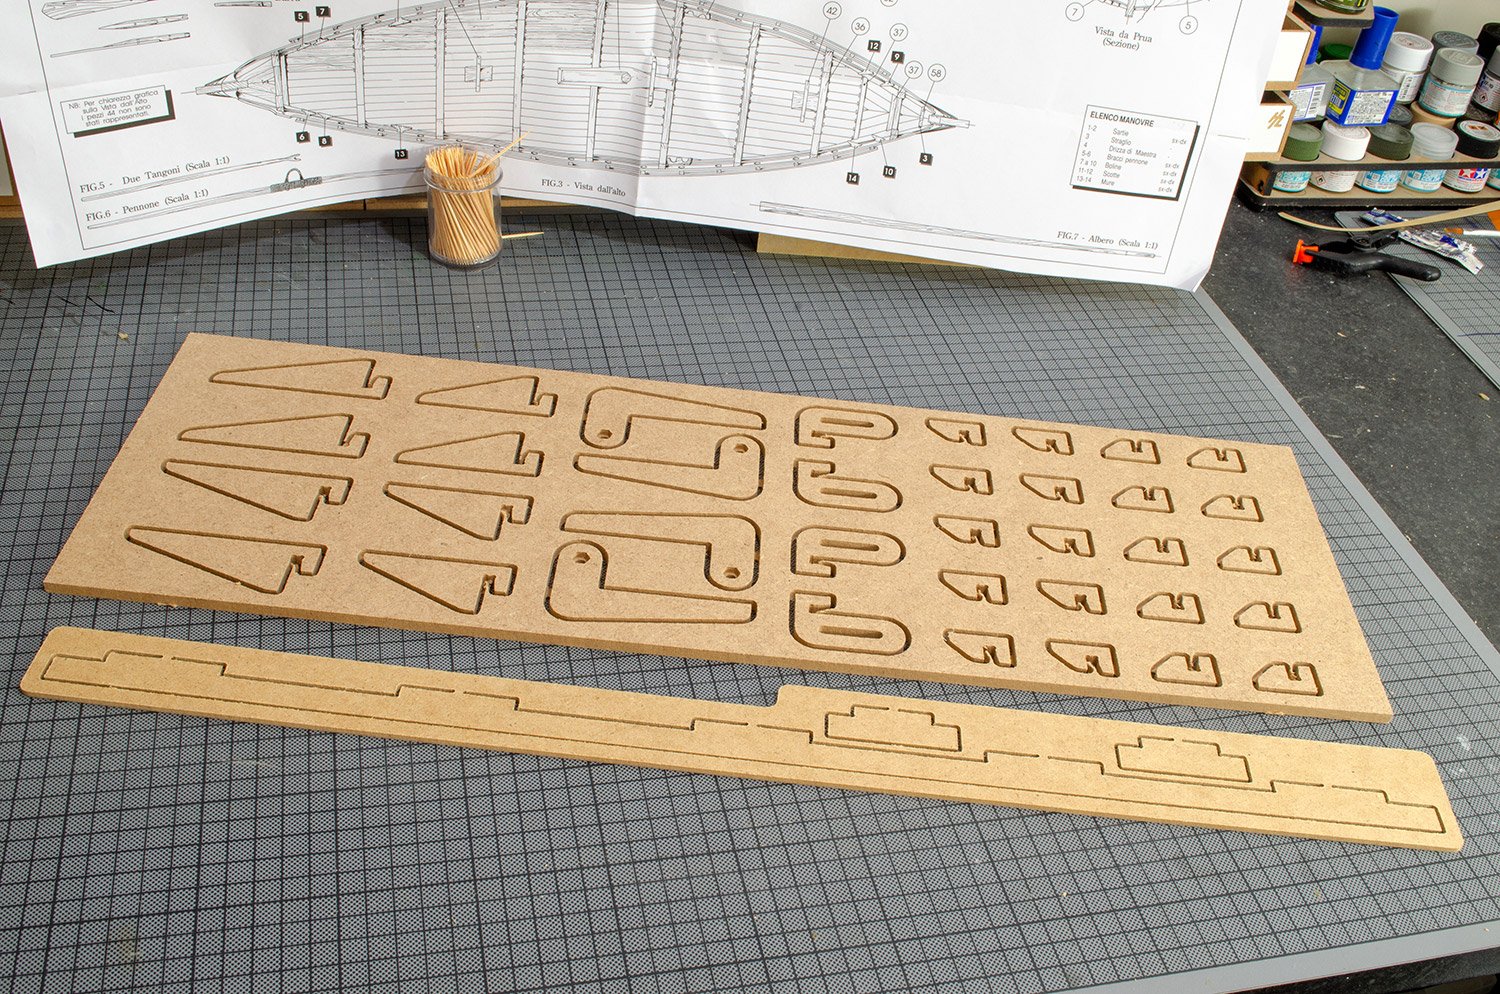
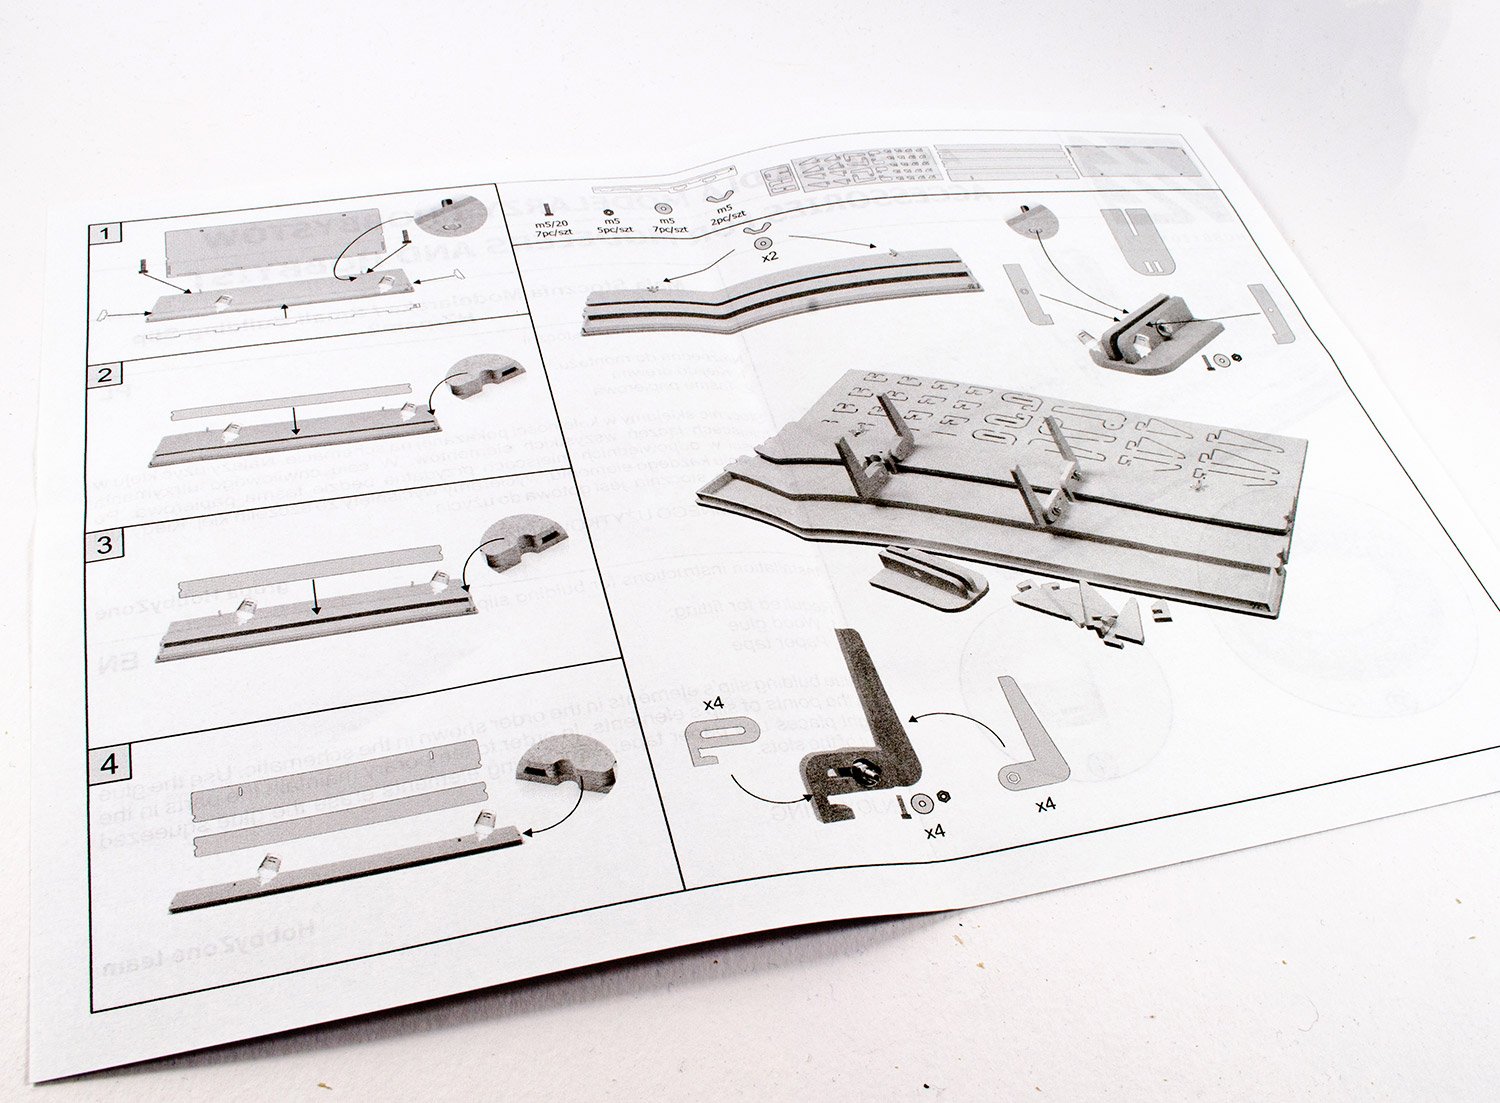
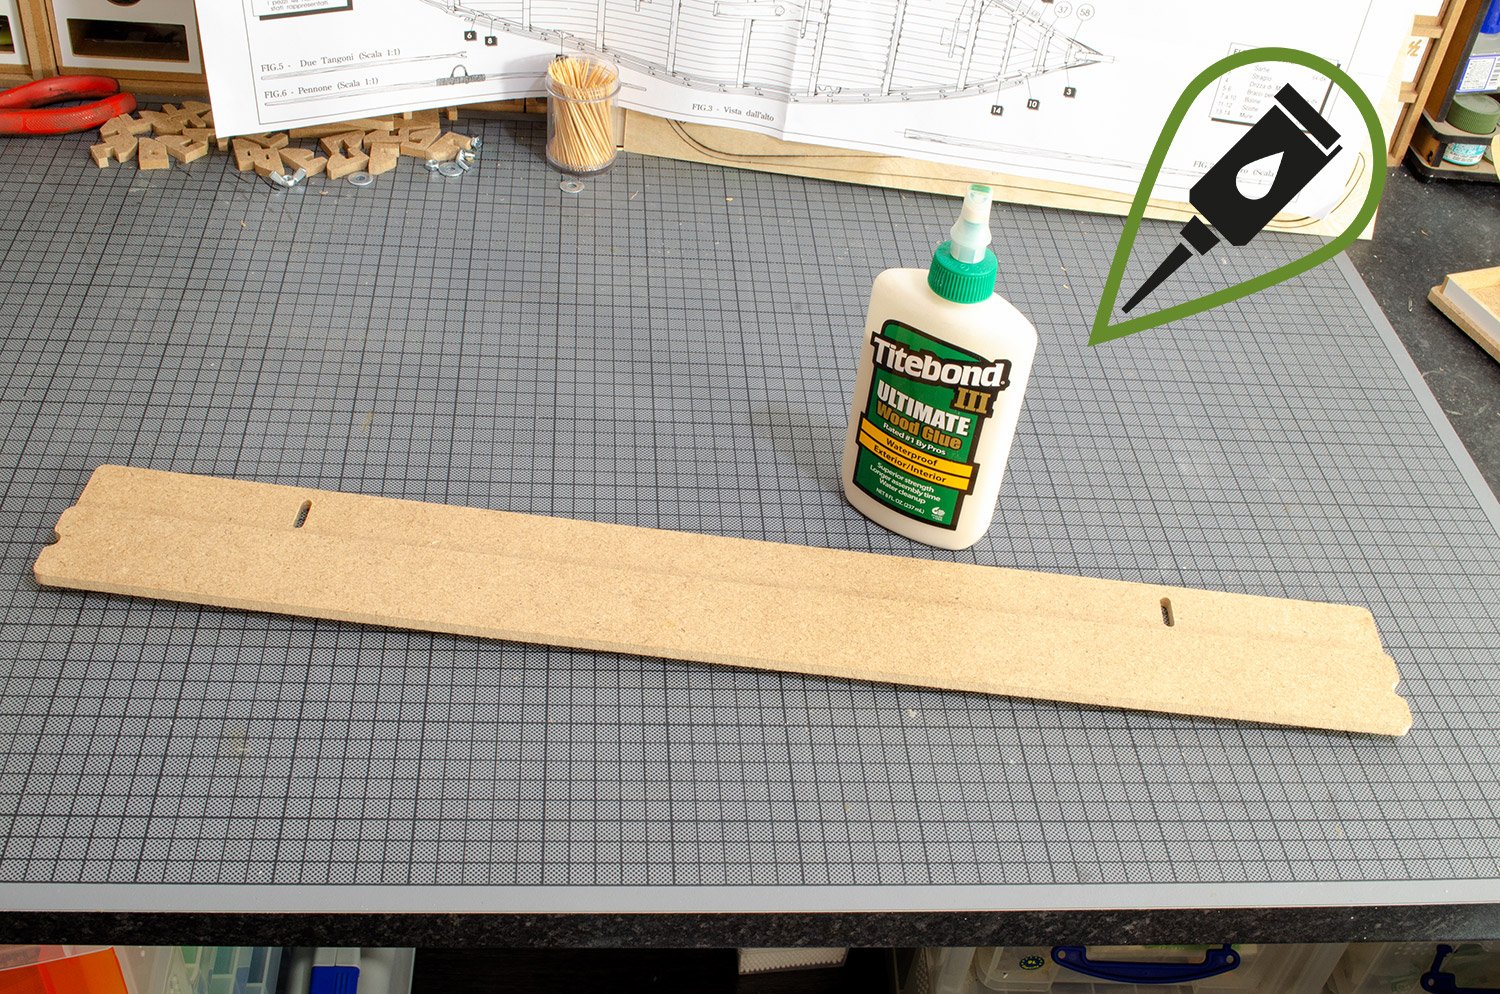
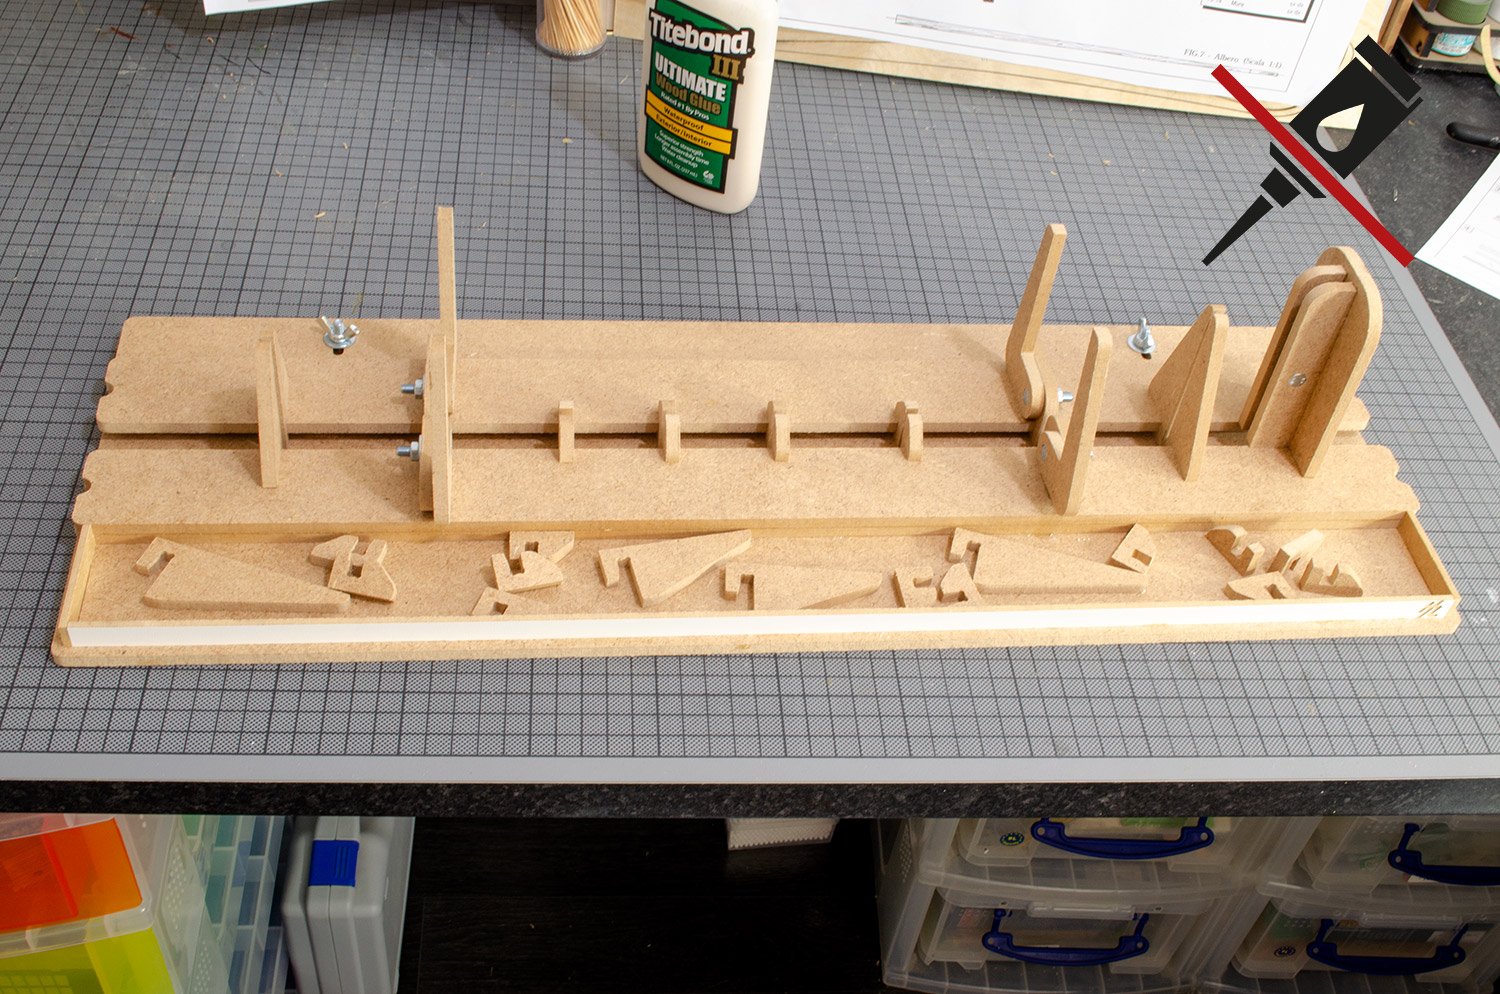
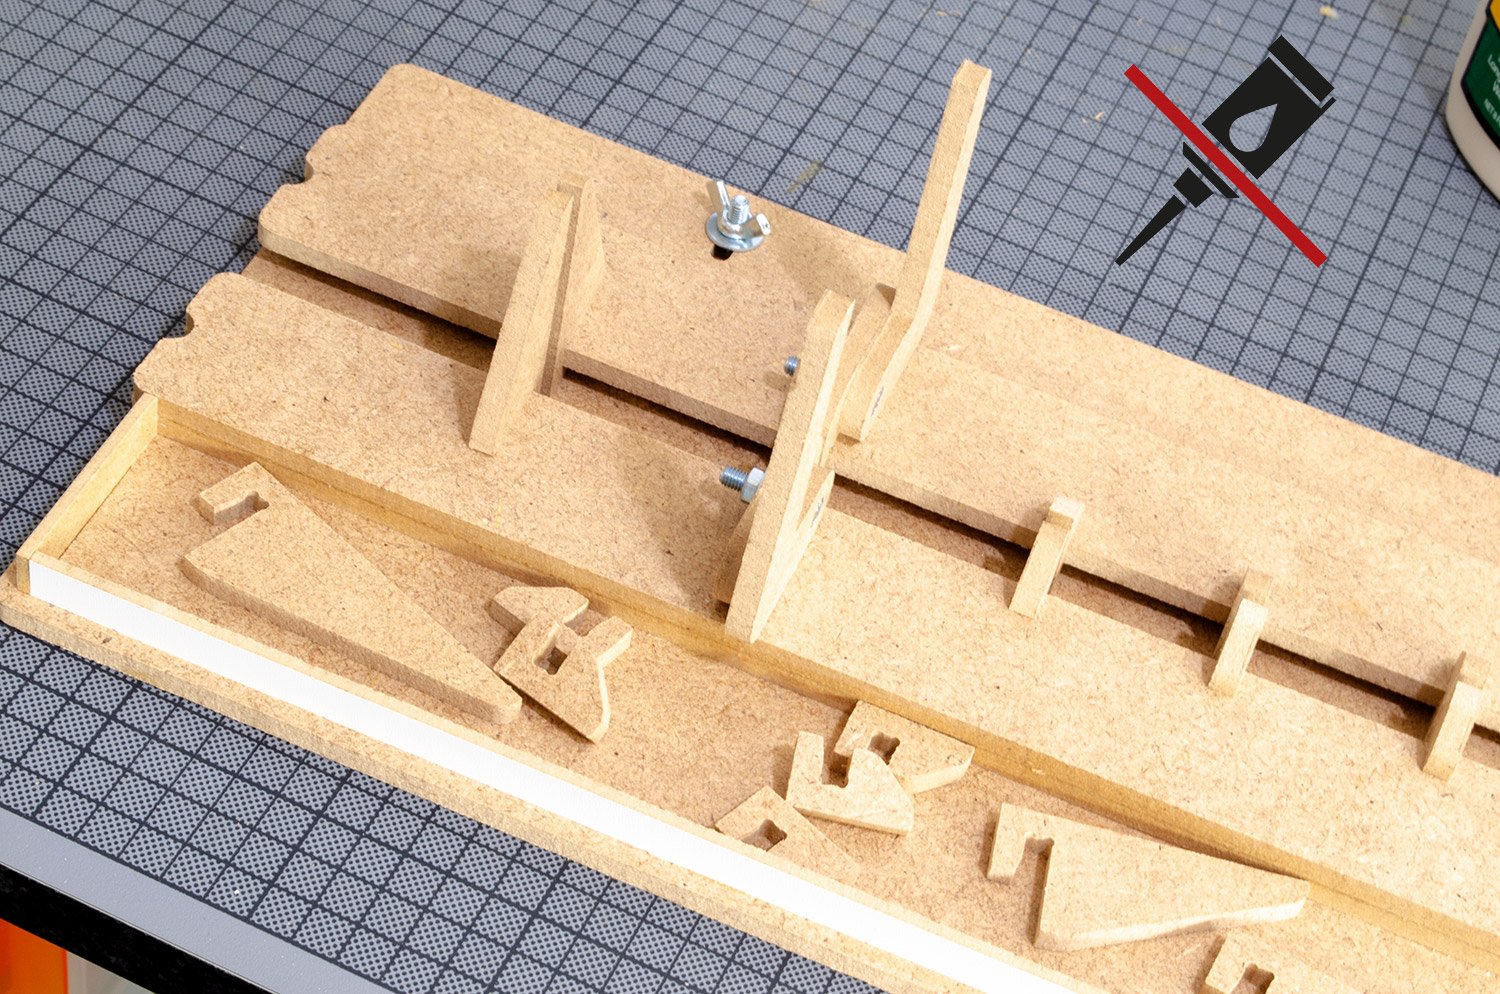
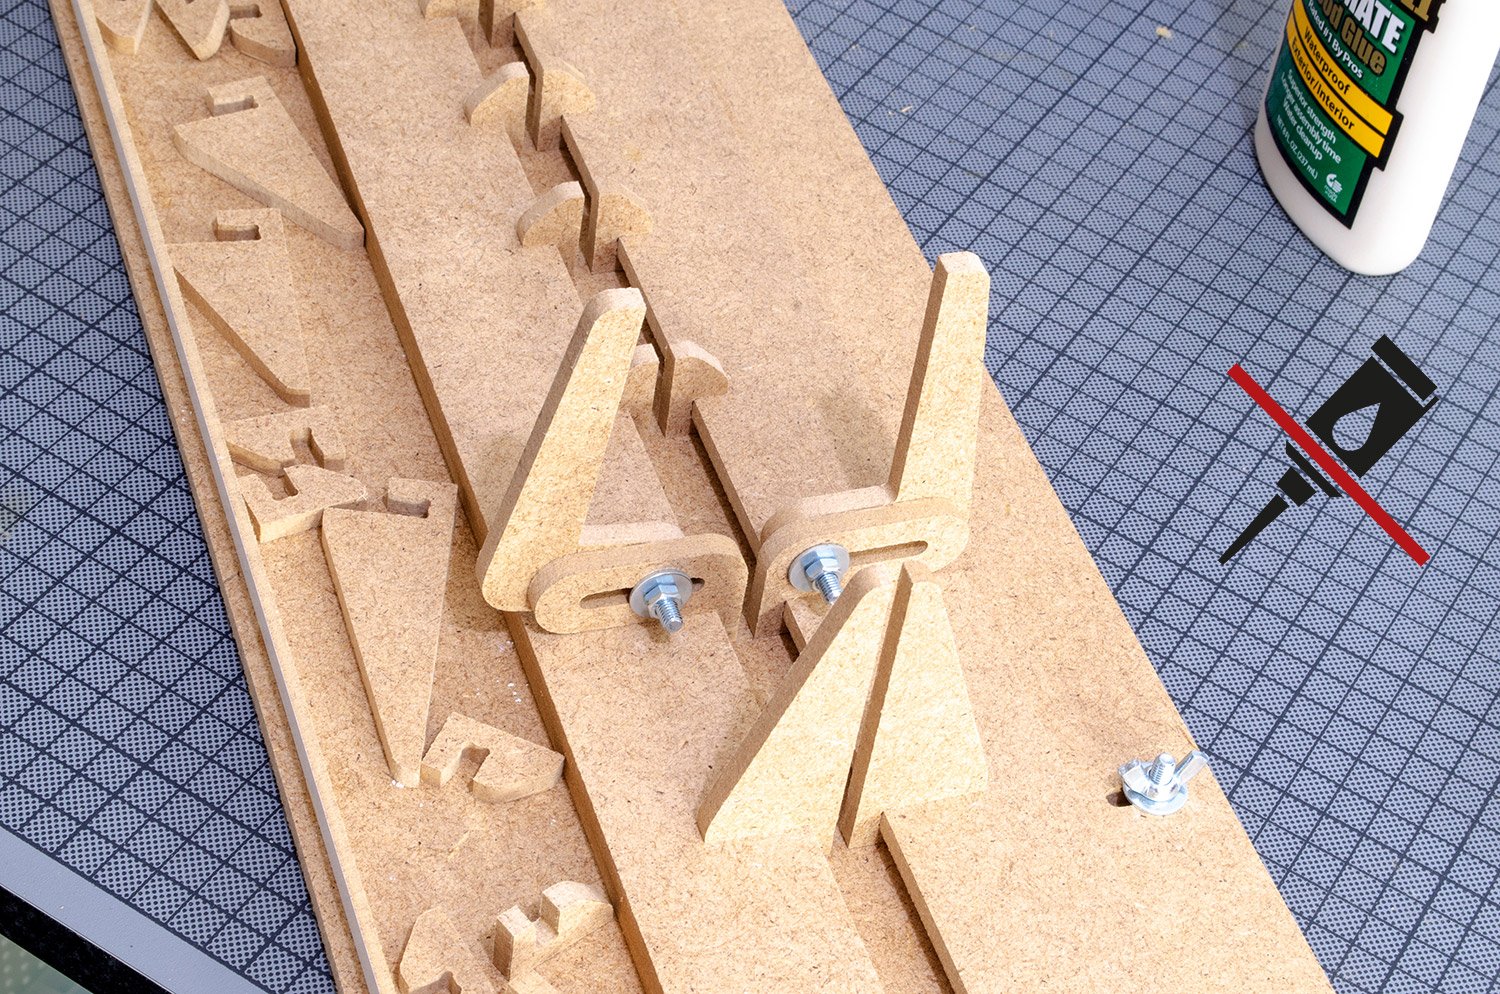
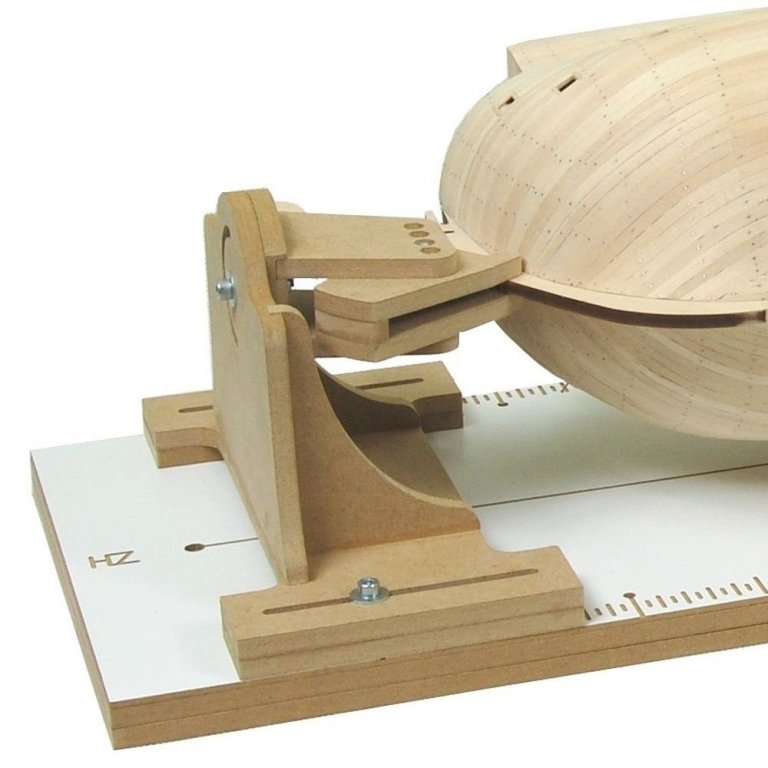
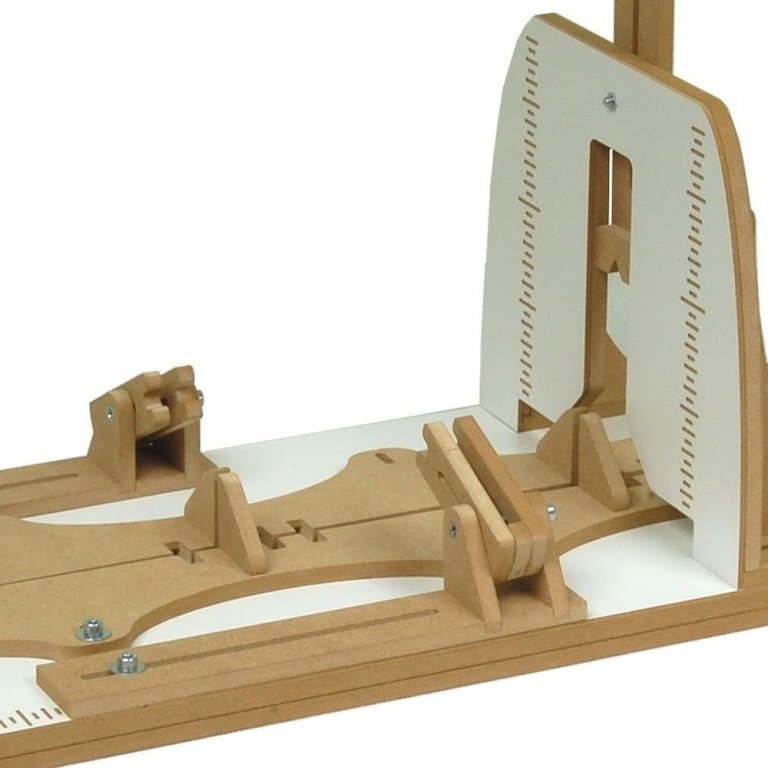
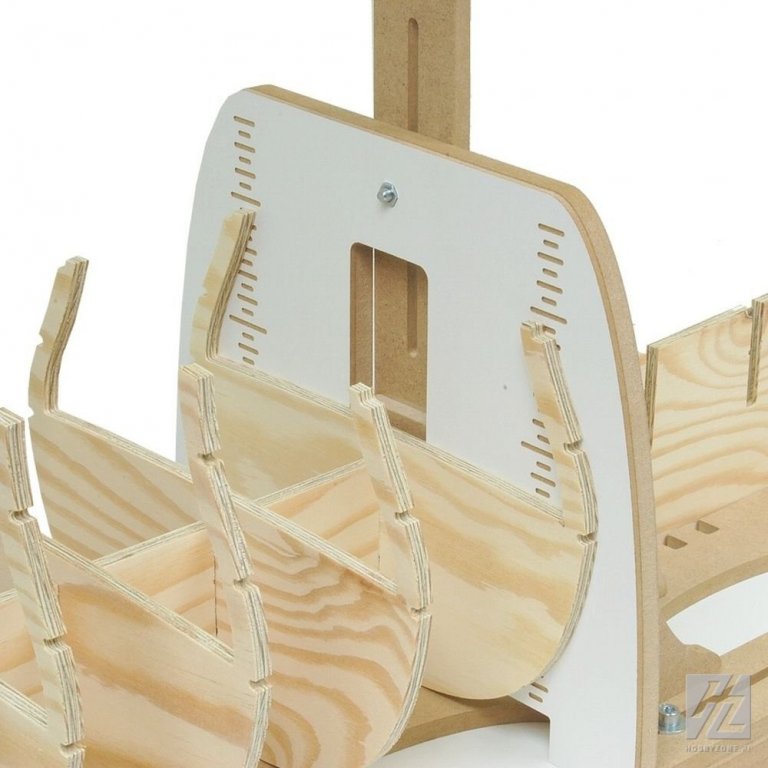
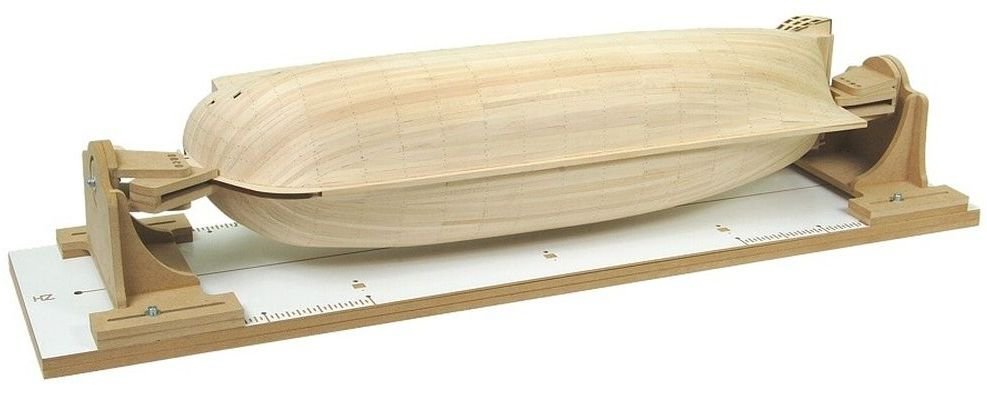
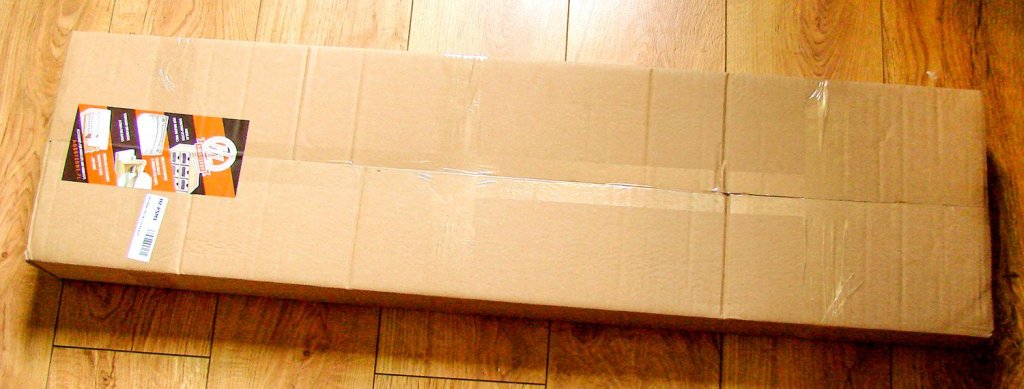
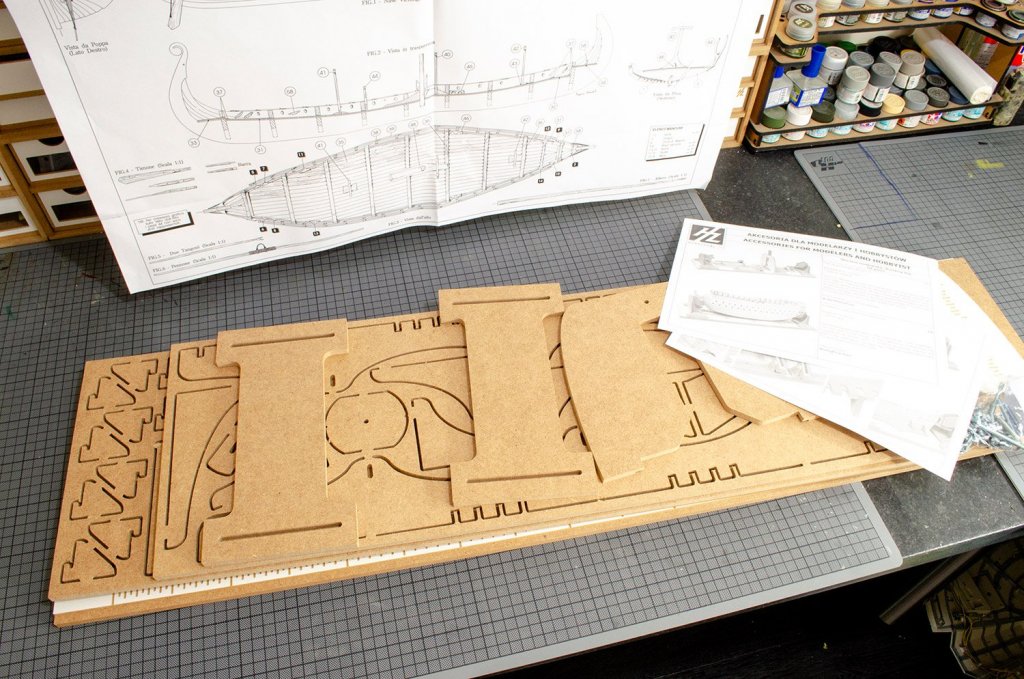
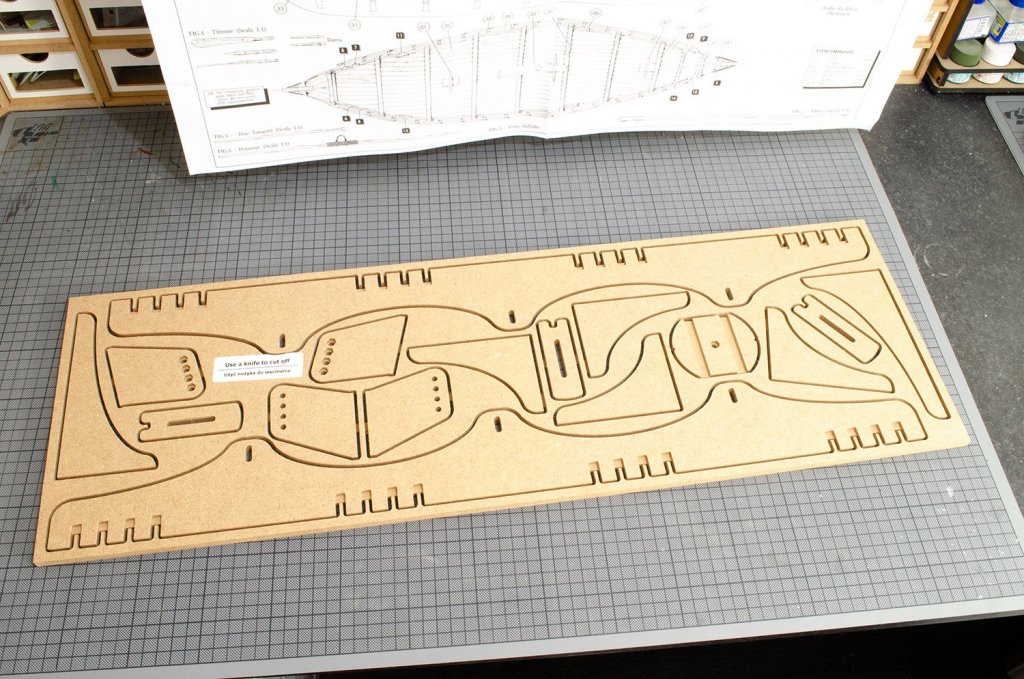
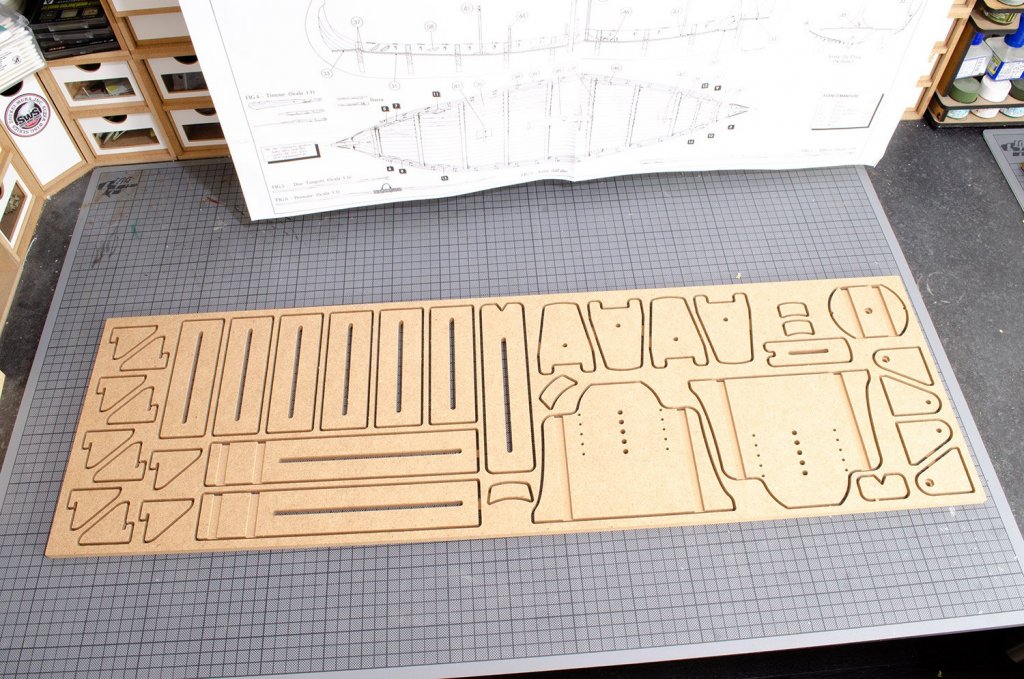
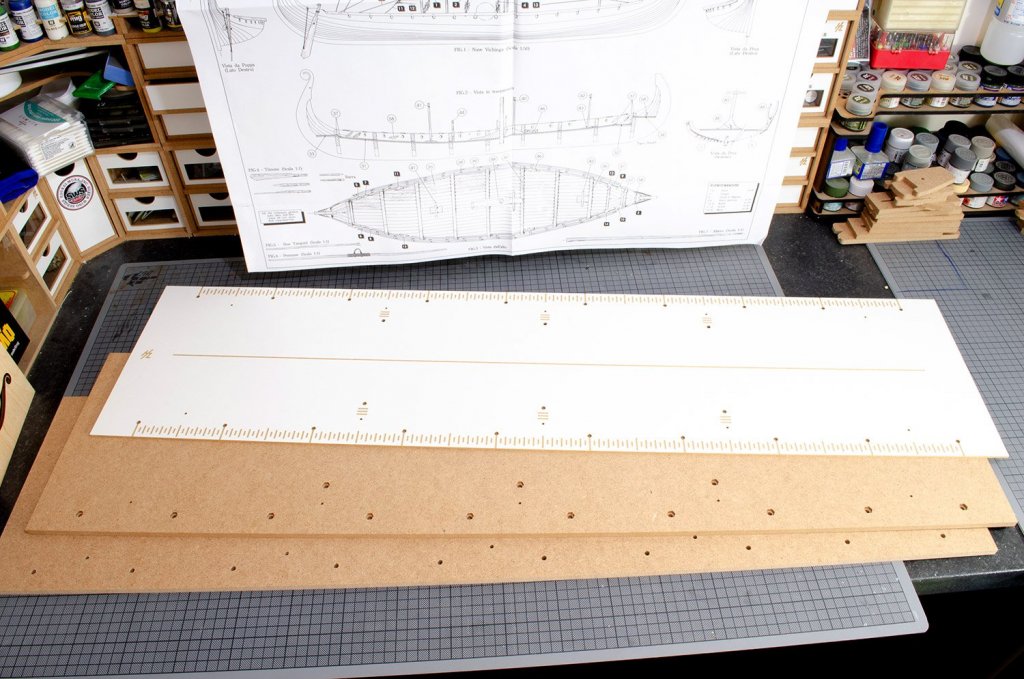
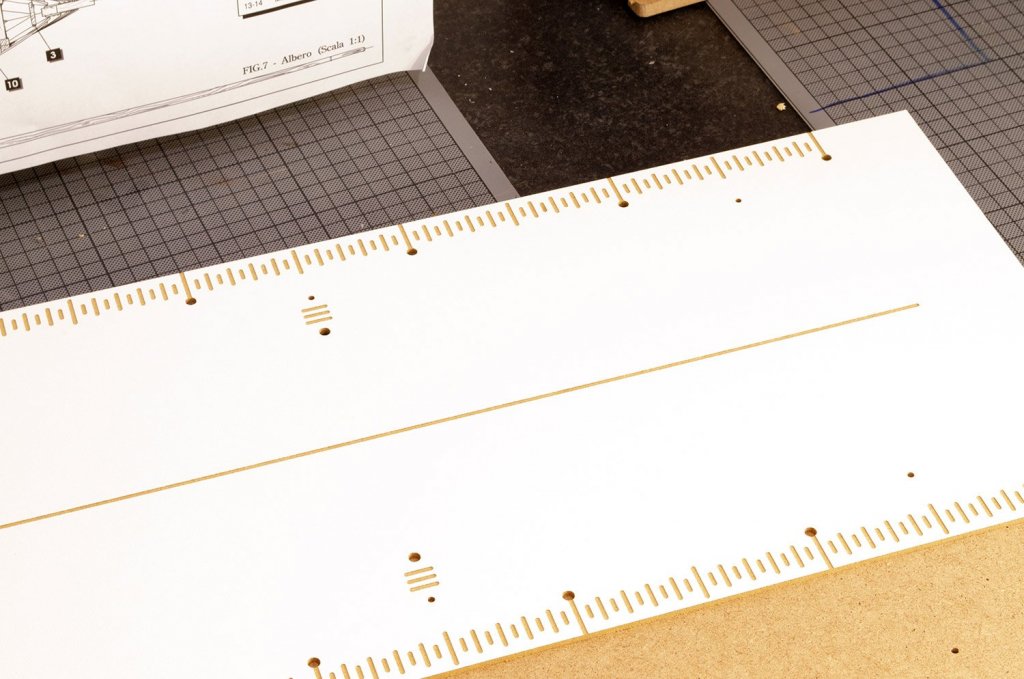
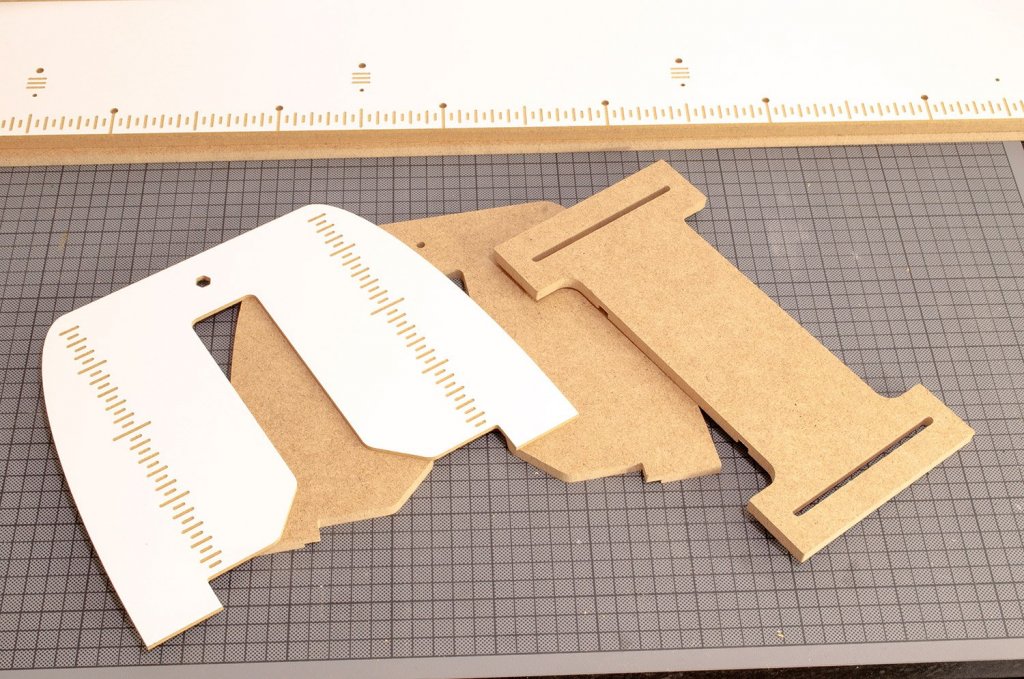
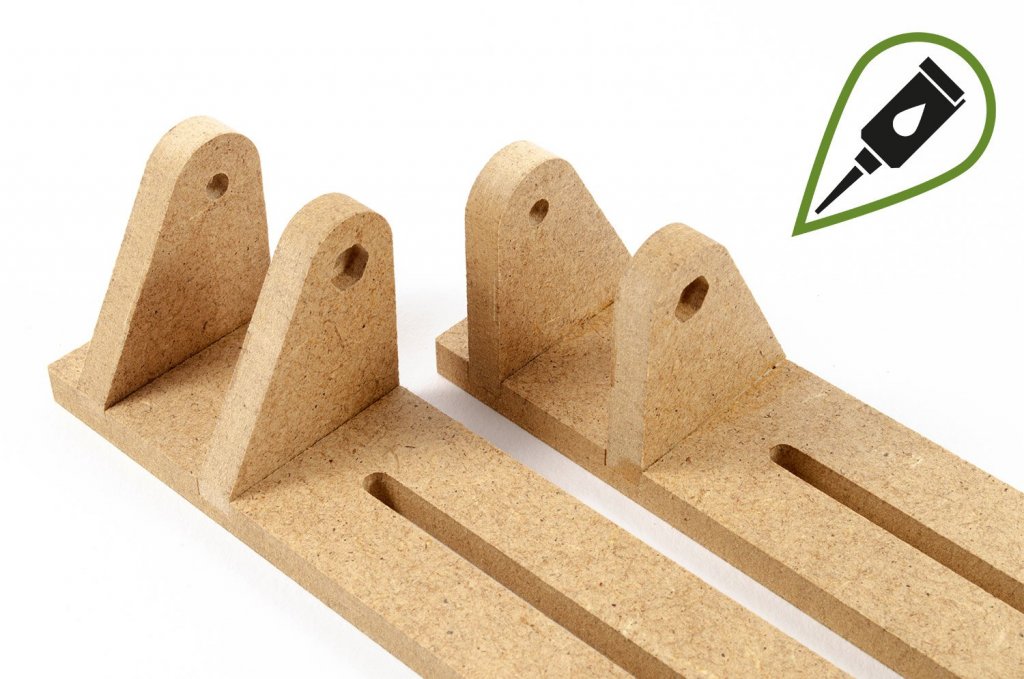
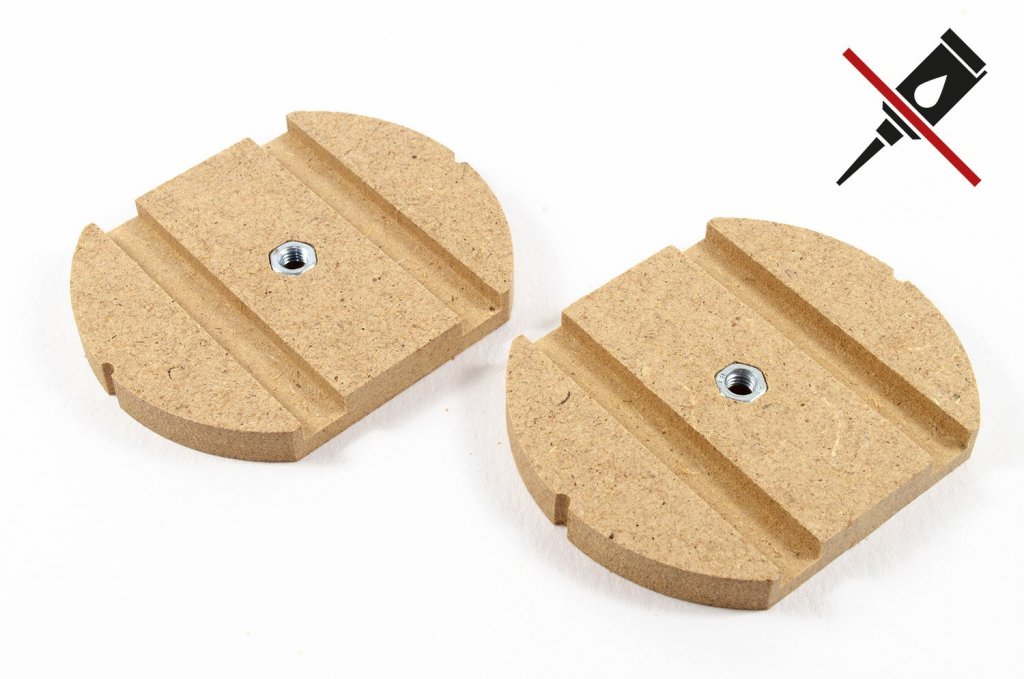
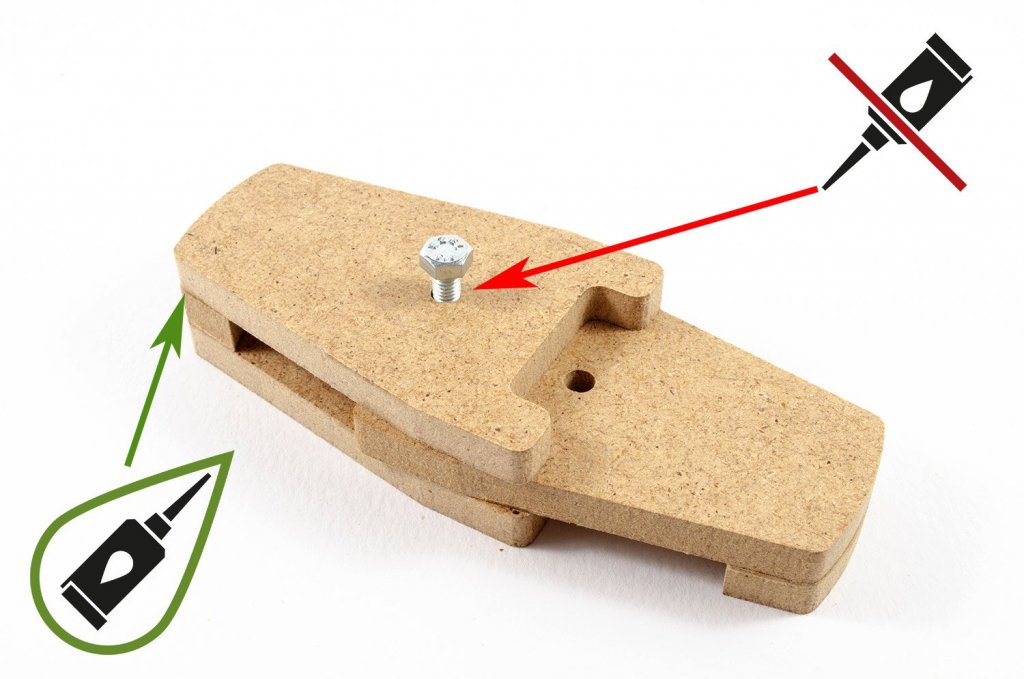
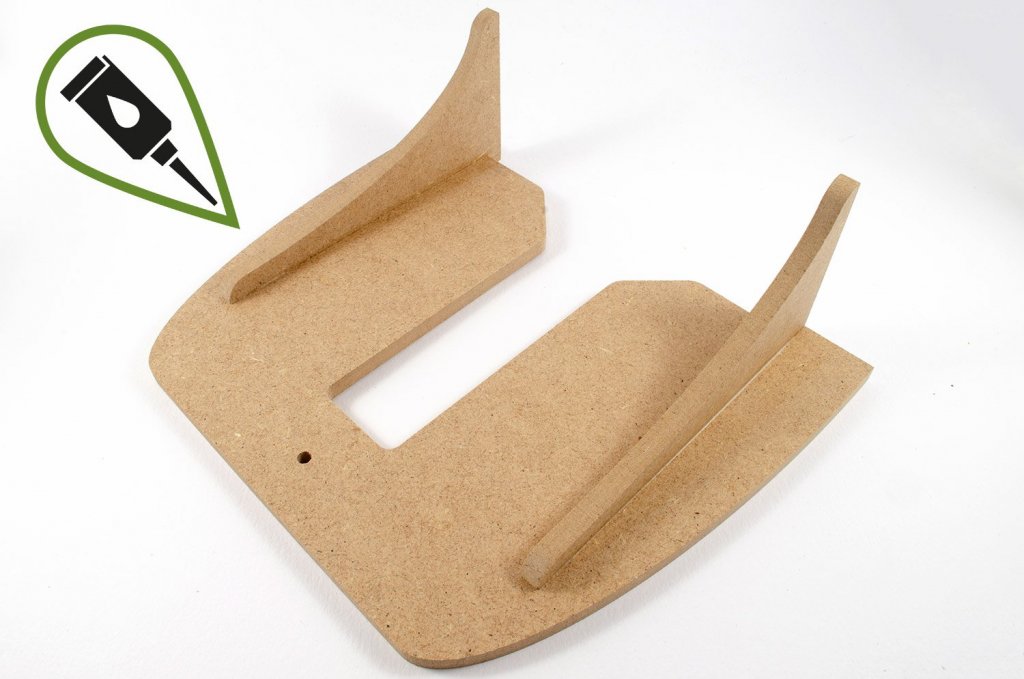
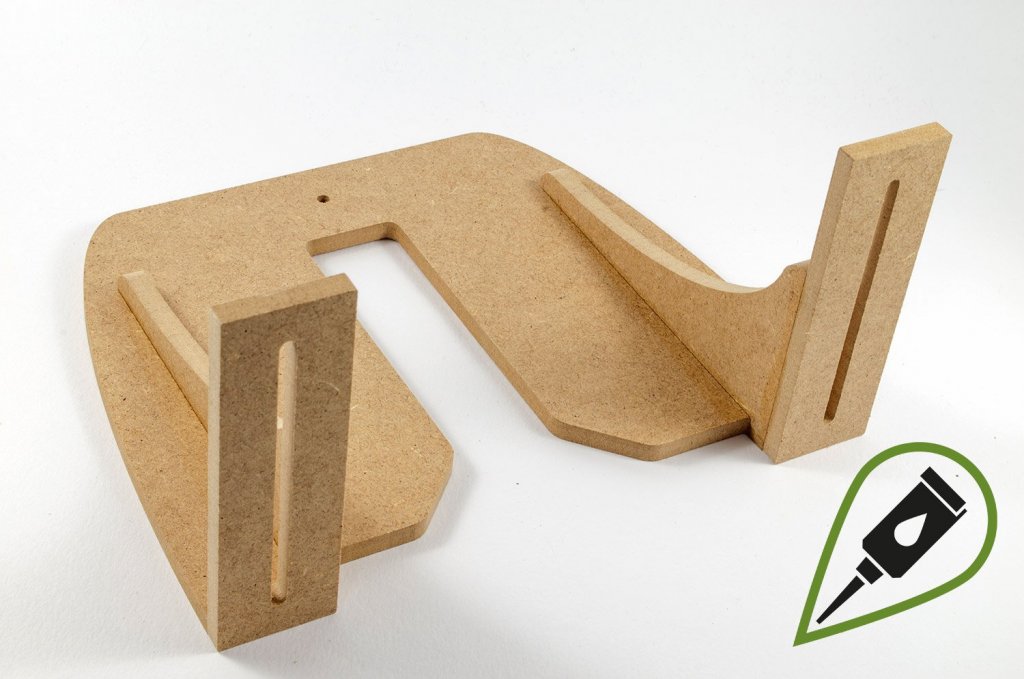
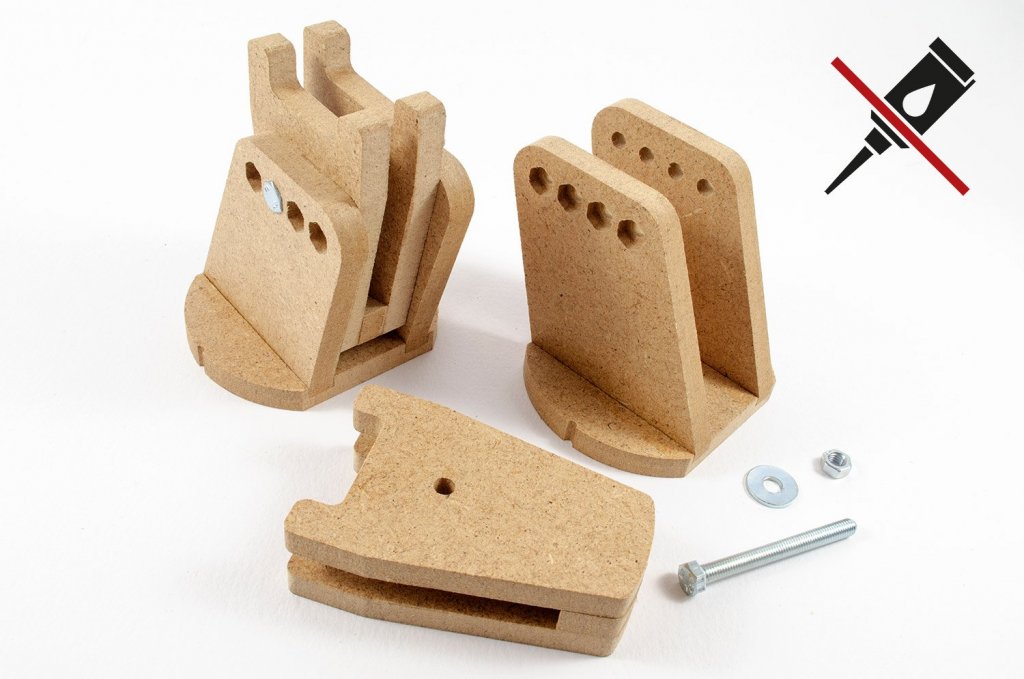
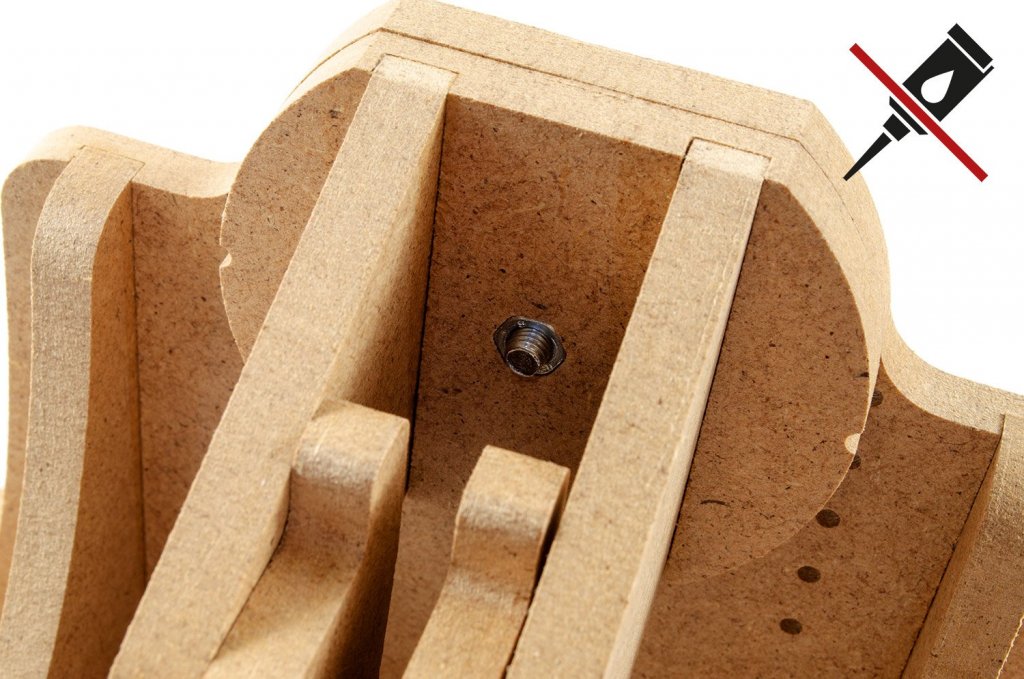
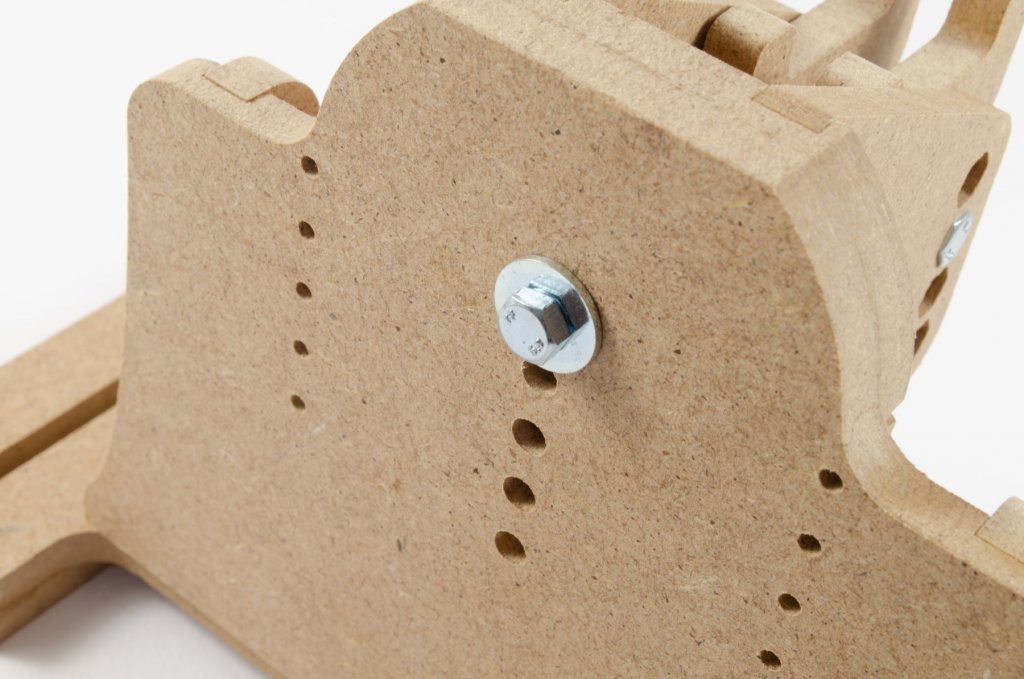
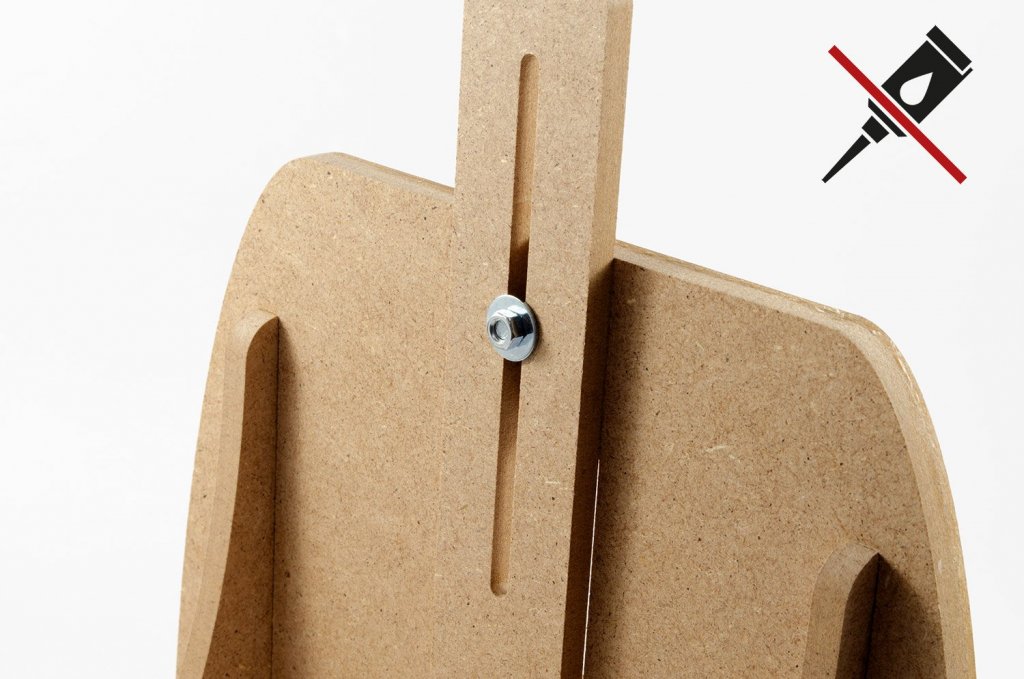
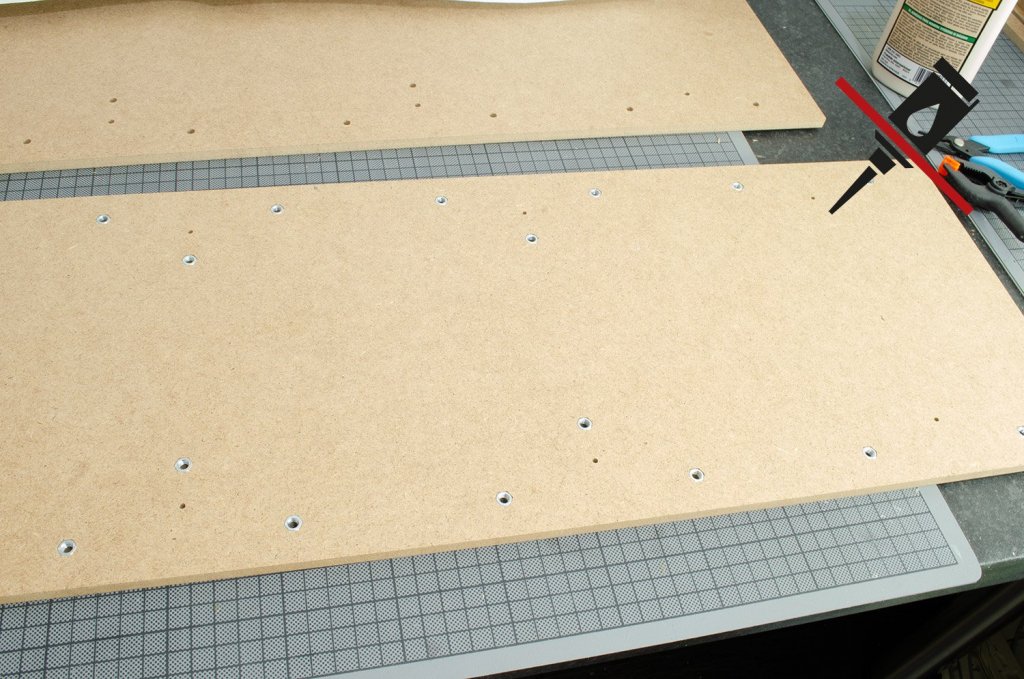
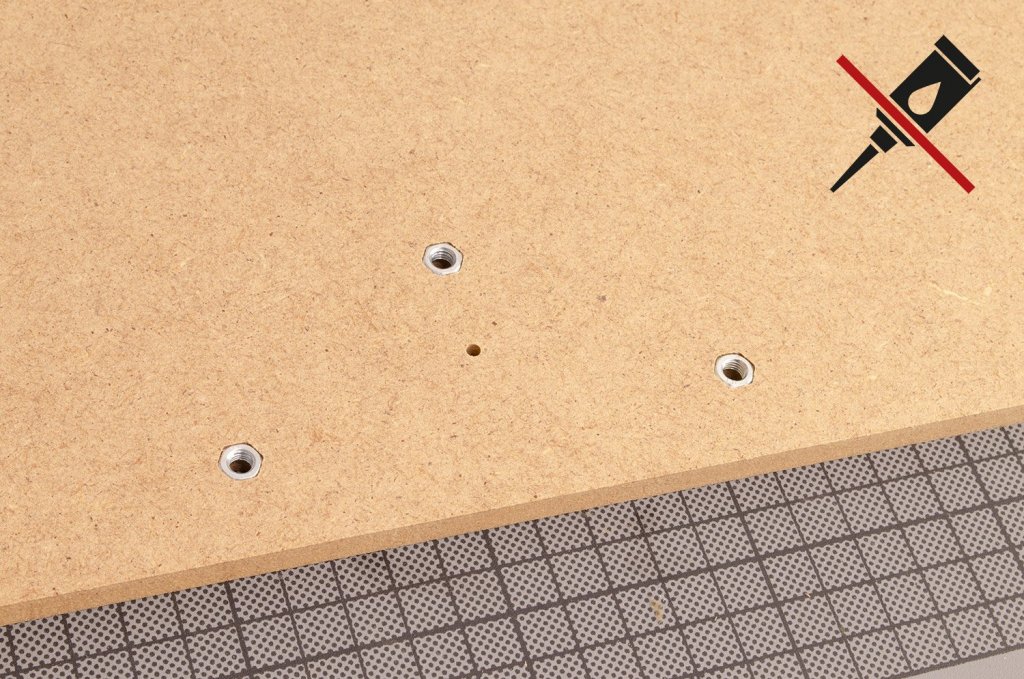
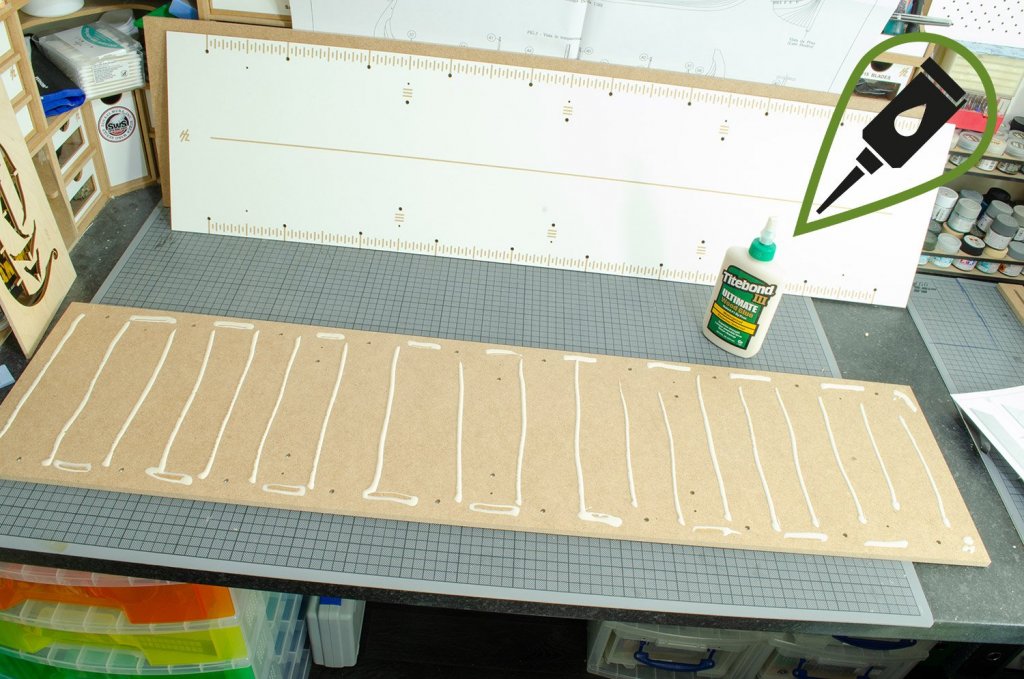
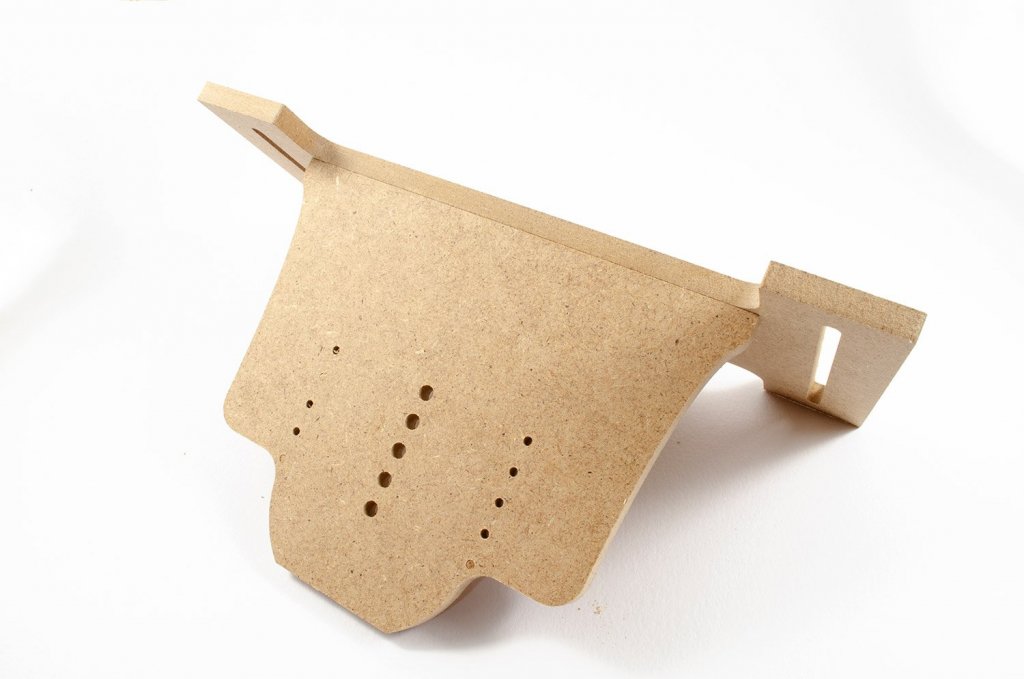
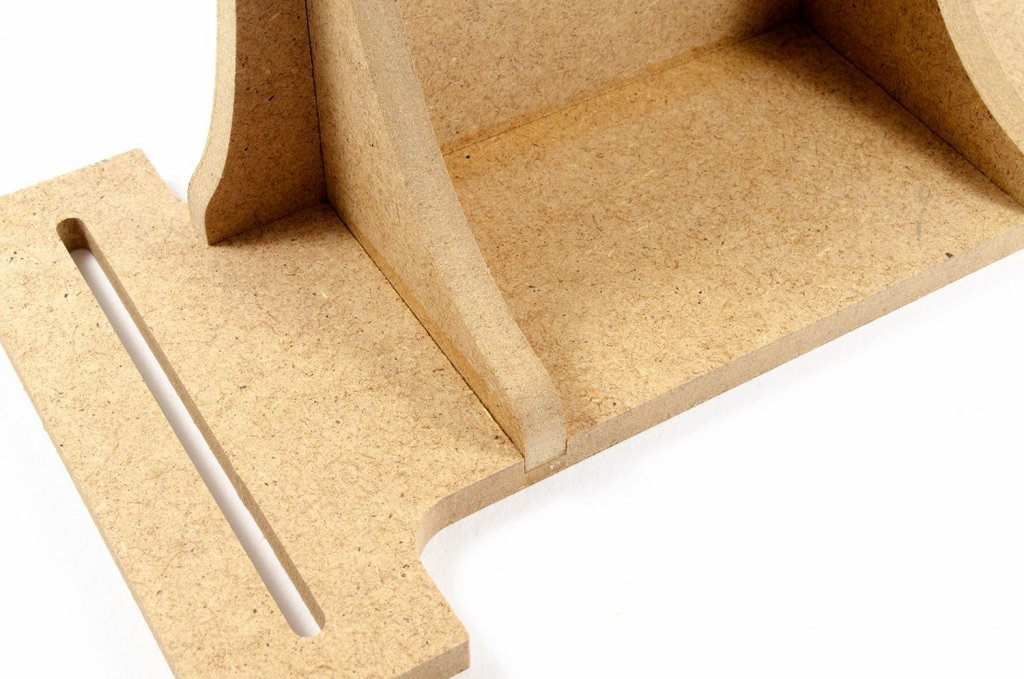
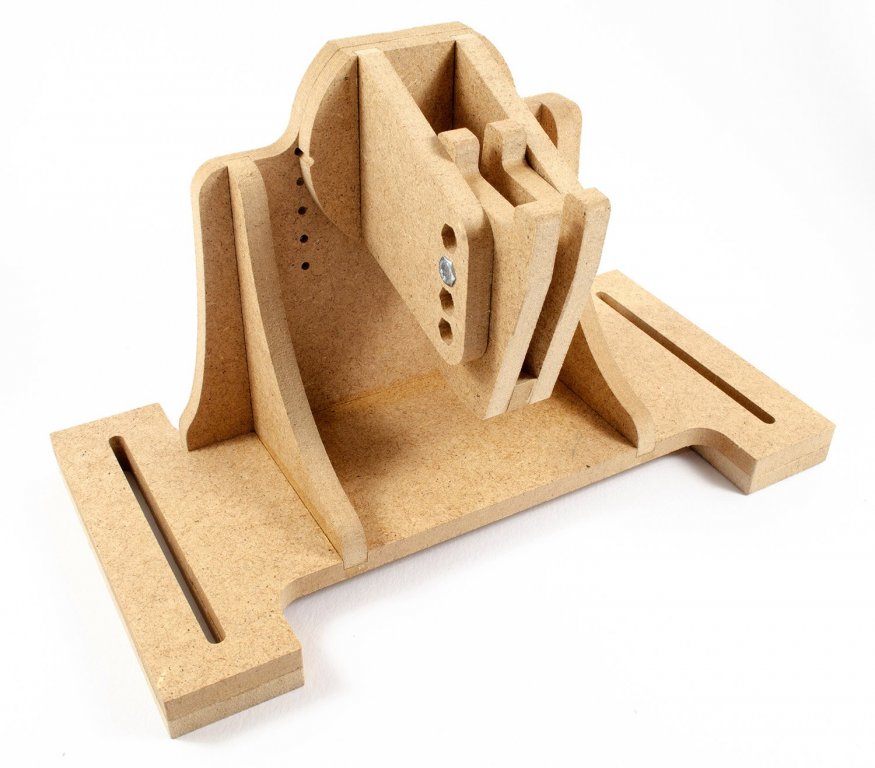
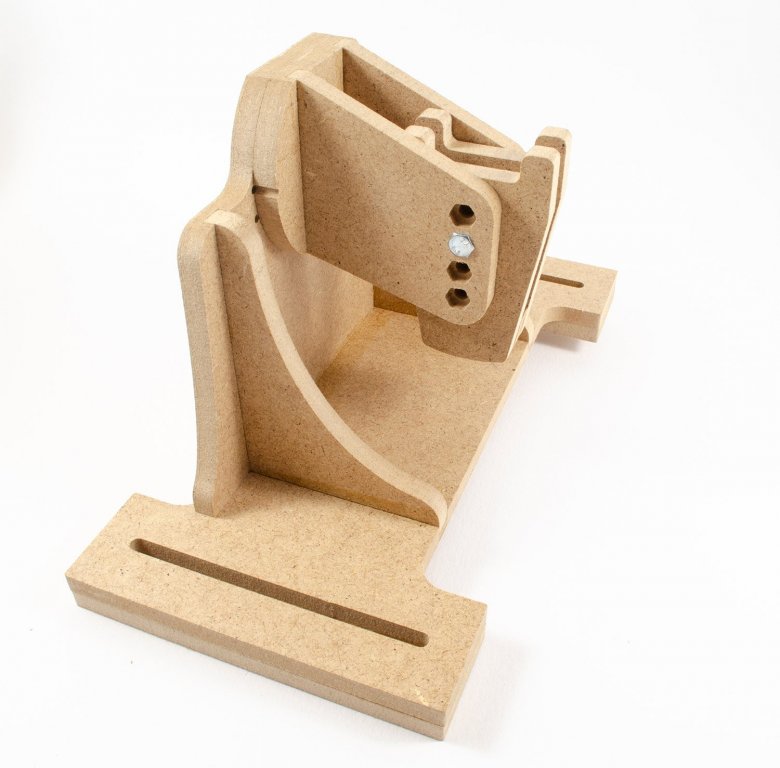
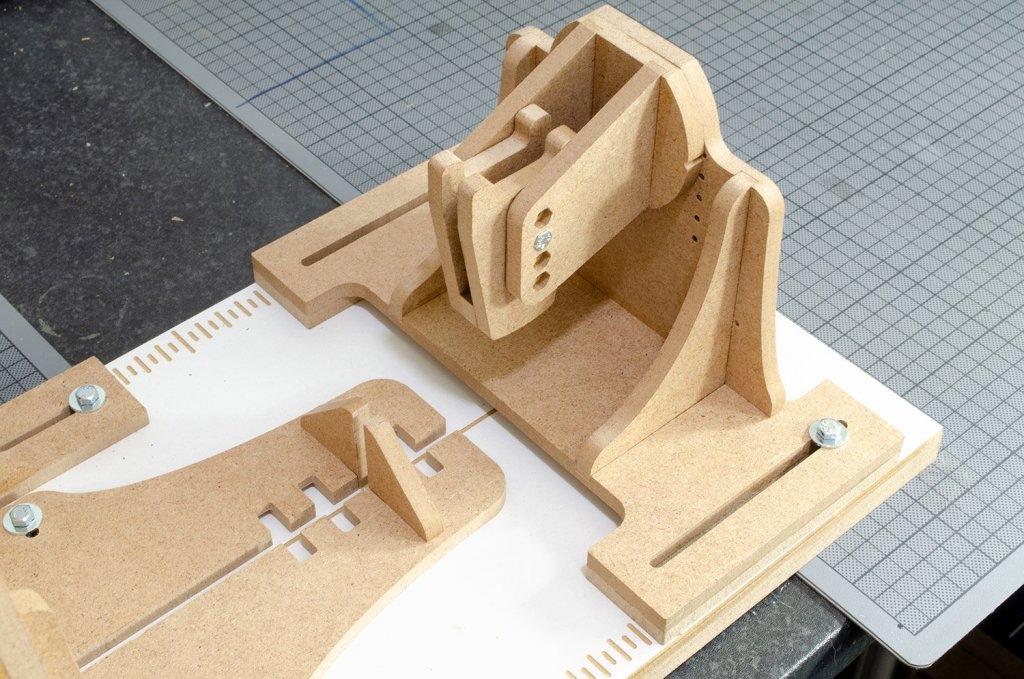
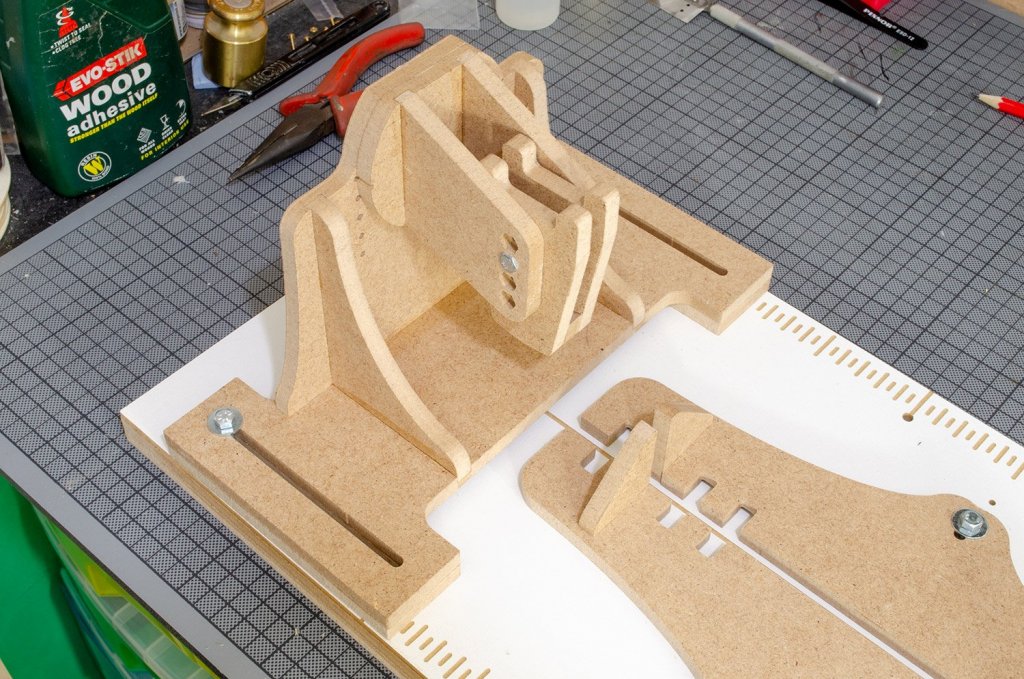
 Professional Building Slip Hobbyzone Catalogue # HZ-PSM1 Available from Hobbyzone for £50.00 We recently took a look at Hobbyzone's Small Building Slip, catering to hull lengths of an average of 600mm to 800mm maximum, but if you want something for larger hulls and with even more flexibility, then today, we take a look at the Professional Building Slip. Hobbyzone has asked me to build this as an assembly guide for them, to help to negate any incorrect assembly which has found its way into some completed slips, and they also intend to link this guide for general reference. Some errors that customers have made pertain to parts orientation, so with this guide, we hope to show you how to successfully complete this mini-project. First of all, the Professional Building Slip caters to hulls up to 100cm in length, so will obviously take in many of the larger kits in our hobby, plus those impressive POF scratch builds we aspire to. This product also varies from its smaller cousin by the ability to be able to rotate a fixed hull through 360°. Of course, the slip can be used for everything from laying the keel/false keel, through to erecting the formers/bulkheads, and then to simply hold and rotate a semi-assembled hull whilst you plank and even fit out the hull at advanced stages of assembly, as well as act as a simple cradle. The completed unit has a length of 100cm, a width of 25cm and will take a keel of out to 7mm in thickness. Packed into a card box, this HEAVY box has all parts within protected by many layers of bubblewrap. Construction is from MDF, with some parts being faced in plastic and engraved with the CNC router for measurements etc. A hefty hardware bag is also included. All you will need to assemble the Professional Building Slip is: Wood glue Craft knife Clamps Instructions are provided on a single sheet of paper, along with an amendment slip stating the use for some included nails. We'll mention this later in the build. CONSTRUCTING THE PROFESSIONAL BUILDING SLIP 1. Before we can start to assemble this project, all parts need to be released from the CNC-routed sheets. A couple of shallow tags are all that connect the parts to their sheets, and these can simply be cut through with a regular craft knife. 2. Once all parts are released, remove any traces of the MDF tags that held them onto the frames. A craft knife is all that is required for this. 3. I now construct the guide bars that sit either side of the slip, using Titebond III glue to secure. Please note the orientation of the vertical parts, and the hex nut head position. These items are mirrored. 4. Each of these guide bars will hold a clamp that will grip the various formers/bulkheads of your model. To begin their construction, I glue the following items together. 5. When these had set, I sat them on top of each other. DO NOT GLUE! 6. NOW, I may glue the other halves of the clamps into place. Sitting the two sections together merely ensures that the clamp faces are parallel to each other...nothing more. 7. With everything fully dry, the clamps are fitted to the guide bars that I previously made, using the nuts, bolts and washers in the hardware pack. Again, not the orientation of the clamps in the guide bars, and that their positions are mirrored. 8. Now I will construct the keel clamp holders that secure to the vertical platforms at each side of the Professional Building Slip. Here, we just push the two nuts firmly into position on the backplates. 9. Using wood glue, attach the keel clamp holder faces to the backplates. Please note the orientation with regard to the hex-head positions, and ensure that everything is square. 10. Now we can construct the keel clamps, in exactly the same way that we made them for the guide bars in the earlier stages. Firstly, glue the parts you see together, using wood glue. 11. Glue the opposite side to the two clamps, and use a bolt to ensure that the holes are aligned. Remember, these two keel clamps in the photo are only sat on top of each other to ensure that the jaws are equidistant. Do not glue them together, of course! 12. When all parts are set, fit the keel clamps to the clamp holders, using the nuts, bolts and washers. Please note that the positions of the bolts can be changed to suit the model you are building. 13. Each of the keel clamps we have just built, is secured to a moveable guide that sit at either side of the Professional Building Slip. To build the guides, I first glue the two supports in position on each of the guide faces. 14. Now, NOTING ORIENTATION of the baseplate, each in turn is glued to the vertical face and left to thoroughly set. 15. Glue the feet to the underside of each of the moveable guides. 16. Using the supplied nuts and bolts, fasten the keep clamps to the moveable guides. 17. We can now build the vertical face which helps us to ensure the model's bulkheads and frames are vertical and even in height on both sides. Firstly, glue the supports to the vertical face. 18. Now glue the feet. 19. At this point, I decide to glue the parts together for the guide which slides up and down this vertical plate. 20. Now I can bring this guide together with the main assembly and fit it with the nut and bolt, so it may be adjusted. I also glue the main white face to the vertical guide plate. 21. You need to clear some workbench space now as we start to assemble the baseboard. Start by pushing the nuts into the hex-head shaped holes. 22. Turn over the baseboard so the nuts are UNDERNEATH, and then apply glue to the top side. Fit the white plastic-faced panel onto this and clamp together until FULLY SET! 23. Un-clamp the glued boards and flip it over so the white face in on the bottom. Now, sit the remaining board on top of this, with the screw head indents facing upwards. Using the supplied screws, fit the board into position. 24.Using the supplied bolts and washers, fit the various assemblies to the baseboard, as thus. REMEMBER that the small edge clamps that you see fastened to the horizontal keel clamp halves are only PRESSED into position and they are NOT glued. This allows them to be repositioned to accommodate the positions of the frames/bulkheads of your model. *******NOTE******* A small number of nails are in included in the pack and there is an amendment sheet to indicate their use. These can be driven through the back end of the various clamps to strengthen them. Remember that these parts will bend as you tighten them, but for me, I would prefer to mostly use thin strips of packing if the keel and bulkheads are significantly thinner than the clamps, as this will remove most of the stress from them. That's it...your Professional Building Slip is COMPLETE! Here are some photos showing its use. My sincere thanks to Hobbyzone for sending this out for review on Model Ship World. To purchase, click the link at the top of the article.
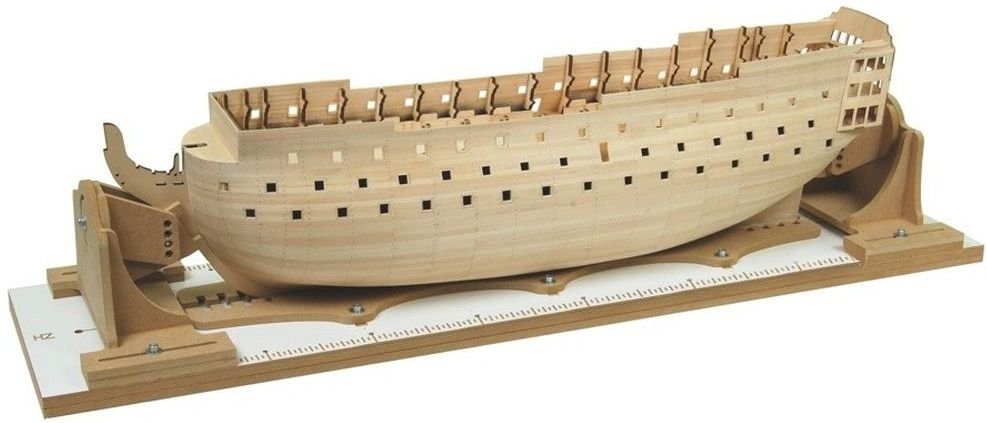


- 71 replies
-
- 16
-

-

-
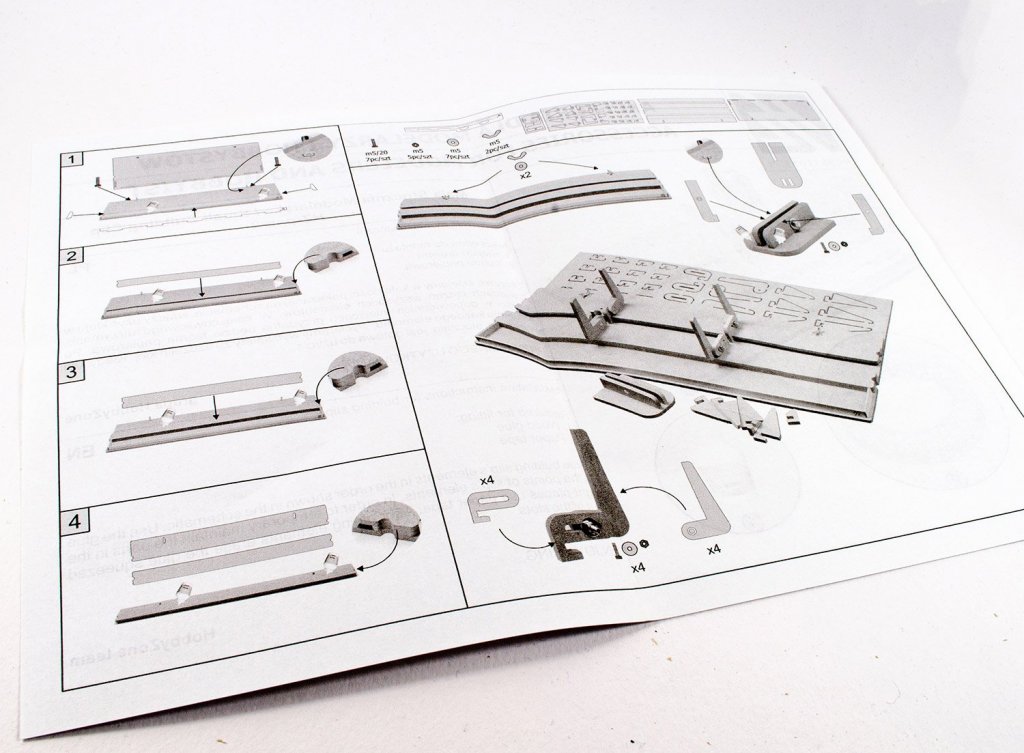
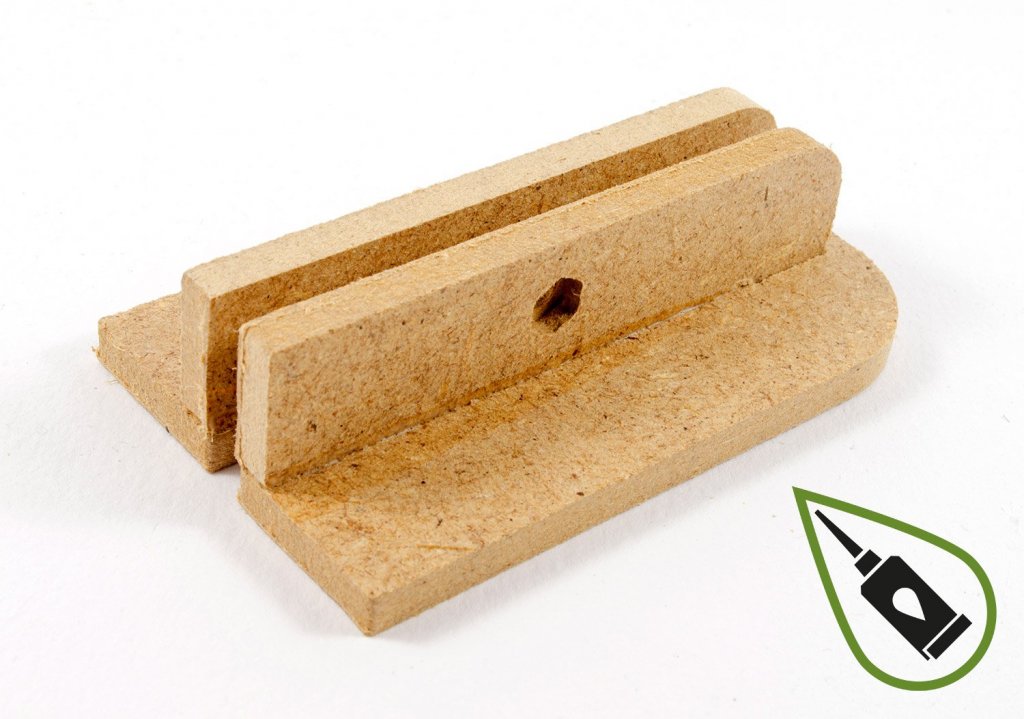
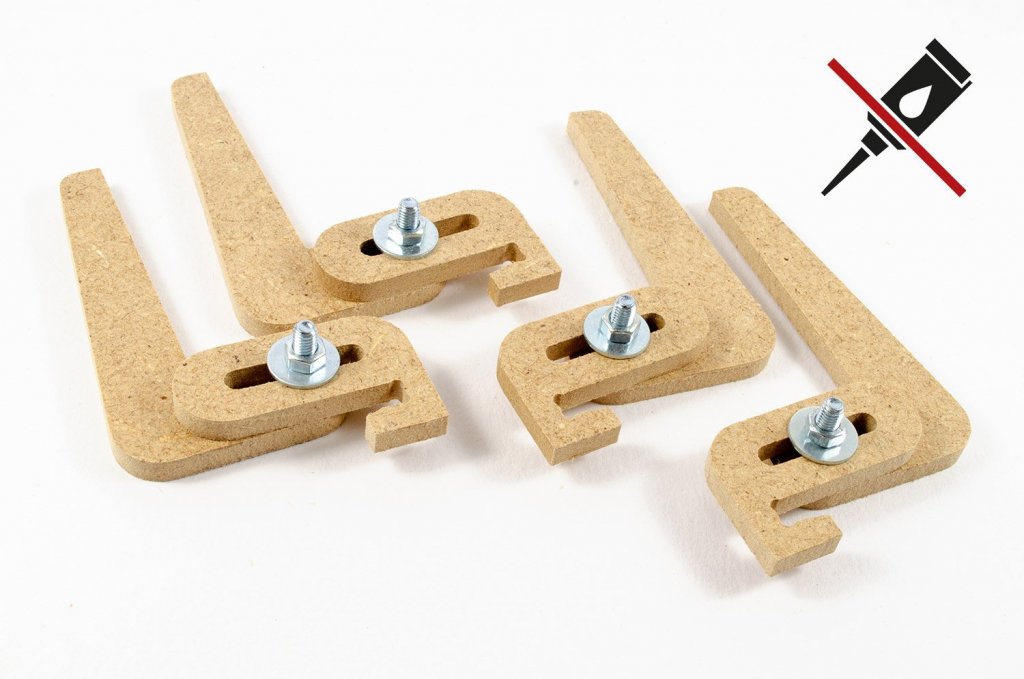
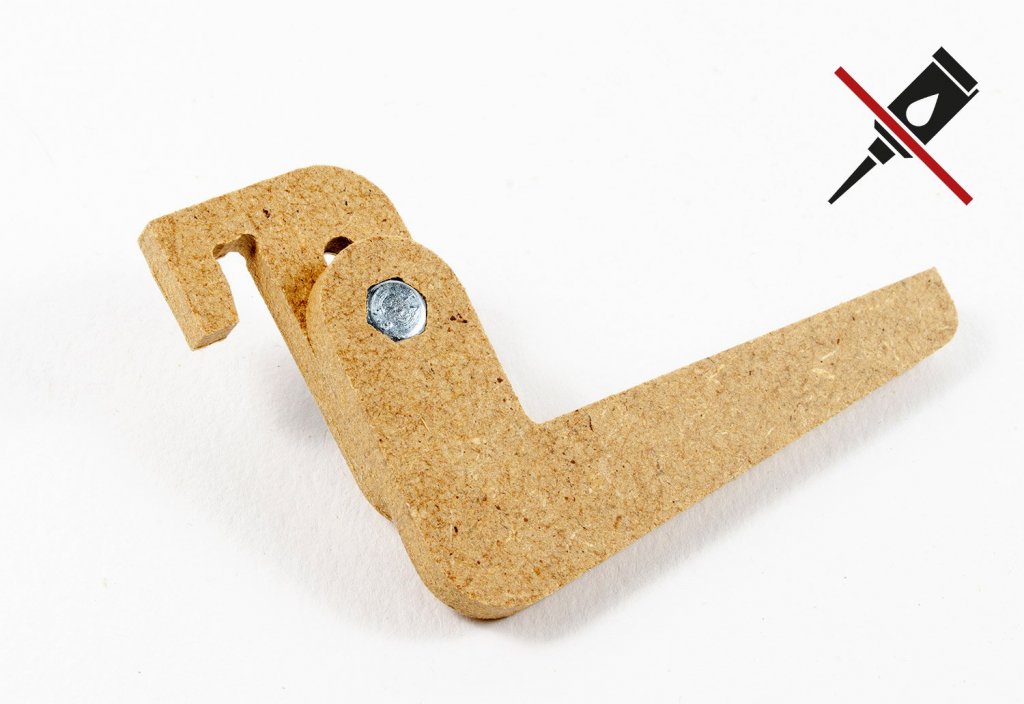
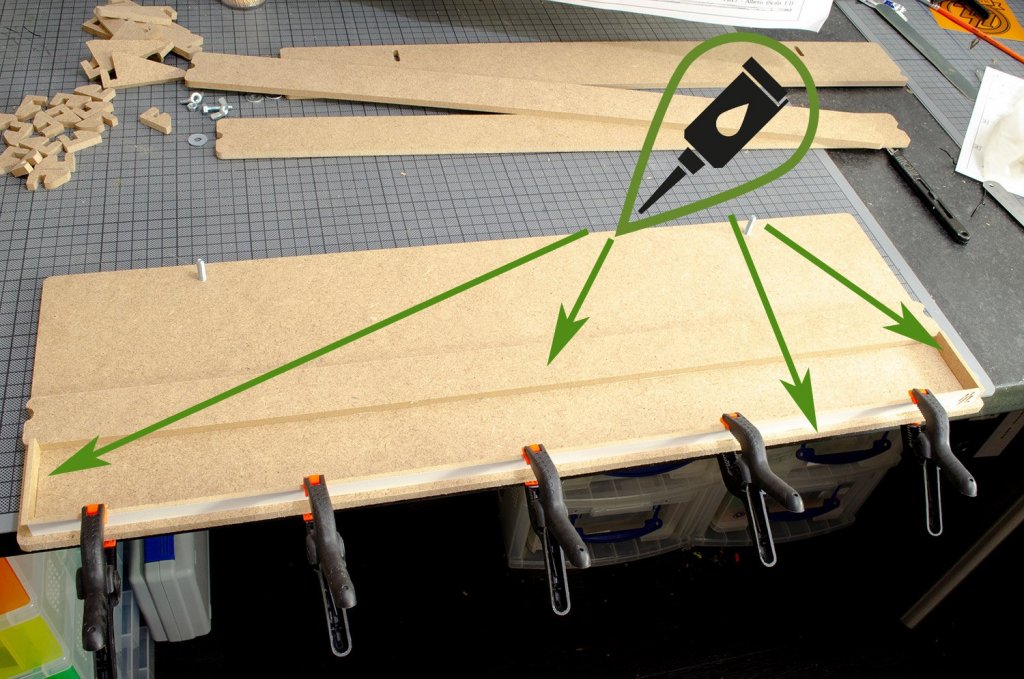
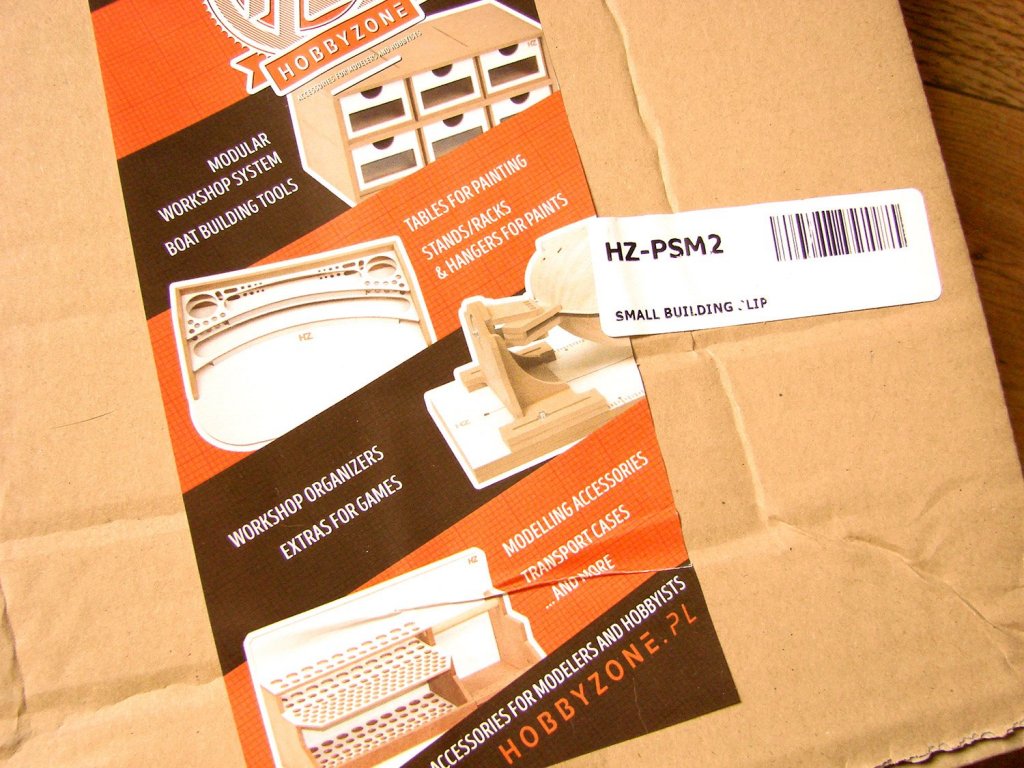
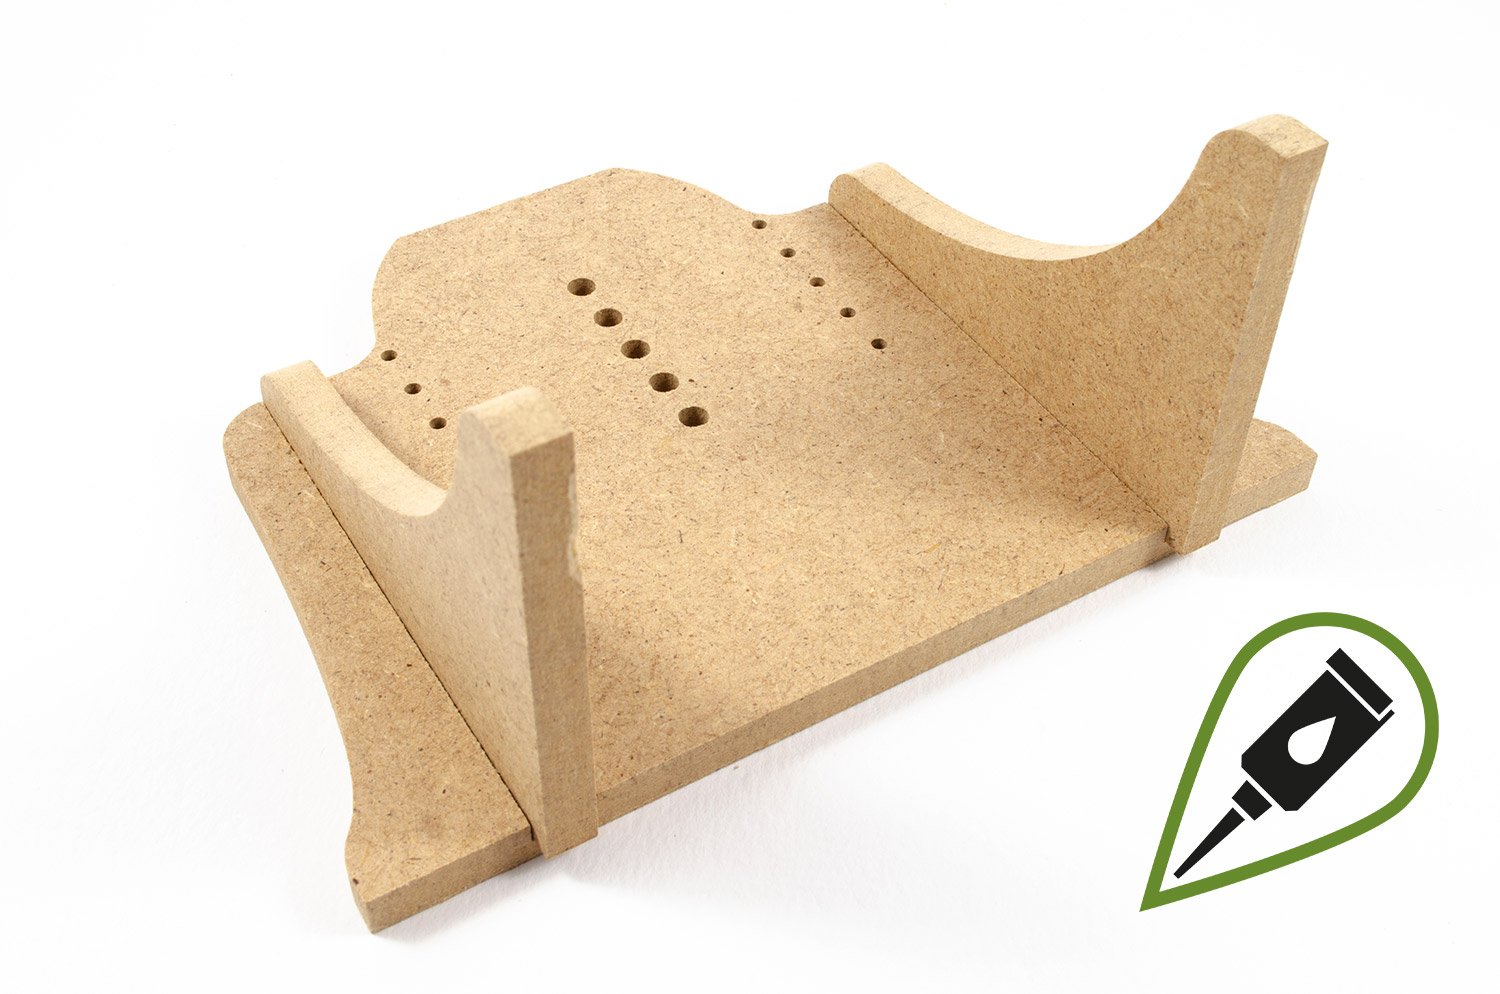
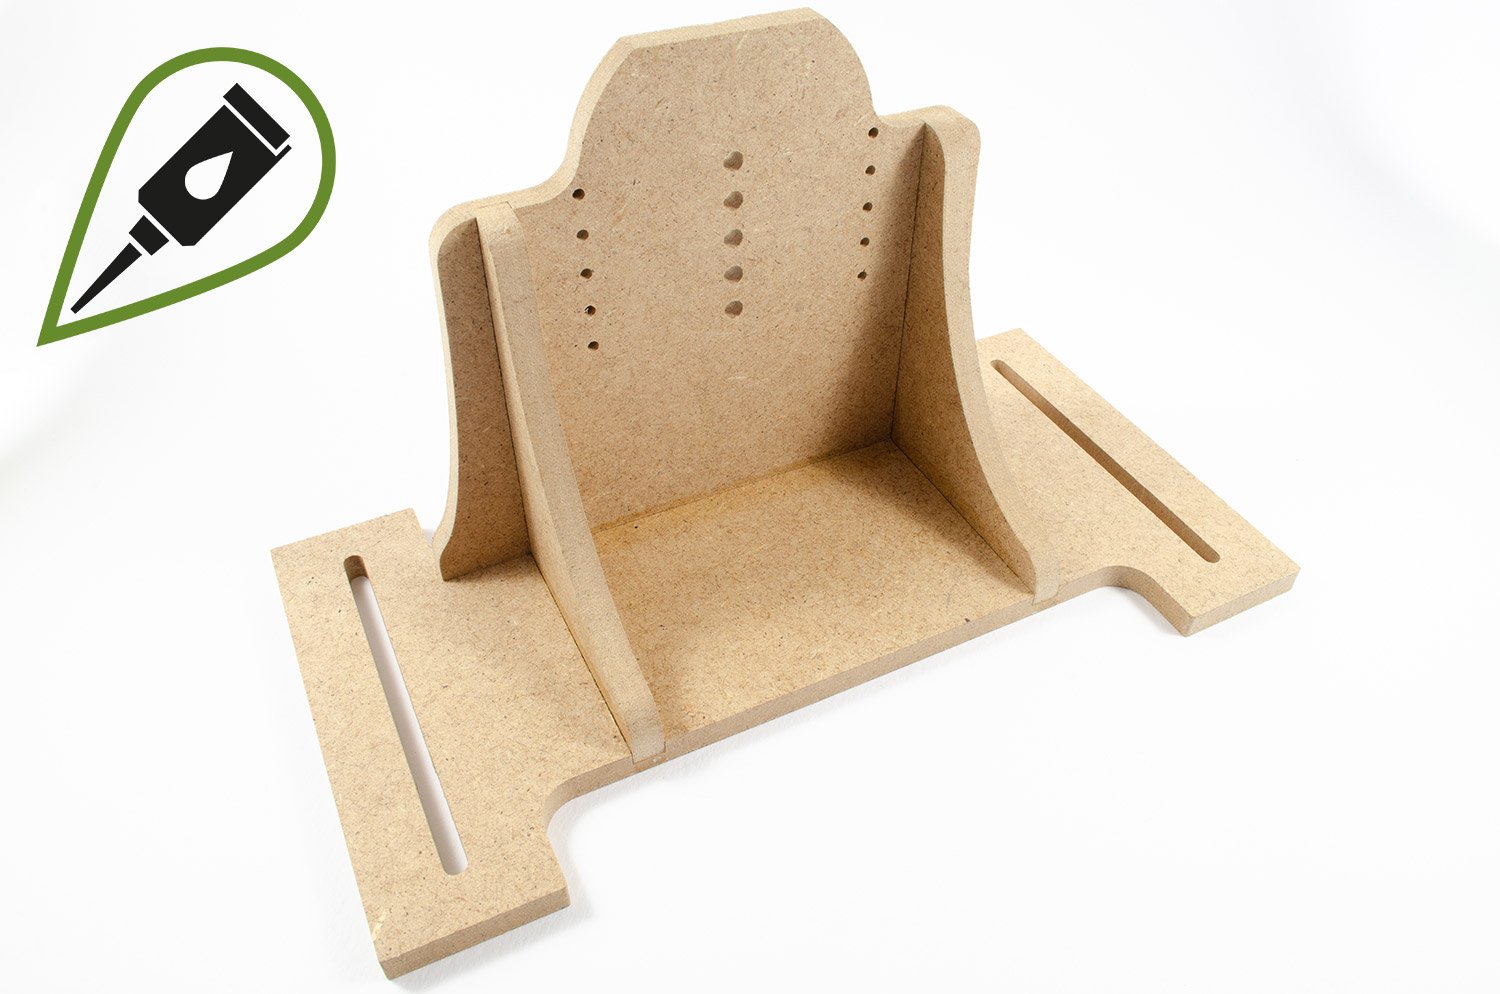
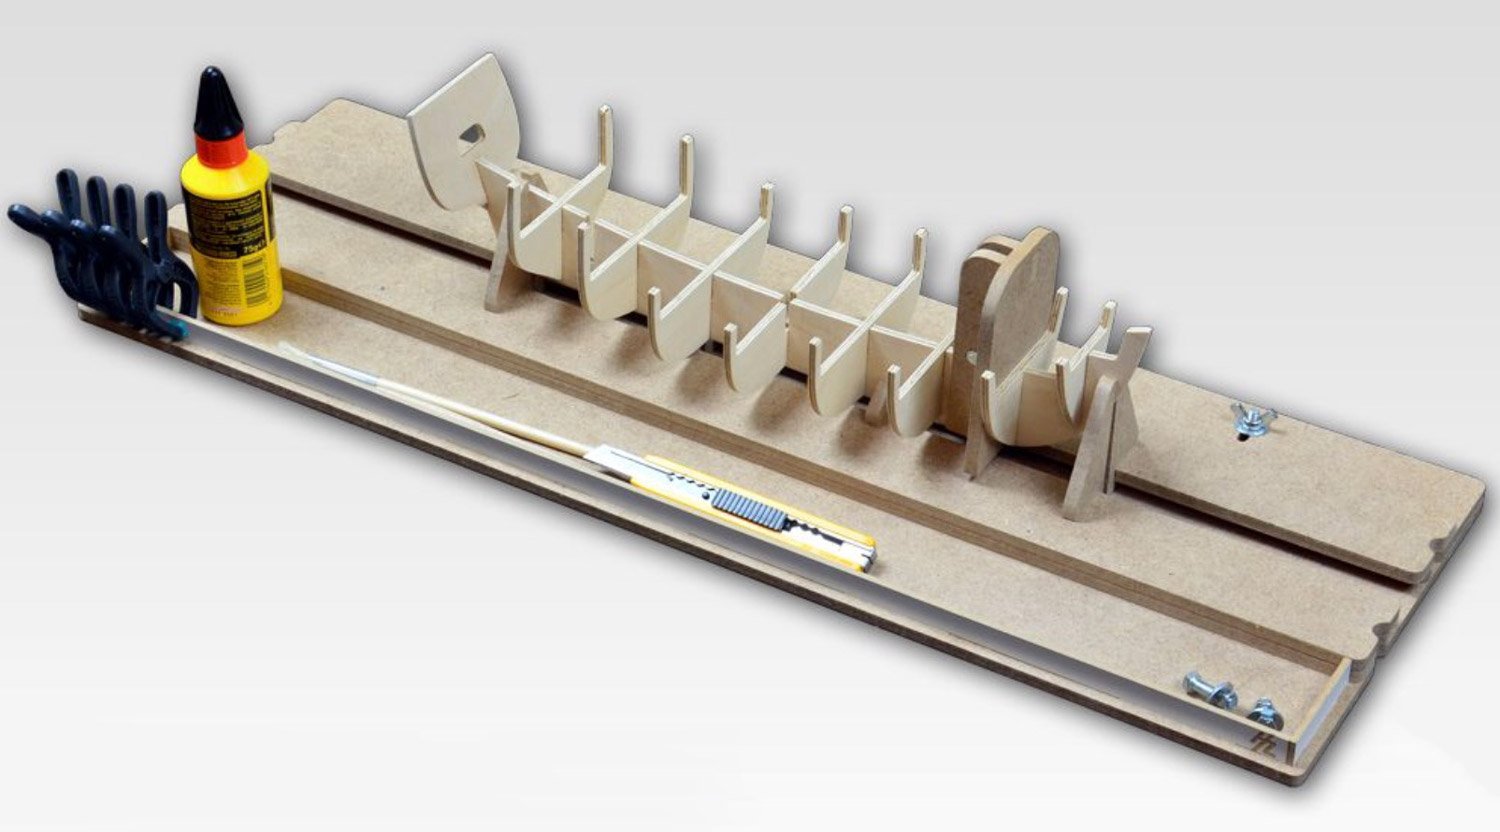
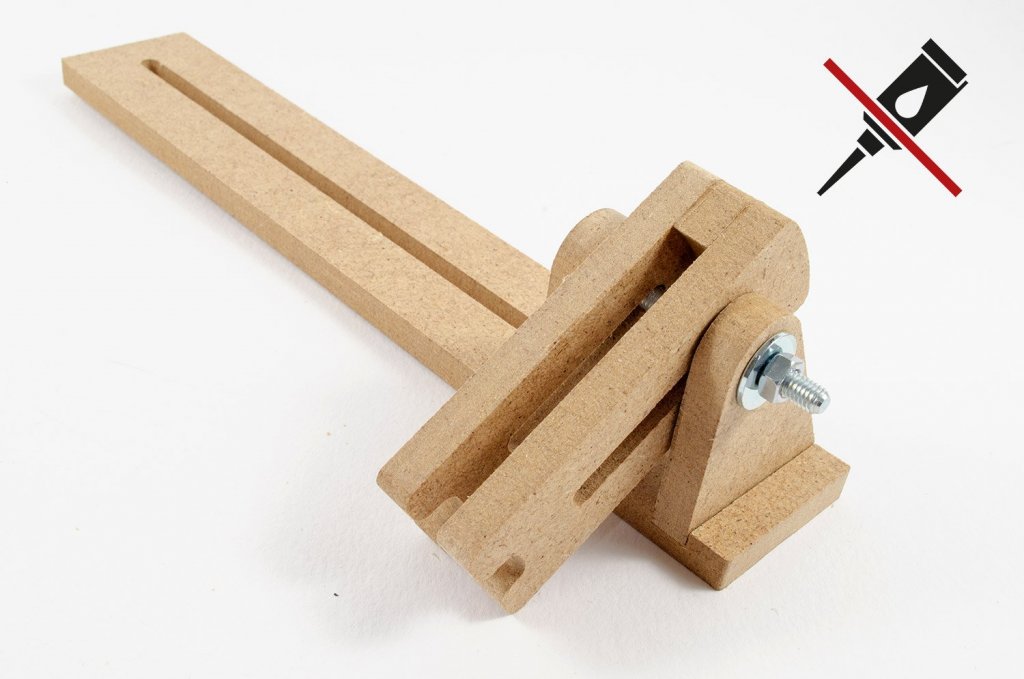
Small Building Slip Hobbyzone Catalogue # HZ-PSM2 Available from Hobbyzone for £25.79 (as of 11th July 2018) My original intention for this review was to do something in the style of the waterline marking tool, but as I've already been asked to create a building guide for the Professional Building Slip which I will publish next week, I thought I'd put the style to practice for this article so that Hobbyzone has something that they can use to refer their customers to. This will be a comprehensive build review...almost like a manual for assembling this product. The product itself is packaged into a cardboard box and the materials within are wrapped in a LOT of bubblewrap to protect further. Furthermore, the contents within are also bound by masking tape to prevent them joggling around in the box. All parts within are made from MDF which has been routed out, leaving only shall tags that can be cut through with nothing more than a craft knife. A number of parts have a white finish to one side. A small bag of hardware is also included. All you will need to assemble this is some wood glue, craft knife, and clamps. Onwards with the build.... 1. First of all, remove the MDF tags that held the parts into position on the boards. A craft knife is perfect for this. You won't need files etc. 2. Take two of the bolts and fit them in the main board. No glue is needed. Flip the board over and now glue the forward strip with the white edge, into the tabs at the front of the slip. Do the same with the small edge pieces. You may consider clamping these until set. Now, tale the narrow MDF slat which has the notches towards one end and glue this right up to the small edge pieces you just fitted. Those notches MUST line up with the ones on the baseboard. Again, clamp this until fully cured. 3. Take the remaining two strips and glue one on top of the other so that the notches line up. The parts will be stepped. Use a pencil to first mark the position and to make placement of glue more precise. When glued, clamp until set. 4. Take the parts shown here and glue them together. Please note the location of the hex indent. Clamp until set. 5. Fit the bolt, washer and nut into position. 6. Take the parts shown here and assemble in this orientation. Note that these are made as pairs, with the base fitting on one pair being opposite to the other pair. 7. Sit the moveable portion of the slip onto the baseboard and use the washers and wing nuts to secure. This portion of course is adjustable to the width of the keel. The other smaller parts, including the end stops and bulkhead clamps are fitted by simply pushing and twisting them onto the stepped edges of the keep clamp. You can use any of the features seen here in any way you like in order to assure yourself that everything is in alignment. A small tray at the front of the slip can be used for the unused parts, or modelling tools. Enjoy the build and your next project you build with it! In all, a nice and easy slip to build and one with quite a lot of flexibility when it comes to the shape of the vessels that can be constructed on it. The slip is designed for models with a keel length of 600mm, but 800mm can be built within it too. Maximum keel width is 5mm, according to Hobbyzone, but I'm sure you could squeeze another millimetre out of it. To give you an idea about keel thickness, the 1/72 HMS Vanguard from Amati/Victory Models has a 5mm thick keel, and that model is designed for a bigger slip than this! SO, in short, you should find this perfectly capable of handling just about every project up to a maximum of 800mm keel length. My sincere thanks to Hobbyzone for sending this out for review here on MSW. To purchase directly, click the link at the top of the article, or head over to your local Hobbyzone stockist.