Search the Community
Showing results for tags 'small'.
-
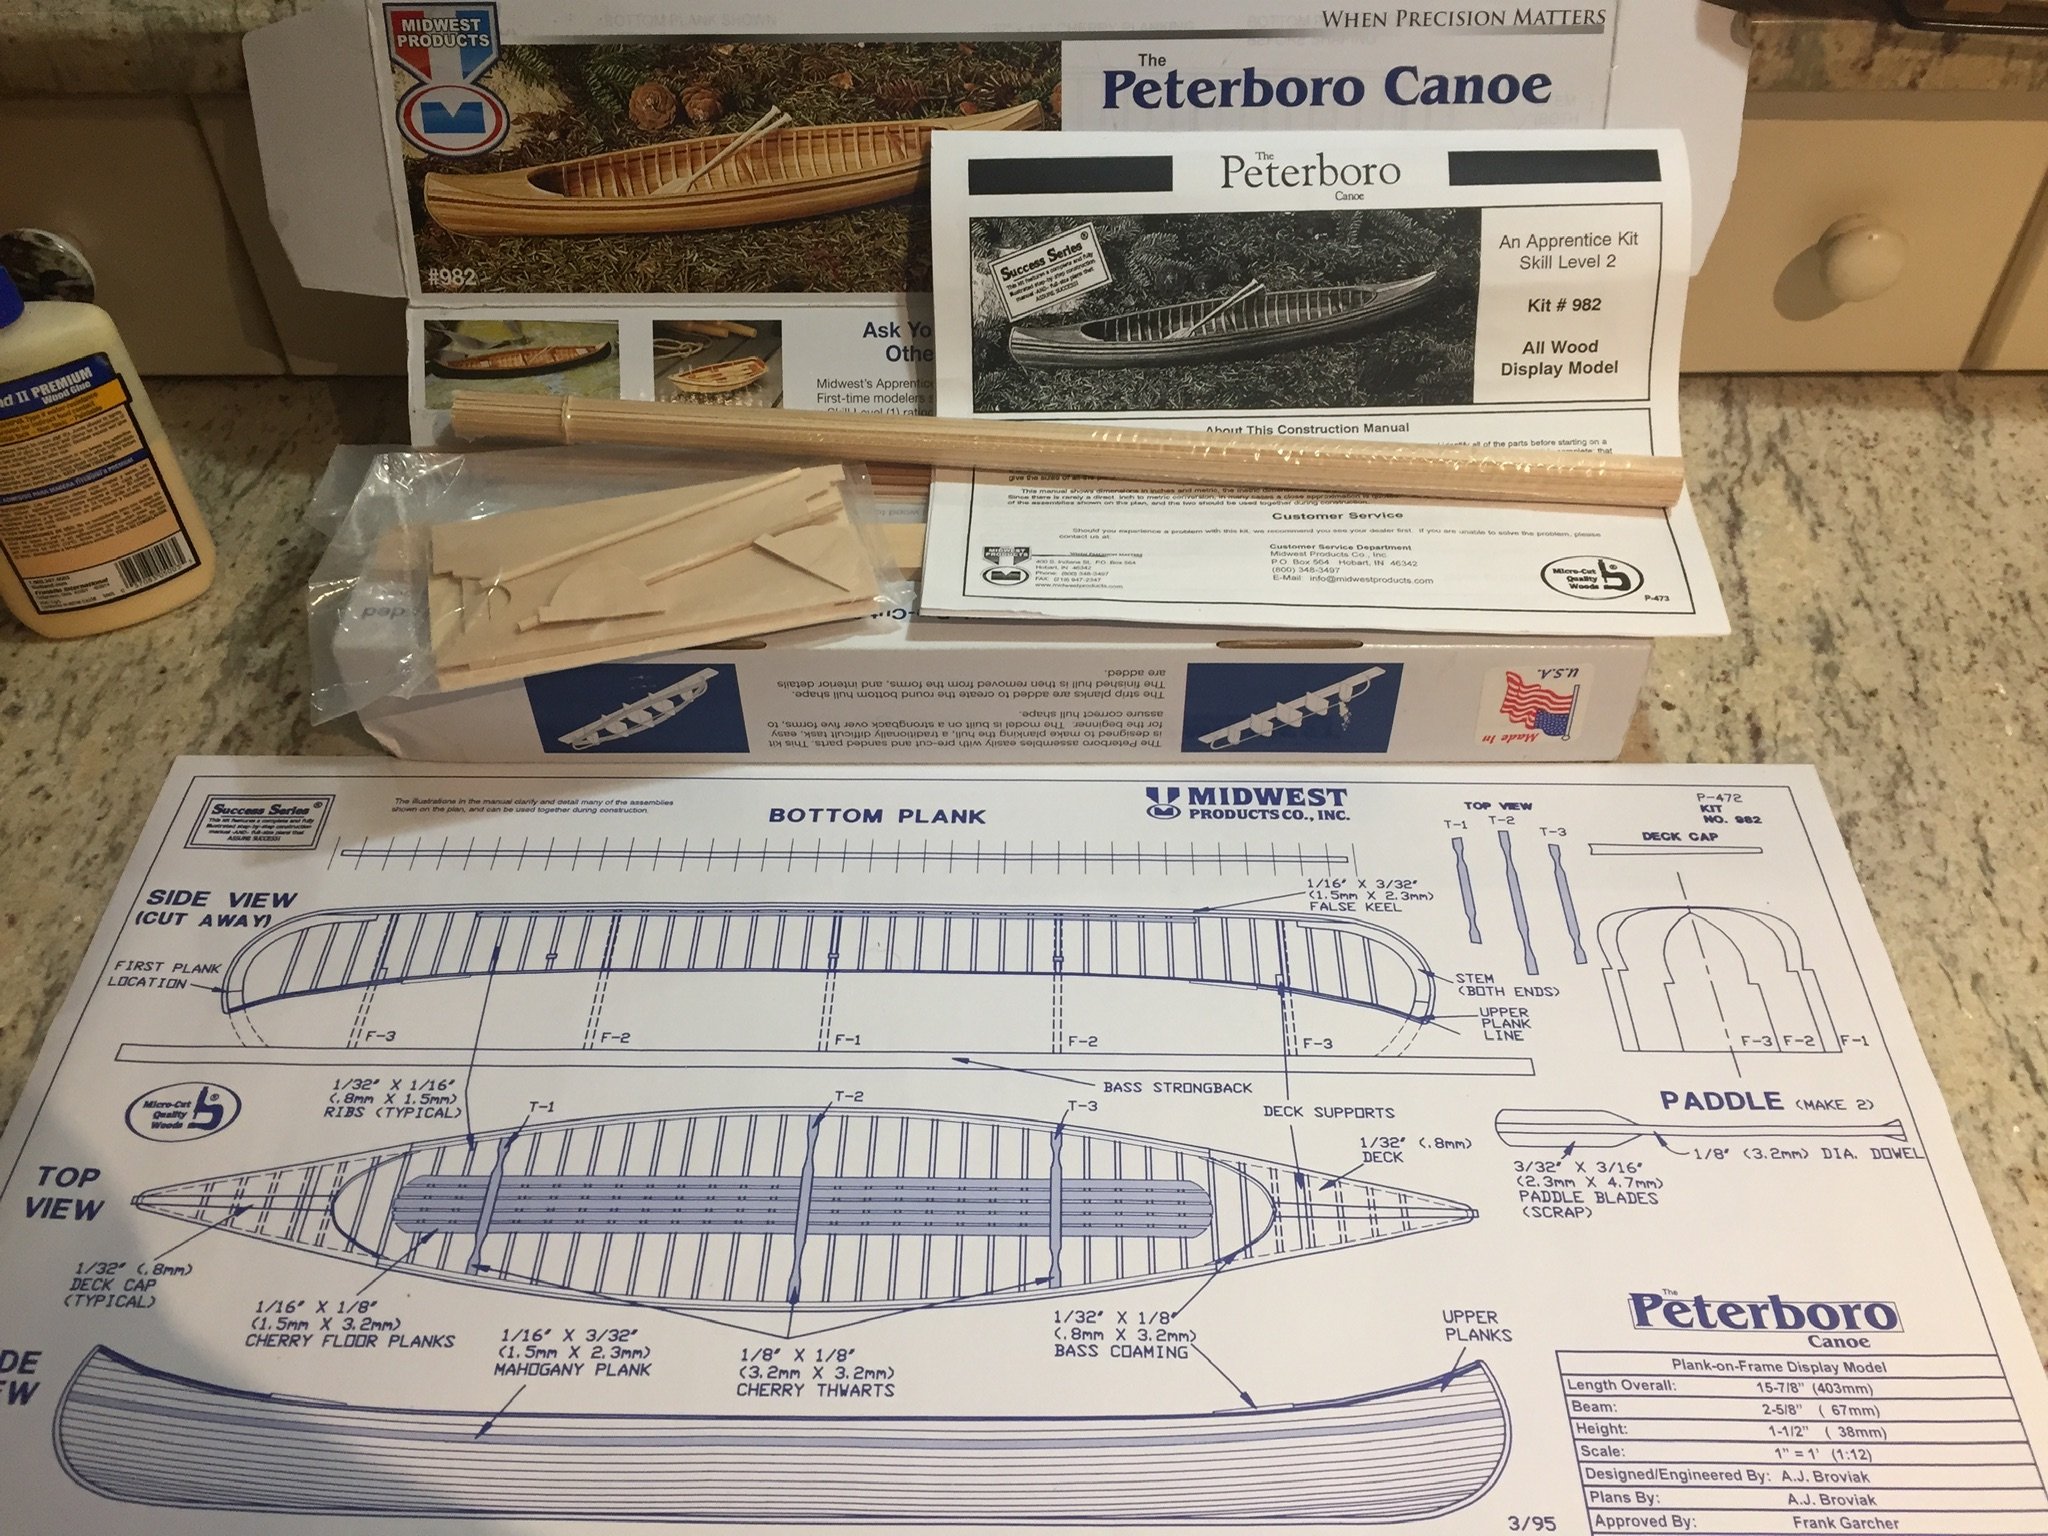
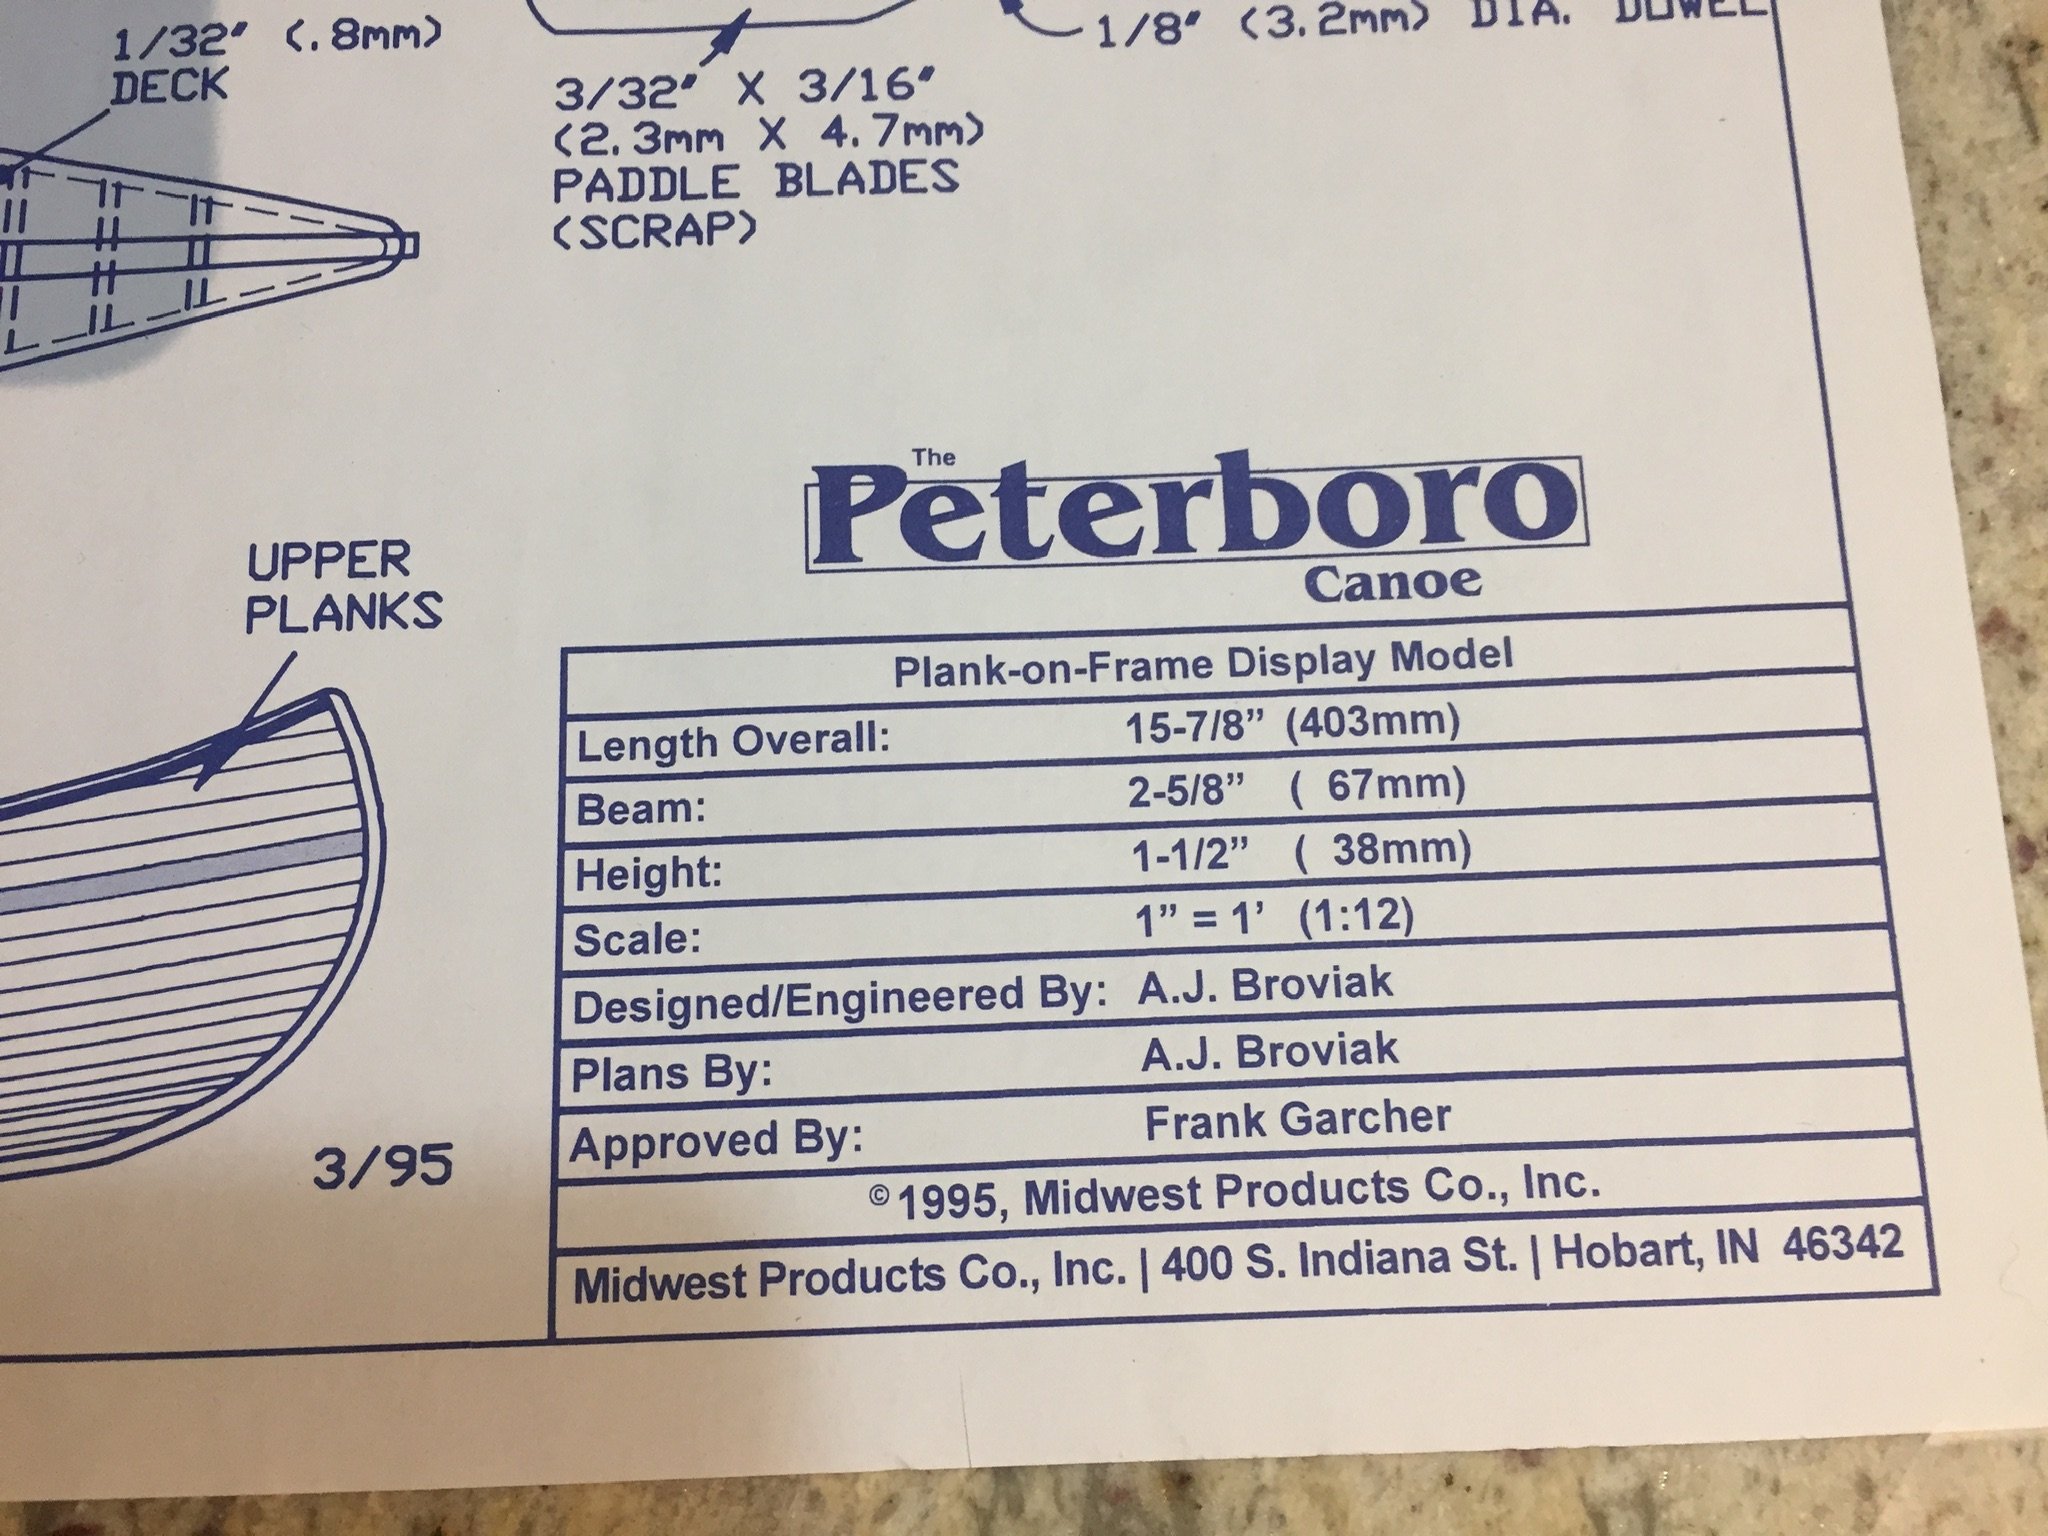
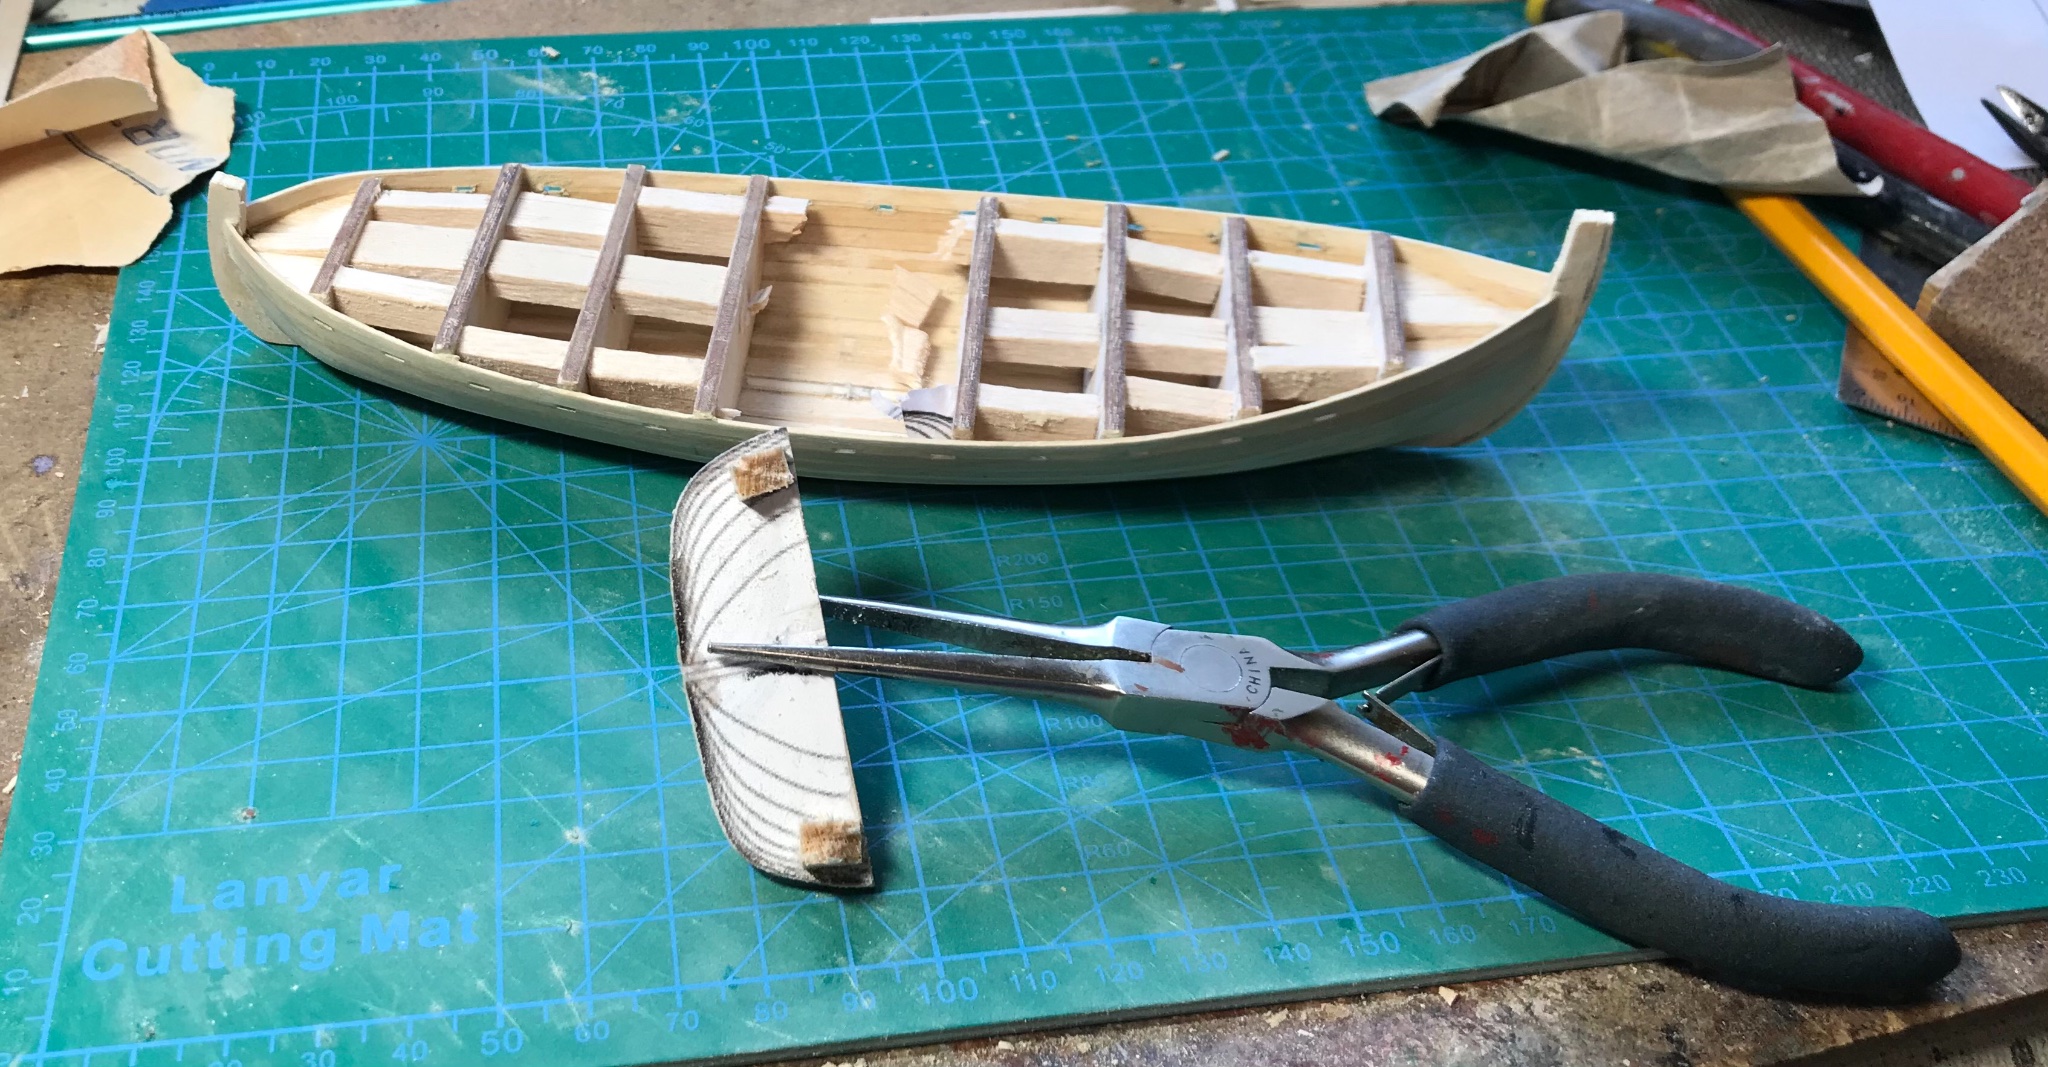
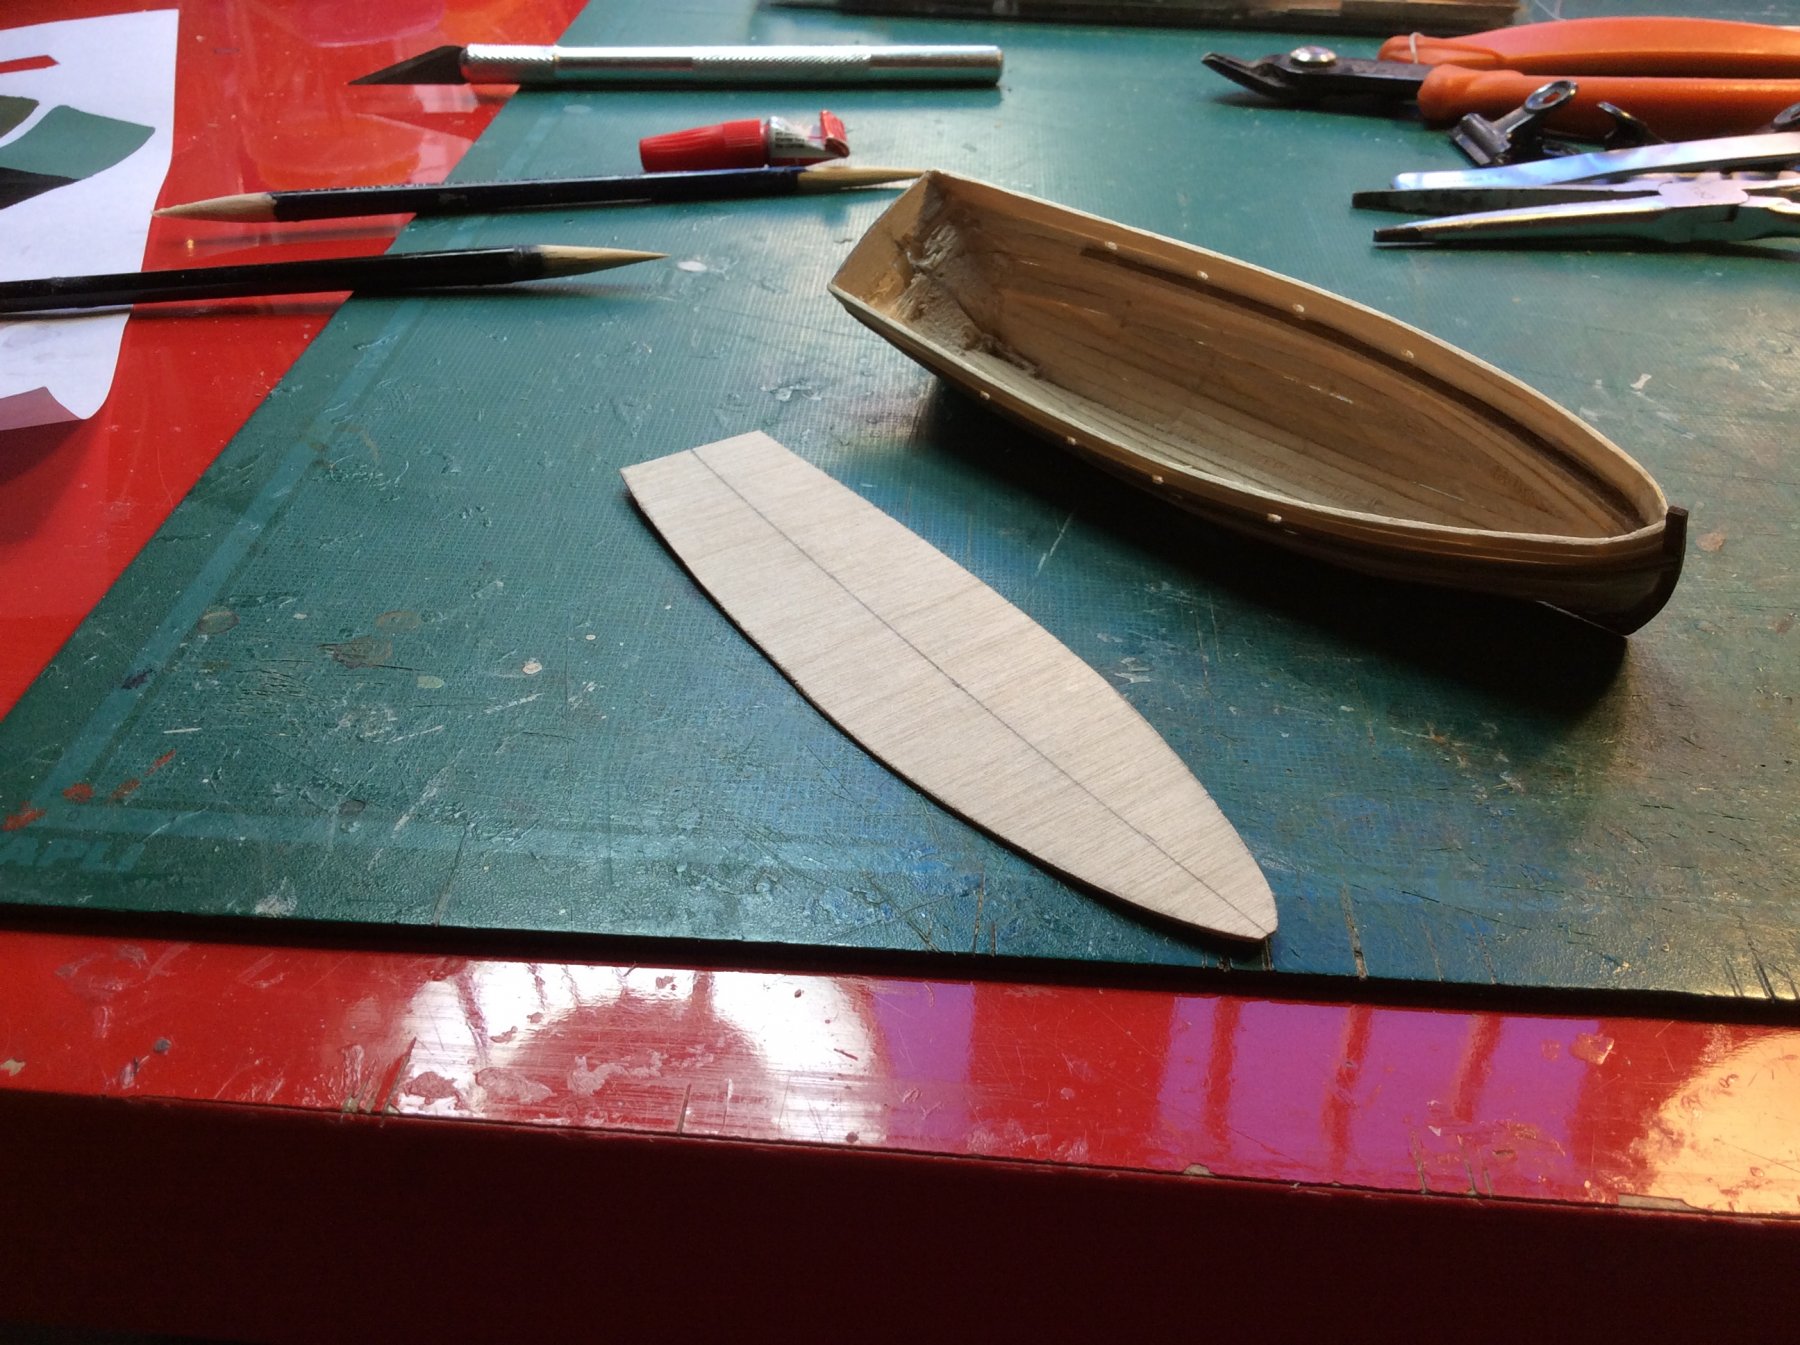
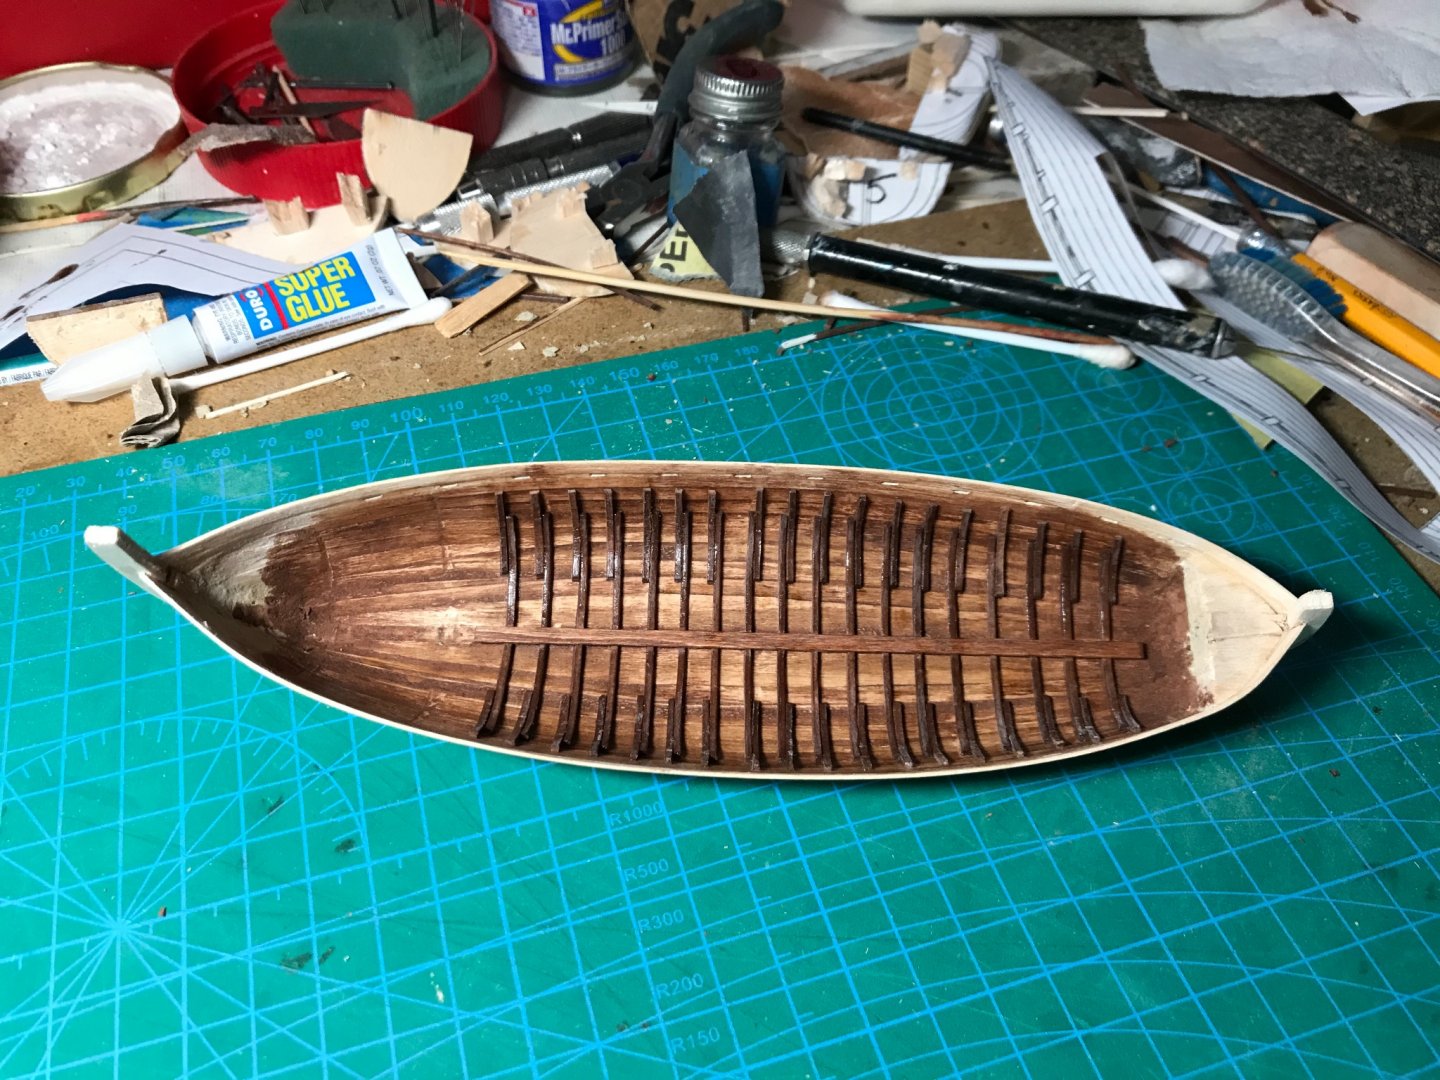
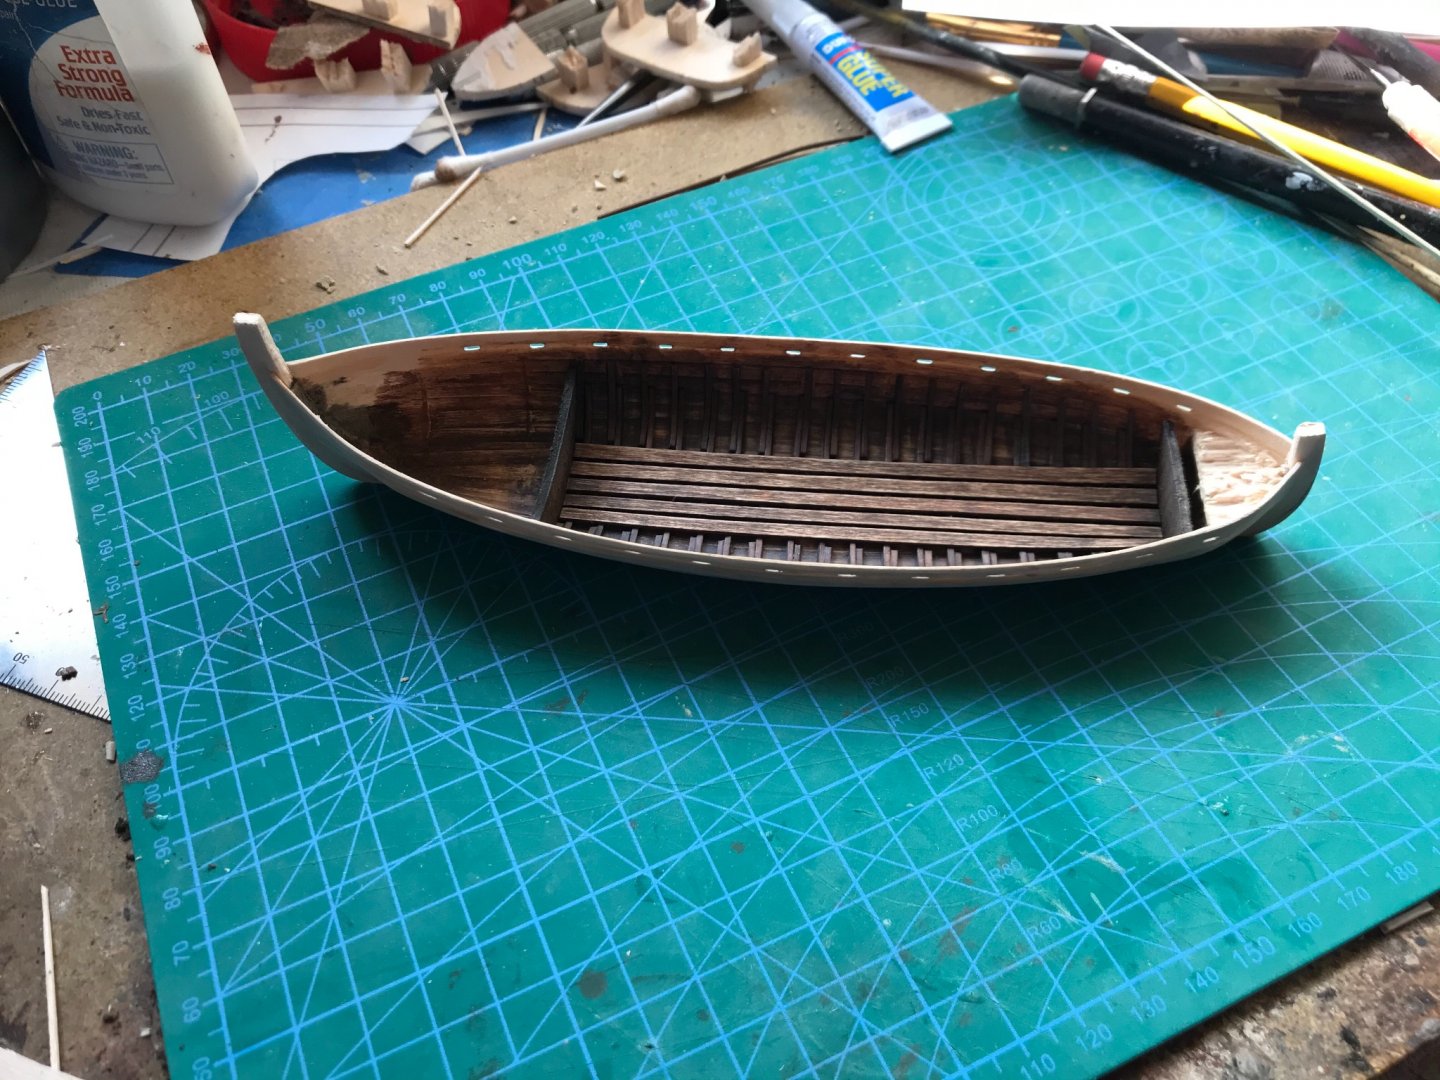
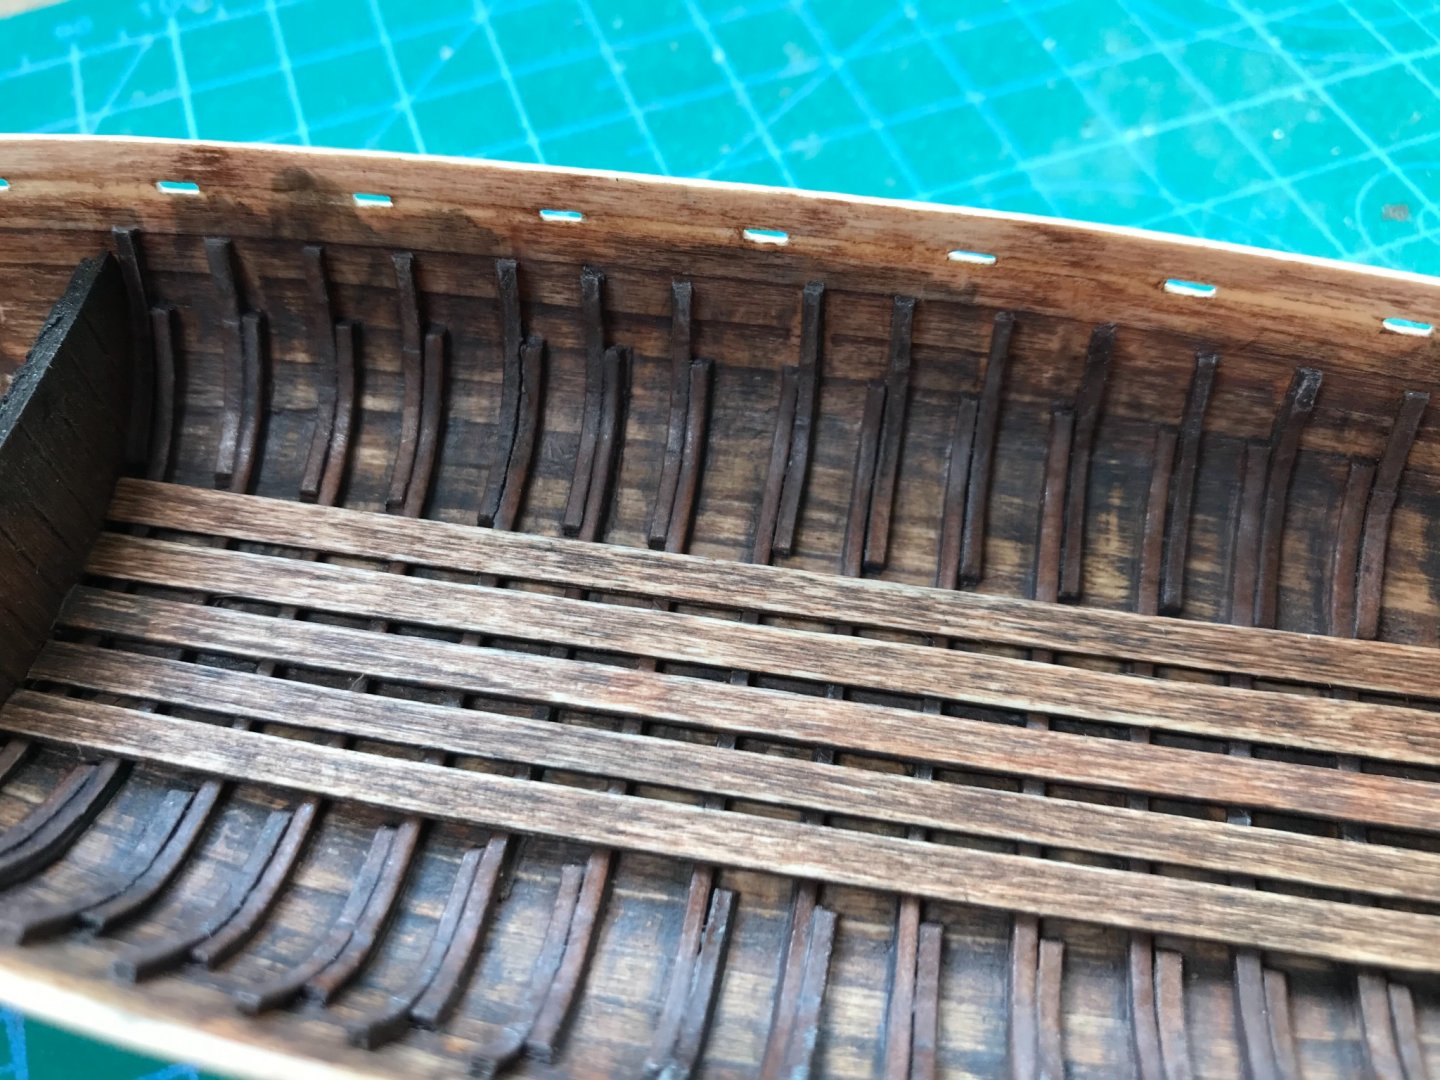
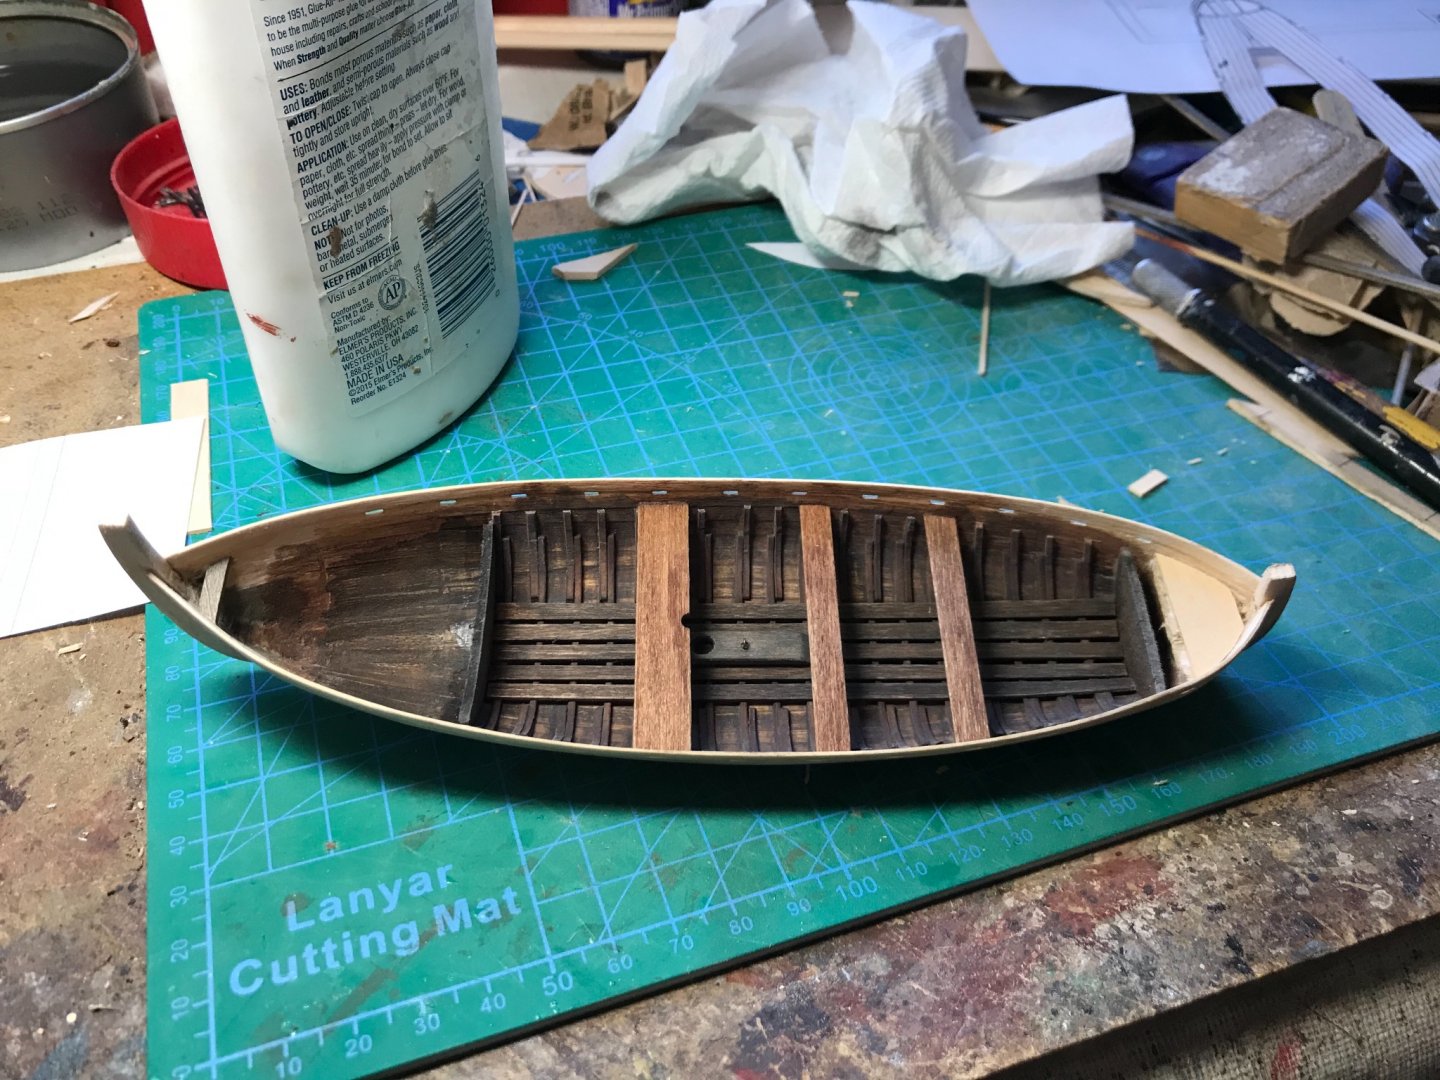
 It was interesting to find out that “The Peterboro Canoe” was named due to the association with Peterborough, Ontario. There was a time almost any wooden canoe In the traditional Canadian style, that is, one basically having the appearance of the woodland bark canoe of the North American Indian, could be referred to as “a Peterboro” certainly a rich history with these canoes. So here is a kit I purchased on eBay for less than $50, well worth the hours of entertainment.
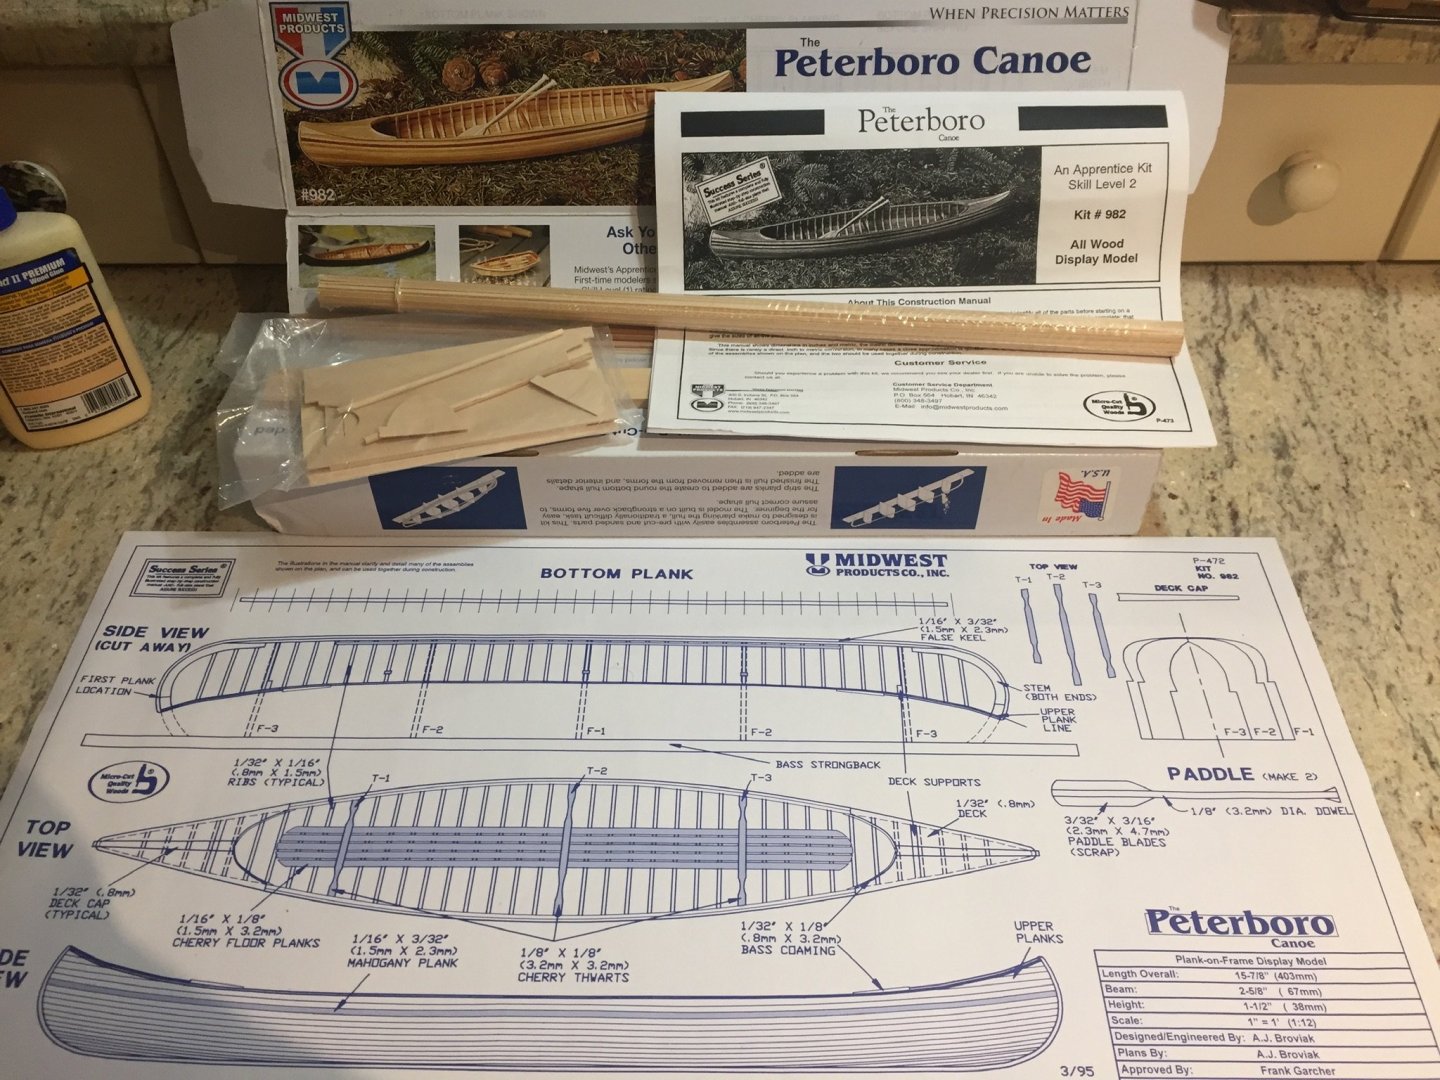

- 113 replies
-
- 5
-

-
- small
- Peterboro Canoe
- (and 2 more)
-
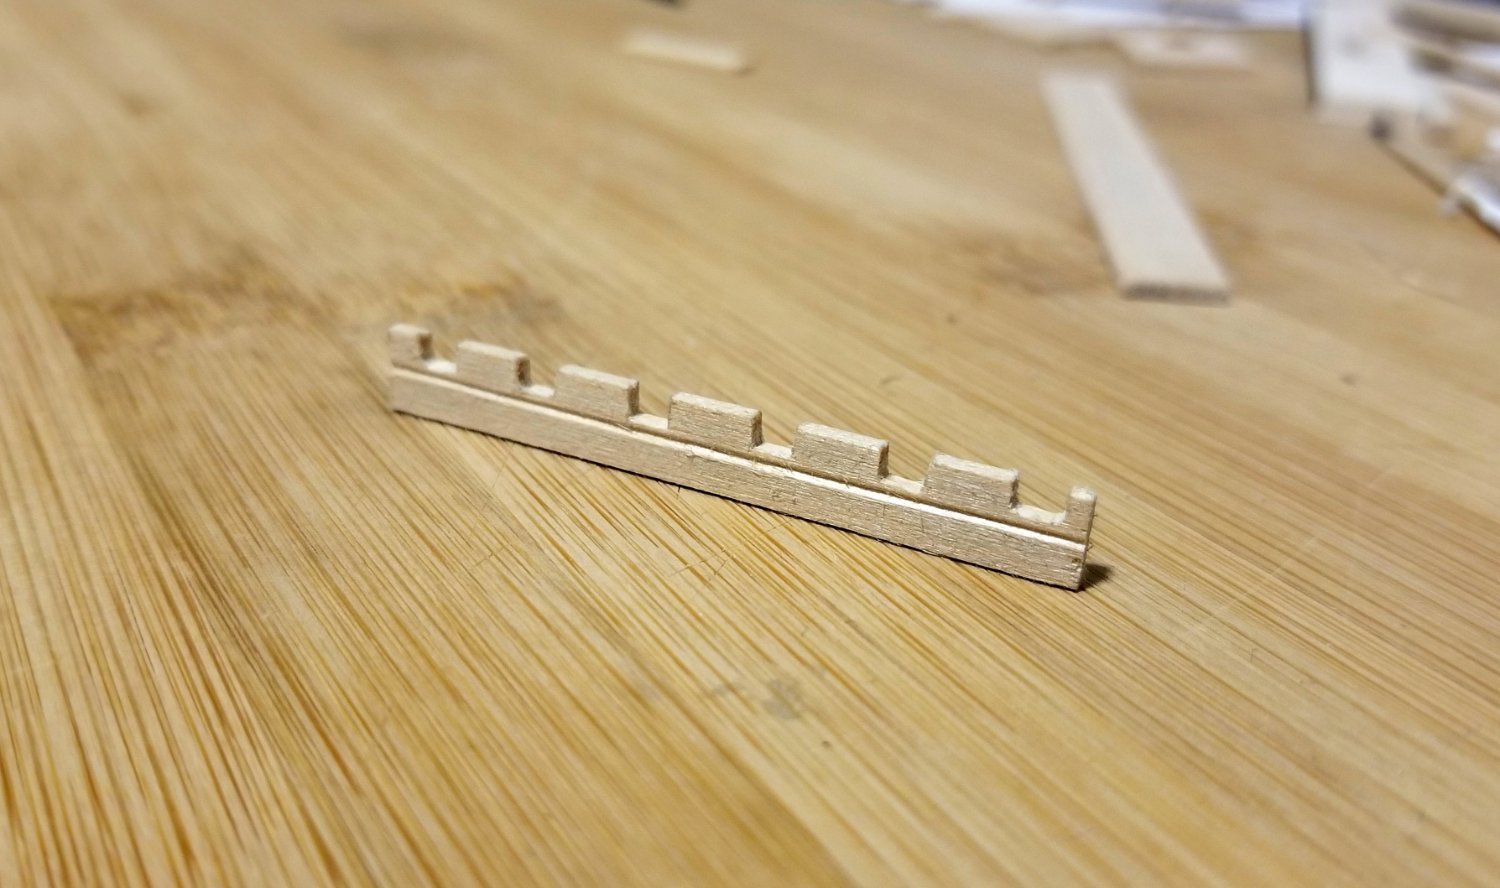
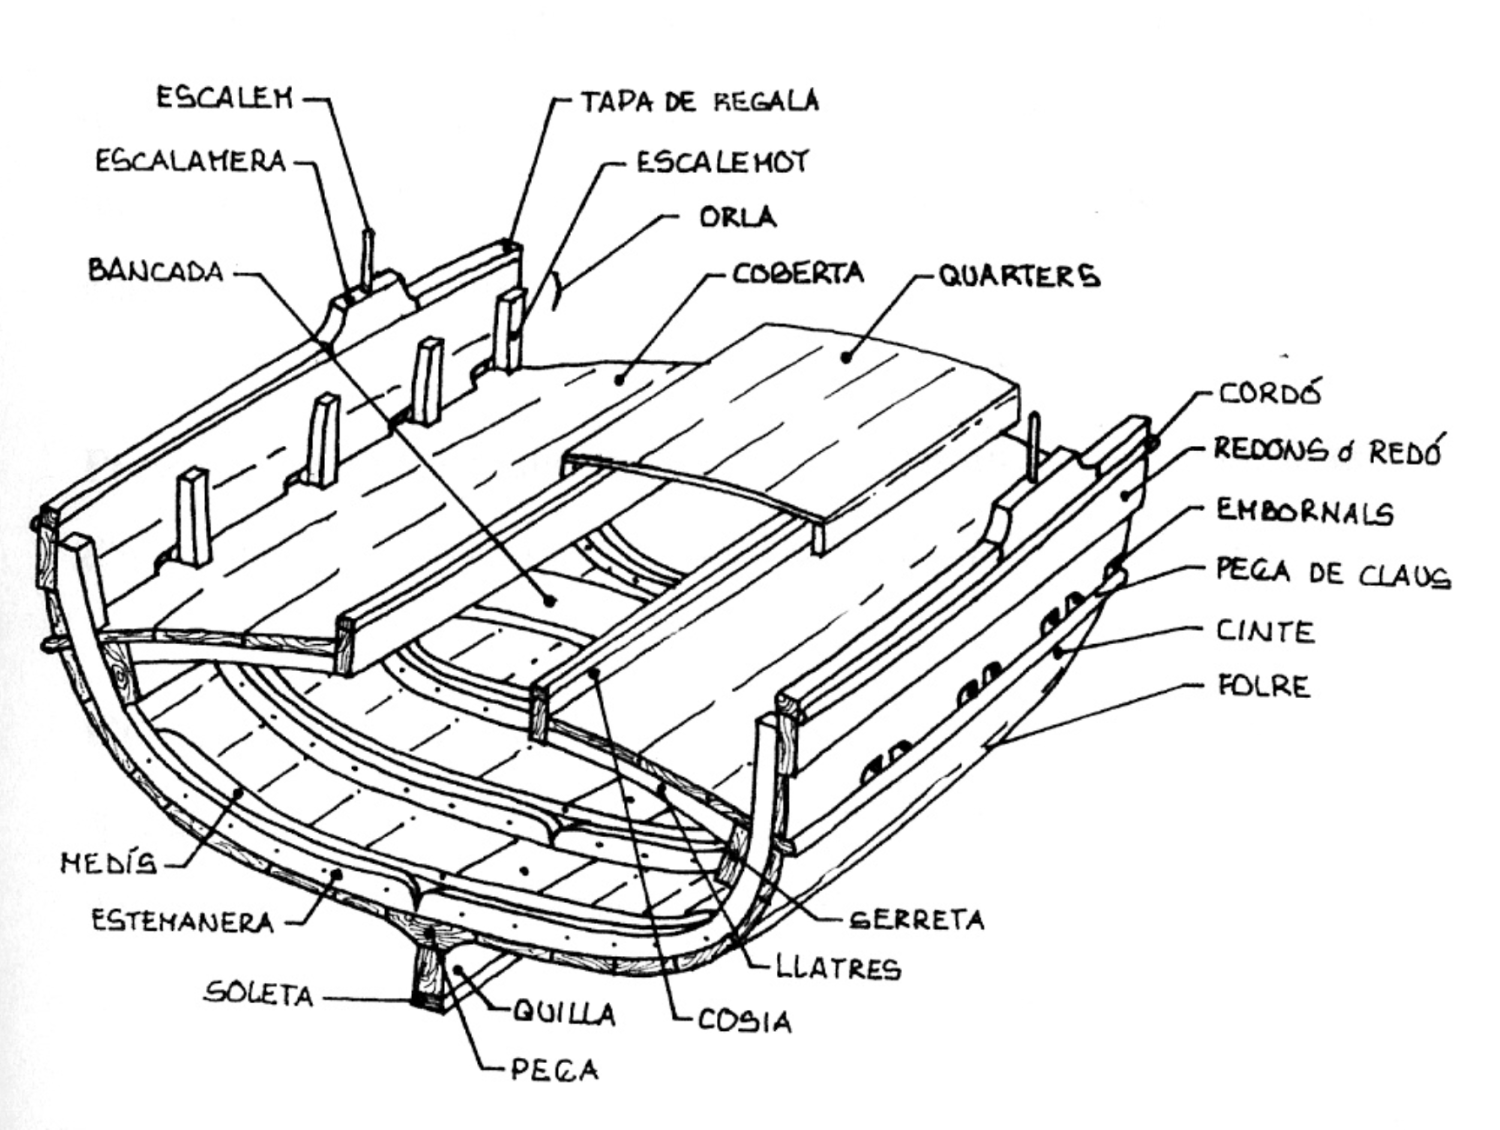
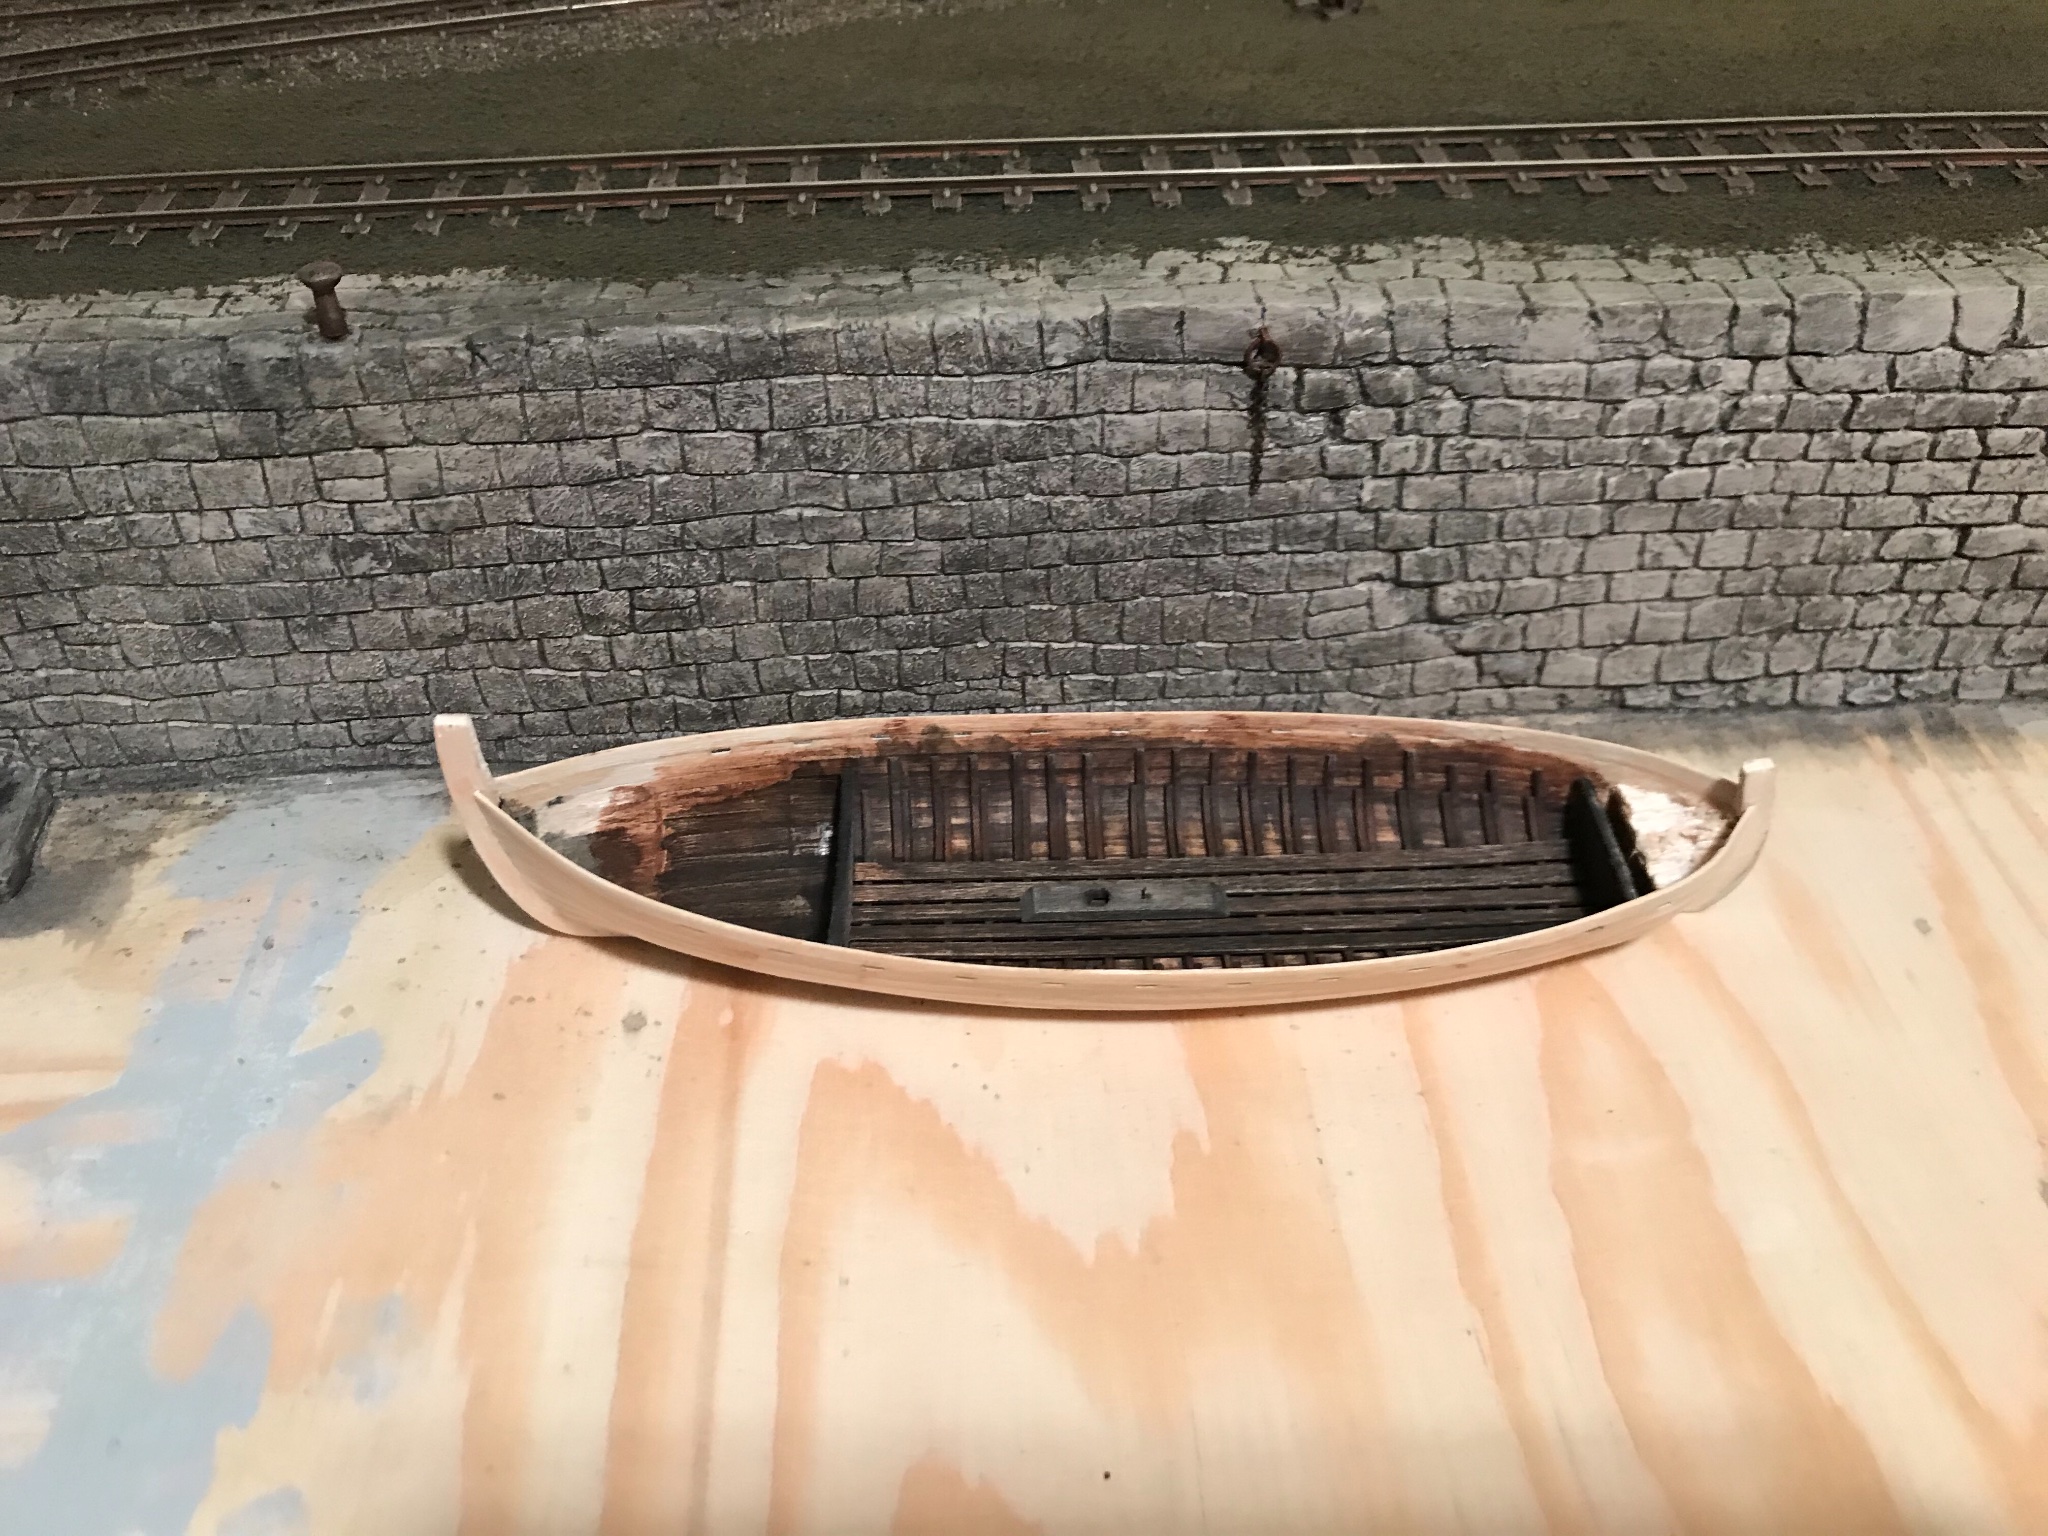
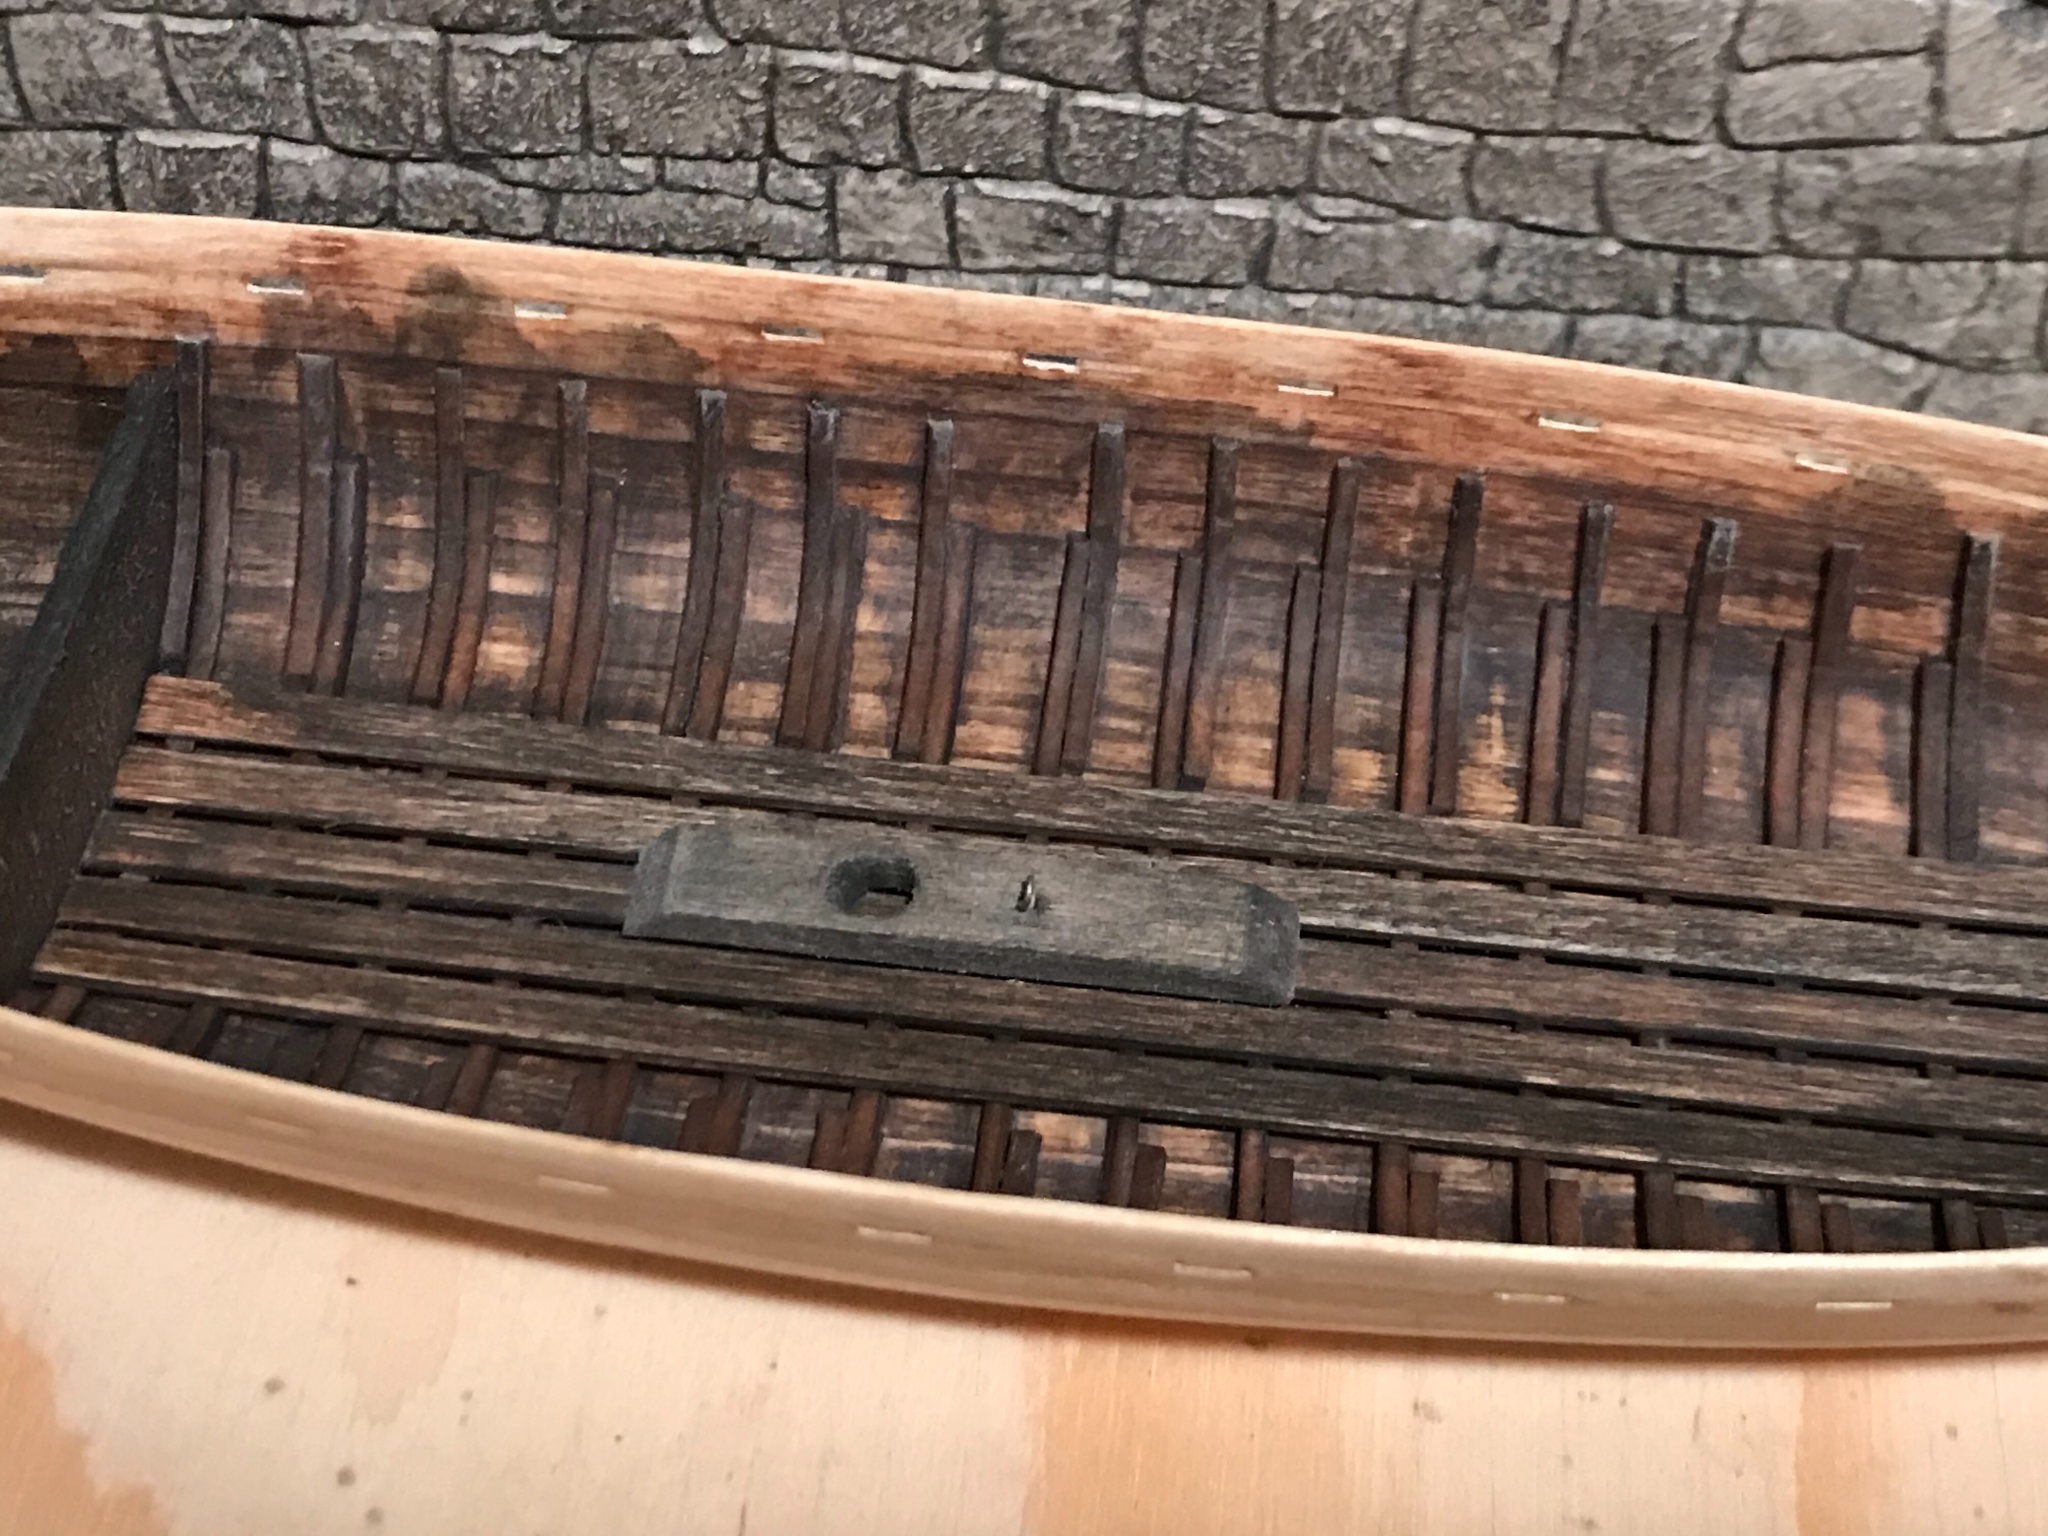
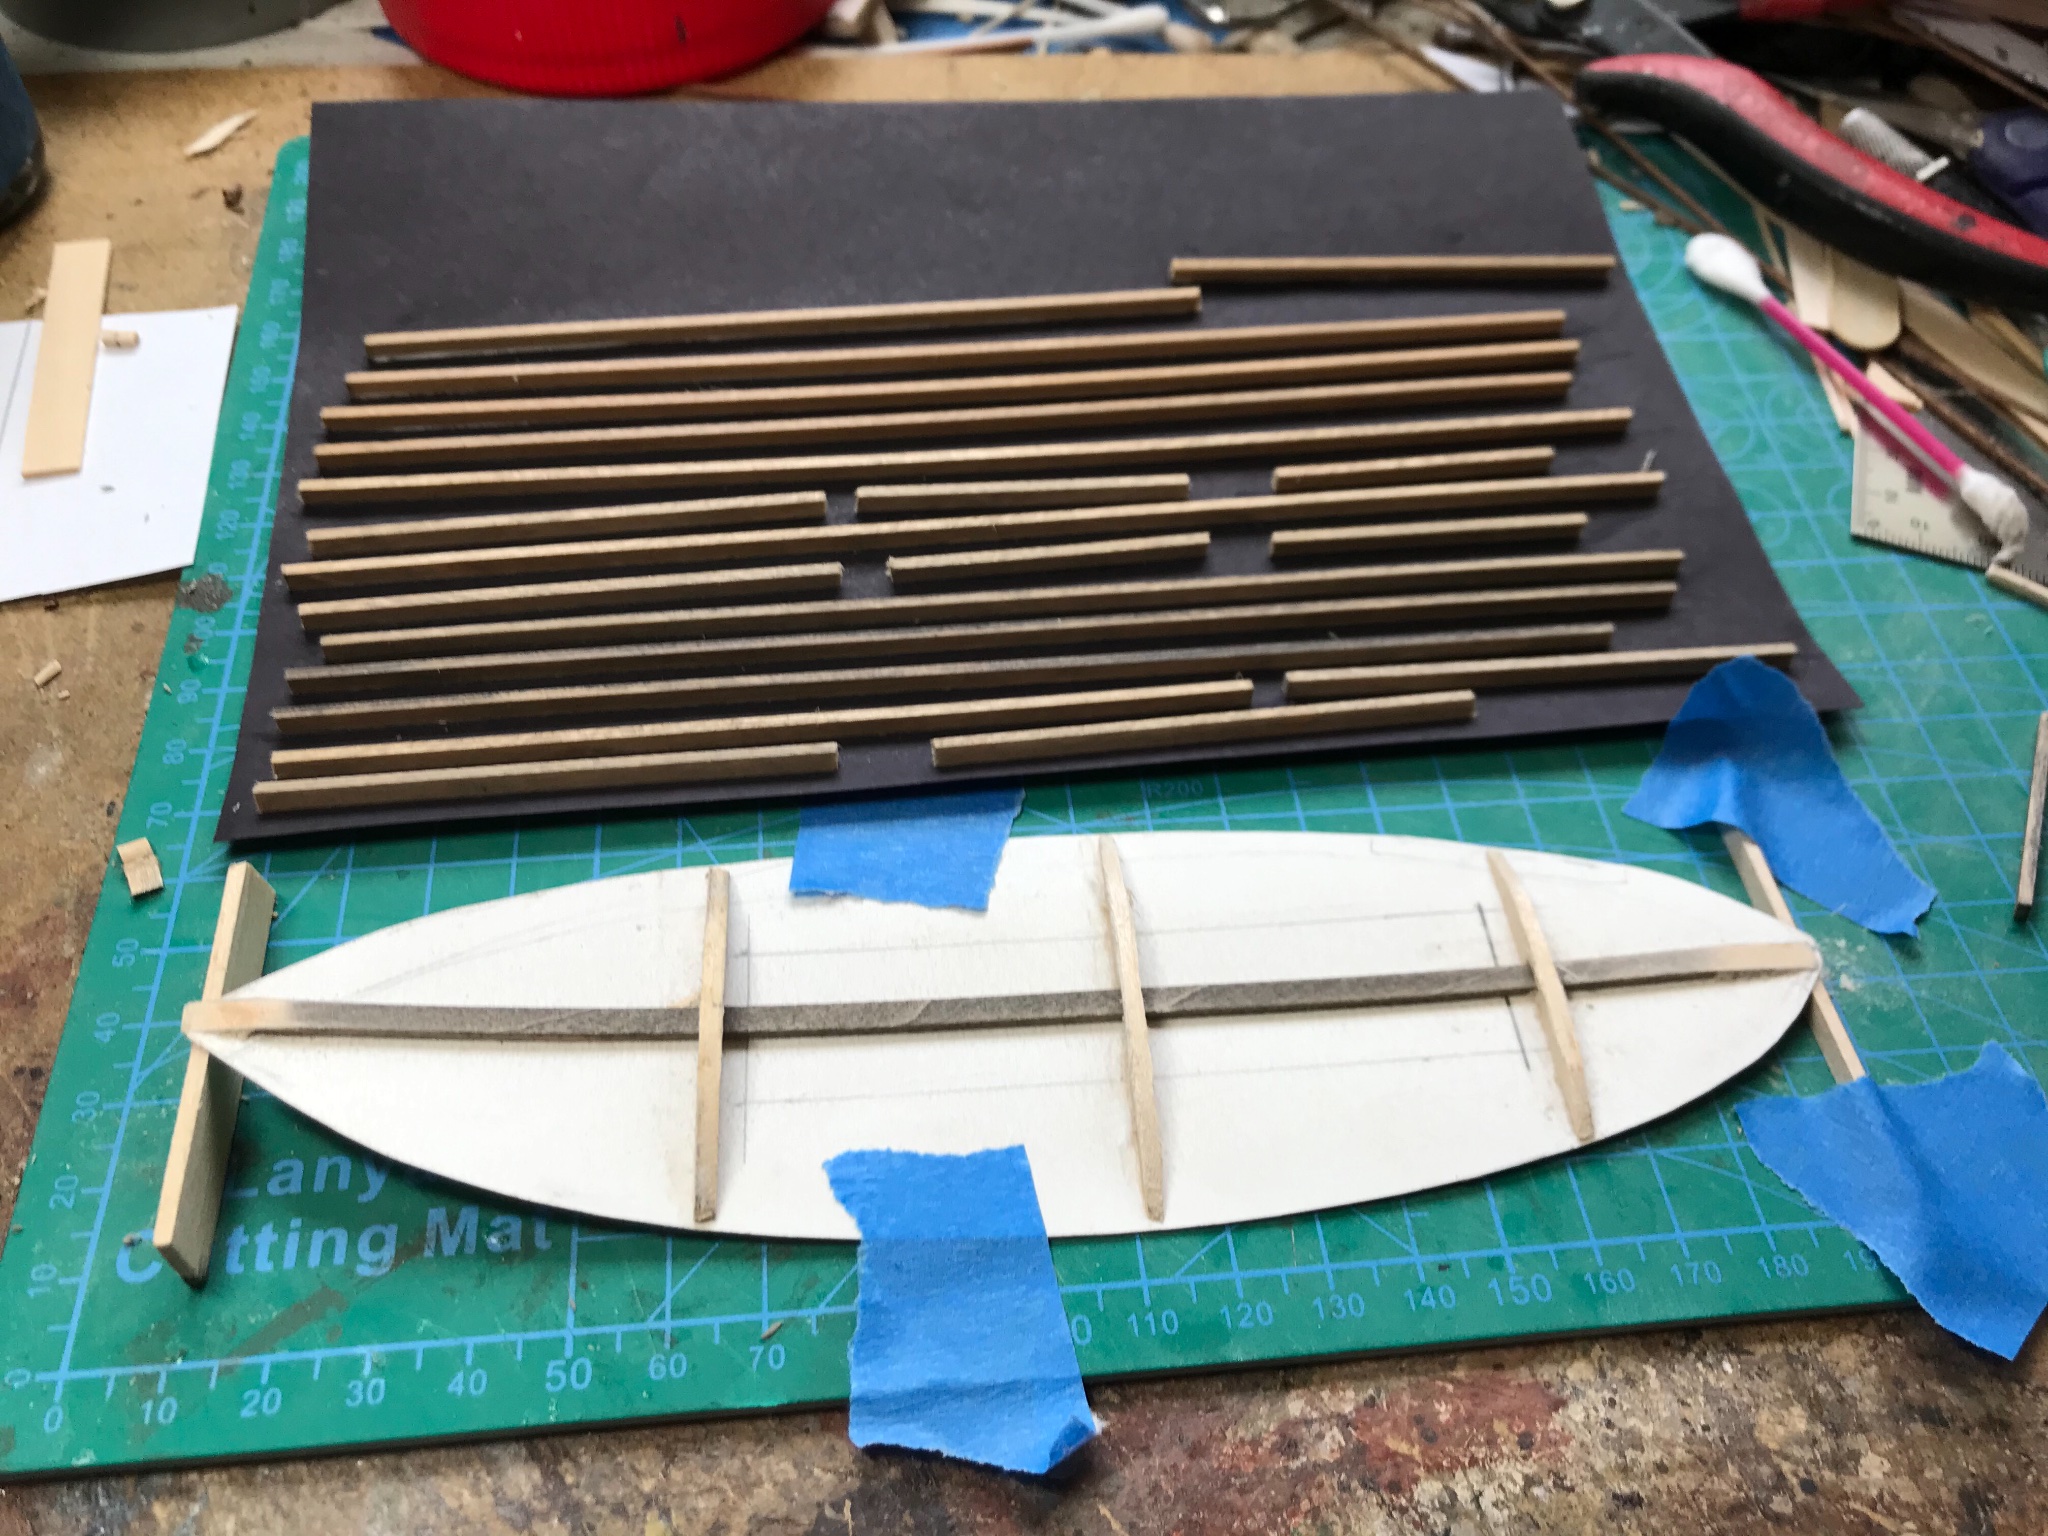
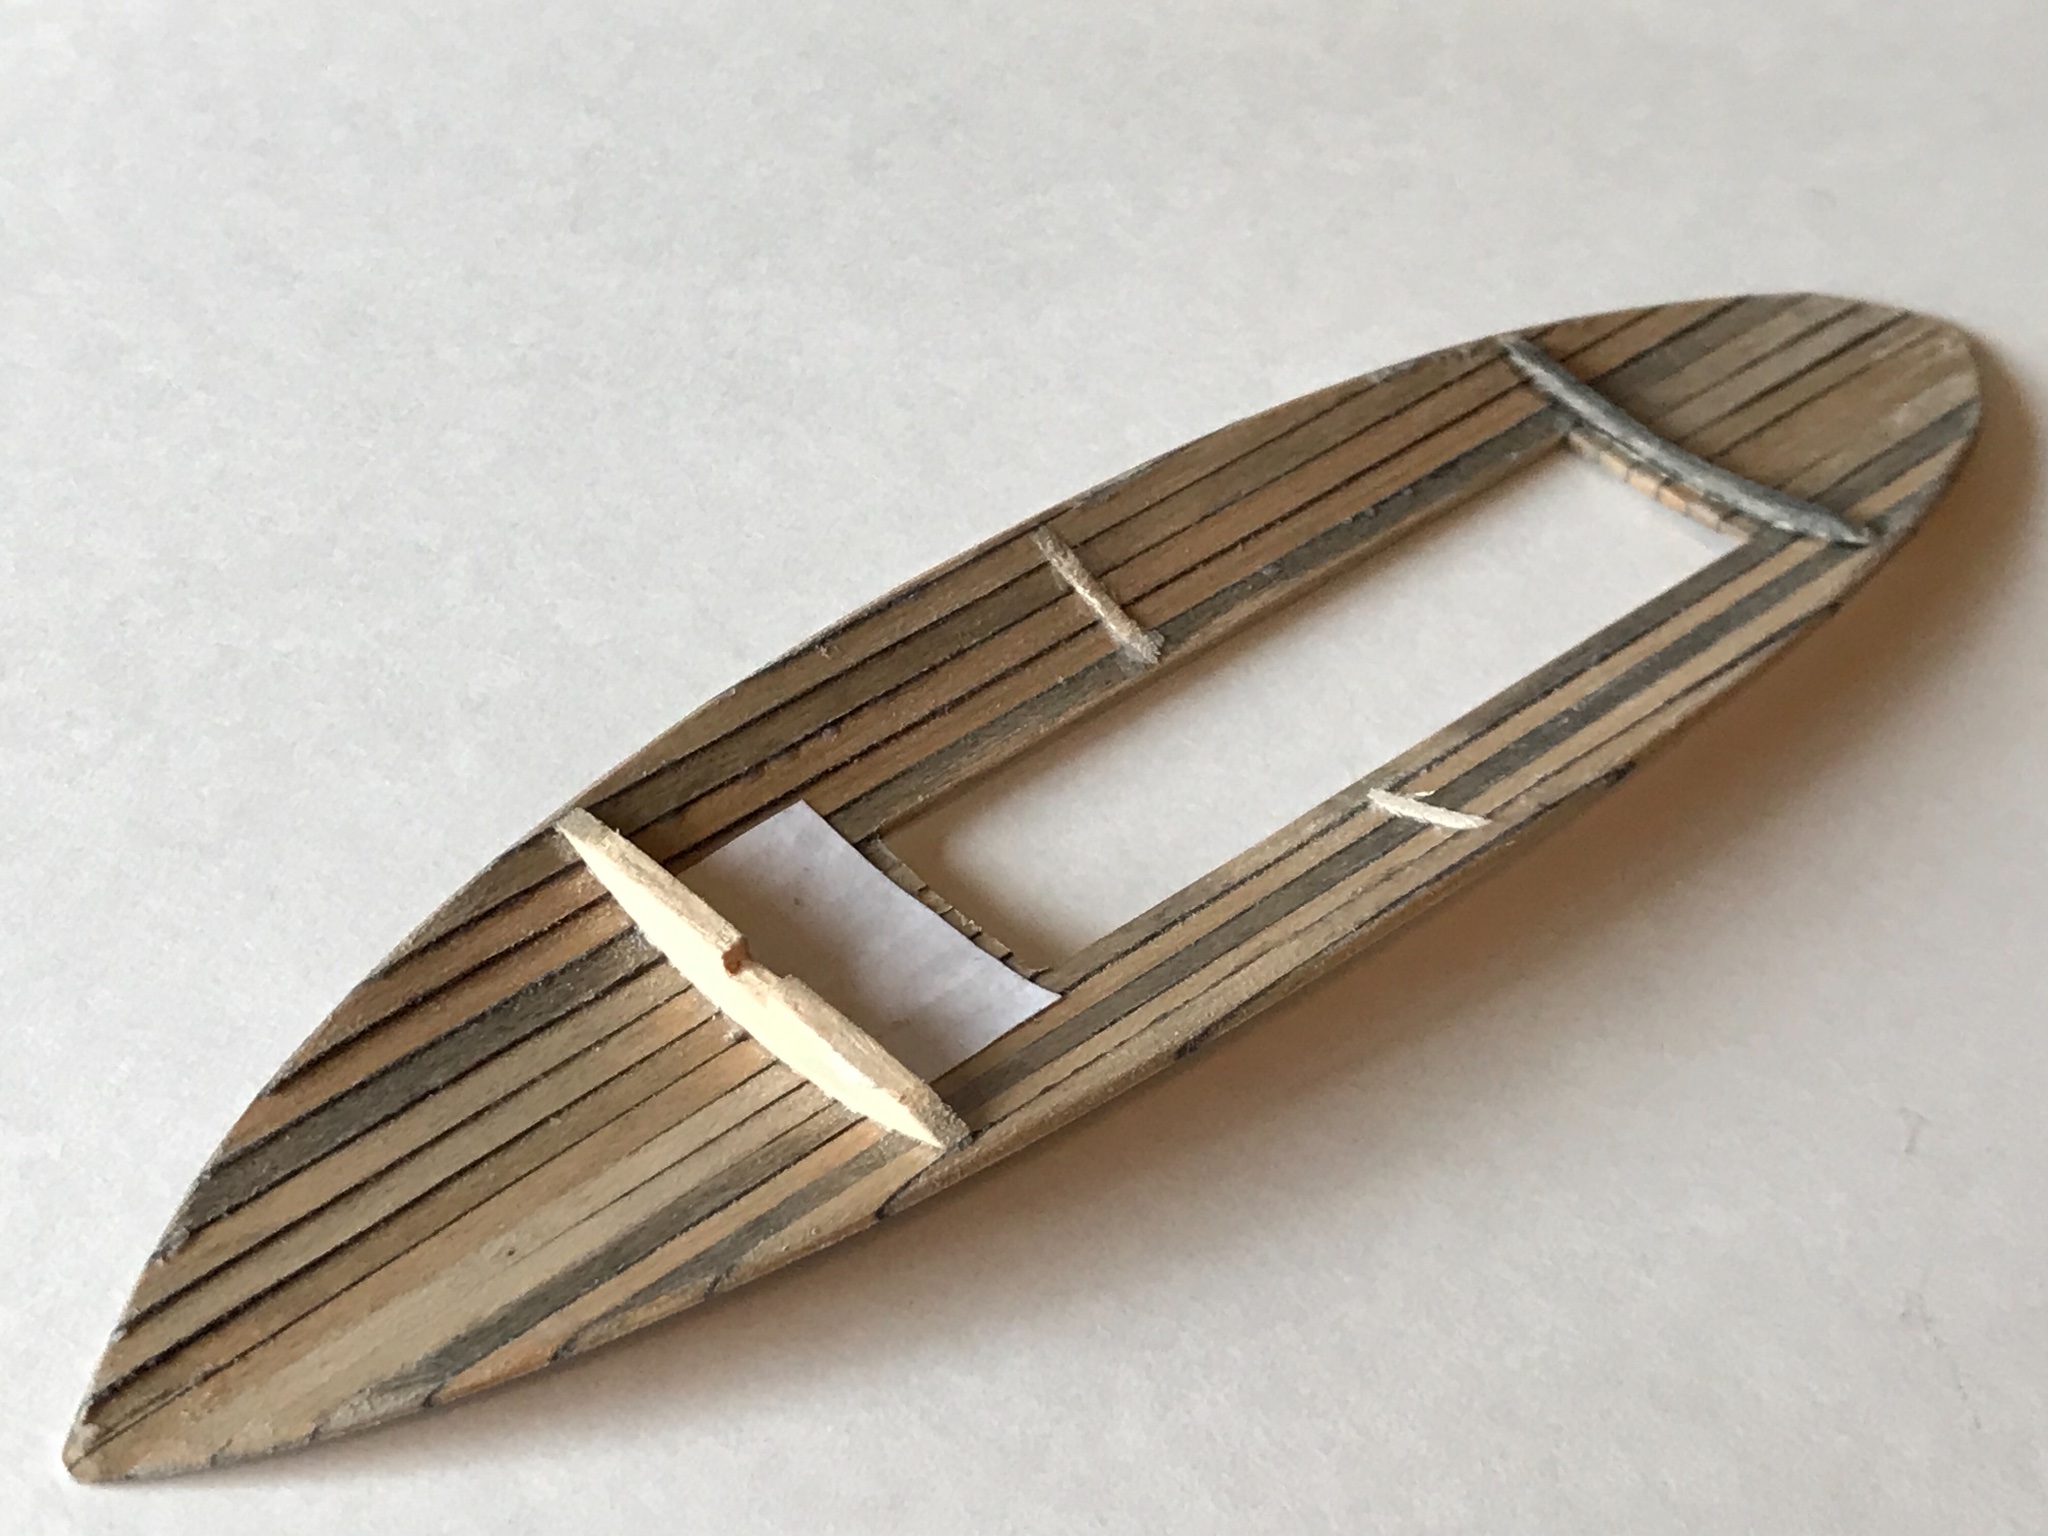
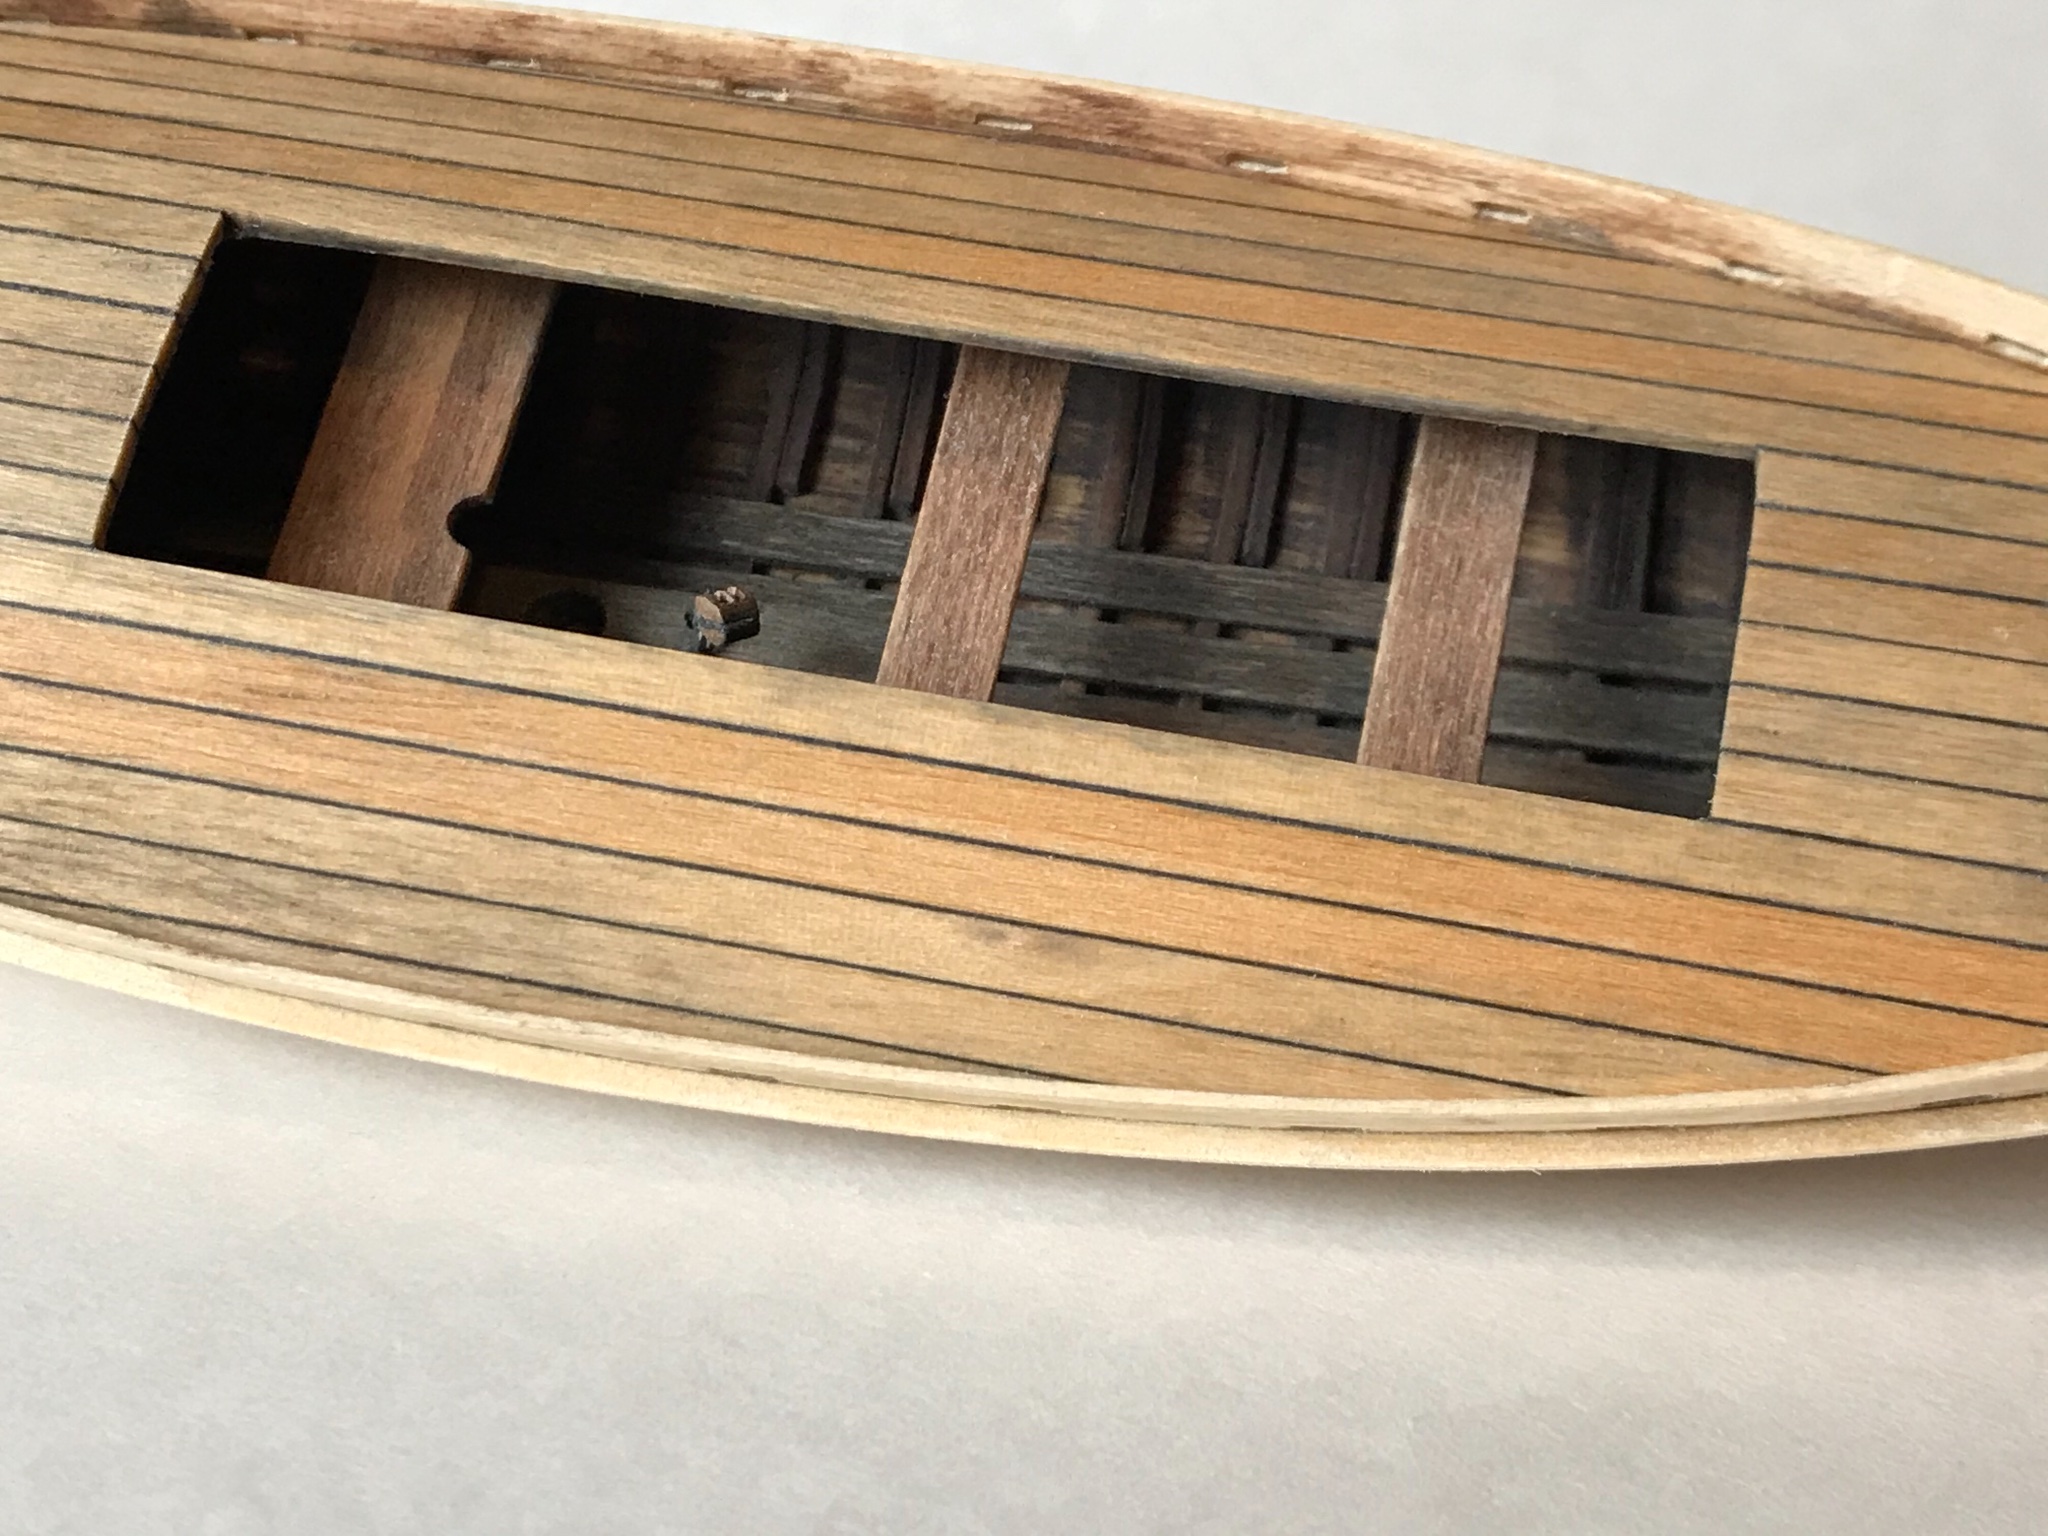
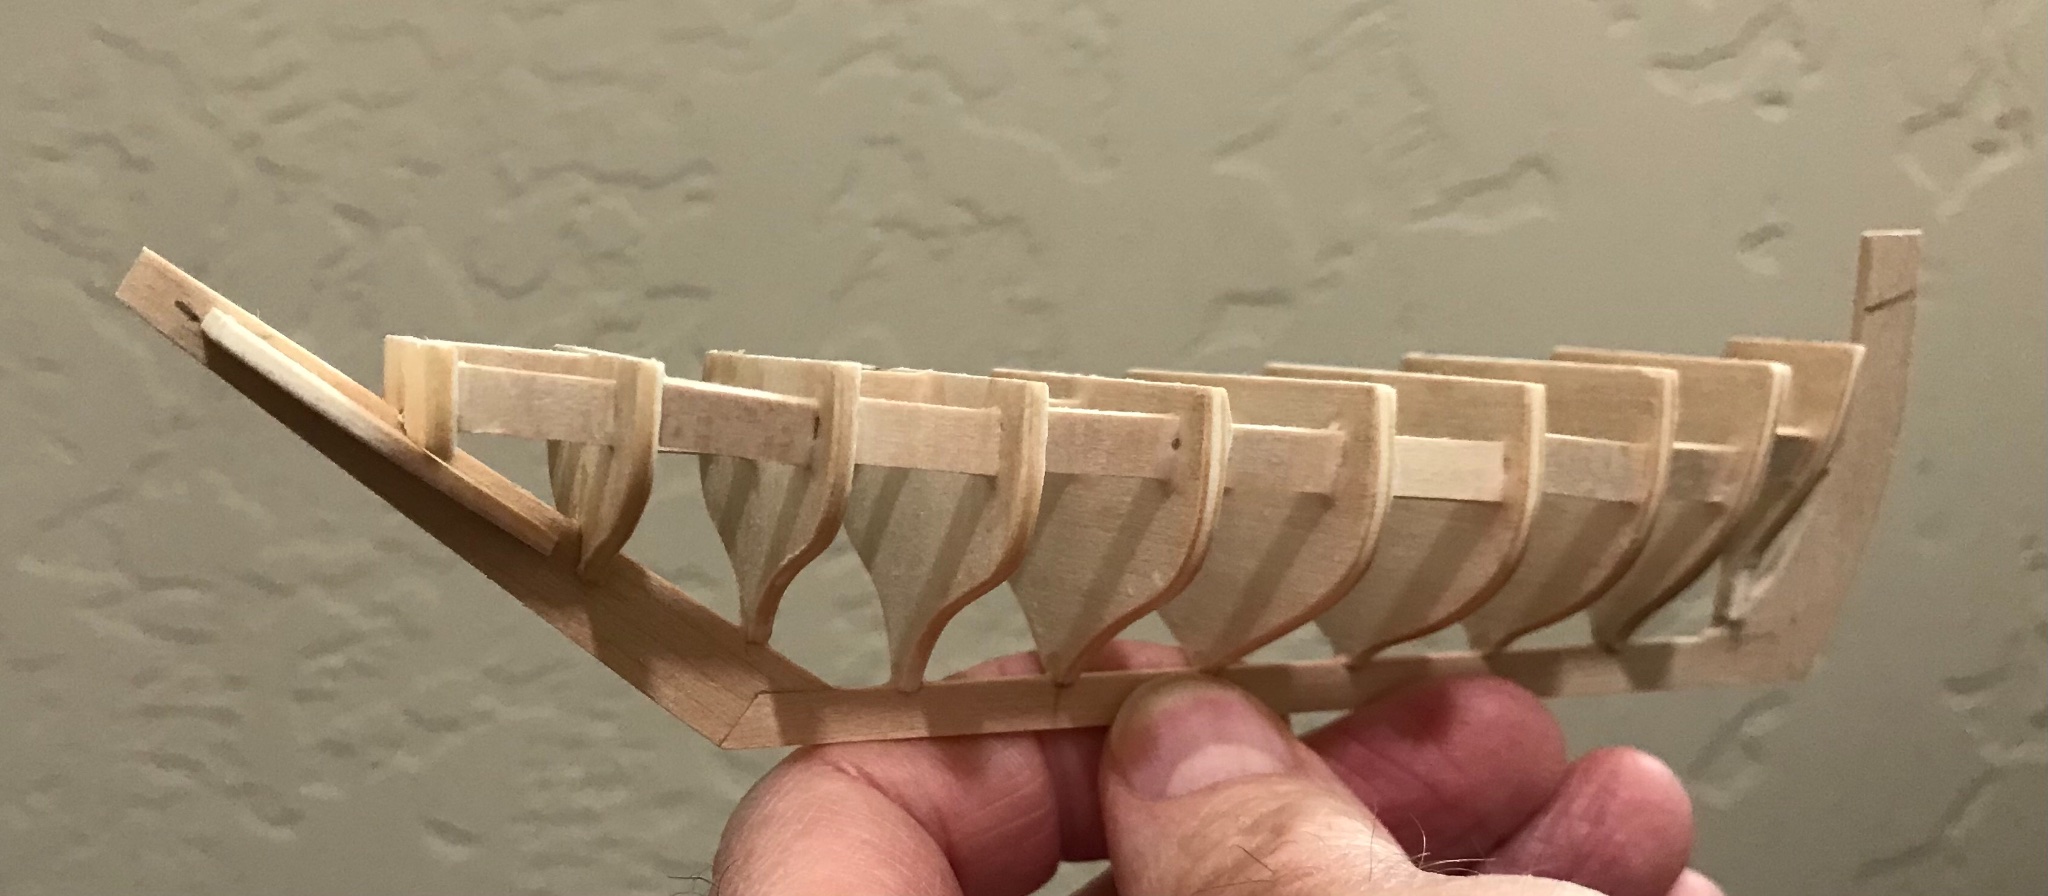
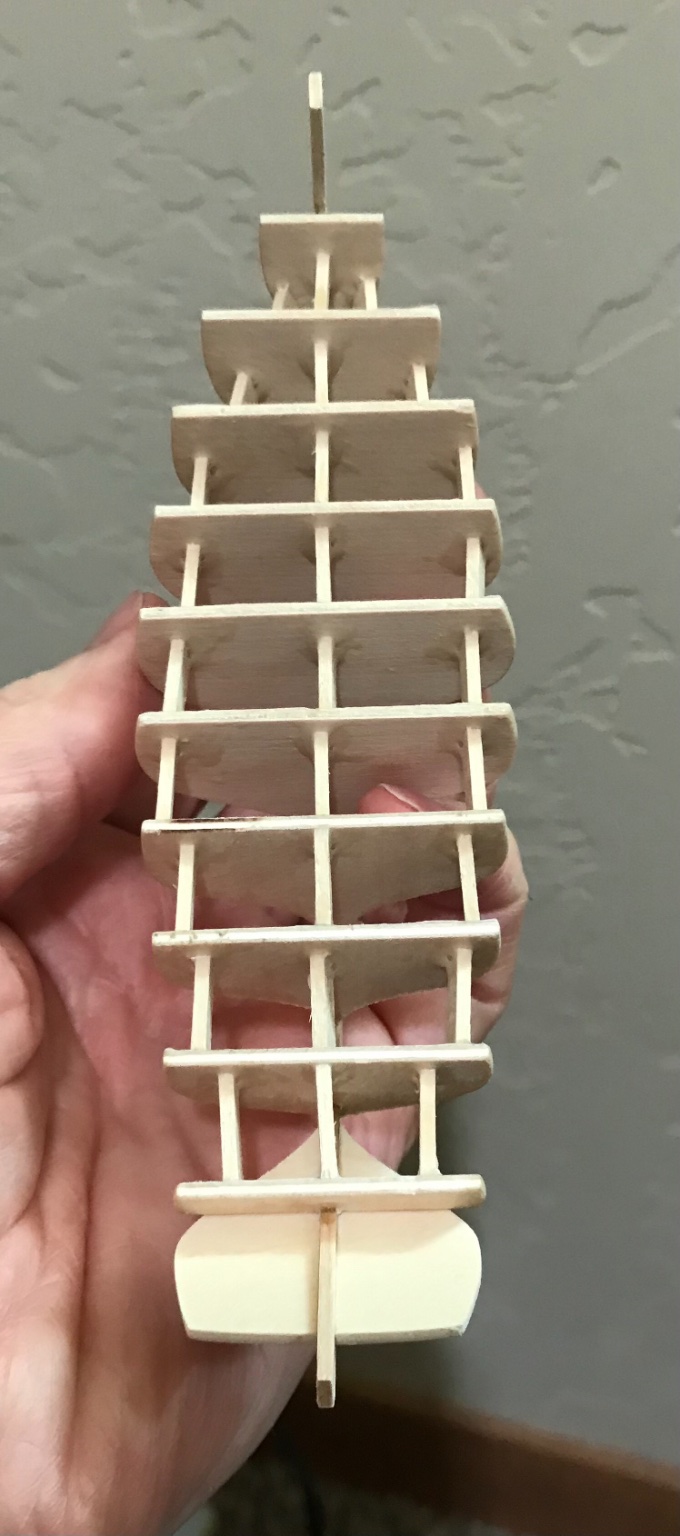
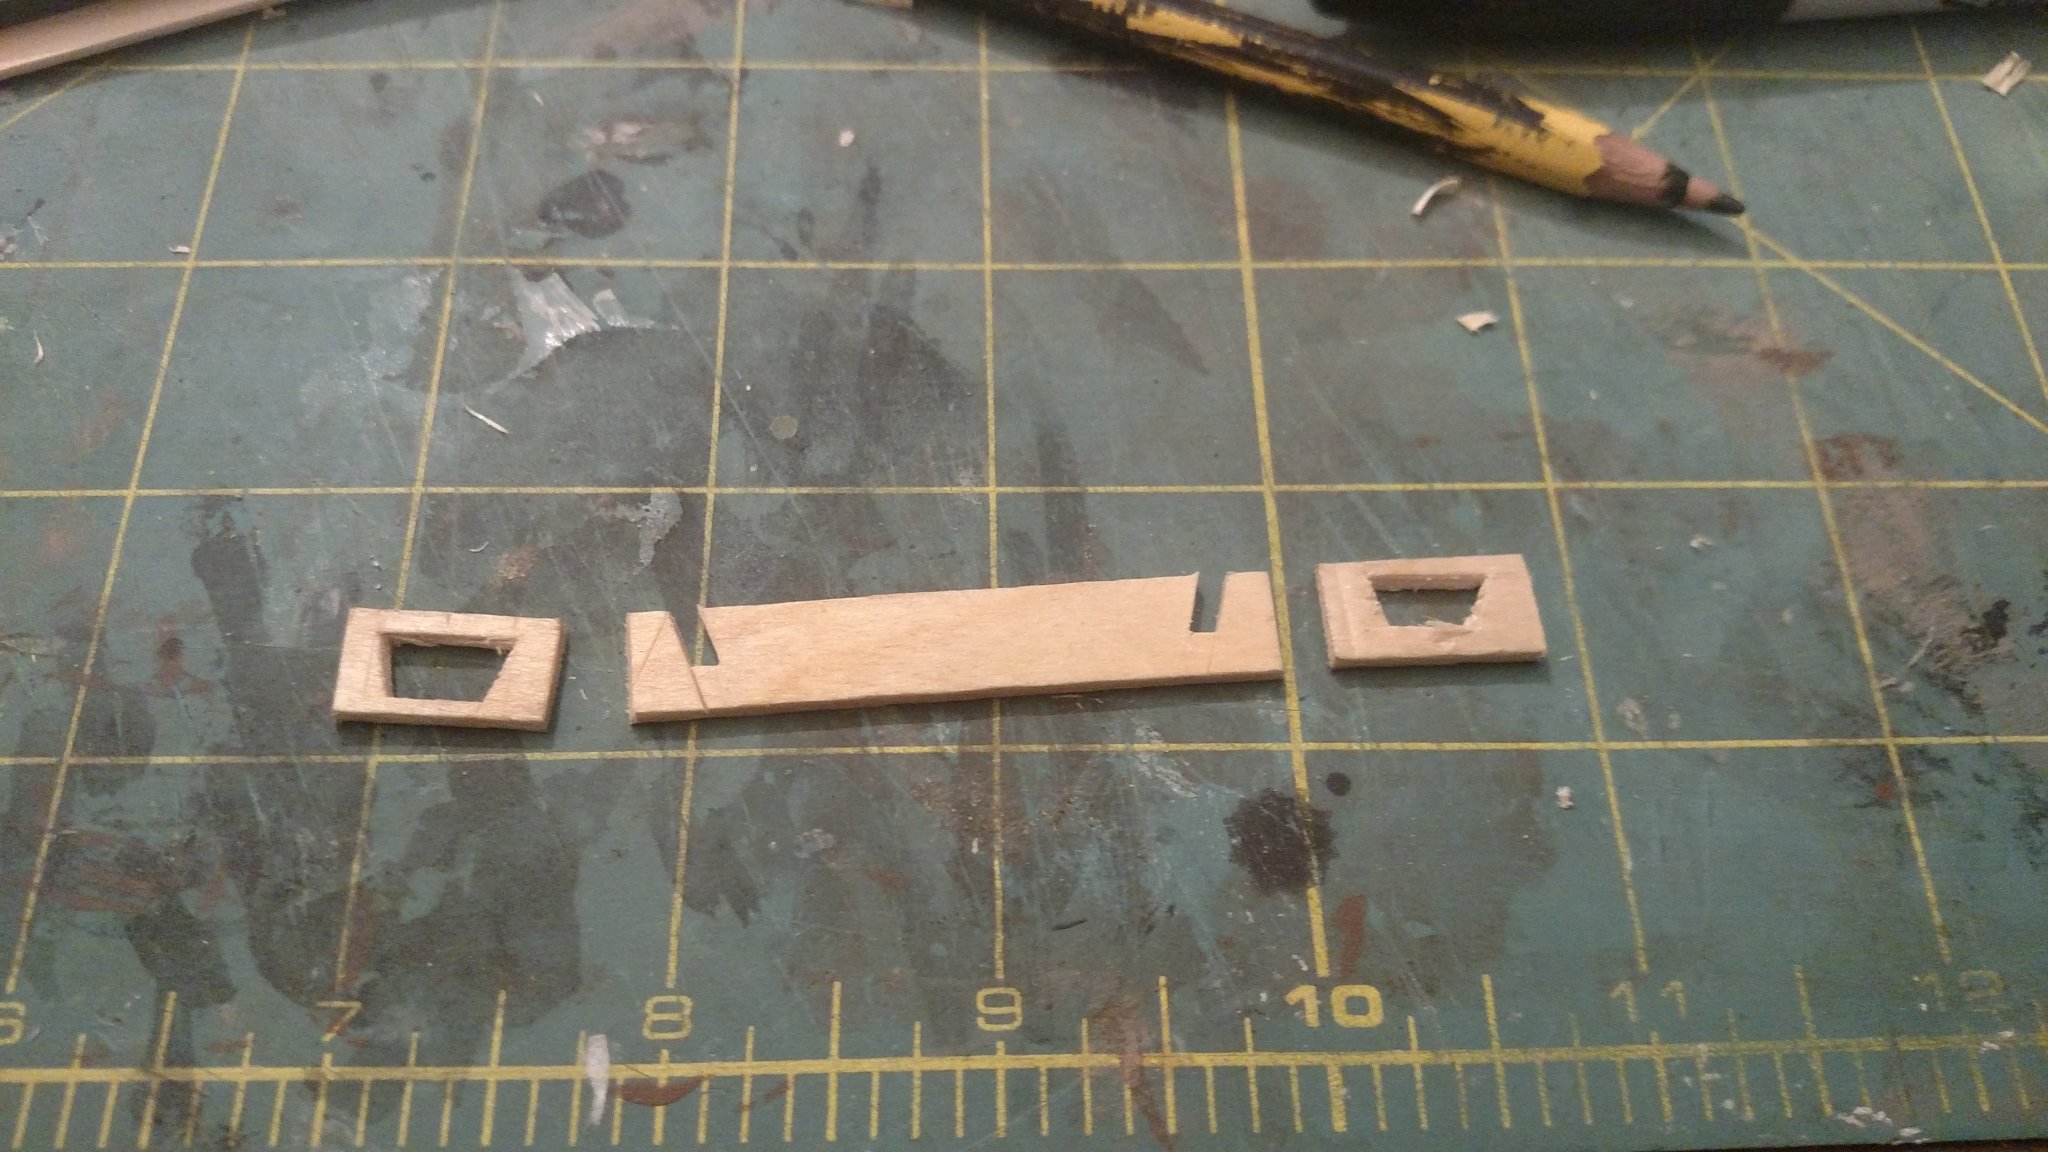
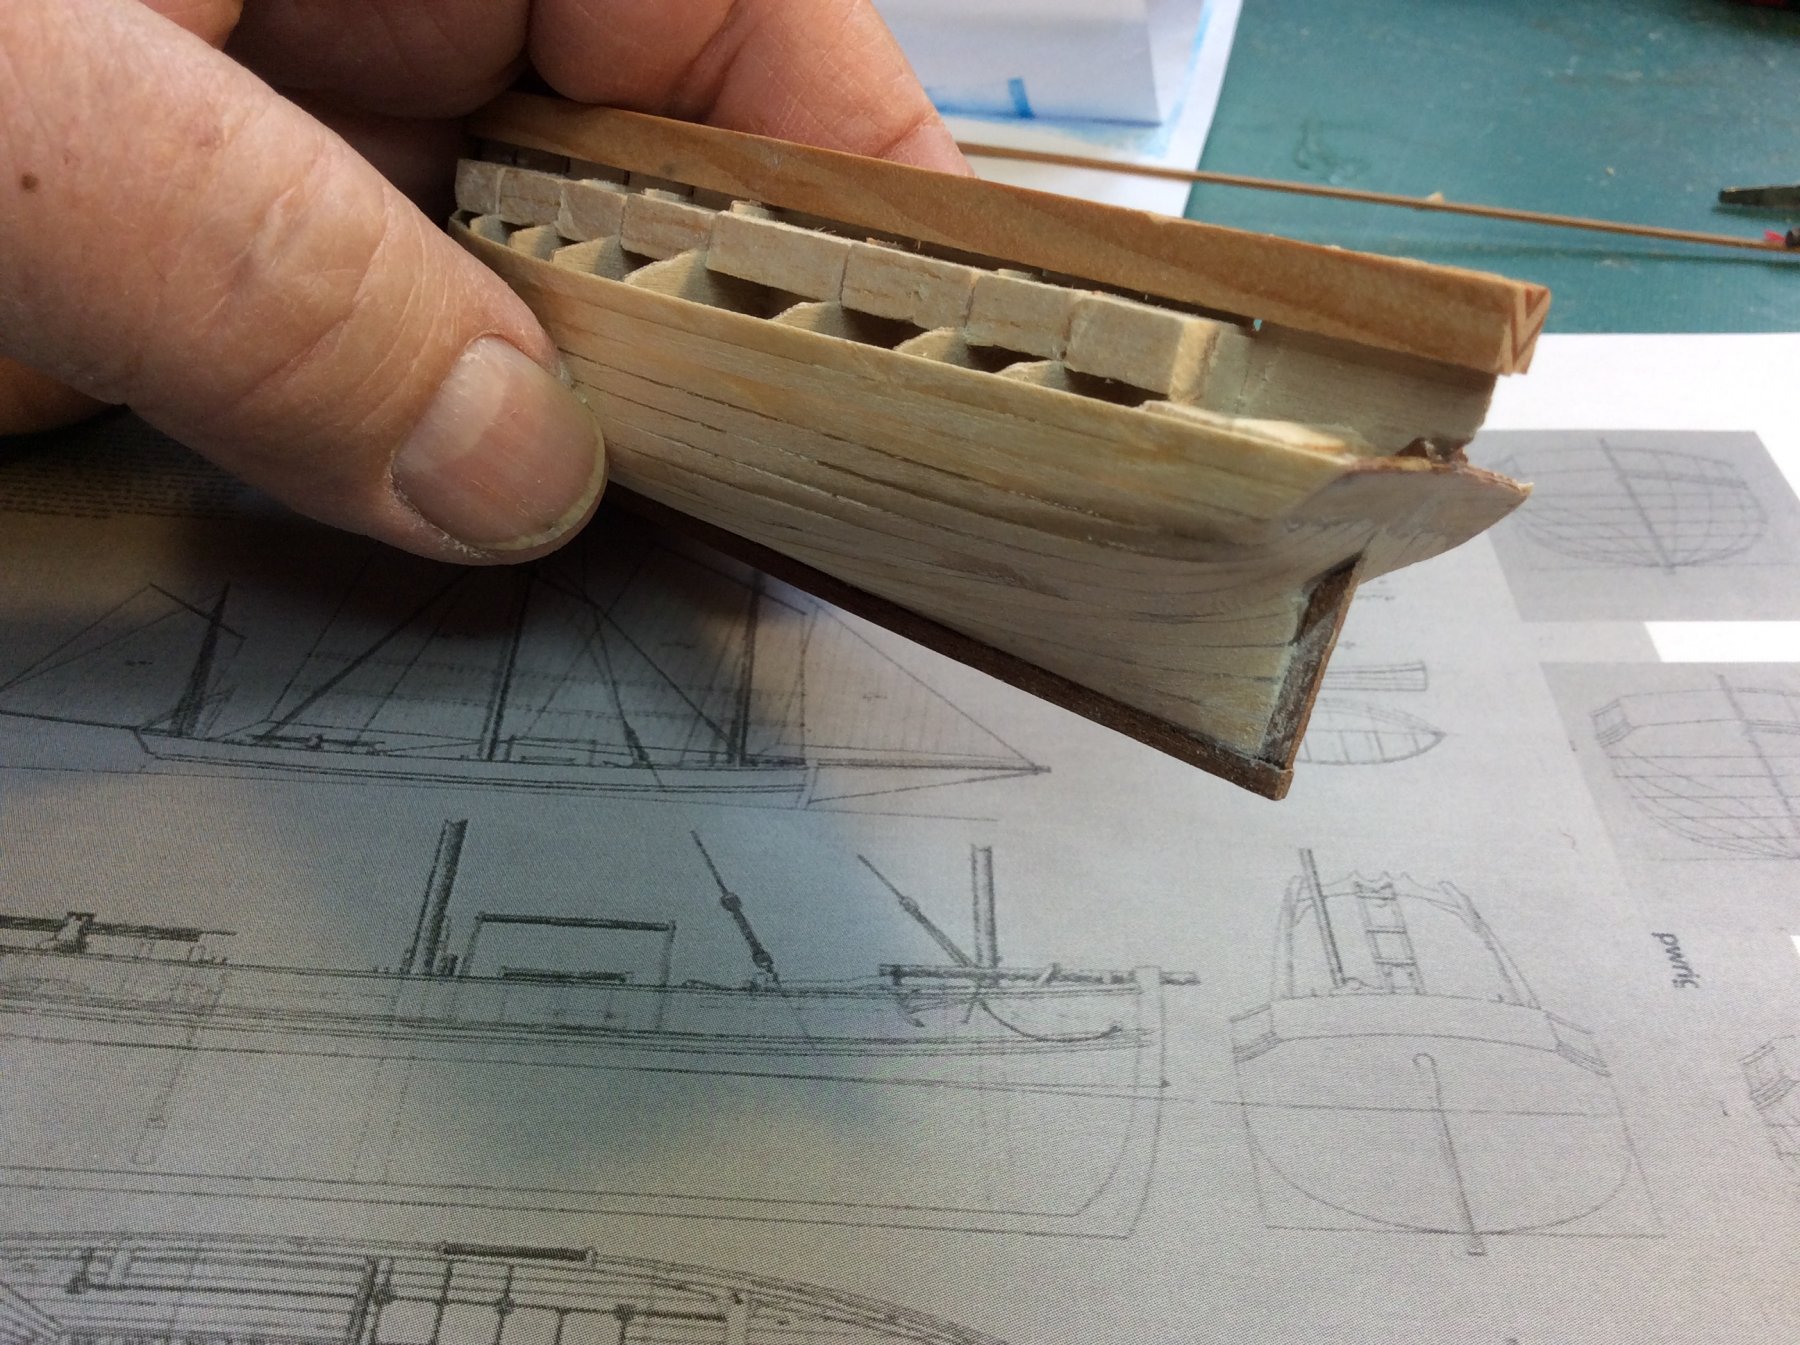
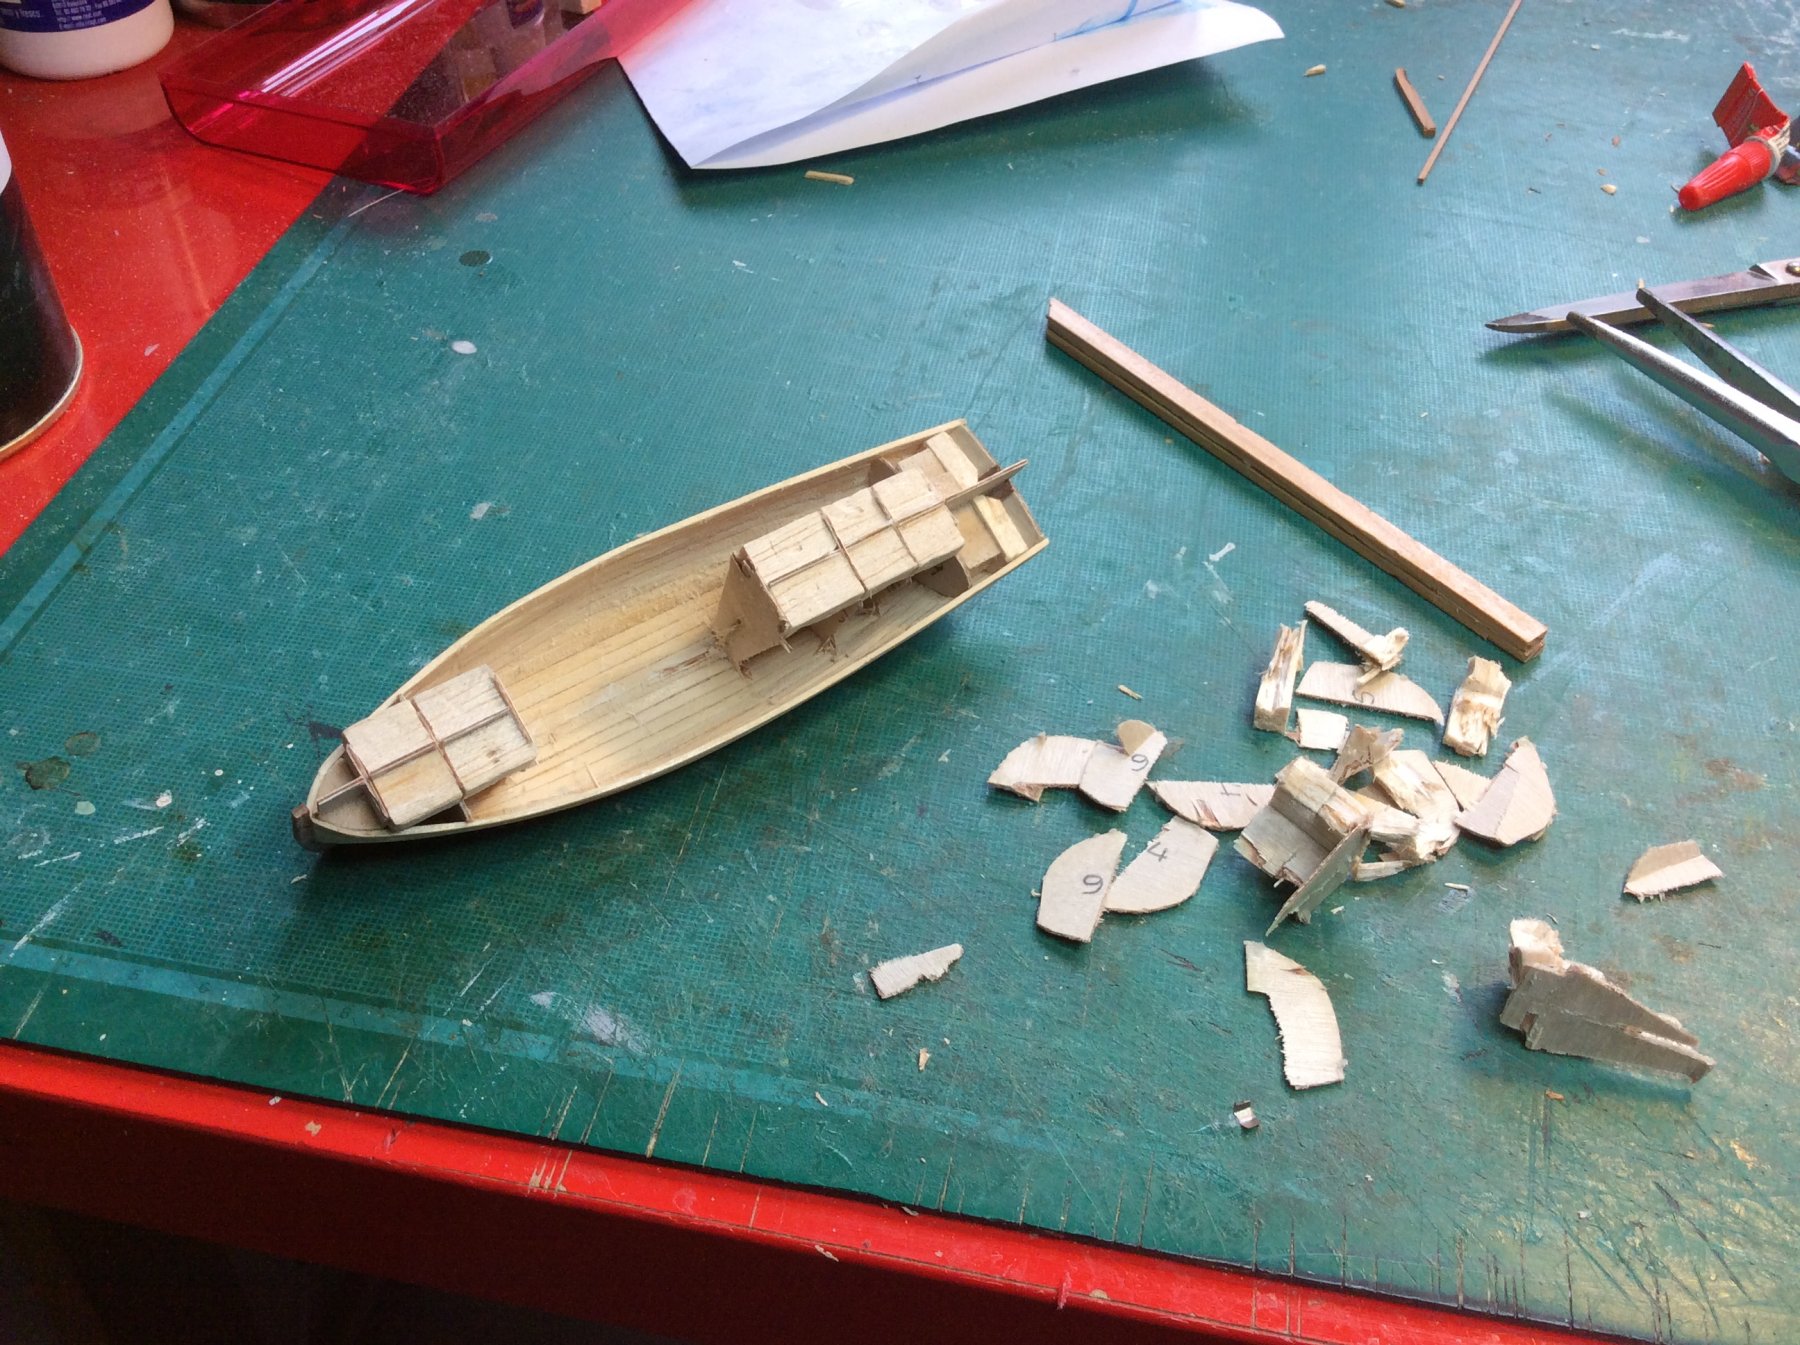
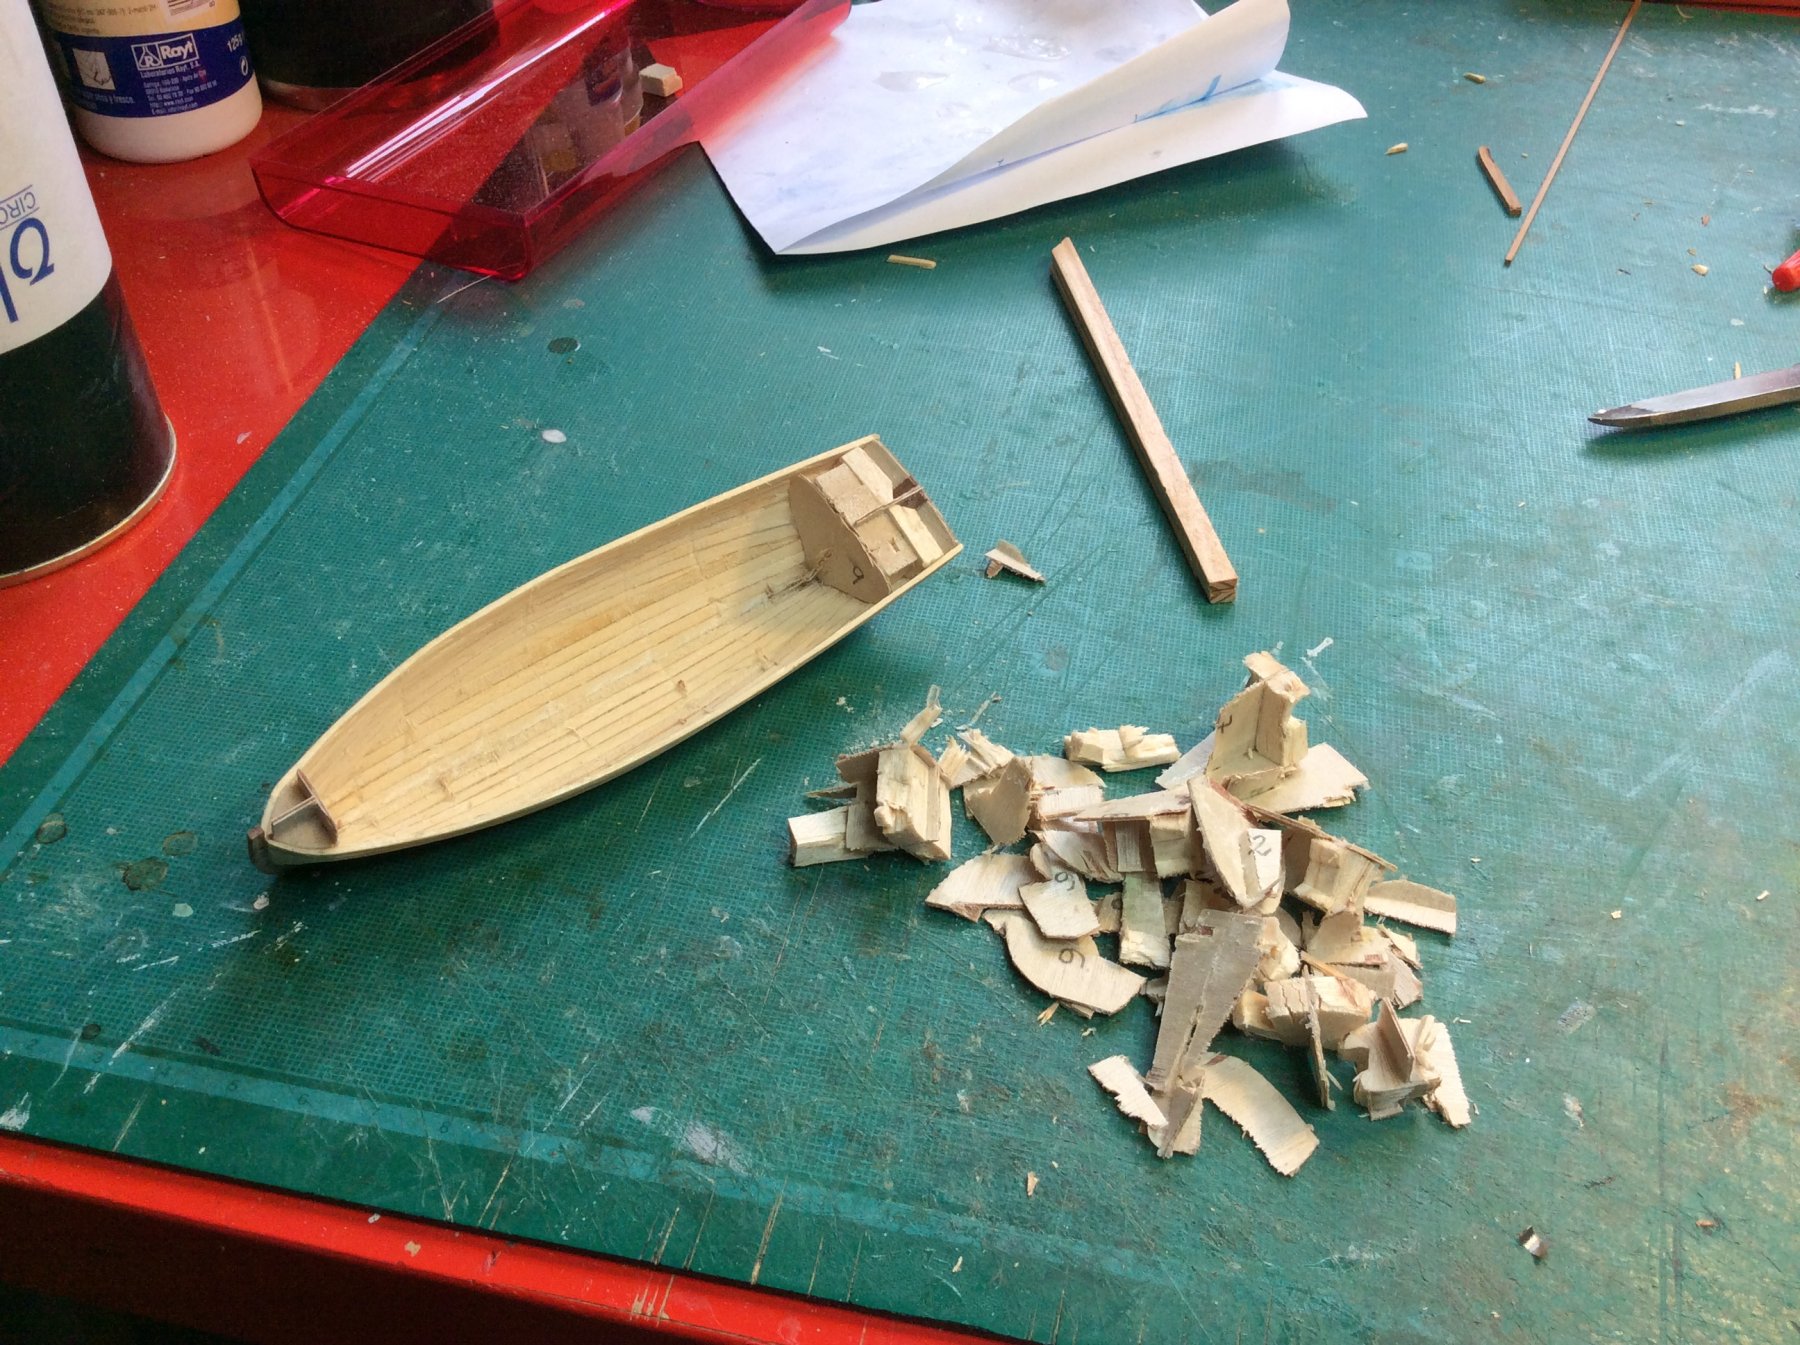
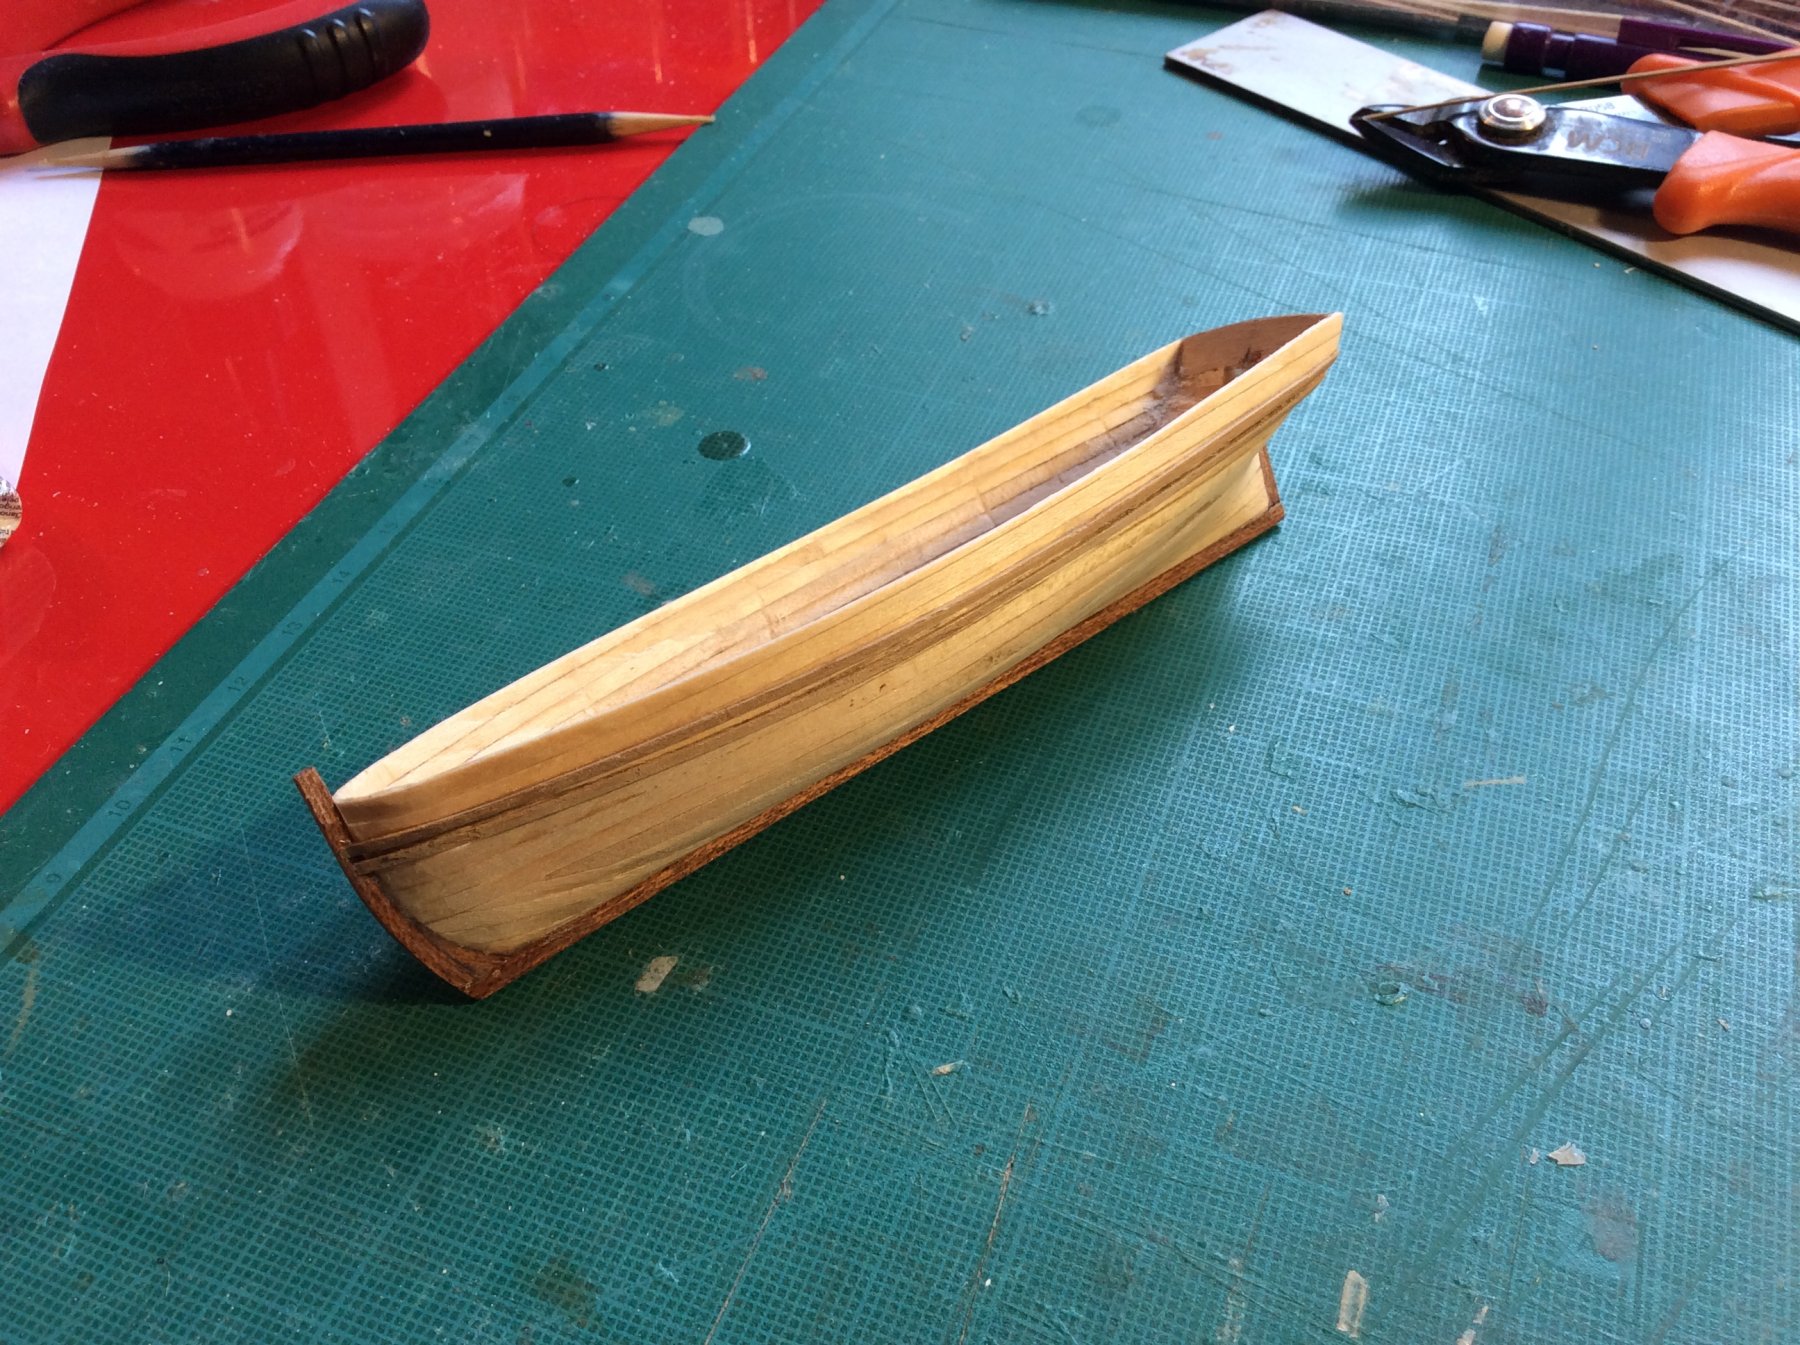
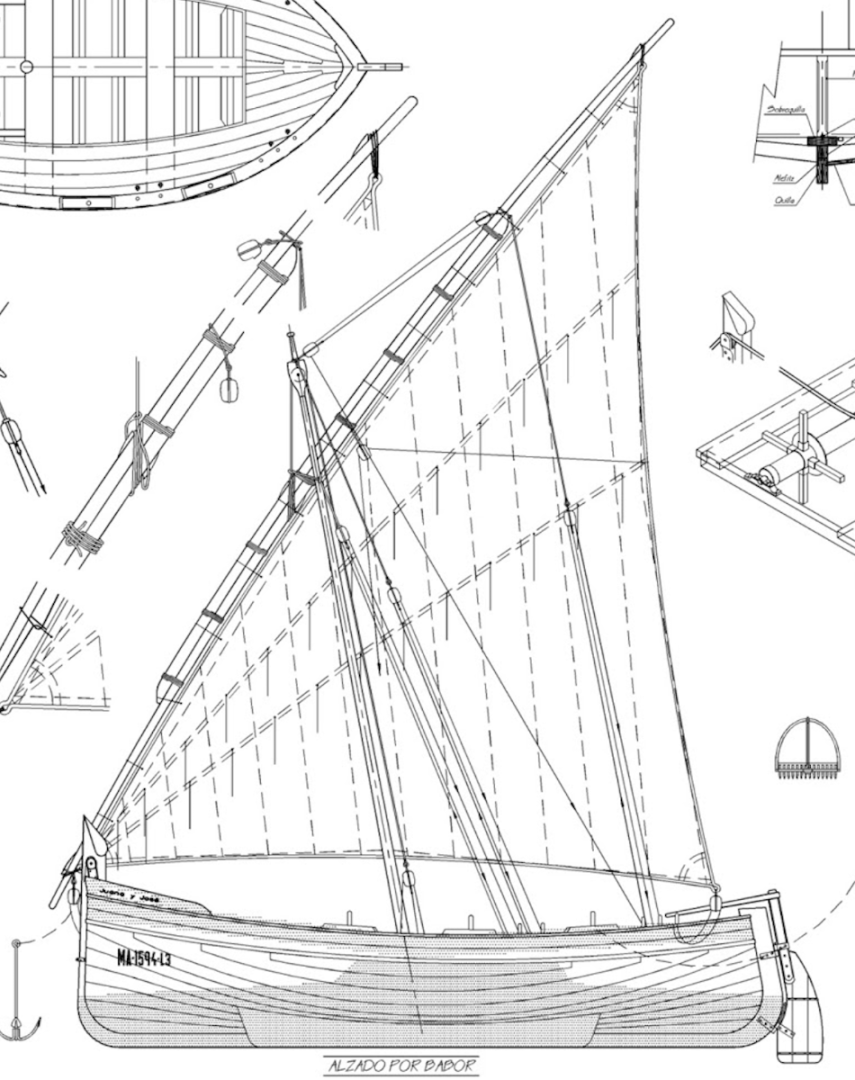
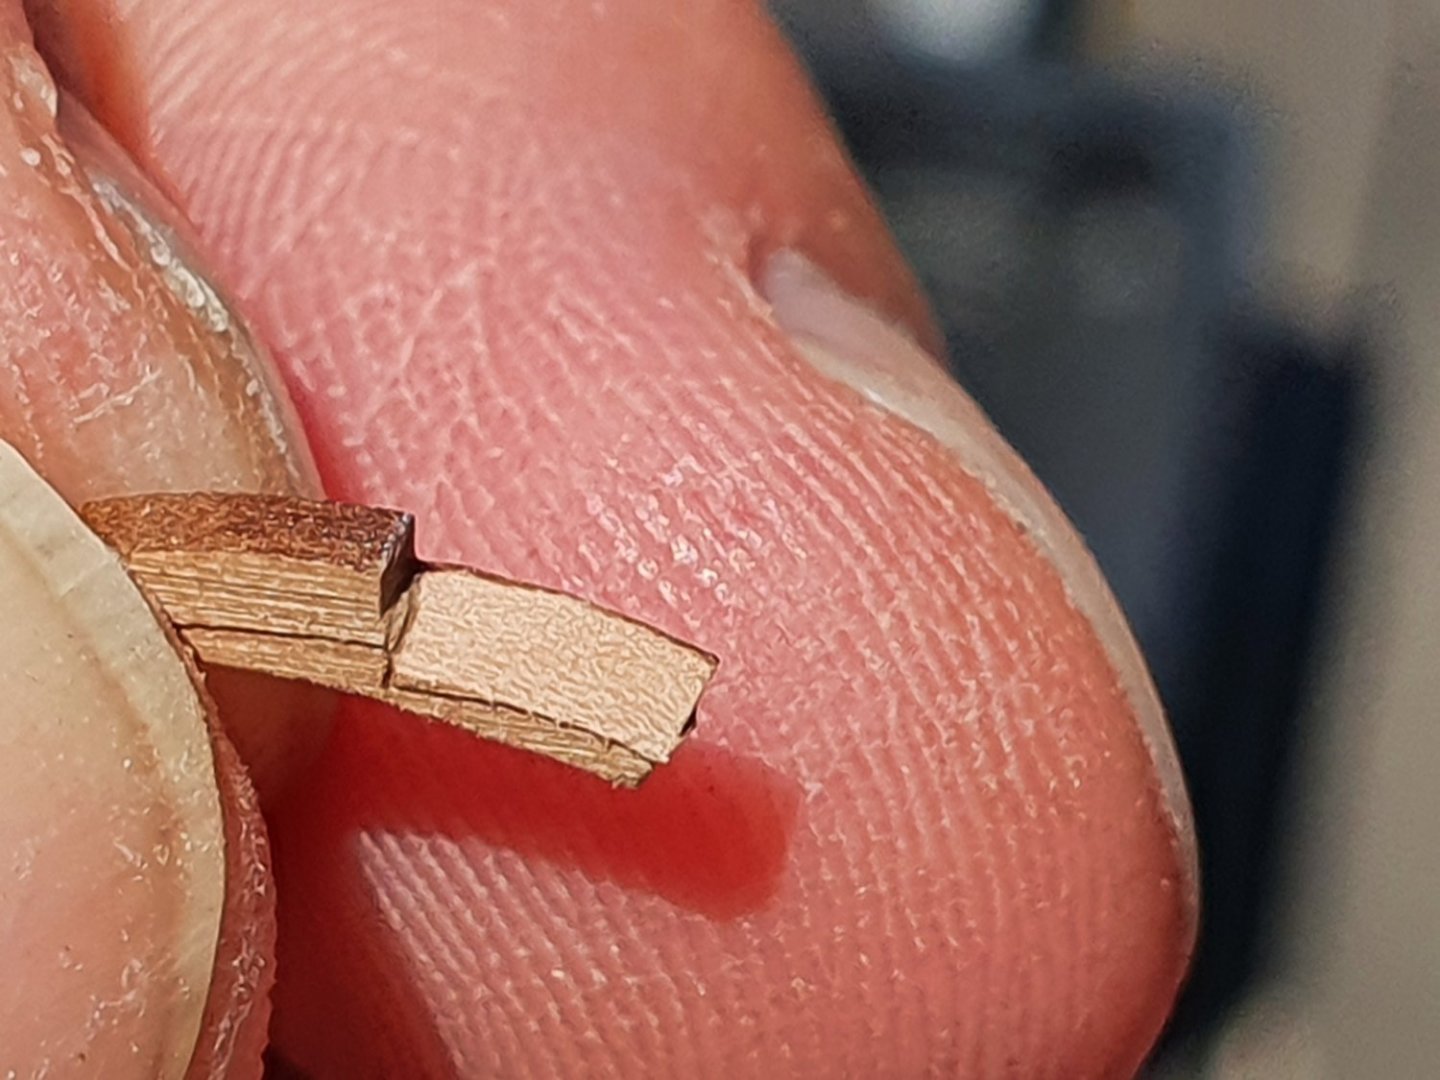
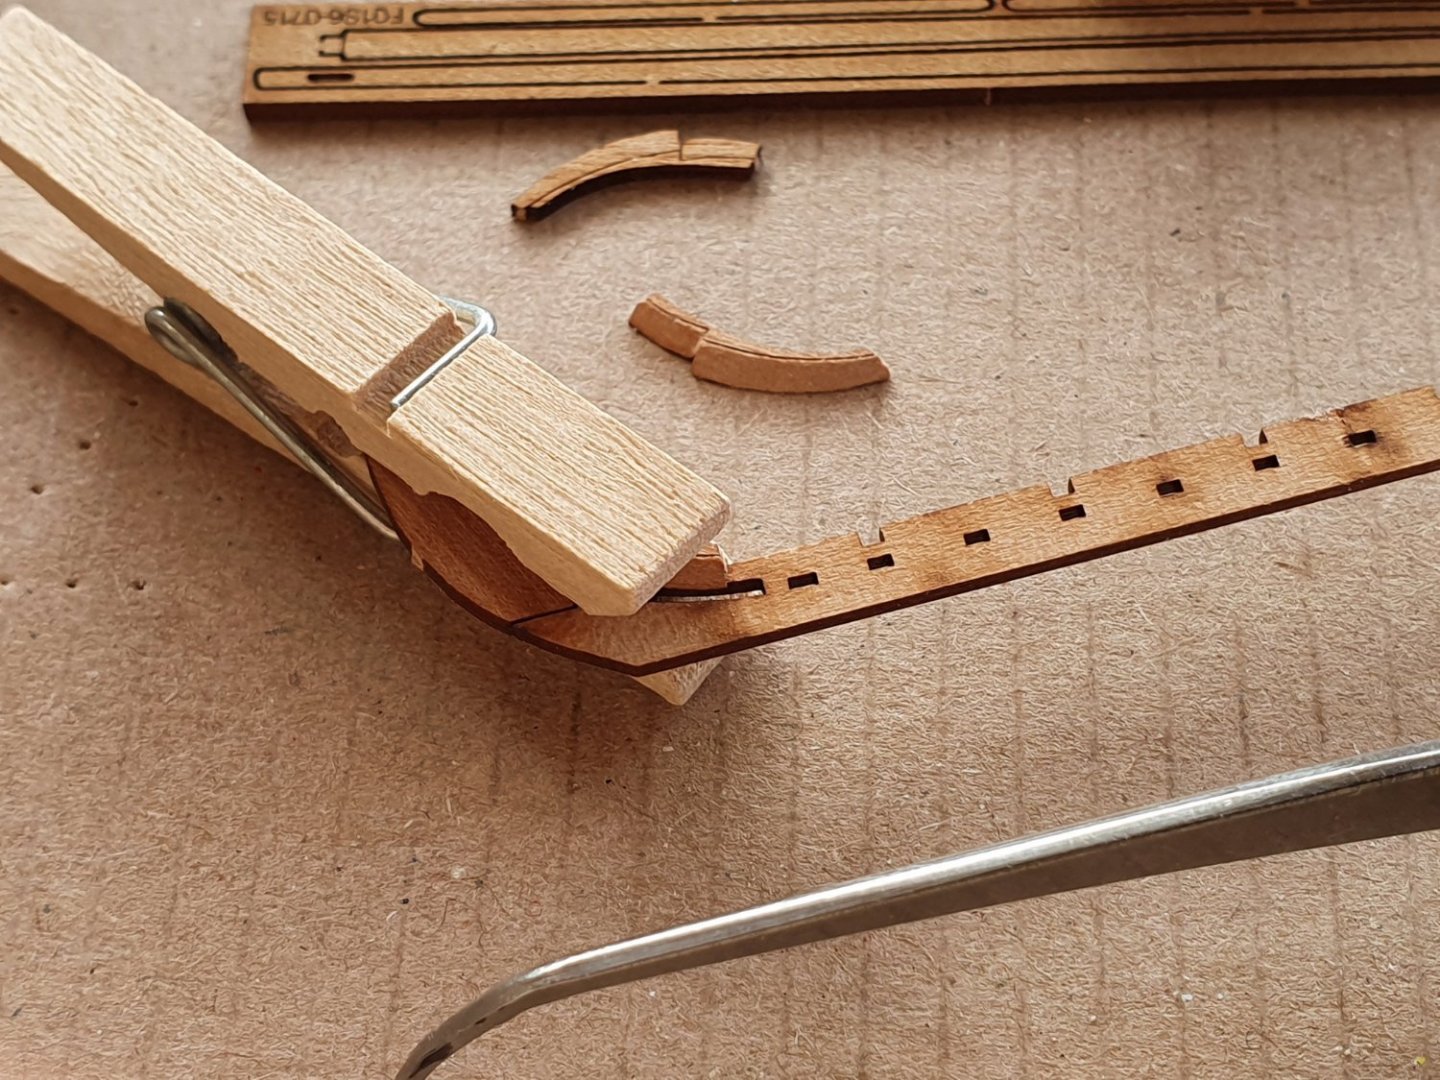
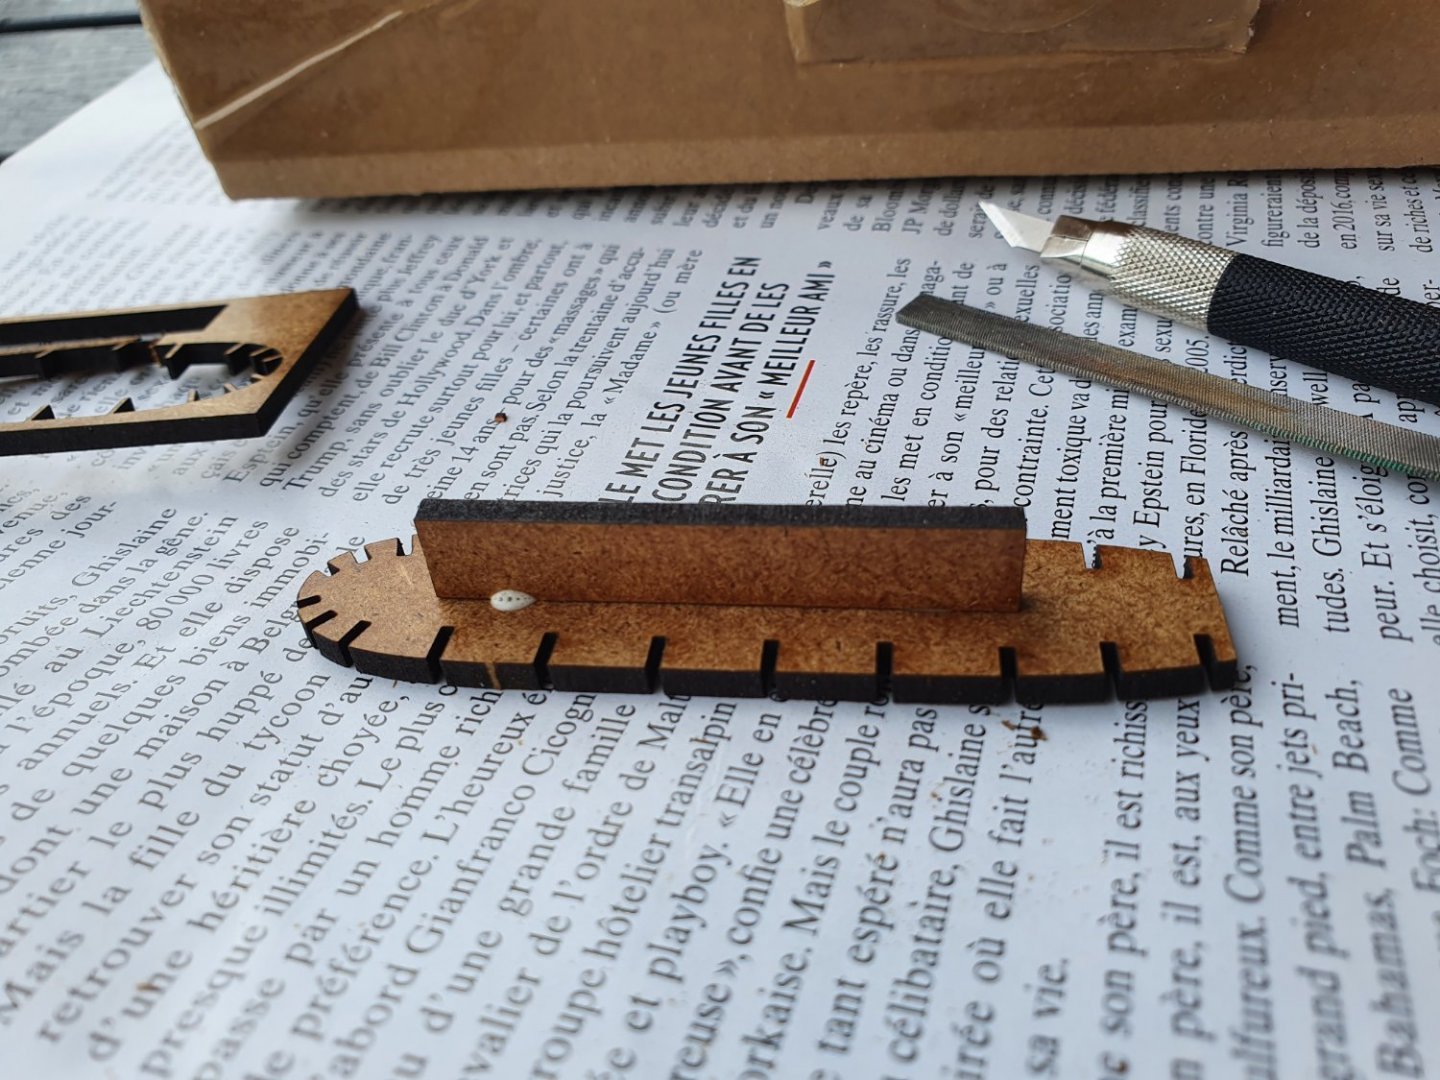
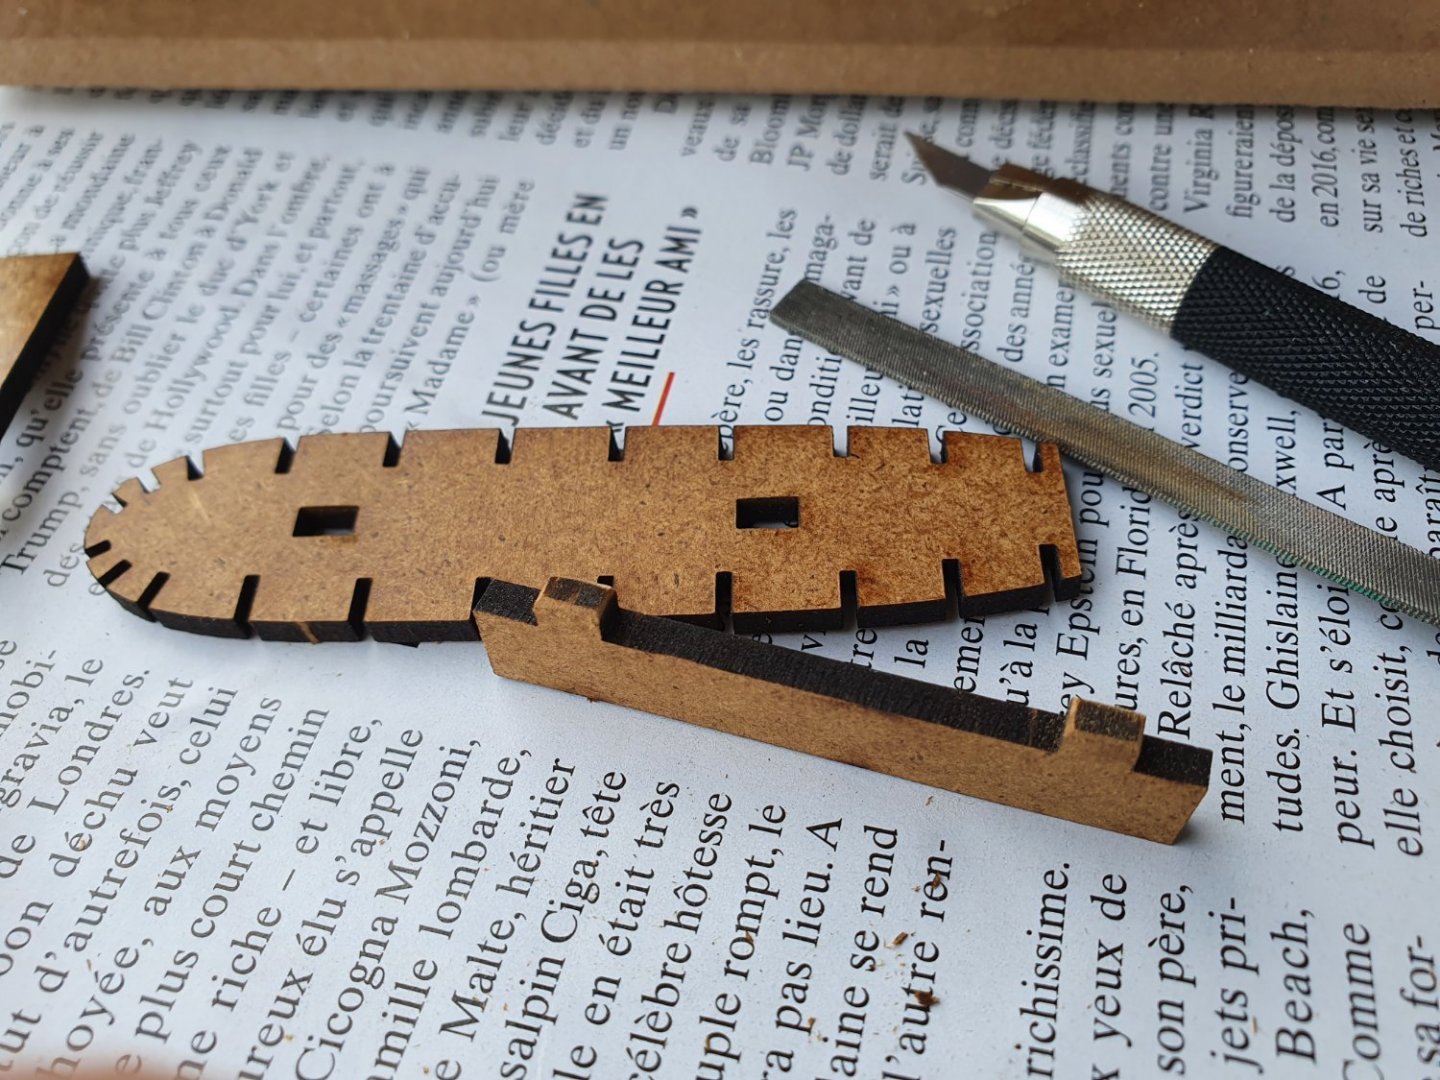
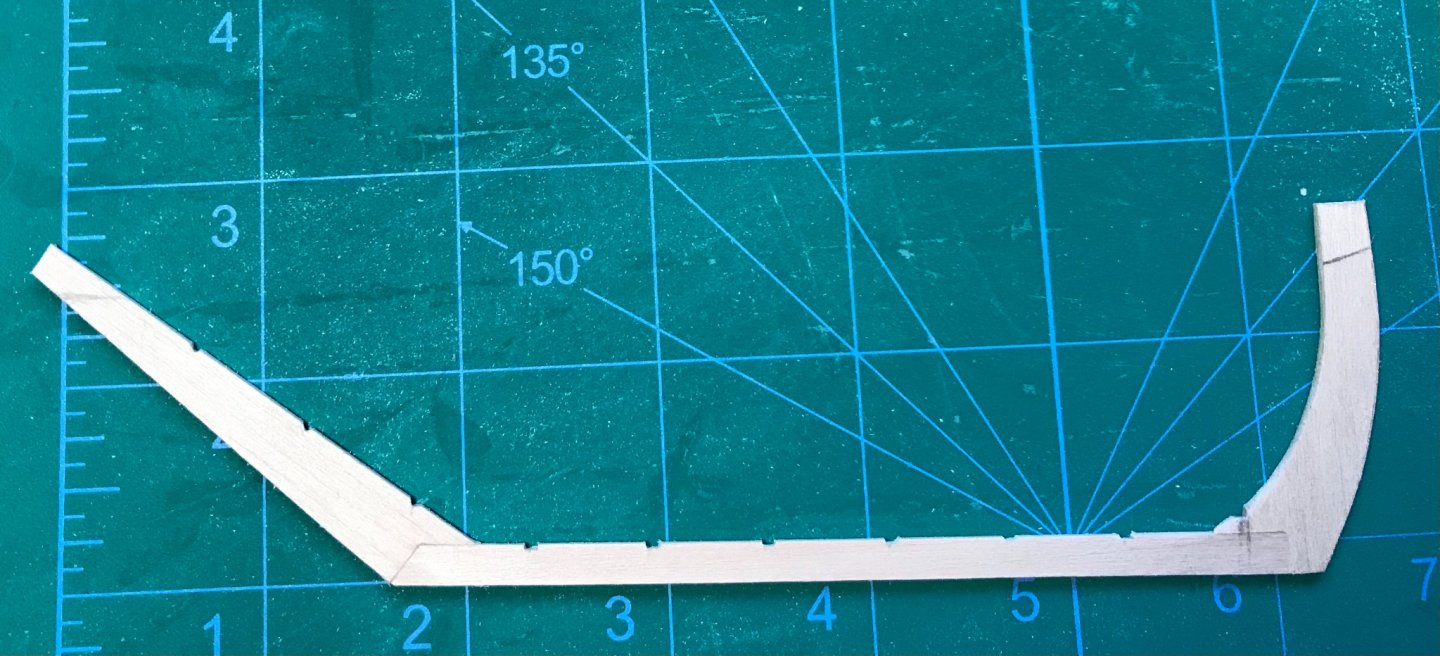
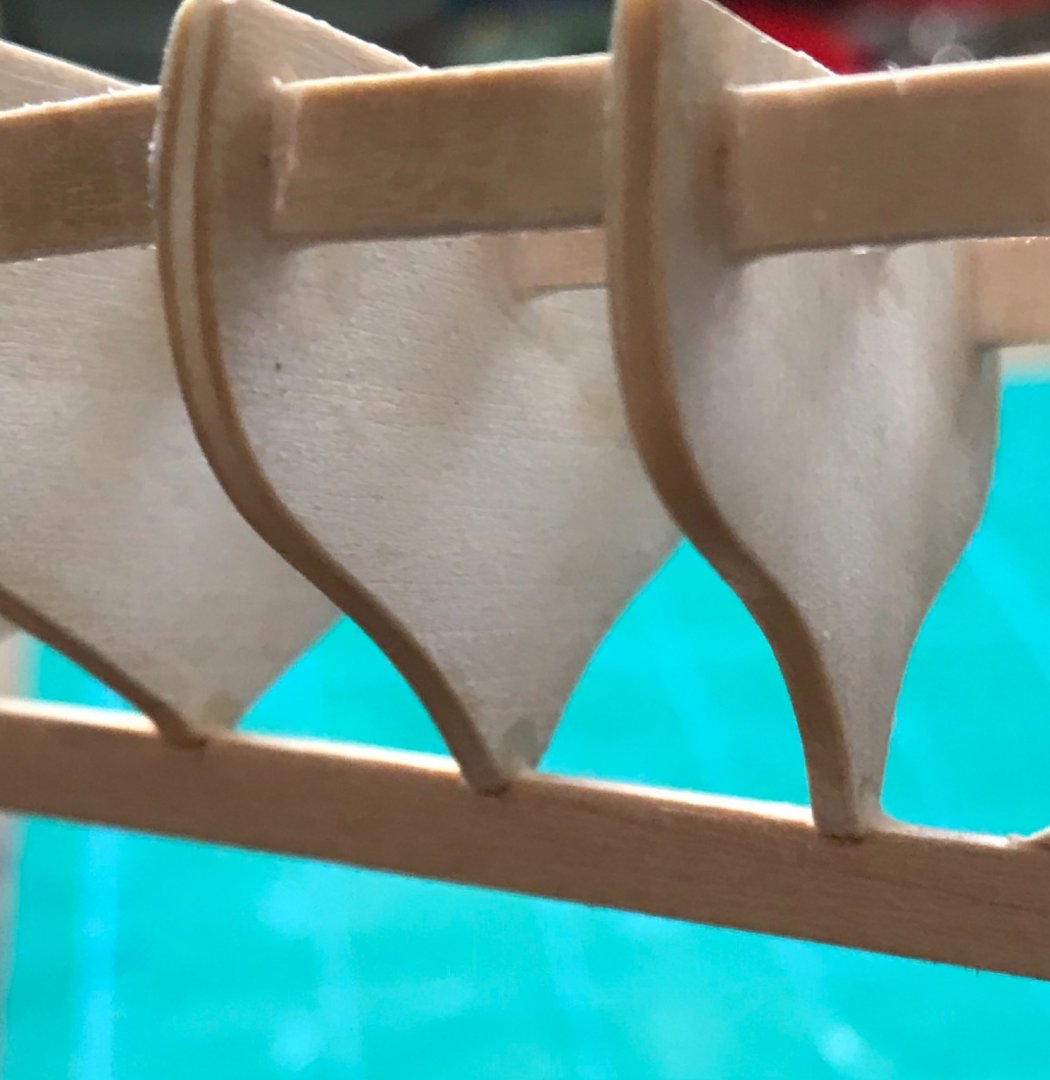
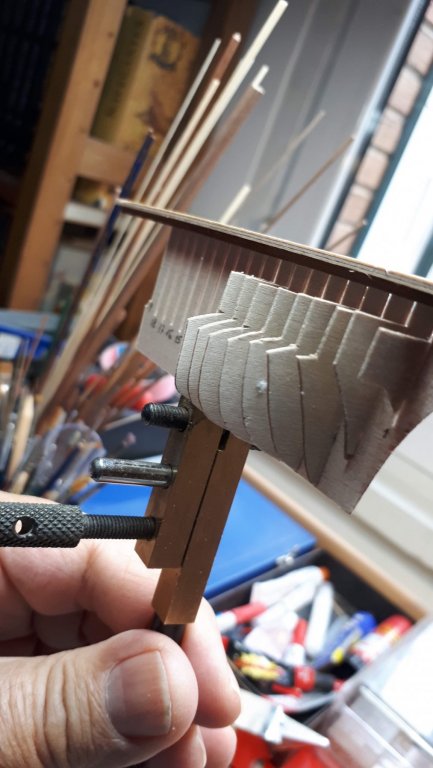
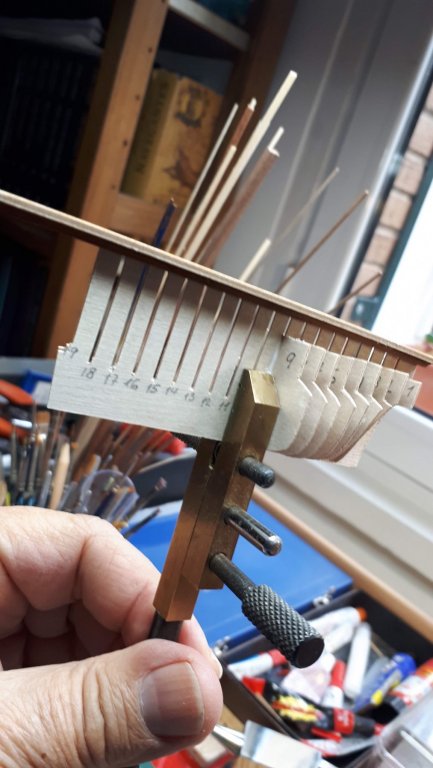
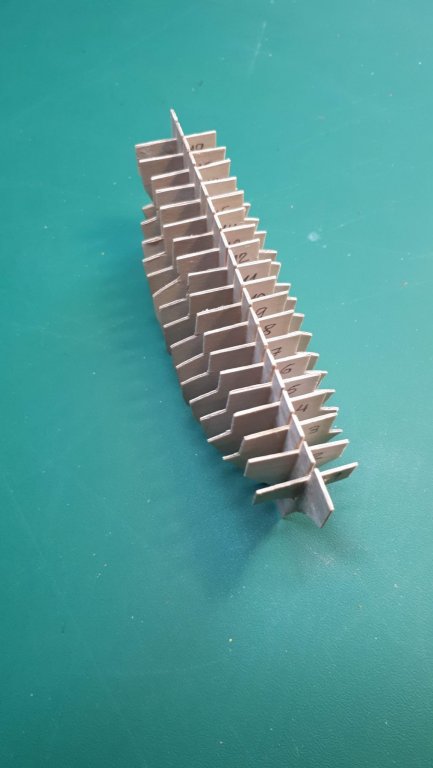
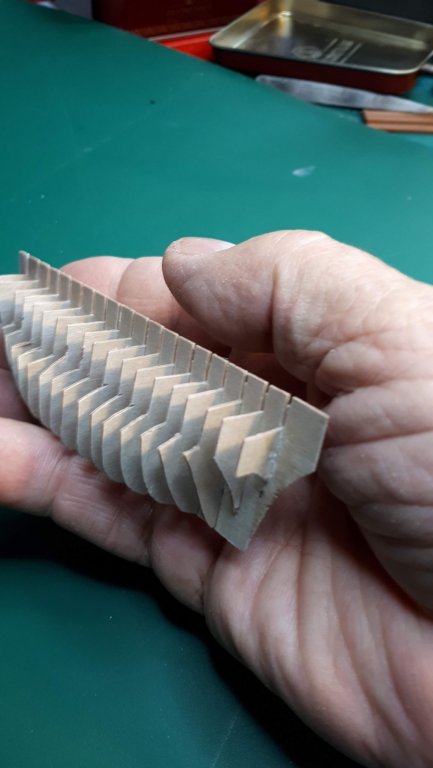
 Apparently I prefer to have multiple builds going at once, as I'm still working on the Lake Chapala Canoa build. But, this should be a relatively short and quick build, as it's a cross-section of a largely open boat. Obviously, this is an unusual choice for a cross-section--why make a cross-section of a boat that already has mostly visible framing?--and I think it will be the smallest vessel with a cross-section build log on the site. So, it's reasonable to ask why I'm doing it. Apologies for the long-winded explanation! Detail from the plans of the Juana y José. A cross-section of a barca catalana, a similar vessel. The Juana y José is actually a bit simpler than this in some aspects. Source: https://es.wikipedia.org/wiki/Barca_levantina#/media/Archivo:Parts_buc-català.jpg Why am I building a cross section of such a small boat? One thing that I'm grappling with is that, for the foreseeable future, I am going to be moving with some regularity and probably won't have much space. This makes modeling difficult. Unless I plan on giving most of my builds away, most everything will have to be readily transportable. So, much as I'd like to jump into even a relatively small model of a rigged sailing ship, like the Chilean Lancha Chilota coasting sloop that I have plans for to make a POB model, or the Model Shipways Muscongus Bay Lobster Smack, I'm struck by how difficult it will be to pack it up and lug it with me. So, I'm considering some more portable options. One option would be an unrigged half hull, and I do think I want to do the NRG half hull. Beyond being a good learning experience, it would be easy to store on a wall and much easier to transport than a rigged model. Another option would be to do some extremely small models or ships in a bottle, the latter of which would definitely take the prize for portability. There are some amazing and creative builds in both categories on the site, but I don't think my building skills are quite there yet. Another option is a cross-section (without a mast). The Triton and Echo cross sections both look fantastic, but both also seem like you really need more tools and skills than I have to build them. Finally, I was looking at a fourth option: a small model around 6 inches long, likely of a rowing vessel in a reasonable scale that wouldn't be too fiddly to make. I got started with modeling after going to the Barcelona Maritime Museum and being blown away by its small craft collection, and one of my goals is to build a POF model of a traditional lateen-rigged Spanish fishing vessel (of which there are a number of types--the barca catalana, the Mallorcan llaüt, the palangrera, the sardinal, the barquets and barches of Valencia that wefalck discusses in detail on his website: https://www.maritima-et-mechanika.org/maritime/albufera/Boats-of-the-Albufera.html, etc). I found that a Spanish modeler, Alfonso del Valle, had drawn up plans--not just line plans, but also diagrams of all frames--and made them freely available for one such boat, the Juana y José. Although there are no builds of it on this site, the Spanish modeling forum Foro Modelismo Naval has a number of builds (such as this one: https://www.foromodelismonaval.es/viewtopic.php?t=15014), and the plans produce a very nice model. Javier Baron, who has a number of albums in the galleries of Model Ship World, even made a beautiful tiny model in 1:74 scale: https://barcosbaron.wordpress.com/2015/01/11/391/). The Juana y José is a small vessel, and the plans are originally in 1:15, but I was curious about what a 1:32 scale build would be like, as that would produce a model about 6 inches long (1:74 scale, in contrast, is well beyond my skills). Printing the plans off in that scale, I noted that the frames would be thin, but perhaps still manageable, and that all parts can be constructed from basswood in thicknesses I have access to. I decided to hold off on a full build for now, as I have no idea how to plank a curved hull form yet. But a small cross-section seemed like a way to test out whether I will want to eventually go ahead with a full build at 1:32, or if I'd prefer a larger scale. It also will give me some experience with POF construction, and will produce a readily portable model. Also, if I eventually do a full build, I can display it alongside the full model. The Juana y José There are a few particularities about the boat and the plans. As del Valle discussed both on his website, now sadly defunct but still viewable through the Internet Archive (https://web.archive.org/web/20160902024136/http://www.modelismonaval.com/magazine/almejera/juanayjose.html), and also on Foro Modelismo Naval, the Juana y José is a real vessel, an old fishing boat that he came across on the beach in Algeciras. The owner allowed him to take its lines and photograph it, and told him about its history. It was built in Málaga sometime in the early 1900s, and was later sold to an Algeciras fisherman. It was broken up in 2003, and was 4.75m/15.6ft long. However, the actual vessel is entirely open and oar-powered (while the owner said it used to have a sail, del Valle saw no mast step or other such evidence, although it conceivably was removed during repairs or renovations). While del Valle accurately depicts the Juana y José in its line plans, in the other sheets, he instead decided to depict it in the rest of the plans as a lateen-rigged, decked vessel, similar in form to a sardinal, and added a prominent windlass, turning it into a traditional clam dragger as he remembered from his youth. So, while the hull is accurate, other details are not. These additions are certainly similar to other vessels, though. So, I could either build the Juana y José accurately as a pure rowboat, follow the plans even if they're not totally accurate--as I've noticed, they make a gorgeous model, and I do really love the look of Spanish lateen-rigged fishing boats--or perhaps take a middle route, inspired by the owner's comment that it used to have a sail, and add a mast while leaving off the deck and windlass. Following the plans would certainly produce the most visually interesting option, even if it's still very simple for a cross-section. The Build, Part 1: The Keel I decided to make the cross-section long enough to include two thwarts, providing the build with some structural rigidity. I chose a six-frame section running from around amidships foreward. If I choose to follow the plans, this section will include the mast step and windlass. The section is just under 2 inches long. I started with the keel. As it turns out, at 1:32 scale, the keel is very close in thickness to 1/16 of an inch, so I was able to use some of my stock of that basswood for the keel. While this seems very thin to me, it's what the plans show and widening it would require reshaping all the frames a bit, so I'm keeping it for now at least. I marked and filed out the frame notches. My filing skills could use a little work, and the notch on the right in the photo below is too wide, but it will do. I then carefully carved out the rabbet, mostly using an exacto knife but also running a file edge along it to widen it a little. I was very concerned about the rabbet cutting through the keel--again, it's 1/16-inch thick--so it's probably not as deep as it should be, but I think it will work. After this photo, I added a coat of sealer-varnish to strengthen the wood a bit--I don't want it breaking along the rabbet or elsewhere, or chipping any more than it already has. Some of the notches may need to be slightly deepened, but I'm going to leave them as-is for now and adjust that once I test-fit the frames. This post is already long, so I'll leave the first frame for the next post.
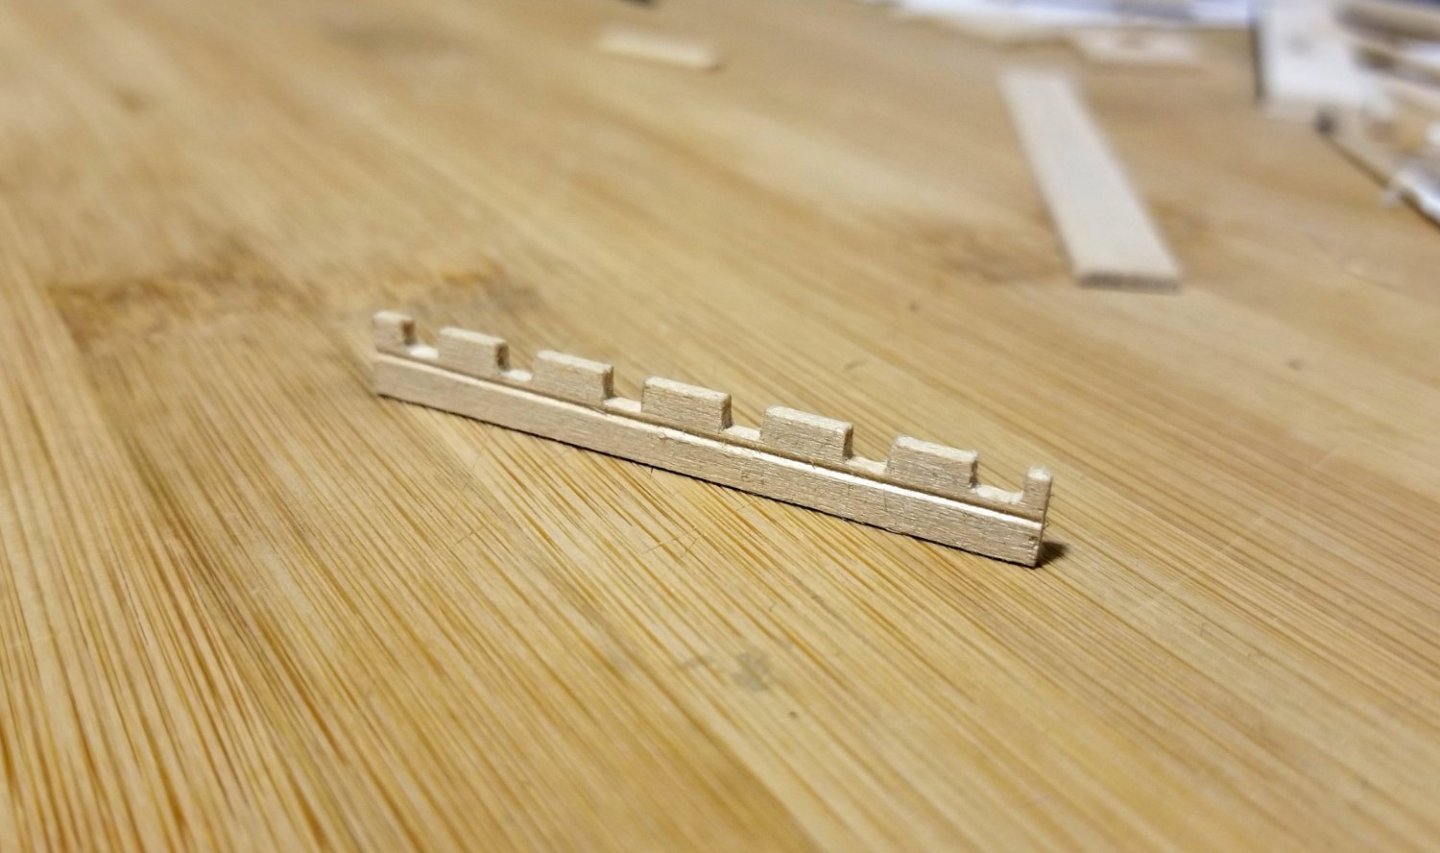

-
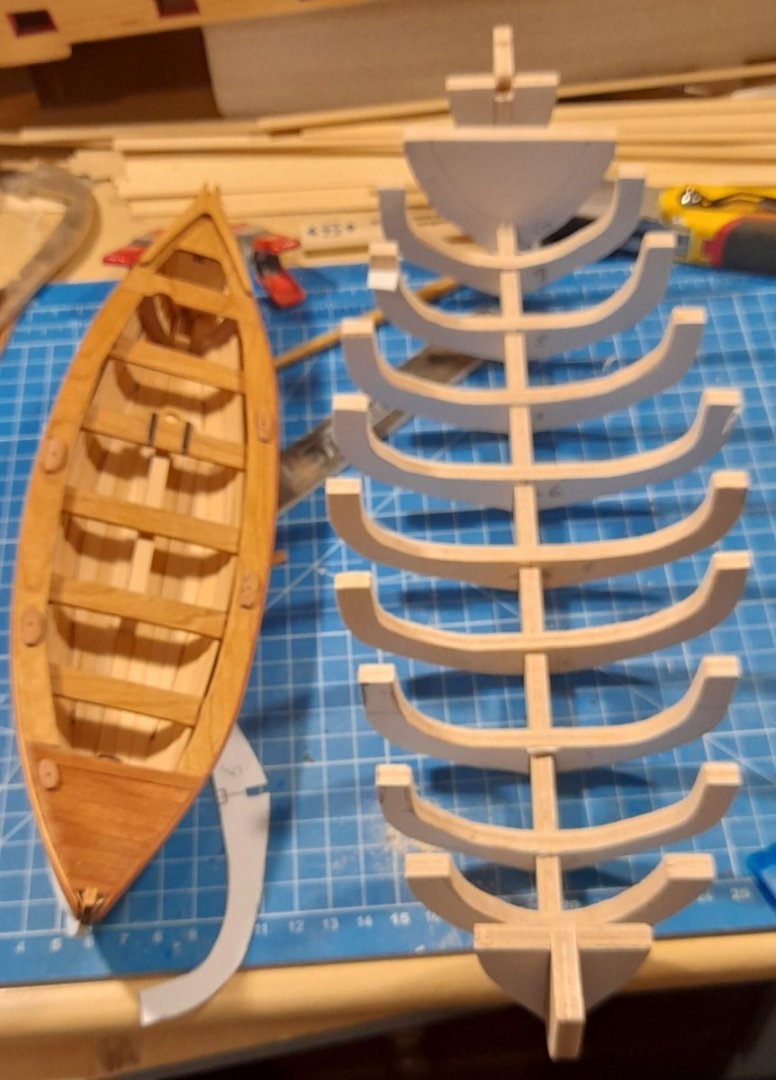
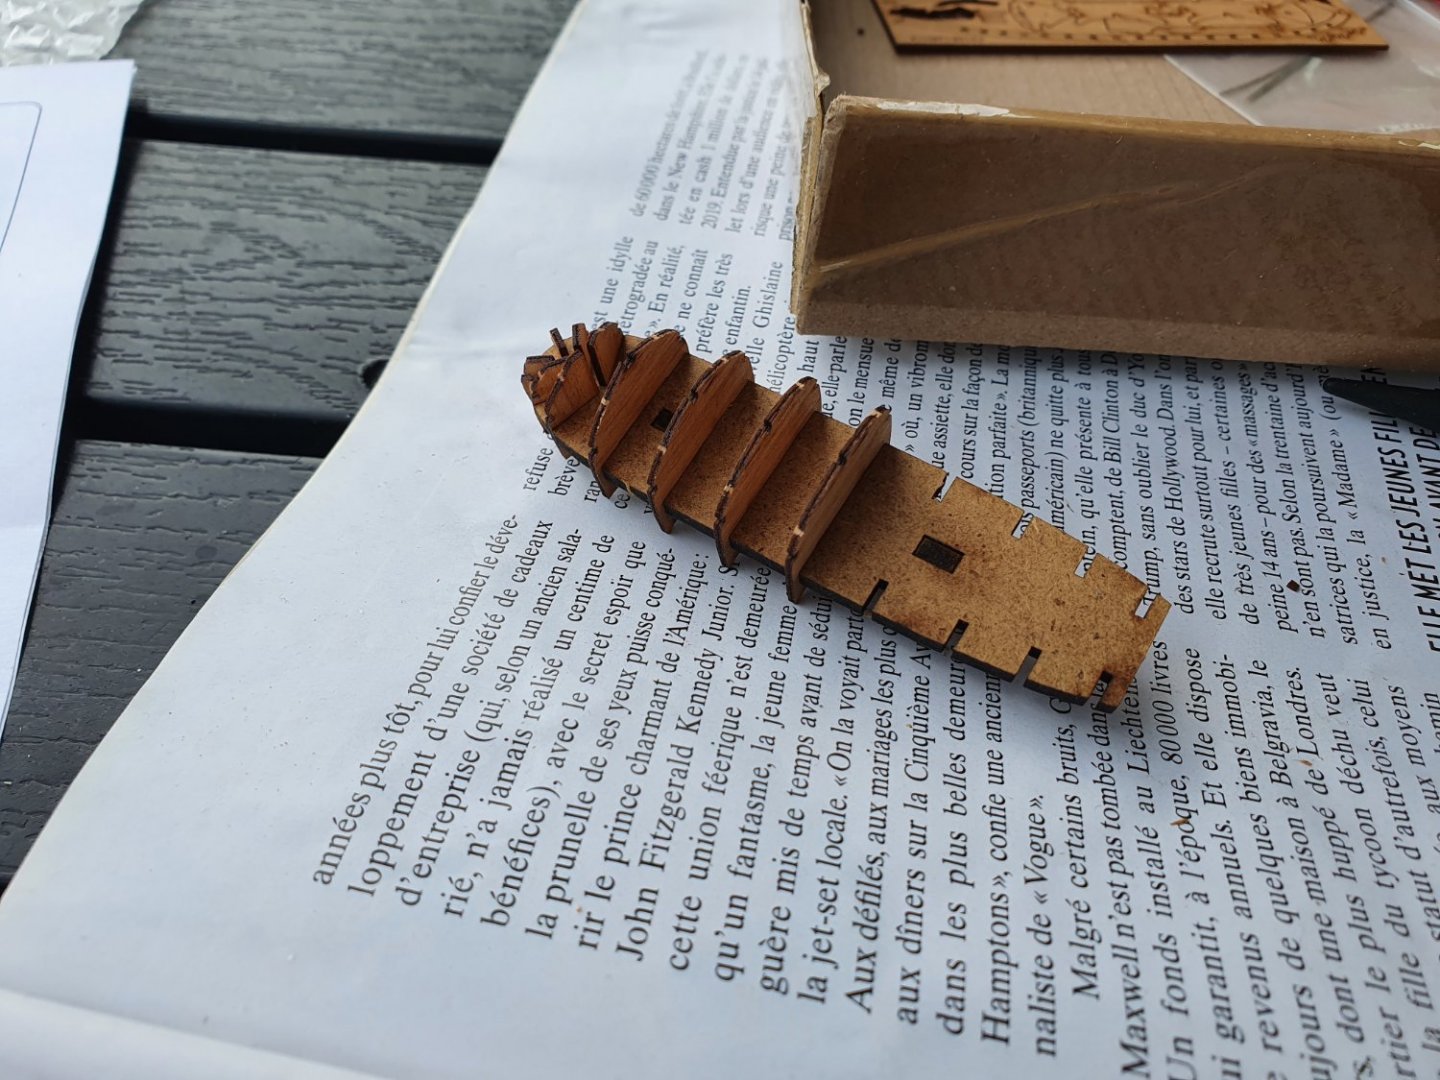
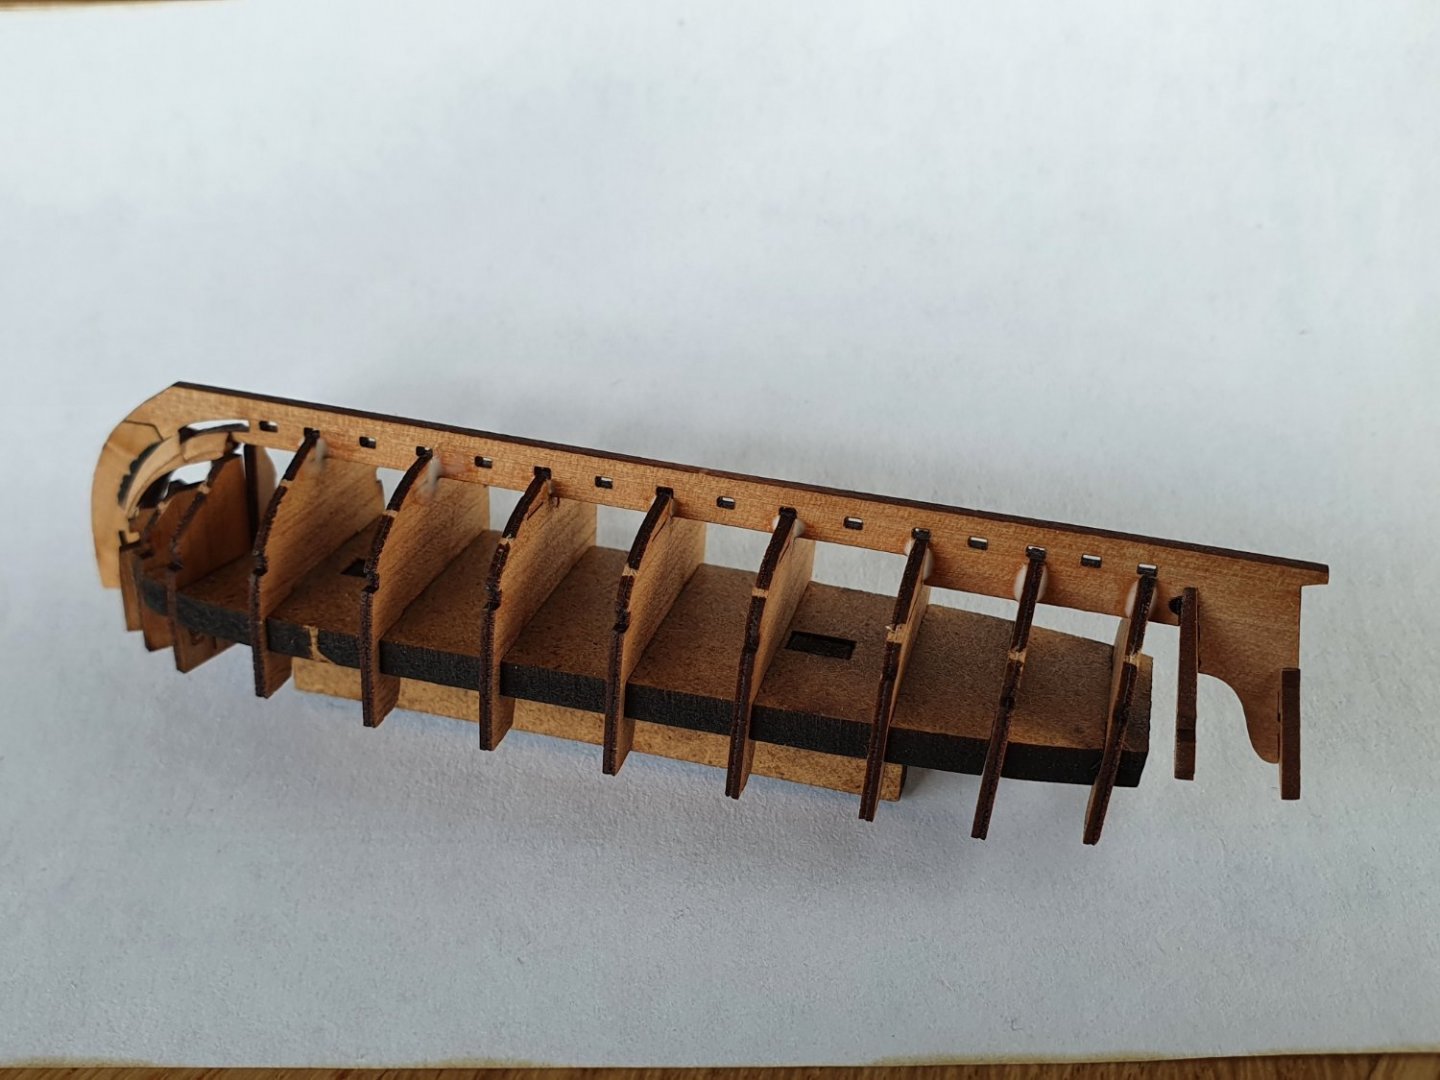
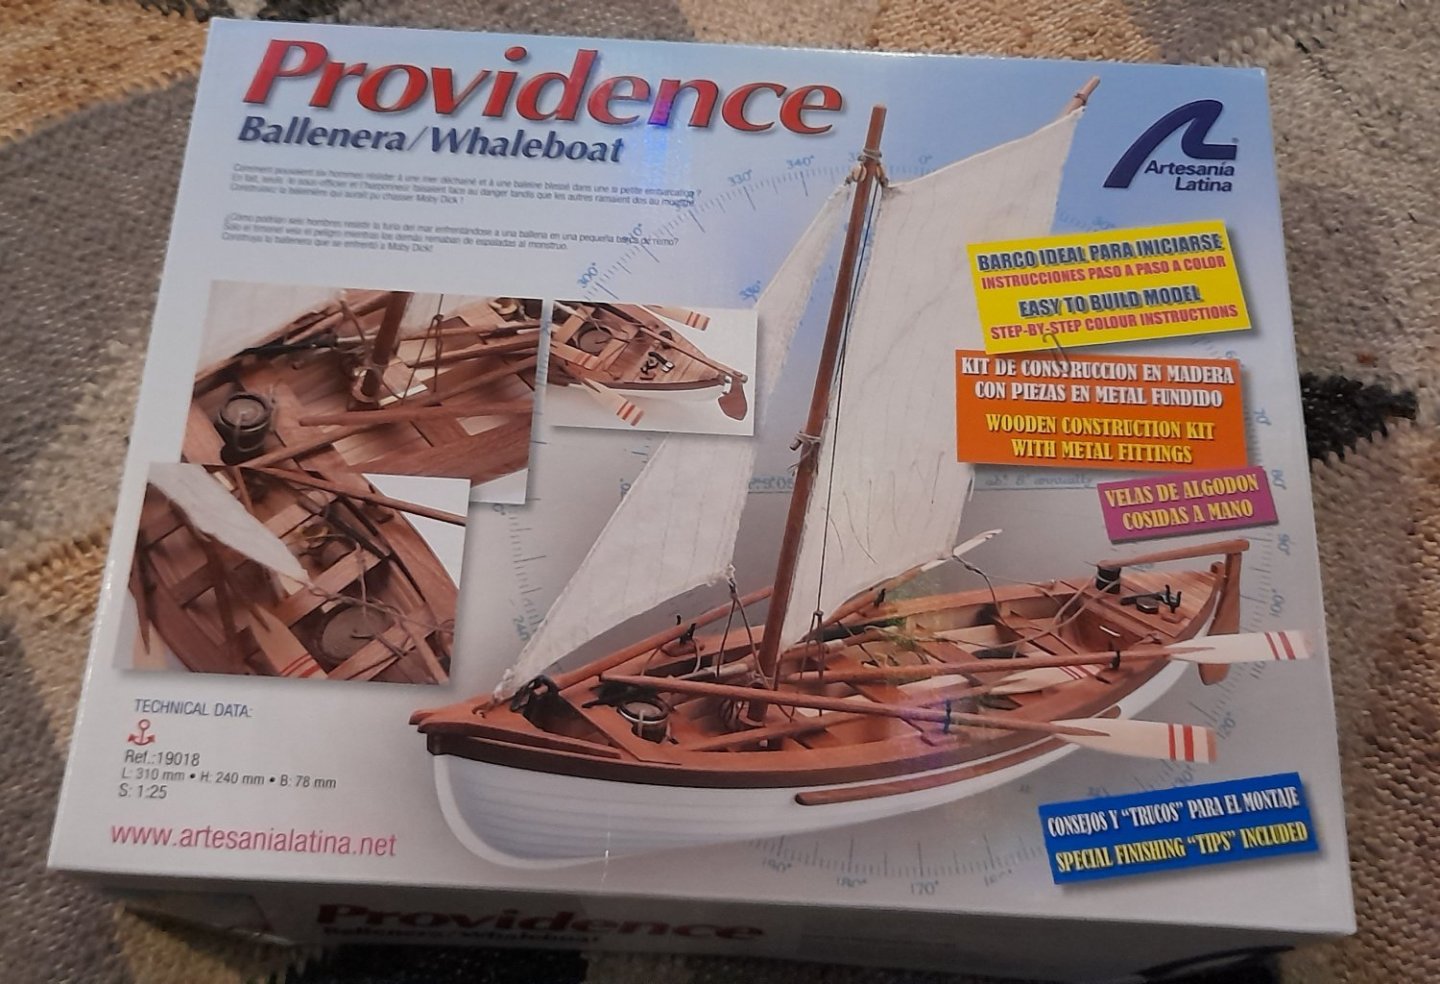
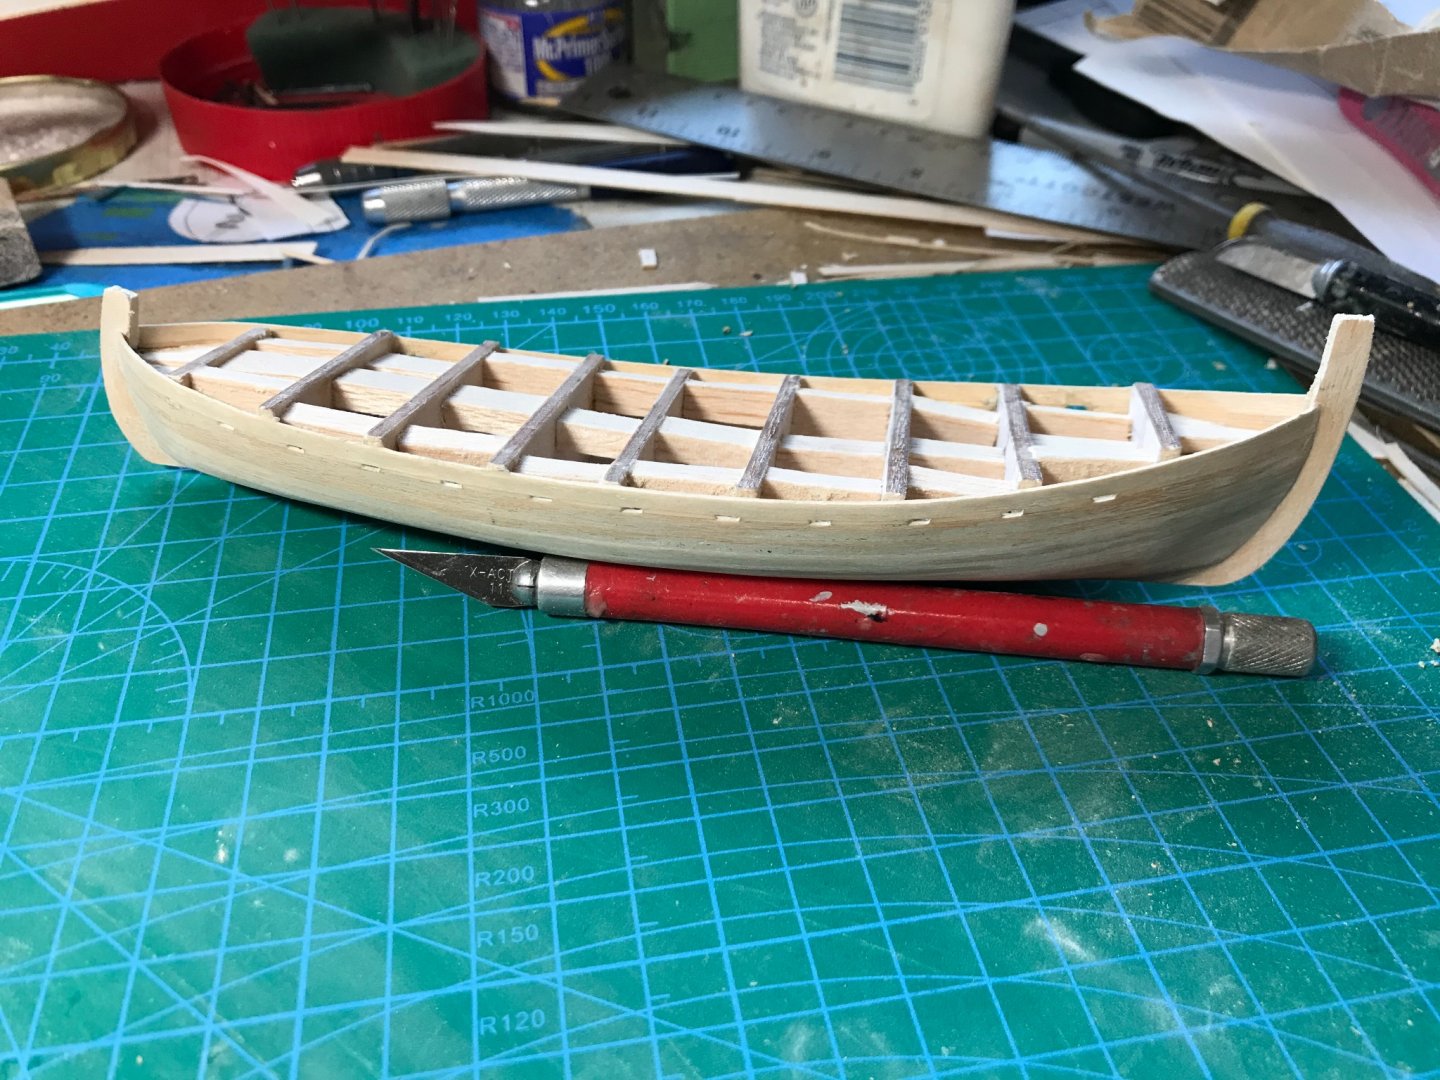
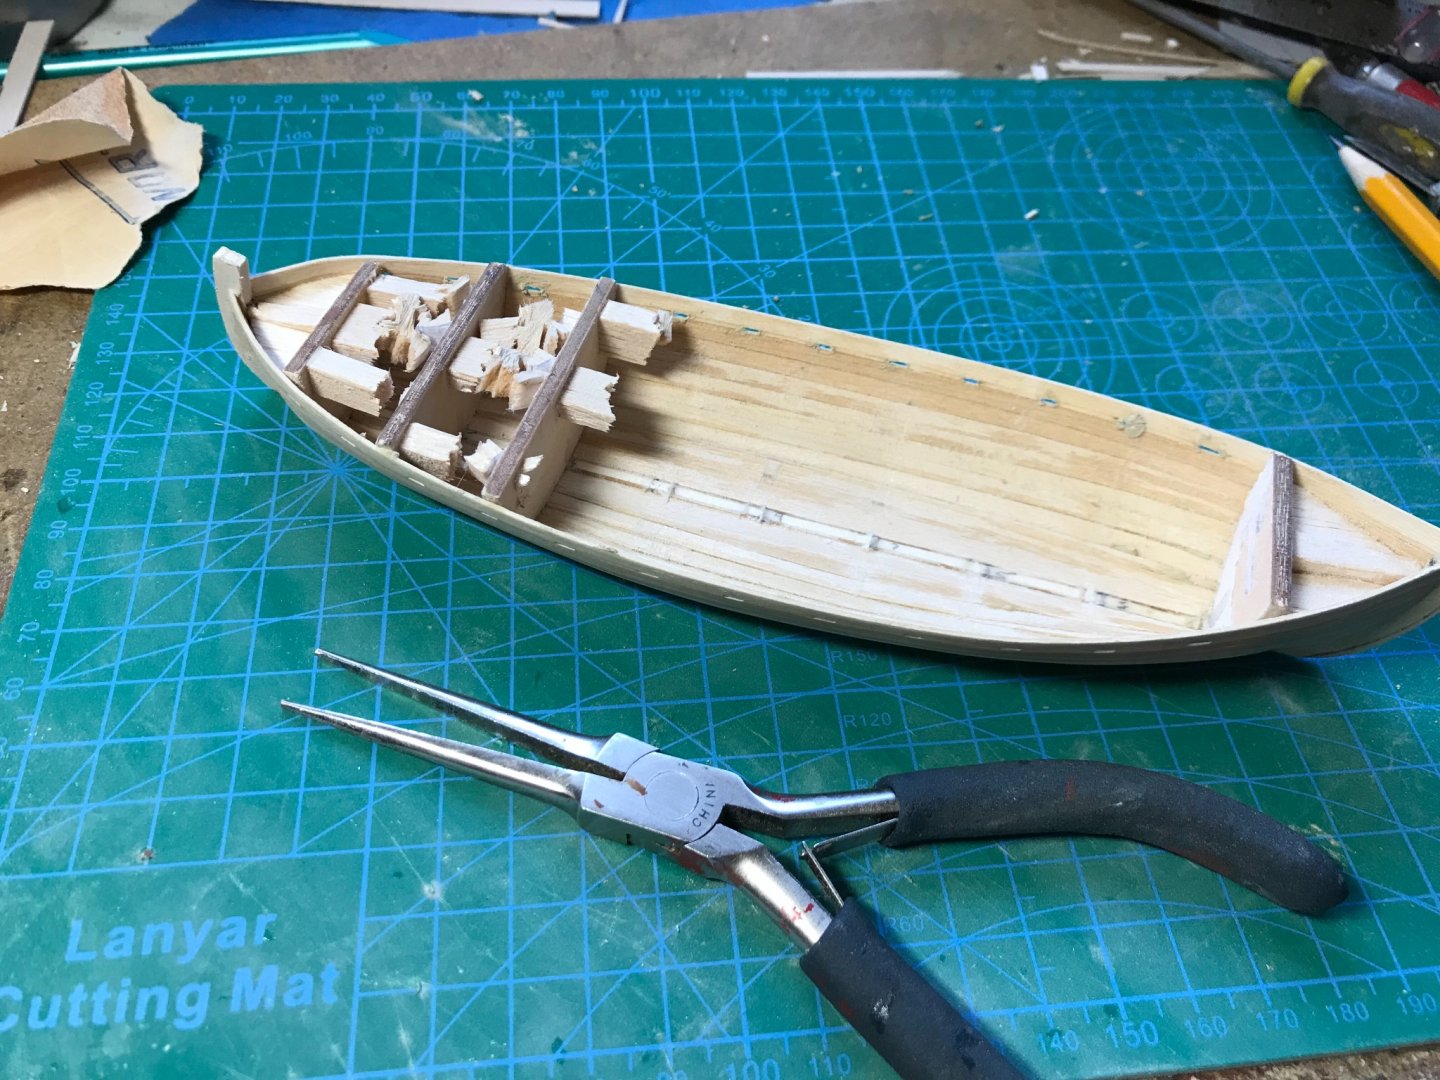
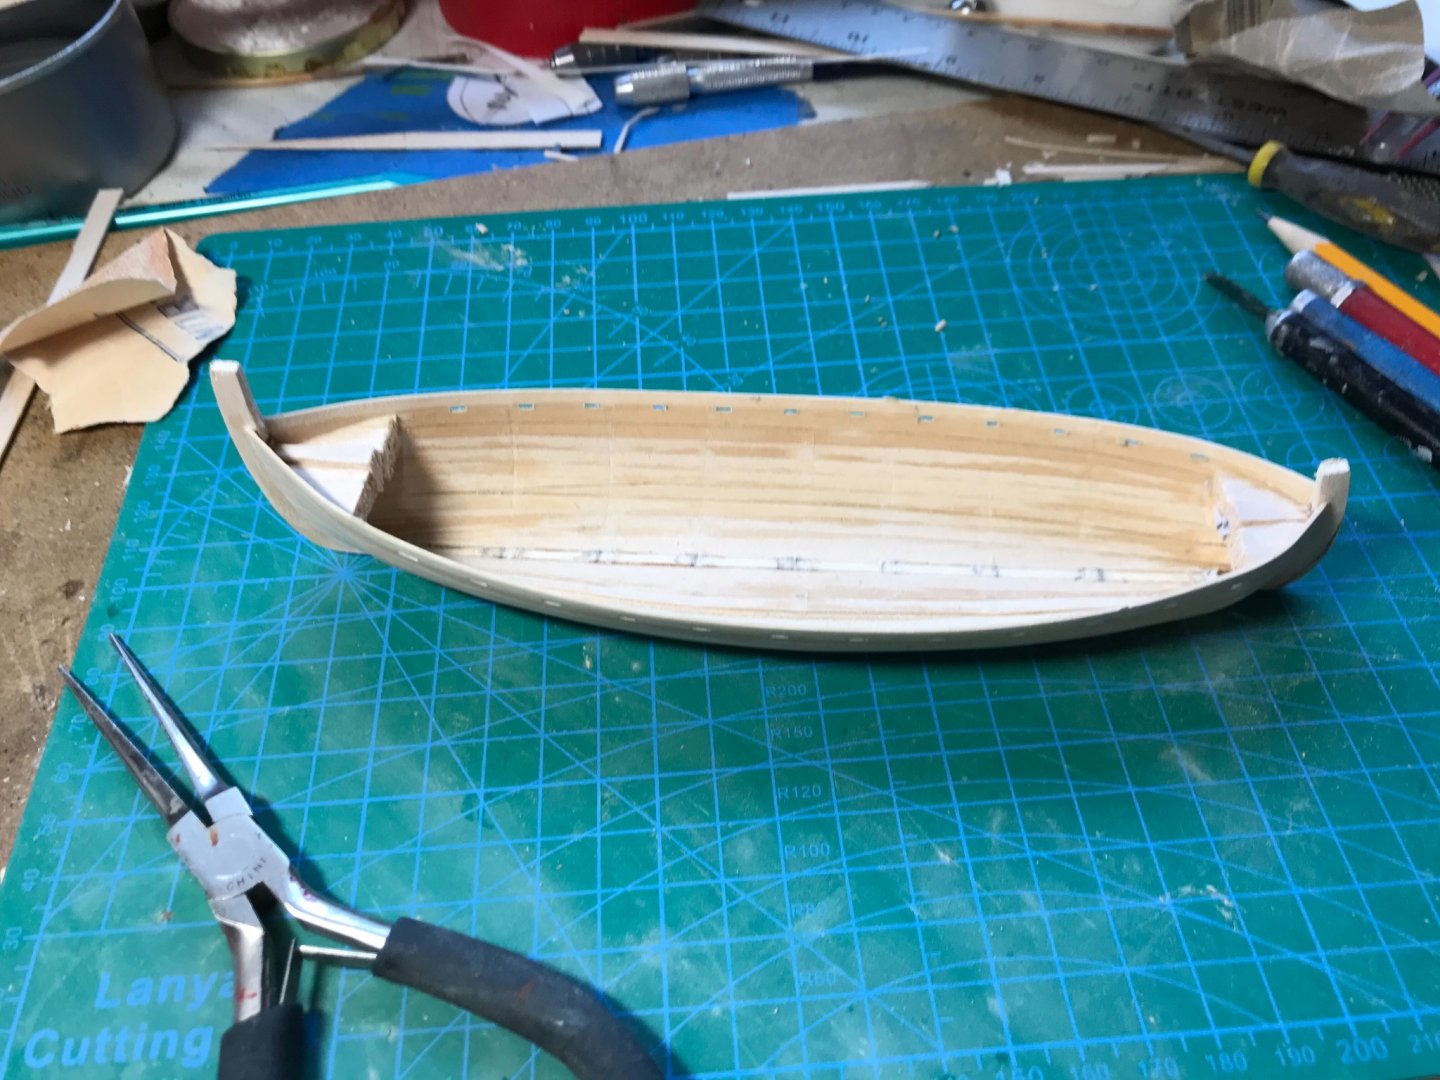
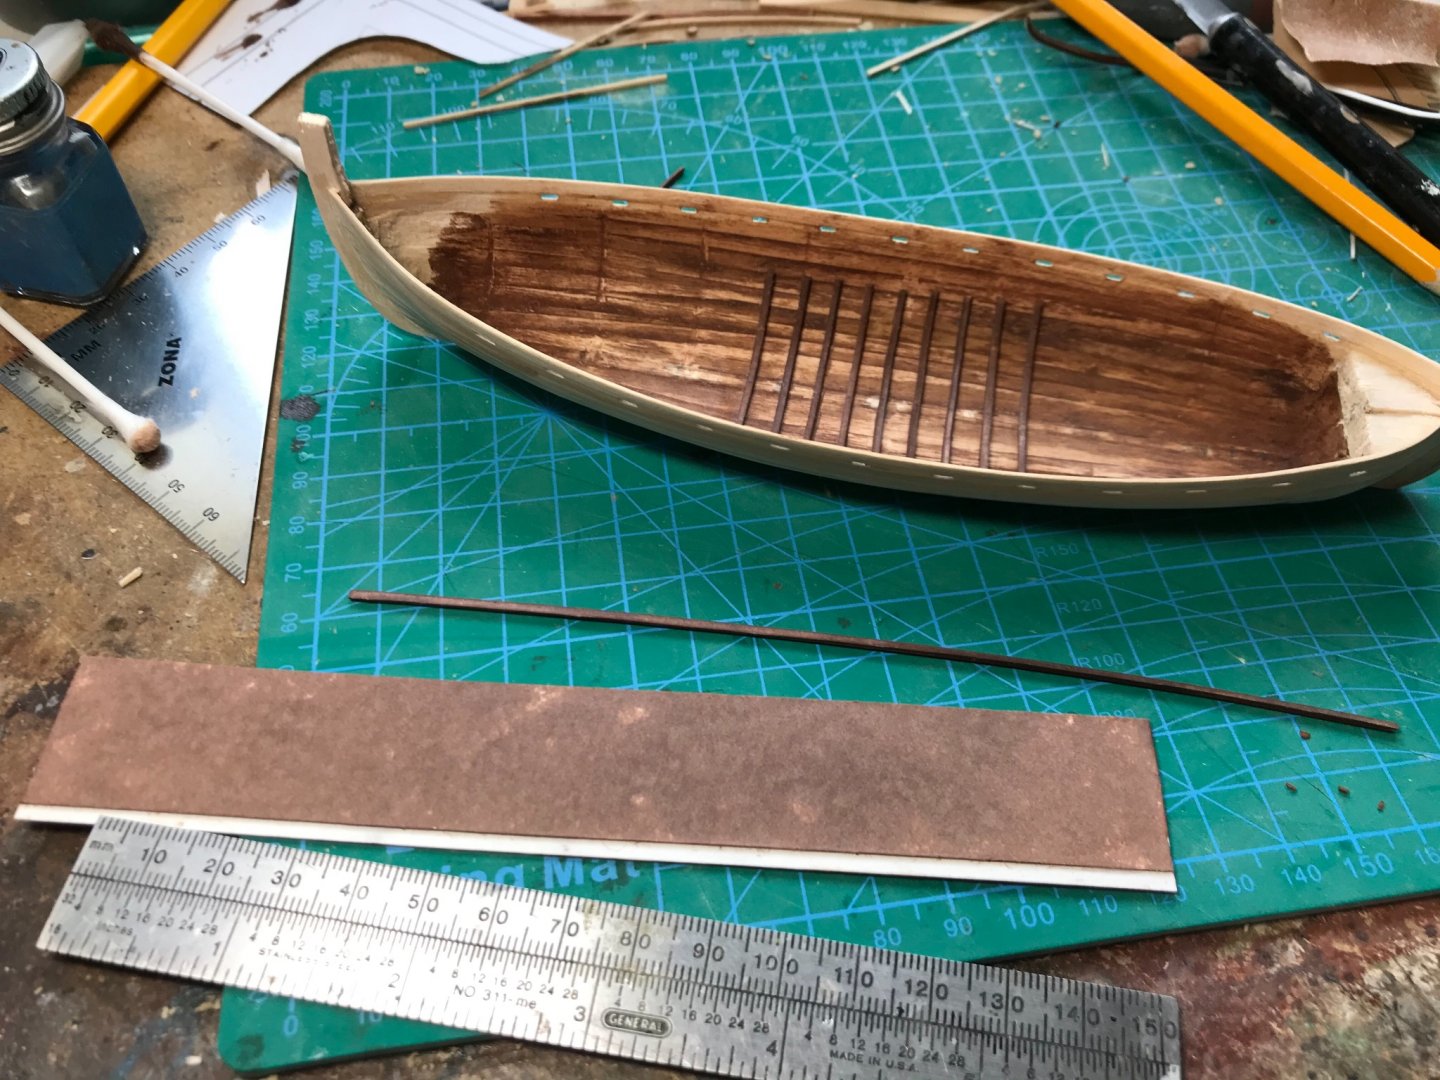
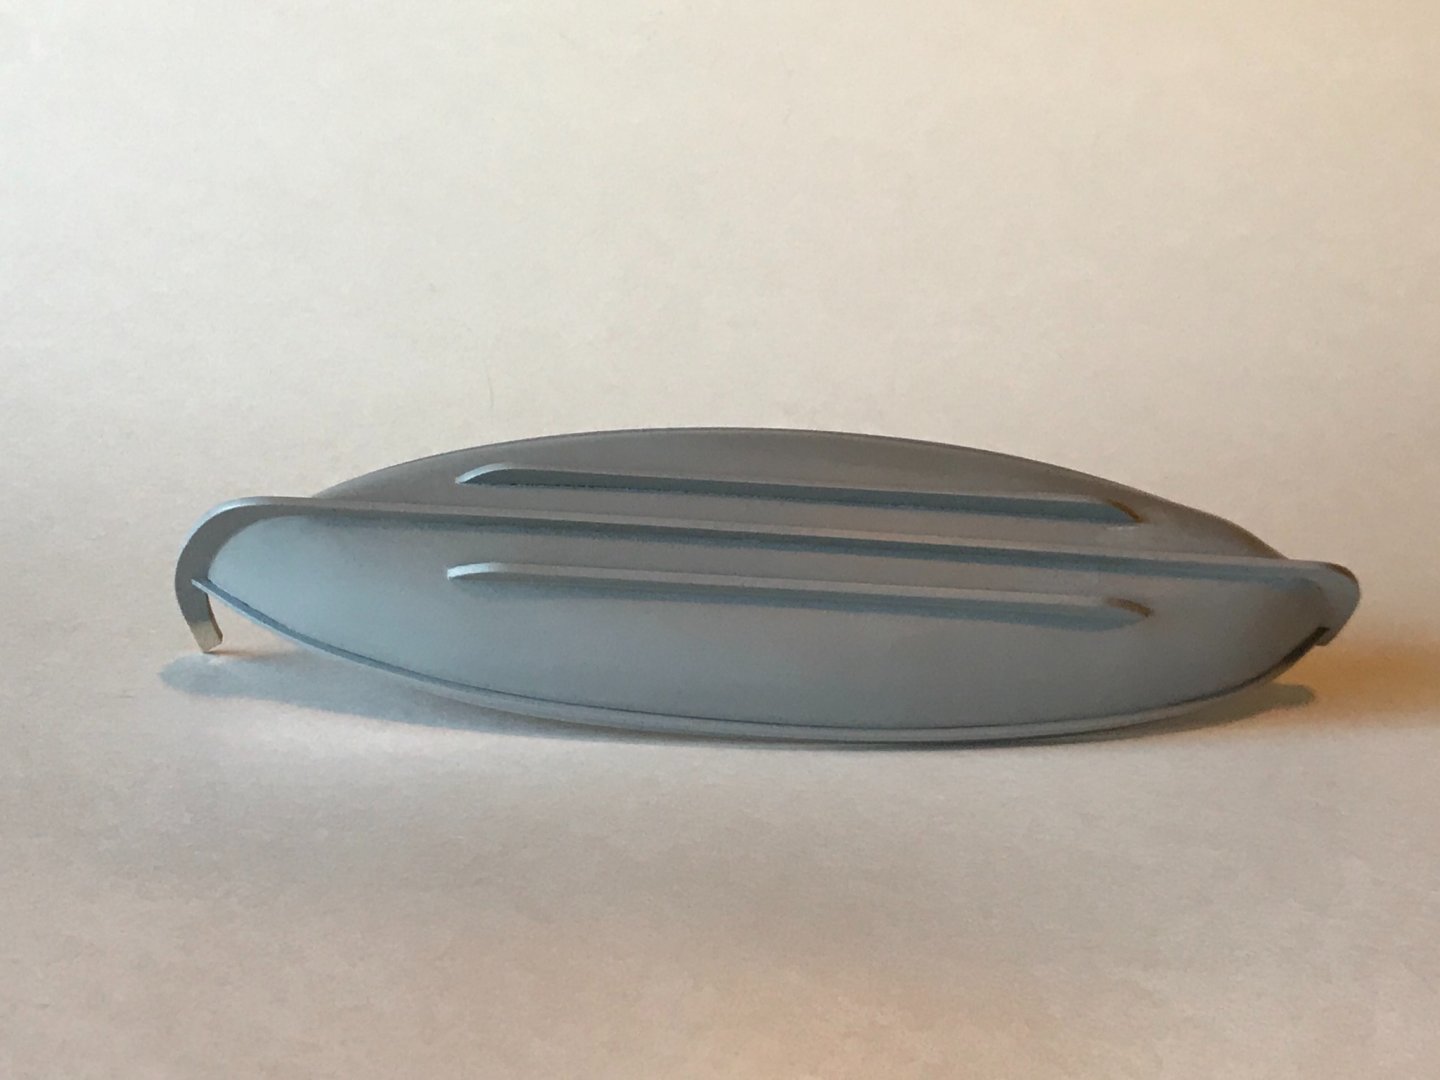
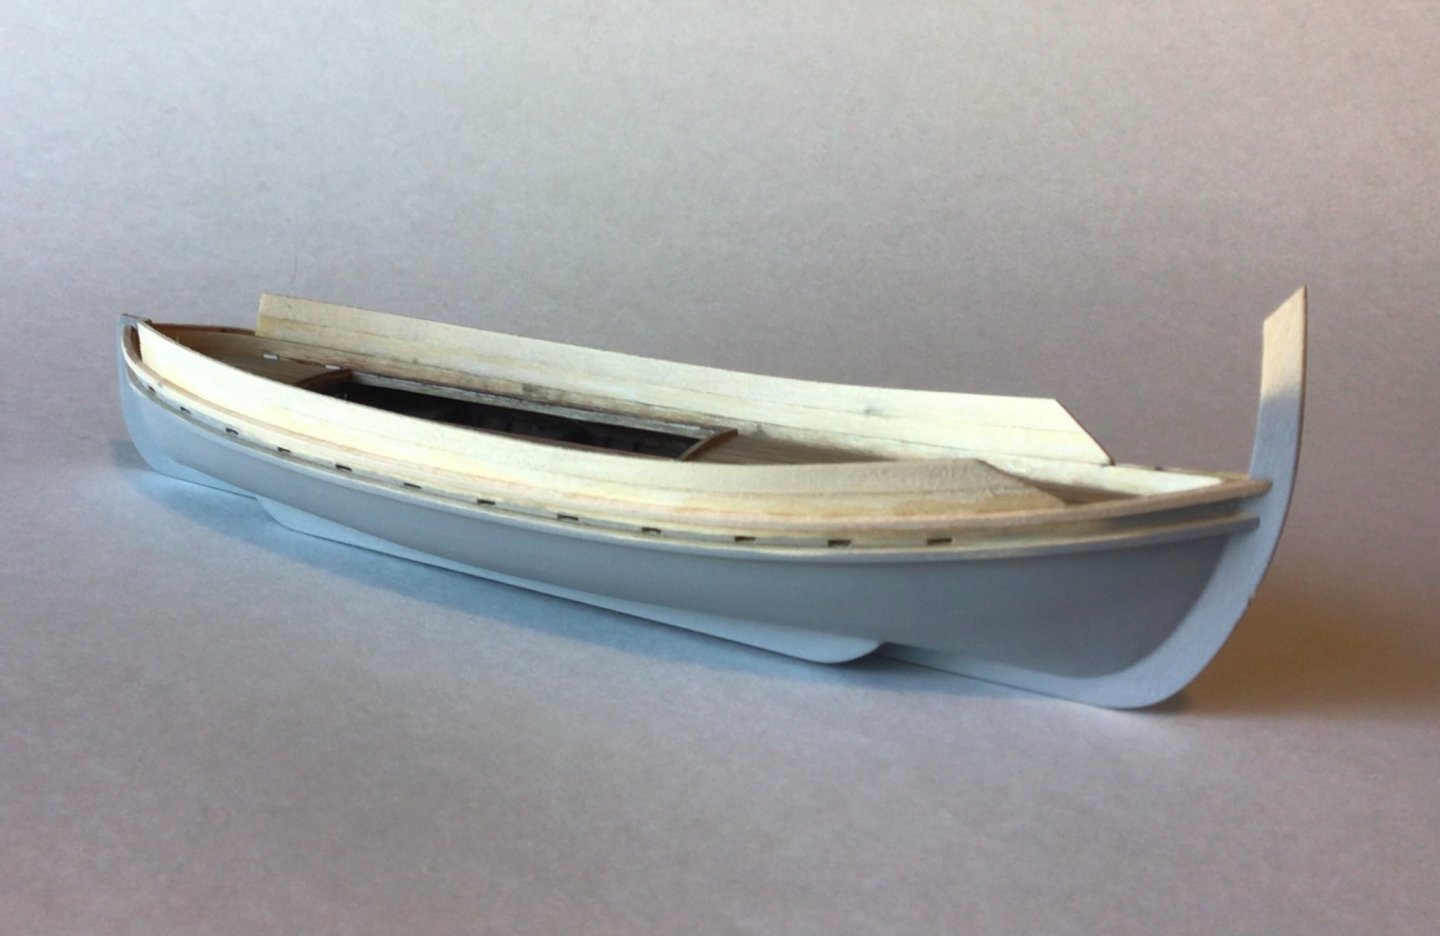
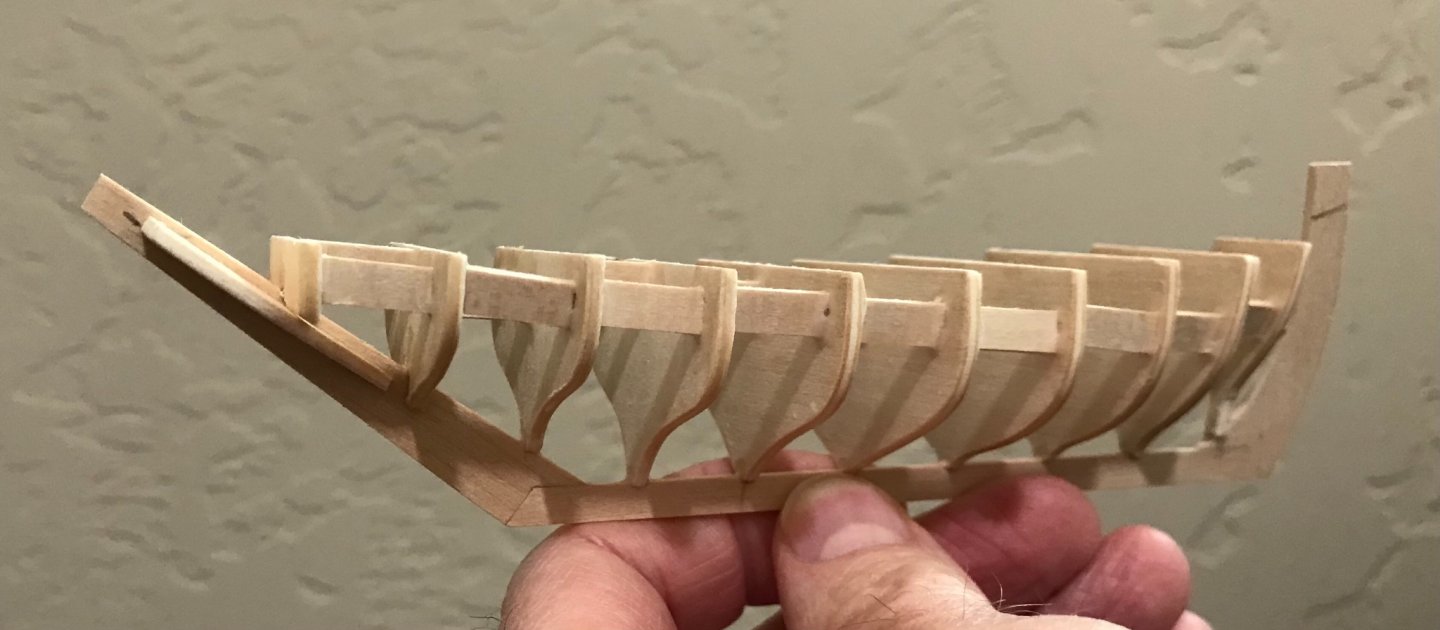
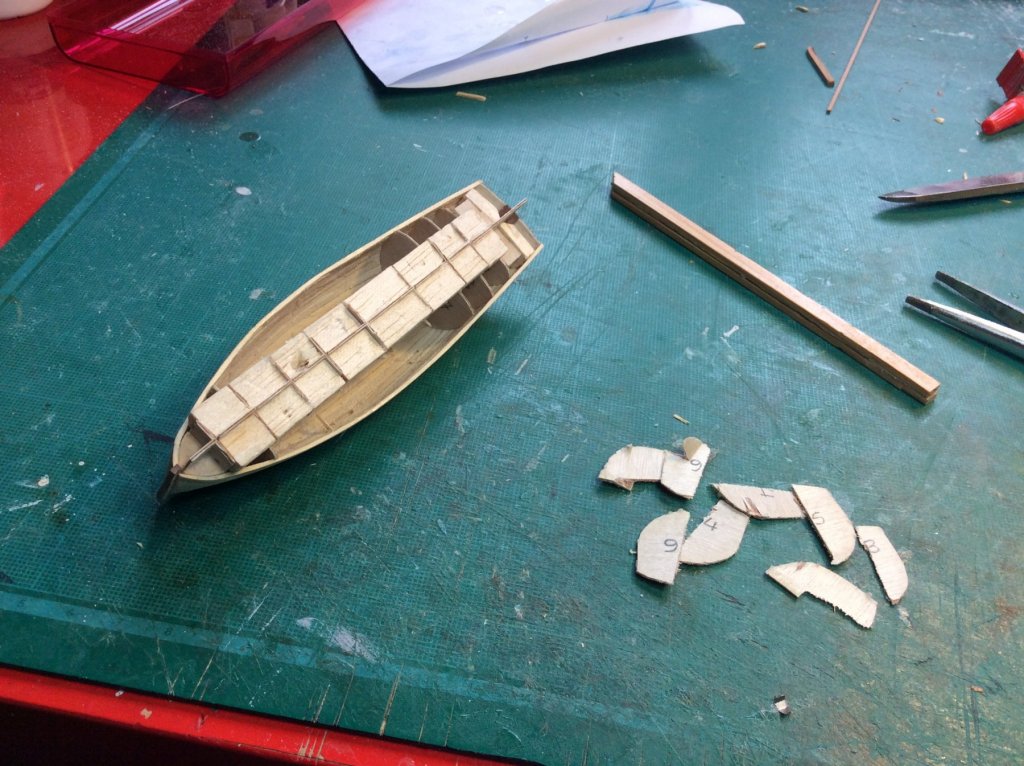
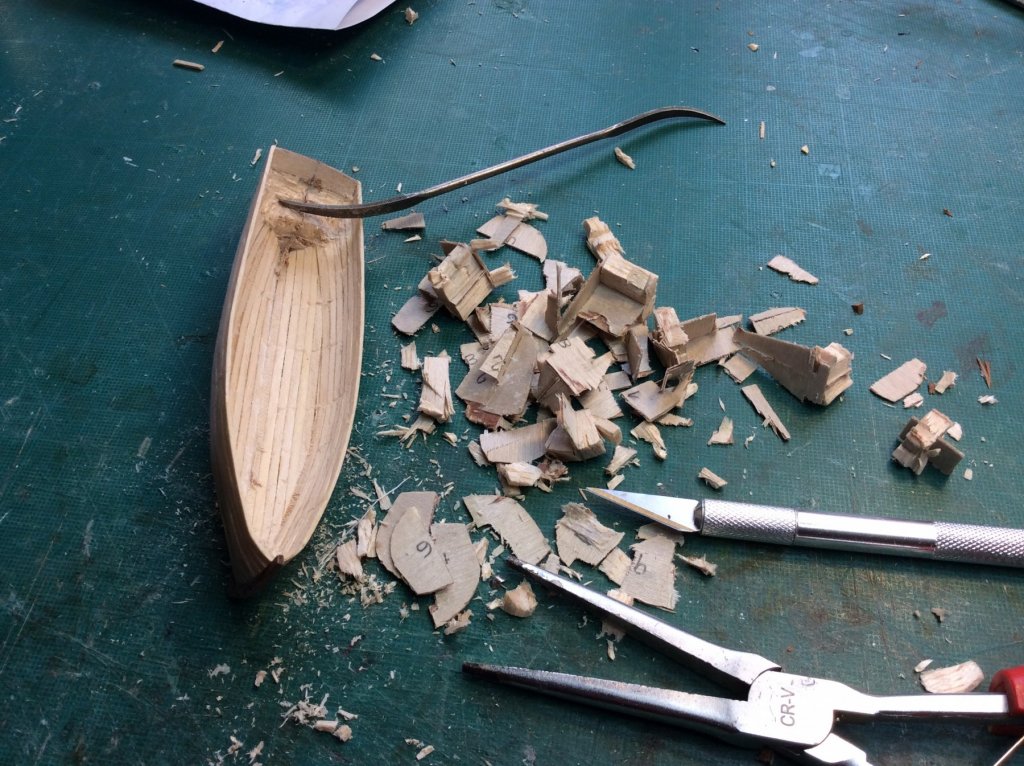
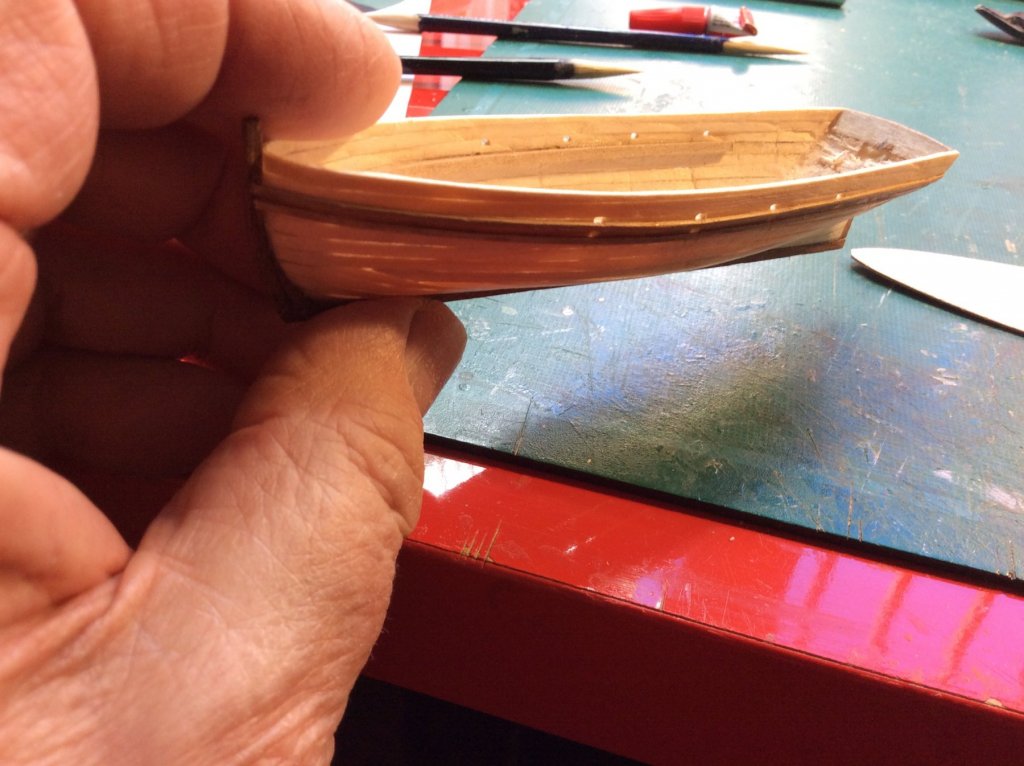
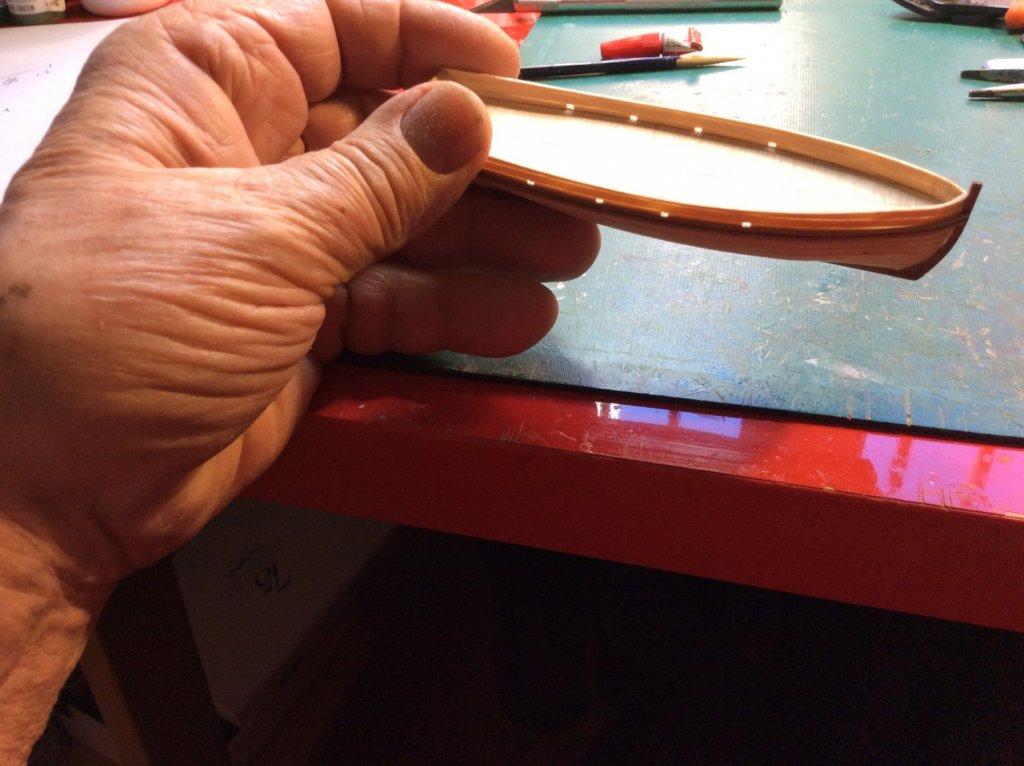
 This build is what I bought the AL Providence whaleboat for, I was going to kit bash it into the Henry Ramey Upcher. But after getting all the dimensions for the lifeboat, it turned out easier to scratch build it, using Providence as a basic shape template. I've picked this subject because as a child, my grandparents spent summers on the Norfolk coast at Sheringham and when my brothers and I visited, would take us to see it, this was before it even became part of the museum. As a parent myself, the Admiral and I have also taken my children there to see it, although they weren't as enthusiastic as I was! I still go and have a look at her whenever I'm in Sheringham. A little bit of background info: The text below is courtesy of National Historic Ships UK HISTORY HENRY RAMEY UPCHER is a lifeboat of clinker built oak construction. She was built in 1894 by Lewis Emery at Sheringham and was powered by oars and sail. The vessel takes its name from the Upcher family of Sheringham Hall who provided the privately-run boat to replace the town's first rescue vessel, the AUGUSTA. She was known locally as the Fisherman's Lifeboat and operated as an independent lifeboat with a crew of local fisherman, there being other RNLI lifeboats in service at Sheringham at the time. Launching was a community effort requiring considerable manpower. The vessel was propelled by 16 oars, occasionally requiring two men to each oar. She could also carry a main lug sail and a mizzen sail. During her service she was launched 61 times and saved 202 lives. Her most famous rescue was of the crew of the brig ISPOLEN in 1897 during the most ferocious storm for decades when her coxswain, Tom Barnes Cooper, was over 70 years old. After her withdrawal from service in 1935 she was launched for the Sheringham regattas and other festive occasions. She is now on display in an indoor museum in Sheringham. Key dates 1894 Vessel was built by Lewis Emery at Sheringham 1897 Rescue of the brig ISPOLEN during a storm 1935 Withdrawn from service as lifeboat DIMENSIONS Breadth: Beam 11.25 feet (3.43 m) Depth 4.33 feet (1.32 m) Length: Overall 34.75 feet (10.60 m) At 1:25 scale the model is just over 400mm long, 130mm wide and 52mm depth The skeleton has been cut from 6mm liteply, they are only dry fitted at the moment. The reason for starting from scratch, quite a lot bigger, both the same scale! I know this is a bit nichè but is a fond memory of my childhood by the sea. Thanks for looking in. Cheers.
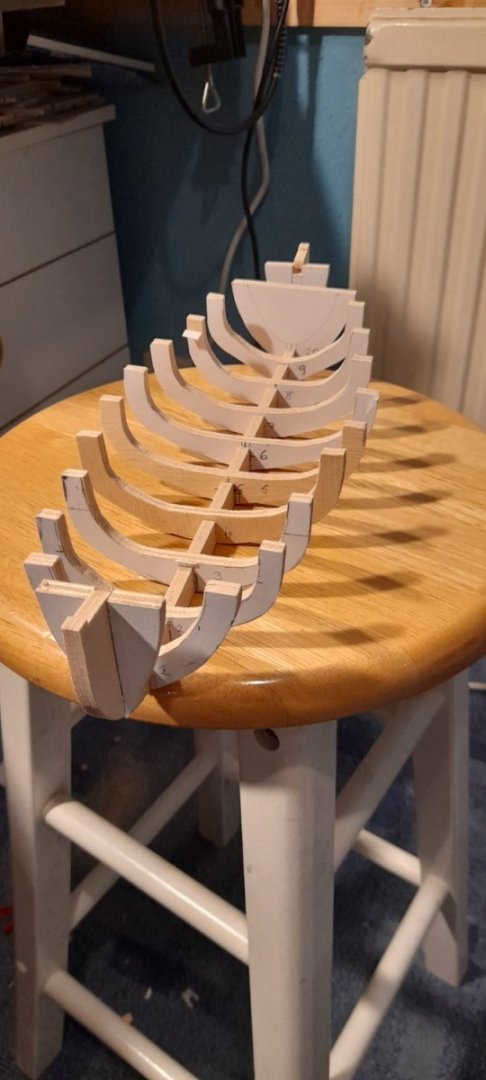
- 30 replies
-
- 14
-
-
- small
- clinker built
- (and 2 more)
-
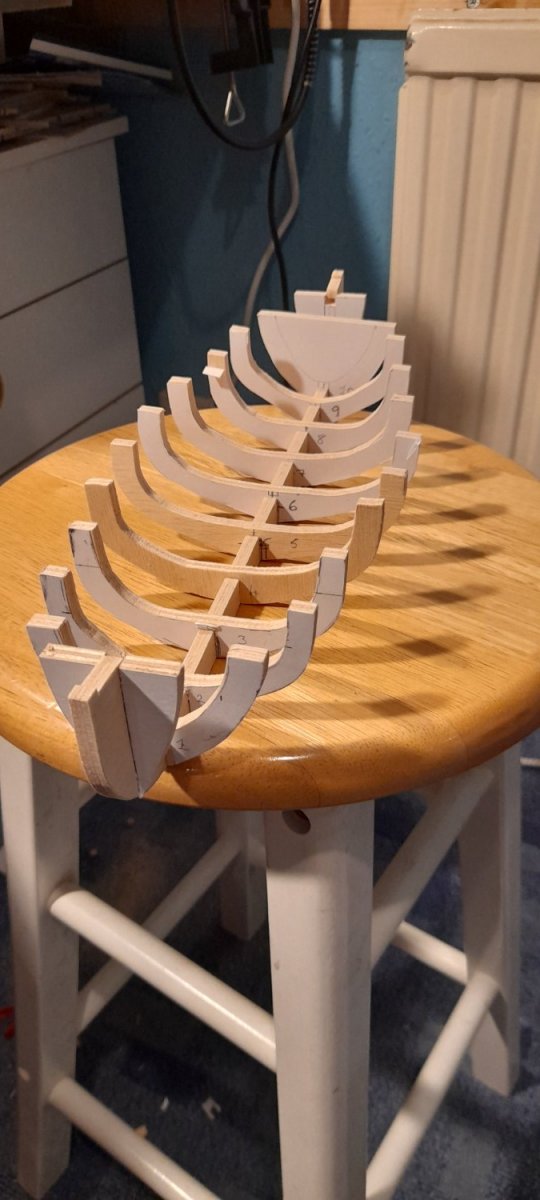
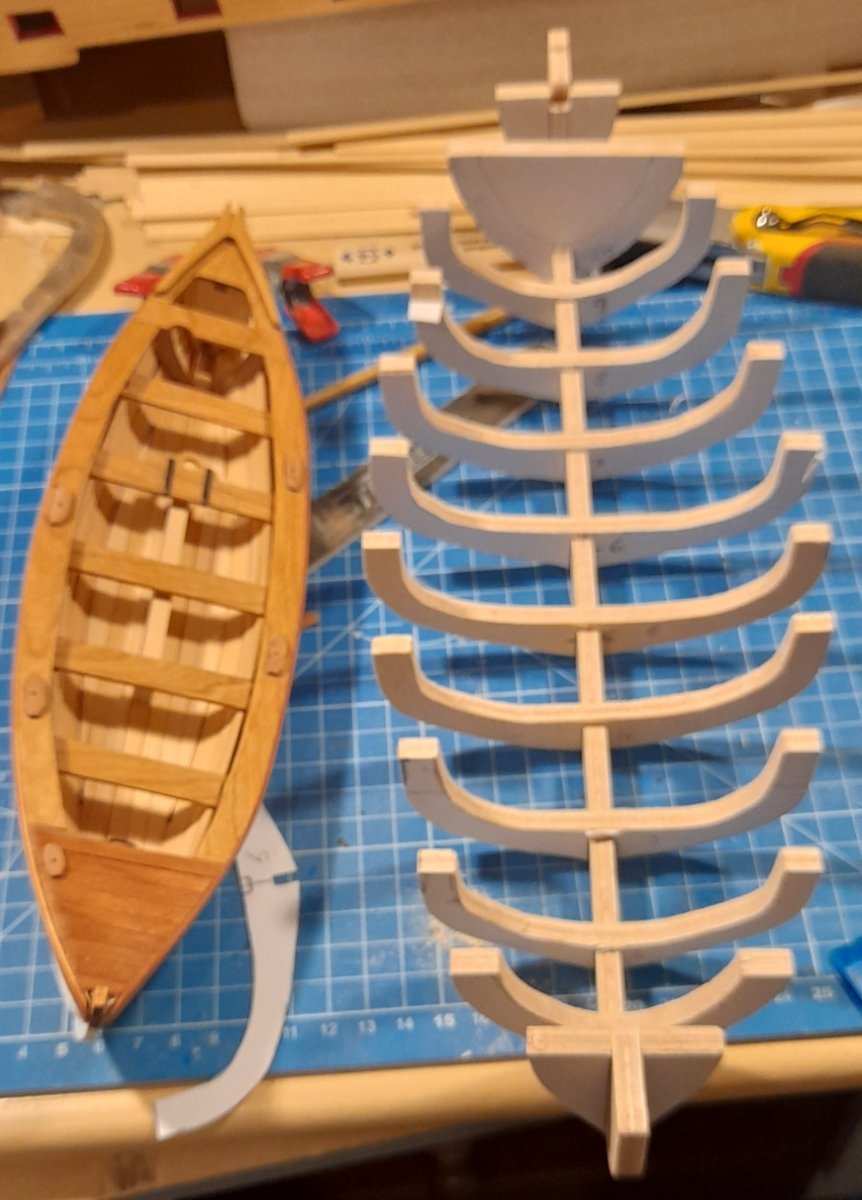
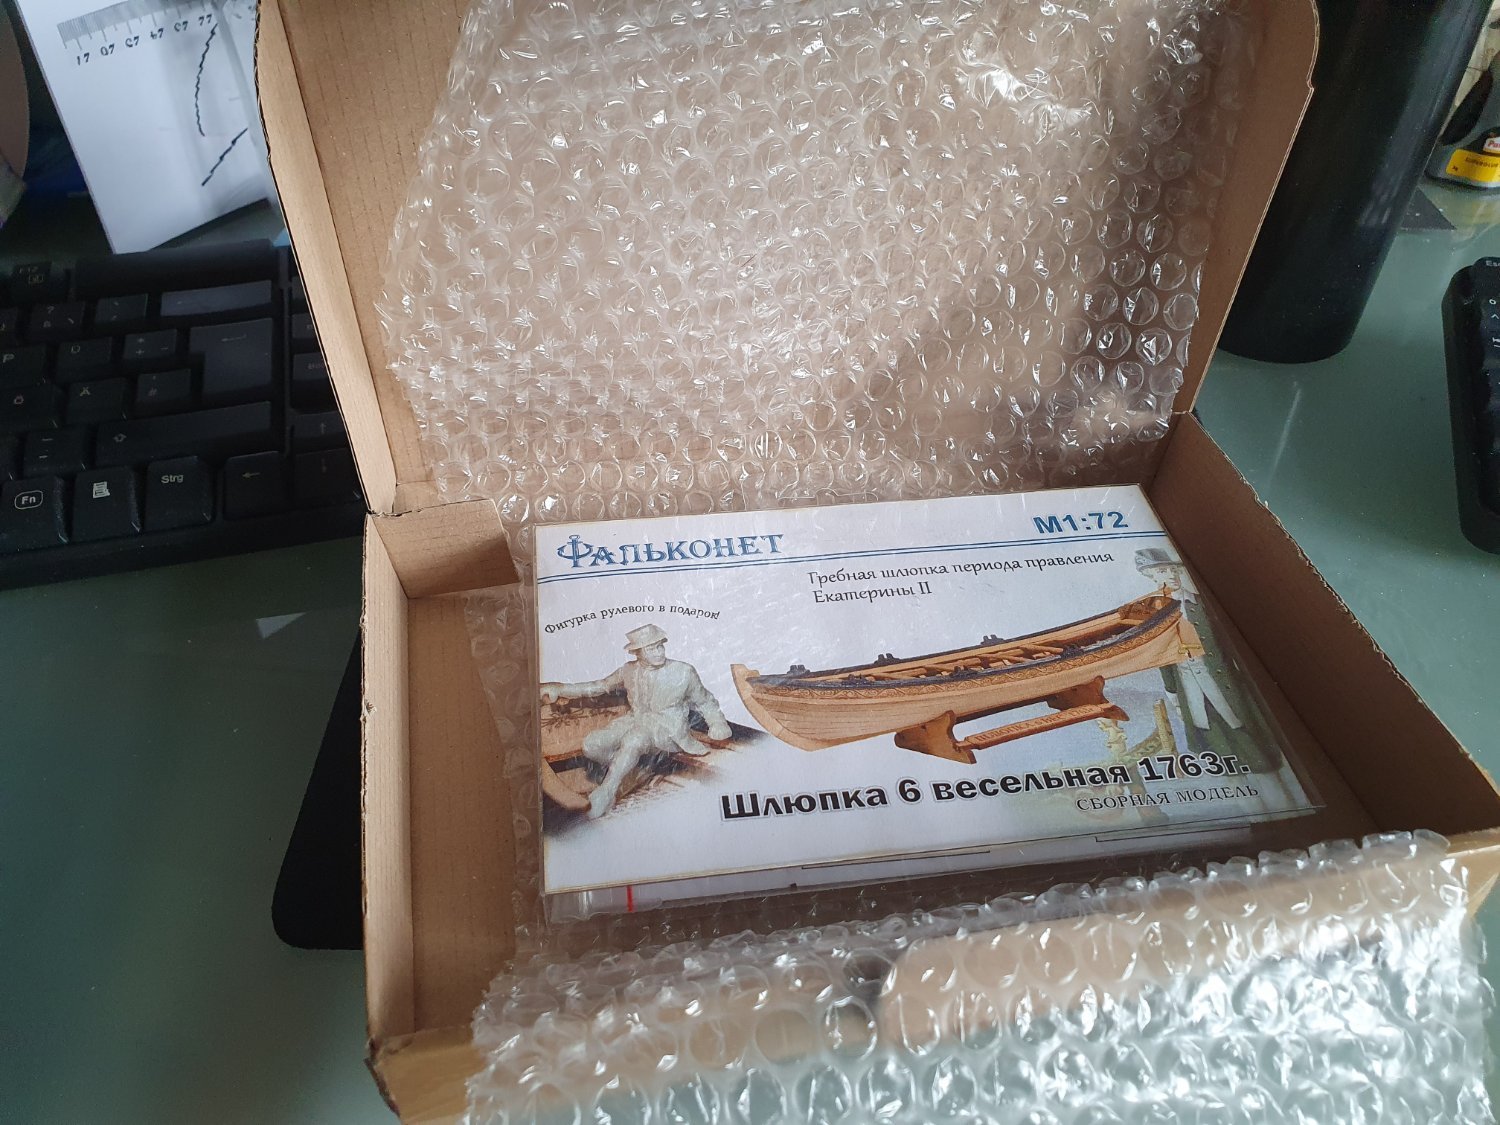
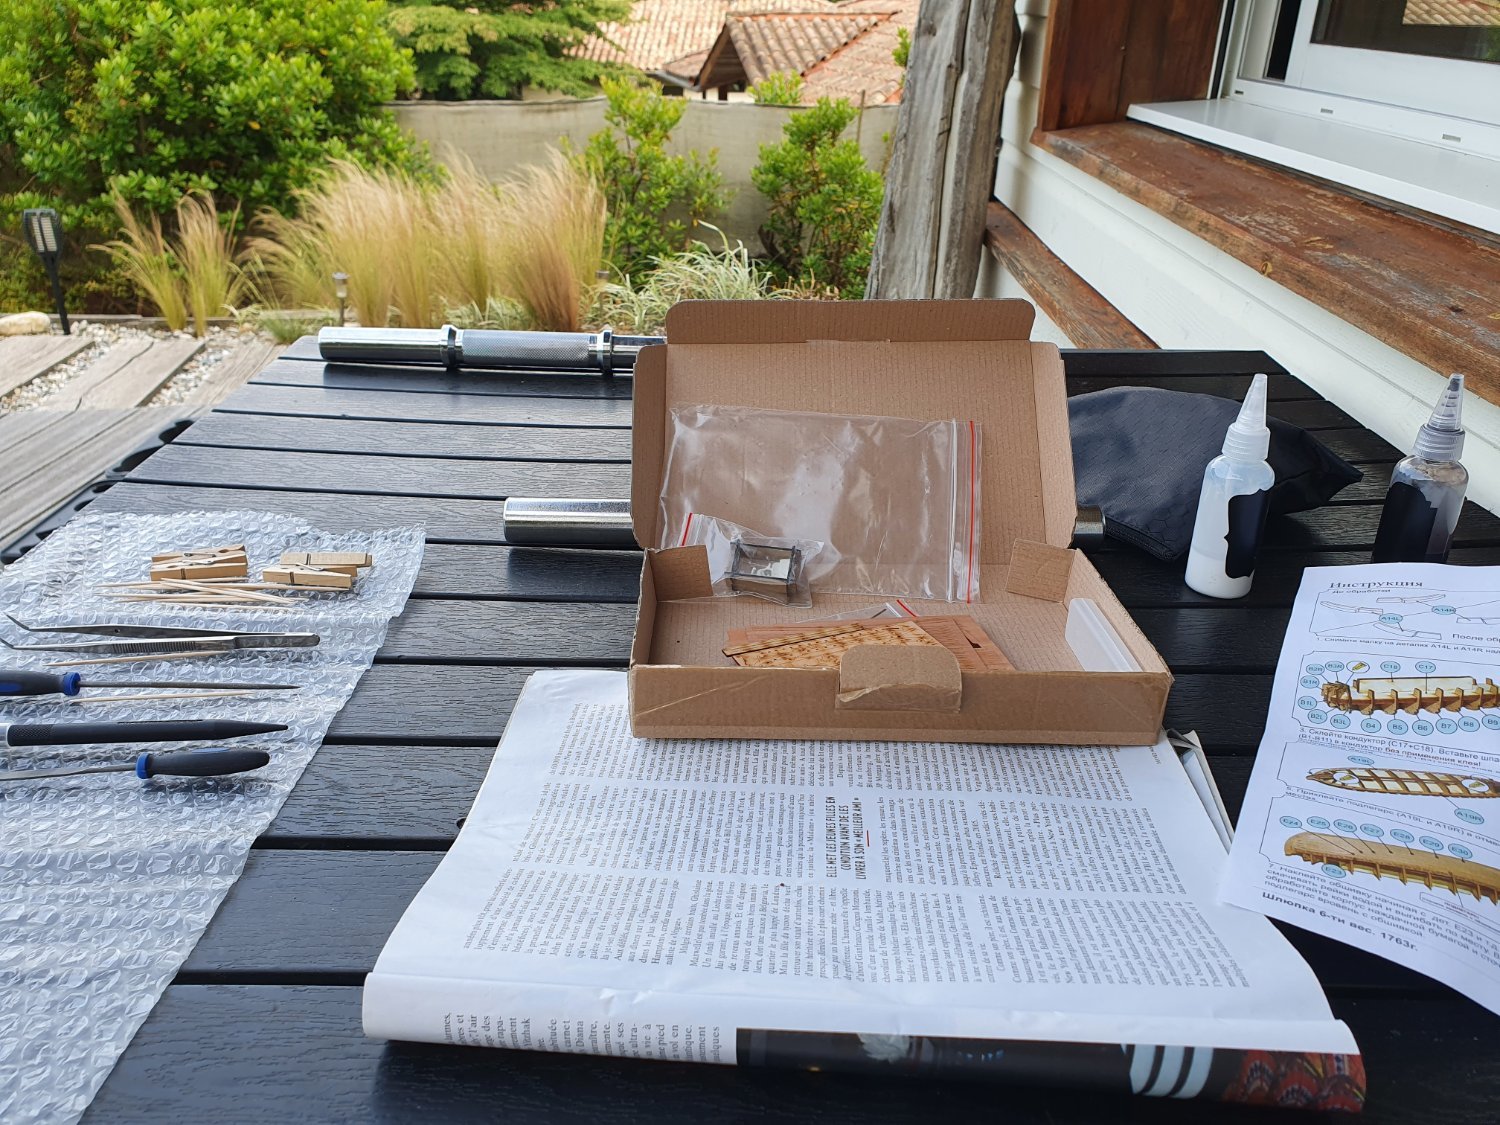
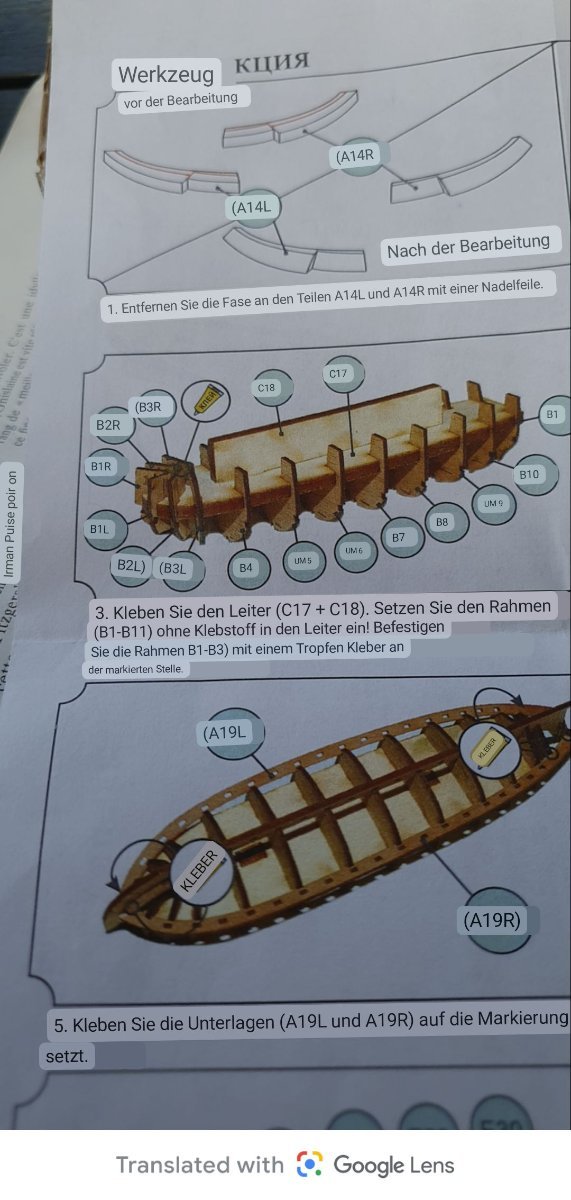
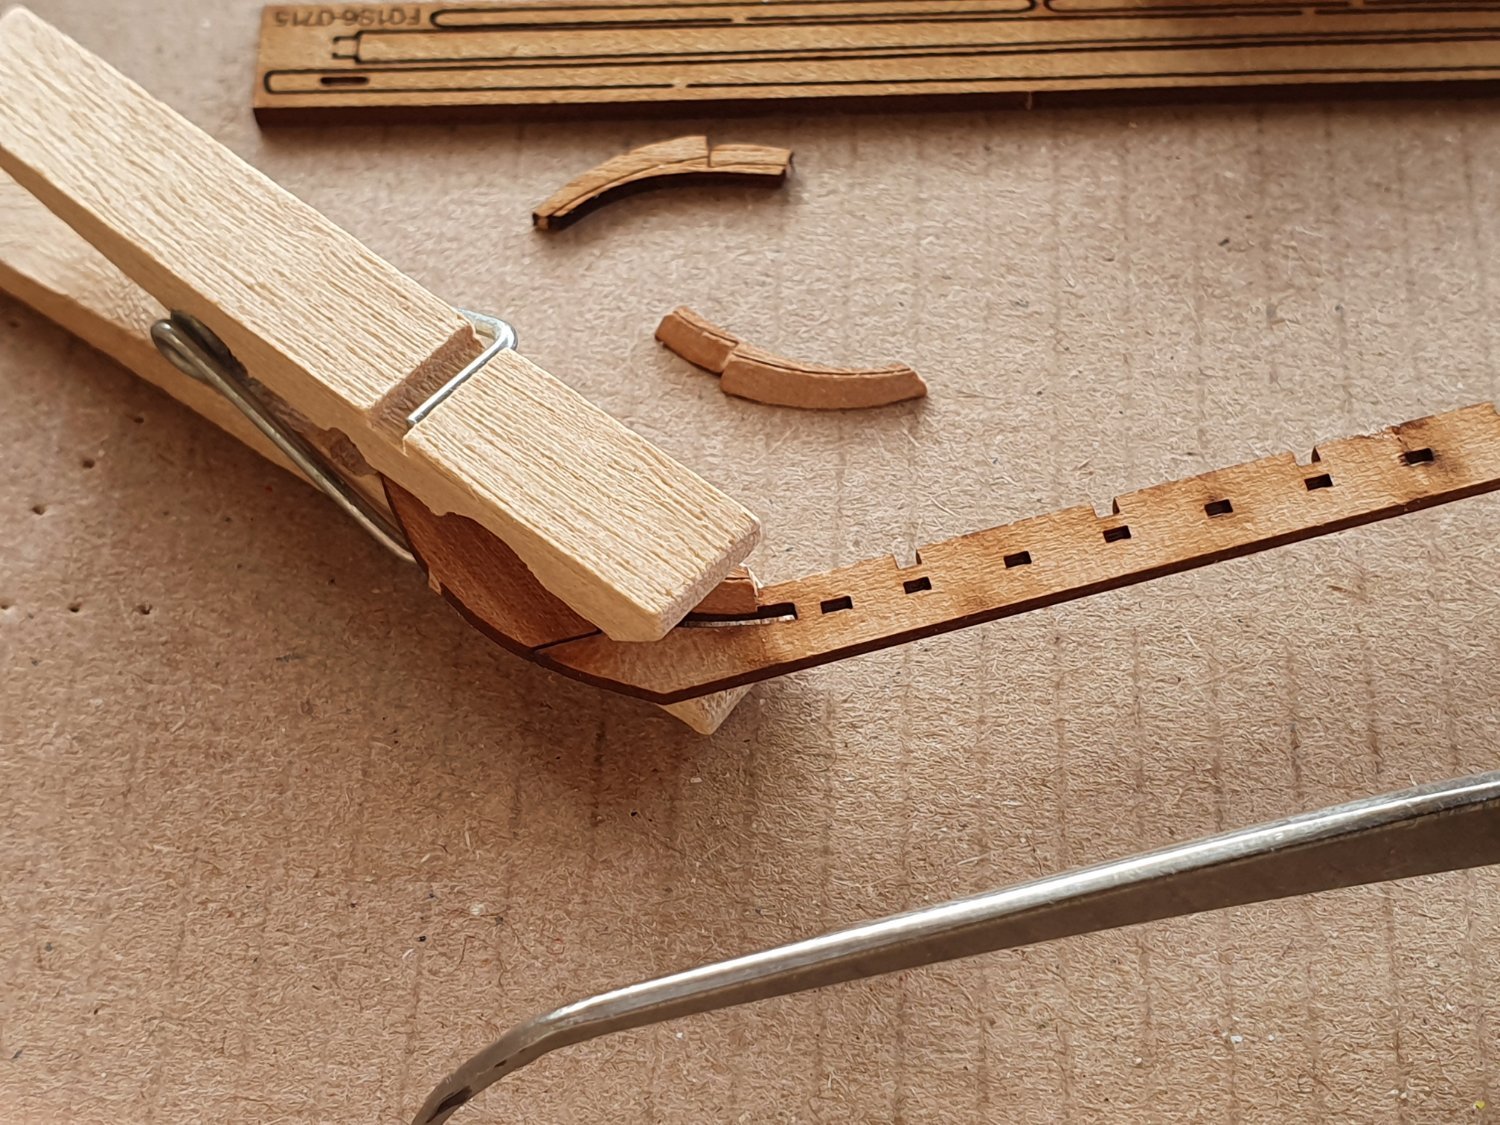
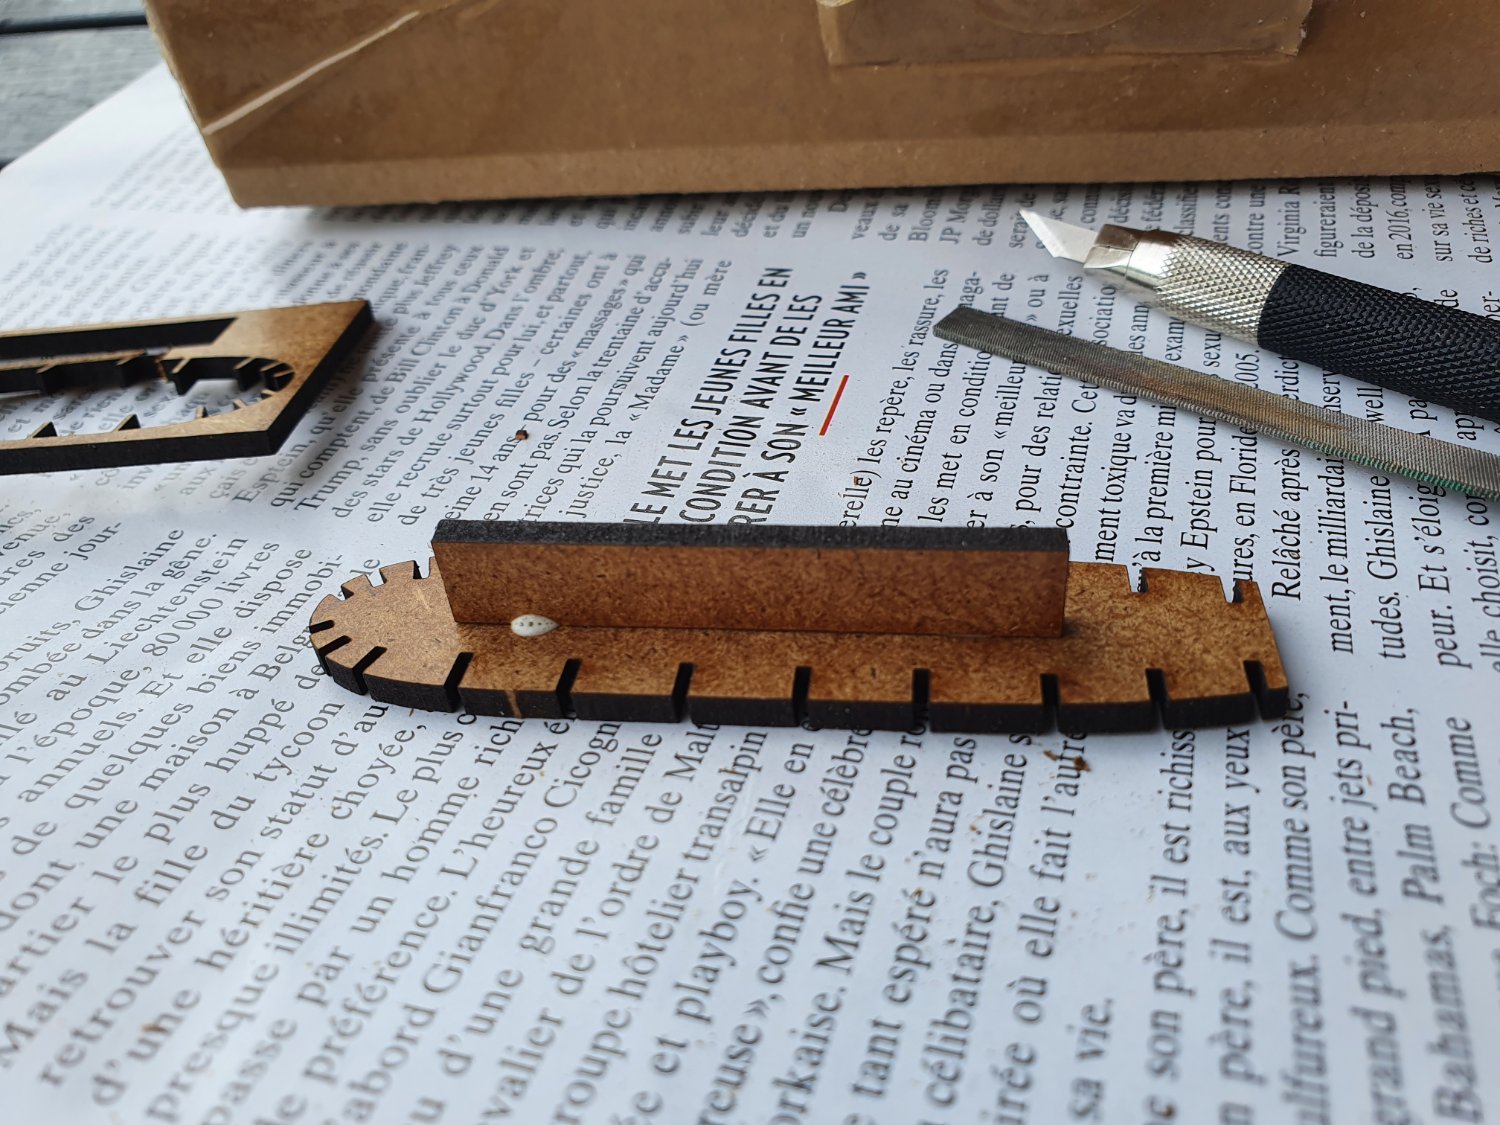
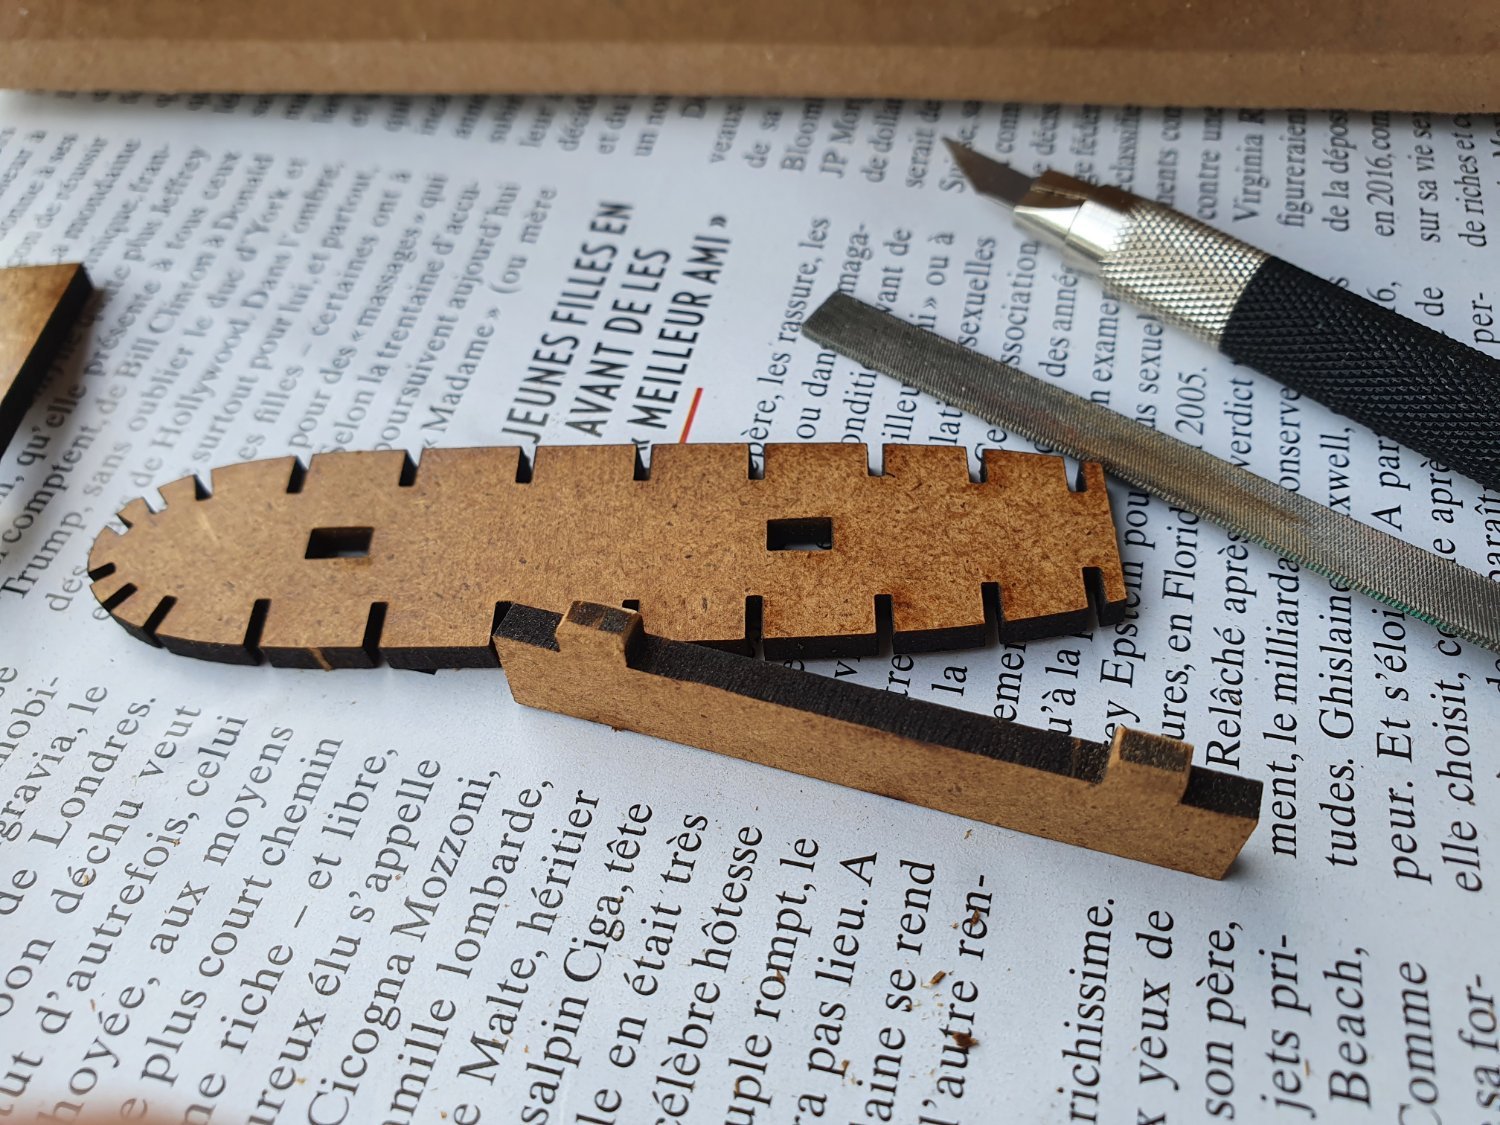
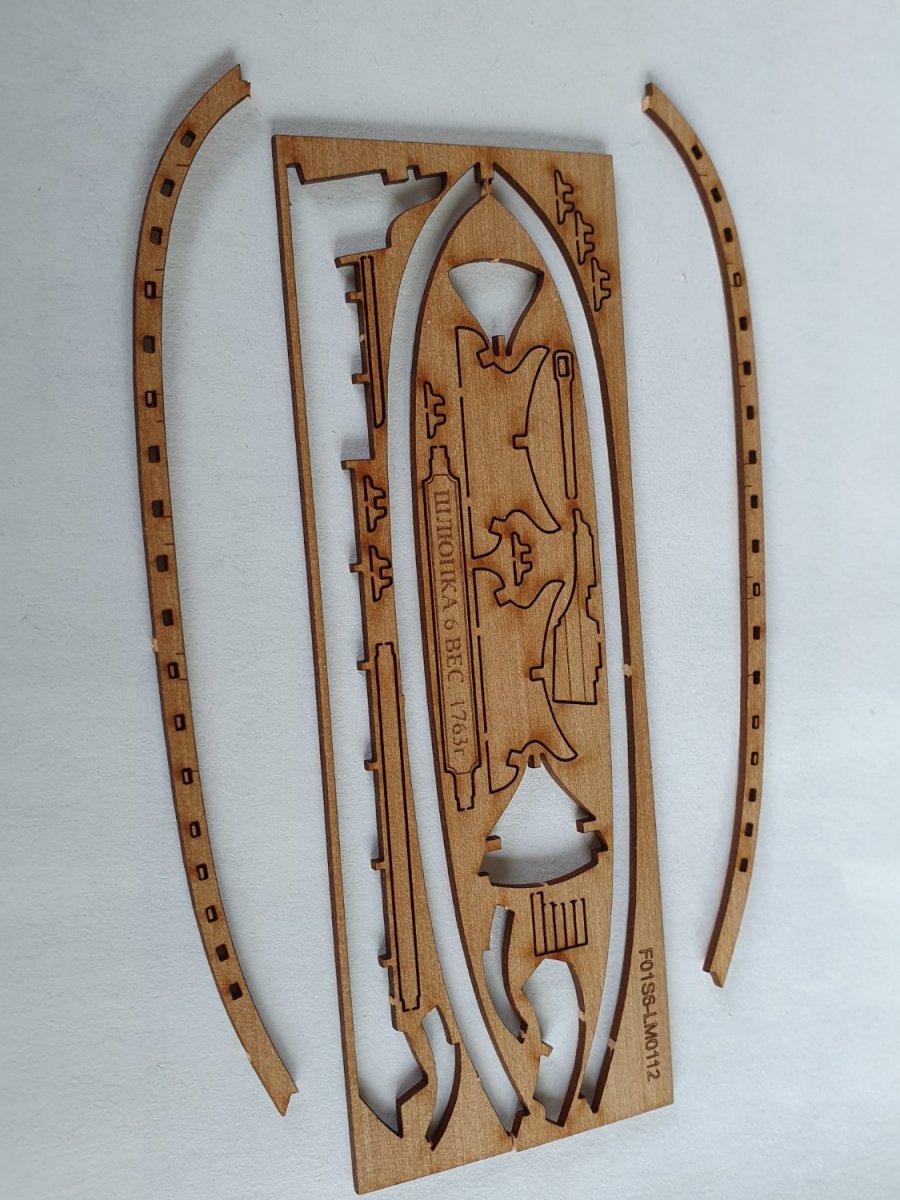
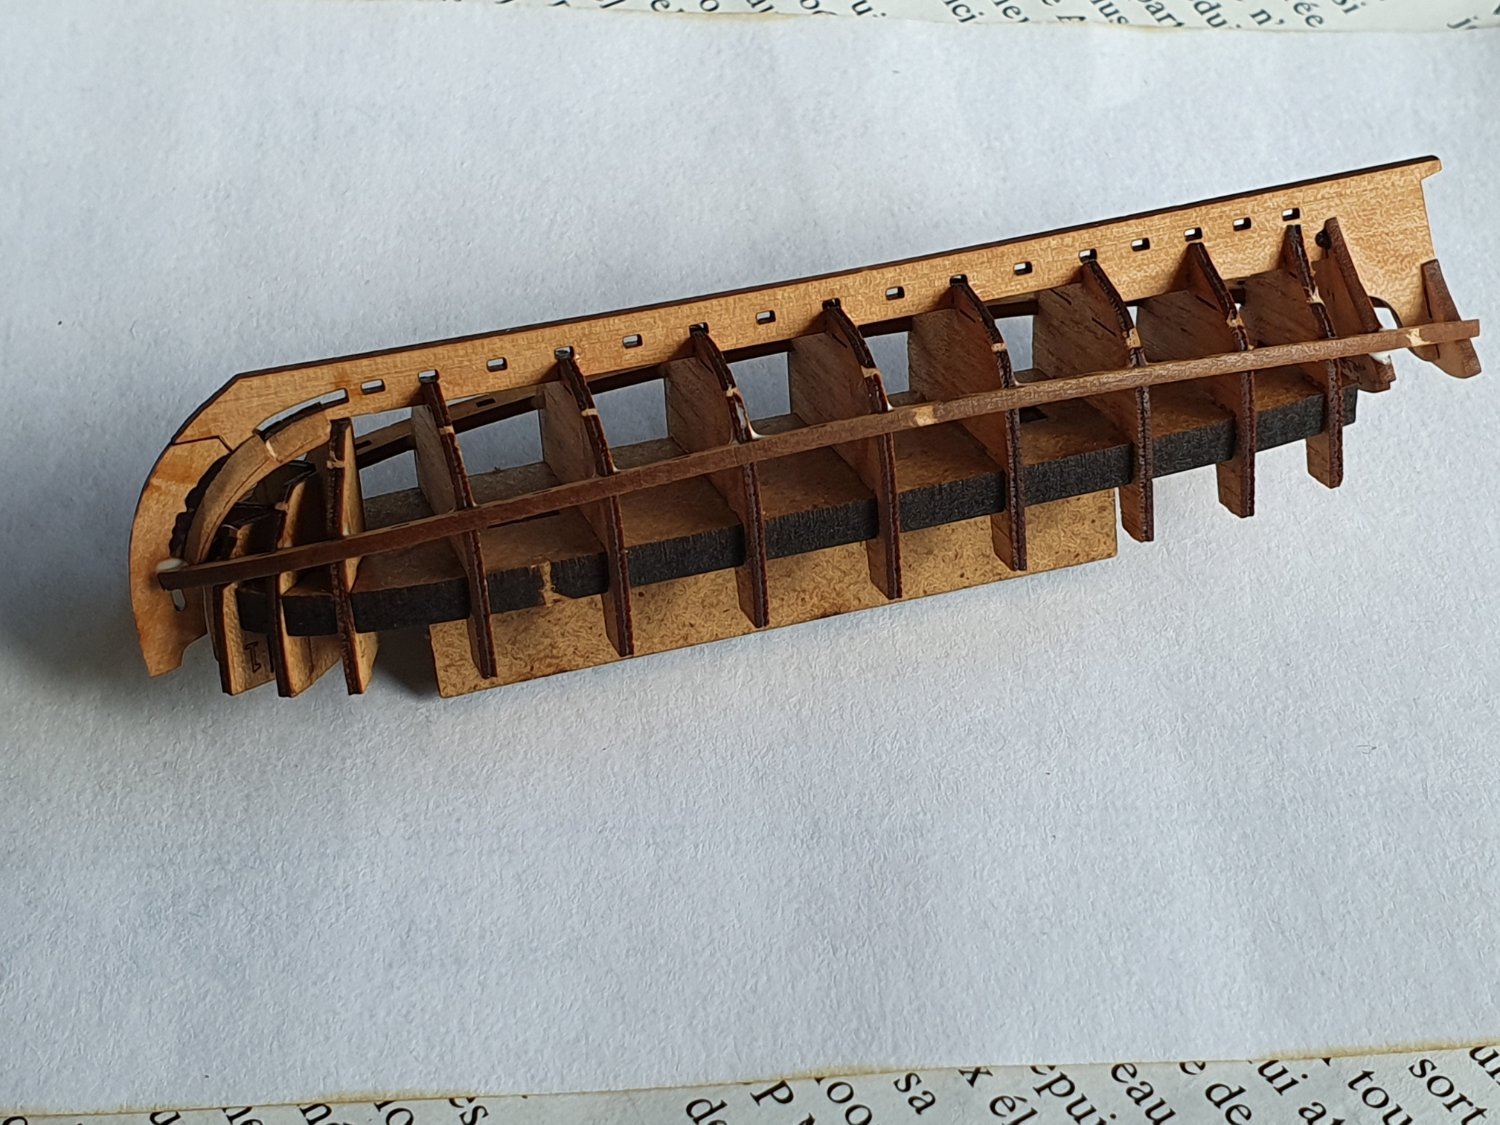
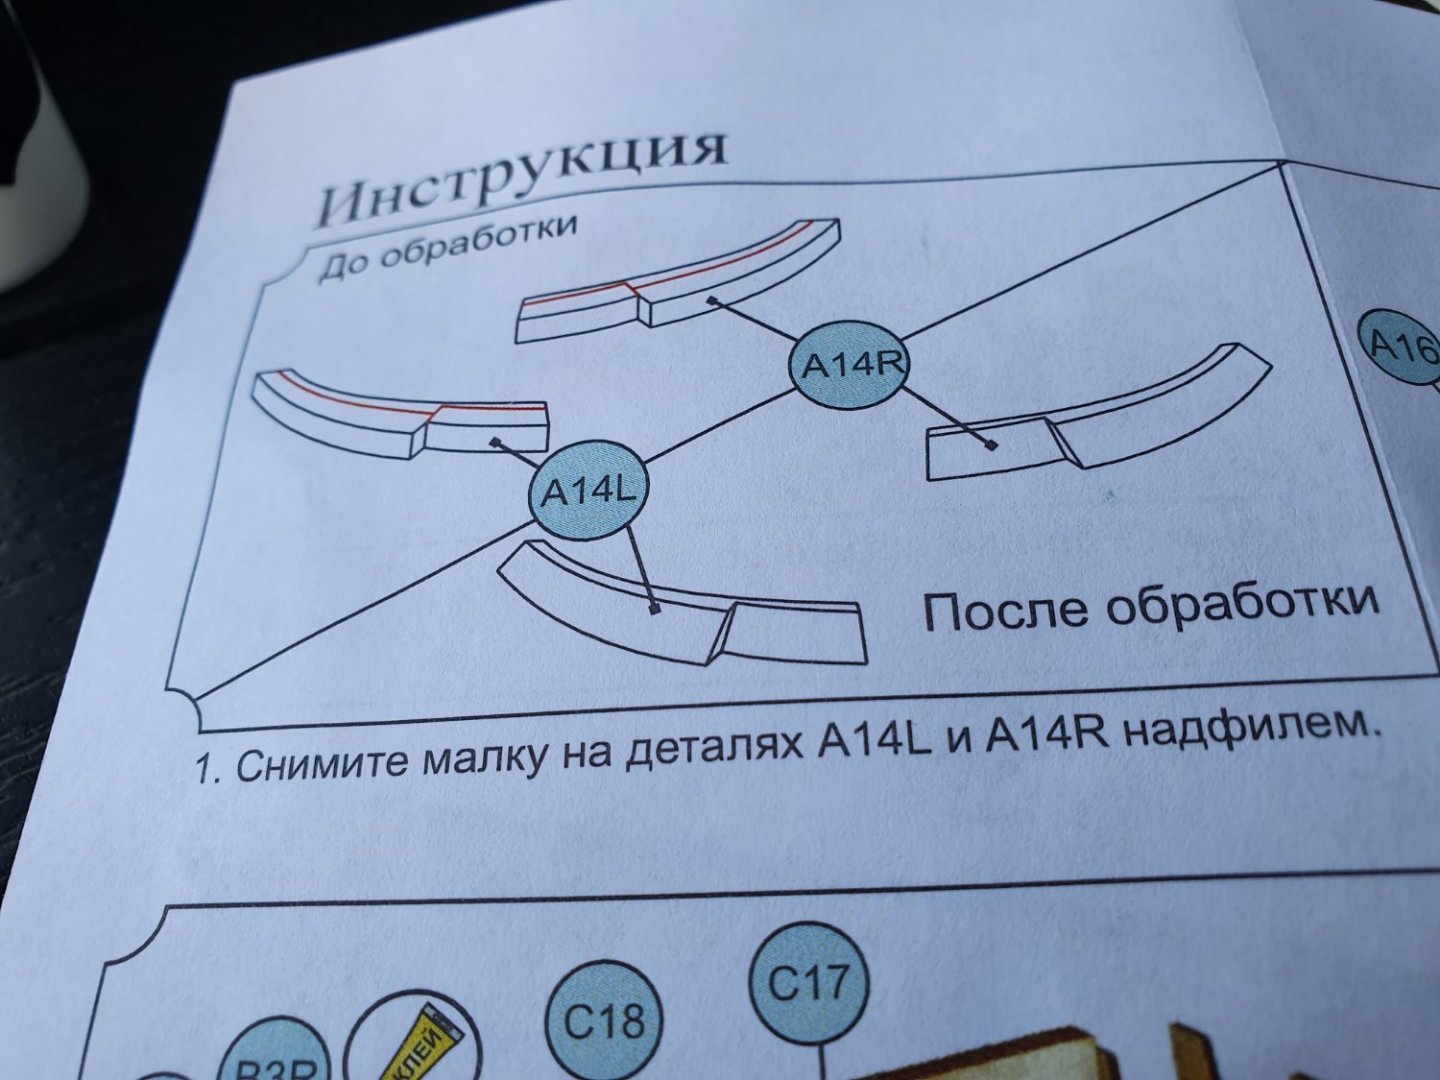
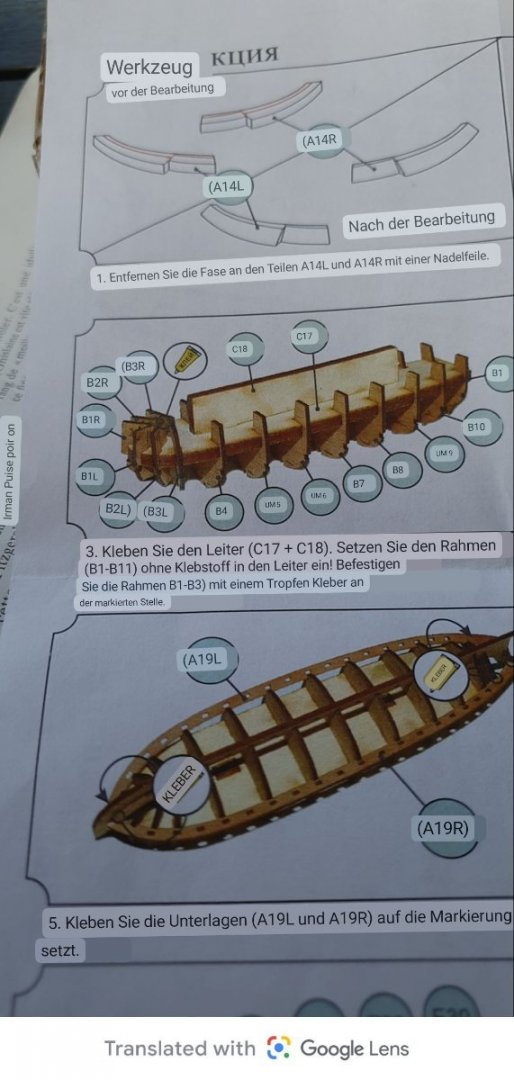
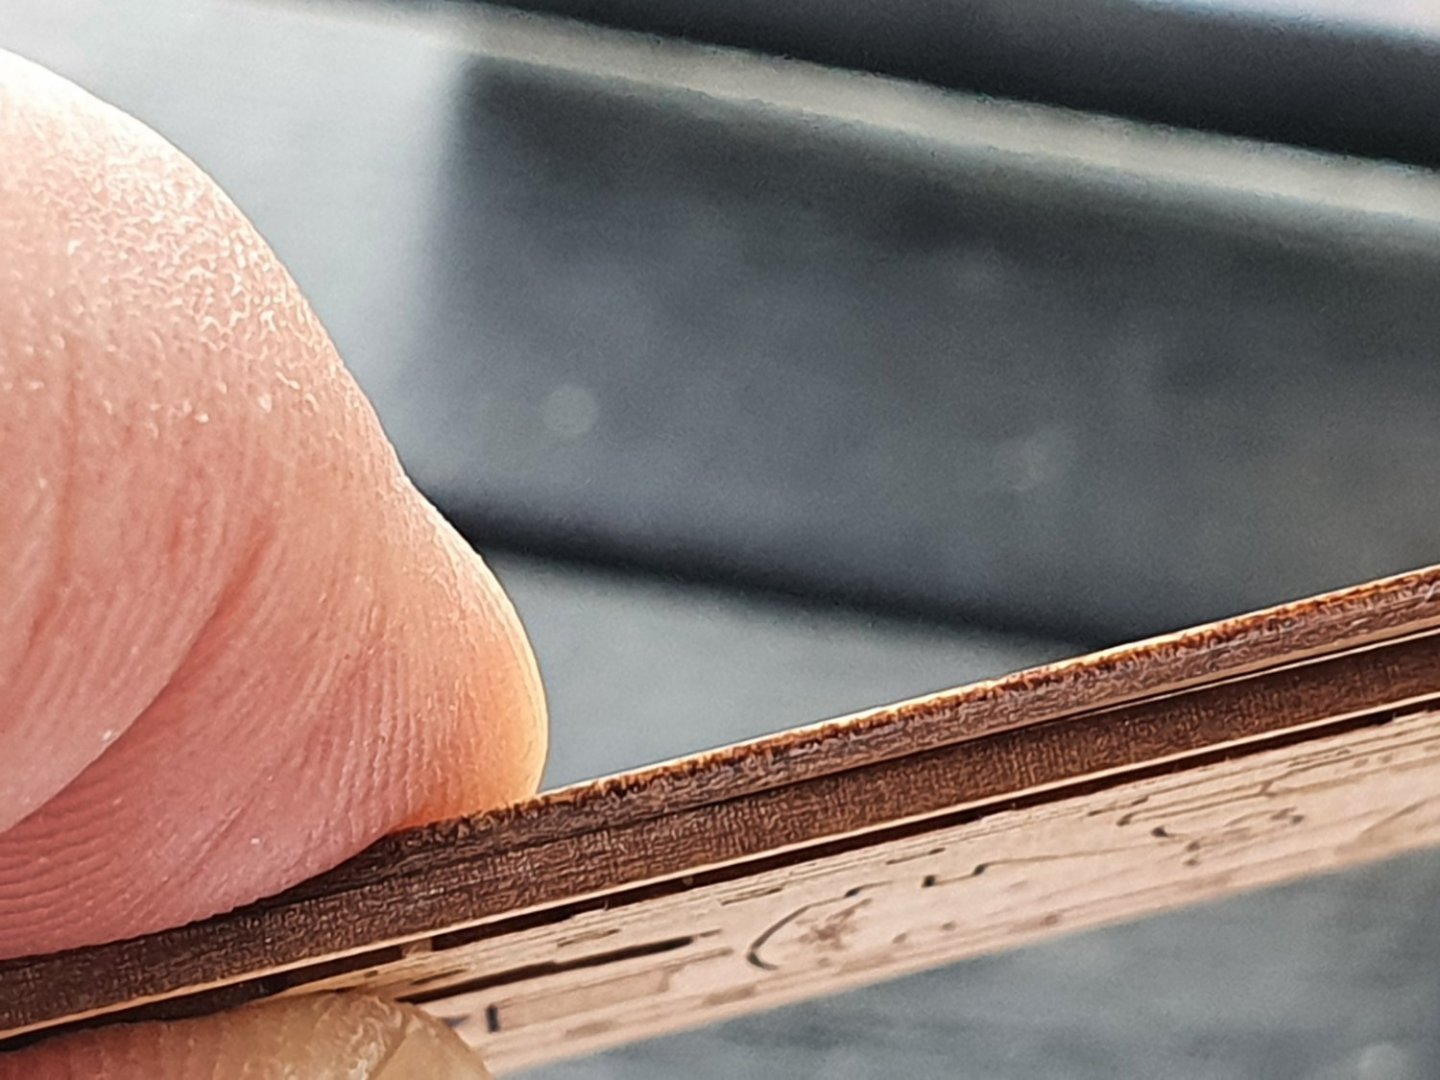
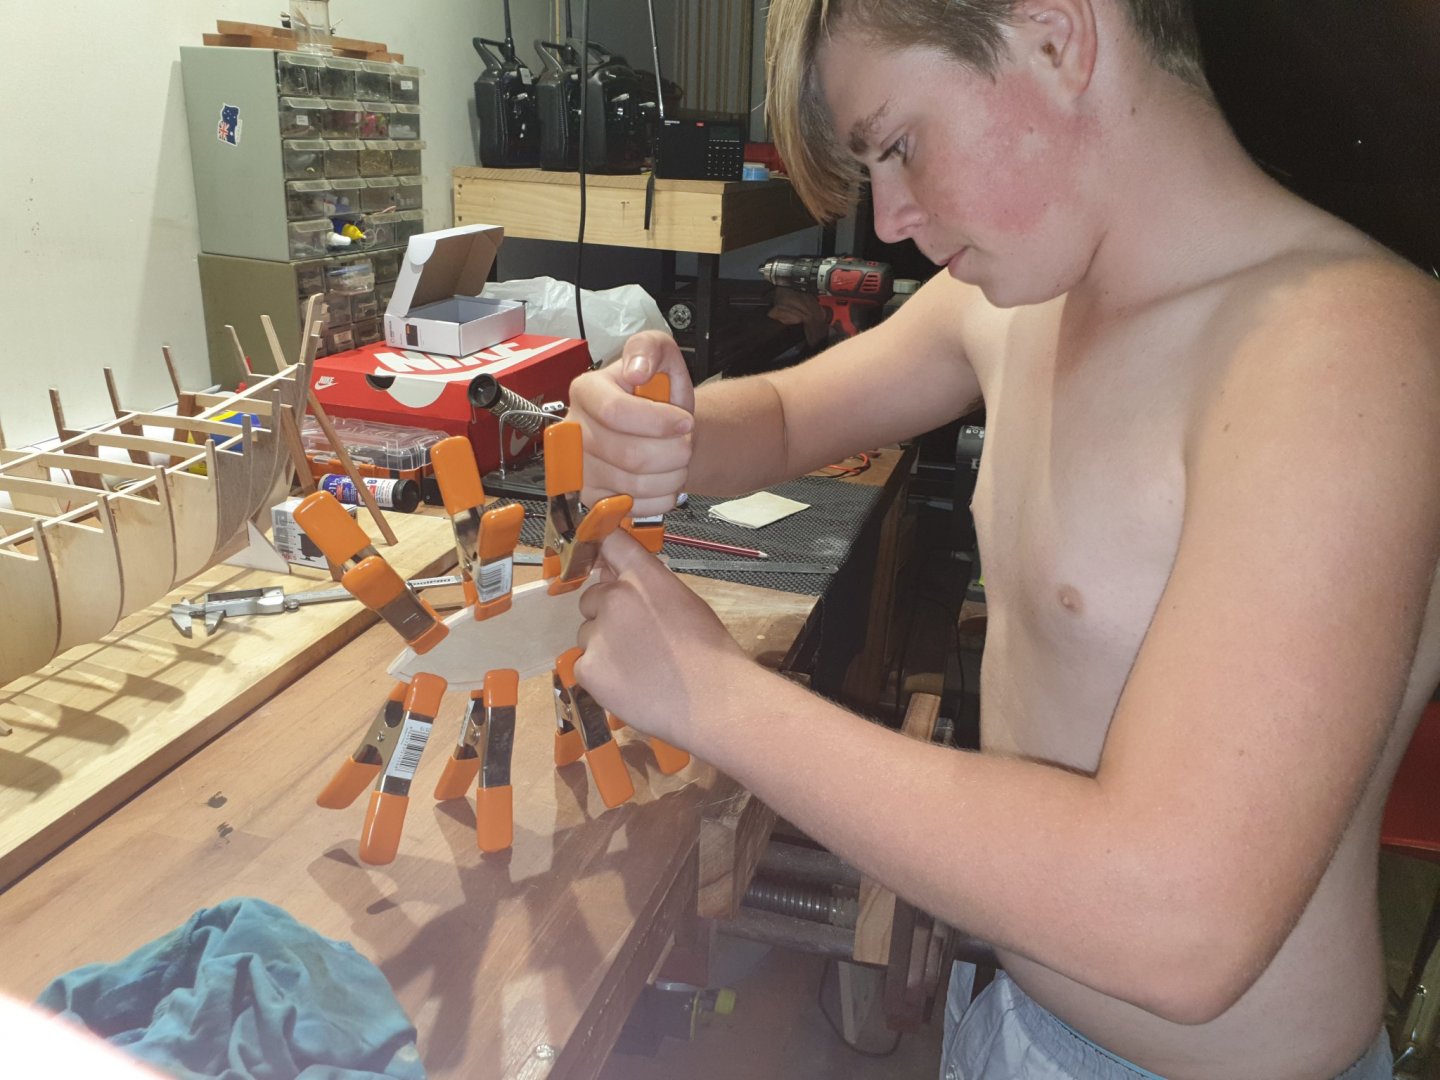
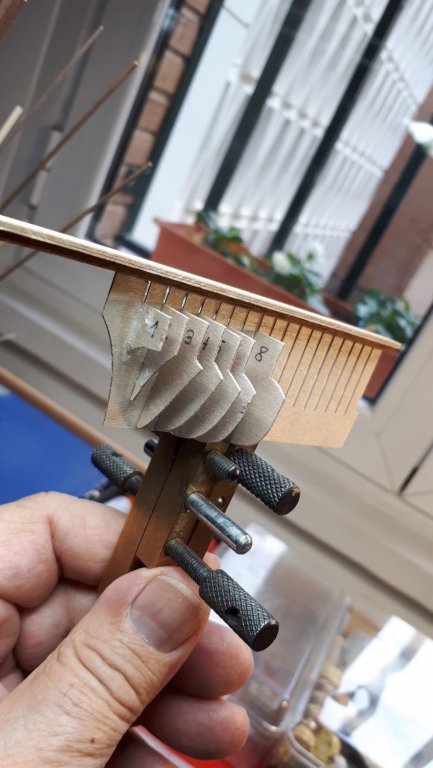
 Ahoy there! What´s up, doc? Vacation with my family. My kids all in the age of puperty used to sleep until the first half of MY day is wasted. So I decided to make use of this quiet time and take a kit with me: the Falkonet 6-oared boat. Its a very nice kit and due to recent experience with a Shipyard Alert with klinkered hull I dared to try this one. My working place was like this: Southern France, Atlantik Coast (Biskaya), you could hear the sea crashing into the beaches (a surfer-paradise nothern Biarritz and Capbreton) - a cool breeze even when the sun burned hot. The start was more tricky than I expected. The plan showed this: But the part A14R uand A14L was available 2 times each!!??? And my russian is not good enought to understand the text. And even the sketch confused me, since the direction of the milling seems not plausible!? It was clear: those two filling pieces support the connection of stem post and keel - and also provide gluing surface for the planking in the bow area. But .. why then a step there? .. and why two pairs of them in the set? An Englisch Pool-technician (thanks Willliam!) gave me the hint: use your smartphones google-browser to translate. You can even translate graphics via hte smartphones camera!!! .. and you can "share" and save that picture: Ups.. sorry, now this translation is in German - which fits well for me.. But although its just a google translation its getting clearer than cyrillic russian texts for me. But still it left me with the question: why in heaven are the two sets of this filling pieces - and even on different thick sheets? I decided to ignore this question and just start with the thicker ones! Milled them in shape according to the lines (ignoring the misunderstandable sketch in the plan - et voila! The filling pieces in place beside the division line of keel and stem post. Aligned so the slot beneth it would not be covered by the step of the filling pieces. Next step is preparing the slade (correct wording?): These where the first parts I needed to file a a bit so that the tongues fitted into the openings. But in general there is not much rework to be done in this laser cut set. Just sanding the cutting area.. and maybe getting rid of the burned edge if you don´t like the dark appearance (which I did not do). Then the frames had to be set loosly into the slade. Only the 4 front ones were allowed to glue together to each other so they don´t get lost. Added the Keel (onto which I already glued the transom and the rear bulkhead) .. Those two rails had to be added too .. And the small kit slowly became looking like a boat ...
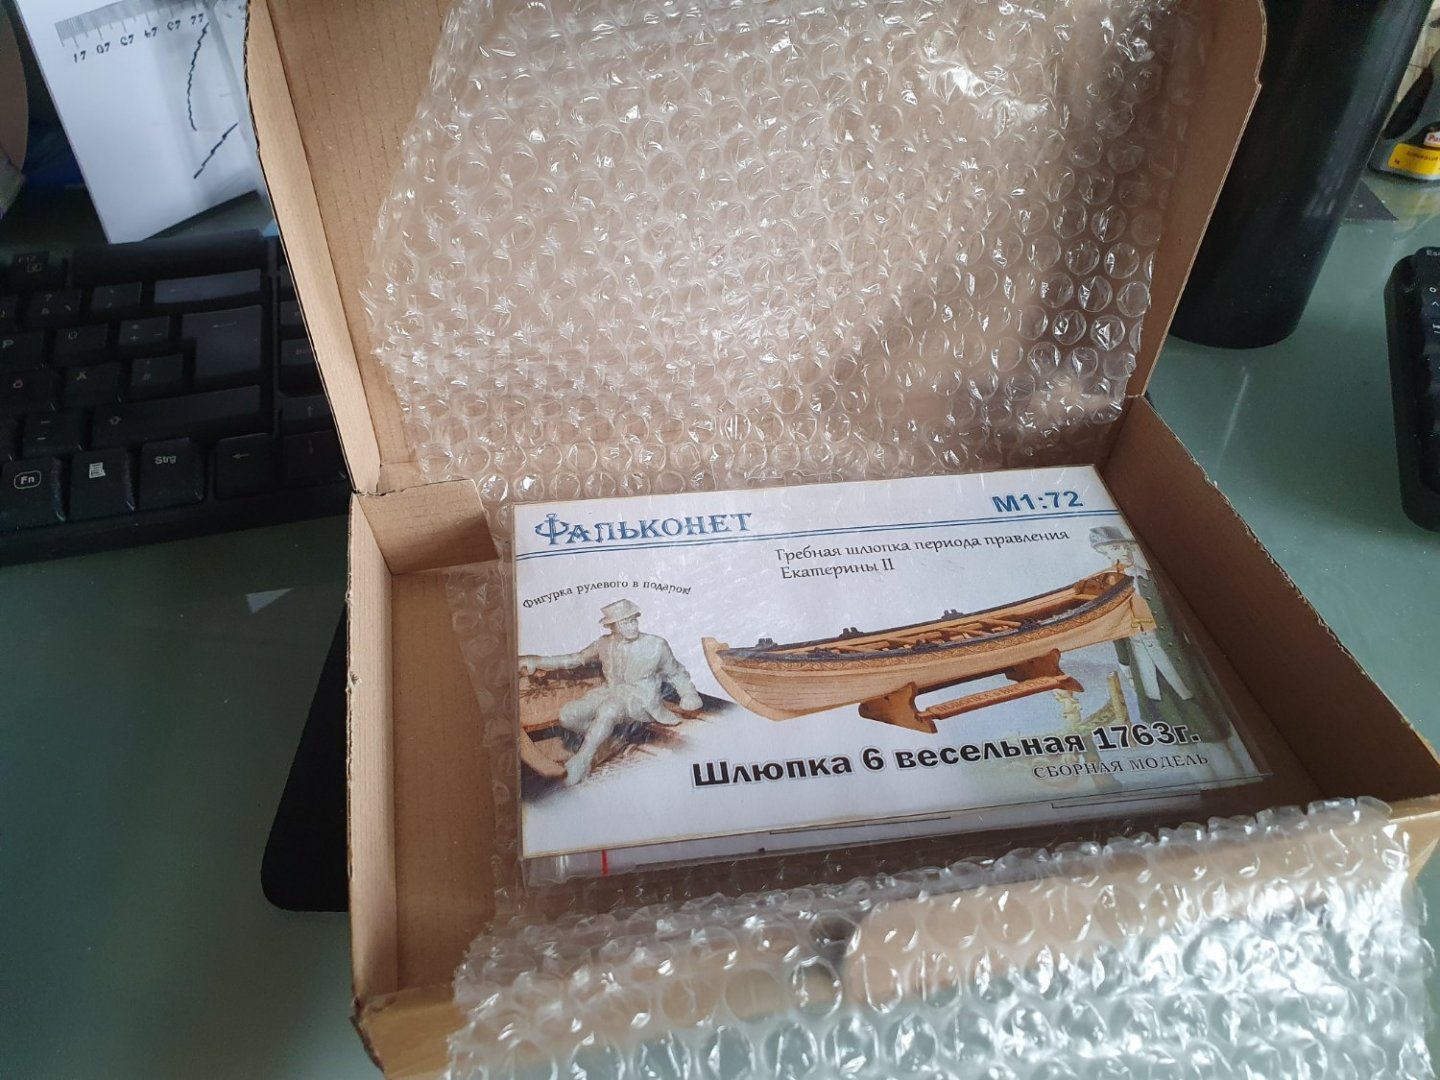


- 6 replies
-
- 8
-
-
- ships boat
- Falkonet
- (and 1 more)
-
 This is a model of a 57' mine sweeping boat from the 1950s. About 50 of these boats were constructed and used in Korea and Viet Nam. My father served on MSB 6, out of Charleston, SC in the early 1950s. While information, plans, and photos of these boats are skimpy, there is information available. The most detailed technical data I found on the internet is located at the Library of Congress web site at: https://tile.loc.gov/storage-services/master/pnp/habshaer/tx/tx1100/tx1140/data/tx1140data.pdf
- 55 replies
-
- 5
-
-
- Mine sweeper
- boat
- (and 2 more)
-
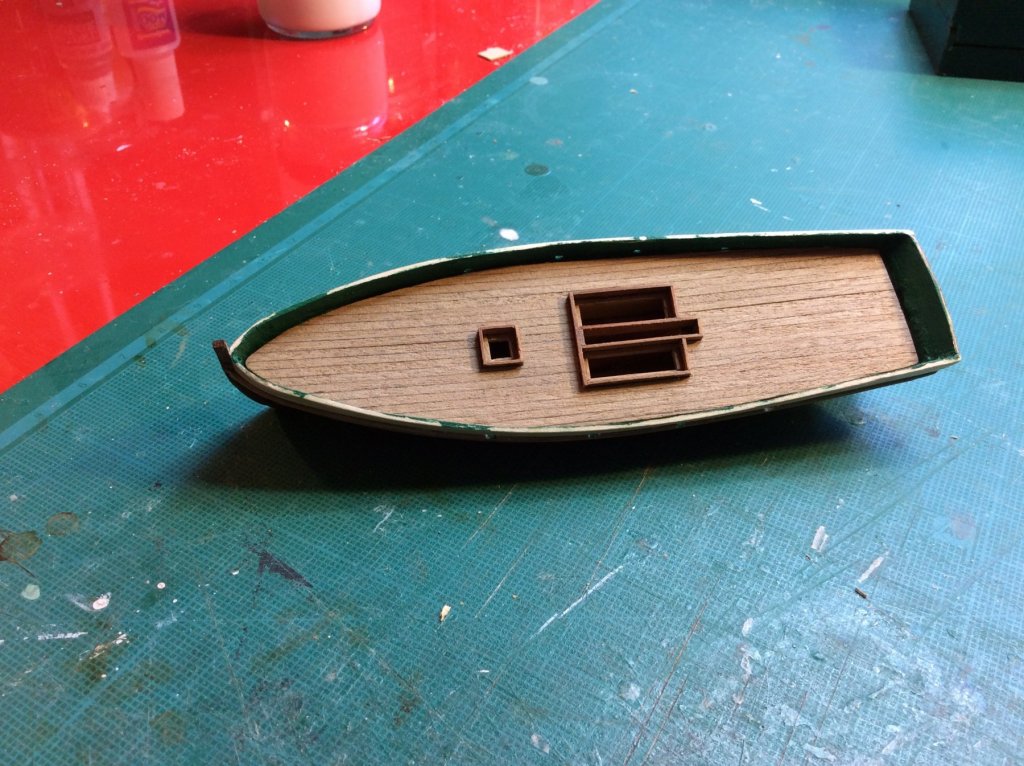
Hello there, I received this as a birthday gift and was going to kit bash it into an English east coast (Norfolk) lifeboat (Henry Ramey Upcher) but after a long think about it have decided to use the basic pattern for the lifeboat as a scratchbuild, therefore I can build this as is, also it will be practice for clinker planking, which I've never done before. (Well not intentionally) More to follow. Cheers
- 16 replies
-
- 3
-
-
- whaleboat
- Artesania Latina
- (and 3 more)
-
Just started a new boat project. After seeing a photo of a small Brazzera with two lateen masts on Veniceboats.com (http://www.veniceboats.com/brazzera.htm), I had to build one! I have not yet found much historical information about Brazerras rigged this way, but there are several plans for single masted boats available. My model will be fictional, based on the type. A ten meter boat was chosen based on the only photo I could find, from Veniceboats.com. The length of the boat was determined and scaled off the people in the photo, and a comparison to photos of a single masted, 9-meter Croatian boat, "Our Lady of the Sea". The "Our Lady of the Sea" is a modern replica of an 18th century boat. I place the photo of my model in the late 19th century, and plan to make it in Italian ownership (maybe a sponge fishing boat?)... Any info or feedback on Brazzeras, especially those rigged with two lateen masts, would be greatly appreciated!


- 55 replies
-
- 5
-
-
- fishing boat
- Fishing
- (and 4 more)
-
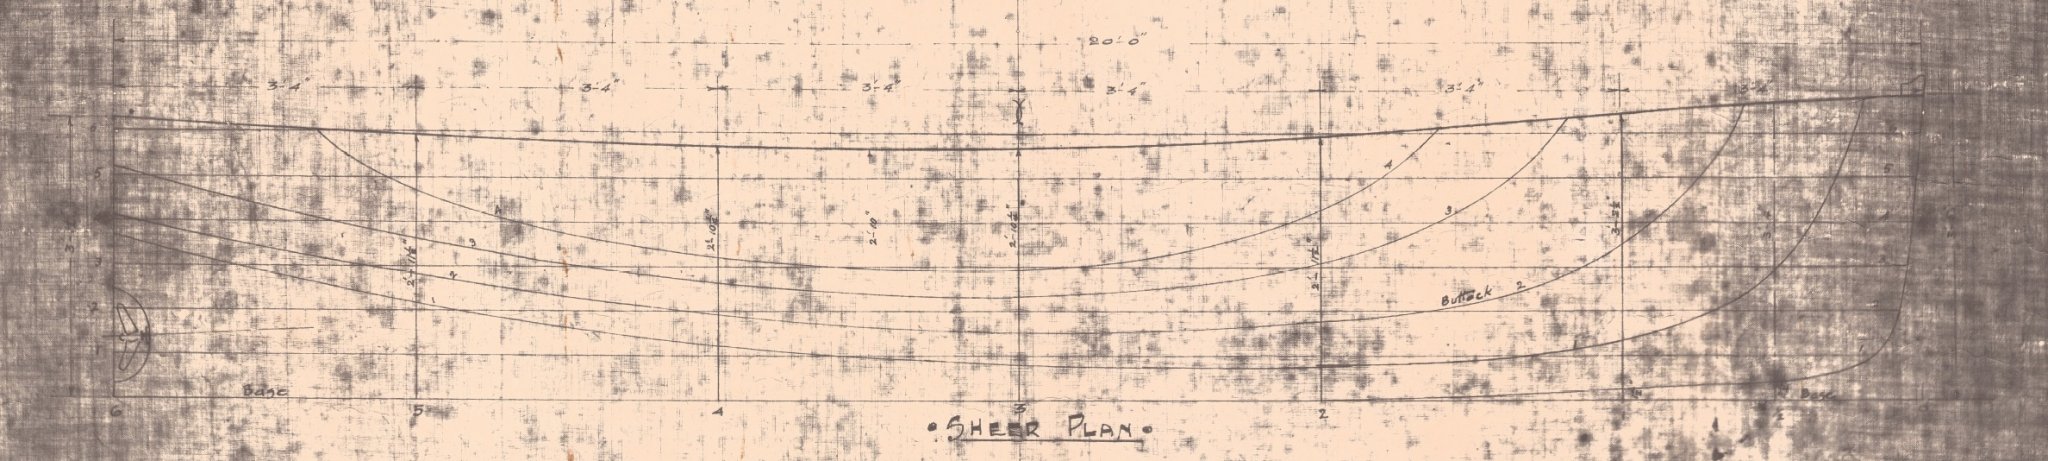
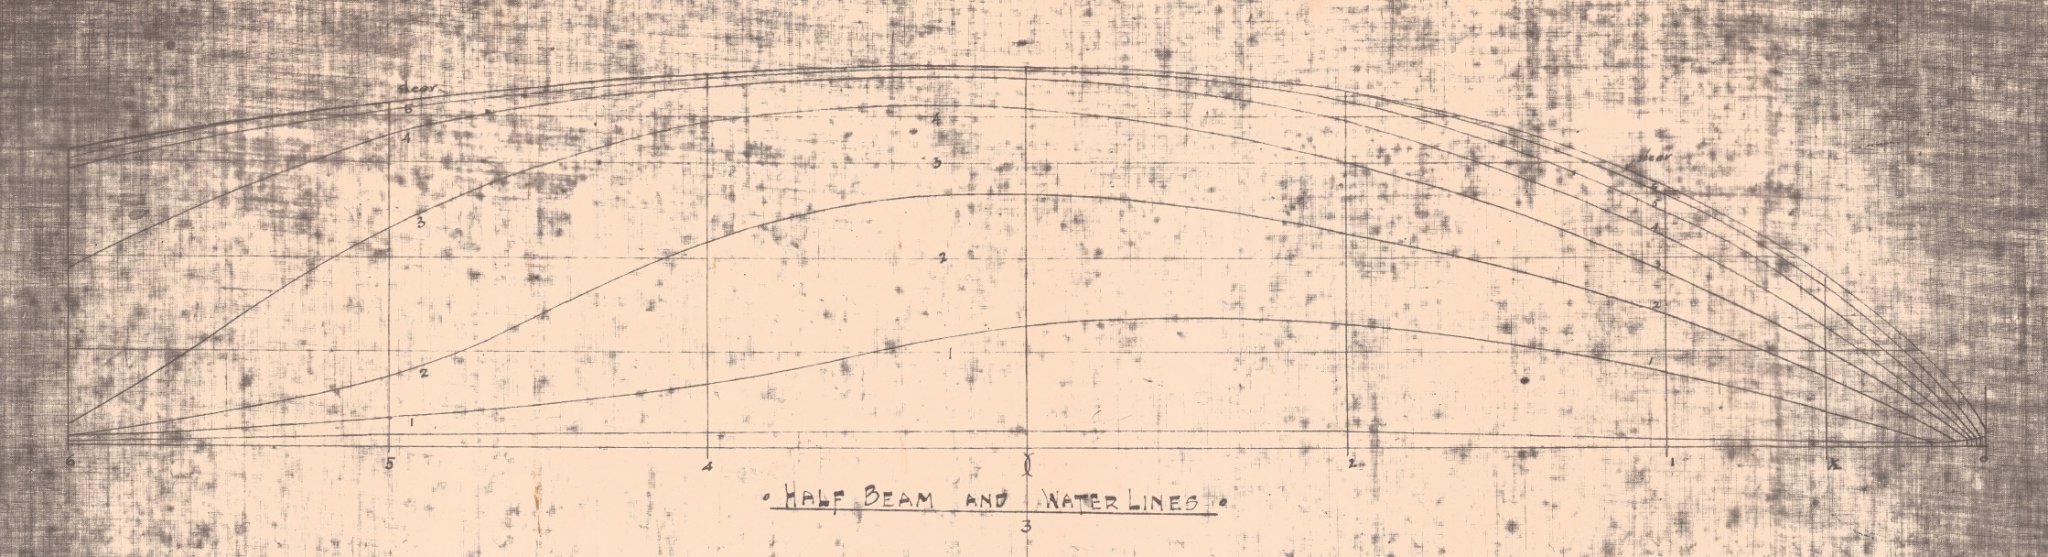
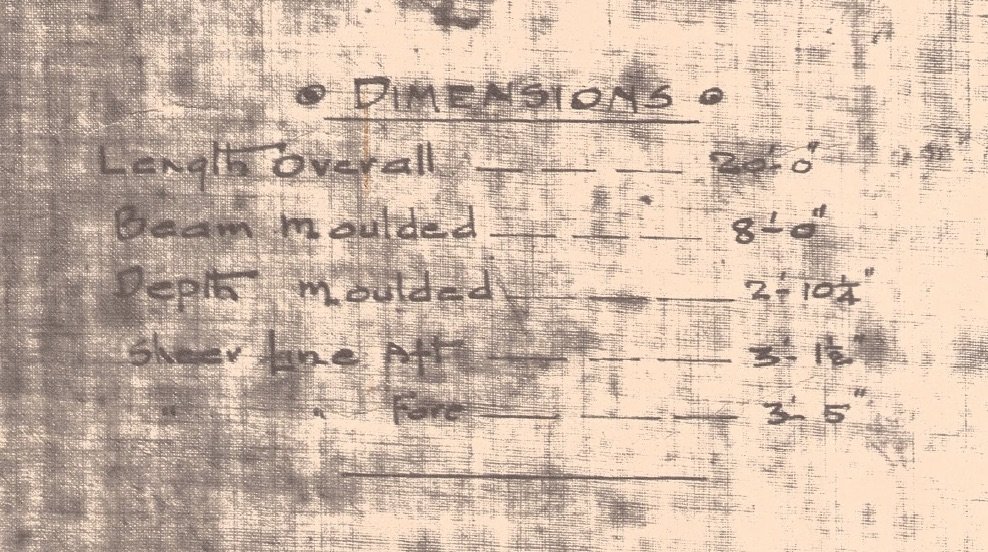
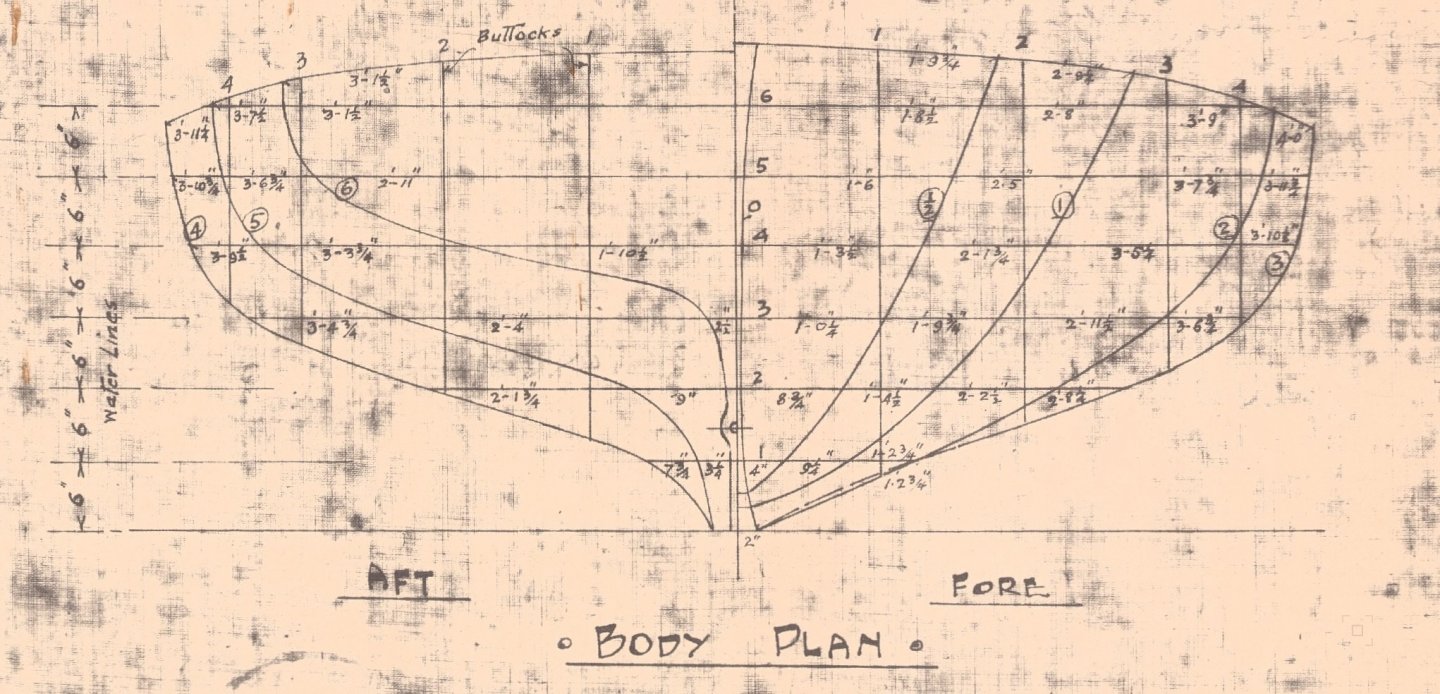
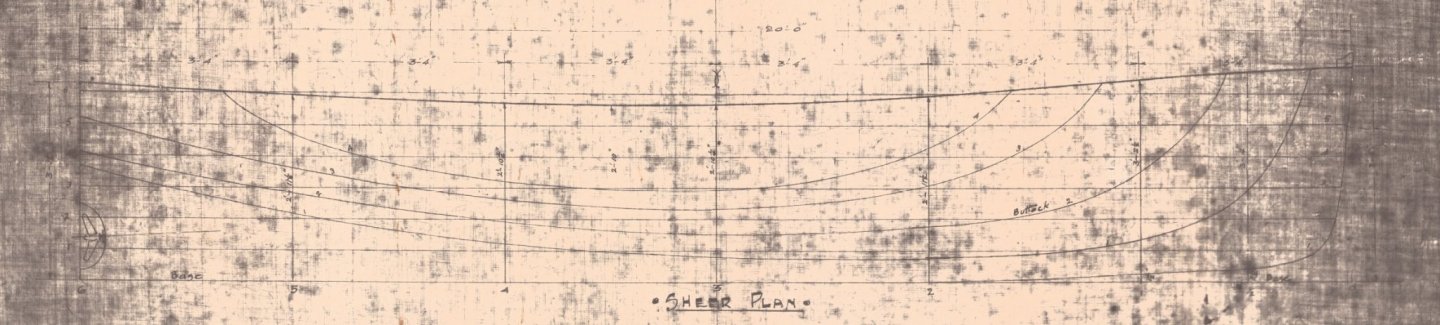
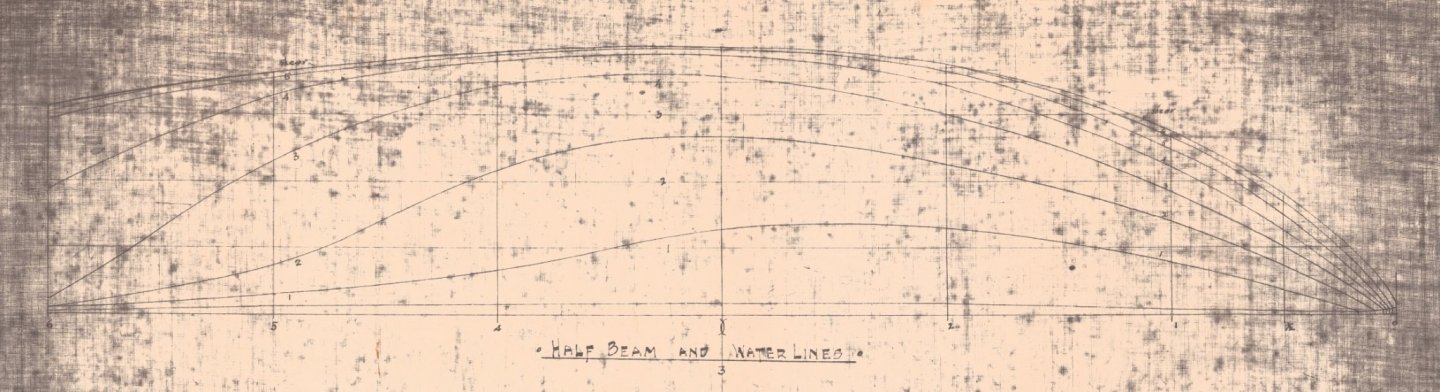
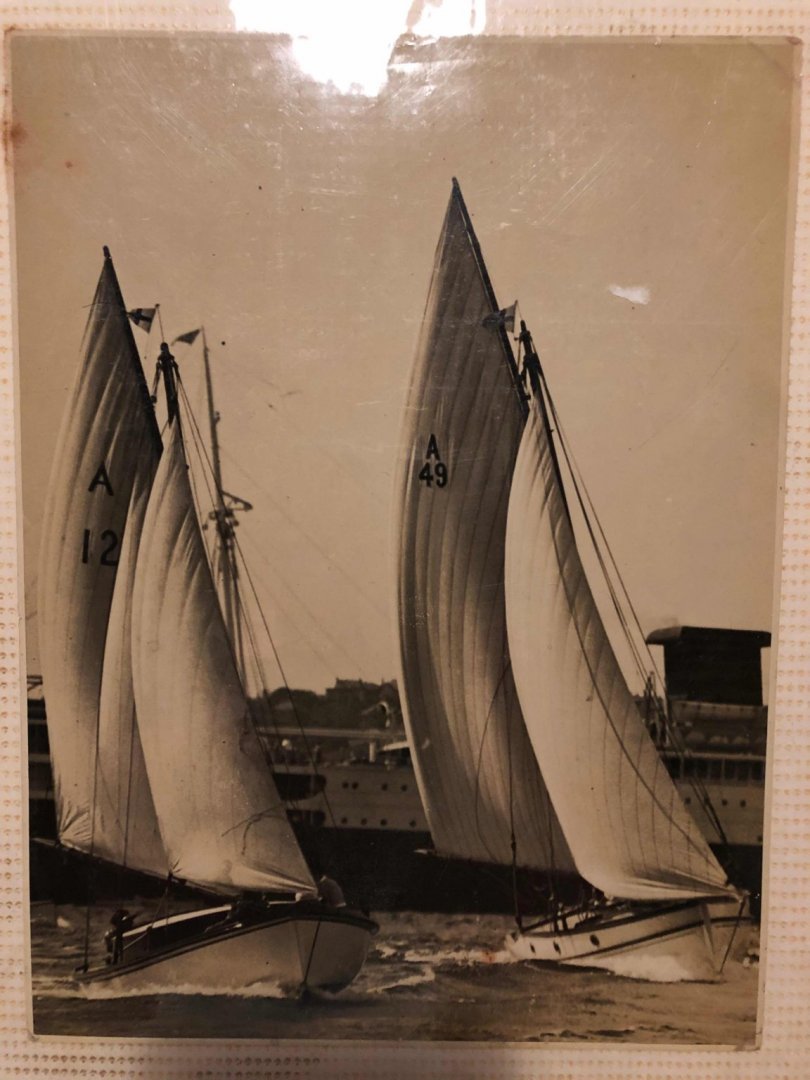
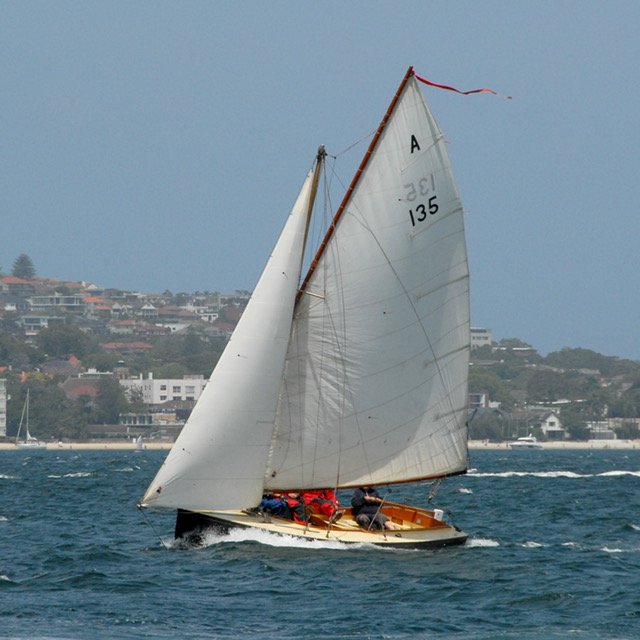
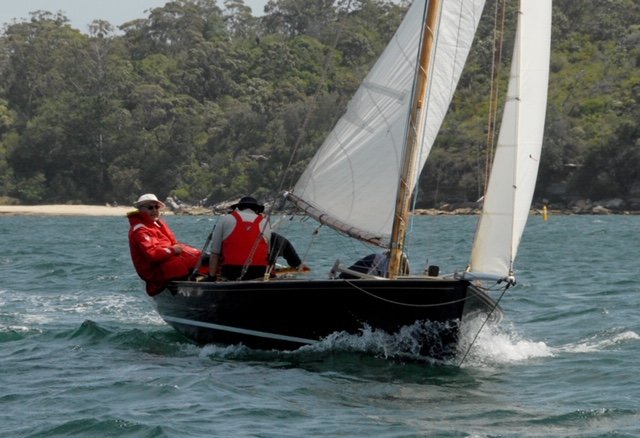
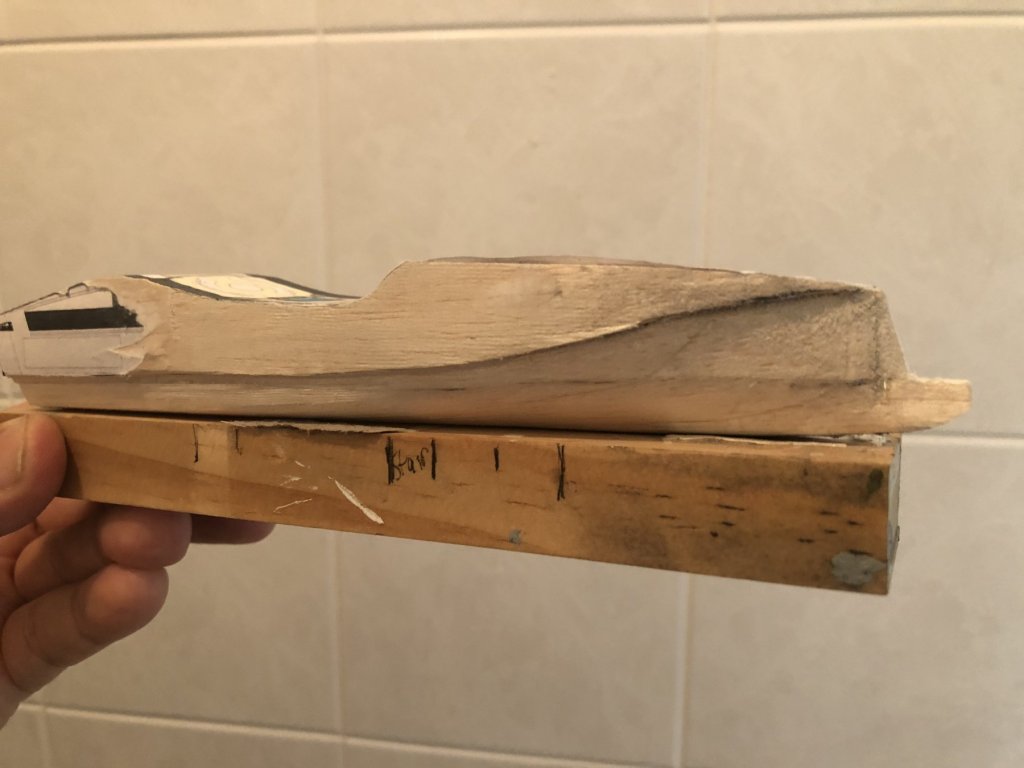
 Hi everyone This is my second venture into model boat building. The first model was an unbuilt yacht design by a Sydney amateur yacht designer; this one is a much earlier design by the same man - E.C. "Cliff" Gale. Karoo was a 20' open sailing boat with a bowsprit & gaff sloop rig. Karoo was raced & was also a family boat. Incredibly they (Cliff & Mrs Gale, plus 3 strapping young sons) used to pack her full of gear for holidays & spend a week or two aboard on Pittwater, Broken Bay & the associated waterways Cowan Creek, Coal & Candle Creek etc. I'm doing a half model of the boat, as a gift for our sailing club model wall. The Karoo was a quick boat, I know because a copy was built about 20 years ago & despite her being given a fairly conservative sailing rig she is well able to keep up or beat with larger yachts. As with the last model the drawn information is not complete, but there are some photos of the original boat. And also I have one of the sons - Bill - who at 95 or so still has an astonishing memory when it comes to yachts. The drawing would have been done from a design half model, Cliff shaped the design in a bread & butter half model, layers dowelled together, & separated them to get the drawn lines. I plan to show some details beyond just the hull: gunwale & toe rail, lower section of the mast, bowsprit, rudder & tiller, centreboard. Coincidentally, it was 90 years plus 10 days ago this drawing was done: The lines show a shallow dishy hull with clean underwater lines; the shape is beamy & shallow. A 40% beam:length ratio is wide, but beamy is (or was) quite common in Sydney: Here, cantering under spinnaker at Pittwater, in the early 30s: This is the rebuilt version, she was slightly lengthened & made finer in the bow. Interestingly the owner's one comment is that she tends to bury the bow downwind under spinnaker. I'm guessing the original didn't do that, or as much, with more buoyancy in the bow. On the left, A12, with a removable cuddy cabin for cruising.
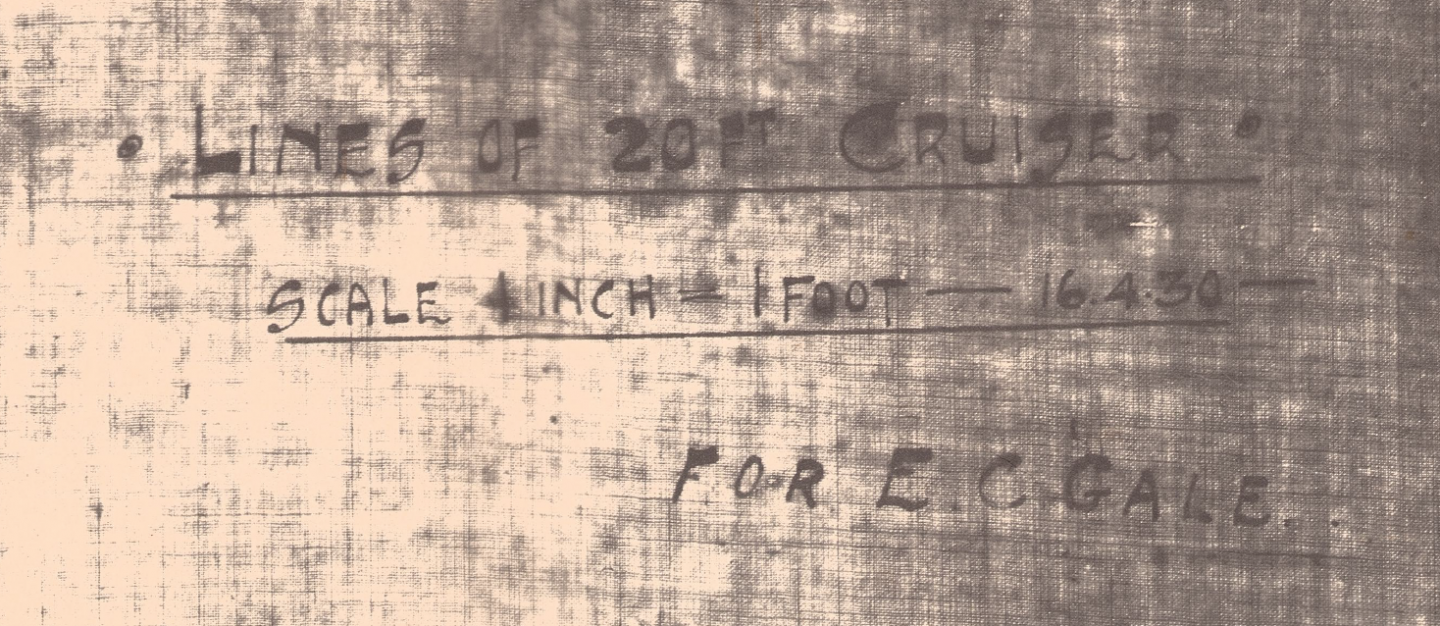

- 99 replies
-
- 11
-
-
- half model
- karoo
- (and 2 more)
-
The Catalan boat is a small lateen-rigged vessel used throughout the Mediterranean in various forms. This model is suppose to represent a typical 9-meter boat from the late 1800s. Photos, plans, and drawings of surviving and modern-day boats are being studied. Also, I was inspired by MSW member Javier Baron's construction methods for his fabulous models, and thought they would work well for this attempt. The false keel, which doubles as a construction frame and handle. Bulkheads will be attached at one small point at each station. Plywood bulkheads attached and braced with balsa blocks. Planking has begun with basswood. Since this is an open boat, the bulkheads are temporary. They are only needed for the planking process. The edges of the bulkheads were rubbed with beeswax to prevent glue (super glue) from adhering to the planks during planking. The planks are just glued to each other (and often my fingers). I used a bandsaw to cut away unwanted parts of the false keel. The bottom has been cut and sanded flush with the planking. The stern and stem posts will be cut away later, and all replaced with new parts. Feeling confident the super-glued planking will hold, I gently started removing the bulkheads after violently breaking the balsa spacers... The "cleaning"continues. Note the balsa "deadwood" at the ends of the boat. Unlike the bulkheads, the planks were glued to the deadwood. I noticed that balsa wood smokes when super glue hits it. That can't be good! All clean. Reminds me of a corn taco.... Seems very fragile! Sanded the interior a little and stained it. Now adding ribs made from heavy card stock (doubled, stained, and cut into strips). Keelson added... "Real" bulkheads and a floor added... The step plate for the mast is added... Benches added (stained basswood). Beginning the decking. Deck planks are being edged with black construction paper. Also a cardboard template was made with the proper sheer to use as a base for the deck construction. The decks on these boats have a lot of camber, hence the three formers. Deck planking started in the middle. The middle two planks will guide alignment, but will be cut later to make the opening in the deck. Viola! Shaped to fit... The underside... Pretty good fit... You will notice new stern and stem posts were added, as was the keel. These boats had extra keel-like structures called "escues" on either side of the keel, and parallel to it. The escues helped to balance and support the boats when the crew ran them up on the beach, to sell their catch. Installed a pulley for the mast... Since the hull of the boat will be painted, I thought I better prime it to ensure I sanded out all the blemishes. Adding the upper planking and wales. Next, on to the rail trim and false frame ribs...


- 72 replies
-
- 11
-
-
- fishing boat
- sailboat
- (and 1 more)
-
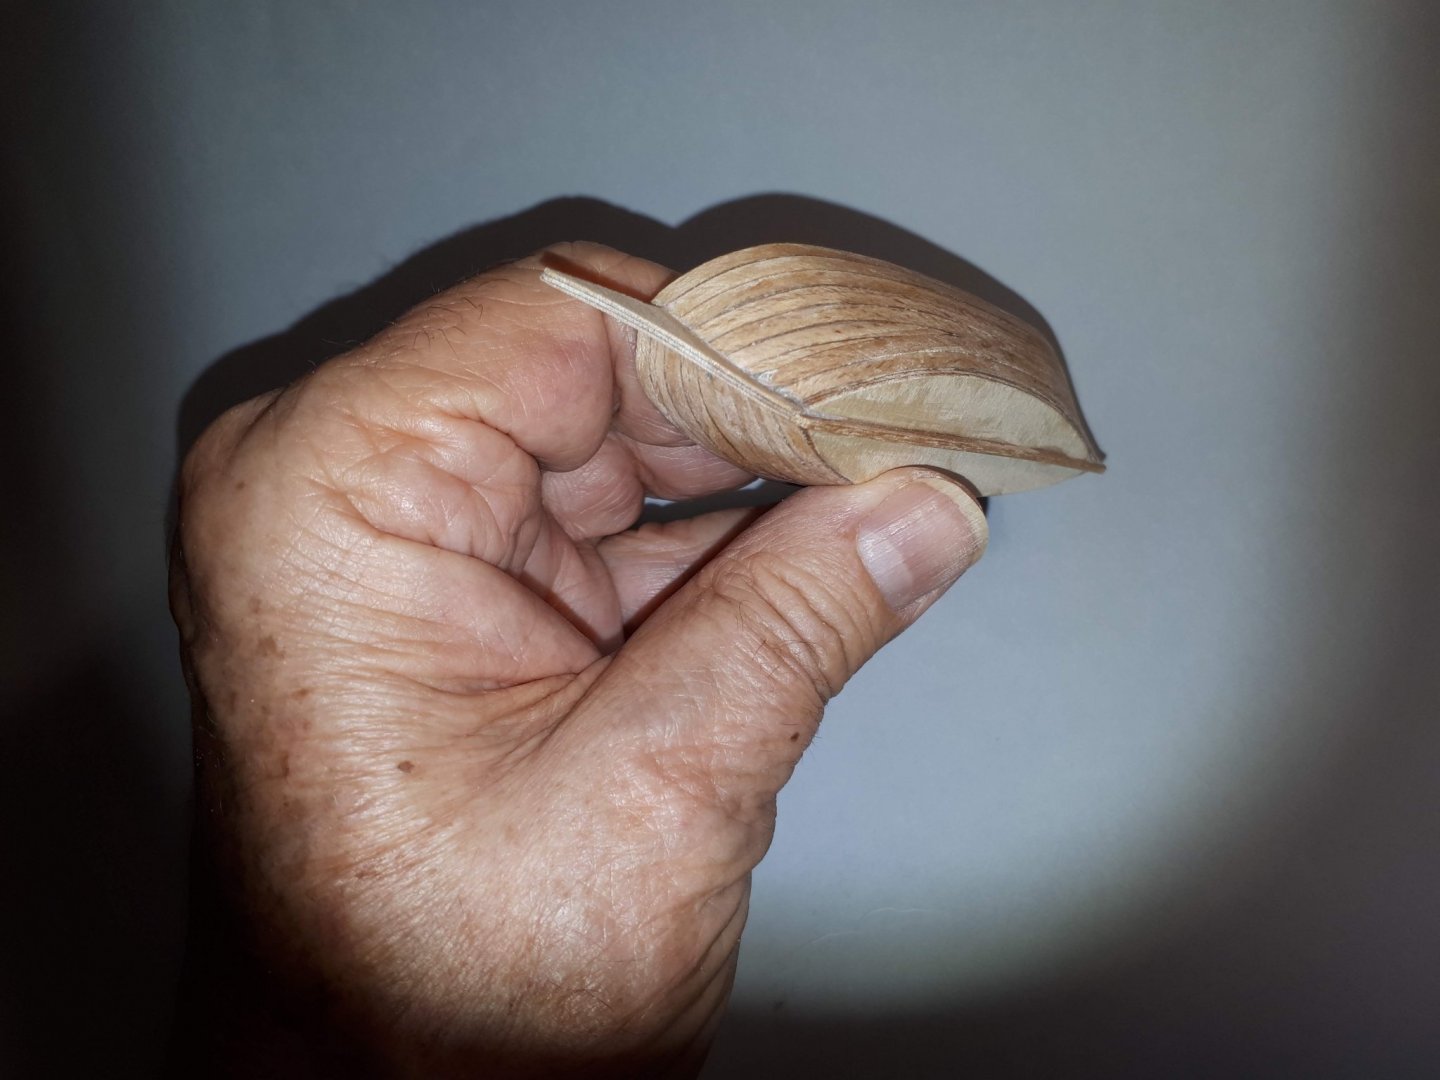
Started a new project: a "Galway Hooker." Evidently, these boats have been numerous in Ireland since the early 19th century, and are still being built today. In the past they were working boats, used for fishing and transporting cargo along the coasts of western Ireland. Today's boats are mostly used for pleasure and racing. The hookers range in size from around 20 to 44 feet (6 to 14 meters), and are broken into four classes, based on size or rigging. There are a lot of information on the internet about Galway Hookers, including plans, drawings, and photos. My model will be a fictional 26-foot (8-meter) boat from the late 19th century of the "gléoiteog" class. Gléoiteogs appear to have been the "real workhorses" of the era because their smaller size made them more affordable (Smylie, Mike. Traditional Fishing Boats of Britain & Ireland. Kindle ed., Amberley Publishing, 2012). Gléoiteogs generally appear to be "open" boats (i.e. no deck), although they sometimes appear with short partial decks (more like shelves) fore and/or aft. Even the larger classes only had half-decks, from the mast forward. I plan to have a short fore deck. The big construction challenge for me will be making a boat that is mostly "open." In 1/48 scale, that is only about 6.5 inches (165mm) long. Model construction began with the keel, made from 1/16 inch (1.6mm) basswood sheet. I added notches for placement of bulkheads later. The bulkheads were sawn from thin (2mm?) basswood plywood and attached in the notches with CA glue. Braces between the bulkheads were added later. Everything was aligned by the "eyeball" method, which relies on a lot of luck...


- 69 replies
-
- 8
-
-
- Galway hooker
- fishing
- (and 2 more)
-
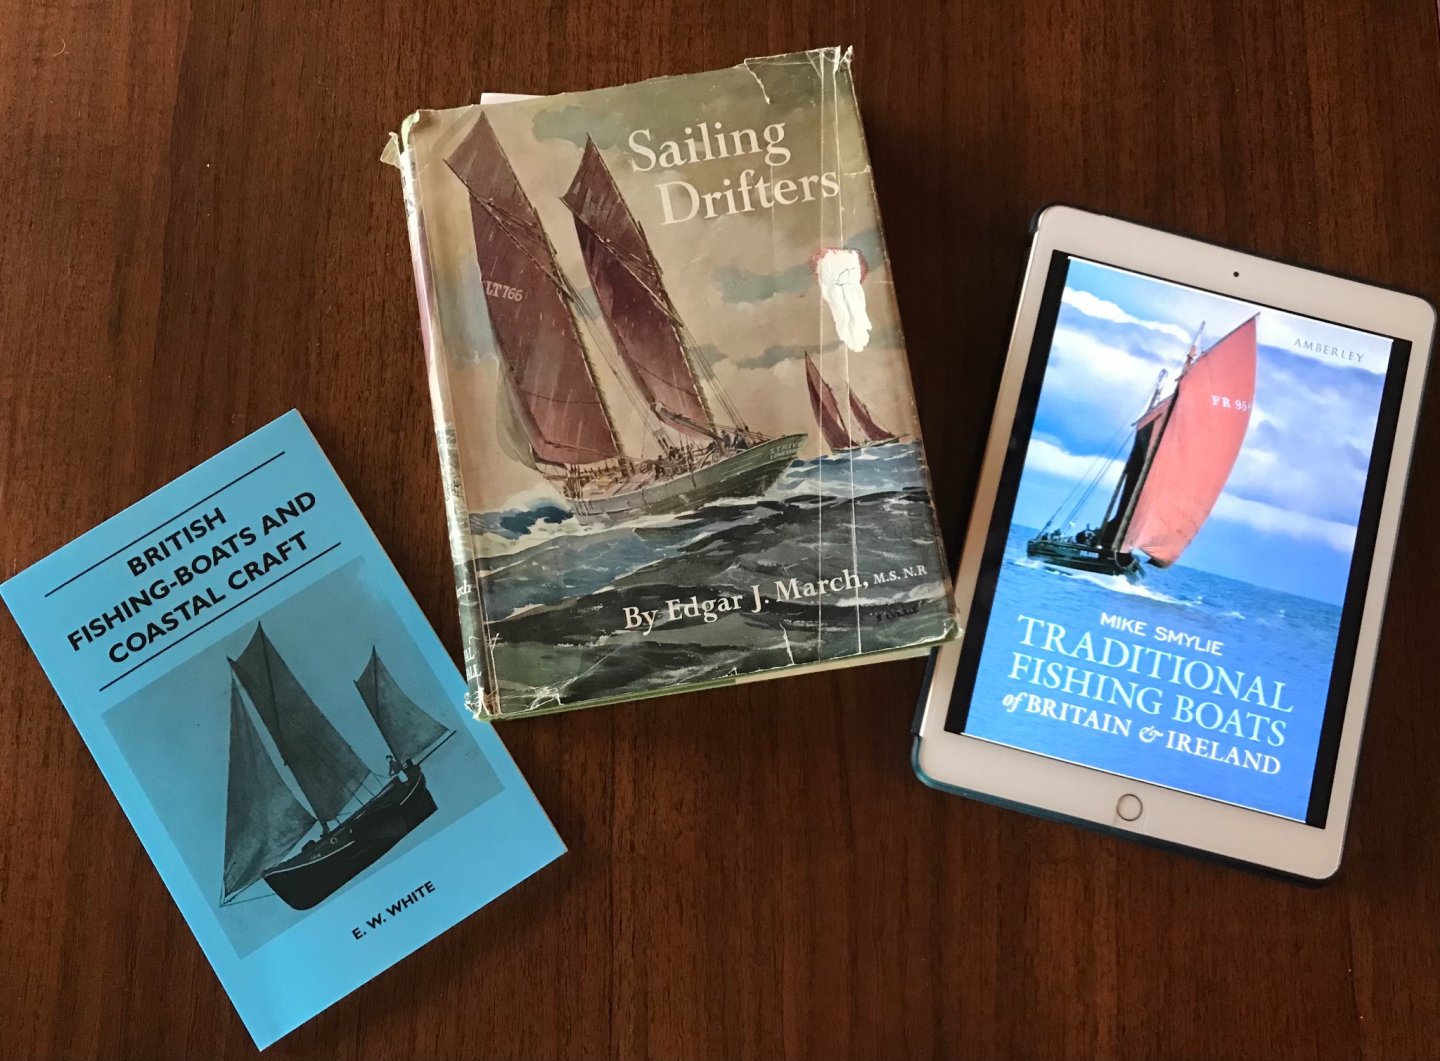
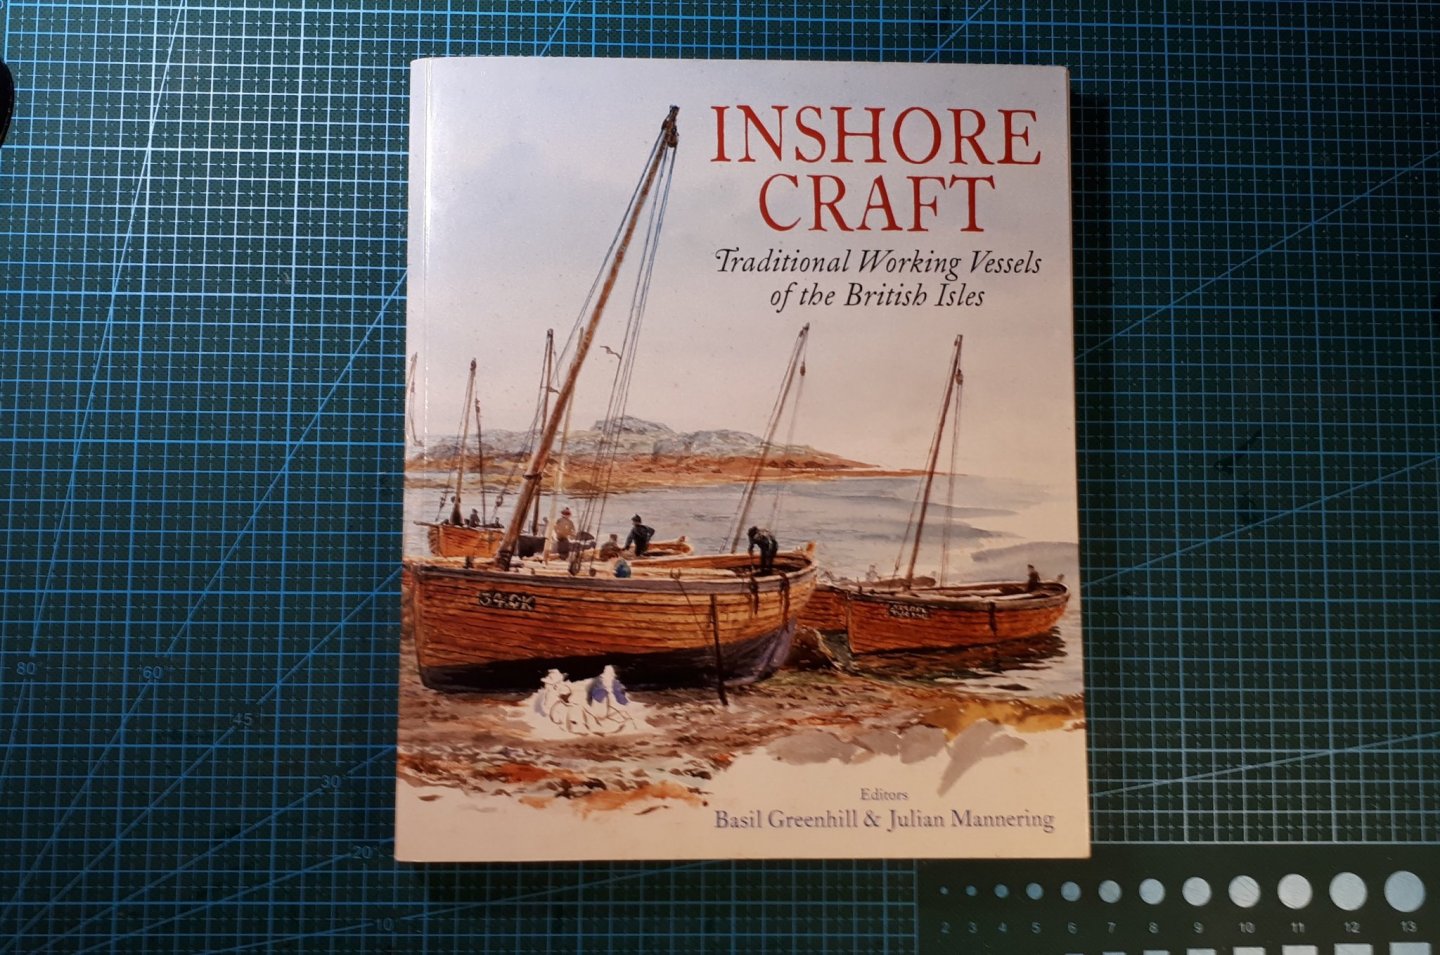
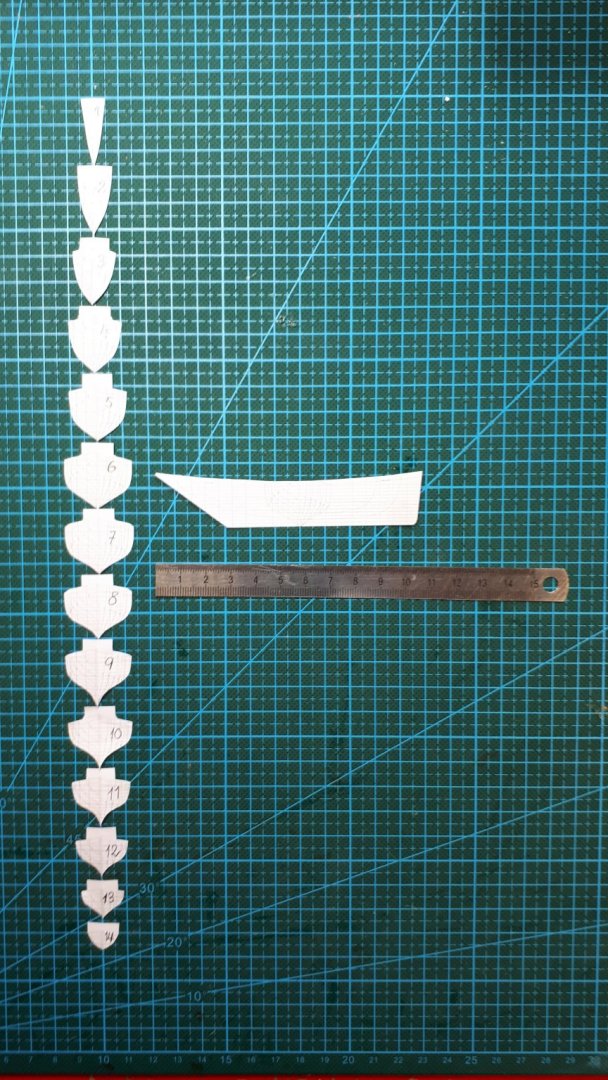
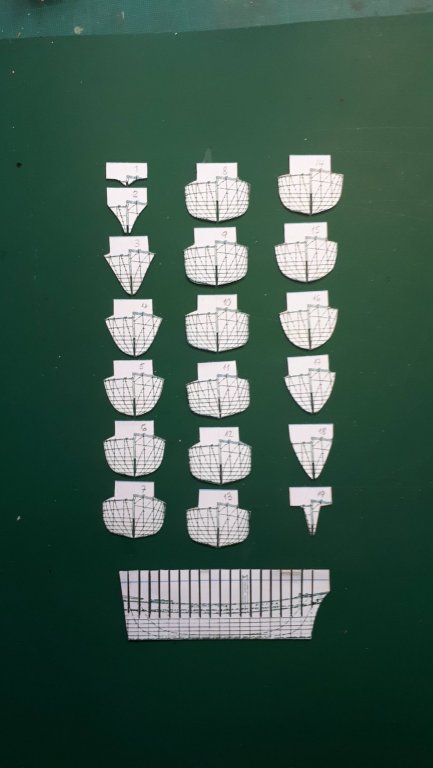
I have been researching the famous Scottish Fifies, and am inspired to try building a model of a small to medium sized boat of 42-feet (12.8 meters). Detailed information about these boats is hard to find. Evidently, the real boats were mostly built by sight, without the help of plans or half-hull models, so there is not a lot of documentation to discover. Most of the sources I did find focus on the large Fifies (60 to 80 feet loa) of the early 1900s. However, from various historical photographs and writings, I am under the impression that smaller boats were more common-place during the late 1800s. In addition, there are very few surviving Fifies left in the world today. One smaller boat, the "Isabella Fortuna," survives as a Scottish National Historic Ship. She was built in 1890 and is 43 feet loa. By using written descriptions, historical photographs, and the plans of larger boats, I have developed my own paper line-plans of what I think would be a typical boat in existence, circa 1870 - 1880. Here are some of my sources:
- 85 replies
-
- 10
-
-
 This is a fun and quicky project. My grandson is building it with a little help from Grandad. We saw some you tubes on these wonderful little craft. Next best thing to steam power but a darned sight cheaper. It is powered by its own pop pop motor which we shall be making next. It makes a realistic pop pop!!! Sound. This is a fun toy but to be honest ,because it has a live burning flame inside it, it can hardly be given to a very young child. I think 13 is okay. Not so sure about the 69 year old though!!! Ha ha. If you get the itch and secretly build one, all I ask is for you to be honest and show us your build. The entire build should only take a few days. We are doing a super version of it in very expensive 1.5mm birch ply. The plan is down loadable from the web. My grandson used " publisher " to make the beam a bit wider than the original. This is as far as we are at the mo. Pete and Brandon.
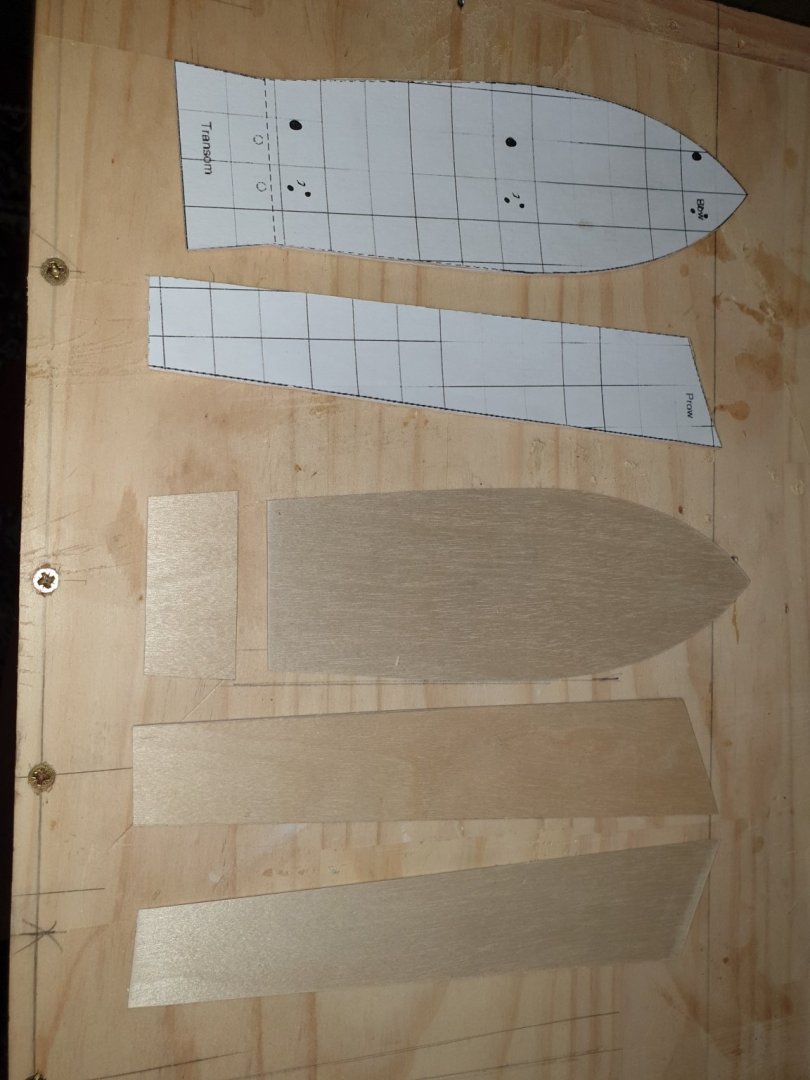


-
This will be a 1/48 scale model of a six meter (20 foot) Misainier fishing boat from the early 1900s. The Misainier was an important feature of the French Atlantic Coast in the early part of the 20th century. These little boats were usually 4 to 8 meters long, single masted, lug rigged, and built by individuals without formal plans. Hundreds plied the coastal fishing grounds of Brittany until the mid 1900s.
-
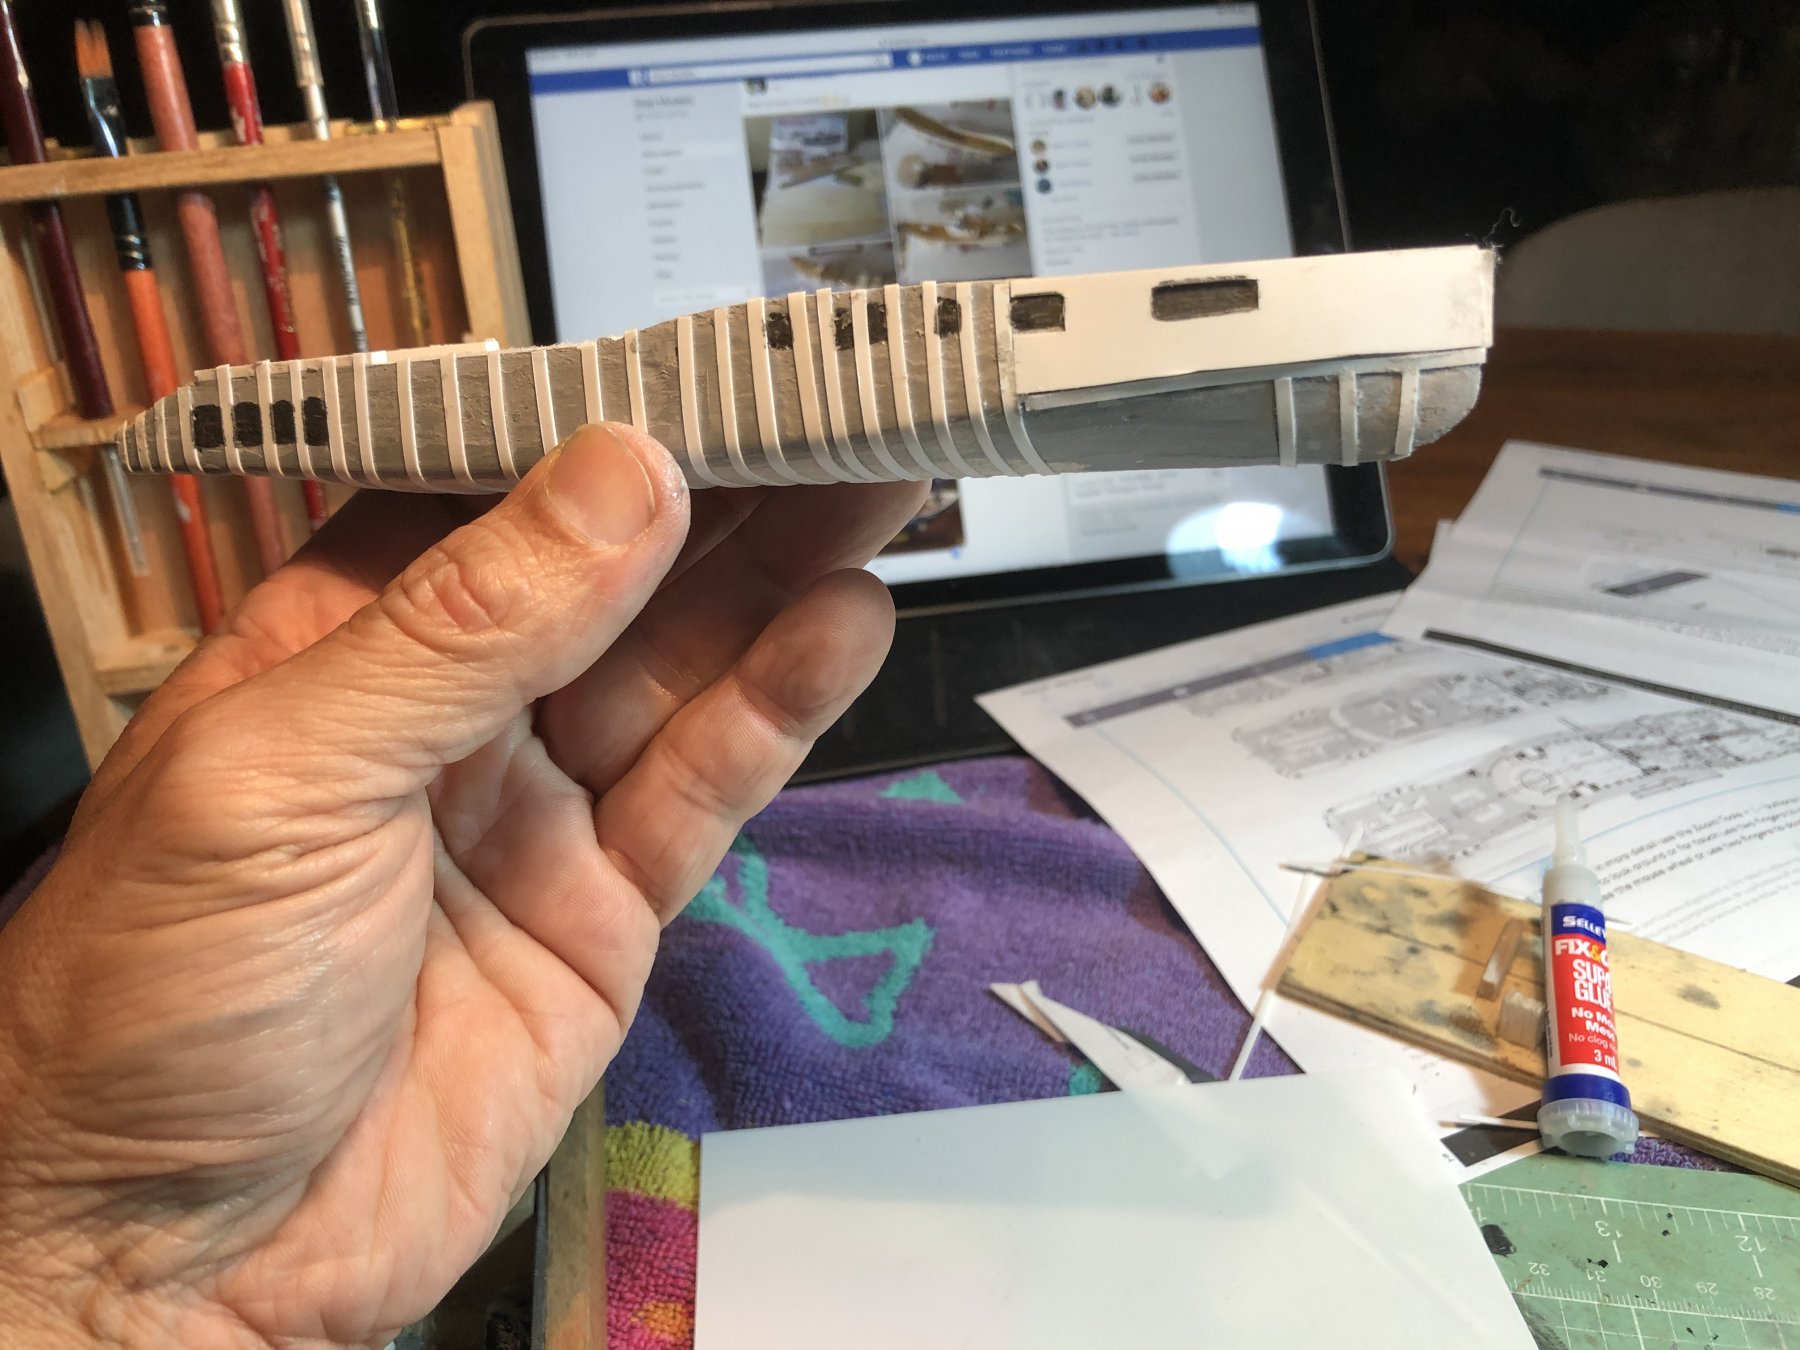
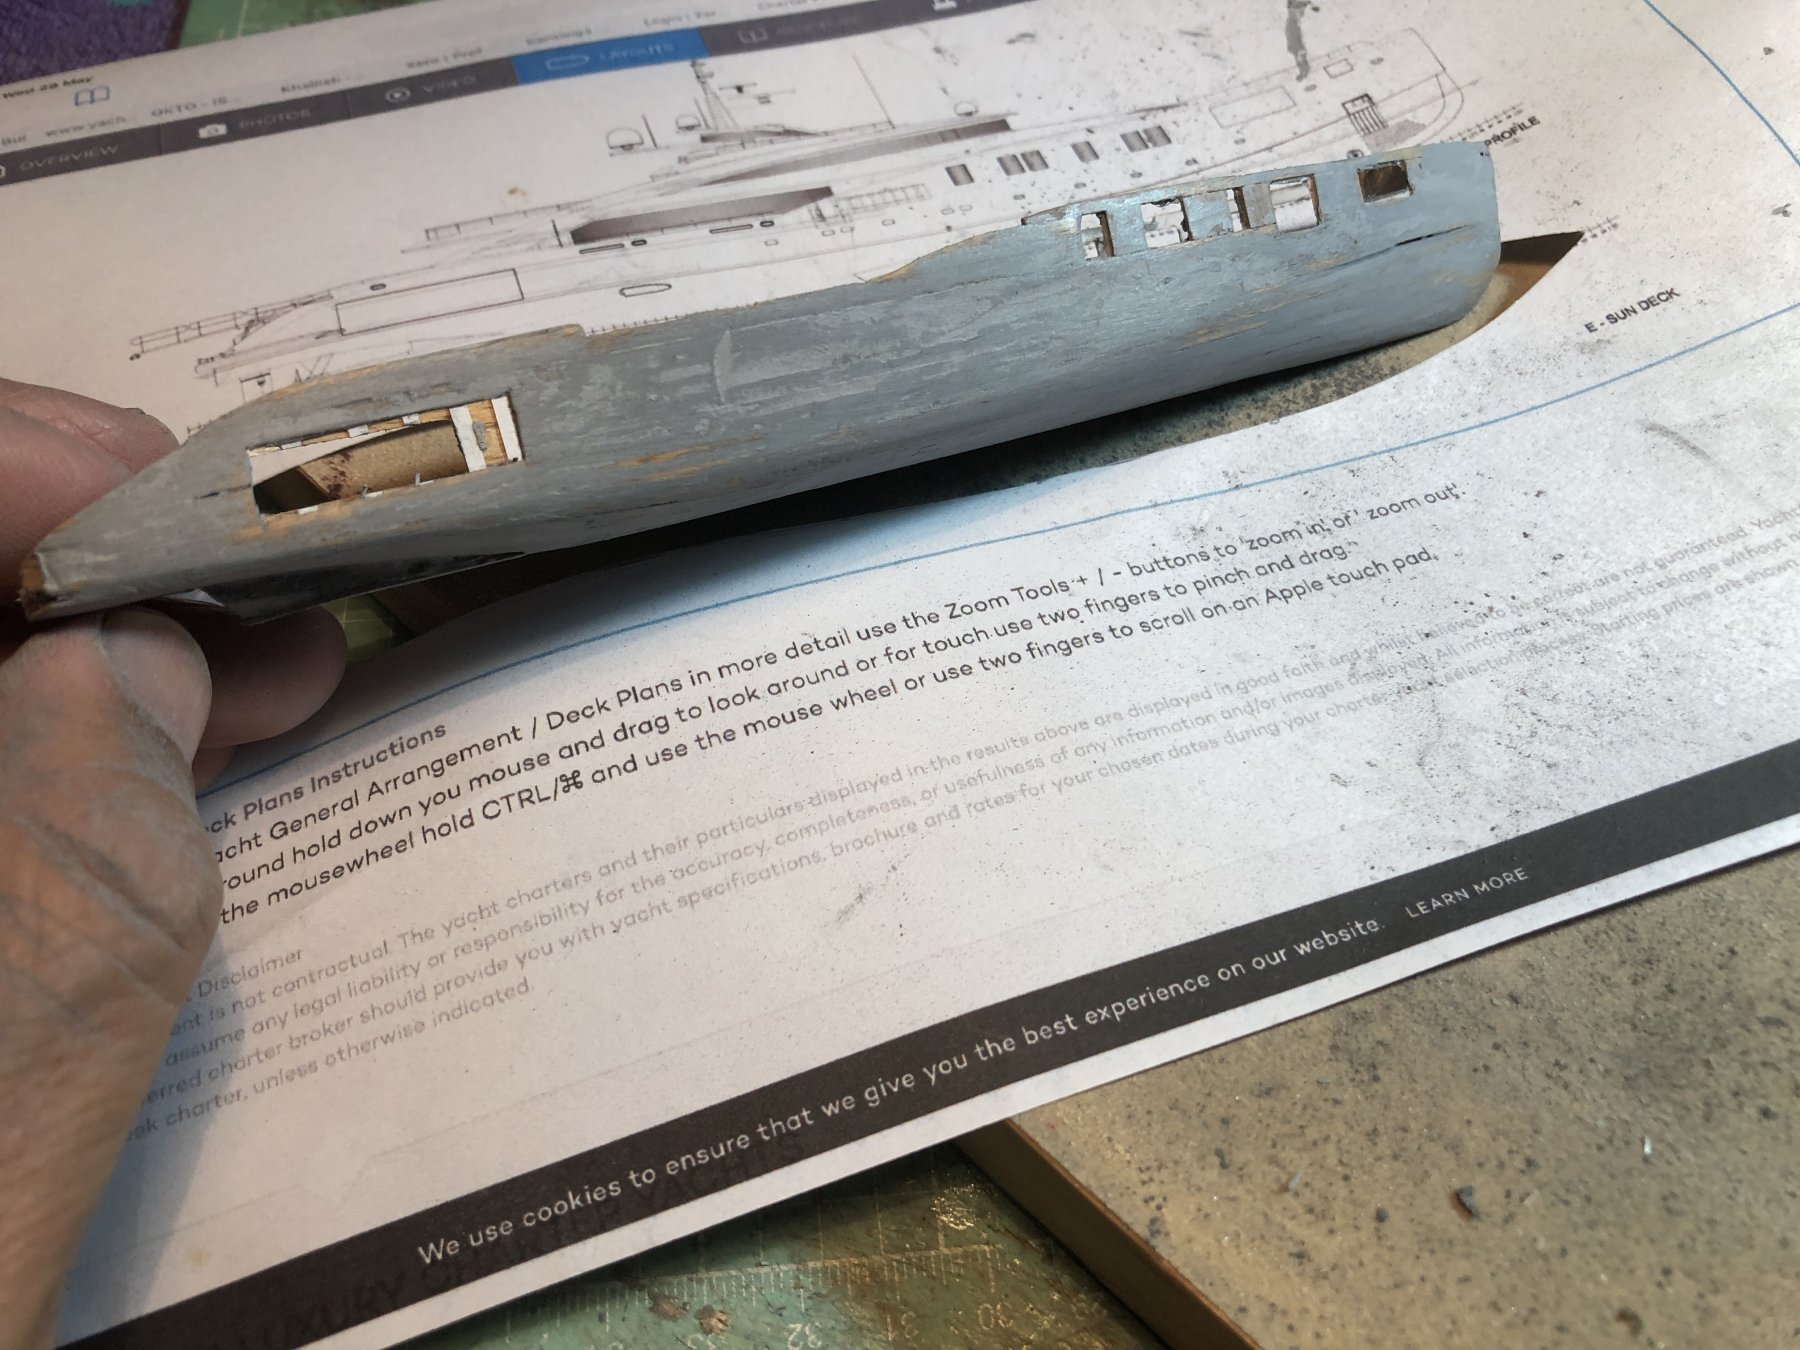
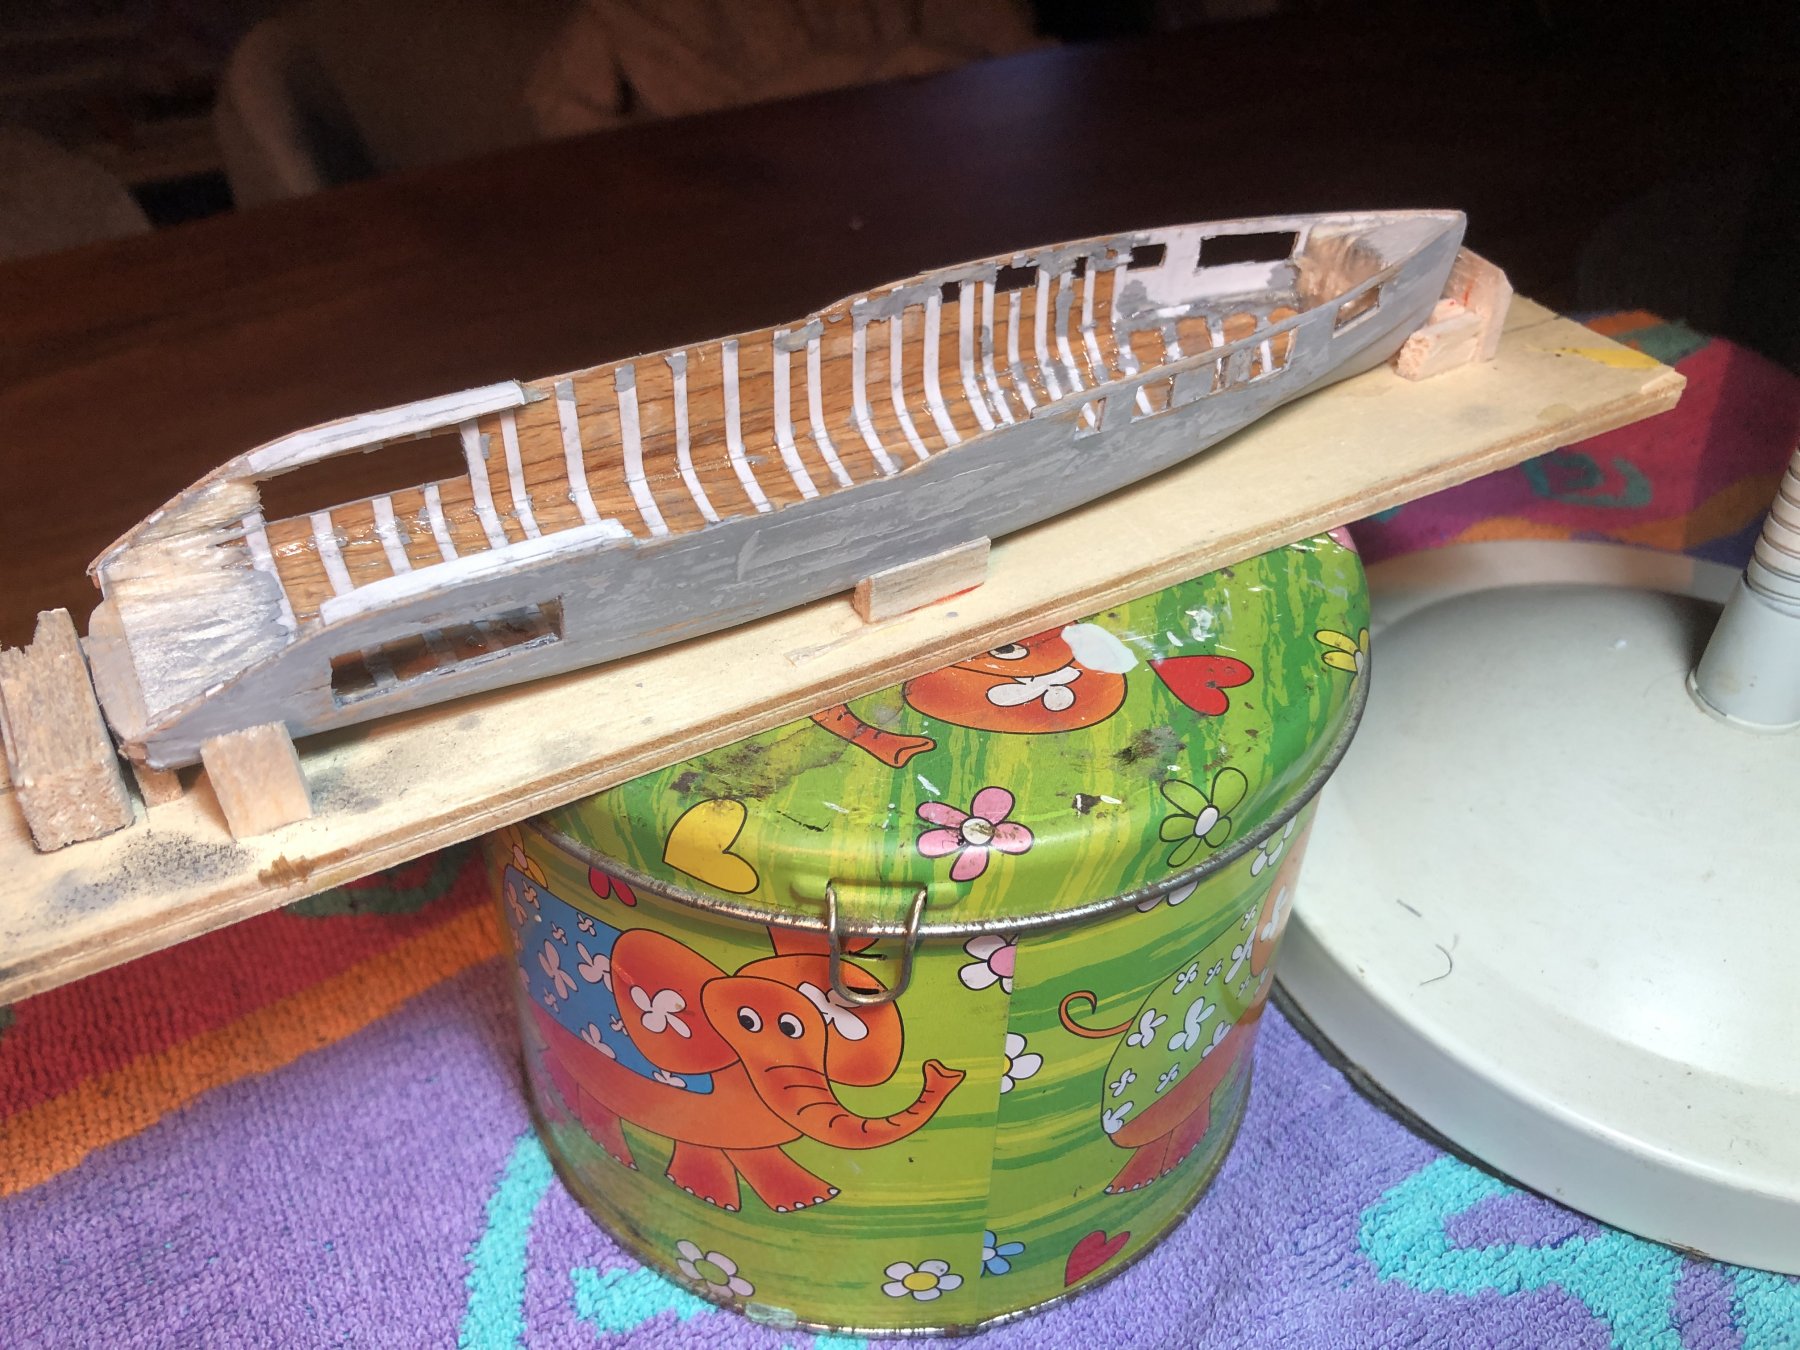
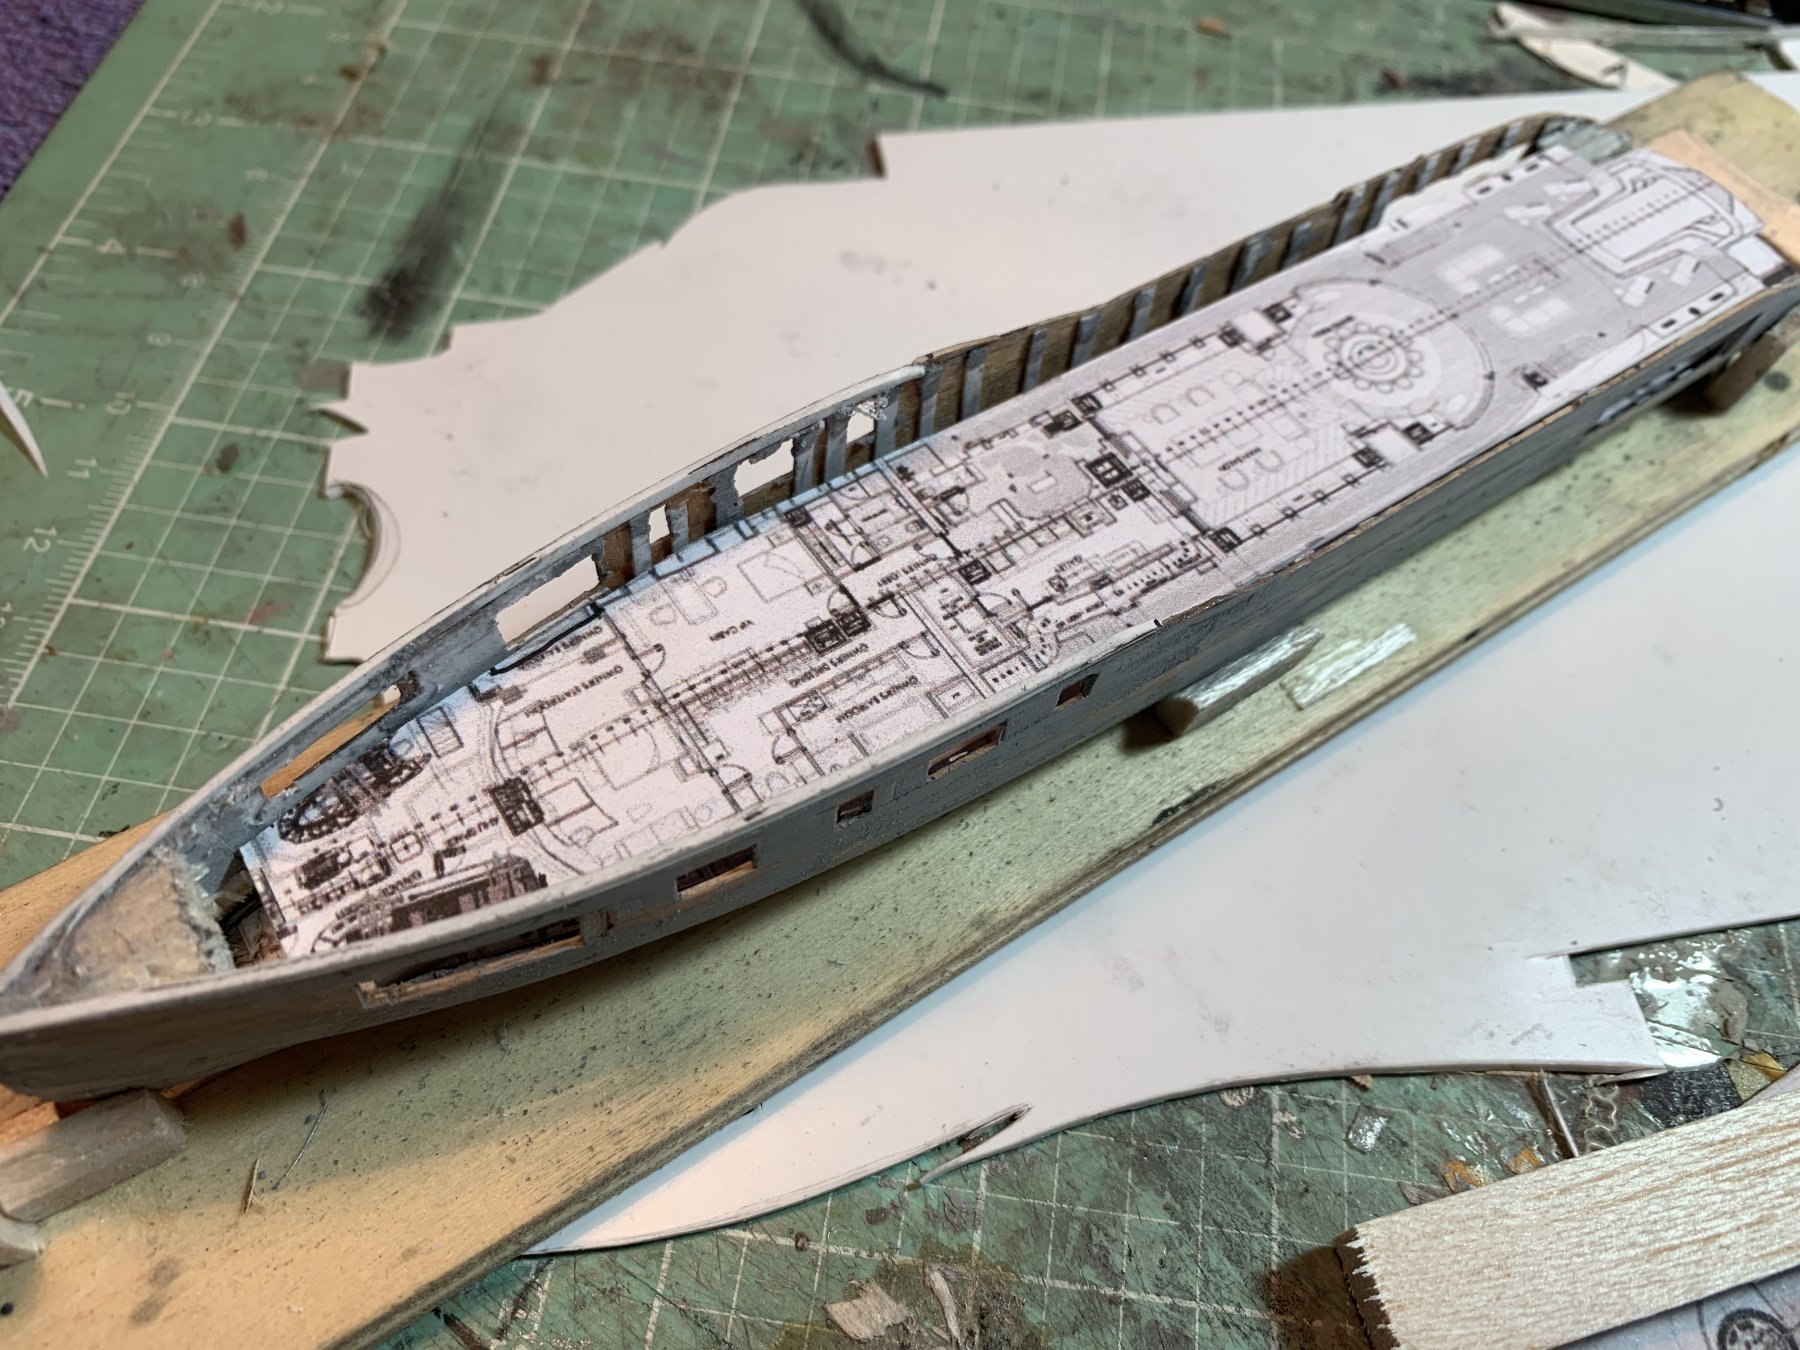
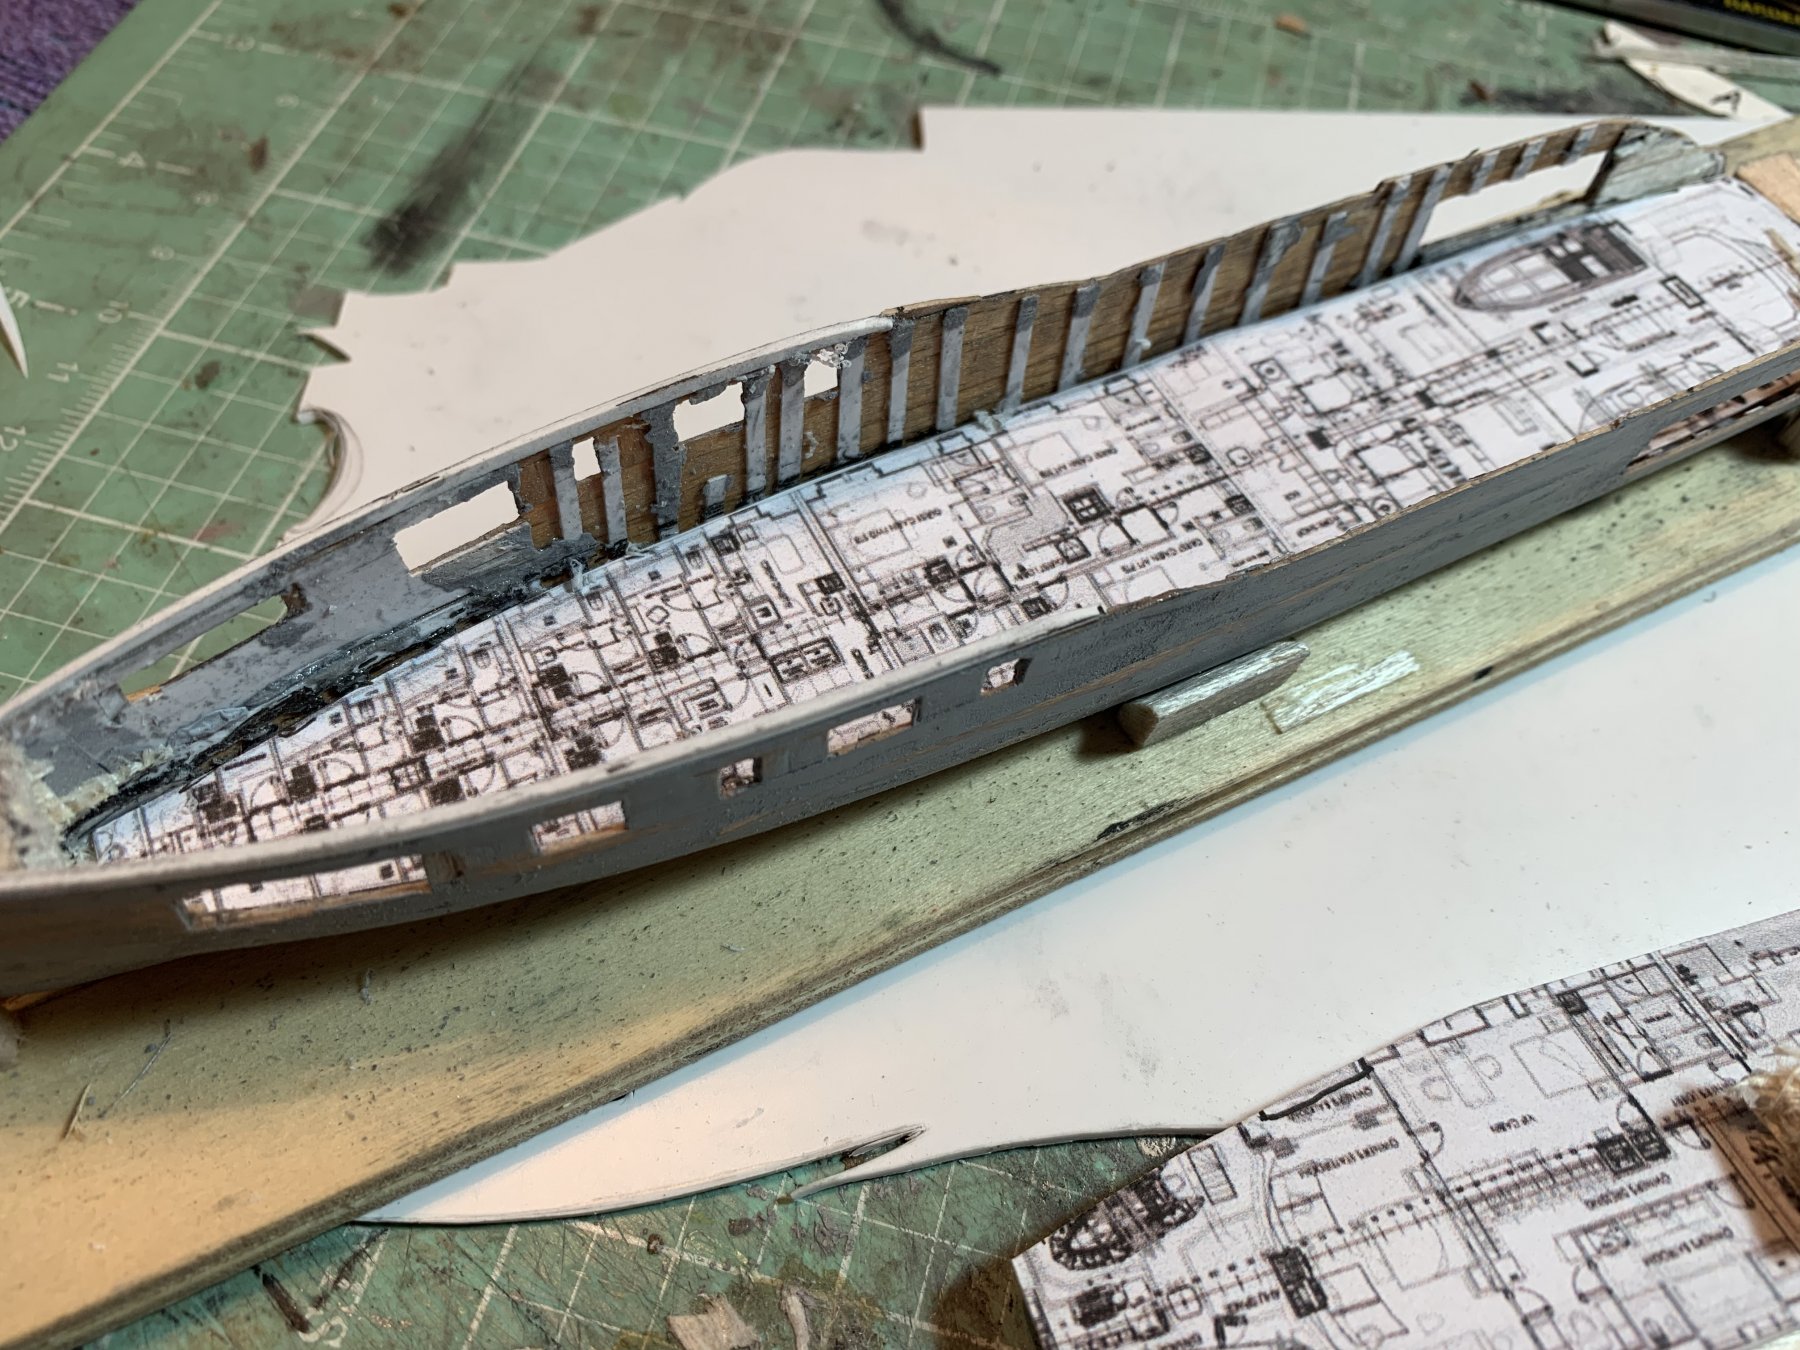
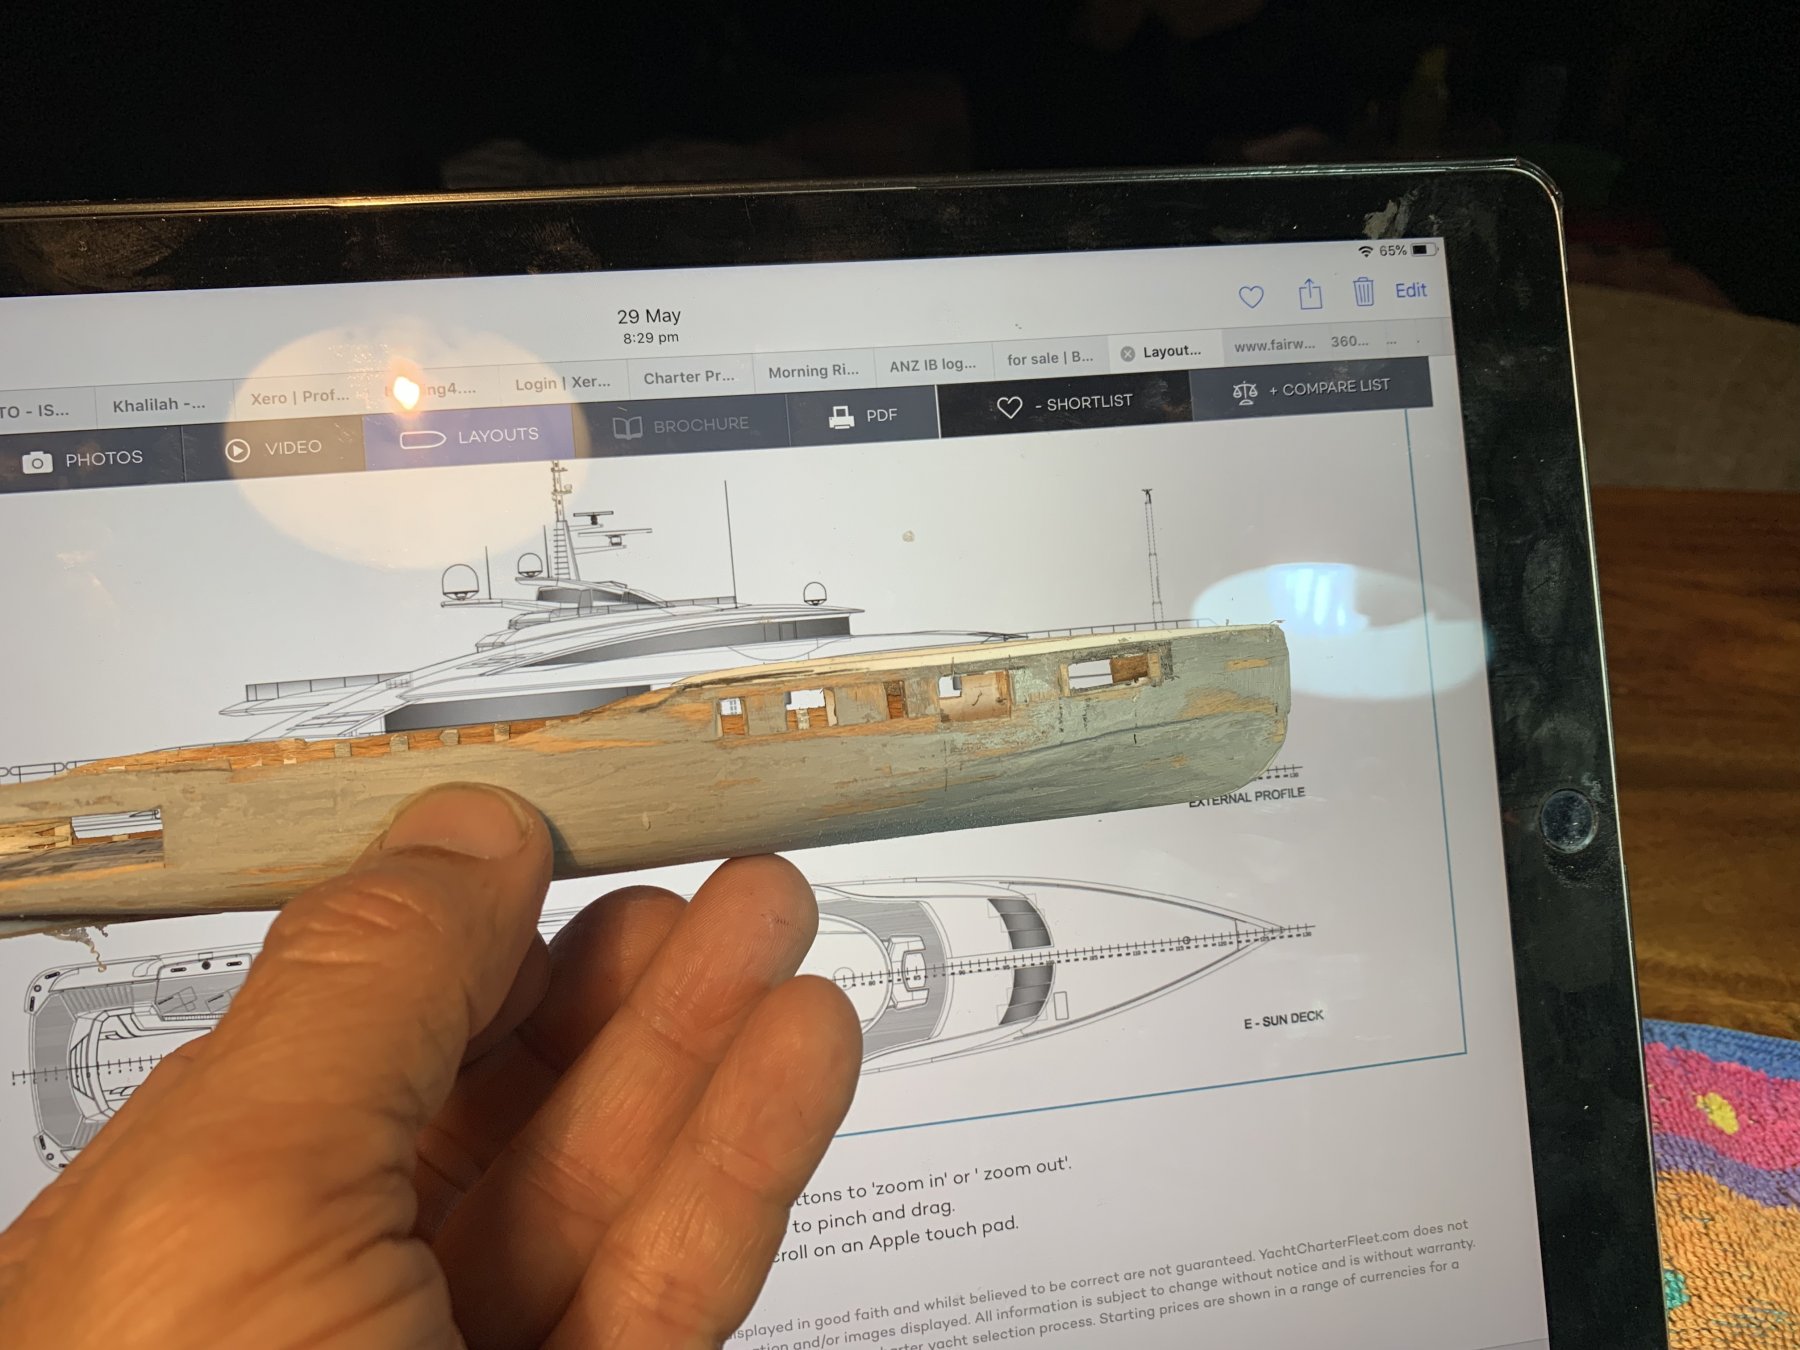
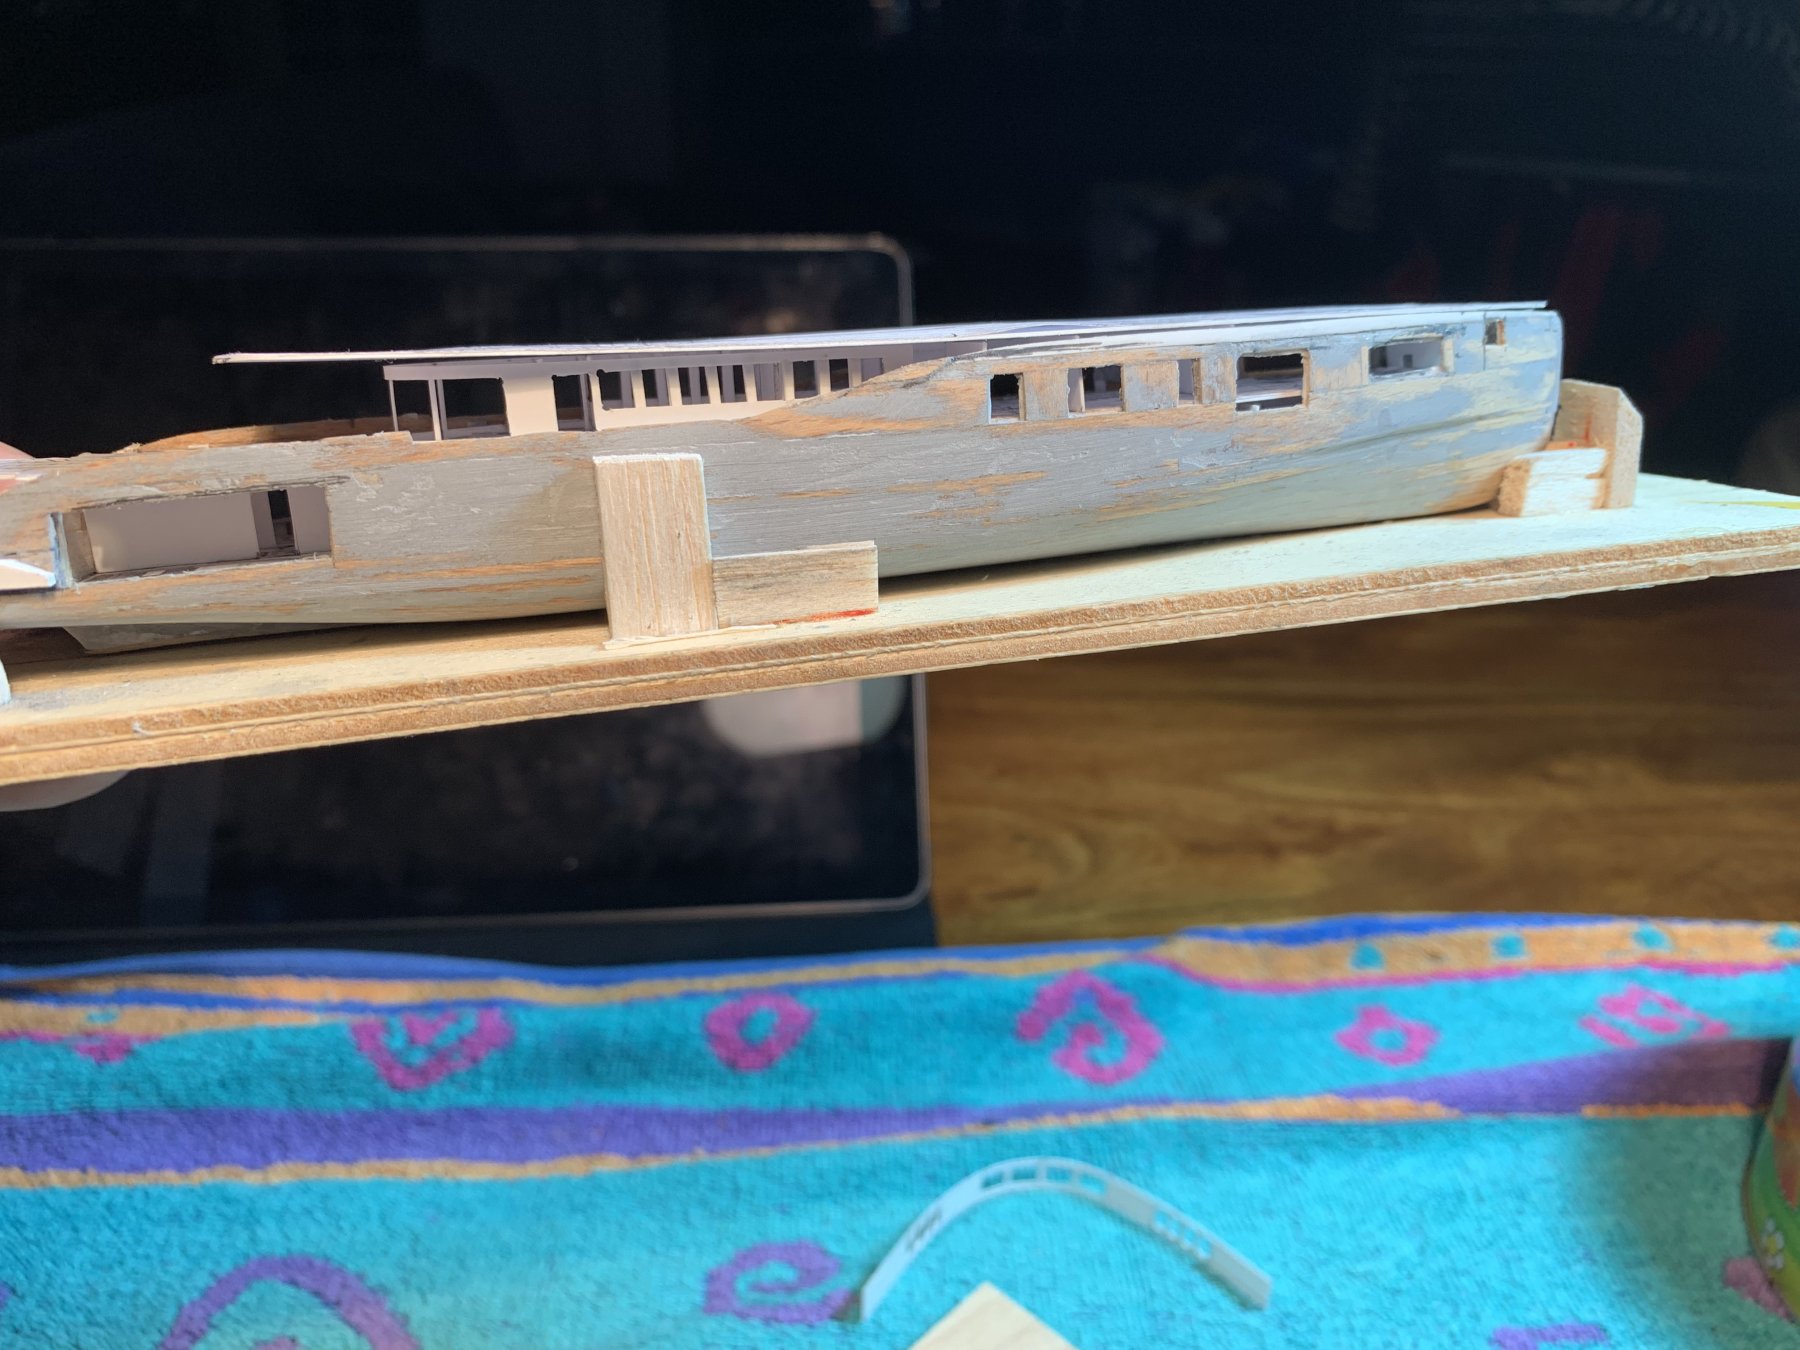
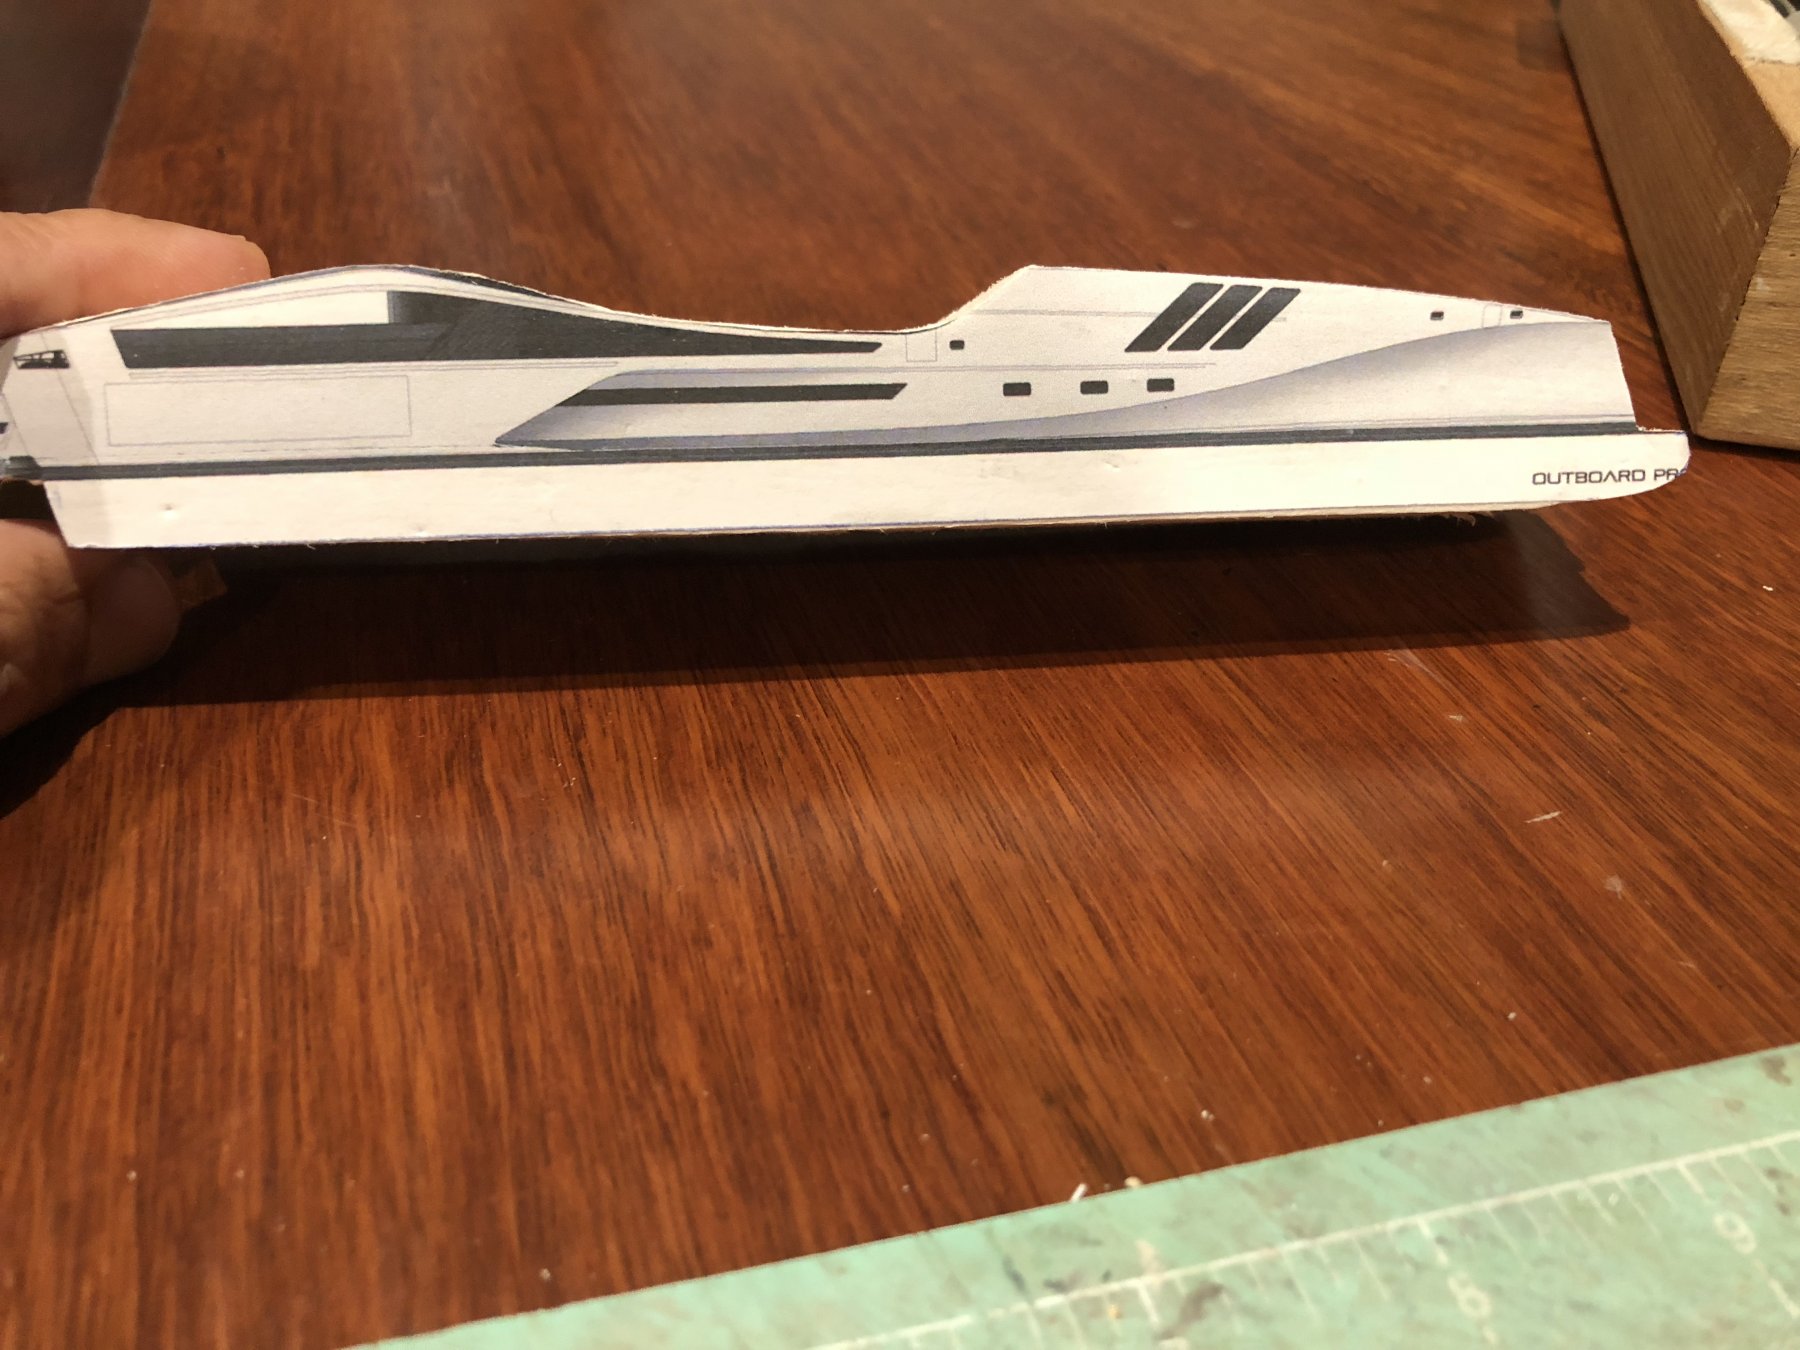
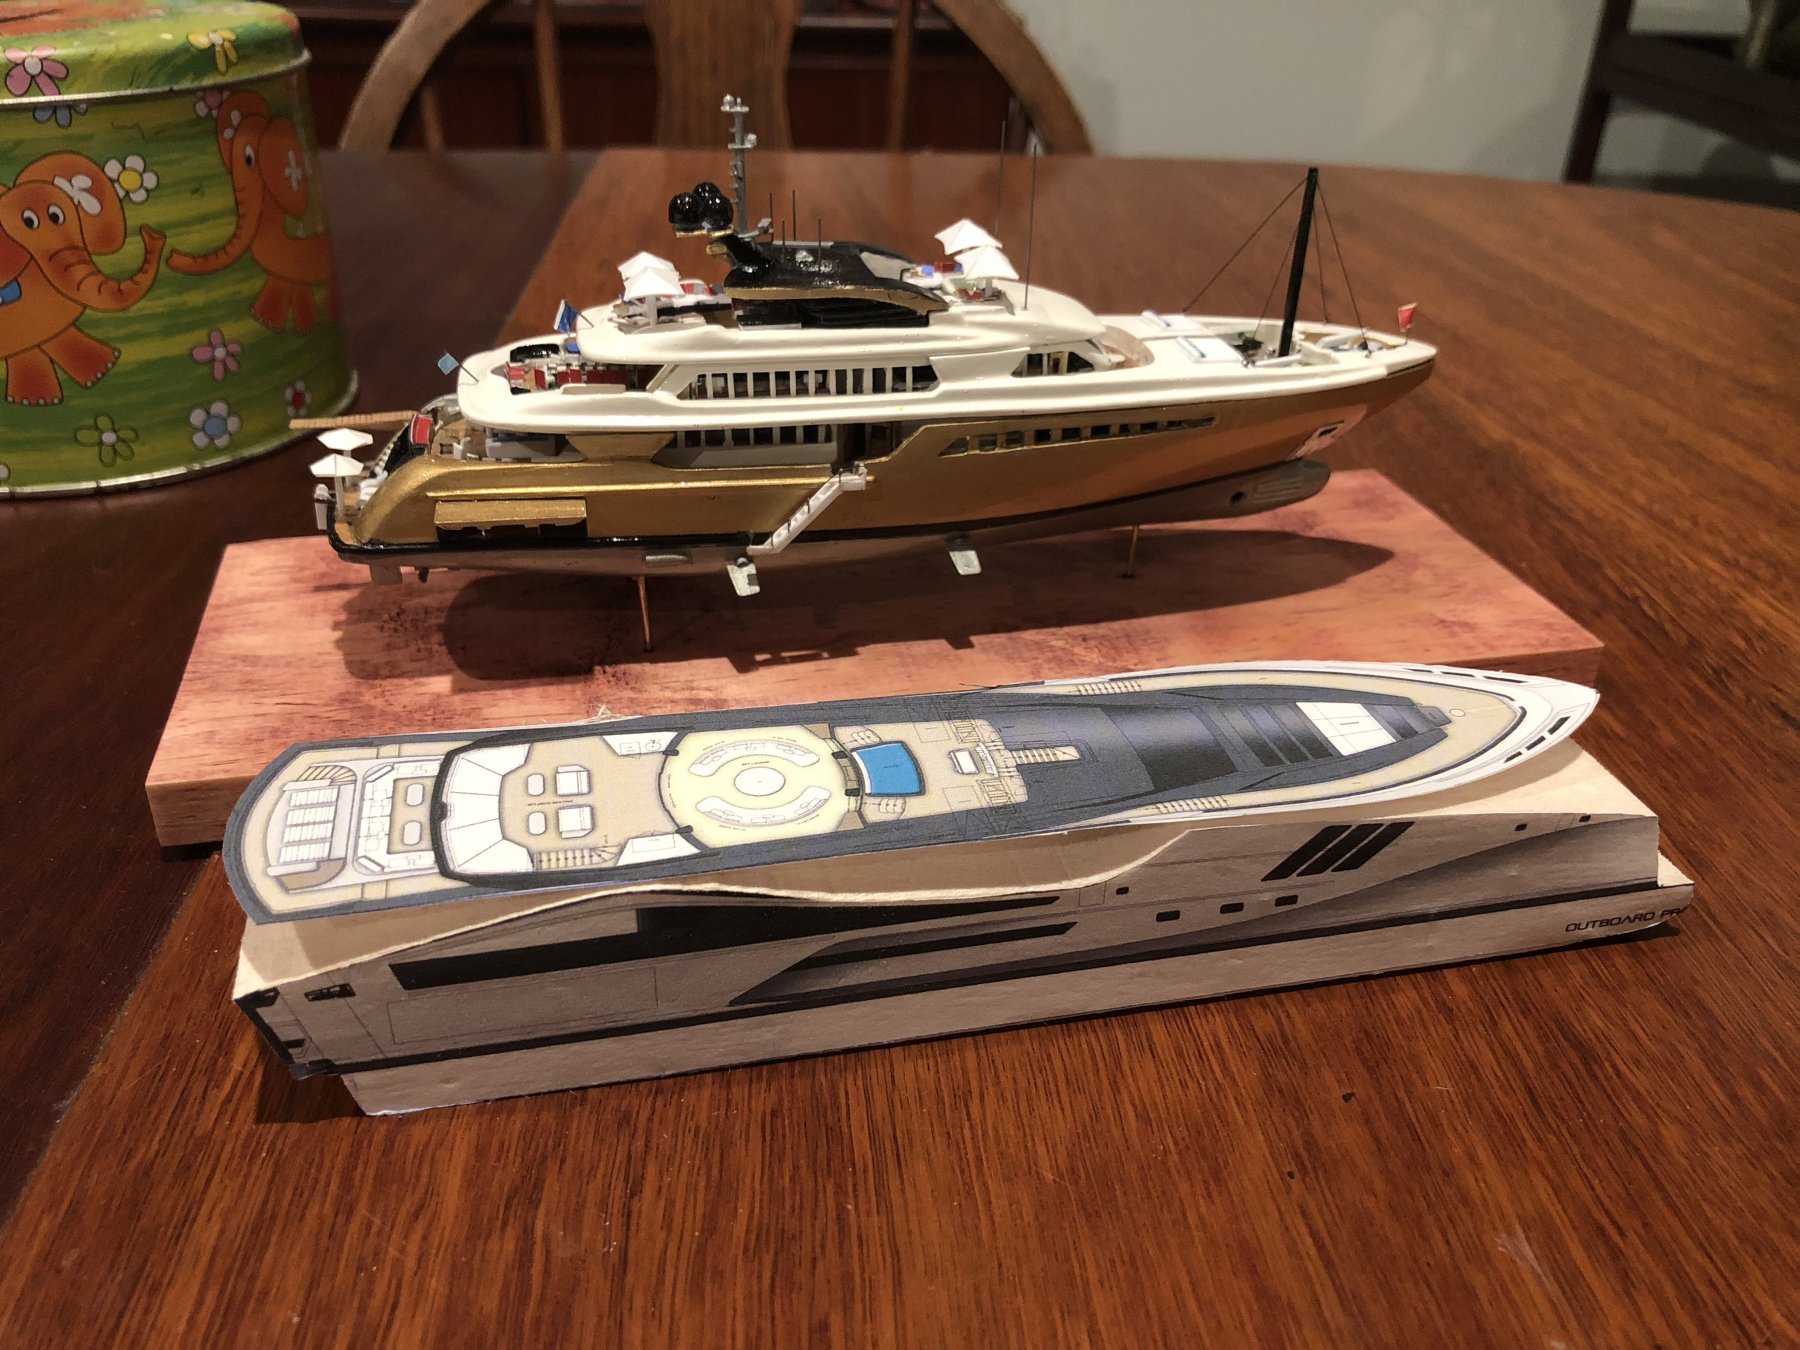
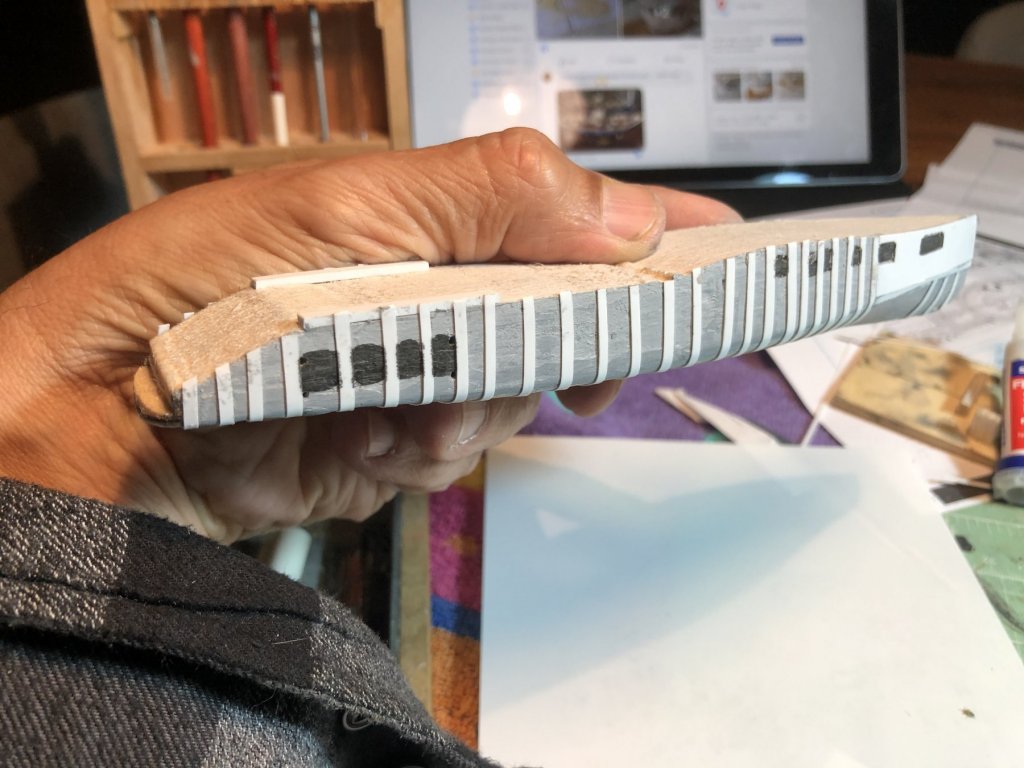
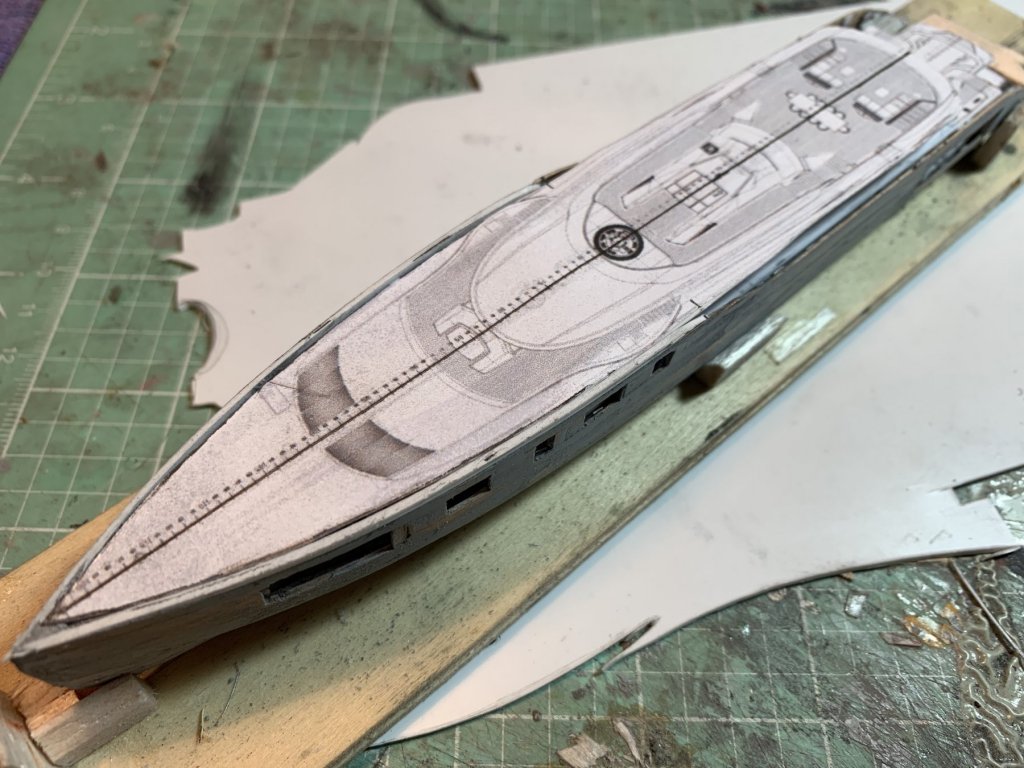
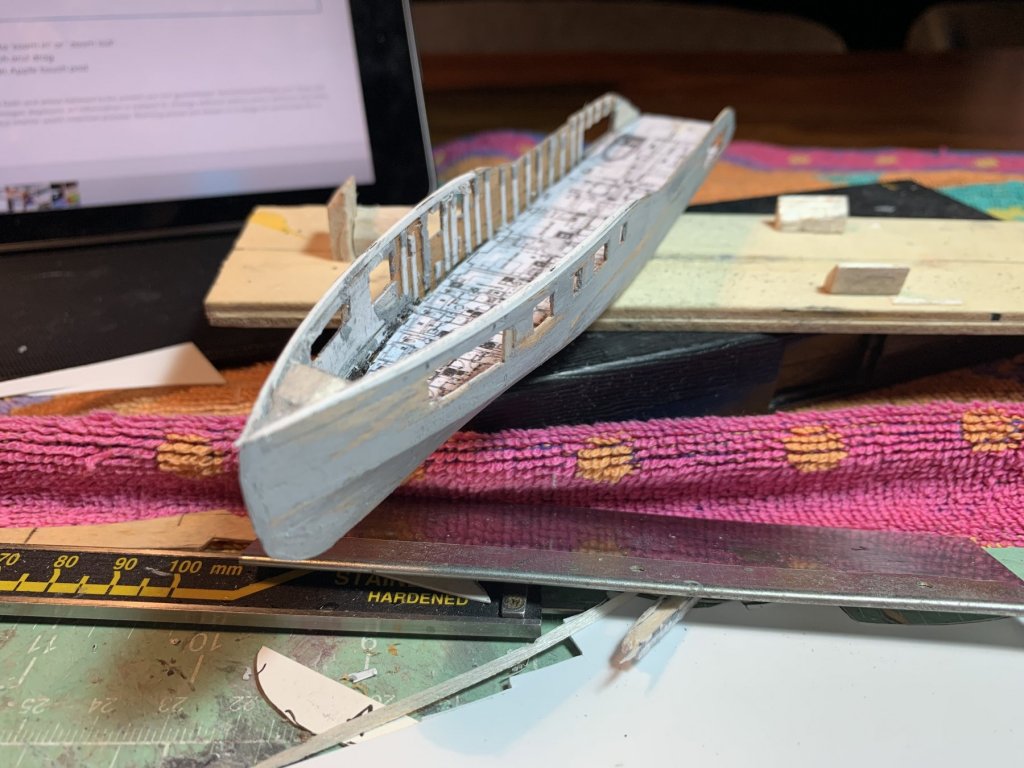
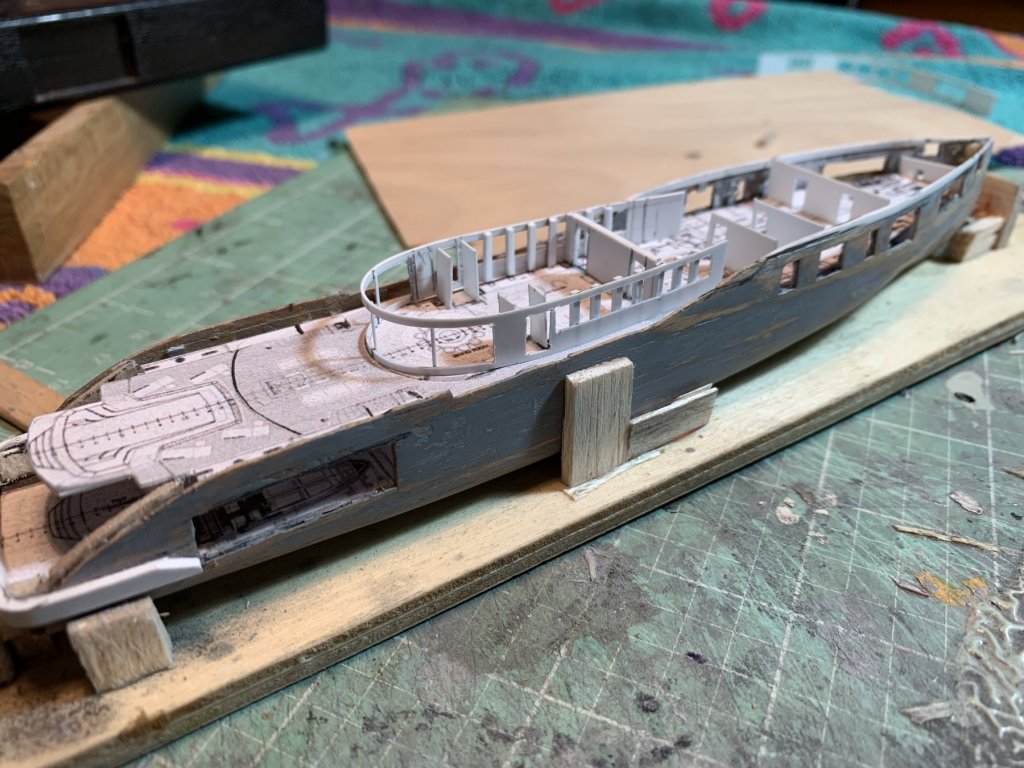
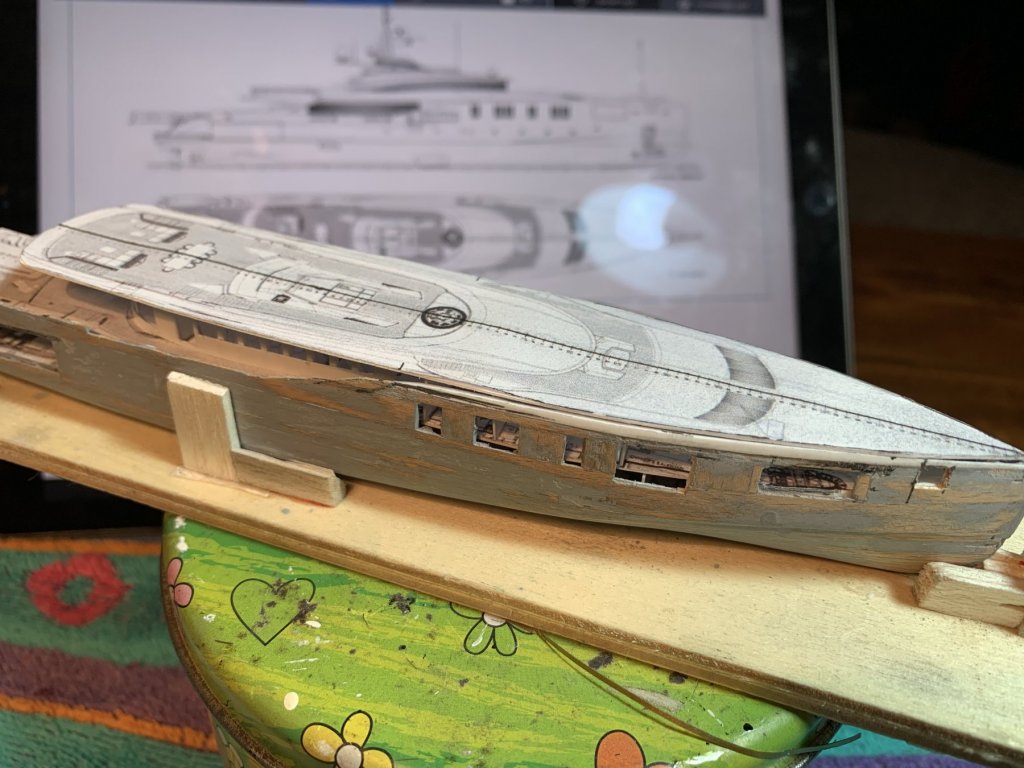
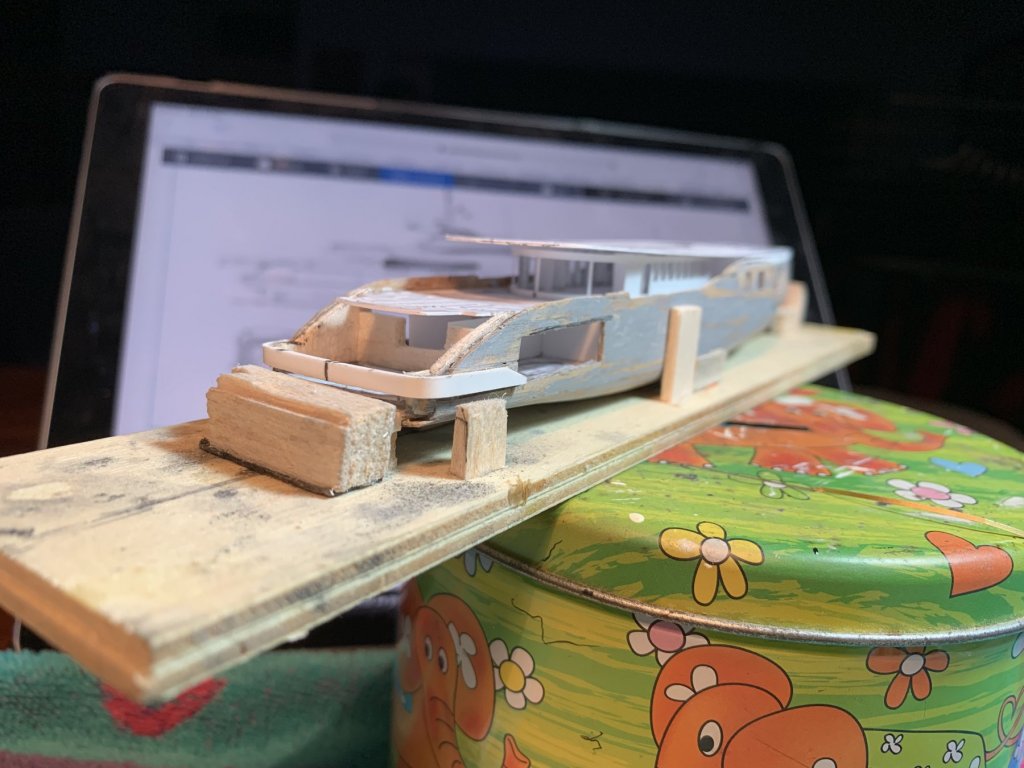
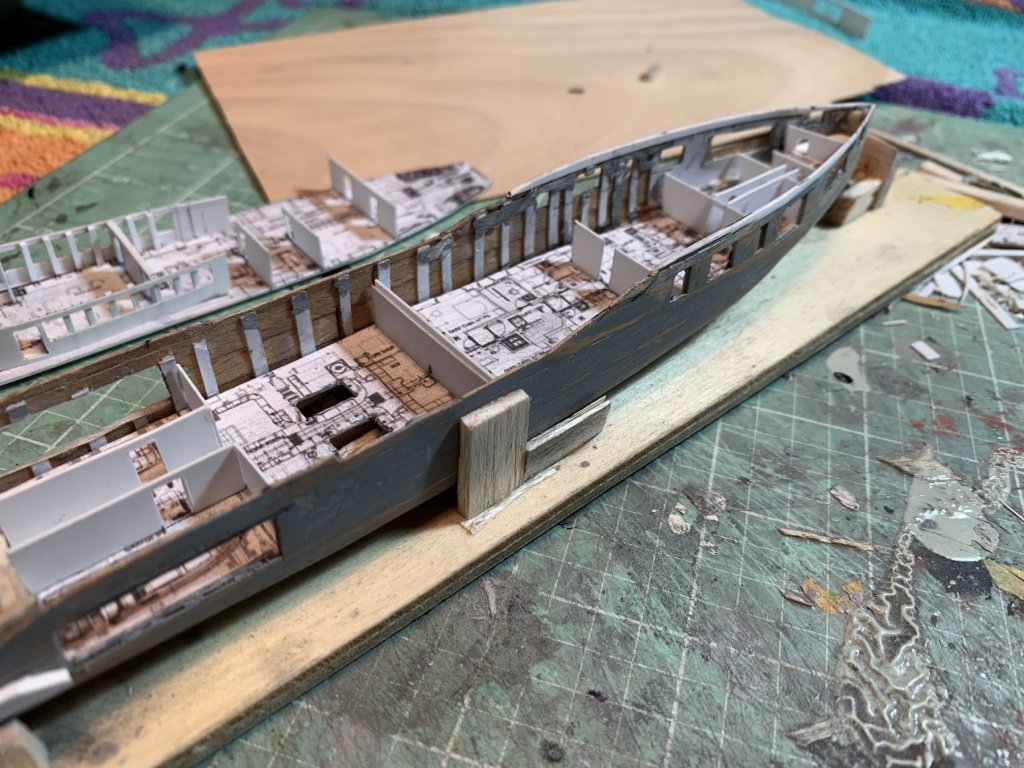
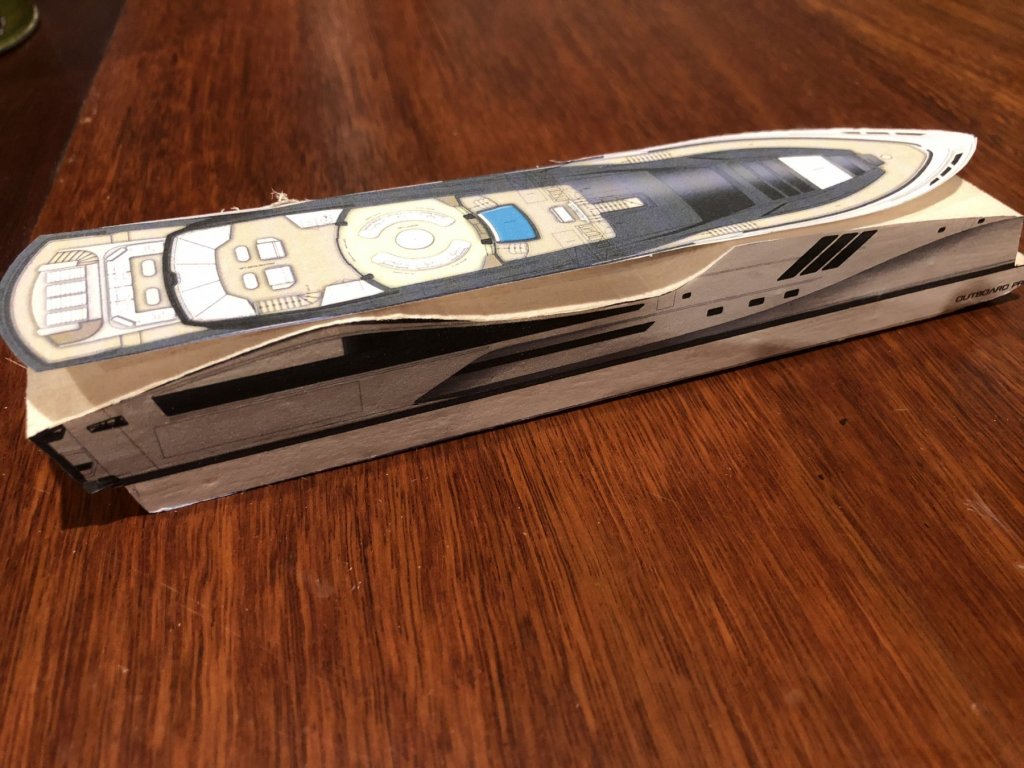
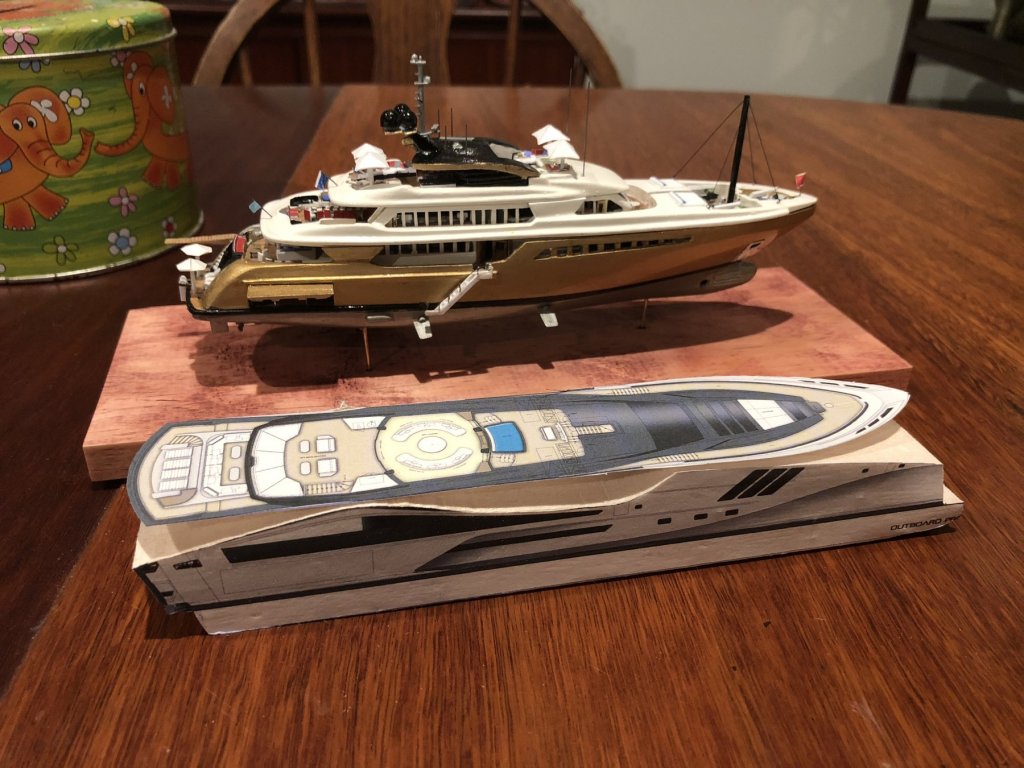
 Hi folks Well, I’ve been a bit impatient lately and started on my next model, Sapphire, before my previous model, Genesis is completely finished. Anyhow, Sapphire is based on an actual mega-yacht called, Okto (https://www.yachtcharterfleet.com/luxury-charter-yacht-43054/okto-yacht-charter-printable.pdf). As is customary with all of my miniature models, the interior accomodation will be fully detailed and viewable through removable decks and superstructure. I hope you can join me on Sapphire’s journey. Cheers. Patrick


- 92 replies
-
- 15
-
-
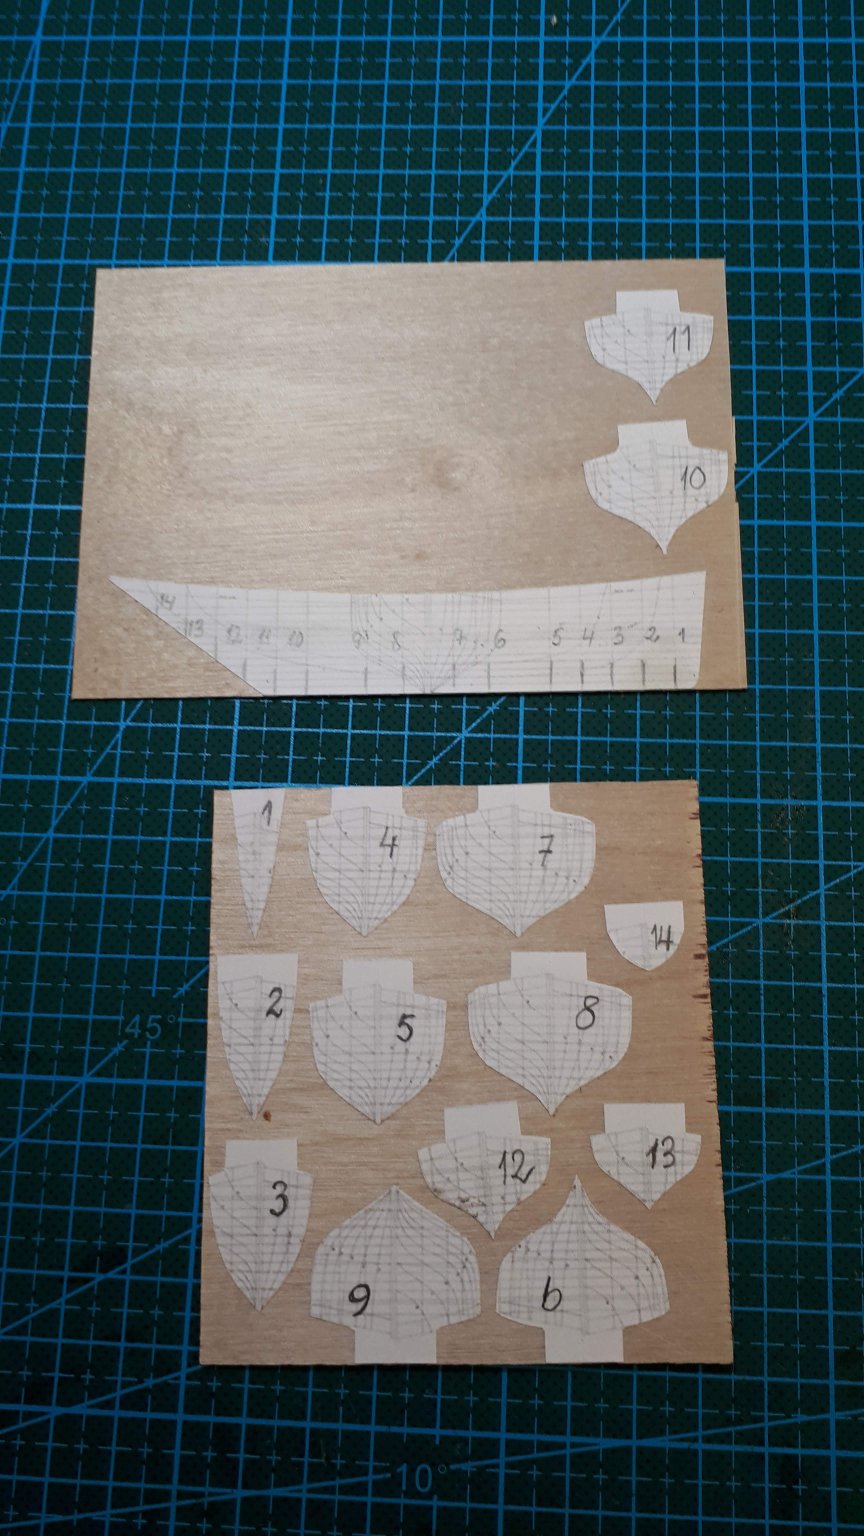
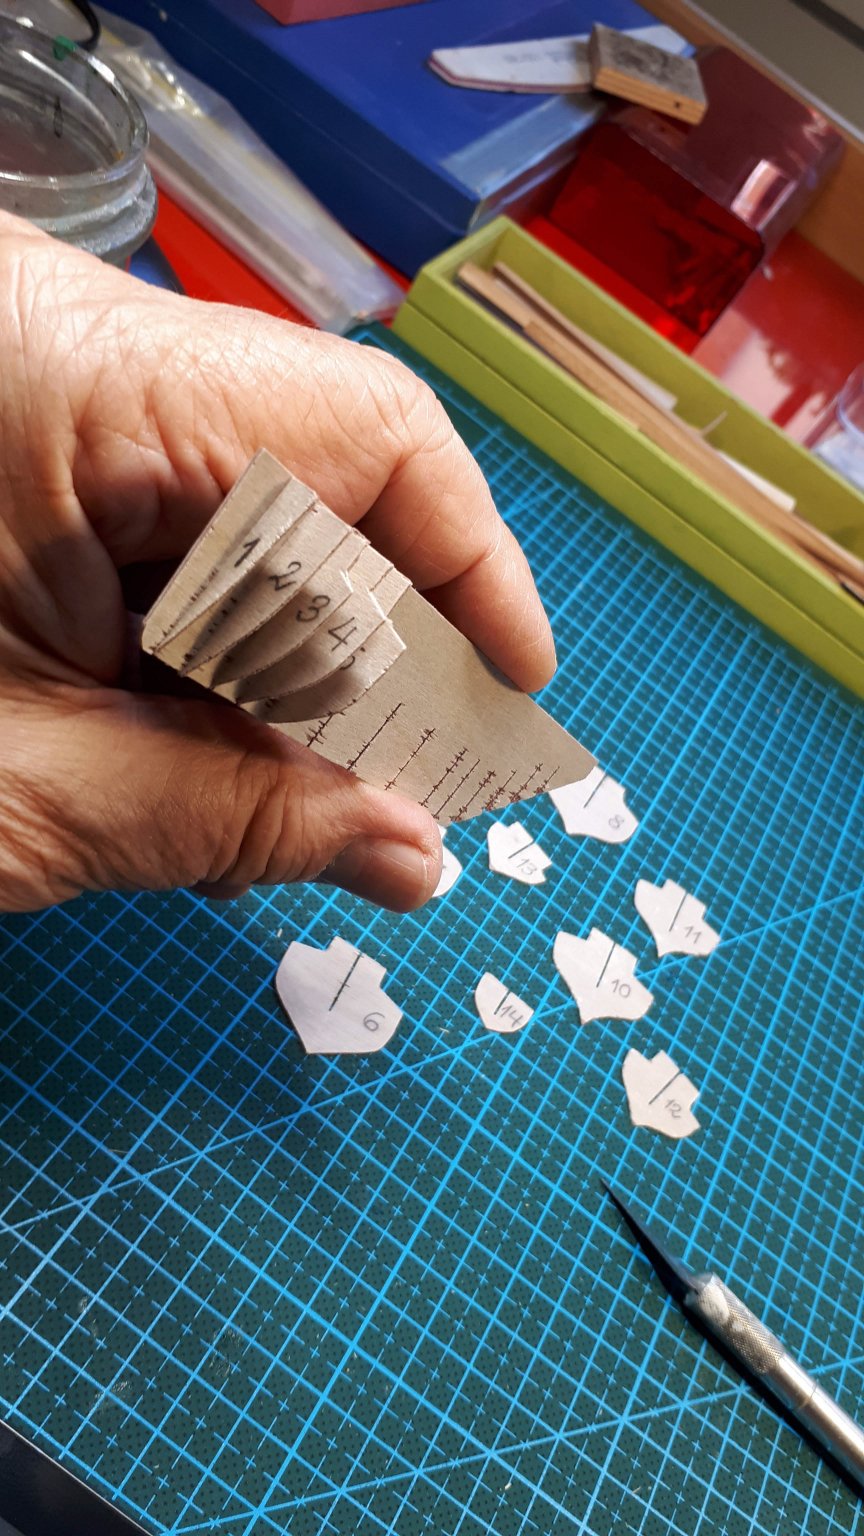
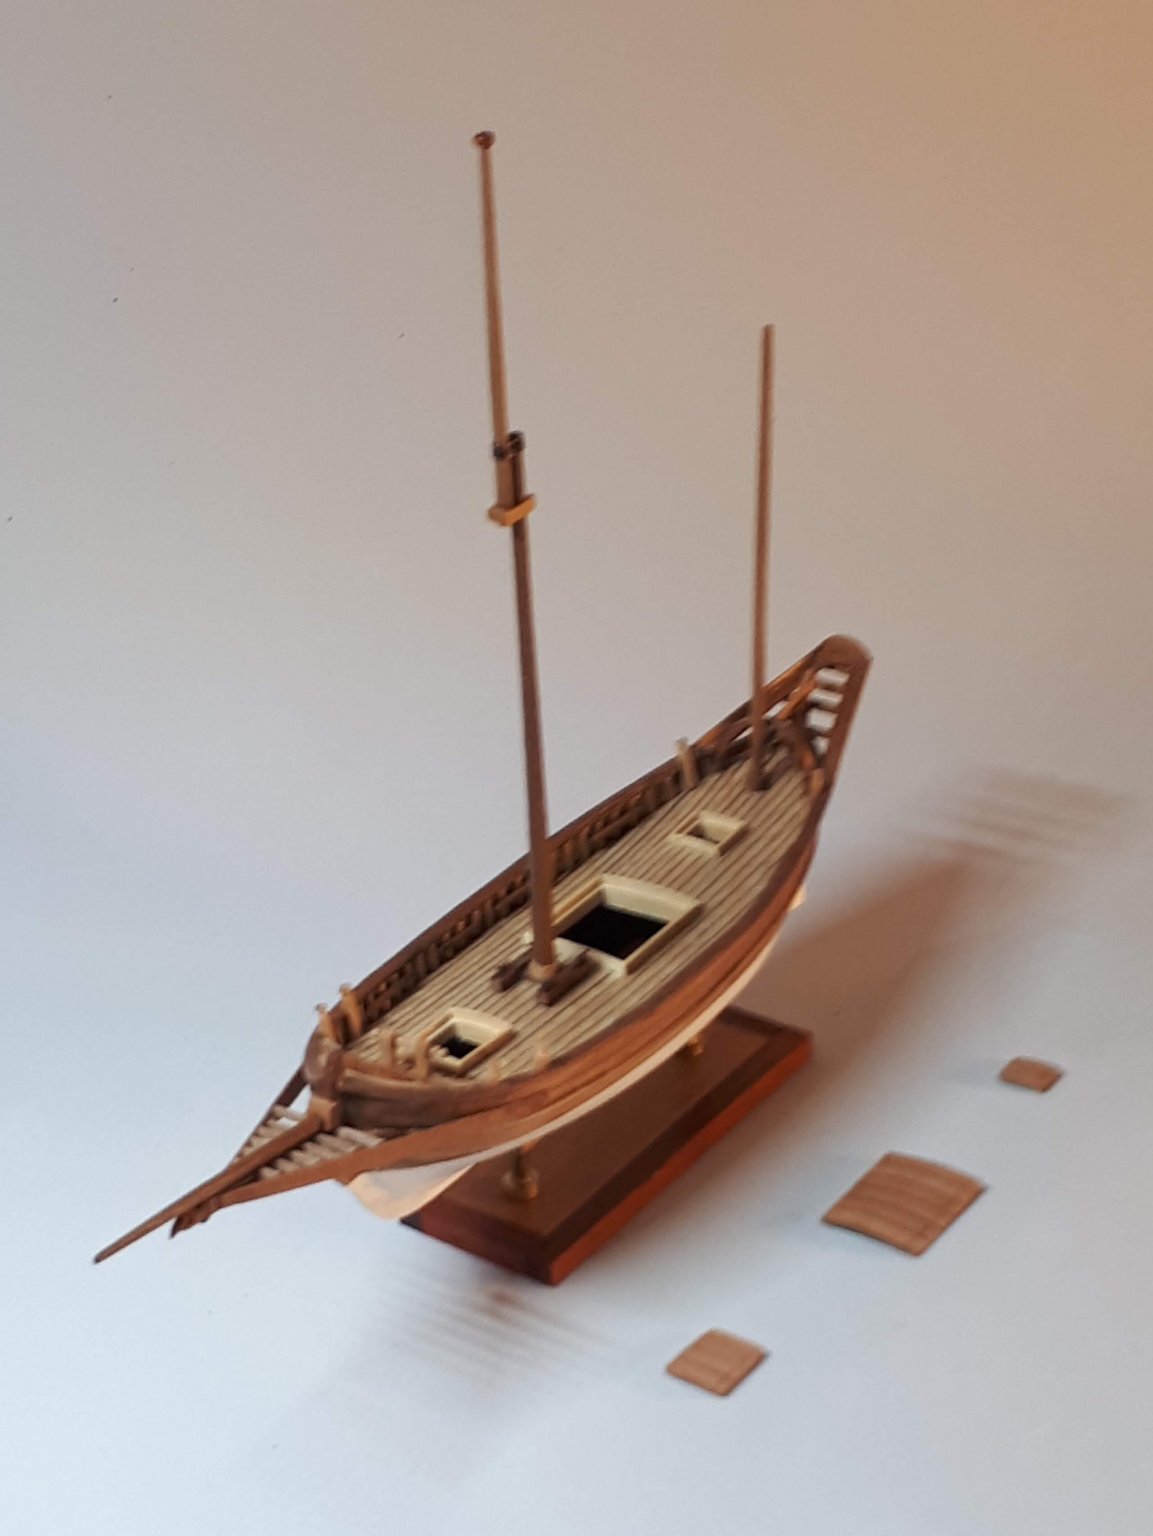
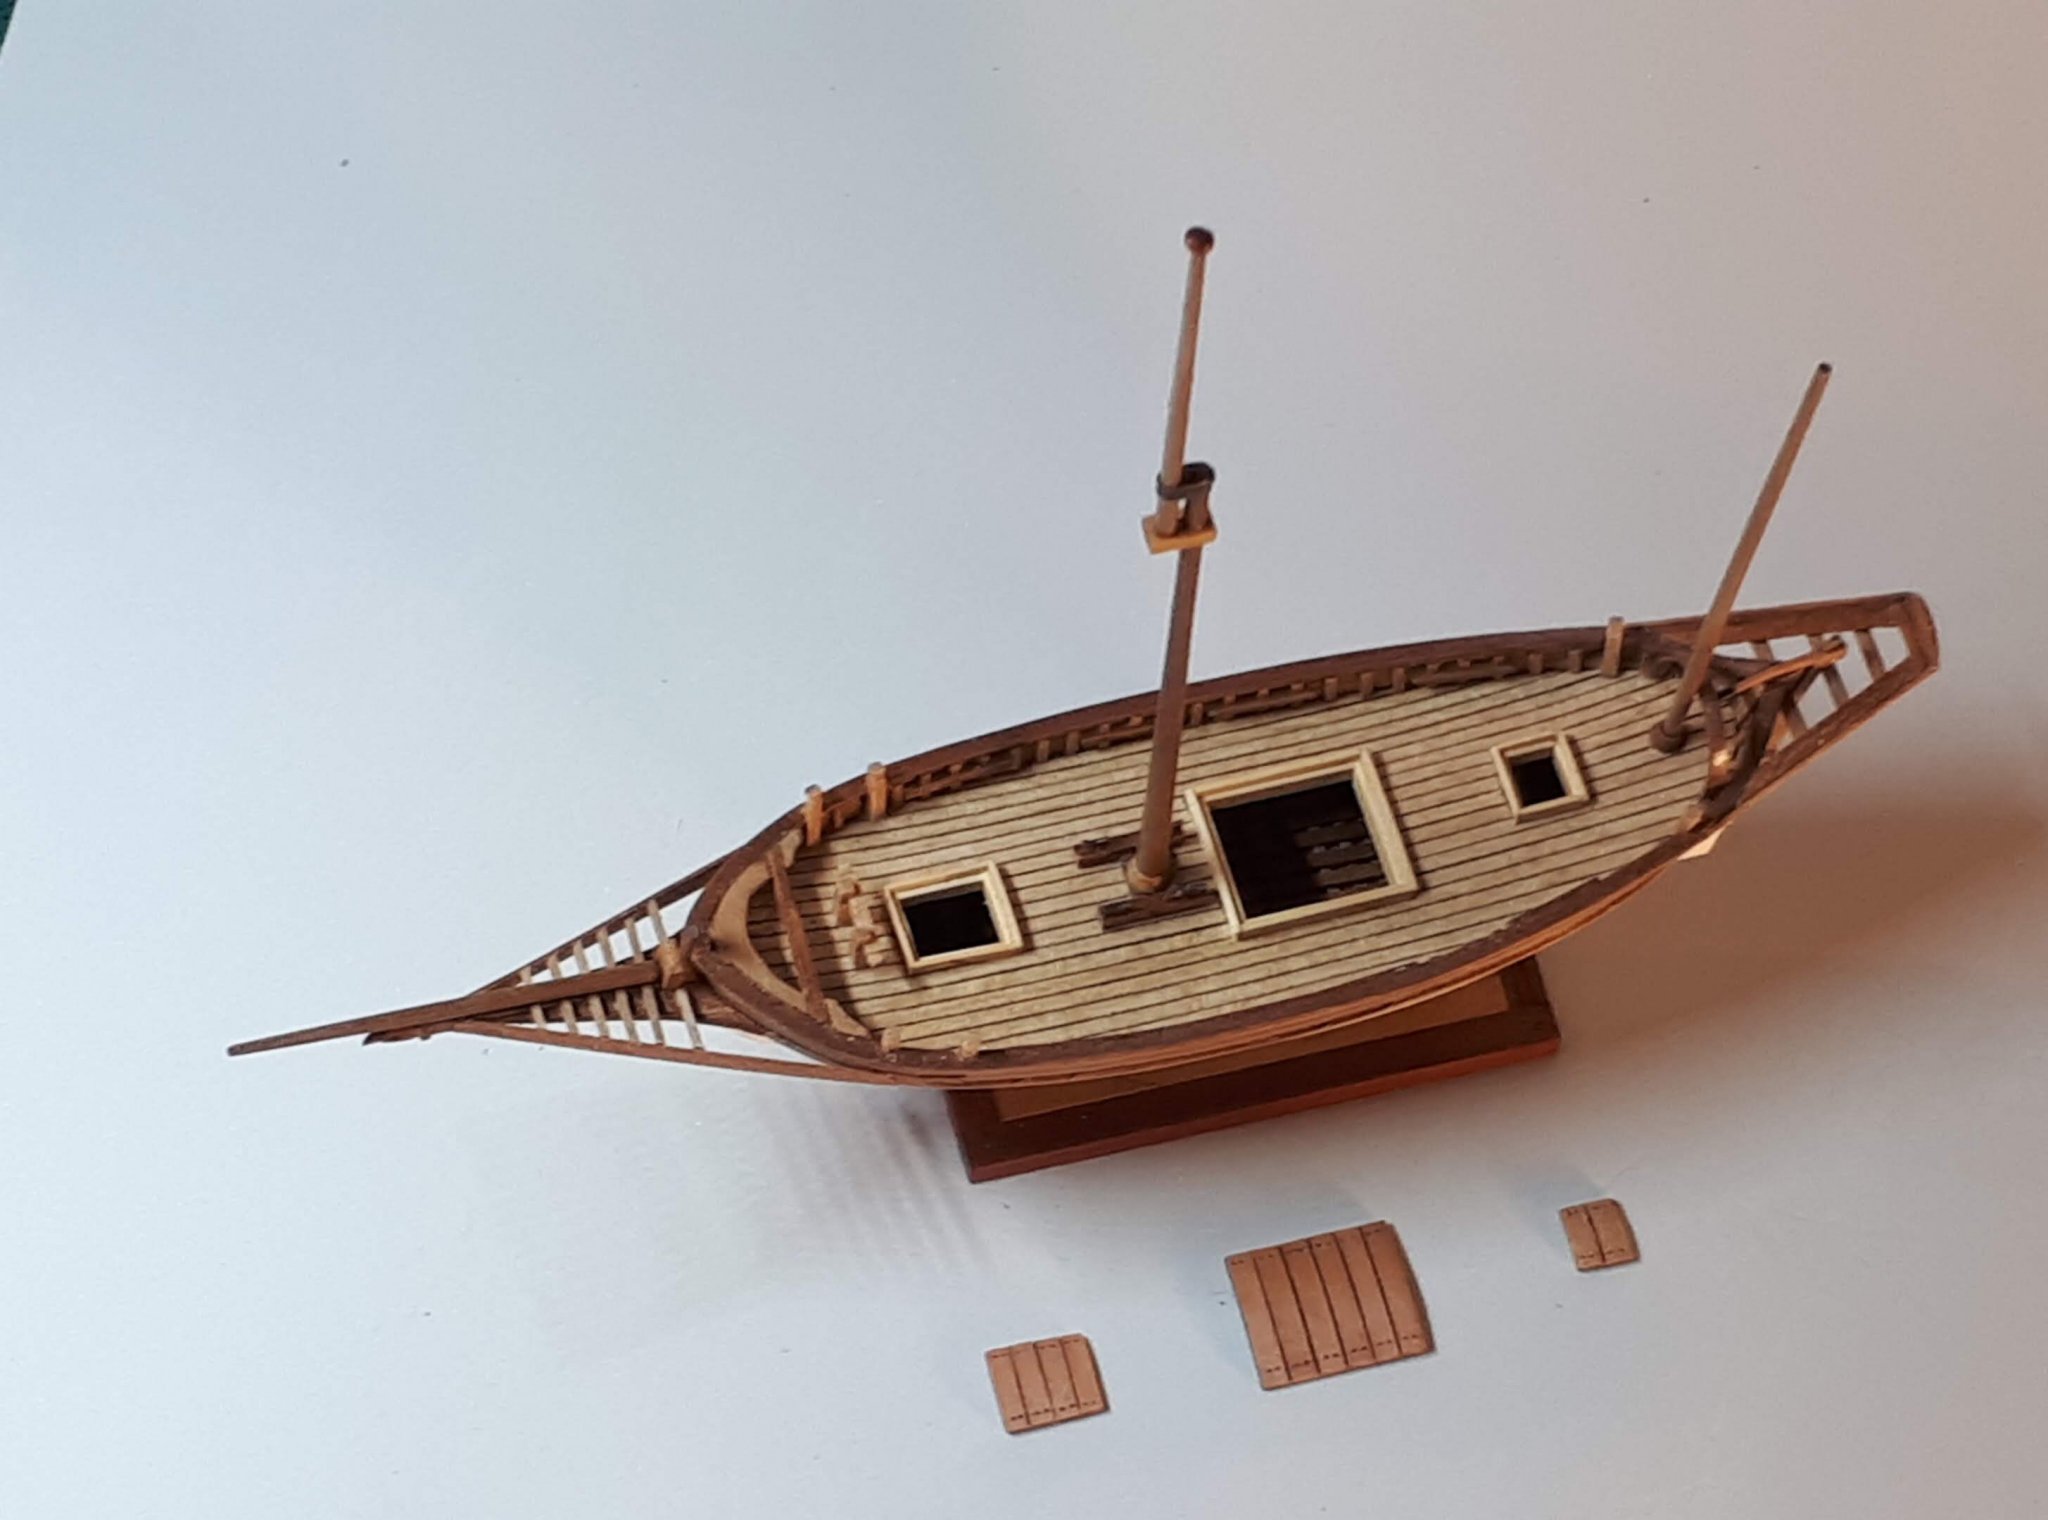
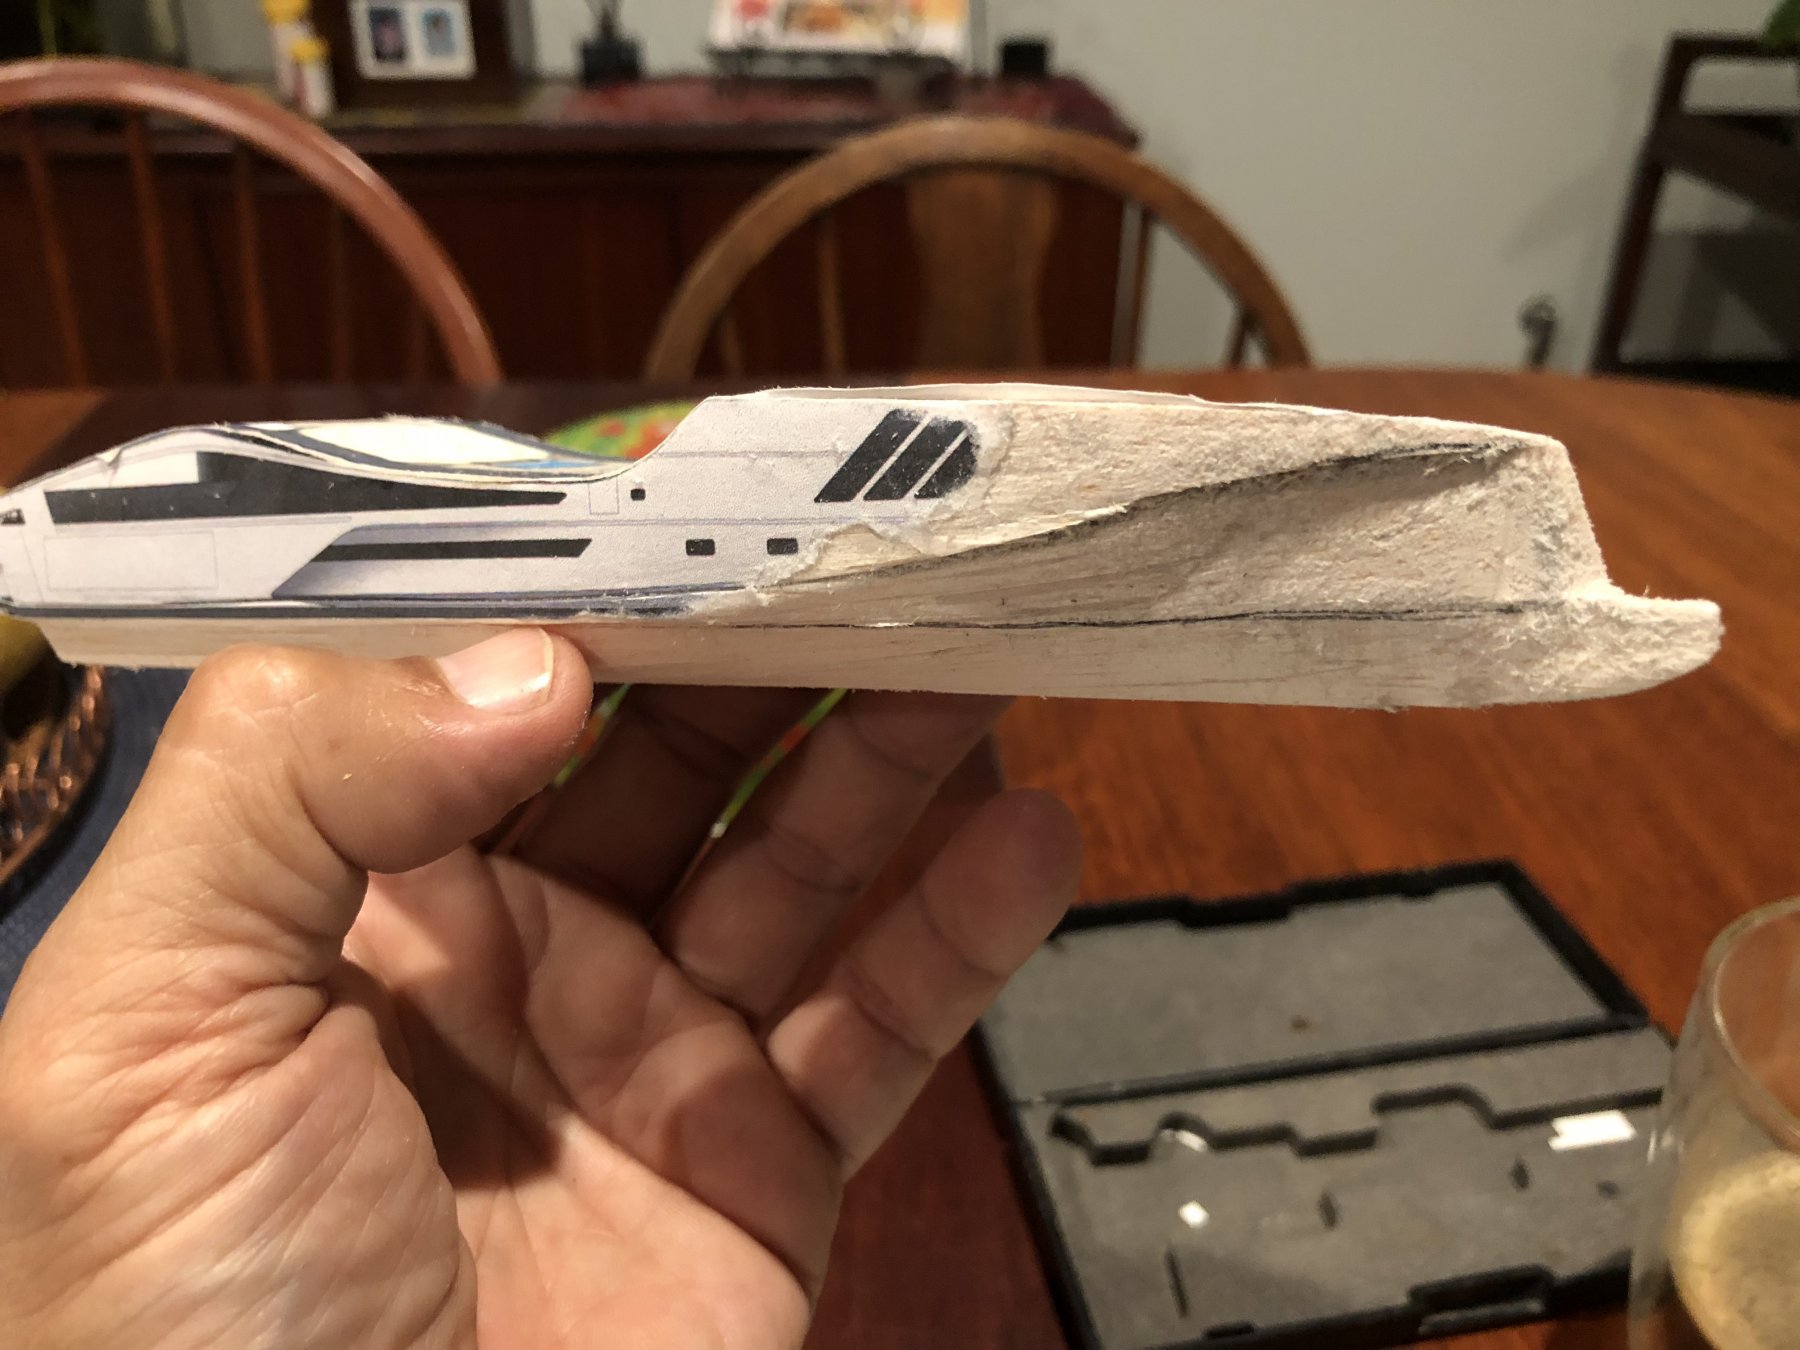
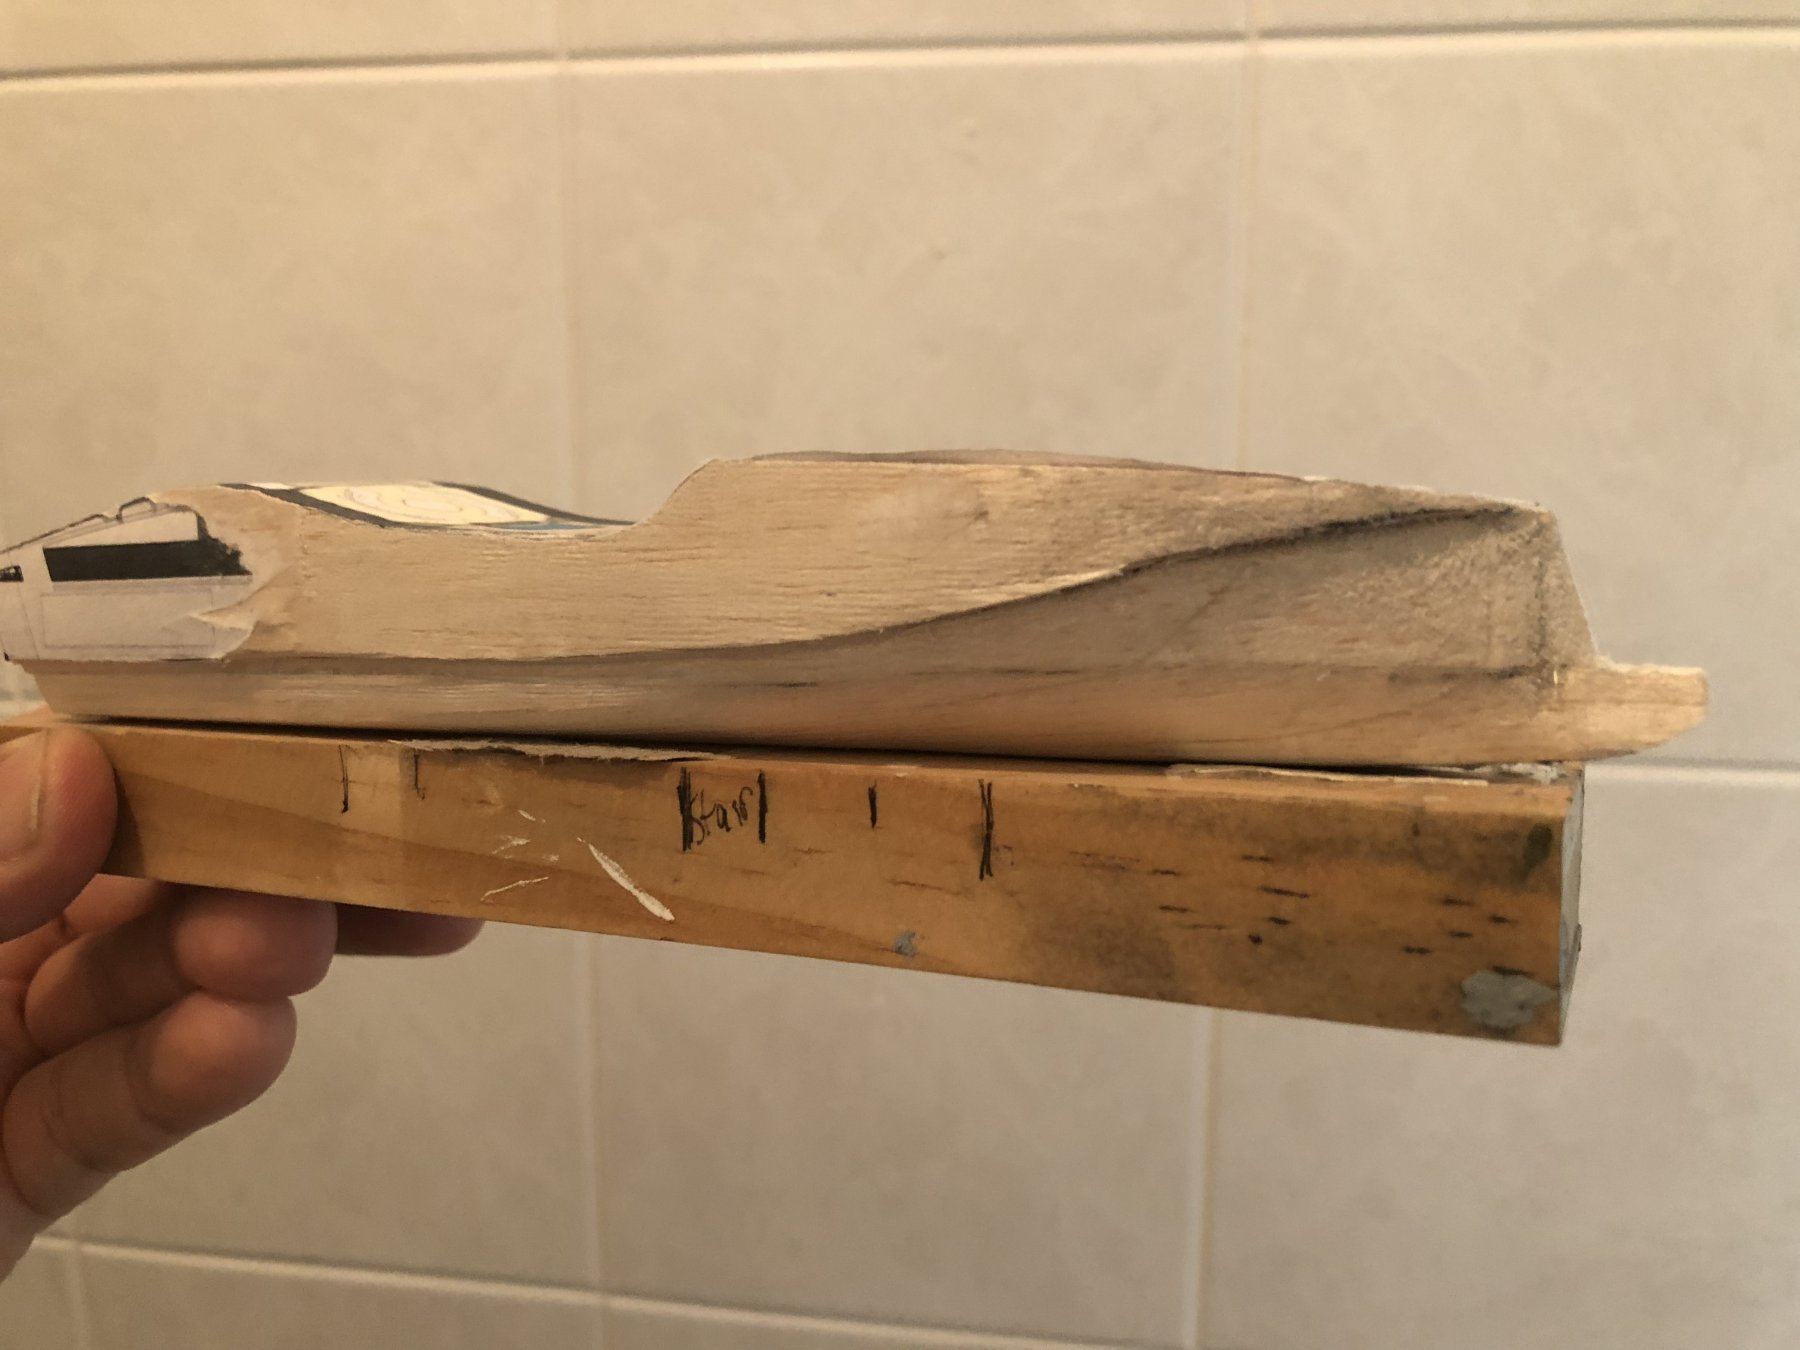
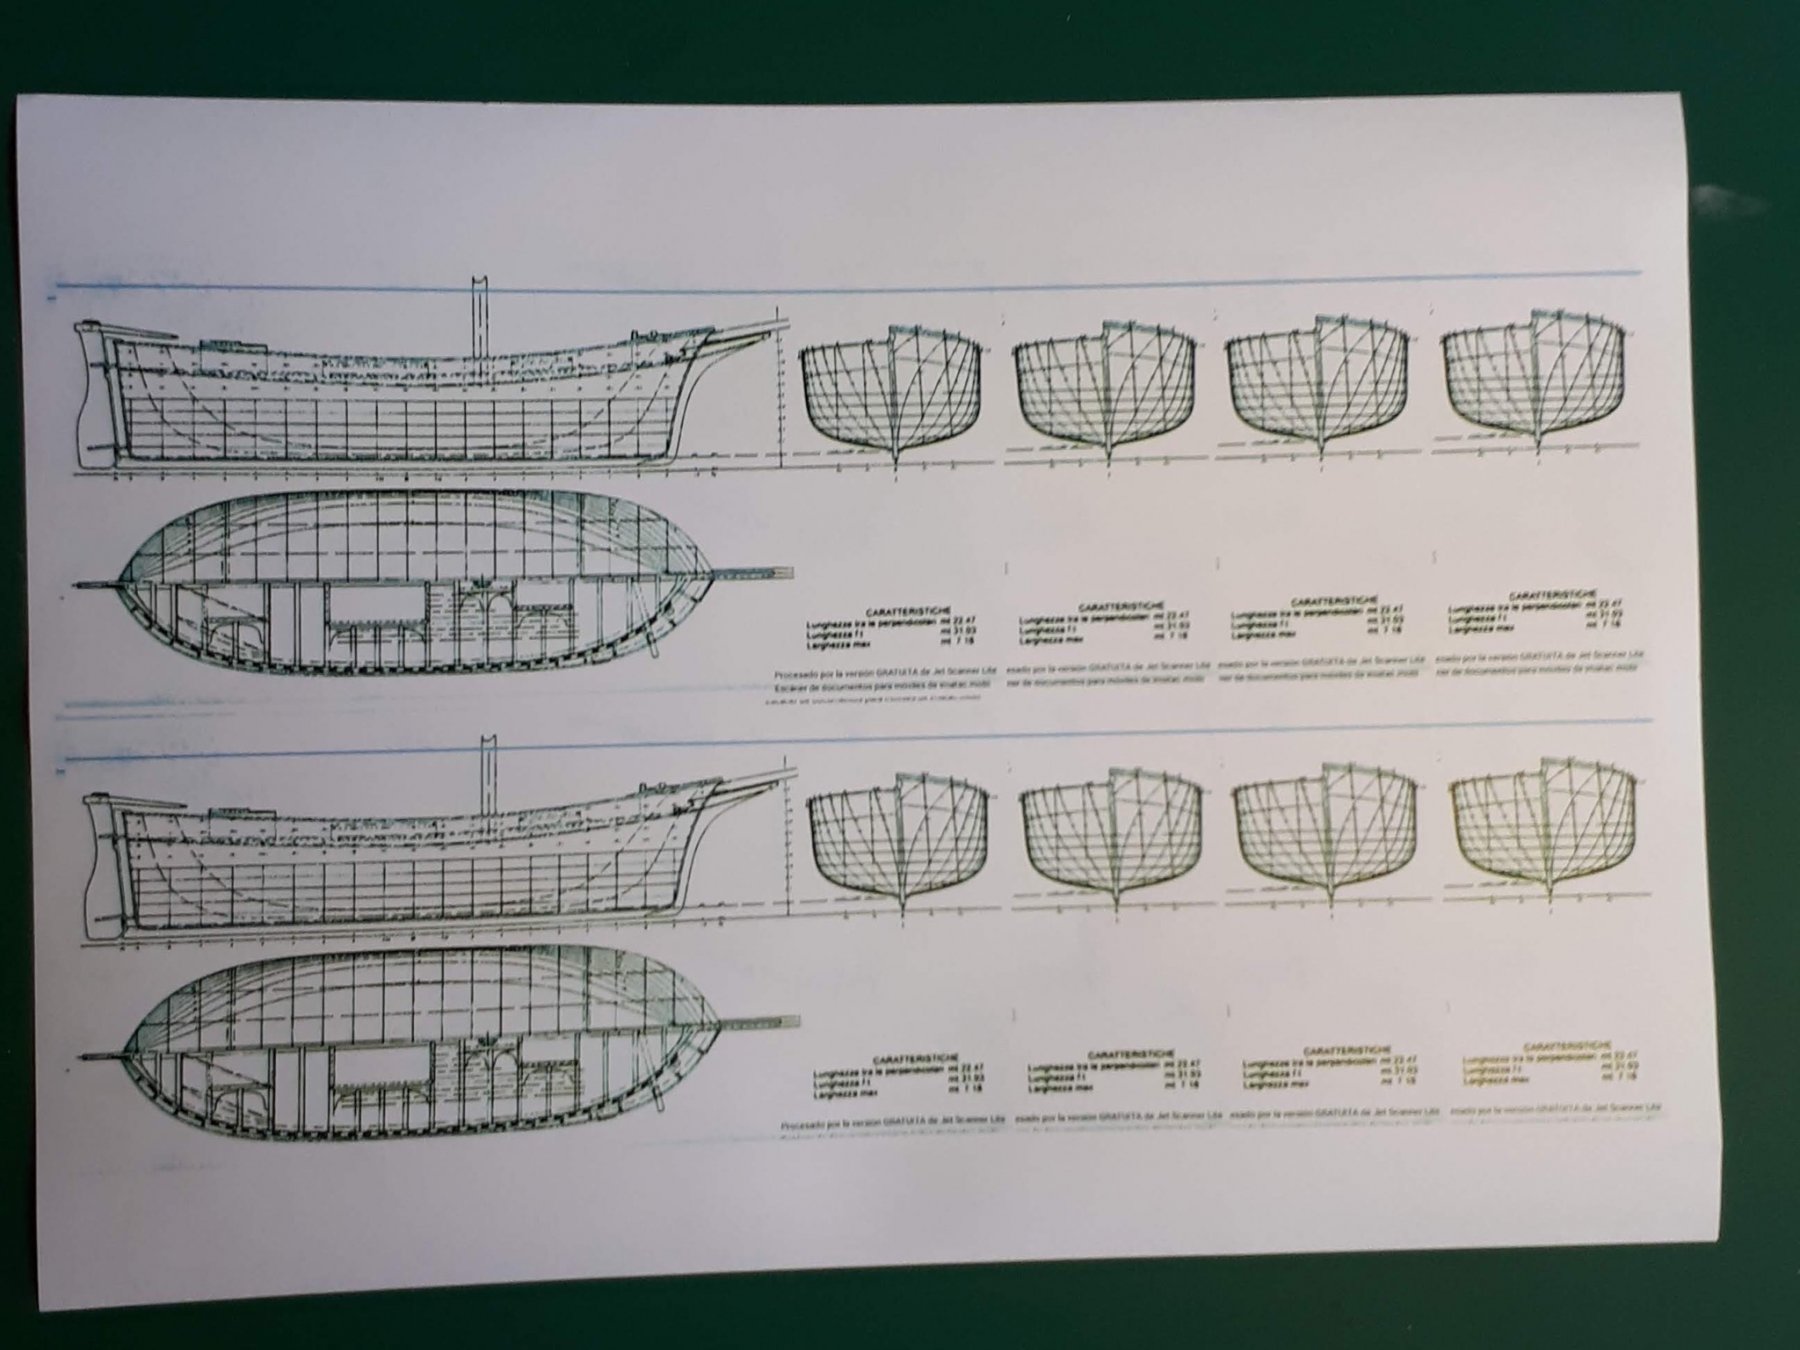
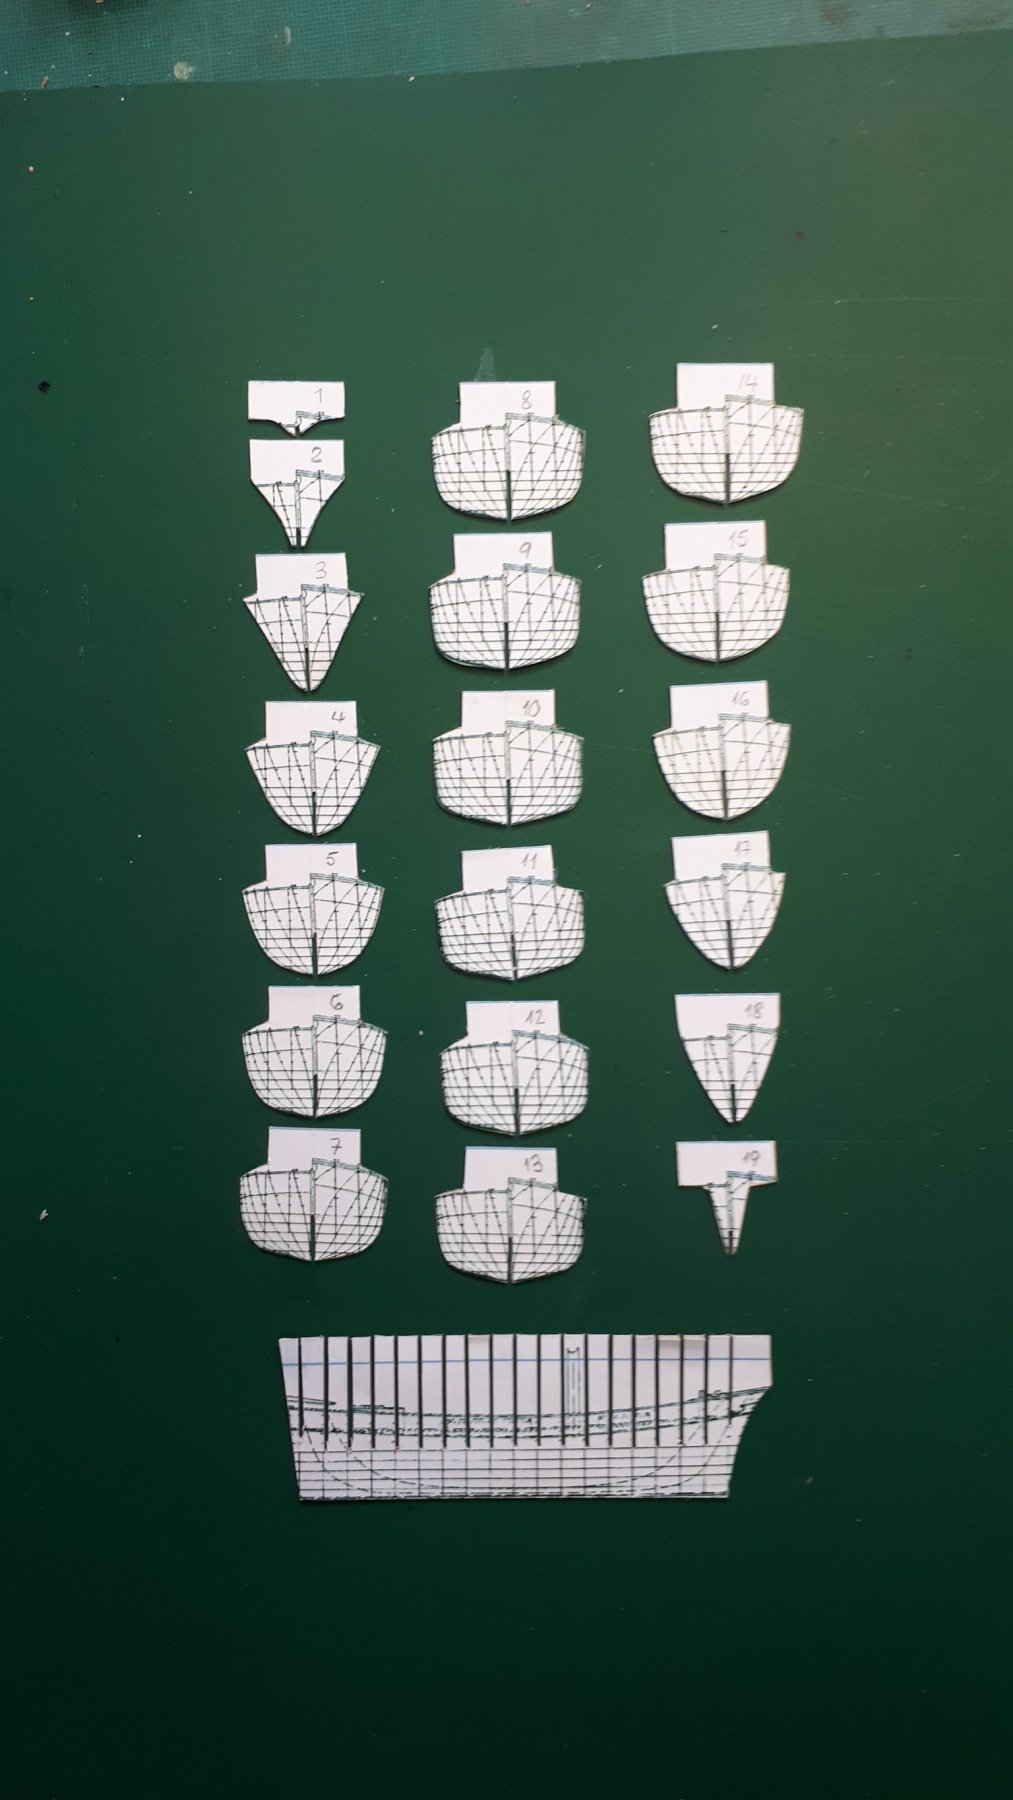
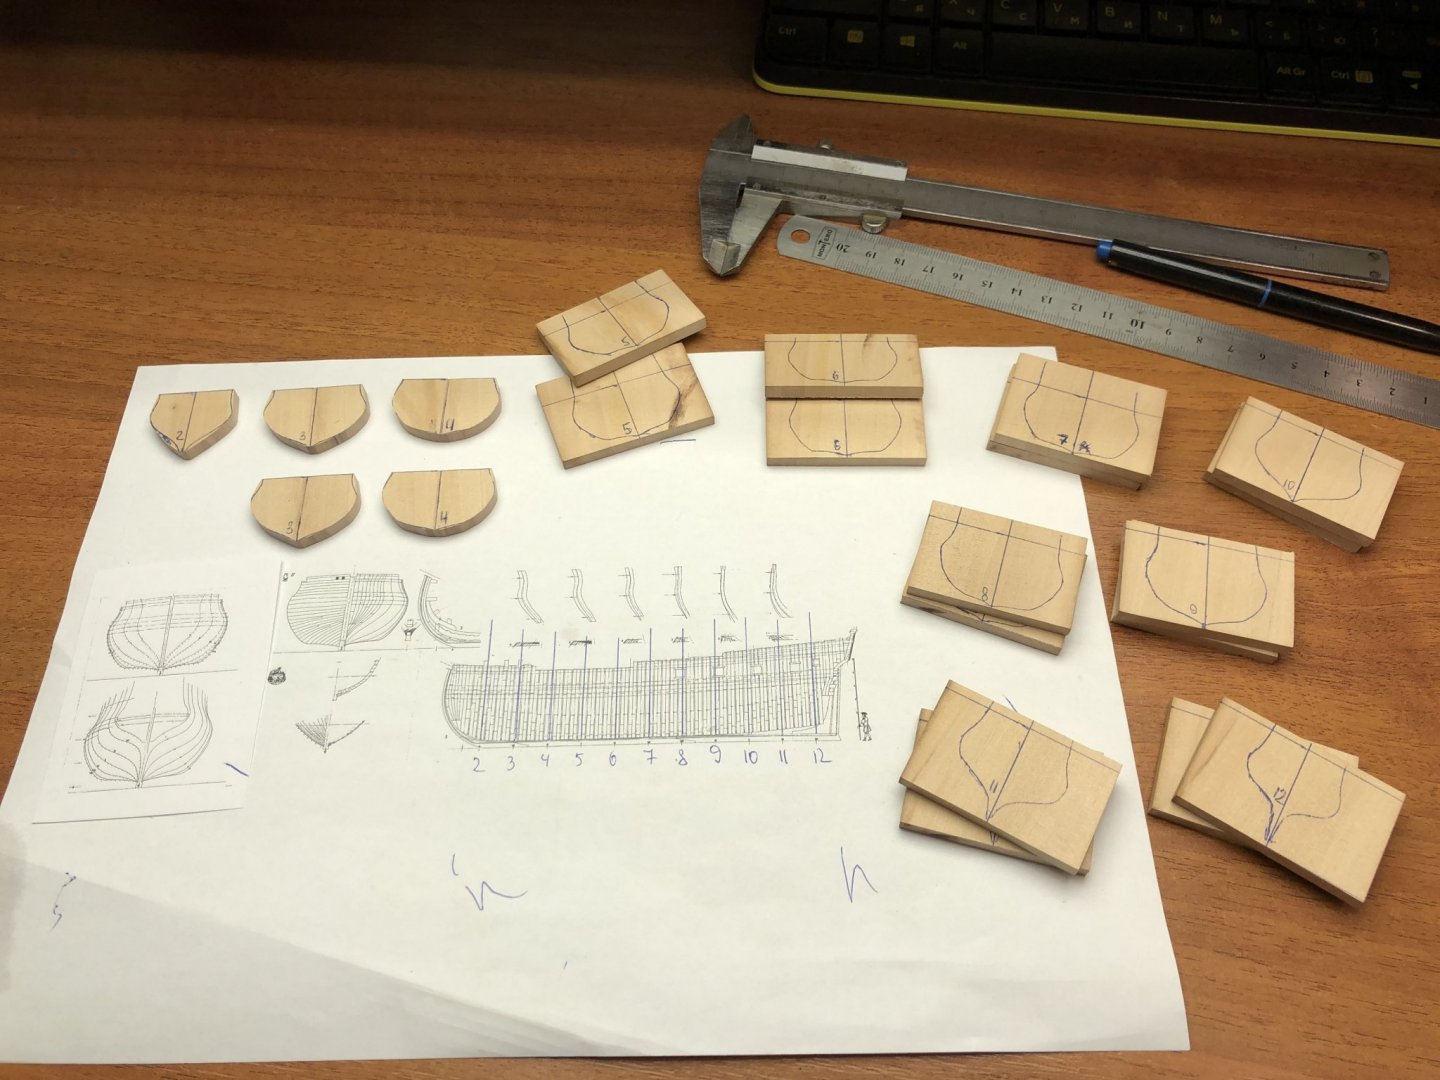
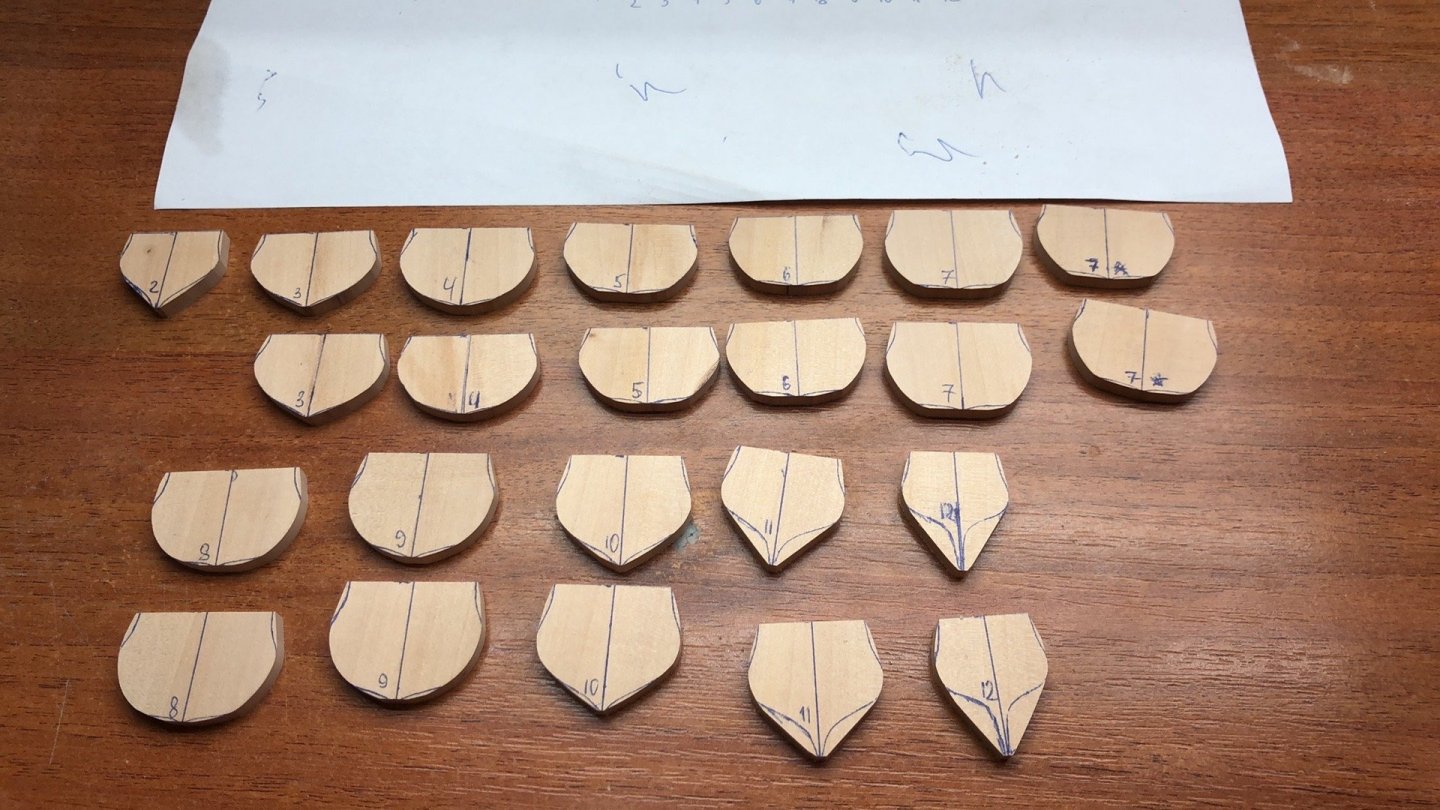
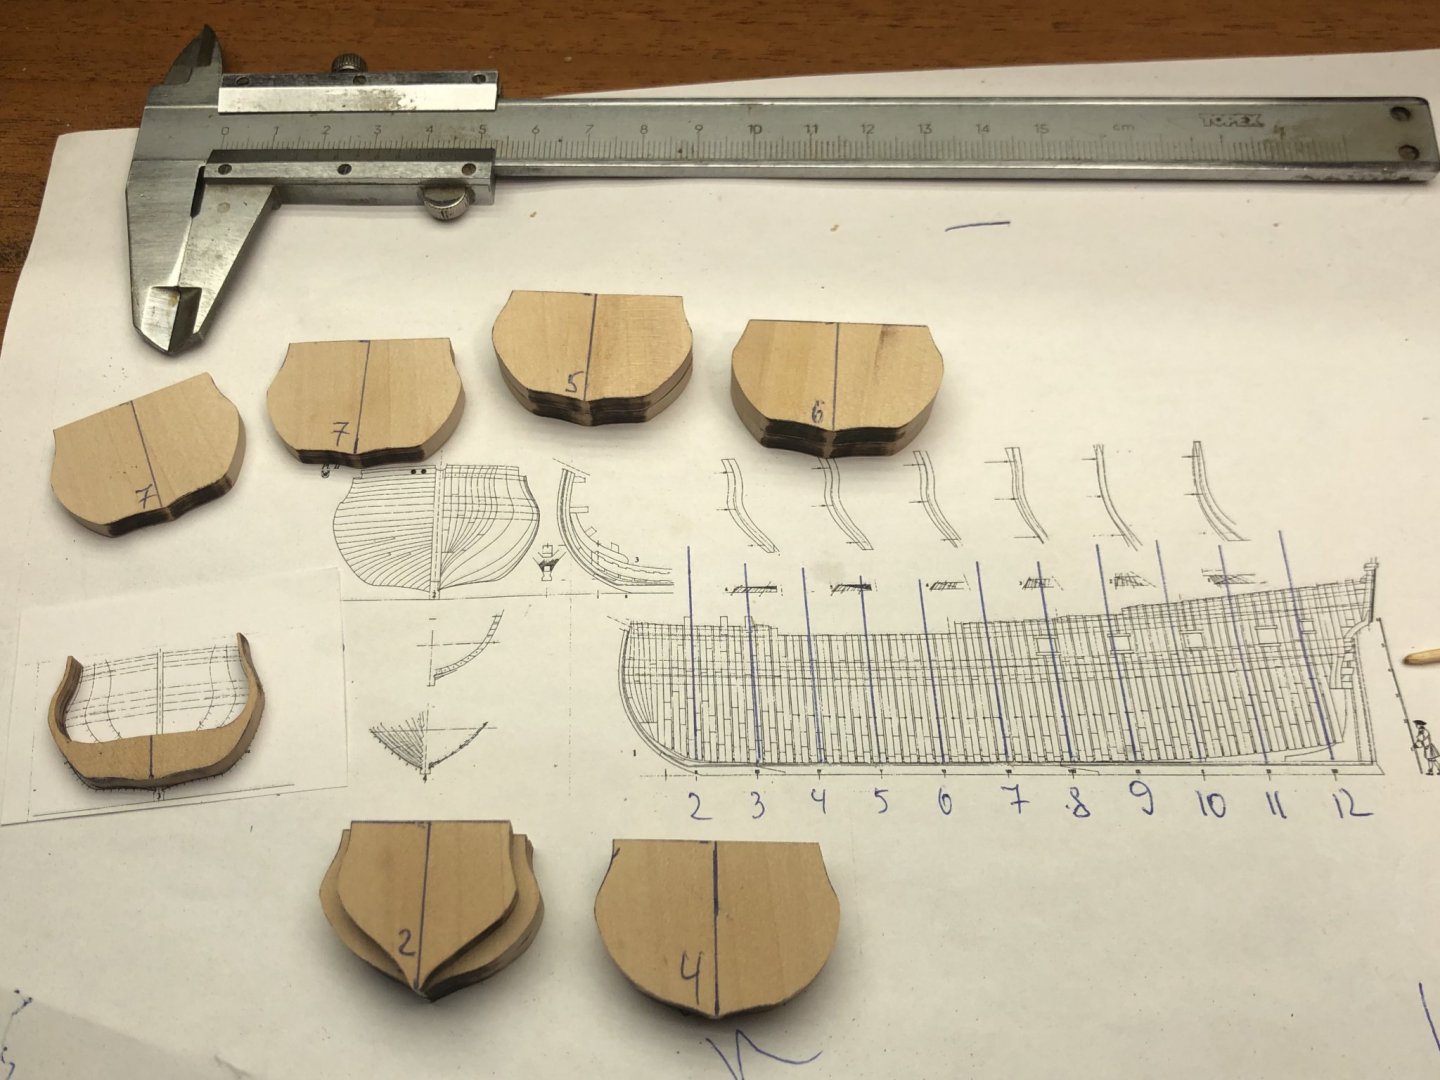
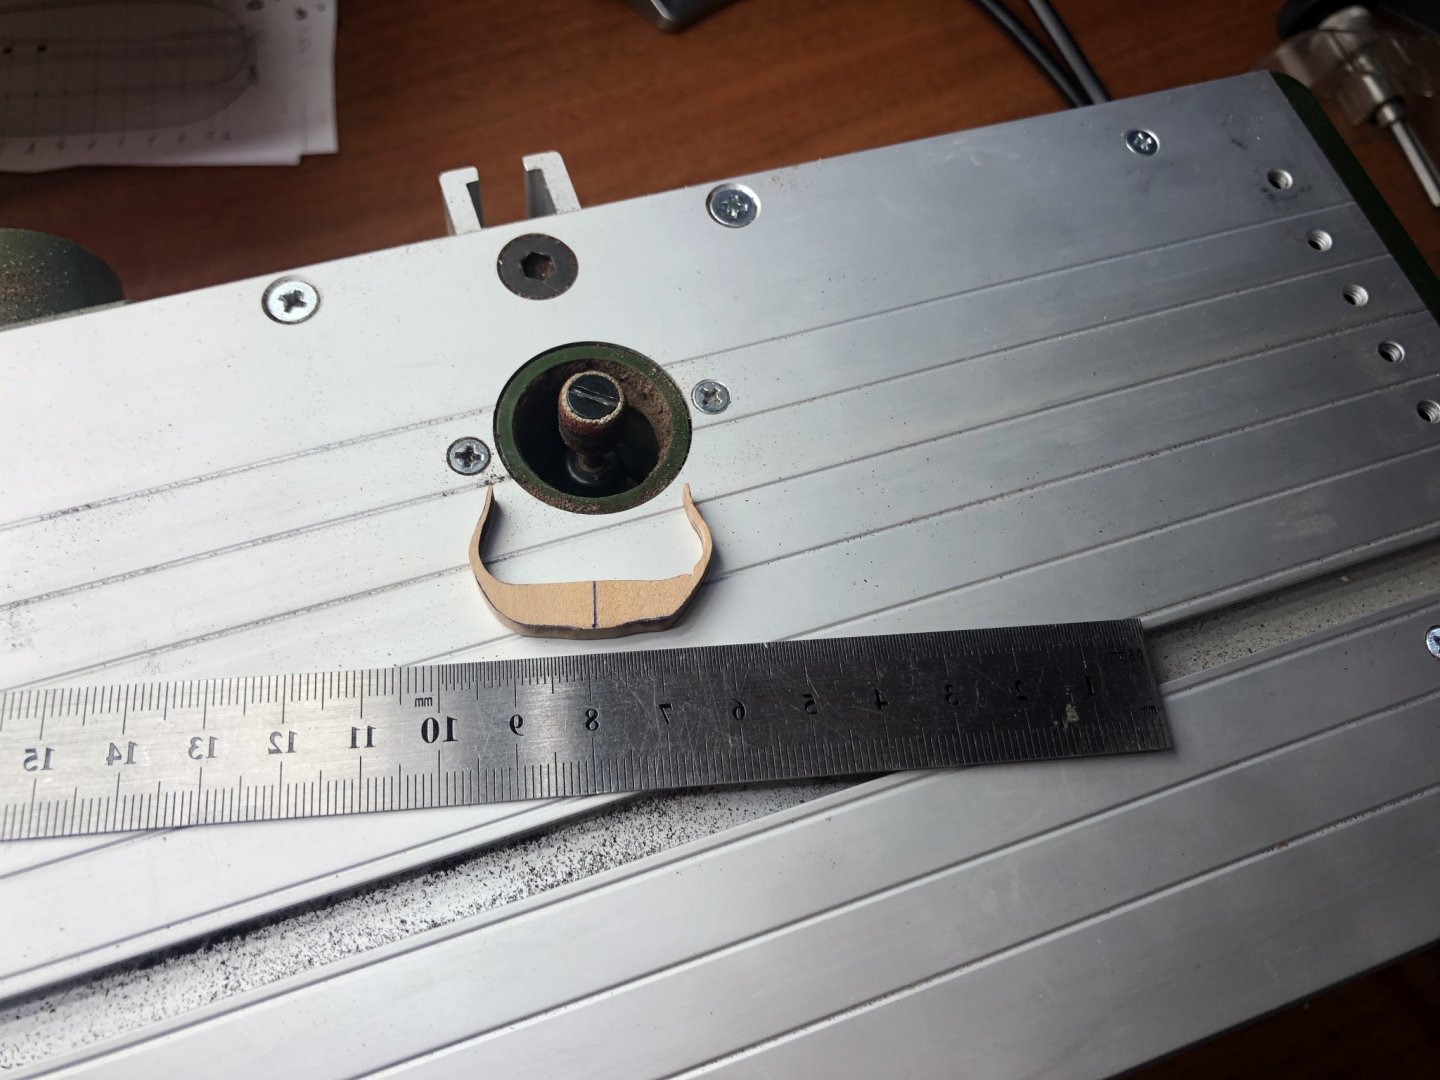
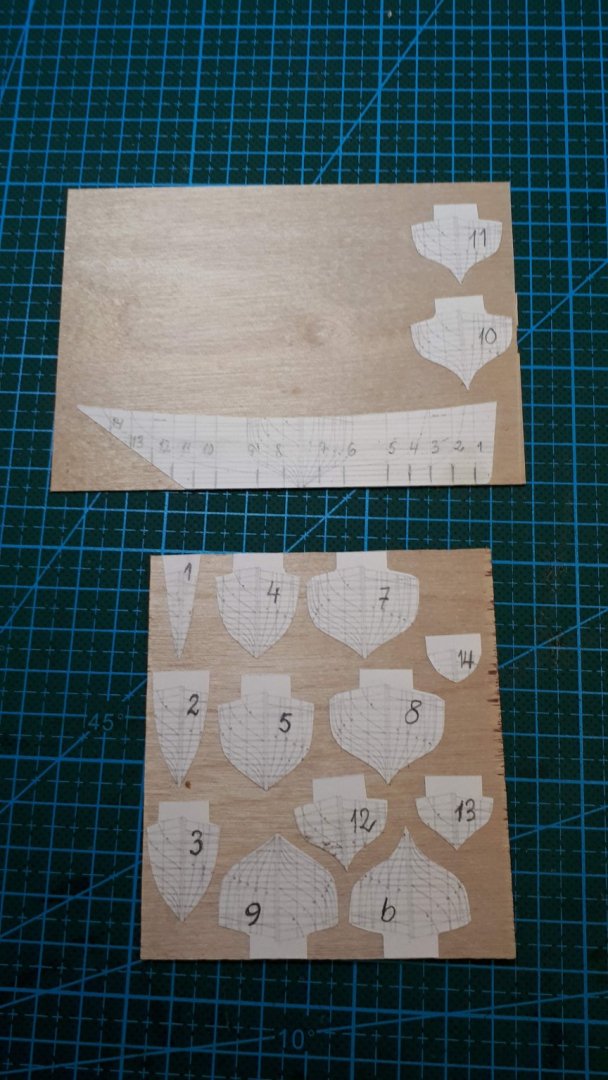
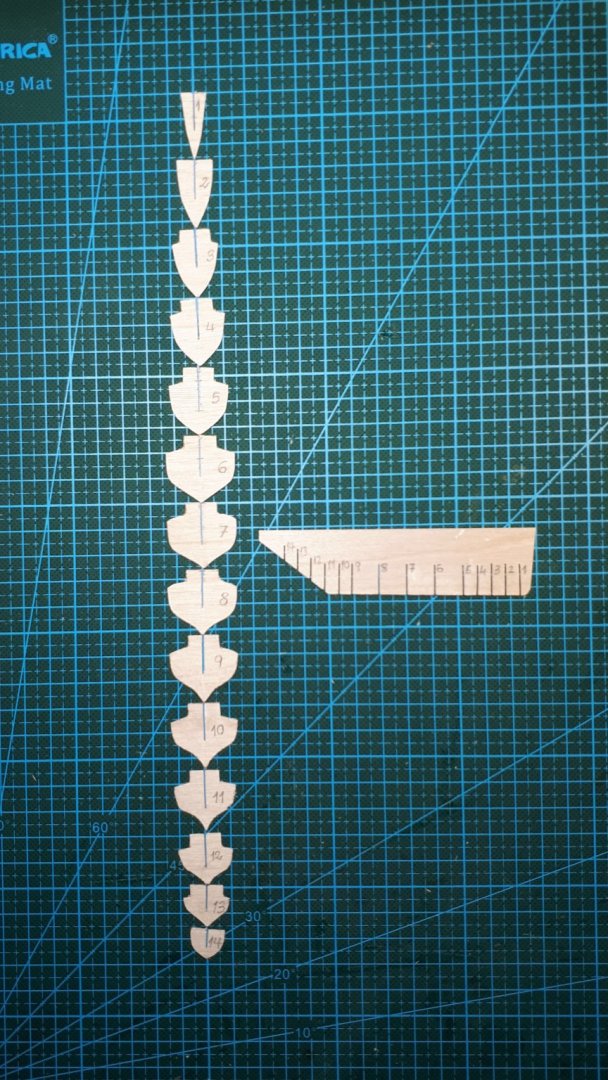
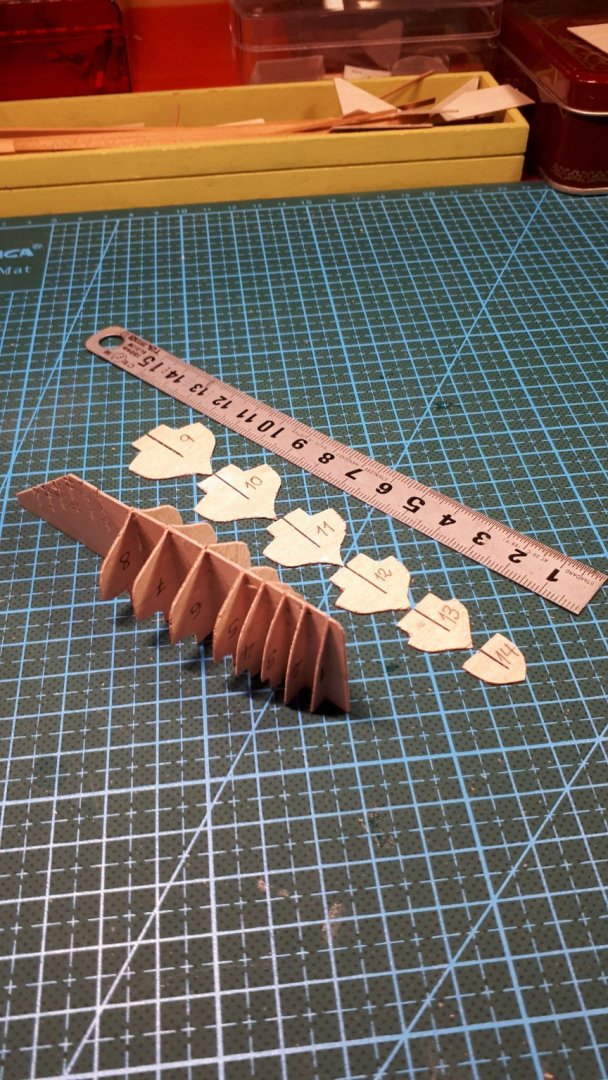
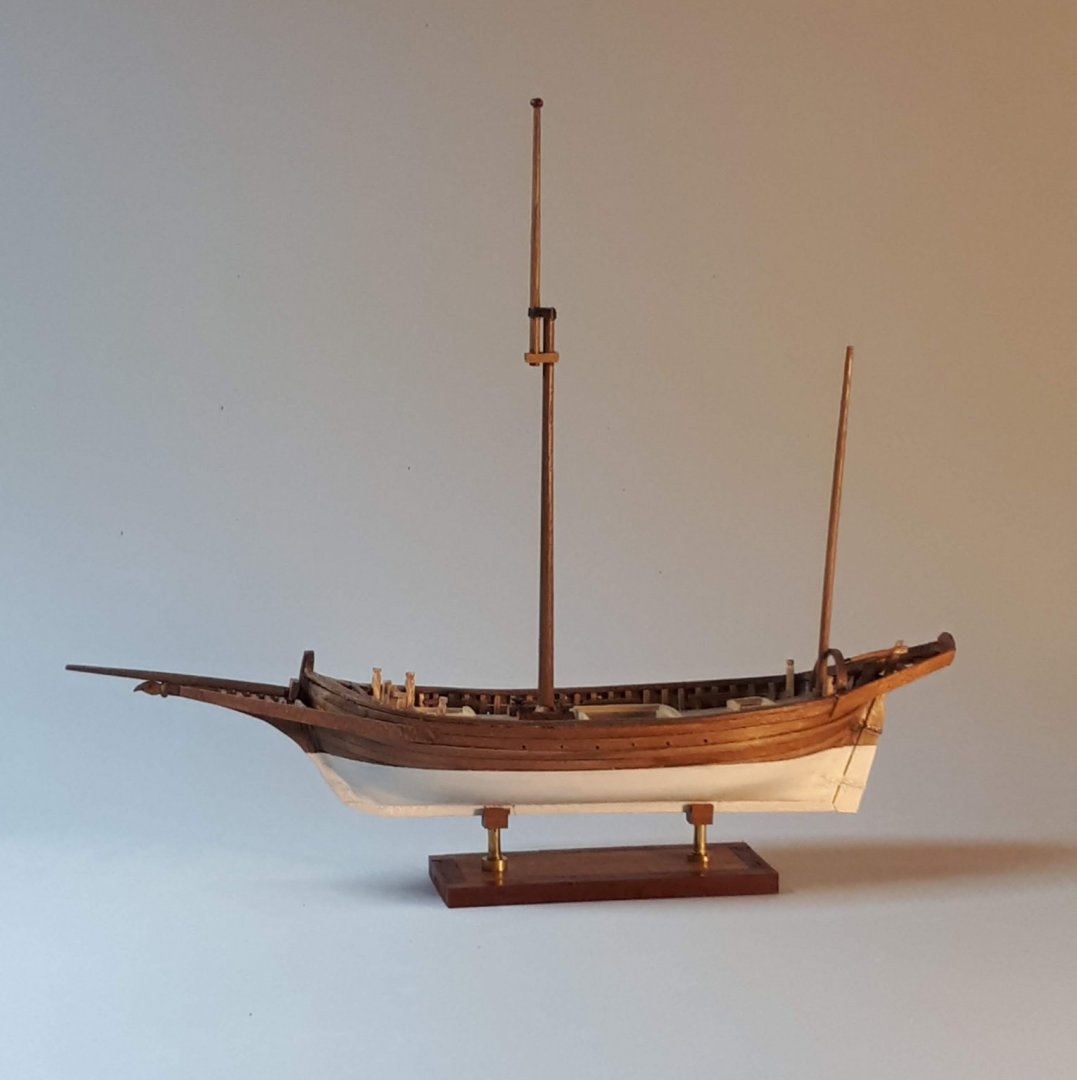
.thumb.jpg.4f9c10d881b295b6363493f5acdb8ebf.jpg) Hi to all. Looks like i'm still here))) For a very long time I thought, wondered and reflected on the scale. And finally I made step for next level (scratch build) and i decided that 1/250 (Naviga C4 class) is what I wanted for a long time, especially due to i'm a seamen and 7-8 months in a year i spend at sea, with this scale I can make a model both at home and at sea. I present to you the beginning of the construction of the La Salamandre 1/250
Hi to all. Looks like i'm still here))) For a very long time I thought, wondered and reflected on the scale. And finally I made step for next level (scratch build) and i decided that 1/250 (Naviga C4 class) is what I wanted for a long time, especially due to i'm a seamen and 7-8 months in a year i spend at sea, with this scale I can make a model both at home and at sea. I present to you the beginning of the construction of the La Salamandre 1/250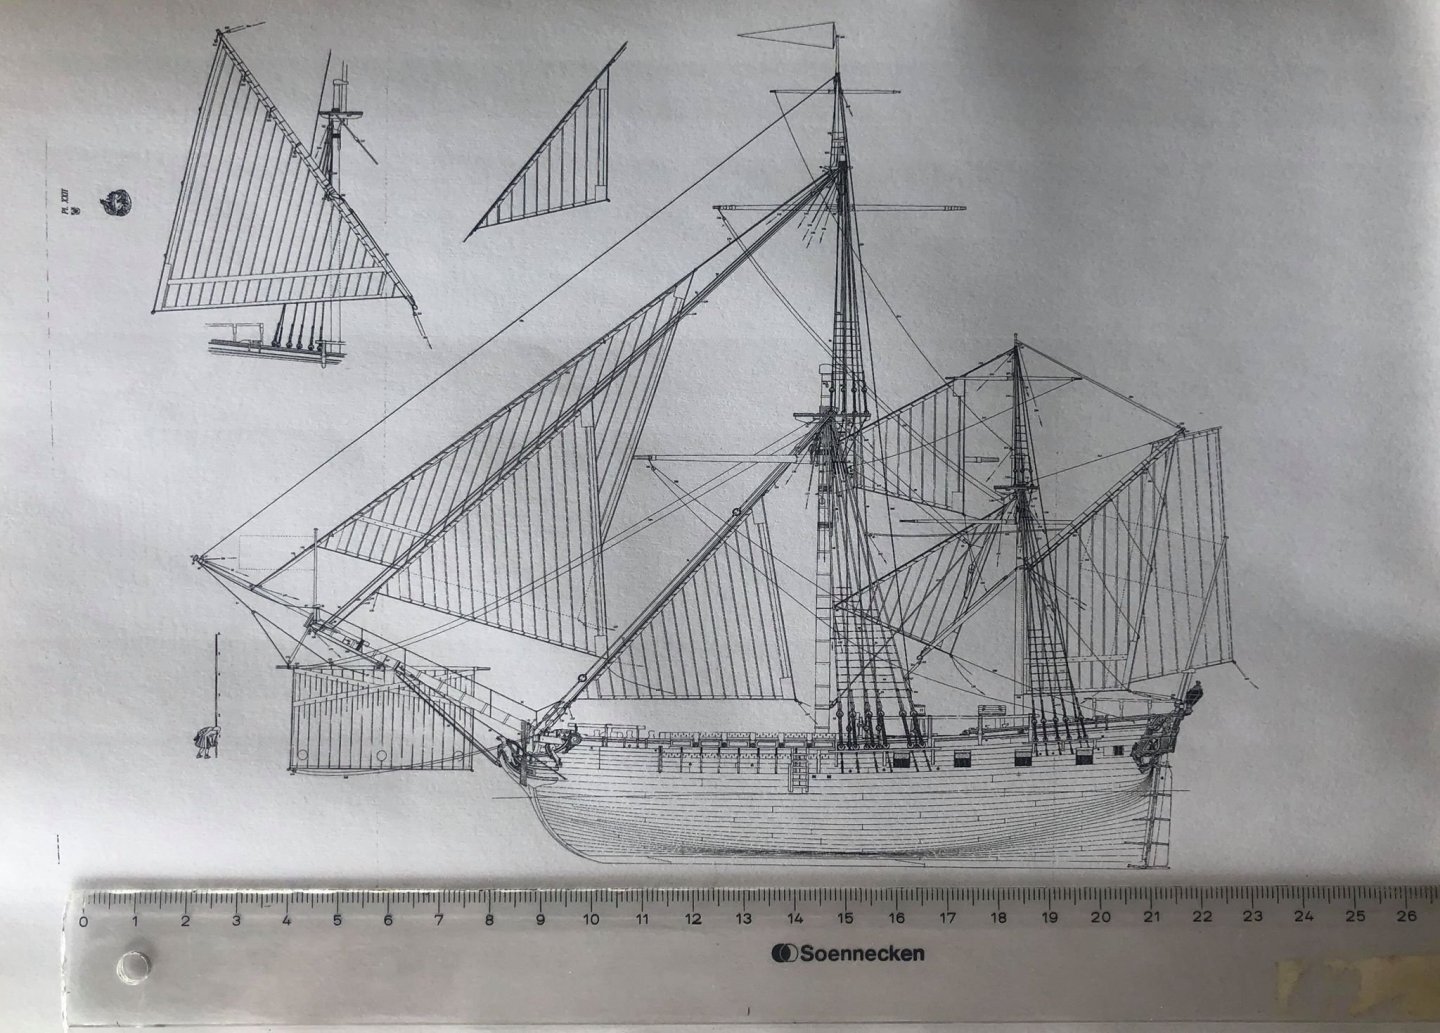


-
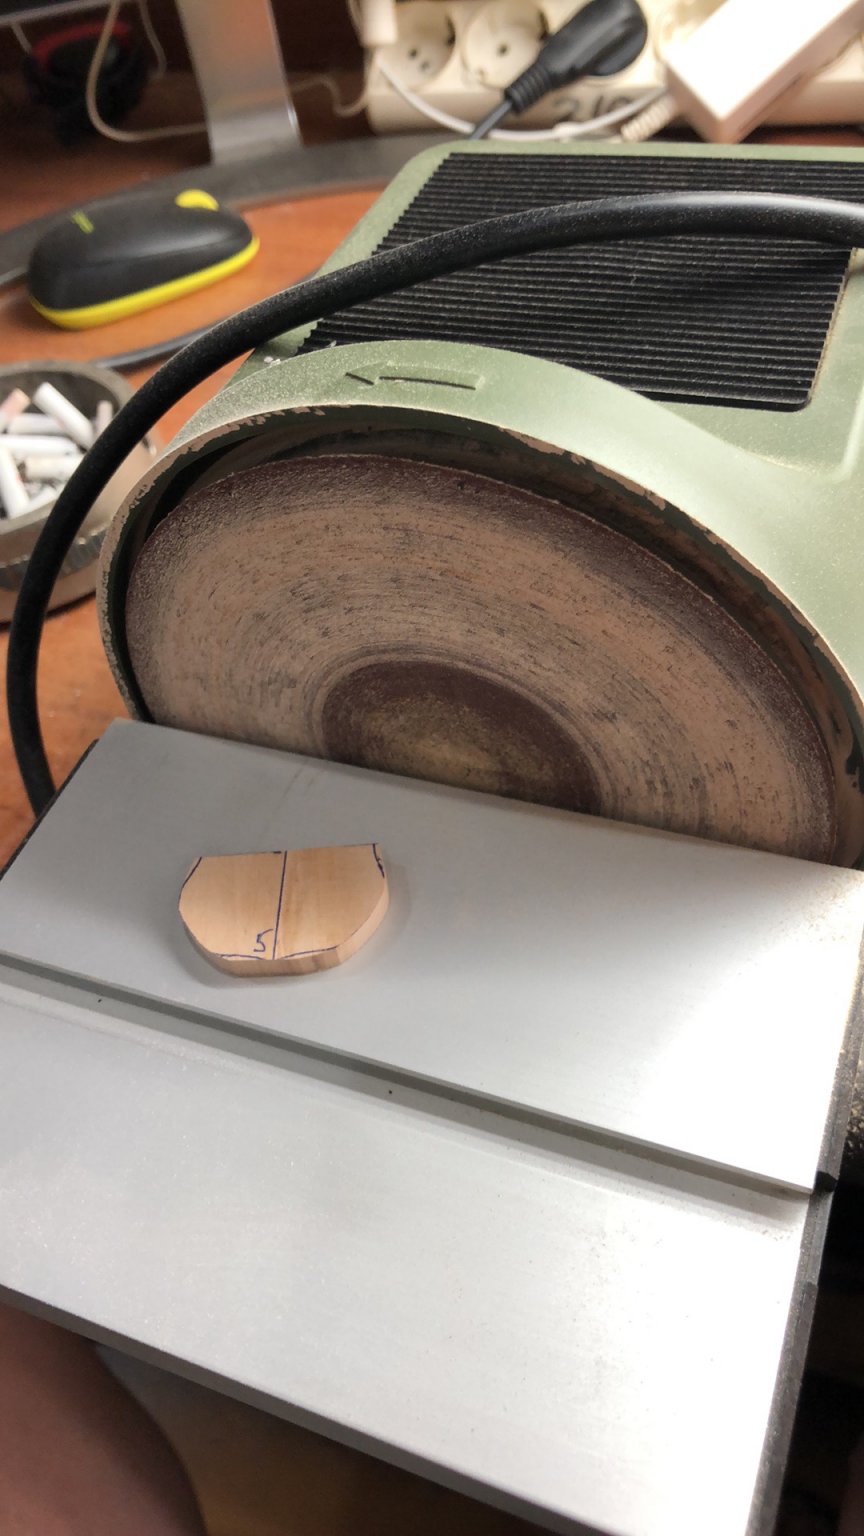
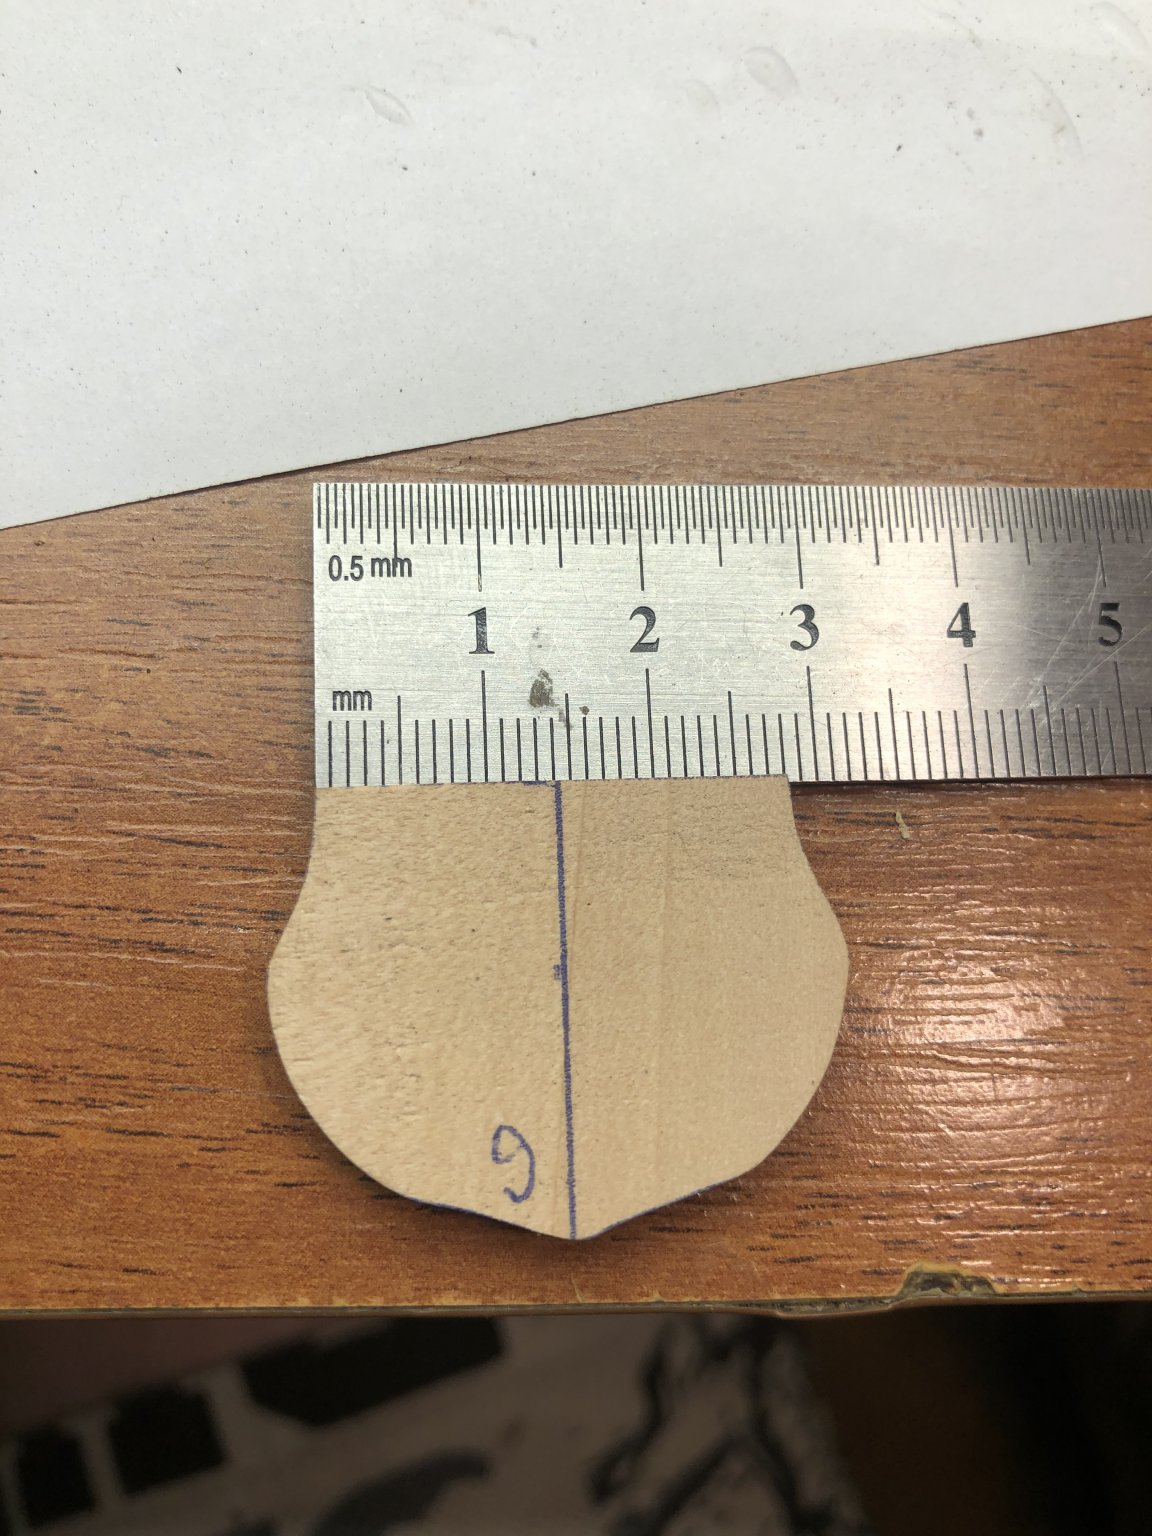
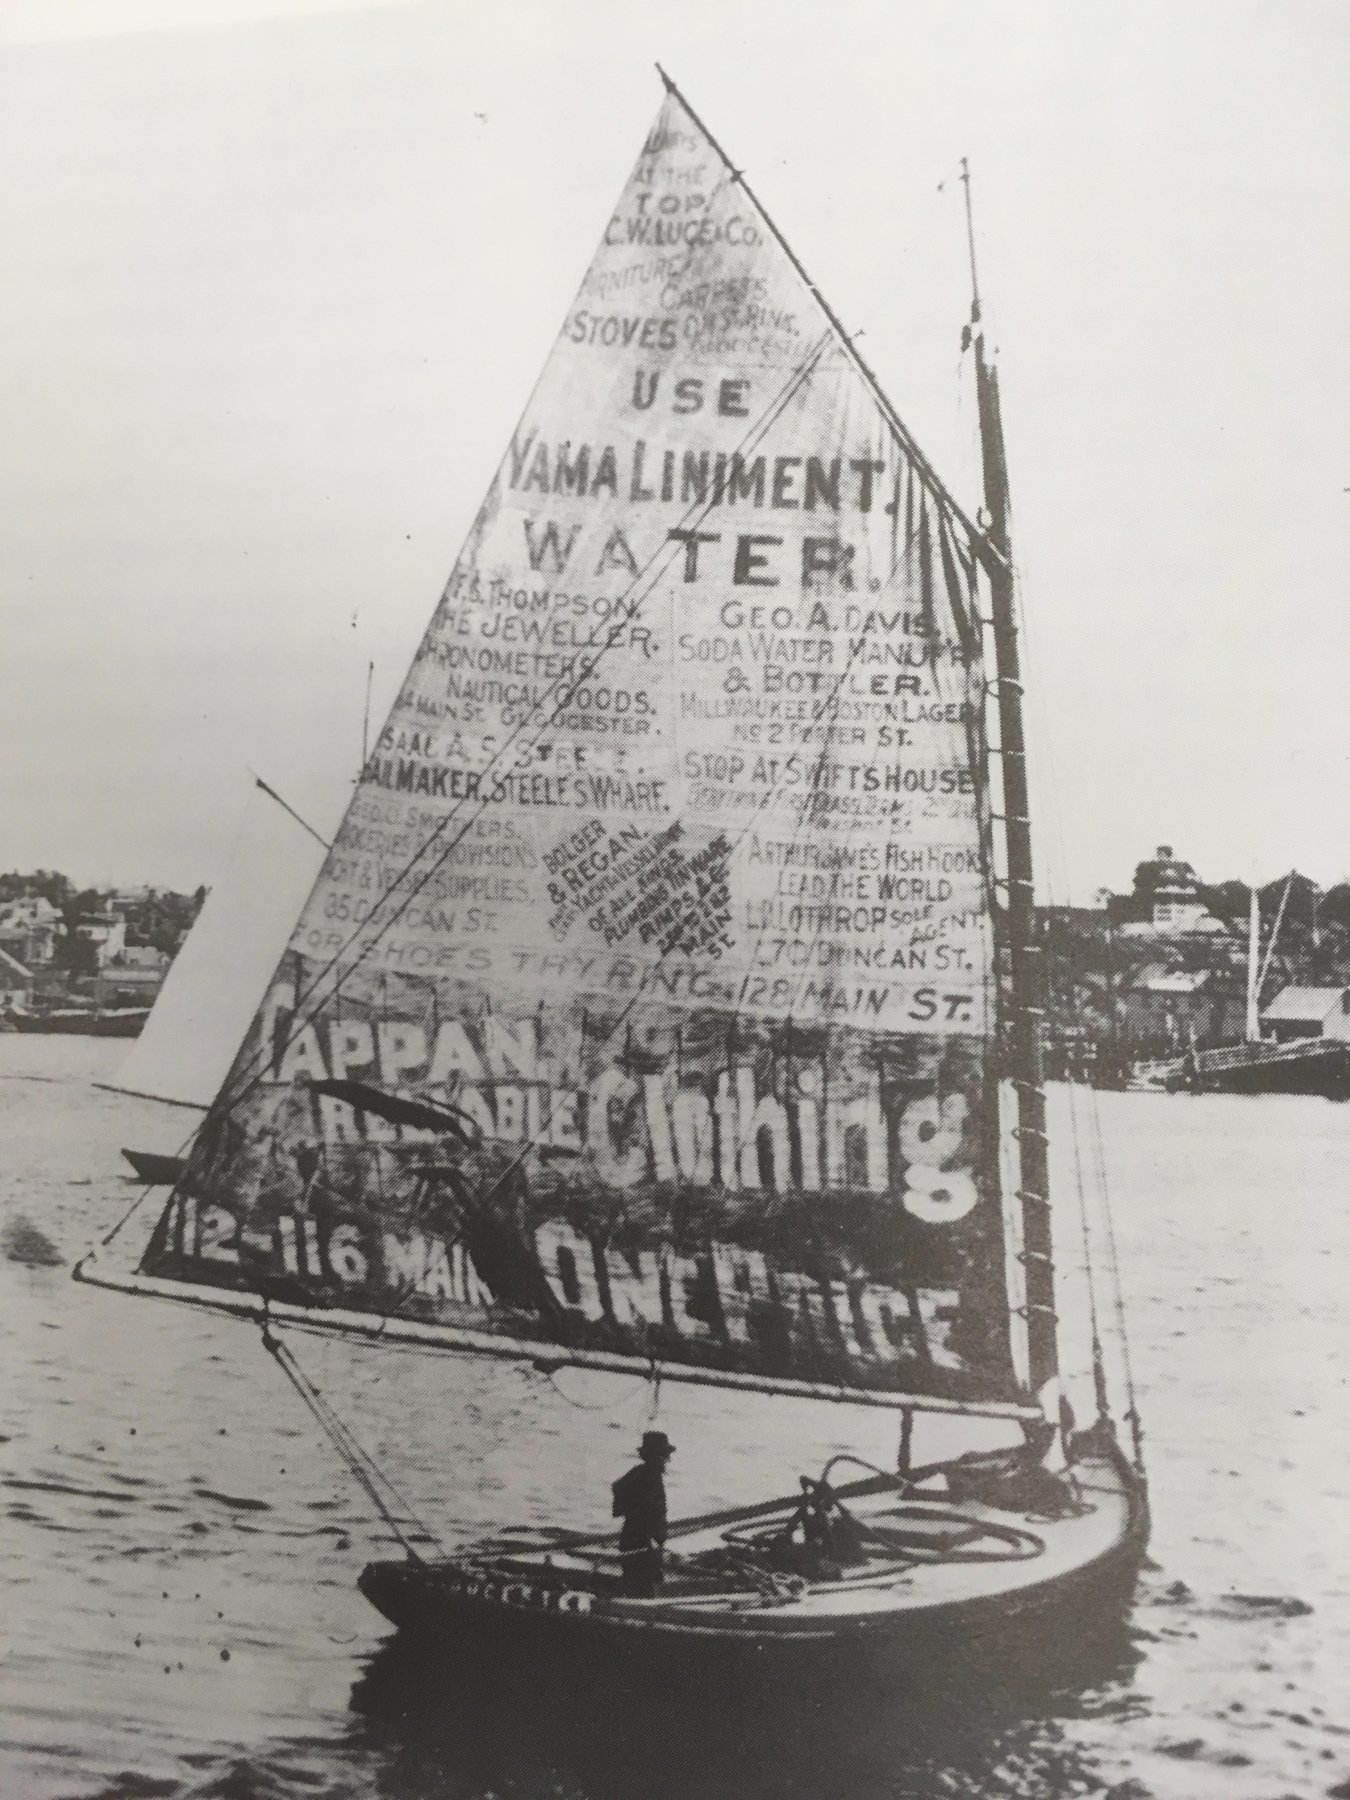
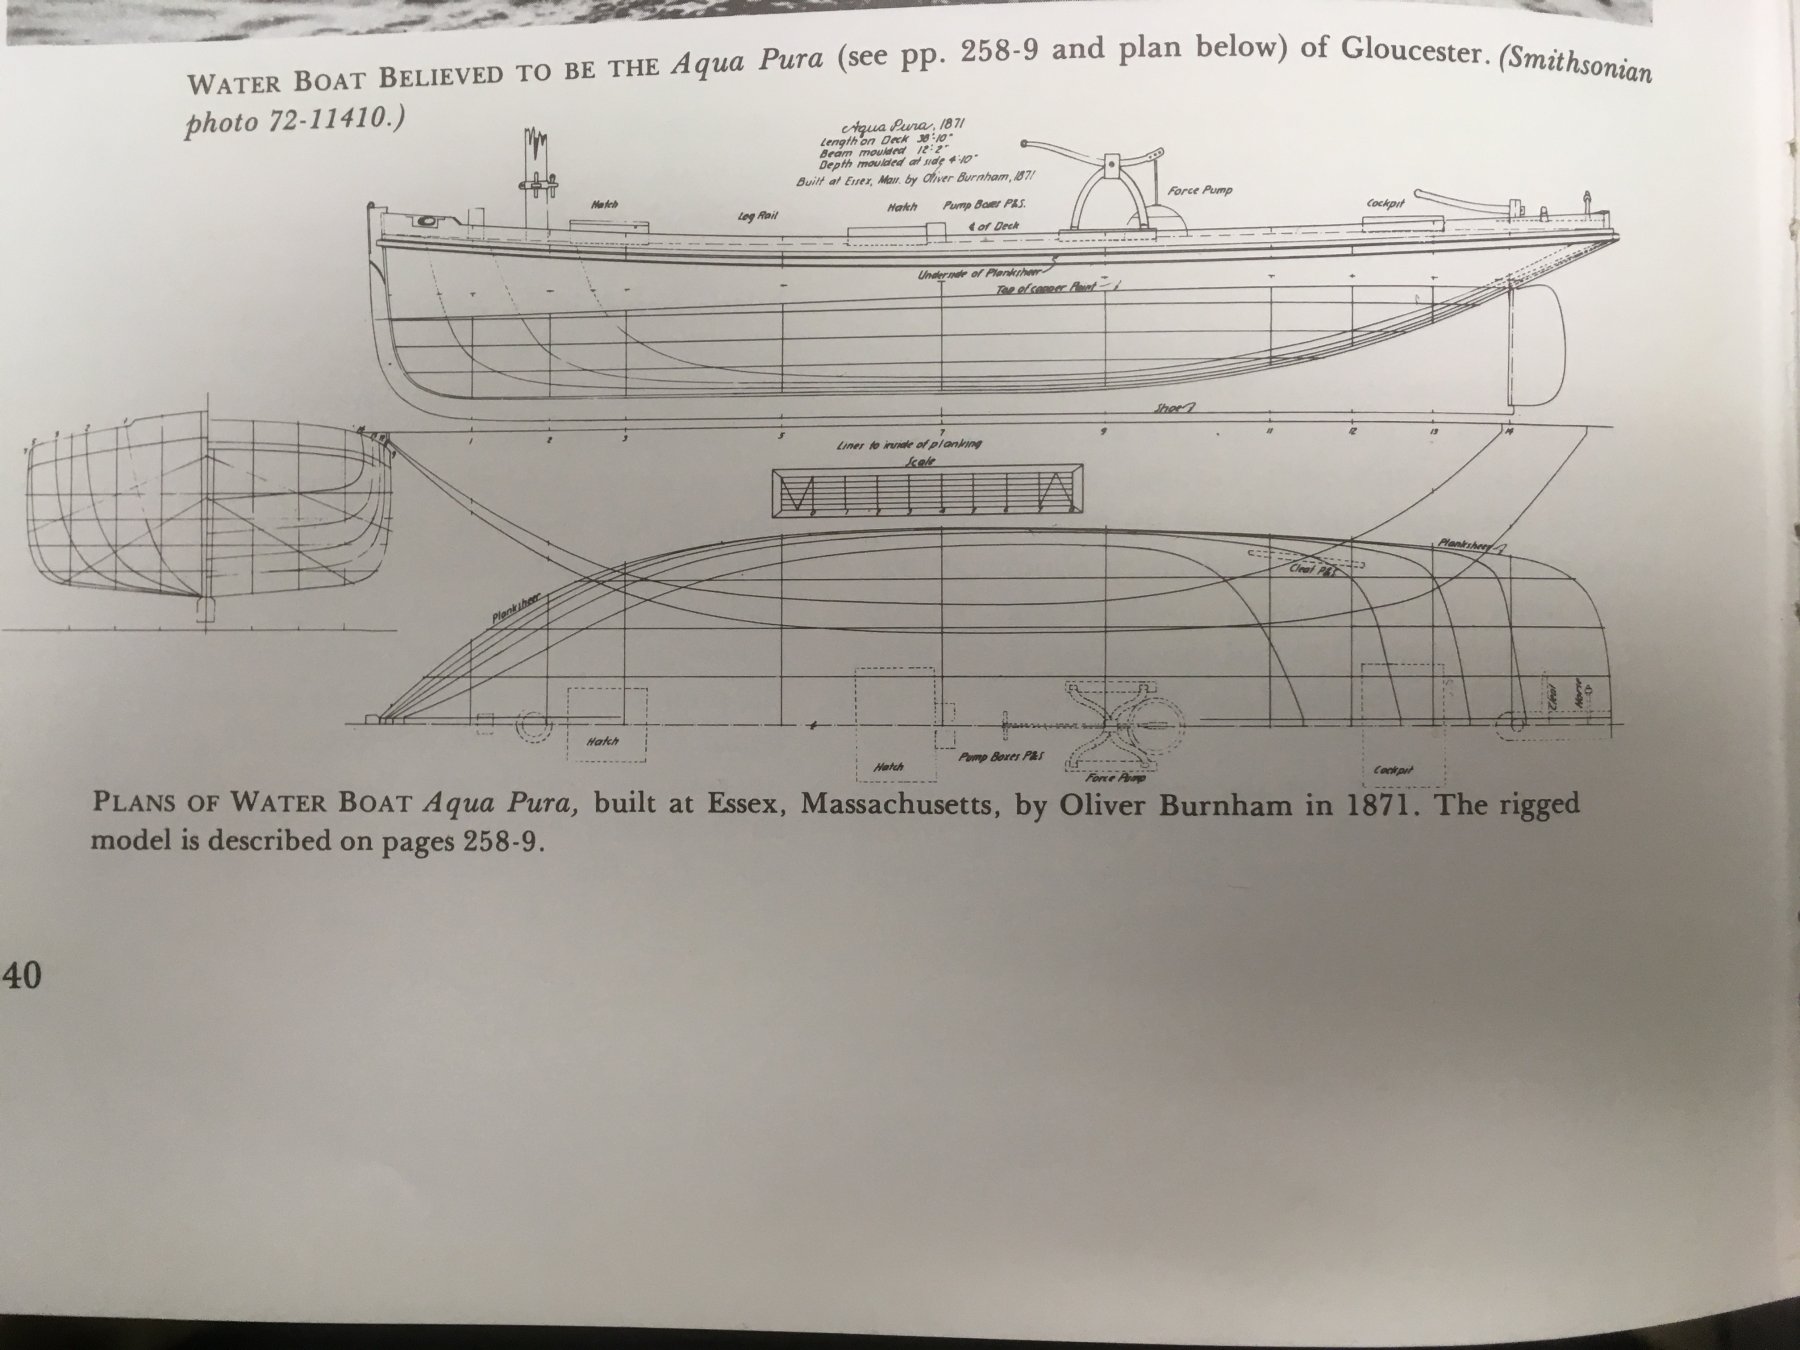
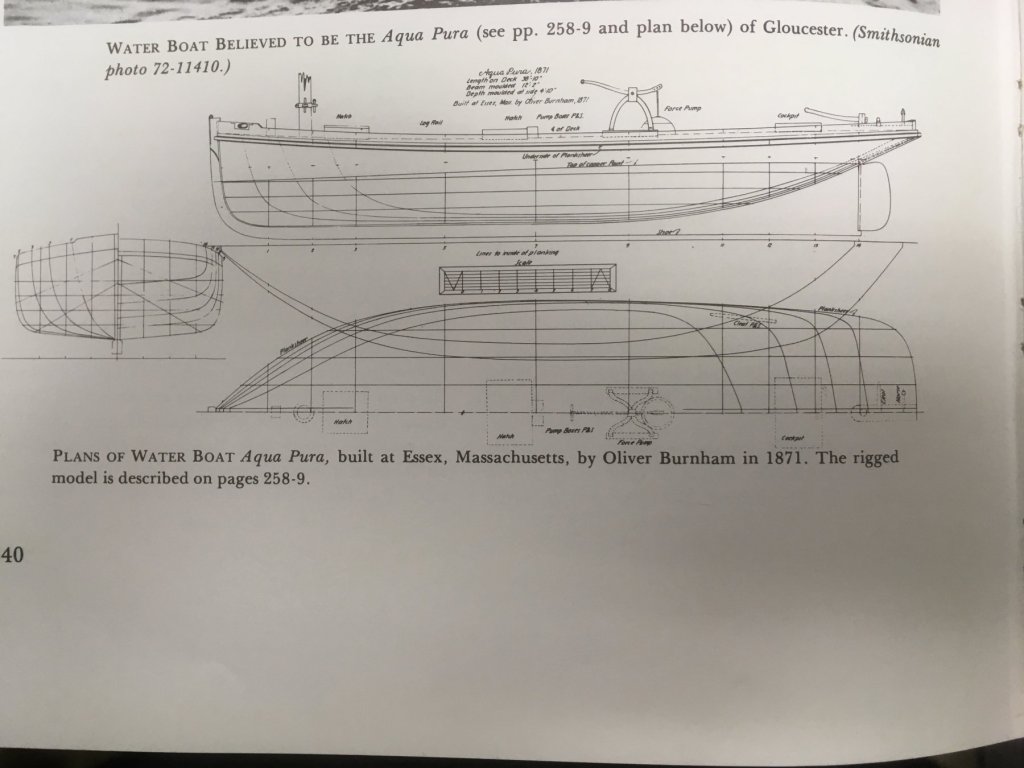
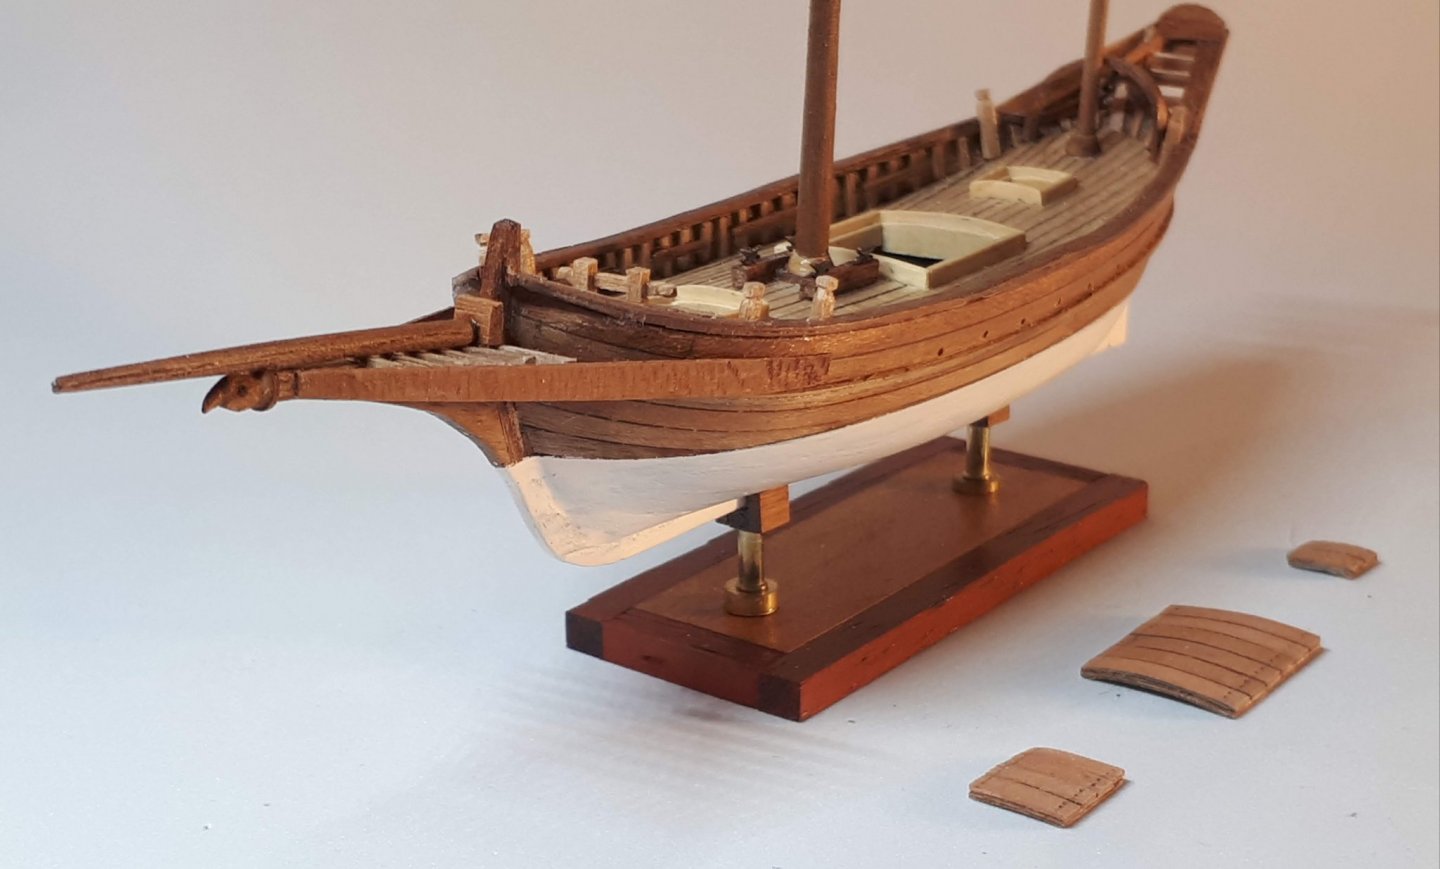
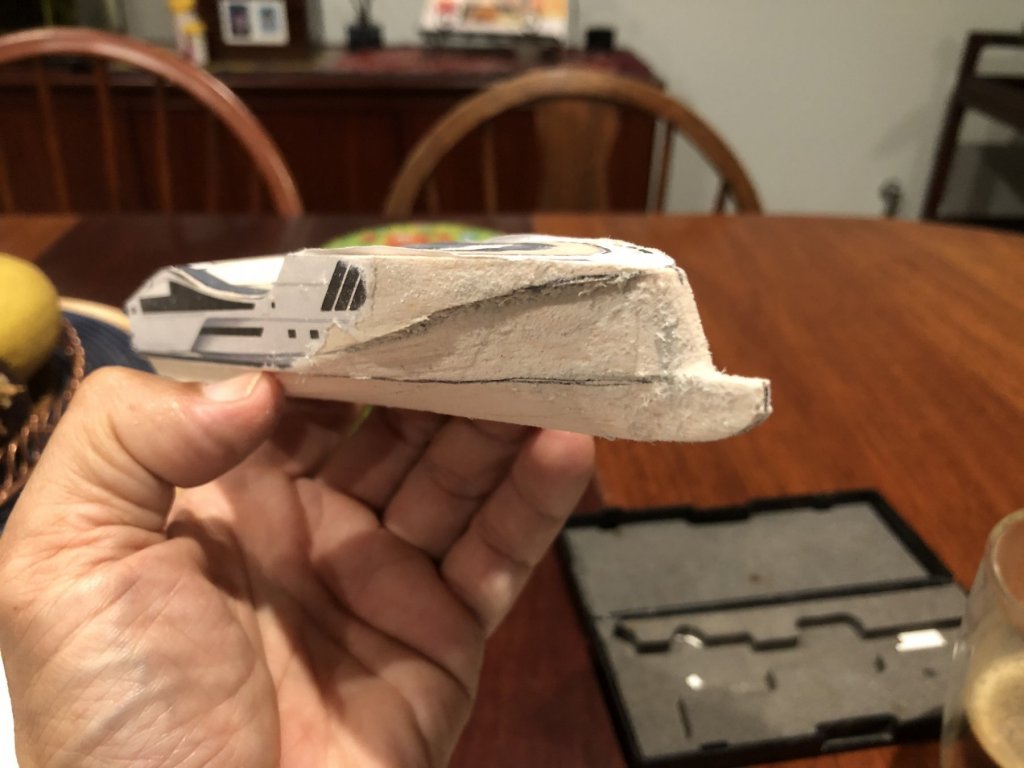
 I found an old copy of Howard Chapelle's The National Watercraft Collection on the $2.00 rack at the local used bookstore. In it I saw the following photo of a catboat in Gloucester harbor. Needless to say, the sail caught my attention. This photo is most likely of Aqua Pura, a waterboat that supplied the Gloucester fishing fleet with fresh water. These boats were commonly catboat-rigged and could carry about 150 barrels of water in a wooden tank located under the deck amidships. The water was discharged into fishing schooners' water barrels via a hand-operated pump and a long hose, both of which are visible in the photo. In 1850, one waterboat operator in Gloucester sold $7,700 worth of water to the fleet at ten cents a barrel. Aqua Pura measured 36' in length and 11.4' in beam. She was crewed by a single owner/operator who painted advertisements for local merchants on his sail. Some of the waterboats carried a limited number of 50 - 100 lb cakes of ice covered in sawdust as well. Chapelle gives the hull lines and deck arrangement here: I just finished building Corel's kit of the Shenandoah, and this will be my first scratch build. The reason I want to build this craft is a bit nostalgic. My dad was a watchmaker who had a family-run jewelers in Southern California. I grew up in the shop. My dad and grandpa and brother all repaired watches, while I repaired clocks and did engraving and simple jewelry repairs. If you look at the sail in the photograph, you'll see an advertisement for a jewelers. I lost my dad last January and miss him pretty badly. I'd like to build this boat and put him and his shop up there on the sail. I may make some other changes to the text as well. That's why I'm calling this build a fictitious waterboat. I'd also just plain like to try my hand at scratch building. I've been watching other people's work and it looks like fun. I guess we'll see. I have very little idea of how to go about this, other than that I'll be attempting a plank-on-bulkhead version of the hull. I'm sure I'll be asking lots of questions. Thanks for reading! Steve
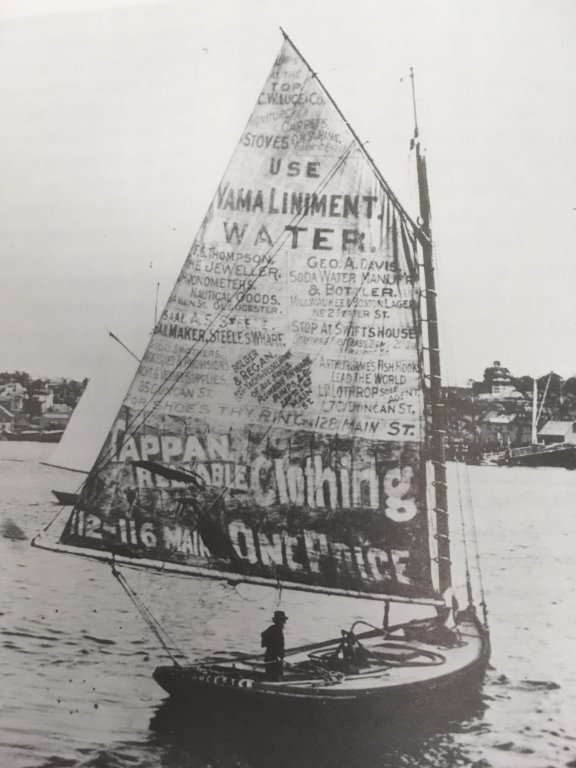
- 60 replies
-
- 16
-
-
- small
- gloucester
- (and 2 more)
-
 This boat was a tartana of fluvial origin that was built in the Rhône region, near Condrieu, Beaucaire, Arlez and Martigues. Thanks to its low draft and its robustness, they became a fundamental element in the development of the region, creating a large fleet that had at the time of its heyday, in 1845, 125 boats, which were used both for transportation construction materials (wood, stone, aggregates) as well as the unloading of ships that could not pass at full load through the bars of the Rhone delta. At times, they also made maritime navigation through the Mediterranean, to Marseilles, Toulon and other towns in Languedoc, Roussillon and Provence. The appearance of the railway as a means of transport led to the disappearance of the "allèges" in the late 19th century.
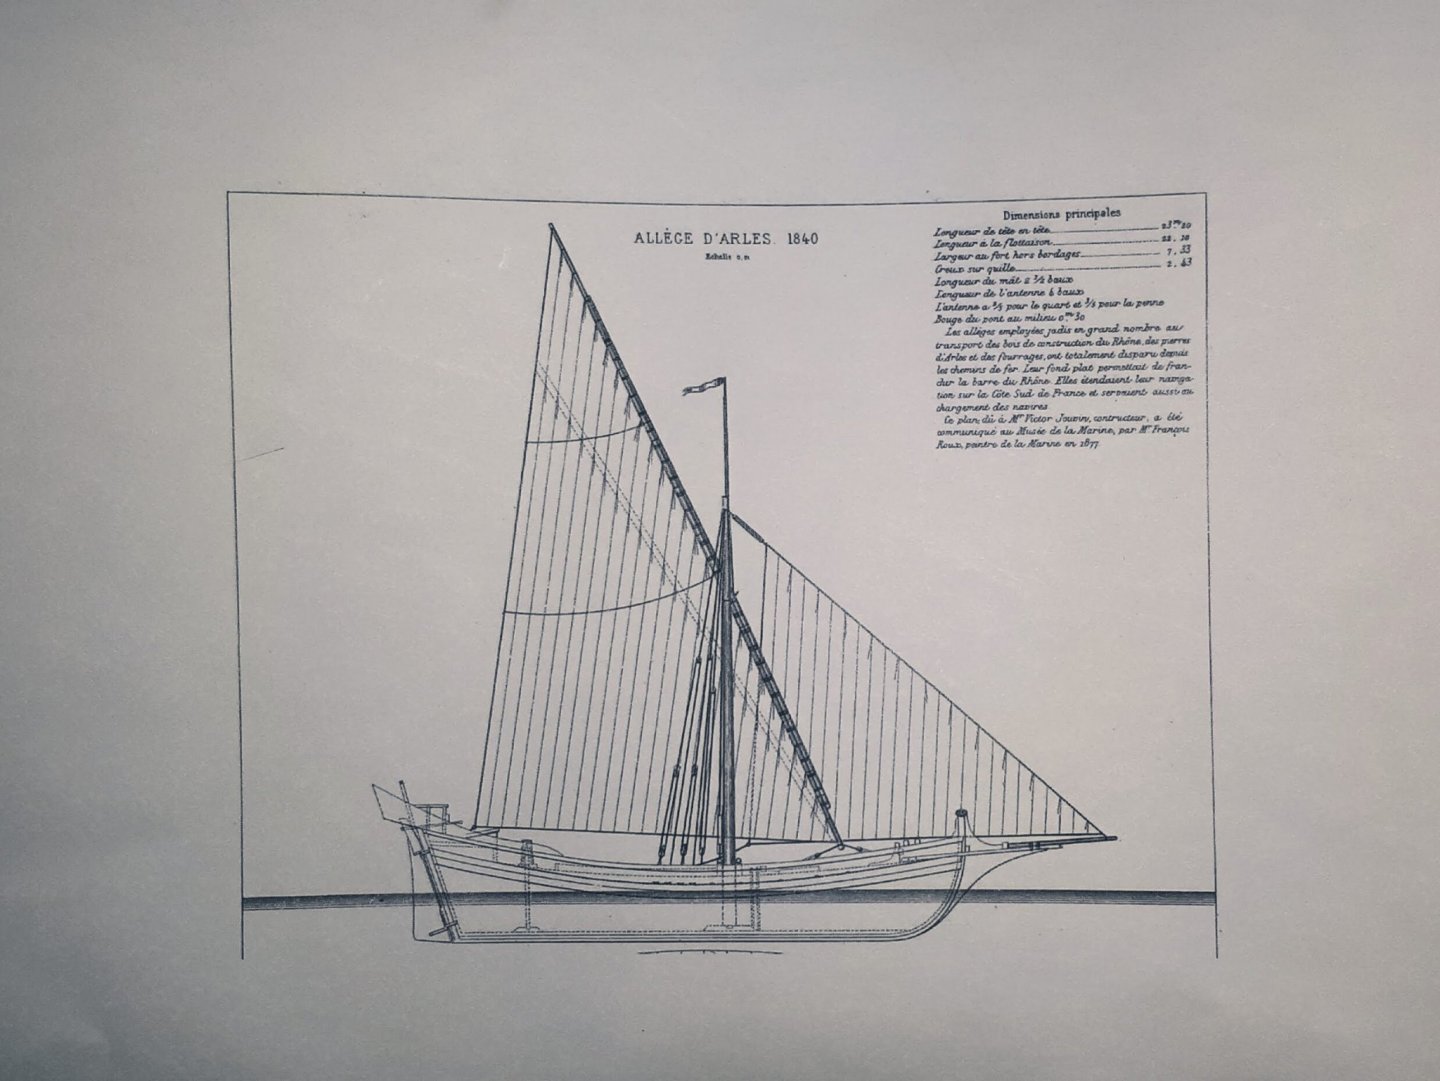


- 18 replies
-
- 13
-
-
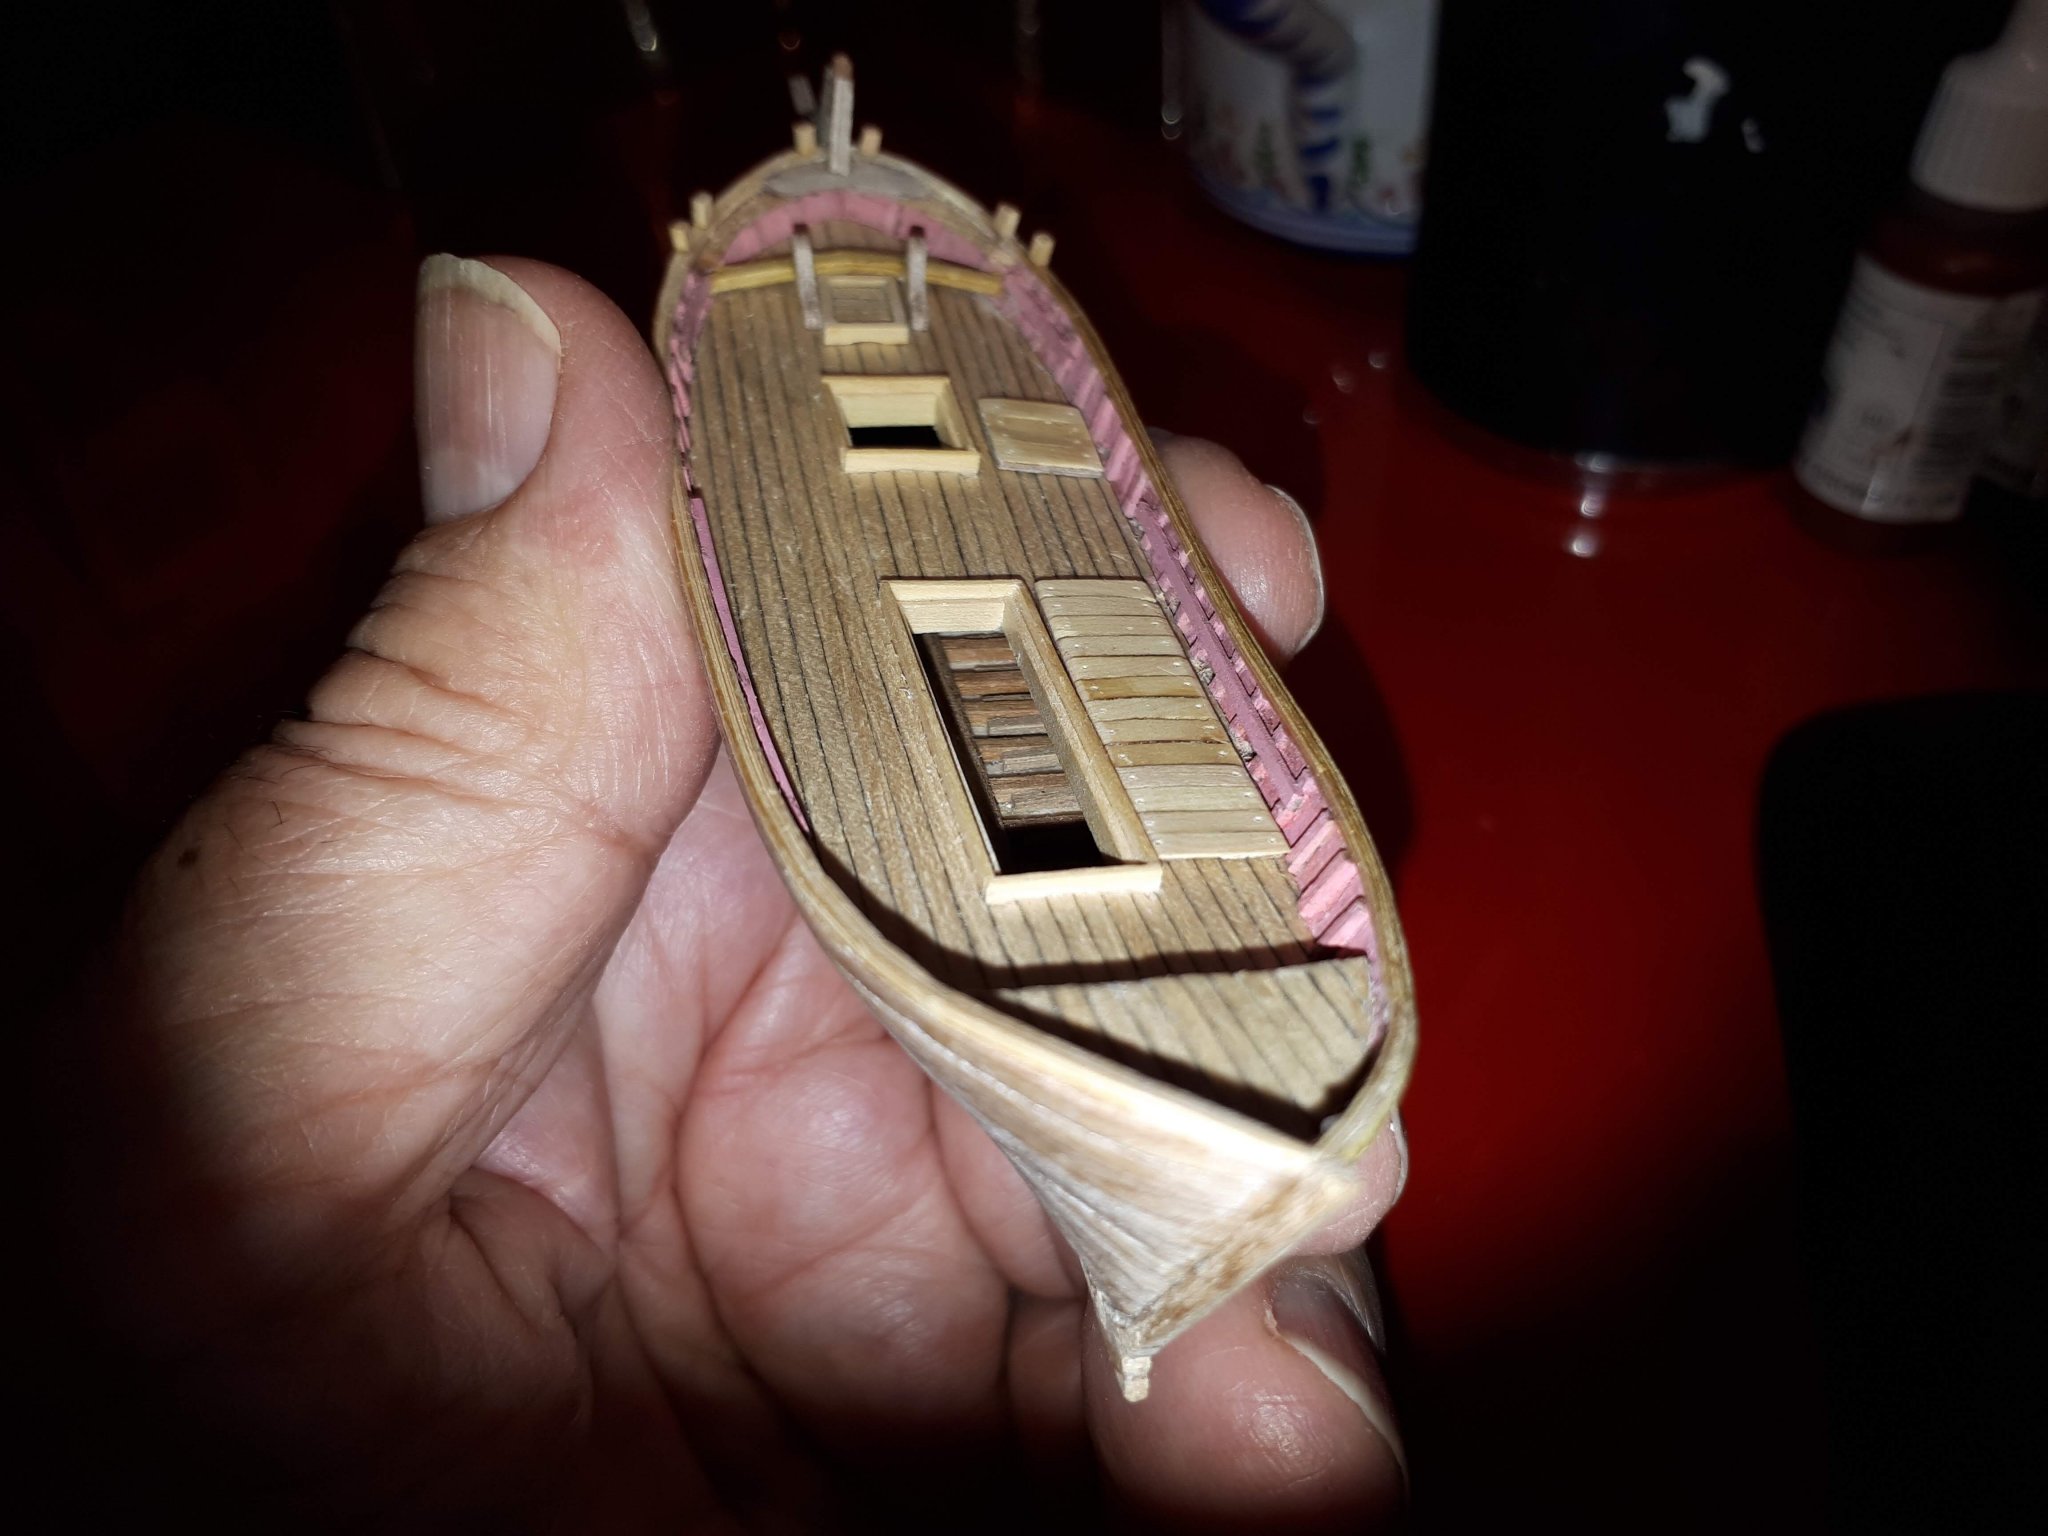
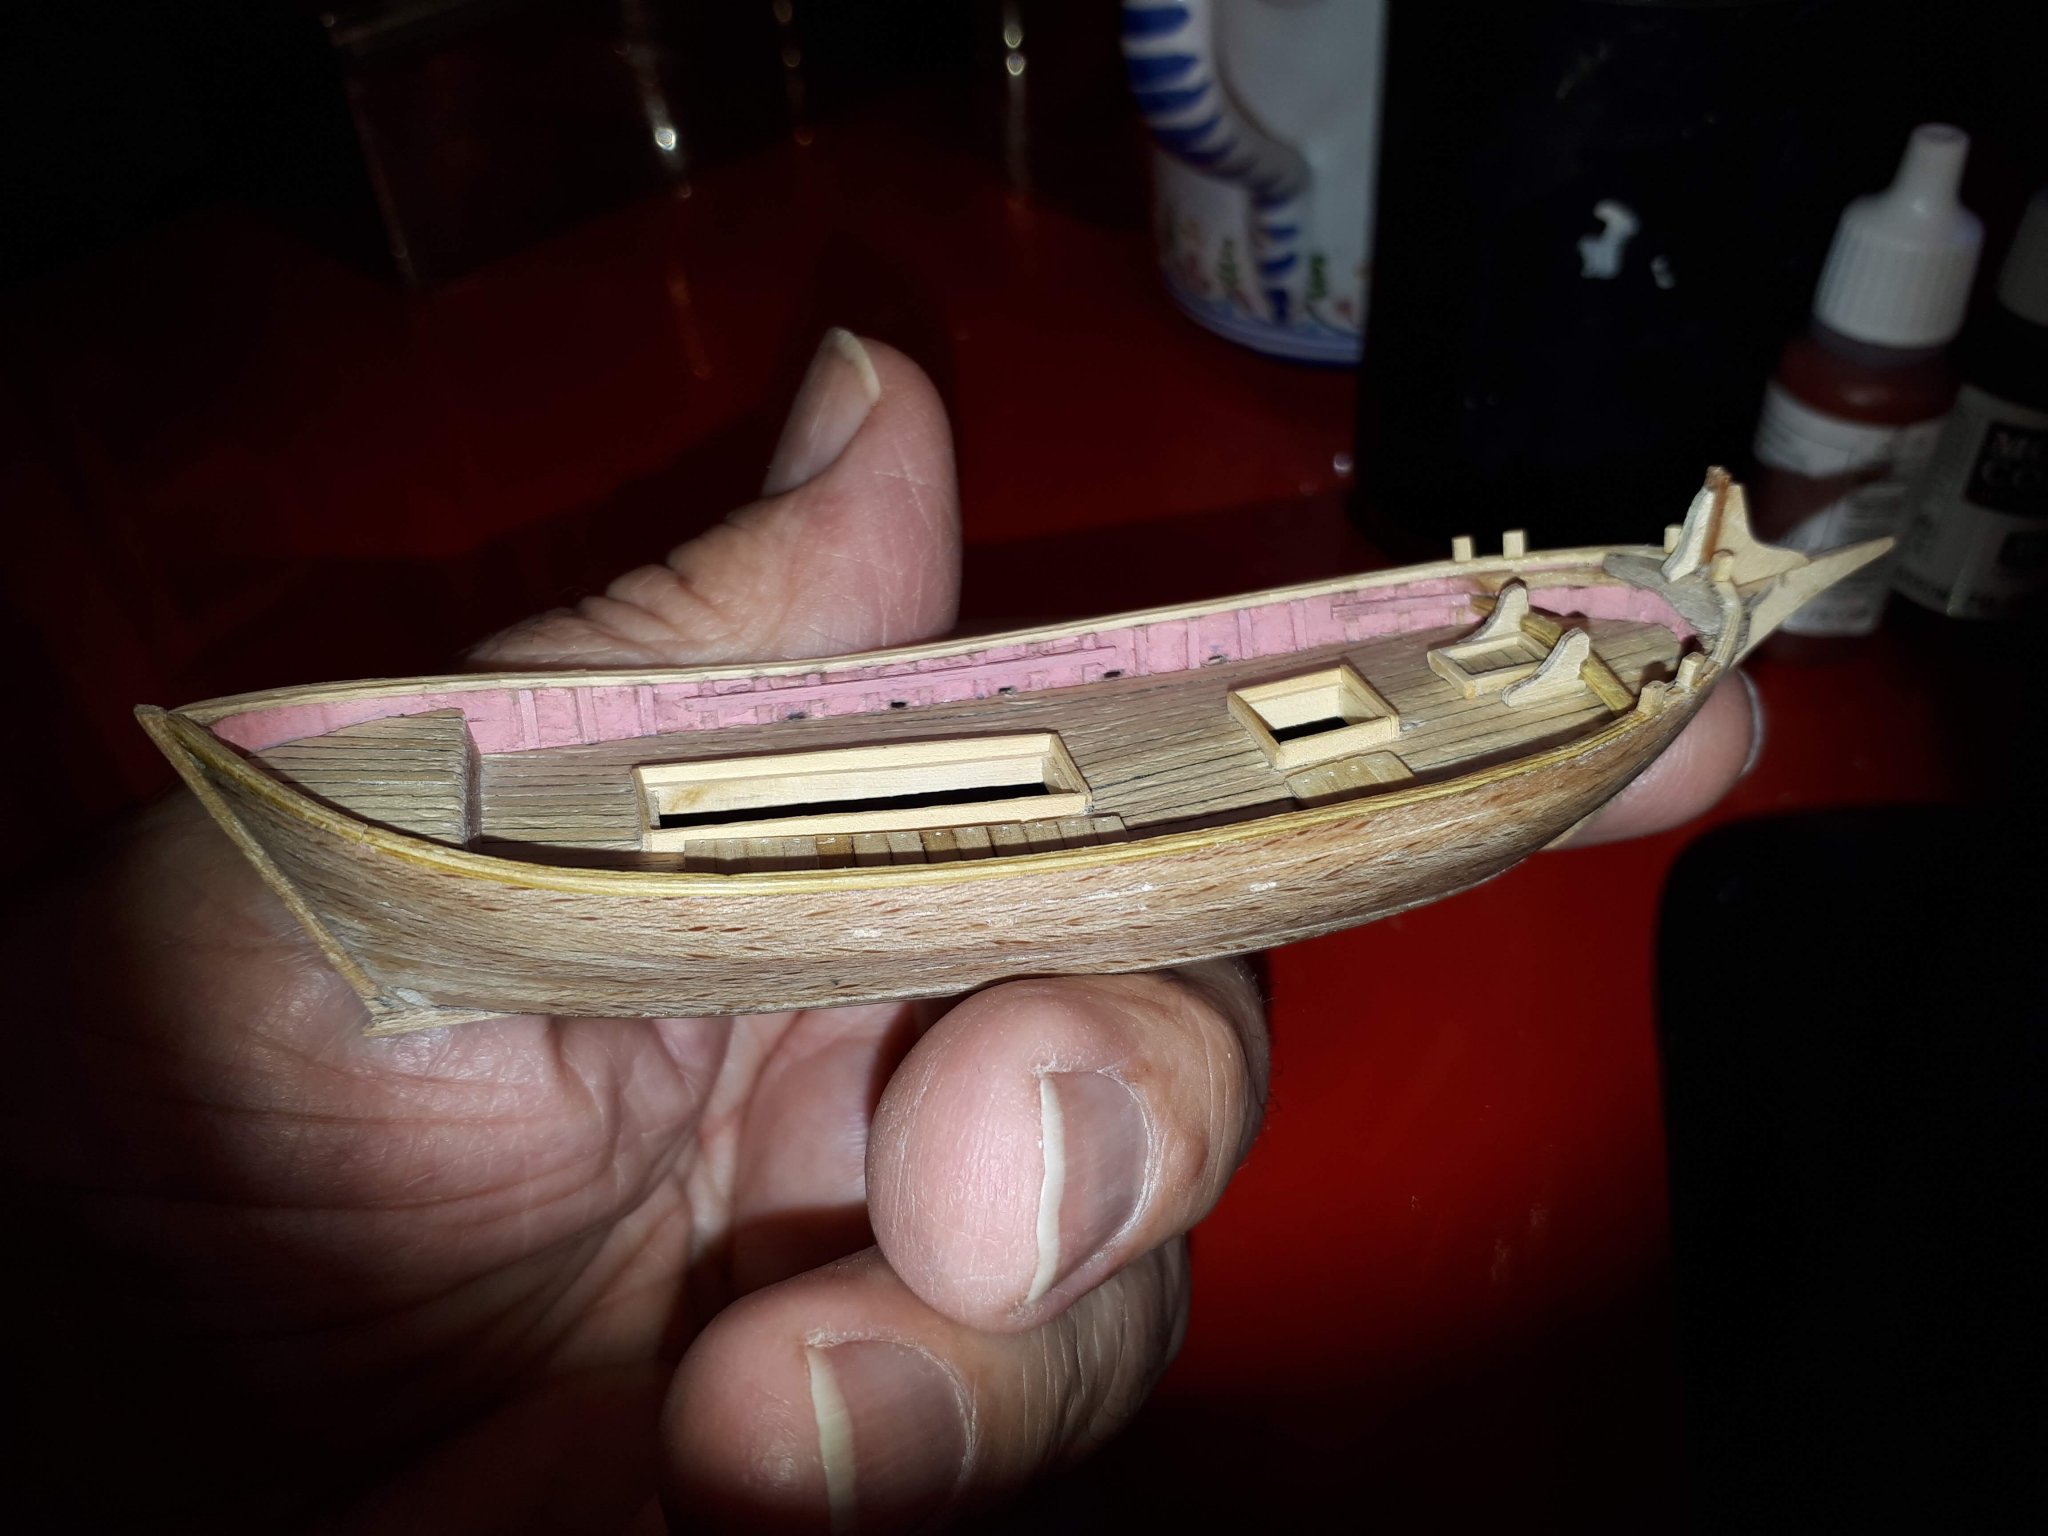
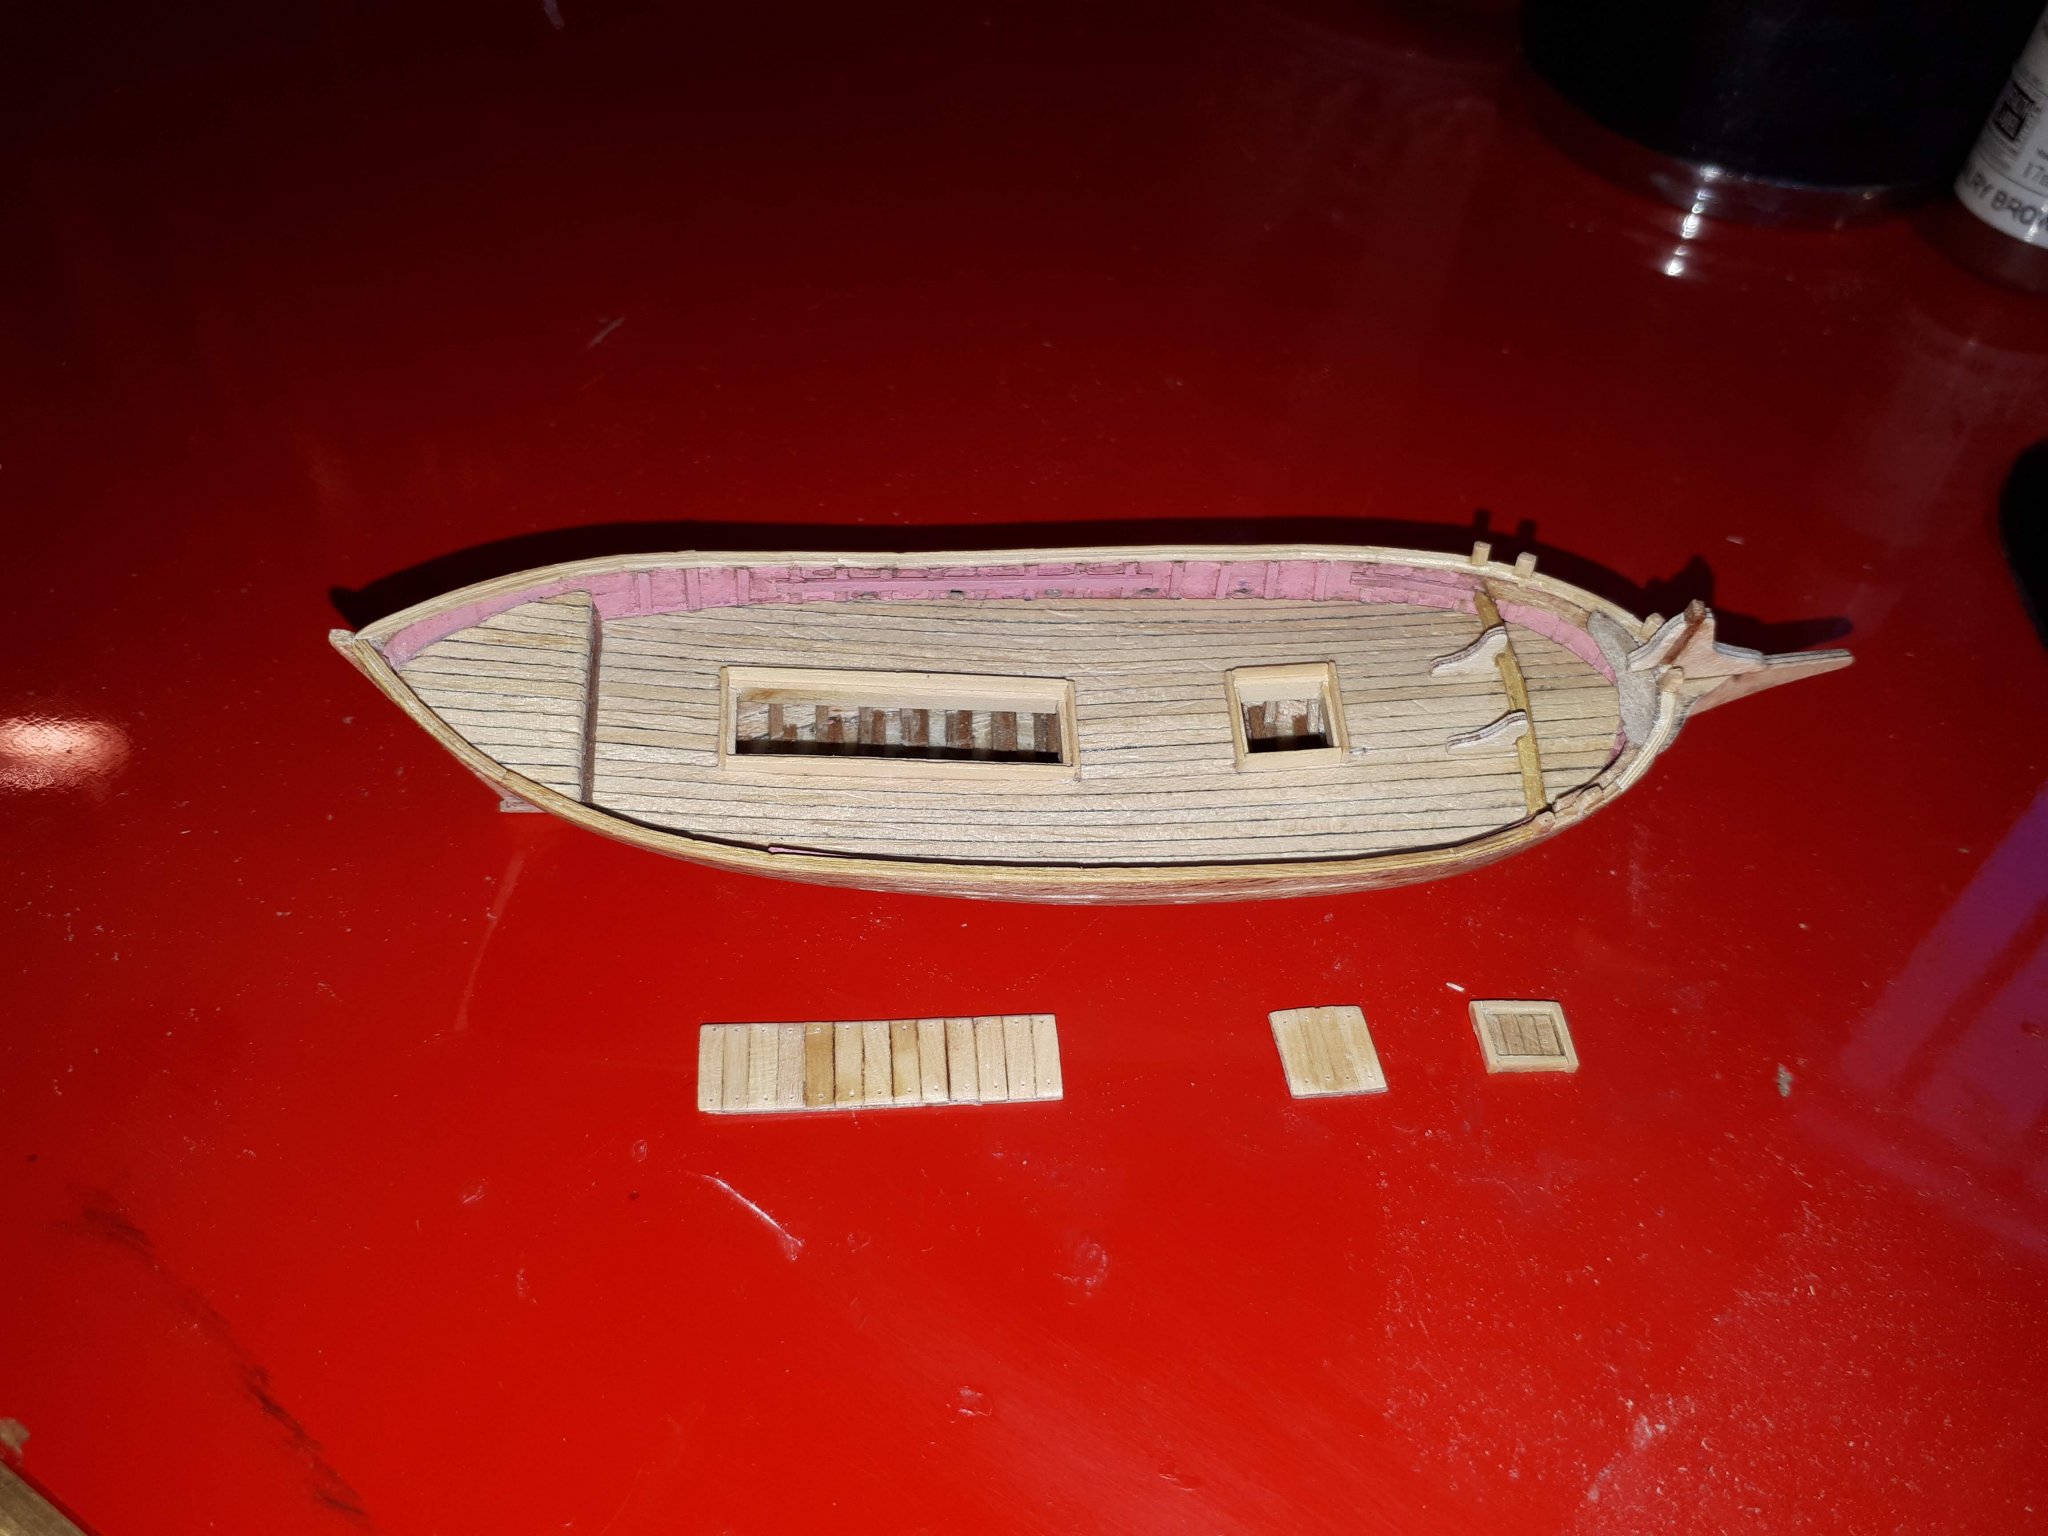
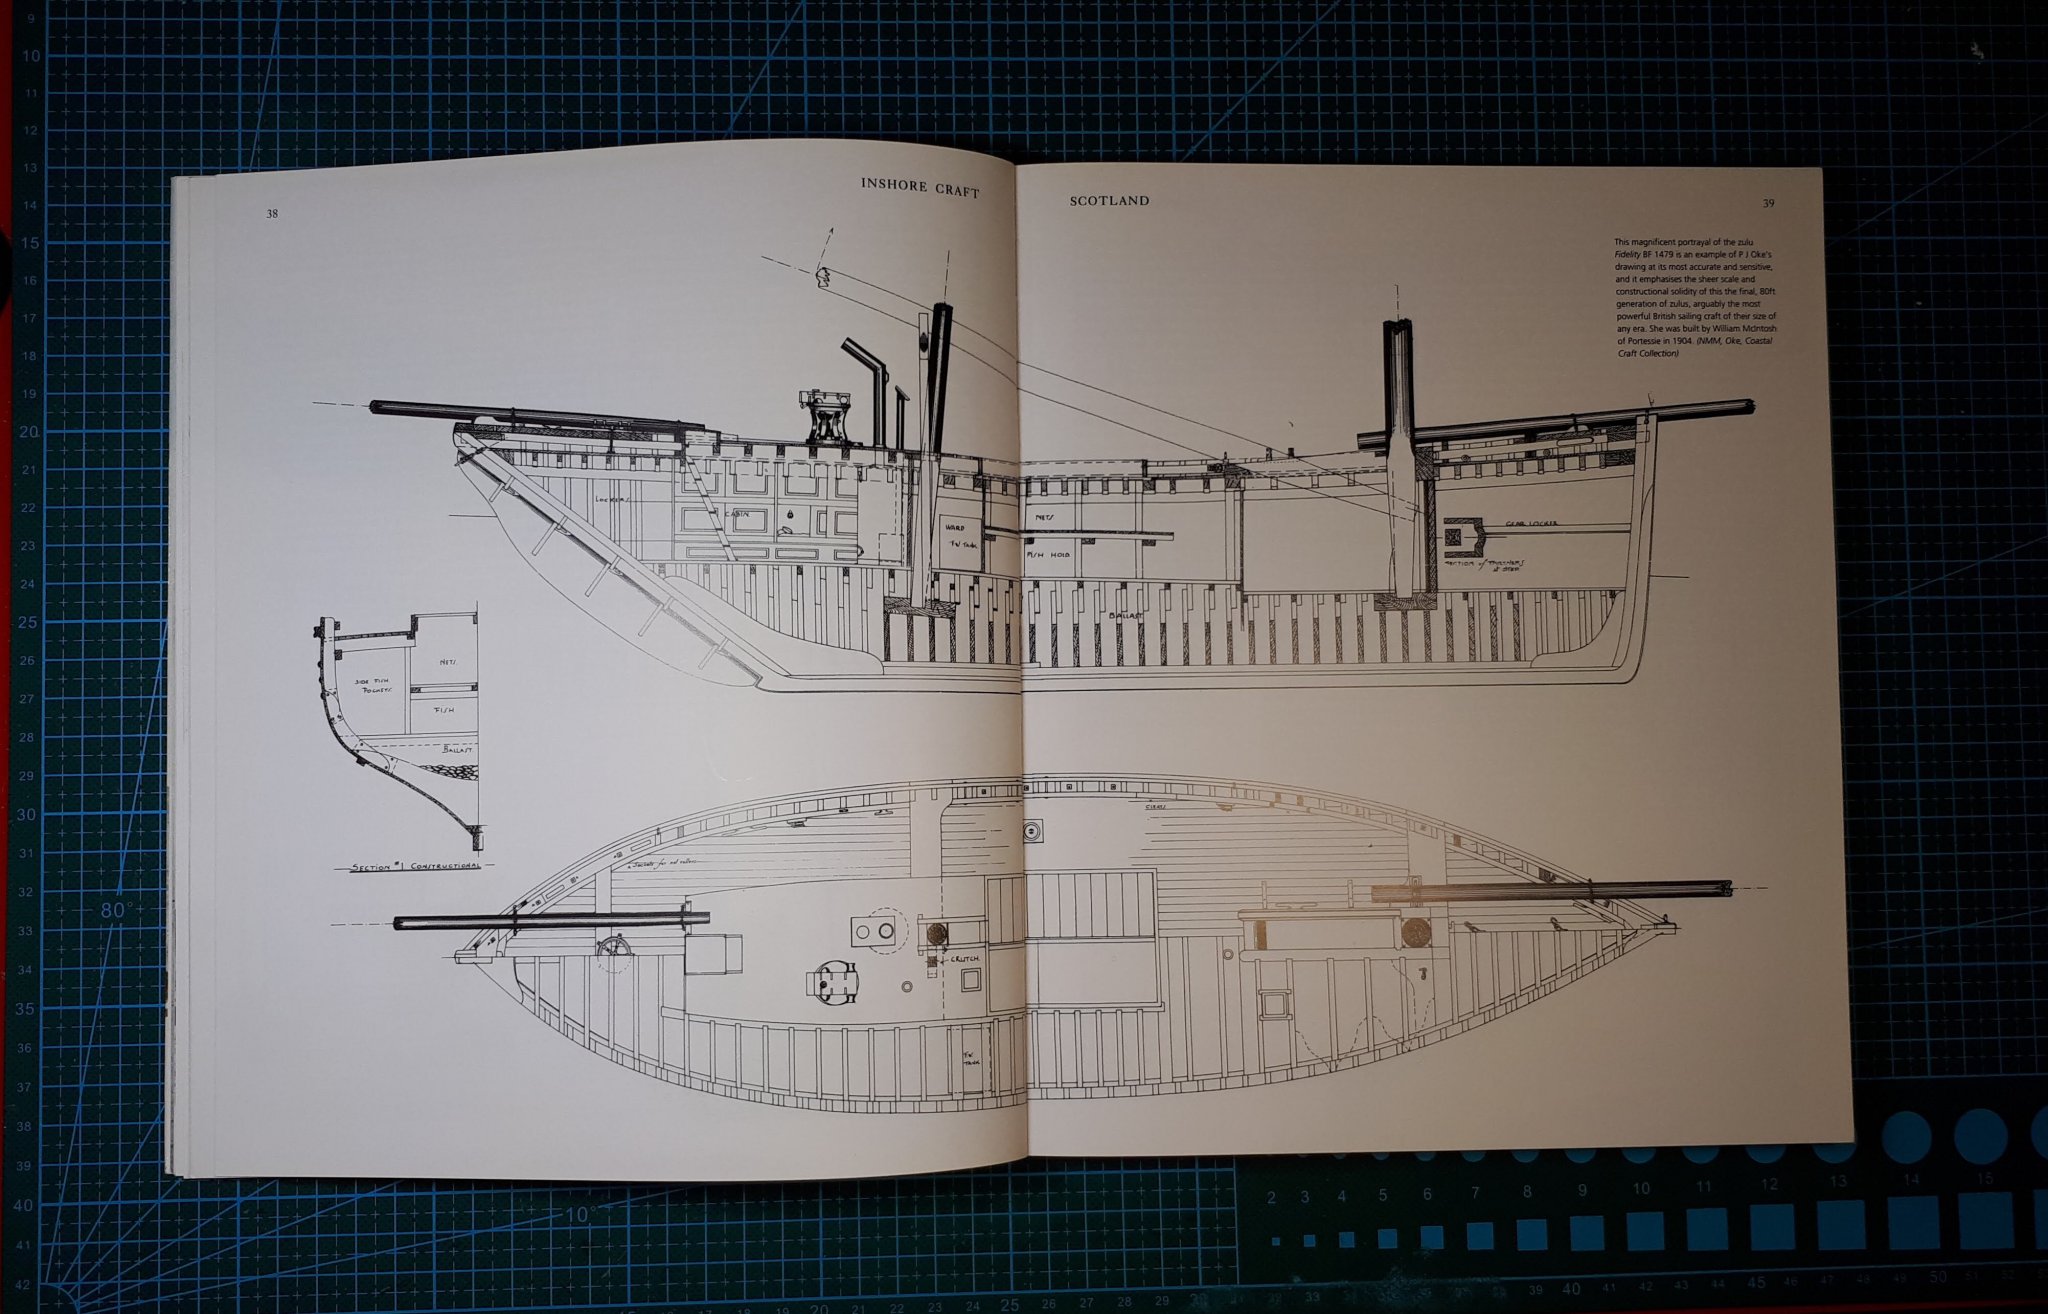
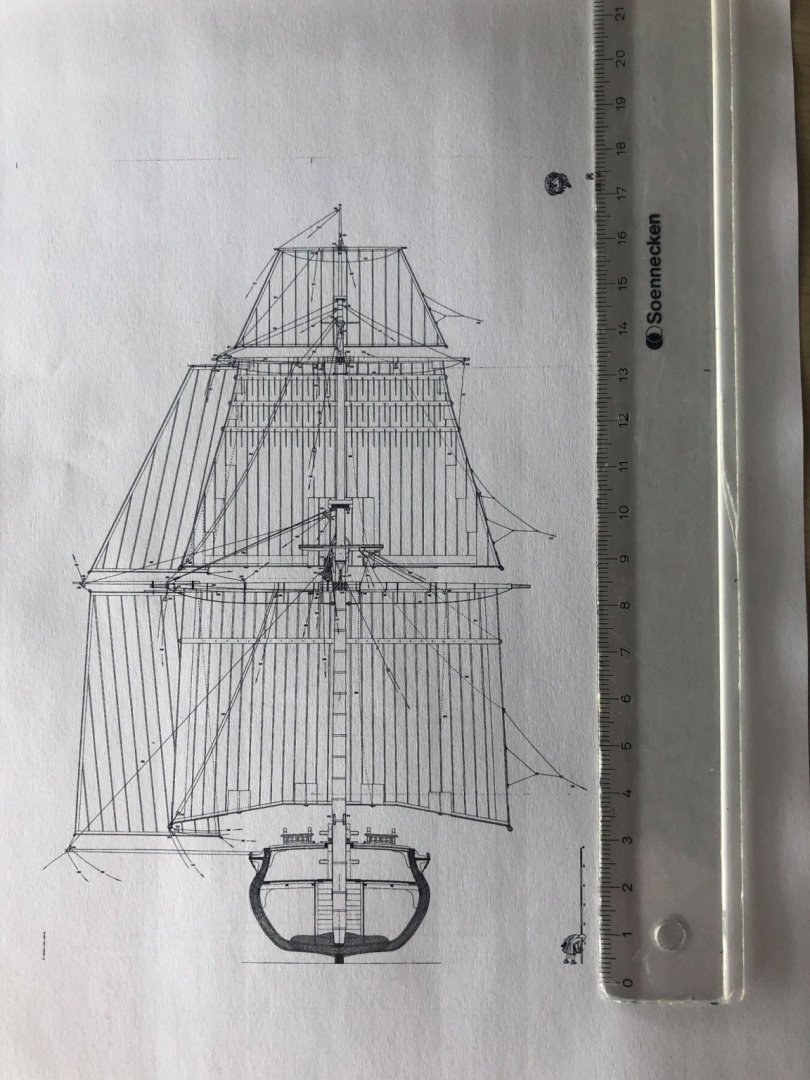
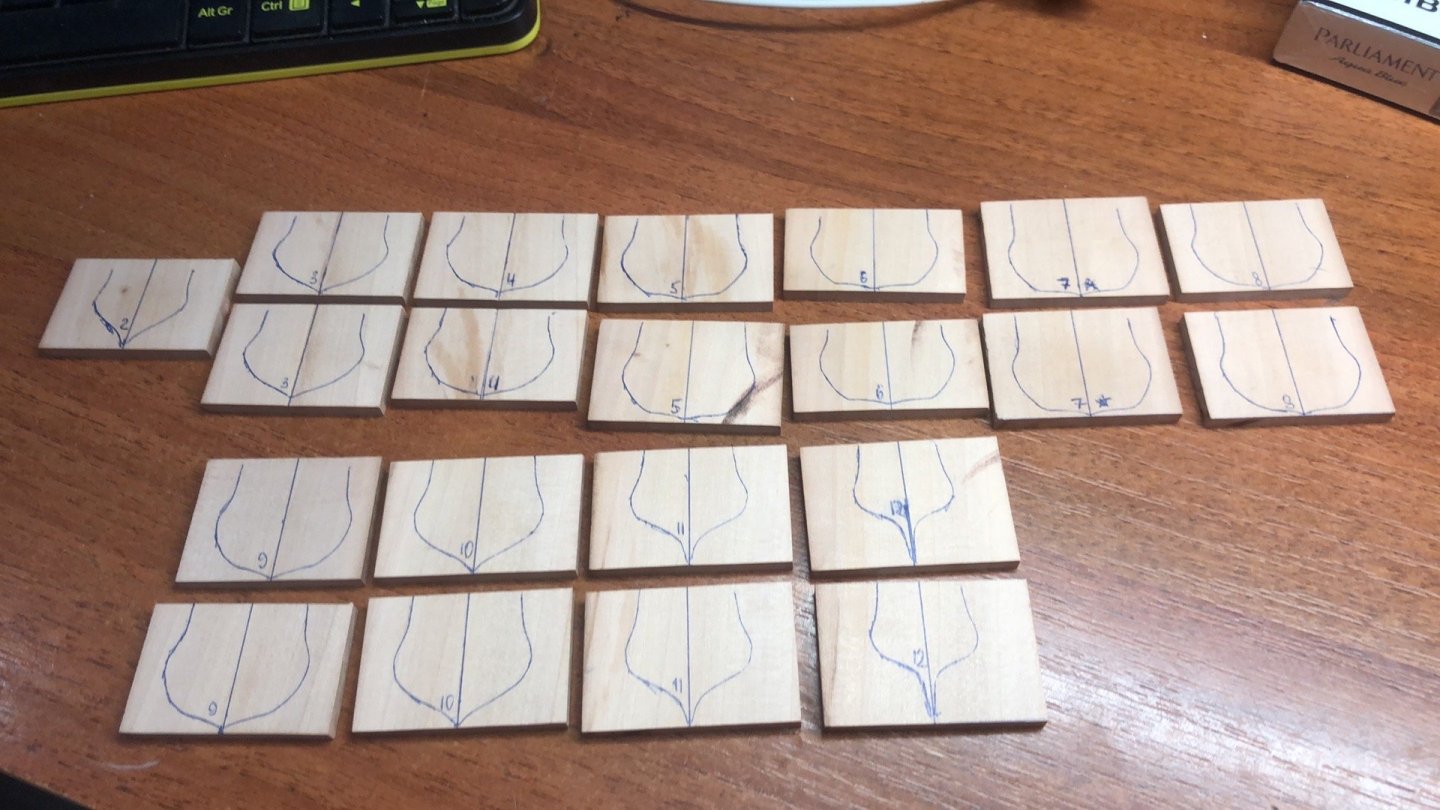
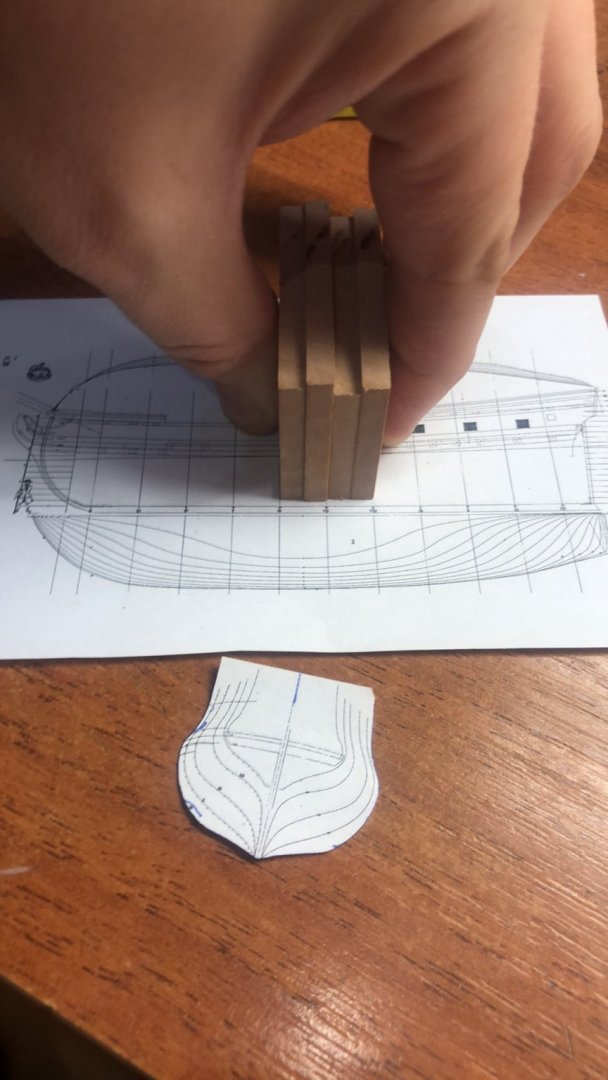
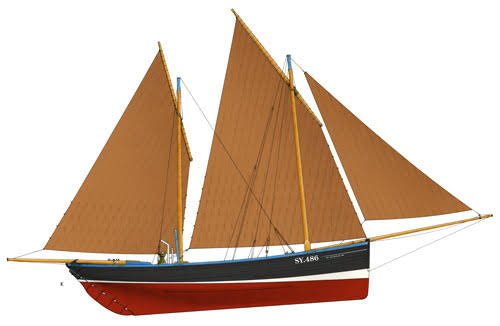
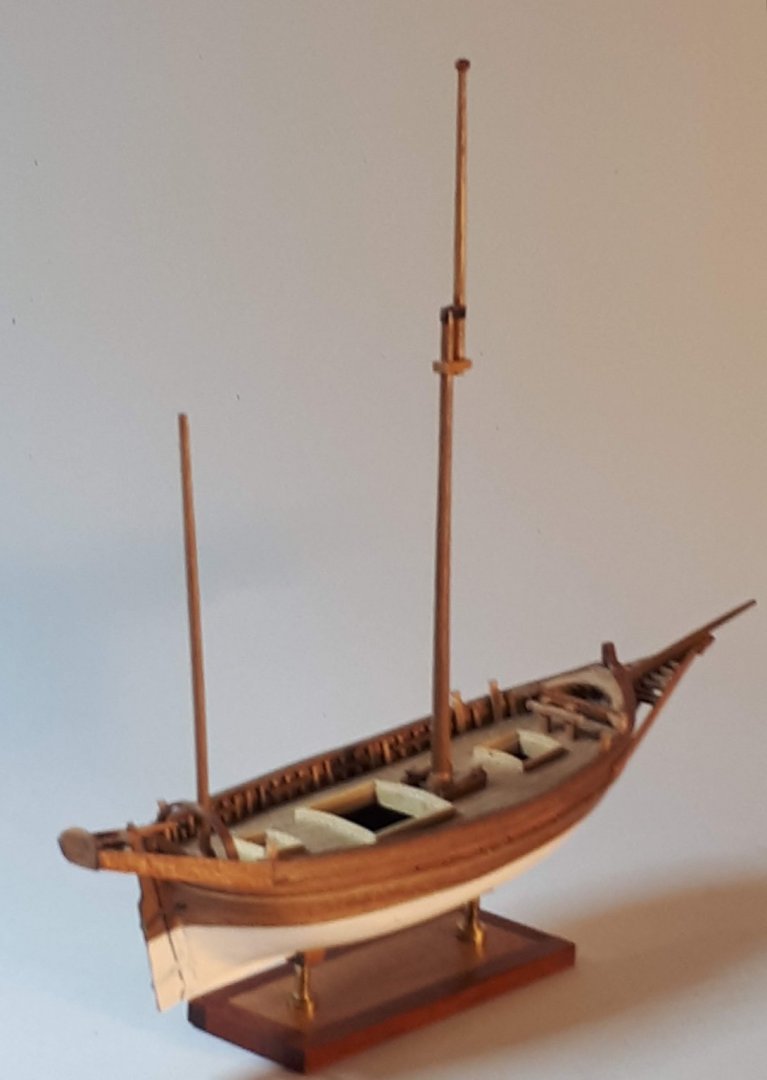
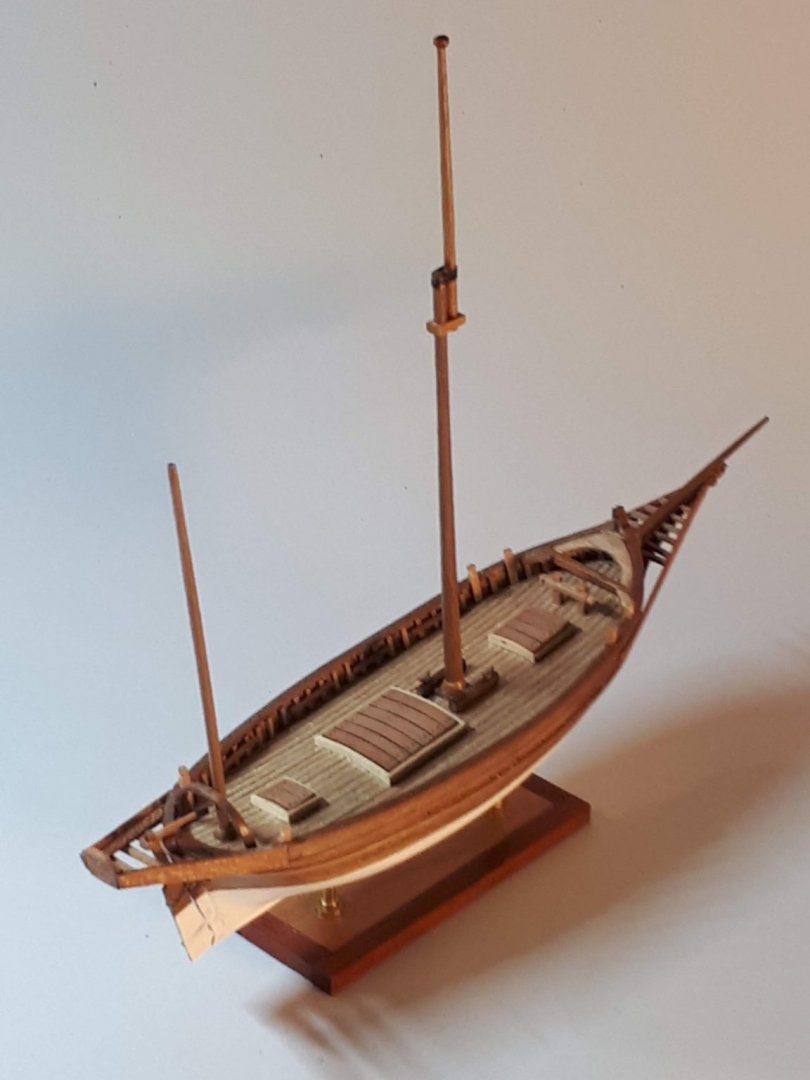
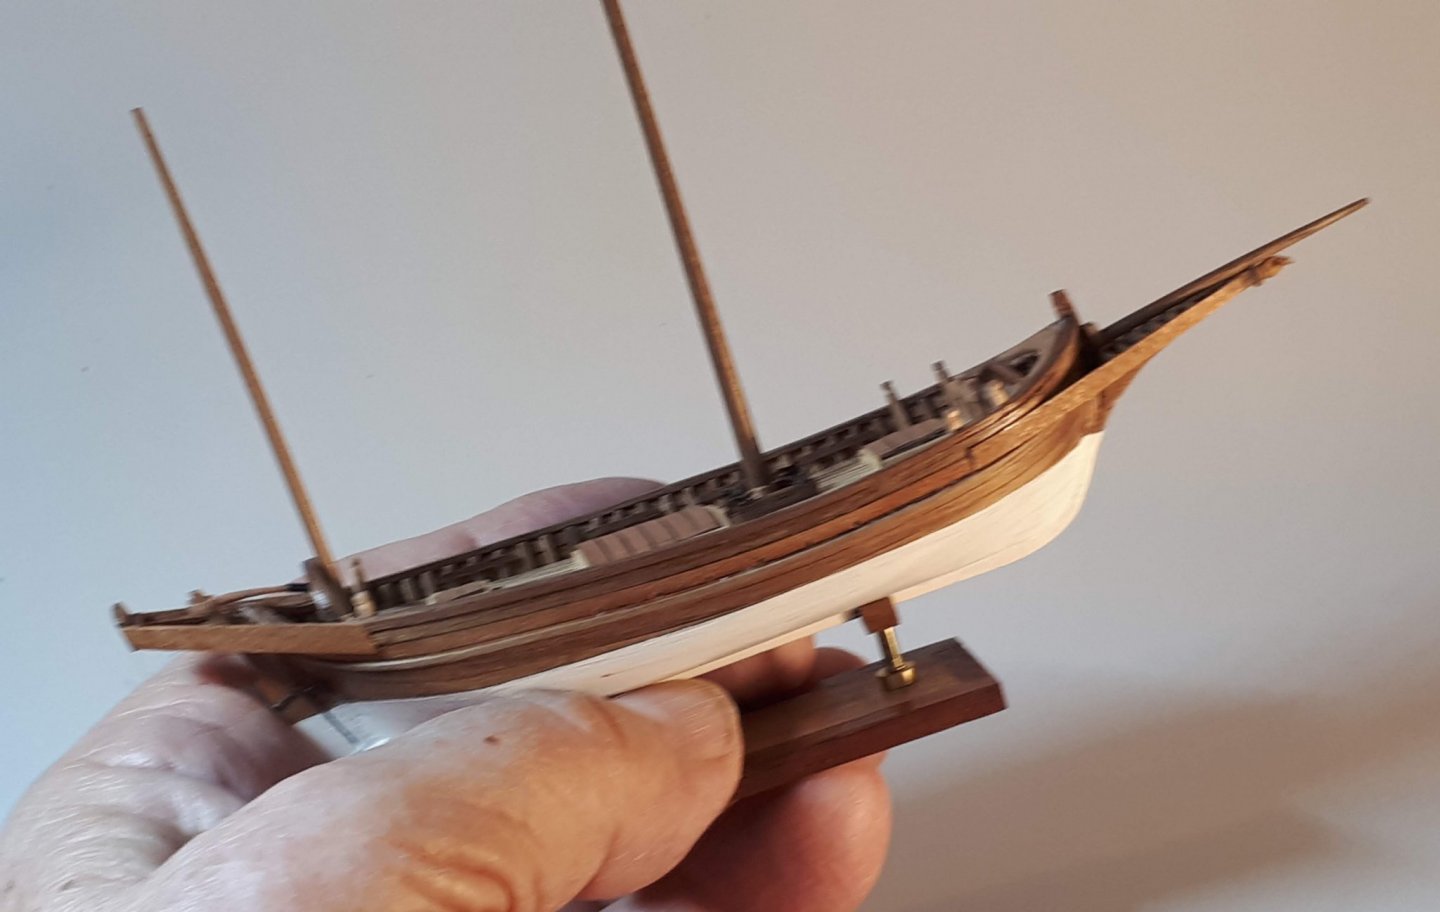
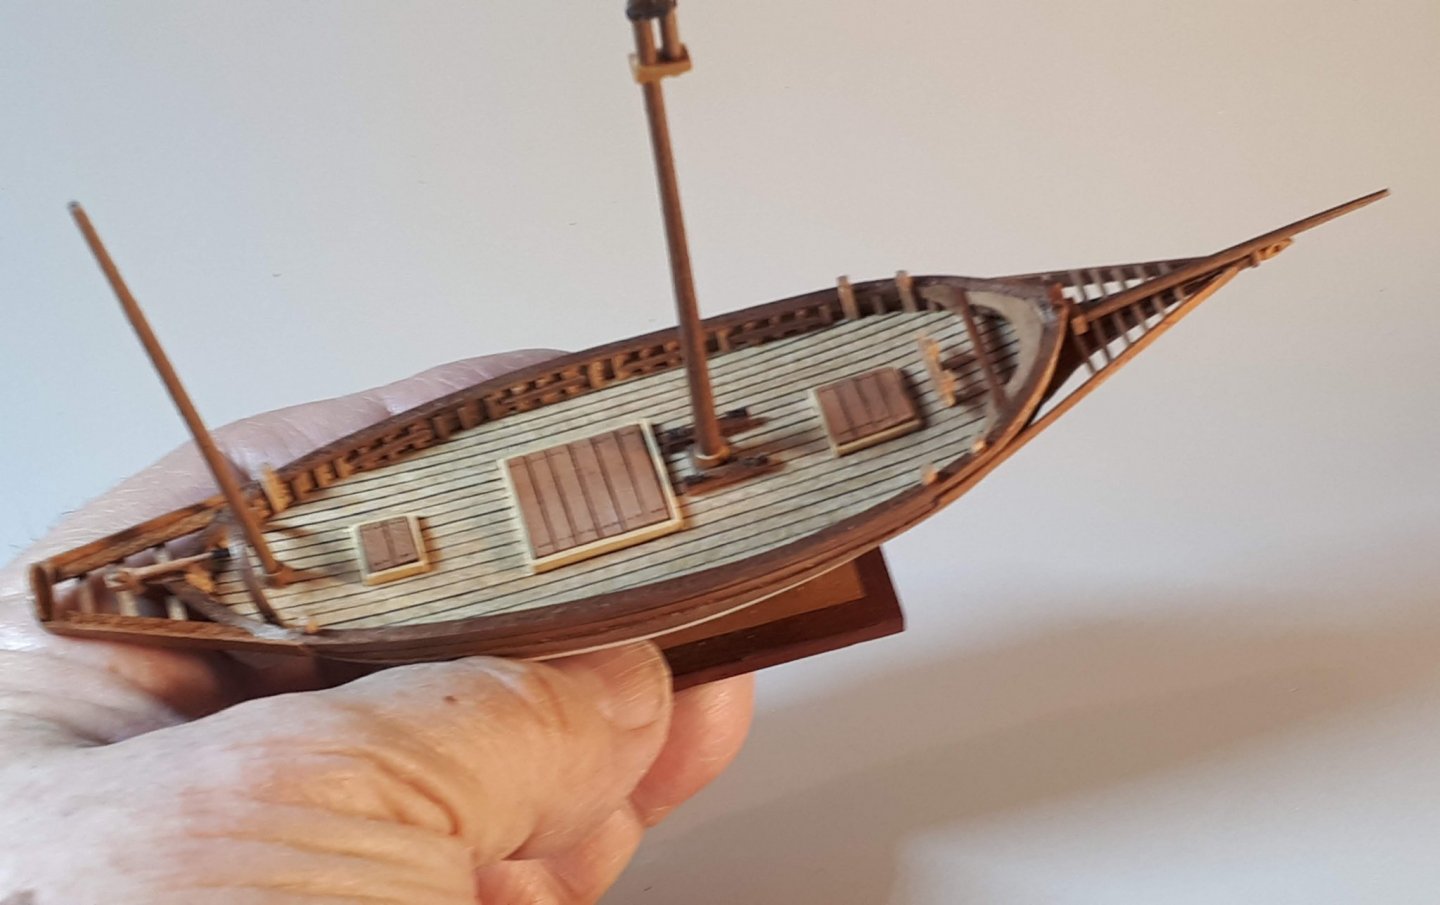
My current project is a lugger of the east coast of Scotland, a type of ship called Zulu, which was the most powerful and efficient sailboat for the herring sail fishery among those of its size in the British Isles. Its origin dates back to 1879, the year in which a Lossiemouth fisherman, William "Dad" Campbell, devised a radical design for his new boat for the capture of herring. He had the vertical bow of the fifie and the sloping stern of the skafie, and called this ship "Nonesuch." It was relatively small, with 16 m. of length and a keel length of 12 meters. This design, which provided a longer deck and a shorter keel, markedly improved the maneuverability of the boat and provided it with a good speed, characteristics that made it highly appreciated by herring fishing fleets, as they managed to reach promptly to the fishing grounds and return quickly with the catch. Due to these qualities, that type of vessel quickly became very popular throughout the Scottish east coast. The new type of vessel was baptized as a Zulu because of the war that was developing in South Africa at that time, in which Scottish soldiers fought, a war that was rejected by the population who thought they were fighting in an English conflict that, deep down, they were not concerned, which made their sympathies lean towards the Zulus. The Zulu ships were carvel built, instead of clinker built, which was the most common in those waters. They were provided with two masts carrying lug sails and a bow jib. The sails were heavy and difficult to maneuver, and the masts to carry them had to be very long and strong. In the Zulu of greater size, the masts came to be 18 m high in boats of 24 m in length. As the twentieth century approached, steam winches were introduced aboard, which made maneuvering sails and nets much easier for crews. However, and despite the success of its design, the life of the Zulu was quite short, since it was replaced by steam fisherboats after a brief existence of just over three decades.


- 34 replies
-
- 20
-
-
The martigana (or marticana, martingana, etc.) was, in the times of the sail, a common vessel and quite widespread in the waters of the Tyrrhenian and Adriatic, although today its name has been almost completely forgotten. This denomination appears only from the second half of the 1700s and only a few decades ago some of them were still seen sailing through Tuscany, and even today a couple of them have been photographed afloat in Sicilian waters. This vessel was used for the transport of goods, even over long distances. The martigana of s.XIX, which is the one that reproduces the model, was a boat with a bow of very pronounced curvature that ended in a spur of the type used in the galleys, with the wedge stern and the rather rounded master frame. In fact, the martigana was, as far as the hull is concerned, quite similar to the tartana, differing from it basically in the sailplan, which was in those of square sails in the main mast and not with the lateen rig that carried the latter . It seems that the origin of this vessel is in Provence, in the village of Martigues, located west of Marseille, on the southern shore of the great Barre lagoon, along the narrow channel that joins the lagoon with the sea, which It was famous as one of the places in the Mediterranean where the best tartanas were built, so that the term martigana was originally an adjective: "martigana tartana" or of Martigues.


- 20 replies
-
- 18
-
-
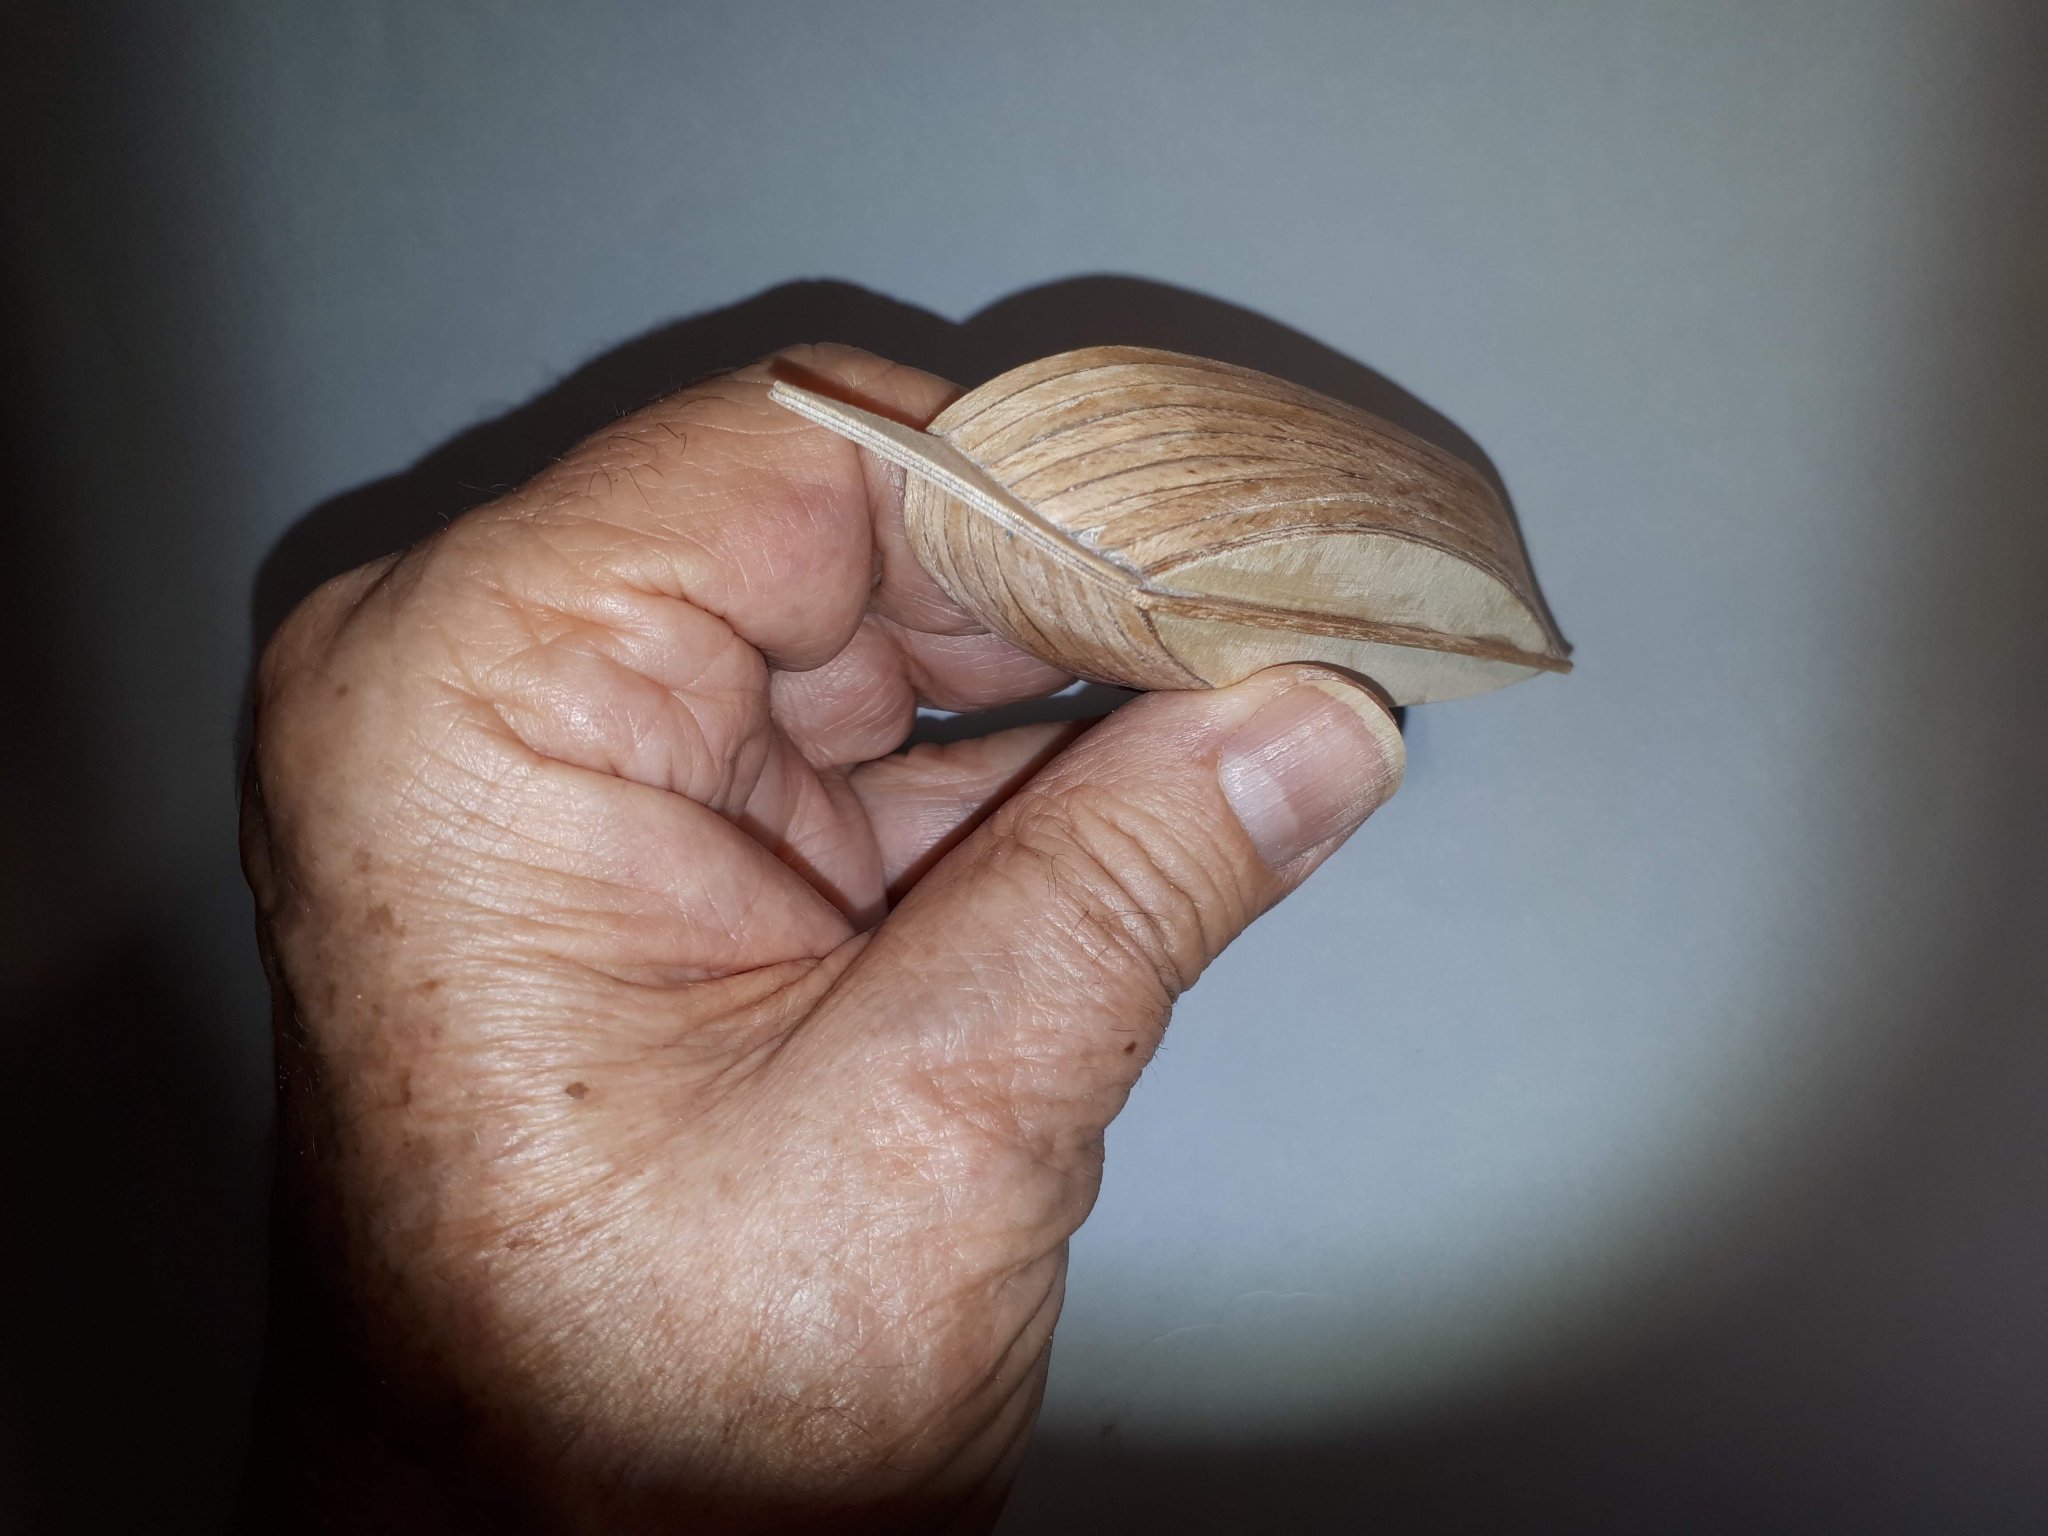
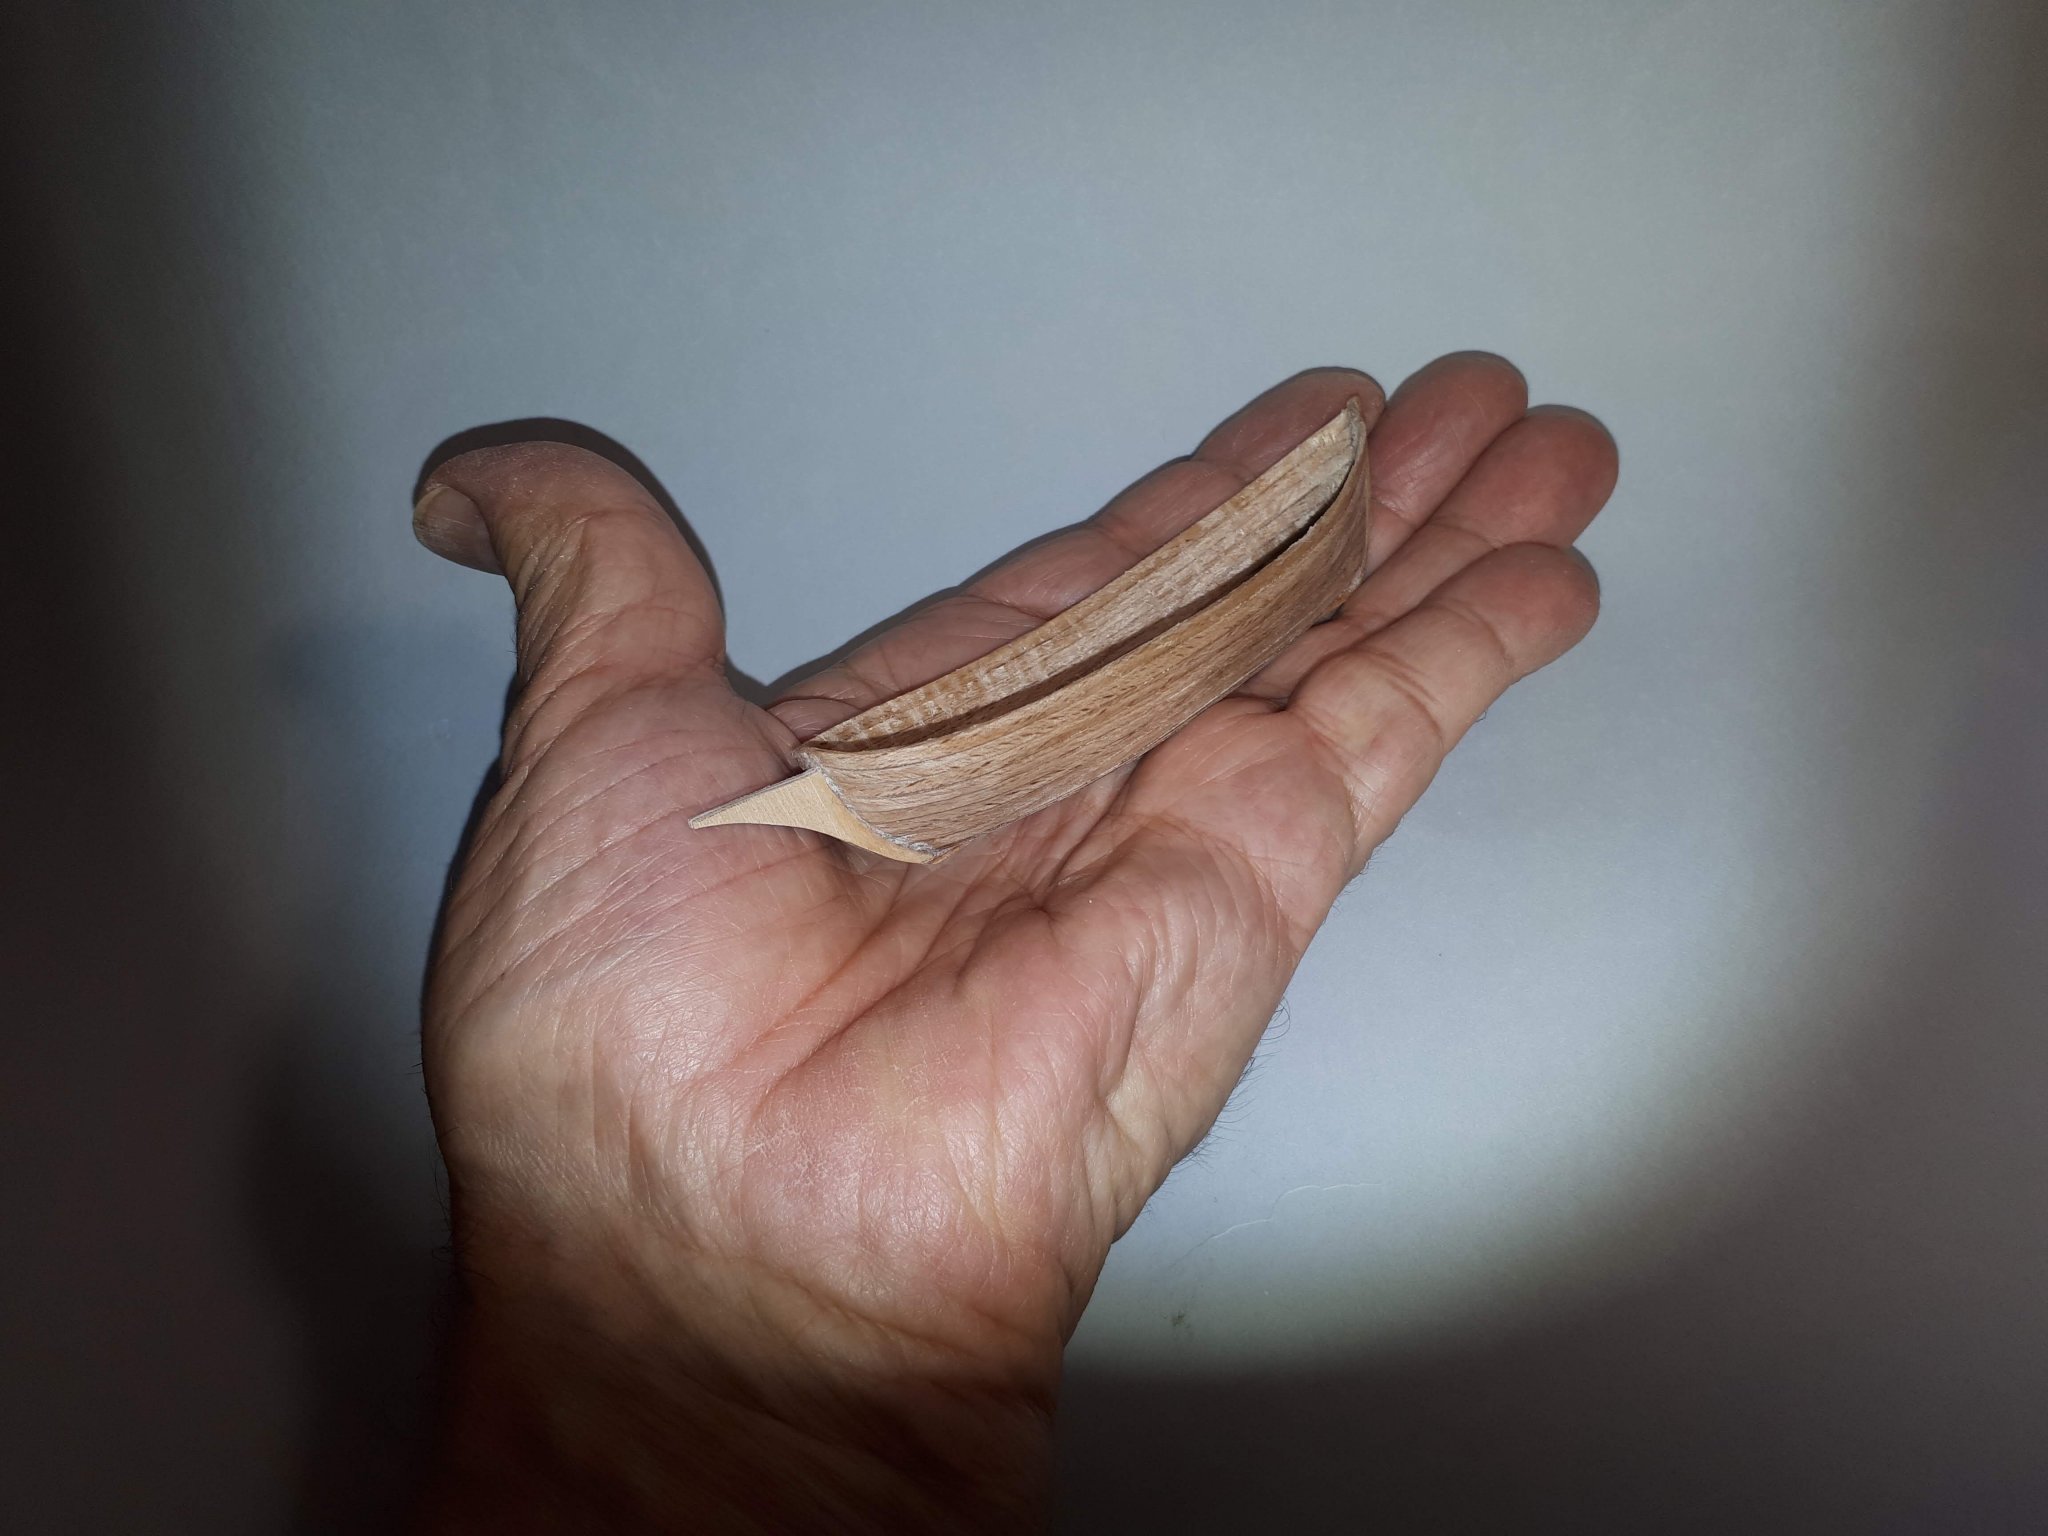
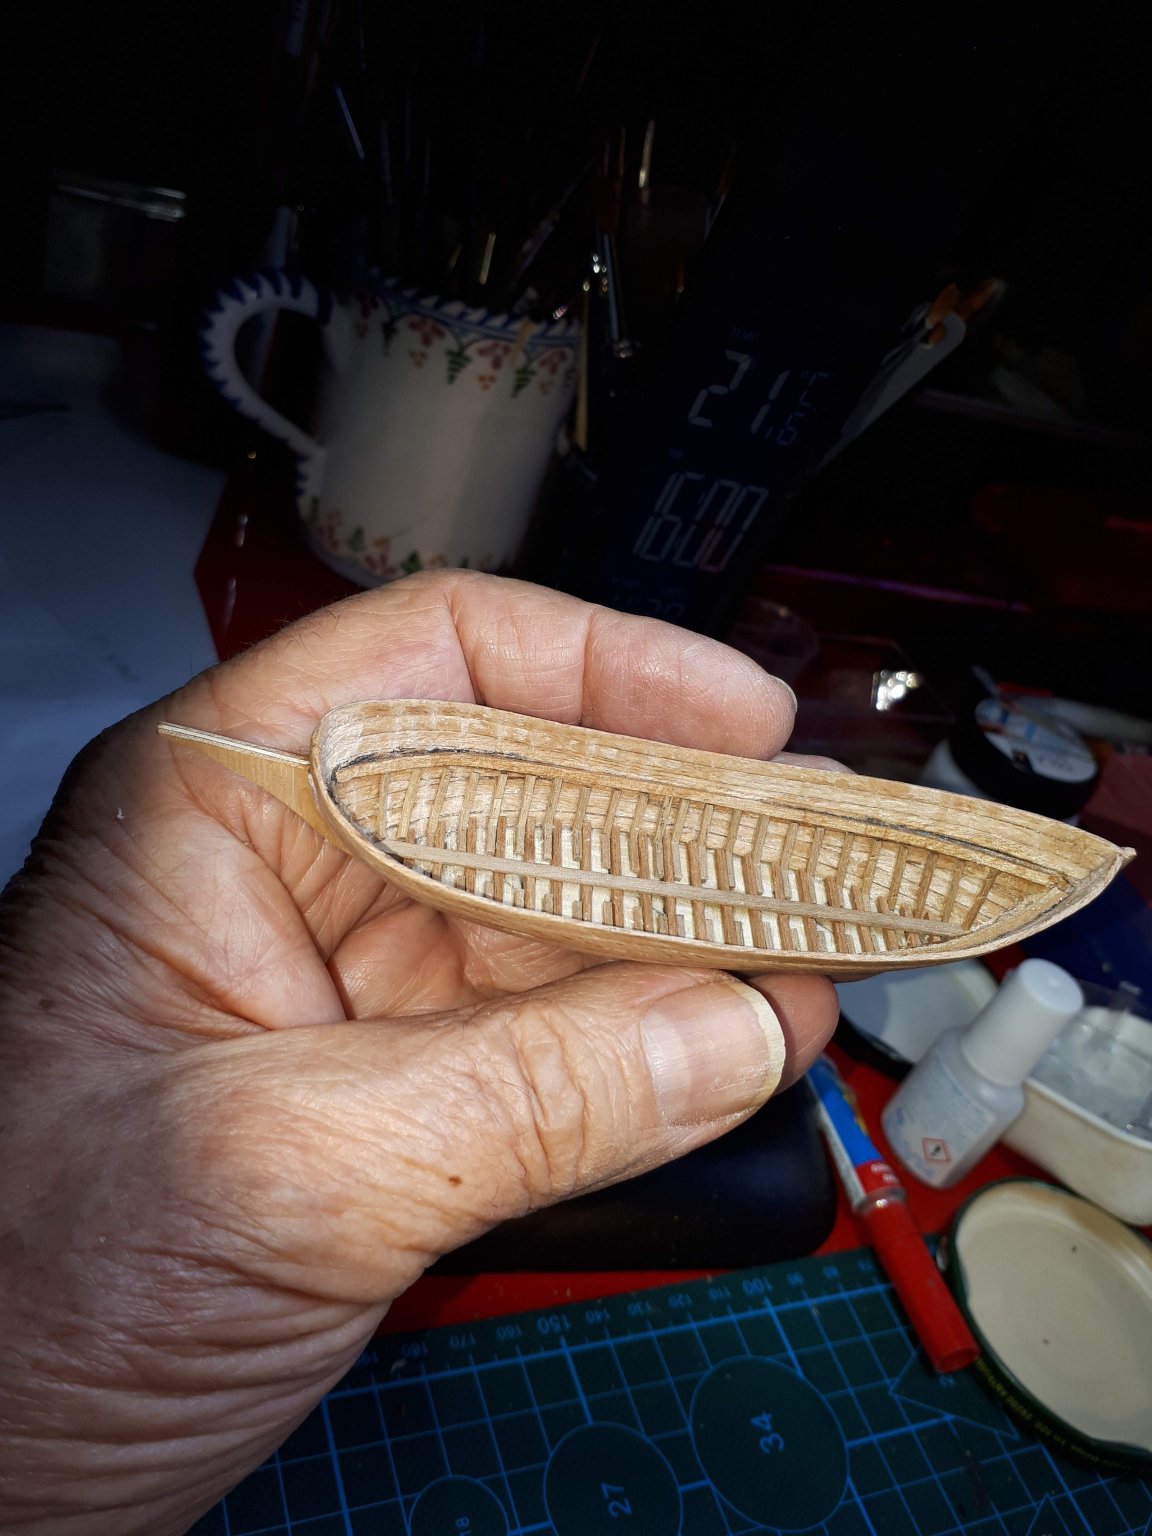
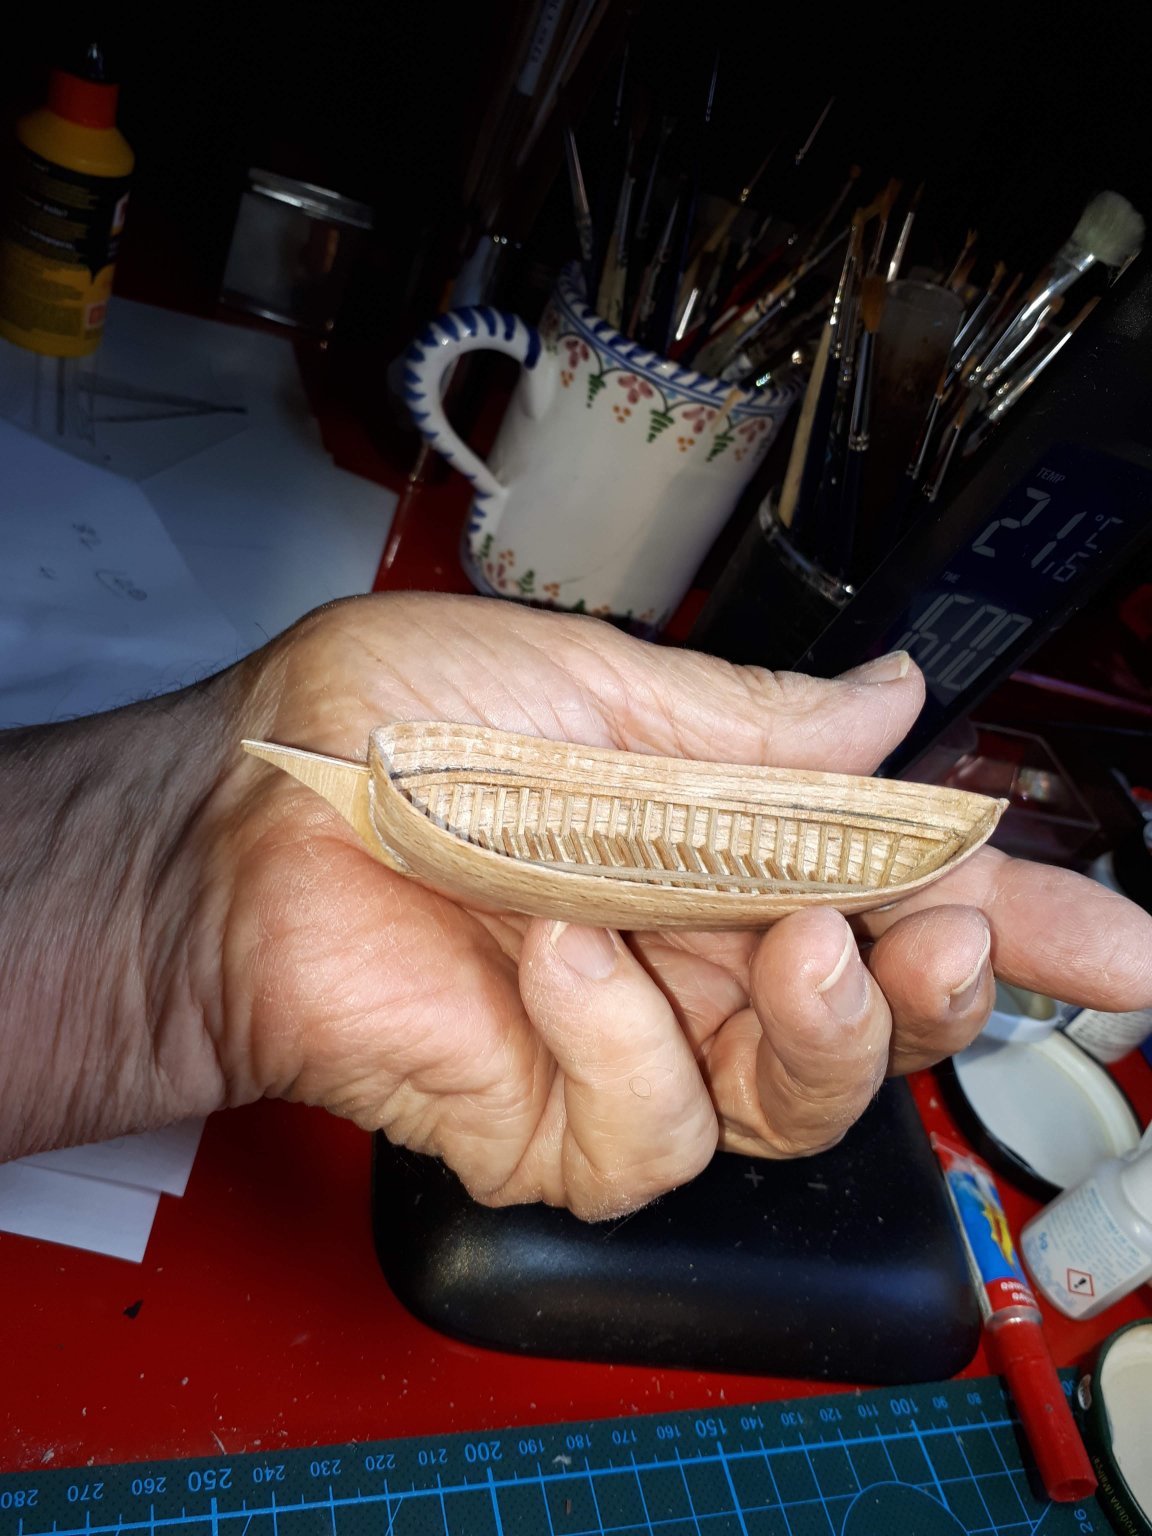
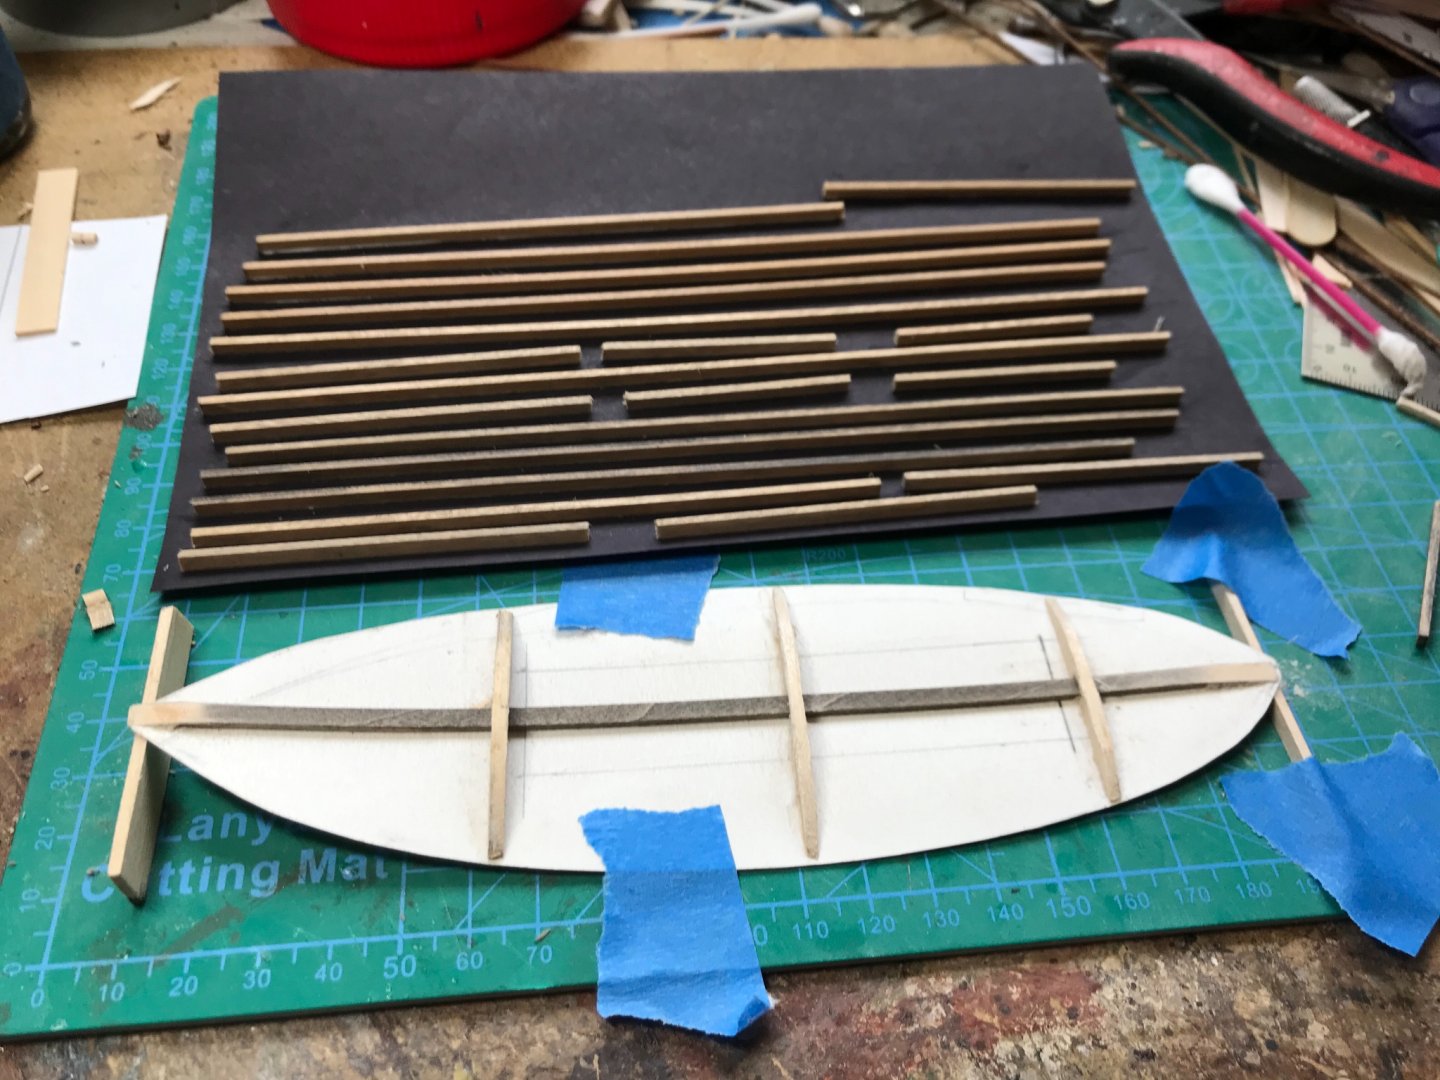
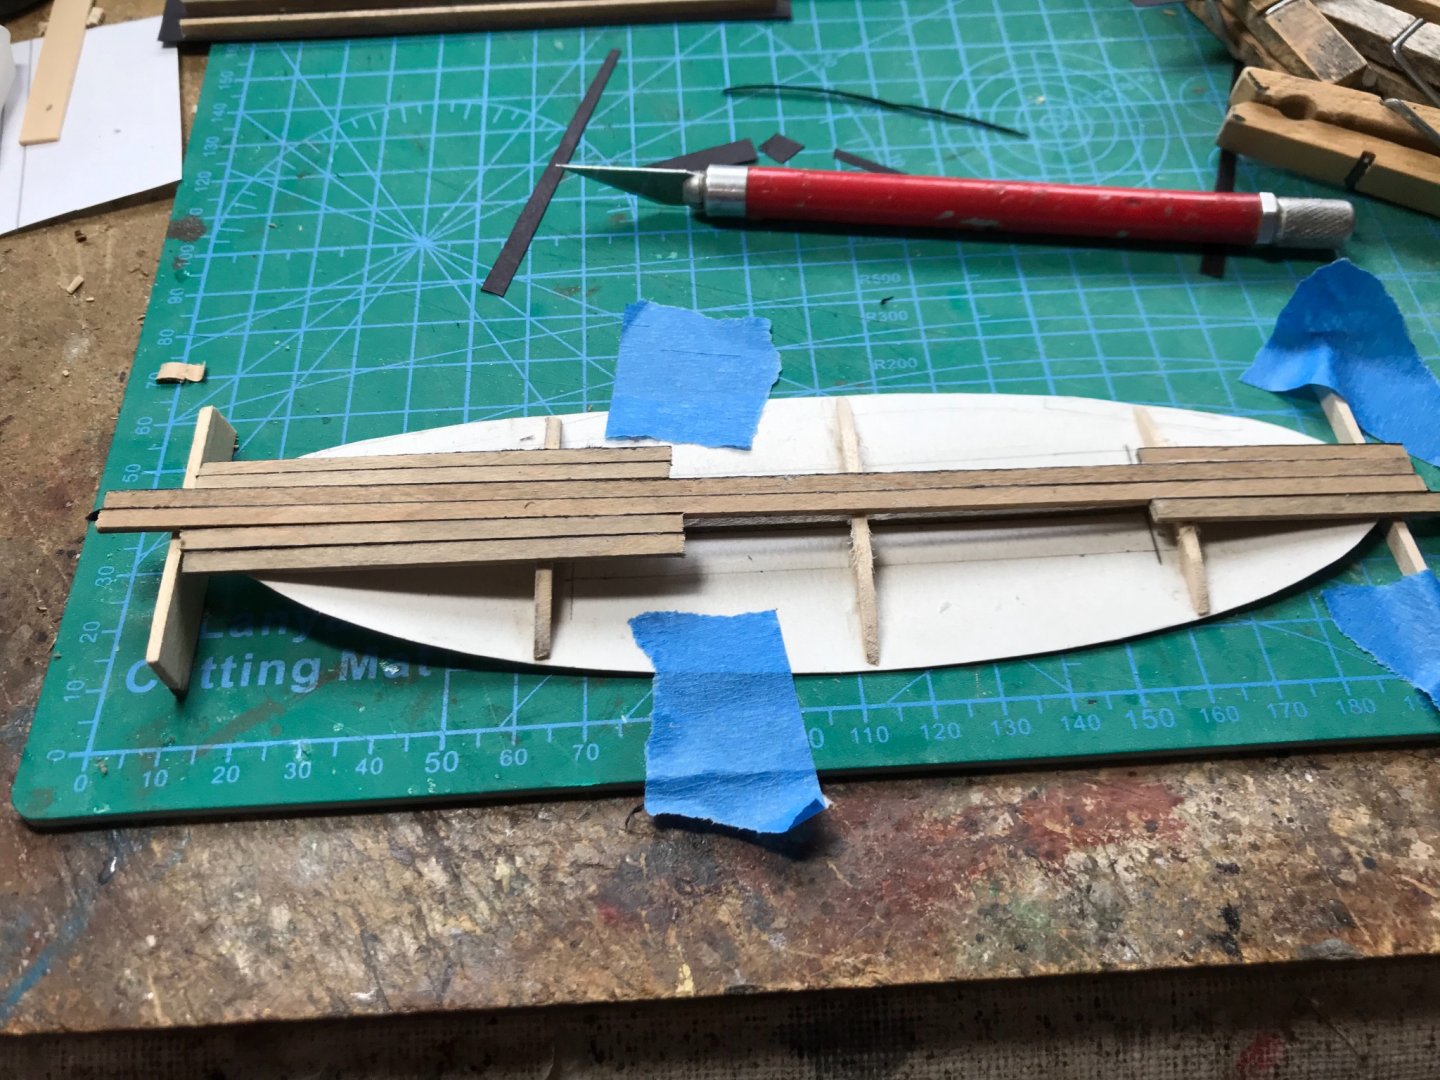
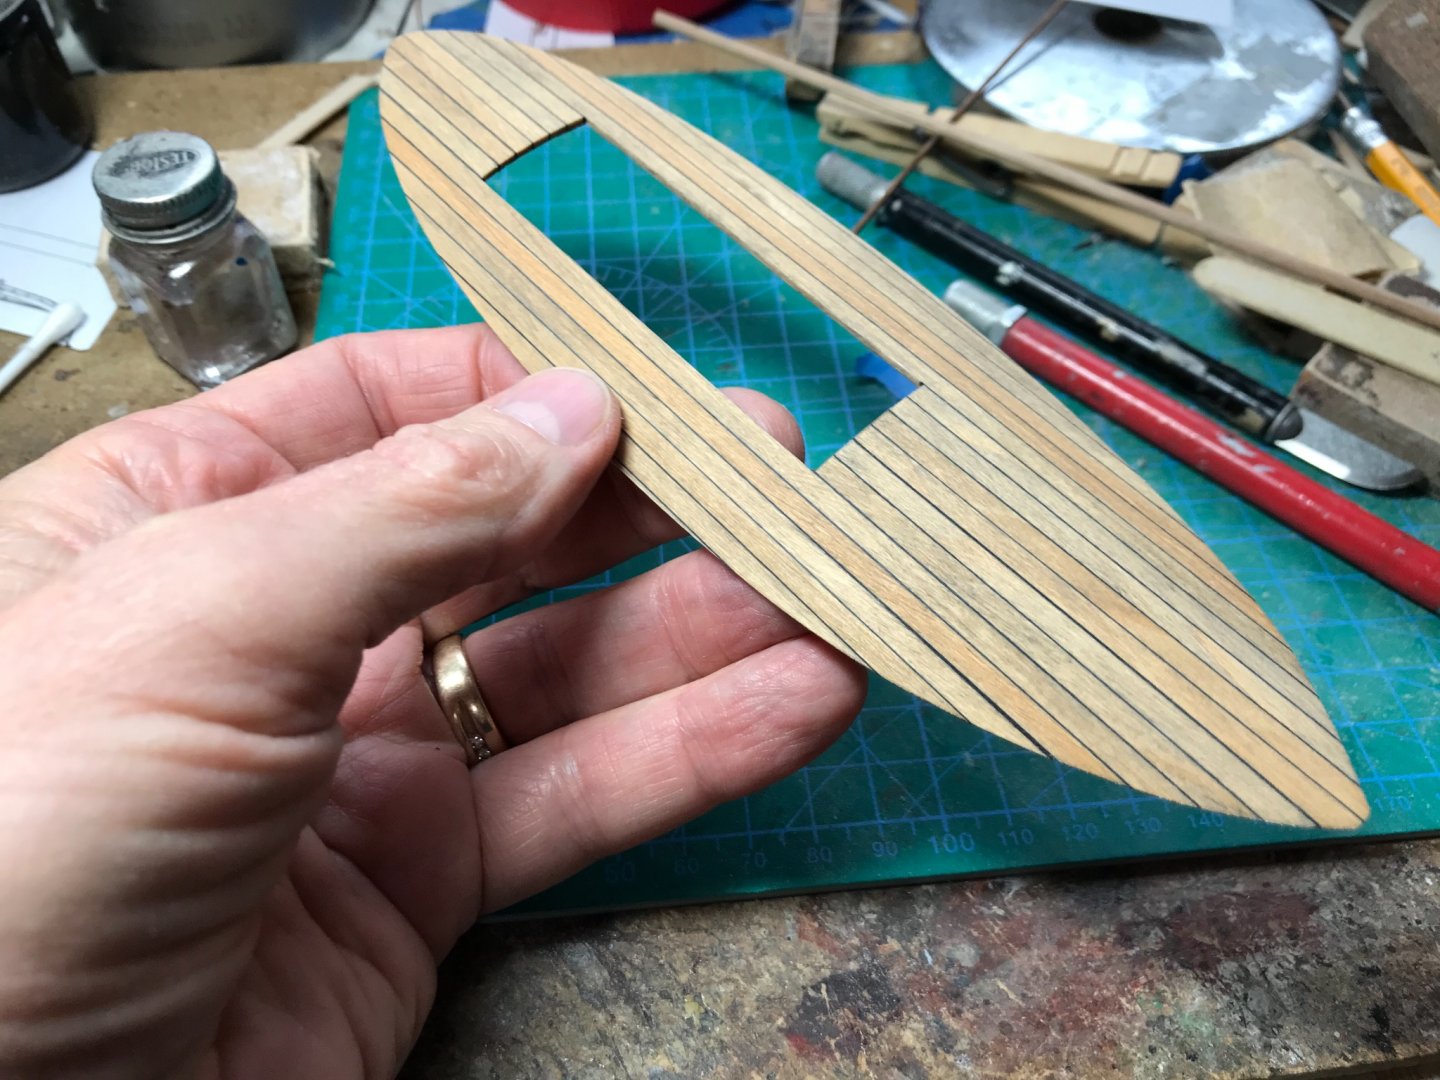
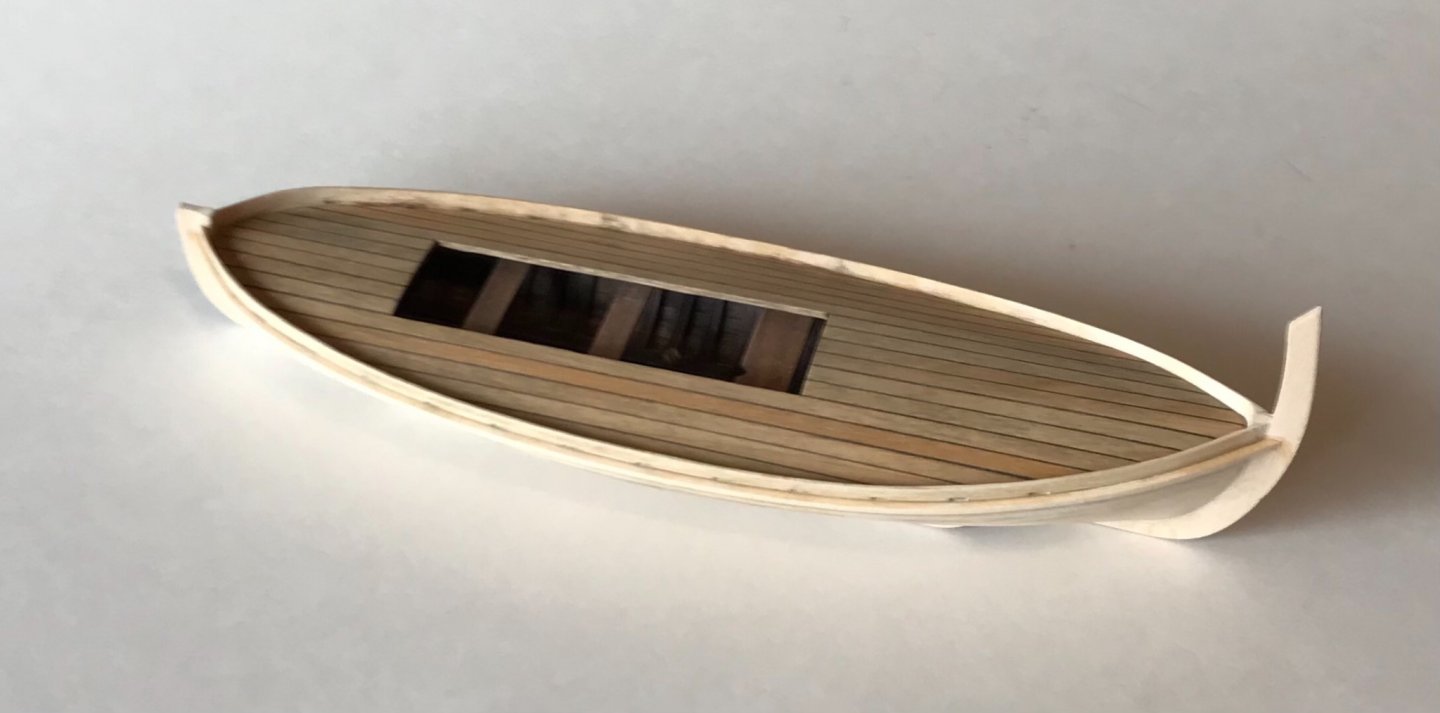
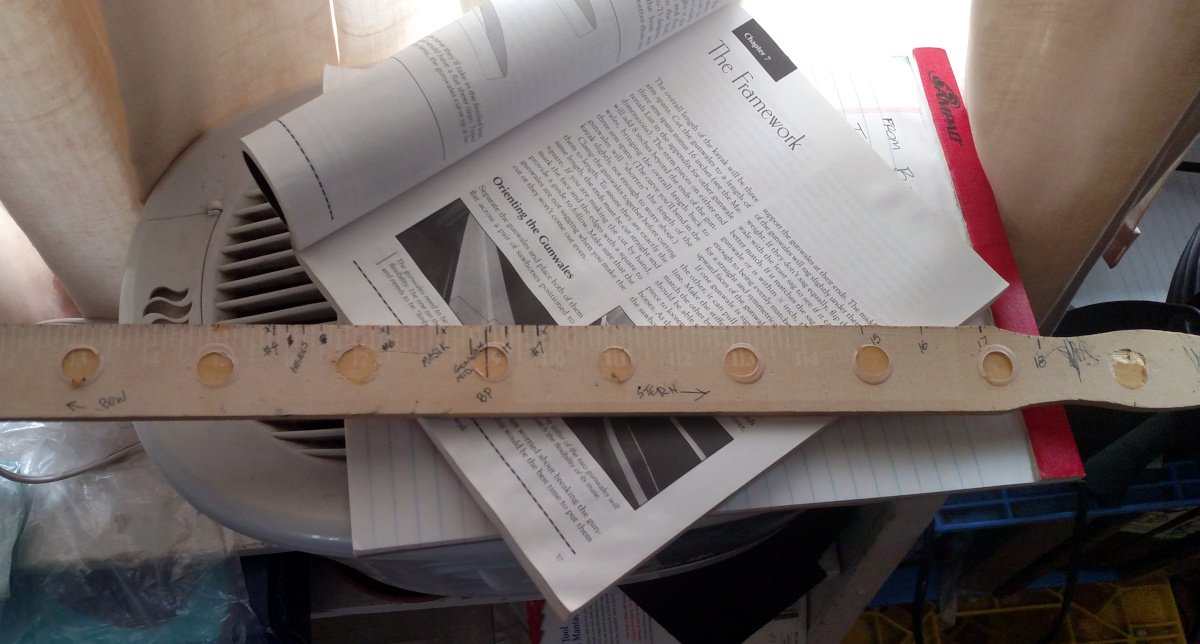
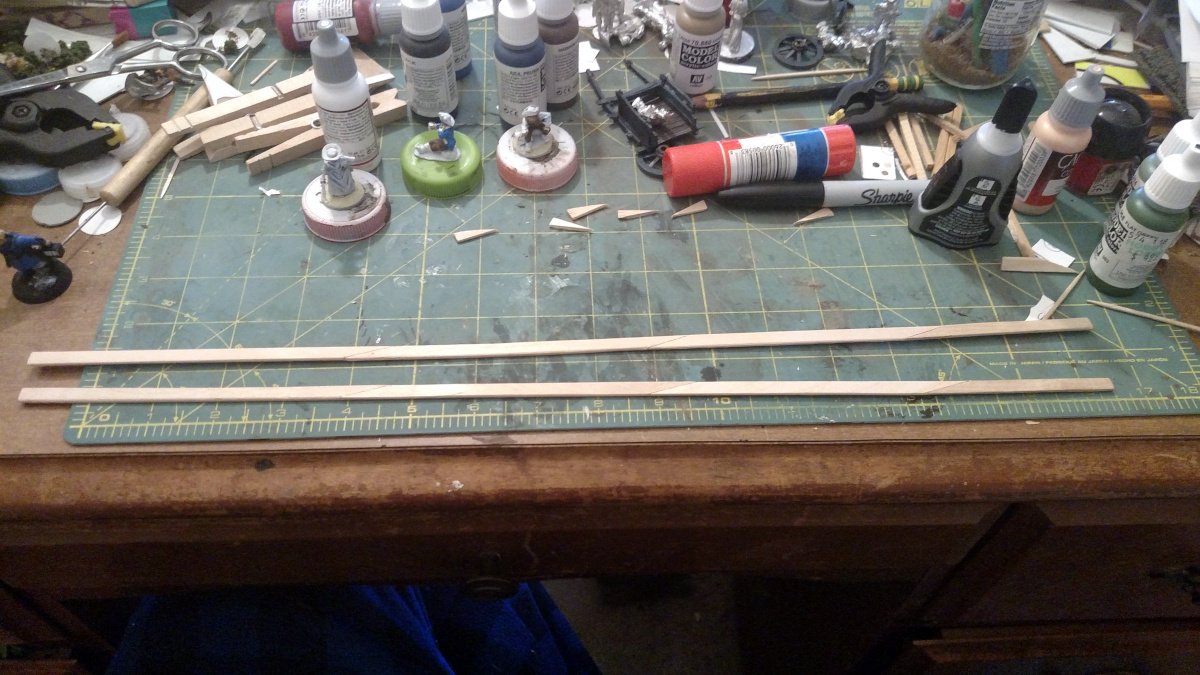
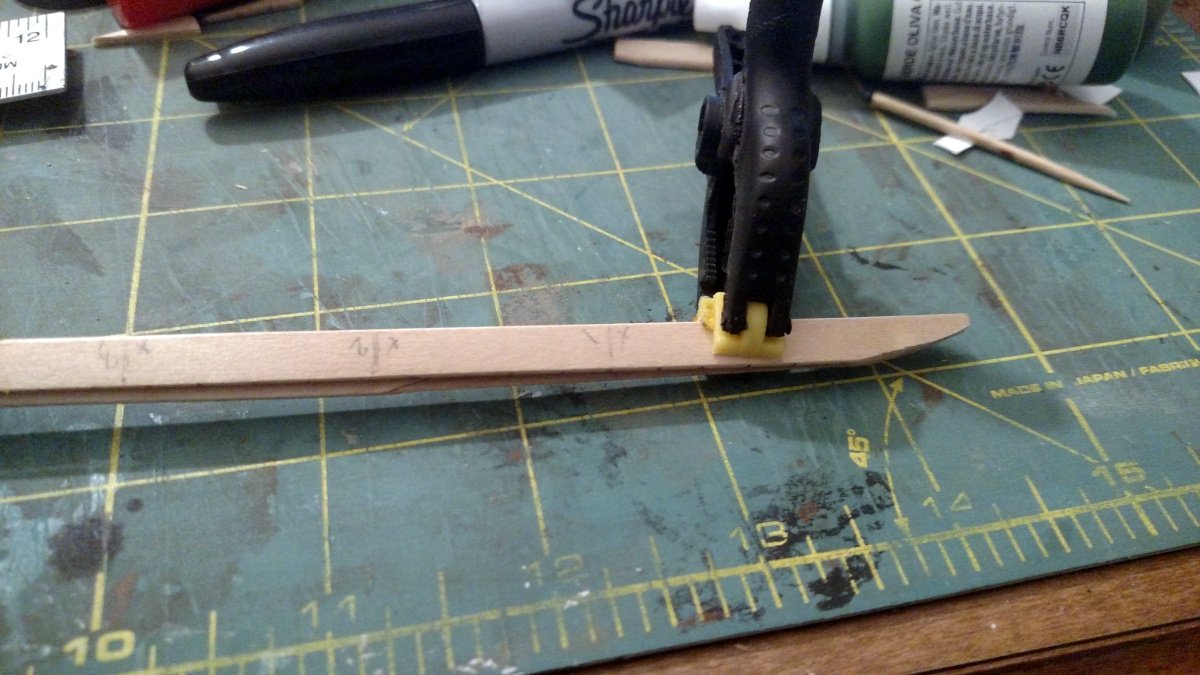
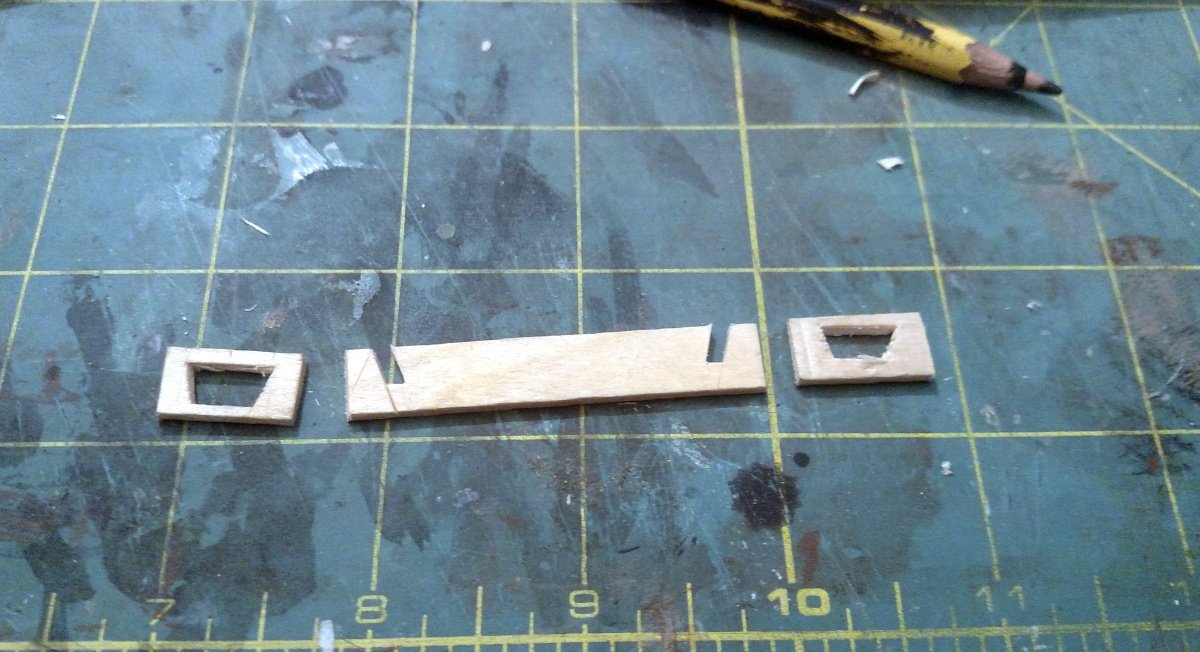
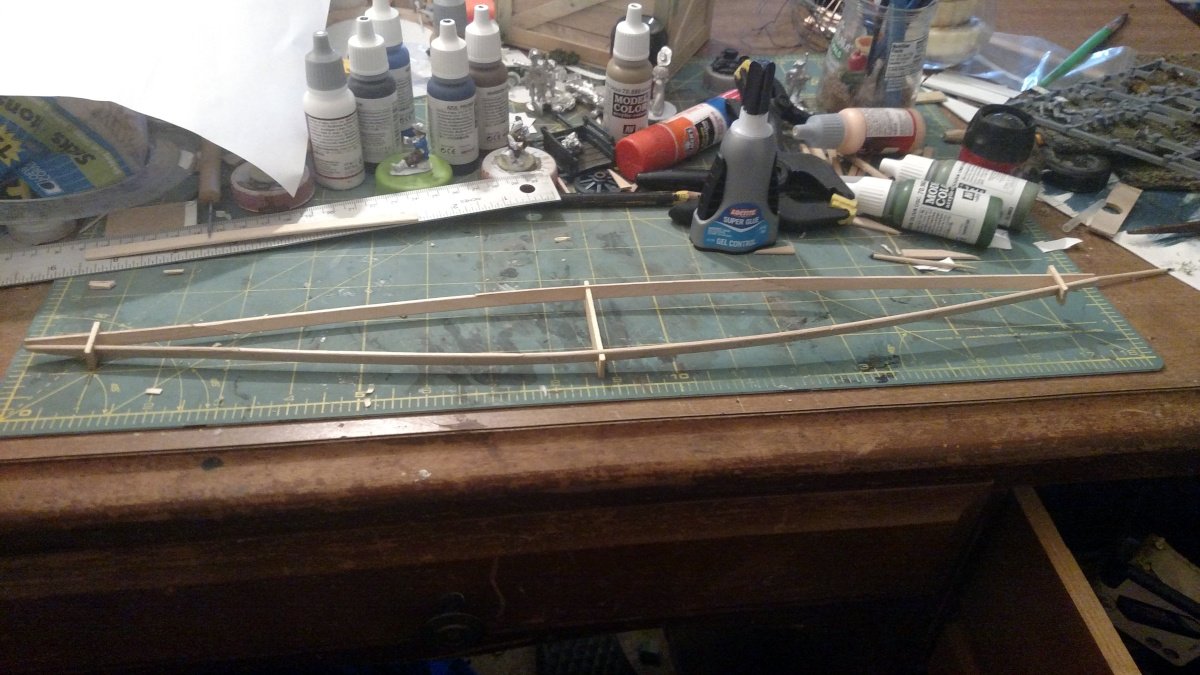
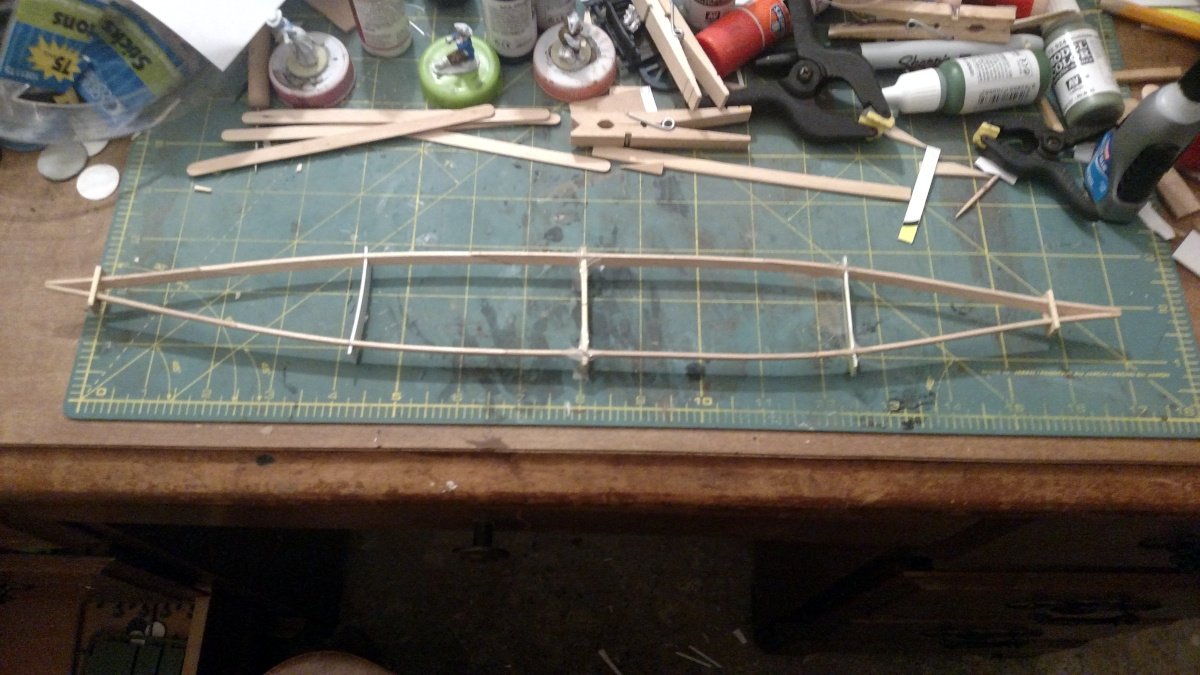
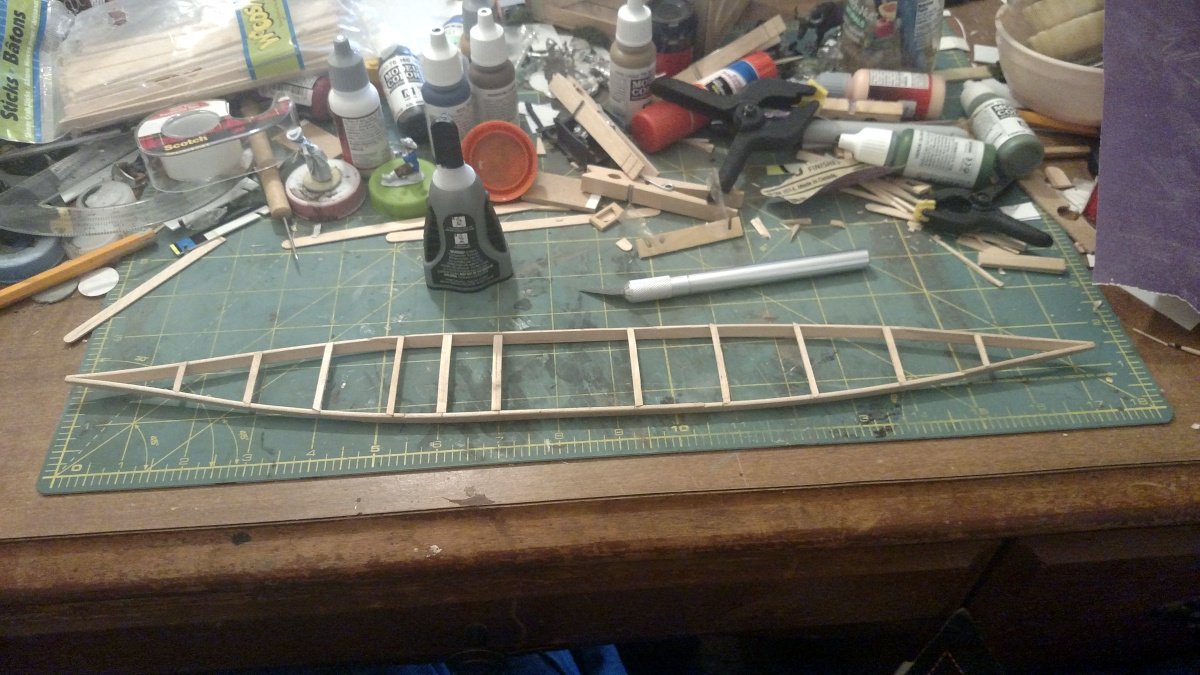
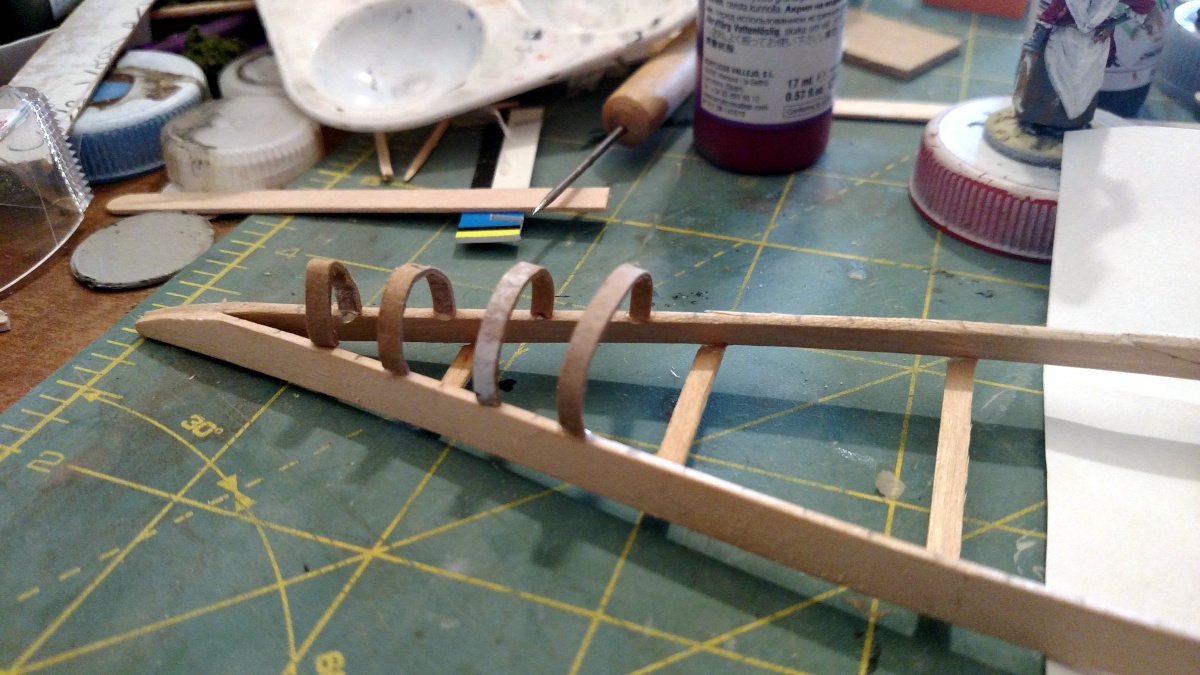
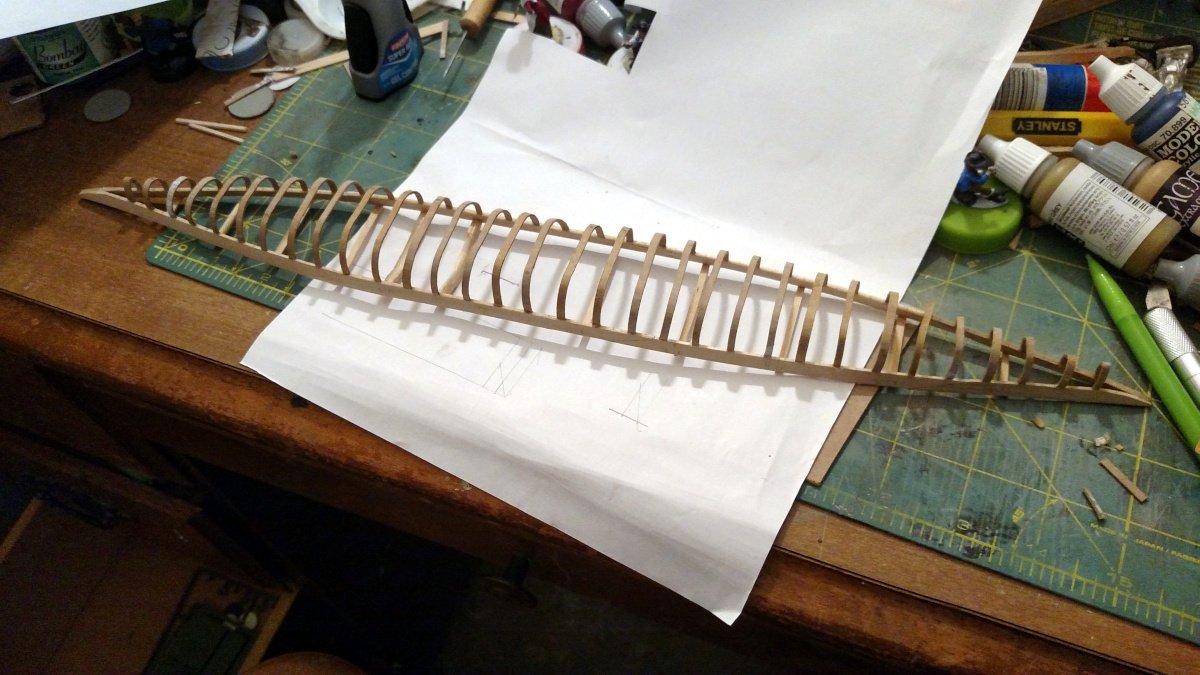
 Roughly 10 years ago, I asked my wife if I could get a kayak to do some paddling on some of the local ponds. In an effort to dissuade me from picking up yet *another* hobby, she said "If you can build a kayak, you can have a kayak." Being the stubborn type, I spent the summer building a kayak using my great-grandfather's hand saw, a dollar-store plane, and an electric drill. Somewhere I had come across instructions for building a traditional style "qajaq," (the traditional Inuit spelling). Once built, my daughter decided that she wanted one, so she and I spent the next summer building hers together. Here's a photo of them together, hers on the left, mine on the right. Both boats are composed of wooden frames, pegged and lashed together with artificial sinew, covered with ballistic nylon, then dyed and coated to make waterproof. Having followed the progress of both builds, a friend of mine asked if I could build a model of one for him. I promised that I would, then promptly life got in the way, so, here we are 10 years later, and I'm finally starting on my friend's model. The goal is to build the model using the basic full-scale building methods, using glue instead of pegs and sinew for the connections. Qajaqs are interesting in that each one is built to the user, using anthropomorphic measurements. For instance, the length isn't X number of feet, it's "three armspans long," while the beam is "hip width, plus two fists." As such, each craft is personalized and specific to the paddler. You can see in the photo above that my daughter's boat is small and more slender than mine, as my daughter is smaller and more slender than I am. 🙂 So, like the full size, the first step in building a qajaq is to create a story pole, which defines the placement of the various frame components. For the model, I took my own measurements, divided them by 12, and marked them out on an old paint stick that I had lying around. This resulted in a model that will be an estimated 18" long. My full-size qajaq is actually just under 18 feet long, so I guess my body hasn't changed much in the last 10 years. Also in the photo, I'm using Christopher Cunningham's book "Building the Greenland Kayak" as my guide. It's an excellent resource for anyone interested in building one. The next step was to create the gunwales. I'm using craft sticks and scrap bits for the frame, so I had to scarf together pieces long enough for the main pieces. From my reading, this was actually pretty common practice in full-scale as well, as many were built using collected driftwood. With the gunwales cut to length, the next step was to bevel each end. This was done by clamping the gunwales together so that each one would match the other. To create the shape of the craft, forms are used. The forms are beveled at roughly 73 degrees. The center form is a "hip and two fists" wide to create the beam. Qajaqs built for racing or rolling competitions may only be a hip wide, but I'm going for a hunting craft, so more stability is desired. With the center form in place, the two end forms are slipped over the gunwales and adjusted until the ends of the boards touch at the bow and stern. Finally forms are added fore and aft of center to establish the final shape. The placement of these is determined by the builder, who moves the forms towards the ends for a fuller shape, or closer to the center for a narrower shape. With the shape determined, the next step was to lay out and cut the deck beams. The ends of the beams are beveled to match the flair of the gunwales. In the full size, these would be mortise and tenon joints, lashed into place with sinew. In the case of the model, I went with CA glue. It's difficult to see in the photo, but the two forward beams closest to the center are arched, to allow clearance for the paddler's legs. Once the deck frame was complete it was time so start on the ribs of the hull. Here's where I hit my first snag. On my full size boat, pine was used for the frame, and steam-bent oak for the ribs. I wanted to keep the model as traditional as I could, but the craft sticks that I have aren't suitable for bending. Each rib is about 1/16" wide, so the wood just crushed instead of bending. After plodding around the house thinking on it a bit, I spied a cereal box in the trash. Pulling it out, the thickness looked good (roughly 3/4" in full scale, so *really* small in 1:12). I cut thin strip off, rolled it around a pencil, and grinned as it kept its shape. So, cardstock ribs it was! I sanded off the printing from the outside of the box, cut a bunch of strips, and started making ribs. To my surprise, they don't look much different than the oak ribs on my full-size boat. Each rib is the width of the deck, plus "the width across the fingers of both hands held together." Wider boats measure across the base of the fingers, narrower ones measure across the tips. I split the difference and went with my middle joints. Like the deck beams, the ribs would usually be mortised, then pegged into place. For the model they are glued to the gunwales on each side. One the ribs were in place, I coated them with a layer of watered-down PVA glue to help stiffen them up a bit. So, that's where things stood as of last night before I went to bed. If the rib stiffening worked out, the next step will be the stem and stearn boards, keelson, chines, and masik (curved deck board in front of the paddler). -Elroy
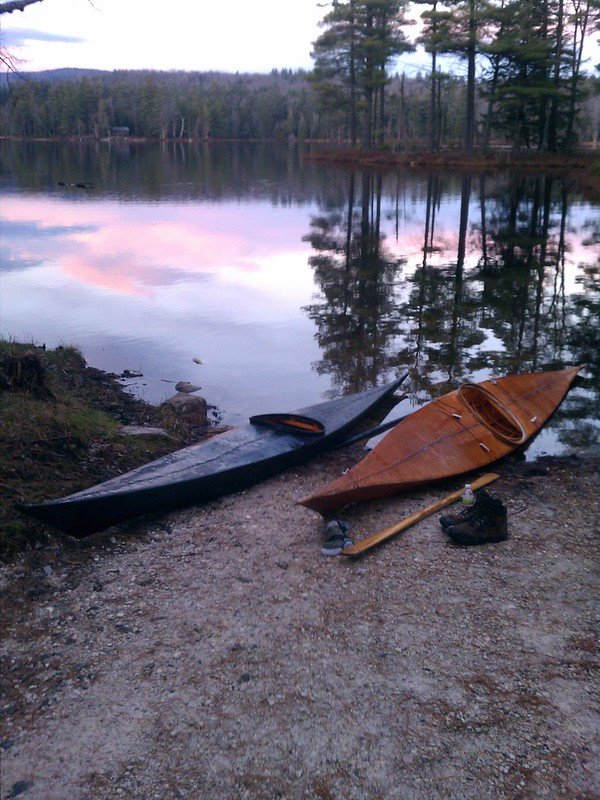


-
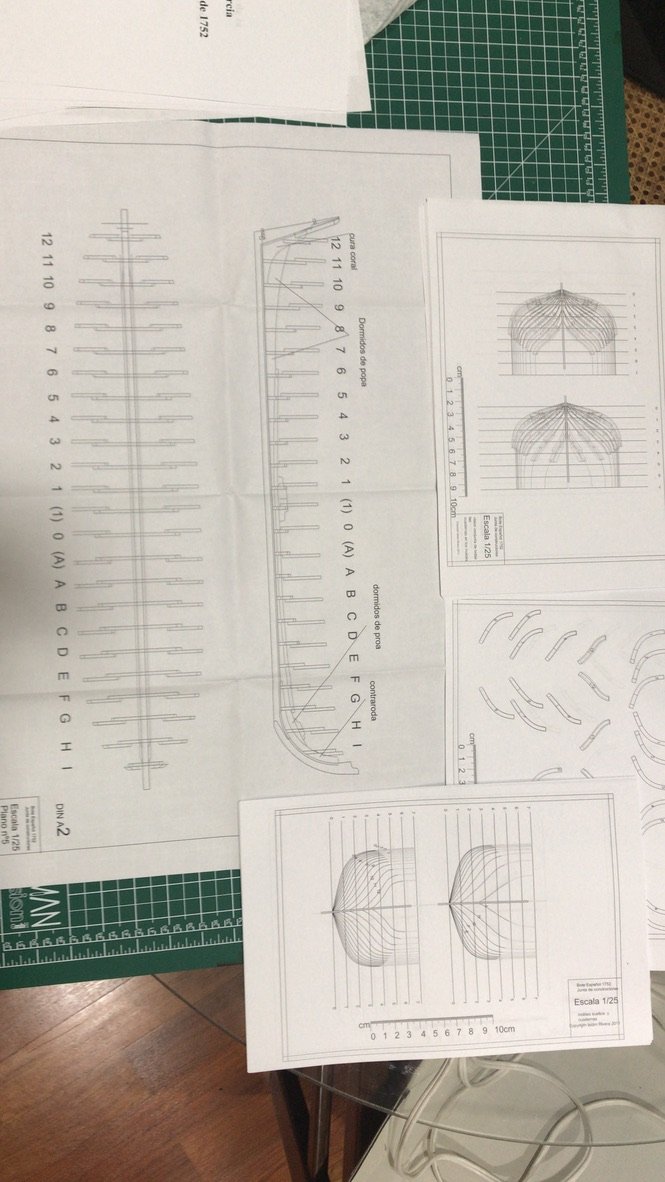
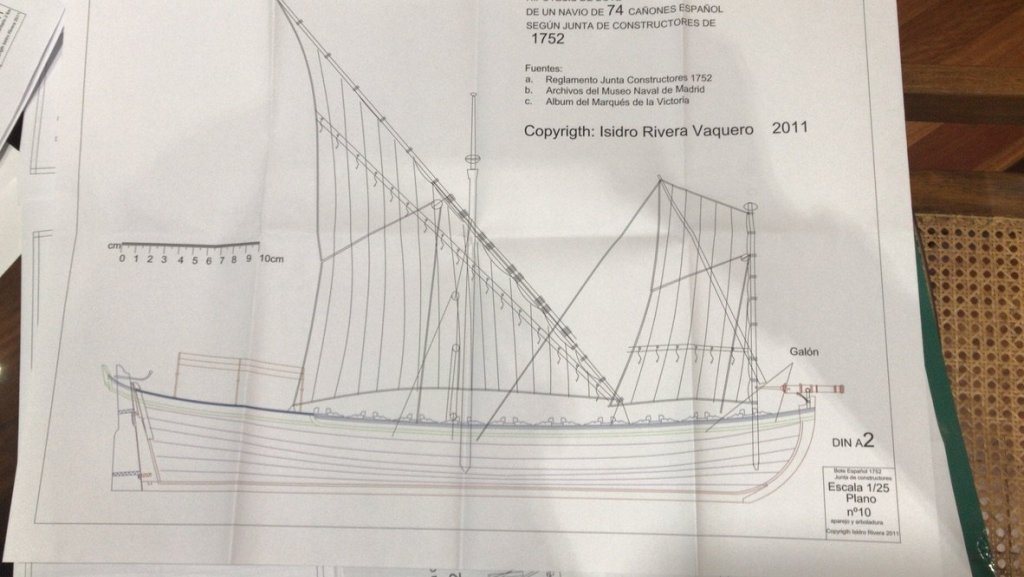
 Hello all I want to share this construction log, about the Spanish Longboat, that could be converted to Falúa (Luxury Longboat for Officers). The plans have been developed by Isidro Rivera, well known spanish naval researcher, who has many papers, books and plans already published. I have the fortune to be in contact permanently with him, Jose Collado who is his partner in construction, and a bunch of really good guys, who are always, willing to help when I need it. I started the 17th of February and.......
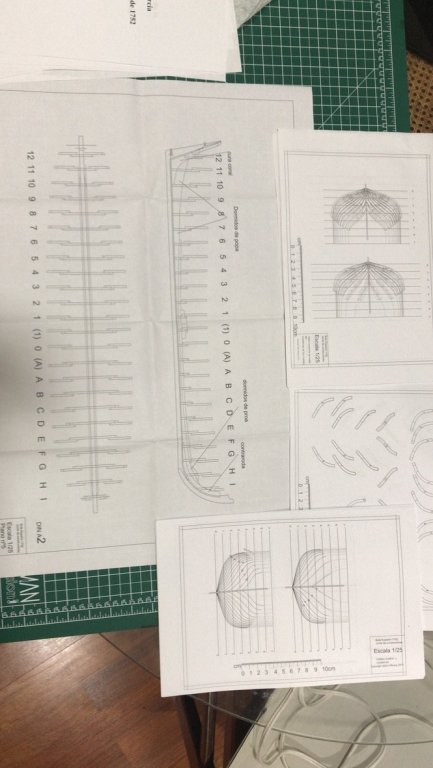
-
Hi folks Hot on the heels of finishing my last model, Shadow, I’ve excitedly started on what I think is my biggest challenge yet - Genesis, a 49m Luxury Mega Yacht, based on an actual ship named Khalilah, built by an American builder, Palmer and Johnson. The details of the ship, Khalilah, can be found here: https://www.yachtcharterfleet.com/luxury-charter-yacht-46797/khalilah-photos.htm#yacht-tabs As I don’t have any detailed plans, a lot of what I’m attempting is by sheer guess work, with a lot of help from a fellow MSW member (whose help and guidance I shall always appreciate). Like all of my other models, Genesis will have a fully detailed interior, from her engine room through to her sky deck. I hope you can follow me on my journey from here on. The following photos show where I’m up to so far with the hull. Lots and lots of work to go, folks!!! Thanks. Patrick


- 432 replies
-
- 19
-
-
I have started the construction of a new model to add to my collection, which will be number 67. It is a tartana from Liguria in a scale of 1: 200. I use as a main source of documentation the monograph of the tartana Gemma, by Franco Fissore, published in Ancre, although I will also use other sources, such as the book "Vele italiane de la costa occidentale" by Sergio Bellabarba and Eduardo Guerrieri, and old photographs of complementary form. For the construction of the hull I use Finnish plywood of 0.6 mm. to make the frames.


- 51 replies
-
- 29
-
-
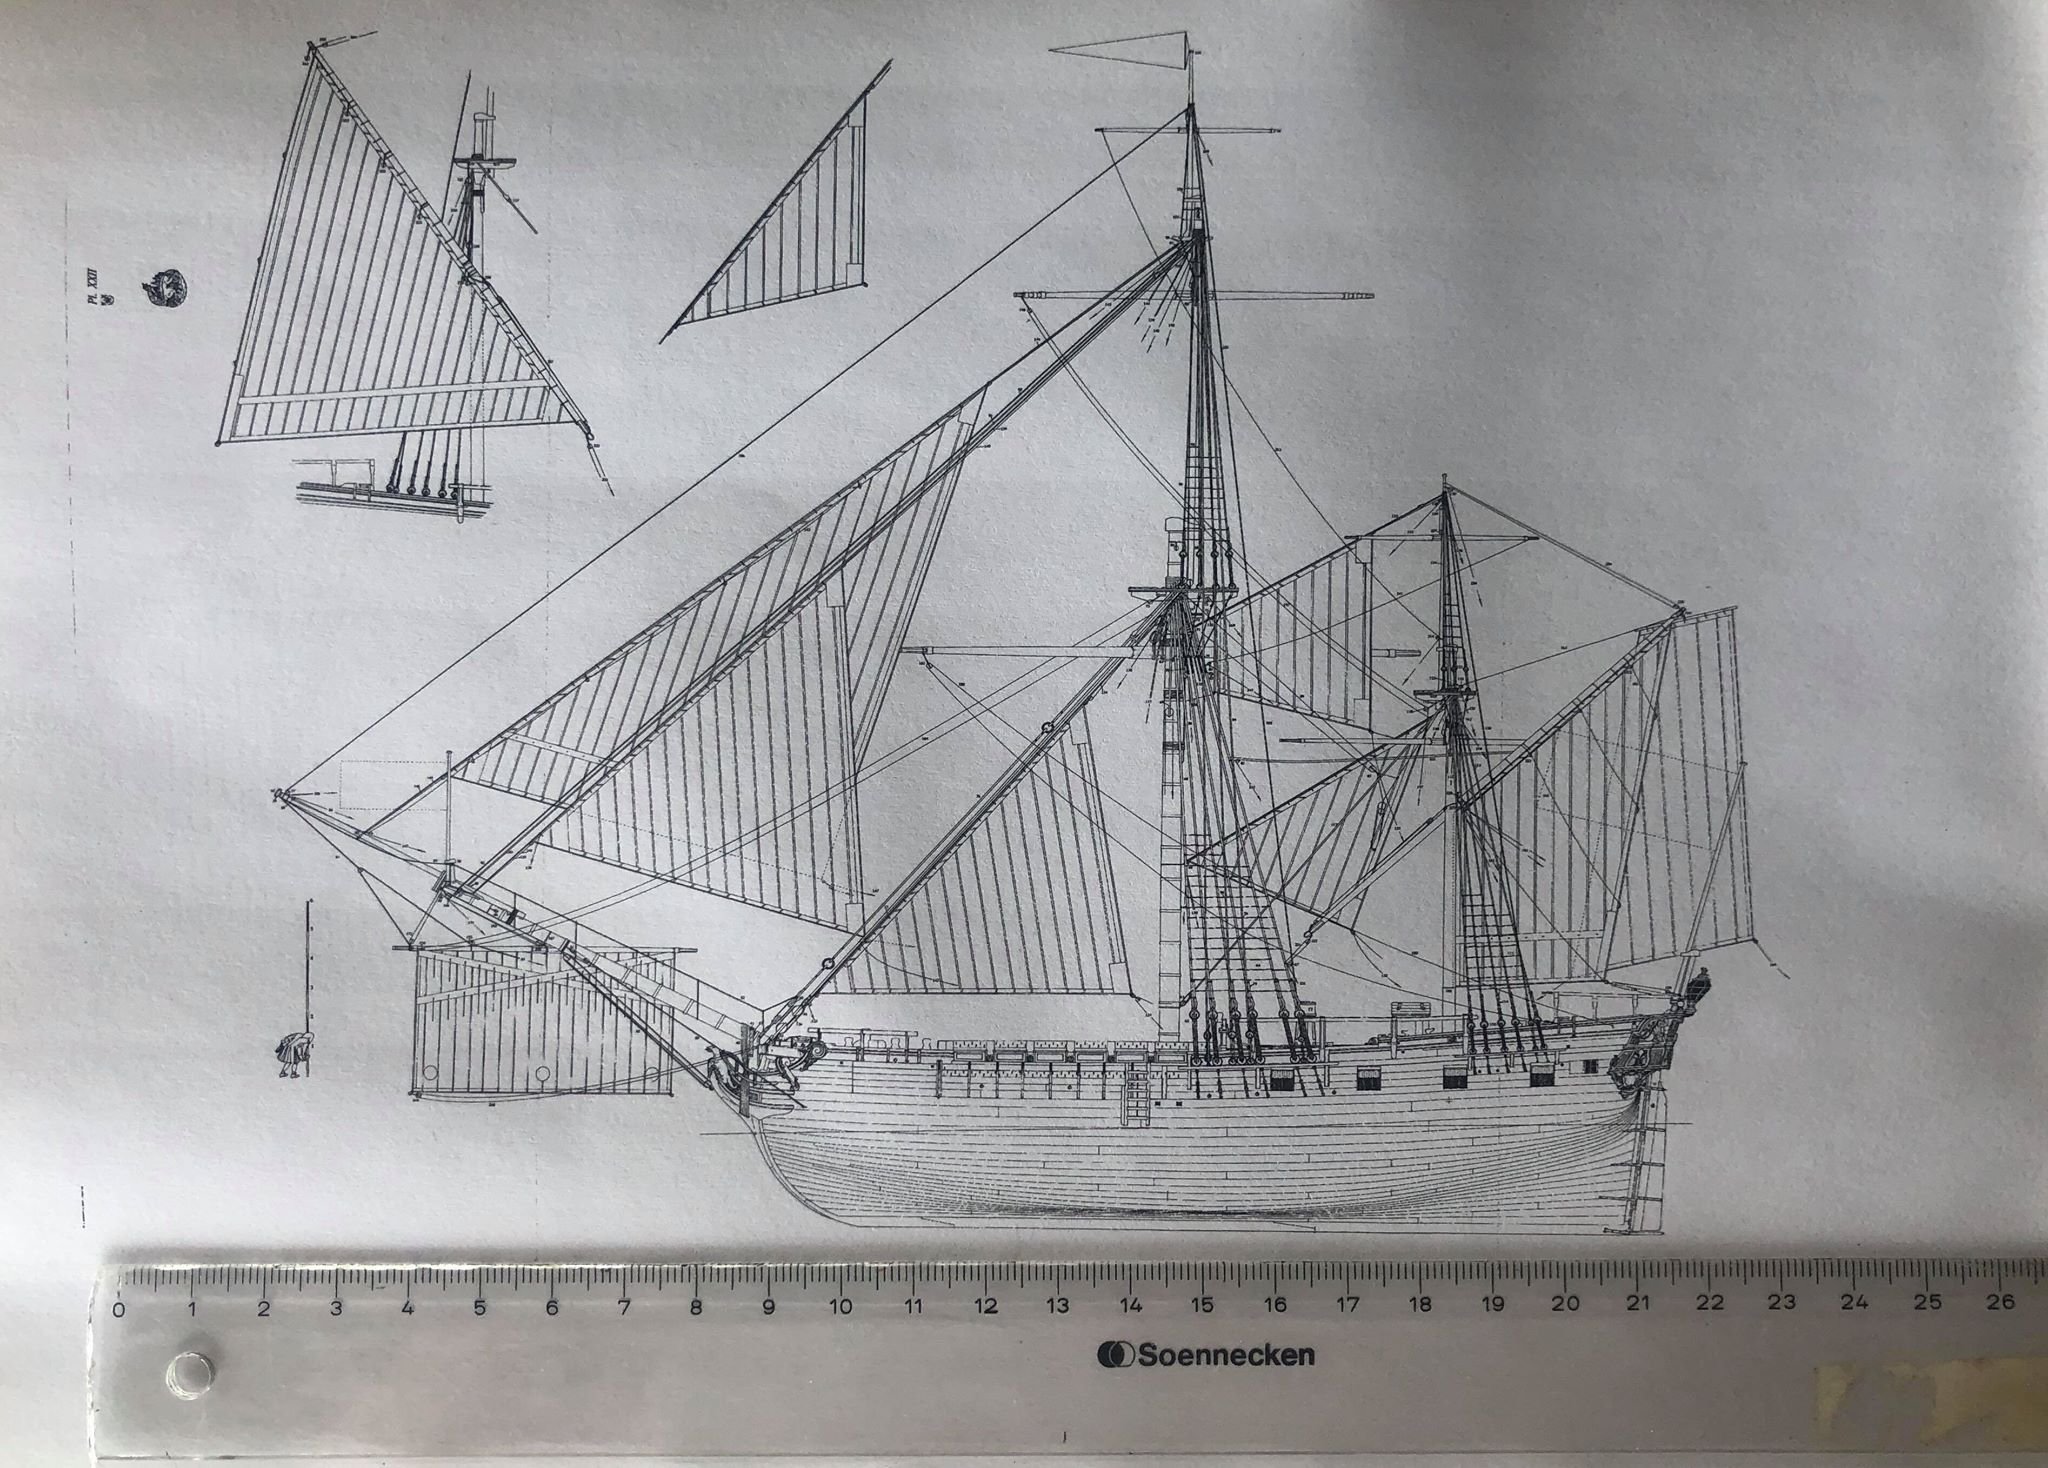
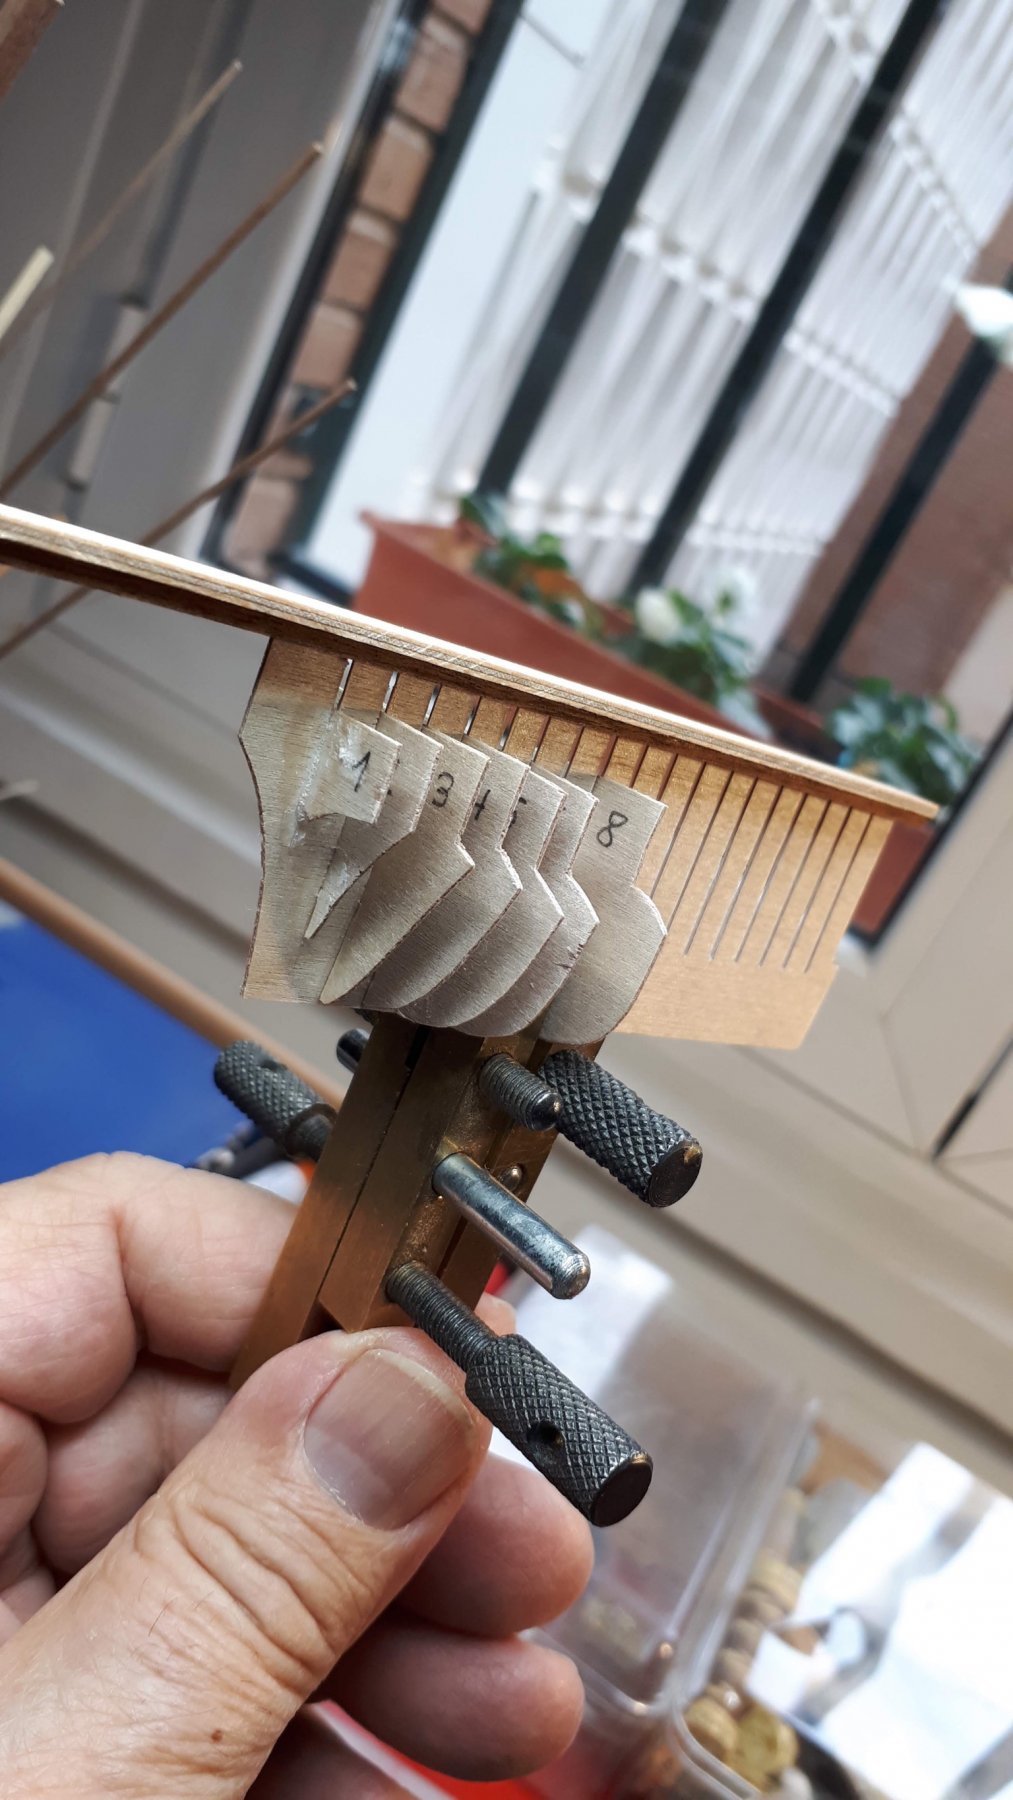
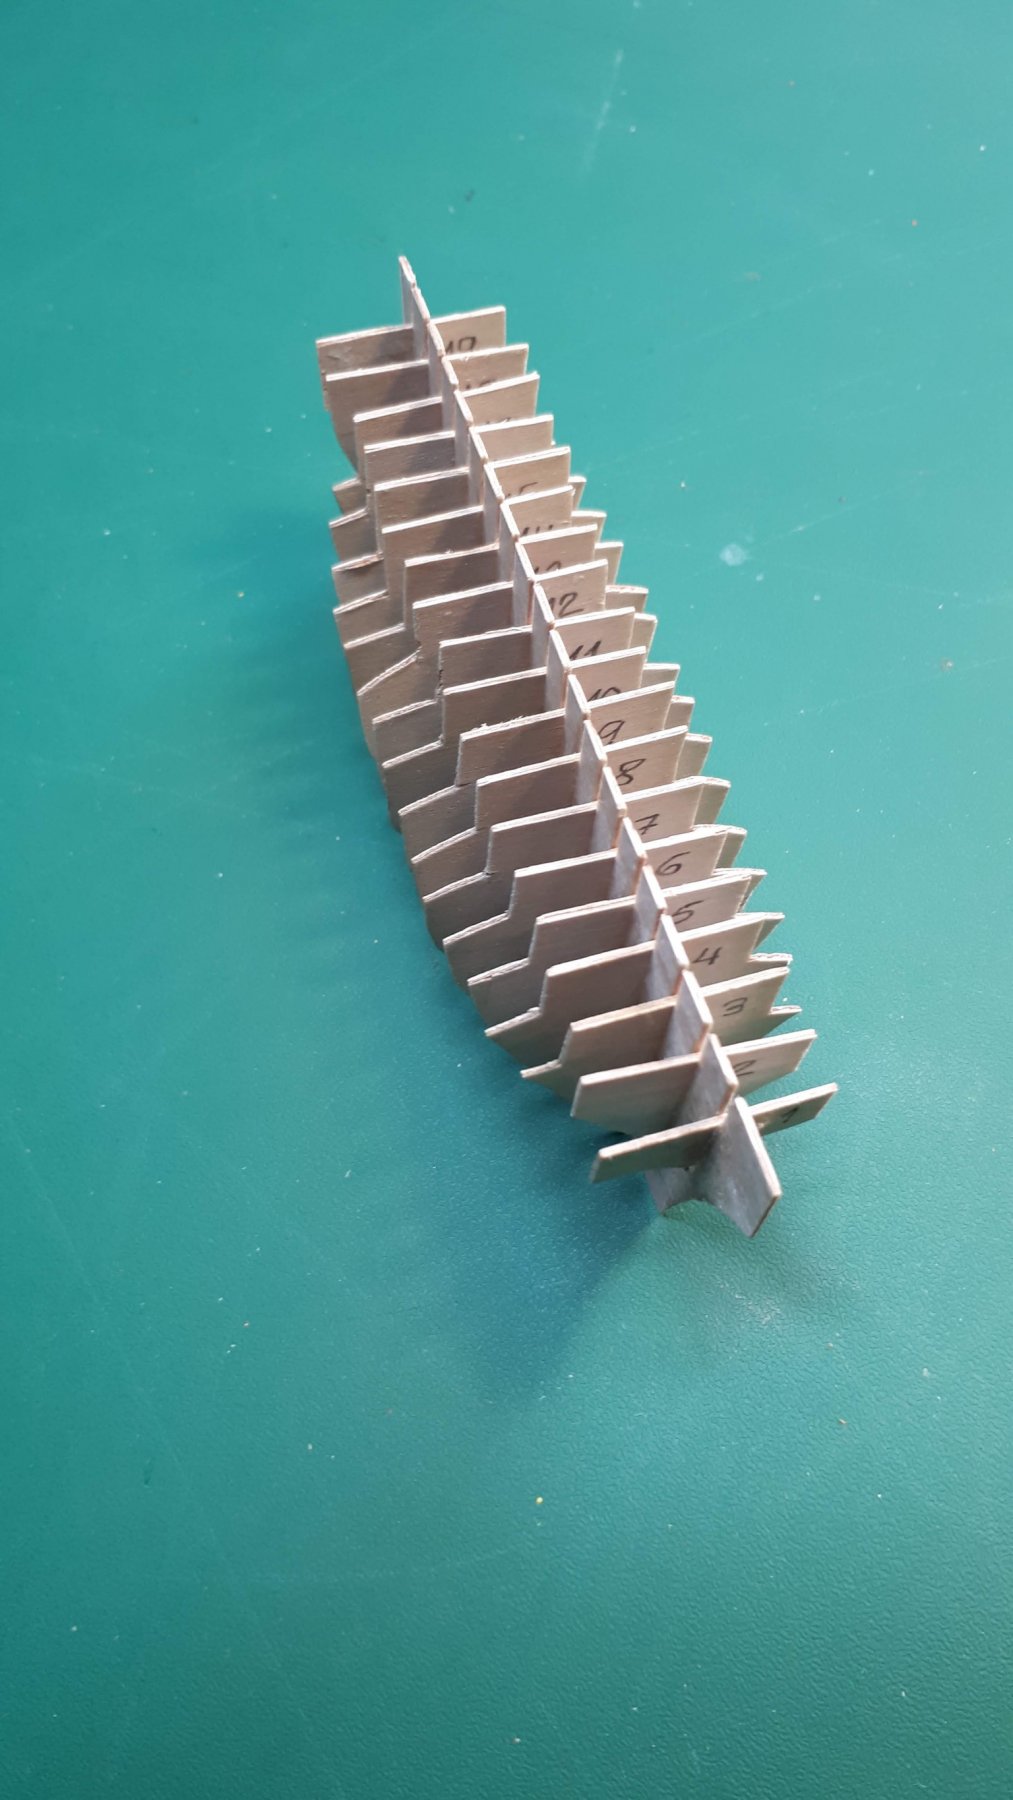
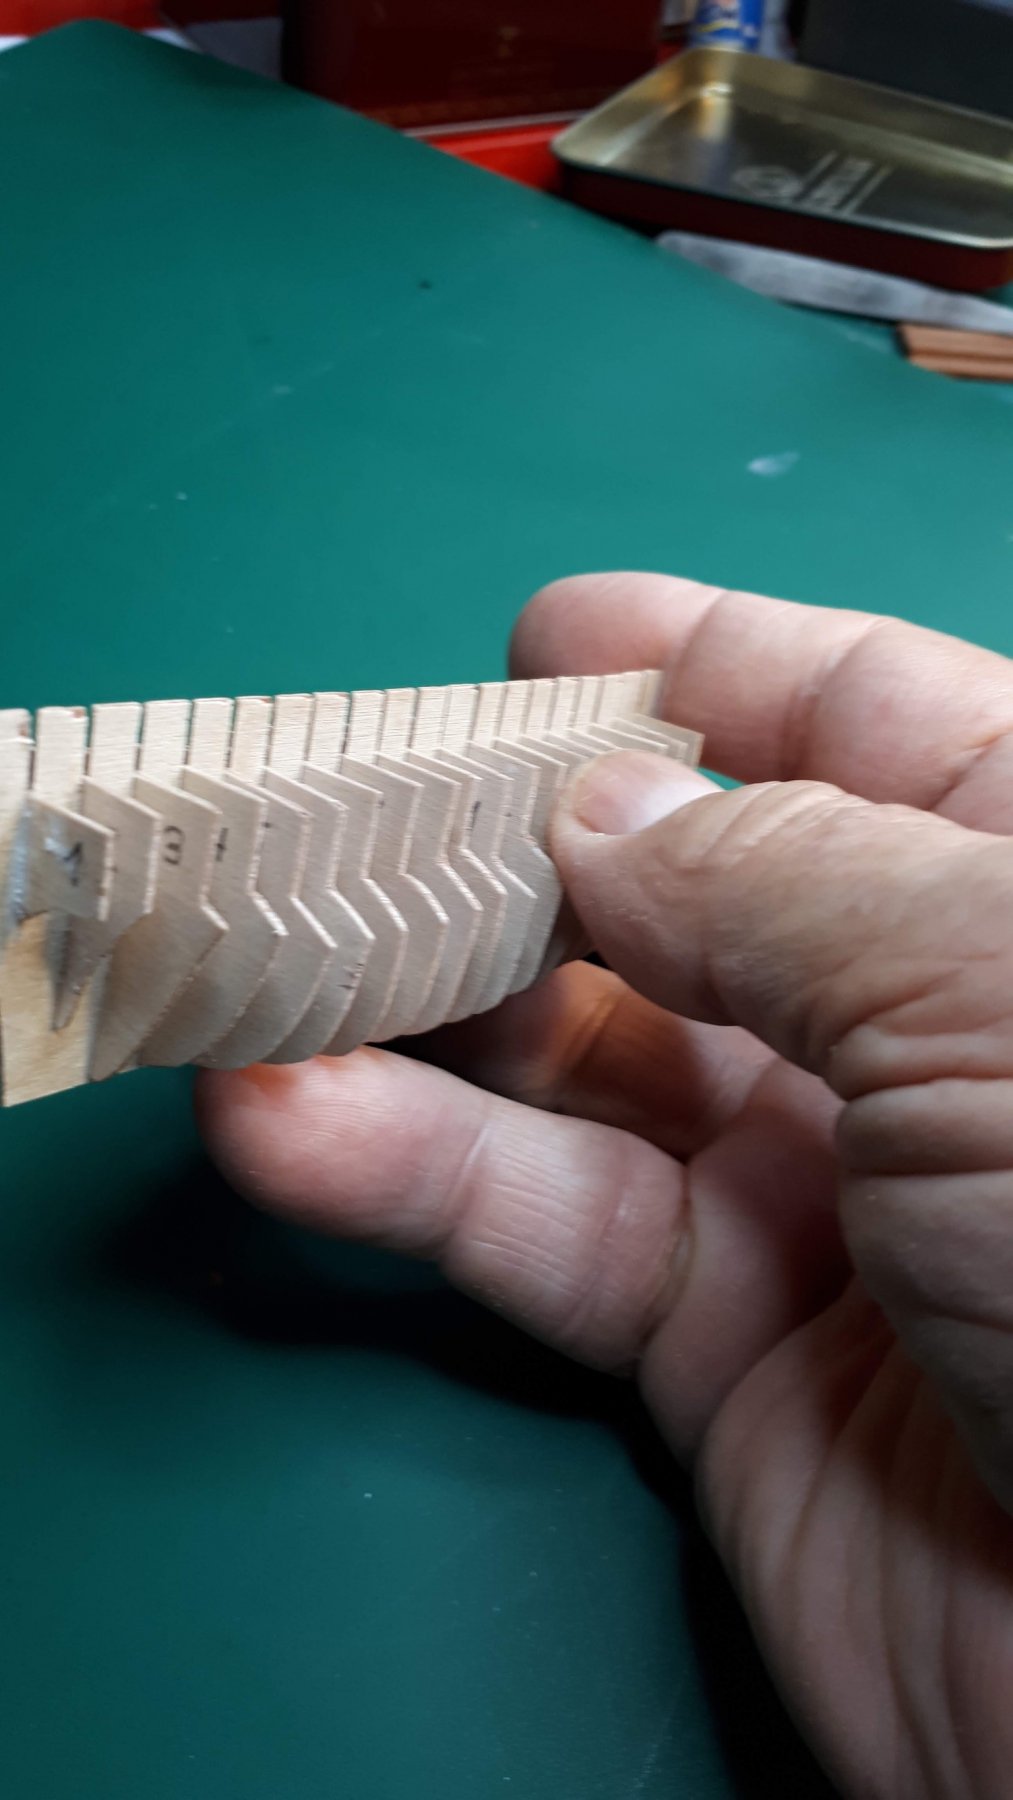
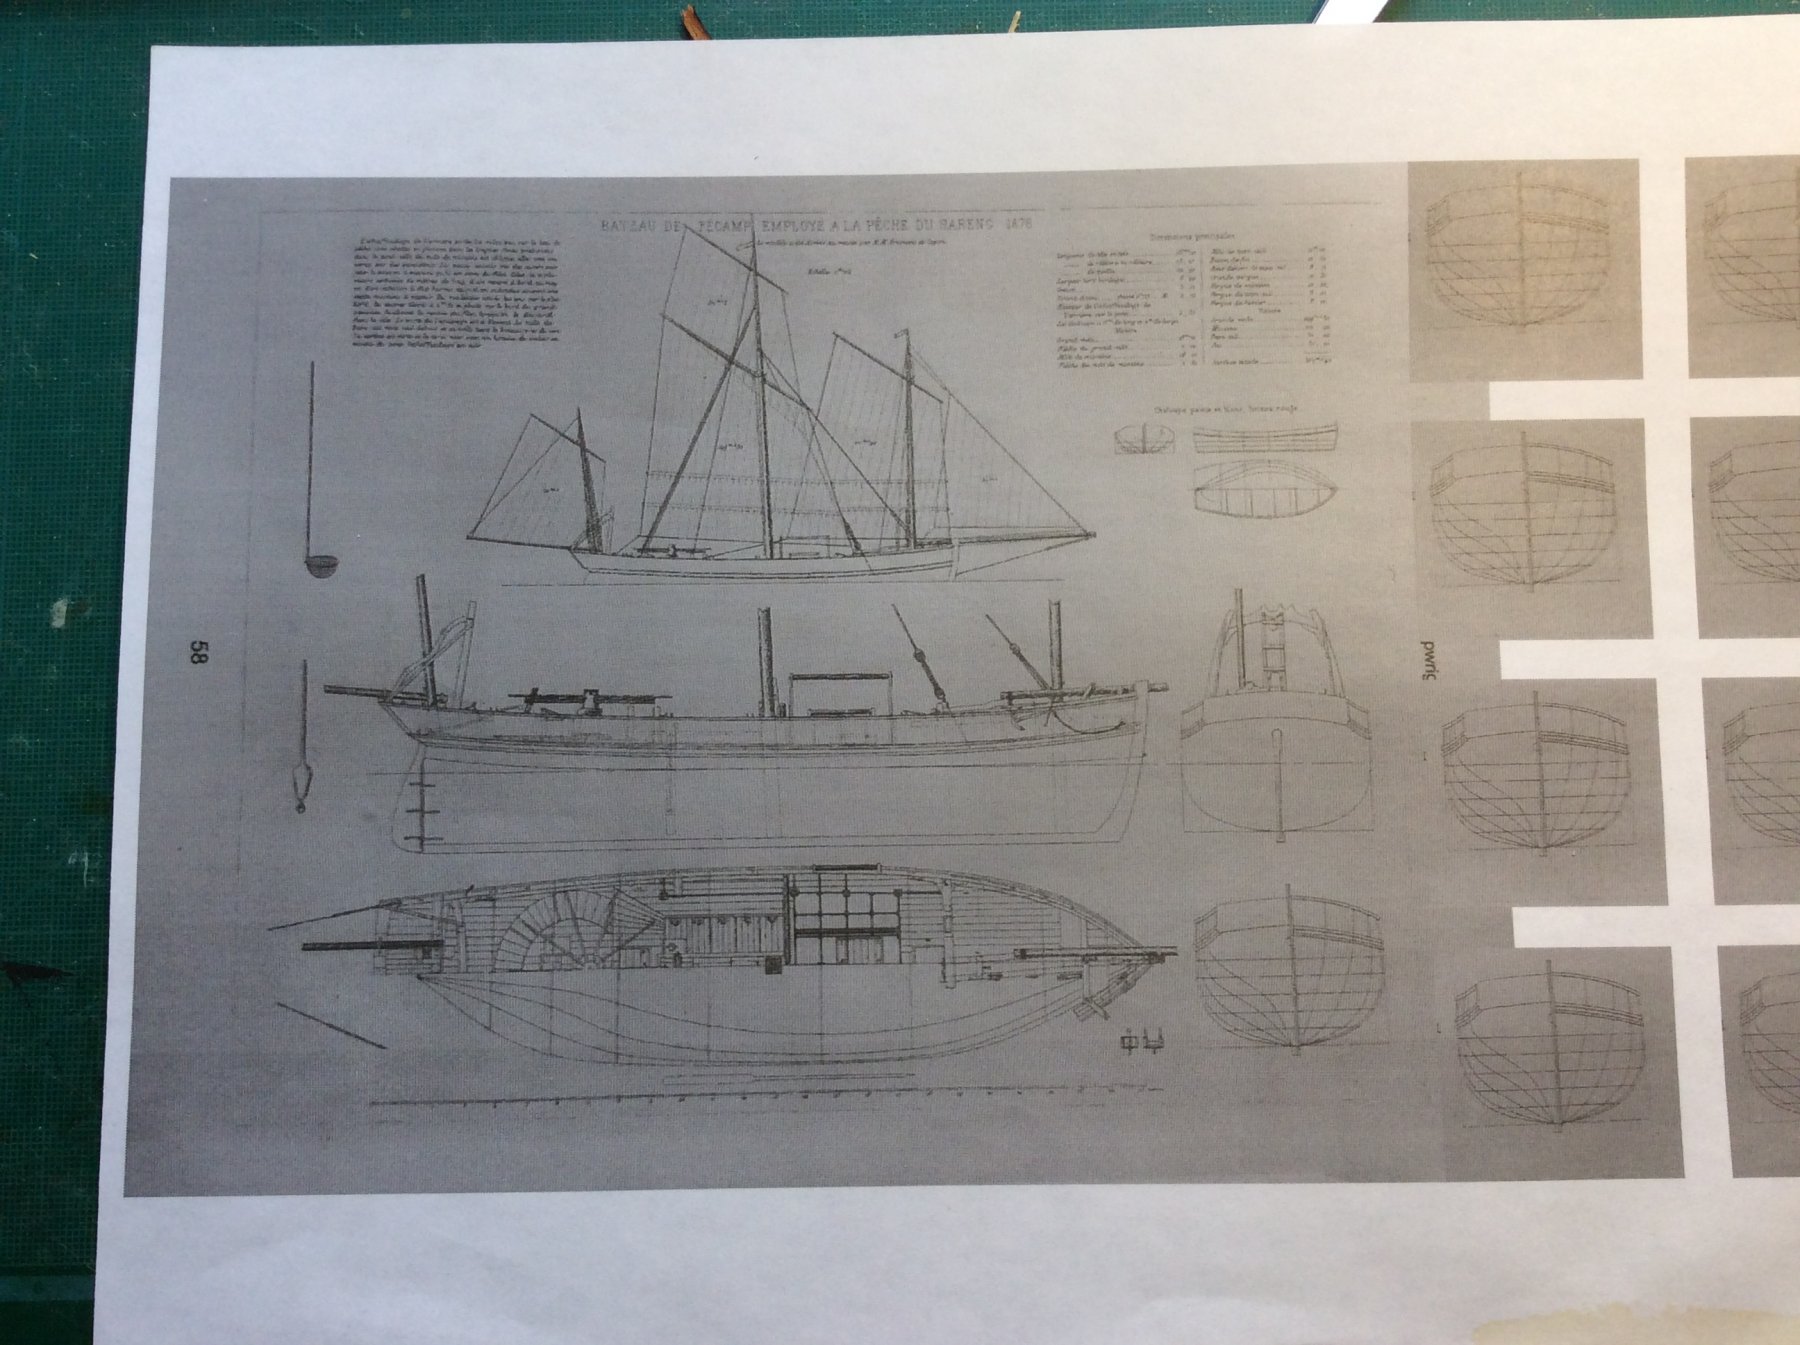
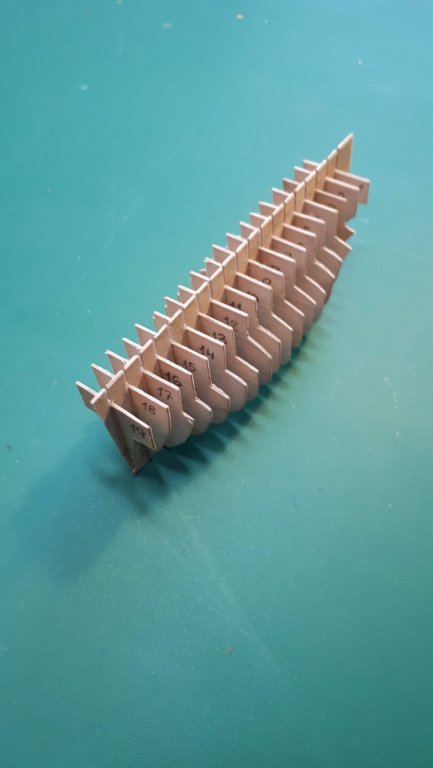
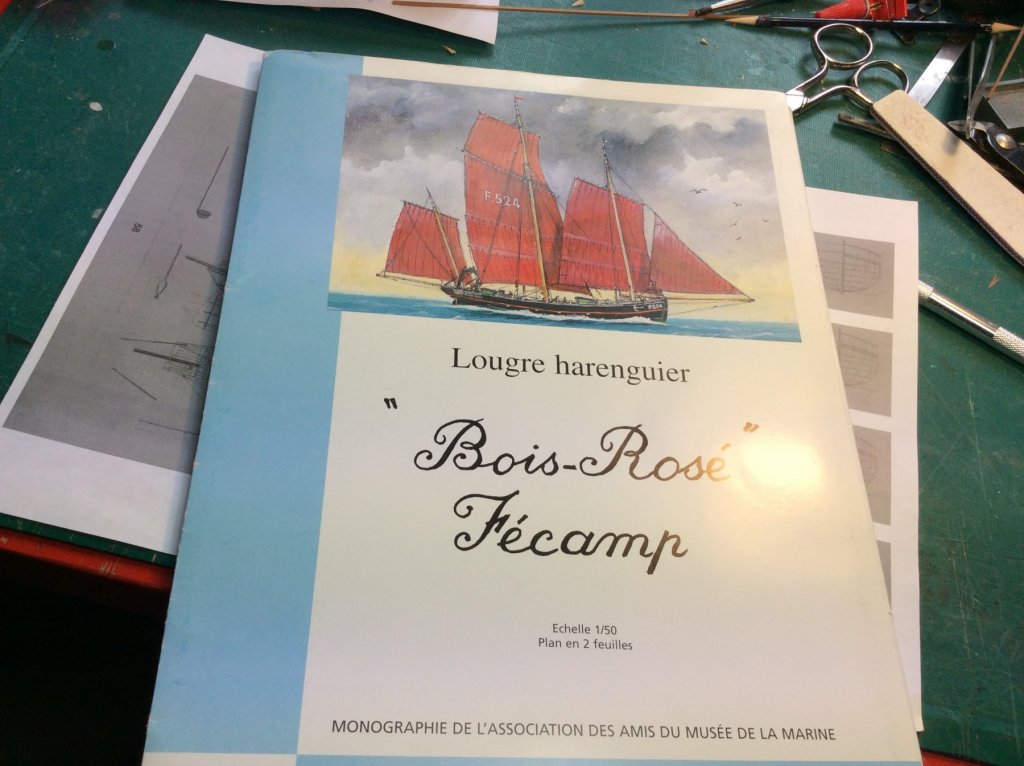
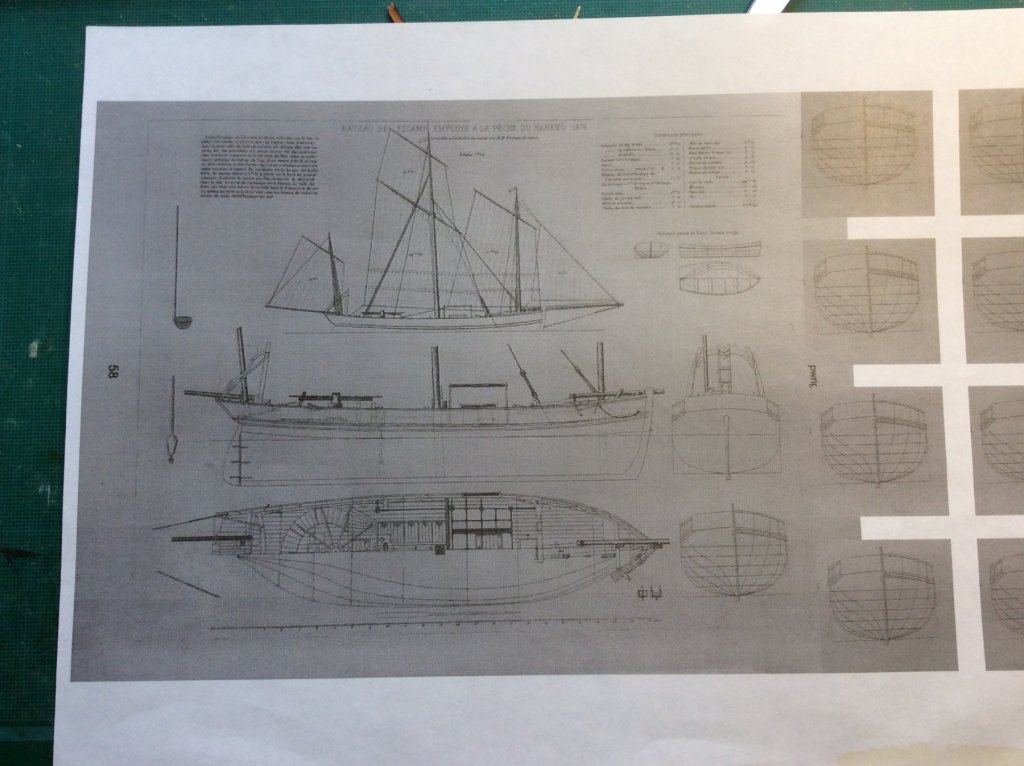
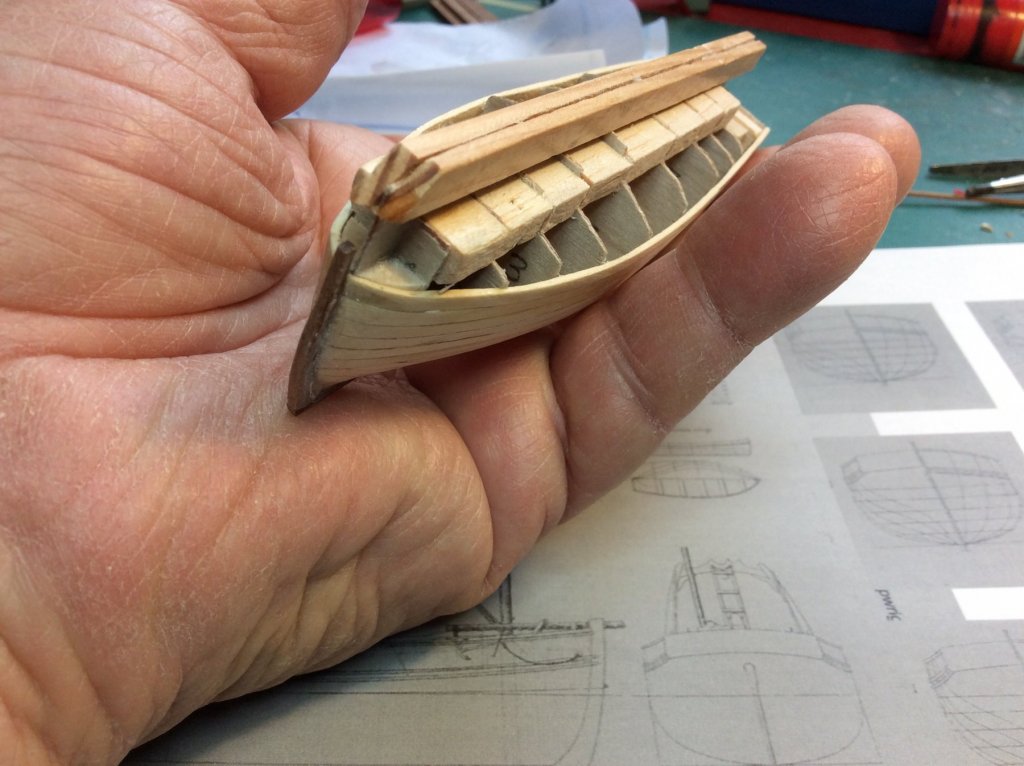
I start a new model for my collection. It is a "Lougre harenguier" by Fécamp, based on the plans in the collection "Souvenirs de Marine Conservés" by Admiral Paris and the monograph of the "Bois-Rosé" of the Association of Friends of the Navy Museum from Paris. The system that I follow for the construction of the hull is that of disposable frames. This system of disposable frames I already showed it in my previous Build Log of the Tartana de Liguria. I believe that the photographs clearly show what the process that I carry out. I started this model about ten days ago, and the last pictures show the current status of the work in progress.


- 39 replies
-
- 22
-