Search the Community
Showing results for tags 'snake'.
Found 16 results
-
 Testing.....

-
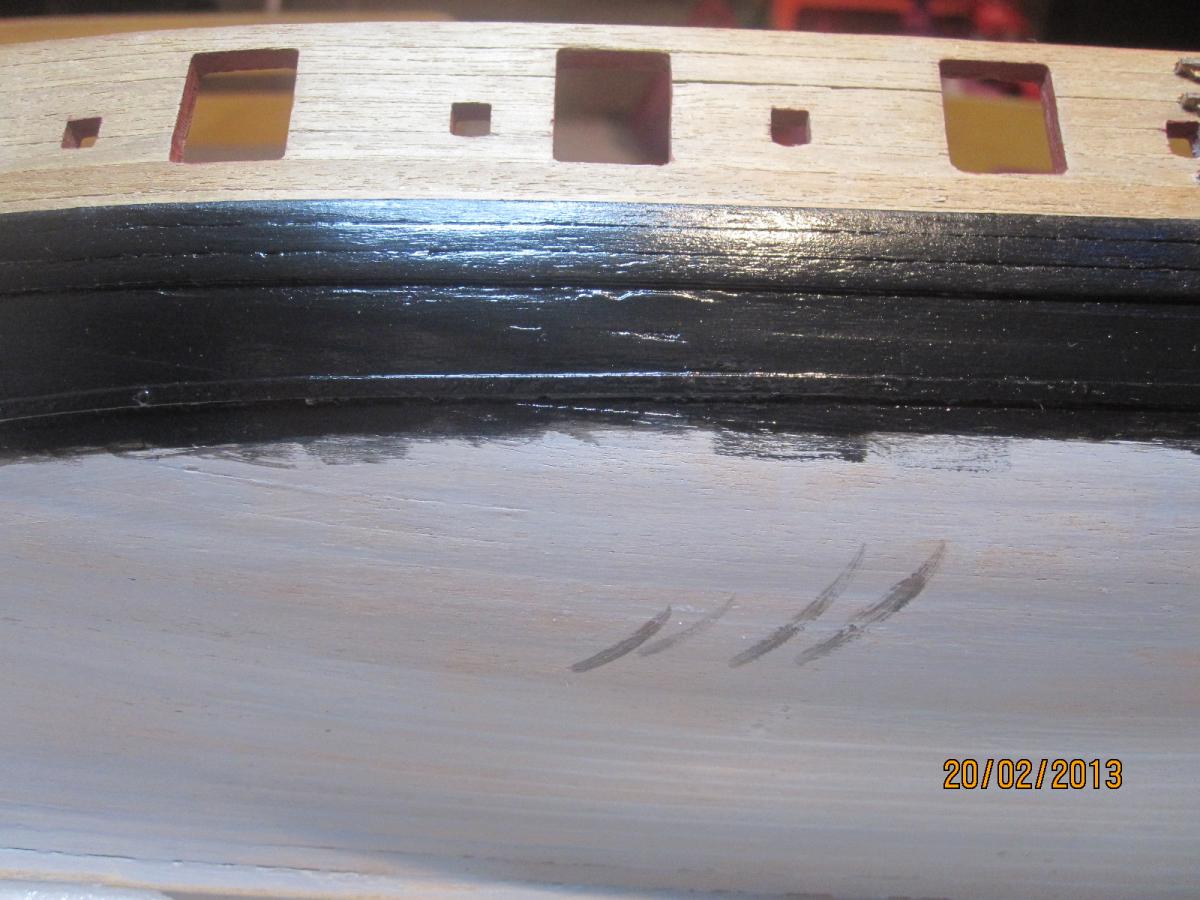
 This is my first post to try and recreate my old build log from before the great crash of 2013. I'll do my best to find what I have from the old log and will resurrect what I can. Unfortunately, if this can be believed, my PC had a hard drive failure around the same time so I'm still int he process of trying to recover what I am able(I hadn't been too studious keeping photos assuming that once posted they would be safe and backed up - never assume!). My commiserations to all the others out there who have lost so much work, it really is a big loss, I hope that we can collectively get the knowledge capital back up to where it once was.
- 800 replies
-
- 1
-

-
- snake
- caldercraft
- (and 1 more)
-
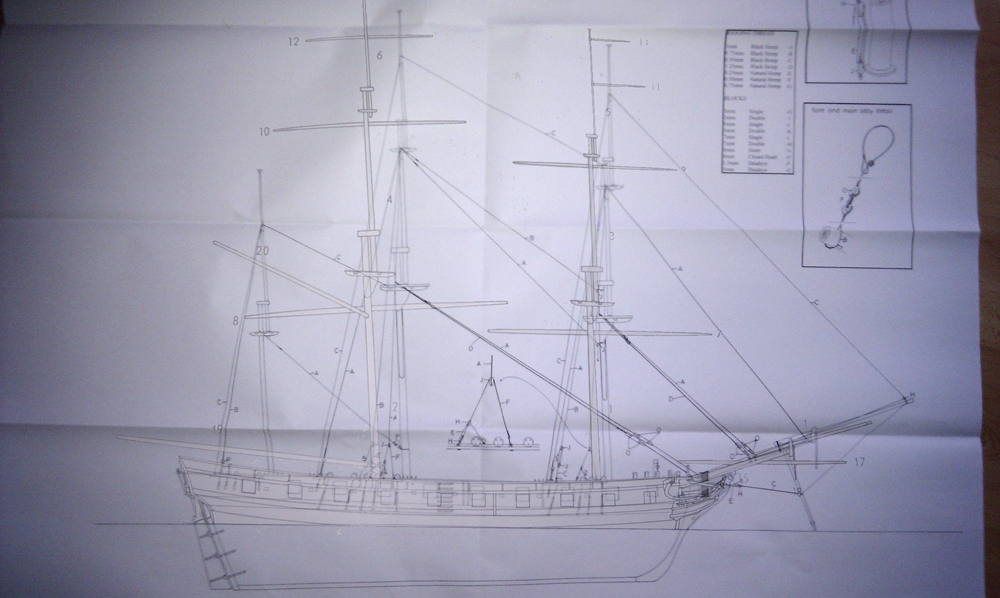
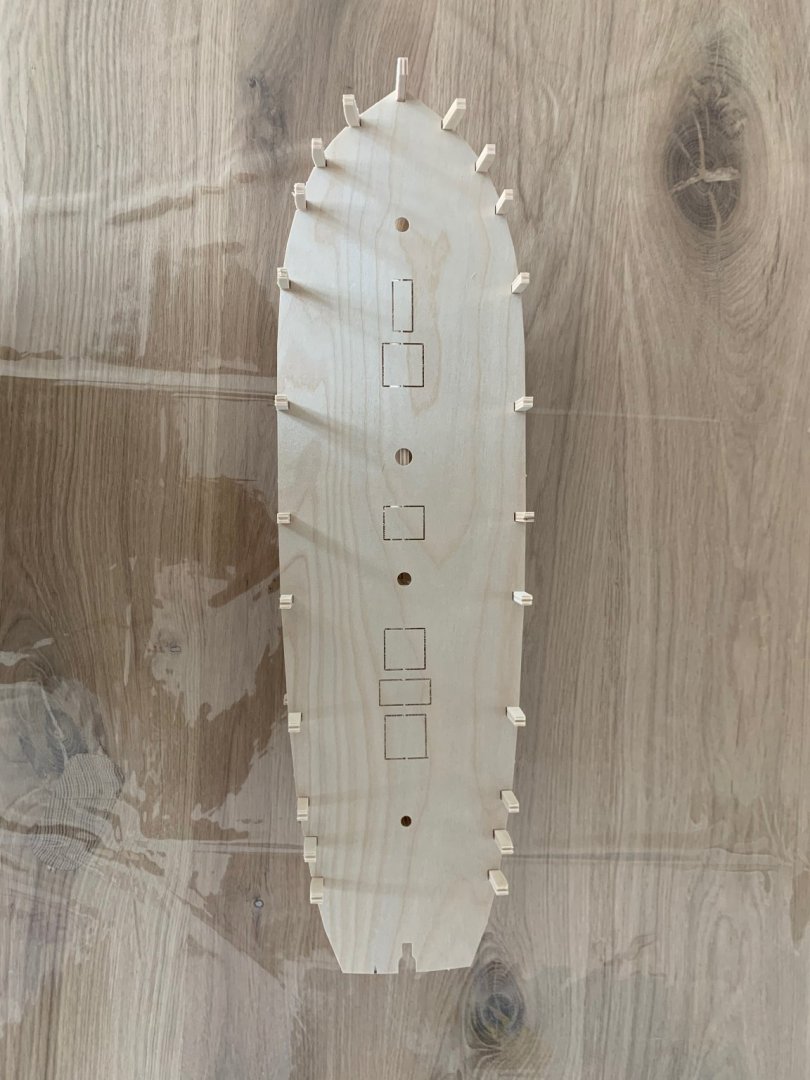
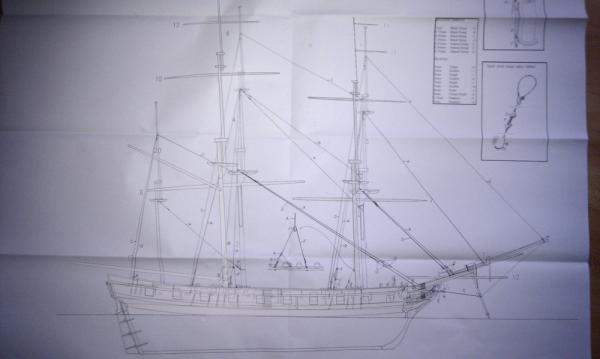
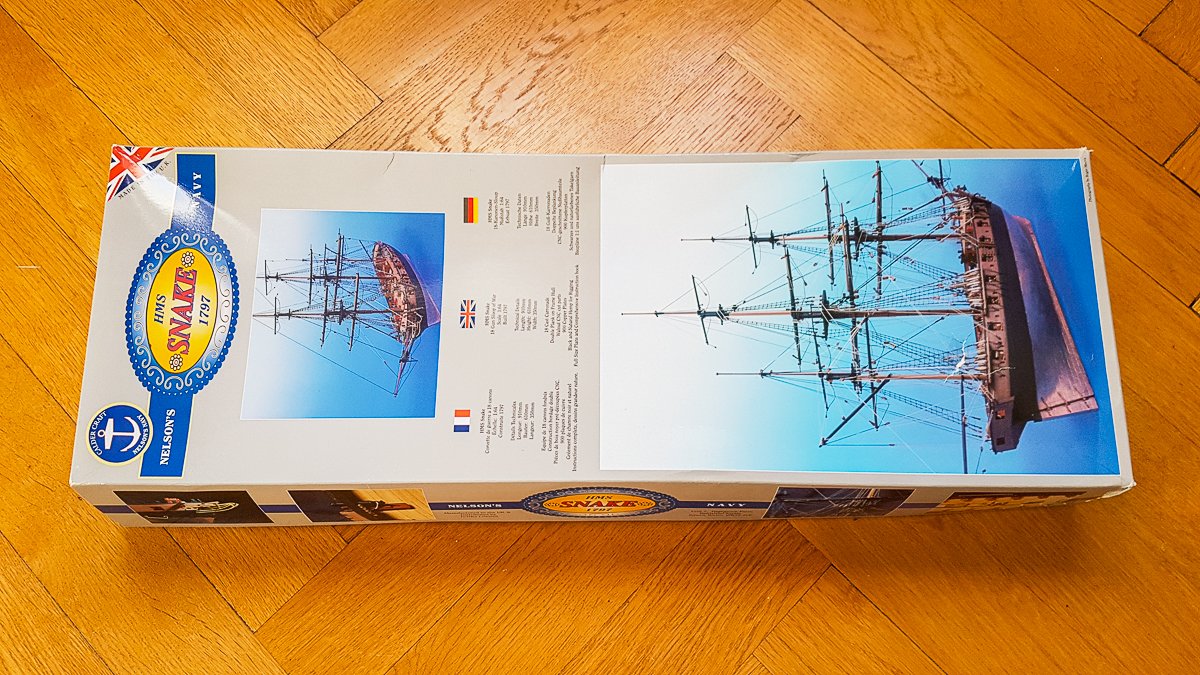
 HMS Snake - 2nd build After picking up my modelship building hobby again (after many years of dorment) I decided to buy my second kit to have something to alternate with when doing the rigging on my first build Corel's HMS Victory in 1:98. It took a while to go through various brands and to decide which one to invest in. My first choice of doing the Victory was kind of naive and a typical newbie mistake. Dont get me wrong, I really love it and it has turned out ok. But I never finished it and modelling is learning by doing and everyone should start more easy is my recommendation. After discovering Caldercrafts Nelson Navy series it become a choice between several ships I found very beautiful. First I was tempted to go for the Diana or even the Agememnon but eventually i decided not to do the same as before and doing something too advanced. In the end it become a choice between the two mast HMS Cruiser or the slightly more advanced HMS Snake. I settled for the latter. It is basically the same model but the Snake is some kind of "special edition" of the Crusier with 3 masts and carronades. History According to Wikipedia, HMS Snake was launched in 1797 as the only member of her class of 18-gun brig-sloops. She captured or destroyed two French privateers and one Danish privateer. She also captured numerous small merchantmen, but spent time escorting convoys to and from the West Indies. She was sold in 1816. The Snake was the sole vessel of her class. This class was very business like with a flush deck and nine cannons or carronades each side, they were very fast and seaworthy. As originally built Snake had a full ordinance of 32 pounder carronades. Carronades replaced the carriage guns because at close quarters the short range carronades proved devastating to their opponents. Class dimensions were: length 100’; breadth 30’6”; displacement 382 tons with a crew of 121. Her designer was Sir William Rule. He produced two designs, one for a ship-sloop (Snake), and one for a brig-sloop (Cruizer) that differed only in their rigging. His designs were in competition with those of John Henslow, who produced the ship-sloop Echo and the brig-sloop Busy. Rule's brig-sloop design won. The Admiralty ultimately ordered 106 Cruizer-class brig-sloops. In 1811, the Navy converted Snake to a brig-sloop, making her indistinguishable from the Cruizer-class brig-sloops. The kit I order it from Cornwall model boats who shipped it quickly to Sweden. My first impression of the kit is really Good. Lots of details and pre fabricated wooden pieces. Caldercraft seem to have quite alot of different design solutions than Corel. The plans where more detailed but at te same time they come in huge size making them abit difficult to handle in my small kitchen "workshop". Two things on the negative side. The box was full of sawdust, perhaps not a major issue but it kind of gave a non quality impression. The second issue was that some of the Wood especially the walnut was not great. Very rough and edgy. A couple of the sticks were basically 50% of the material they should had been. This comes as a surprise considering that Caldercraft seem to be at the high end of kit manufactureers. The rest of the material seem to be fine.
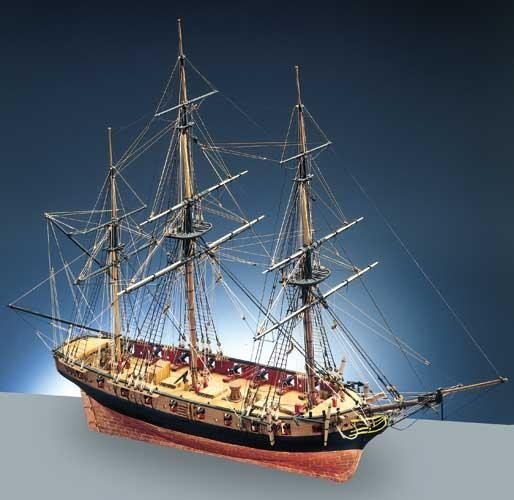


-
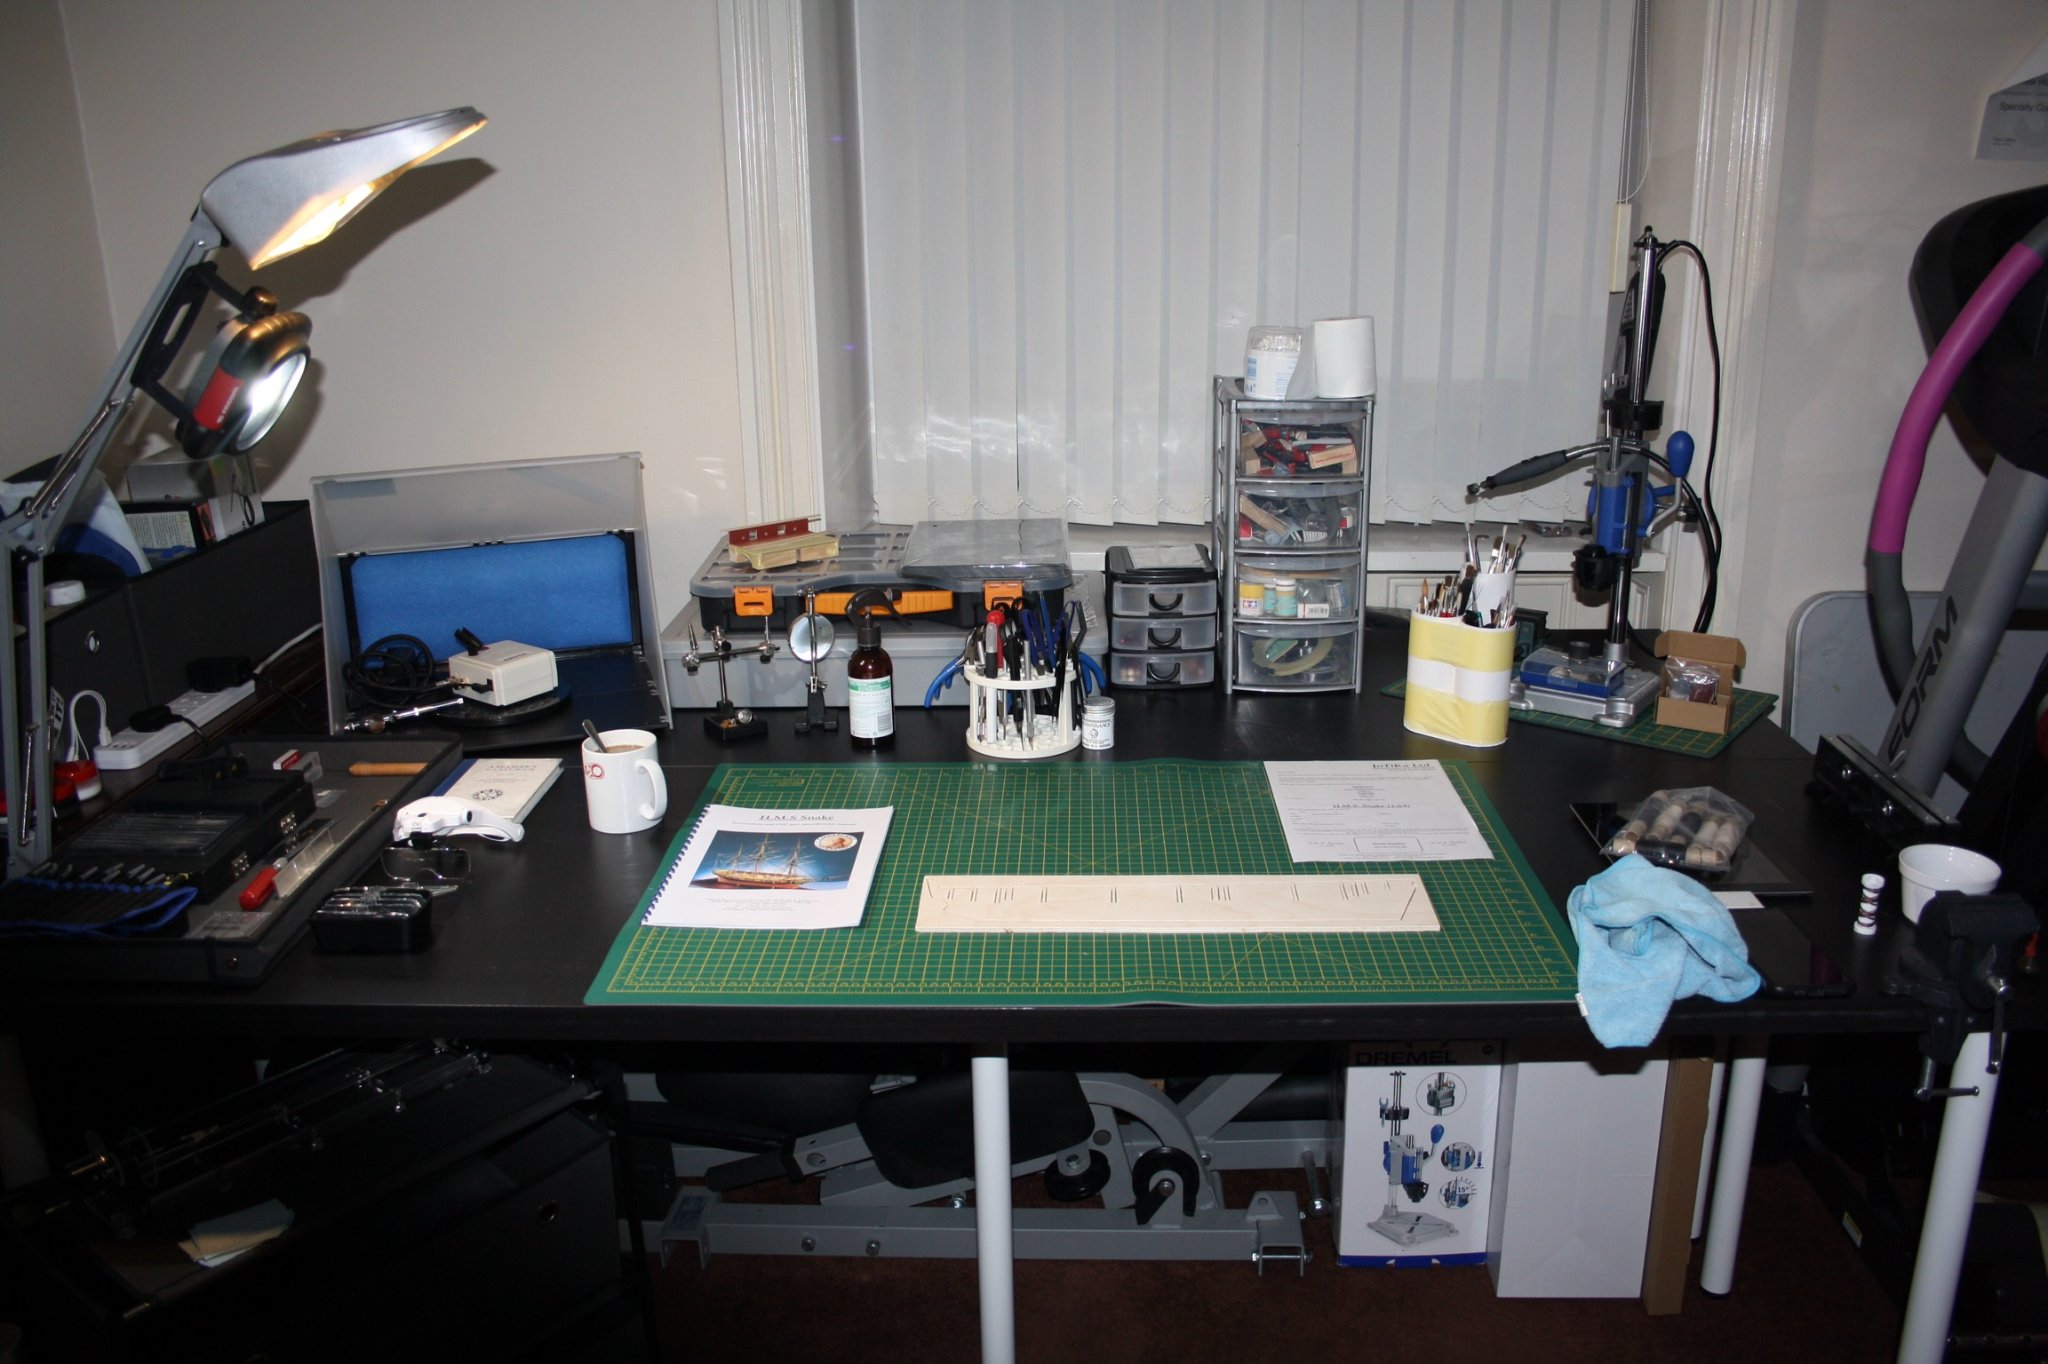
 And so it begins. This is my second build, having caught the bug earlier this year. That makes me a novice, and I plan to show other novices the process of climbing the learning curve. Many have been here before me, and you can find build logs of their work. Those I have found are by @Beef Wellington, @Stone, @Vane, @mispeltyoof, @Davemc, @jim_smits, @peteri and @BenD. Should I be worried that none of them is finished?
- 109 replies
-
- 1
-
-
- snake
- caldercraft
- (and 1 more)
-
 HMS Snake was launched in 1797 as the only member of her class of brig-sloops. She captured or destroyed two French privateers and one Danish privateer. She also captured numerous small merchantmen, but spent time escorting convoys to and from the West Indies. She was sold in 1816. Scale: 1:64 Length: 910 mm Width: 350 mm Height: 910 mm And now the build begins.
- 53 replies
-
- 6
-
-
- brig-sloop
- Caldercraft
- (and 2 more)
-
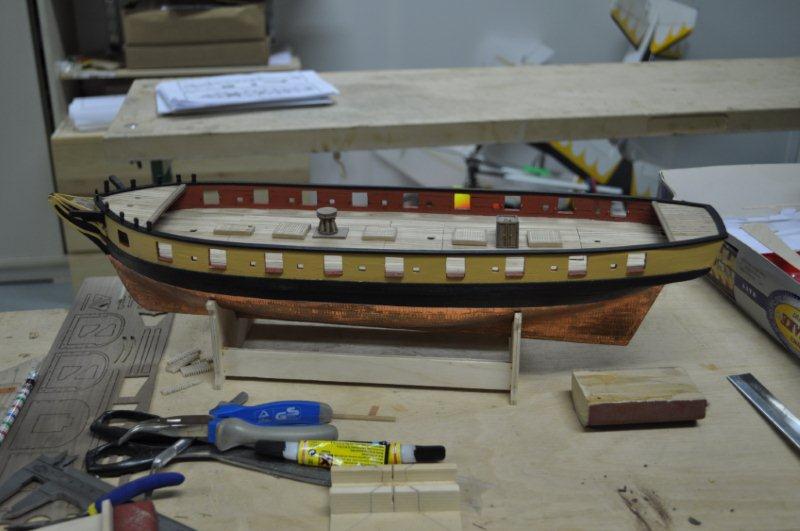
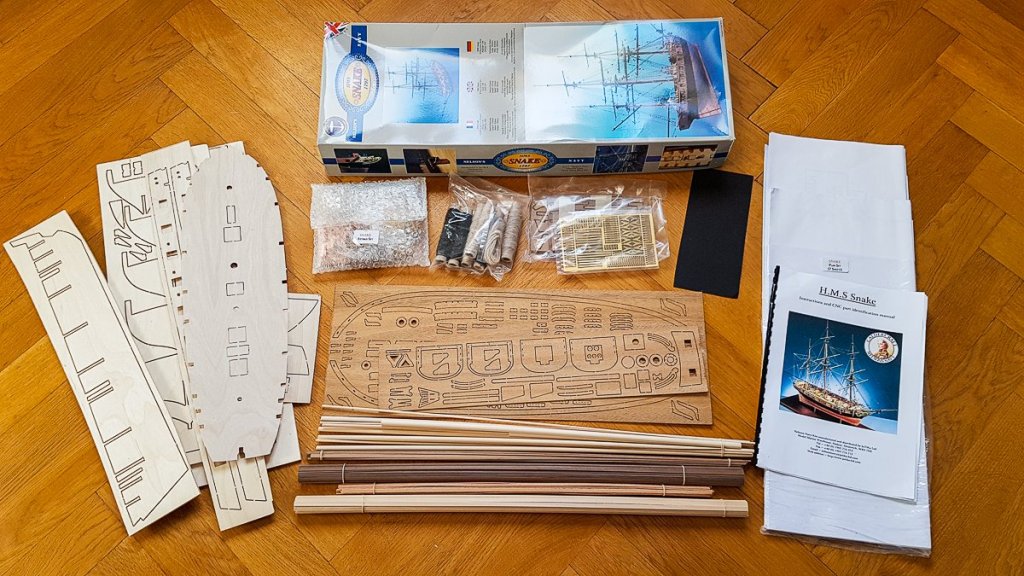
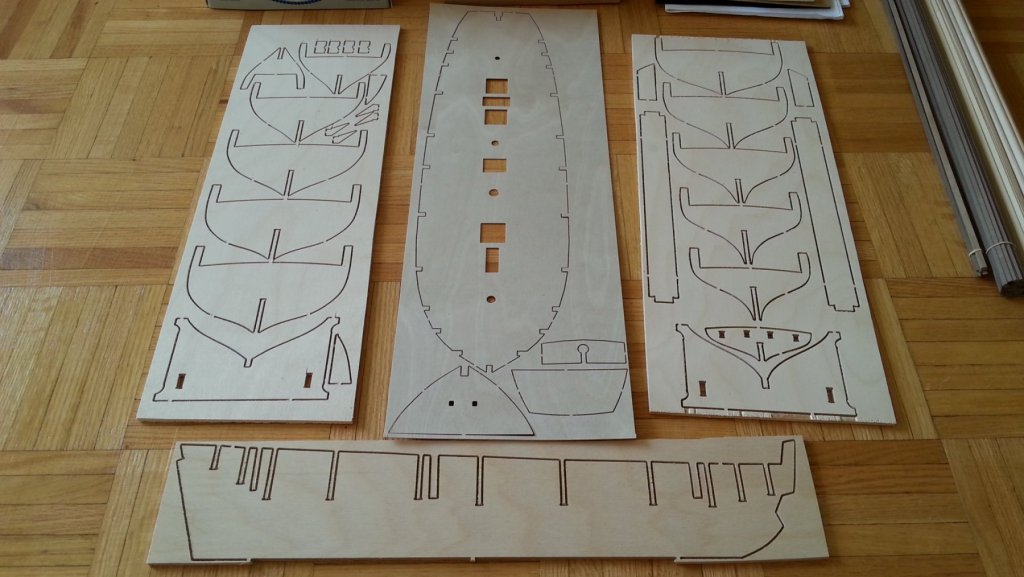
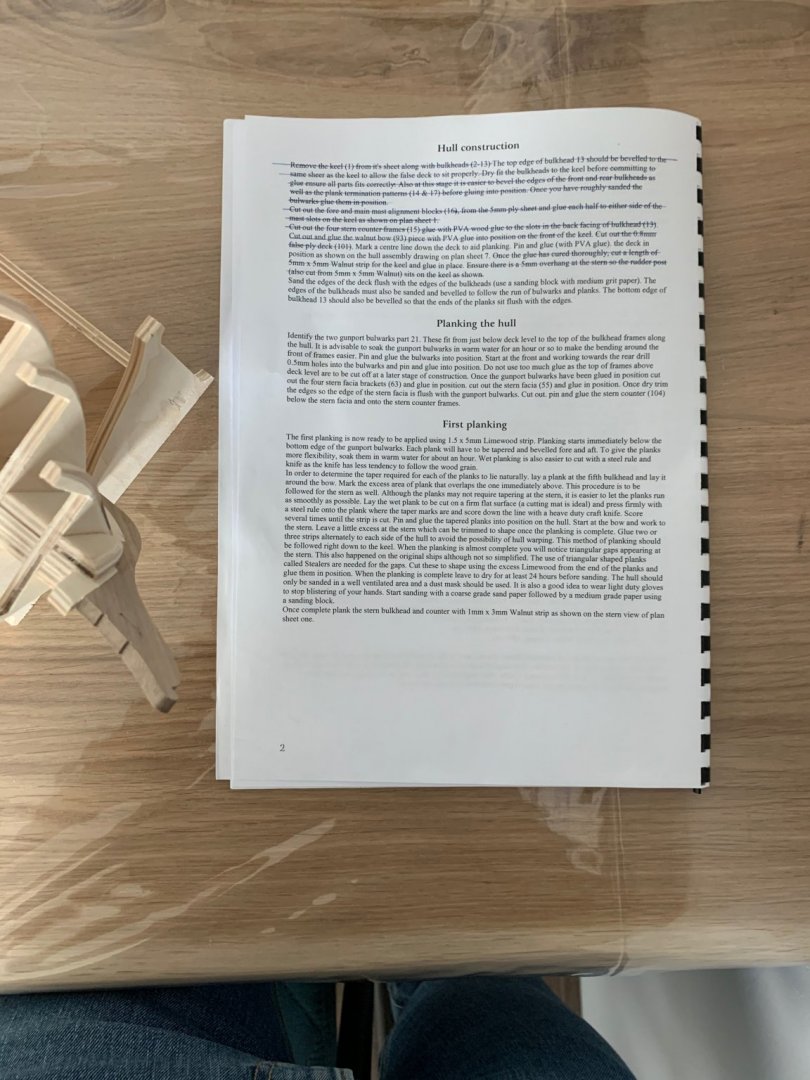
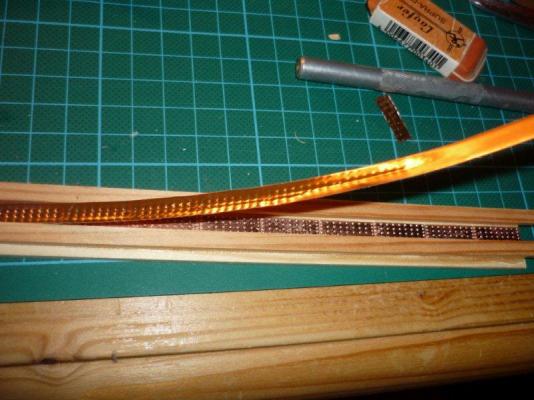
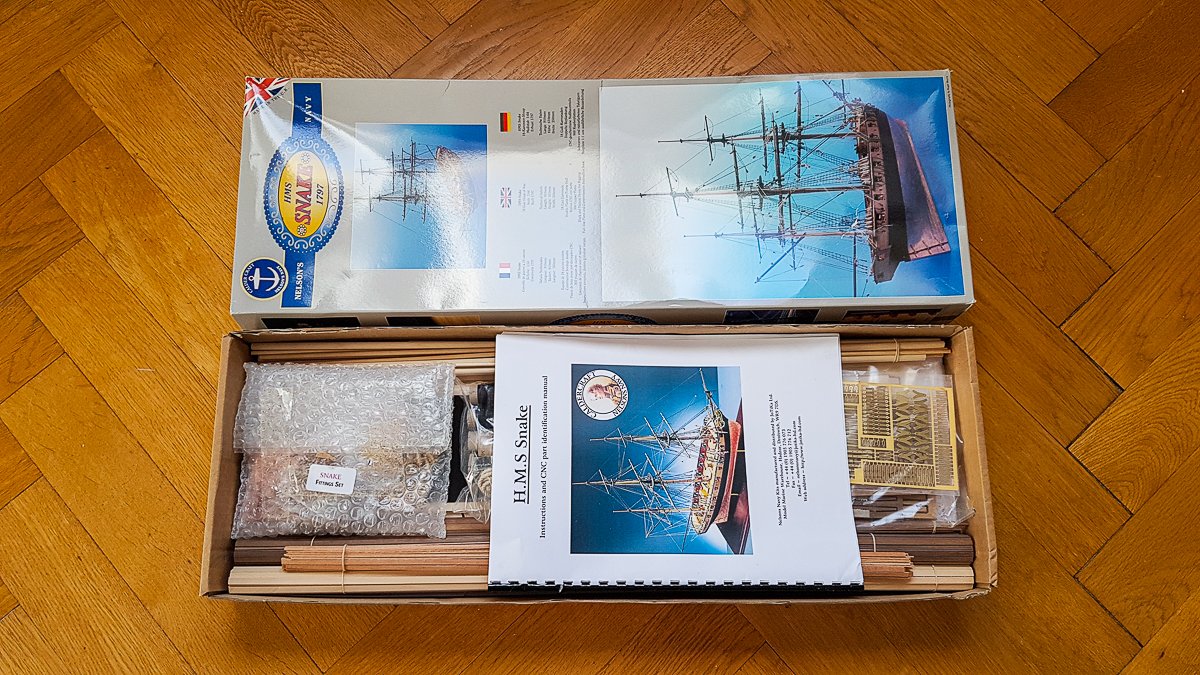
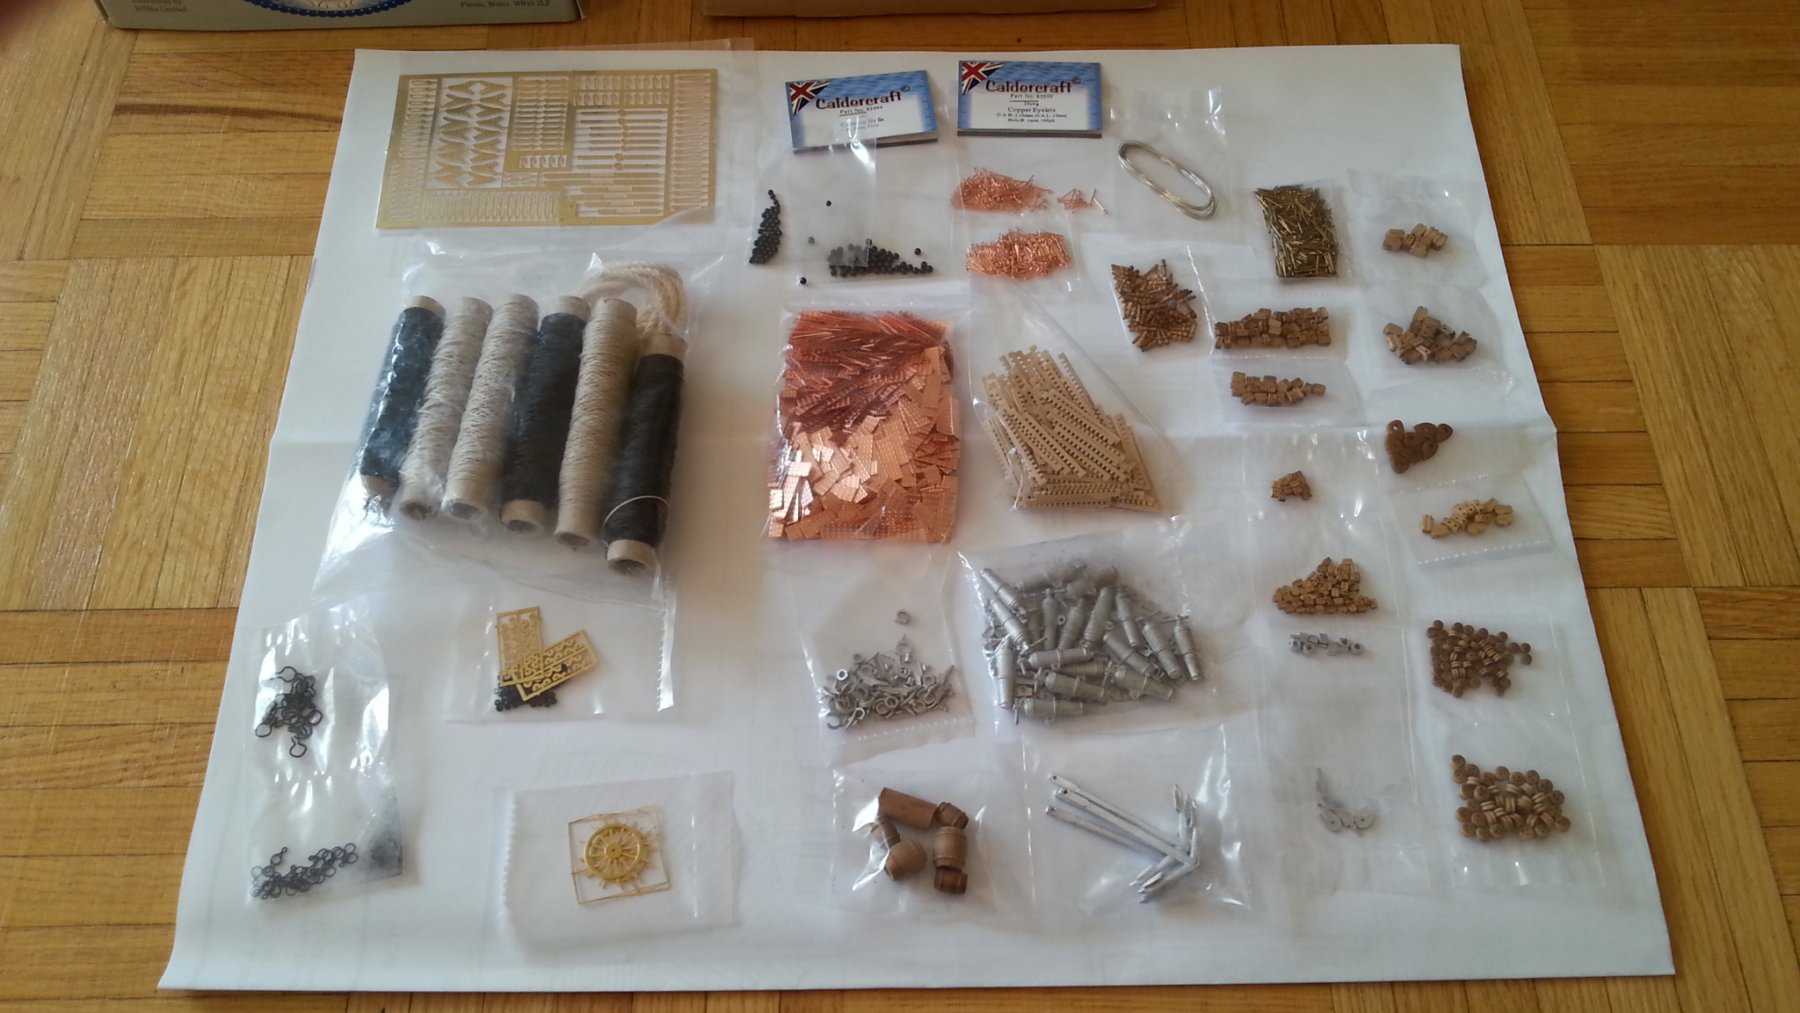
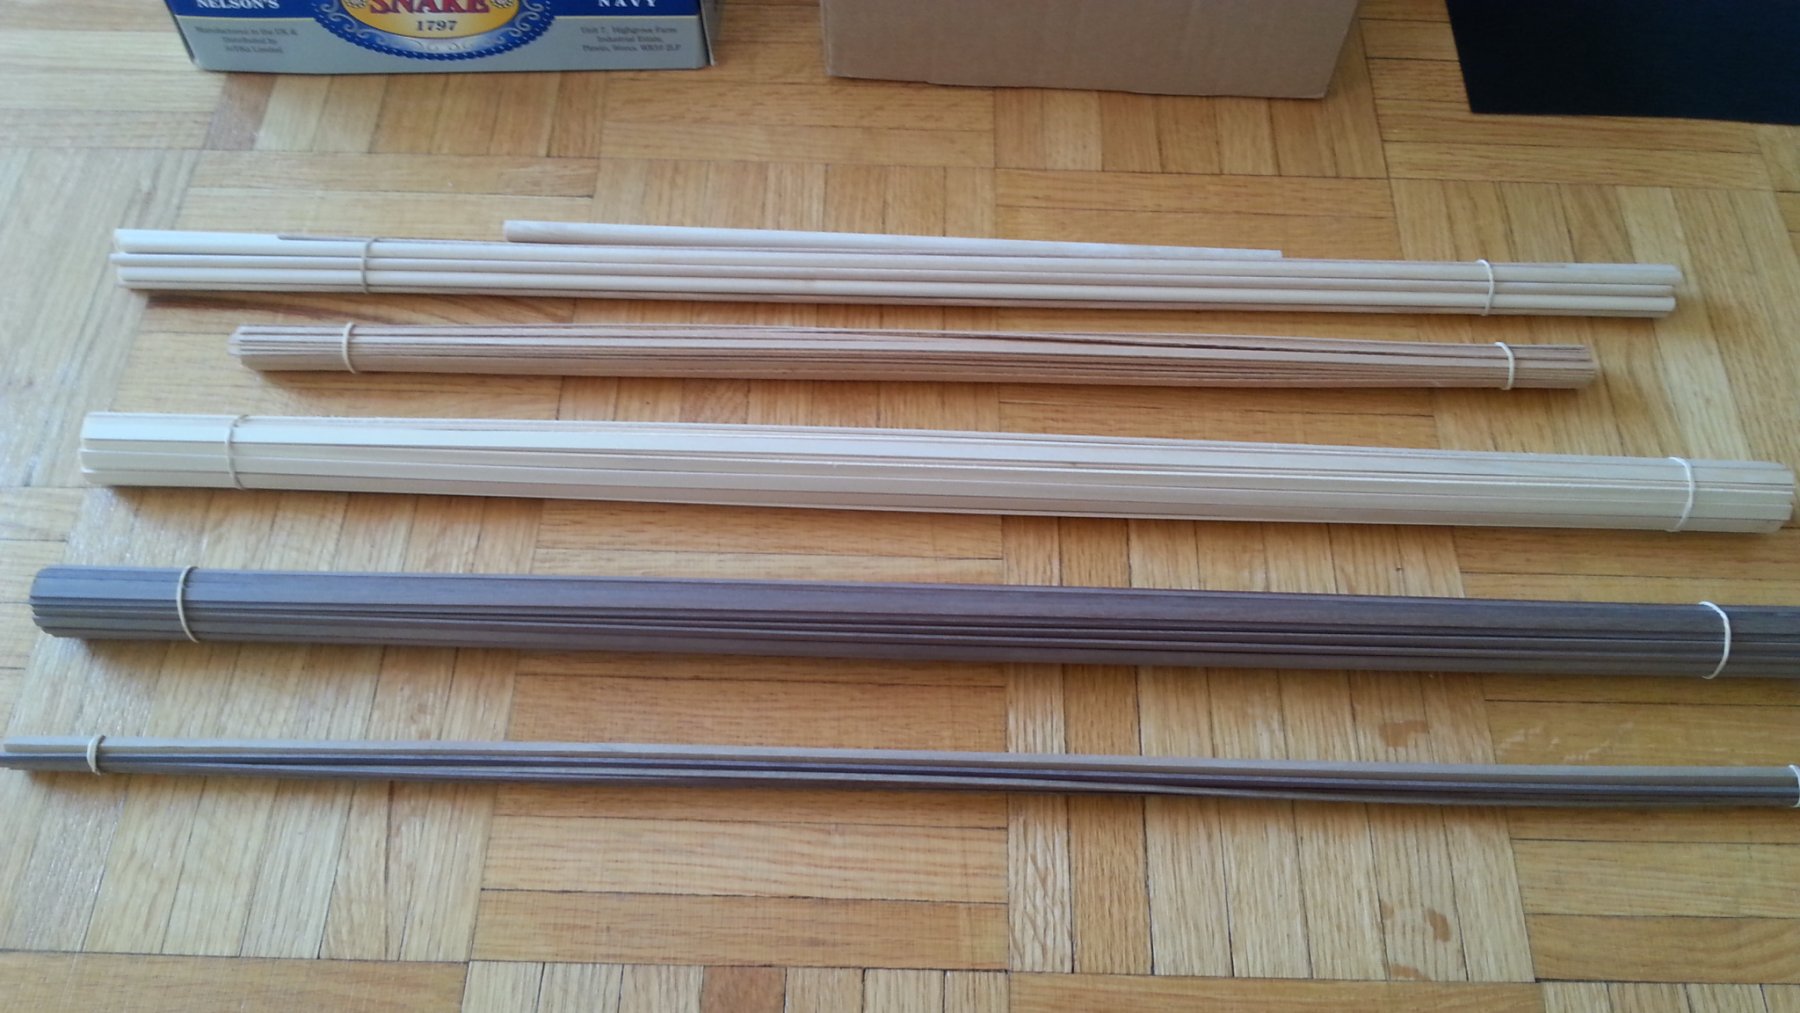
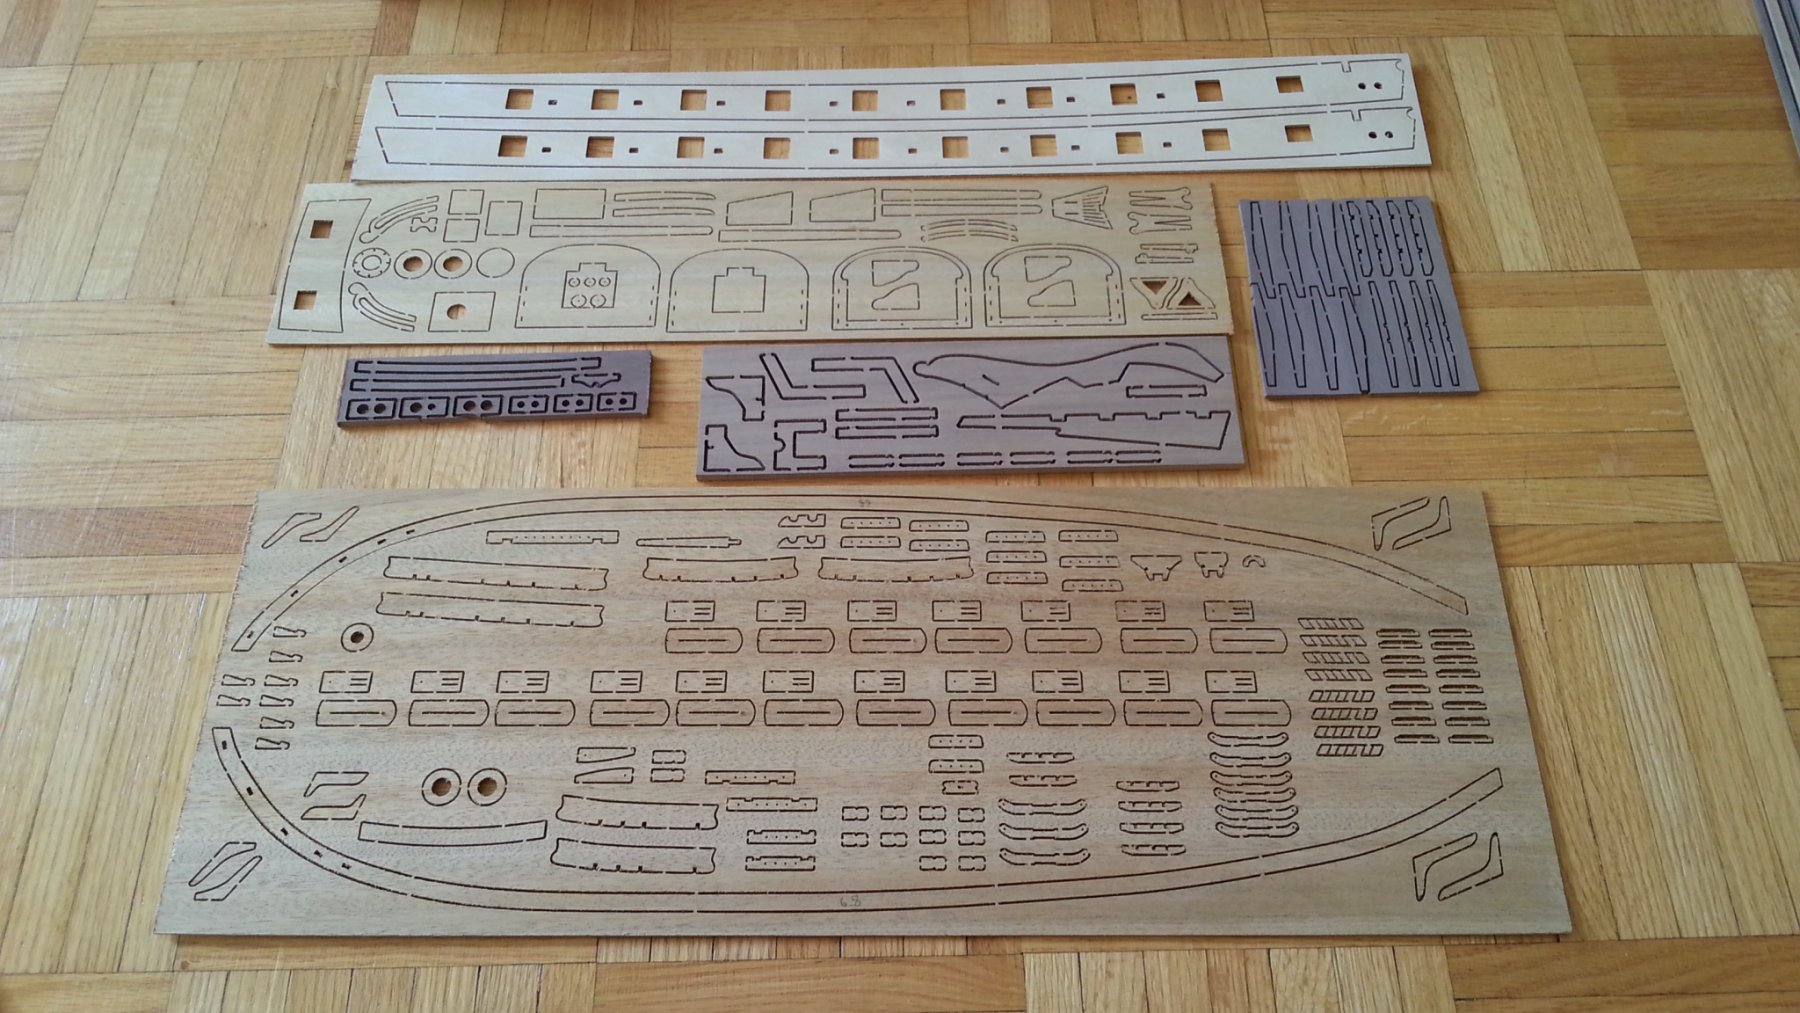
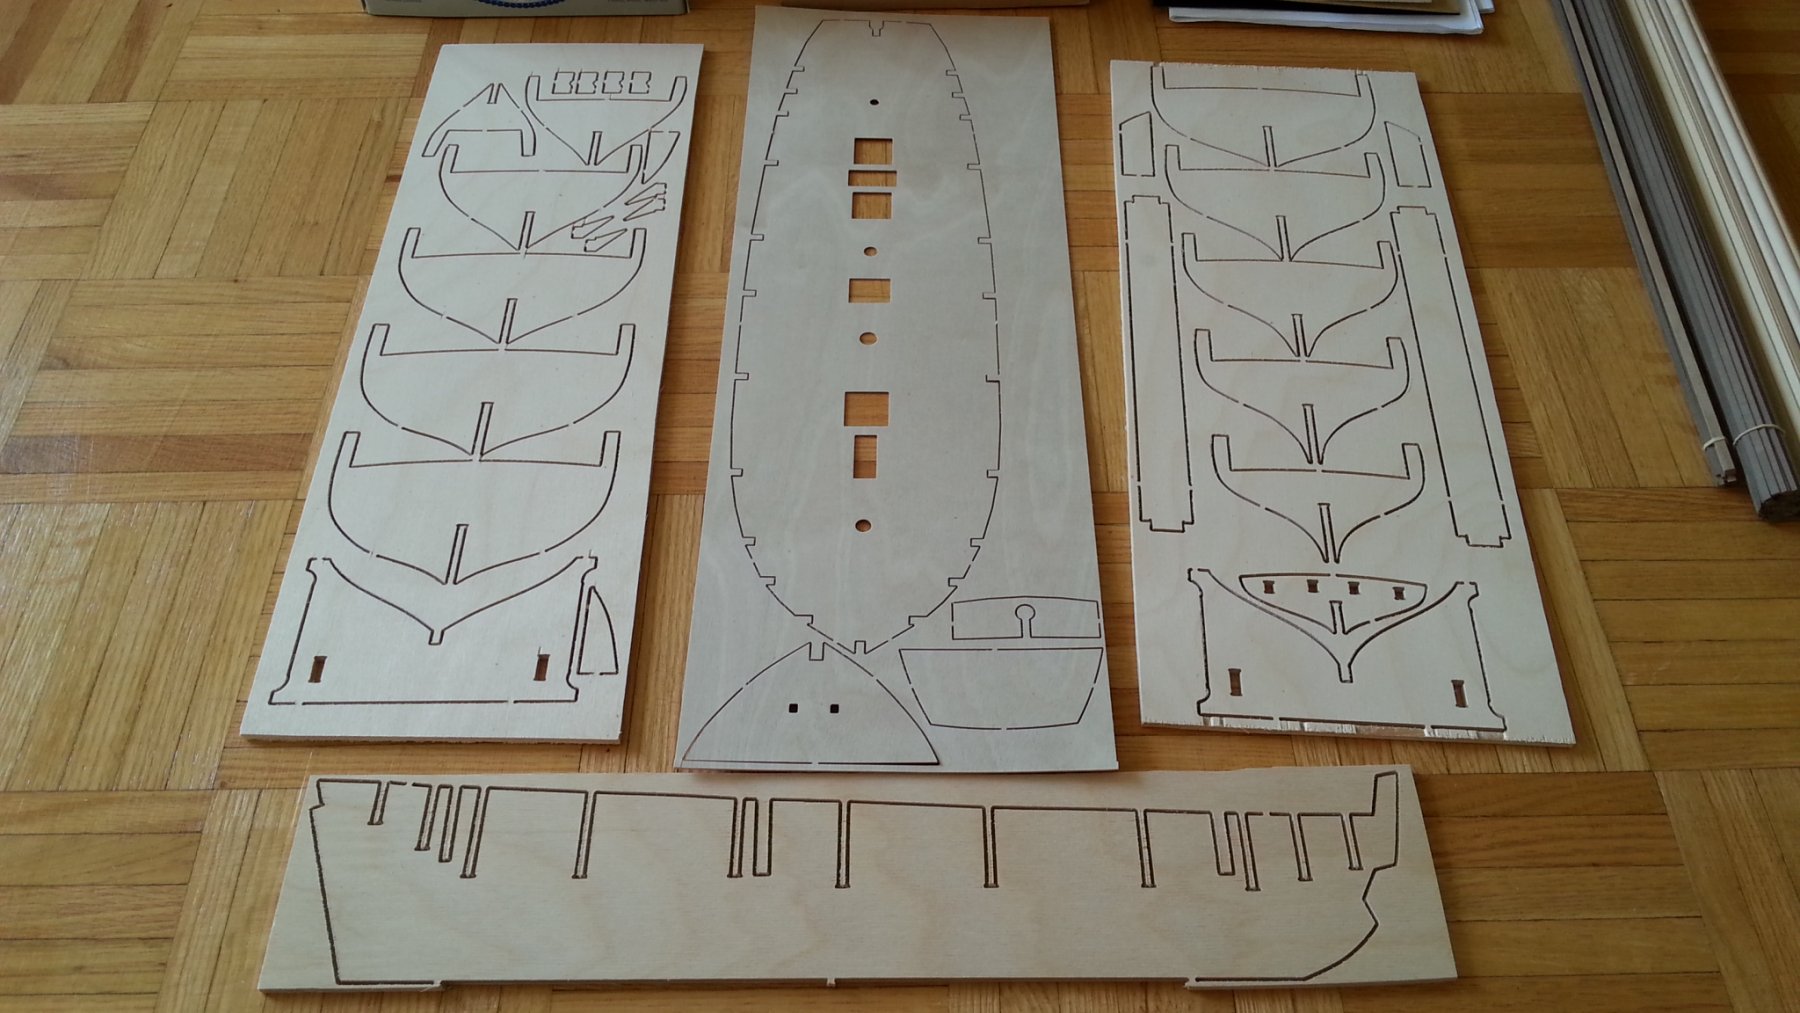
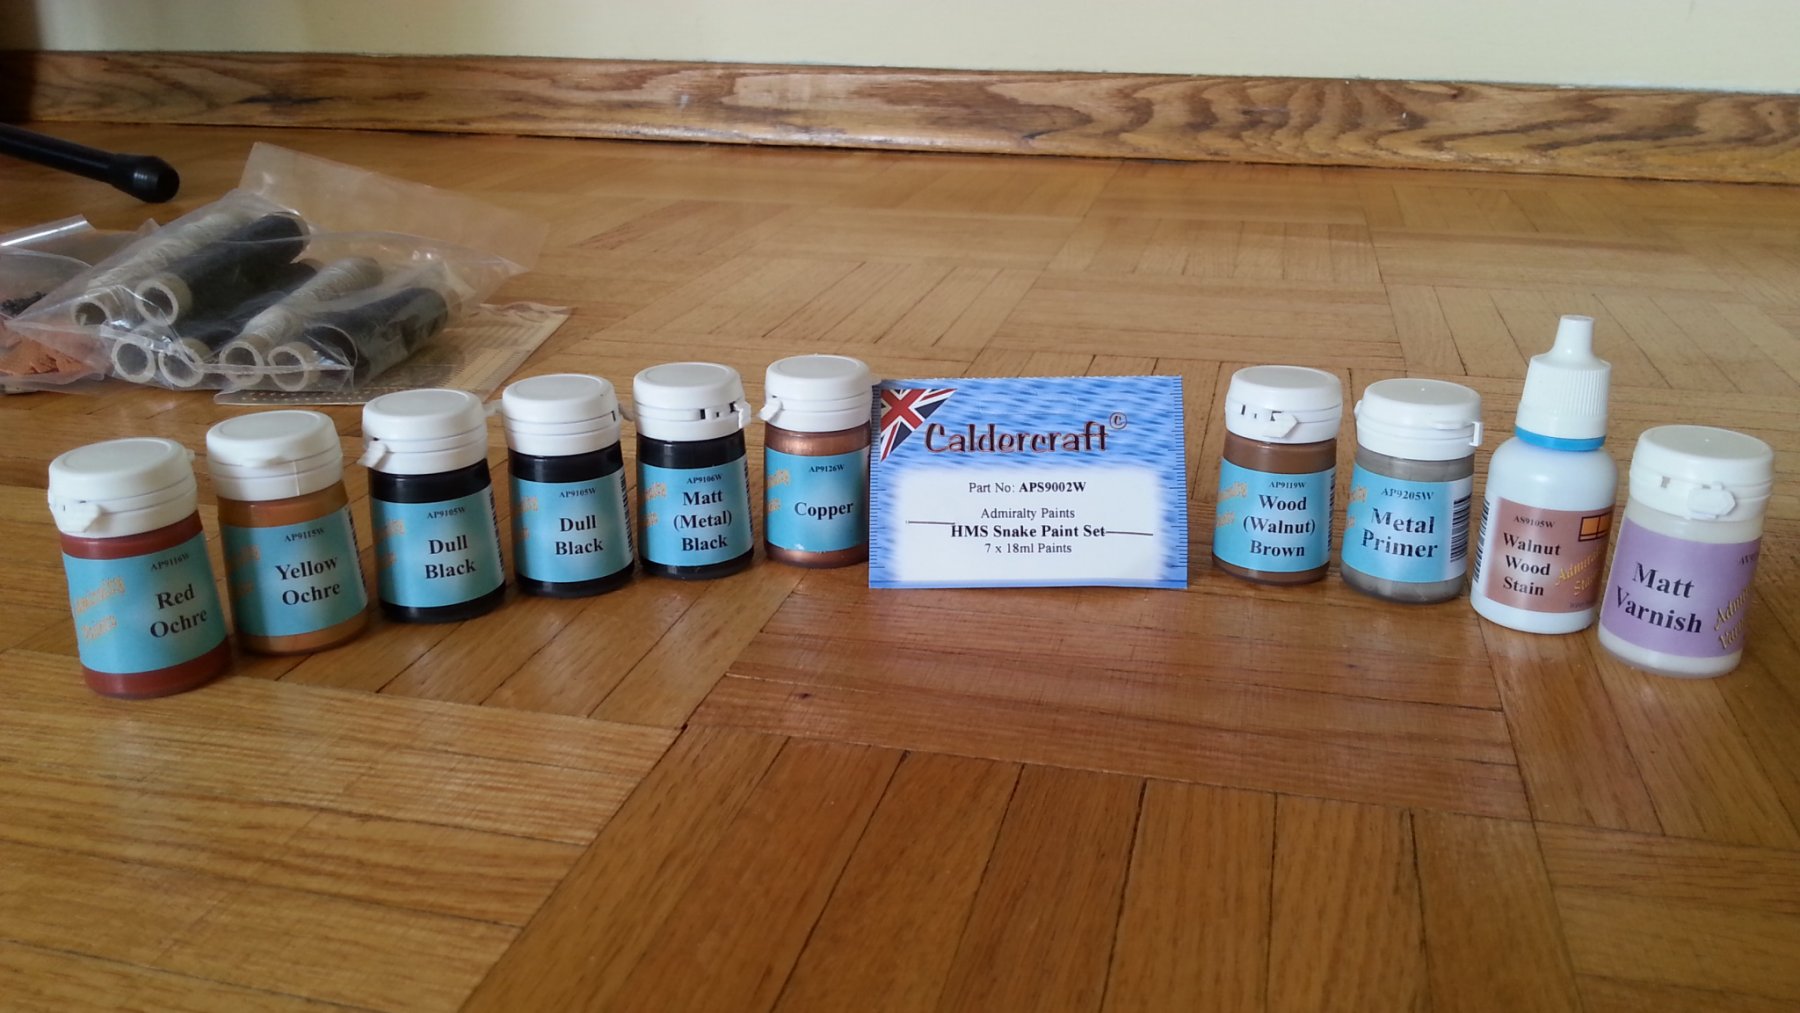
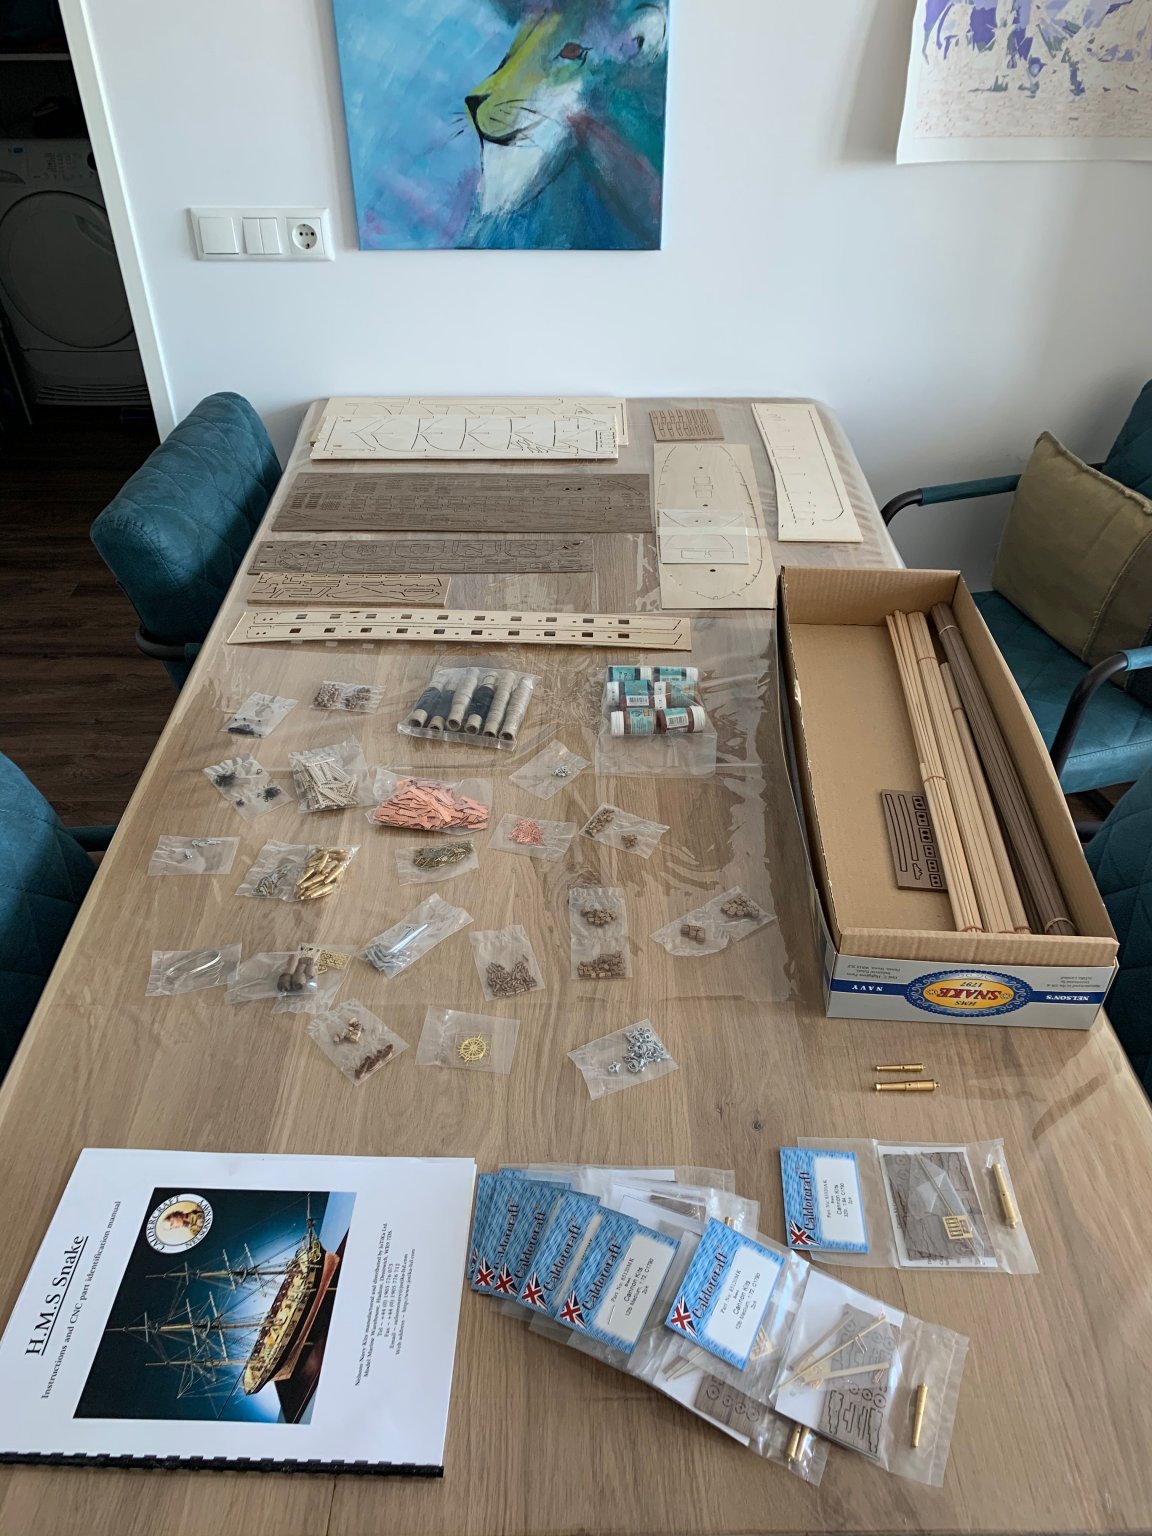
 HMS Snake As requested by a user on this forum I will show all the contents of this kit, The other snake builds do not have this it seems. I ordered the kit with some extras (cannon balls, Snake paint set) and a few other things. I will start work on it in a few weeks, Just need to finish up the running rigging on the Sherbourne and make her a display case. All of the fittings are good quality and even the blocks seem to be of highers quality that what came with the Sherbourne. The Caronades are rough looking but the cast is aligned they just need a some work. The bag of copper plates is surprisingly heavy! The wood strips are so much better than what I had on my Sherbourne, they are all well milled and don't look like a dog chewed them. The dowels are mostly strait. The Tanganyika strips are a bit weird as in one side is darker that the other on most of the strips so I will have to keep that in mind while laying the deck. The plans are just huge and there are 7 sheets! The instruction manual is just a few pages though as it is one of Caldercrafts older kits, it's not to bad because it makes you reference the full size plans. The cutouts are one of the highlights I feel. The CNC cuts are good they just have a bit of fuzz in them but I think it beats laser cut char any day. The keel has just a slight bend which will be easily adjusted. Everything else is solid. And finally the paint set plus some extras I bought. I thought they would have been smaller given the price so I'm pleased. -c
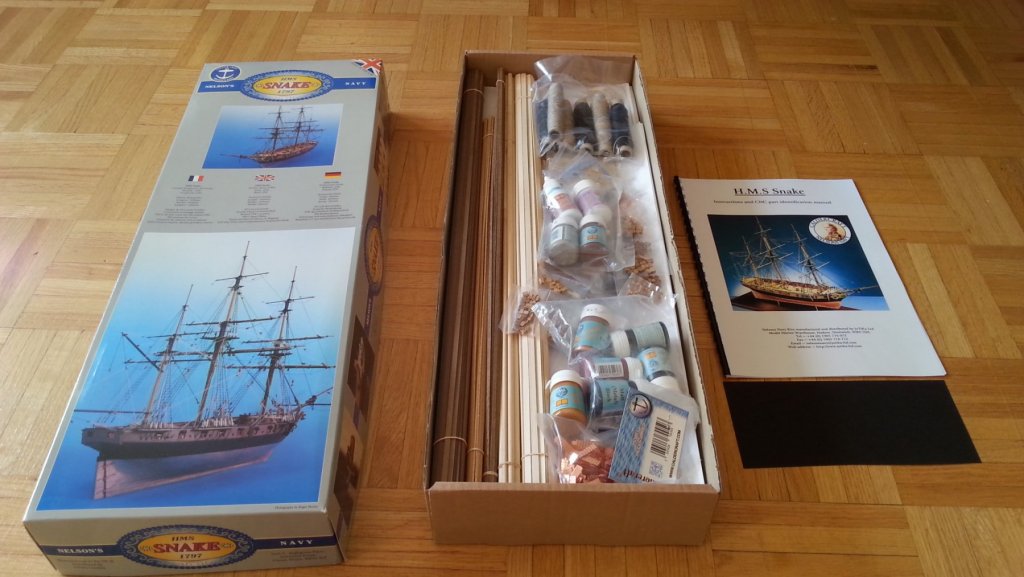


-
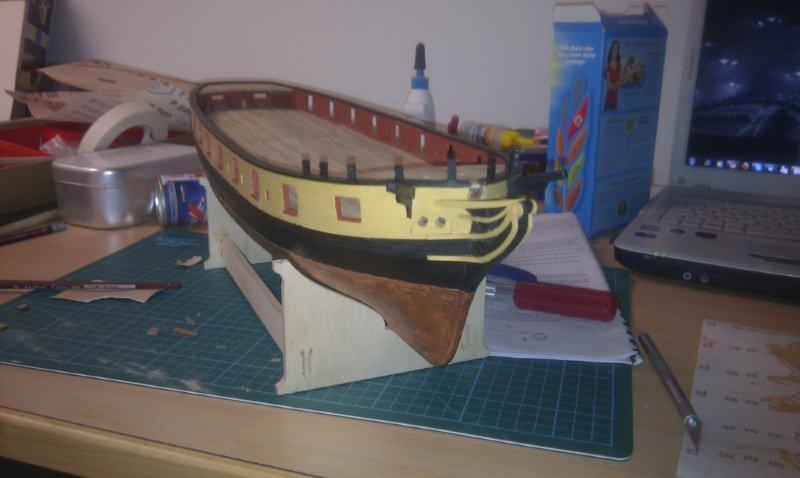
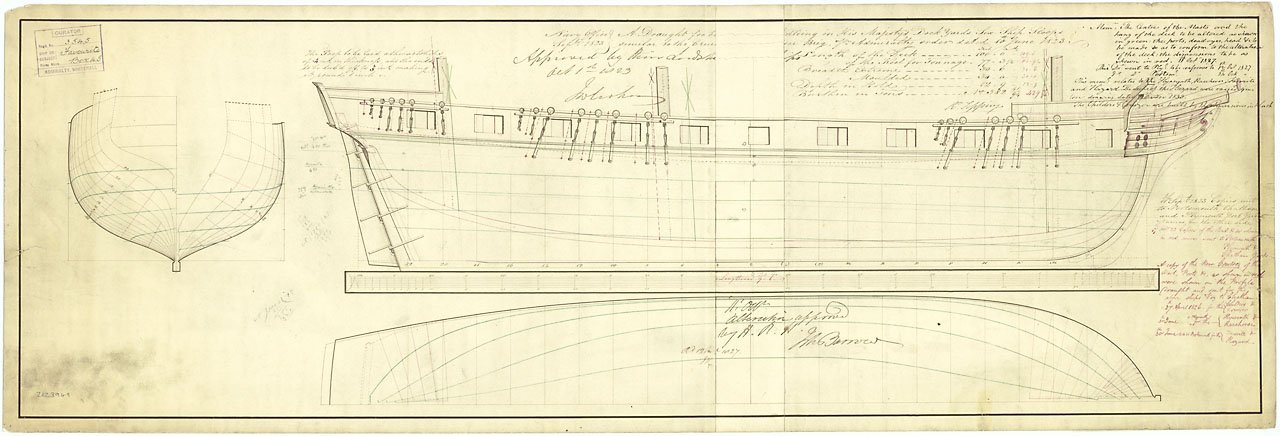
 I’ve had a kit of HMS Snake barely started for several years, during which time I’ve struggled to get back in to building, what has caught my imagination is a conversion using the Snake kit as a starting point. My plan is to convert the Snake kit into a Cruizer class ship sloop of 1828, also named HMS Cruizer, which may seem odd at first sight as there already is a Caldercraft kit of HMS Cruizer of 1797. Confused? Stay with it a moment and I’ll just put things in to context. HMS Cruizer (name class) of 1797 was a two masted brig sloop, which spawned over 100 ships predicated on the same basic design. HMS Snake was a 3 masted ship sloop based on the Cruizer design also of 1797, only 2 ship sloops were initially completed, although several of the brig sloops were later converted to ship sloops as the lessons of war, particularly those of 1812 showed the ship sloop rig to be more resilient to battle damage. In 1826 5 more of the Cruizer class were ordered, 2 of which were to be ship rigged, but the changes weren’t merely in the rig, the ship sloops were to be lengthened, as demonstrated on the plans still held by the National Maritime Museum (http://collections.rmg.co.uk/collections/objects/83740.html): Plan ZAZ3949 (attached) “Scale: 1:48. Plan showing the body plans, sheer lines and longitudinal half-breadth for building Childers (1827), Cruizer (1828), Favorite (1829), Hyacinth (1829), Racehorse (1830) and Hazard (1837), all 18-gun flush-decked Ship Sloops similar to the Cruizer (1797) brig. The plan was cut in two along the midship section and a new piece inserted for the proposed (and approved) lengthening for the last four ships and the alterations to the mast positions as a result. Signed by Robert Seppings [Surveyor of the Navy, 1813-1832]” So, all I need to do is to cut the model in two and slap a bit in the middle! Or there may be more to it than that, not only lengthen it, but also re-position the gun ports, and add raised forward and aft platforms (similar to those flush platforms found on some of the earlier Cruizer models). Then there is the raising of the hawse holes, fashioning a new rudder, raise and re-model the stem, add 2 more Elm Tree pumps (4 shown on the inboard profile), and fabricate a bowsprit bed. After which there is the fitting out, I’ll be going with Stud anchor chain which will mean adding chain stoppers, and for the rig adding Trysail masts which are evident on HMS Pelorus - converted in 1826 from a brig sloop to a ship sloop so the rigging and masts are contemporary with the 1828 Cruizer. As to her career, Wikipedia states: “HMS Cruizer was a Snake-class ship sloop launched in 1828 for the British Royal Navy. The ship was built as a revival of the retired Snake-class ship-sloops. The Navy converted her to a brig in 1831, back to a ship in 1840, and sold her at Bombay in 1849. In 1839 Cruizer participated in the Aden Expedition along with the frigate HMS Volage and the two British East India Company (EIC) vessels, the sloop HCS Coote and the schooner HCS Mahi. Cruizer saw extensive service during the First Opium War. She participated in the Battle of Whampoa, the Second Battle of Chuenpi, the Battle of Canton, the Battle of Amoy, and the Battle of First Bar. During the Battle of Whampoa, Maj. General Hugh Gough, commander of the British army during the First Opium War, personally directed the land assault on Whampoa island from Cruzier's deck. In January 1841, Cruizer recaptured the whaling brig Pilot. The local inhabitants in the Nicobar Islands had captured her in December 1840 and murdered most of her crew. Pilot was taken into Singapore.” I’m going to swap-out a lot of the kit supplied wood and use Swiss Pear, Box and Ebony, I won’t be double planking, but will infill between the bulkheads with balsa. Painted components will be kept to a minimum. Fittings are from Cladercraft, Syren and RB Models. For reference, as well as the basic Snake instructions, and the excellent Snake and Cruizer logs elsewhere on the forum, I’m using the NMM plans and profiles, as well as the book by EW Petrejus - Modelling the Brig-of-War Irene: A Handbook for the Building of Historical Ship-Models. There are then a number of models and paintings available at the NMM and elsewhere to tap into. So the first job – strip off the few planks I’ve got in place and cut the carcass in half. But that’s for the next log instalment. All welcome to follow along, just don't expect a fast pace, I've taken early retirement and am starting the travel bucket list. Gary
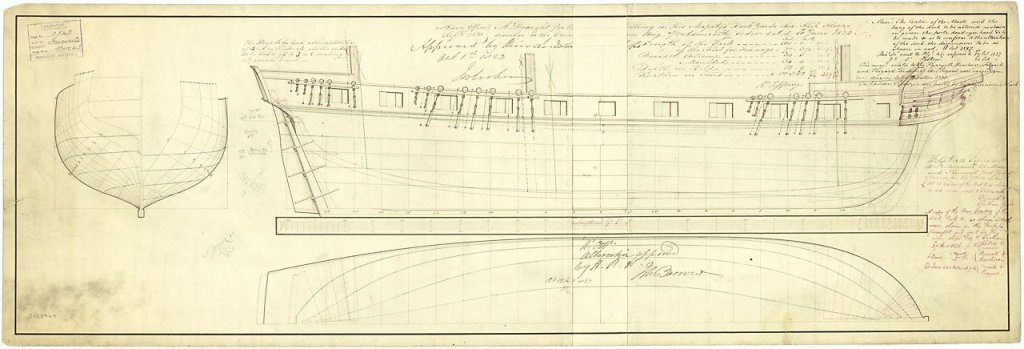
- 2 replies
-
- 6
-
-
- caldercraft
- Cruizer
- (and 1 more)
-
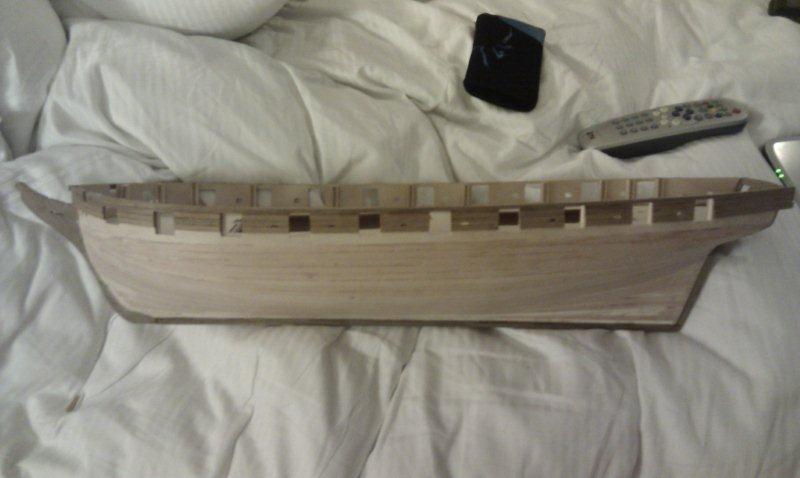
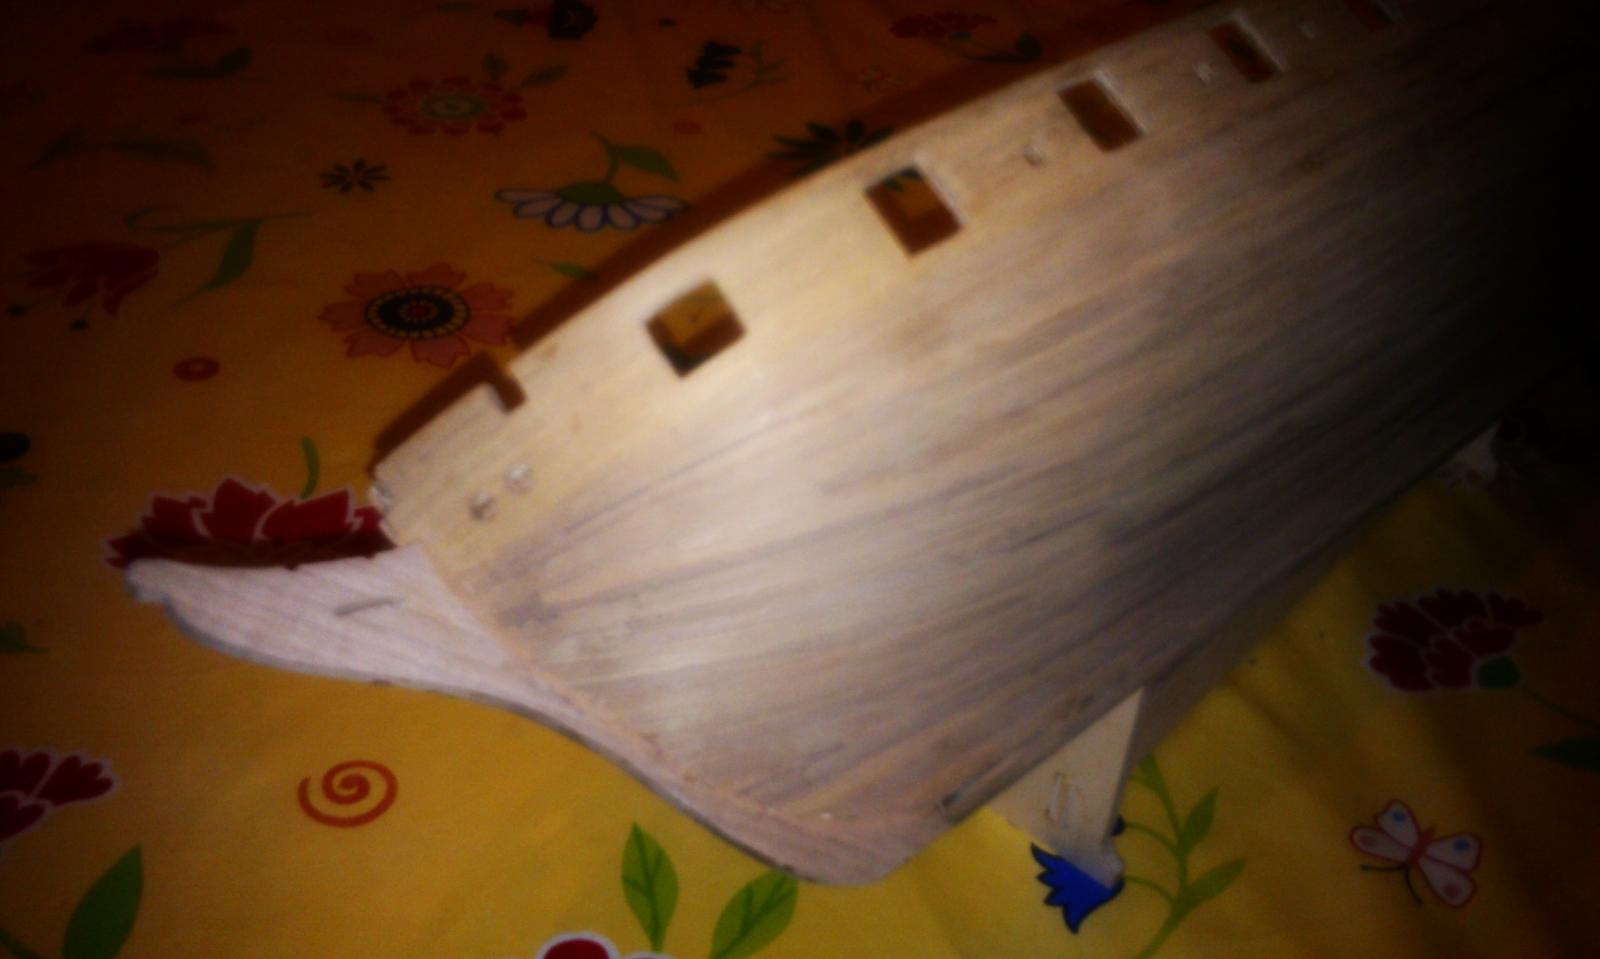
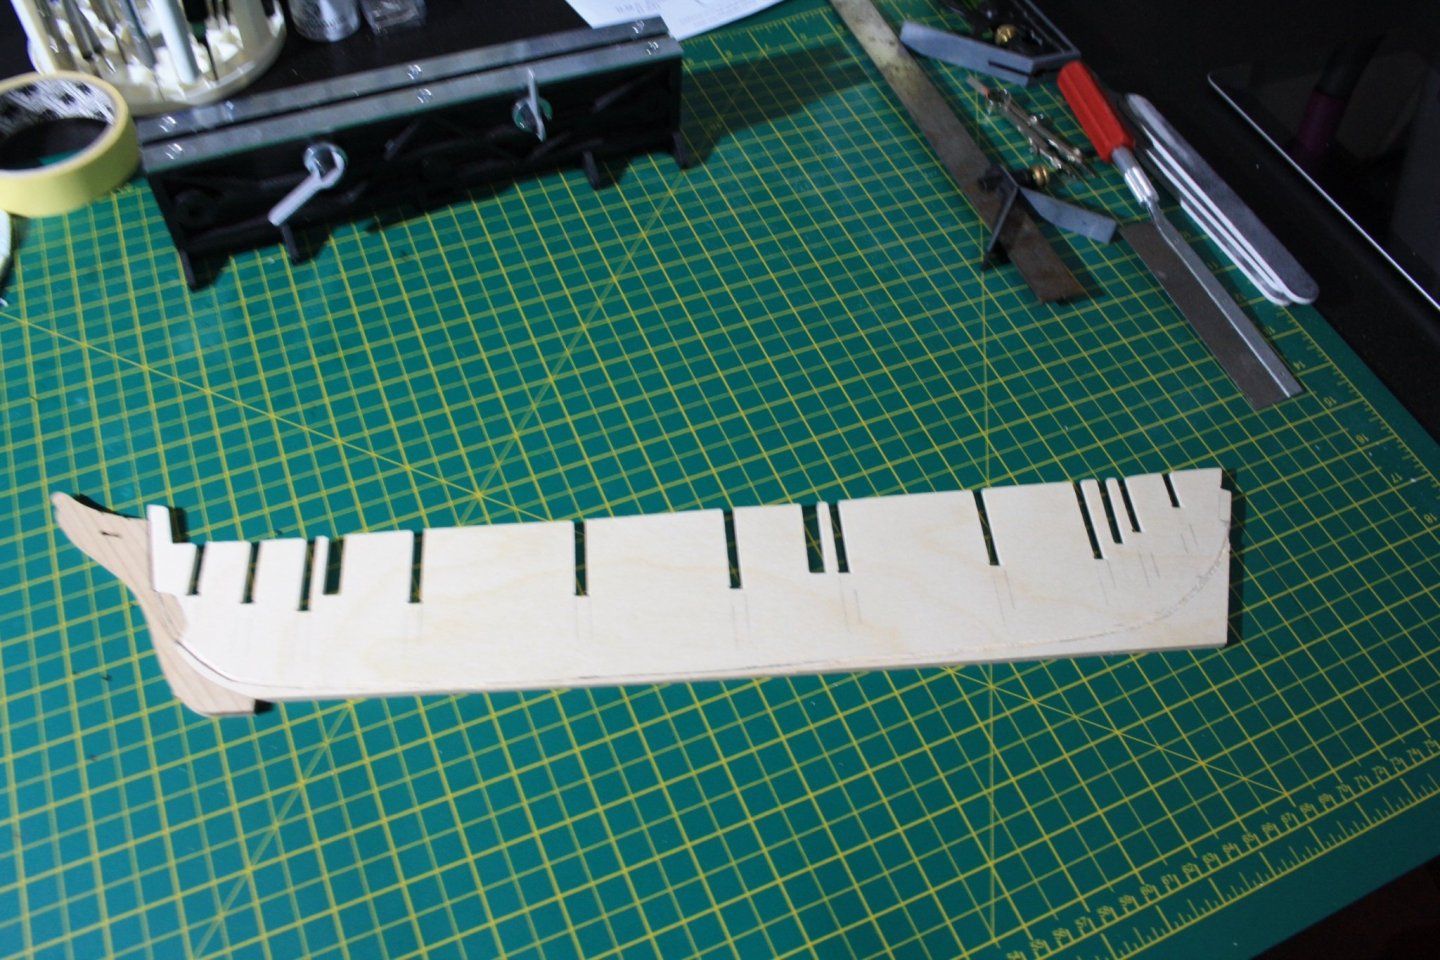
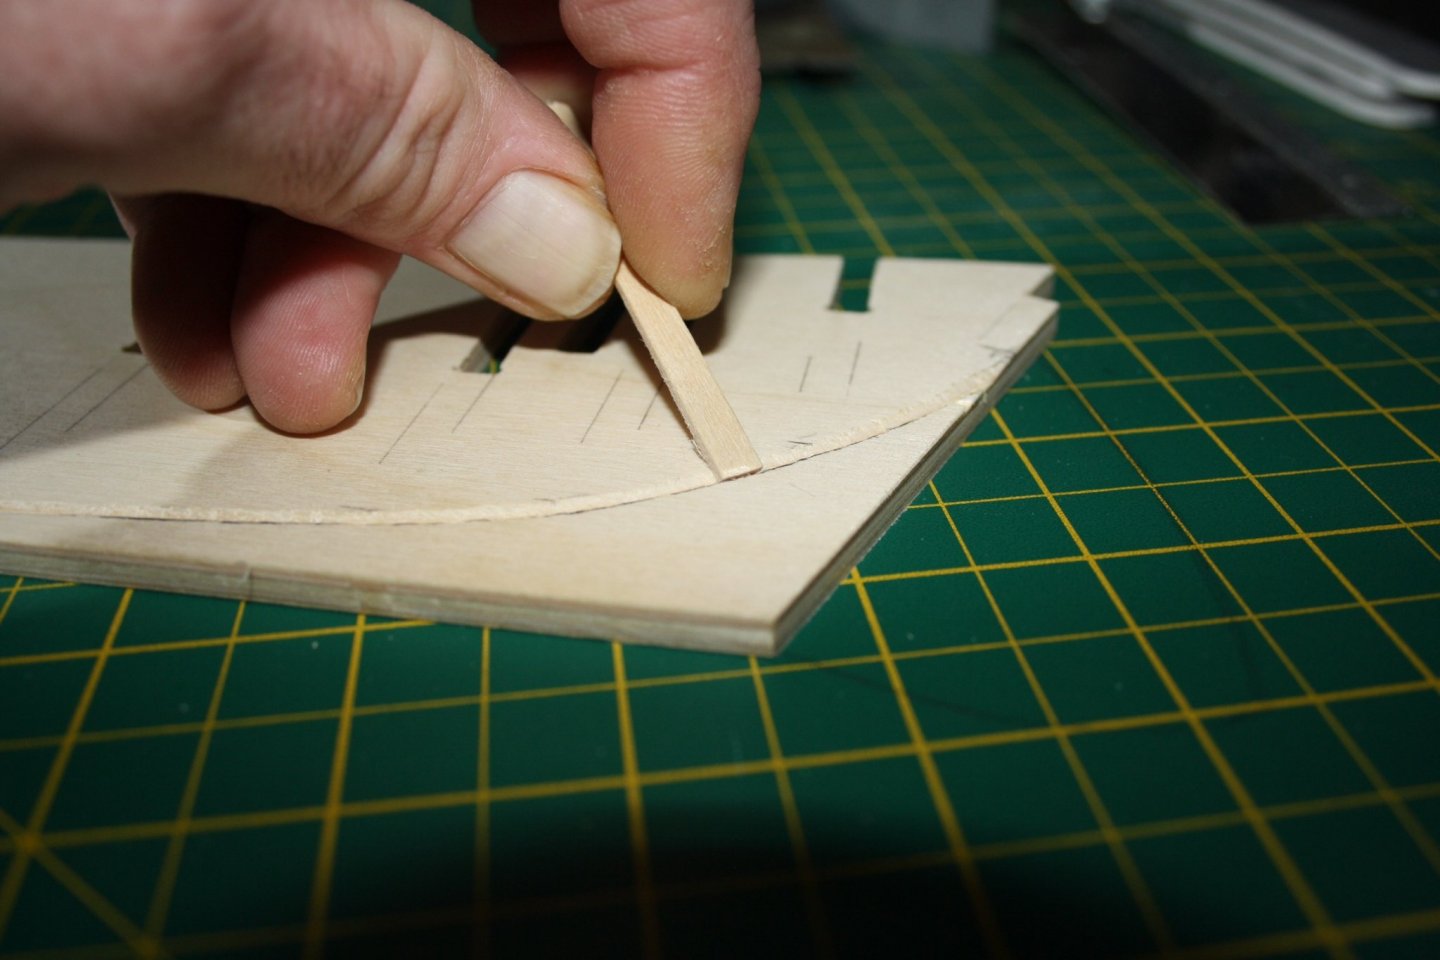
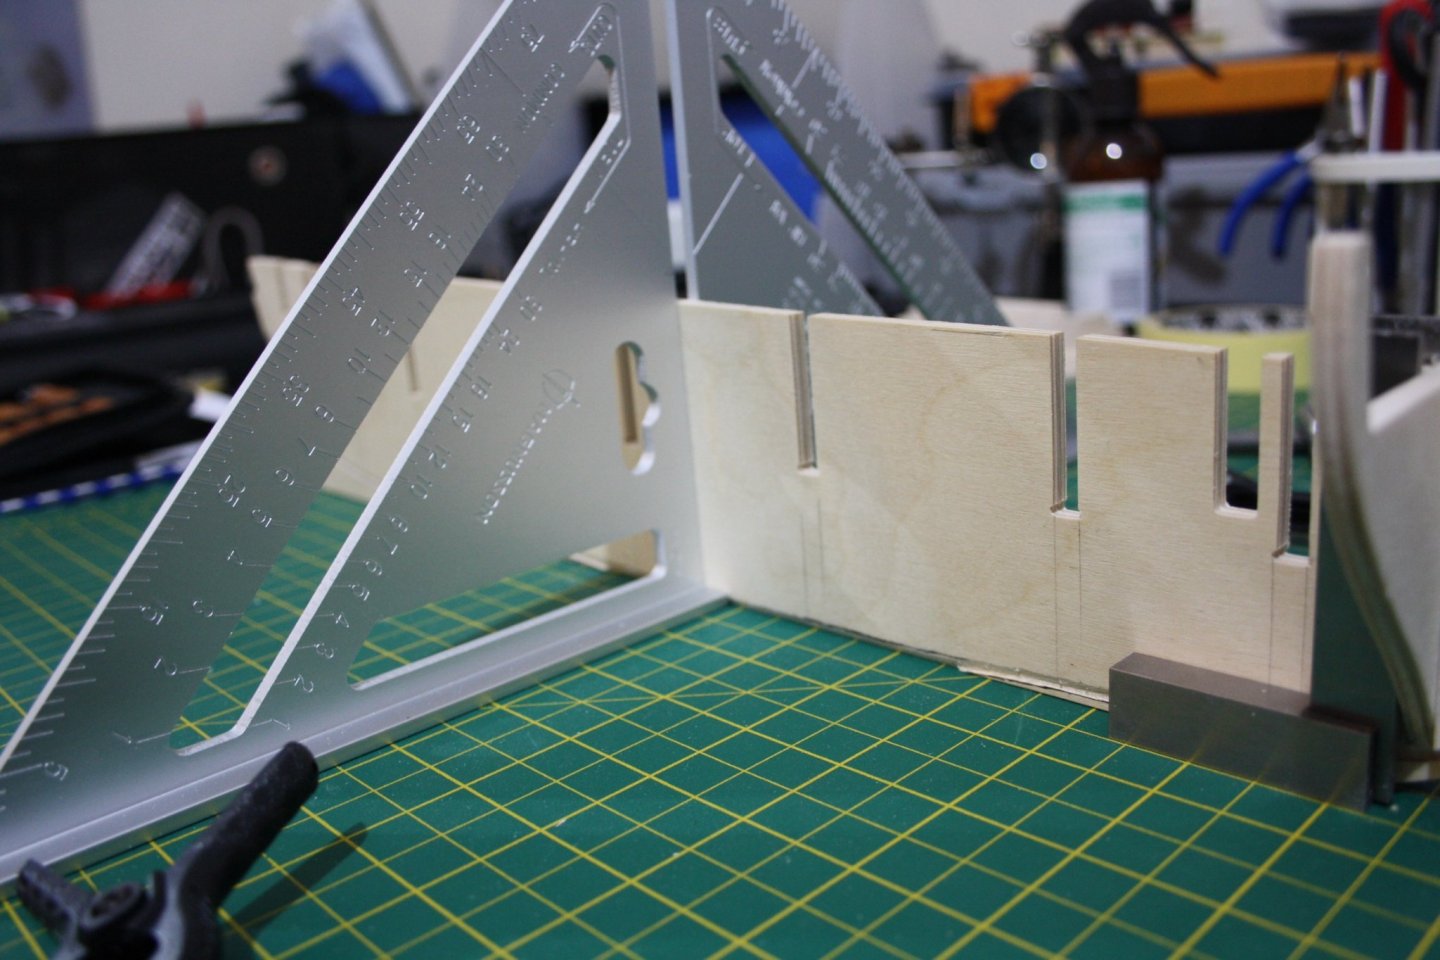
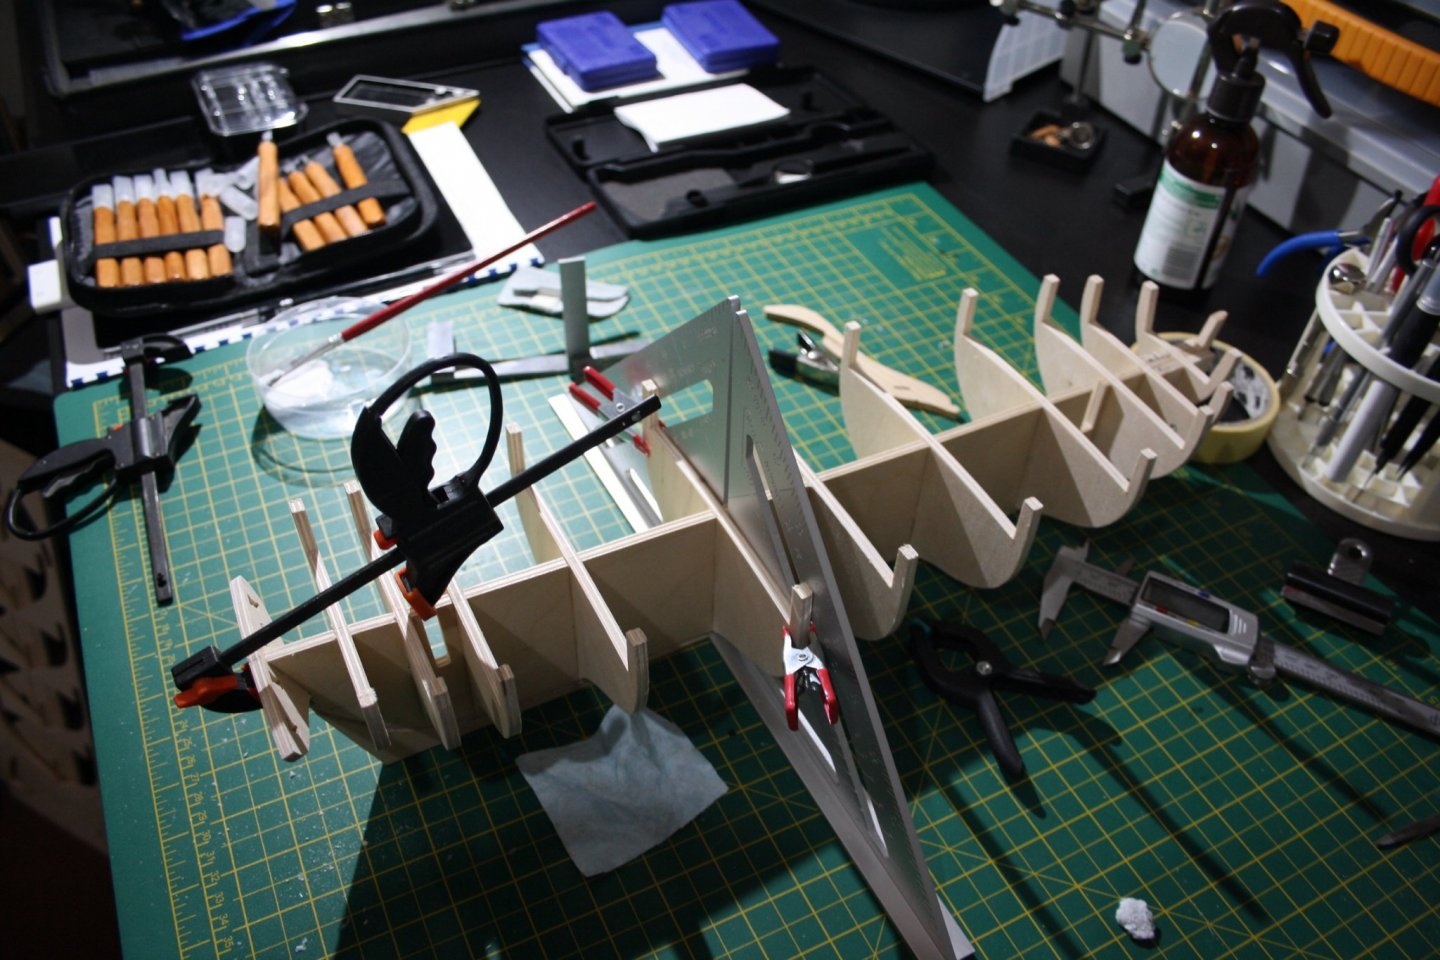
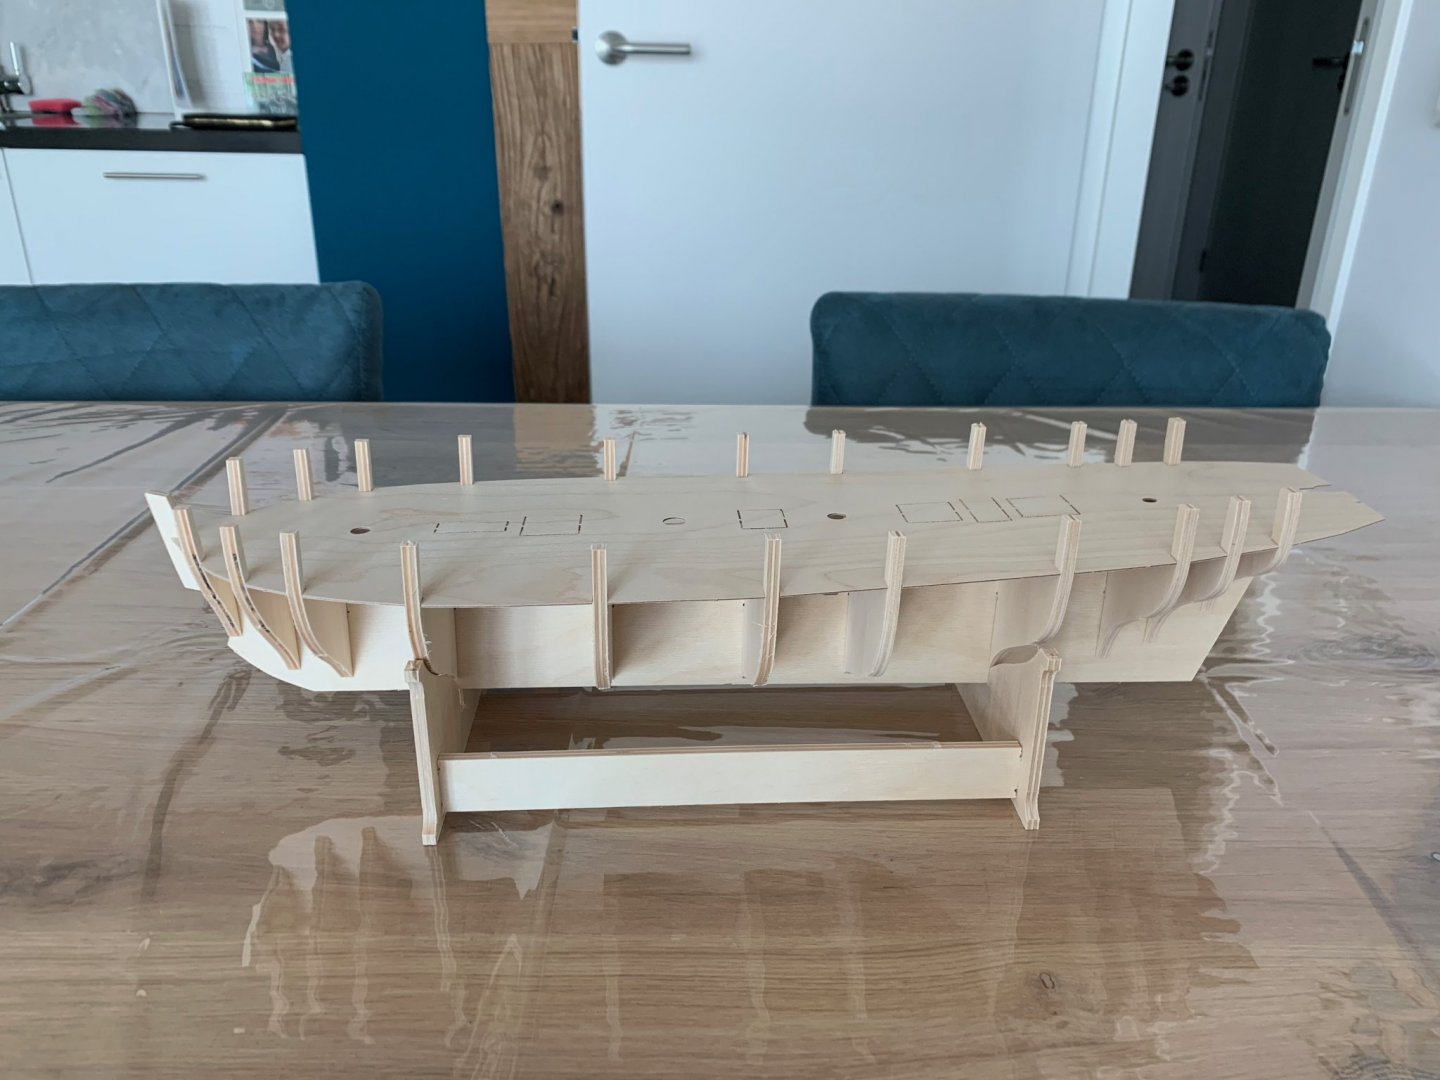
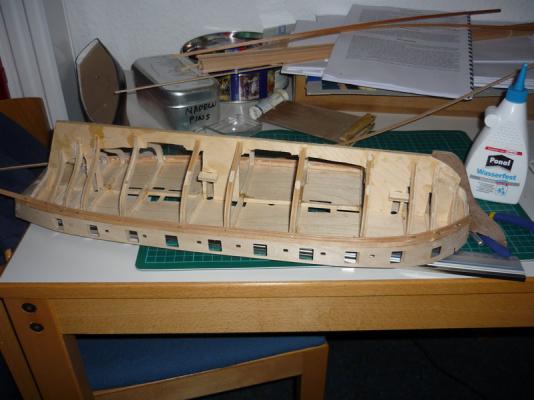
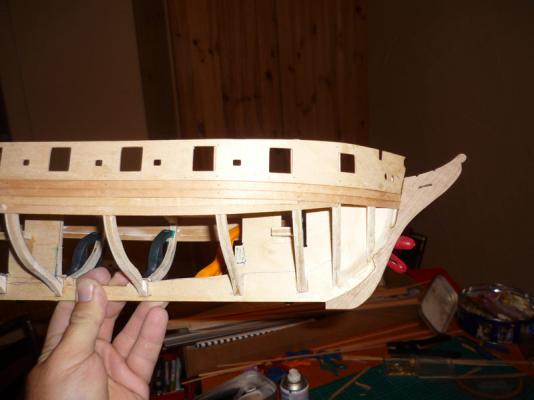
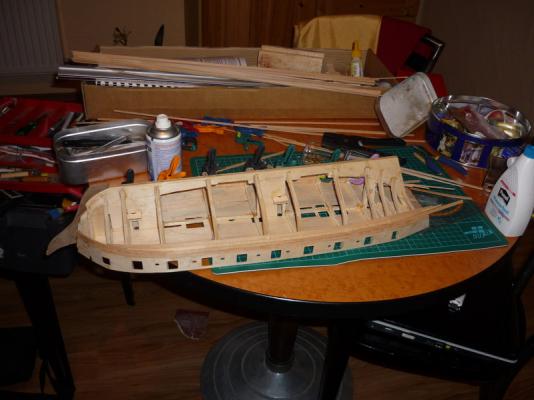
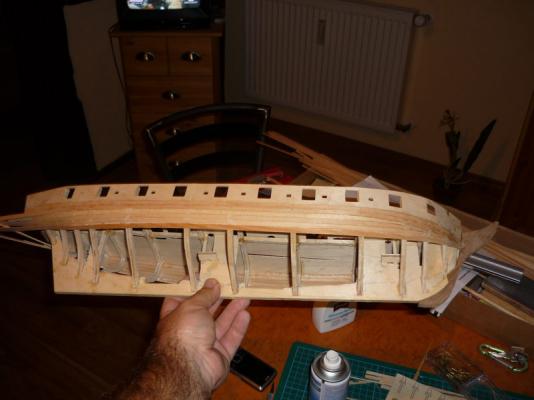
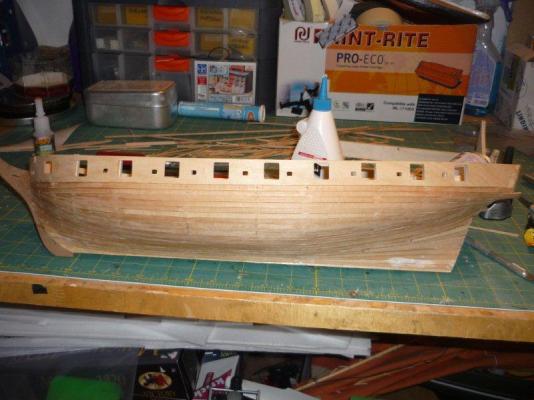
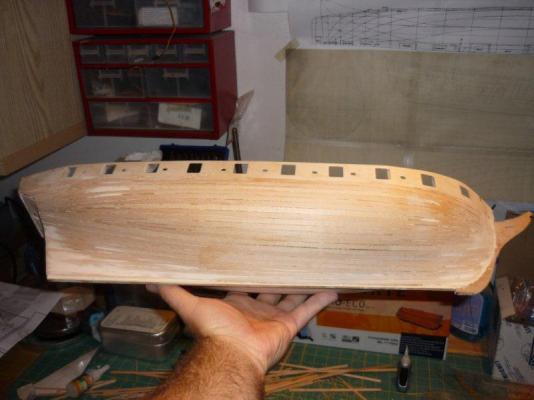
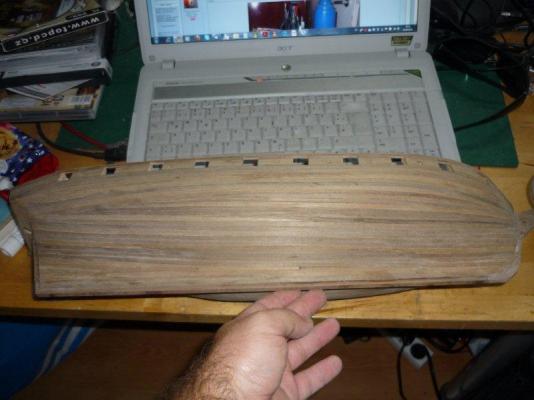
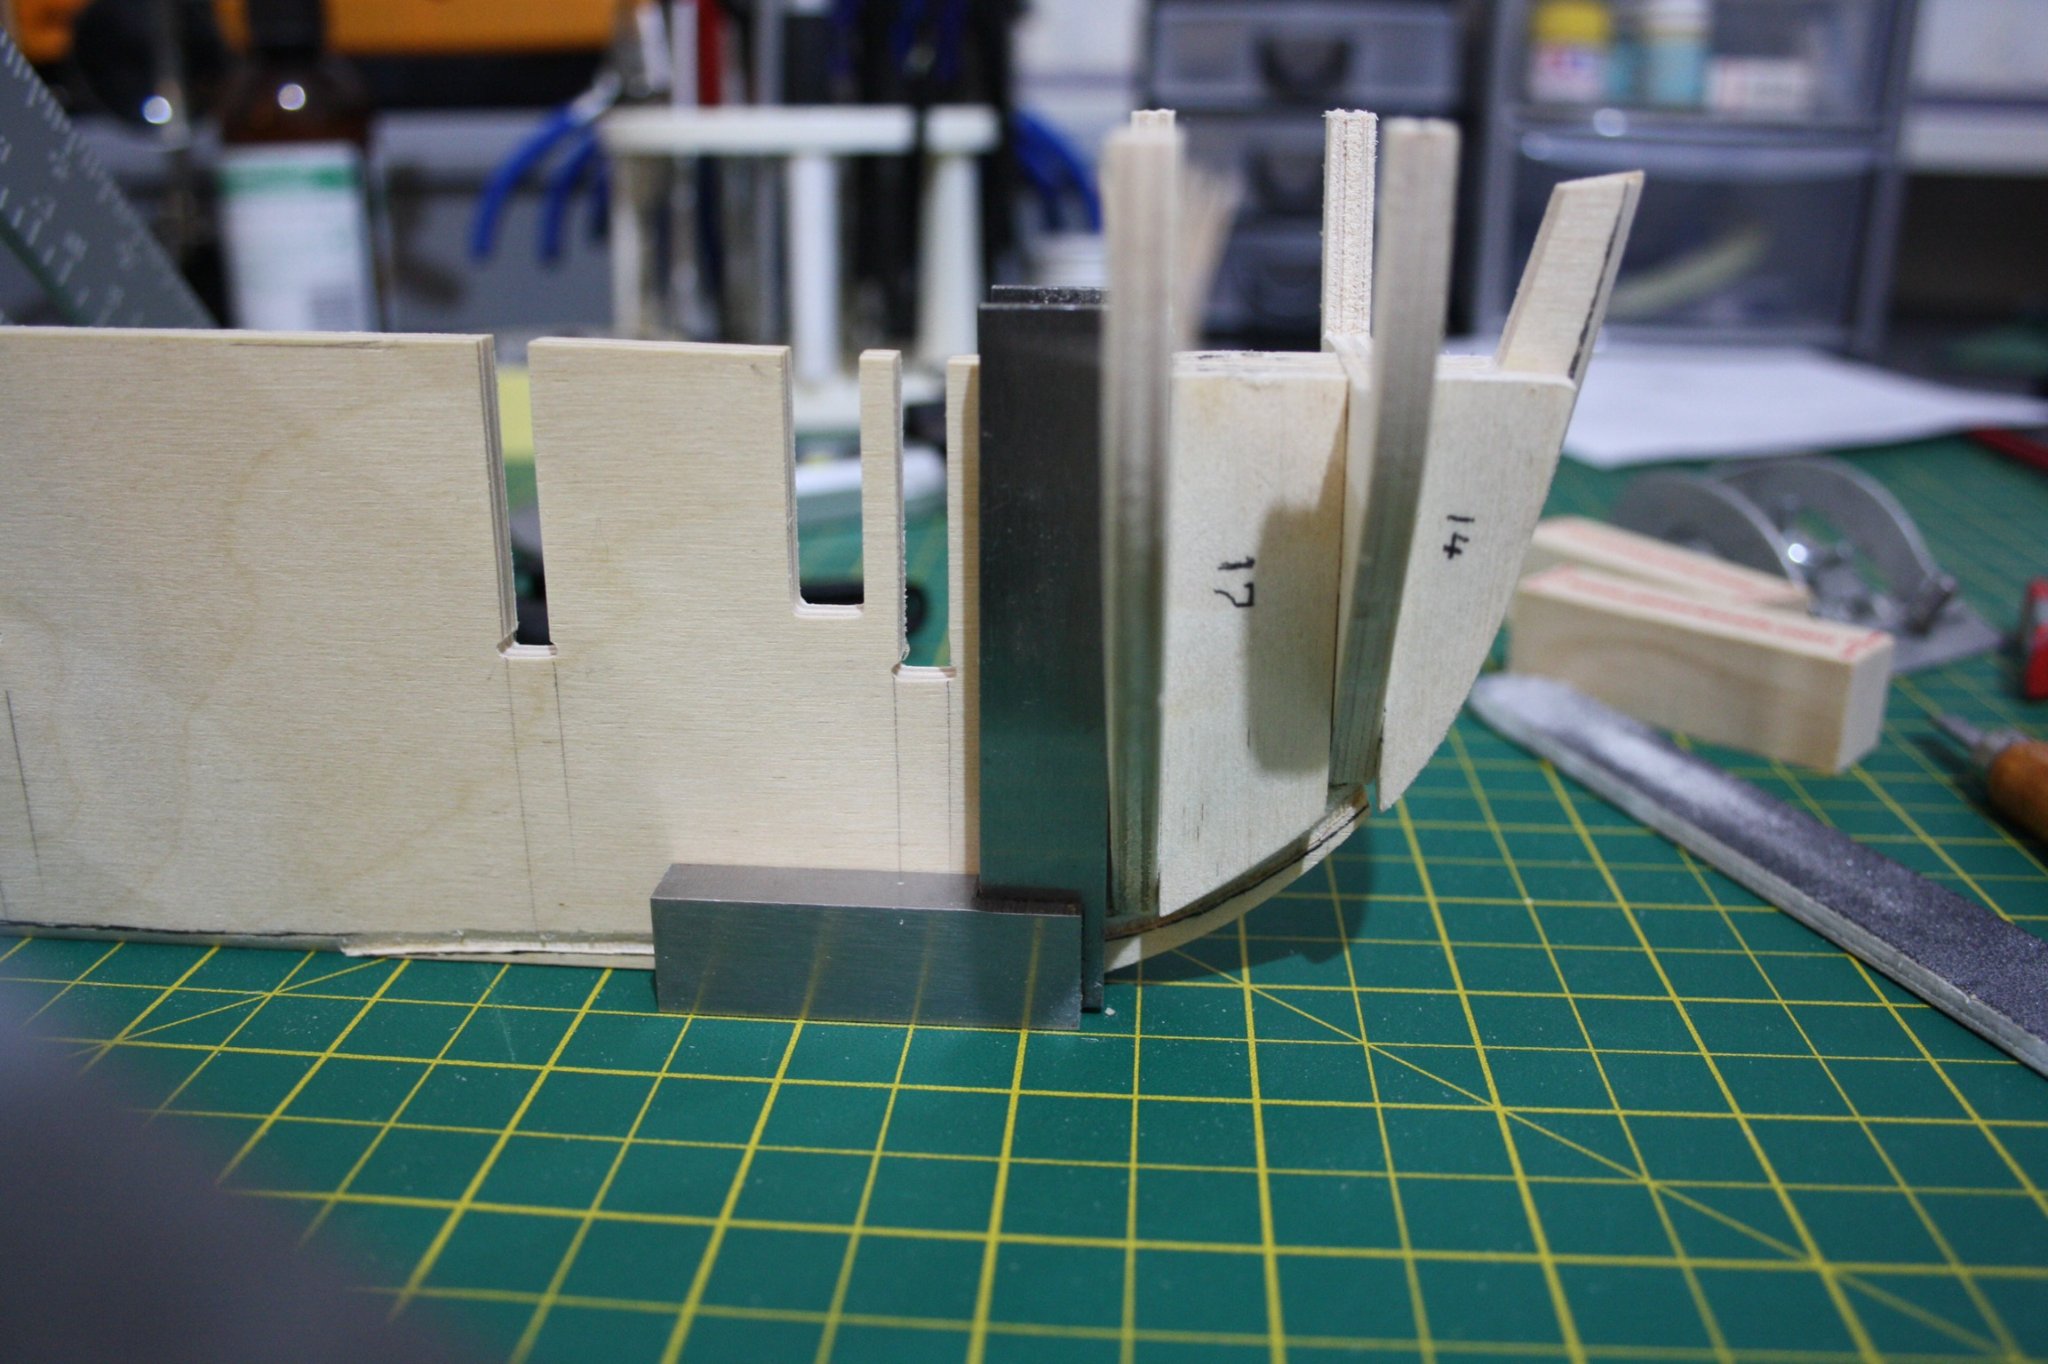
 Hello and welcome to my build log for Calder craft H.M.S Snake this is my second build but my first log. I found that i learned a lot on my first build and i hope to learn more as i go with this build going to try new things and improve on things i did first time. This is going to be a slow build hope to have it done in about 2 years but have seen build logs that have been going a lot longer so i am very flexible on time scale and realistic as to my abilities and skill level that i have at the moment First build H.M.S terror has taken me around 10 months and i want to go into more detail on Snake couple of pics to start only got to stage of false keel and bulk heads glued started to fair the bulk heads and working on a rabbit line at the moment
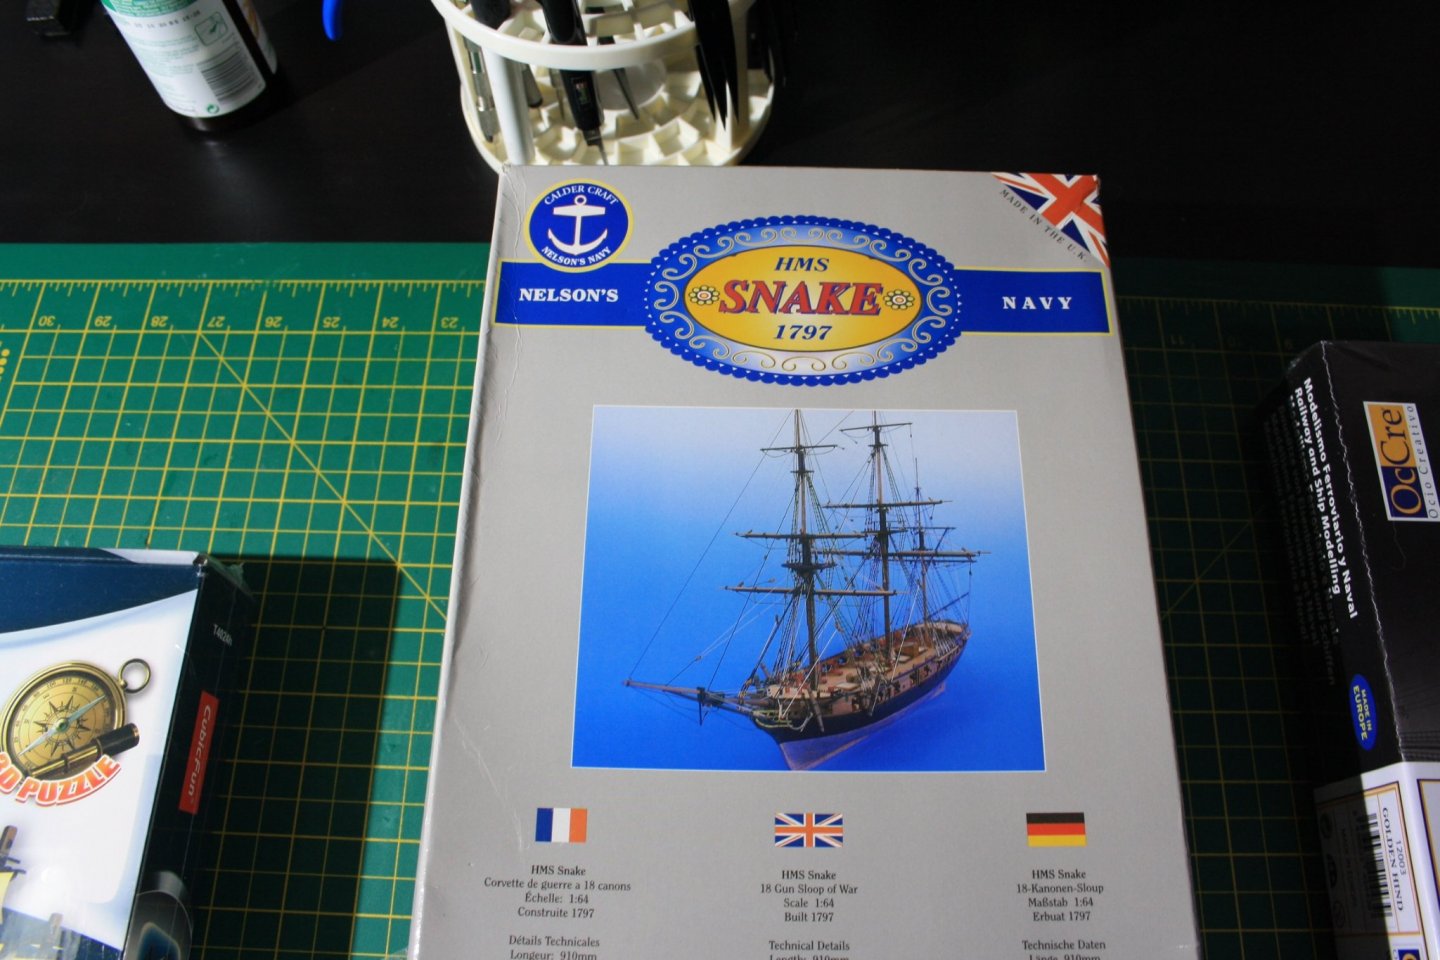


-
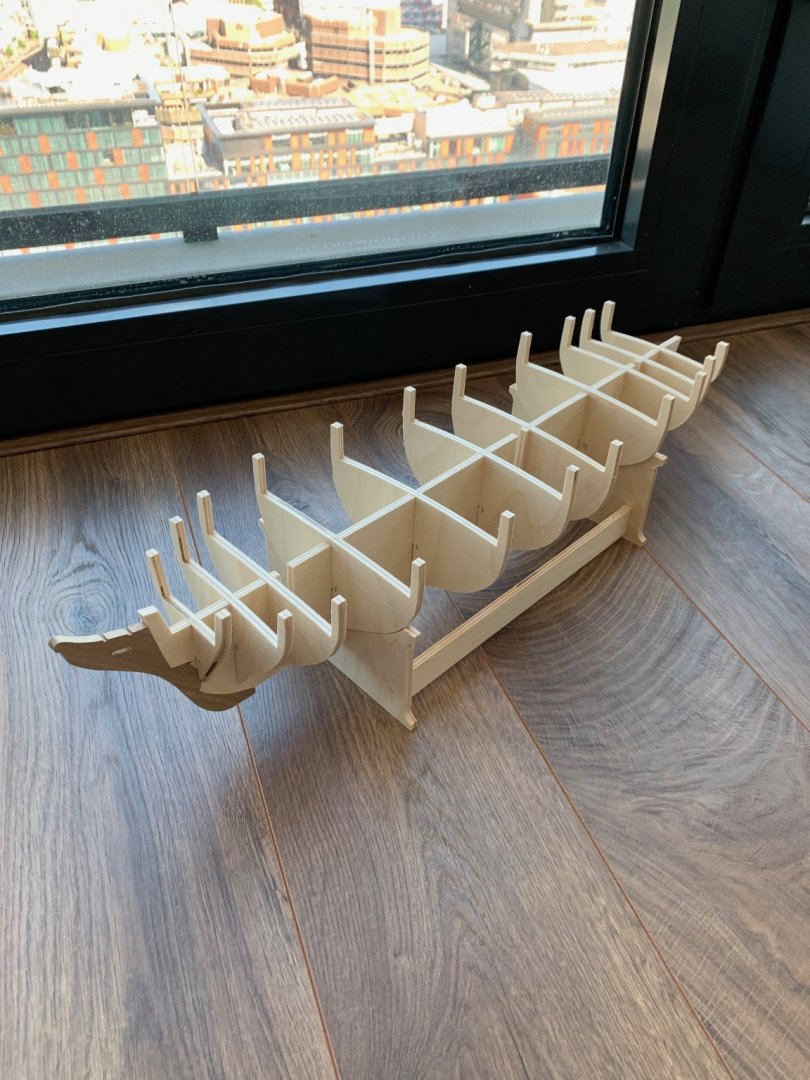
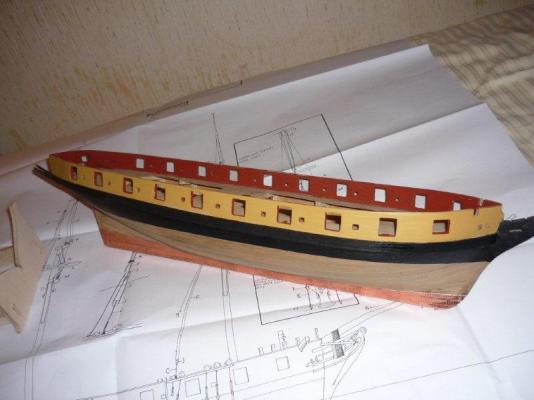
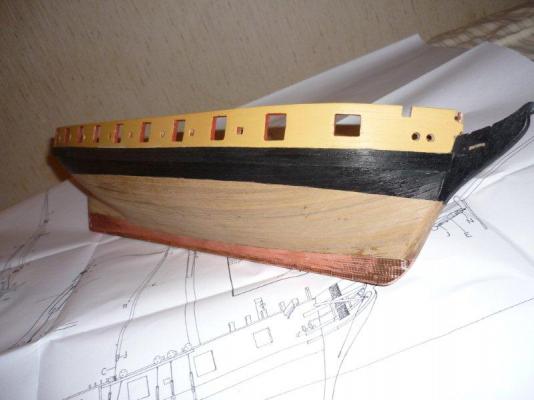
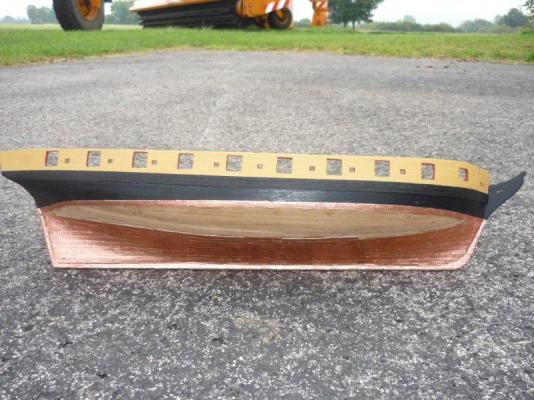
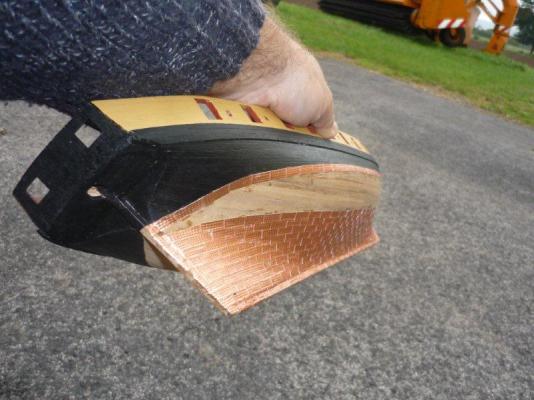
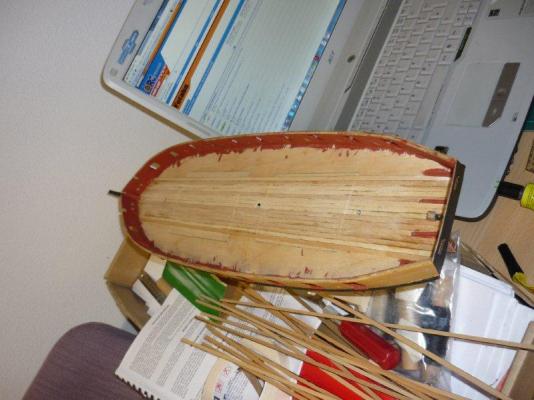
 Hello again I have recently finished my first model hms Sherbourne which I was very pleased with the result it was ok for a first timer. I have now just started to build my second model HMS Snake I picked this model as it has multiple masts so much more rigging and it also has a copper hull so it interested me it also has rigged cannons and a bit more detail so should be a challenge. so I hope you all enjoy this one and any help and feed back will be appreciated no doubt I’ll be asking for advice along the way.
 -
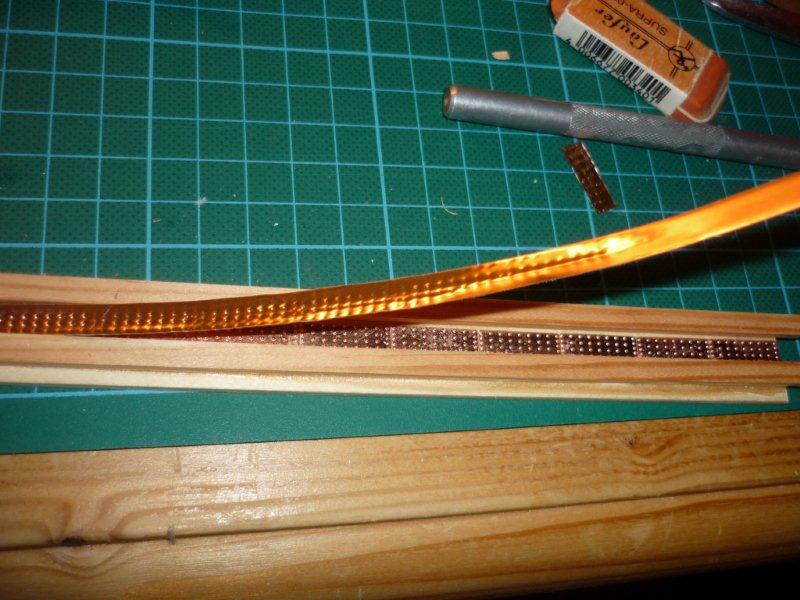
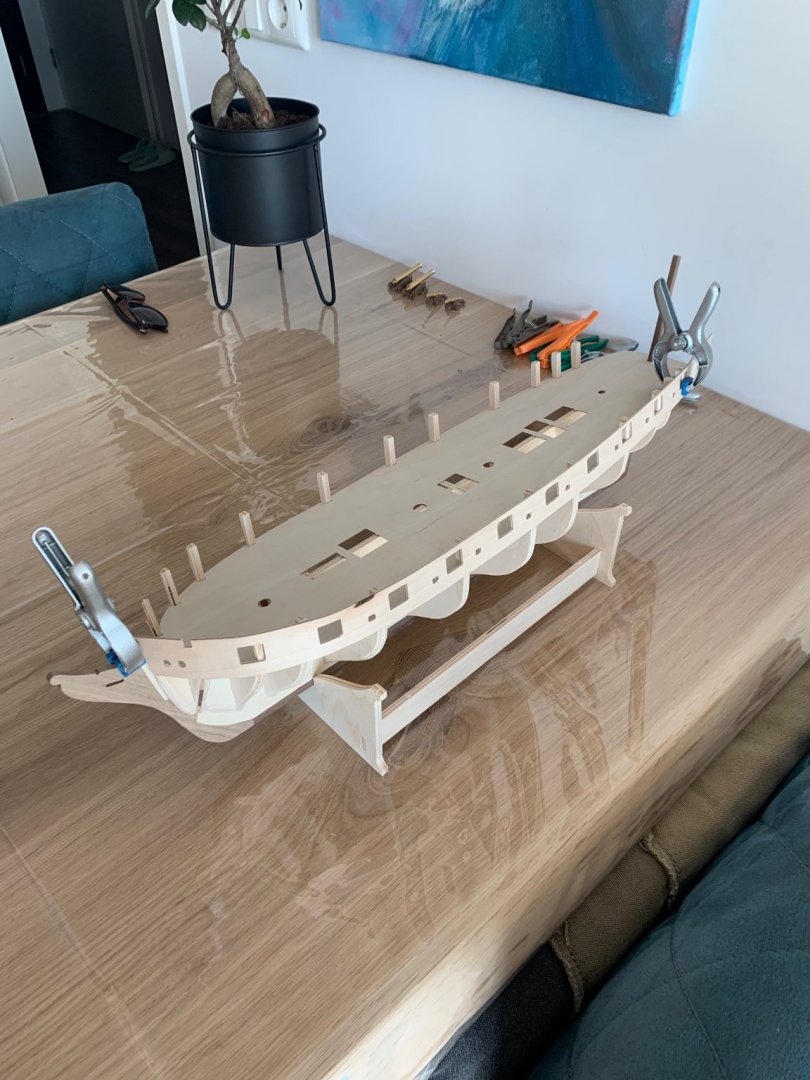
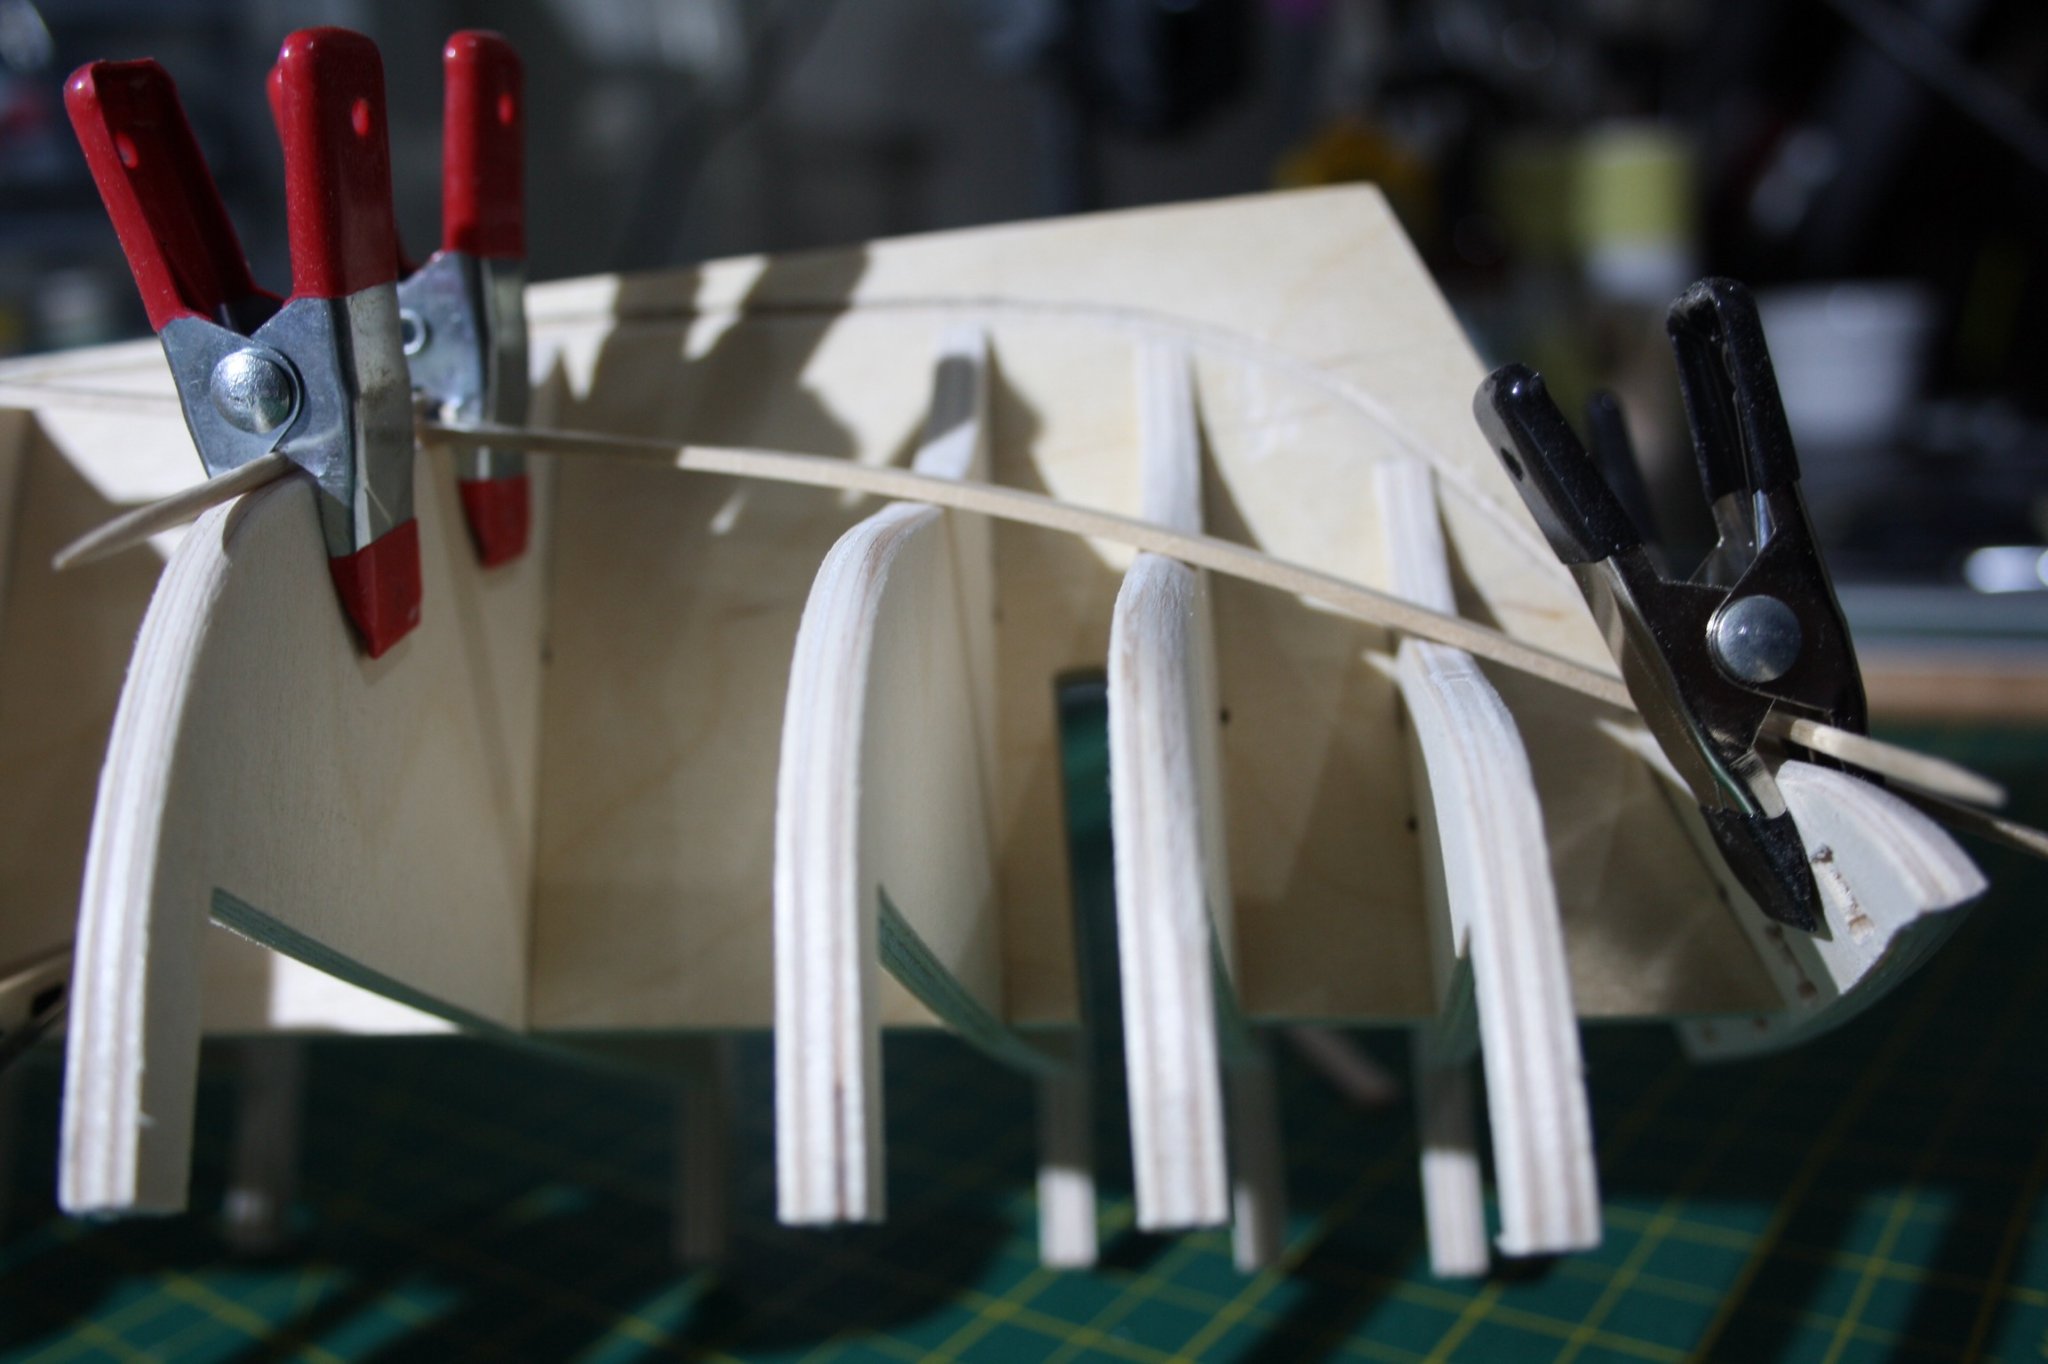
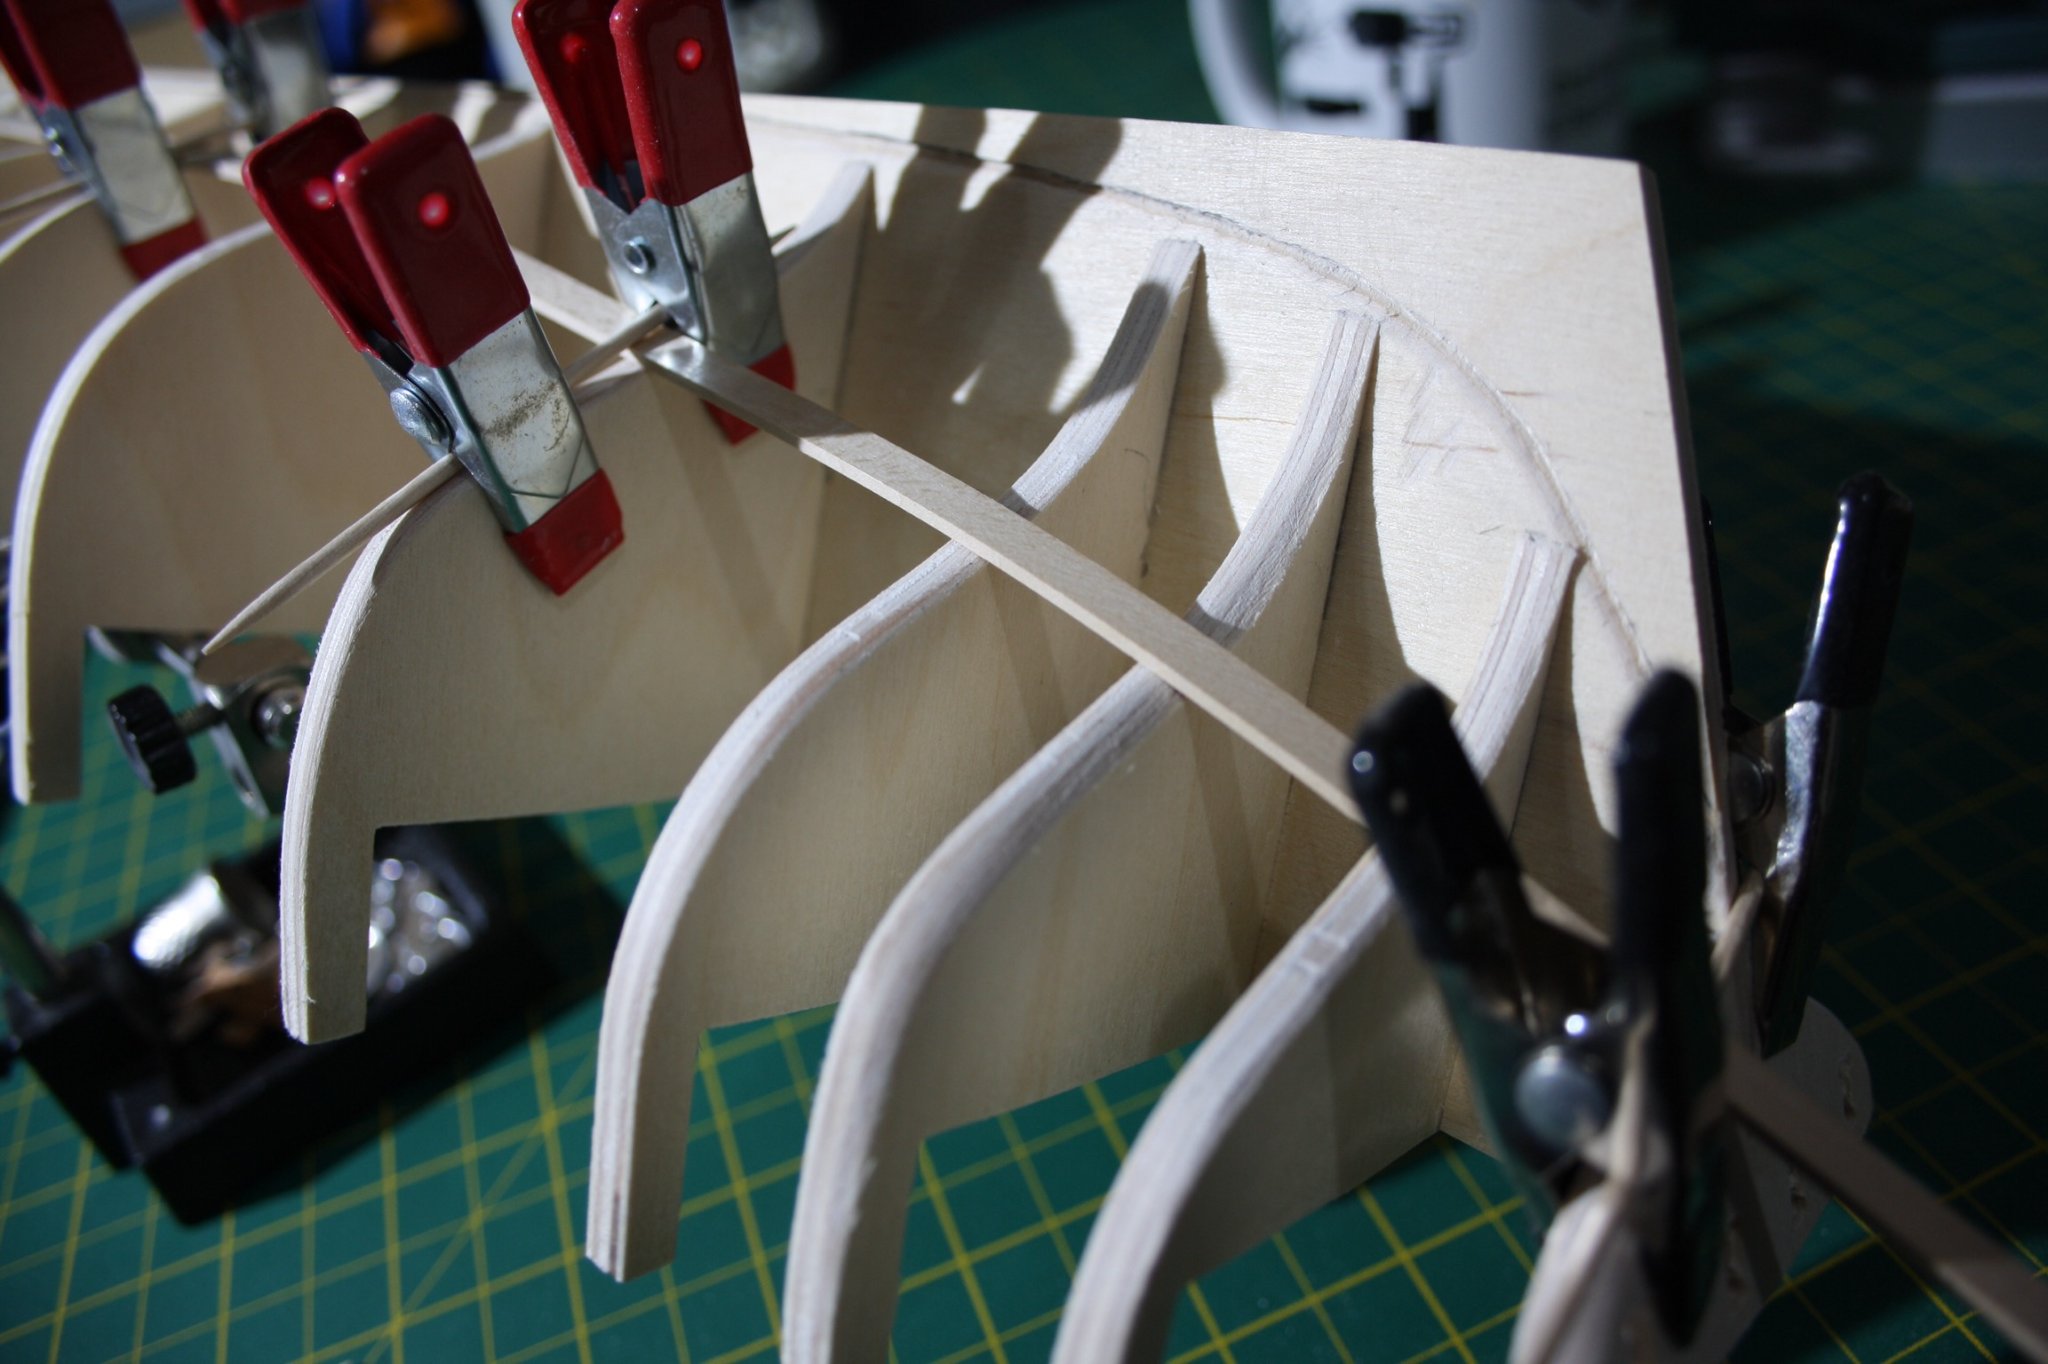
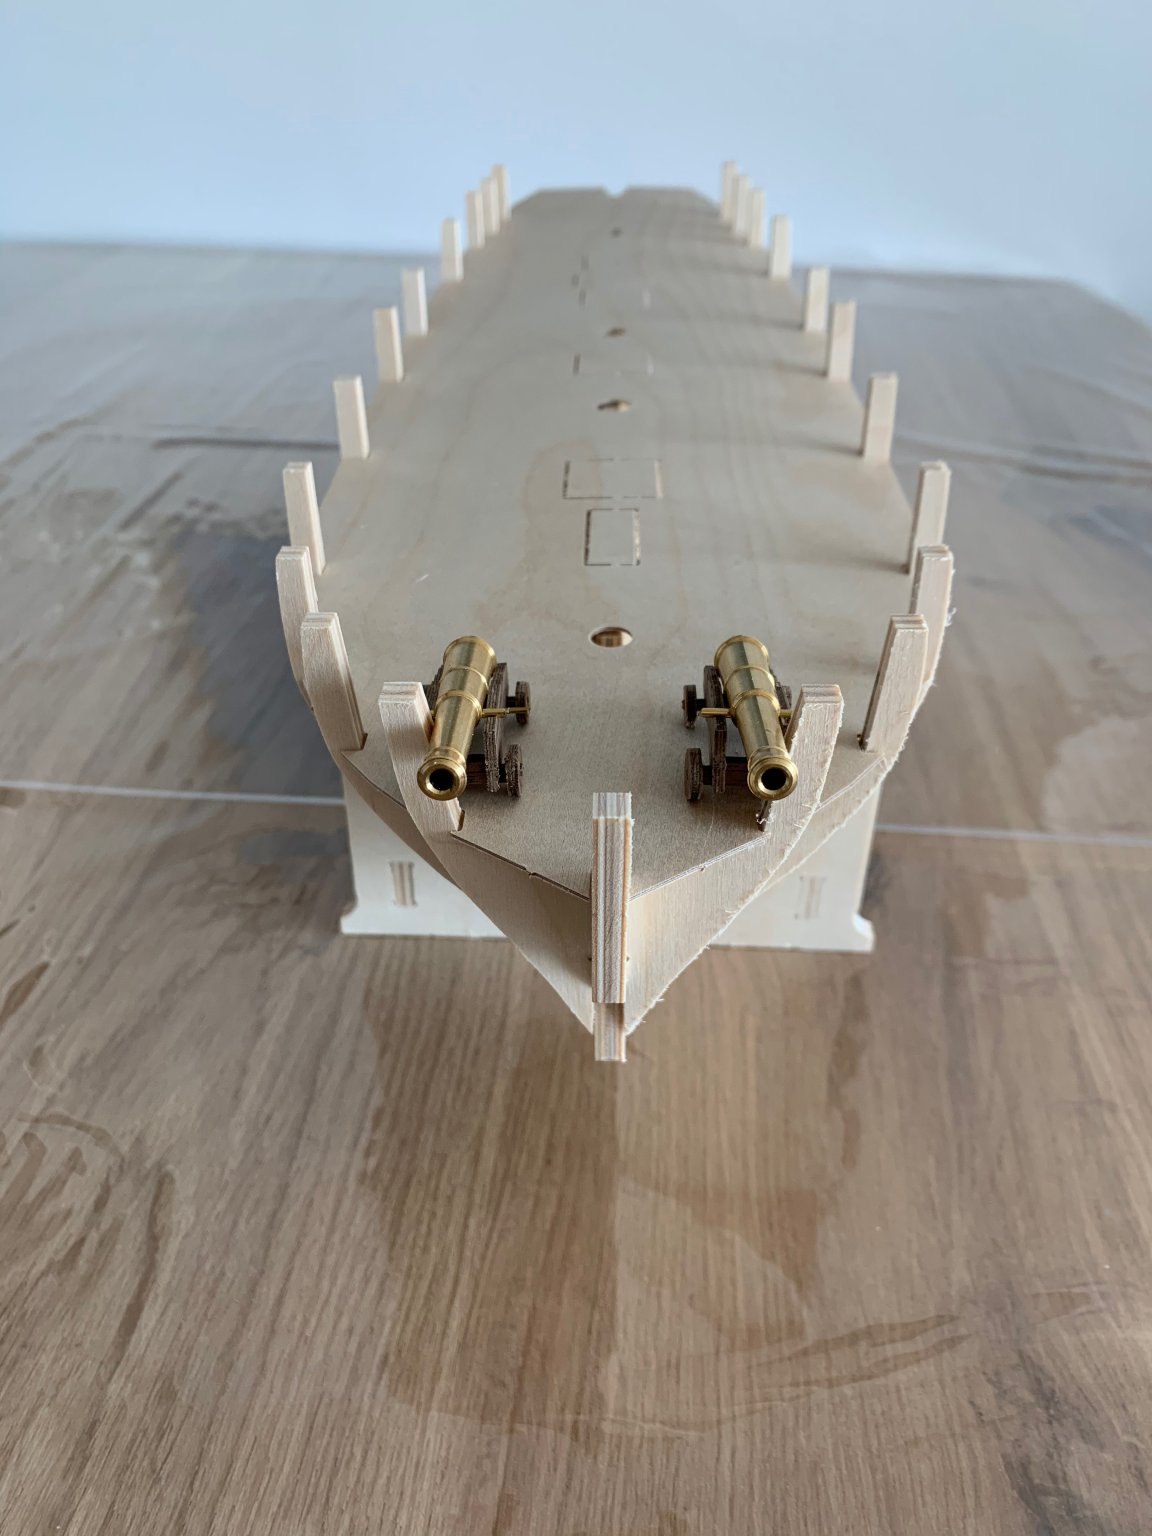
 Hi everybody, Thank you for your interest in my shipbuilding journey! This is going to be my first ever ship build. This has been on my wish list for a long time (to be fair, since I read Tin Tin: The Secret of the Unicorn as a boy). This interest got fueled again while reading the Bolitho novels from Alexander Kent. So last month I decided to start looking for a model and as many others, I got inspired by the HMS Victory, HMS Surprise, HMS Diana builds. However, after reading the topic "For Beginners - A cautionary tale" I decided to be smarter than myself. So because of @Beef Wellington and @Vane (which I wanna thank in advance for their detailed description on their build, as I read through your logs with much pleasure) I decided to start with the HMS Snake from Caldercraft. If anyone has suggestions, opinions or wants to help me in any way, feel free to post a comment. As I said, I'm in new territory so my methods could be "wrong", "rookie" or even barbaric! Some additional notes before I start my building log. First, this is going to be a natural/industrial build. Which in my case means, I won't be painting the ship (probably only to highlight some specific structures), as when I'm finished, I want to see the building process, modifications and "scars" of my work. Second, this won't be a historically accurate and/or Caldercrafts intended build. My "source of inspiration" is the Sloop of War HMS Sparrow from the Bolitho novels. This means I will change the armament to two 32-pounders as bow chasers and sixteen 12-pounders and probably some other things. Third, let's go! (Above) To be honest, I got a bit overwhelmed when I open the box and read the instructions. The provided wooden planking strip are pretty neat compared to what I've seen from other build, they only need some light sanding I guess. (Above) Dry fitted the keel, bulkheads and deck...they fitted pretty easily. Plus build the two 32-pounder bow chasers, very happy with those. (Above) Attached the Walnut keel and the front of the keel. (Above) pinned two planks on the middel bulkhead to see the bulkheads curvature I needed to sand off. (Above) To prevent being overwhelmed again with things to do, I decided to check off the things I'd already completed. (Above) First gunport bulwark added. I used the "water-method" and decided to do a wet-dry fit (first picture). After taking the bulwark out of the water I fitted it on the bulkheads and let I dry so the wood dried in the proper shape. After which, I glued the bulwark pretty easily in position by using the cannons as reference (second picture). Now I will have to wait for the glue to dry to start on the other side. My main concern is the strength of the gunport bulwark as it does not have a lot of contact surfaces.
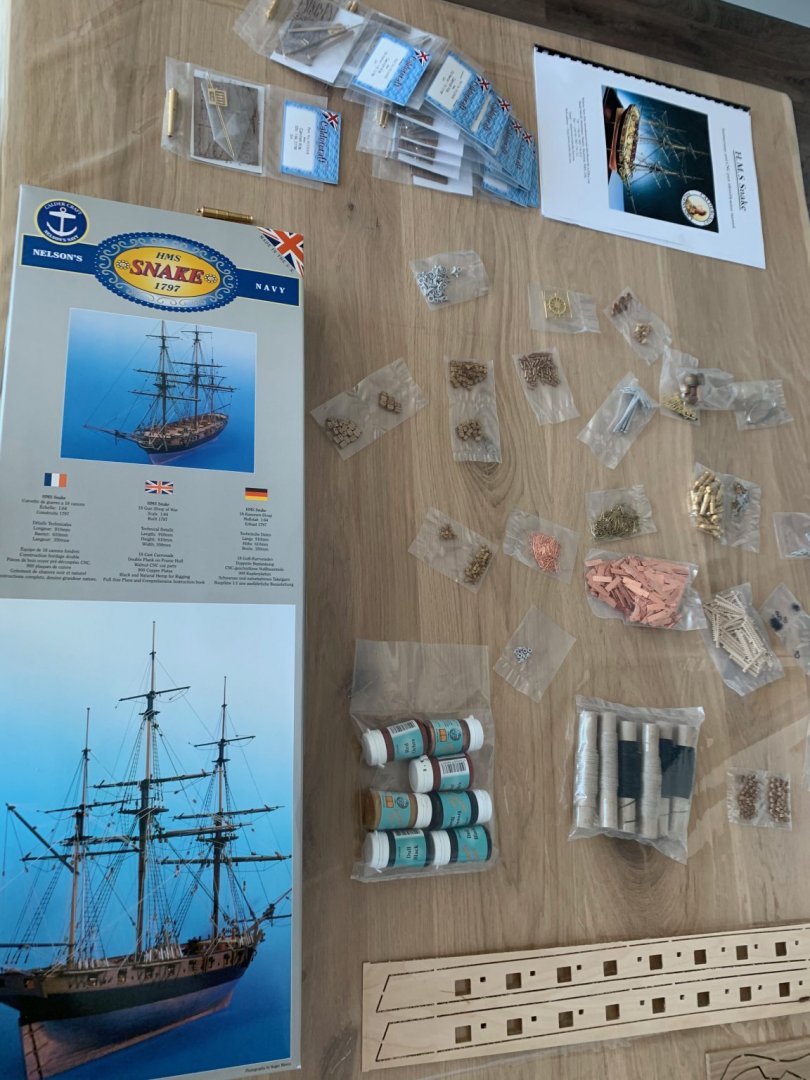


- 5 replies
-
- 5
-
-
- snake
- caldercraft
- (and 1 more)
-
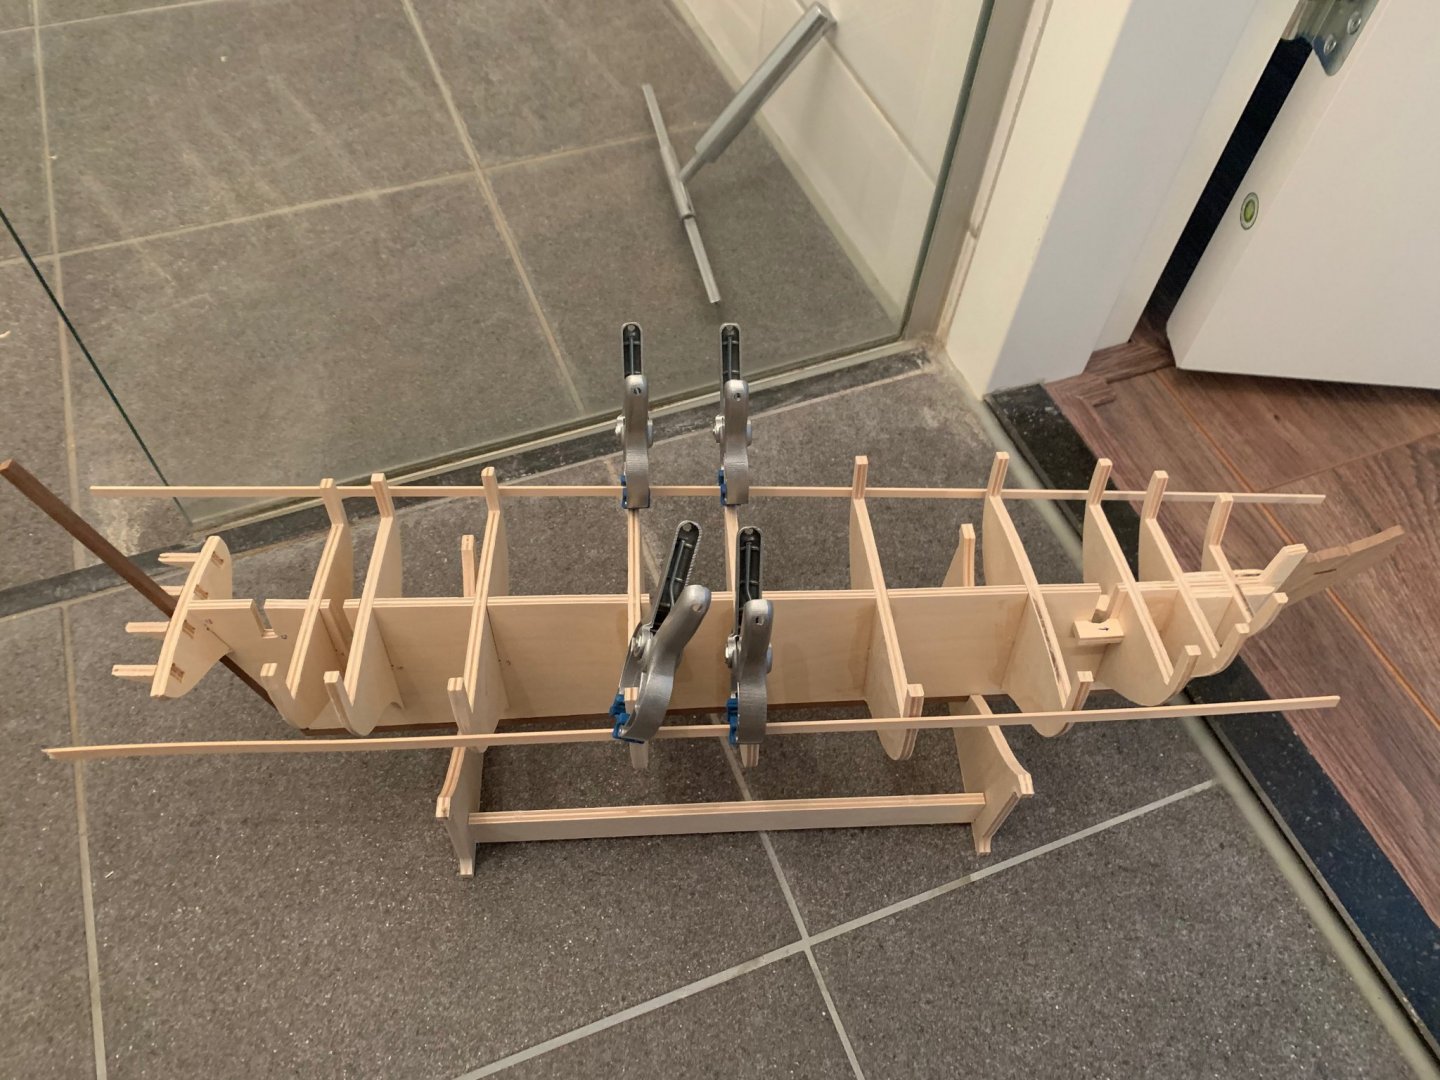
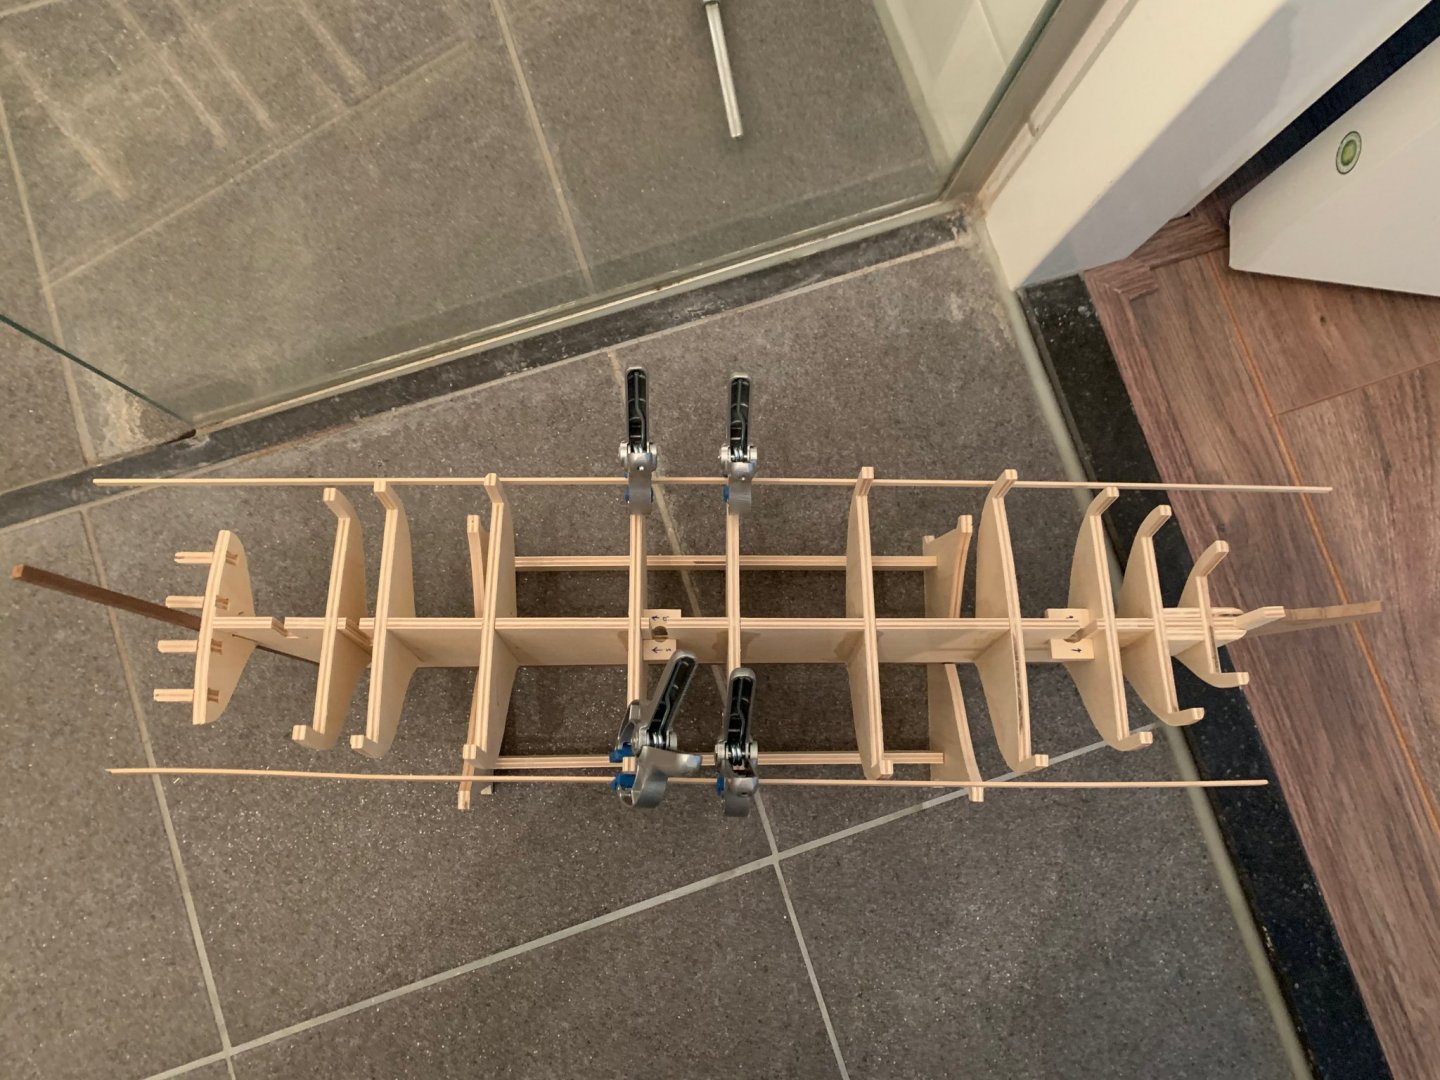
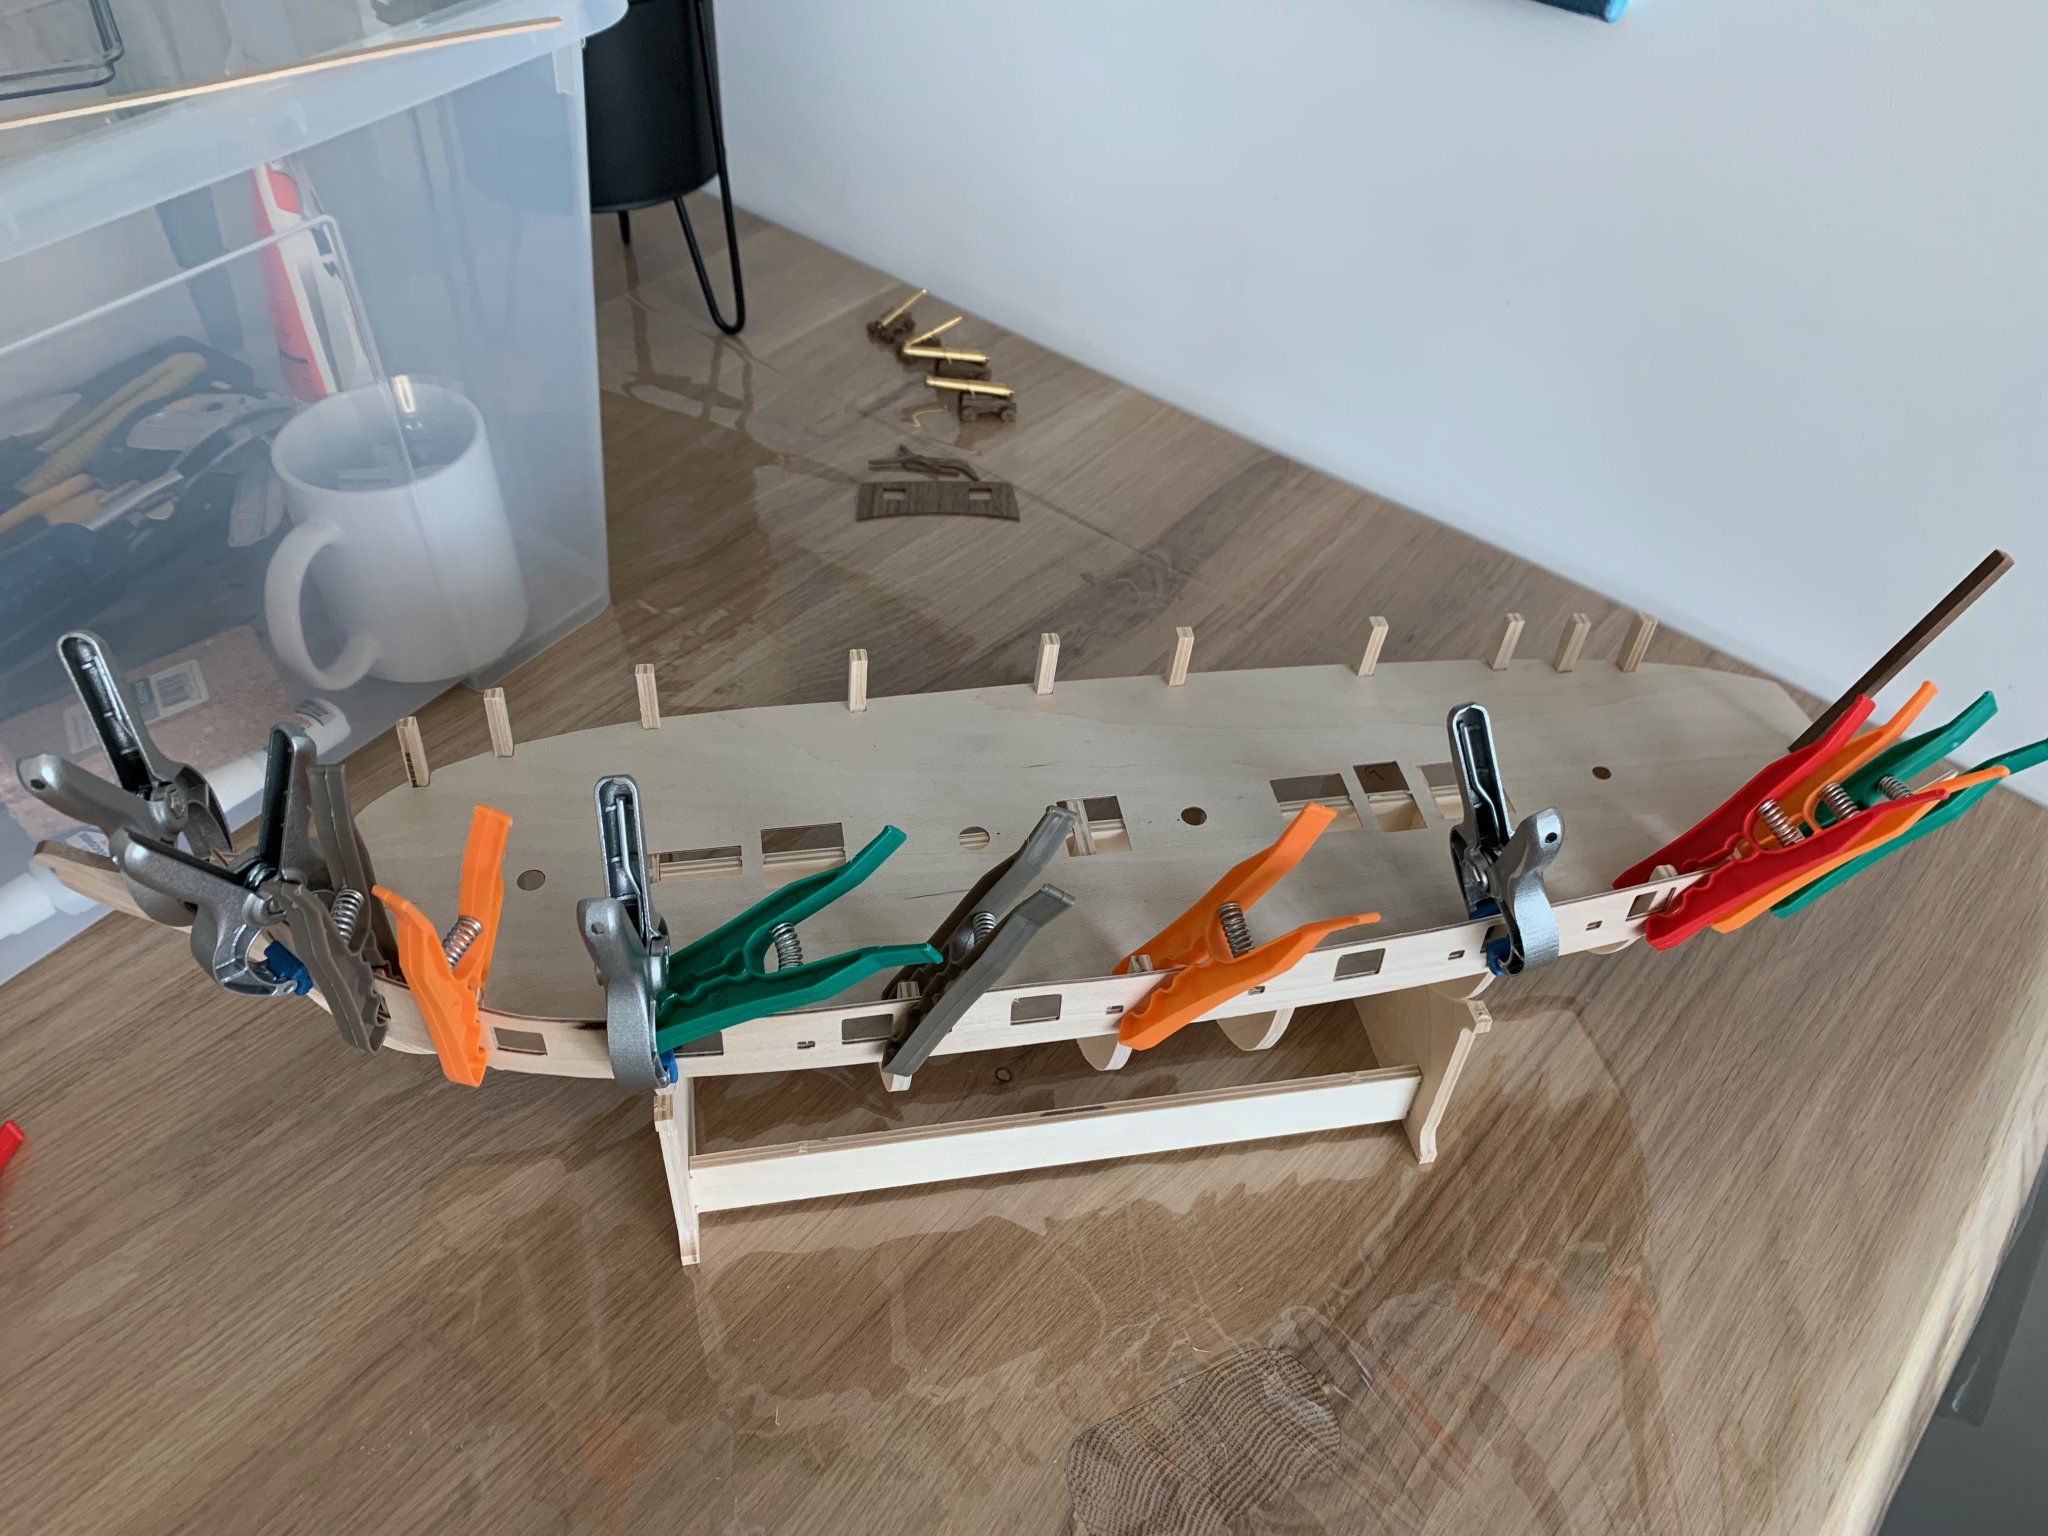
 Begun the Caldecraft Snake kit. Impressed with quality of components although with the very high price paid should be. Also impressed with the provision of a cradle to build the ship all providers could easily supply.All components seem to be there for now. All bits fit well with a small amount of filing. But when dry fitting the false deck it appears that it us well out if kilter to match up with the bulwarks. Tomorrow's job will be to try to match the deck up with bulwarks for fitting presumably by much sanding ,cutting and filing to get them to line up. One problem I can see is the false deck is incredibly thin and flimsy so vulnerable to splitting.
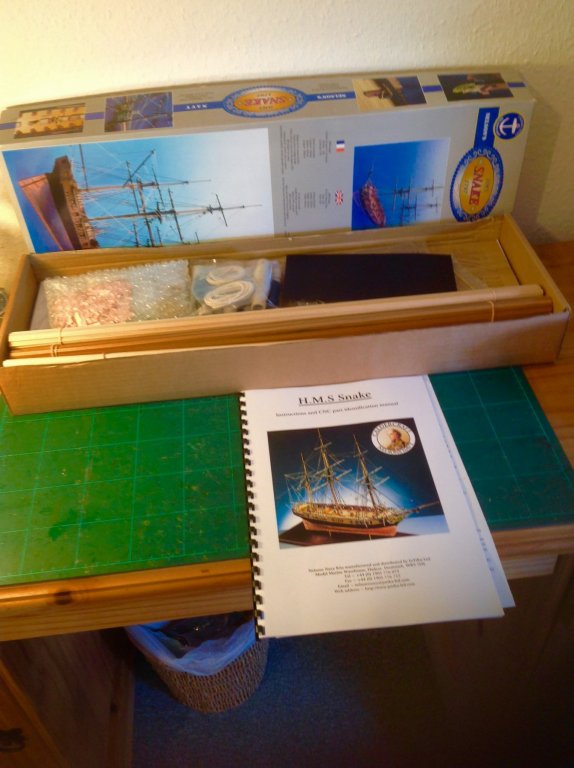

- 31 replies
-
- 6
-
-
- snake
- caldercraft
- (and 1 more)
-
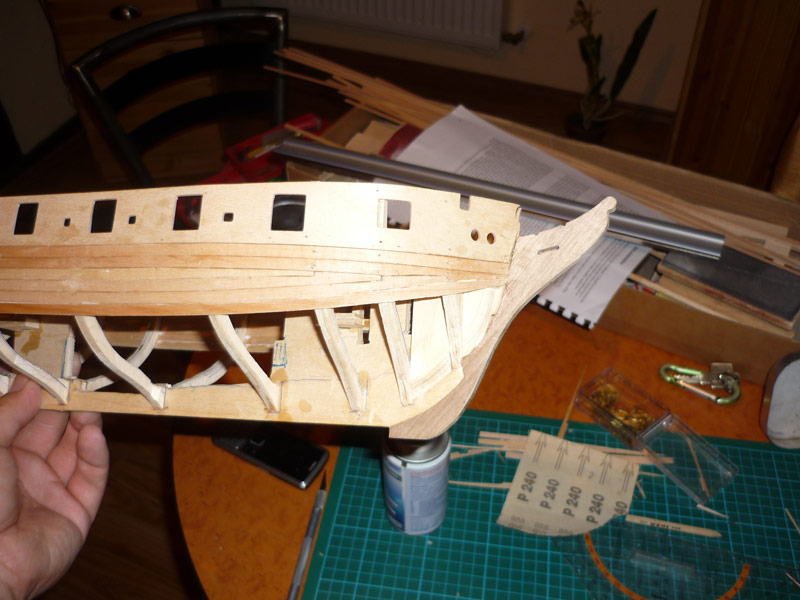
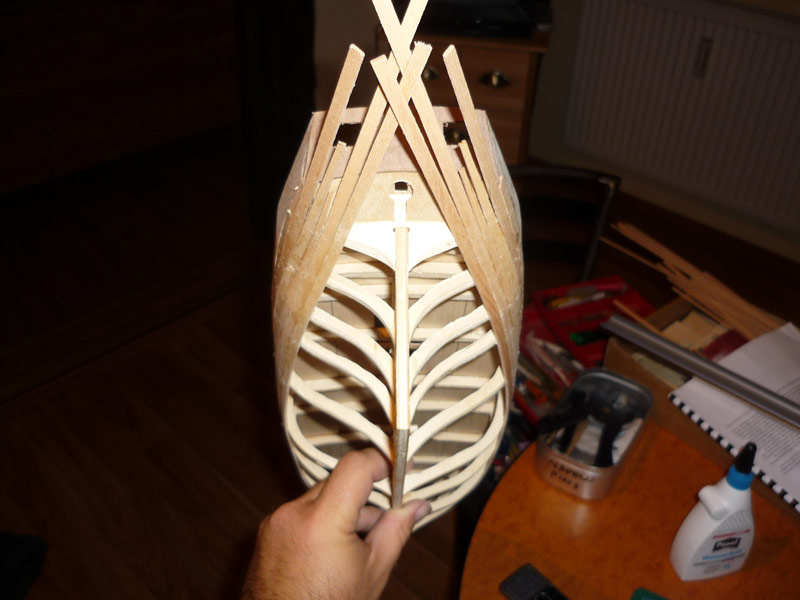
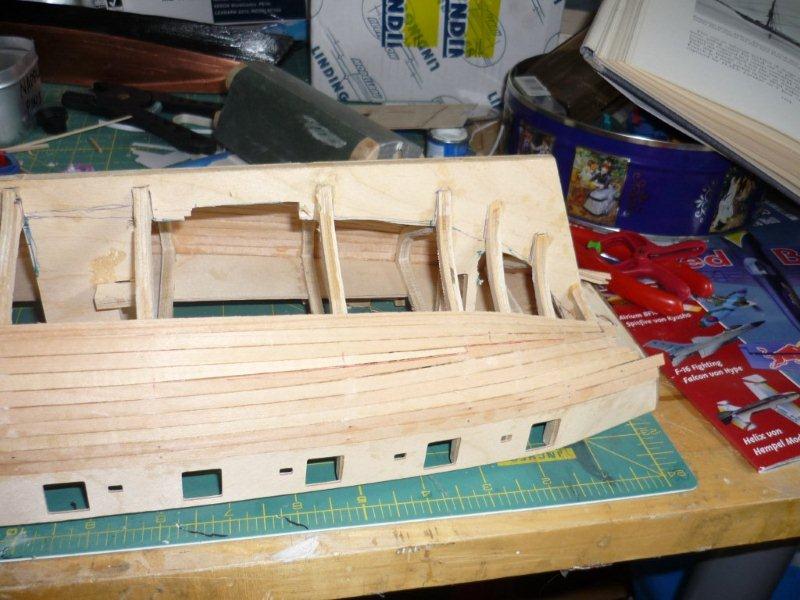
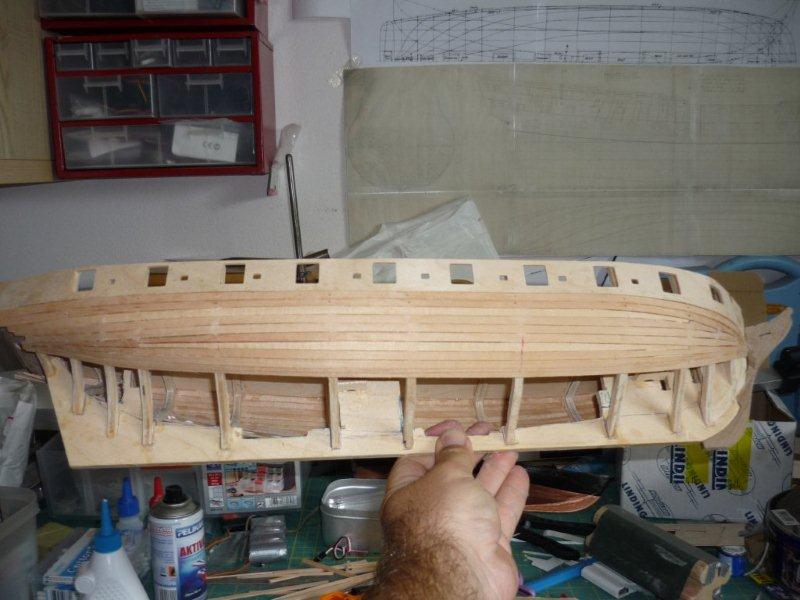
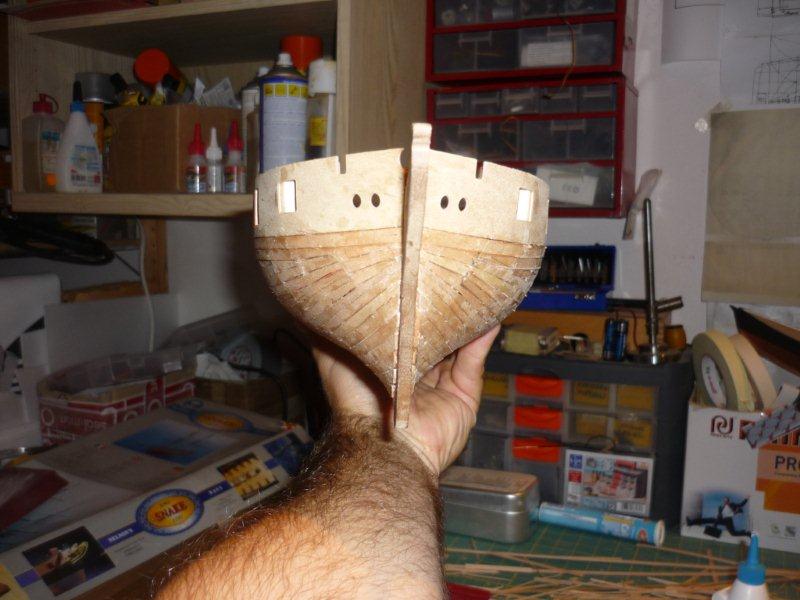
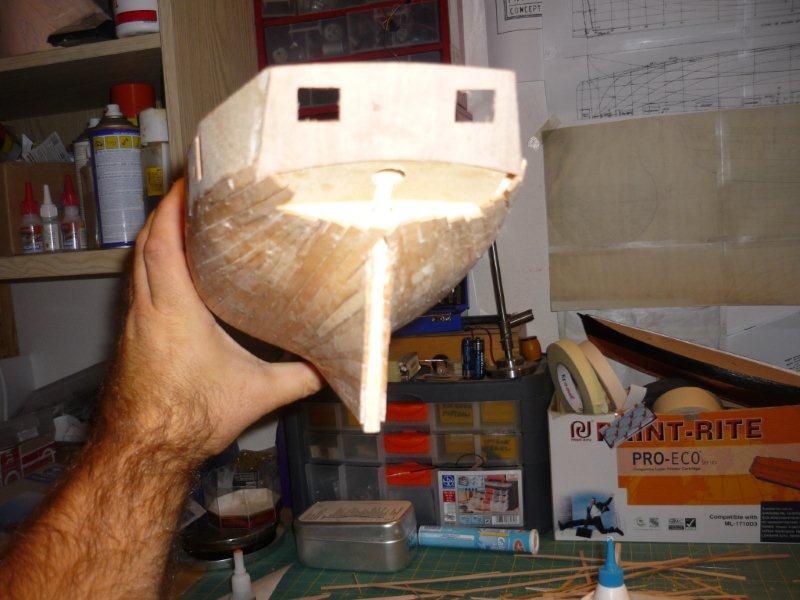
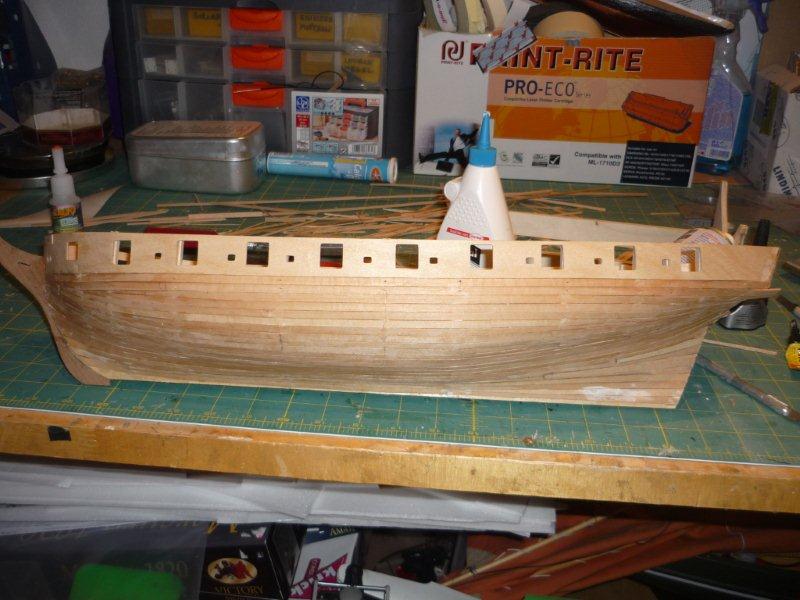
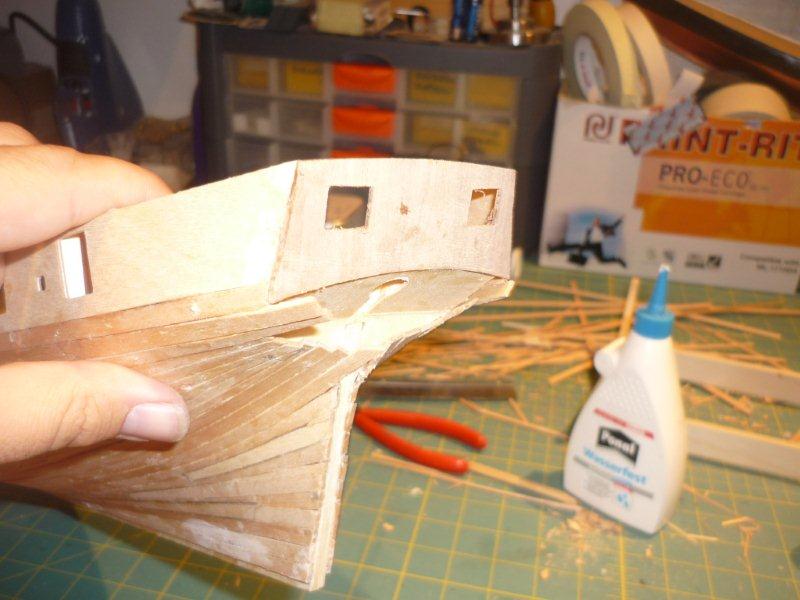
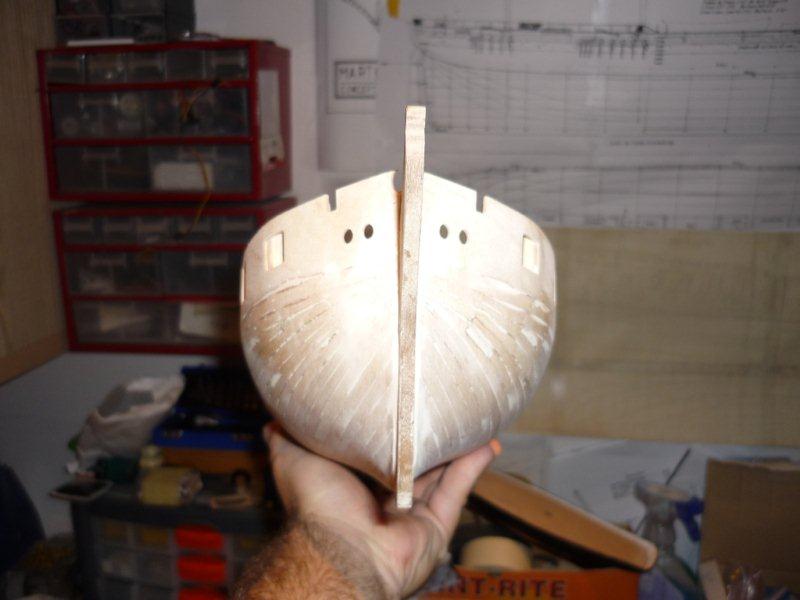
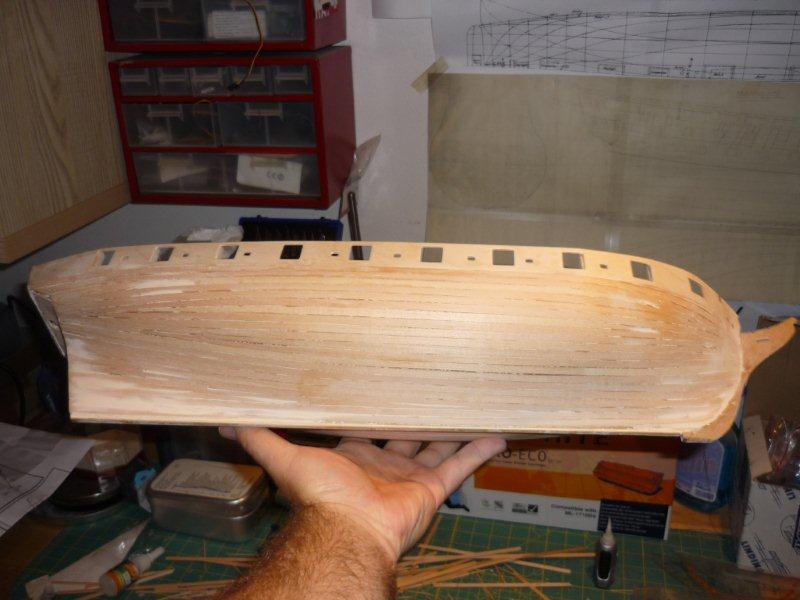
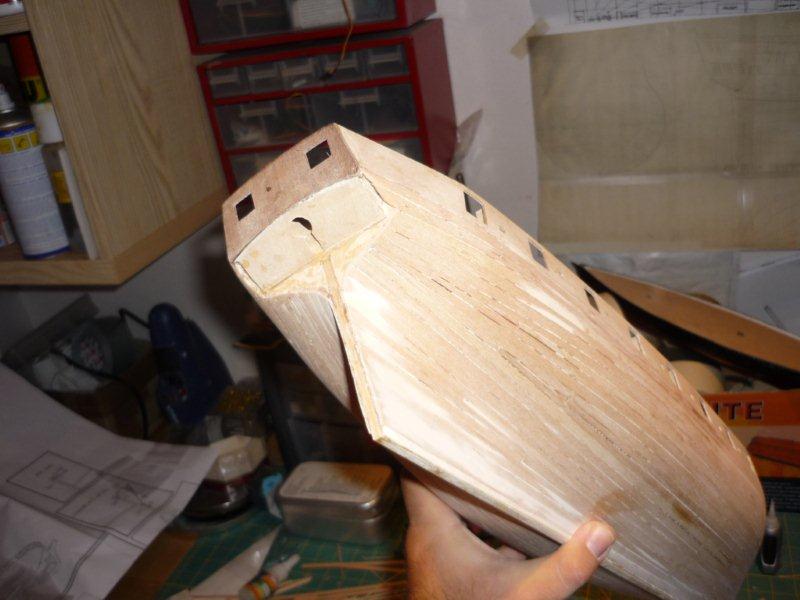
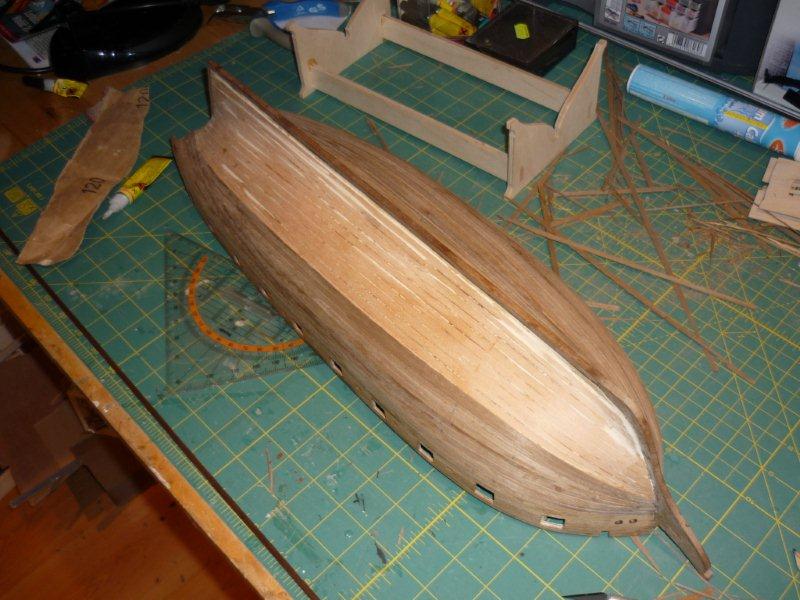
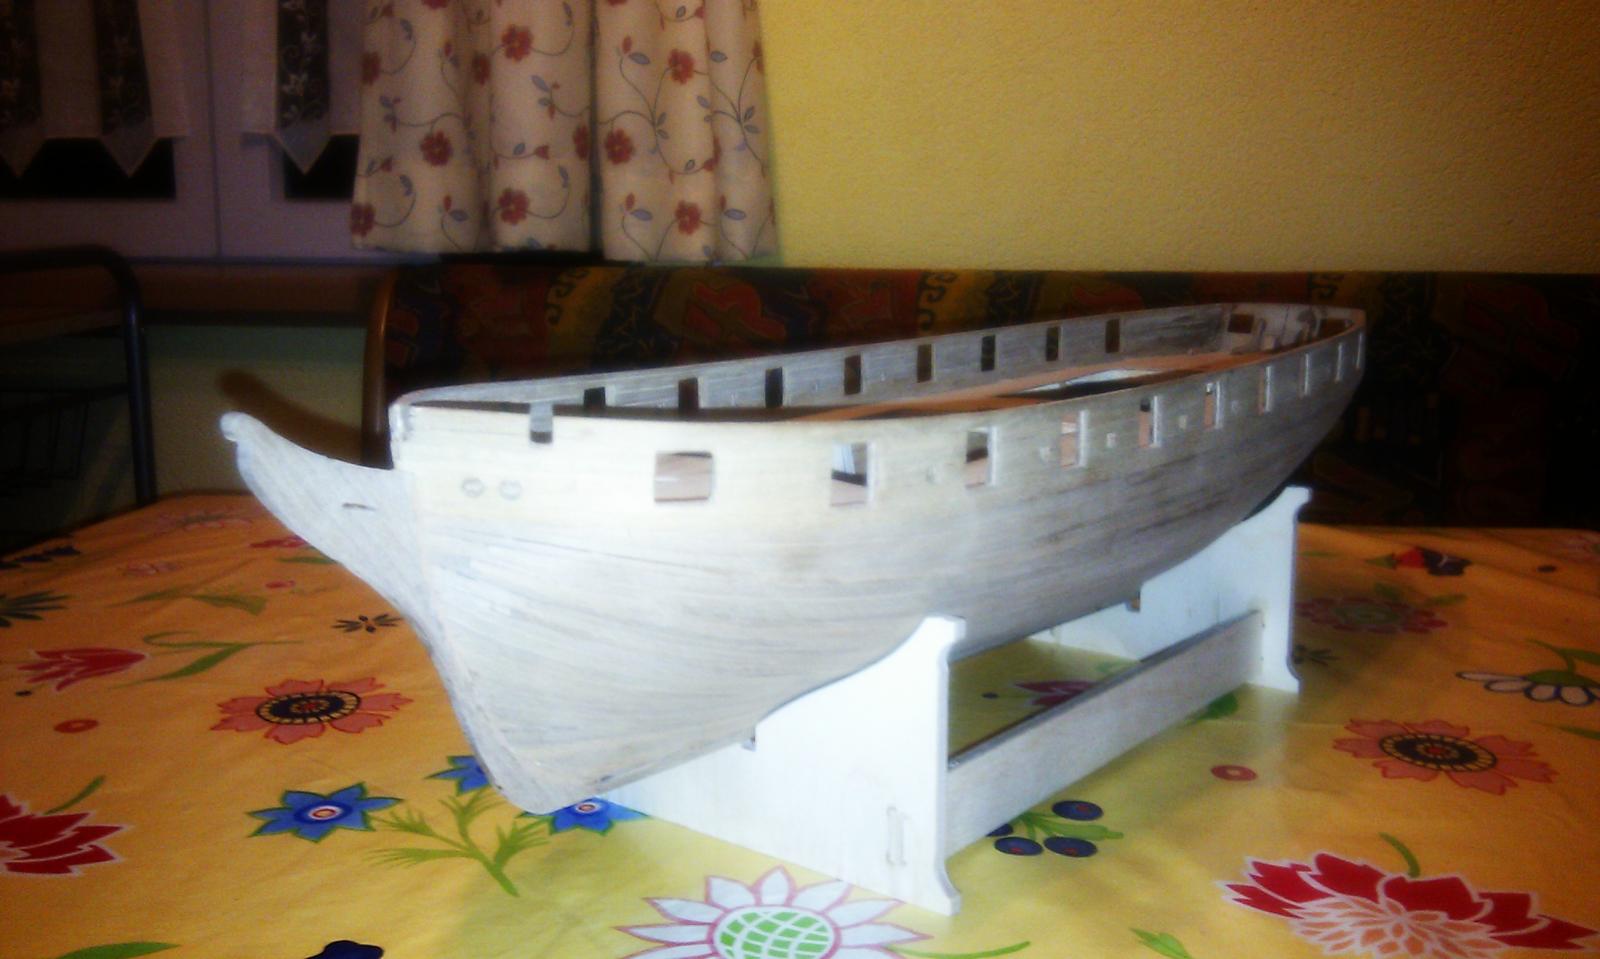
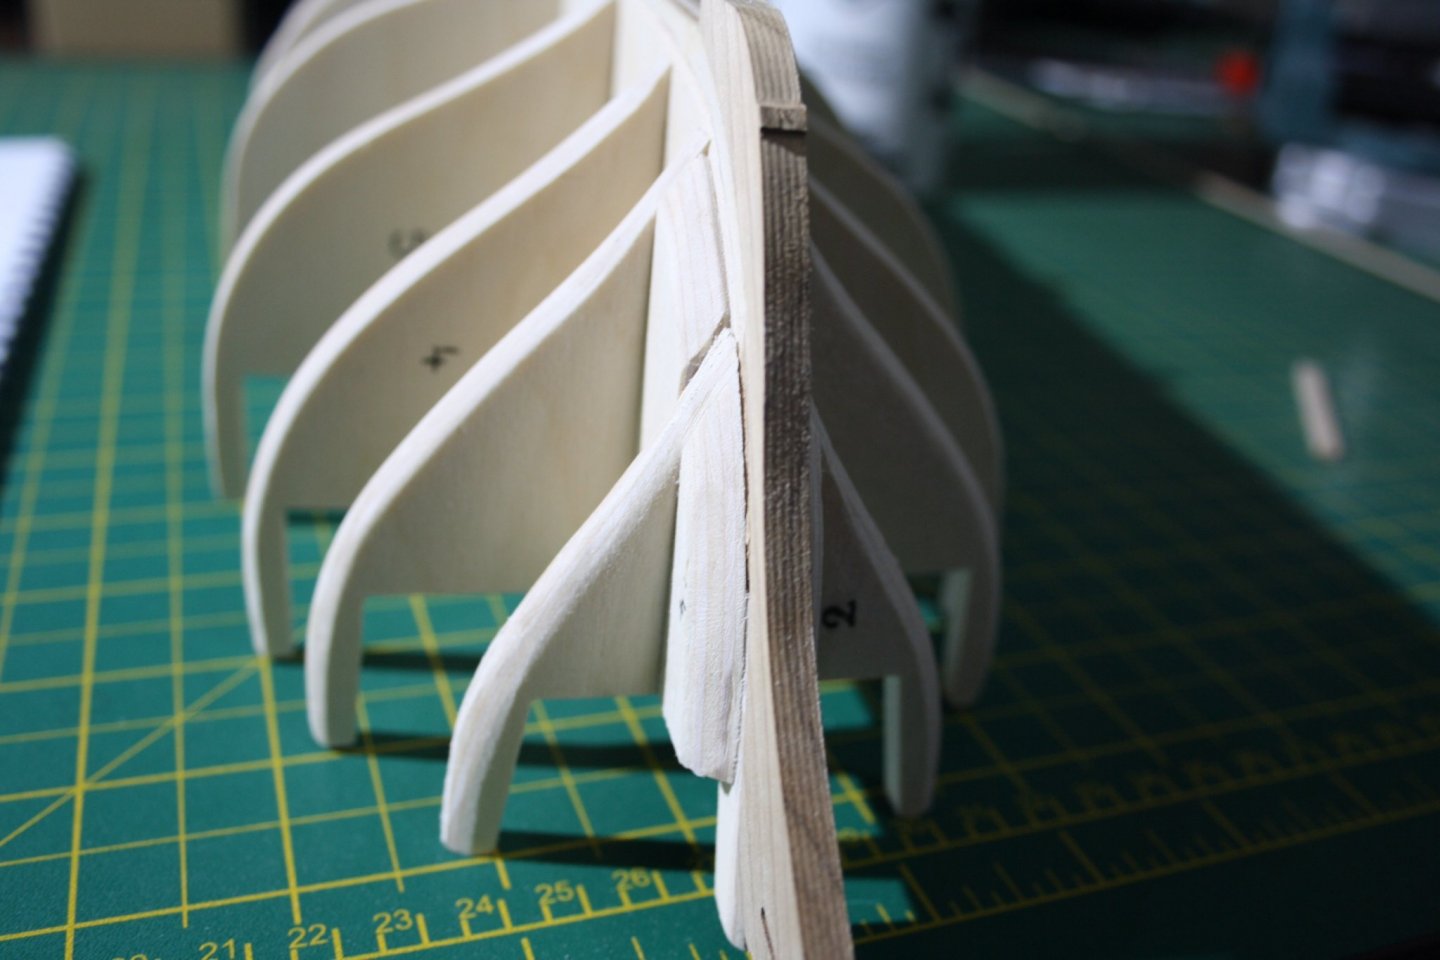
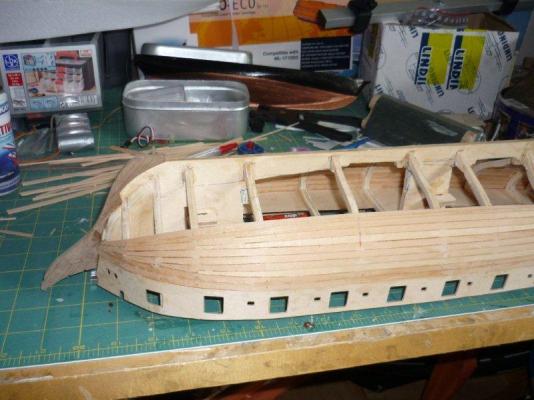
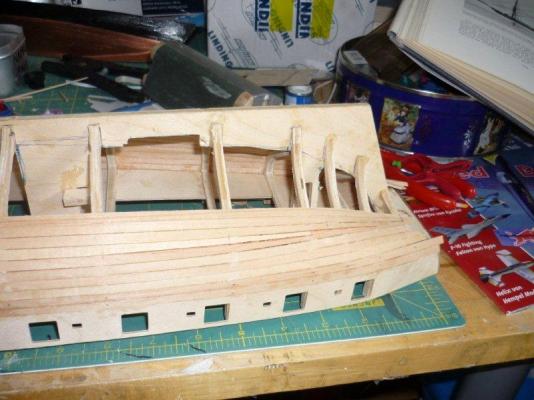
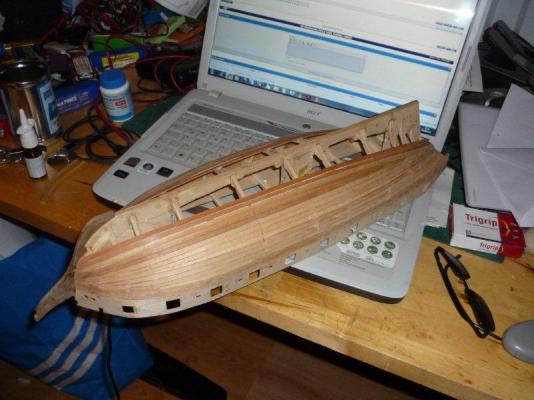
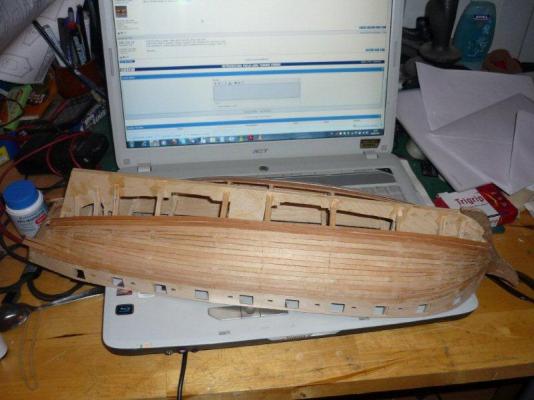
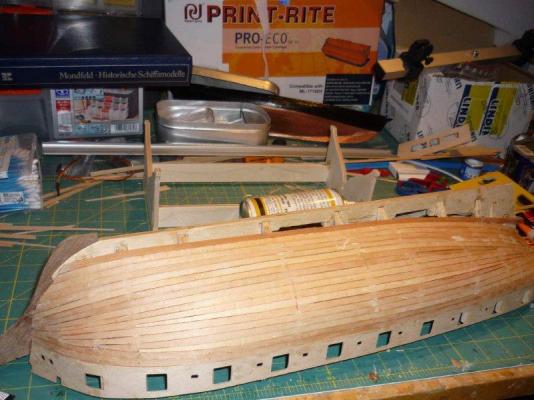
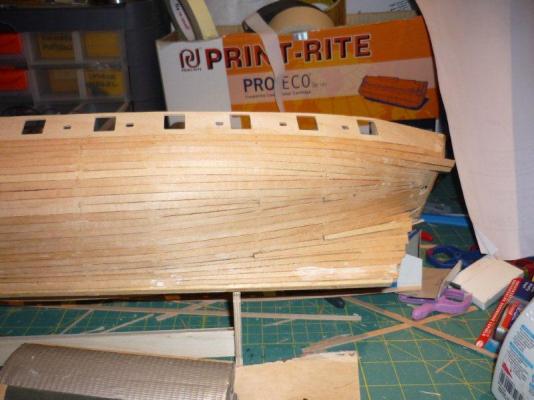
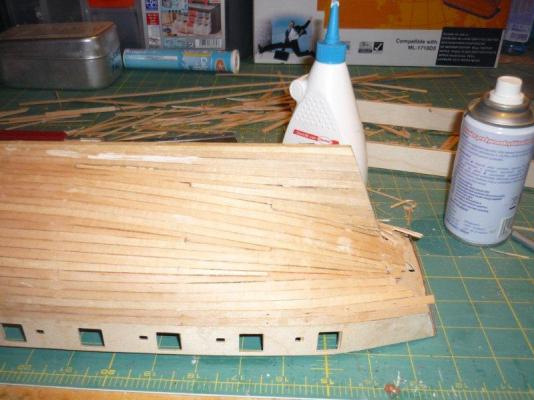
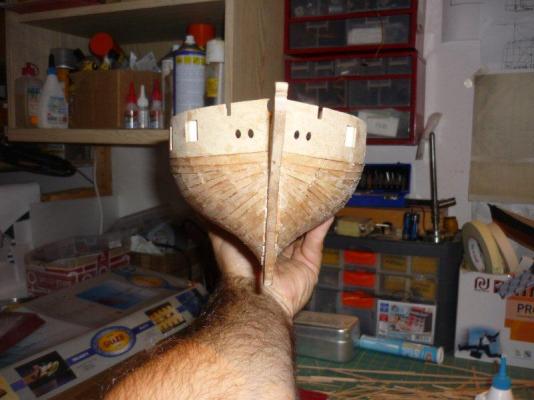
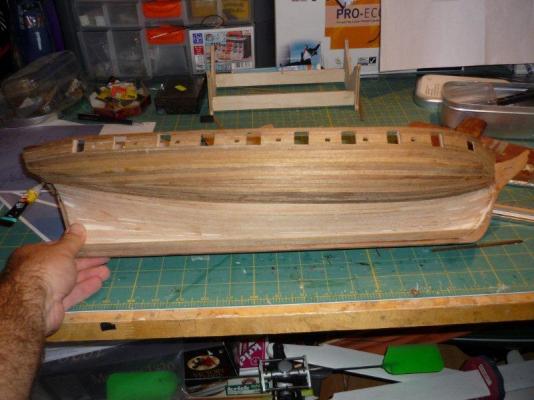
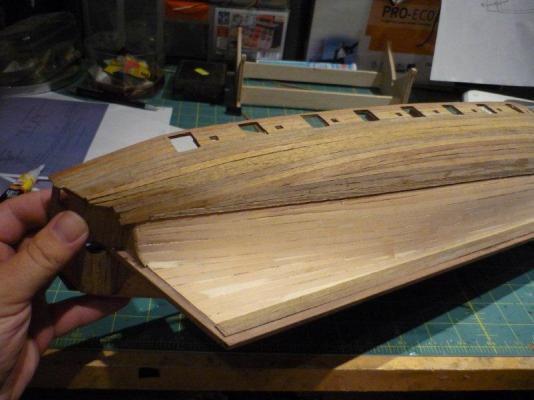
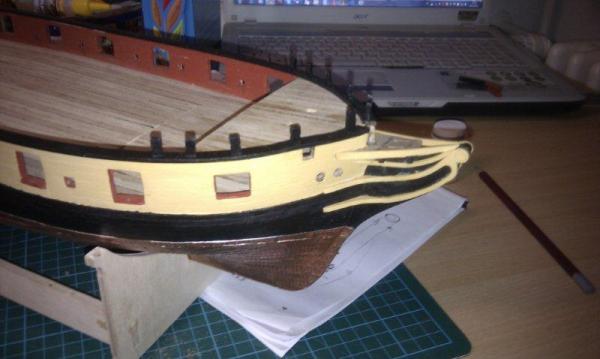
.thumb.jpg.31273b535b82e53d104538017f8a7b21.jpg) I have started to build HMS Snake the initial stages have been completed, first planking etc, the only point of interest maybe that i used "wood filler" to fill between the bow bulkheads then sanded to shape to help the first planking of the hull.
I have started to build HMS Snake the initial stages have been completed, first planking etc, the only point of interest maybe that i used "wood filler" to fill between the bow bulkheads then sanded to shape to help the first planking of the hull.- 25 replies
-
- 1
-
-
- snake
- caldercraft
- (and 1 more)
-
 Hello all! I go skiing in Germany for a week and it's all gone wrong in my absence...! It's a shame that the upgrade had a bit of a mishap but thats life. Well done to everyone who is pulling the site back together. I still have my images from the original build log and managed to find a cached text version from Jan 13. I will post the text and images to preserve the thread as well as i can. Also I have managed to find 1,2 & 3 of 5 pages of beefwellingtons snake build log in text format. Beef let me know if you are back and want the text. Anyway onto the catch up.
- 412 replies
-
- 2
-
-
- snake
- caldercraft
- (and 1 more)
-
 This is my first attempt to build a Caldercraft kit.
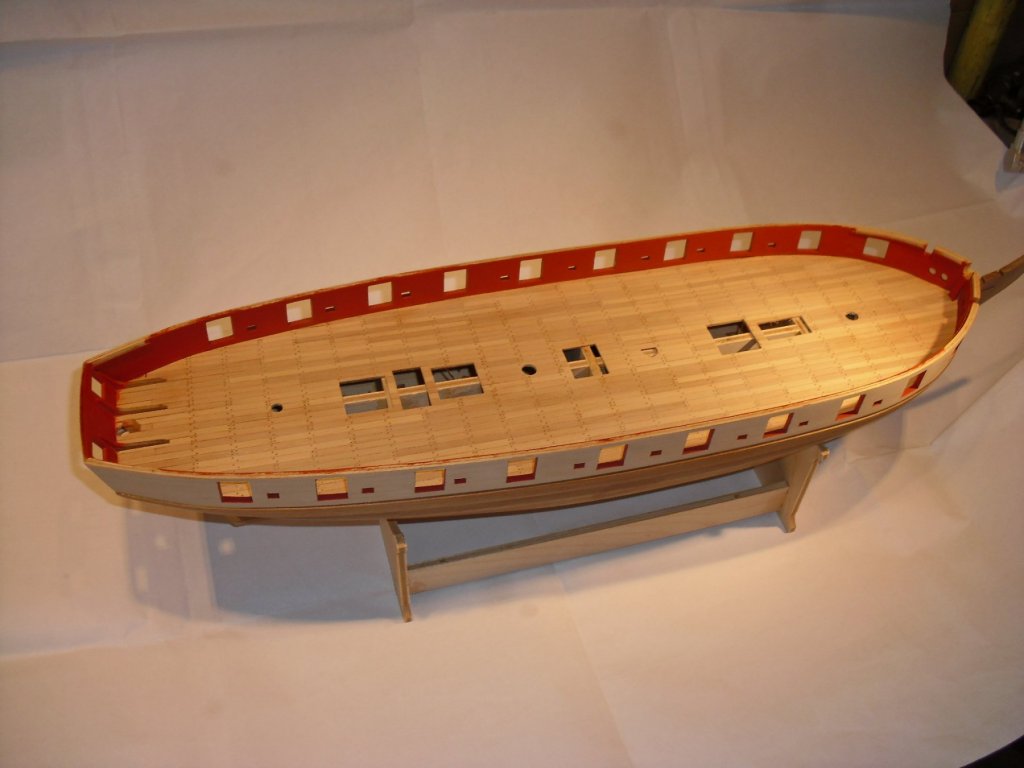
.thumb.JPG.718ec2c2e5dc72760854ee488ada5bdb.JPG)
.thumb.JPG.13237acc77c2ff8d86187f6da3632363.JPG)
-
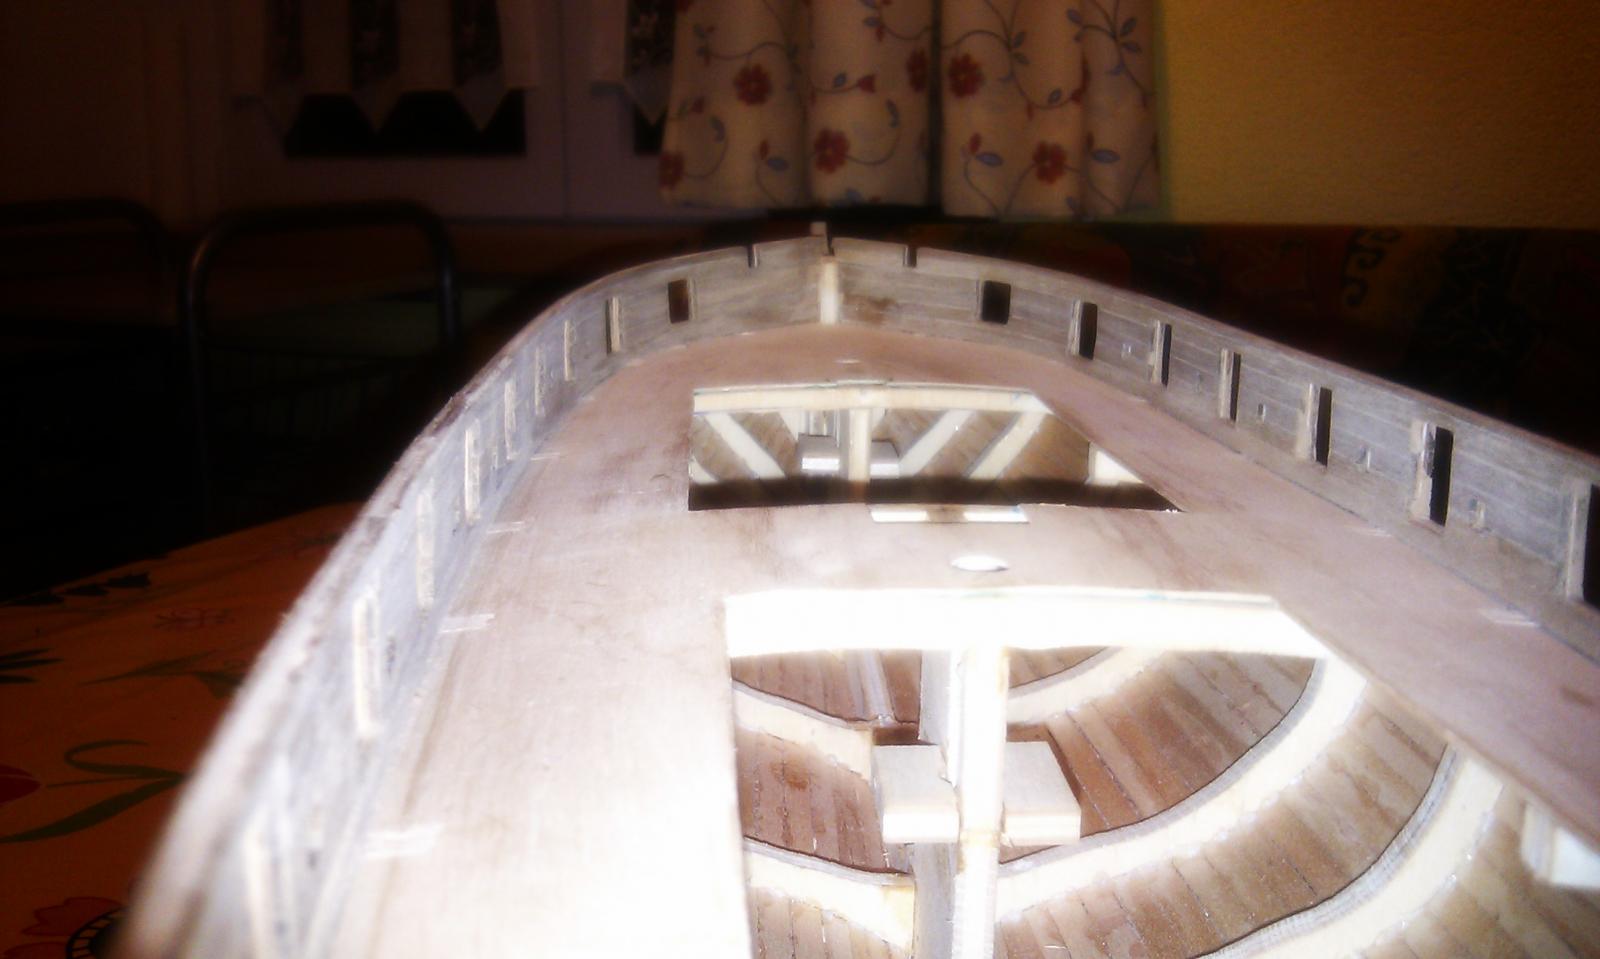
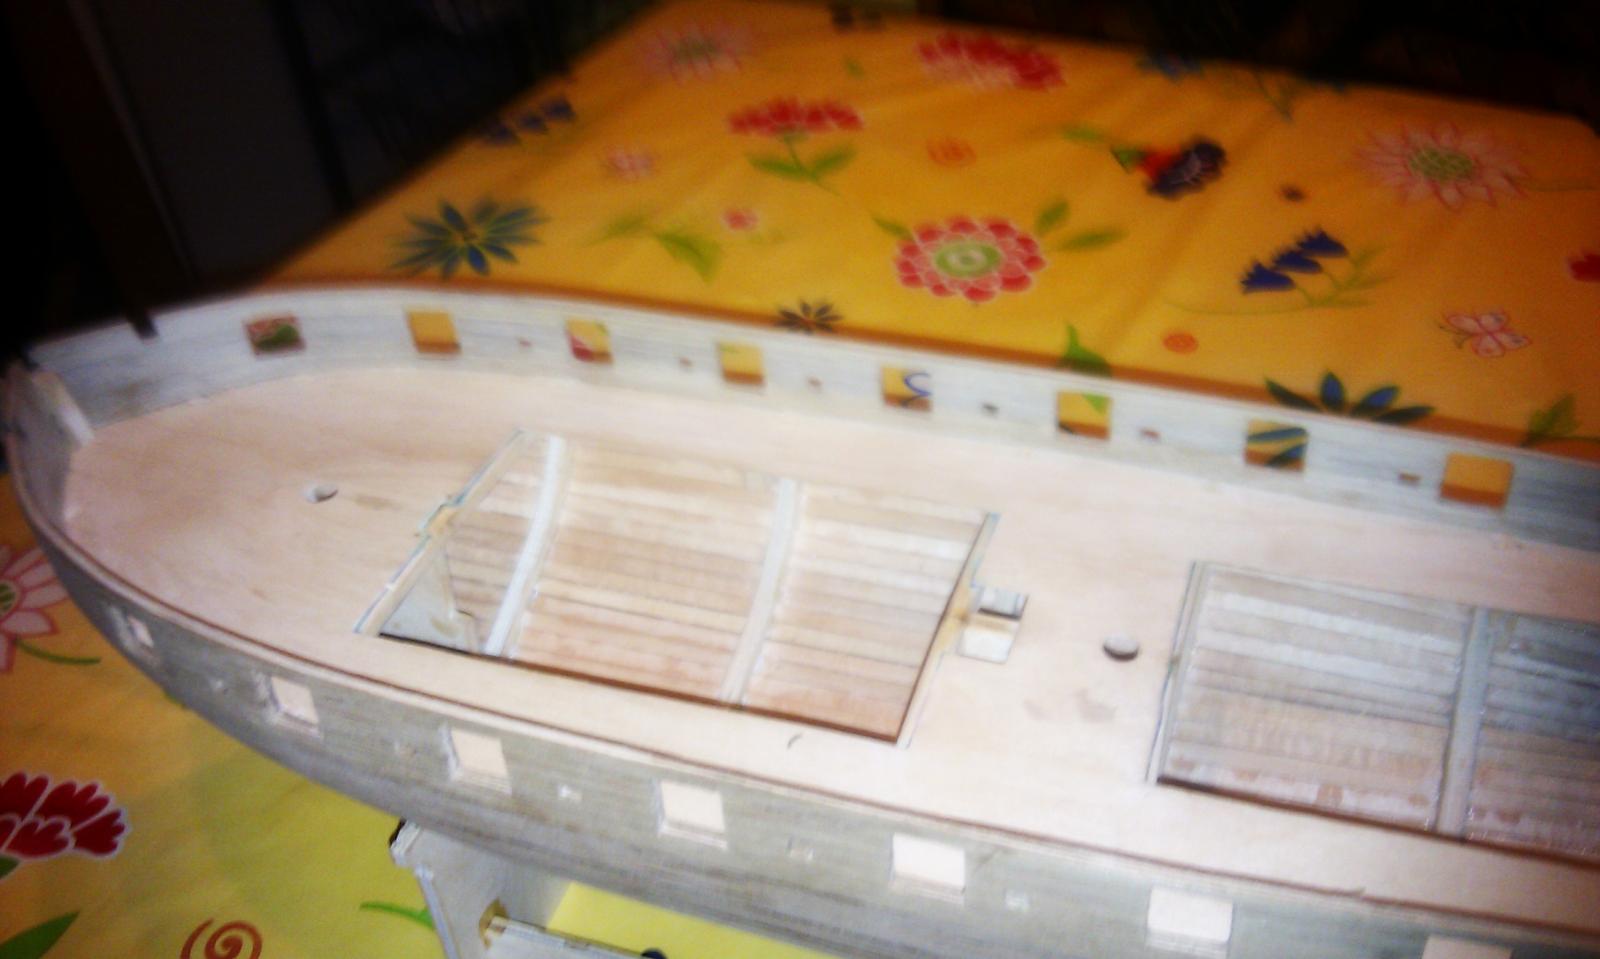
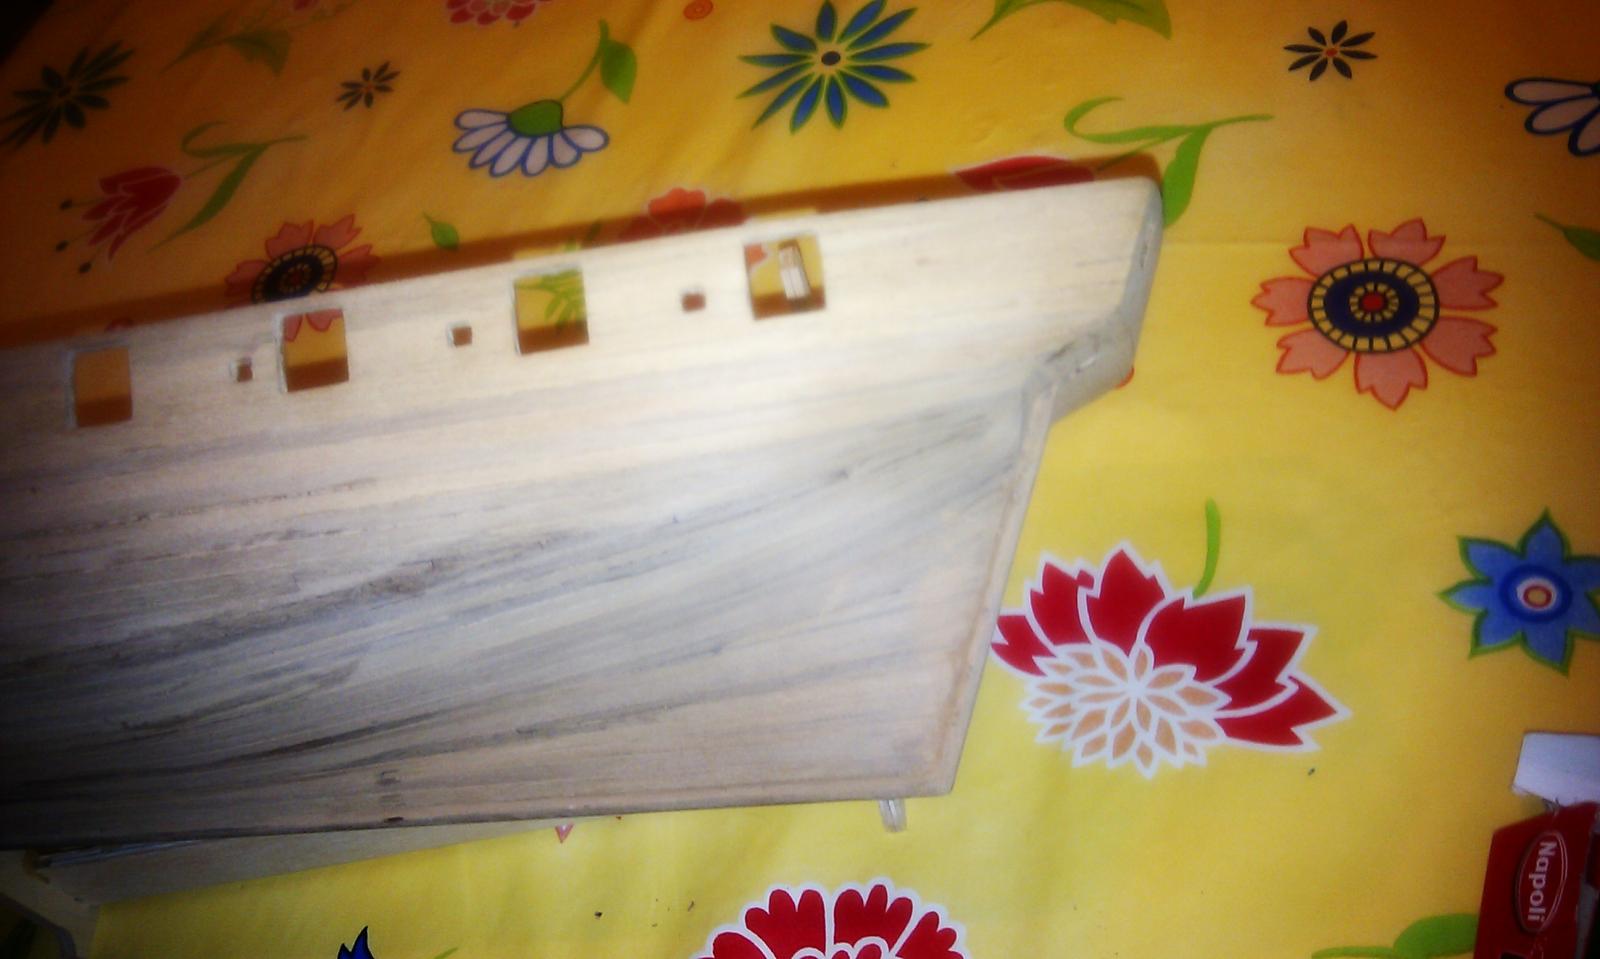
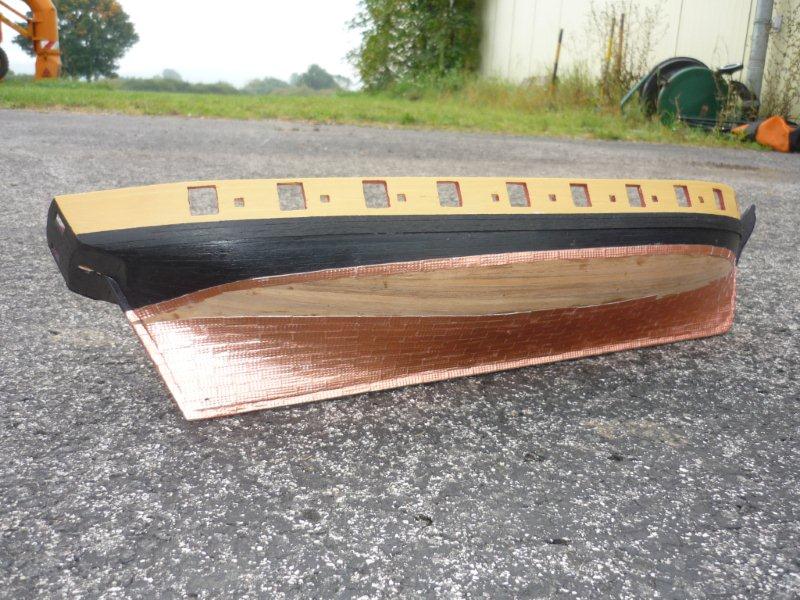
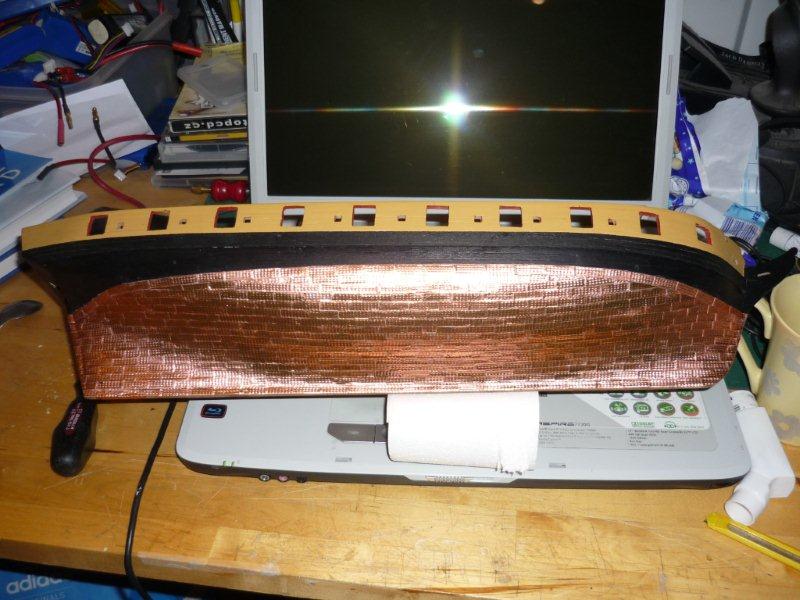
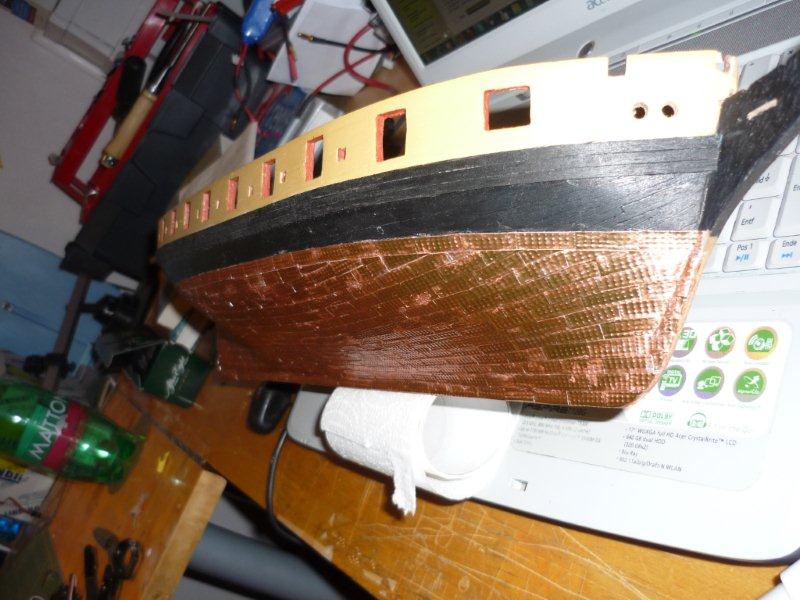
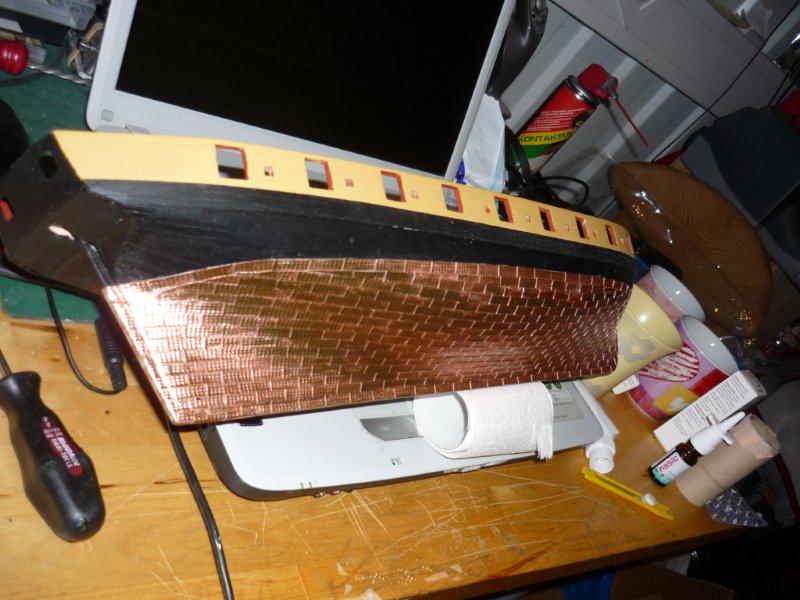
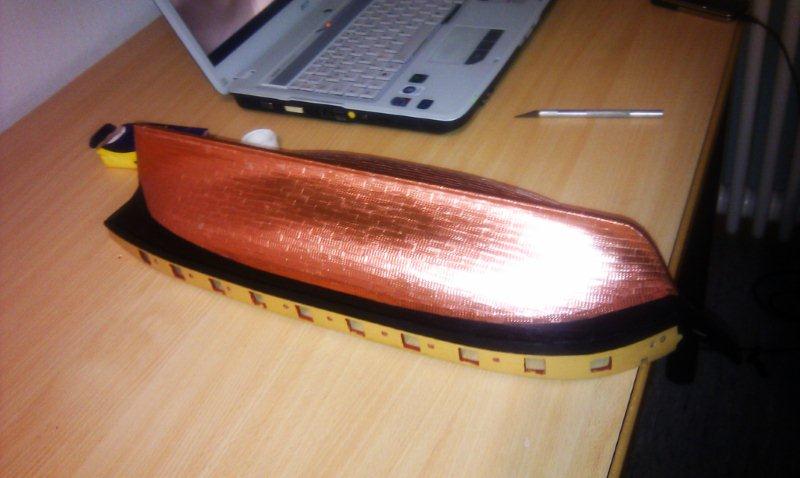
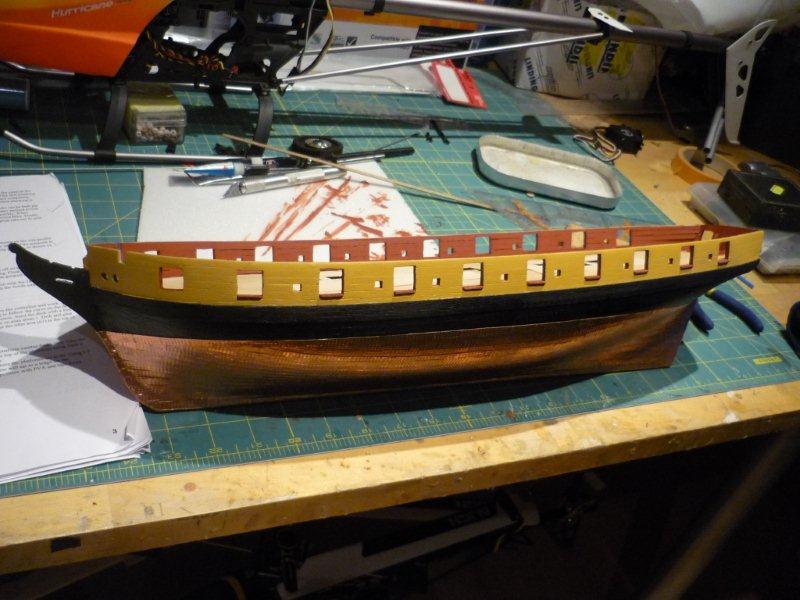
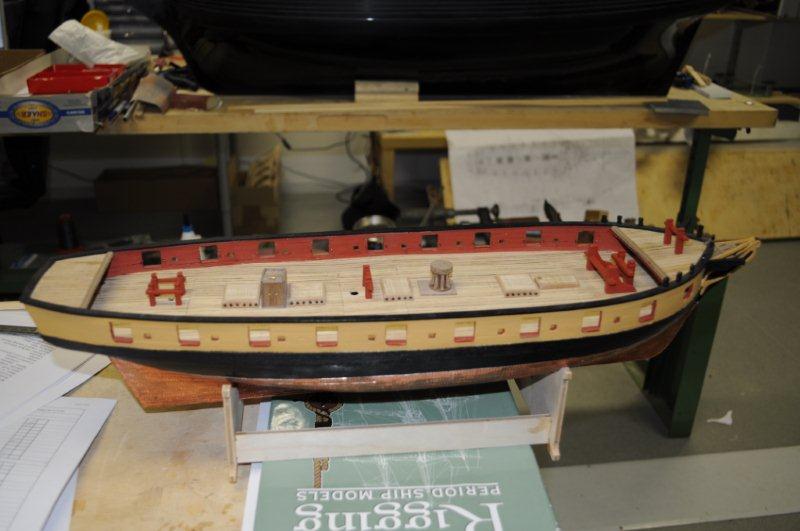
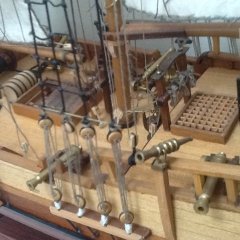
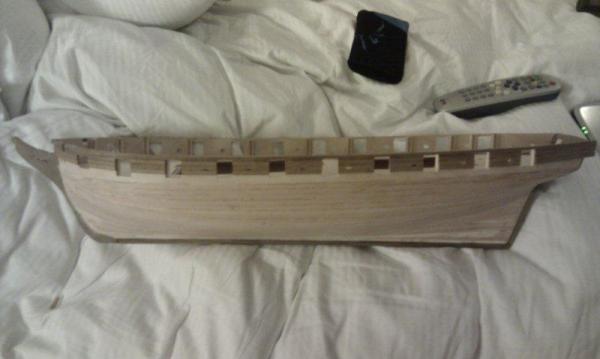
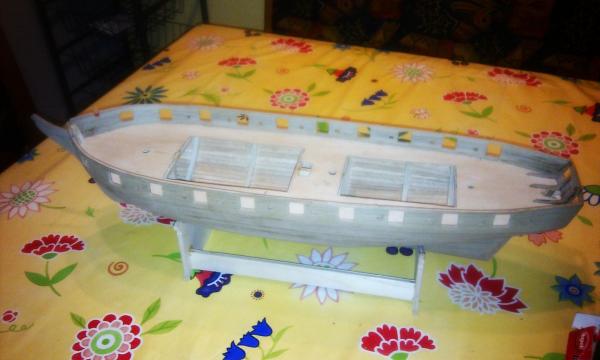
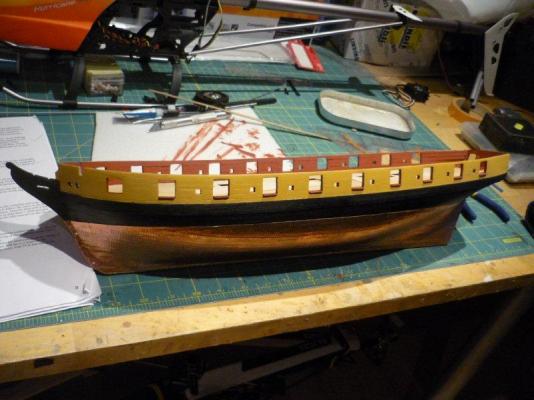
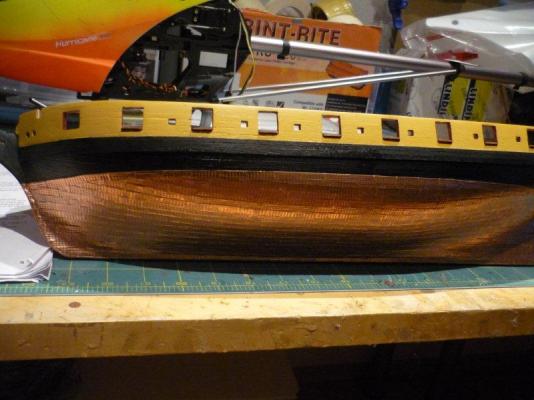
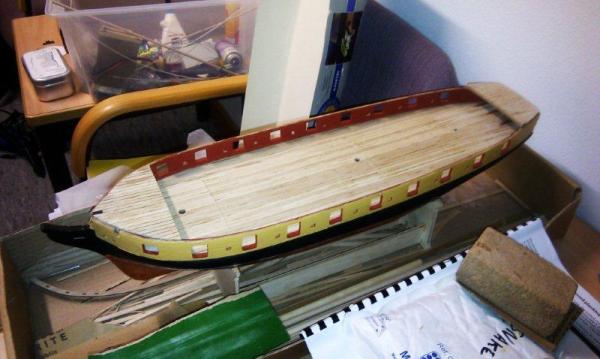
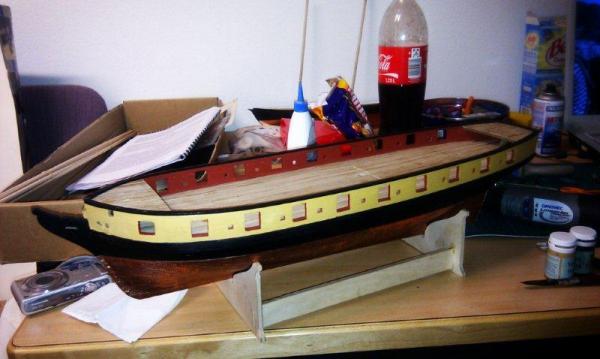
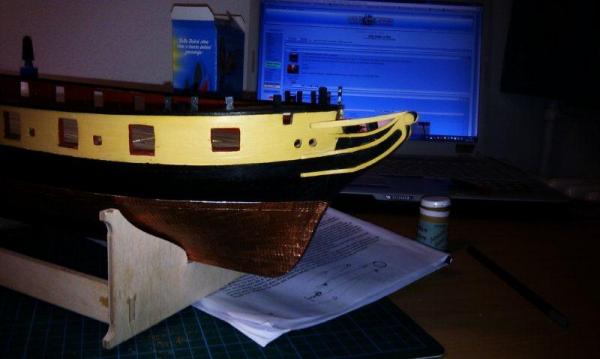
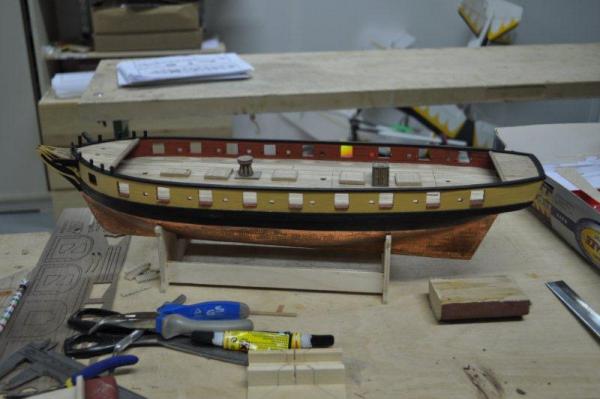
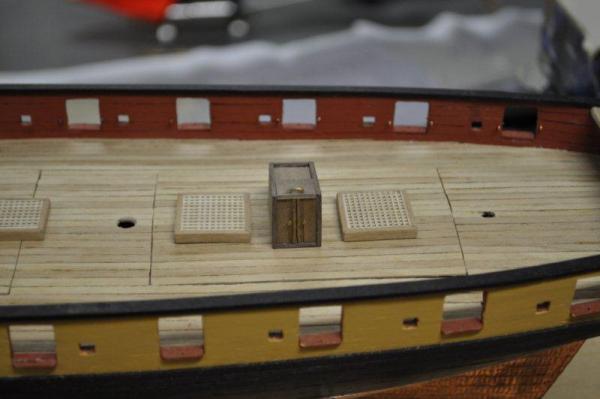
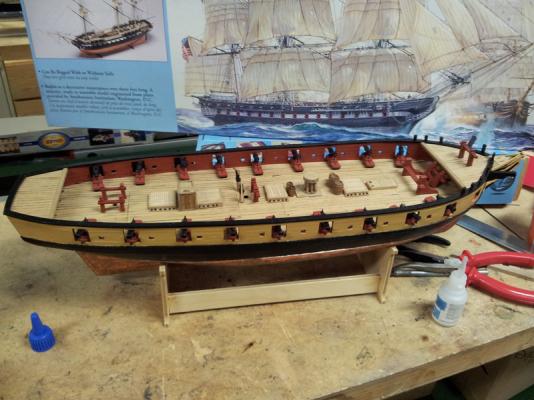
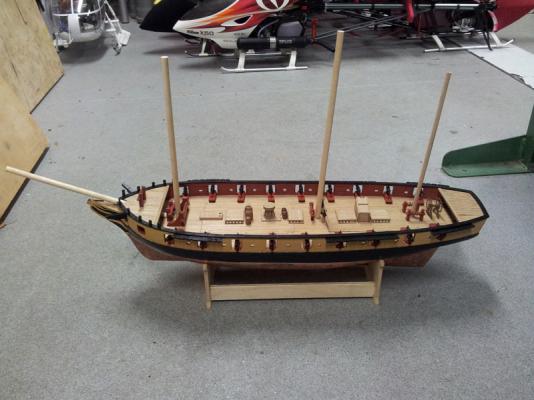
 Back again after a nearly four year break with my snake build. Moving house meant everything got put away (on the plus side I now have my own man cave in the basement) and I recently been getting my modelling mojo back by doing some plastic modelling. Before we moved I'd got as far building the hull and coppering and I've restarted again, I've put the rails on and some of the deck furniture. Now I'm getting to the wheel rigging and I'm wondering what the best way forward is on this? For those wondering where it is I need to reattach the tiller for the third time which is annoying (the last reattachment didn't really work!). I assume the blocks should attach to the deck with the eyelets, so should I rig this before glueing eyelets & blocks to the deck? The instruction aren't being very helpful on the subject.
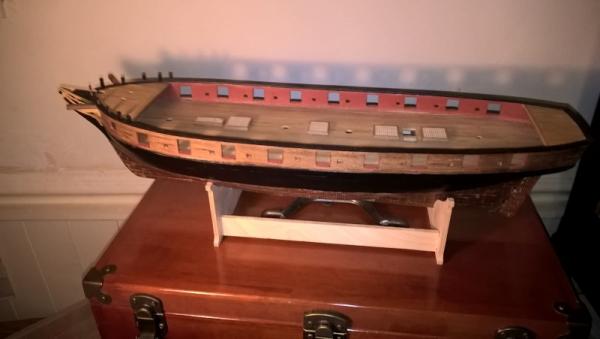
- 14 replies
-
- 3
-
-
- snake
- caldercraft
- (and 1 more)
-
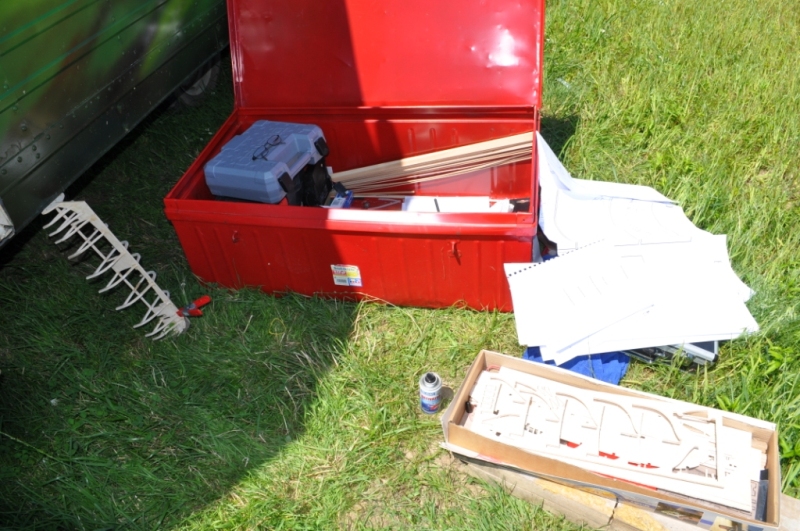
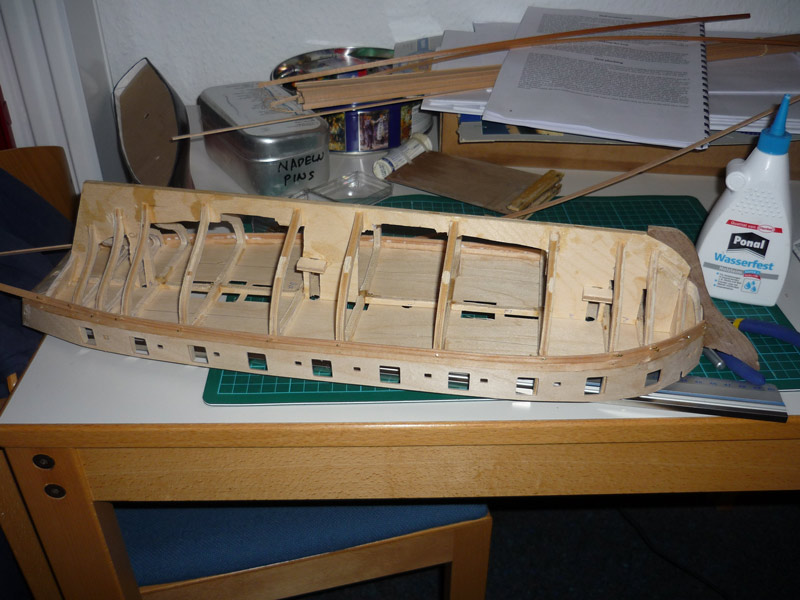
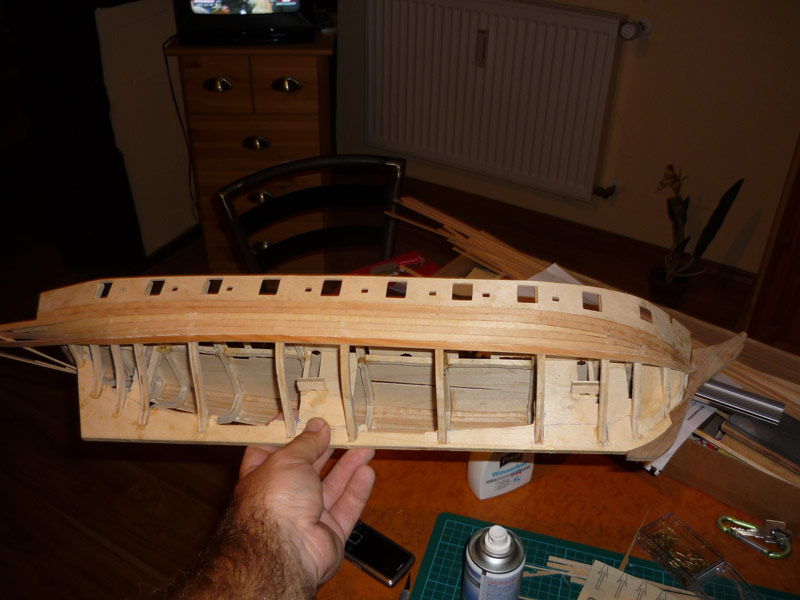
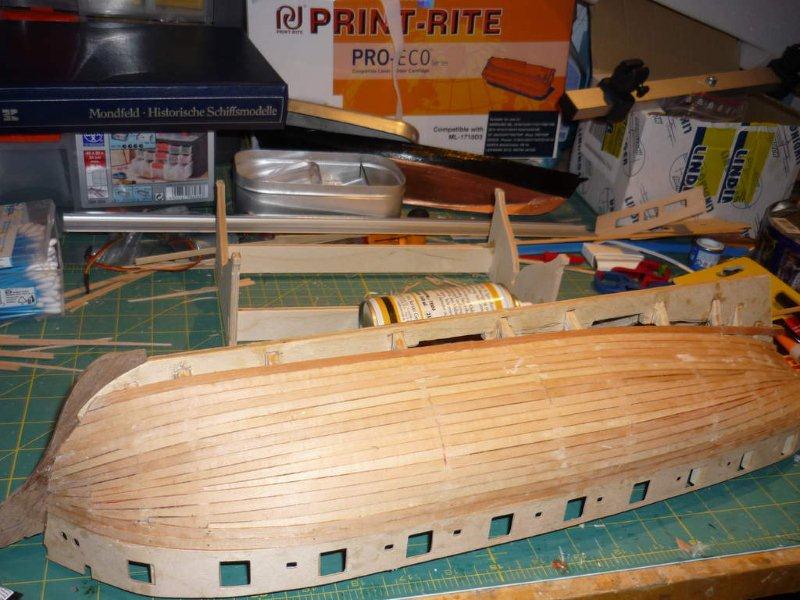
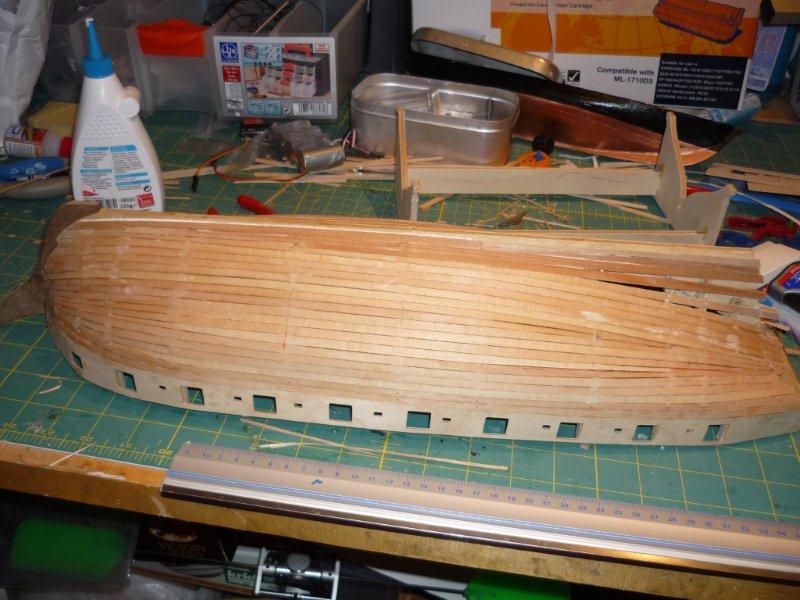
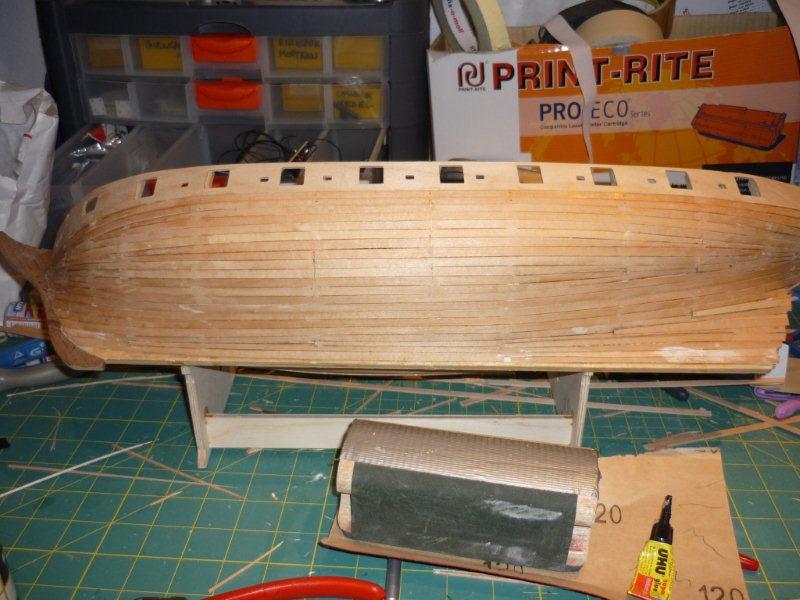
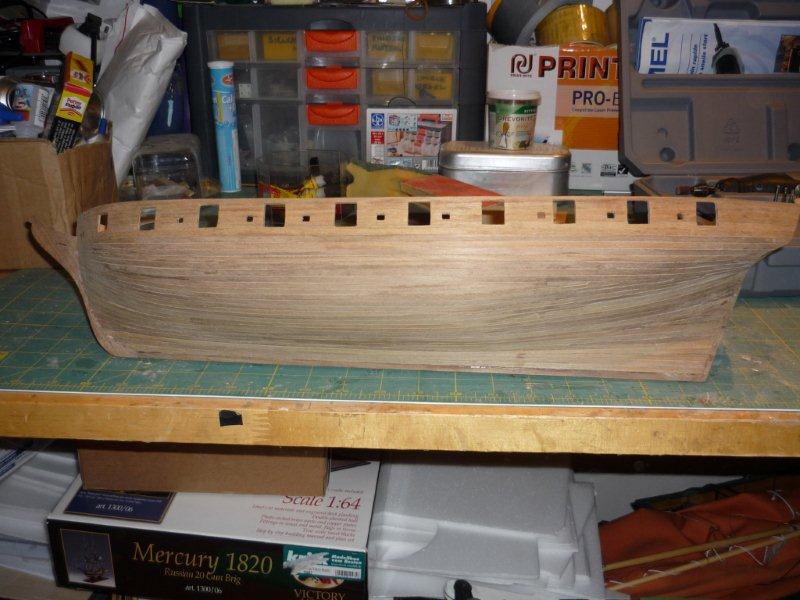
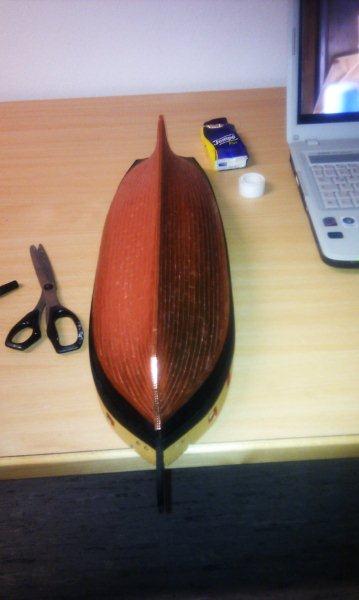
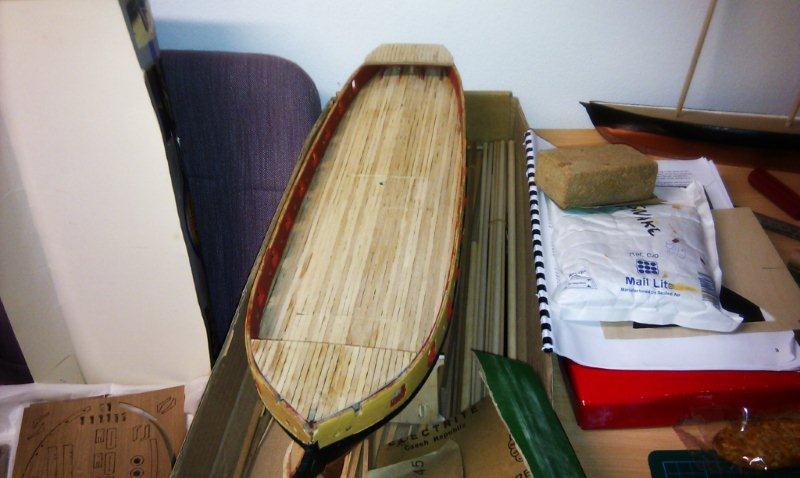
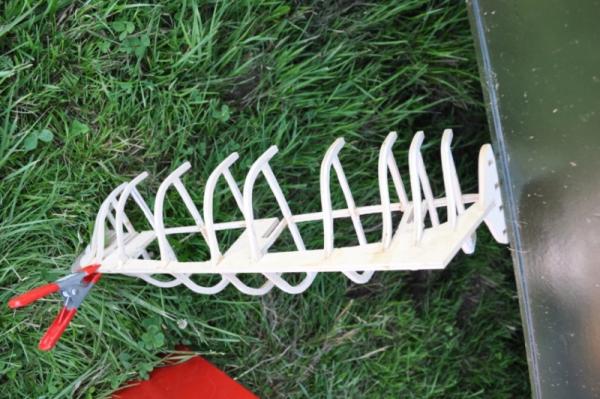
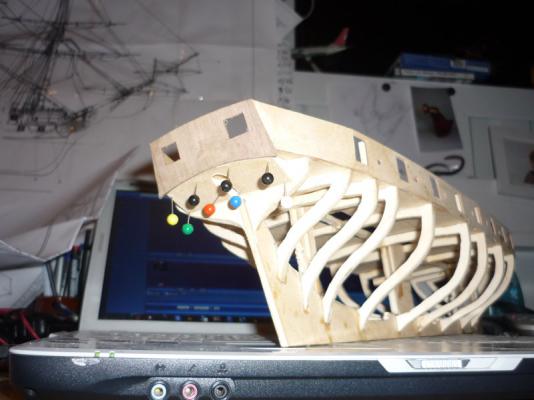
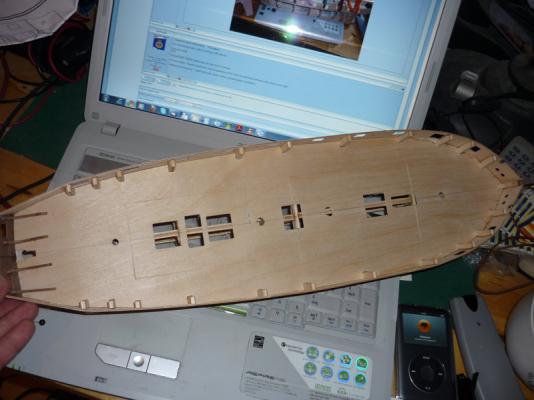
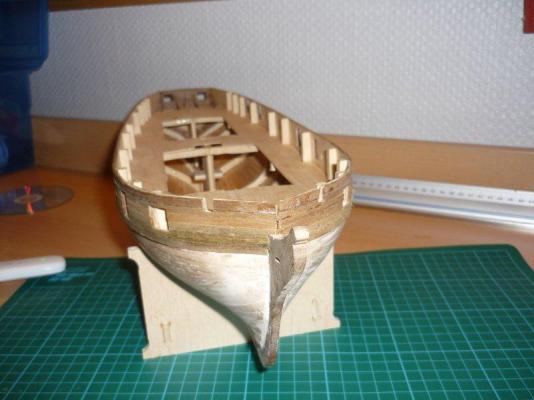
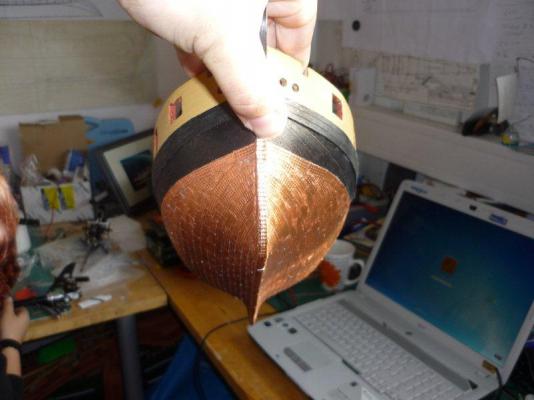
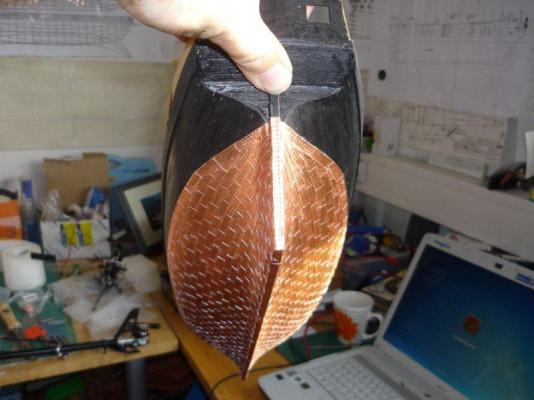
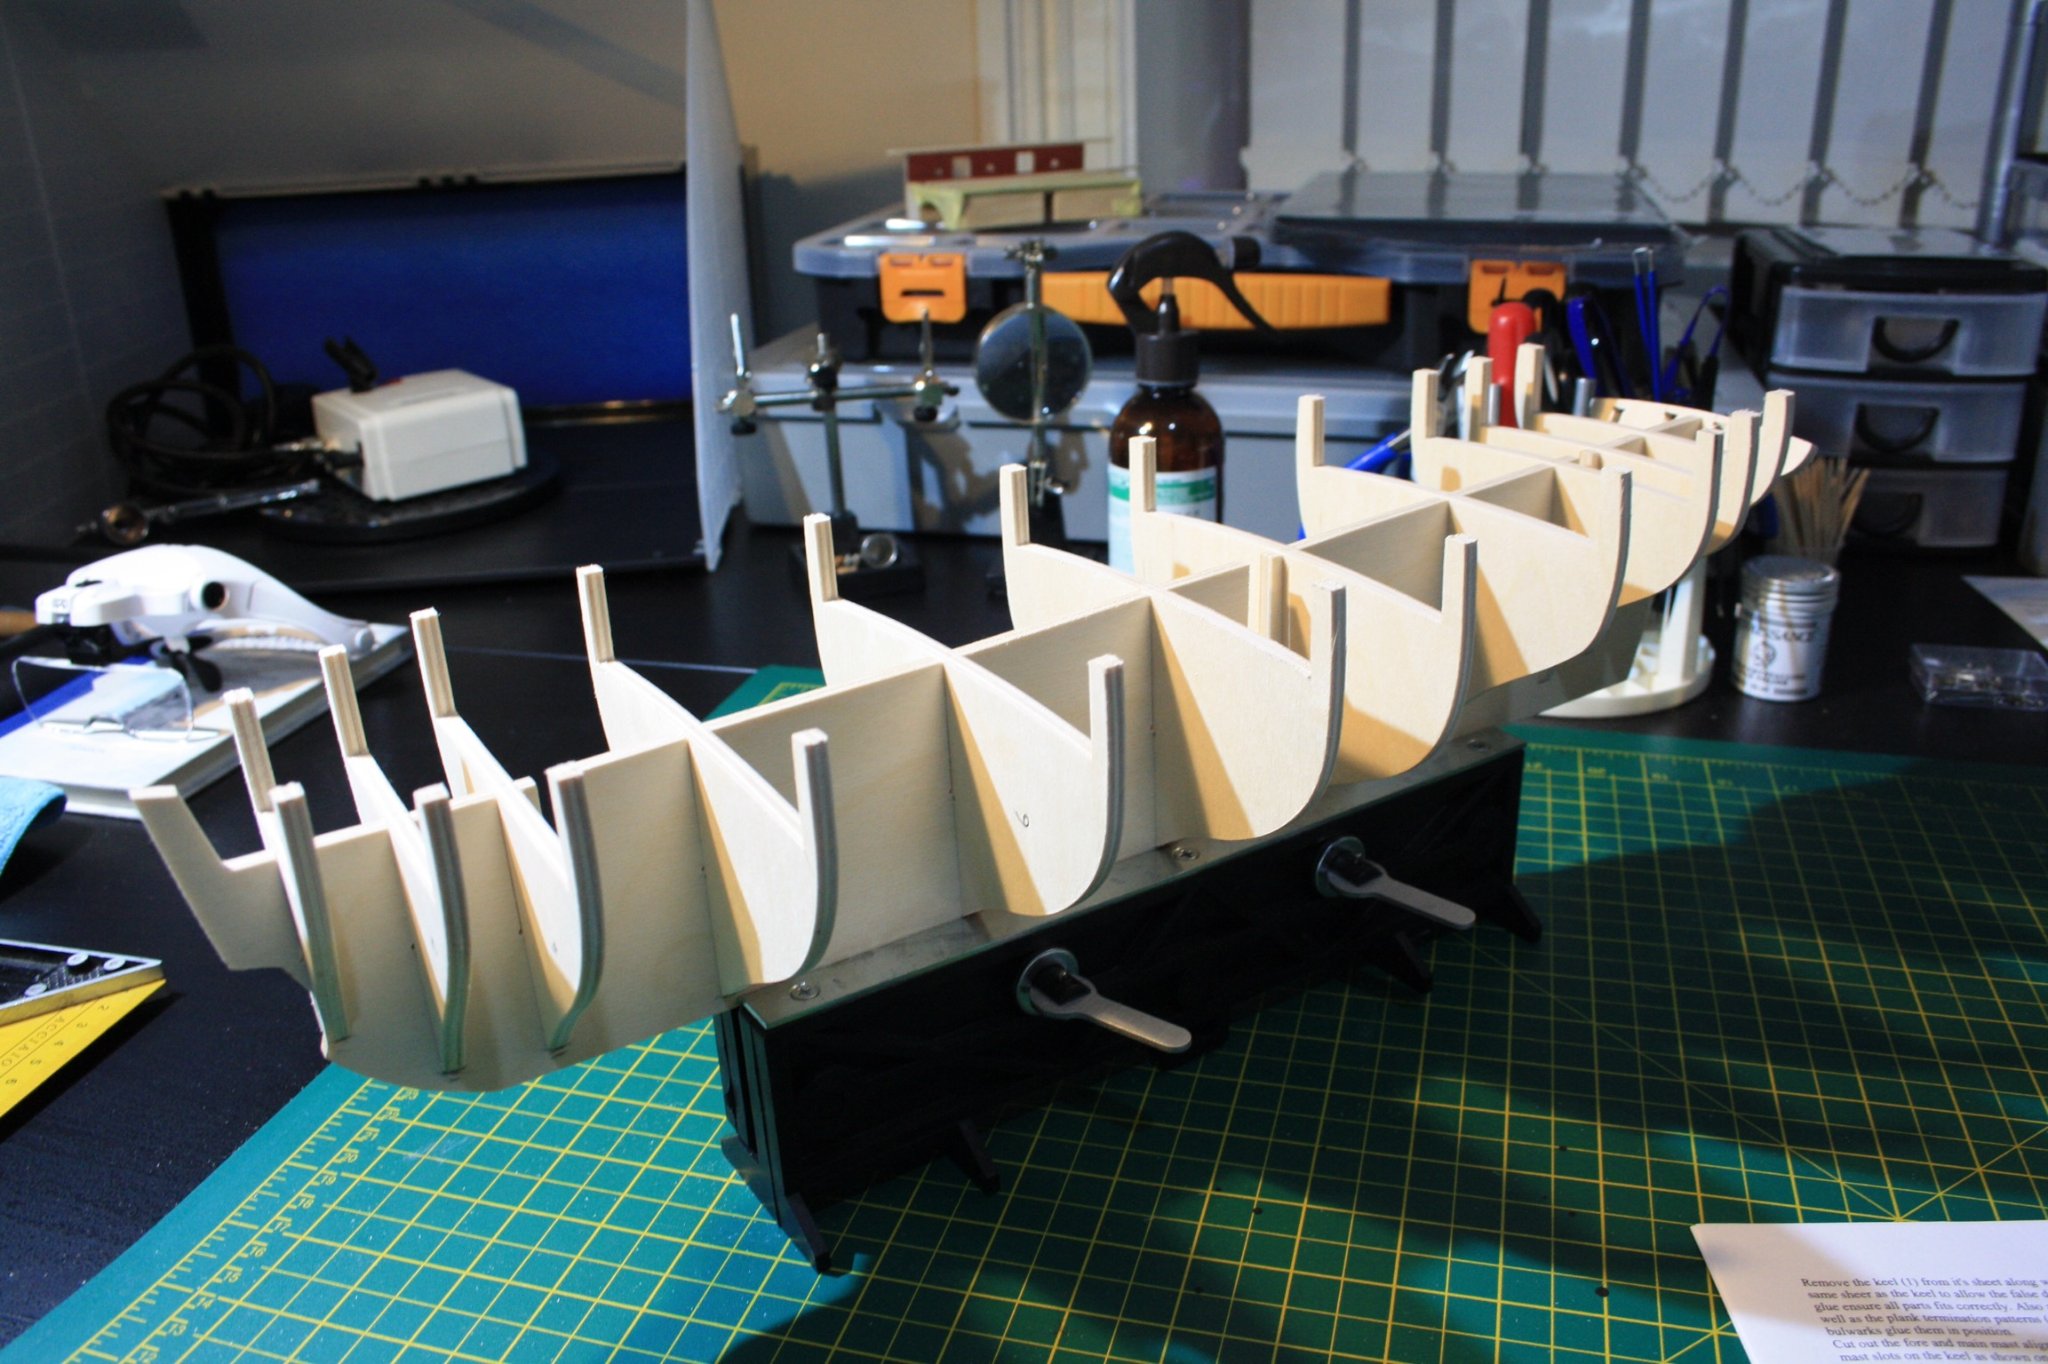
 Well It took me a while to get the energy to even rebuild my build log. i`ll give it a try. Unfortunately the most important part of it, all the helpfull hints and tips of other forum members that helped to motivate and push me along will not be there anymore. at least i can bring back the pics After building several quite successfully sailing RC square riggers with either carved out solid hulls or bread and butter style built up hulls, i thought it high time to start and try a proper planked model (my first!). Searching for a suitable model i fell in love with the Caldercraft/Jotika Ltd. HMS Snake kit in 1/64 scale. I like the hull lines a lot, she is beamy and has a not too shallow draft hull to give you some displacement to work with for a RC conversion. I was torn between the Cruiser (like SC&Hs Cruiser class Brig) and Snake which share the same hull, and only differ in their rig (Brig vs. ship rigged) but the Snake kit has been updated recently and so the decision fell for Snake A direct conversion of the Tonnage of the real ship to scaled down to the scale of the model gives a rough estimate of the displacement of 1,4kg total that should be do able. She will have 3 channels: rudder Fore and Headsails winch servo (all sails forward of CE) Main,Mizzen and spanker sheet whinch servo (all sails aft of CE) The RC equipment weight about 250g using a 2 cell Lipo to run the RX and a UBEC, I want to have a ballast weight of at least 500g so i`ll have a weigth budget fo the rest of the ship of about 700g. Pretty tight, but we will see. i have reduced all the bulkheads to frames to save weigth and the keel part also got reduced for gaining space and also weight saving. I have assembled the basic hull skeleton and am going to place the hatches for access between Fore and main mast and 1 between main and mizzen. The rudder servo will be hidden under the poop deck and accessible with the poopdeck removed. below is the state of the build so far.. unfortunately my buidling stalled out in 2011 as my focus shifted again to RC Heli flying, so she is waiting patiently laid up in ordinary on my workshops shelf until i come back for her
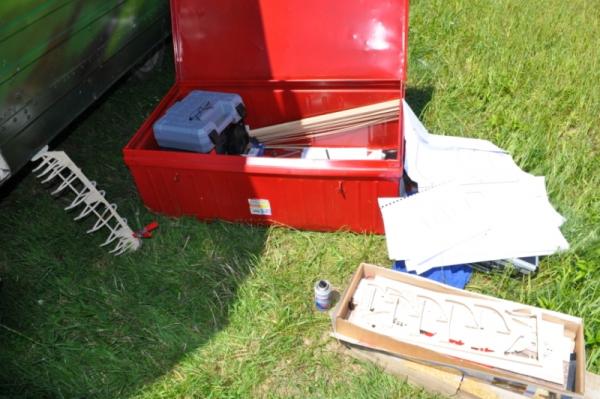


- 2 replies
-
- 1
-
-
- snake
- caldercraft
- (and 1 more)


.JPG.30e7d7a809e9abc6ec3ed75ba9efeaab.JPG)
.JPG.08a21a3c4c9b1a97b2fe2c6cd92382e3.JPG)