Search the Community
Showing results for tags 'sultana'.
Found 20 results
-
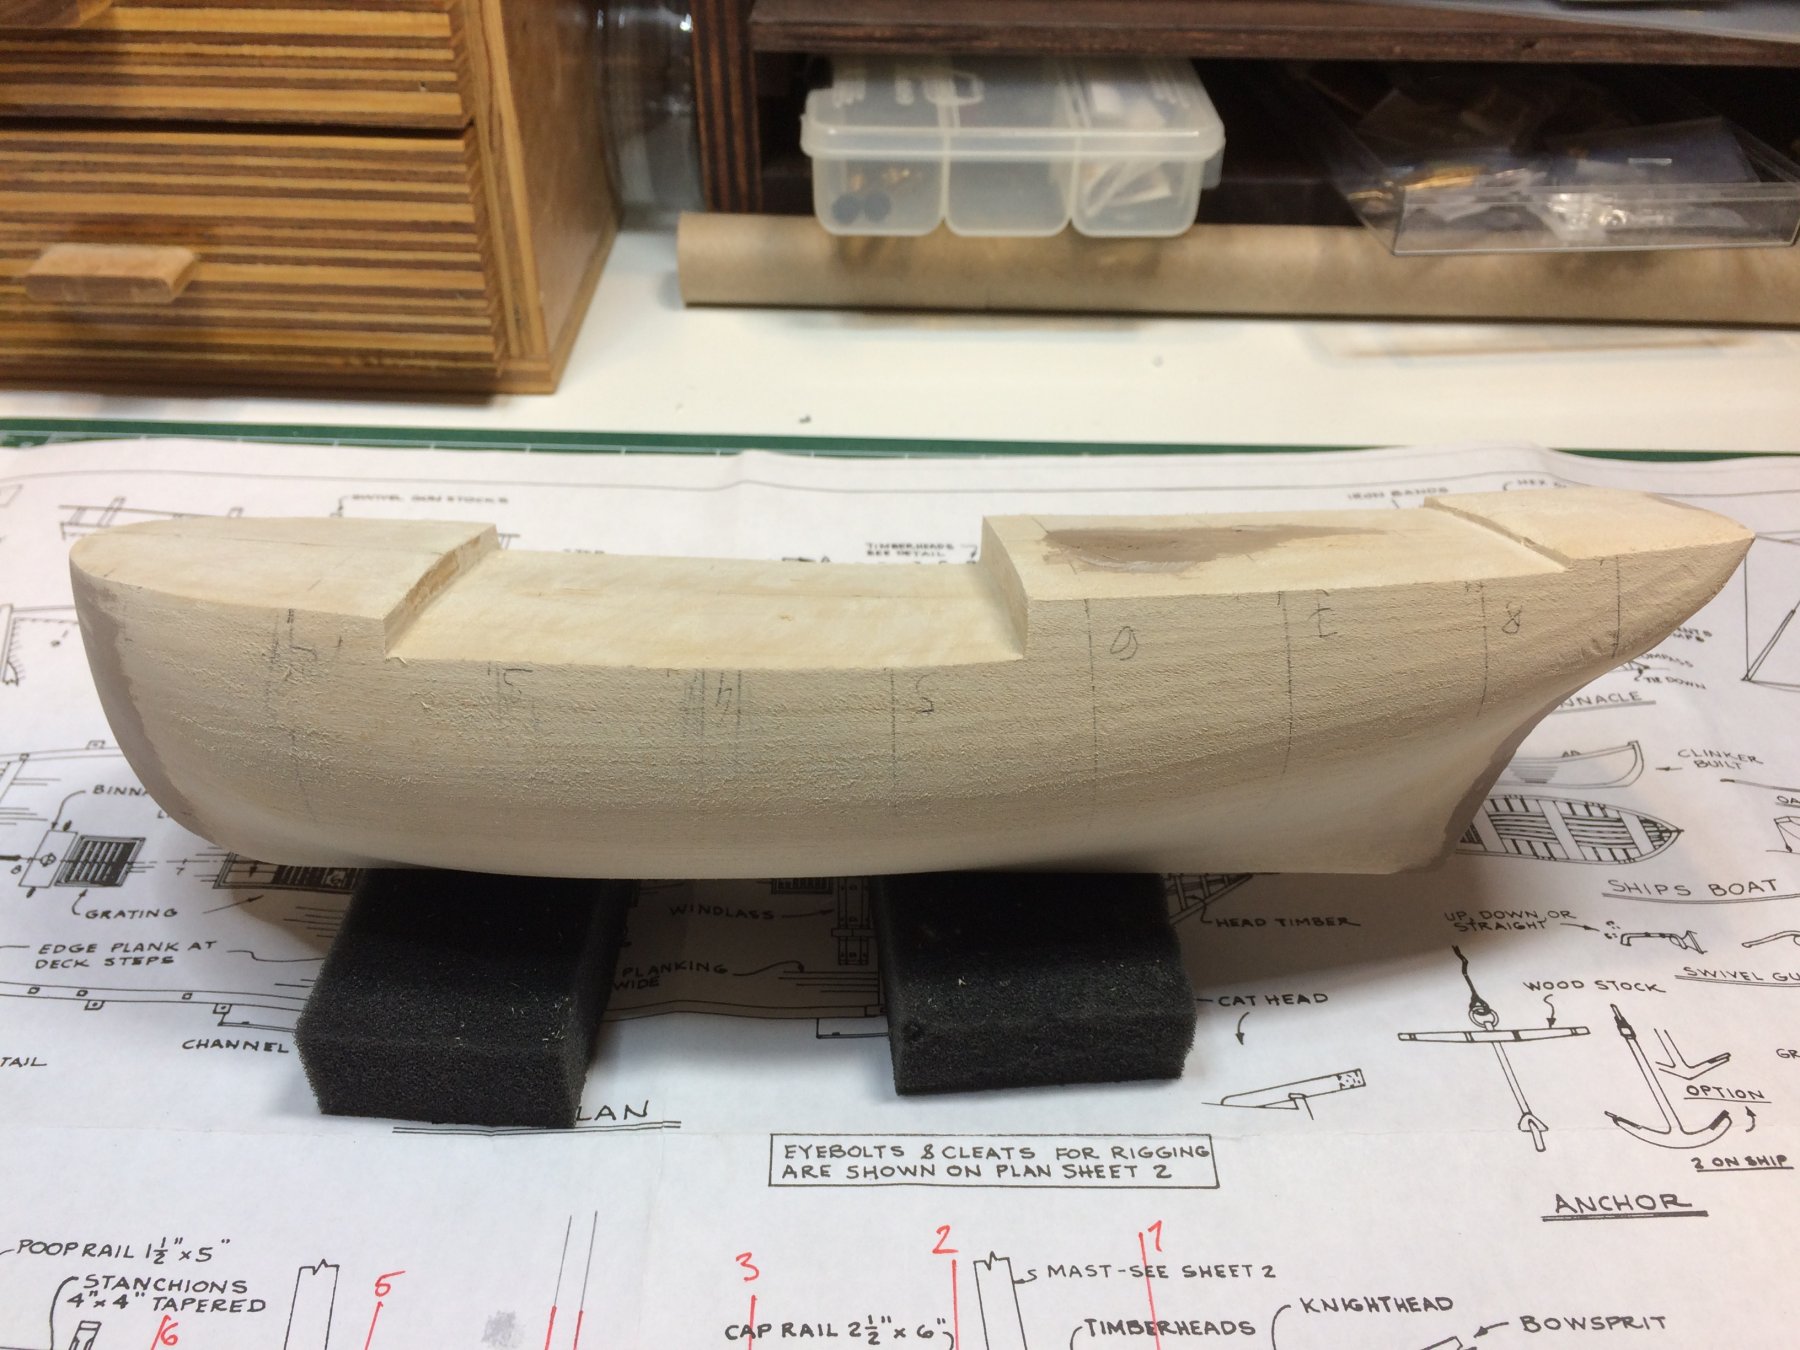
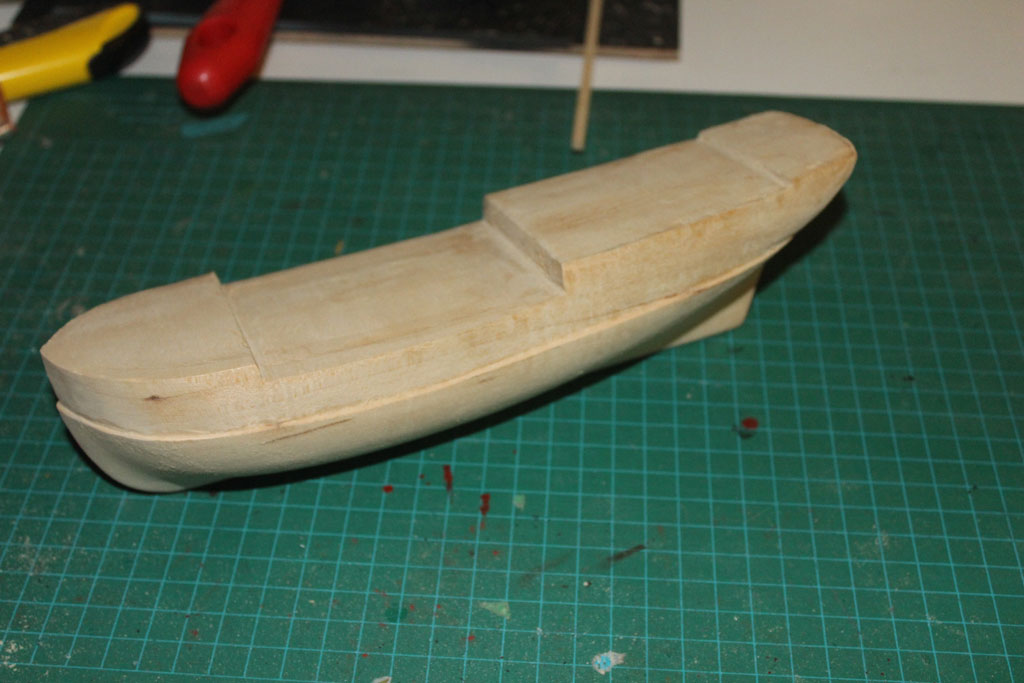
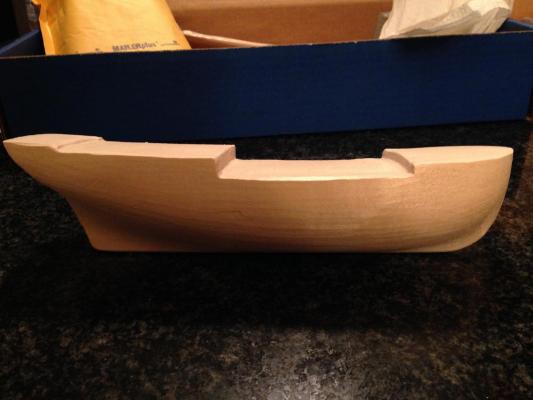
 I am moving on to this ship after finishing the NRG half hull planking project. I was looking for my next ship when I was finishing the MS Lobster Smack and found Chuck Passaro’s very detailed shop notes for this model. I kept looking at those instructions wondering if I could follow them. I finally decided to order the kit, but after about 6 weeks, Model Expo told me that they had stopped making it. So I did the half hull project next to work on my planking skills. While I was working on it I found a Sultana kit on EBay. I think it’s pretty old. The shop notes give detailed instructions for modifying the kit and doing some scratch building. Some parts of it look pretty difficult. I am especially worried about the fun with Sculpy parts that involve sculpting a new quarter badges and a figure head, but they are a long way off, and I can always wimp out and just use the cast ones that come with the kit. The hull is supposed be planked above the waterline, and the planking replaces the carved bulwarks so the first step is to modify the solid hull. This is the hull as it comes out of the box: This is after slowly shaving off the bulwarks. I am glad I bought a big pack of number 11 blades for this one.! I think there is more to take off, but decided to finalize it when the time comes to sand and shape the decks: I cut out the hull profile templates and started shaping the stern. It needs a lot of wood removed! Chuck recommend a rotary tool. I did that for a bit. It made quite a mess and made me nervous I was going to take off too much wood. I switched to sand paper wrapped around a dowel to take away more wood for the concave curve at the stern. The profile template says there is more to take off. This is my first solid hull model, and I think the challenge is going to be using the templates to get the hull shape correct. I seem to work pretty slowly, and I think this one is going to take me a quite while!
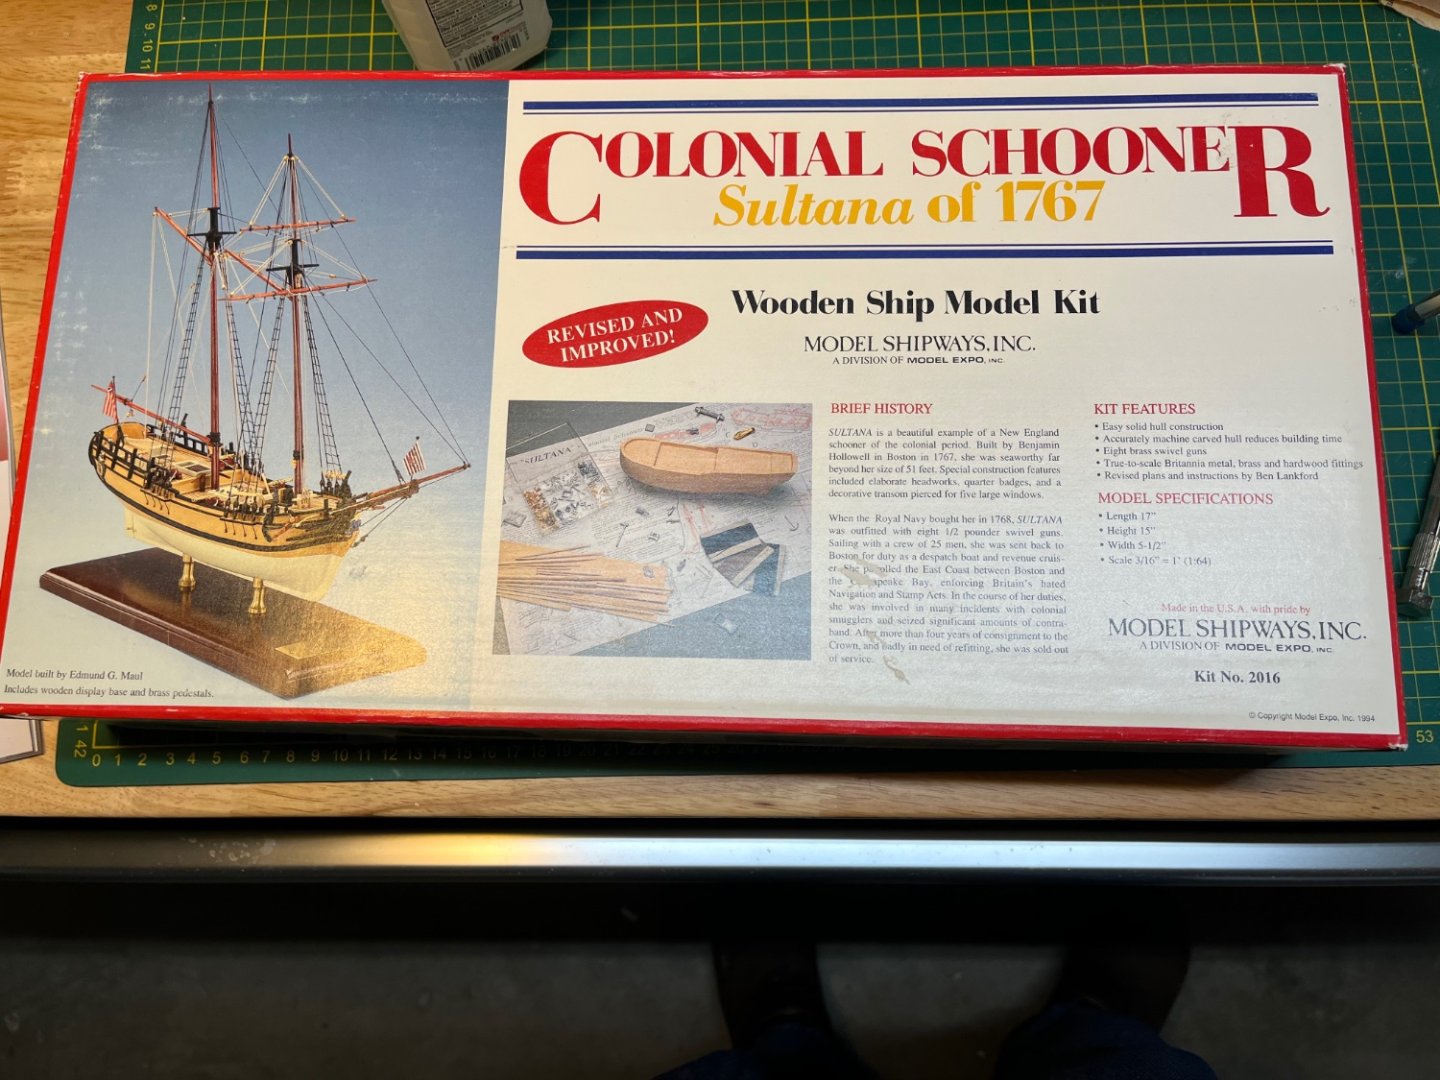
-
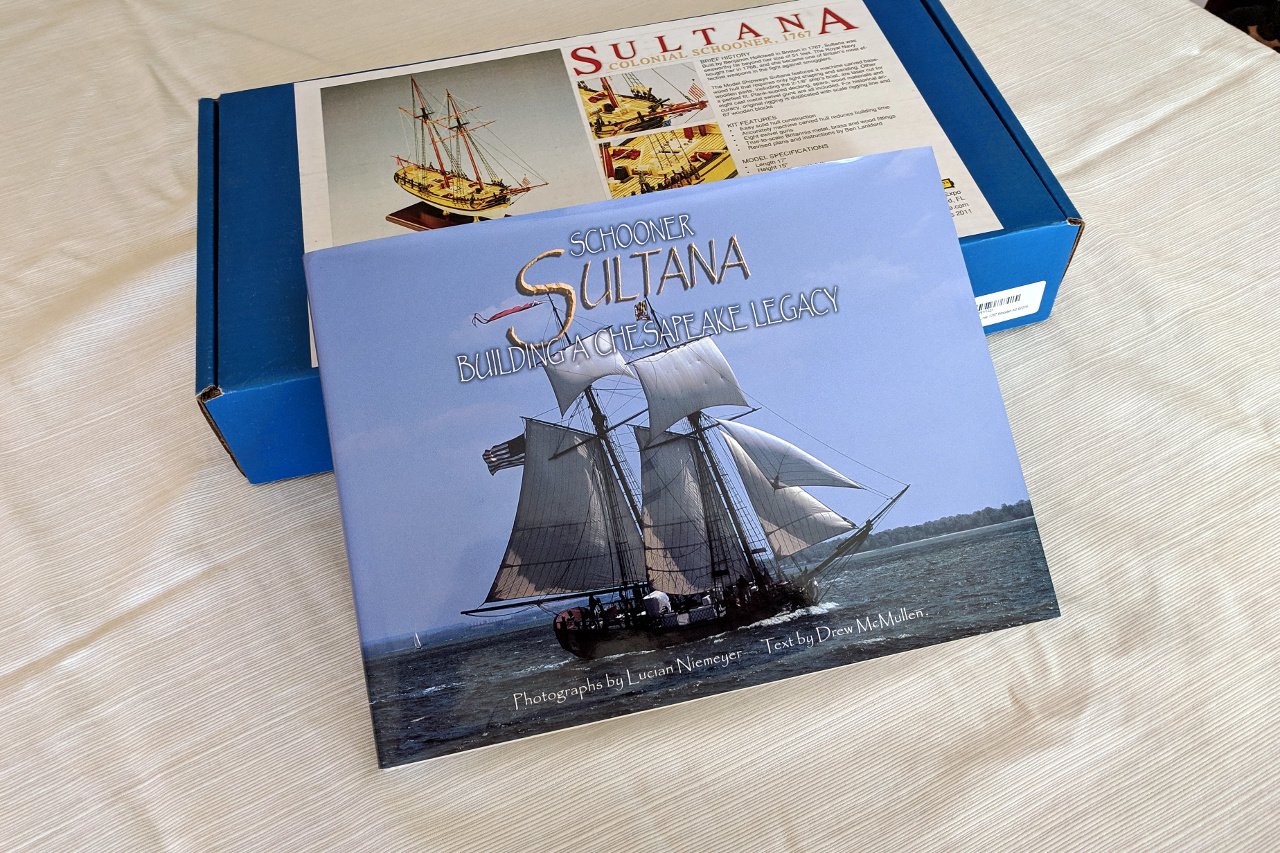
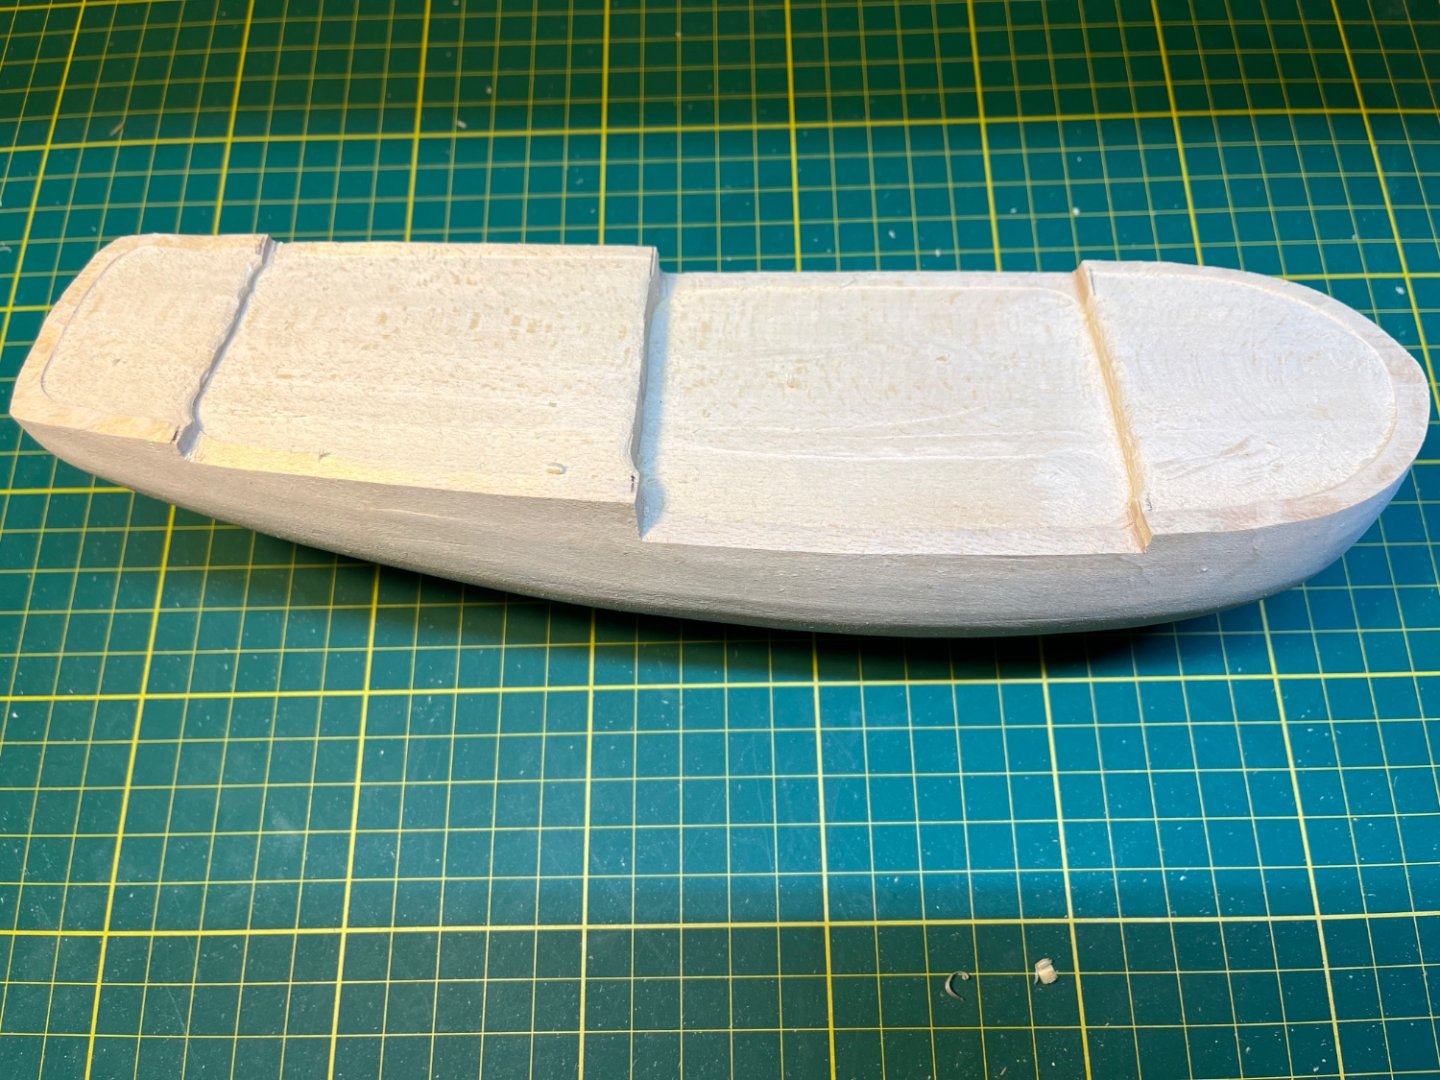
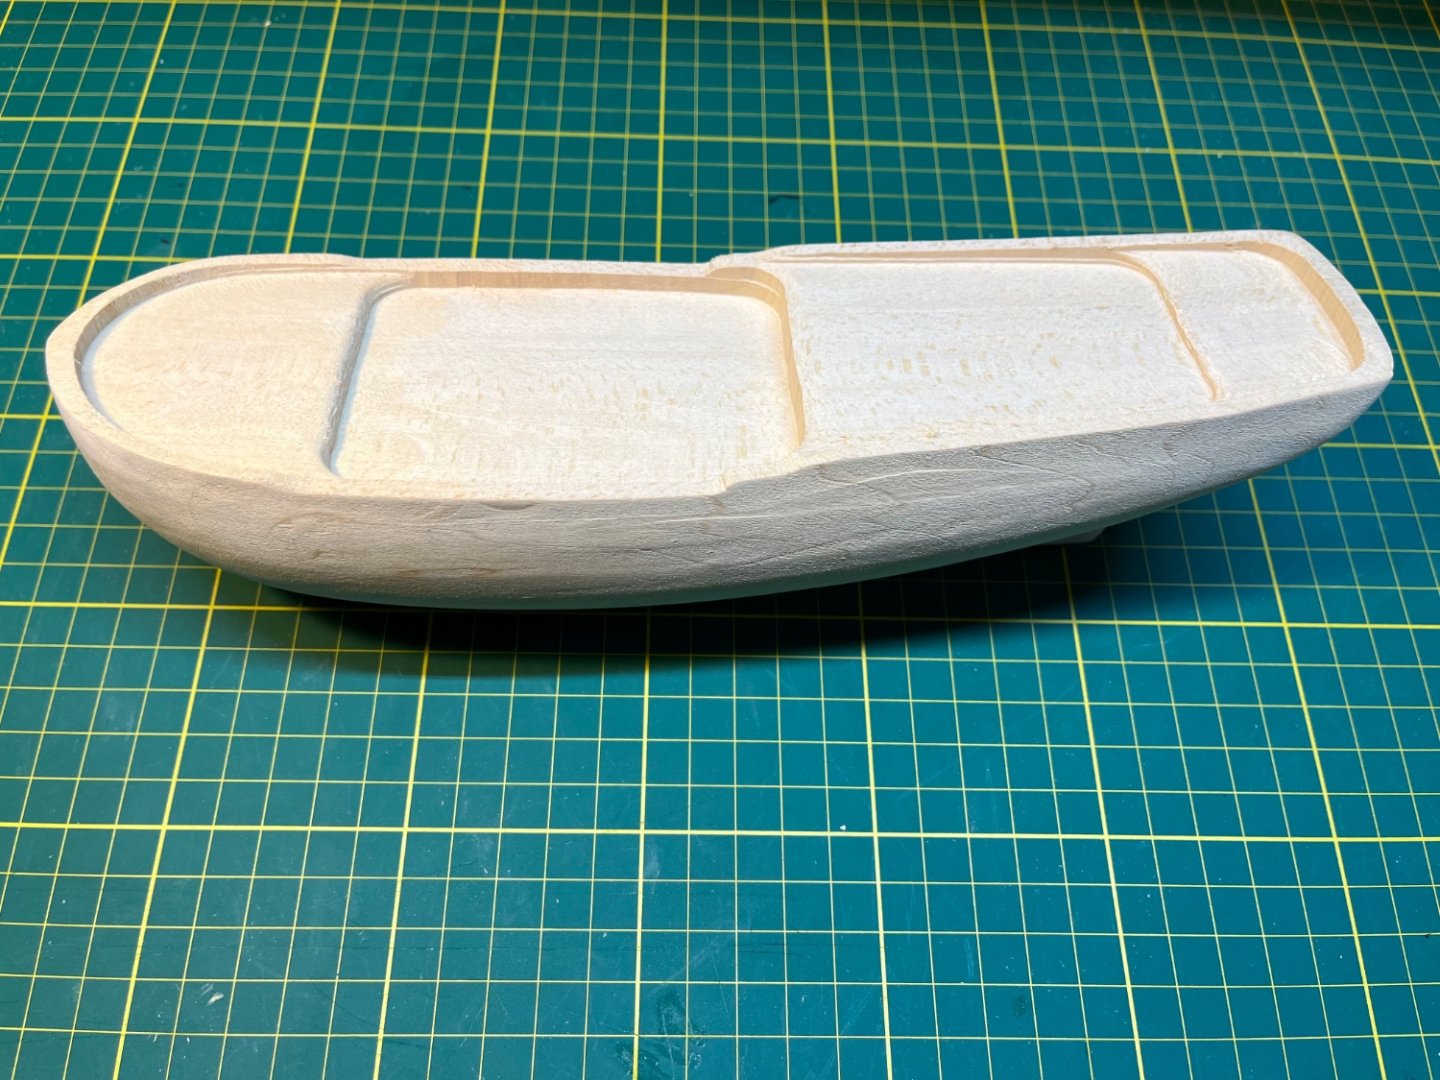
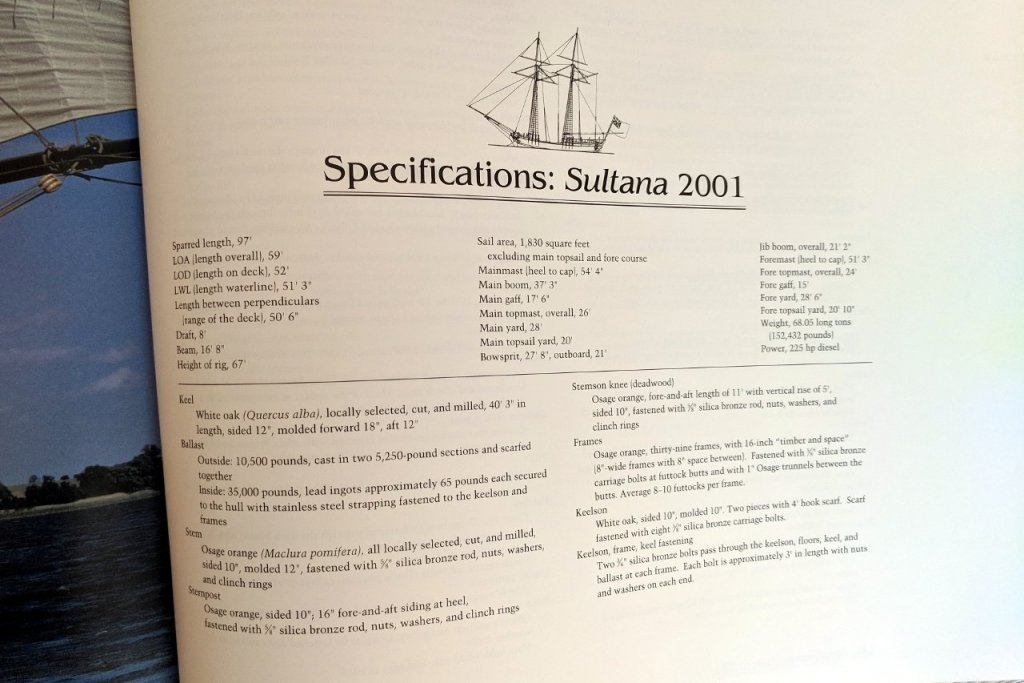
 Welcome to my Sultana build log. I plan for my Sultana to deviate from the kit in two significant ways. First, I will be modeling the 2001 Sultana replica, rather than the 1767 original. In addition to pictures taken by myself and others, I'll be using the book Schooner Sultana: Building a Chesapeake Legacy by Drew McMullen with photos by Lucian Niemeyer. The book covers the construction of the 2001 ship with lots of descriptions and photographs. Best of all, there is an appendix with measurements of many of the main components. The second significant deviation is this.
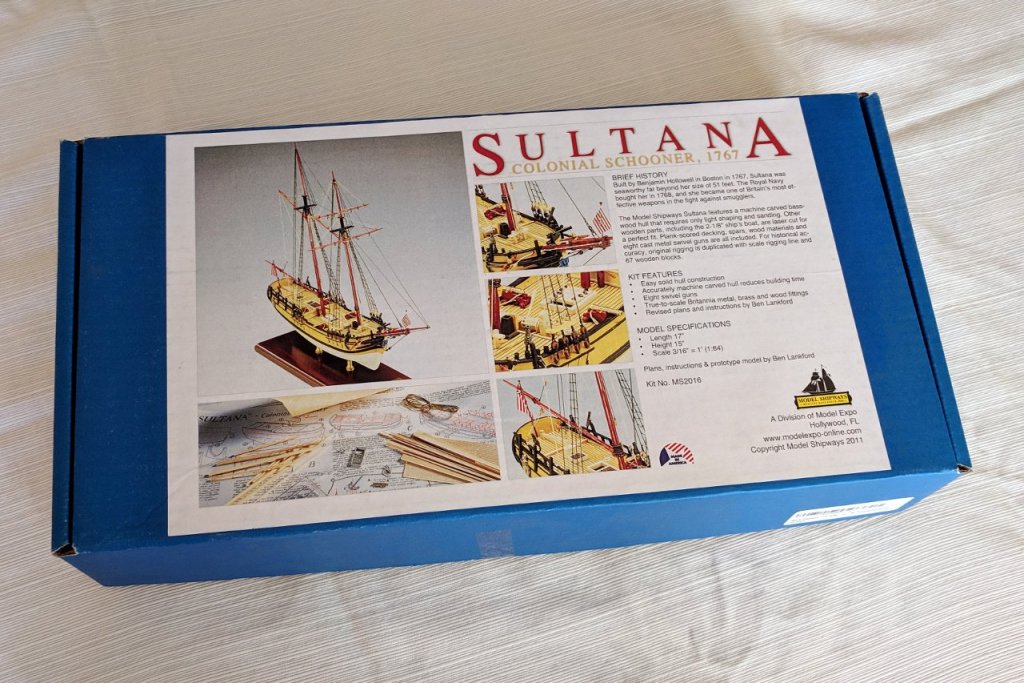

-
 It is time to start a new build; actually it is time to continue with existing build i started some time ago while still residing in my rented apartment. No room to do much but eager to get back to favourite hobby, i opened a box and started building it. Unfortunately at some point i realized that it is better to drop it back in the box and wait for better times, actually to get to the new place... After some time, my new shipyard was ready and it is time to start it again. So back to the shipyard after completion of Greek Birema, opened already opened box and started new ship building journey. I will be following Chuck Passaro's building practicum for Sultana. I think it is covering very interesting approach to build and very useful for people wishing to get back to this hobby. So lets start... This is a solid hull model, that need some adjustment during building process. First is to remove existing bulwarks that will be replaced with double planking. In the box we have some amount of planking material i will be replacing with basswood that i have in my shop. I will be cutting it on my mini table saw. Here is hull with removed bulwarks, at the deck level hull was sanded and some wood filler added to correct the hull shape. Ok, that is for now; see you all soon.. Happy modelling..
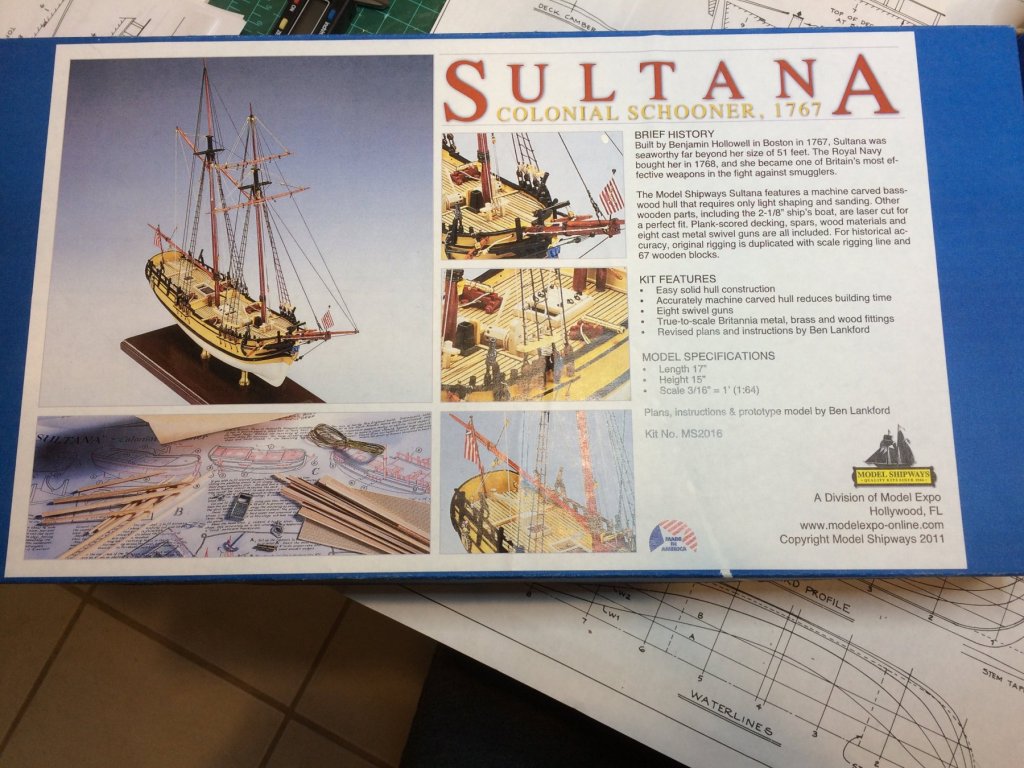

-
 I have read logs on Sultana. As this was the first wooden model kit I bought – I was SO eager and vibrating with excitement to get my hands dirty and start building…only to get overwhelmed with the minutia of what tools/jigs/materials I needed to make a perfect job of my first attempt. So…this kit quickly got sidelined by a bit of frustration (as I am a bit of a perfectionist) on me part. Subsequently, started a build log for a plank on frame for newbies (Lady Nelson). However, life got in the way, and so did planking! (A skillset that will take some time to develop is planking) Fast forward many months, and the Lady has been sidelined by the Sultana. Having overcome one major obstacle…my fear of failure. Yes, I no longer care if I screw up – because that was what was holding me back from trying new things! That mind set was really killing my love of modeling (I have built many plastic models but always wanted to get into wood ship models). So….damn the torpedoes…the build logs/post/forums/ship club members really helped recharge my self confidence…and the fact that great ship models are nothing but a series of skilled mistakes overcome by patience, experience, laughter, and some wood filler. (Haha) With that said, I can honestly say that my model's name, Sultana, could be replaced with more colorful Names….for instance: The Bloody Thumb The WhatTheHellDidIJustDo The Chuckling Asymmetry (My favorite) So…I have made some progress on my Sultana and intend this to be my first finish! I will be updating this posts with a variety of pics and lessons learned. Stay tuned! -Patrick
- 449 replies
-
- 7
-

-
- sultana
- model shipways
- (and 2 more)
-
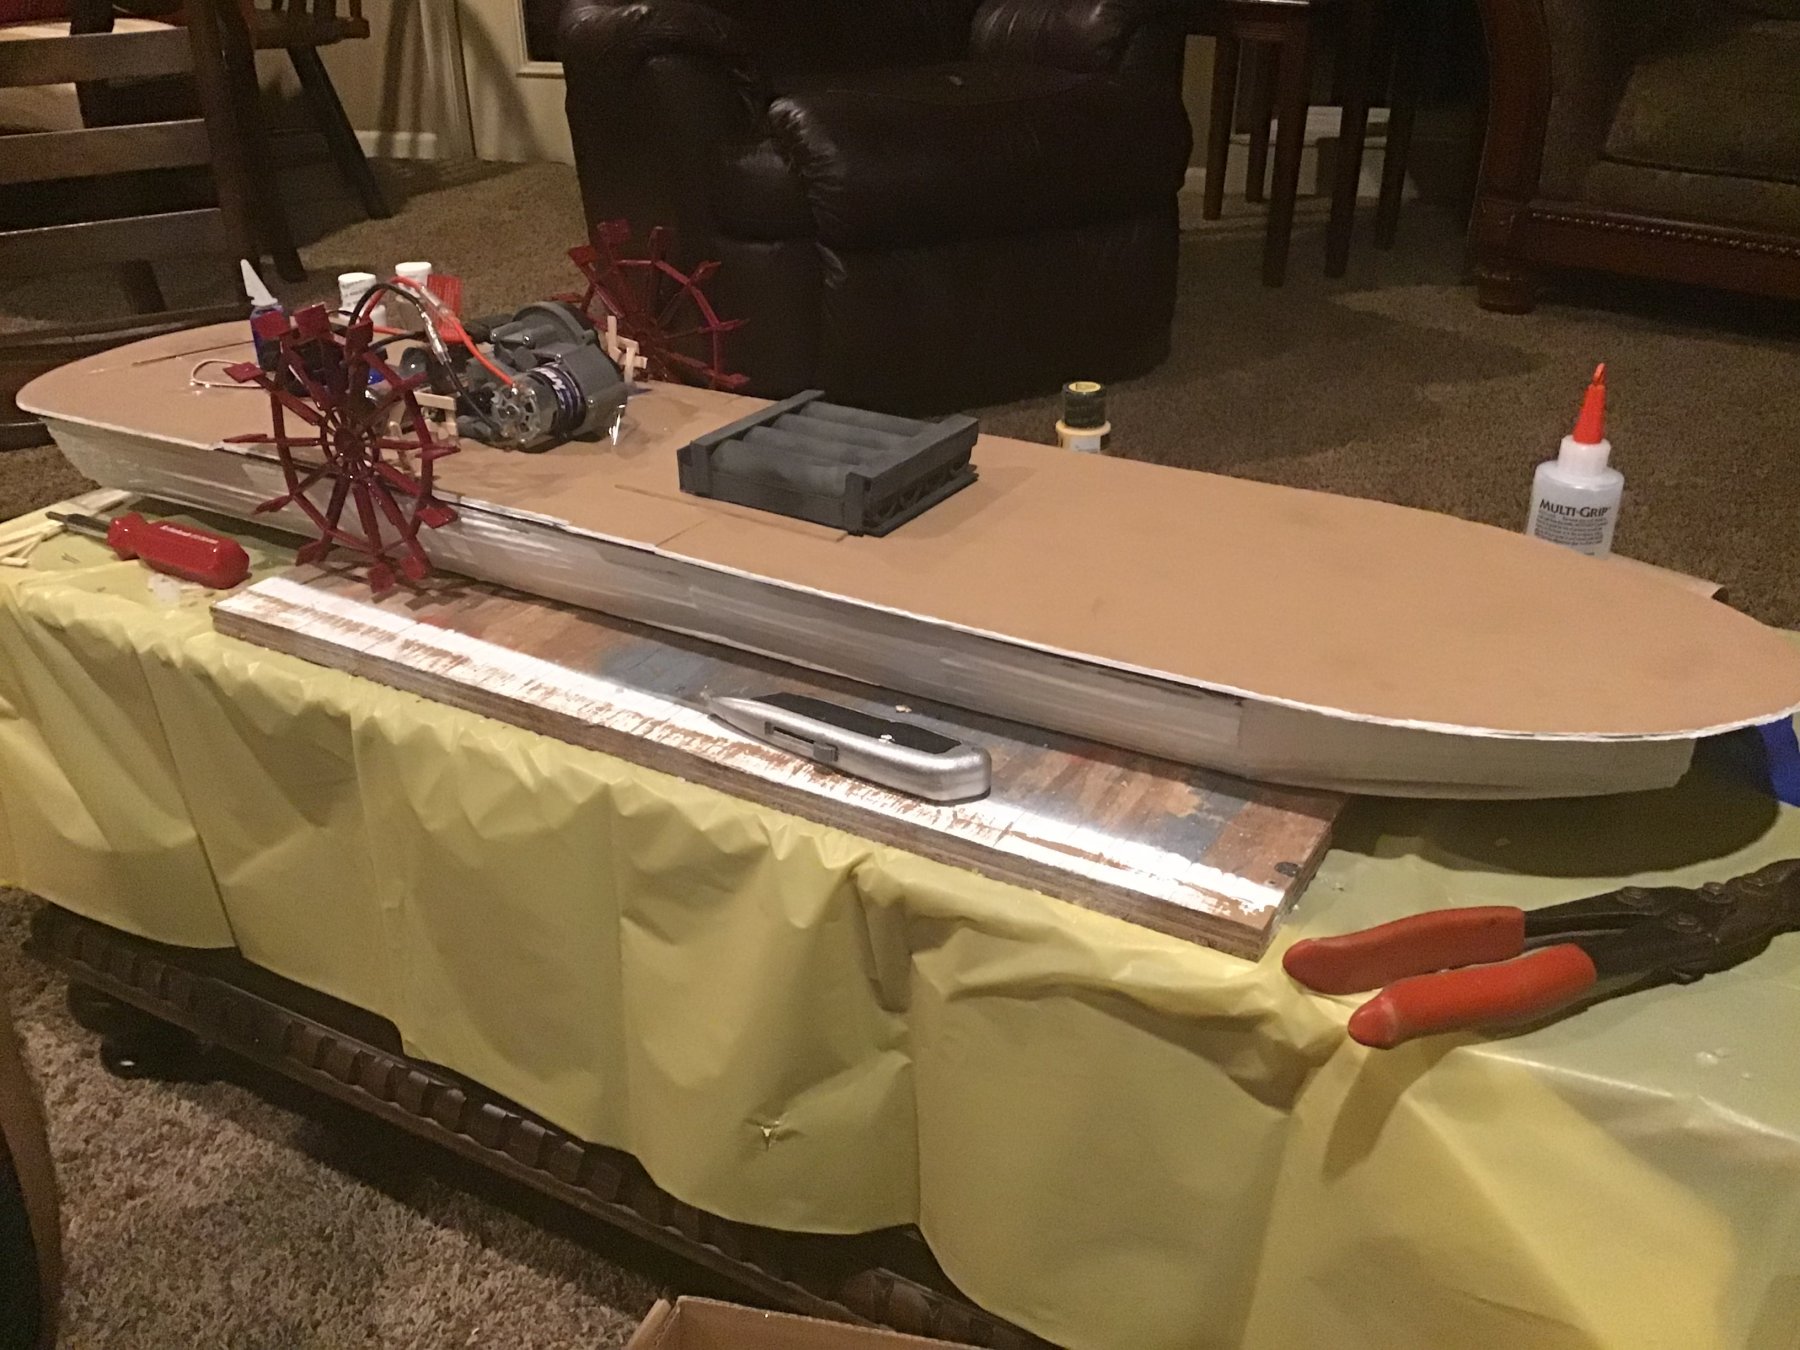
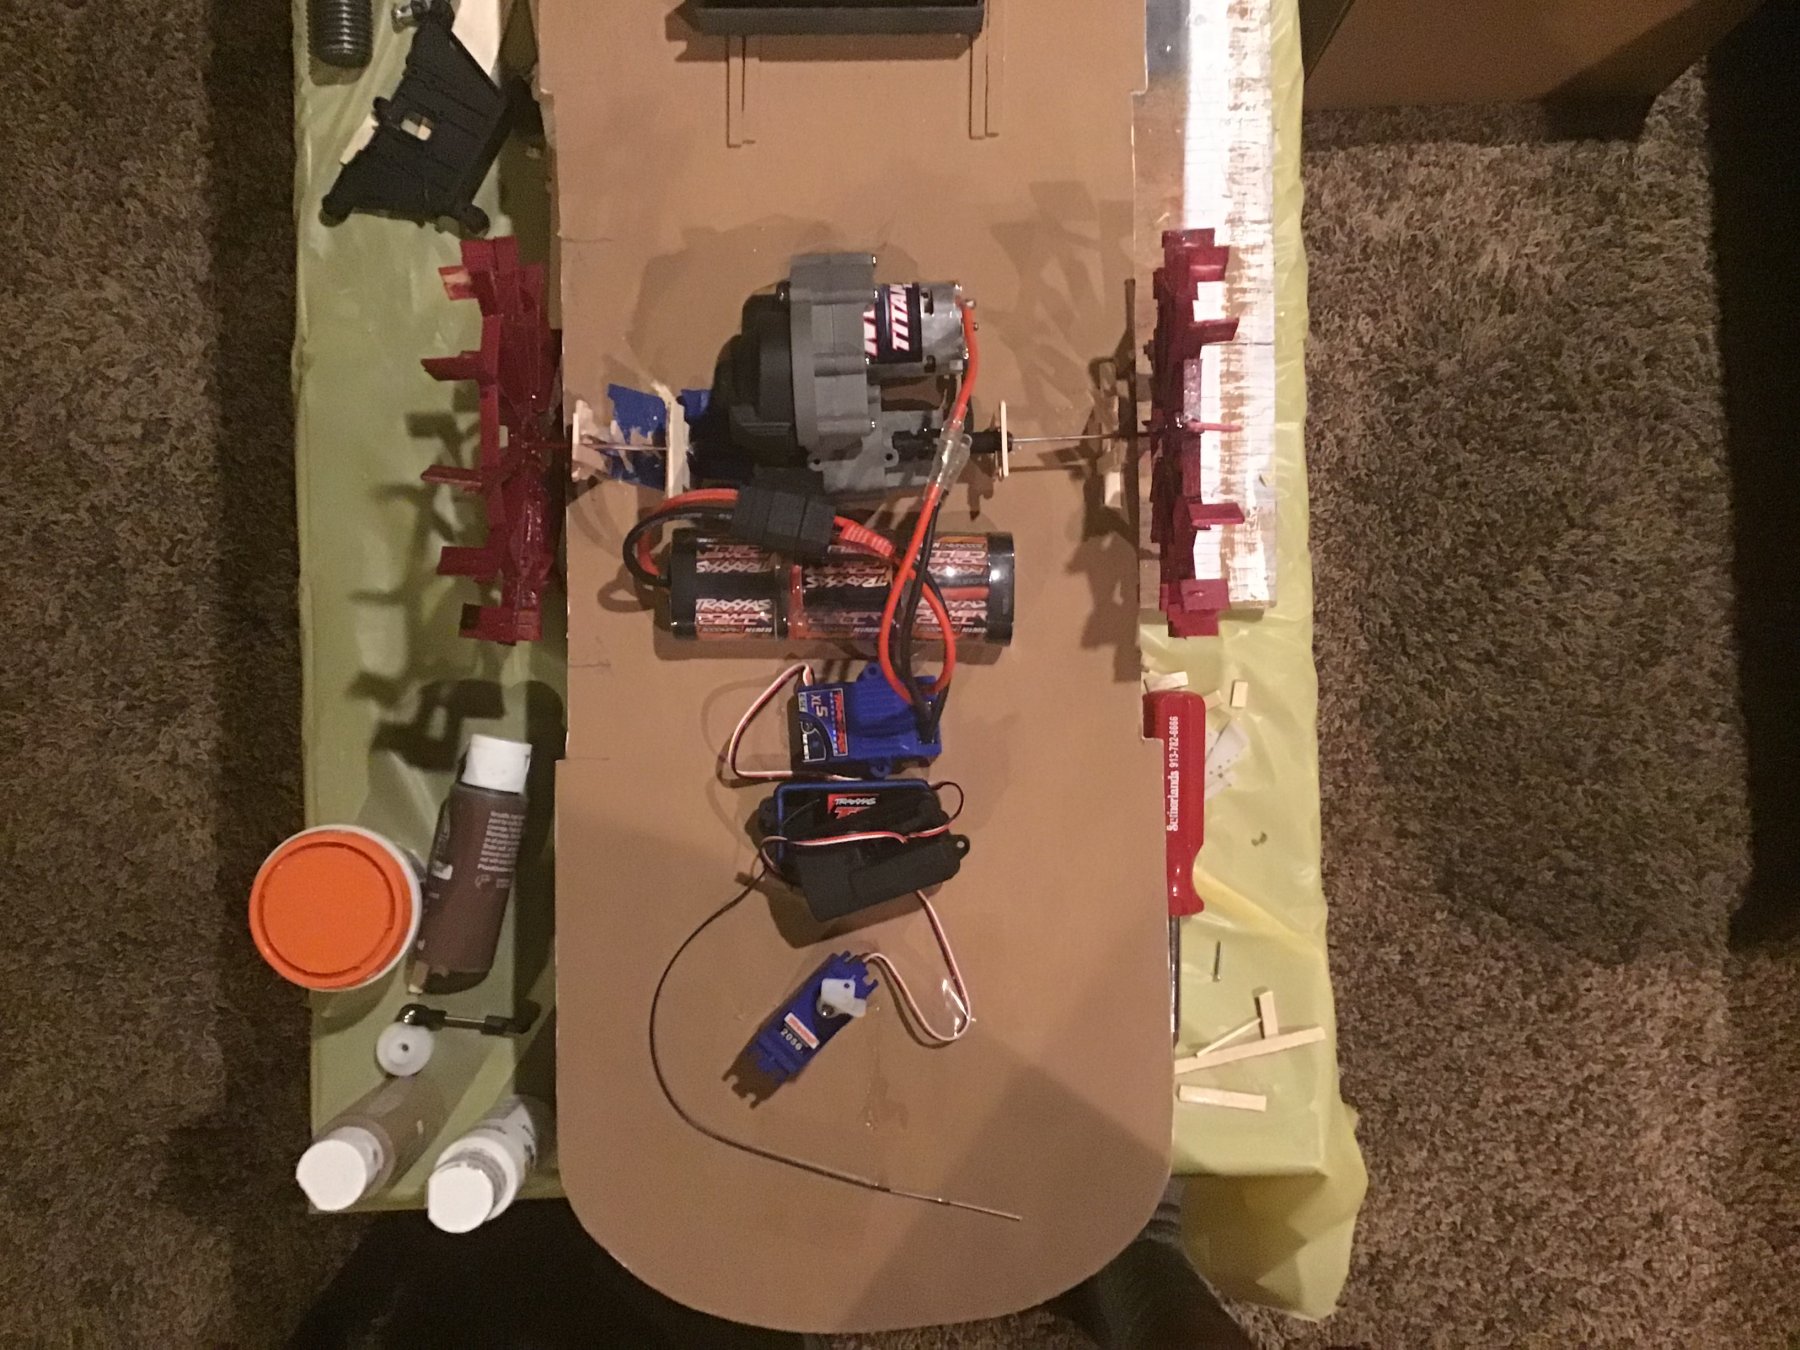
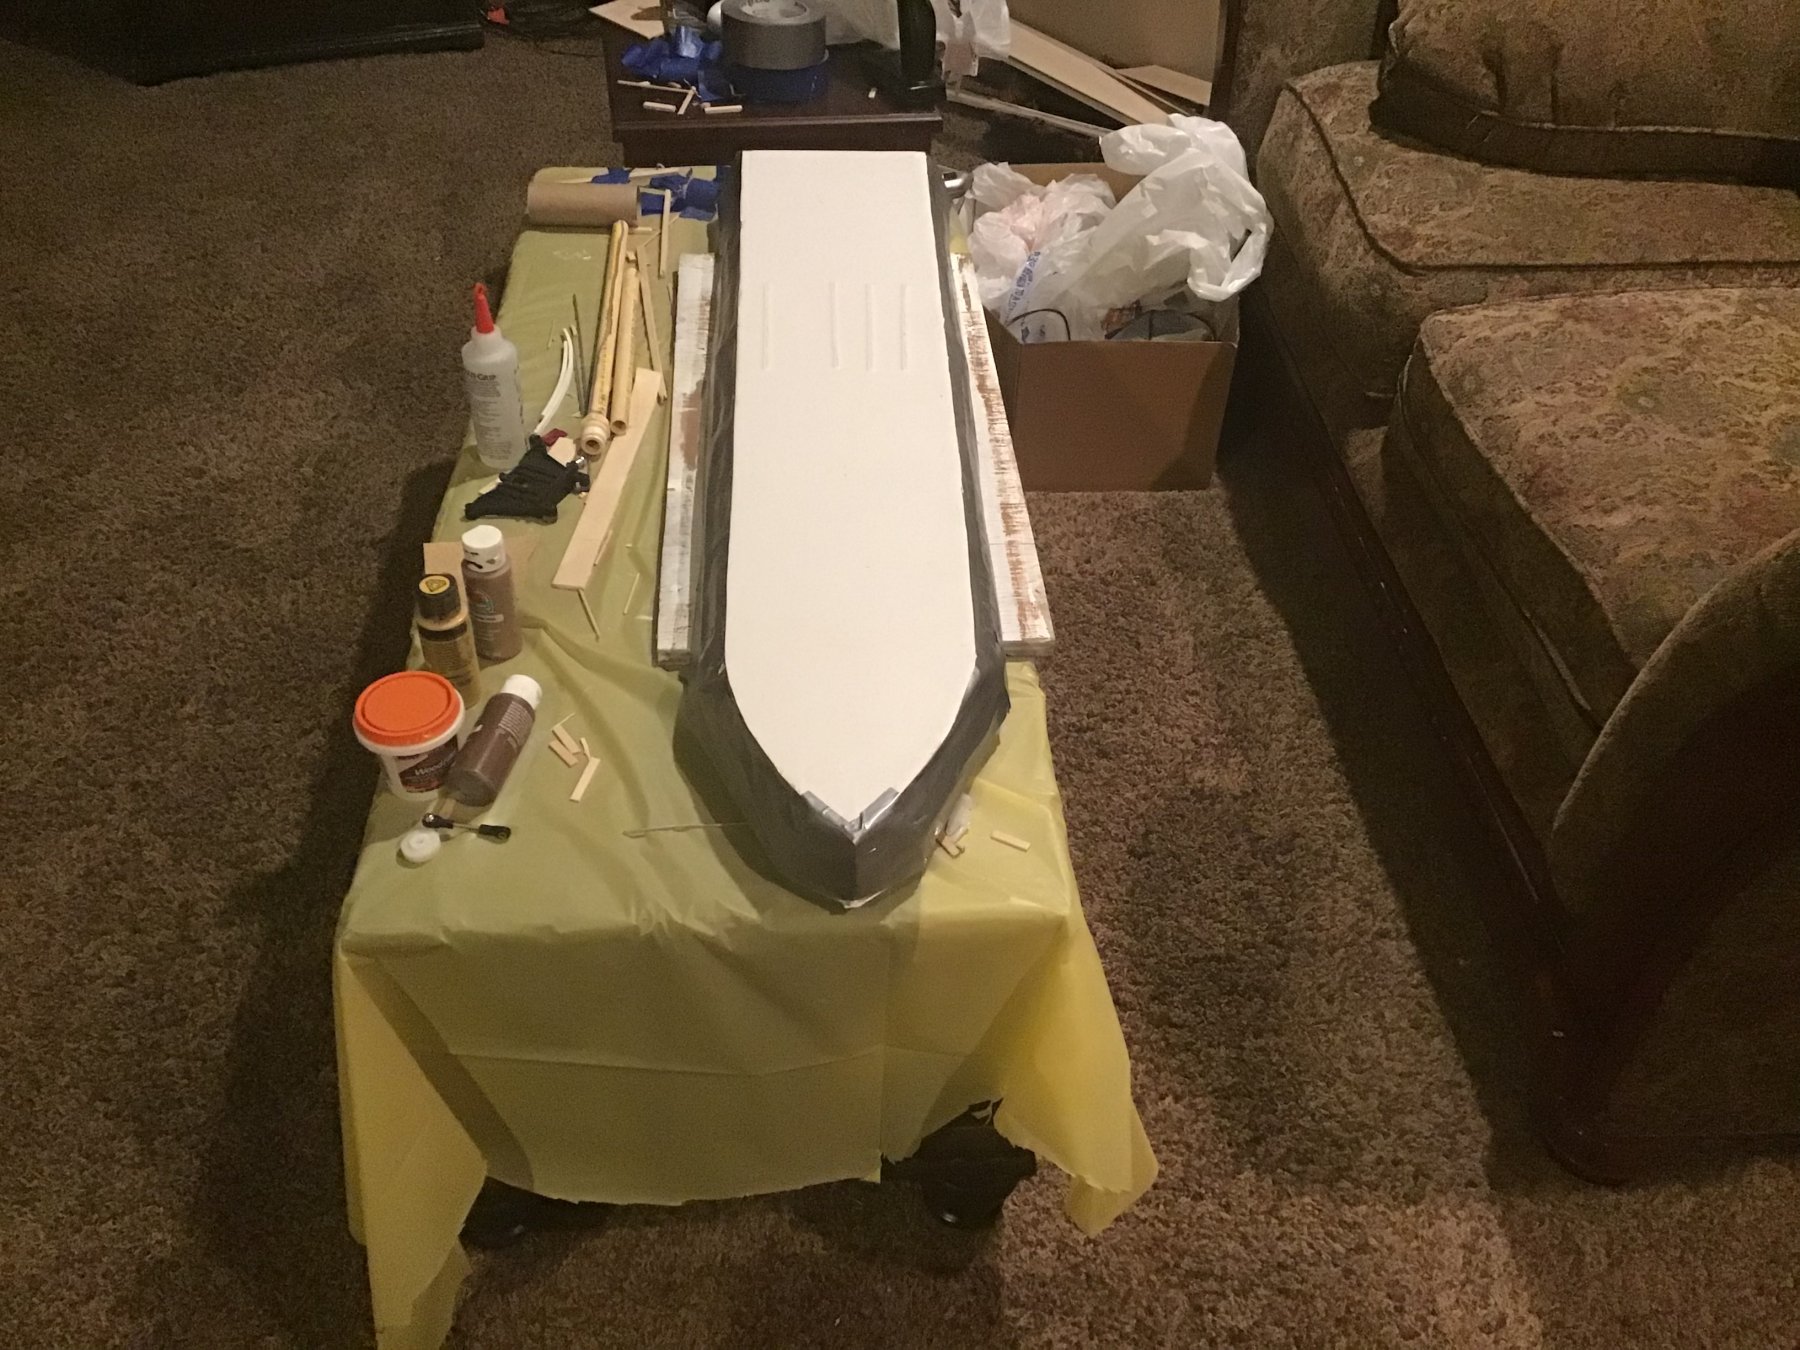
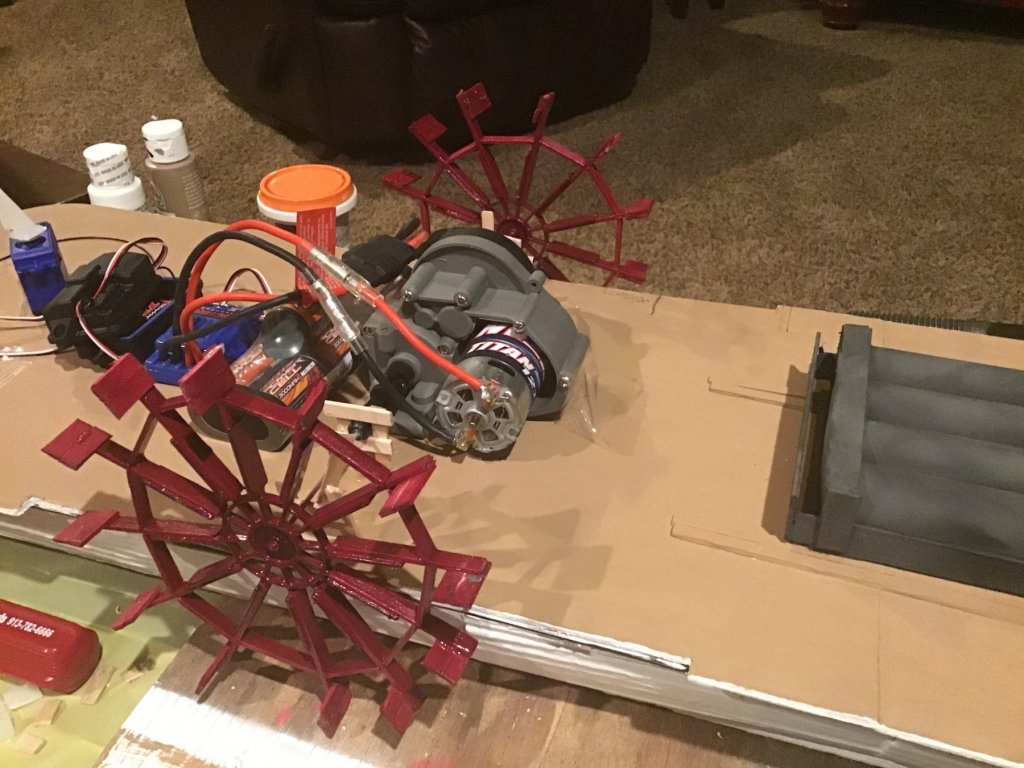
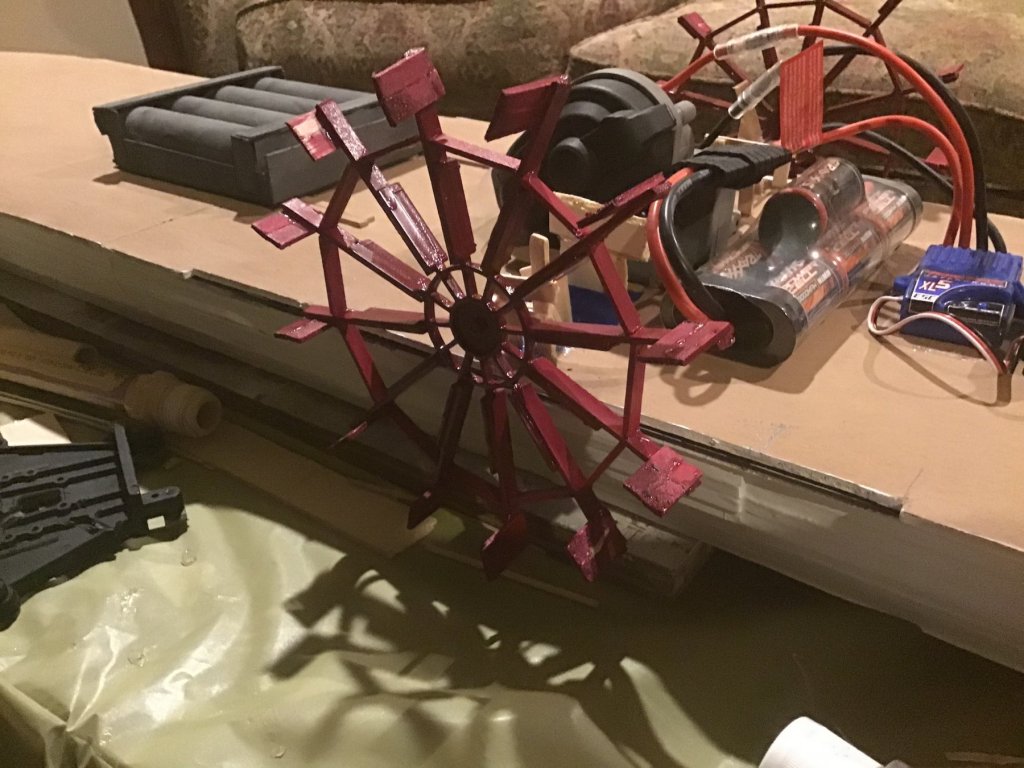
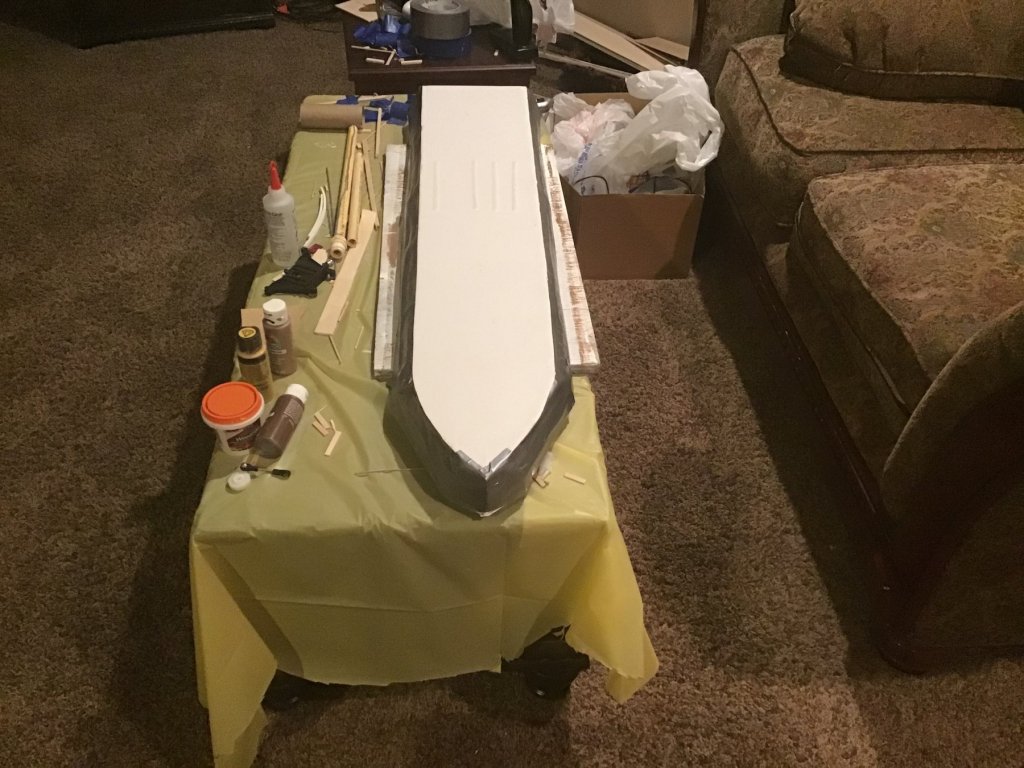
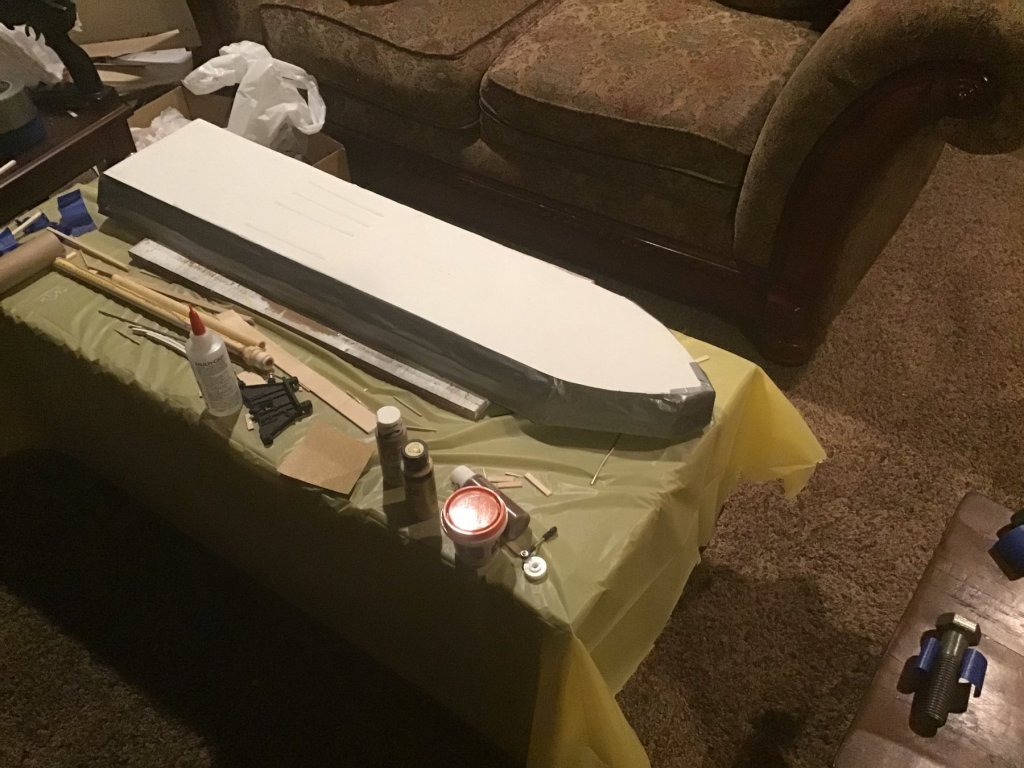
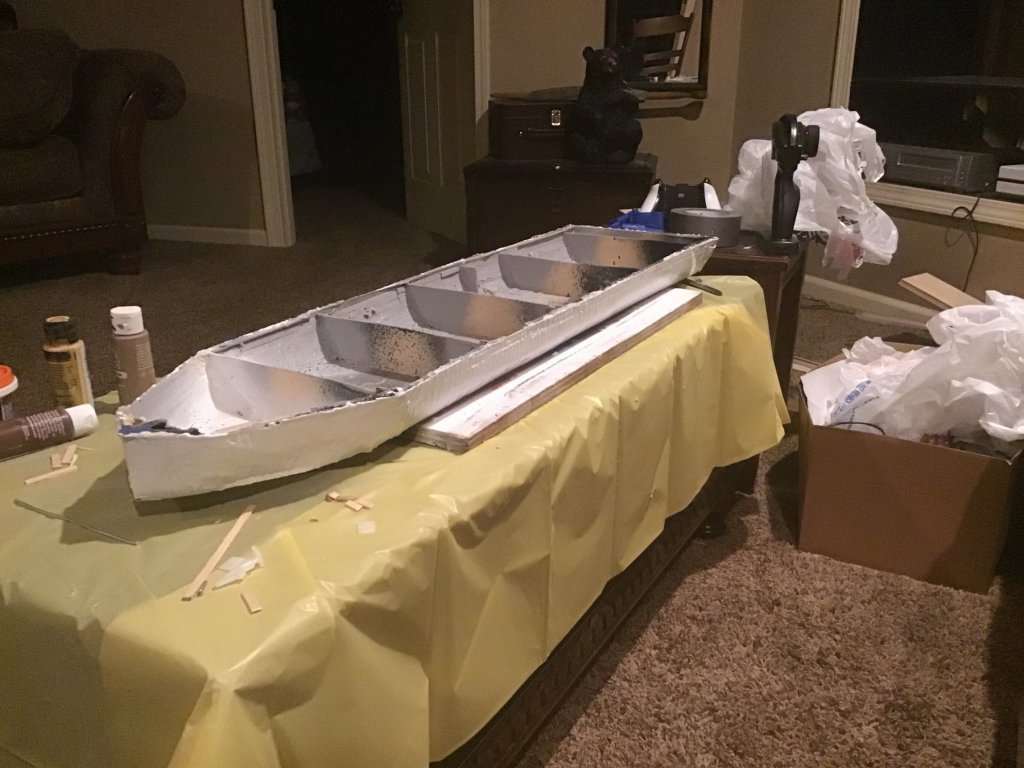
 Hi all, I’m new here and have been working on a model of the infamous Sultana that sank in the Mississippi River at the end of the American Civil War in April of 1865. Her sinking took the lives of over 1800 union soldiers who were heading home. Sultana II, which will be her name, is going to be 3ft 8in long, and 10in in width. Her height is yet to be determined. She will be capable of going into the water with her engine and paddlewheels. Hope you all will enjoy watching her rise. This was a process I used to make the hull look smoother and completely waterproof.

-
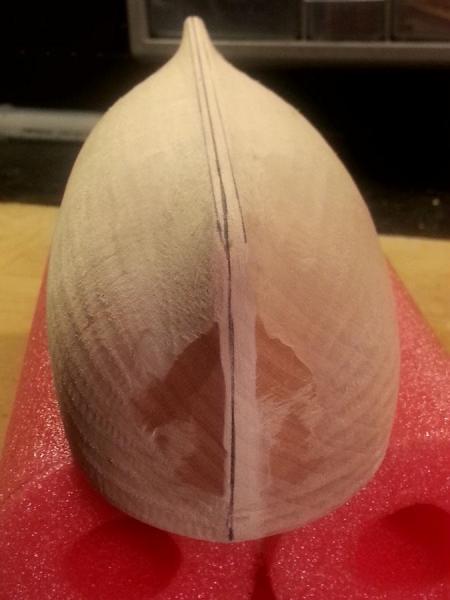
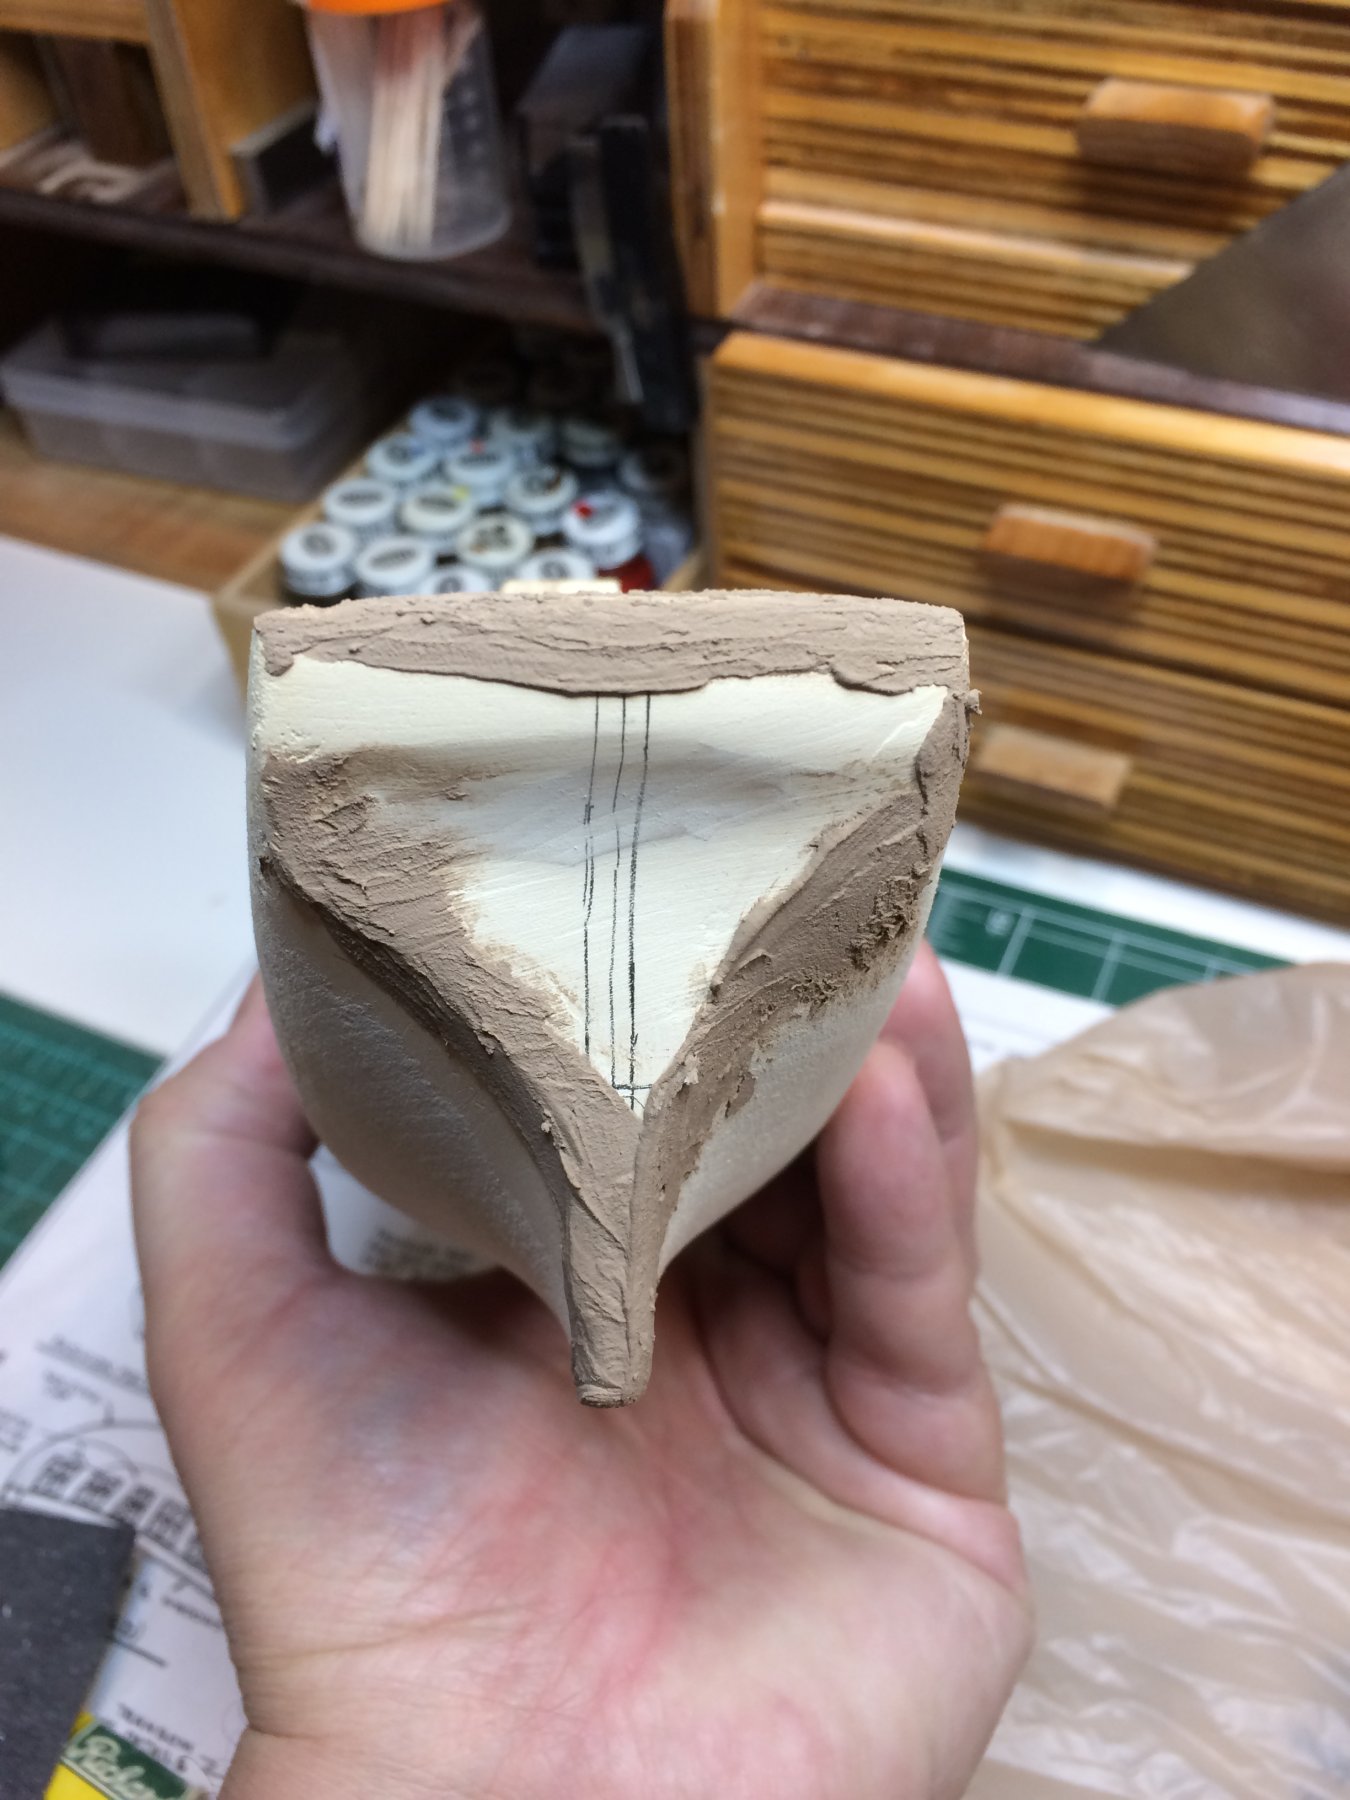
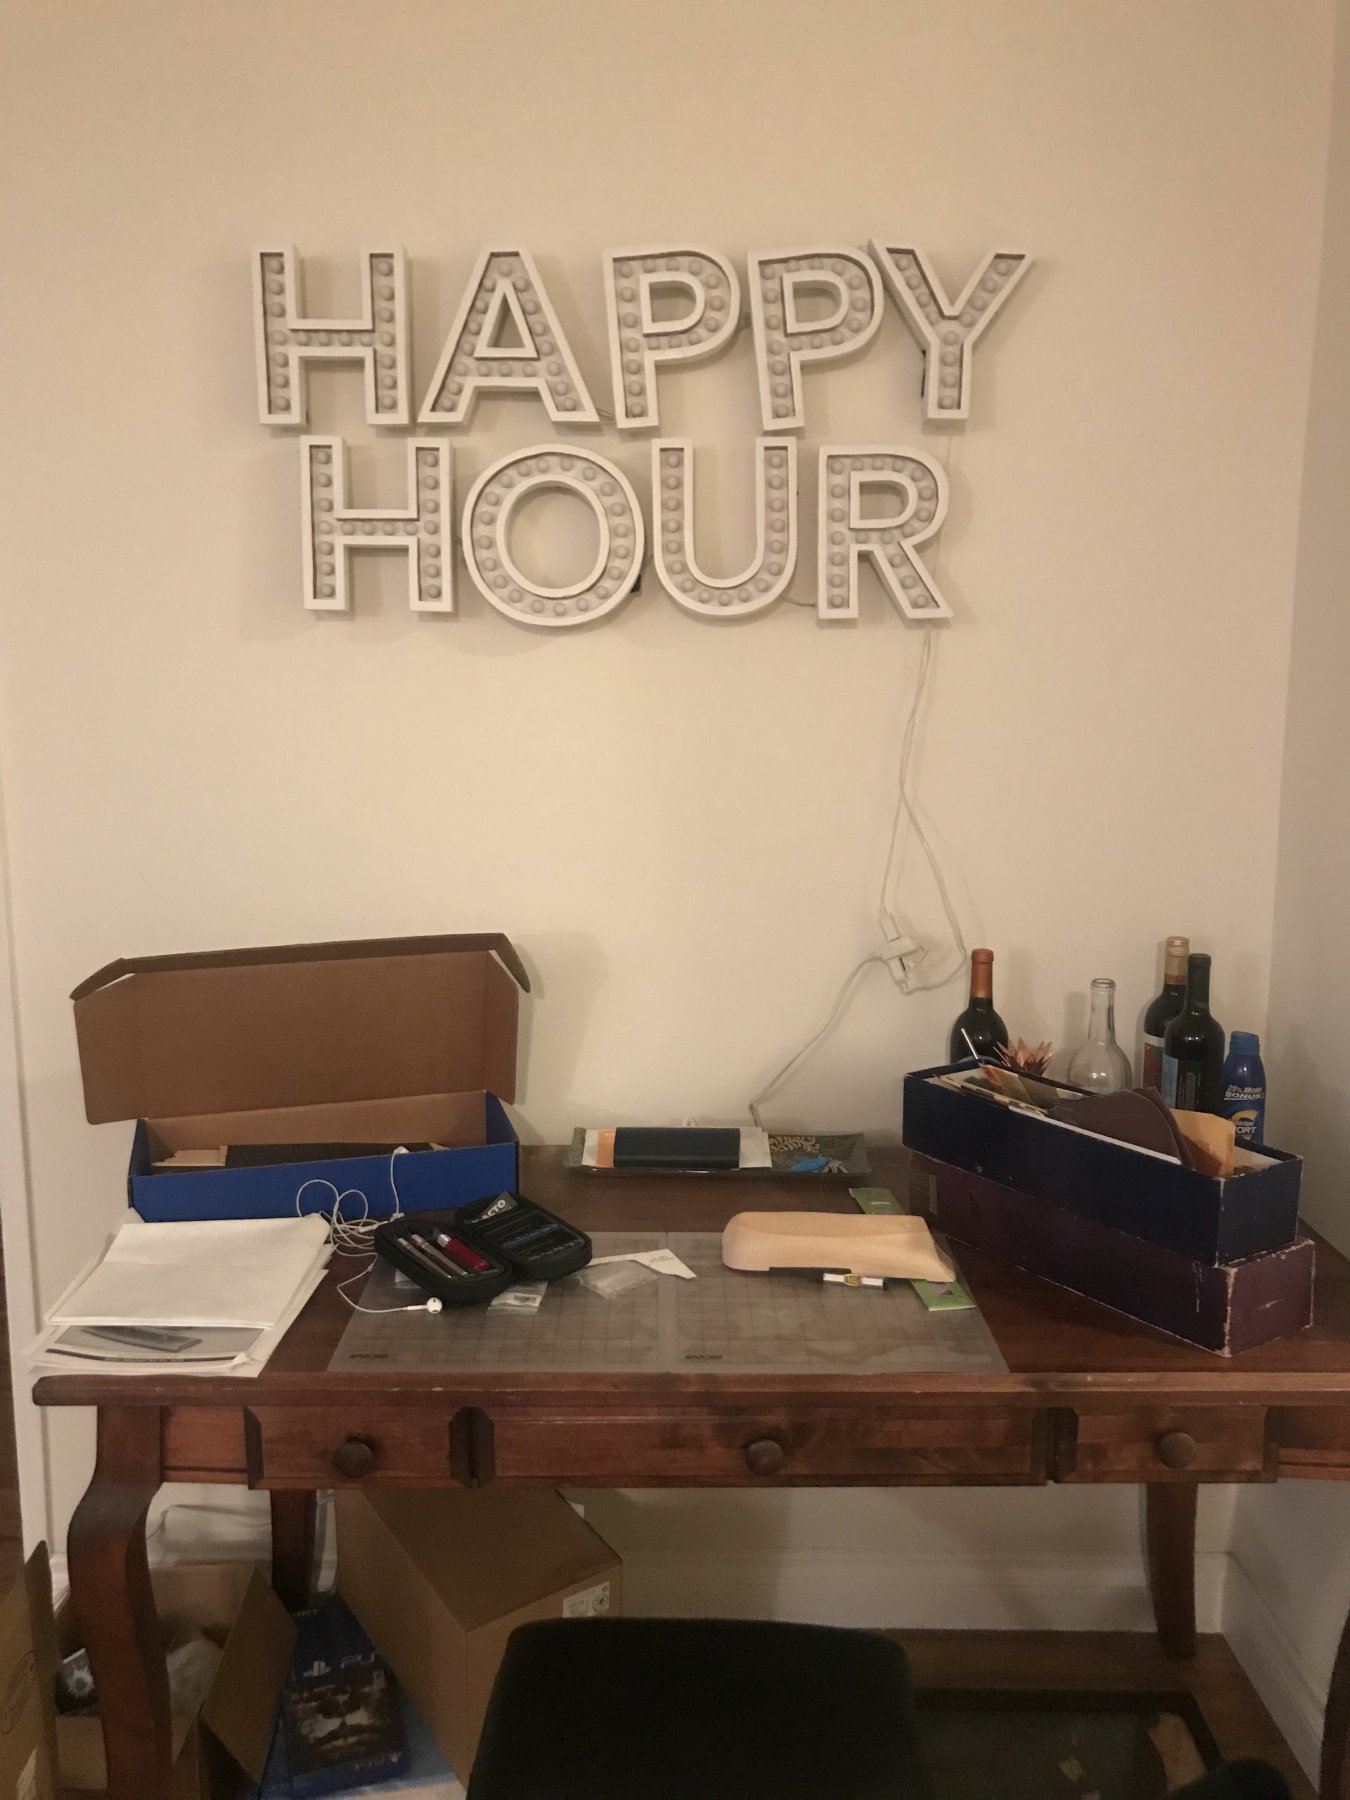
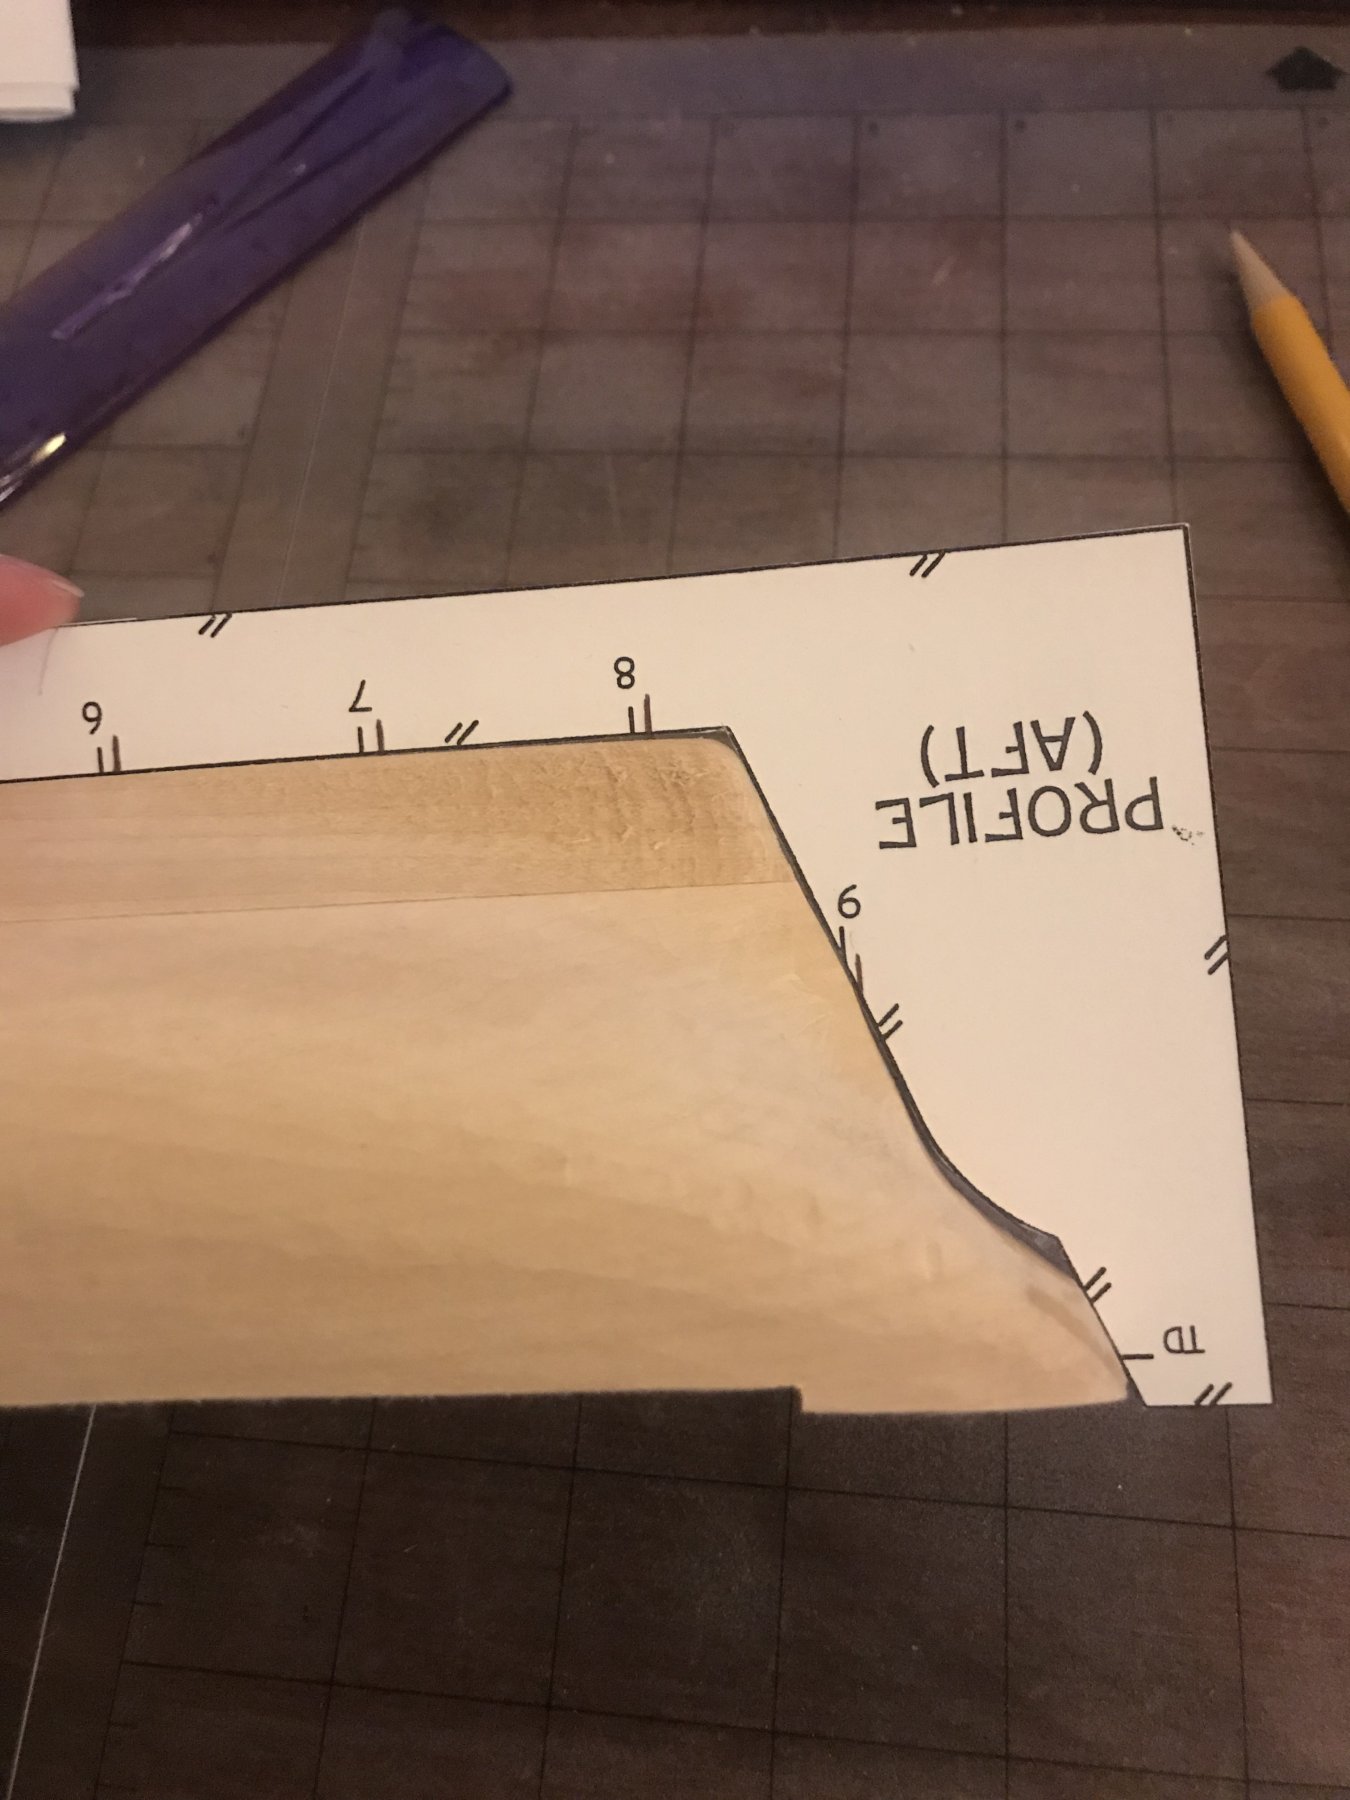
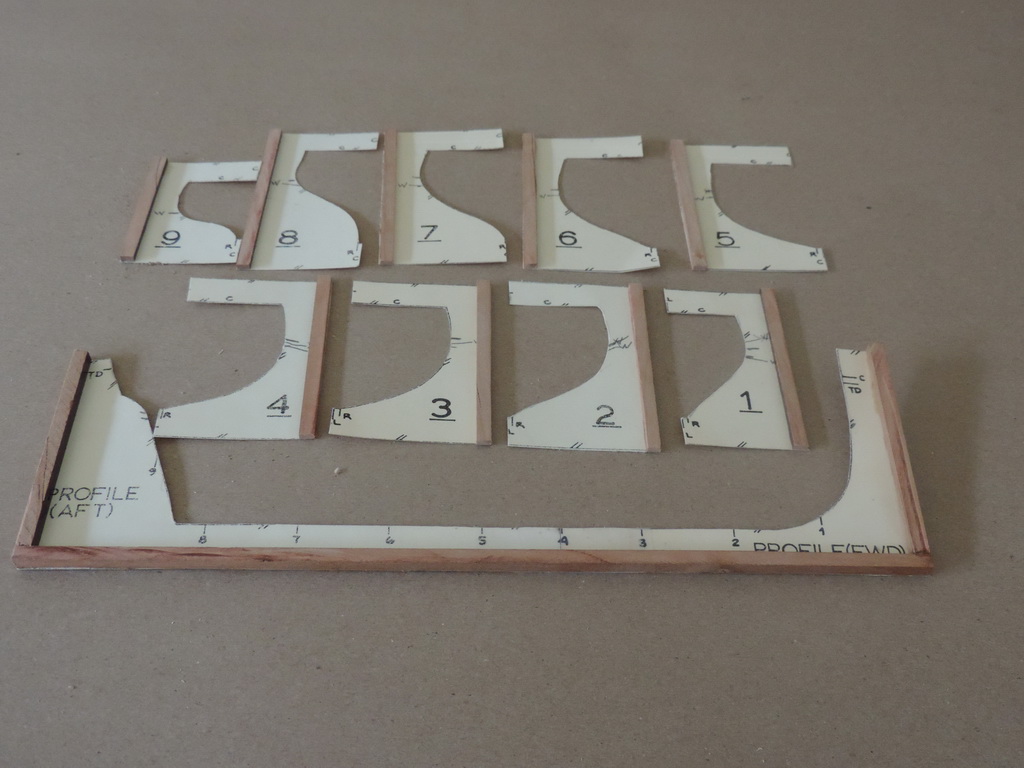
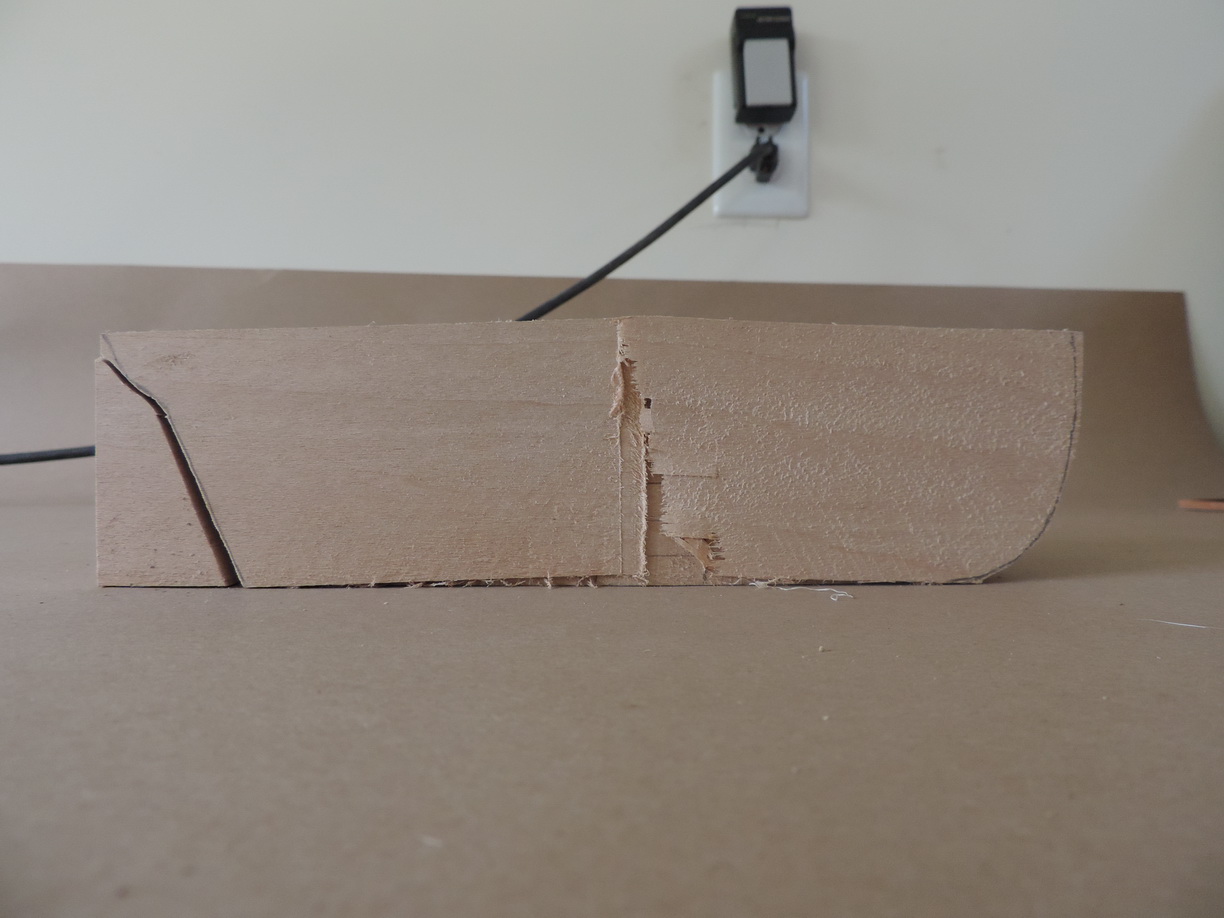
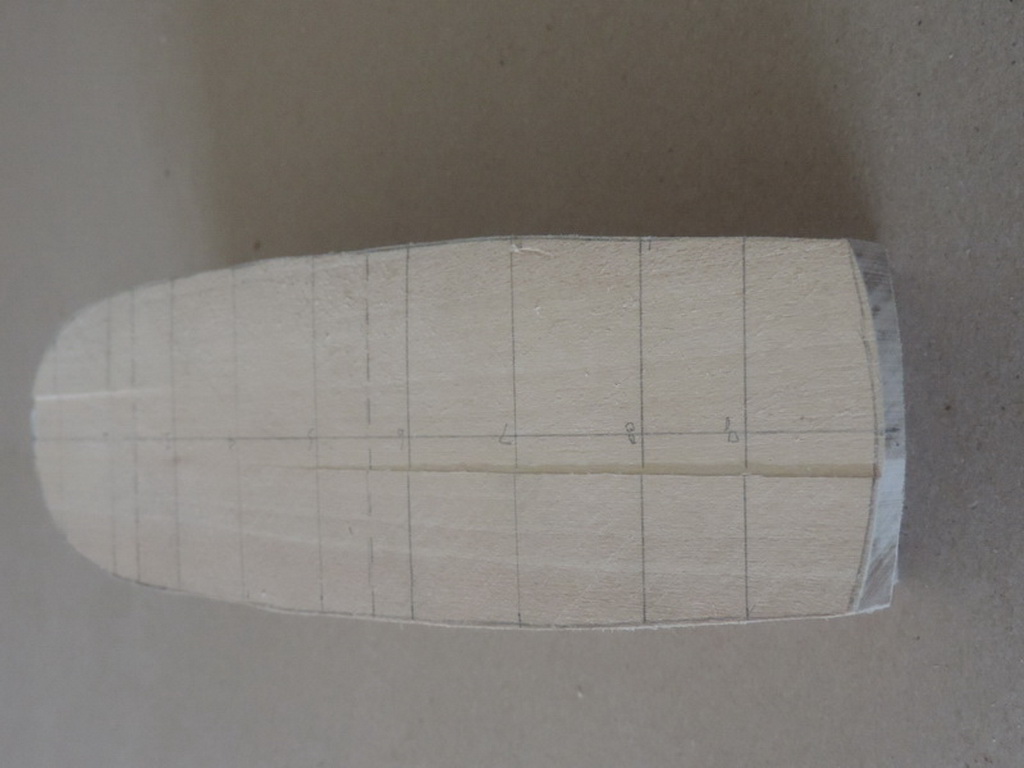
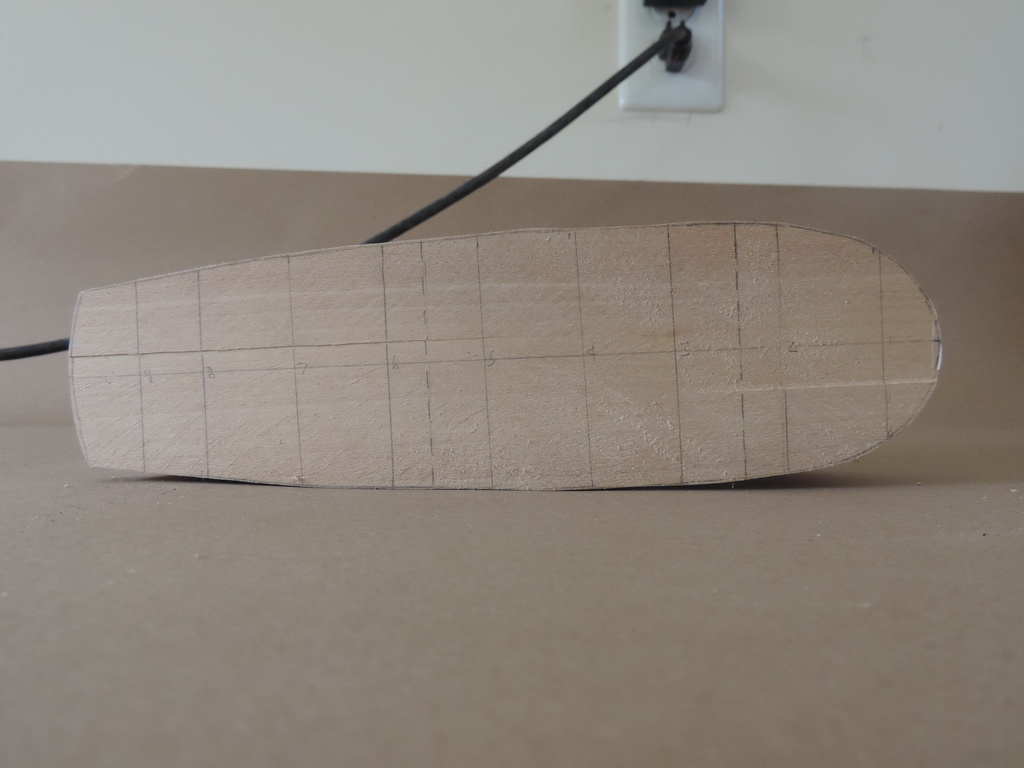
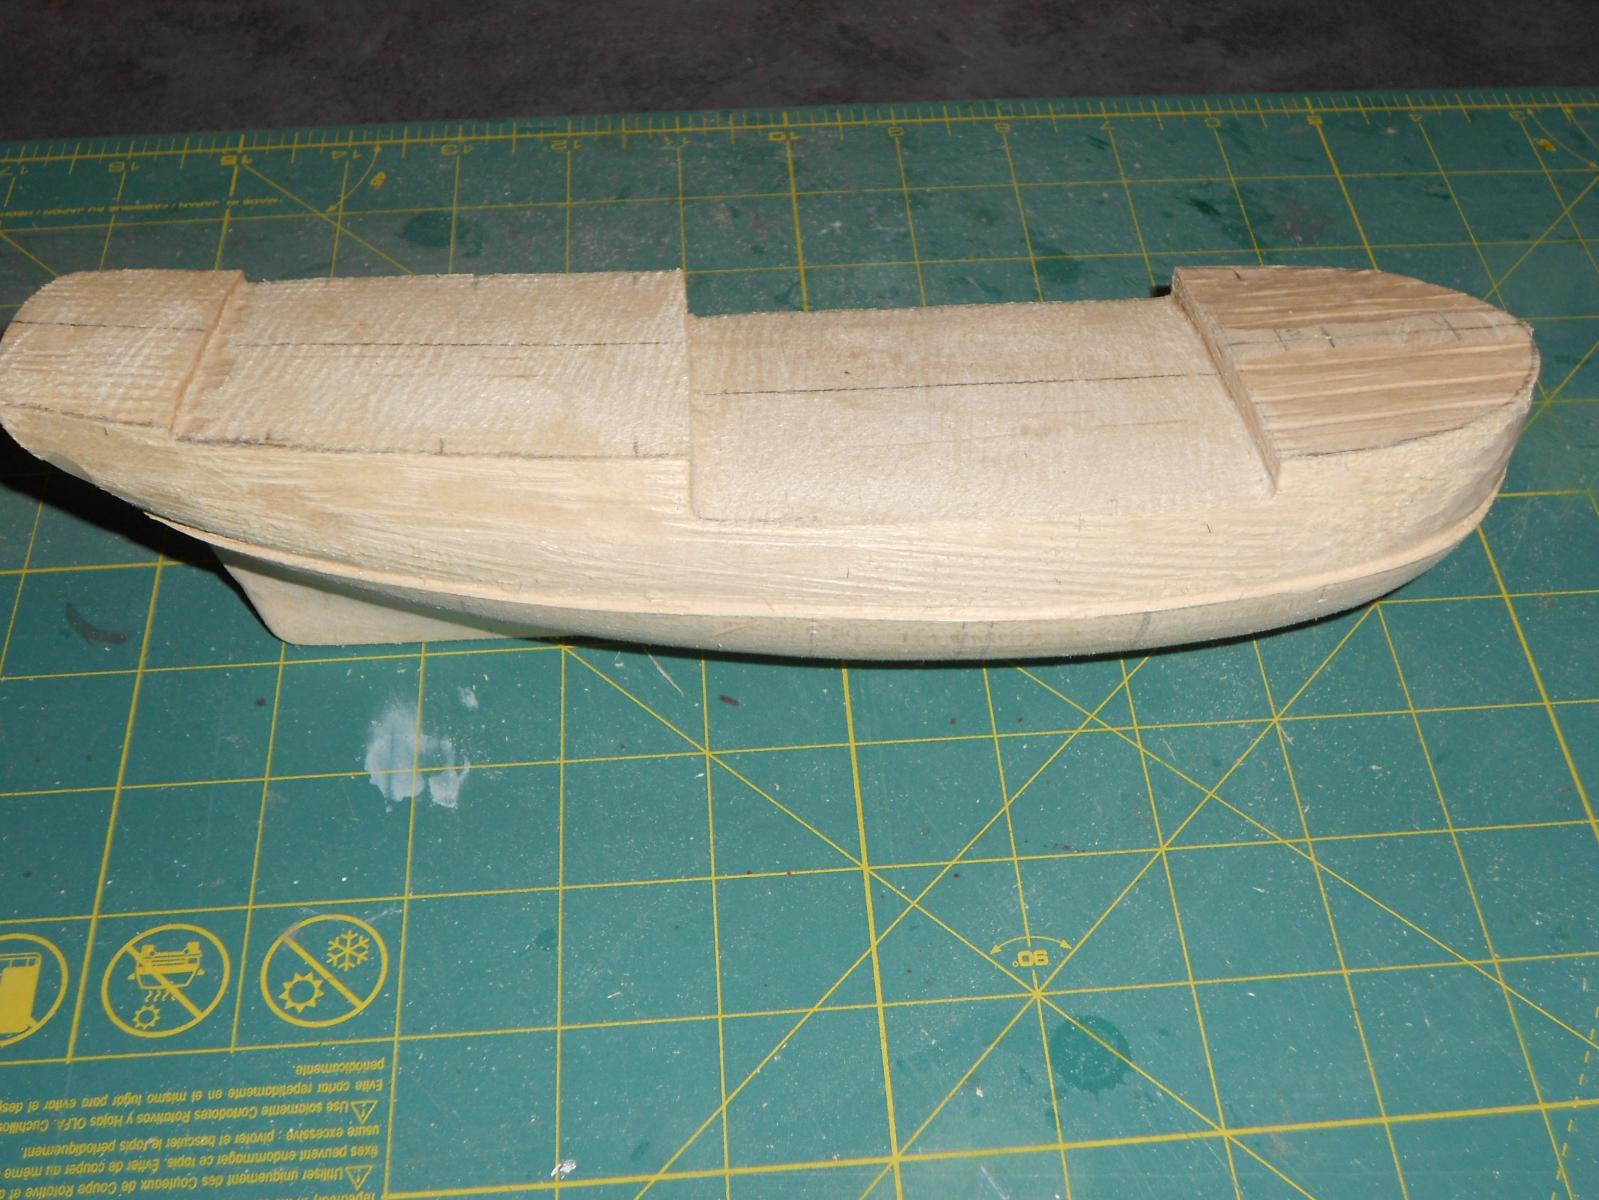
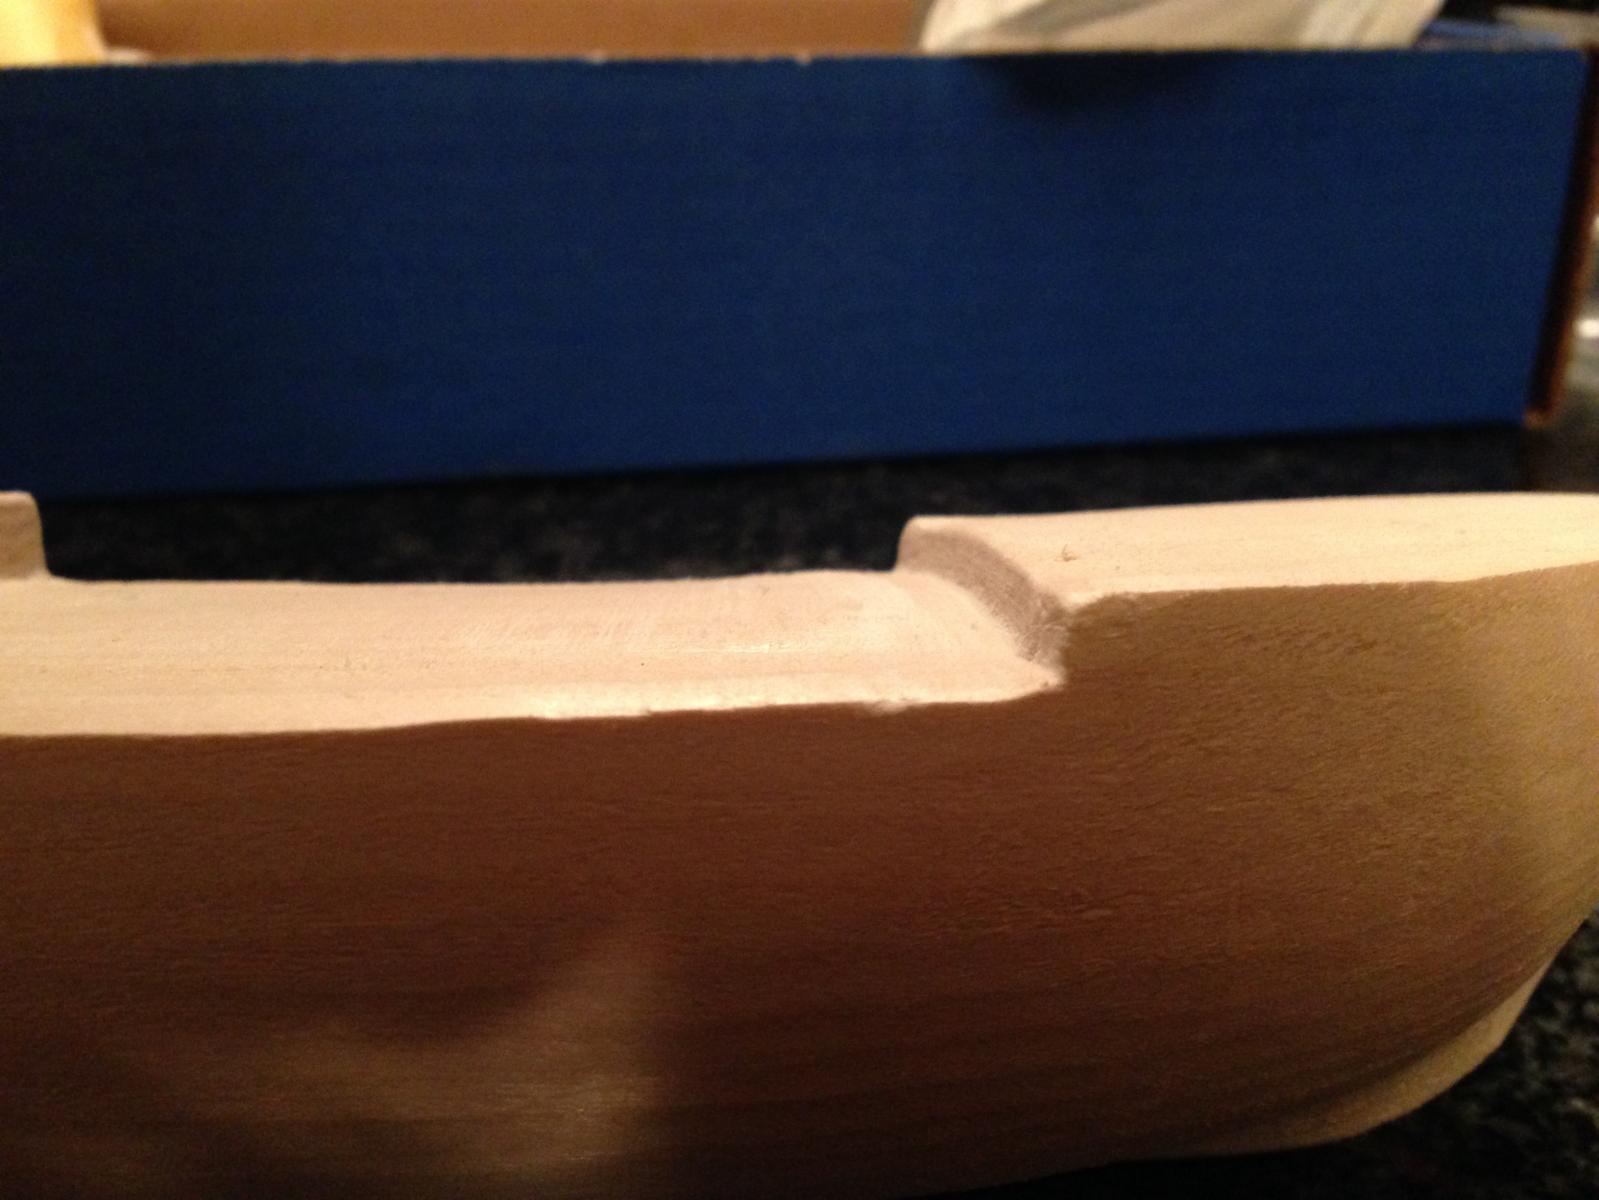
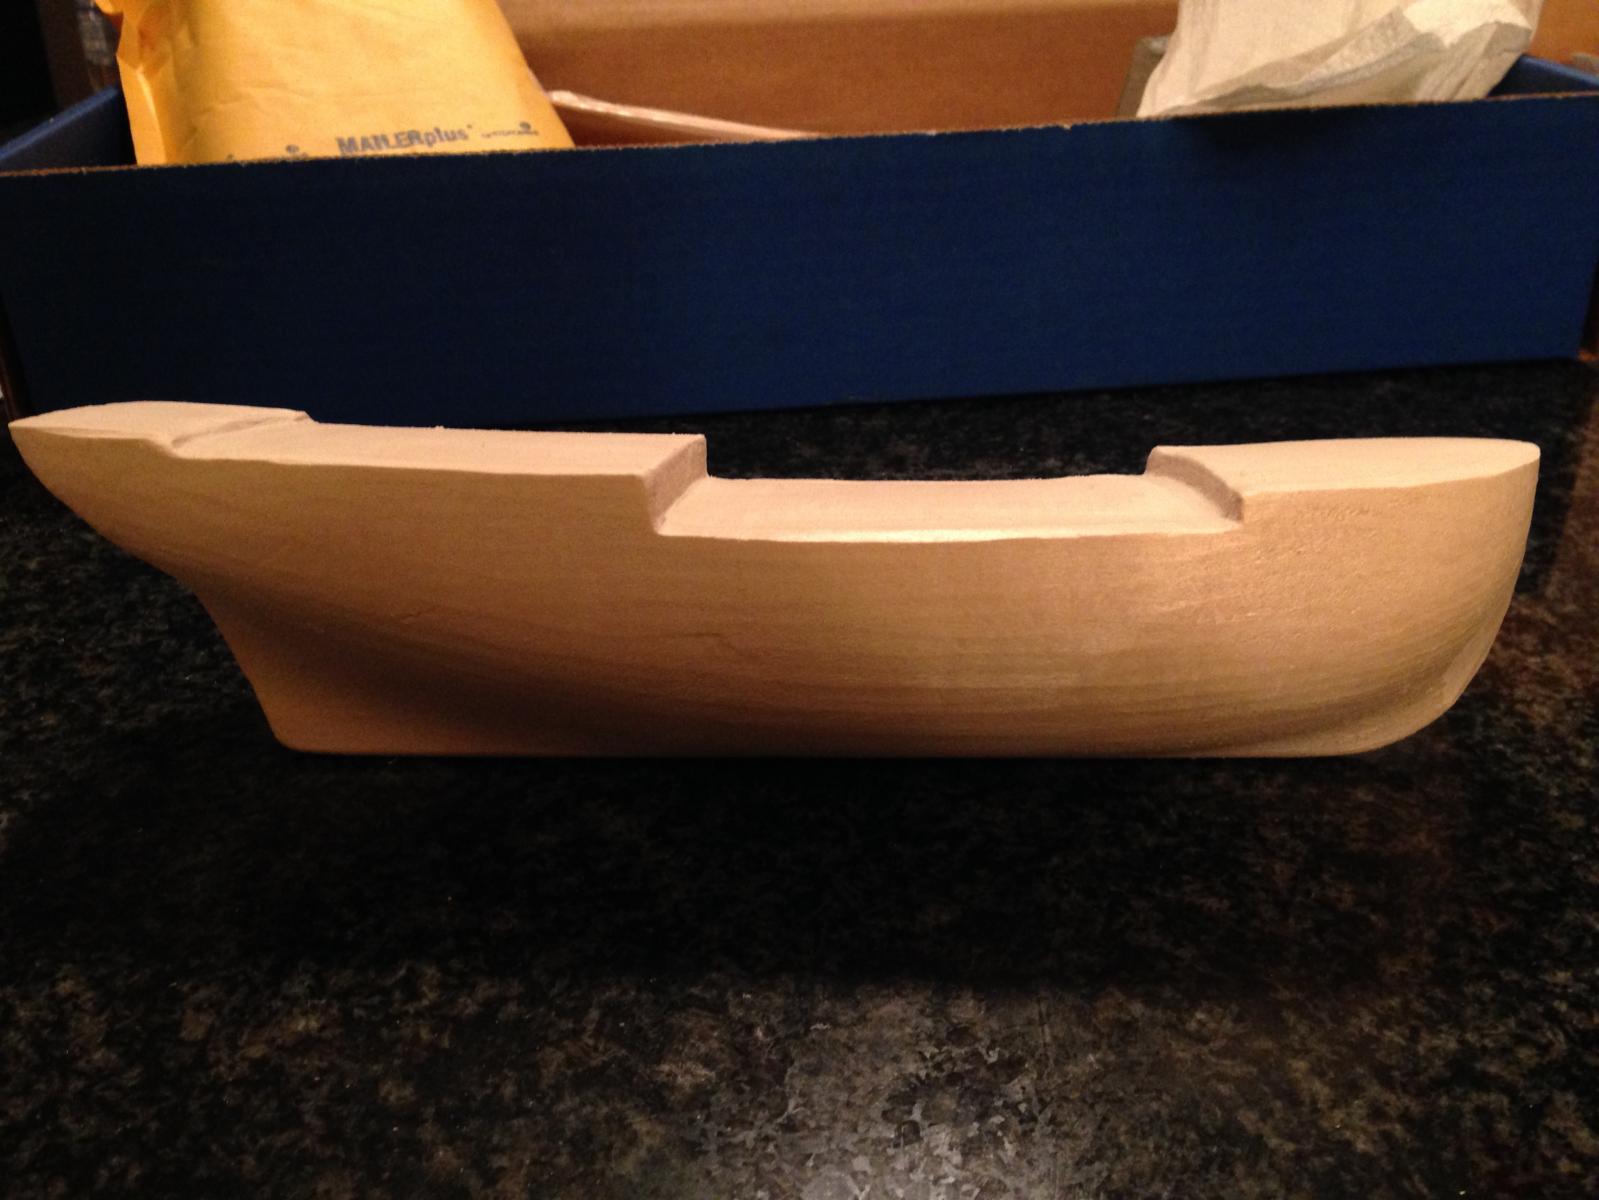
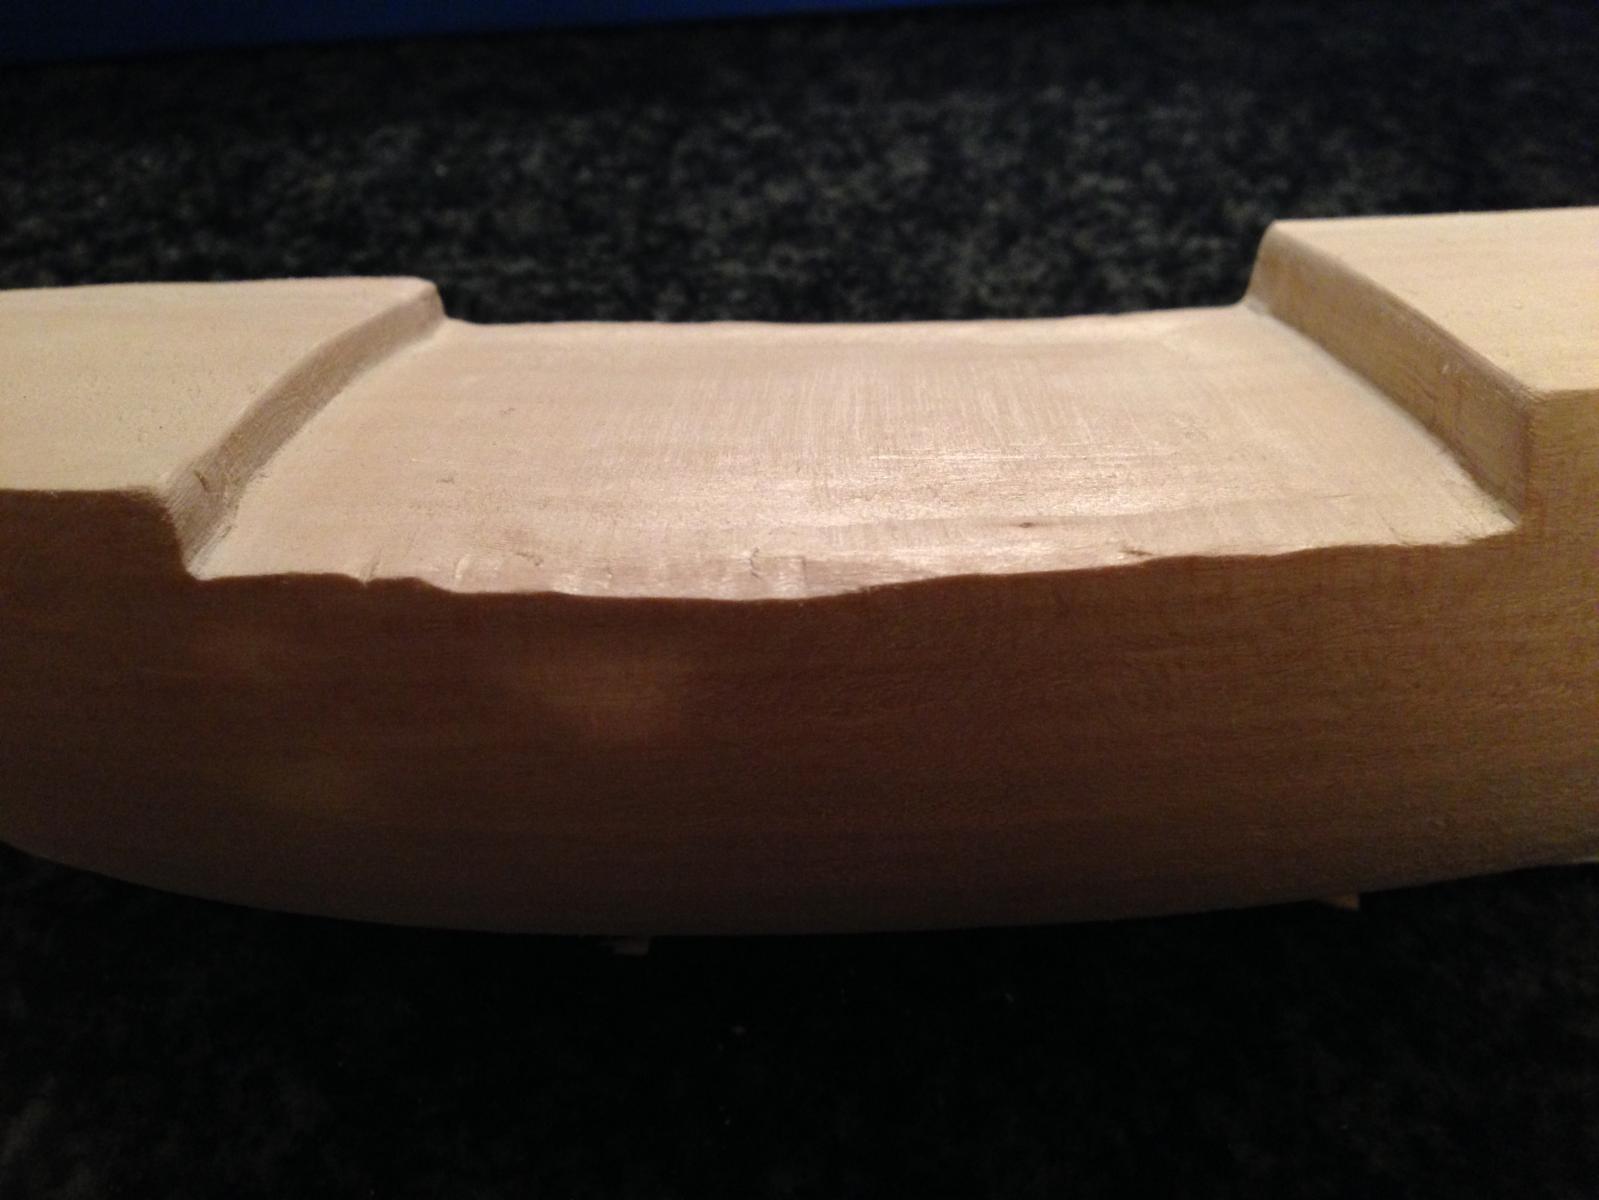
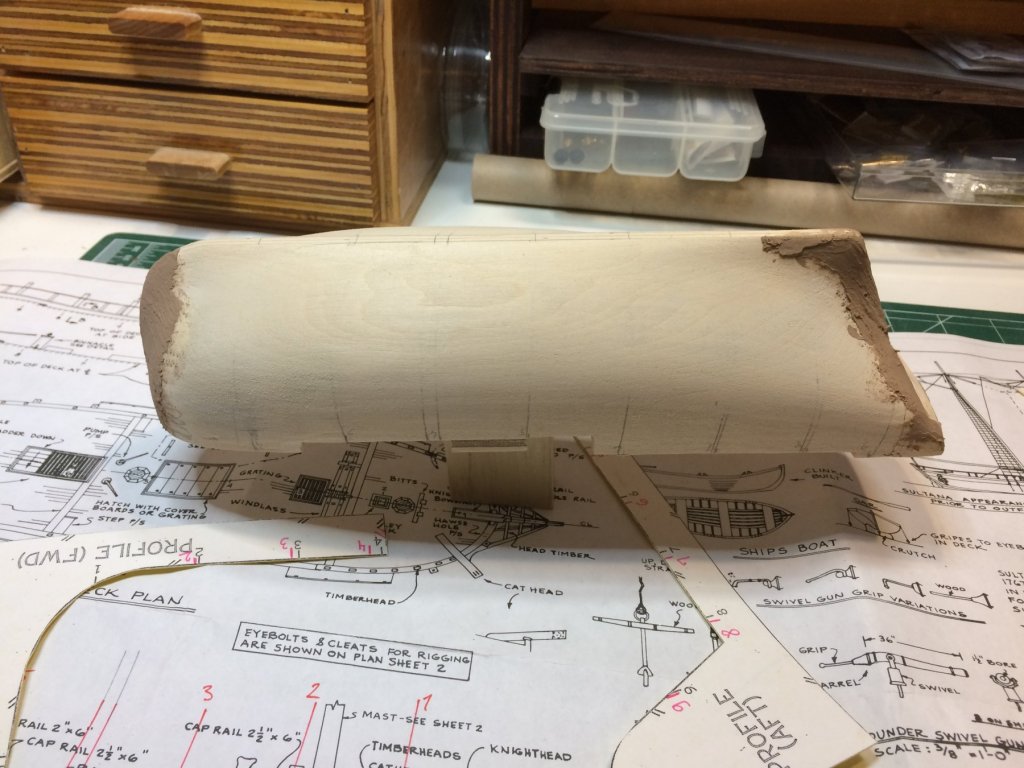
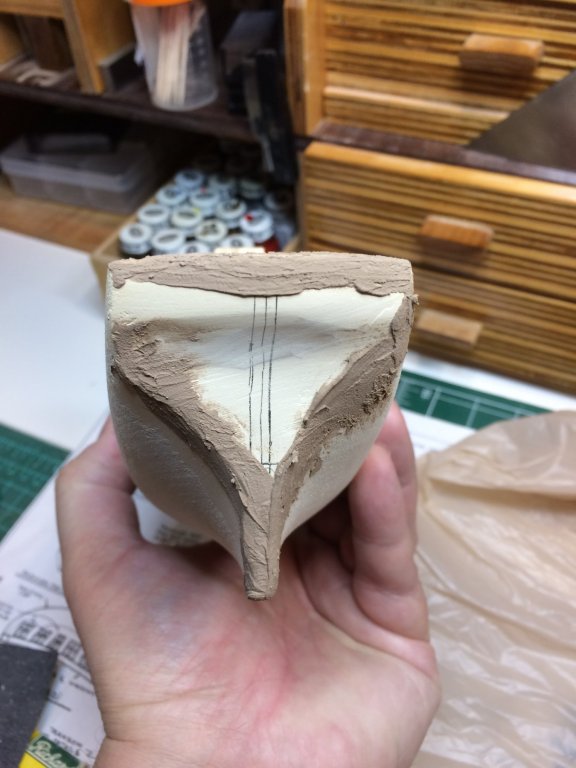
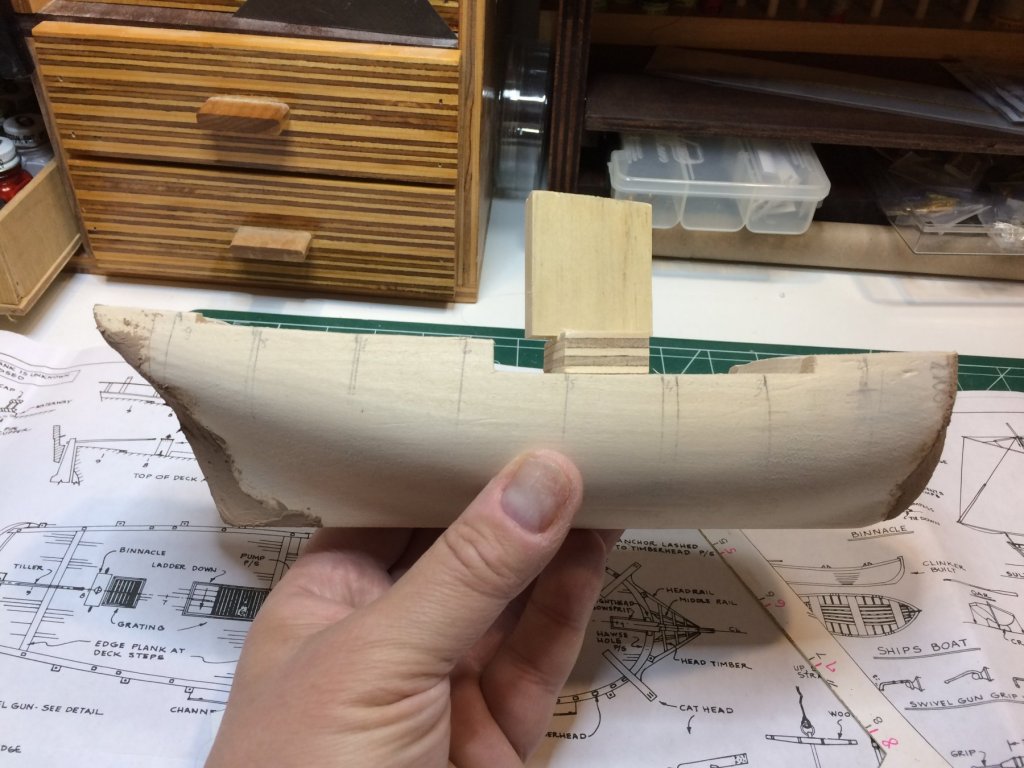
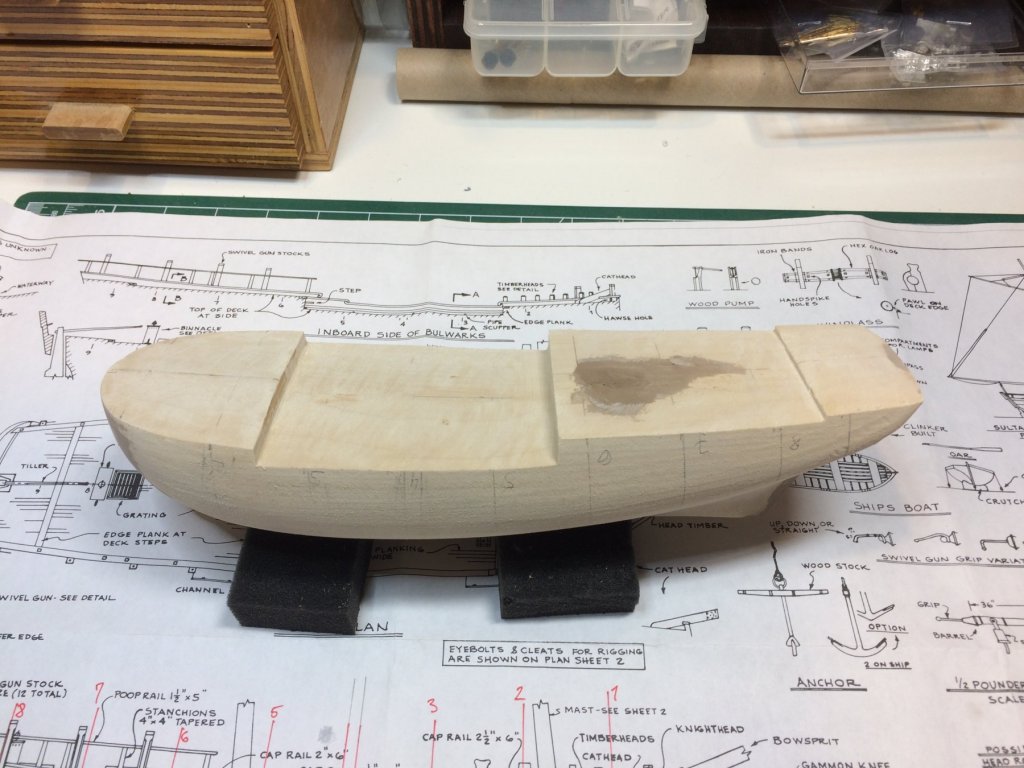
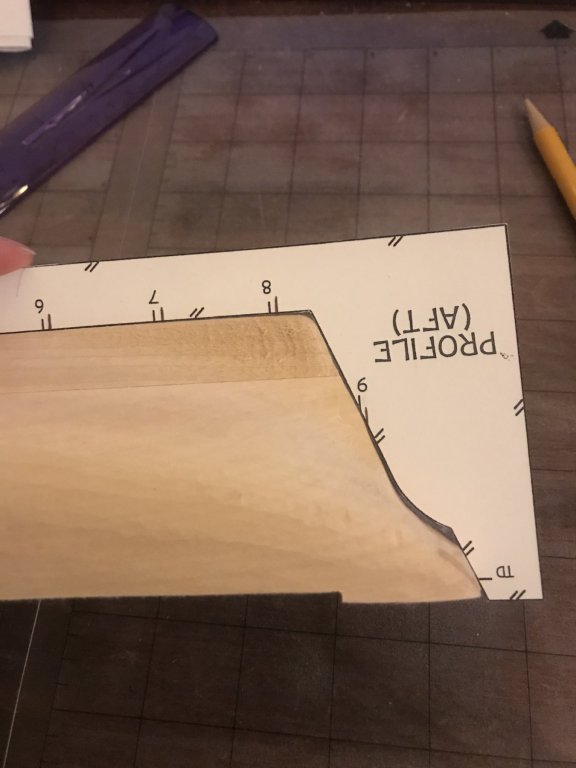
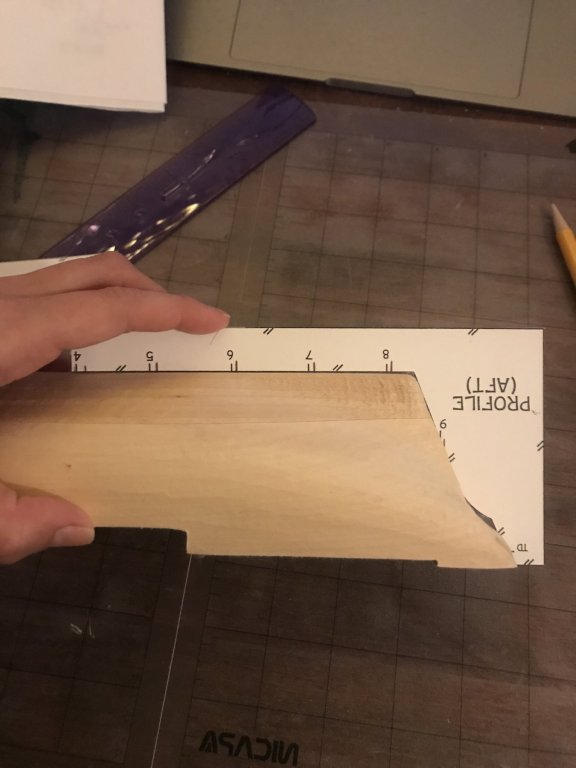
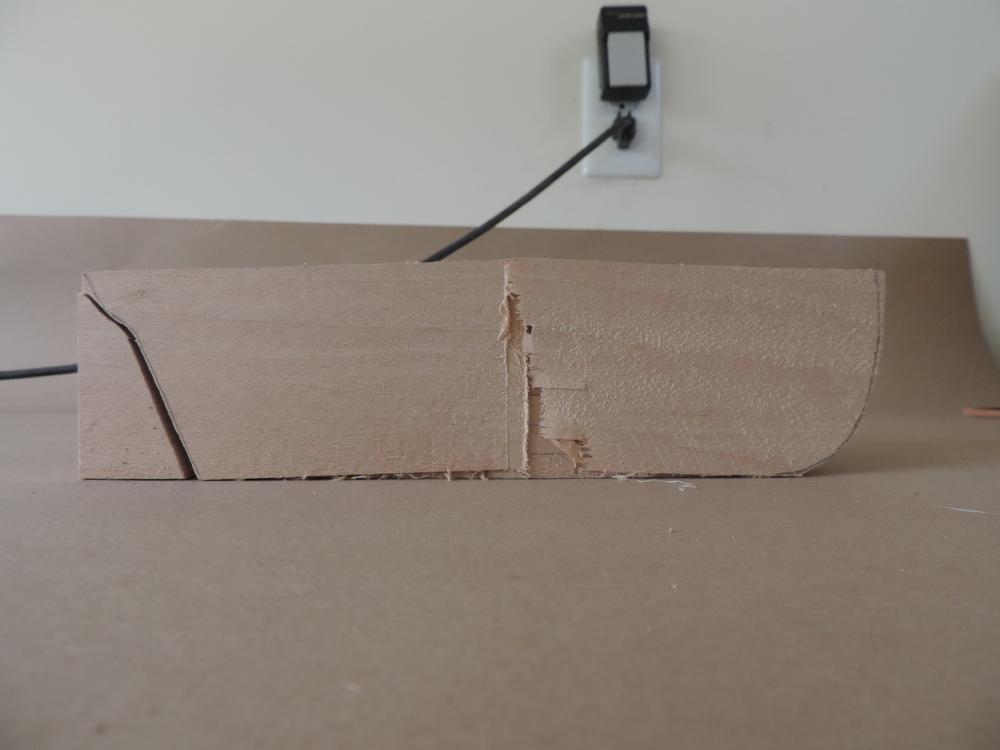
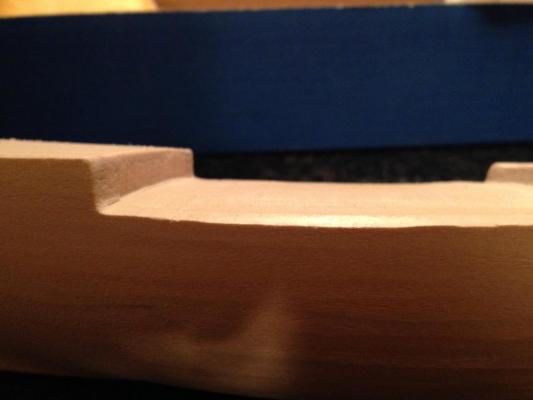
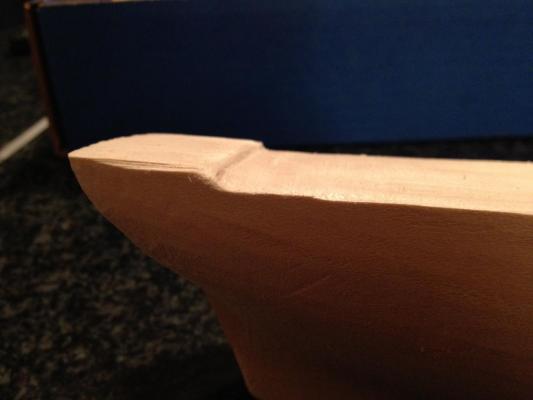
 Hi All, My name is Andrea and I have finally started my journey to build the Sultana! This is my current workstation. I know it is a bit messy; I am moving in 3 weeks so this is as good as it will get for now. I built the (crooked) happy hour sign that is above my desk. It brought me a lot of joy and satisfaction to complete a project and I am hoping to find that in this ship build as well. I've always been somewhat crafty, but I am worried that I may have underestimated the amount of experience needed to build one of these models. The Sultana is supposed to be a beginners build, but even with Chuck's practicum, I am already very lost. I've been looking at other logs of Sultana builds and it seems like even the beginners have it figured out. I got to page 5 of 70+ pages and I am already frustrated. To draw the centerline, do I just eye it to the best of my ability? Above you can see how the template fits the stern of my hull. It seems to fit a lot better than Chuck's did. I'm not really sure what steps to take to make this fit better. Do I need to sand it down or do I need wood filler to fill in the gap? Thank you in advanced for your patience. I think this is going to be a very long and slow build. If anyone would like to join me on this journey, I would be very grateful. Best, Andrea
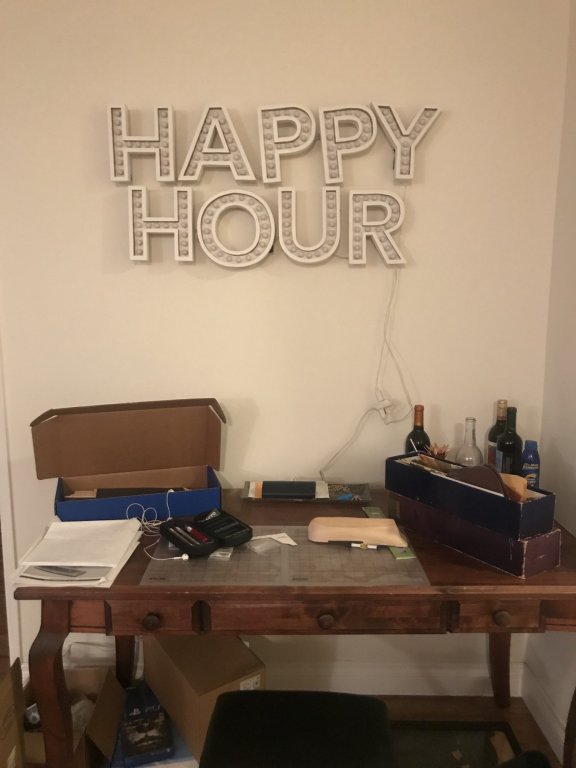
- 36 replies
-
- 2
-
-
- sultana
- model shipways
- (and 1 more)
-
 The remaining plans have been listed on eBay. Brand new, Model Shipways New Bedford Whaleboat. $19.99 from MSW. 3 large sheets with lines plan and templates. $10 SOLD Model Shipways Sultana. 2 large sheets. Good clean set of plans. $5 SOLD Model Shipways Clipper Ship Young America. Older plans on heavy paper. 4 sheets plus 3 sheets of instructions. Very good clean set of plans with some minor pencil marks. $5 Model Shipways Brig Fair American. Older plans on heavy paper. 3 large sheets plus 2 small sheets and instructions. $5 SOLD Model Shipways Frigate USS Essex. Older plans on heavy paper. 3 large sheets plus 3 small sheets and instructions. $5 SOLD Model Shipways Frigate USS Constitution. Lines plan, stern detail, large scale drawing of 24pdr and carriage, large scale drawing of 24pdr bow chaser and large scale drawing of bower anchor. $5 Mamoli Schooner USS Lexington. 6 large sheets of drawings, details, templates and instructions. $5 SOLD Mamoli Cross Section USS Constitution. Scale 1:93. 6 large sheets and one small sheet of drawings, templates, details and instructions. Good clean set of plans. $5 SOLD Bluejacket Bon Hom Richard. 1 very large sheet. Scale 1/8"=1'. Older plans that have yellowed and are creased but still clear and usable. $5 Bluejacket Pirate Brig. 3/16"=1'. Older plans that have yellowed and are creased but still clear and usable. 1 very large sheet. $5 MRB Landing Craft LCI. Scale 1:50. Text in French. 2 large sheets. Older plans that are age darkened but clean and completely usable. $5 Buy them all and I will pay the shipping.
 -
 Greetings everyone! After a brief hiatus I am back and ready to show what I have done so far on Model Shipways 1:64 scale Sultana. It isn't much yet but I've been in between a lot of things especially work in Real Estate which is super busy these days. I've already encountered a few issues with the build and any assistance on these matters (which were discussed in the practicum) would be greatly appreciated. First below you see the untouched solid hull before carving and my tiny cramped work space Charlie
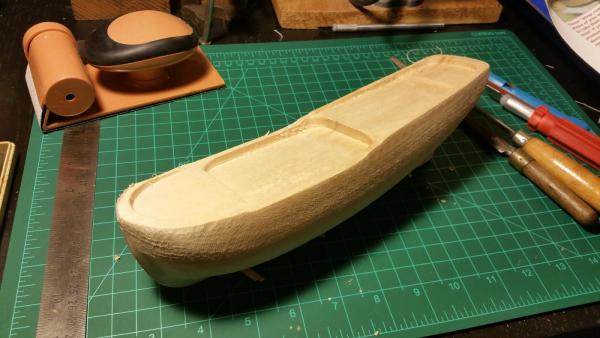

-
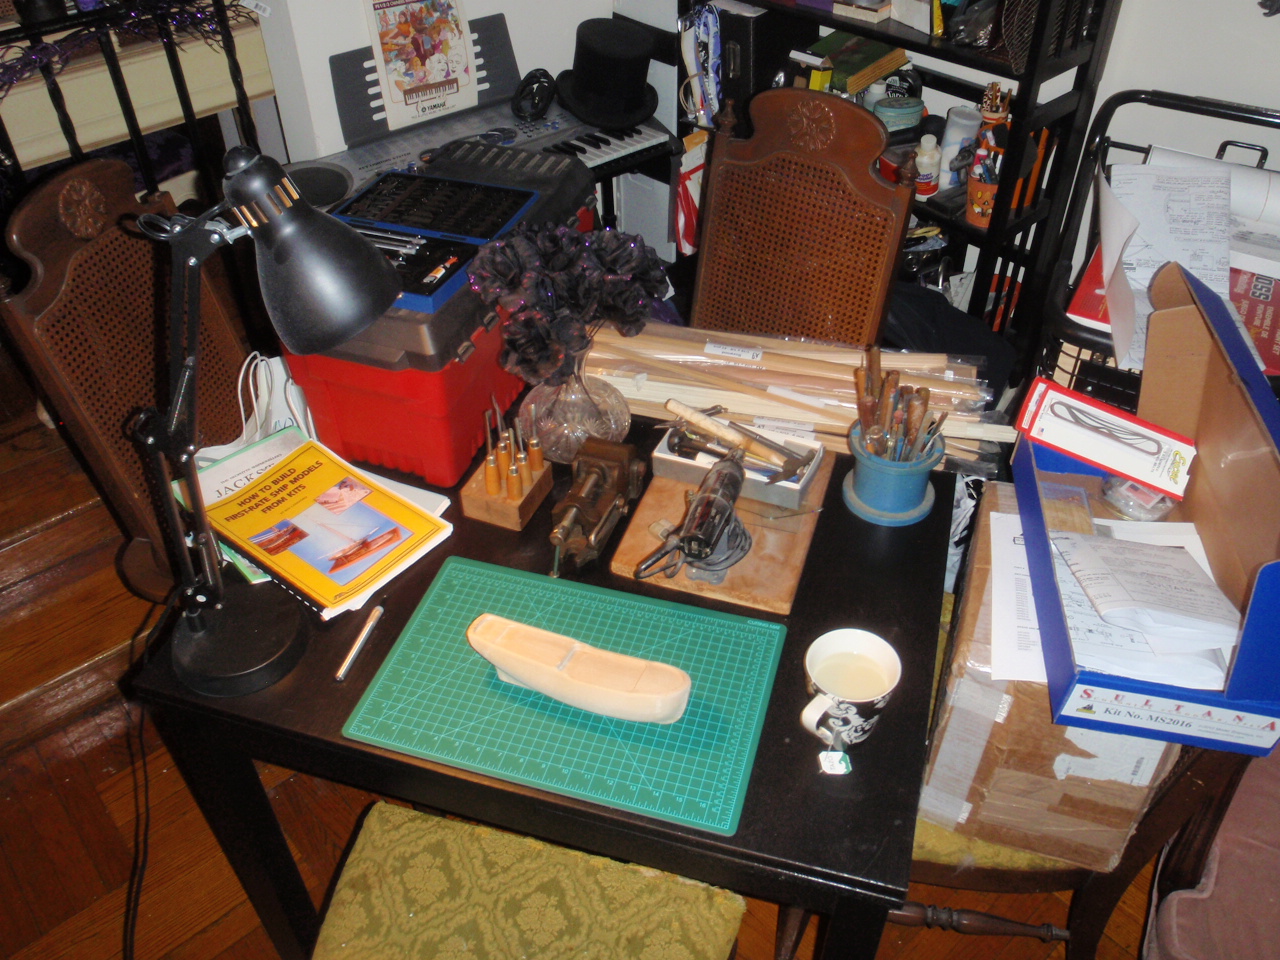
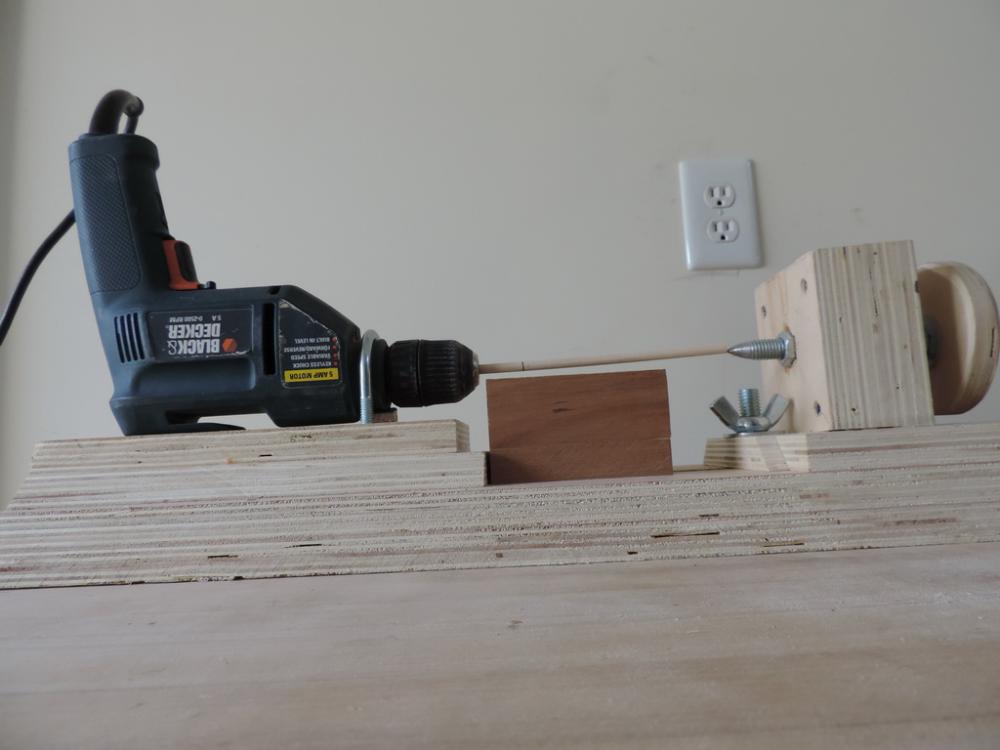
 Greetings, Several years ago I bought the Model Shipways Sultana. I butchered the first hull and Model Shipways was nice enough to send me another gratis. I proceeded to butcher that hull as well So, the Sultana went on the shelf to fight with me another day. Then I went into plank on frame construction and am having a ball. I am building HMB Endeavour, 1:60, by Corel. I have a log ongoing here. While perusing the Model Ship Builder site, I discovered Charlie Zardov’s Sultana log. He is doing a beautiful job. I also found Chuck Passaro’s practicum. The juices started to flow , and, I needed a break from the masting and rigging of Eneadvour. But, I just couldn’t get myself to ask MS for another hull. So, I decided to build the hull from scratch out of a block of bass wood. As Jack Nicholson said in the movie As Good as it Gets, “I know I can do this”. Now we begin: Since I had all the templates cut from file folders from the previous attempts, I had a nice head start. I laid out the profile view and the deck plan on the block, as well as marking the center line on all 4 surfaces and the station lines. I cut out the profile first so I would have a flat surface (keel to be) to cut out the deck plan. The band saw did a very nice job. The next step was to locate the top of deck line. There is really only one reference point that is reliable for measuring the height of the ship's lines. and that's the keel. By using a combination of the profile view and the inboard bulworks view, I was able to get the top of the deck line at the edge of the deck. Then measuring the camber drop from the plans and adding this to the edge deck line, I was able to get the top of deck line on the centerline. Now, it’s time to start carving. I am going to start with the area between stations 4 and 6. This is the widest beam and the gentlest curve on the hull so there will be less wood to remove. Some photos below. Also a picture of a homemade mini-lathe using an electric hand drill as the motor and head stock. It works pretty well. Courtesy of U-Tube.
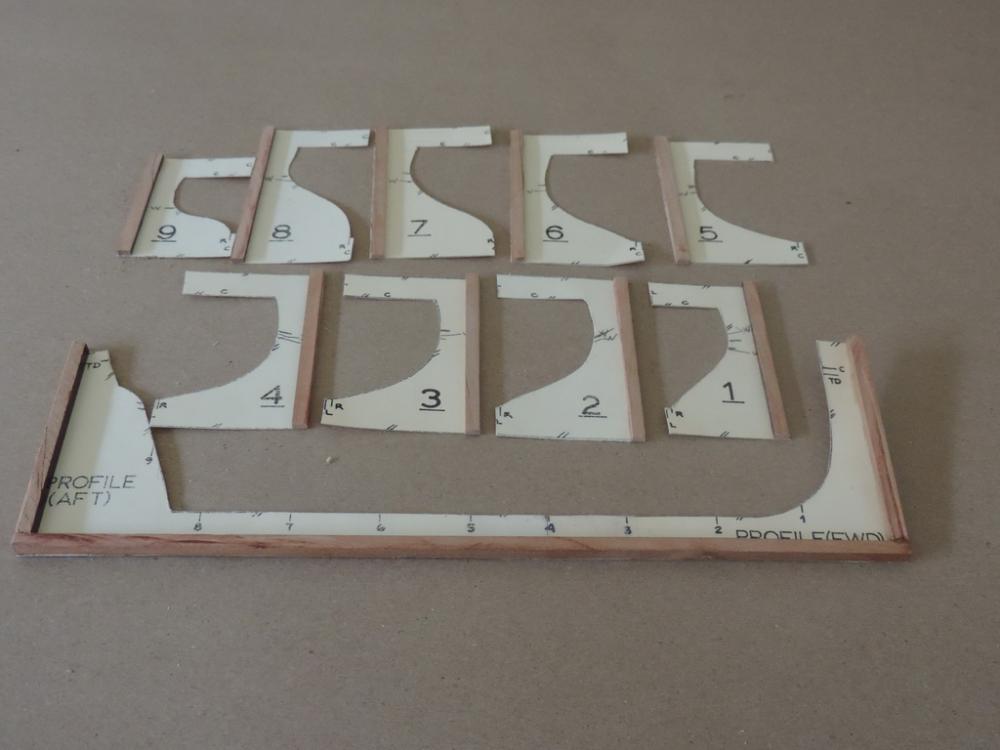

-
Greetings all. So as I sloooooowly chip away at Sultana I've been thinking a lot of the questionable figurehead provided with the kit. Naturally I want to replace it with something I make from scratch however I am aware that the admiralty plans did not include a diagram of what the figurehead looked like and the only information I have read says that the figurehead was a beautifully carved woman.... which was then likely removed after purchase by the royal navy. This does not explain much and I'm hoping that someone might know of some sort of written description either first person source or even someone's extrapolation to help me surmise what the figurehead possibly looked like. Any thoughts or directions towards sources would be appreciated. I've so far looked through Chappelle's books and also the Harold Hahn Colonial Schooner book but he doesn't give much discussion to Sultana's appearance more the history. I would actually love to see more pics of Hahn's Colonial Diorama as the Sultana model looks like it has a figurehead and I trust his judgement on the matter.
-
 I have always liked wooden ships, but have also always had about a million other things on the go both hobby wise and in real life. I picked up a few wooden ship kits several years ago and worked my way through the Model Shipways Phantom as a first go at the hobby. It turned out ok and based on that I picked up a Sultana as a next step, a Syren as a third build, and a Bluenose. I finished the Phantom in about 3 months, but then got sidetracked with painting several new Warhammer 40,000 armies, several 15mm WWII armies, and forces for several other miniatures games that I play. Now, 3 years after finishing the Phantom, I decided enough is enough time to get another ship done. It also didn’t hurt that I had an extra week of banked time at work that needed to be used before the end of September, so I decided to start on this and get a good start on it with the hope of being done before mid-December as at that point an annual miniature painting challenge starts and I have over 200 miniatures lined up to be painted from December through March. While I have extensive hobby experience and scratch building experience it has all been with metal, resin, plastic, and green stuff (sculpting compound), so I specifically picked ships that came with or had practicum’s available so that I could work through them with some extra guidance from some experts. That led me to the Phantom and Syren to start, even though what I really want to build is a Bluenose and a Victory. Anyway, enough background, onto the build…. Day 1 (Monday Sept. 21) The Syren kit from Model Shipways is an excellent, if not very exciting kit for beginners. We all want something big and complicated and impressive looking, but that’s not a great idea. I learned this from painting miniatures, start easy and move up. Having completed a Phantom, I thought the next step would be something with some planking. Even though this kit is a solid hull, the practicum explains how to improve on the base and plank the top half of the kit. I thought this would be a good next step. Day one involved a lot of sanding and shaping of the hull. I first removed the bulwarks and cleaned up the hull a bit as there was some rough spots. I Then moved onto making sure the keel area was flat and centered. Next came marking the line on the hull above which I would need to carve away material to make room to plank. I then marked out the lines to follow so that I could follow Mr. Passaro’s practicum on doing faked board lengths. It was at this point that I realized I needed more wood as all of the planks I would need are not in the kit as it wasn’t meant to be done this way. This made a stop for the day, but by that point I had some video games calling me….

-
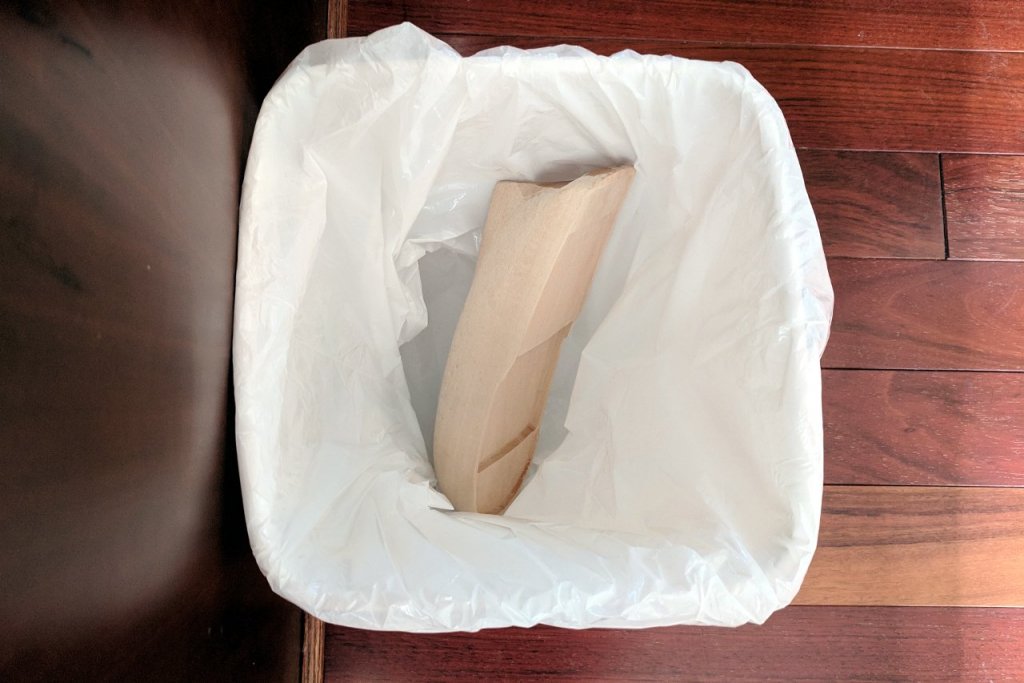
 Started my 1st ship kit this weekend. The Sultana in 1:64 scale by Model Shipways. This a solid hull kit, so I had some sanding and carving to do so that the supplied templates fit properly. The carving was required on both the inside and outside of the bulwarks to achieve the correct scale thickness. At an early stage, my "carving" turned into something more akin to gouging, so I turned to my xacto knife with a #11 blade and actually found it easier than using my chisels, which I couldn't seem to get a sharp edge on, even after minutes on the honing stone. Note the repaired area in the front (sorry- still don't know my nautical terms)...I had already sanded the outside of the hull up to my stopping point that I had marked, THEN I started carving the inside of the bulwarks to the required thickness. That is when I cracked the thin basswood in a couple of places. At least the breaks were clean, so I salvaged the pieced, used thin super glue, and carefully and quickly put them back in place. I dared not try sanding the area yet, but it will be my next step now that the glue has had a day to dry. Hopefully, my damage control will not show up later, as this hull will be painted.
- 44 replies
-
- 3
-
-
- Sultana
- Model Shipways
- (and 2 more)
-
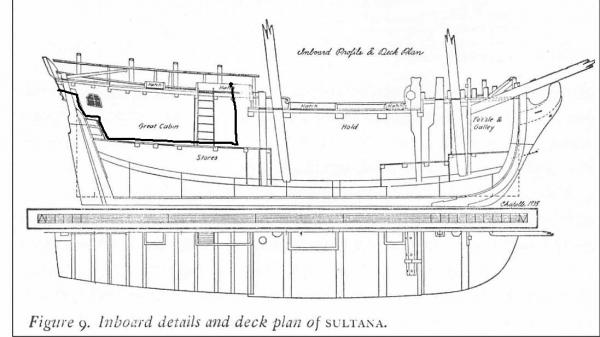
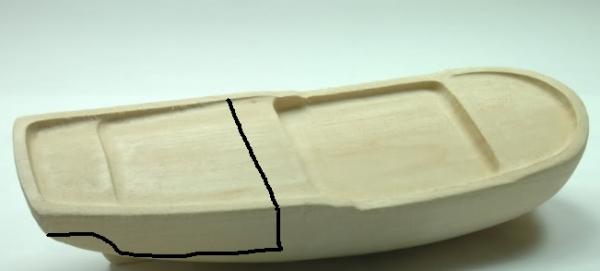
Hi everyone! Sorry for all the questions lately I'm just trying to plan everything I need for my impending build. I'm interested in possibly adding a cabin space to the Sultana for a little extra challenge/fun (add some lights furniture etc.) and I figure the replica in Baltimore gives me a lot of reference to work with. My initial thought would be to use a band saw and cut horizontal which means I would have to rebuild the side bulwarks in the process but it would give me an even measurement to work on the lower deck. The other alternative might be to burrow into the hull though I worry about the inner deck winding up uneven. To anyone who as attempted or contemplated doing something similar on a solid model hull I would greatly appreciate some opinions/advice on tools, methods and resources so I can start planning what to read/buy. I put pictures below to show exactly where I plan to cut, forward of the ladder but still leaving part of the poop deck in order to give the deck support. Charlie
-
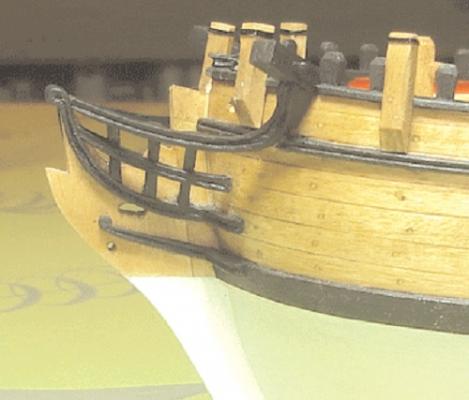
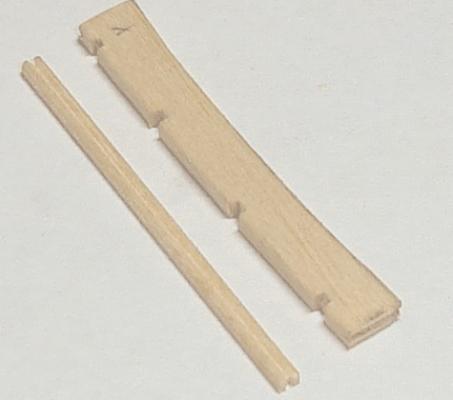
Greetings all! I am a beginner in the field of wooden ship modeling (though I have some experience through my grandfather who did a scratch build Santa Maria years back). My "noob" question is about beaded moldings and for clarity I took a few photo's off the Sultana Practicum (which I plan to start building shortly and very excited about). I'm trying to determine the best method to make them, tools etc. or even better if any model sites sell beaded molding strips already complete in respective scale. Thank you all and appreciate the learned advice. Charlie
-
 This build log is kind of a late start on the building. I currently have the hull in pretty good shape and about to plank the deck. I'll post a few pictures of the early stages, but it is well underway at this point. Chuck's practicum on it is what drew me to this kit. This is the farthest I've gotten on a sailing ship build to date and intend on actually completing it. I got the kit on sale, as Model Expo prices fluctuate wildly. I'm cheap, so if I find something I want, I'll follow the prices and purchase at what I think is a fair price. It seems like a good kit to work on building skills. Hopefully, others can avoid the mistakes I've made along the way. In the beginning ...
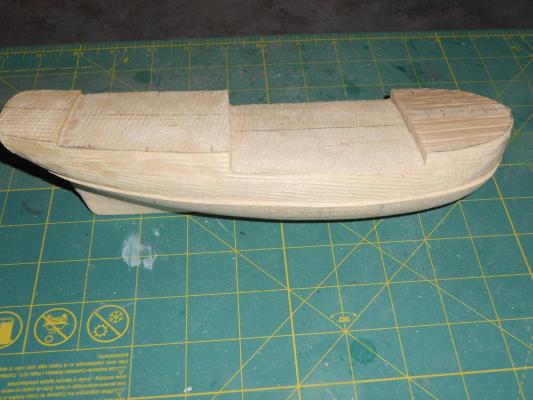
-
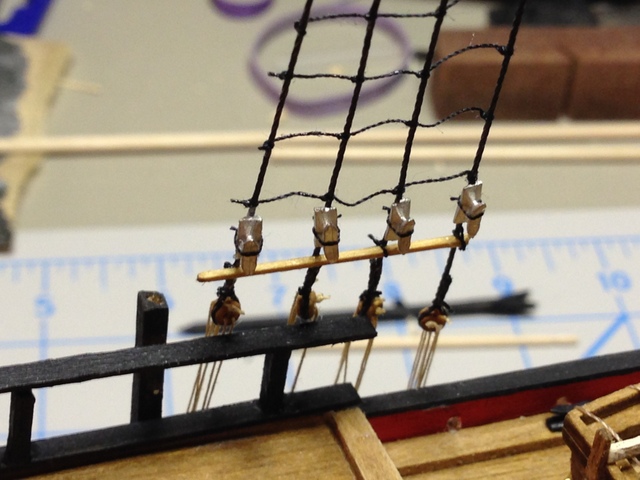
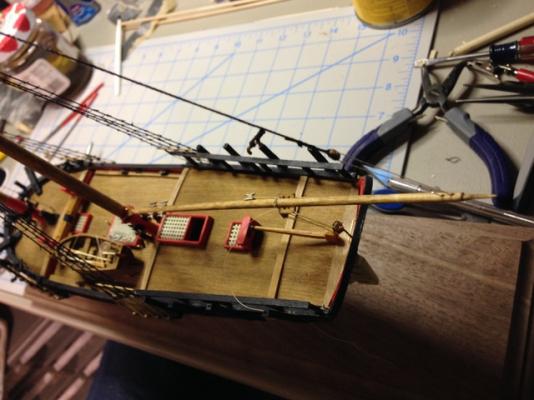
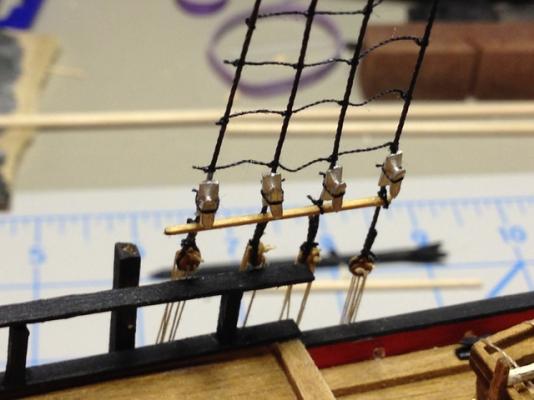
 I started a couple of months ago on the Sultana as my first wood ship model build and have been lurking about these forums for quite some time. I must admit, there is a HUGE wealth of knowledge here, and for that I am most thankful to you all. Thank you! I probably would have hung up my tools for another year without this place. My background: I love to work with my hands, but I am not a woodworker historically. I have build lots of airplane models, starting from plastic kits decades ago, to balsa, to remote control and such. I got really good at that, and still have many hanging around the house. I also got into HO and N scale railroad modeling with two large layouts in the basement. Thinking that now was the time to take on the dream of building some wooden ships, I researched a bit and decided to take the plunge. I must admit, there have been some stumbles along the way. Errors along the way: how does one really do a good job of curve-fitting a solid wood hull? I need to see this one in action to really "get it". I almost think that planking would be easier. 😉 I messed up the stern a bit and have found the joys of using wood filler as a patch solution. It has saved me at least twice. Current status: I am rigging. I really like this part.... so ... here are some images of along the way... the last are the most recent. I promise to be better about logging my work as it is in progress. I should have joined the group earlier! ~johnb


- 11 replies
-
- 7
-
-
- sultana
- model shipways
- (and 1 more)
-
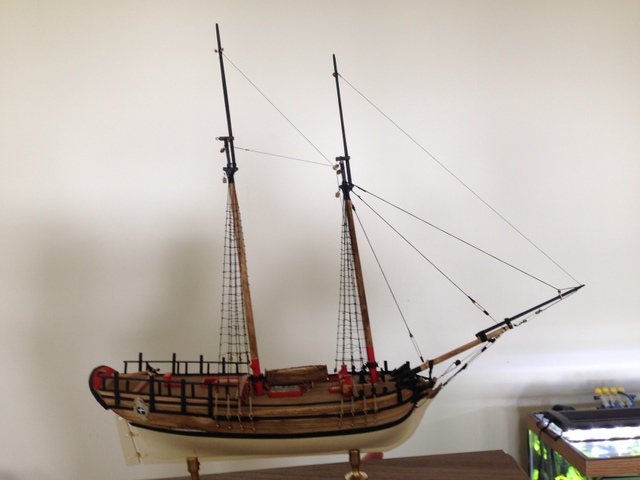
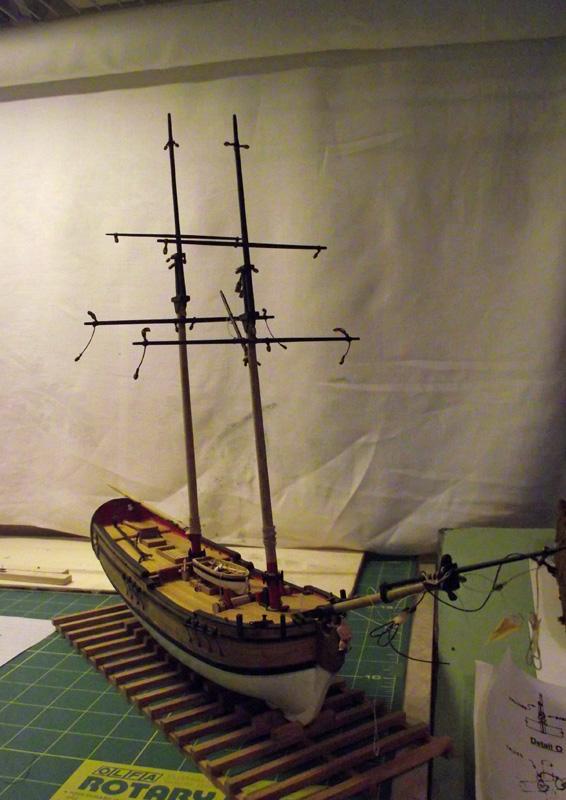
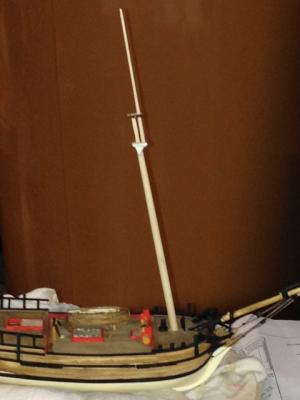
 I guess the sooner I restart my Sultana the better. Once we were quite a fleet but now rhere are none left. In scanning through photos this one came to hand. It shows the hull with spars temporarily pinned in place . and is as good aplace as any to begin. Kip (aka Sawdust)
-
 Hey all, First, I'd like to say I'm impressed by the community and excited about becoming a contributor to it. This seems like a great collection of folks who are passionate about the hobby and quick to help one another. A little background on me: I'm brand new to this whole thing with minimal woodworking experience. Put together plastic models in my younger years and finally pulled the trigger after mulling over a model ship for the last year. I decided on the Model Shipways Sultana with the tools/paint provided by Model Expo. Decent little kit with a few of the tools needed to get going. A story you've likely all heard once or twice before. I started putting tool to wood about 24 hours ago (though I've only done about 1-2 of actual work) after reading up on a handful of materials. I've been following the log by hopeful, Chuck's practicum and the instructions included with the kit. Step 1 was removing the bulwarks. I've been using a combination of the #11 blade, a chisel edge blade and a file to do so. Frankly my inexperience is showing right from square one. It's a rather solid butcher job and I'm concerned that the edges are not sharp enough. Any tool/technique suggestions to achieve some cleaner lines would be much appreciated. Photos are attached for reference.

-
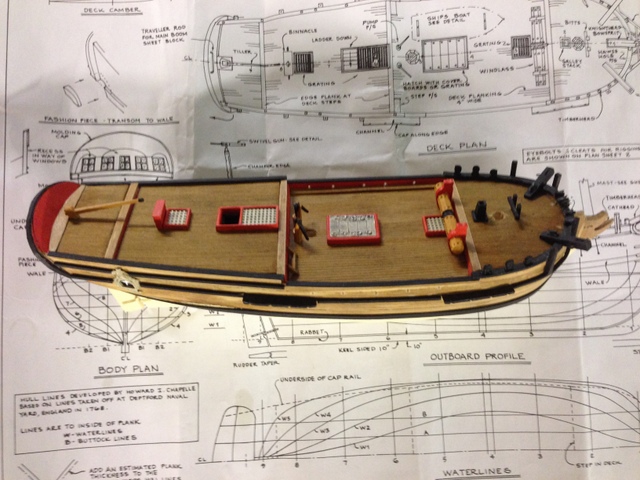
 Hi Mates, Post #1 of my Sultana Build The Sultana is my second build and is in progress....not quite 50 percent completed. I Will repost my build log up to this point and continue posting as I continue building the vessel. For the repost, I will provide photos and return and add some dialog later. Each post will be numbered as well as each photo so future builders can communicate with me efficiently if they any questions as they build their own Sultana. Please note I am building the vessel following MSW's directions as well as Chucks excellent tutorial. I jump around the instructions a bit when building. My recommendation is that you follow along using Chuck's practicum. As Shortgrass indicated there were a number of Sultana builds that we builders could refer to when building our own Sultana's. Some of the builds were completed and others not. All of the builds were lost so it is important we get a few Sultana builds back on the forum. Hopefully other Sultana builders will repost their logs as well. Photo 1 Box art Photo 2 Solid hull Photo 3 Wood build materials Photo 4 Ships boat Photo 5 Bits and pieces along with rigging cord Photo 6 Flags Photo 7 Hull templates Photo 9 I created a note book for my Sultana build incorporating both the MSW plans and Chucks Practicum. This replica show the beauty of the Sultana on the water. The build begins. More later....... BFN, Hopeful aka David
 -
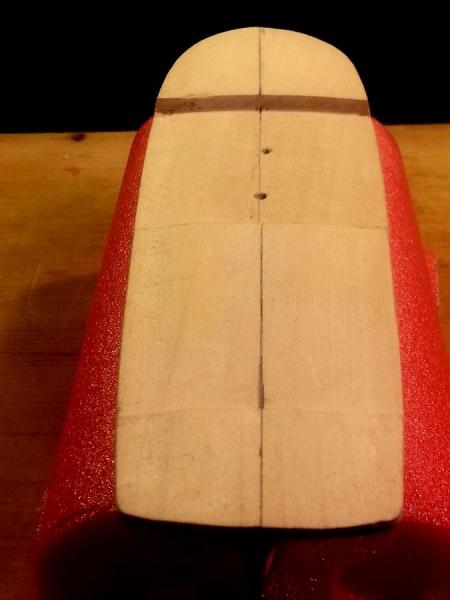
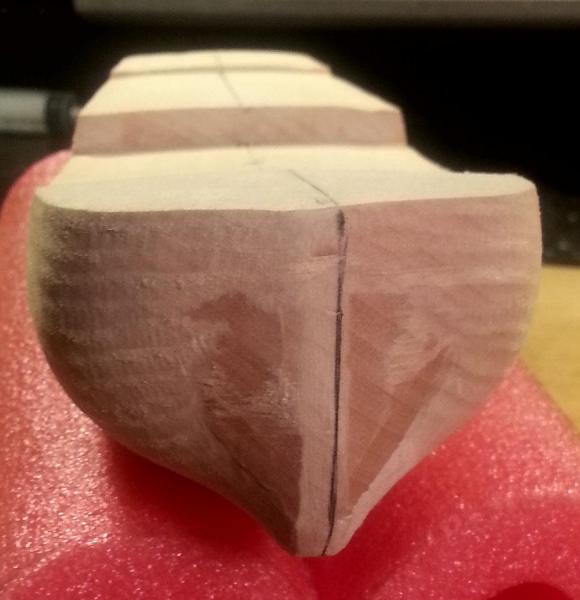
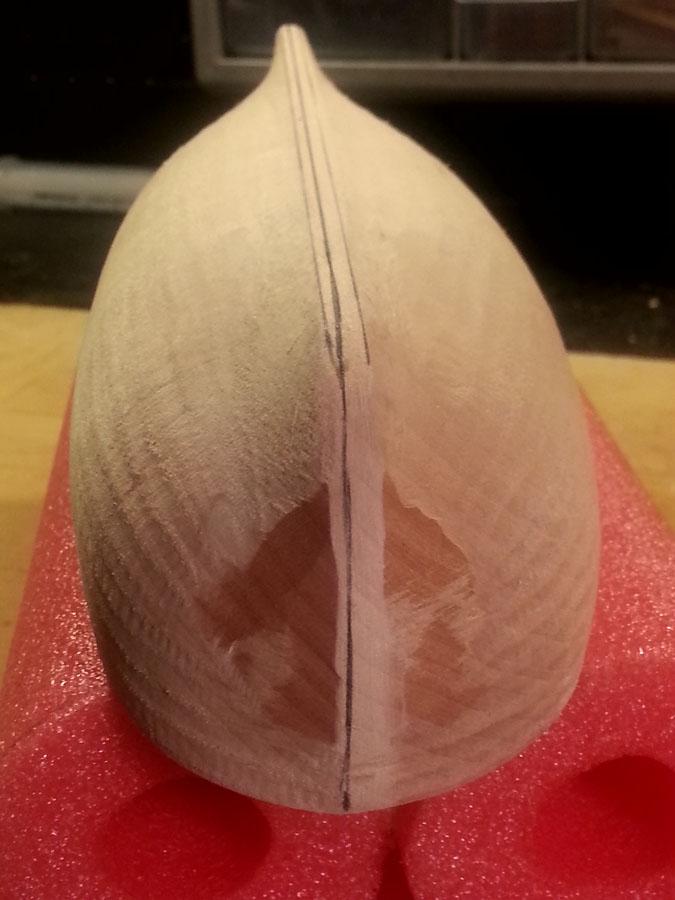
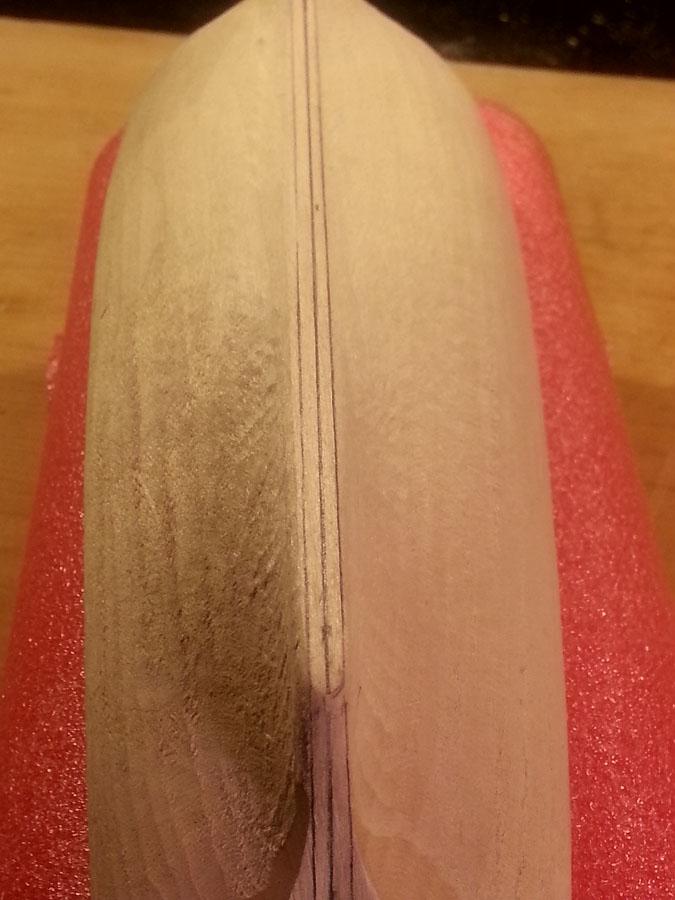
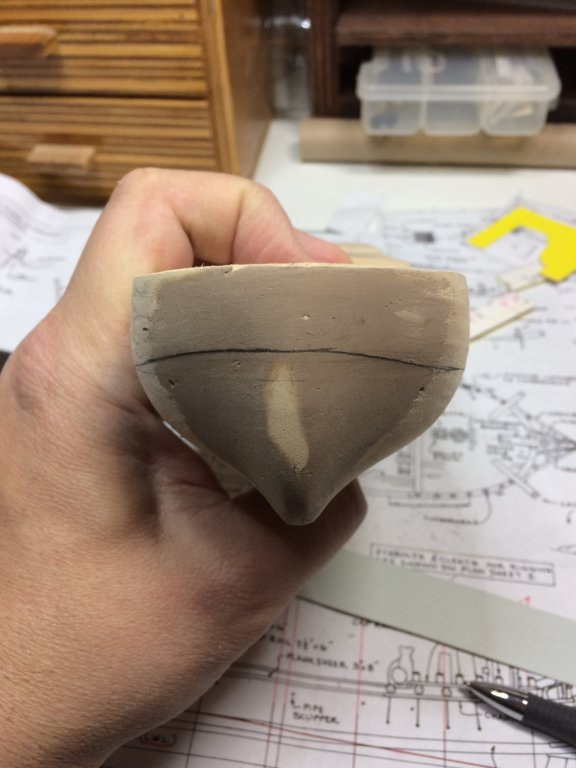
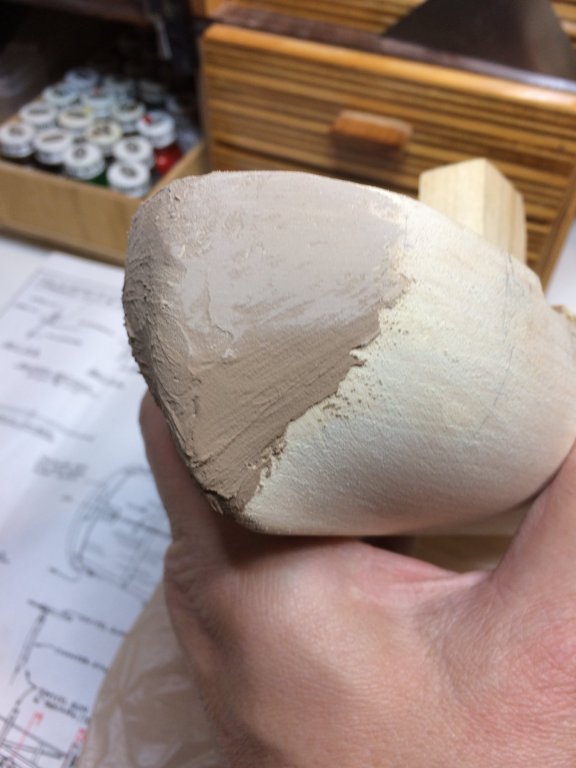
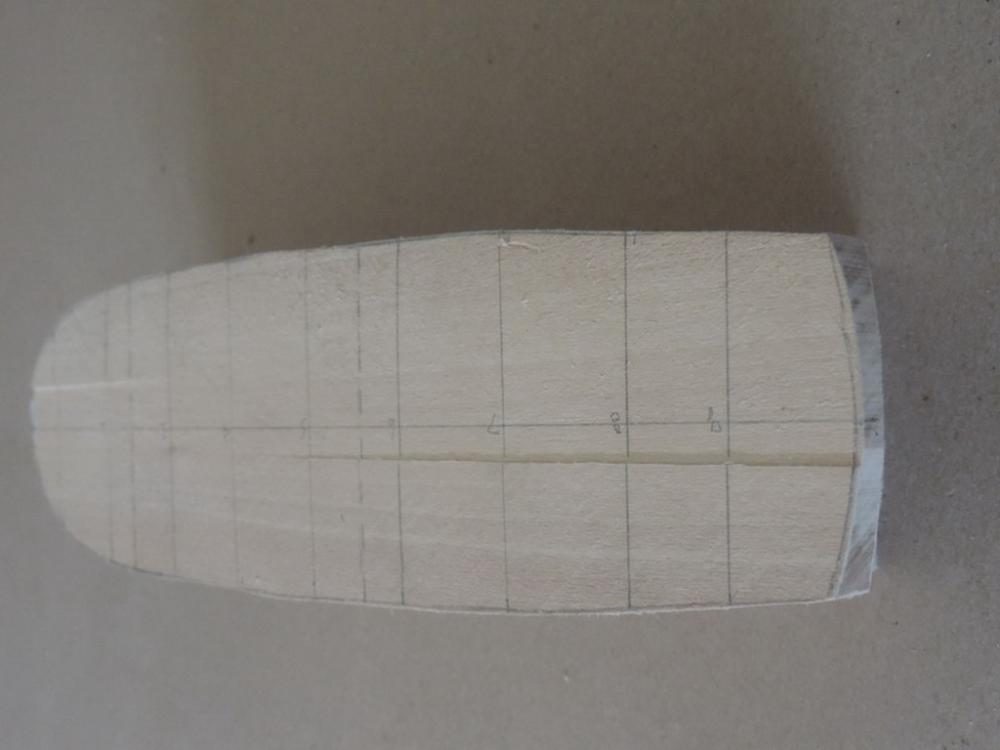
 This is Sultana "Re-Deux". I started my 1st Sultana right after Christmas. Due to several mistakes, I decided to order a replacement hull from MS. It took them quite a while but I finally got it this week. I am following Chuck Massaro's practicum plus all of the tips that I have picked up from the rest of you all. I am gratefull. This time, I will take my time. As shown, I have done away with the bulwarks. I have "attempted" to mark the centerline. After much weeping, wailing and gnashing of teeth, I think I have come pretty close. This is actually the third or fourth attempt to get a line that looks pretty good. I used a jig that I copied from one of you builders with a centering ruler. The deck went fairly well. Marking the keel and the bow was another story. Getting the keel line to match up with the deck line was tricky too. When I look at the deck line from stern to stem, it's straight. But when I eye it from stem to stern, the forward deck line looks to veer to the right. I think it's an optical illusion. If anyone knows of a solid technique to establish the CL, I sure would like to talk to you. It's been a while since I have built a wooden ship. Twenty or so years to be somewhat exact. So I welcome any and all suggestions, ideas and critiques.