Search the Community
Showing results for tags 'tools'.
-
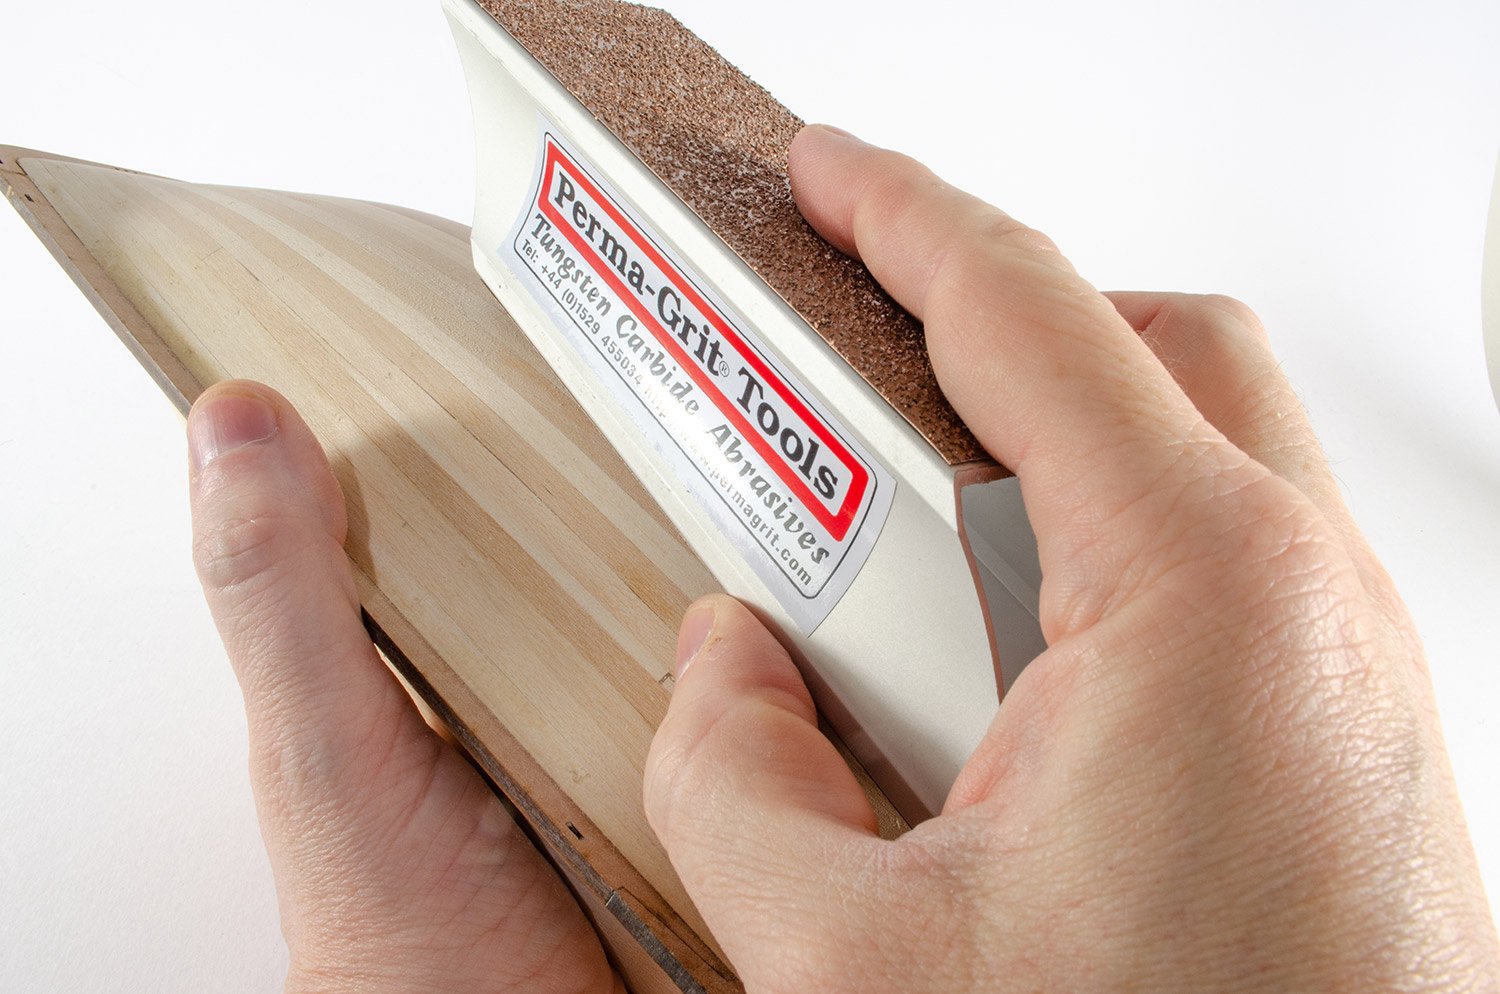
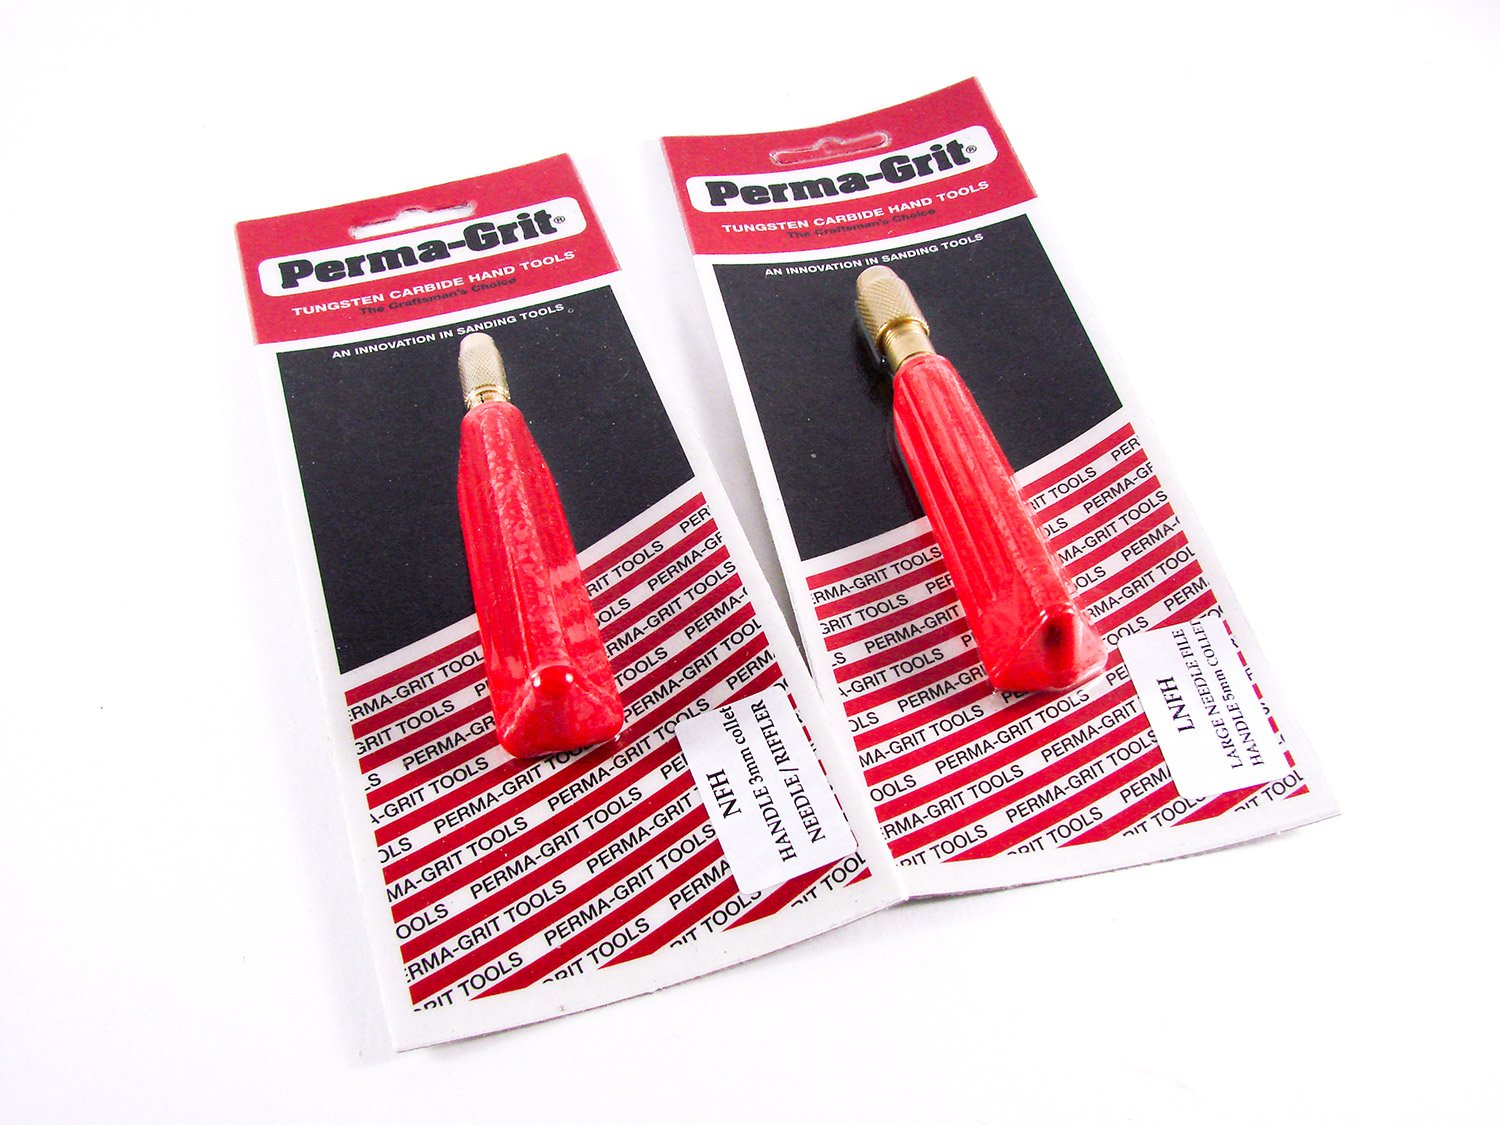
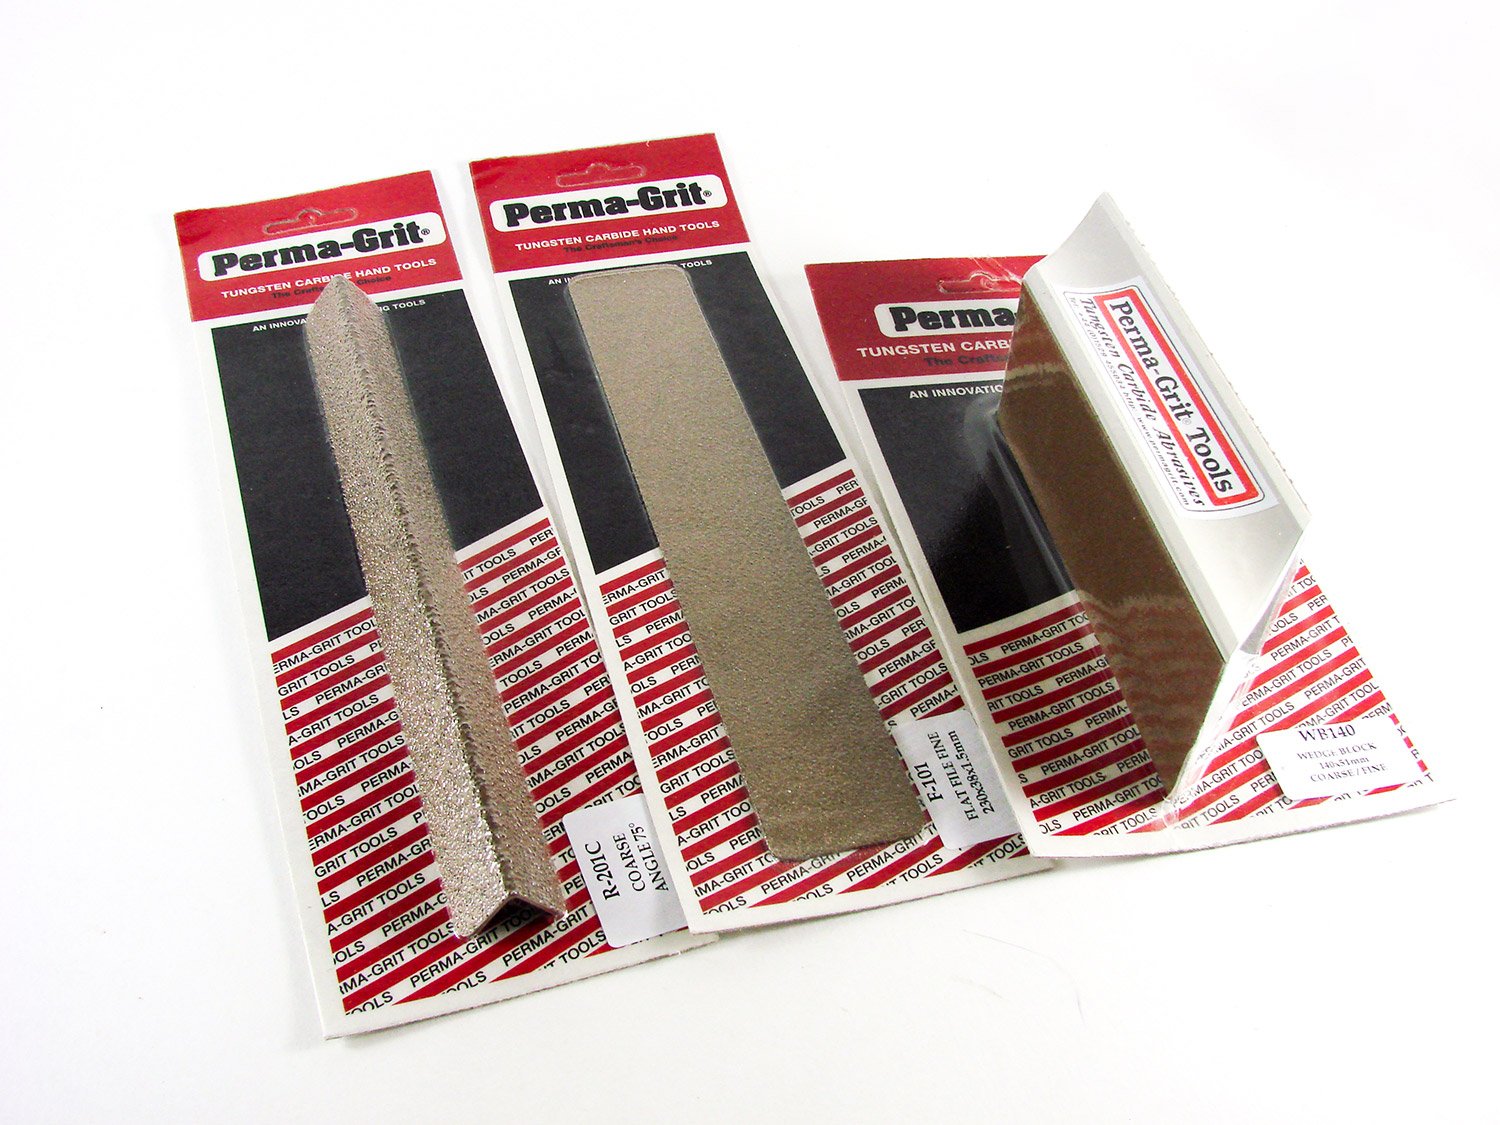
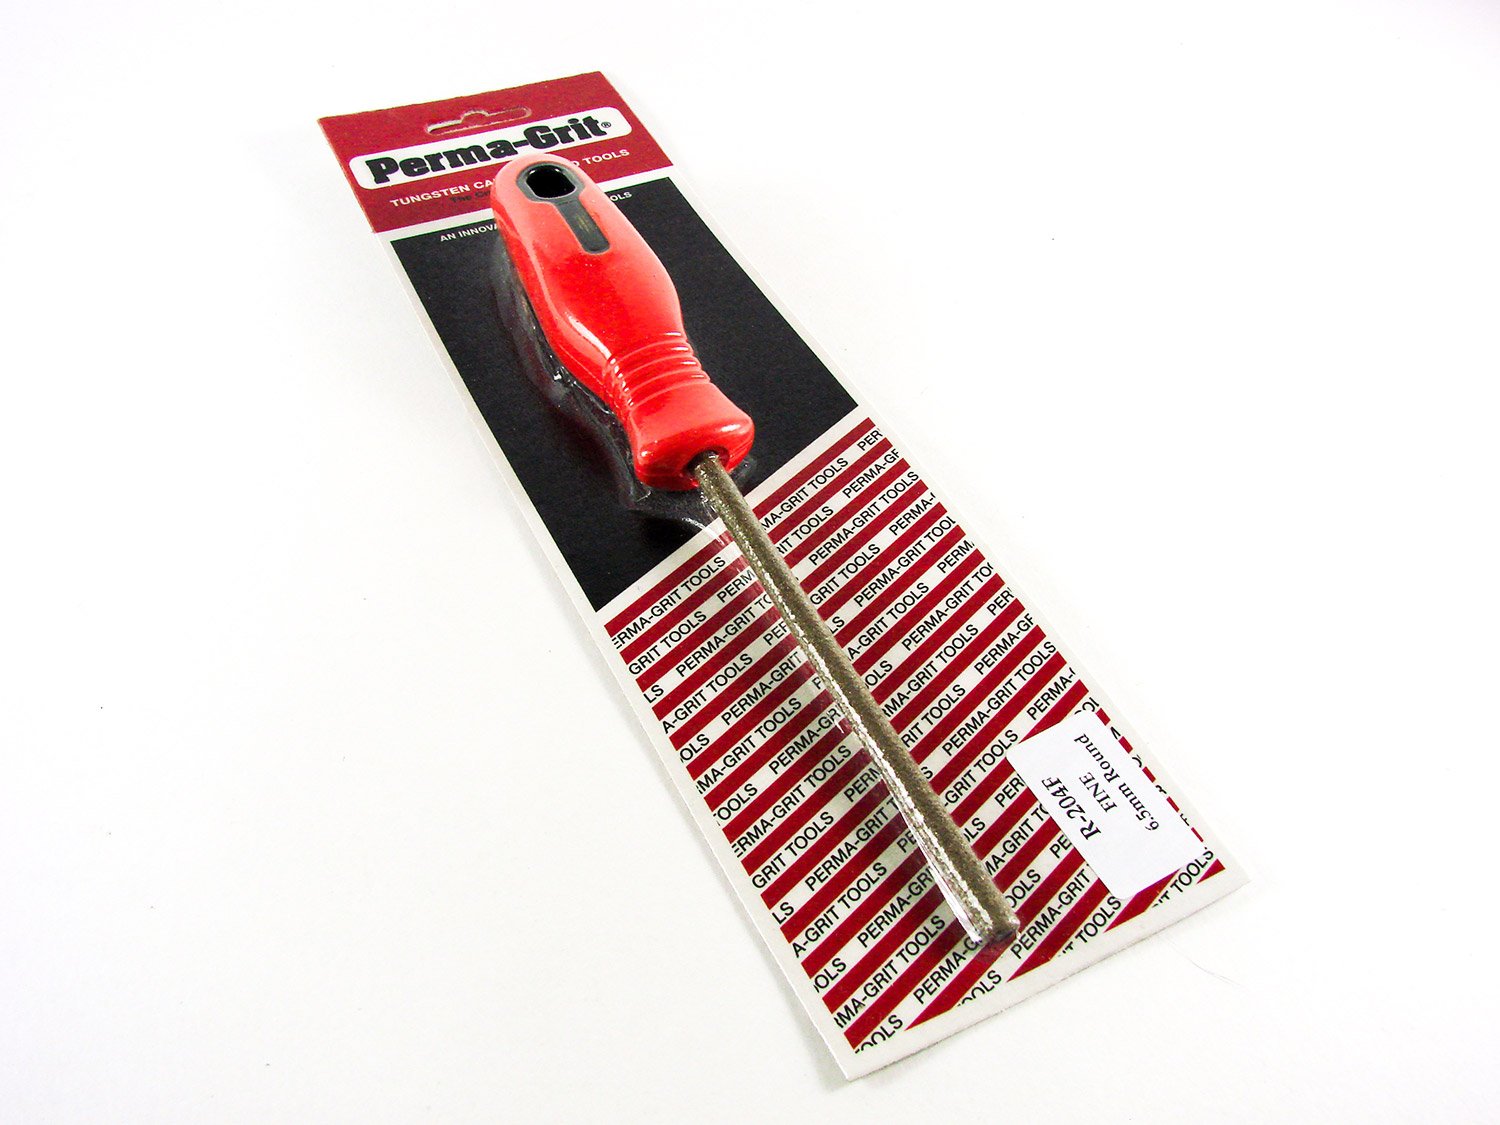
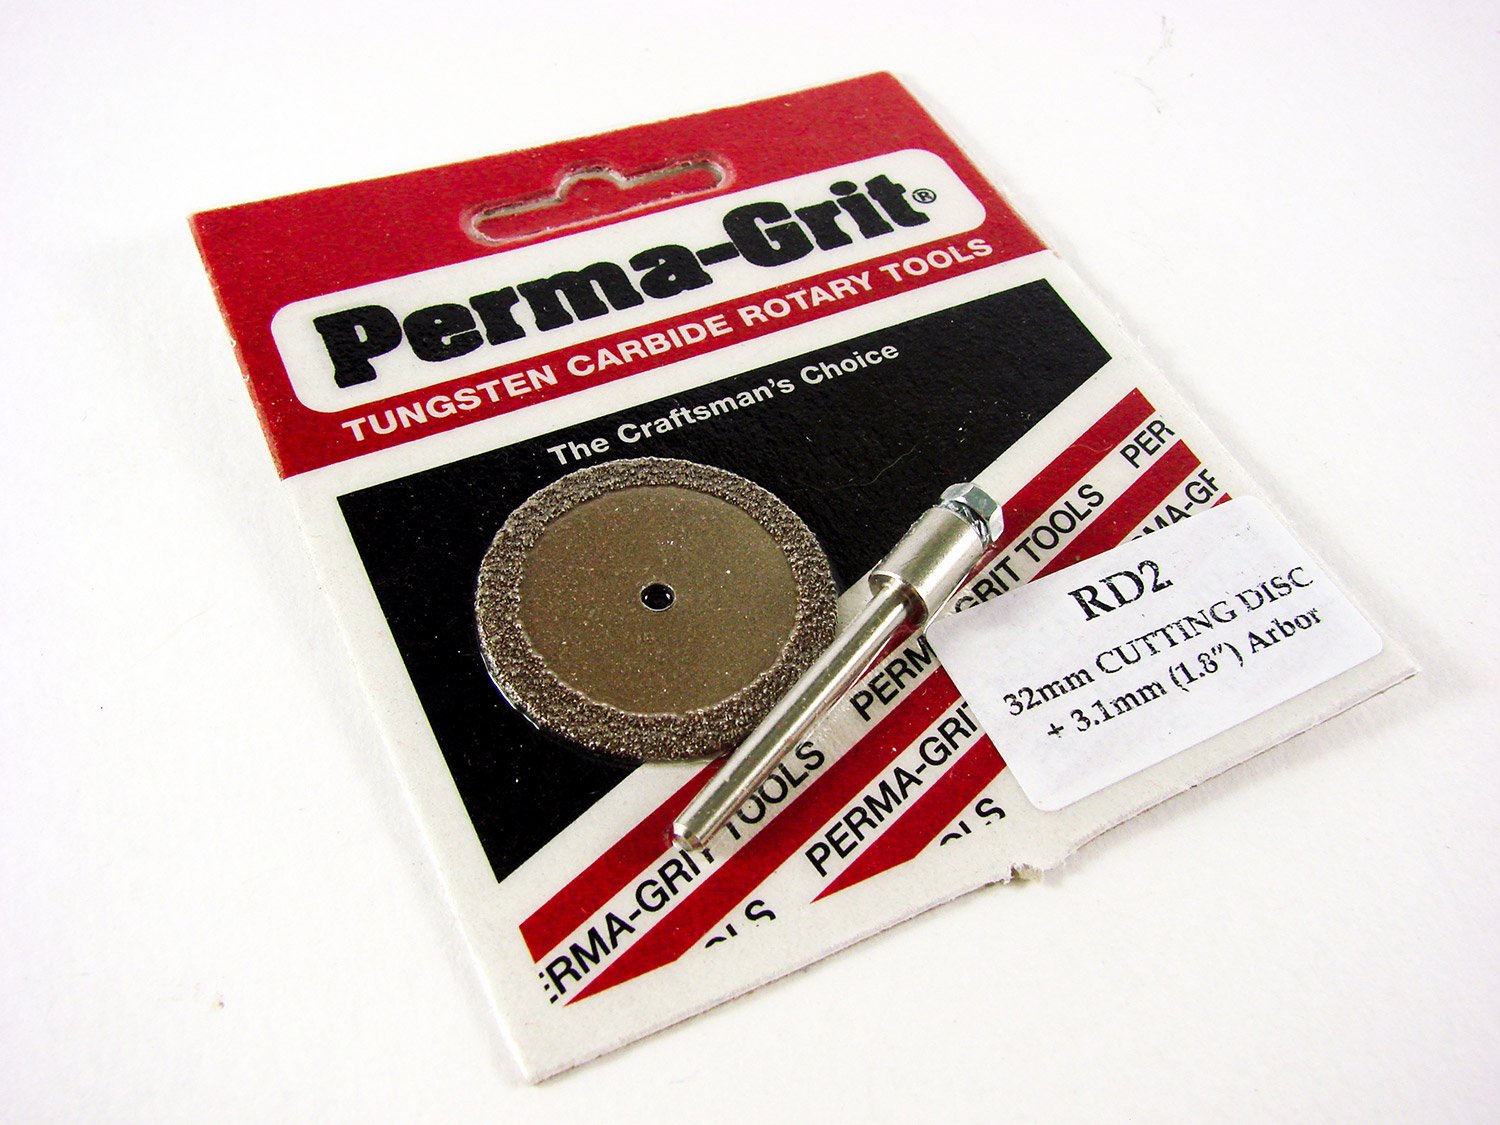
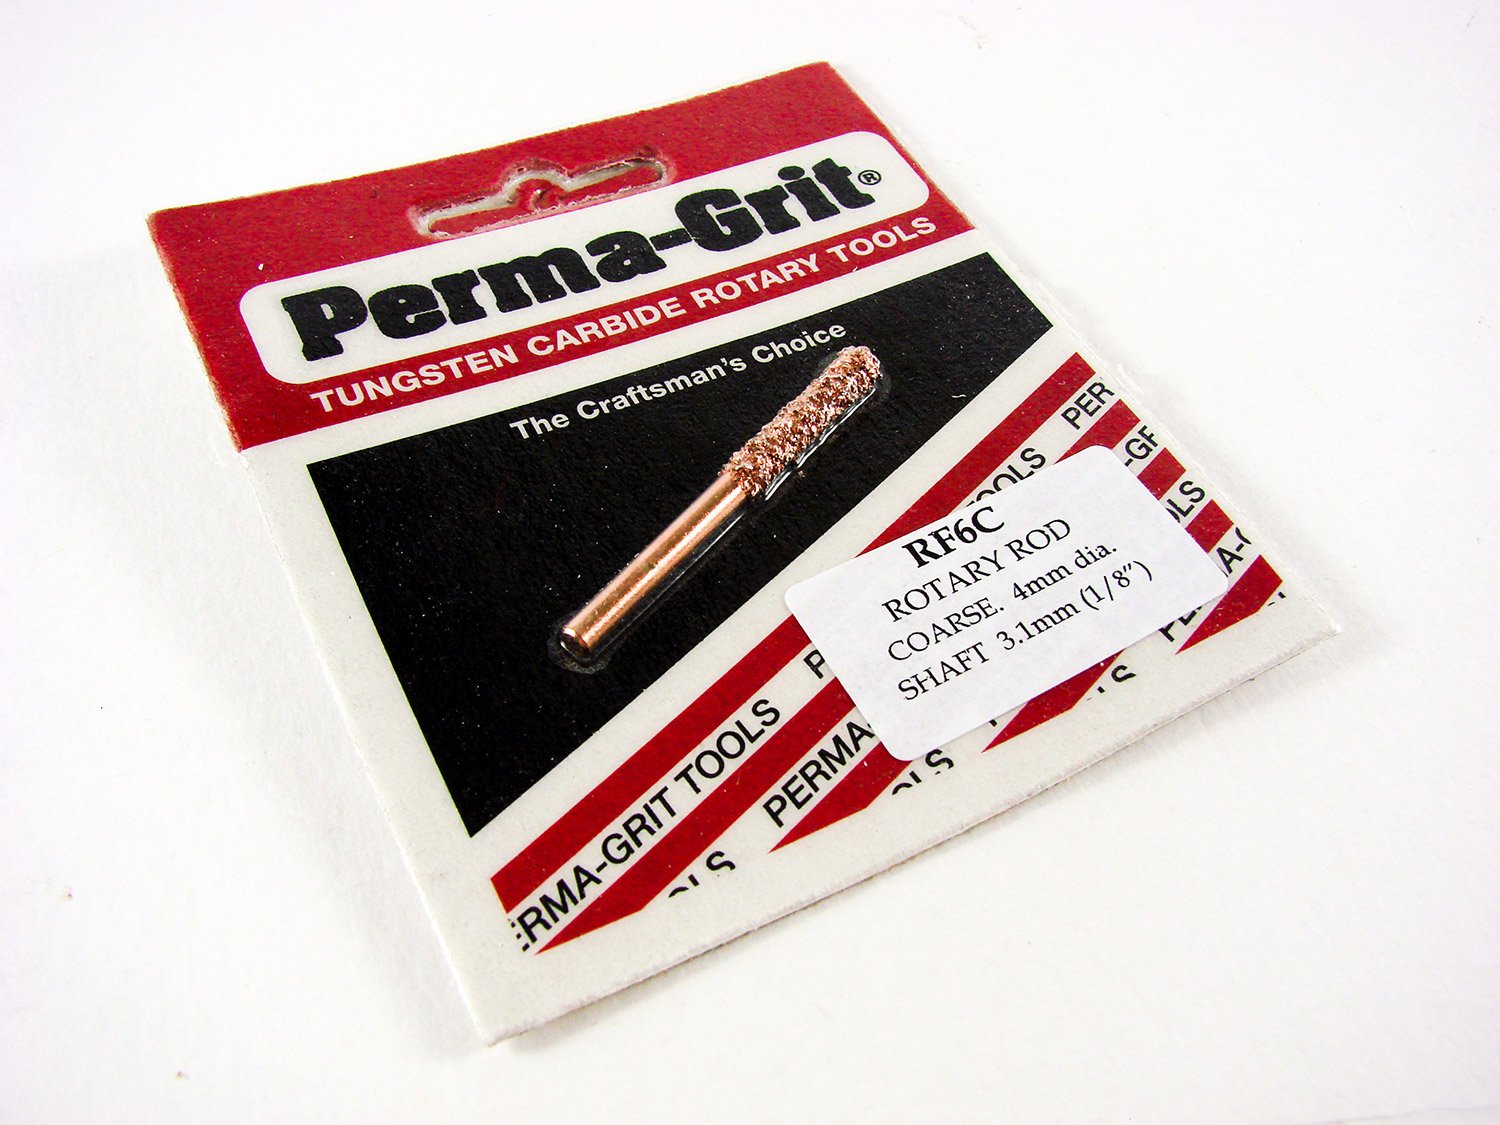
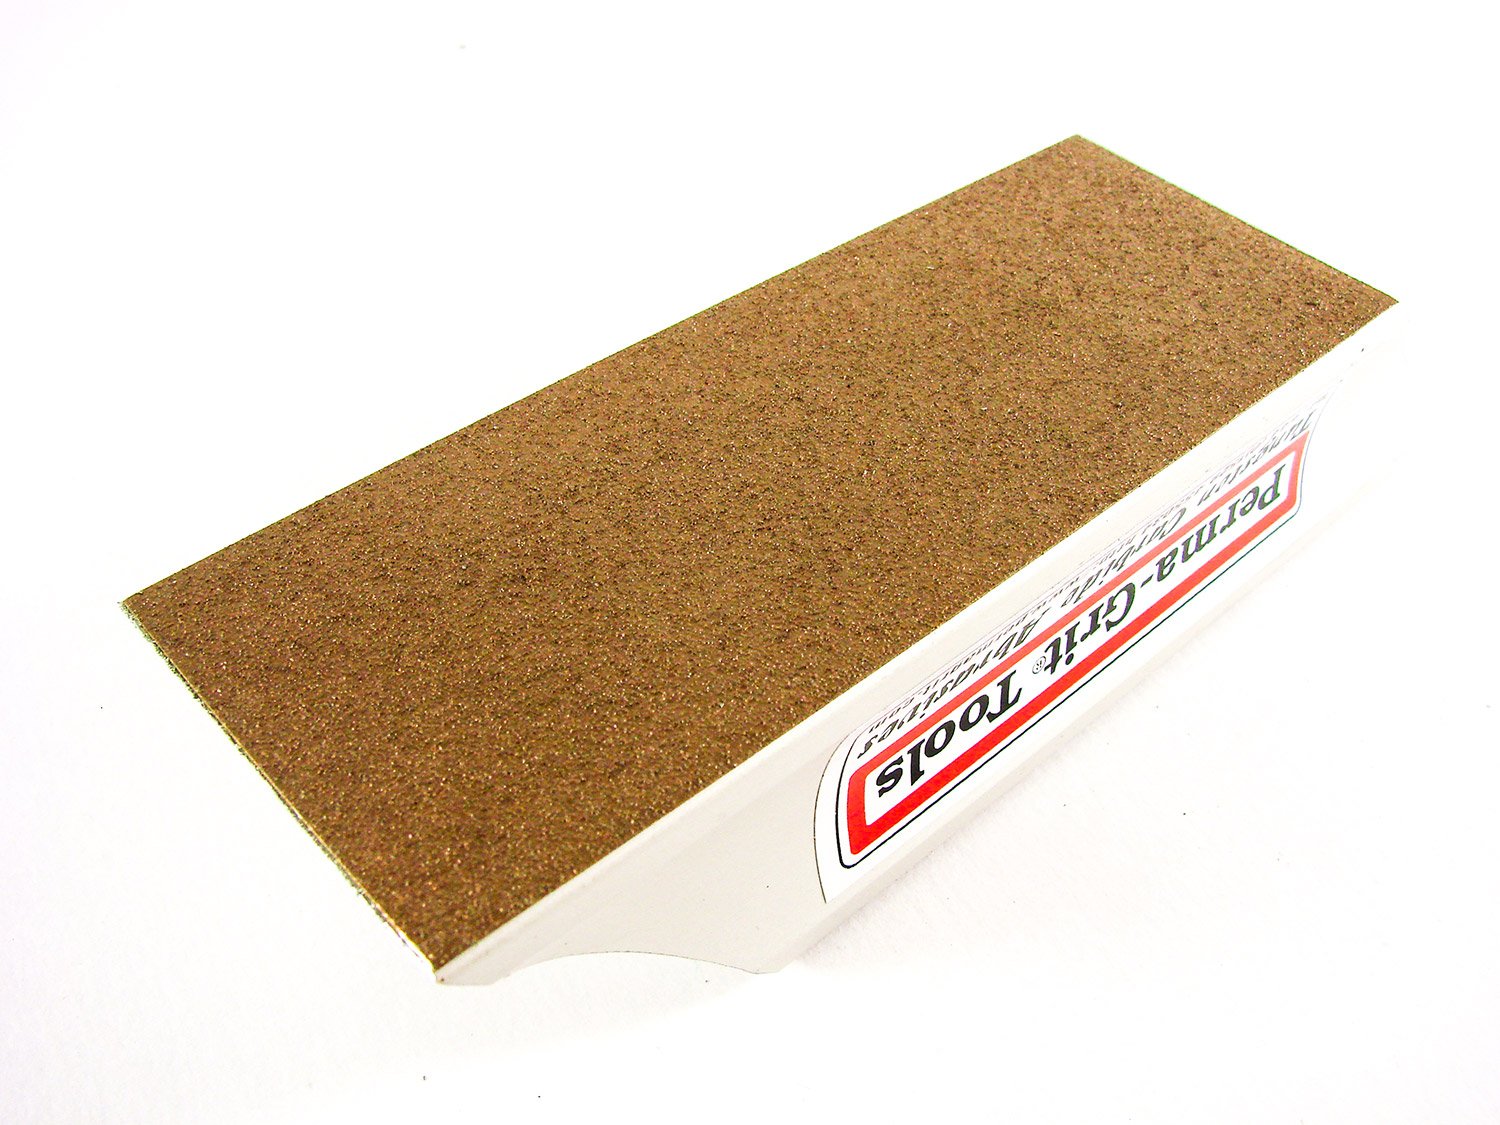
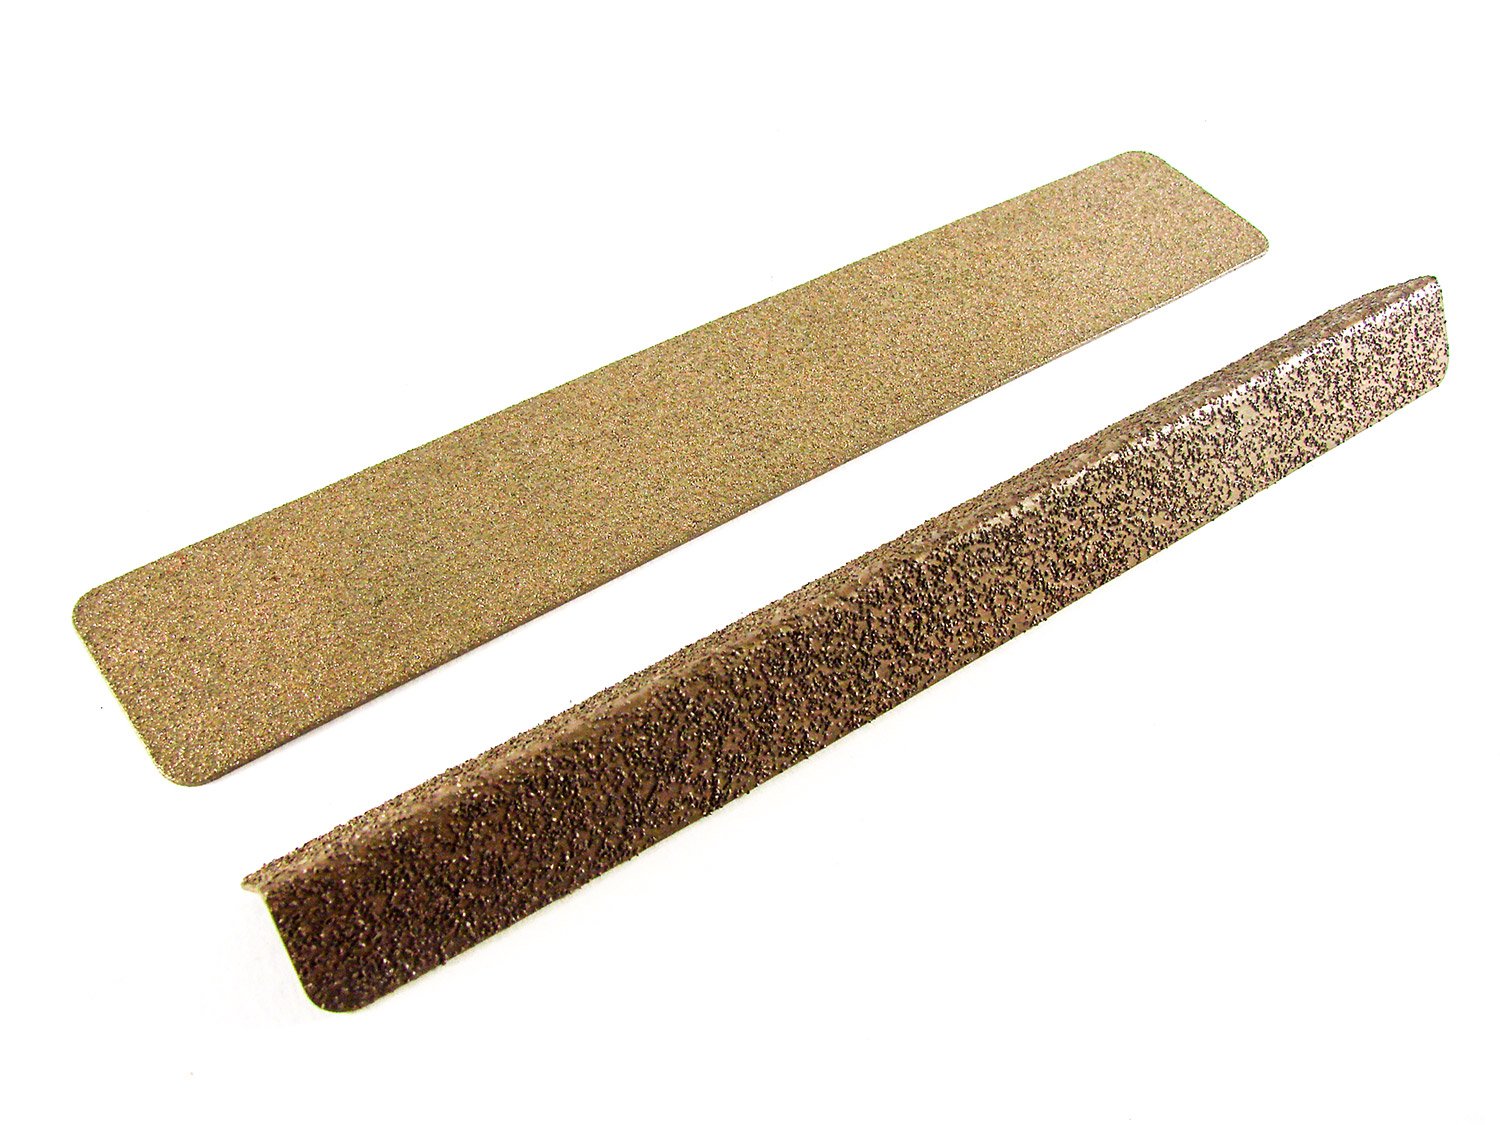
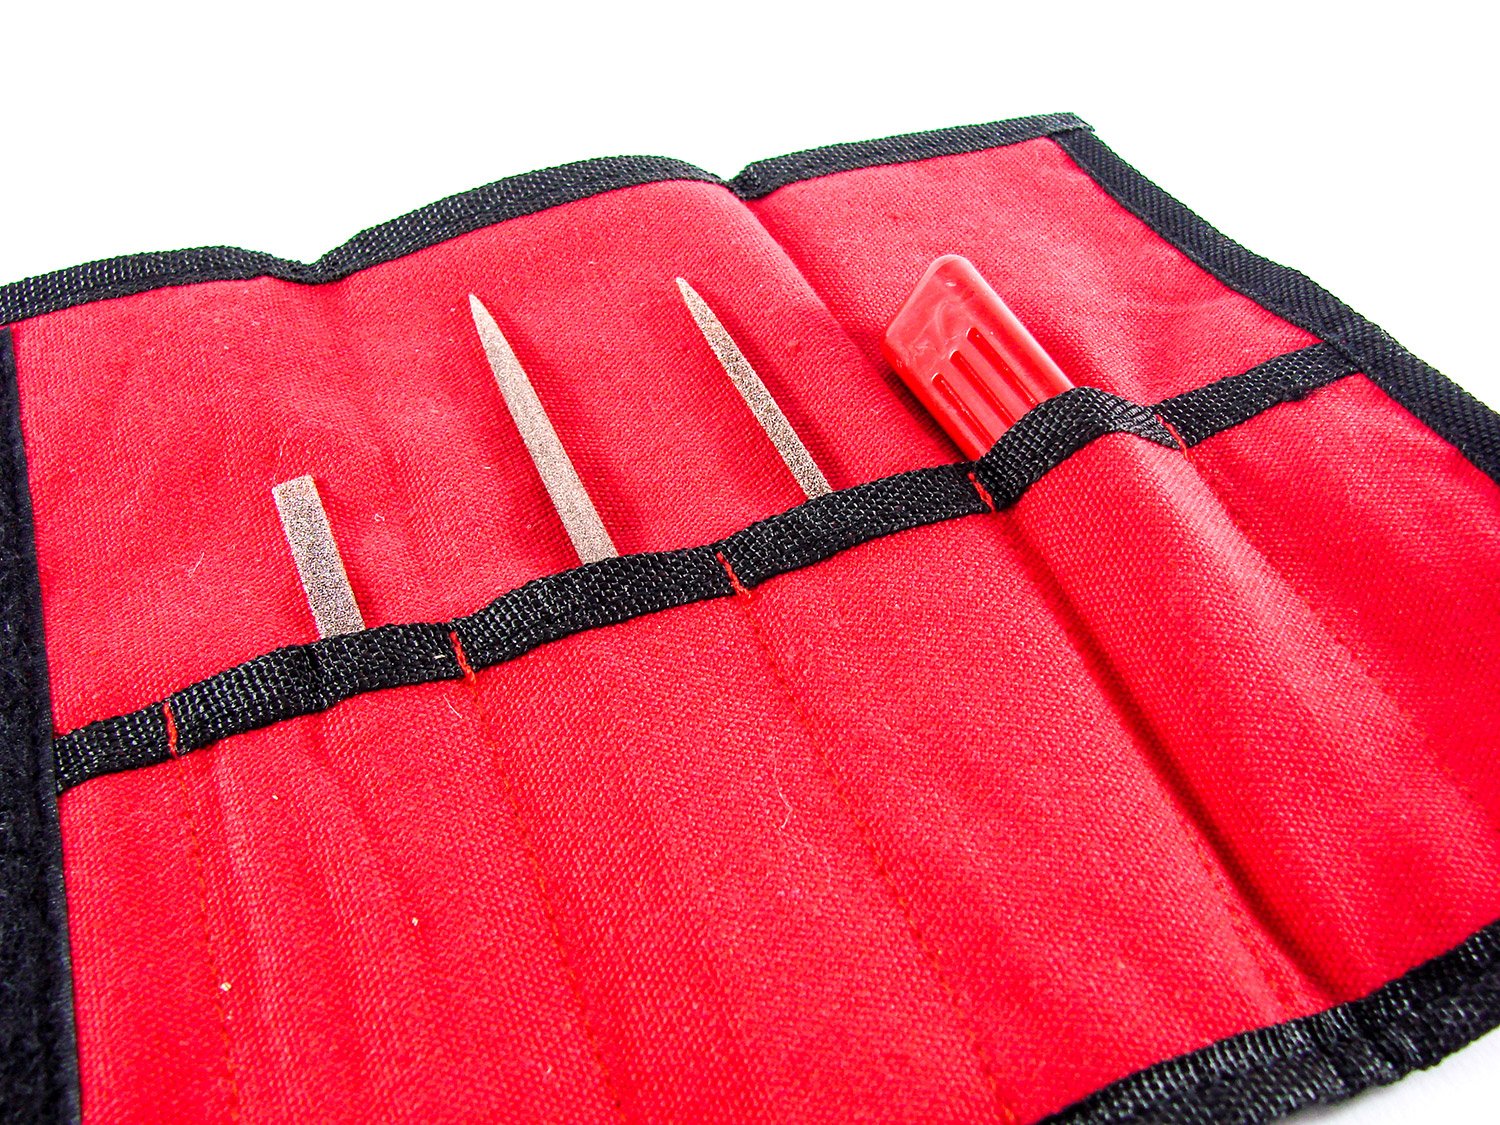
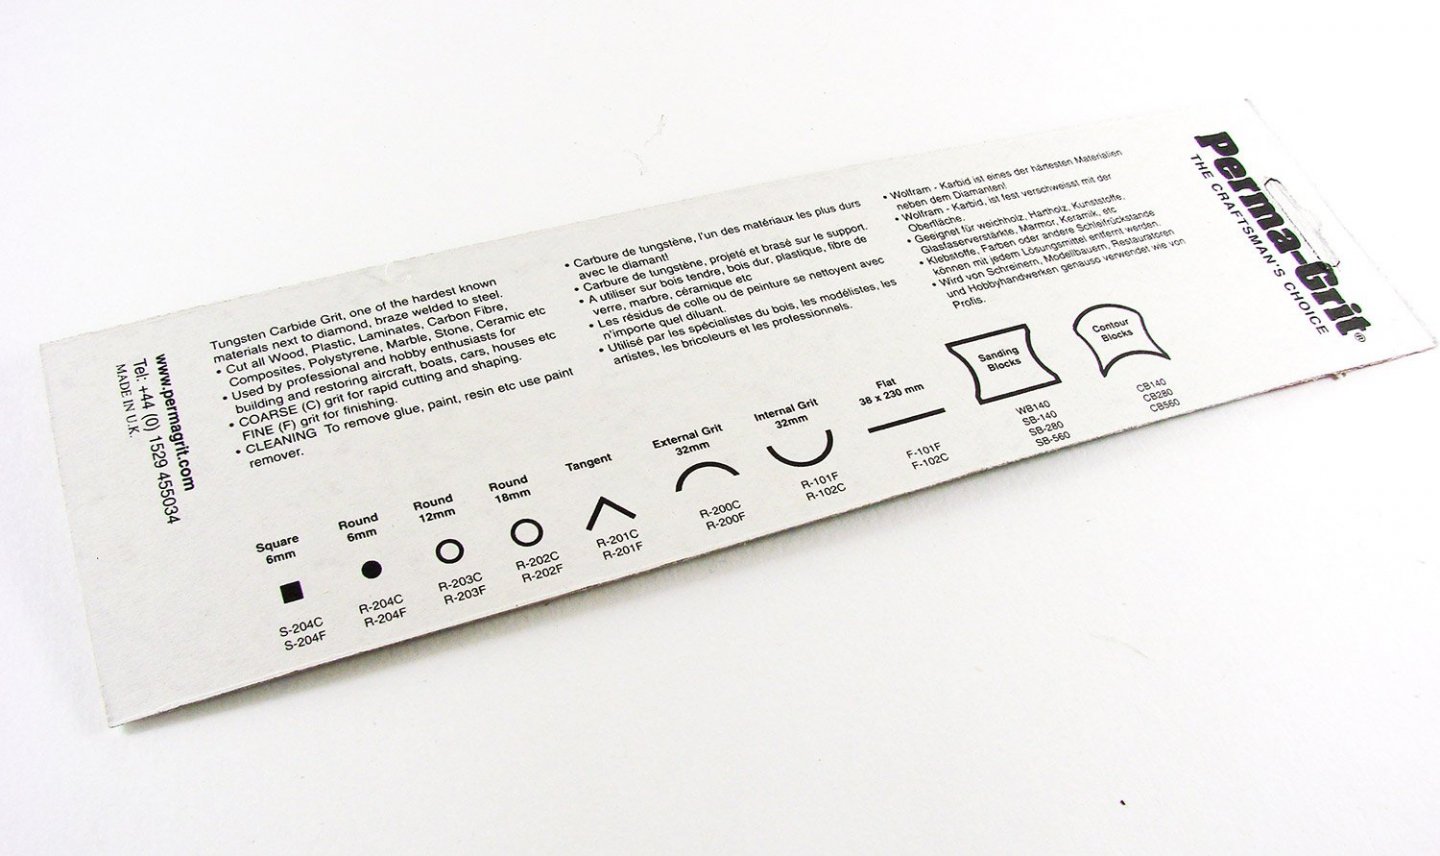
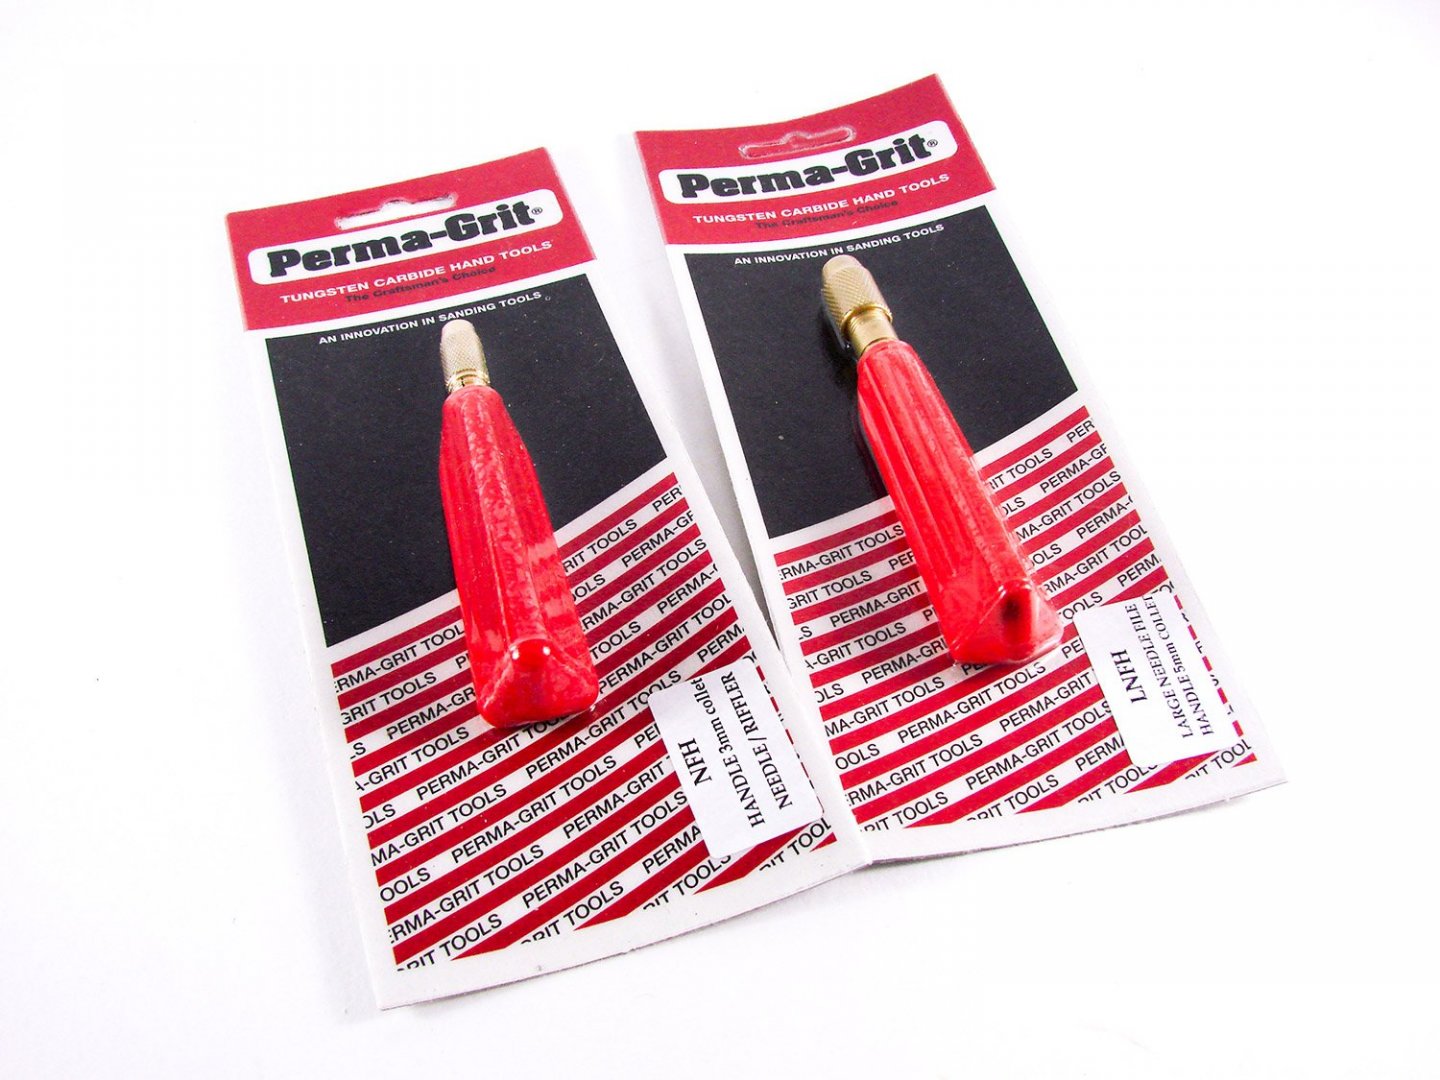
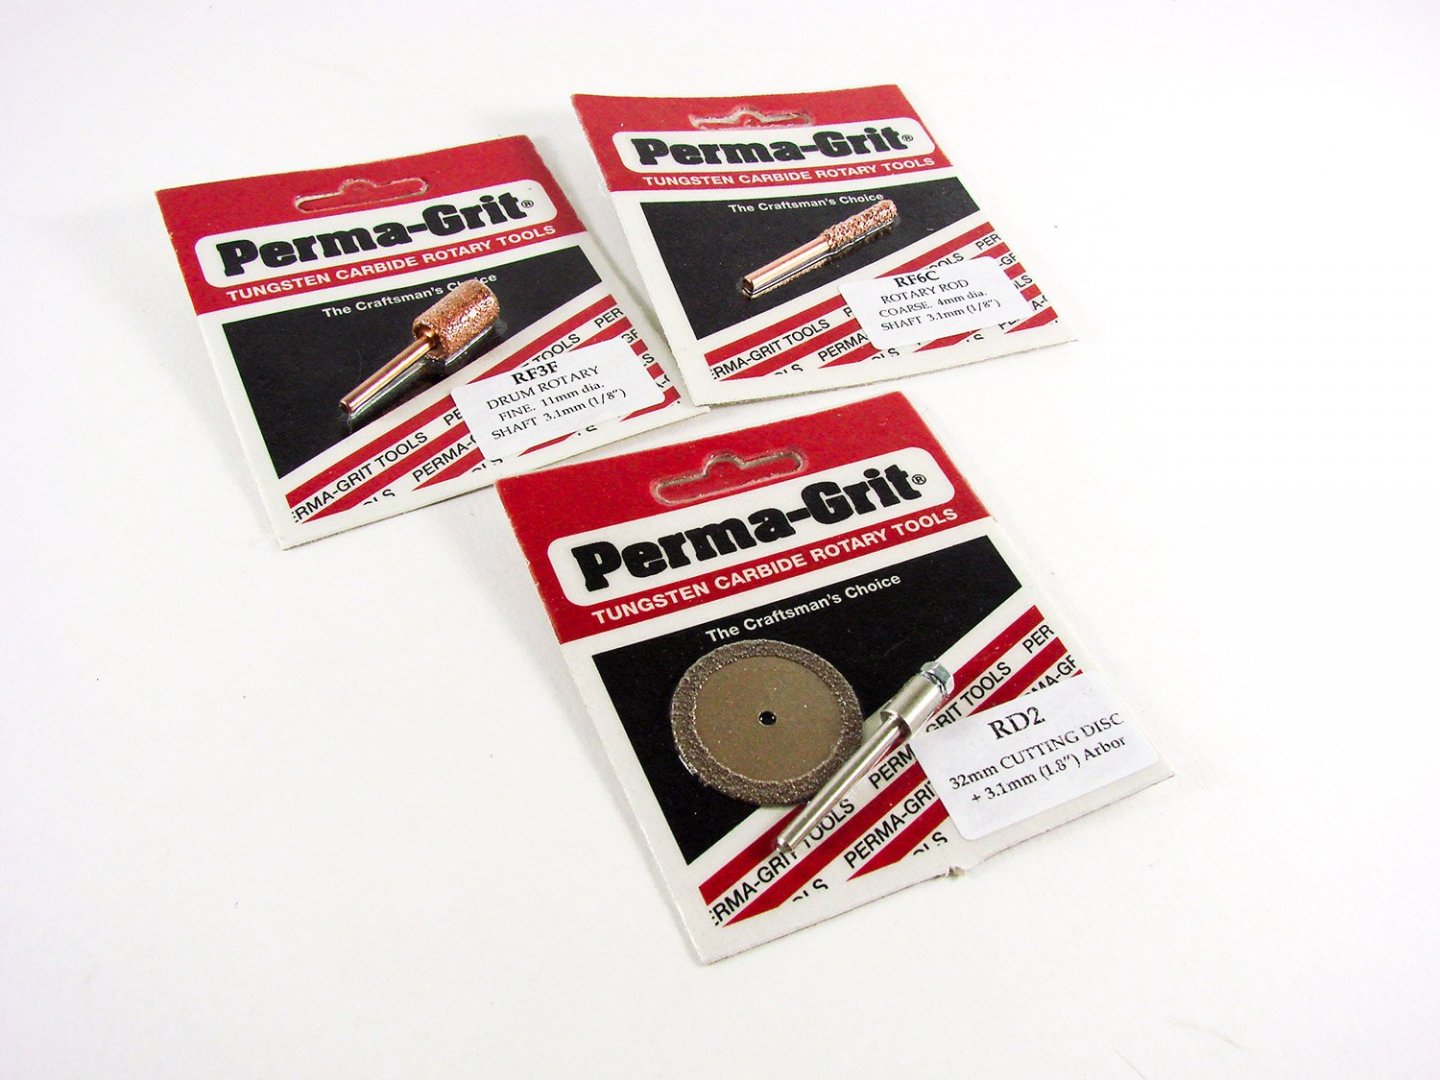
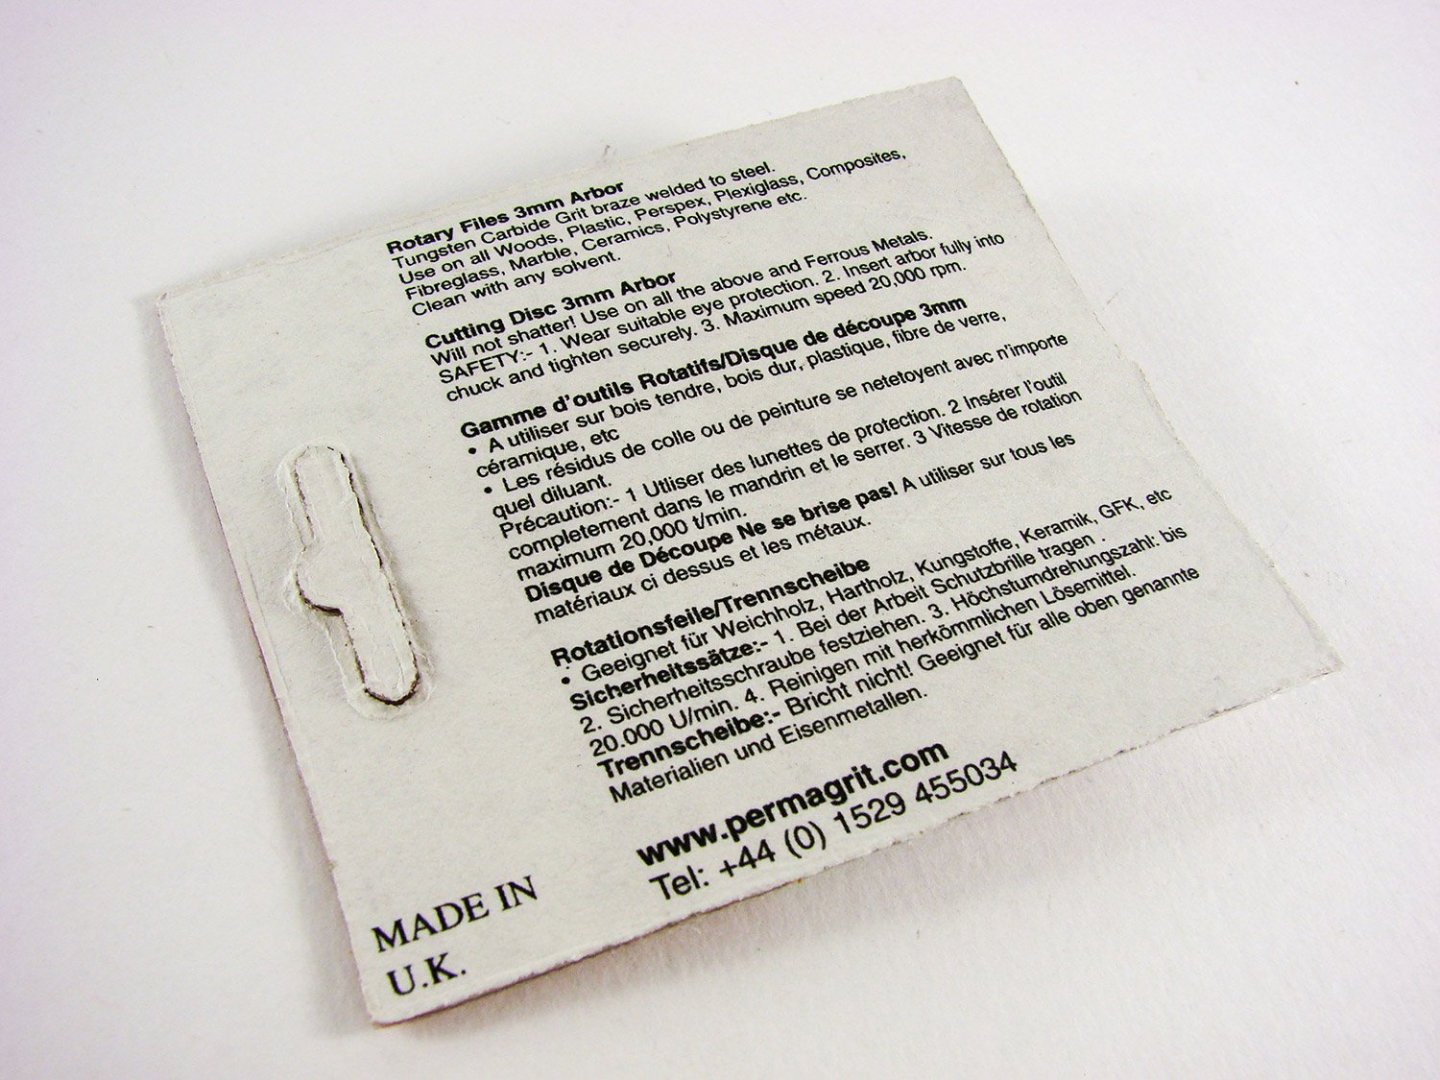
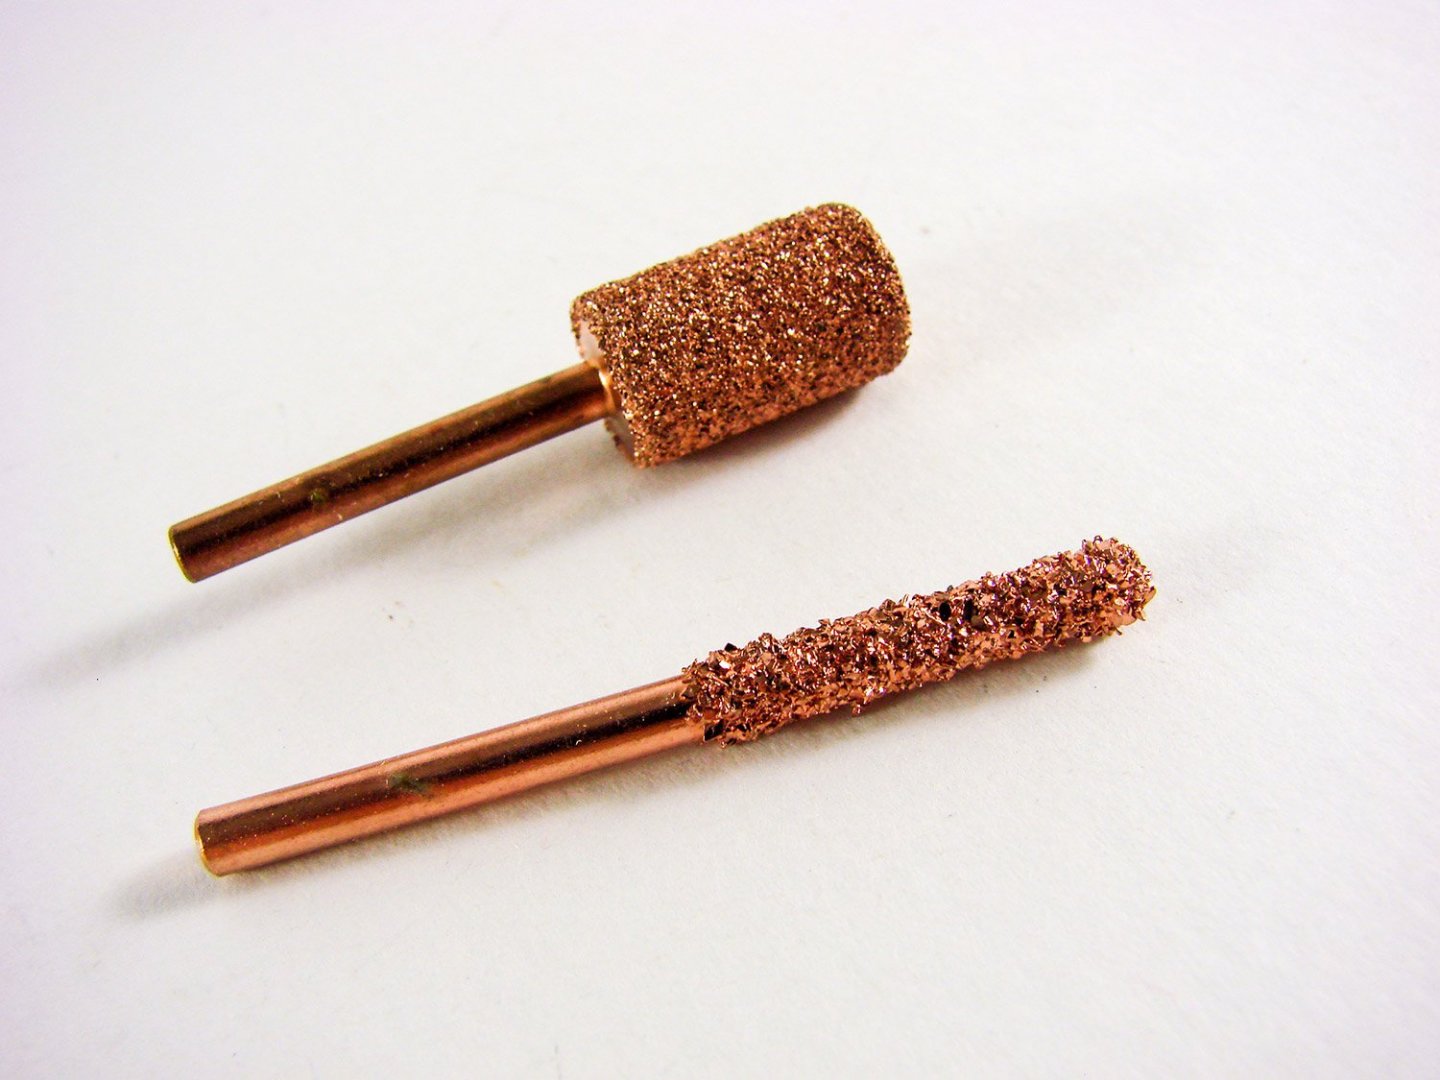
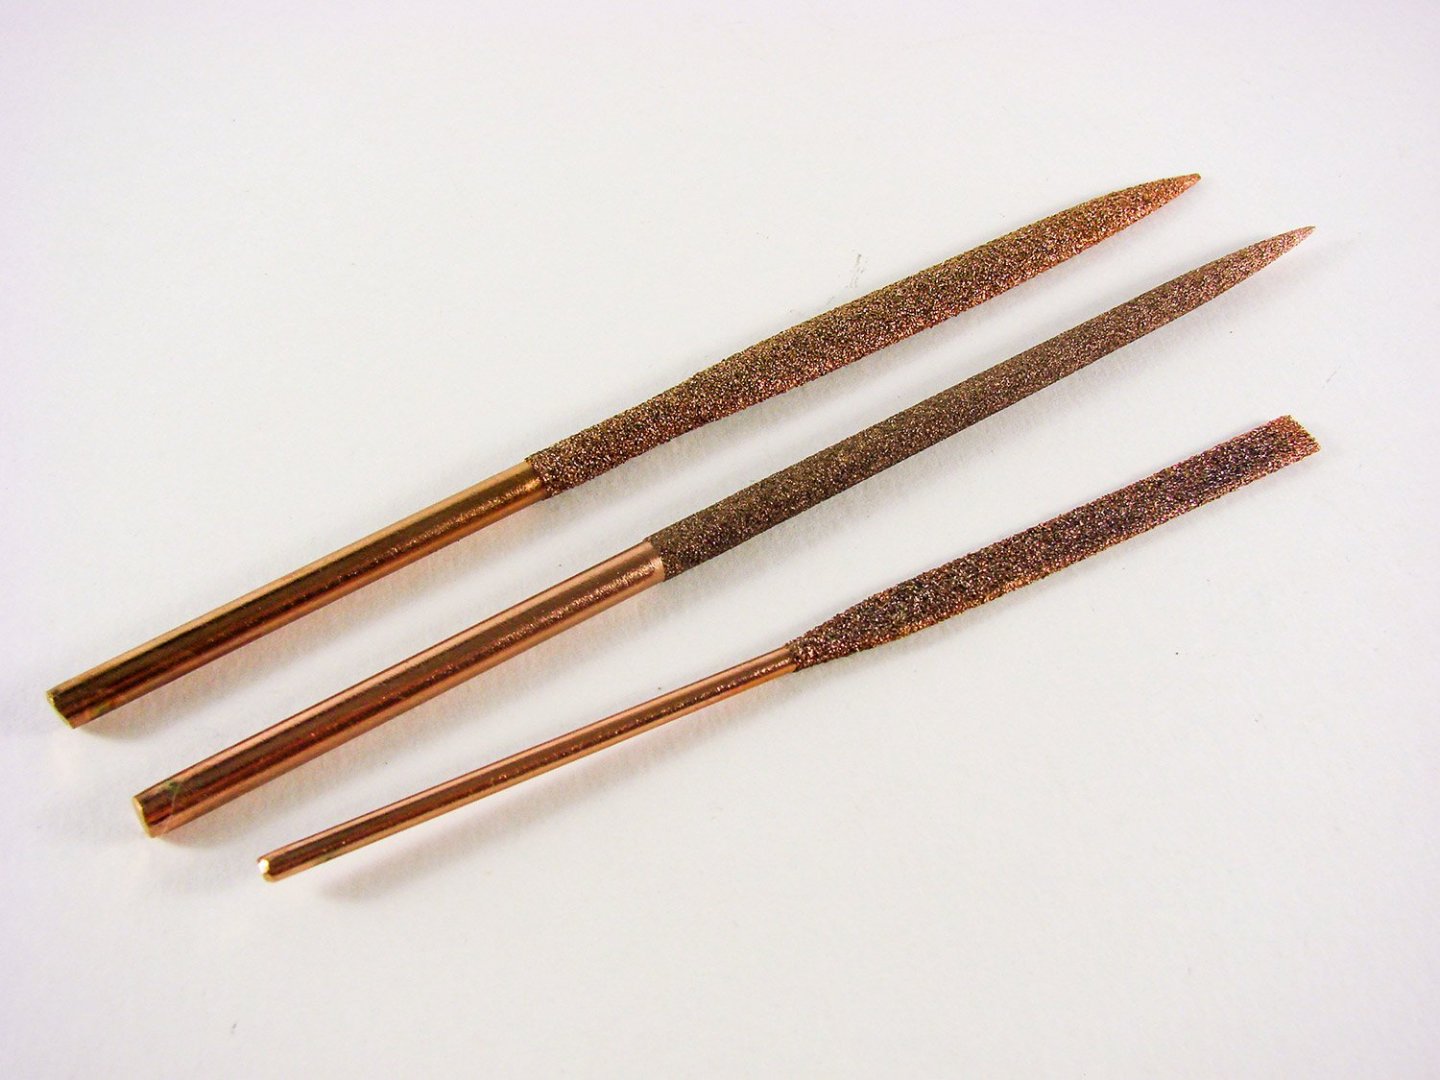
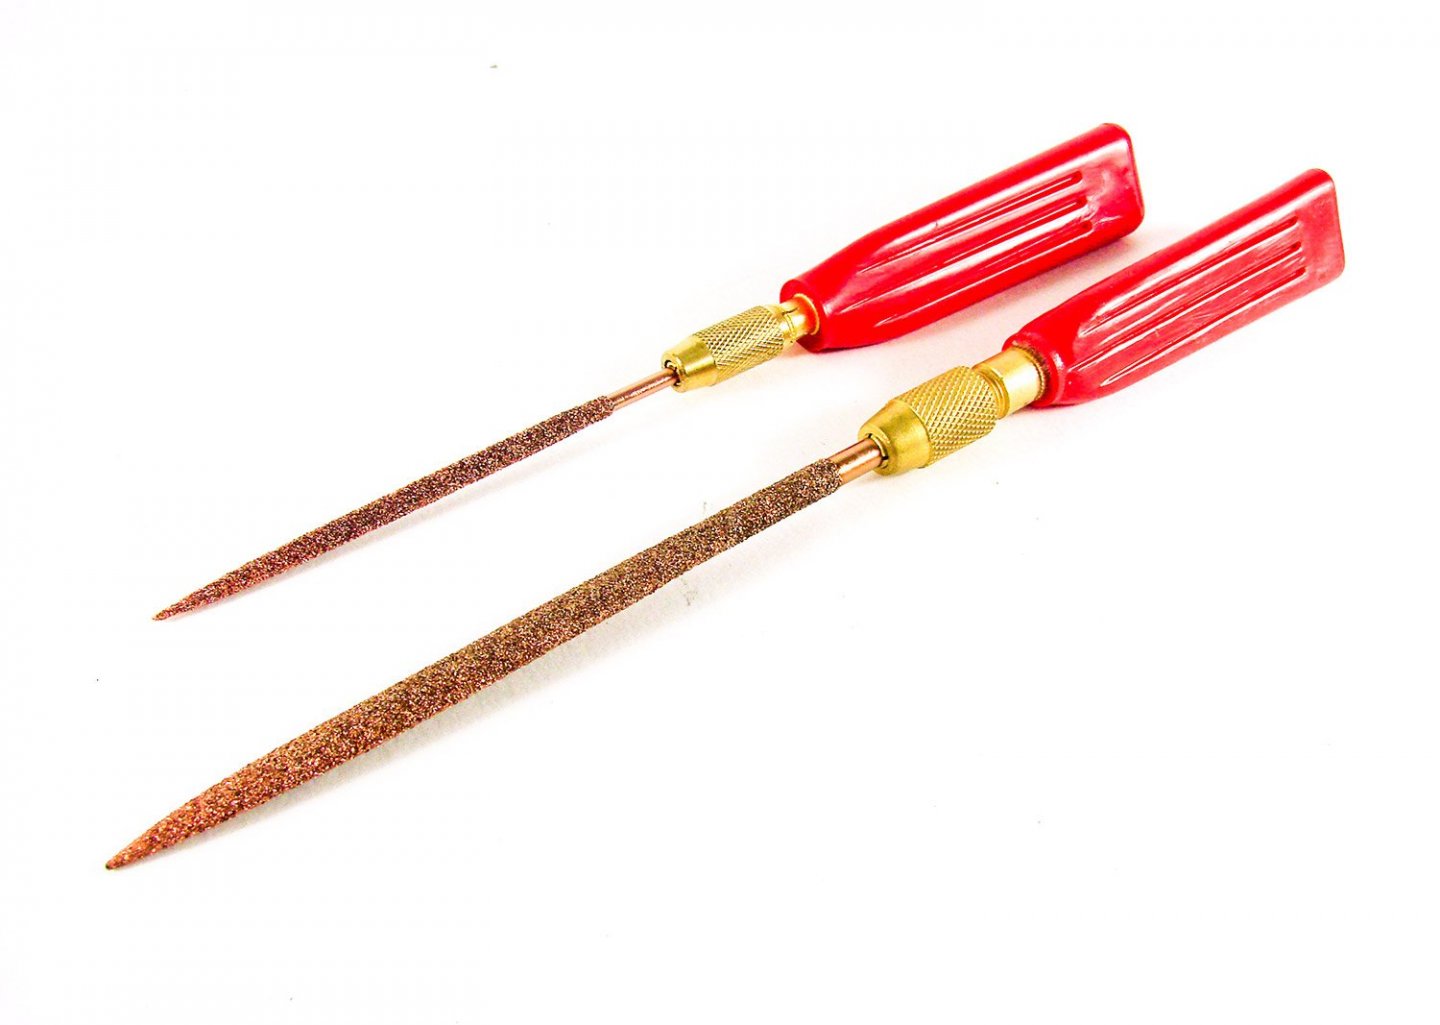
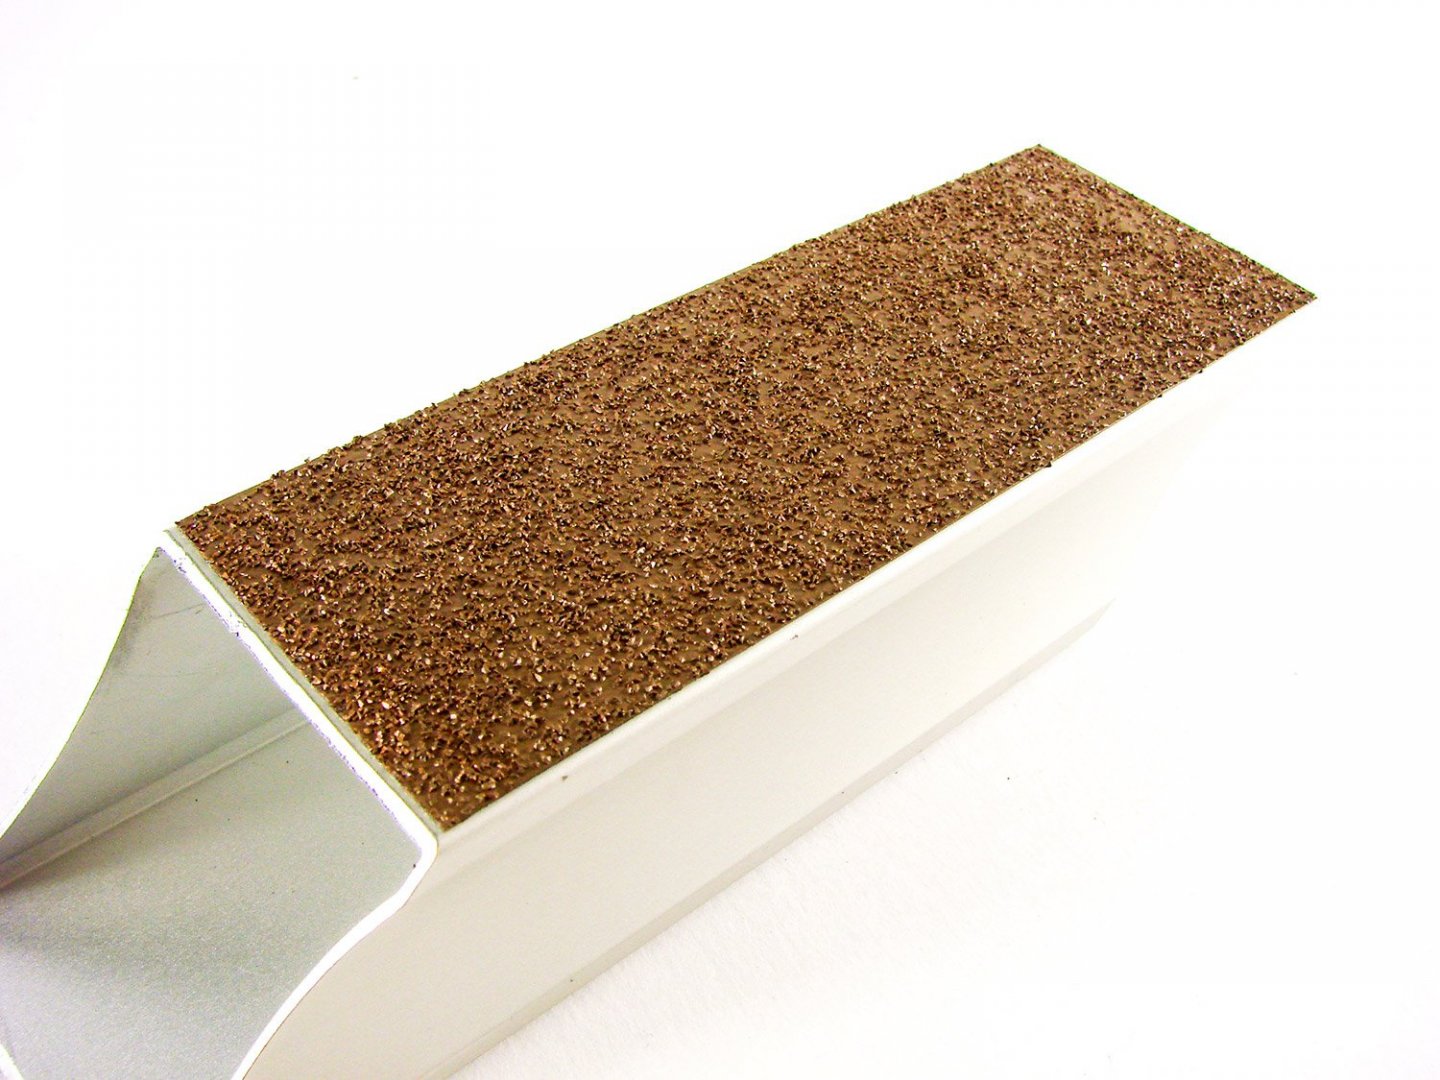
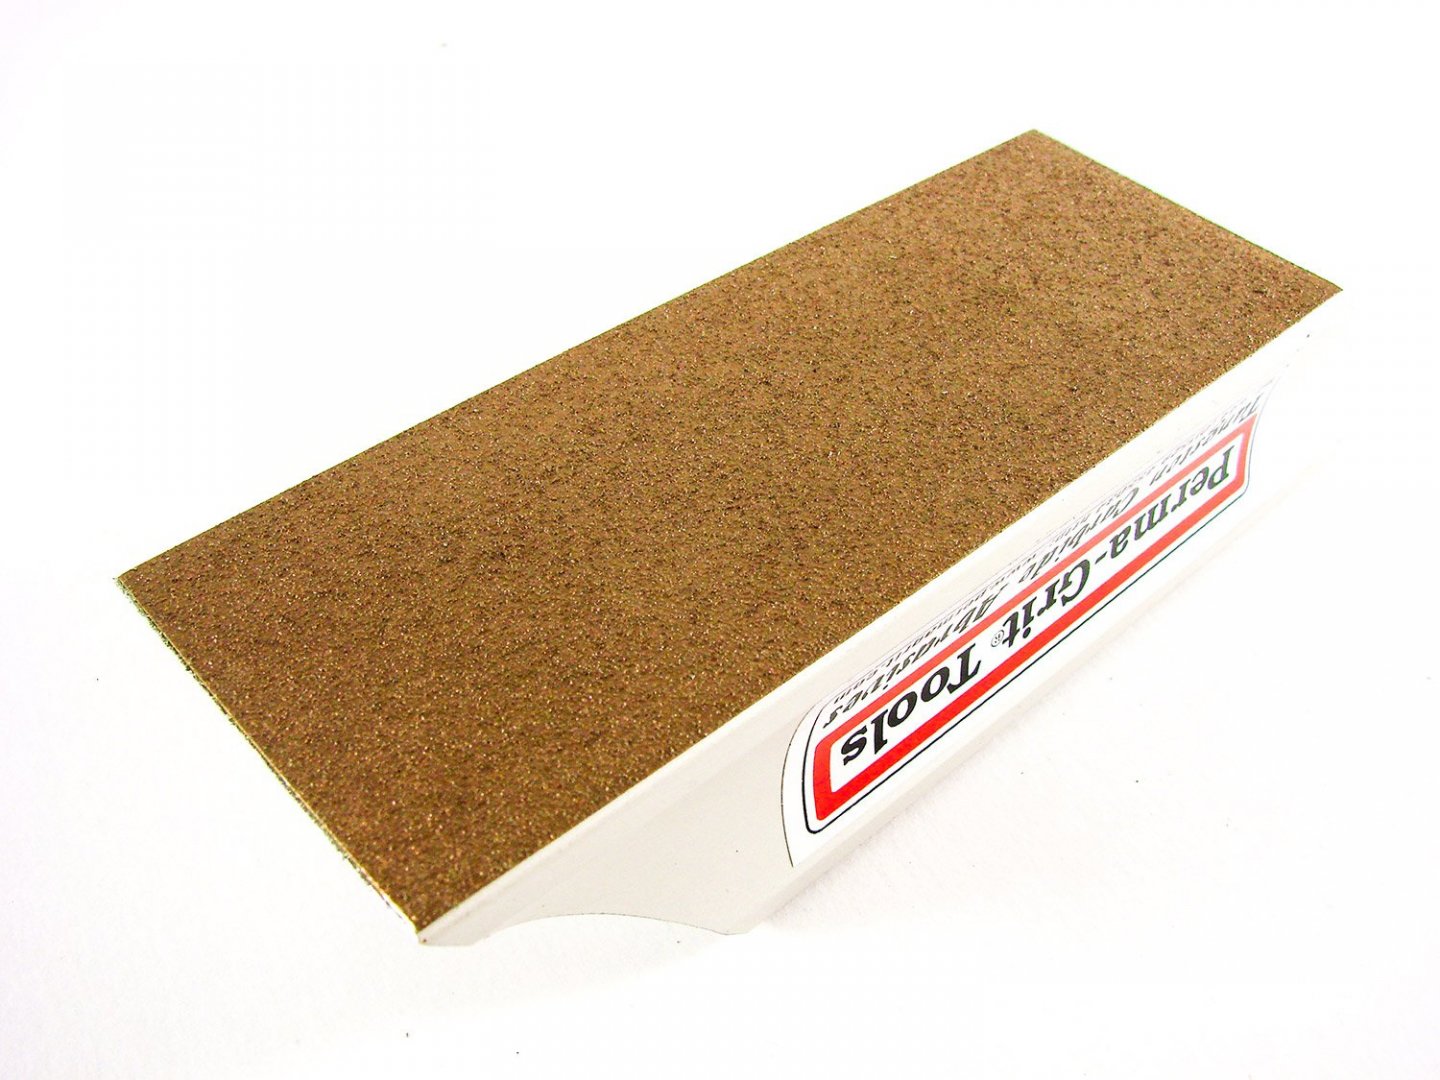
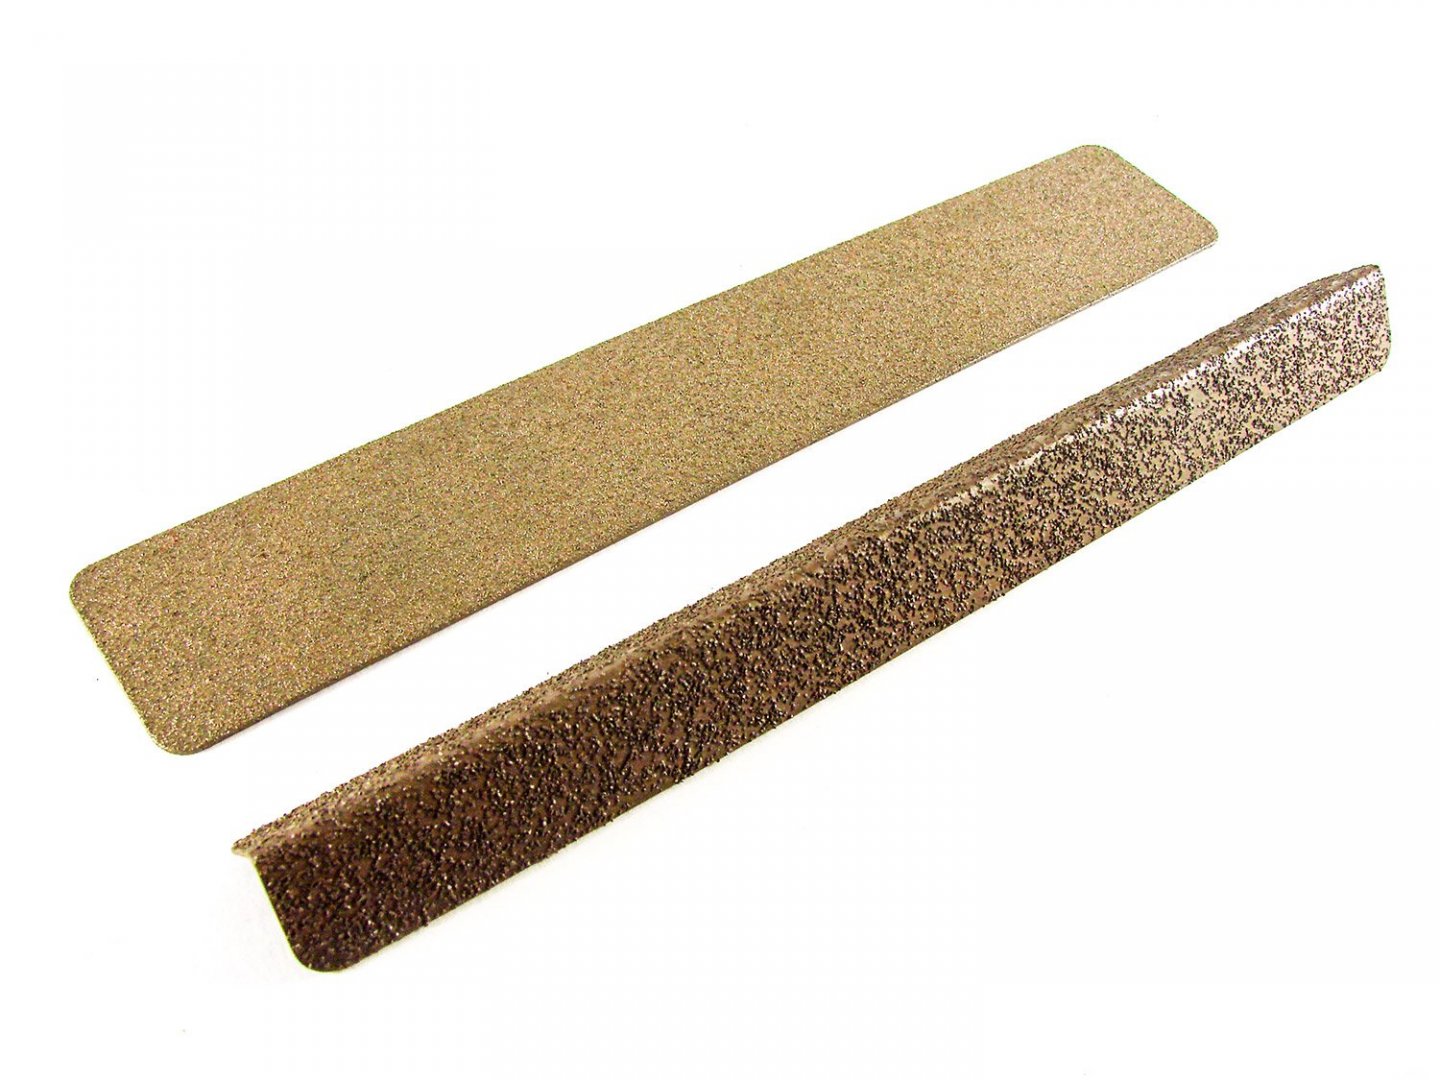
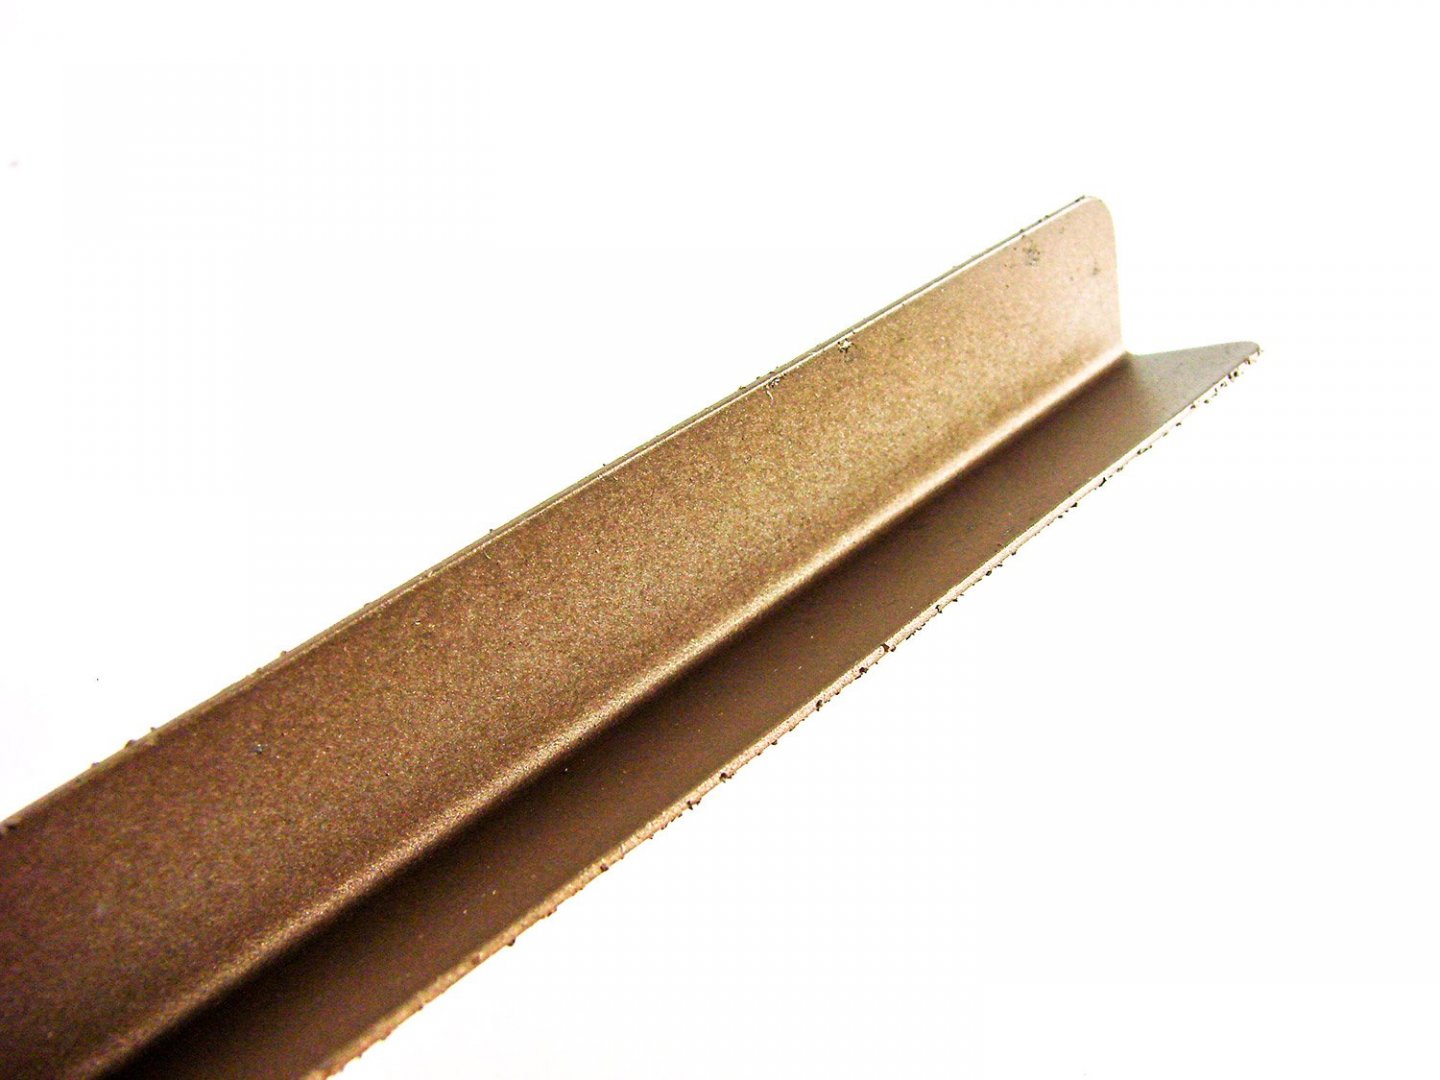
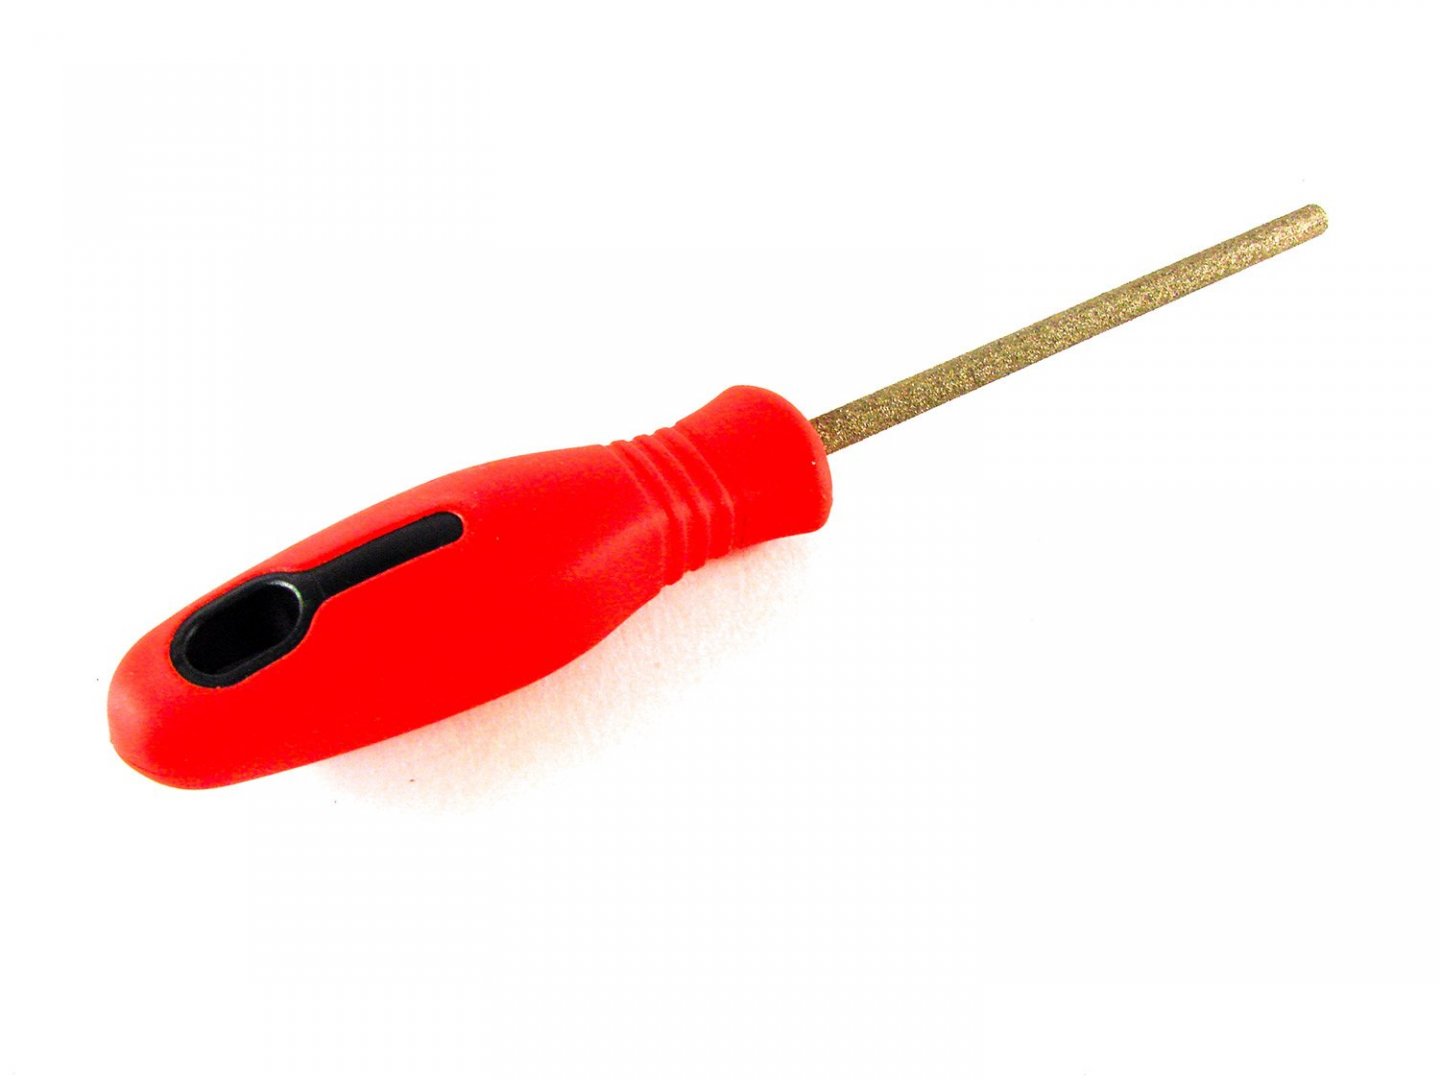
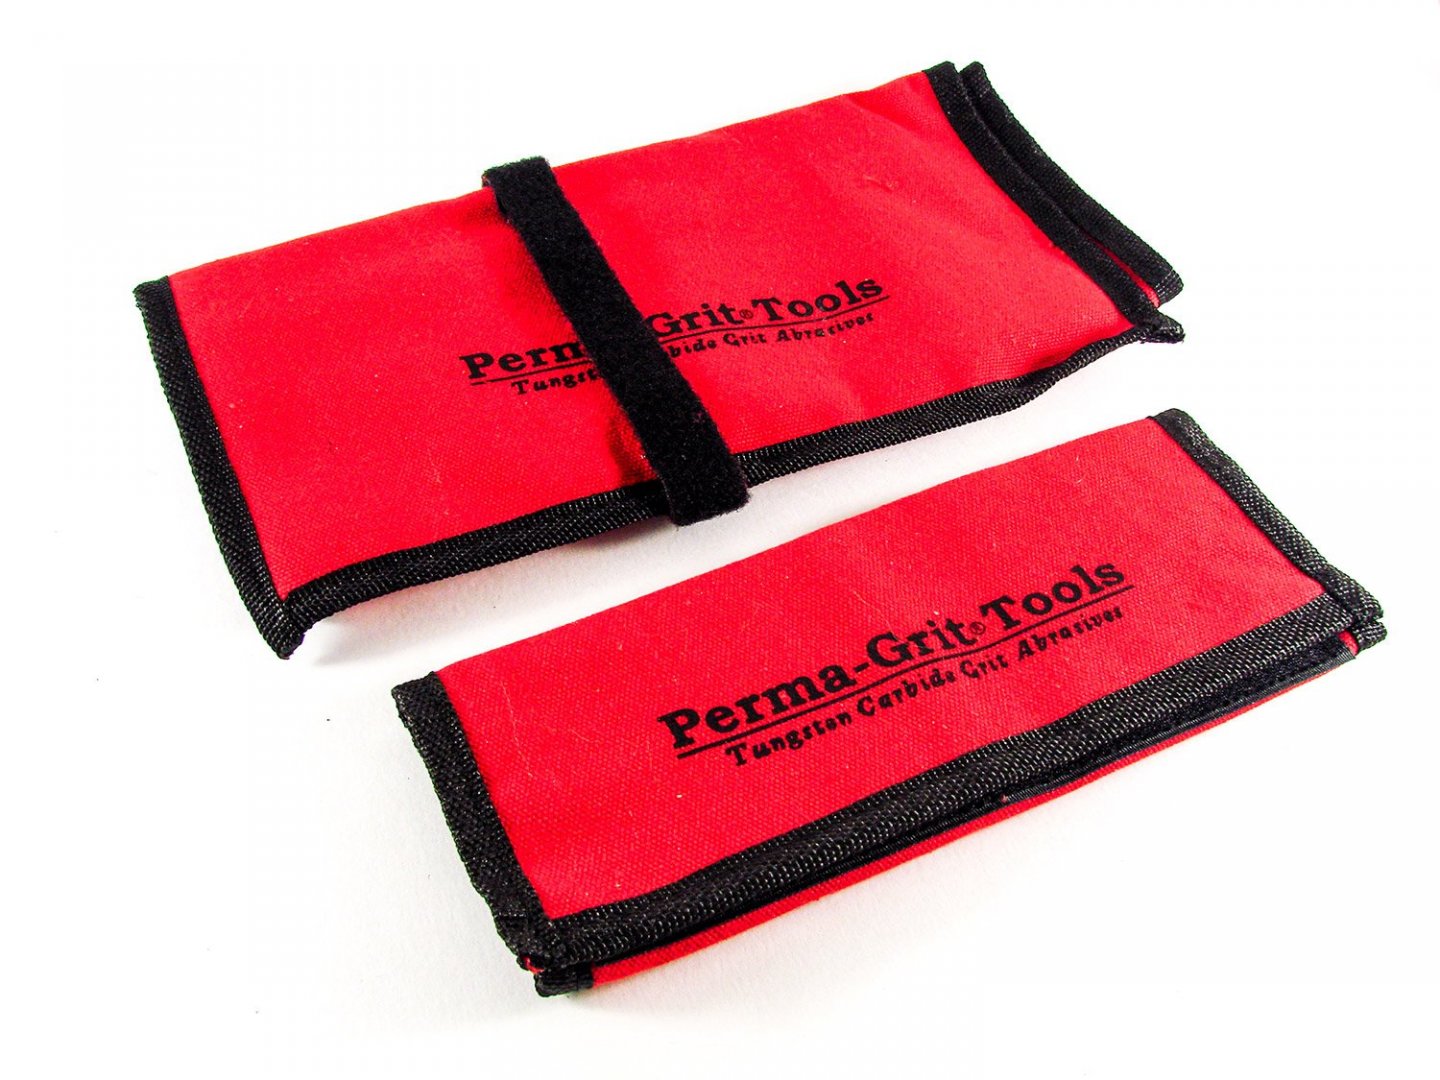
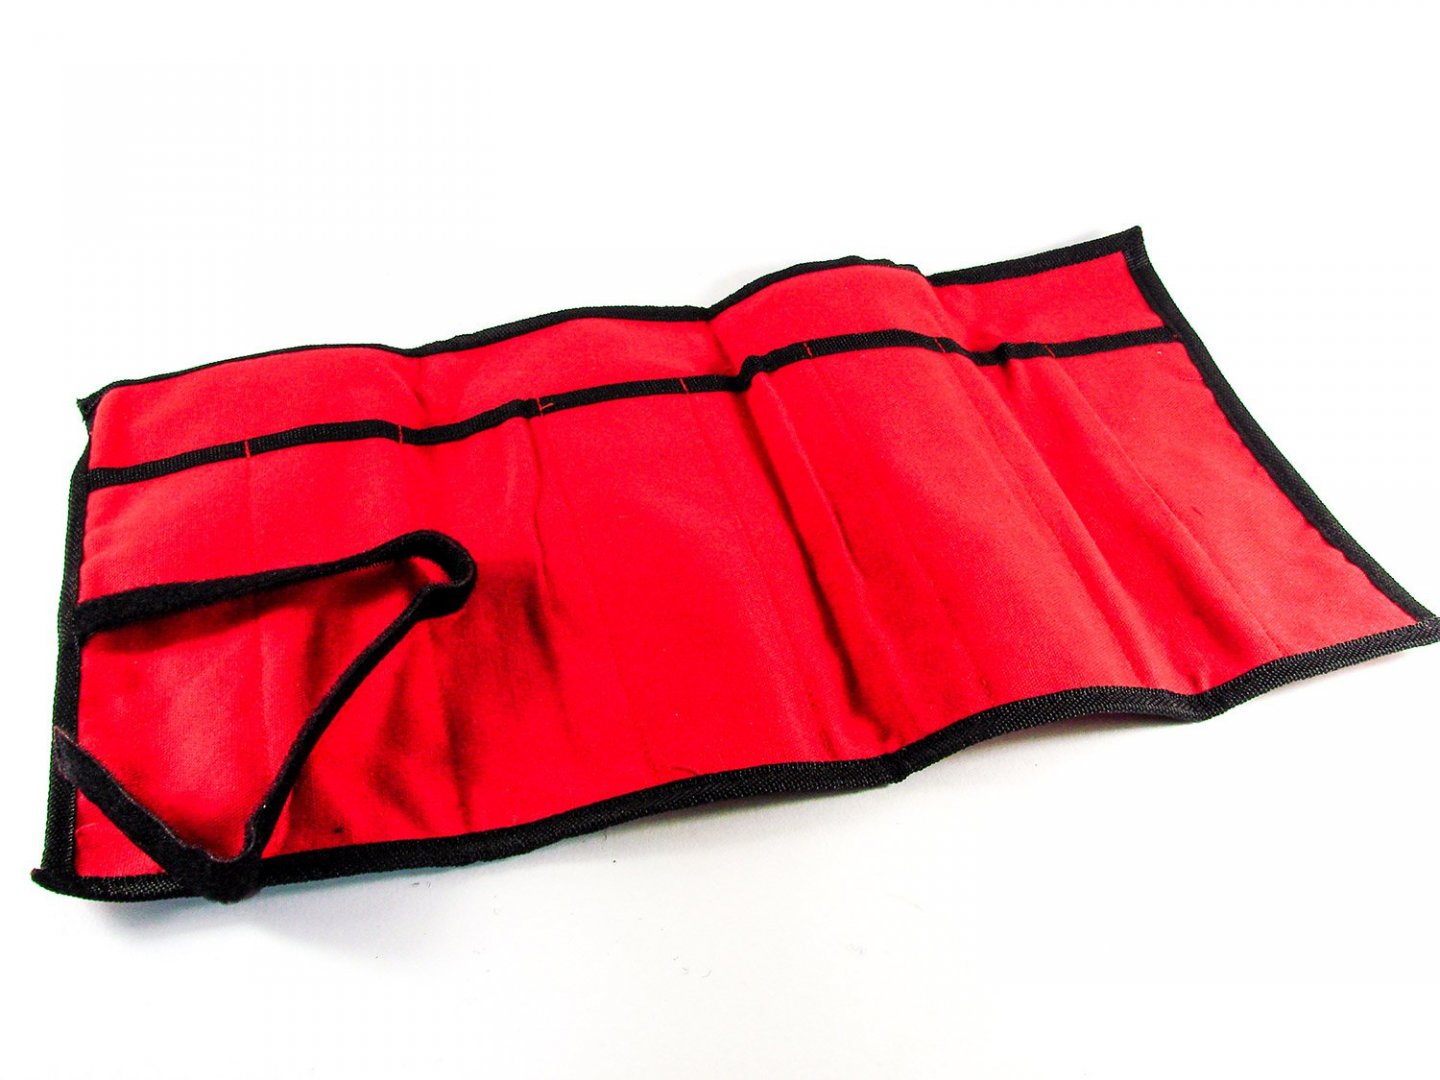
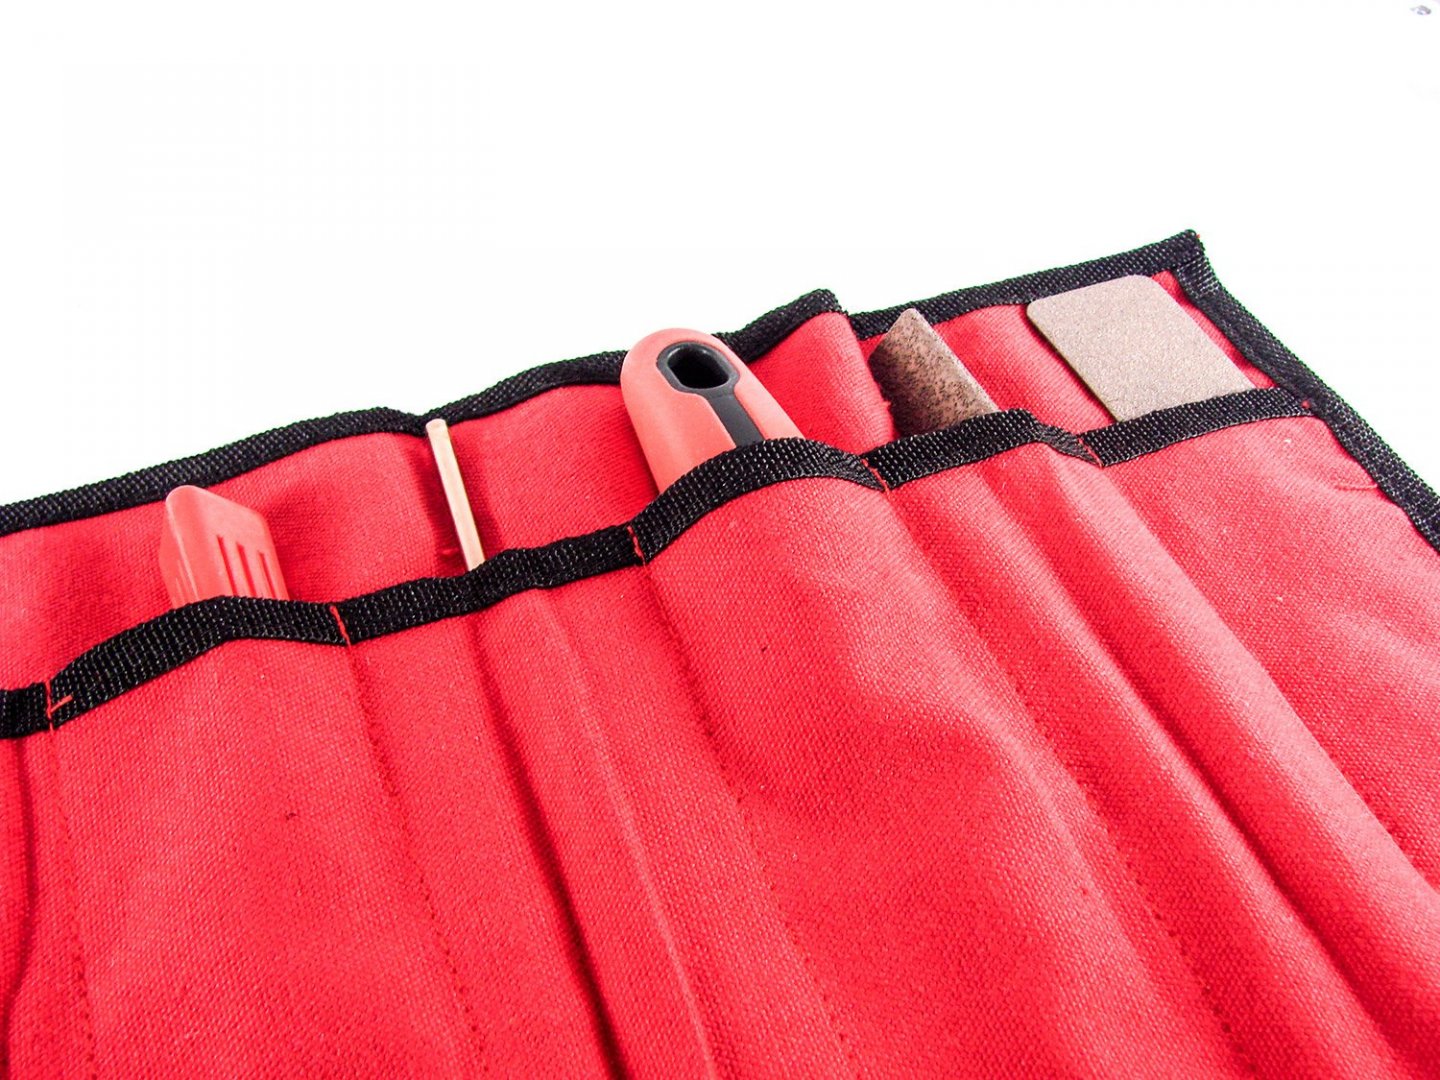
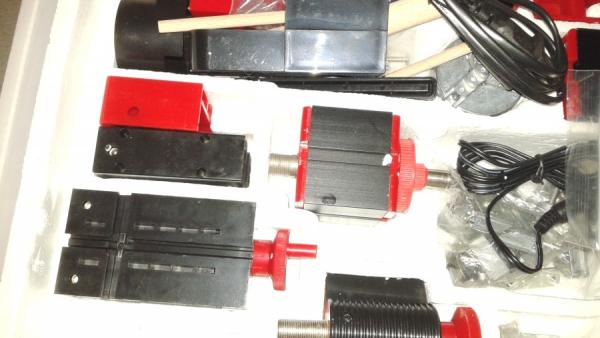
 Perma-Grit Tools Perma-Grit Ltd. For purchase and enquiries, visit www.permagrit.com We all know the old adage when it comes to making purchases, ‘Buy well, or buy twice’. That is especially true with regard to buying tools. We’ve all bought things for our hobby which looked great at the time or looked like a bargain. I know that in my case, very few of those purchases were actually money well spent. One area, working with wood, that we all need to buy for, is the sometimes-onerous task of sanding our models. Over the years, I’ve learned that buying good quality aluminium oxide paper is probably a better deal than cheap silicon carbide paper. However, when it comes to specific tools to do the job, one of the best names on the market, and one of the most respected, is English firm, Perma-Grit. This company has built its reputation up over a period of almost 30yrs now, manufacturing Tungsten Carbide grit tools of different grades, by bonding it to steel under extremely high heat, in a furnace. Perma-Grit have sent us a sample of their tools which a modeller could find very useful on the workbench, and I have taken the opportunity to use a small number on my current Zulu fishing boat. Needle Files (different size shafts) In my sample pack were these four needle files. These are the 18cm/5mm shaft, and 14cm/3mm shaft. All Perma-Grit tools are packaged against a card backing and shrink sealed in clear plastic. The rear of the packet also has information relating to the specific product range. The tools you can see here are: 18cm Large Needle File (Round, fine), # LNF-ROUNDF 18cm Large Needle File (Half round, fine), # LNF-HROUND 14cm Needle 3 Square, (medium), # NF-3SQUARE 14cm Needle File, Hand (medium), #NF-HAND Firstly, a little about the grade of grit with these needle files. Files with ‘fine’ grit are classed as an equivalent of UK 320 grit sandpaper. Those with ‘medium’ grit as classed as UK 220 grit sandpaper. The surface of these files is densely packed with grit, and I can’t see any of this coming away readily. Whilst Perma-Grit don’t supply a lifetime’s guarantee, if you feel that any tool from them hasn’t met your expectations, then you are always welcome to let them know of this. Cleaning the surface of these has also been thought of. These files are pretty impervious to most chemicals, so you can use acetone to remove any CA, and Nitromors/paint stripper to remove general debris. Whilst these tools can be used ‘as is’, some modellers will feel more comfortable using a handle, and I’m also one who would feel that I can exercise more control with a handle fitted. To cater to shaft size, Perma-Grit offer these two handles: Handle 3mm collet, # NFH Handle 5mm collet, # LNFH These are simple to use. You just twist the knurled ring to loosen the collet and then slot the file in before retightening. Of note here is that the red handle is hollow and can accommodate quite a lot of the file shaft so you can adjust the file to what suits you best. Sanding blocks, angles, and flat files Sanders come in all shapes and sizes, and so they do from Perma-Grit too. We have three types here, all very different and with a wide range of roles in our hobby. For your info, tools classed as ‘coarse’ have an equivalent UK sandpaper grit of 180. Angle 75 Degrees (coarse), # R-201C Flat File (fine), # F-101 Wedge Block (coarse, fine), # WB140 The Angle sander is an unusual thing. It’s very easy to hold and manipulate, with two sanding faces. This one has a coarse grit, but can also be bought with a fine grade, which, given the shape and possible modelling uses, would perhaps be a safer bet. The Flat File is simple in approach. This is long length of steel with a fine abrasive coating on one side. This could be used for getting the squareness of a freshly planked hull, removing a lot of that waste until you switch to a sanding block or just manual sanding paper. With the Wedge Block, you get something more akin to a traditional sanding block, except in metal of course. Where this differs is that one side of this is fine grit for some nice finishing work, and the other side is coarse. As I’d already done the rough work on my model hull, I took the opportunity to do some fine sanding. The grit on these sure takes off material superbly, and I went very gentle with this. 6.5m Round File (fine), # R-204F If traditional style files feature in your workshop, then this one is very similar to that, being a regular looking round file with an integrally moulded handle. The whole shaft on this is coated in Tungsten Carbide and the handle is very comfortable in the hand as well as being nicely weighted. Rotary tool bits Perma-Grit sent me a small number of their most commonly used rotary tools. All of these have 3.1mm shafts and are compatible with Dremel rotary tool products. The ones I have here are: Rotary Drum (fine, 11mm diameter), # RF3F Rotary Rod (coarse, 4mm diameter), # RF6C Cutting Disc (32mm diameter), # RD2 The Drum tool is as you would expect and very similar in appearance to Dremel except that this doesn’t need to be assembled, nor will it wear out as quickly. Being fine grade, this will be perfect for the hobby, when bevelling bulkheads etc. The Rod tool is exactly that. Tungsten Carbide has been fused to the shaft, enlarging its diameter to 4mm. The one I have here is coarse but can also be purchased in a finer grade. Of course, the Cutting Disc does need a little assembly. All that’s involved is slipping the disc underneath the nut and spring washer, tightening with a small spanner. It MUST be noted the rotary tools running speeds are anywhere from 5000rpm to 20,000rpm, and they are NOT recommended for metal Whilst these tools have been supplied as separates, they can also be bought as sets. If you already have several of these tools, then the sleeves (tool rolls) can be purchased separately. I have two such sleeves here. One is designed for the larger tools, and the other for smaller tools. These are made from red canvas so are rugged, and they are secured with a Velcro fastener. My sincere thanks to Perma-Grit for sending these tools out for me to take a look at for Model Ship World. To buy these and check out the rest of their extensive range, visit www.permagrit.com


- 17 replies
-
- 16
-

-
- permagrit
- perma-grit
- (and 3 more)
-
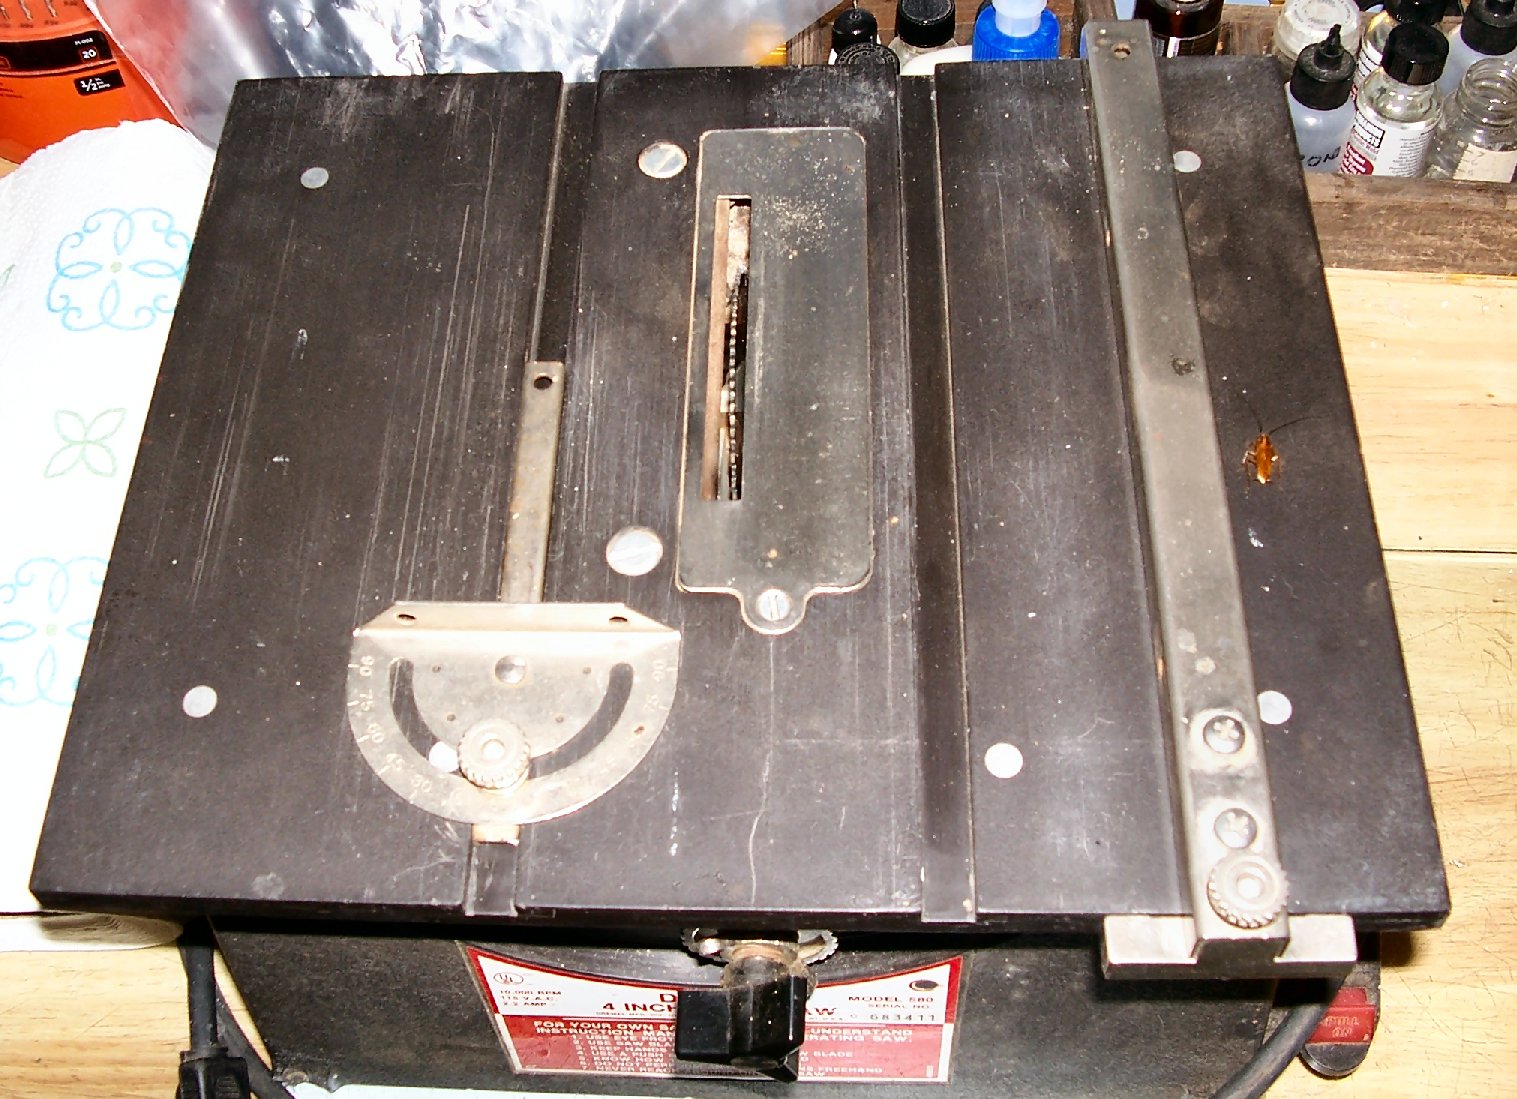
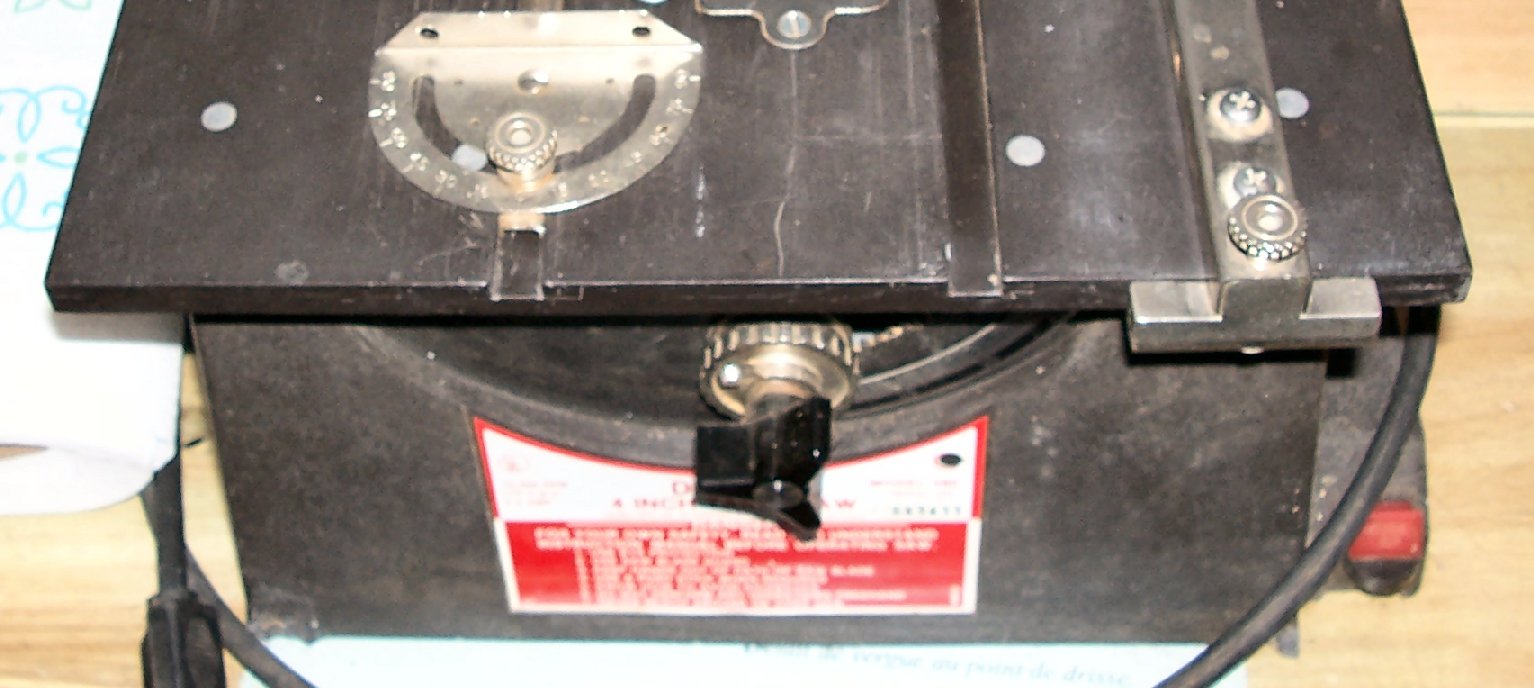
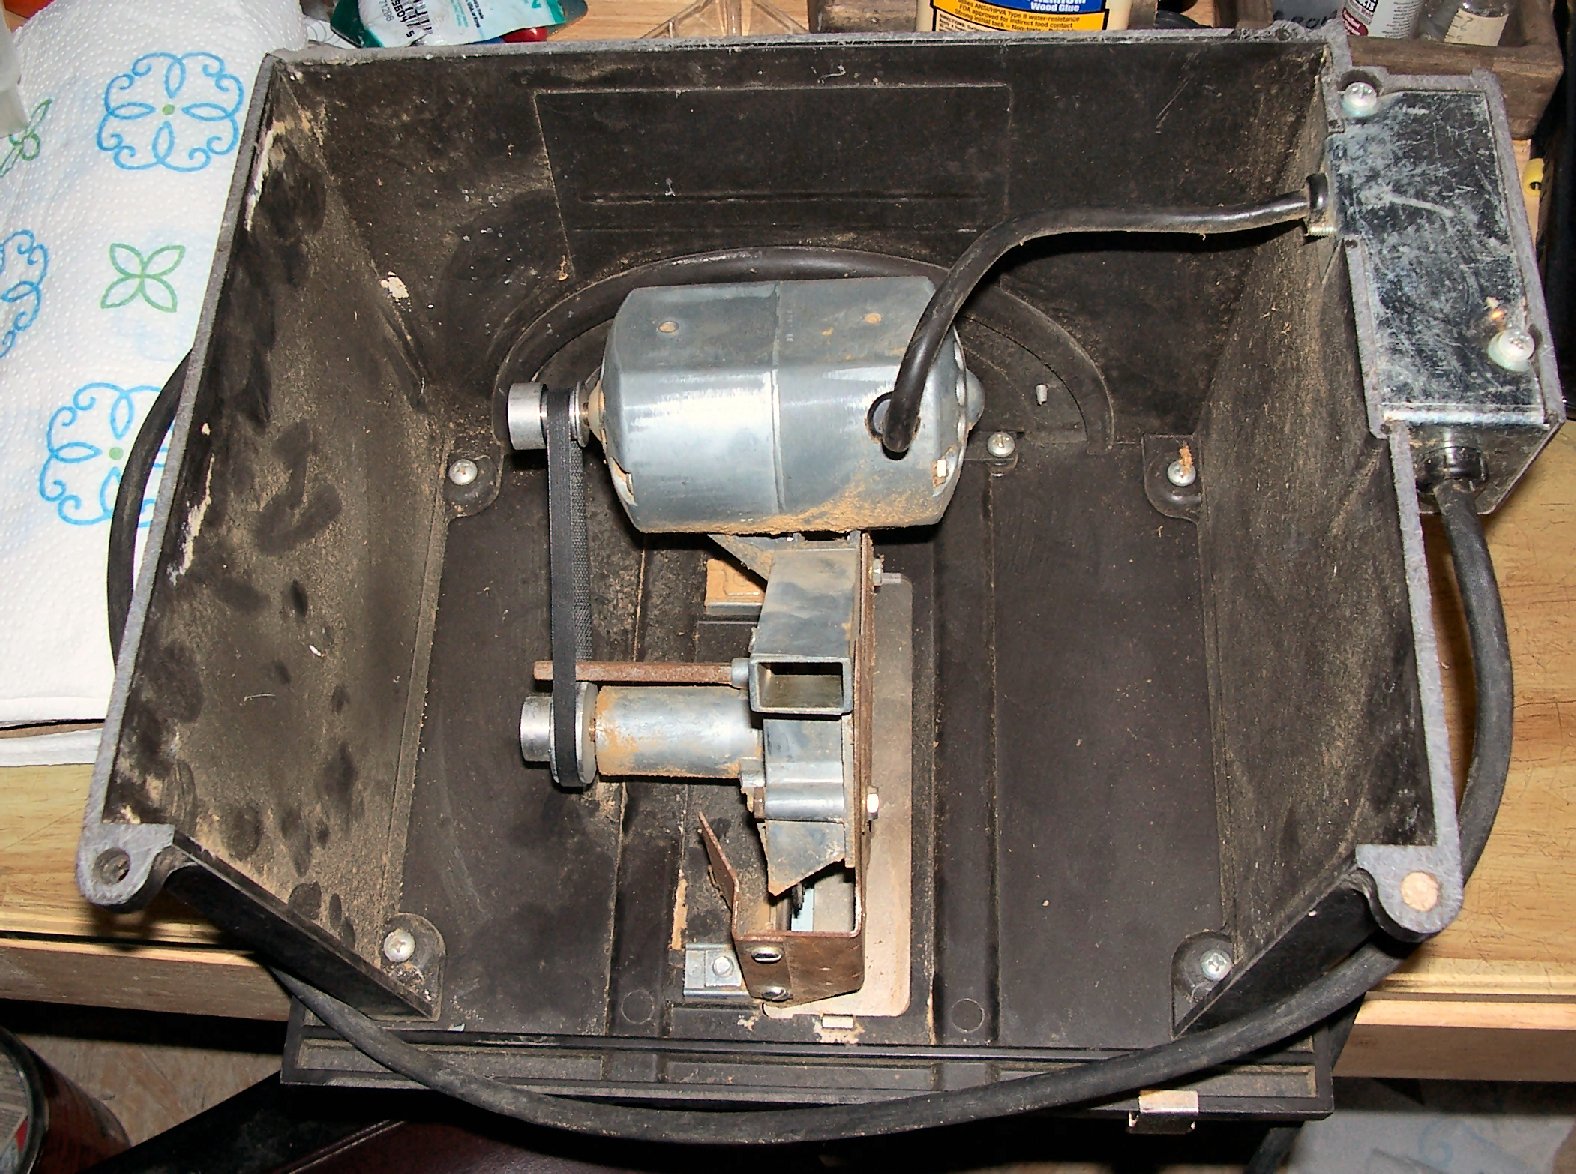
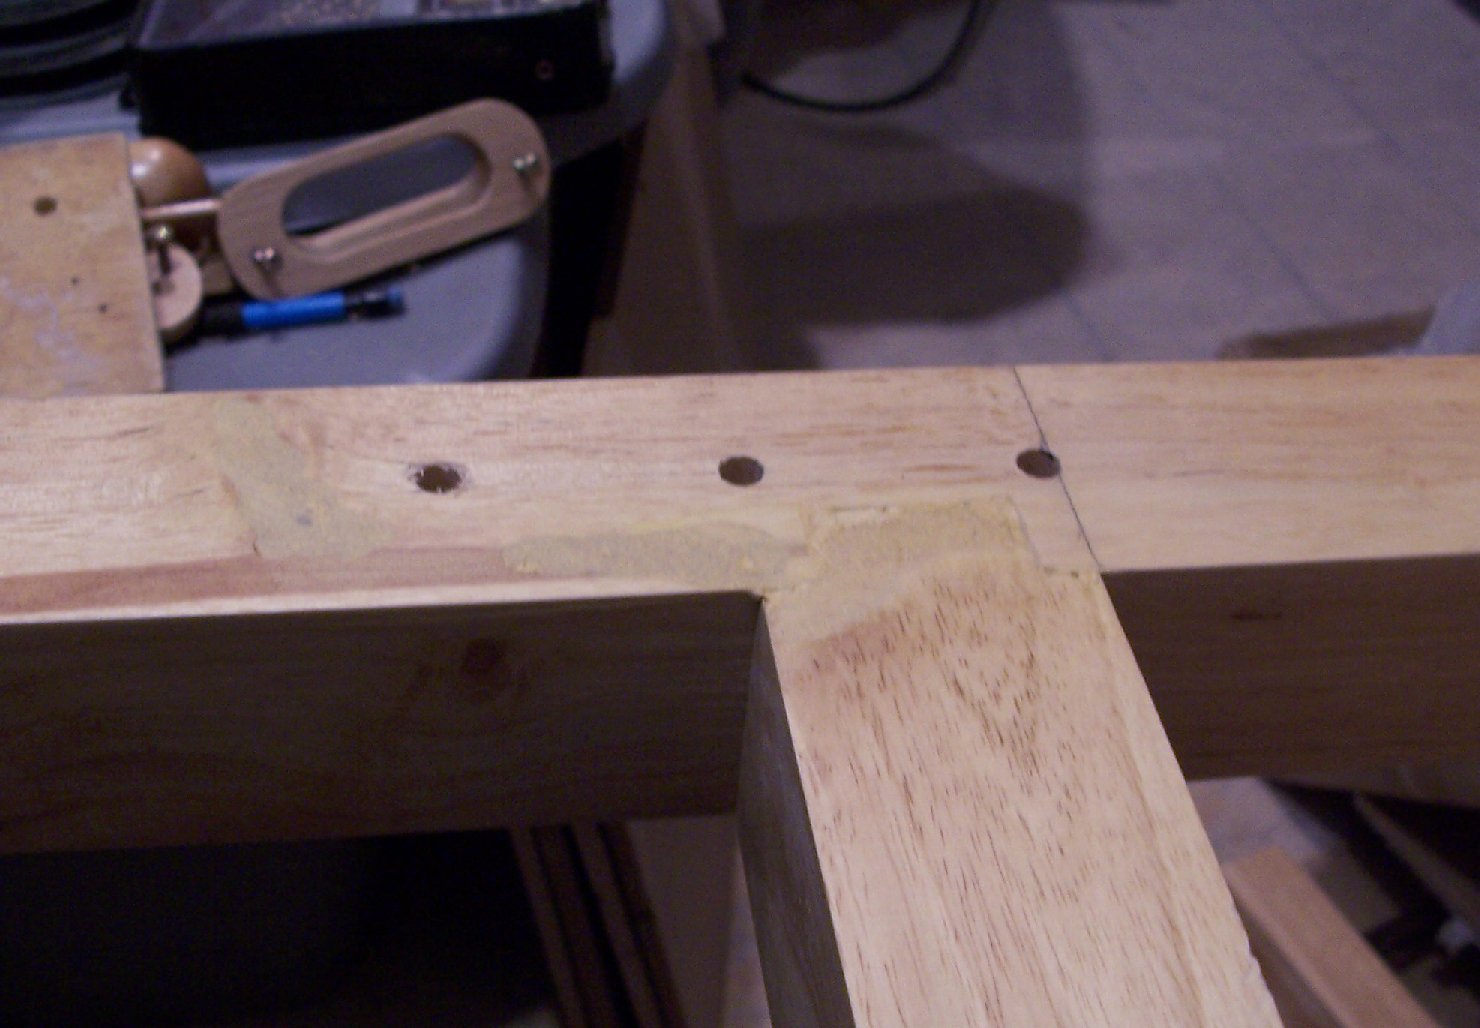
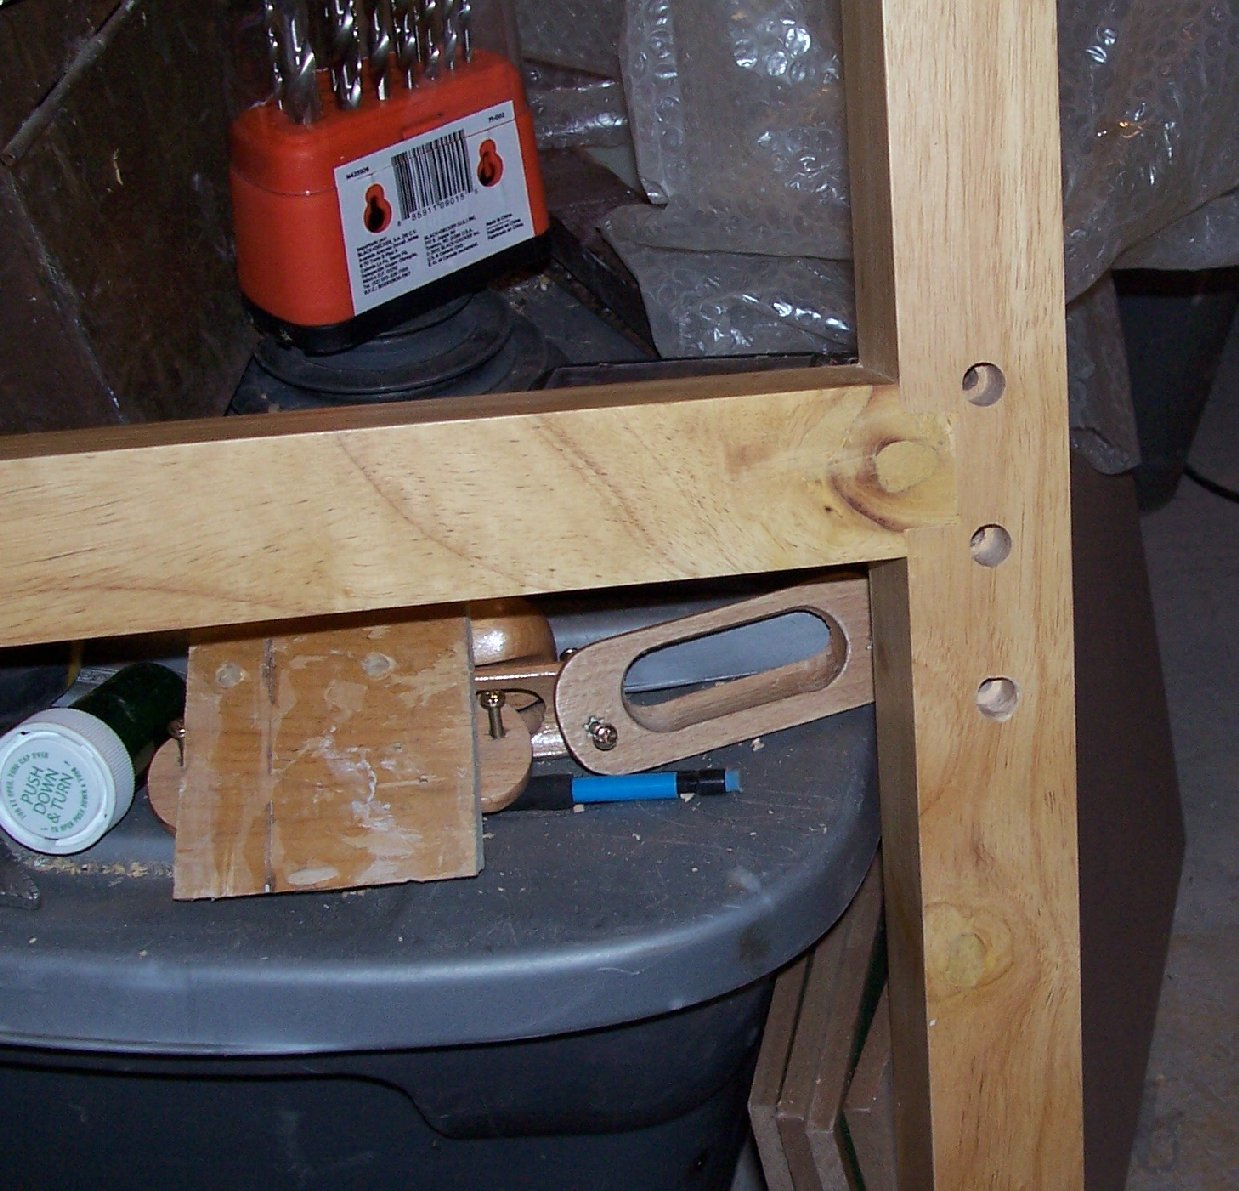
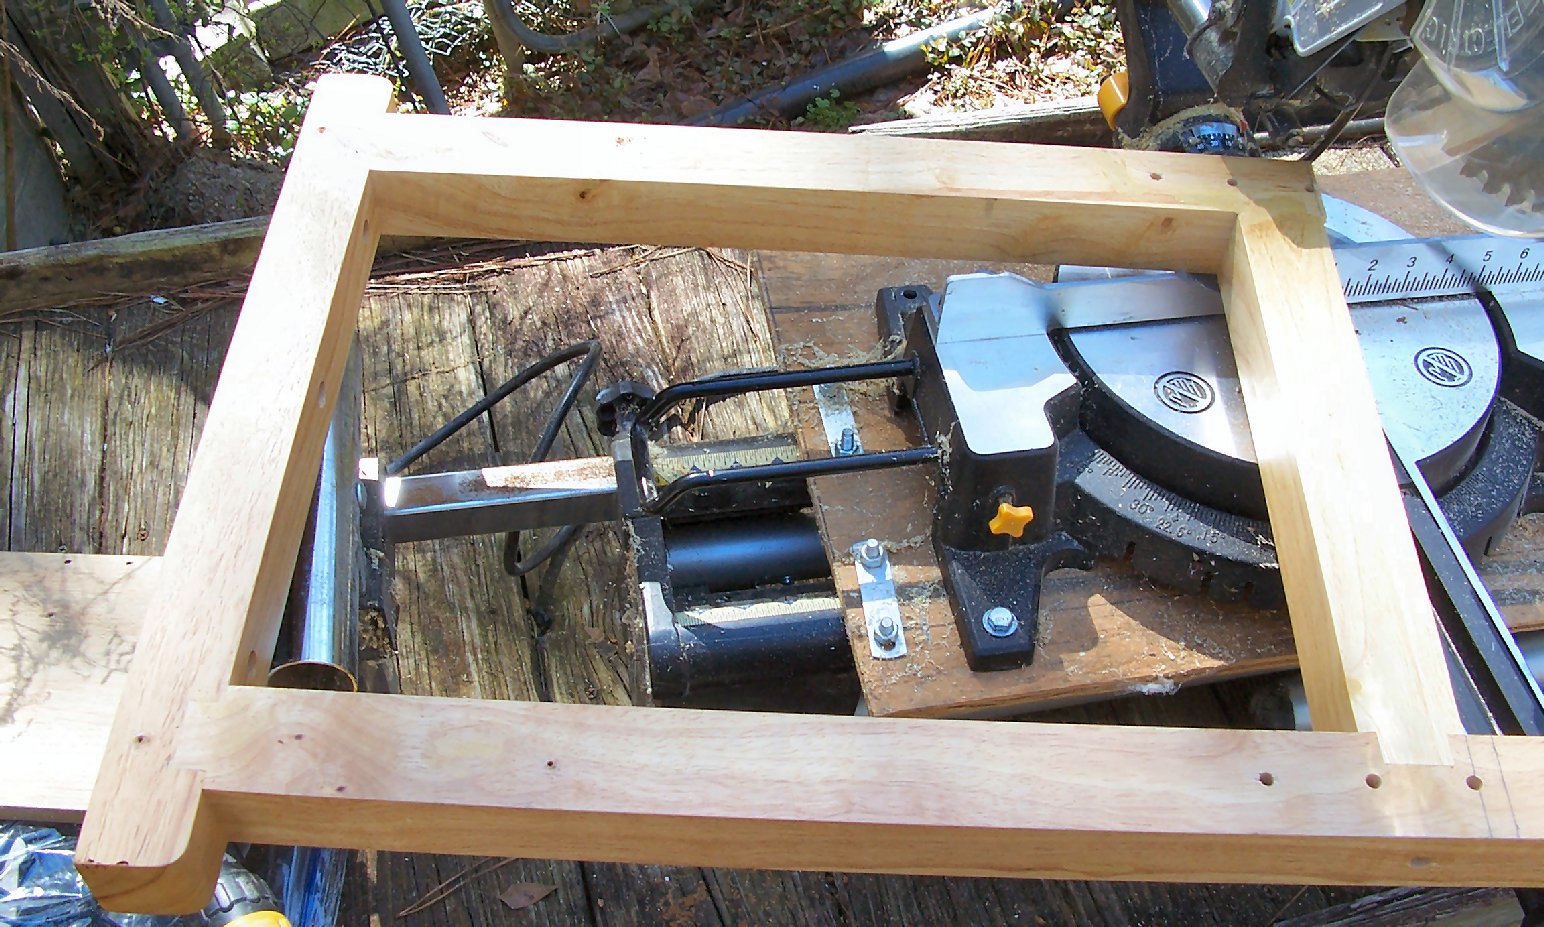
 Part 001 I looked at my available options for a modeling table saw. The contenders are: 1. The Harbor Freight type 4” table saw (many similar types of this basic type of saw). 2. The Proxxon table saws, the cheapest is in my price range, the others cost enough that they are almost as expensive as the Gold Standard Byrnes table saw (see below). 3. The old Dremel 4” table saw. 4. The Byrnes table saw. The best and the Gold Standard, but well over my present funding level at about $500 with shipping. I hope to get one of these in the future, but that is at least a year or more away. The Harbor Freight type table saws are poorly built, and the blade height adjustment is by raising the table, on I’m sure poorly fitting leg/slides. It also does not have a fence. The saw blade slot is cast integrally with the table. This prevents you from cutting thin pieces, as they will tend to be pulled down into the slot. On a regular table saw the blade comes up through the table in a removable insert. If you are cutting thin pieces you replace the insert with one with a thinner slot. In many cases you put a solid plate in and run the blade up through the insert, giving you a zero clearance fit. Of course you need a carbide blade if it is a metal insert, but you can make a thin wood insert from hobby plywood for a regular steel blade. I can’t imagine the Harbor Freight type having good enough tolerances on the table slides for this, even if you can attach something to span the slot. Prices on these range from about $40 to over a $100. The cheaper Proxxon saw has a fixed blade height, also no insert, and only a 2” diameter blade. It does however come with a small plastic fence that does not span the full depth of the table. Prices range about $125 to $200. The Byrnes saw is built more like a machine tool, rather than a saw, and has a large array of available accessories, but it comes with a matching price tag. If you have the money get this. The Dremel saw is no longer made, but is available used for about $125 to $225,with shipping on Ebay. It has a blade that can be raised from under the table, as in a standard large table saw, and the blade can be angled also as in a standard saw. The blade is belt driven and the motor is more powerful than the Proxxon and HF type saws. It does come with a fence that spans the whole depth of the table, and a miter gauge. It has a removable insert. The base is a thick plastic, but durable. There are some accessories available in the aftermarket, but the sources are drying up. The blades and belt are still readily available, though. I chose this route as it falls within my price range, and has more standard table saw features, including a blade insert. My saw did not come with a blade protector, some of the later models did. The blade raising/tilting mechanism is not as sturdy as I would like, the miter gauge is a bit loose in the slots, and the fence is not the most robust, however. I will attempt to remedy some of these faults as this build log continues. The saw is eminently usable, though. This log will not be a regularly updated one, but I will relate all my experiences with both using and upgrading it as time goes on. Here are pictures of the saw as I got it. The first shot is the top. I noticed when I was editing the photos, that I had a visitor. I’ll have to fog the shop, this week. This is the front with the blade raising and tilting controls. These are the same types as a standard table saw. The power switch is on the lower right corner. If you look closely you will see that both front mounting lugs are broken off. The seller did not pack the saw well, and I guess the box got dropped at some point! Both lugs were in the box, though. I assume that they were still attached when it was packed, otherwise I’m sure they would have disappeared before the unit was sold. I’ll glue them back on with epoxy. I am not sure what type of plastic the base is molded of, so using a plastic cement may not work. If I had to guess, I would say ABS plastic. Here is the “guts of the saw from underneath. This is also similar to how a standard table saw is built. Notice though that there is no back to the saw. At one point there was an aftermarket back available, with a vacuum outlet, but they are no longer sold. I will make my own back for mine. Note that the rust is not atypical, the metal parts were not painted when built. It does not affect the operation of the saw. The saw ran well when I plugged it in, with the belt running smoothly. To start with I will disassemble and clean the saw mechanism, using the tips on this site. https://karincorbin.blogspot.com/2009/07/ye-olde-dremel-table-saw.html I will also need to come up with a support for the back of the blade mechanism when making fine cuts. This support may have to be removed to tilt the blade. I have to think more on this idea. Until the next part, thank you for reading my thread.
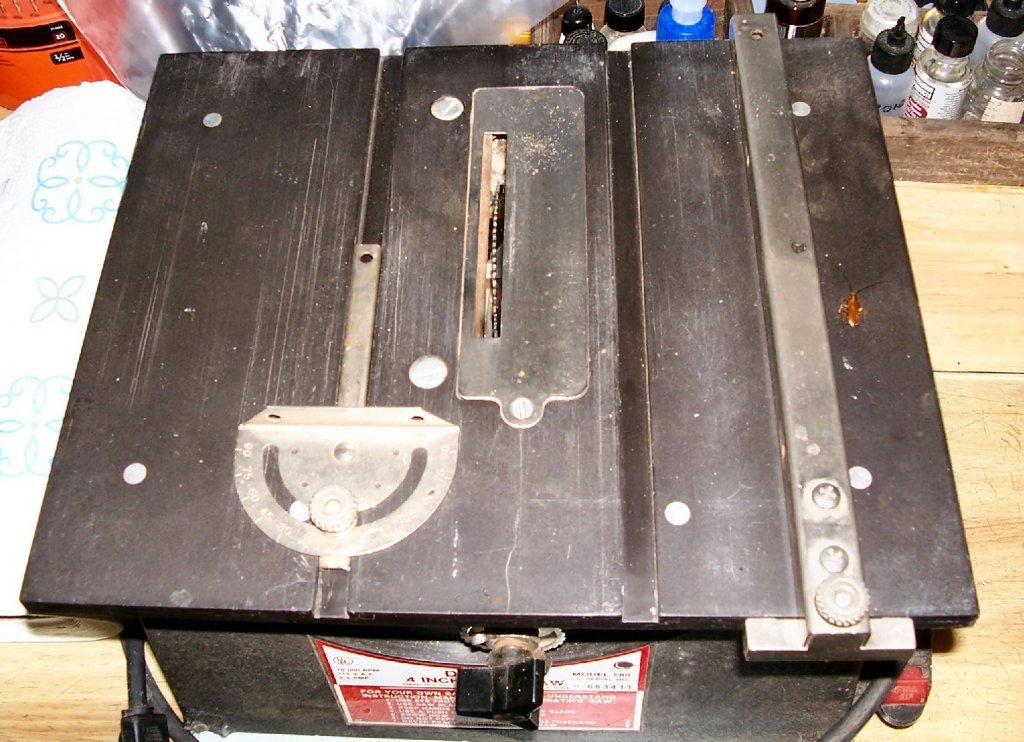


- 67 replies
-
- 11
-
-
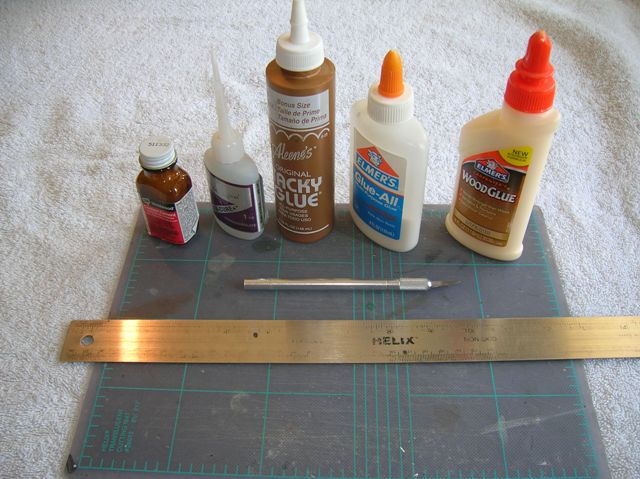
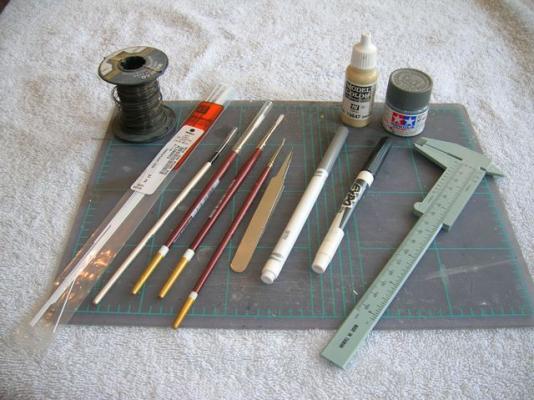
The tools needed to get started in card modeling are ridiculously few. Basically, you need a cutting tool and some glue. Everything else is optional. Here's some basic tools: You'll need a self-healing cutting mat, available from most office supply or crafts stores. Next, you need something to cut with. Notice the lack of scissors in the picture. Most card modelers rarely use them. Instead, your garden-variety craft knife will do the job nicely and with more precision. Get a good supply of #11 blades -- card can be surprisingly hard on them. A steel rule is a must, not just for measuring, but more importantly for cutting straight lines. Glue is, of course, essential. A variety of glues will do the job, and each has merits and drawbacks. Good ol' PVA glue, either white (such as Elmer's) or yellow (wood glue -- hey, paper is wood, you know) are good general purpose glues with one proviso: it must be remembered that PVA glues are water-based, and card or paper will absorb the glue and deform. Thus, PVA is not good for gluing large surfaces together. Cyanoacrylate glue, or CA (commonly known as 'Super Glue', which is a brand name), has its uses in card modeling. Fast-cure CA can be wicked into card stock to stiffen it, and medium-cure CA is useful for gluing parts made of different media together, as well as for paper-to-paper bonds. Contact cement (not to be confused with rubber cement) is a non-water-based glue and thus good for gluing large surfaces together where severe warping would occur with a PVA glue. Contact cement sets rapidly, so repositioning of parts once they come in contact with each other is iffy at best. Modelers in Europe have access to UHU-brand glues that some modelers swear by. I haven't come across any myself, so I haven't had a chance to try them out. Polish modelers, who seem to be born with a master card modeler gene in their DNA, use something called 'butapren'; I'm not a chemist, so I'm not familiar with what exactly butapren glue is, and it doesn't seem to be easily available in the US, possibly because it is a favorite of glue sniffers. Perhaps someone with knowledge of this substance can fill us in. Now, on to some optional stuff that you'll probably want to have on hand: From left to right we have: blackened, annealed wire - an assortment of diameters is useful for making gun barrels, railings, etc. styrene rod - card can be rolled into tubes, but for tiny tubes, styrene is often a better choice assorted paint brushes - for painting, but also for aids in rolling tubes tweezers paint, marking pens, or other media for coloring cut edges (more on this later) calipers - for measuring card stock thickness, especially when laminating sheets together hobby pliers (not pictured) - for cutting and forming wire (end nippers, needle nose, round nose) Some other useful items to have are thin, flexible, clear acetate sheets (for glazing windows), matte clear spray varnish (for prepping parts sheets), and 3M spray adhesive (for laminating card and/or paper sheets together). 3M costs more than other brands, but take my advice, it's worth the money. Cheaper brands don't coat as evenly and produce clumpier spray patterns. Trust me -- I learned this the hard way. I'm sure there's some other stuff I forgot to list, but I'll add those if and when I remember them. Now, go get your supplies, and we'll move on to the model! Back to Part III: Shopping for Card Models On to Part V: Building V108 - The Hull

-
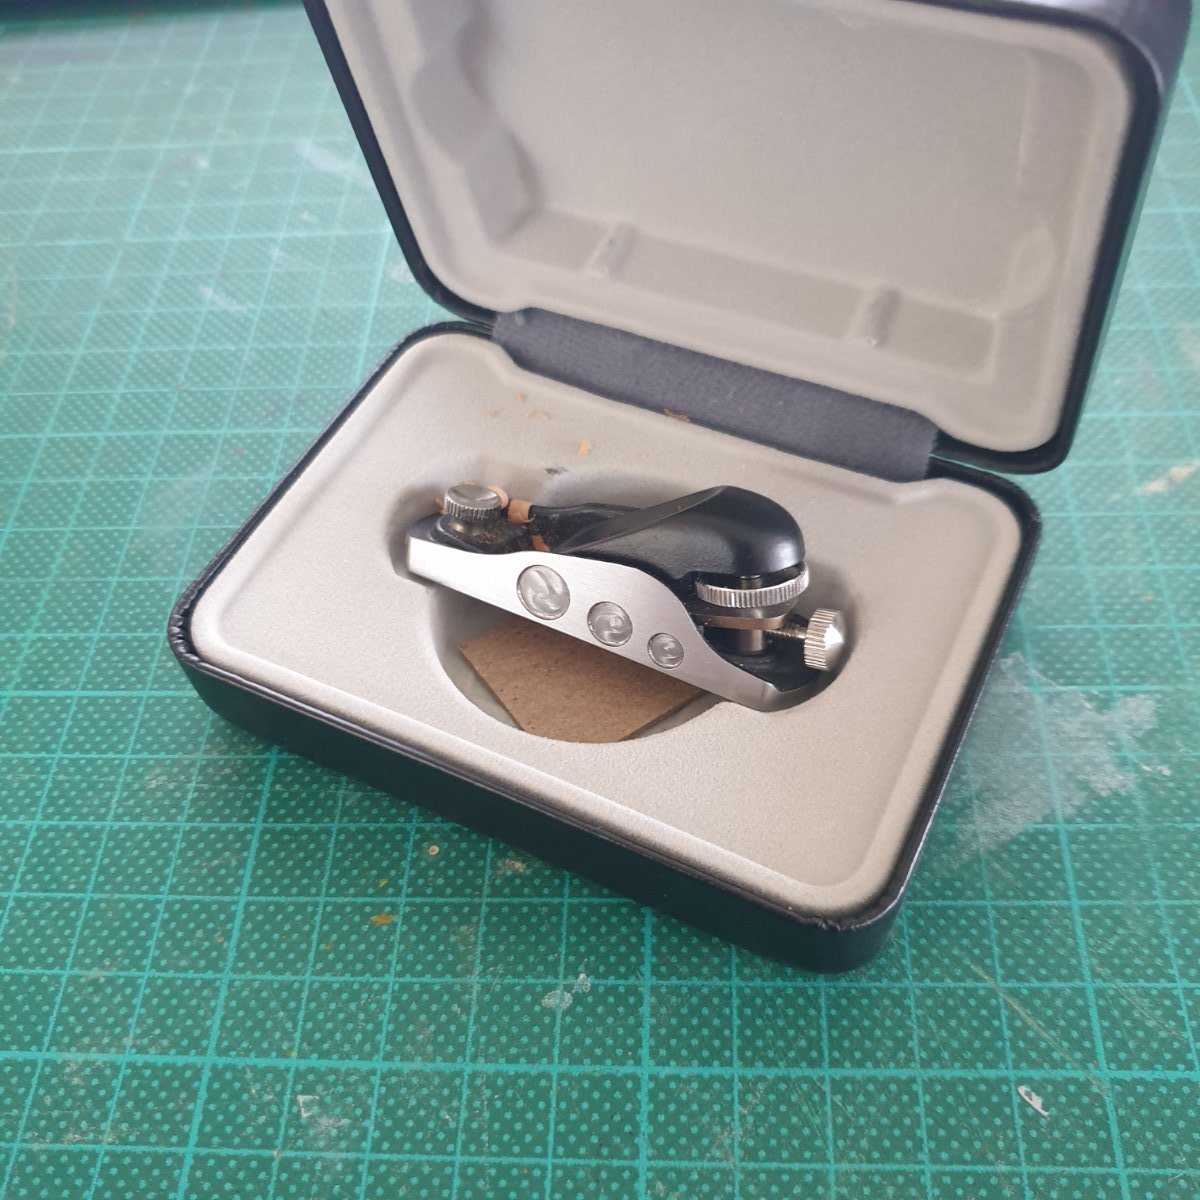
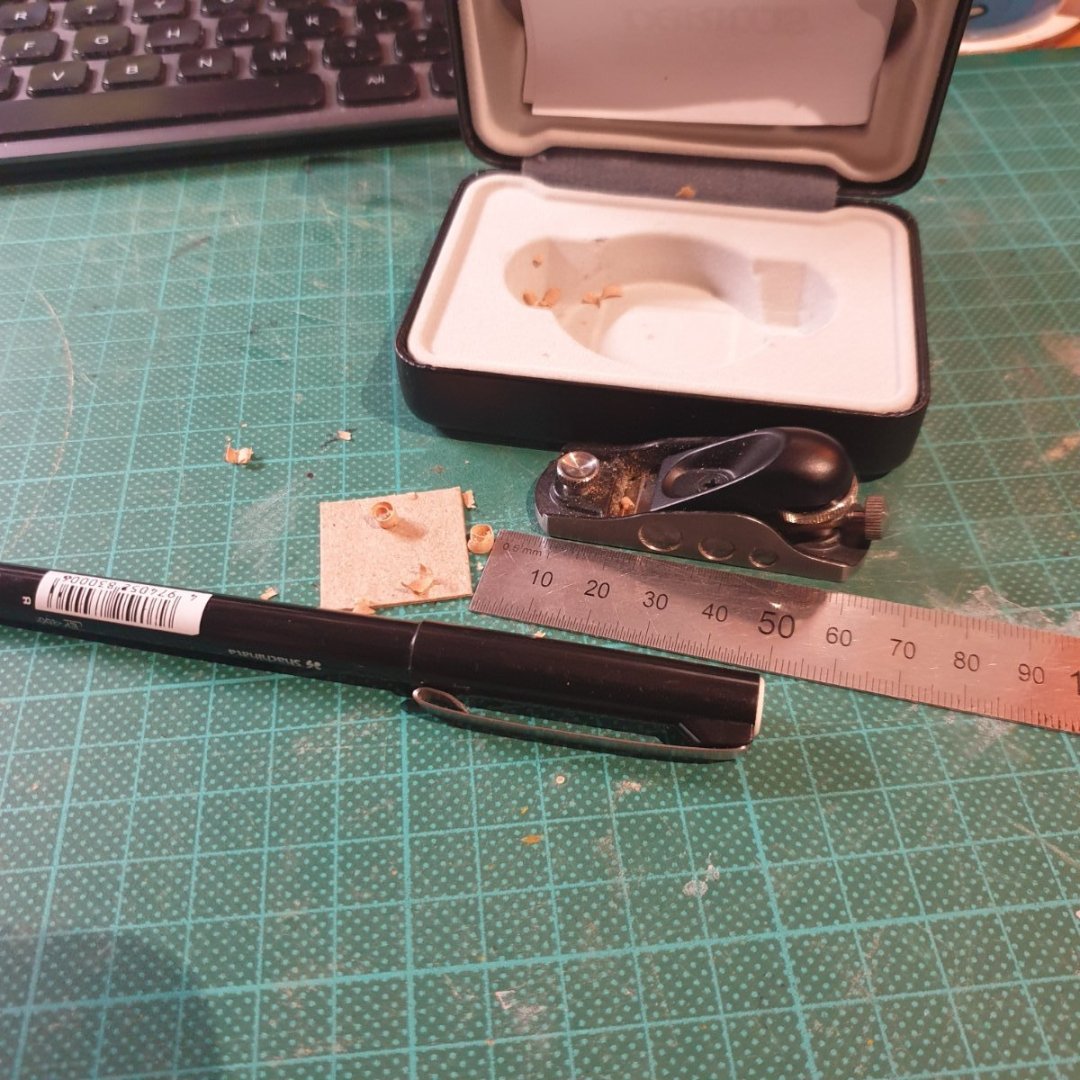
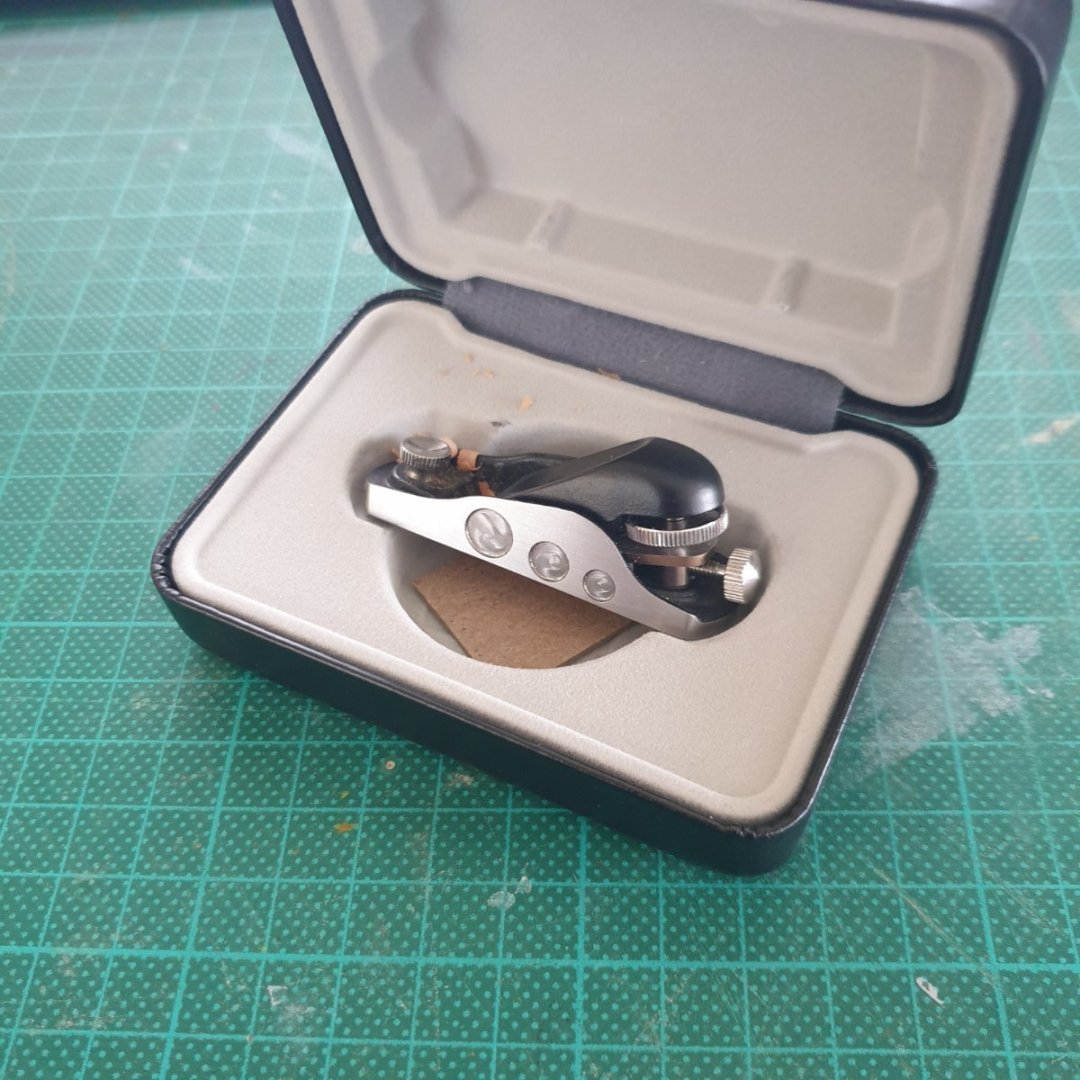
My Veritas Miniature low angle Block Plan arrived yesterday and it is a little ripper - I wasn't sure just how practicable it was going to be but a few trial strokes on some swiss pear straight out of the box convinced me, with shavings peeling away with little effort. I don't have small hands yet it was a natural fit into the mitt - so to speak - can see plenty of use for this and wasn't at all expensive costing me just $79au. Well worth the price of admission. Cheers Pete PS If you buy one don't throw the little cardboard square out - It is, quoting the instructions "a corrosion inhibiting chip offering continuous corrosion protection for up to two years"
-
Is there a more affordable alternative to the Keel Klamper? Looking to get something (make?) that'll hold the ship in place while working on it. Thank you
-
 Hello, Aside from being generally entertaining and culturally informative. I think you'll see some tools and techniques that could be adapted for dimensioning think strips of wood, e.g. the 'planer', the 'bender', the 'splitter'.
- 12 replies
-
- 9
-
-
- dowel plate
- splitter
- (and 2 more)
-
 Anyone know of online suppliers for modeling tools or supplies that have great sales or deals on for Black Friday?
 -
 Hi Guys are there any Aussie members with a Proxxon or Sherline/MicroMark or Taig Lathe that they aren’t using that much and would be prepared to sell. The $au exchange rate and zero freight service to Australia at the moment make a new purchase unviable. Drop me a PM if you have one please - Thanks for looking - Cheers Pete
 -
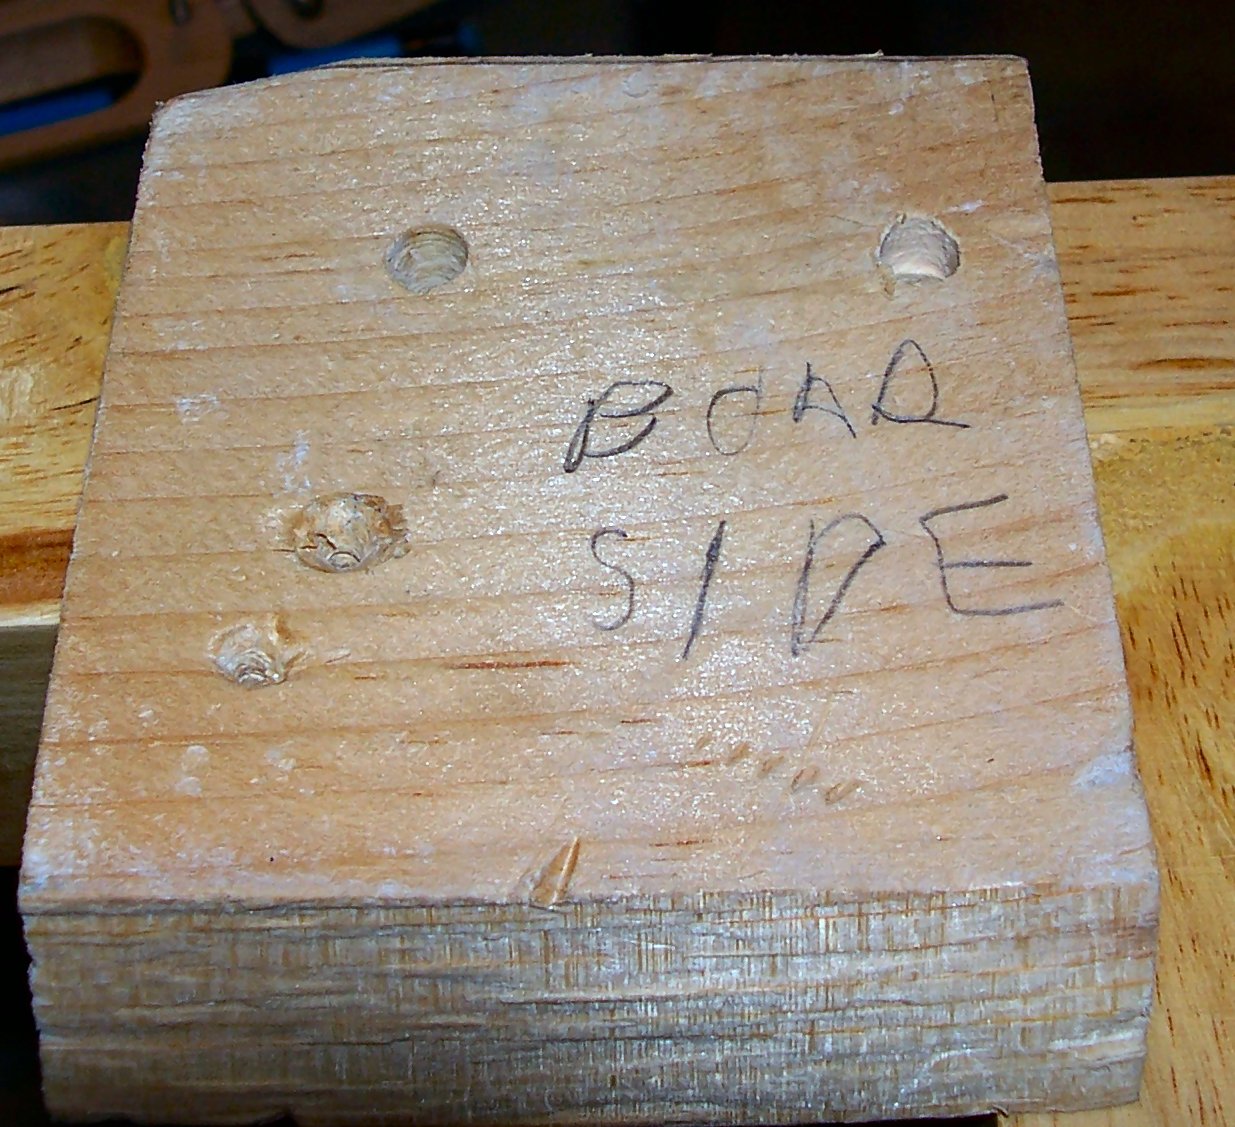
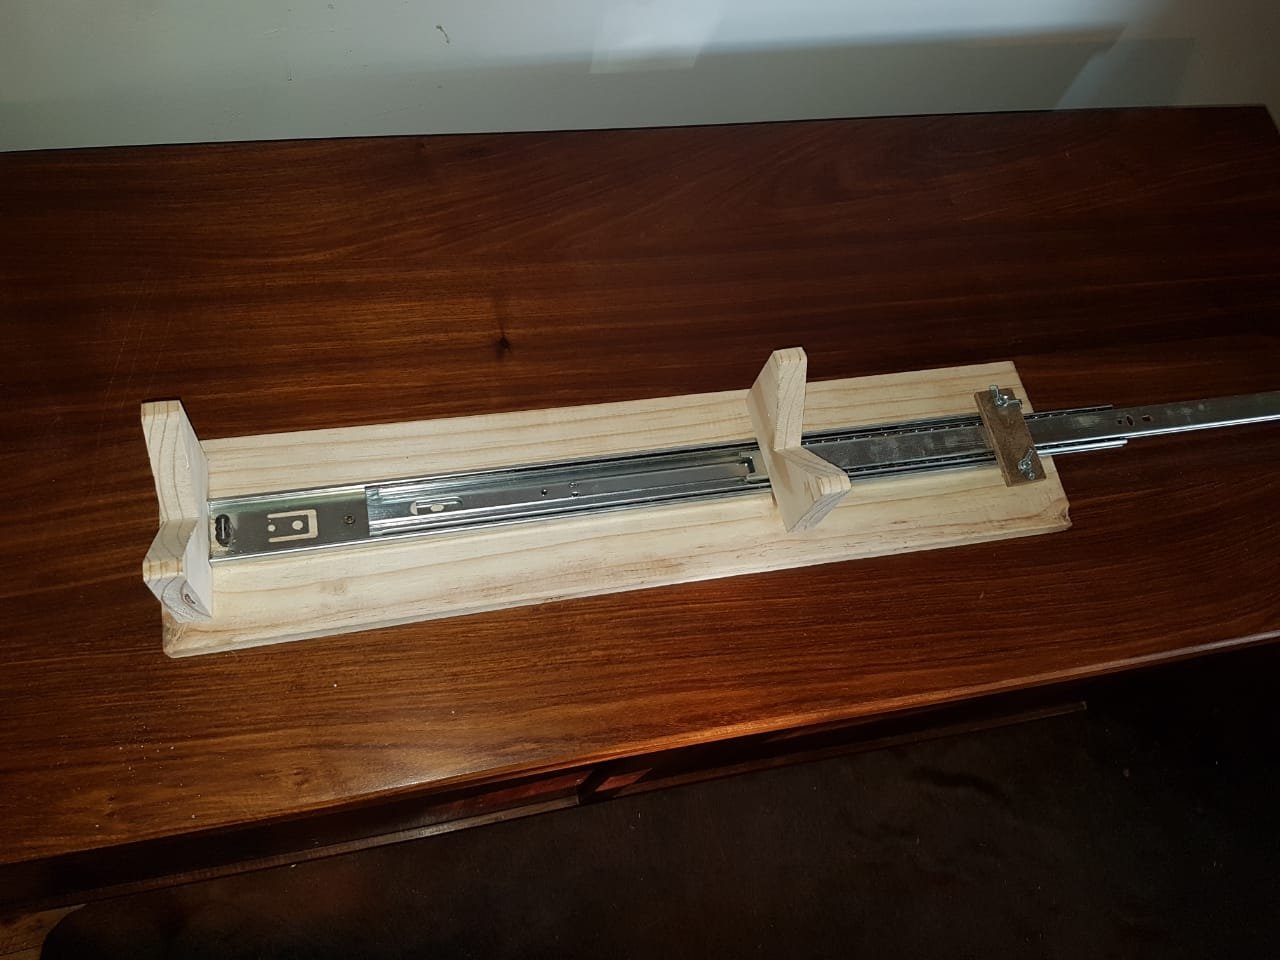
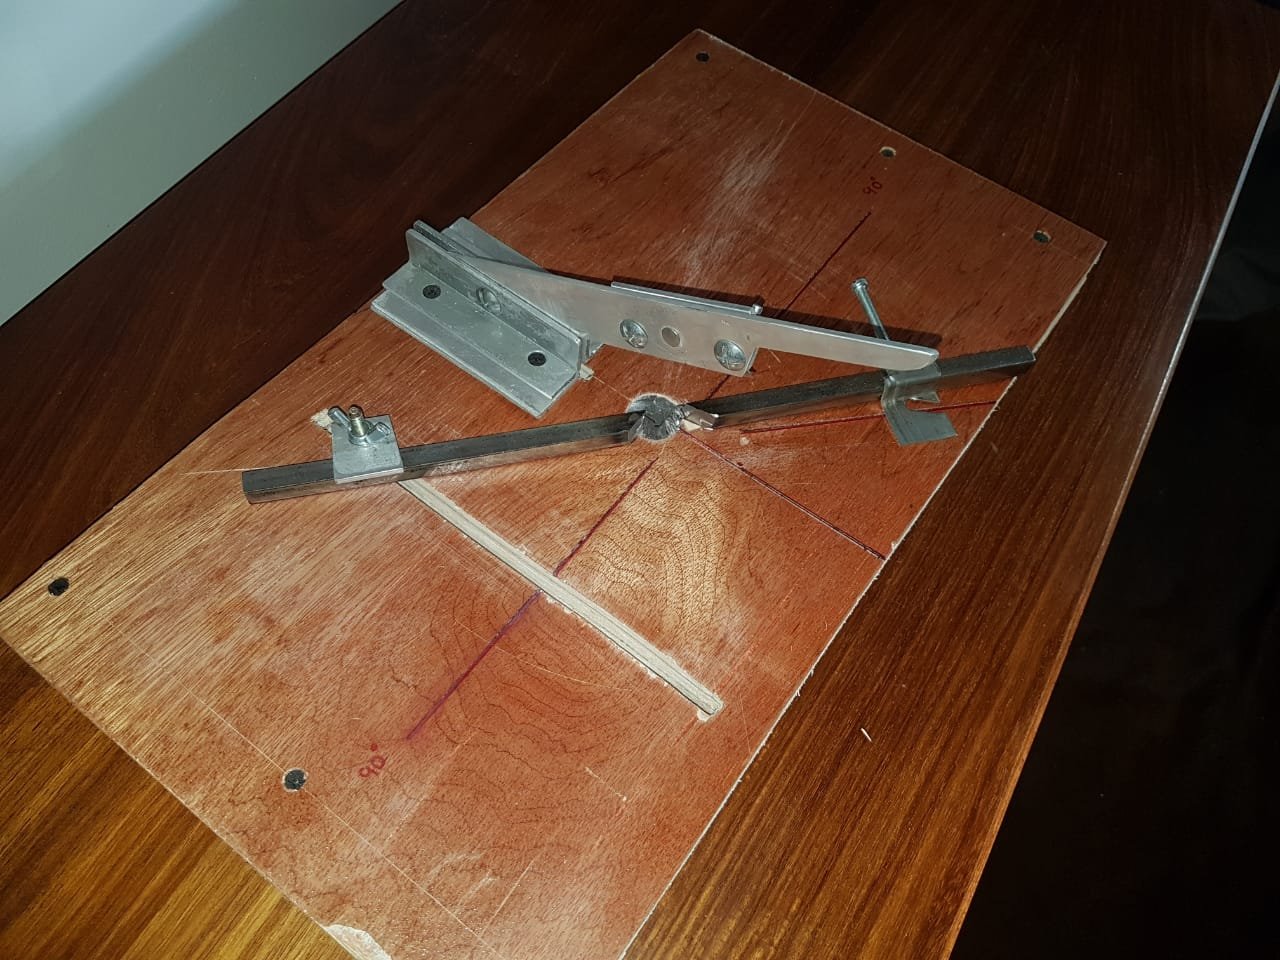
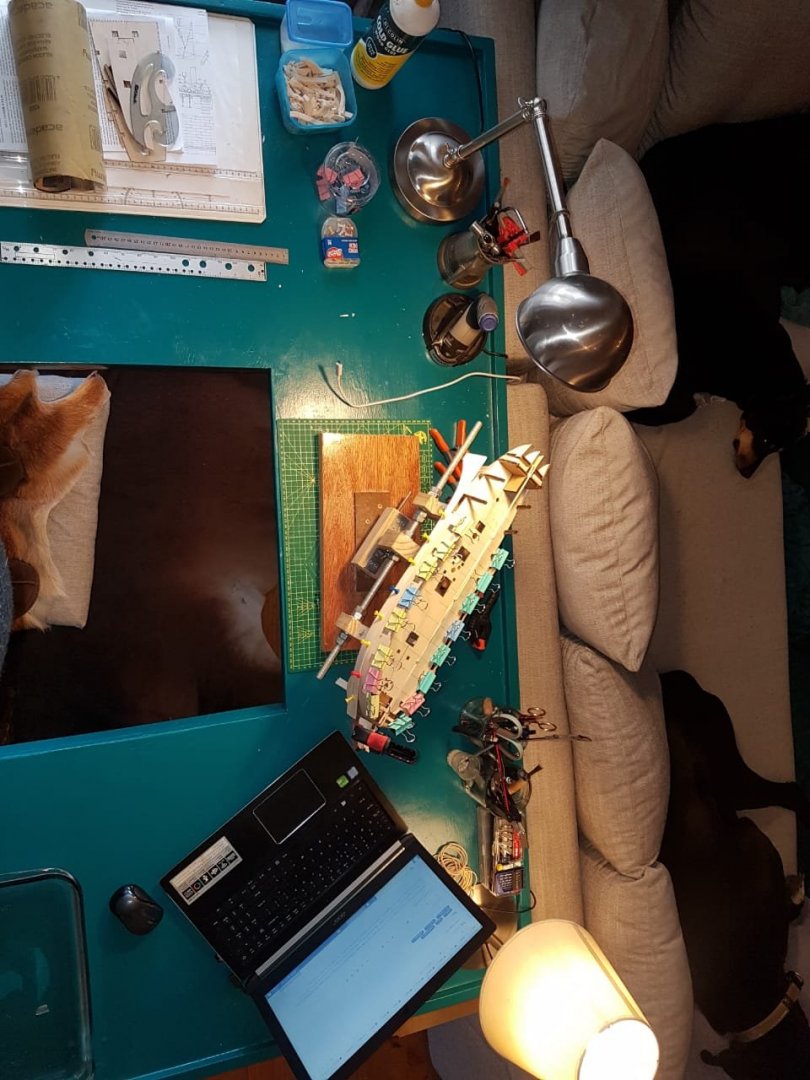
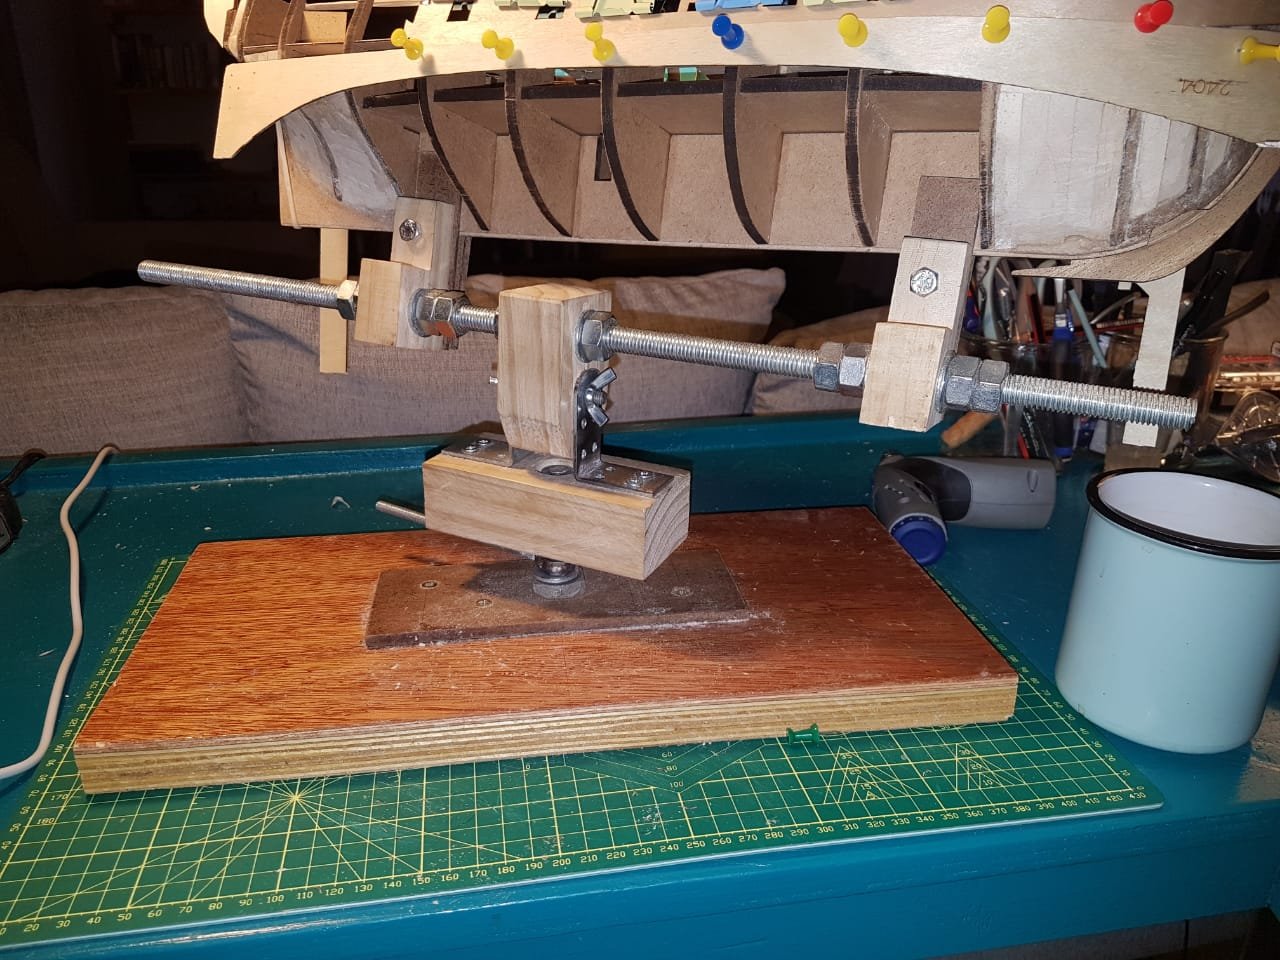
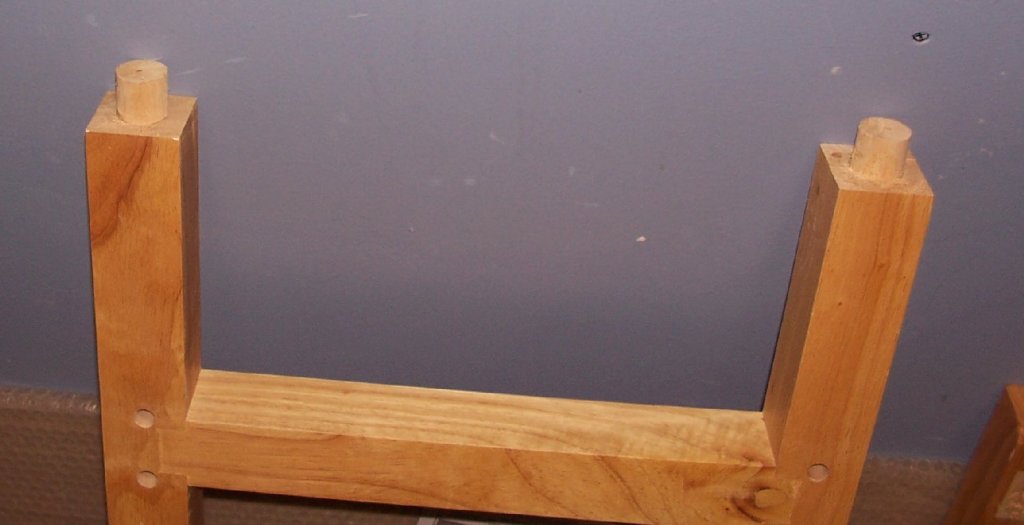
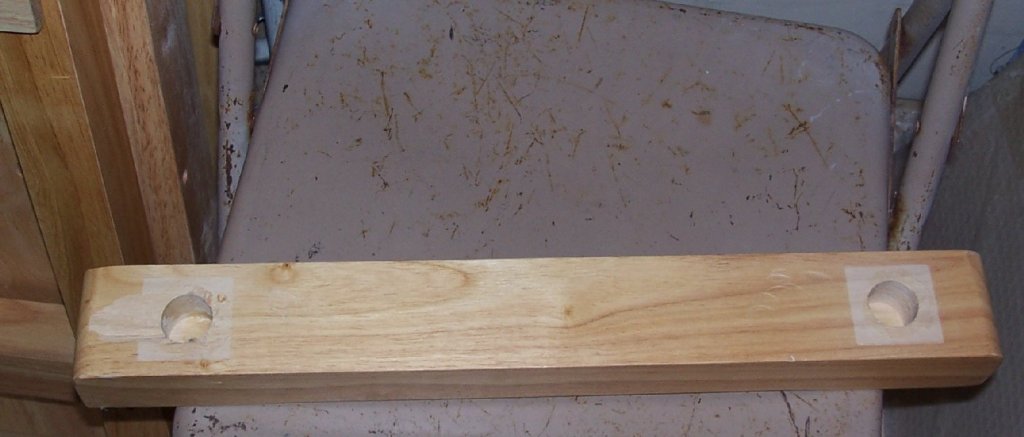
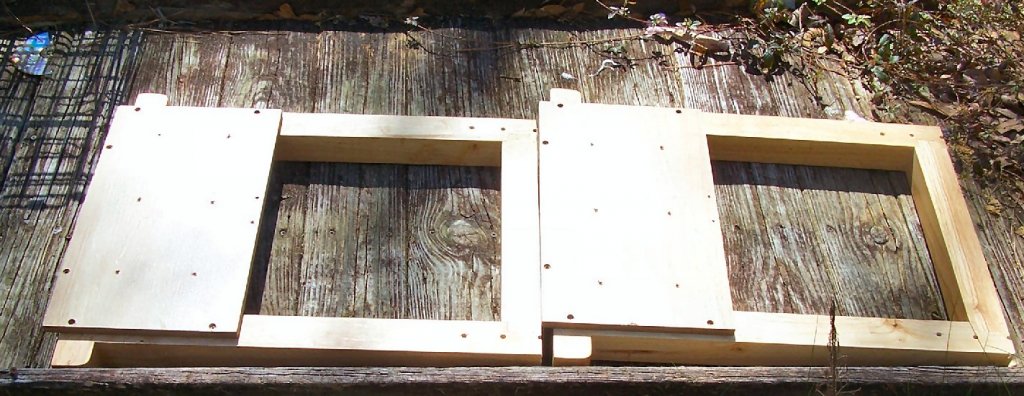
Good Morning kids! I just wanted to post a couple of photos of some of the items that I have made to assist with my first build. They really are nothing fancy, their focus is on cheap and cheerful. I thought this might help for those of you looking for ideas on how to save some money with this already expensive project. If you have any suggestions, questions or comments please let me know and I will do my best to respond. The photos below are the following. A steam tube, guillotine for cutting specific angles and lengths, an adjustable keel rest and a lockable, adjustable keel clamp(which I absolutely love). I have also included a photo of the desk I made specifically to build this vessel. please excuse the strange colour. I entered into a rather weird negotiation with my girlfriend and somehow ended up agreeing to paint this desk "teal" in exchange for the permission to build it.

-
Good day Gentlemen/women After much thought, research and deliberation(literally years of umming and aahing) I decided that I would bite the bullet and purchase a fairly challenging vessel to start my career in model ship building. I settled on the HMS Pegasus and I am extremely excited about getting started on it. I realise that any sane person would have started on something far more simple but my thinking is as follows... 1. I have prepared myself for what I expect to be a 2 year project. 2. The wealth of knowledge, willingness to help and attention to detail that can be found on this forum really gave me hope that I could work through this project and succeed. 3. I feel that every single element of doing this project is essentially very simple if it is broken down to its tiniest detail, every step is researched carefully and tackled without haste. 4. I like to think that I am fairly good with my hands. I do blacksmithing and carpentry both as hobbies and essential skills for a farmer in a remote part of South Africa. I hope that this somewhat simplified approach to this problem will turn out to be correct but the proof will be in the proverbial pudding. As of this moment I am still waiting for my model to arrive(I ordered directly from AMATI and paid 319 Euros including shipping). Unfortunately amati used a shipping company called Asendia who then handed the shipping over to the South African post office. This means that I can expect my package to arrive sometime within the next week or possibly during the next ice age. At this stage my primary means of securing my package is being on hold to the post office, checking my tracking number 380 times a day and thumb holding. In the meantime I have built a couple of simple tools to assist me and purchased the rest. The home made tools include. A "U" shaped desk(which through some bizarre negotiation with my girlfriend ended up being painted "teal"(thats blue to you and I)) An adjustable, lockable, rotating, swiveling, pitching, rolling keel clamp An adjustable keel rest (this is probably not the right term) And a guillotine with adjustable angles that takes a carpet knife blade. A plank bender made from a forged and polished chunk of copper and a soldering iron. I am not sure if there is a specific place where I should post photos and text about some of the tools that I made or if anyone would be interested in this but the information if available if anyone is interested. I also managed to get hold of a broken down scroll saw for a bargain and I restored it to a condition that im proud of. I have a dremmel stylus with a decent selection of attachments as well as the following bits and pieces Soldering Iron hand scroll saw razor saw multiple scalpel blade holders a variety of drawing equipment for technical drawig a variety of drill bits, sandpaper, clips, clamps, files, brushes, chisels blades, rulers, squares, clippers, cutters and pliers. If anyone has any questions, advice, suggestions or guidance for me(or perhaps a recommendation for which pegasus/fly builds to reference most) then I would be eternally grateful. Gods speed to you all! Cheers! Haiko(The Bitter End)
-
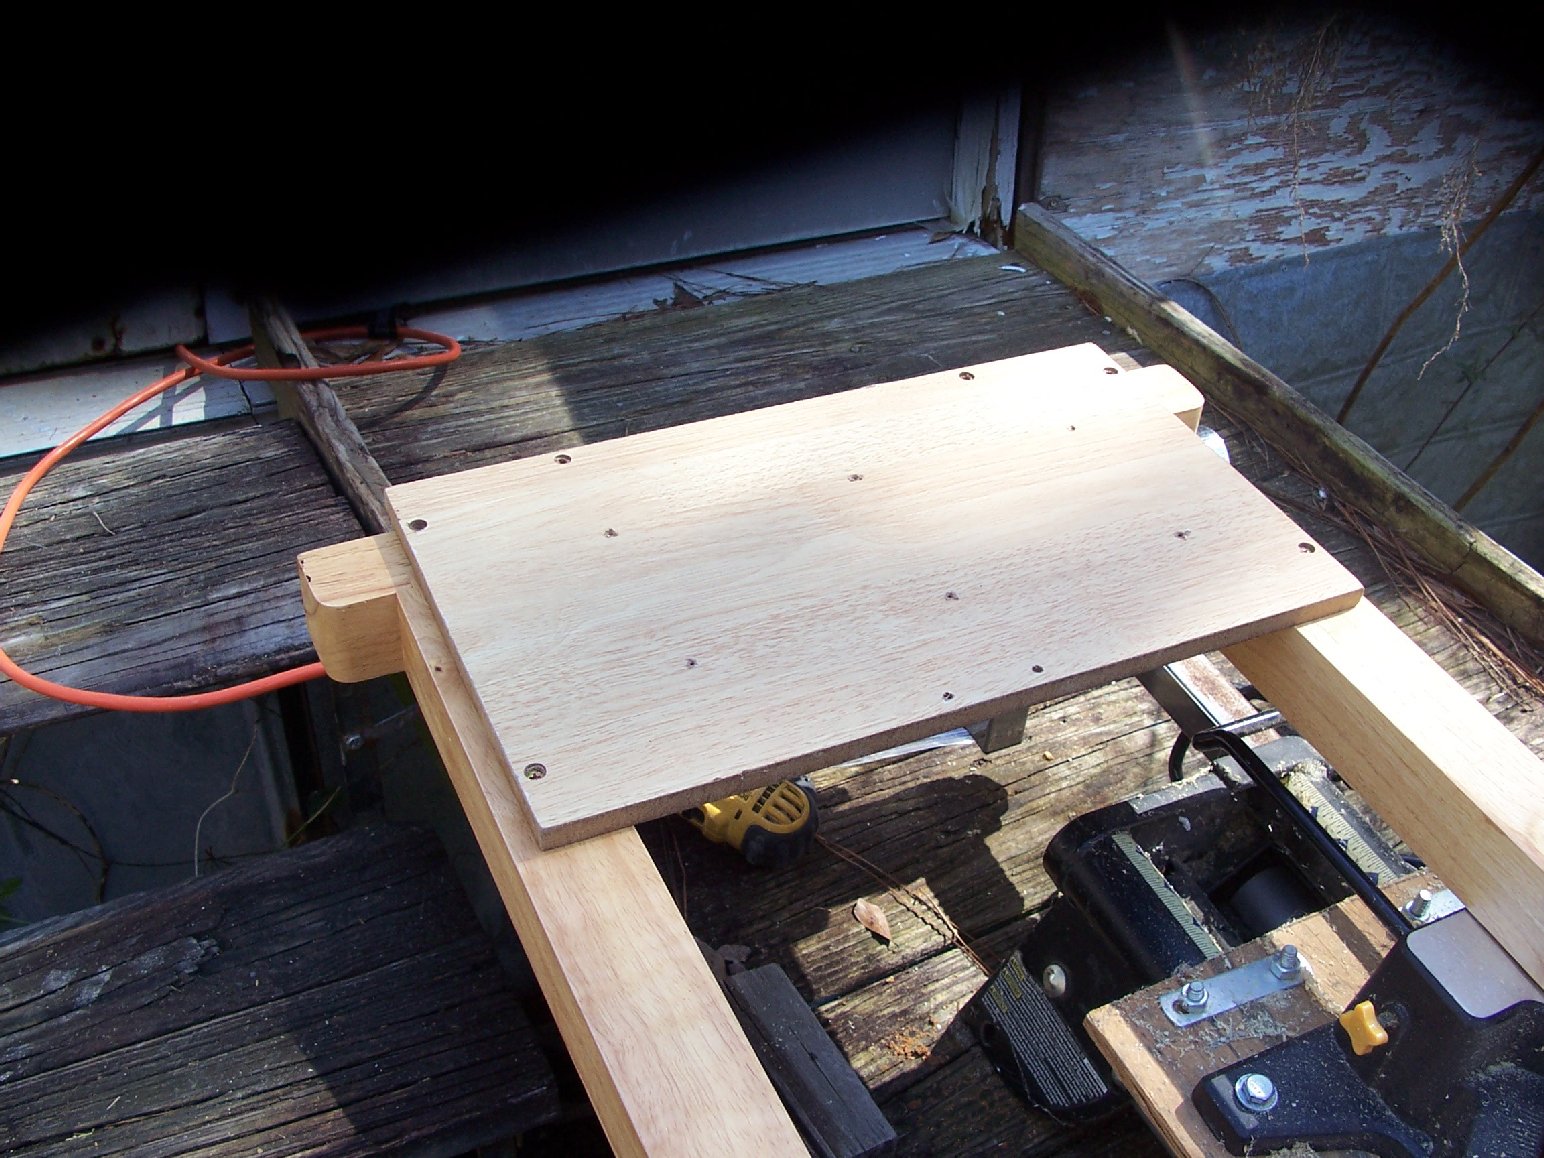
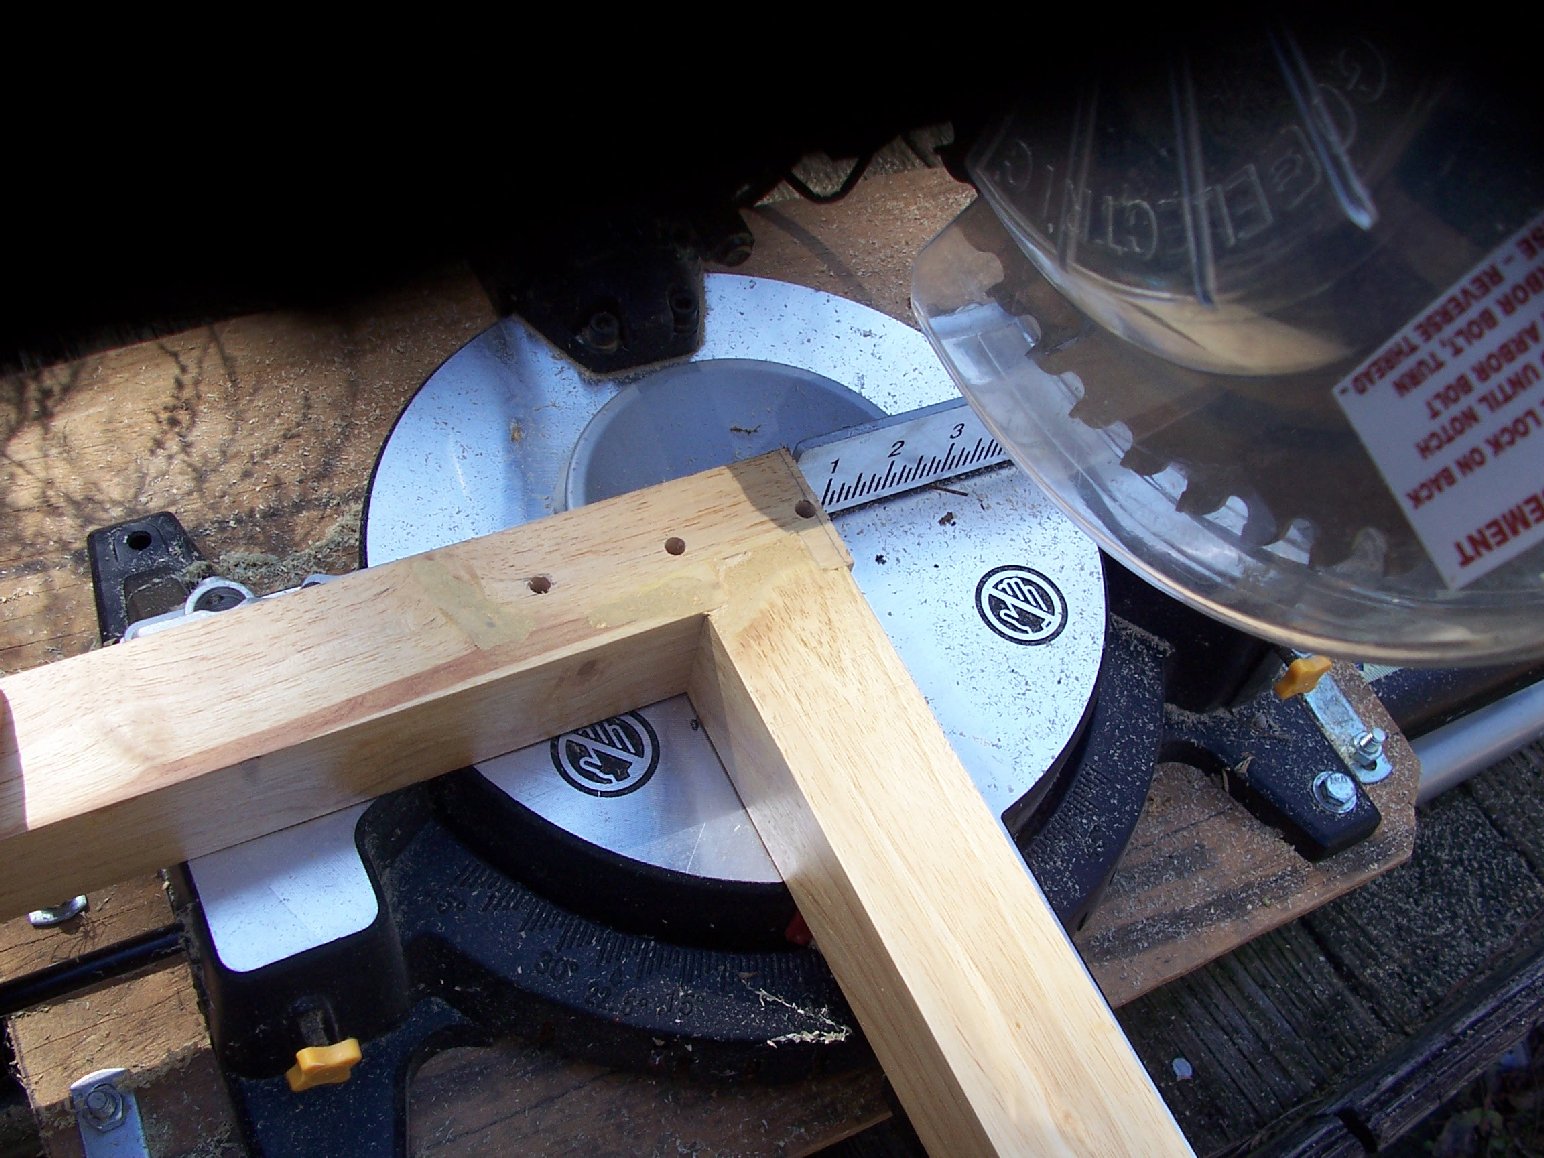
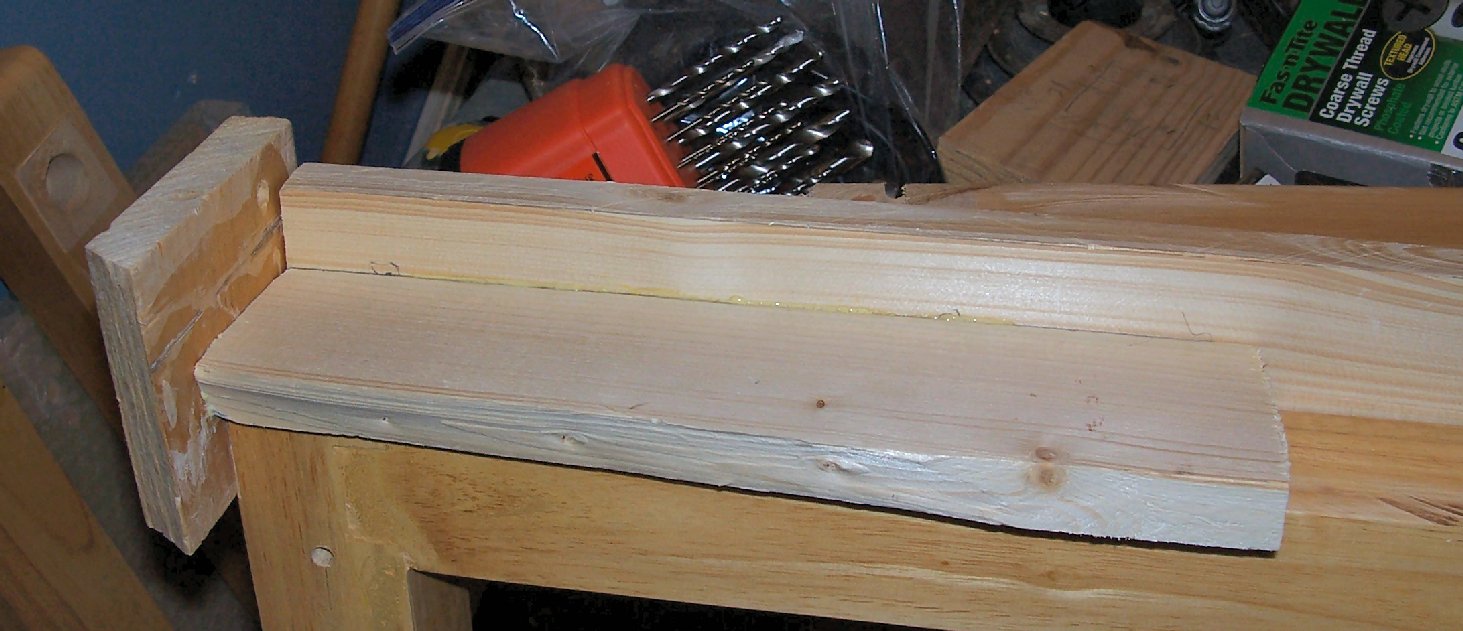
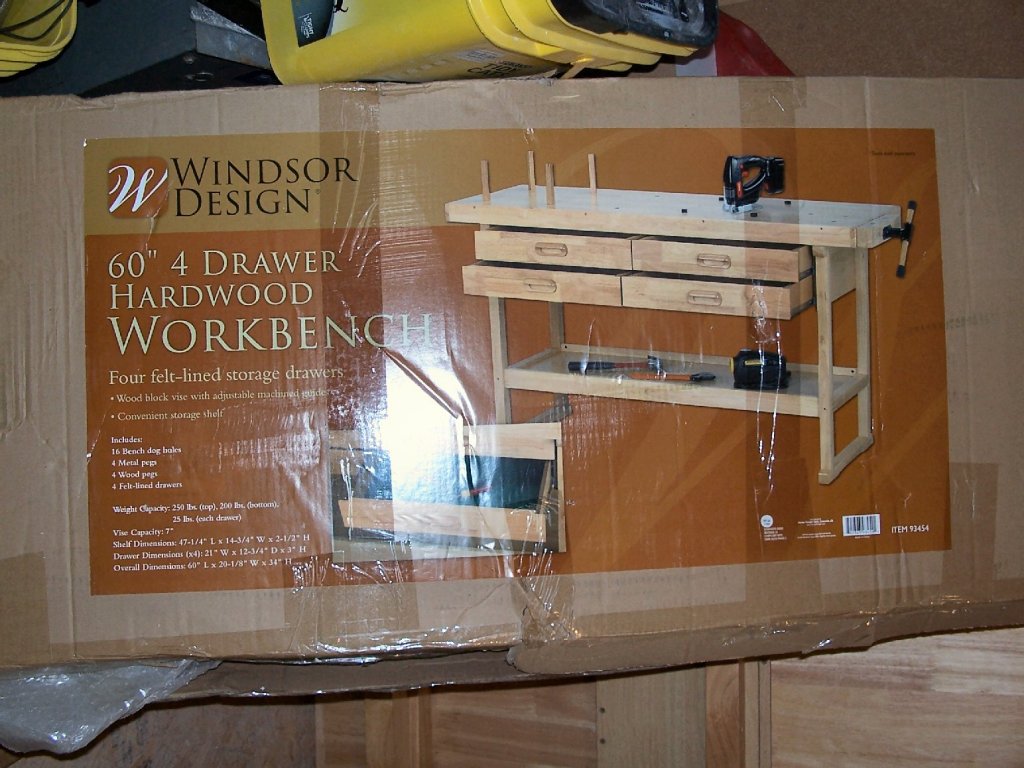
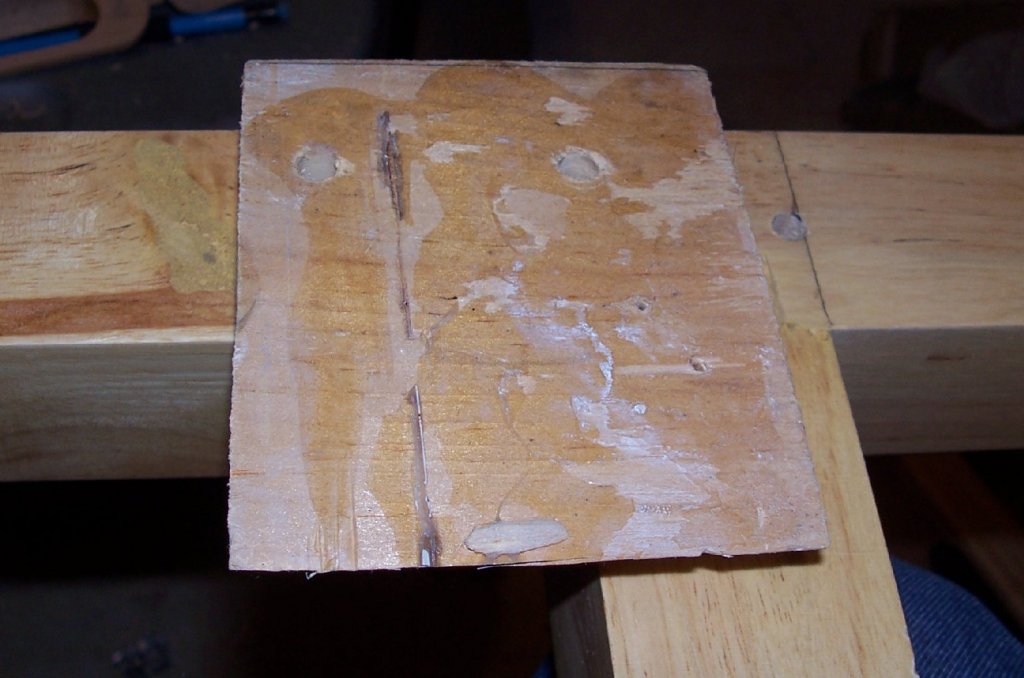
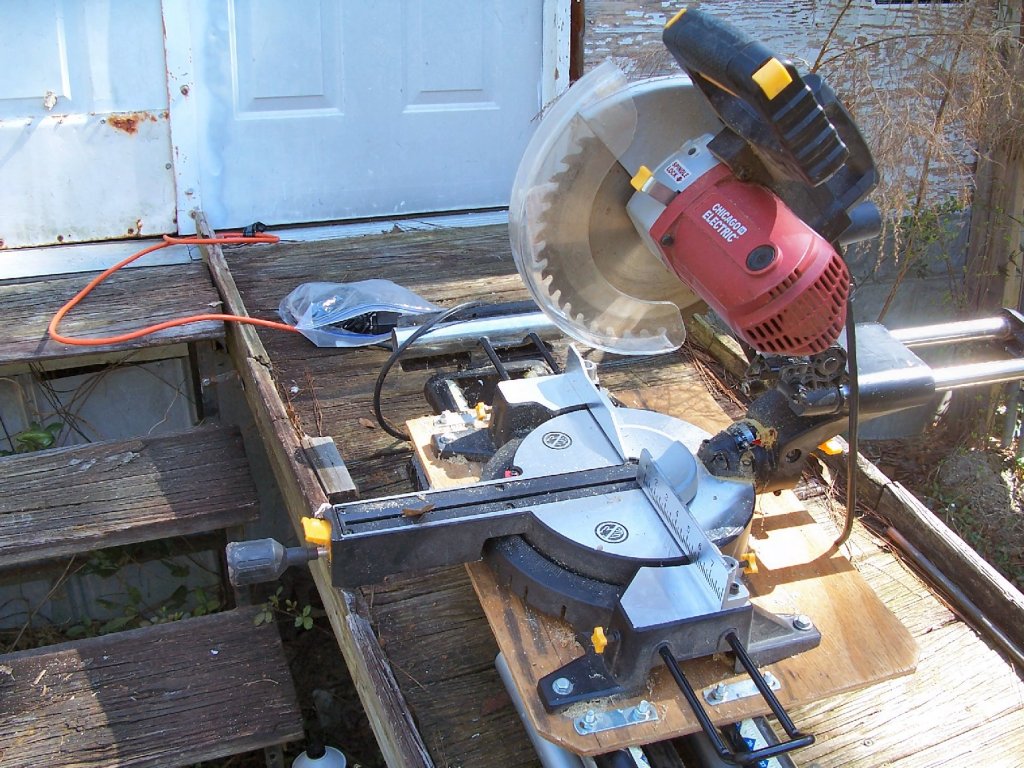
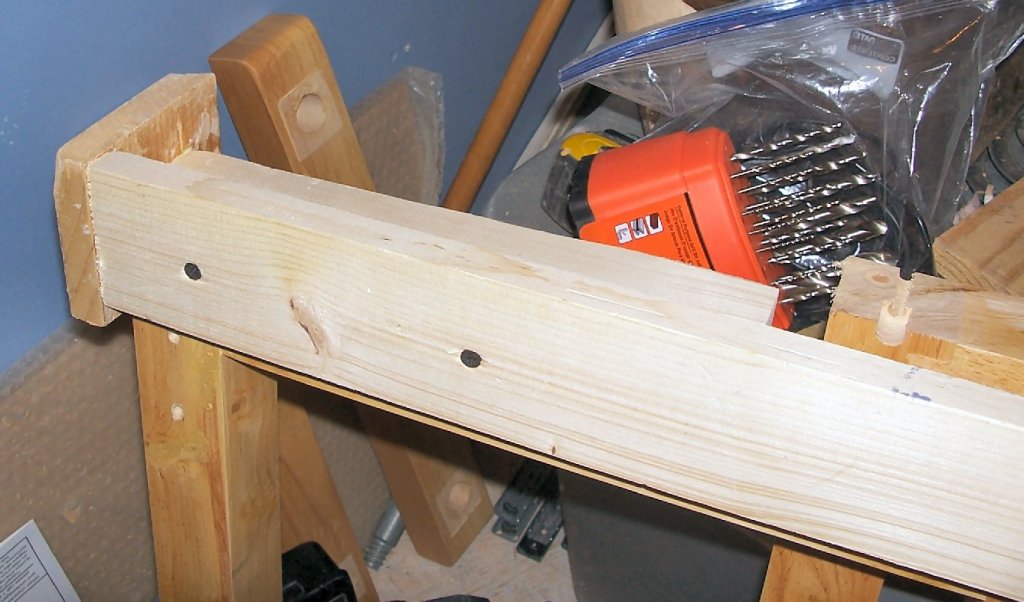
Part 01 After many years of wanting one, I finally bought a Harbor Freight Hardwood Workbench! Actually this is the second one I bought, the first one was in my truck when it was stolen last year! This workbench is designed to be used while standing, not ideal for me, or my knees! So I’m going to kit bash it so I can use it while sitting at it. As it comes the work surface is 34 inches high, I prefer a 27 inch height. Also I need to delete the drawers and the front shelf support bar and shelf board of the lower shelf. I’ll save the drawers and slides for a future project. The legs below the horizontal shelf board on the sides are 7” long, so cutting the legs off at the bottom of this will get me the height I need. The first step was removing the screws that held the feet to the legs, and taping them off the legs. Thankfully the manufacturer did not do a good job of gluing them together! So the first problem is that I will need to drill the shortened legs for a new 1” dowel to mate with the existing hole in the feet, more on this later. I will not be regluing this joint when I reassemble the legs, I will add a couple screws from the foot into the horizontal shelf board to add the needed stiffening. The pins on the end of the legs are turned not a separate dowel, and are slightly larger than 1” anyway, with a matching larger hole in the feet. When I shorten the legs the cut will bisect the lower shelf bracket hole, so I clamped a scrap piece onto a leg, and drilled through the existing holes to make a jig. Next I drilled new upper holes using the jig, then opened up the inside with a larger drill to match the existing holes. I used a piece of duct tape on the larger drill as a depth guide. Sorry that some of the pictures are a little blurry. I had to balance the part on my knees while holding it in one hand and using the other for the camera. I broke out my miter saw to cut the legs. I adjusted the stop on the end of the table so all the legs would be the same length, and cut the first leg. At first I was going to cut just below the hole, but then decided to cut it flush, allowing the foot to rest on the cross piece. This should be more stable. To cut the other leg, I had to remove the square piece, which originally held the slides for the drawers. It stuck up past the top of the leg assembly, and interfered with the stop, when I flipped the assembly over to cut the other side. After the legs were cut I re-installed the piece, as it also stiffens the assembly.Here are both leg assemblies cut. As this picture shows the new end of the leg has this nice divot in it from the original shelf support hole. This is not very conducive to drilling the end for a dowel! So I build another jig to guide the drill for the new dowel hole. It was at this point that I discovered that both my old spade bit and even older Fosner bit were both dull and wandered while drilling!. So I tore the jig apart, and will buy a new drill bit, when I buy a piece of 1” dowel.


- 14 replies
-
- 10
-
-
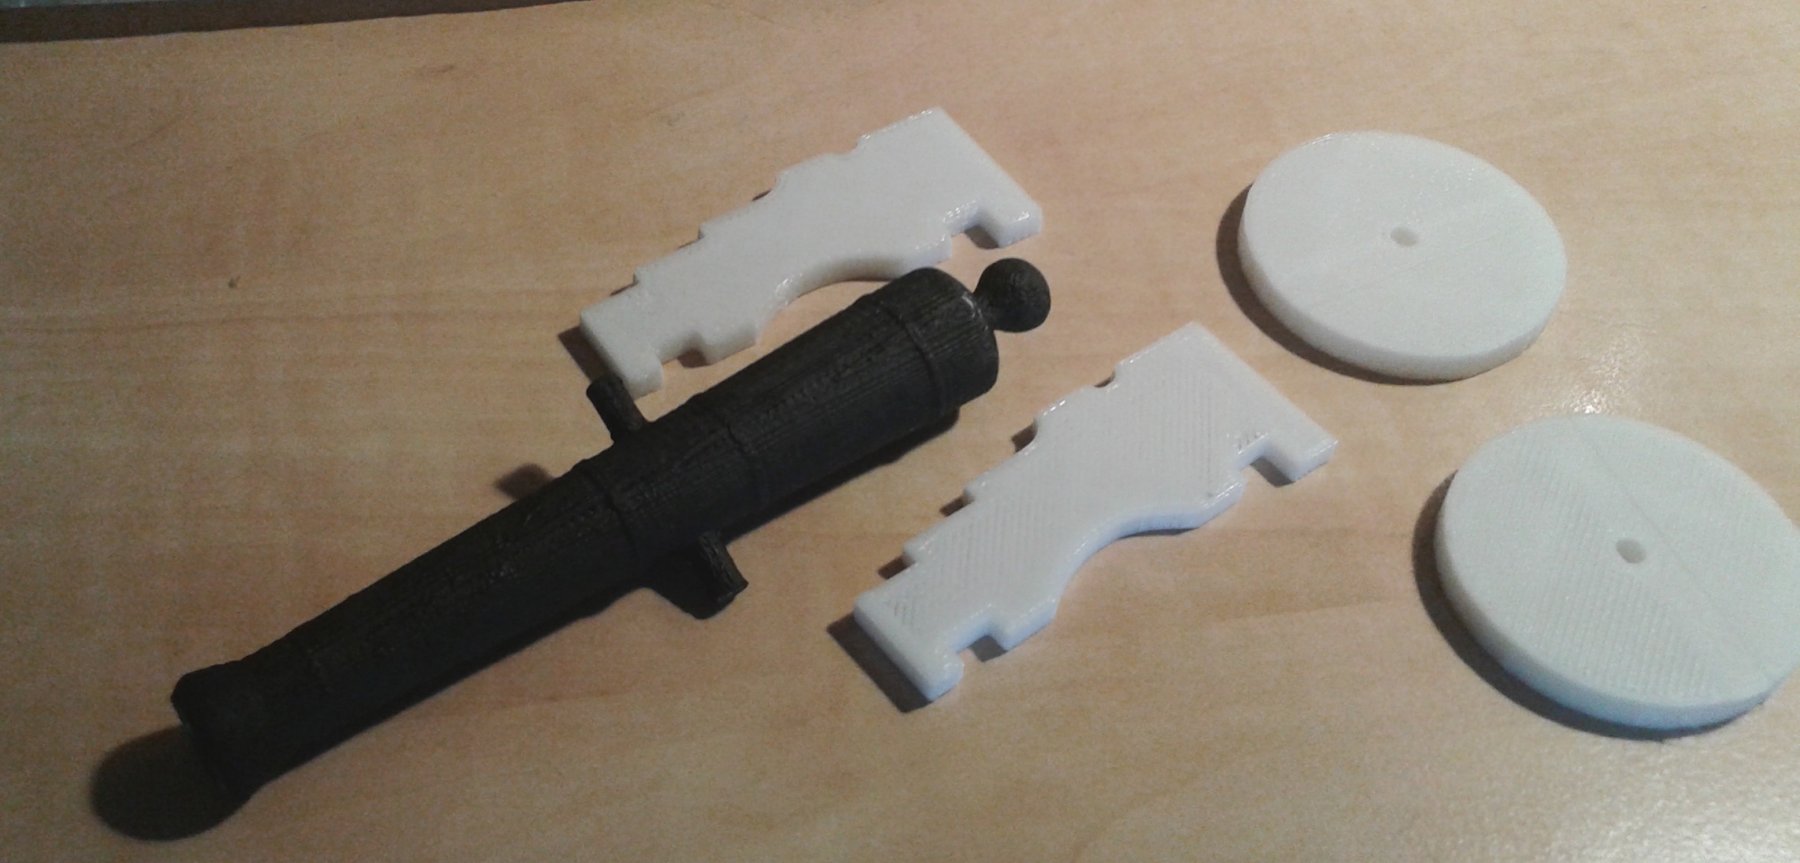
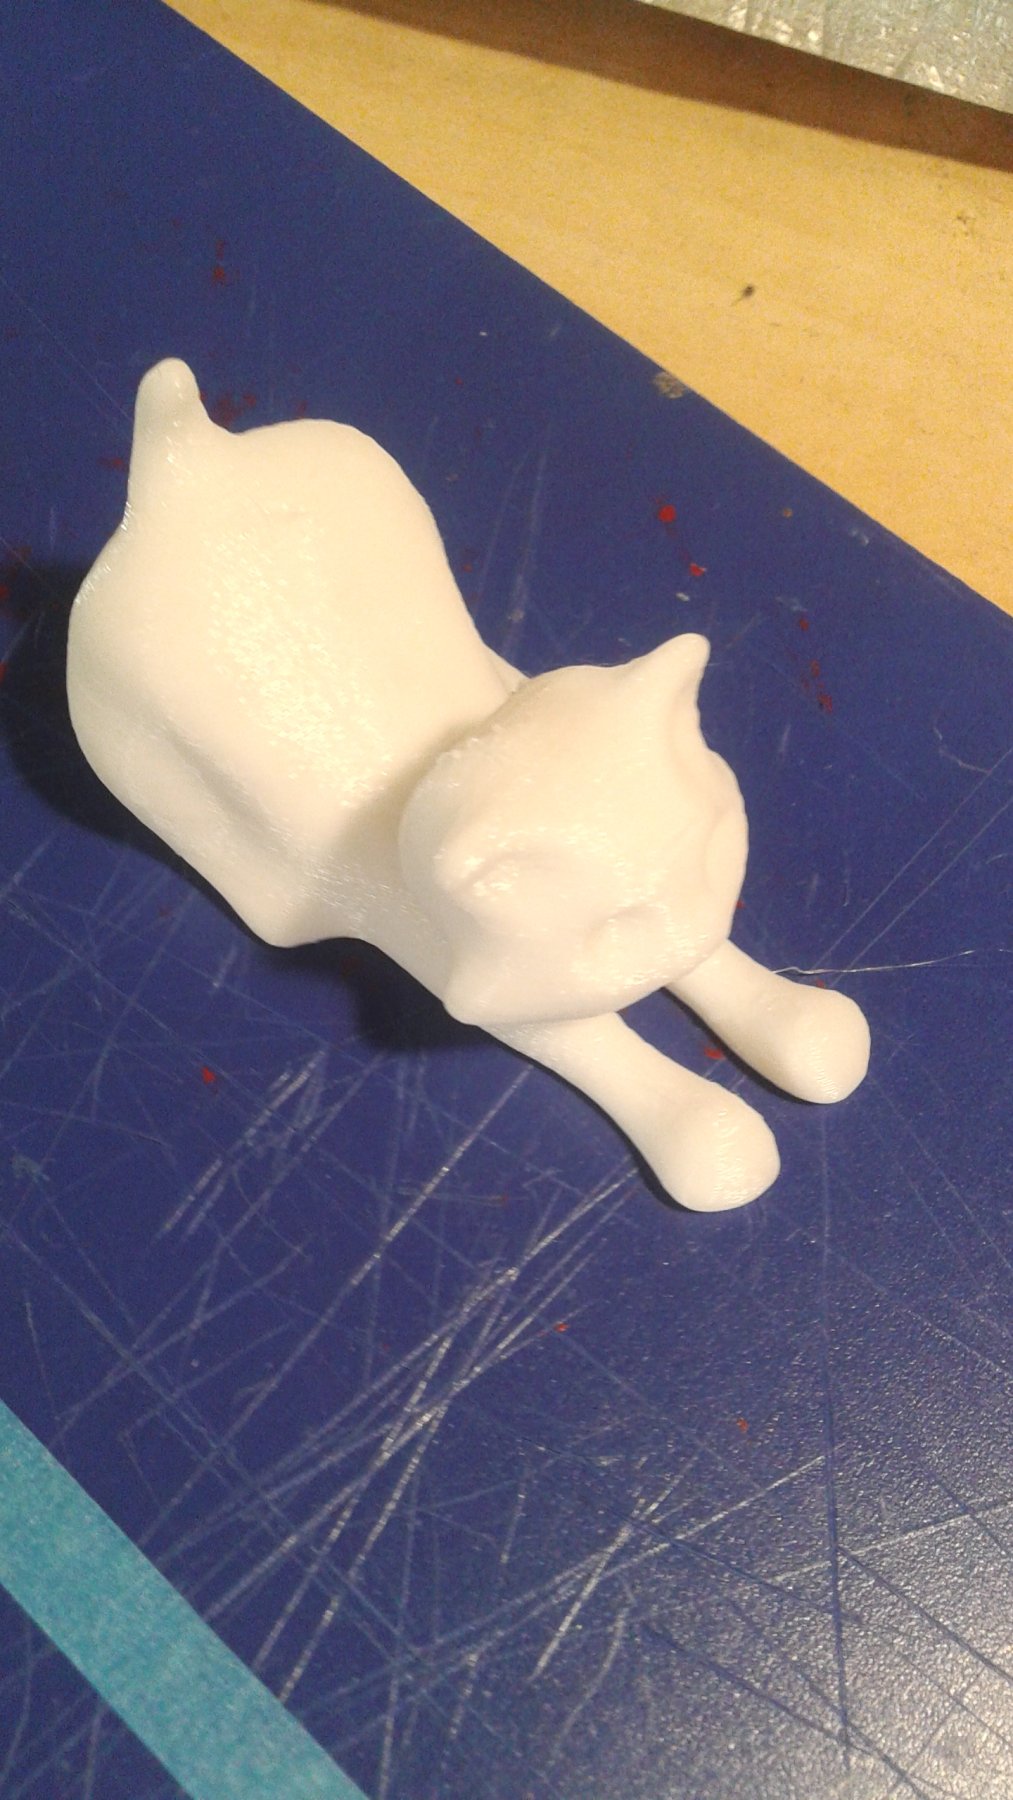
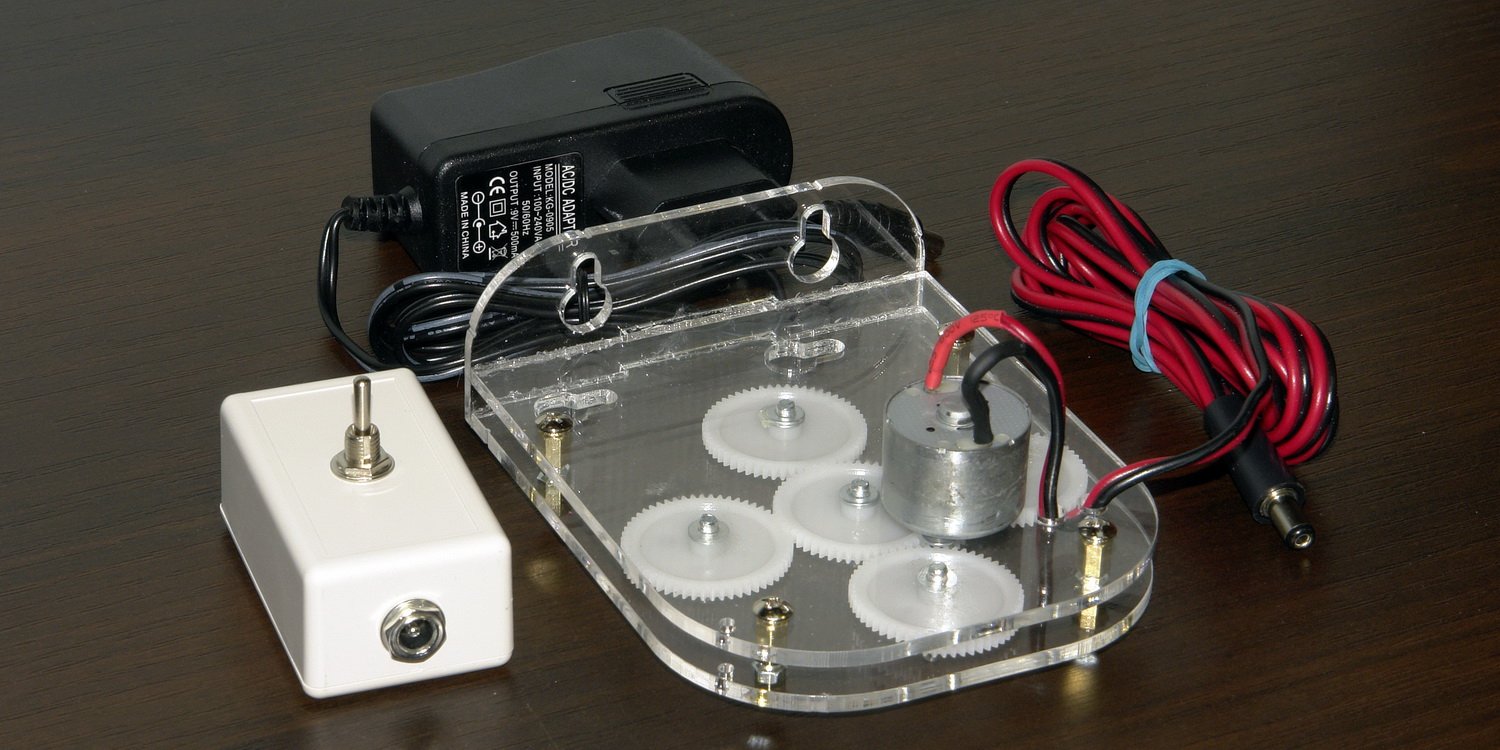
 As it was the retired period from a 40 years period of tv, graphics, and 3d projects, i said it is time to test a second tool. The first was a laser and CNC tool. Now i bought a 3d printer to make from scratch, and i will show some tests. This are some of the first tests, working for the ship hobby. I also mede some "toys" for my granddaughter, just to see how to work. It seams it is a good tool, and to test parts for ships is excellent. I will show how i build, pictures and explanations soon Cristi
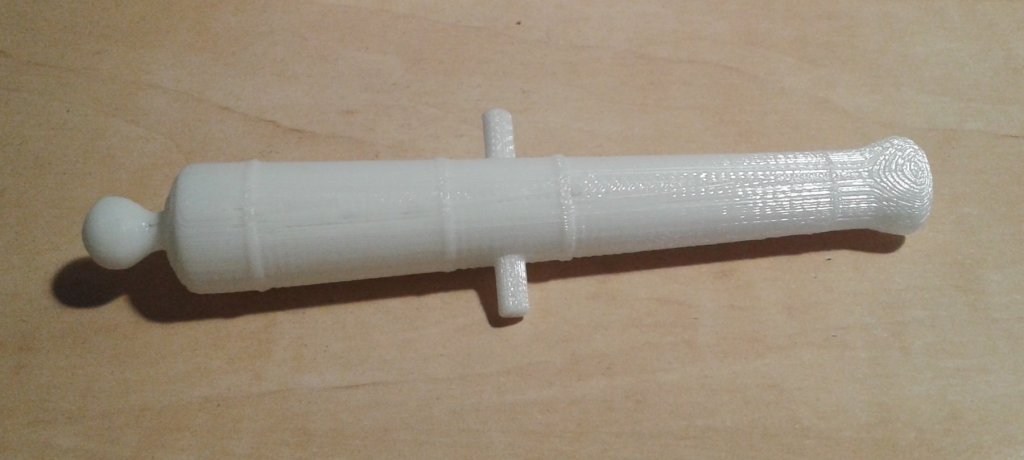


-
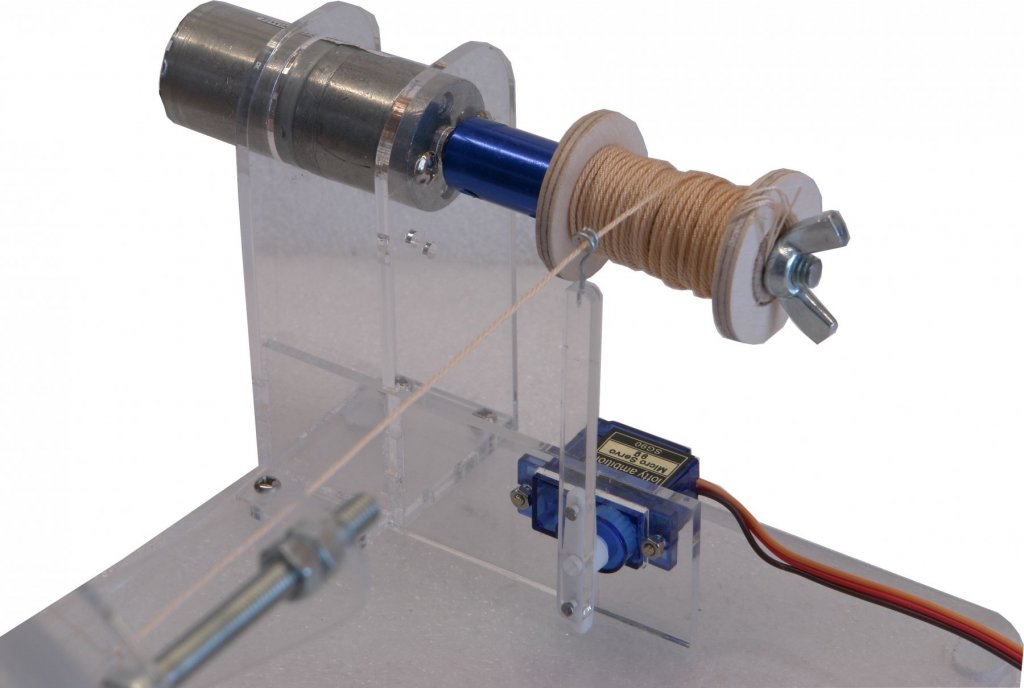
 Dear friends, I proud to present next version of endless rope making machine (video to come soon): https://shipworkshop.com/products/tools/pl-3.2-endless-rope-making-machine PL 3.2 Endless rope making machine with traverse Fully automated ropewalk with traverse (rope making machine). Minimal control is needed. Basic features PL Endless rope making machine with traverse ("PL machine") is intended for making professional model ropes: 2-, 3- or 4-stranded; With/without the core; Plain laid or cable laid; Left or right lay. What's new: PL = Planetary ropewalk. New version of former ropewalk "Planetary". New traverse unit. New Smart Control Unit v3.0 Endless means extra long result ropes. User manuals: PL Endless rope making machine Smart Control Unit v.3.0
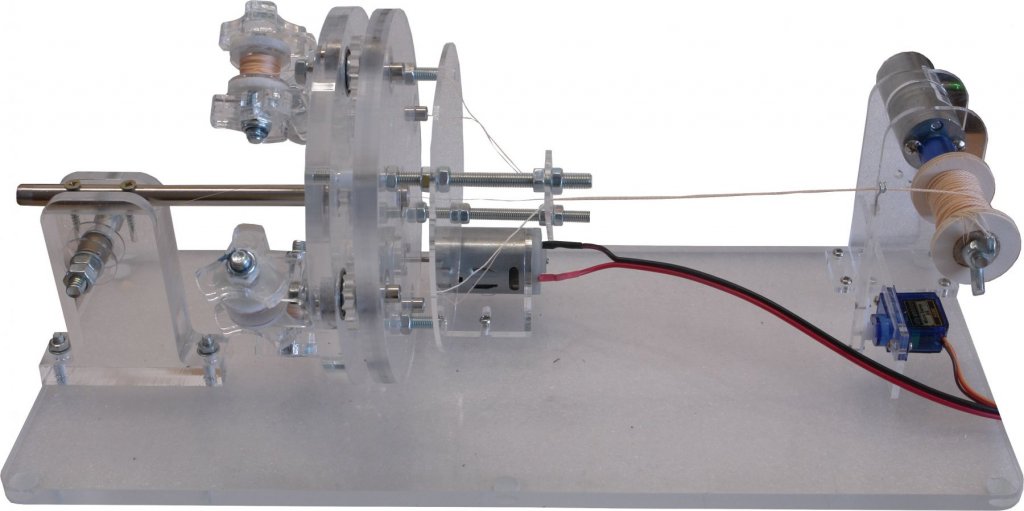
-
Dear friends, I proud to present next version of rope making machine (video to come soon): https://shipworkshop.com/products/tools/vr-31-rope-making-machine VR 3.1 Rope making machine (HD adaptable rope making machine. Former Ropewalk "Prosak") What's new: VR = Vertical ropewalk. New version of former ropewalk "Prosak". No need to reassemble for 3- or 4-stranded ropes. Can be secured on both horizontal and vertical surfaces. HD adaptable. Can be transformed into HD (Horizontal Design) machine. Not yet available. There are notches on the machine that will help to mark screw holes for securing the machine. Here is user's manual: VR31.pdf

-
 Since there has been considerable discussion of lathes, milking machines direct read outs, and CNC lately I thought it might be worthwhile to present some thoughts on the way that I have used machine tools. For a number of years I have been interested in building a series of warships’ boats to a common scale of 1:32. My comments apply to scratch building of these models. If you are say turning a set of identical cannon barrels your needs may be completely different. Almost 20 years ago I bought a Sherline long bed lathe and milling column to replace an ancient Sears metal lathe that had died. The Sears lathe did have two features that I thought that I wanted that the Sherline lacked: power feed, and a tail stock that could be set over to turn a taper. As it has turned out I have not needed either of these features. I have also found that that my work has not required a vast assortment of accessories. Chucks and hold downs: For most of my work, I use a 1/2 in Jacobs chuck attached to a Morse tapered shank that fits into the headstock. I also have a Sherline three jaw chuck but have only needed to use it two or three times. I also have a set of fractional collet chucks that are great for machining fractional sizes of brass rod. If I have rod that matches one of these collets I use it. Another highly useful and inexpensive accessory is a set of T nuts and hold downs. While their application to the mill is obvious they can also be used for making fixtures, sometimes from plywood that can be clamped to the tool post. I recently needed to drill a hole longitudinally down an oar shaft to fit a handle. Freehand made a mess of things. I made a U shaped bracket from plywood and mdf, held down to the toolpost with T nuts. A drill equal to the oar shaft diameter was chucked in the headstock and by moving the toolpost was drilled through the two uprights of the U. This hole was now centered on the headstock. A smaller drill equal to the handle diameter was chucked and by feeding the oar shank through the holes in the U bracket a hole concentric to the center of the oar shaft resulted. Drilling: Many projects involve drilling a hole, and for this a tail stock chuck is essential. I also use the sensitive drilling attachment in the milling column whenever I can. Turning: I have a vertical sanding machine with a 1in wide belt ( a linisher to our British friends) that I prefer for grinding lathe tools. I find this to be easier to use than a bench grinder. A parting tool is essential, but I also have a miniature one made from 1/4 in bar stock that accepts a piece of an Exacto blade. While the regular lathe tools are used for turning stock to a diameter or tapering, much detailing is done freehand with needle files. Calibration: For much work, I find that cut and try using simple plywood gages is easier than using the calibrated handwheels. For example I recently made a set of belaying pins. The raw material was 1/16 in brass rod. First this was chucked in a 1/16in collet chuck and the shank was turned to 1/32in, the diameter checked with a 1/32in hole drilled in a piece of thin model plywood. It was necessary to turn a short section of rod to its required diameter, then loosen the collet and to feed out another section until the entire shank had been turned. Otherwise it would have collapsed. The head of pin was then shaped with needle files and the pin was cut off with a razor saw. With some ingenuity there are all sorts of simple gages that can be made to produce work of sufficient accuracy. Roger
 -
I am about to rig my longboat model and while the rigging is simple, I would like to do a good job of it. There has been discussion on the forum about the use of fly tying thread thread and some mention of fly tying tools. Can anyone who has used fly tying tools comment on which tools they have found to be useful and how they are used? Thanks, Roger
-
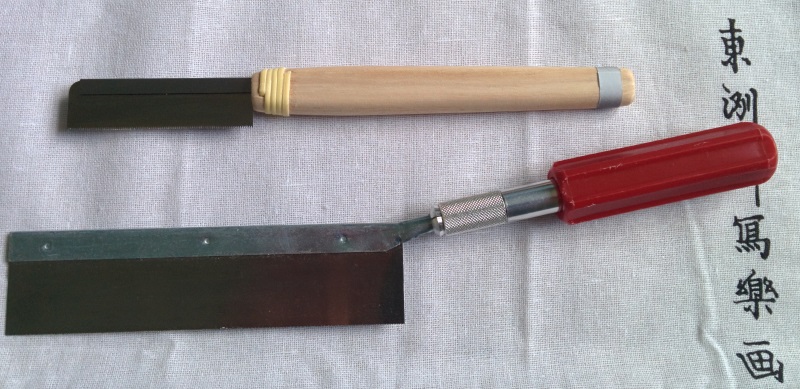
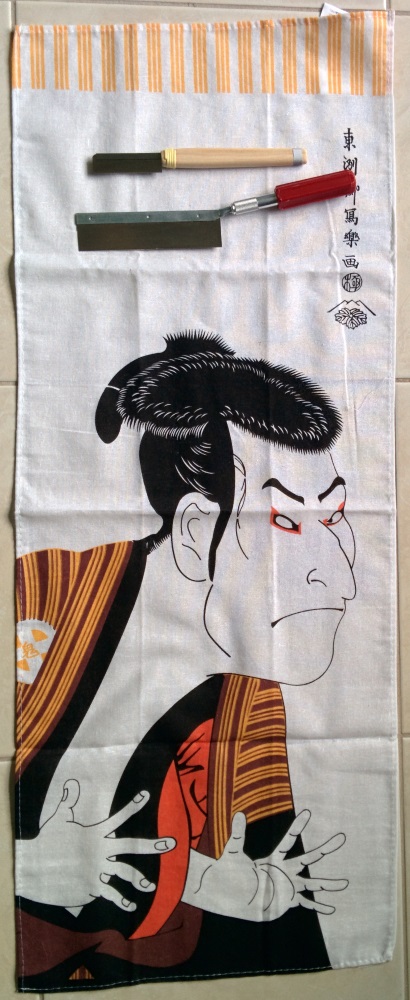
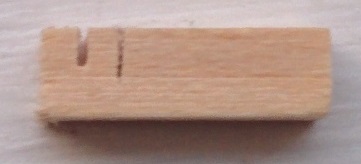
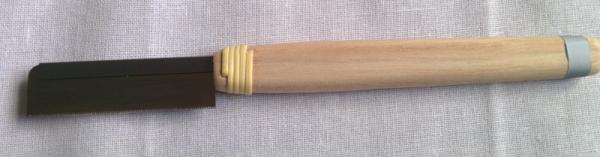
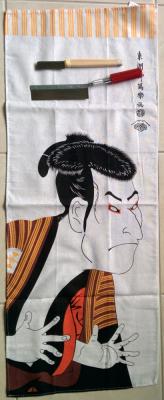
 Having seen this saw in Clare's post http://modelshipworld.com/index.php/topic/10860-yakatabune-by-catopower-woody-joe-124-scale-small/page-2#entry330886, I decided to order one from Zootoyz.jp. It took about 10 days to arrive from Japan. The saw is small and with a very narrow blade. Here is a comparison with my x-acto razor saw. These are some sample cuts on 1/8" sq basswood. The HISHIKA is on the right. The saw came very well packed. It was inside 2 heavy plastic sleeves then wrapped in this cloth, then bubble wrap, all in a box. I'm not sure of the significance of this guy . The saw is not cheap, about $25 with shipping, but is very nice and well worth the money. Zootoyz were very helpful and responsive. Here is the link to the site http://zootoyz.jp/contents/en-us/d141_HISHIKA_Super_Fine_Cut_Saw_.html Richard.
- 34 replies
-
- 13
-
-
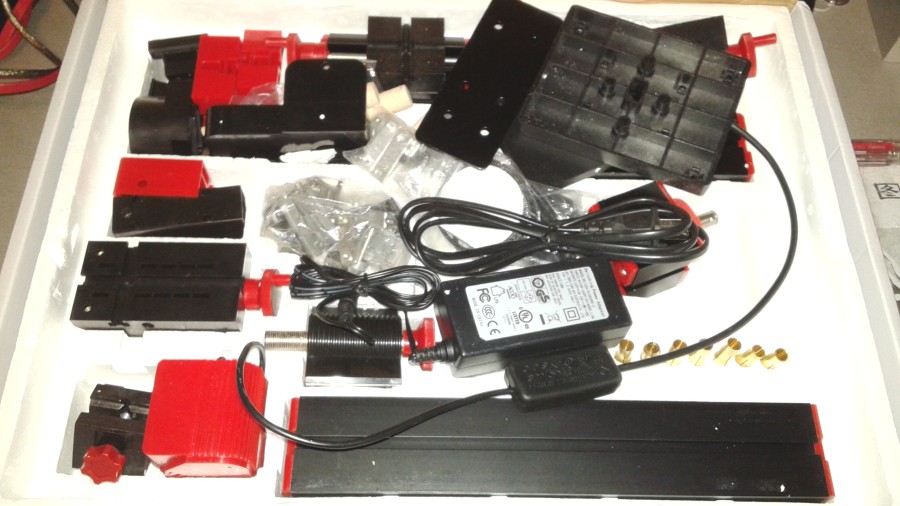
I don't want to make advertise, and this is why i don't present the name of the manufacture. I was a "good boy" and Santa Clause (from my own pocket) came early ths year I will try to present the toy, and how it looks inside, for the one that want to buy one, and did not see the interior of the box


-
 All, I have a couple questions. I have been granted permission to purchase a mill. I have decided on a Sherline 5400. Where has everyone purchased their equipment? Directly from Sherline? An authorized dealer? Obviously I'm looking to get the best deal I can. Also which does everyone prefer, imperial or metric? I don't want to start a debate, but just looking as to which direction everyone goes and why. What about DRO (Digital Read Out) seems like it would be a nice feature to have. What about CNC, I've never used CNC before and for what I will be using the mill for it doesn't really seem to be an option I would really need right now. Any guidance would be appreciated. Thanks Shawn
 -
I found this website during browsing for another thing. It has a lot of good info but also ideas of what we builder can built ourselves to help us in the workshop and having some diy tools. Specially lathe setup with a power drill seems interesting.
-
 With the oft-repeated discussions about which power tools to use, and the oft-repeated replies referring to the fact that they didn't have power tools in the 18th Century, I was wondering where to look for articles about the tools and techniques used at that time by ship modellers. I'd really like to know more about which tools were used, how they were made and the various little techniques that were used to achieve their perfect results -- especially in making Admiralty models. I suppose it's strongly linked to fine cabinet making, especially in miniature-- and there's probably lots of info on that. Obviously knives, blades, saws and chisels don't need much discussion, and I'm clear about the types of lathe used. But I'd be quite interested in accurate drilling, for example, or sanding techniques or the kinds of jig that may have been used. I'm sure lots of you have already considerable knowledge about this, so I thought I'd ask to see where I might start. Thanks for any replies or interest! Tony
 -
 Hello, everyone! I am currently preparing to build my first wooden ship model (the Amati/Victory Models Lady Nelson). I have been reading up on the various techniques needed to construct the hull, and while I wait for the kit to arrive, I thought I'd go about gathering some basic tools to help me with the build. I thought it might be a good idea to list the various tools that I have purchased (or will purchase) so that all the knowledgeable and experienced members of this forum can let me know if I'm forgetting something important. Since this is my first build (and I'm on a budget), I am keeping it simple and sticking to basic hand tools -- you won't find any lathes or Dremels in this list! I'm not going to be using any special plank-bending tools, as the "old school" method of soaking the planks, bending them over the bulkheads, clamping them, and allowing them to dry before attachment really appeals to me (and seems like a great way to get a really nice fit). I should also mention that, for now, I'm focusing on the tools I will need to construct the hull (I don't want to get ahead of myself). When it comes time to do the rigging, I will obtain a few extra tools, such as picks/hooks and perhaps a "helping hands" with a magnifier. So, here's my list: Deluxe Ship Modeler's Tool Set (I found a great deal on this set, and since I don't have any of the tools included with it, I thought it would be a good place to start; the set includes 3 hobby knives with 15 assorted blades, aluminum miter box with razor saw blade, pointed nose tweezers, flush cutter with spring-loaded handles , aluminum awl, 4 assorted gouges, 2 small needle files, pin vise with 3 micro drill bits, and a wooden sanding block with wedge) Mantua Strip Clamp (doubles as a keel clamp for hull work and a plank vise with a metal edge to assist in planing planks when tapering) Additional needle files (to supplement the contents of the kit) Miniature wood plane (1" wide) Analog calipers (I chose these over digital calipers for the savings, and the lack of batteries required) Small square Ruler Metal compass and mechanical pencil Emery boards Sandpaper (assorted grits) White wood glue CA glue Wood filler Small folding clips (the black metal clips with silver metal arms; for clamping during hull planking) T-pins Q-Tips Index cards Self-healing cutting mat Swing-arm lamp (with magnifier) From what I can tell, this list seems to include the essentials that I'll need to do a good job, while not being too pricey. Let me know what you think! Thanks!
 -
Hello, I ran across this article, and I thought it might be interesting to those who have limited space to work. As shown, it is meant to be clamped in a large workbench vise, but it could easily be altered for C-clamping to a table or desk top. https://books.google.com/books?id=UyYDAAAAMBAJ&lpg=PP1&pg=PA158#v=onepage&q&f=false It occurs to me that the persons who would find this most useful probably do not have the facilities or tools to make one. If that's so, then I could make this or a customized workboard for you in exchange for compensation for materials & labor. Please PM me if you're interested. And before I forget, here's a source for good quality tools and other items at reasonable prices: C.R. Hill of Berkeley MI. http://www.crhill.com/
-
This addition is something of an aside, and, at the risk of looking foolish I thought I'd share it. Like, I suspect, many others, there is an abundance of tools I'd like to possess but simply cannot justify the purchase price. One of the primary ones being a keel clamp. One of the better ones is the lovely one costing a little short of £50.00. Well, I was in Aldi this afternoon, actually went specifically to have a look at one of their "specials", a table vice, which I thought could maybe pressed into service as a keel clamp, and with other uses. The vice edges are rubber sheathed to protect the object in the jaws. I bought one. Getting it home I thought perhaps it was a waste of money, its quite a robust thing, die cast aliminium and weighty with it. However I tried it; I was pleasantly surprised. Have a look at the photo just taken. Its bulky and its use will be limited, but I can see it proving useful for some tasks. Its available as a clamp mounted thing that clamps to a table edge or similar or a suction mounted one. And why am I making such a fuss? Well it costs less than £7.00!! bryanc

-
I've been doing some research and interviewing some older ship in bottle builders and thought I'd open this discussion up on this forum. I'm gathering information on how some of the first ships in bottle were built in hopes of using the same materials tools and techniques and documenting the experience through a build log and my blog. It seems to me a lot of this information is fading in time or at the very least hard to find. I'd like to contribute another source to make it that much easier to find and keep it alive. Here's what I have so far. Wood used was mainly pine. While not used for actual ships it had a lot of other purposes and was widely available. Hulls were often thinner then what would be scale. Segmented hulls were not often if ever done in older ship in bottles. I have heard of old ships in bottles being made from bone as well. Masts and yards were made from either splintered wood or match sticks. Both would have likely been sanded down with dry sharkskin. Glue was made from different fish parts boiled down. There's youtube videos on this I'd have to dig around for them again though. Thin thread may have been hard to find but wax from candles could have been used to strengthen pieces enough to use. Don Hubbard had a thought that Baleen from whales could have been used for thread but there's no way to know for sure. Sails were not common among old ship in bottles because they were harder to do. Usually the ship was just shown with the bare yards. When it was done they used paper or some times wood shavings. Sea is tricky and I think it depends on the time period. Michael Bardet suggested that seas were made of wood in old ship in bottles. I've seen some of the old ships he restores, some as old as 1895, and have seen how that was done. His work is incredible I highly suggest seeing it. http://michel.bardet.pagesperso-orange.fr/indexa.htm Other methods for sea was some kind of putty with pigment in it. Don Hubbard theorizes that green copper oxide could have been used as well. As far as bottles I found an interesting idea from an article by Louis Norton. He says that most alcohol would have been transported in wood barrels on sailing ships so the bottles used were more likely medicine or spice bottles. I wouldn't doubt that a sailor would keep a clear liquor bottle he picked up in port though. Most of the old bottles I've seen have mostly been wine bottles. I've looked around a little bit in regards to tools. Sailors definitely had knives and this would have been a primary tool. Other things I found were surgical scissors and Sail Awls. Tweezers or forceps could have been carved out of wood. I'm not sure yet on drills. Don Hubbard uses a technique where you sand down a needle and use it as a drill. This may have been the tool used. Shark skin for sand paper. From what I can tell sailors were quiet resourceful. Just about anything and everything could have been used. I'm sure there's ideas I haven't thought of or possibly books I don't know about. If you have any ideas please post them.
- 2 replies
-
- 5
-
-
- Ship in Bottle
- Bottle
- (and 2 more)