Search the Community
Showing results for tags 'whaleboat'.
Found 20 results
-
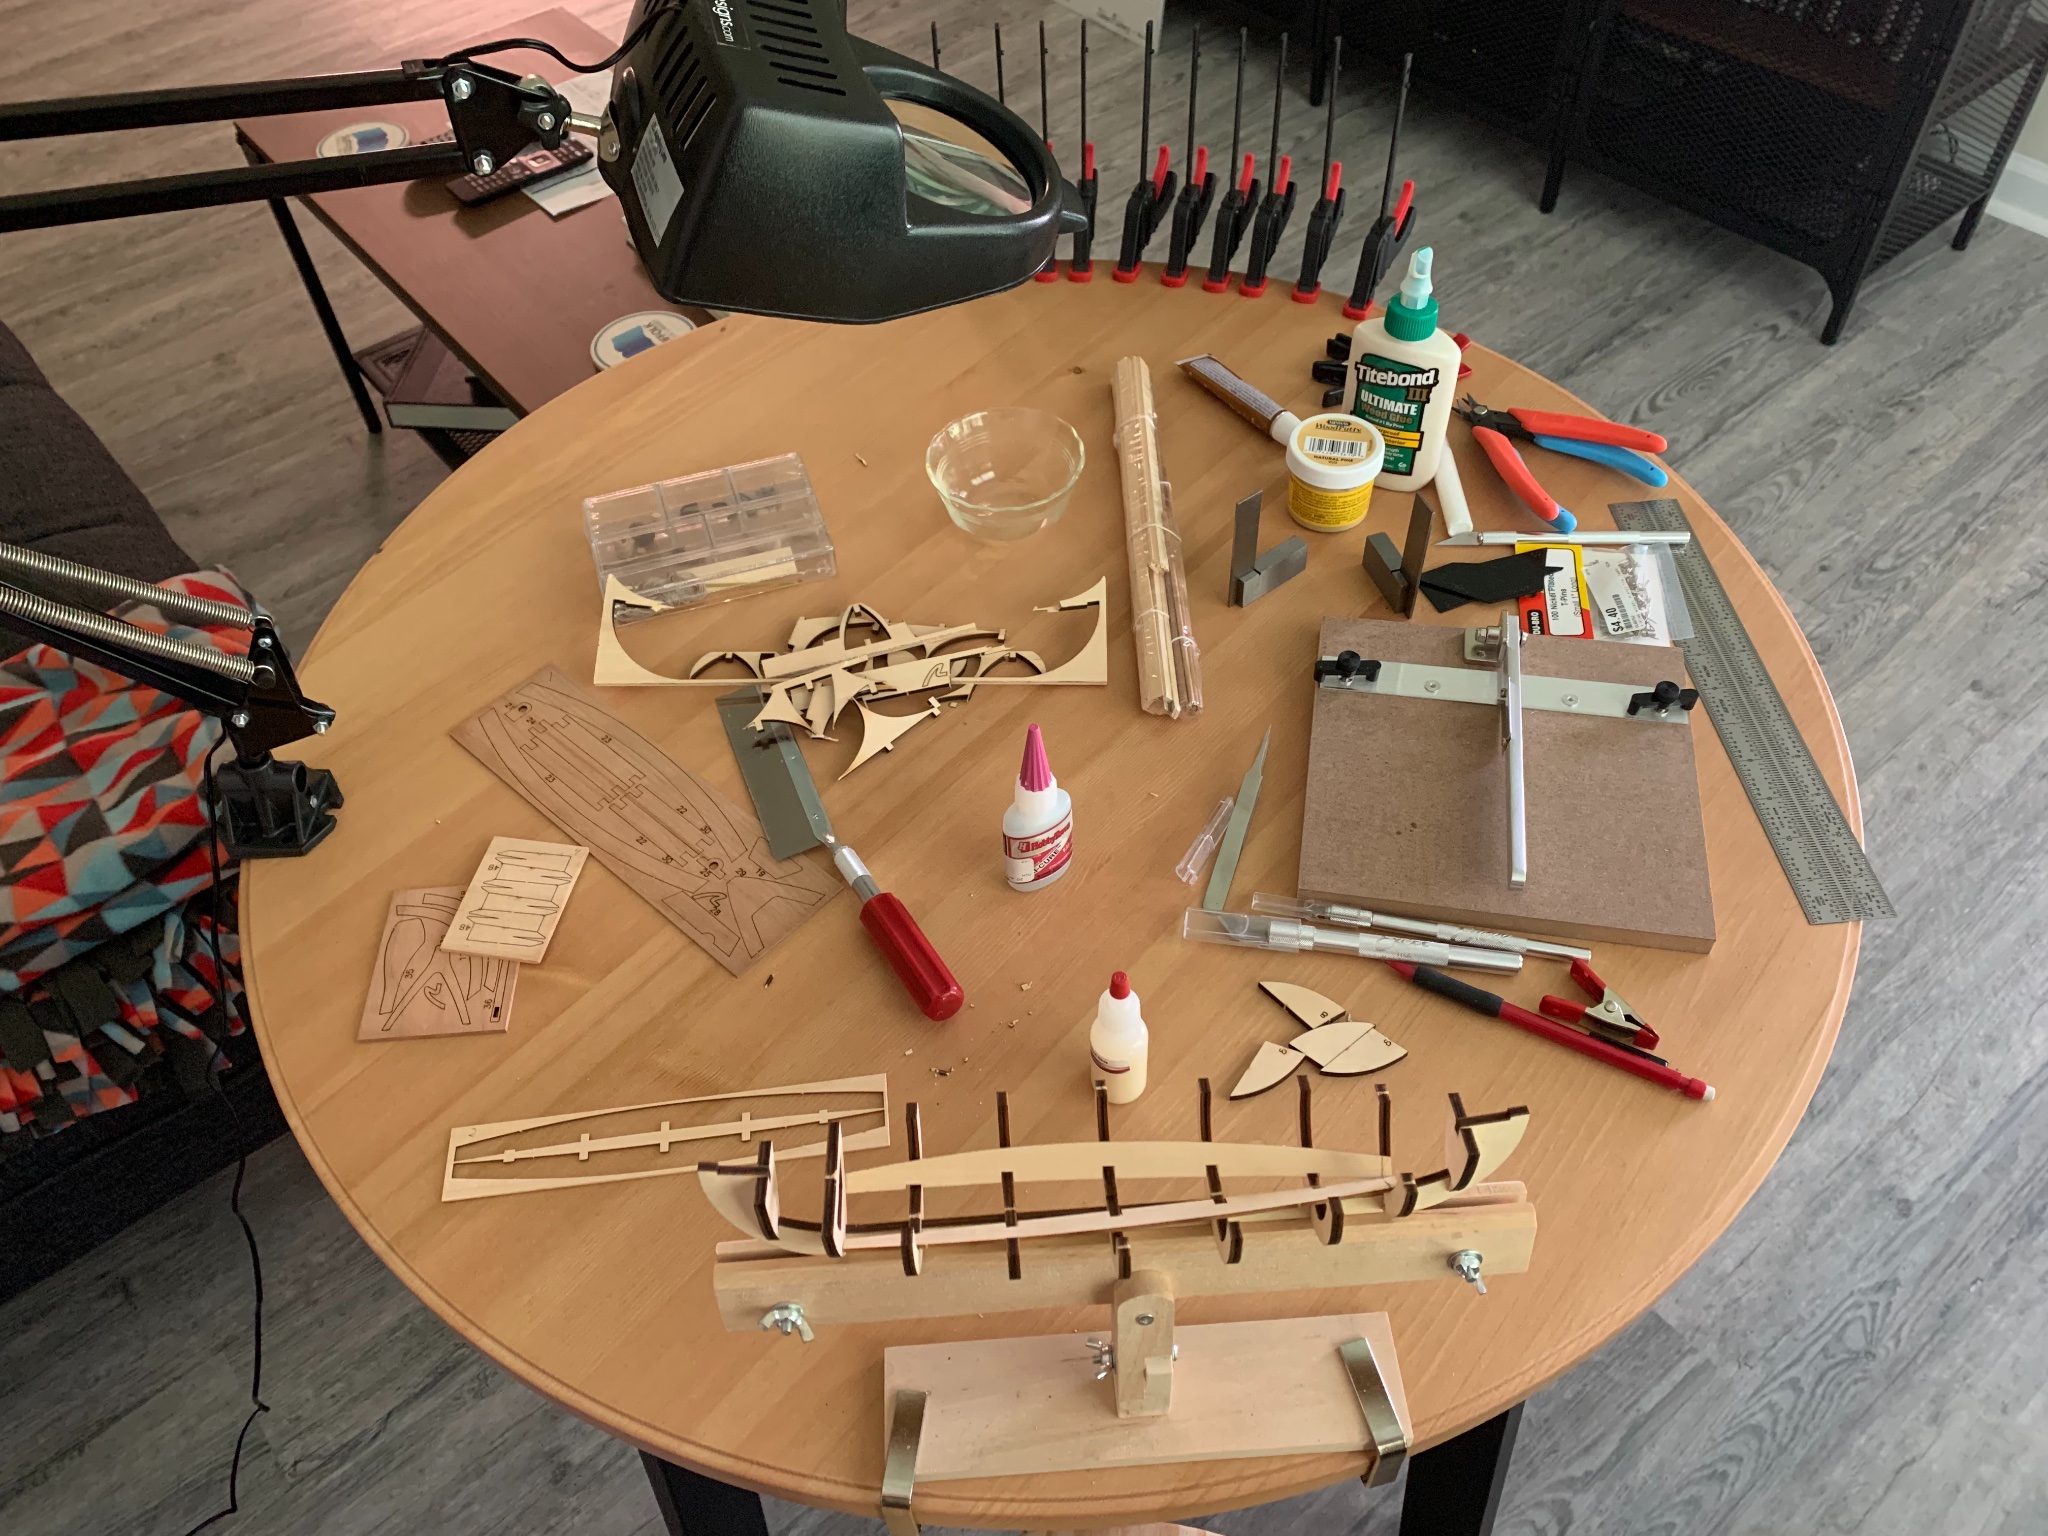
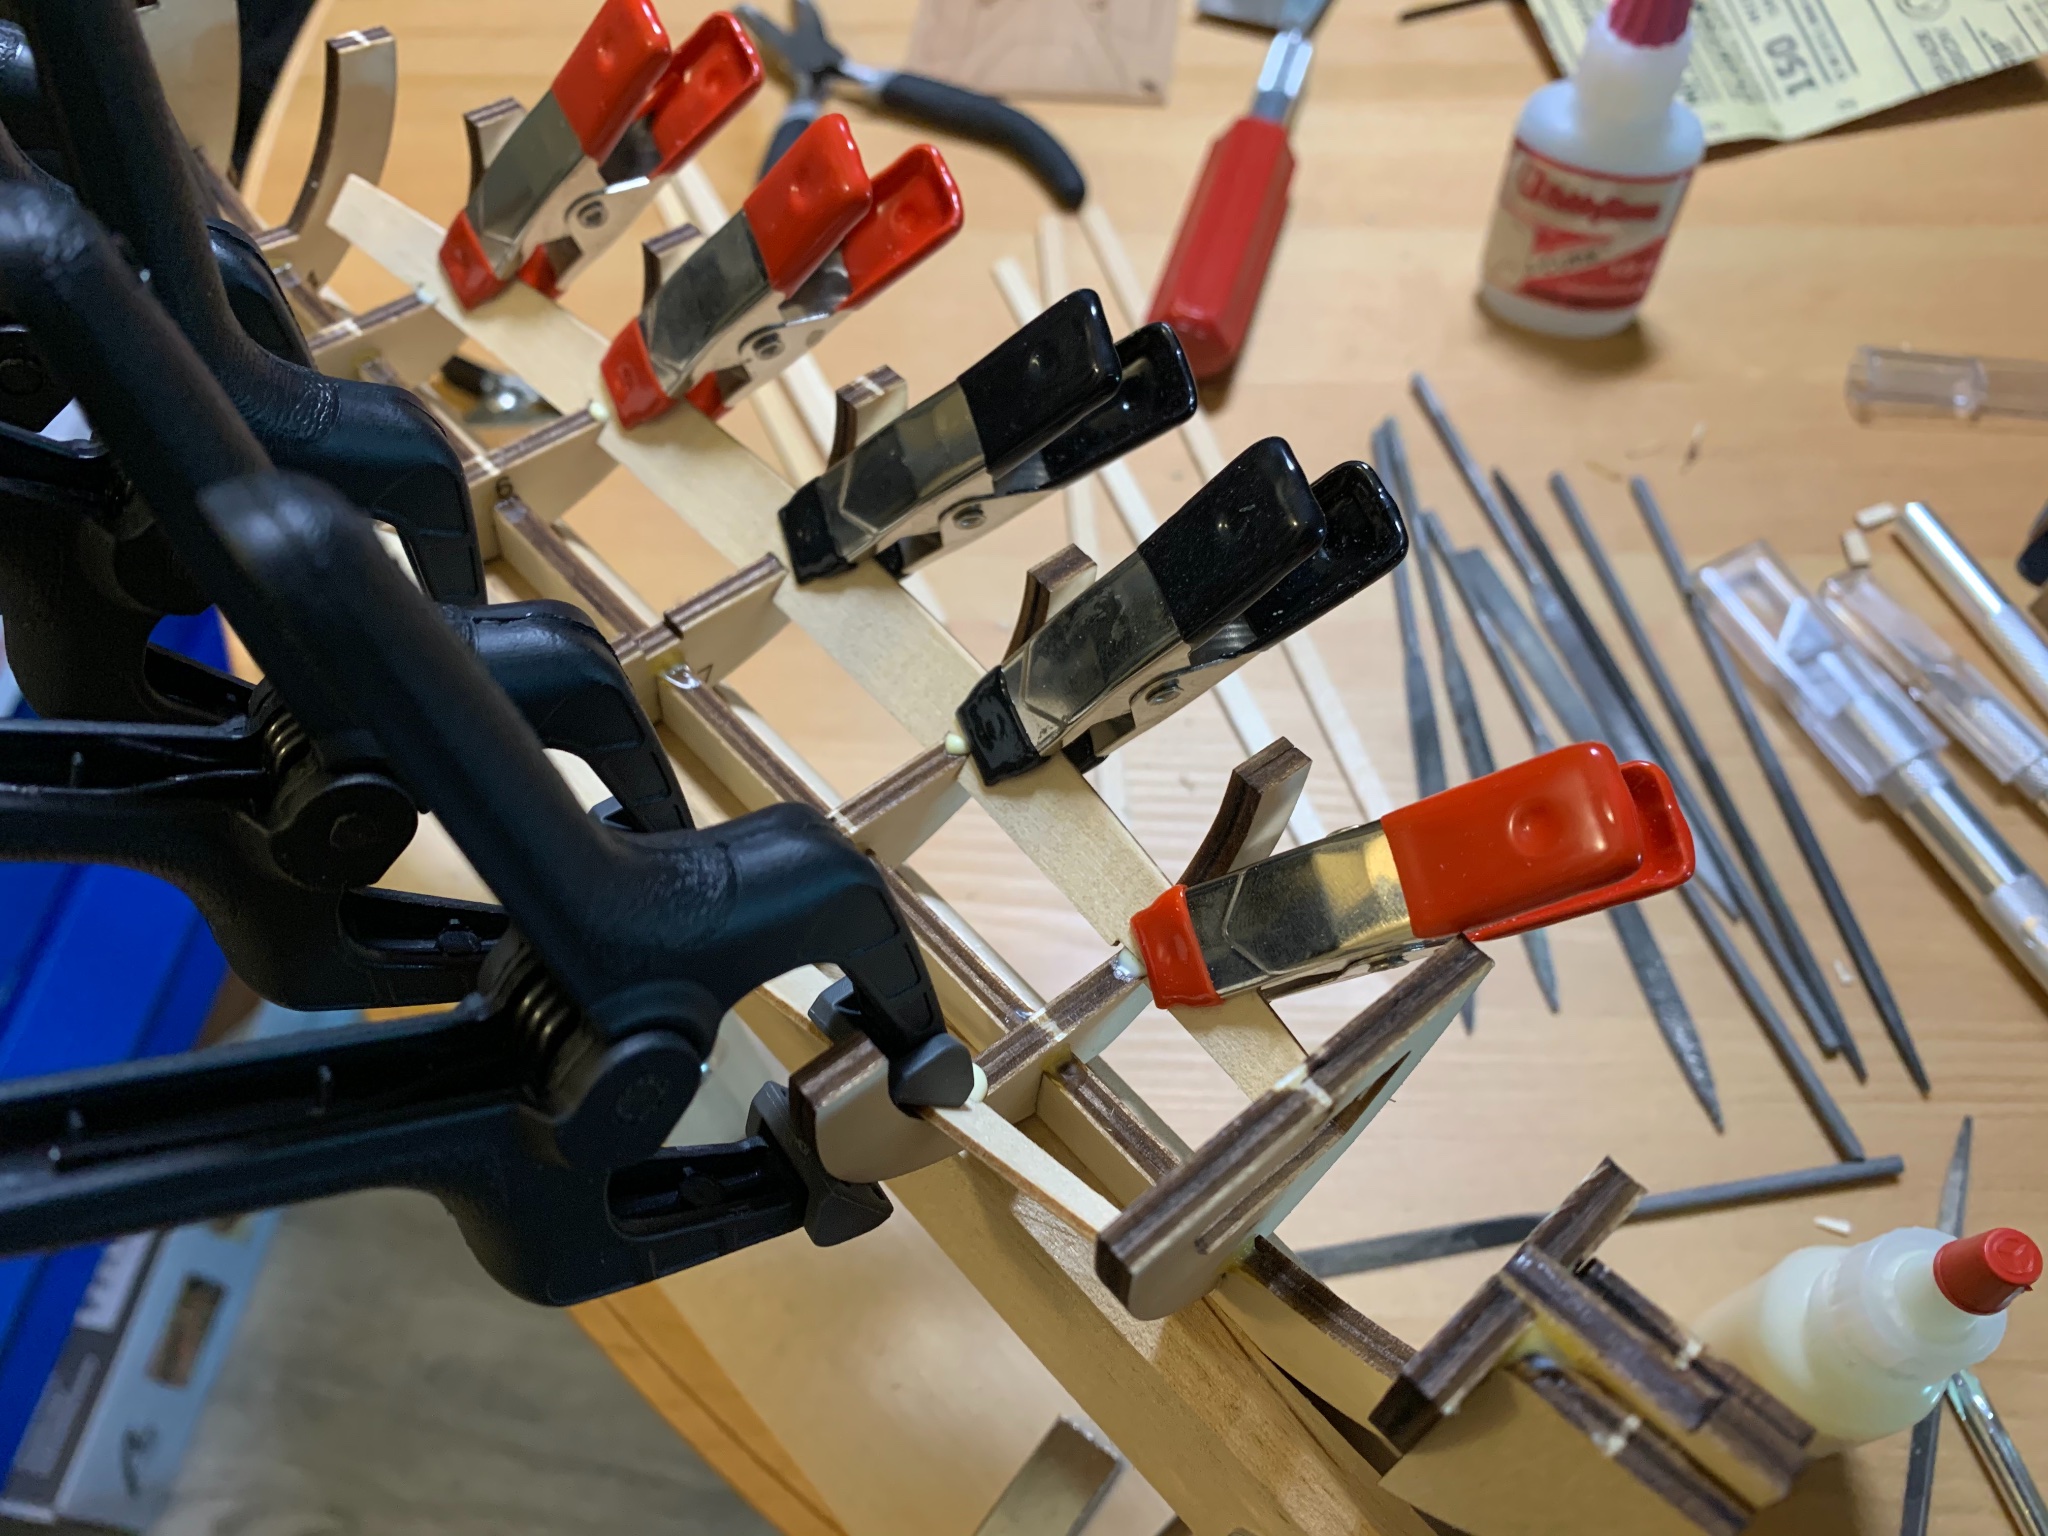
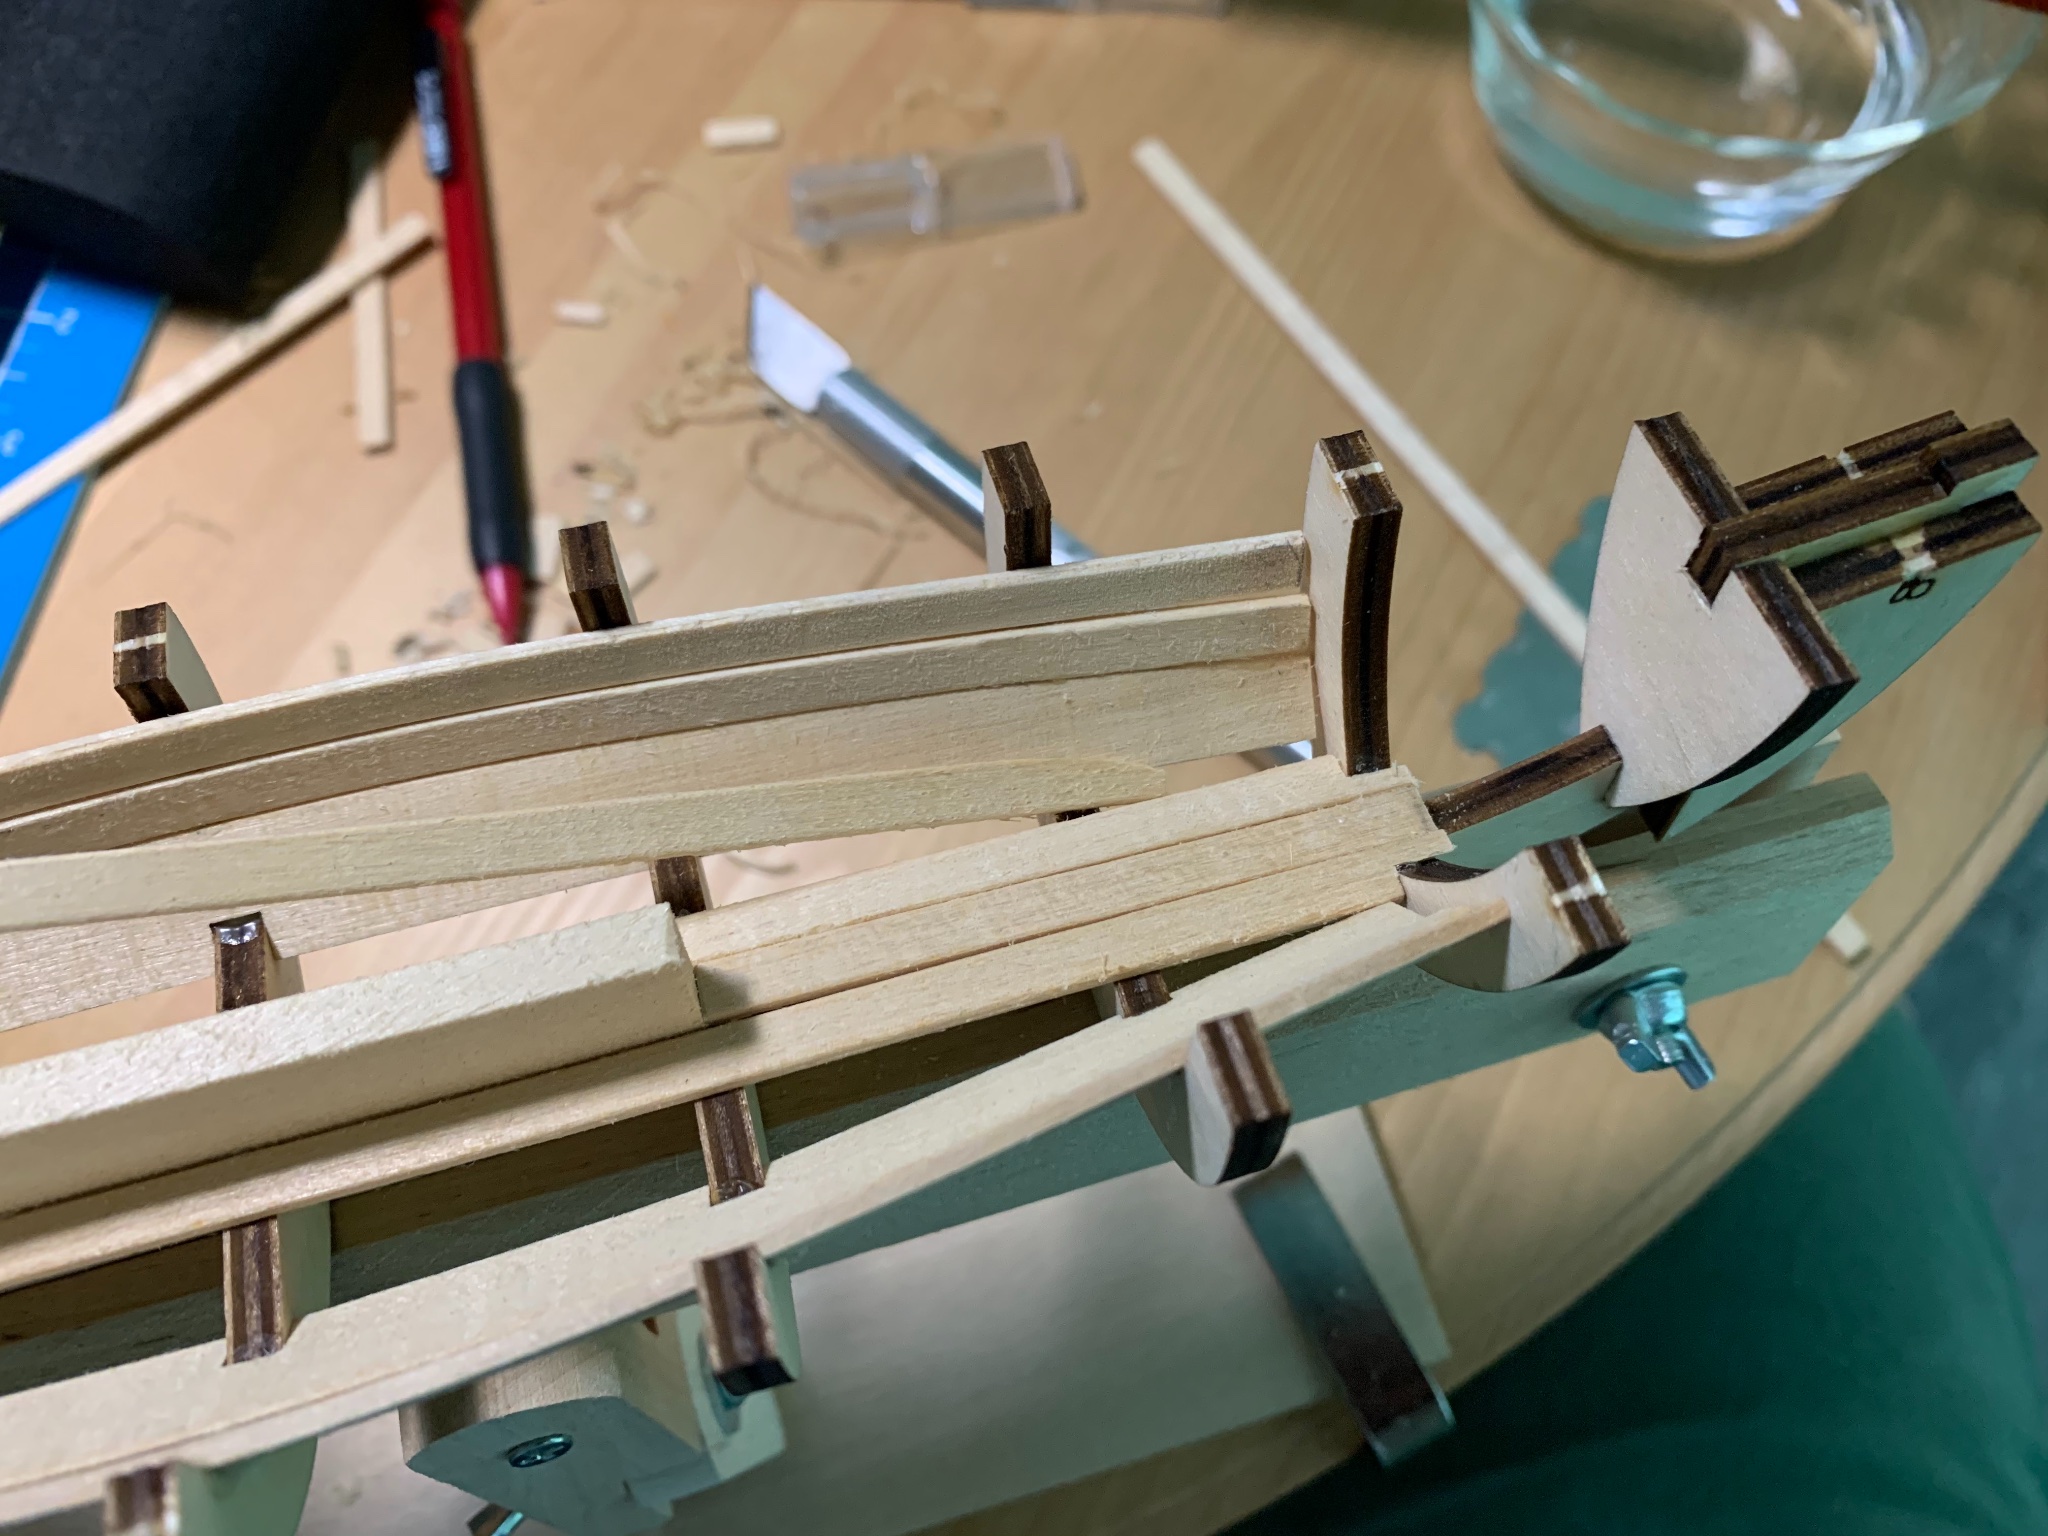
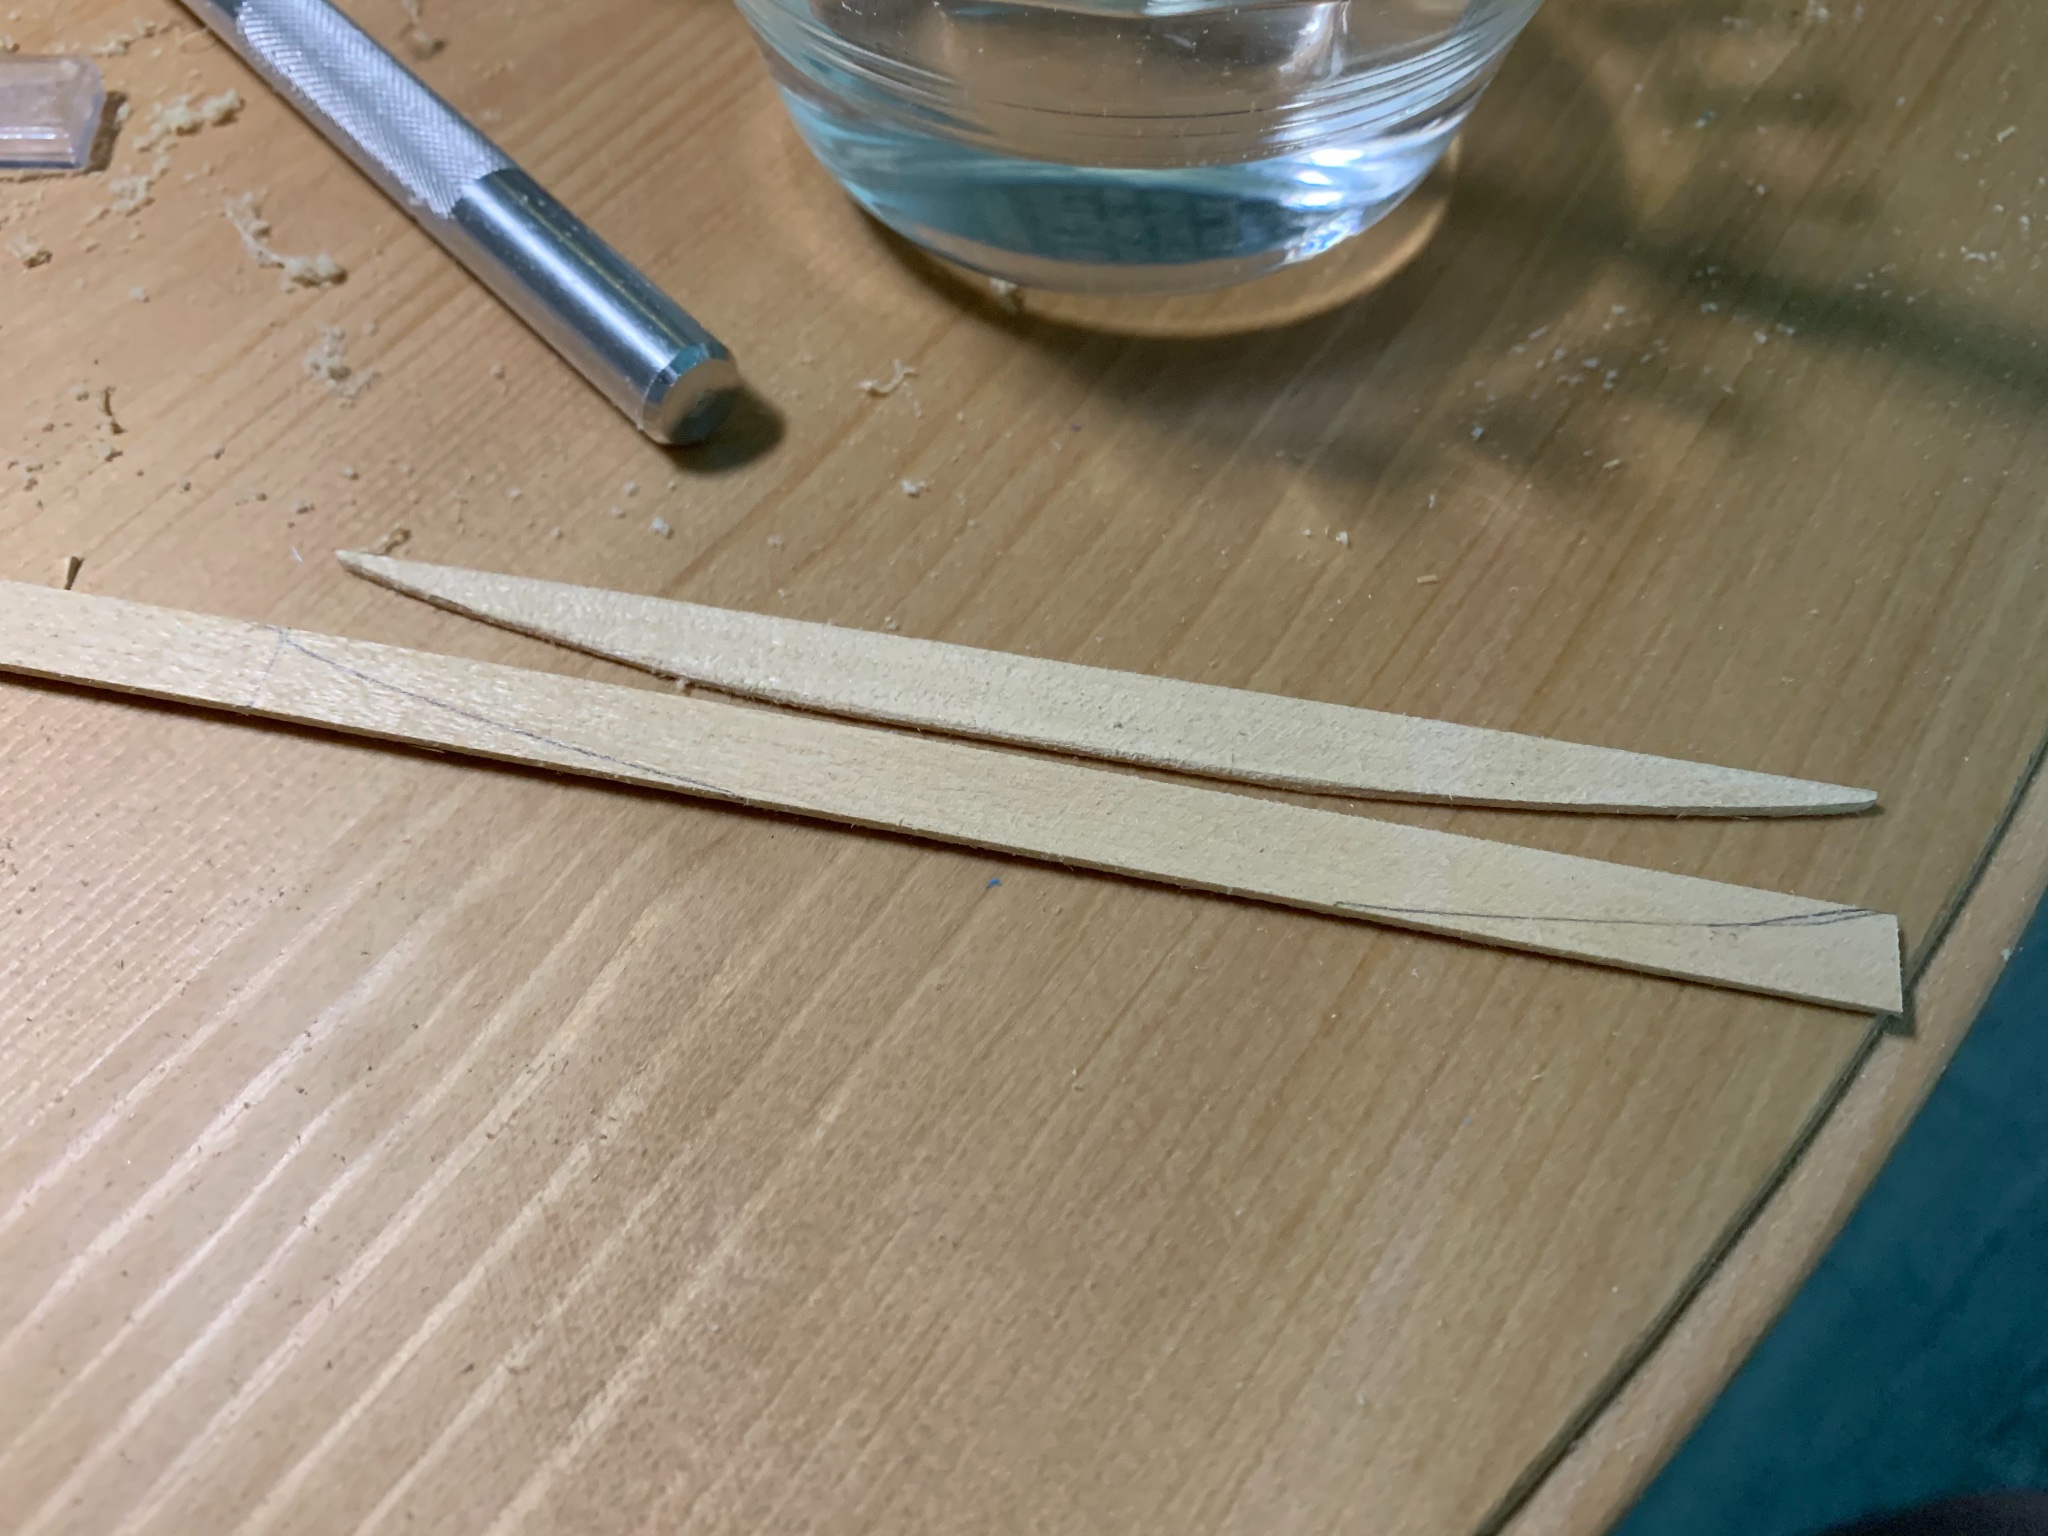
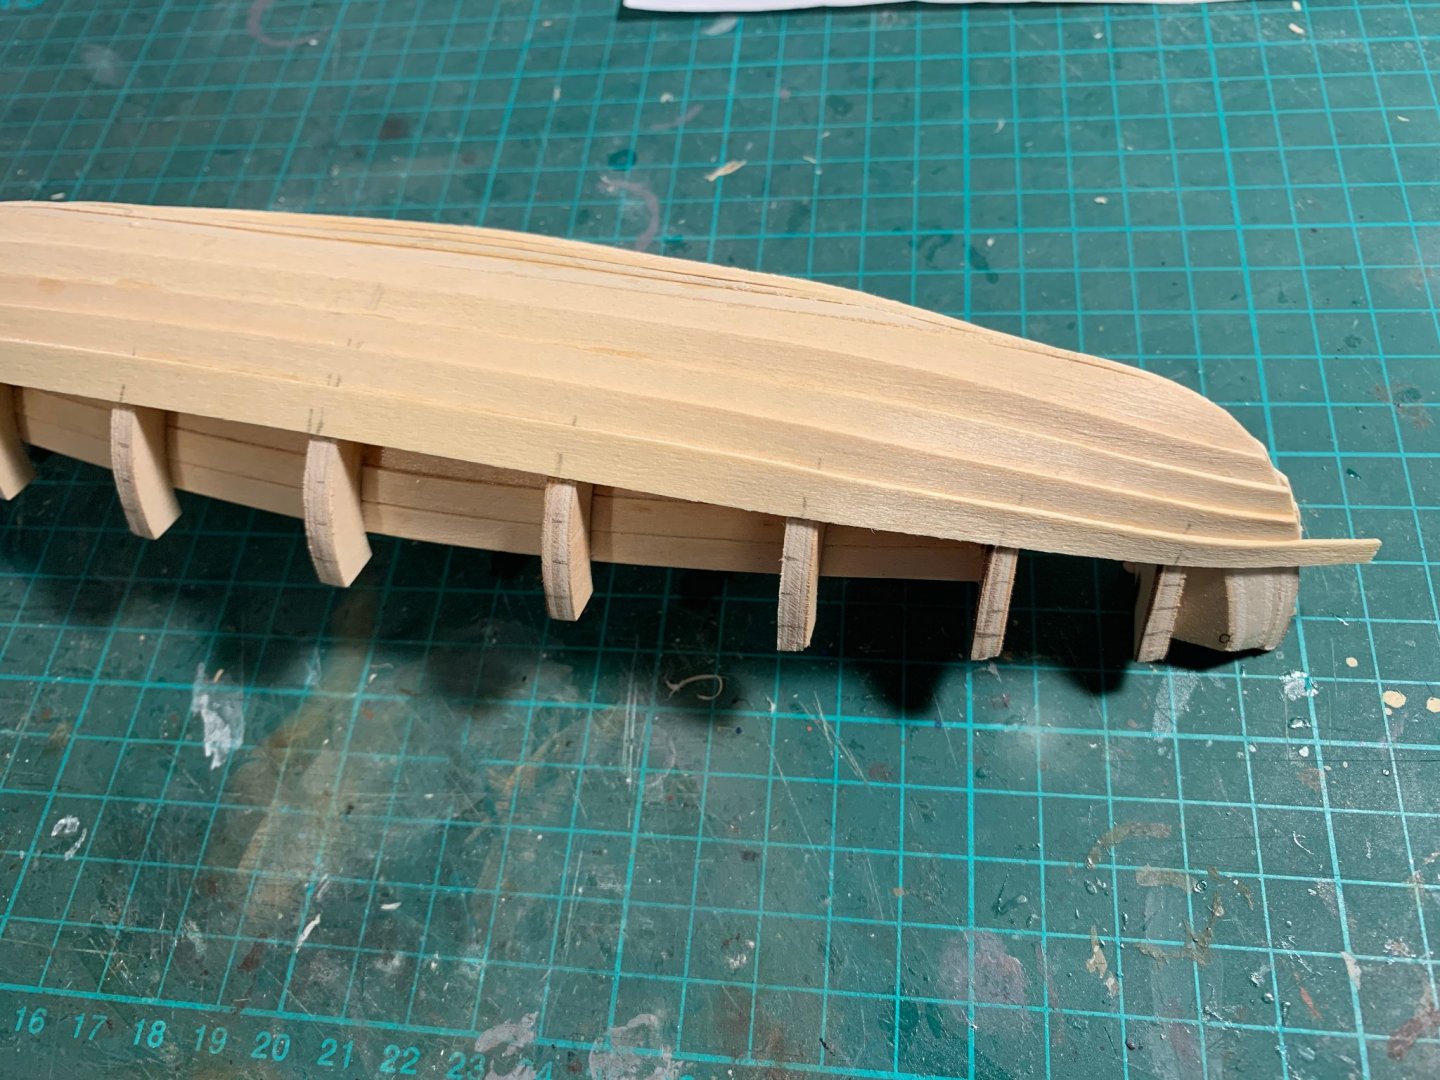
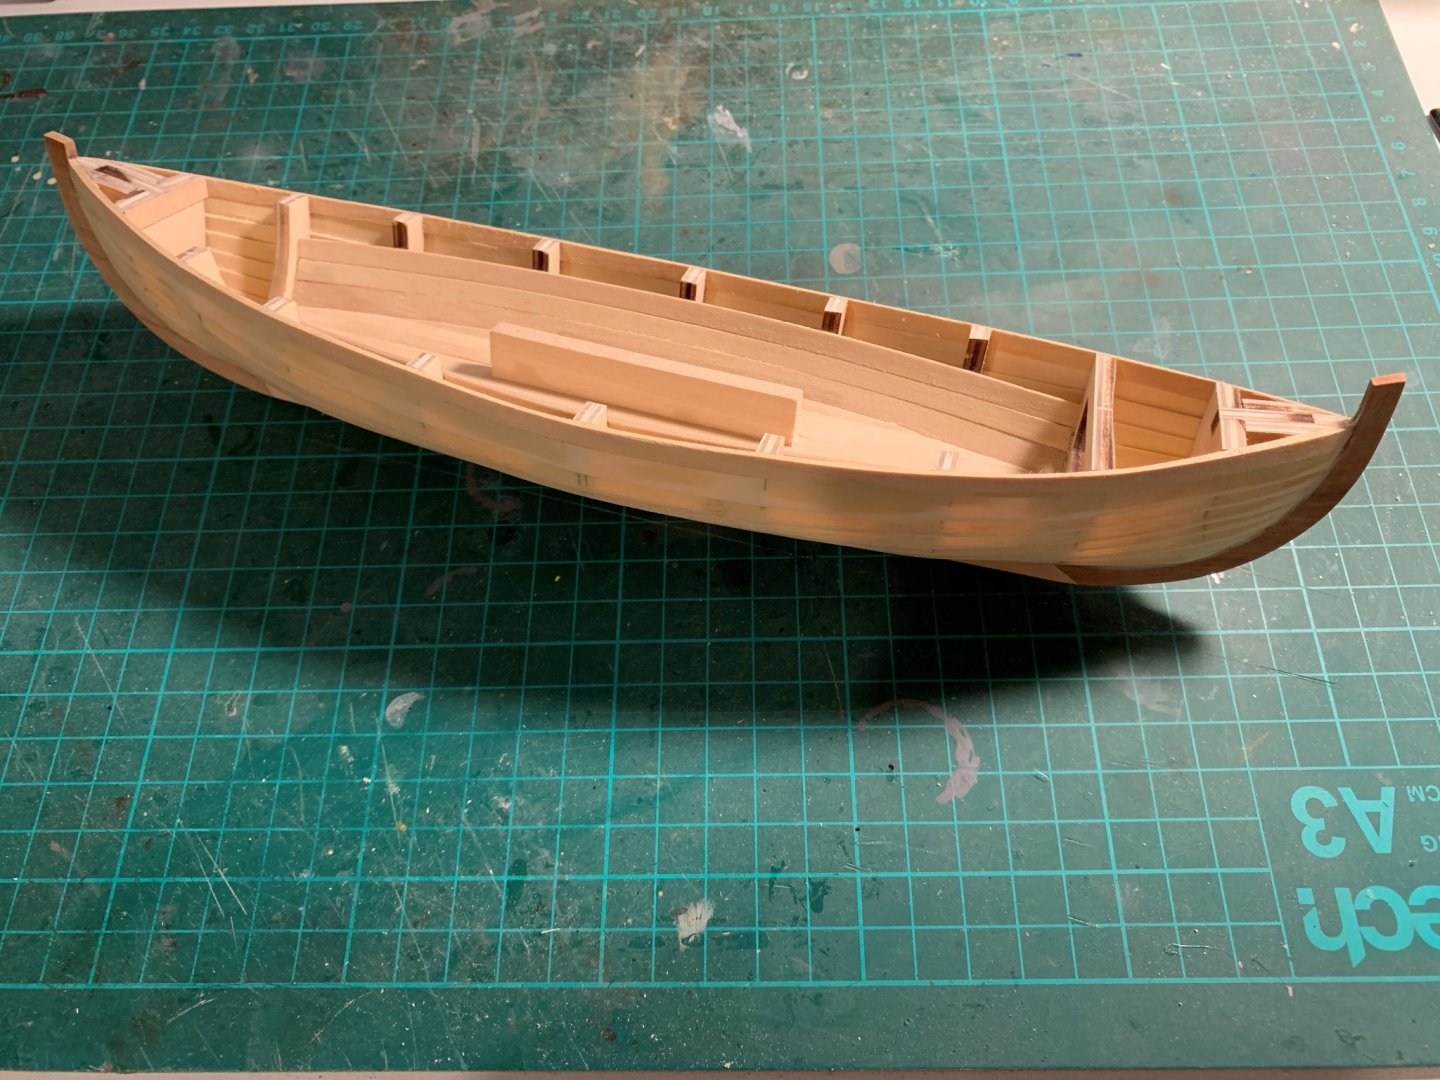
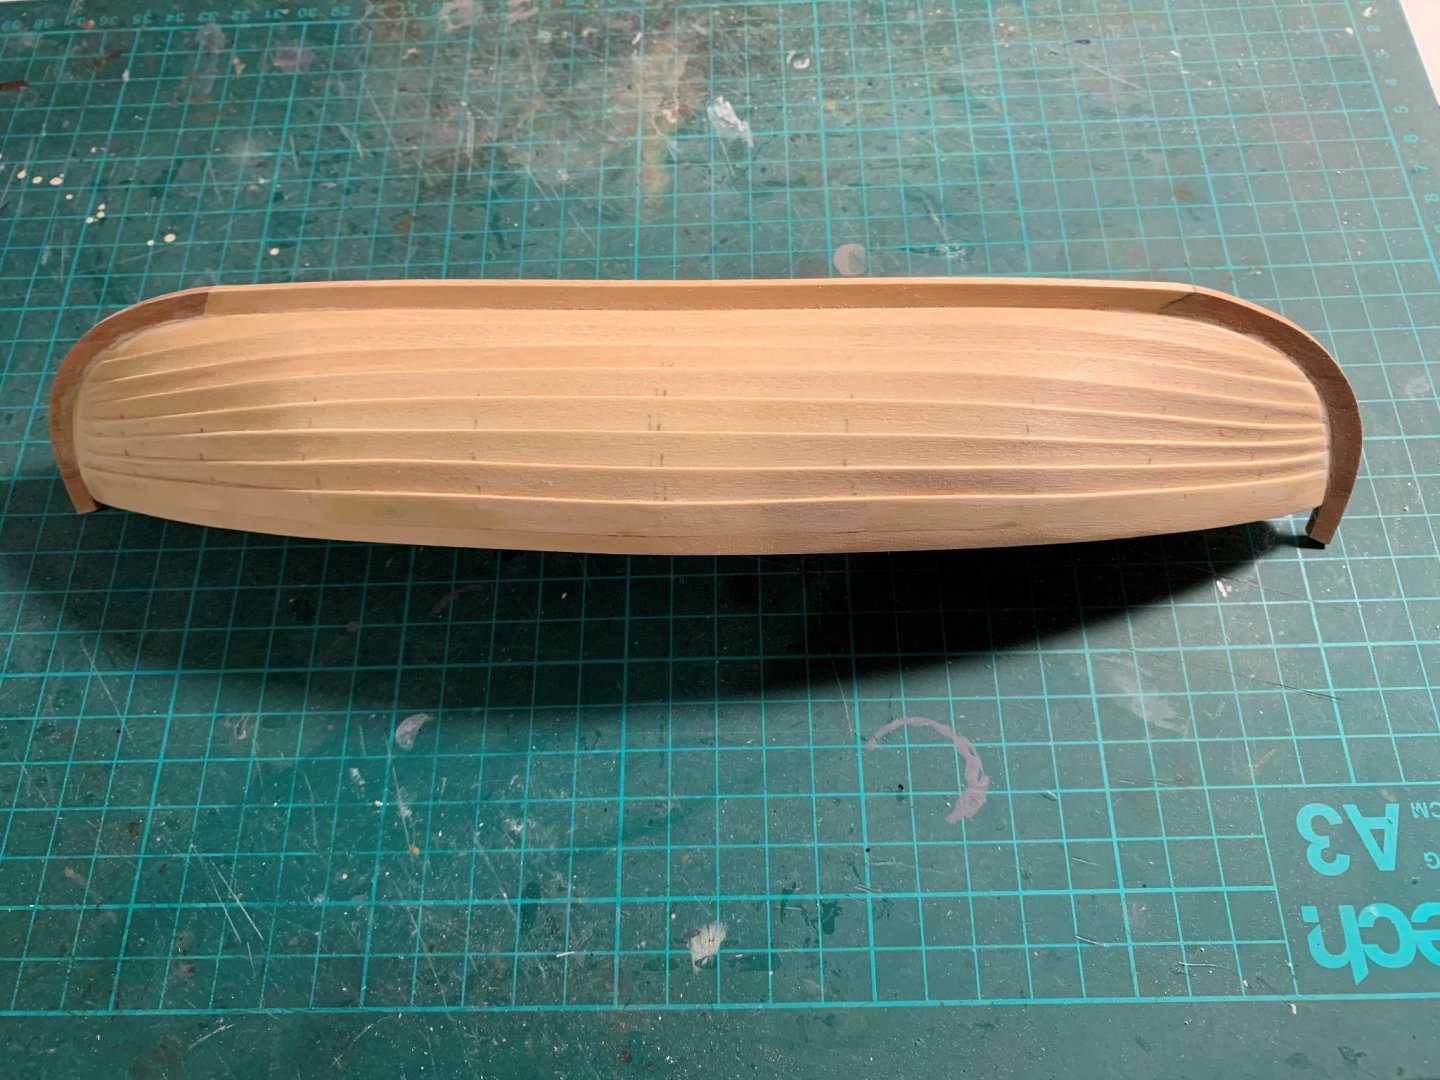
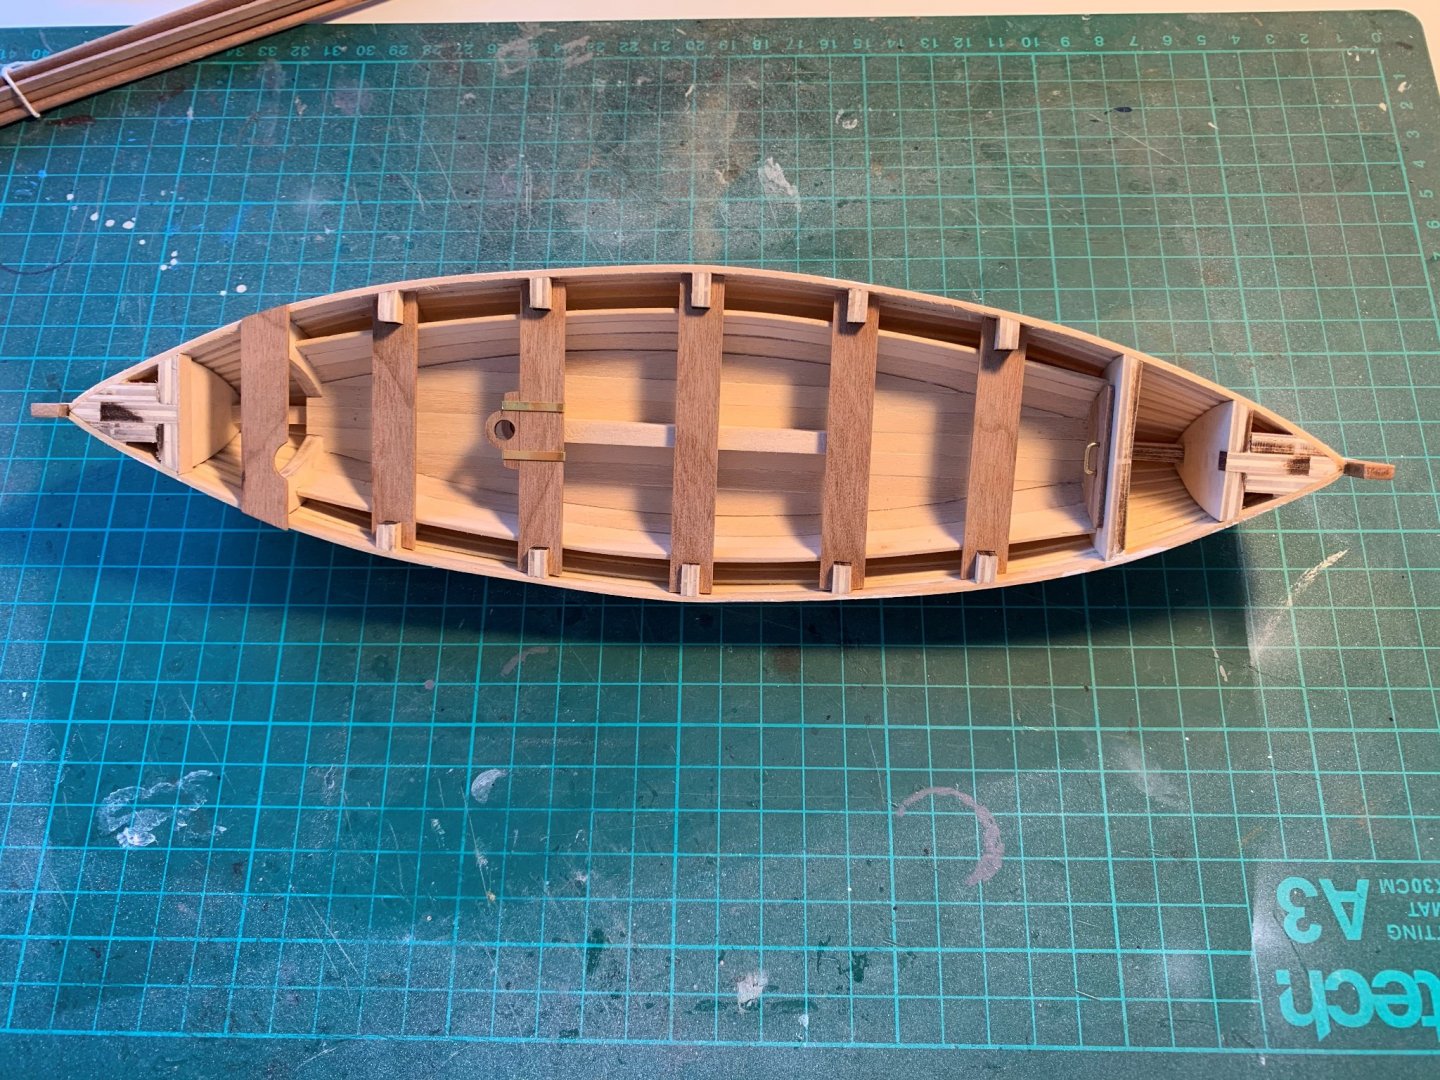
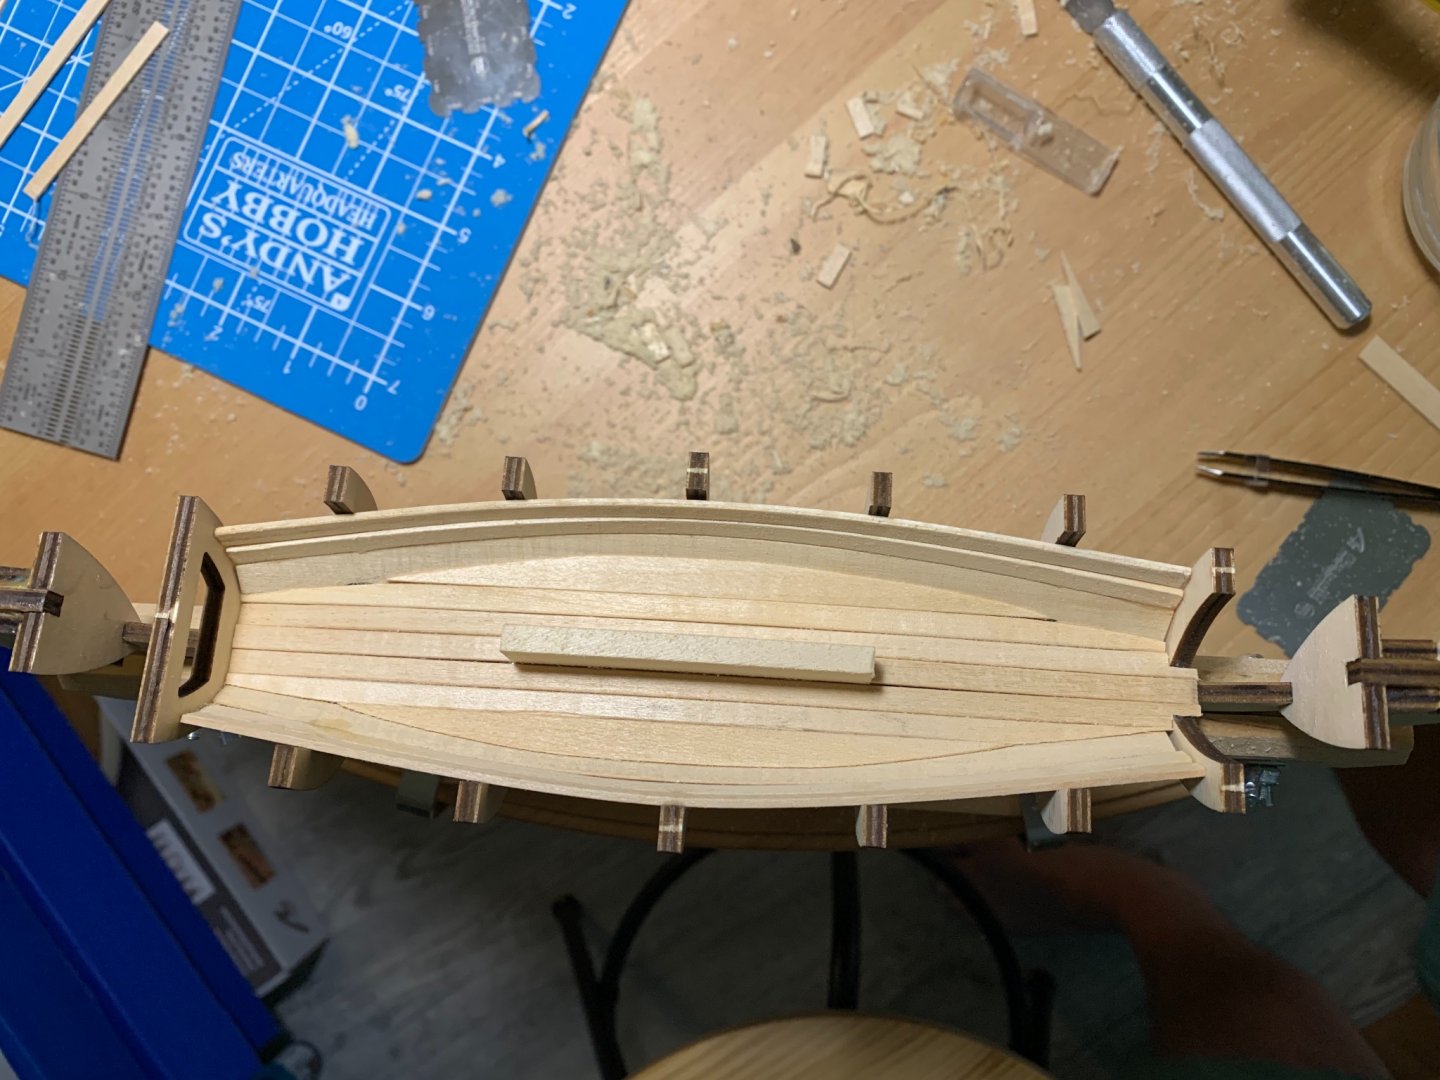
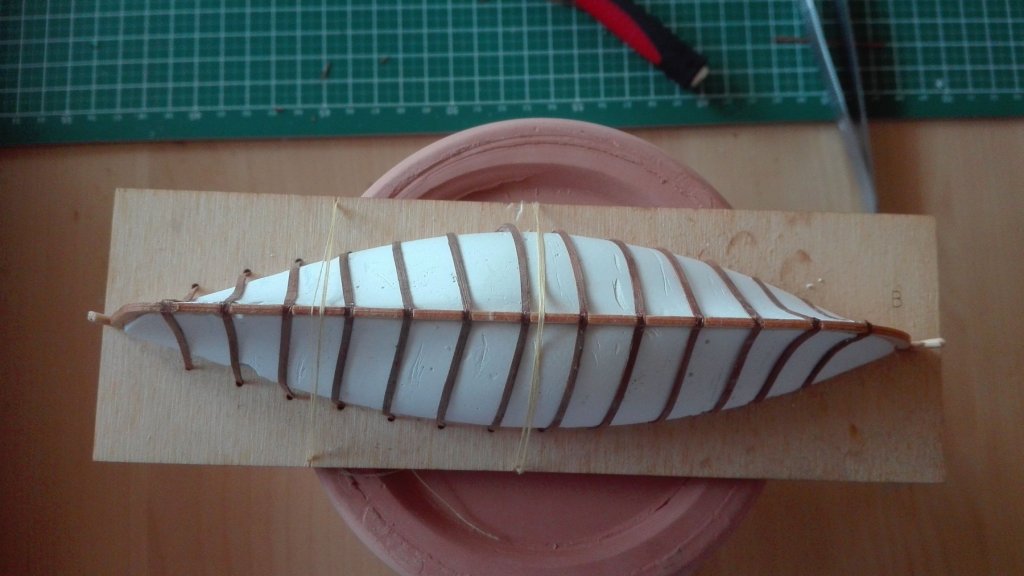
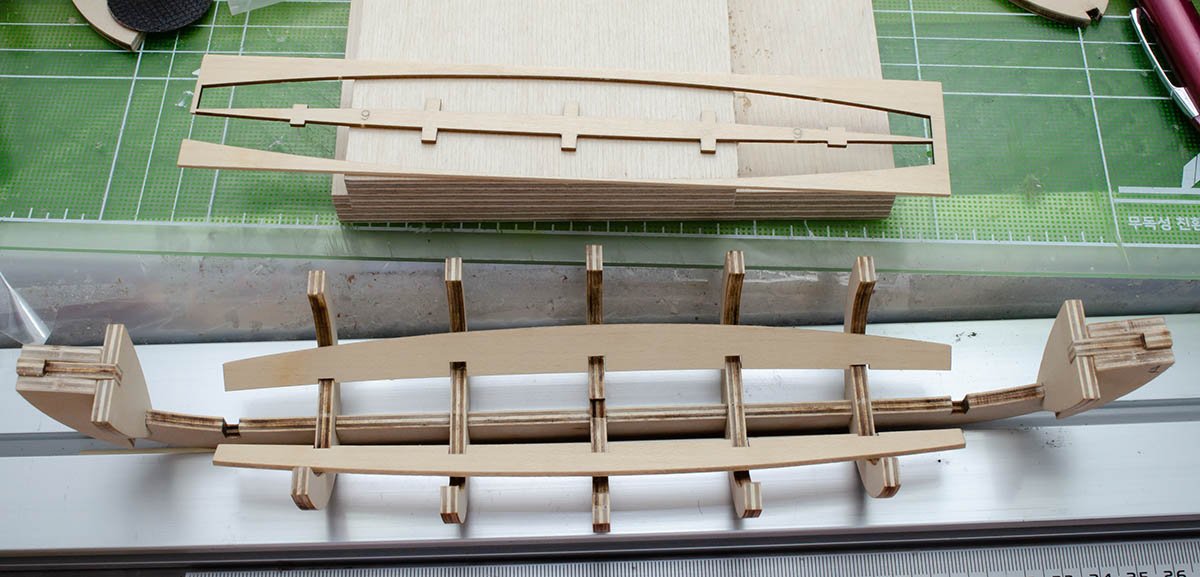
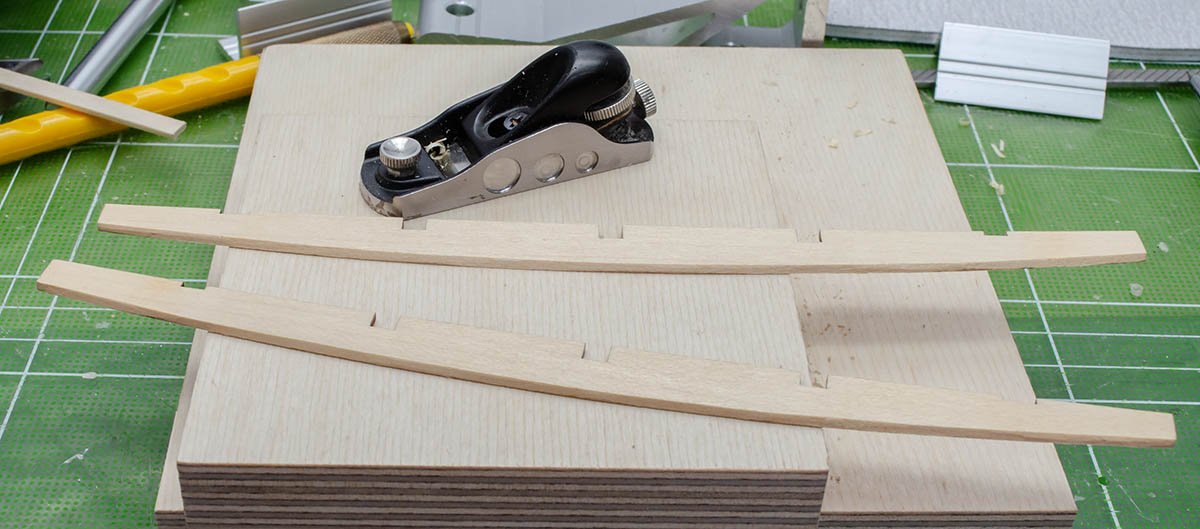
 I decided to begin yet another of the models on my shelf. it is a whaleboat of European origin, I assume i can work on this while glue dries on other models I am building 😬 here are some shots of building the frames
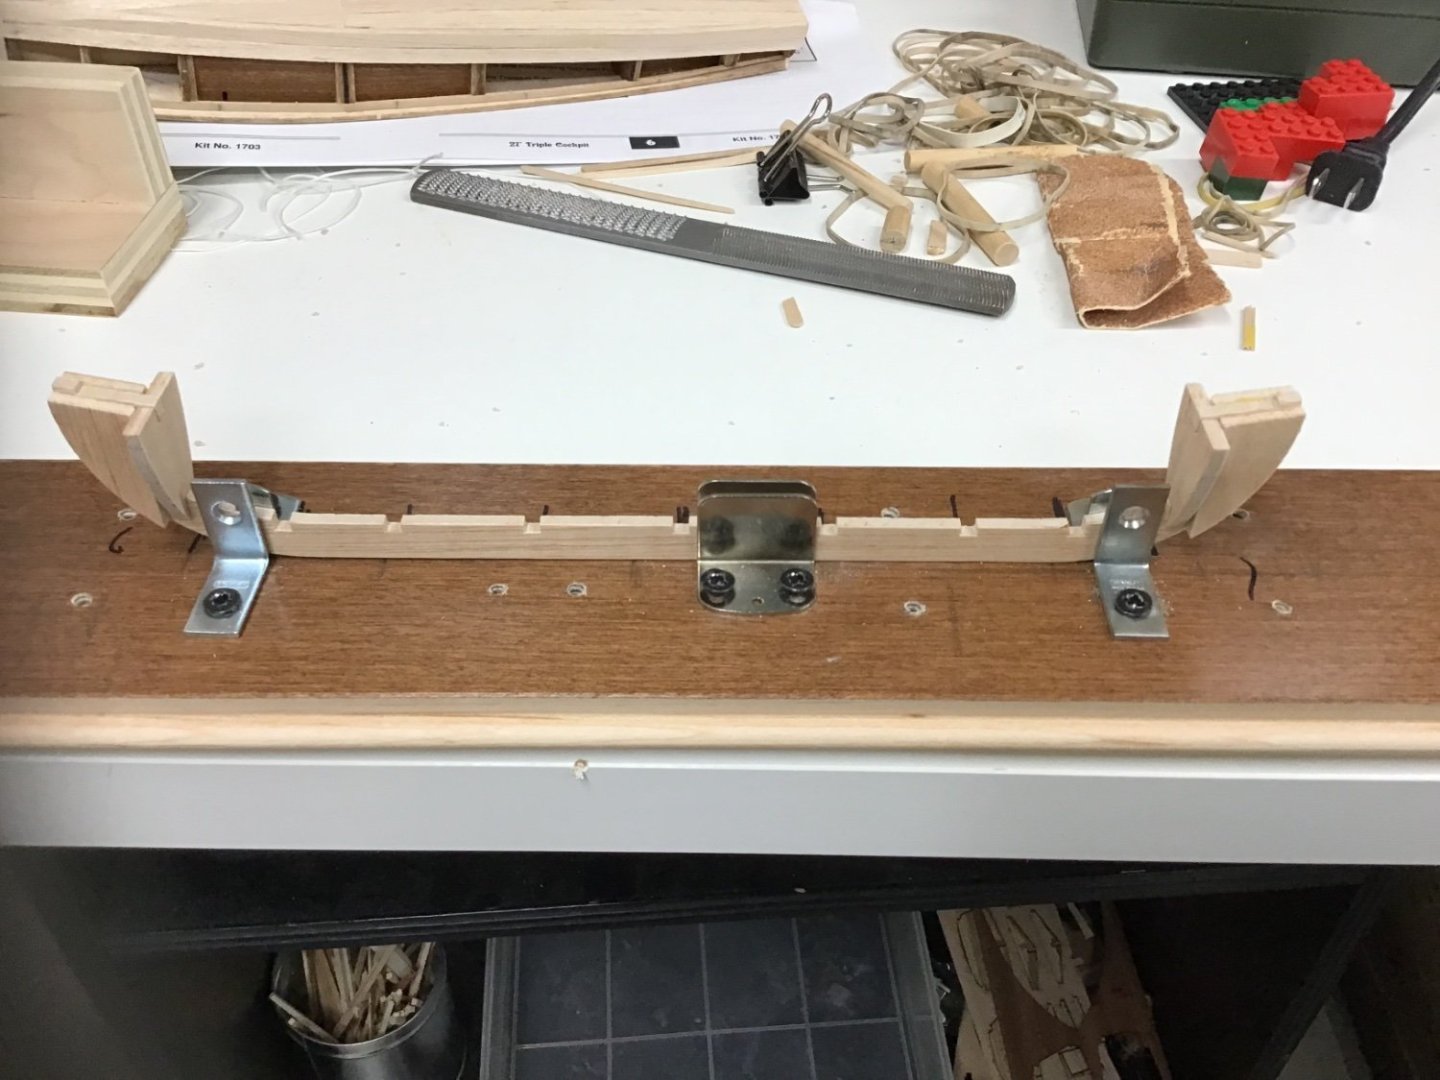

- 1 reply
-
- 4
-

-
- Whaleboat
- Artesania Latina
- (and 1 more)
-
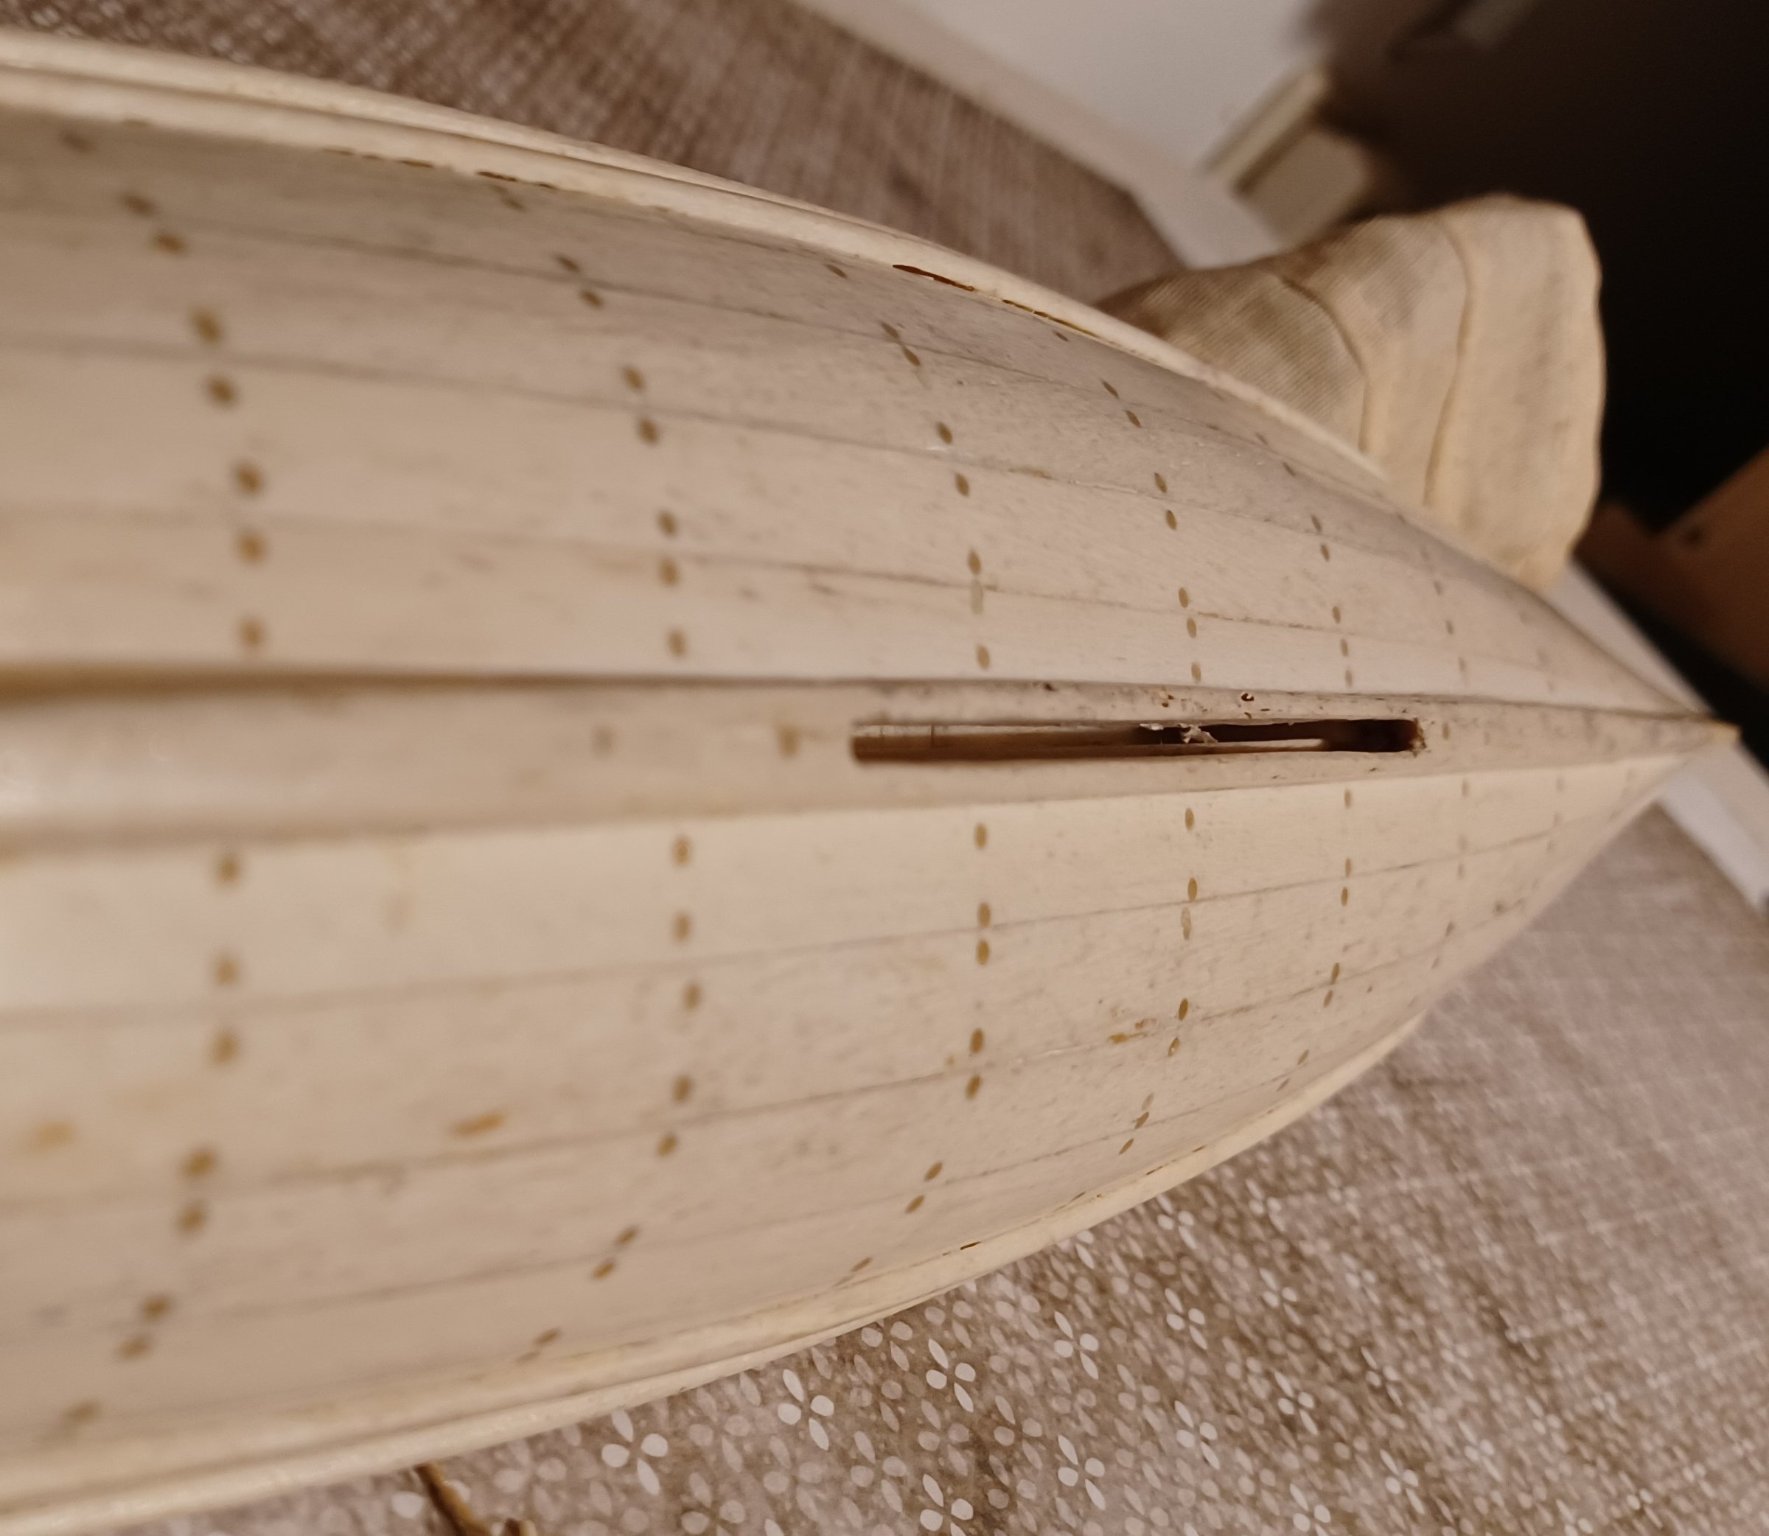
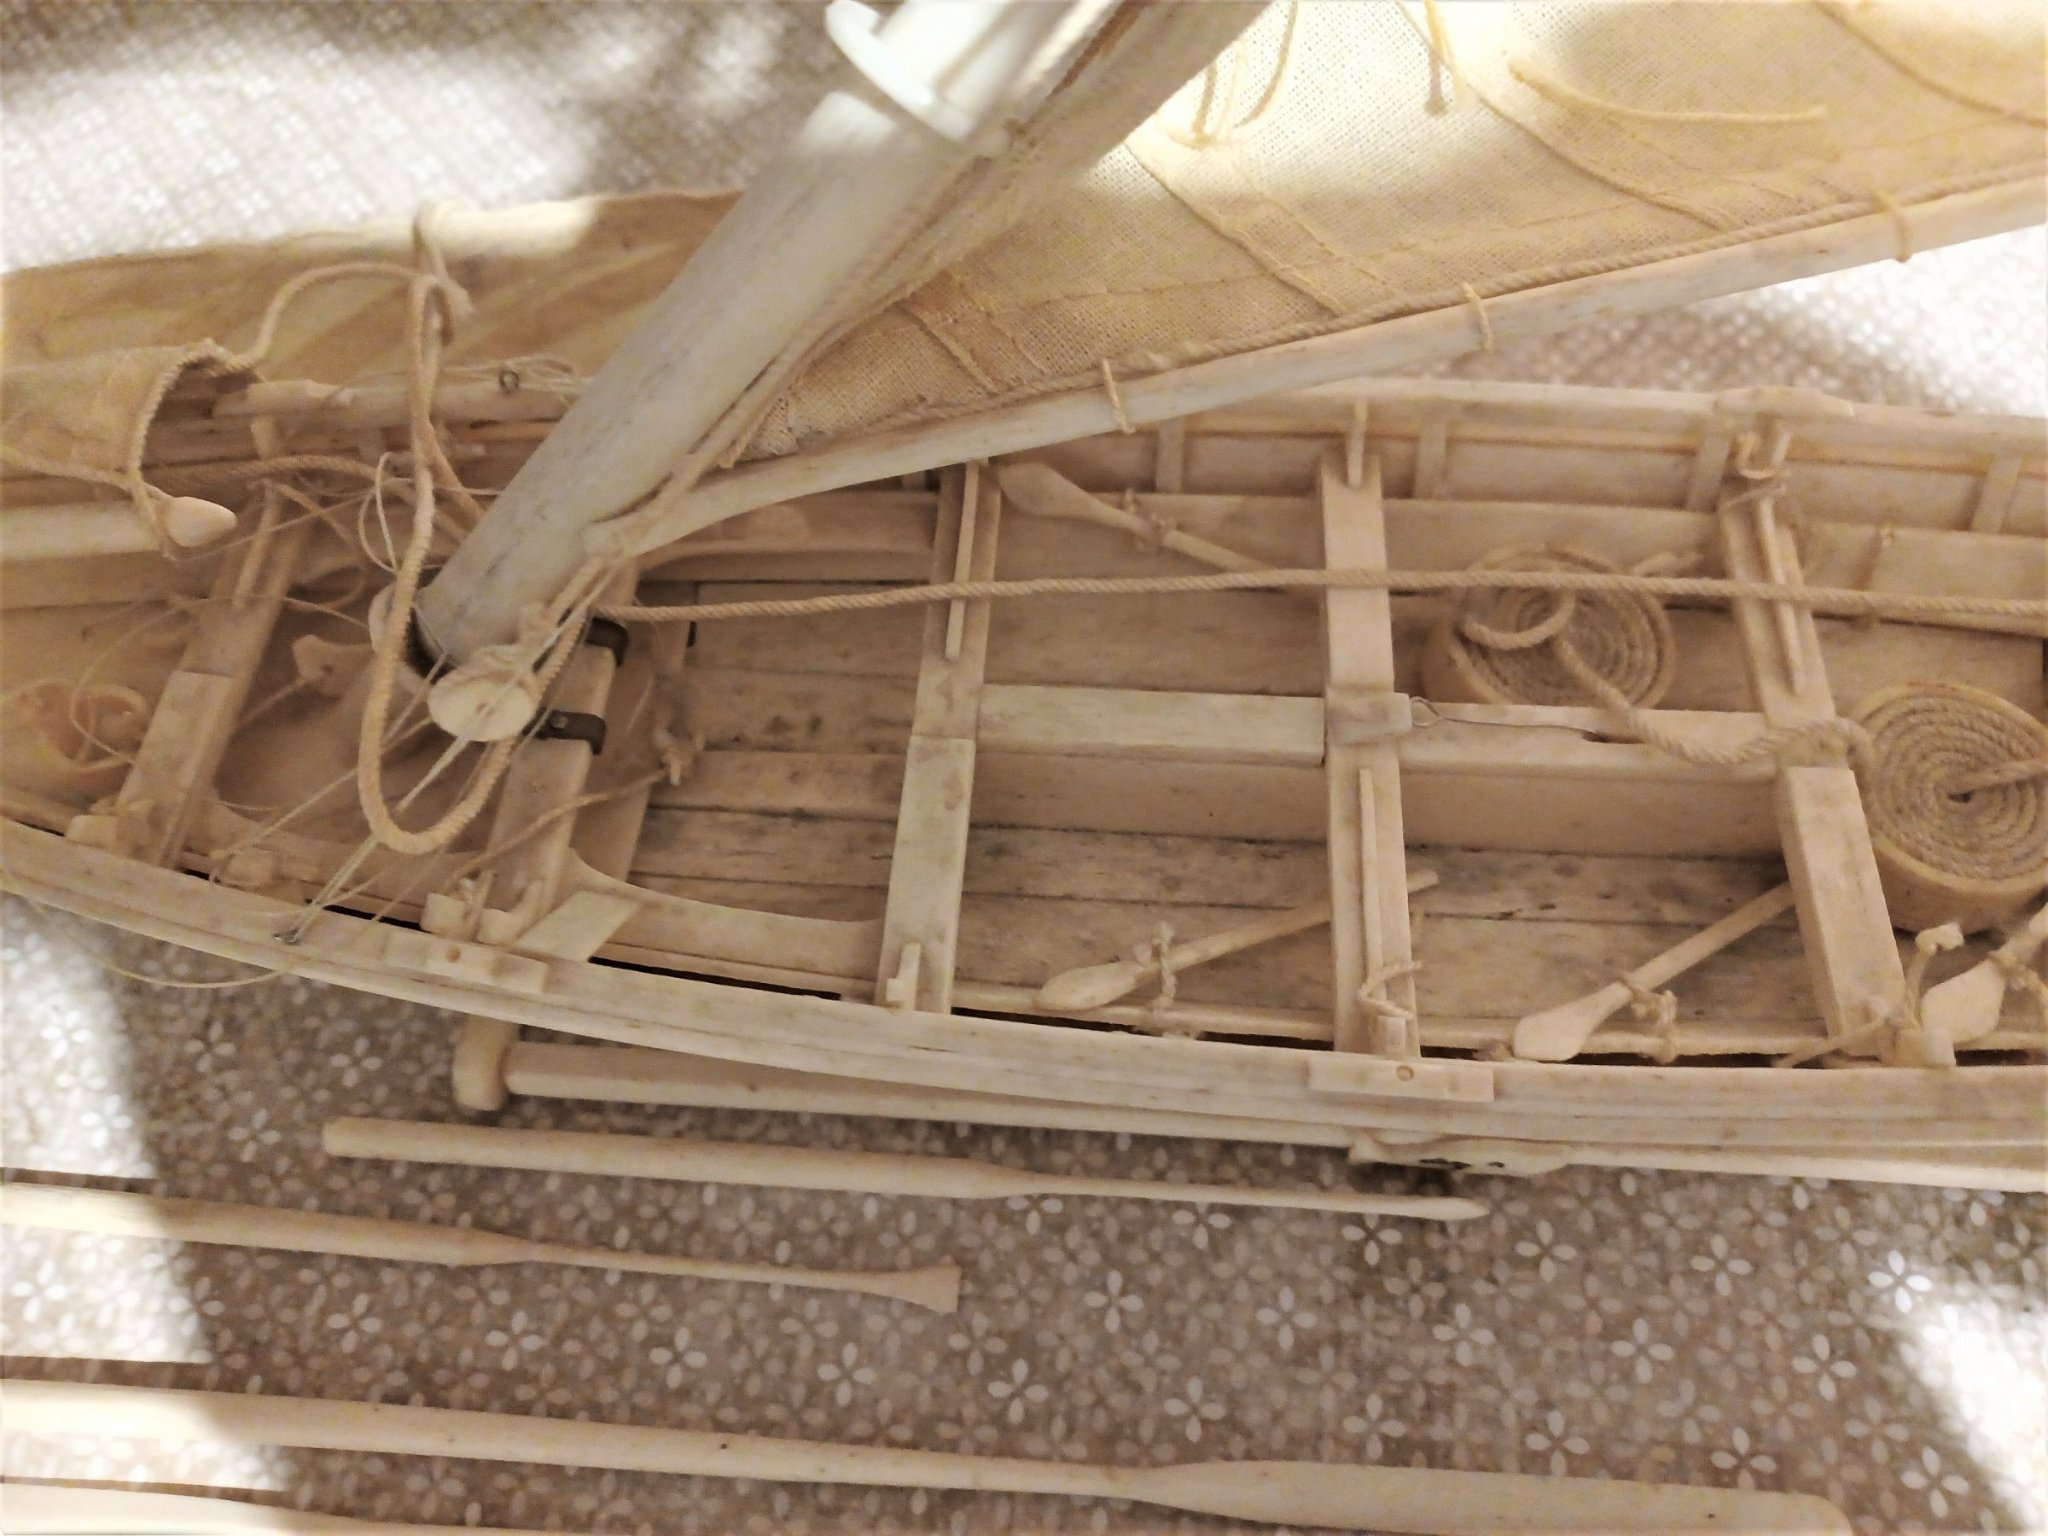
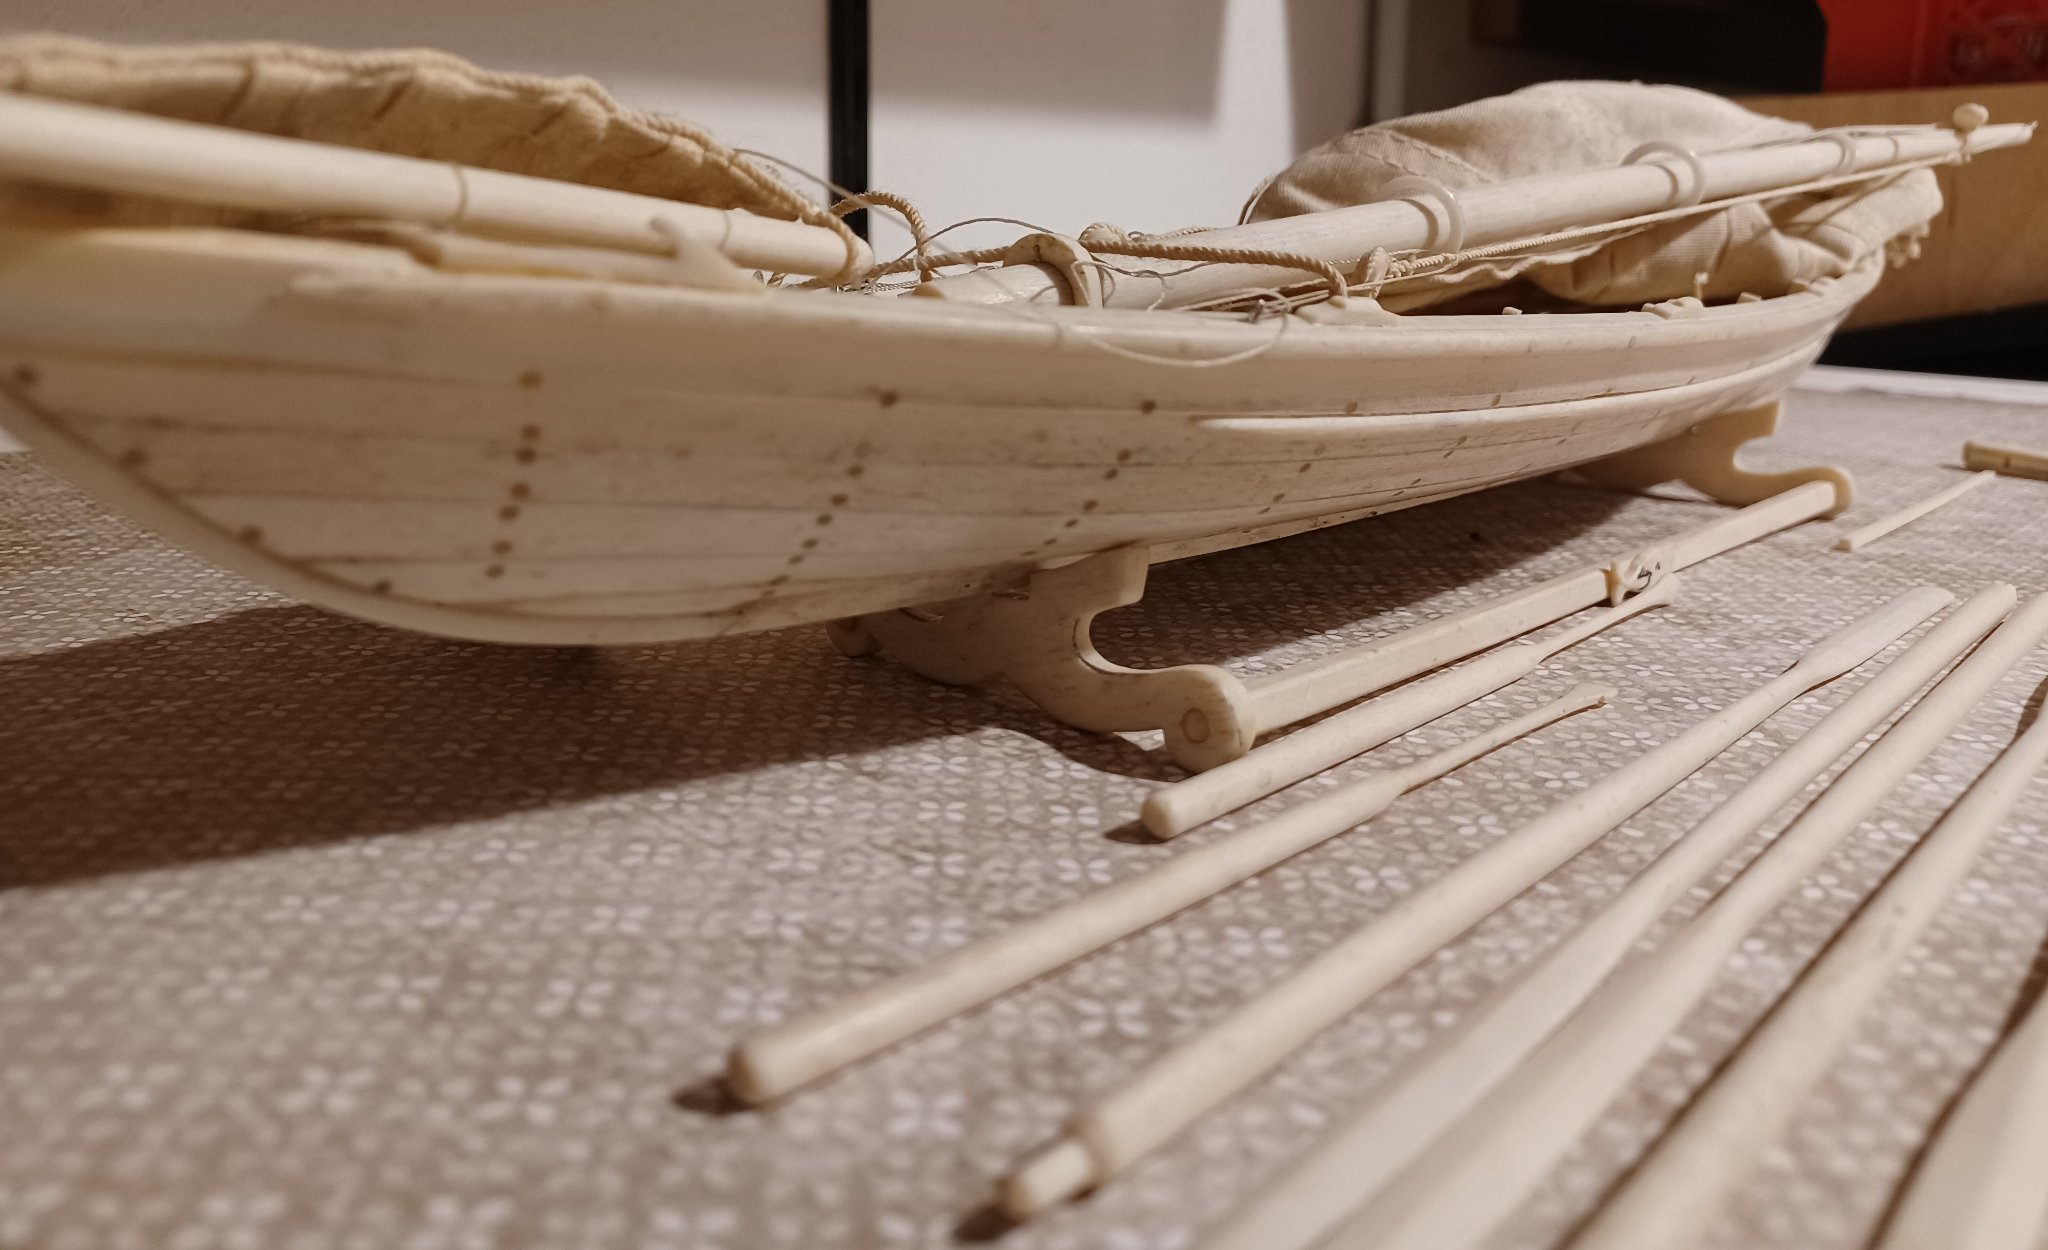
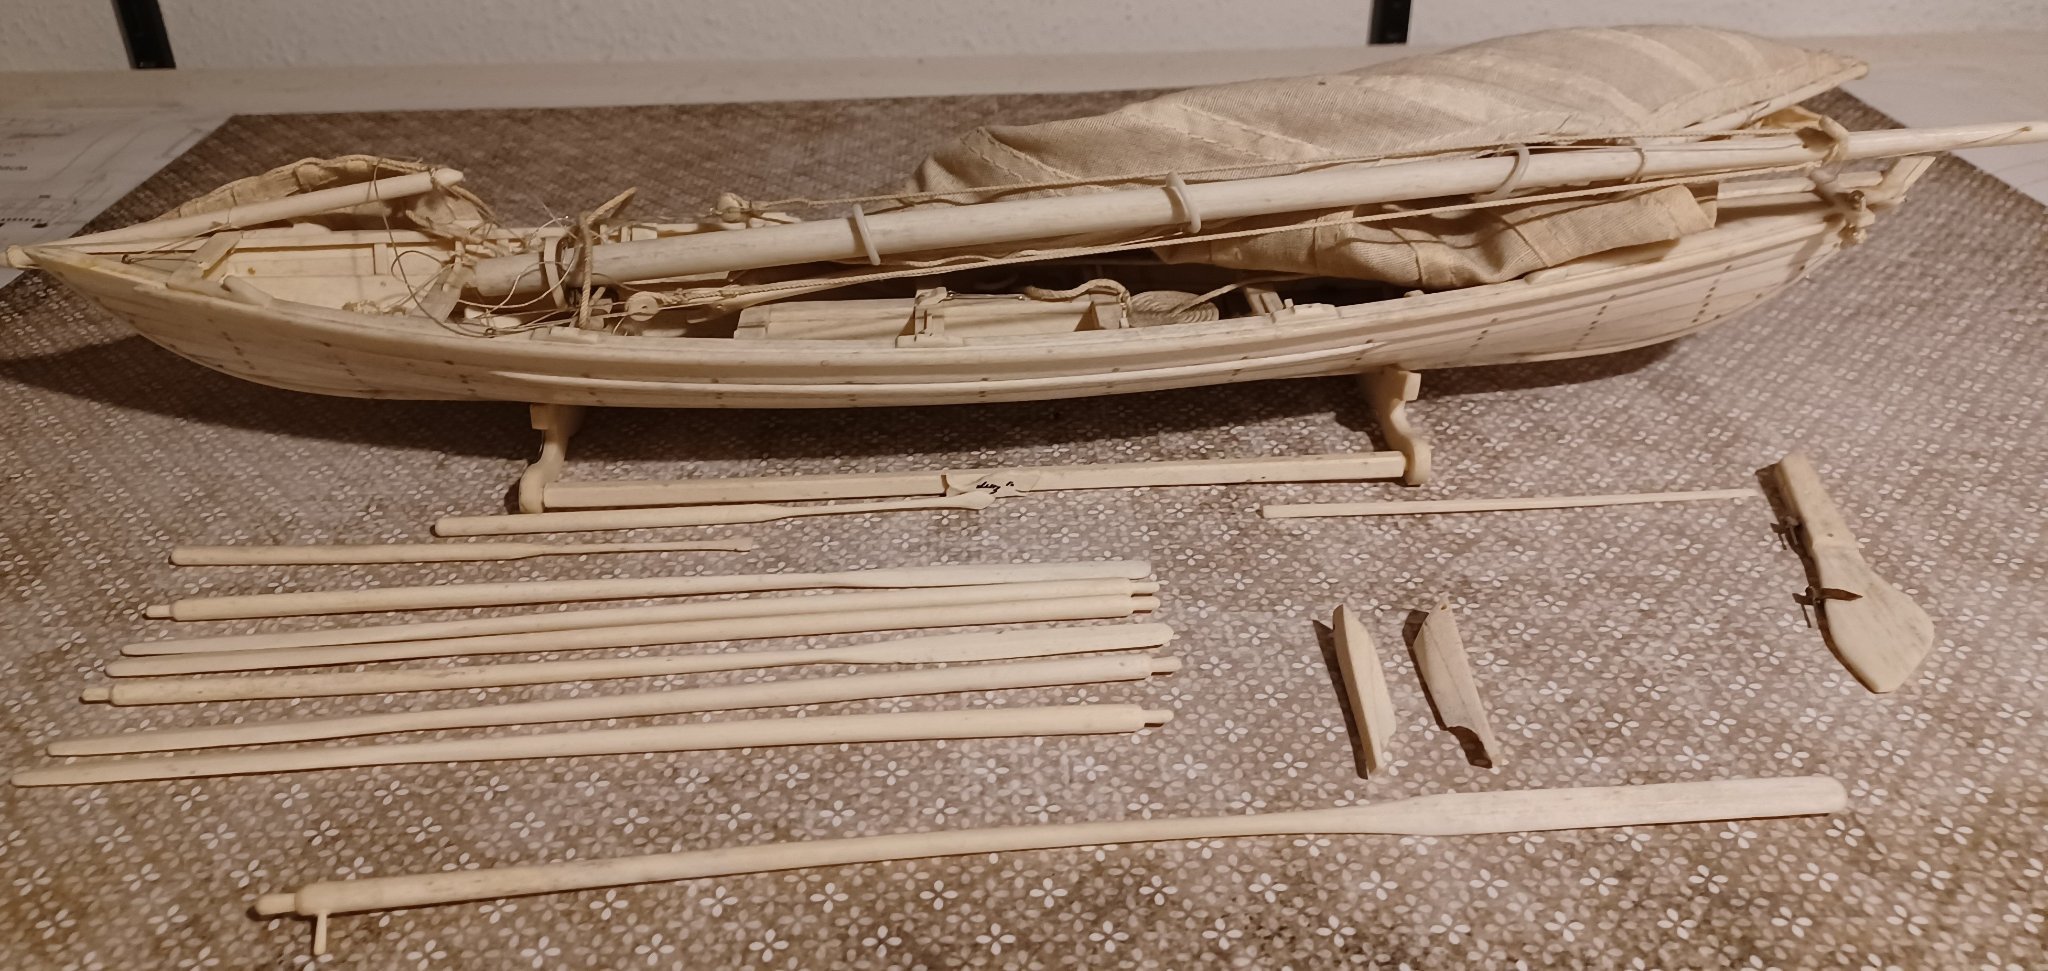
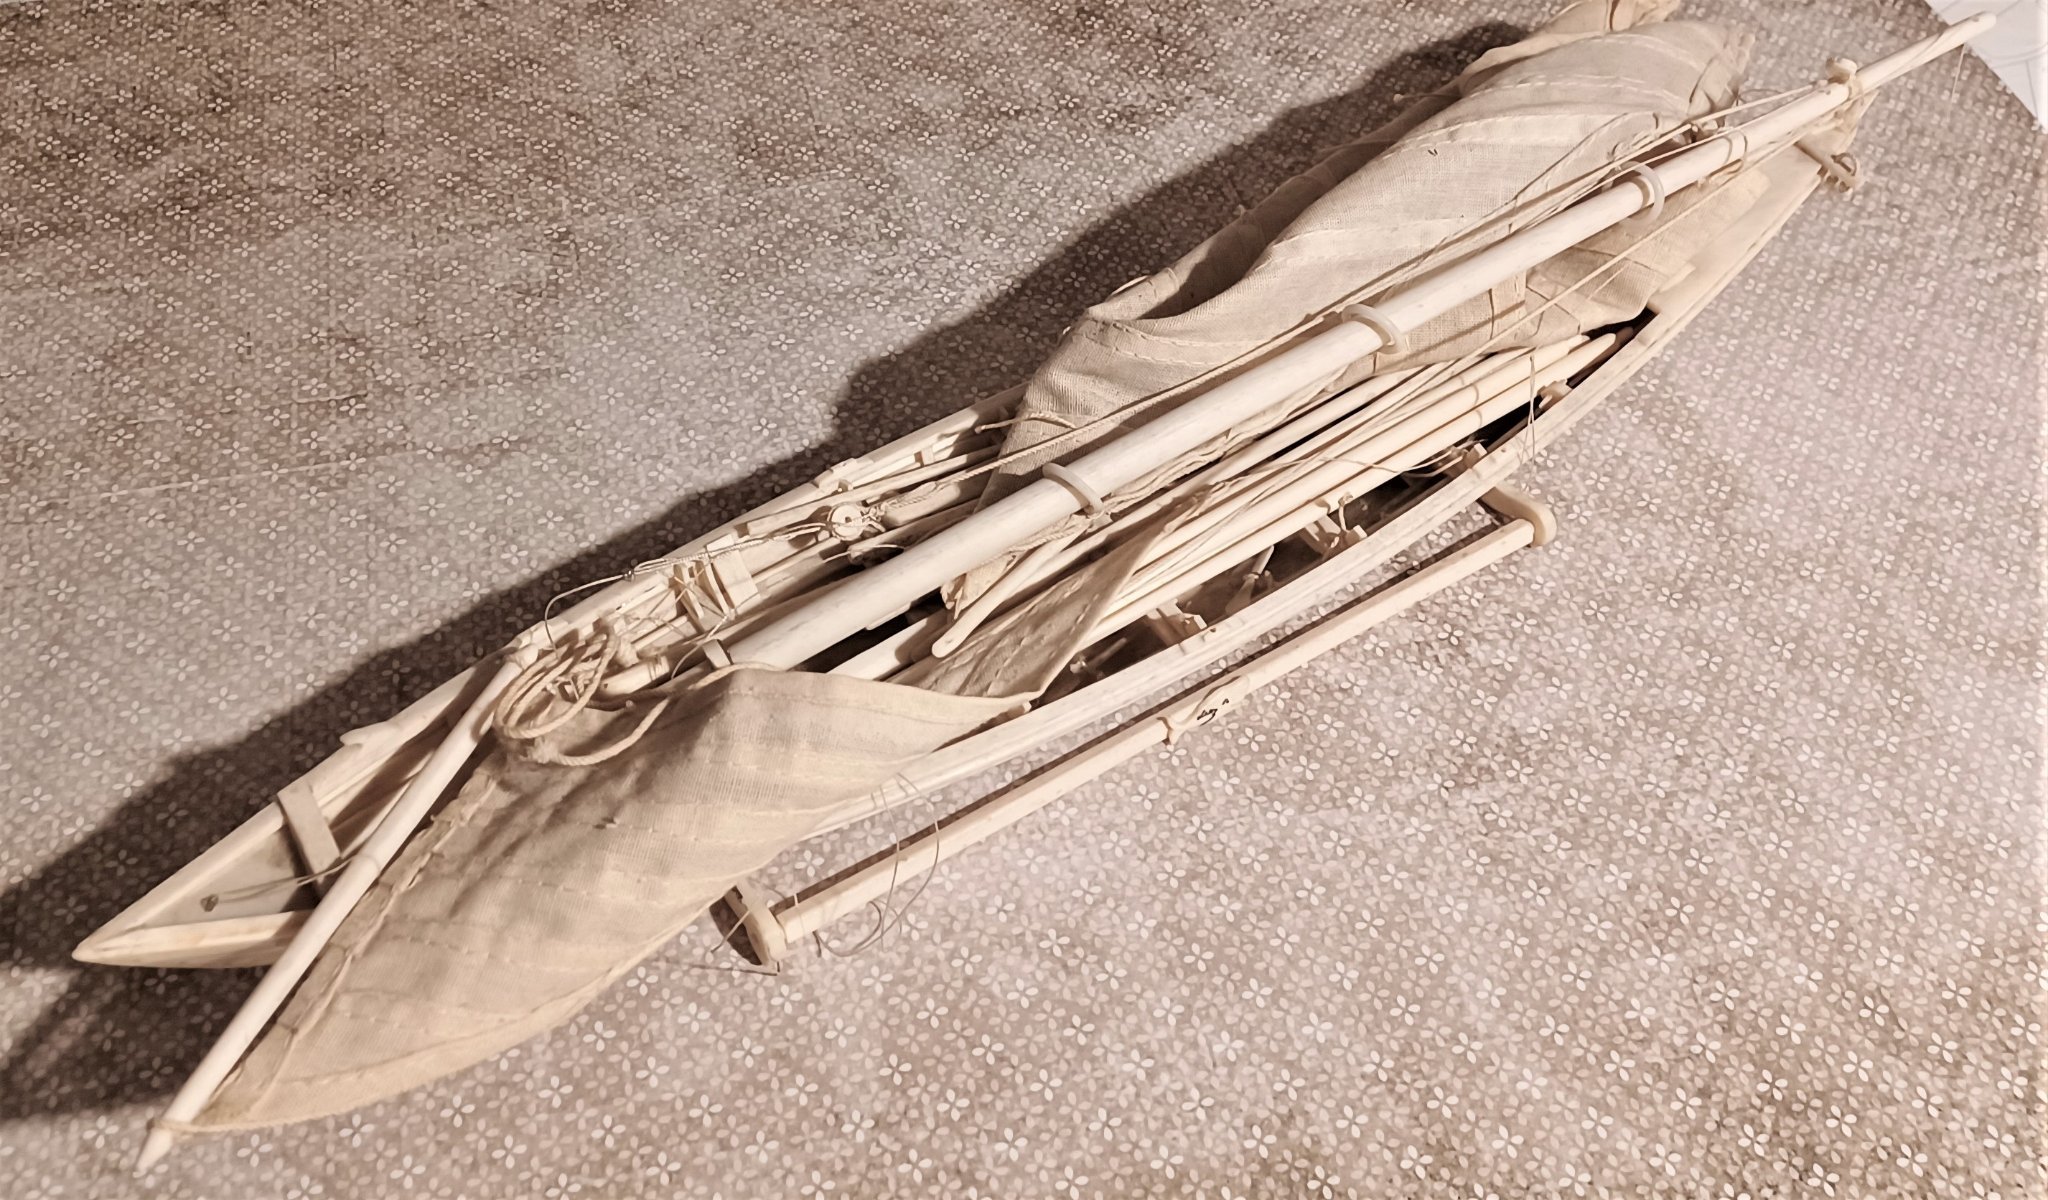
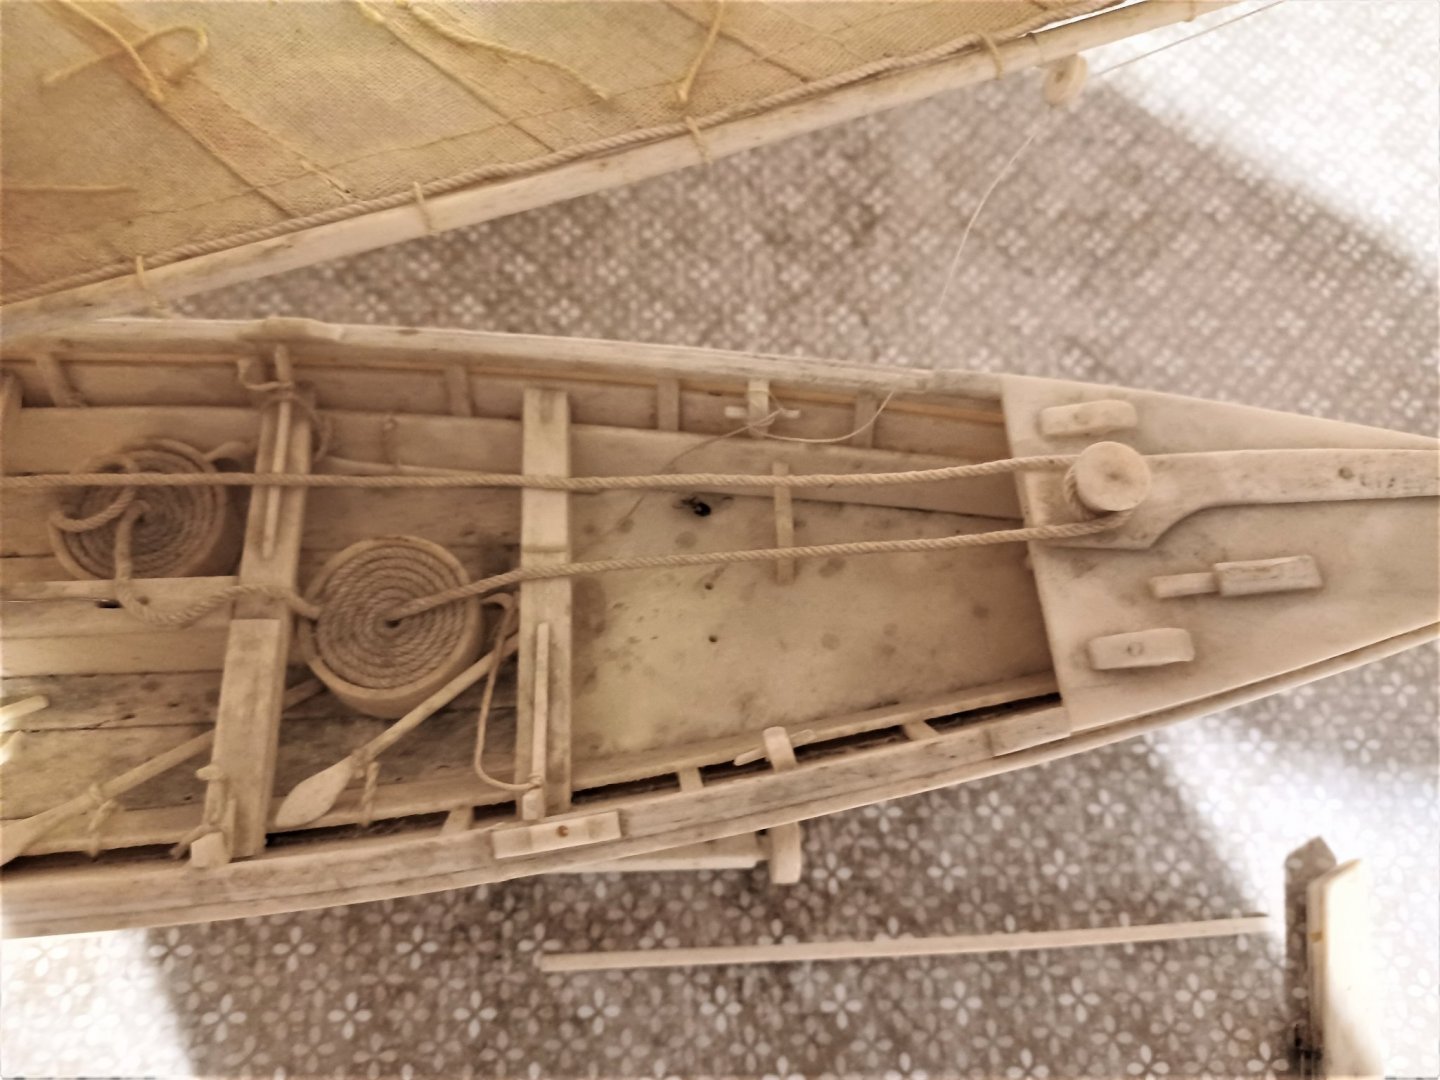
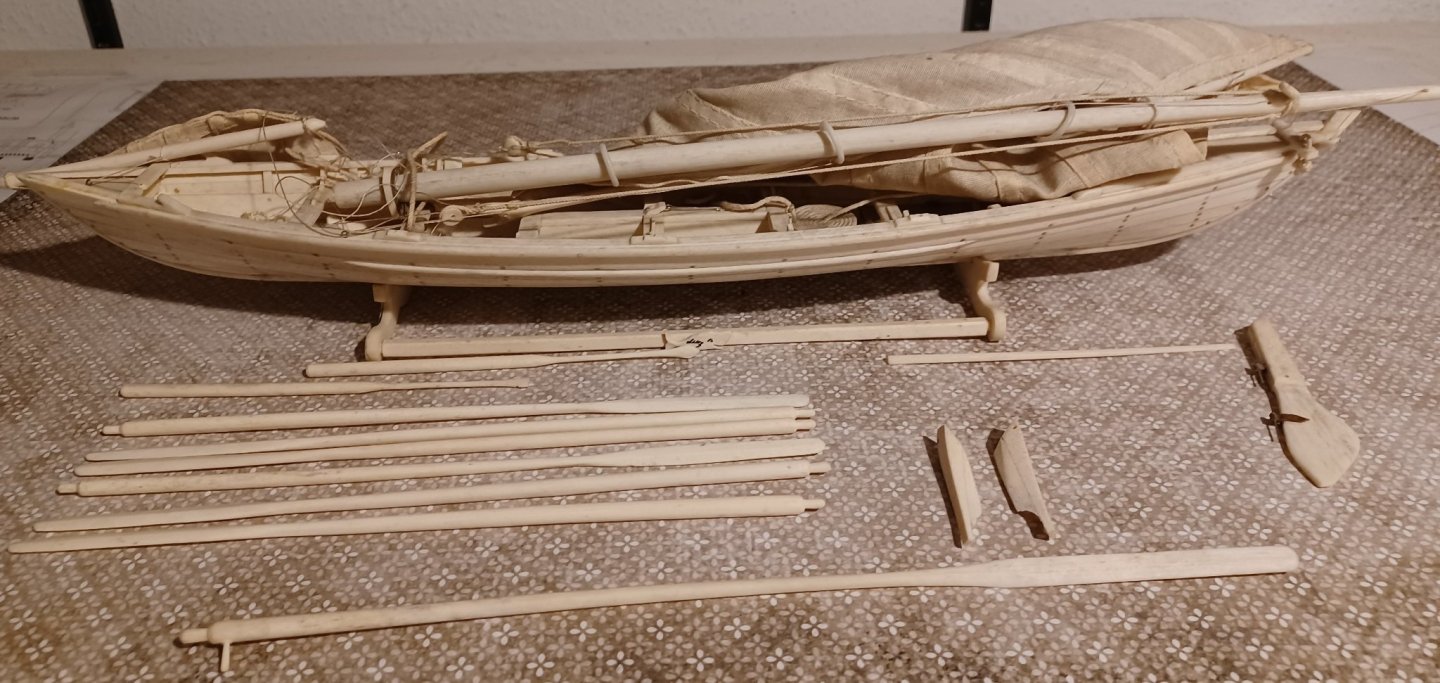
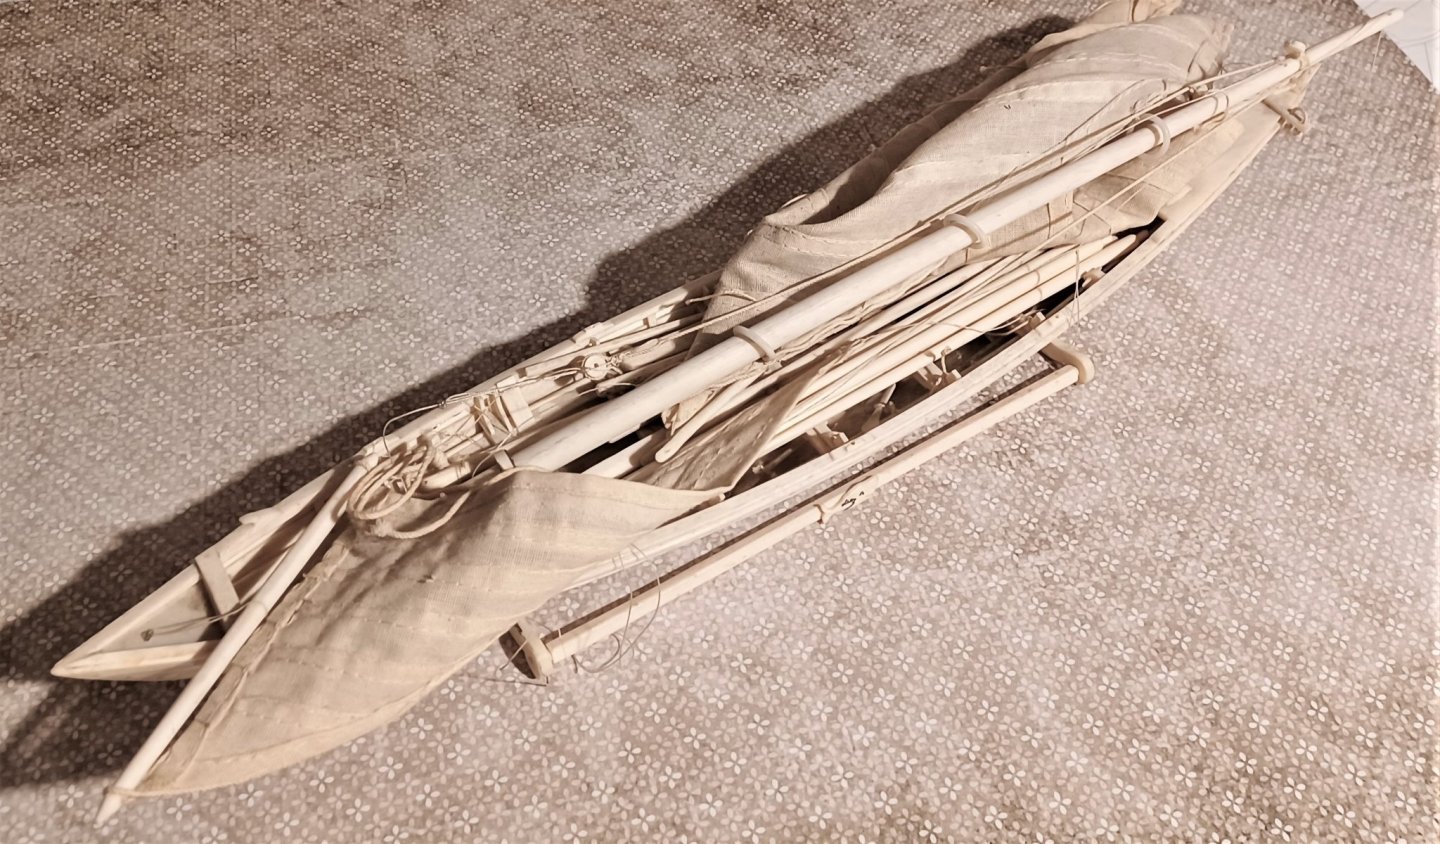
 Hello everybody, I recently got this model of a small boat, entirely made from bone. It is about 35 cm long and completely equipped with a collapsible mast, sails, 6 oars and one long oar for steering, a rudder, harpoons and knifes etc. It is a beautiful work of art. Very nicely crafted. it has some damage and is quite dirty. The stand is made of bone as well and bears the name LUZ. Here are some photos of the model: I had a look in the internet and found some similar models in a couple of maritime auctions. On one or two models the name LUZ appeared as well on the stand and it was mentioned, that the guy, who built these models was called Albertino Sousa Luz and that these ships come from the AZORES. Does anybody of you know more about the background of these models? Was there a sort of manufacture for whale-bone-models? Or did the owners of the whalers made them for themselves, like some captains of sailing-ships did in the past? I would be grateful of some background information. Matthias


- 7 replies
-
- 11
-
-

-
- whaleboat
- restoration
- (and 2 more)
-
 Hello! This would be my first build log, as recommended by Mark Taylor in another forum section, when asking about the Disarmodel Whaleboat, 1:40 scale. I really have no open box pics at the moment, but I can get some later and upload. It is indeed a very nicely packaged kit, all of the wood tightly grouped, as well as a small plastic box with the smaller parts inside. There is a nice poster of a top-view of the assembled whaleboat, and last, the instruction booklet. This is where the fun begins... instructions are basically quick comments per each step, and not that many pictures to help a novice builder. There are no plans whatsoever, so for those looking a kit with a nice instruction/print set, this is not for you. In the other hand, the frames are nicely laser cut, but delicate... they have a very thin veneer, so to speak, that will eventually come loose, so there will be sections that you will have to fill in, as these frames become part of the structure of the boat (think of huge ribs). Assembly was pretty straightforward, with 2 thik additional pieces for bow and stern that you will have to fair, along with the frames, in order to install the planks. The keel per se is delicate in a couple of places, so you have to be delicate when sanding/fine tuning the fairings on frames. Now, onto the first pics... first planks, port and starboard. Not glued in place... the planks were lightly wet, and installed so they take form... not sure if I will form the hull, and prepare ribs in lieu of the kit frames... still thinking if going this way! And sorry for the background, but my worktable was too cluttered with other stuff that I have to clear! As soon as I have a bit of progress, will post more info/pics... duty calls, have to work, pay the bills! All feedback greatly appreciated!
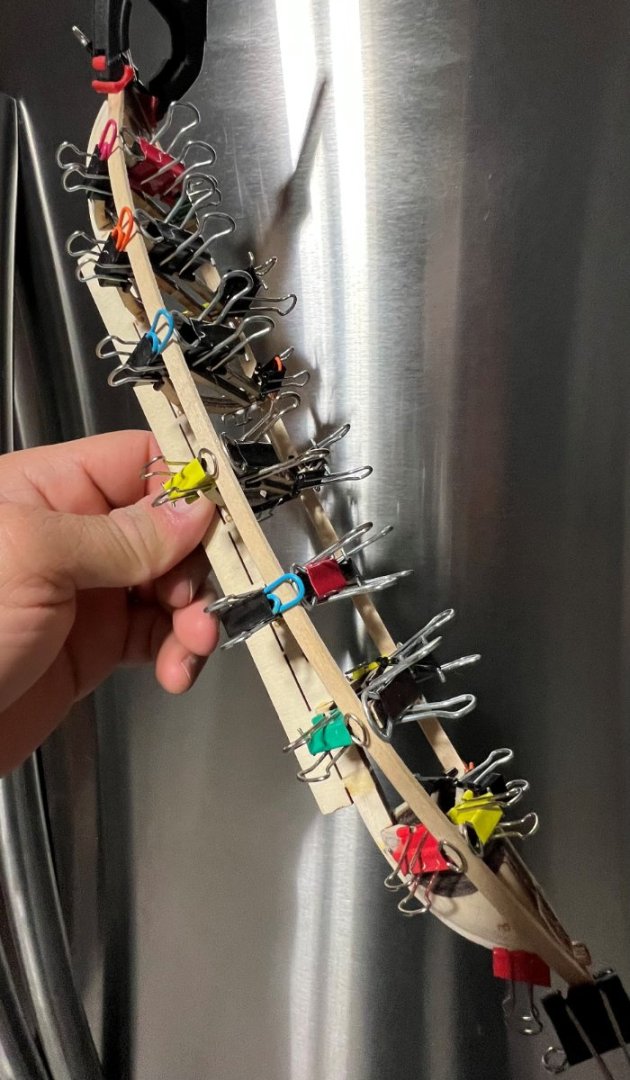


-
 Late to the website, but practicing with posting my first build done three years ago... Decades ago I built model airplanes (plastic) and had good eyesight, steady hands and a knack for detail. Fast forward and I have so-so eyesight, a tremor and a desire to be as detailed as I can within my limitations. I love small wooden boats, whaleboats in particular, so I picked up a kit off the internet in 2019. Little did I know that it would take over my discretionary income... Photos from the first few weeks will appear if I figure out the interface. Janelle IMG_2840 (1).HEIC IMG_2841 (1).HEIC IMG_2844.HEIC
 -
 Hello there, I received this as a birthday gift and was going to kit bash it into an English east coast (Norfolk) lifeboat (Henry Ramey Upcher) but after a long think about it have decided to use the basic pattern for the lifeboat as a scratchbuild, therefore I can build this as is, also it will be practice for clinker planking, which I've never done before. (Well not intentionally) More to follow. Cheers
- 16 replies
-
- 3
-
-
- whaleboat
- Artesania Latina
- (and 3 more)
-
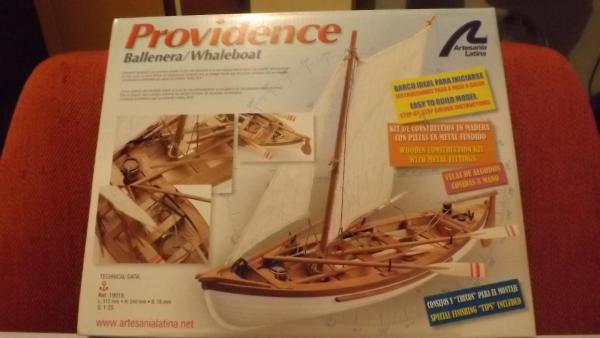
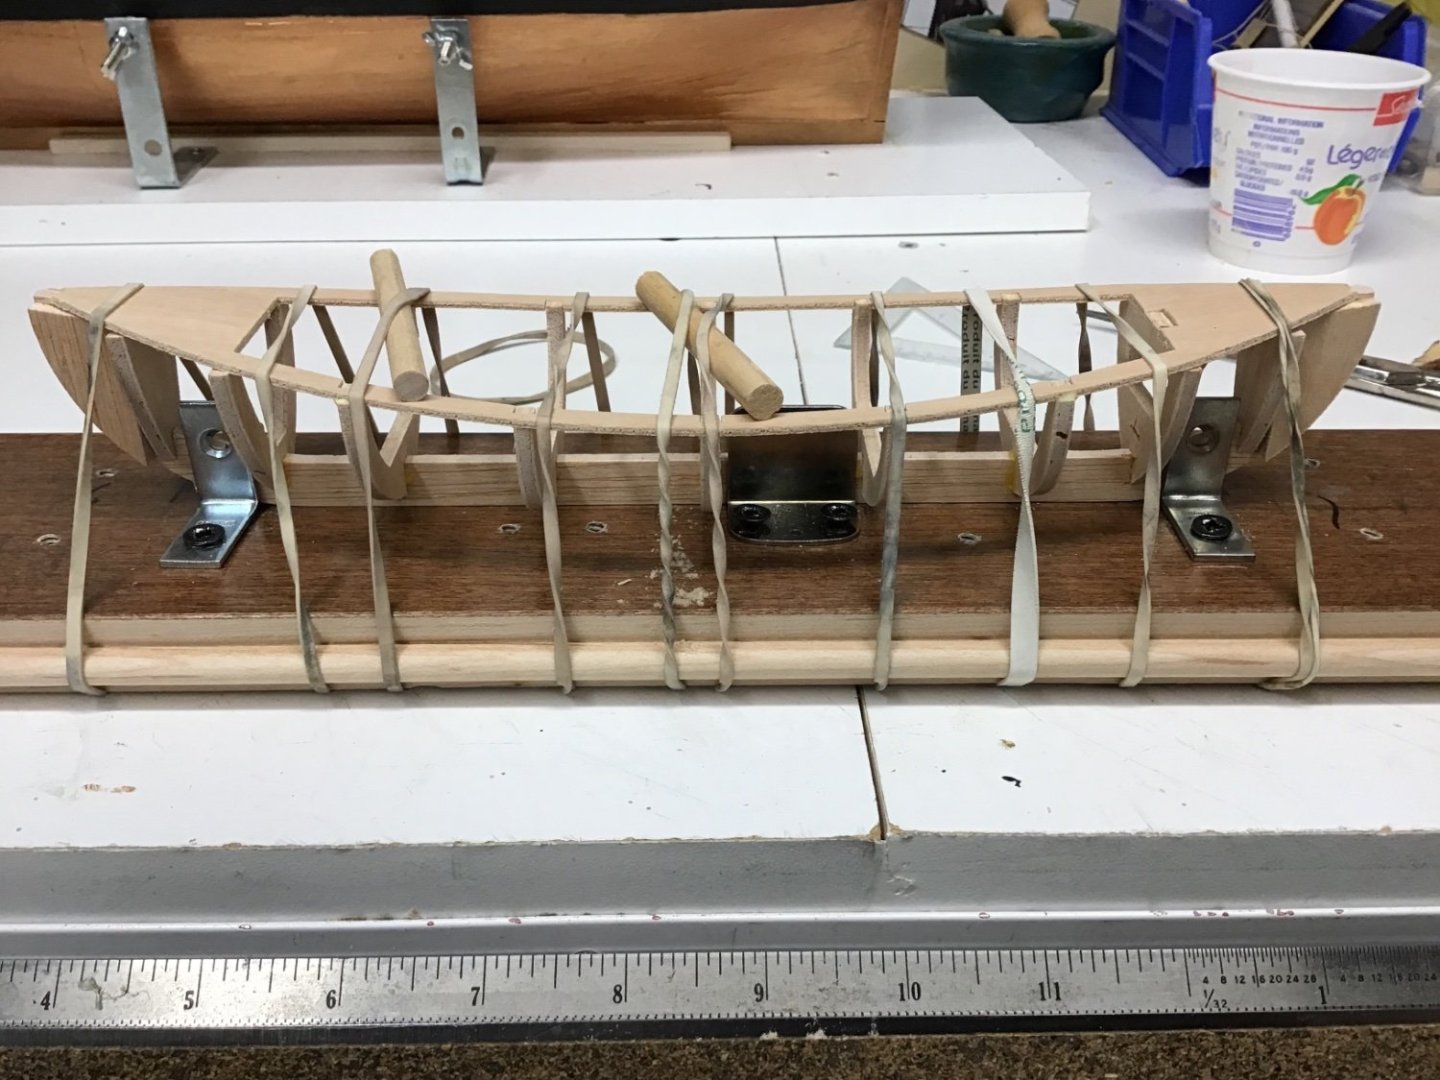
 So I started on another kit but it proved to be a bit over my head so I have started with this kit. So far it has been straightforward. There seems to be enough plank work to get me ready for more advanced kits to come. I have NO experience and I’m building the kit On a limb 😬. I know I have plenty of advice and help from this forum and will be using it...a lot. Please lend all the Crits and advice you can give me. It will be a slow process as I’m sure most of these type kits are but so far it’s been very relaxing. Thanks for tuning in!

- 16 replies
-
- 3
-
-
- providence
- artesania latina
- (and 2 more)
-
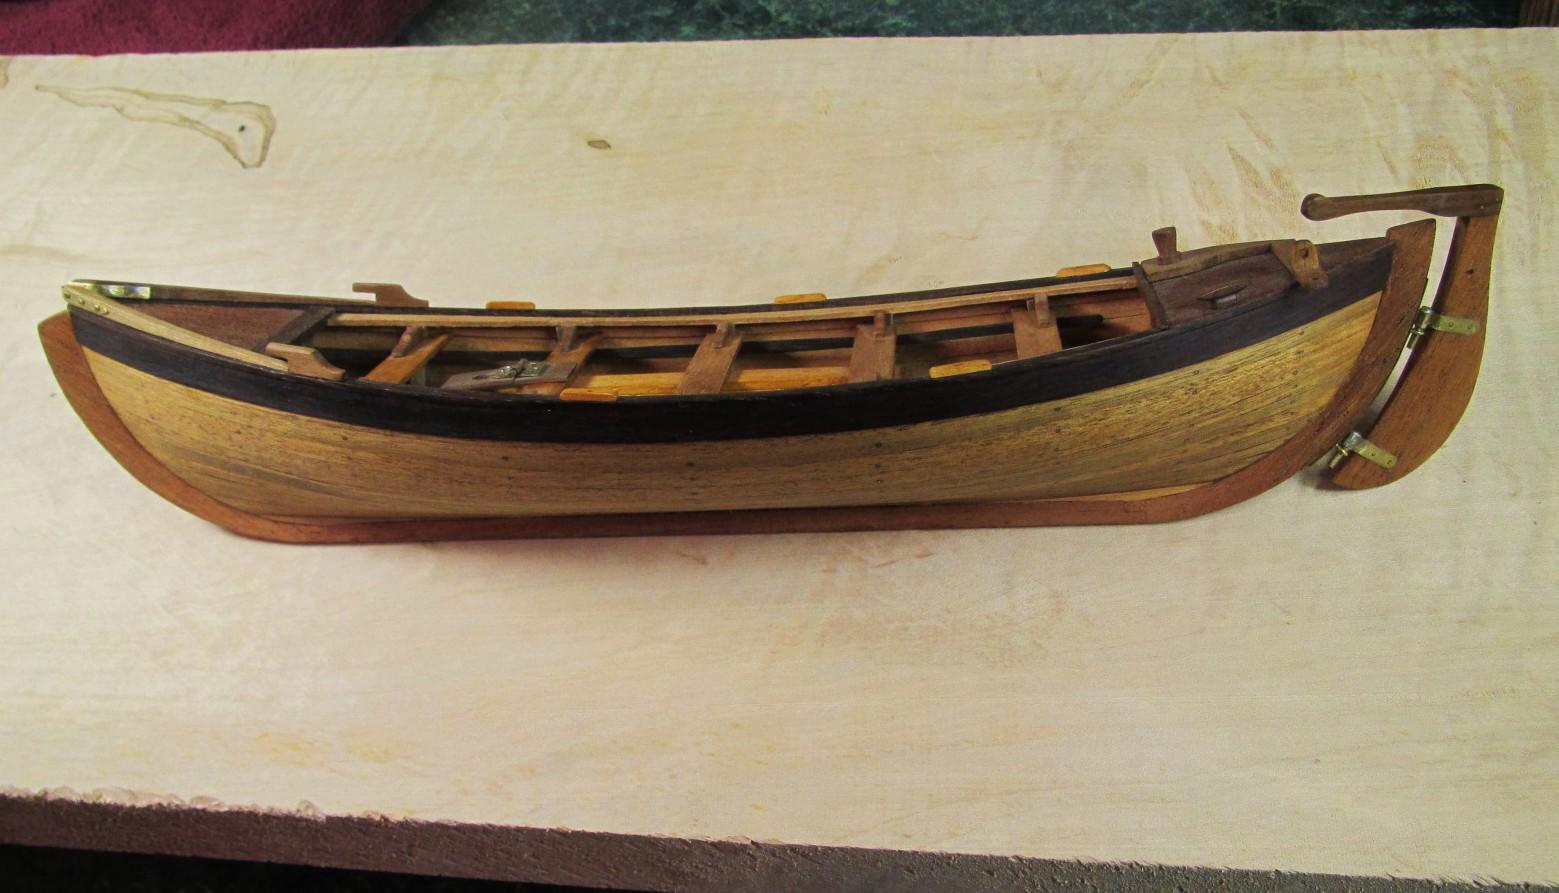
 Hello, I did not take photos during its assembly, I present it finished. I hope you like it. Greetings. (Hola, no hice fotos durante su montaje, os lo presento terminado. Espero que os guste. Un saludo)
.jpg.586355d6a97cee434e3cd26ad1191ce6.jpg)
.jpg.749ed87ea02d8d8c28d837d28d5a6177.jpg)
.jpg.0b5b0233b1ef3f3681e1cdf7b0d53fa8.jpg)
.jpg.0a3ac56775a014ceb780cca513483c3c.jpg)
.jpg.112a38cf475bdad7c0aa2a92e9e64392.jpg)
.jpg.01883680ec9462180501411a319ca99d.jpg)
-
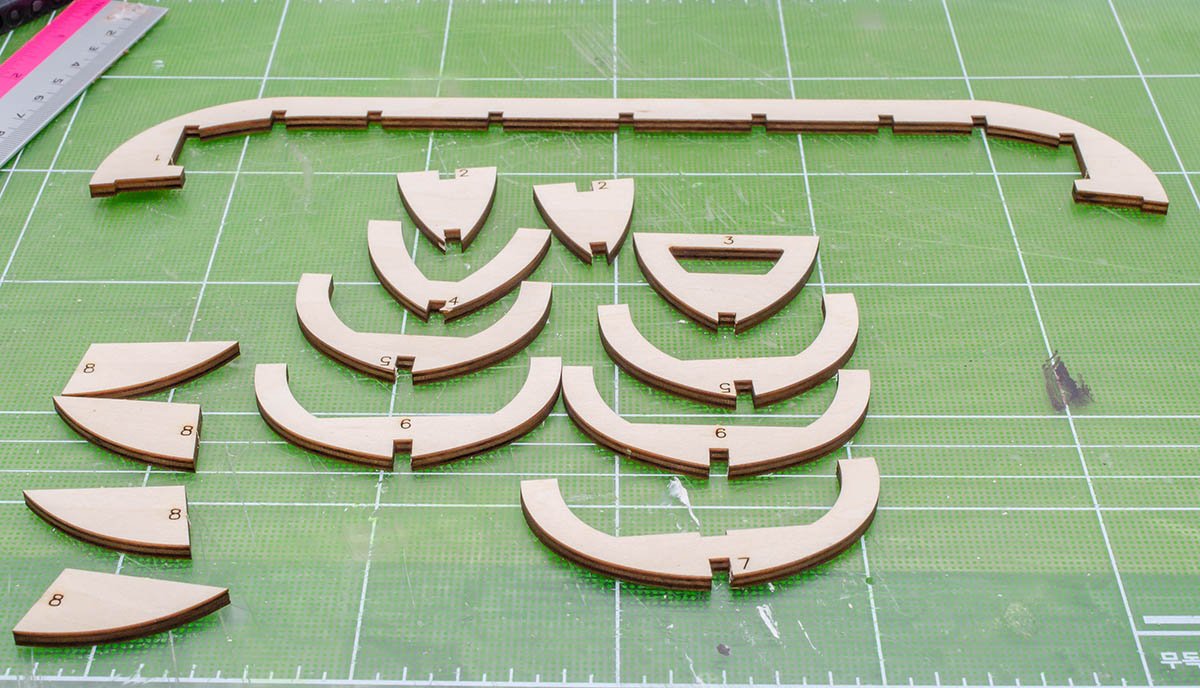
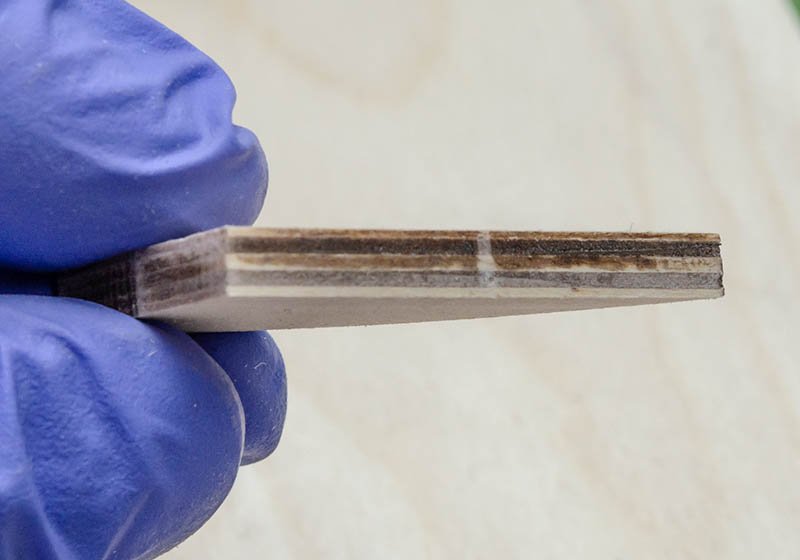
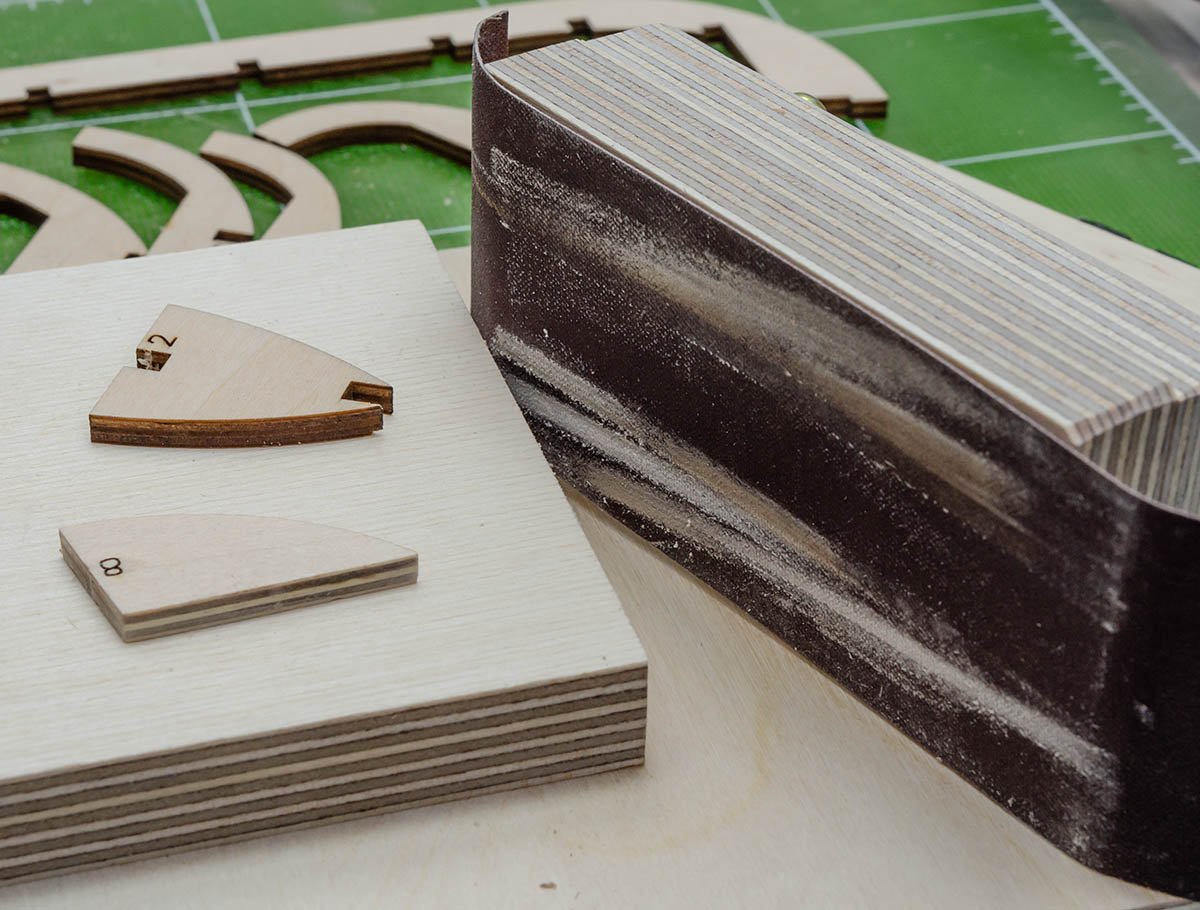
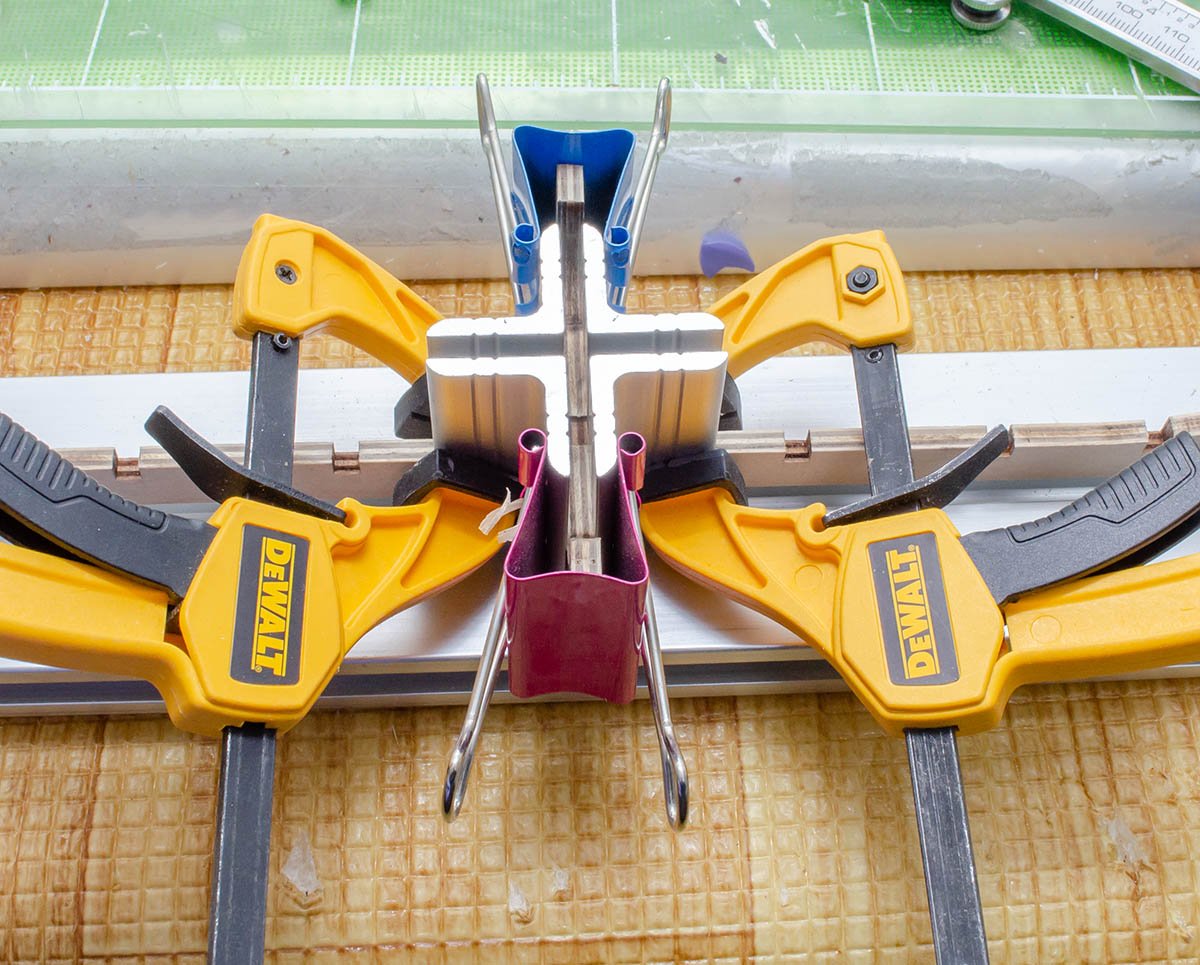
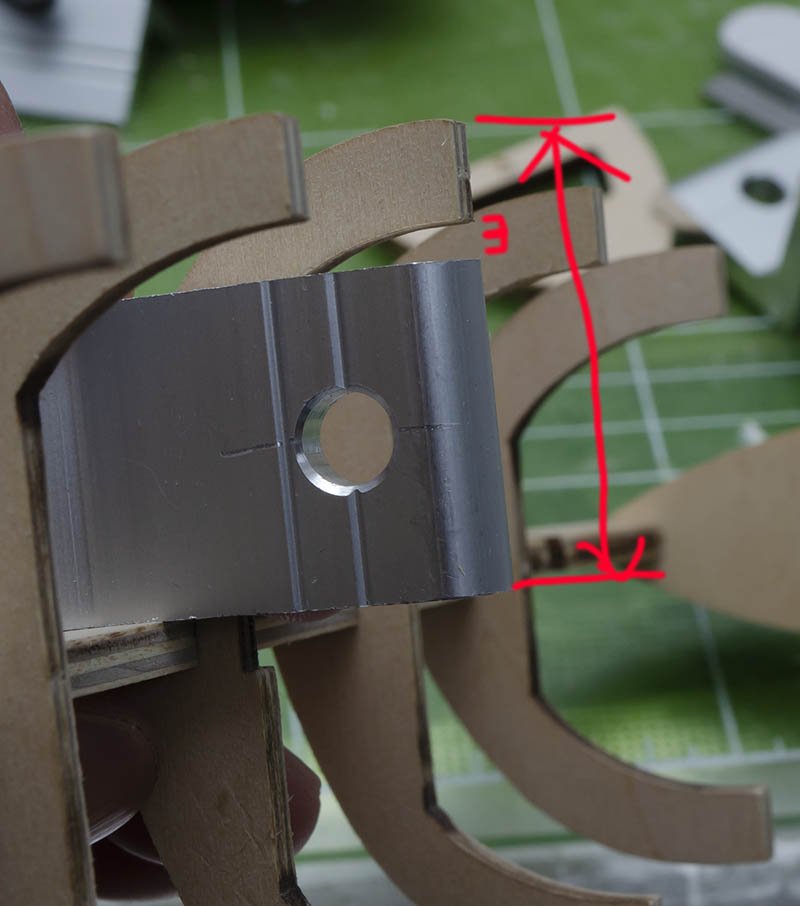
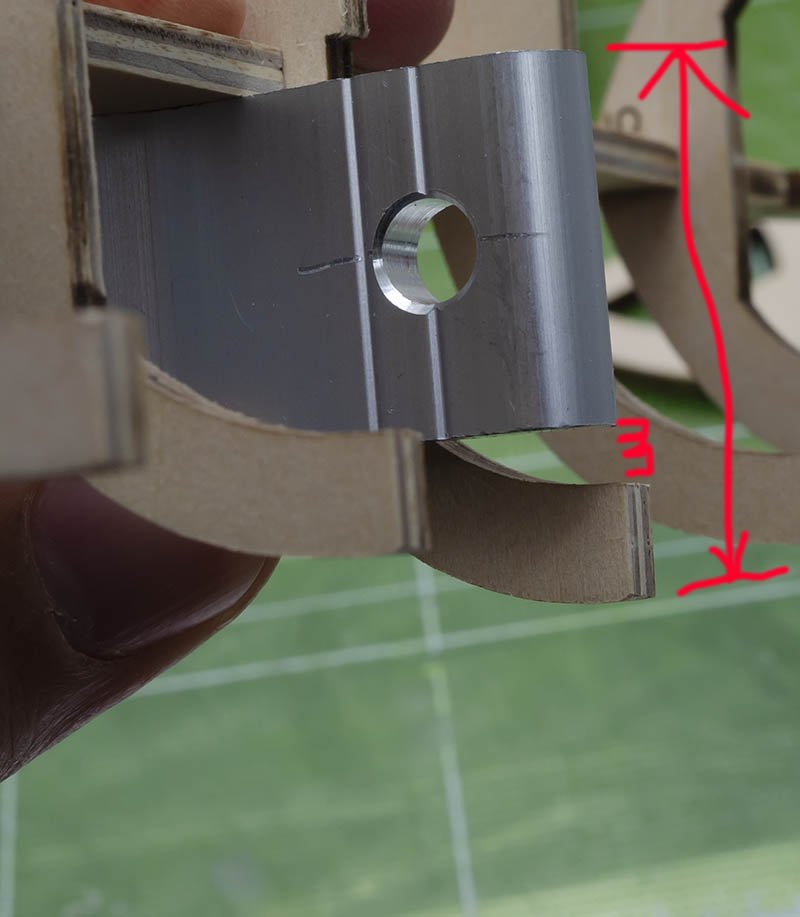
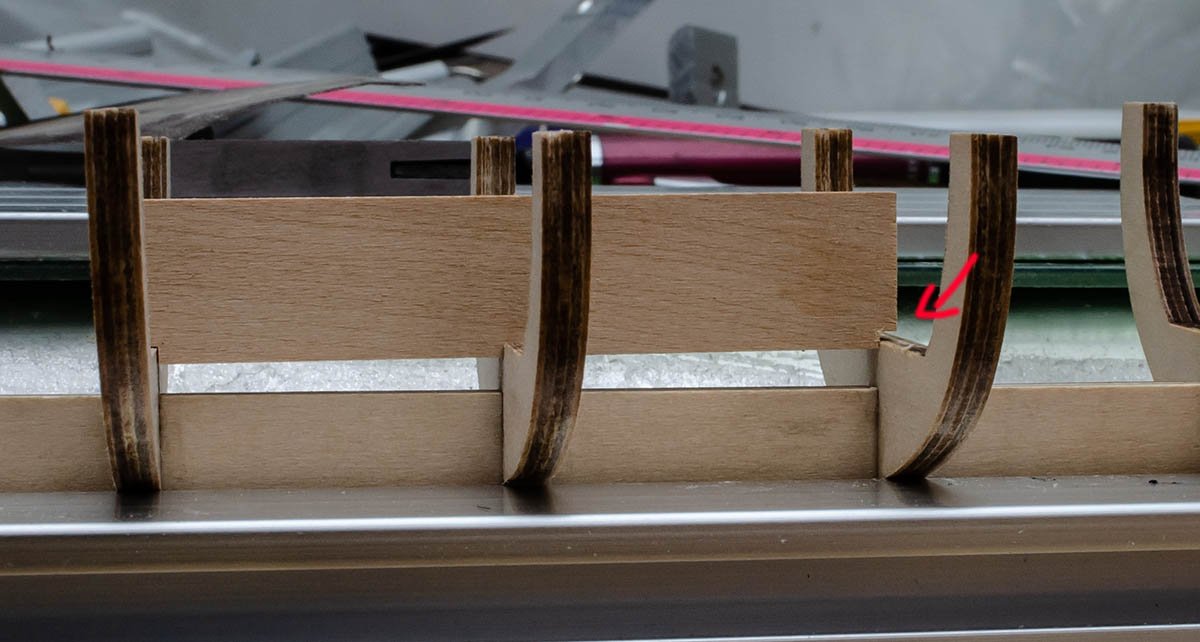
 Hi everyone, this is my first build log here on MSW, and 5th wooden ship model. With this kit I wanted to get a break from rigging HMS Terror I've been building for over a year now (build log pending, I'm not very good with keeping logs). I'm rather disappointed with this kit, and hopefully the build log will show why. The build process looks straightforward from the first glance at the instructions, but as I was progressing it was more and more obvious that there are lots of very unclear moments that instructions don't show. And what really baffles me - there are no plans of the boat included, you have to kinda guess part placement and some dimensions based on few small photos. Here you can see bow and stern reinforcement plates being mistakenly glued lower than they should be, because instructions give misleading information on doing this. I had to remove them and glue flush to the top of main keel piece. Next thing that really surprised me was the amount of material that needs to be sanded off the keel prior to planking (about 1cm). It's a very strange design decision, and instructions don't really explain it, you have to figure it out from pictures. Planking (arguably the most important step when building a clinker-built boat) is barely explained, luckily this being my fifth model I had no issues with it. Calculated and marked all plank sizes, glued with thick CA glue. Reasonably happy with the result, didn't bother much with getting it perfect because all of it will be pained white as per instructions. On next photo you can spot a strange horizontal plank on the bow bulkhead. It's made from 0.6mm scrap piece from HMS Terror build and is covering the ugly end of the plywood keel that would be otherwise visible on a finished model. Installed the benches, and this step really showed the problems with the kit. You see, with all those elements (bulkheads, benches) being laser-cut, one would expect them to fit reasonably well. But no, not even close. Benches are too long for bulkheads they should pair with, and pre-cut slots that bulkheads should fit in are different sizes on each side of the banks. It's just hilariously bad. Not a big deal for me, but for a kit that is positioned as a beginner-friendly it's unacceptable. Especially given how easy is to adjust source files for laser cutting (it's not like it's ejection molding and you have to make new forms), there is no excuse for such quality issues. On a positive side, I loved the use of cherry for the benches and other details, beautiful colour. Although the wood quality for cherry parts is all over the place.
- 6 replies
-
- 2
-
-
- providence
- artesania latina
- (and 2 more)
-
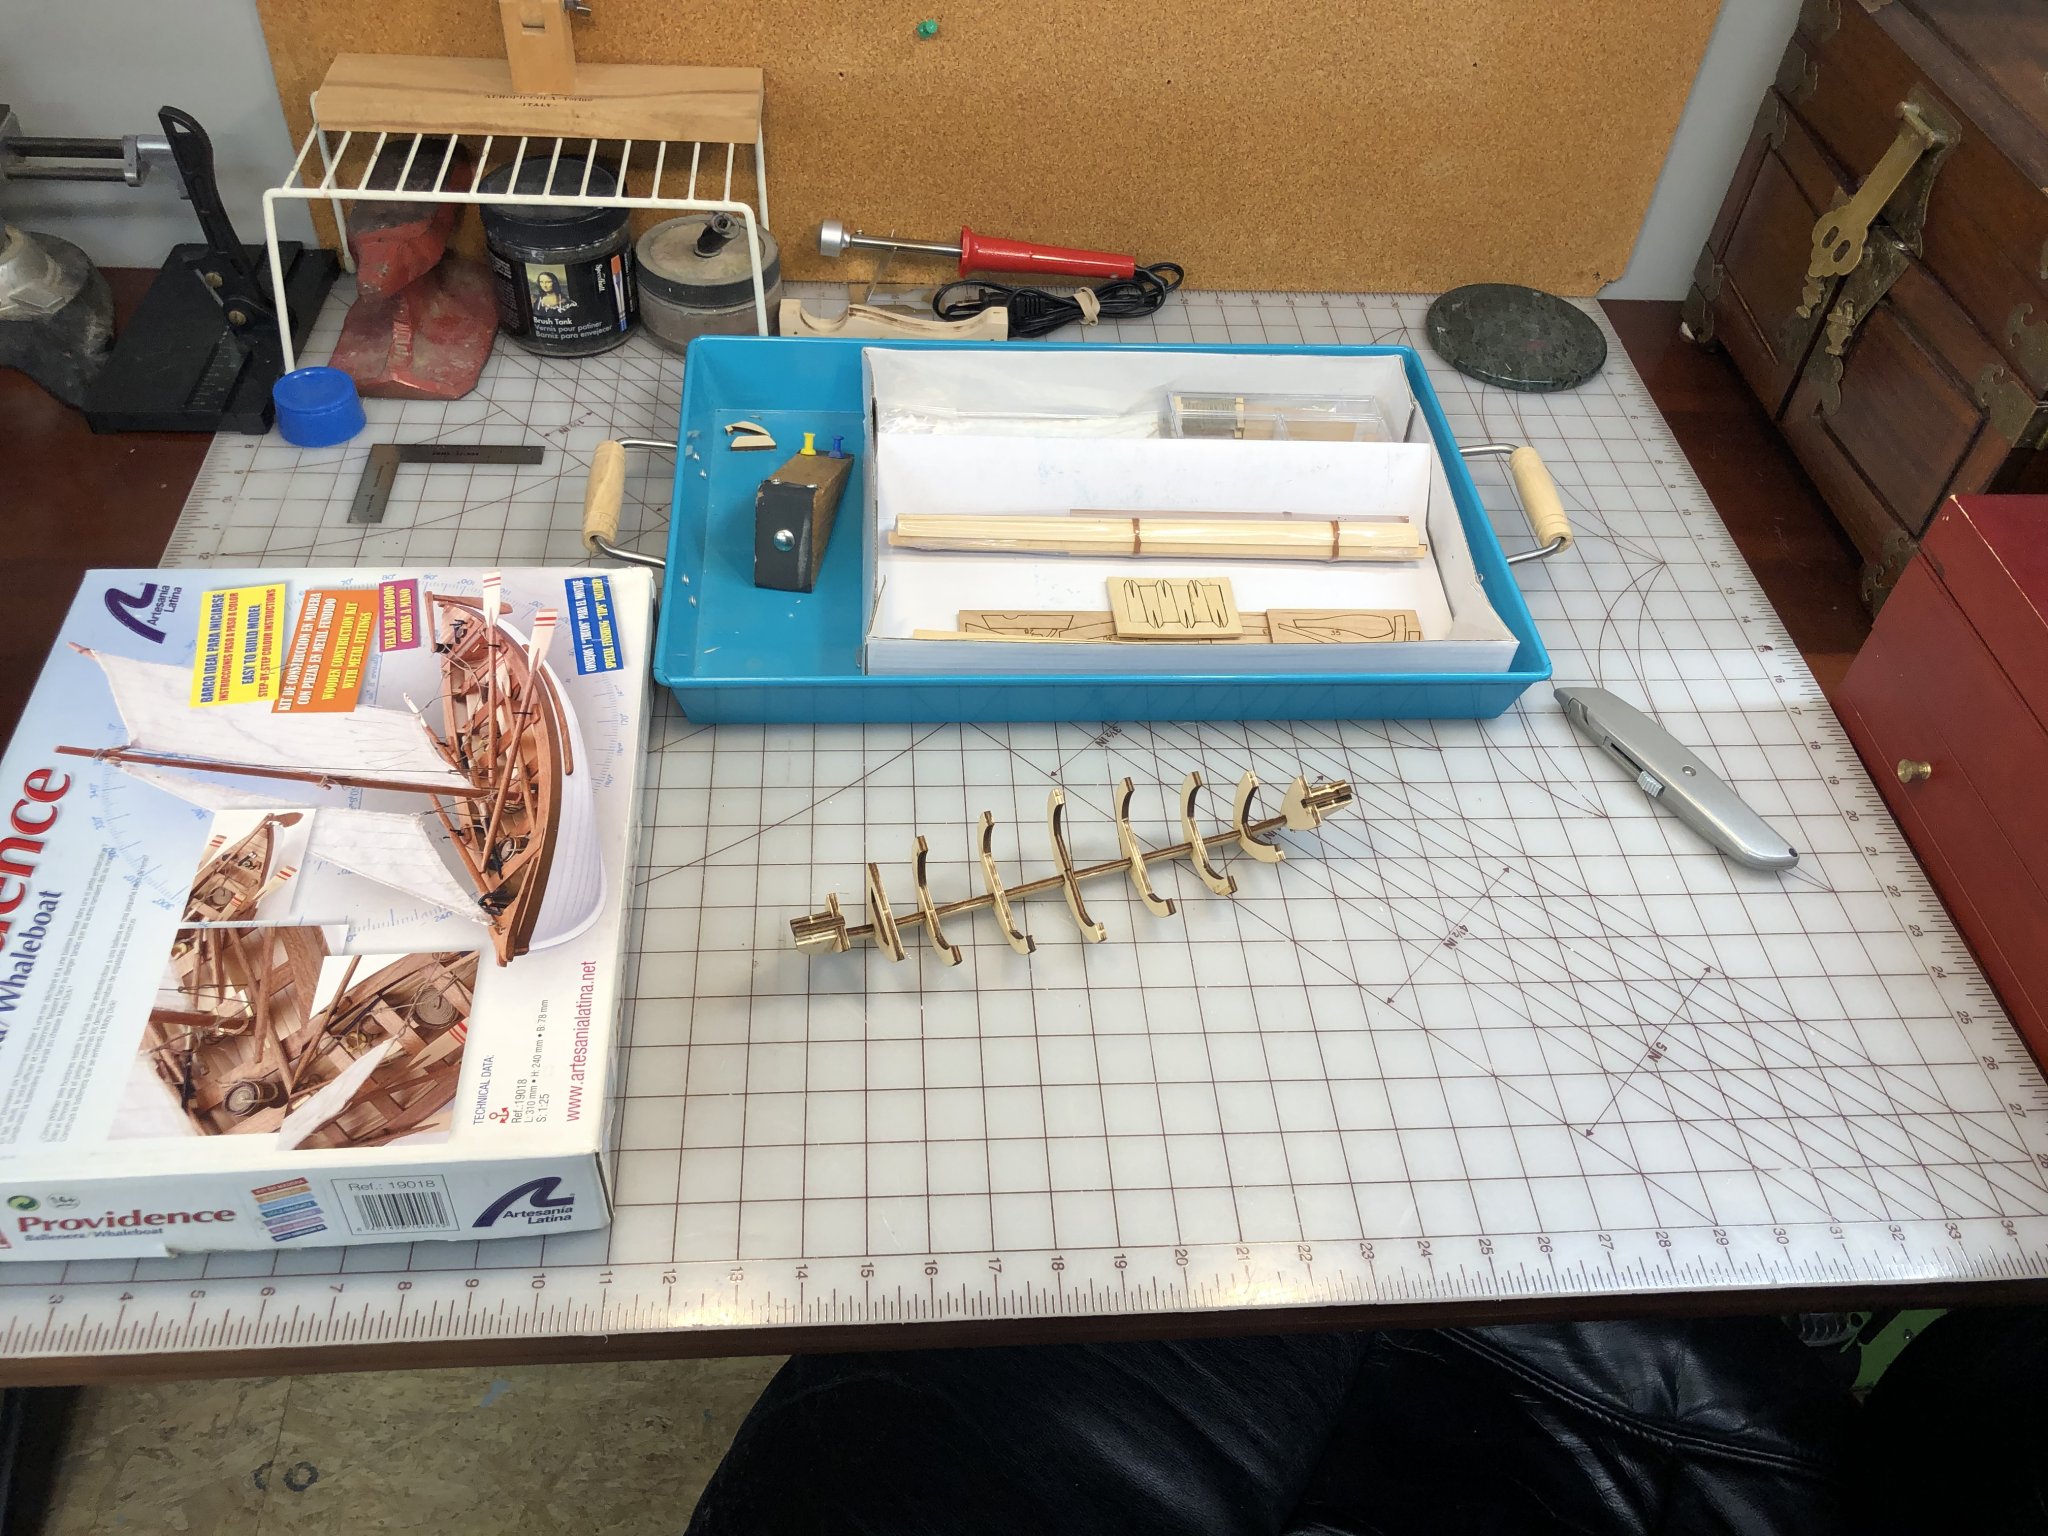
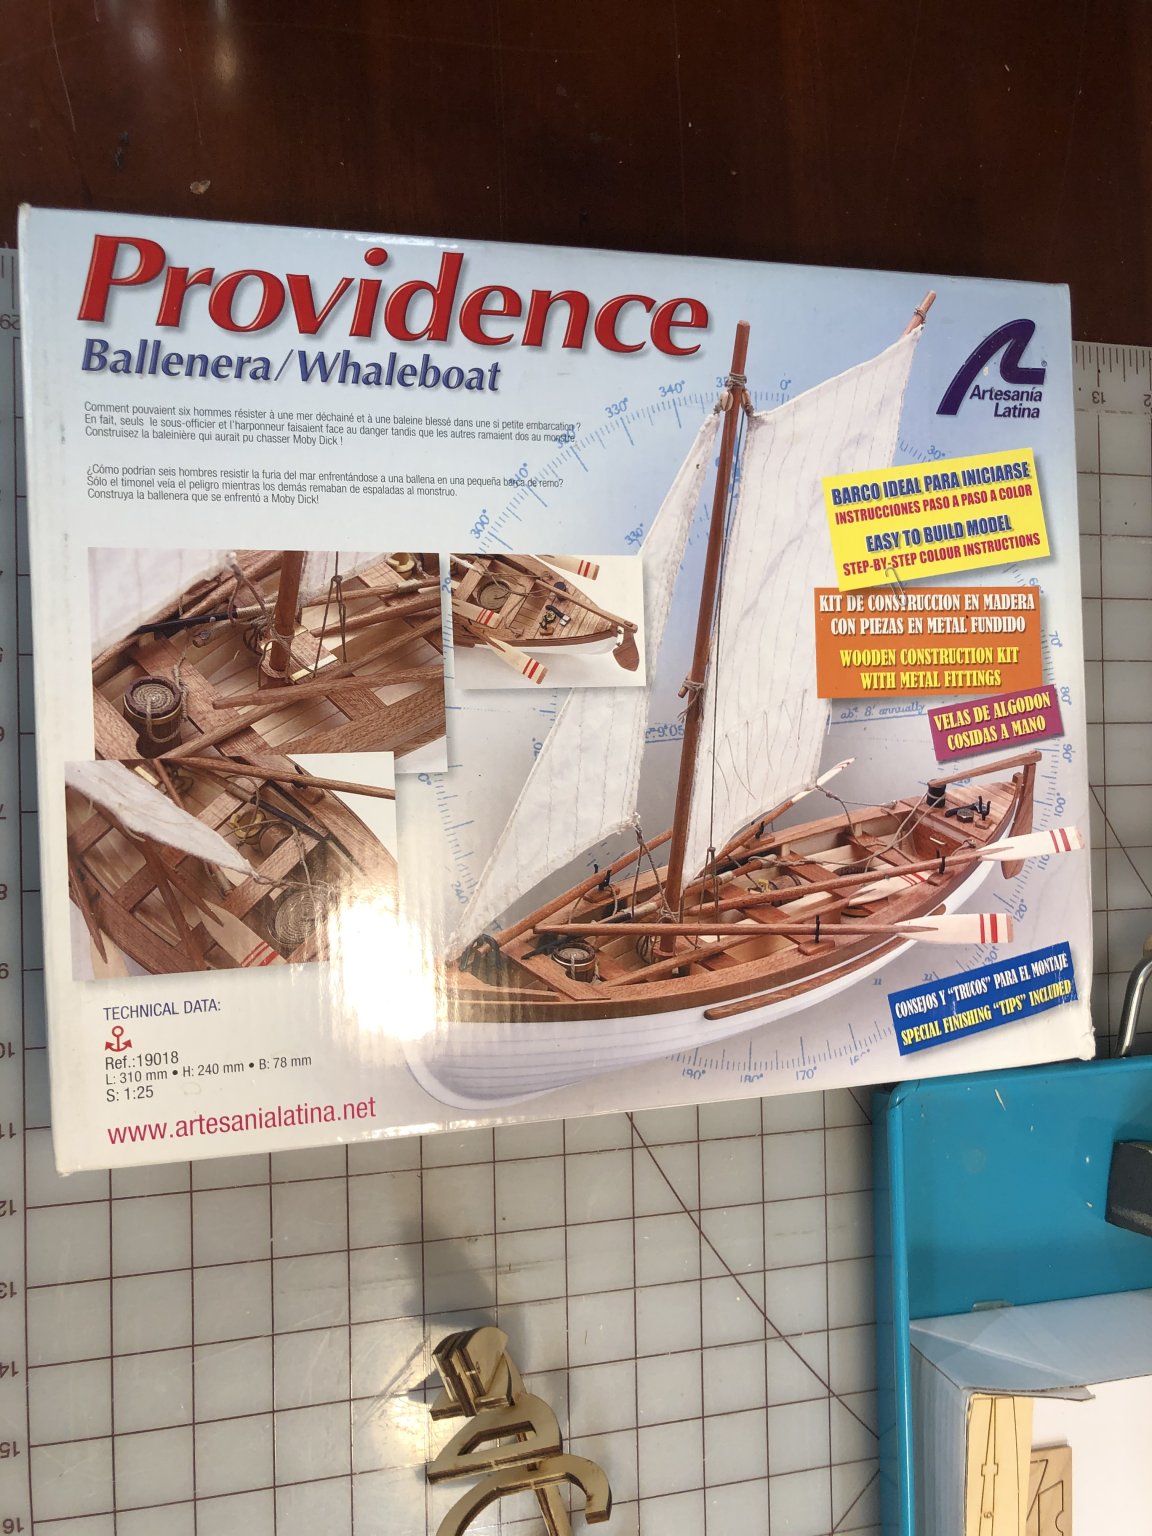
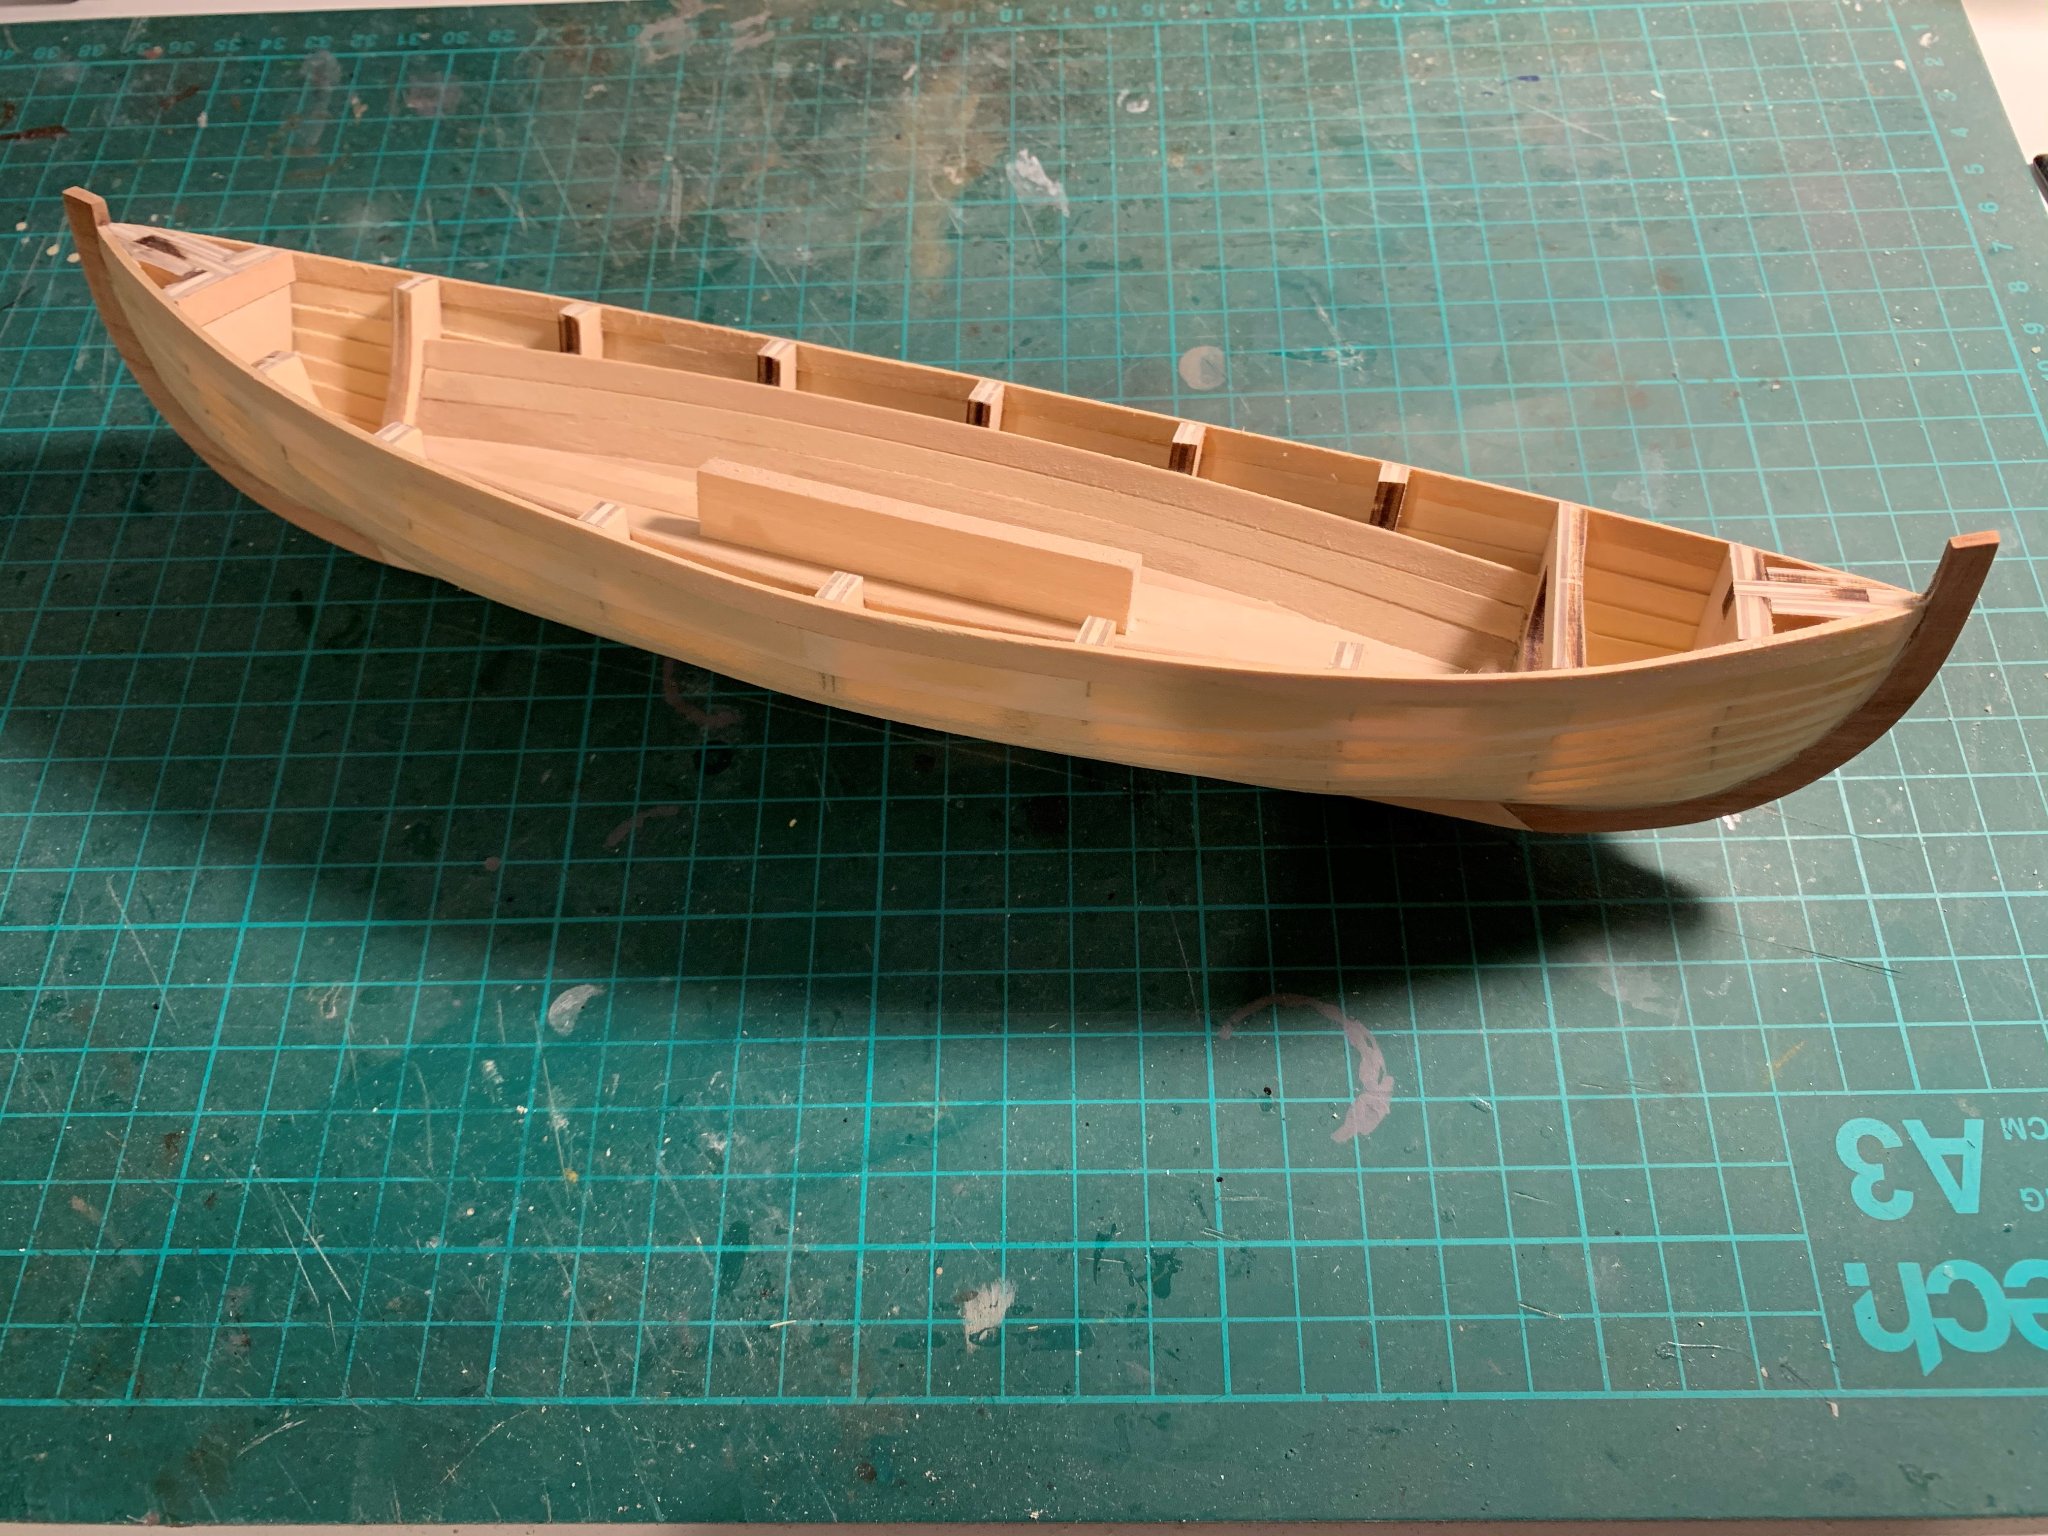
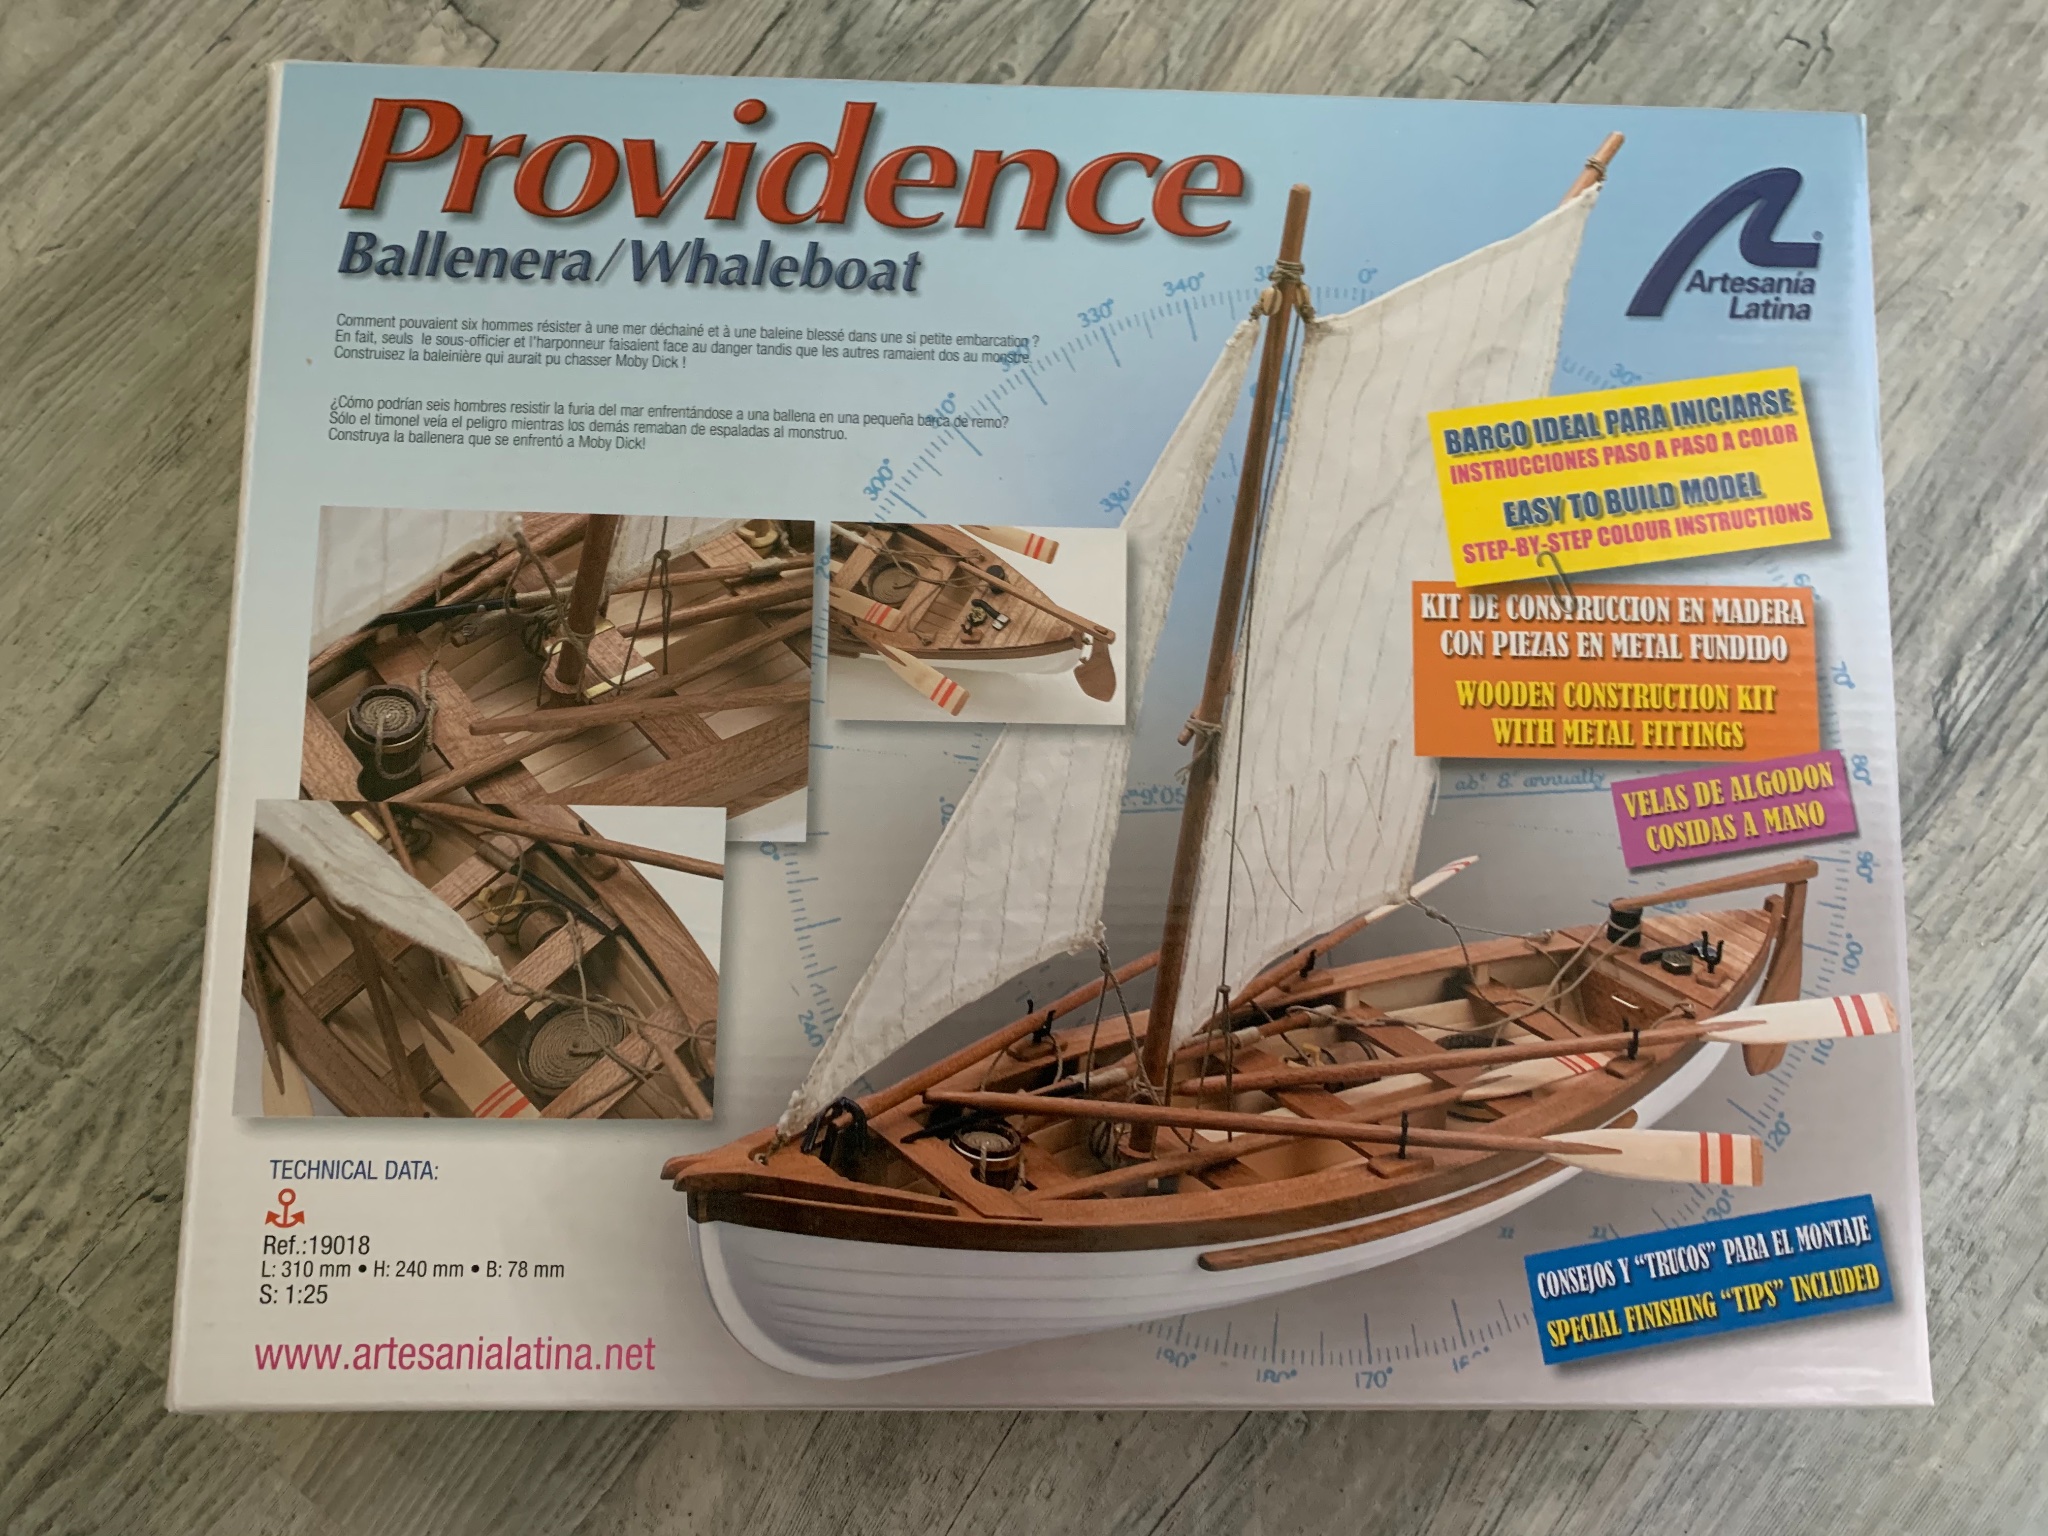
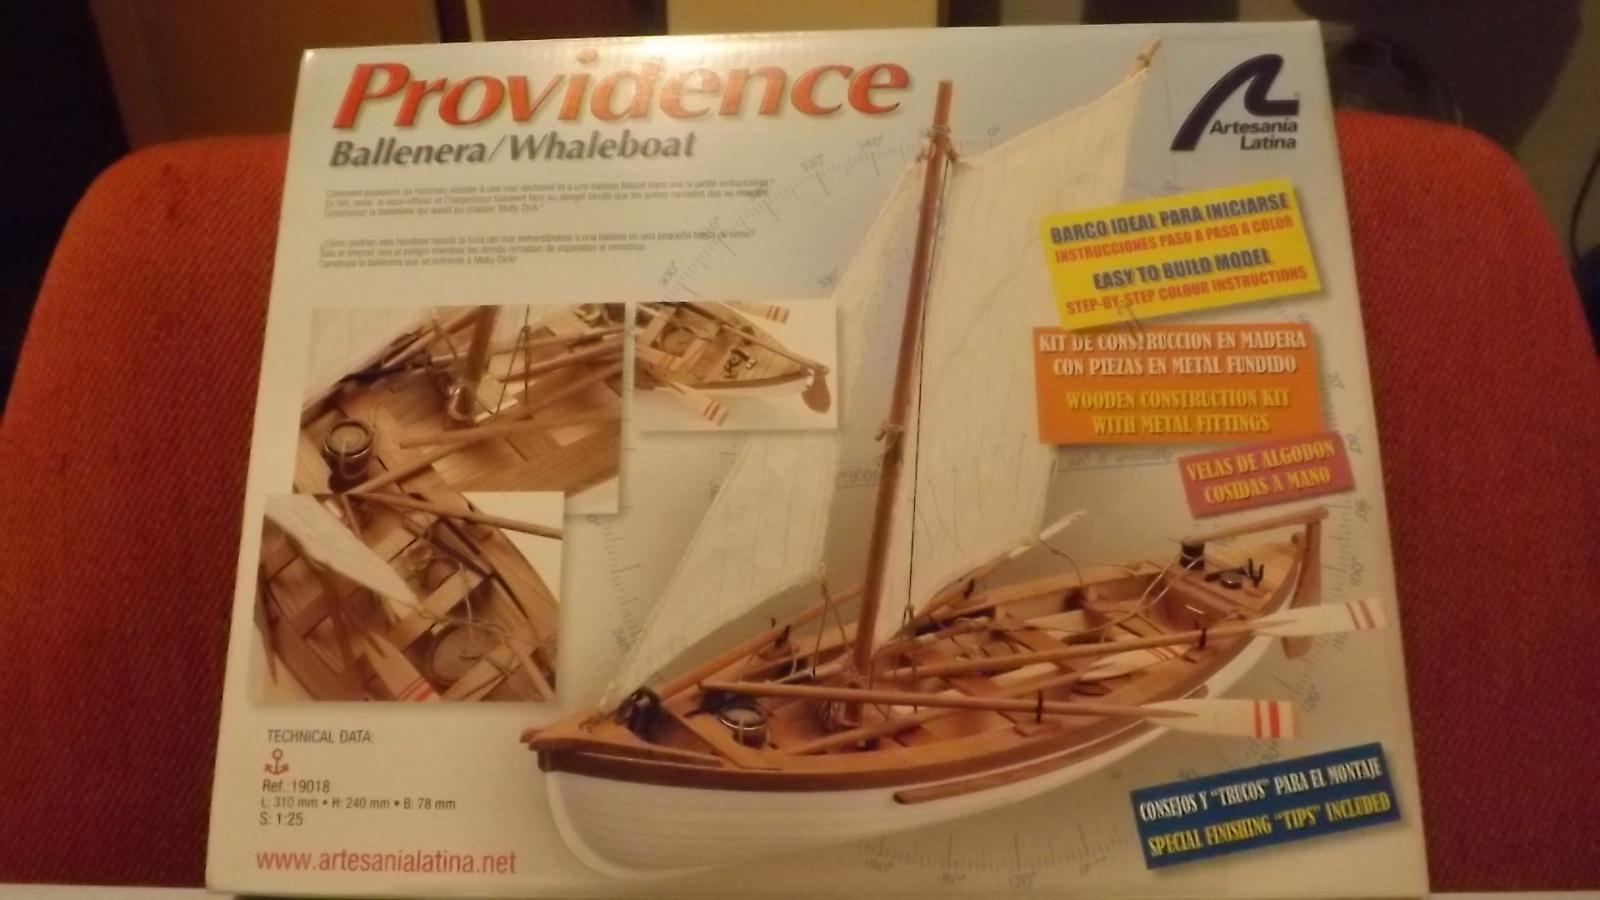
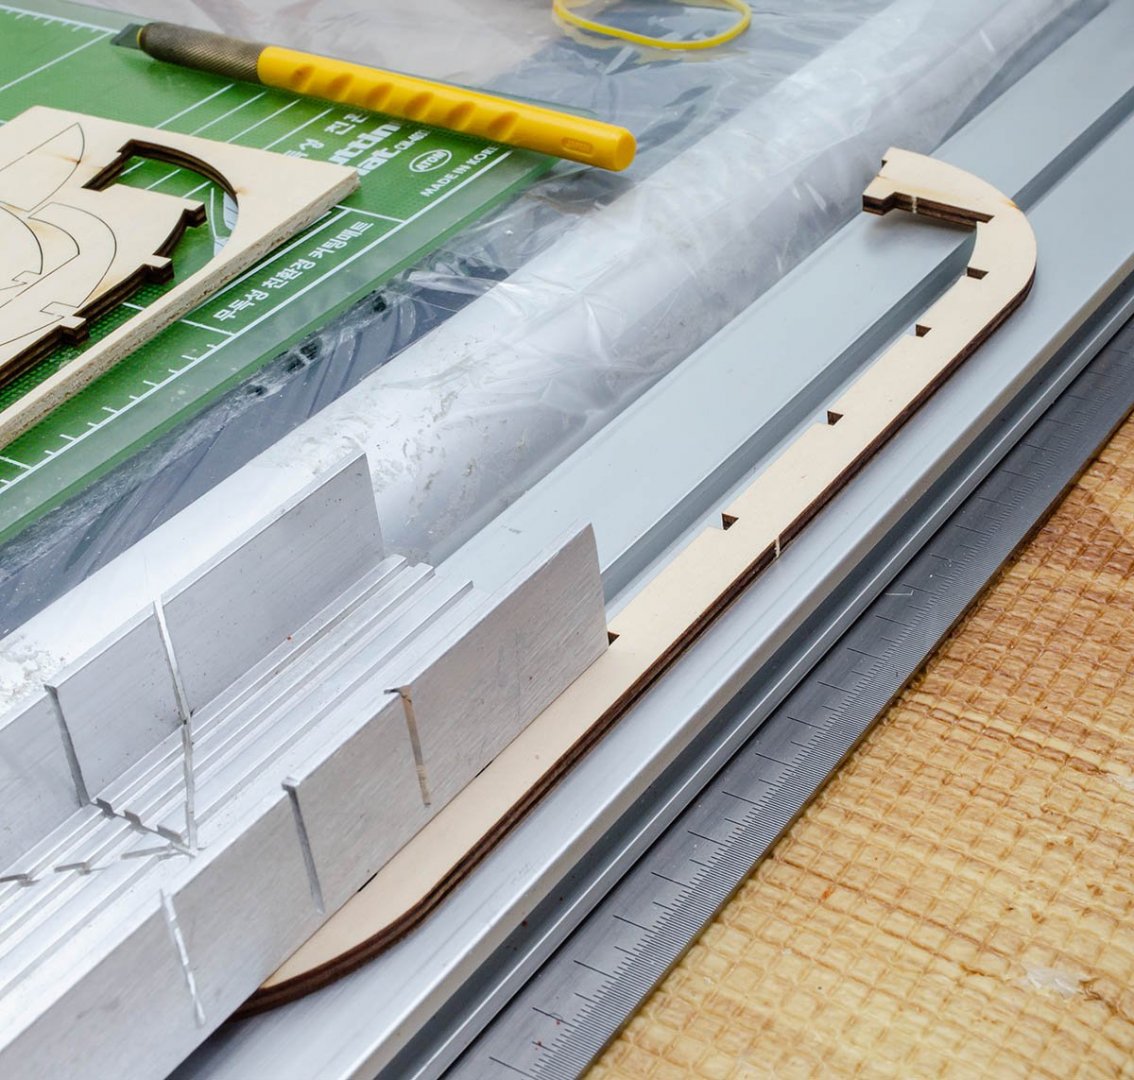
 Started my second boat kit this weekend, Providence Whaleboat by Artesania Latina, one of their beginner’s kits. I’ve consulted the other build logs and am trying to avoid the issues they found with this kit, and it’s coming together very well so far. Frames fitted neatly, though the plywood was very brittle. Using a lot more tools on this kit than I did on my first, getting a much better result. The instructions just call this the “interior side piece.” Made double sure that it would fit cleanly, since I saw other builders having trouble with this piece. There is a lot of room for error. I got to use my Micro Shapers from Artesania Latina on the interior planking, to make it round on the edges. Needs cleaning up afterwards, but it’s a neat tool. The interior side planking isn’t perfect, once again I forgot to sand the frames, but it’s better than my last boat. The floor planking was very easy with enough sanding and cutting. Sanded one of the “Cockpit floor side battens” and used it as a form to make the second one. Took a great deal of sanding and fitting, but the floor planking finished very neatly. I’m very proud of this work so far. Now begins the laborious task of sanding down the frames to receive the exterior planks! I’m listening to an audiobook of Moby Dick while I work. Call me Ishmael!


-
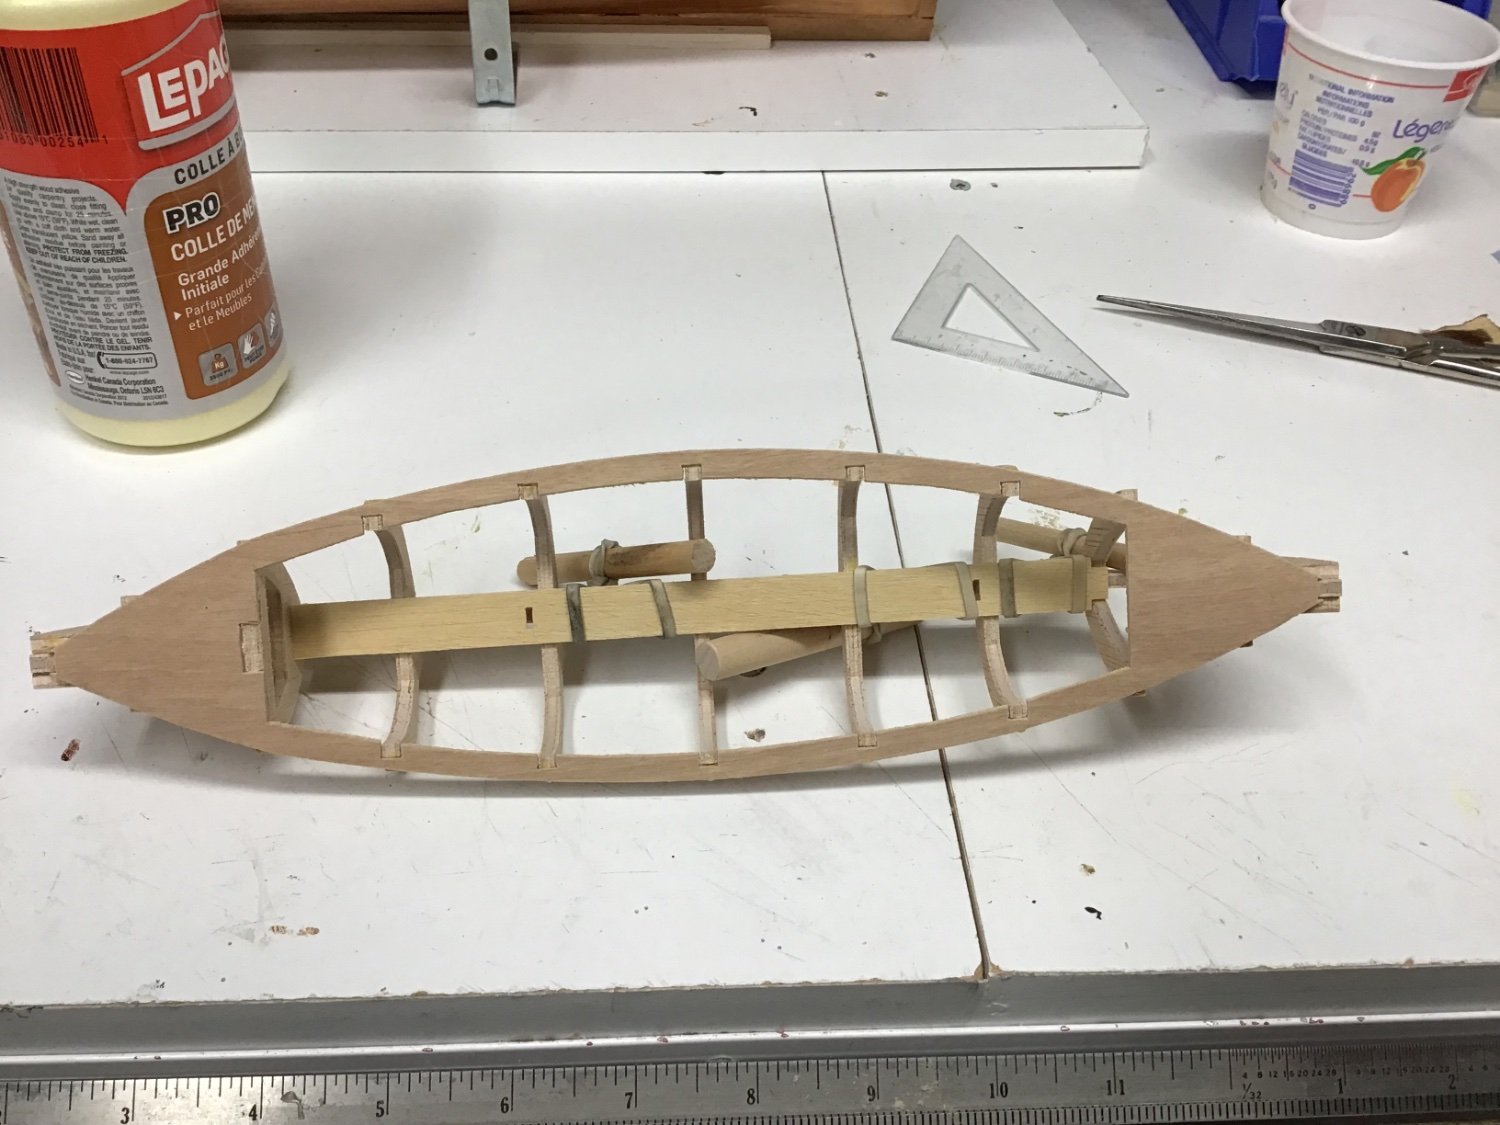
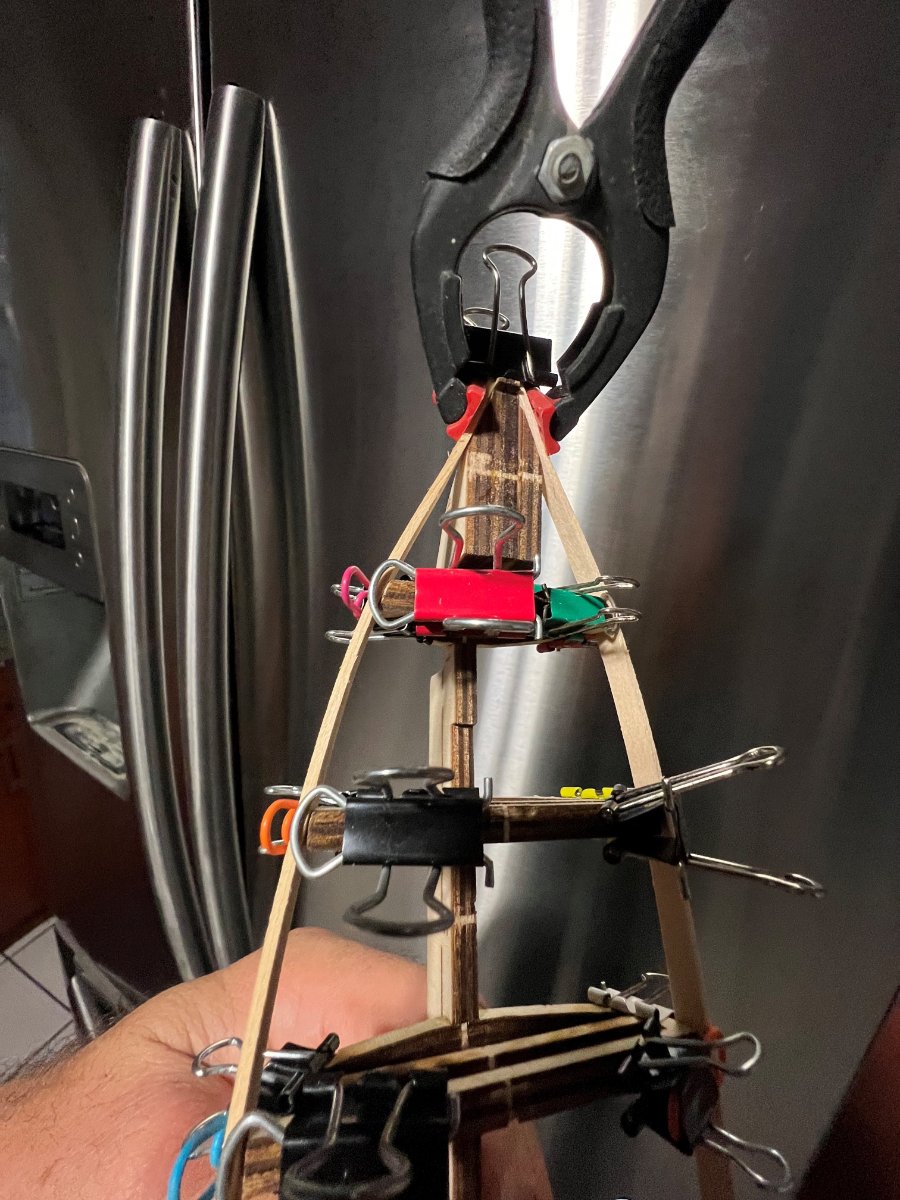
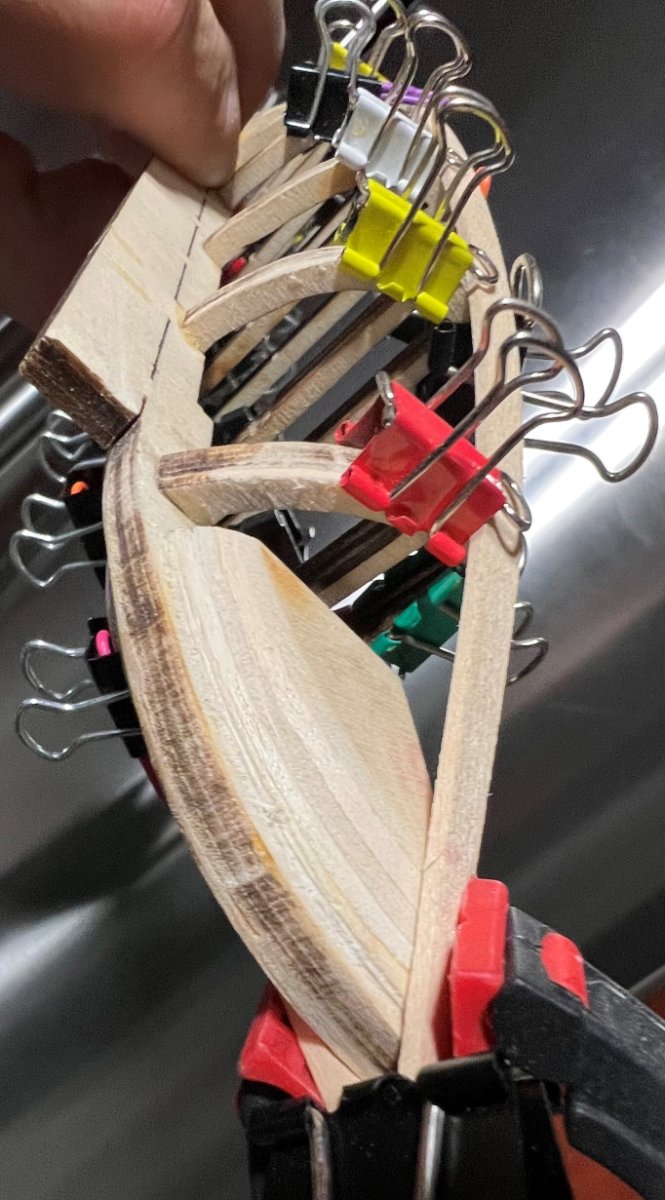
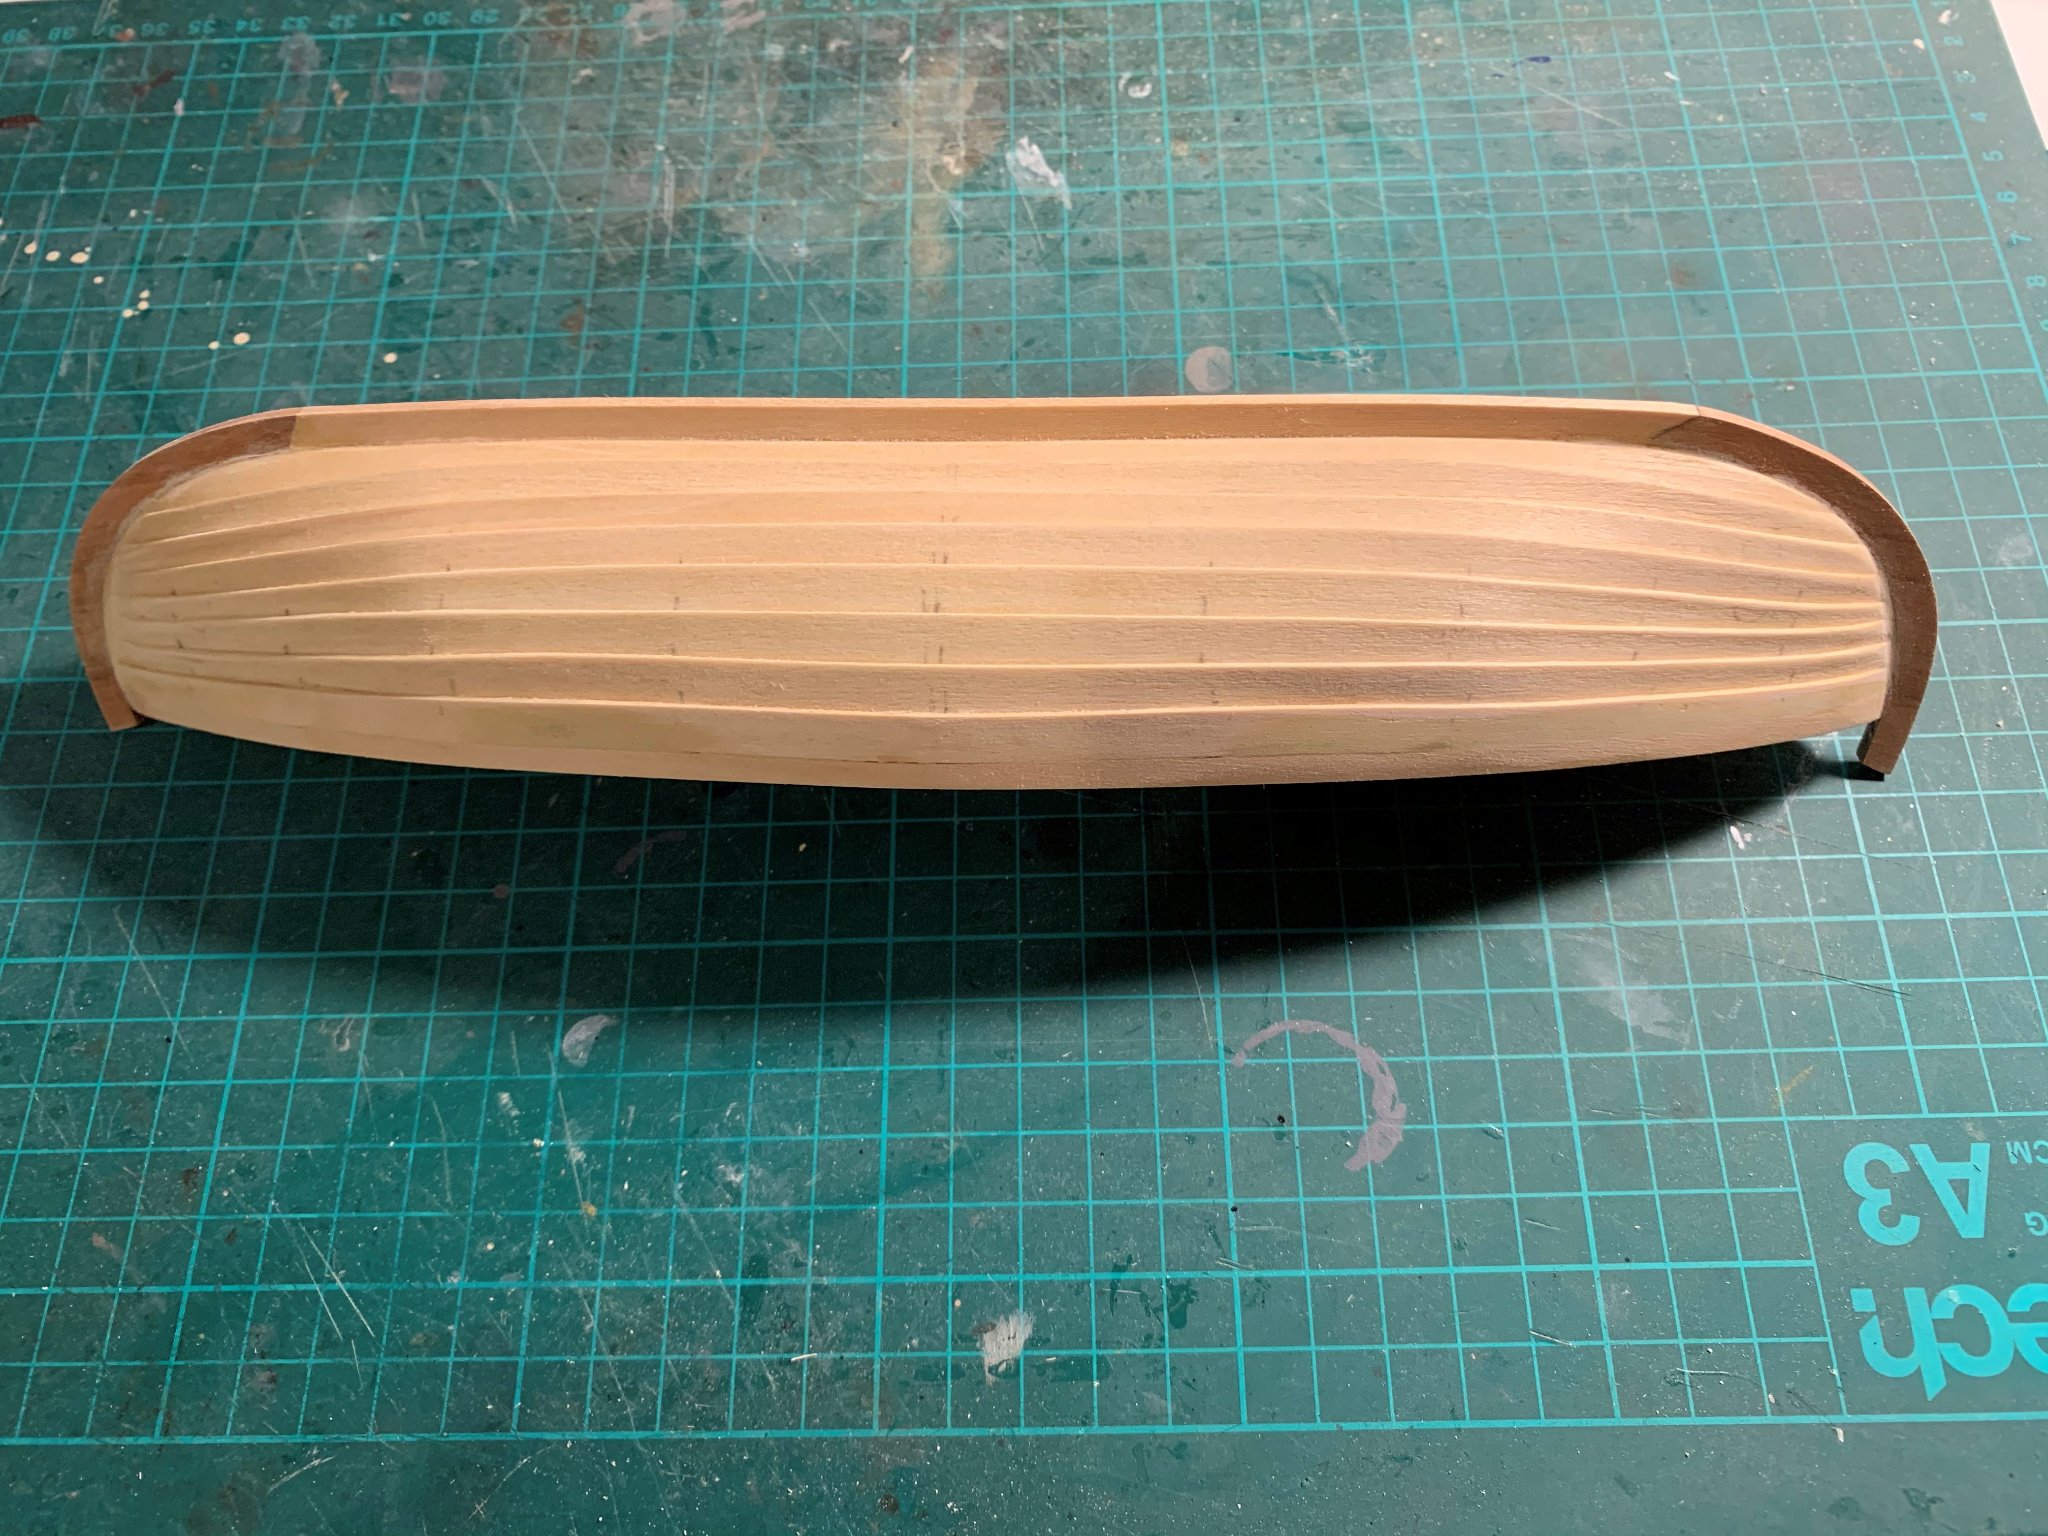
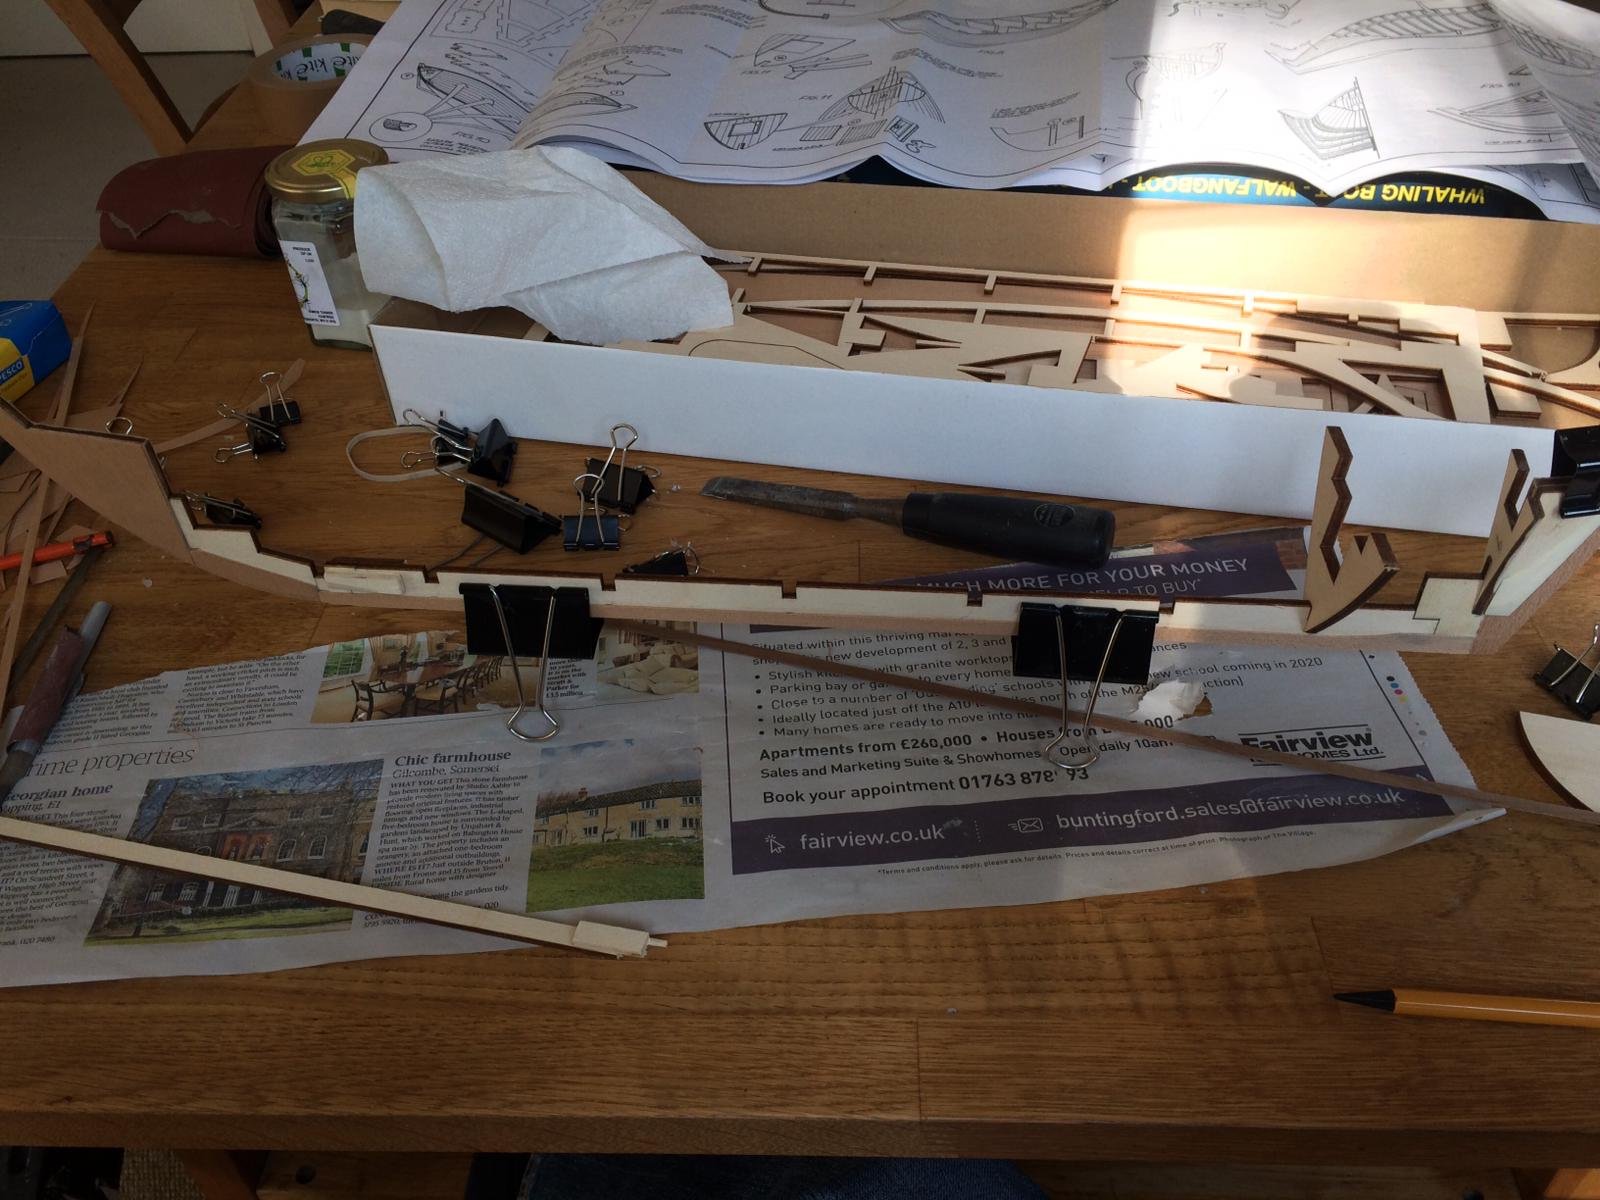
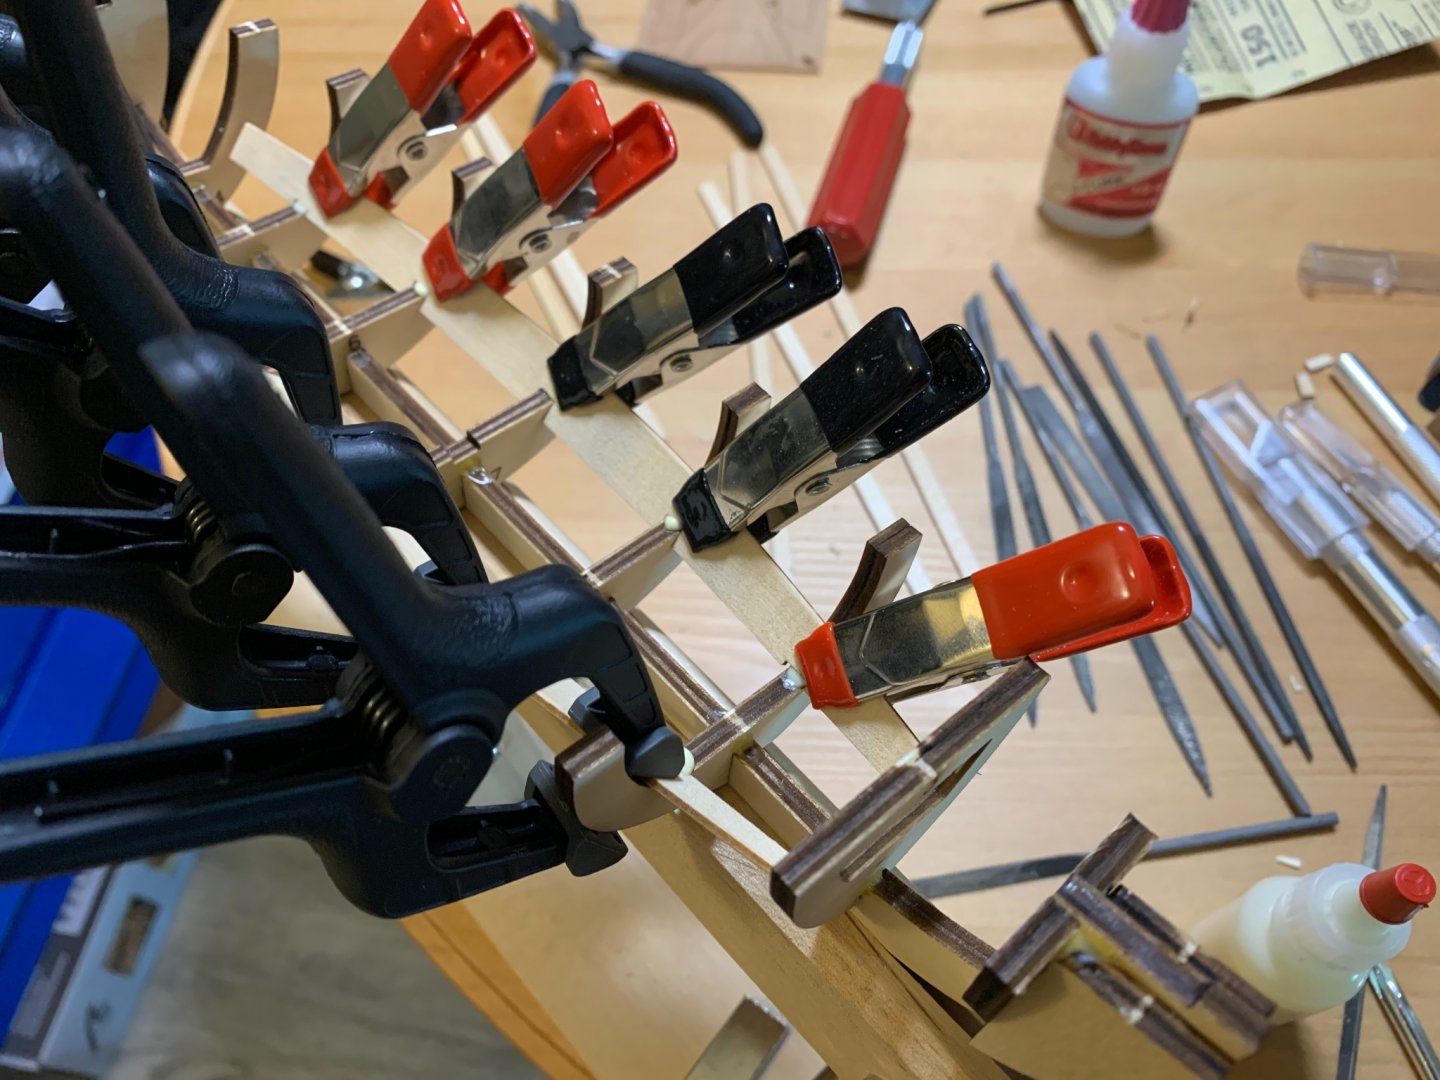
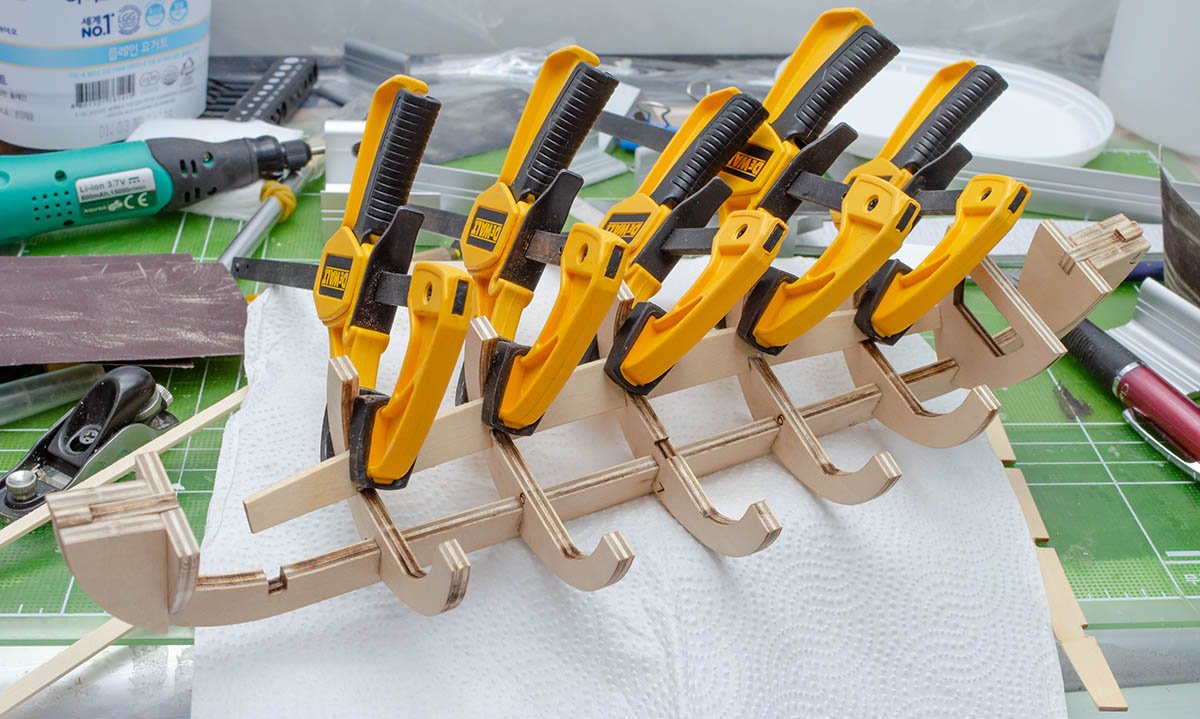
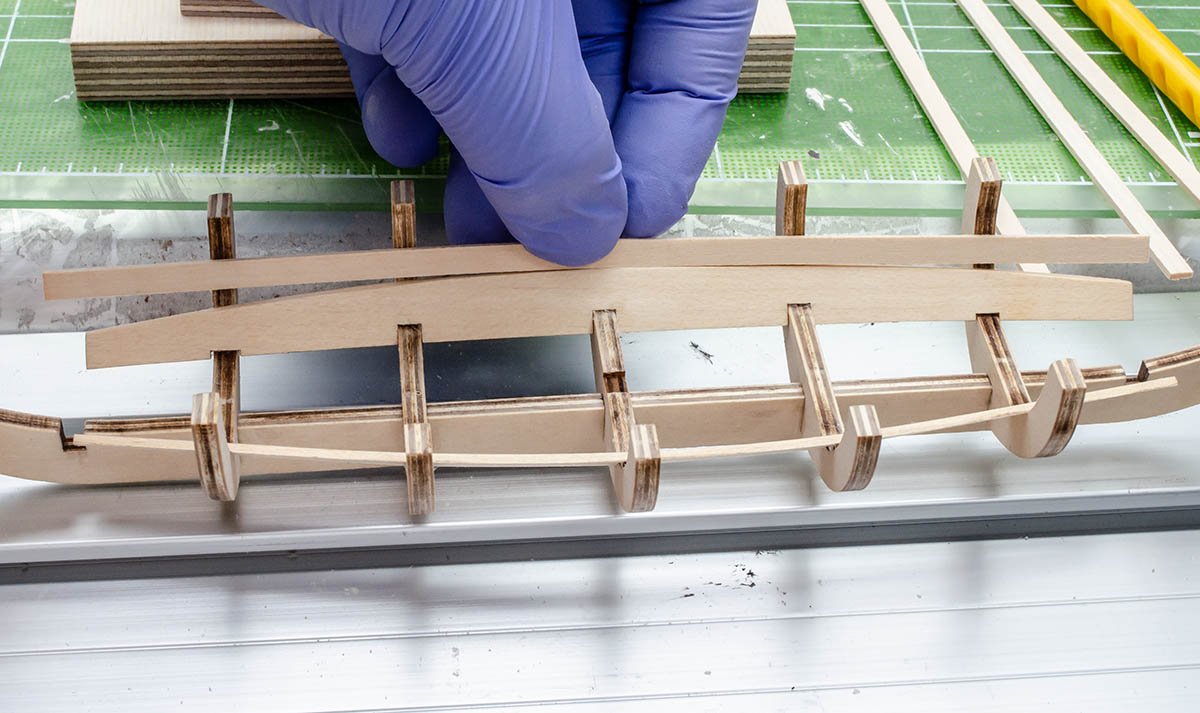
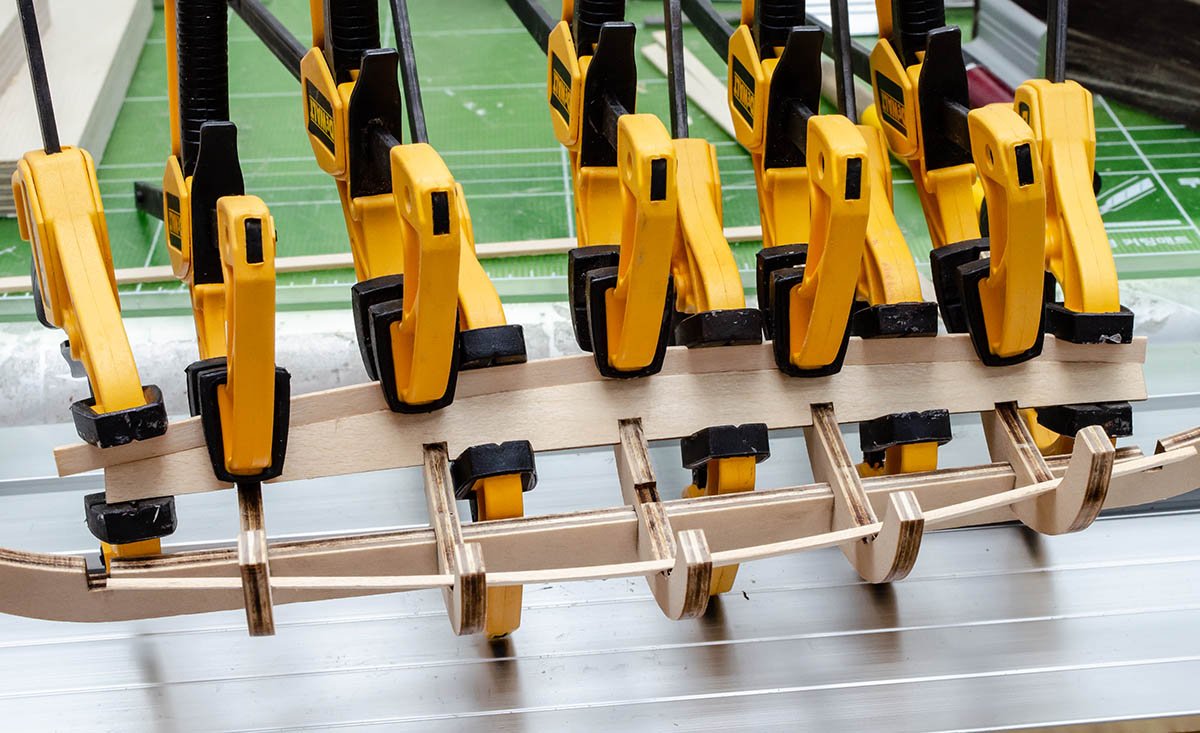
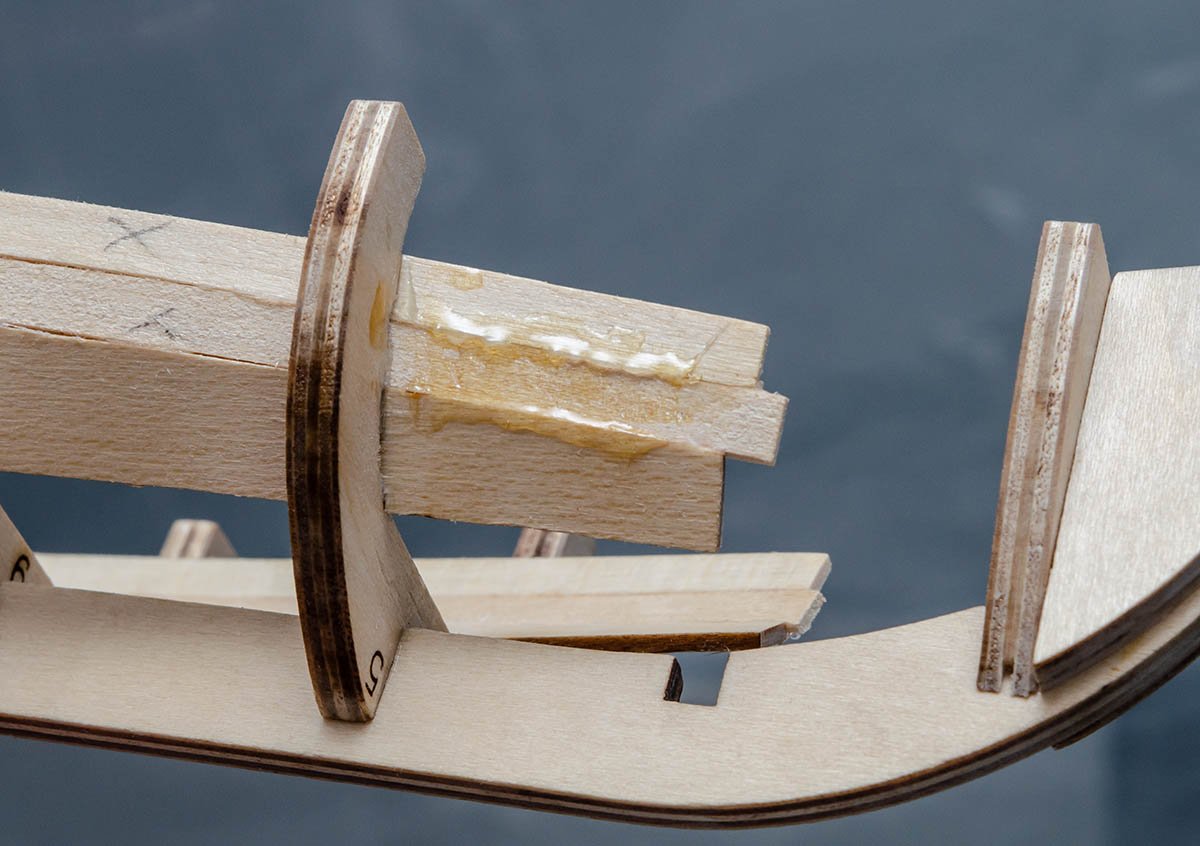
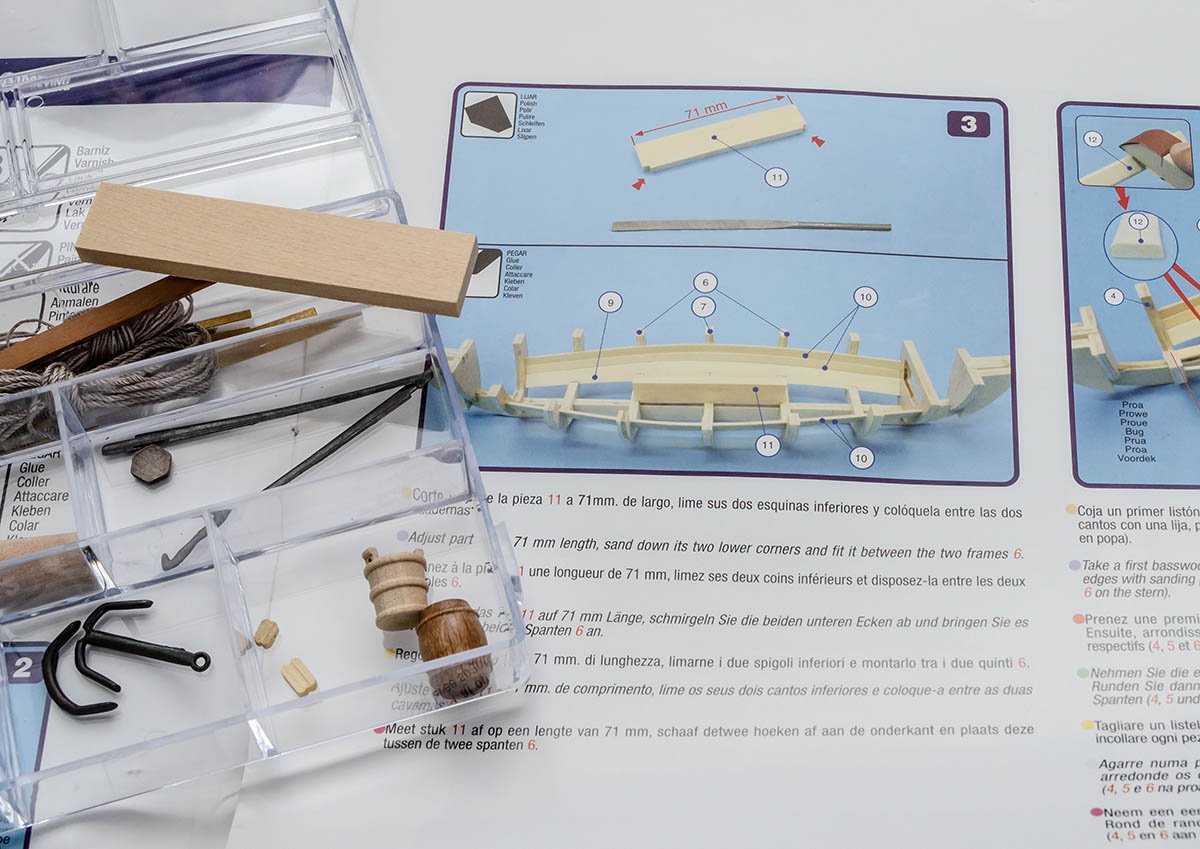
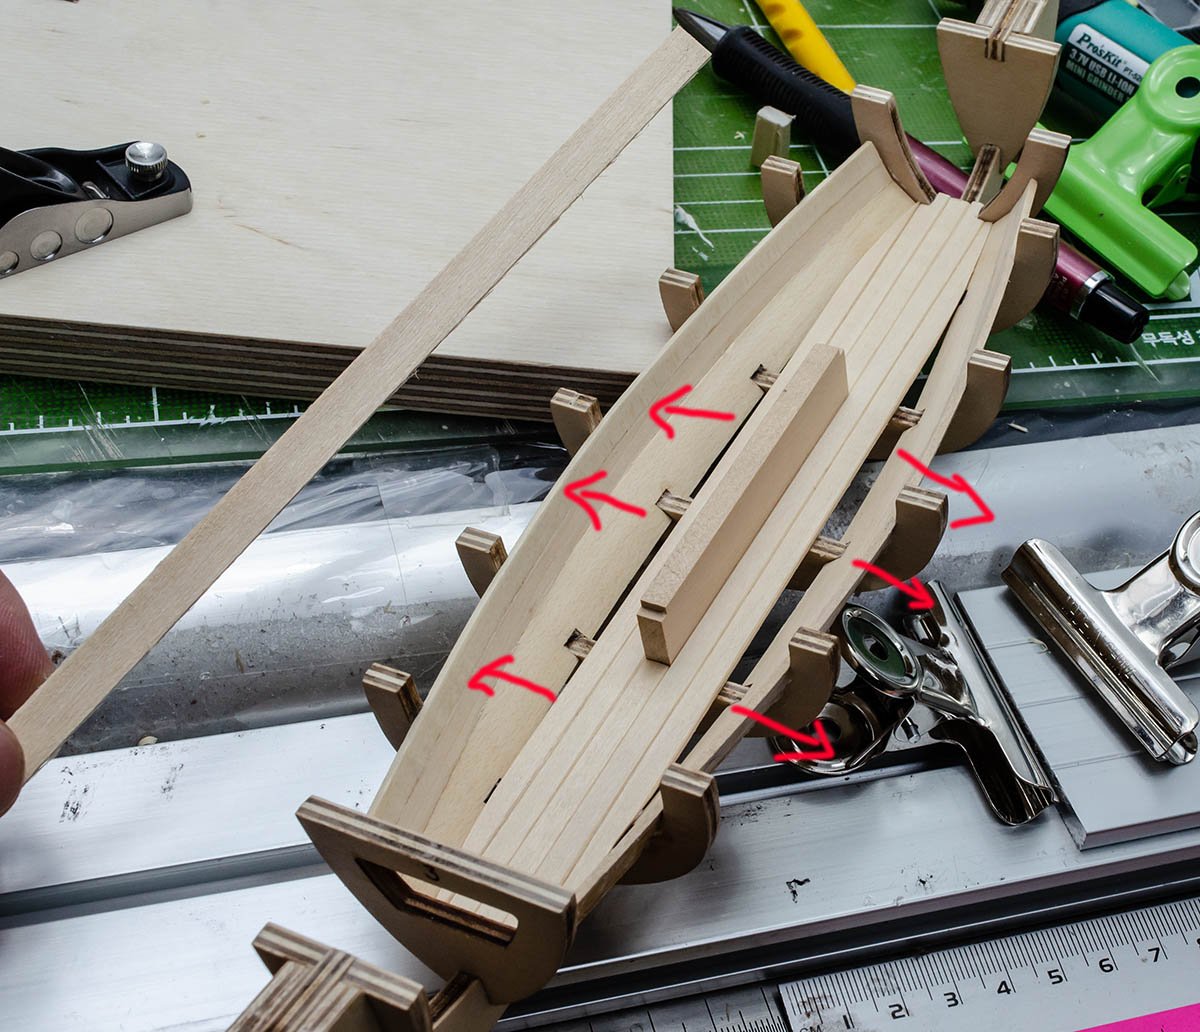
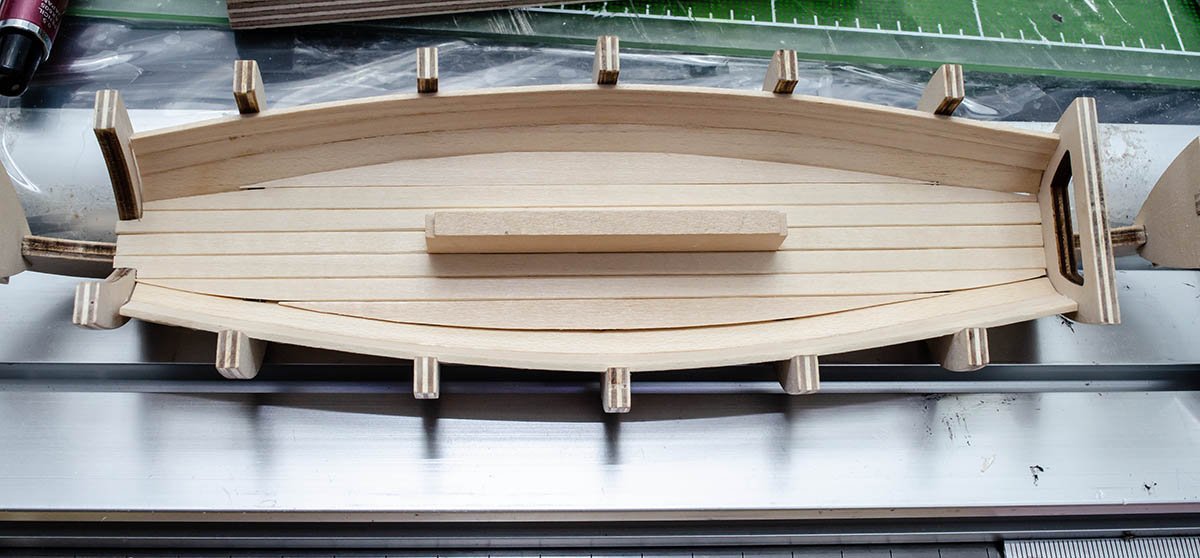
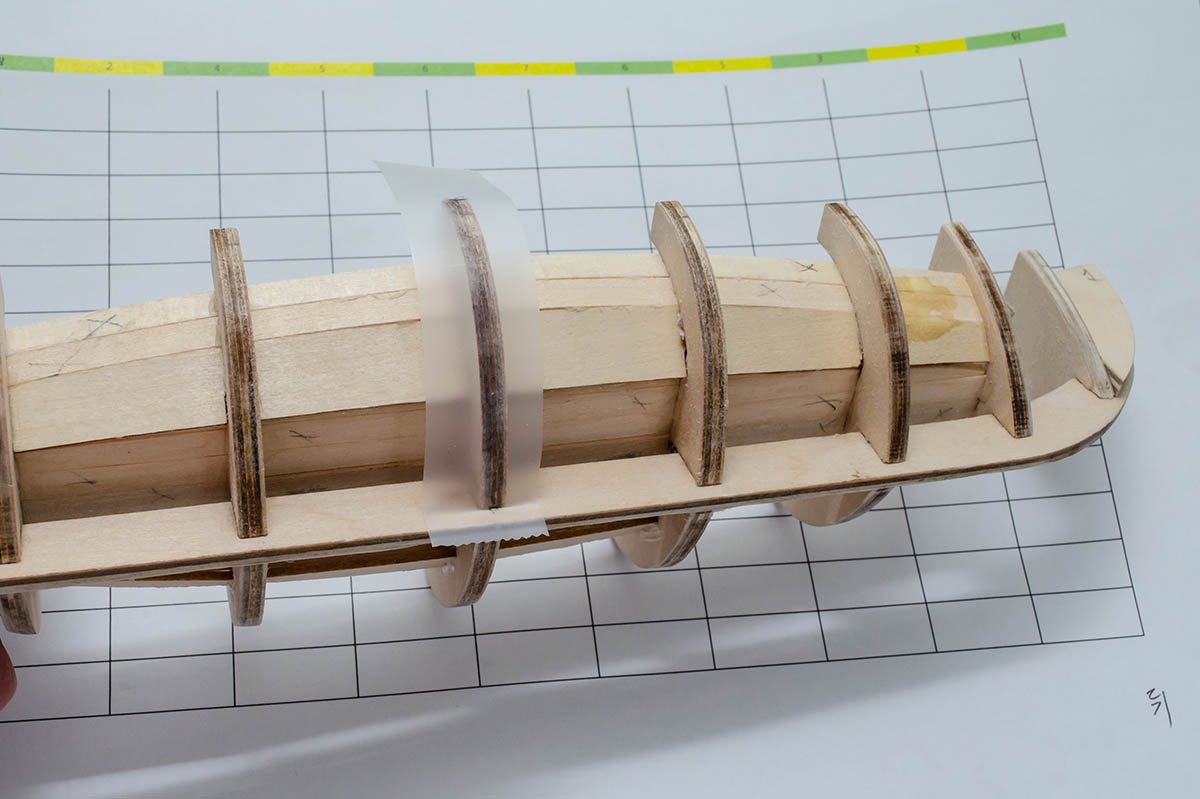
 Hello, and welcome to my first build log in the MSW forums. This is a kit from the Spanish manufacturer Artesanía Latina. It is labeled as suitable for beginners, however, there are several details that increase the difficulty somewhat, mainly because of omissions or lack of clarity in the instructions. It is not too complex to build, but I still would not recommend it to a total noobie, unless they already have some experience with other kits—like plastic—or wood working in general. Some familiarity with nautical terms will surely help. I bought it from Amazon USA in 2018, but apparently all Artesanía Latina kits have become scarcer since. I picked it up for two main reasons: I wanted to practice my technique with something easy and cheap that I wouldn't mind too much if I botched something, and my love for 1800-era ships and the whaling industry in general. Since I have some experience with other engineering, hobby and DIY house projects, I already had most of the necessary tools and instruments. Without further ado, this is what happened: I will refer to the small pictures in a normal, Western-style reading order (left to right, top to bottom). In the first two pictures: frames and keel are fitted and glued. Some of them had to be properly aligned using clothespins. bow and stern reinforcements were glued in place too. The instructions are not too clear about these. Pictures 3 and 4 shows an ad hoc solution for holding the wooden parts in place: clothespins are too weak, but the foldback paper clamps are too strong and damage the soft wood. To prevent this, tissue paper is used over the contact surfaces. Some planks had to be soaked in warm water to allow for better shaping and curving. Five minutes submerged was enough, and the shaping was done by hand. All were previously cut to the proper size and sanded. If everything looks neat and clean that's because it is. Every part is first sanded to a smooth finish, and then glued to the kit. This proved useful later, saving time and unnecessary hassle. I carefully studied beforehand the whole instruction booklet, and every visible part will be given this special treatment from the beginning. In picture 5 some weight is added to keep the centerboard in place while the glue dries. The first floor planks have been glued too. Pictures 6 and 7 show the last planks being glued and the inner "tub" ready. In picture 8 you can see the sanding and shaping of the keel, bow and stern (close-up detail in picture 9). The tools used can be seen in the background. This particular kind of boat is designed to be highly manoeuverable and speedy, so both ends are symmetric in case a quick reversal of direction is needed. Up next: the clinker hull.
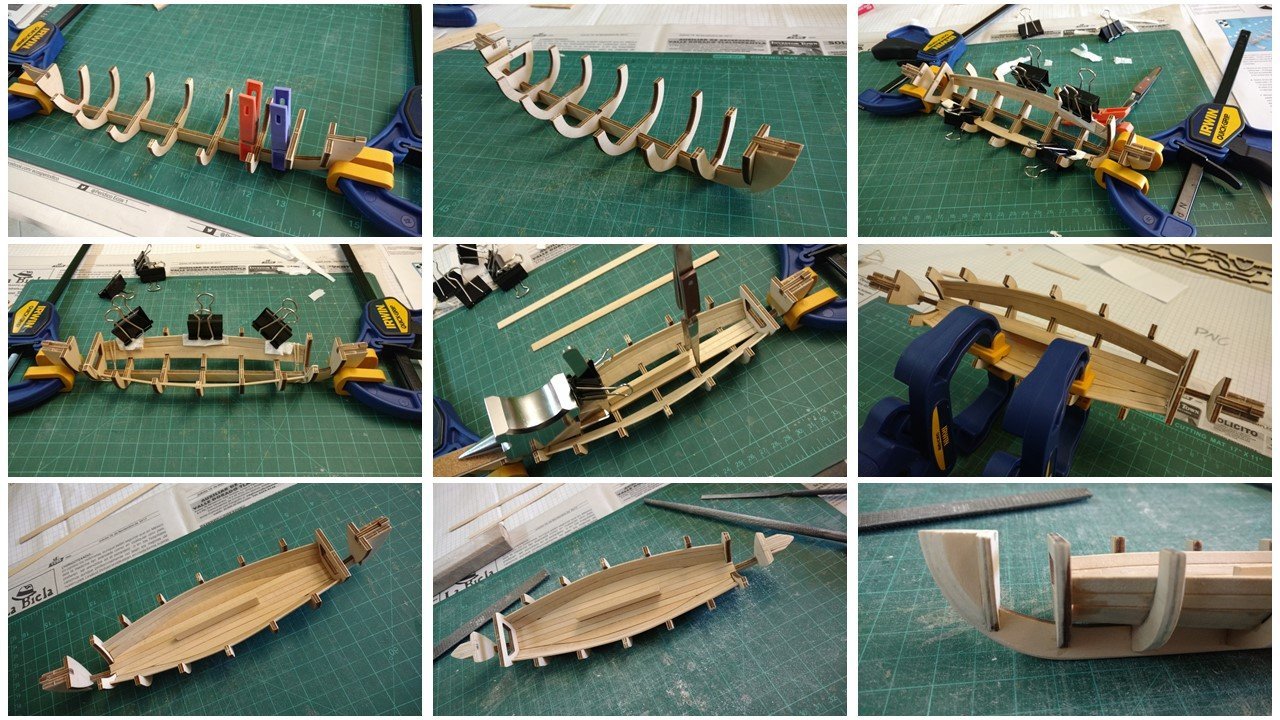
- 33 replies
-
- 4
-
-
- Artesania Latina
- Whaleboat
- (and 3 more)
-
 Hi, so I've just started this kit as my first build - not only do I lack previous experience, I lack many handy tools and anything more than than a kitchen table to build on, but here we go! Keel and veneering seems fine, and just starting on the bow and stern faring blocks. One thing I can't quite understand (from the instructions 'translated' from Italian) is how the bulkheads can be glued to the keel, have the planking glued to them, but still be removed later, to get the open hull result. Should they just be pinned to the keel? special glue to use that's easily dissolved? My current range of available glues is from PVA to...PVA I'll keep posting photos, if just to show the pitfalls of a beginner buying an intermediate kit!
-
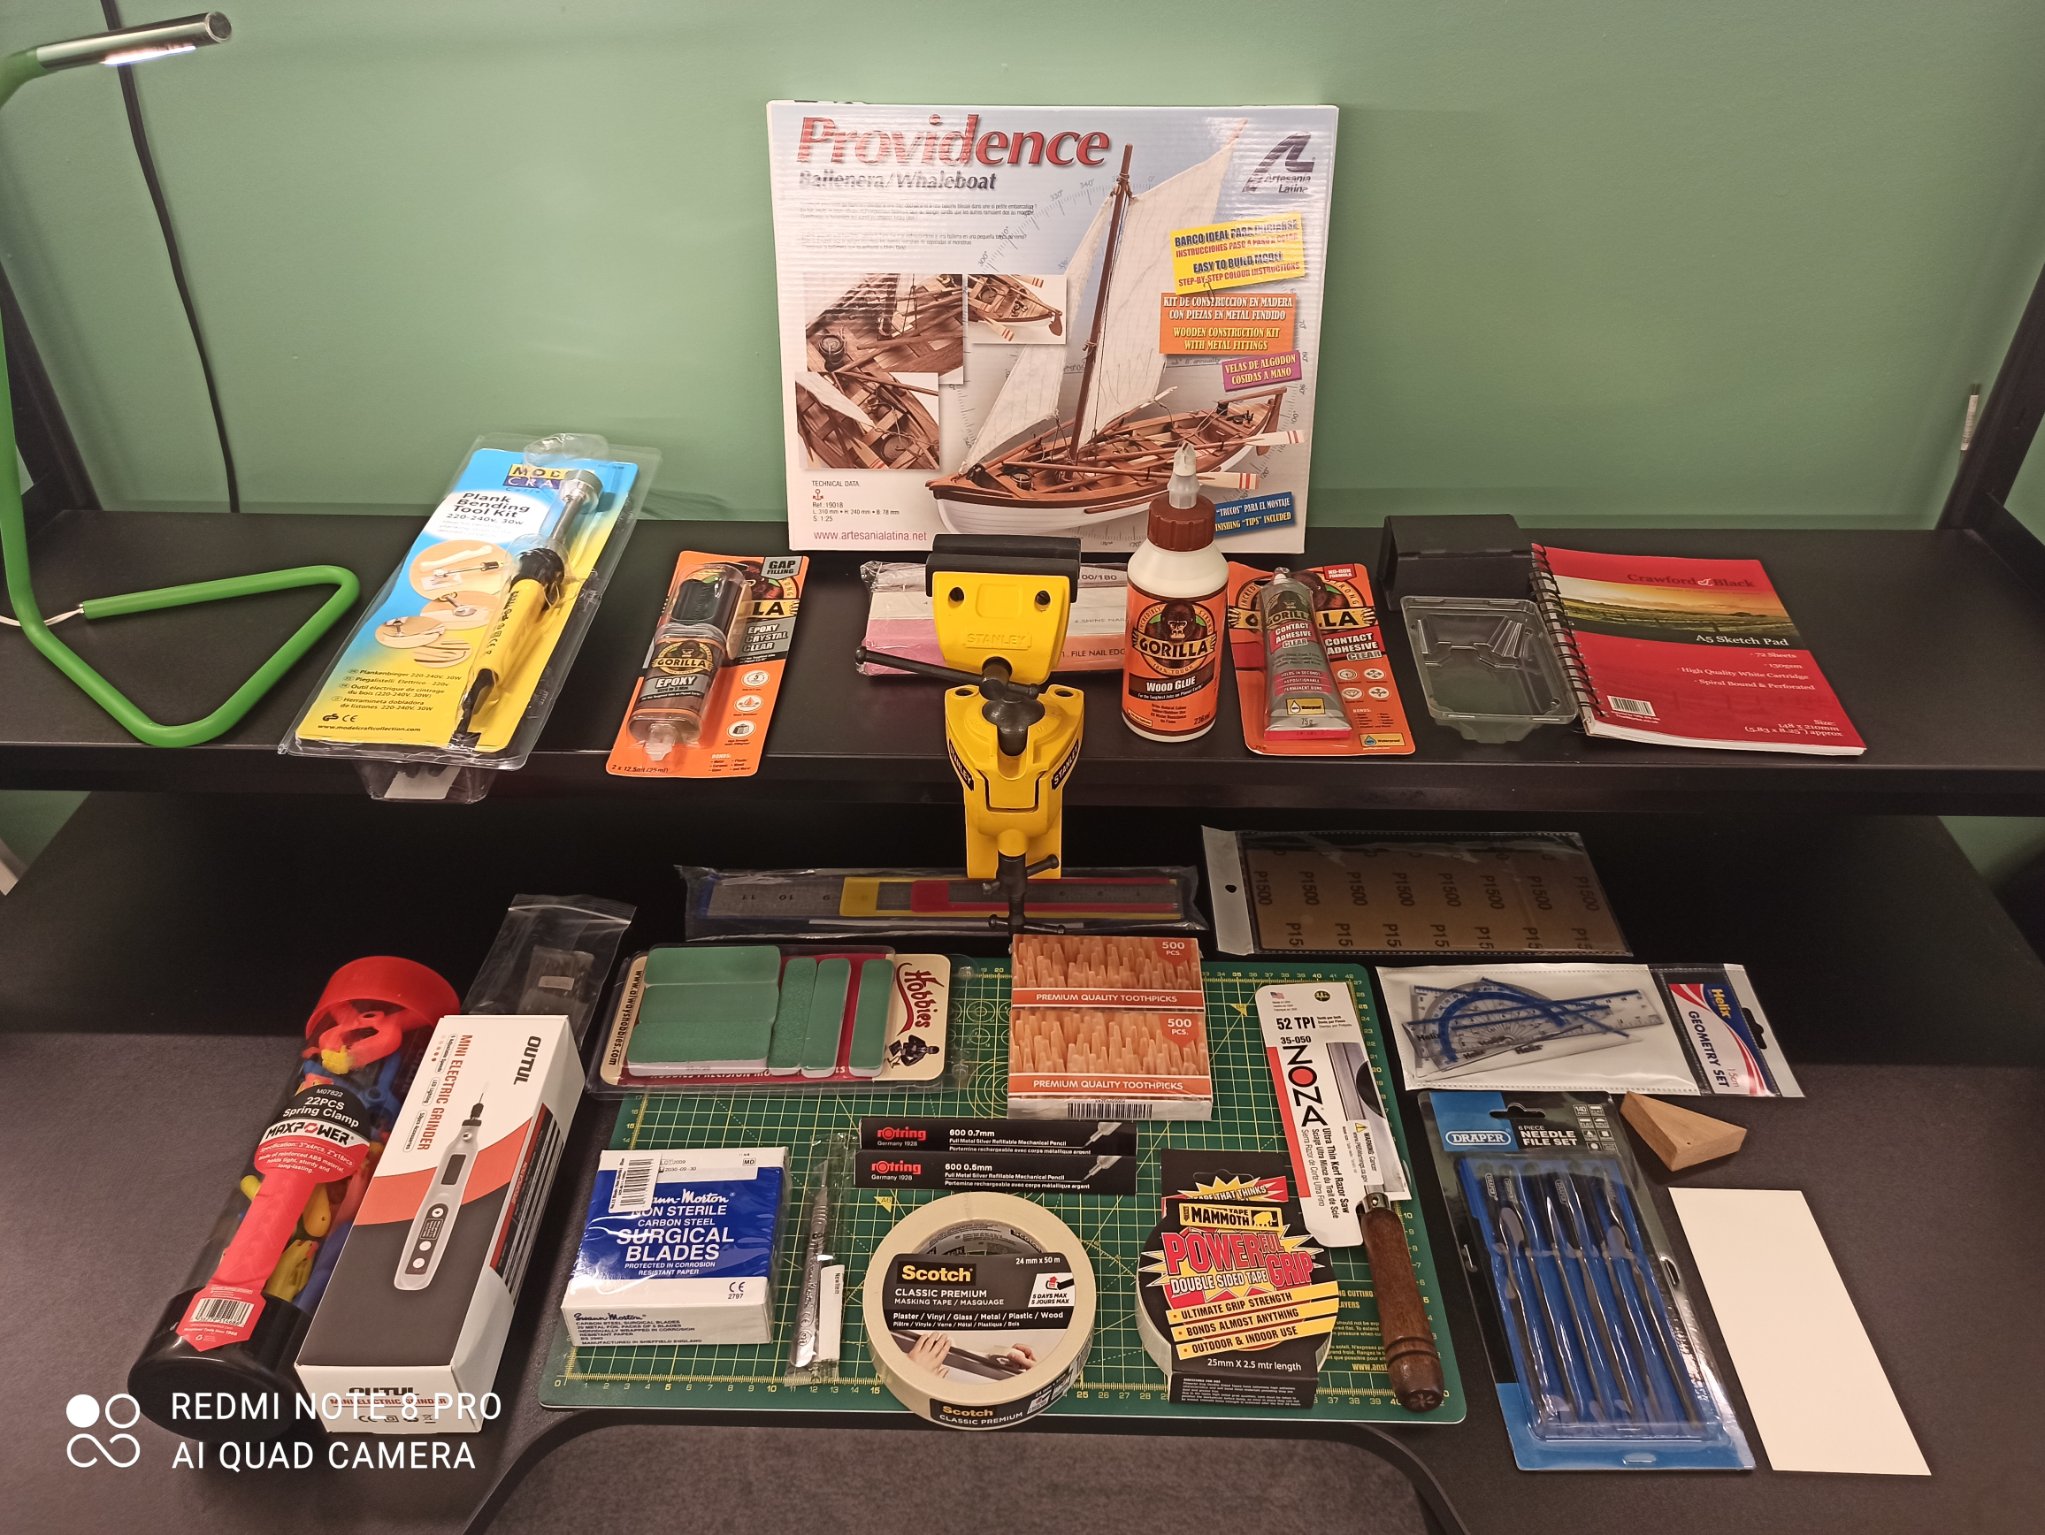
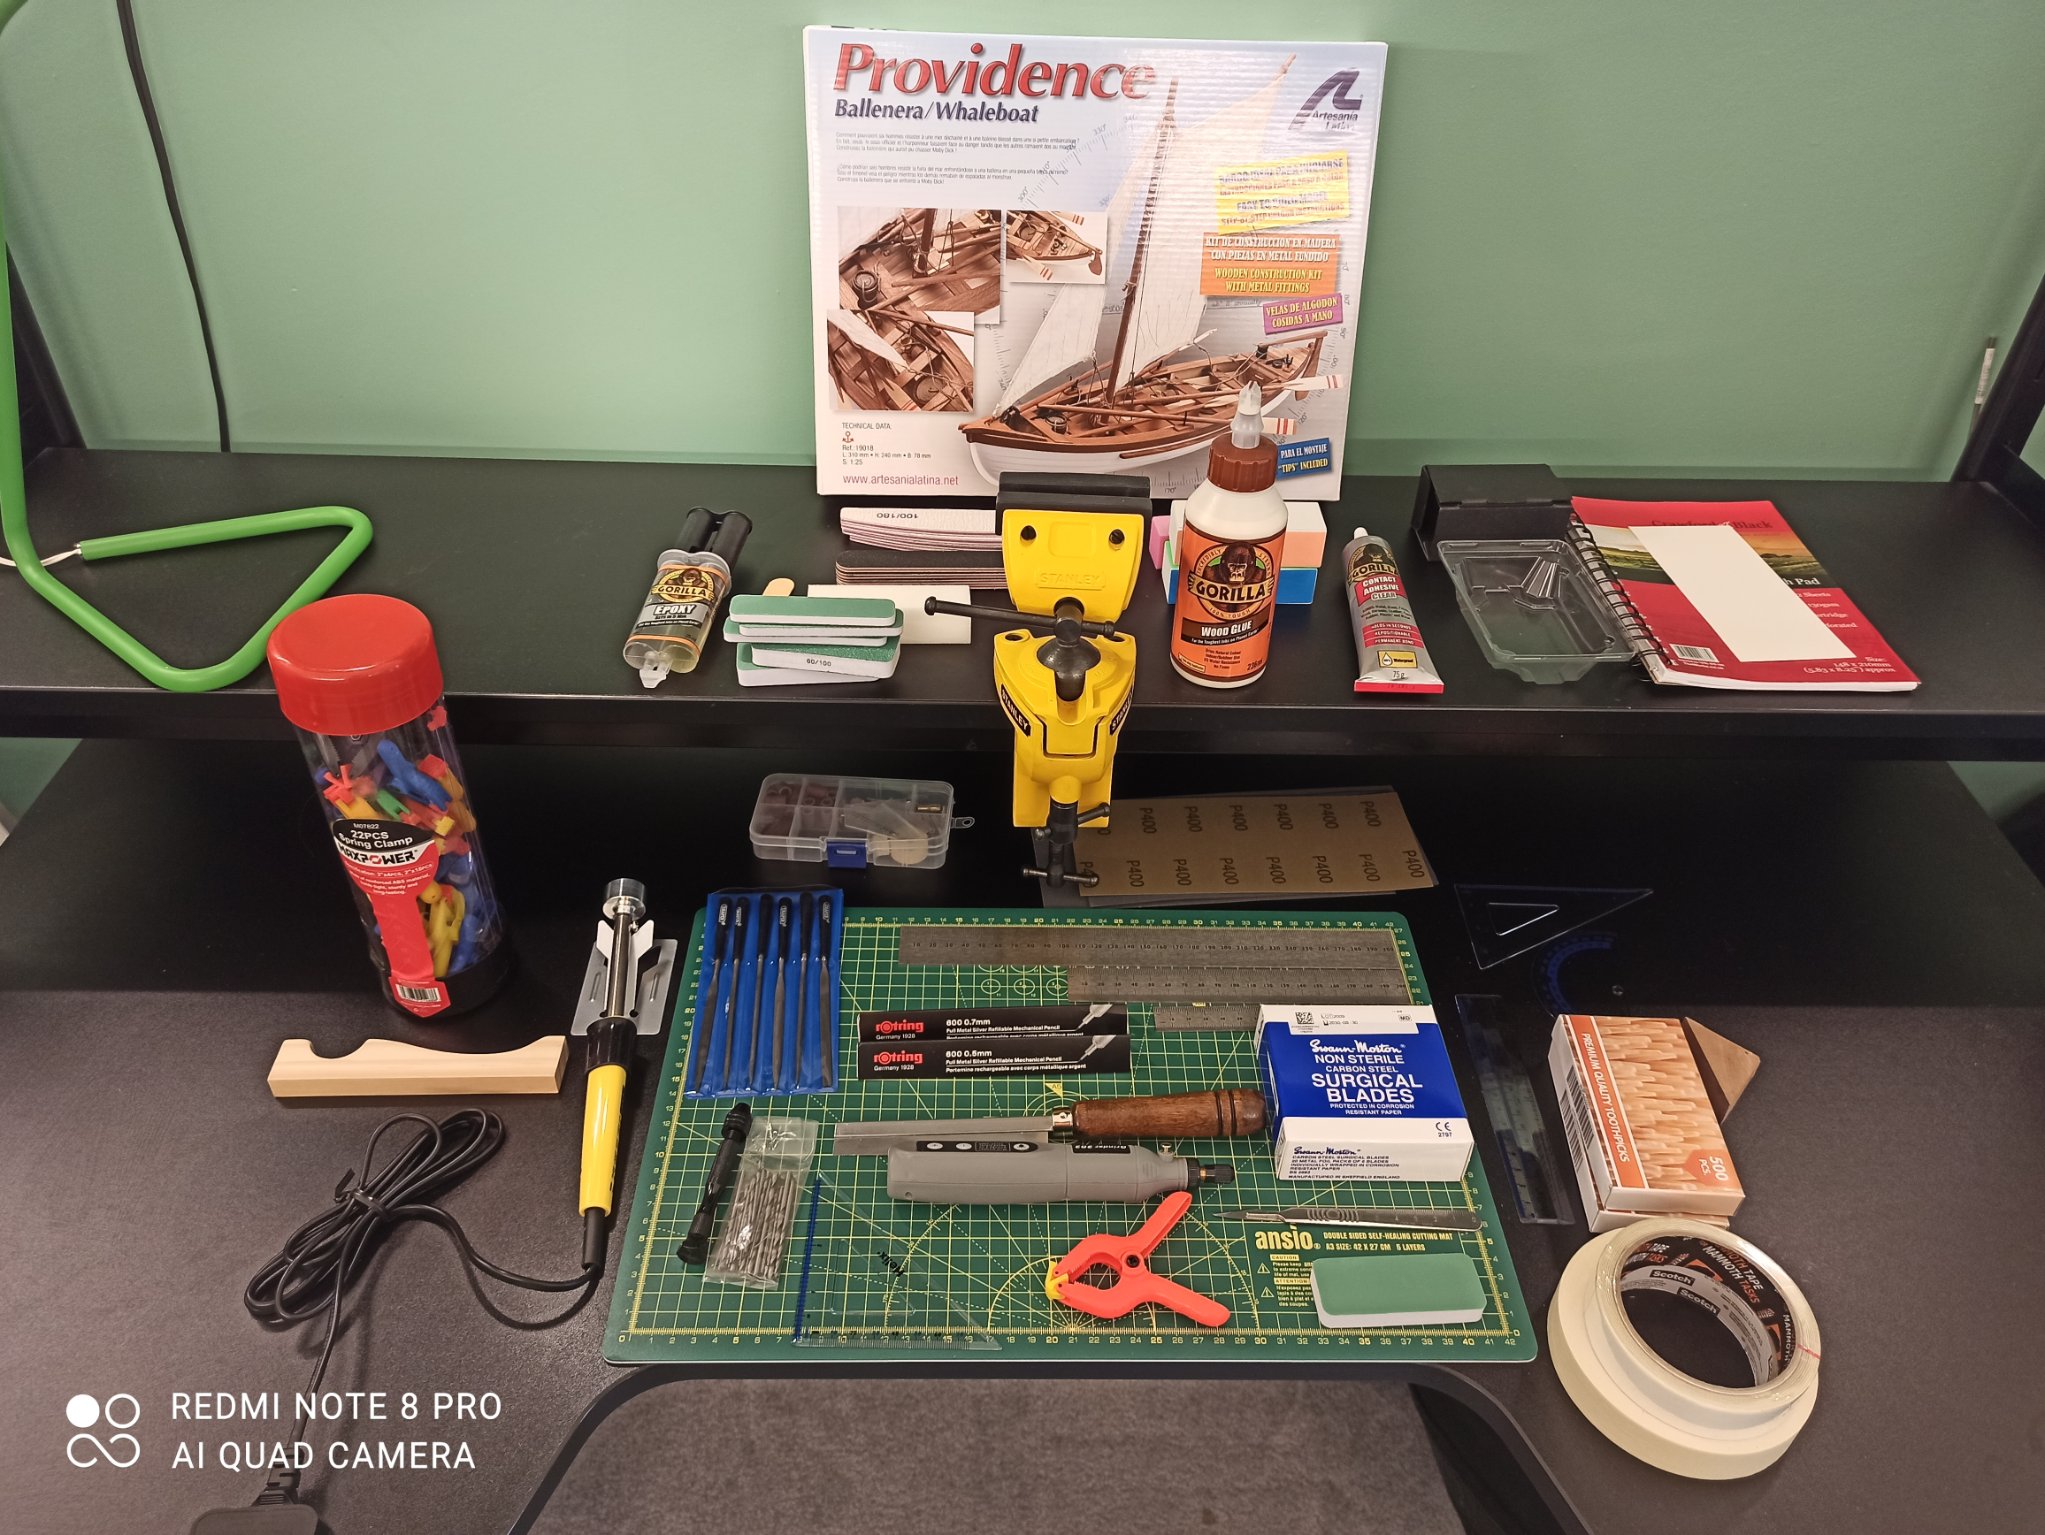
 Hi everyone. This is my first wooden model ship. I thought I would start with this kit, as it seems to be one suitable for beginners, and it looks beautiful in the photos (although I am not expecting my first work to look as good as that). I have never read Moby Dick, although that connection attracted me. It seems unbelievable that anybody would venture out in something so small to fight a whale. I guess they were made of strong stuff back in the day. My previous experience has been limited to relatively easy model Airfix and Revell plastic aircraft. Even then I tried to smash those out in an evening or two with a friend, doing a late nighter with copious quantities of ale. I know this is going to be a very different experience. I intend to take it very slowly and carefully. The closest thing to this I ever tempted was a Guillows wooden plane, the Fw 190. I made the mistake of using the foaming type of water activated Gorilla glue, which was a lot of fun, but made a terrible mess of the model. I never got to the wings and it was abandoned. This time, I have dedicated an entire bench to the project, and bought the appropriate tools. I will attempt it with a very different mindset. Regarding tools, I basically had nothing to start with (I'm not much of a DIYer). I went a little overboard, but tried to keep it (relatively) sensible. I have attached a couple of photos. I will try and keep a log of what is useful or not, as when I was researching I really didn't know the difference between what I really NEEDED and what was nice to have. I suspect some of what I've acquired won't get much use, and yet there will be some surprises as to what becomes indispensable. My initial thoughts: I'm pleased with the table vice, which was relatively inexpensive, and has a ball socket that allows you to move the model into any position. I'm not sure the cheap rotary tool will get much use, and I'm not sure the epoxy will be used for anything. Same with the nail files, I mainly got them to have something to wrap the sandpaper round. I have a little hammer somewhere else. I'm not sure how well those super cheap plastic clamps will hold up. I really like what I have read so far in this community regarding the MINDSET about approaching a build, and it seems that patience and mindfulness are championed here. I am hoping some of that will rub off on me, both in this build, and also in my daily life. With this in mind, I treated this week as: STEP 1: Man cave tidied and cleaned STEP 2: Materials and tools laid out I am looking forward to step 3, unboxing the kit, and reading the instructions.

- 66 replies
-
- 3
-
-
- Providence
- Artesania Latina
- (and 1 more)
-
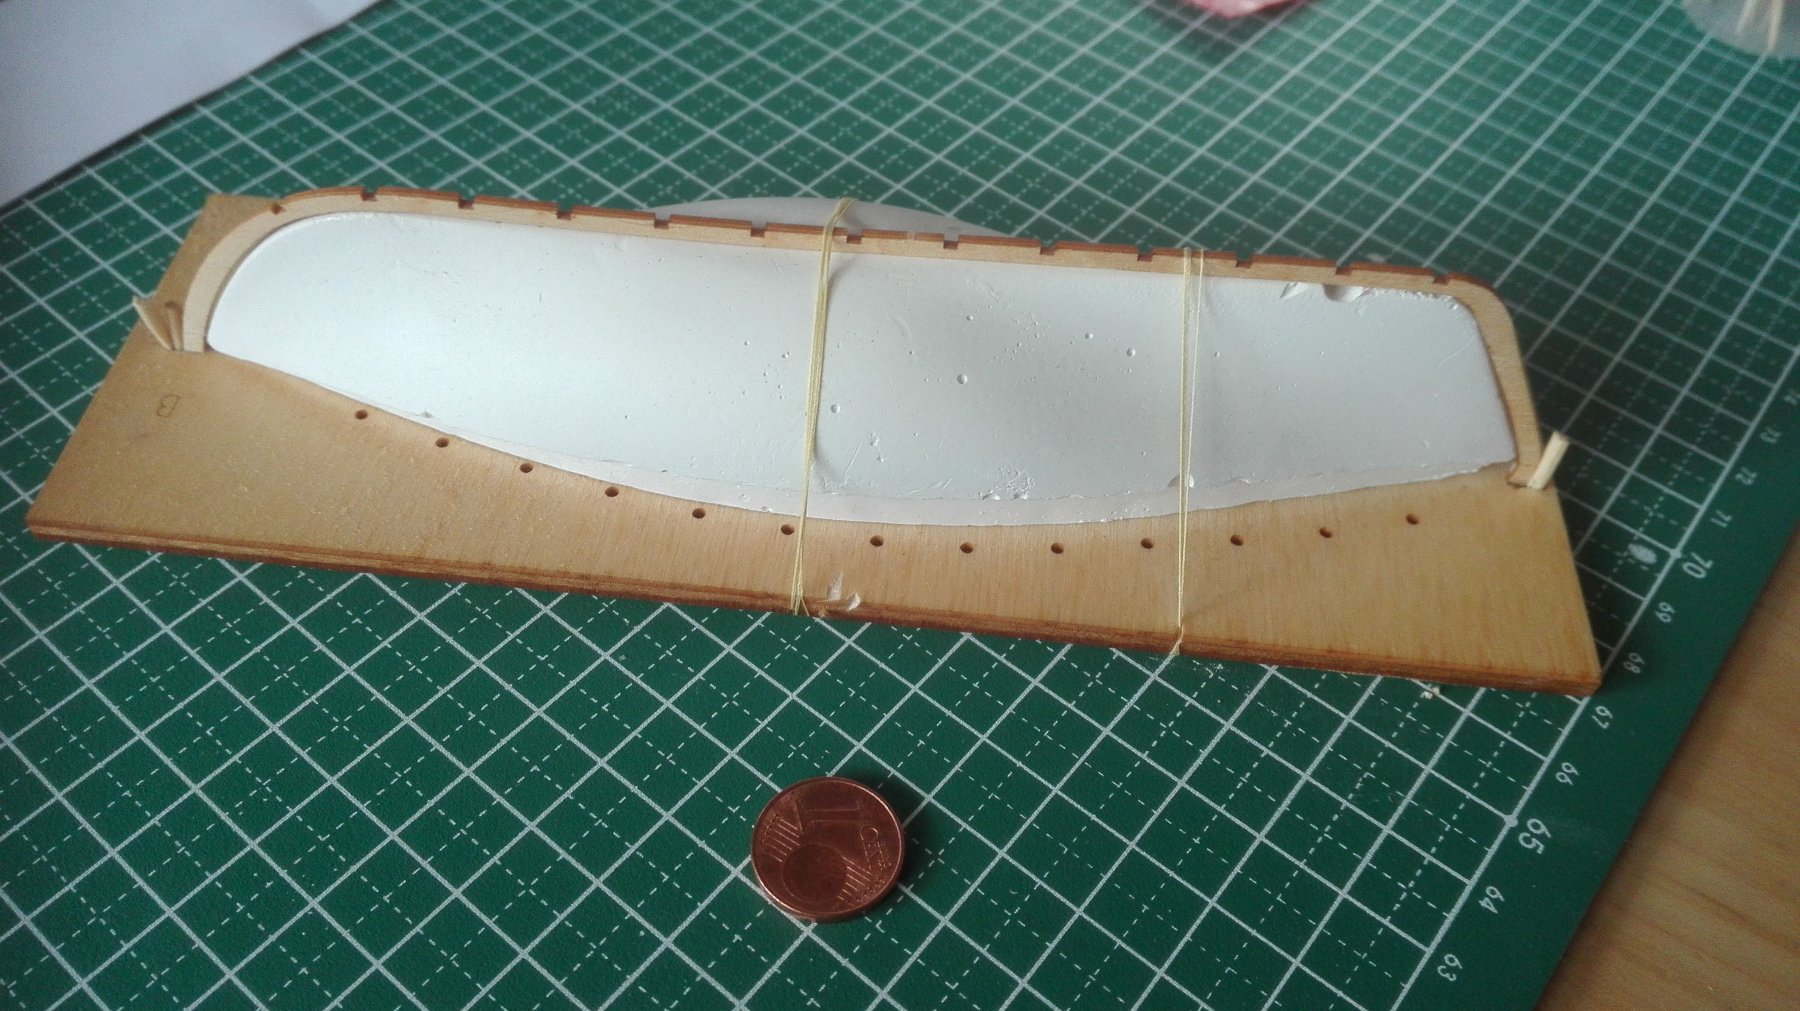
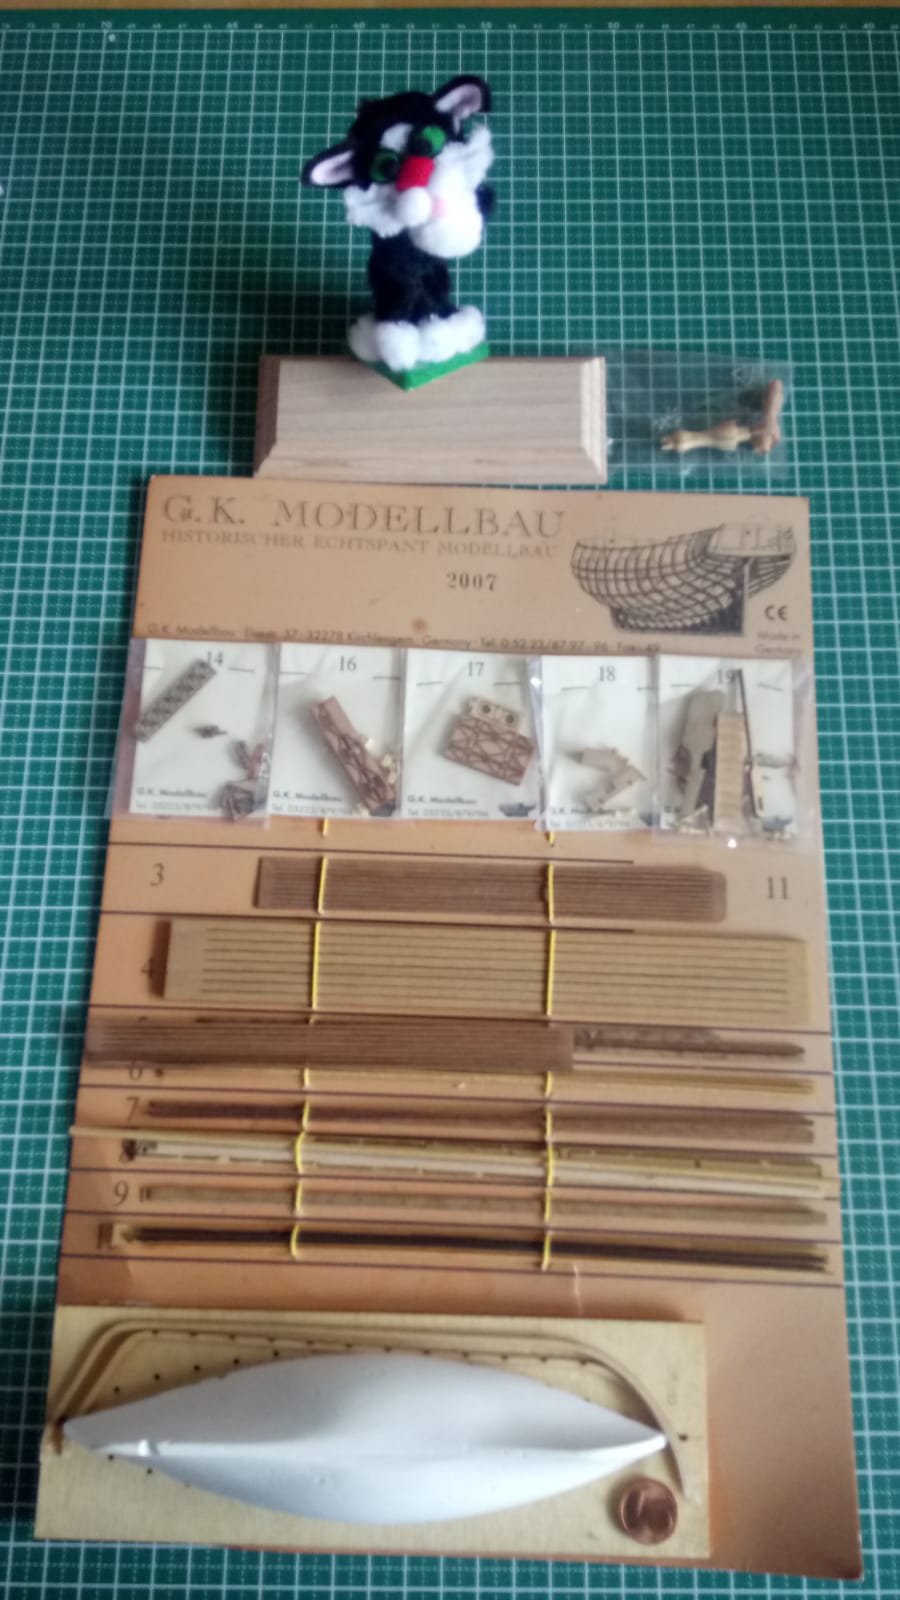
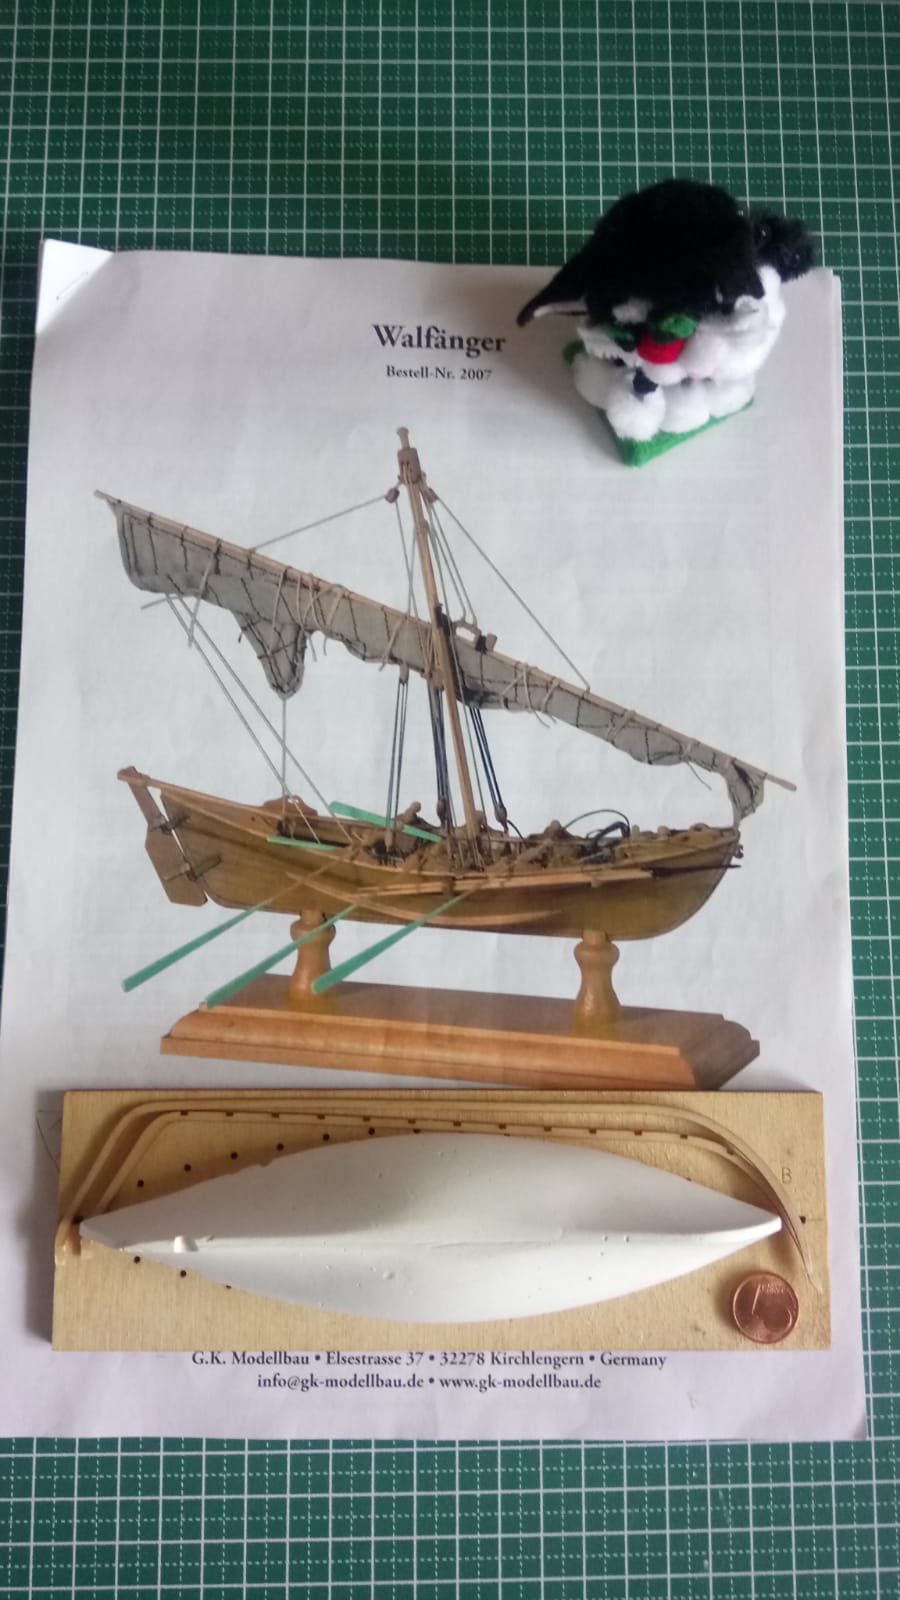
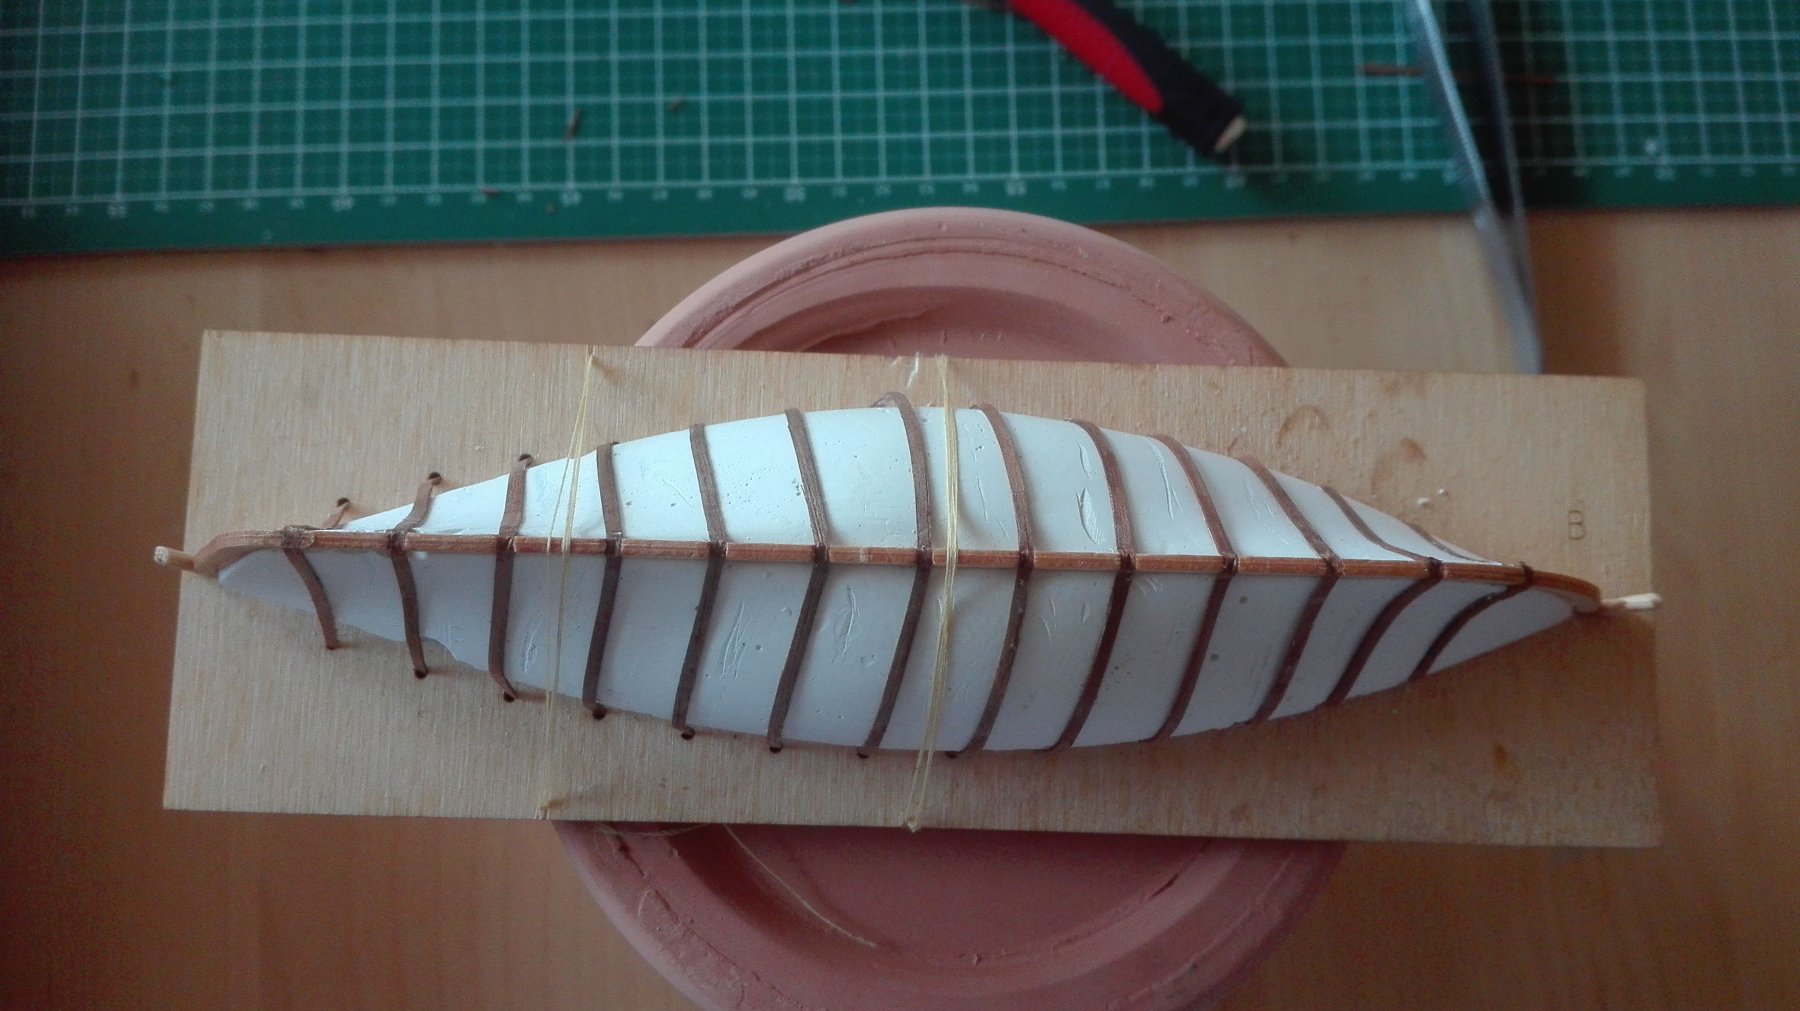
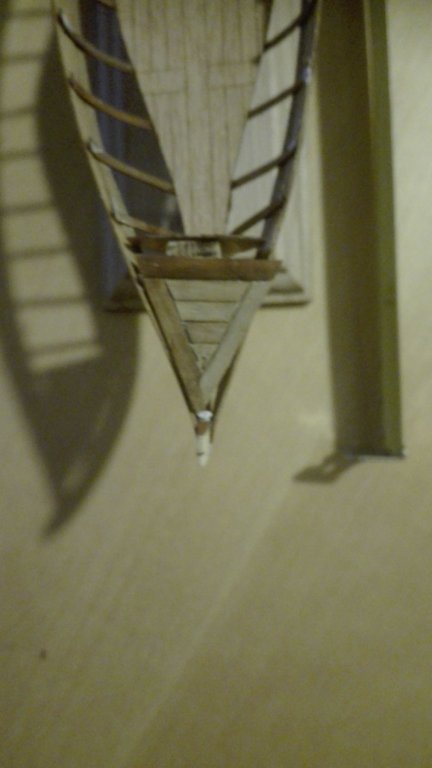
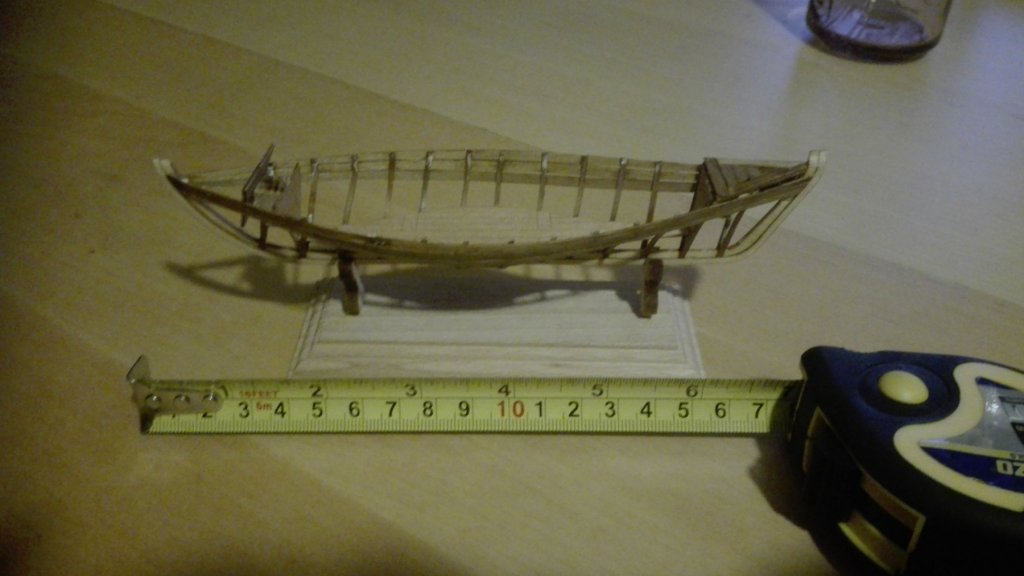
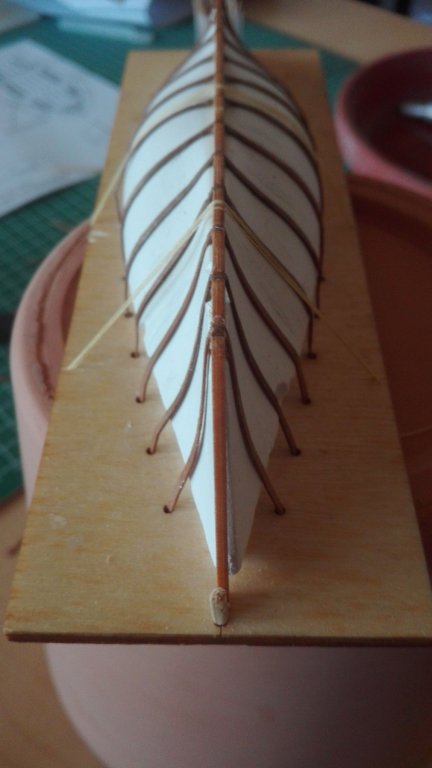
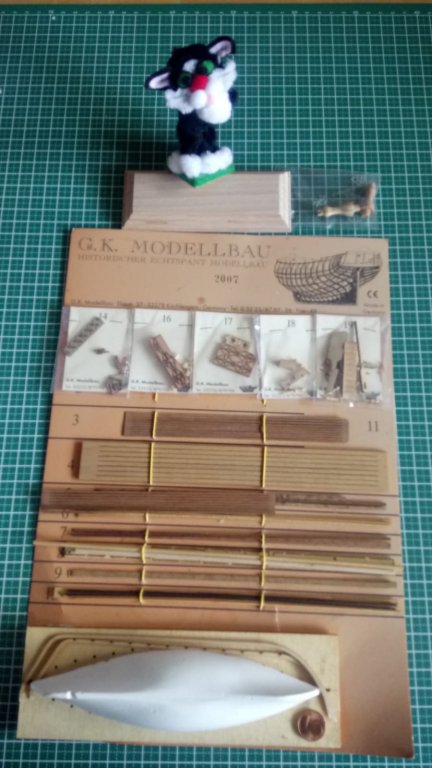
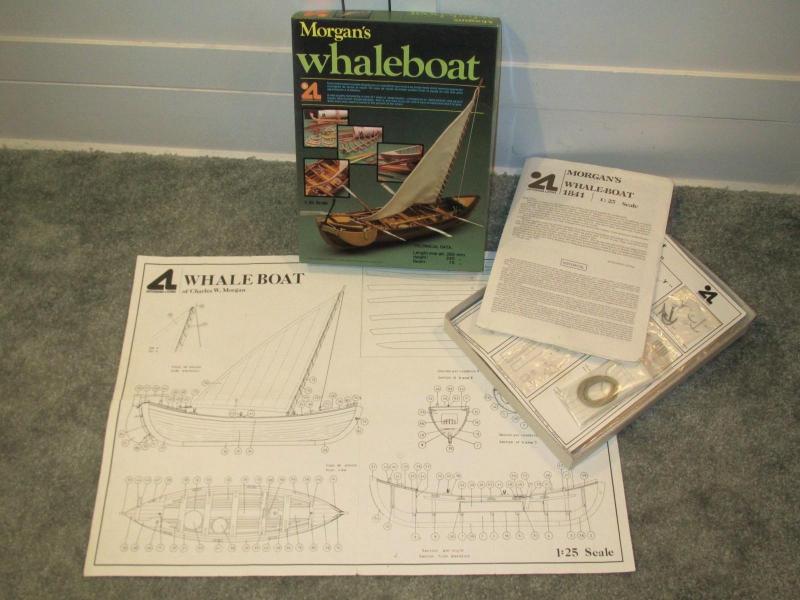
 Hello, as I told you I'll do some small short turn projects in between. Here is N°1. Todays noon I did start a whale boat by GK-Modellbau/Kirchlengern (Germany) in some strange vaneer based PoF style. Mondfeld critics this buildingtype very hard in his new Encyclopedia of Modelbuildung (3.1/3.2 the Hull part I. & II.) Here my shipcat on the vaneer, gypsum mould kit - and the quite nice stand within. It is a coaster boat of the XVII.century hunting the whale in a small villages whalemen group. So there is no need for a big whaling ship to be built, too. The formers lay quite well on the gypsum moulds surface - wetted with water and pressed on by a soldering iron. The holes for the formers are not aline with the grooves in the keel - so the formers are diagonal... Hope you like todays progress and the scratching freestyle on the fore and aft lockers topsides. Here the sideview of todays progress; that ruler shows how small the hole kit is at the very end. Wishing you a good night.


-
 Click on the tags in the title above (shown in black) for an instant list of all the build logs for that kit subject.
 -
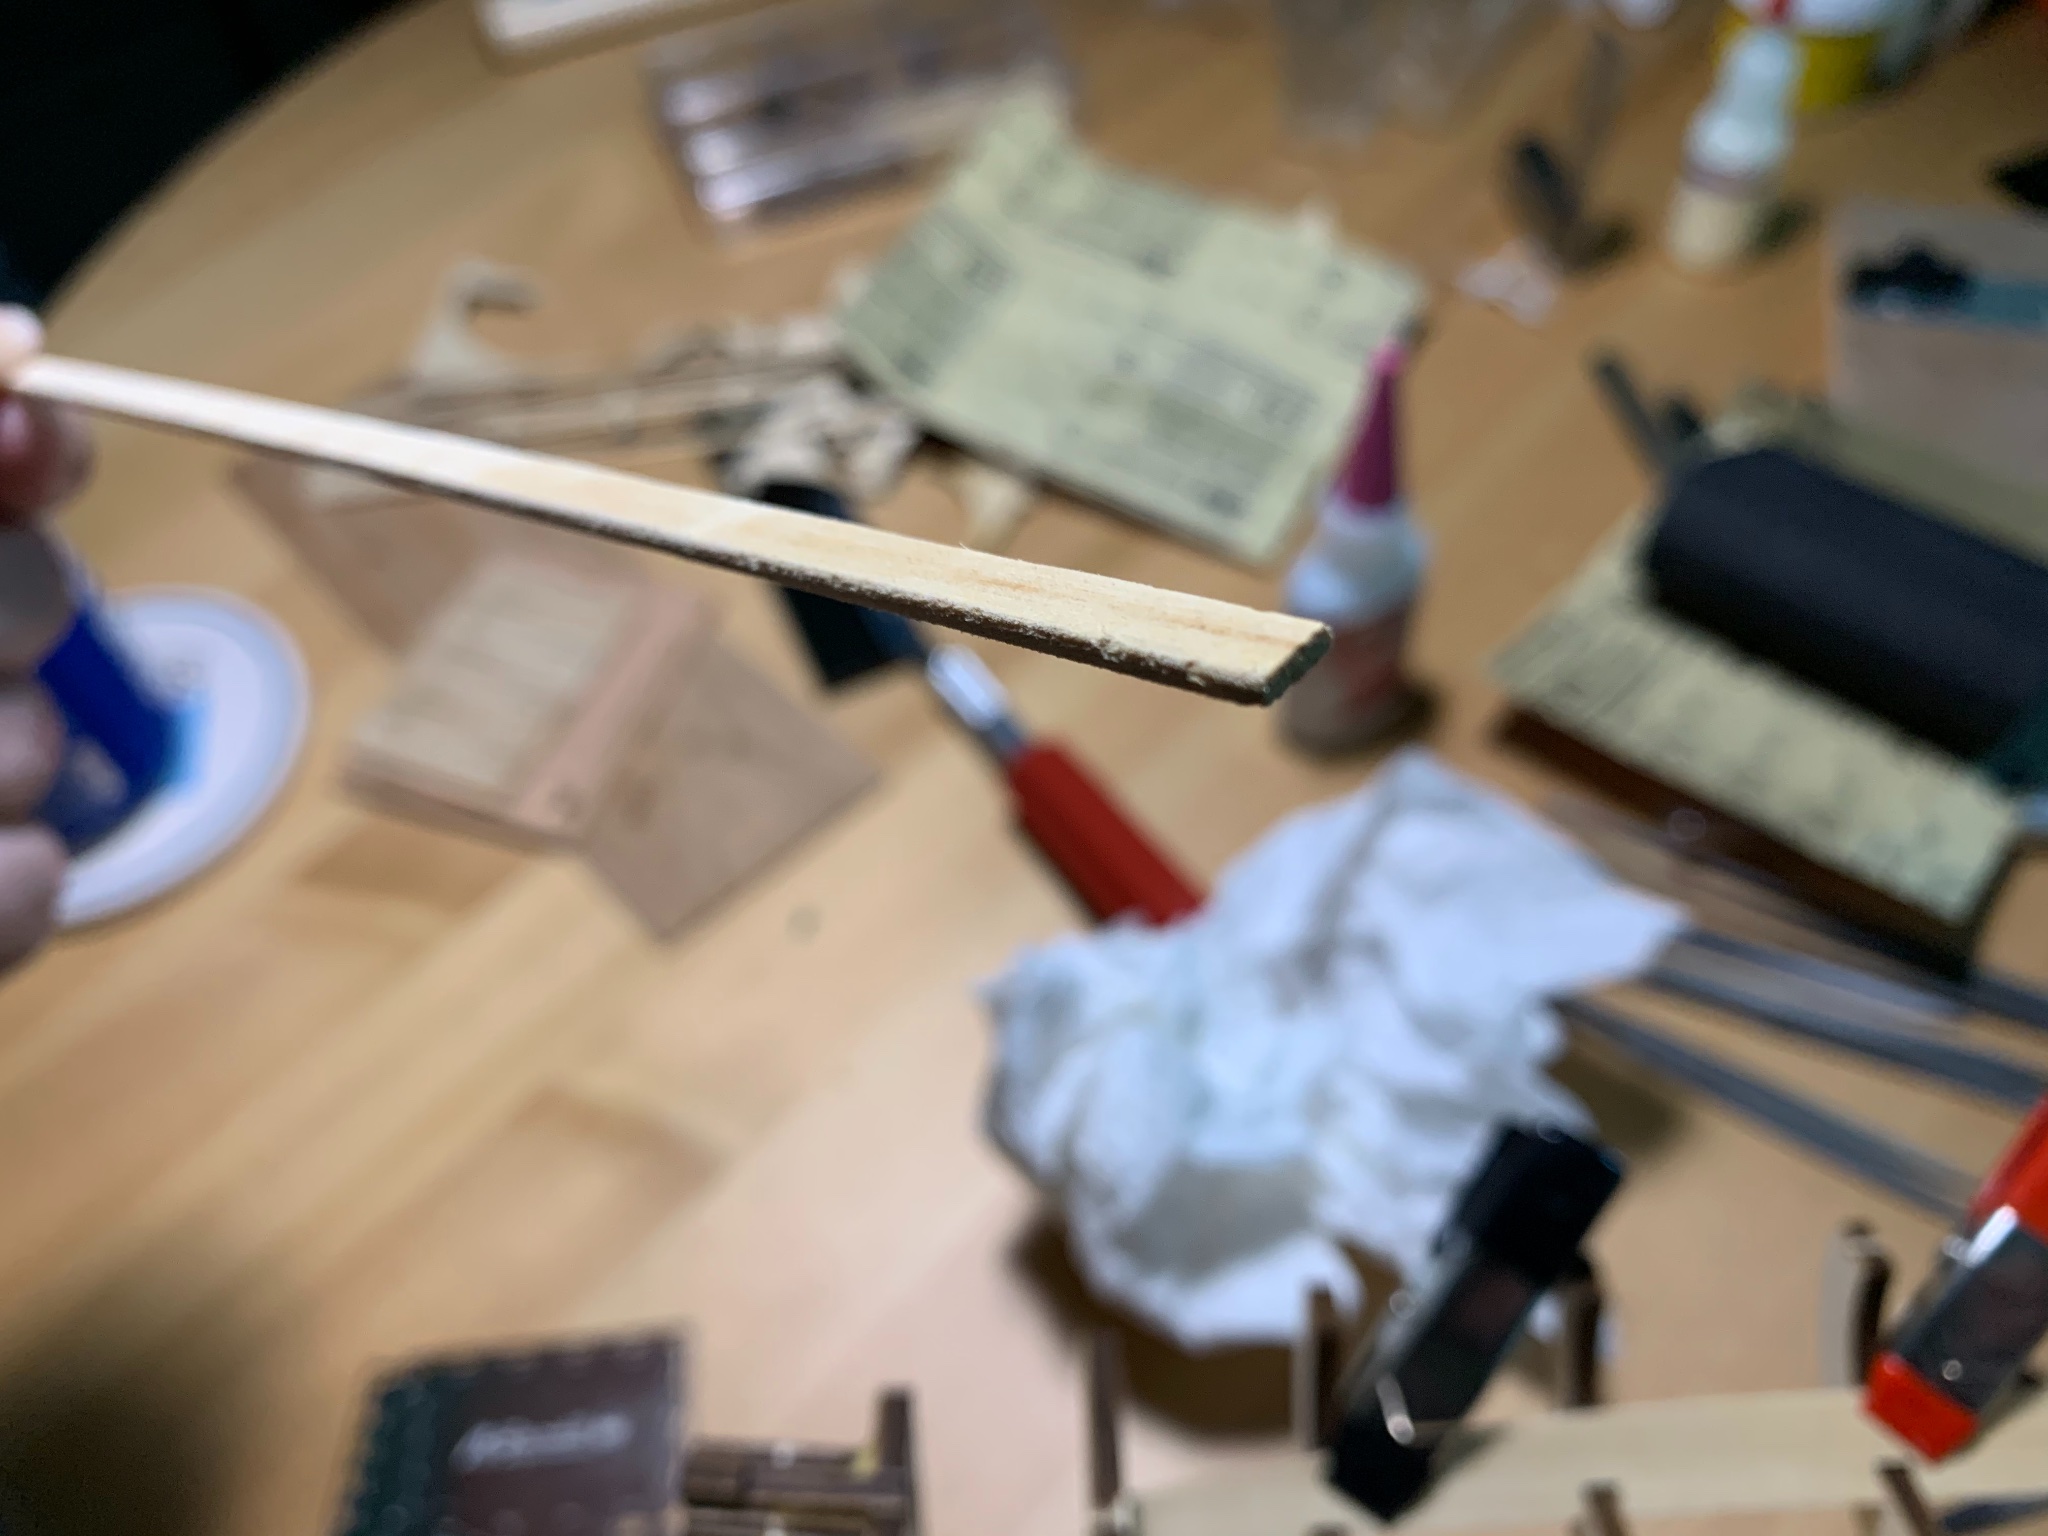
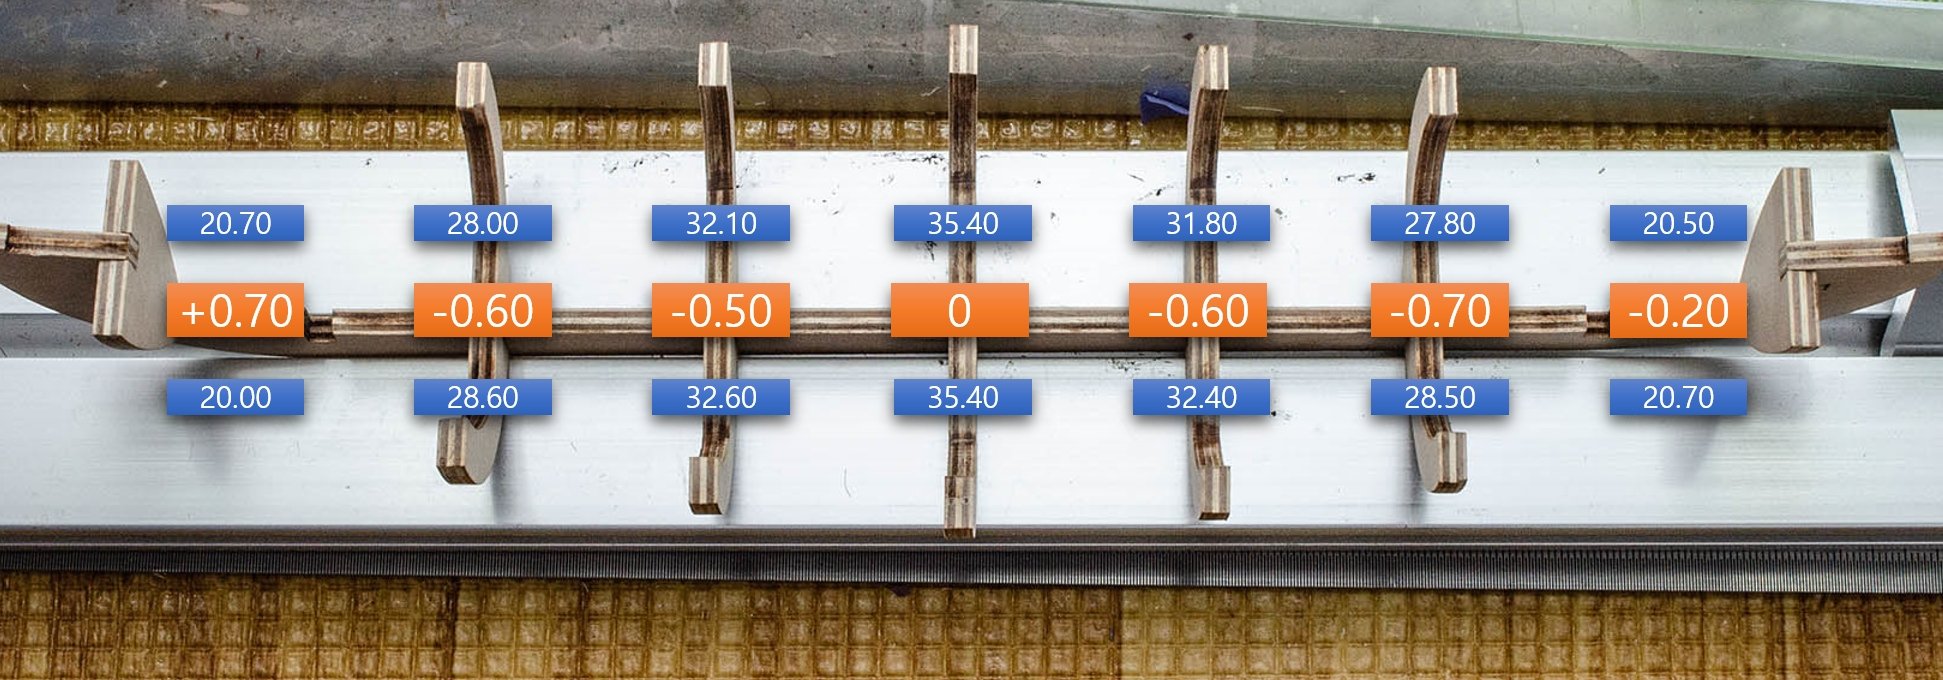
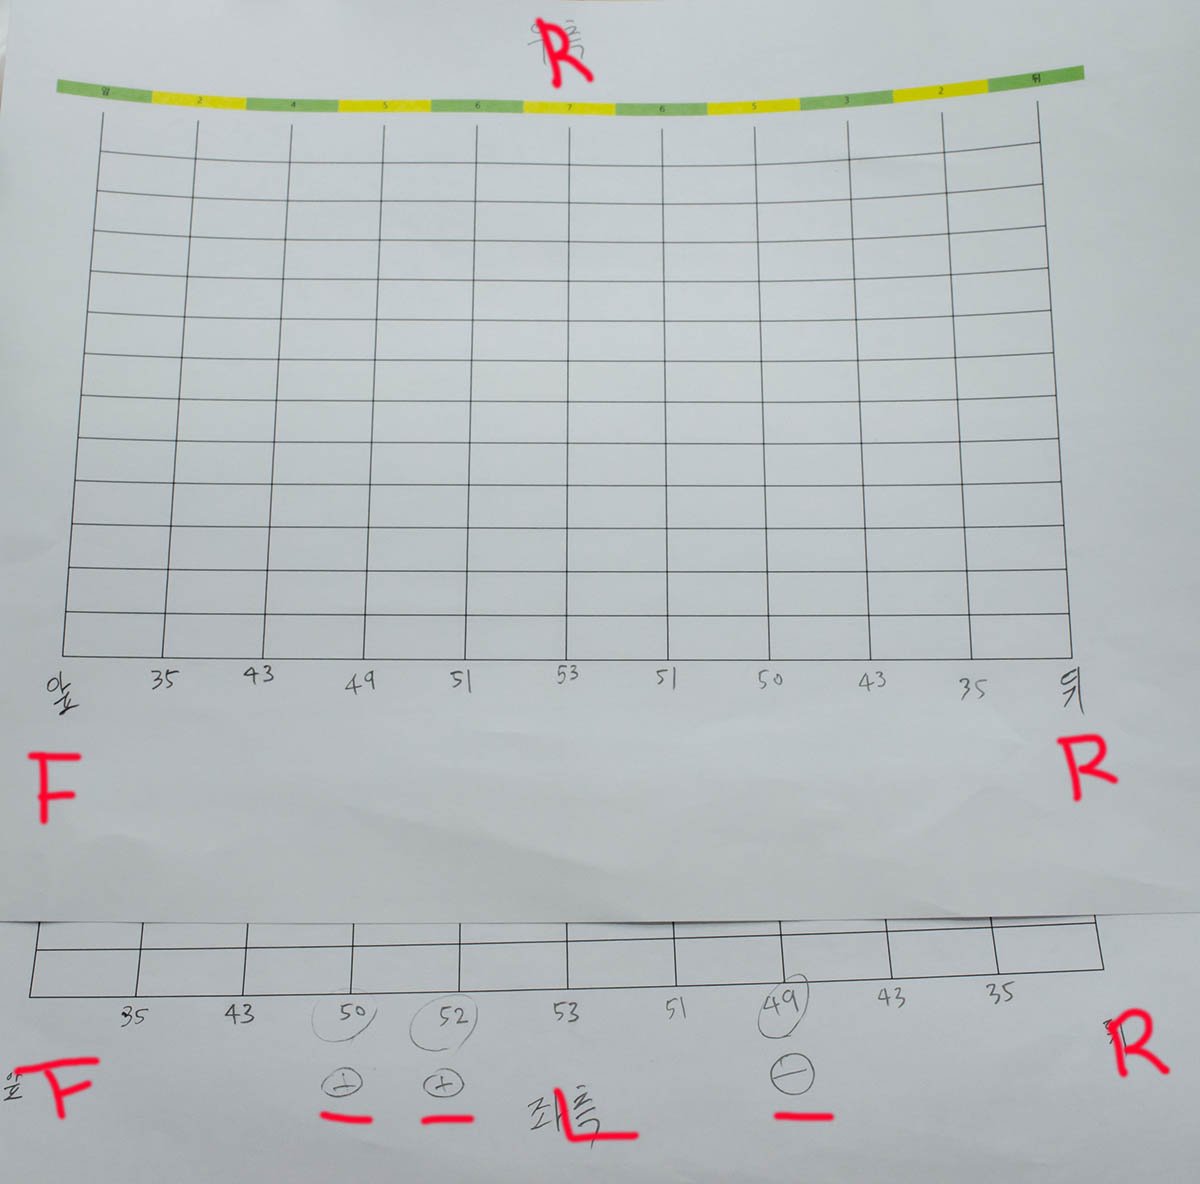
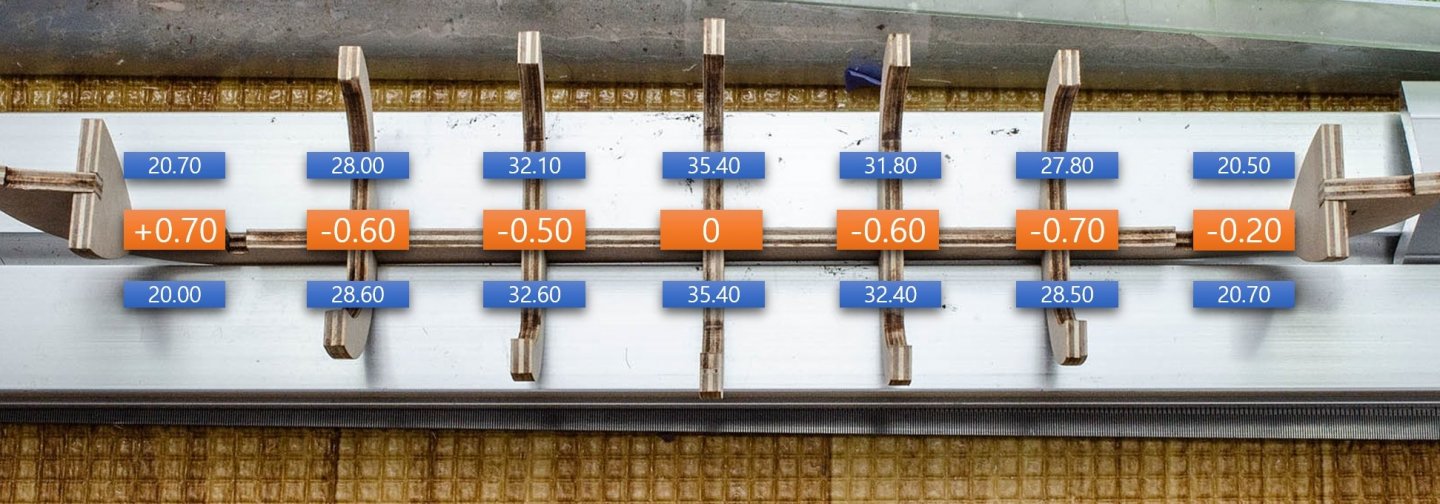
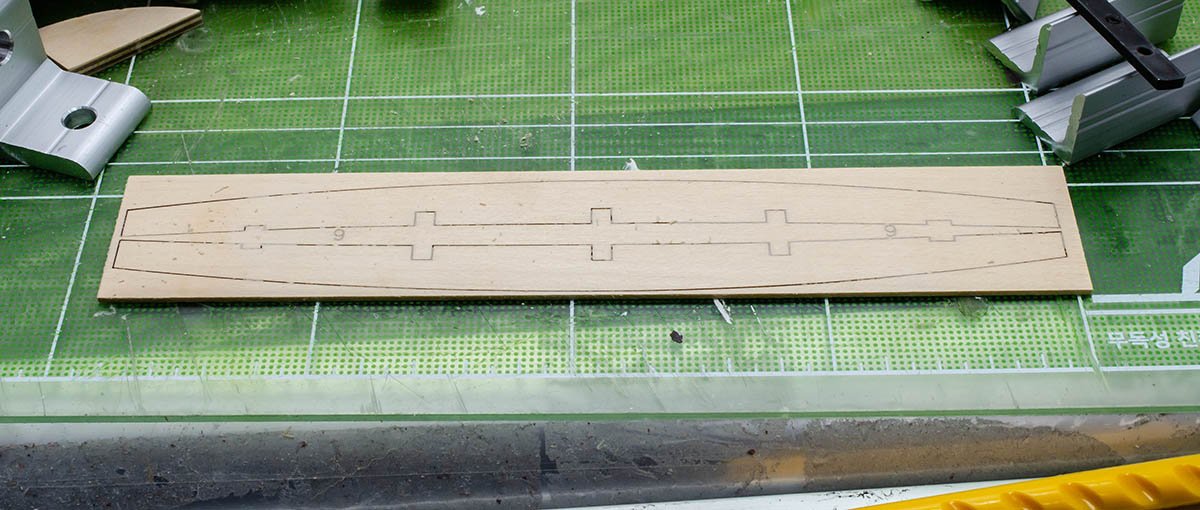
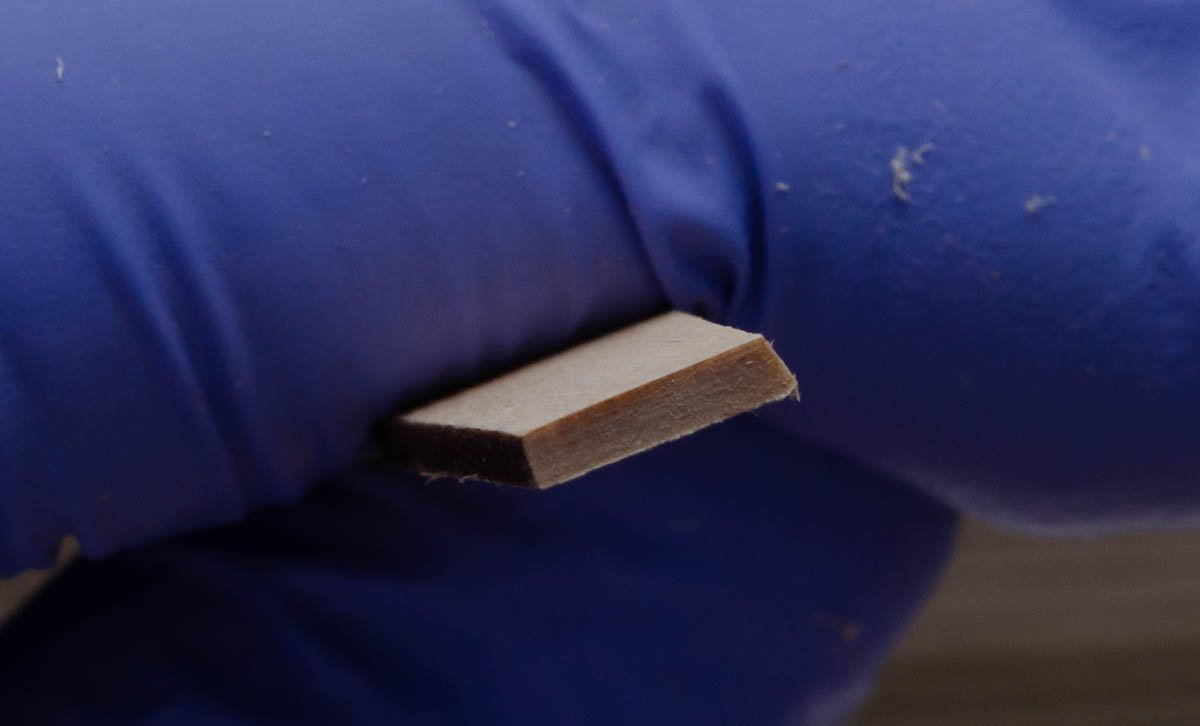
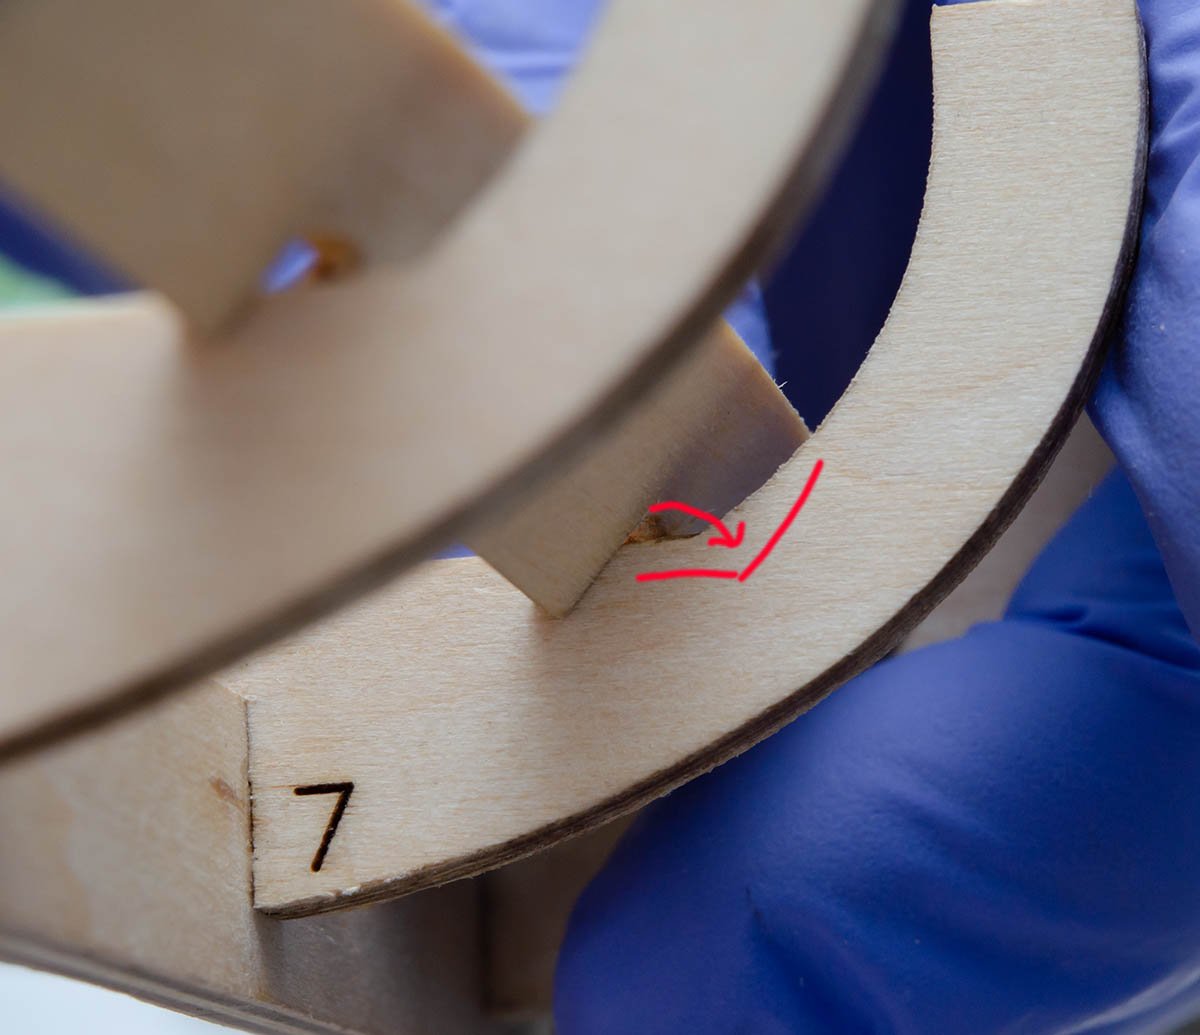
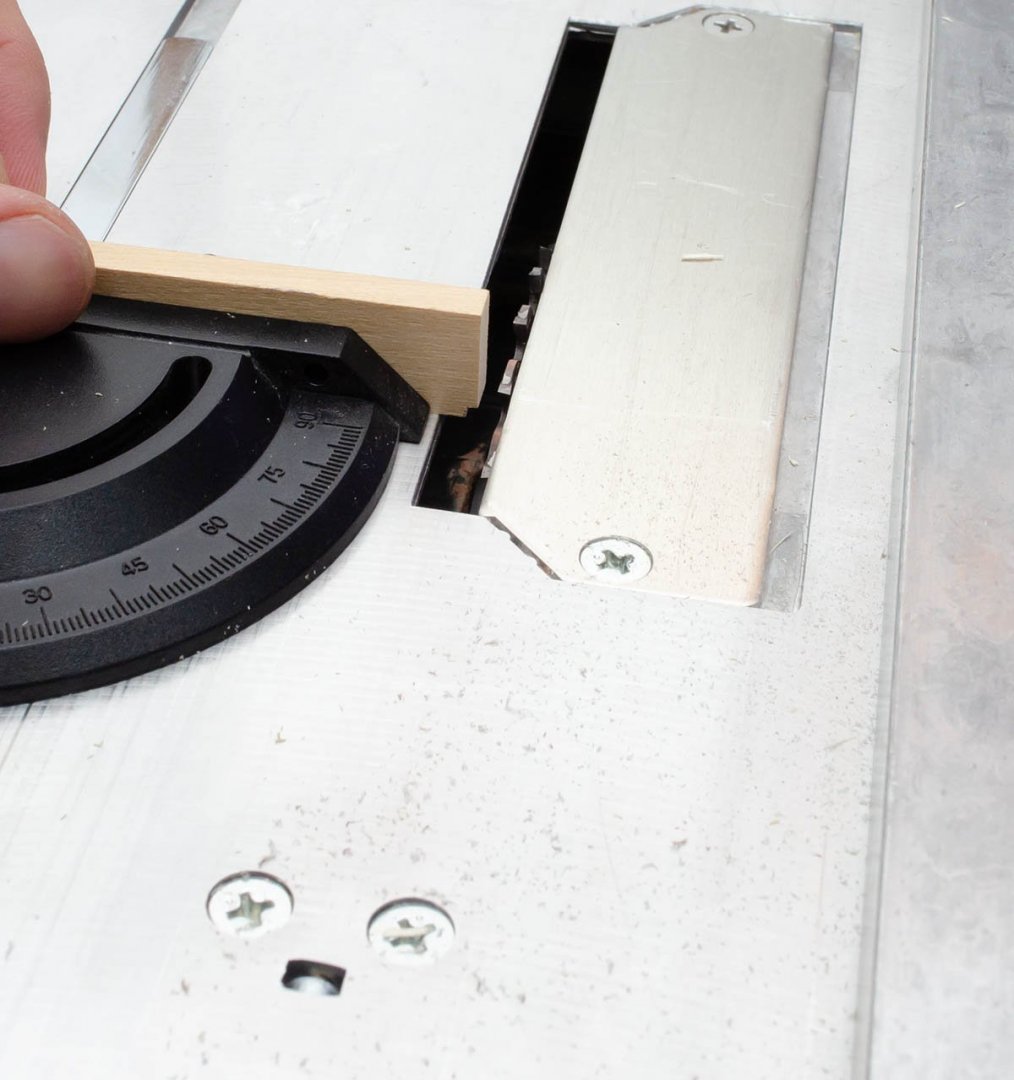
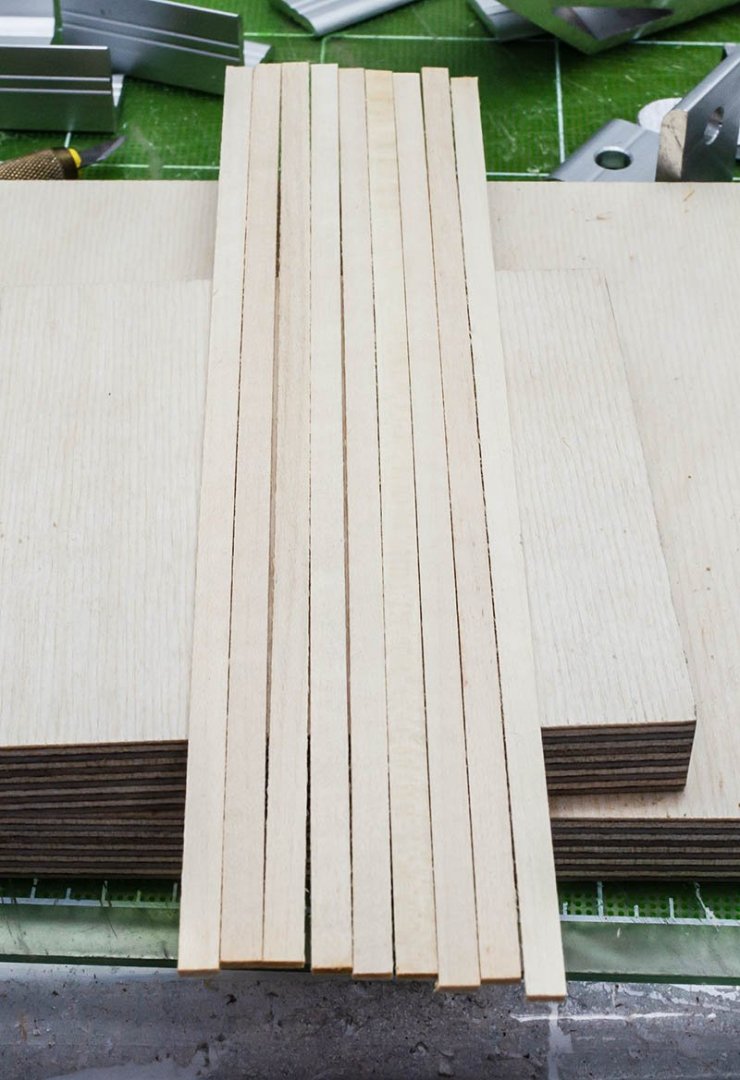
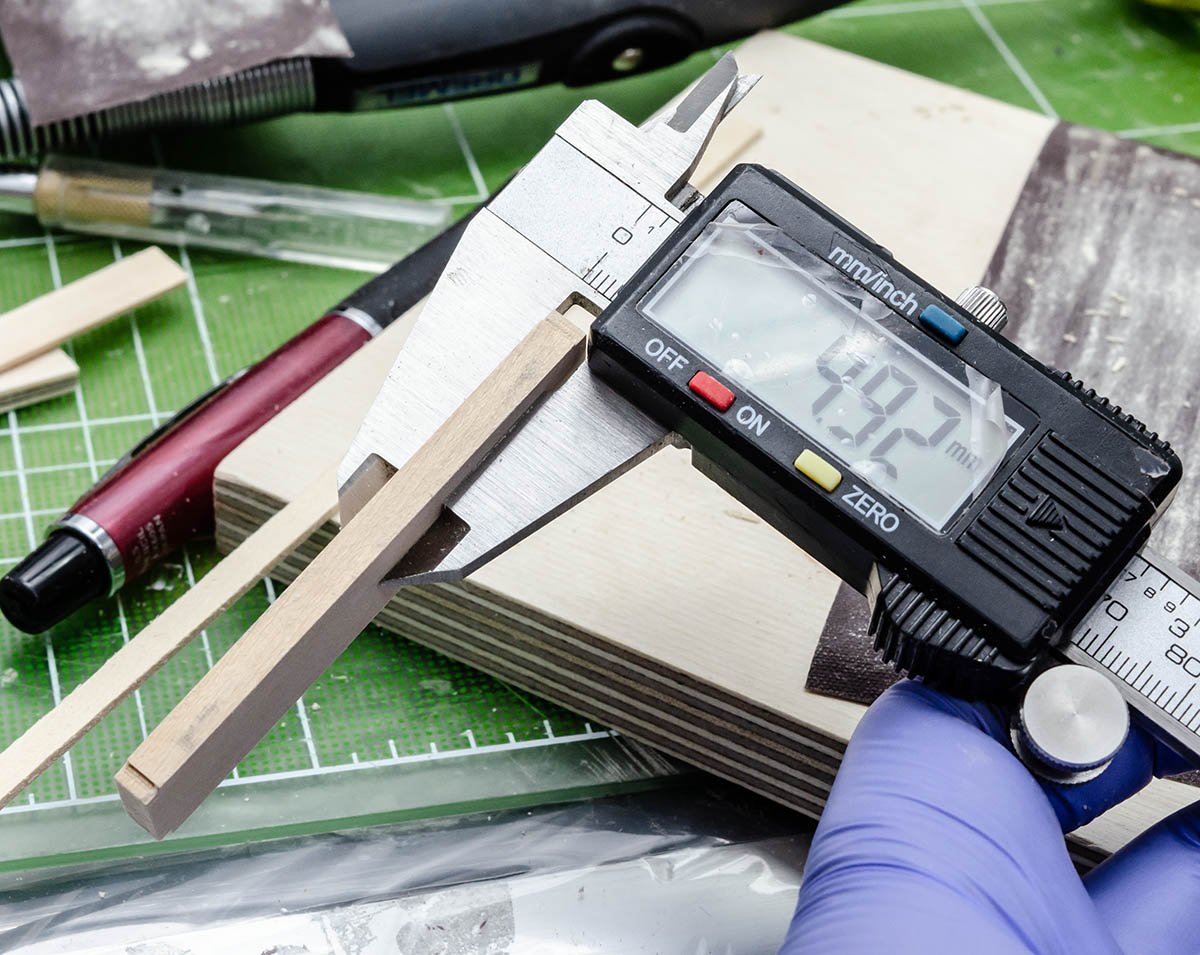
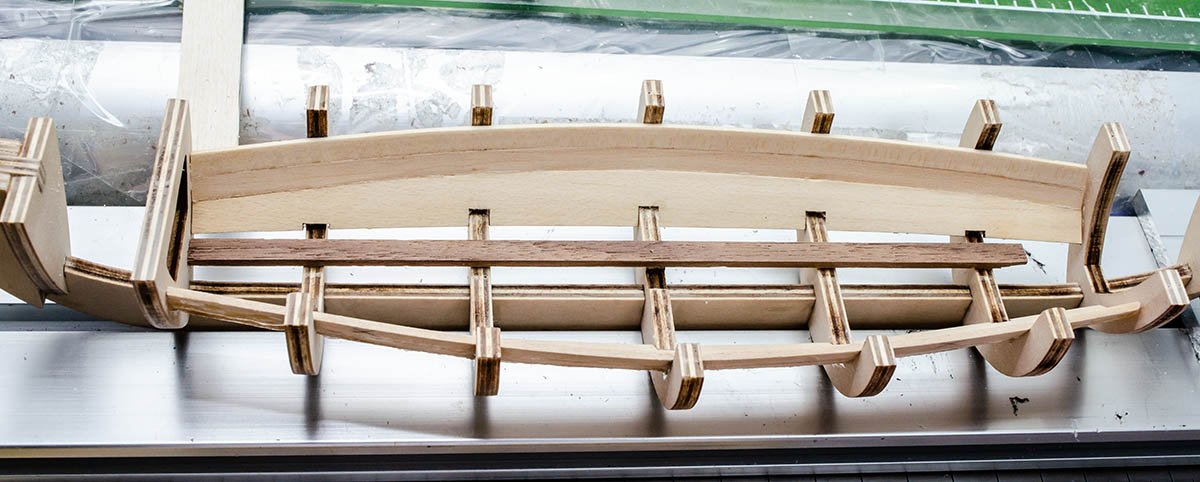
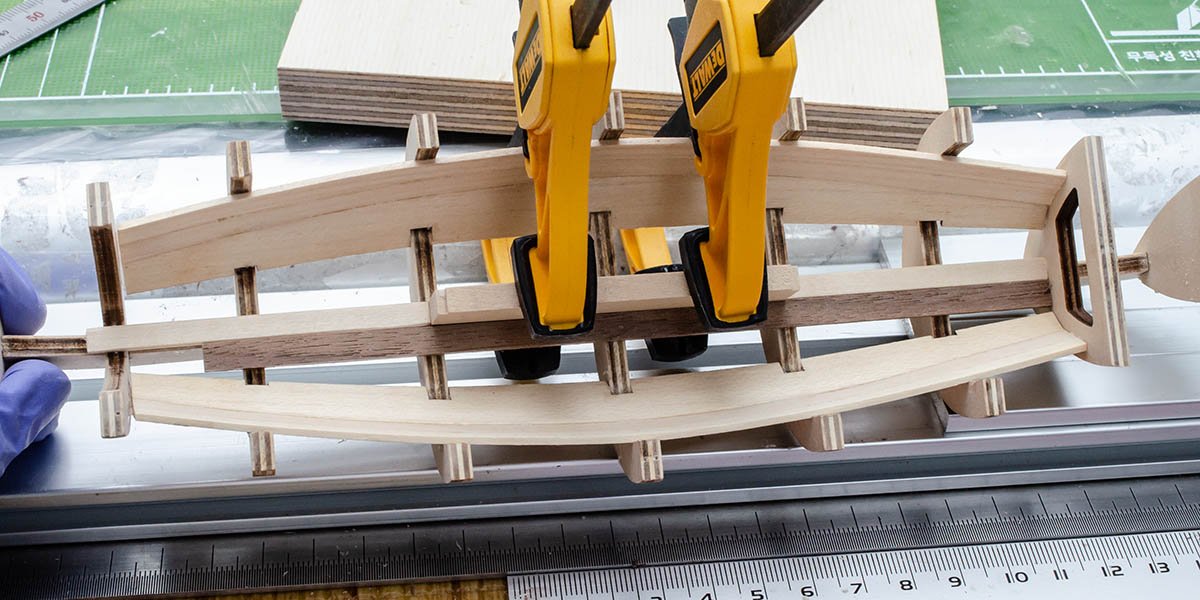
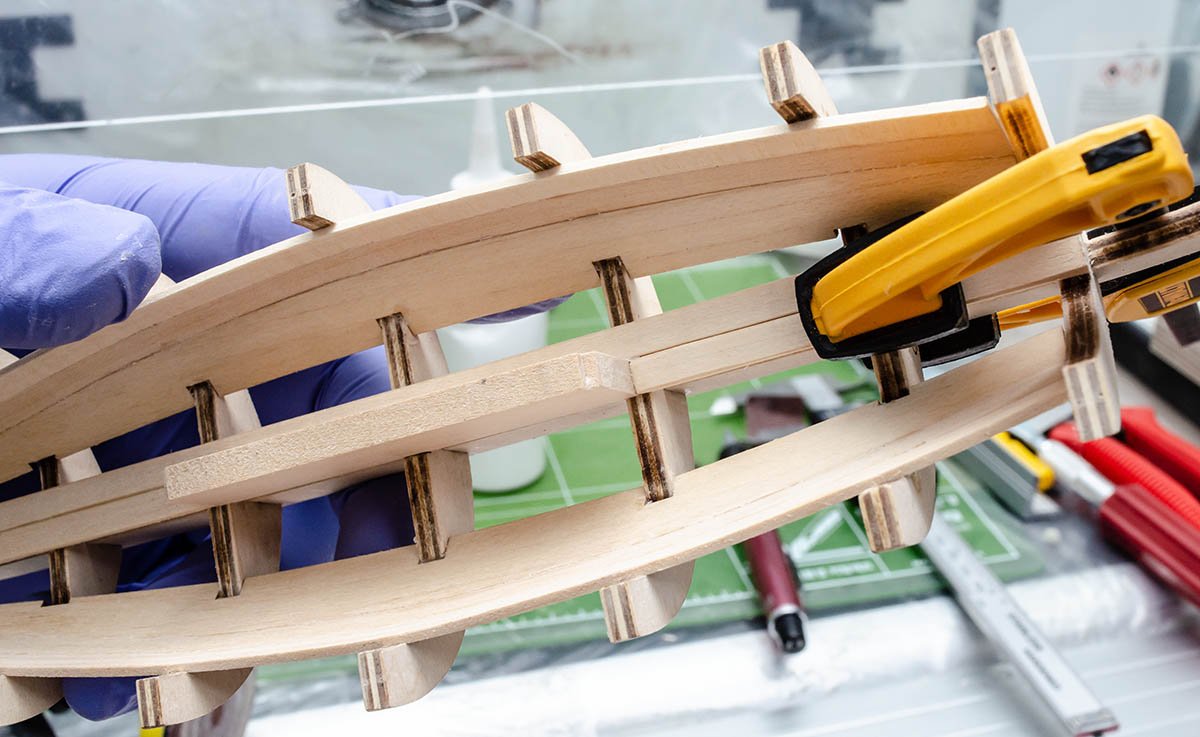
 Because I'm not an English speaker, I apologize for not explaining every pictures. I hope my build log help new comers. Bought it to get a rest. Good packaging, but... The keel twisted just after a week. I couldn't let it anymore. Don't open sealing before you are ready. It's sanding time. Time to battle with myself. Made some jig for exact vertical sanding. Very common technic. Found significant differences. Already banned from NAVSEA museum guideline. Fixed, but it's my best. Sanding before cutting is the best way. I didn't know which side is front or not. Veritas miniature blockplane is my best friend. Much accurate than sander. My second mistake. The part 9 must be sticked together with the side of part 7, not the bottom of it. Museum curator will say that"Your skill is so fledging that even dead AL will be revived!" Finally found the mistake, but I couldn't accept my mistake and didn't fix it... Huge resistance required many clamps. Because the parts' gluing was too week, I used a gorilla glue instead of fixing all of them. How bad... Found the wood bar from plastic case. Used degraded replica of Proxxon FET table saw from Japan. Don't buy it. It is $100 cheaper than FET, but the function is disappointing. Oops. Third mistake. I thought 1.40mm is enough, but it was too big for it. Arround 0.50mm is good. As you know, kit's wood strips are not enough for museum quality. Different colors, width, thickness, and grains. To make a same width, I had to sand the wood bar. I temporally attached the straight guide to frames. The fence made work easier. One of the most easiest part. And, finally encountered the second mistake. It is too narrow to stick the 8mm strip! I had to push the side strips to make an enough space. Too late. Closed my eyes and made a best effort to cover my mistake, but the defect is already making model looks bad... ouch. It's planking time! Measured them all, and the balance is not bad. 1mm differences are within an error. I don't need two planking sheet for portside and starboard.
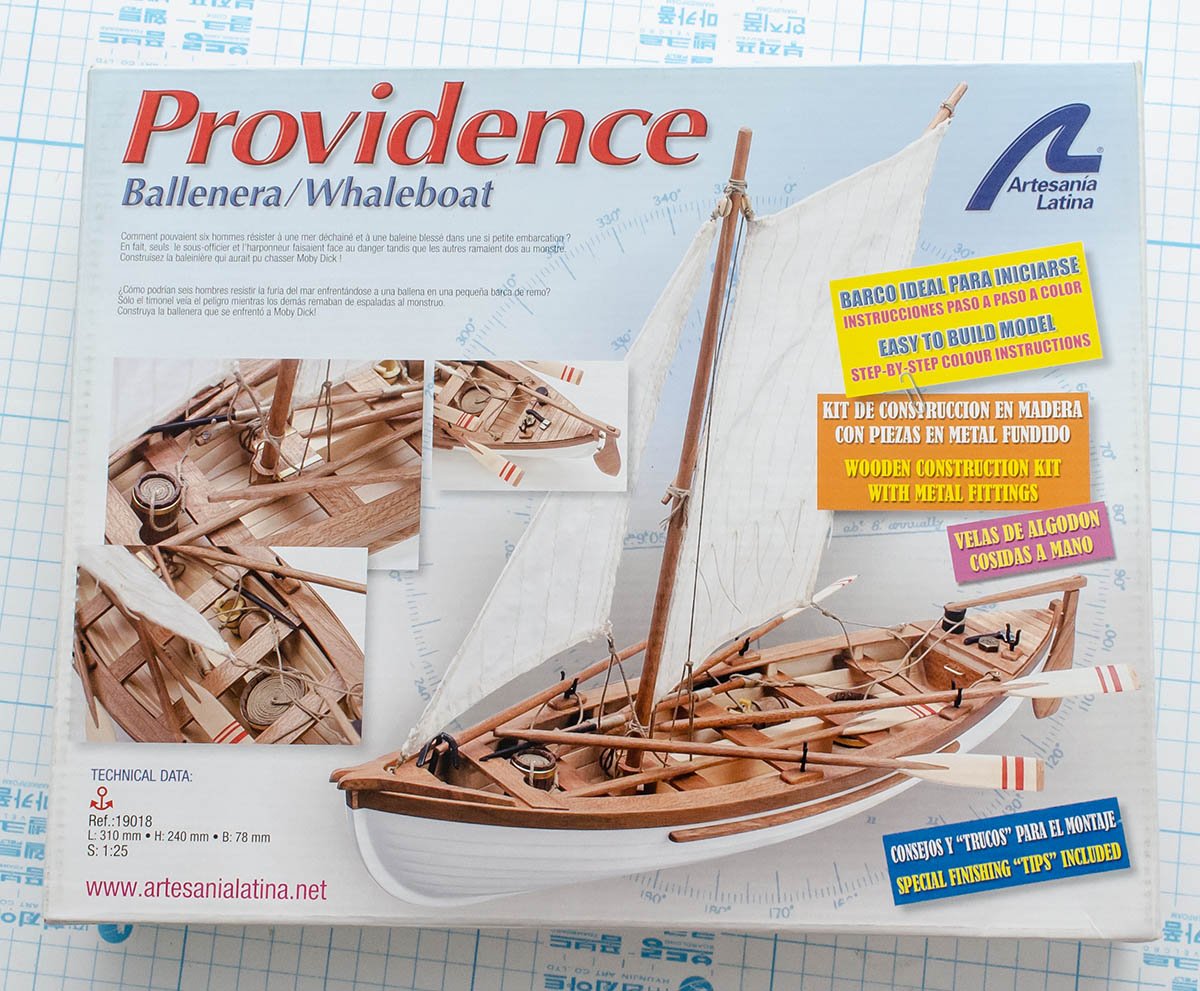


- 19 replies
-
- 4
-
-
- providence
- artesania latina
- (and 2 more)
-
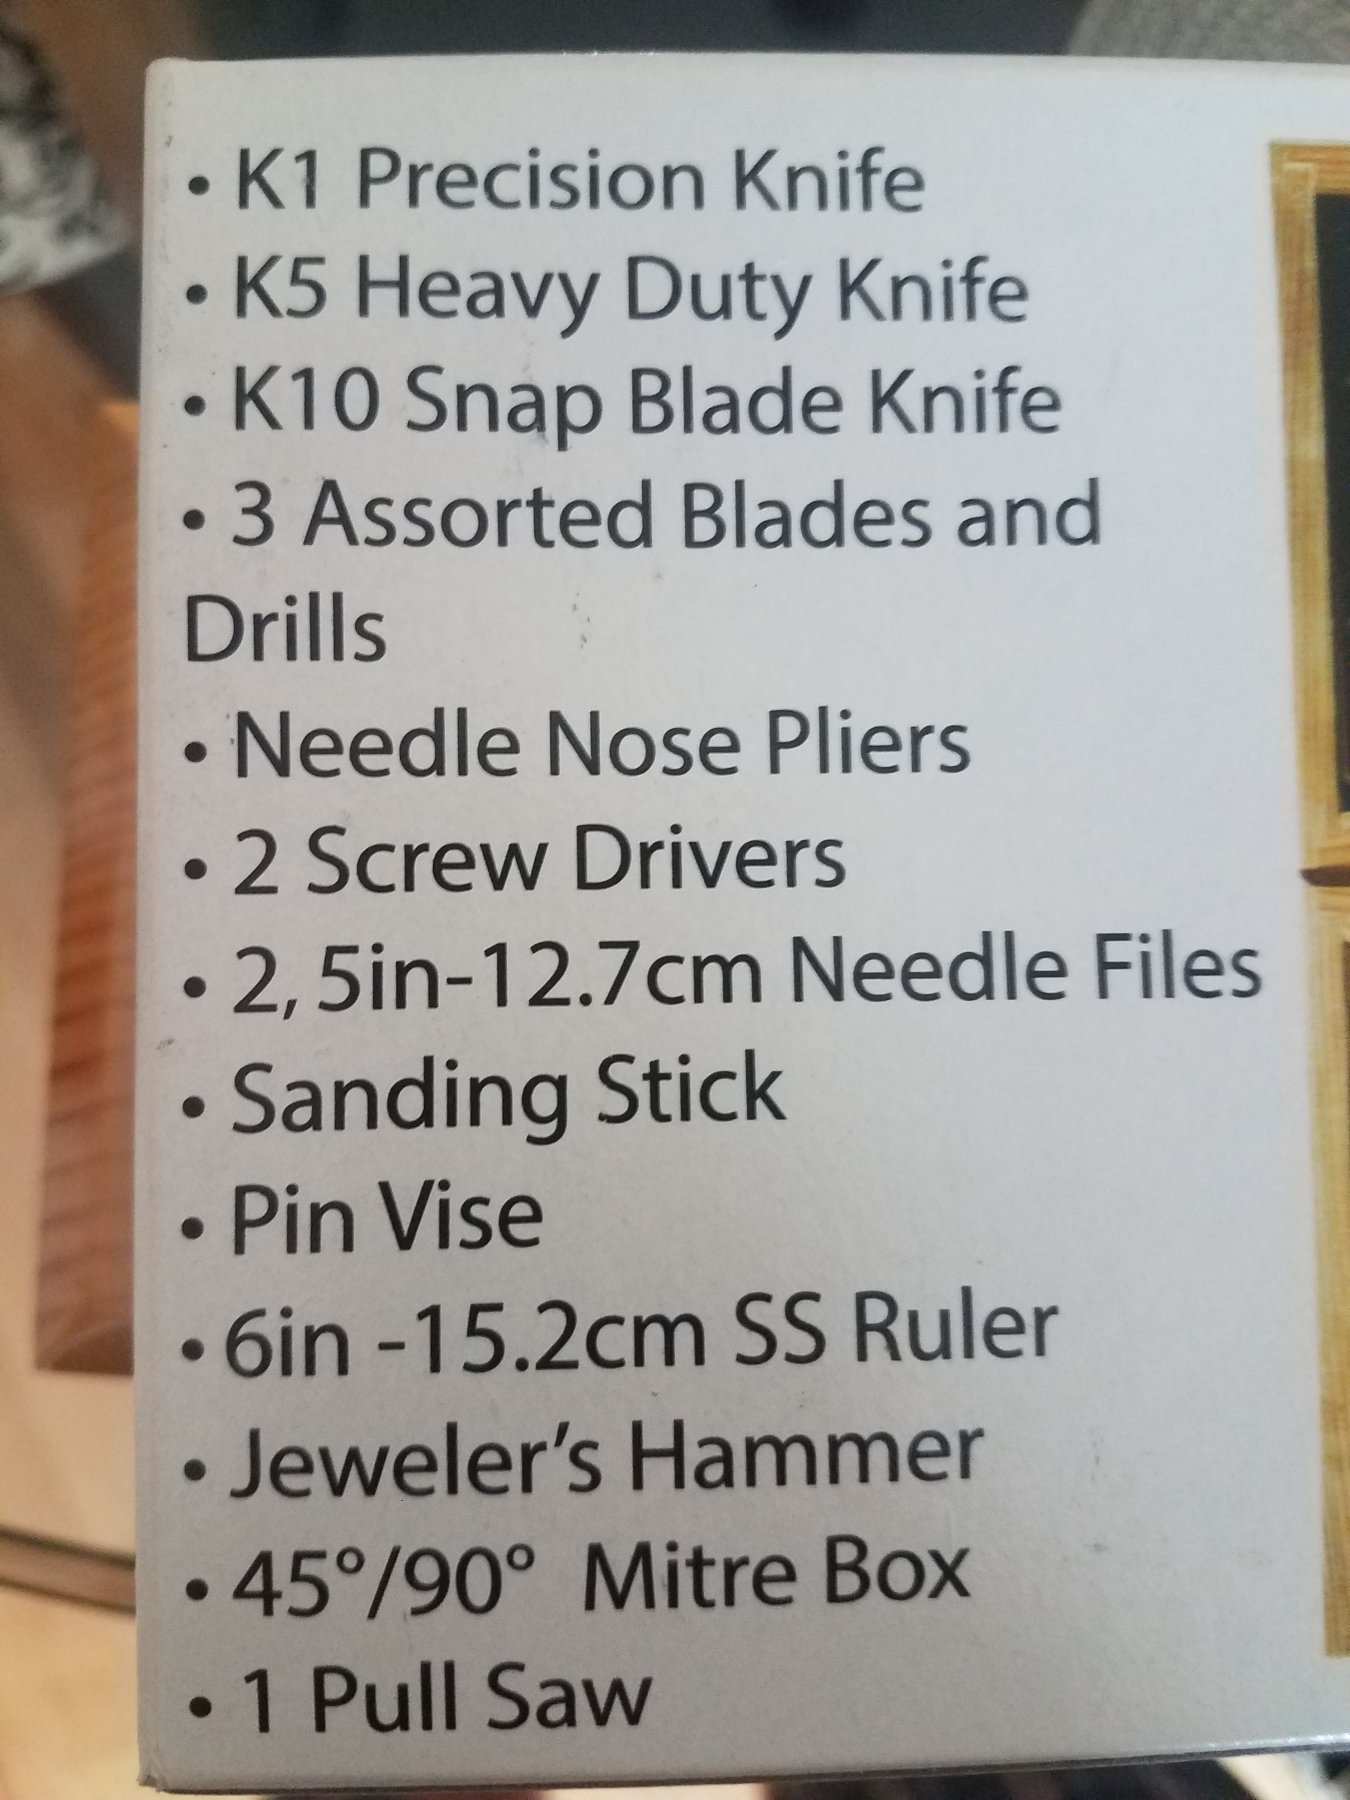
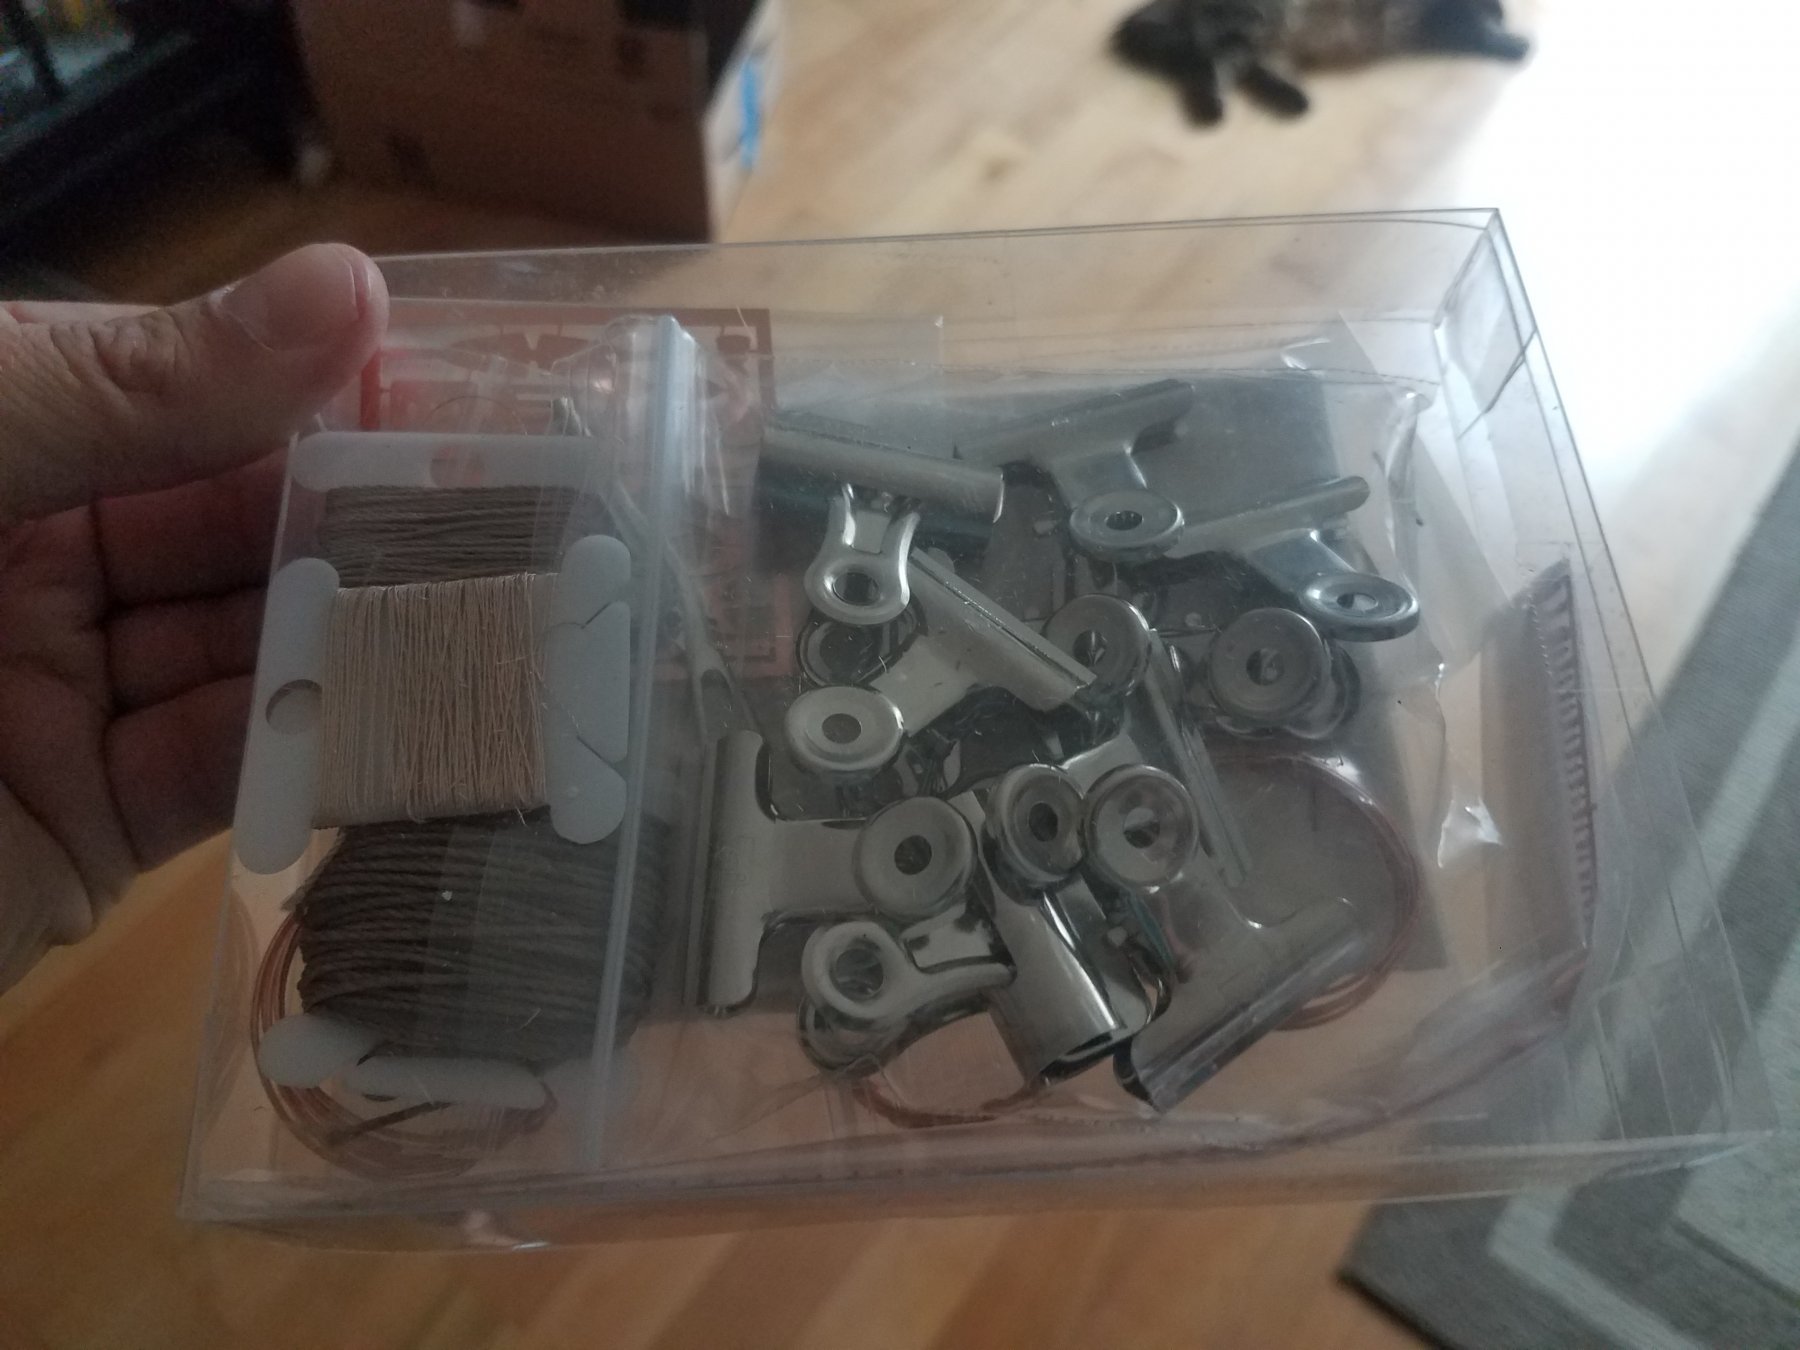
 Hi all - I received my tool kit, glue and my model kit today. Although actual building may not start for a few days, i wanted to start my build log and post a few pictures of my current toolkit and ask a few questions. Here are a few questions I have before digging in, with a statement about what i got in the mail first: I had an issue with shipping on my original order ( see my member introduction post for more on this ). Long story short, i have a claim in with the post office for a lost 18th century longboat kit originally ordered. The tools i ordered may not be the ones i originally wanted, because amazon gave me an allowance to spend on AMAZON SOLD AND SHIPPED ITEMS ONLY. So my buying options for tools were limited. Unfortunate. 1) Will this glue work for the model kit? I haven't seen anyone use it, and im doubtful because it "remains flexible". It is a craft glue, but seems to be more for fabrics. Anyone with experience? I have no issue getting the right glue, i only ordered this because of my limited buying options ( see above). 2) I will be doing a full inventory on the kit soon, but one thing i noticed is that some of the metal parts were out of the clear shipping tube upon arrival and bent quite a bit. None were broken. Is this cause for concern? Wondering if I may run into issues because of this down the line. 3) Is there anything missing that is truly vital from the tools in the pictures I posted? I know i may need some higher grit files or sand paper, but the kit was described as a model railroad tool kit. Again, limited buying options due to amazon allowance from shipping issues. PHEW that was a lot. Sorry for the novel, i plan on keeping my posts from here on out lighter and to the point!! Thanks in advance, Ryan (Soup591)
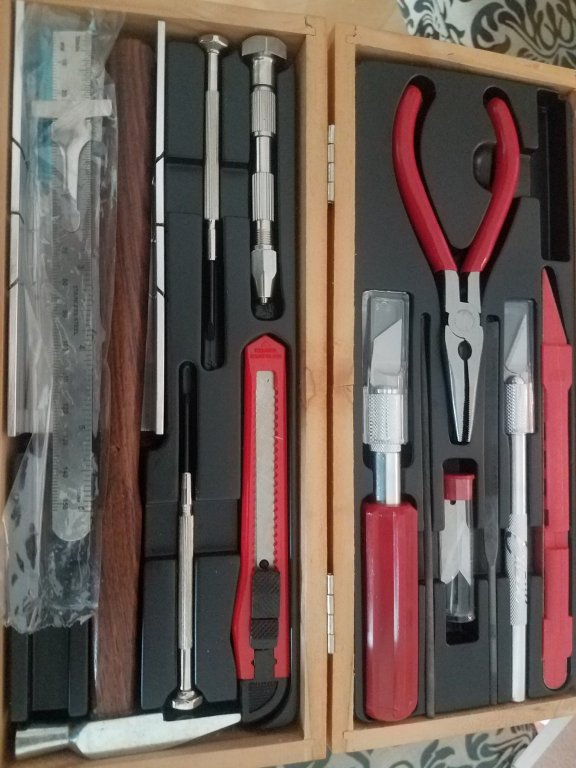


- 21 replies
-
- 6
-
-
- whaleboat
- model shipways
- (and 1 more)
-
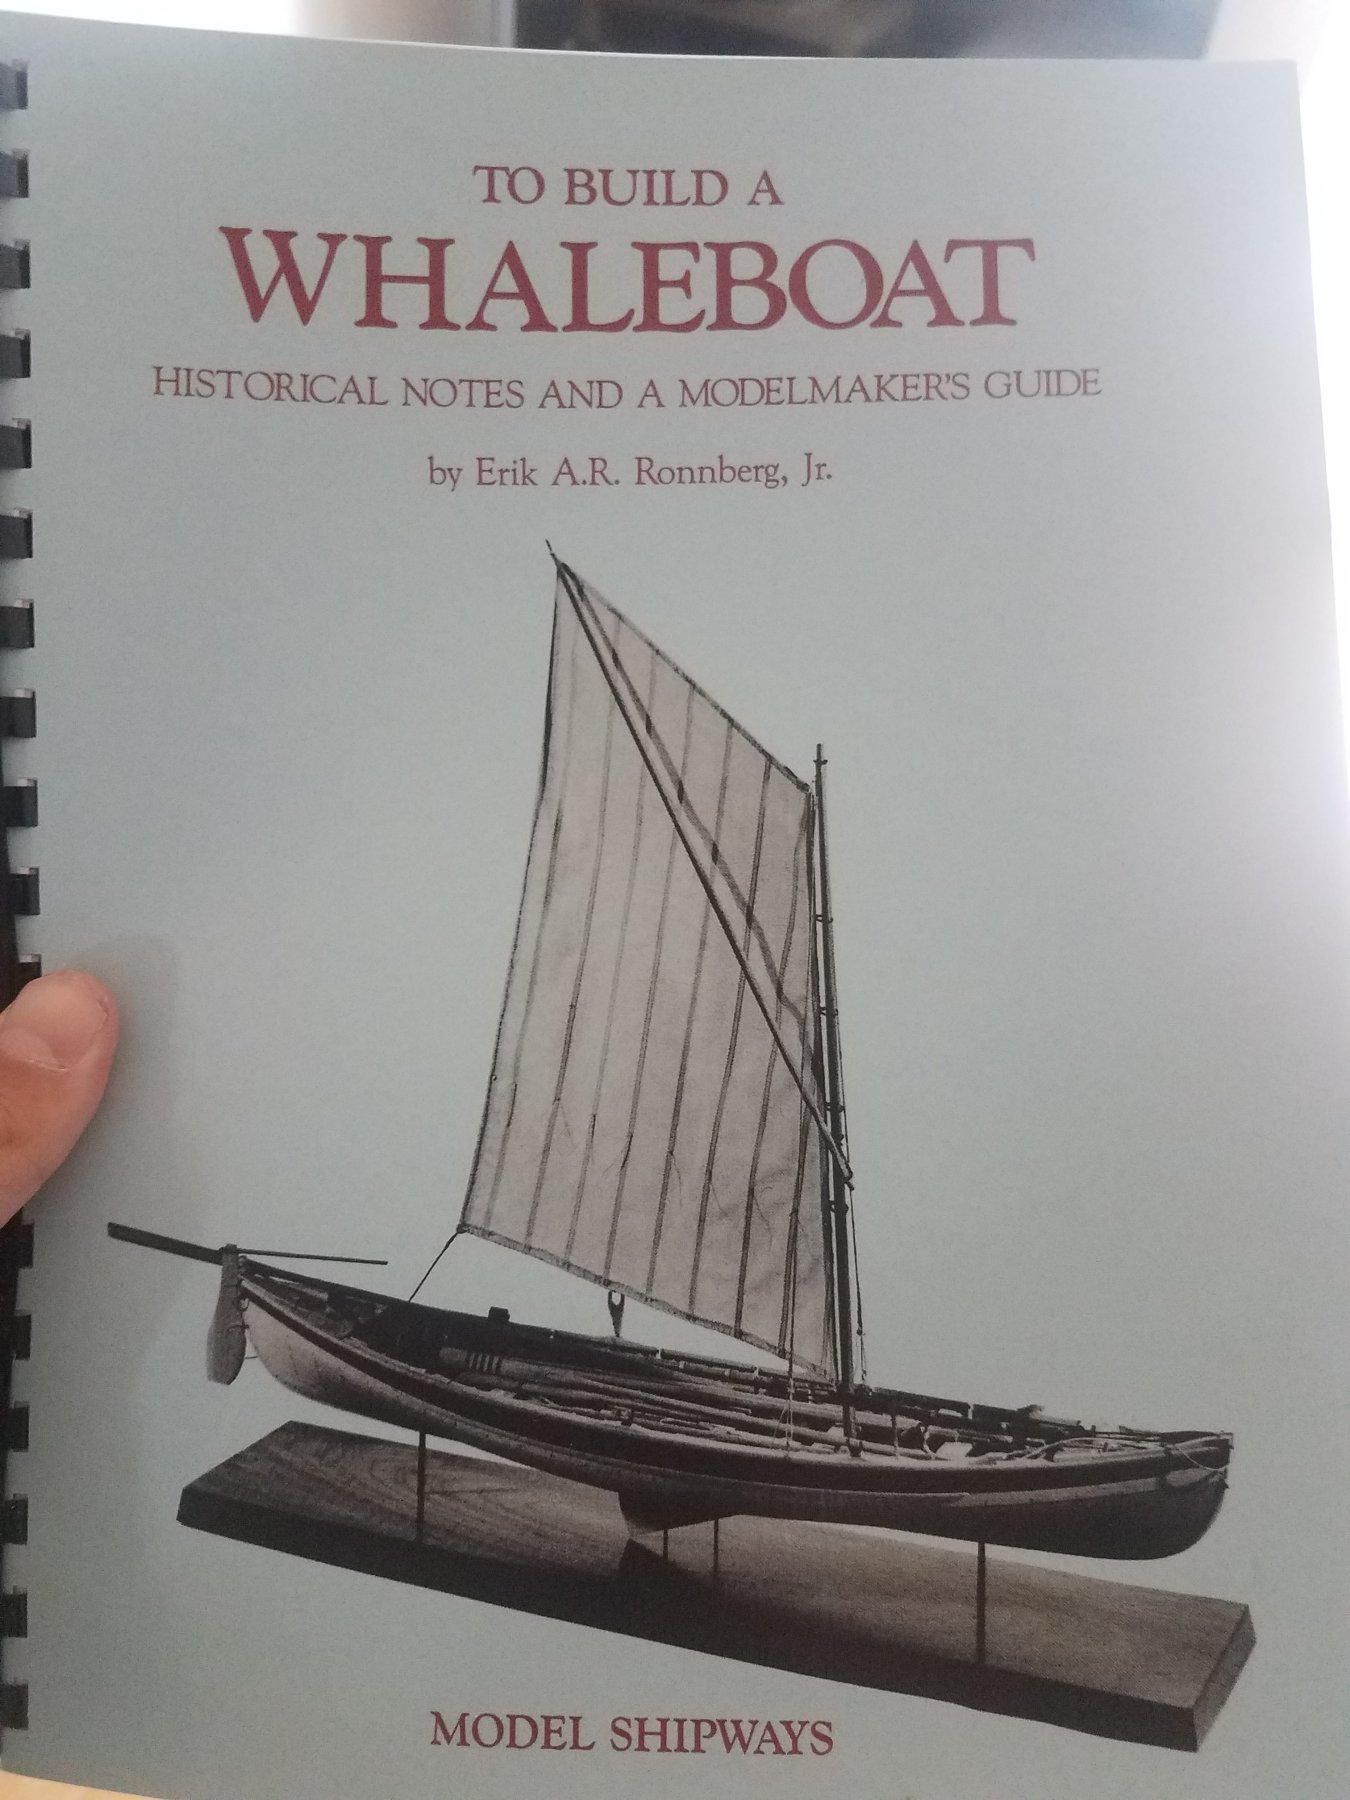
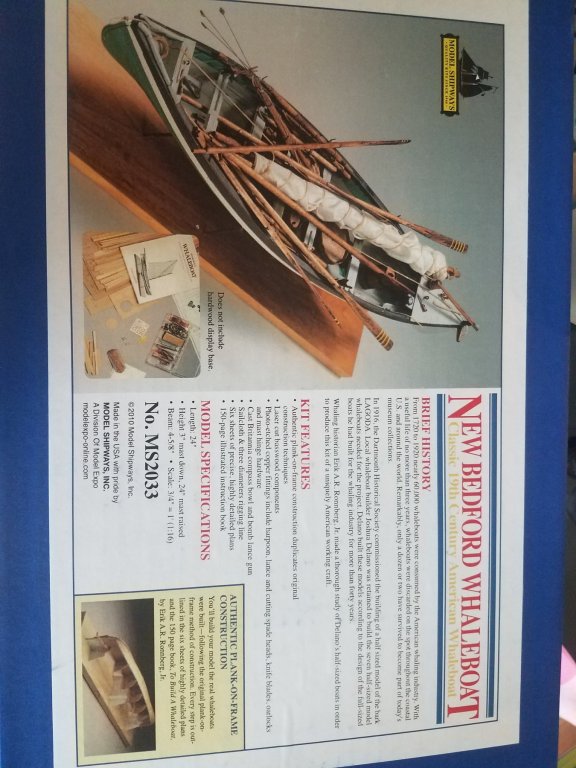
 The remaining plans have been listed on eBay. Brand new, Model Shipways New Bedford Whaleboat. $19.99 from MSW. 3 large sheets with lines plan and templates. $10 SOLD Model Shipways Sultana. 2 large sheets. Good clean set of plans. $5 SOLD Model Shipways Clipper Ship Young America. Older plans on heavy paper. 4 sheets plus 3 sheets of instructions. Very good clean set of plans with some minor pencil marks. $5 Model Shipways Brig Fair American. Older plans on heavy paper. 3 large sheets plus 2 small sheets and instructions. $5 SOLD Model Shipways Frigate USS Essex. Older plans on heavy paper. 3 large sheets plus 3 small sheets and instructions. $5 SOLD Model Shipways Frigate USS Constitution. Lines plan, stern detail, large scale drawing of 24pdr and carriage, large scale drawing of 24pdr bow chaser and large scale drawing of bower anchor. $5 Mamoli Schooner USS Lexington. 6 large sheets of drawings, details, templates and instructions. $5 SOLD Mamoli Cross Section USS Constitution. Scale 1:93. 6 large sheets and one small sheet of drawings, templates, details and instructions. Good clean set of plans. $5 SOLD Bluejacket Bon Hom Richard. 1 very large sheet. Scale 1/8"=1'. Older plans that have yellowed and are creased but still clear and usable. $5 Bluejacket Pirate Brig. 3/16"=1'. Older plans that have yellowed and are creased but still clear and usable. 1 very large sheet. $5 MRB Landing Craft LCI. Scale 1:50. Text in French. 2 large sheets. Older plans that are age darkened but clean and completely usable. $5 Buy them all and I will pay the shipping.
 -
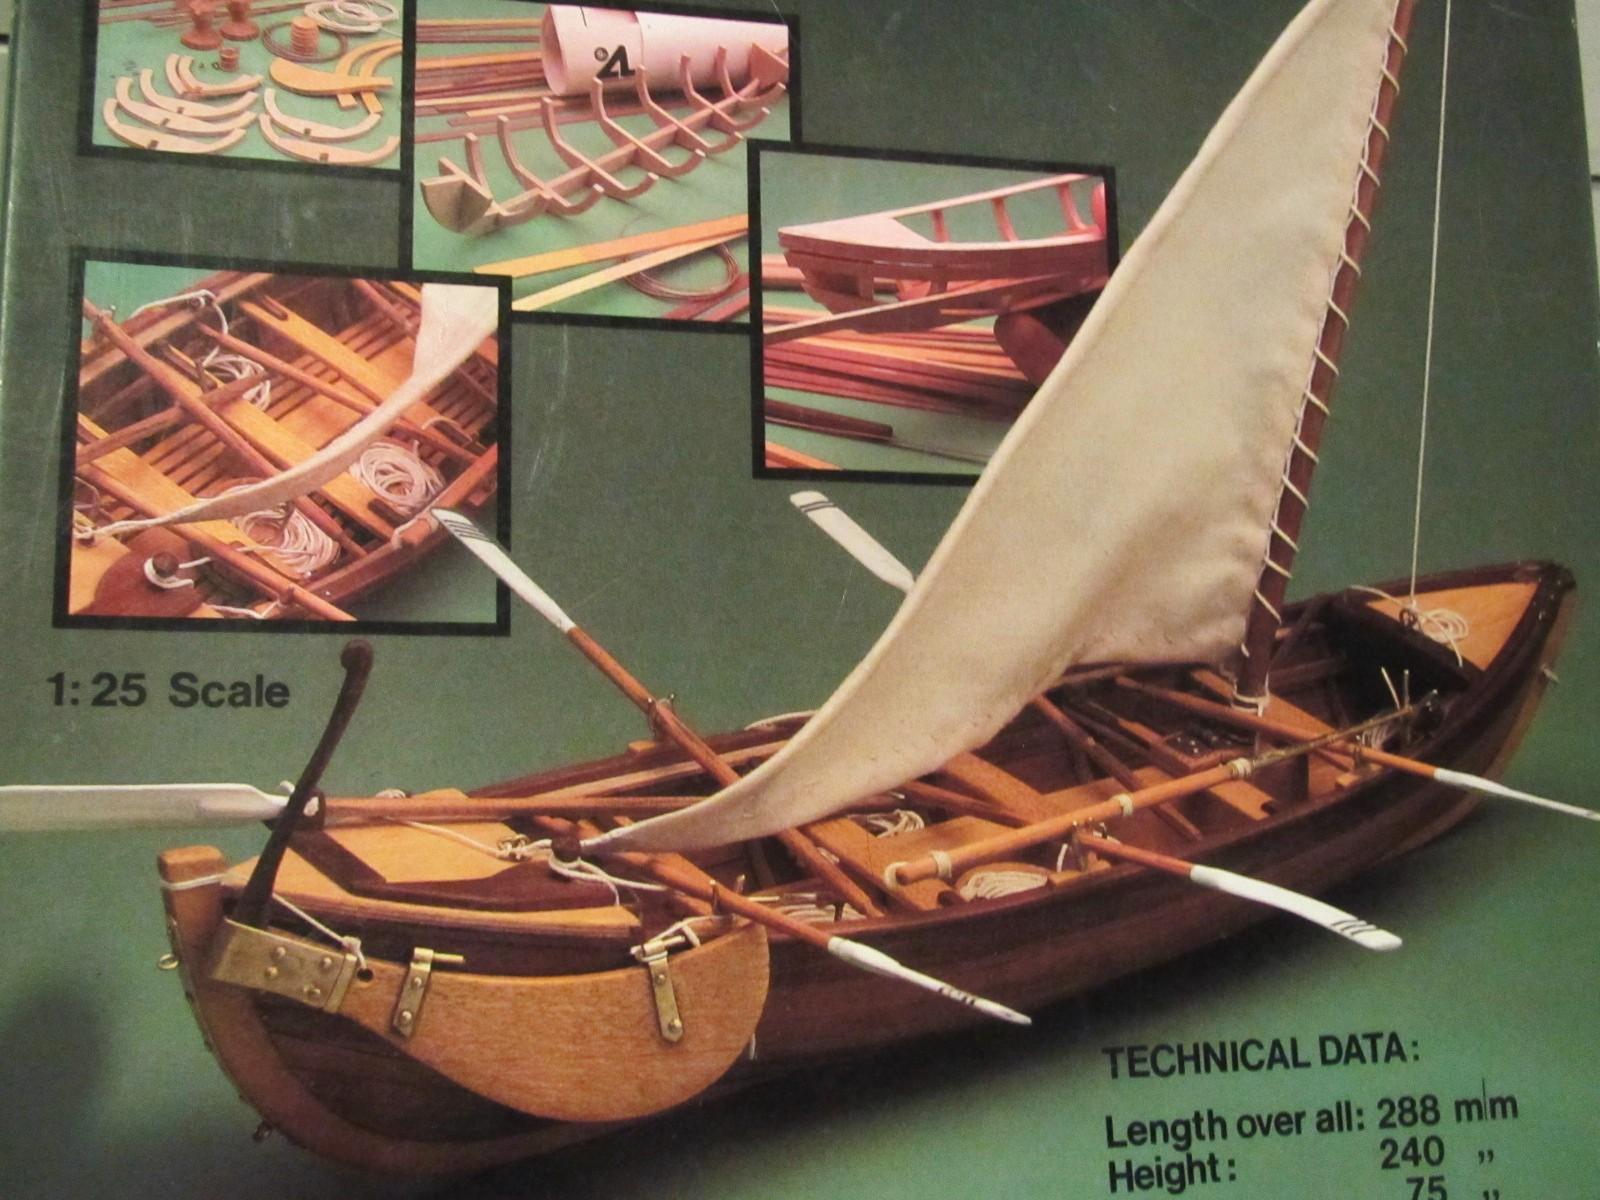
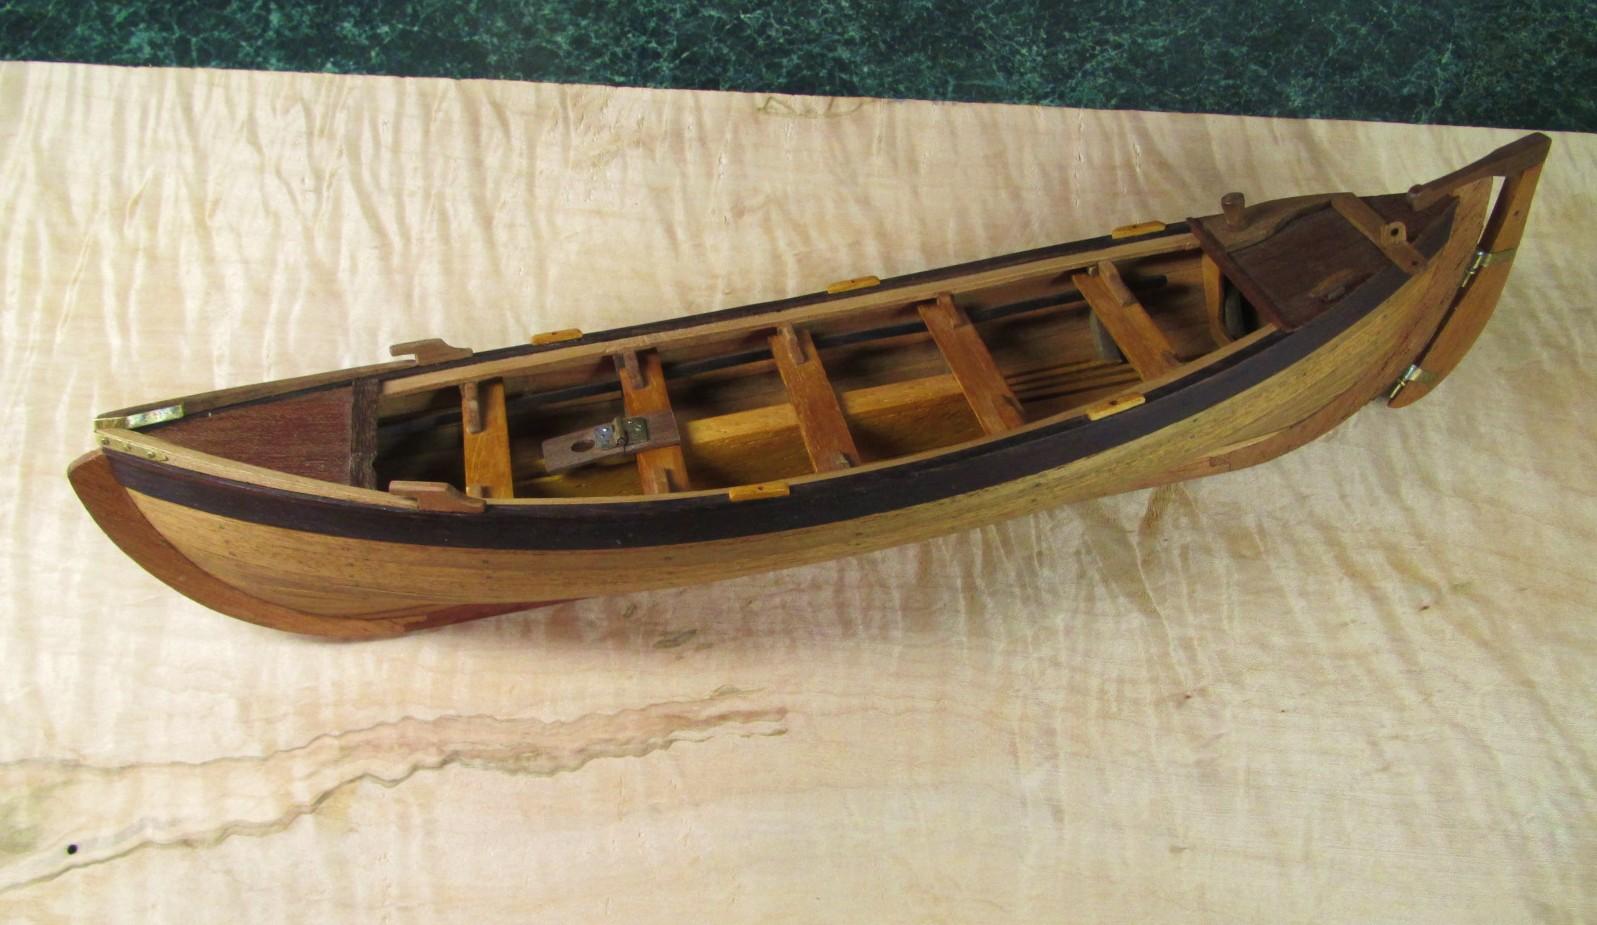
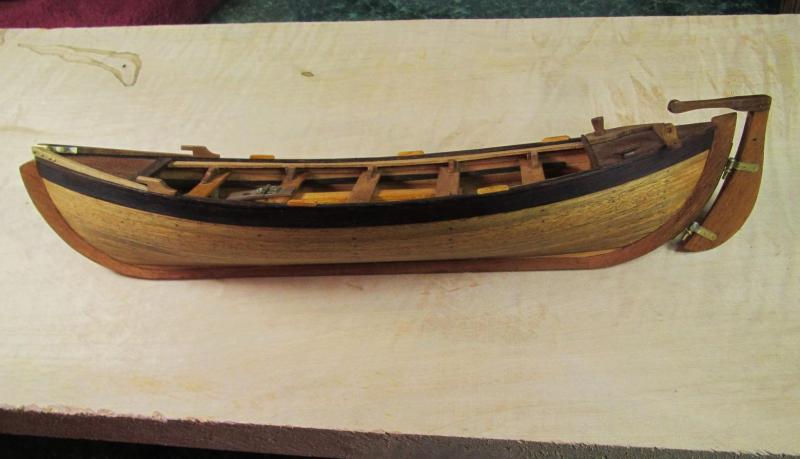
 Yesterday started like this: After shoveling a spot for our little white dogs with low ground clearance to do their thing, I decided it was the perfect day to gather up info to start a build log. I had the day off anyway. My wife gave me this kit for Christmas back in 1986 after I casually left a Model Expo catalog laying open in her chair with a note saying 'I'd really like this for Christmas'. I got a good start on it back then, but life got in the way and it sat until about a year ago. Back in 1986, Model Expo used to sell this kit for $24.95, and although the kit is no longer made, they show up on eBay for about $25 every now and then. This boat is inflation proof! Here are the box pictures, which I beleive by build log law, must be shown about now: This kit is designed to be double-planked with wide pre-shaped limewood first layer planking and "walnut" veneer second layer planking (my kit's 2nd layer strips were a dark red-brown wood with giant pores like oak end grain). The instructions said that if you prefer, you could buy some 1.5mm x 5mm walnut strips instead. Of course the nice pictures of this boat on the box and in the catalog showed it as single planked with good walnut. I thought it would look wierd in an open boat if the backside of the planks didn't match the outside, so I ordered some walnut planking from Model Expo. Besides looking better, I figured that it would be twice as easy to build this way since it would only be one layer! My logic could have been wrong about that... So here is where I am in the build now. The hull is about ready to receive a finish and the detail parts made. I've taken pictures with the boat sitting on a really nice maple board because anything would look better than it really is while sitting on it! I'll add posts to try to discuss some of the challenges and little triumphs I encountered along the way until I get caught up to the current build activity. I am to slow as Popeye is to fast, so if I can stay ahead of my posts in real life, I hopefuly will be able to avoid long delays between posts. Starting this log should also put a fire under my ...


- 515 replies
-
- 5
-
-
- artesania latina
- whaleboat
- (and 1 more)
-
 All, I am posting this topic here as well as in my build log for the Kate Cory: A question all: The Kate Cory has a port-side fore whaleboat. As with all the whaleboats, there are two davits to hoist the boat up and out of the water or to lower it down. The stern davit for this whaleboat is inboard of the bulwark, like all the rest. The forward davit for this whaleboat is on the outside of the bulwark, actually in a location intermingled with the forward shrouds and between chainplates. I am ok with the location. What is not clear to me from the plans or instructions is the method by which this davit is attached to the outer hull of the ship. Ideas anyone? Images? I would imagine not only does it have to be attached firmly but also maybe to swivel? Maybe not? Maybe it's rigid? All help on this one greatly appreciated. Thanks, ~john
 -
 this my frist at the build that iam going to been doing so hope all goes well for me iam just going to take all the time i can to get it right if u see something that u can help with ples do i will be looking for help as i go here is a pic of the boat that iam going to do