jhearl Posted March 29, 2015 Share #1 Posted March 29, 2015 I'm wondering how folks use the tilting table on their Byrnes saw. Years ago, when I bought my Preac, I bought the tilting table accessory. I think I tried it out once but never wound up using it for a project. About the only thing I could think of to use it for was hatch coamings, which often have a bevel on the outside. But I wound up just doing them on the disk sander. There is something I could use a tilting saw blade for on a model. The bulwarks on a particular ship I'm building are made up of pieces shaped like a parallelogram in cross section. Like this: But I don't see any way to do that with a tilting table. It seems to me you can only make an angle cut on one edge. Of course, you could make the cut on one edge, then turn the stock around to cut the other edge, but with small stock, that would seem pretty much impossible and dangerous to me - I don't see how you could hold the stock for the second cut. (I'm talking about stock that's maybe 3/16" (4.7mm) wide). But maybe I'm missing something since I don't own the Jim saw or the tilting table. If you own this accessory, have you ever used it for a real project and, if so, what did you use it for? Thanks - John Quote http://modelboatyard.com Recently Completed: Chesapeake Bay Buyboat - F.D. Crockett Link to comment Share on other sites More sharing options...
druxey Posted March 29, 2015 Share #2 Posted March 29, 2015 It's perfectly possible. Cut sheet stock to thickness first, then add the tilting table and cut strips off the sheet. Ta da! GLakie and mtaylor 2 Quote Be sure to sign up for an epic Nelson/Trafalgar project if you would like to see it made into a TV series http://trafalgar.tv Link to comment Share on other sites More sharing options...
jhearl Posted March 30, 2015 Author Share #3 Posted March 30, 2015 OK - this is where I get confused. Let's say I have the tilting table to the right of the saw blade. The table tilts up to allow the stock to be sawn at an angle. It would seem to me (and this was my experience with the Preac) that the left edge of the stock touches the saw table (not the tilting table) where the saw blade and tilting table come together. (It seems to me that the left edge of the tilting table must almost touch the saw blade.) So you can make that first cut at an angle, no problem. But how, after that, can you move the stock any more to the left (down) to allow you to cut off a strip? The main saw table is in the way. As I say, I must be missing something with regards to how the table should be used. I've searched around on the net looking for a video or even photos of someone actually using the table but haven't found anything so far. Cheers - John Quote http://modelboatyard.com Recently Completed: Chesapeake Bay Buyboat - F.D. Crockett Link to comment Share on other sites More sharing options...
RichardG Posted March 30, 2015 Share #4 Posted March 30, 2015 Could you not cut a strip to the width between the red lines without the tilt. Then tilt the table, cut one side, turn over the strip, and cut the other side. Richard. GLakie, dgbot and mtaylor 3 Quote Richard Current Build: Early 19th Century US Revenue Cutter (Artesania Latina "Dallas" - messed about) Completed Build: Yakatabune - Japanese - Woody Joe mini Member: Nautical Research Guild & Midwest Model Shipwrights Link to comment Share on other sites More sharing options...
jhearl Posted March 30, 2015 Author Share #5 Posted March 30, 2015 (edited) Here's my simplistic representation of the way I think the tilting table is set up: Again, I may be misunderstanding the setup or its proper use since I don't own one. If the illustration is accurate, then I can't see any way to move the stock down the tilting table to make a second cut. The saw table is in the way. Moreover, if you decided to lower the tilting table to make a narrow strip (or start with a square strip as suggested above), then raise the table again for the second angle cut, it would be difficult, impossible, or extremely dangerous to try to hold the strip in place as you make the cut. Edited March 30, 2015 by jhearl Quote http://modelboatyard.com Recently Completed: Chesapeake Bay Buyboat - F.D. Crockett Link to comment Share on other sites More sharing options...
Ulises Victoria Posted March 30, 2015 Share #6 Posted March 30, 2015 Instead of trying to do that cut using the tilting table, why not do it without it and just lying the wood flat on the saw table at the angle you want? I'm not sure I understand your case and I hope I'm making sense here. Quote There aren't but two options: do it FAST, or do it RIGHT. Current Project Build Log: Soleil Royal in 1/72. Kit by Artesania Latina. Last finished projects: Royal Ship Vasa 1628; French Vessel Royal Louis 1780. 1/90 Scale by Mamoli. 120 Cannons Future projects already in my stash: Panart: San Felipe 1/75; OcCre: Santísima Trinidad 1/90; Wish List: 1/64 Amati Victory, HMS Enterprise in 1/48 by CAF models. So much to build, so little time! Link to comment Share on other sites More sharing options...
RichardG Posted March 30, 2015 Share #7 Posted March 30, 2015 I would assume you'd have a sled of some sort to hold the strip down and more importantly keep your fingers out of the way. I always find power saws scary buggers! Richard. dgbot 1 Quote Richard Current Build: Early 19th Century US Revenue Cutter (Artesania Latina "Dallas" - messed about) Completed Build: Yakatabune - Japanese - Woody Joe mini Member: Nautical Research Guild & Midwest Model Shipwrights Link to comment Share on other sites More sharing options...
jhearl Posted March 30, 2015 Author Share #8 Posted March 30, 2015 I probably haven't been clear. The illustration with the parallelogram is a cross section of a long strip. In other words, it's a piece that's, let's say 24 inches long but if you looked at either end of the piece, it would look like a parallelogram. Here's a drawing of the bulwark (again, in cross-section). In the image above, it's as if you're looking from the bow aft so the outboard side of the bulwark is to the left. I don't have the exact dimensions in front of me, but those bulwark pieces at scale are probably 3/16" or 1/4" wide. I can, of course, cut these on my full-size table saw with its tilting blade although there's a good bit of waste, but I was wondering if I am just misunderstanding how the tilting table is set up and used. Quote http://modelboatyard.com Recently Completed: Chesapeake Bay Buyboat - F.D. Crockett Link to comment Share on other sites More sharing options...
Q A's Revenge Posted March 30, 2015 Share #9 Posted March 30, 2015 I think this is perhaps where the design falls down? With a fall size saw with a tilting blade you could just keep cuting off lozenge shapes from a wide board. Not sure how you'd do that with this design? Quote Link to comment Share on other sites More sharing options...
jhearl Posted March 30, 2015 Author Share #10 Posted March 30, 2015 That's my thinking as well but, as I say, perhaps I am misunderstanding how the table is to be set up. It also takes me back to my original question - is there any real use for this accessory? Like I say, the only thing I've come up with so far is making the bevels on hatch coamings. Quote http://modelboatyard.com Recently Completed: Chesapeake Bay Buyboat - F.D. Crockett Link to comment Share on other sites More sharing options...
Q A's Revenge Posted March 30, 2015 Share #11 Posted March 30, 2015 I think you're understanding is correct. It appears to be of limited use. Quote Link to comment Share on other sites More sharing options...
GLakie Posted March 30, 2015 Share #12 Posted March 30, 2015 (edited) The tilt table has a fence and miter-slot, does it not? Just cut it to width, like Richard suggested, then with the tilt, using the fence and a push-stick, cut one angle, then flip it and slice the other angle. Edited March 30, 2015 by GLakie Quote GEORGE Don't be bound by the limits of what you already know, be unlimited by what you are willing to learn. Member of the Nautical Research Guild Link to comment Share on other sites More sharing options...
UpstateNY Posted March 30, 2015 Share #13 Posted March 30, 2015 Interesting discussion as this saw is on my ever increasing wish list of tools! So I just looked at the actual image of the angled table on the Byrnes website and my 2c from the way the table appears is you would have to do sequential cuts, dropping the table after you did the miter cut to cut the stock to the final length before then applying the finishing angle cut to the other end of the piece if this was needed Probably doable for most cases but certainly more work than on a table with the capability to angle the blade. Hopefully someone actually with the angled table option can comment how it works in practice and what I am missing perhaps. I believe the Proxxon saw does allow the blade to be angled. George... from the Byrnes image, the tilting table does indeed show a slot on the tiling part of the table. I do not see how a fence could be used however, but I am probably misunderstanding the intent of your question here. Cheers, Nigel. Quote Current Build Logs: H.M.S. Triton Cross Section, USF Confederacy Model Shipways Completed Log: Red Dragon Artesania Latina Gallery: Red Dragon: Artesania Latina Member: Nautical Research Guild Link to comment Share on other sites More sharing options...
GLakie Posted March 30, 2015 Share #14 Posted March 30, 2015 There's a You Tube video that shows how to make an angle adjuster for the tilt, but also shows some good images of the tilt table. They show the miter track and fence. The tilt table itself mounts to the saws fence for adjusting how much of the corner you want to slice off. Like for a warships waterway. In this case you would want to slide the unit as close to the blade as you can, with the corner of the piece to be cut just touching the saws table-bed. The fence on the tilt probably won't be of much use here, but the miter gauge with extension, and a push stick would. But like Richard and I pointed out, cut the piece to width first, THEN use the table for the angle on each side. Hope that helps some. UpstateNY 1 Quote GEORGE Don't be bound by the limits of what you already know, be unlimited by what you are willing to learn. Member of the Nautical Research Guild Link to comment Share on other sites More sharing options...
UpstateNY Posted March 30, 2015 Share #15 Posted March 30, 2015 Thanks George. Didn't see before that the tilt table was actually attached to the fence. Makes perfect sense now. Cheers, Nigel. GLakie 1 Quote Current Build Logs: H.M.S. Triton Cross Section, USF Confederacy Model Shipways Completed Log: Red Dragon Artesania Latina Gallery: Red Dragon: Artesania Latina Member: Nautical Research Guild Link to comment Share on other sites More sharing options...
dgbot Posted March 31, 2015 Share #16 Posted March 31, 2015 This quandary has come up before. Kurt talked with Jim and found the easiest and safest way is to tilt the table saw so that the fence is flat to you. David B UpstateNY and GLakie 2 Quote Work in progress USS Maine in cardstock.http://modelshipworld.com/index.php/topic/7446-uss-maine-by-dgbot-hmv-card/#entry220003 Completed Blockade runner Teazer http://modelshipworld.com/index.php/topic/6063-blockade-runner-teazer-by-dgbot-card-stock/#entry175967 Completed The Monitor Lehigh http://modelshipworld.com/index.php/topic/6920-the-monitor-lehigh-by-dgbot-card-model/#entry203680 Completed Kingston Class MCVD http://modelshipworld.com/index.php/forum/10-kit-build-logs-in-progress/ Link to comment Share on other sites More sharing options...
Q A's Revenge Posted March 31, 2015 Share #17 Posted March 31, 2015 The Proxxon does indeed have the ability to angle the blade like a full size table saw Nigel. Cutting lots of angled strips would be a breeze with this saw. GLakie, UpstateNY and sonicmcdude 3 Quote Link to comment Share on other sites More sharing options...
mikeaidanh Posted March 31, 2015 Share #18 Posted March 31, 2015 I love my tilting table. Works fine once you have engaged the little grey cells. Mike. GLakie 1 Quote Previous Build: LA gun deck cross section. Previous Build: Lancia Armata. Panart 1:16 Previous Build: HMS Pickle. Jotika Build. HMS Triton cross section 1:32. Shelved awaiting improved skills: Chuck"s Cheerful. Current build. Tender Avos. HM cutter Alert. : Link to comment Share on other sites More sharing options...
gwish Posted March 31, 2015 Share #19 Posted March 31, 2015 On my Byrnes saw, I use a zero clearance insert when using the tilting table. I helps with the thinner stock. Gwyl justsayrow and GLakie 2 Quote Link to comment Share on other sites More sharing options...
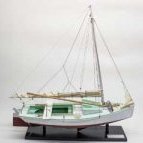
jimbyr Posted March 31, 2015 Share #20 Posted March 31, 2015 Hey, not trying to pick on the competition but isn't the little red mark that says the blade is at 90 degrees off about 2 degrees on that Proxxon saw? Nice bull too Jim mikeaidanh, GLakie and CAd My Fingers 3 Quote Link to comment Share on other sites More sharing options...
Q A's Revenge Posted April 1, 2015 Share #21 Posted April 1, 2015 Hey, not trying to pick on the competition but isn't the little red mark that says the blade is at 90 degrees off about 2 degrees on that Proxxon saw? Nice bull too Jim If it's like my Bandsaw then it's possible to beyond the "Zero" point. Easier to see on this machine but the pointer is also beyond zero and you can clearly see the angle of the blade. As with a full size Table Saw though vertical should always be checked with a square. Nice Digital fence on this one! cristikc and nobotch 2 Quote Link to comment Share on other sites More sharing options...
keelhauled Posted June 20, 2015 Share #22 Posted June 20, 2015 Does anyone have video of using the tilting table? I'm wanting to buy the saw, but wondering about how the tilt table works. It's easy to see with the proxxon its the same as the full size table saws that I've used in the past. GLakie 1 Quote Currently building the Cutty Sark http://modelshipworld.com/index.php?/topic/1000-cutty-sark-by-keelhauled-mantua-kit-bashed-first-wooden-ship-build/ Link to comment Share on other sites More sharing options...
toonewtoknow Posted October 10, 2015 Share #23 Posted October 10, 2015 (edited) REVIEW OF THE BYRNES TILT TABLE Hi all! I do own the tilt table. I see this is a bit dated but I will put in my 4 cents. First I want to be clear, the Byrnes saw is a real nice tool and I am not bashing it. If all you need to do is cut with the blade at 90* it is a dream. But.....many of us need to cut bevels, at least I do. Most of my cuts are bevels. I do not build ships, I make small craft items many octagonal or hexagonal shapes. So real clean mitre joints are required and if the bevels are not exact then the last piece will not fit and it will look like a bad apple. I needed a small saw and when I searched online only a few appeared and the Byrnes saw was the best looking and also the most expensive. I am not rich but I am too tired of bying import stuff that does not work so I sprang for the $800 for the saw and some accessories. Before I purcahsed it naturally I called and spoke to Donna who is very pleasant and knows the product very well. I explained to her that I needed to cut mainly bevels on small stock giving her the exact size 24" long by 2" wide by 3/8"- 1/2" thick with a bevel on both ends and a final part 2" long but I need other lengths as well and asked if their saw could do it well. She assured me that many saw owners do it and the results are amazing. She said I needed to buy the tilt table to do it. I asked why the arbor did not tilt and she told me they were looking for precision cuts so they did not use a tilt arbor. She told me to find reviews online about the saw. I started out online to watch the reviews before I plunked down the $800. I wanted to see the tilt table in action. I looked for days and I could only find reviews of the saw but none of them had a tilt table. A few mentioned it as an add on but nowhere could I find one being used or reviewed. Being a little nervous I called and spoke to Donna again. She again reinforced that the tilt table will work. So I ordered it. I got the saw and it is a sight to see. It is truly well done. After staring with joy for a while I decided to try the tilt table. I needed 22.5* so I only had a protractor and quickly found that I needed something else to set an angle since the table had nothing on it to set the angle. My first thought would be cut a piece of wood to the desired degree using a mitre saw. I cut one, of course later figured out I could have used the protractor rip tool I bought with the saw but I failed to think about it. Having an angled wedge I proceeded to set it under the tilt table and set an angle. RIght off I found that because the tilt table is fastened to the flat table fence you have a problem setting a wedge under the table because the small end will sit on top of the fence which makes the angle skewed. It was easy enough to cut the pointed end off the wedge but if you want to use angle blocks (metal) you would need to add spacers to the block which makes it very hard to do because most angle blocks are thin making it hard to pile them up and keeping them from falling especially if you need a 22.5* angle because I already had 3 blocks under it just to get that angle. I also cut 30 + 45* angles as well. Of course you could always have blocks made without the point which would work. Since using a wedge turned out to be very poor, the angle was not precise I gave up on blocks. I went out and sprung for a digital angle gauge. Now this was better I thought. I put it on the tilt table and snugged the pivot bolts and slowly brought the table to 22.5*. When I got it I tried to tighten the bolts but it caused the angle to change. I fought with it for a while and finally was able to find a way to allow for the drift upon tighening to hit my mark. A real pain and certainly not going to work if you change setups often like I do. I also find that when using the tilt table the angle will drift during cutting. I really muscled it tight but I know this will eventually stretch the threads and finally strip them so the drifting is also an issue that is not well thought out. The tilt table is soo heavy and there are only two small allen heads that lock it down. The pivot surfaces are both very smooth only brute force will hold them so if you need to cut many parts at a time be ready for the table to drift. Remember only a 1/2 degree drift very slight will cause poor fitment when you are making 16 cuts on 8 parts. Add the error together and the final result is very poor fitment. Now that I have the correct angle set it was time to cut a bevel. I took my 24" long stock and found that there is no way to cut it. Because of the design this task will never work. It was clear you first need to cut individual small pieces and then since you can only cut one edge and then have to spin the part around to cut the other end. This is a pain for me because its so difficult to set the angle I used my band saw to cut the long stock into small parts so they would work on the tilt table. This is nuts with a shiny Byrnes saw I should not have to use another saw but if you need many parts like I do it was much easier to use two saws. I use different length parts so it was easier to leave the tilt table setup and use the band saw too. For the money this saw costs I was becoming upset of the outcome so far. Just to note I design my own items so much of my work is prototype work which means I can't run a hundred parts at once, if I could I could cut the parts on the flat table then setup the tilt but my need is both, production and prototype so two saws are needed because of the flaws with the tilt table design. The next problem I encountered when cutting smaller parts 2" or less I found that the slot for the mitre gauge on the tilt table allows the very thin edge of the beveled end to drop into the slot. This causes uneven cuts. If the table was flat this would be far less of an issue but because the table is angled up, you are fighting gravity trying to hold the part uphill against the fence but it is also very dangerous because your hands are an inch from the blade and the guard is not used on the tilt table. I finally cut a strip of wood to fill that slot and it seems to help. By this time I was very upset because as much as I wanted this saw to work for me it will not. A saw with a tilting arbor is a must. I contacted Jim a few times and the first time I was told they knew nothing of these issues and I was the first to complain about them. As I read forums I found the issues that I have many people have. I let Jim know I read the forums and others have the same issues. He then told me to build a table on an angle to tilt the saw then the tilt table would be flat and it would be better. I looked into doing that and that too is flawed. I am right handed so I would need to tilt the saw to the right so the tilt table would be on the right of the blade but because of the vac port you have to tilt it to the left which will not work for me. Conclusion.....This tilt table does not work for me and I have tried my best to make it work. For the price of this setup I should not have to work so hard to make it cut, it's a saw for goodness sake. I feel I was misled before I bought it since I told them exactly what I needed it to do even giving them the dimension of the wood I was using and what a finished part would need to be. I also told them I needed quantity of parts and time was a factor. I was told it would do it. My suggestion if you really need to cut bevels more than one a month look elsewhere because you too will have the same issues I have. Many others have them too. If the saw was not sooo costly it might be easier to deal with but for this price it should be able to do the job, for me it falls way short. Someone should do a video review of the tilt table. That would be very helpful for those that are thinking of buying a saw like this. It certainly would have made me keep looking for another saw that was better suited for my needs. Edited October 10, 2015 by toonewtoknow FAA, nobotch, Mike Y and 1 other 4 Quote Link to comment Share on other sites More sharing options...
mikeaidanh Posted October 11, 2015 Share #24 Posted October 11, 2015 You could a video review showing your problem with the tilt table. You could also take up model ship building as, after all, you have the right saw for it. As a further thought if you are repeatedly cutting beveled angles why not make you own jigs? Mike. mtaylor and Canute 2 Quote Previous Build: LA gun deck cross section. Previous Build: Lancia Armata. Panart 1:16 Previous Build: HMS Pickle. Jotika Build. HMS Triton cross section 1:32. Shelved awaiting improved skills: Chuck"s Cheerful. Current build. Tender Avos. HM cutter Alert. : Link to comment Share on other sites More sharing options...
GLakie Posted October 11, 2015 Share #25 Posted October 11, 2015 Didn't find any videos of the tilt-table but the solution involves making a cradle for both the tilt-table, and the saw itself, and tilting the saw up making the tilt-table level in the process. I own the saw, among other Byrnes tools, but don't have the tilt-table yet. I will be getting it down the road though, and at that point will play around with a design that will work as a home-made jig for it. Tilting the whole saw isn't really a convenient way of using it but it's a whole lot safer. The whole reason this saw doesn't have a tilt-arbor is because you'll lose something in the 90 degree accuracy of it by adjusting it back and forth. By as much as 2-4 degrees... dgbot, Canute, mikeaidanh and 1 other 4 Quote GEORGE Don't be bound by the limits of what you already know, be unlimited by what you are willing to learn. Member of the Nautical Research Guild Link to comment Share on other sites More sharing options...

Recommended Posts
Join the conversation
You can post now and register later. If you have an account, sign in now to post with your account.