Blighty Posted January 25, 2017 Author Share #61 Posted January 25, 2017 That will look cute Ken, added to my 'todo' list! Canute, Nirvana, Elijah and 2 others 5 Quote Link to comment Share on other sites More sharing options...
Blighty Posted January 25, 2017 Author Share #62 Posted January 25, 2017 Ken, I've been practicing different 'chalking' techniques on some scraps of wood, I think I found an easy method, the secret is subtlety of color use I think. I settled for this:-) In fact, I am so pleased with the results, I'm going to redo the hull. The devil is in the detail!!! Great tip Ken. John Allen, mtaylor, Canute and 6 others 9 Quote Link to comment Share on other sites More sharing options...
Canute Posted January 25, 2017 Share #63 Posted January 25, 2017 Len, take a look at Pan Pastels. Here is one site, aimed at modelers versus the fine arts folks: http://modelingcolors.com/ They stock 2 weathering kits for rust & earth and for greys, grime & soot. I think the armor folks discovered them, but many different areas use them now. The site has a how-to video and basic use instructions. Hunt around on the web for best prices. I am just a satisfied user of this product; no financial interest in this company. Elijah, Nirvana and mtaylor 3 Quote Ken Started: MS Bounty Longboat, On Hold: Heinkel USS Choctaw paper Down the road: Shipyard HMC Alert 1/96 paper, Mamoli Constitution Cross, MS USN Picket Boat #1 Scratchbuild: Echo Cross Section Member Nautical Research Guild Link to comment Share on other sites More sharing options...
Cathead Posted January 25, 2017 Share #64 Posted January 25, 2017 As another method, I'm quite fond of using cotton swabs (Q-tips) for applying gentle color using pastels. Rubbing the swab's head on the pastel and then gently on the model gives a really nice gentle wash of color. It won't necessarily create thin streaks, but it's great for applying tone in a variety of settings. Nirvana, mtaylor, Canute and 1 other 4 Quote Eric Current builds: scratchbuilt Missouri River steamboat Peerless (1893); 1:1 scale timber-framed outdoor kitchen Nautical builds (kits): USS Cairo; NRG capstan project; NRG half-hull; Viking longship; US revenue cutter; 18th century longboat; Bounty launch Missouri River craft (scratchbuilt): 1853 Missouri River steamboat Arabia; 1865 steamboat Bertrand; Lewis & Clark barge; keelboat; 1876 steamboat Far West Link to comment Share on other sites More sharing options...
Blighty Posted January 25, 2017 Author Share #65 Posted January 25, 2017 Cathead, Canute, thx for info on the pastels. I went to the local Dollar Store and picked up some OIL PASTELS to try out. These were similar to wax crayons and they didn't go down on the model very well at all. I had not looked at the pics Ken sent prior to picking these 'crayons' up, or I wouldn't have bothered. I'll go down the model shop tomorrow an get some good soft colors, looks a very effective way of adding detail. I'm looking forward to trying that method out. Thx for the info. I'm close to gluing all the parts down to the deck, I just need to detail the deck, here are a couple of picks of latest status, getting close to sheet 2!!!! I've rubbed the deck paint off at the stair rail to represent heavy ware, I will clean up the scratches soon. Thx for checking out my log. GemmaJF, Elijah, mtaylor and 3 others 6 Quote Link to comment Share on other sites More sharing options...
Jack12477 Posted January 25, 2017 Share #66 Posted January 25, 2017 You could also stop by a good art store (as in artist supply) and pick up some pastel chalk in various tones. You can apply with Q-tip as above or scrape them with a razor blade to create a fine dust - then using a clean dry artist paint brush apply them when you want. The chalk dust gives it a nice texture as well as color. Nirvana, mtaylor, Elijah and 3 others 6 Quote Jack "No one is as smart as all of us" - Is ón cheann a thagann an cheird The craft comes from the head --------------------------------------------- Current build: US Constellation Non-ship builds: USCG UH-65A Dolphin M16 Multi-gun motor carriage diorama M4A3 Sherman Tanks dioramas 1936-1939 Mercedes Benz 540K 1934 Rolls-Royce Phantom II JSDF Light Armor Vehicle Figures: The Last Bridge: Raider Reaper Edge of Universe: Ianis The Last Bridge: Vadim with cart Completed build log(s): 18th Century Longboat , Marie Jeanne, Willie L Bennett 1888 50 ft Gaff-rigged Ice Yacht Scratch Build The Sullivans (DD 537) Liberty Ship SS John W Brown USS England (DE 635), Artesania Latina Titanic Lifeboat Gallery: Swift , Armed Virginia Sloop, Santisima Trinidad Captain's Launch , 18th Century Longboat , Marie Jeanne Other: Rhinebeck Aerodrome Tour Link to comment Share on other sites More sharing options...
Blighty Posted January 25, 2017 Author Share #67 Posted January 25, 2017 Thx Jack, to be honest, that's about the only type of pastel I've ever tried and that was a long, long time ago. I'll call in model and art shop tomorrow. I didn't realize that oil pastel was different to any other pastel. I'll check it out tomorrow nd get some good brand name pastels. I'm excited to try it out. Does anyone know what colors were used on the inside walls? I'm assuming white, any advise would be greatly appreciated. Len Nirvana, Canute, mtaylor and 3 others 6 Quote Link to comment Share on other sites More sharing options...
Cathead Posted January 25, 2017 Share #68 Posted January 25, 2017 Ooh, yeah, oil pastels are NOT a good idea. Sorry, it didn't even occur to me to warn you about that! I've also used a finger to apply pastel dust; something in the skin oil seems to do a good job of helping the powder stick to wood. Elijah, mtaylor, Nirvana and 2 others 5 Quote Eric Current builds: scratchbuilt Missouri River steamboat Peerless (1893); 1:1 scale timber-framed outdoor kitchen Nautical builds (kits): USS Cairo; NRG capstan project; NRG half-hull; Viking longship; US revenue cutter; 18th century longboat; Bounty launch Missouri River craft (scratchbuilt): 1853 Missouri River steamboat Arabia; 1865 steamboat Bertrand; Lewis & Clark barge; keelboat; 1876 steamboat Far West Link to comment Share on other sites More sharing options...
Blighty Posted January 25, 2017 Author Share #69 Posted January 25, 2017 No problem Cathead, the oil pastels were the only ones they had so that threw me also. I'll pick some good ones up tomorrow, I think 'm favouring Jack's suggestion, chalk sticks. Got any advise on interior wall color???????? mtaylor and Elijah 2 Quote Link to comment Share on other sites More sharing options...
Jack12477 Posted January 25, 2017 Share #70 Posted January 25, 2017 Here's a technique you can try - one I used to use on my N-scale RR structures - make a jar of "wet" water (i.e 8 oz of tap water with 1-2 drops of liquid dish detergent added, example, Dawn brand) - paint a scrap of the wood you are using for the model the same color as the model - let dry a day or two. Using a paint brush apply some pastel dust to an area, move it around with the brush till you get it where you want it, then using an eyedropper take some "wet" water and drop a few drops onto the dust, let it run down the wood. When satisfied, stop. Let dry completely, then spray with an artist quality fixative (acrylic usually) to set it permanently. It will look like rain over time has washed, streaked and/or faded the wood. The water will flow more naturally than you can do painting it on. You only need a drop or two of wet water - don't get too heavy handed with it. It's called "wet" water because the detergent breaks down the surface tension of the water molecules and allows the water to flow more freely and evenly. You can also do this to a 50-50 mixture of white glue and water plus a couple drops of detergent. Elijah and mtaylor 2 Quote Jack "No one is as smart as all of us" - Is ón cheann a thagann an cheird The craft comes from the head --------------------------------------------- Current build: US Constellation Non-ship builds: USCG UH-65A Dolphin M16 Multi-gun motor carriage diorama M4A3 Sherman Tanks dioramas 1936-1939 Mercedes Benz 540K 1934 Rolls-Royce Phantom II JSDF Light Armor Vehicle Figures: The Last Bridge: Raider Reaper Edge of Universe: Ianis The Last Bridge: Vadim with cart Completed build log(s): 18th Century Longboat , Marie Jeanne, Willie L Bennett 1888 50 ft Gaff-rigged Ice Yacht Scratch Build The Sullivans (DD 537) Liberty Ship SS John W Brown USS England (DE 635), Artesania Latina Titanic Lifeboat Gallery: Swift , Armed Virginia Sloop, Santisima Trinidad Captain's Launch , 18th Century Longboat , Marie Jeanne Other: Rhinebeck Aerodrome Tour Link to comment Share on other sites More sharing options...
Canute Posted January 25, 2017 Share #71 Posted January 25, 2017 (edited) The Pan Pastels aren't oils. You can wipe them off if the color doesn't get pushed into the wood too deeply. I remember two sets of chalks, one in greys, the other in browns. We scraped or sanded the sticks get quantities of pastel powder to work with. We should start a new topic for this and not highjack Len's log. Edited January 26, 2017 by Canute Elijah, mtaylor and Jack12477 3 Quote Ken Started: MS Bounty Longboat, On Hold: Heinkel USS Choctaw paper Down the road: Shipyard HMC Alert 1/96 paper, Mamoli Constitution Cross, MS USN Picket Boat #1 Scratchbuild: Echo Cross Section Member Nautical Research Guild Link to comment Share on other sites More sharing options...
Cathead Posted January 25, 2017 Share #72 Posted January 25, 2017 PM Kurt to ask about the interior walls: he's the real Chaperon expert around here. Personally I'd say white is a good bet, possibly unpainted. Jack12477, mtaylor and Elijah 3 Quote Eric Current builds: scratchbuilt Missouri River steamboat Peerless (1893); 1:1 scale timber-framed outdoor kitchen Nautical builds (kits): USS Cairo; NRG capstan project; NRG half-hull; Viking longship; US revenue cutter; 18th century longboat; Bounty launch Missouri River craft (scratchbuilt): 1853 Missouri River steamboat Arabia; 1865 steamboat Bertrand; Lewis & Clark barge; keelboat; 1876 steamboat Far West Link to comment Share on other sites More sharing options...
kurtvd19 Posted January 26, 2017 Share #73 Posted January 26, 2017 Cathead is right on going with white. Whitewash was cheap and plentiful and helped with vision in cabins with small windows. By far the most common colors on riverboats were white and red due to the cost and availability of other colors in that era. Some boats had brown or green decks, but few had anything other than white on the walls. Kurt mtaylor, Elijah, Cathead and 2 others 5 Quote Kurt Van Dahm Director NAUTICAL RESEARCH GUILD www.thenrg.org SAY NO TO PIRACY. SUPPORT ORIGINAL IDEAS AND MANUFACTURERS CLUBS Nautical Research & Model Ship Society of Chicago Midwest Model Shipwrights North Shore Deadeyes The Society of Model Shipwrights Butch O'Hare - IPMS Link to comment Share on other sites More sharing options...
Blighty Posted January 26, 2017 Author Share #74 Posted January 26, 2017 I'll play with these techniques tomorrow, surely one of them will suit my heavy hand. Thx all for the info, will be fun toying with these proposals. I have no problem hosting the discussion on pastels on this log, trouble is I have nothing to contribute...............yet!!! Canute, Elijah, Jack12477 and 1 other 4 Quote Link to comment Share on other sites More sharing options...
Blighty Posted January 26, 2017 Author Share #75 Posted January 26, 2017 Thx Kurt, white it is, I also will be taking your advise on the red oxide as the only red, (paddle wheel), etc. I can't see skippers or owners going out to buy different more expensive paints on work boats. Jack12477, Canute, Elijah and 1 other 4 Quote Link to comment Share on other sites More sharing options...
Blighty Posted January 26, 2017 Author Share #76 Posted January 26, 2017 Hi, I was just checking fits for the next stage of the build and I came across an issue with the location of the smoke stacks contacting the longitudinal rail that spans the boiler room. I think the only way round this is to cut away the contact area of the stack to clear the rail. This issue must have come up on all builds unless I have some thing completely wrong, Kurt, did you come across this? Comments very welcome. mtaylor, Elijah and Jack12477 3 Quote Link to comment Share on other sites More sharing options...
leclaire Posted January 26, 2017 Share #77 Posted January 26, 2017 Cutting away a portion of the stack to fit around the rail is the solution I used on my Chaperon. Much easier than cutting the rail itself and figuring out how to support the pieces left. I am enjoying your build. Keep the pictures and good ideas coming. Bob Canute, Elijah, mtaylor and 1 other 4 Quote Link to comment Share on other sites More sharing options...
Blighty Posted January 26, 2017 Author Share #78 Posted January 26, 2017 Hi Bob, I agree with you, easier is better, thanks for your comments, I hope you continue to stay on board, A pic of your Chaperon would nice!!! Len. I'm off to get some pastels now..... Elijah, mtaylor and Canute 3 Quote Link to comment Share on other sites More sharing options...
kurtvd19 Posted January 26, 2017 Share #79 Posted January 26, 2017 Here is what I did. The plans were updated after I contacted the kit designer to show the problem - have no idea of how many sets were initially printed but eventually the correction will show up in kits sold. Kurt Canute, Elijah, Cathead and 2 others 5 Quote Kurt Van Dahm Director NAUTICAL RESEARCH GUILD www.thenrg.org SAY NO TO PIRACY. SUPPORT ORIGINAL IDEAS AND MANUFACTURERS CLUBS Nautical Research & Model Ship Society of Chicago Midwest Model Shipwrights North Shore Deadeyes The Society of Model Shipwrights Butch O'Hare - IPMS Link to comment Share on other sites More sharing options...
leclaire Posted January 26, 2017 Share #80 Posted January 26, 2017 Kurt, Now that is even easier. I assume you offsett the post like that to give the proper clearance. Bob mtaylor, Elijah and Canute 3 Quote Link to comment Share on other sites More sharing options...
kurtvd19 Posted January 26, 2017 Share #81 Posted January 26, 2017 I explained it in the magazine article - copied below; Parts 39A P/S (Port/Starboard) are to be installed at this point. These parts are supports for the boiler deck and they match the shear of the decks so their orientation is important. Also, these parts need to be cut shorter than they come out of the laser cut sheet as they interfere with the smoke stacks unless they are cut short at the forward end. See Photo #26 that shows part 39A on the port side installed as the part comes from the kit. Photo #27 shows part 39A on the port side interfering with the smoke stack passing through the hole in the boiler deck. Part 39A must be cut short as shown in Photo #28. I discovered the interference when I first laid the boiler deck onto the model to check the fit of the boiler deck and the parts were painted and glued in place. Photo #12 in the instruction manual does show the correct shortening and assembly of parts 39A but the instruction do not call this out. The fix was easy to do once I figured out what was needed. I spoke with Bob Crane, the kit designer, and the instructions for this assembly will be corrected in the next printing. The 3 photos accompanied the text. The middle photo shows the deck piece moved towards the centerline of the boat. Kurt mtaylor, Elijah, Cathead and 1 other 4 Quote Kurt Van Dahm Director NAUTICAL RESEARCH GUILD www.thenrg.org SAY NO TO PIRACY. SUPPORT ORIGINAL IDEAS AND MANUFACTURERS CLUBS Nautical Research & Model Ship Society of Chicago Midwest Model Shipwrights North Shore Deadeyes The Society of Model Shipwrights Butch O'Hare - IPMS Link to comment Share on other sites More sharing options...
Blighty Posted January 26, 2017 Author Share #82 Posted January 26, 2017 My mod is a variation on Kurt's fix. I clipped 39A into position and used that as a template to mark up the relocated vertical pole at the front. Drilled new holes and glued the posts to 39 only, not to the deck as I do not need that part asm'd at this time. I then plugged the original hole. The front portion of the 39A rail will be removed after I have glued into the deck the posts as I can use the rail for correct height location. See pics below. Cathead, Ryland Craze, GemmaJF and 3 others 6 Quote Link to comment Share on other sites More sharing options...
Blighty Posted January 26, 2017 Author Share #83 Posted January 26, 2017 Just about finished the stack clearance issue, looks ok. I also added a division wall at the back of the boiler. I imagined this would be a useful, REMOVABLE option dependant on cargo carrying requirements. Note, the division wall is not the full width of the boiler house, it is meant to protect the cargo from the bulk of coal dust, heat etc. but maximizing the opening into the forward compartment as well as offering a solid backup for 'stuff' to be stacked against. Could this be a real world option, if not I'll likely remove it, but if I was the boat operator I would want to maximize flexibility of cargo capacity/security. I will not paint this panel, I'll give it the vinegar treatment, which incidently I did as a top coat on the deck, I think it stained down well. jct, Elijah, mtaylor and 2 others 5 Quote Link to comment Share on other sites More sharing options...
Cathead Posted January 27, 2017 Share #84 Posted January 27, 2017 I'm not sure about Chaperon, but a lot of boats had a water pump system behind the boiler (sometimes called the "doctor"). I guess if the plans don't show it, it maybe wasn't there, but there's not a lot of room between the boiler and that bulkhead for any kind of access. Although from a functional point of view, you can't push such a bulkhead any further aft without cutting off lateral access to the rest of the area, which is maybe why it wasn't there. Since you're customizing this build anyway, I'd say it falls under builder discretion. Kurt, how did Chaperon draw its boiler water? I don't know as much about these later boats. Was a different system in use by this time that didn't require a steam feed pump behind the boiler? mtaylor, Canute and Elijah 3 Quote Eric Current builds: scratchbuilt Missouri River steamboat Peerless (1893); 1:1 scale timber-framed outdoor kitchen Nautical builds (kits): USS Cairo; NRG capstan project; NRG half-hull; Viking longship; US revenue cutter; 18th century longboat; Bounty launch Missouri River craft (scratchbuilt): 1853 Missouri River steamboat Arabia; 1865 steamboat Bertrand; Lewis & Clark barge; keelboat; 1876 steamboat Far West Link to comment Share on other sites More sharing options...
Blighty Posted January 27, 2017 Author Share #85 Posted January 27, 2017 Hi Cathead, You 'nailed' the 2 concerns I have also. The clearance from back of boiler to rear face of the division wall at true scale is 2'6" and opening through to cargo area is 5'. Considering the plentiful manual labour available, I figured 5' was plenty wide enough for hand loading cargo. Ideally I would have liked to reduce the boiler length by an inch (4')to push the wall forward and increase the gap between the wall and the back of boiler but doing a comparison of boiler volume between Chaperon's 3 boilers and a similar ship I found 'the Evansville, which had a 2 boiler system, the volumes were the same, 500 cubic feet. Hence the reduced width of the wall to maximize opening. The other thing is, I think it looks cool, but I'm still on the fence as to whether include it or not. mtaylor, Canute, Cathead and 4 others 7 Quote Link to comment Share on other sites More sharing options...
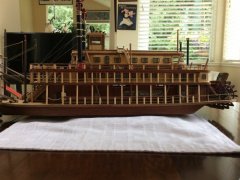
Blighty Posted January 27, 2017 Author Share #86 Posted January 27, 2017 Hi, First off, thx to all who are looking in on my log, it is very rewarding to see other modellers keeping an eye on what's going on. I've been practicing with the pastels I bought from Michael's, I was recommended the Artist's Loft brand, it's Michael's own brand so I was told. Great deal 40% off, only cost eight bucks, they work great. I'm starting to use more and more on the model but I've still got a lot of practice to get confident with them. On scrap wood I have tried all the options except the wet water technique, I need bigger pieces of scrap wood to fully check that out. .........coming soon! A fair amount of updates done since my last post;- Painted the interiors white. 95% completed the deck with touch ups, vinegar wash, sanded bare spots of wood in heavy traffic areas. Added mud line to one side of hull, repainted the detail after sanding off my first attempt. Upon reflection, I would not have painted the hull so early on in my build, I think I have learned a lot on aging/weathering a boat on other smaller parts that were easier to paint over and redo. The hull is to important a part to showcase my shortcoming. Adding chalking effect, I like it. Added the rubbing strips on both sides. That's about it. My son, Rossi46 is on his way over to check it out so I have to go and hide my beers. Sorry I was going to add some pics but my battery is flat, be loaded shortly. Len Elijah, Cathead, GemmaJF and 3 others 6 Quote Link to comment Share on other sites More sharing options...
Blighty Posted January 27, 2017 Author Share #87 Posted January 27, 2017 Latest status pics Elijah, mtaylor, Ryland Craze and 2 others 5 Quote Link to comment Share on other sites More sharing options...
Blighty Posted January 28, 2017 Author Share #88 Posted January 28, 2017 One small change today. The rear post on the frt side opening above the coal bunkers is now unsupported due to the shortening of the side support rail to clear the smoke stack. So I added a rail across the top. Final clean up in the joints and dry fit, will be gluing her up today. Elijah, mtaylor, Jack12477 and 3 others 6 Quote Link to comment Share on other sites More sharing options...
Blighty Posted January 29, 2017 Author Share #89 Posted January 29, 2017 Good morning all, Well! I'm a little frustrated with my efforts today, I have been working on the cargo and planned to make some cotton bales.So, after several material changes, several process changes, several shape and size changes I finally settled on a bale to be proud of. That took approx 10 hrs, the second bale only took 2 hours. Unfortunately, when I glued the 2 together there was an unsavory reaction and the bales melted before my very eyes. #@$*happens right? so all I have to do is find an alternate glue and if I can do that, I should be able to produce the 300 bales required in about 1 year so it might be a while before I post again. Alternatively I could fill the openings with boxes, which I decided to do. I'm not sure what's in them. . BTW, the OTHER wall is in.! Can anyone help me with a dealer who stocks 1:48 scale cotton bales, or any other stock that would be shipped on a steam boat. Thx. Len Elijah, Jack12477, mtaylor and 3 others 6 Quote Link to comment Share on other sites More sharing options...
Kishmul Posted January 29, 2017 Share #90 Posted January 29, 2017 Try taking a look at the suppliers of accessories (in 1:48 scale) for the plastic military modelling diorama scene. A quick look brings up oil barrels and much else, some nice clutter to enhance your model. (No cotton bales that I have found yet!) Ken ScottRC, Canute, Elijah and 1 other 4 Quote Link to comment Share on other sites More sharing options...

Recommended Posts
Join the conversation
You can post now and register later. If you have an account, sign in now to post with your account.