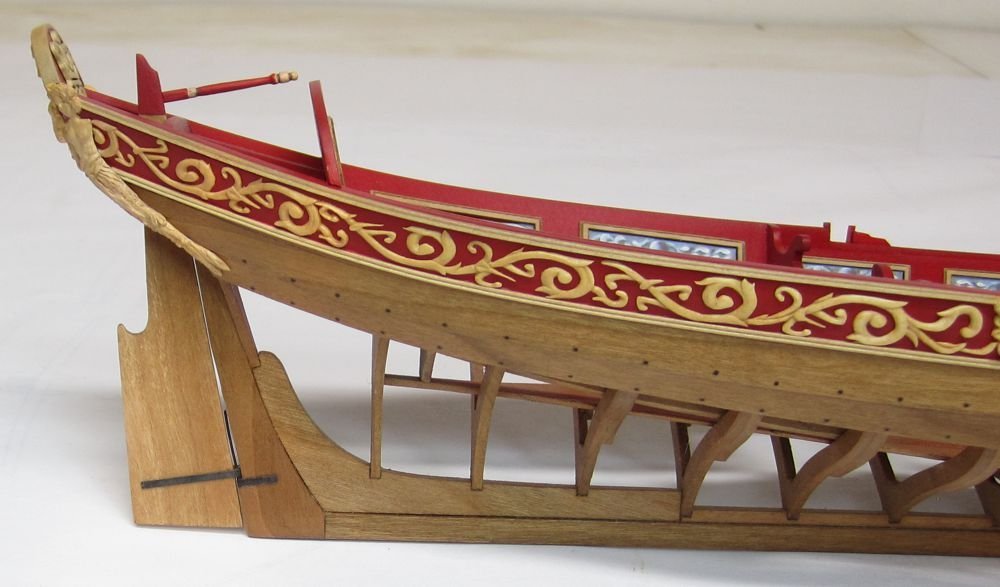
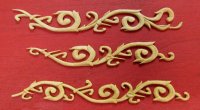
MEDDO Posted March 18, 2017 Share #1 Posted March 18, 2017 I wanted to try this for some time. I found this section of the site and decided to try my hand. I only have a crude non-variable speed dremel so will be only using scalpel blades and maybe chisels as I carve. Recently Bob (username rafine) started up a build of the same ship I am building but using the Lumberyards framing package. I saw the pieces that were included in the package and was comparing them to my resin castings. The LSS did a good job but I "may" be able to do better if I practice a bunch. Here we go... As I wait for the glue to dry I started messing around with the blank Oops, not following the grain... Decided to try a stop cut and thinning How about a railing post??? Here is the LSS Halifax resin castings... Maybe just maybe... More to come once crown is dry... Canute, mtaylor, Ryland Craze and 3 others 6 Michael Shipwrights of Ohio Current Build: ... Completed Builds: Queen Anne Barge - Syren, Pinnace - MS, Halifax 1768 - LSS, Murrelet - Pygmy, Swift 1805 - AL Link to comment Share on other sites More sharing options...
MEDDO Posted March 24, 2017 Author Share #2 Posted March 24, 2017 First attempt. Need to work on stop cuts a bit more. One thing I found is that the blades I have get dull pretty fast. Blades were super cheep so not too much a problem. Keith_W, Canute, CaptainSteve and 2 others 5 Michael Shipwrights of Ohio Current Build: ... Completed Builds: Queen Anne Barge - Syren, Pinnace - MS, Halifax 1768 - LSS, Murrelet - Pygmy, Swift 1805 - AL Link to comment Share on other sites More sharing options...
MEDDO Posted April 3, 2017 Author Share #3 Posted April 3, 2017 I have been traveling a bit recently and just realized I could take this in my checked bags so I brought it on my current trip. To the unaided eye it looks pretty good. The magnified photo shows all the warts... I didn't bring any sandpaper or files with me but I plan to try to smooth it out when I get home. Canute, Jack12477, CaptainSteve and 1 other 4 Michael Shipwrights of Ohio Current Build: ... Completed Builds: Queen Anne Barge - Syren, Pinnace - MS, Halifax 1768 - LSS, Murrelet - Pygmy, Swift 1805 - AL Link to comment Share on other sites More sharing options...
MEDDO Posted April 3, 2017 Author Share #4 Posted April 3, 2017 Sorry about the iPhone pictures but I figure this is a better use of time than watching bad television here. I see where the cuts look a bit blocky and am going to try to clean em up. CaptainSteve, Canute, mrjimmy and 2 others 5 Michael Shipwrights of Ohio Current Build: ... Completed Builds: Queen Anne Barge - Syren, Pinnace - MS, Halifax 1768 - LSS, Murrelet - Pygmy, Swift 1805 - AL Link to comment Share on other sites More sharing options...
Hubac's Historian Posted April 3, 2017 Share #5 Posted April 3, 2017 Hi Meddo, I'm not sure if you are doing this already, but one thing that I have always found helpful, with this sort of relief carving, is to trace in a center line throughout the length and all details of the carving. This gives you a reference line to carve to and makes it easier to smooth out and shape the surfaces. It should be said that this line isn't always an exact centerline; on a leafy scroll, for example, you may skew the line closer to the top of the scroll, in order to carve a more accentuated cove, on the other side of the line. Or, sometimes, the opposite would be more appropriate. Whichever you do, though, it's going to always be a constant back and forth with the blade edge to adjust to the ever changing grain direction, as you work your way through the carving's shapes. mtaylor, MEDDO, Canute and 2 others 5 We are all works in progress, all of the time. Link to comment Share on other sites More sharing options...
MEDDO Posted April 3, 2017 Author Share #6 Posted April 3, 2017 Thanks, I am going to try that on the next one. I was going to attempt the small one with a flower next. This is my first try at such a small scale and even seeing the grain is a bit tough. Maybe it's time to finally accept my fate as an aging middle aged man who needs to explore the wonders of bifocals/magnifying glasses... Canute, mtaylor and CaptainSteve 3 Michael Shipwrights of Ohio Current Build: ... Completed Builds: Queen Anne Barge - Syren, Pinnace - MS, Halifax 1768 - LSS, Murrelet - Pygmy, Swift 1805 - AL Link to comment Share on other sites More sharing options...
Hubac's Historian Posted April 3, 2017 Share #7 Posted April 3, 2017 Of course, I'm offering this advice without having done much small-scale carving myself. All of my relief carvin has been for furniture projects with a few full-figure reliefs, in my mix of experience. I can well appreciate how much more difficult it must be to follow the grain, at small scales. The upside, it seems to me, is that very little material has to be removed, in order to achieve a nice effect. The trick is removing the right material. I will say, though, that the few times I have tried to use EXACTO type blades for smallwork - i have found it difficult to control depth of cut. The longer blade bevel, of even miniature carving gouges and chissels affords you more control over the cutting action. CaptainSteve, MEDDO, mtaylor and 1 other 4 We are all works in progress, all of the time. Link to comment Share on other sites More sharing options...
MEDDO Posted April 3, 2017 Author Share #8 Posted April 3, 2017 I have both the xacto blades as well as scalpel and much prefer a regular scalpel handle. I can never seem to get the blades tightened down in the xacto handle. I do also have some "micro chisels" I bought a few years ago and will try them out when I get home. My concern would be learning how to sharpen them. mtaylor, CaptainSteve and Canute 3 Michael Shipwrights of Ohio Current Build: ... Completed Builds: Queen Anne Barge - Syren, Pinnace - MS, Halifax 1768 - LSS, Murrelet - Pygmy, Swift 1805 - AL Link to comment Share on other sites More sharing options...
MEDDO Posted April 3, 2017 Author Share #9 Posted April 3, 2017 I also got a chance to see some real carvings today as my uncle from Sydney was in town visitng and wanted to drive down and see the Naval Academy. Of course I had to show him Preble Hall. As always very impressive. Maybe future projects....... Galley Washington and a Swan class Canute, mtaylor, reklein and 1 other 4 Michael Shipwrights of Ohio Current Build: ... Completed Builds: Queen Anne Barge - Syren, Pinnace - MS, Halifax 1768 - LSS, Murrelet - Pygmy, Swift 1805 - AL Link to comment Share on other sites More sharing options...
MEDDO Posted April 4, 2017 Author Share #10 Posted April 4, 2017 One thing is for certain, I need to work on the small tight curves. Once again the camera takes what appears nice with the naked eye and exposes all the flaws. Canute, mrjimmy, Chuck and 7 others 10 Michael Shipwrights of Ohio Current Build: ... Completed Builds: Queen Anne Barge - Syren, Pinnace - MS, Halifax 1768 - LSS, Murrelet - Pygmy, Swift 1805 - AL Link to comment Share on other sites More sharing options...
vossiewulf Posted April 4, 2017 Share #11 Posted April 4, 2017 5 hours ago, MEDDO said: One thing is for certain, I need to work on the small tight curves. Once again the camera takes what appears nice with the naked eye and exposes all the flaws. Alexander in his Carving from Belgogrod topic cites taking pictures regularly as one of his trade secrets, specifically because it shows him flaws he's not seeing. If you don't know this trick, my advice is to keep a small mirror handy and look at the piece regularly in the mirror. Flipping it prevents your brain from recognizing it as your work and making all the little improvements to the shape/lines that it will make to boost your ego. Always amazes me when something I'm working on looks completely different in the mirror. Small tight curves are of course the most difficult, almost always crossing the grain. And doing it with a #11 is the most difficult. Honestly I wouldn't do it that way, I'd get it in the ballpark with the knife and then use diamond points in a pin vise to work in the smooth curves. If part of this exercise is only using the knife, try cutting somewhat down as you cut the curve, as close to 45 as you can, this makes it more of an oblique cut and less likely to leave fuzz/protruding bits where the curve crosses the grain. Oh and strop the hell out of the #11 blade as you go. They really aren't very hard and lose their edge rapidly, on the up side because they're not hard you can remove big dings with just a strop. Also, learn to sharpen, not that hard to do. That will allow you to use much better tools with Rc62-64 edges that can be made much sharper than a brand-new #11 and will hold that edge far longer. When I'm sharpening one of the tests my knives have to pass is to cut basswood end grain cleanly, with zero tearing. Xacto can't do that brand new. mtaylor, Canute, Hubac's Historian and 3 others 6 Building HM Cutter Lady Nelson 1:64 Link to comment Share on other sites More sharing options...
Hubac's Historian Posted April 4, 2017 Share #12 Posted April 4, 2017 On April 3, 2017 at 4:26 PM, MEDDO said: I have both the xacto blades as well as scalpel and much prefer a regular scalpel handle. I can never seem to get the blades tightened down in the xacto handle. I do also have some "micro chisels" I bought a few years ago and will try them out when I get home. My concern would be learning how to sharpen them. Sharpening chisels is a subject with much variation according to personal preference. The nice thing about "micro" tools is that it is a micro job to tune them up and keep them sharp. This is what I do with all of my edge tools. I bought a two-sided oil stone at Home Depot a number of years ago. I use the coarse side to shape my bevel, and the fine side to refine my edge. Then I move to a ceramic "stone" that I bought from Woodworkers Supply that never dishes out from wear, to further refine the edge. Then I move on to a 5000 grit wet stone. At each stage, I'm lapping the back of the tool to help work the "wire" that forms along the edge, so that at the next and final stage, the wire releases and I have a truly razor sharp edge. The final stage is to strop along a piece of leather that I've loaded with a superfine abrasive compound make by Tormek. The key to all of this - whether or not you manage to keep the bevels of your straight chisels perfectly flat or slightly rounded - is to always pull the tool across the stone or strop so that the edge is trailing. Often, you will see someone working a single edge tool back and forth across a stone, but I have found this to be counter-productive, as you inevitably end up grinding micro-bevels into the tool edge that prevent you from refining a consistent hone along the length of the edge. a final micro-bevel is considered, by some, to be a desireable feature, but that, in itself, is a whole other subject of conversation that doesn't even apply to micro carving tools. In the absence of stones, one can achieve the same degree of bevel shaping and edge-refinement with non-loading sandpaper, in a number of grits, upon a thick piece of glass (1/4" or thicker). When it comes to gouges or any other type of curved, edge tool, it does take some practice to learn how to roll the tool along the stone so that the whole edge gets honed with each pass, but this is not so difficult to master. Usually, micro chisels are not made of such hard steel that it is laborious to re-shape and sharpen an edge, if you mess it up. If you follow some sequence of sharpening like I laid out, you'll he able to keep a razor edge for quite a while, simply by stropping, before the compound deforms the edge enough to necessitate re-sharpening. Even then, I find that the ceramic stone is as far back as I need to go to quickly re-shape and hone an edge. Canute, mtaylor, Alan Cabrera and 4 others 6 1 We are all works in progress, all of the time. Link to comment Share on other sites More sharing options...
MEDDO Posted April 6, 2017 Author Share #13 Posted April 6, 2017 Thanks for the replies. I am going to learn how to sharpen the regular tools although the cost of the surgical scalpel blades I use I am just going to recycle/trash them. Canute, mtaylor and CaptainSteve 3 Michael Shipwrights of Ohio Current Build: ... Completed Builds: Queen Anne Barge - Syren, Pinnace - MS, Halifax 1768 - LSS, Murrelet - Pygmy, Swift 1805 - AL Link to comment Share on other sites More sharing options...
vossiewulf Posted April 6, 2017 Share #14 Posted April 6, 2017 For small blades like this you have lots of options for sharpening, including diamond and ceramic and water stones. Of those I prefer water stones even though they're the most messy, they cut fast and leave an excellent surface. Diamond cuts fast but tends to be much more coarse in terms of grit, their supposed 1200 grit is more like 300 in water stones, plus they wear out. I've tried several ceramics and they all got tossed as useless, they cut slow and glaze easily. Probably best option if you don't want water stones is sanding films, they come in appropriate grits for sharpening and work well, but I find them to be expensive as like any sandpaper, these wear out rapidly and you can spend $3 or $4 just sharpening one knife. My favorites are the Shapton Glass stones, not cheap but cut faster than anything else I've used but unlike water stones they stay reasonably flat. I have those in 220/1000/4000/8000 with a strop to finish and haven't used anything else since I got them aviaamator, CaptainSteve, Mike Y and 3 others 6 Building HM Cutter Lady Nelson 1:64 Link to comment Share on other sites More sharing options...
MEDDO Posted April 10, 2017 Author Share #15 Posted April 10, 2017 Thanks for the tips. I finally got back home and was able to find some of the tools I have. One set is a small <palm> carvers which someone gave me years ago. They are definitely lowest quality though. I am going to try to see if I can sharpen them up a bit though. I can feel the pits in the blades. The little metal collars are also loose on half of them. Much different than the surgical instruments I am used to using. I also have these that I bough many years ago but never opened. Canute, CaptainSteve, Duanelaker and 4 others 7 Michael Shipwrights of Ohio Current Build: ... Completed Builds: Queen Anne Barge - Syren, Pinnace - MS, Halifax 1768 - LSS, Murrelet - Pygmy, Swift 1805 - AL Link to comment Share on other sites More sharing options...


Recommended Posts