Heinz6672 Posted May 3, 2016 Author Share #151 Posted May 3, 2016 I think you did very well . Many errors of knowledge that I have done, that thou hast not. Great... Isalbert this means that there is still hope for me? :-) Thank you very much !!!! - Heinz - mtaylor, slow2cool and Seventynet 3 Quote HMS Victory by Heinz746 Link to comment Share on other sites More sharing options...
waspy Posted May 3, 2016 Share #152 Posted May 3, 2016 looking great Heinz! mort stoll, Seventynet, mtaylor and 1 other 4 Quote Current build: HMS Victory - Constructo - First wooden model Link to comment Share on other sites More sharing options...
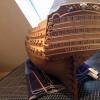
Heinz6672 Posted June 12, 2016 Author Share #153 Posted June 12, 2016 Hello my friends! It´s time for a new update! Last time, I asked myself, whether I should start to plank the deck or finish to plank the hull. I decided to first plank the hull. Unfortunately I had some problems to get new wood stripes. This is why I changed my mind and start to plank the deck. I knew that it would not be easy to do, because this time I first built the gratings on the deck. In fact, it took my much longer to plank the deck. But I think I managed it quite well and I am glad to say, that I am happy with the result. As you can see in my pictures, I used my "old" technic. That means I first lay the wood stripes with a little slit between them. Then I fill the stripes with my black wood filler. After scraping and sanding the planks I seal them with varnish. Now I start to finish the hull planking! Greetings and best wishes to all of you! - Heinz - captgino, mort stoll, oscarmate and 10 others 13 Quote HMS Victory by Heinz746 Link to comment Share on other sites More sharing options...
captgino Posted June 12, 2016 Share #154 Posted June 12, 2016 Beautiful work. What is the recipe for your 'old technique'? Seventynet and mort stoll 2 Quote Jean-Philippe (JP) Current build: Syren , Rattlesnake (Scratch built) Please visit and subscribe to my YouTube Channel On Hold: Mayflower, HMS Victory Cross Section Completed: Armed Virginia Sloop, Viking ship, The Flyer, Pilot Boat, Krabbenkutter, Marie-Jeanne, Sloup, The Smasher Link to comment Share on other sites More sharing options...
Heinz6672 Posted June 12, 2016 Author Share #155 Posted June 12, 2016 Beautiful work. What is the recipe for your 'old technique'? Hello captgino, thank you for your nice compliment. My old technic? I mean the way I make the planks and the caulking. I tried to explain it with these words: That means I first lay the wood stripes with a little slit between them. Then I fill the stripes with my black wood filler. After scraping and sanding the planks I seal them with varnish. Best -Heinz- slow2cool, captgino and Seventynet 3 Quote HMS Victory by Heinz746 Link to comment Share on other sites More sharing options...
Seventynet Posted June 14, 2016 Share #156 Posted June 14, 2016 Hi Heinz, Nice deck planking. As usual your work is just outstanding. Sorry I haven't done anything on my Victory for a while. Soon. Best, Ian slow2cool and Heinz6672 2 Quote Builds in progress - Hayling Hoy Builds completed - Naval Cutter Cheerful - by Syren Ship Model Company - Cape Cod Catboat - by Bluejacket - Gokstad - by Dusek - Ship's Boat - by Dusek - Brazzera - by MarisStella Link to comment Share on other sites More sharing options...
Kevin Posted June 14, 2016 Share #157 Posted June 14, 2016 just love the deck planking, much better than my painting one edge and one end, well done Heinz6672 1 Quote Its all part of Kev's journey, bit like going to the dark side, but with the lights on All the best Kevin SAY NO TO PIRACY. SUPPORT ORIGINAL IDEAS AND MANUFACTURERS. KEEP IT REAL! ------------------------------------------------------------------------------------------------------------------------------------------------------ On the build table HMS Indefatigable 1794 by Kevin - Vanguard Models - 1:64 - Feb 2023 HMHS Britannic by Kevin SD 14 - Marcle Models - 1/70 - March 2022 - Bluebell - Flower Class - Revel - 1/72 U552 German U Boat - Trumpeter - 1/48 Amerigo Vespucci 1/84 - Panart- HMS Enterprise -CAF - 1/48 Finished St-Nectan-Mountfleet-models-steam-trawler-1/32 - Completed June 2020 HMS Victory - Caldercraft/Jotika - 1/72 - Finished Dorade renamed Dora by Kevin - Amati - 1/20 - Completed March 2021 Stage Coach 1848 - Artesania Latina - 1/10 -Finished Lady Eleanor by Kevin - FINISHED - Vanguard Models - 1/64 - Fifie fishing boat Link to comment Share on other sites More sharing options...
Heinz6672 Posted June 14, 2016 Author Share #158 Posted June 14, 2016 Ian and Kevin, many thanks for the nice words! They are really welcome :-) @Kevin: the way I planked the deck has 2 big advantages: the first advantage is the old (dirty) look caused by the black wood filler all over the planks. The second is, that you can hide some mistakes, like planks that don´t fit perfectly together. But you need very good nerves when you see your deck completely coated with the wood filler... Kevin, slow2cool and Seventynet 3 Quote HMS Victory by Heinz746 Link to comment Share on other sites More sharing options...
J T Lombard Posted June 14, 2016 Share #159 Posted June 14, 2016 Heinz: Your deck planking looks great. Can you answer a few question about it? 1. how do you "space" your planking? 2. Is the wood for your planking from the kit or did you purchase different wood strips? 3. What is the "black wood filler" you used to coat your deck? regards J Lombard Quote Link to comment Share on other sites More sharing options...
Heinz6672 Posted June 14, 2016 Author Share #160 Posted June 14, 2016 Heinz: Your deck planking looks great. Can you answer a few question about it? 1. how do you "space" your planking? 2. Is the wood for your planking from the kit or did you purchase different wood strips? 3. What is the "black wood filler" you used to coat your deck? regards J Lombard Thank you for your compliment! I made a photo of the wood filler. It is from the company "Clou". I do not know if you can buy it outside of Germany. But here you can buy it in any hardware store. So I don´t think that it is something very special. I use the wood stripes from the kit. I think it´s a beautiful wood and good to handle. Although many stripes are very crooked. I tried to use the best parts of it. About the spaces...hmmm, I don´t know how to explain it... the only thing I do, is to put the wooden stripes not close to each other, but leave a small gap. I did this by eye. So there is no secret or special ability. I hope this will help you :-))) Best wishes -Heinz- slow2cool, Seventynet and Kevin 3 Quote HMS Victory by Heinz746 Link to comment Share on other sites More sharing options...
J T Lombard Posted June 14, 2016 Share #161 Posted June 14, 2016 Heinz: Thanks for your reply J Quote Link to comment Share on other sites More sharing options...
Heinz6672 Posted July 14, 2016 Author Share #162 Posted July 14, 2016 Hello friends, I want to show you a new update and what I have done in the last few weeks. As I told you, I decided to finish the planking of the hull. Again I have the situation, that I don´ t want to use the parts of the kit. There are several moldings to put on the planks that have to be made of wood. I study the Victory of Alexandru very carefully, because he does it in such an outstanding way. I try to copy his work. But - surprise - it´s not as easy as it looks :-) I had so many problems with it, I could not tell you. I decided to do it in my way, concerning to my skills. But even than I get some problems. First I had to find out, that my molding was invisible, because I used the same walnut-wood I used for the planking. The strips were a little bit thicker (1,5 mm instead of 1,00mm) but that was´t enough to have a visible contrast. The solution was to prepare them with my black wood filler and make them darker. Wood filler become a panacea for all my problems.... The next problem was the second and smaller molding. I simply don´t know how to do it and where to fix it. I have to admit that I was not able to build everything in the way that it fits perfectly and everything is exactly in the right position as it is written in the plans or on better models. So again I have to say: my model is inspired by the original, but it´s not a perfect copy. After finishing that part I returned to the upper deck and the walls (you can see in my pictures what I mean). Comparable to the stern I don´t wanted to use the sheet windows from the kit. I made new ones with my yellow wood. Also I had the idea to fill the vertical slits with that wood, to have a contrast and a little "eye-catcher". What do you think about it? Of course these parts are not fixed on the deck. I only placed them for the photo. Best wishes -Heinz- oscarmate, slow2cool, Shipyard sid and 12 others 15 Quote HMS Victory by Heinz746 Link to comment Share on other sites More sharing options...
Seventynet Posted July 18, 2016 Share #163 Posted July 18, 2016 Beautiful precise work Heinz. You're coming along nicely. Regards, Ian Heinz6672 and slow2cool 2 Quote Builds in progress - Hayling Hoy Builds completed - Naval Cutter Cheerful - by Syren Ship Model Company - Cape Cod Catboat - by Bluejacket - Gokstad - by Dusek - Ship's Boat - by Dusek - Brazzera - by MarisStella Link to comment Share on other sites More sharing options...
Heinz6672 Posted August 10, 2016 Author Share #164 Posted August 10, 2016 Hello modeling friends, just a small update with my recent photos :-) Best to all of you! -Heinz- Klaas, NMBROOK, Seventynet and 8 others 11 Quote HMS Victory by Heinz746 Link to comment Share on other sites More sharing options...
Seventynet Posted August 10, 2016 Share #165 Posted August 10, 2016 I'm loving the detail Heinz, beautiful work. And that's no small update! Regards, Ian Heinz6672 and cristikc 2 Quote Builds in progress - Hayling Hoy Builds completed - Naval Cutter Cheerful - by Syren Ship Model Company - Cape Cod Catboat - by Bluejacket - Gokstad - by Dusek - Ship's Boat - by Dusek - Brazzera - by MarisStella Link to comment Share on other sites More sharing options...
Heinz6672 Posted August 11, 2016 Author Share #166 Posted August 11, 2016 Thank you again, Ian. Without your nice words every time, it would be half the fun to build my model :-) - Heinz - Seventynet 1 Quote HMS Victory by Heinz746 Link to comment Share on other sites More sharing options...
Heinz6672 Posted October 3, 2016 Author Share #167 Posted October 3, 2016 Hello friends, I think it´s time for a new update. All canons are on their places now and fixed. The handrail is finished. And the poop deck is at his place and planked. It sounds like easy and fast work, but it was so much to do. I am really happy with the result. What do you think about it? Many greetings to all my friends and modellers all over the world! :-) Have a nice week! -Heinz- Shipyard sid, Ryland Craze, Karleop and 5 others 8 Quote HMS Victory by Heinz746 Link to comment Share on other sites More sharing options...
donrobinson Posted October 3, 2016 Share #168 Posted October 3, 2016 Beautiful work, is that paint you apply to the deck then scrape it off? cobra1951 and Heinz6672 2 Quote Completed: MS-AVS, Amati Trabaccolo, Dusek ship's boat, AL-Mayflower, Batelina - MarisStella, MarisStella-Trabakul Liburnian Novilara - MarisStella, 17th Century Battle Station, Ragusian Galley-MarisStella Current: Barque Stefano - MarisStella, On Hold: Amati Pegasus Link to comment Share on other sites More sharing options...
Heinz6672 Posted October 3, 2016 Author Share #169 Posted October 3, 2016 Hello Don, thank you for your nice words. It´s black wood filler. Please look at the top of this site. There is a picture of it. -Heinz- cobra1951 1 Quote HMS Victory by Heinz746 Link to comment Share on other sites More sharing options...
donrobinson Posted October 3, 2016 Share #170 Posted October 3, 2016 I seen that but wasn't paying attention , sorry about that. Your photography is excellent Heinz6672 and cobra1951 2 Quote Completed: MS-AVS, Amati Trabaccolo, Dusek ship's boat, AL-Mayflower, Batelina - MarisStella, MarisStella-Trabakul Liburnian Novilara - MarisStella, 17th Century Battle Station, Ragusian Galley-MarisStella Current: Barque Stefano - MarisStella, On Hold: Amati Pegasus Link to comment Share on other sites More sharing options...
cobra1951 Posted October 3, 2016 Share #171 Posted October 3, 2016 All I can say it is an interesting and very effective way of caulking and it also gives the planking a used and aged effect. I may try this myself sometime. Excellent idea Heinz6672 1 Quote Bob Current Build HMB Endeavour - Occre 1:54 Completed Builds Section Deck Between Gun Bays - Panart 1:23 scale....x 2 Link to comment Share on other sites More sharing options...
Heinz6672 Posted October 4, 2016 Author Share #172 Posted October 4, 2016 Hi Bob, you are right. I love that "aged effect". And because of that I don´t only use that method for caulking my planks. I prepare many pieces with the wood filler and make them look older. It looks great on the walnut wood. I should have used it more often. The next model I will do it :-) - Heinz - cobra1951 1 Quote HMS Victory by Heinz746 Link to comment Share on other sites More sharing options...
Karleop Posted October 6, 2016 Share #173 Posted October 6, 2016 Hallo Heinz: You are doing a really splendid work with your Victory, Congratulations!! (By the way I also must check with the Google translator all my writings, but from spanish) Tschüss, Karl Heinz ( aus dem Gulf von Kalifornien, Mexiko) cobra1951 1 Quote Finished Models (Gallery): Pandora (Constructo), HMS Endeavour (AL), San FranciscoII (AL), Fishing boat (scratch), Vasa (Billing Boats) Construction logs: Vasa (Billing Boats) Pride of Baltimore II (M. Shipways) Link to comment Share on other sites More sharing options...
Heinz6672 Posted October 6, 2016 Author Share #174 Posted October 6, 2016 Hello Karl Heinz, thanks a lot for your nice compliment. I´m very glad about that! I think we are both not the only guys who need to use the translator. But... who cares ? :-) Now you have made me curious. Are you german too? You write, that you translate from spanish, but your greetings and your name sound very german :-)))) No matter, you are very welcome! - Heinz - cobra1951 1 Quote HMS Victory by Heinz746 Link to comment Share on other sites More sharing options...
Karleop Posted October 6, 2016 Share #175 Posted October 6, 2016 Hallo Heinz: Yes, I have my Deutsche Staatsangehörigkeit because my father was German and although I've been a few times in Germany I was born in Mexico. Saludos; Karl Heinz Heinz6672 1 Quote Finished Models (Gallery): Pandora (Constructo), HMS Endeavour (AL), San FranciscoII (AL), Fishing boat (scratch), Vasa (Billing Boats) Construction logs: Vasa (Billing Boats) Pride of Baltimore II (M. Shipways) Link to comment Share on other sites More sharing options...
Mirabell61 Posted October 6, 2016 Share #176 Posted October 6, 2016 A great build Heinz, you are doing an excellent job with that kit Nils Heinz6672 and cobra1951 2 Quote Current builds -Lightship Elbe 1 Completed - Steamship Ergenstrasse ex Laker Corsicana 1918- scale 1:87 scratchbuild - "Zeesboot" heritage wooden fishing small craft around 1870, POB clinker scratch build scale 1:24 - Pilot Schooner # 5 ELBE ex Wanderbird, scale 1:50 scratchbuild - Mississippi Sterwheelsteamer built as christmapresent for grandson modified kit build - Chebec "Eagle of Algier" 1753--scale 1:48-POB-(scratchbuild) "SS Kaiser Wilhelm der Grosse" four stacker passenger liner of 1897, blue ribbond awarded, 1:144 (scratchbuild) "HMS Pegasus" , 16 gun sloop, Swan-Class 1776-1777 scale 1:64 from Amati plan -"Pamir" 4-mast barque, P-liner, 1:96 (scratchbuild) -"Gorch Fock 2" German Navy cadet training 3-mast barque, 1:95 (scratchbuild) "Heinrich Kayser" heritage Merchant Steamship, 1:96 (scratchbuild) original was my grandfathers ship -"Bohuslän" , heritage ,live Swedish museum passenger steamer (Billings kit), 1:50 "Lorbas", river tug, steam driven for RC, fictive design (scratchbuild), scale appr. 1:32 under restoration / restoration finished "Hjejlen" steam paddlewheeler, 1861, Billings Boats rare old kit, scale 1:50 Link to comment Share on other sites More sharing options...
Heinz6672 Posted October 6, 2016 Author Share #177 Posted October 6, 2016 Thank you all for your nice words. It´s the best motivation to keep it on :-)))) Thank you, thank you, thank you! - Heinz - Mirabell61 1 Quote HMS Victory by Heinz746 Link to comment Share on other sites More sharing options...
paulb Posted October 13, 2016 Share #178 Posted October 13, 2016 Excellent job, Heinz. The craftmanship is amazing. Paul Heinz6672 1 Quote Regards, Paul Link to comment Share on other sites More sharing options...
Heinz6672 Posted November 27, 2016 Author Share #179 Posted November 27, 2016 Hello friends, I had a few free days. Of course I used them to work on my model. The weather here don´t allow something else :-) As you can see in my pictures I built the stairs to the quarter deck. Again I tried to build everything from wood. Although I know that this is not original. But if you follow my blog you know, that I prefer that way. The next step was building the fire buckets. It was very difficult to make the logos on them, because they are so small. Even the smallest brush is too big. Finally I used the tip of a metal needle. But the tough and sticky gold color makes it impossible to create a clear logo. I did my best. Hopefully nobody looks too closely on it. After this I turned to the front and the roundhouses. Here, too, the basic principle was: no paint or sheet! But that means that I had to plank everything and try to build the bows with my yellow elderberry wood. What do you think about the result? I really like it :-) Finally I build the two carronades today. Best wishes and a happy sunday :-) - Heinz - Karleop, paulb, etubino and 5 others 8 Quote HMS Victory by Heinz746 Link to comment Share on other sites More sharing options...
Charter33 Posted November 27, 2016 Share #180 Posted November 27, 2016 Quite simply outstanding! Superb work, Heinz. Thank you for sharing it with us. Graham Heinz6672, Eddie, Seventynet and 1 other 4 Quote Link to comment Share on other sites More sharing options...

Recommended Posts
Join the conversation
You can post now and register later. If you have an account, sign in now to post with your account.