BANYAN Posted January 26, 2015 Share #61 Posted January 26, 2015 (edited) That's an interesting arrangement you have proposed Sharpie, and something like that may very well have worked. Can you lean on any experience from how the Egyptians did it? Also, was it definitely rope or could it have been leather, which if wet can be tensioned considerably when dry? She is coming along nicely and an interesting log to boot cheers Pat Edited January 26, 2015 by BANYAN Quote If at first you do not suceed, try, and then try again!Current build: HMCSS Victoria (Scratch) Next build: HMAS Vampire (3D printed resin, scratch 1:350) Built: Battle Station (Scratch) and HM Bark Endeavour 1768 (kit 1:64) Link to comment Share on other sites More sharing options...
mtaylor Posted January 26, 2015 Share #62 Posted January 26, 2015 I'm with Pat on this... very interesting concept. The only question in mind would be is that there should be a better way of securing the "windlass". These vessels were designed for ramming and I'd think that the hit would bow the keel slightly, maybe more then enough to shake that brace loose. I wouldn't want to be anywhere near that thing when the winding torque on the cable was suddenly released. Quote Mark "The shipwright is slow, but the wood is patient." - me Current Build: Past Builds: La Belle Poule 1765 - French Frigate from ANCRE plans - ON HOLD Triton Cross-Section NRG Hallf Hull Planking Kit HMS Sphinx 1775 - Vanguard Models - 1:64 Non-Ship Model: On hold, maybe forever: CH-53 Sikorsky - 1:48 - Revell - Completed Licorne - 1755 from Hahn Plans (Scratch) Version 2.0 (Abandoned) Link to comment Share on other sites More sharing options...
Sharpie Posted February 16, 2015 Author Share #63 Posted February 16, 2015 (edited) I'll try to post a photo in a day or so when I get them installed. Well, that didn't happen. Anyways, I did manage to get some work done over the past few days. Most of the main deck beams have been installed, and the fore deck beams have been bent and stained. Also, eight of the mid-ribs have been installed. (EDIT: for some reason, the lower deck beam supports/stringers appear to curve rather severely inward, but I just checked the model and they are in fact straight.) (I noticed the stray blob of glue on the deck beam after I took the picture. It has since been scraped off.) The inside of the hull is already getting pretty crowded. I'm going to have to install the rowing benched and footrests with tweezers through the lower deck beams. It still looks somewhat orderly from straight on, but from an angle the effect is much more chaotic. Once all of the hull stringers, benches, and supports are in place it'll be really messy. I can't say for sure when the next update will be, but it probably won't be too long, as the pace is about to increase considerably. I need to have the model finished in 48 days. It's a bit of a rush, but I think I can make it. Thanks for looking! Edited February 16, 2015 by Sharpie dgbot, WackoWolf, IgorSky and 10 others 13 Quote Current build: Roman Quadrireme Past builds: Mediterranean Merchant Galley, Roman Trireme (First Build) Link to comment Share on other sites More sharing options...
BANYAN Posted February 17, 2015 Share #64 Posted February 17, 2015 Looking great Sharpie - good luck with the completion date cheers Pat Omega1234 1 Quote If at first you do not suceed, try, and then try again!Current build: HMCSS Victoria (Scratch) Next build: HMAS Vampire (3D printed resin, scratch 1:350) Built: Battle Station (Scratch) and HM Bark Endeavour 1768 (kit 1:64) Link to comment Share on other sites More sharing options...
Sharpie Posted March 10, 2015 Author Share #65 Posted March 10, 2015 (edited) Thanks Pat. I've made a lot of progress since the last update; I'll try to post a few pictures tomorrow. 27 days to go! Edited March 10, 2015 by Sharpie Omega1234 1 Quote Current build: Roman Quadrireme Past builds: Mediterranean Merchant Galley, Roman Trireme (First Build) Link to comment Share on other sites More sharing options...
dgbot Posted March 10, 2015 Share #66 Posted March 10, 2015 Every time I look at your build I am amazed at the amount of advanced planning you have to do to get it right. David B Omega1234 1 Quote Work in progress USS Maine in cardstock.http://modelshipworld.com/index.php/topic/7446-uss-maine-by-dgbot-hmv-card/#entry220003 Completed Blockade runner Teazer http://modelshipworld.com/index.php/topic/6063-blockade-runner-teazer-by-dgbot-card-stock/#entry175967 Completed The Monitor Lehigh http://modelshipworld.com/index.php/topic/6920-the-monitor-lehigh-by-dgbot-card-model/#entry203680 Completed Kingston Class MCVD http://modelshipworld.com/index.php/forum/10-kit-build-logs-in-progress/ Link to comment Share on other sites More sharing options...
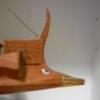
Sharpie Posted March 10, 2015 Author Share #67 Posted March 10, 2015 Thanks David-- though I don't do nearly as much planning as I probably should! Of course, in ancient times, they probably didn't have much in the way of technical drawings. Here's what the ship looks like as of this afternoon: All of the middle rib sections have been installed except for a few in the back. I'm in the process of cutting those out, and they'll be installed in a day or so. After that, all of the upper rib sections need to be made, but I can save a lot of time by cutting the central ones in stacks of four or six and the fore/aft pieces in pairs. The hull planking has been coated with wood filler in preparation for the black paint. I've decided to hold off on sanding it until the rest of the planking has been added. So far, 36 lower deck beams are in place. There will be 6 more at the stern, two of which I've already made but not installed. Here's a view looking towards the bow: One of the major areas of focus right now is getting all of the rowing bench seats made. There are a total of 180, and each seat is made up of three parts, for a total of 540 pieces. It's not quite as bad as it sounds though; I made 50 seats just this morning. I put in one set of seats to check spacing and alignment relative to the beams, and it looks alright to me. All of the pieces that the seats attach to have been cut to length, but I'm waiting to put them in until I add the reinforcing wale at the waterline, which will make sure all of the middle rib sections line up properly. I've also made a few oar shafts, to make sure I can reliably taper them without breaking them, and achieve a somewhat consistent end diameter. The looms will be proportionately shorter than on a trireme, mostly just for spacing reasons. To make them any longer, the thole pins would have to be placed on an outrigger, which would necessitate hundreds more pieces. If every rowing station was fitted with an oar, there would be a total of 90, but I think I'll omit a few of them, both to allow a less cluttered view into the non-planked portion of the hull and to save time. In addition, I've made a lot of progress on the wooden screen that would have provided ventilation and protection. I've made a full 24 inches-- one side's worth. Depending on how pressed for time I am at the end, I may leave off some on the starboard side for better visibility into the lower deck area. Following Ships88's example in his Greek Trireme build log, I picked up a few colors of paint to be used on the ram; I'll be mixing the brass and black to get bronze, and I'll try (on a scrap piece first, of course!) dry-brushing some green over it to create the appearance of a patina. Hah! Waiting on the video. ship ballista test fire.MOV Looking back over the thread I realized I never uploaded this. I don't have a Youtube account to post it there, but I've attached the file. (I decided not to risk breaking the ballista again by stressing the articulated joints, so I just fired it by hand. The trigger mechanism does work though. ) I'm off school for spring break this week, and I'm working double overtime to get as much done as possible. What I'm most worried about is finishing the hull planking. I've decided to expand the non-planked area of the hull farther upward to save time (though I think it will also look considerable better), so it should be doable. I'm starting to see all kinds of advantages to building an incomplete ship... Thanks for looking! kees de mol, WackoWolf, GrandpaPhil and 4 others 7 Quote Current build: Roman Quadrireme Past builds: Mediterranean Merchant Galley, Roman Trireme (First Build) Link to comment Share on other sites More sharing options...
BANYAN Posted March 11, 2015 Share #68 Posted March 11, 2015 Coming along very nicely Sharpie; impressed with the Ballista! If the power you generated in the scaled version is translated up at the same ratio/proportionally, that would have been one powerful weapon for those times. cheers Pat Omega1234 1 Quote If at first you do not suceed, try, and then try again!Current build: HMCSS Victoria (Scratch) Next build: HMAS Vampire (3D printed resin, scratch 1:350) Built: Battle Station (Scratch) and HM Bark Endeavour 1768 (kit 1:64) Link to comment Share on other sites More sharing options...
mtaylor Posted March 11, 2015 Share #69 Posted March 11, 2015 Impressive work, I'm with Pat... that ballista is amazing. Omega1234 1 Quote Mark "The shipwright is slow, but the wood is patient." - me Current Build: Past Builds: La Belle Poule 1765 - French Frigate from ANCRE plans - ON HOLD Triton Cross-Section NRG Hallf Hull Planking Kit HMS Sphinx 1775 - Vanguard Models - 1:64 Non-Ship Model: On hold, maybe forever: CH-53 Sikorsky - 1:48 - Revell - Completed Licorne - 1755 from Hahn Plans (Scratch) Version 2.0 (Abandoned) Link to comment Share on other sites More sharing options...
Vivian Galad Posted March 11, 2015 Share #70 Posted March 11, 2015 Nice shooting! The model is coming along, really nice. Beautiful work! Omega1234 1 Quote Current: Red Dragon (modified) by Vivian Galad - Artesania Latina - 1:60 Oseberg (modified) by Vivian Galad - Amati (1:50)Cocca Veneta by Vivian Galad - Corel - 1:70 Finished 15th Century Latin Caravel kit model from Artimanha models Link to comment Share on other sites More sharing options...
Louie da fly Posted March 11, 2015 Share #71 Posted March 11, 2015 (edited) The progress on the ship is very impressive, and I love the ballista. I want to make two of them for the dromon I'm planning to build (as well as a Greek fire siphon). Would it be ok to get in touch to pick your brains when the time comes? Steven Edited March 11, 2015 by Louie da fly Omega1234 1 Quote It's not really a ship model unless you've bled on it. CURRENT BUILDS Venetian merchant Ship from Basilica of San Marco Golden City - Ballarat paddlewheeler FINISHED Australian couta boat RMS Titanic HMVS Cerberus 11th century Byzantine dromon Winchelsea Nef - Late 13th century Mediaeval ship Henry Grace a Dieu - Rebuild of 1:200 model I started in 1967 https://modelshipworld.com/topic/36379-mistydeefer-by-louie-da-fly-finished-restoration-decor-yacht/#comment-1040663 Mistydeefer - restoration of decor model yacht Link to comment Share on other sites More sharing options...
reidar@rindal.net Posted February 11, 2017 Share #72 Posted February 11, 2017 Does anybody have some hints on how to make the oar's movement look right? I'm making a 1/25 model of the Olympias from the "original" drawings from the trust, and have been watching the different videos on the subject. The oars' motion is not circular, more like an elongated egg... Not easy to simulate with electric motors driving the action! Any ideas? mtaylor 1 Quote Link to comment Share on other sites More sharing options...
BANYAN Posted February 11, 2017 Share #73 Posted February 11, 2017 Reider, I am not sure if Sharpie is still updating this log. There is another log somewhere on this site that discusses the mechanisms for movement of the oars; it was very impressive - I just cannot recall the thread. A good search of the forum may turn it up for you. cheers Pat mtaylor and pollex 2 Quote If at first you do not suceed, try, and then try again!Current build: HMCSS Victoria (Scratch) Next build: HMAS Vampire (3D printed resin, scratch 1:350) Built: Battle Station (Scratch) and HM Bark Endeavour 1768 (kit 1:64) Link to comment Share on other sites More sharing options...
mtaylor Posted February 12, 2017 Share #74 Posted February 12, 2017 Reider, Have look here: http://modelshipworld.com/index.php/topic/6207-greek-bireme-by-bensid54-radio/ Omega1234 and WackoWolf 2 Quote Mark "The shipwright is slow, but the wood is patient." - me Current Build: Past Builds: La Belle Poule 1765 - French Frigate from ANCRE plans - ON HOLD Triton Cross-Section NRG Hallf Hull Planking Kit HMS Sphinx 1775 - Vanguard Models - 1:64 Non-Ship Model: On hold, maybe forever: CH-53 Sikorsky - 1:48 - Revell - Completed Licorne - 1755 from Hahn Plans (Scratch) Version 2.0 (Abandoned) Link to comment Share on other sites More sharing options...
tartane Posted February 12, 2017 Share #75 Posted February 12, 2017 A magnificent book which will certainly give all the information you need is the following; "The age of the galley, Mediterranean oared vessels since pre-classical times, by Robert Gardiner" ISBN 0 85177 554 3 1995. (256 pages, 25 x 30 cm) It gives information about everything that has to do with the subject. In the book are a lot of drawings and diagrams which give the exact movements the rowers had to make. Constant Omega1234 1 Quote Link to comment Share on other sites More sharing options...
Richard Braithwaite Posted May 1, 2022 Share #76 Posted May 1, 2022 (edited) Great to see someone producing a model based on another of John Coates reconstructions! Building frames first and then planking them seems to work fine. I produced my trireme hull the other way round... Planking first onto a jig of temporary frames at the hull stations. Here is the hull planked up to the level of the floors: And then fitting the frames from the inside Working up level by level until all the planks and frames were in place and then removing from the frame jig: Edited May 1, 2022 by Richard Braithwaite Ian_Grant, Seventynet, GrandpaPhil and 1 other 4 Quote Link to comment Share on other sites More sharing options...
Louie da fly Posted May 3, 2022 Share #77 Posted May 3, 2022 Reider, Richard Braithwaite (above) is also building an Olympias model and is currently working on the action of the oarsmen - see By the way, have you looked at the oar action in the video of the Olympias's sea trials https://www.youtube.com/watch?v=ZcsrNrRkQis ? Steven Richard Braithwaite and mtaylor 2 Quote It's not really a ship model unless you've bled on it. CURRENT BUILDS Venetian merchant Ship from Basilica of San Marco Golden City - Ballarat paddlewheeler FINISHED Australian couta boat RMS Titanic HMVS Cerberus 11th century Byzantine dromon Winchelsea Nef - Late 13th century Mediaeval ship Henry Grace a Dieu - Rebuild of 1:200 model I started in 1967 https://modelshipworld.com/topic/36379-mistydeefer-by-louie-da-fly-finished-restoration-decor-yacht/#comment-1040663 Mistydeefer - restoration of decor model yacht Link to comment Share on other sites More sharing options...

Recommended Posts
Join the conversation
You can post now and register later. If you have an account, sign in now to post with your account.