Ray
-
Posts
404 -
Joined
-
Last visited
Content Type
Profiles
Forums
Gallery
Events
Everything posted by Ray
-
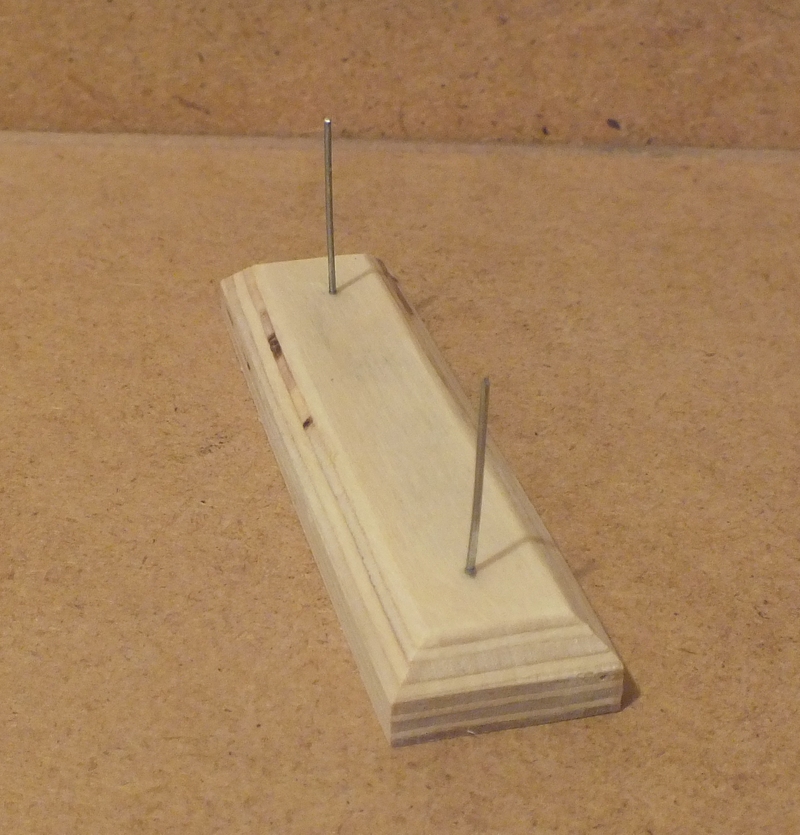
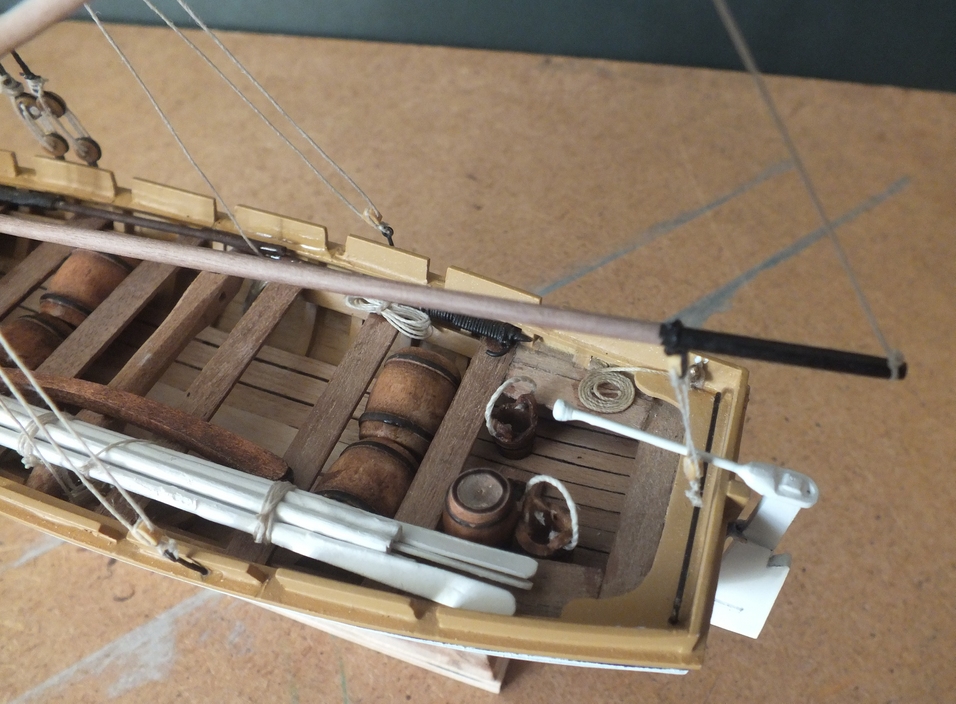
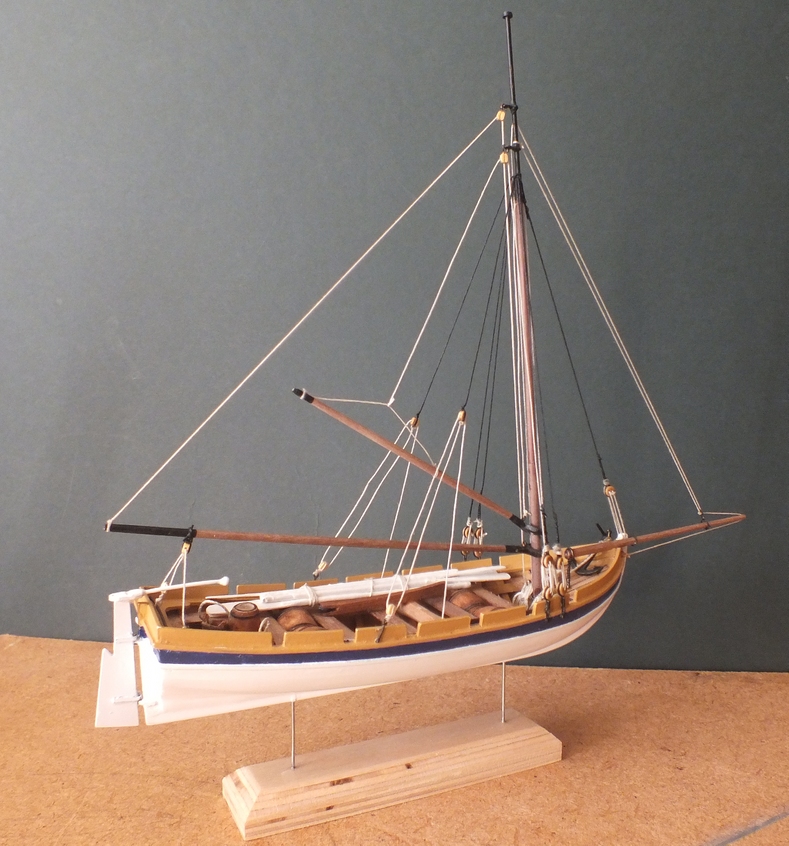
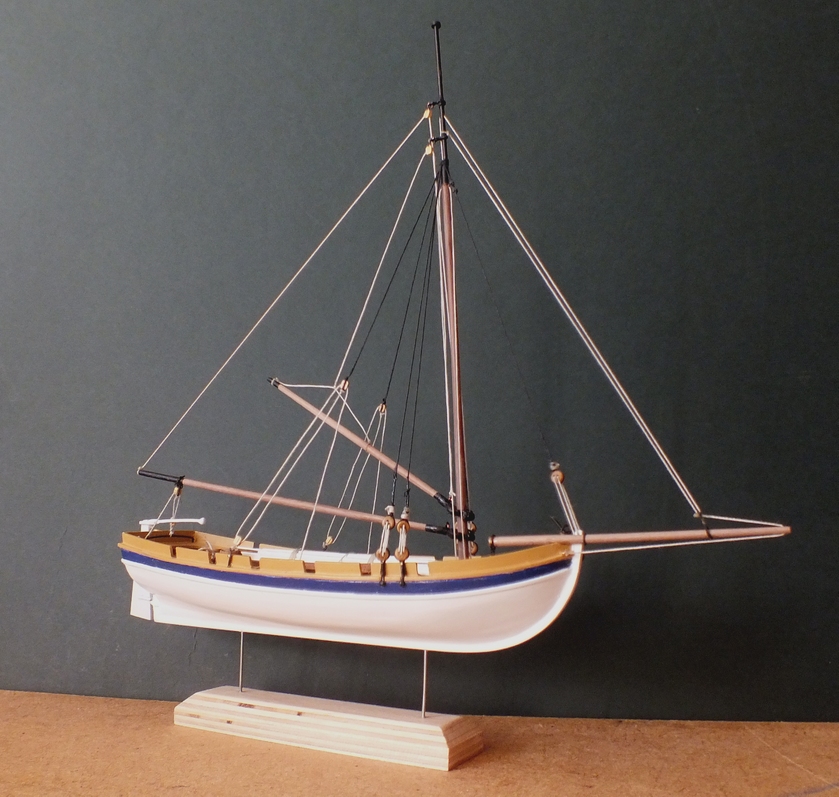
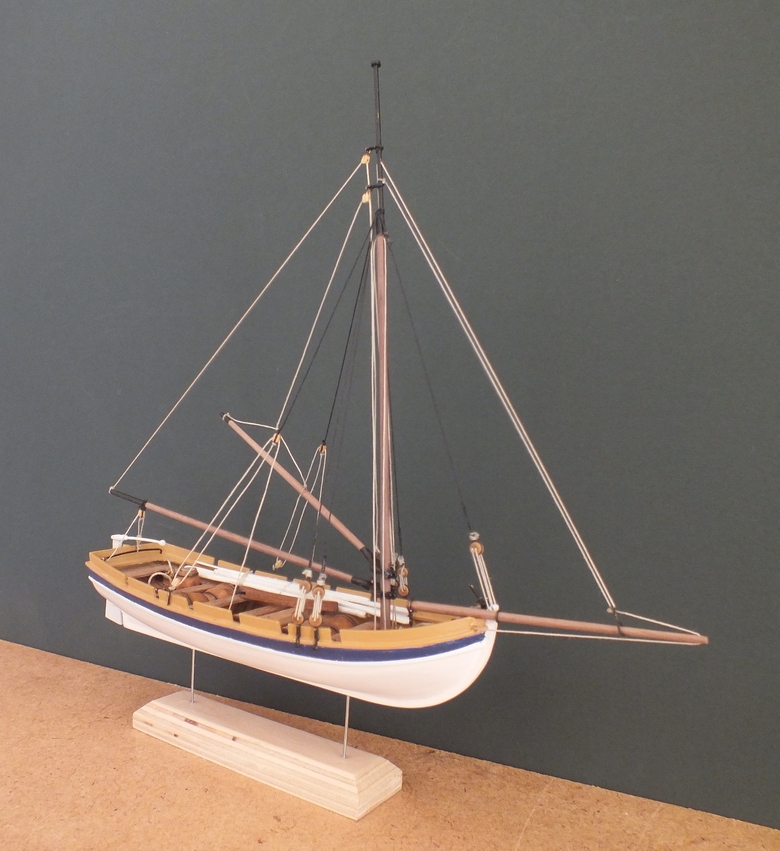
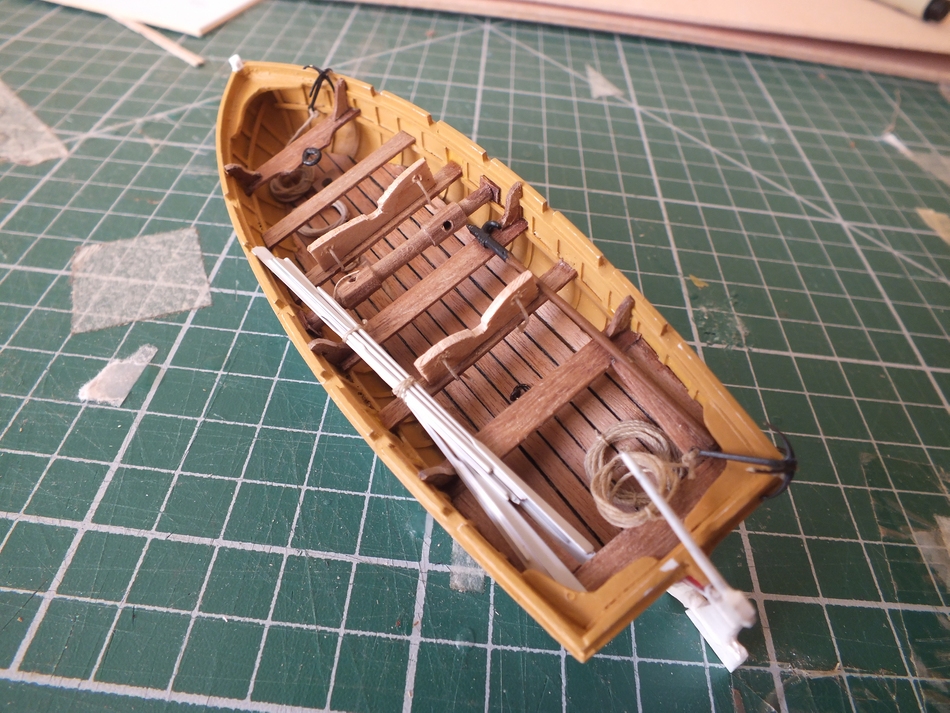
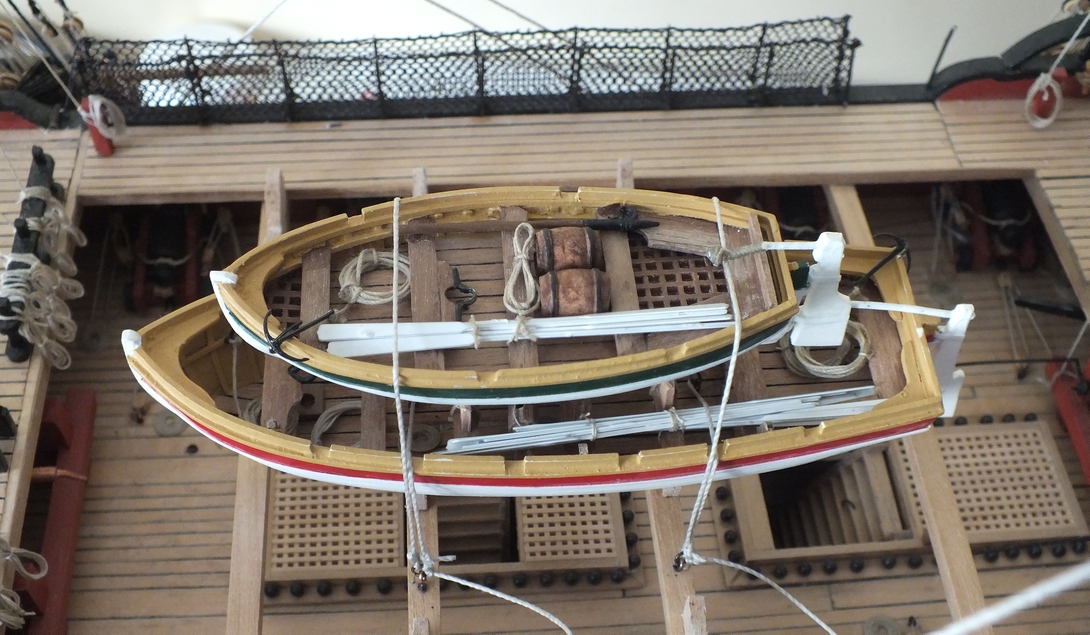
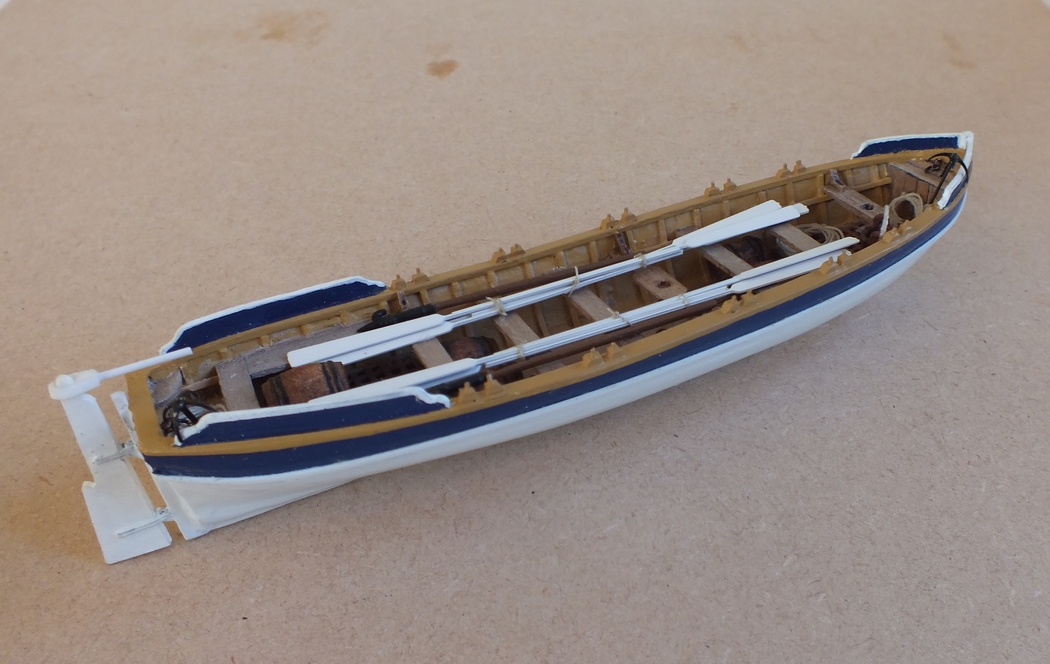
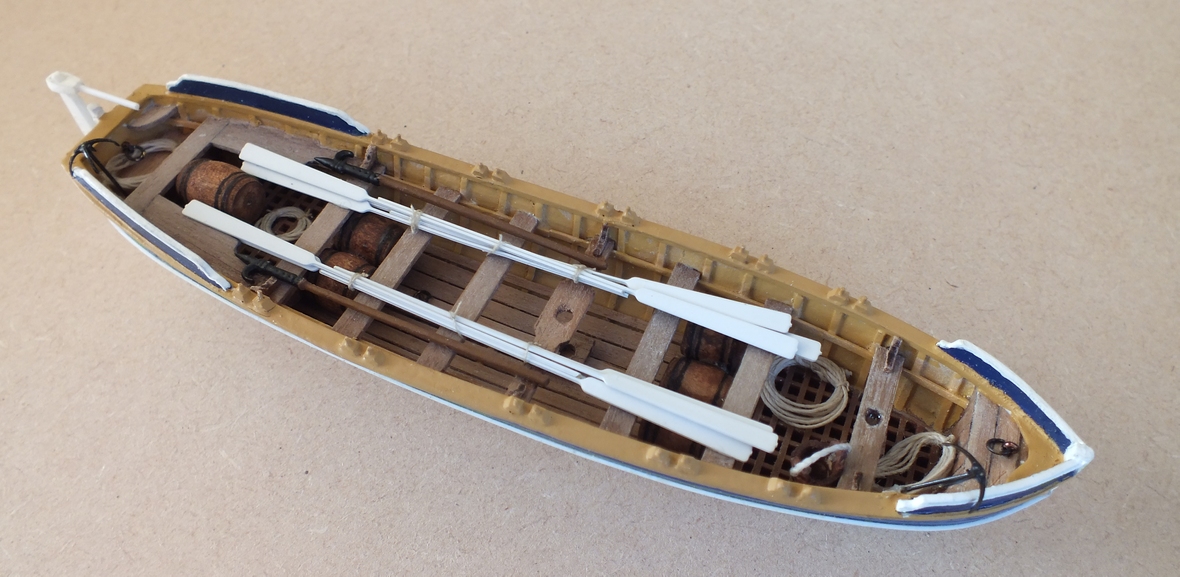
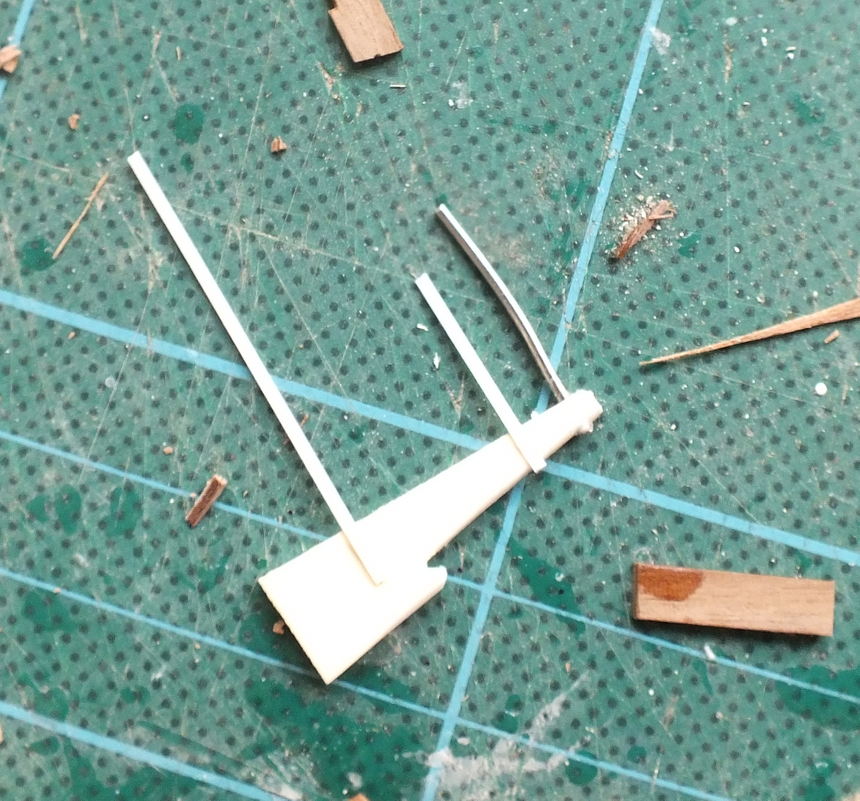
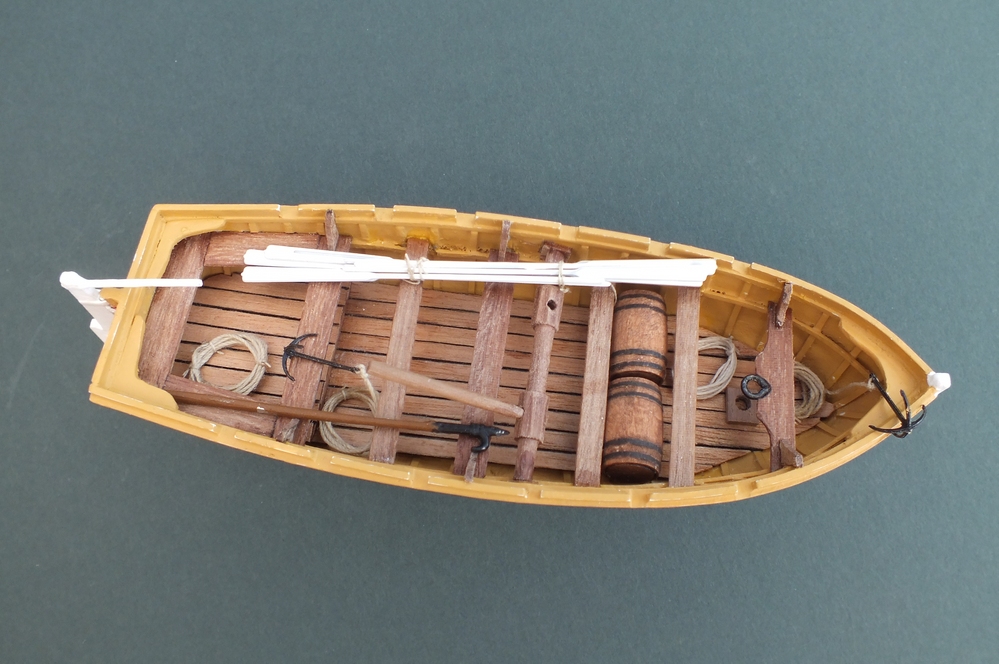
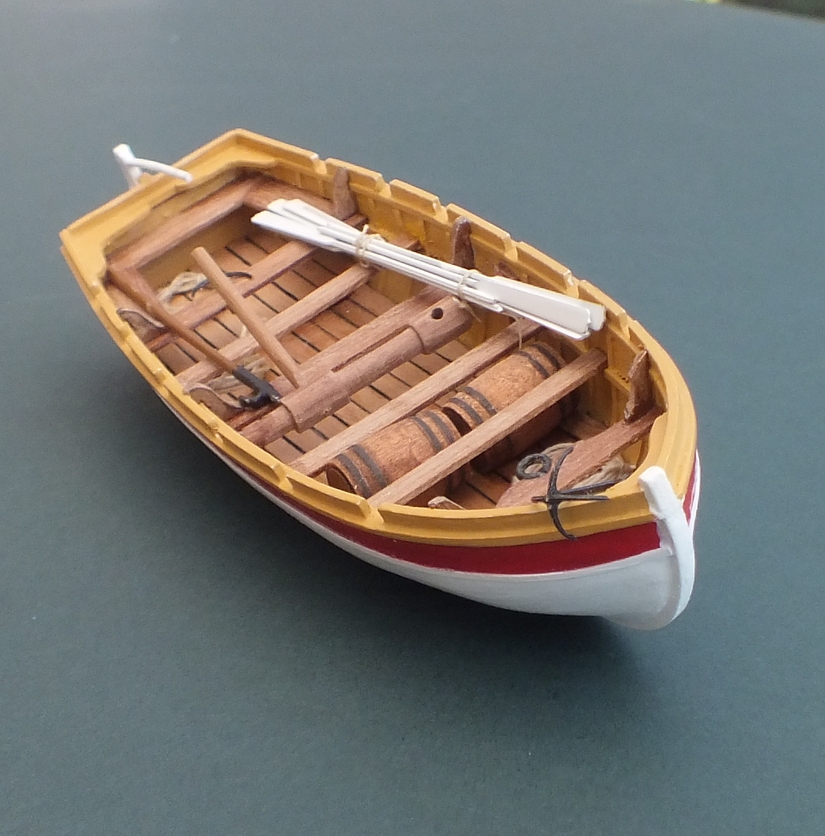
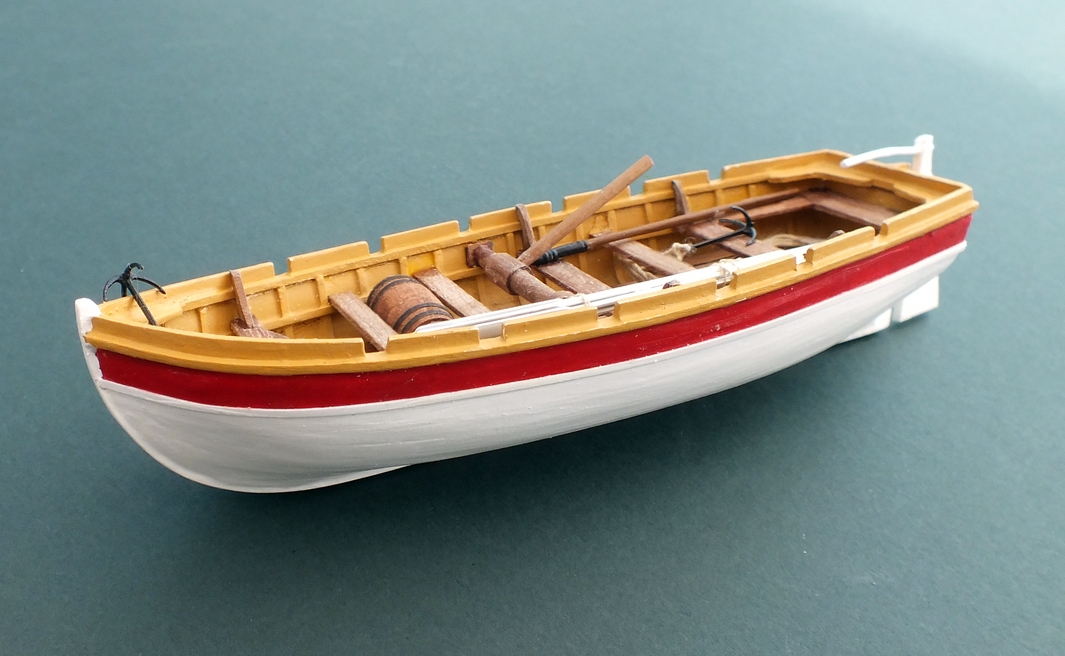
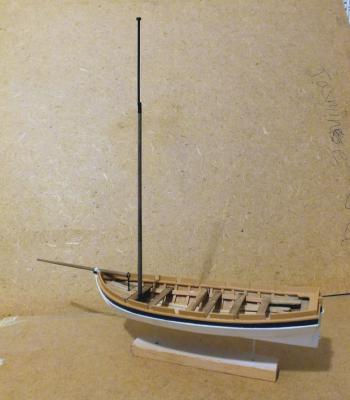
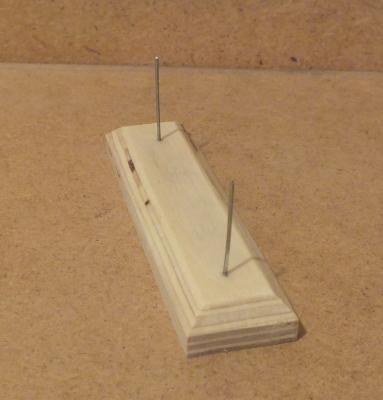
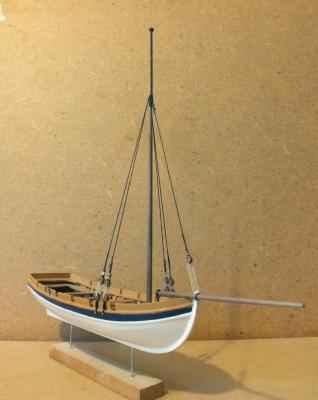
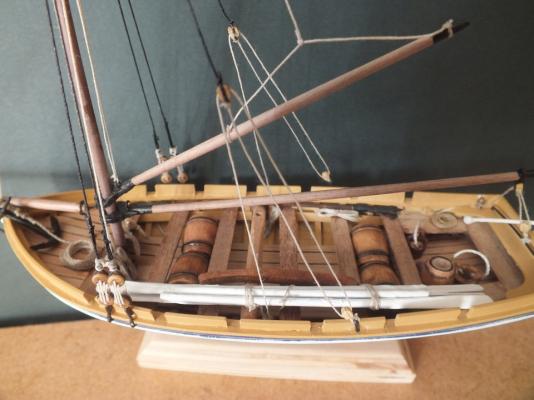
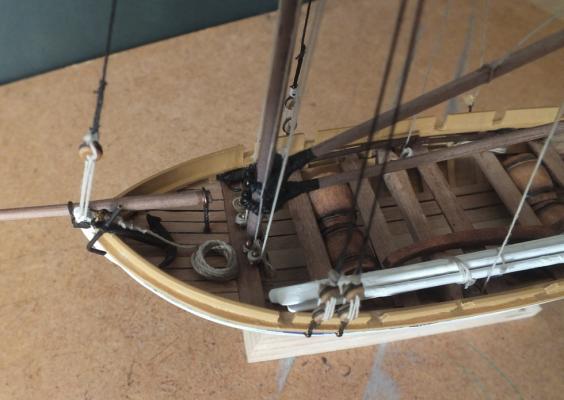
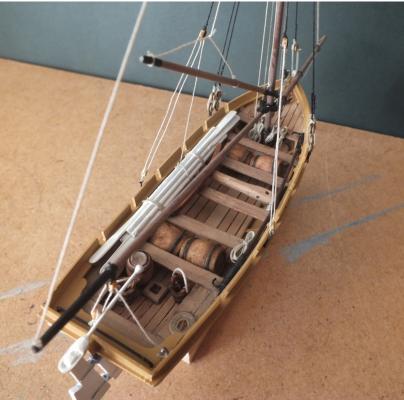
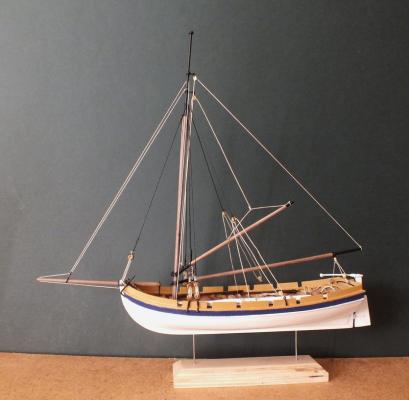
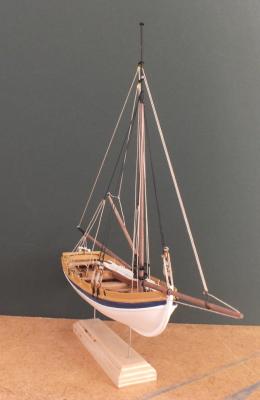
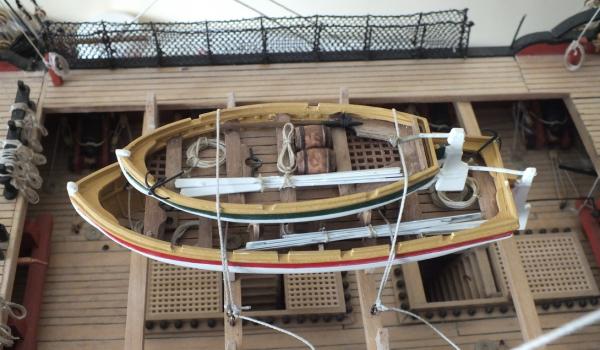
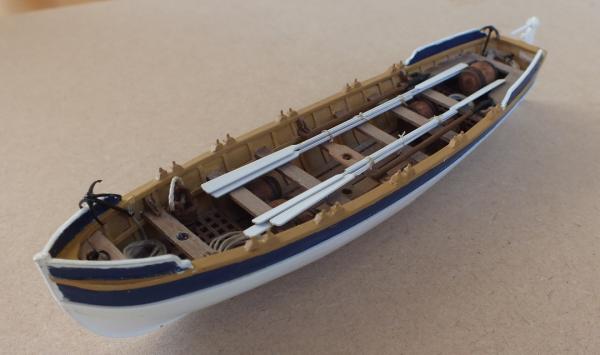
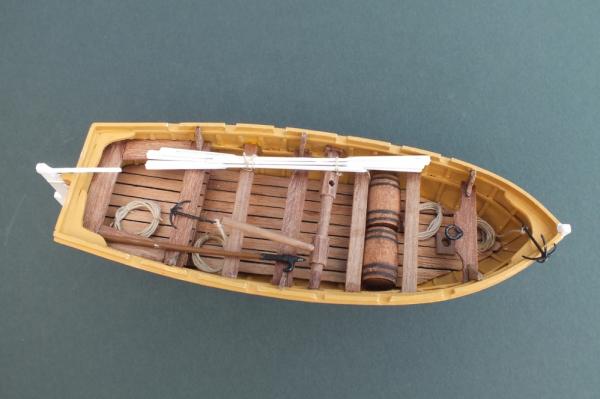
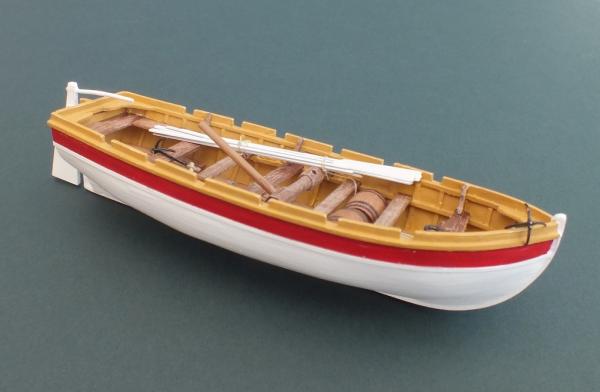
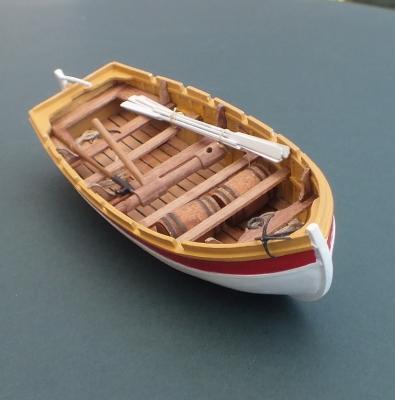
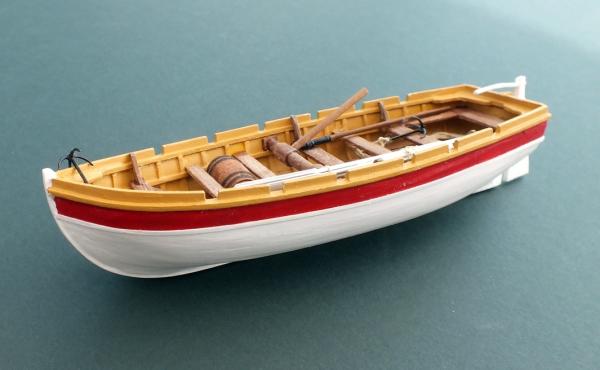
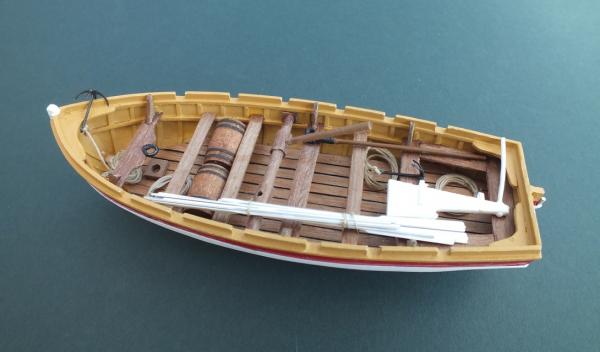
 The mast bowsprit and the rigging has now been completed, with the ropes, buckets, barrels,boat hooks,and oars added, only the barrels were bought the rest made,I will cover that on the next boat in the group,I also made a simple stand out of ply,so the 26ft launch is finished,one down three to go. Mast Stand Rigging started Inboard views Finished boat
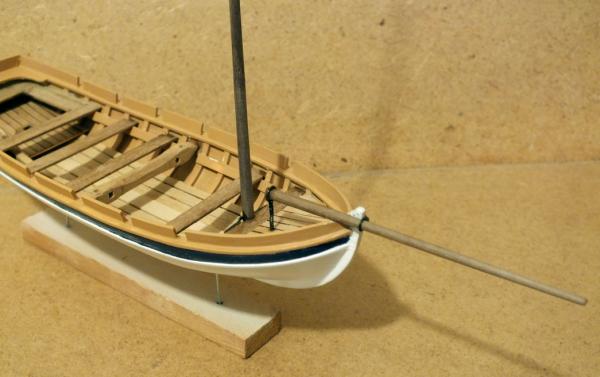


- 8 replies
-
- 12
-

-
- ships boat
- diana
- (and 1 more)
-
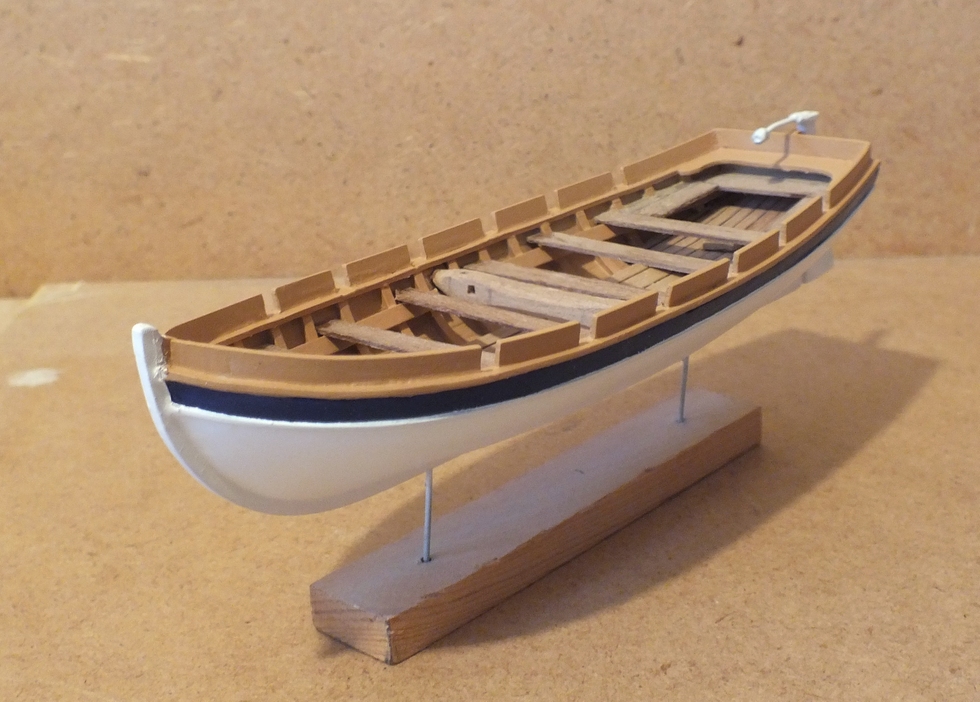
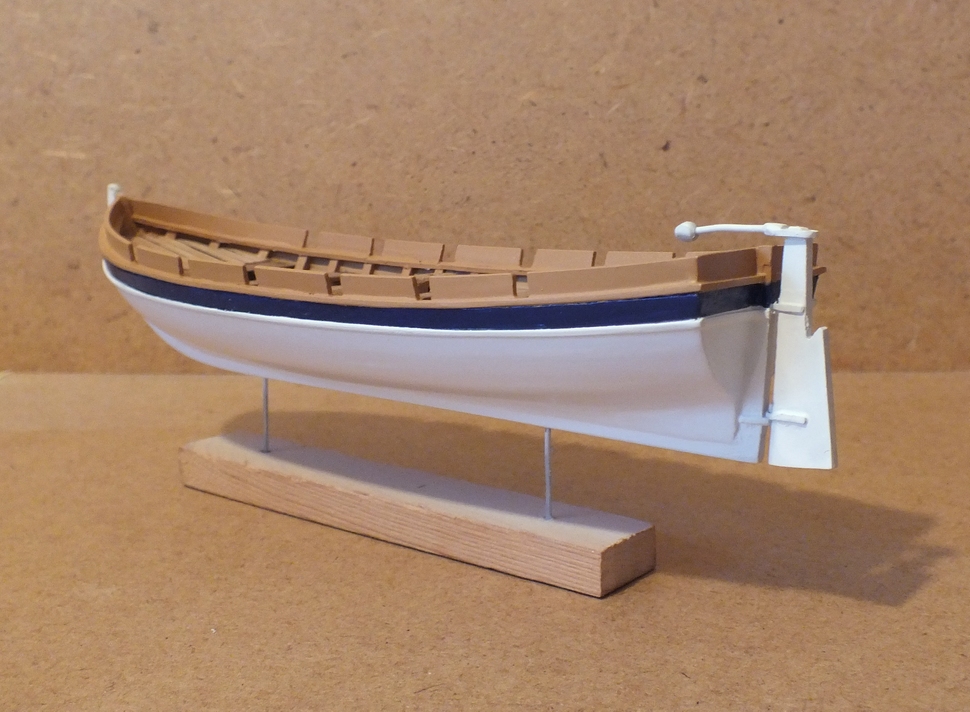
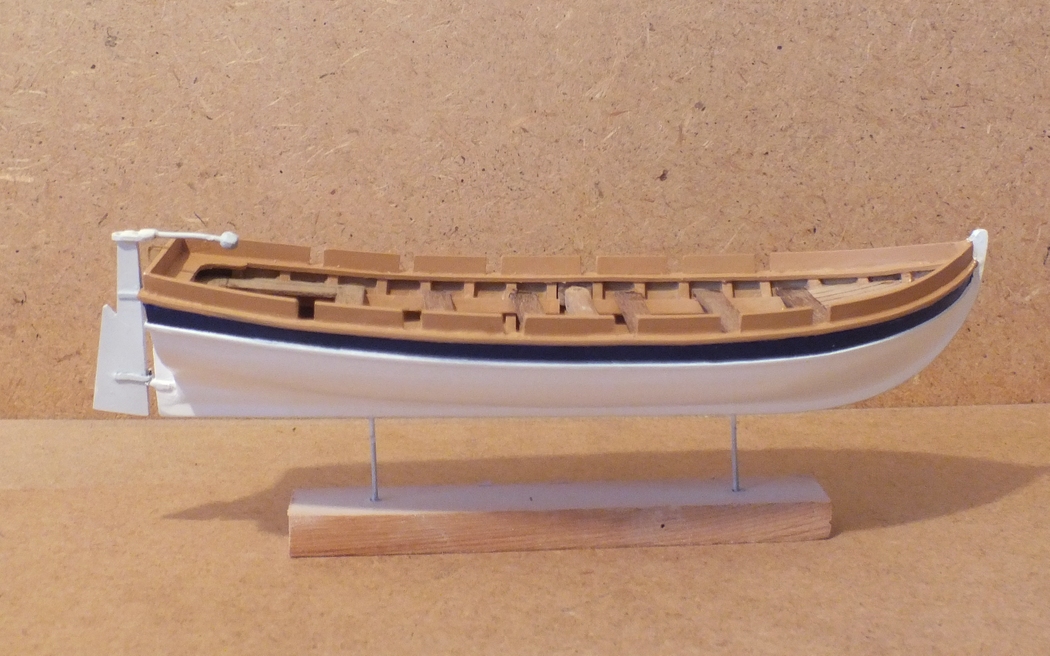
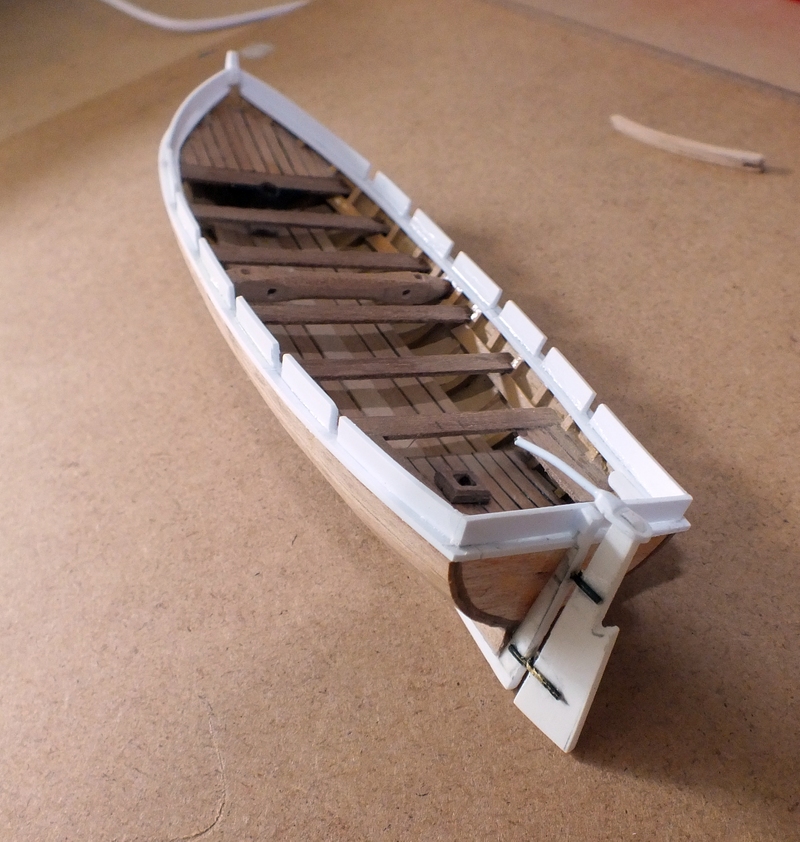
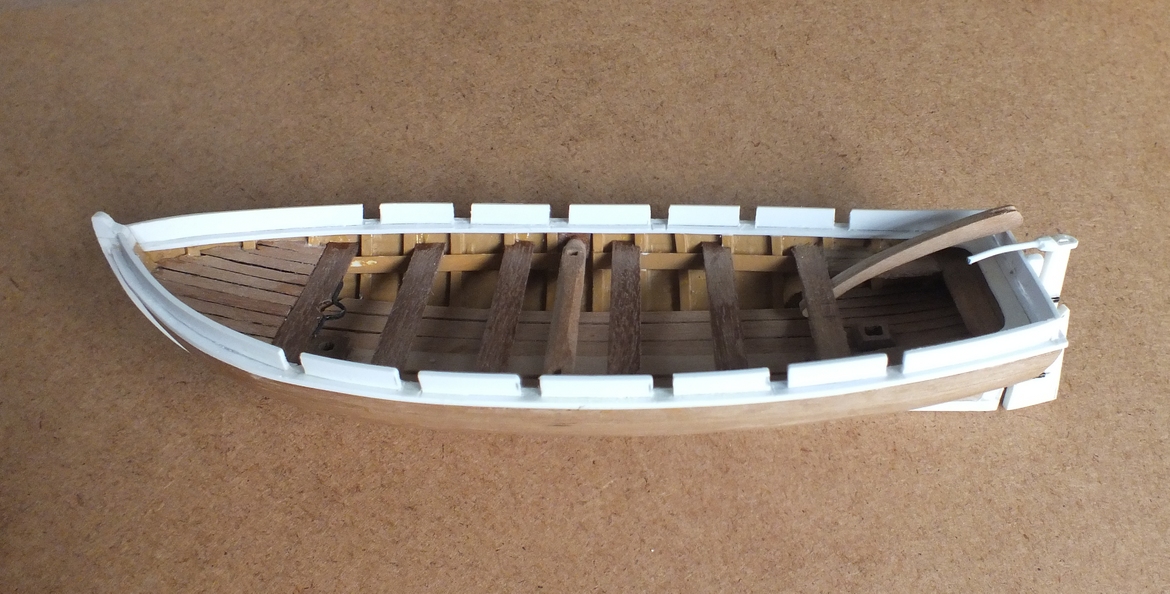
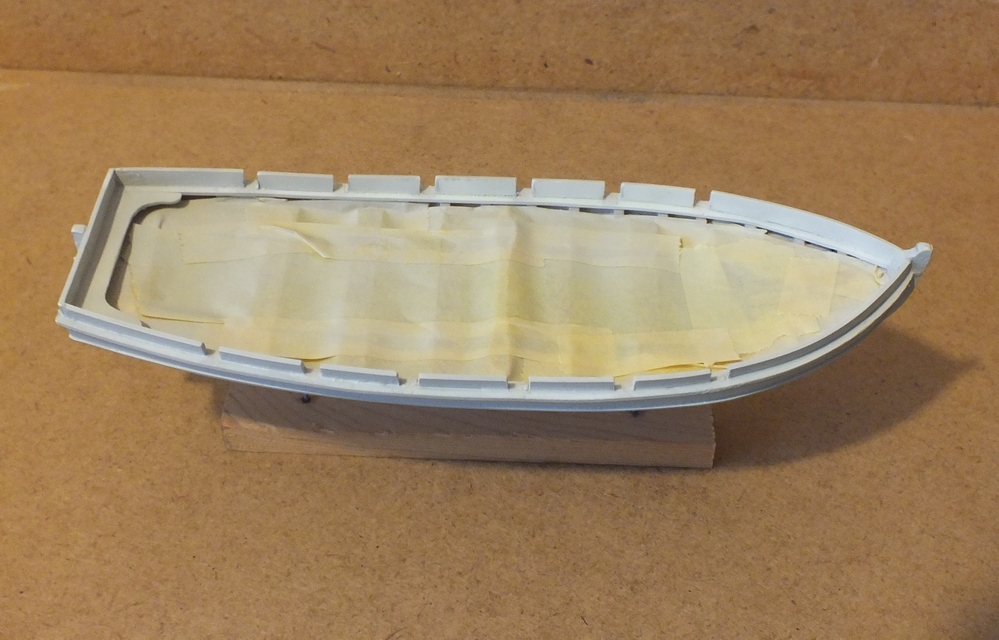
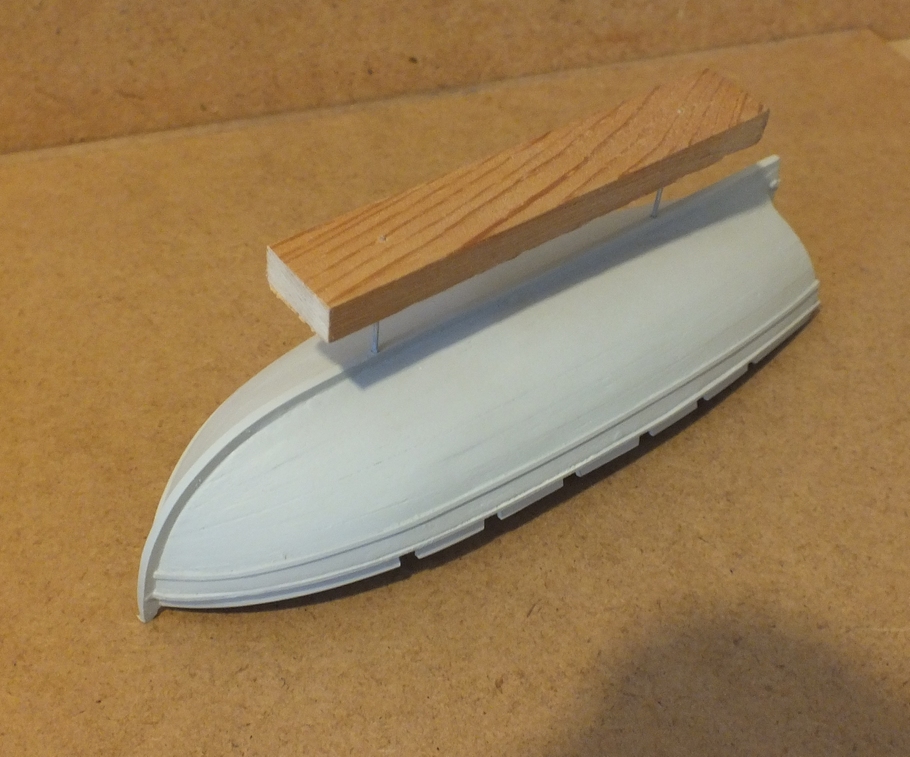
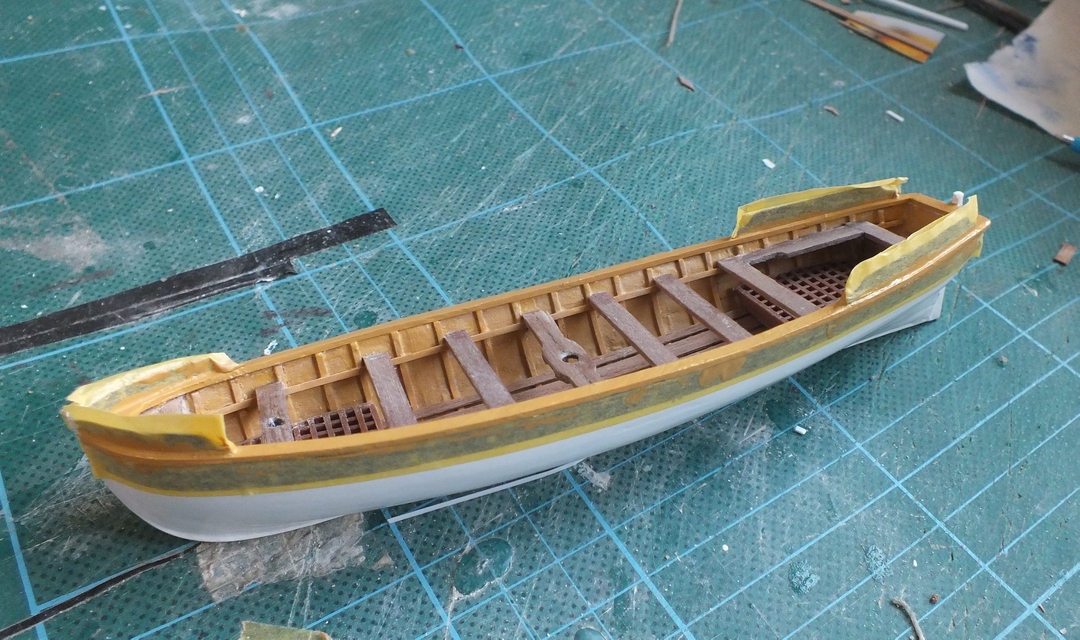
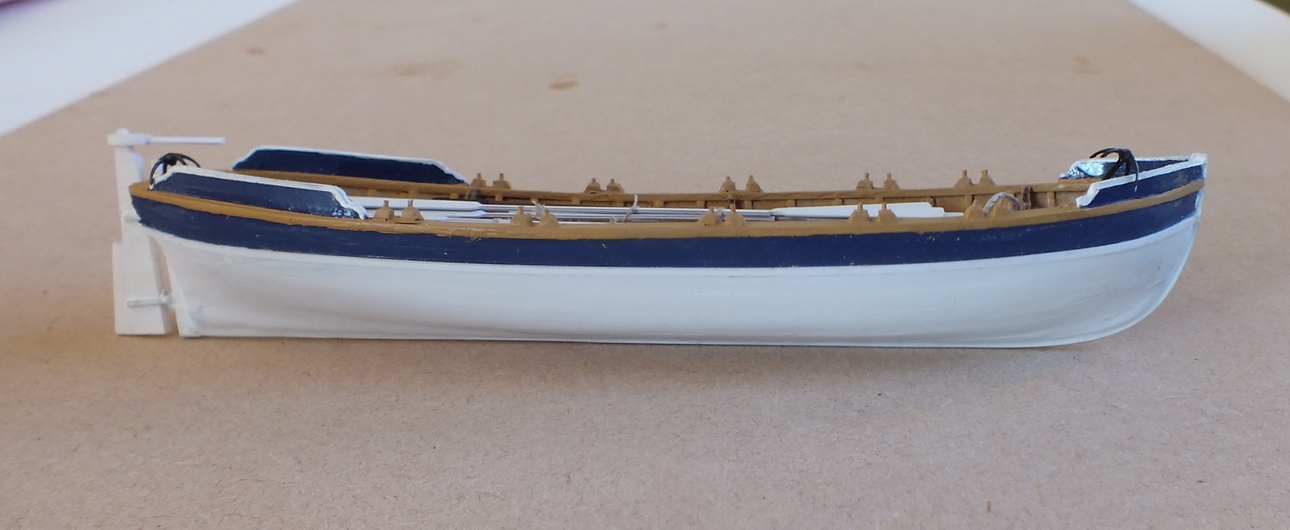
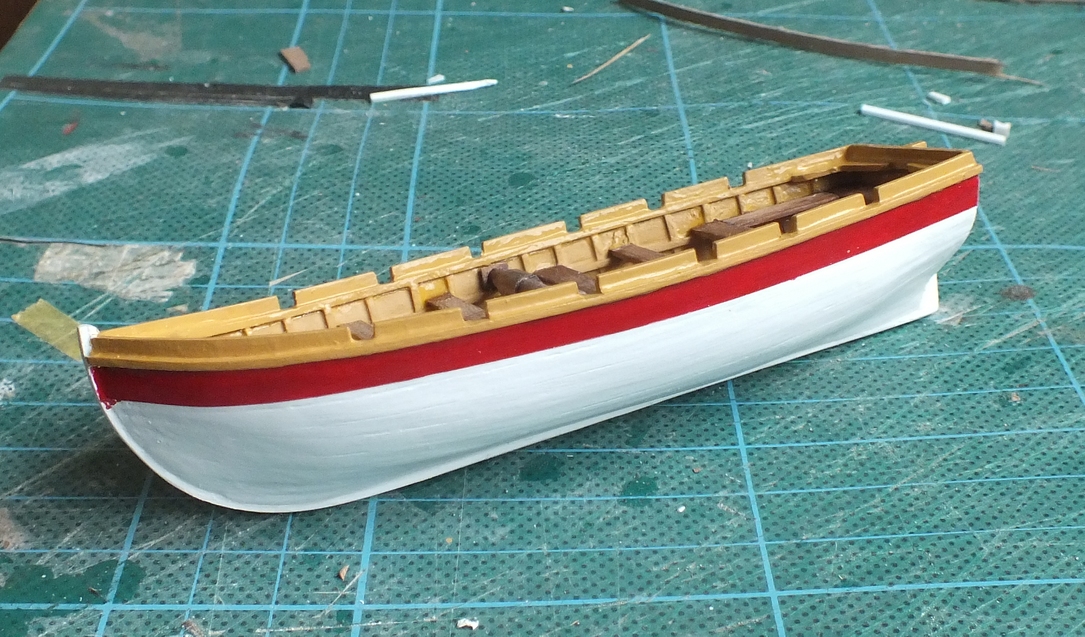
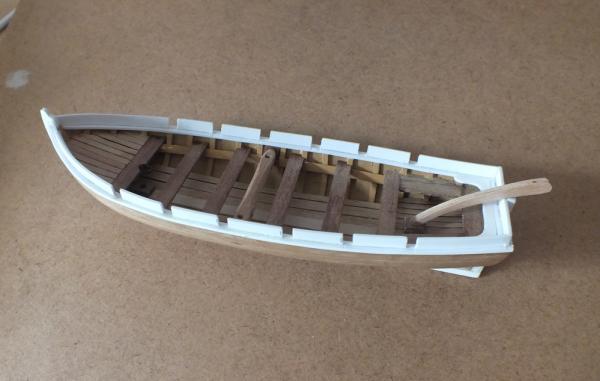
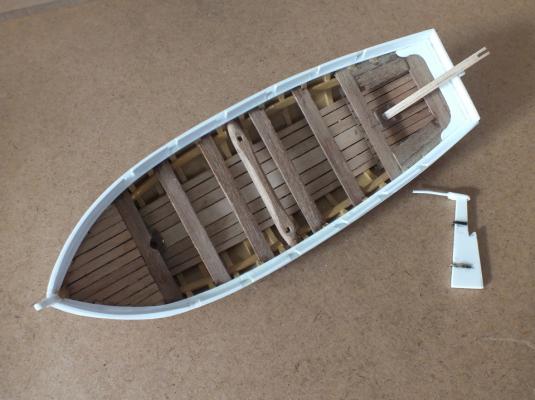
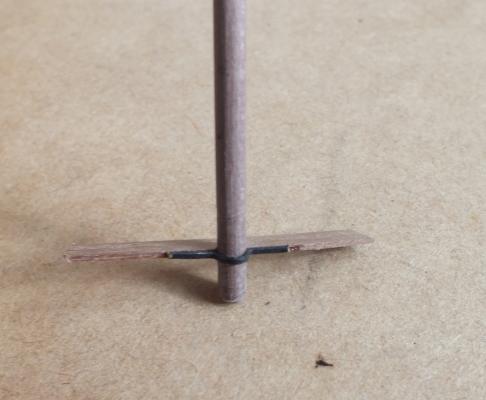
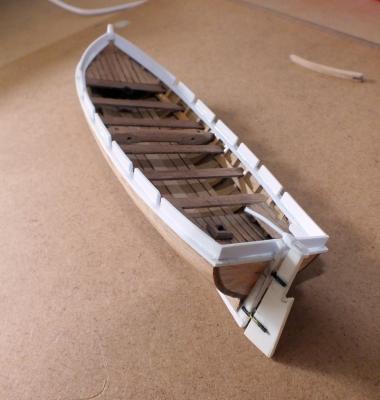
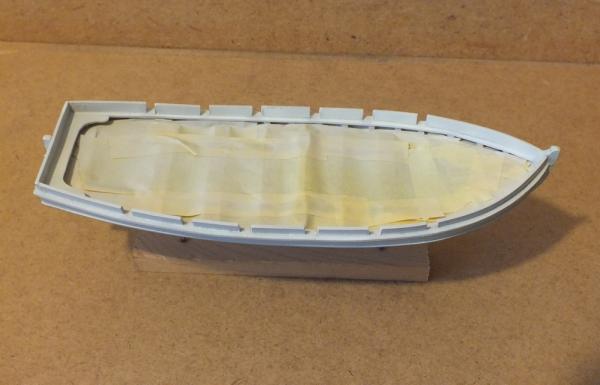
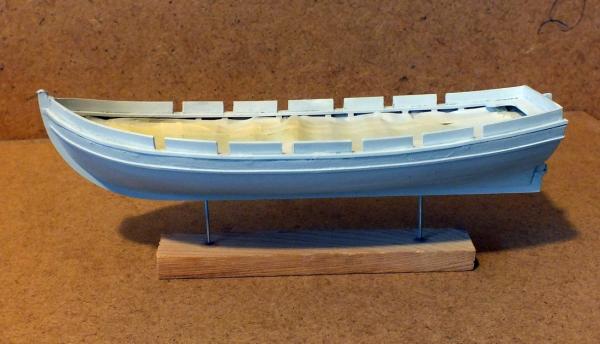
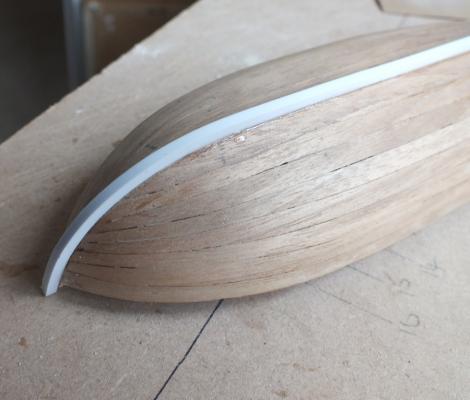
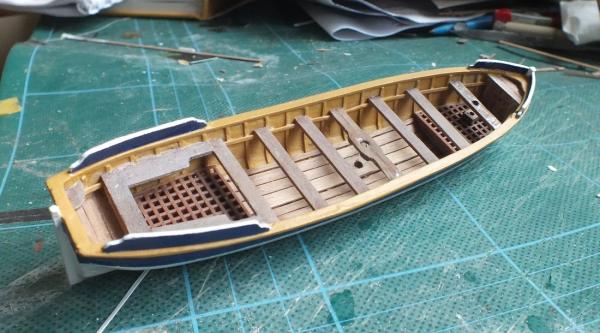
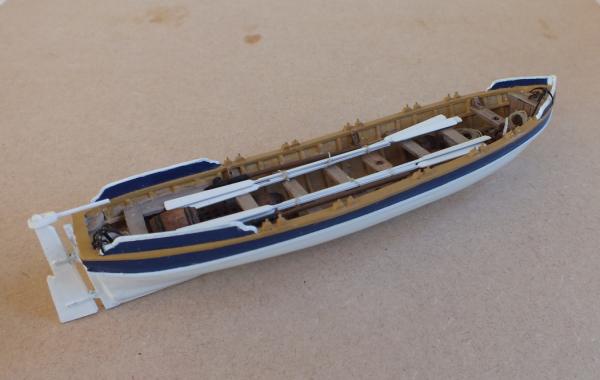
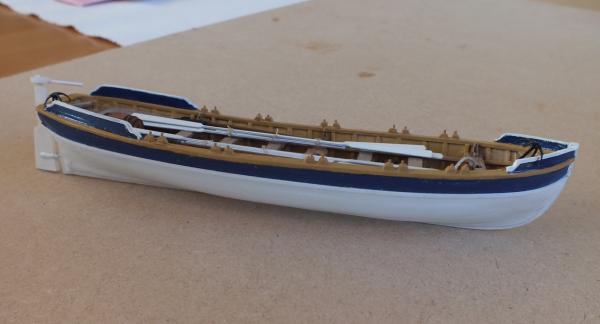
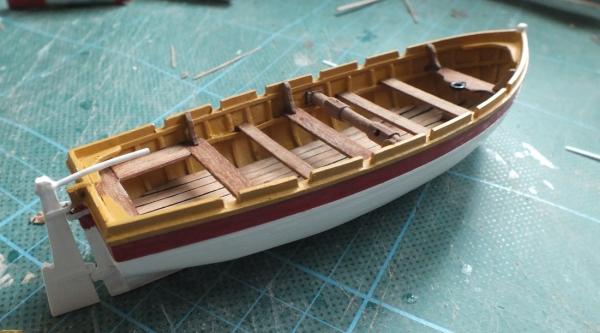
The stern seats were added and the winch and davit made, the davit will just be stored on board as it cannot be in place with the rudder mounted,the rudder has also be made, but I will alter the arm,the wash strakes have been added to the hull and the oar slots cut,the boat has been masked up and sprayed with quite a few coats of primer rubbed down after every two coats. Spray painting the boats will be a new venture as I have invested in a small compressor and air brush, and it will be a learning curve, but so far after just doing the primer, I am well pleased with the results, the main thing learnt so far is just how thin you need to get the paint (acrylic) to get a good result.

- 8 replies
-
- 6
-
-
- ships boat
- diana
- (and 1 more)
-
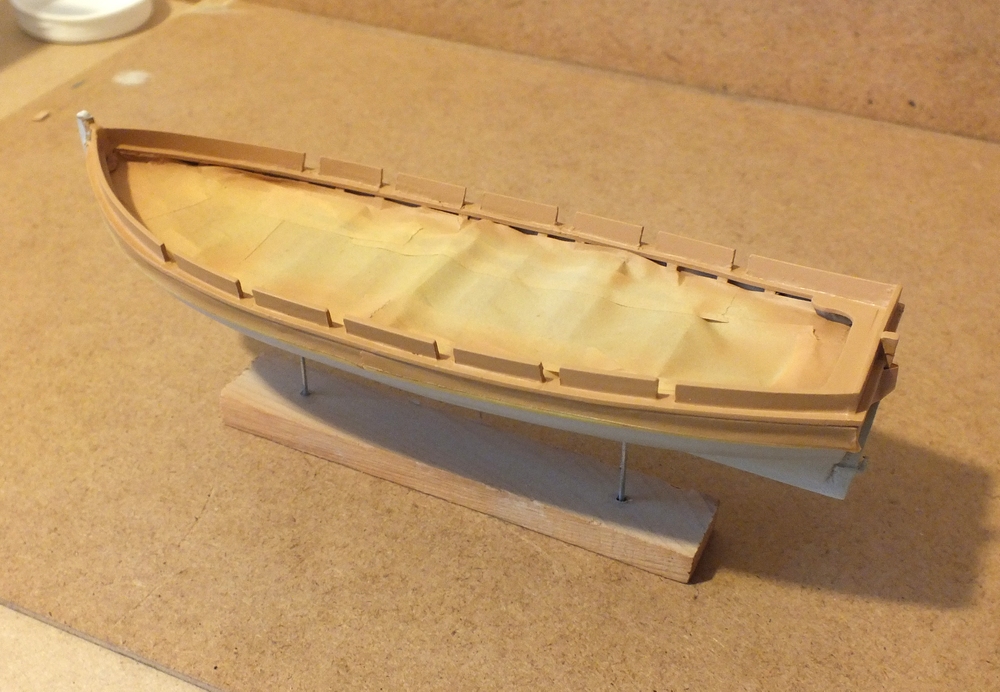
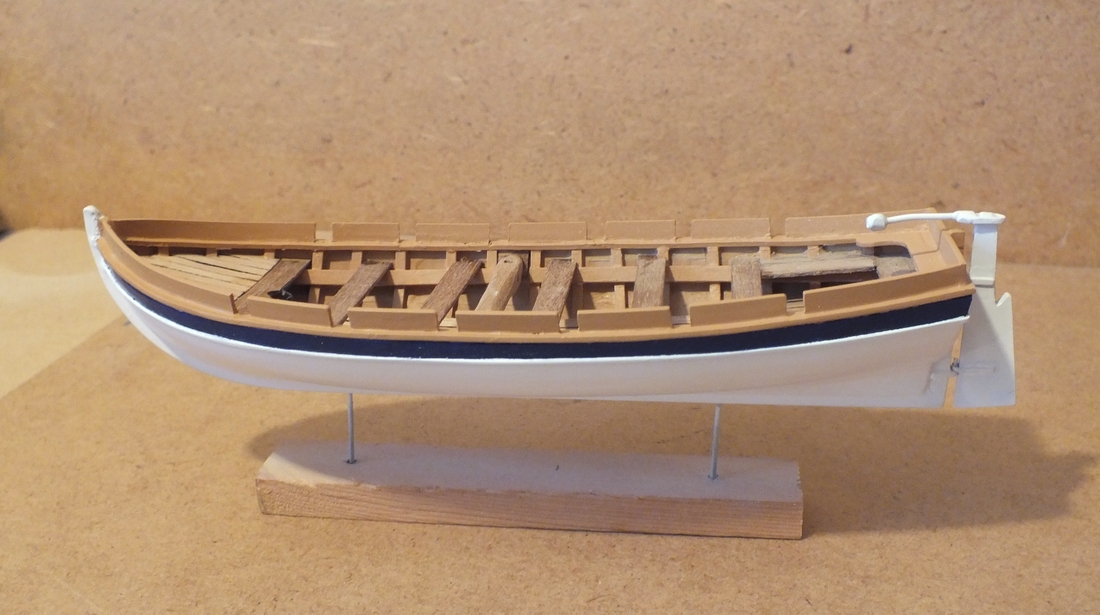
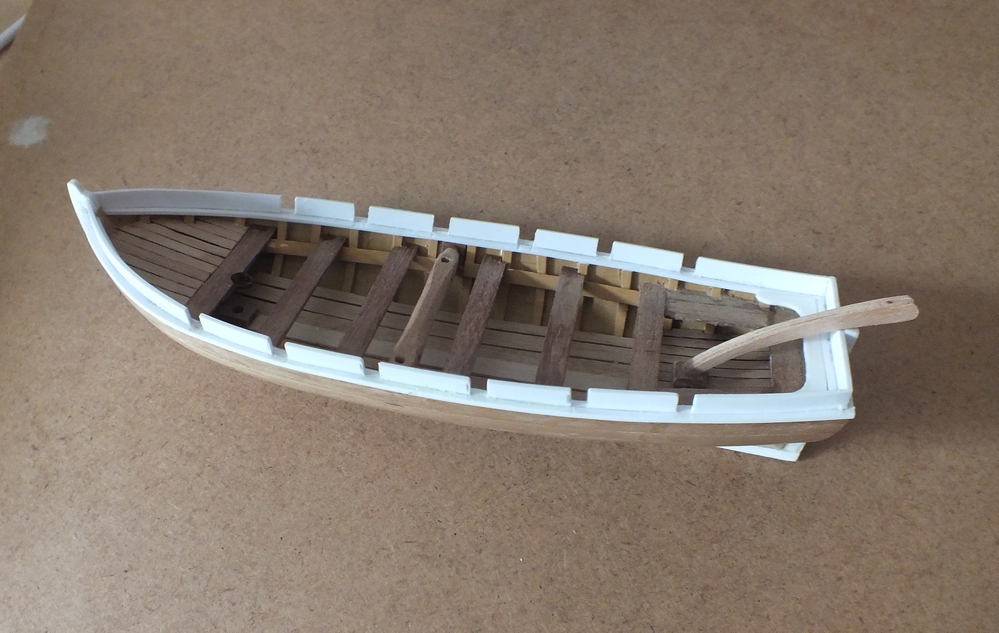
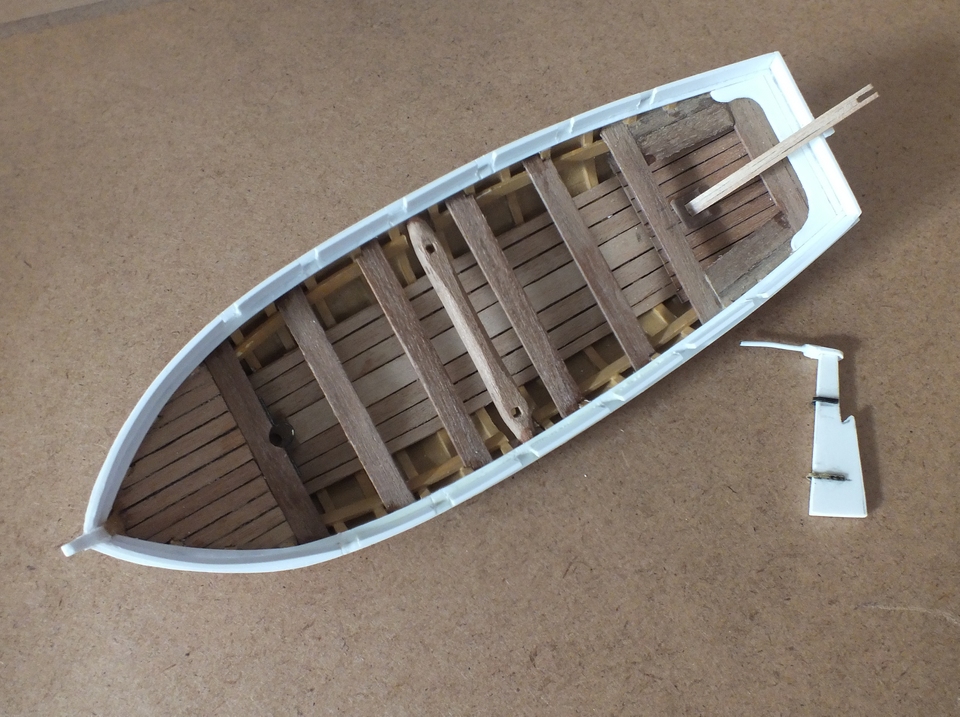
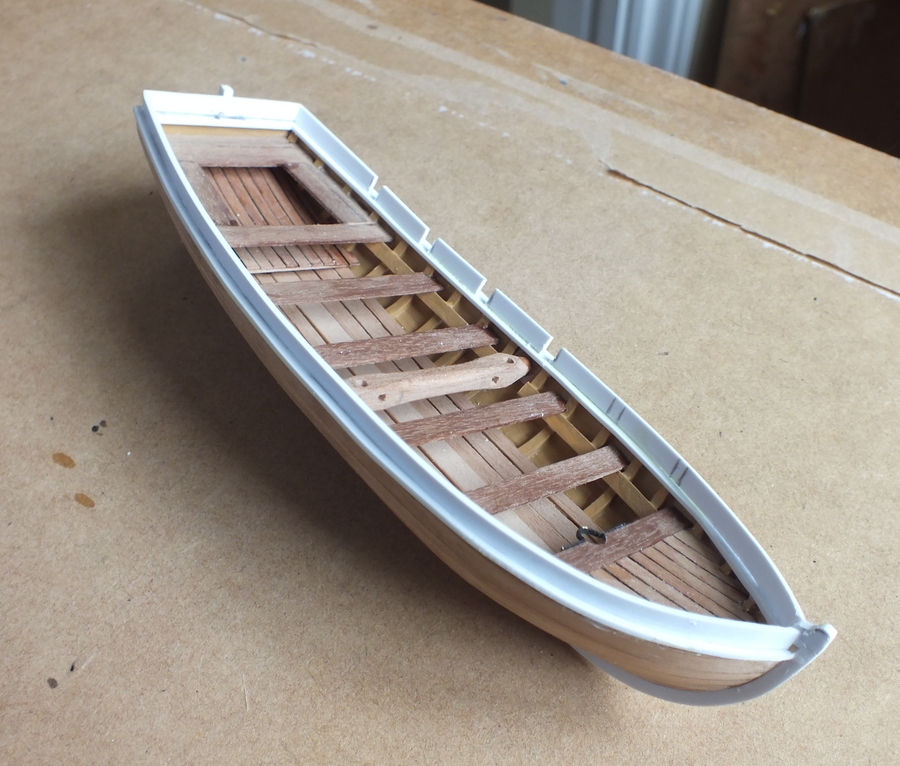
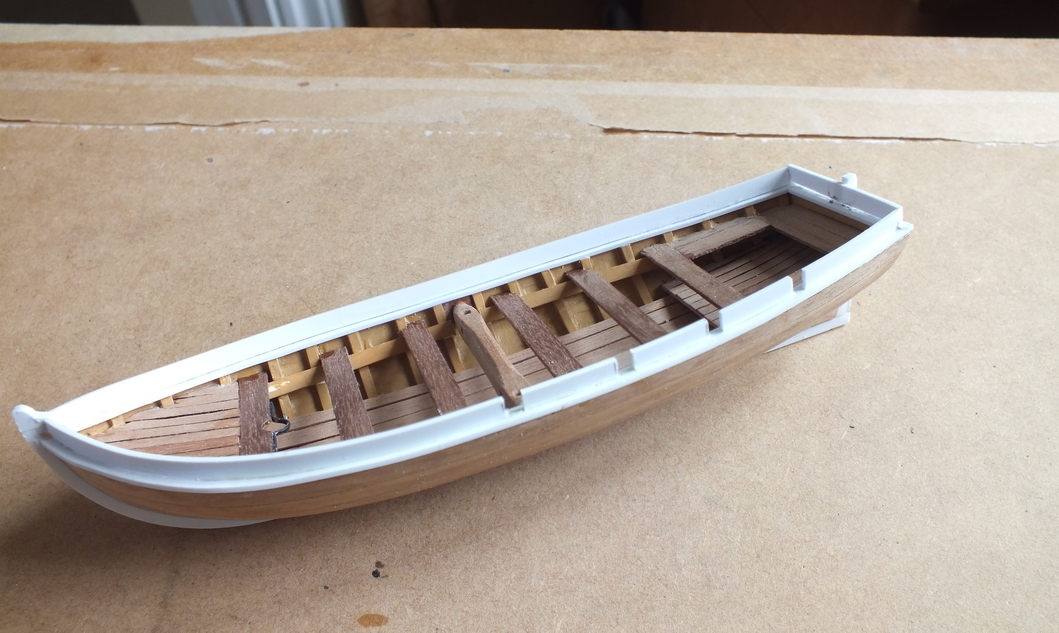
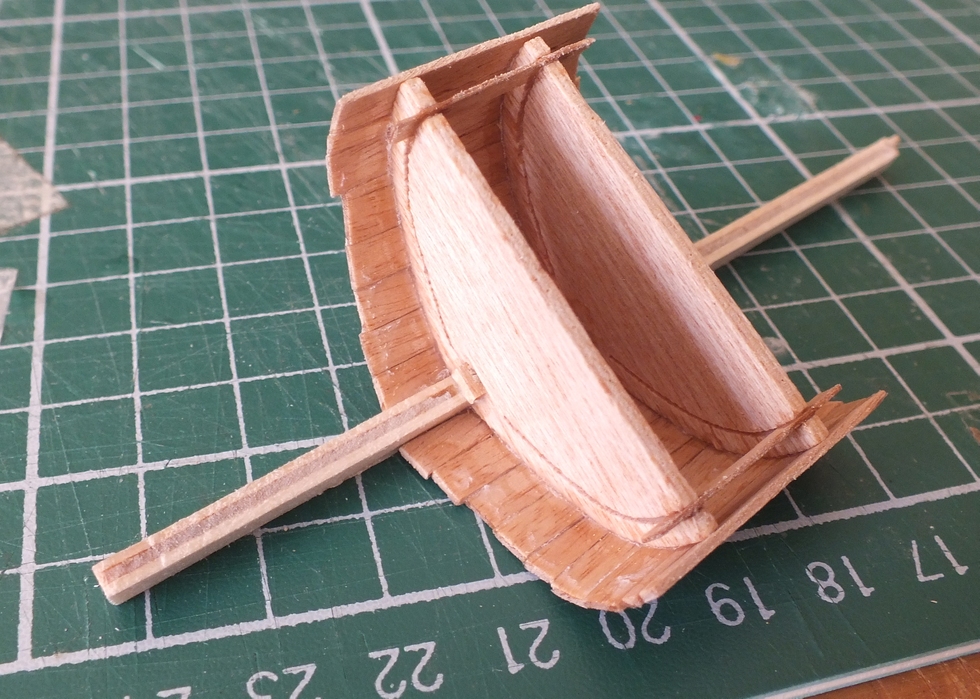
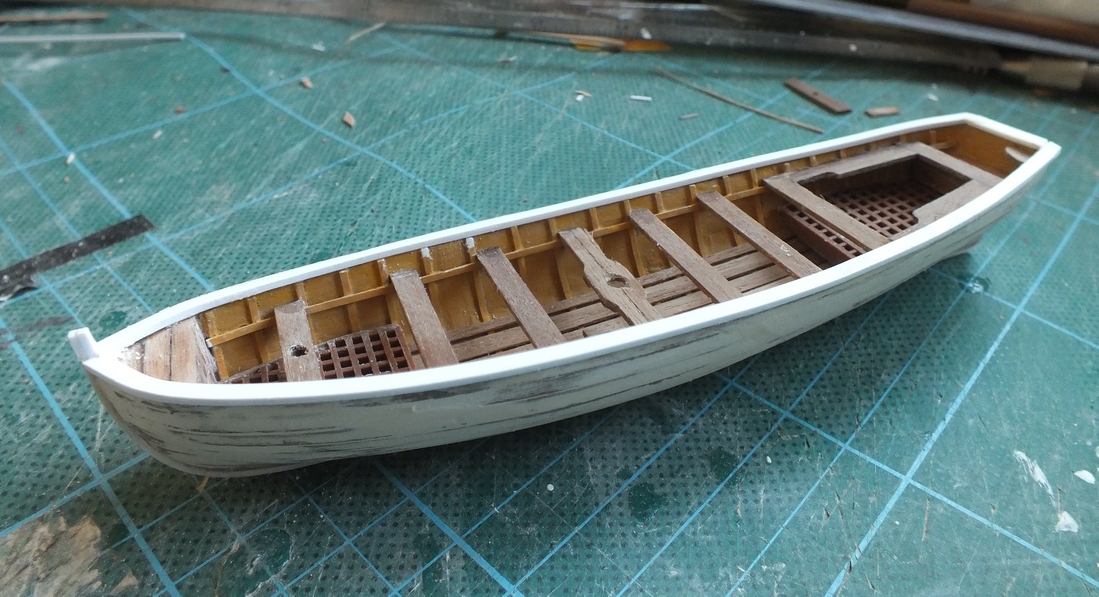
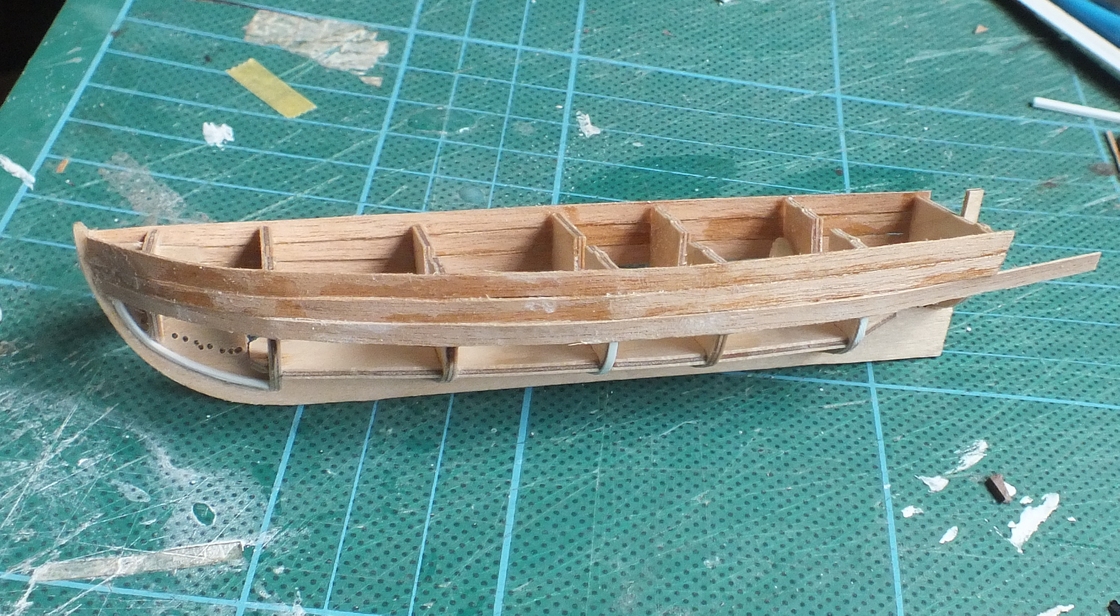
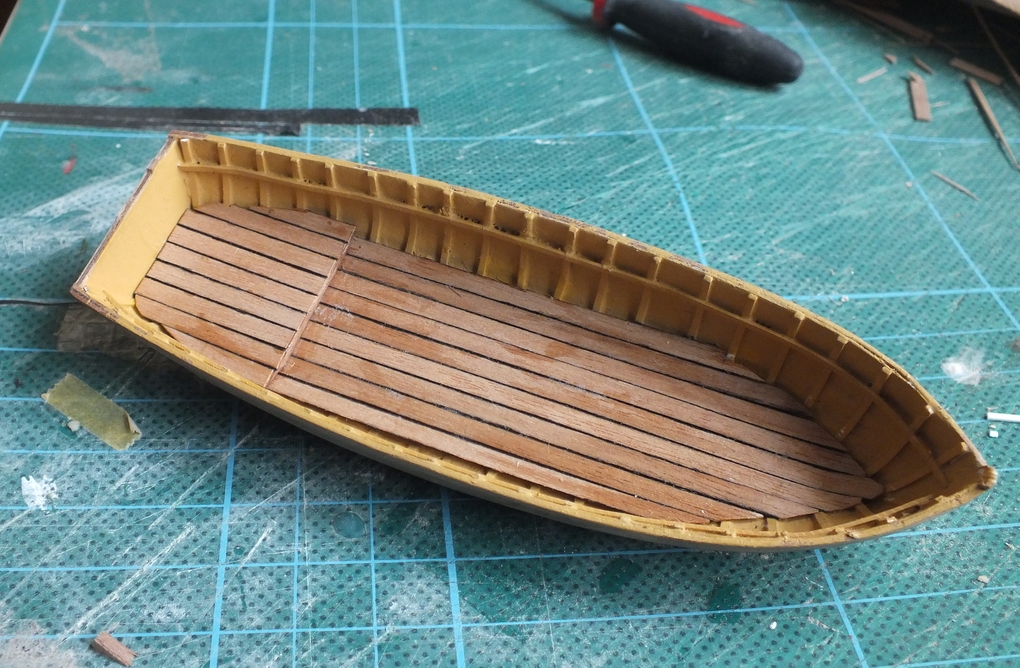
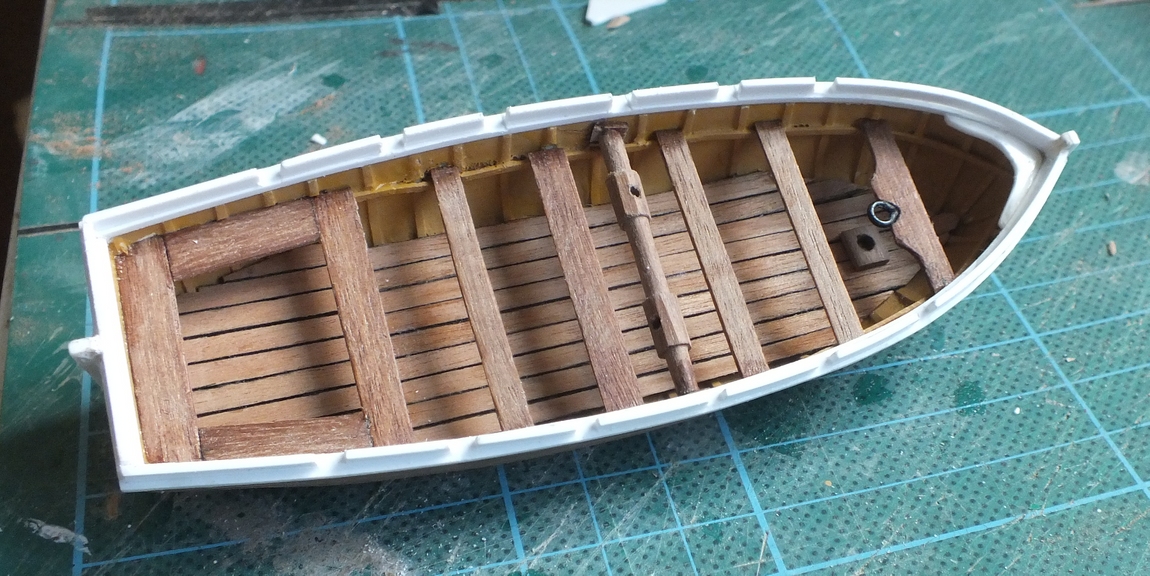
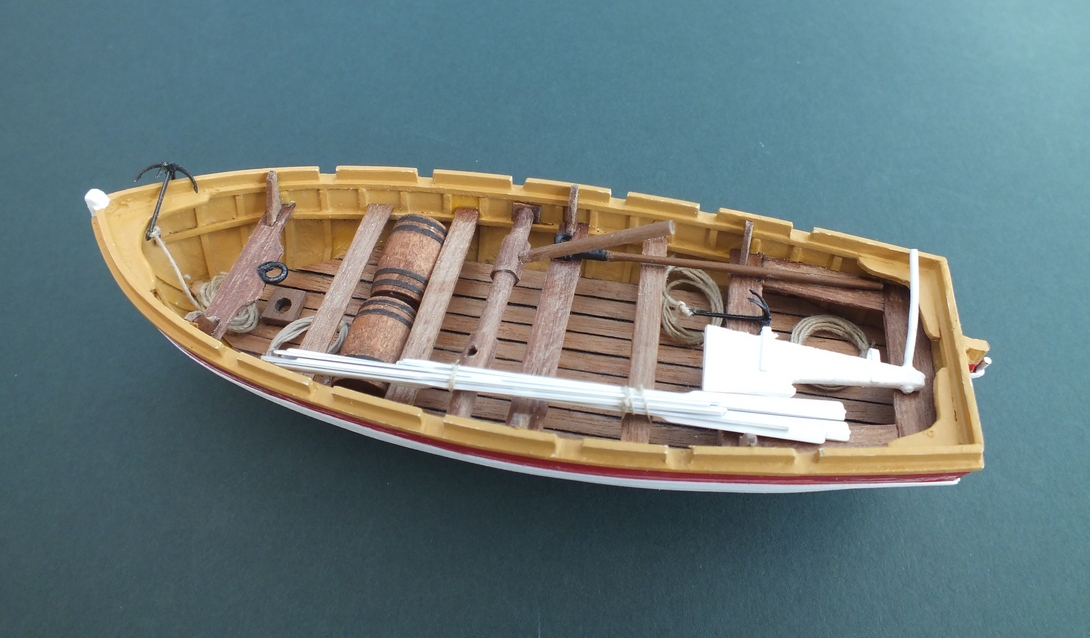
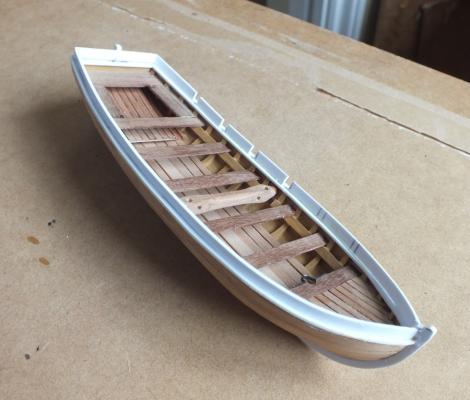
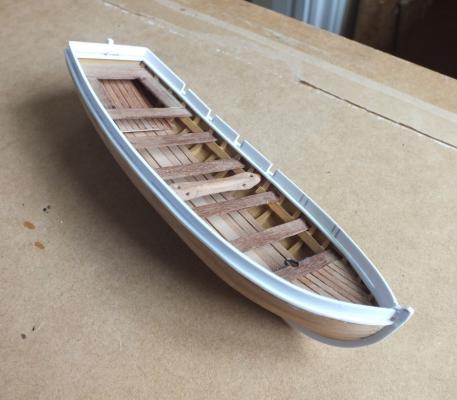
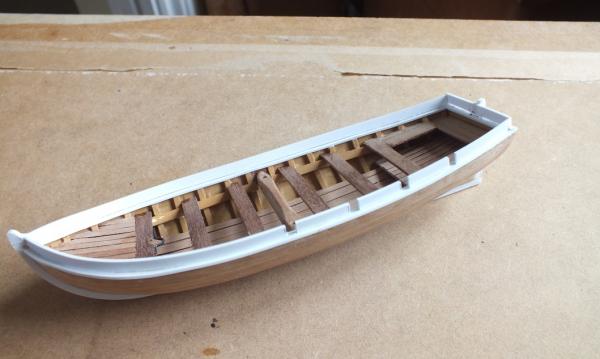
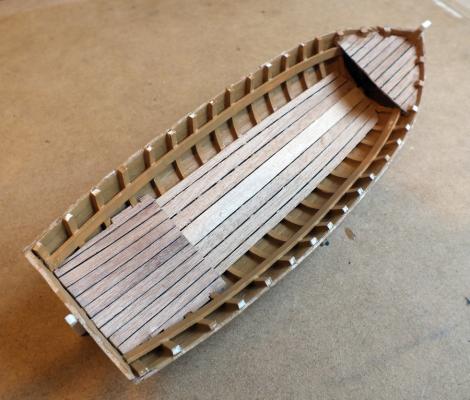
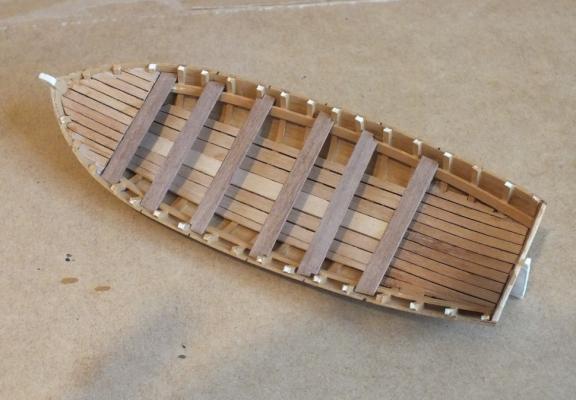
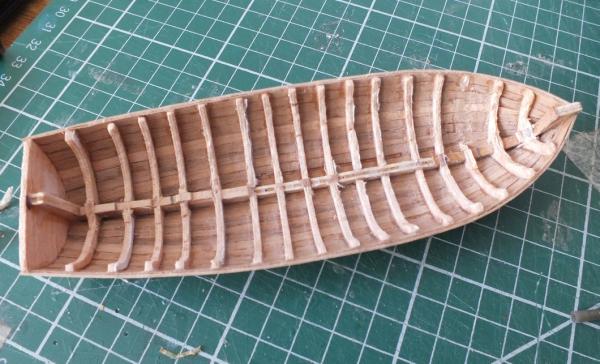
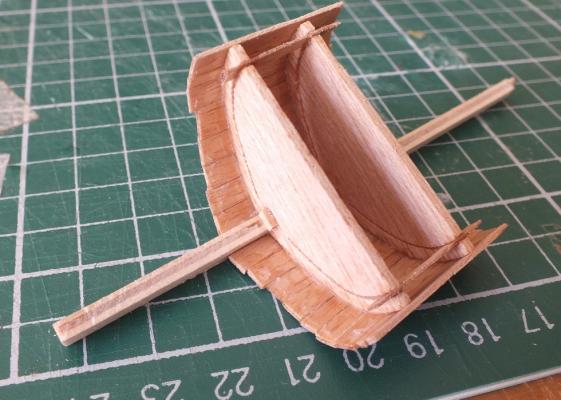
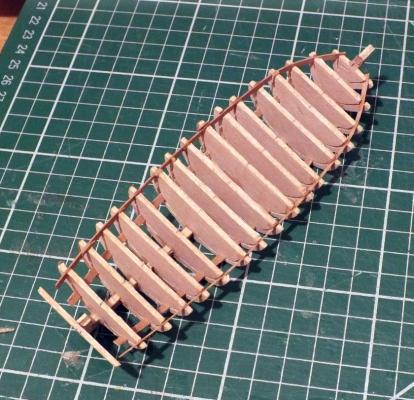
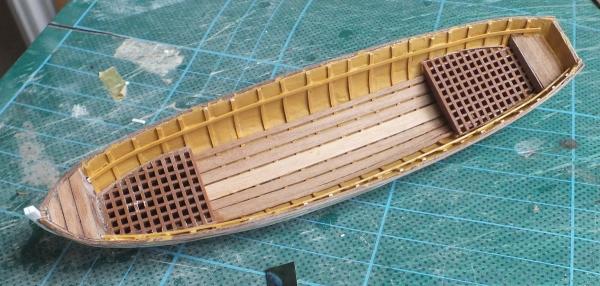
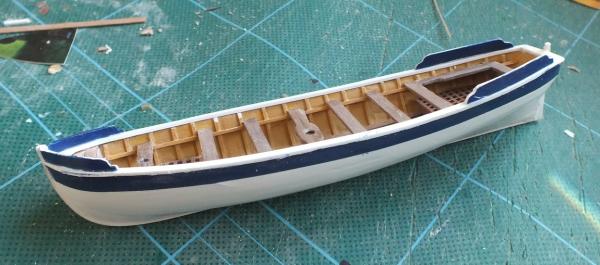
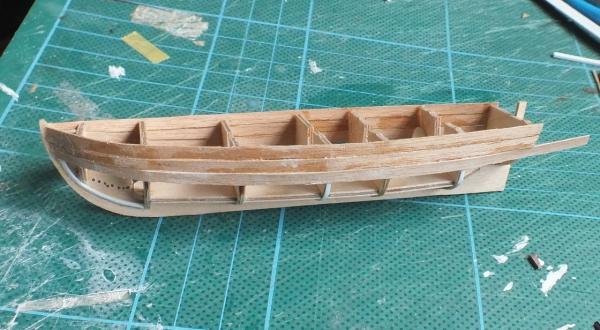
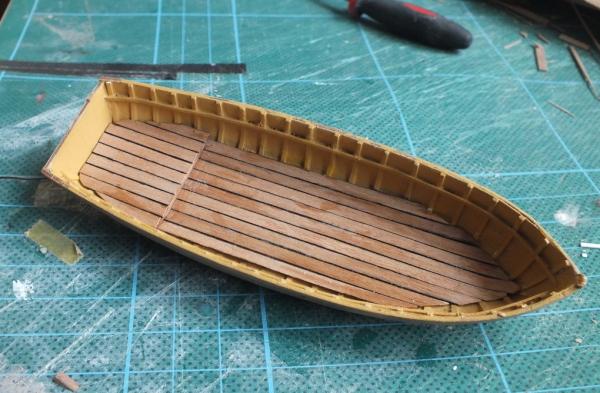
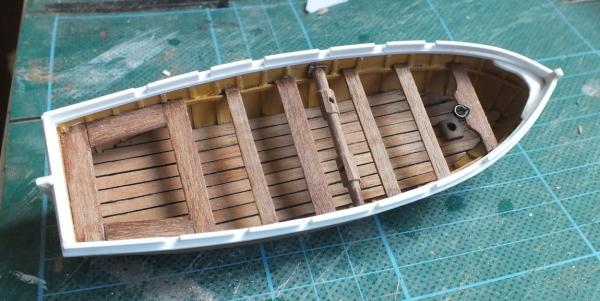
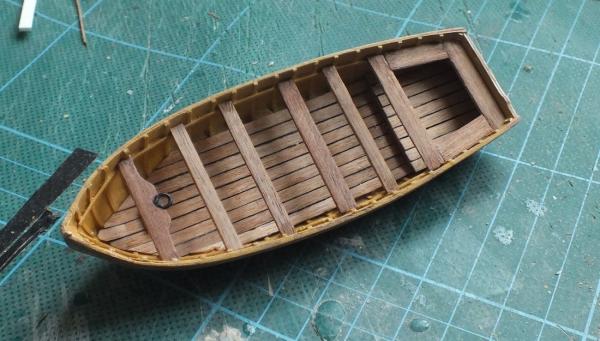
With the ribs fitted the inside has now been fitted out with the floor and decking.
- 8 replies
-
- 9
-
-
- ships boat
- diana
- (and 1 more)
-
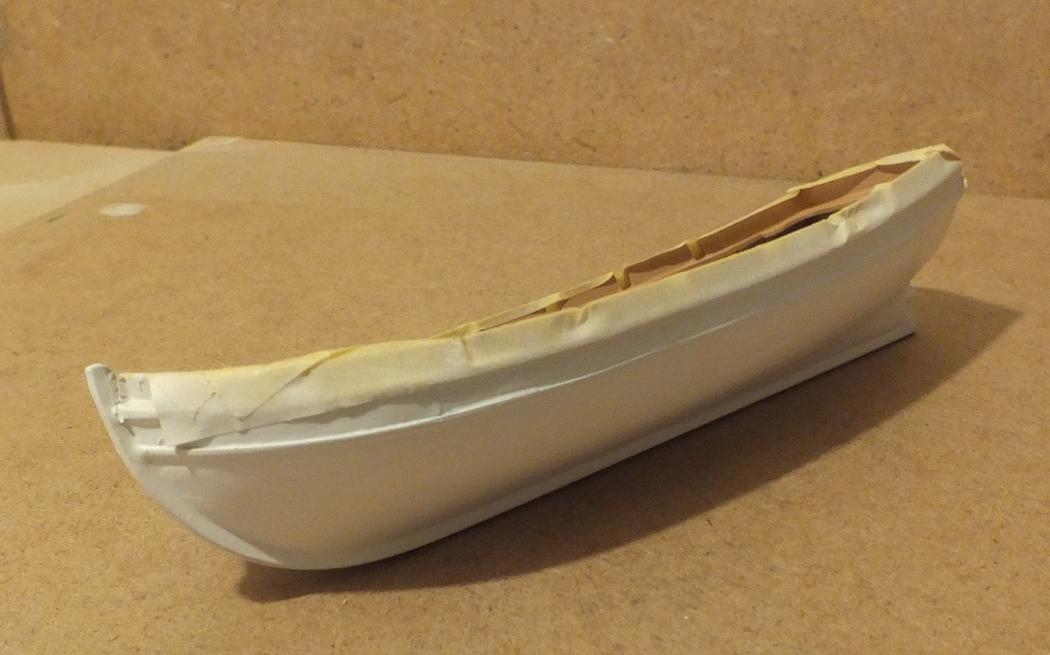
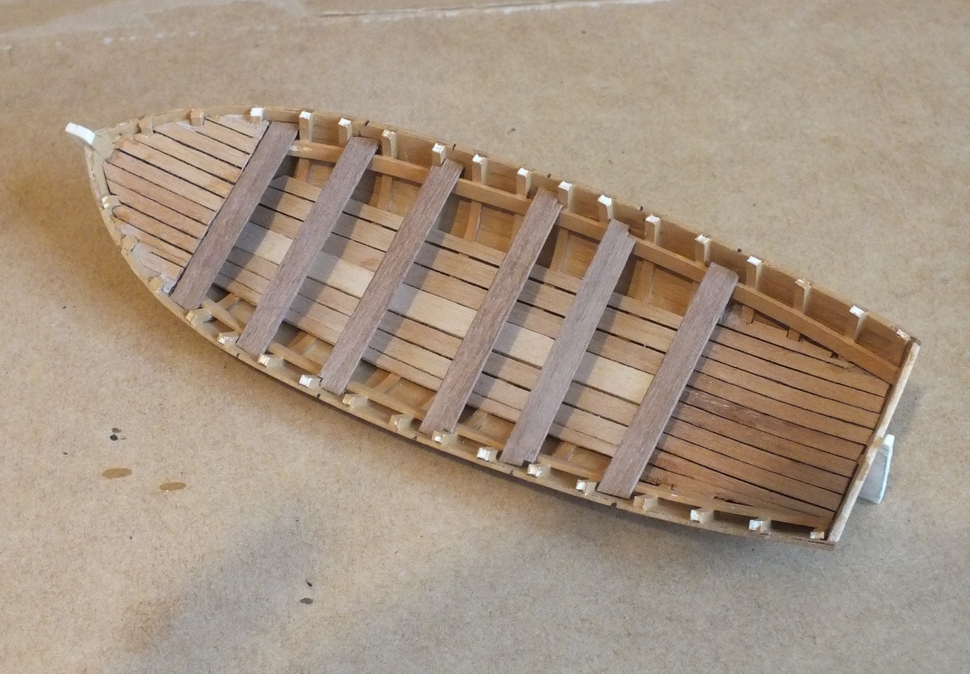
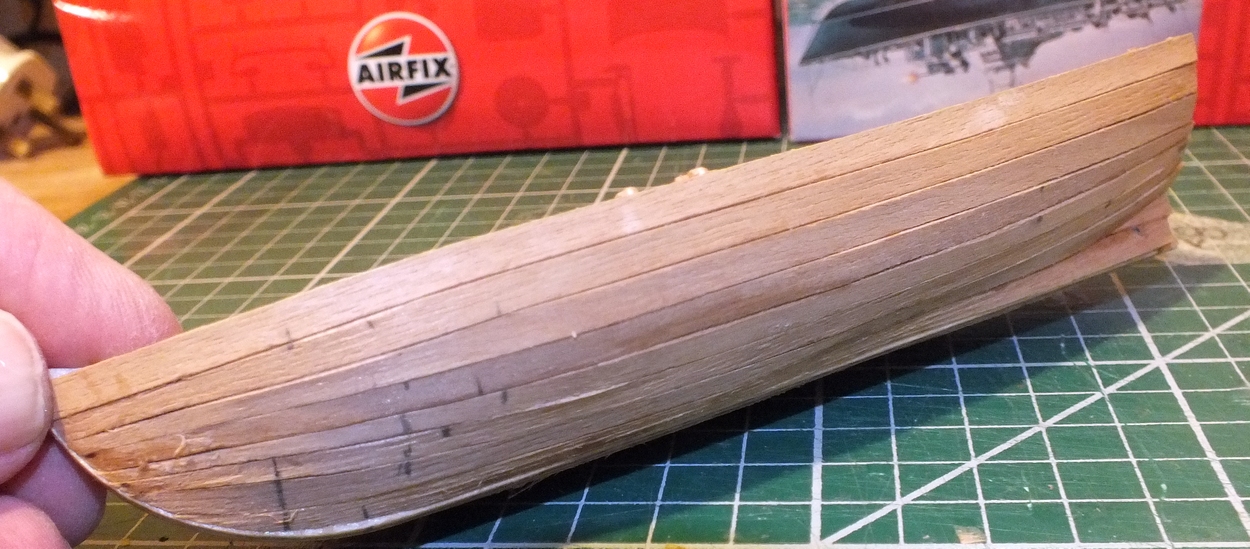
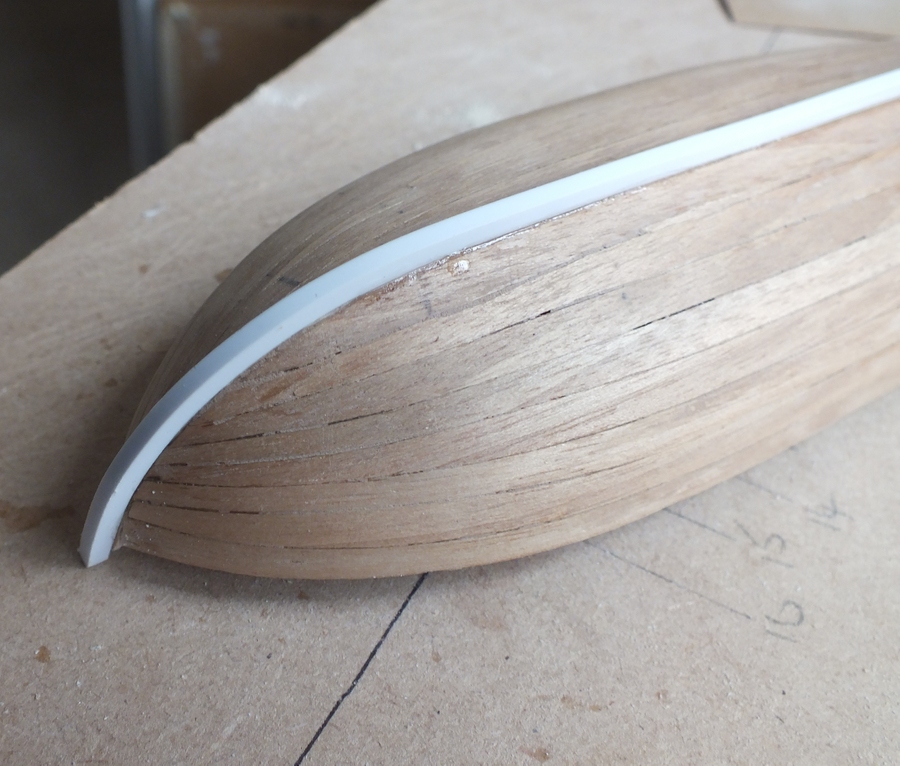
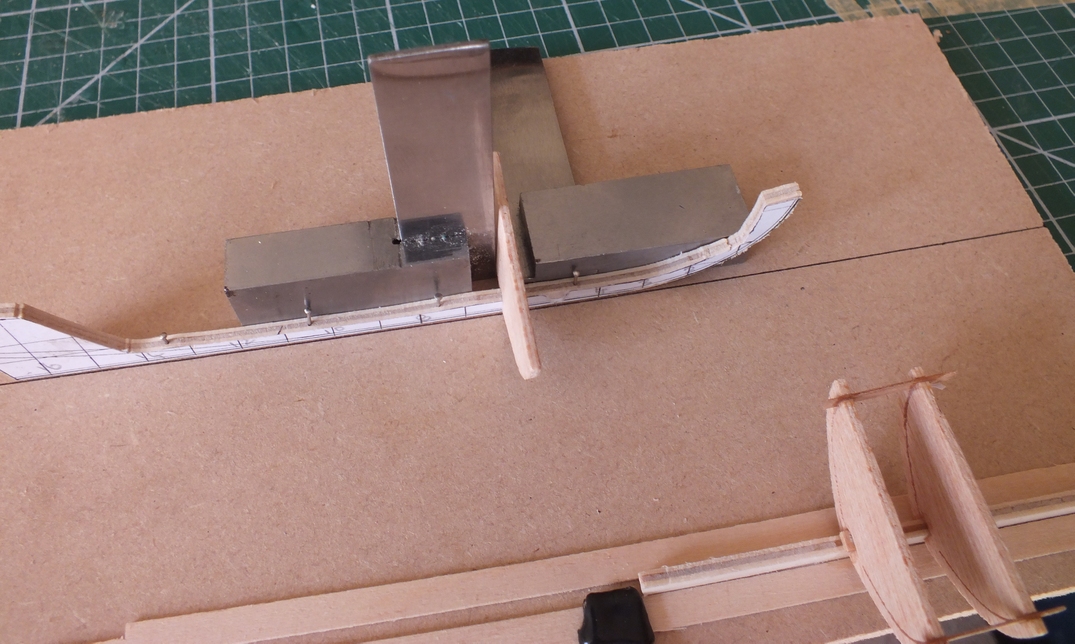
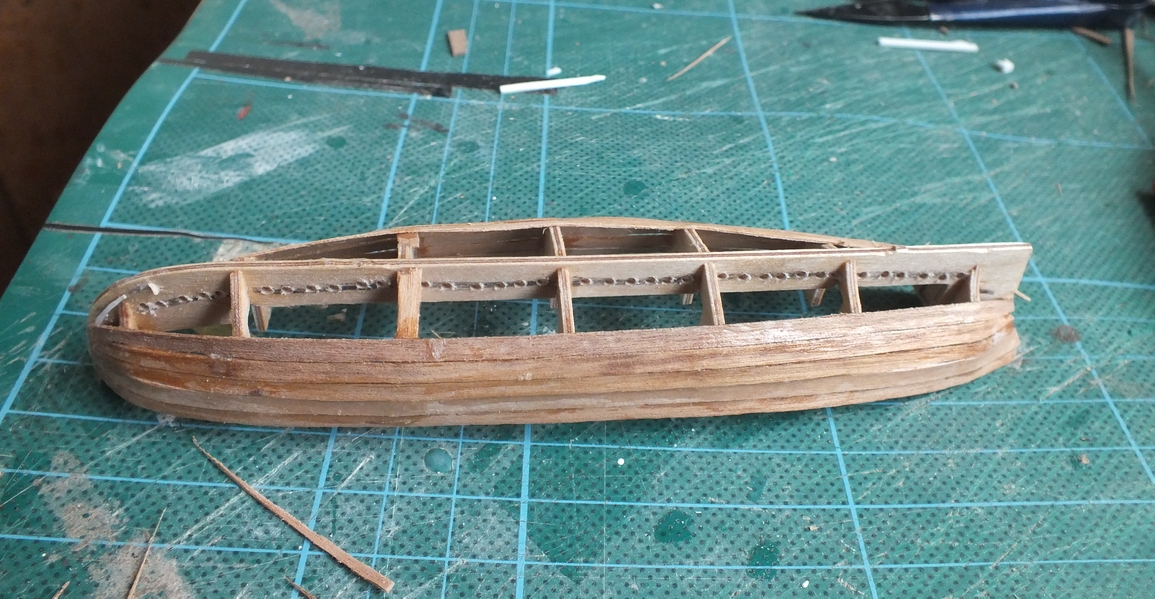
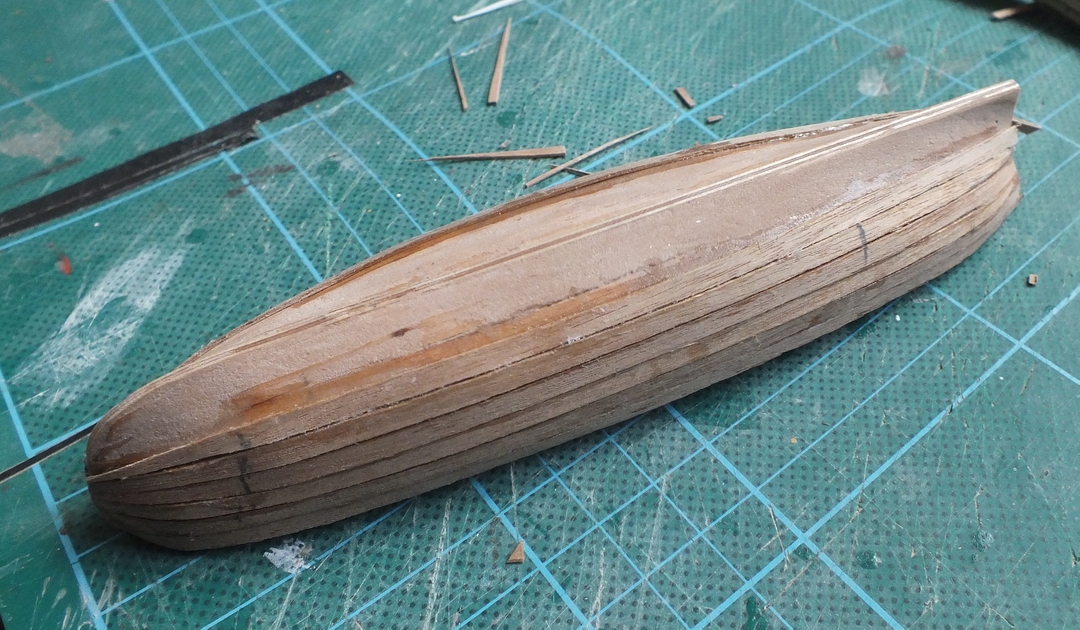
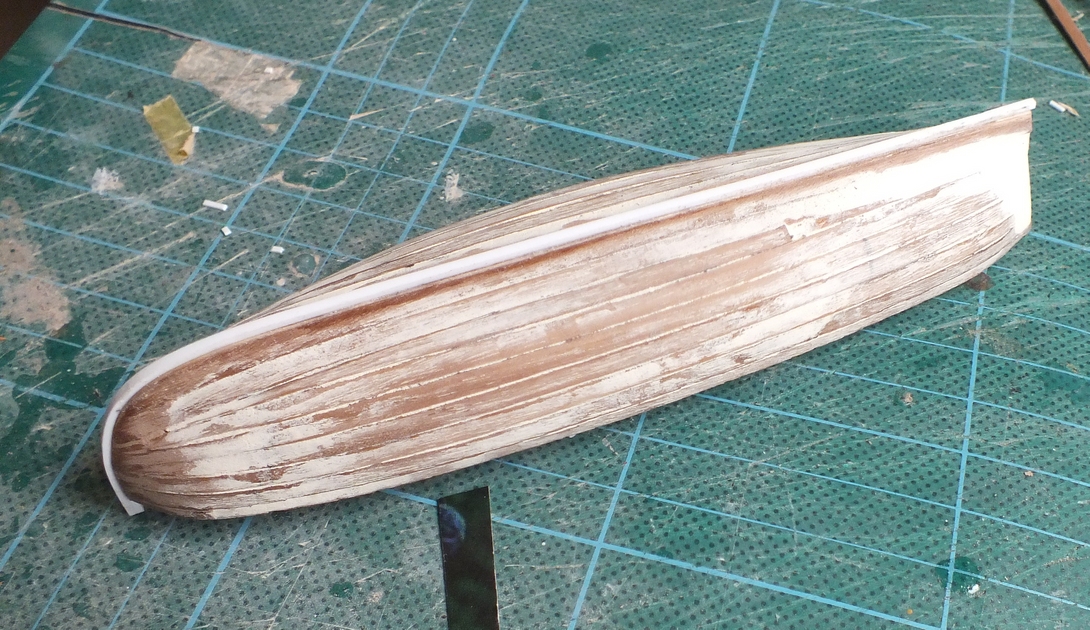
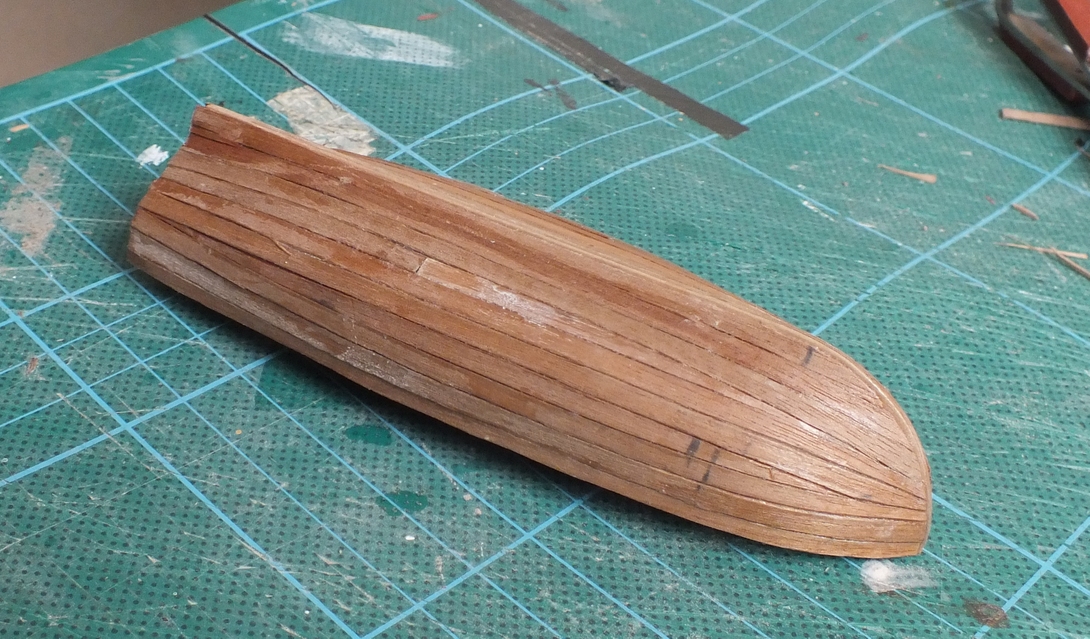
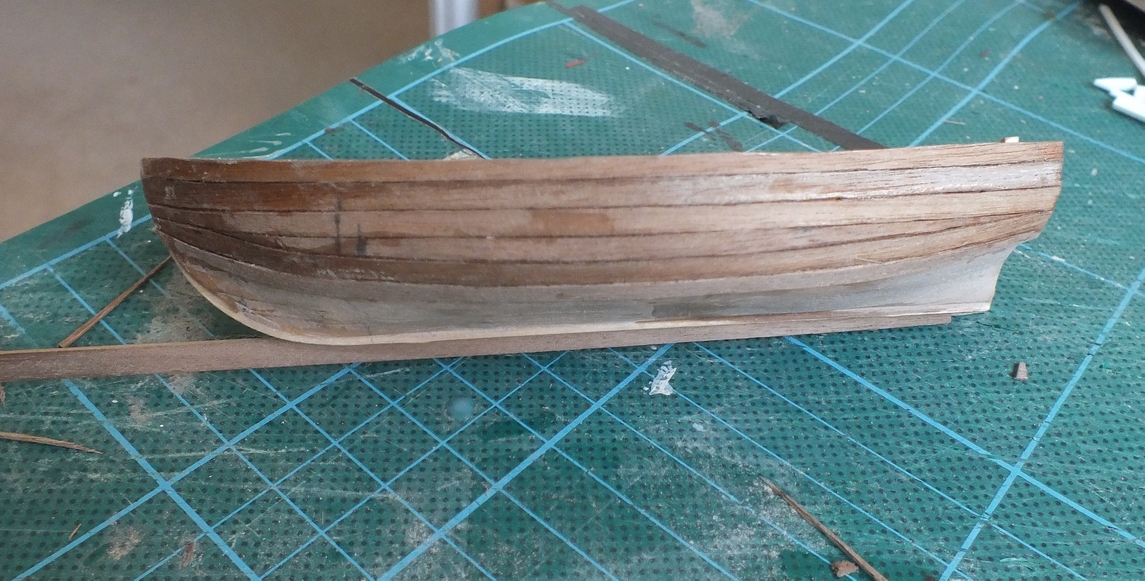
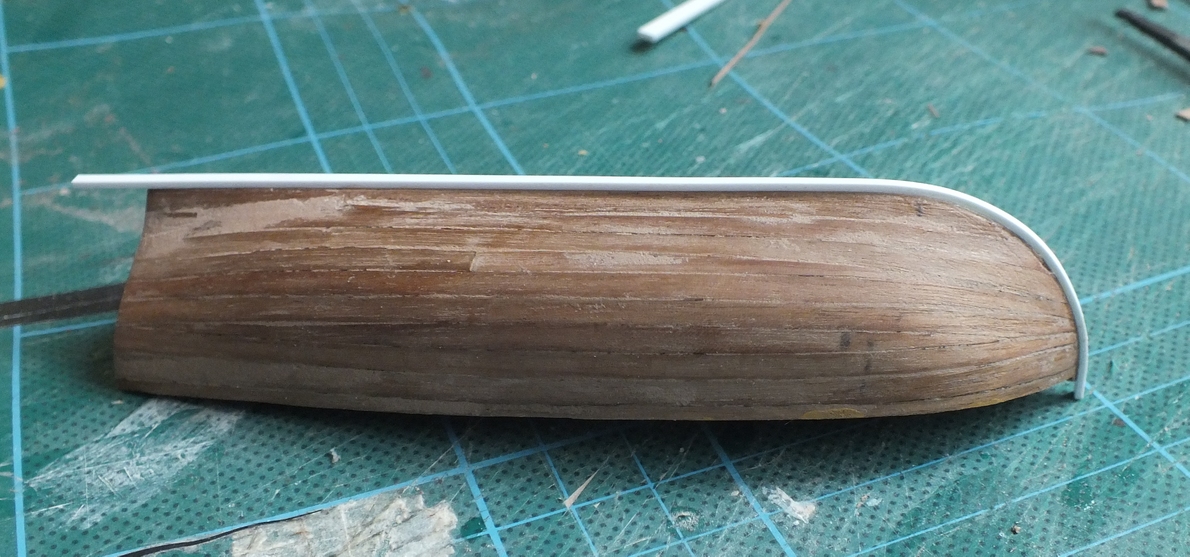
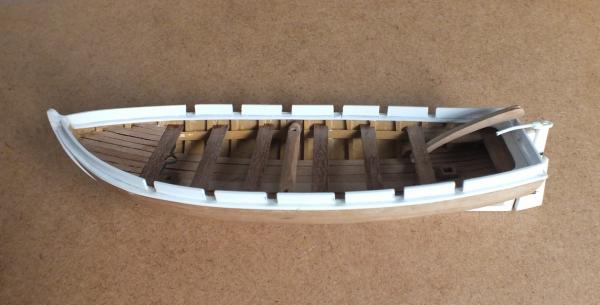
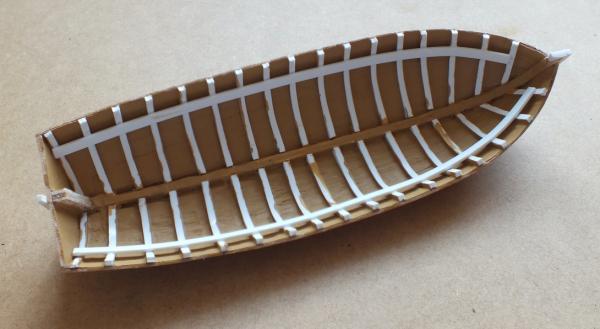
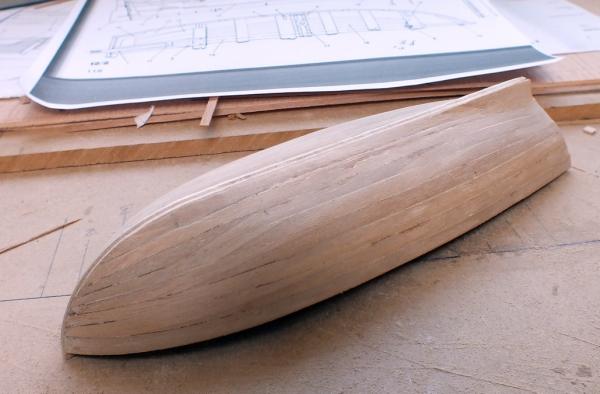
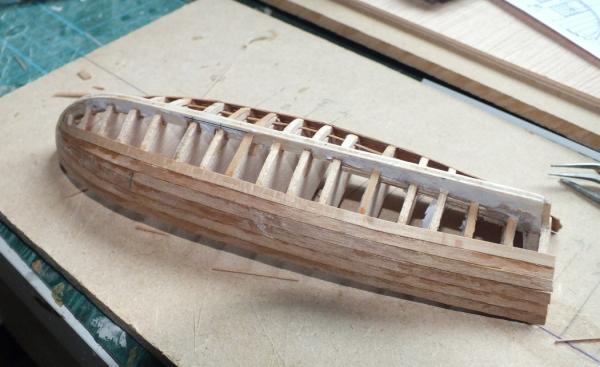
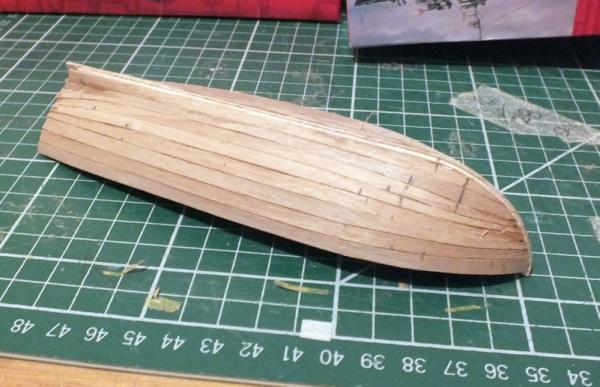
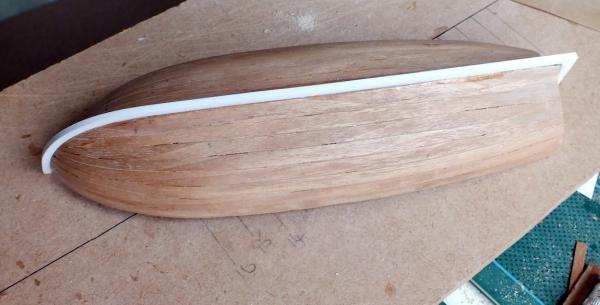
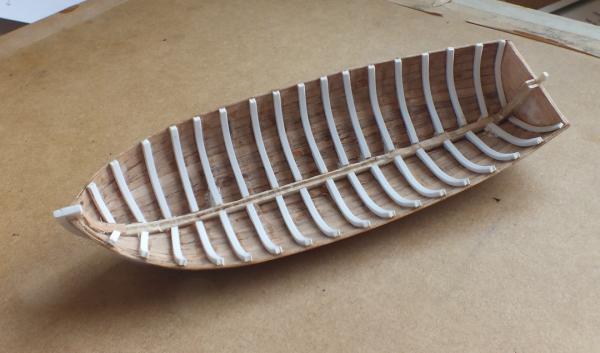
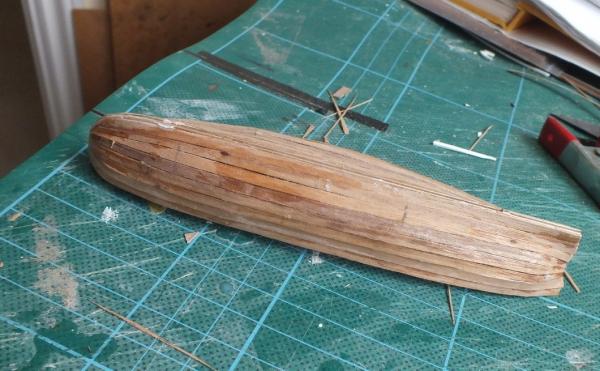
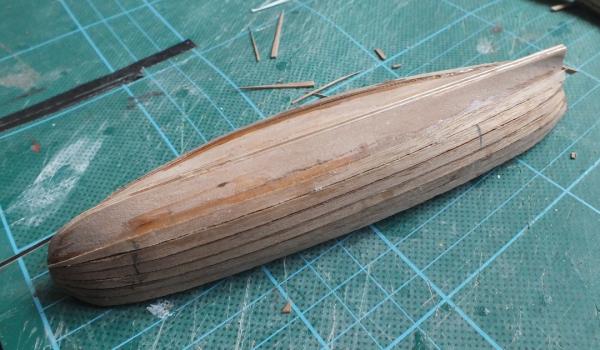
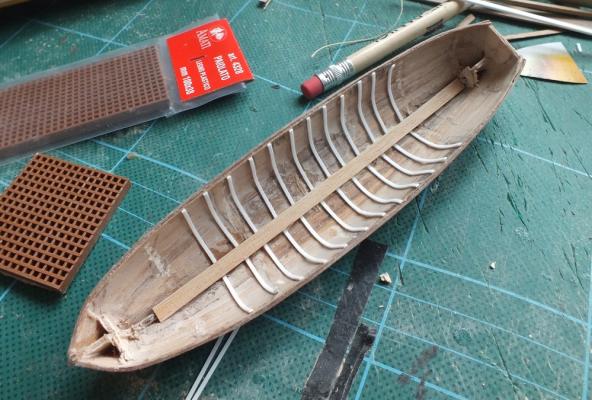
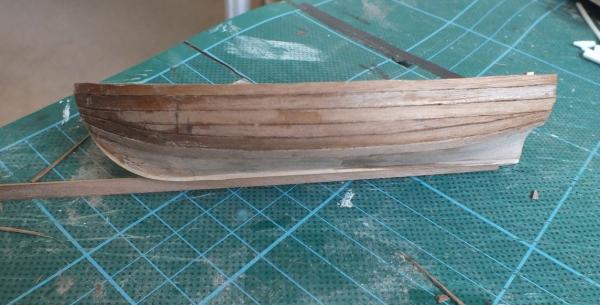
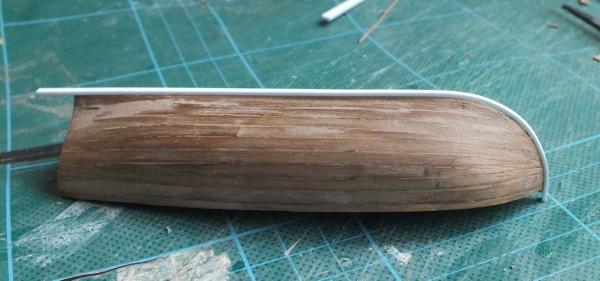
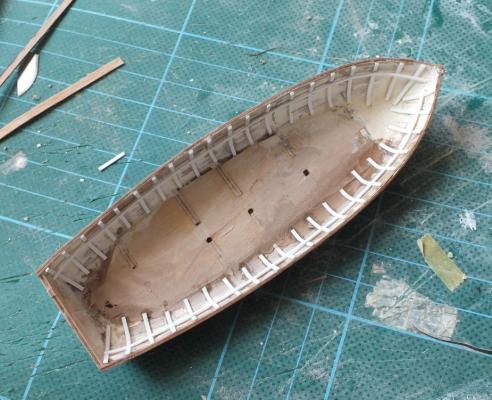
The hull was double planked firstly with .5x3mm planking, sanded down, and the second planking was 1x4mm, all planking was fixed with std super glue, after the second planking, had been sanded down this gave a hull thickness of around 1mm. The inner part of the frames were broken out exposing the ply ribs, I thought they looked to rough so I decided to use the contingency plan and removed the ribs firstly I added the false keel again from evergreen styrene, I then sanded the inside of the hull,and then added the dummy ribs with styrene which look even and sharp. Planking Finished hull frame removal Keel added Inside hull ribs removed and sanded first dummy rib in New set of ribs


- 8 replies
-
- 6
-
-
- ships boat
- diana
- (and 1 more)
-
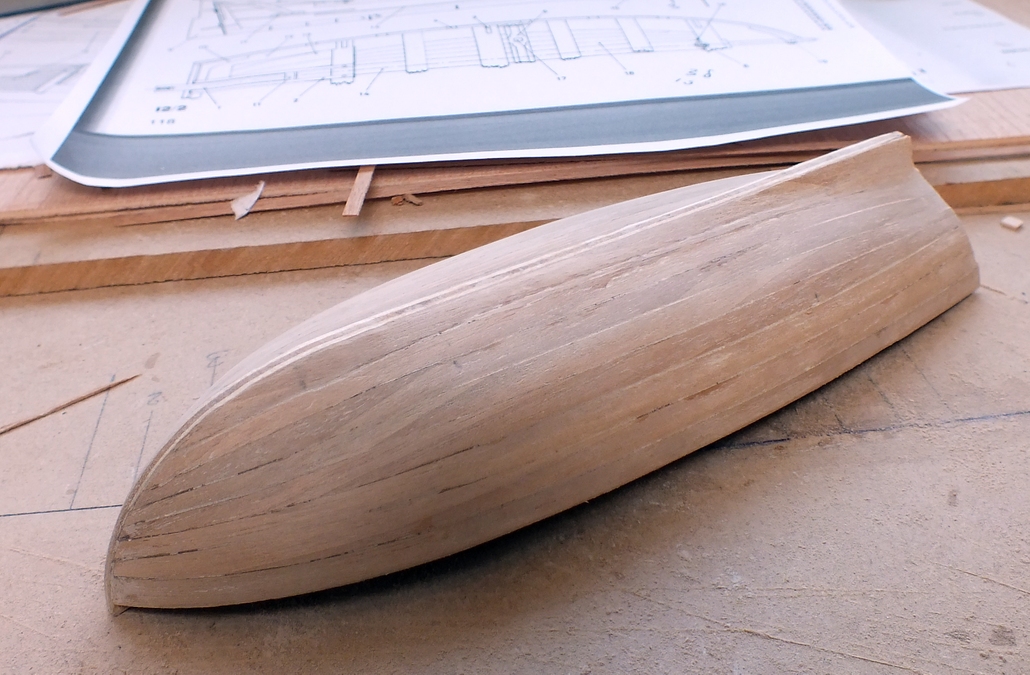
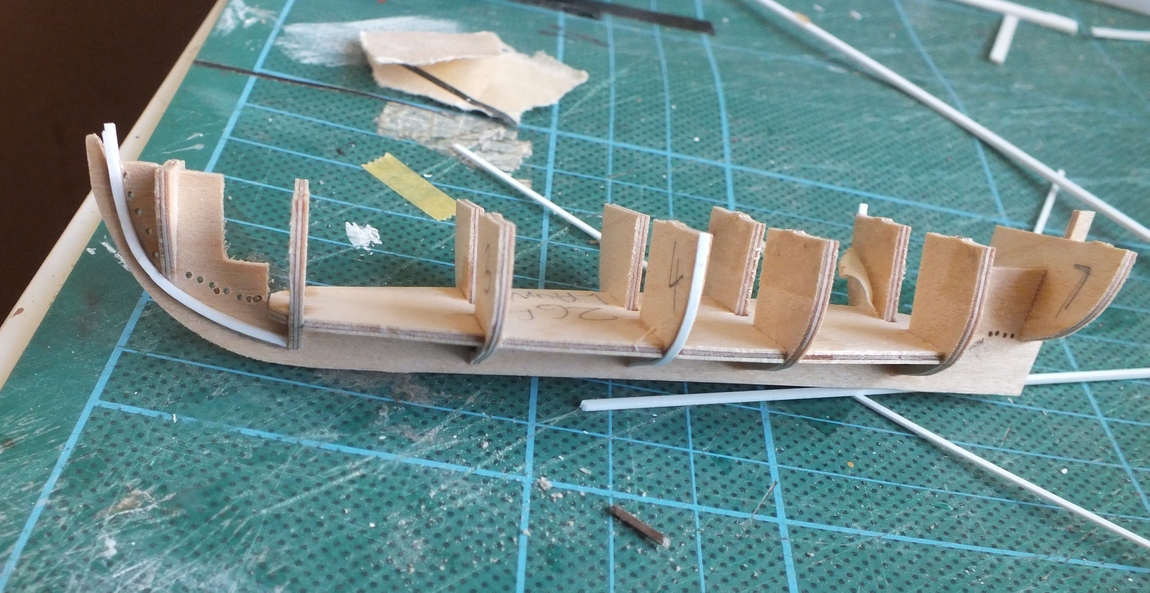
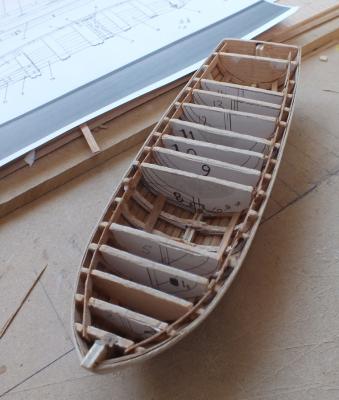
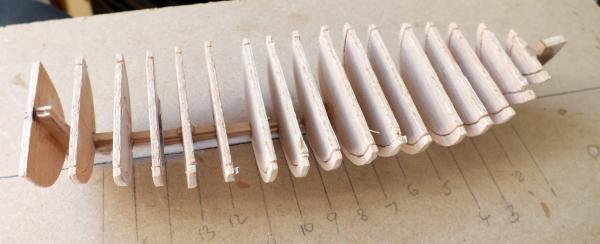
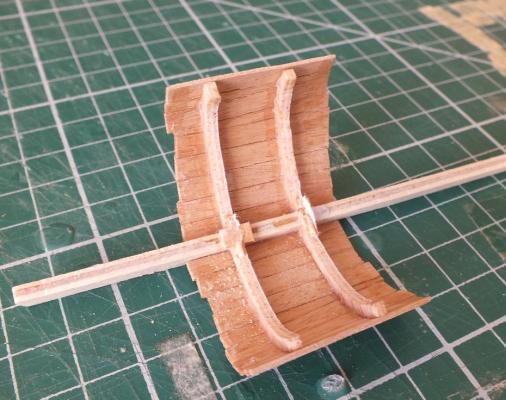
Scratch build Dana’s boats @1/48 a 26ft Launch,18ft Cutter,24ft Cutter and a 32ft Pinace After building a set of much modified ships boats for my HMS Diana which I really enjoyed doing, I decided to scratch build a set at 1/48 scale, using the plans in A O S Diana and include masts and rigging, the builds will run along side my deans marine kit build of the WW2 military class trawler HMS Royal Marine (bought on ebay for less than half price) as practice build before building the Hunt Class Destroyer HMS Tanatside my father served on her at the time of the d-day landings on Omaha. The boats will not be woodworking master builds, leaving the outside hull showing bare planking, they will be painted as they would have been in service,which gave them protection, when stored on-board ship, for weeks or months at a time,I will build them depicting carvel built hulls which according to Ships Boats by q e may they would have been for foreign service,as the clinker built boats were for English Channel use. So they will be a mixture of wood and styrene and I will use grating and anchor kits and possibly oars. First photos show the set of boats on my model of HMS Diana,these were virtually scratch built. The first boat a 26ft launch. The frame plans used, were from The Anatomy of the ship HMS Diana, copies of the half frames were doubled, and then glued to 2mm ply,and the keel plan to 3mm ply,I then did a mock up of a section to see how the planking would look with the first planking with .5mm timber and the second with 1mm. The frame were cut out with my £25 jigsaw buy from good old ebay, I cut the frame centres so they could be broken out and this would leave the ribs in the hull, but added some strips to hold everything together whilst planking. I hope the frames left in the hull will be OK and look like a nice set of ribs, but I do have a contingency plan if they are to rough I will remove them and replace them with dummy ribs made from plastic strip which I know will look nice and sharp and after all they will be painted.


- 8 replies
-
- 10
-
-
- ships boat
- diana
- (and 1 more)
-
Nice to see you back great protect we seem to running parallel after a big build we are now doing small boats I have started a scratch built set off Diana's boats at 1/48
- 129 replies
-
- 4
-
-
- armed launch
- panart
- (and 1 more)
-
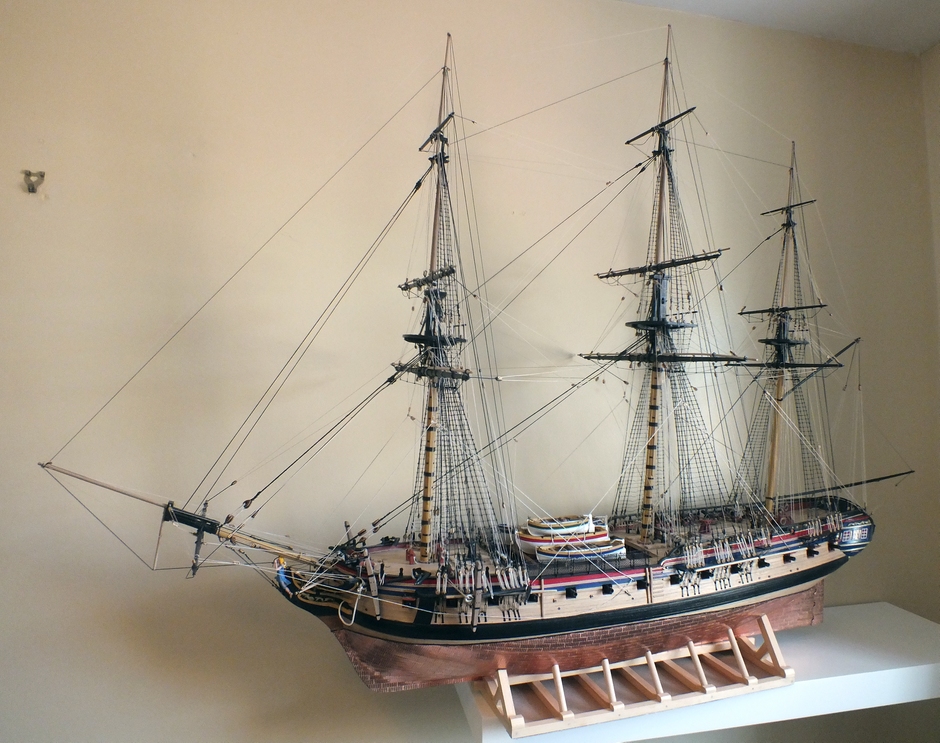
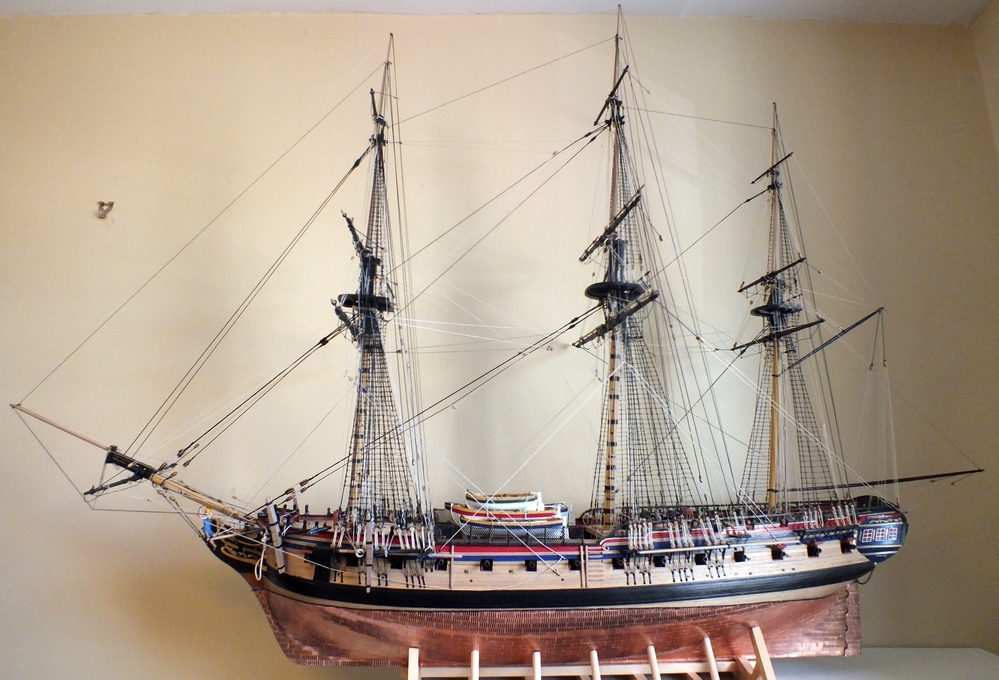
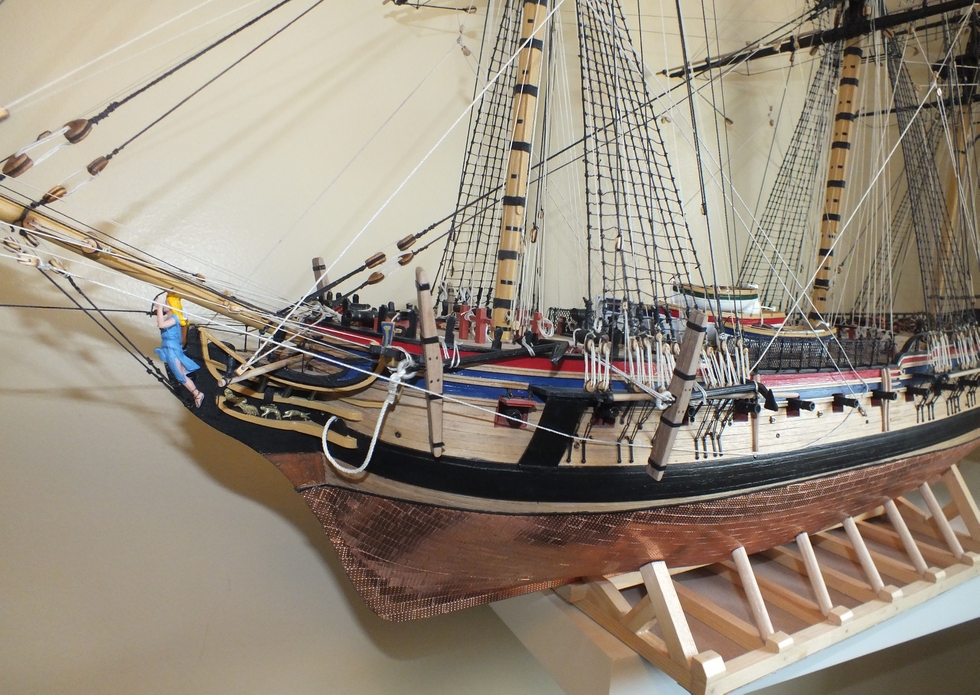
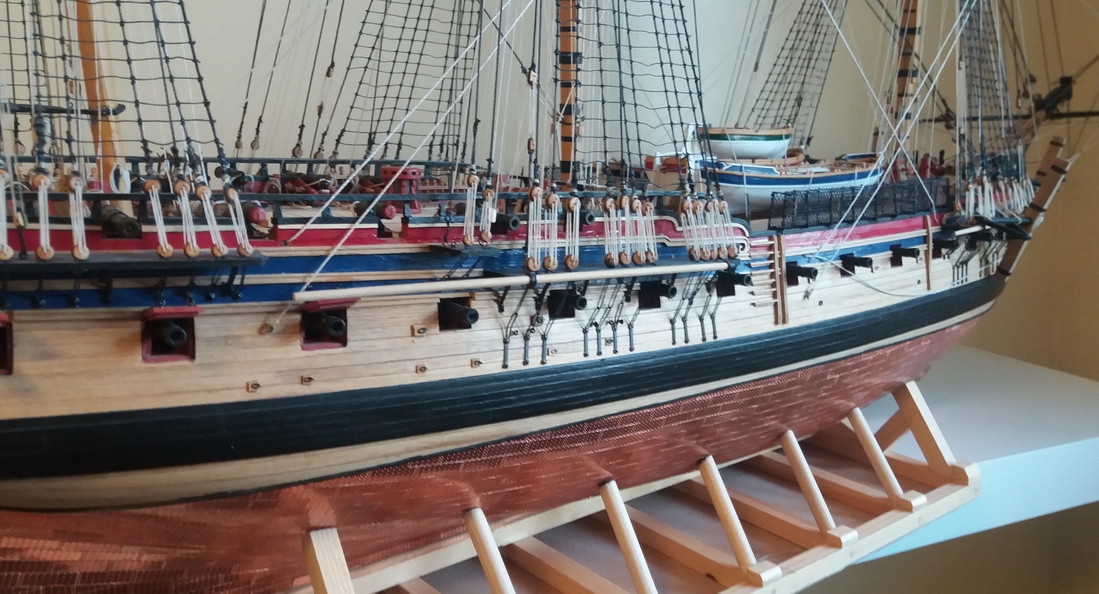
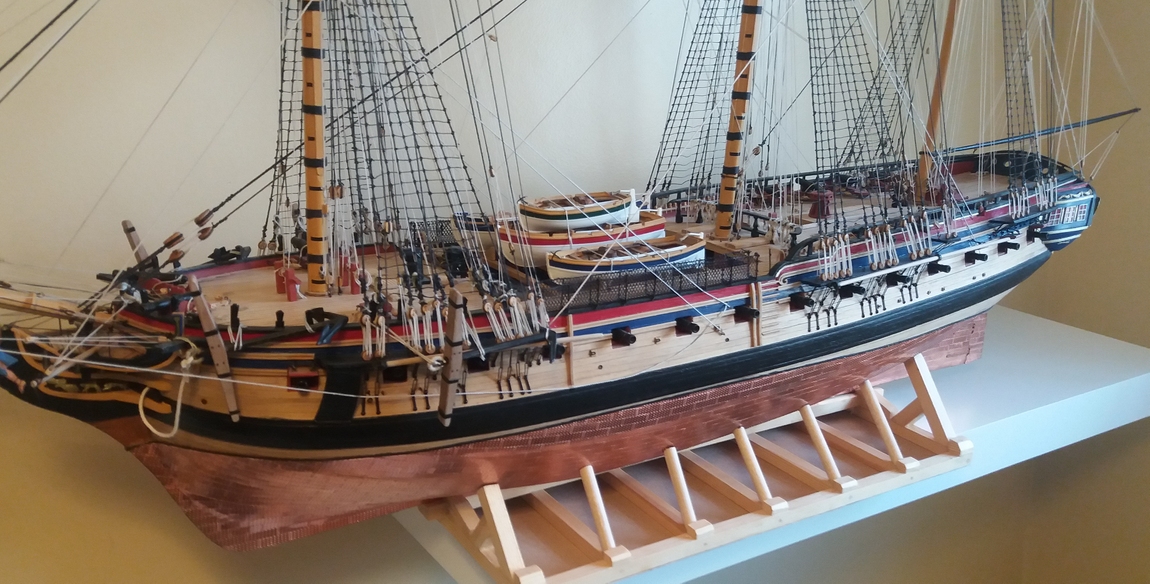
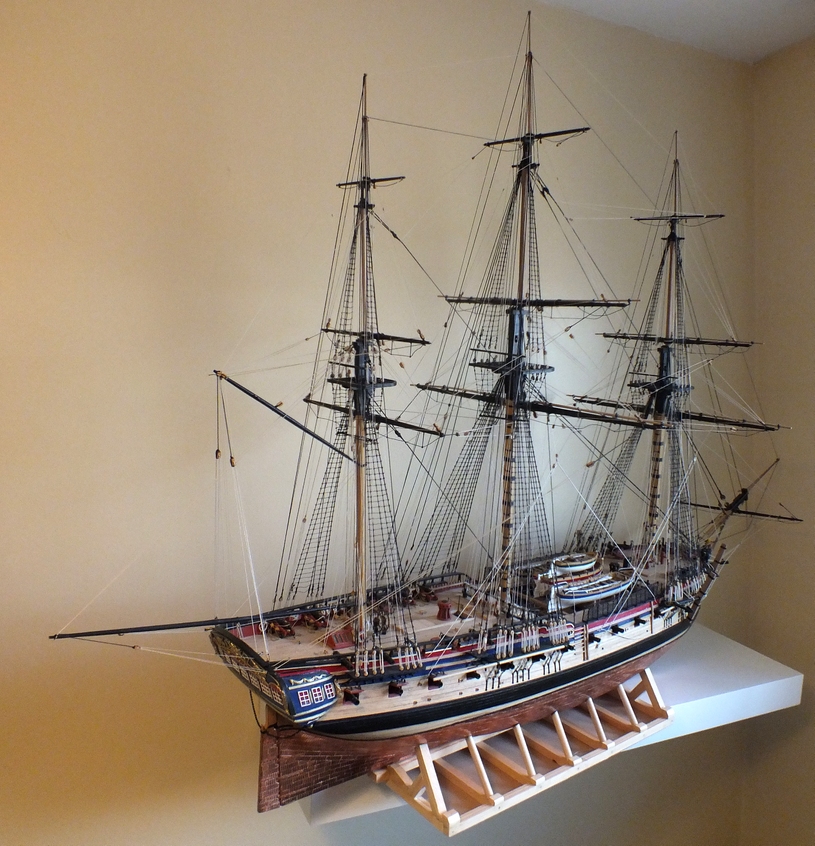
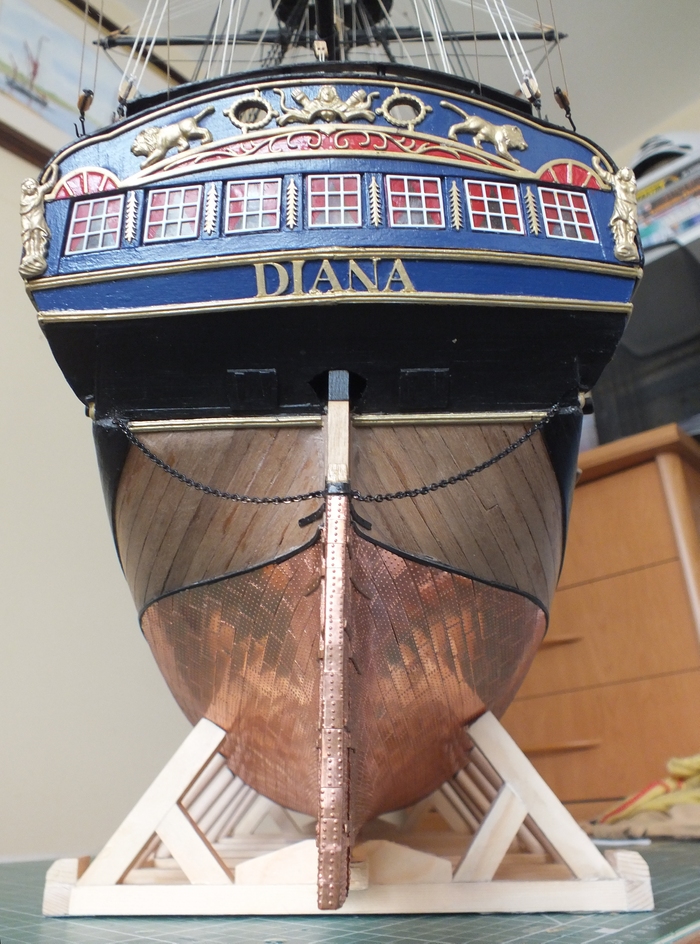
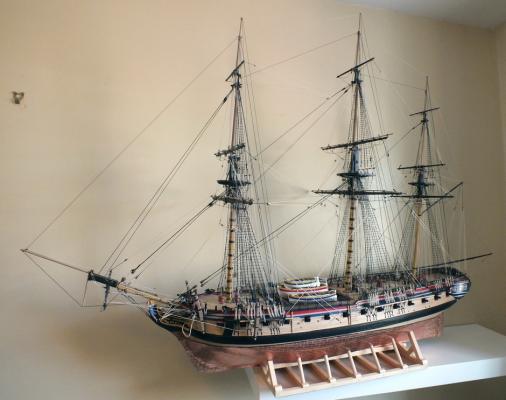
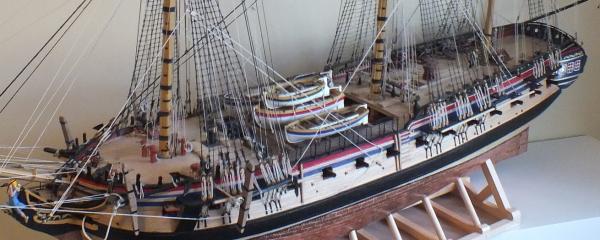
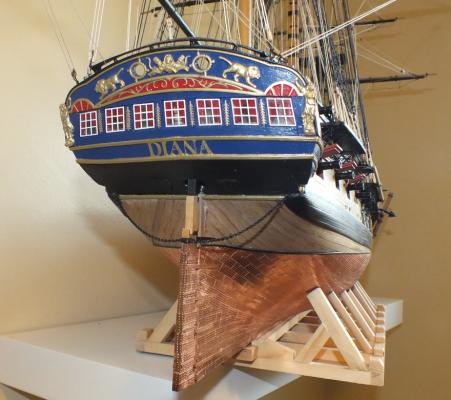
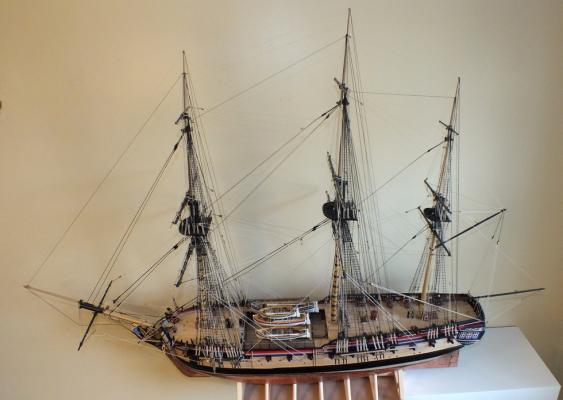
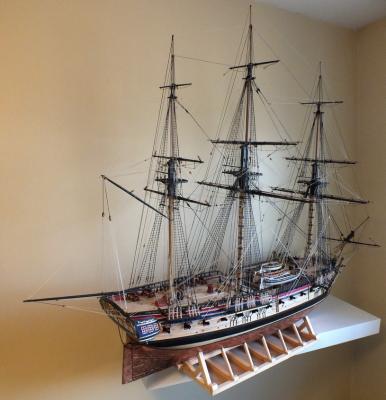
Hi Guys Diana the final photos. I have managed at last to take and crop and re-size the final photo`s. Just under the 3 years to build, she has been a pleasure, although not without some difficulty`s, I am fairly pleased with the result, in hindsight some things I would have done a little bit differently, but not many, I might not have virtually scratch built the ships boats if the hull kits had been around, but this has lead me to be building another set of boats (scratch) at 1/48 as an in between project.


- 536 replies
-
- 34
-
-
- diana
- caldercraft
- (and 1 more)
-
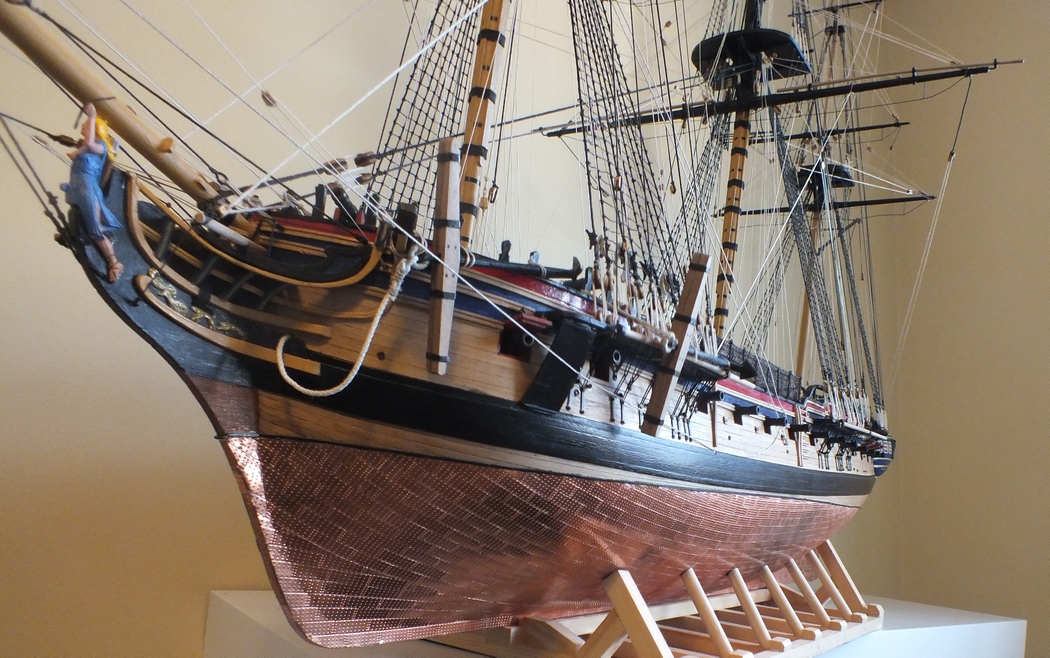
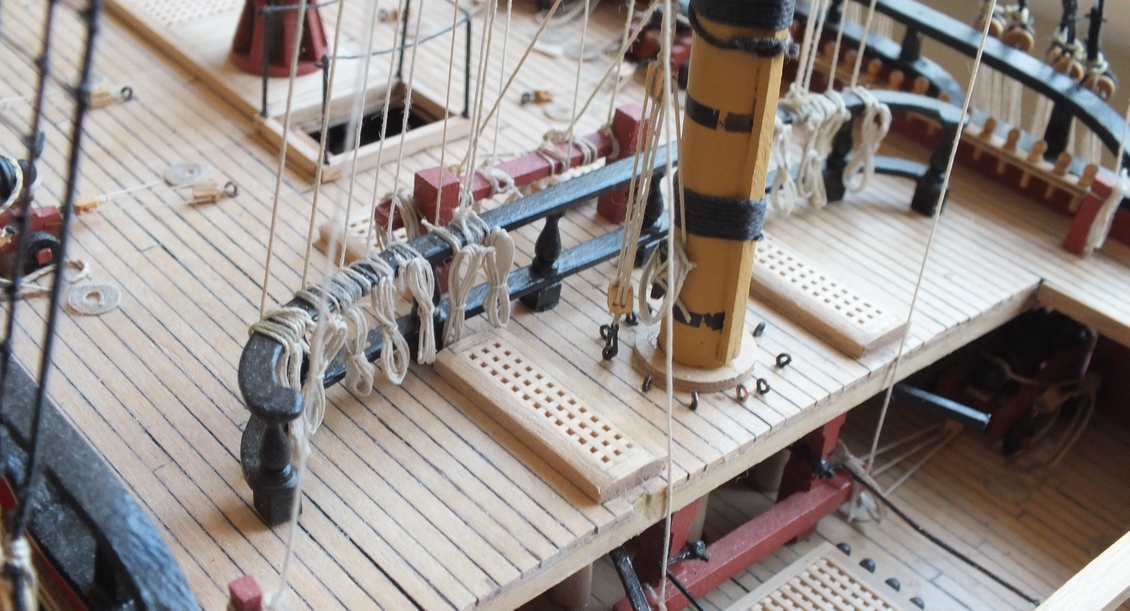
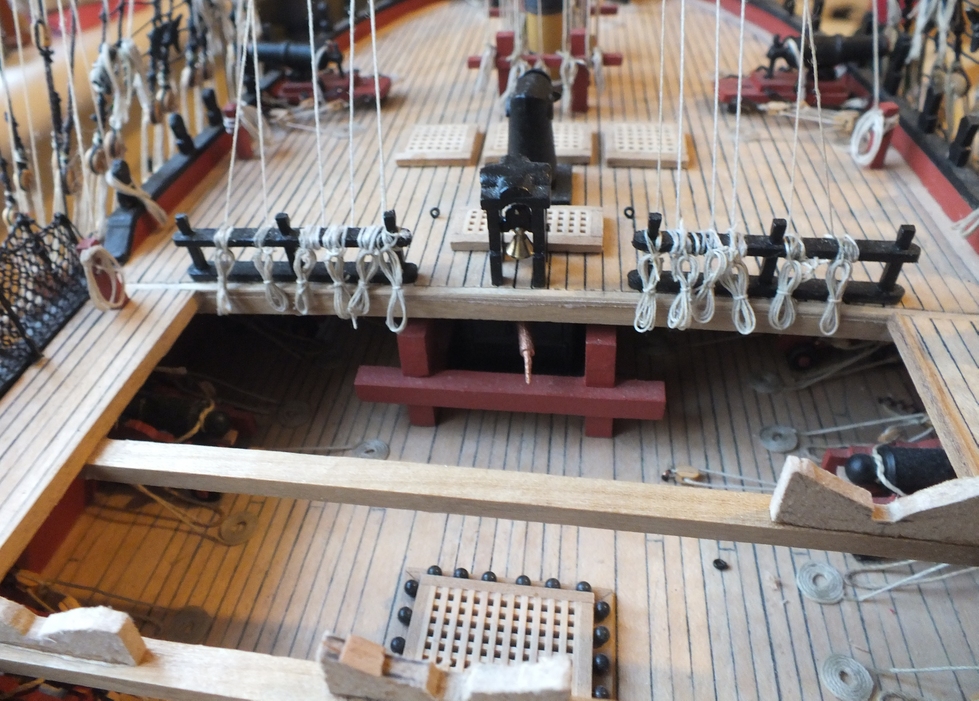
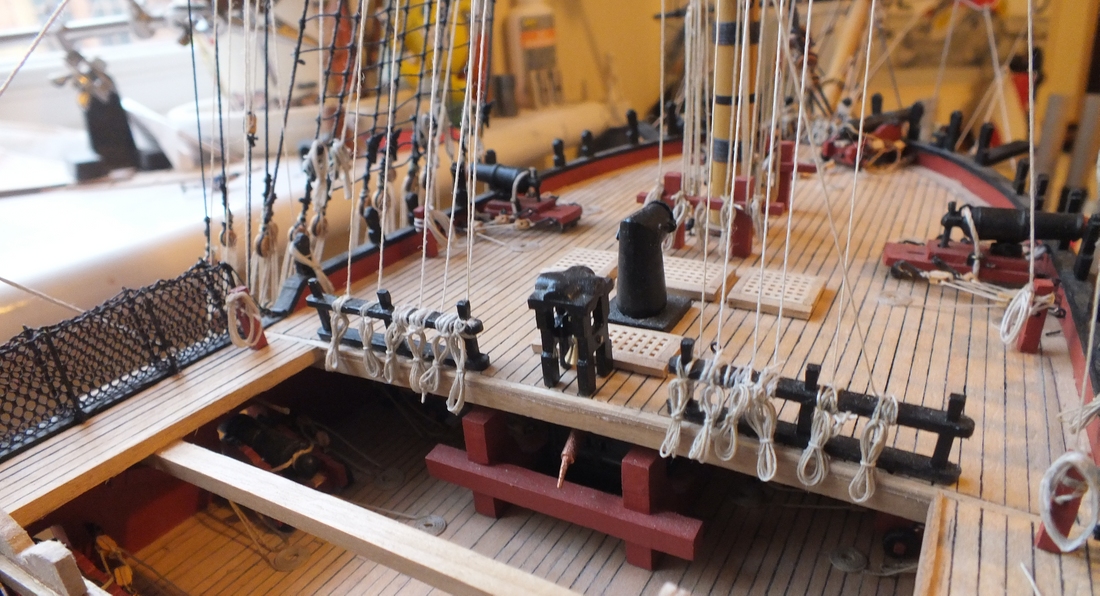
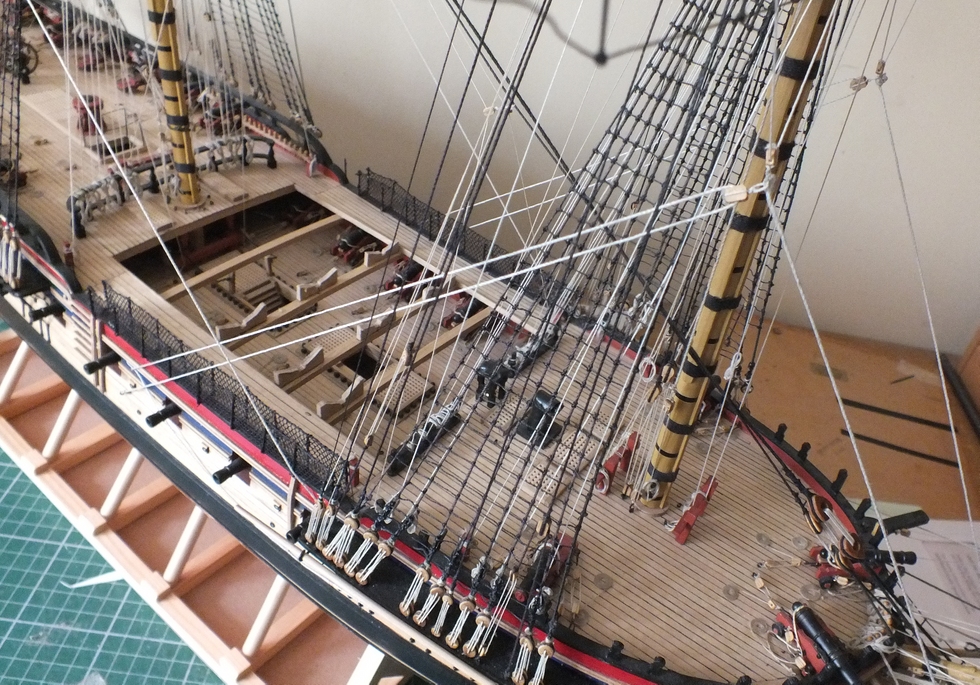
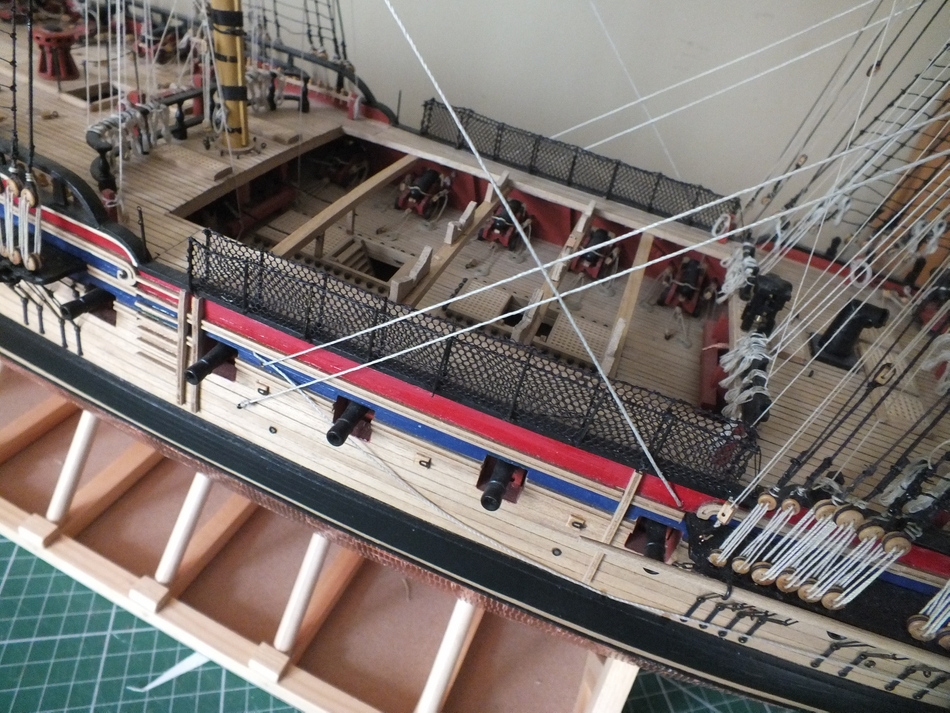
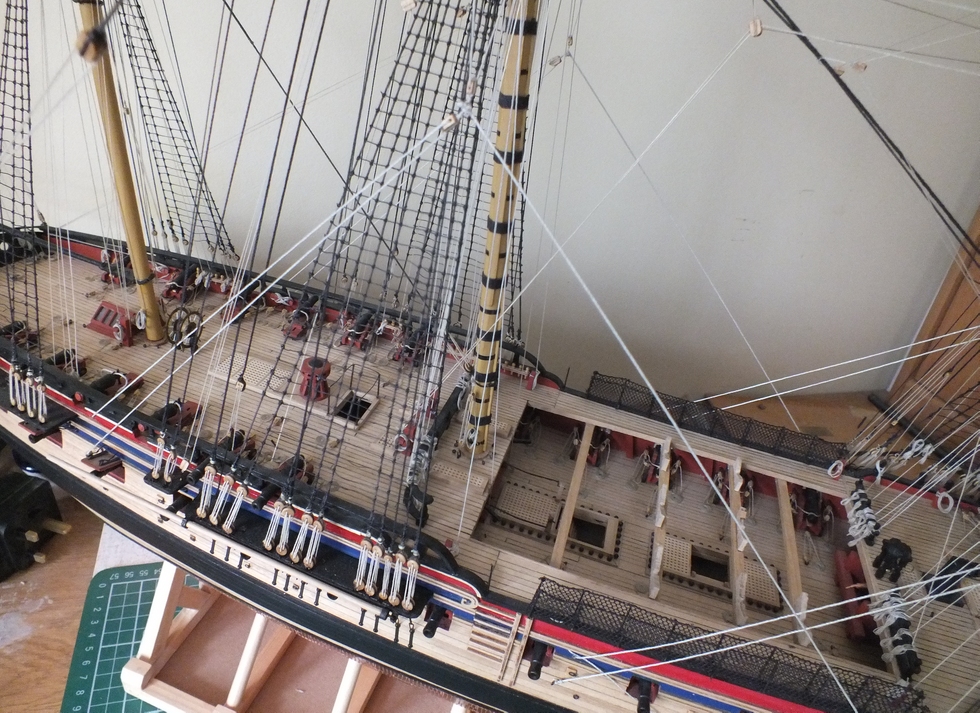
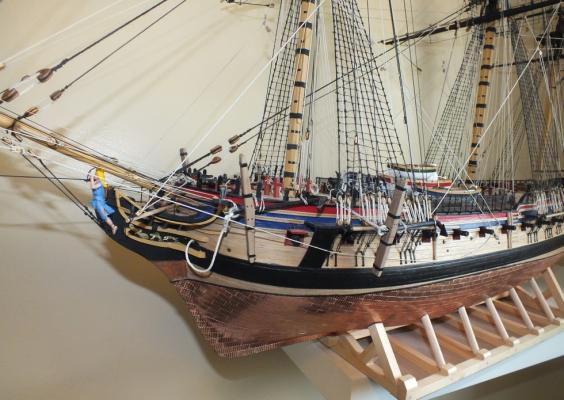
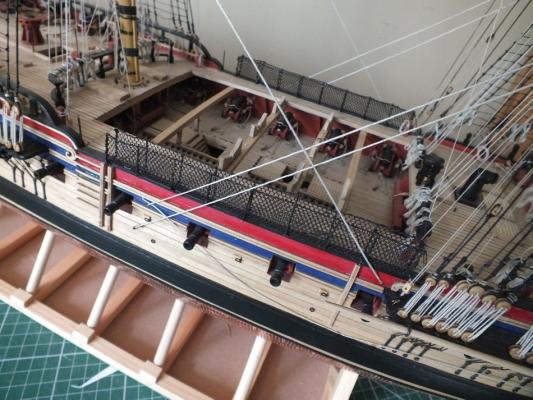
Jason nice to see very good progress, I am a believer that sometimes you can over think things, and it just works out when to come to do it, practically all of the hull under the wale is covered by copper so although we aim for the best finish possible it will not be seen. I have just finished Diana, taking the final photos (after 3 weeks holiday) and it is a suprize just how much detail is covered up, you can hardly see the gun deck with the boats in place, but we know what`s there. Best regards Ray
-
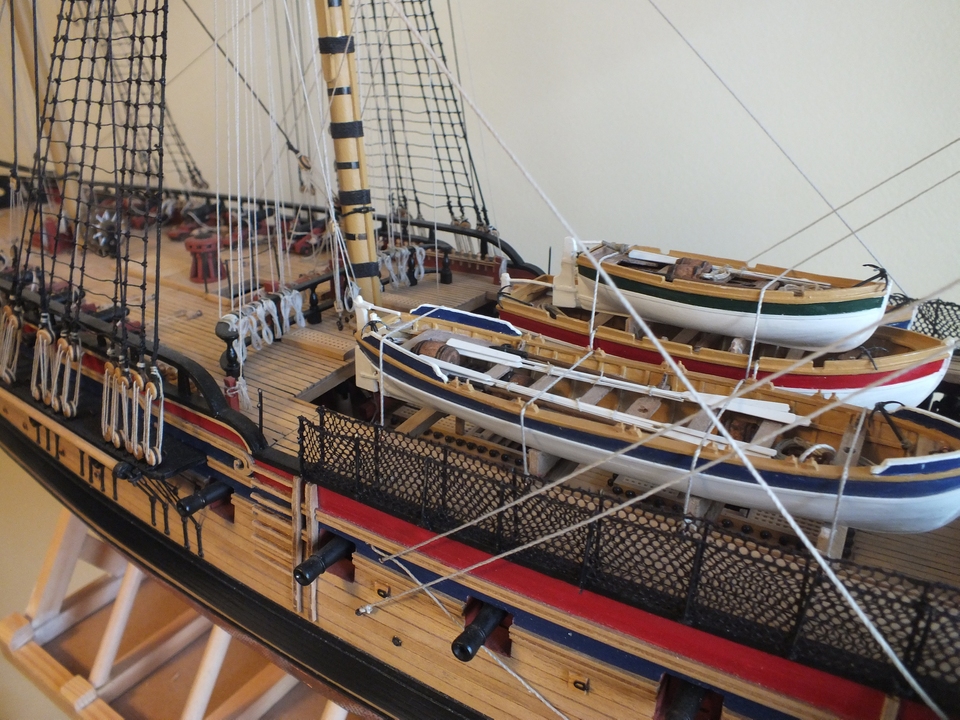
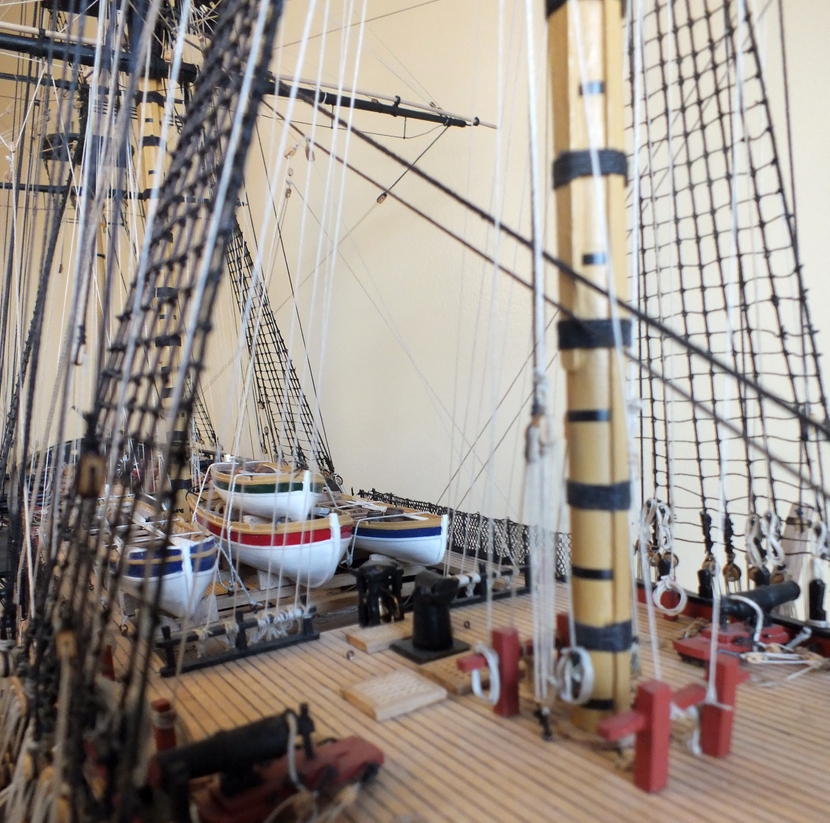
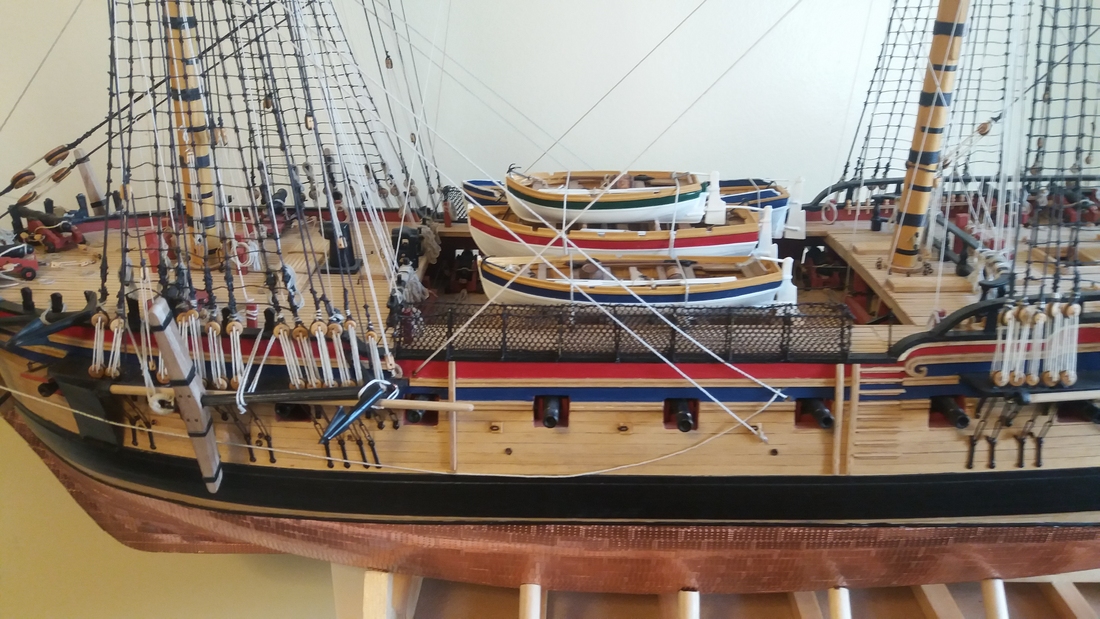
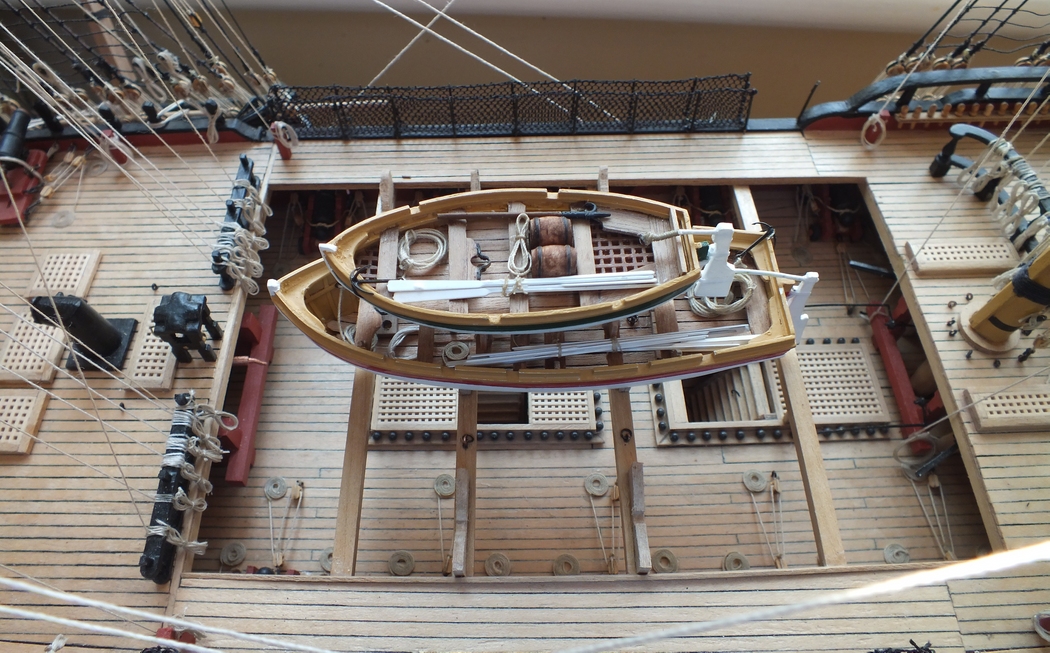
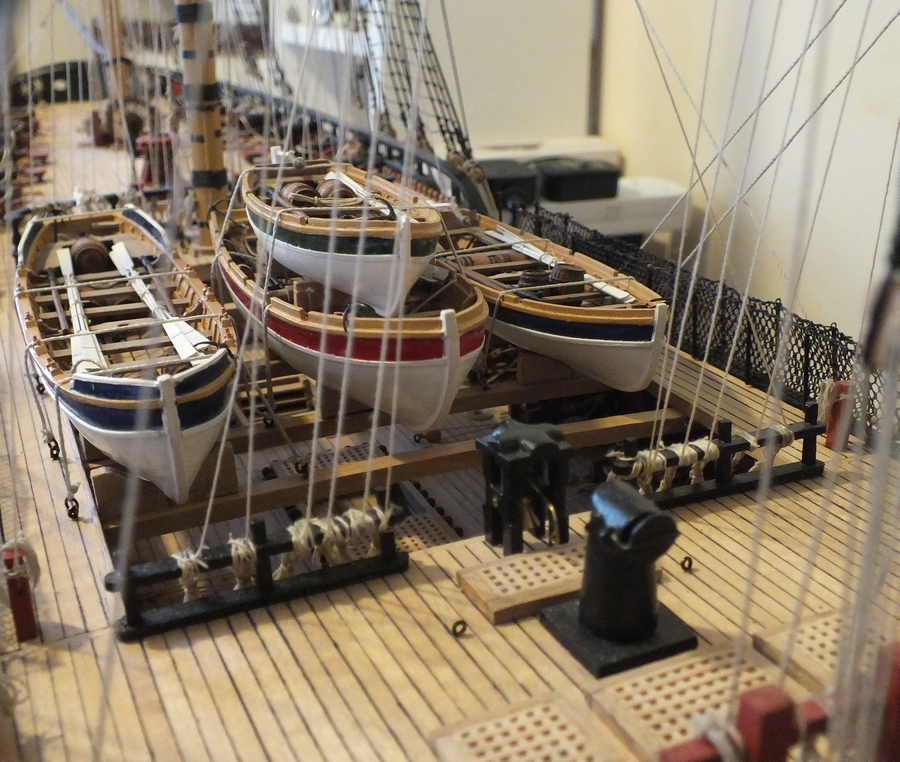
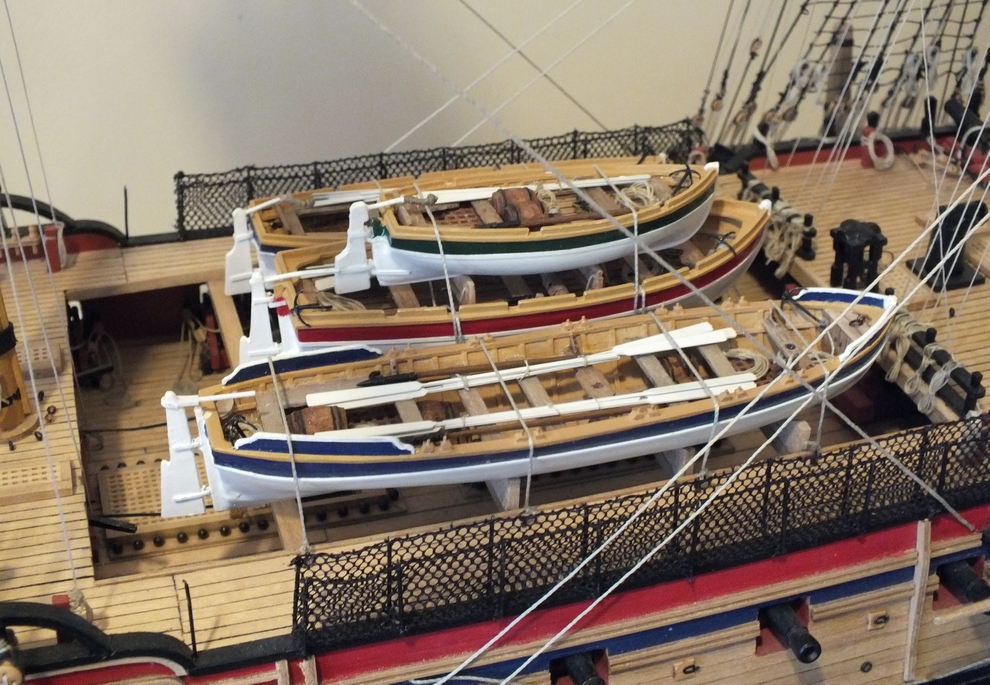
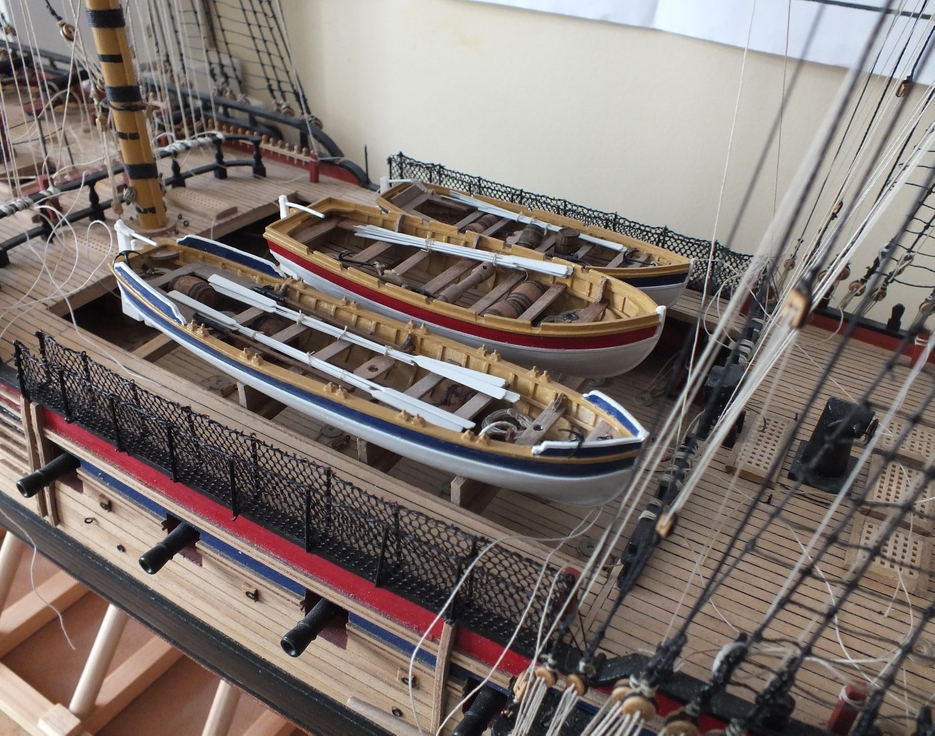
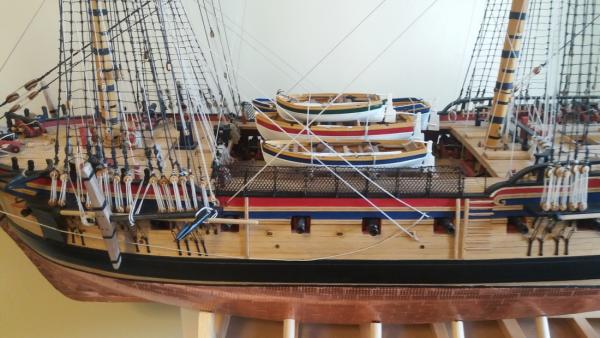
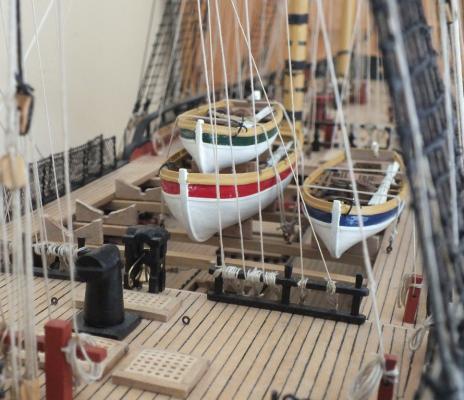
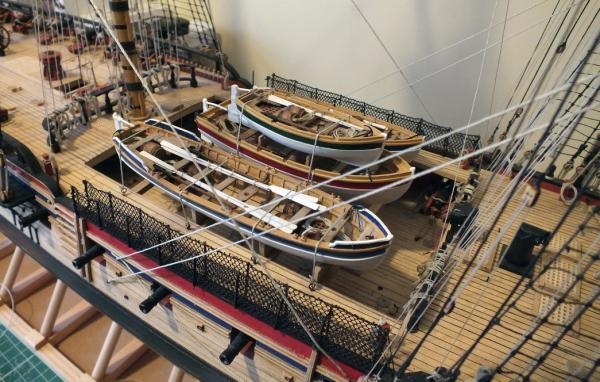
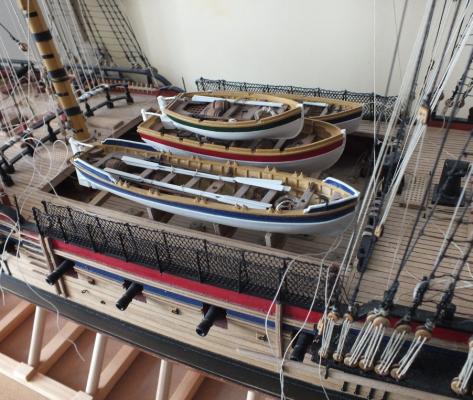
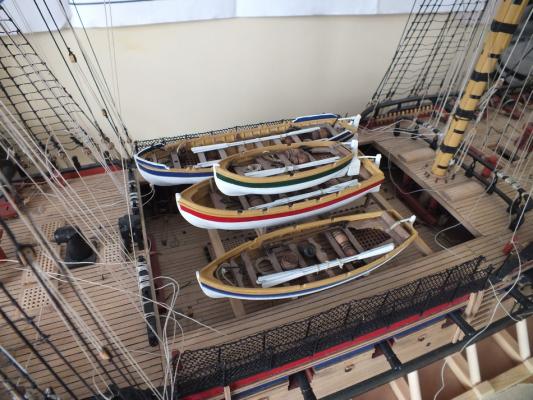
The Last Job The ships boats were put into the cradles and tied down. JOB DONE. Just the final photo shoot to do. Which will not be until the end of November as we are on holiday for three weeks 3rd to the 22nd. chocks for the small cutter ready to tie down Two boats tied down Three tied down All done


- 536 replies
-
- 19
-
-
- diana
- caldercraft
- (and 1 more)
-
Hi David the rings will stay as they are covered with .5mm nat coloured rigging thread.
- 536 replies
-
- 2
-
-
- diana
- caldercraft
- (and 1 more)
-
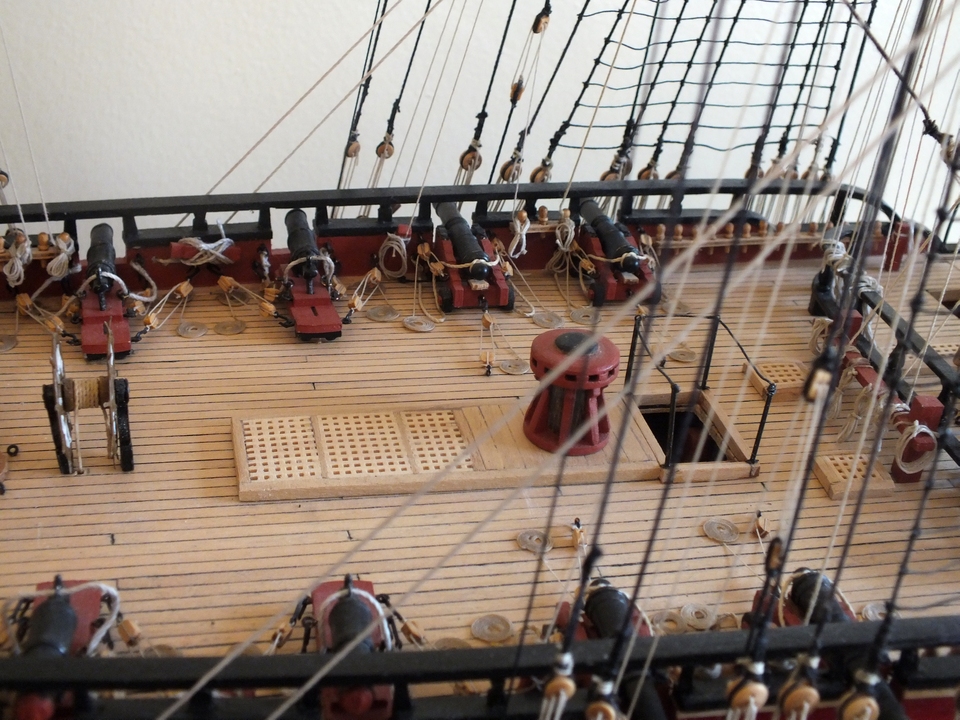
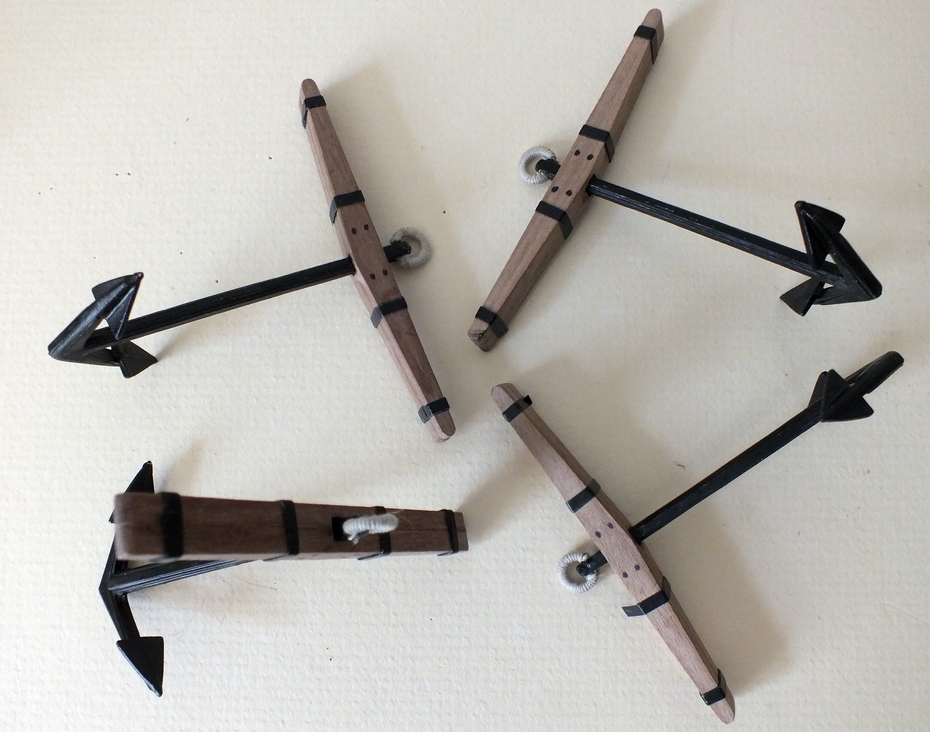
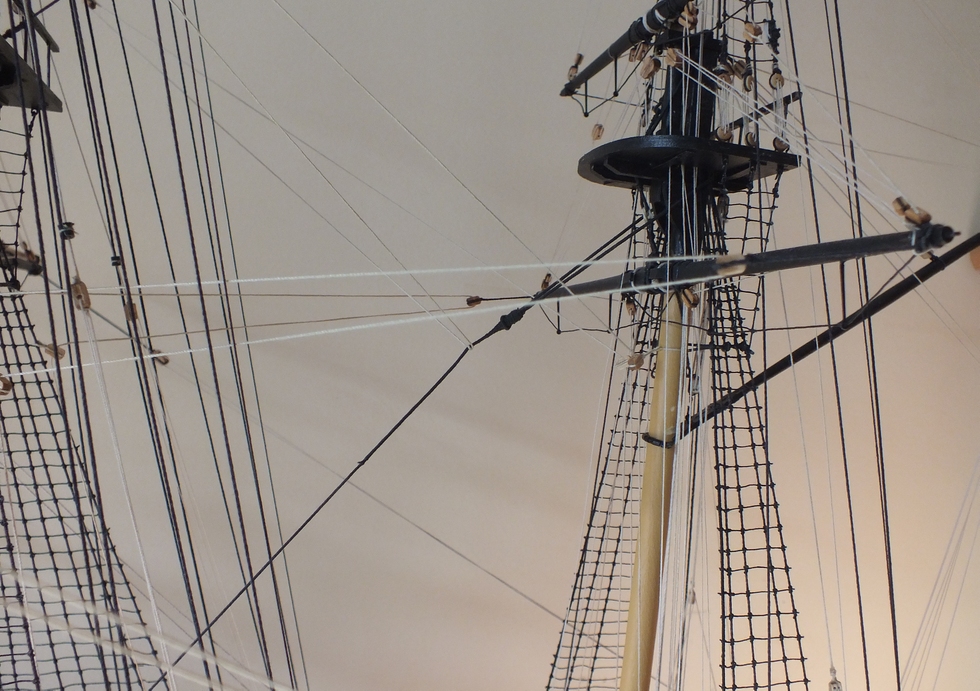
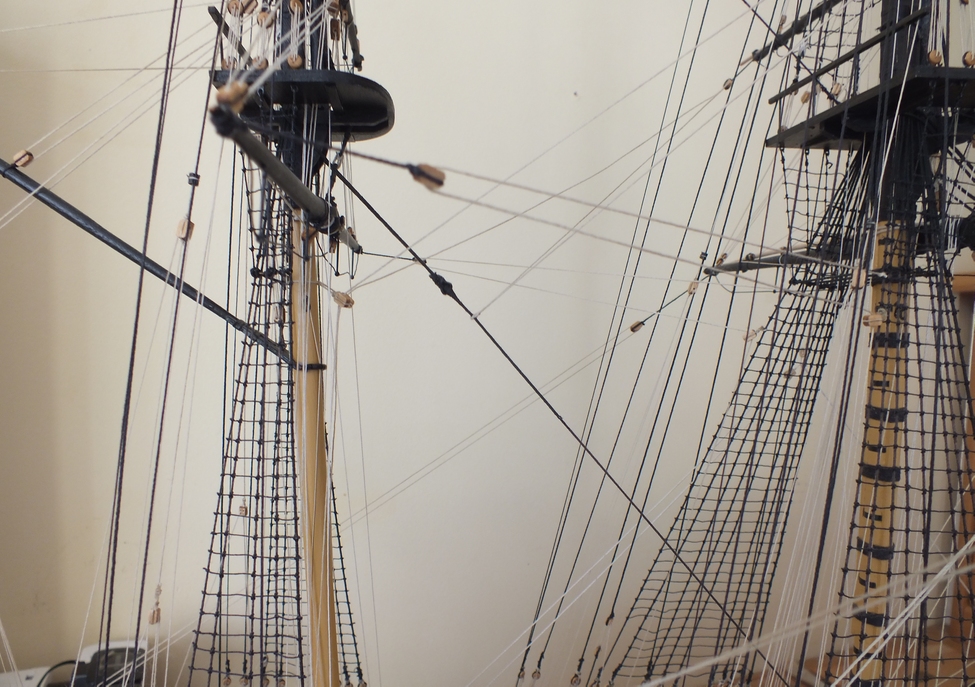
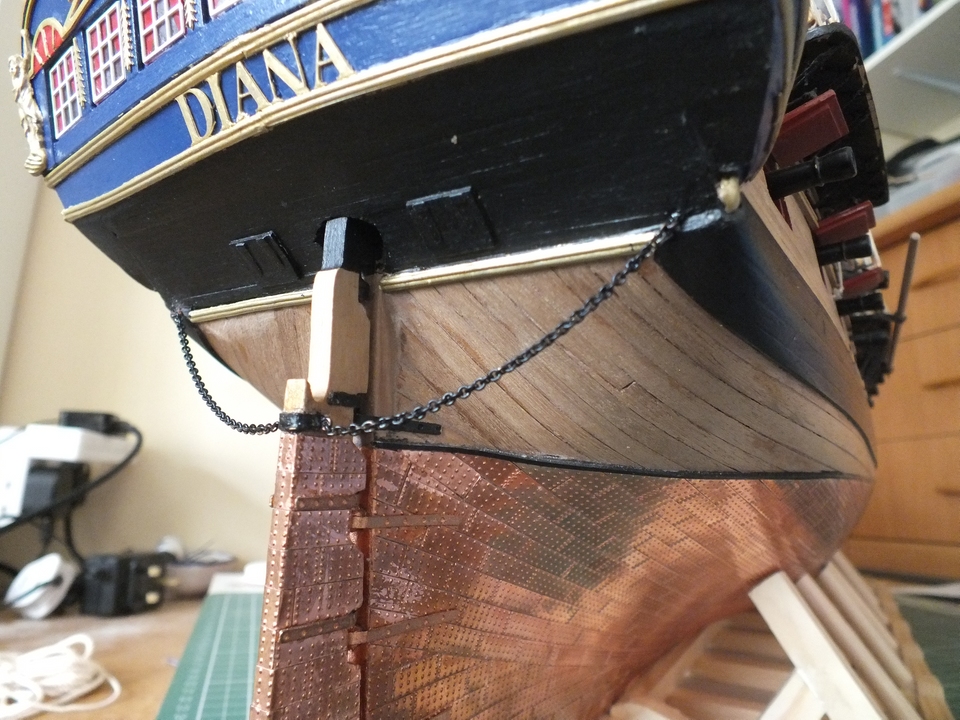
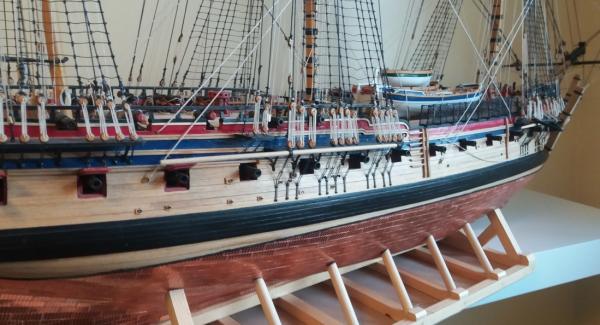
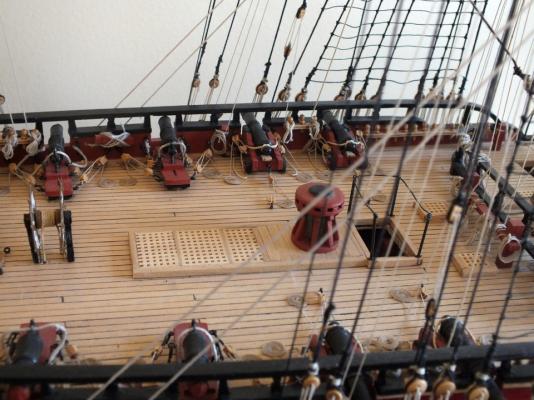
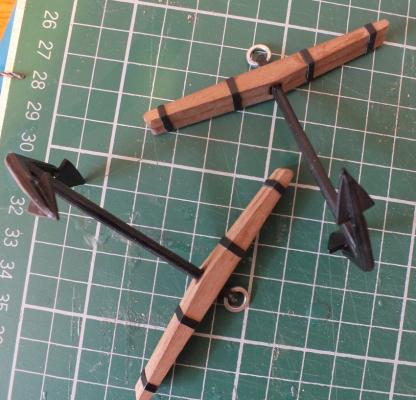
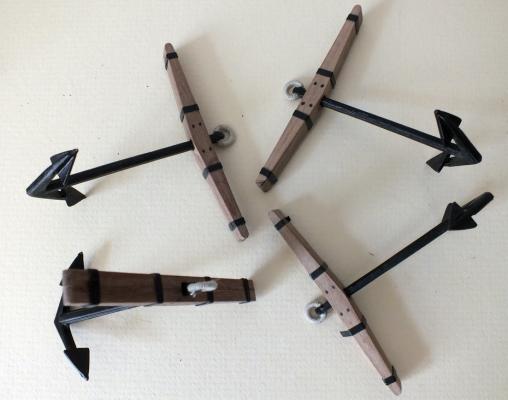
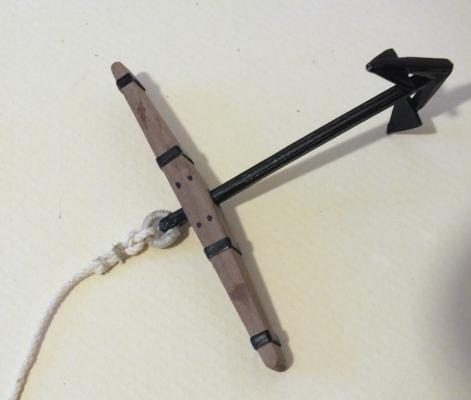
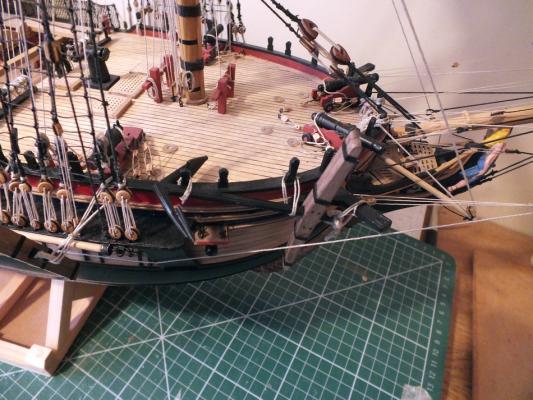
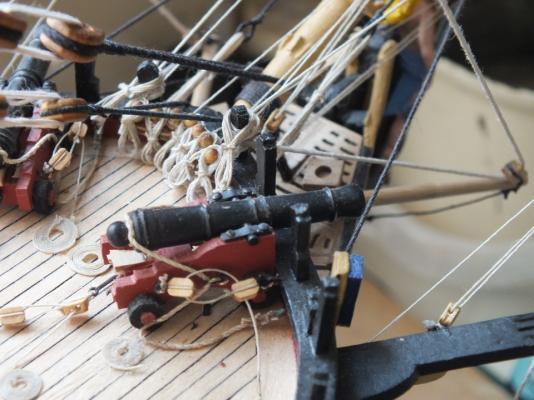
The anchors were made up I used some split washers for the rings and added the puddening and used black tape for the iron bands,the overall look of the anchors are fairly good,they were then fitted in place. I then went right through the rigging and made a few tweaks and a bit of re-tensioning (as photos below)and tidying up,only one job left adding the boats. Anchors added A stay pulled out of shape Re rigged stay

- 536 replies
-
- 9
-
-
- diana
- caldercraft
- (and 1 more)
-
Hi Christian The boats look good nice with the clinker effect I carval built mine, I also took a lot more than two weeks more like eight, keep them coming the Pinace was my favourite.
-
Hi Paul the blocks used for rigging the cannons are Amiti 2mm they need to be as small as possible to allow some space between them.
- 536 replies
-
- 1
-
-
- diana
- caldercraft
- (and 1 more)
-
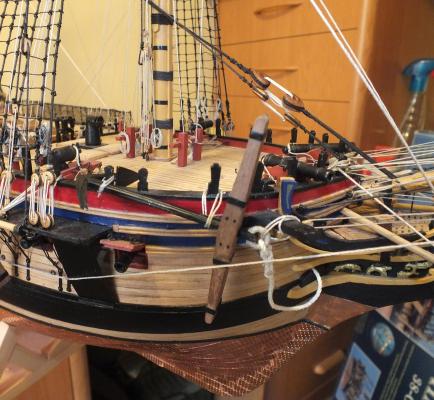
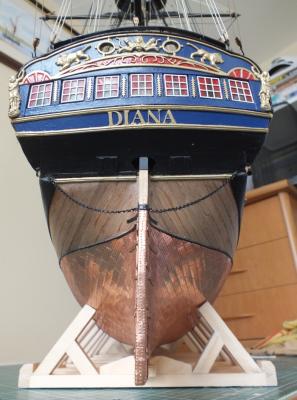
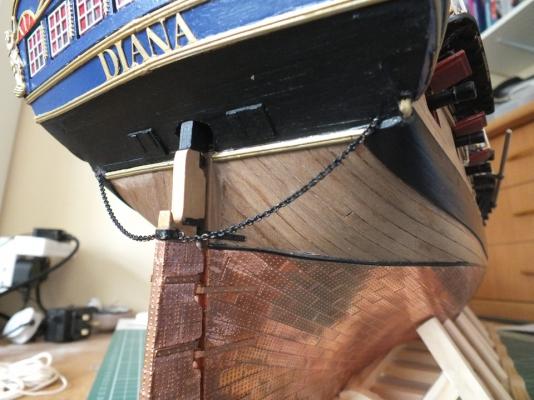
The ropes have been added to all the termination points, and the rudder chains fitted.
- 536 replies
-
- 23
-
-
- diana
- caldercraft
- (and 1 more)
-
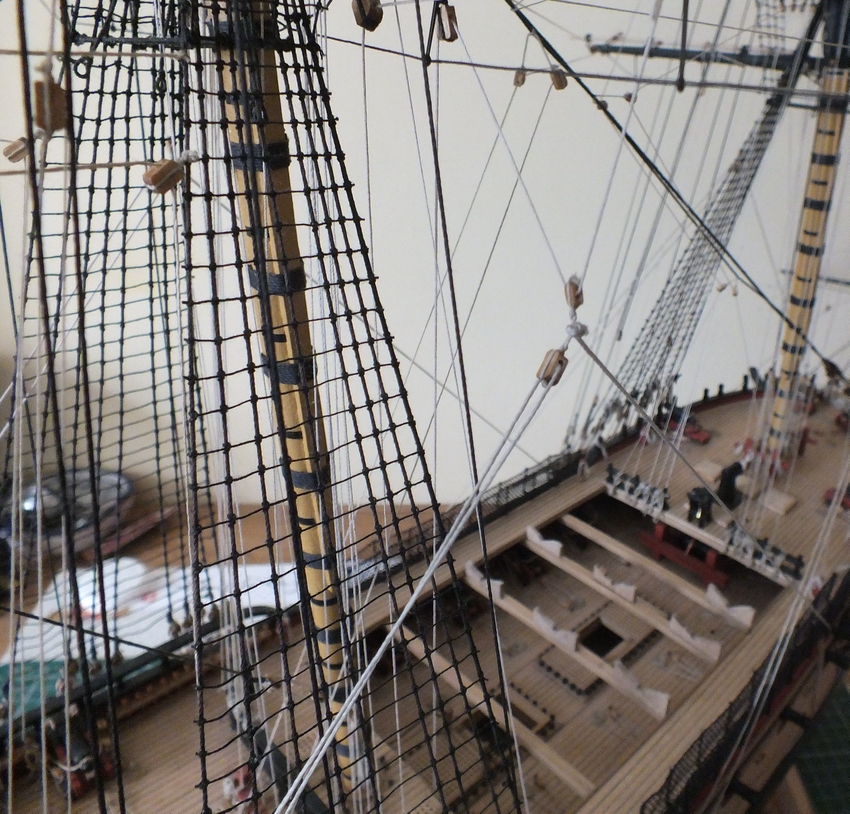
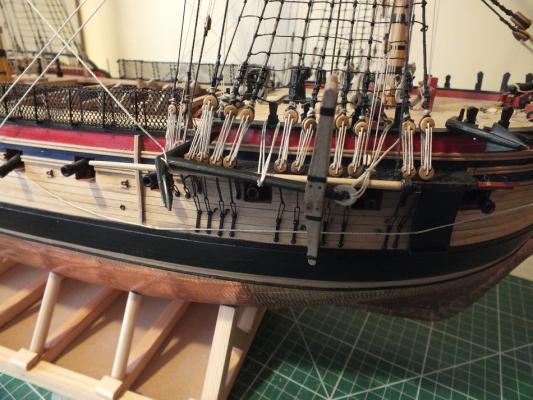
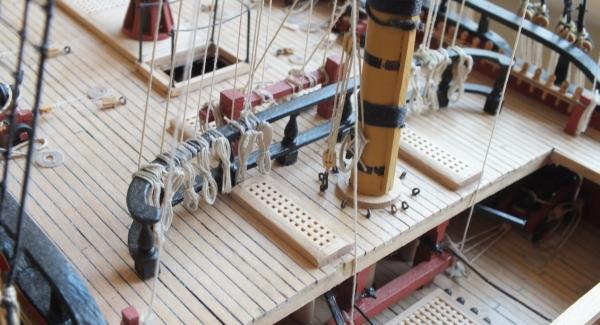
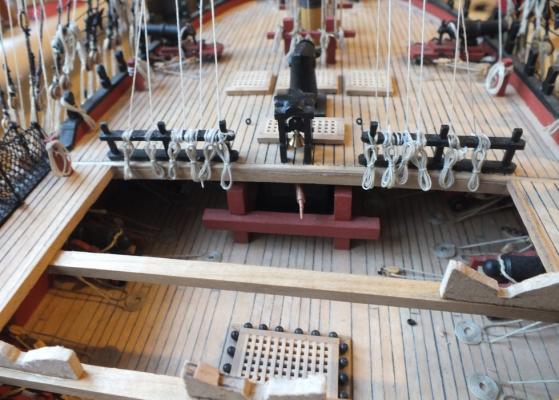
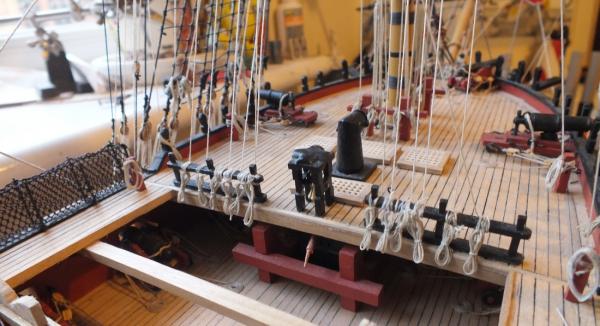
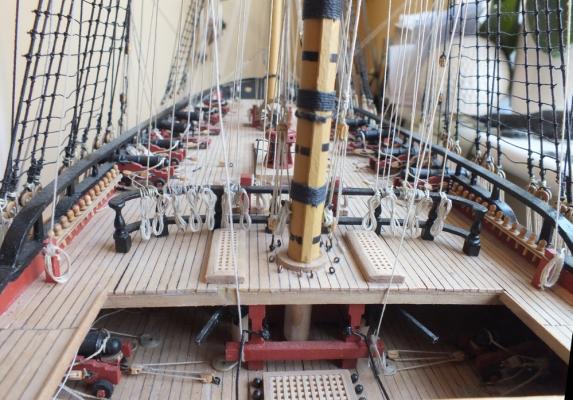
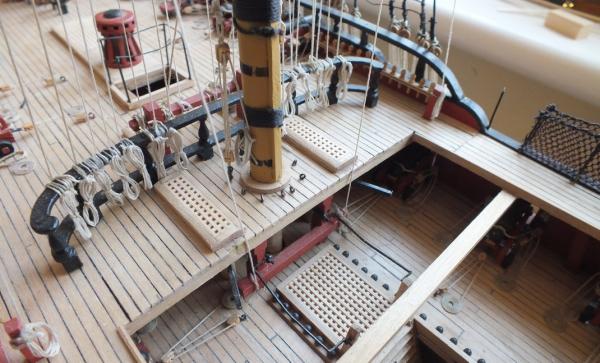
With the ships boats finished it has been back to the last of the rigging all be it slowly as other things have taken up most of my time in the last few weeks,the fore sheets tack and clue lines and the main sheets tack and clue lines have been added and rigging done !!! I am now making lots of rope coils to add to the belaying pins and all the other rigging termination points.


- 536 replies
-
- 19
-
-
- diana
- caldercraft
- (and 1 more)
-
Hi Christian nice to see you back the boats look great, the evergreen styrene is what I used it is nice to work with and takes paint fairly well, look forward to more updates. I am very close to the end of my Diana journey.
-
Hi Jason nice rework one thing not mentioned so far is the rudder thickness will increase when the copper tiles are added as possibility the dimensions in the book would be with the copper plates on.
-
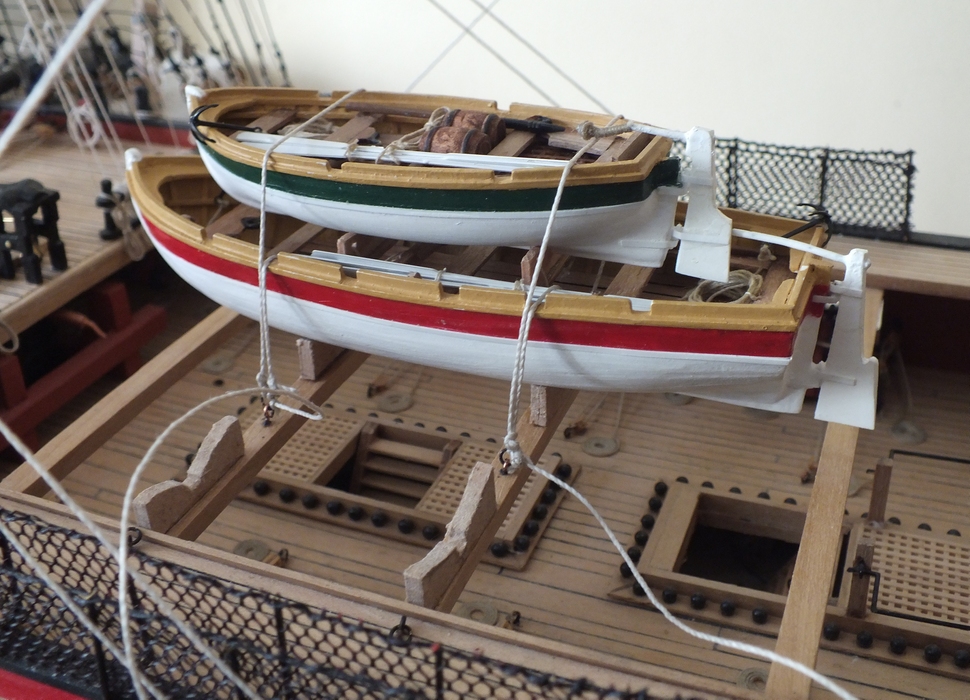
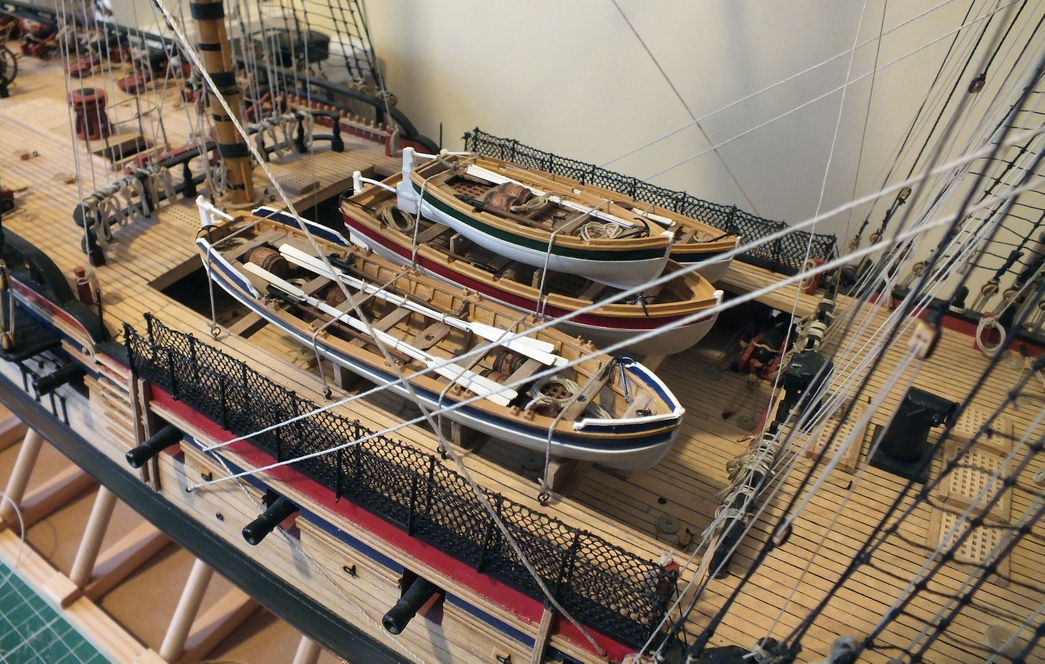
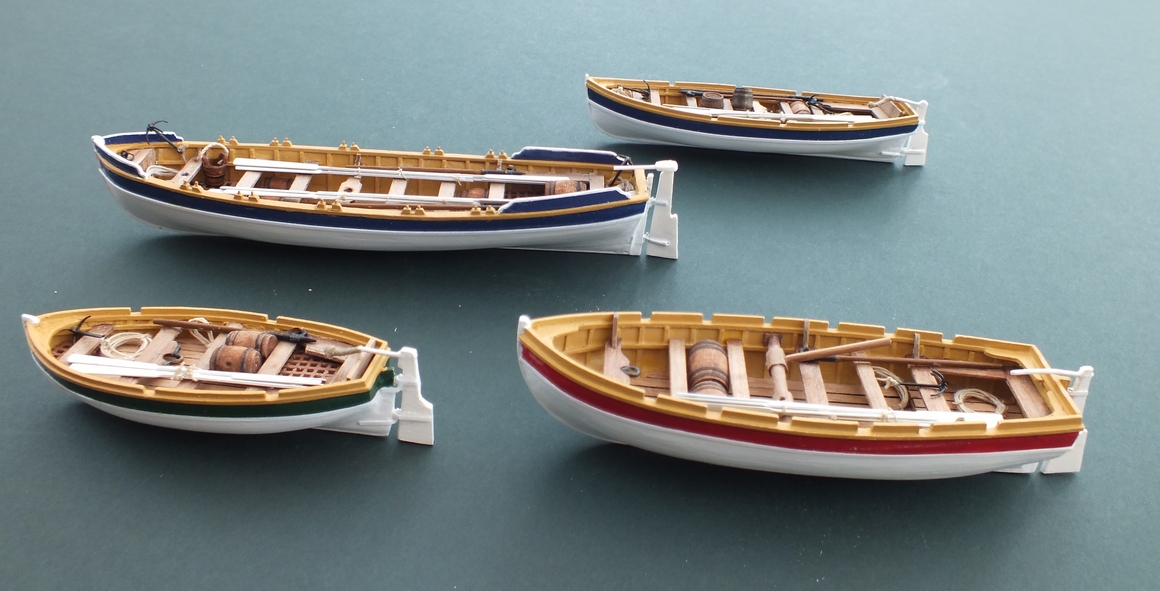
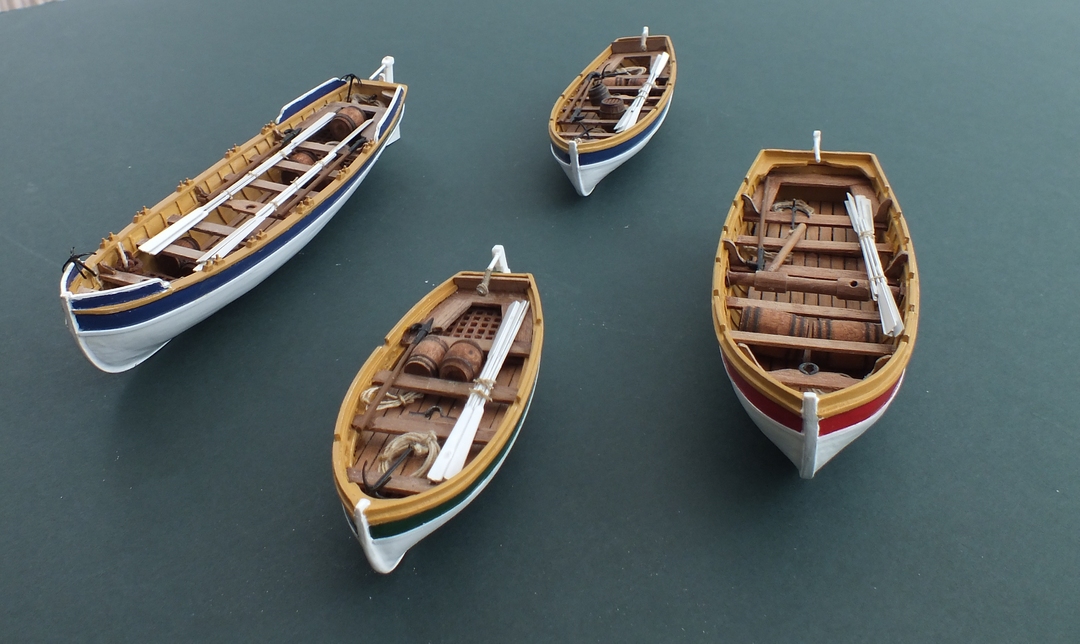
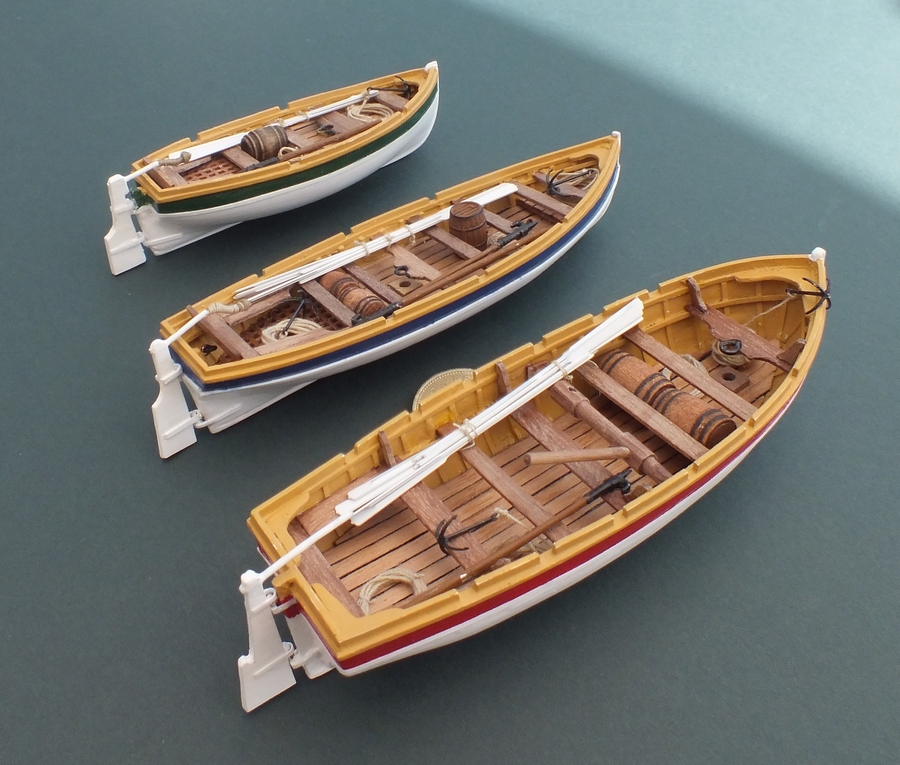
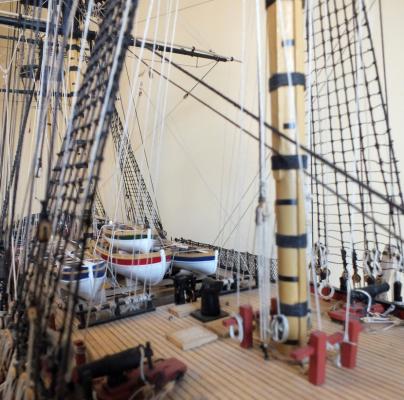
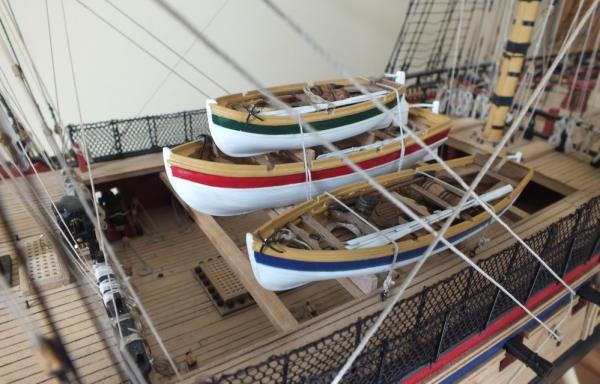
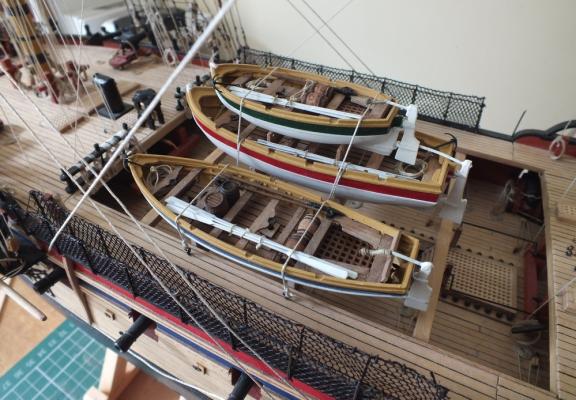
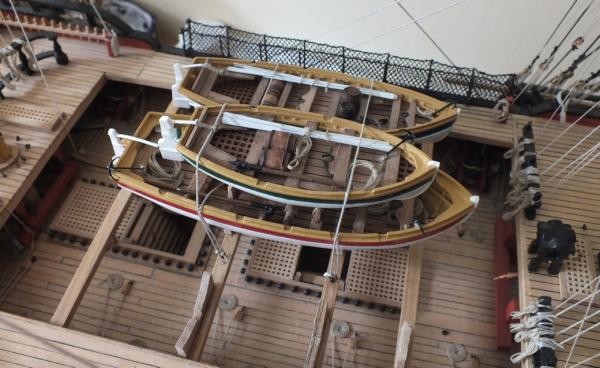
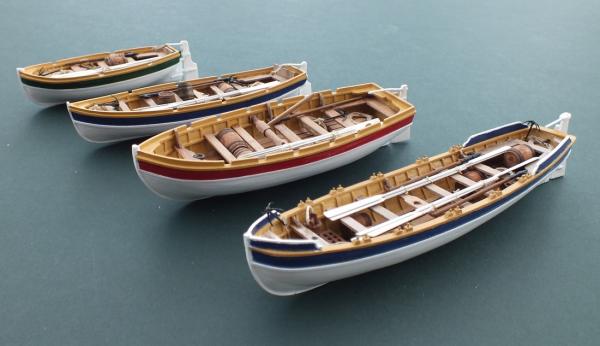
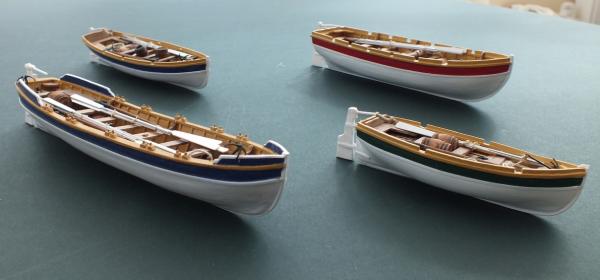
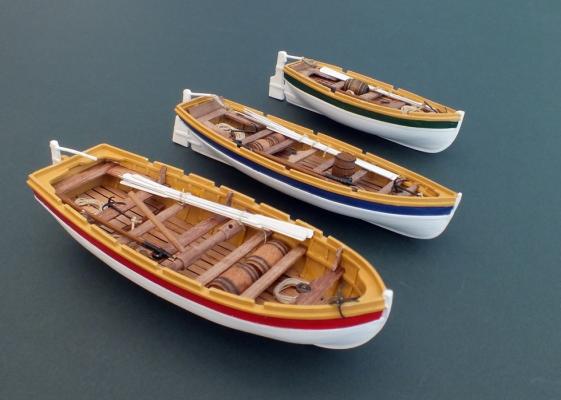
The ships boats completed below some photos of the completed line up. Back to the last of the rigging.


- 536 replies
-
- 14
-
-
- diana
- caldercraft
- (and 1 more)
-
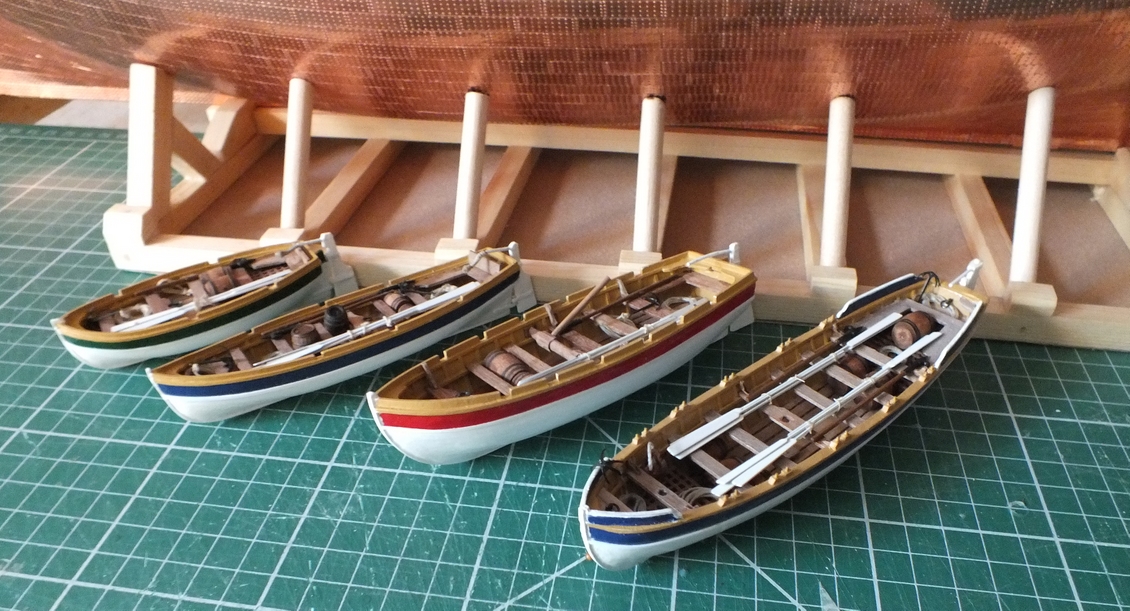
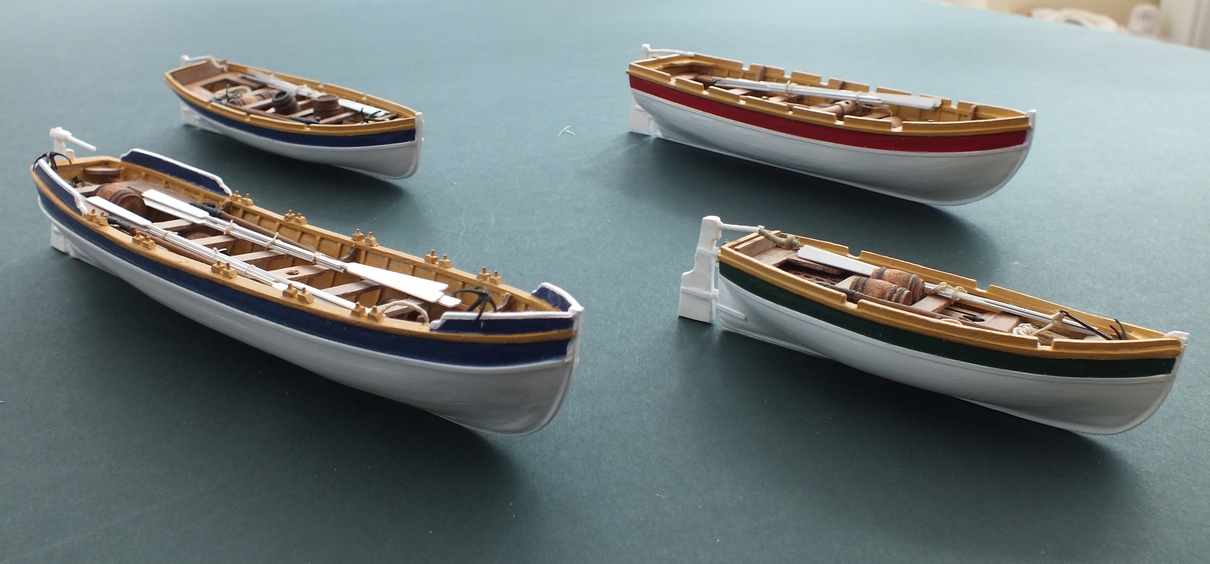
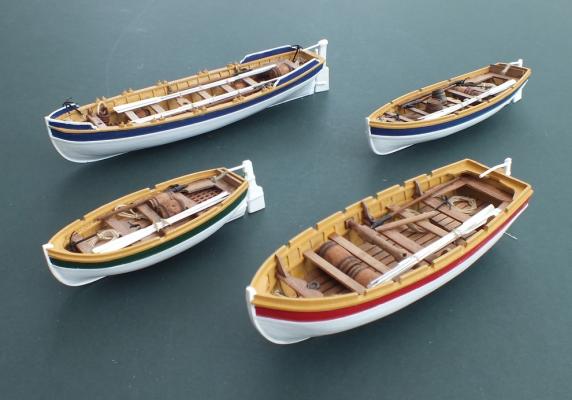
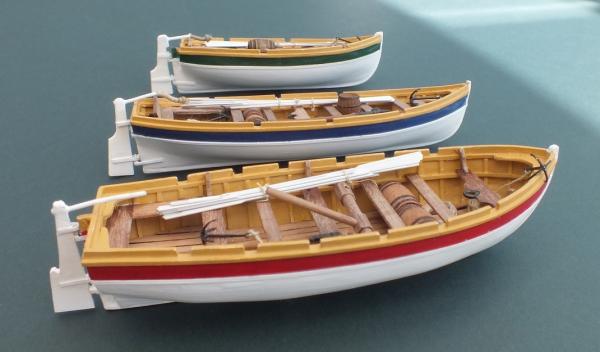
Hi Guys many thanks for all the ticks and positive comments,I will add a few photos of all the boats together. Now its back to the last of the rigging not to much to do now, the largest job left are the rope coils at the termination points. David B Below are the colours used on the boats I used colous that I liked, the blue and red matched the colours used on Diana. White Humbrol 130 Red Humbrol 19 Green Humbrol 3 Admiralty paints French blue and Yellow Ochre.
- 536 replies
-
- 3
-
-
- diana
- caldercraft
- (and 1 more)
-
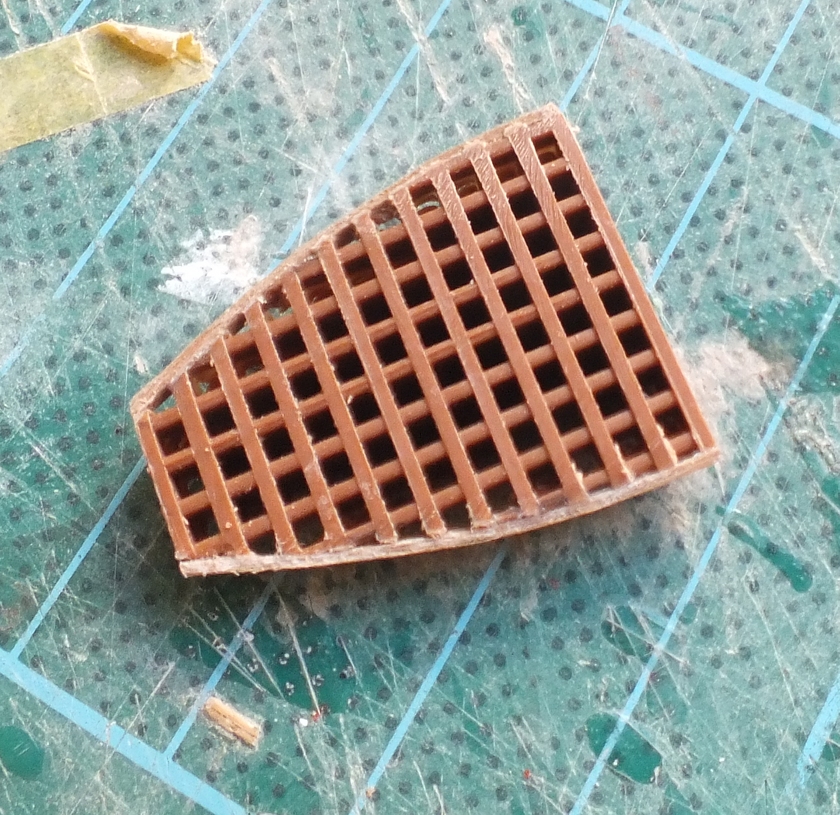
The 32ft Pinnace I built the Pinnace in the same way as the other boats, but did the decking differently, and a bit of white lining on the paint job, on the sides, to make the boat a bit more like the Captains boat,, I have really enjoyed building these boats, so much so that during my next project I am going to build some more at a larger scale,they will also be painted as they were in service, as this added to the boats protection on long voyages and will also be carval built as supplied to ships in service not in the channel. 1st planking holes cut to make breaking out inside easier 2nd planking grating keel added ribs deck and grating fitting out painting Finished boat


- 536 replies
-
- 15
-
-
- diana
- caldercraft
- (and 1 more)
-
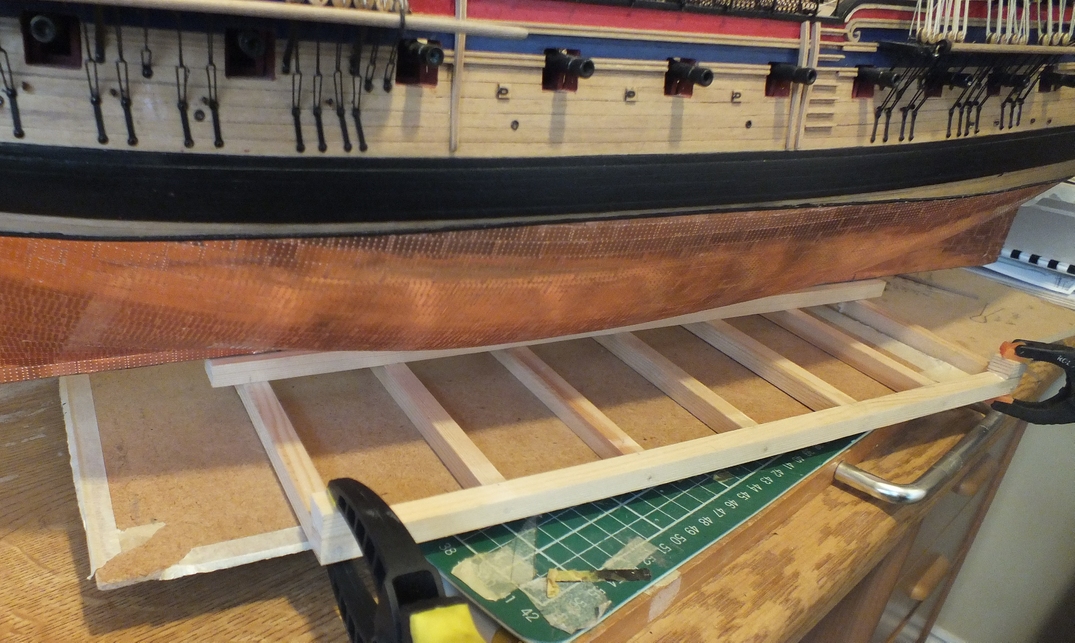
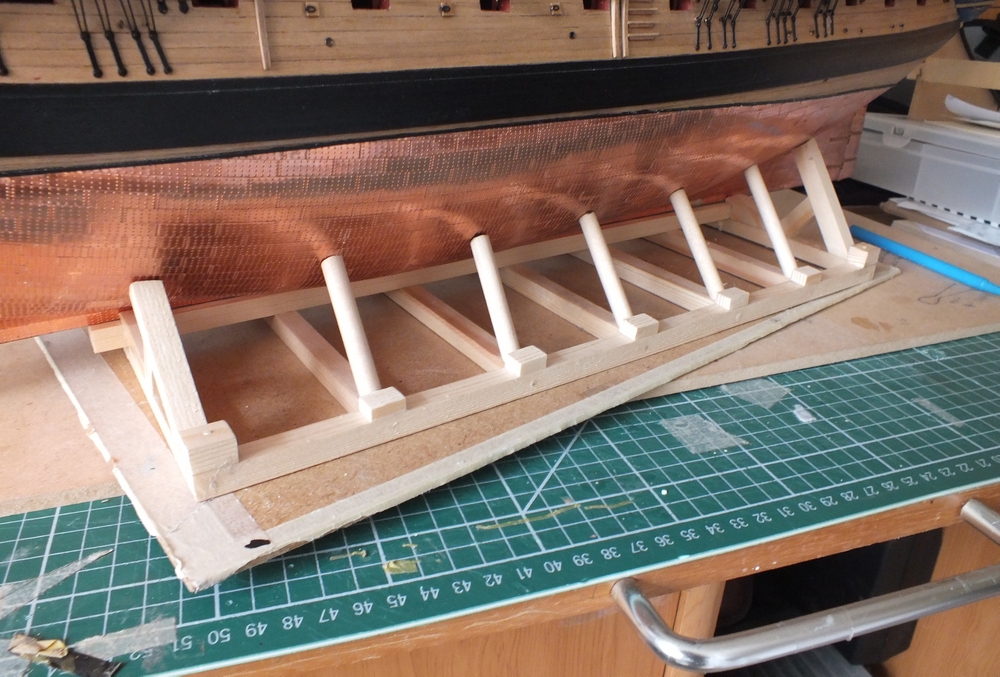
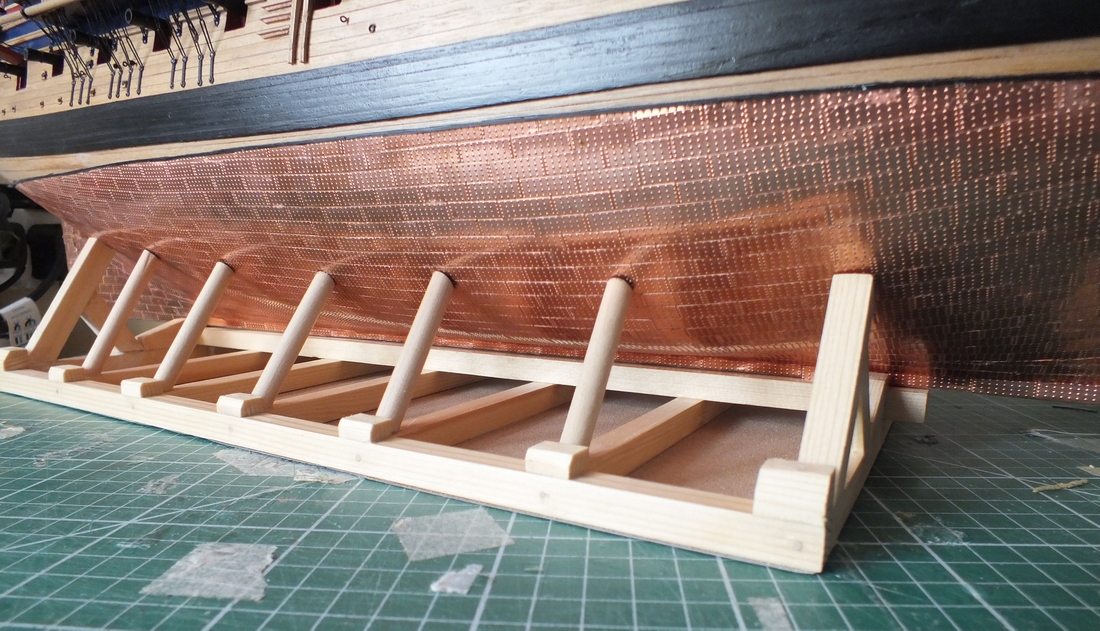
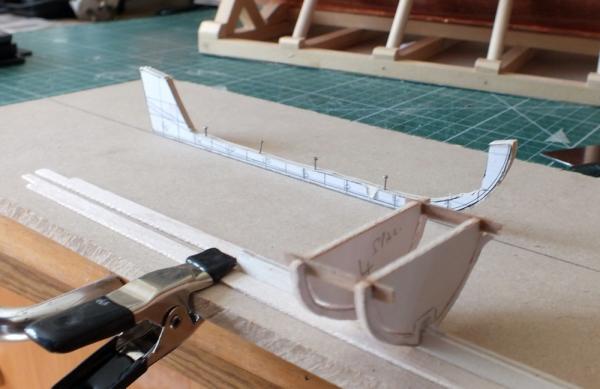
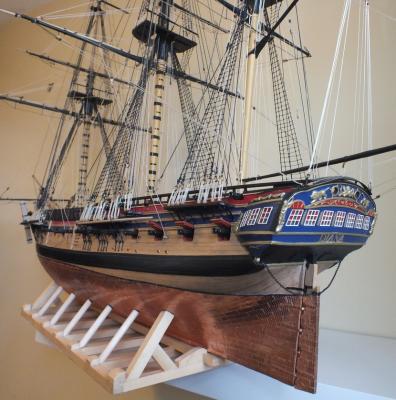
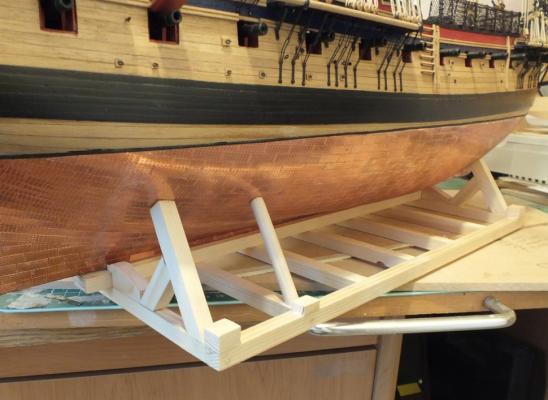
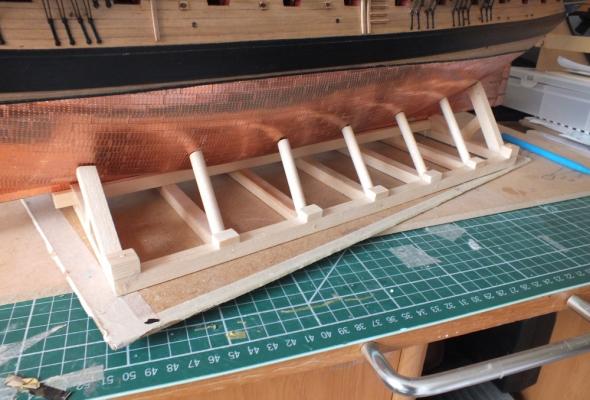
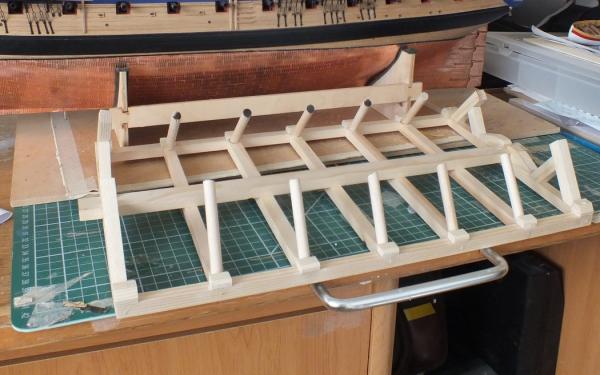
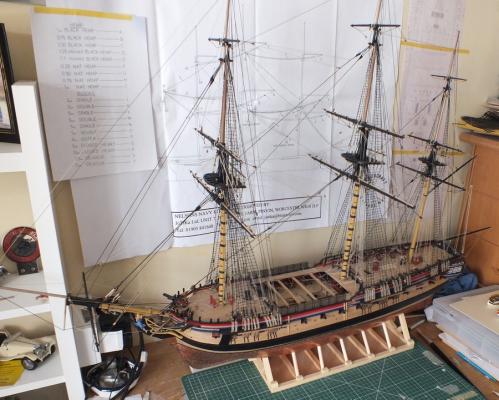
The Display Stand Before building the Pinnace I decided to build the display stand, I very much liked the one Mobbsie built for his Aggy so I take no credit for the ideas or the design, so its my version of Mobbsies stand.


- 536 replies
-
- 13
-
-
- diana
- caldercraft
- (and 1 more)
-
Hi Guys thanks for the many ticks and comments Mort The boat hooks are 57mm A4750/01 oars 65mm A4405/01 (used so far) 85mm A4405/02 ( to be use with the pinace) Kedge anchors 11mm A4400/01 all were from the every reliable C M B
- 536 replies
-
- 1
-
-
- diana
- caldercraft
- (and 1 more)
-
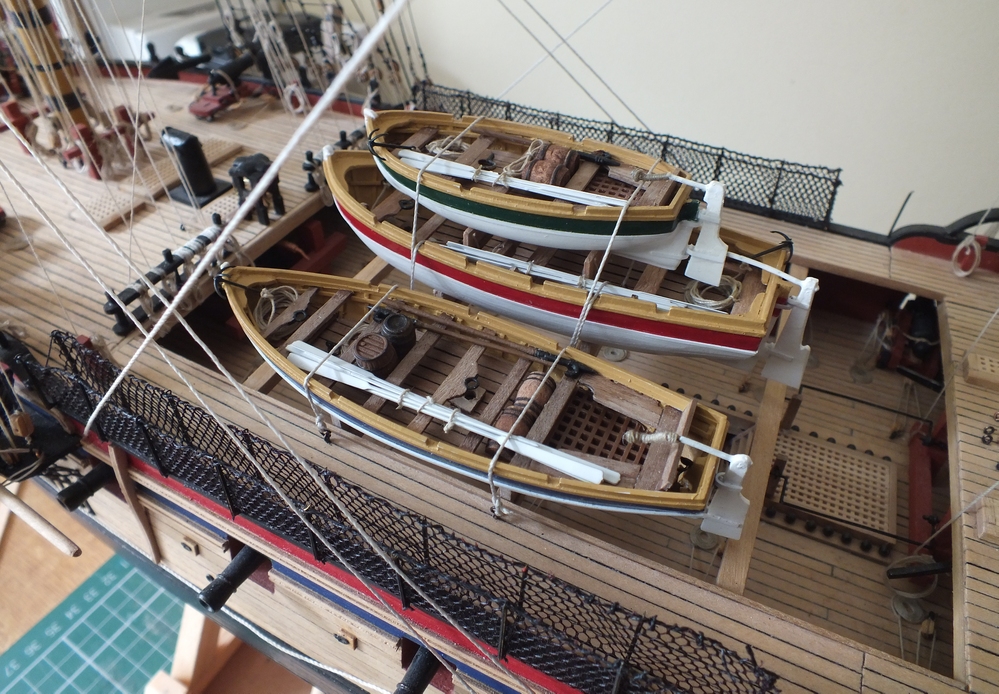
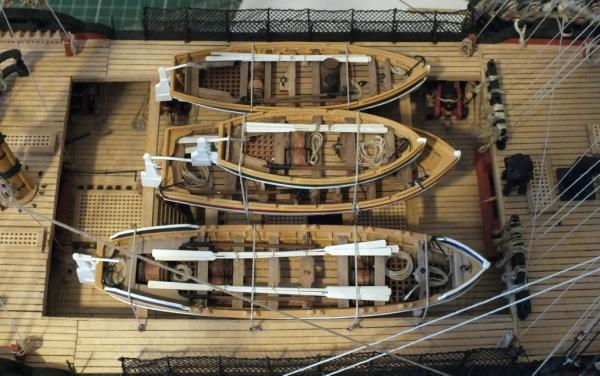
The next boat to be completed is the 26ft launch built as the other two plus some photos of all three only the pinace to do now as before the early stages done but on holiday for two weeks from Sunday so they should all be completed by the end of the month. Keel & frames 1st planking 2nd planking false keel inside ribs decks added seats row locks & winch tiller painted tiller added inside fitted out completed tiller inboard three finished boats


- 536 replies
-
- 16
-
-
- diana
- caldercraft
- (and 1 more)