Ol' Pine Tar
-
Posts
70 -
Joined
-
Last visited
Content Type
Profiles
Forums
Gallery
Events
Everything posted by Ol' Pine Tar
-
 Thanks JPam. Yes, the gun ports were the cause of most of my miseries. I think I've got that problem solved. And, once again, I've been going through all the FA build logs on MSW and still finding a lot of good advice. Thanks for commenting!
 -
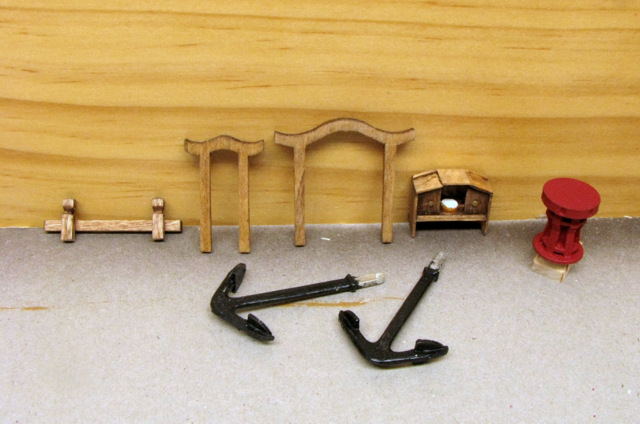
Thanks Don. The gallows, bits and binnacle are wood. Gallows are from the kit and the bits and binnacle scratchbuilt. The capstan and anchors are kit castings. I'll probably replace several of the castings with scratchbuilt stuff.
-
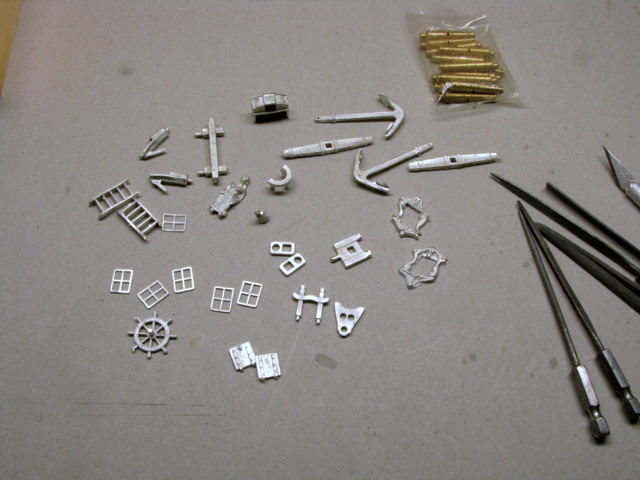
Thanks for the comments and likes! Still contemplating a rebuild of the hull. Meanwhile... Cleaned up some of the castings and laser cut pieces,and built a couple of smaller items.
-
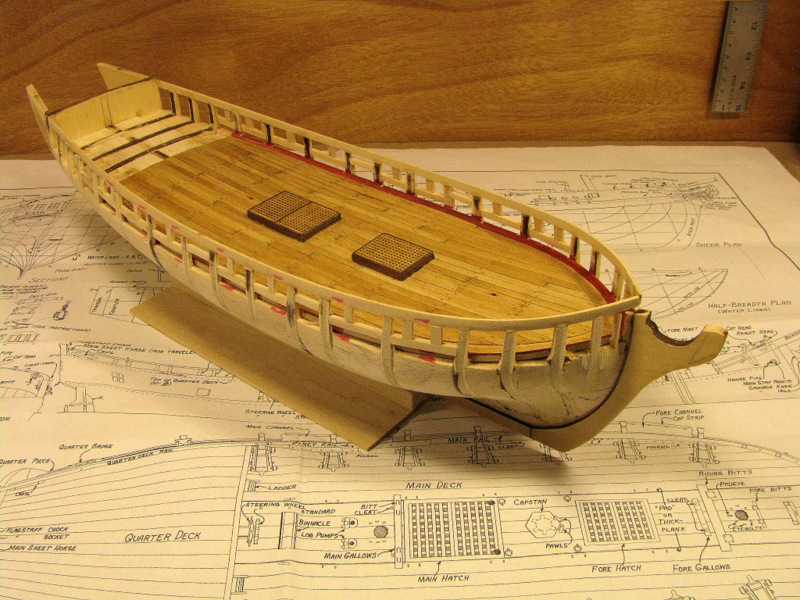
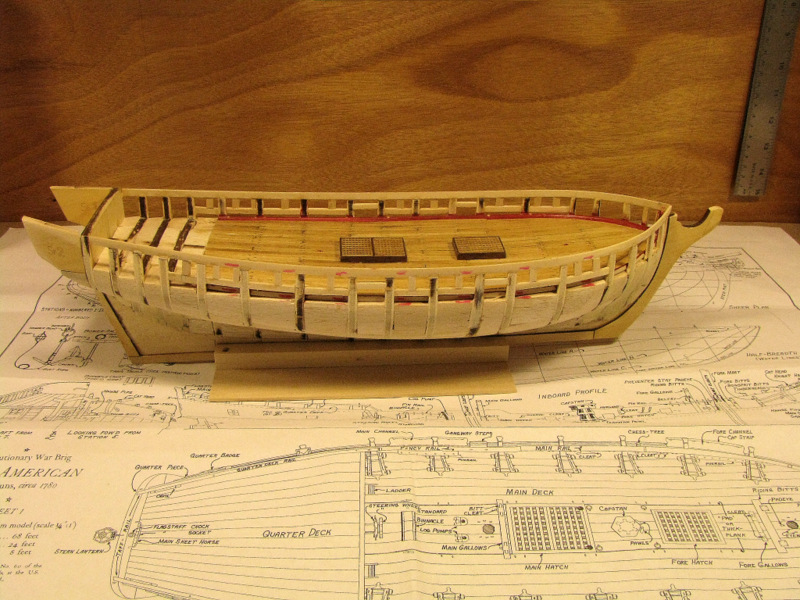
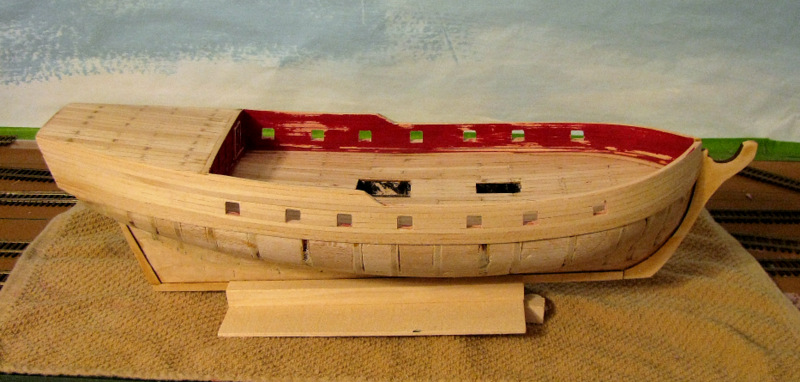
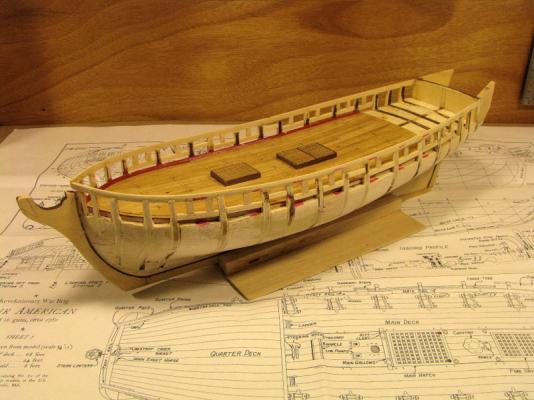
I posted earlier this week that my FA build was being retired. Well not so fast... Its been almost 2 years since I did any model ship work. I've spent most of that time trying get settled into retirement, selling big house, buying smaller house, moving all the work shop stuff, the work bench, the model railroad, all the wife's artsy-crafty stuff... Then unpacking, finding everything and getting it all set up in a newer, smaller space... I'm sure most of you have "been there, done that" Anyway, a couple of weeks ago I finally got around to getting the FA back on the workbench. Man, what a mess. The gun ports were the wrong size and way out of position, the quarterdeck was too high, the deck planking was just plain bad. I really considered scrapping the whole build and starting on something else, but after a couple days of looking it over I thought better of it. So I got busy and rebuilt everything that didn't look right, including re-planking the main deck. The quarterdeck is going to get re-planked this weekend. Lot happier with it now, so I guess this build will continue after all. Sort of where we're at now... I want to thank all the folks here who take time to post their work. Its so helpful and inspirational to all of us. Thanks!
-
For starters, cannon and carronade barrels,and figureheads
-
EEEgads! Four months since a post. Lotta water gone under the bridge since then - no pun intended... Been lurking about the Forum, just a lot of distractions. Revamped the mancave/workshop/office. Bought some stuff, sold some stuff, Goodwilled a bunch of stuff, threw a bunch of stuff in the dumpster. Still trying to get completely retired. Sometimes I think retiring is more work than work - maybe by August. Fixin' to put the FA back on the work bench. I see all of y'all have been doing some mighty fine work and making a lot of progress on your projects. Best to all and, hopefully, we'll have the shipyard up and running here in a few days.
-
Congratulations, Gary! One very nice model. Thanks for taking time to post your build. I've learned a lot from your experiences.
-
Jim, Gary, Bob THANKS for the kind comments! I keep up with all of the Fair American build logs on a daily basis. Thanks for sharing your knowledge and wisdom. :im Not Worthy:
-
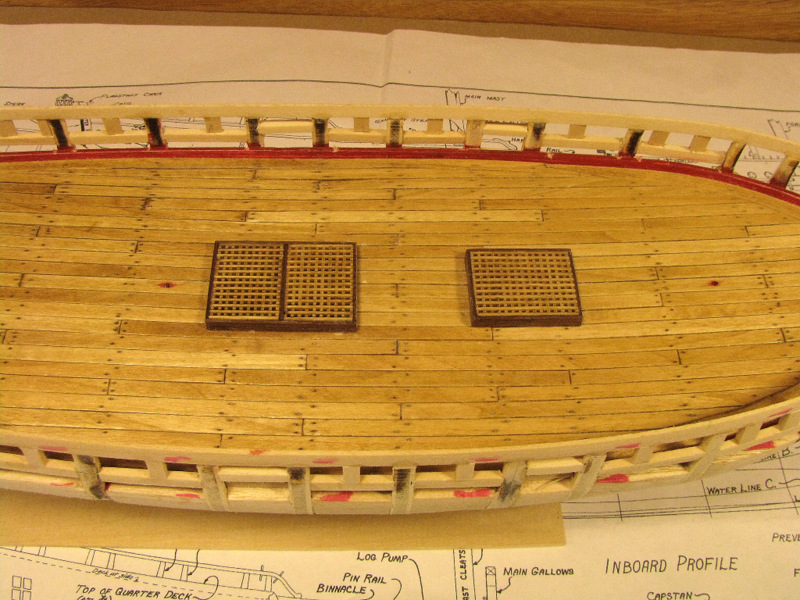
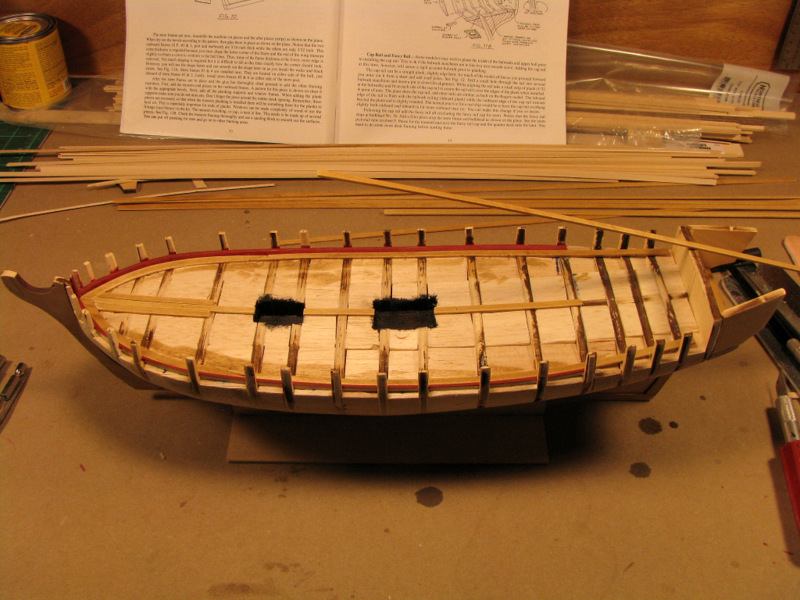
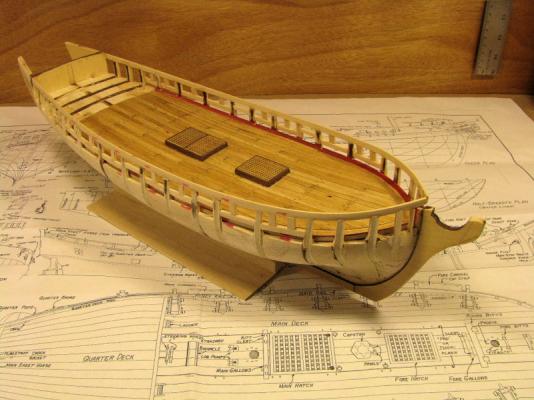
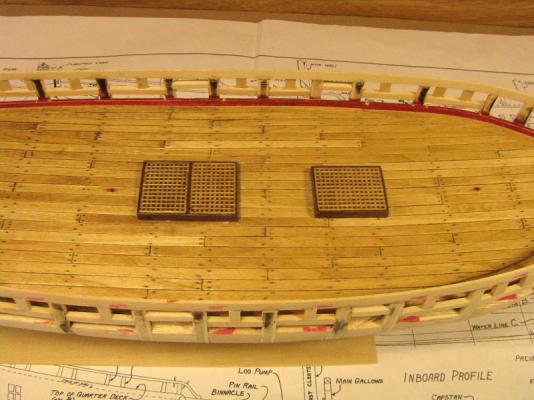
Thanks everyone for the comments and “likes.” I see Ken has finished his Fair American. Beautiful ship! Looks like I'd better get to moving smartly. I constructed the deck hatches and gratings. I used walnut for the coamings and the grating supplied in the kit. I sanded the bottoms to shape using a sheet of sandpaper taped down to the deck and glued them down. Next I framed the gunports. Following Ken and others lead, I put a 1/8 x 3/32 piece across the tops of the bulkheads to facilitate the larger gunports. After a good bit of trial and error – mostly error – I managed to build up the fixed sheaves somewhat like Bob's. Notice the “somewhat”... Thanks, Bob. Got them framed in. Thanks again everyone for taking time to look and comment!

-
Ken, Your excellent model shows the result of a lot of talent, skill, and perseverance, enhanced by your photography. Thanks for taking time from your build to photograph and post your work.
- 455 replies
-
- 1
-

-
- fair american
- model shipways
- (and 1 more)
-
Ken, Excellent work and photography. "The boat as seen from the dock" photo is definitely a winner. It has that "sunrise through the rigging" look to it. Thank you for taking time to share your work on MSW.
-
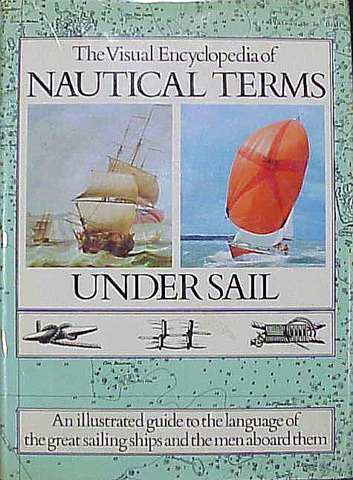
I'm sure this book is a fairly common part of most MSW member's libraries but I didn't find a review or mention of it here. Anyway, I've found it to be a good reference plus being fun just to look through. The Visual Encyclopedia of Nautical Terms Under Sail Basil W. Bathe, George P. B. Naish, Alan Villiers, et al Crown Publishers, 1978 - 352 pages This book is an excellent source for terminology dealing with seafaring for both the neophyte and the old salt alike. It is divided into a number of chapters according to the types of words being dealt with. Each word is defined clearly and concisely. Where necessary, clear line drawings illustrate terms that are difficult to completely explain in words. Also there are some comical illustrations for some of the more humorous items of sailor's slang. It also has sections relating to ship types and construction, sailing, sailors' customs, flags, calls and commands, navigation, weather, pilotage, tides and currents, fishing, and mooring and has a comprehensive index. The book is readily available on both ebay and Amazon used for as little as $10 USD.

-
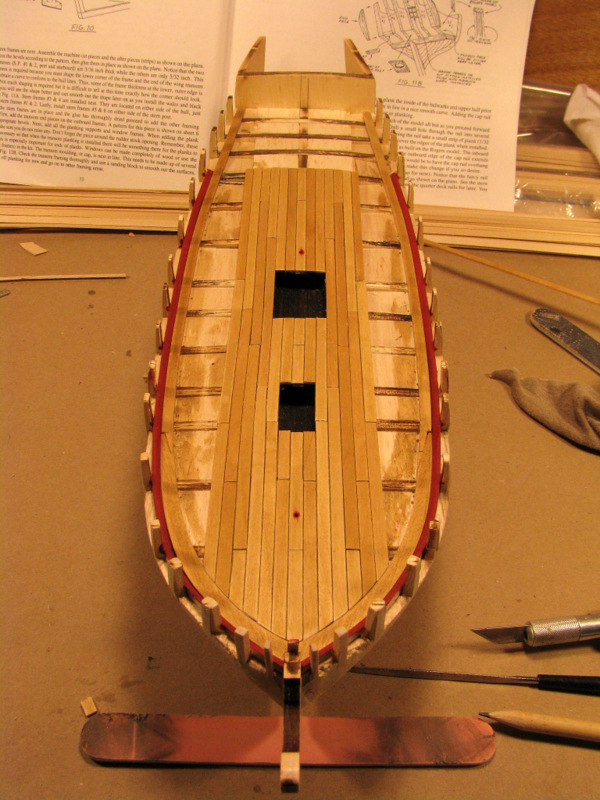
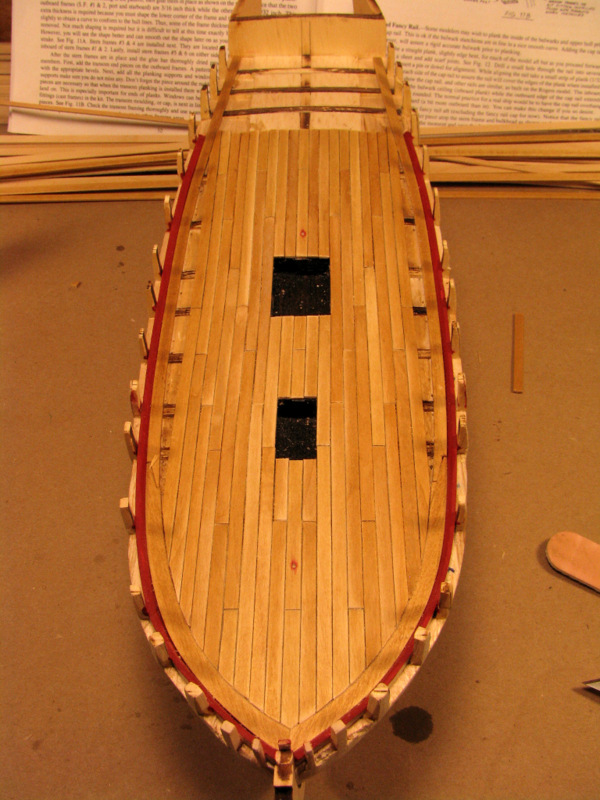
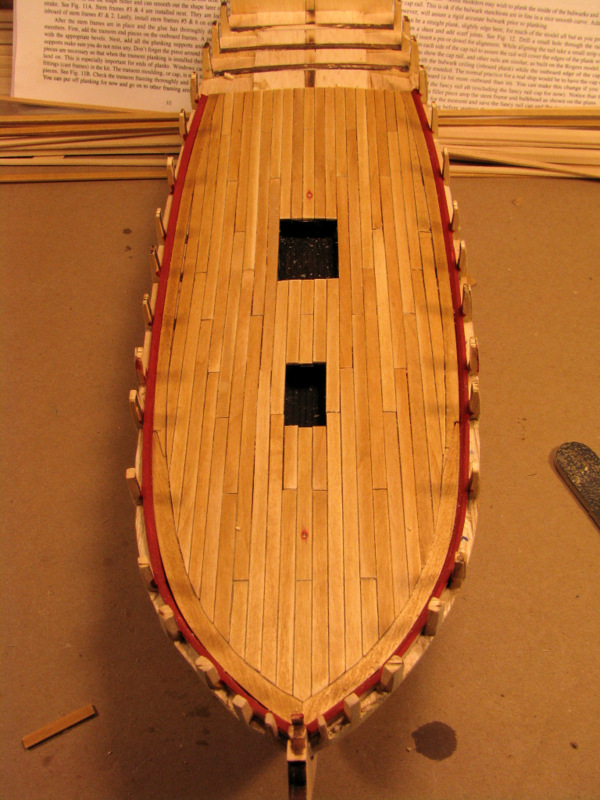
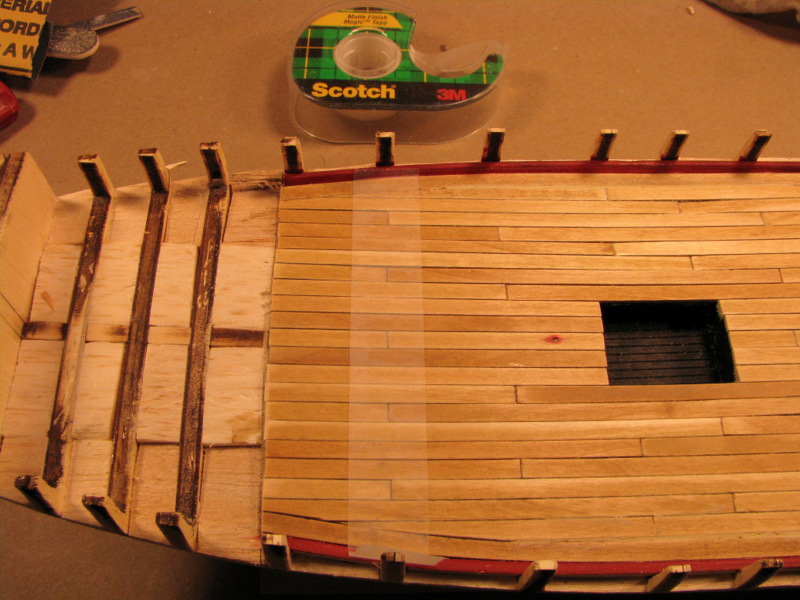
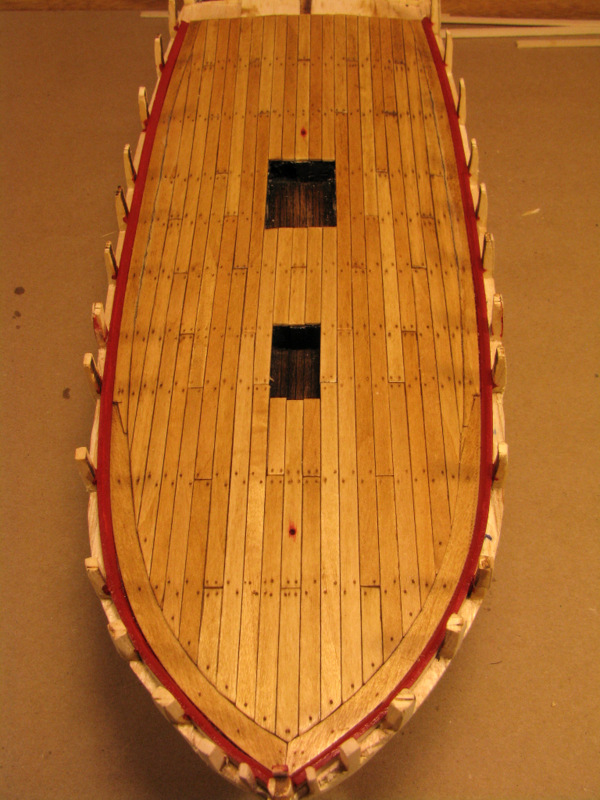
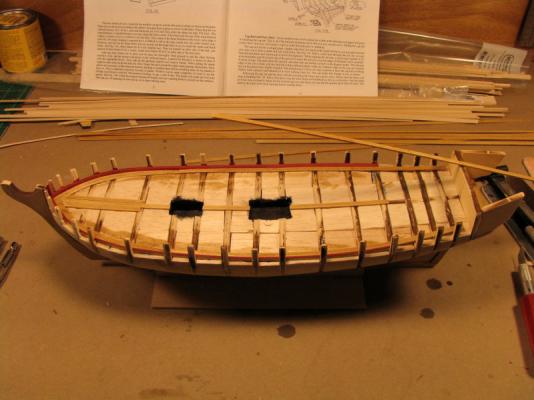
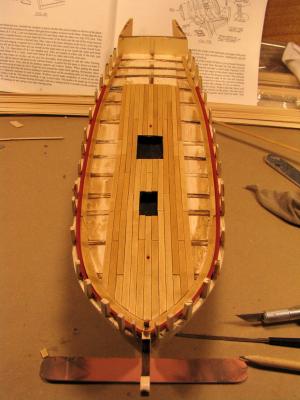
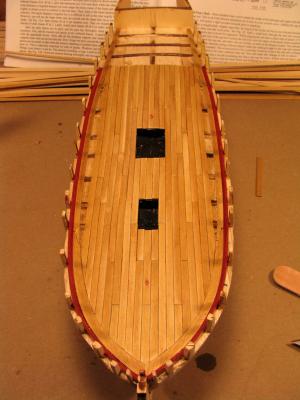
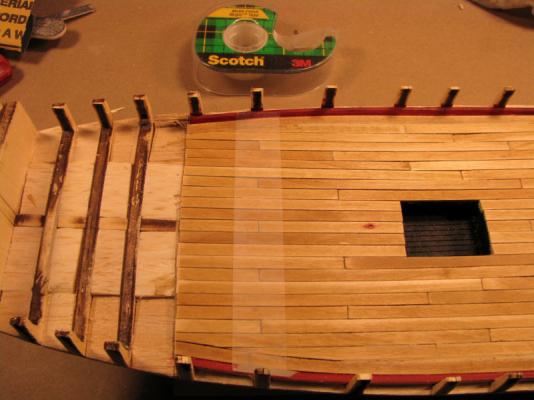
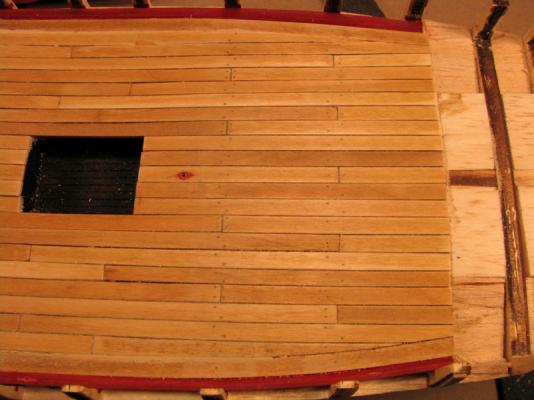
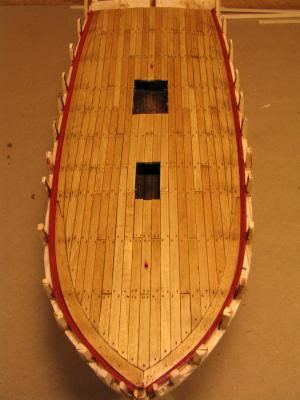
Thanks everyone for the comments and the “likes.” I decided to go ahead and plank the main deck with the 3/16” basswood supplied in the kit. Before I cut and glued the planking, I sanded each piece with 220, 400, and 600 grit, applied Minwax Pre-stain conditioner and then stained the pieces with Minwax Golden Oak stain. Used a #2 pencil to mark the caulk lines. As for glue, I normally use Aleene's Tacky Glue, but this time I thought I'd try a medium CA. Worked just fine. Main thing was I didn't have to clamp and wait for the glue to dry before putting down the next plank. I applied just a drop to the top edge of each bulkhead the plank covered and laid the plank in. The medium CA gives you some wiggle time to get the plank in straight and butt-up to the previous one. Fifteen seconds or so and the plank is stuck. After the planking was down, I used Scotch tape to mark the guide lines and drilled the trunnel holes. I then lightly sanded the deck down to fill the holes with sanding dust and applied another coat of stain and a couple coats of Minwax satin finish Wipe-On-Poly. Overall no big problems. The scarph joints in the margin plank were a little rough and I'm still having a time getting the planking more level, but we're getting there. I did have some problem with the stain wicking up the grain on the butt ends of the planks and the trunnel holes with the basswood. I'm not quite ready to invest in a stock of alternative woods, but I will certainly consider some boxwood, holly, or swiss pear for my next build. As always, your comments, suggestions and advice are always welcome. Thanks for taking time to look and comment.

-
About the photos... I moved all the C W Morgan photos to my Flickr page. Also posted the USS Constitution photos. This link should take you to my Flickr Albums page. If not let me know. All are welcome to the photos. Should have some more stuff up soon.
-
Merry Christmas & Happy Holidays to You & Yours From The Turner Family

-
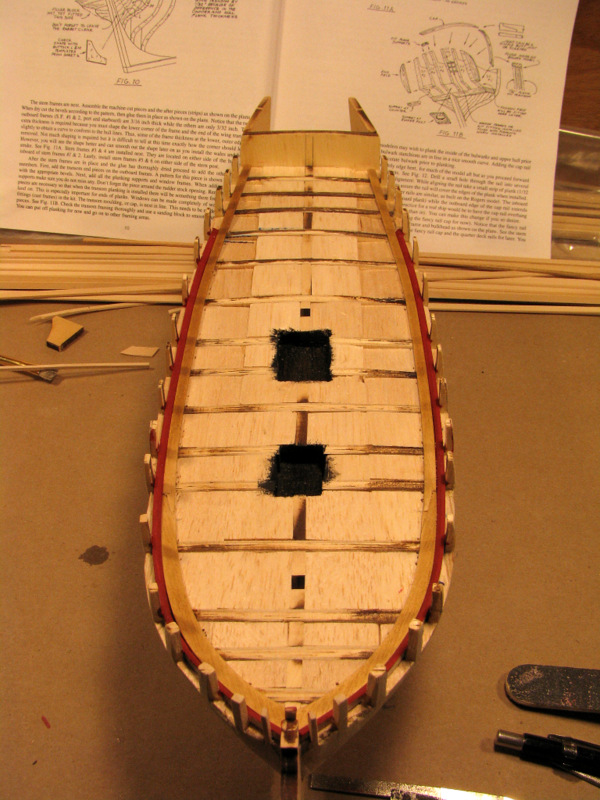
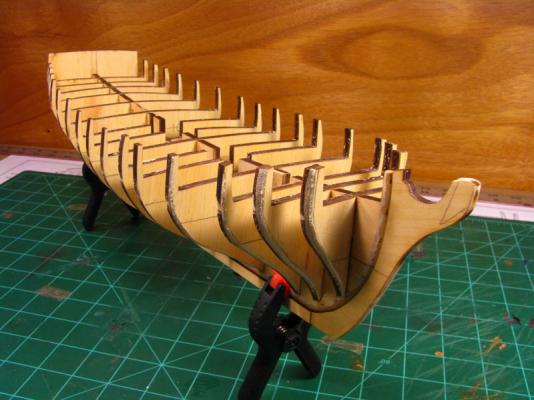
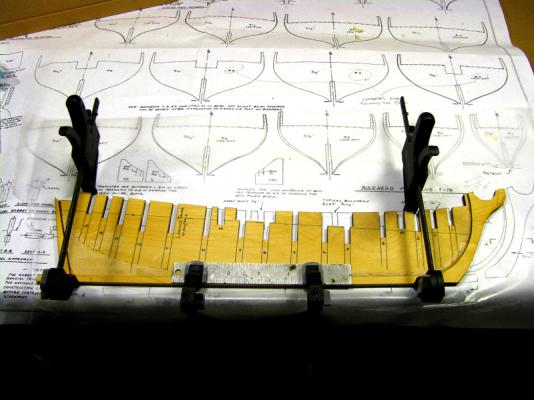
Been a while since we posted... Why, You ask? #1 - The work bench got commandeered by the Admiral. “Can I use your workbench to wrap a few things Dear?” “Of course, My Love...” Five days later. “You probably need to empty your trash, Dear. I have just a few more things to wrap...” Then, of course, I had my stuff to wrap. #2 – Vacation... Viva Las Vegas! and another five days.... Actually we go for the shows, restaurants and the fact you can get a suite in a nice hotel for about 80 bucks a night... Yesterday I finally managed to get back to the workbench. After reading through the instructions and the several build logs, I decided to plank the deck before doing the bulwarks and gun ports. So, yesterday and today we worked on fairing the balsa deck fillers so the planking will hopefully lay in fairly smooth and flat. Added the waterway and the margin planks. I cut the forward sections from 1/16 basswood sheet and the remainder of 1/16 x 3/16 strip. The scarph joints look a little rough, but... practice makes perfect? More like practice makes lots of trash. As for deck planking, I think I'm going to use the 3/16 wide stuff. That comes out to 9” scale, probably a bit wide, but I'll lay in a few pieces and see how it looks. On another note... I see the NRG annual meeting in 2015 is going to be held at Mystic Seaport. Nice timing... I went to Mystic and Boston in October instead of going to St. Louis. I'd been wanting to go to Mystic and Boston to see the Constitution before it went to drydock, so off we went. All the while I was at Mystic, I kept thinking, “Just watch. The NRG get together next year will be at Mystic.” Looks like a return trip may be in order. By the way, I posted a bunch of photos of the C. W. Morgan on my Picasa Web Albums. I have a bunch more of Mystic Seaport and the Constitution that I'll be posting in the near future. I make a separate post about that.


-
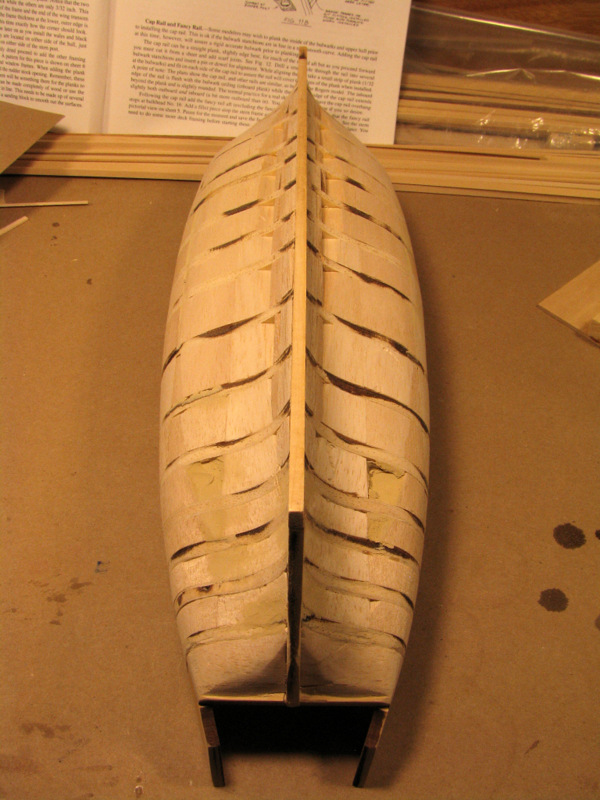
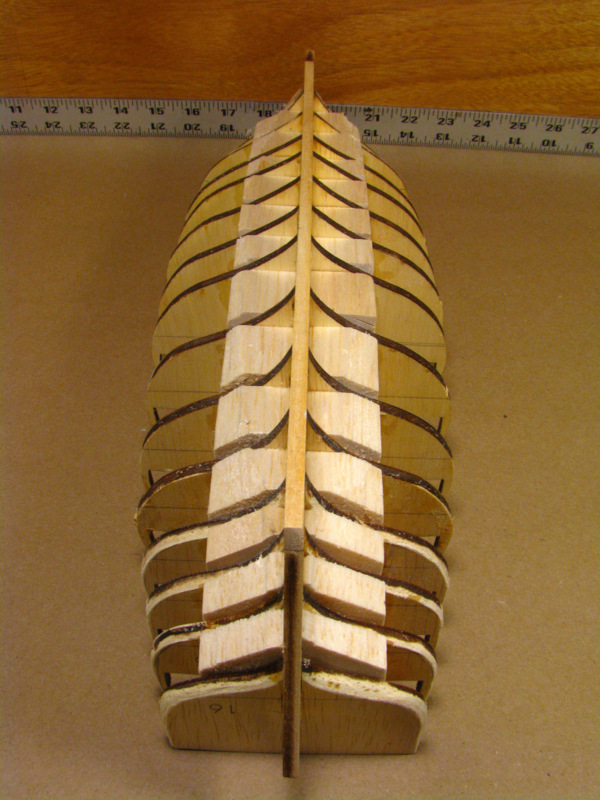
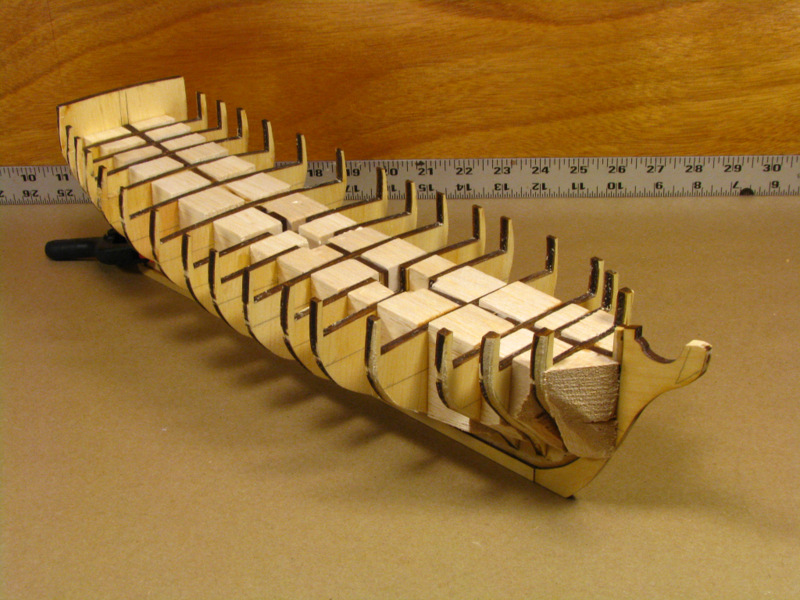
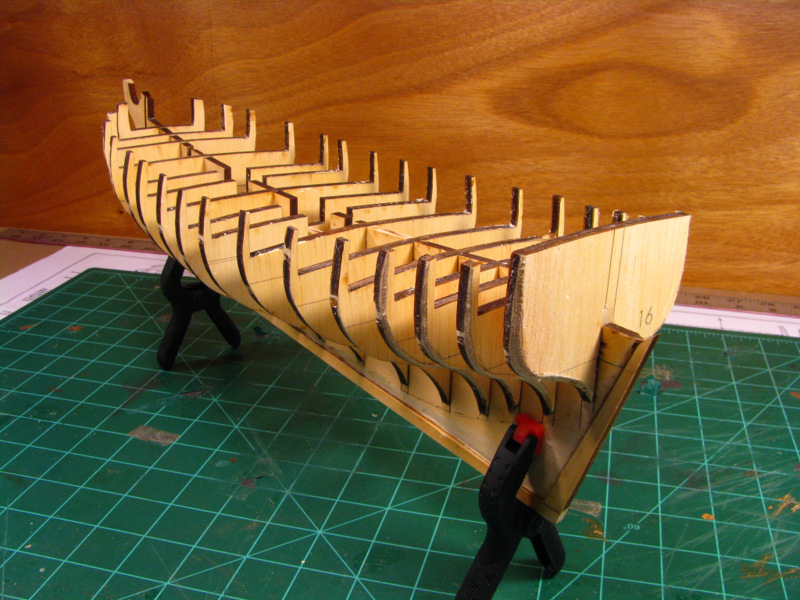
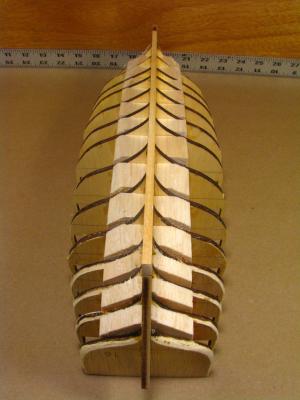
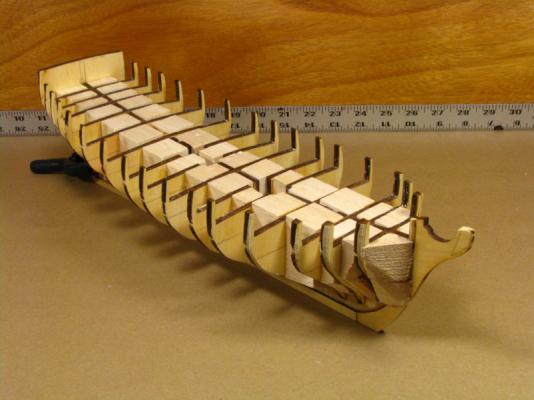
More bulkhead fillers... OK – I know this was probably not necessary but I went ahead and filled the majority of the bulkhead spaces with balsa, making this essentially a solid hull. When I faired and planked one of my “learner” projects, I found fairing the bulkheads was easier and the planking was much smoother on the portions of the hull where I had filled the bulkhead spaces. So... After finishing the fillers and some basic fairing...

-
Ali and Bob... THANKS ! for signing on. Exceptional work by both of you. I'm honored to have you looking over my shoulder.
-
Thanks John ! I'm trying to trim them a bit as I go, but the balsa is pretty easy to trim and sand. I think sometimes you end up with more on the floor than you have left on the model.
-
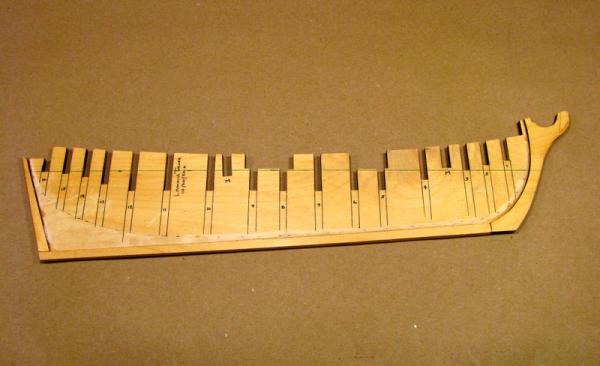
Thanks ! everyone for the comments and "likes." Moving along with the basic hull construction... Bulkhead fillers... Cut, fit, and glued the first set of bulkhead filler blocks using 1” x 2” balsa. Thanks for dropping in to take a look! Your advice, suggestions and questions are always welcome.

-
John, Thanks for checking in! Your Morgan build, which I'm following, and your website are very nicely done. I like the Lufkin pumping unit. Still see a bunch of them going out. I'll PM you about the photos.
-
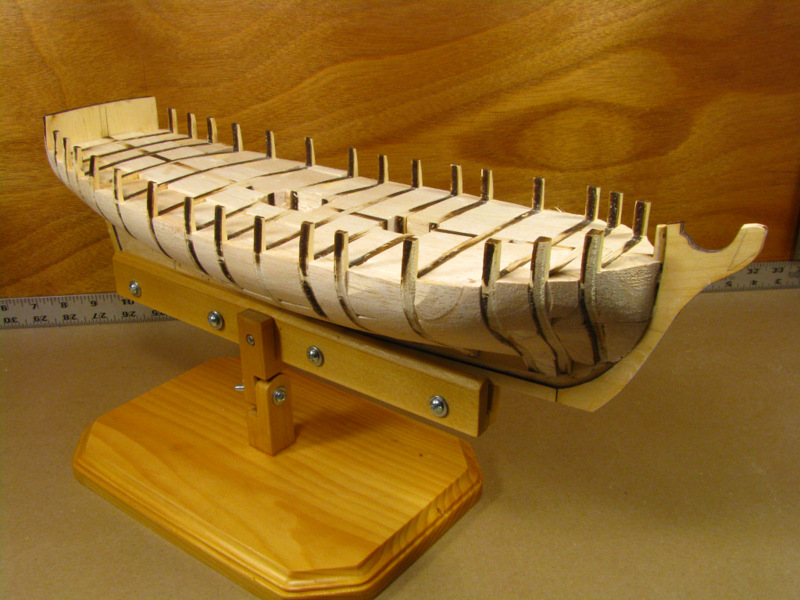
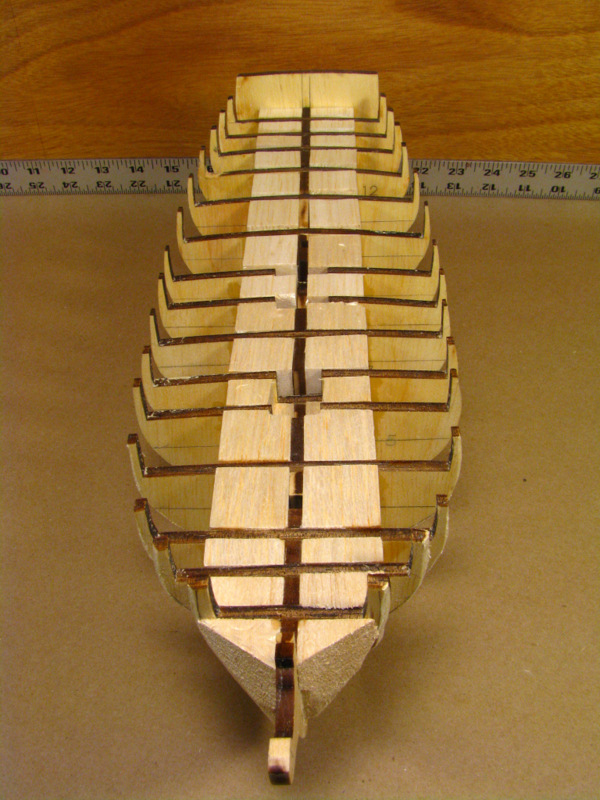
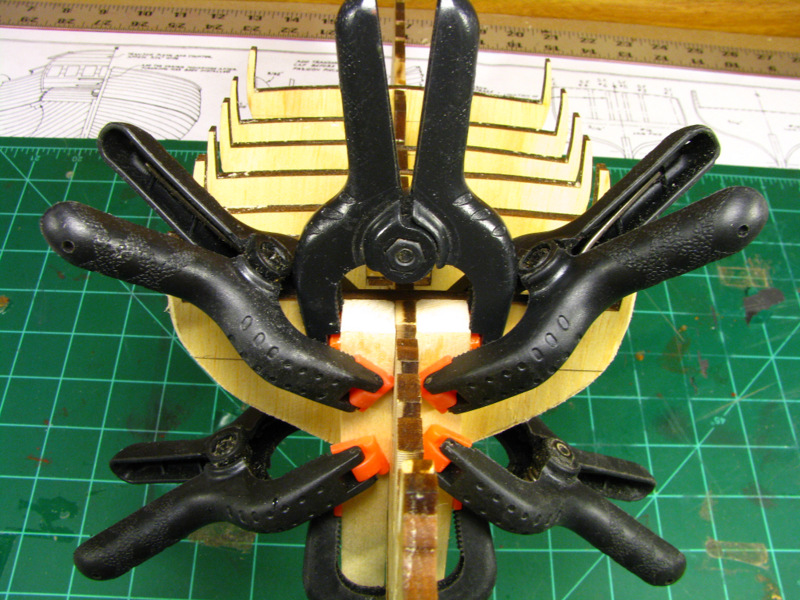
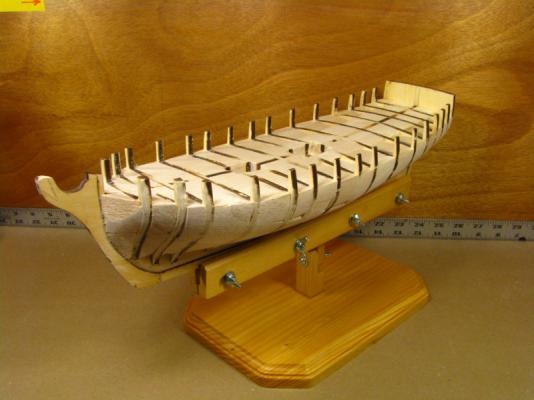
Although I have a good bit of model building experience – mostly model railroading – I'm quite new at model ship building. I've always been sort of a “scratch-basher,” very seldom building anything according to the plans and instructions. I learned pretty quick that model ship building doesn't work that way... So, with this project I'm making every effort to stick with the plans and instructions. I'm also using as a practicum several of the Fair American build logs, especially those of Pete, Bob, Gary, Kevin and Ed. Excellent work Gentlemen! And THANKS! for sharing your work. Bulkheads... Once again I dry-fit all the bulkheads on the center keel assembly to make sure everything still went together OK. I beveled the forward four and the aft four bulkheads, but not quite as much as the plans called for, wanting to be sure I didn't remove too much material before I got ready to begin fairing. Satisfied with the fit of the bulkheads, I clamped and glued each one individually, making sure they were square to and flush with the top of the center keel. After setting overnight, everything looked straight and square. Creative Clamping 101... or maybe some medieval torture device????


-
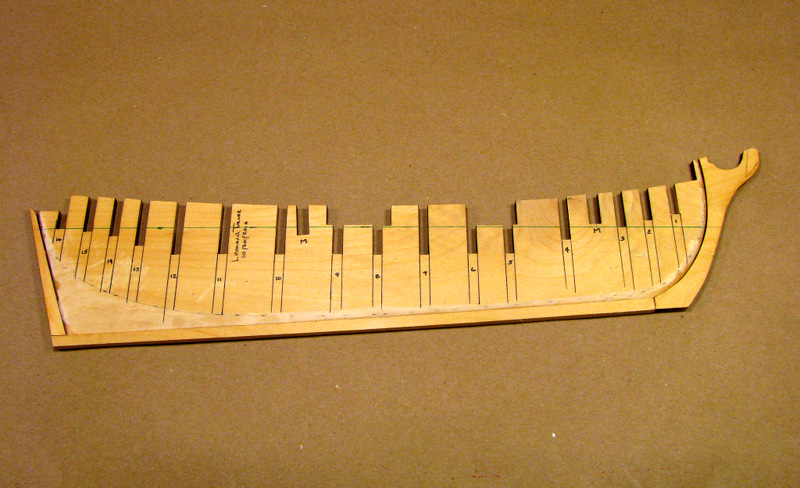
THANKS! everyone for the comments and the "likes." Your critique and comments are always welcome. Fitting and attaching the stem, keel, and stern post... I cut a new keel piece of proper length from the remnant of the 3/16” basswood sheet. After a little sanding and fitting I attached it, the stem and the stern post to the center keel. More to come...
-
Brian, Just finished going through your AVS build log. She's coming along quite nicely! Also your build log is very informative, especially your explanations of how you've handled the adversities of the build. Nicely done!