

Chasseur
-
Posts
461 -
Joined
-
Last visited
Content Type
Profiles
Forums
Gallery
Events
Posts posted by Chasseur
-
-
-
Wow Dave very impressive. I am amazed as you picked up the process so easily. Some people take years to learn and do this process properly.
Good on you Dave, very well done indeed! BTW October 4th is my birthday so I will never forget this post.
Jeff
-
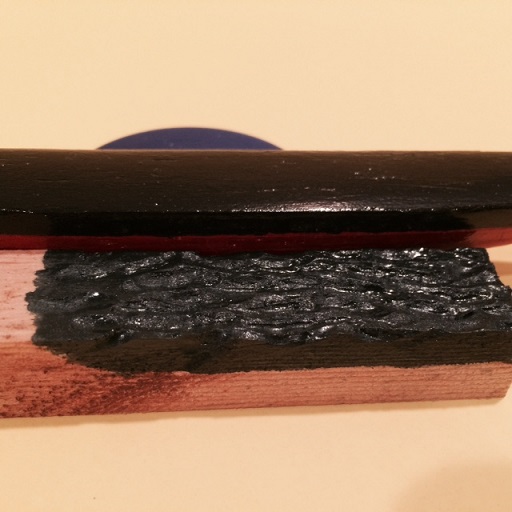
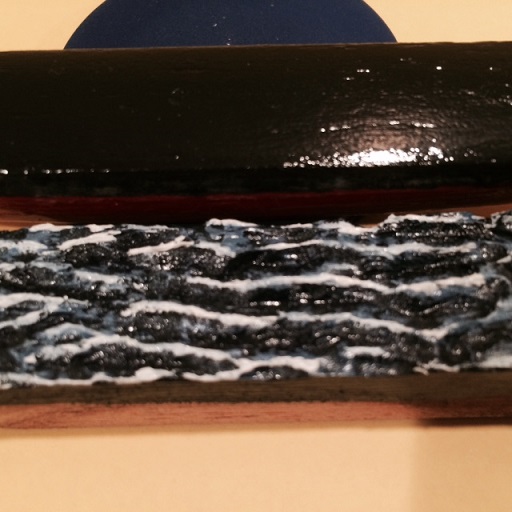
Today I had some time to get into the Man Cave and experiment with carving and painting the wooden seas. In this first exercise I wanted to make as many mistakes as possible to fine tune my techniques and get the seas to where I want them at this scale for a SIB.
Above I started with the mid size Dremel tool I purchased and it carved like a dream. No issues what soever!
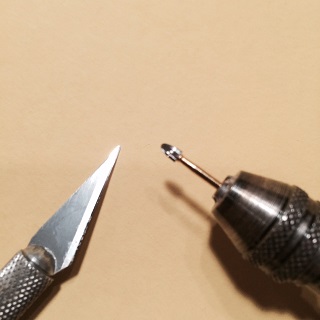
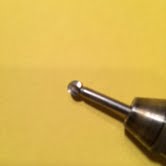
I then scaled down to the fine dental cutter my dentist gave me and again no issues. The Fir carved like a dream and I was able to mirror what Mr. Lloyd McCaffery did on page 127 of his book Ships in Miniature. Also at this point I never paid no real attention to wind and wave direction just more concerned about caving and achieving crisp edges on the top of the waves.
Above you can see the Fir carves really well. This wood is perfect for my application.
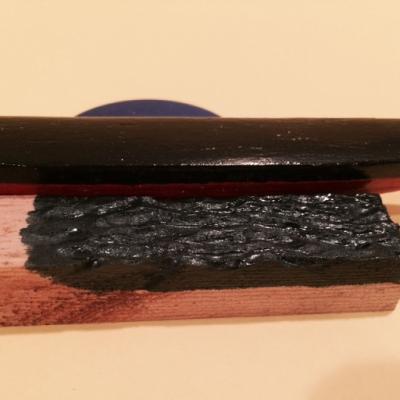
Then I took some Model Master Dark Sea Blue to see how the wood would accept the paint and if it would bleed a bit. No worries here as well. One notable I will primer the wood first next time. Mistake number #1.
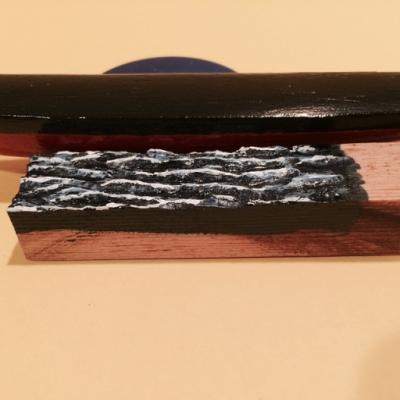
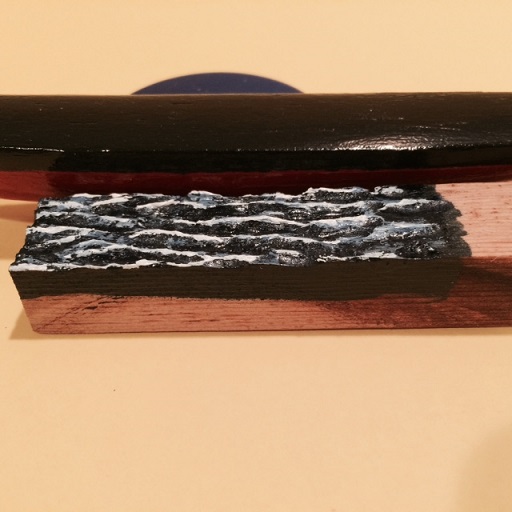
Then I dry brushed in some French Ultramirine Blue artist's oil paint and blended. Then some brushing with some Titanium White. Mistake # 2 was, I think I put the white on a bit heavy with the dry brushing. I have to watch this carefully next time especially at this scale.

I finished the waves and their crowns with the white. So for 1 hour of work a whole lot was learned with this exercise. Now the next step is to map out exactly how the waves and swells will look on my four pieces, get the magnets installed and hooked up, then draw out and outline how, and where, to remove the wood material, and then go for it!
Also I need to build so more bottle tools and refine my paint pallet for the seas. I am thinking a little green has to go into the waves under the white to show a bit of translucent color next to the hull and there should be a touch of black/red/white reflection at the waterline. Also I am looking into a silicon method for bow and stern wake and splash. There you have it, no worries and definitely no rush as the last two weeks work has been extremely busy and I actually put in 10 hours of overtime.
Just waiting for some documentation from Germanus to come in the post. He is sending me some details from Heller's plastic kit of the Preussen in 1/150. :-)
Steady as she goes ... Jeff
-
-
-
Nils,
Germanus Hullen sent me the link to this build. I didn't even know this build was taking place till today. I can only echo what has already been said, simply outstanding and a true thing of beauty. Looking forward to to the Gorch Fock if that's what you're intending to build. I will watch closely with intent.
Jeff
-
Dave,
The figures are outstanding. Well done my friend.
Jeff
-
Excellent Germanus!
You are truly a scholar and a gentleman. I look forward it and thanks for the useful information. Greatly appreciated and you're right about the curse of the detail. The aforementioned is something I am well aware of.
Thanks again!
Jeff

-
Germanus,
thanks for responding as I did try Heller a few times and struck out. So yes please, a copy of the 1:150 building manual would be superb. You are truly a saviour and I would be greatful for a copy of the building manual. So if you can please send them I'll cancel the hold it put on a Pantograph at Lee Valley.
Please advise,
Jeff
-
-
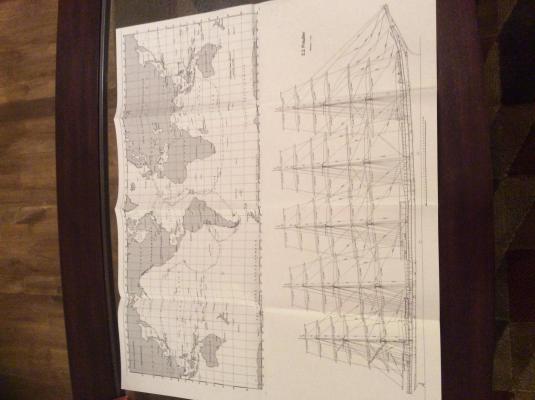
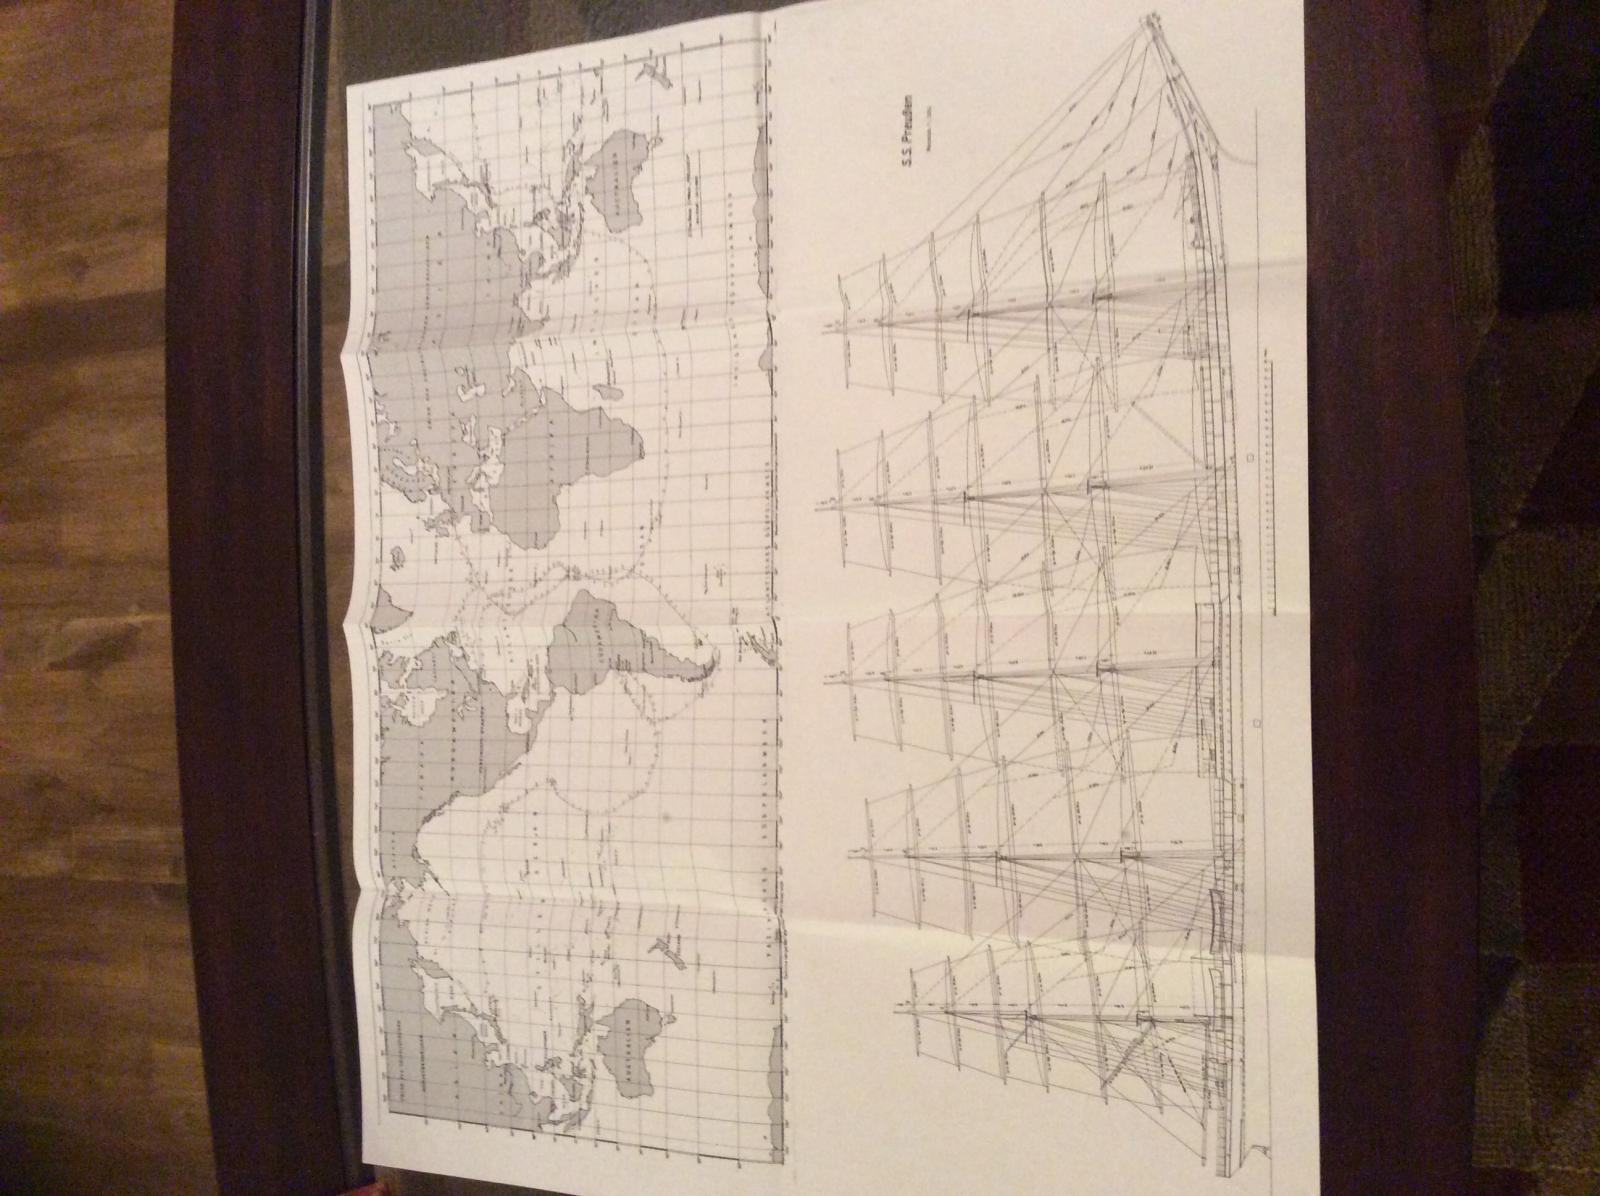
Today my Preussen plans arrived from Gunzburg Germany from Mr. Germanus Hullen.

The plans are everything I imagined and more.
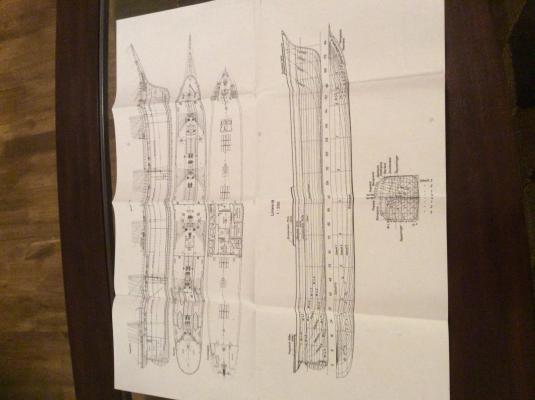
Excellent sail plan with a cool map of some her voyages. Now I need to make a trip to Lee Valley Tools and pick up a pantograph so I can scale things down and get a super accurate drawing. The distortion from the original scan off of the Internet in my opinion is third rate compared to these plans. Thank-you Mr. Hullen.
Stay tuned for more ... Jeff ⚓️
-
I like either one to be honest, however beauty is in the eye of the beholder!
Well done Dave $ She is money.
Jeff
-
Clive Monk has a great technique for making scale railings. Twist up some thread then glue. Once the glue is dried paint the desired color. Please see attachment for details ... Jeff
Railing Techniques (Recovered).pdf
-
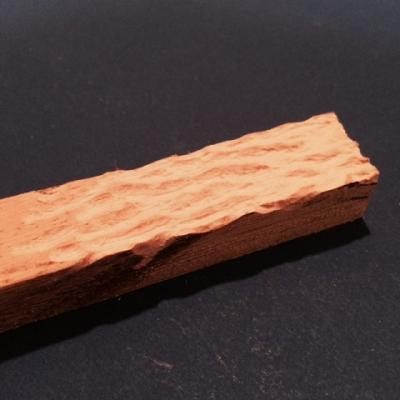
Thanks Daniel and just to clarify the seas will be carved from the fir and the hull from Western Red Cedar. I am going with the cedar from a tip I gleaned from Ray Gascoigne regarding the carving qualities of the wood. Ray's video on Vimeo has truly inspired me and he is a true artisan when it comes to modelling ships in bottles. I am assuming you have seen his video, smithjournal.com.au
Bottled History is Ray's storey in Smith volume six and is on the shelves in Australia.
Respectfully,
Jeff
-
-
Dave and Michael,
excellent tips!
I'll checkout Wallmart for the mini magnets as they could save a lot of time trying to shave the ones I bought. Yes Michael is was a pleasure meeting you and seeing your work! The tin seems like a great idea. I will investigate that idea.
Respectfully,
Jeff
-
Today I was able to get into the Man Cave and do a little work. Life has been exceedingly busy however... I am in no rush and today was affirmation of that. Jo Conrad AKA Germanus saw my post and is going to send me prints of the Preussen from Konigin der See - Funfmastvollschiff "Preussen" by Hamecher in the post free of charge! "What a true Gentleman."
So when they arrive I will have an accurate scale print to work off of. Once the prints arrive, I am going to have everything I'll need to build an accurate scale model less the math work involved when scaling down the dimensions. Also I have the last week in October off, as well as the second week in November off to get into the Man Cave to get serious about this build. The prints from Hamecher will be instrumental when it comes to the running and standing rigging.
I decided to build a quick mock up of the hull section to see how to cut up the fir for my wooden seas. I just took some balsa and built a quick template, carved it up, and threw on some paint/varnish for the photo. I like doing stuff like this to get a feel of the lines and how things are going to break quickly at this scale. The aforementioned is critical as two things were learned.
1. The sheer at the rudder breaks quickly so less material has to be taken at this area from the fir wood.
2. The stem and bow area is a bit more blunt than I anticipated so care must be taken here when I build my hull templates for the final carve. Also while I was reading Michael Mott's post on his 1:500 cutter build he came up with a unique way to carve out the side of the hull by heating up an exacto blade to incorporate the bulwarks. Love it! Below a shot of the mock up hull.
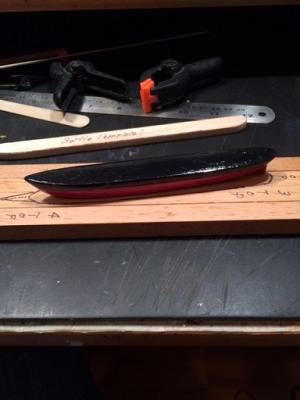
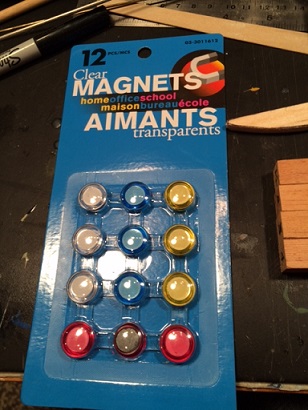
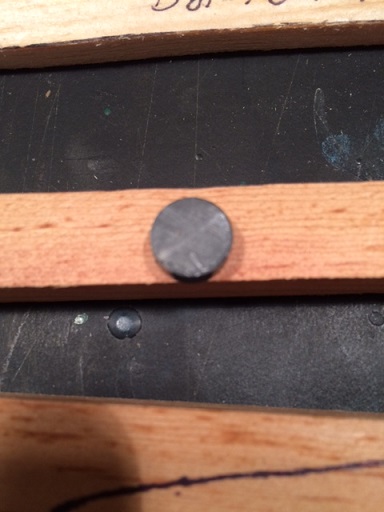
I had been debating how I was going to line up the 4 pieces of fir in the bottle and decided a trip to the dollar store was in order to pick up a cheap set of magnets.

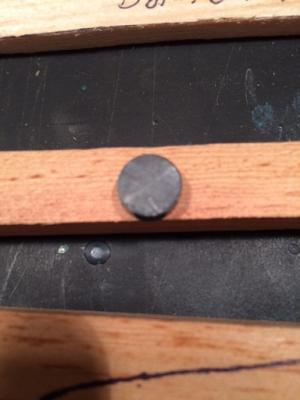
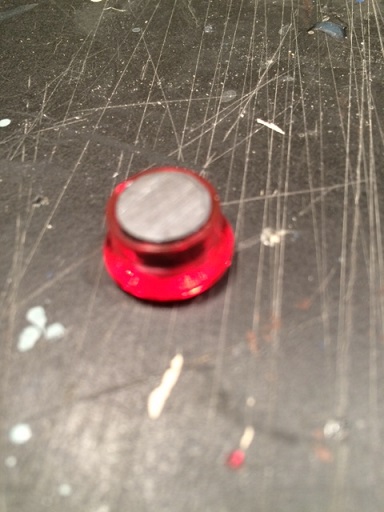
I'll cut the plastic off to access the magnets and mate them up with a steel plate in the adjacent piece of wood and incorporate a dowel effect. Next photo shows a typical school magnet.

Next shot shows the magnet removed from the plastic cover and I am gauging up how much will have to be removed if any from the magnet as there is going to be some undulations and swells to incorporate near the hull.
So now it's a matter of mocking up some modelling clay to see what my waves, swells, and hull wake will look like, cut the profile of the fir, get out the dremel and start carving, finishing up with aligning the magnets and steel plugs/dowels for final alignment for test insertion into the bottle. Once all is carved then she'll get some oil paints applied to depict the open ocean. Also I need to build some more bottle tools and working on some ideas for scale foam and wash next to the hull. Stay tuned!
Jeff AKA ... Monsieur le Chasseur
- Omega1234, Salty Sea Dog, IgorSky and 2 others
-
 5
5
-
I like Symphony. Looking forward to the build.
Jeff
- Omega1234 and Dimitris71
-
2
-
Michael,
thanks for posting this! As well, your tip posted in this build has inspired me regarding how to do the bulwarks on my Preussen build. I will definitely explore the heated exacto blade technique. Also it was great to meet you in person at the club. I was inspired by your work. I will watch this thread closely.
Jeff
-
Wow that is one clean looking hull! Michael thanks for posting and it was a pleasure meeting you last Wednesday at the ship modelling club. For any of you who have seen Michael's Bristol Pilot Cutter here on MSW I was blessed to see it up close in person. Brilliantly crafted and Michael is a true artisan when it comes to ship modelling. I saw all of his running rigging up close which is hand made, he had his rope walk at the club and even showed me his had made ship compass which really does work!
We go from Michael's 1/8" scale down to Omega's model. Such a great testament to what can be done!
Jeff
- mtaylor, Omega1234 and michael mott
-
3
-
-
Frankie ... Looking really good! The photo I believe is an ink drawing from one of Jules Verne's novels. The Kraken and ship will be excellent once completed! I have a similar painting on this site on a diorama I completed. Search Nemo's War here on MSW. Just so you know I am building the Clipper Ship Preussen in a bottle and love the tool idea you came up with.
I am going to carve my seas from Douglas fir and then paint it up so watch my future posts here on MSW.
Jeff
-
I would concur definitely walnut and It looks exactly like the walnut that comes with most Mamoli kits including my Constitution kit. Your wood looks seasoned and quit dry. Aussie is bang on!
Jeff
-
There was a post on the Internet by a Gent who used tin foil to form guilding on the stern of a vessel by drawing with a blunt scribe on the reverse side of what was to show. This raised section was then painted accordingly. You could make an octagon plug of desired height and shape and then stretch the foil over it.
Then scribe on the reverse side where the glass sections go with a blunt needle. Then paint it up. Remember at this scale less is more.
The only other option would be a piano or guitar string wire formed to shape and then glue on some 0.005" clear plastic of the sort the model railroaders use. It's intricate work however one person wrote " a Ship Model is a series of models within a model and each model deserves the utmost attention to detail."
I look forward to what you come up with!
Jeff


Preussen by Chasseur - BOTTLE - barque
in - Build logs for subjects built 1901 - Present Day
Posted
Thanks Daniel and no worries.
I like your blog.... very informing and the interviews with other S.I.B. modelers is a nice touch indeed!
Jeff