Muzzlehead
-
Posts
25 -
Joined
-
Last visited
Content Type
Profiles
Forums
Gallery
Events
Everything posted by Muzzlehead
-
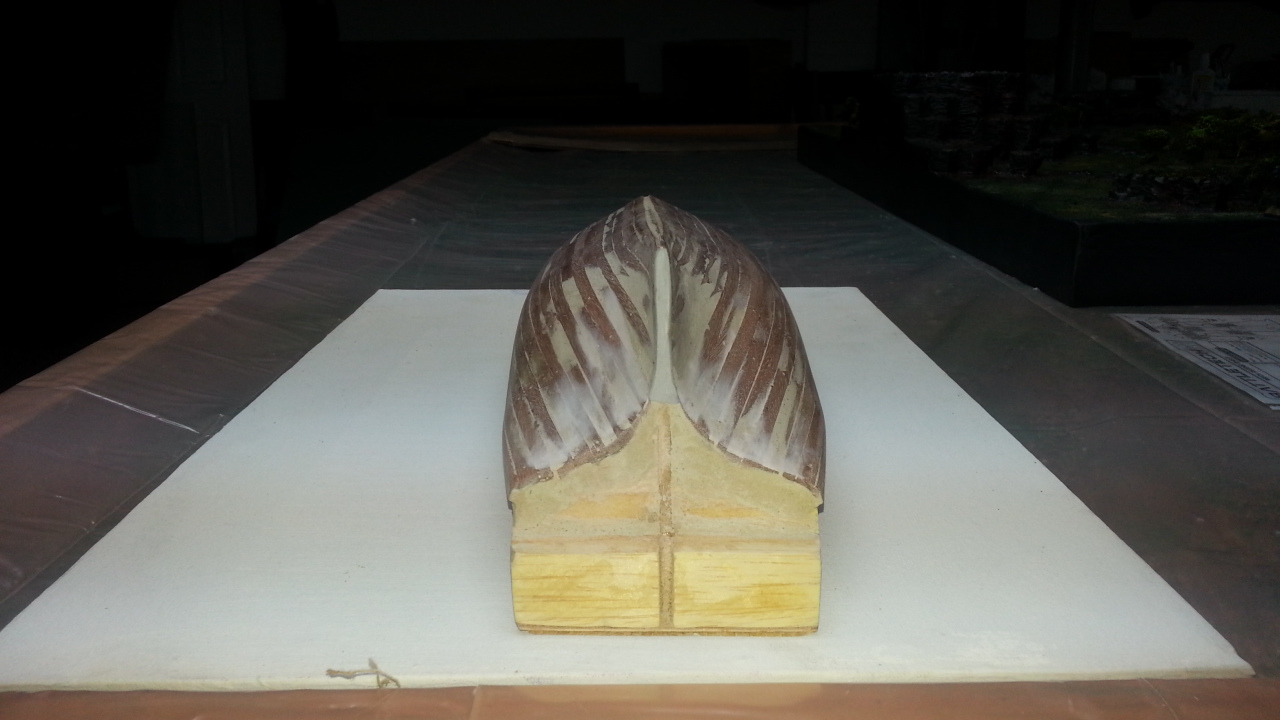
 I am back! Real Life stole time from me but things have calmed and now I have time for the important things in life I am preparing for my second layer of planking, currently I am finishing off my stern
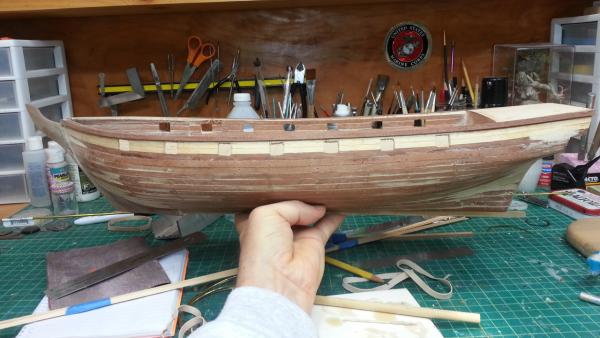
-
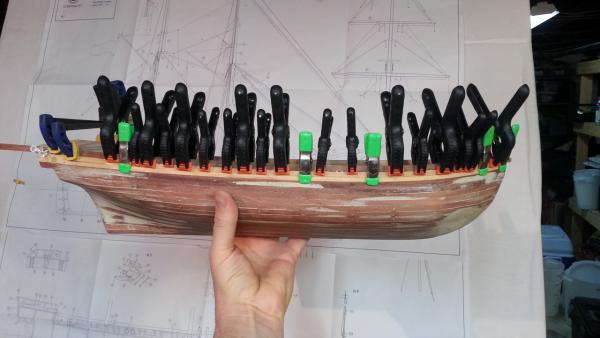
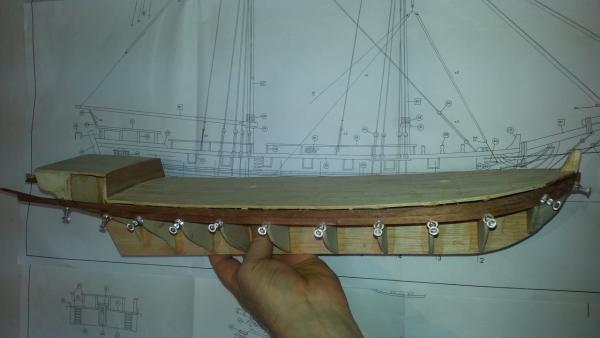
Here is a quick camera phone shot (disregard all the distortion ) That is the clamping of the last plank on the upper hull. Next I start cutting gun ports, then I apply the veneer planking. Need a clamp?
-
I need to sneak a macro lens purchase past my Obersturmführer..... for now I will have to make do with my stock 50- 35mm lens . Problem with my 35mm camera is it does not wirelessly transfer pics. Overall I am lazy, I prefer shooting the pic and uploading it as opposed to shooting then connecting to my pc with a wire and uploading from there. I will discipline myself and no longer shoot pics of my WIP off my phone.
-
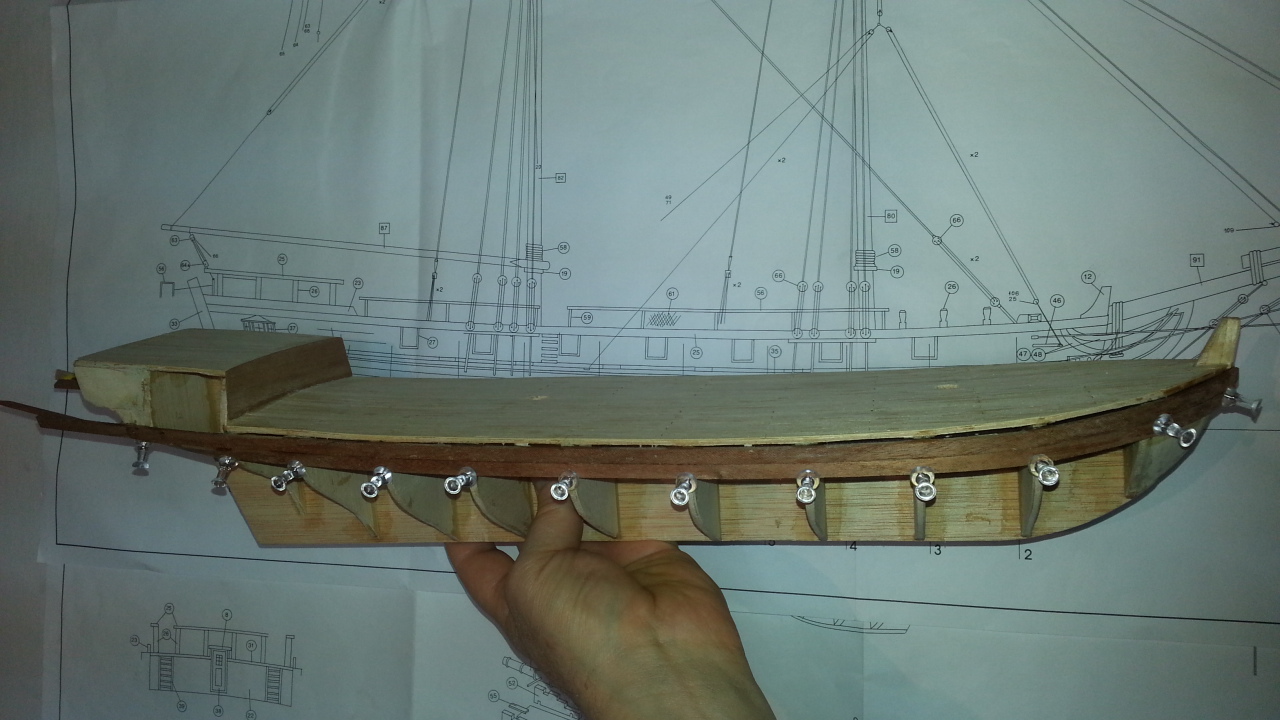
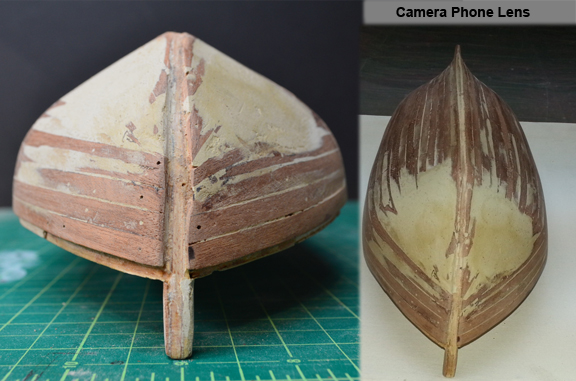
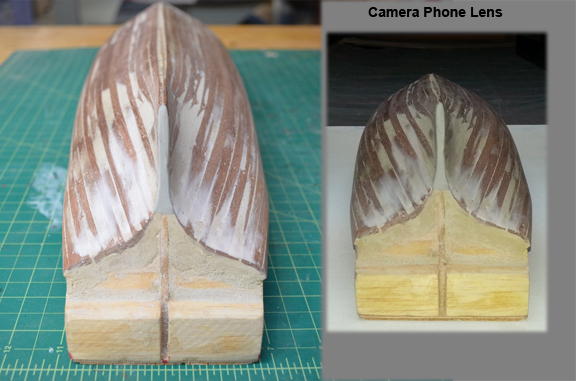
Fear & Loathing with lens distortion. I went down the entire lower hull with my contour gauge, and found a few deviations and corrected them. The majority of my prior hull pics were the result of lens distortion off my camera phone. I re-shot the hull with my 35mm camera and added the phone shots for comparison. There is still some slight distortion with the 35mm but nothing compared to phone! Next up is building the bulwark, then scuppers and gun ports, then stem/keel/stern post/ solepiece, and then secondary planking. Though I am considering moving the carving of the scuppers & gun ports after secondary planking... I will contemplate that as I build the bulwark
-
Sam I am working my contour gauge over the hull.... so far a few minor deviations that I smoothed out. I think the pictures are just plain bad and deceiving. I am going to re post some shots with guide lines and a grid background after I confirm the rest of the lower hull.
-
Here are a few shots of the Lower Hull first planking. Next step is to decide how to plank the Scuppers and Bulwarks. My kit (the old version) only suggests a single planking where the newer kit planks in two widths thick on the Bulwark. After some research there does appear to be precedent for both. As the first captain complained the Bulwark was not bullet proof and later this was 'thickened'. After the Bulwark is complete and gun ports cut I will vaneer the entire hull. I am not sure why the lines down the center look so askew in the pics.... I think it was the angle I shot the pics on my phone. They are much straighter in RL.

-
Well I am only 4 planks from finishing the lower hull and hoped to have pics up tonight but.... instead I spent the day snaking my pipes and bathing in sewage. Hopefully tommorow I will have the pics up. If the plumbing holds
-
Well things slowed down a little with the hull planking, particularly after my first major mistake. I added four strakes for the Main Wale (now I have three) that were not tapered. This resulted in a crowded stern and bow. Fortunately this is the 'first planking' and any major strake mis-alignments will be concealed by the 'second planking' with the supplied veneer. Yet I want to run the 'first plank' strakes as close to the 'second planking' if only to practice, though it will absolutely improve the 'second planking process'. My last 'out' concerning hull irregularities should be concealed with paint, as I am aiming for a historic presentation of the model over a classic 'wood stained' presentation. In this pic I have removed the fourth plank and began spiling the lower hull. Today I am laying the garboard and will lay a few rows of planks as time allows. I hope to have the lower hull completed by the weekend. Question: I am considering a 'shift of butts' for the 'second planking' any recommendations for plank length for the Enterprise at a scale of 1/51?
-
The planking has begun! For all intents and purpose I am on nominally following my limited instructions and looking at a variety of research and completed kits. I consider this a Scratch-Kit, the components are excellent but the instructions meh . If you look close at the pic I have left a 3mm separation from the hull strakes and the sheer line of the deck. Here I will attach the scupper strakes and build up the bulkhead. After some discussion with Sam, I have a plan for working the waterway and scuppers. I suspect the hull will take another week to complete. My plans for the hull are to double plank it with strip and then sheet, though I plan to ultimately paint it historic colors so I may only lay a single plank if it looks decent at completion. I am soaking my strakes about 24 hours and using a DIY bender which is a mash of a bearing and a soldering iron. It is working well. I'll post more pics tonight.
-
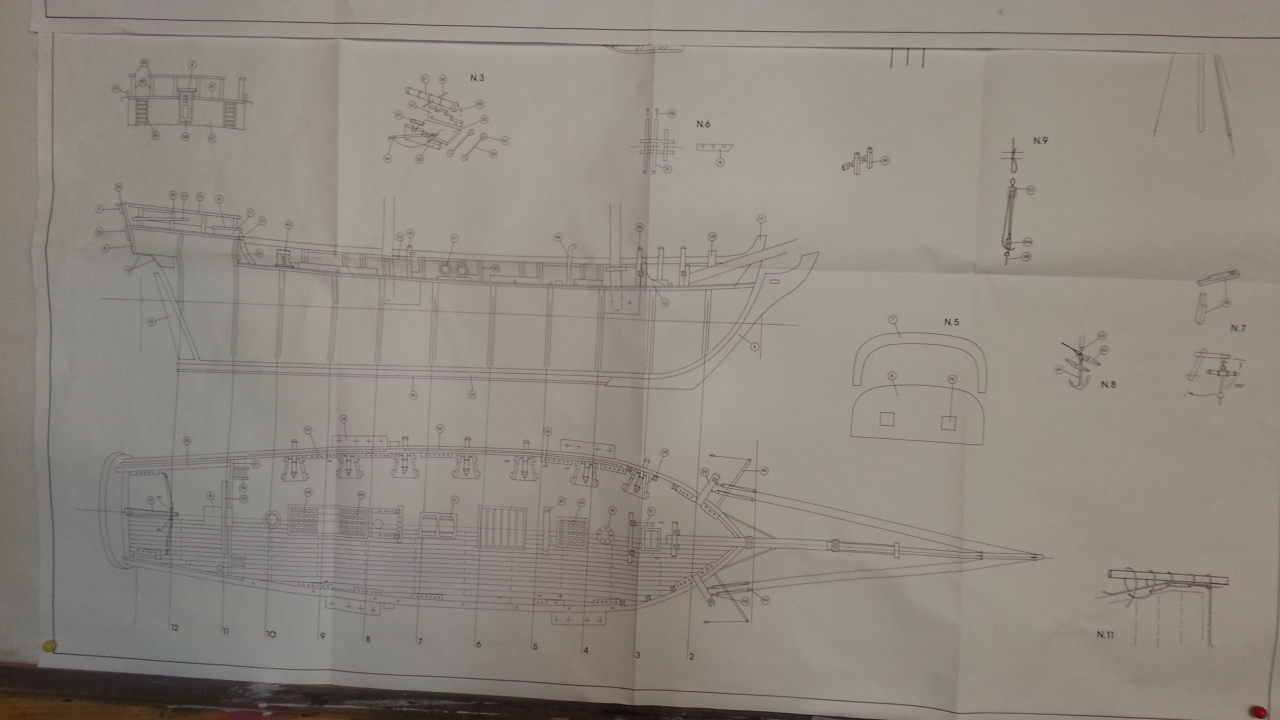
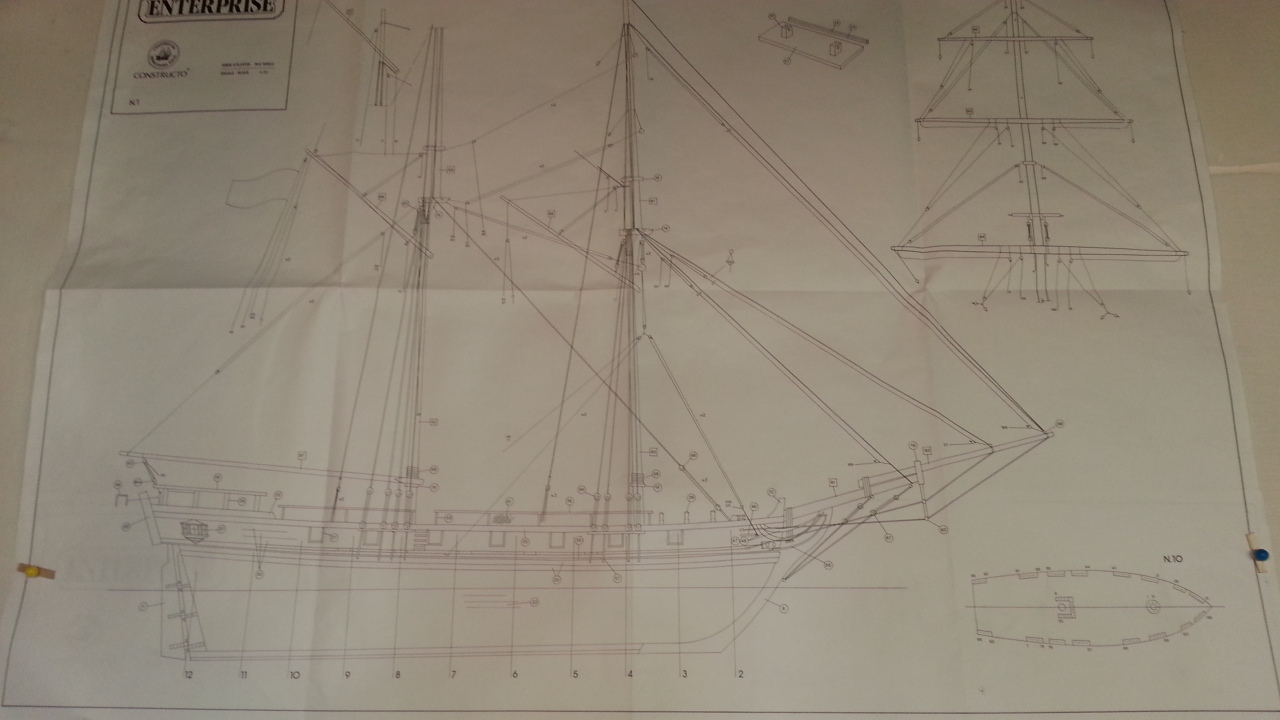
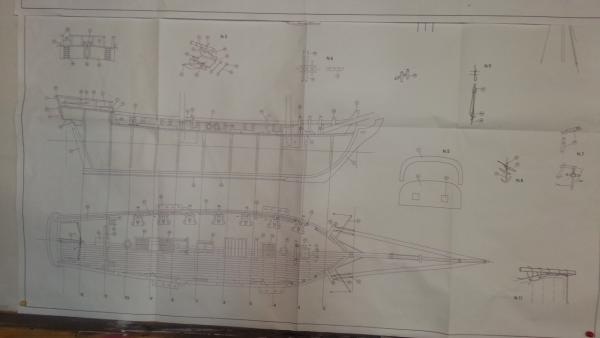
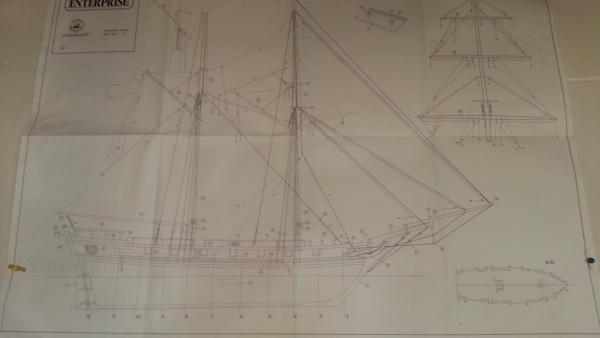
Sam, I do have 2 sets of plans but mine are reversed from yours my #1 is rigging. My #2 shows two hull views: a profile and a birds eye view of the deck. My #1 shows the scupper marks and the gun ports along with some notation of strikes. It becomes confused as rigging info is mixed in. I am working off the plans but using pictures from other builds to heavily supplement my research as I build. I am not sure I understand when you stated, "You will alternately plank inboard then outboard till you reach the proper height." Are you saying my bulwark strakes should be double width (4mm), that is i should alternate until I have the full height of the bulwark? Or should I level off the scupper strakes and the bring the bulwark to height by following the outer scupper strake (single width 2mm)? And yes any pics would be wonderful. I really appreciate the advice and assistance. I am finding the actual building process is not to difficult but interpreting these Byzantine instructions is a pain. I certainly see why the redid the kit. Scott Edit: Here are somewhat blurry images of the plans that came with my kit. Some of the #2 is plan is covered by the #1 but it does not deal with the scuppers/waterway I have been using the first image as my guide for the scuppers. There is a evidence of them only on this (#1) drawing. This is also the only drawing of the plan that 'I read' as showing information on the placement of strakes. Are these similar to what you referred to in your previous post? I did not find any useful information for the scuppers/waterways on this sheet of the plans.
-
I am perplexed by how the instructions describe building the scuppers (and I assume the waterways also, as they are not directly mentioned in the instructions or plans). The instructions read: "Glue two nr. 23 strips (2x6mm sapele) onto the upper part of the hull in the gap left between the deck and planks used for planking the hull." I can read this two ways. 1: The hull strakes begin 3mm below the sheer line of the deck; so the FIRST scupper strake sits on the upper most hull strake and extends 3mm above the sheer line of the deck. The SECOND scupper strake is glued to the first and cut down to 2x3mm resting 2mm inboard and 3mm high on the deck forming the waterway and through which the scupper is cut. Then the first bulwark strake (2X5mm ayous) is set on the FIRST scupper strake. OR 2: The hull strakes begin 3mm below the sheer line of the deck; so the FIRST scupper strake sits on the upper most hull strake and extends 3mm above the sheer line of the deck. The SECOND scupper strake is glued to the first and rests 2mm inboard and 6mm high on the deck forming the waterway and through which the scupper is cut. Then the first bulwark strake (2X5mm ayous) is set on the FIRST scupper strake. The problem with reading #2 is you end up with a 6mm high waterway which is too high in relation to the gun carriage which is 10mm high. So I am still struggling with the limited information I have and my novice ability but I think the correct reading is the #1. Your comments are appreciated.
-
I have planked the false deck and false poop deck. One question I have for those in the know: What type of wood should I use for the Margin Planks? I can not find any reference to it in the instructions (these instructions are truly a masochist's dream)

-
Ha! Happy Birthday old men... both of you .... I am but a young sprite having turned 45 last November I'll take the youngest in the room anytime! I just finished planking the main deck and will work on the after deck this evening. I hope to have pics up on my build log tomorrow night.
-
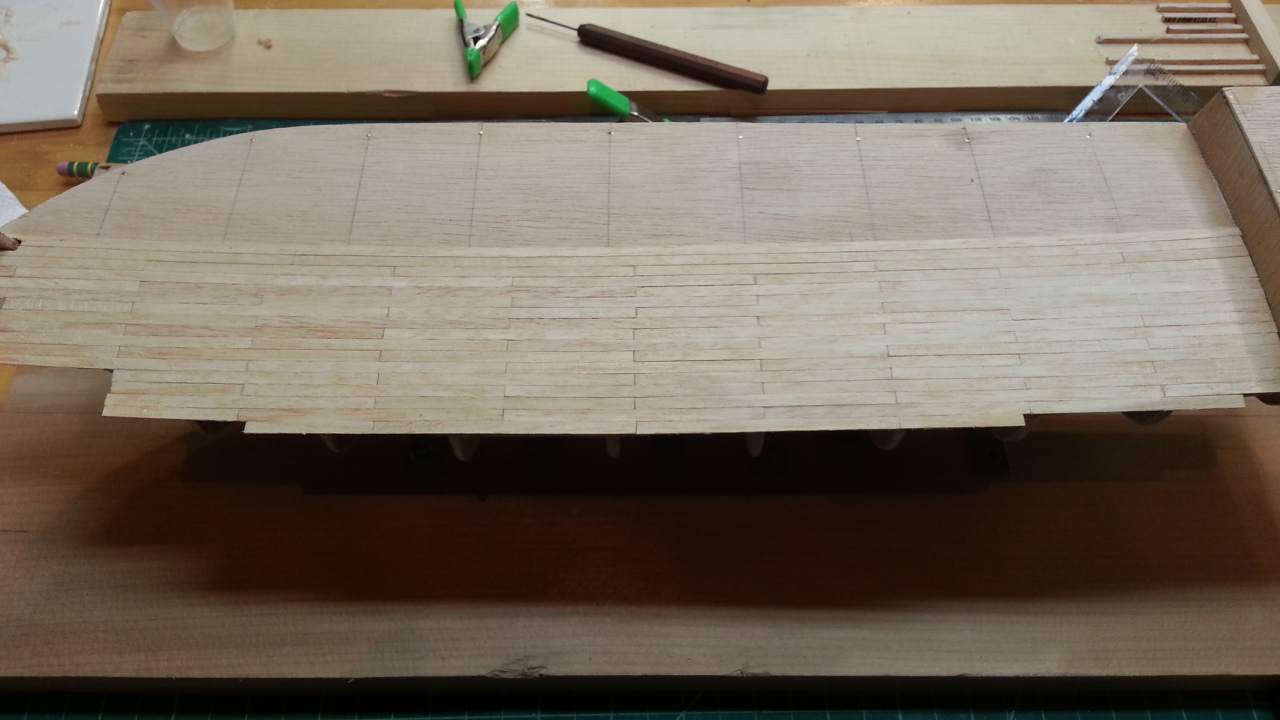
Half of the main deck planked. My plank decking jig is in the back of the picture. I am cutting the planks to 80mm.

-
I do not have any information on the Golden Kit. Yes this is the 'older' version... it is a nice kit just lean on instructions
-
Thanks for the heads up... planking is underway and I should have a finished shot up no later than Sunday night. I am cutting the planks with a jig at 80mm and staggering every other one. Slow going but looking nice... I am using a technique I have worked with flooring doll houses.
-
I suppose I am being overly cautious and if need be I can scribe the two planks. Thanks for the feed back
-
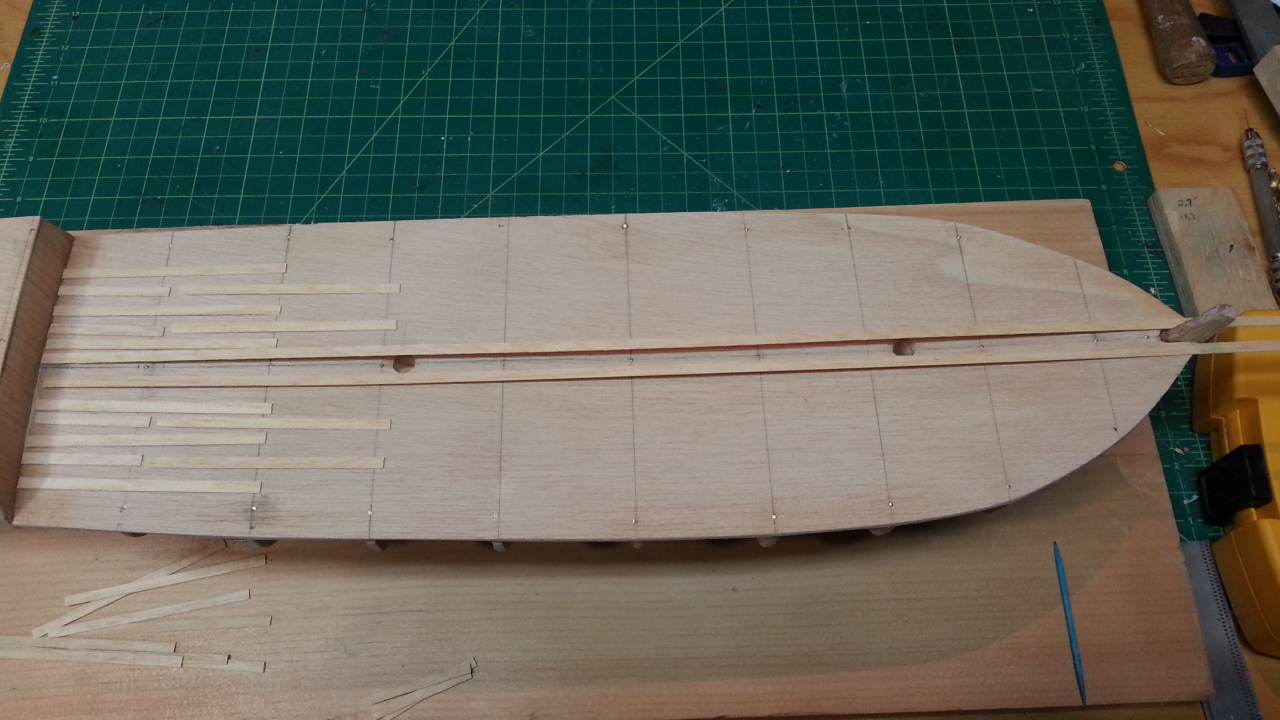
I am building an 'Old' version of the Constructo Enterprise My directions (what little I have) seem to imply I am to run two 'uncut' planks on either side of the keel line on the false deck, the entire length of the main deck, then stagger with 80mm planks across the rest of the deck. Does anyone know if this correct or is it a poor English translation? I looked at several pics but I could not tell if the center 2 planks were cut at 80mm or ran the length of the main deck of the ship. The pic provides what I think is the correct layout. The spacing is for visual clarity only, the actual application will have the planks with no spacing.

-
My directions (what little I have) seem to imply I am to run two 'uncut' planks on either side of the keel line, the length of the ship, then stagger with 80mm planks across the rest of the deck. Does anyone know if this correct or is it a poor English translation? I looked at several pics but I could not tell if the center 2 planks were cut at 80mm or ran the length of the ship. The pic provides what I think is the correct layout. The spacing is for visual clarity only, the actual application will have the planks with no spacing.

-
Yea it was over-sized... when you measured it on the plan, it confirmed it. Also JLuebbert who also has the 'old version' and he also confirmed the issue. I did contact Constructo a few years ago and they were unwilling to send me a photo manual for the build. They said my kit was not the same as the newer ones.... maybe it is true but I think the photo guide would help. But with the builds available I am not too worried about getting stuck. I spent the evening cutting the planks for the deck... hope to have the deck finished by the weekend with pictures up here
-
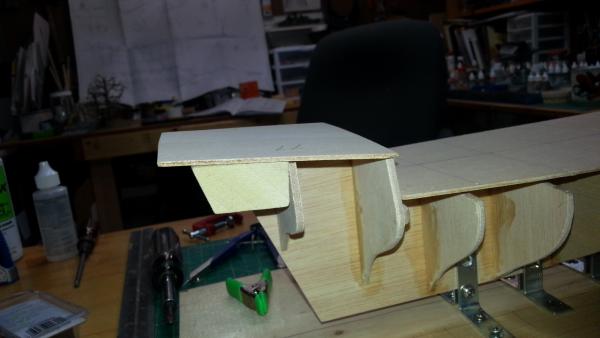
One confusing aspect of the false after deck is the over sized nature of the original piece. I cut about 8mm of the back after I set the after deck in place.
-
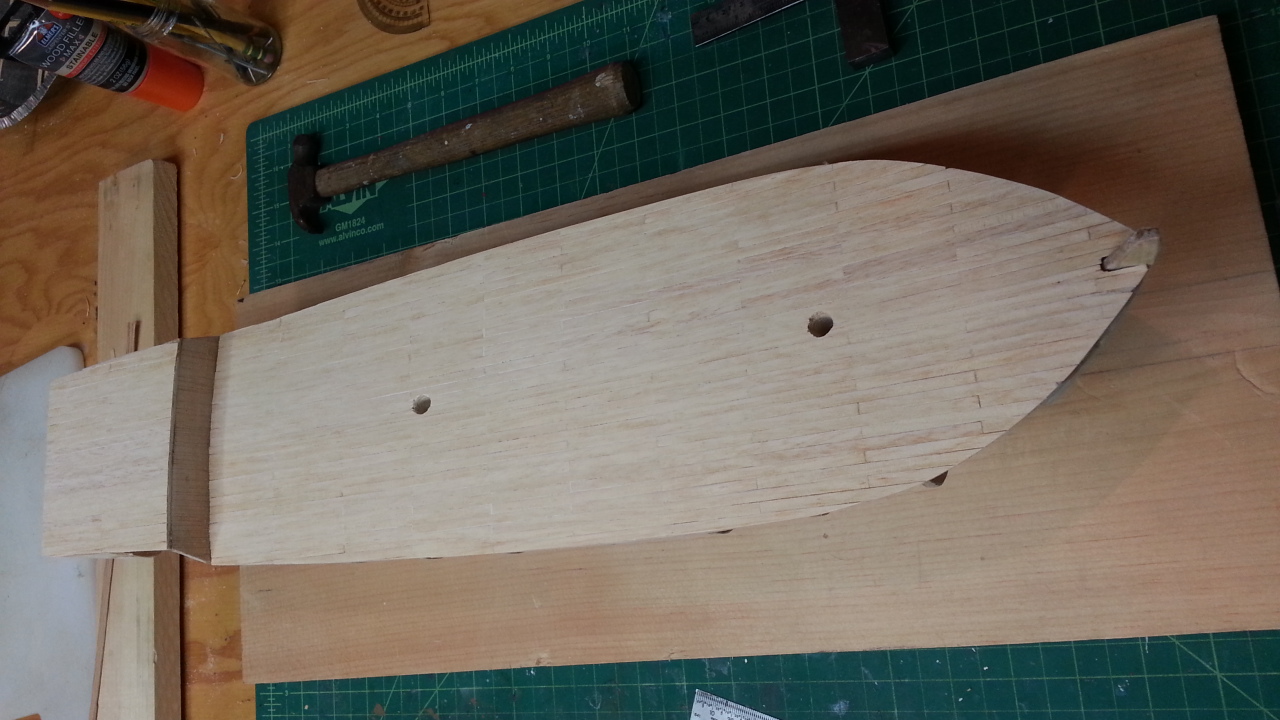
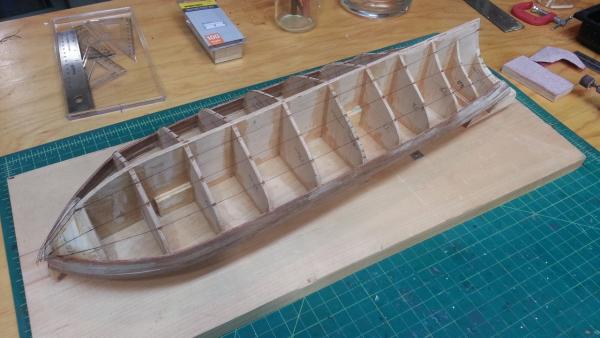
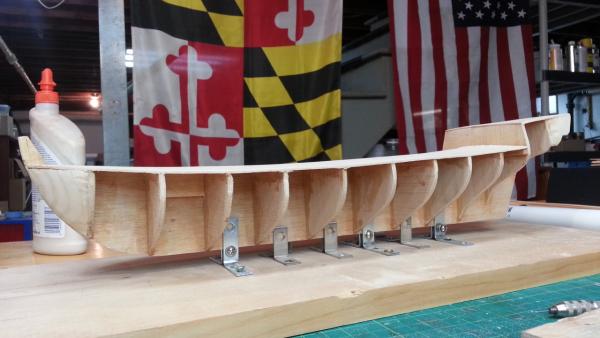
I have squared the bulkheads, laid the false decks and added a filler block for planking in front of the #2 bulkhead and stem. If you look careful you can also see the mast base blocks in place
-
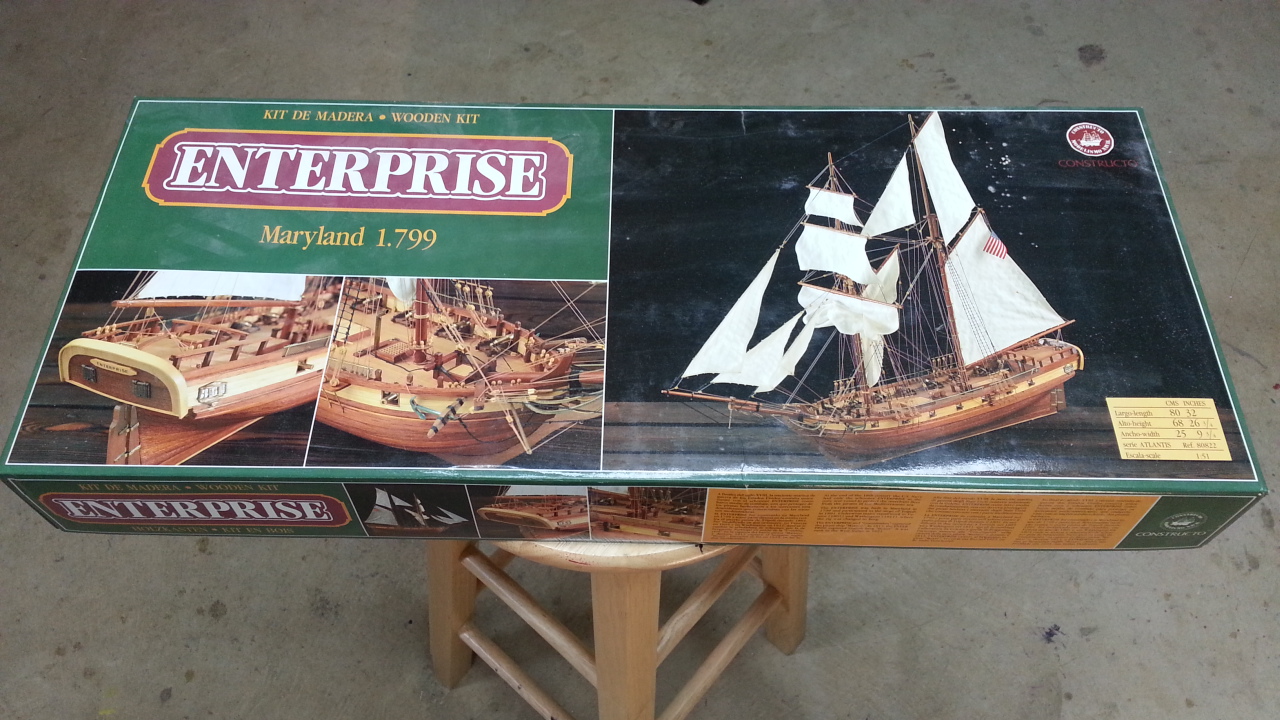
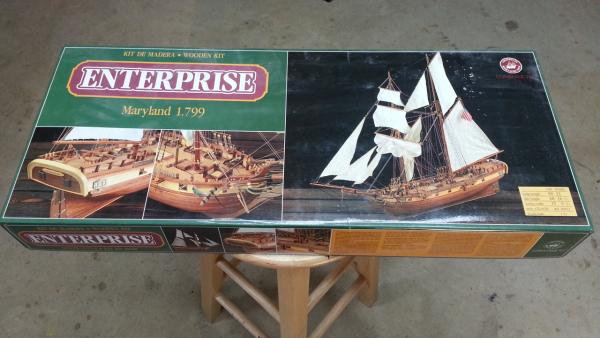
Hi All, This is my first build log on Model Ship World though I have been a lurker here long before the 'Great Crash'. There are several excellent build logs on the Enterprise by Constructo already in the forum: JLuebbert, Archicar, SRC, Probablynot, I view mine as an additional compliment to these builds. I am working with the 'Old' version of the Enterprise kit with the 'limited' instructions, and the links above have informed my approach to this kit. Frankly without those above build logs and others scatter around the internet this kit would probably still be in the box. I have been building models, both kit and scratch, for well over 30 years but this is my first 'Wooden Ship Model'. I also mold/cast resin pieces for wargames and some of that work is found on my blog. I consider miniature and plastic kit modeling as my foundation skills which I plan to draw together as I learn new ones, ultimately bringing everything to the next level with this project. My father-n-law, who has been an avid recreational sailor all his life, turns 70 in September 2014. The Enterprise will be a gift for his birthday, and as recognition of all the help and support he has provided my wife, children and I over the last two decades. He is my build 'motivation' for this project. The choice of this particular kit came by way of a barter as partial payment for another project (one thing leads to another). At the time, around 2009, I did not know the relative complexity and lack of instruction of this particular kit. I read a very nice review about the Enterprise kit, unfortunately I did not know that there were two versions of this kit and the review covered the 'newer' one which has photo instruction. I felt the kit would push my skill set but the photo instructions would provide the crutch to get me through any tight spots. What a surprise when I opened it and discovered that I had an older version with no real instruction. I dug through the kit and then shelved it (until last week) feeling it was above my skills in 2009. If the kit had been opened I would have felt scammed but I do not think the client had any more idea of the limited instruction than I. The client had aquired the model as part of an inheritance after a relative passed. Since I acquired the kit I have read several books on Wooden Ship Modeling and many more build logs. This kit has lingered in the back of my mind over the years and my father-n-law's coming birthday pushed me to finally get going on it. I am no expert in building Wooden Ships but I feel I am ready for the challenge; and so that is how this kit ended up on my bench, as my inauguration into Wooden Ship Modeling. I look forward to this project and hope you too will enjoy this build.
-
Ha! I just started this also. I agree the directions are very cryptic... I have been spending the morning identify the parts that are not listed by bag. Feel free to hit me up if you get stuck. I look forward to your progress