Jörgen
-
Posts
243 -
Joined
-
Last visited
Recent Profile Visitors

.jpg.d84ec4dad1d7791e855dca06210ab6f3.thumb.jpg.f45209242e851d4409eca1a09293165b.jpg)


-
 Jörgen reacted to a post in a topic:
HMS Dreadnought 1907 by RGL - FINISHED - Zvezda - 1/350 - PLASTIC - revisited
Jörgen reacted to a post in a topic:
HMS Dreadnought 1907 by RGL - FINISHED - Zvezda - 1/350 - PLASTIC - revisited
-
Crofty reacted to a post in a topic:
HMC Sherbourne by Jörgen - Caldercraft - 1:64
-
 Jörgen reacted to a post in a topic:
Bismarck by madtatt - FINISHED – Trumpeter with Pontos set – 1:200 - PLASTIC
Jörgen reacted to a post in a topic:
Bismarck by madtatt - FINISHED – Trumpeter with Pontos set – 1:200 - PLASTIC
-
Jörgen reacted to a post in a topic:
Airplanes and Tanks in plastic by Jörgen
-
Baker reacted to a post in a topic:
Airplanes and Tanks in plastic by Jörgen
-
Javlin reacted to a post in a topic:
Airplanes and Tanks in plastic by Jörgen
-
king derelict reacted to a post in a topic:
Airplanes and Tanks in plastic by Jörgen
-
mtaylor reacted to a post in a topic:
Airplanes and Tanks in plastic by Jörgen
-
Jörgen reacted to a post in a topic:
Airplanes and Tanks in plastic by Jörgen
-
VitusBering reacted to a post in a topic:
Airplanes and Tanks in plastic by Jörgen
-
Old Collingwood reacted to a post in a topic:
Airplanes and Tanks in plastic by Jörgen
-
Landlubber Mike reacted to a post in a topic:
Airplanes and Tanks in plastic by Jörgen
-
 Egilman reacted to a post in a topic:
Airplanes and Tanks in plastic by Jörgen
Egilman reacted to a post in a topic:
Airplanes and Tanks in plastic by Jörgen
-
CDW reacted to a post in a topic:
Airplanes and Tanks in plastic by Jörgen
-
Jörgen reacted to a post in a topic:
Airplanes and Tanks in plastic by Jörgen
-

Airplanes and Tanks in plastic by Jörgen
Jörgen replied to Jörgen's topic in Non-ship/categorised builds
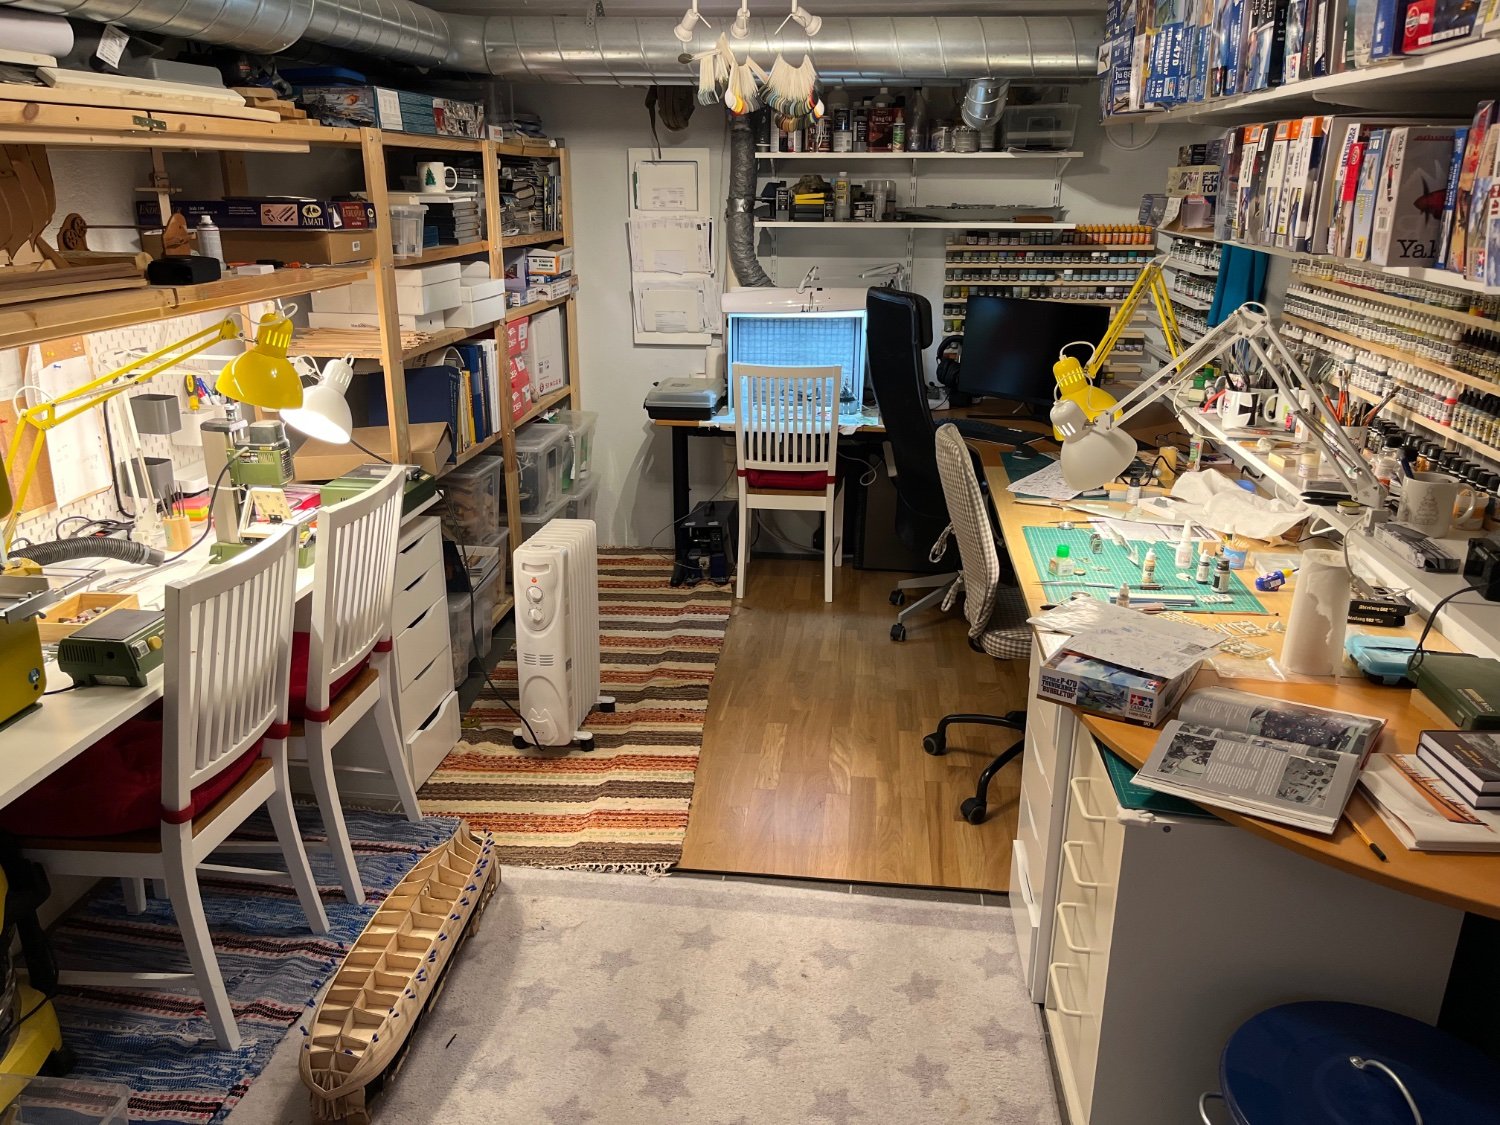
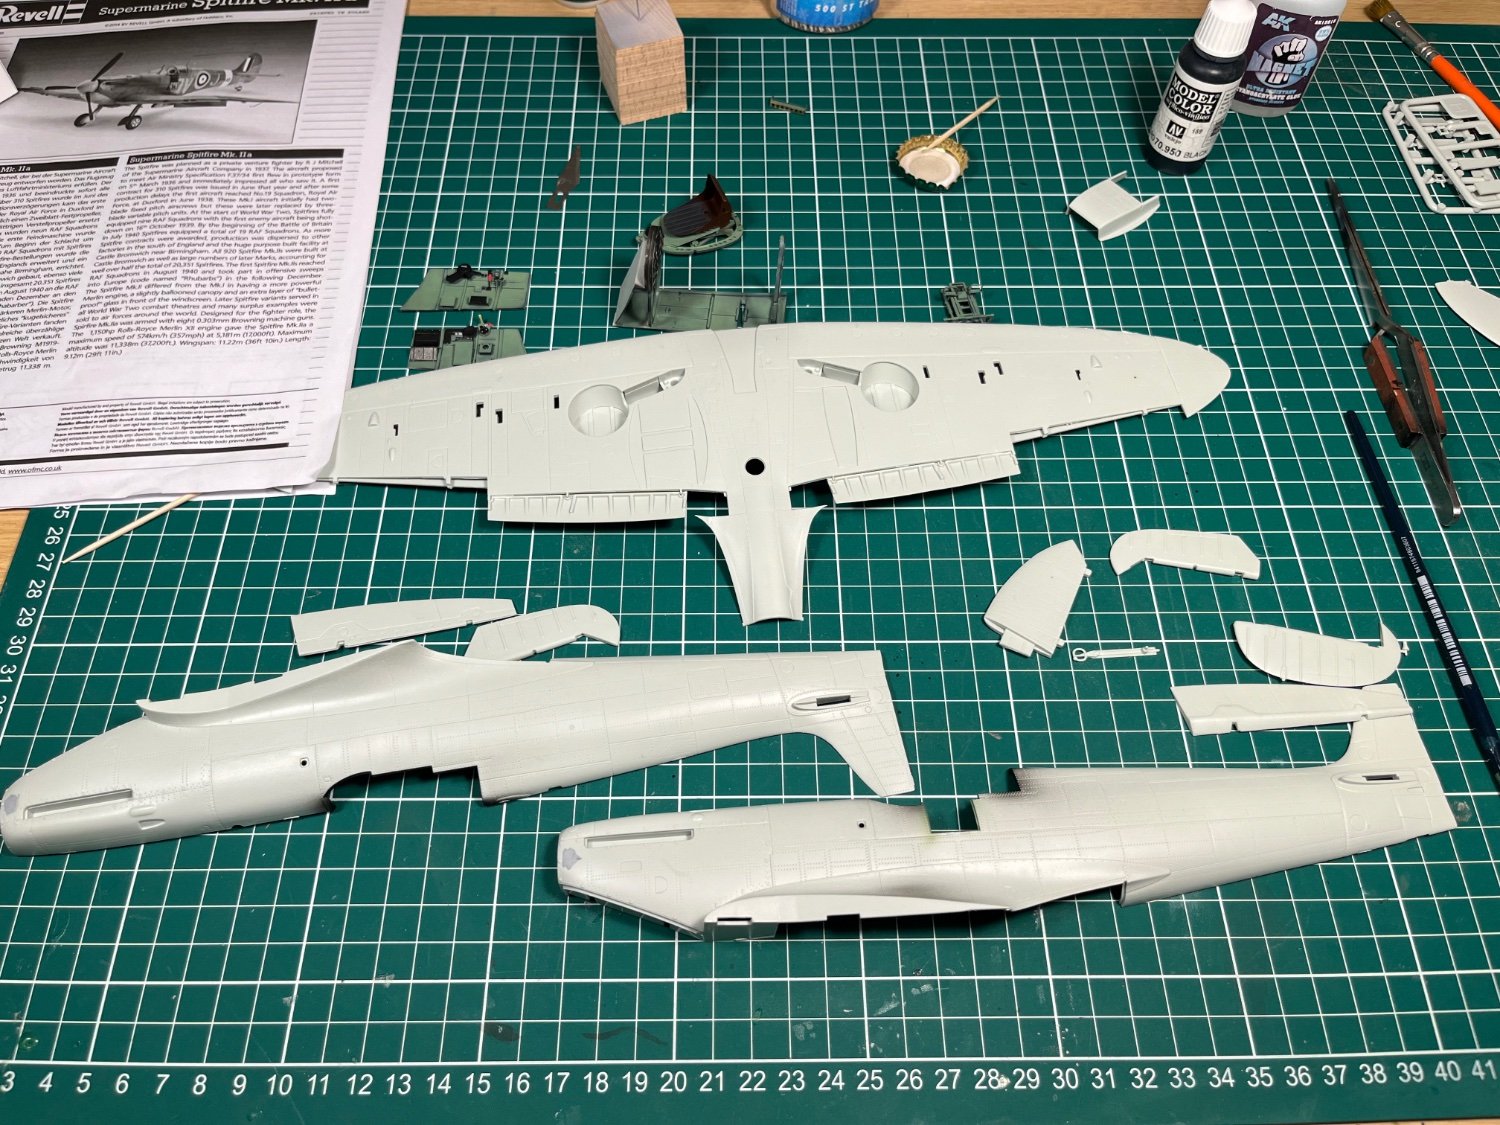
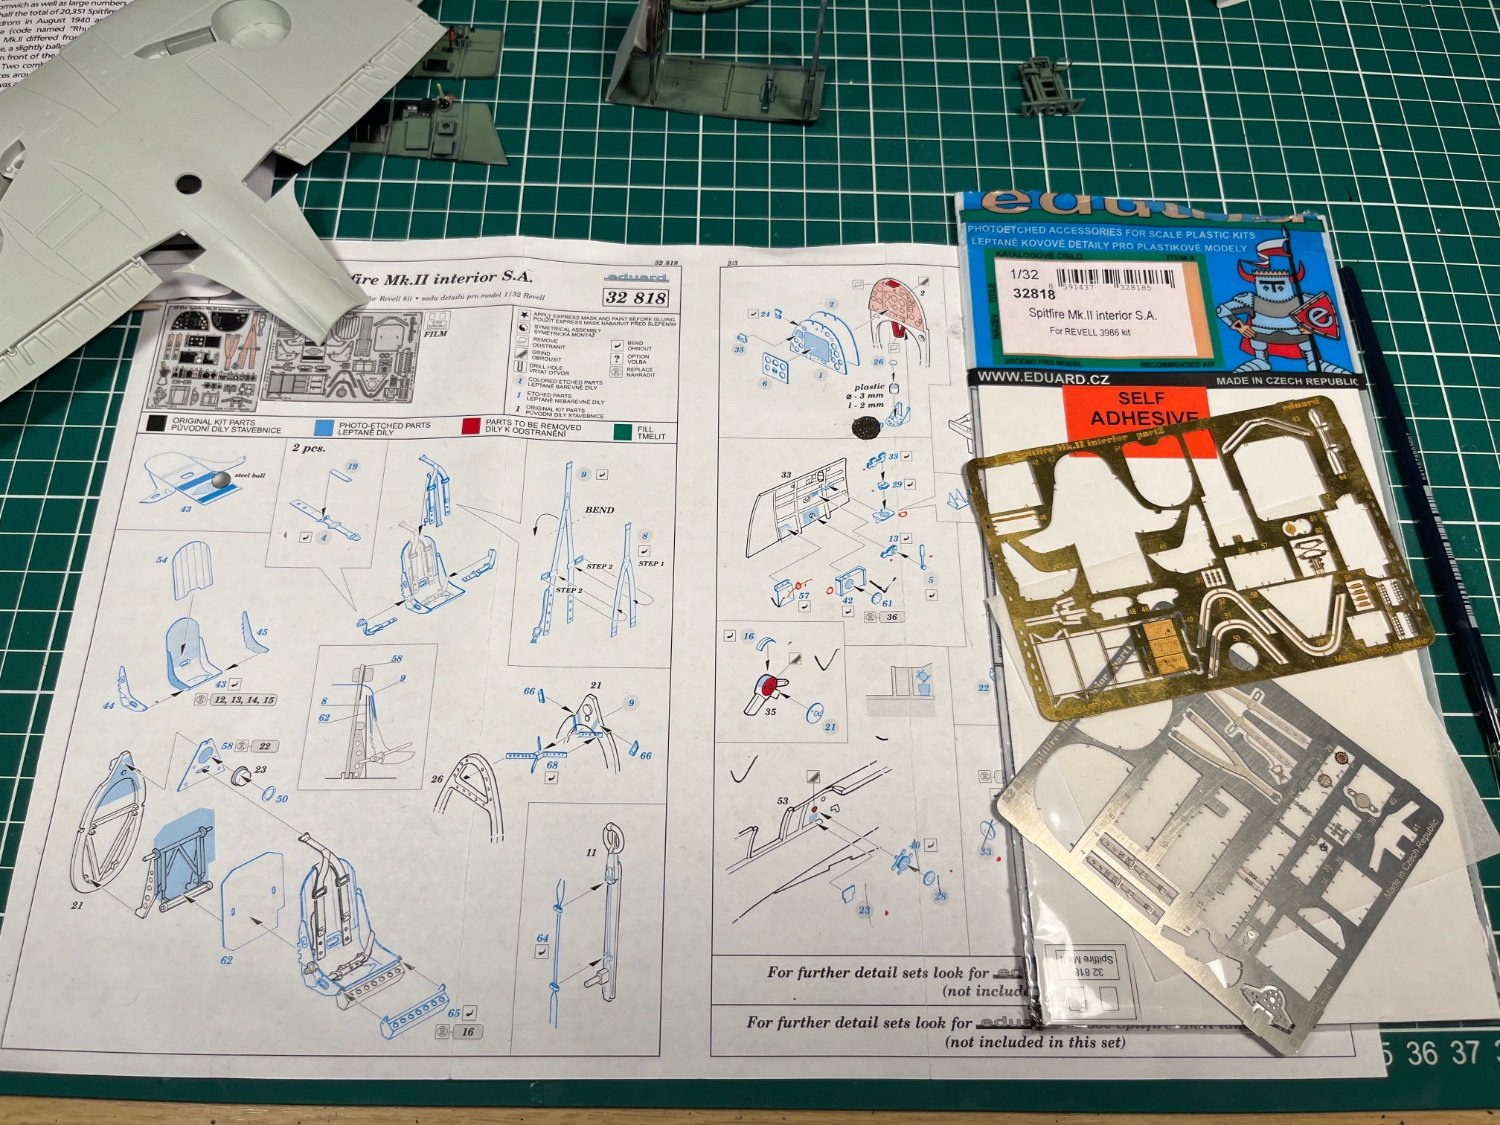
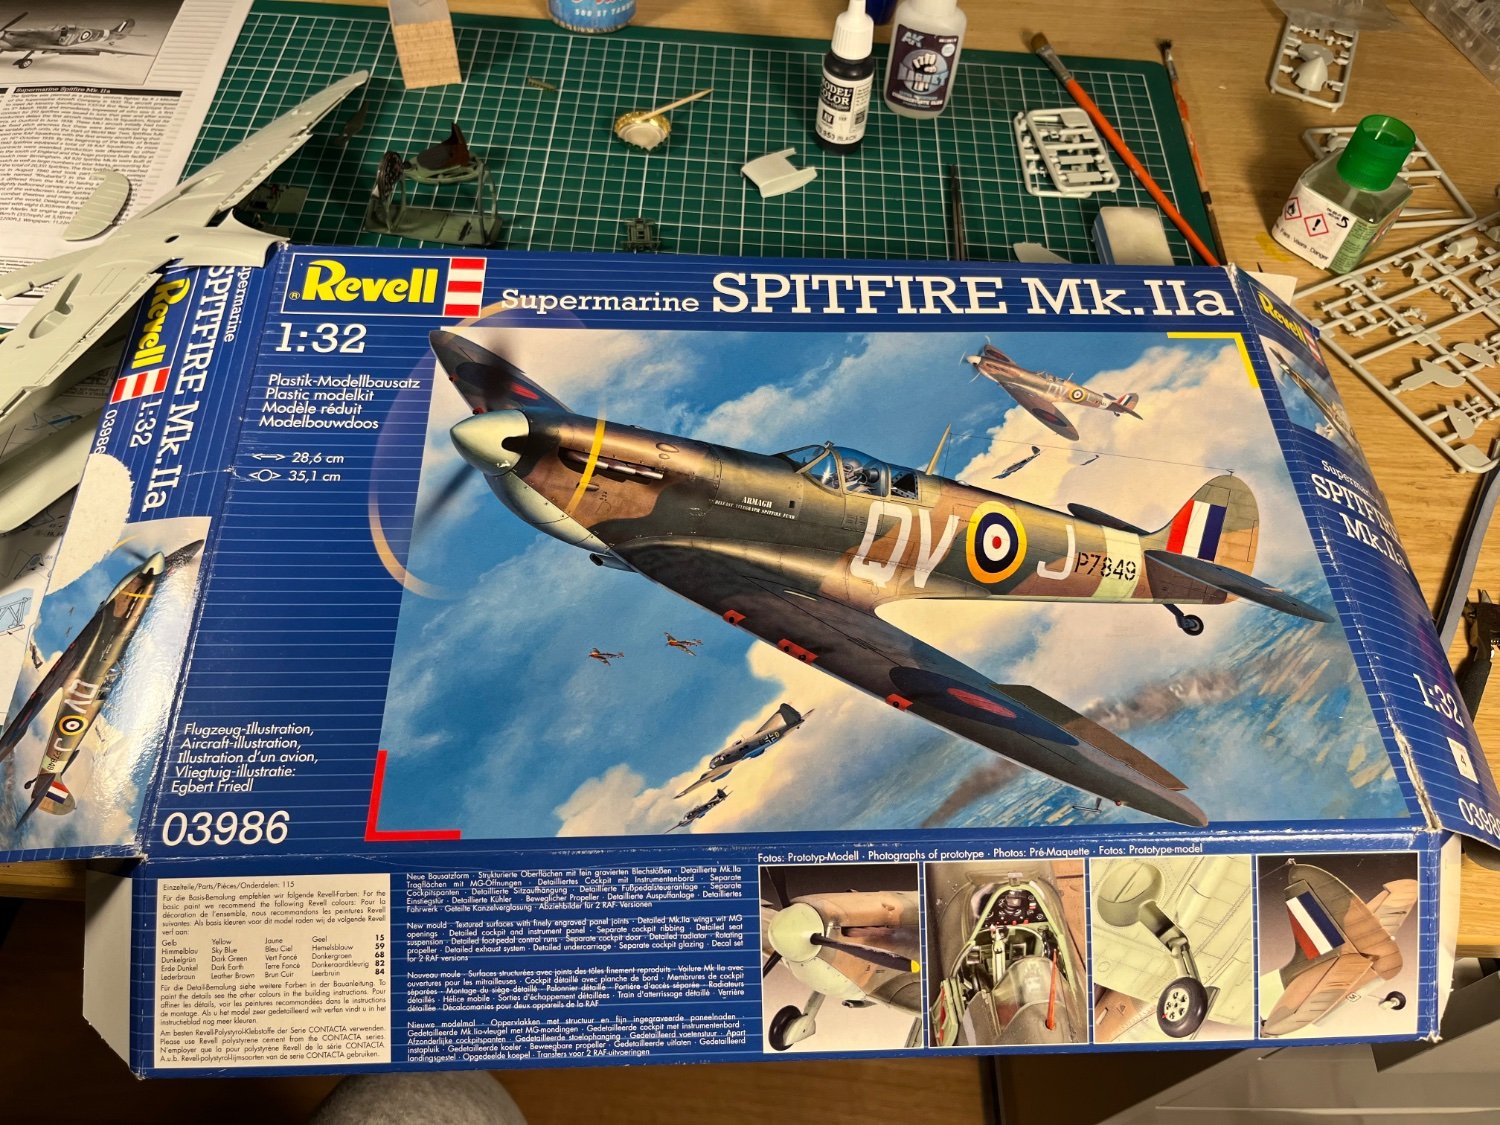
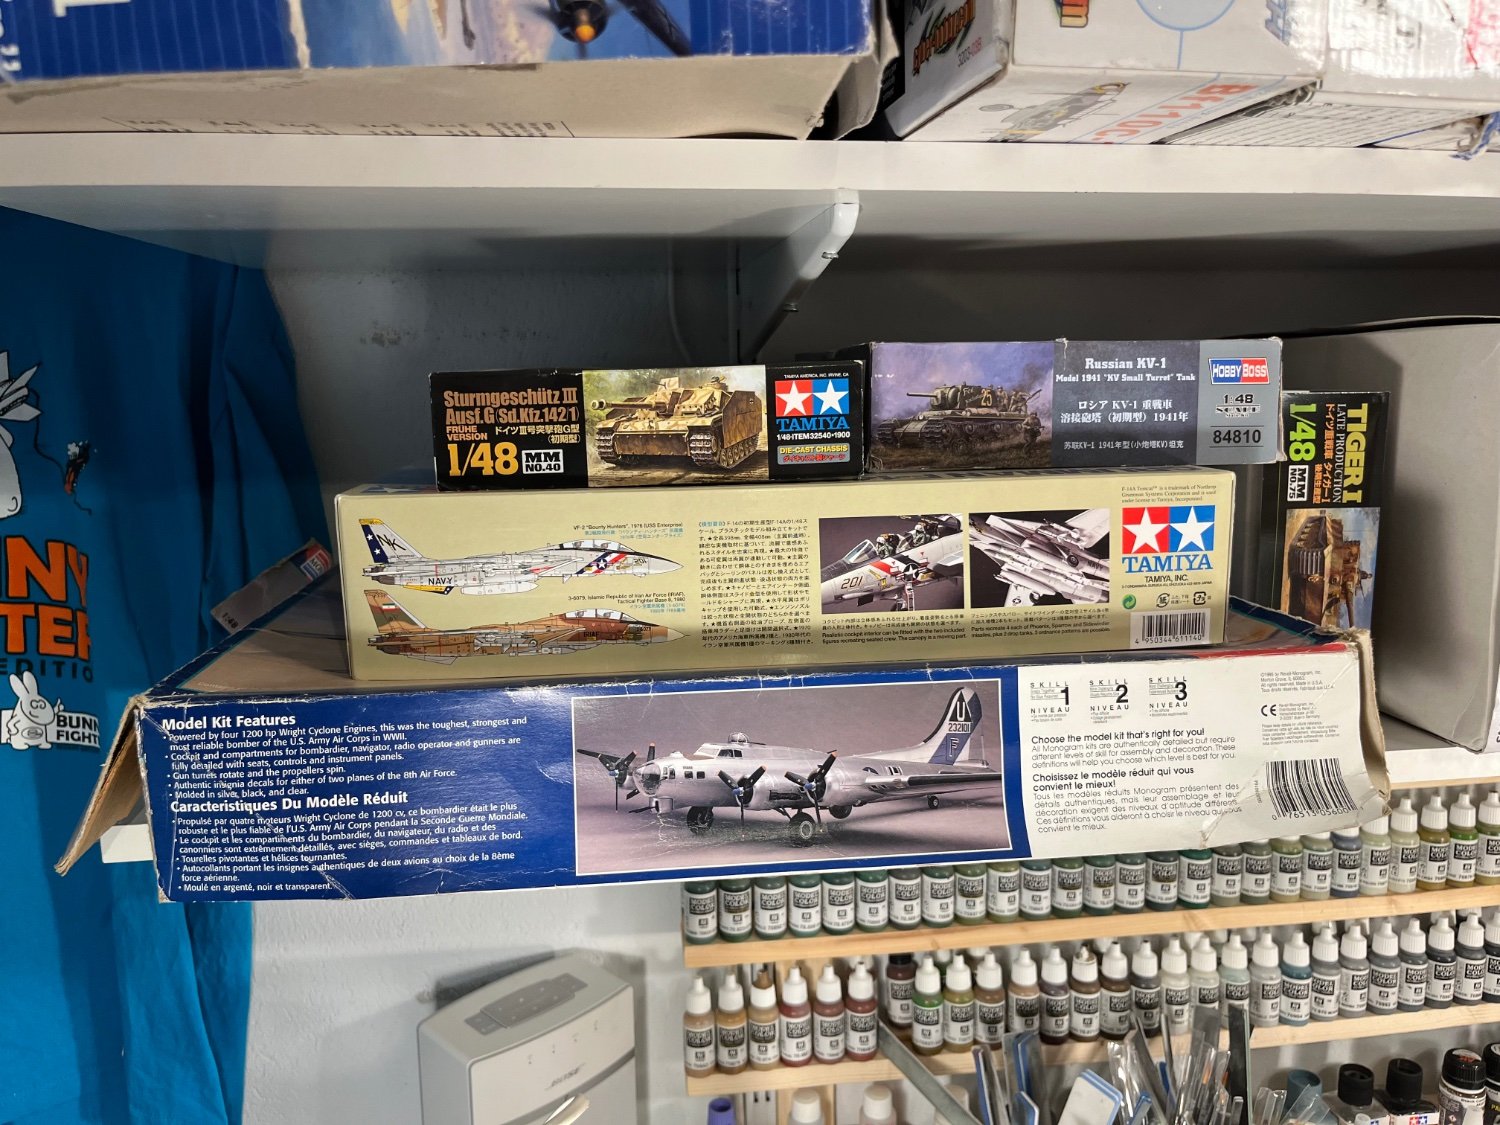
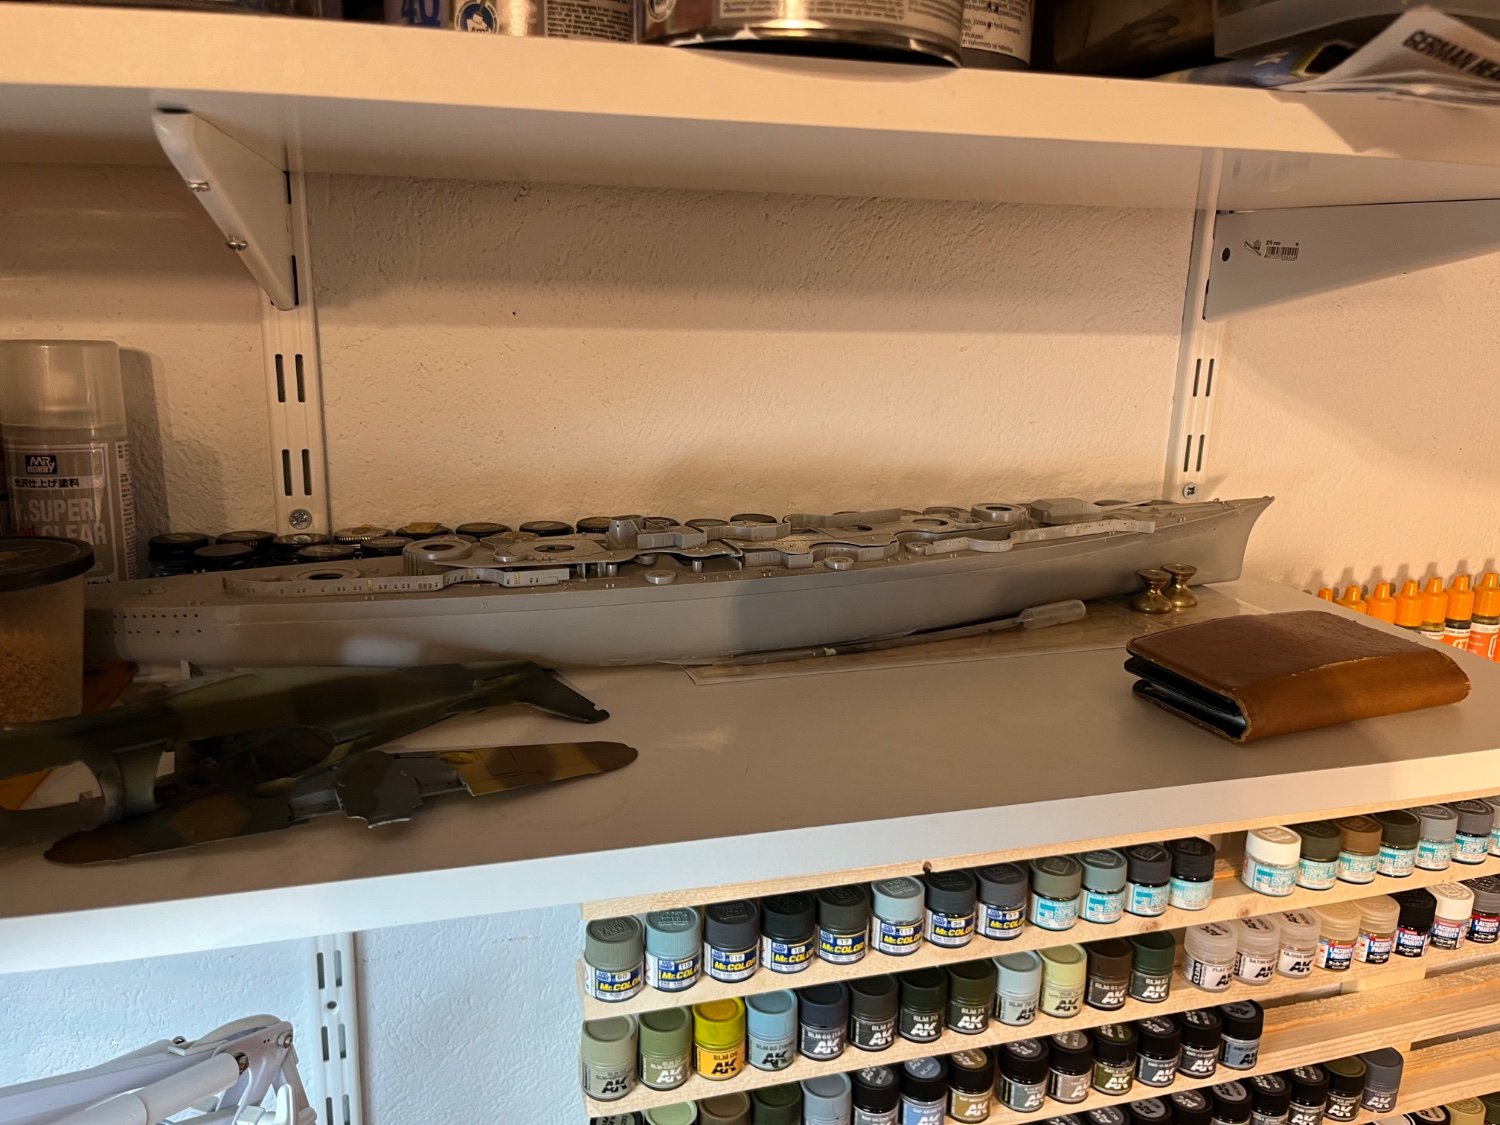
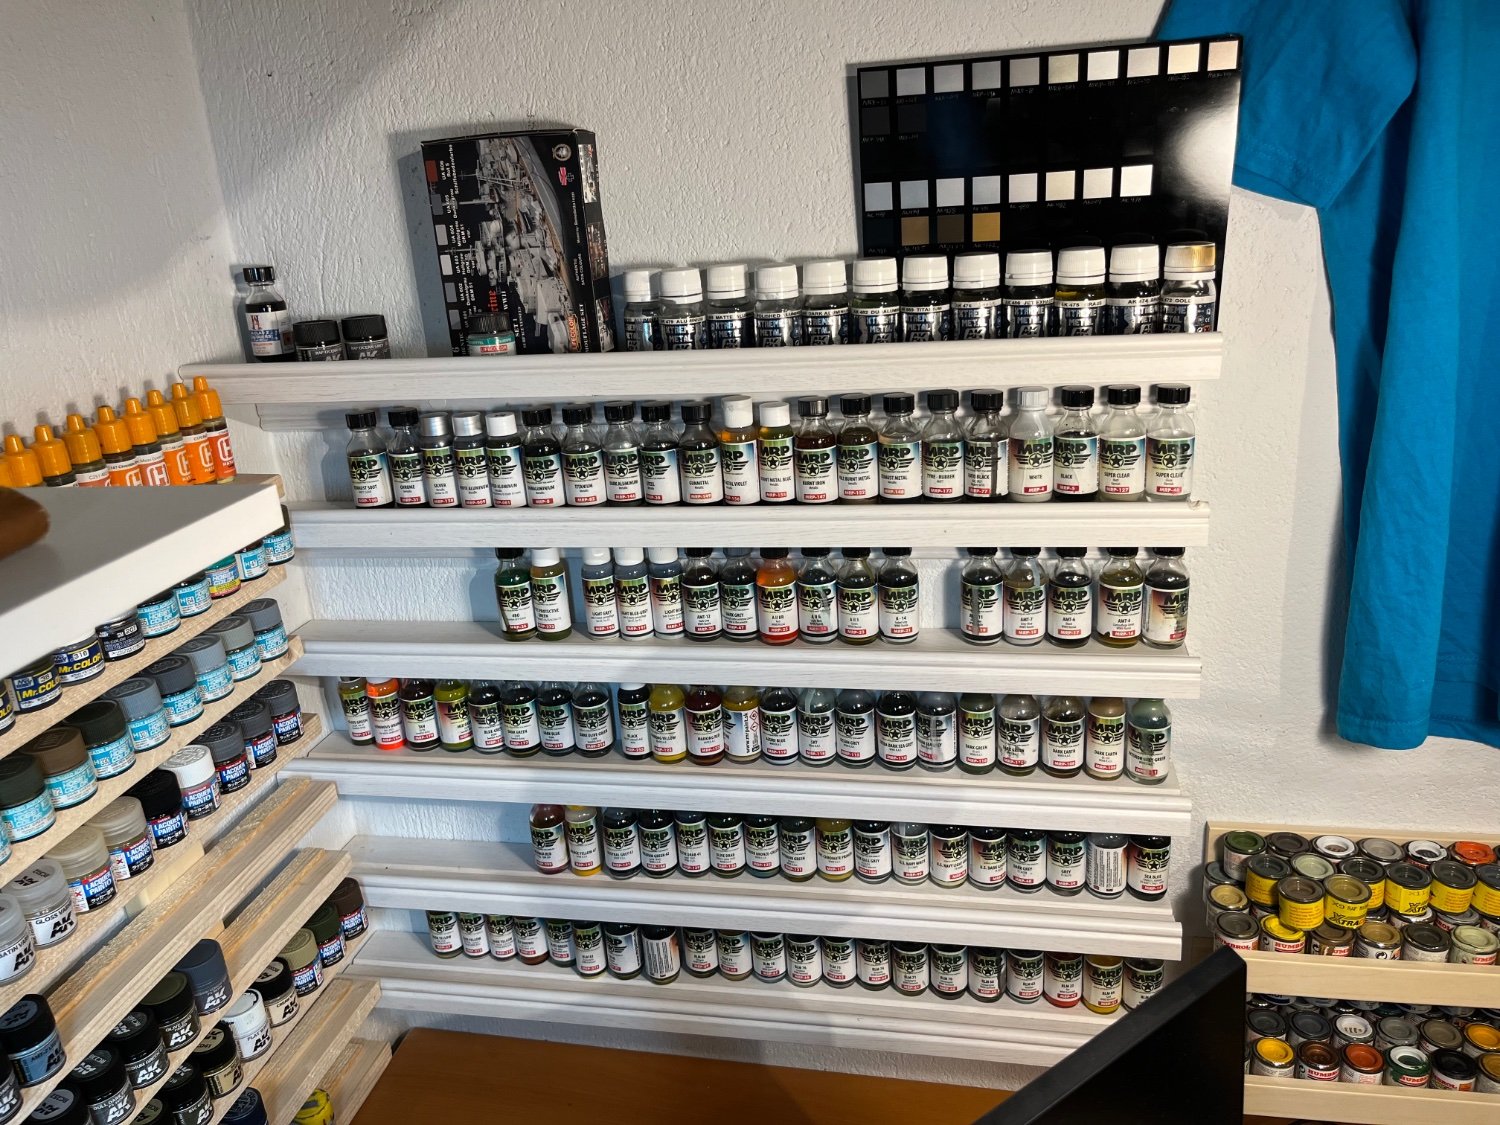
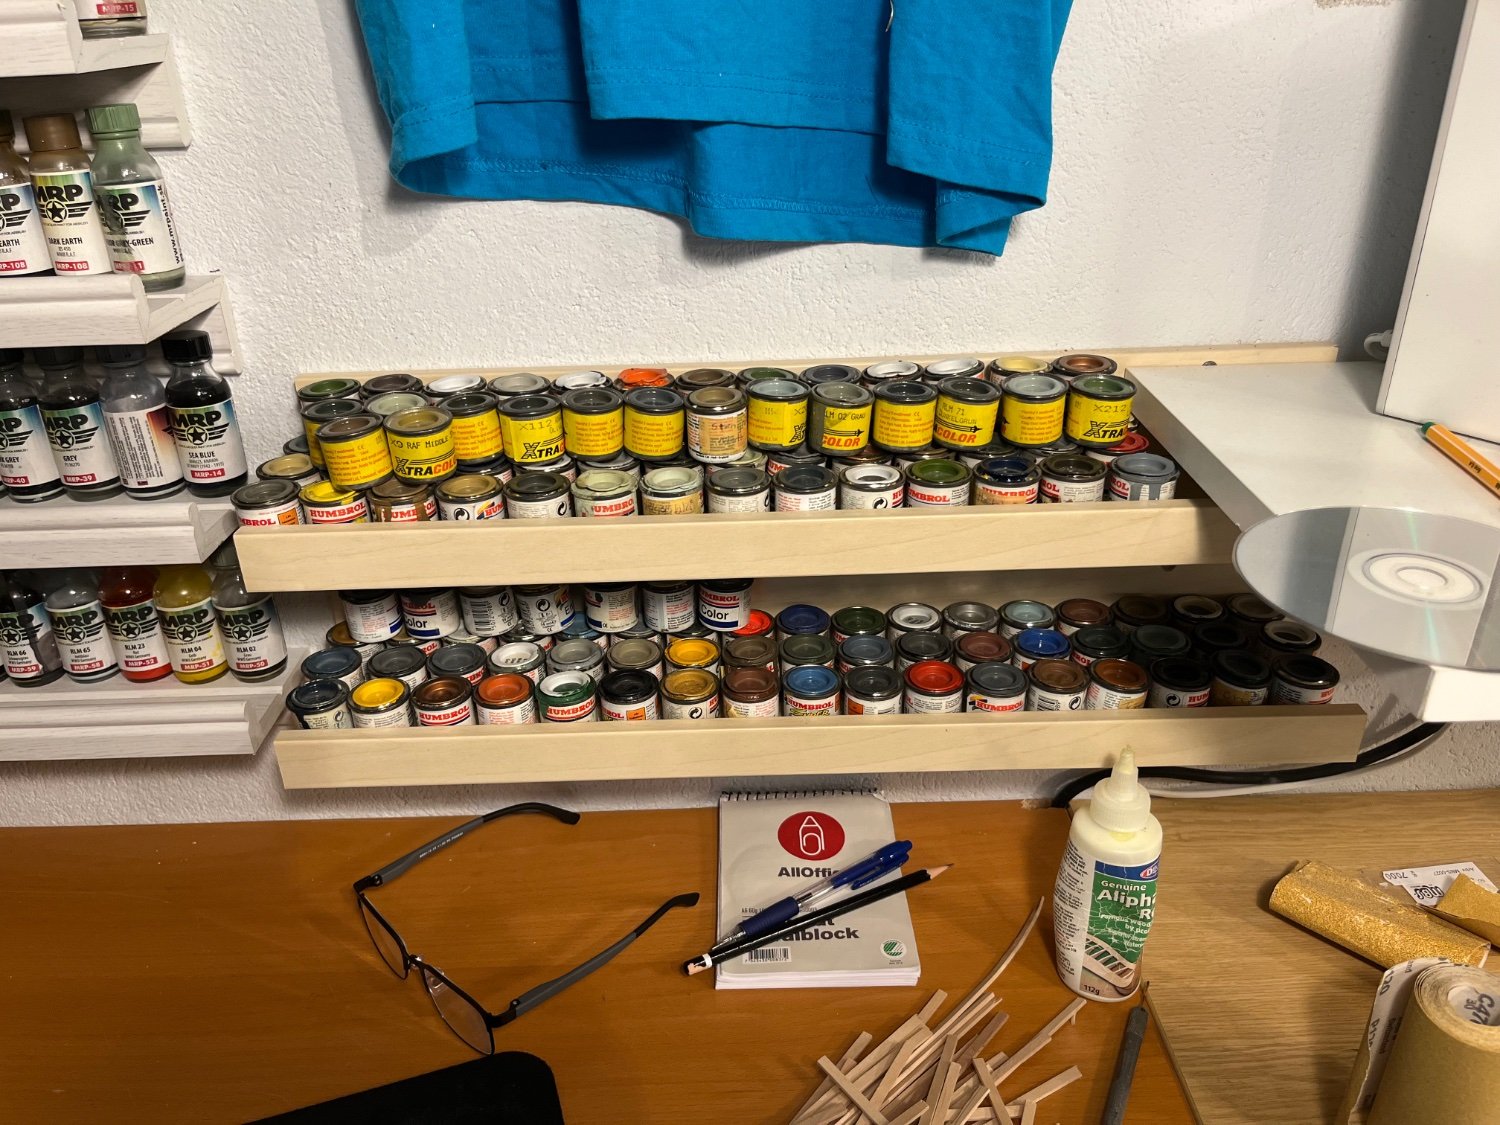
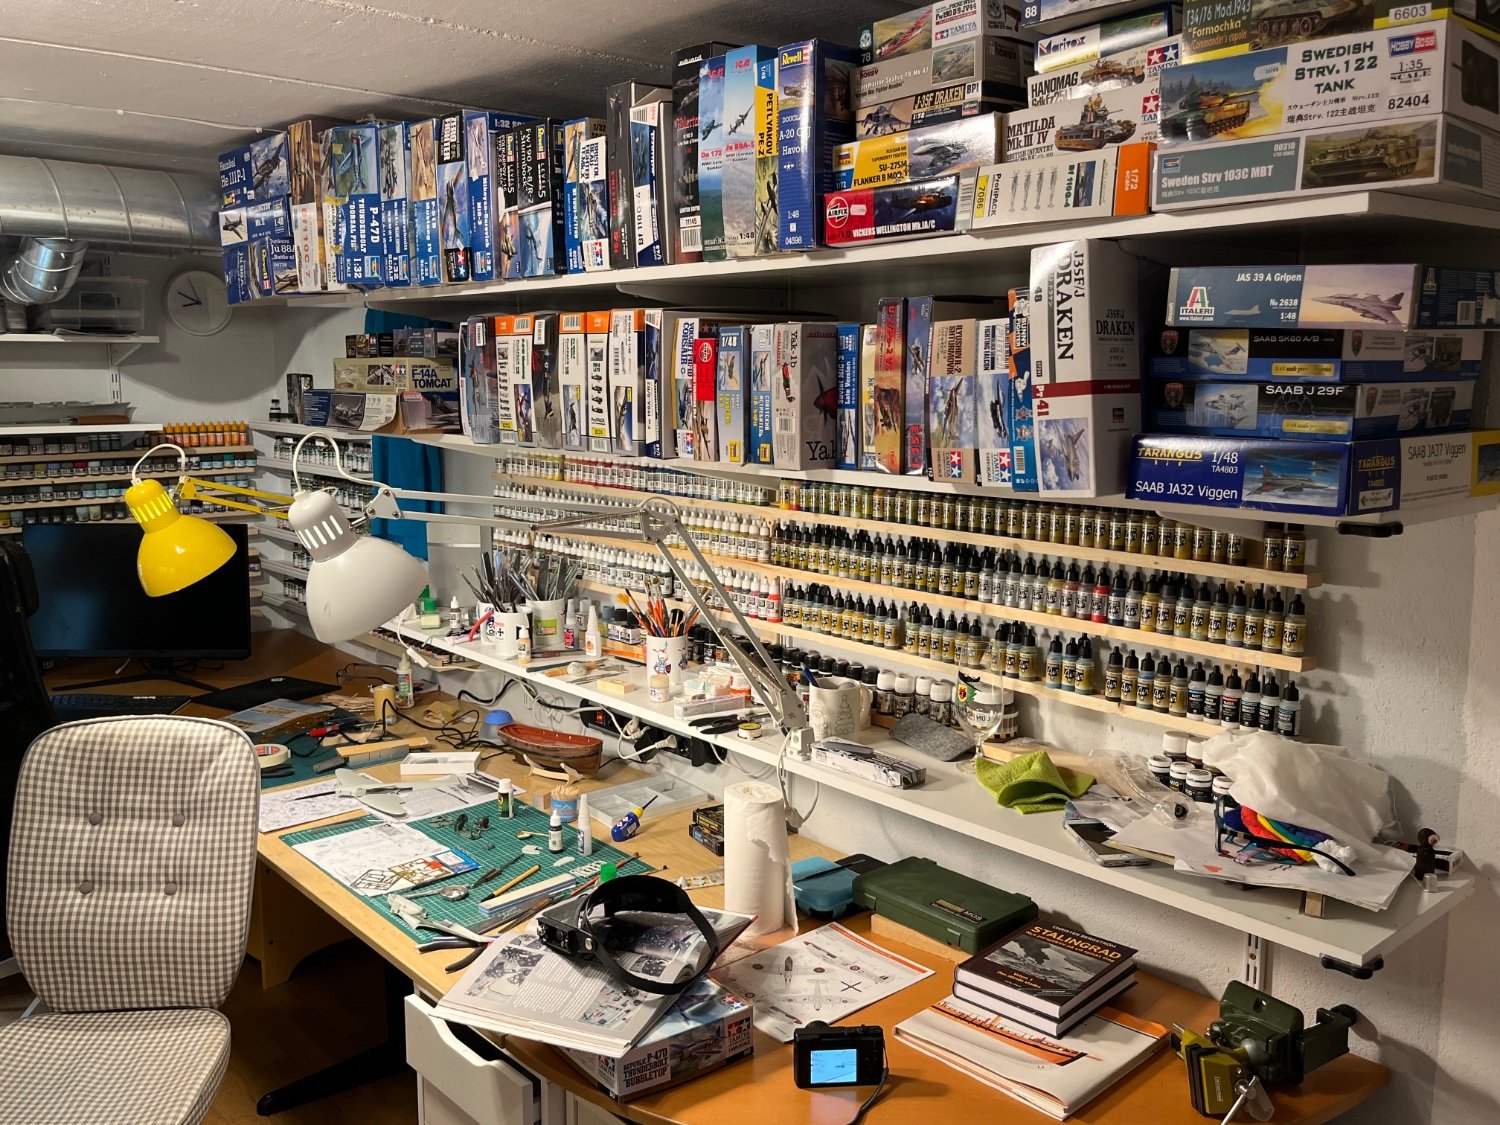
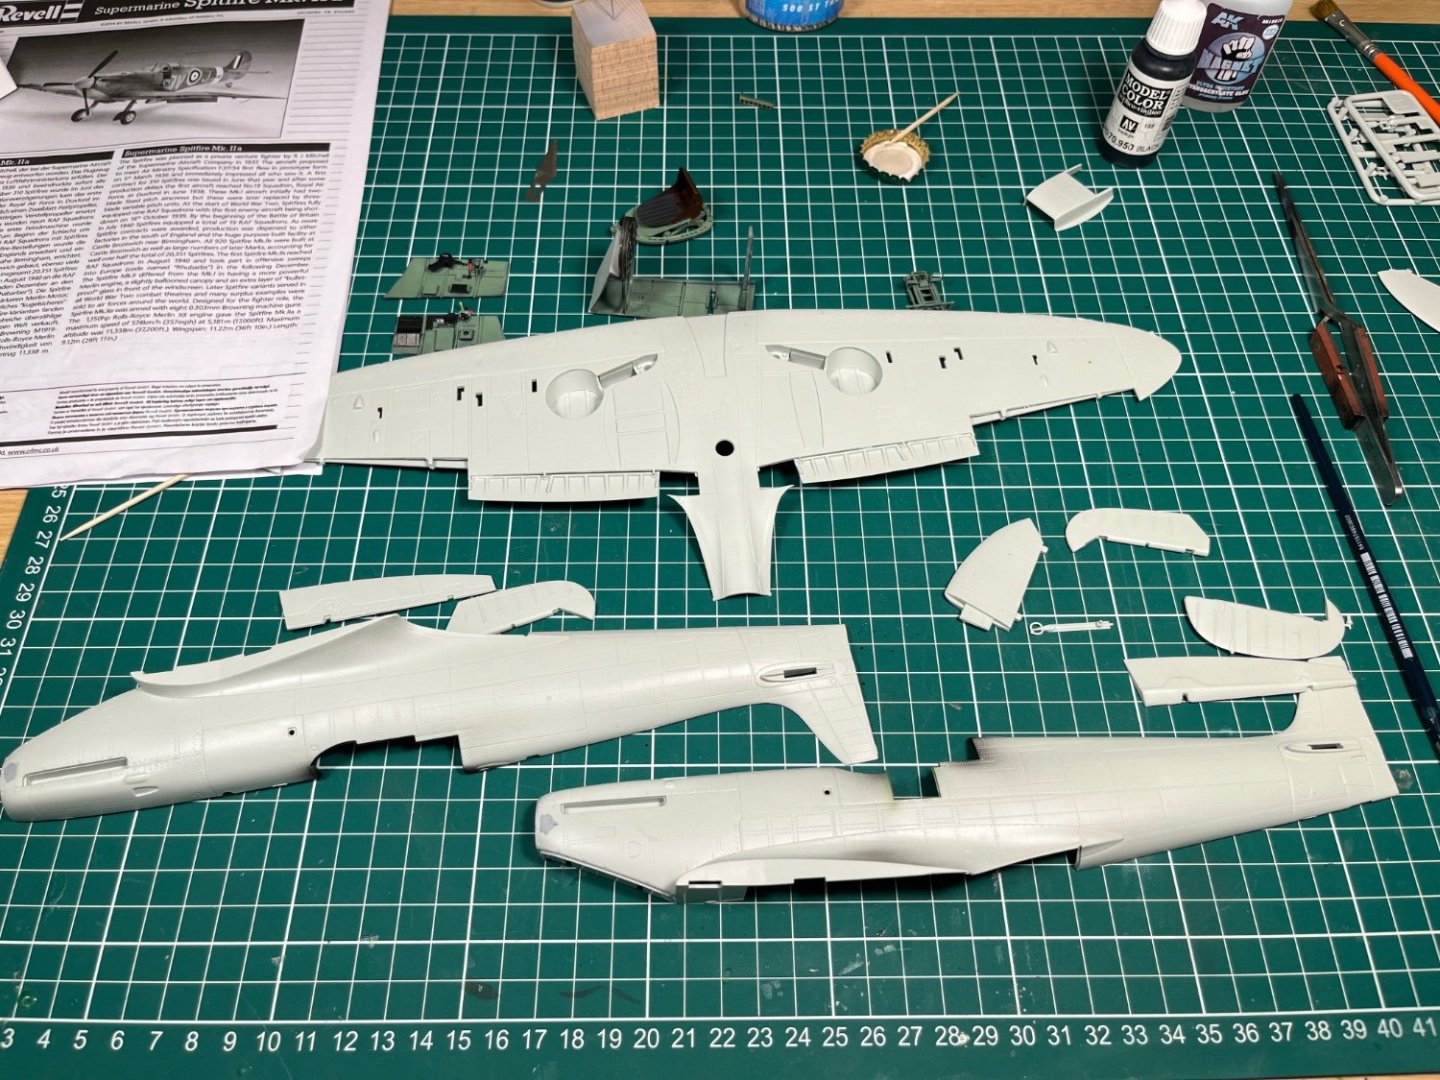
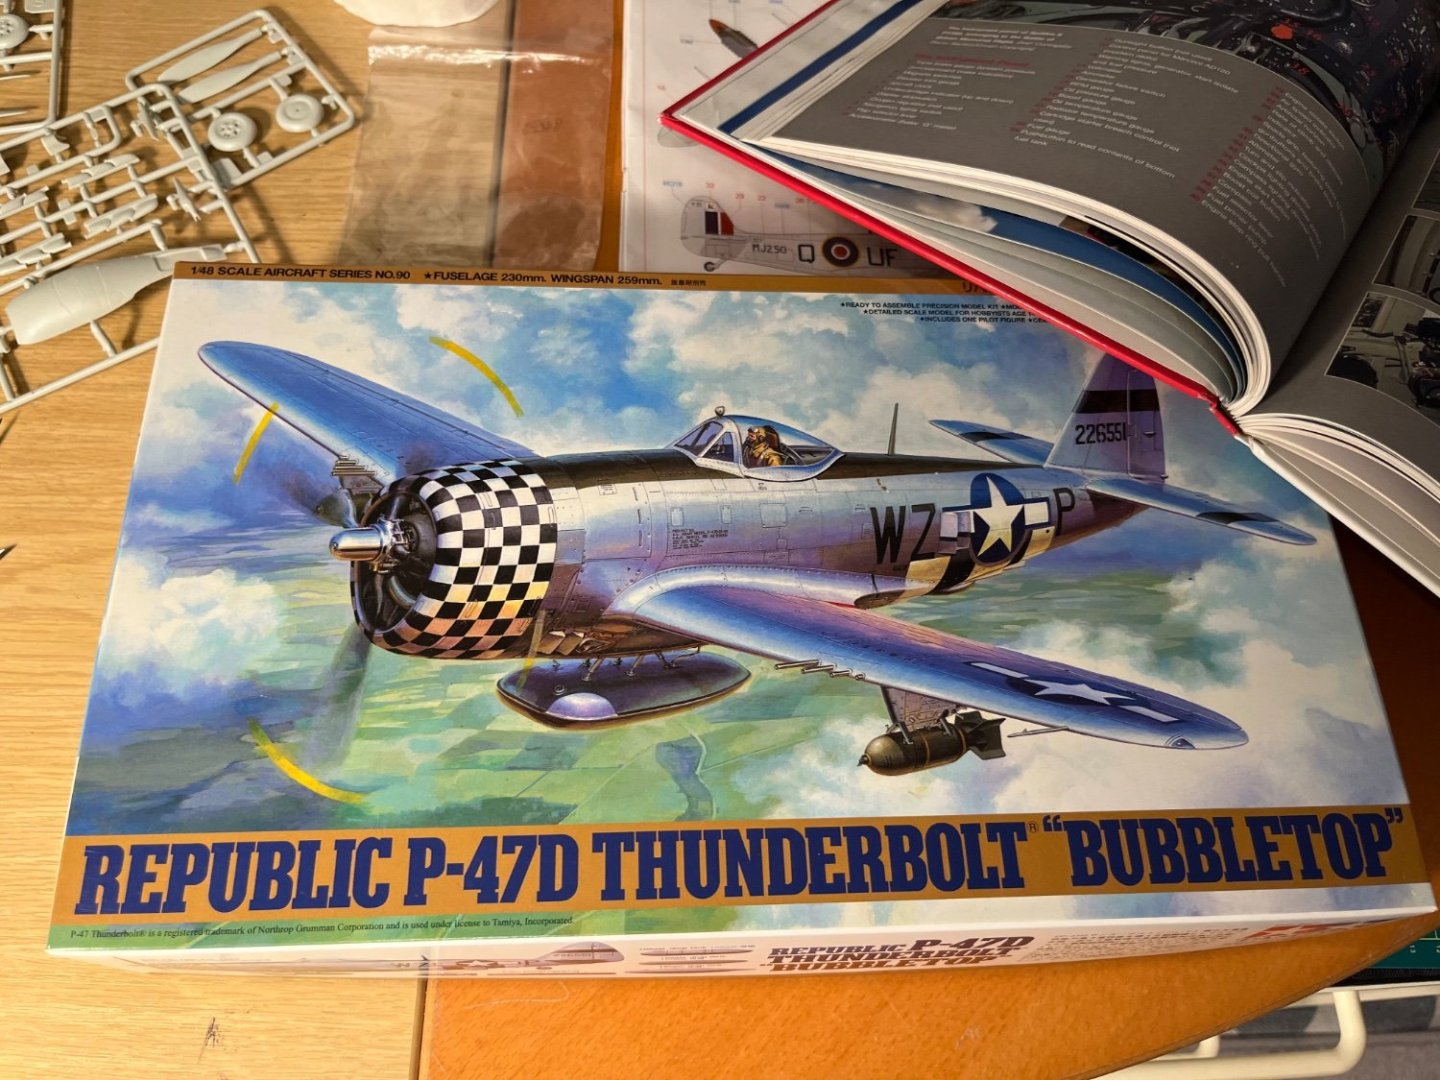
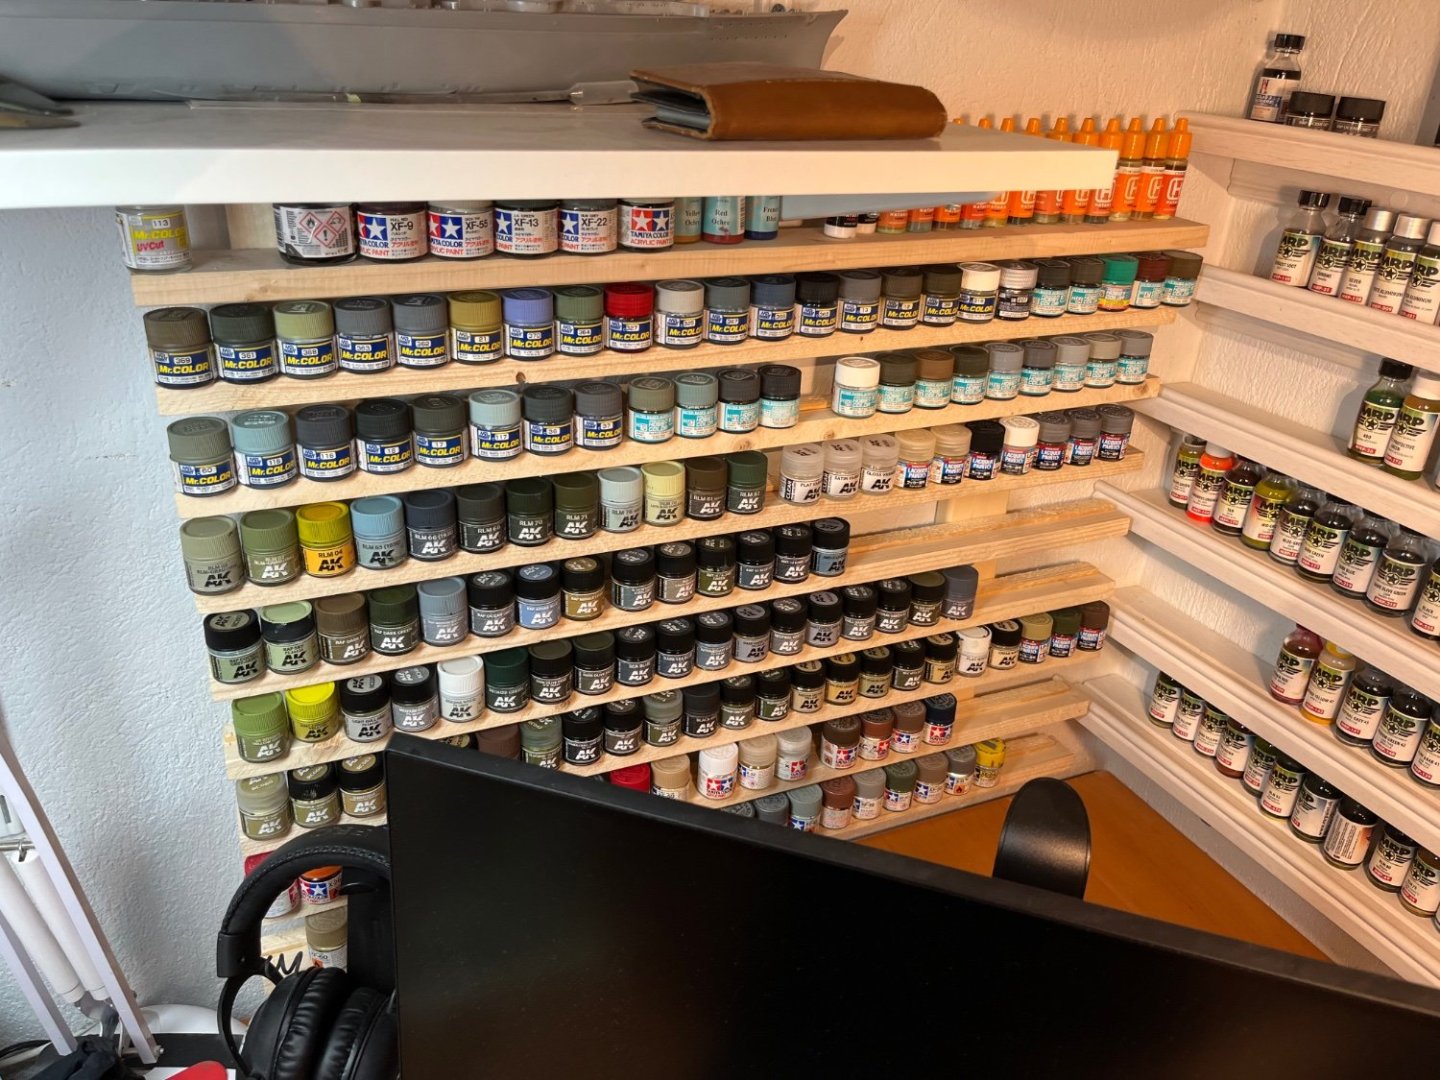
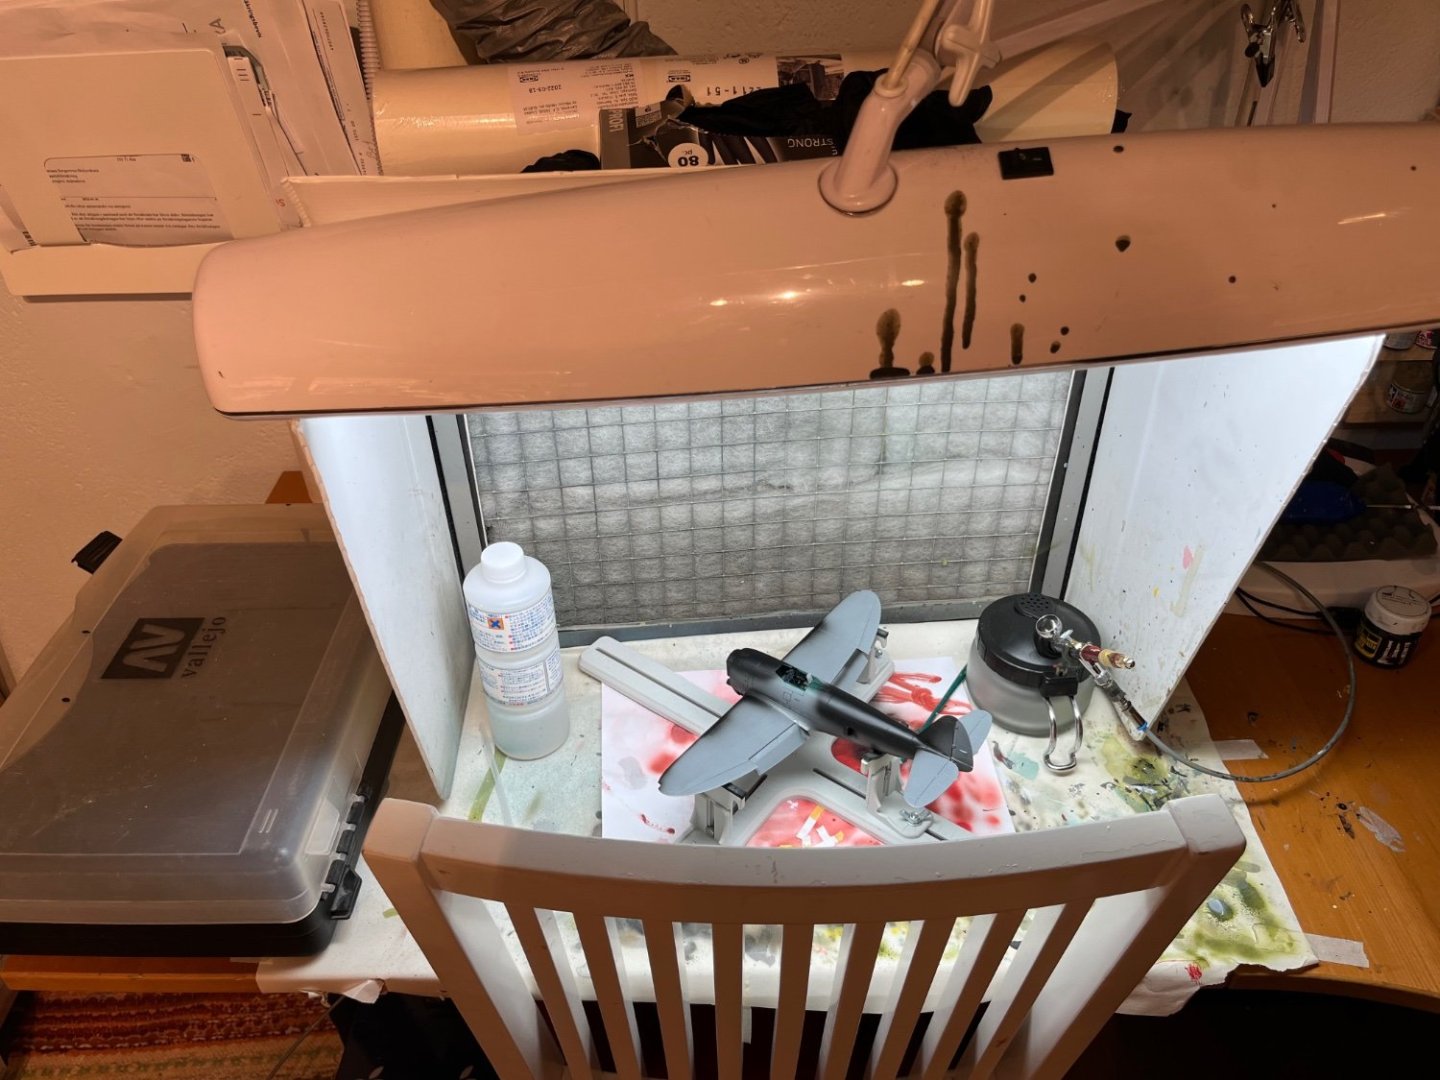
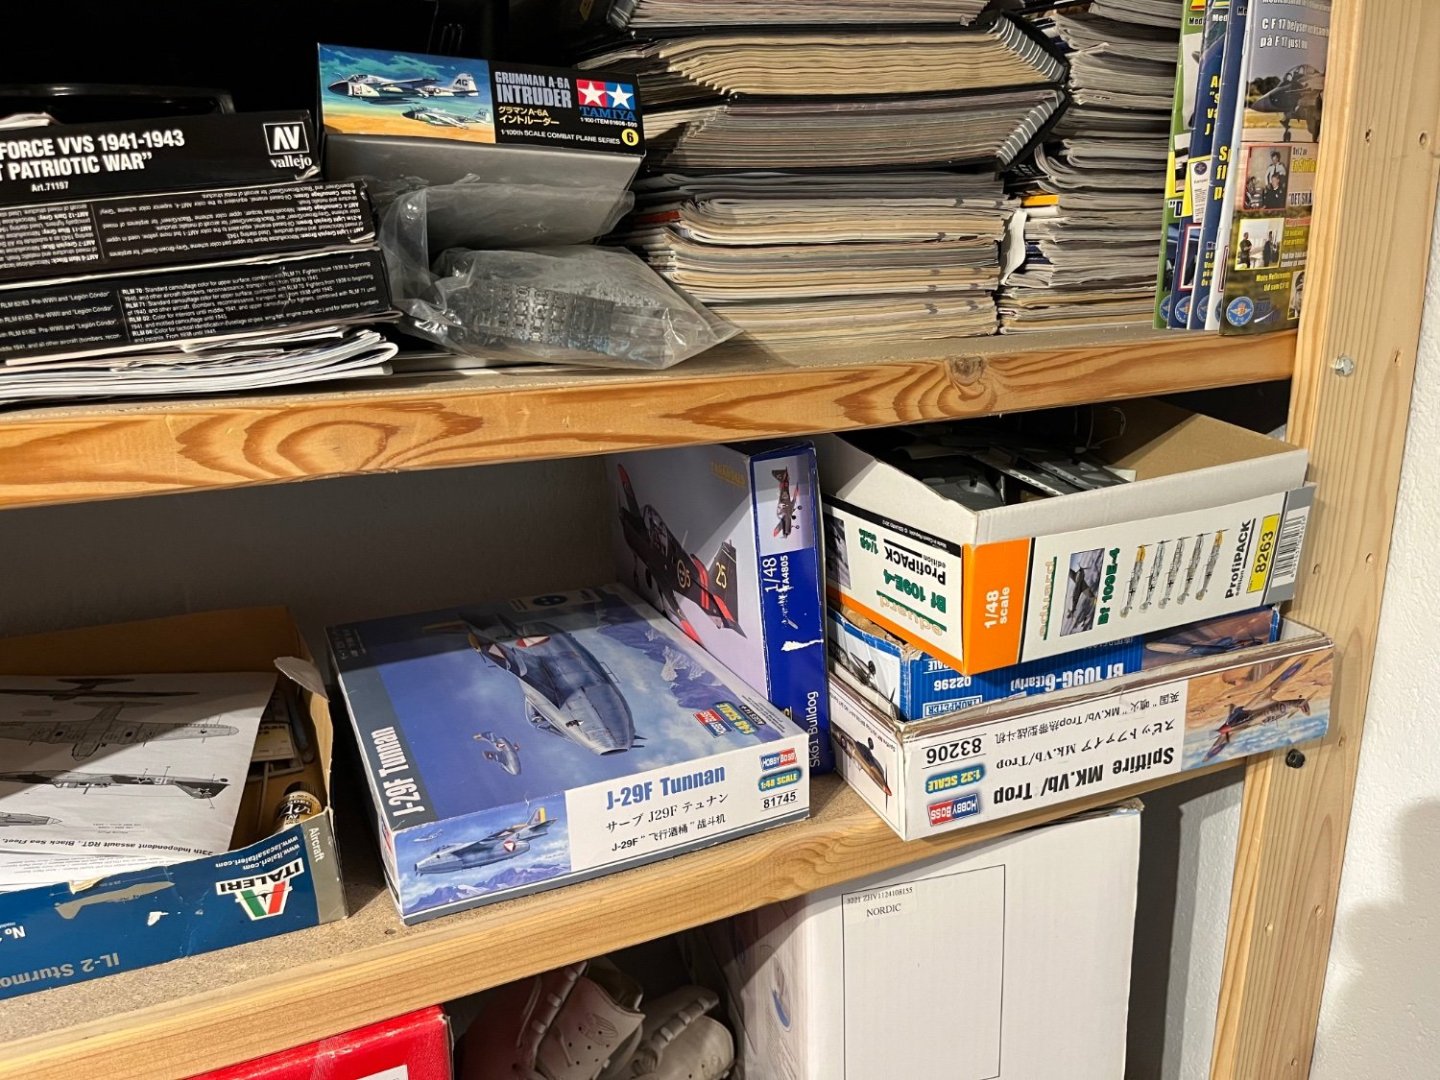
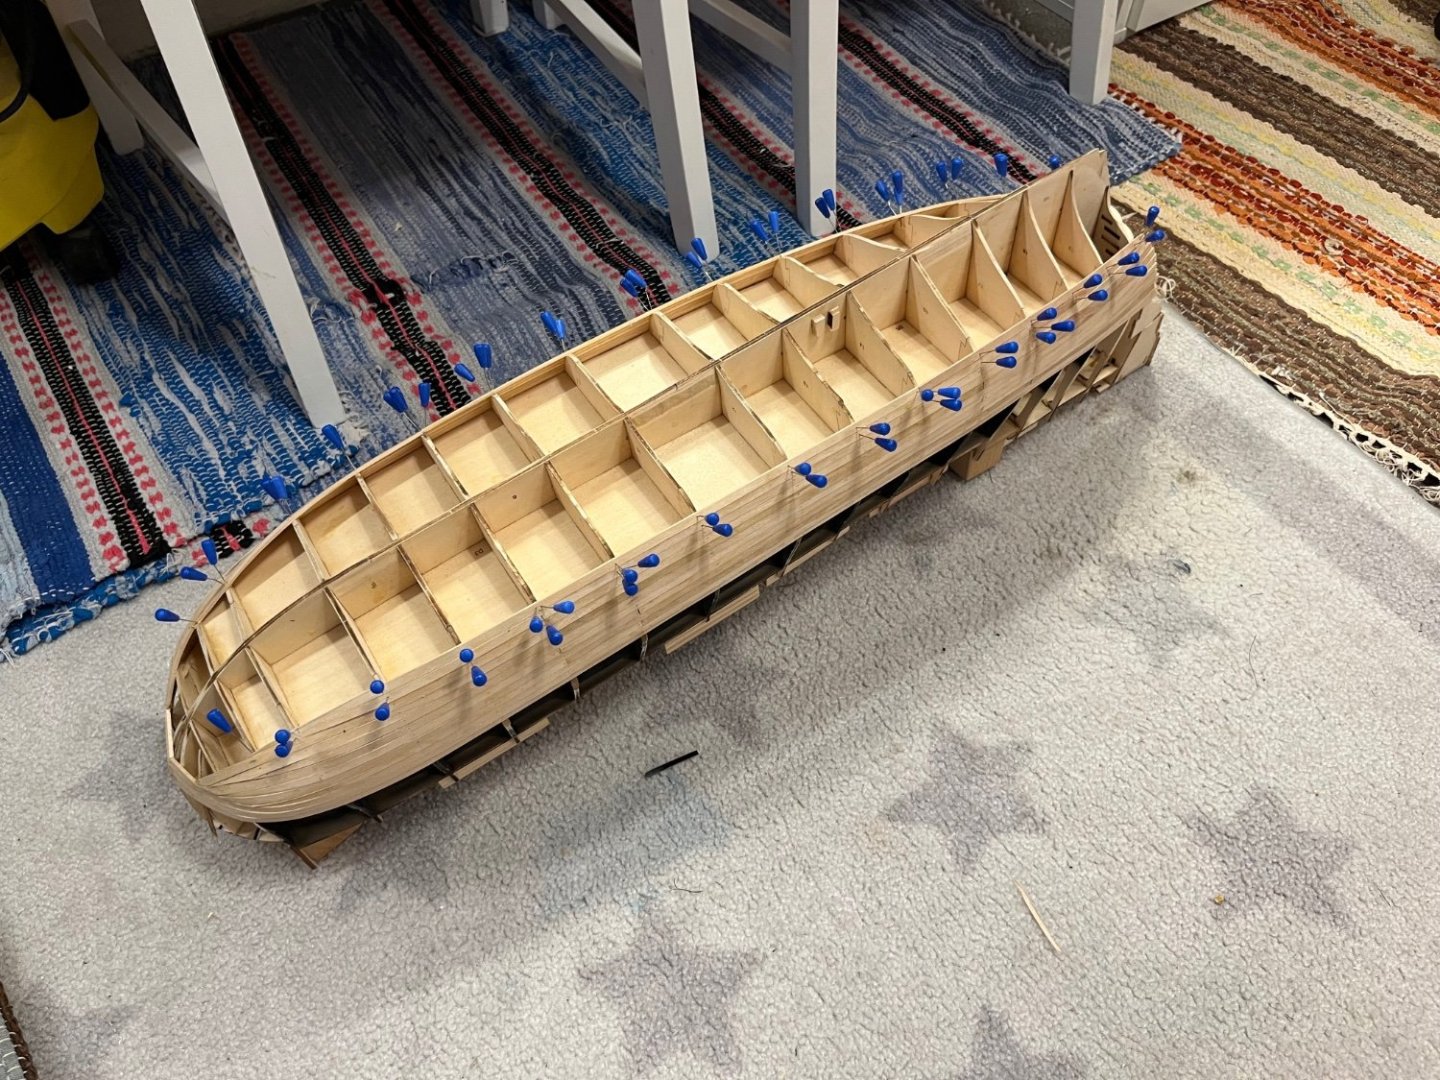
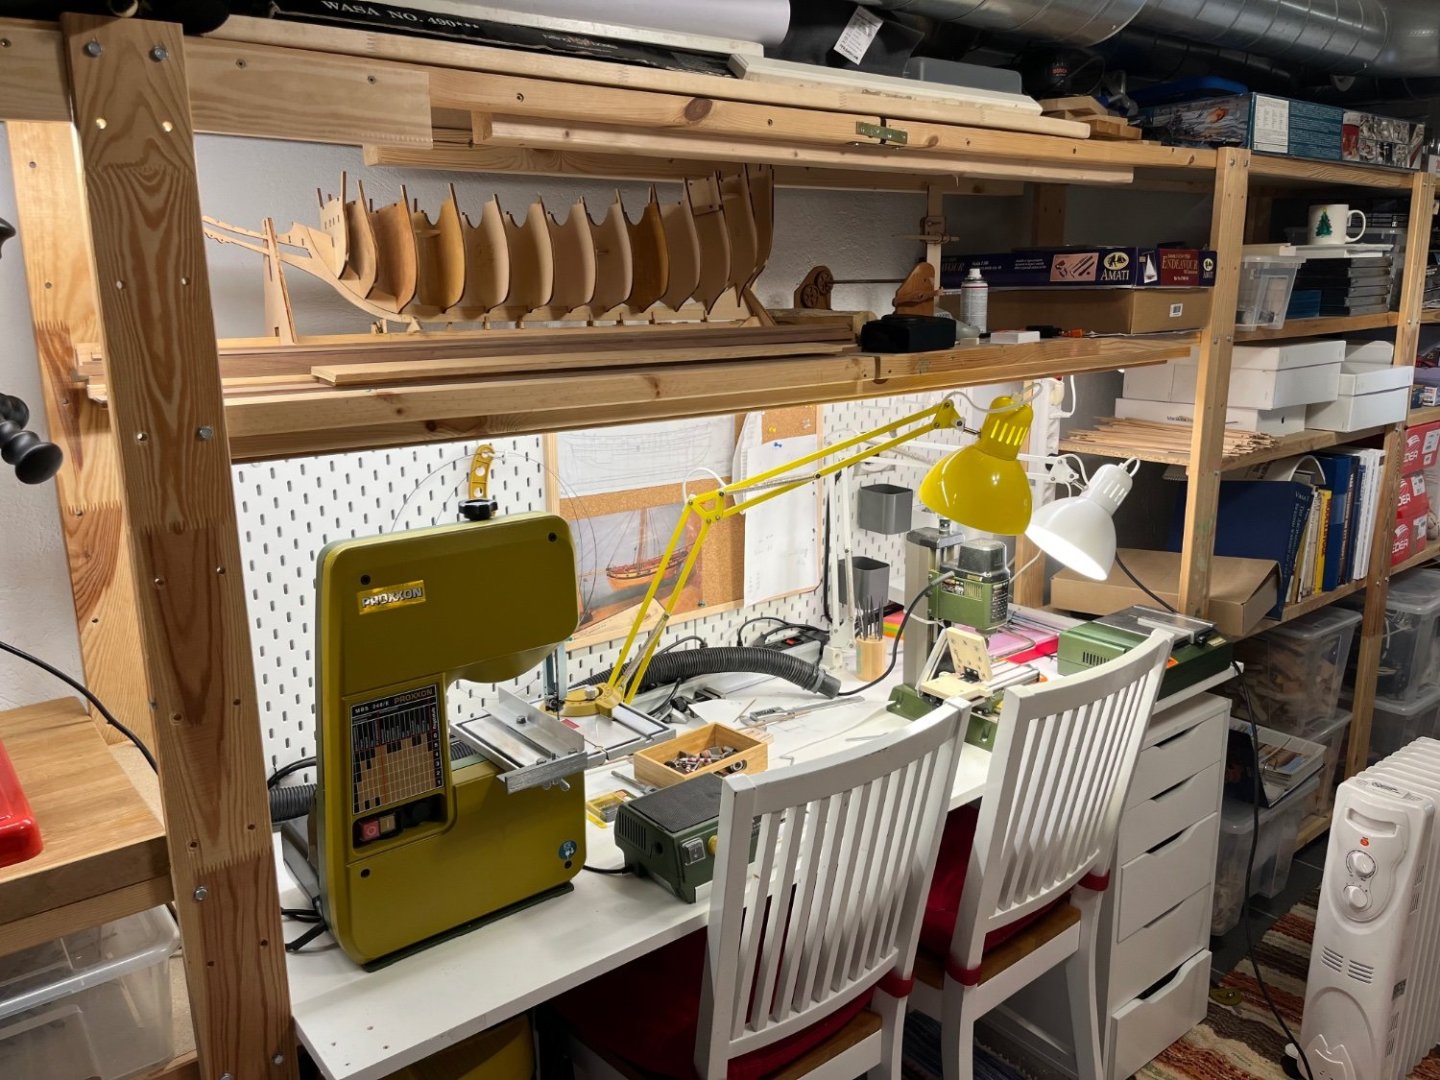
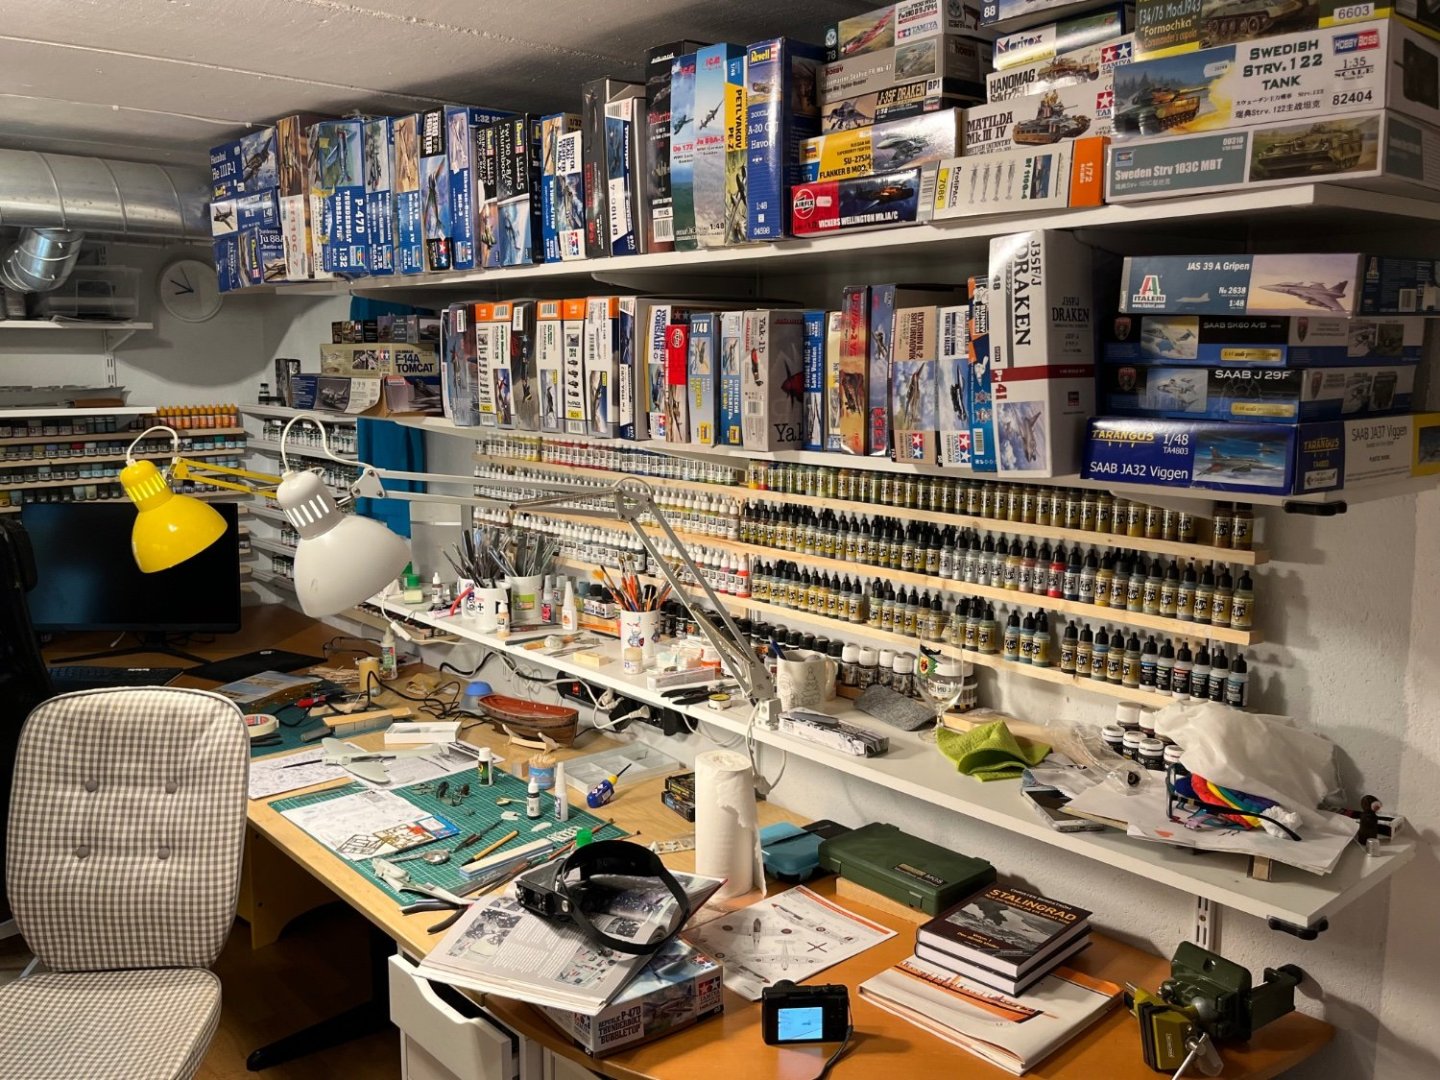
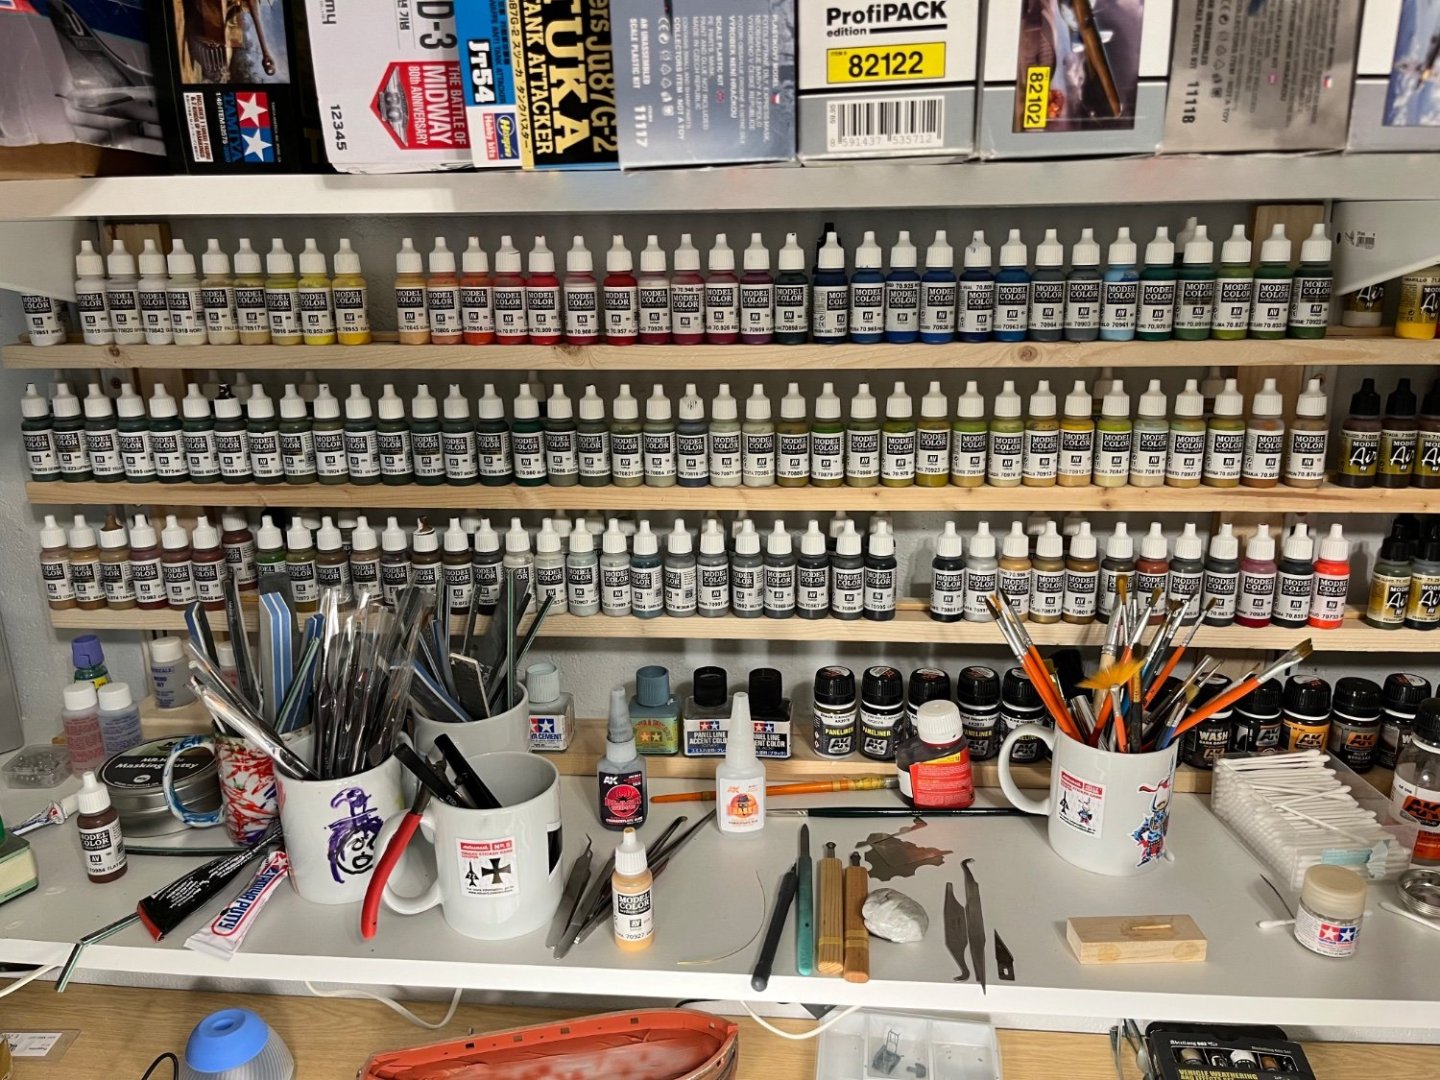
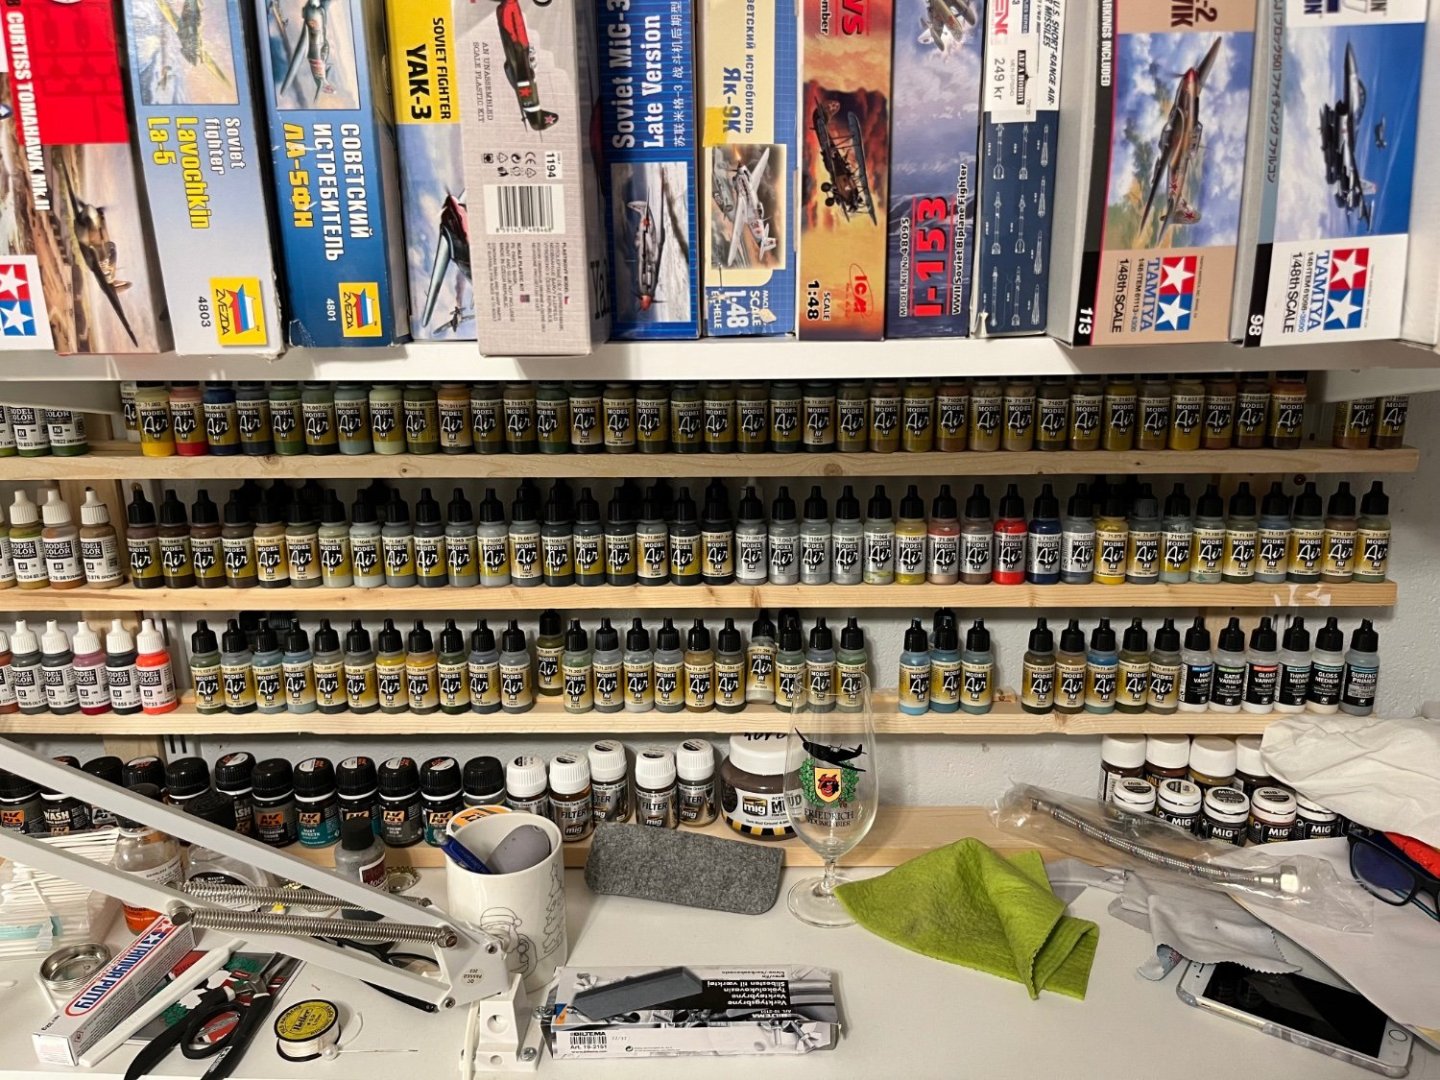
Ok i will try to do it. But I will do it in this thread if it is ok. The reason is that I have started some bulldogs for plastic kits in the past but I have never finished them. The reason is how I build. Many times I start a kit and build half of it and then it ends up on the shelf for a lot of different reasons. It is much easer to do pure bulldogs for the wooden ships. But to be honest, I have to many projects ongoing at the same time....and I change between them all the time. So here I will keep a blog or whatever it is called for my builds in for plastic kits. I will start to show my working place if you don't mind. Some of you might think I am crazy over how much I have but the reason is that almost all of it is collected more or less in a lifetime. I have collected things but never actually used them because of lack of space, work etc. But 12 years ago we bought a house and suddenly there were a place to put everything. Most of the time since then have been in fixing the house. But now everything is finished and our children starts to be little older (8 and 11) so there will be more free time to put in the hobby. So let's jump in to it, here is my "Man cave" in the basement. Please ask questions about anything so can I explain it here, things that I use, how I use them etc. But just to be clear, there are a lot of better model builders on YouTube than me. Here is my room. I always have a totally mess when I build. It doesn't matter how much I try to put things in order, it just ends up in the same way. But after all, that is one of the rules in the universe. Everything try to go to chaos and the lowest energy state Here is my ship building place will all the machinery. The model on the shelf is Billing Boats Vasa that I want to build with the "old painting scheme" suggested by Björn Landström. The reason is that I really like that scheme and have grown up with it even if it is not correct. Here I can aslo mention that I always build what looks ok for me. I don't care at all for historical correctness. This helps me when I destroy decals and then just choose another number or whatever DeAgostini Vasa on the floor with ongoing first planking. I am very slow on this. This kit will have the proper painting scheme. Her is my station for the plastic modeling and other detail work. Some kits waiting on the shelf to be build..... I bought the big color sets from Vallejo many years ago and they are still working fine. Here are the model Color range and other tools that I use. My Sherbourne can aslo be seen down in the picture. Vallejo model air range. I don't use them any more because of lacquer paints but they are perfect for my children. The paints from my childhood....I never use these any more. But the memory in a tight room with enamels are still there.... My precious MRP paints! These paints were/are the game changer for me. More to that later in the builds. More laqures I try to play with. I like the Mr Color range since they are close in shades to MRP. The Ak real color is a good color but I still can't understand their approach to the shades. The actually released two really good books when they introduced the color range. But the colors are not same as in the book. These two brands are actually a very good complement to MRP since I paint with these first and then MRP as last step. This to give variation in the paint. More to this later. Here are also my old tamiya paints that I use very seldom. Here is my spray cabinet that I have connect so the fumes is venting to the outside. This is also a game changer in using hot stuff. But I still use a gasmask when I spraying much. As you see I use a Harder Steenbeck Infinity airbrush that I bought many years ago. One of the ongoing projects that I will start to cover in this log have it seems checked. Another ongoing projects.... Bismarck 1/350 Some ongoing airplanes... And more ongoing airplanes and some tanks.. And here are what I am working on at the moment so let this "new"log start here: 1/32 Spitfire MkII by Revell and 1/48 P47 Thunderbolt by Tamiya The P47 is out of the box but I have the etch cockpit set from Eduard to the Spitfire And this is how far as I have come. Im just glued all major parts togheter and now I am working on the cockpit. The cockpit is just assembled and painted with black primer and the MRP RAF interior green. I am working to attach the photo etc. So let's start it from here. I will post updates on what I am doing and the subjects will change often. I hope that will be ok with all. And also sorry for my English, it is far away from good but I don't care. I thin you understand it anyway even if it is Swedish/English Jörgen


- 60 replies
-
- 13
-
-
-
-
Jörgen reacted to a post in a topic:
Airplanes and Tanks in plastic by Jörgen
-
Airplanes and Tanks in plastic by Jörgen
Jörgen replied to Jörgen's topic in Non-ship/categorised builds
Great Please give feedback if the movie was ok. -
Airplanes and Tanks in plastic by Jörgen
Jörgen replied to Jörgen's topic in Non-ship/categorised builds
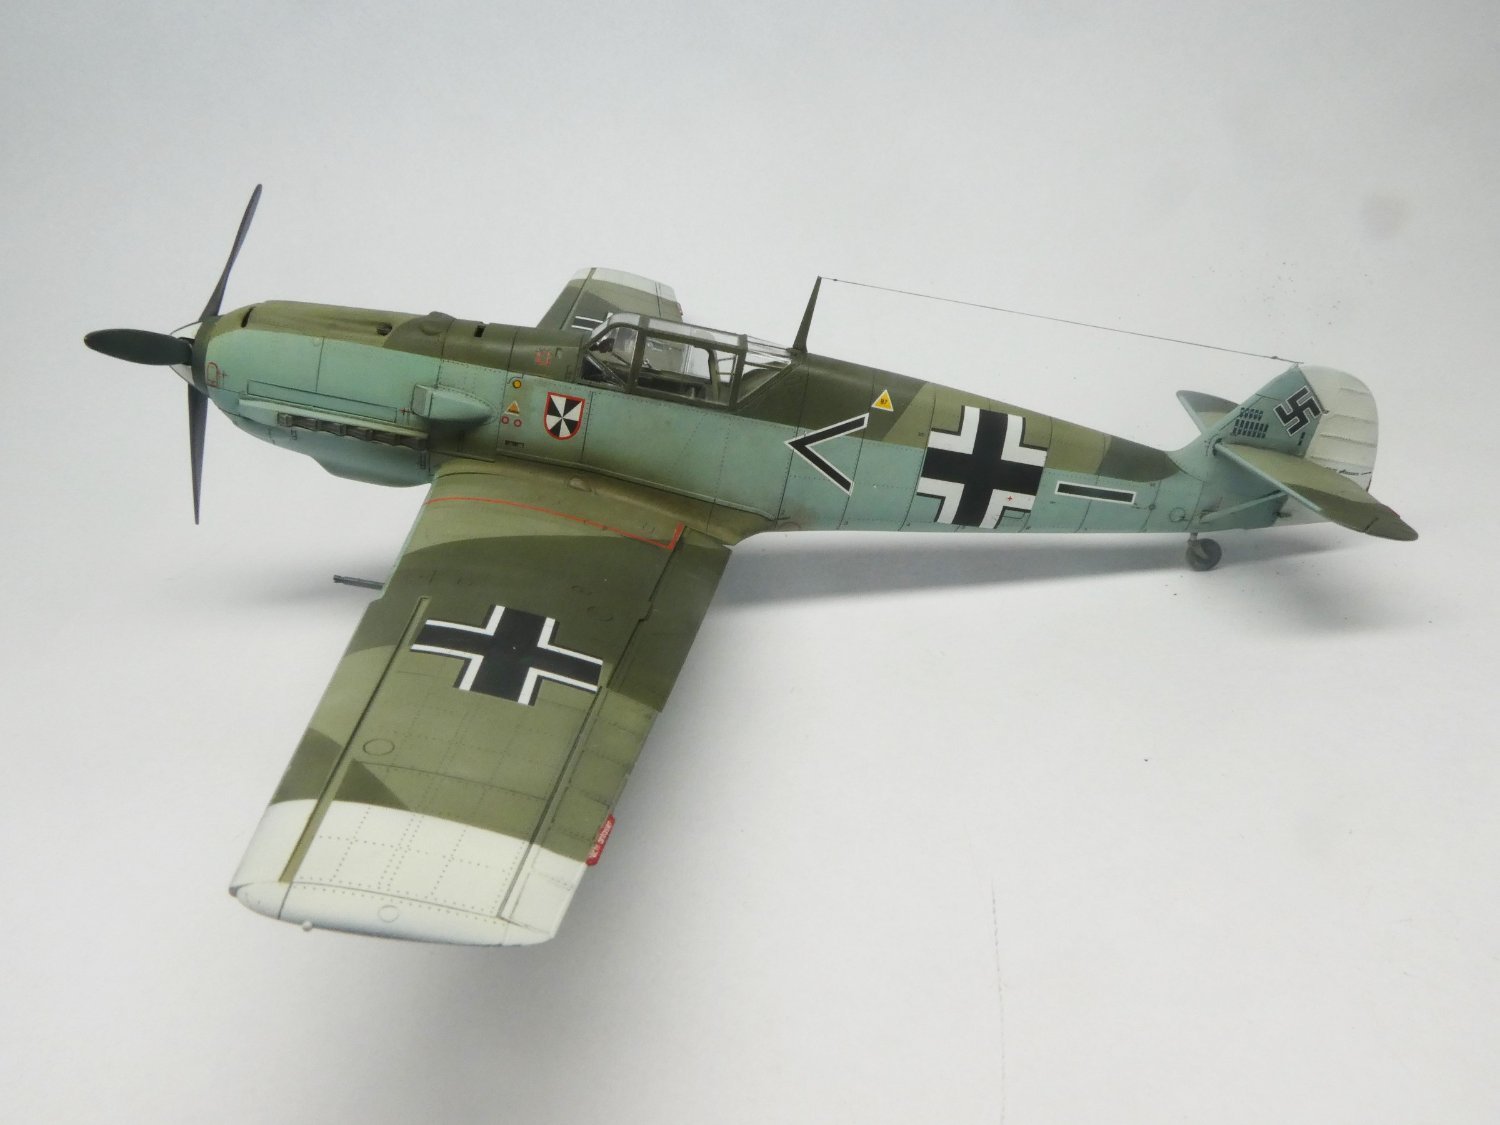
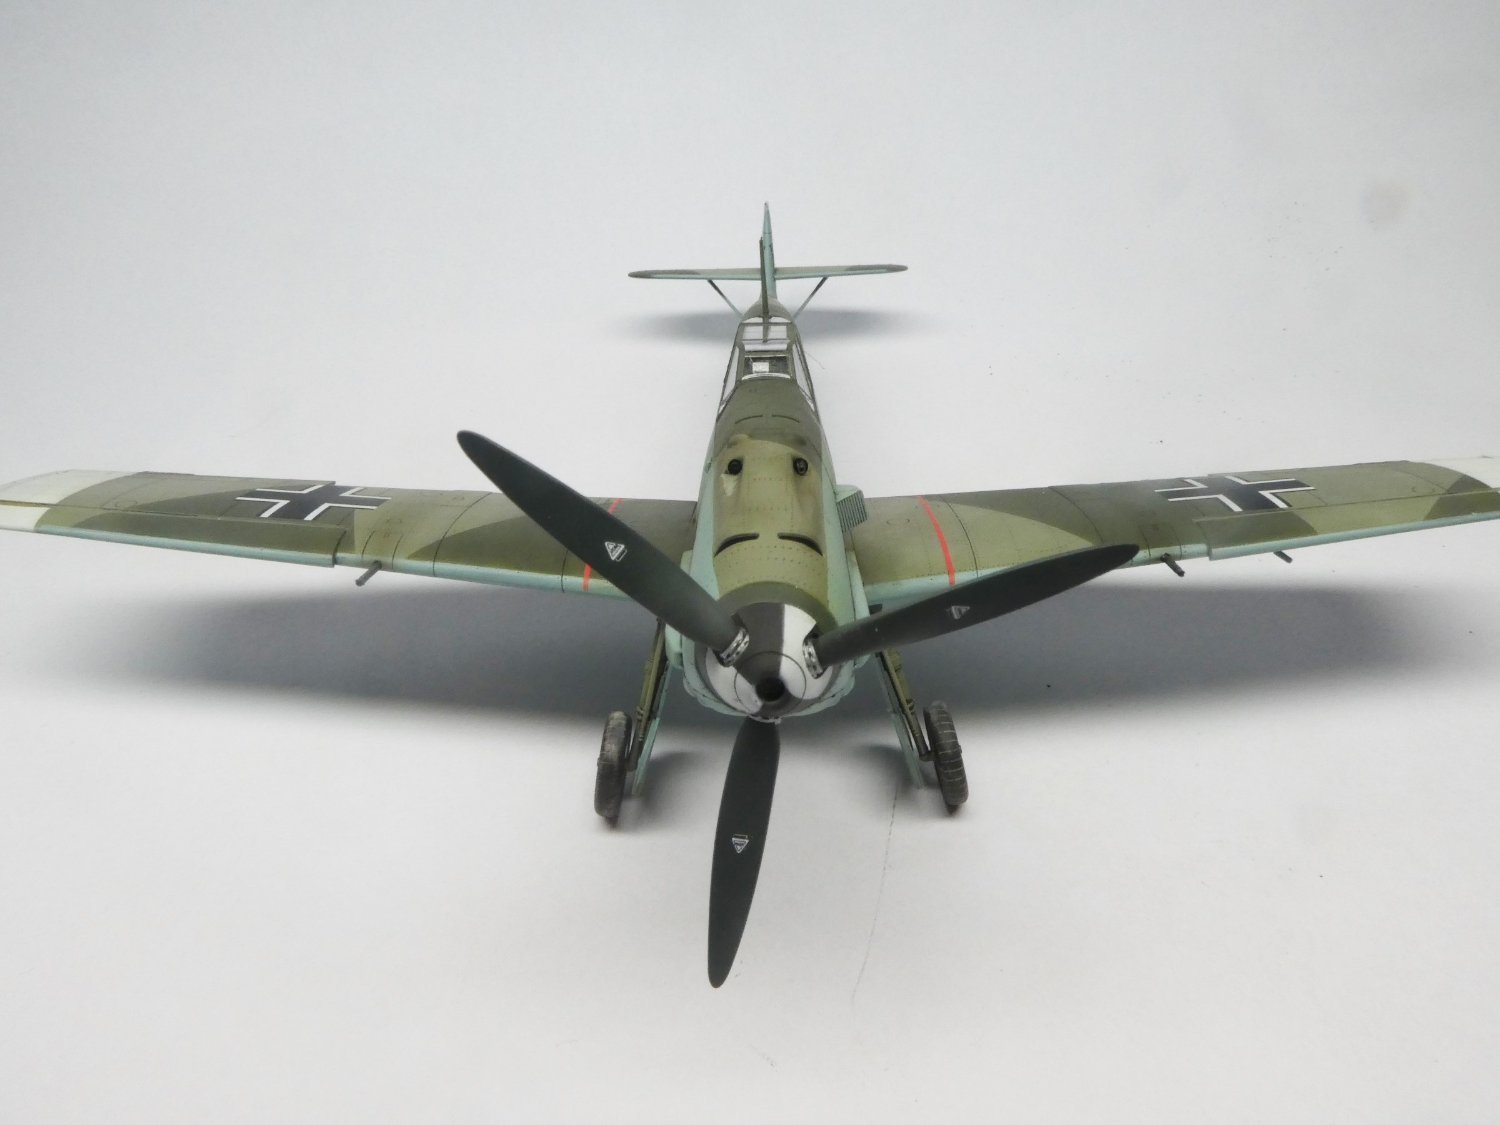
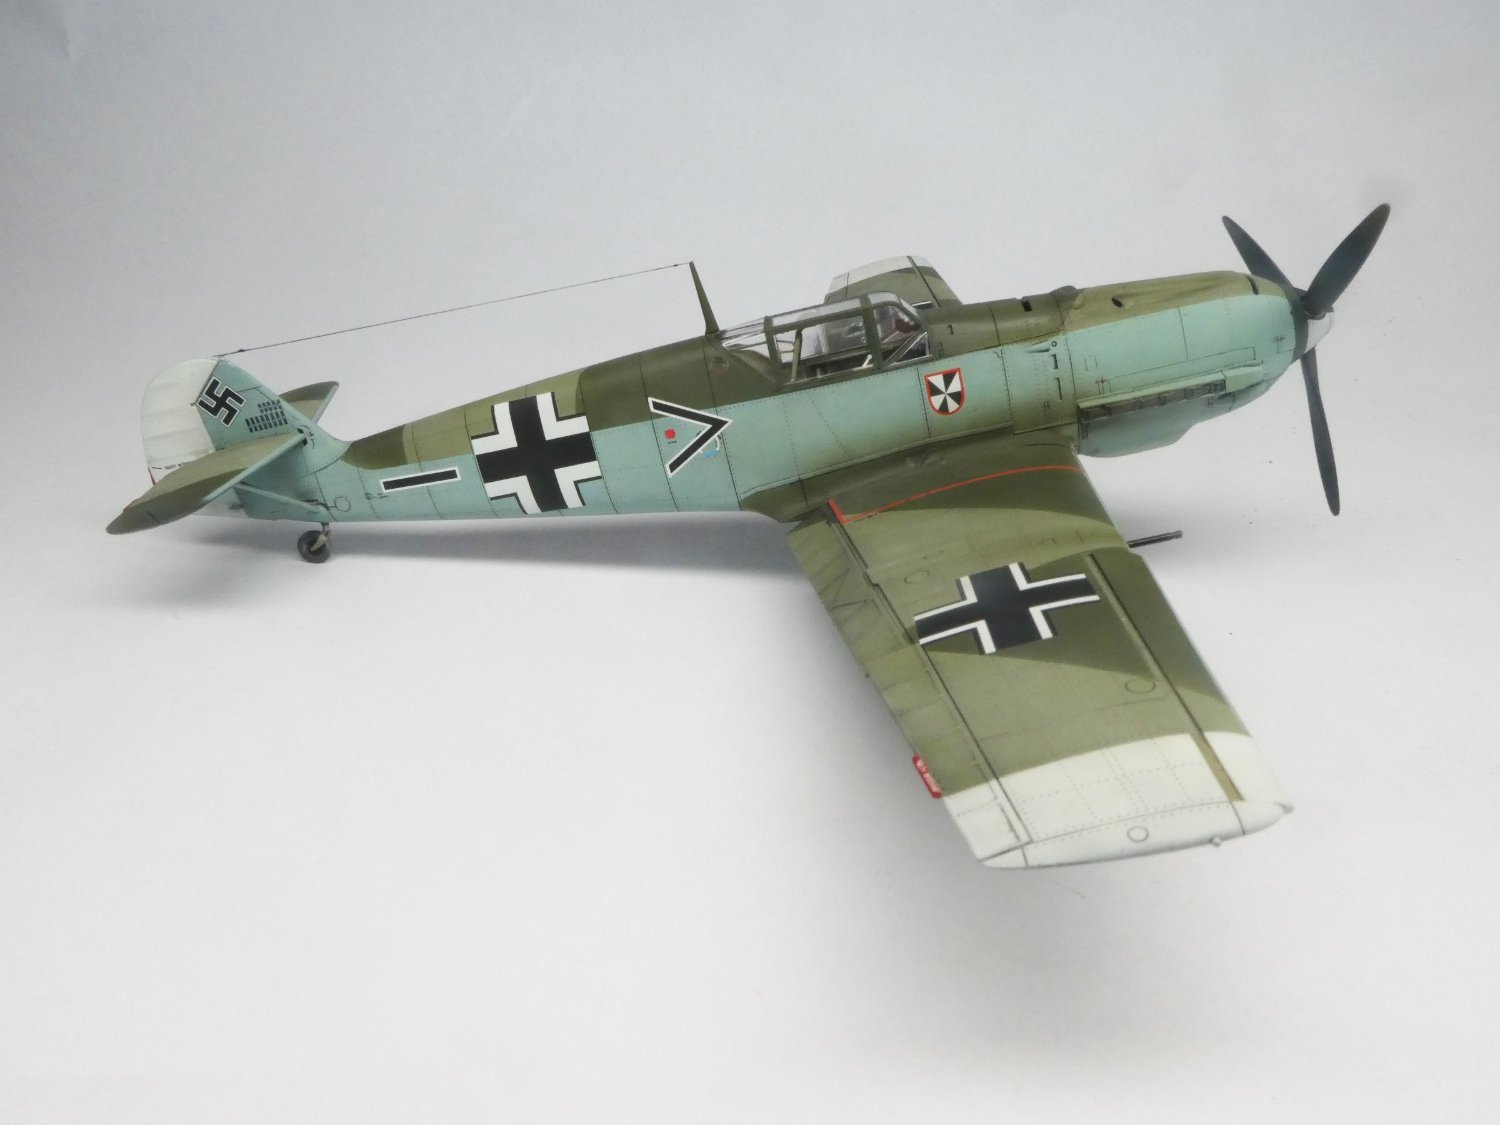
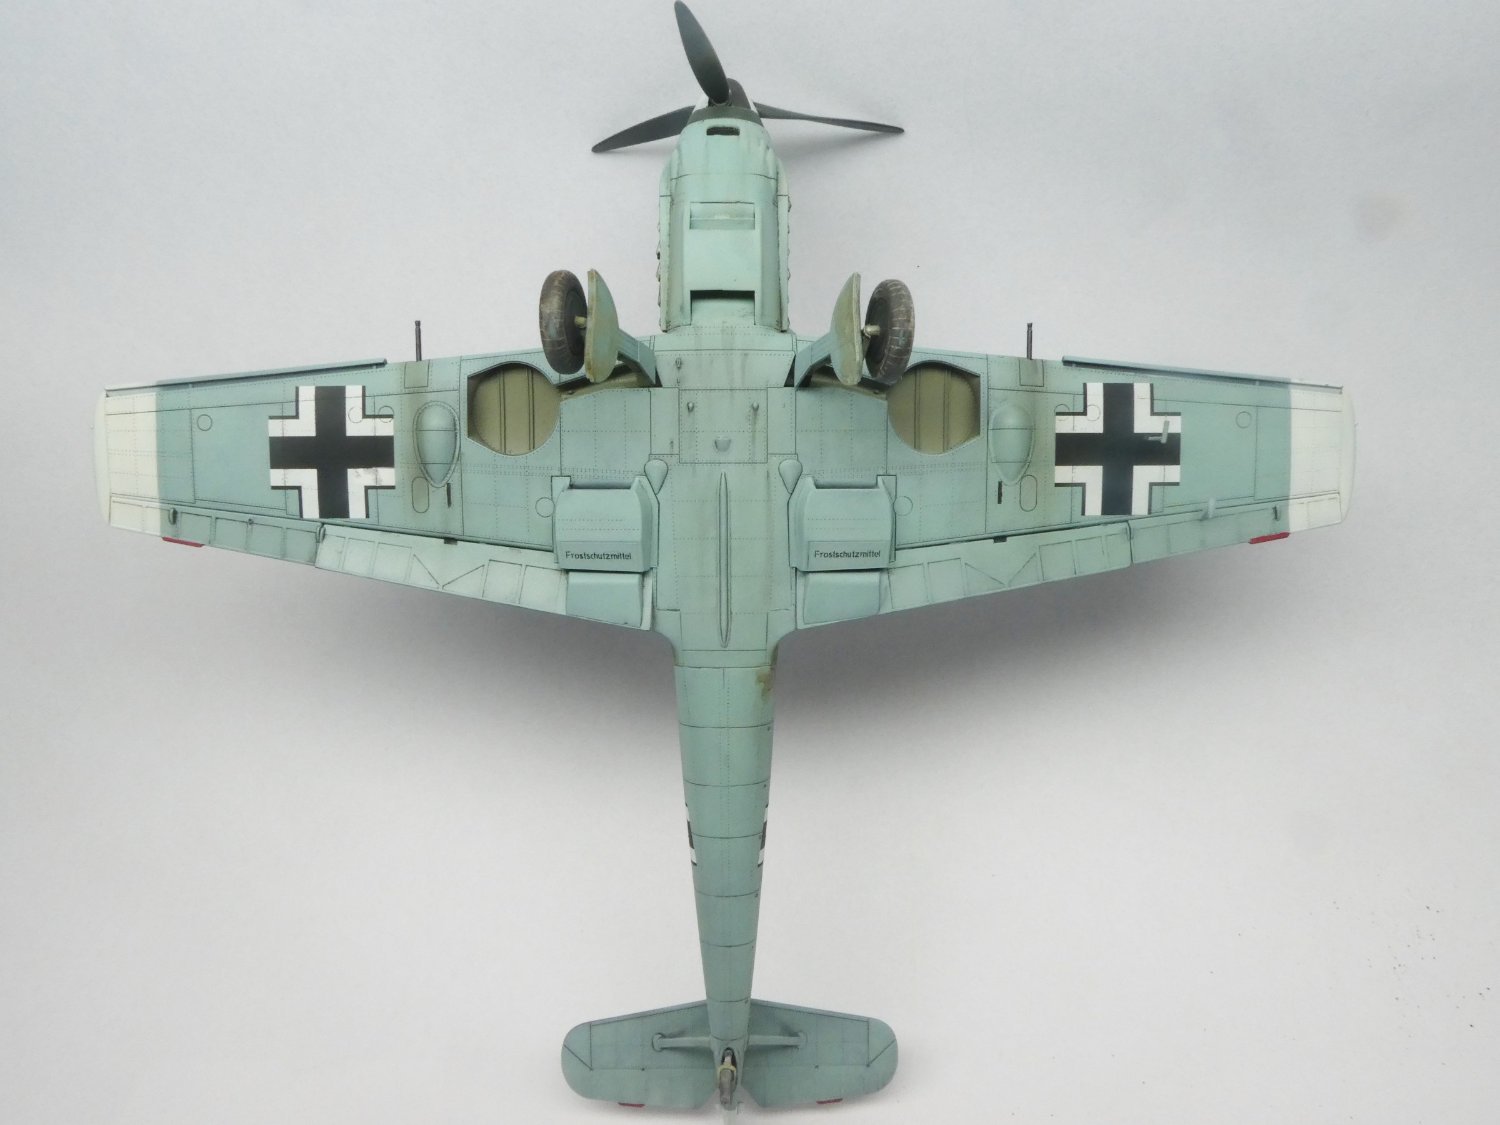
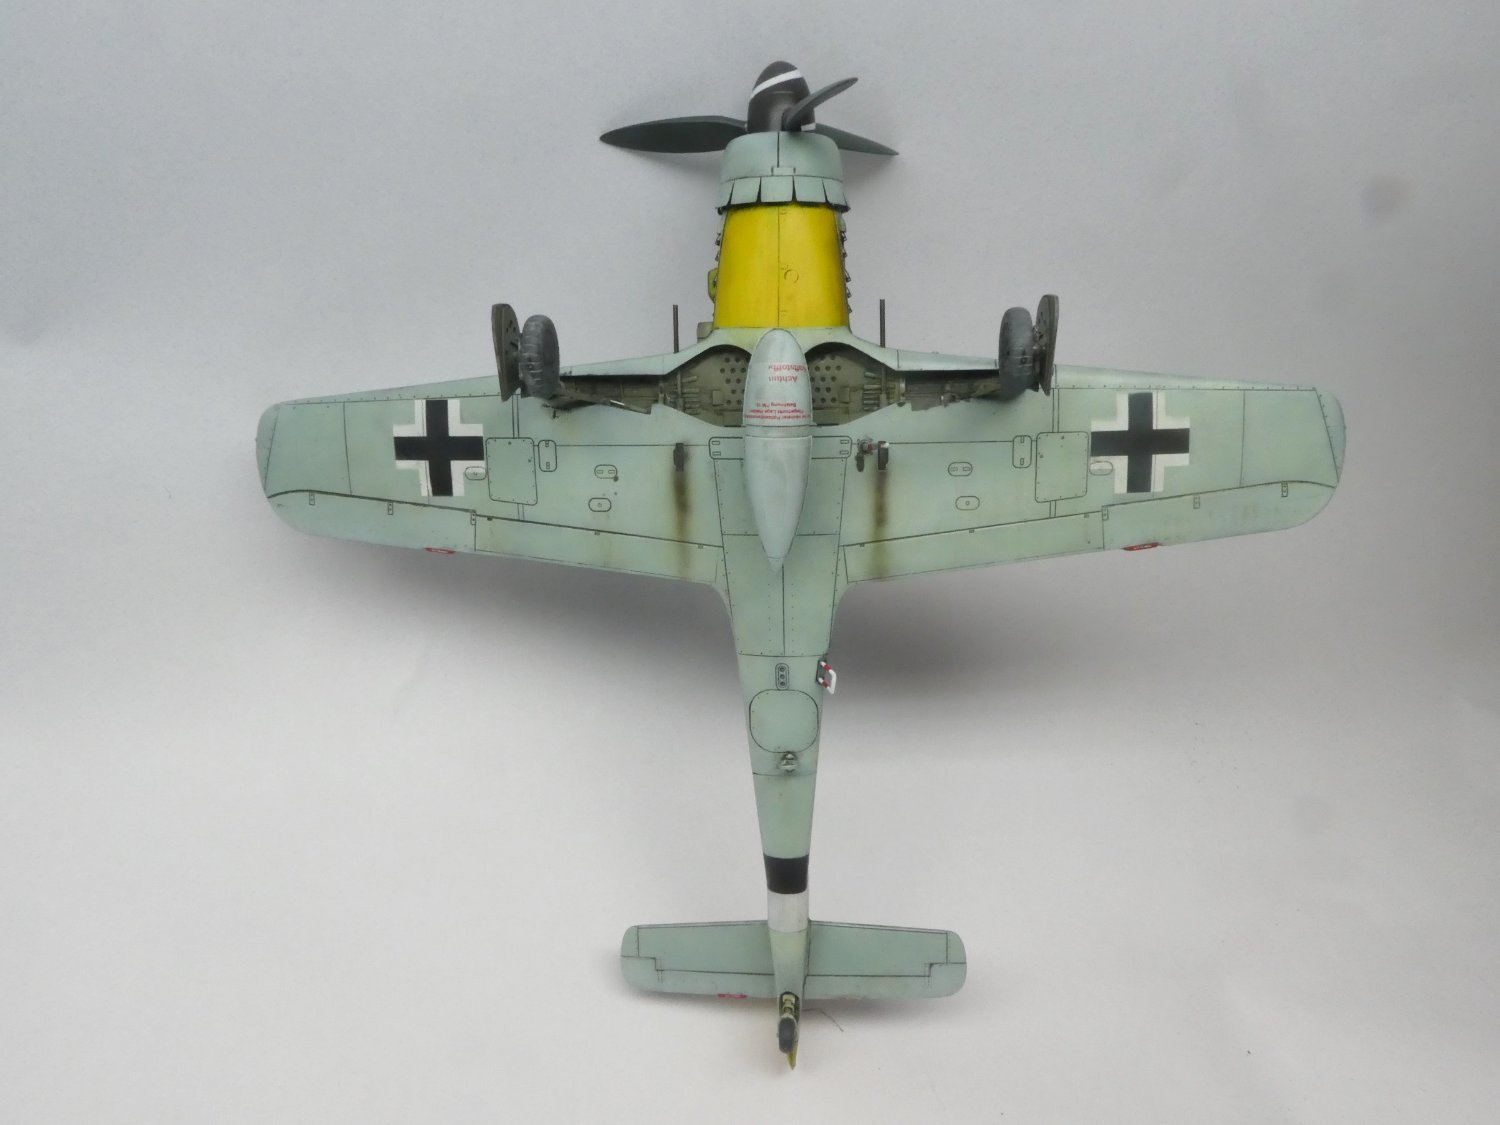
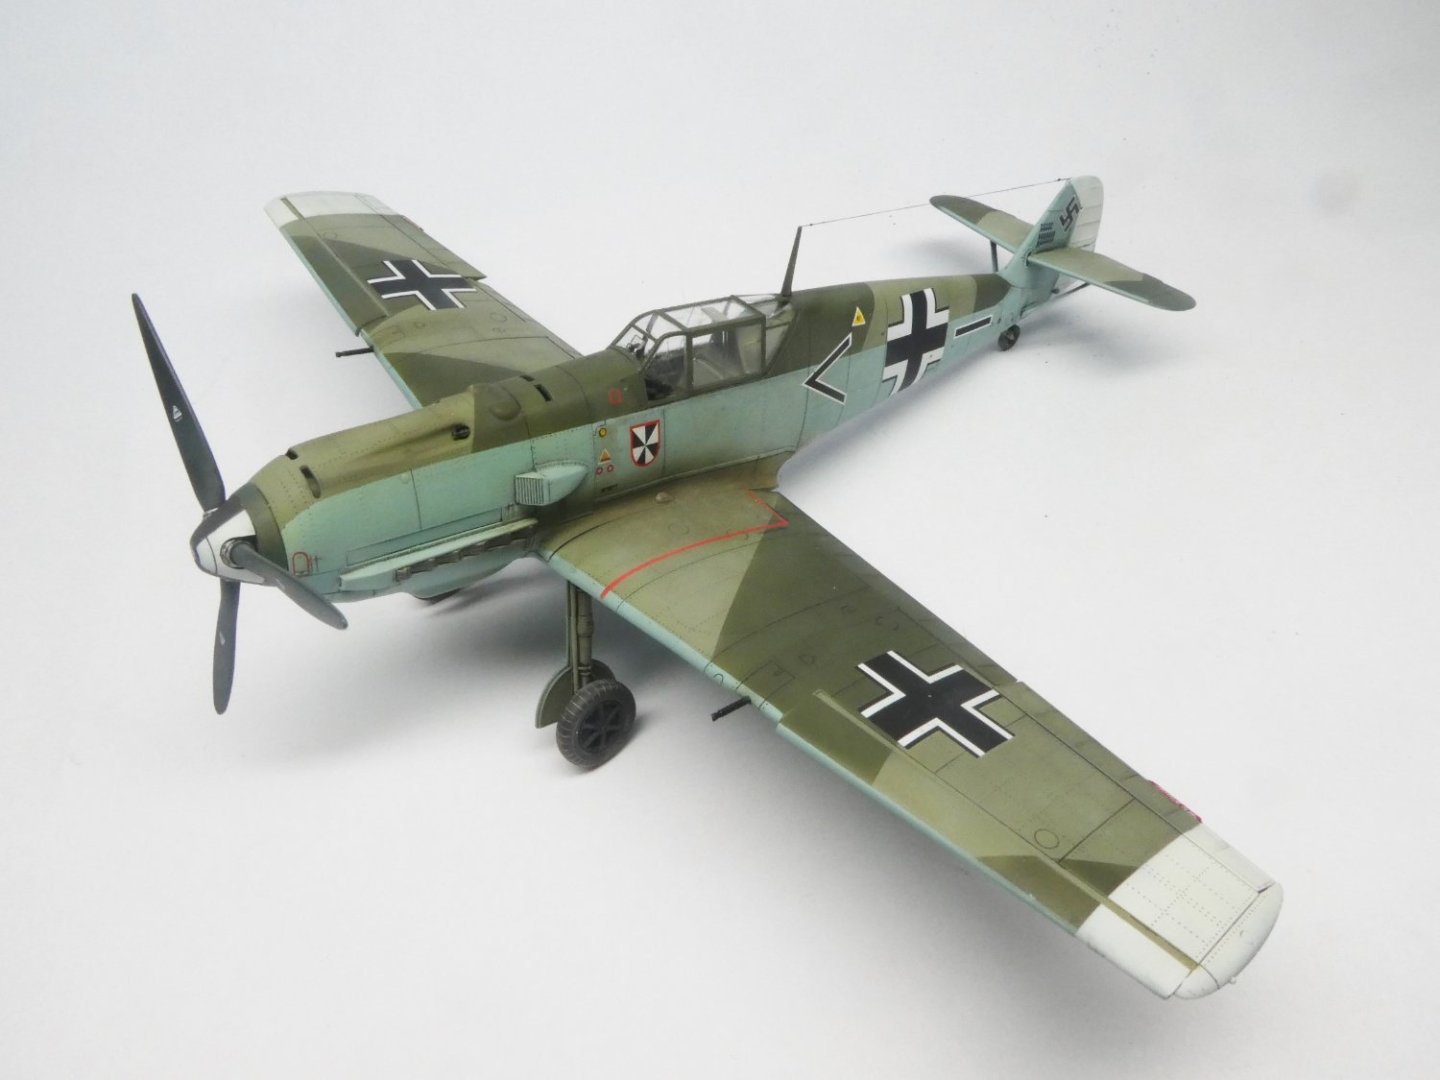
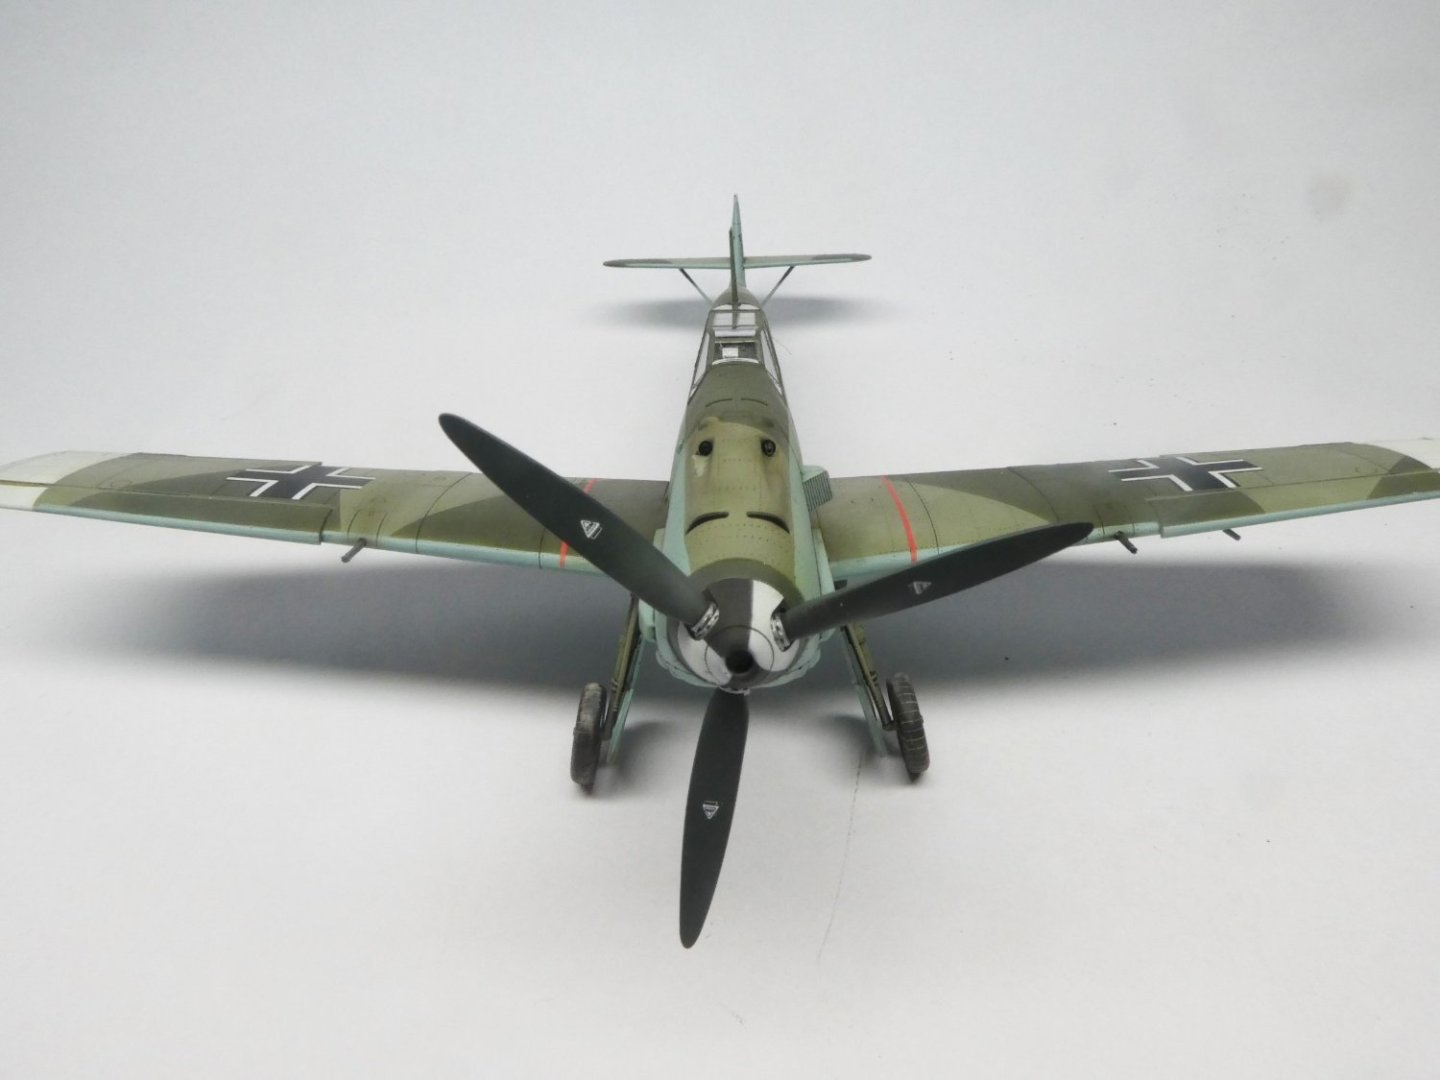
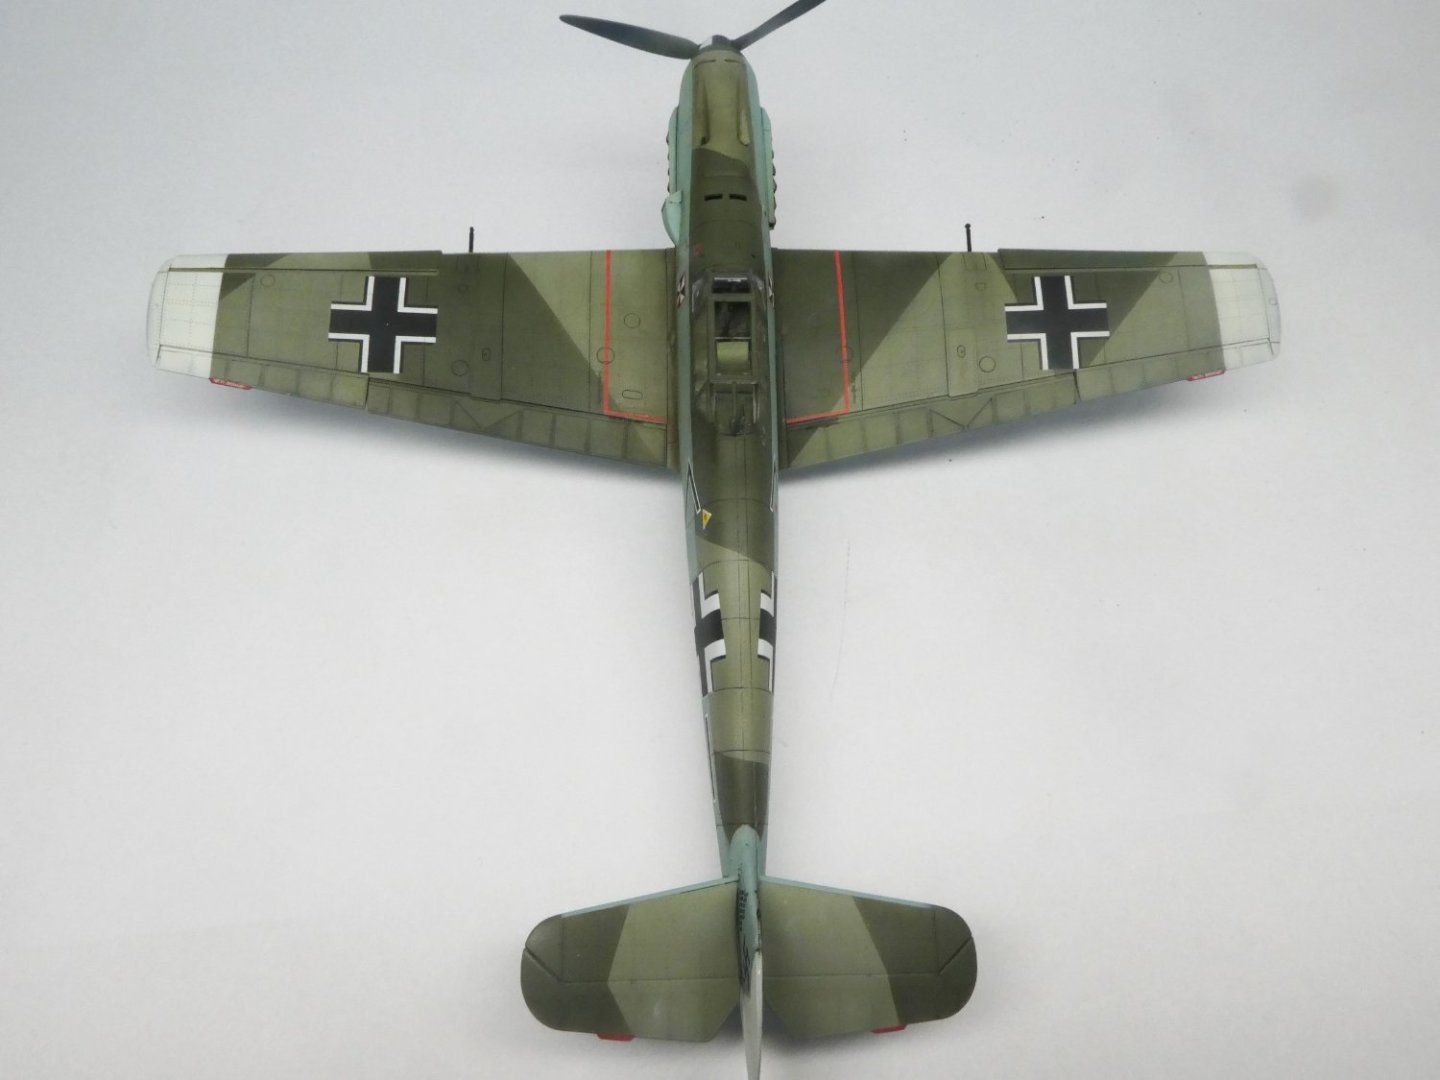
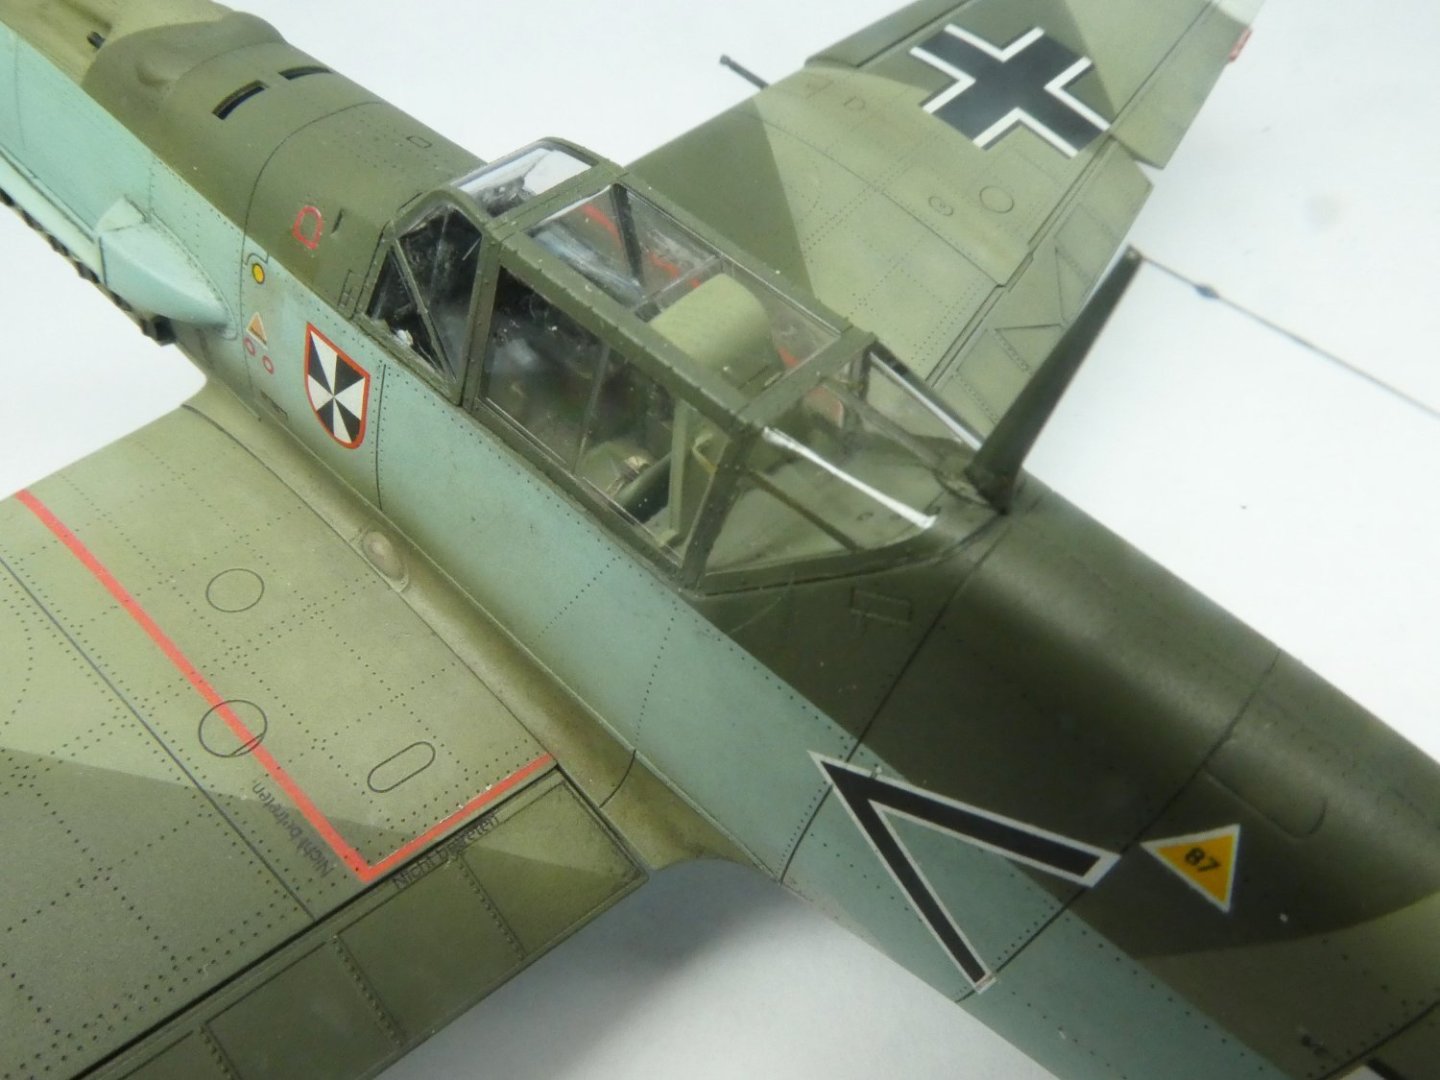
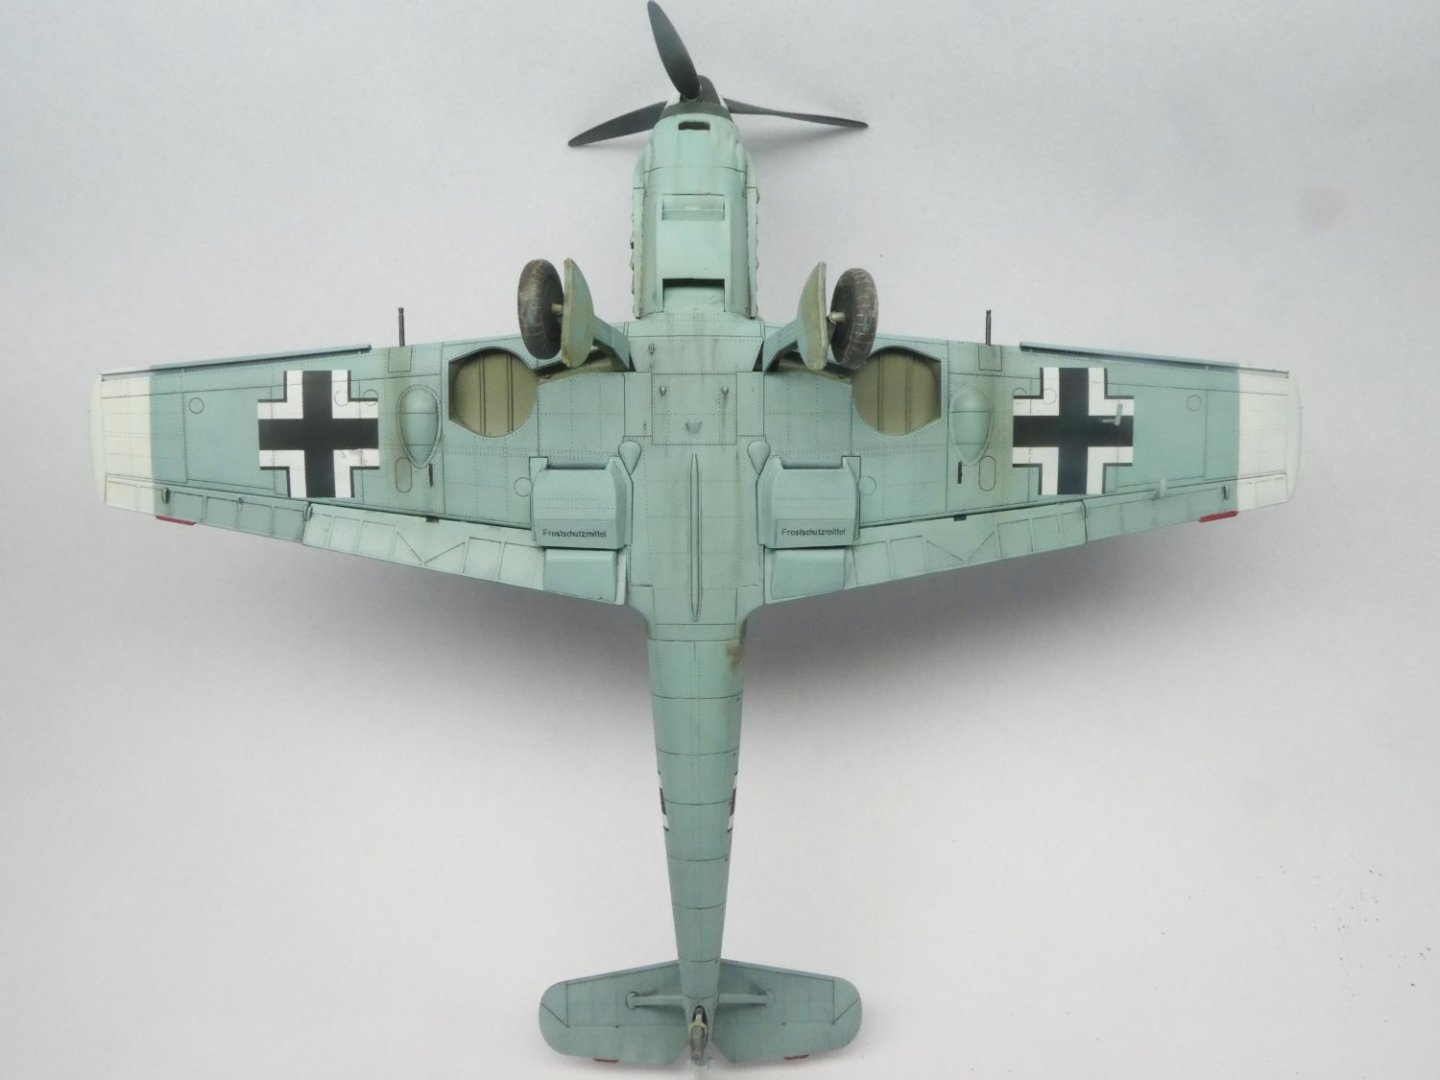
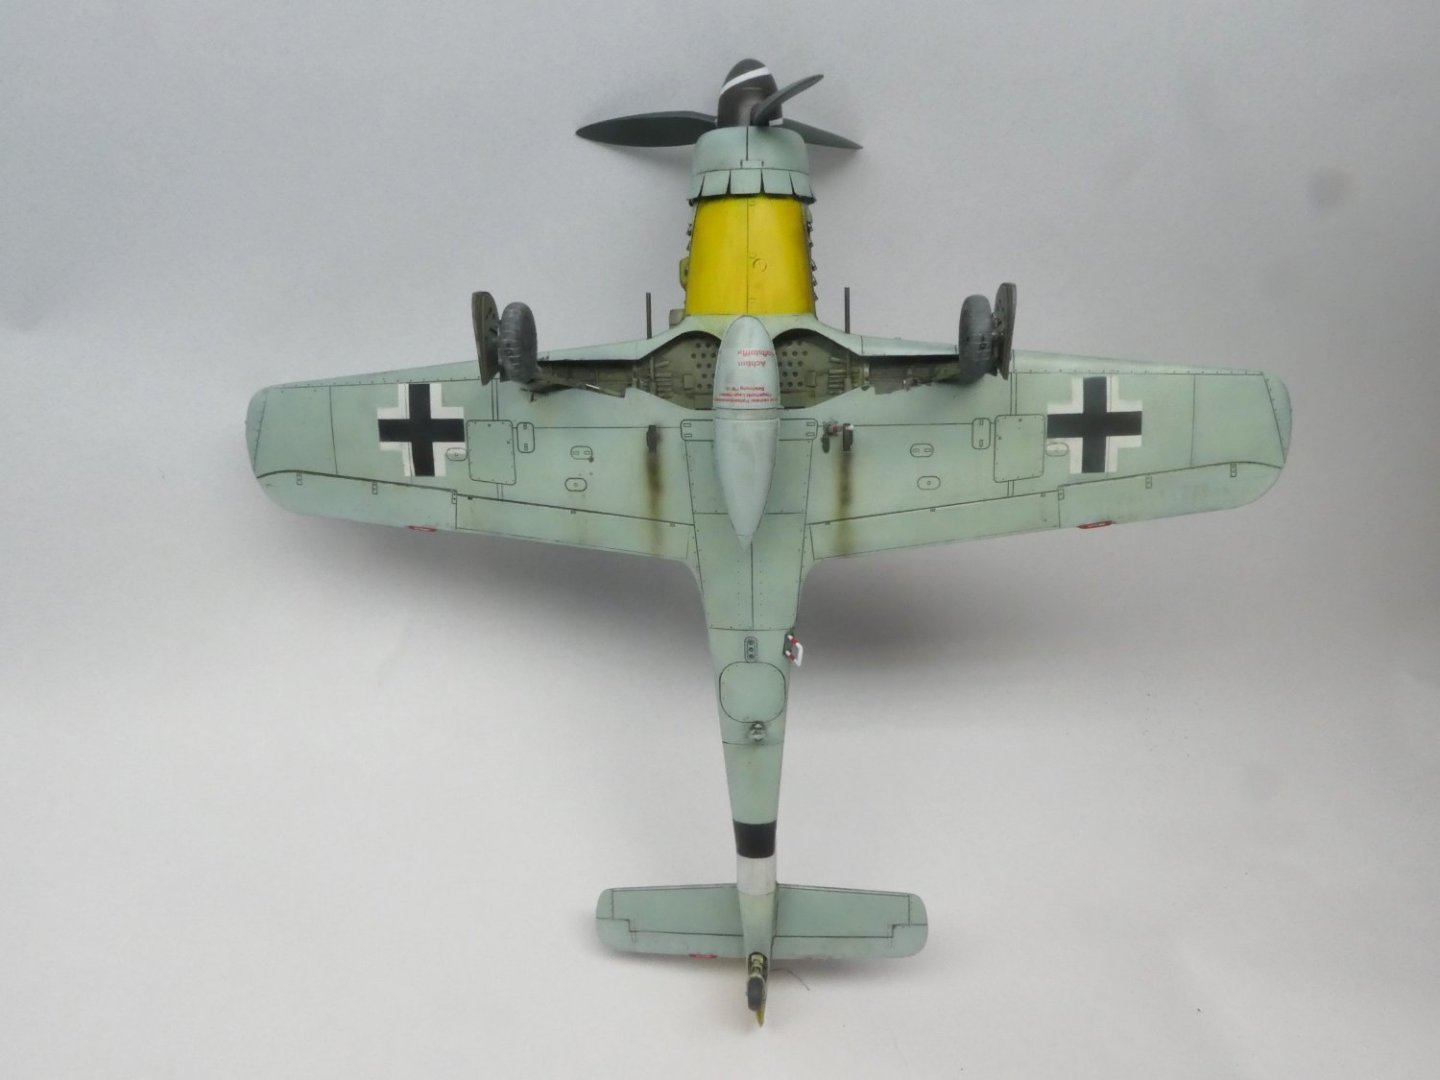
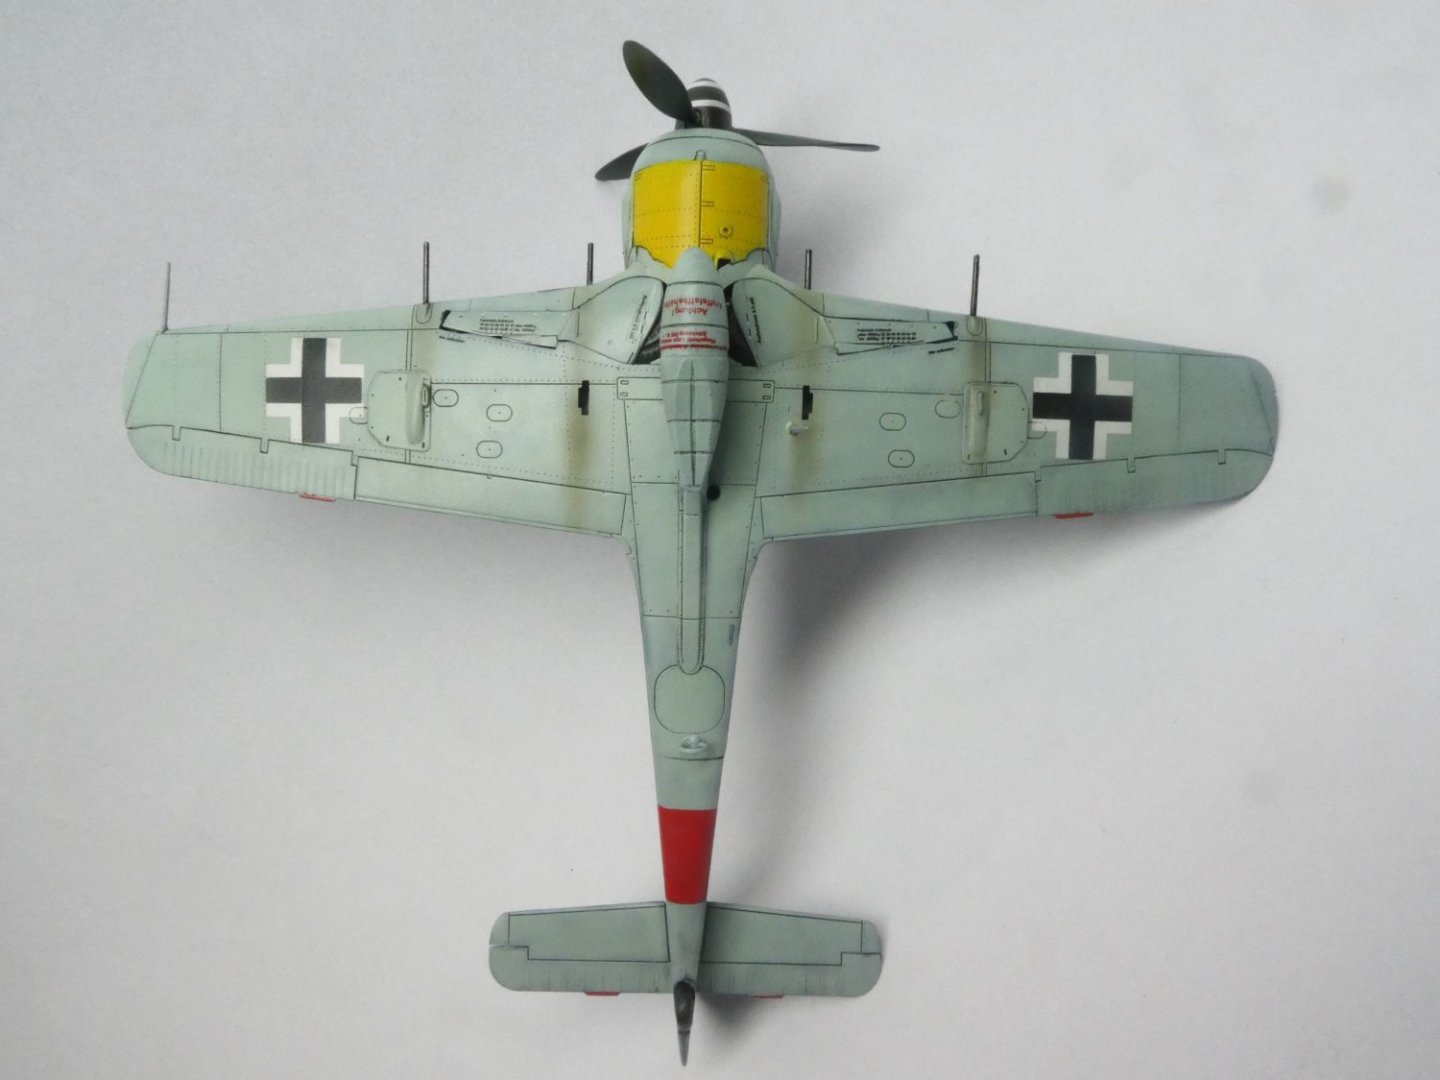
This is a BF109 E4 that was shout down during the Battle of Britain. The pilot Franz von Werra had a quite special history that I recommend to read. This is my last model up to date so I will post here more seldom. But when I have something finished, you will se it. I really hope you enjoy these kind of photos. Model: BF 109E4 Scale: 1:48 Manufacture: Eduard Extras: None Colors: MRP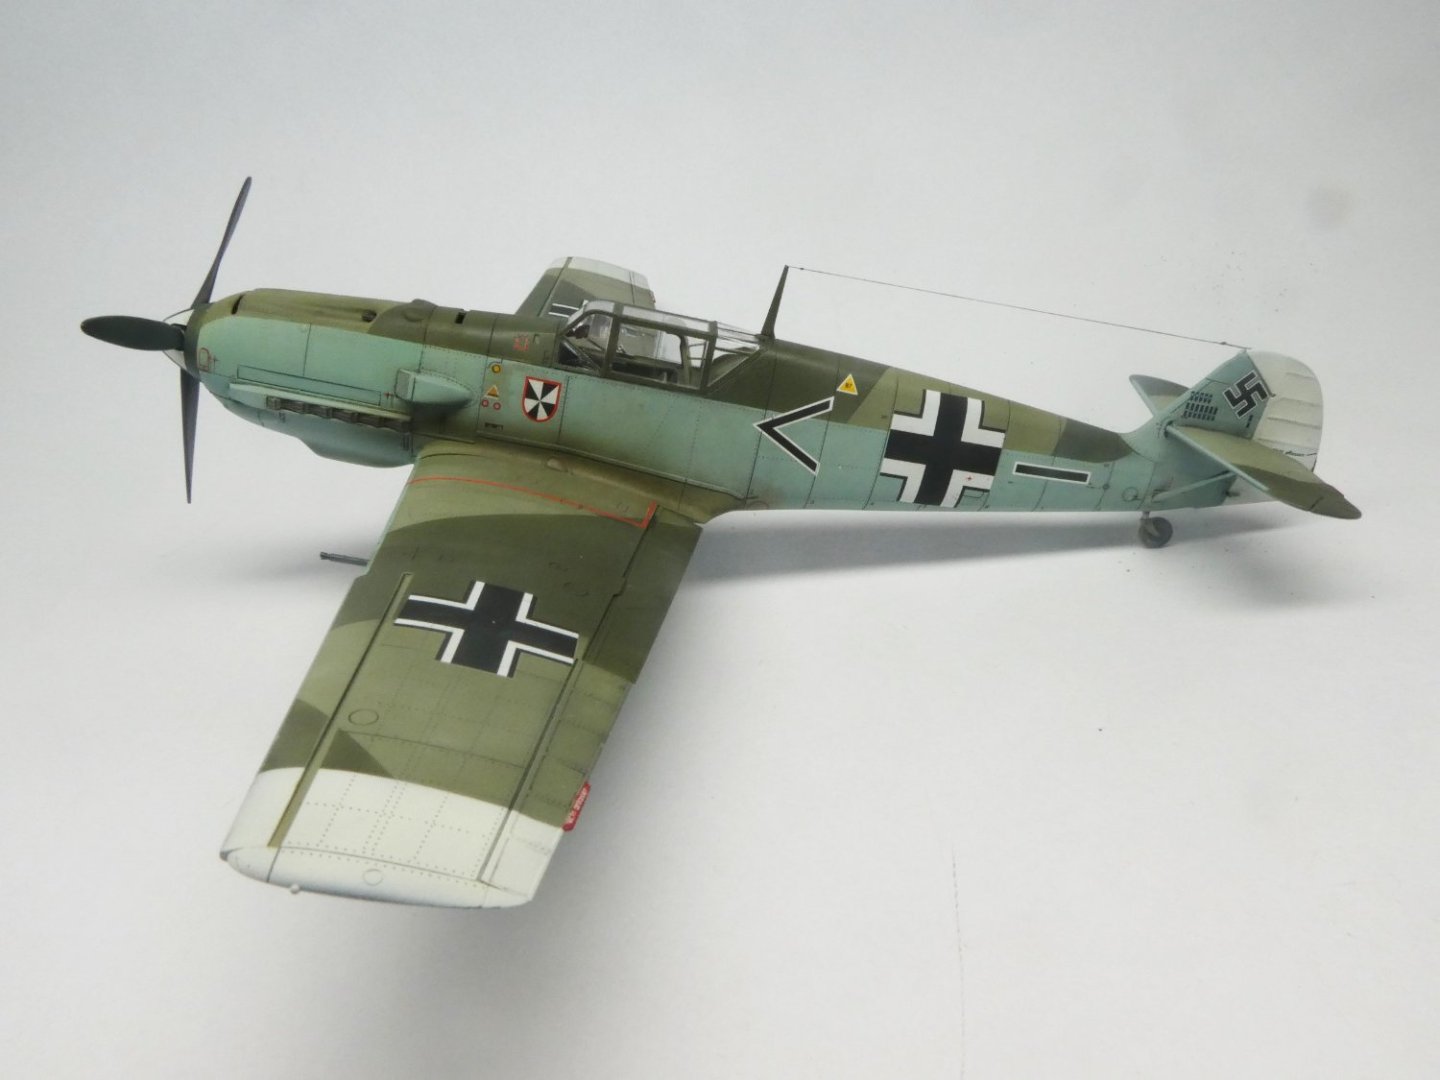

-
Airplanes and Tanks in plastic by Jörgen
Jörgen replied to Jörgen's topic in Non-ship/categorised builds
Wow, that was a very good looking tempest, and also the classic JF E And I also checked your Card Wildcat build. It looks really good and for me you are really good at it. I have never seen this side of the hobby before. -
Airplanes and Tanks in plastic by Jörgen
Jörgen replied to Jörgen's topic in Non-ship/categorised builds
I have never tried a card model. How is that compared to plastic or wood kits? -
Airplanes and Tanks in plastic by Jörgen
Jörgen replied to Jörgen's topic in Non-ship/categorised builds
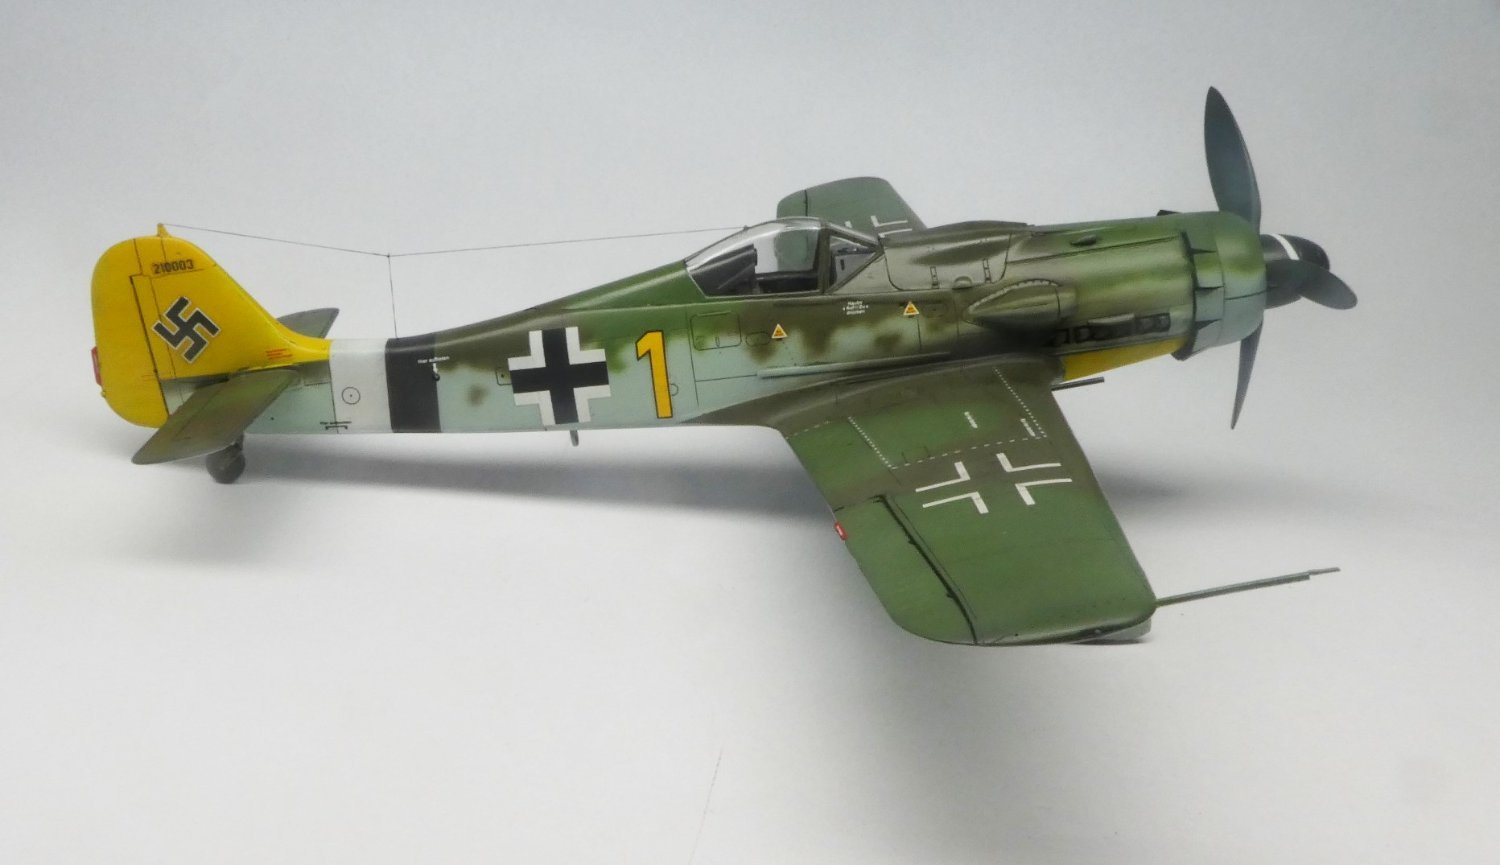
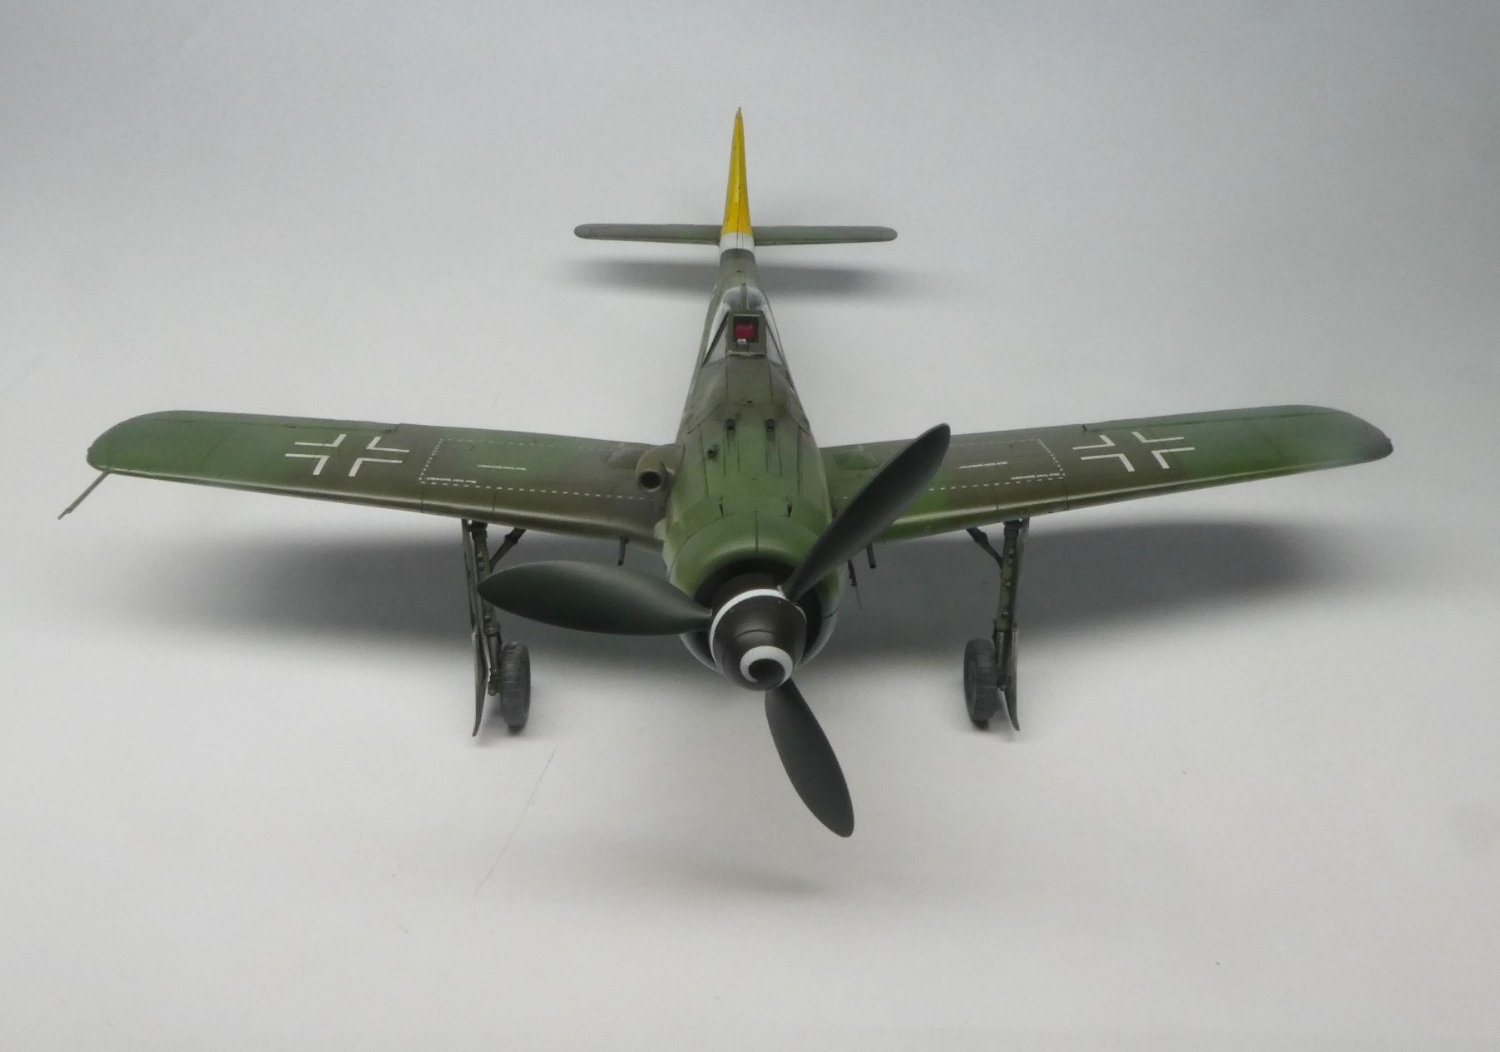
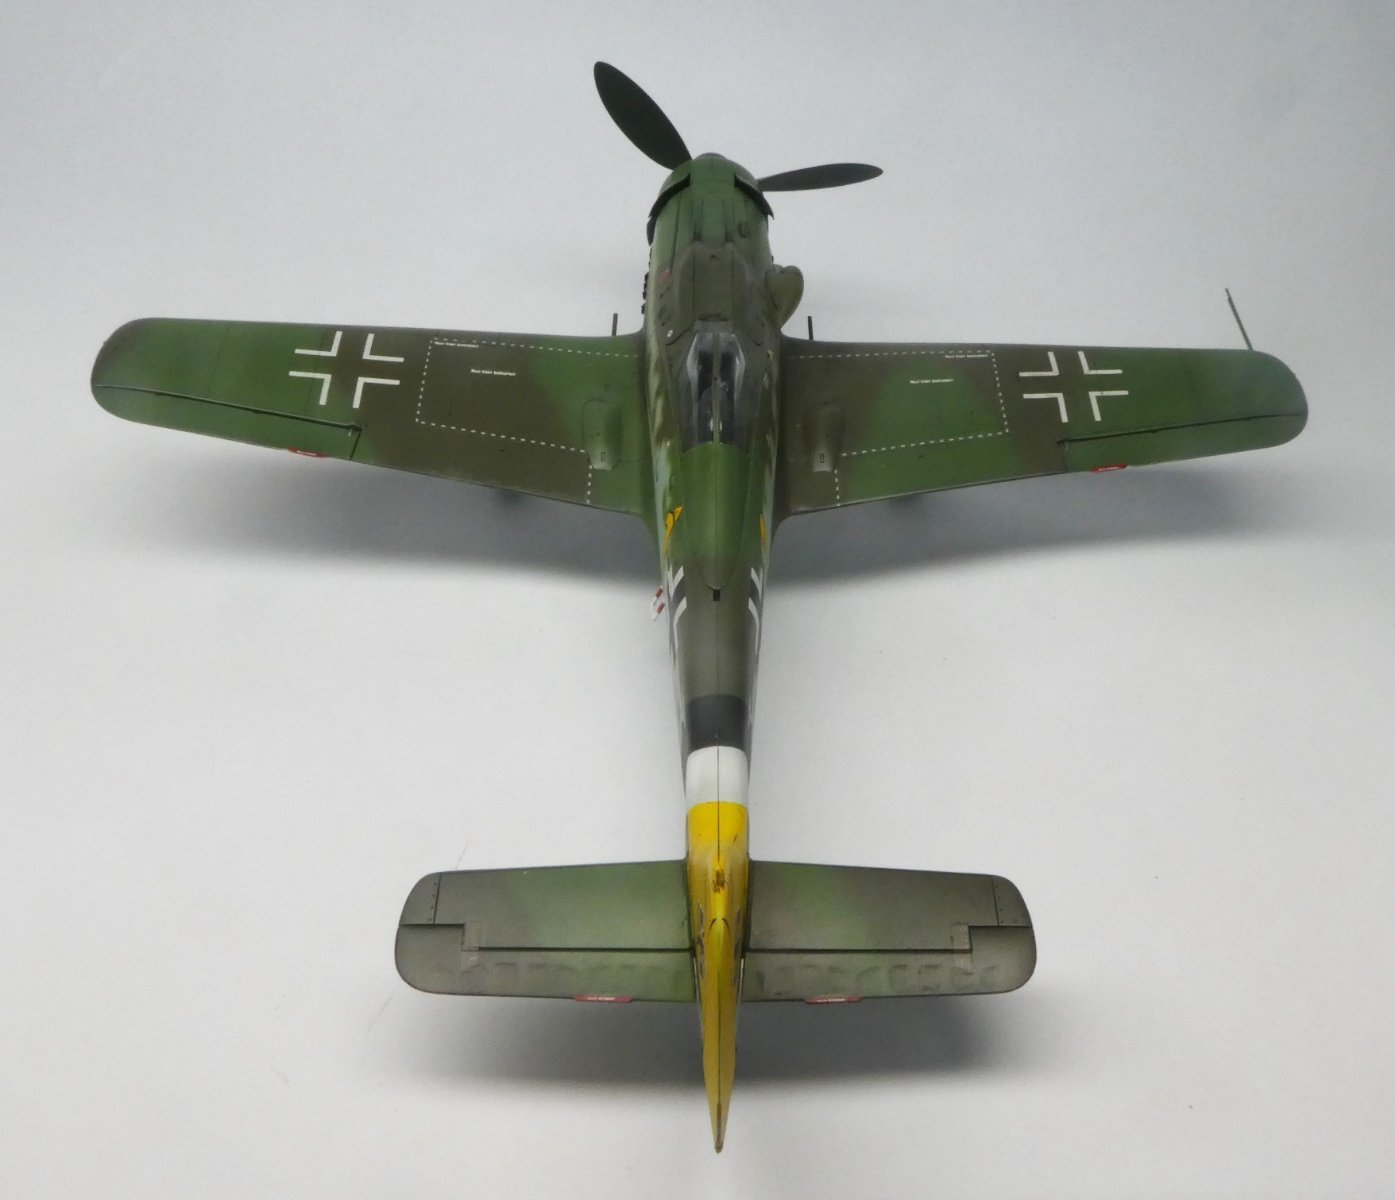
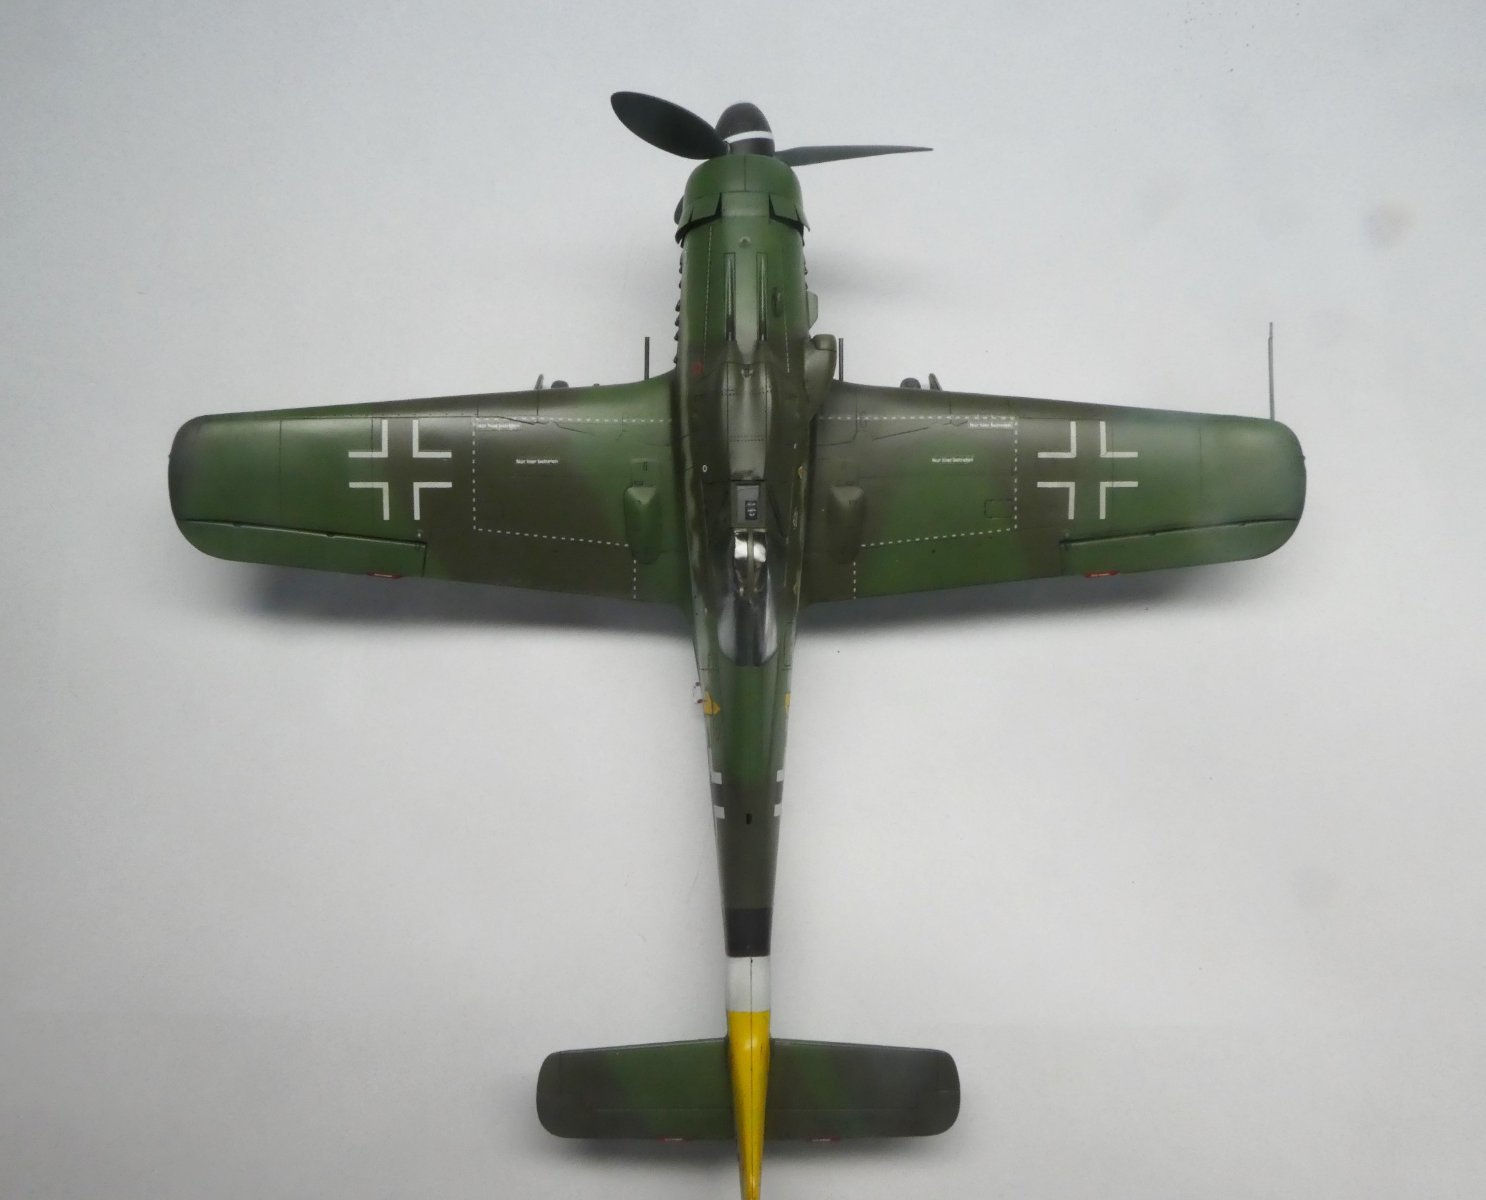
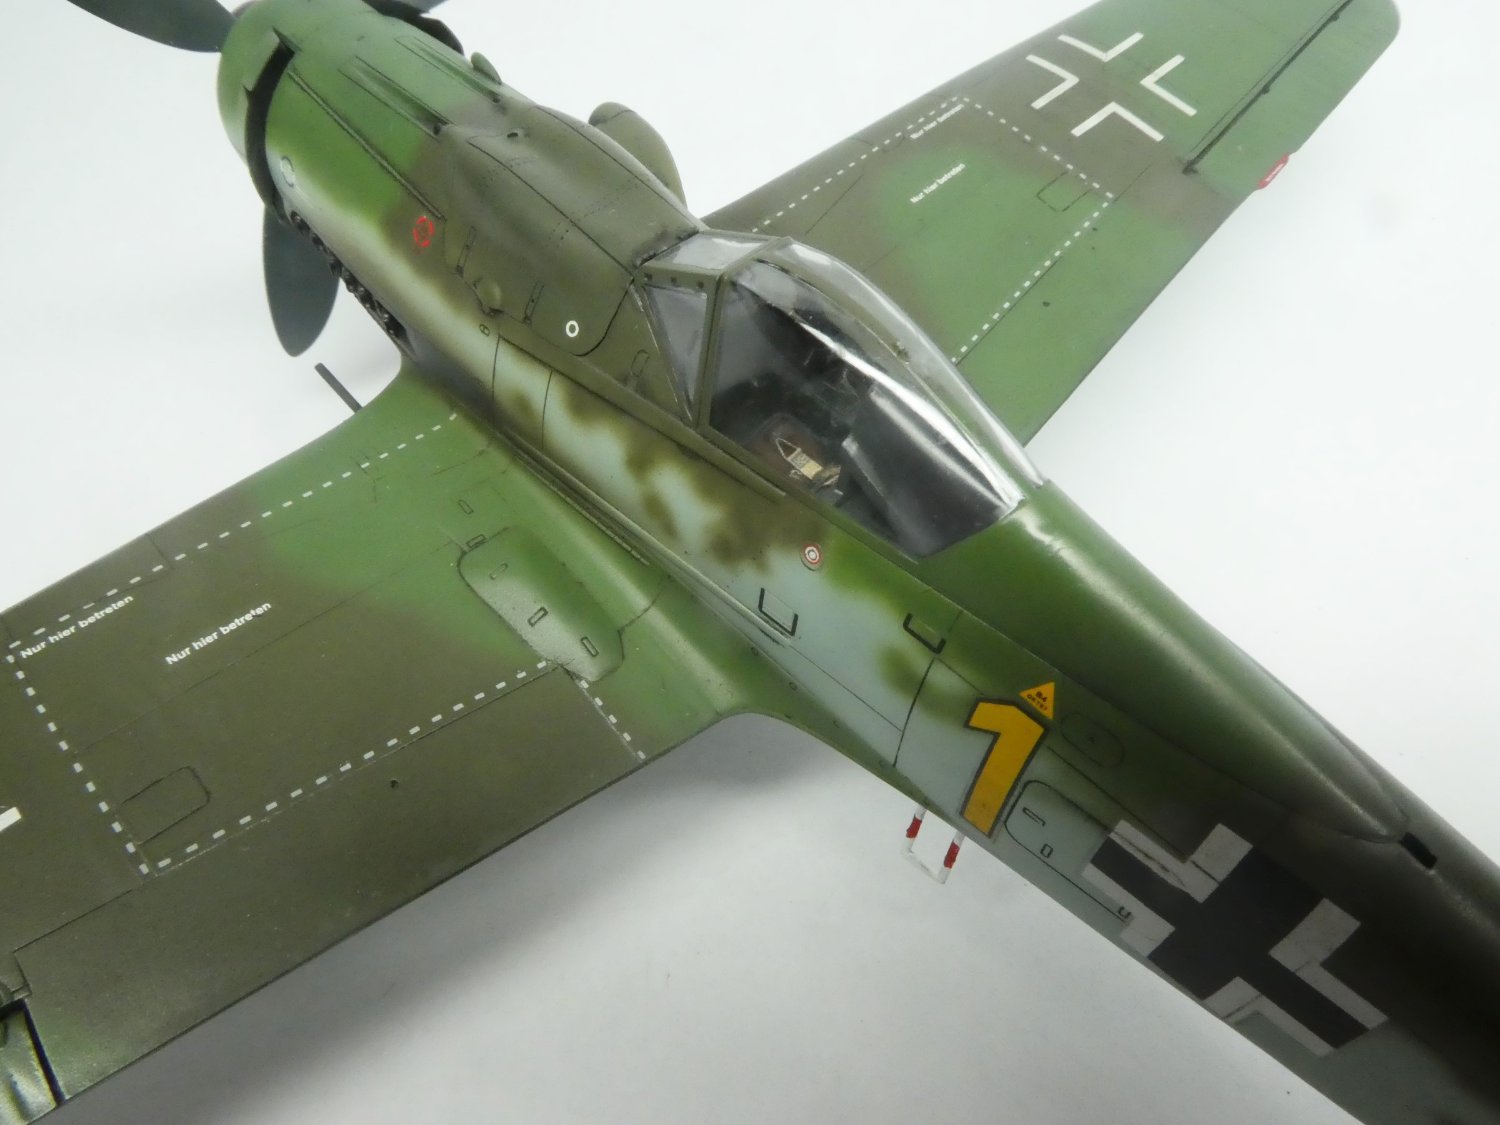
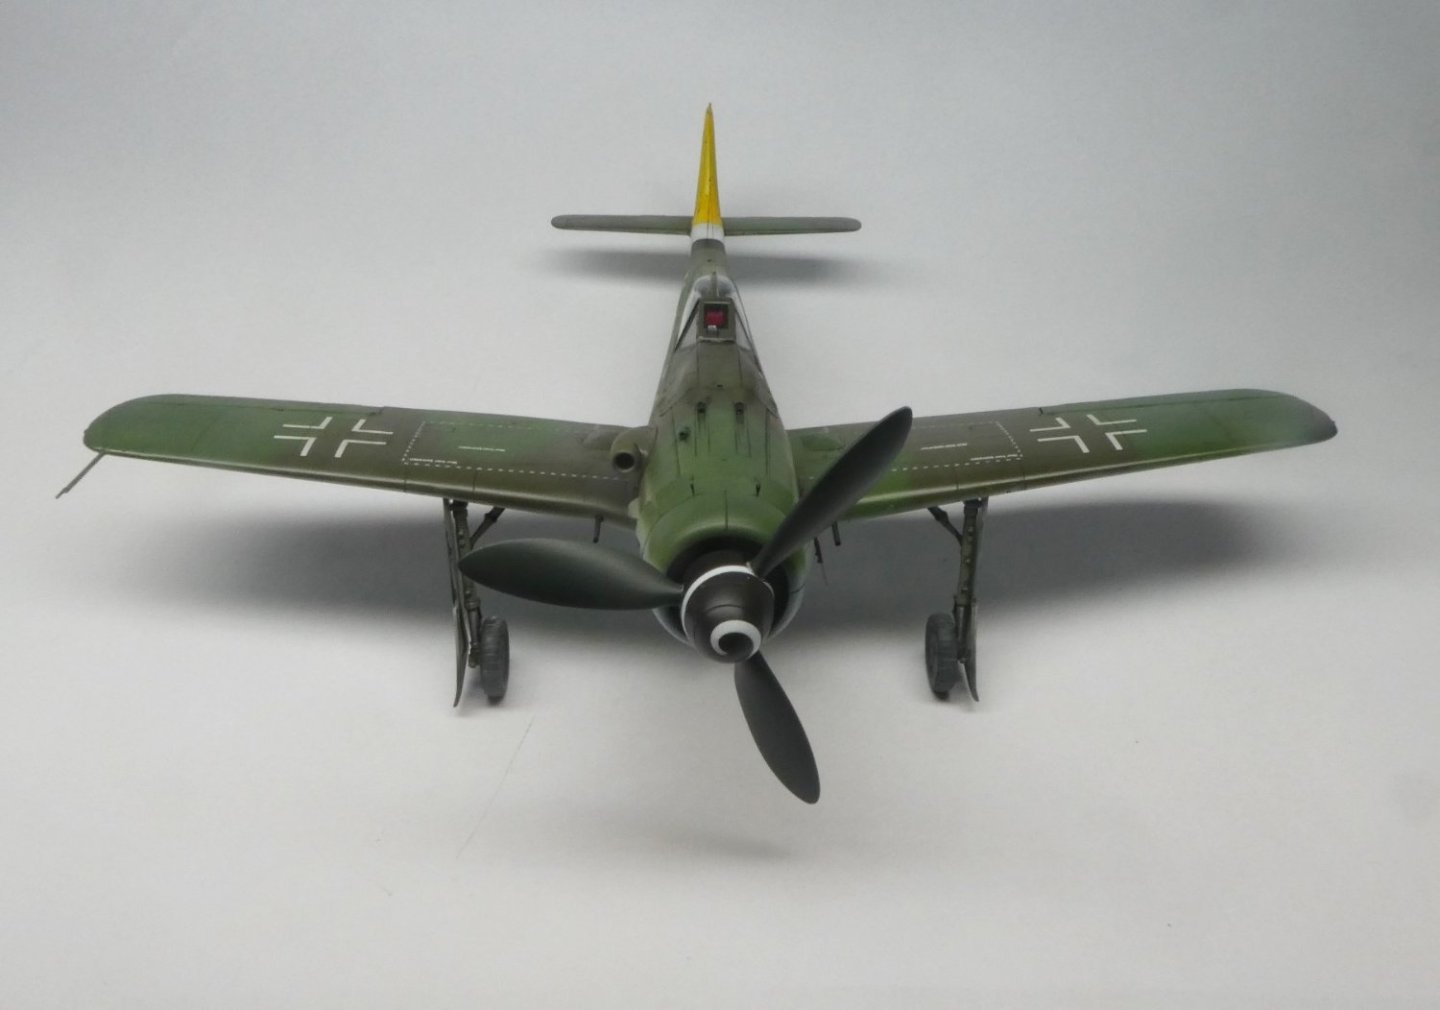
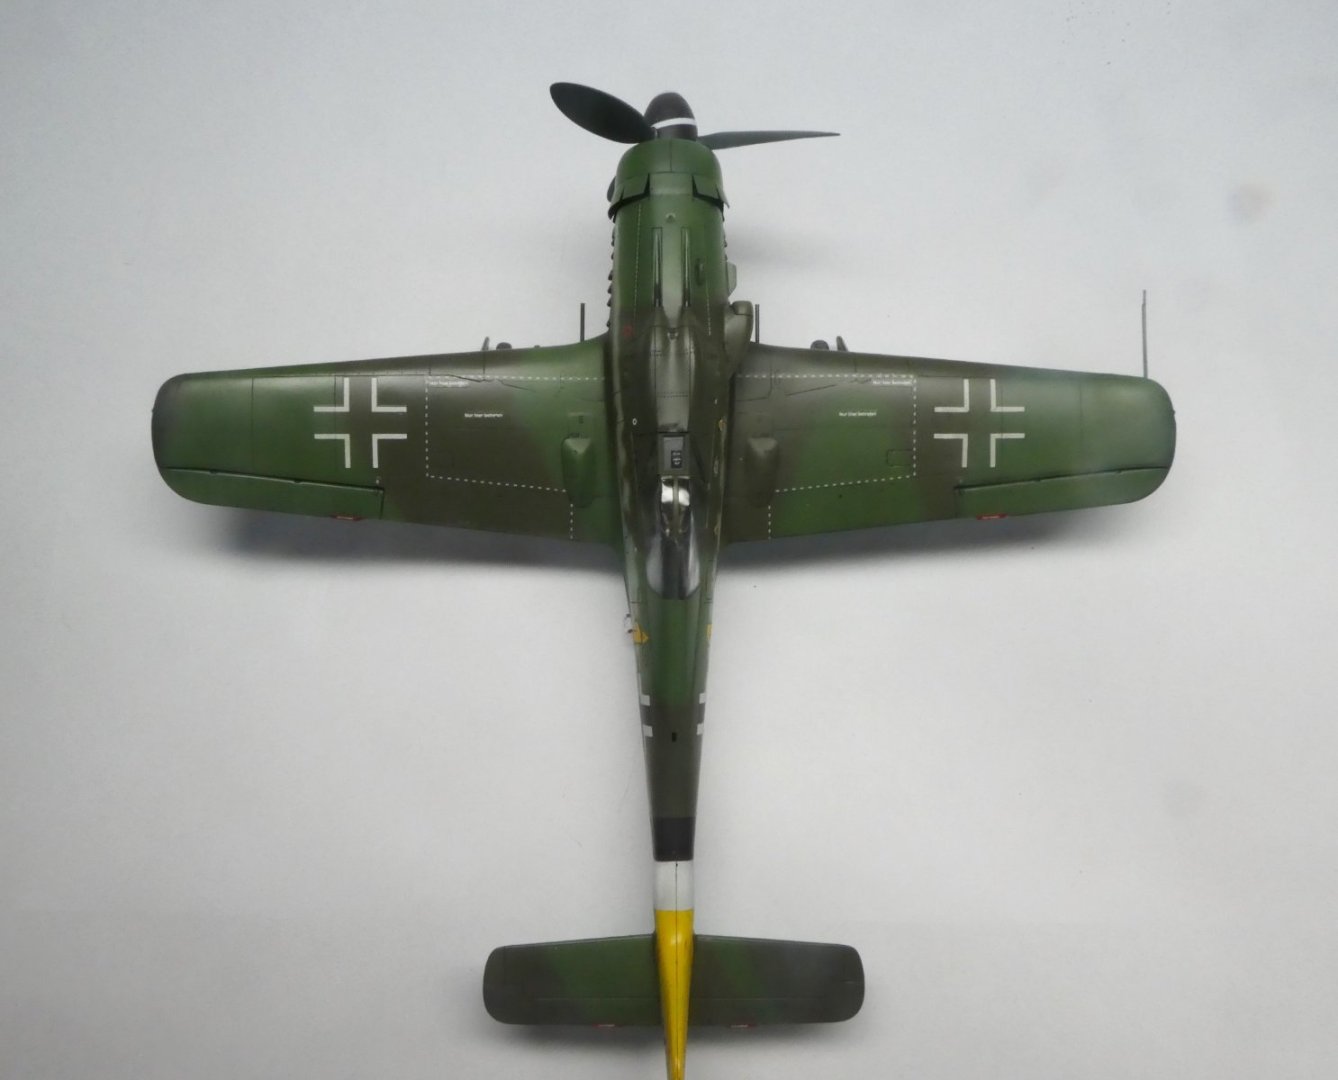
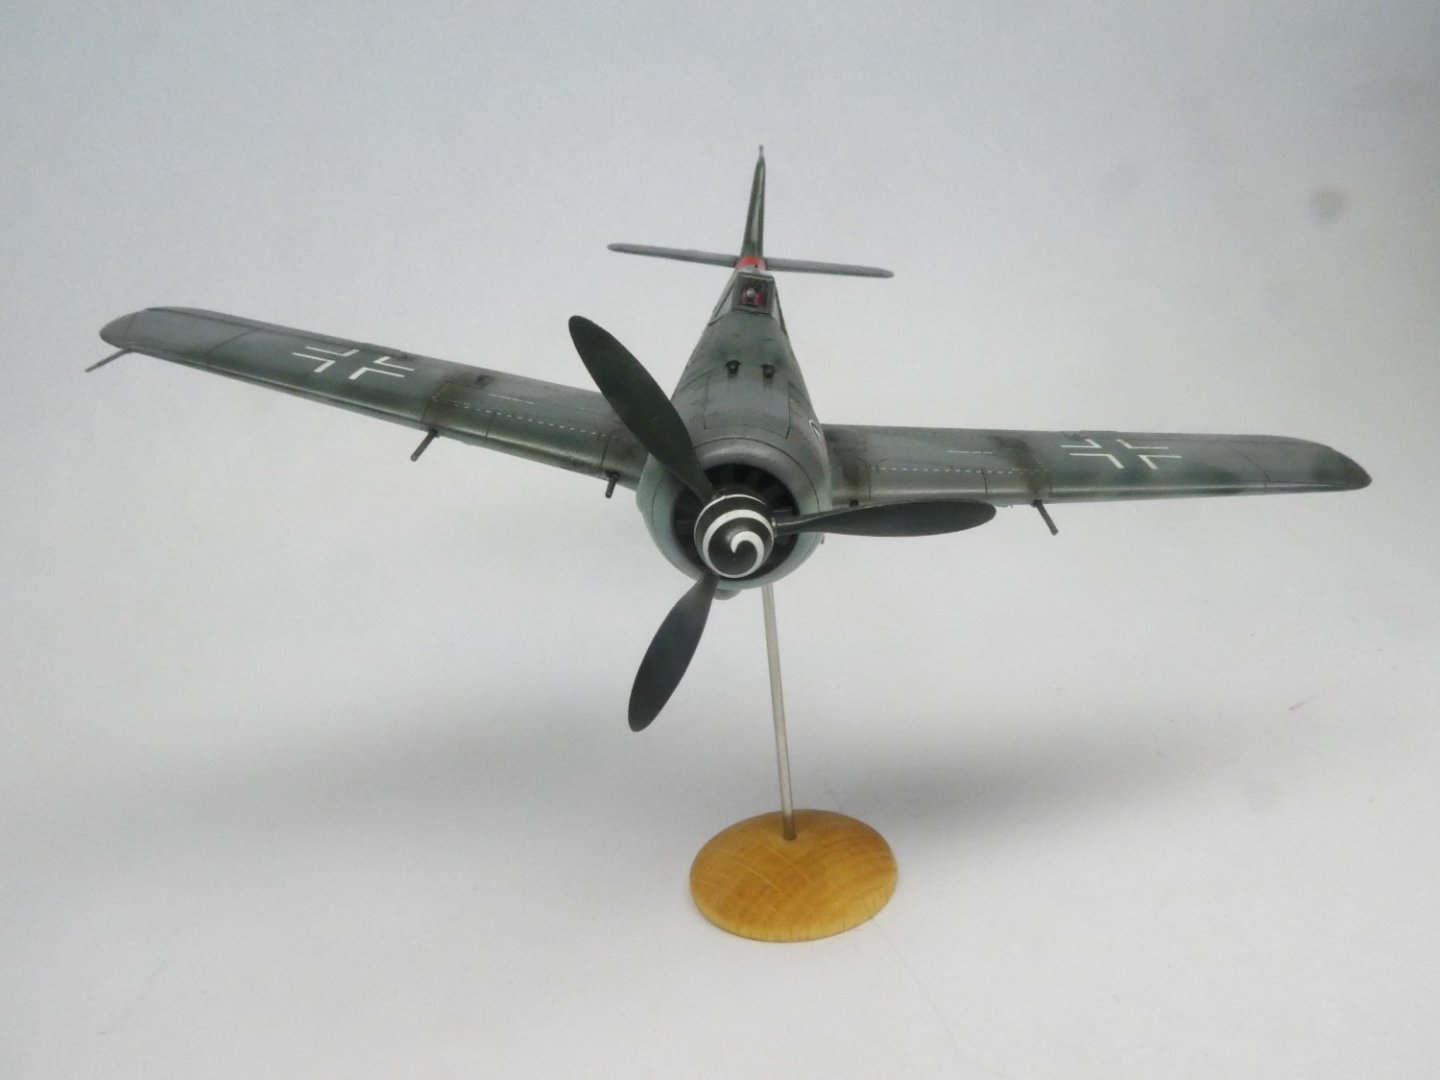
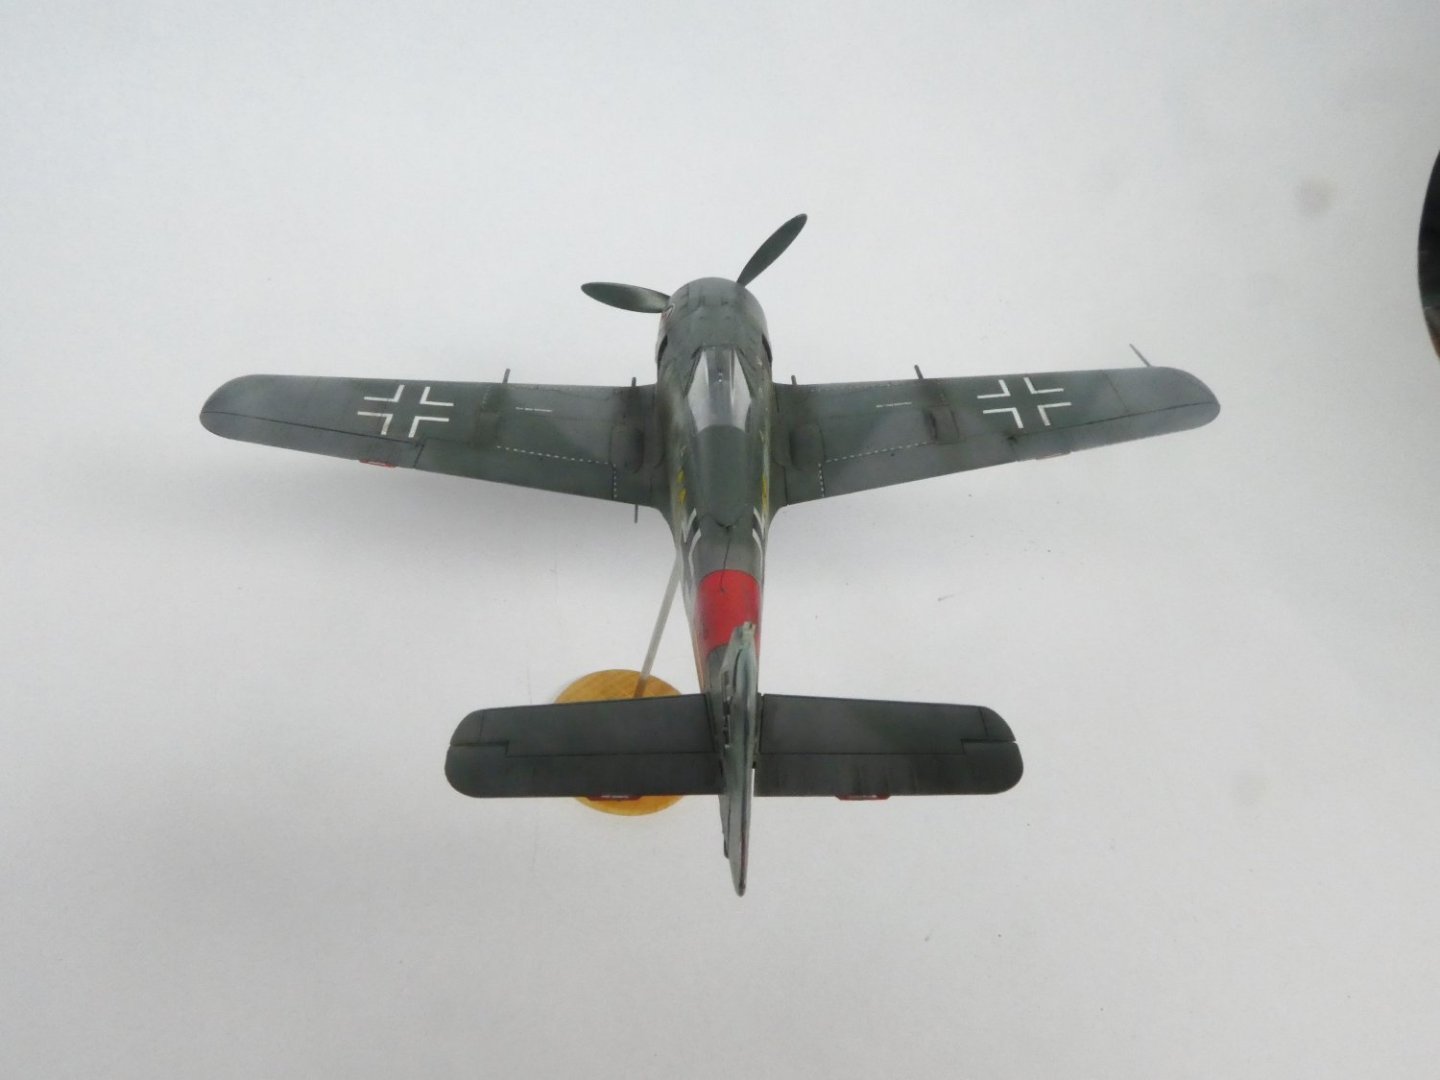
Pierre Closterman was shot down by the end of the war in his Hawker Tempest by Hans Dortenmann who according to the book was little of a Tempest specialist. (Pierres Hawker Tempest is waiting on the shelf to be built) This is Dortenmanns FW 190 D9 at the time of the air victory. I really like the color shades of the late war RLM 76/81/82. Model: Focke Wulf 190 D9 Scale: 1:48 Manufacture: Tamiya Extras: None Colors: MRP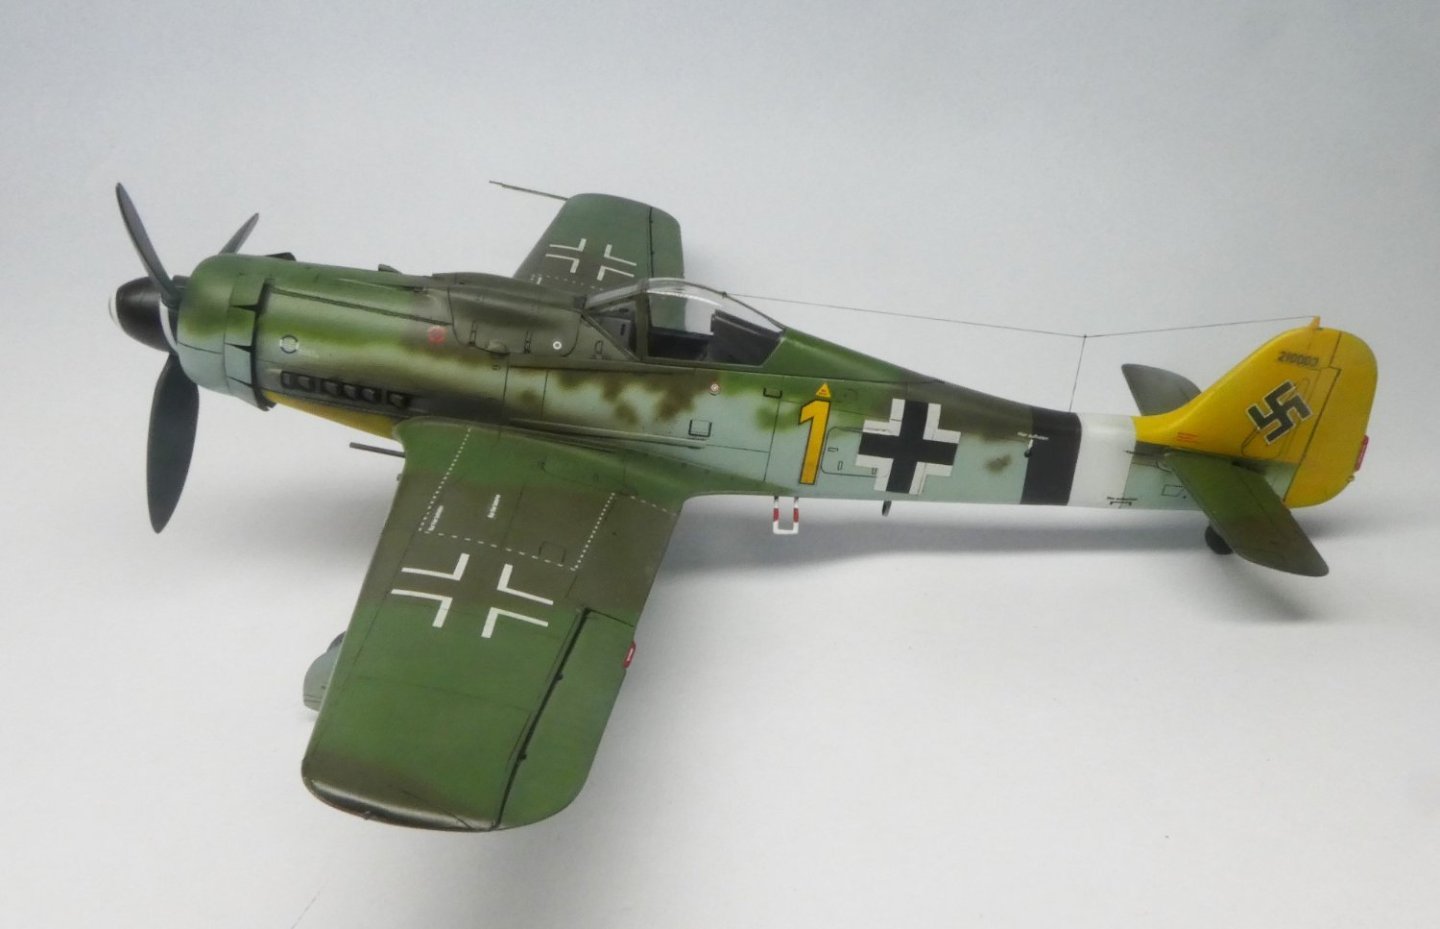


- 60 replies
-
- 11
-
-
Airplanes and Tanks in plastic by Jörgen
Jörgen replied to Jörgen's topic in Non-ship/categorised builds
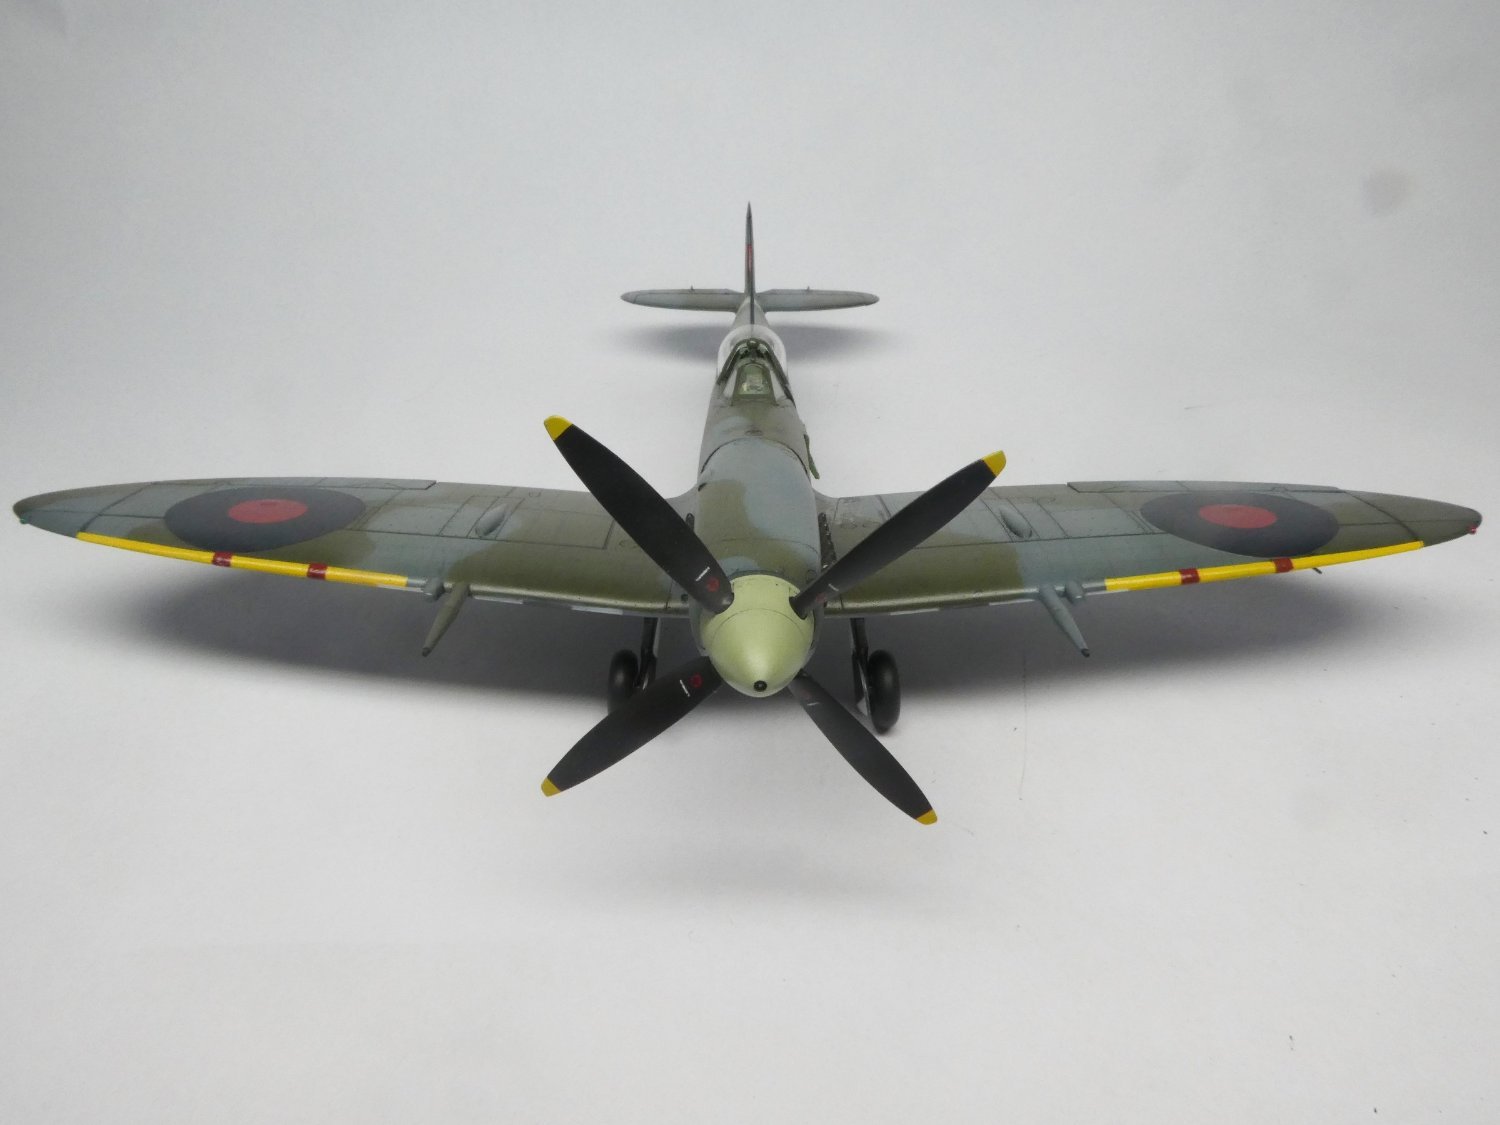
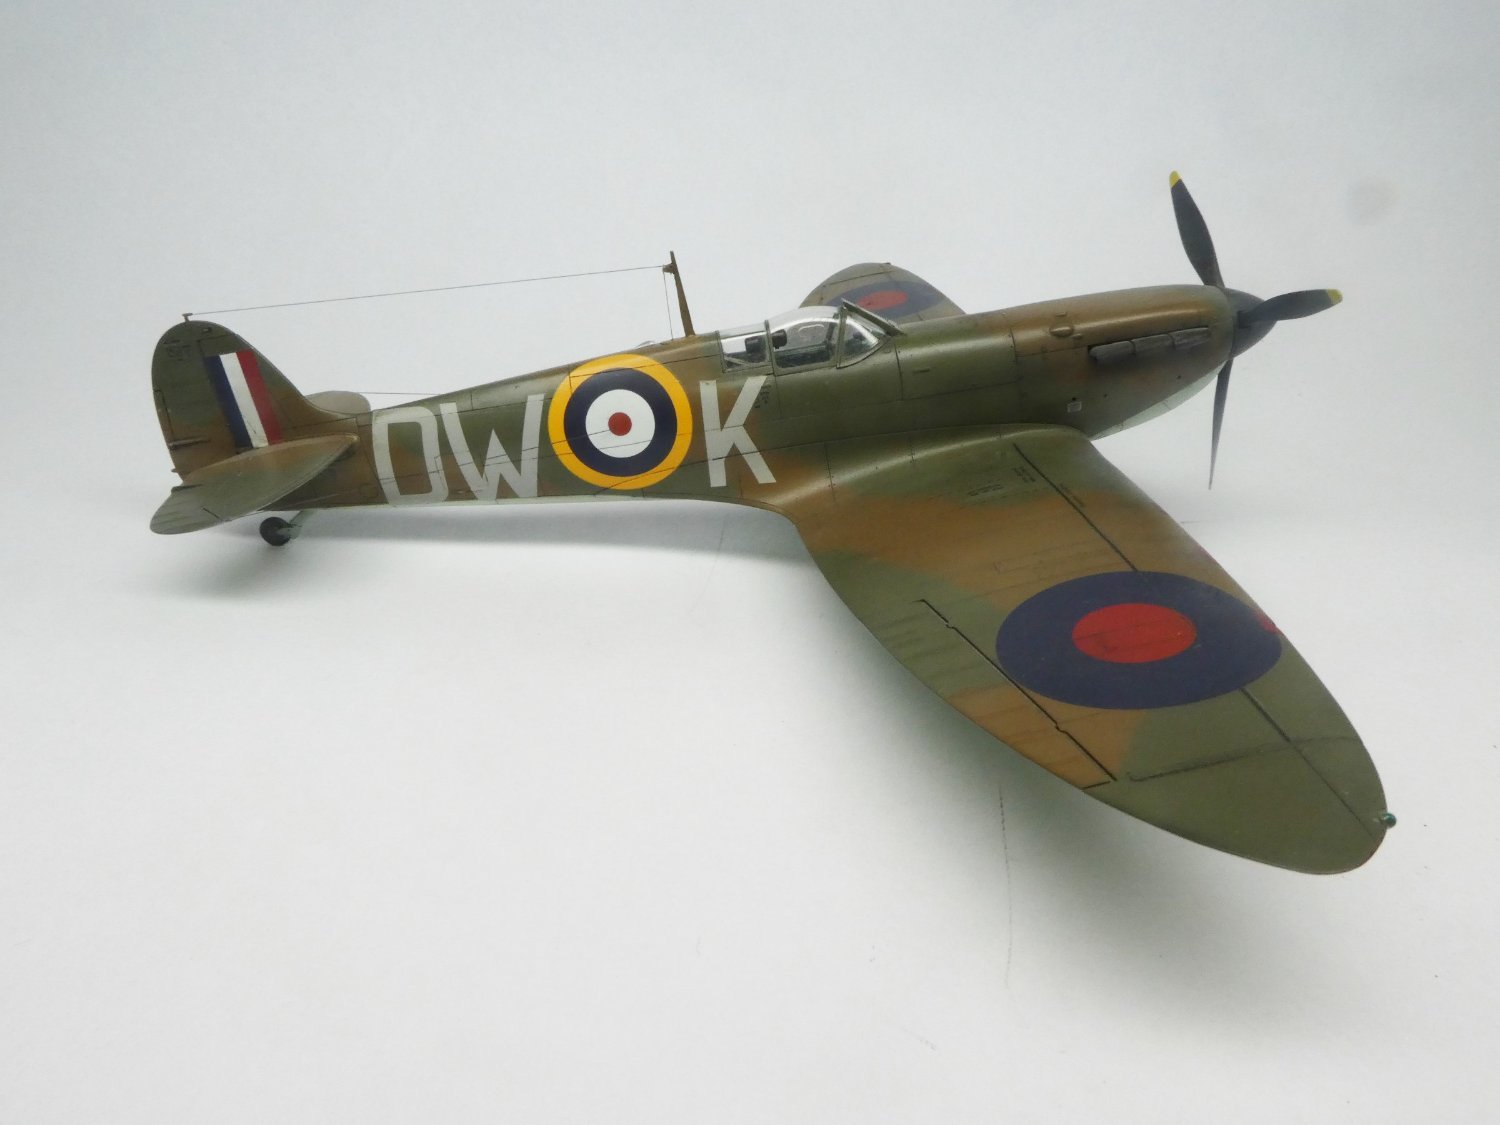
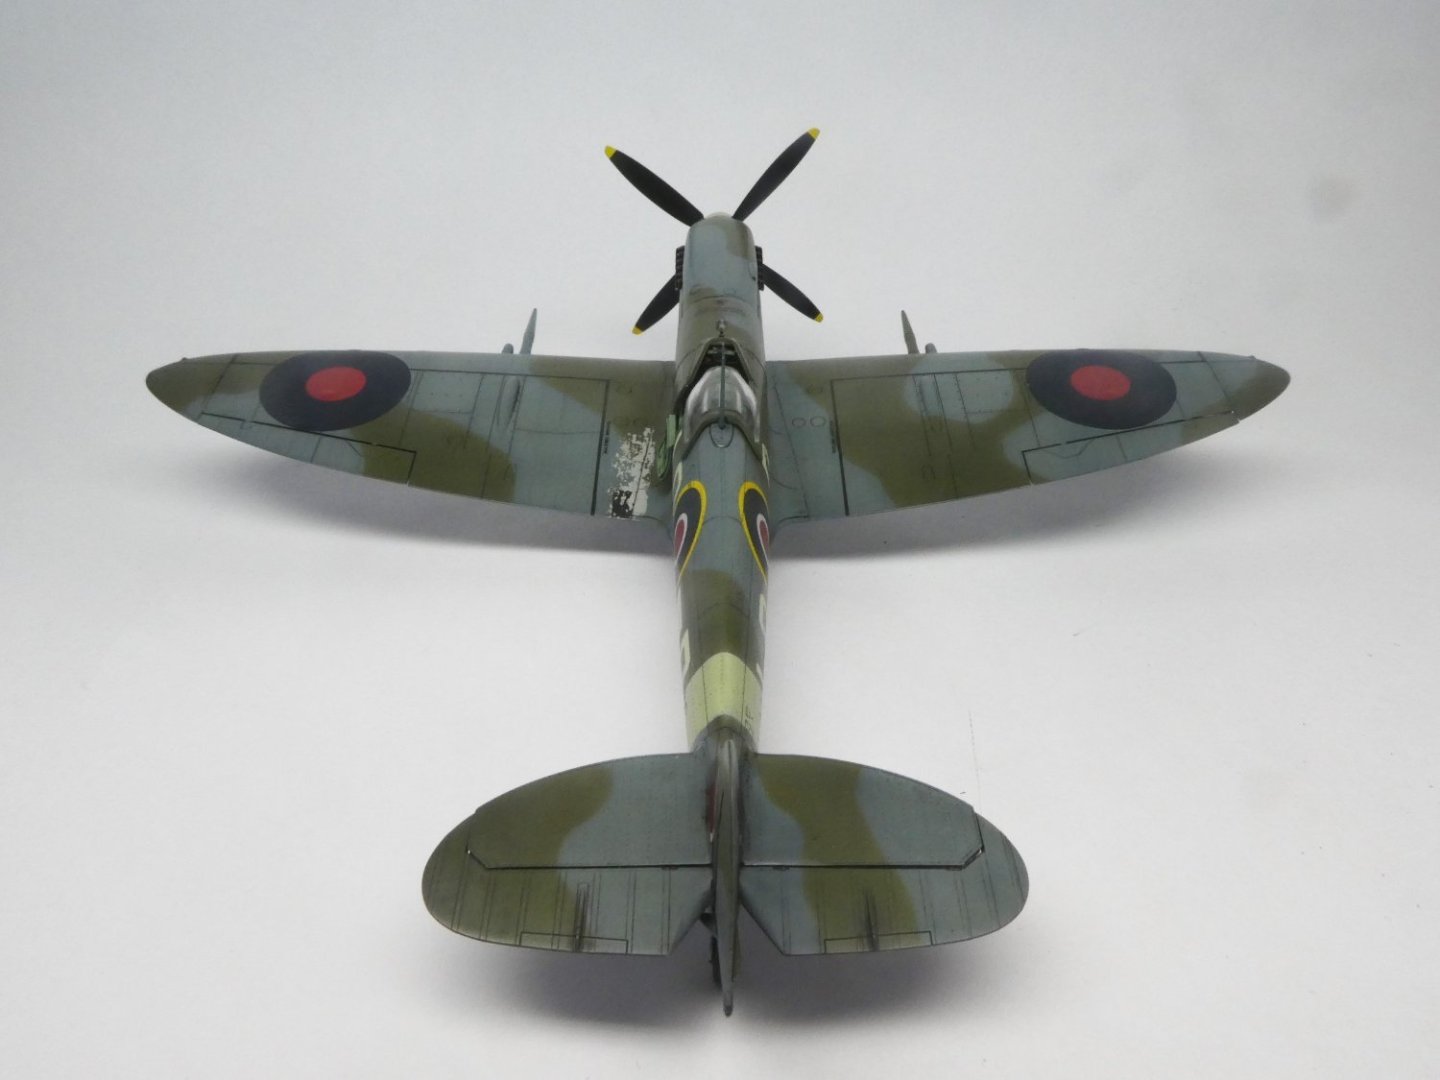
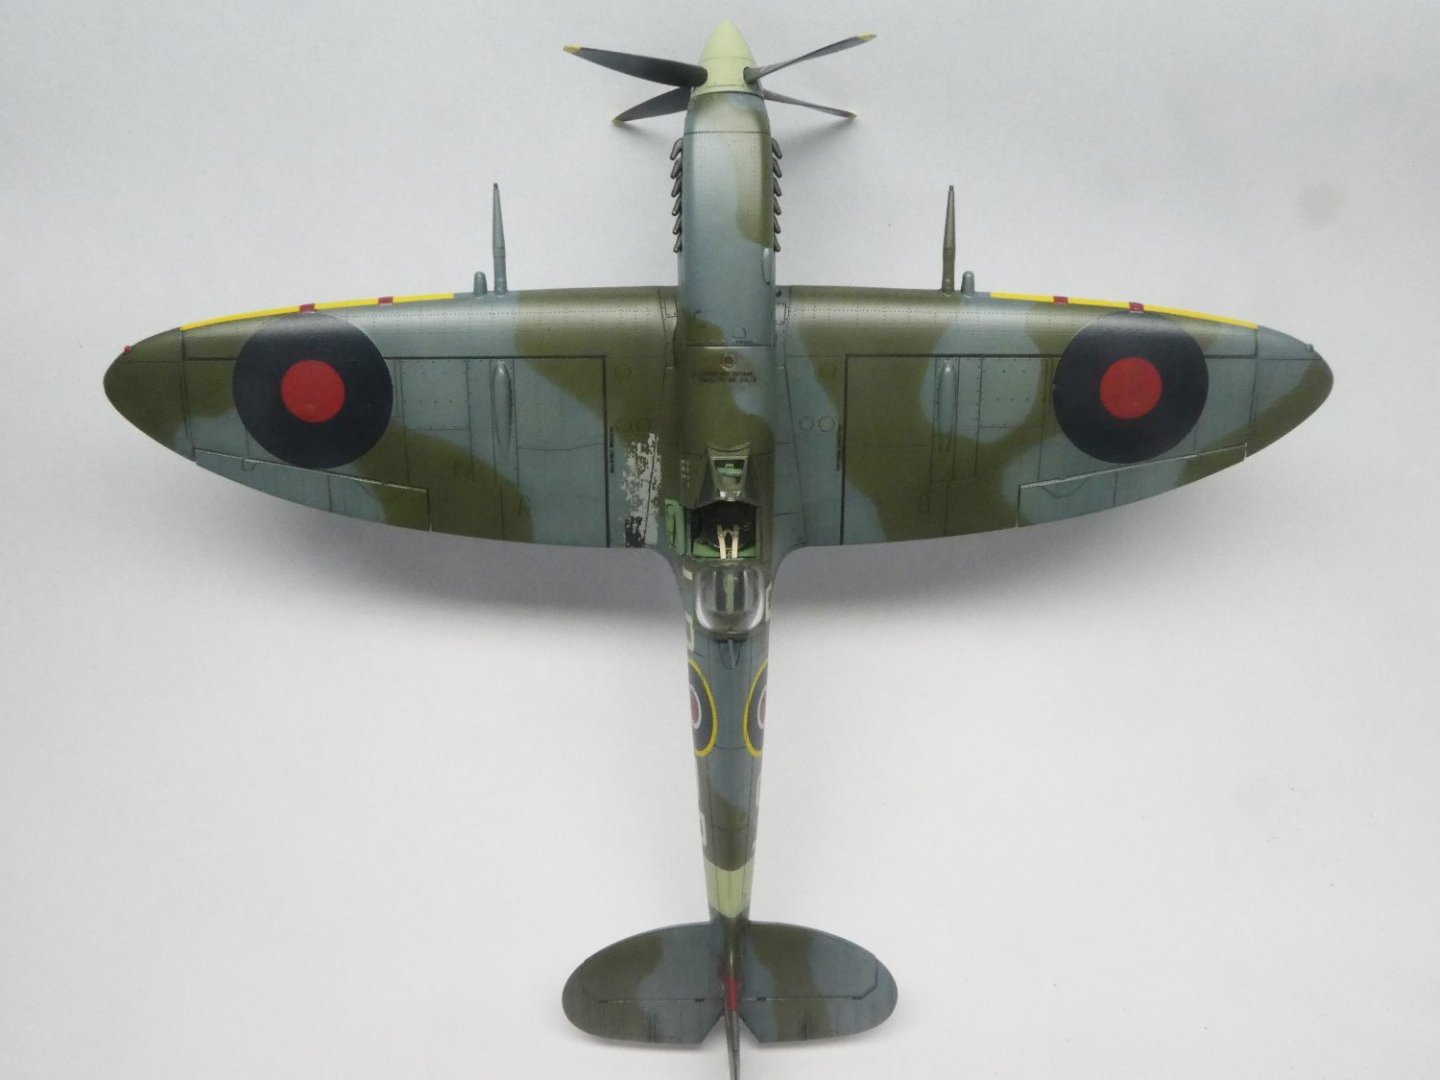
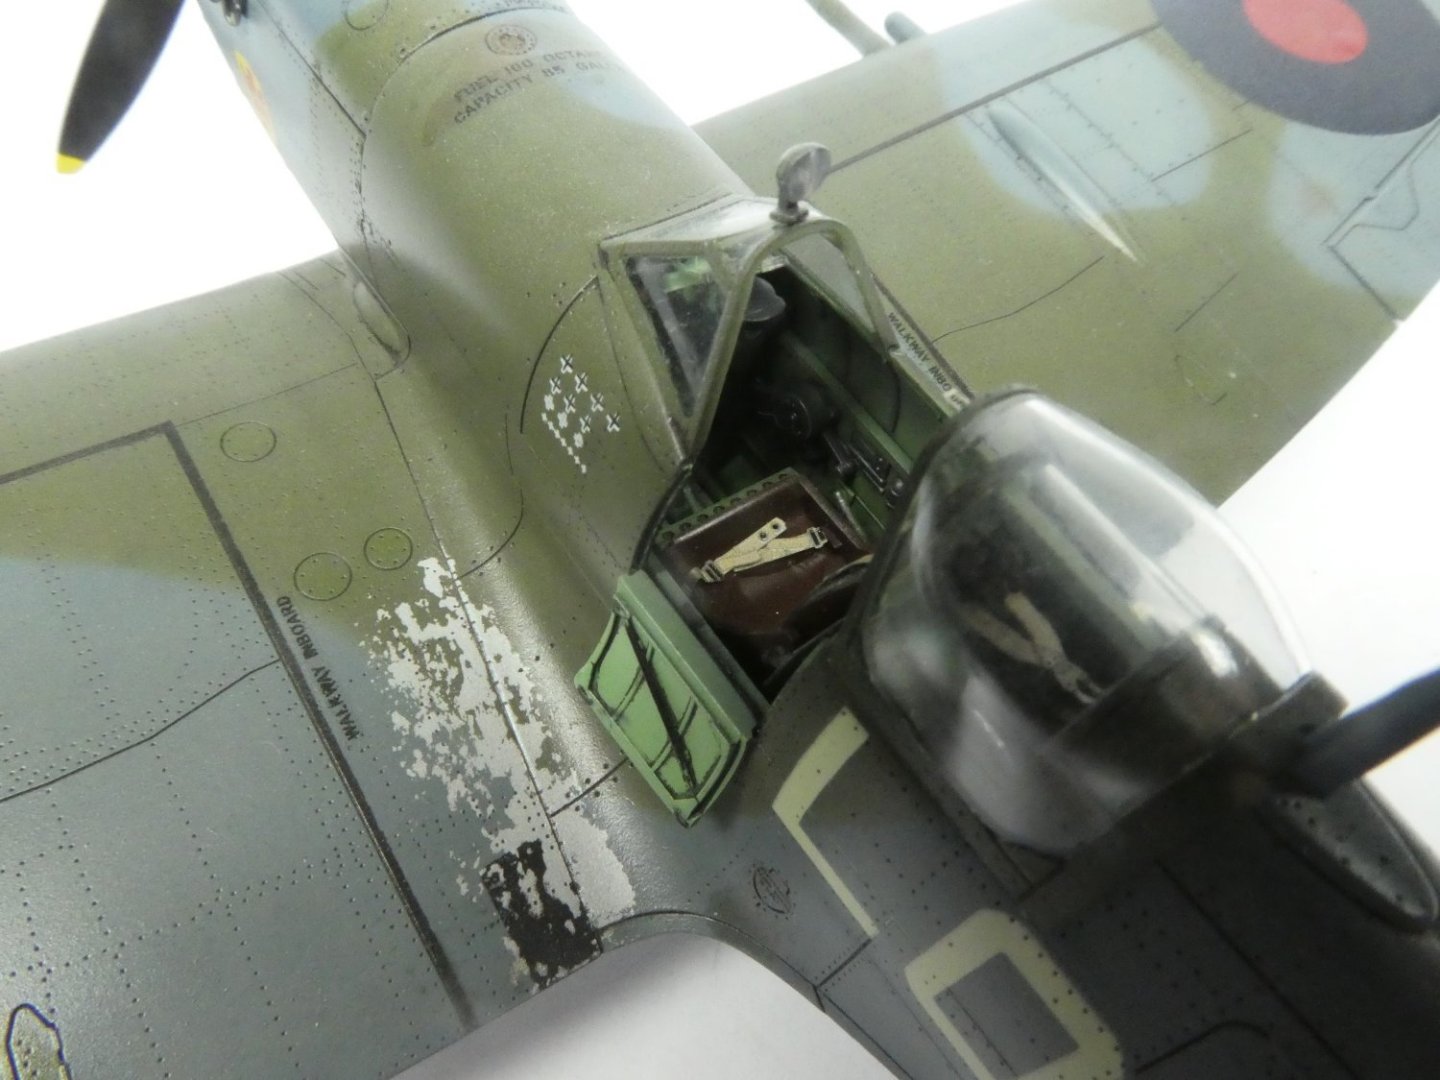
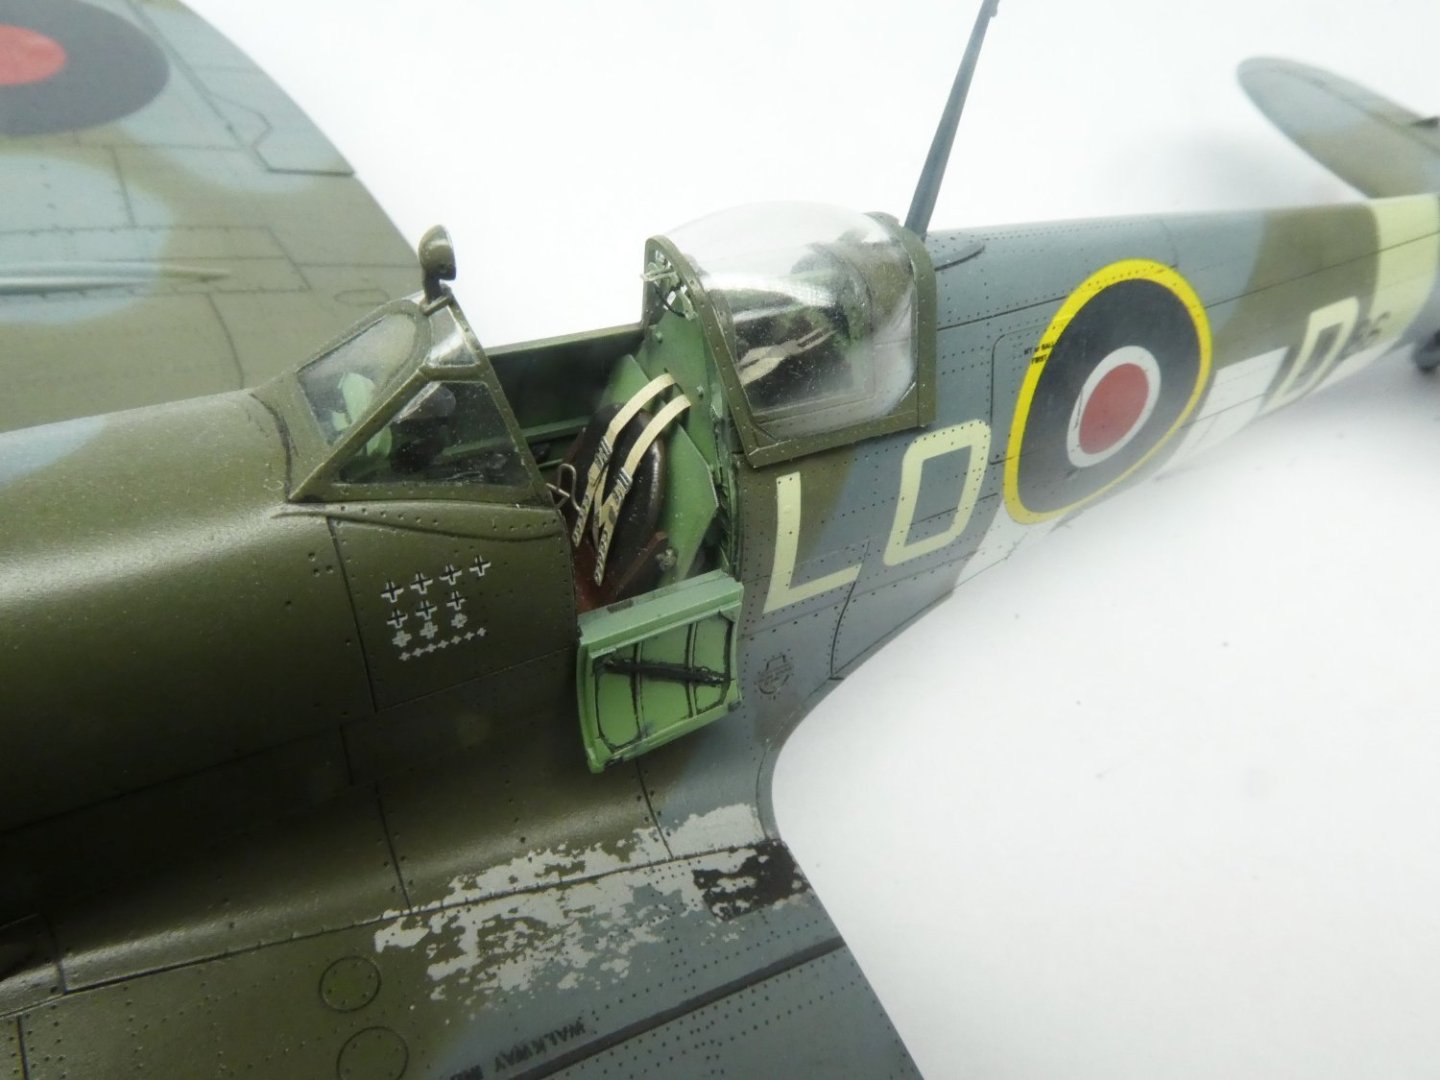
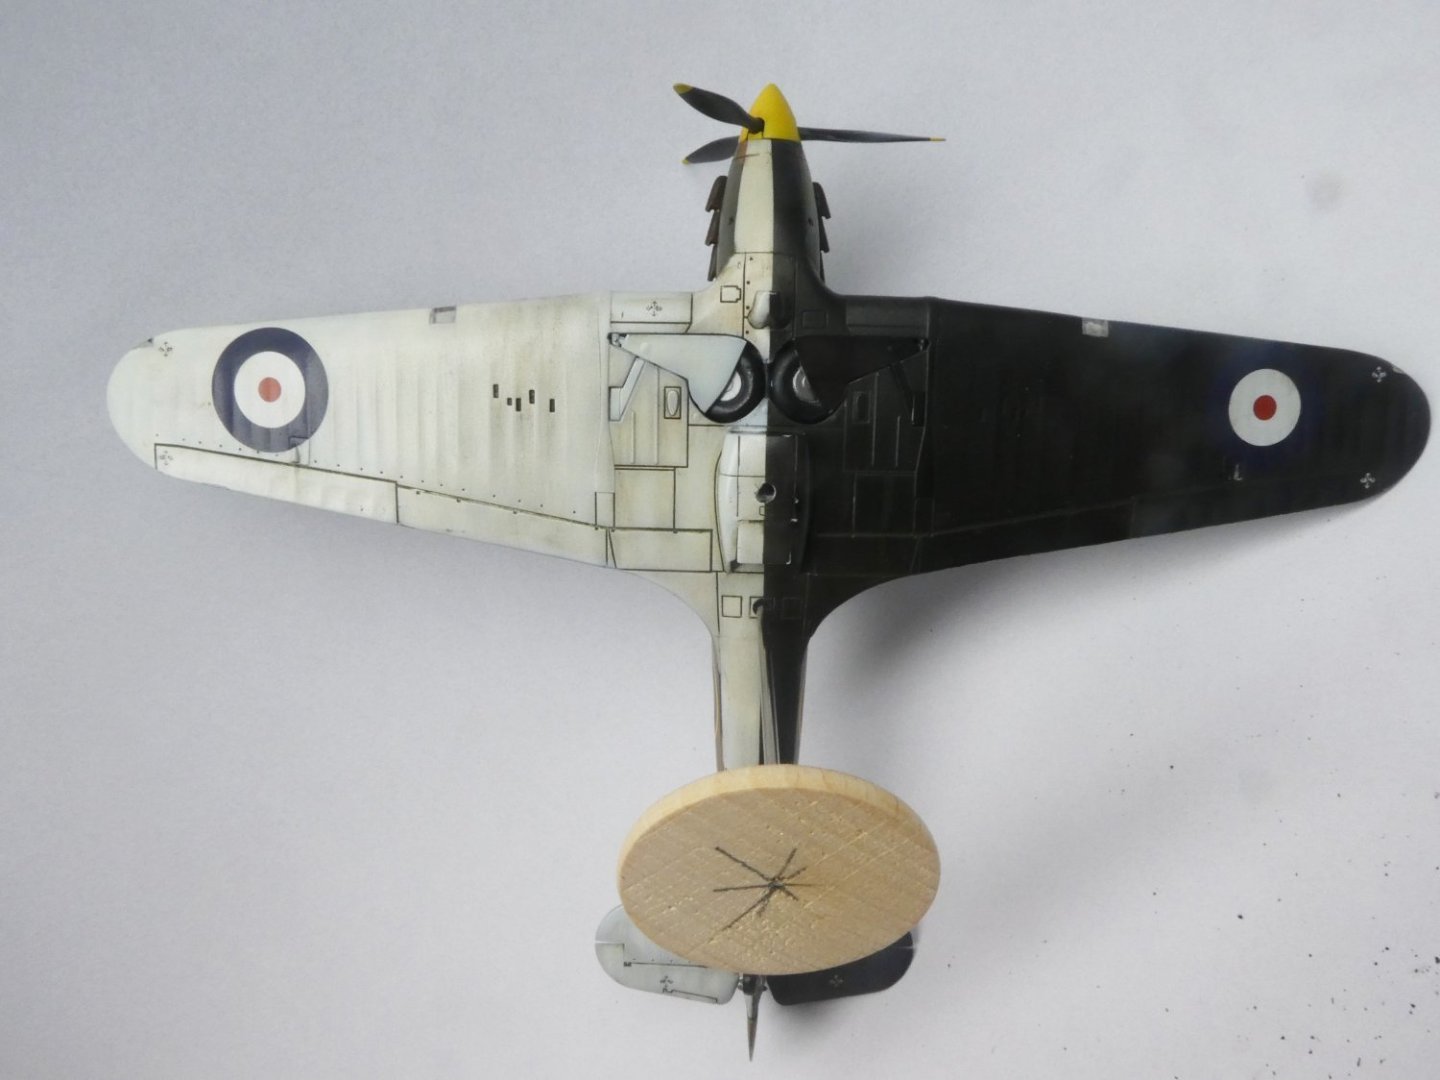
One of my first and most read book about air battles during WW2 is "The big show" by Pierre Clostermann. I can highly recomend to read the book. This is Pierres Spitfire Mk IXc LO-D when he just has landed in France shortly after D-day. It will come more Clostermann related planes further on. The kit is Eduards superb Spitfire. Model: Supermarine Spitfire MK IXc Scale: 1:48 Manufacture: Eduard Extras: None Colors: MRP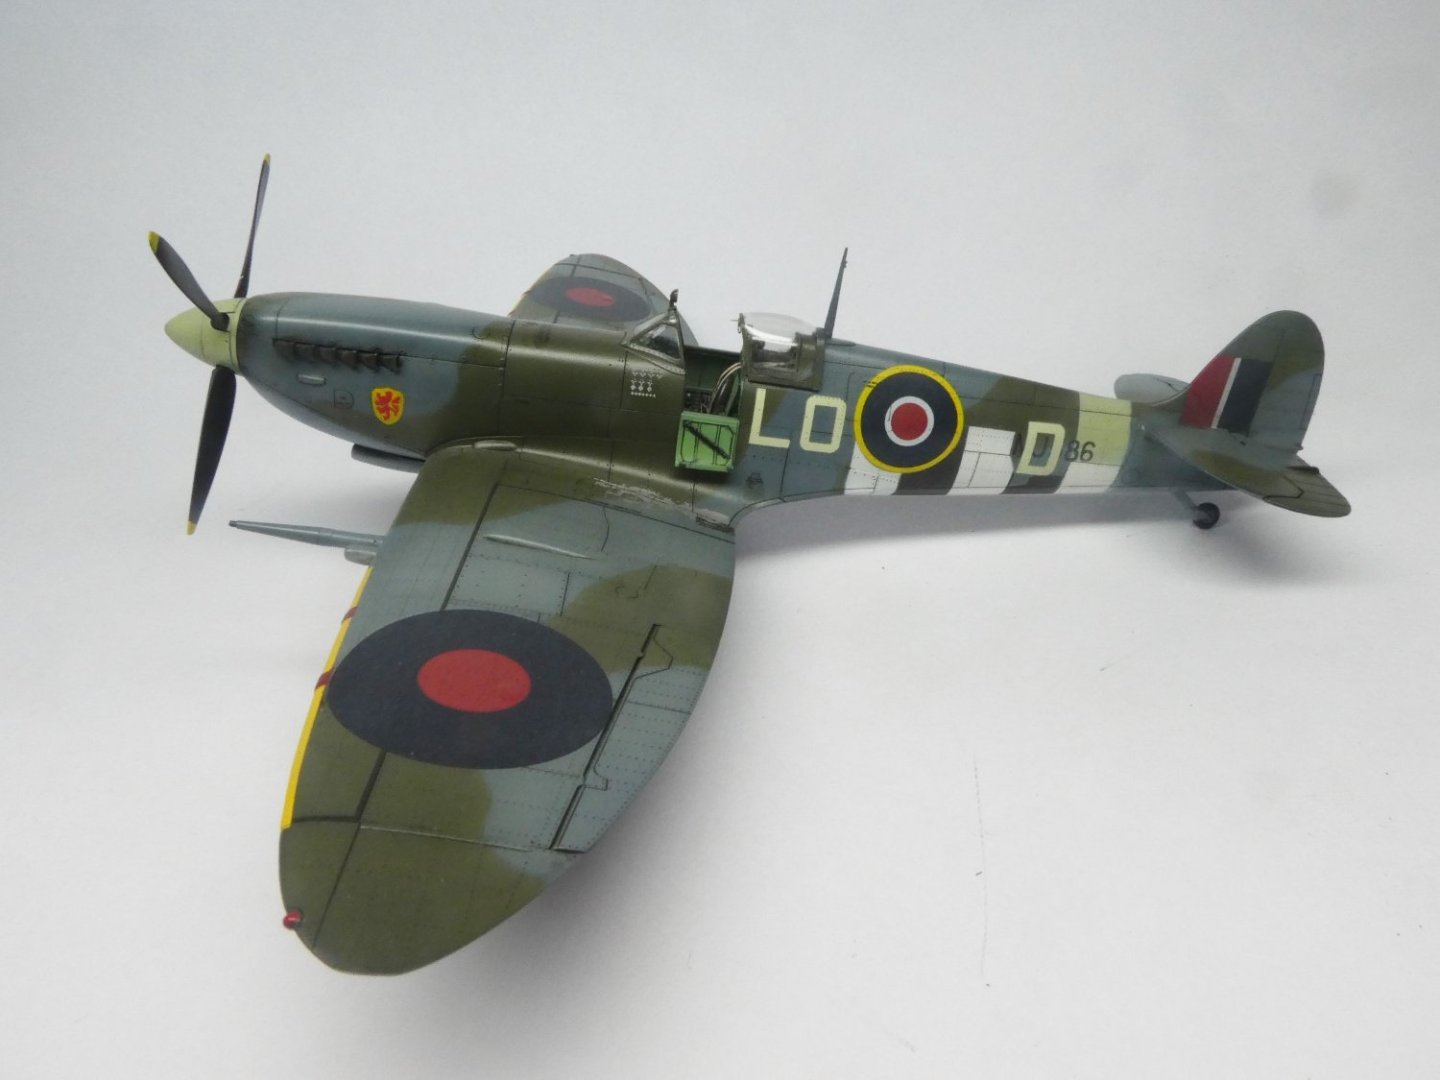


- 60 replies
-
- 18
-
-
-
I did the same on my Endeavour. First use the sand sealer. Then I used Tamiya plastic putty several times and sand it down between the layers. The result were perfect. I even paint it afterwards with water based Vallejo model color. No problem att all.
-
Airplanes and Tanks in plastic by Jörgen
Jörgen replied to Jörgen's topic in Non-ship/categorised builds
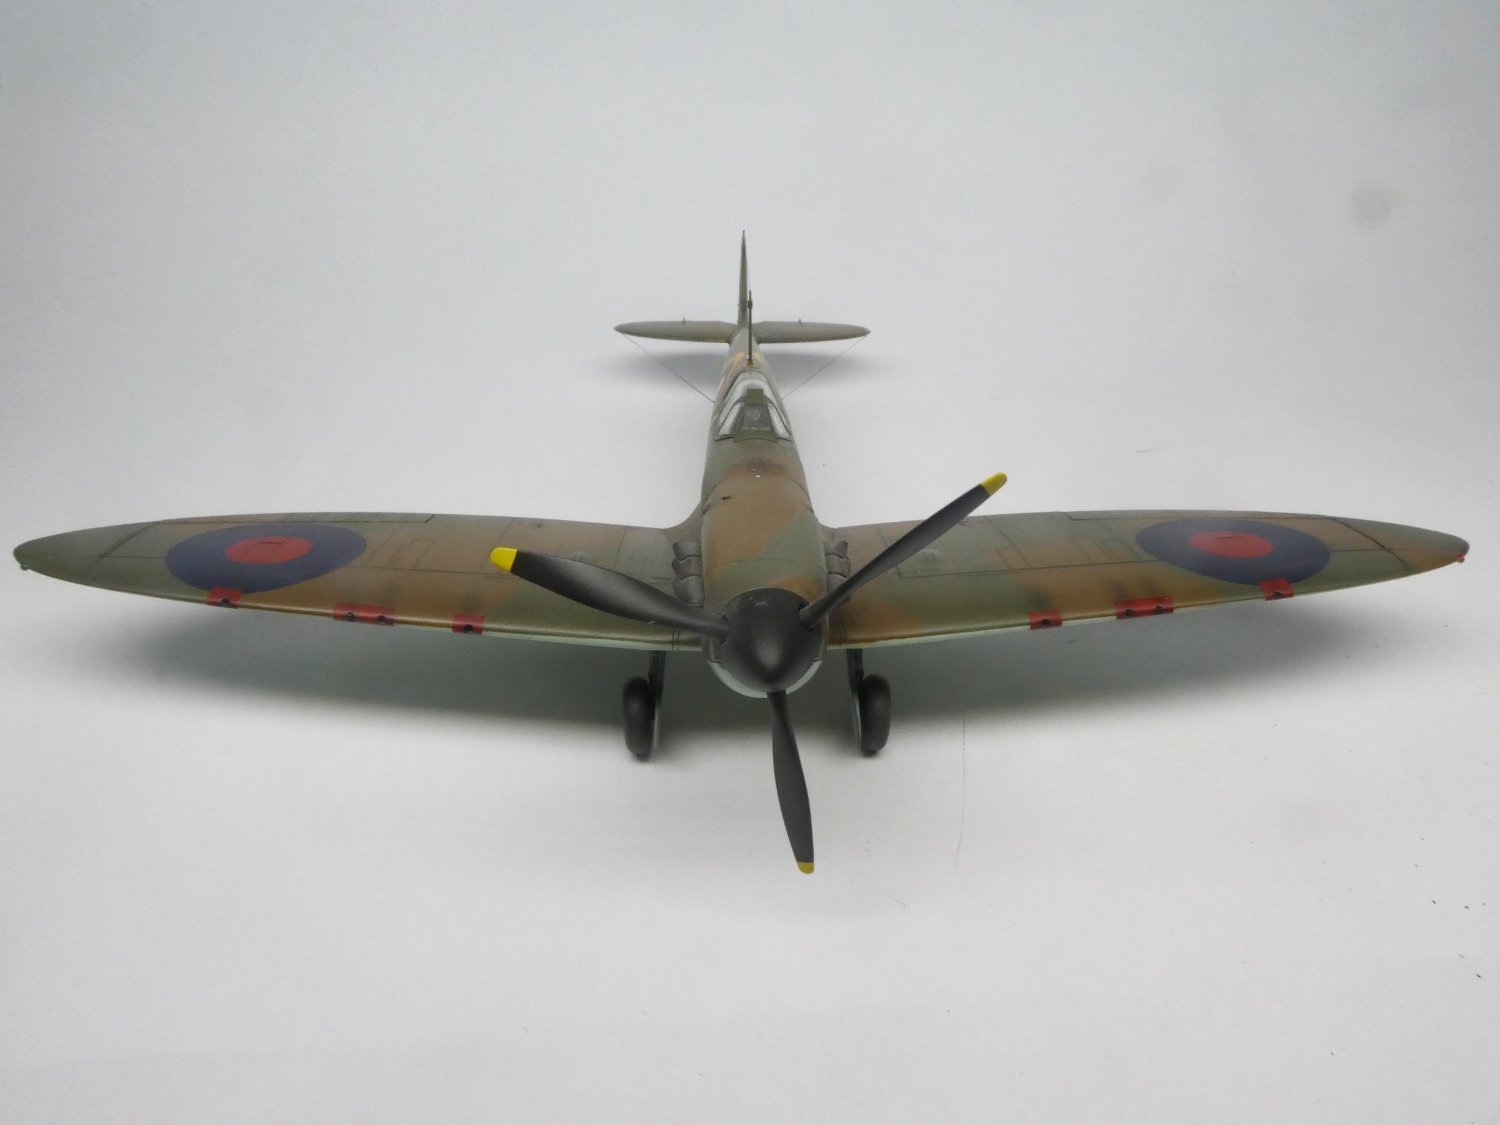
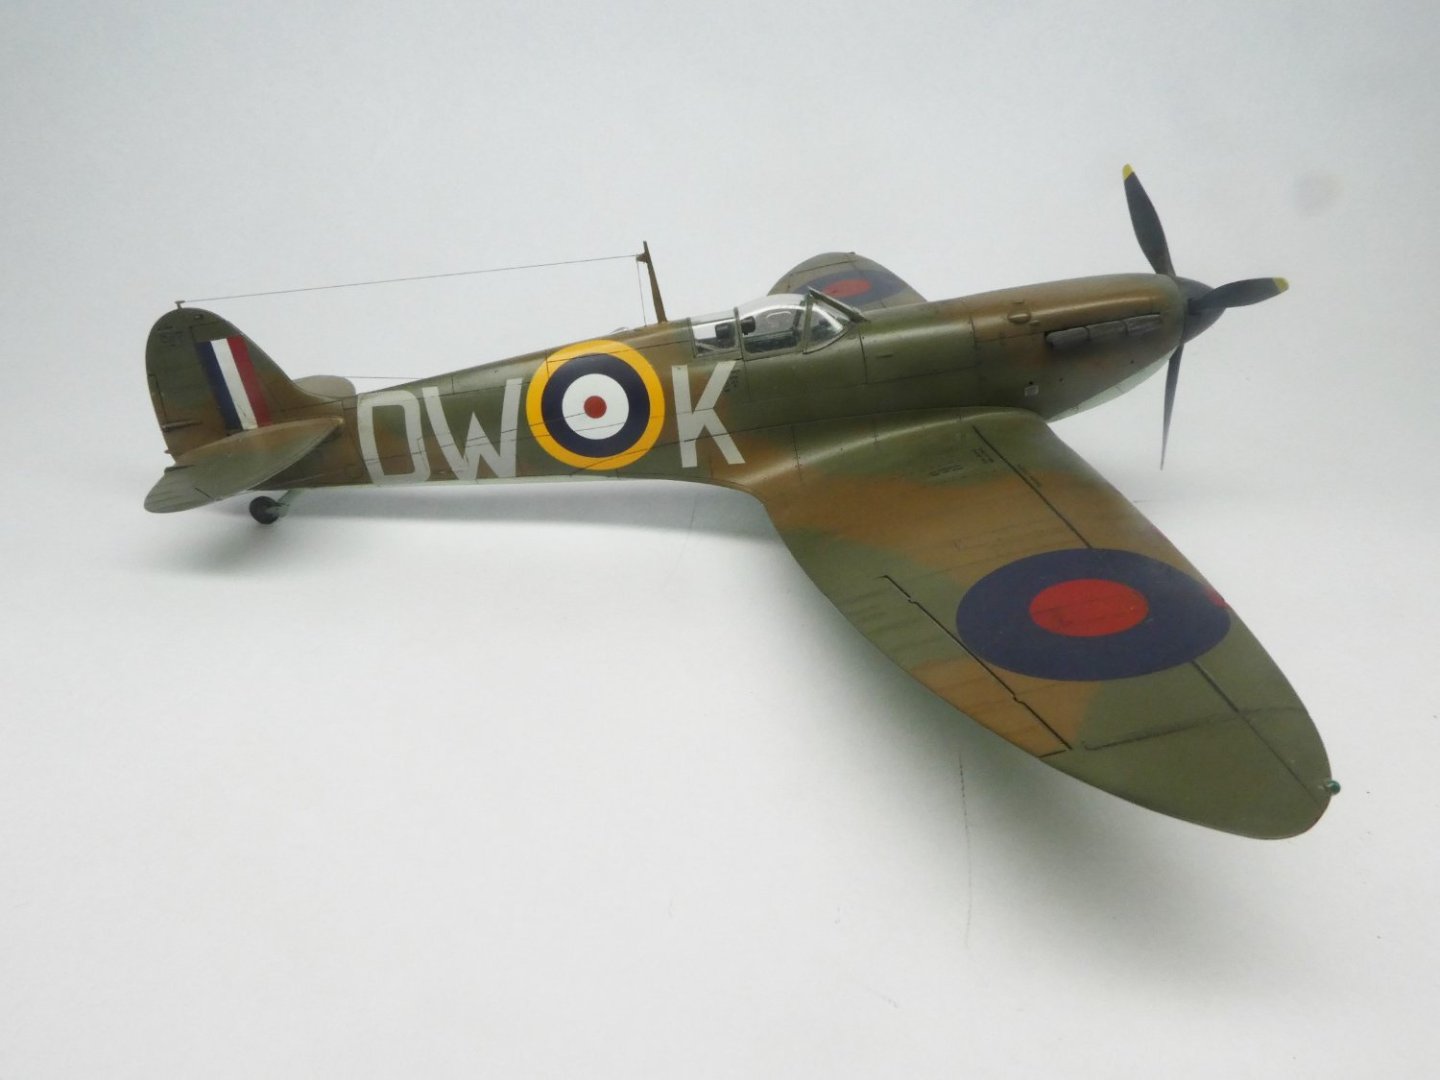
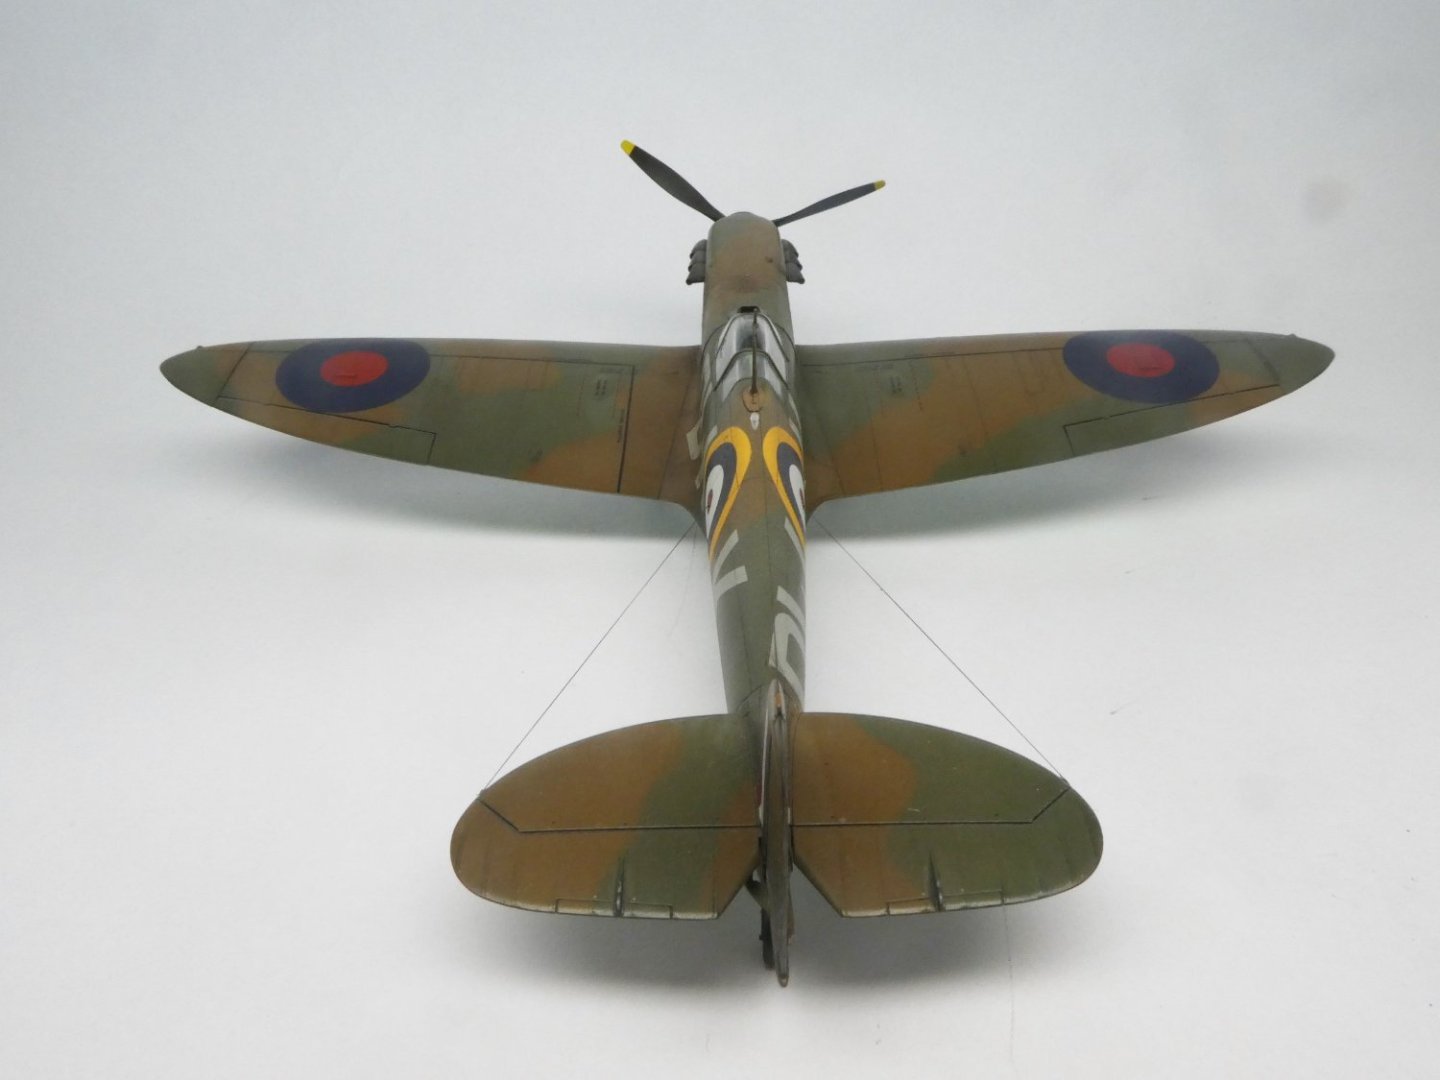
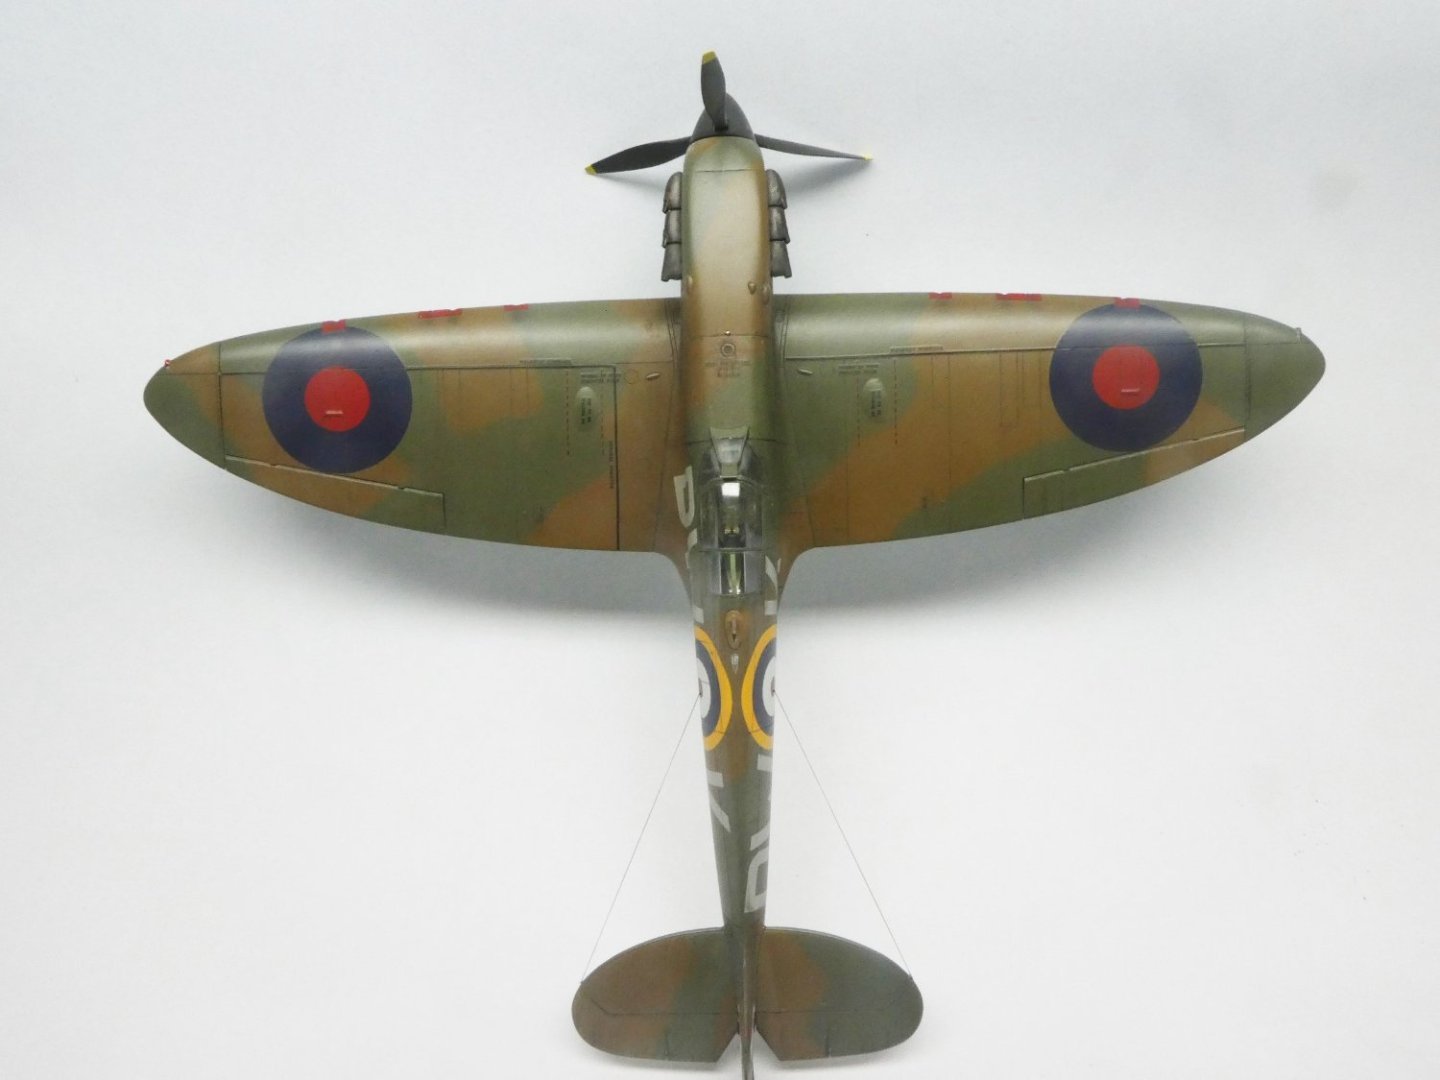
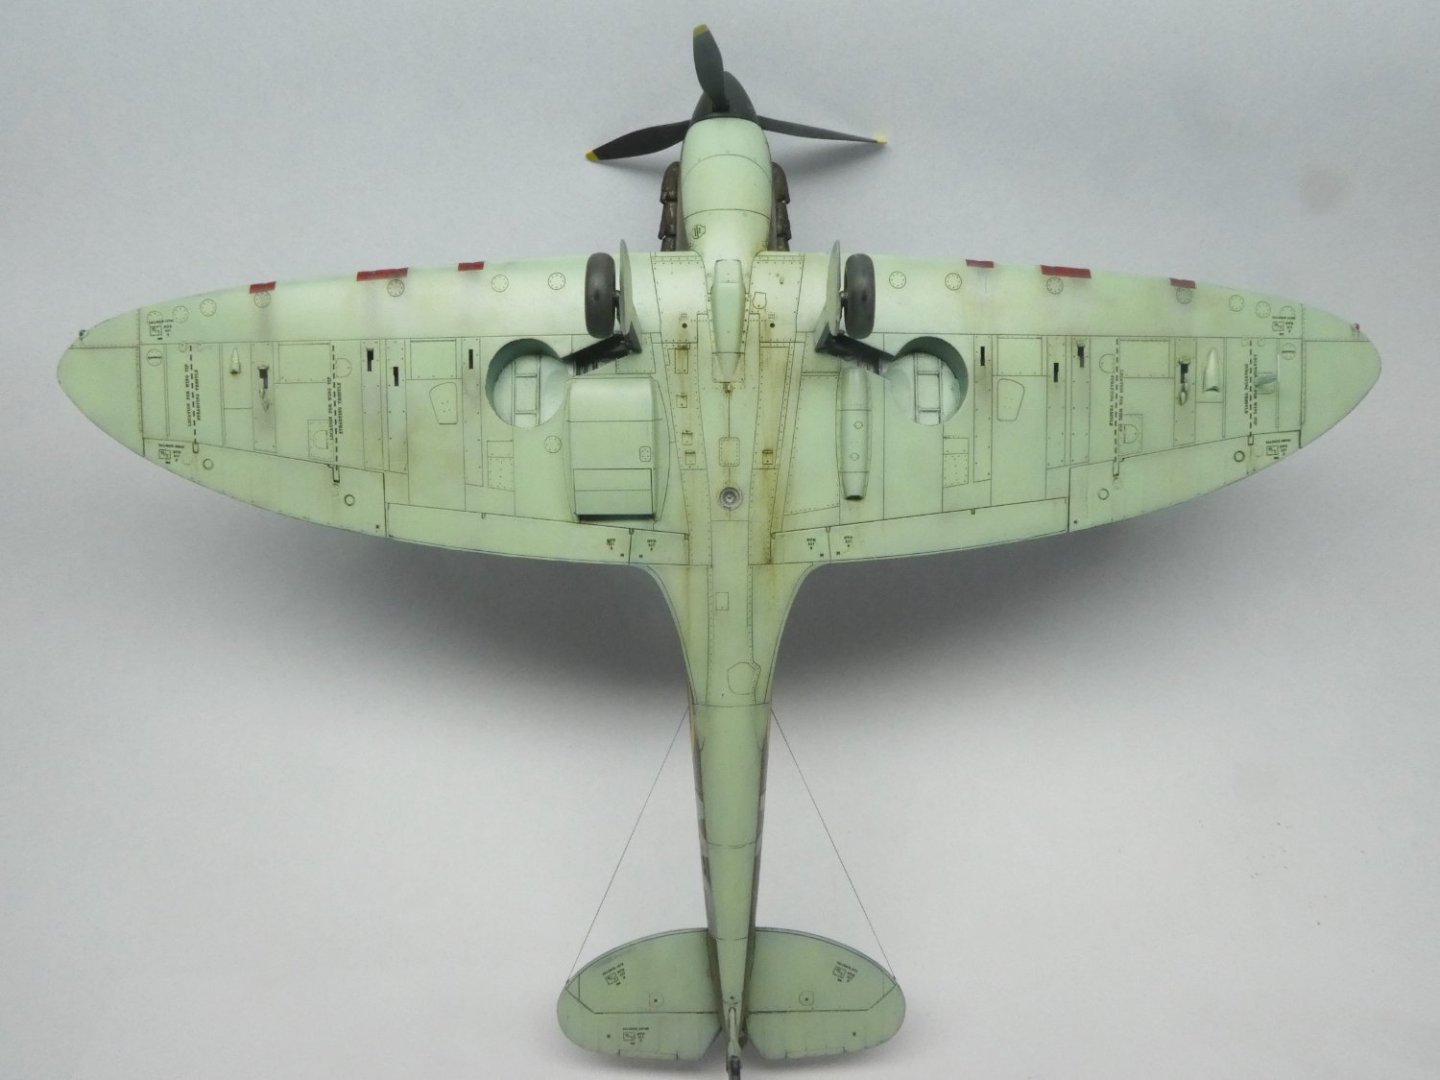
Now is it time for the first spit. Enjoy Model: Supermarine Spitfire MK1a Scale: 1:48 Manufacture: Tamiya Extras: None Colors: MRP

- 60 replies
-
- 11
-
-
Airplanes and Tanks in plastic by Jörgen
Jörgen replied to Jörgen's topic in Non-ship/categorised builds
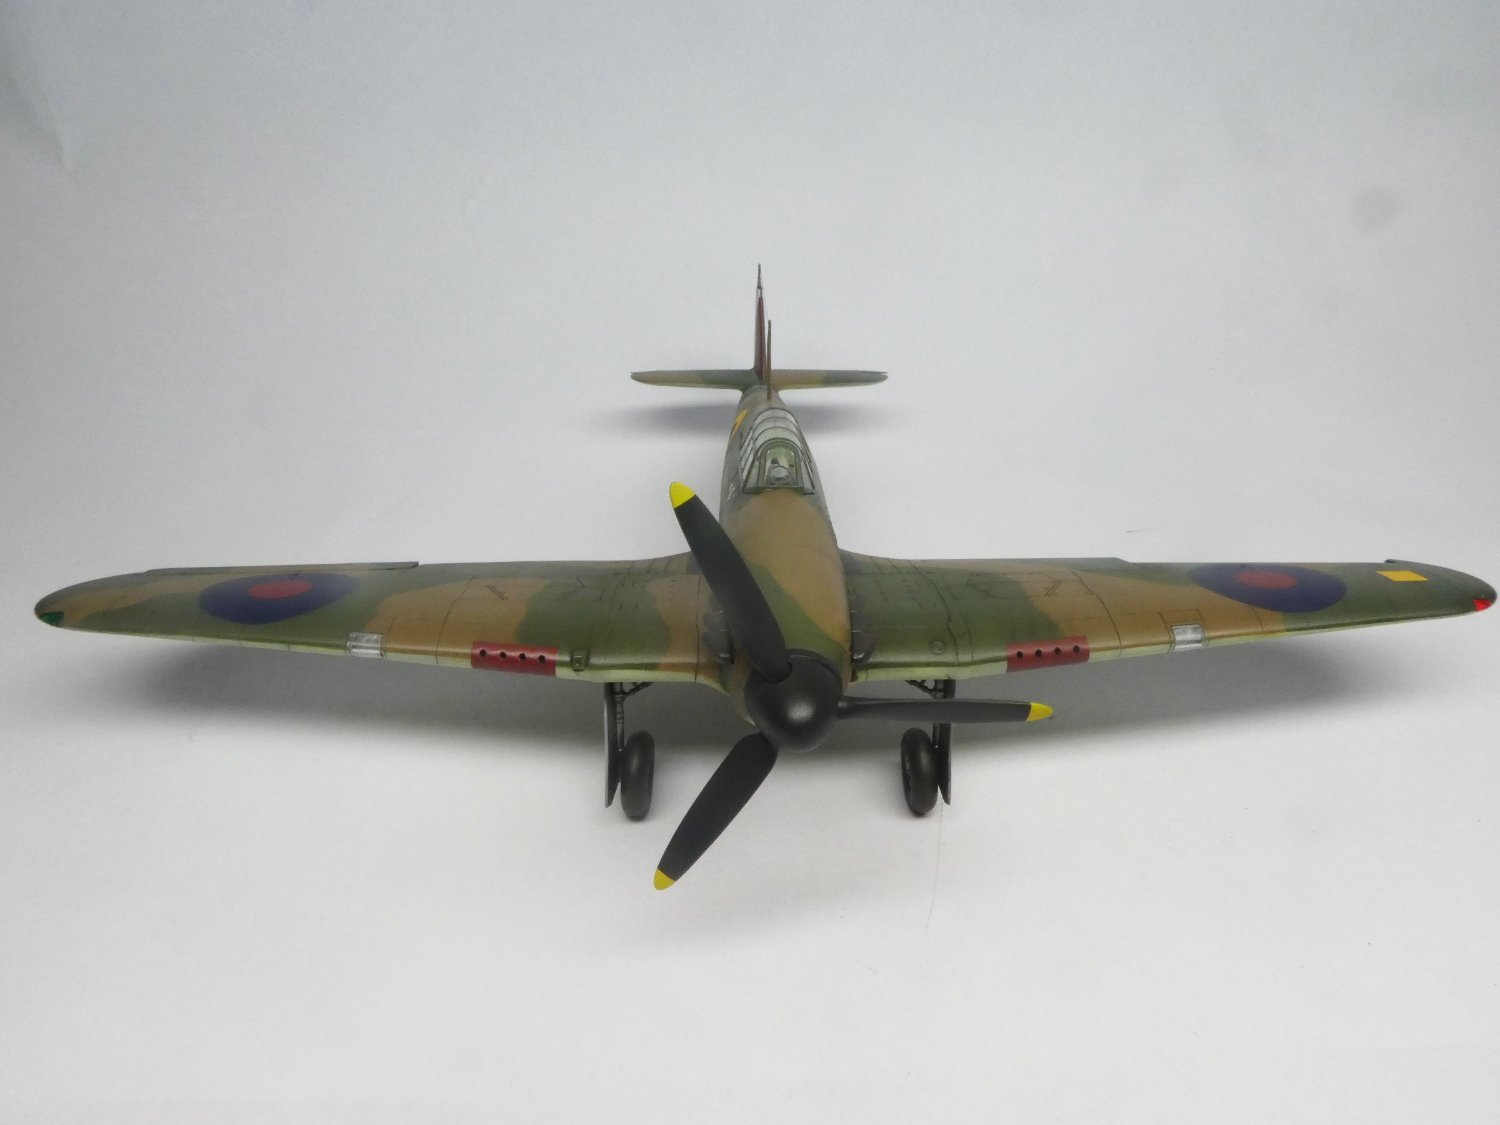
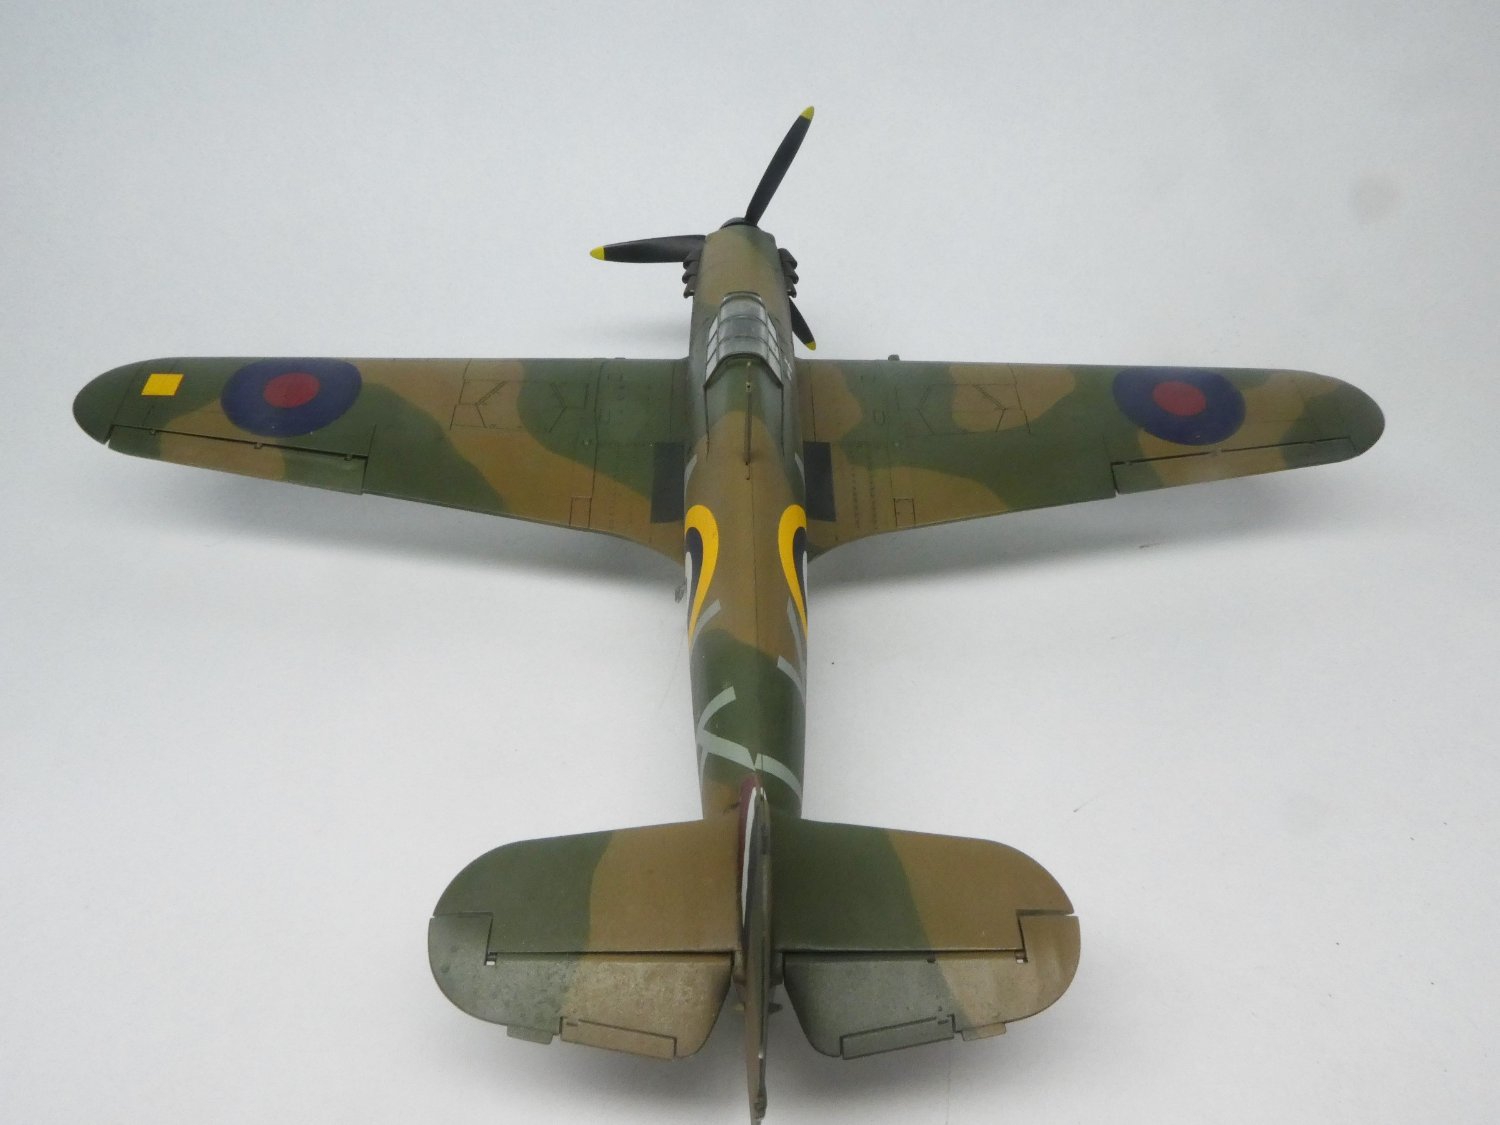
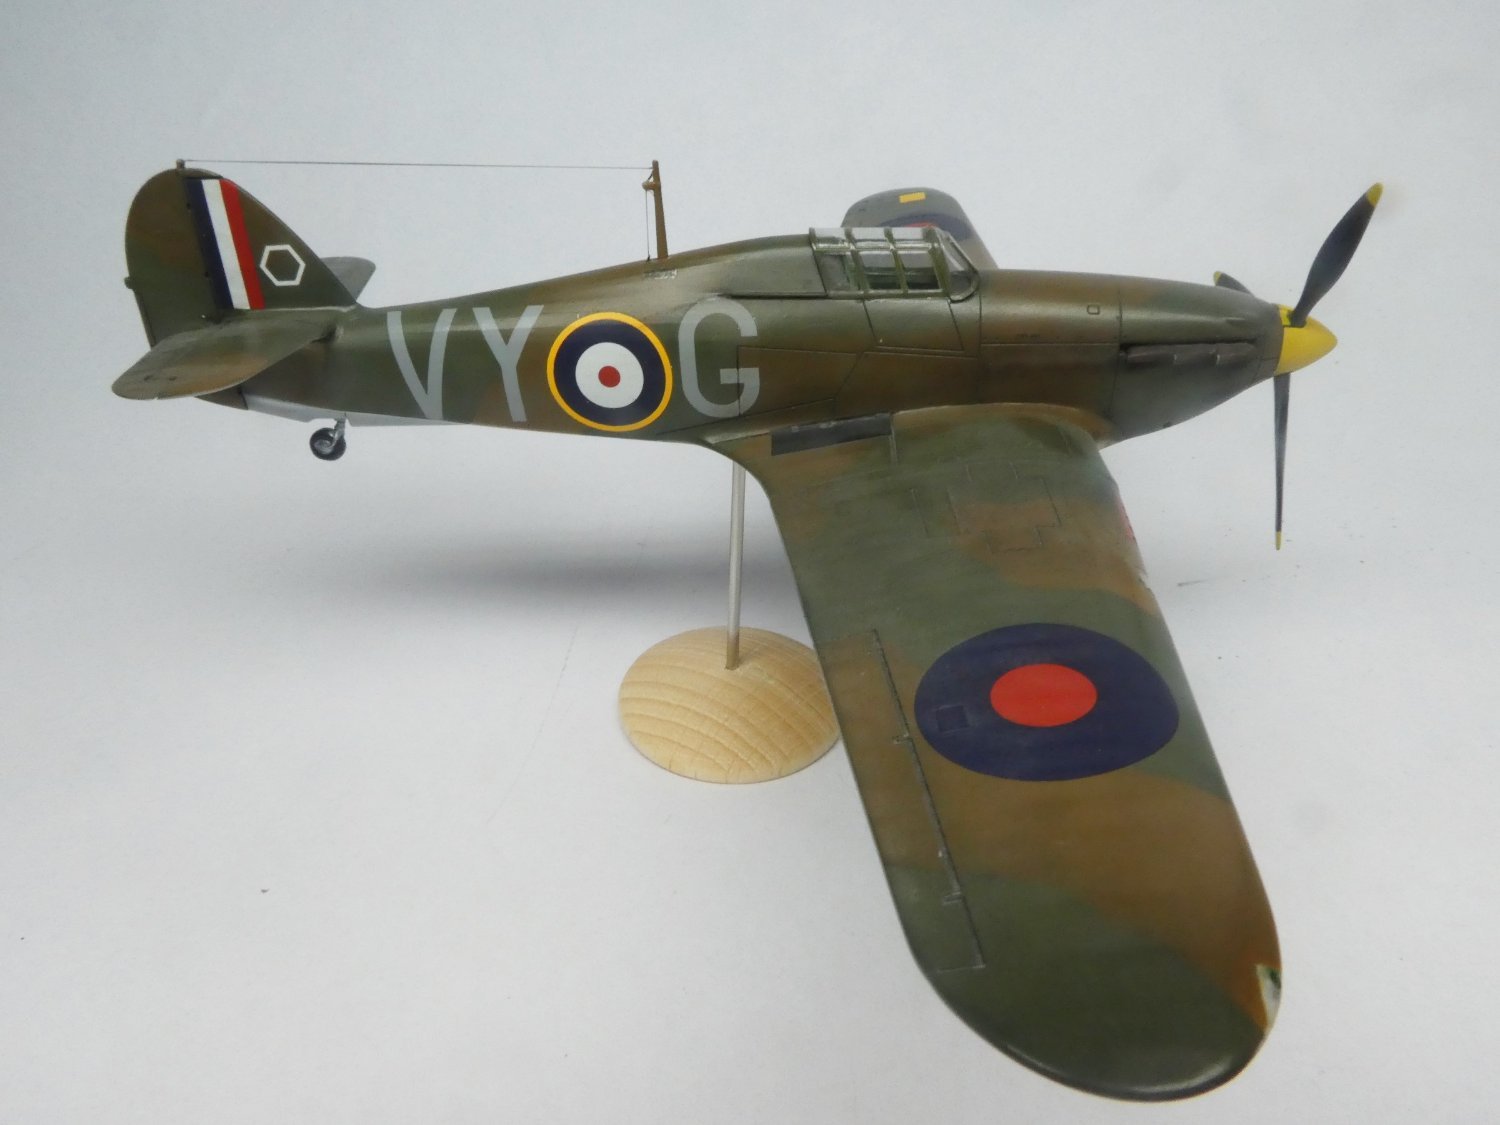
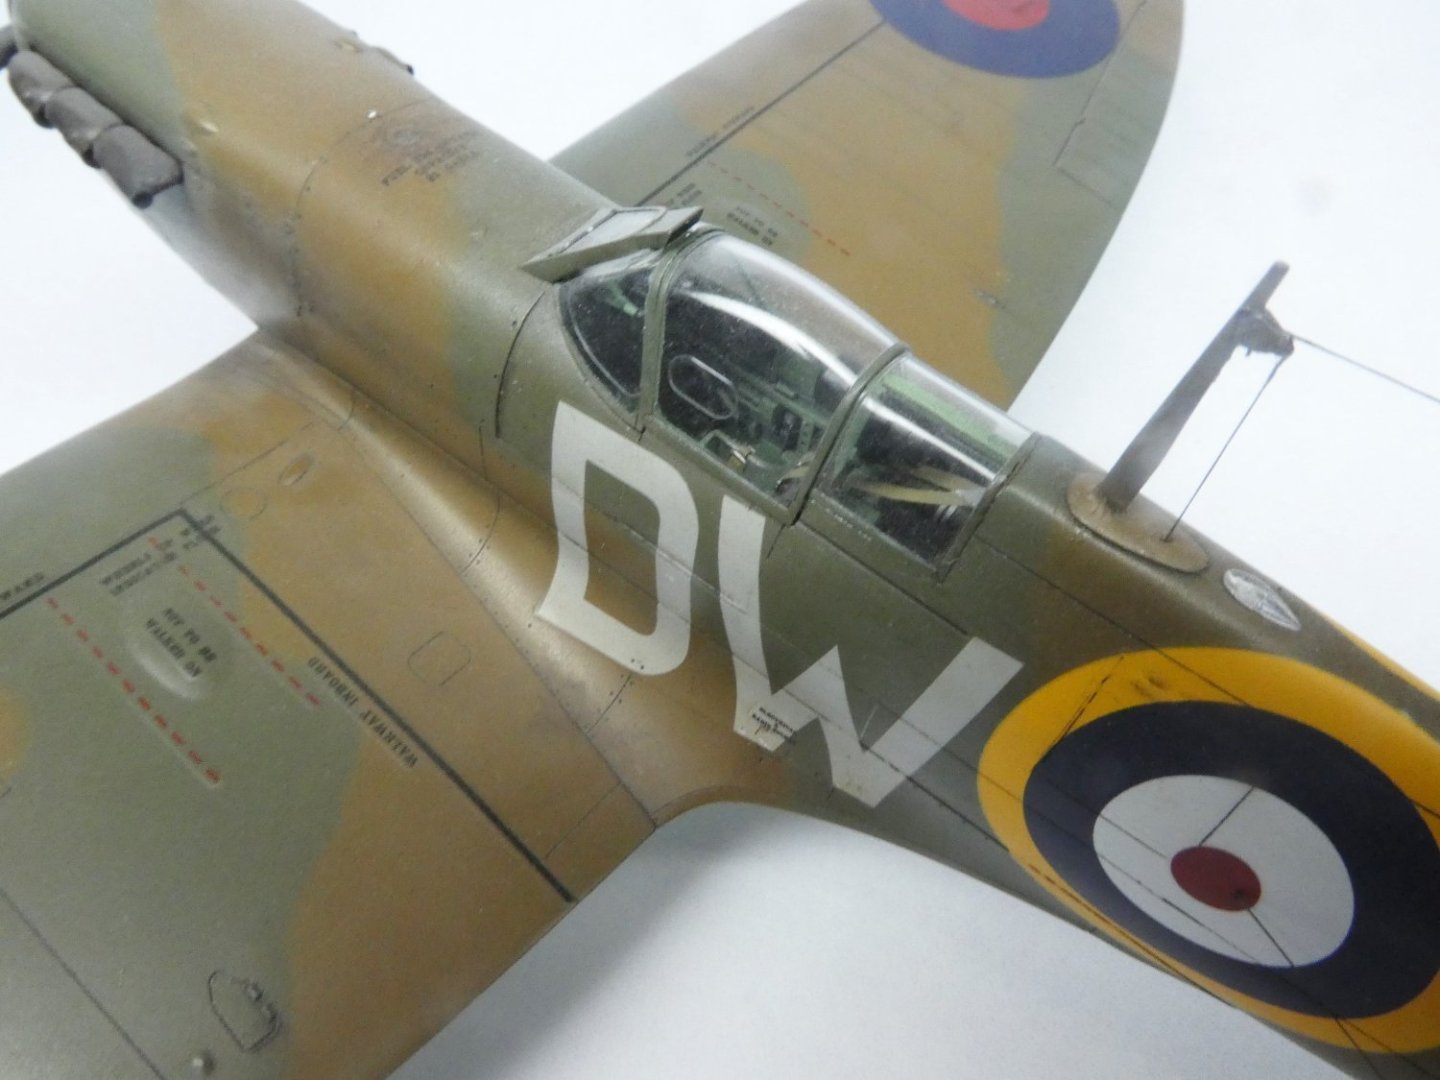
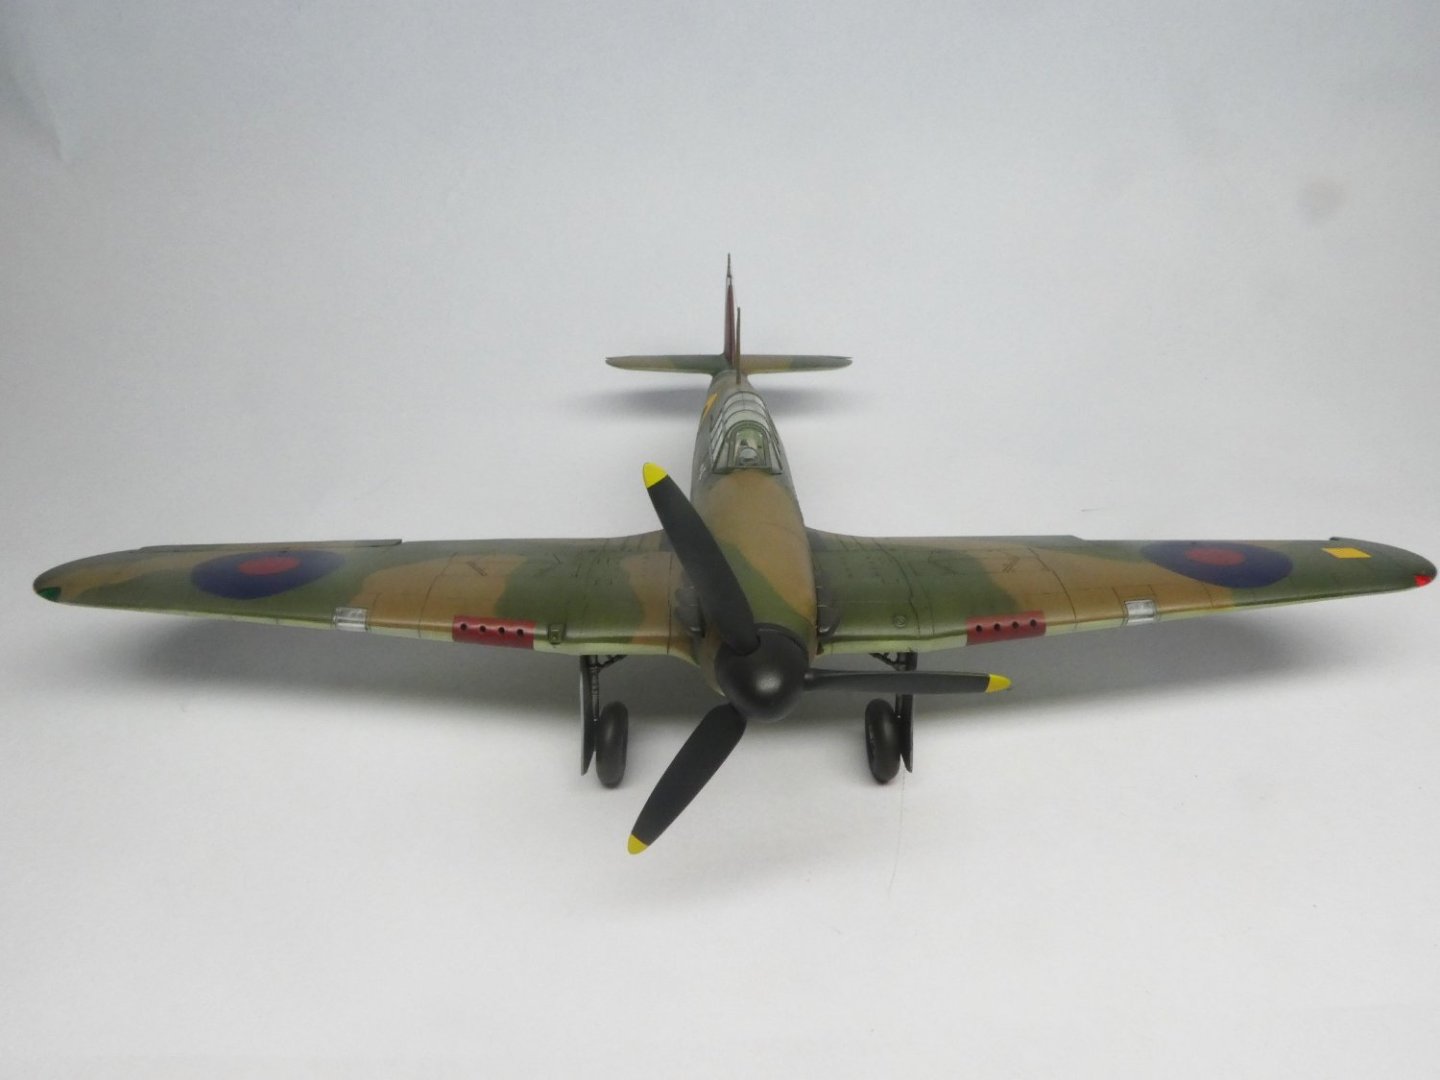
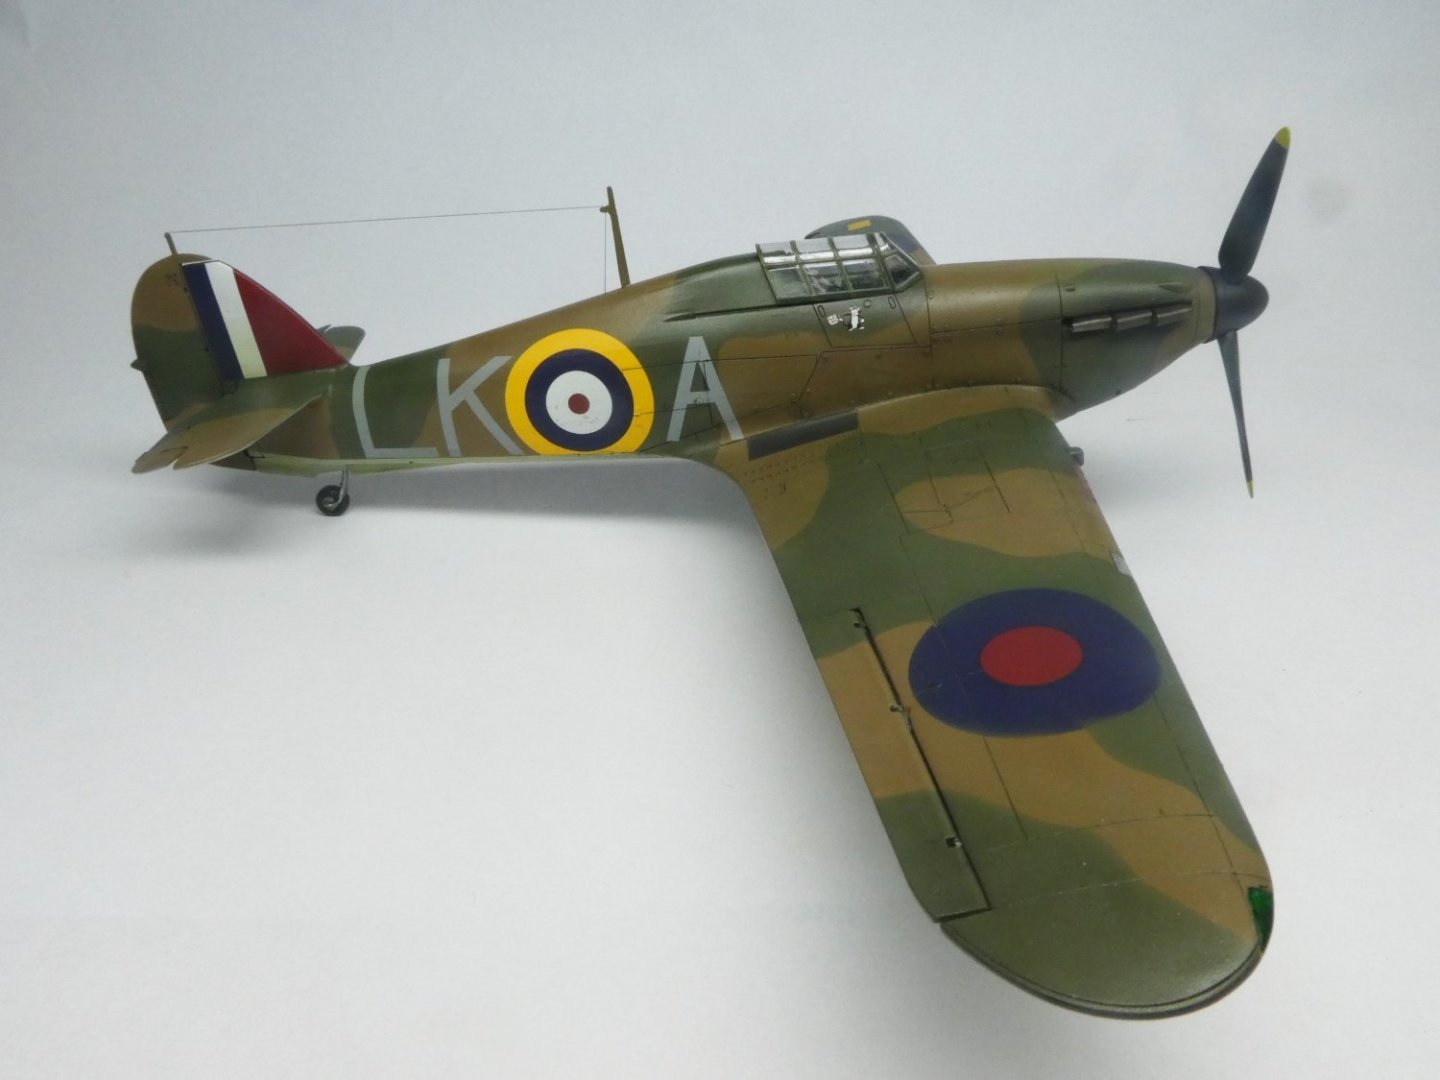
Now back to 1:48 again. This time it is a Hurricane MK1 with metal wing. This time I tried the Mr. color range instead of MRP for the RAF colors. It is crazy how much the shades differ from brand to brand for the same color. In MRP:s case it also differ in batches.. Model: Hawker Hurricane MK1 Scale: 1:48 Manufacture: Airfix Extras: None Colors: Mr. Color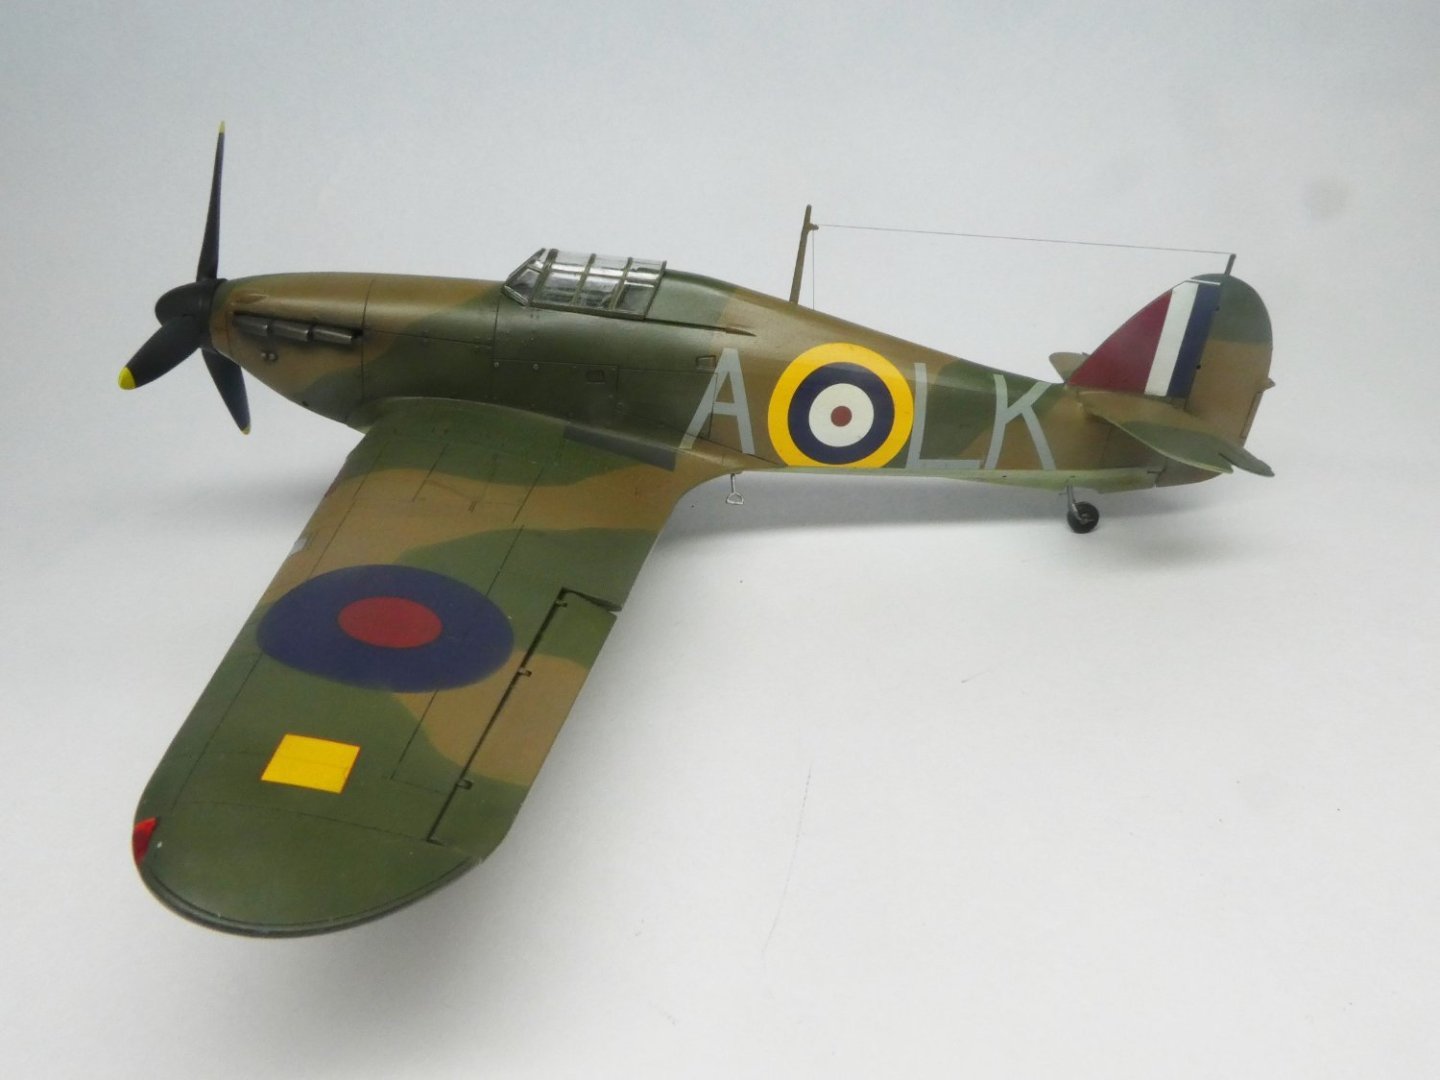
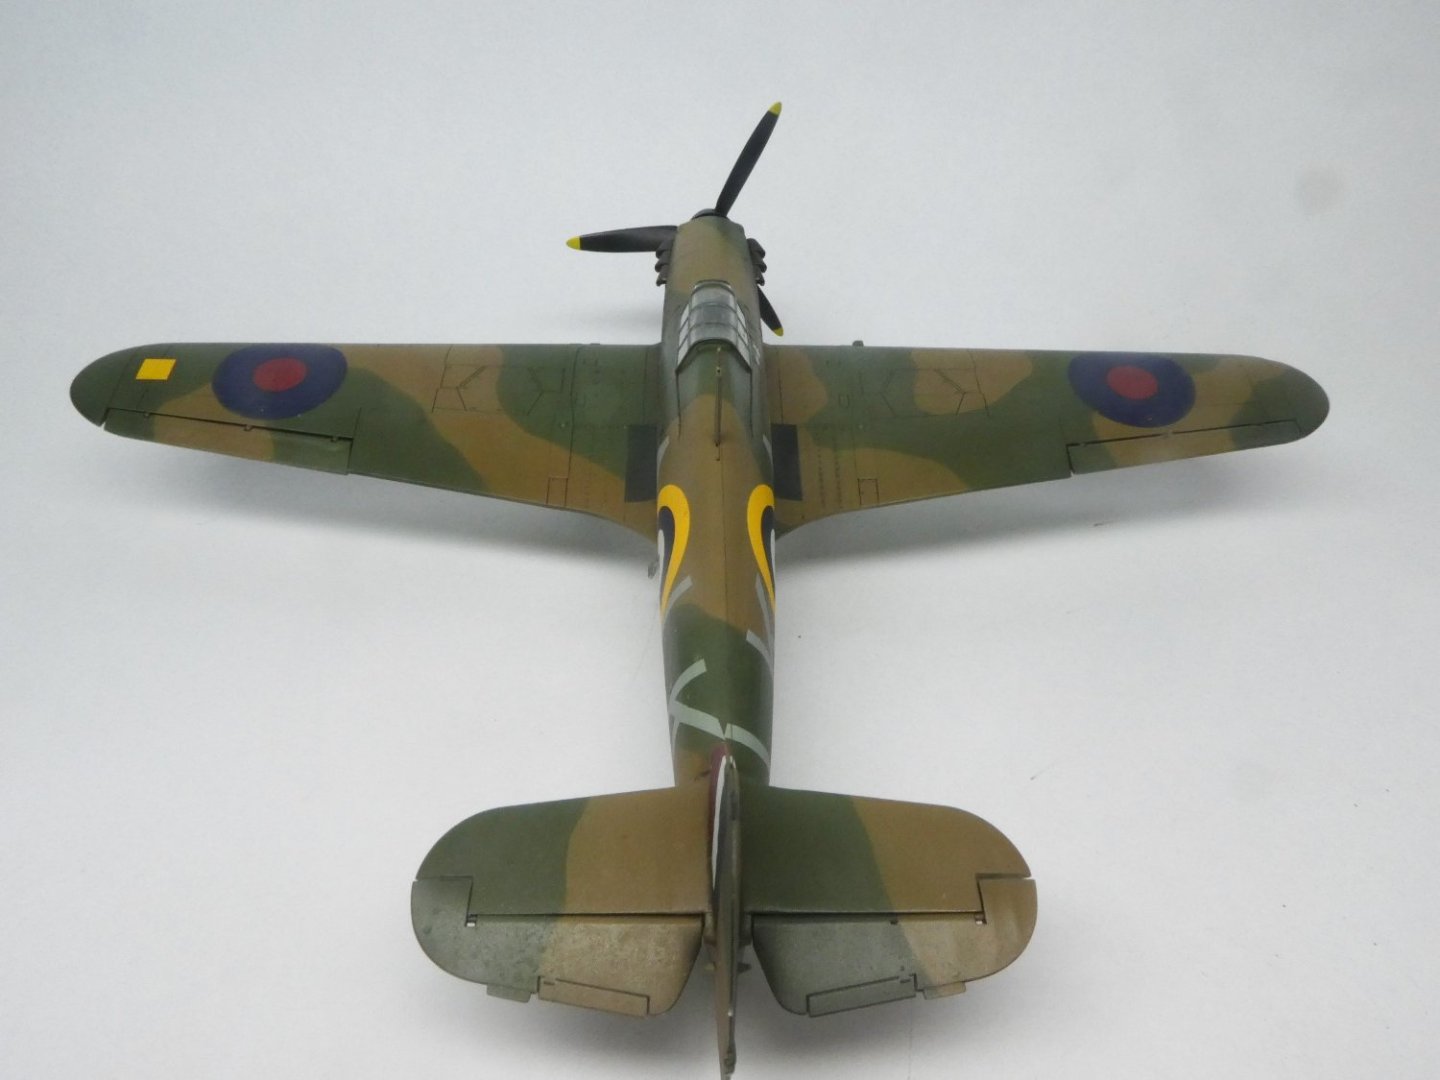

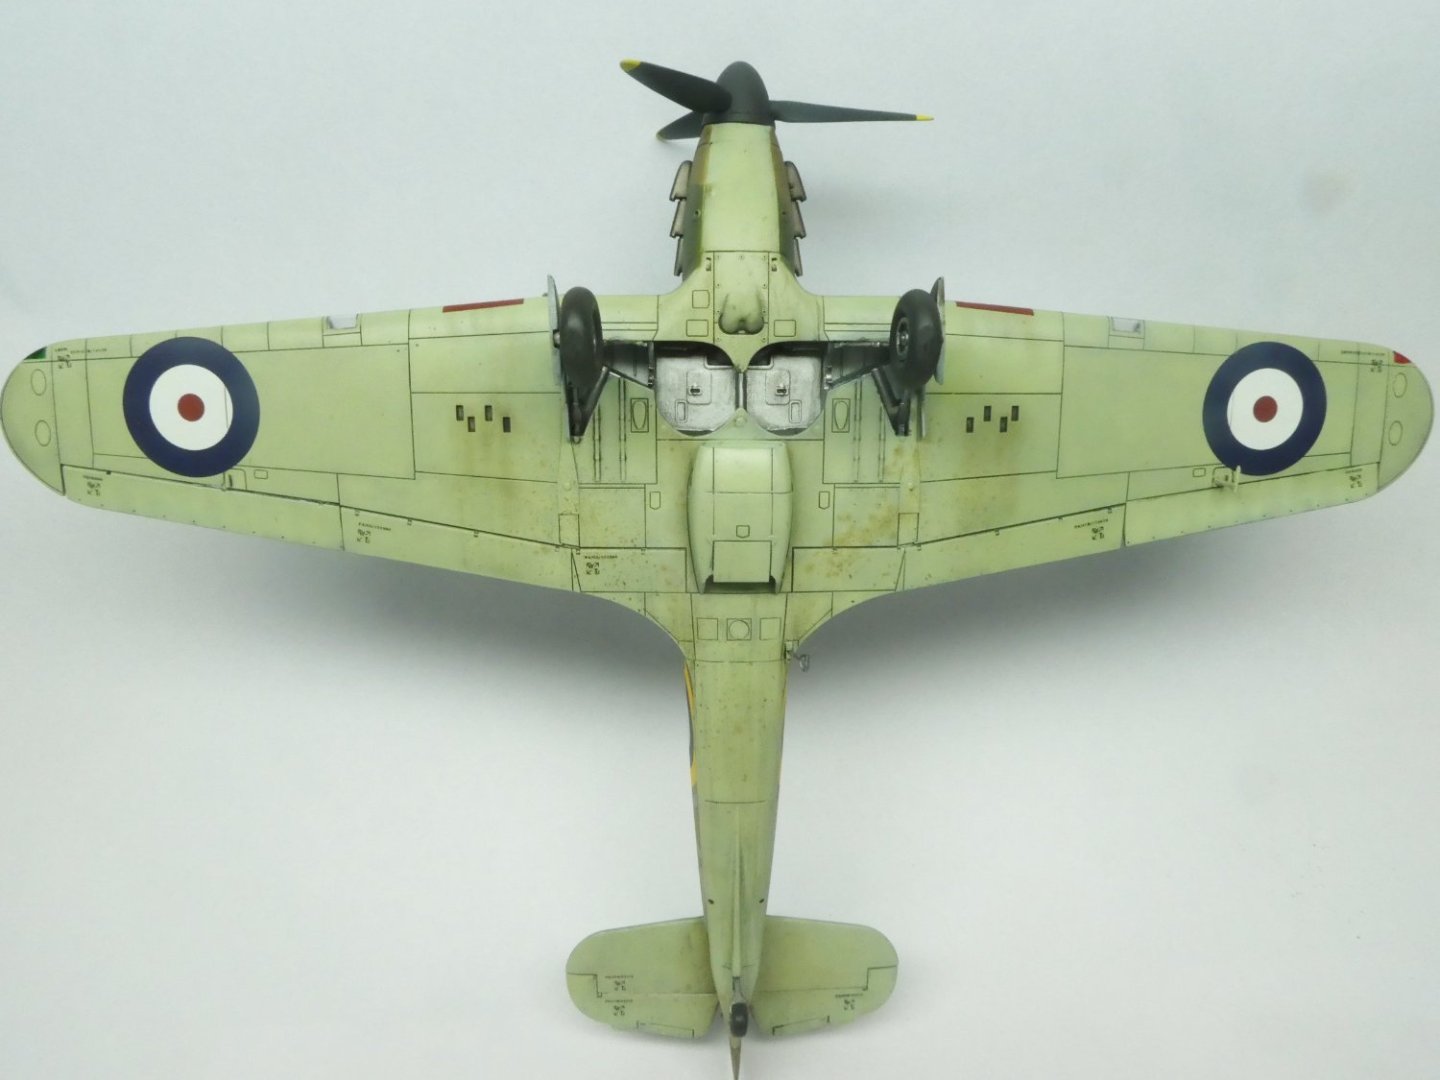
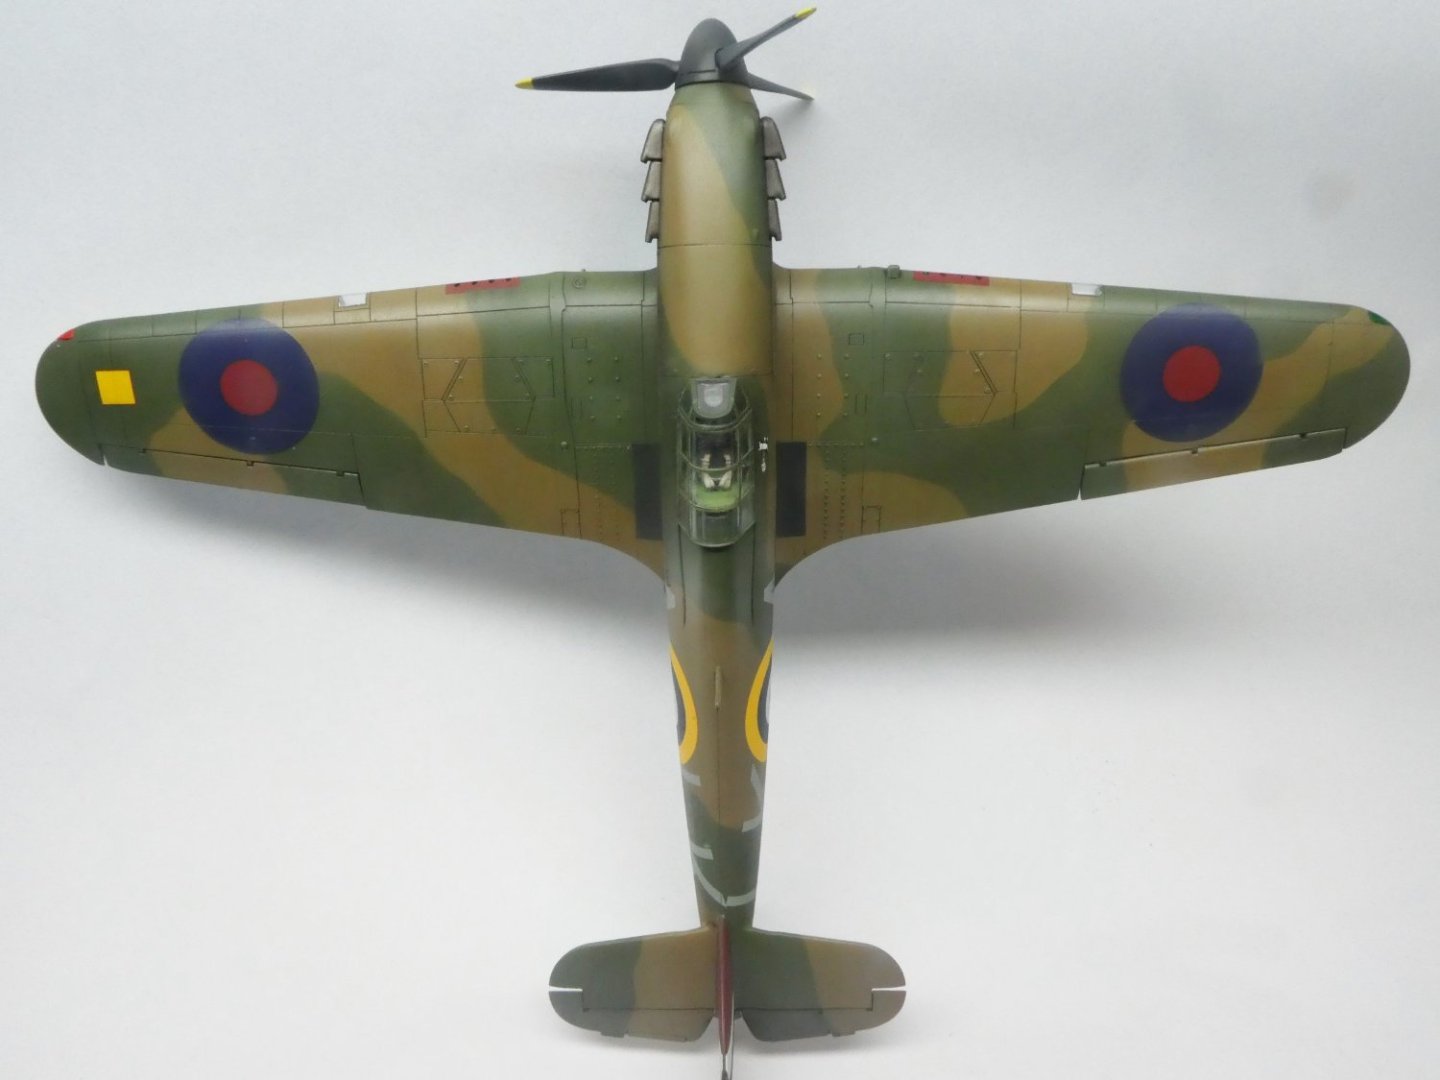
- 60 replies
-
- 12
-
-
Airplanes and Tanks in plastic by Jörgen
Jörgen replied to Jörgen's topic in Non-ship/categorised builds
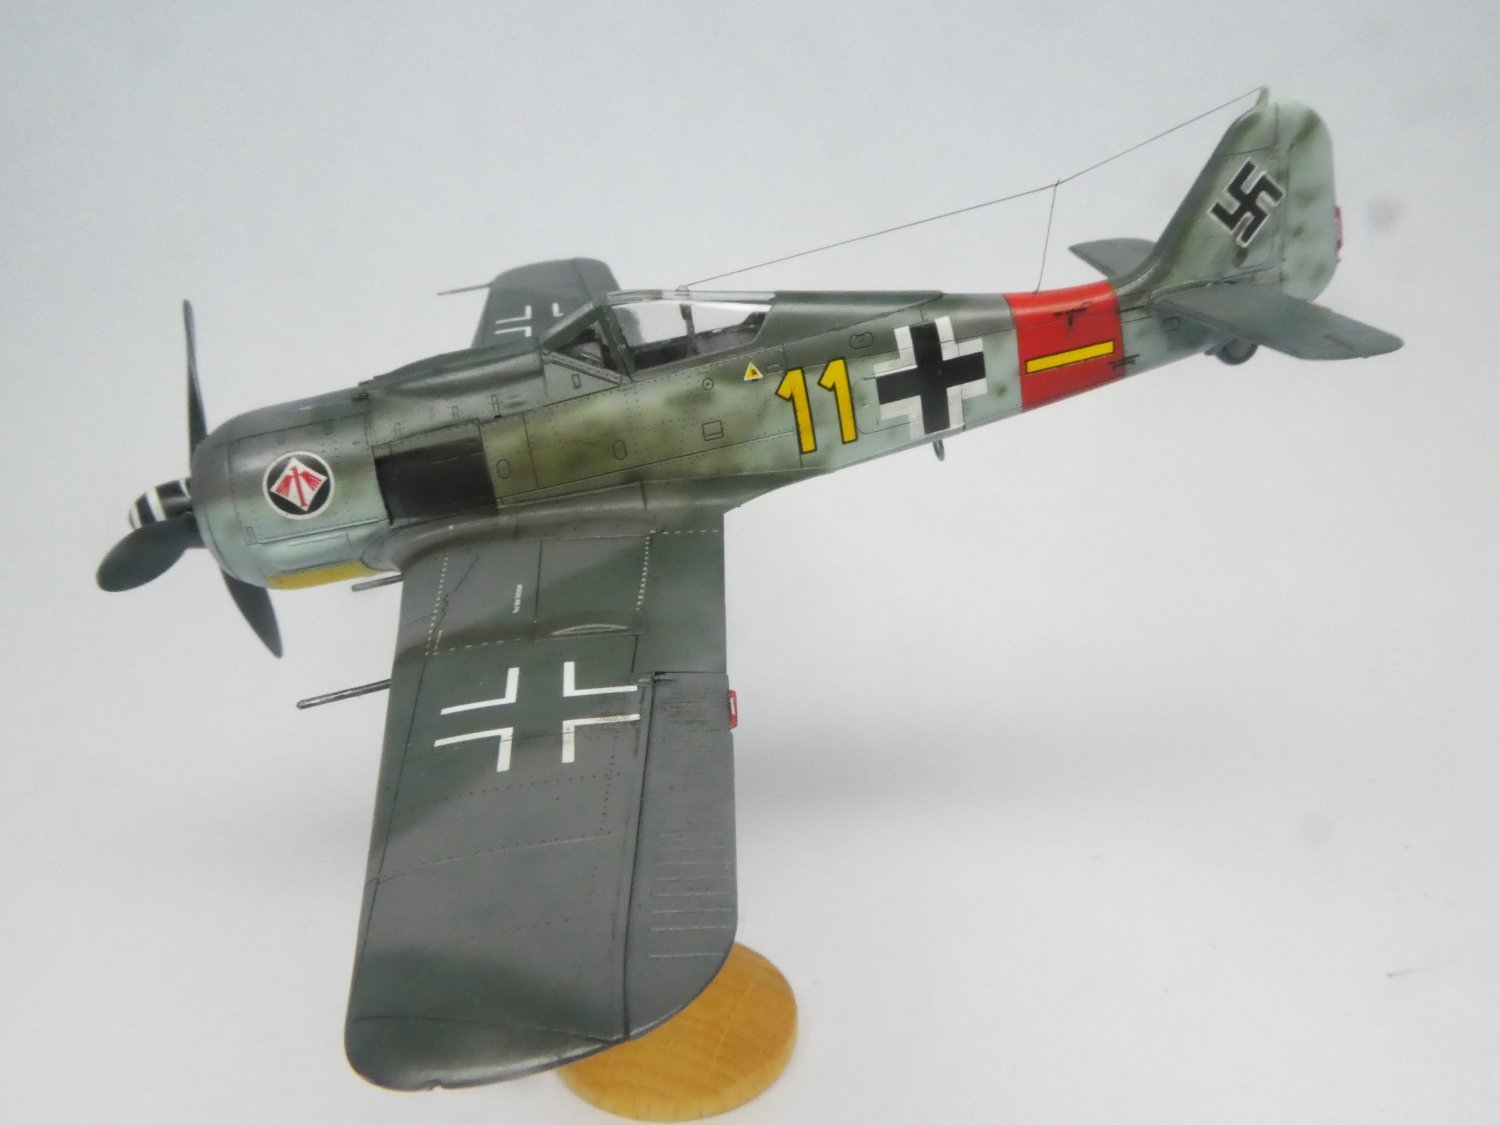
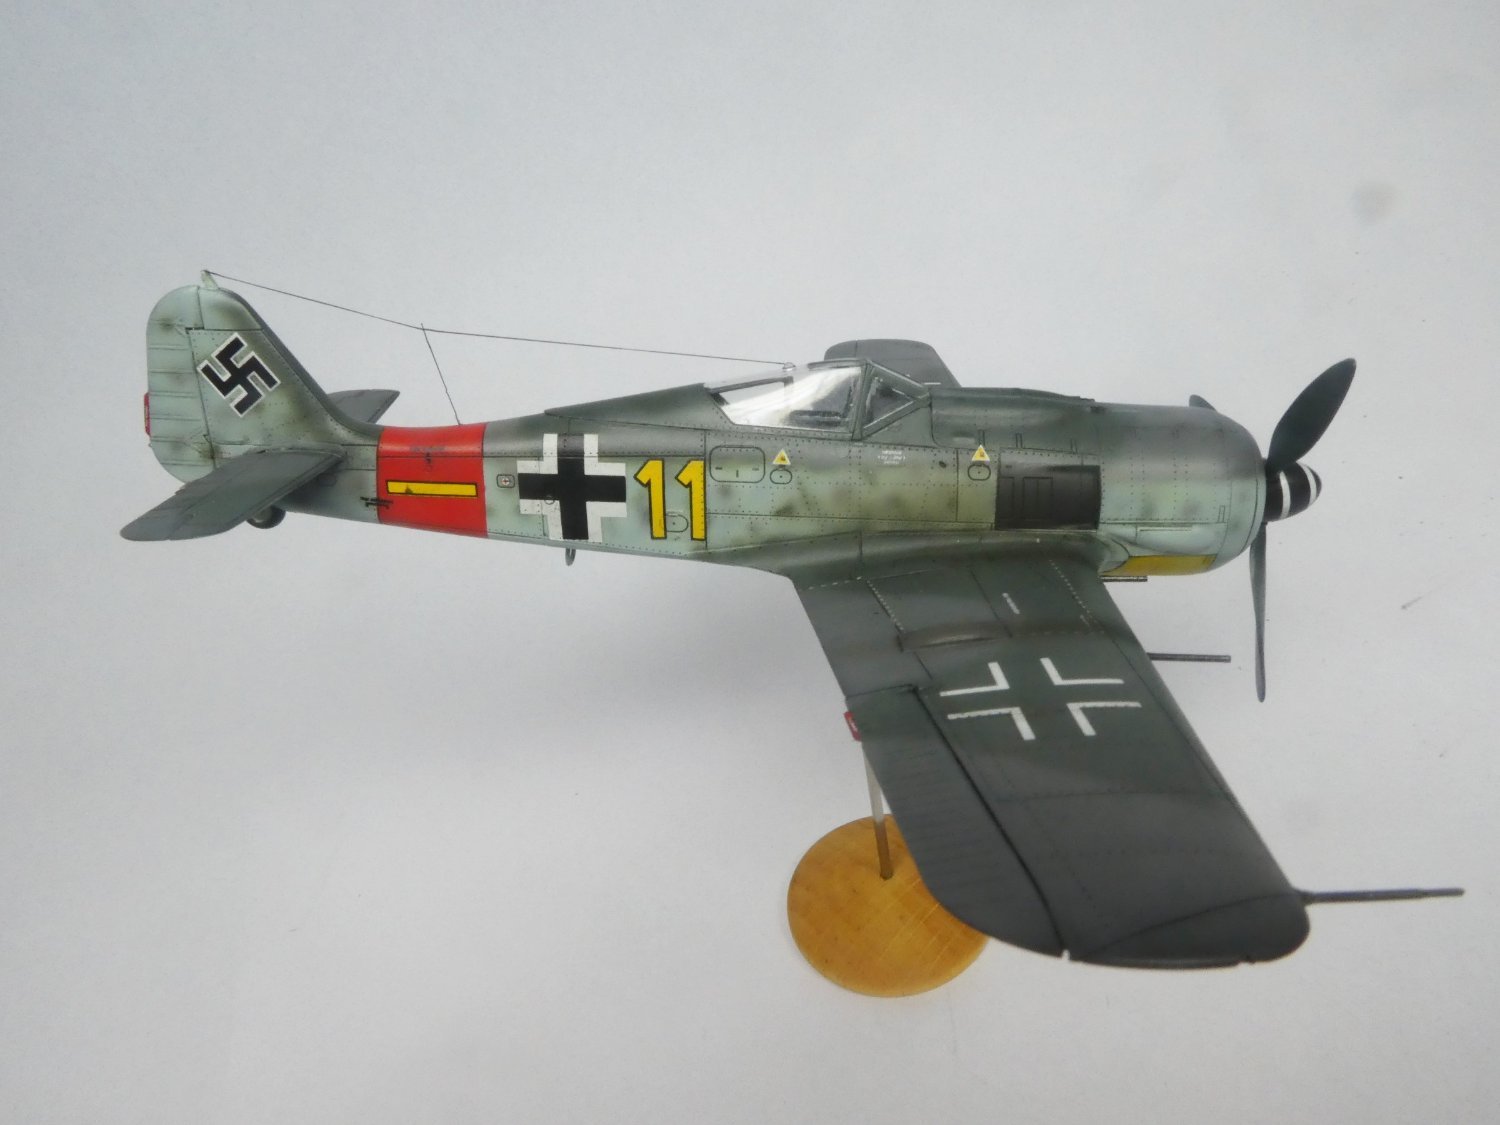
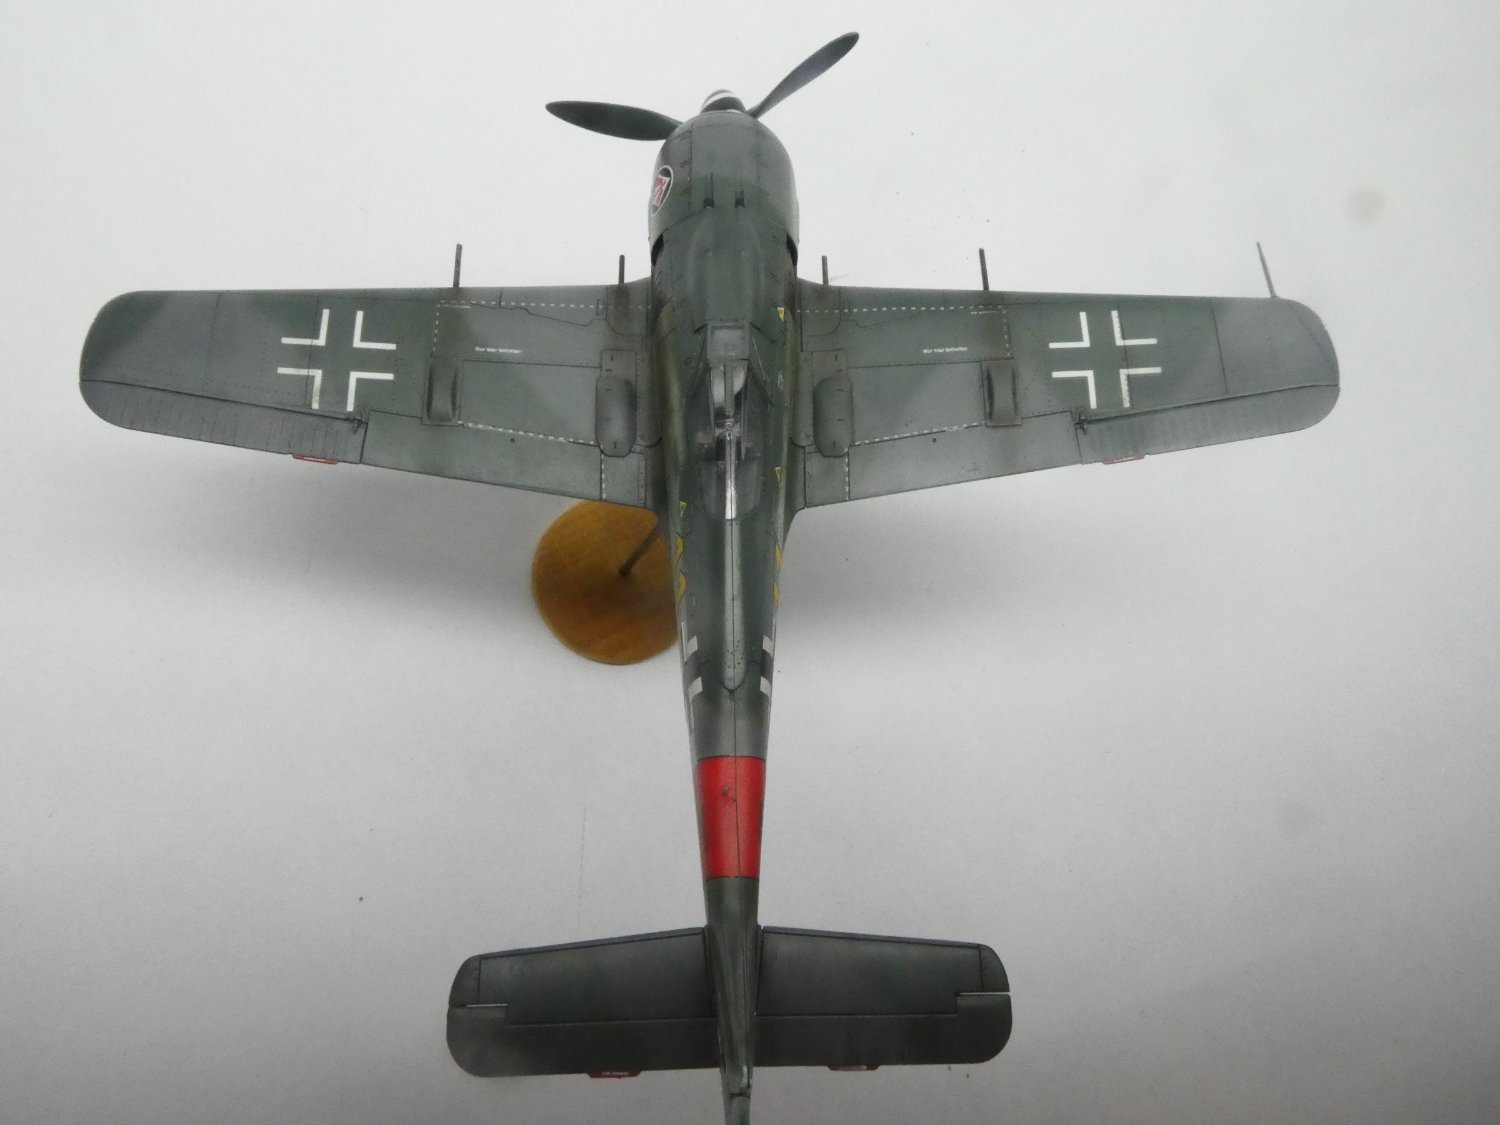
Now will here come a real gem as a kit. If you haven't tried Eduard's 1:72 range I really recommend it. The detail is very good even if the plane is small. Model: Fw190 A8 Scale: 1:72 Manufacture: Eduard Extras: None Colors: MRP


- 60 replies
-
- 12
-
-
Airplanes and Tanks in plastic by Jörgen
Jörgen replied to Jörgen's topic in Non-ship/categorised builds
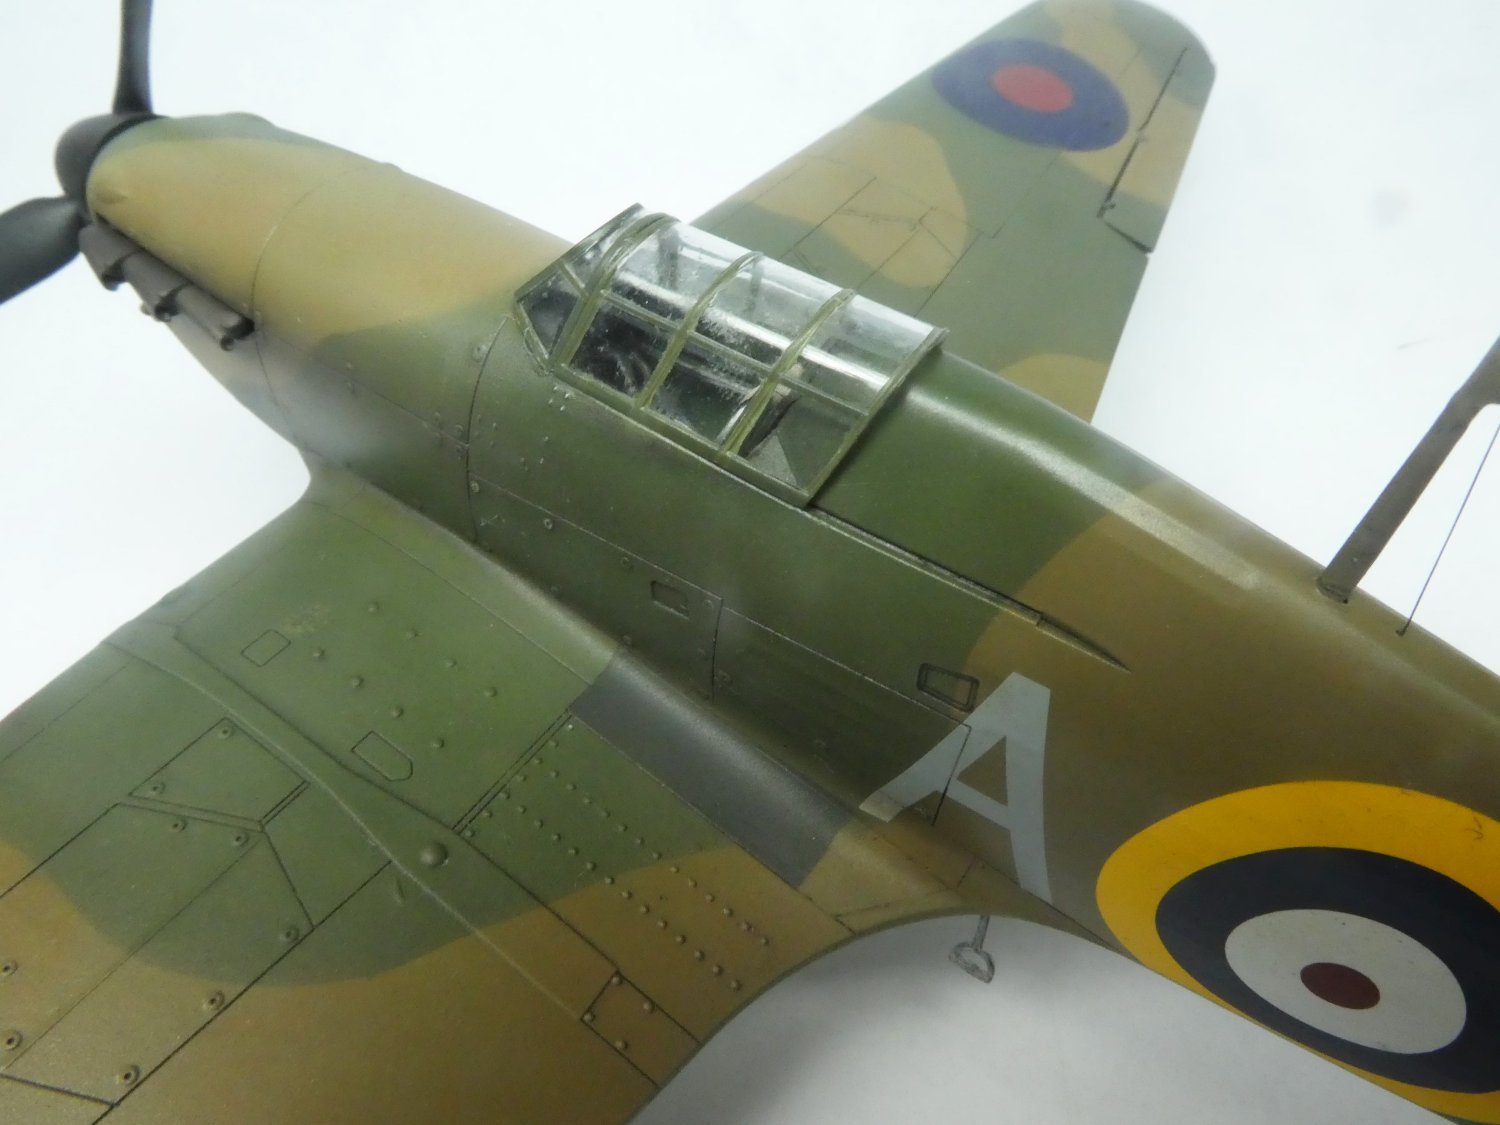
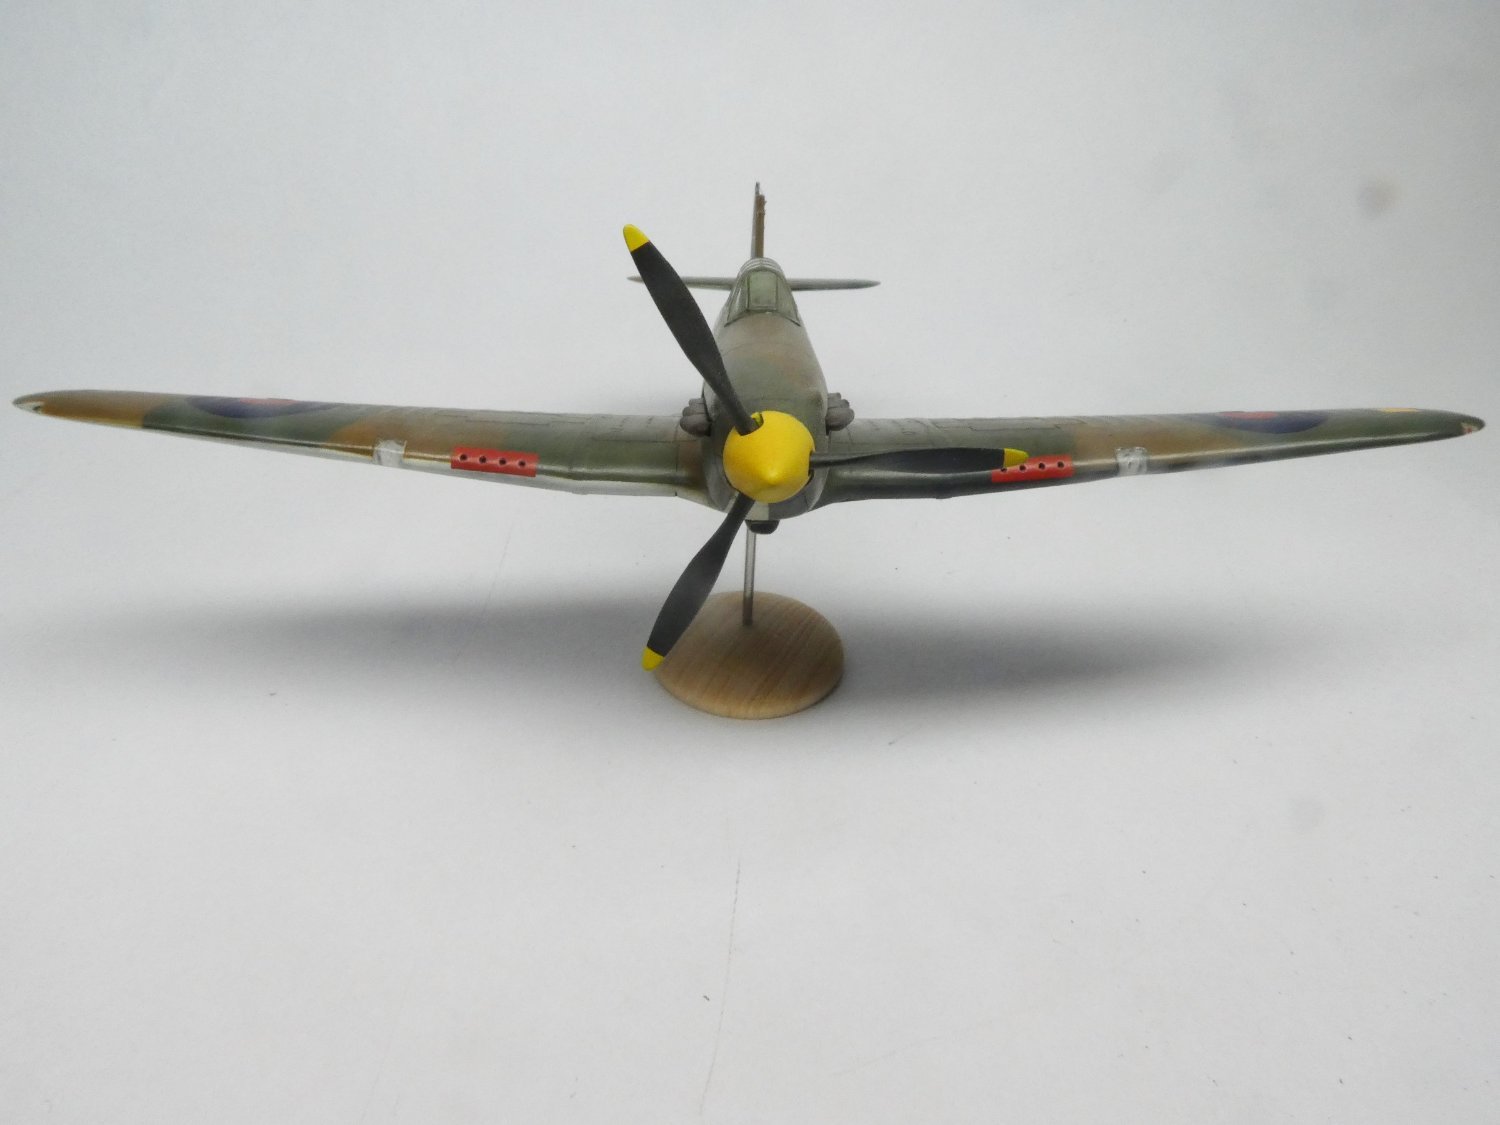
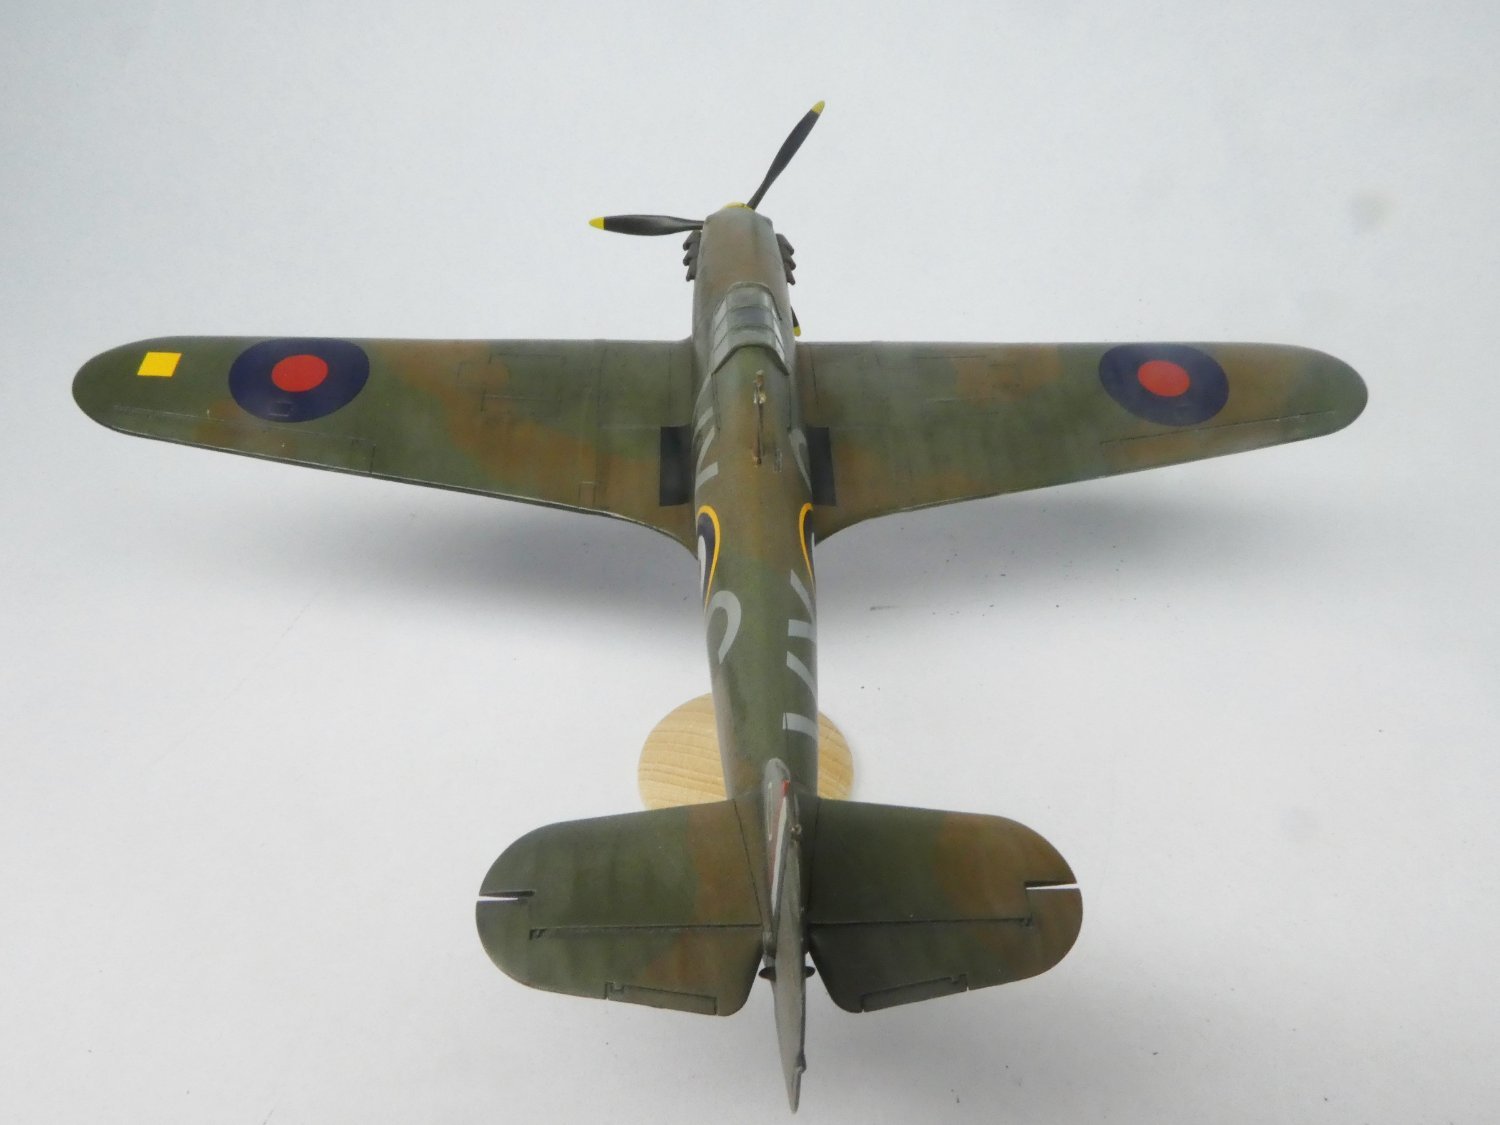
Here is the first 1:72 kit. As you se I have stared to do these in flight mode. The pictures are bigger than the kit Model: Hurricane Mk1 Scale: 1:72 Manufacture: Airfix Extras: None Colors: MRP


- 60 replies
-
- 14
-
-
Airplanes and Tanks in plastic by Jörgen
Jörgen replied to Jörgen's topic in Non-ship/categorised builds
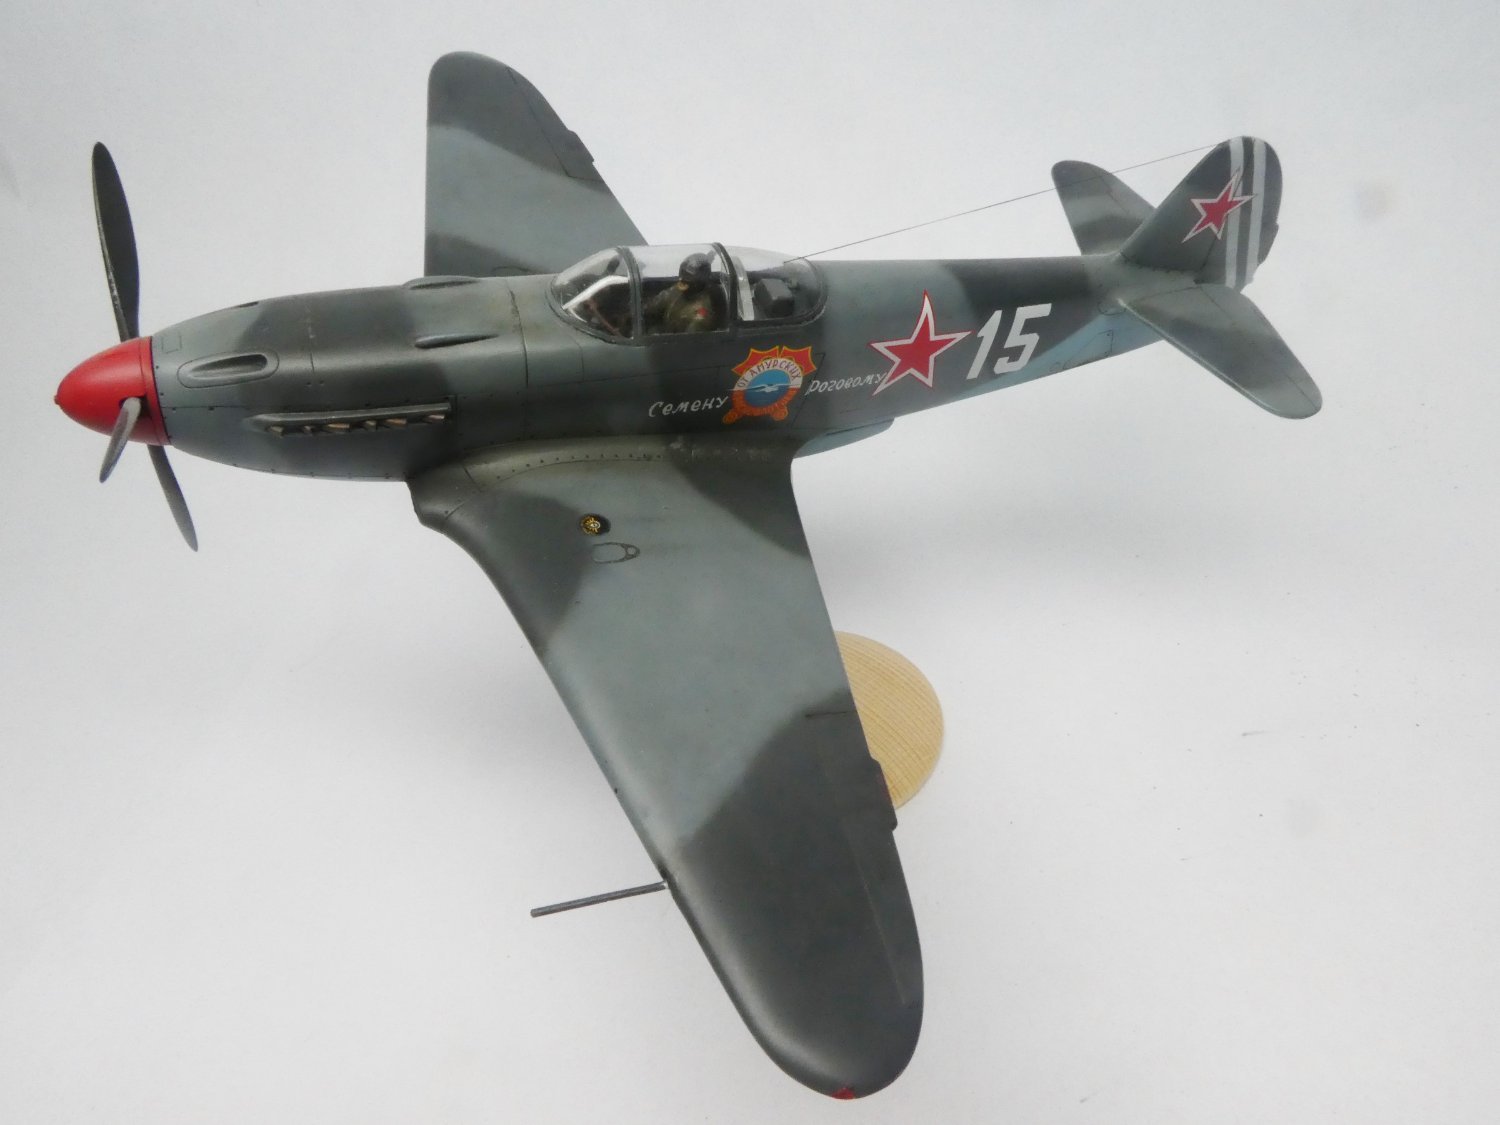
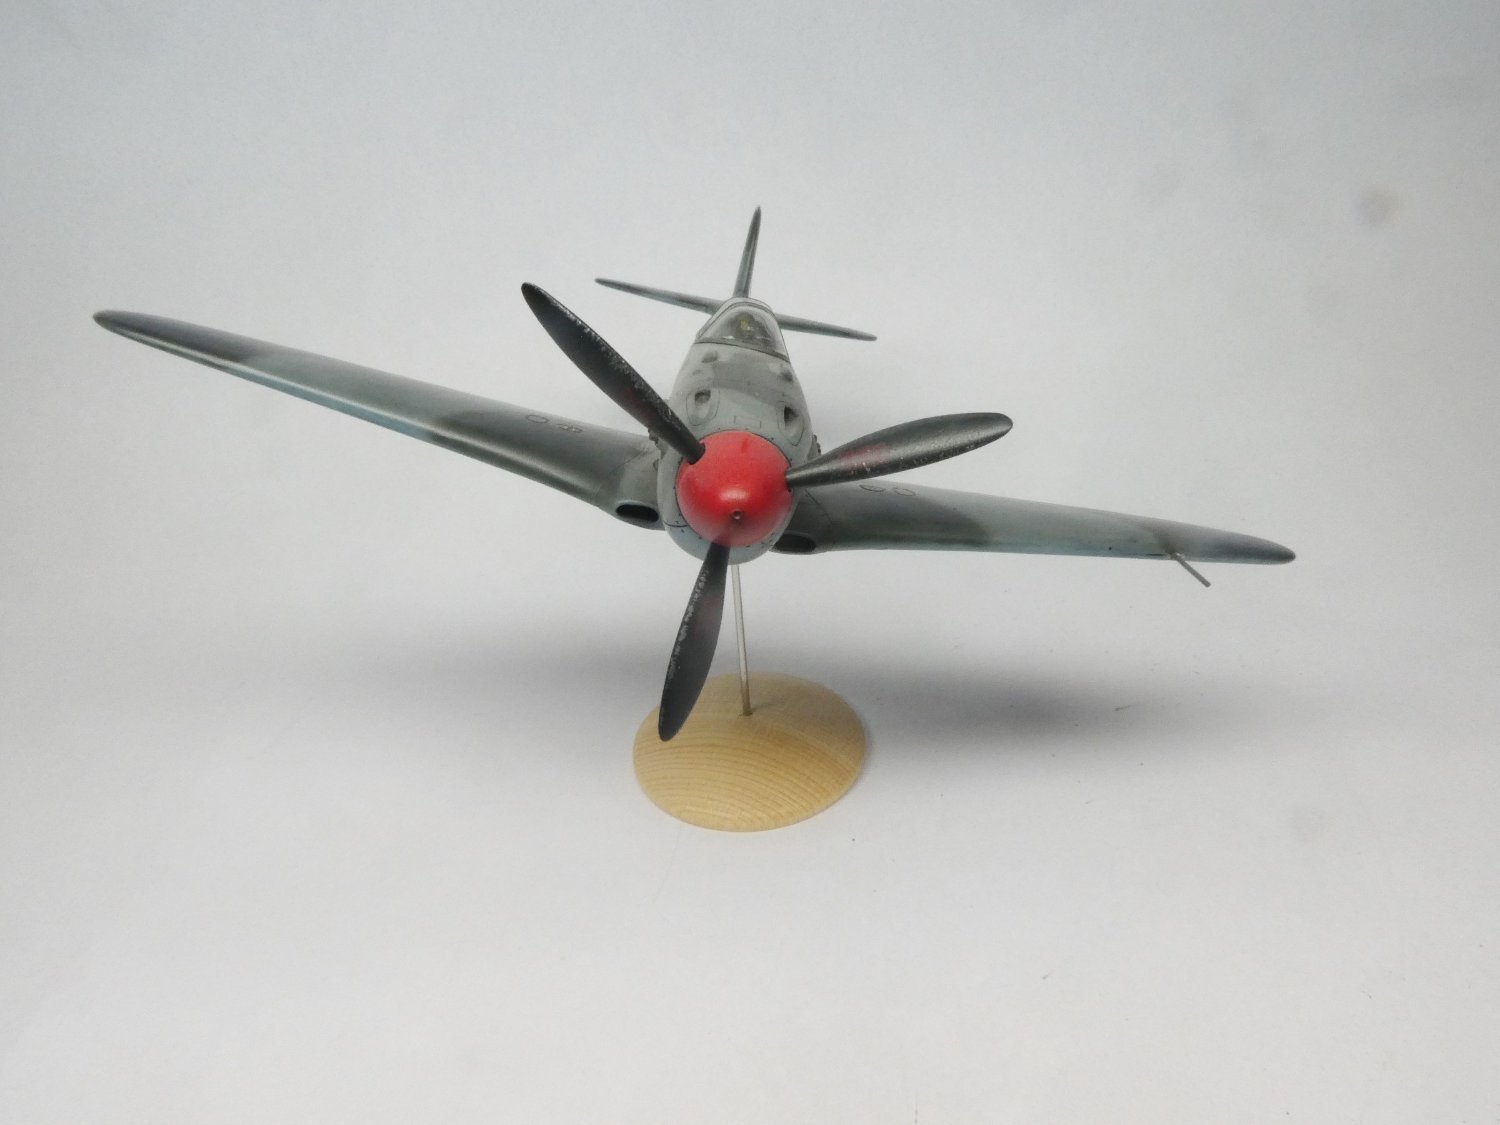
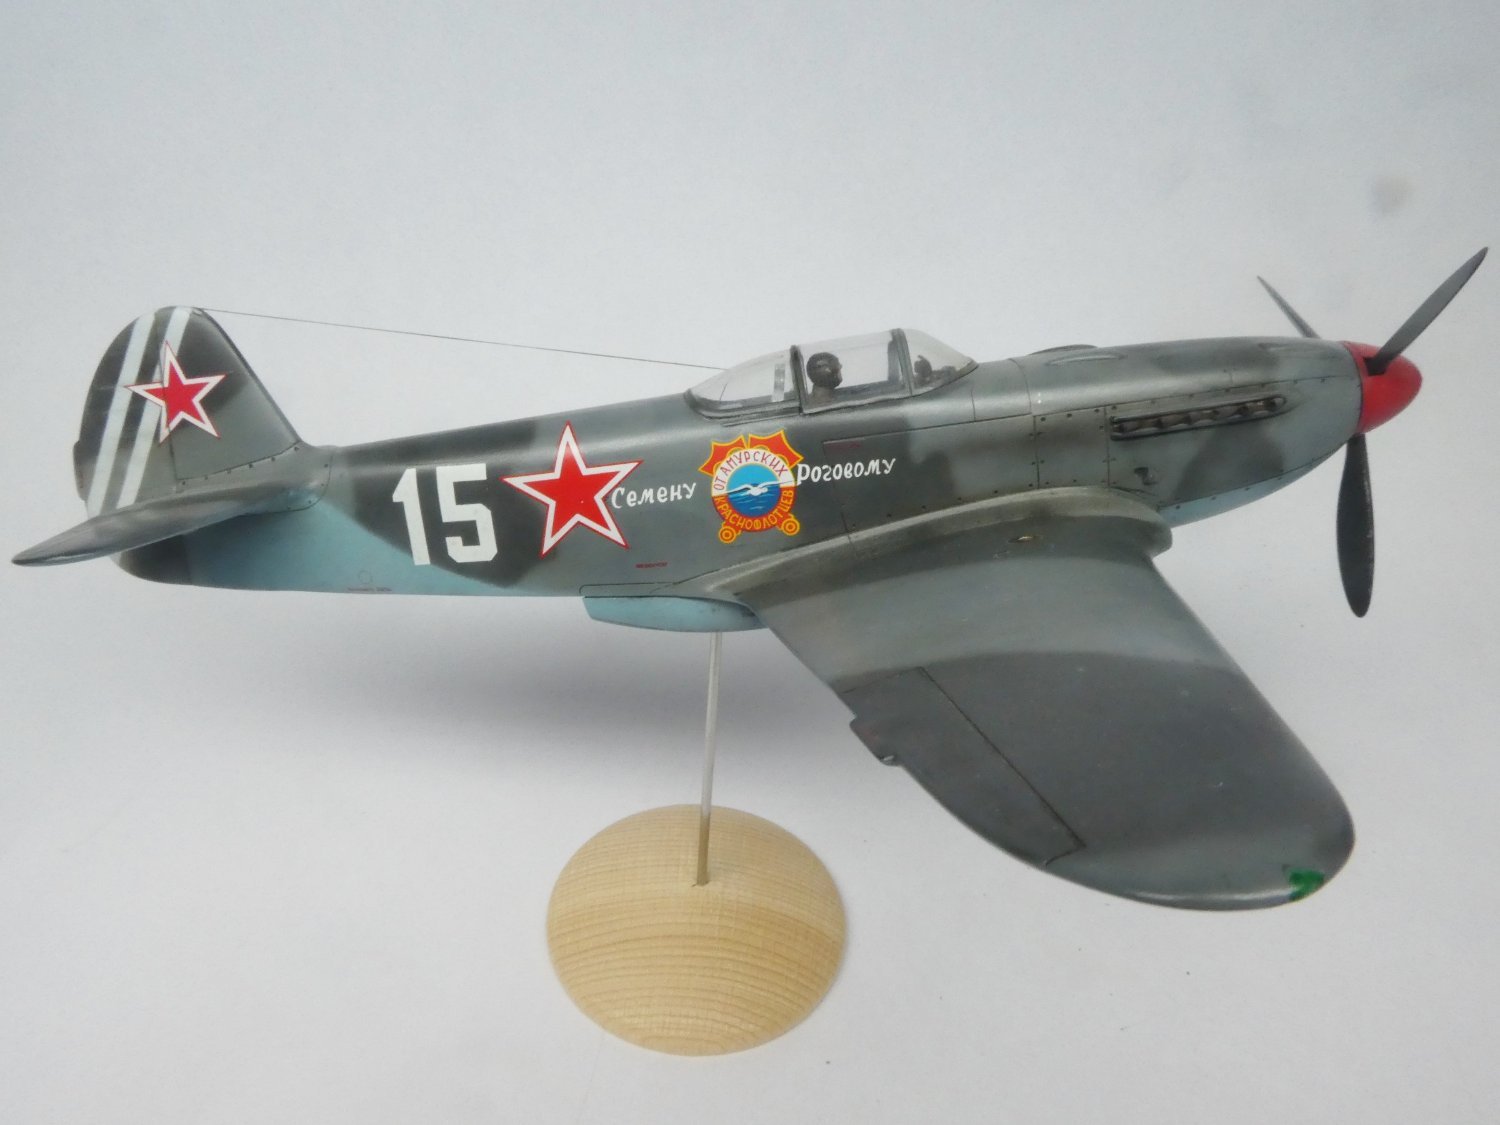
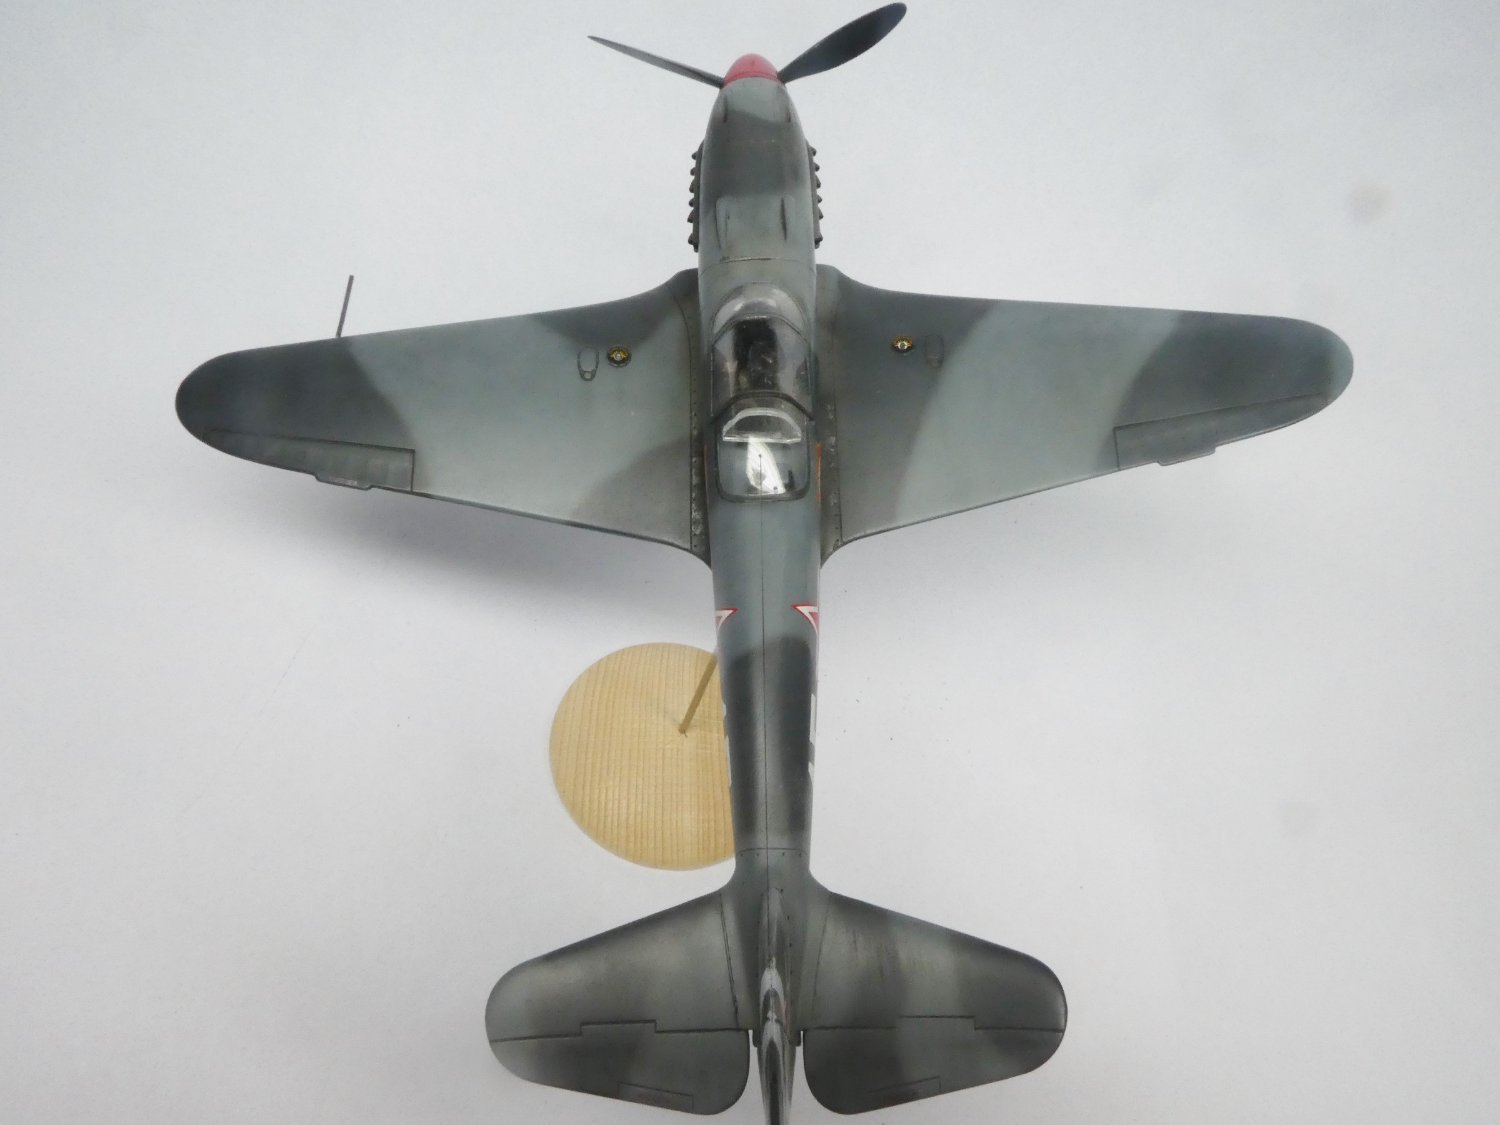
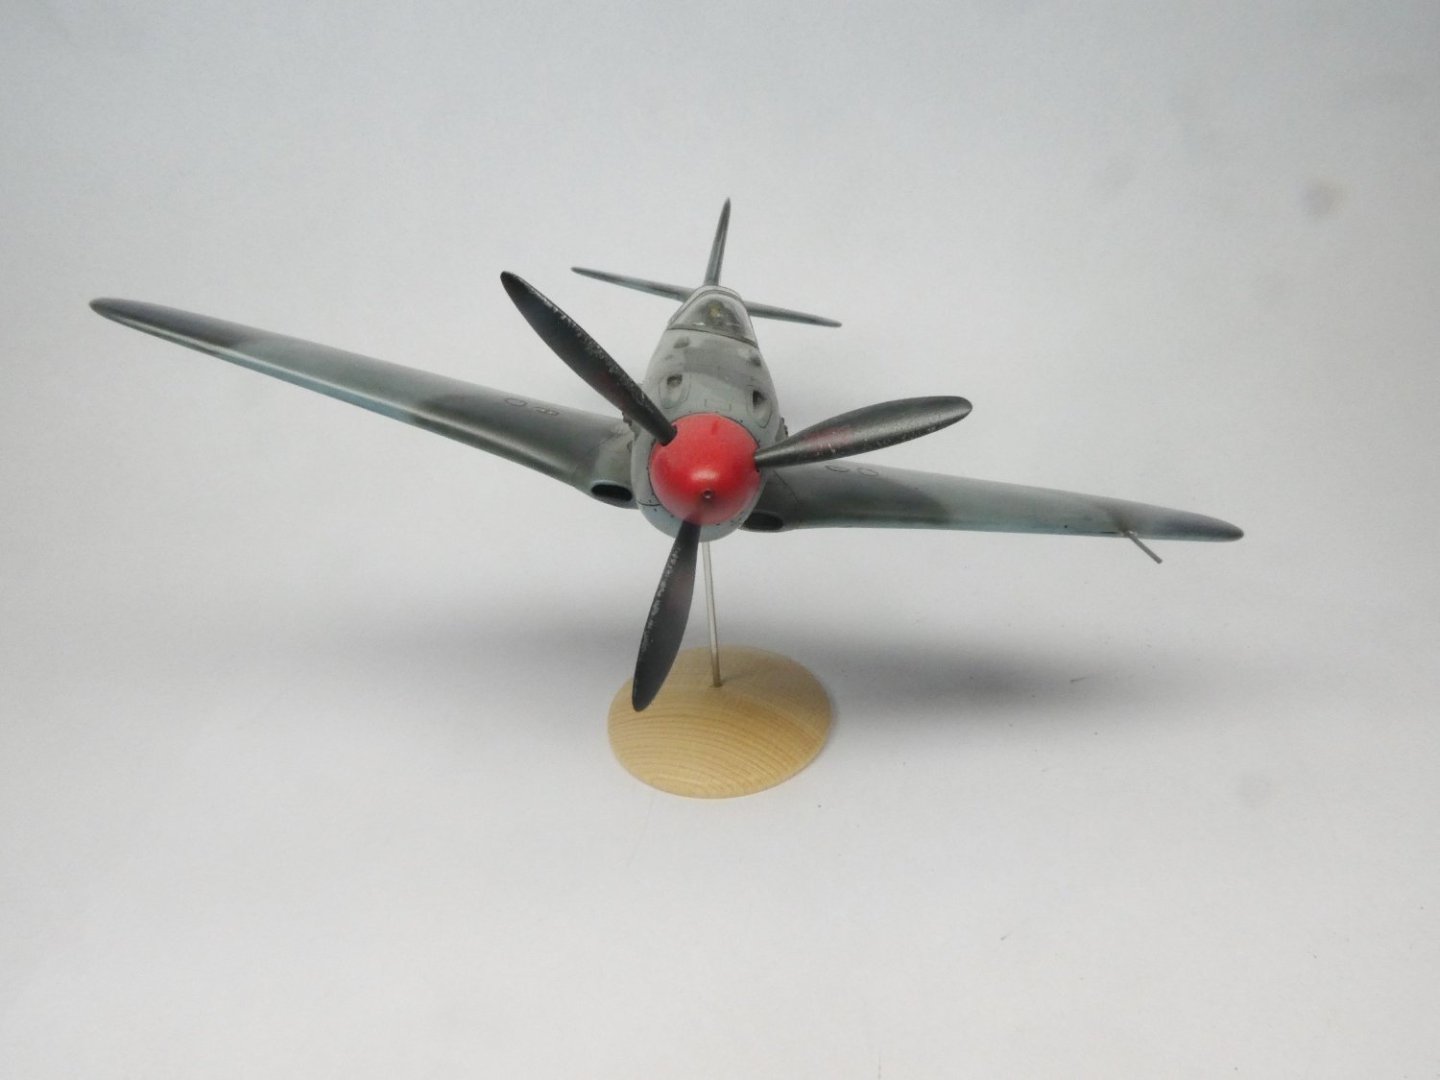
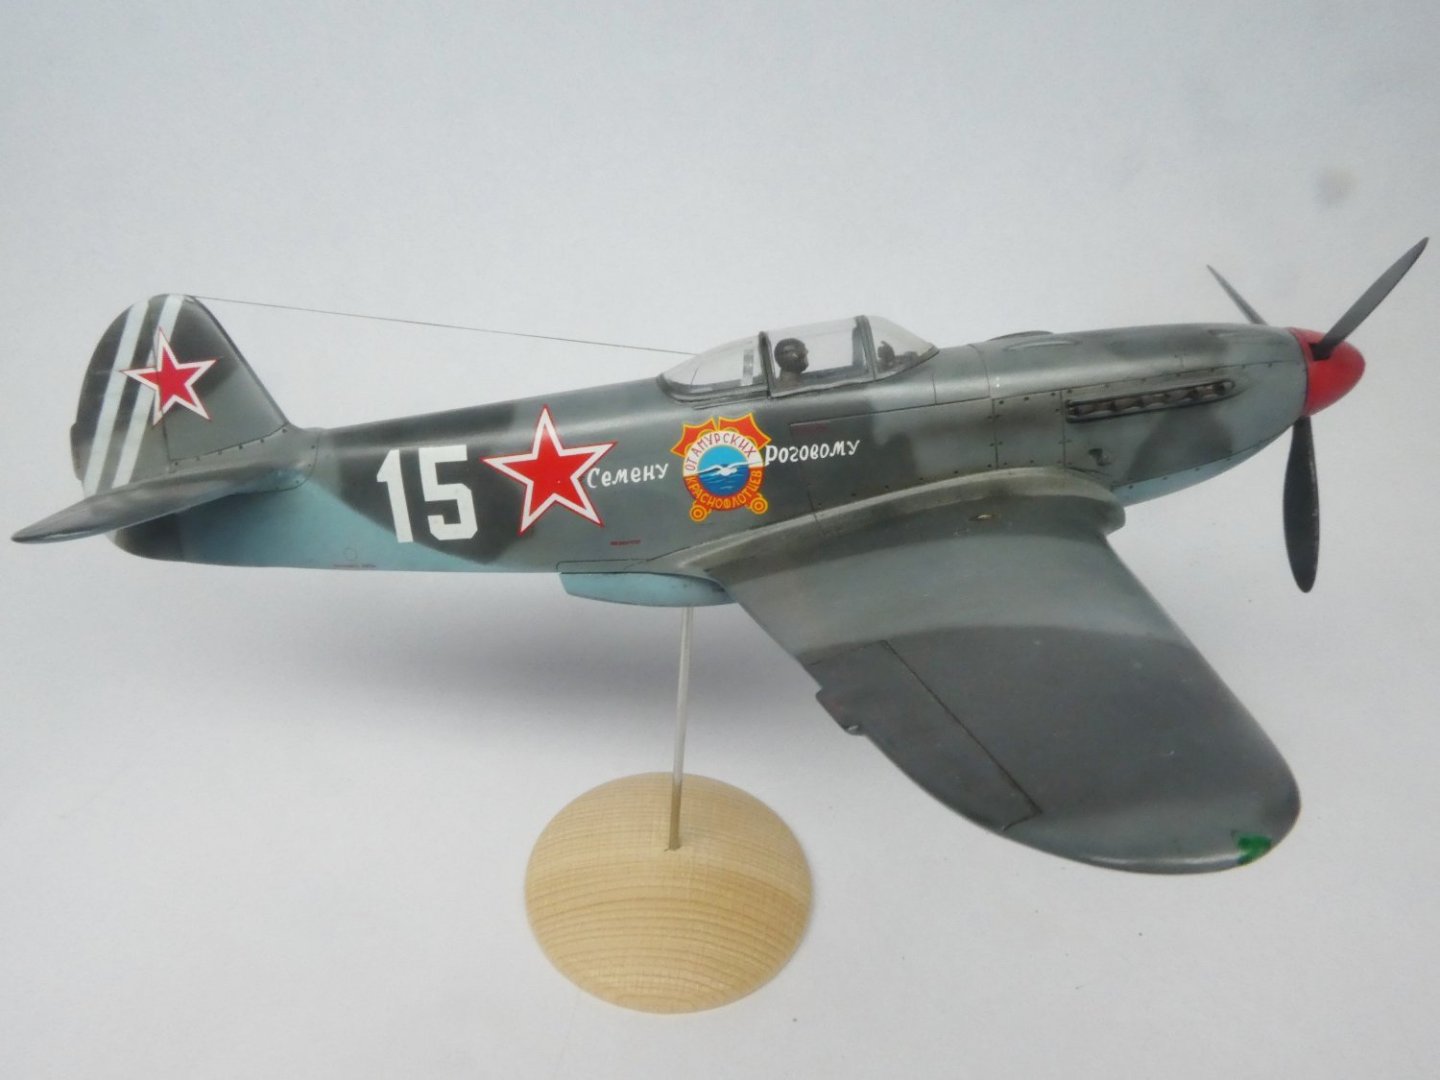
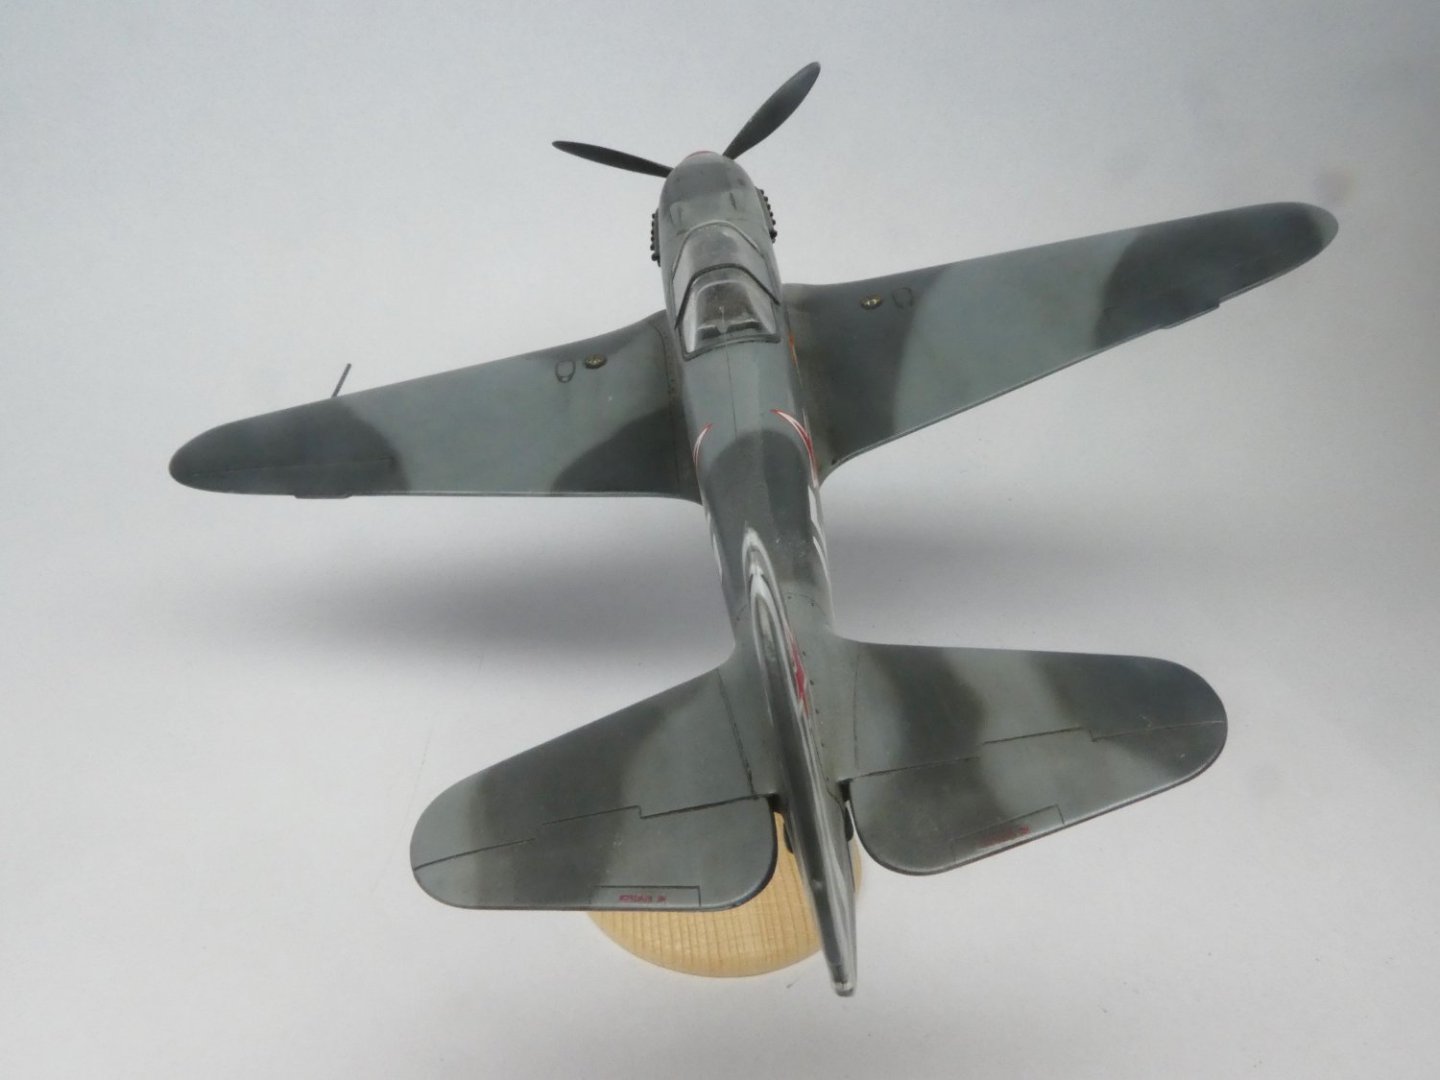
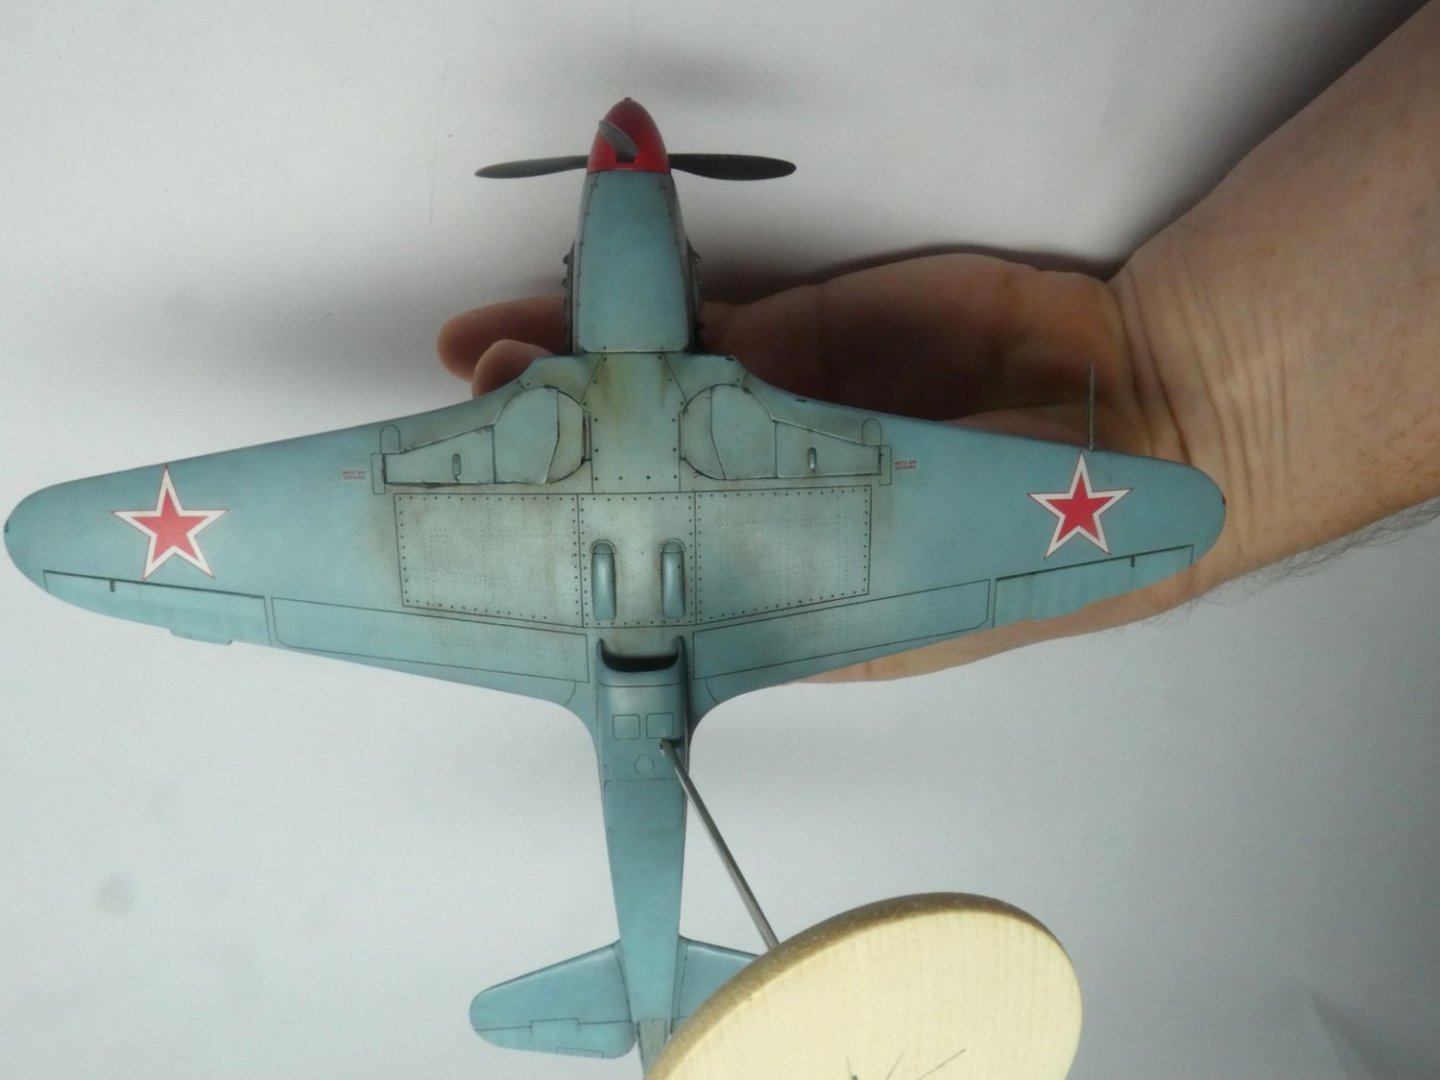
Next is a Yak3 and here I experimented long time to find a good locking way to make to make a stand so I can build the planes in flight mode. I ended up to using a cheap round tree base and a stainless steel welding wire. In my opinion it looks clean enough. I will do this for all my 1:72 airplanes in the future. This experiment is in 1:48. Model: Yak 3 Scale: 1:48 Manufacture: Eduard Extras: None Colors: MRP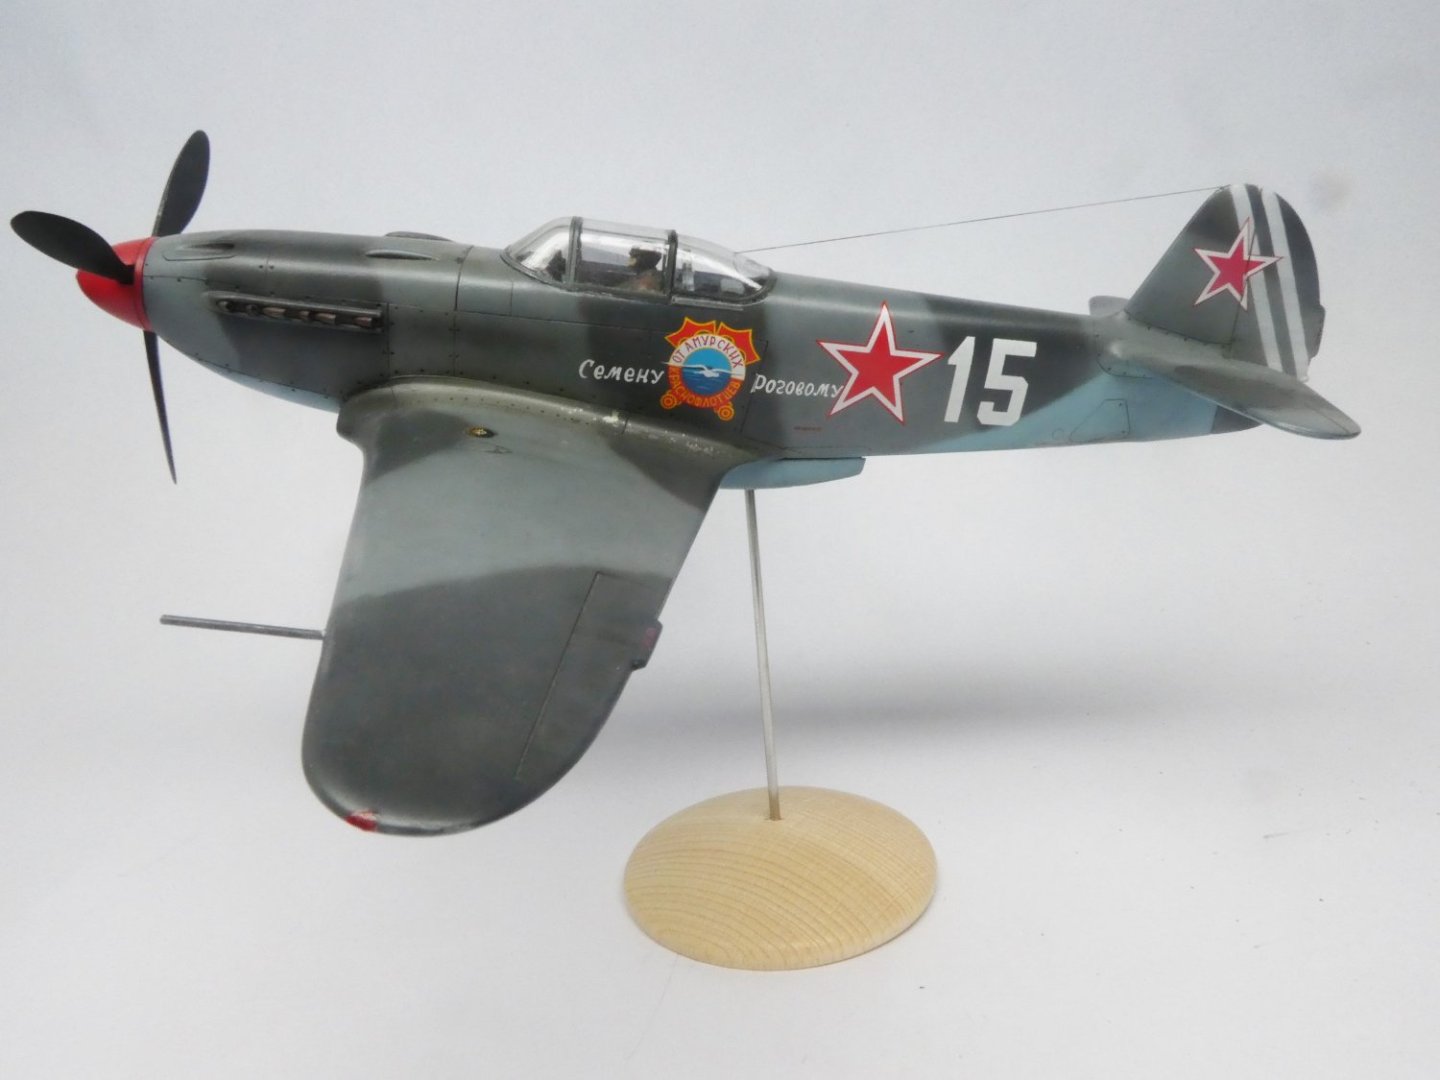


- 60 replies
-
- 12
-
-
Airplanes and Tanks in plastic by Jörgen
Jörgen replied to Jörgen's topic in Non-ship/categorised builds
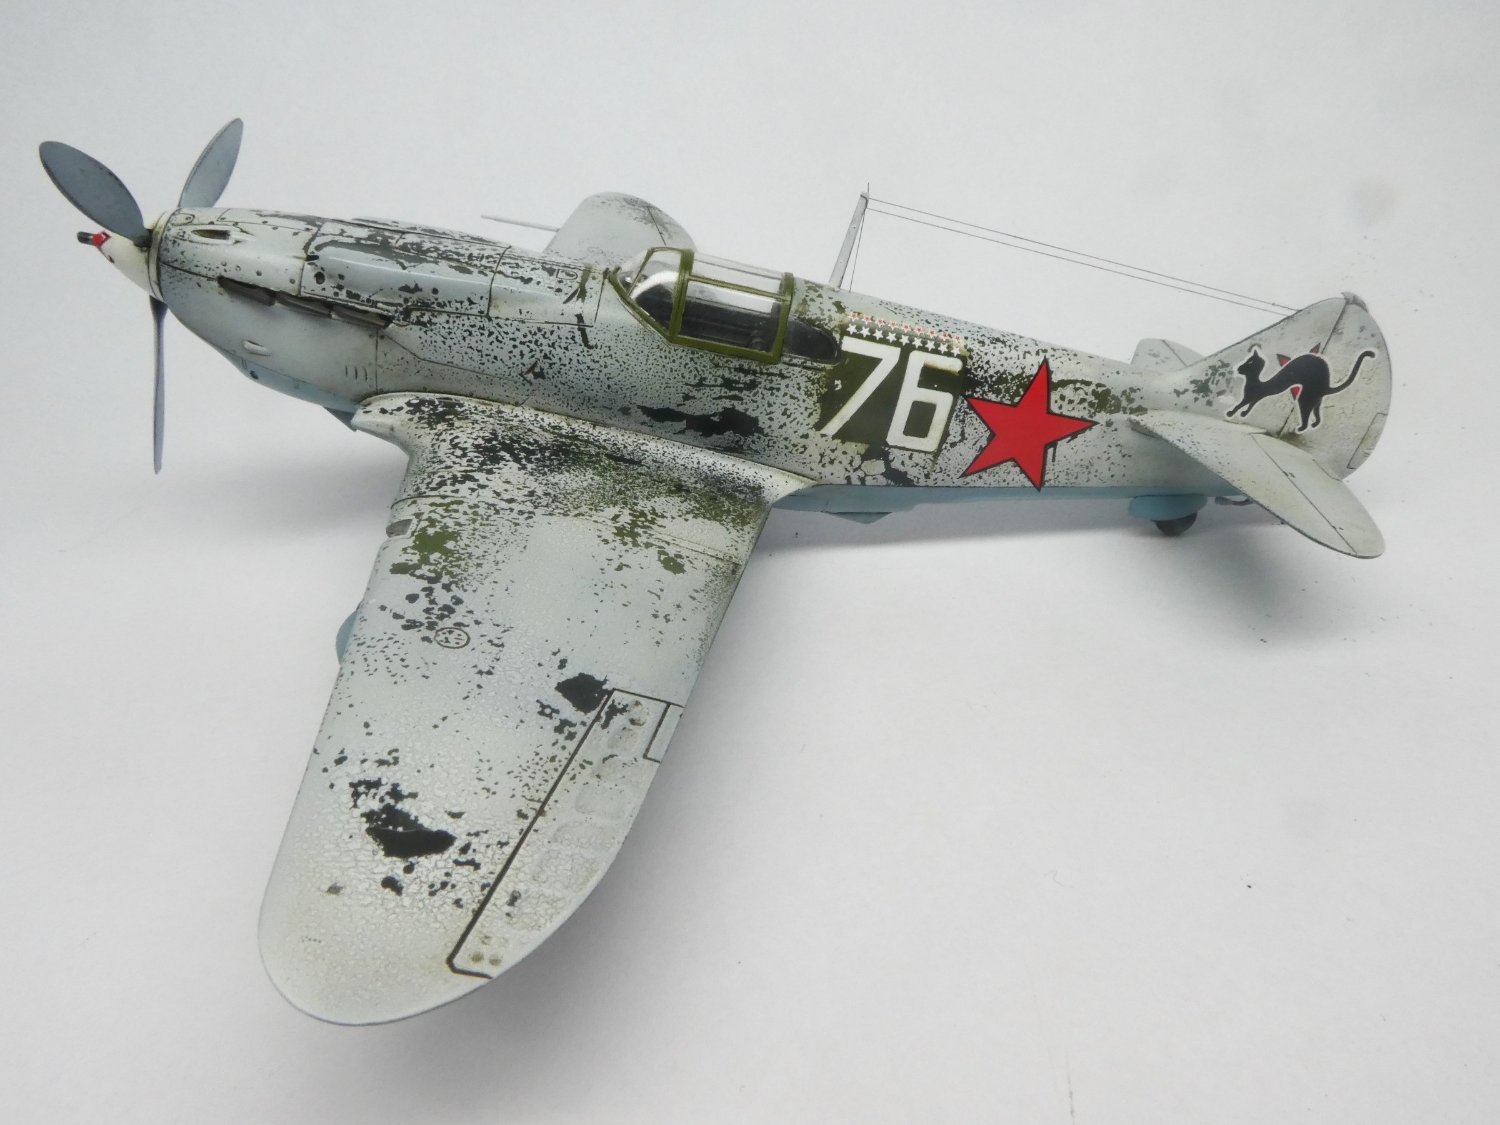
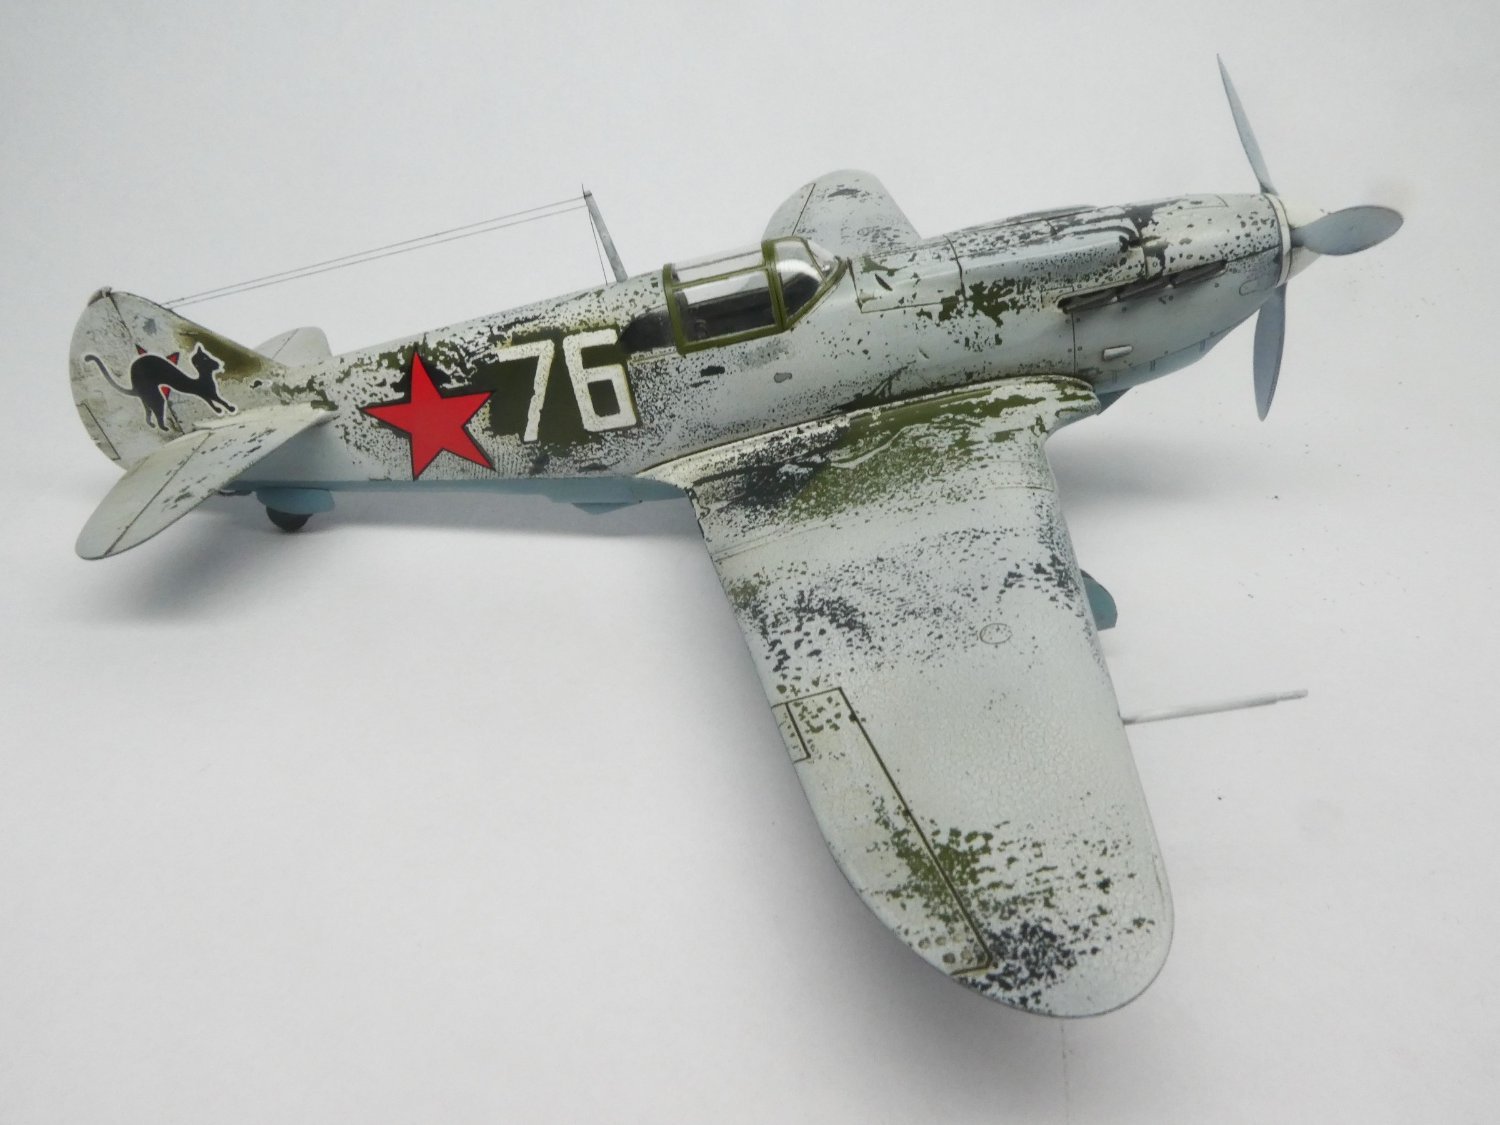
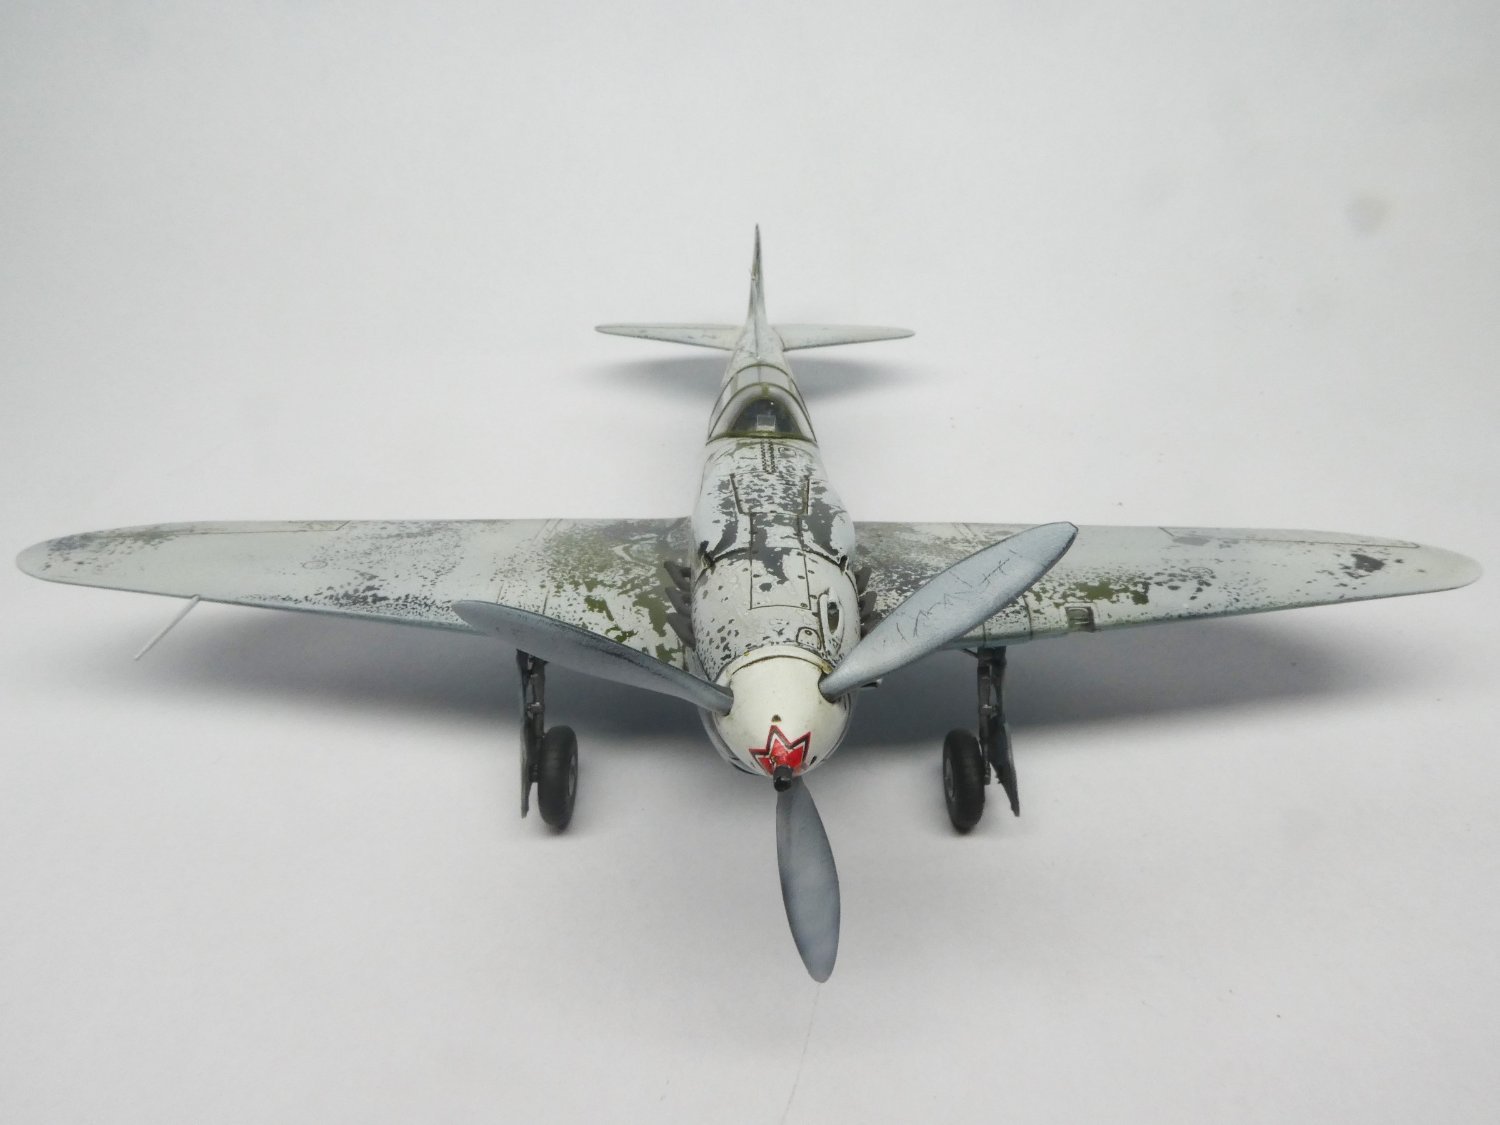
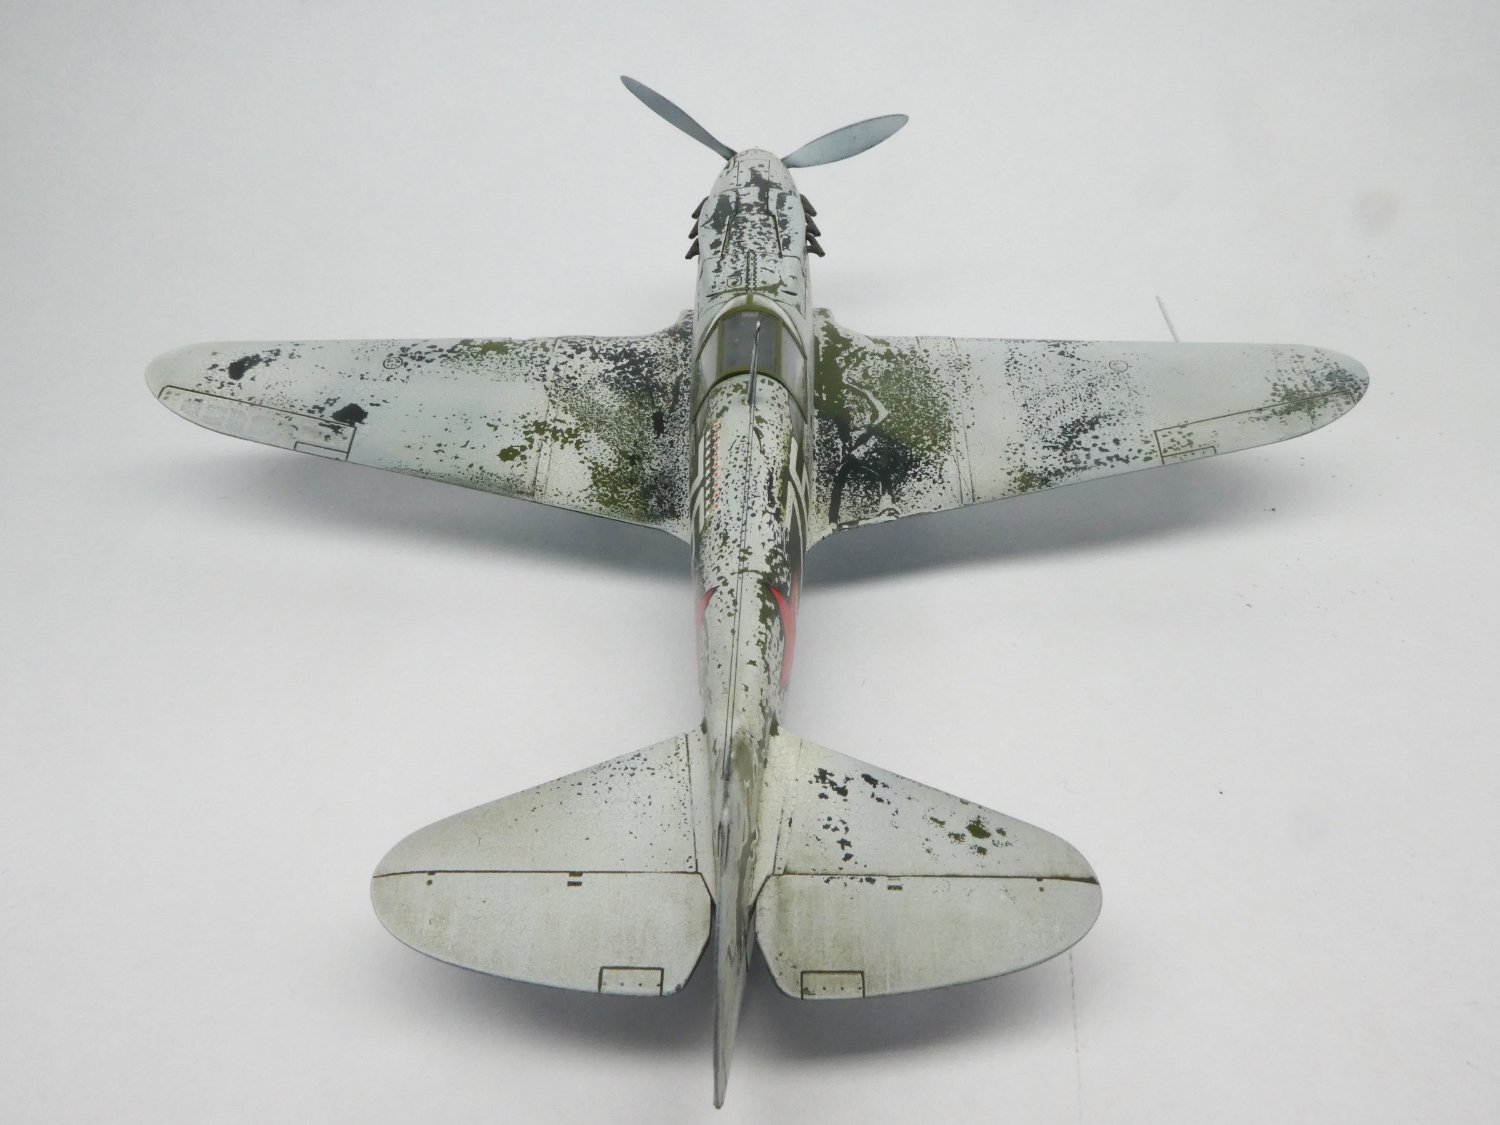
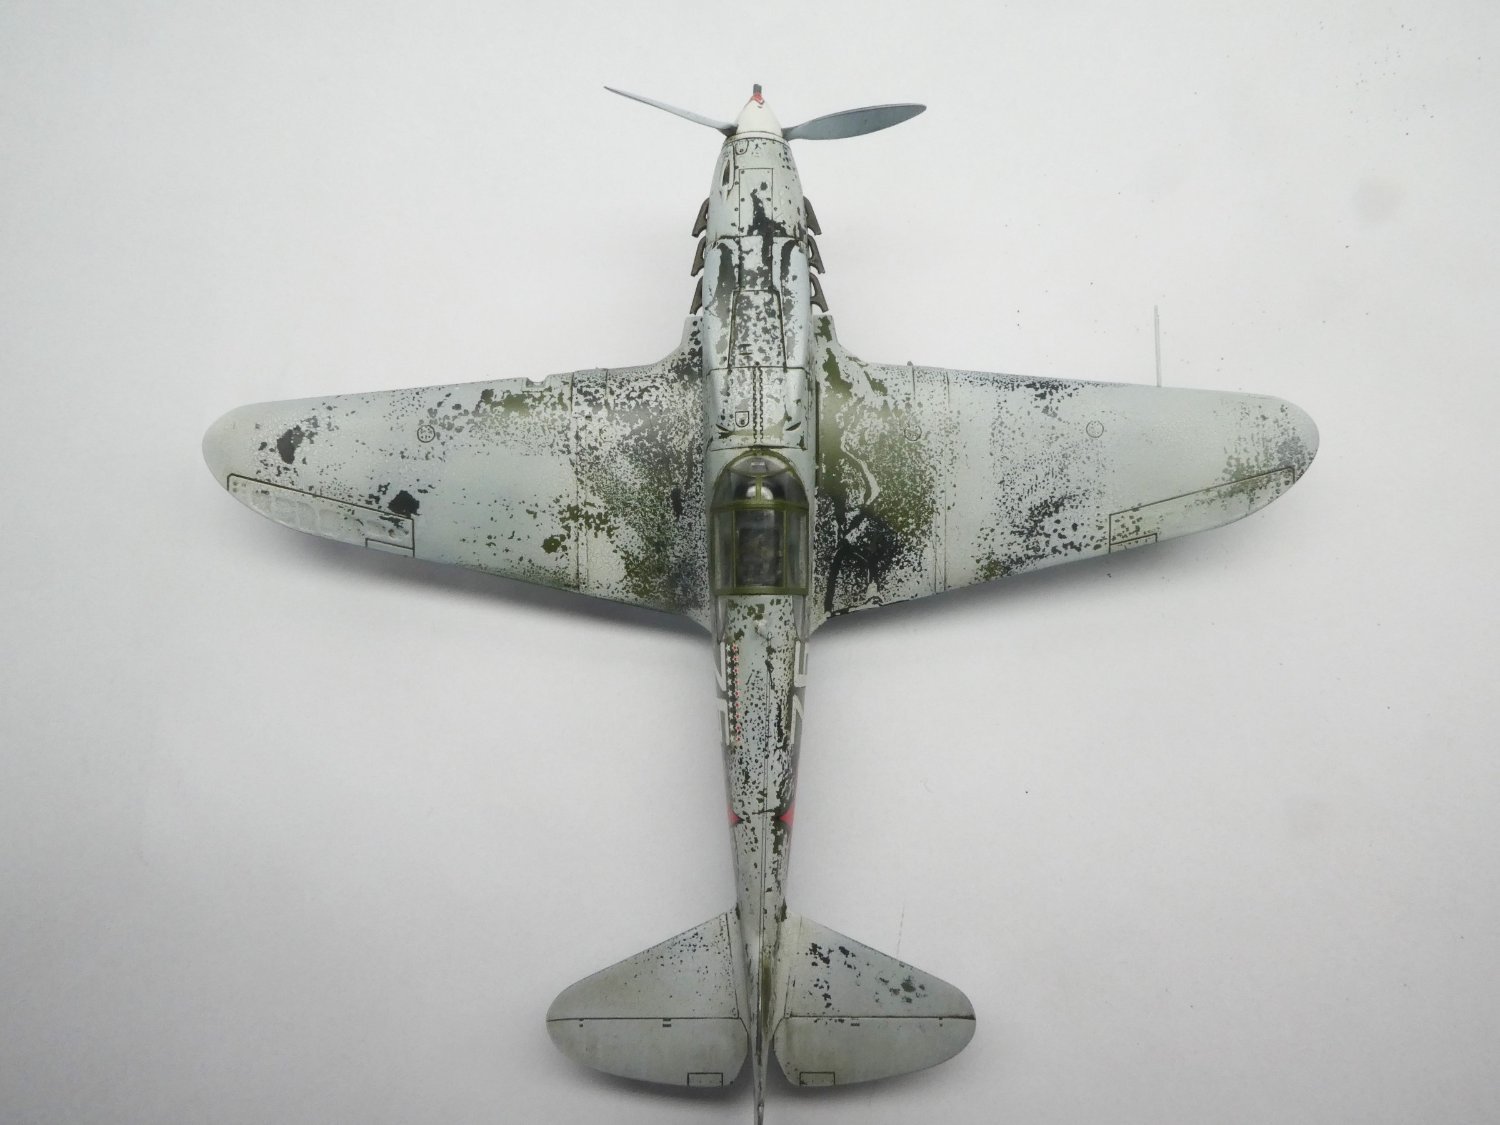
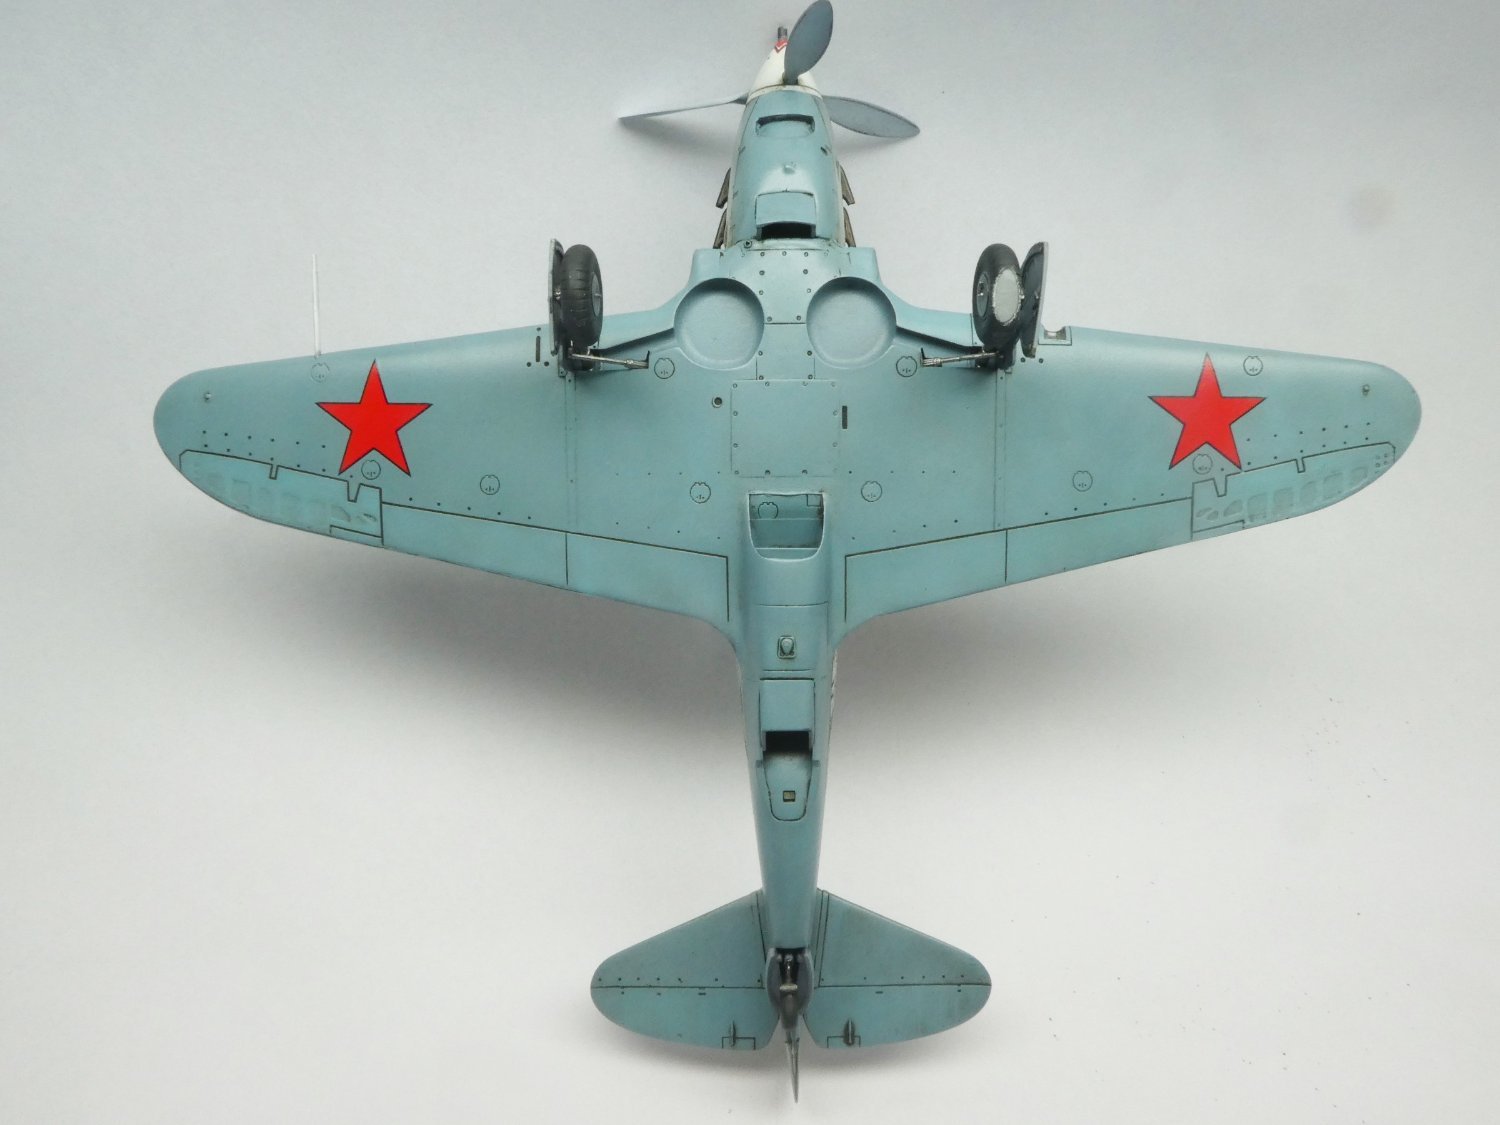
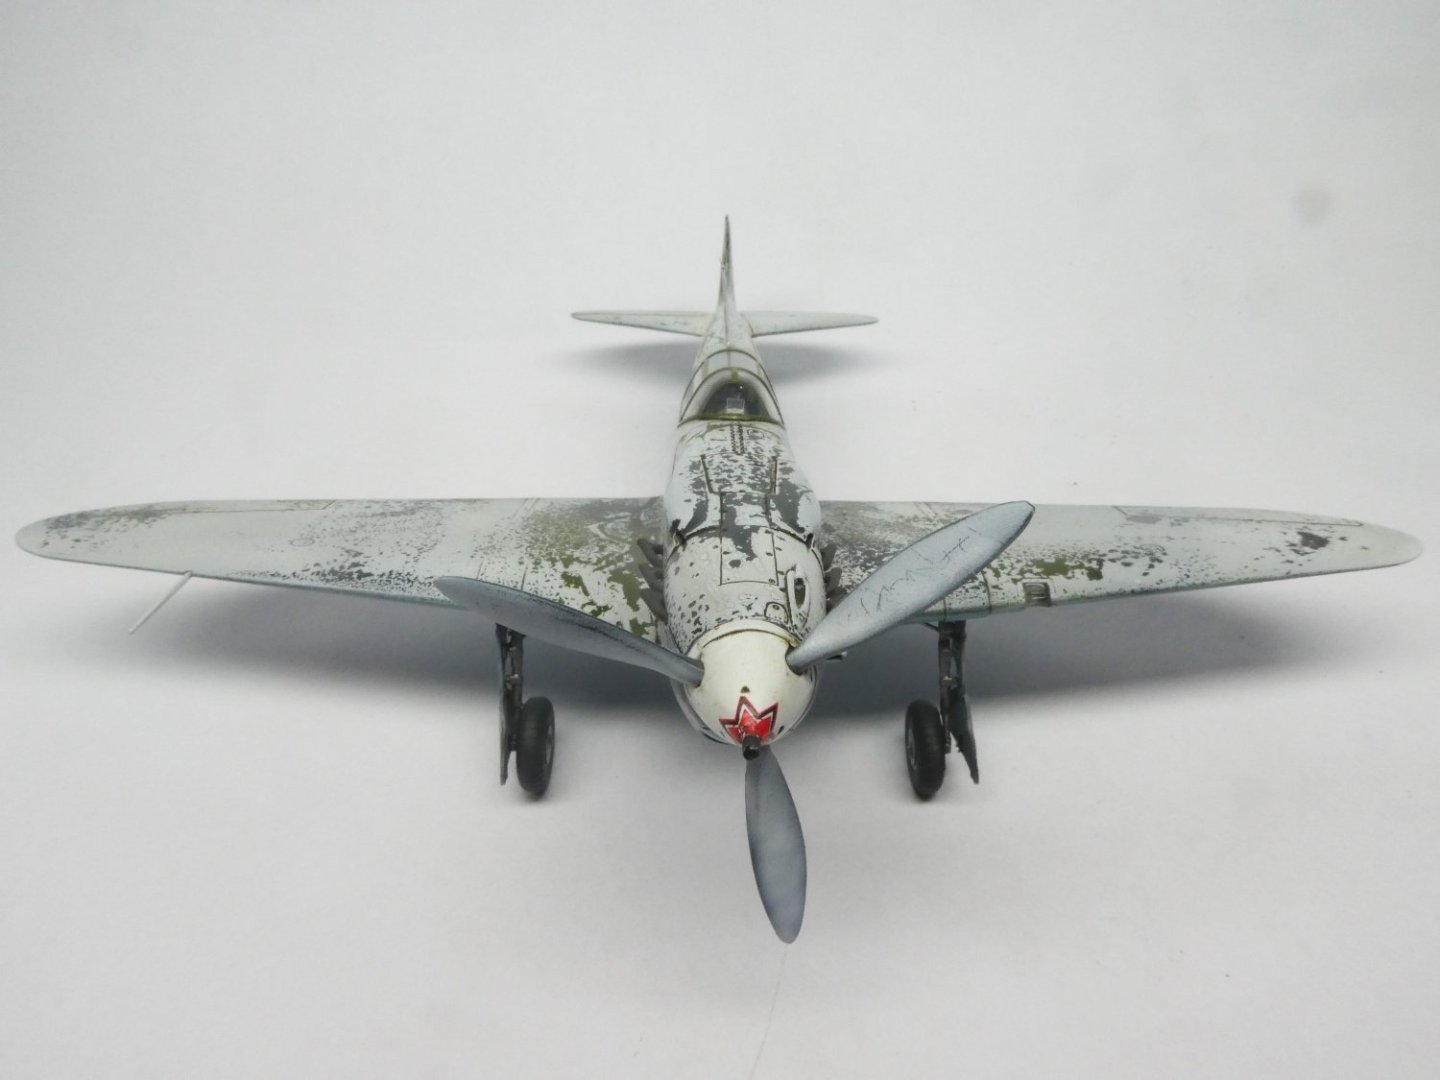
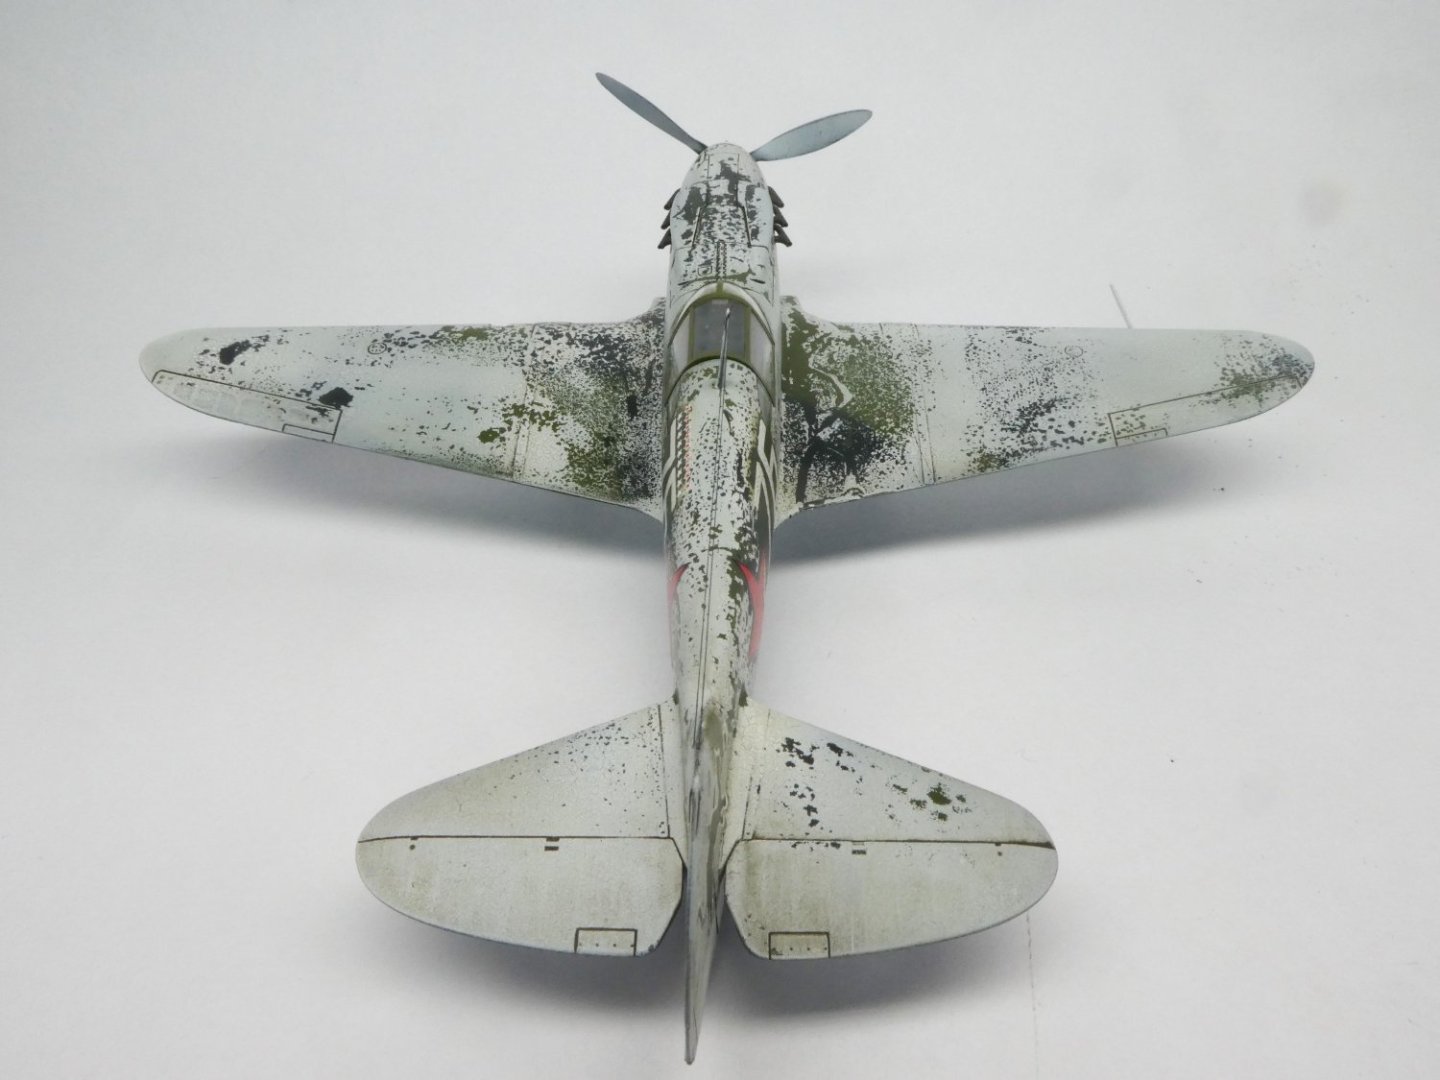
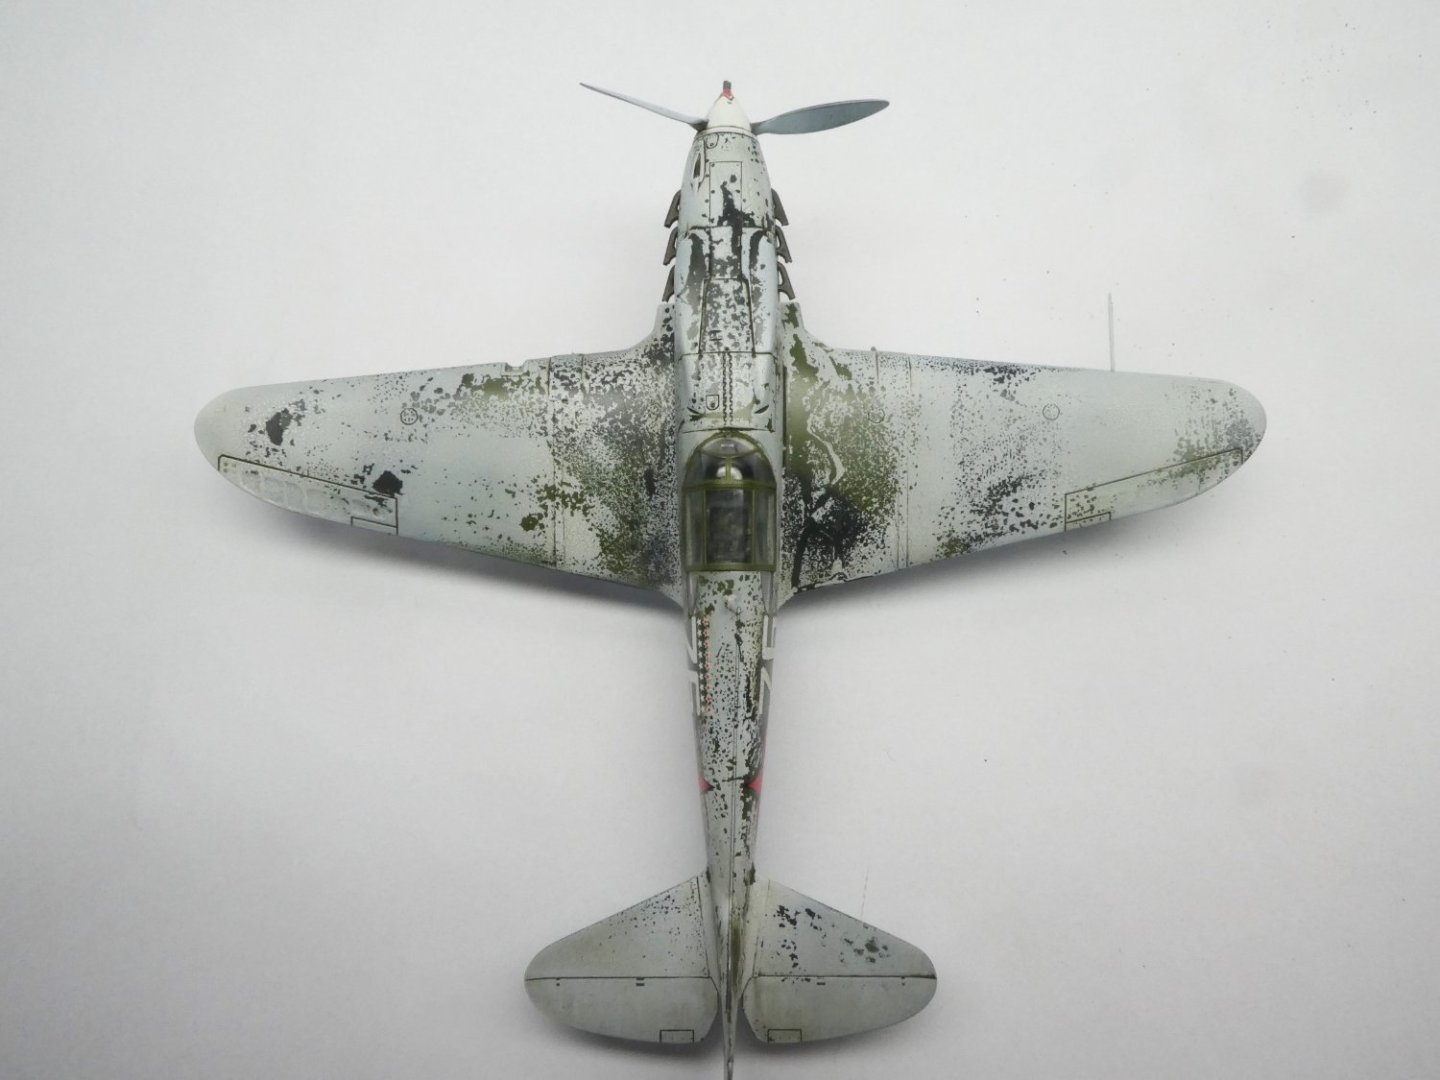
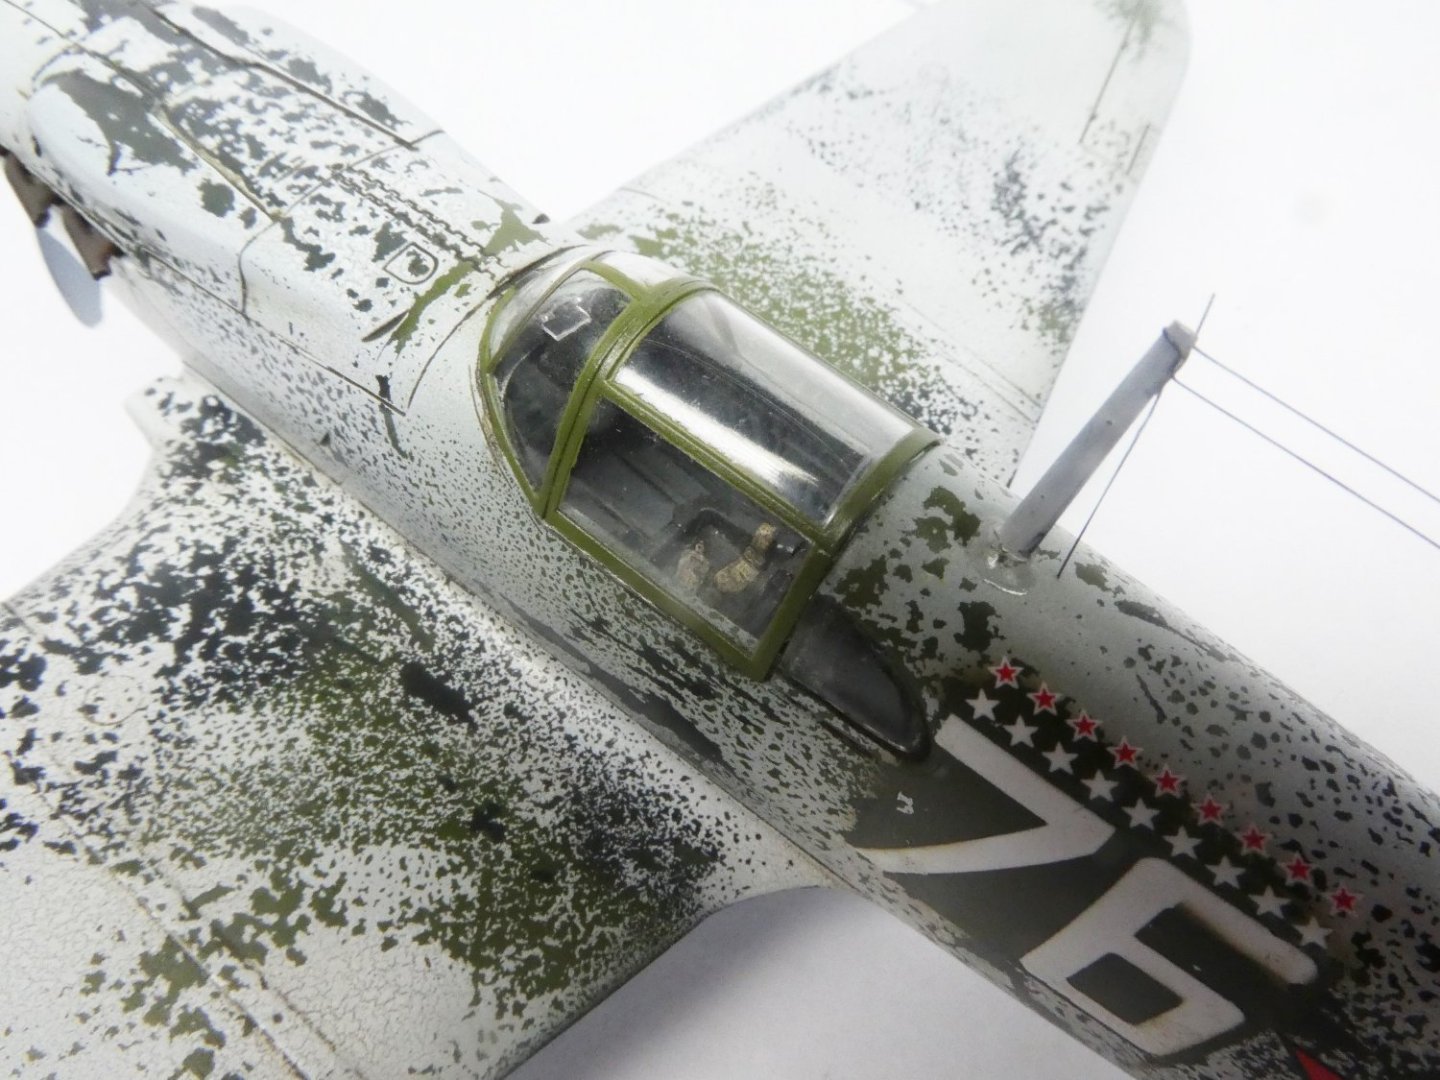
Hi again. I haven't post anything here for a while but I have continued to build. So it is my intention to catch up on what I have been doing. I hope you like the photos and objects. I will try to do it in the right time order. So first out is one kit were i was trying to do winter camo that starts to wear off: Model: Lagg 3 Scale: 1:48 Manufacture: ICM Extras: None Colors: Mr Paint, Tamiya


- 60 replies
-
- 14
-
-
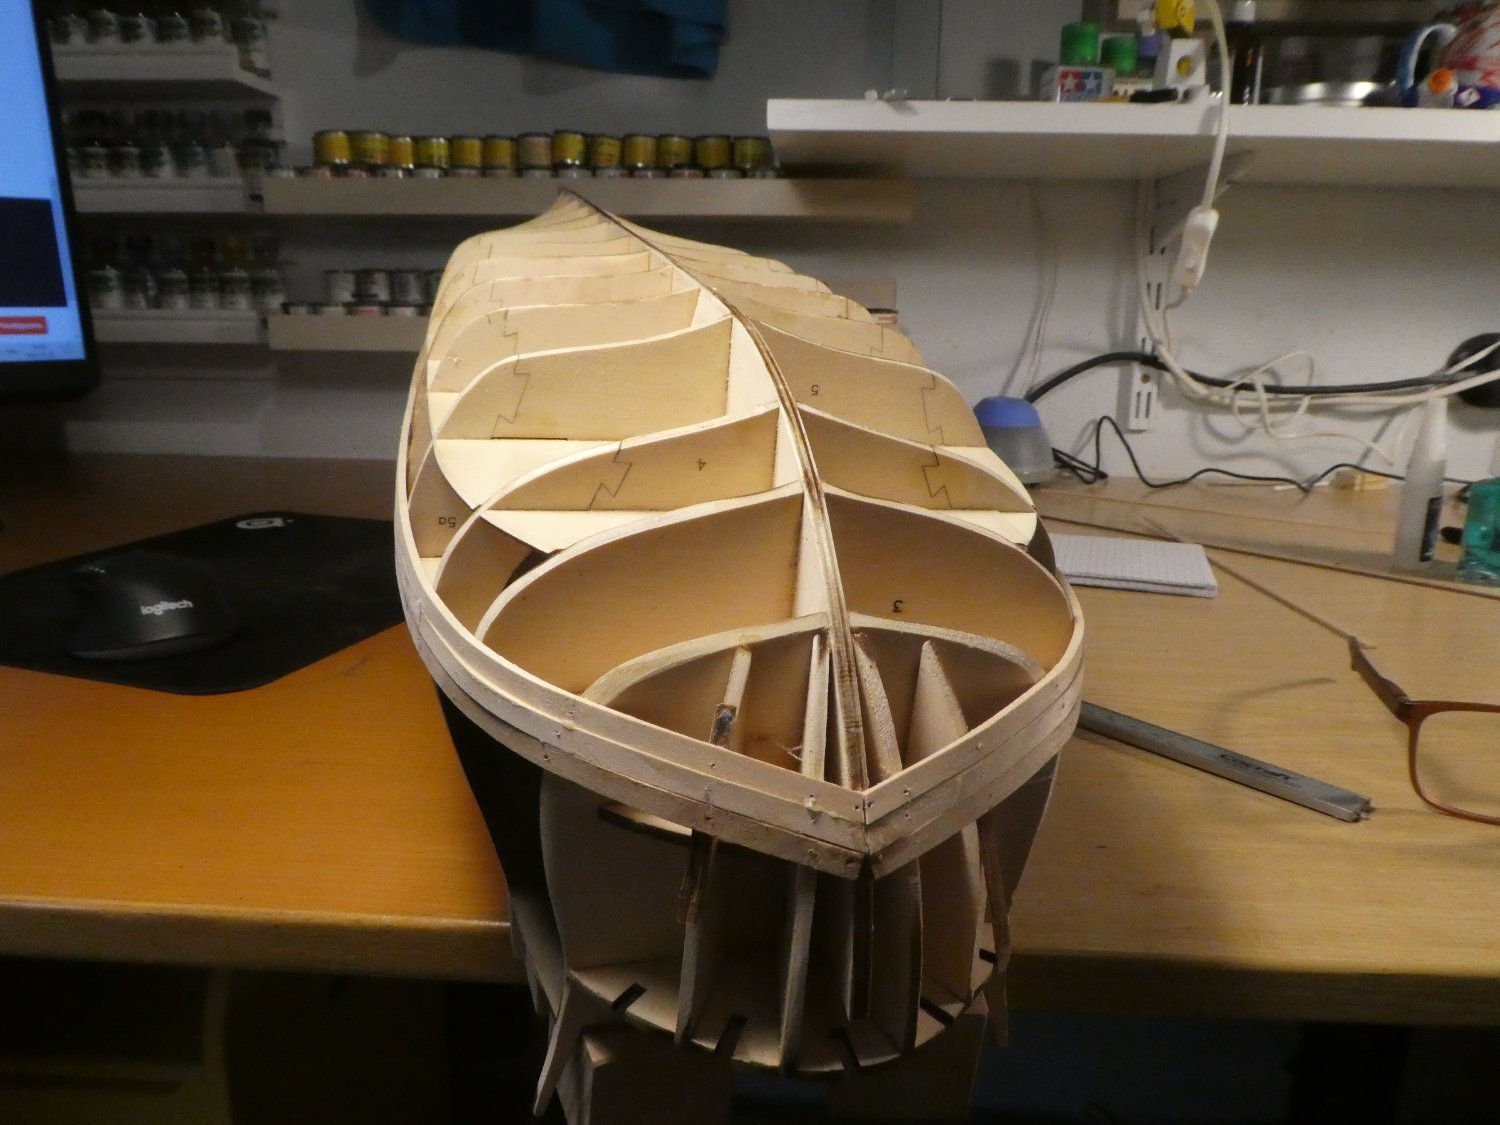
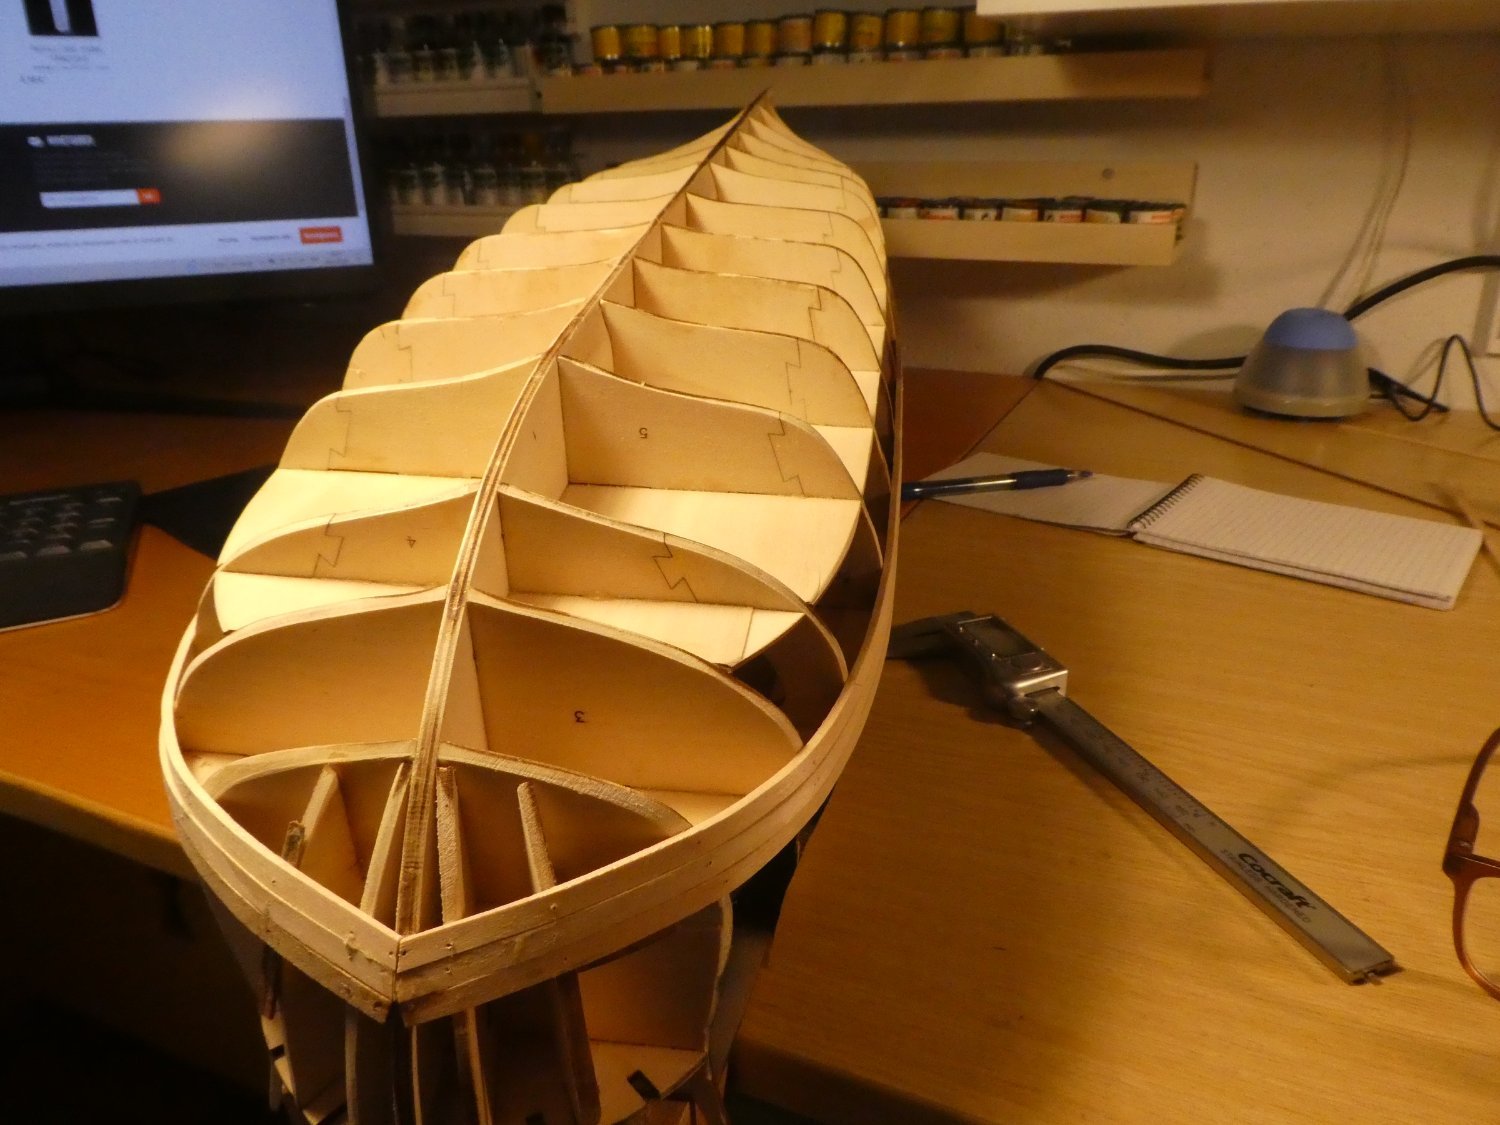
Vasa by Jörgen - DeAgostini - 1:65
Jörgen replied to Jörgen's topic in - Kit build logs for subjects built from 1501 - 1750
Hi again. A small update. The planking is on its way again and I thank you again Hubac for slowing me down so I could see and correct my mistakes. The lines of the hull looks better now. It is still not perfect but the rest will I fix with sanding and filler before the second planking layer.

- 50 replies
-
- 4
-
-
- vasa
- deagostini
- (and 1 more)