derik
-
Posts
11 -
Joined
-
Last visited
Content Type
Profiles
Forums
Gallery
Events
Everything posted by derik
-
HMS Surprise by Derik - Artesania
derik replied to derik's topic in - Kit build logs for subjects built from 1751 - 1800
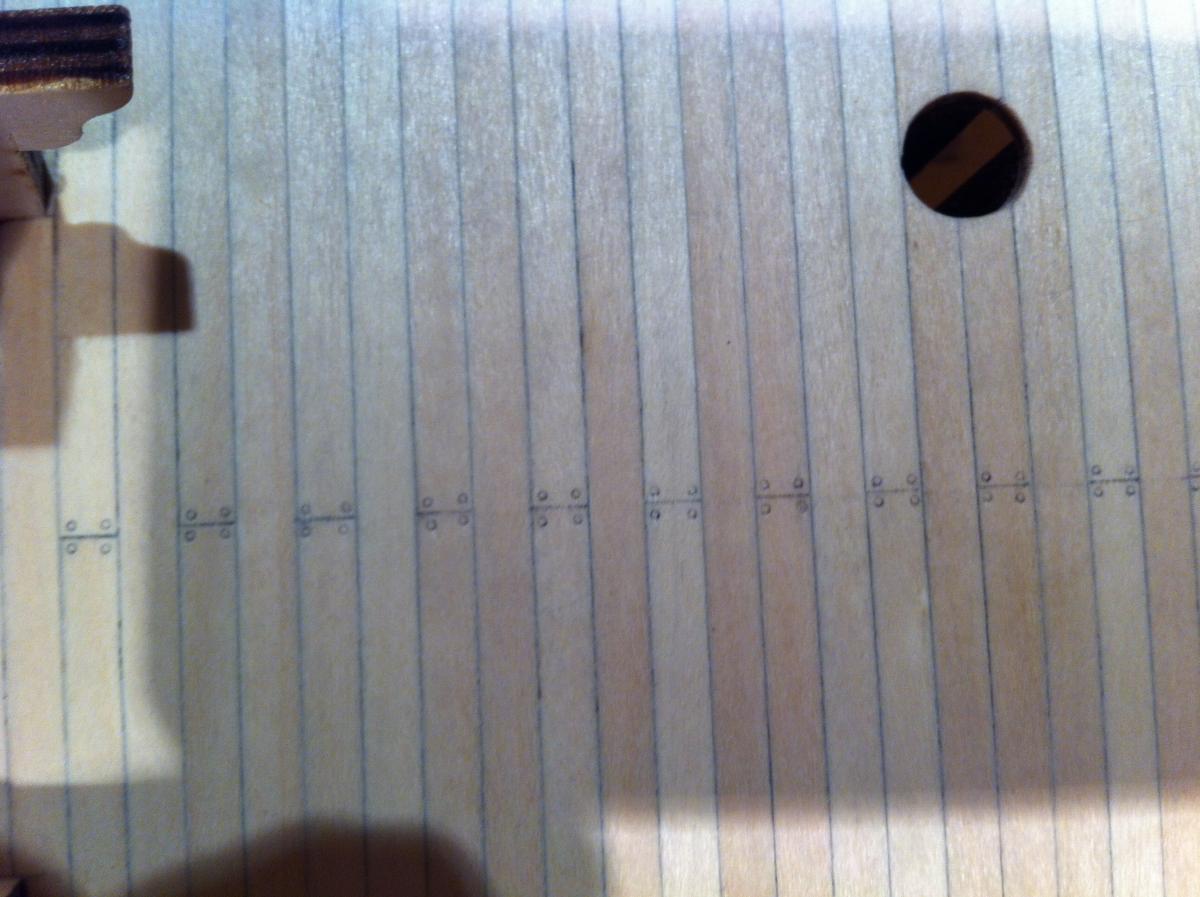
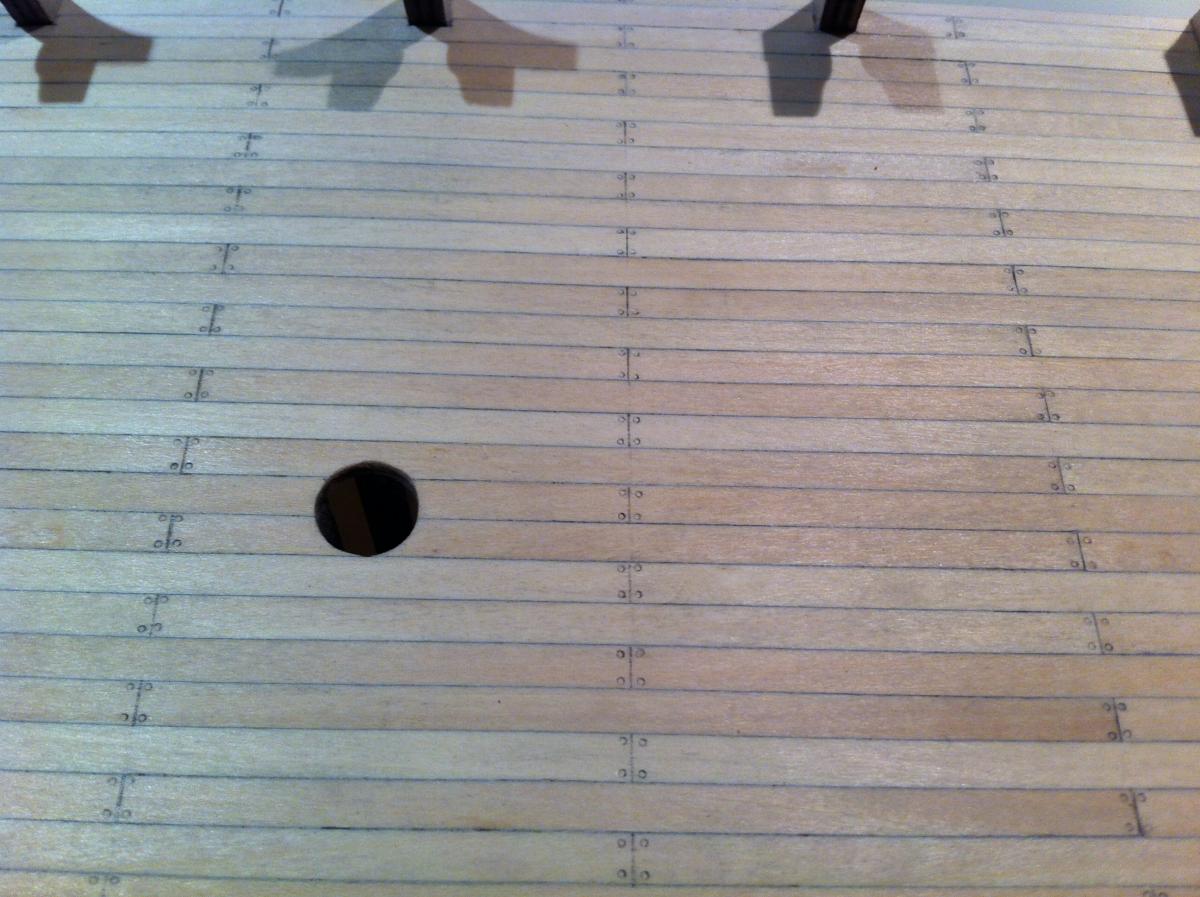
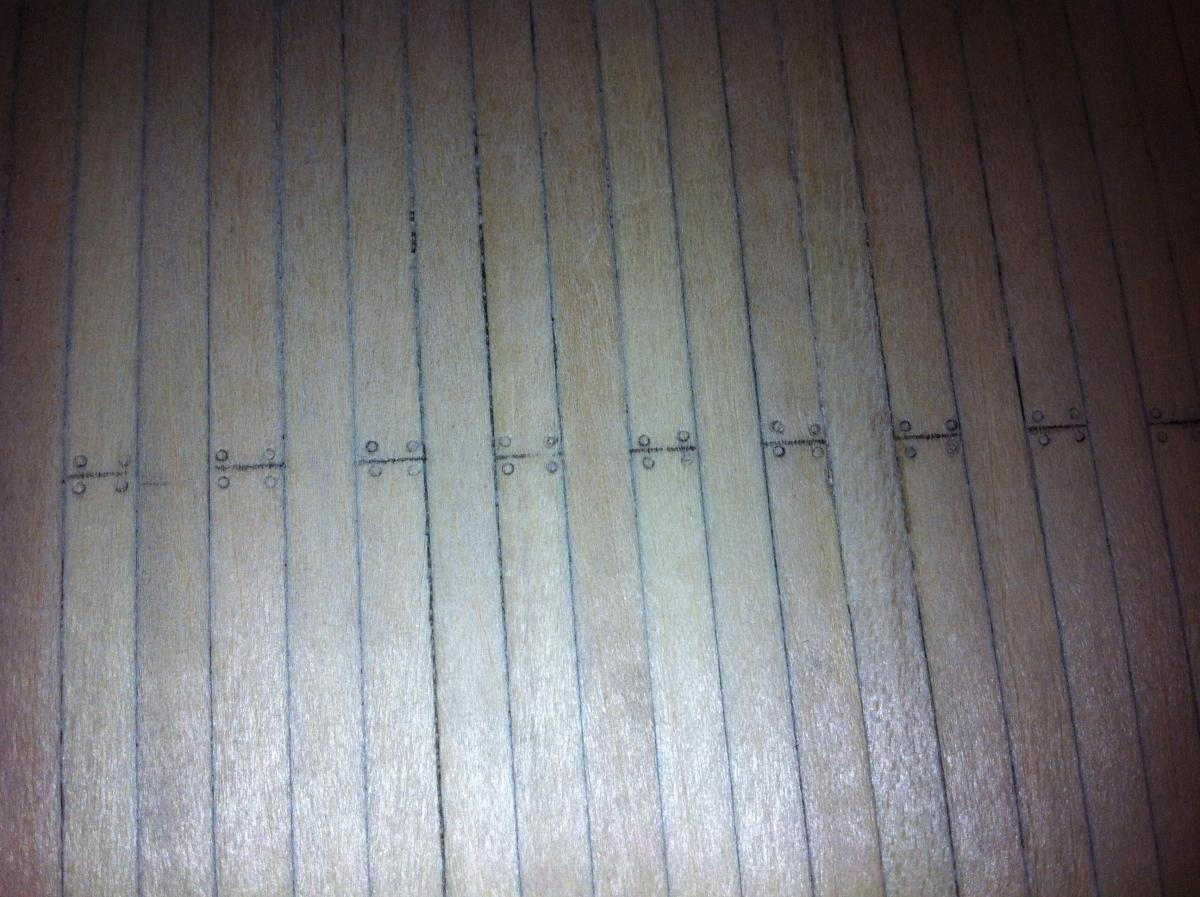
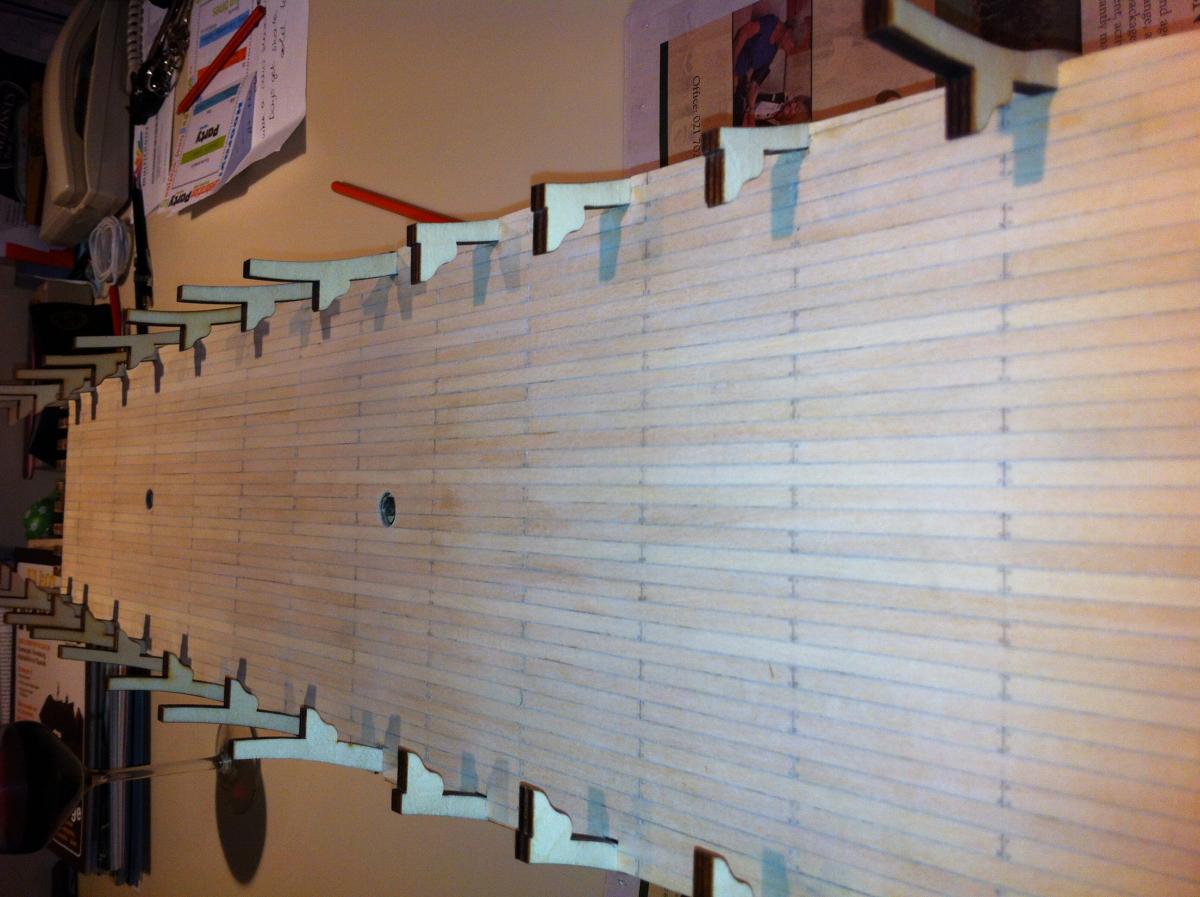
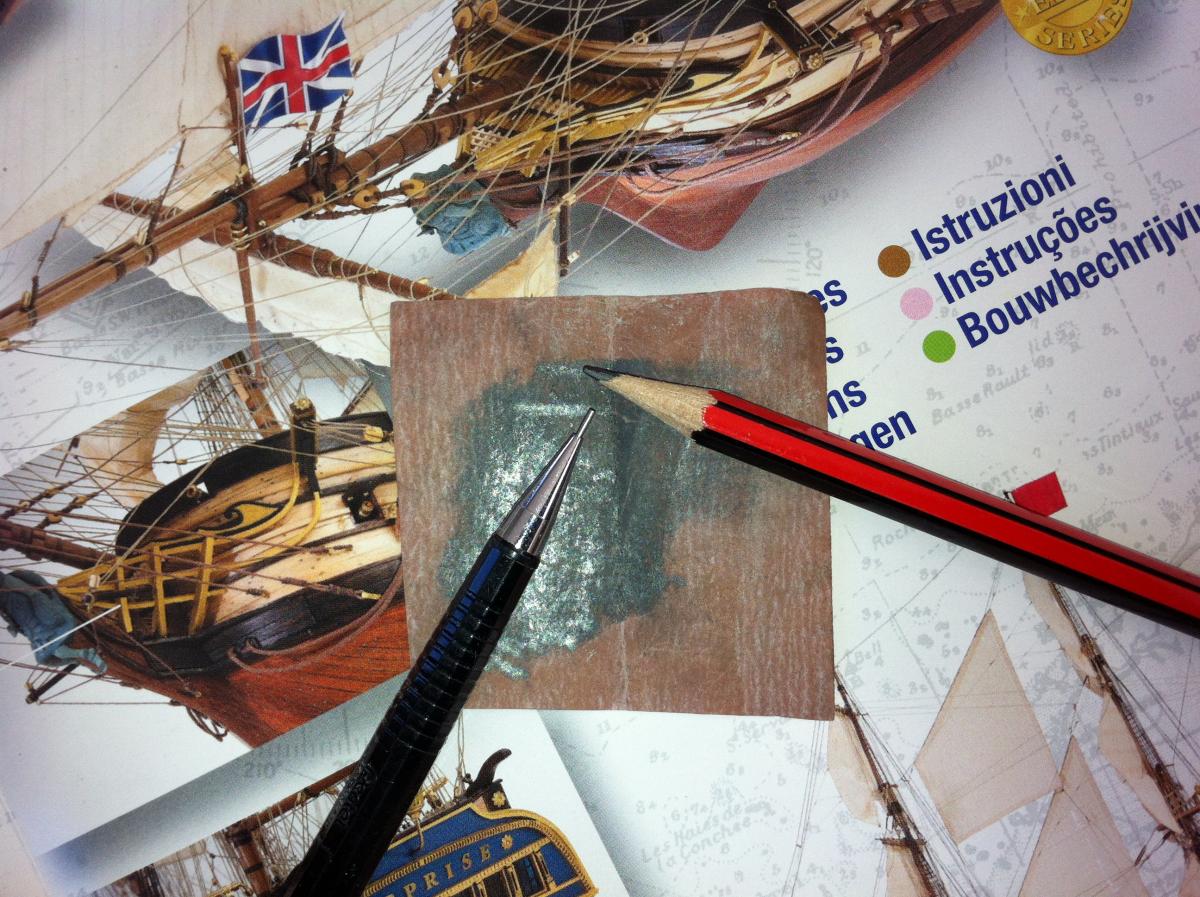
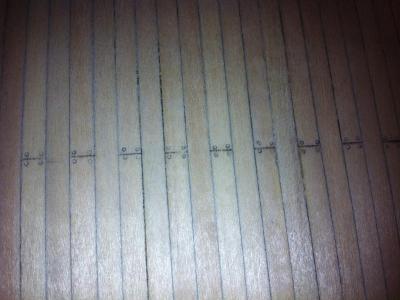
Thank you Peter, Mobbsie, Popjack, themadchemist, Mark and Tophog for your encouraging comments. I am now ready to start modeling again. To answer themadchemist, with a little bit of pressure, I used the clutch pencil to cut a a tiny circular groove to create the core of each simulated trenail. Before each cut I dipped the tip in the graphite powder. In this way the graphite gets crushed into the cut. So there is no smearing. One can even sand it with fine sandpaper afterwards and just blow the dust off. The little circle stays. I tried many different kinds of ink, but the ink always "bled" into the surrounding wood. I finally found that the sanded graphite powder works. Once sealed with a layer of varnish it will stay. I did not use any heat to bend the planking - just dipped the planks in a tall glass of water and then used I plank bender to bend the planks. Shaping each plank was done by hand. I first marked the planks on every second or third bulkhead. I figured out how wide the plank should be at each of these locations. I used some medium sandpaper and a "caliper" to shape each plank by hand. I measured each at about three bulkheads and made sure not to go below 2.5 mm at the tips. This went fairly quickly. Popjack, I notice you are from Oak Ridge. I studied at UT Knoxville for 6 years in the early eighties. GO VOLS. Mobbsie, before buying the surprise, I phoned caldercraft, but they could give no hint of when their Surprise would be launched. I also loved the dimensions of the Artisania Surprise - nice and big. Mark, we have now changed the kids playroom in a kind of studio - it delayed my modelling, but at least I now have a proper work area. Derik -
HMS Surprise by Derik - Artesania
derik replied to derik's topic in - Kit build logs for subjects built from 1751 - 1800
Thank you to rebekb and Mayohoo for the encouragement. Need a new milestone to target. -
HMS Surprise by Derik - Artesania
derik replied to derik's topic in - Kit build logs for subjects built from 1751 - 1800
Further progress


-
HMS Surprise by Derik - Artesania
derik replied to derik's topic in - Kit build logs for subjects built from 1751 - 1800
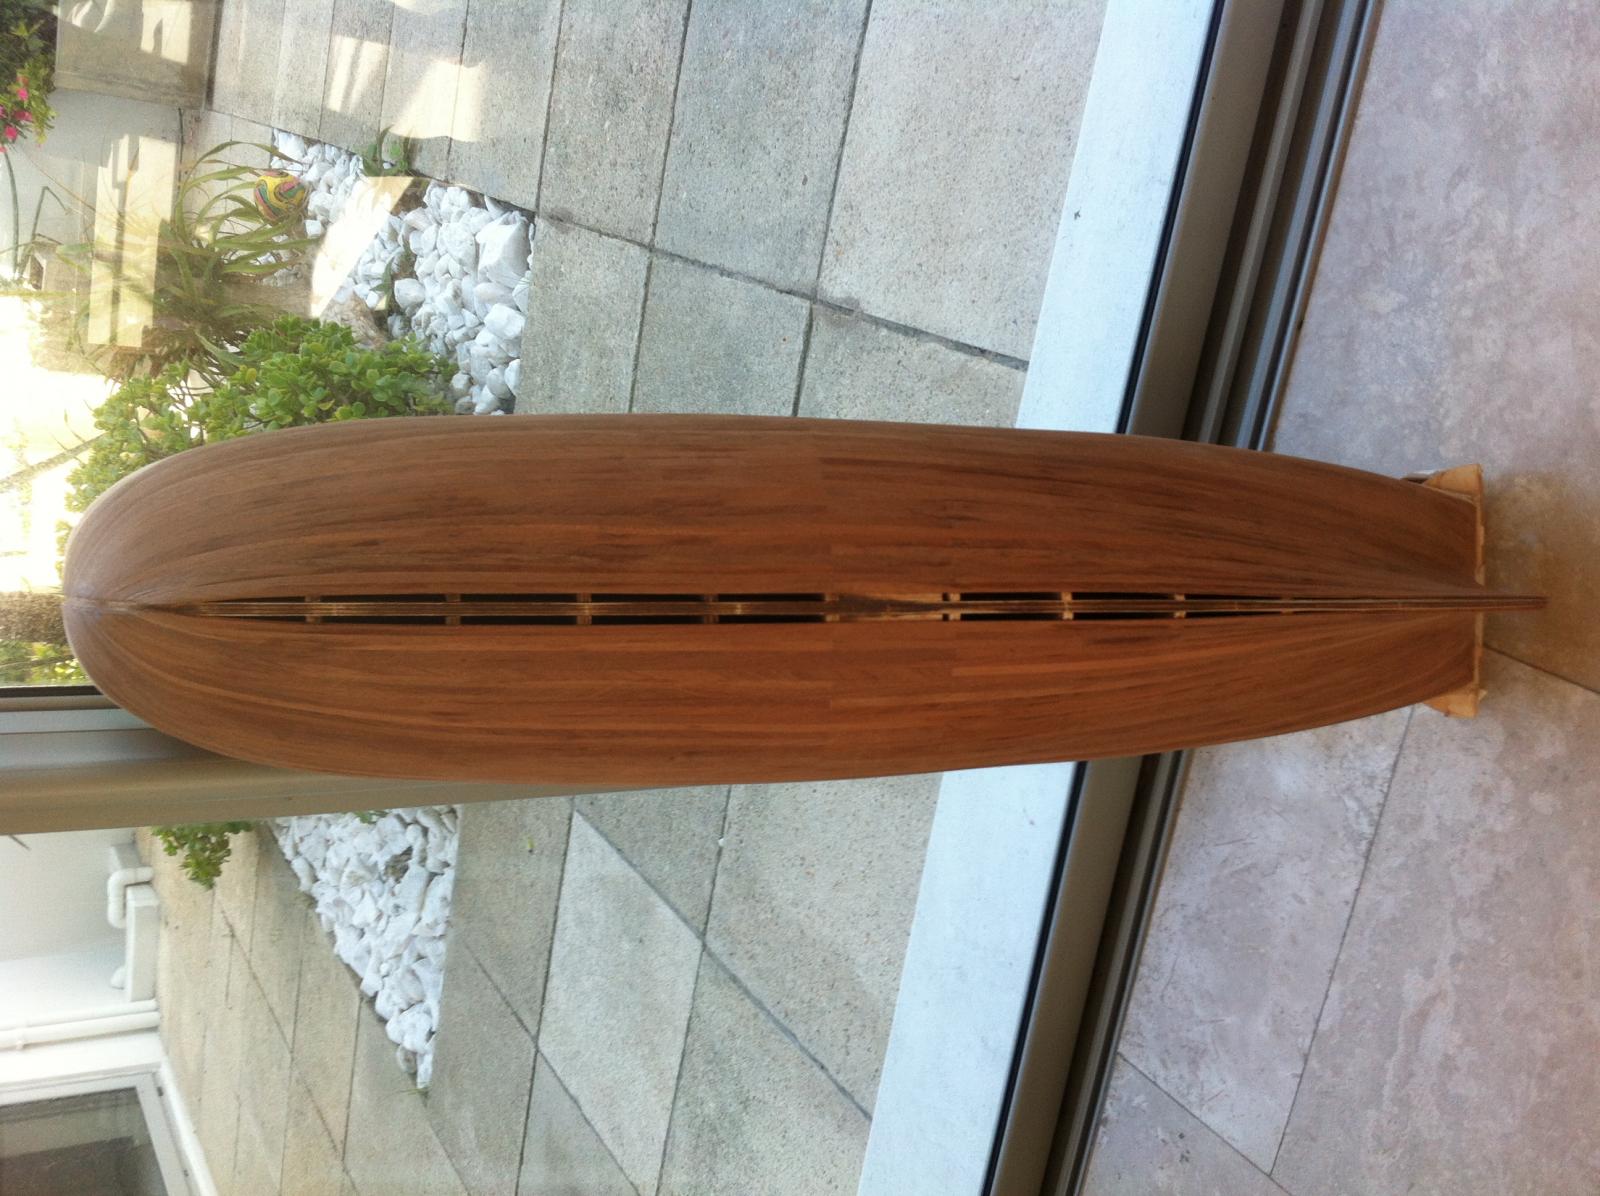
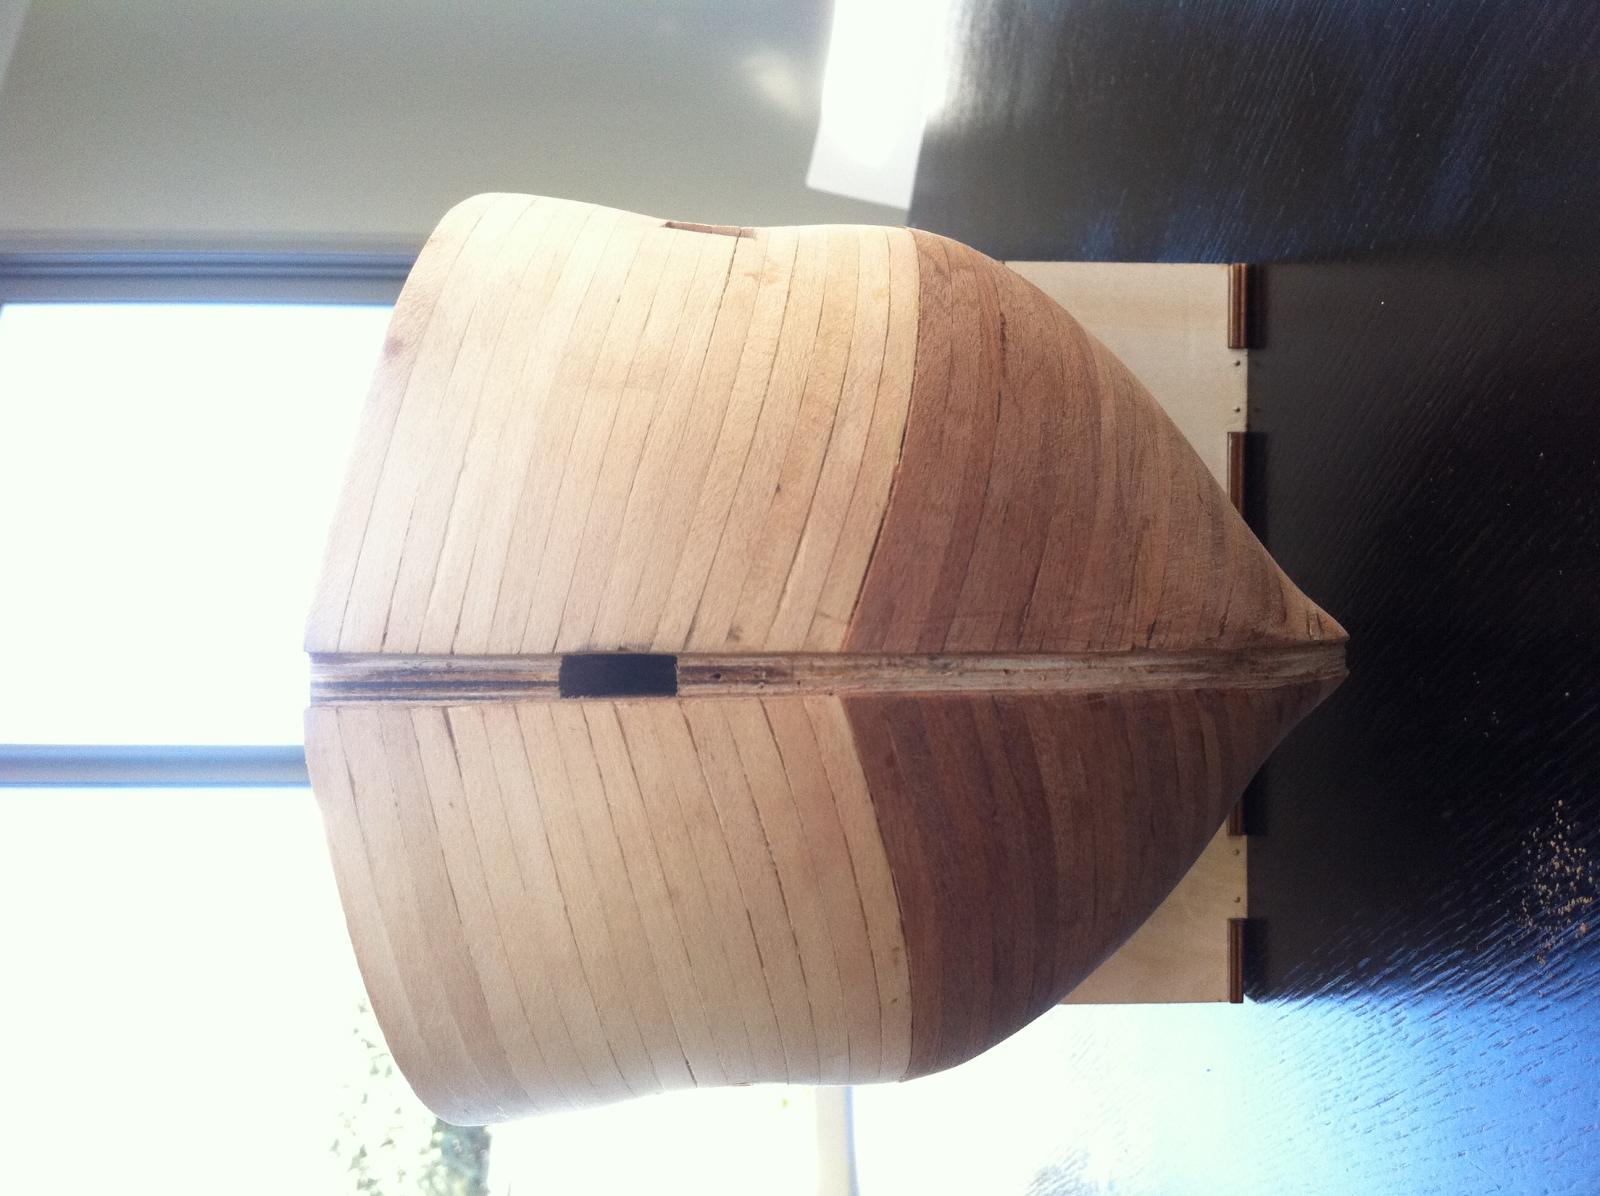
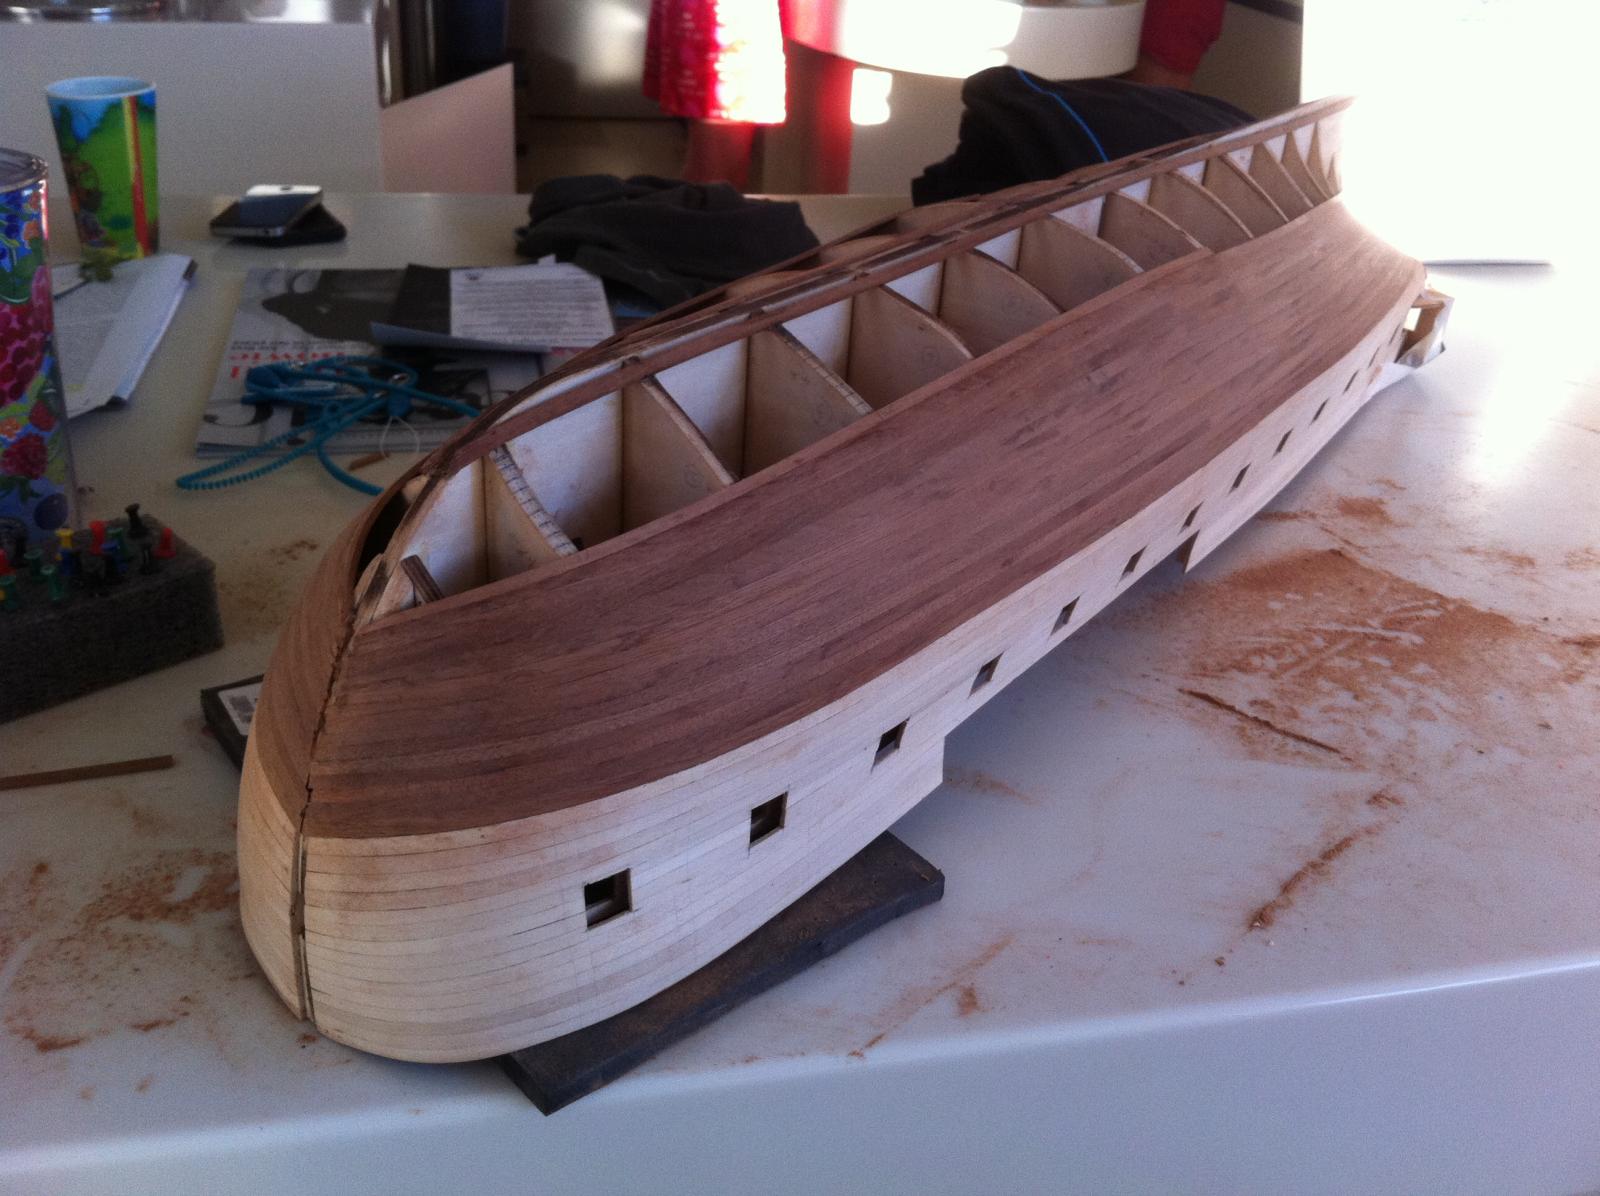
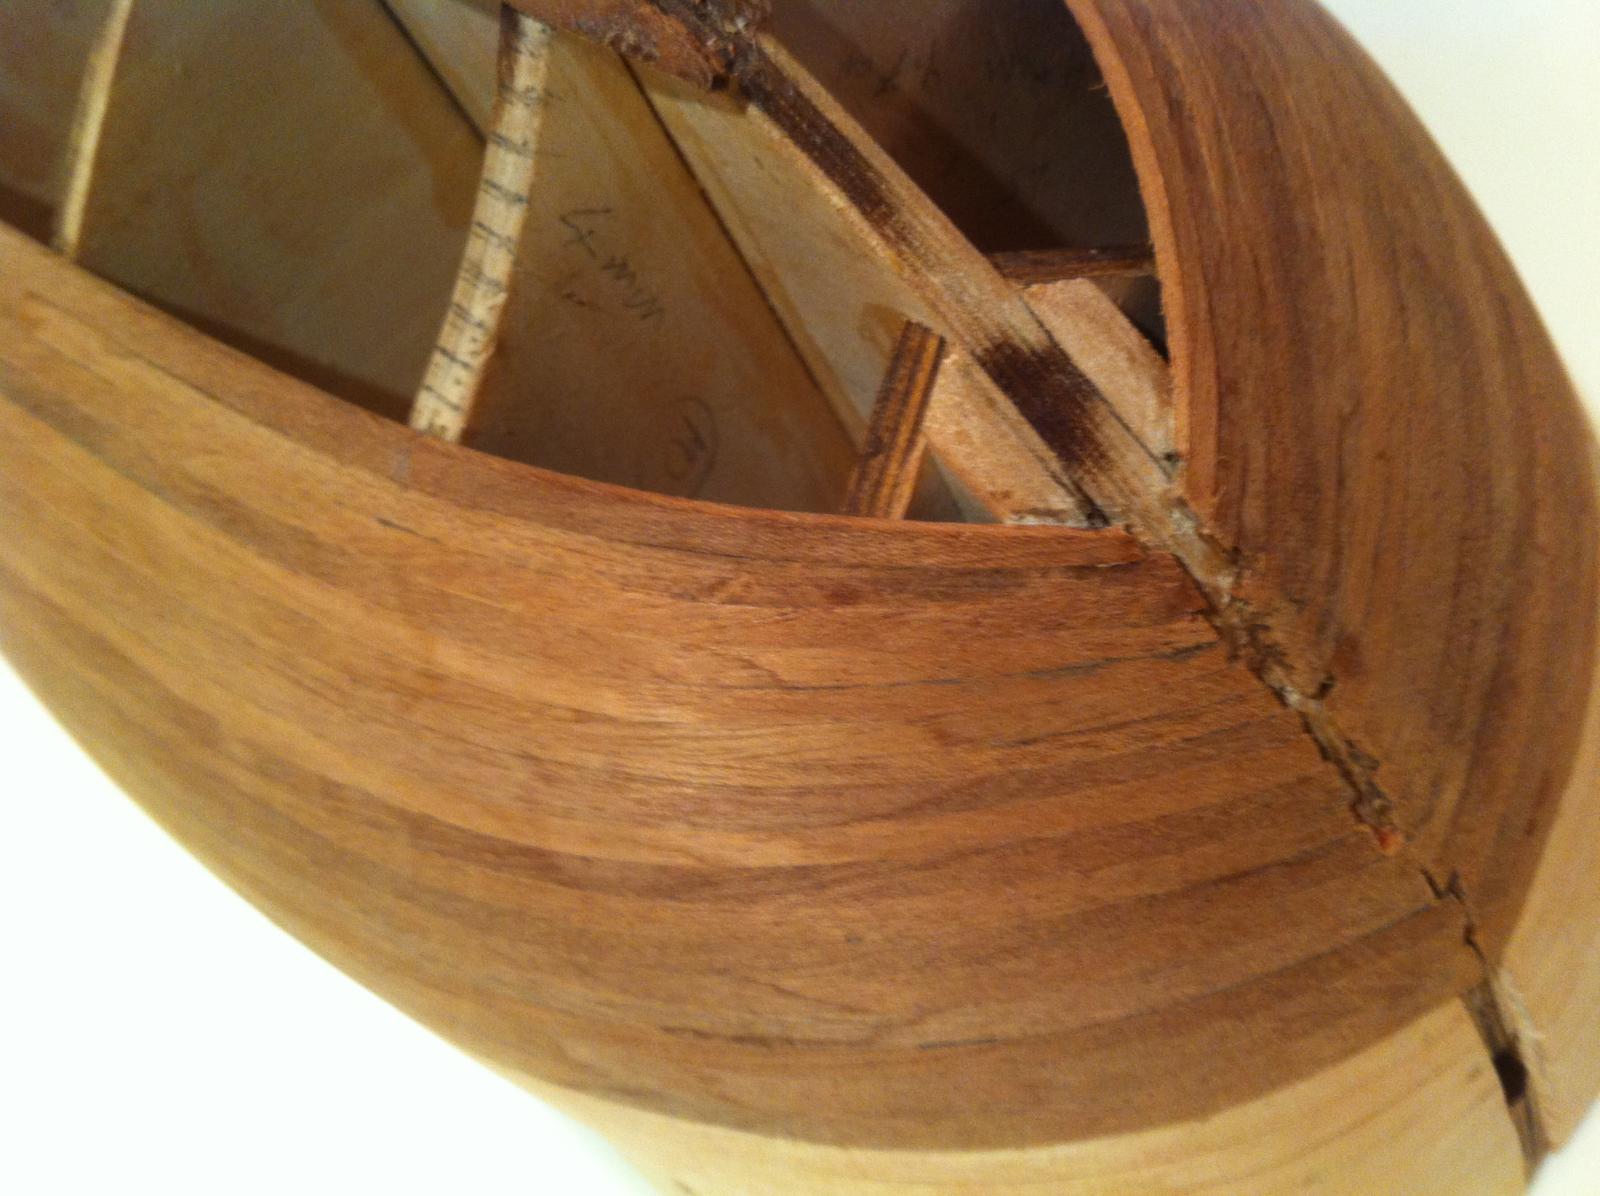
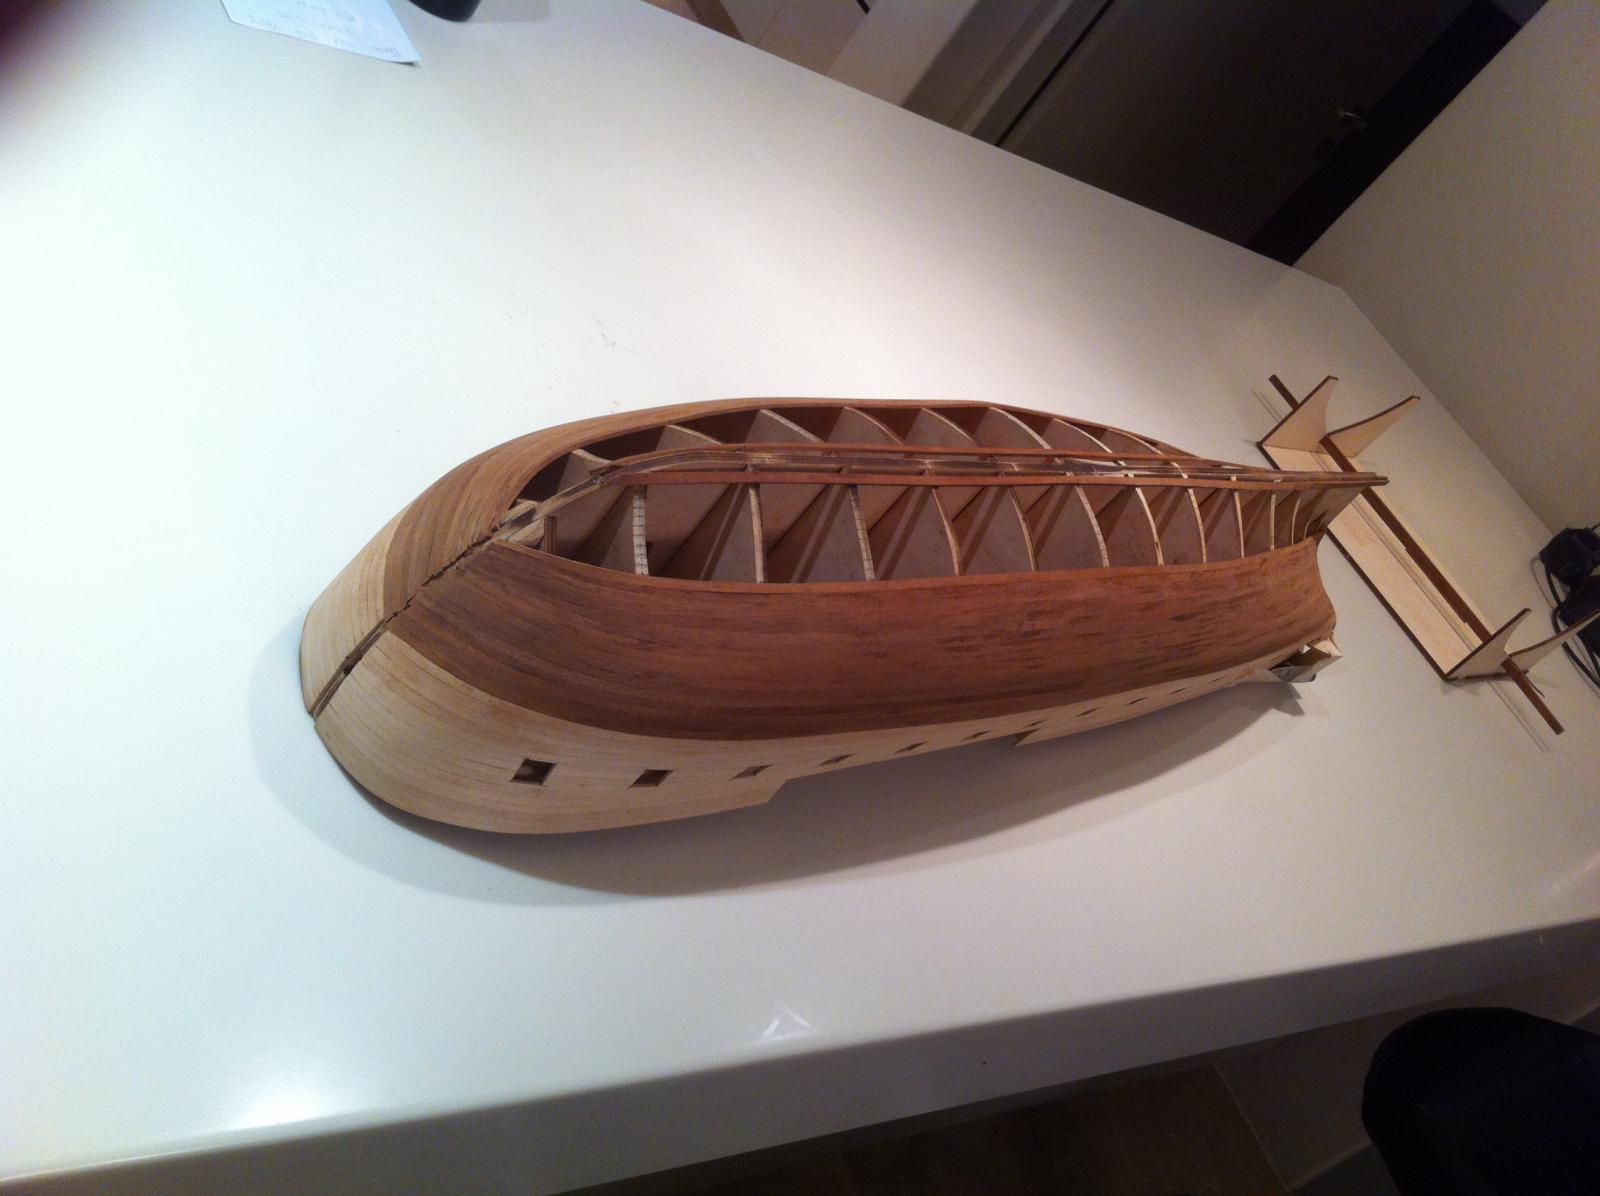
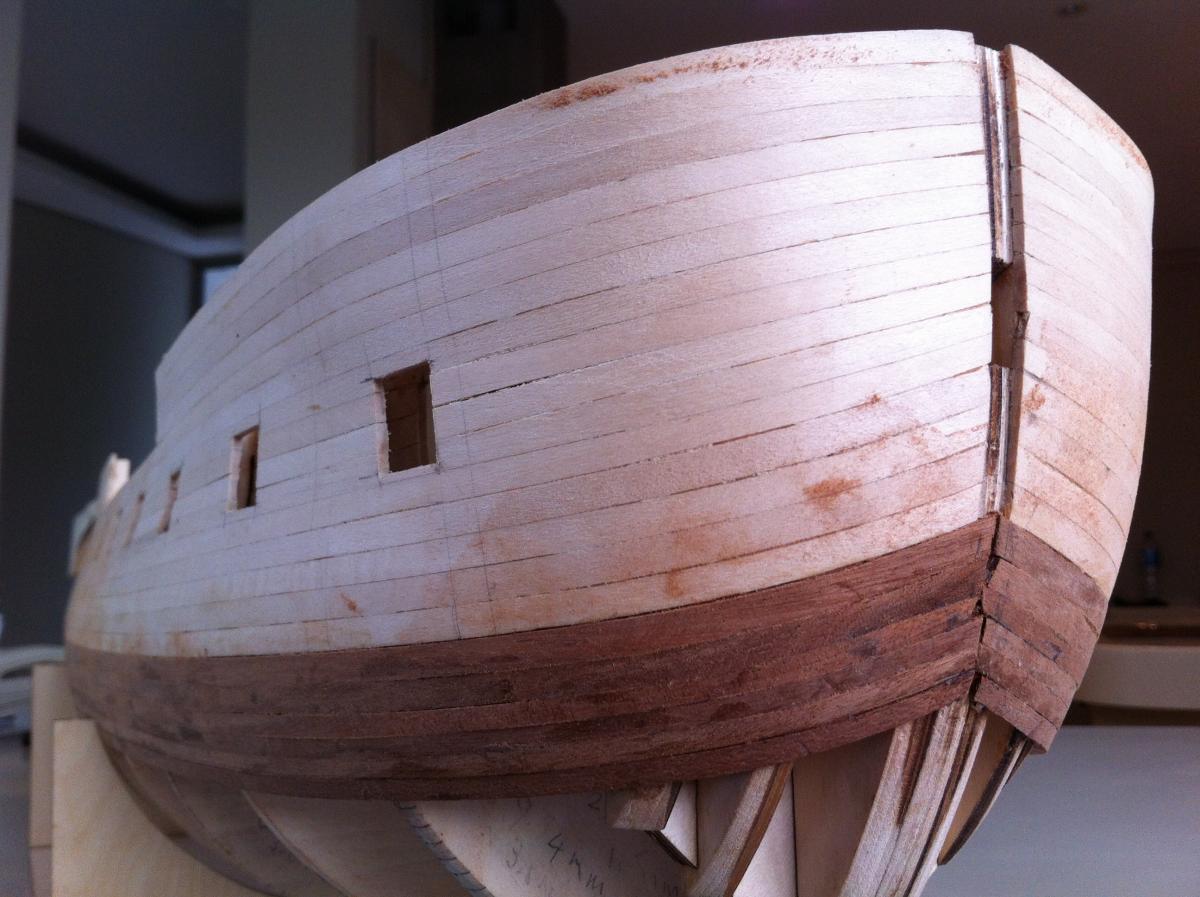
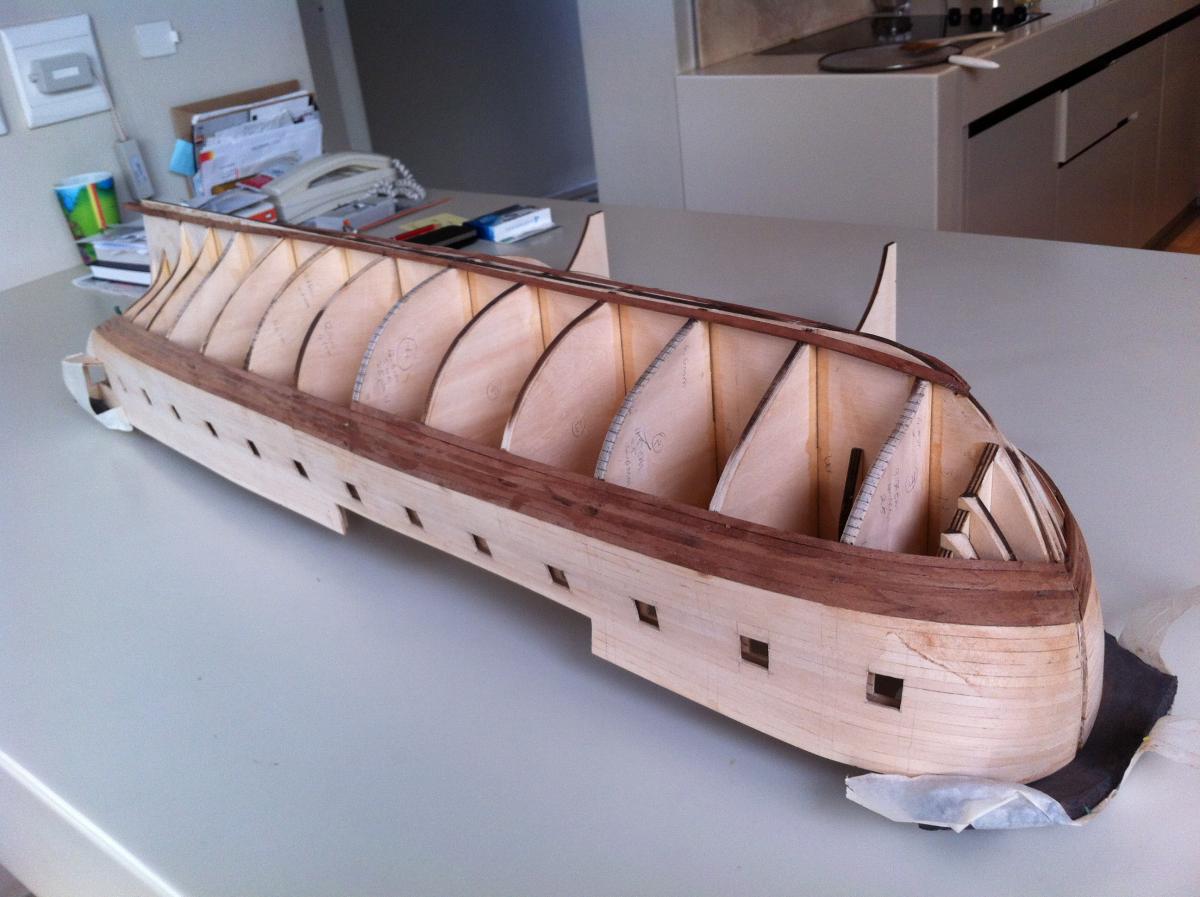
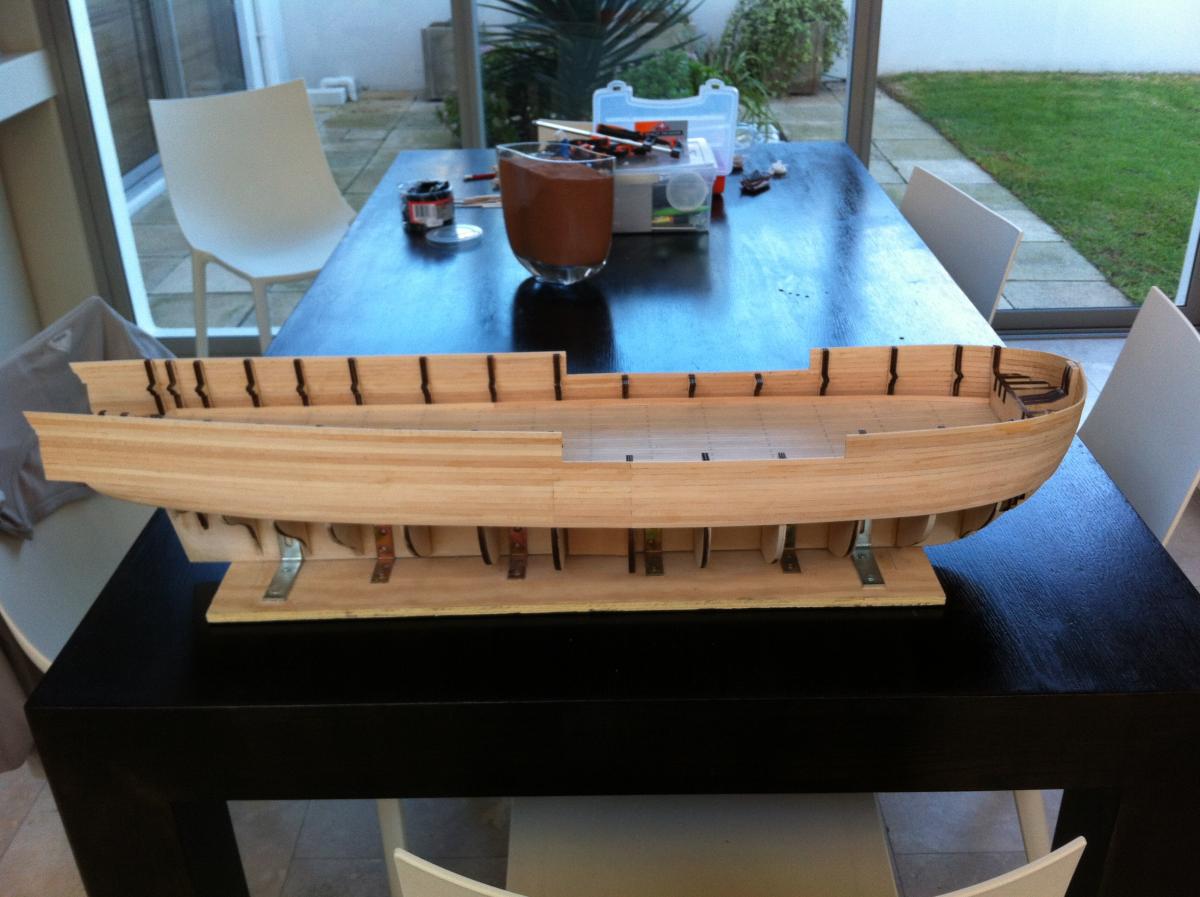
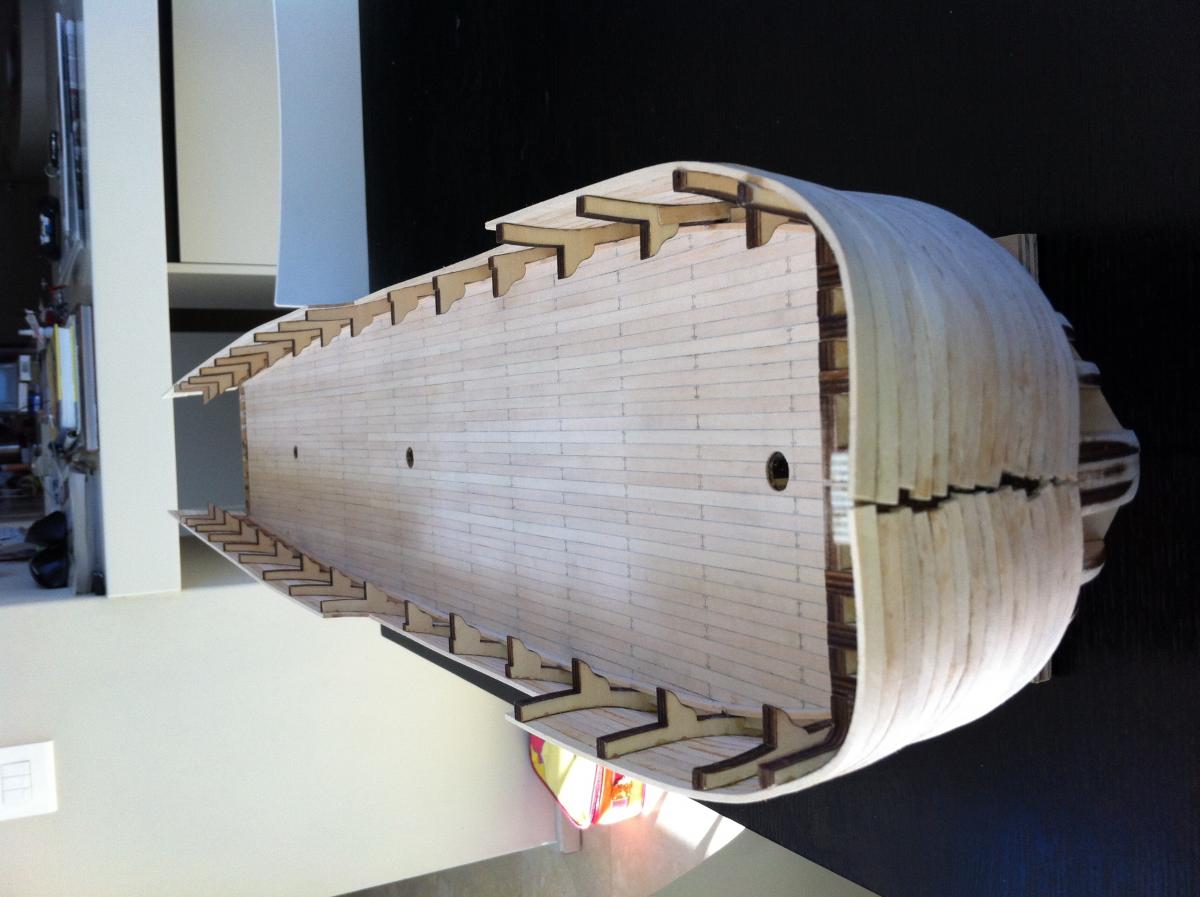
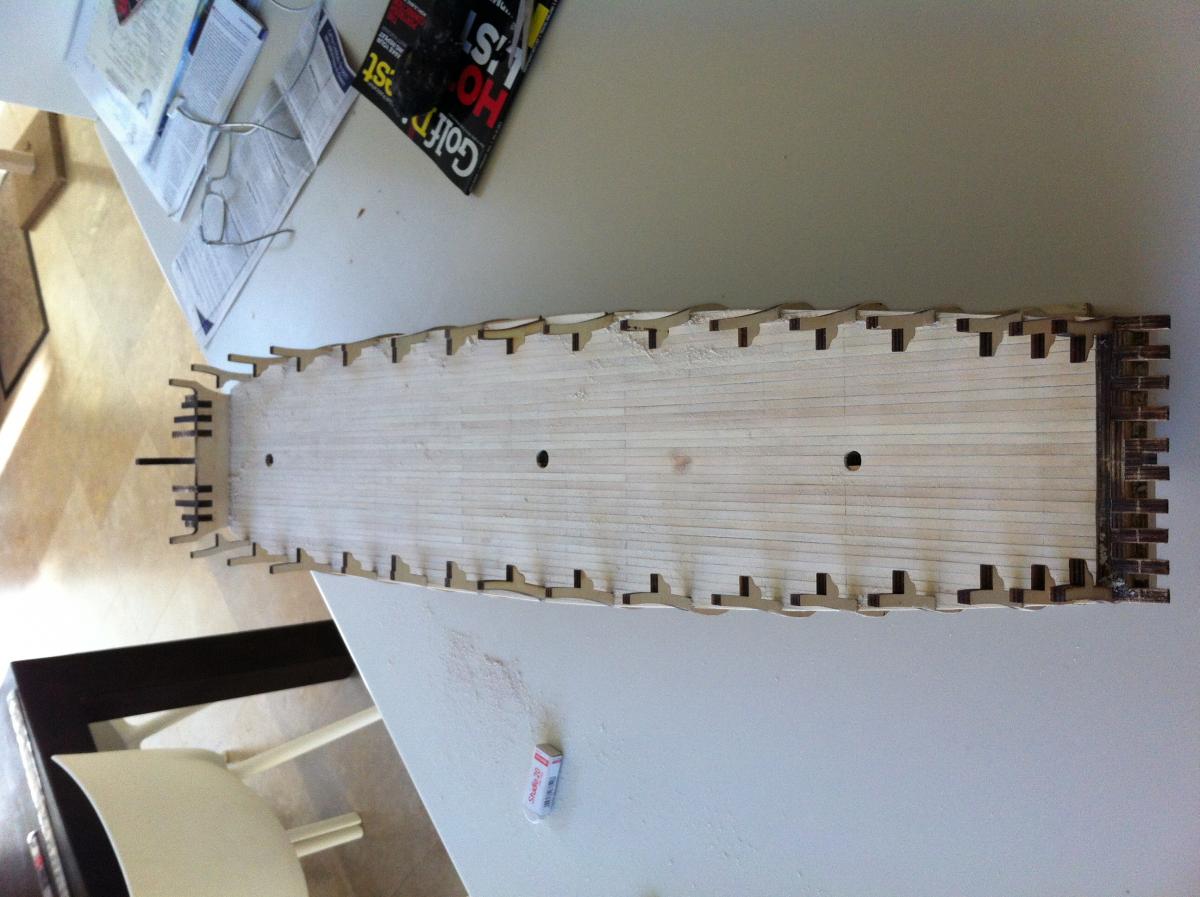
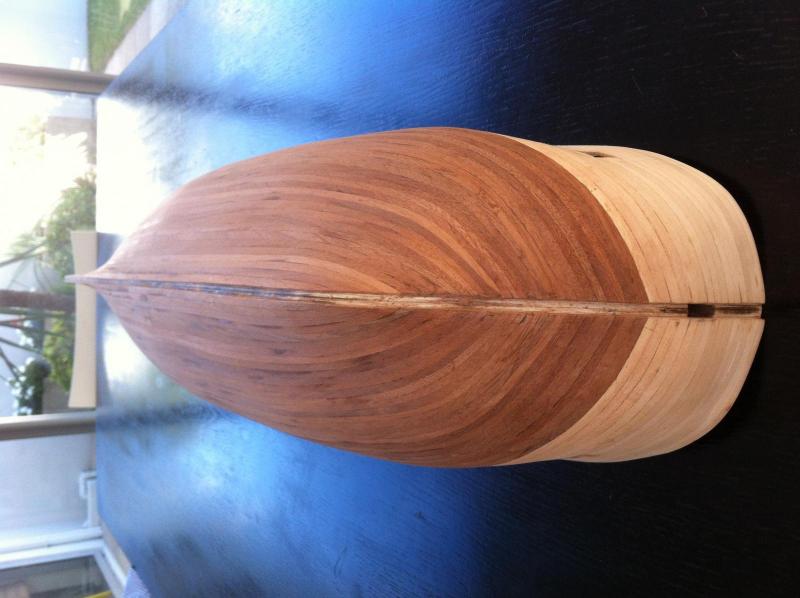
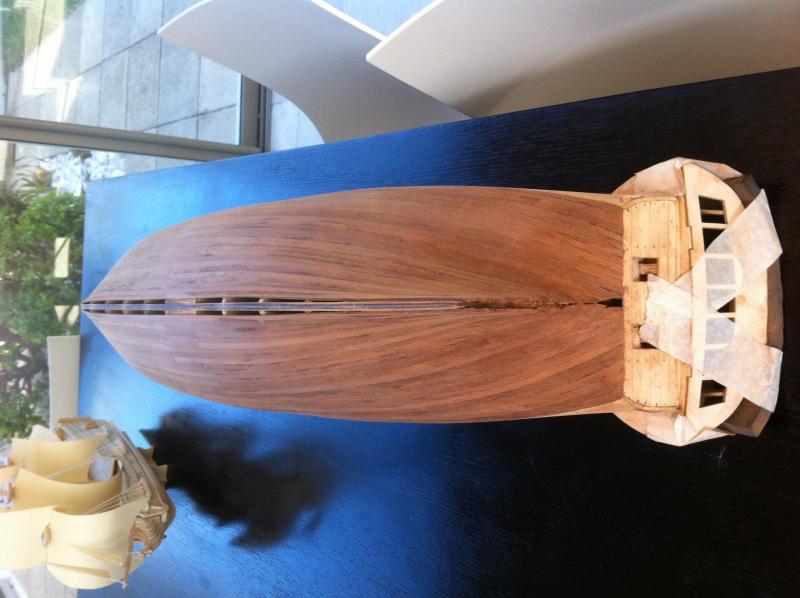
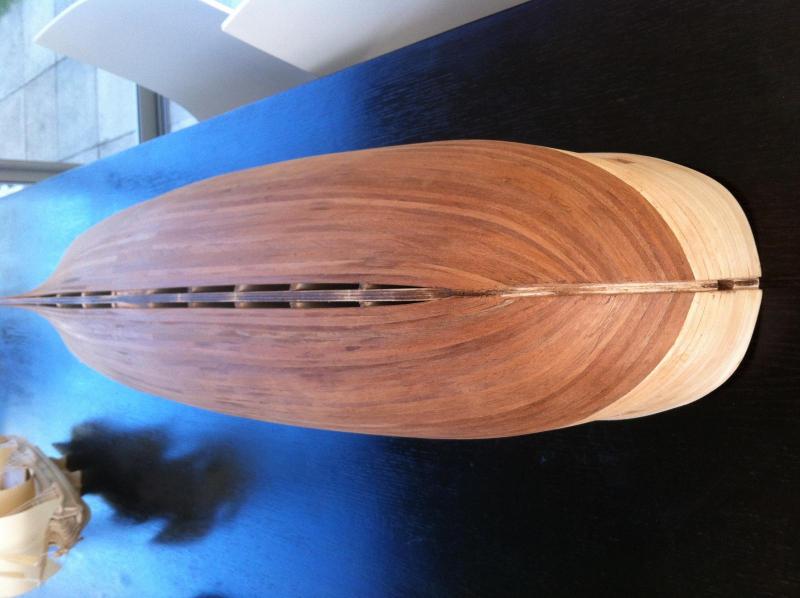
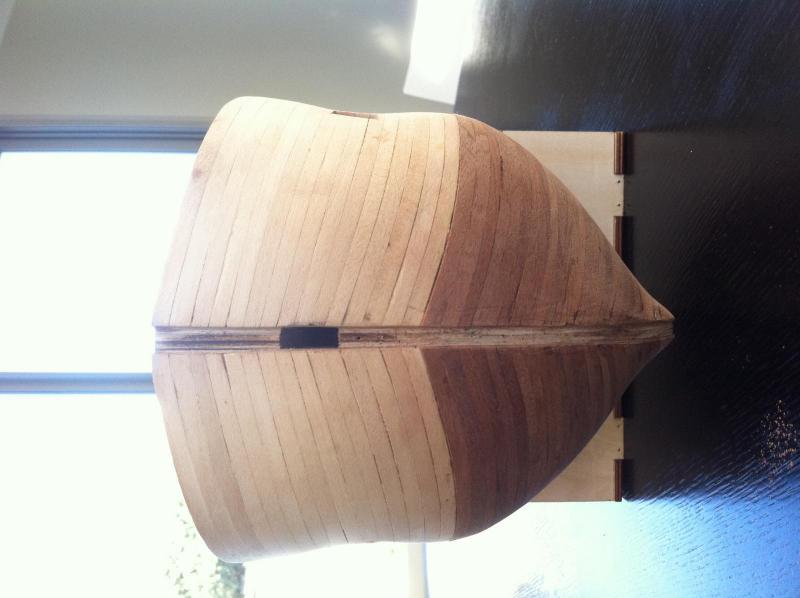
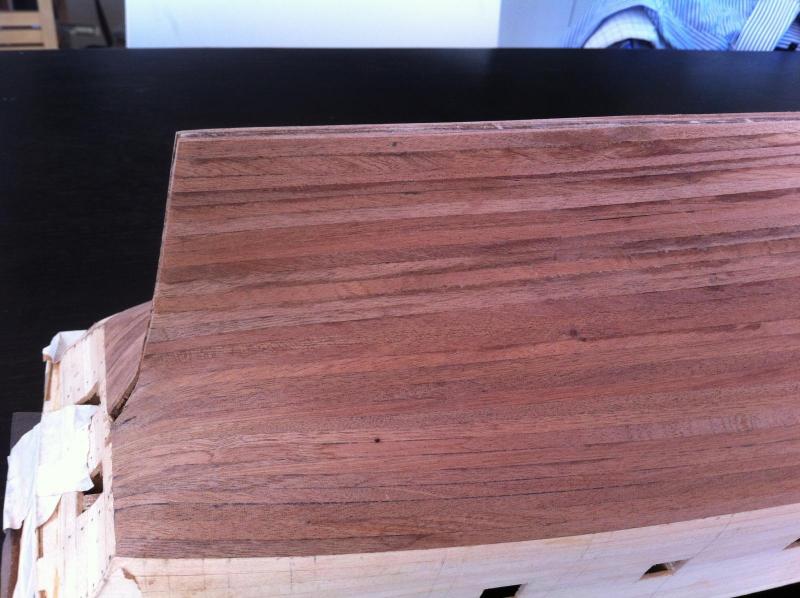
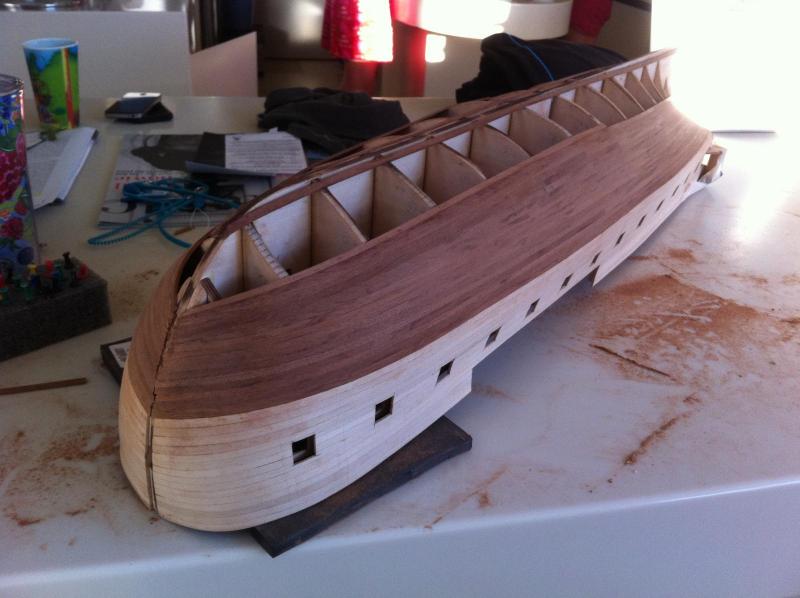
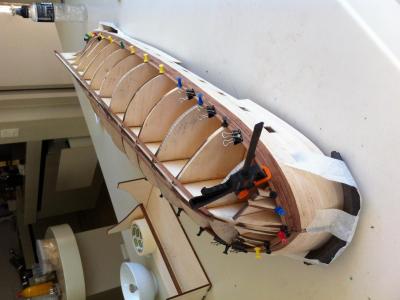
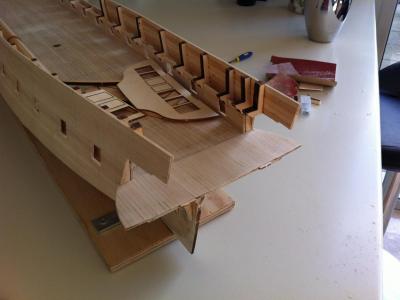
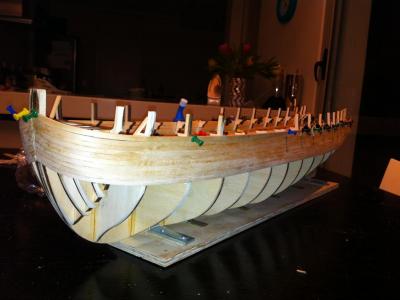
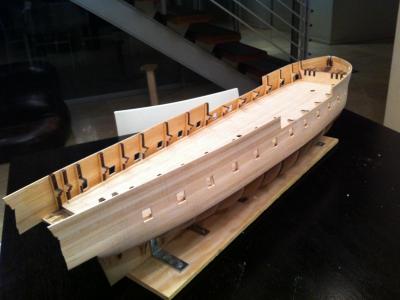
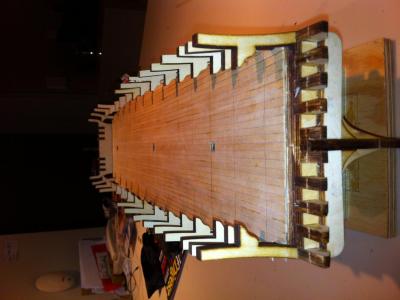
Yesterday I reached a major milestone by completing the lower hull planking. I stuck to my plan of working from the top of the hull down to the keel. I read somewhere that a ship's hull must be viewed as a kind of barrel. It must have the same number of planks at bow and stern as in the middle. I took this as my objective for this project. By shaping each plank, down to half width at the bow and flared to maximum width at the stern, I ended up with the same number of planks at each end as in the middle. I did not use any drop or steeler planks. None of the planks were reduced to less than 50% width. I am reasonable satisfied with the result. Still need to do a lot of sanding. In the mean time I got banned from working on the kitchen counter. Derik

-
HMS Surprise by Derik - Artesania
derik replied to derik's topic in - Kit build logs for subjects built from 1751 - 1800
Thank you for the link Mike. In the mean time I have made good progress with the lower hull planking. I will post some pictures later. Derik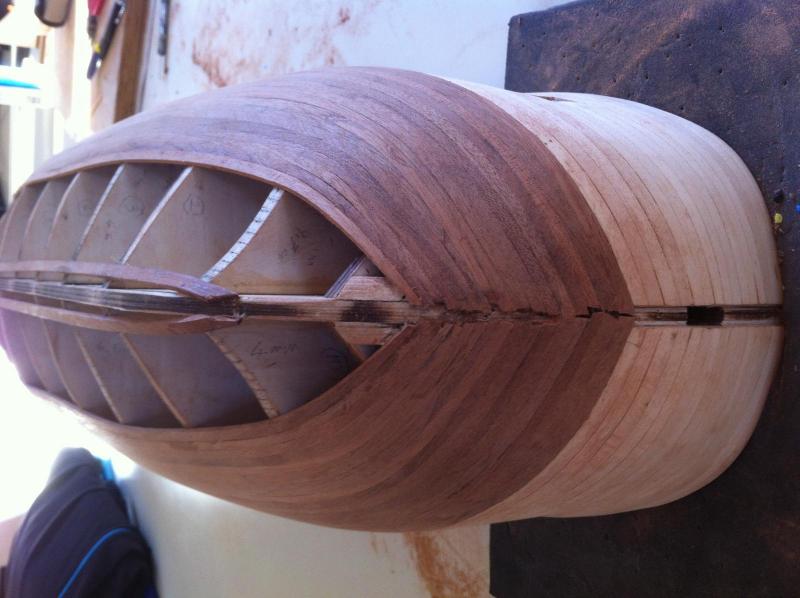
-
HMS Surprise by Derik - Artesania
derik replied to derik's topic in - Kit build logs for subjects built from 1751 - 1800
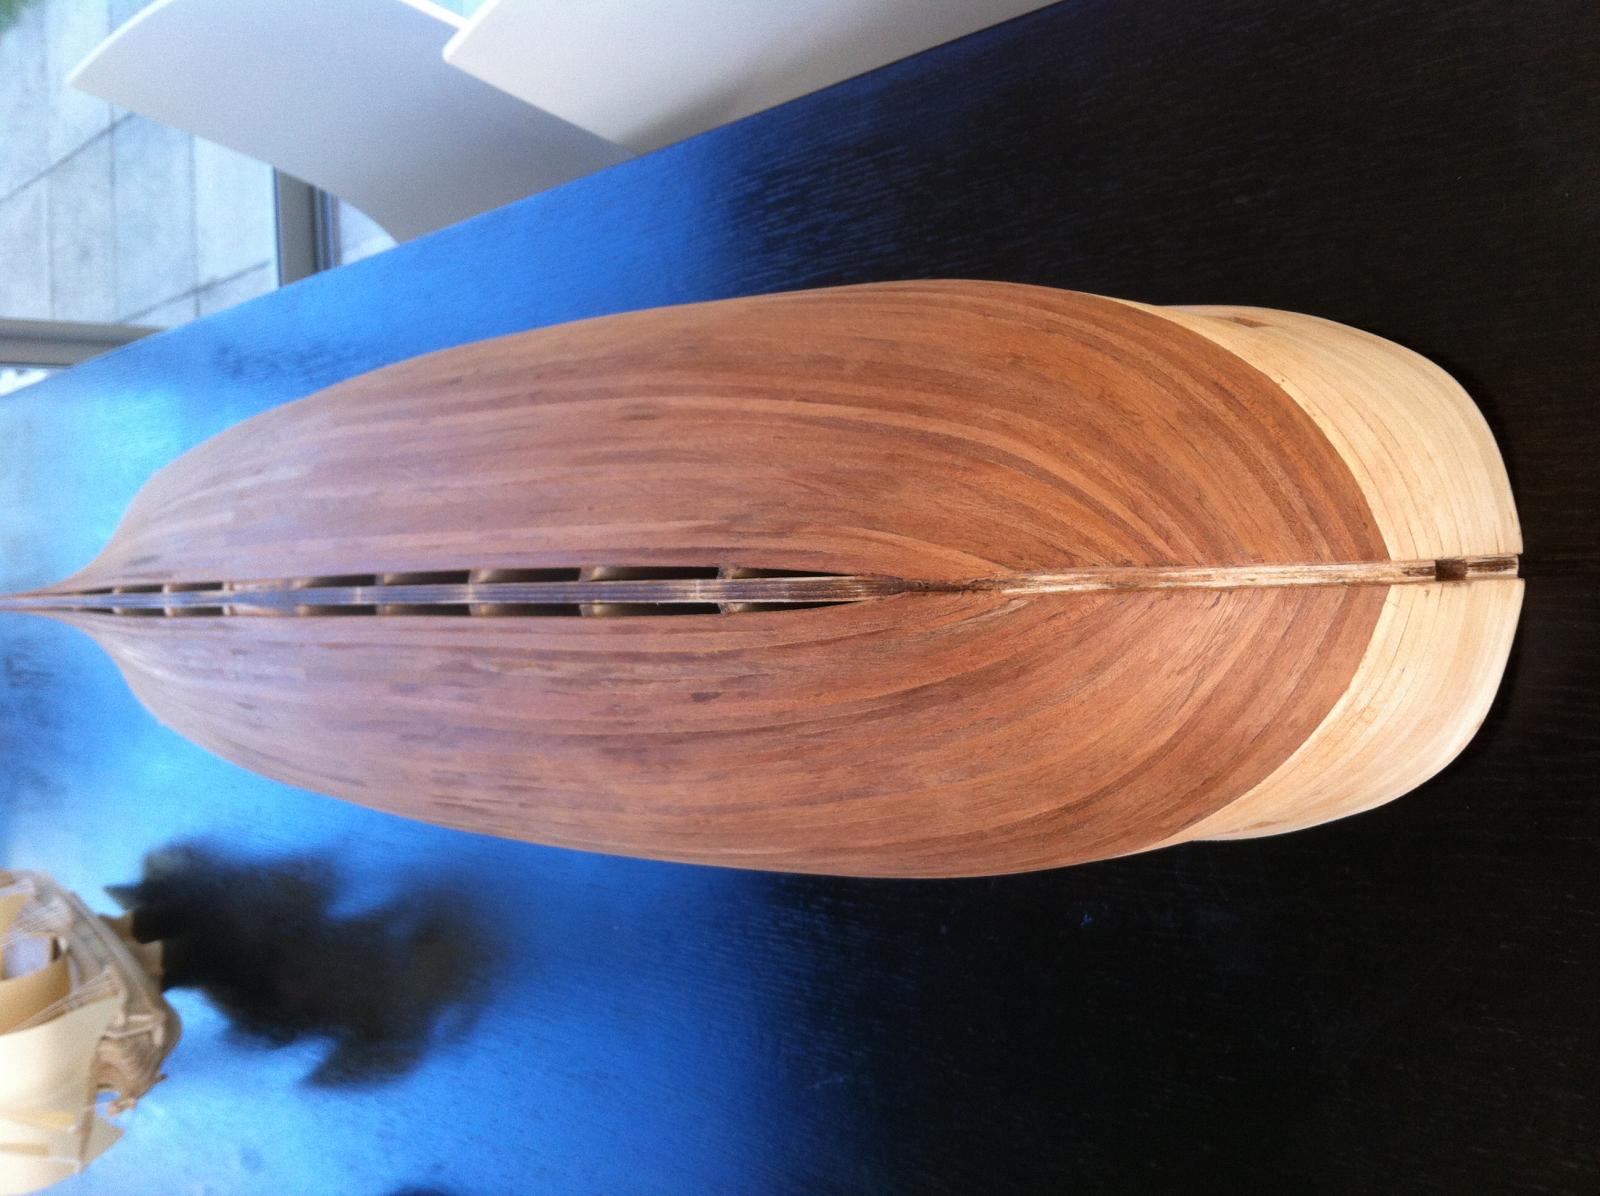
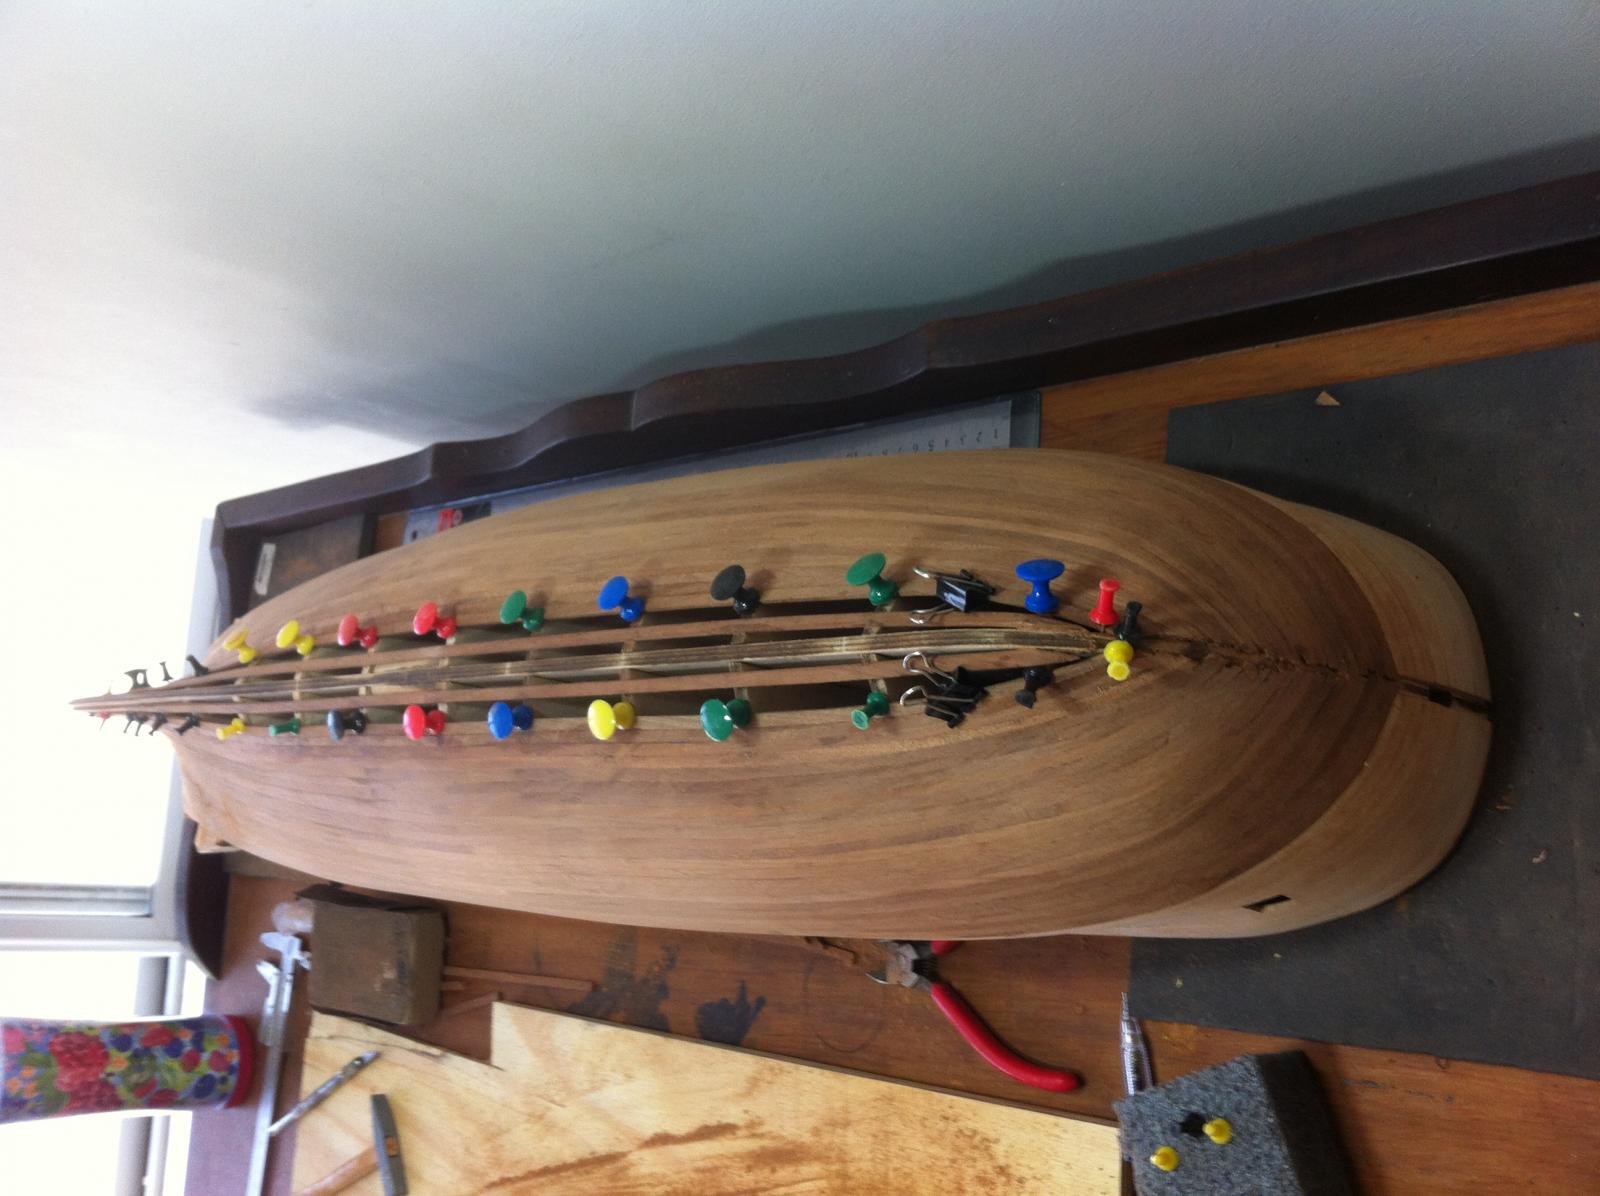
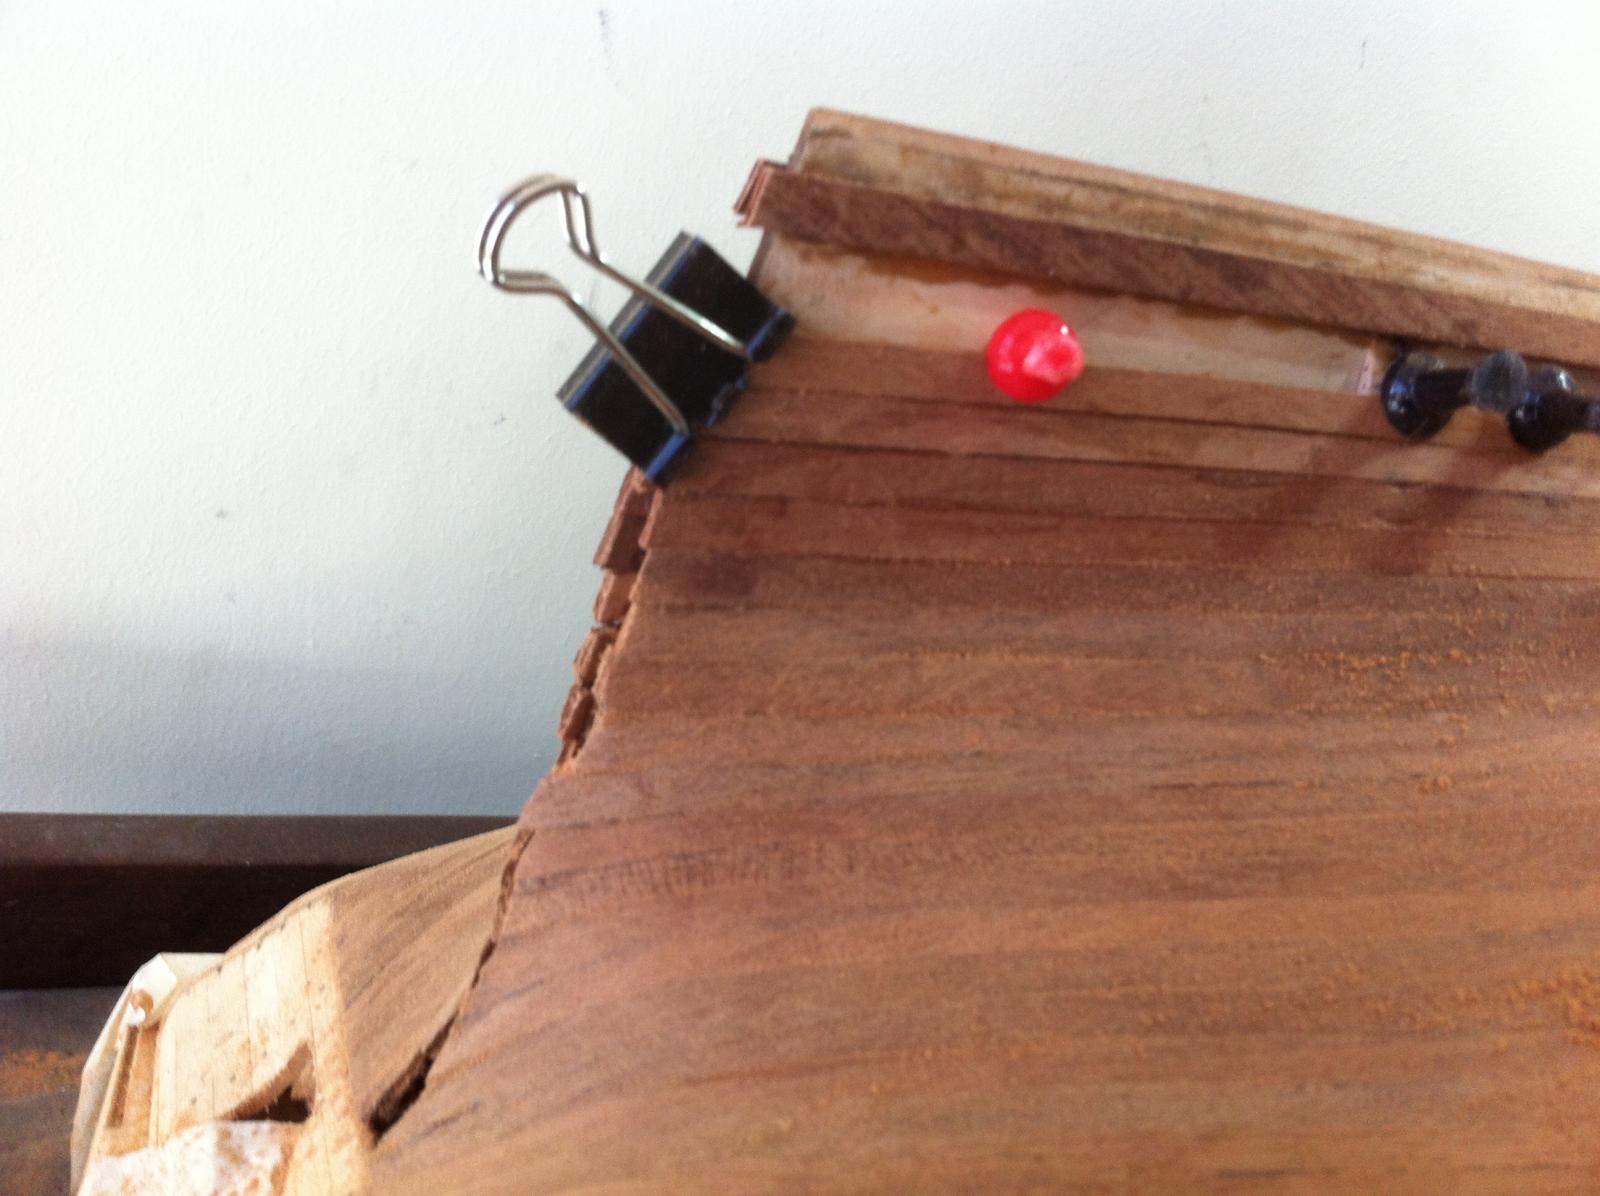
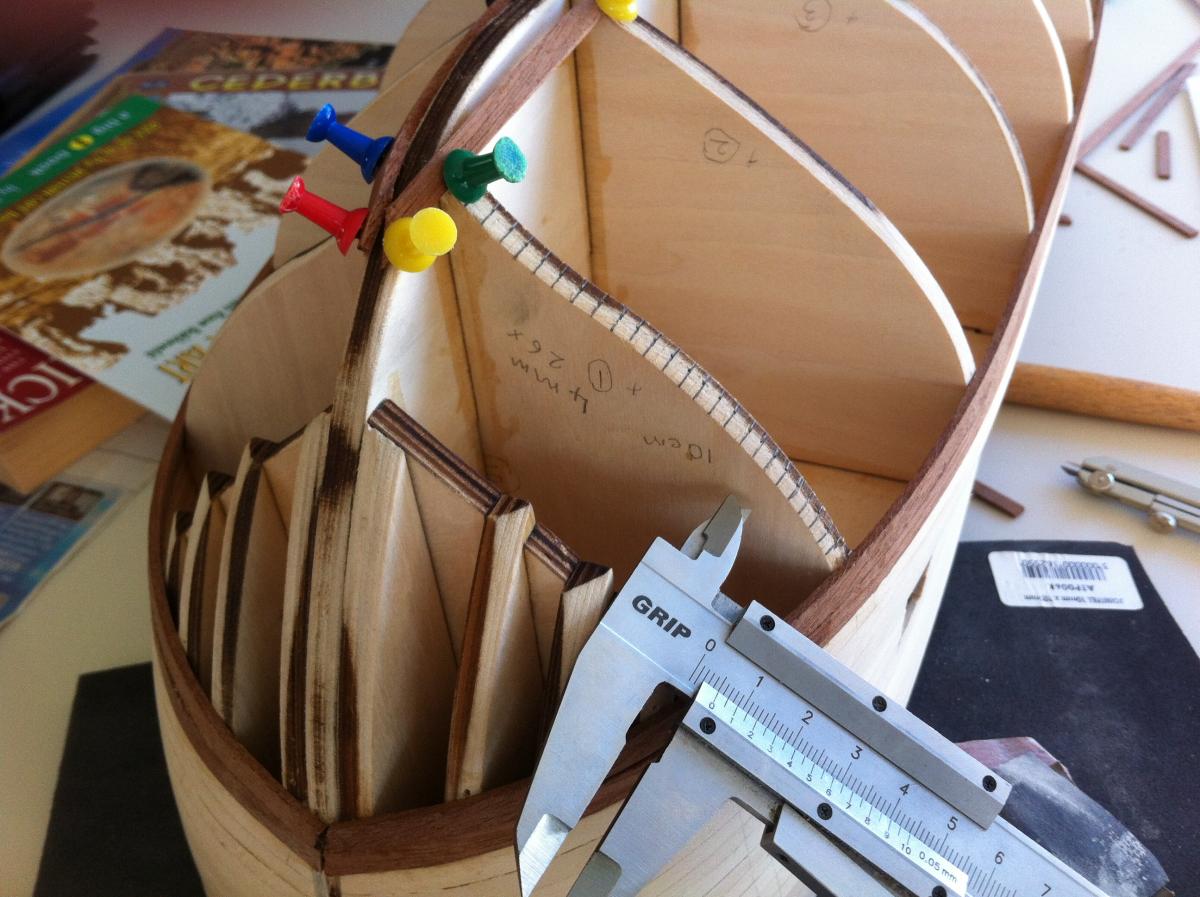
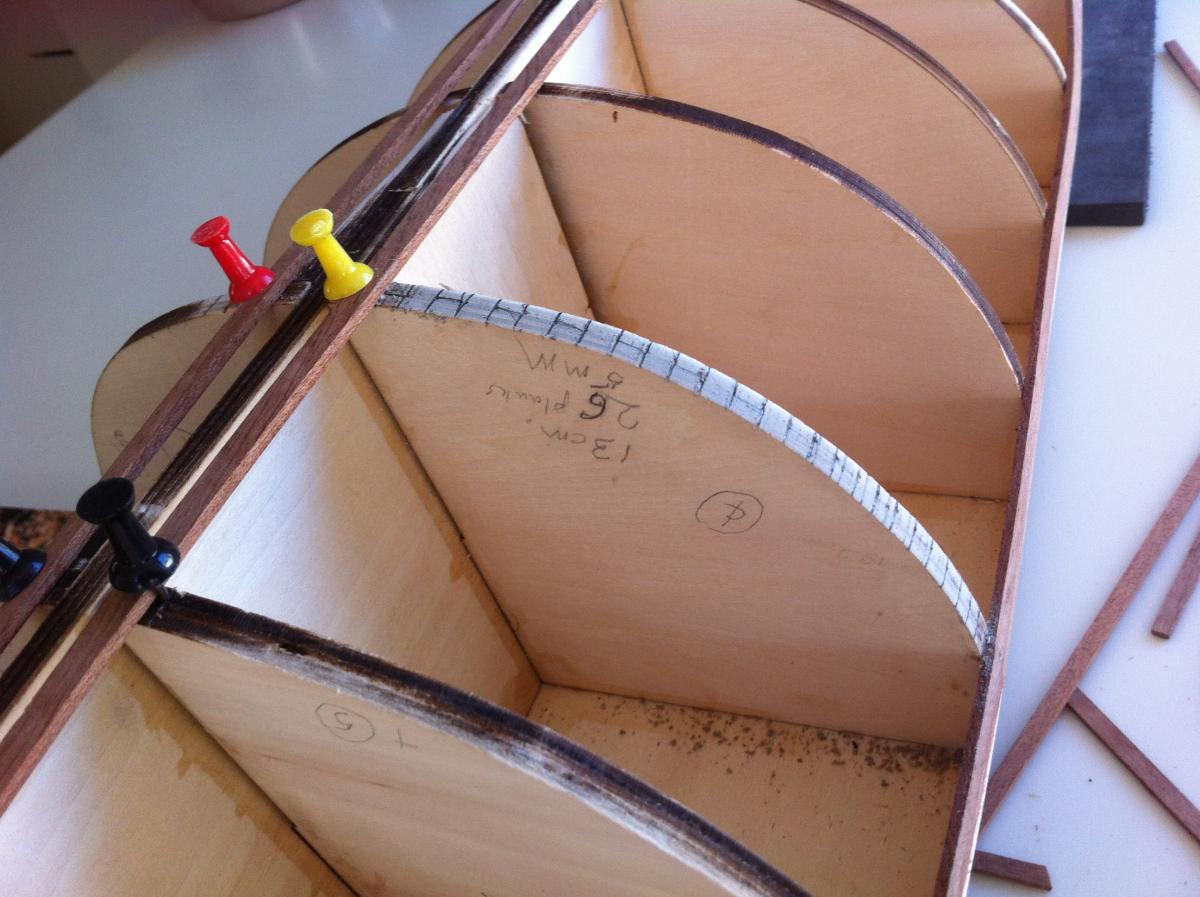
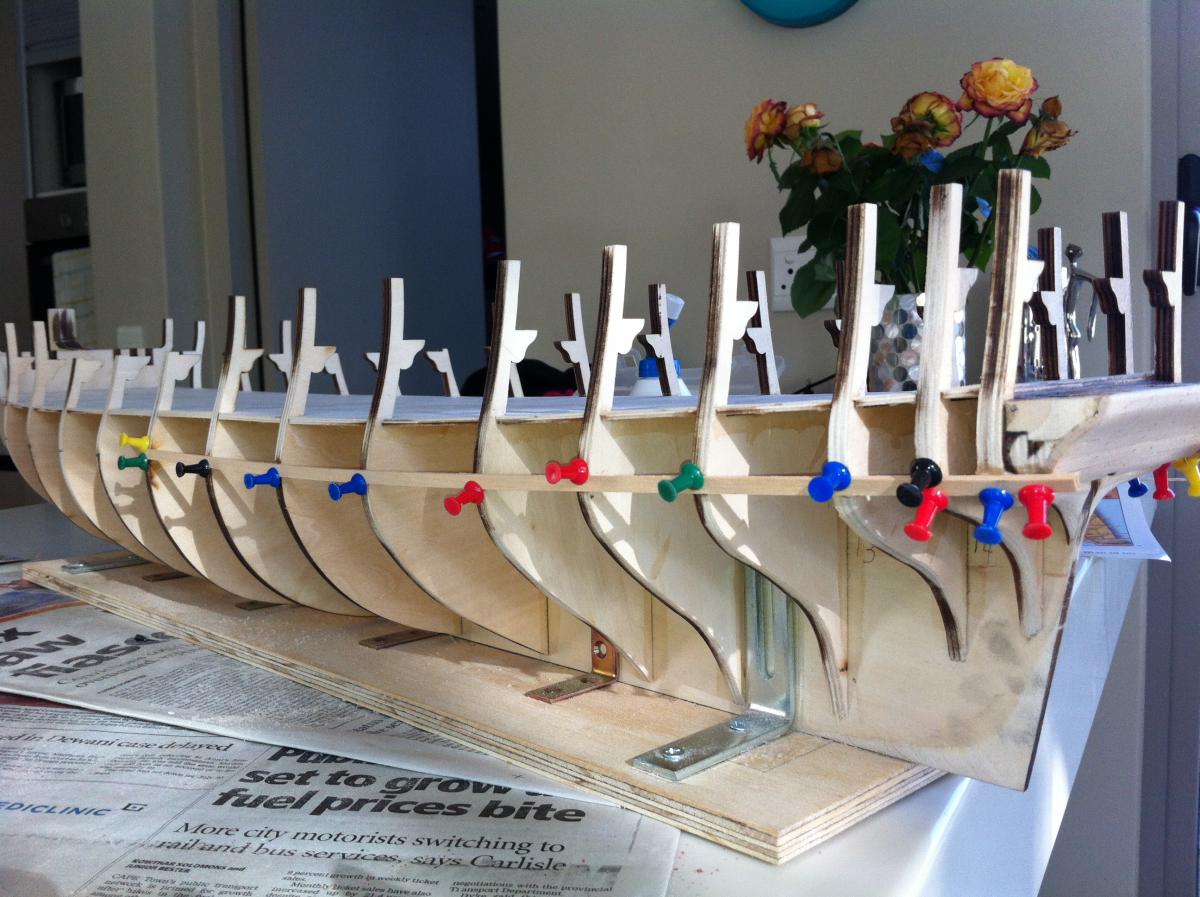
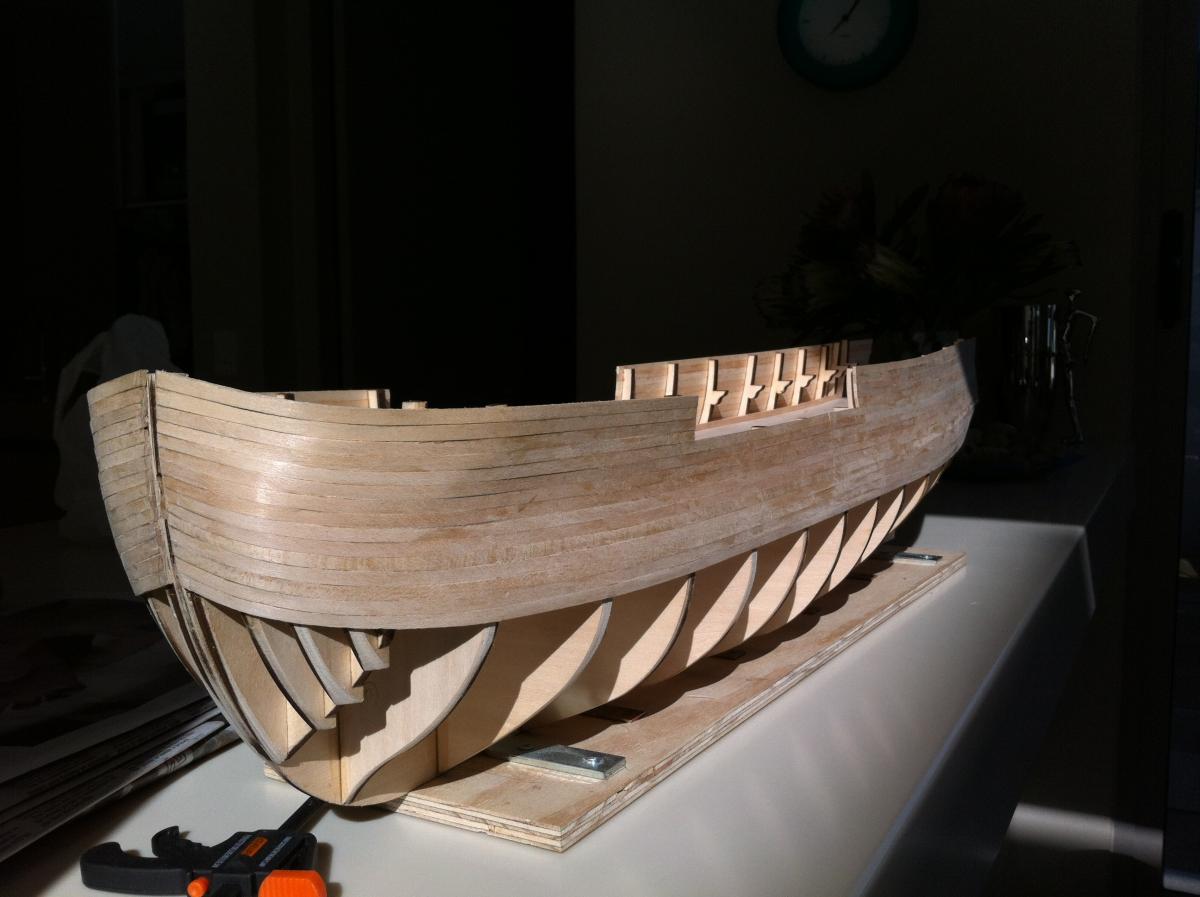
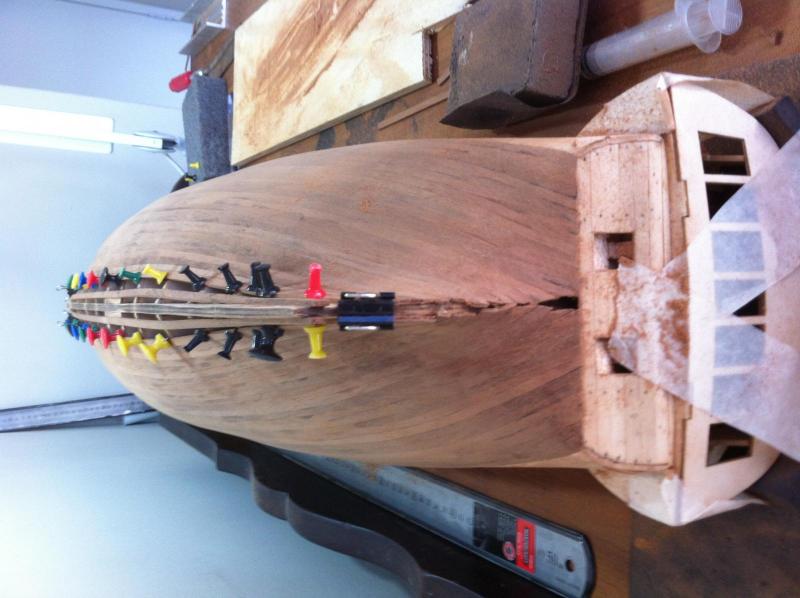
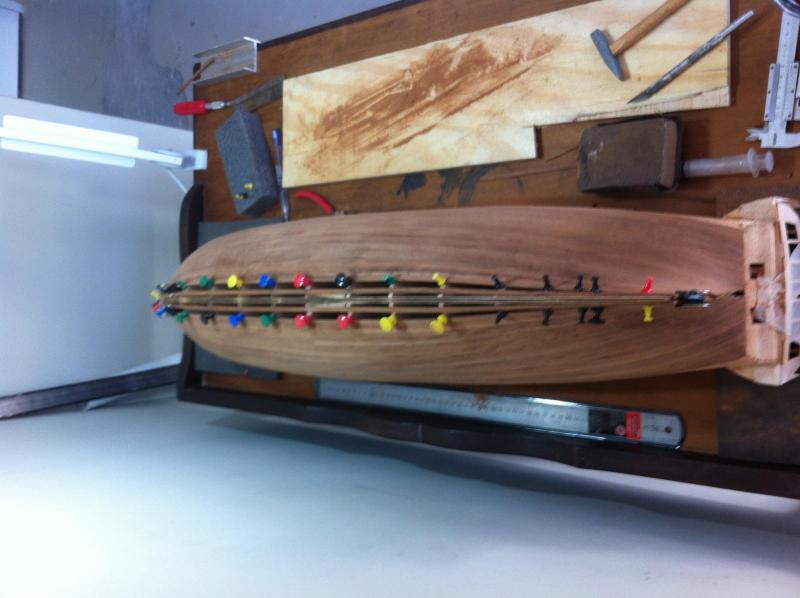
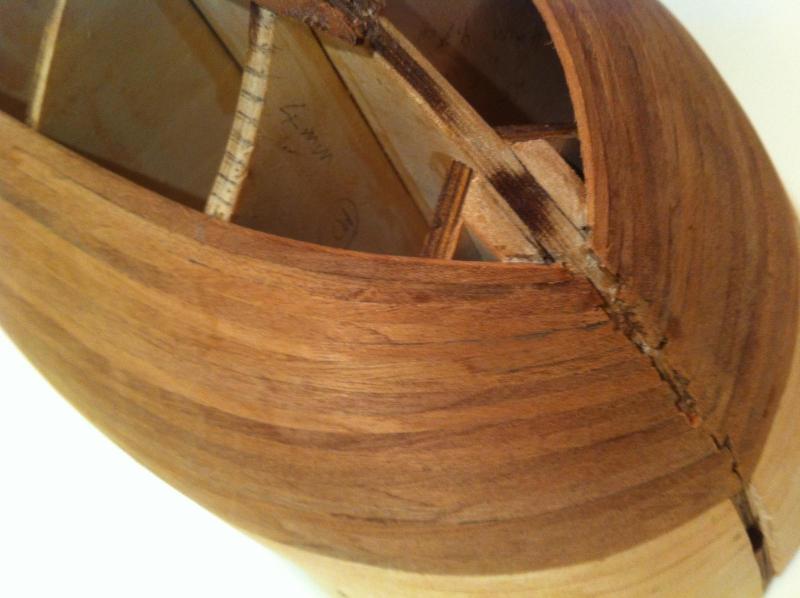
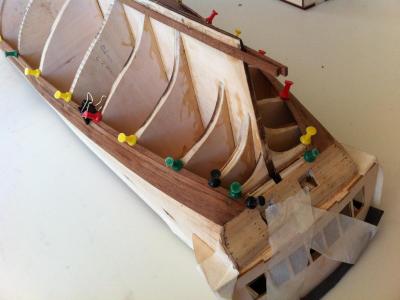
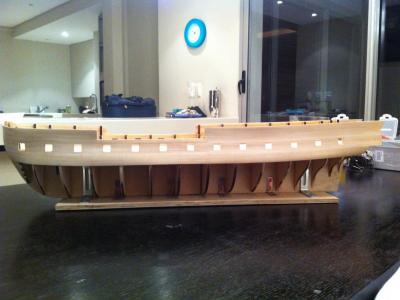
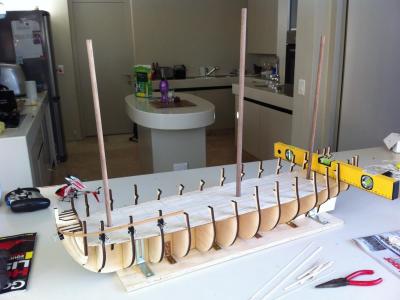
After July 2012 I did not do any work until a few weeks ago, February 2013. After much debate I decided to taper the lower hull planking. I measured the length of each of the key bulkhead outer surfaces and marked the width of the planks on each. The objective of course is to end up with the same number of planks at the bow as in the middle. I am taking a more artistic approach by sanding each plank by hand using 80 grain sandpaper. Up to now I have done 5 shaped planks at the bow and stern with no significant clinker effect yet. Seems to be working so far.


-
HMS Surprise by Derik - Artesania
derik replied to derik's topic in - Kit build logs for subjects built from 1751 - 1800
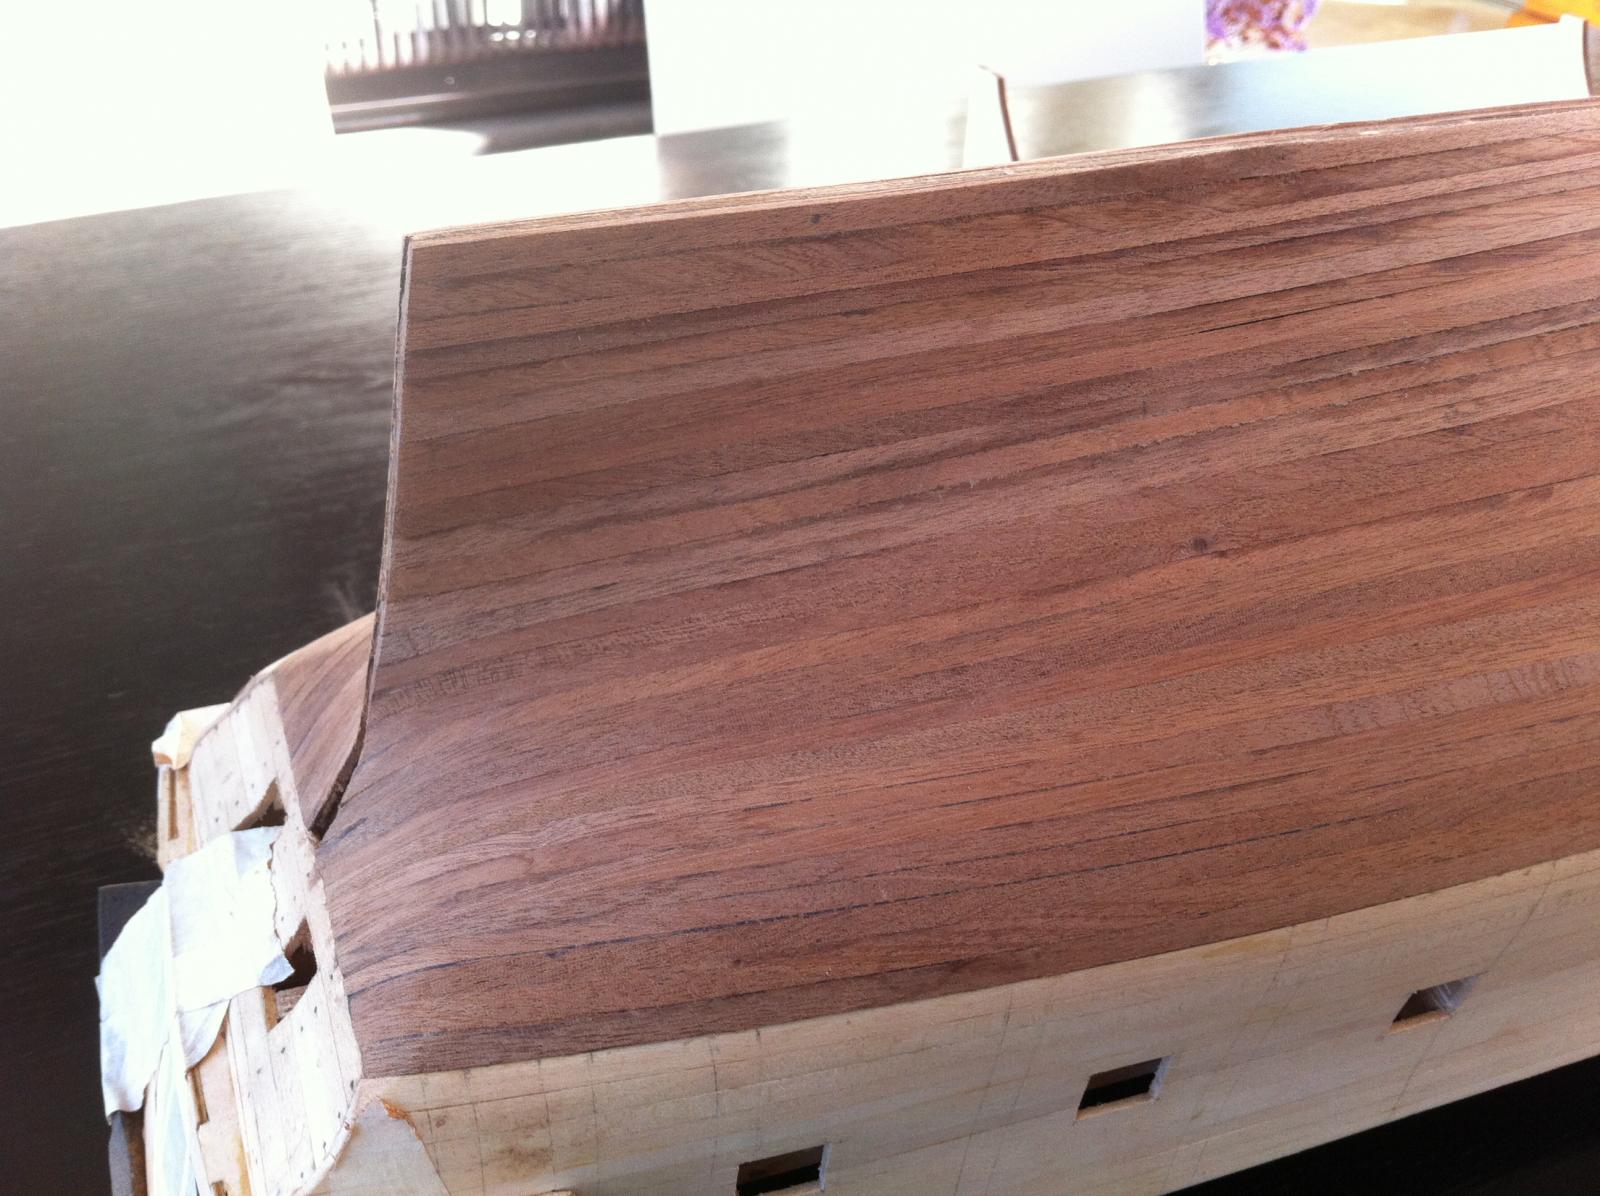
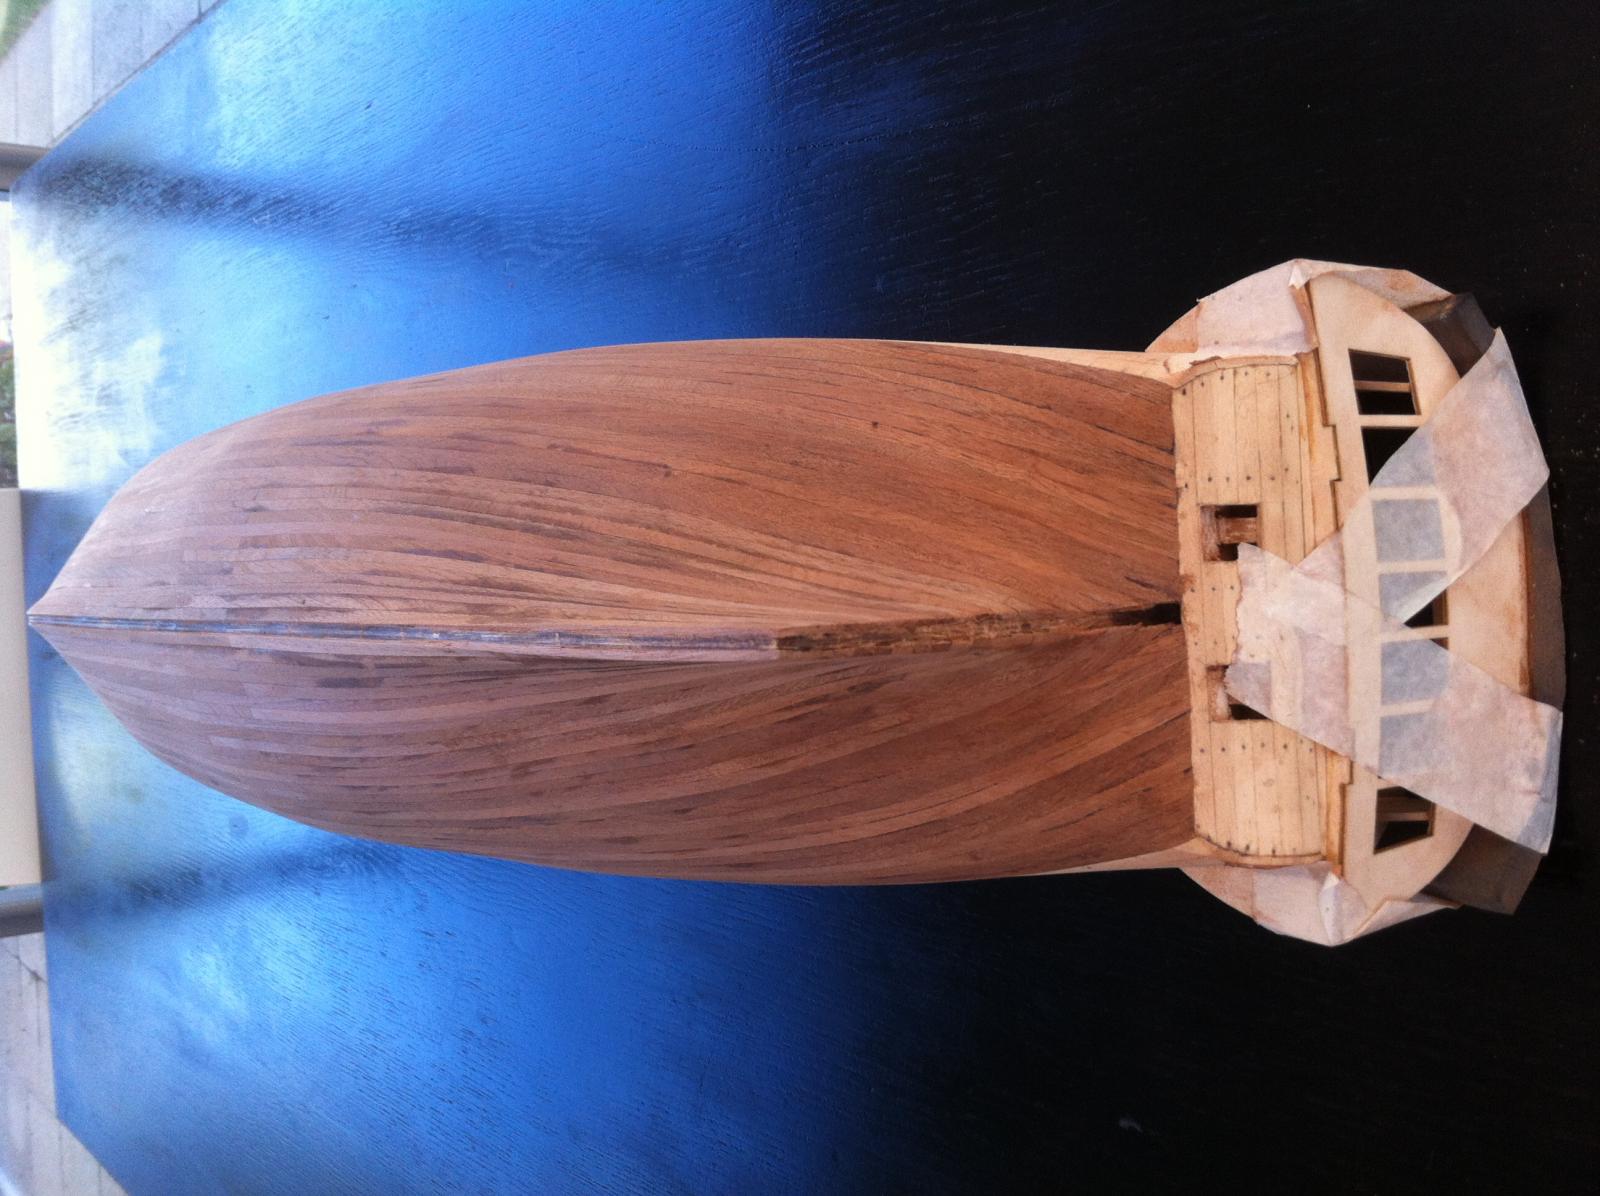
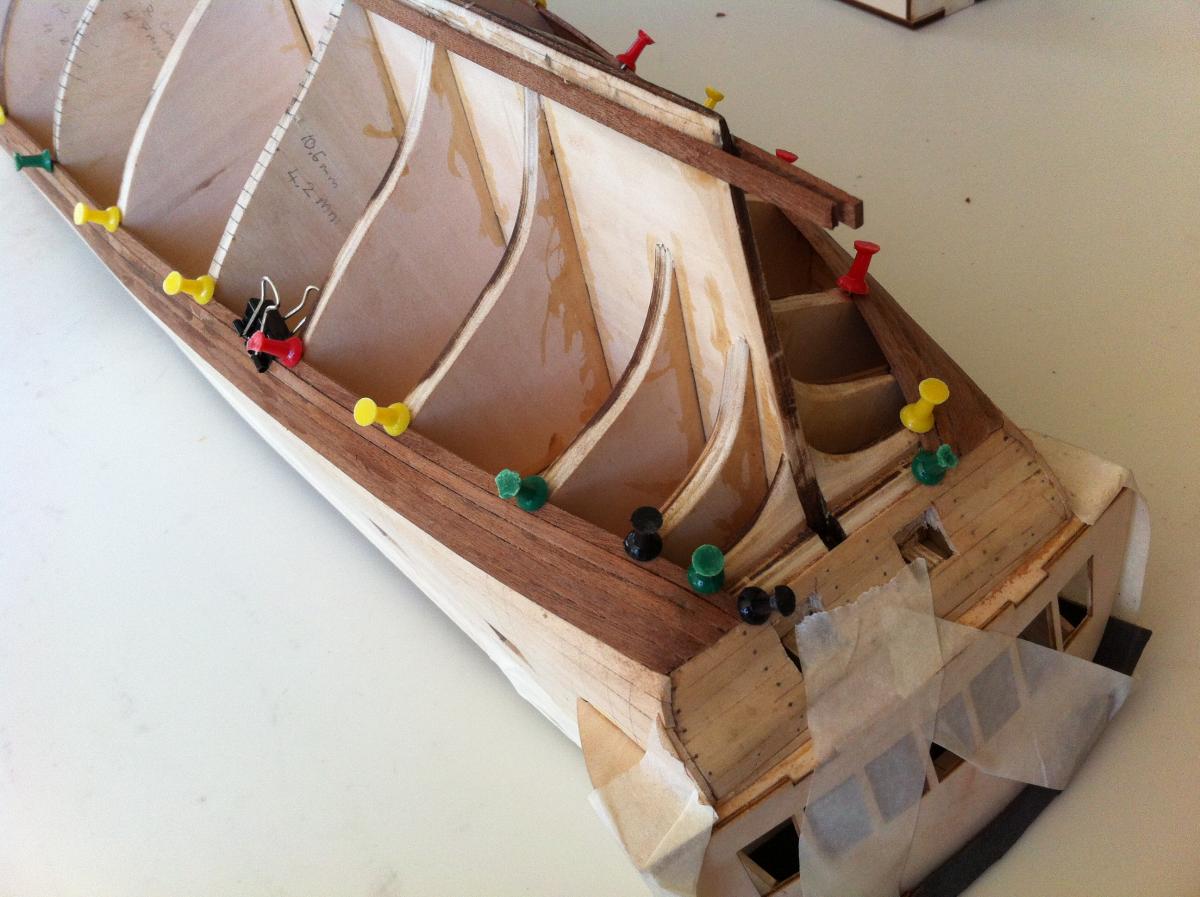
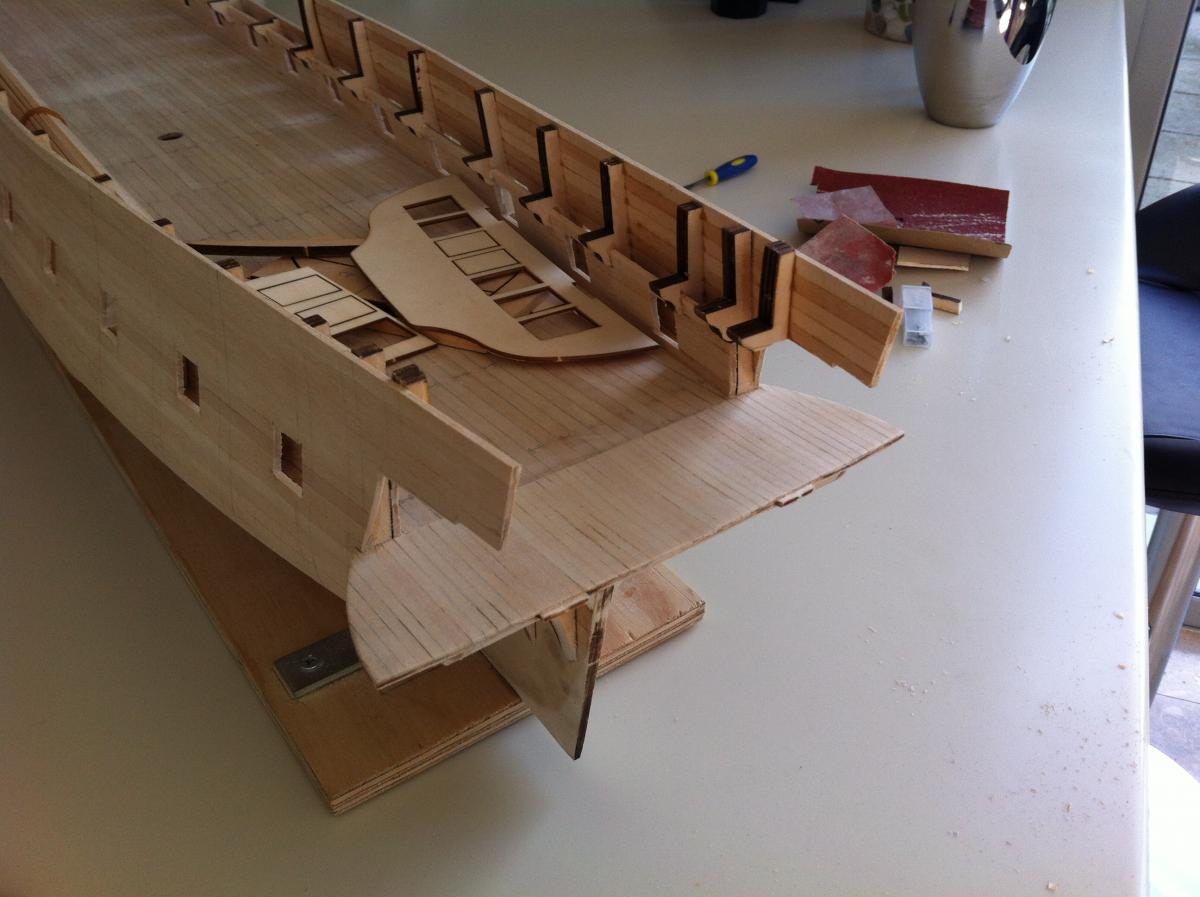
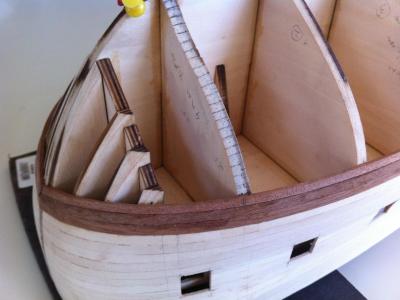
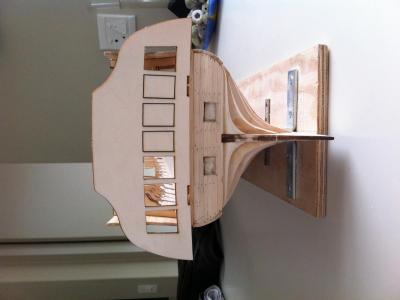
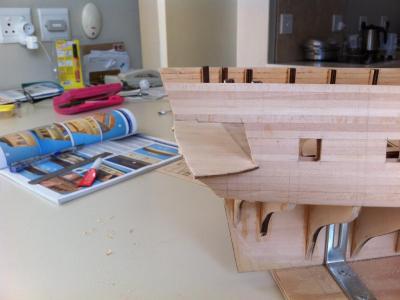
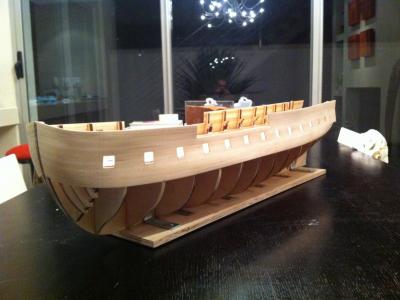
In July 2012 I decided to do some out of sequence work on the stern castle, mainly for the aesthetic effect. The instructions were vague. I looked a lot at other builder's work - like Magpie.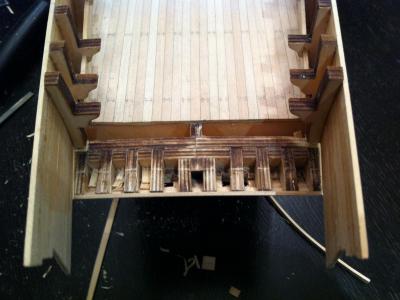

-
HMS Surprise by Derik - Artesania
derik replied to derik's topic in - Kit build logs for subjects built from 1751 - 1800
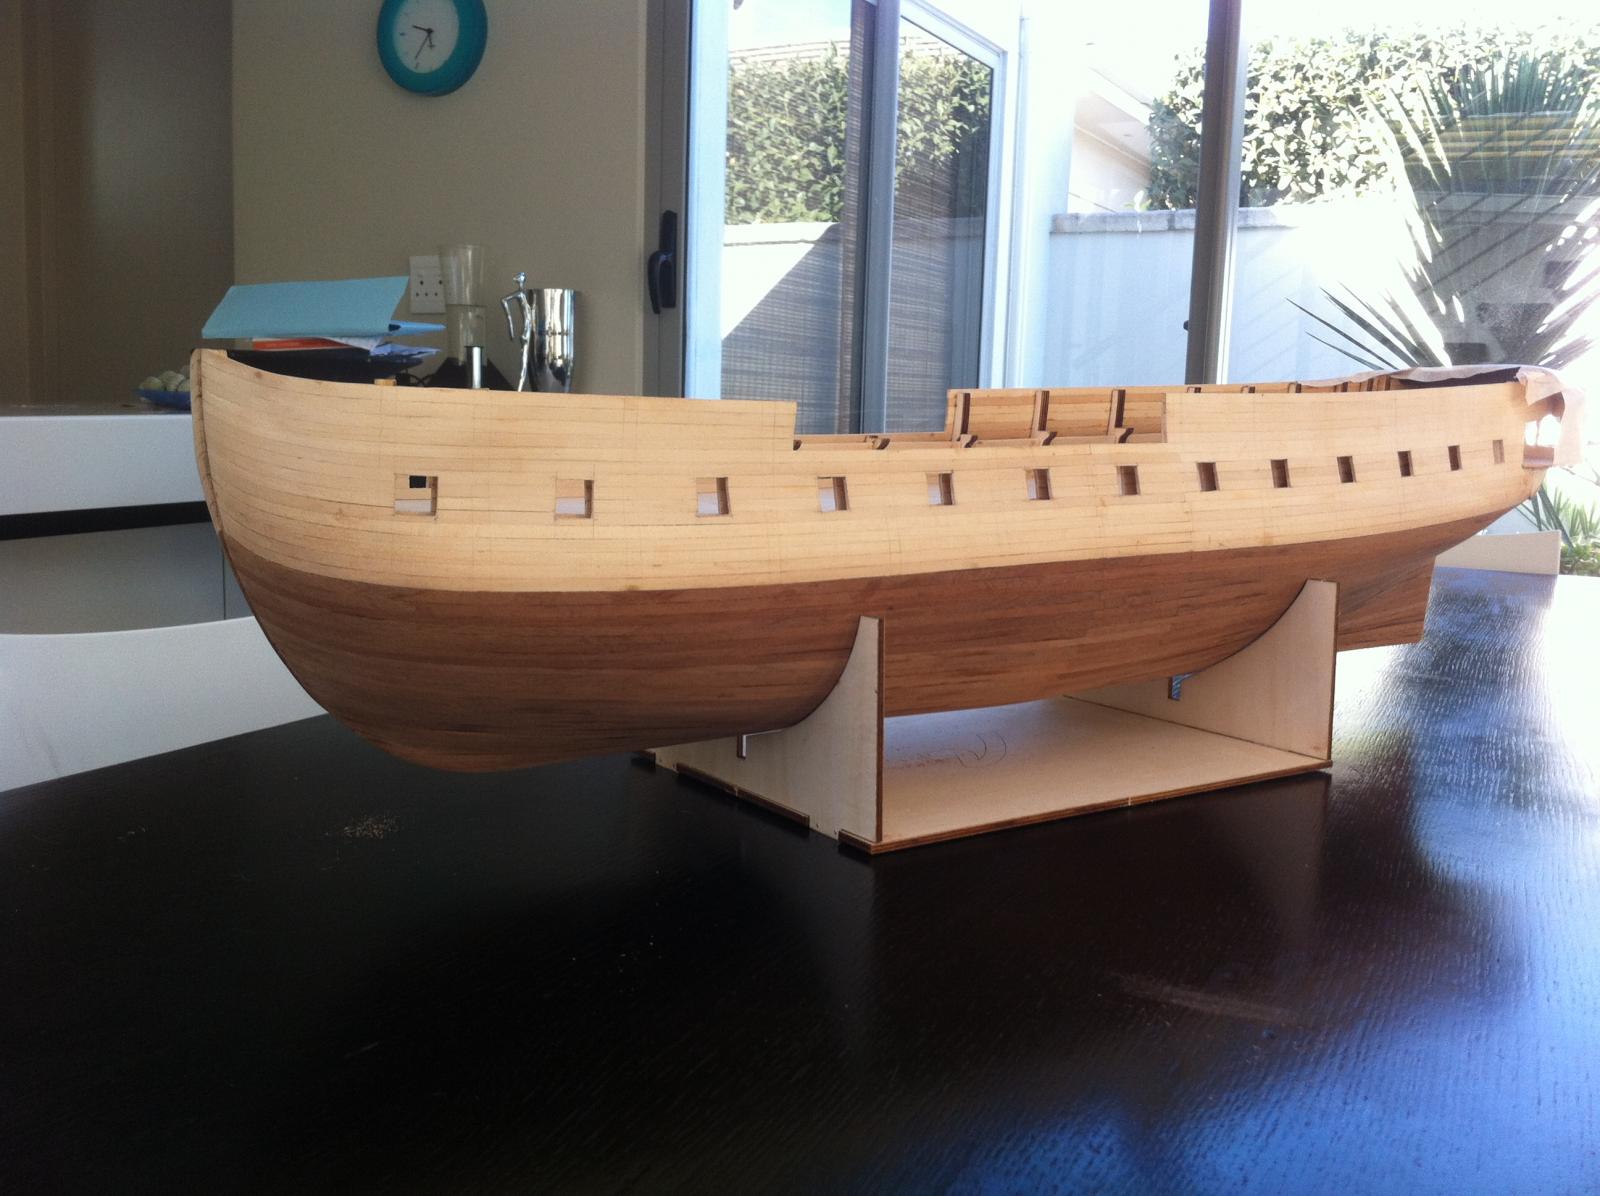
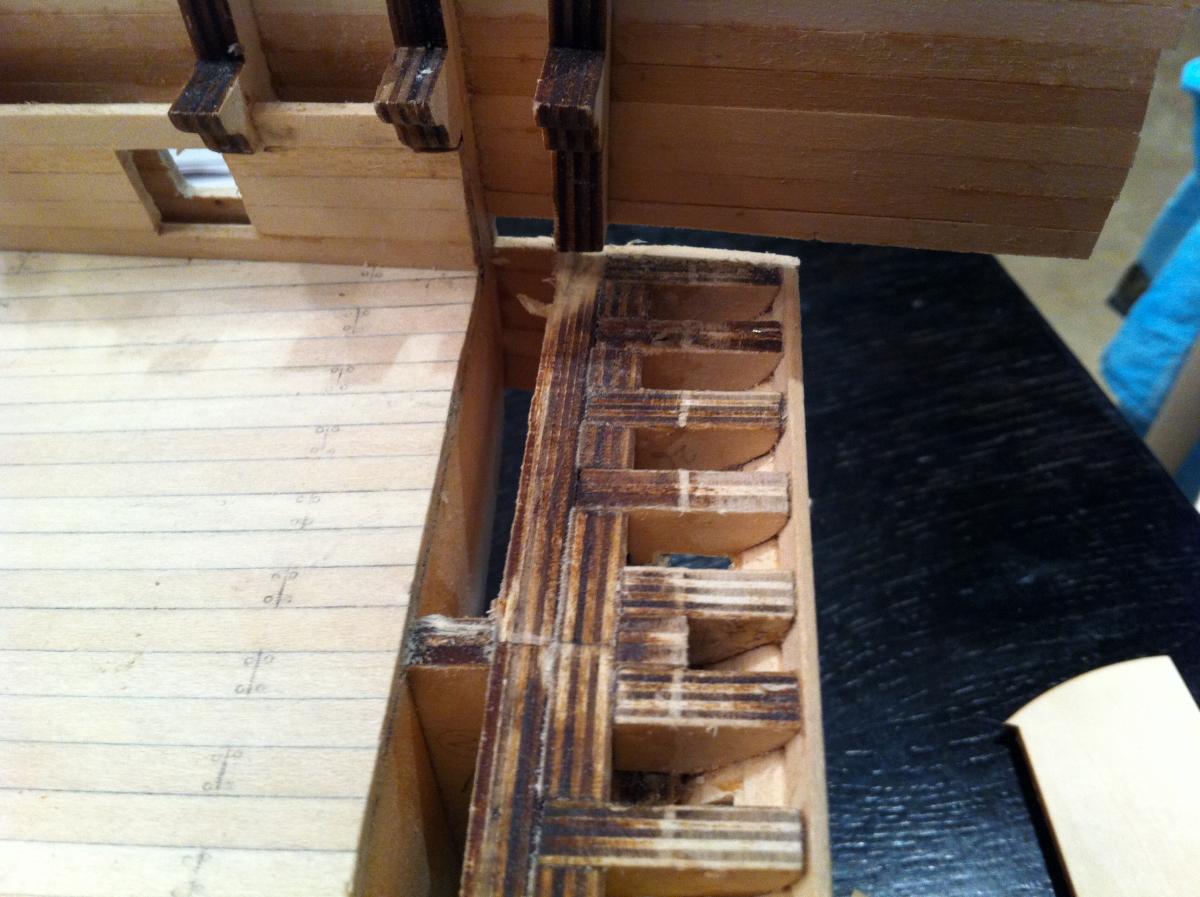
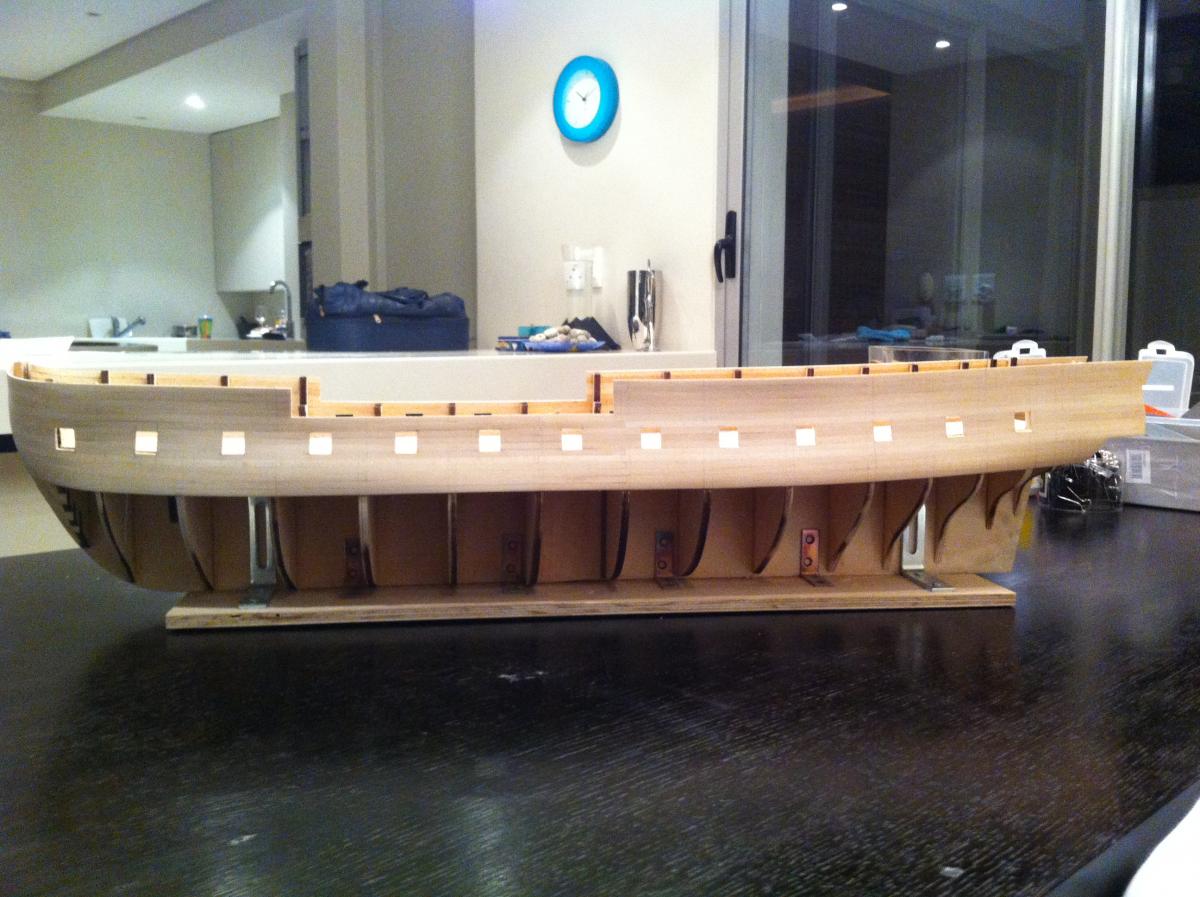
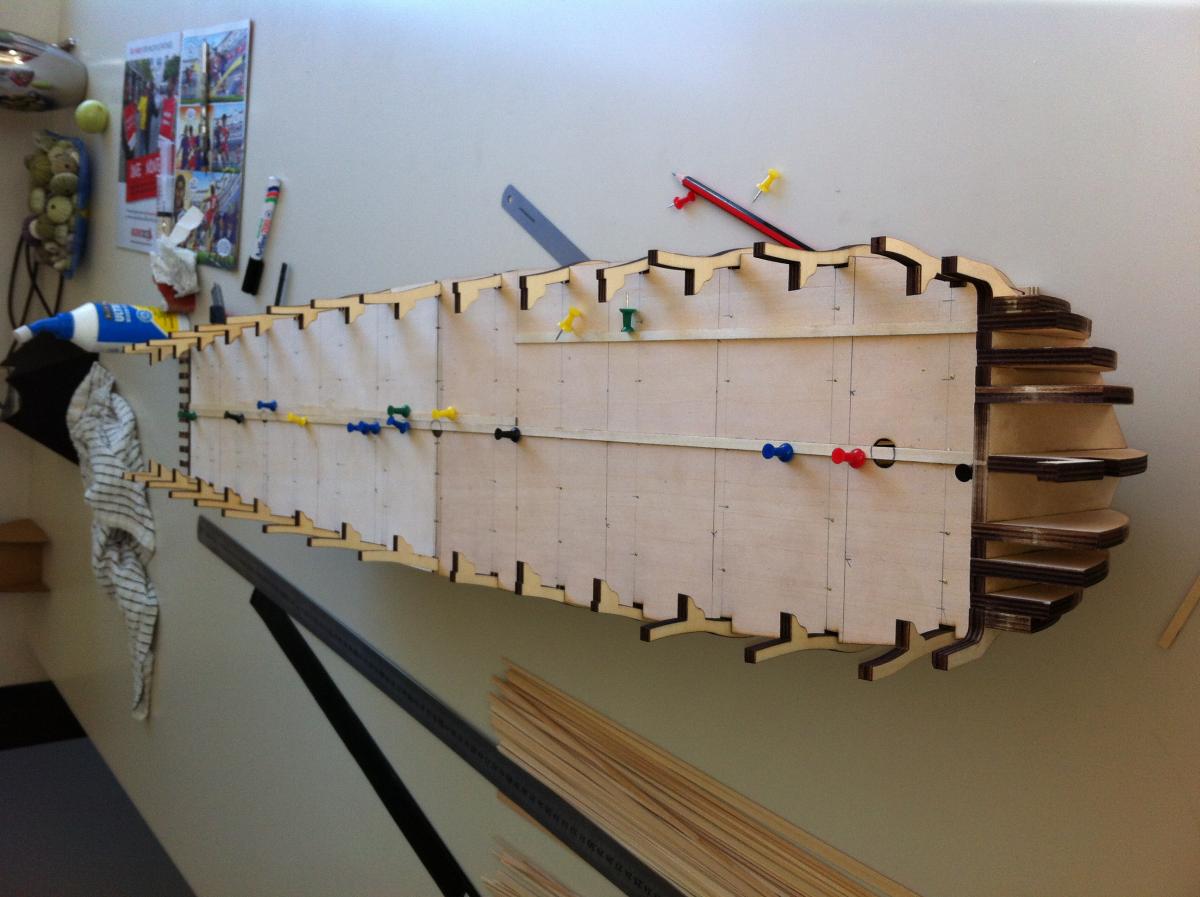
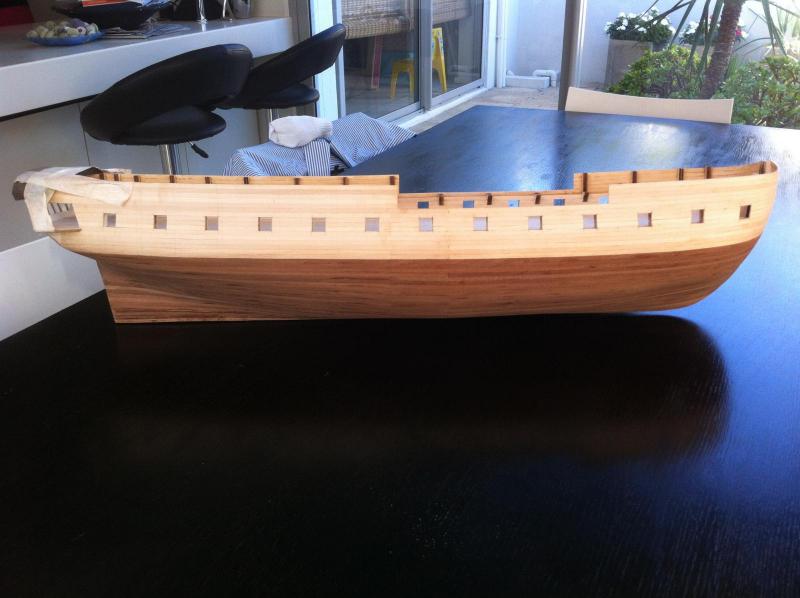
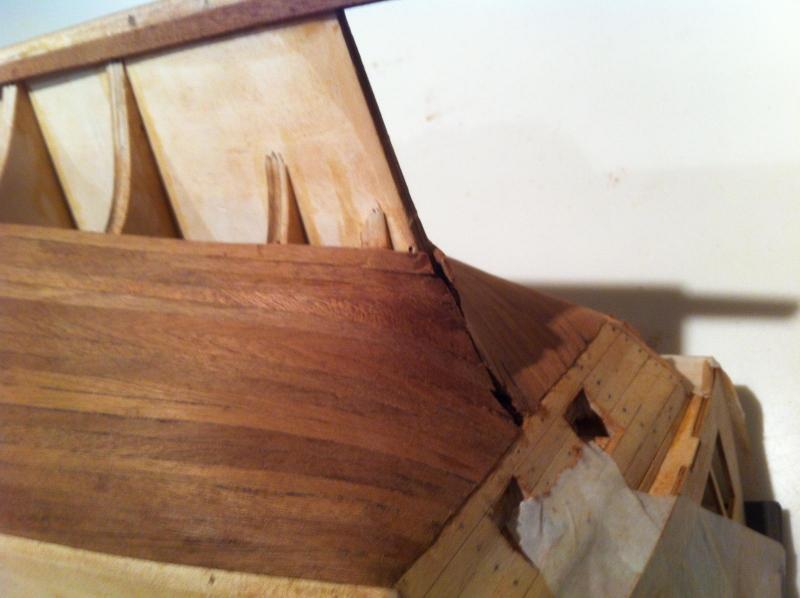
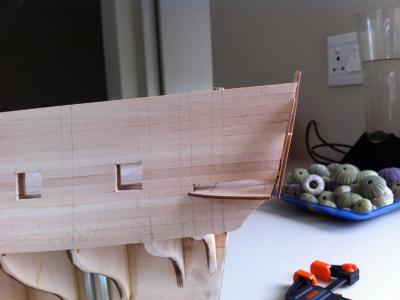
I worked until June 2012 to complete the upper hull planking, cutting the gunports and planking the inside of the bulwarks. Measuring the gun ports was tricky, small errors accumulate quickly. Then got busy on other things and the model took a break. The first plank was allowed to follow the natural shape of the hull. This resulted in a curve upwards towards the bow. As a result the last planks towards the top of the bow had to be tapered. Good practice for what is coming later with the lower hull.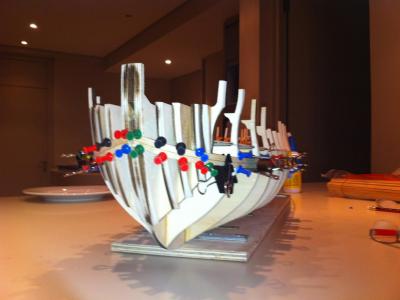


-
HMS Surprise by Derik - Artesania
derik replied to derik's topic in - Kit build logs for subjects built from 1751 - 1800
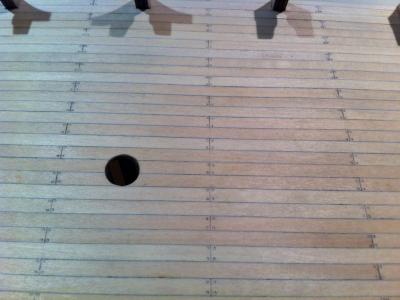
I thought a lot about how to simulate the trenails on the deck. I wanted to obtain small round circles with a wooden interior, without having to drill holes nor insert wooden pegs. My solution was to use a 0.5 mm clutch type pencil with the lead removed. I sanded some ordinary HB pencil lead and then dipped the clutch pencil tip in the lead powder. This was then used to make two or three simulated "wooden nails" in the deck planking at a time. Turned out OK.


-
HMS Surprise by Derik - Artesania
derik replied to derik's topic in - Kit build logs for subjects built from 1751 - 1800
Uploading pictures seems to be working on my iMac at home.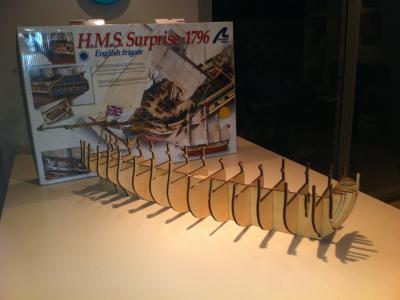


-
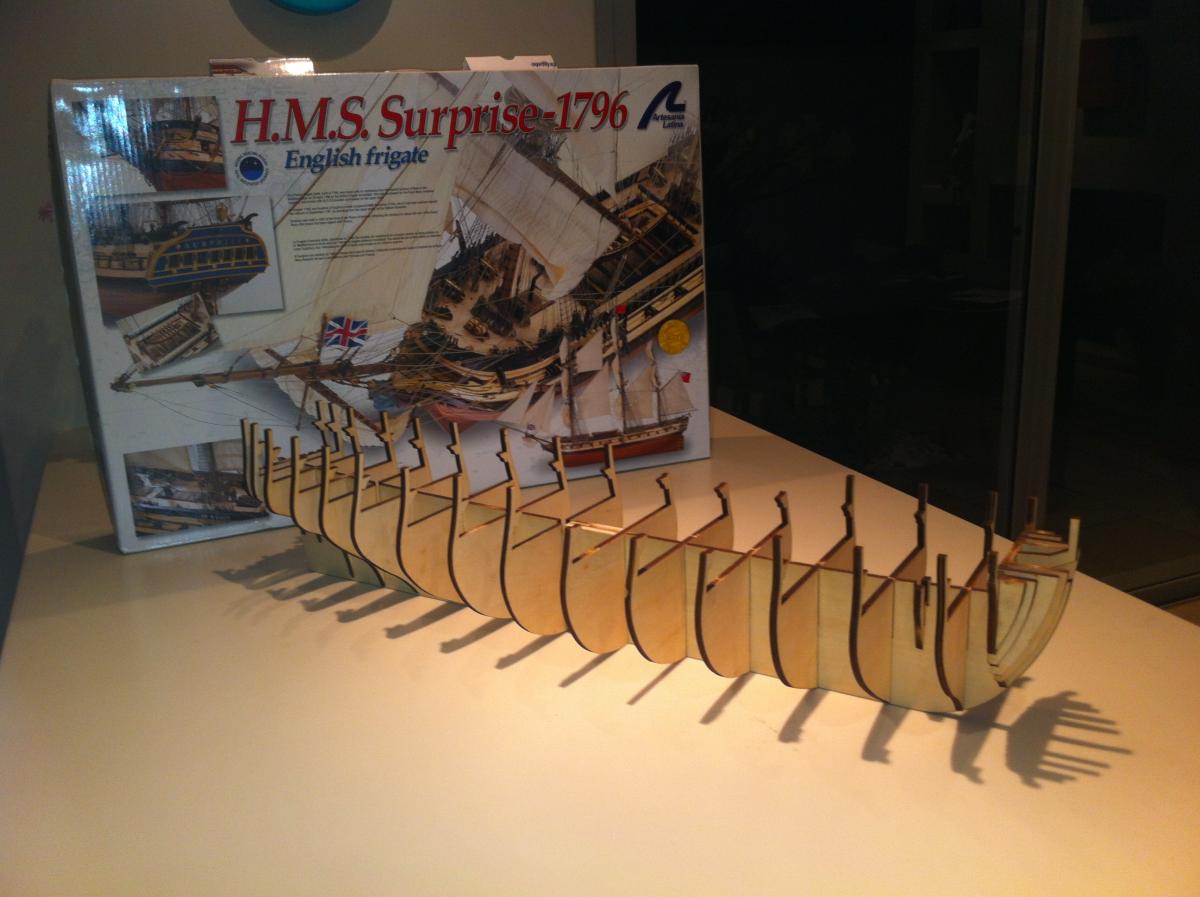
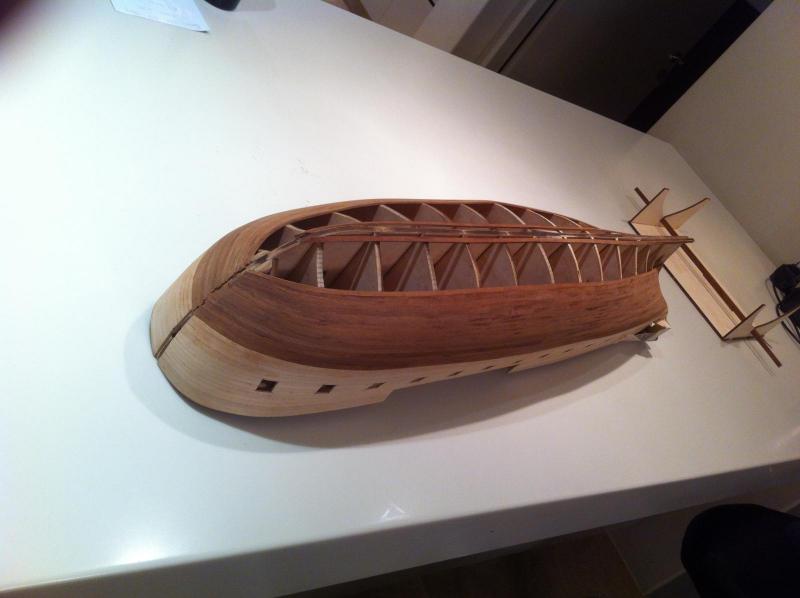
My name is Derik and I live in Cape Town, South Africa. I fell in love with model ships when I first read Tintin and the Unicorn in primary school. I even visited the flea market in Brussels to look for the Unicorn. Unfortunately there was no fourth model for sale. I started the HMS Surprise in April 2012. Good progress was made until July. I will upload the typical start Picture as a test. If it works I will post more of the progress.