-
Posts
1,268 -
Joined
-
Last visited
Content Type
Profiles
Forums
Gallery
Events
Posts posted by jack.aubrey
-
-
Monday 21 October 2019
By now the classic activities on the hull are practically almost finished; only some detail activities are remaining (rudder, figurehead, etc.). They can be performed later. For example, the installation of the rudder would make the use of the building slip unpracticable; until now it proved very useful and with exceptional stability. So whoever expects to see the rudder will have to wait again . . .
As for the figurehead I have to wait for the coming of some carving inspiration, something that is totally missing at the moment . .So I started thinking about the installation of the masts and then proceeding with the stanging and running rigging.
So I started to study the two plans in order to understand how the whole rigging system and sails is structured. Although it is a relatively simple masting, for me this is a real headache. To understand something more and also to memorize as much as possible, I am preparing a document where I try to clarify and write down what to do. Even if it is a document only useful to the undersigned, I attach it to this post just to show the "method".
Thanks to the "method" I realized that new details on the decks and tops are needed, and also some changes due to the impractical nature of the proposed solution are required. In any case, I spent a couple of afternoons making and installing the missing details.
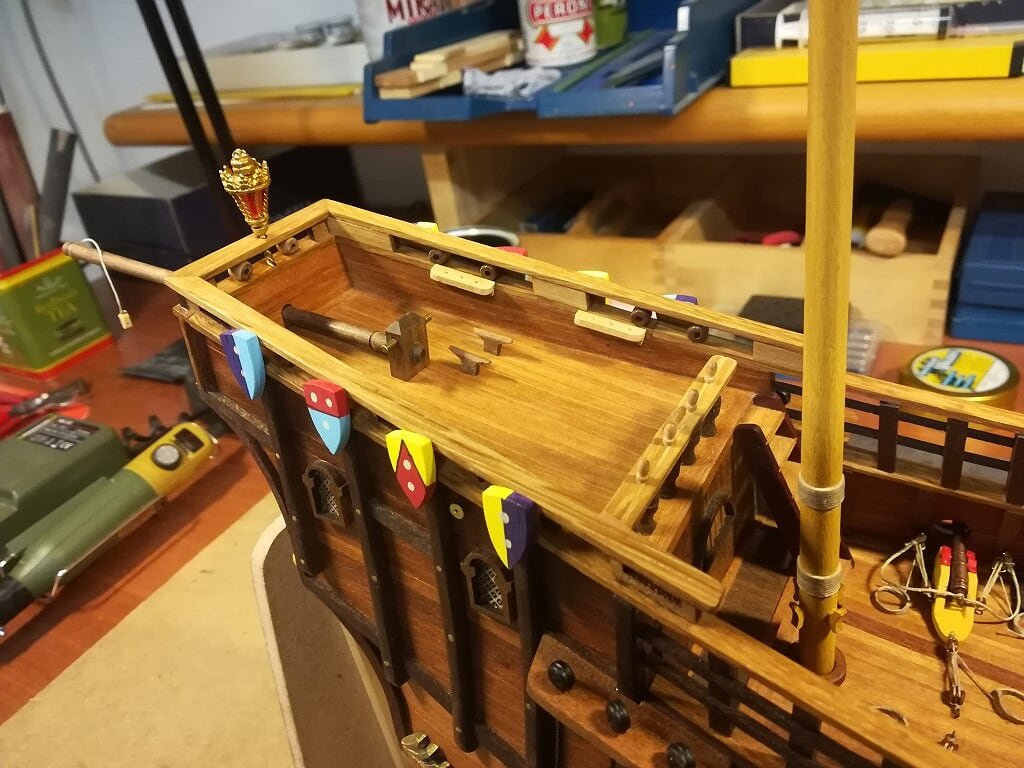
The photo 01 shows the new elements applied in the poop area: the decorated shields on the external sides, the pinrails added inside the walls, some cleats and the poop lantern . . .
01 Ragusian Carrack/21102019/IMG_20191021_165514.jpg
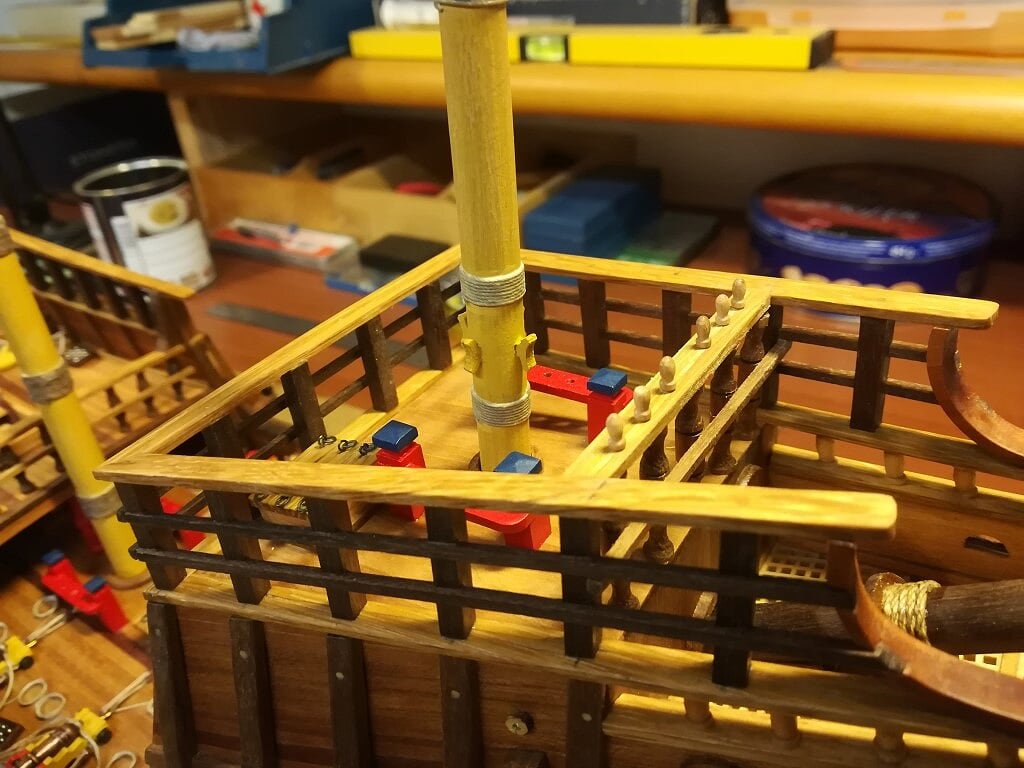
Also at the bow I am preparing material for the belaying pins . . .
02 Ragusian Carrack/21102019/IMG_20191021_165524.jpg
Finally on the main deck I installed new pinrails applied similarly to those on the poop deck . . .
03 Ragusian Carrack/21102019/IMG_20191021_165536.jpg
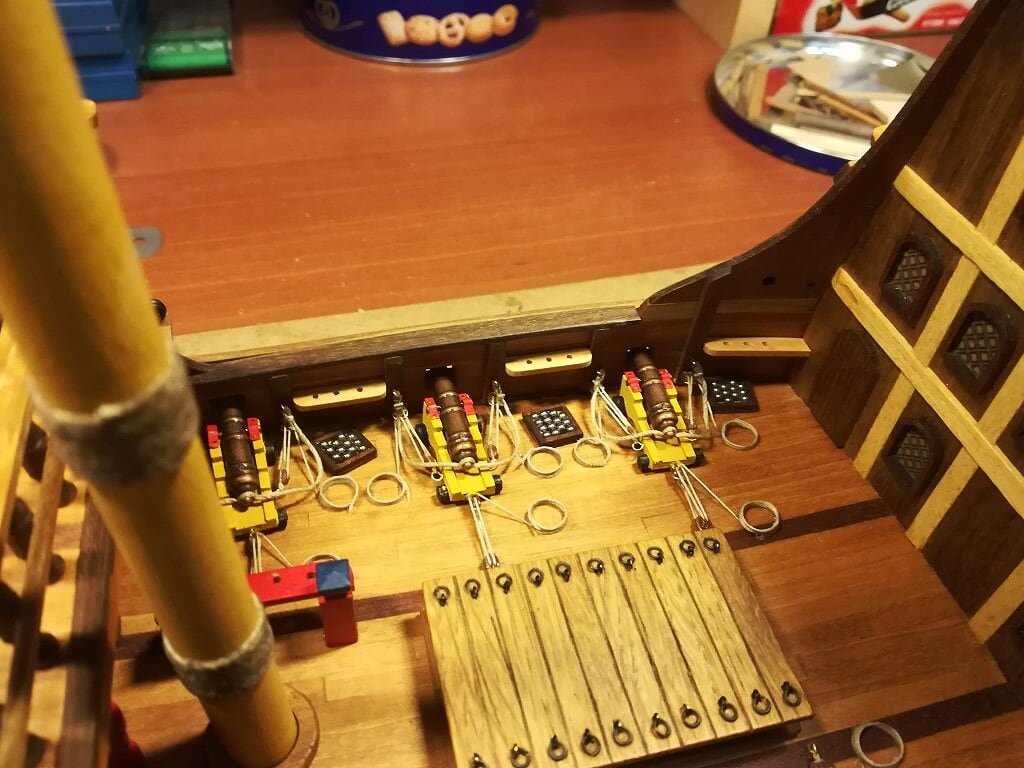
In short, many details, even tiny ones, that will be used later for the rigging. I have prepared all these pinrails to replace an almost similar number of cleats. I thought it impossible to fix these cleats seriously because of their small size and almost no surface that could be used to glue them to the sides. Hence a functionally similar solution but which gives me more guarantees of robustness.
That's all for today, Jack.
- Kikatinalong, yvesvidal, J11 and 6 others
-
 9
9
-
Saturday 12 October 2019
These last 15 days saw me and my wife busy with a cat that got sick and gave us a lot to do to treat it. This fact, which continually created unplanned situations, prevented me from dedicating myself to the usual activities on this model and consequently I did nothing really interesting.
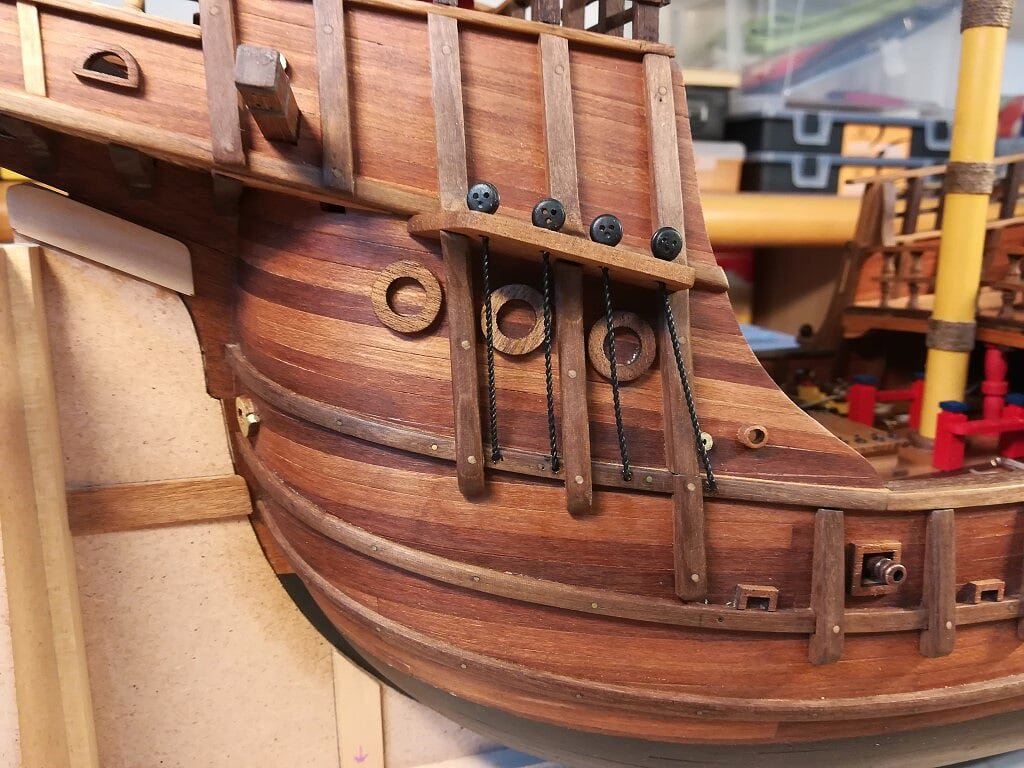
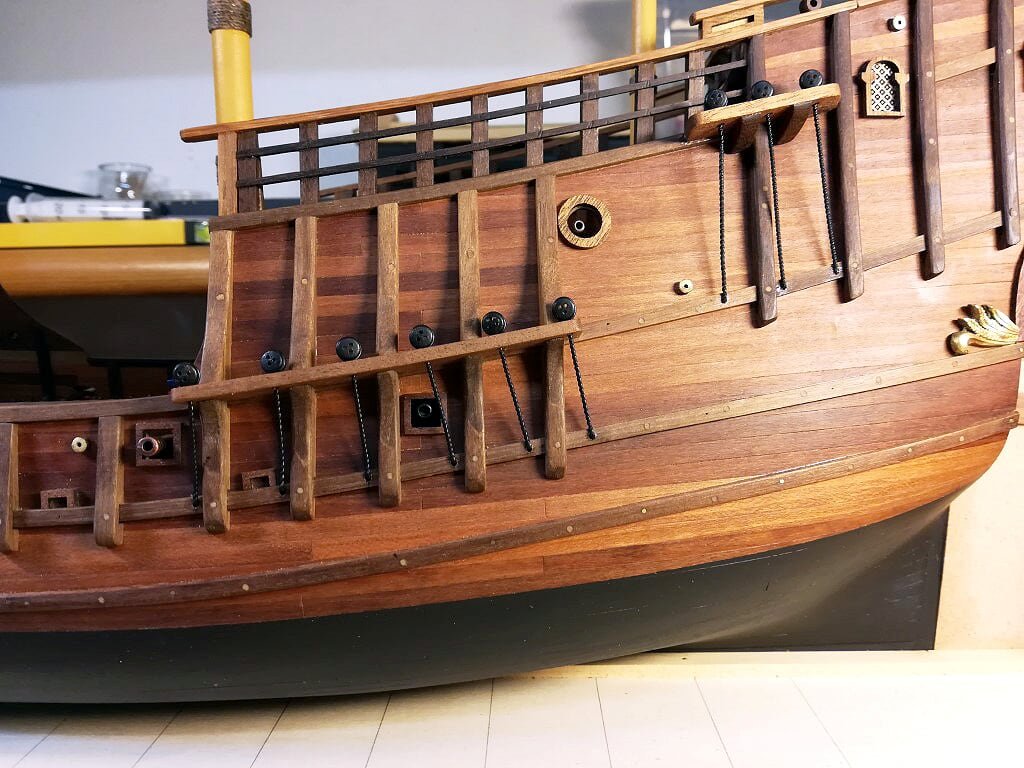
Using few free moments I managed to finish the chain plates, to paint them and, finally, to install them, by fixing them on the sides of the hull in correspondence with the wales. The result is practically equal to the MarisStella project even if the technique I used is not the same.
The first three images show the finished work.
01 Ragusian Carrack/12102019/EFFECTS.jpg
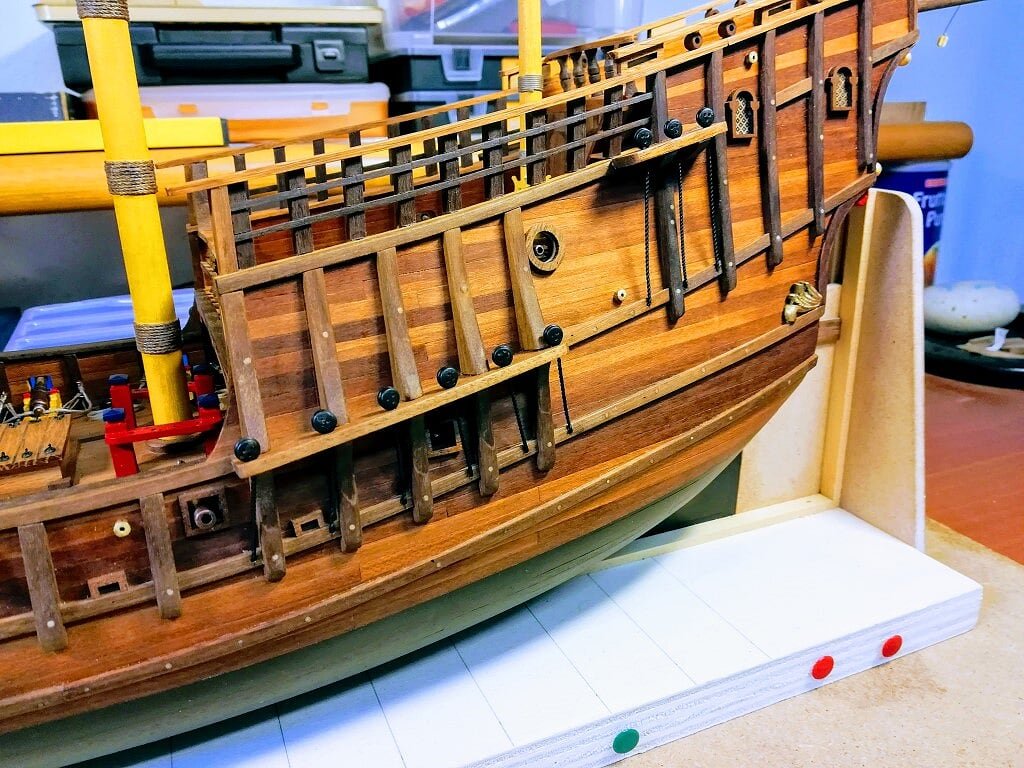
02 Ragusian Carrack/12102019/IMG_20191012_160621.jpg
03 Ragusian Carrack/12102019/IMG_20191012_160634.jpg
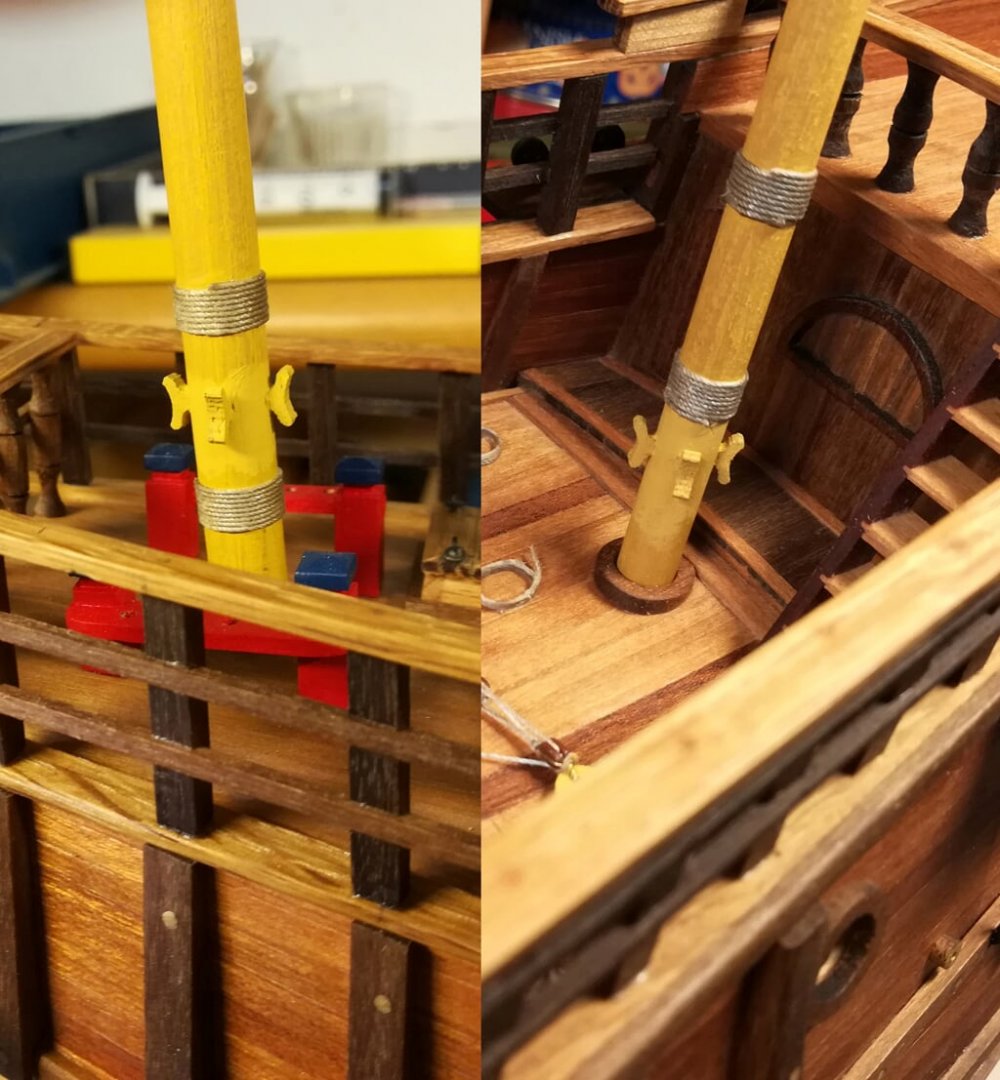
Another task, small but truly interesting for the method I used to obtain an acceptable result, is highlighted in the last image, the result of a copy & paste of two images of the lower zone of the foremast and the mizzen mast. These are the four cleats visible at the bottom of the two mast that are very small and difficult to fix properly in their place.
This experiment, perfectly successful, is important as there are many others to install and therefore replicable.04 Ragusian Carrack/12102019/Due&TreResized.jpg
Good-bye, Jack.
- GrandpaPhil, Louie da fly, J11 and 5 others
-
 8
8
-
Thursday 3 October 2019
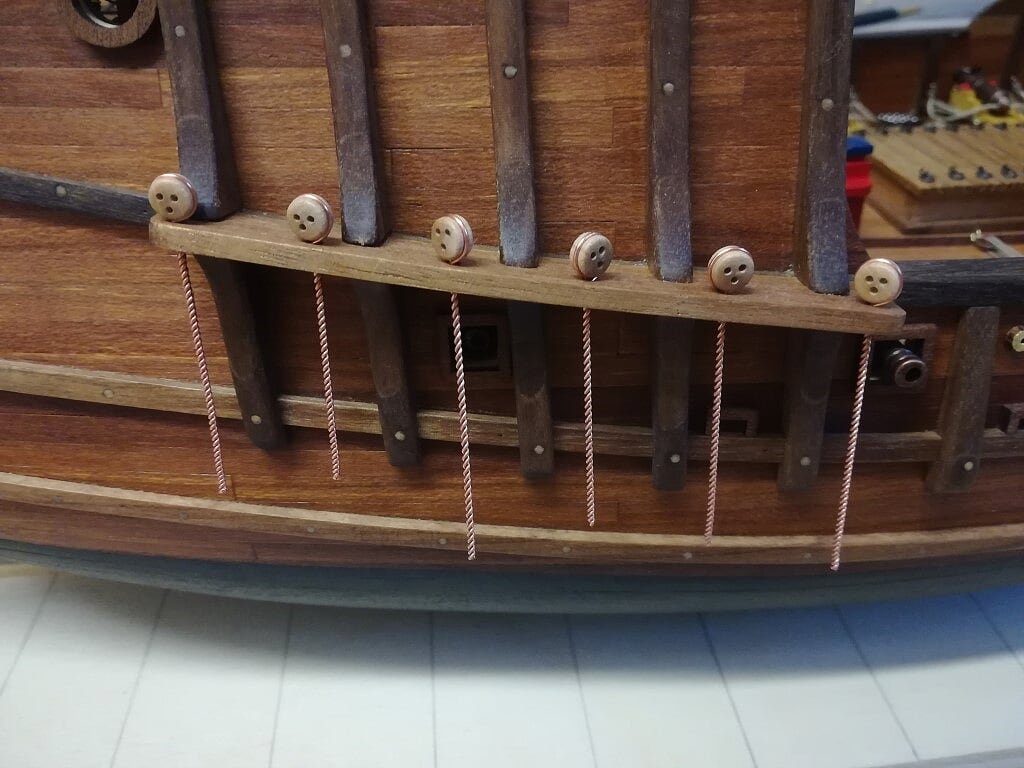
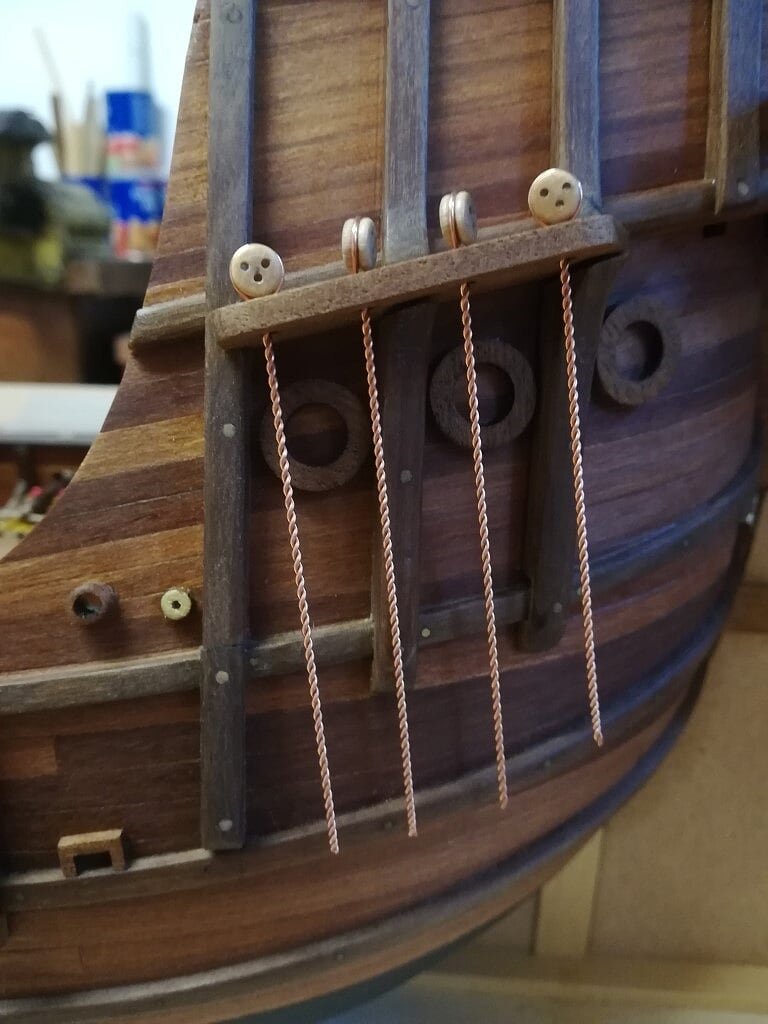
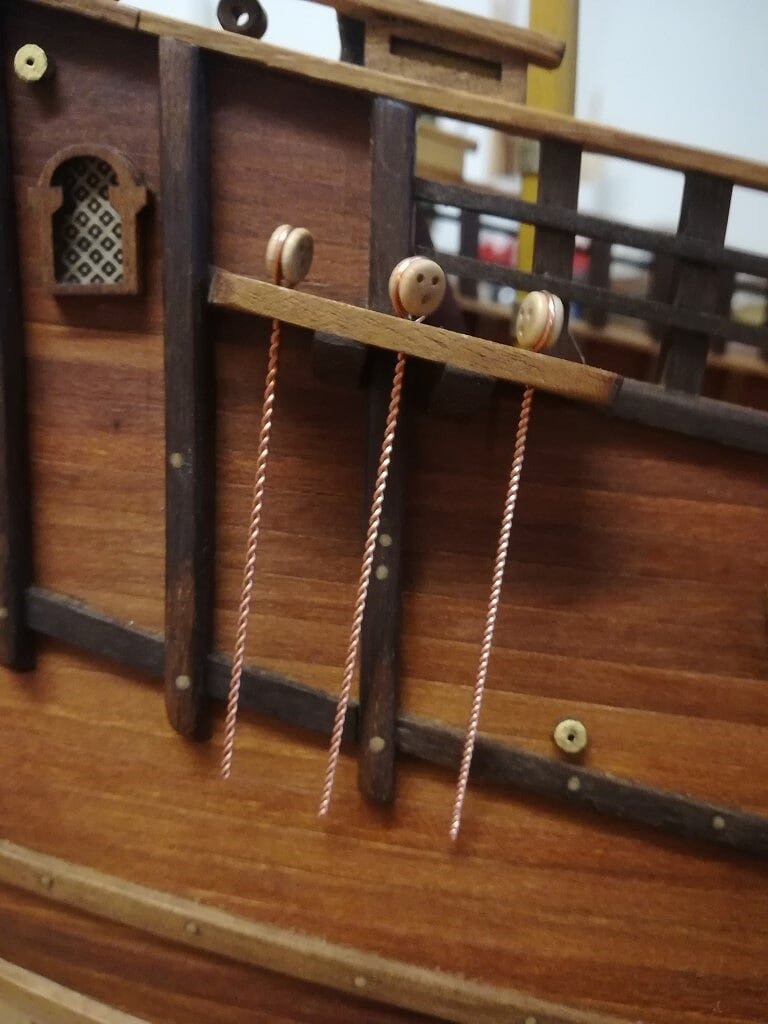
While some activities on masting are still continuing with bland rhythms, I started preparing the chain plates with their deadeyes.
Unlike those adopted on more recent sailing ships, such as those of my Soleil Royal (which gave me quite a bit to do), on this carrack they are relatively simple to build. For today I have finished preparing those of the starboard side, in the next days I will also finish the port side.See you soon, Jack..
01 Ragusian Carrack/02102019/IMG_20191002_173141.jpg
02 Ragusian Carrack/02102019/IMG_20191002_173155.jpg
03 Ragusian Carrack/02102019/IMG_20191002_173228.jpg
-
Wednesday 2 October 2019
Yesterday afternoon, with the friend and fellow model maker Antonio, we lathed the famous 12mm. rod destined to become the main mast. For this event, I had the opportunity to use a simply monstrous lathe, more or less 2-2.5 meters long, with which a pole could have been turned.
A heartfelt thanks for the unexpected help.
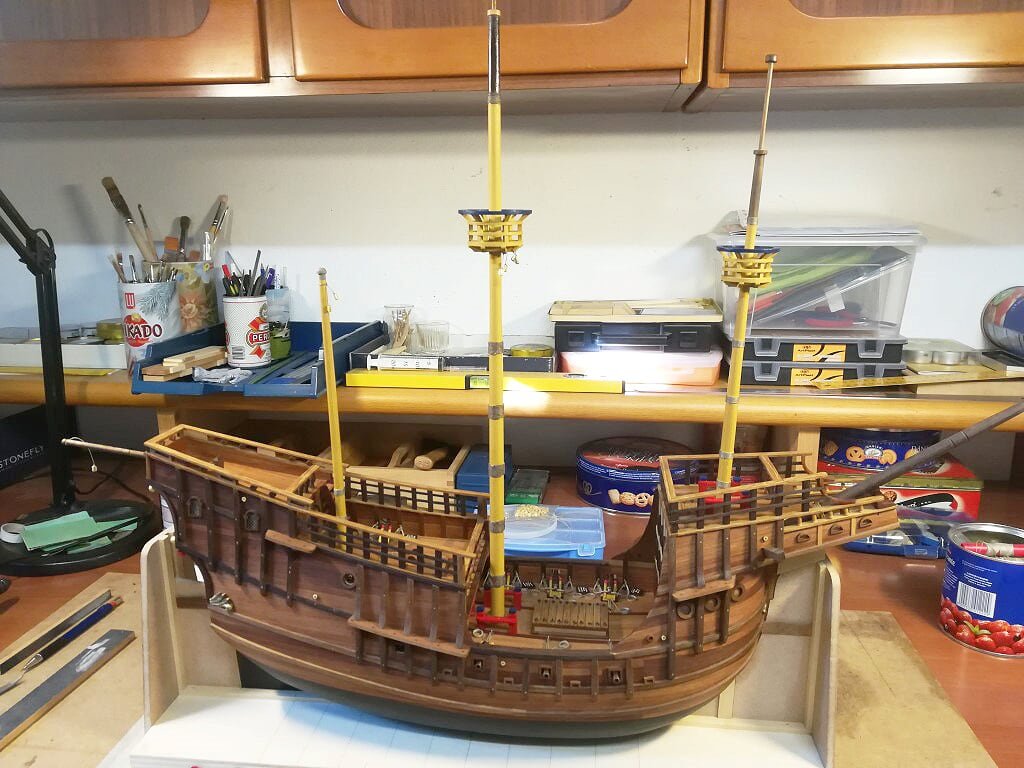
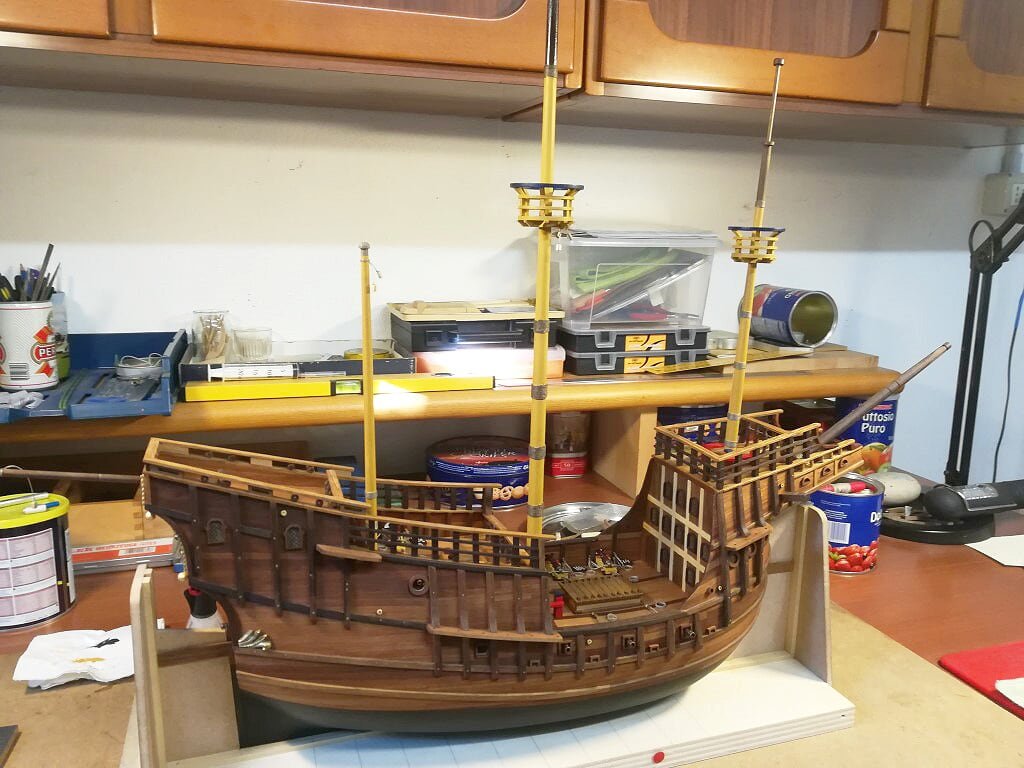
Today, in my workshop, I proceeded to complete the mast with its accessories and below I show you the model with all the components of the masting positioned, obviously excluding spars and beams.
Sincerely, Jack.
01 Ragusian Carrack/02102019/IMG_20191002_160815.jpg
02 Ragusian Carrack/02102019/IMG_20191002_160825.jpg
03 Ragusian Carrack/02102019/IMG_20191002_160830.jpg
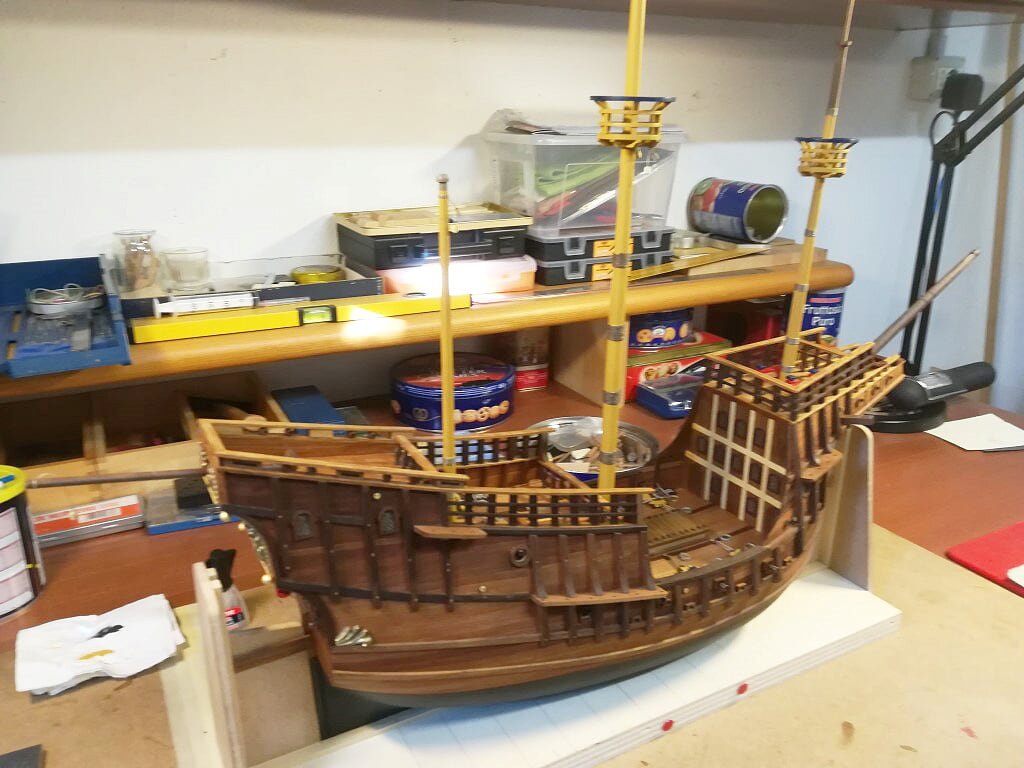
04 Ragusian Carrack/02102019/IMG_20191002_160836.jpg
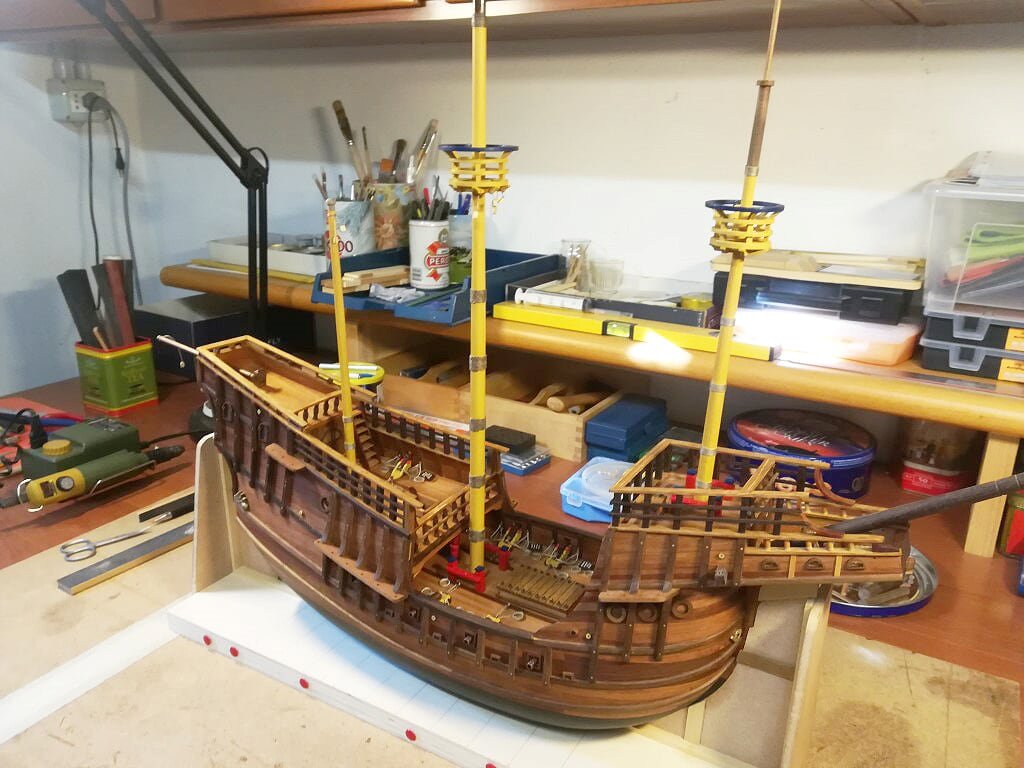
- mtaylor, vossy, GrandpaPhil and 9 others
-
 12
12
-
Wednesday 25 September 2019
I prepared all the pieces that make up the masts of the carrack, with the sole exclusion of the mainmast due to the known problem with the lathe. At the end I took the decision to color both the masts and the yards: the masts are colored with yellow ocher paint while the yards in black. When completely dry, I sanded the pieces with very fine grain paper to give them an appearance of "used".
Below two images of the foremast and mizzenmast . .
01 Ragusian Carrack/26092019/IMG_20190926_105955.jpg
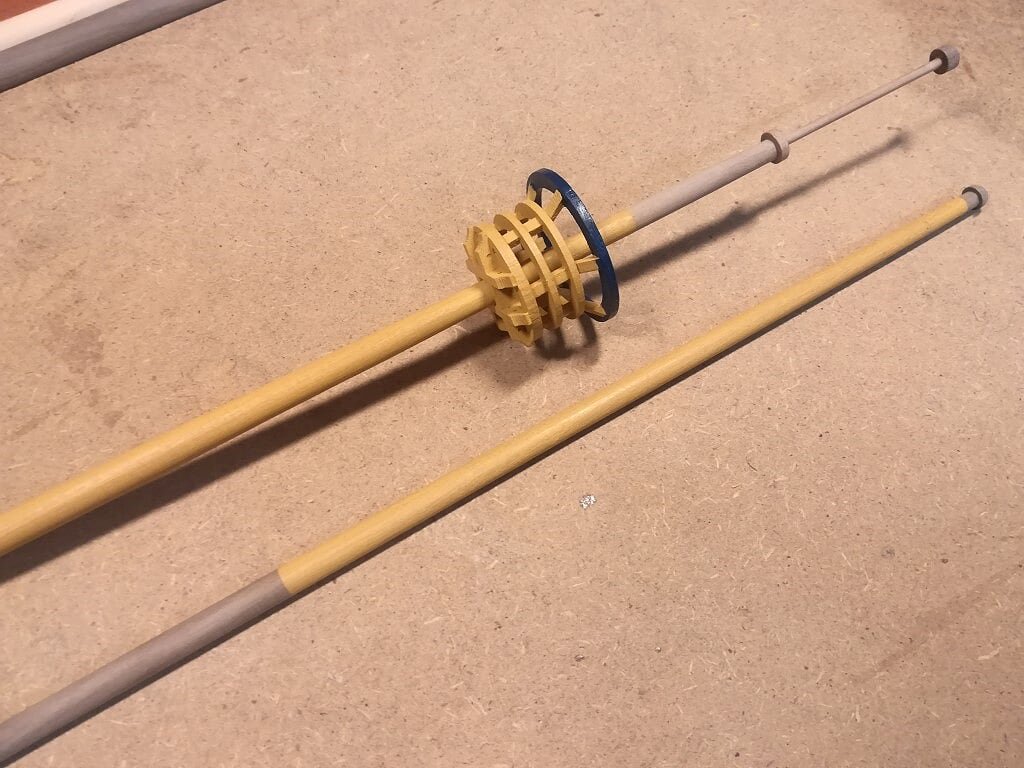
02 Ragusian Carrack/26092019/IMG_20190926_110029.jpg
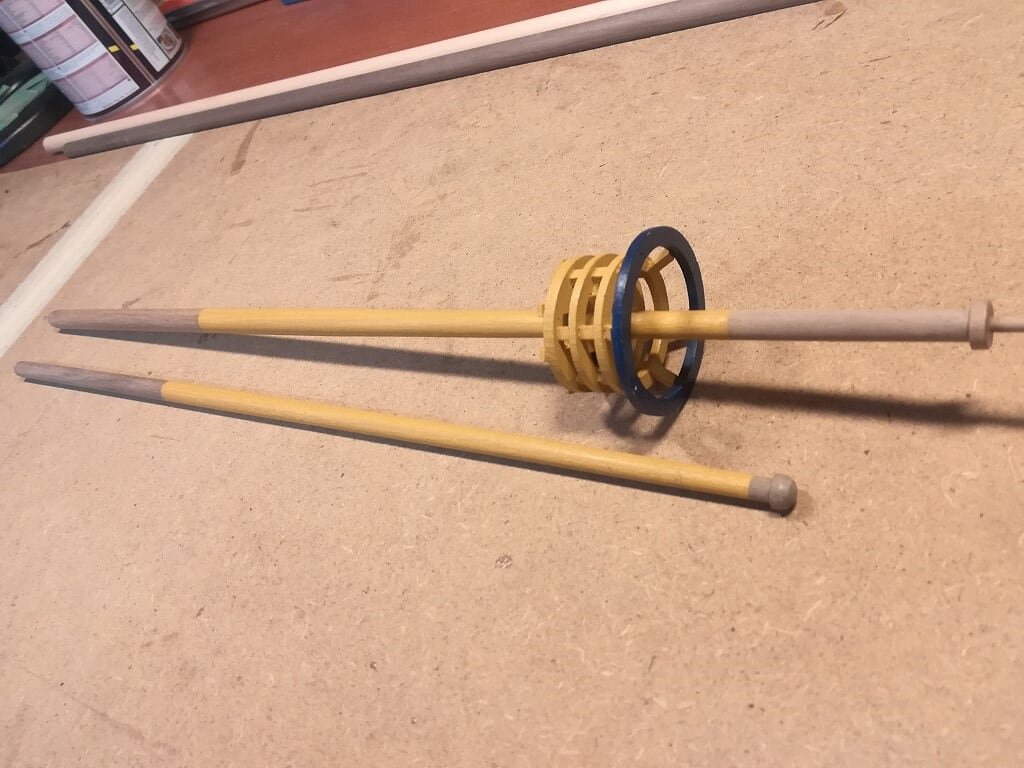
Below, instead, the lower yard of the mainmast and the beam of the lateen sail on the mizzen mast . .
03 Ragusian Carrack/26092019/IMG_20190926_110054.jpg
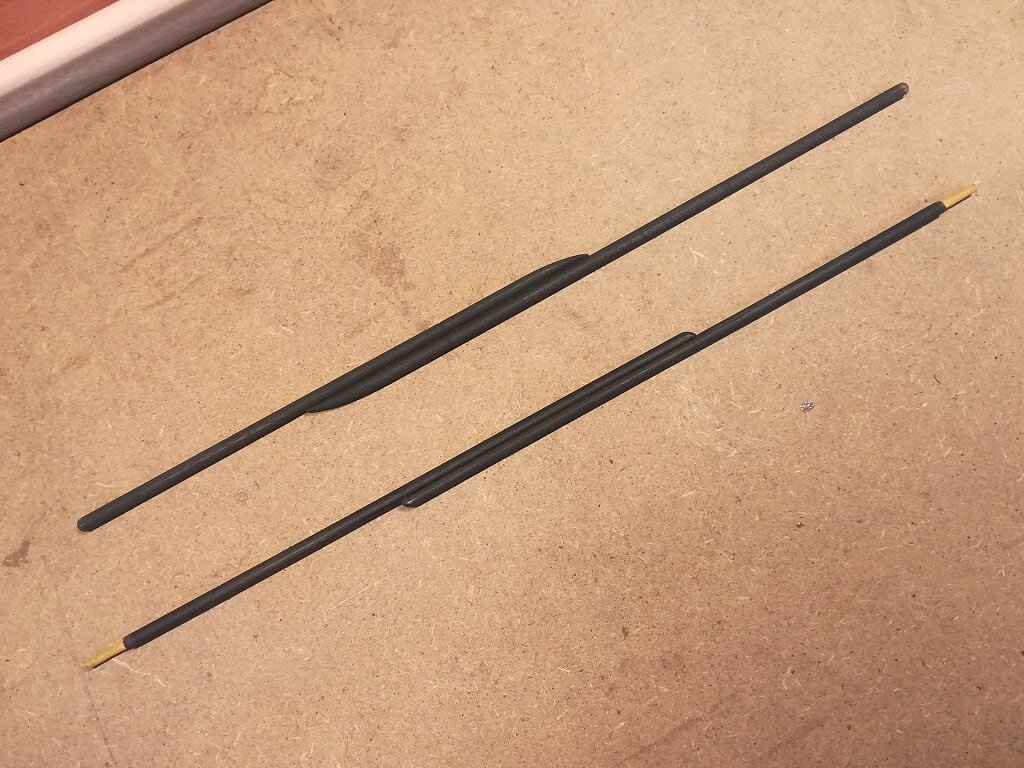
04 Ragusian Carrack/26092019/IMG_20190926_110109.jpg
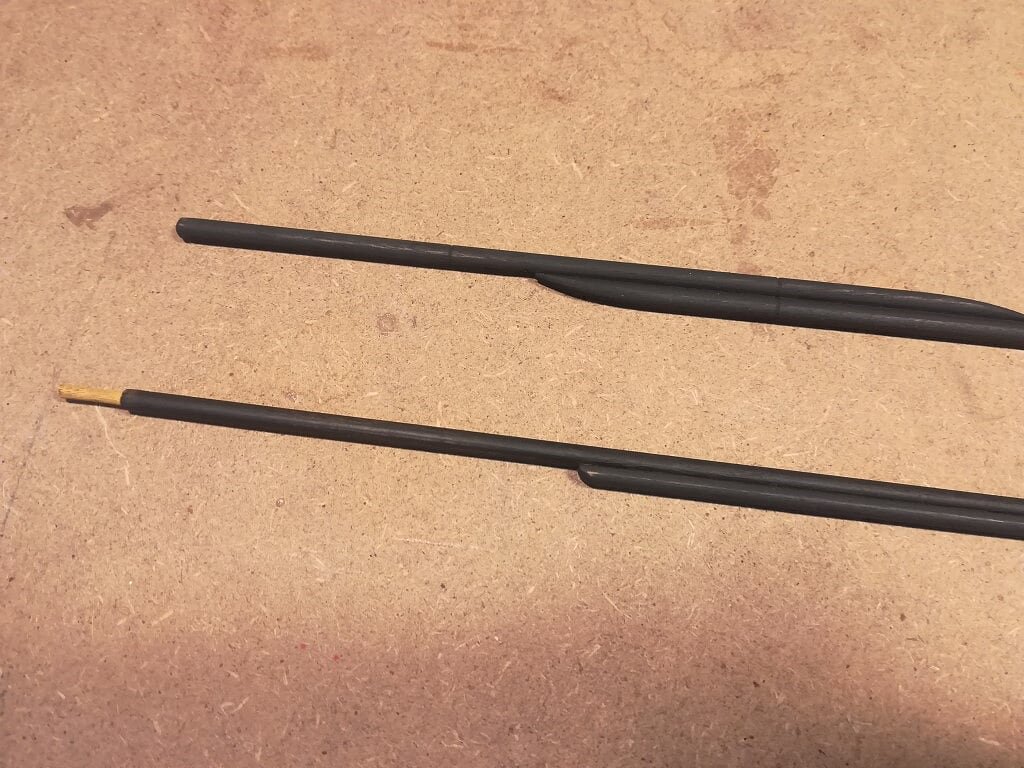
Here below the other remaining yards (bowsprit, foremast and mainmast) . .
05 Ragusian Carrack/26092019/IMG_20190926_110124.jpg
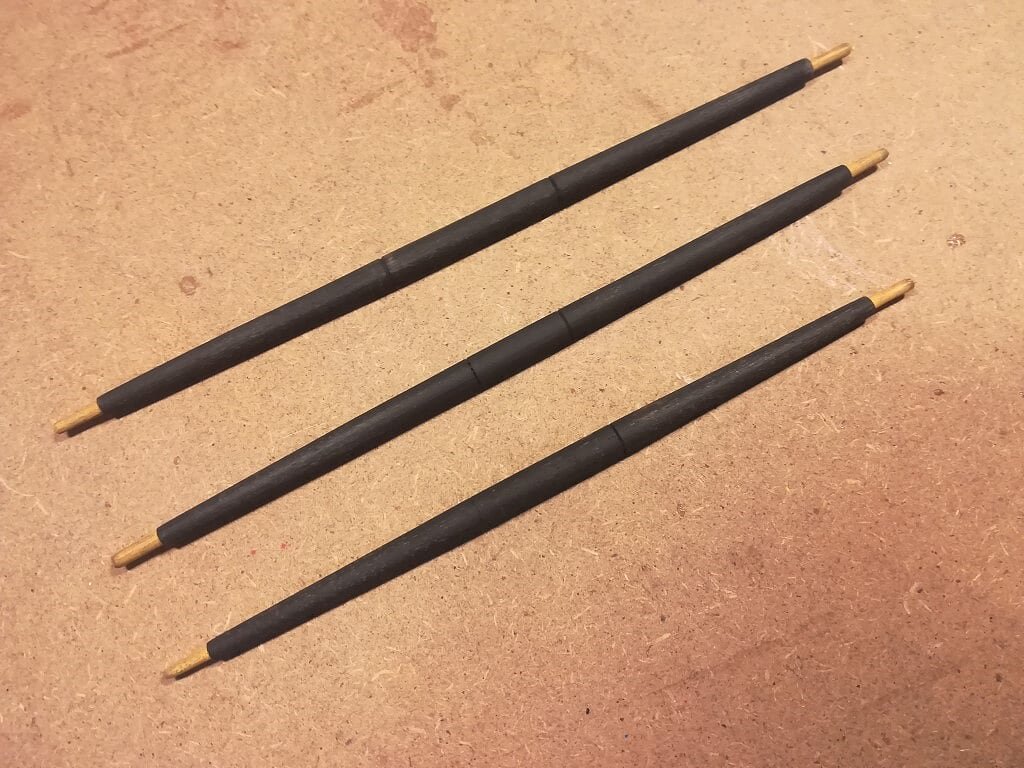
06 Ragusian Carrack/26092019/IMG_20190926_110132.jpg
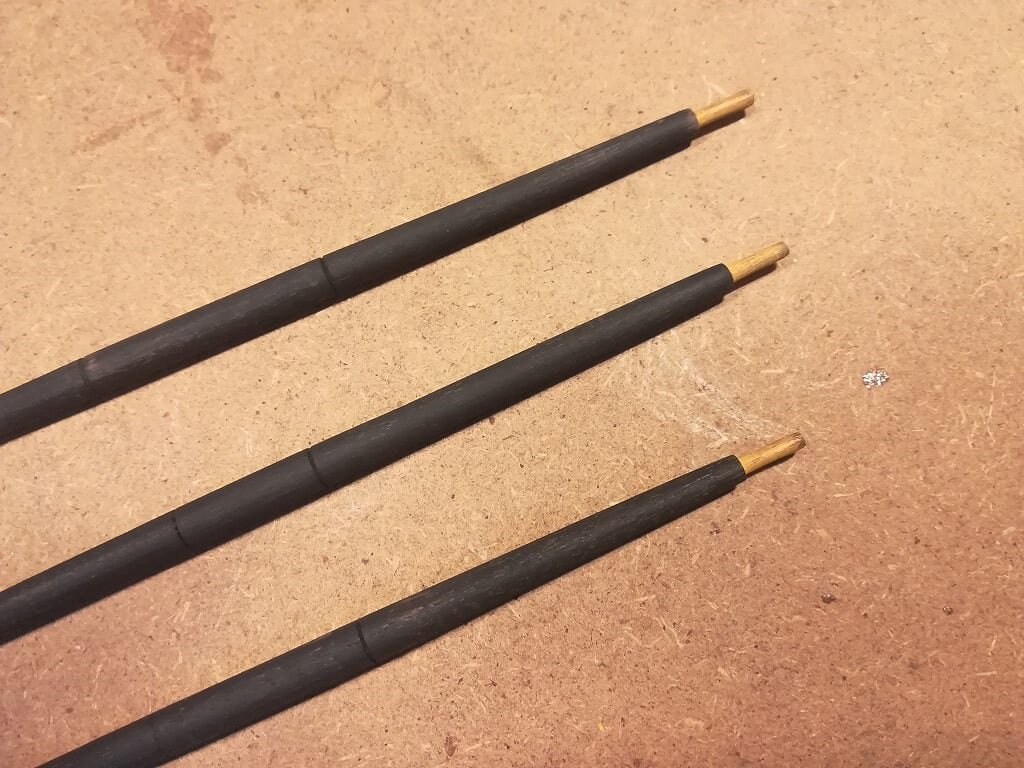
One last mention about the lathe issue: I had almost definitively decided to manually taper the mainmast but today I received an email from my common friend Antonio who offered me the availability of a "REAL" lathe located in his workshop. Obviously this changed all the scenarios. Next week I will also finish this missing element.
Best regards, Jack.- GrandpaPhil, Heronguy, J11 and 4 others
-
 7
7
-
Thursday 19 September 2019
With these last details I finally put an end to the guns installation. I'll almost open a bottle of Prosecco or Lambrusco to celebrate this event . . .
01 Ragusian Carrack/19092019/IMG_20190919_170220.jpg
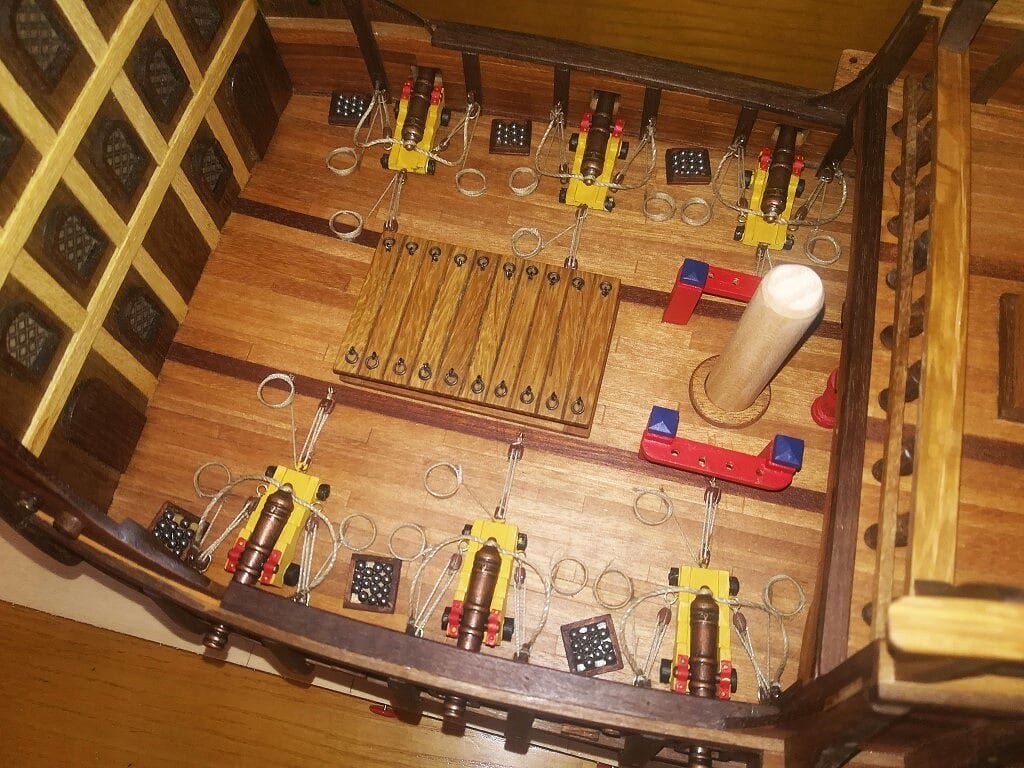
02 Ragusian Carrack/19092019/IMG_20190919_170300.jpg
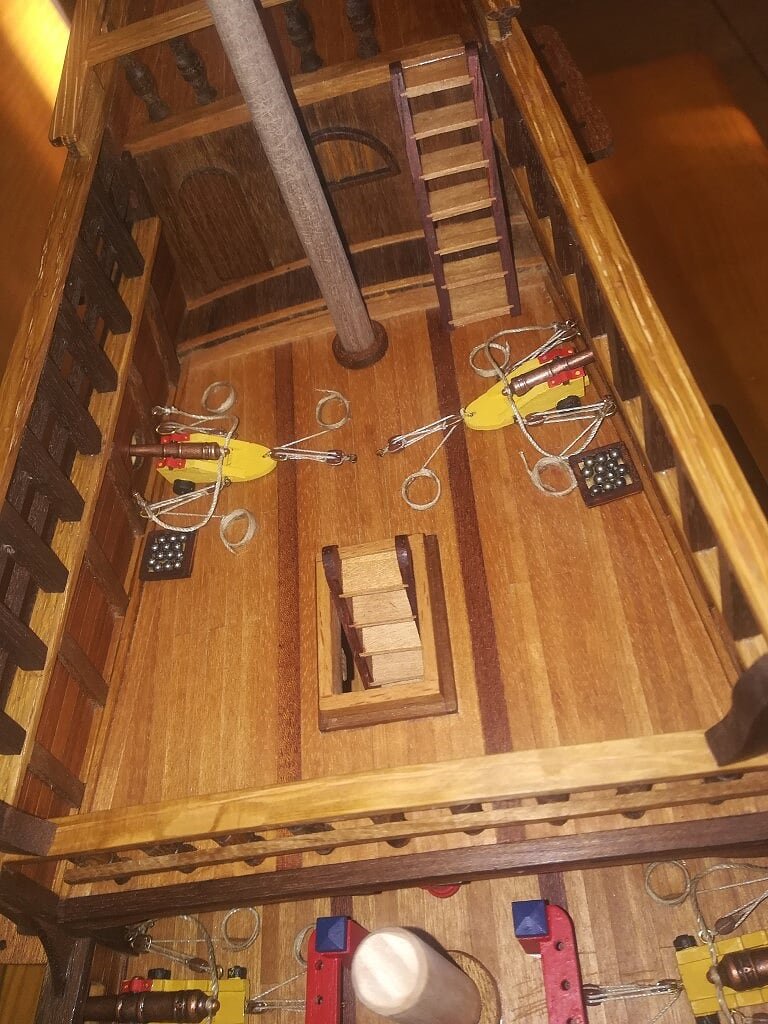
Now there are many other activities that can be started. Rudder installation, figurehead, anchor installation, masts and so on.
For the moment I decided to experiment the building of the masts and maybe even various spars and rods. There is no particular reason to do one thing before the other and so I follow the will of the moment.Using my small Proxxon wood lathe, I started to prepare the foremast and the mizzenmast. The foremast consists of a 10mm diameter rod that must be tapered up to a 6mm diameter. The mizzenmast is an 8mm rod to be tapered to 5mm. Using the lathe the operation became to me particularly well and I am very satisfied.
I then completed the foremast by installing the top, ready for some time.03 Ragusian Carrack/19092019/IMG_20190919_170337.jpg
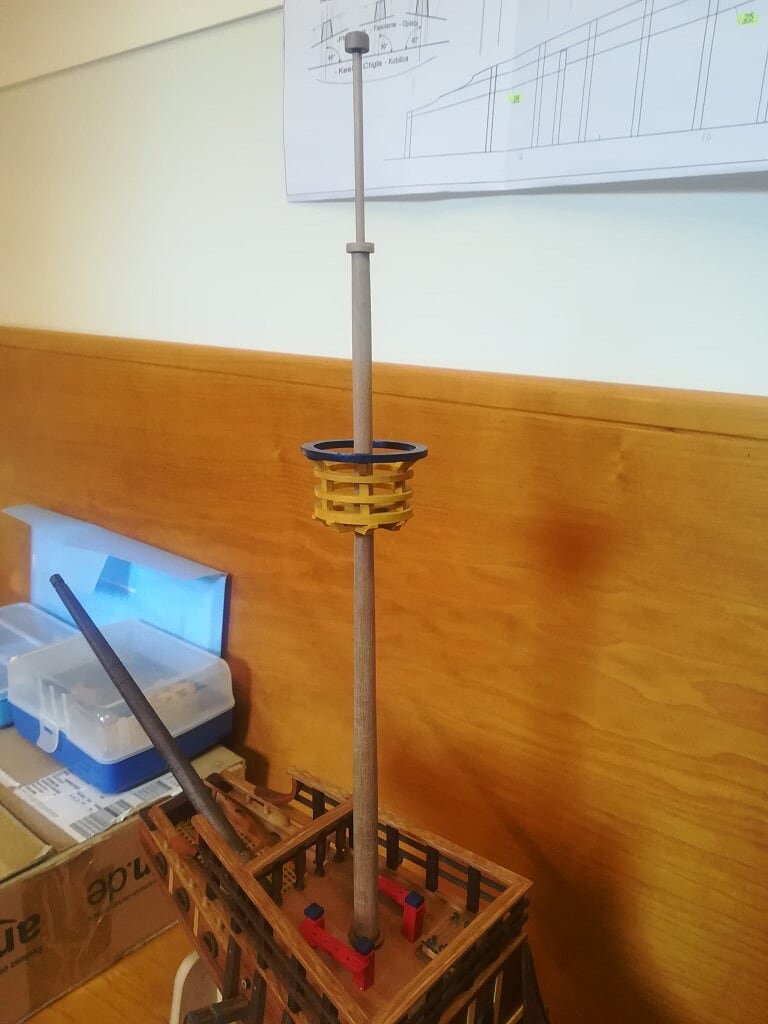
04 Ragusian Carrack/19092019/IMG_20190919_170345.jpg
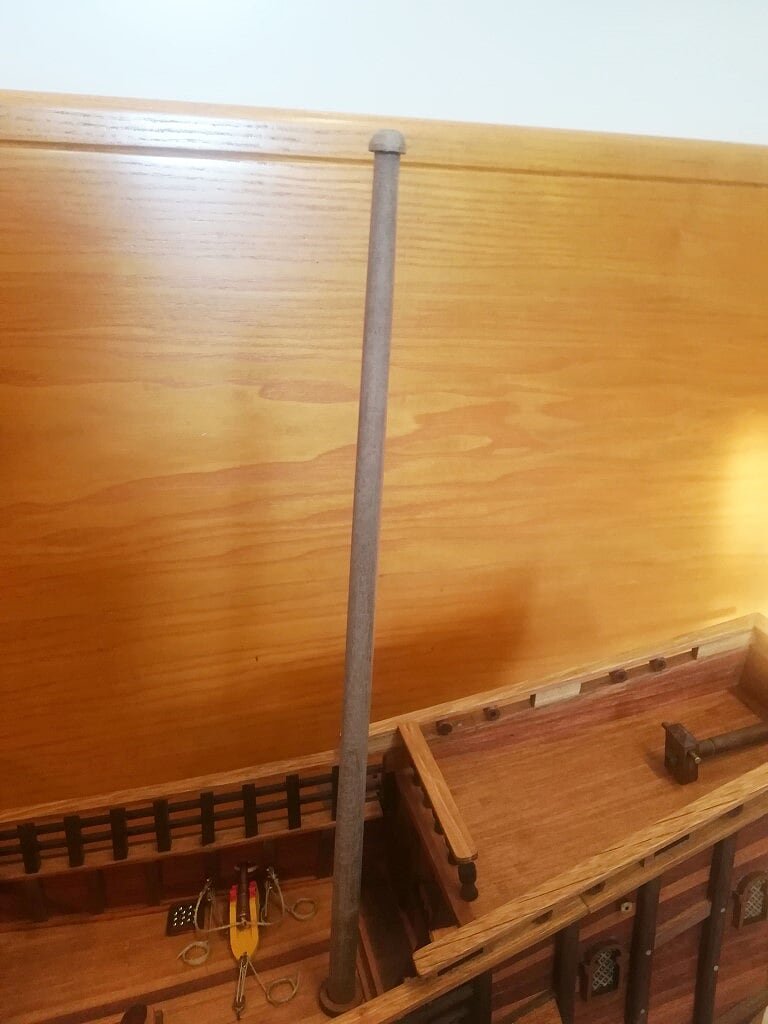
But now there are two beautiful problems to be solved: one is very simple, since it is a question of choosing whether to leave the masts and the yards in their natural wood-color or to color them, as they most likely were: masts in ocher yellow and yards in black.
The other one is more complex and concerns the mainmast: it involves turning a 12mm diameter rod that must reach the 8mm at the end. But the problem is that my lathe reaches a maximum of 10mm and therefore cannot be used as I have done up to now.
I have to find an alternative route that I currently can't see, even using Google Maps !!
In the meantime I will take time working on the other elements of the masts but for my problem I need an adequate idea.05 Ragusian Carrack/19092019/IMG_20190919_170637.jpg
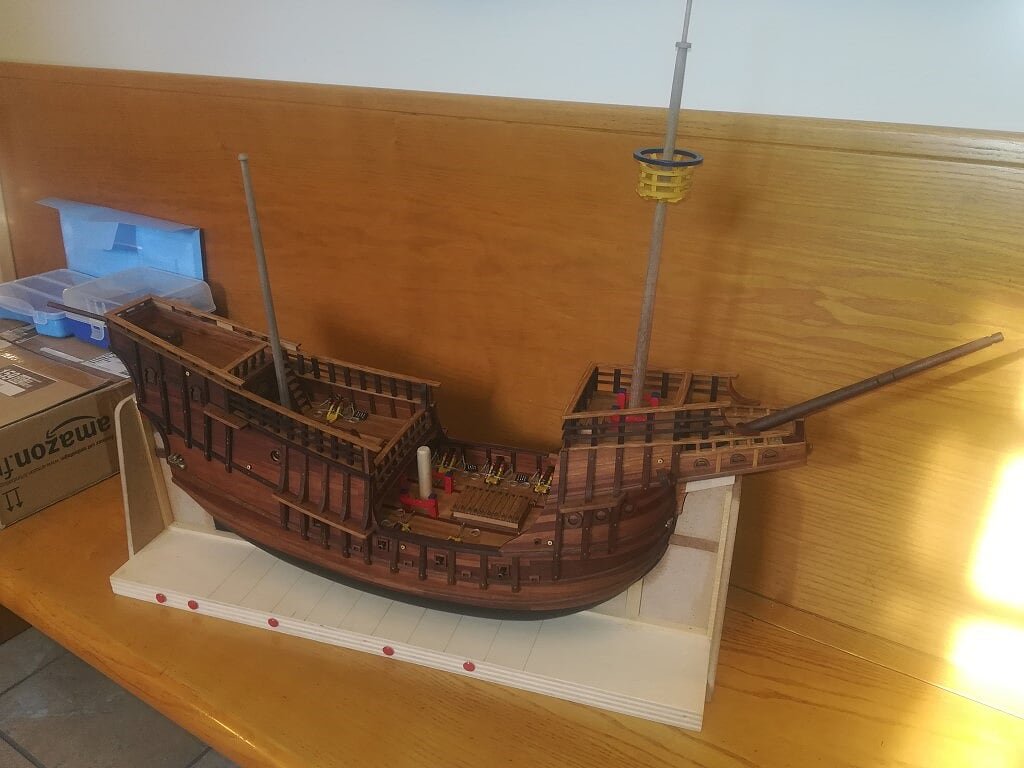
See you soon, Jack.Aubrey.
-
Perhaps it was better to adopt roperings at the end of the blocks of smaller diameter . . . any comment ?
-
Tuesday 17 September 2019
The installation of the 6 guns on the main deck is finally complete. Two guns are still missing: the ones of smaller caliber located on the quarterdeck . . . . anyway the most is done.
01 Ragusian Carrack/17092019/IMG_20190917_105831.jpg
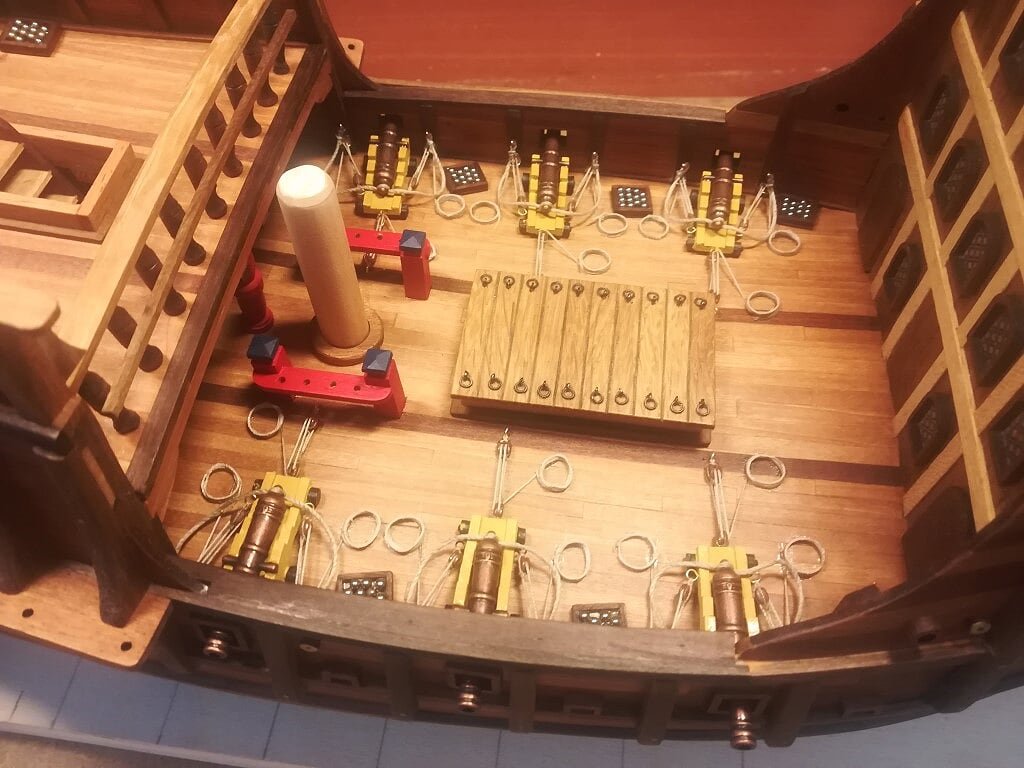
02 Ragusian Carrack/17092019/IMG_20190917_105849.jpg
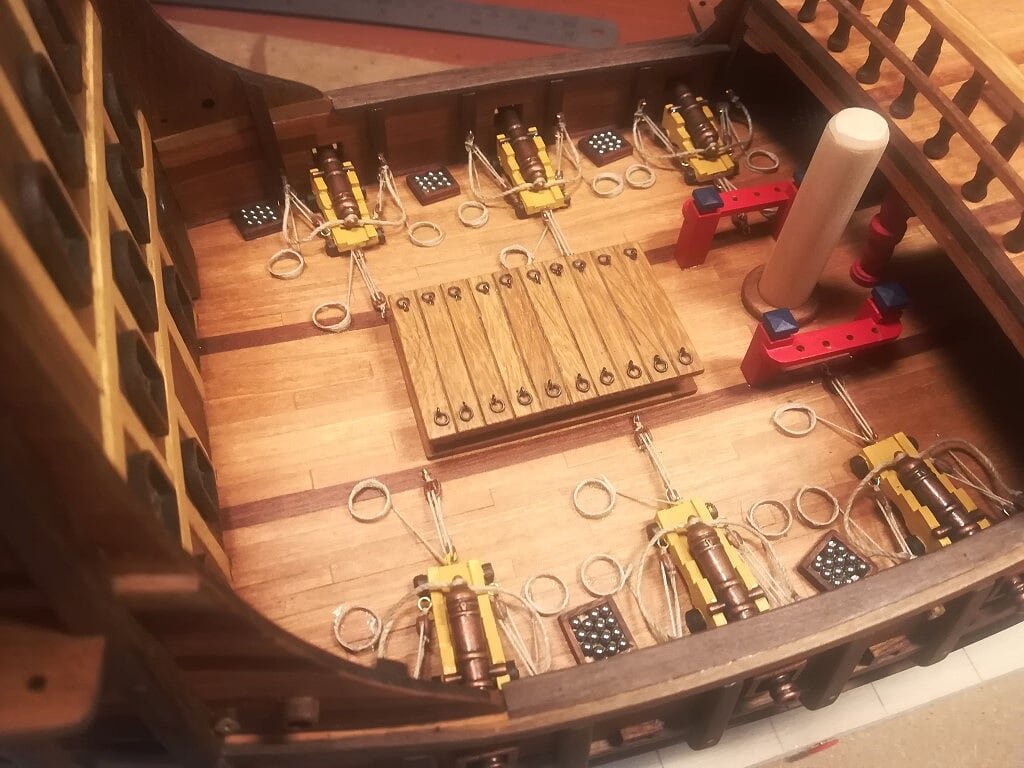
03 Ragusian Carrack/17092019/IMG_20190917_112032.jpg
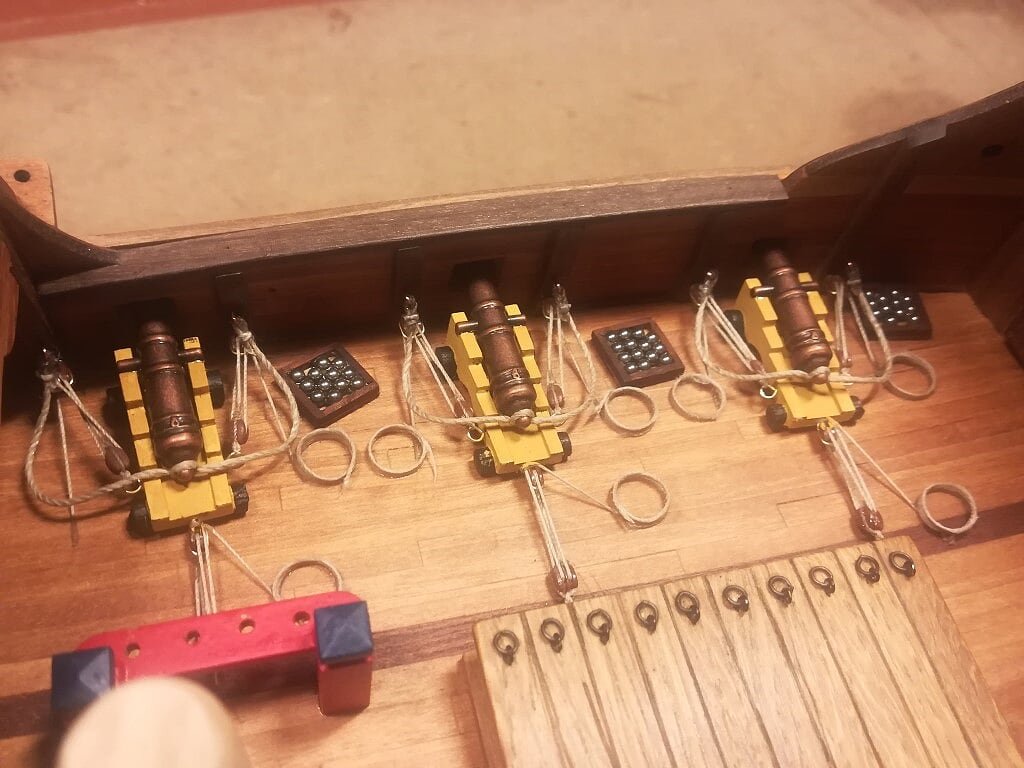
04 Ragusian Carrack/17092019/IMG_20190917_112011.jpg
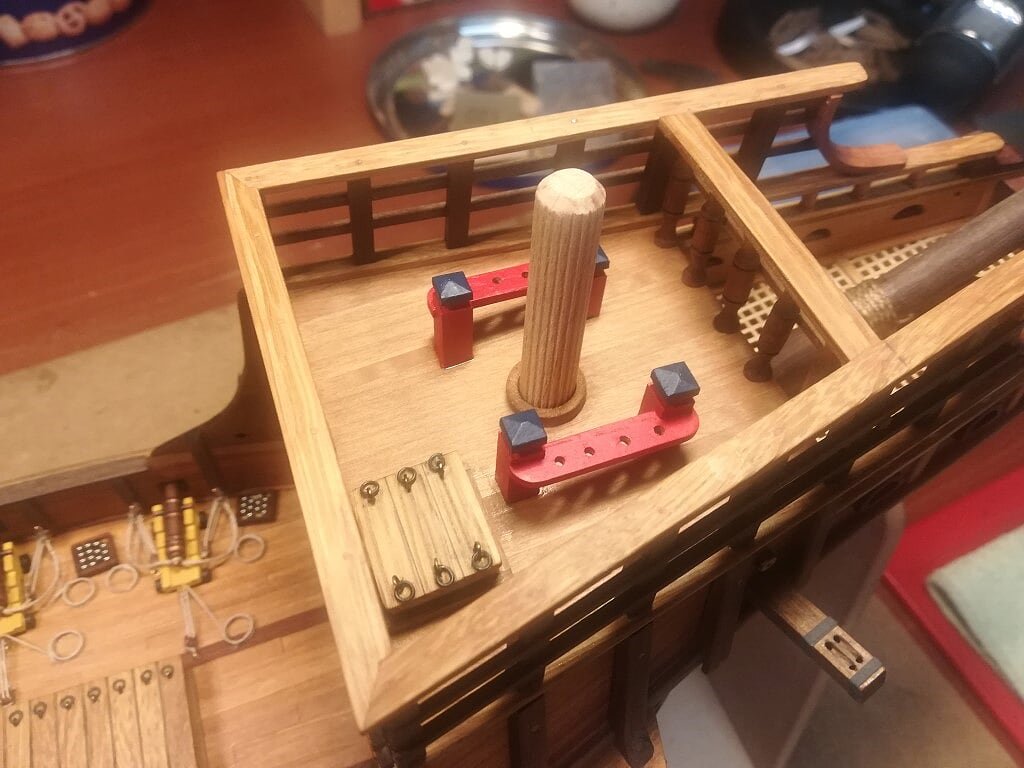
To diversify the work around the guns, I prepared the four planned fife rails. Here I indulged myself with a pretty showy coloring with the aim of creating some kind of color contrast . . . a bit like the ocher color for the gun carriages.
05 Ragusian Carrack/17092019/IMG_20190917_105837.jpg
06 Ragusian Carrack/17092019/IMG_20190917_105856.jpg
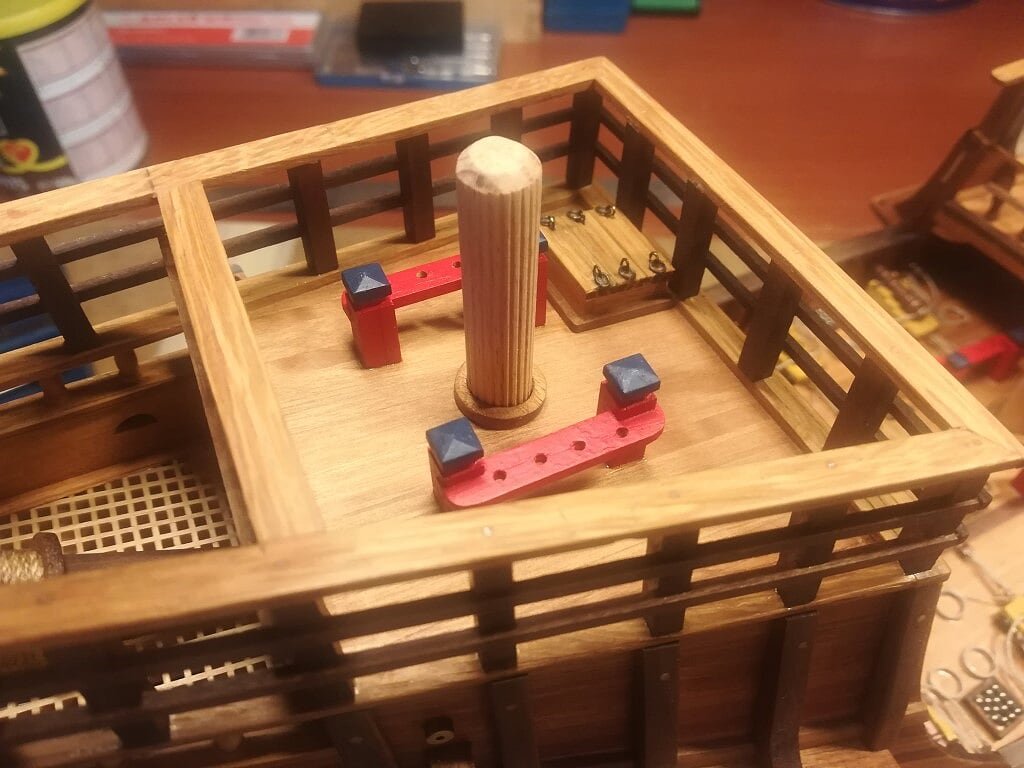
Another hour of work and even this tedious activity can be said to have ended happily.
Greetings, Jack.- mtaylor, ccoyle, GrandpaPhil and 1 other
-
 4
4
-
Thursday 12 September 2019
During these 10 days since my last update for this model there have been very few news worth to be illustrated: I had to prepare a bunch of raw objects that required lot of patience, anyway very important to allow the implementation of the blocks and finally start to install the guns.
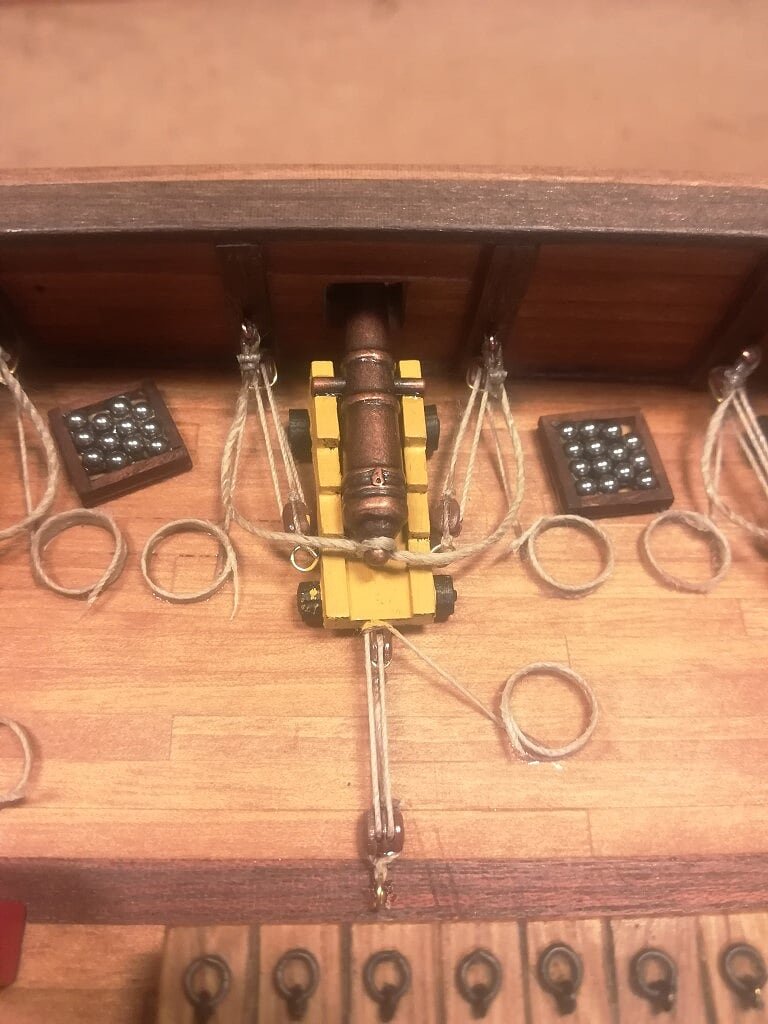
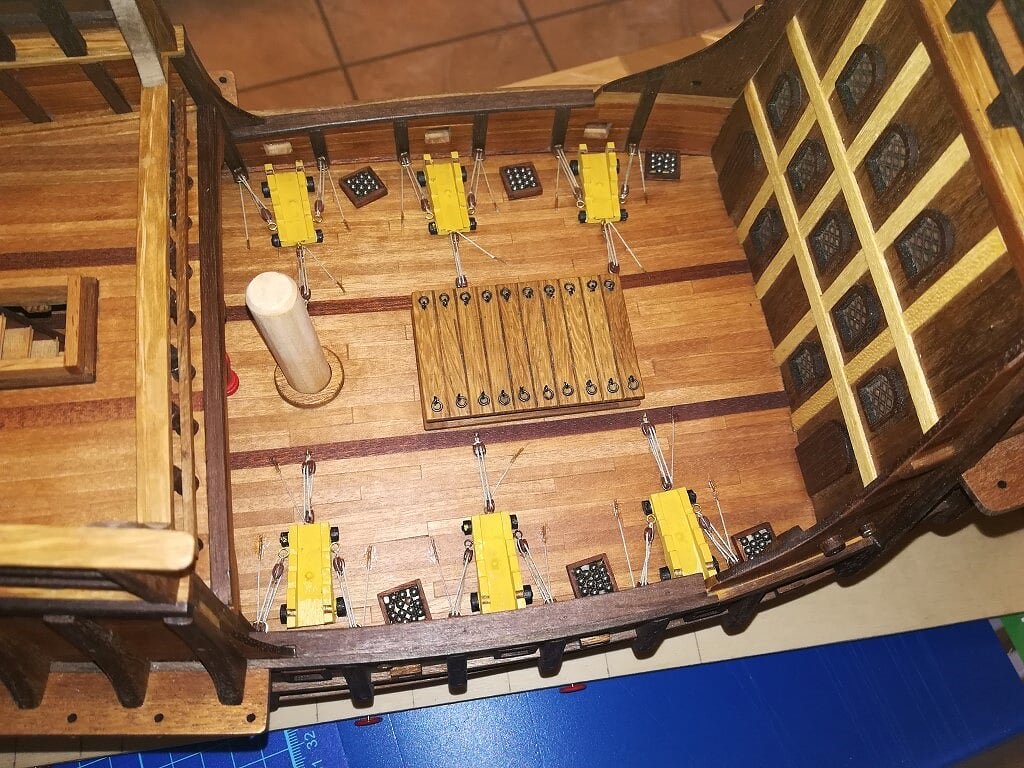
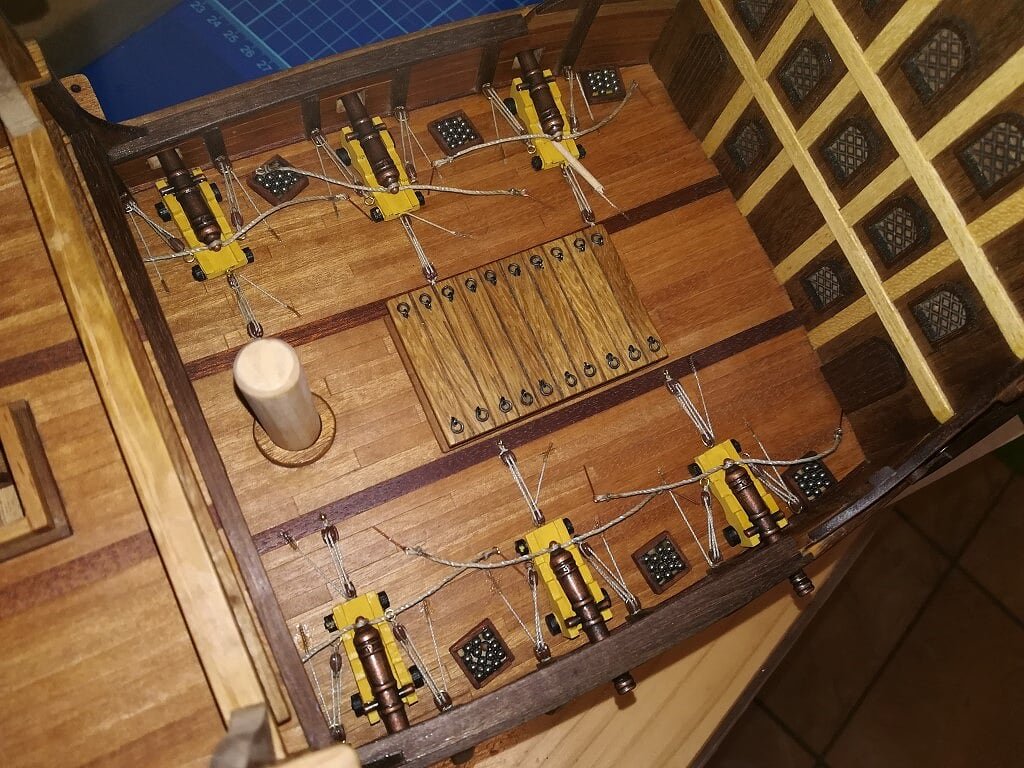
The images show the gun carriages definitively fixed on the decks: the fixing takes place through the insertion of a pin that passes through the carriage into the deck floor; it is visible, even if with some difficulty as it was later painted, in the central part of the carriage itself.
The images 01 and 02 below show the eight guns that make up the ordnance of this model, partially "wired". Each rope endpoint of the completed tackles is fixed to the deck with a drop of super glue and cut. Later I will prepare the rope curls, as I did for other models in the past, trying to make them better as realism. The curls will be applied over the endpoints so that they look like its natural continuation.
01 Ragusian Carrack/12092019/IMG_20190912_145128.jpg
02 Ragusian Carrack/12092019/IMG_20190912_145134.jpg
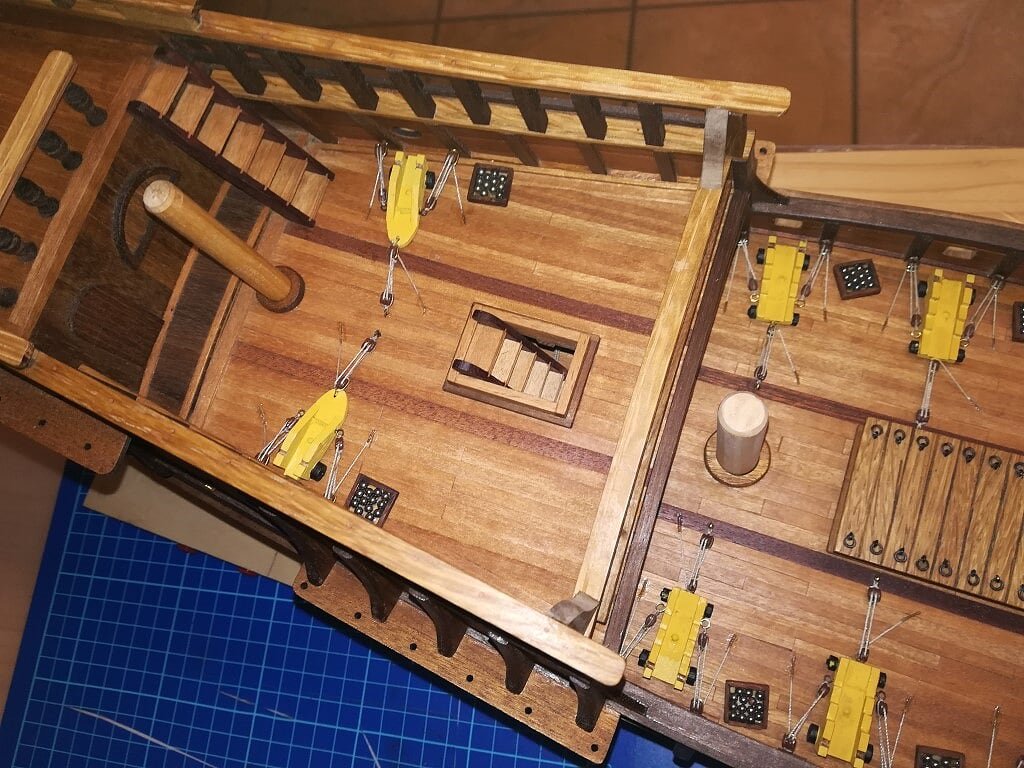
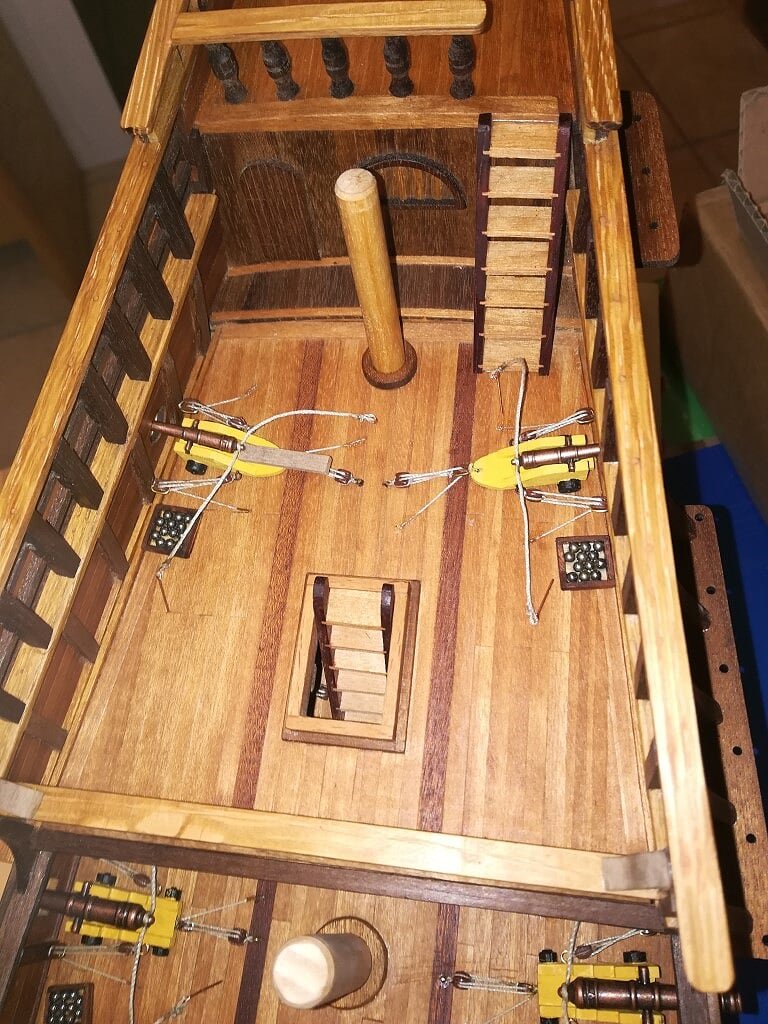
In the next two images (03 and 04) I started fixing the gun barrels on the carriages. The barrels are glued in their position with a small amount of two-component epoxy glue. Now I have to wait sometime to allow this glue to harden and then I will be able to proceed with the subsequent operations. Each gun has its own supply of ammunitions, prepared days ago, fixed to the deck with a drop of superglue.
The recoil rope has already been added to all the gun barrels, in the next days this rope, prepared before fixing the barrel to its carriage, will be definitively fixed on the inner side of the bulwark.
As you can see, there is still a bit of work to flag this activity as completed, but surely I'm approaching the final tasks.
However, this trick cost a lot of working hours and lot of patience.Cheers, Jack.
03 Ragusian Carrack/12092019/IMG_20190912_153039.jpg
04 Ragusian Carrack/12092019/IMG_20190912_153056.jpg
- yvesvidal, GrandpaPhil, mtaylor and 3 others
-
 6
6
-
Monday 2 September 2019
The challenge to install the guns has began.
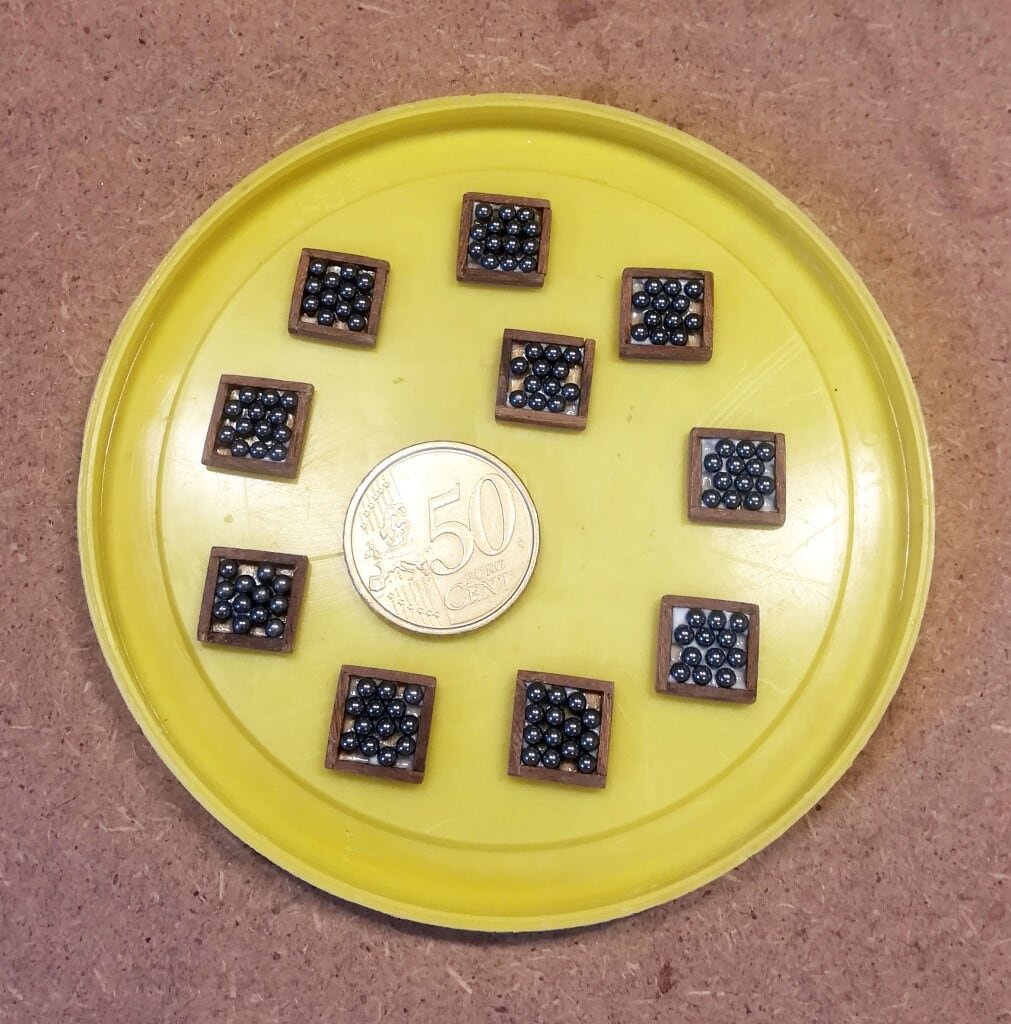
As anticipated it's a long and boring task but must be done . . I started with the cannon balls stock . . . at least these are now ready.
See you soon, Jack.01 Ragusian Carrack/02092019/IMG_20190902_172330.jpg
- GrandpaPhil, J11, ccoyle and 3 others
-
 6
6
-
Thursday, August 29th, 2019
Adding new details. .
Having prepared the bowsprit on a lathe, I then fixed it in the correct position.
01 Ragusian Carrack/29082019/IMG_20190829_103636.jpg
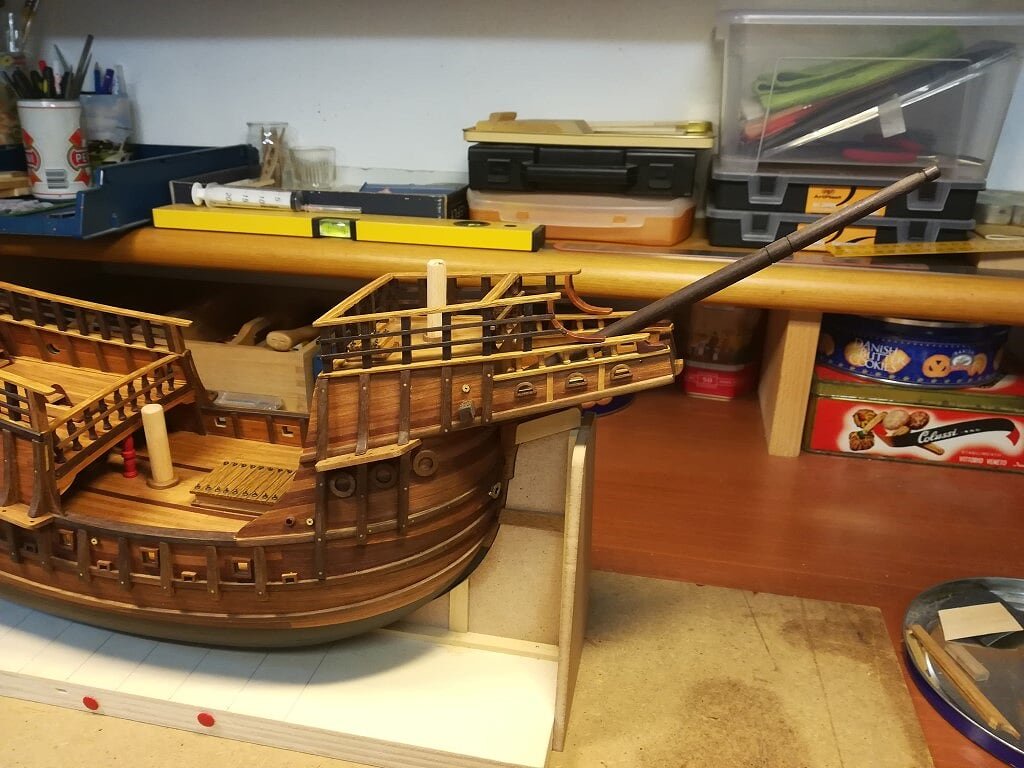
In addition to the bowsprit in this picture you can also see the cathead, applied also on the other side of the hull.
02 Ragusian Carrack/29082019/IMG_20190829_103657.jpg
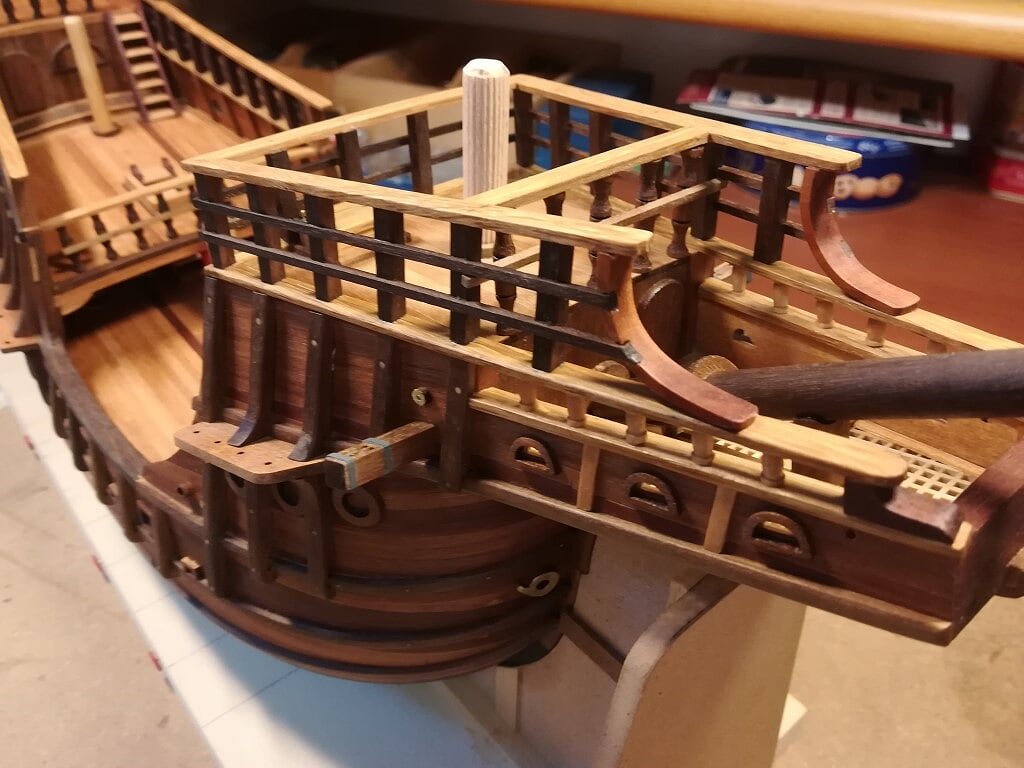
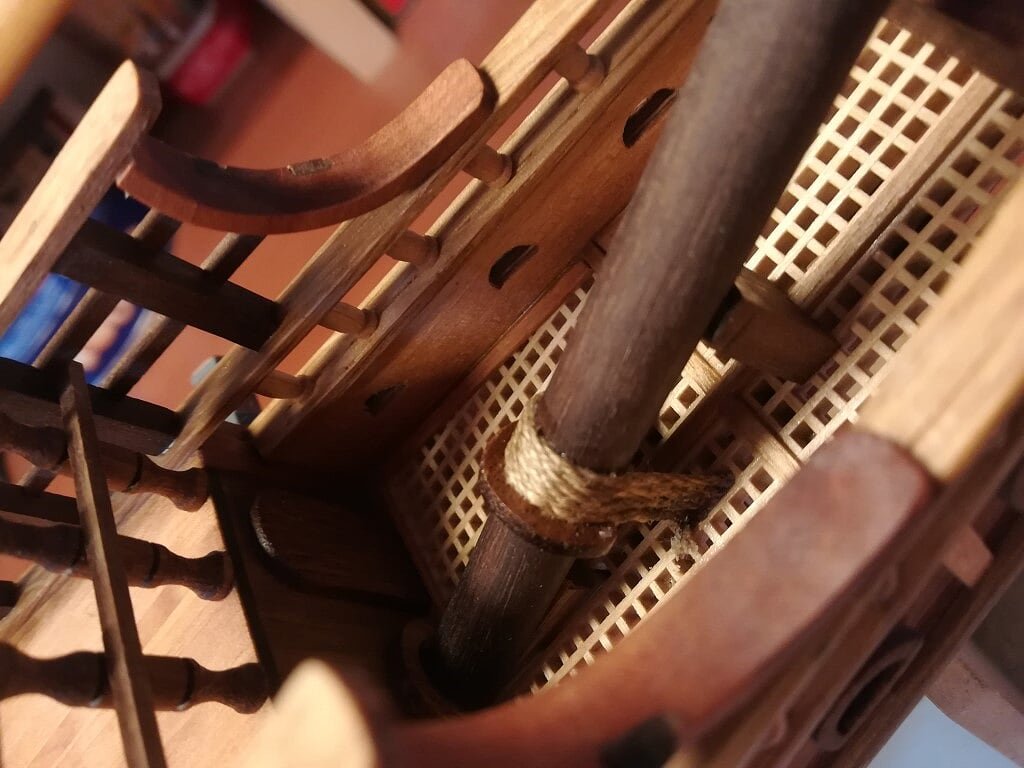
Here are some details of the base of the bowsprit, including the classic rope binding from the bow to this mast.
03 Ragusian Carrack/29082019/IMG_20190829_173326.jpg
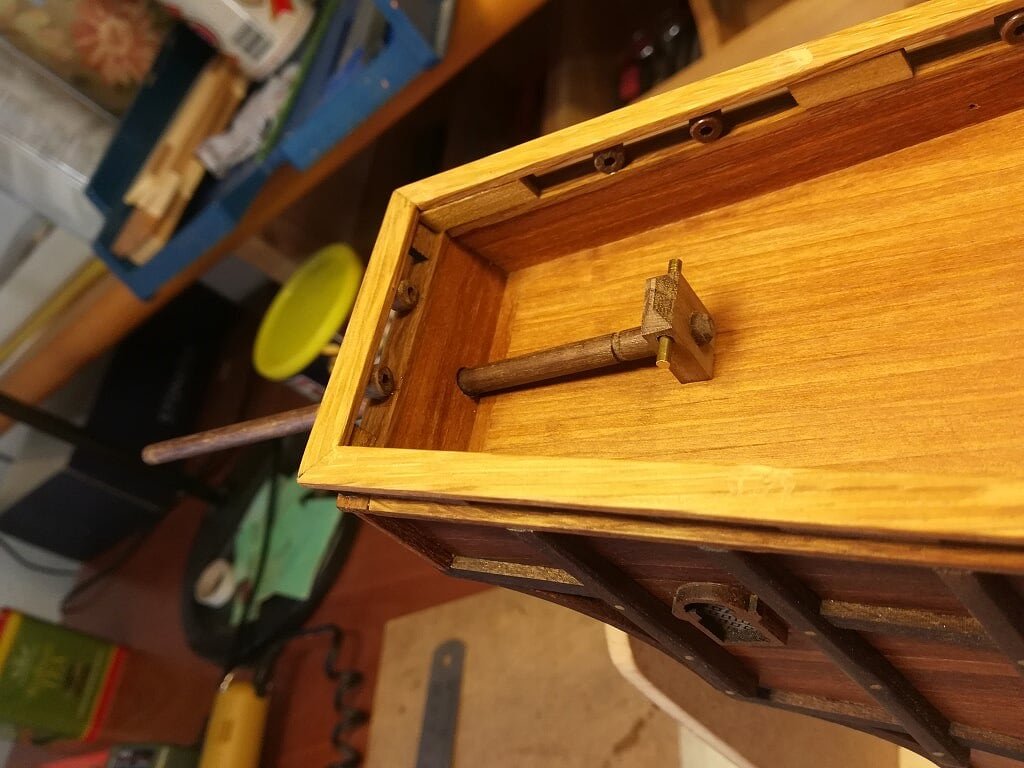
A beam has been installed also aft, protruding far beyond the hull.
04 Ragusian Carrack/29082019/IMG_20190829_173314.jpg
Finally the last missing detail on the railing between the main deck and the quarterdeck.
05 Ragusian Carrack/29082019/IMG_20190829_103651.jpg
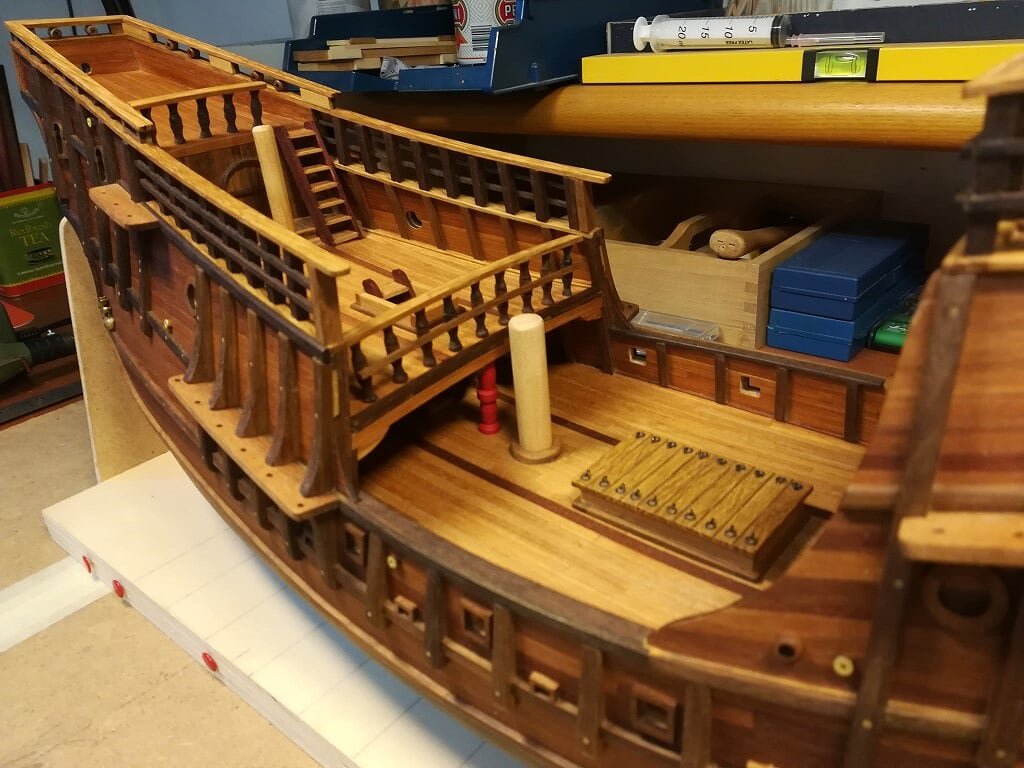
Now I will dedicate myself to the guns, task quite long and boring. Luckily, there are only eight.
Greetings, Jack.- vossy, hexnut, paulsutcliffe and 7 others
-
 10
10
-
Saturday, August 24th, 2019
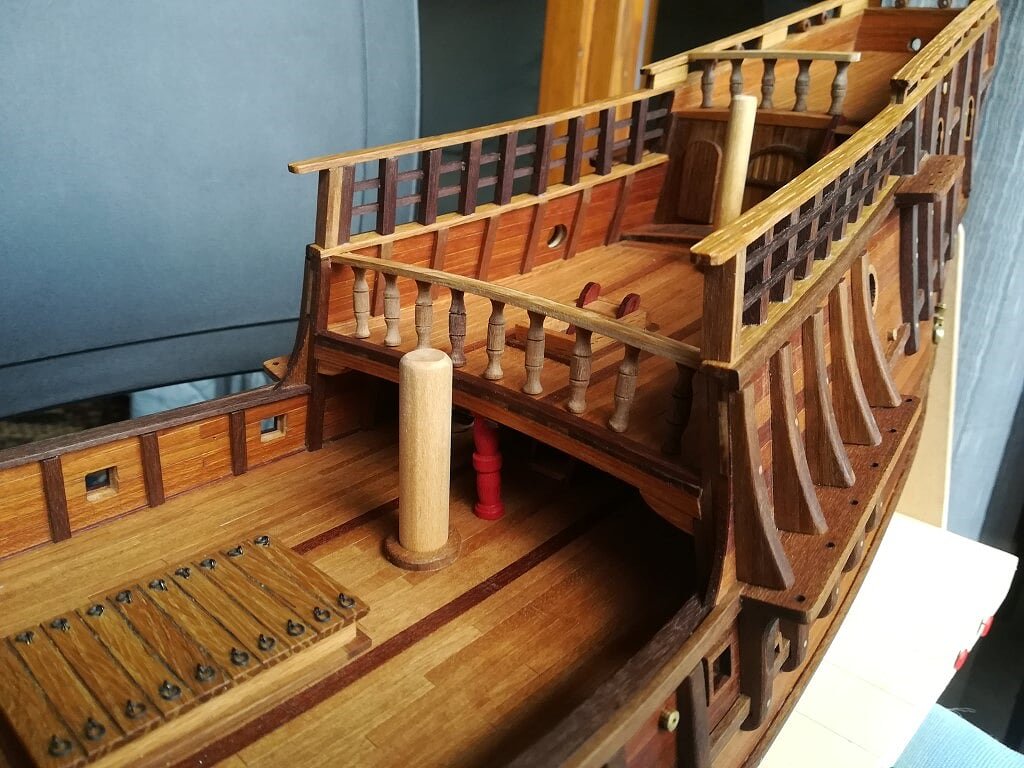
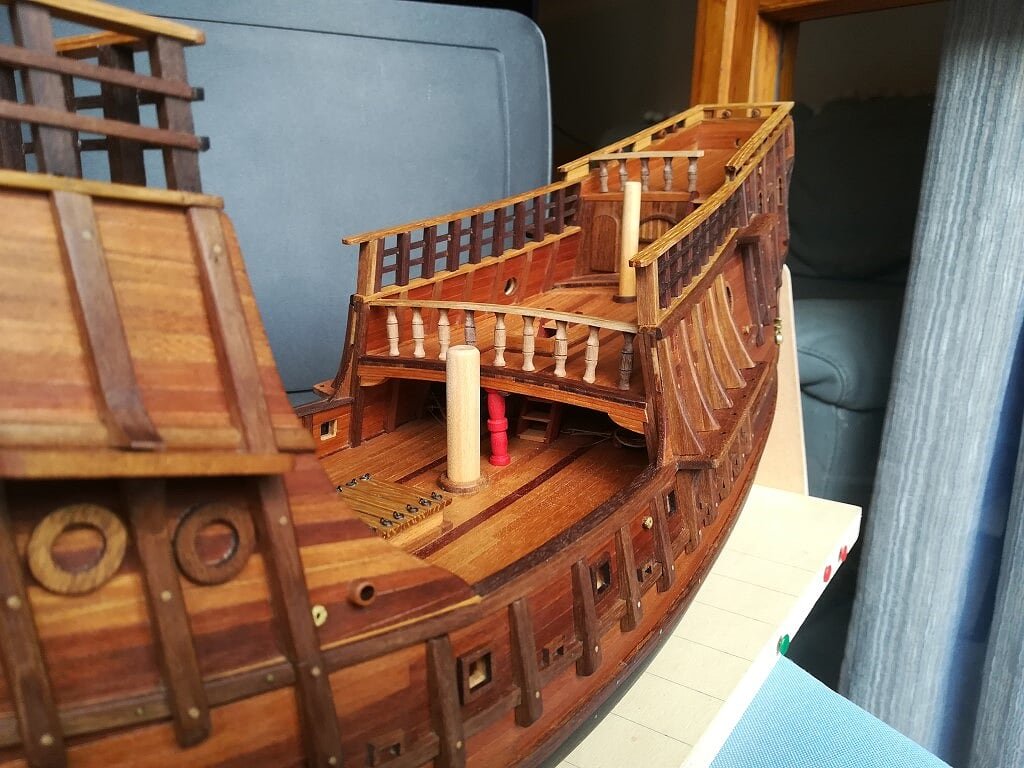
I've finished also the last railings, using the small columns lathed last thursday . . . now I have to think about and plan the nexts activities.
See you soon, Jack.01 Ragusian Carrack/24082019/IMG_20190824_180540.jpg
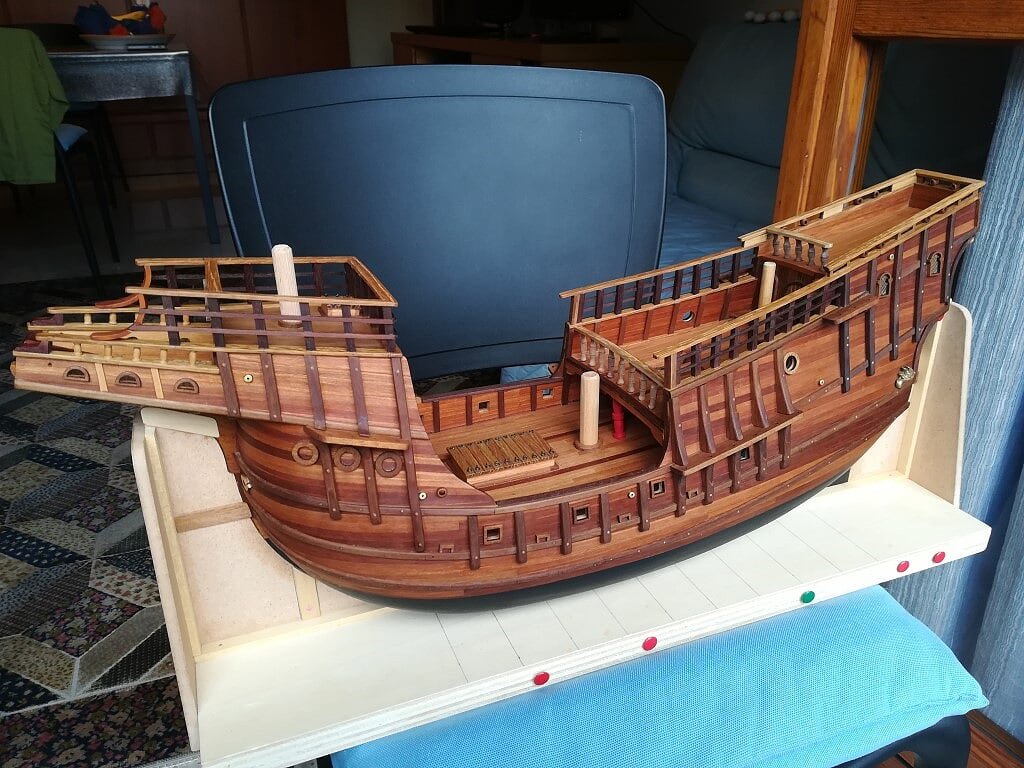
02 Ragusian Carrack/24082019/IMG_20190824_180549.jpg
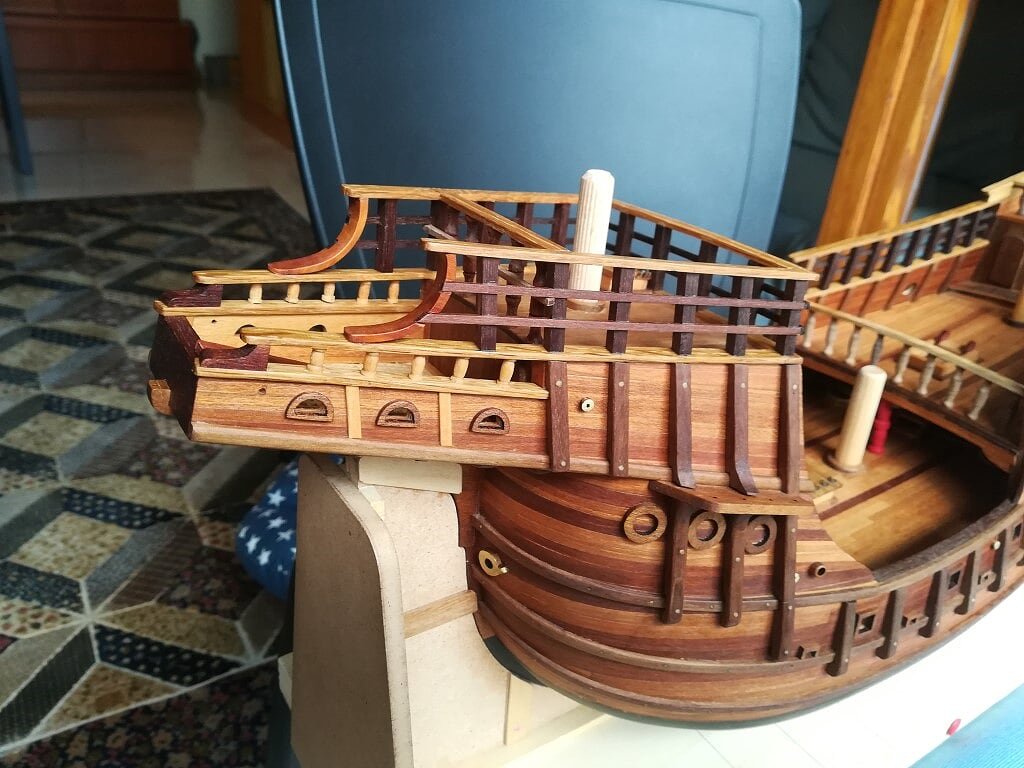
03 Ragusian Carrack/24082019/IMG_20190824_180602.jpg
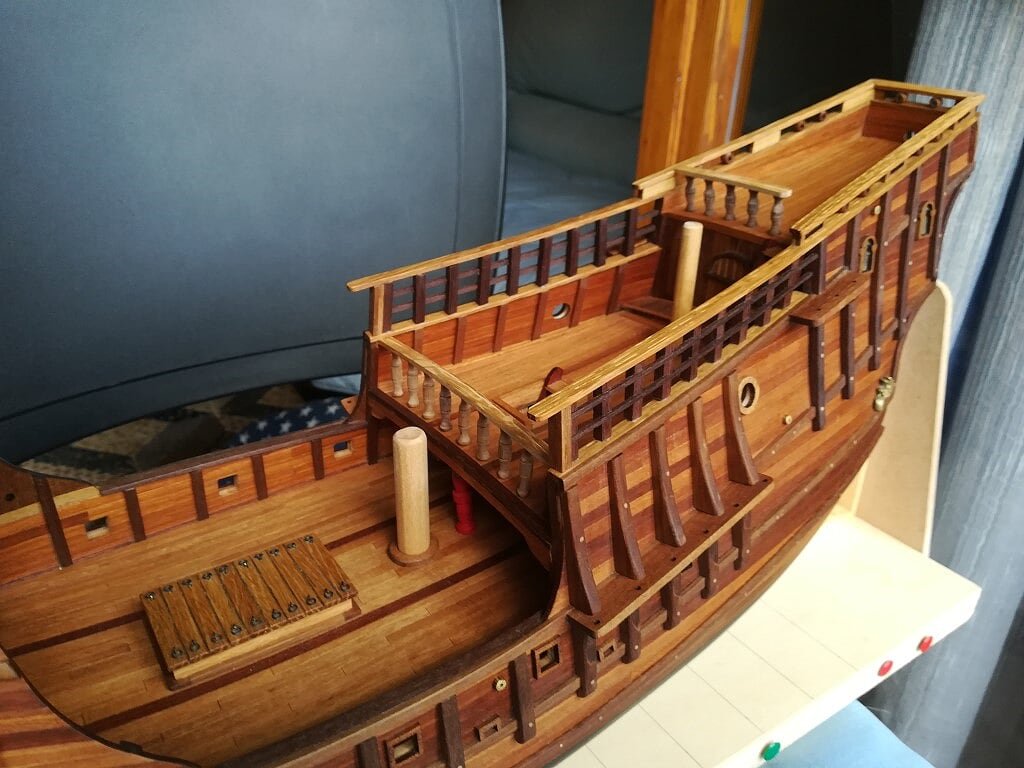
04 Ragusian Carrack/24082019/IMG_20190824_180609.jpg
05 Ragusian Carrack/24082019/IMG_20190824_180839.jpg
- mtaylor, paulsutcliffe, GrandpaPhil and 3 others
-
 6
6
-
Thursday 22 August 2017
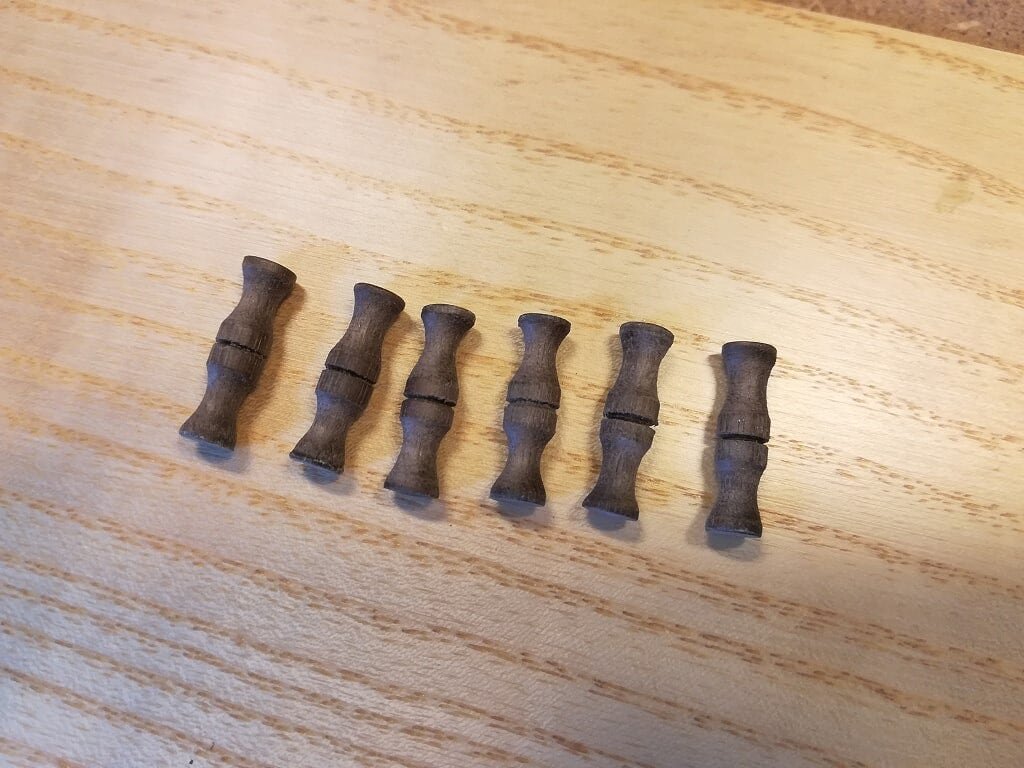
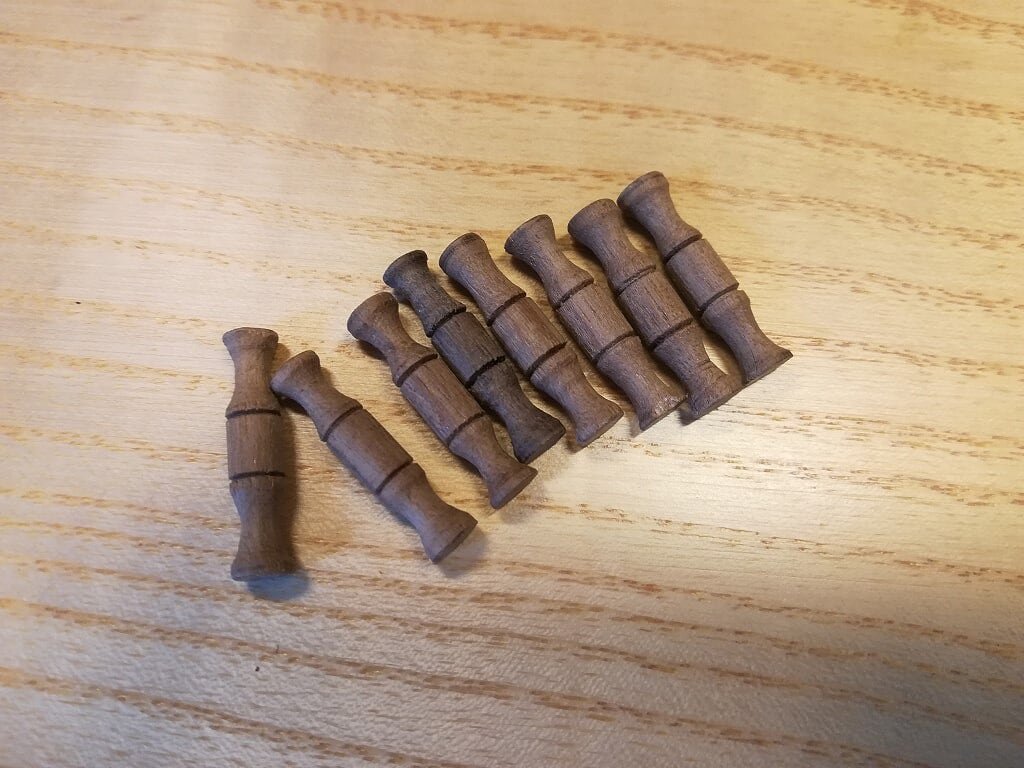
Day spent on the lathe to prepare the columns needed to install the railings between the various decks of the carrack. Next step their installation, after which this chapter will also be finished. Dimensions: those of the first picture mm. 16, the others mm. 22.
Salutoni, Jack.01 Ragusian Carrack/22082019/IMG_20190822_172716.jpg
02 Ragusian Carrack/22082019/IMG_20190822_172739.jpg
- JpR62, hexnut, paulsutcliffe and 4 others
-
 7
7
-
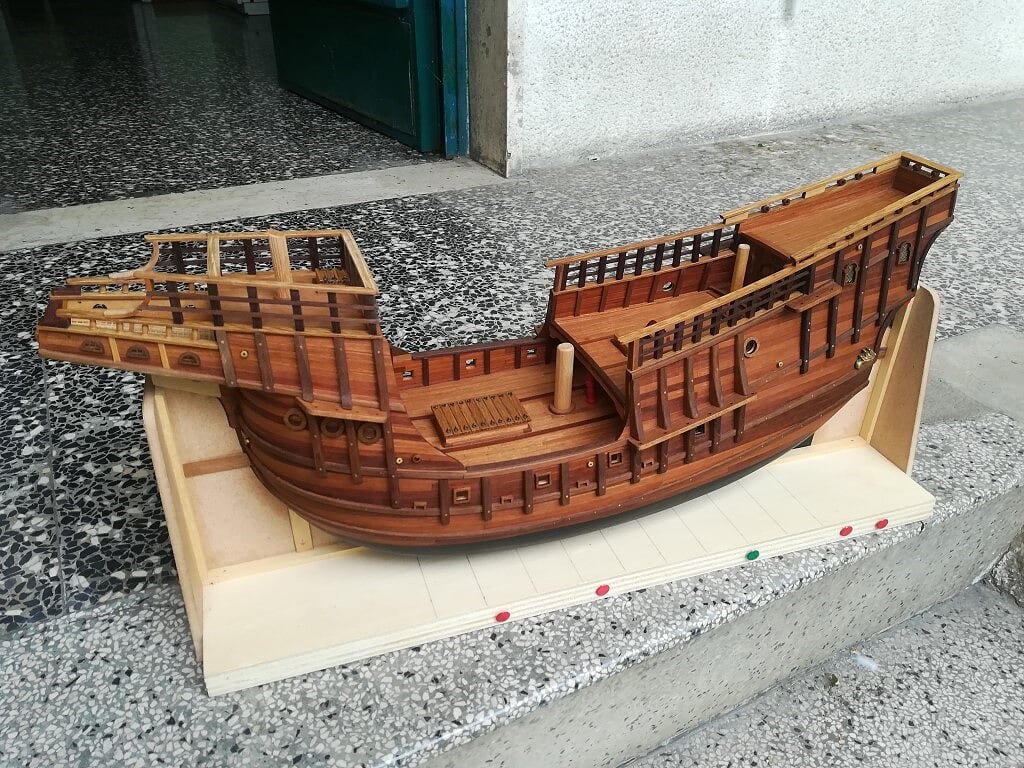
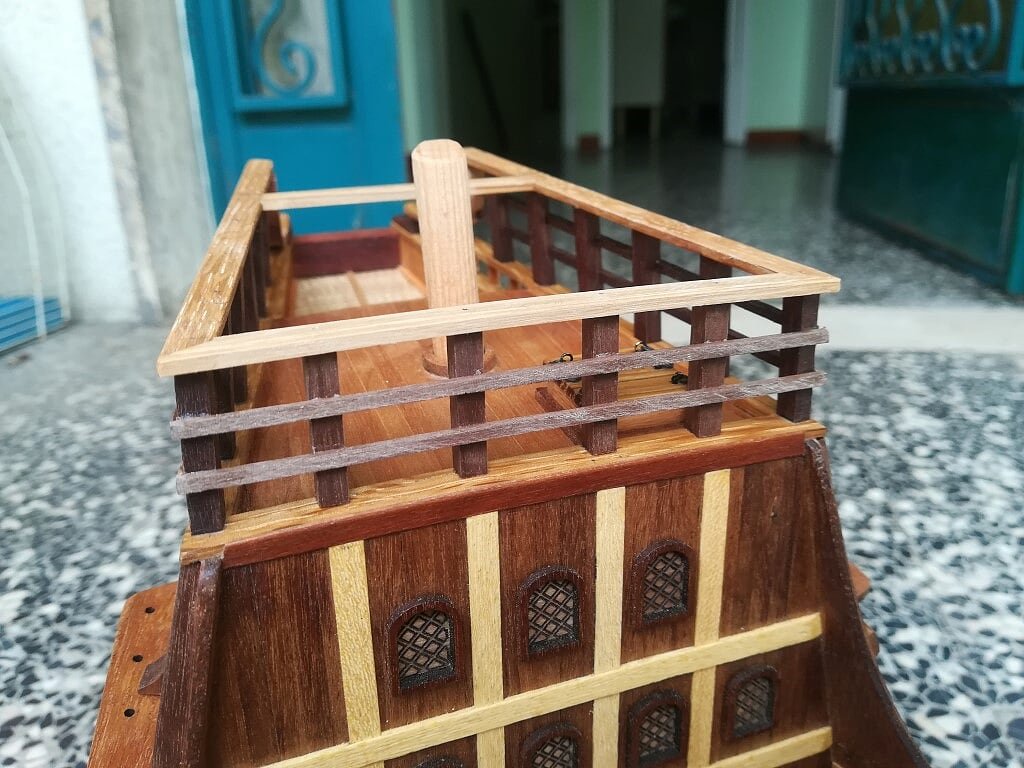
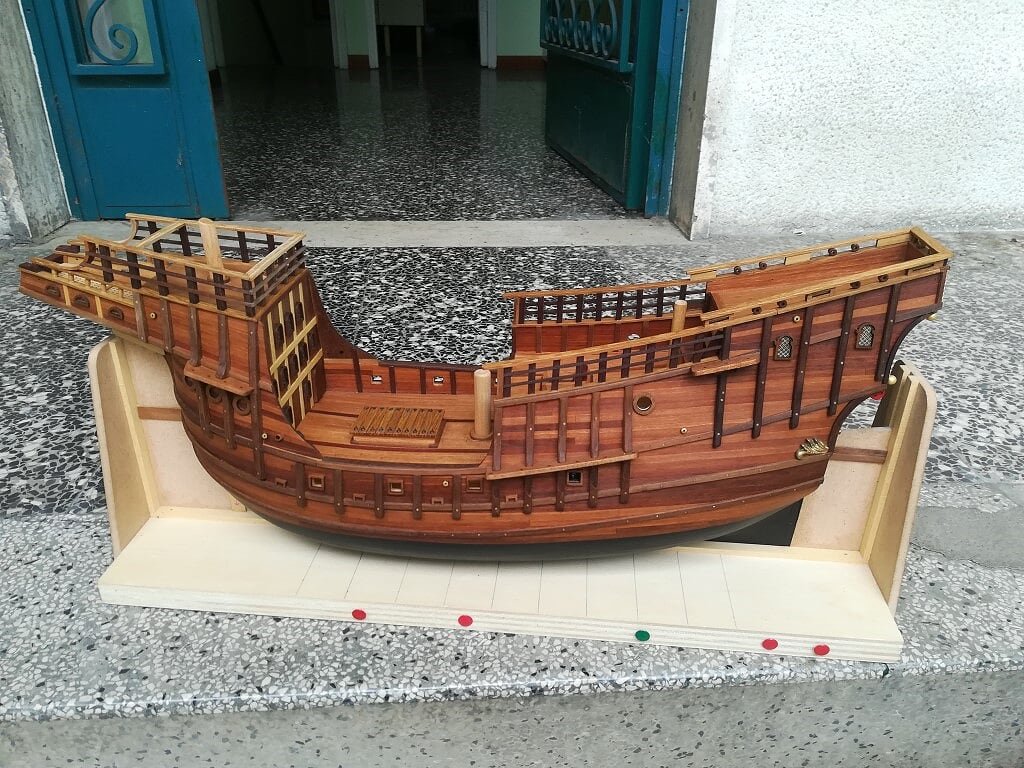
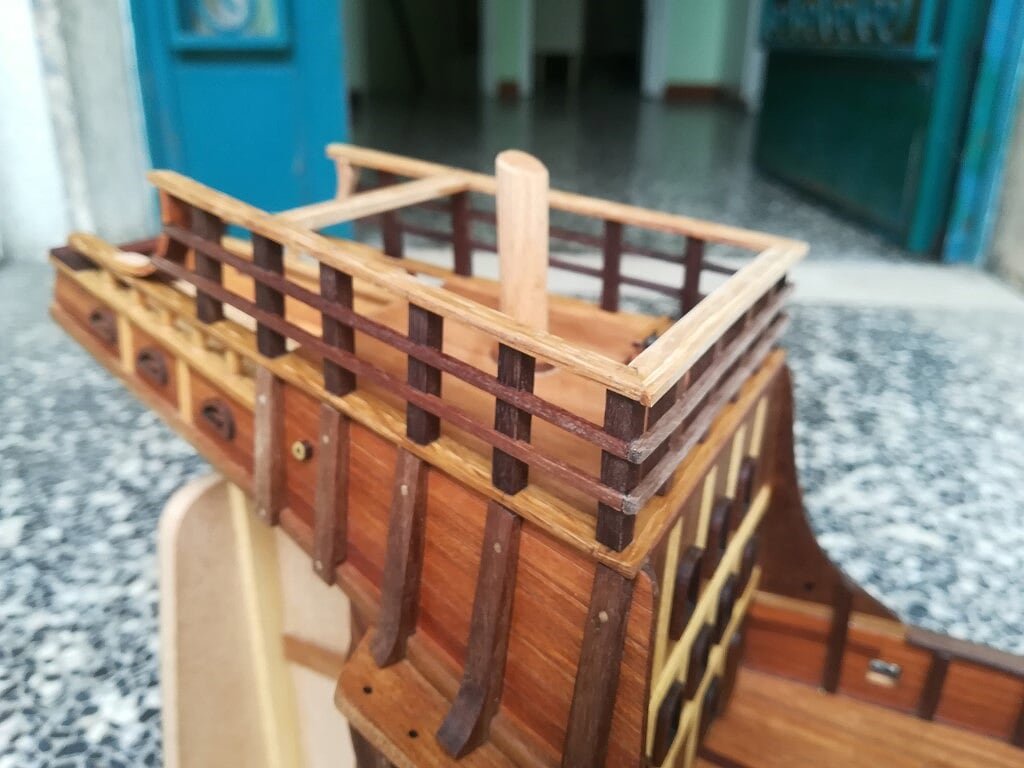
Other images of the model taken yesterday, today I would like to start making the railing columns described in the previous post, even if I would like to do them with a slightly different shape. First I'll do some prototypes before deciding.
Salutoni, Jack.01 Ragusian Carrack/20082019/IMG_20190820_150509.jpg
02 Ragusian Carrack/20082019/IMG_20190820_150443.jpg
03 Ragusian Carrack/20082019/IMG_20190820_150454.jpg
04 Ragusian Carrack/20082019/IMG_20190820_150437.jpg
-
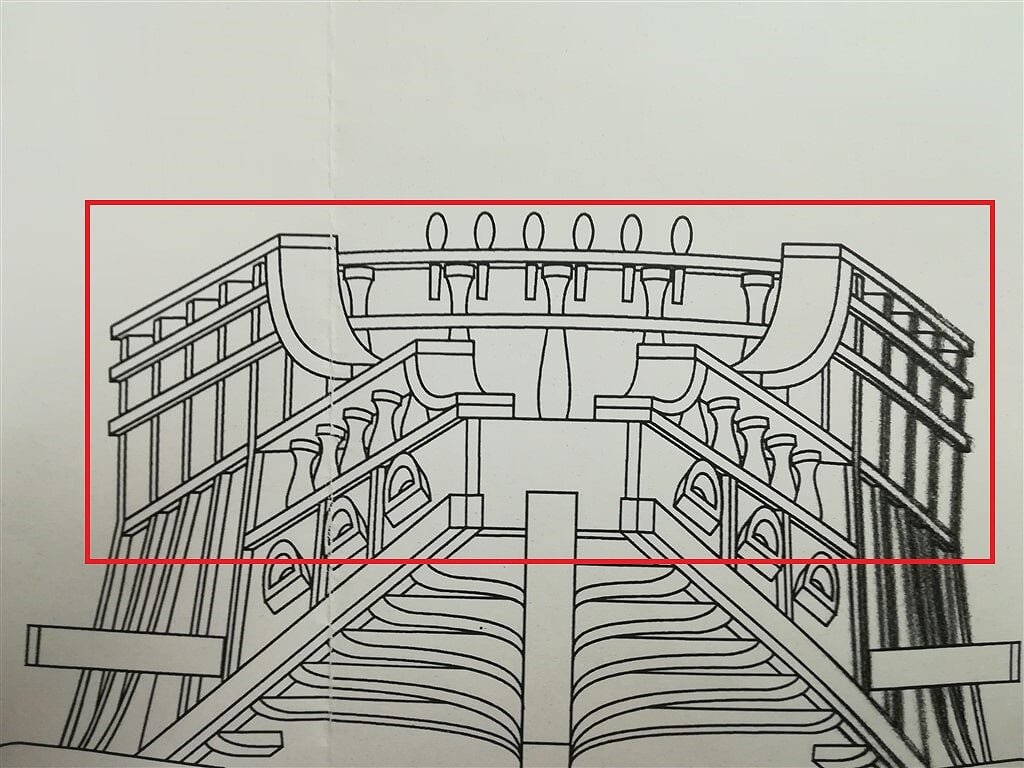
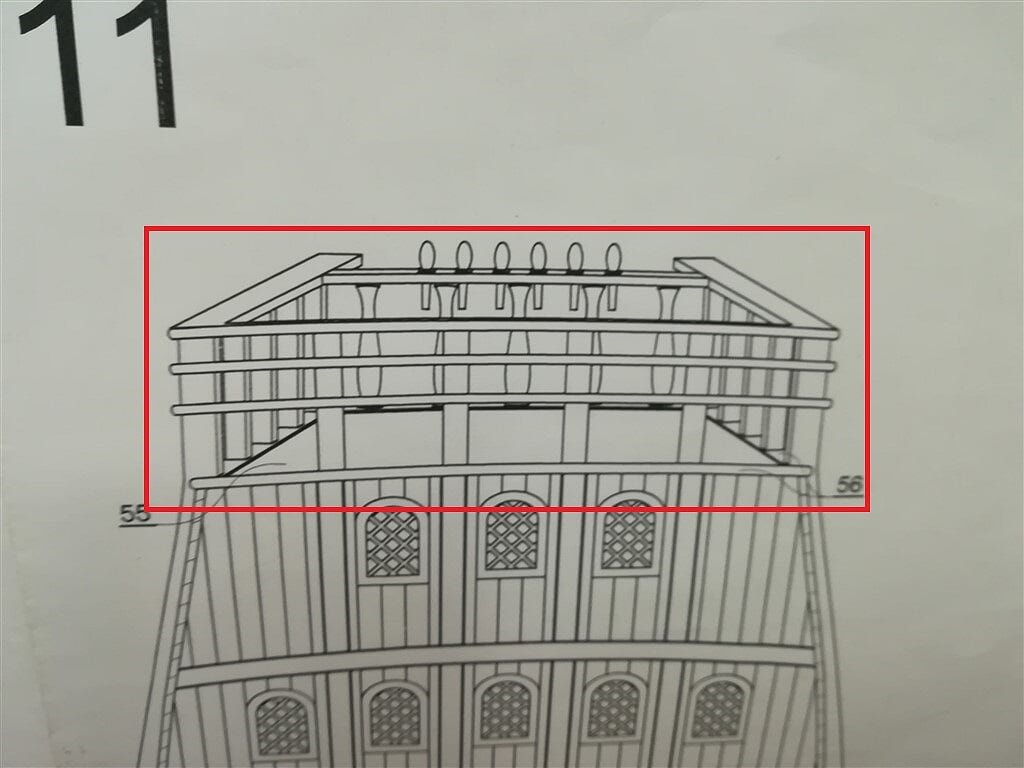
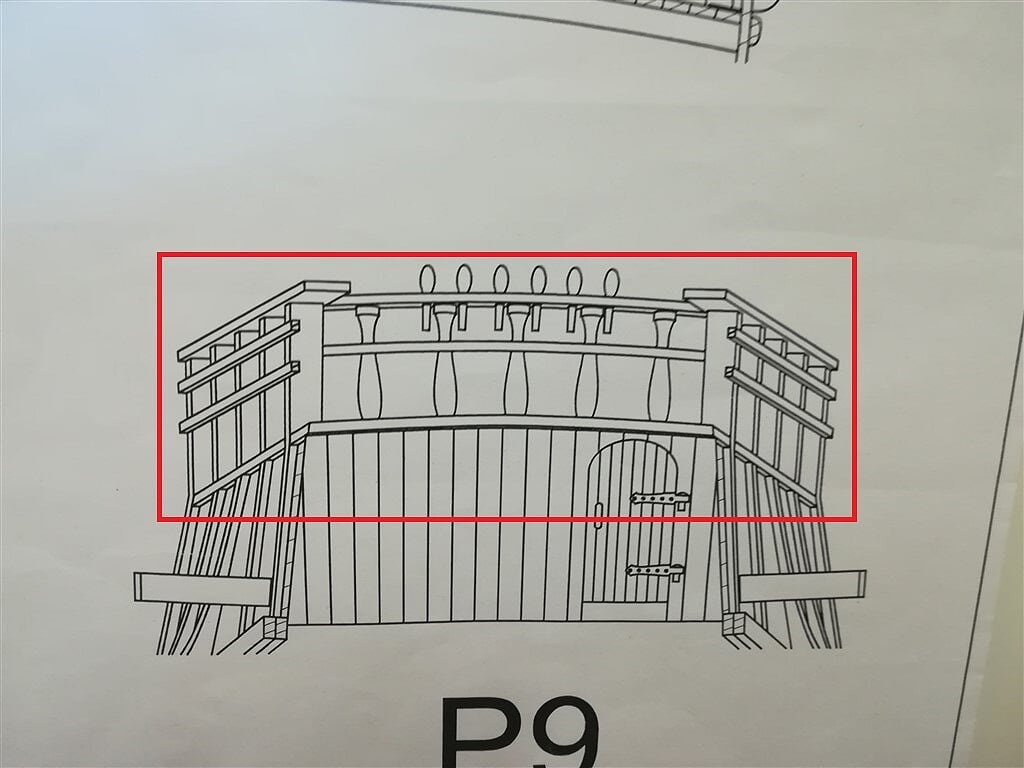
Tuesday 20 August 2019The installation of the forecastle railings is also finished . . . Now only three smaller, although complex, internal railings still remain to install. They are, positioned to protect the ends of the decks, as shown in the last two images, taken from the model plans.Their peculiarity is given by the rounded small columns to be prepared with a wood lathe, instead of the square ones.See you soon, Jack.01 Ragusian Carrack/20082019/IMG_20190820_150523.jpg
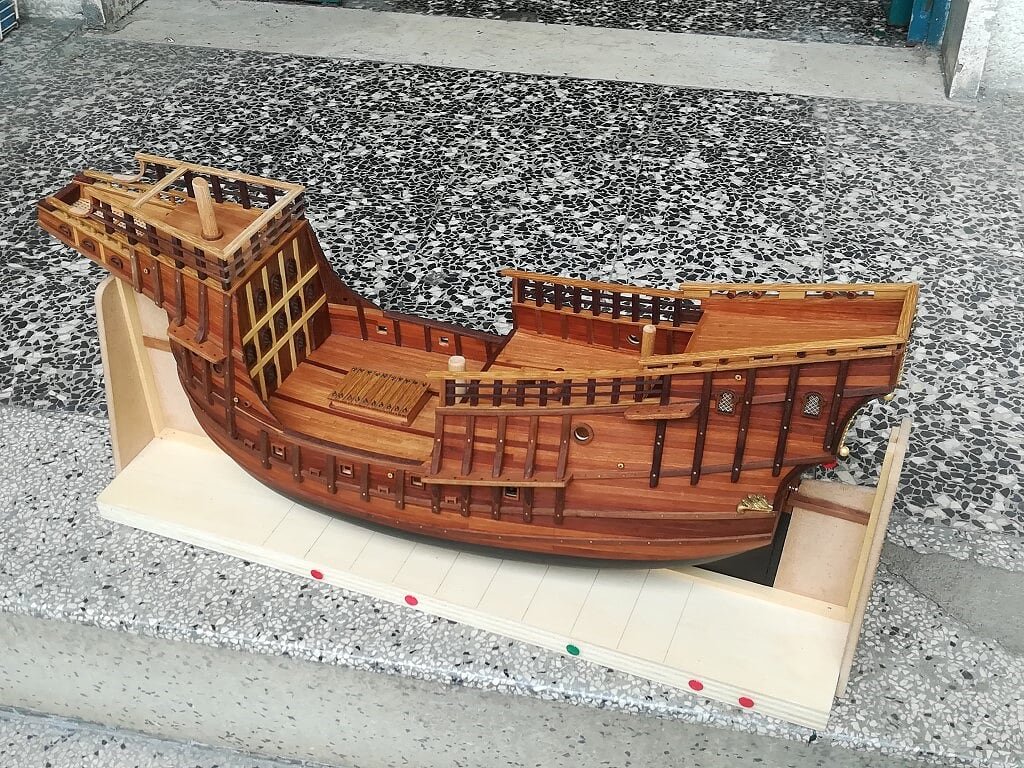 02 Ragusian Carrack/20082019/IMG_20190820_150315.jpg
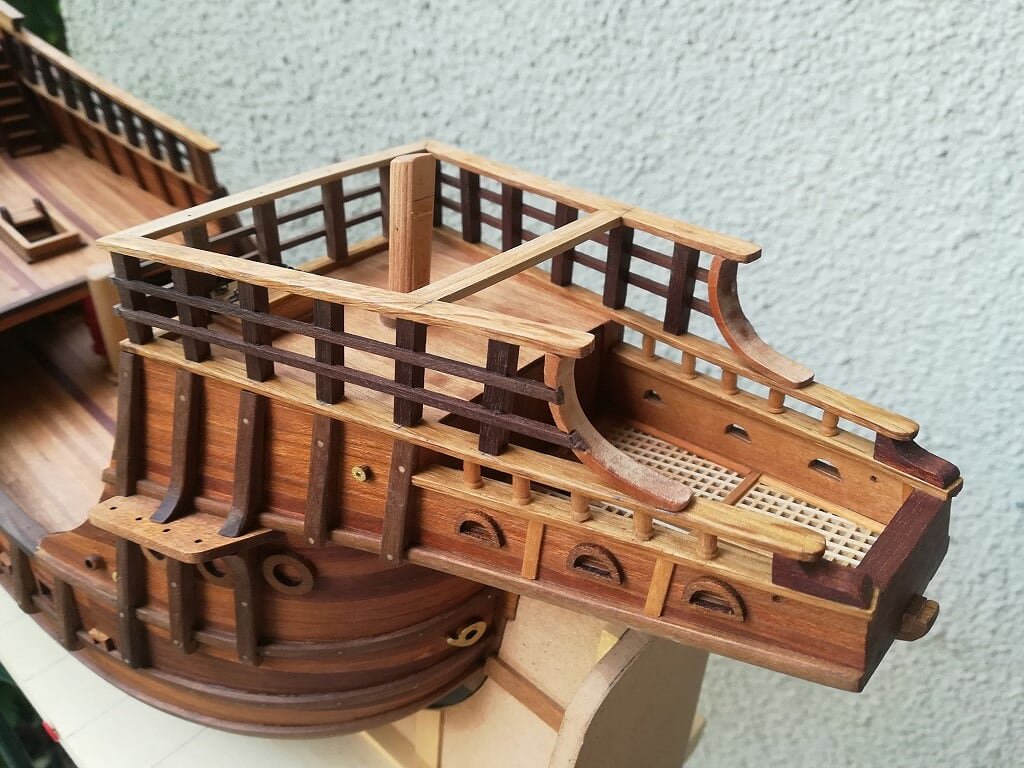 03 Ragusian Carrack/20082019/IMG_20190820_150332.jpg
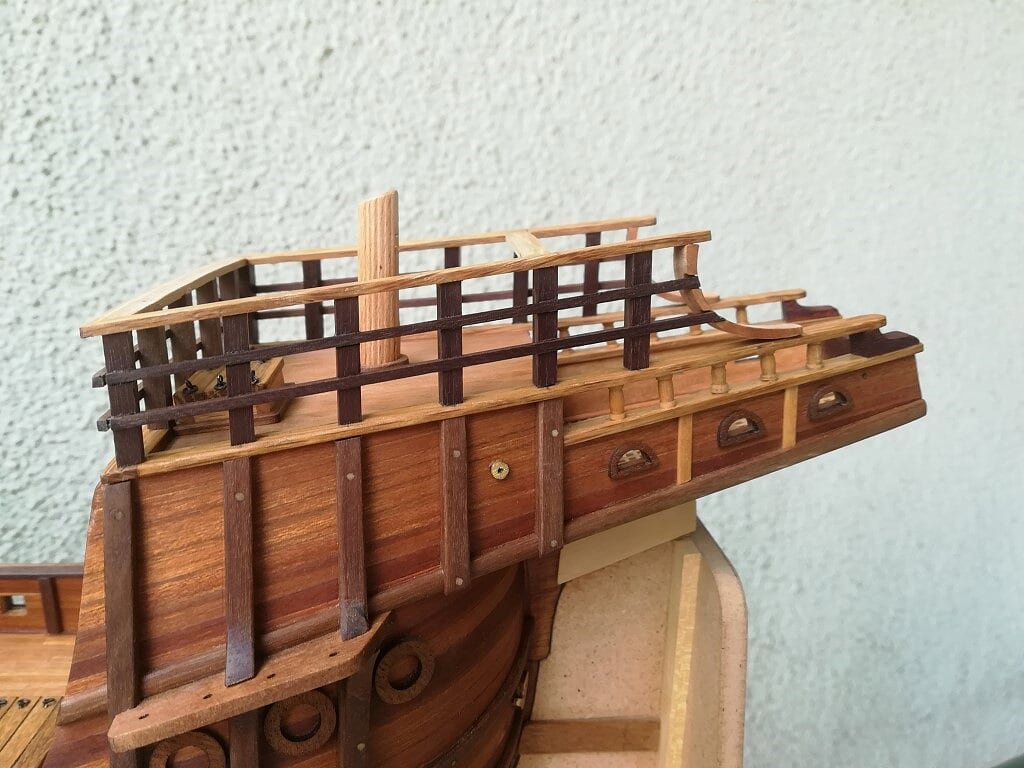 04 Ragusian Carrack/20082019/IMG_20190820_150345.jpg
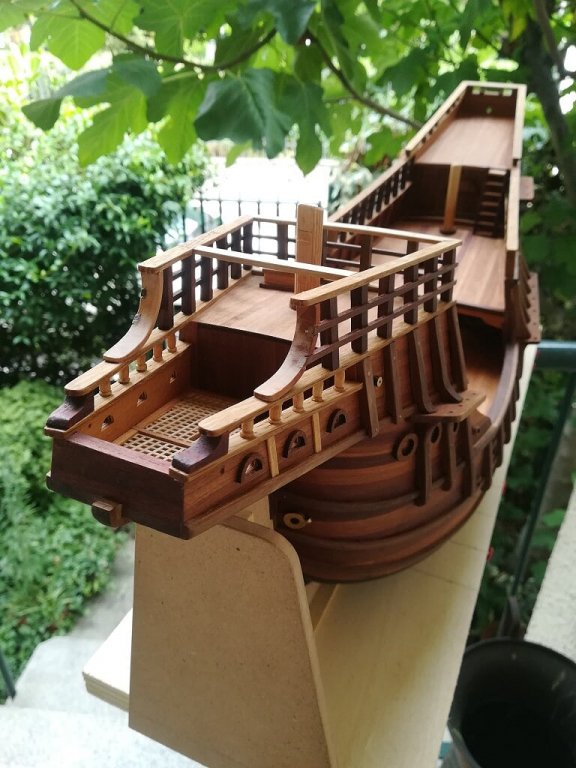 05 Ragusian Carrack/20082019/IMG_20190820_150423.jpg
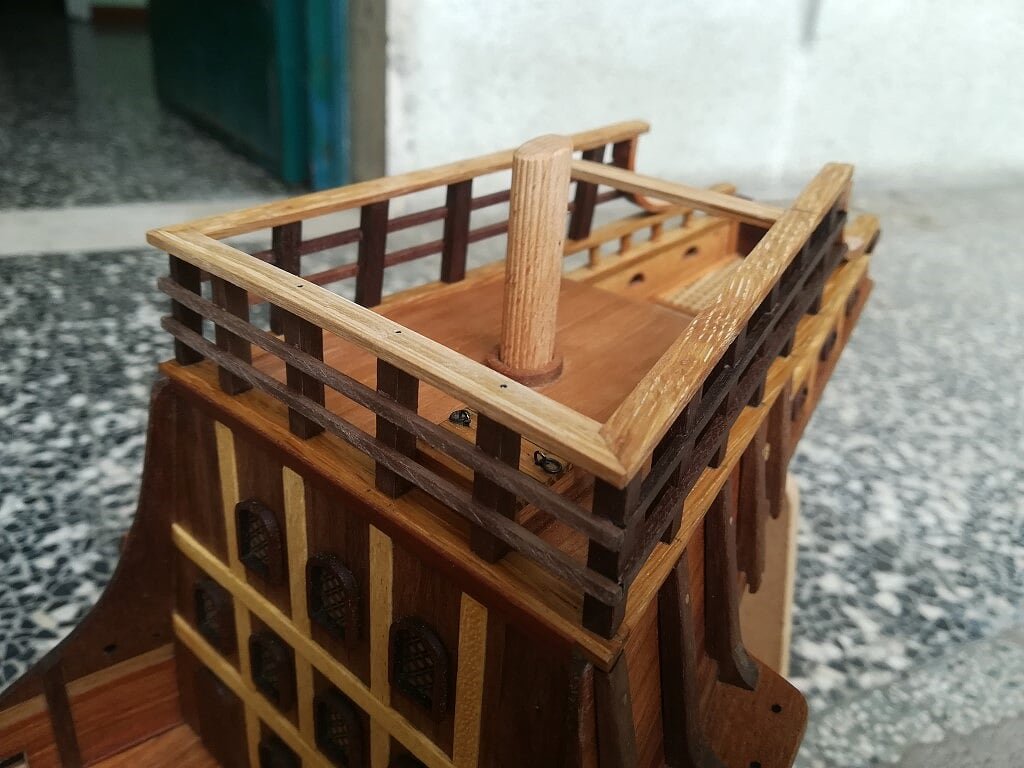 Ragusian Carrack/Ringhiere1.jpg
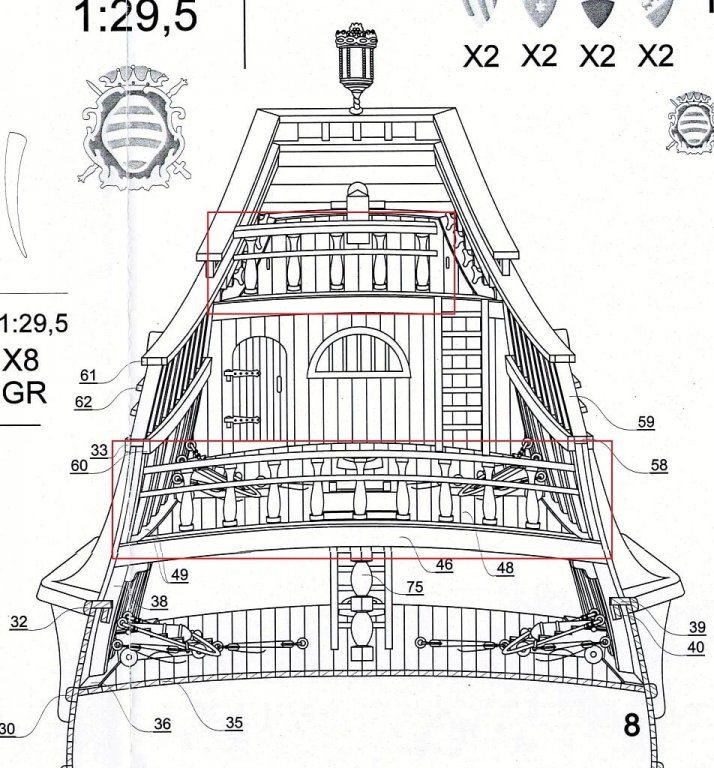 Ragusian Carrack/Ringhiere1.jpg
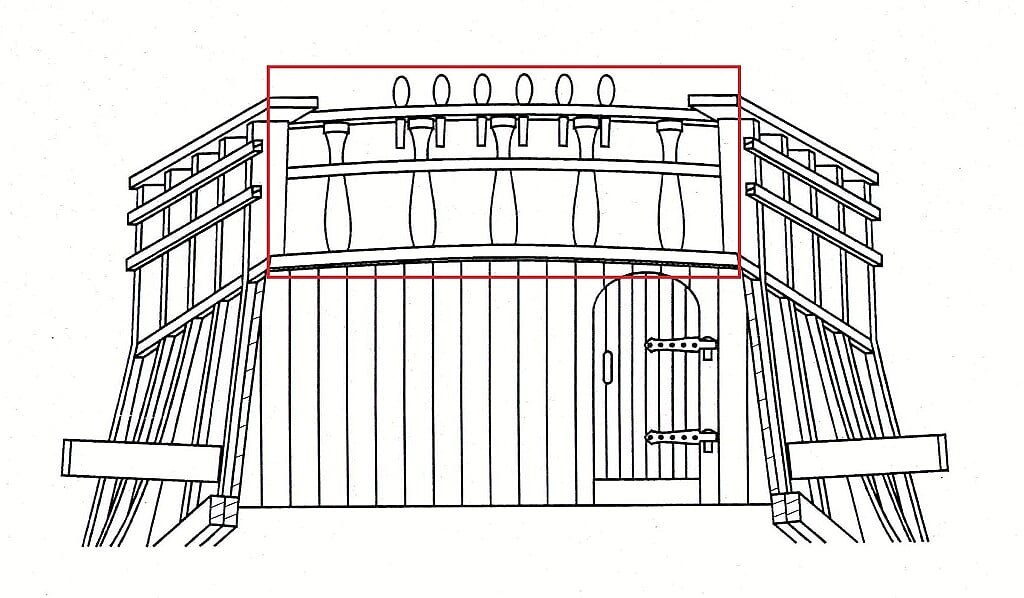
- mtaylor, paulsutcliffe, GrandpaPhil and 4 others
-
 7
7
-
Friday, August 16, 2019 - Railings of the forecastle
The building the forecastle railings is still in progress. I decided to glue the two lateral railings built earlier.
In order to ensure the necessary strength of the bonding, until I'll have also installed the front and the rear railing, I have glued a temporary batten that connects the two sides getting their force thanks to the gluing to the foremast stump. In due course it will be removed with a light touch or twist as the glueing has been done with a point of cyanoacrylate glue.Best regards, Jack.
01 Ragusian Carrack/16082019/IMG_20190815_165452.jpg
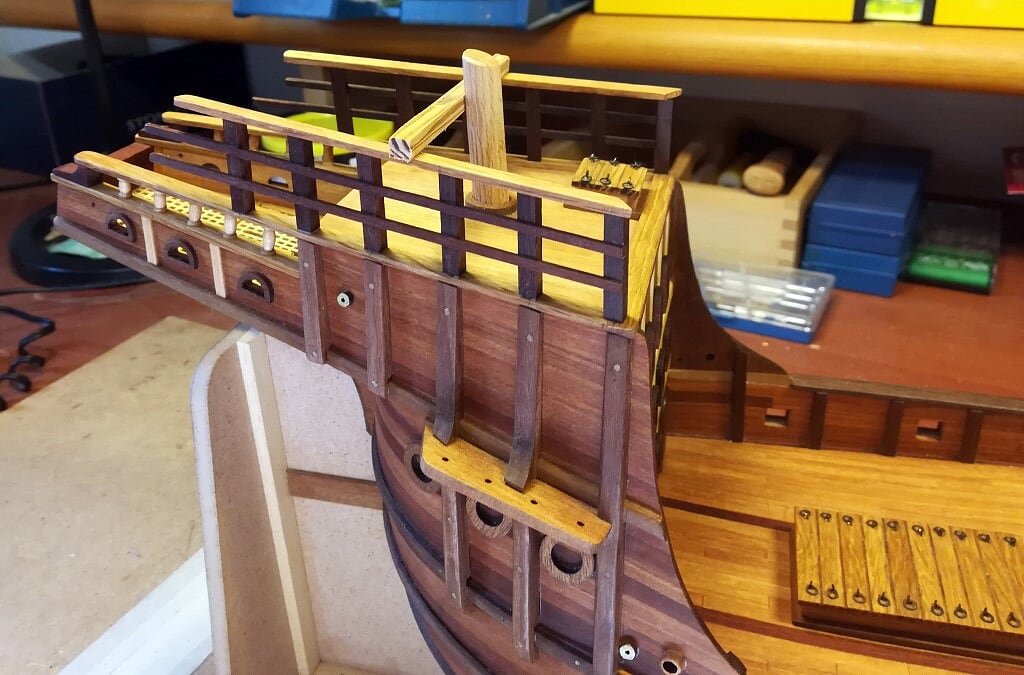
02 Ragusian Carrack/16082019/IMG_20190815_165501.jpg
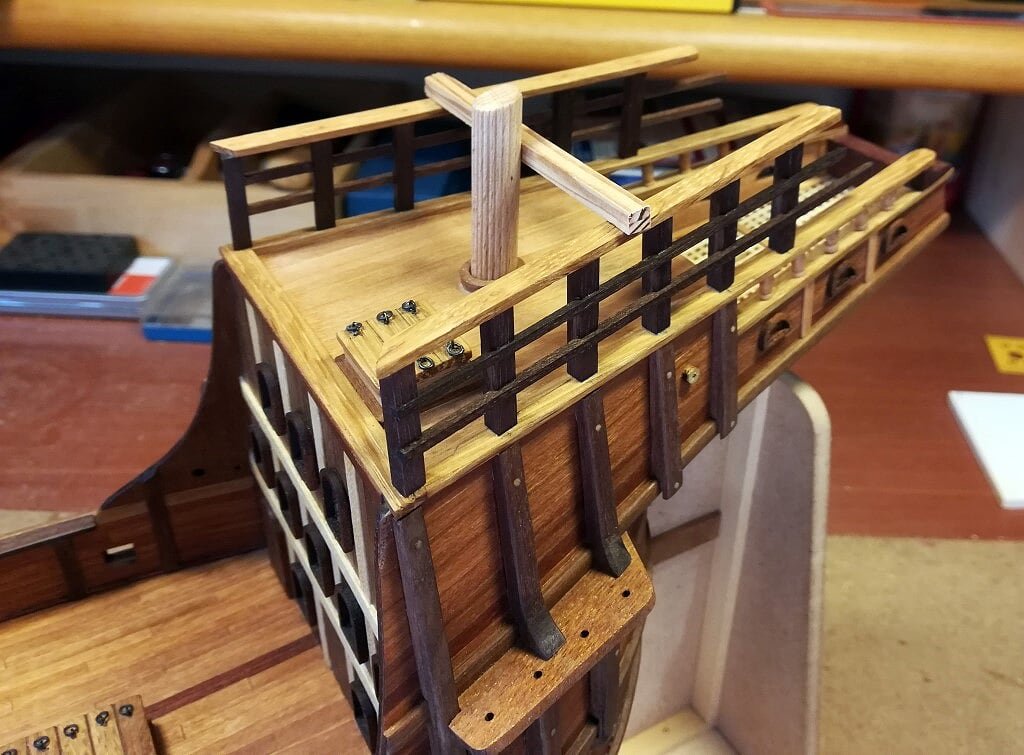
03 Ragusian Carrack/16082019/IMG_20190816_102348.jpg
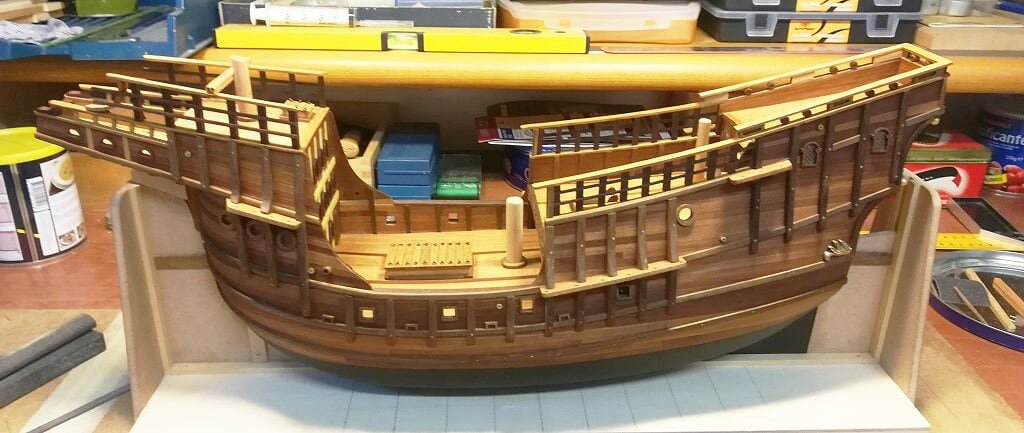
04 Ragusian Carrack/16082019/IMG_20190816_102356.jpg
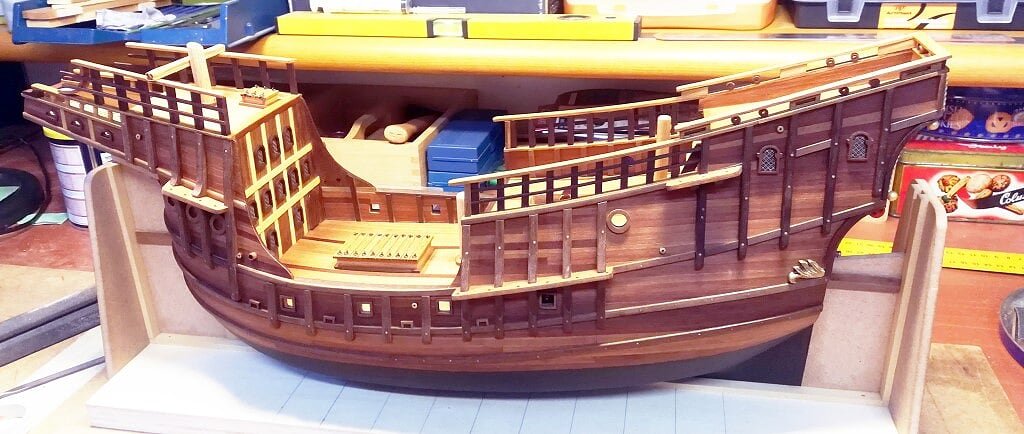
- GrandpaPhil, hexnut, paulsutcliffe and 4 others
-
 7
7
-
Wednesday, August 14th, 2019
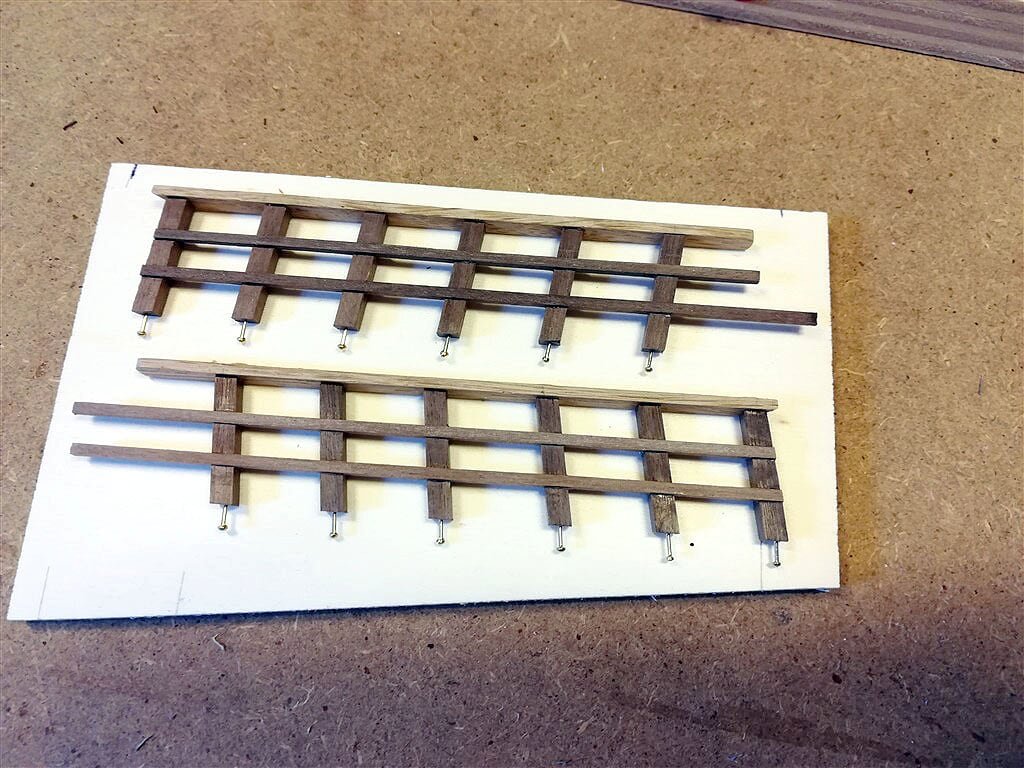
I started to build the forecastle railings . . for this task I identified the possibility to build these elements separately and assemble them on the model as final process. This fact has two great advantages: it allows greater precision in the preparation of the pieces and, last but not least, greater ease of execution. Furthermore, the experience gained up until now has played an essential role.
There is still a lot to do before finishing, but it seems to be progressing very well.
See you soon, Jack.01 Ragusian Carrack/14082019/IMG_20190814_173229.jpg

02 Ragusian Carrack/14082019/IMG_20190814_171334.jpg
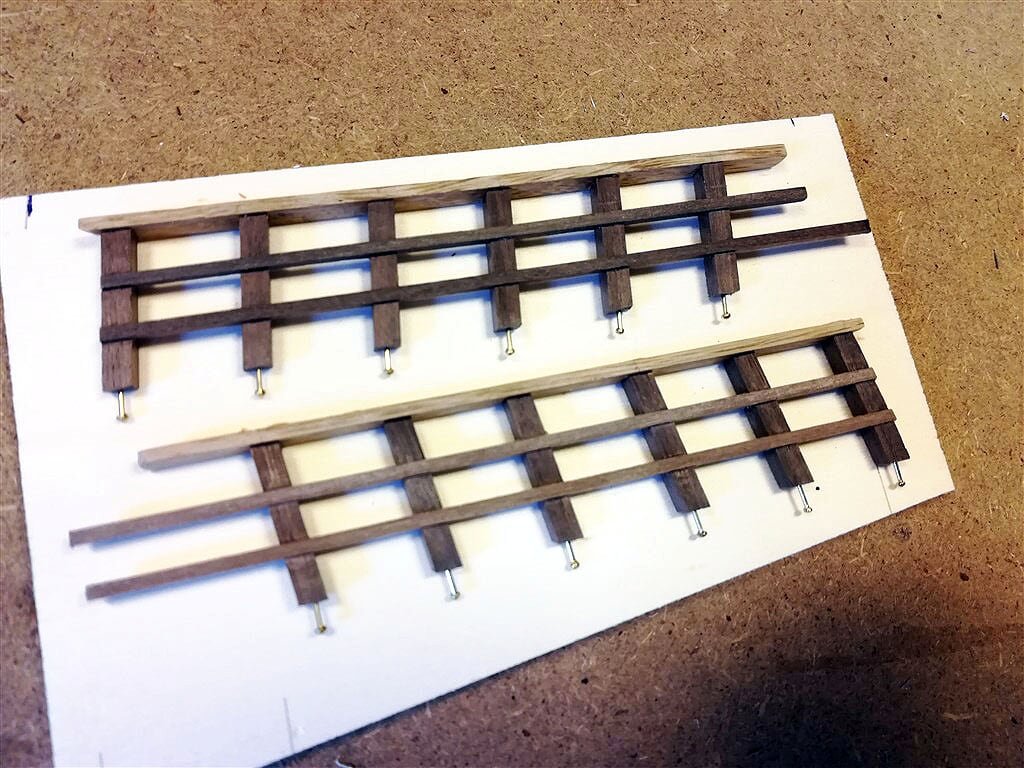
03 Ragusian Carrack/14082019/IMG_20190814_171330.jpg
-
Saturday, August 10, 2019
Additional elements again in the stern area . .
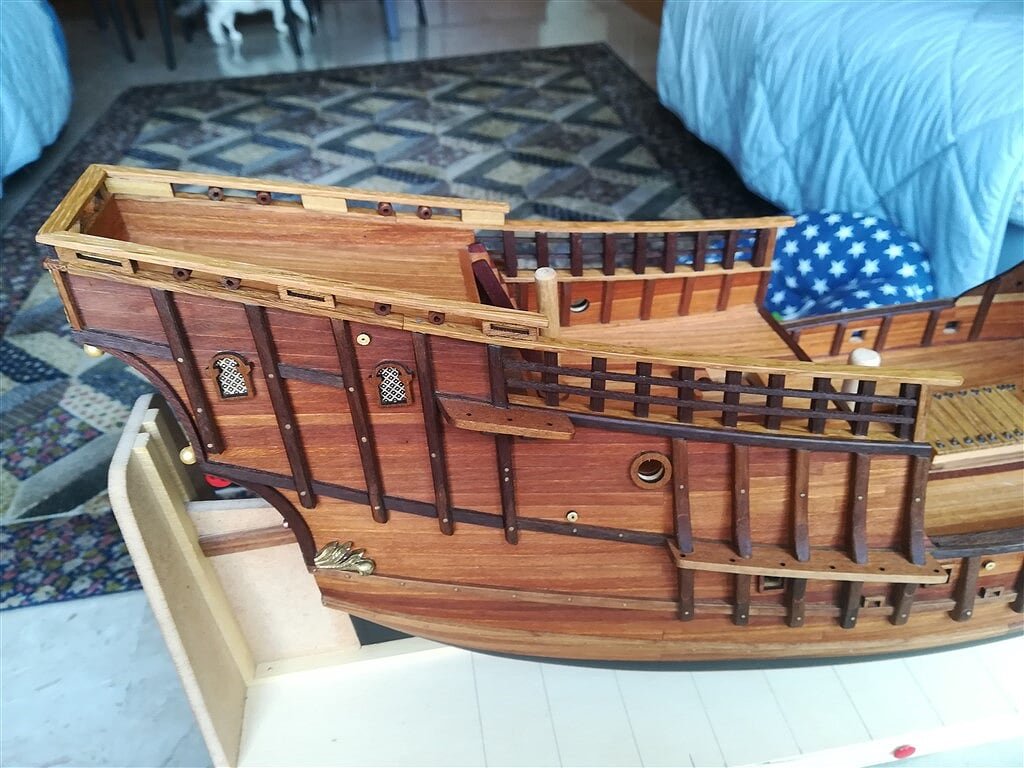
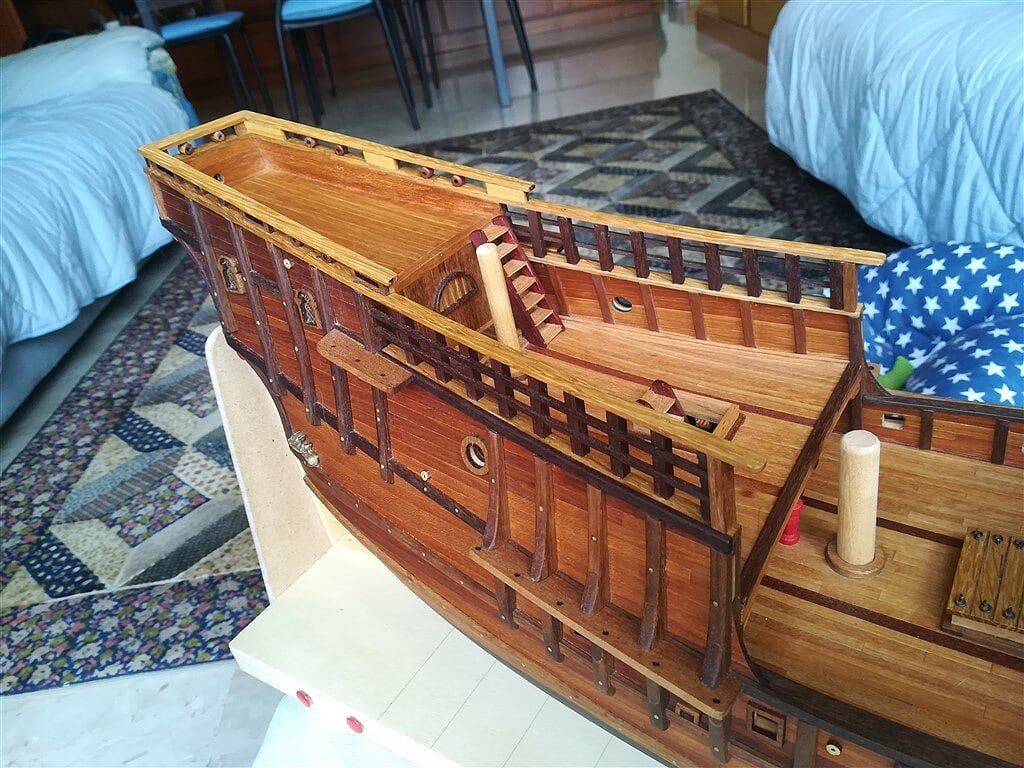
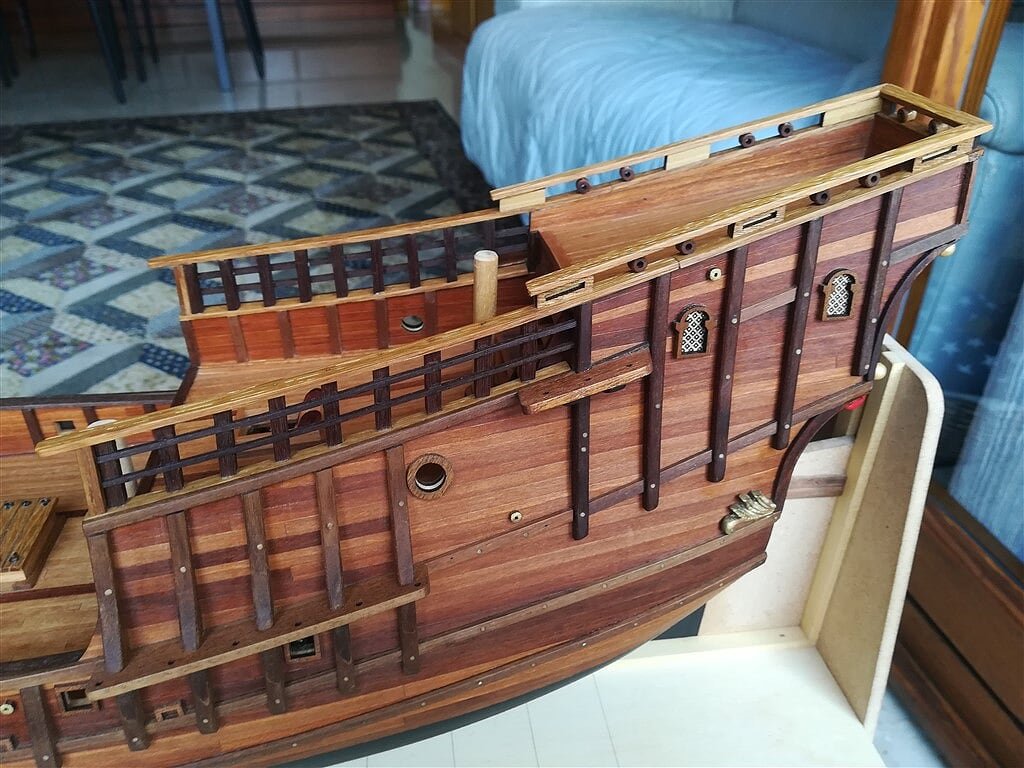
It seems a small achievement but it is absolutely not true; the round decorative elements with a hole in the center were made using a lathe, starting with a rod reduced to the correct diameter, drilled in the center and so on. Nothing magic but a lot of patience.
At this point the matter in the stern area is practically closed, some elements are still missing but this is certainly not the right time to install them. Now it's time to focus on the railings on the forecastle. Another challenge of patience and precision, combined with the necessary robustness.
See you soon, Jack.
01 Ragusian Carrack/10082019/IMG_20190810_111943.jpg
02 Ragusian Carrack/10082019/IMG_20190810_112004.jpg
03 Ragusian Carrack/10082019/IMG_20190810_112107.jpg
04 Ragusian Carrack/10082019/IMG_20190810_112114.jpg
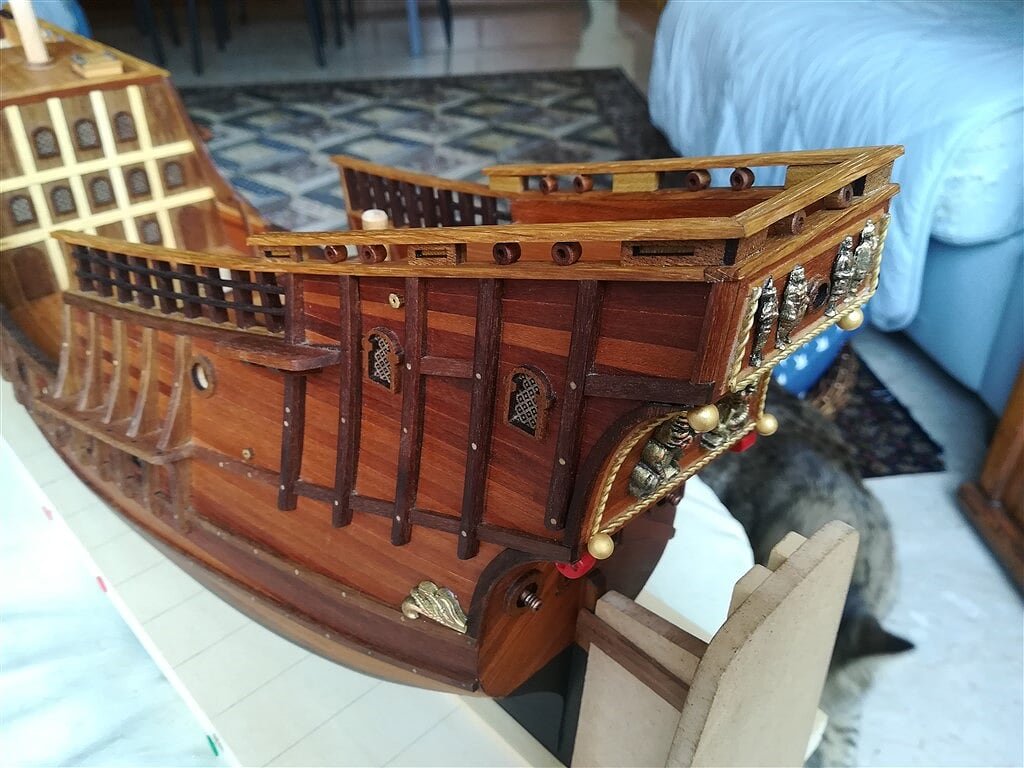
05 Ragusian Carrack/10082019/IMG_20190810_112255.jpg
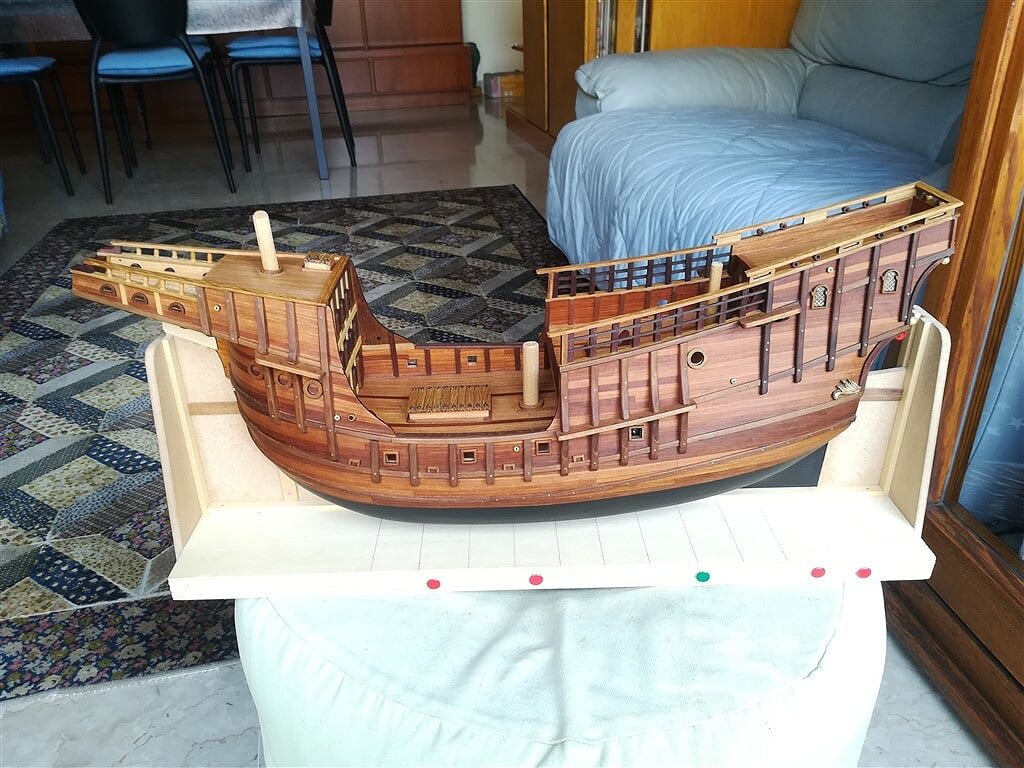
-
Thursday, August 8th, 2019
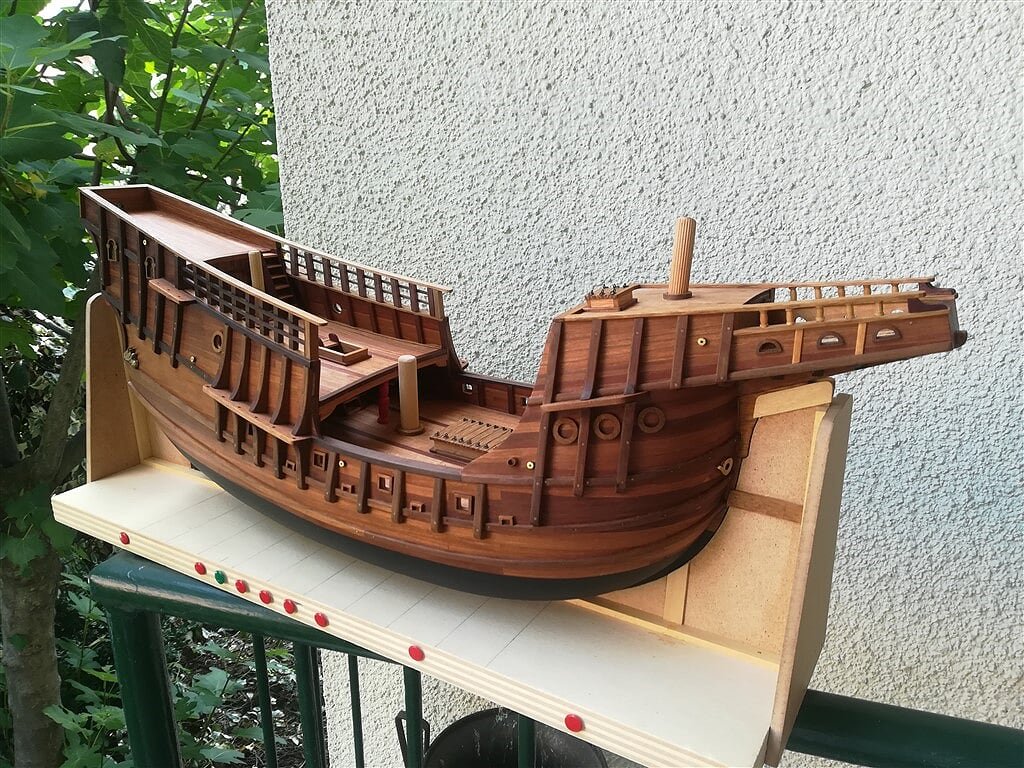
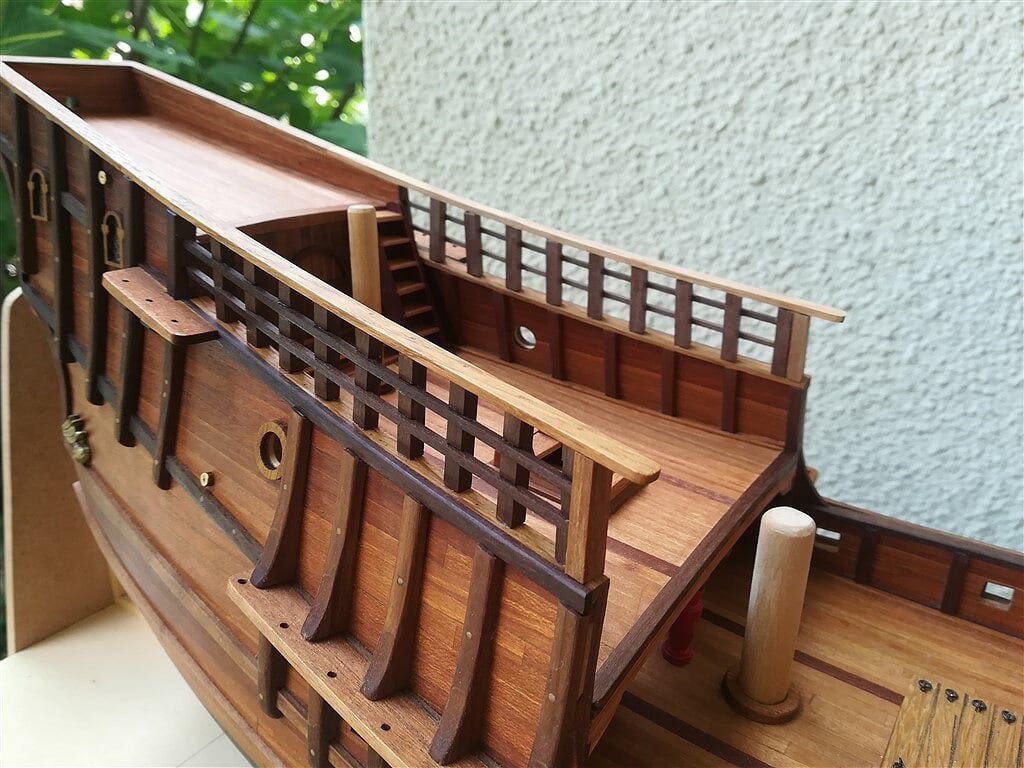
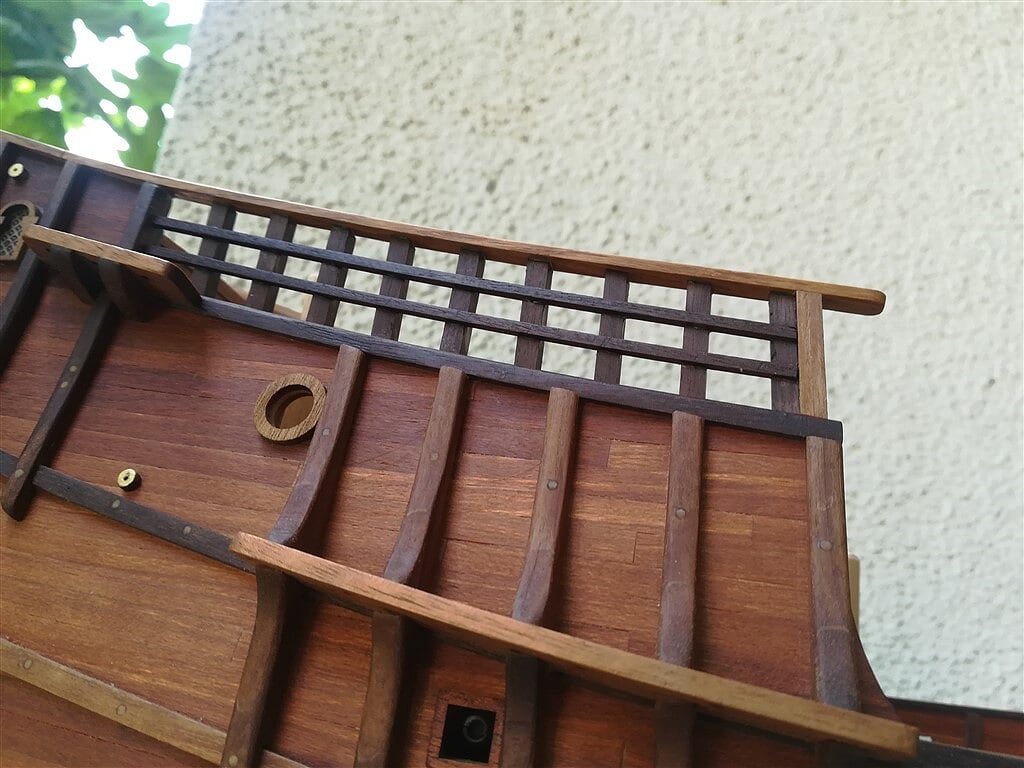
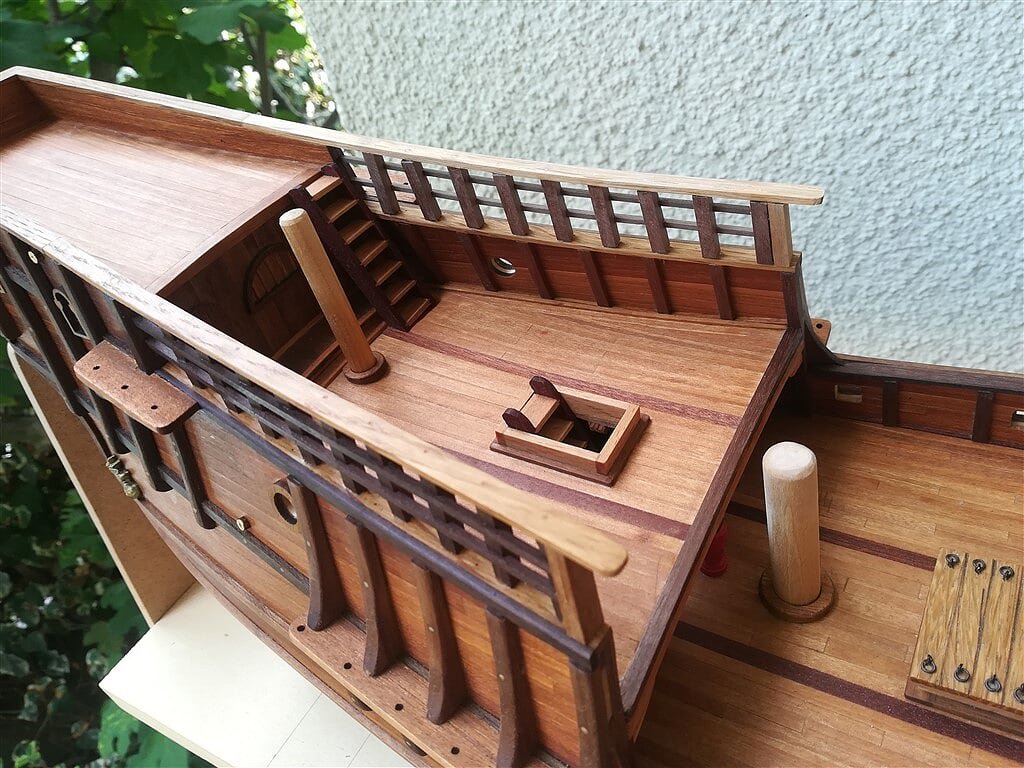
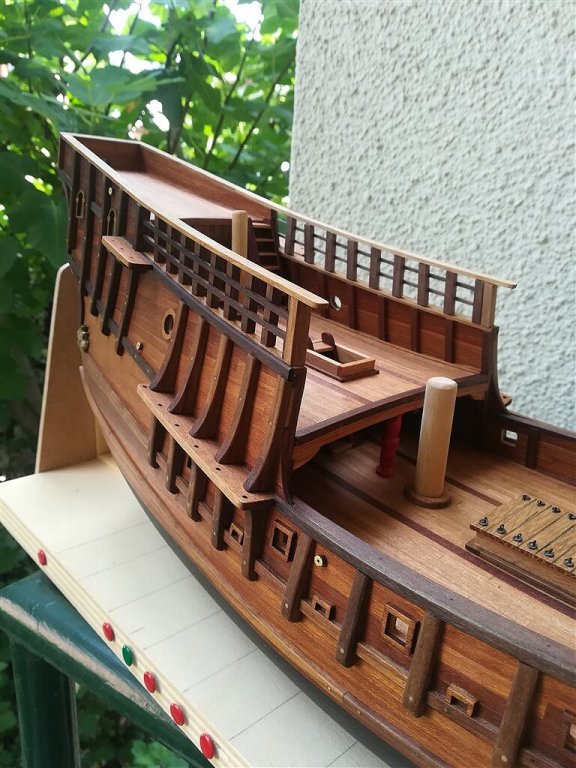
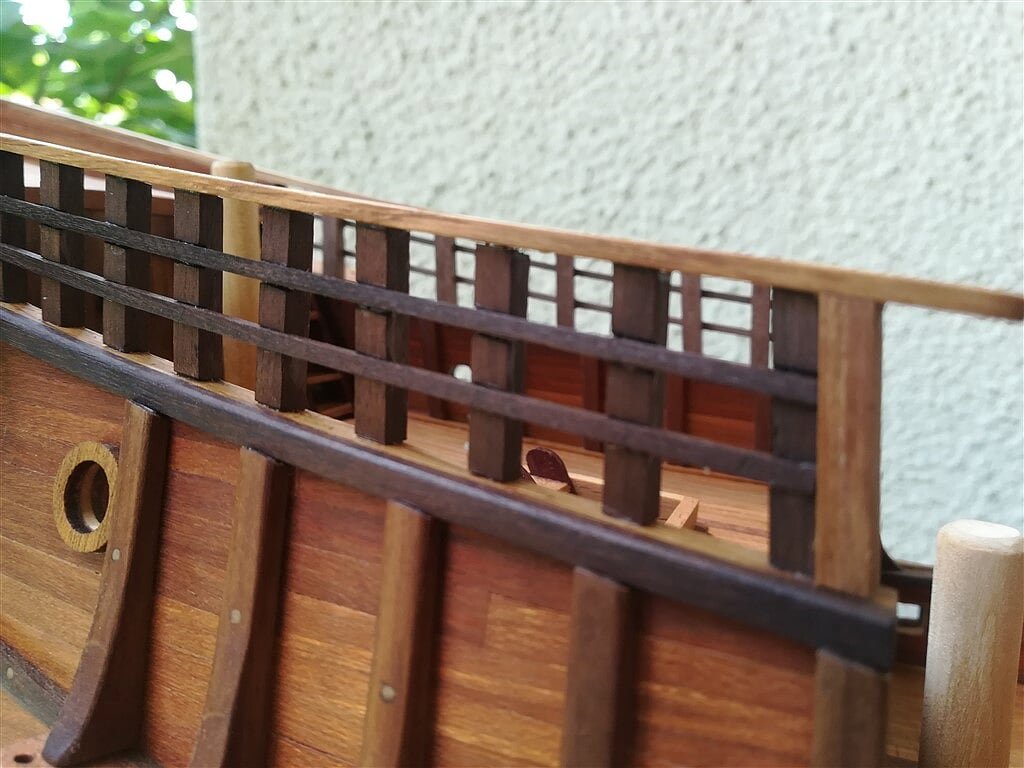
At the end, after a week of work, I managed to complete the railings located in the stern area.
It has been an activity that engaged me in a long planning job to obtain a result from one side enough precise and from the other adeguately strong. In particular this last point made me lose a lot of time to setup joints and pins able to ensure the required strength.
In hindsight I have to say I hit the target, but anyway . . . . it was a tough and complex matter.The images below document the work done, work that further enhances the aesthetics of this model. Now still some details, always located in the stern, are missing but they are easy to implement; and then a similar task will start for the forecastle railings. . . but here, with the experience so far made, I'm no longer worried.
Salutoni, Jack.
01 Ragusian Carrack/08082019/IMG_20190808_150753.jpg
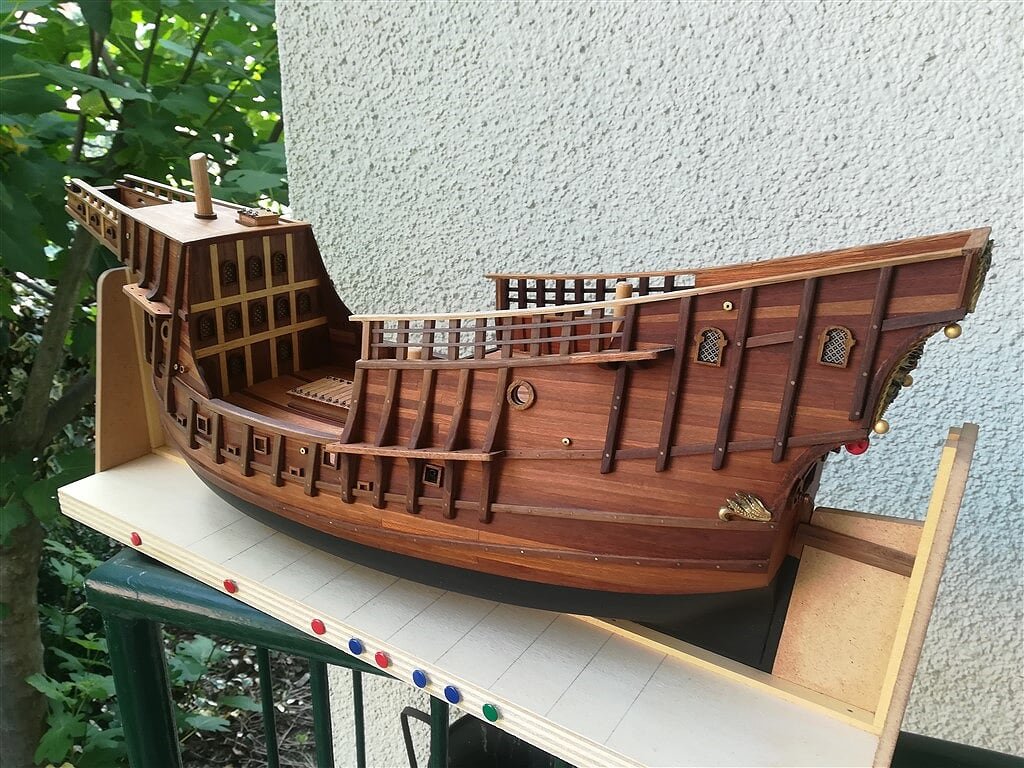
02 Ragusian Carrack/08082019/IMG_20190808_150808.jpg
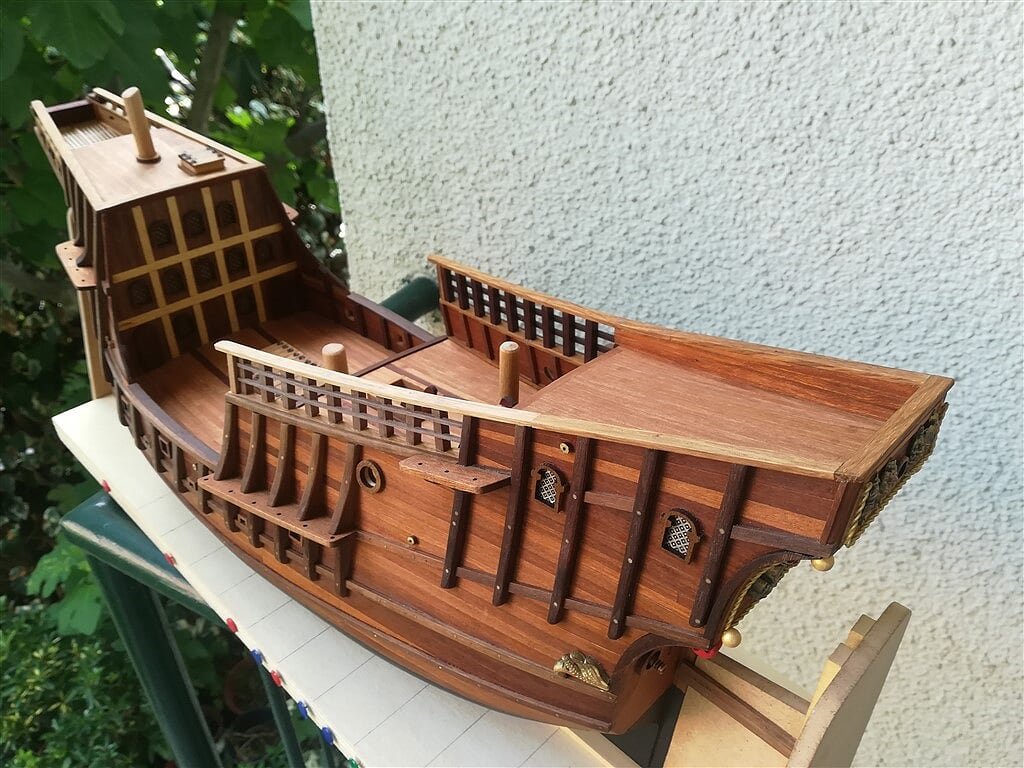
03 Ragusian Carrack/08082019/IMG_20190808_150844.jpg
04 Ragusian Carrack/08082019/IMG_20190808_150851.jpg
05 Ragusian Carrack/08082019/IMG_20190808_150857_1.jpg
06 Ragusian Carrack/08082019/IMG_20190808_150902.jpg
07 Ragusian Carrack/08082019/IMG_20190808_150923.jpg
08 Ragusian Carrack/08082019/IMG_20190808_150931.jpg
- paulsutcliffe, GrandpaPhil, JpR62 and 4 others
-
 7
7
-
Thanks Steven and Mark,
I think I'll follow the basic ideas you have proposed in your posts, with some changes because I prefer to avoid painting the gunwales, leaving them as natural wood. My idea is to apply over the top gunwale a strip of veneer to hide the view of the pins. From another side I'll prefer to drill the vertical supports in order to insert a pin on both ends, using as pins some toothpicks, as I made to simulate the wood nails . . .
At the right moment I'll show what I mean with proper images.
Regards, Jack.
-
Tuesday 30 July 2019
What to do next ?
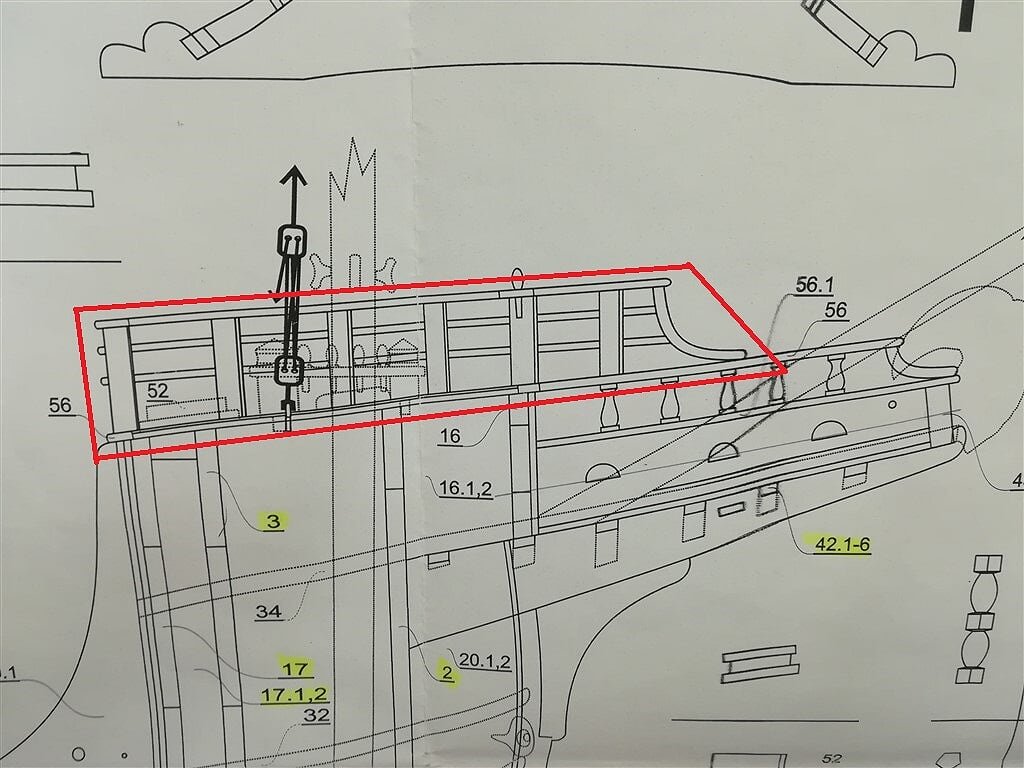
Apart from some secondary activities, anyway postponable, and only one as really prerequisite, from today the "focus" of the important, and no longer delayable tasks, shifts to build the railings (is it the right term?) planned both on the forecastle than on the quarterdeck.
Figure 01 shows, in the area highlighted in red, this detail for the stern area.01 Ragusian Carrack/28072019/IMG_20190728_173654.jpg
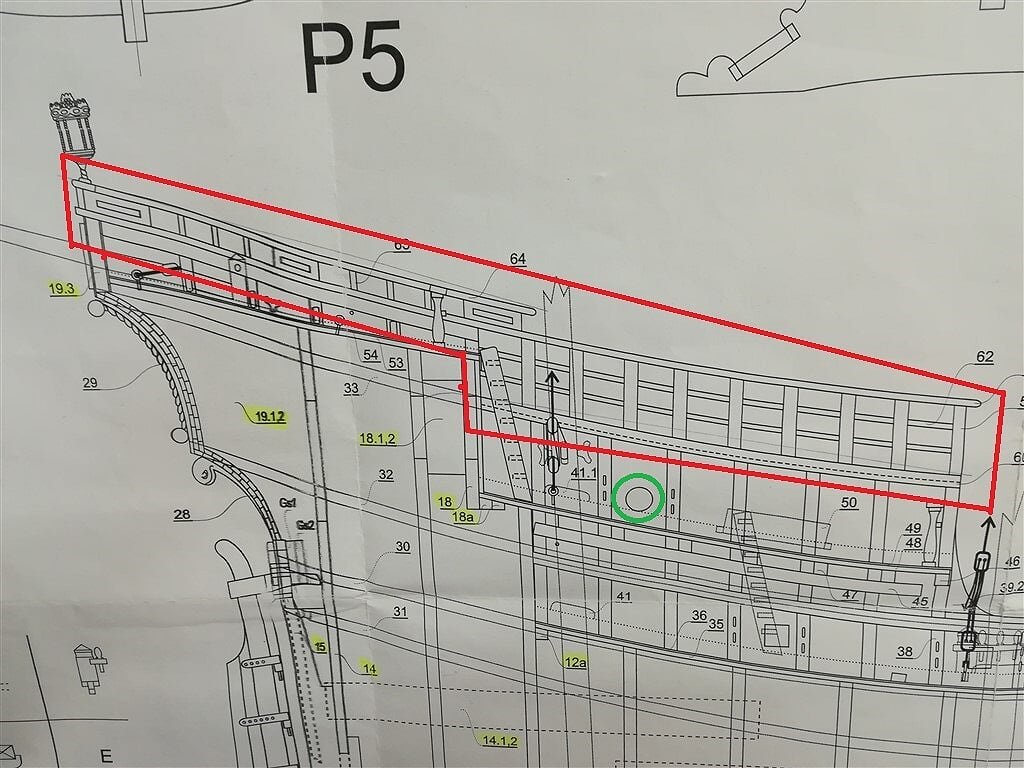
As you can easily see, it is a matter of installing 9 vertical 5mm square supports with the base resting on the gunwale of the quarterdeck and the top anchored to the gunwale of the last poop deck. The whole tied and reinforced by two 2x2mm streams embedded in the vertical supports.
In theory, the build of this detail is not complex, even if it requires a good amount of patience and precision, but for me, the real challenge consists in keeping an adequately strong structure, which does not risk falling apart at the first working accident.
So ideas will be needed to make it as robust as I would like.Another matter, even if finalized to the same result, on the forecastle, as shown, in the same way as in figure 01, in figure 02 (side view), 03, 04 and 05 (views from other directions). For the forecastle railings, unlike the poop ones, it is possible to setup a separate assembly followed by the final fixing it only at the end. This would make work more comfortable and more precise.
To the next episode, Jack.
02 Ragusian Carrack/28072019/IMG_20190728_173701.jpg
03 Ragusian Carrack/28072019/IMG_20190728_173732.jpg
04 Ragusian Carrack/28072019/IMG_20190728_173709.jpg
05 Ragusian Carrack/28072019/IMG_20190728_173714.jpg
-
Sunday, July 28th, 2019
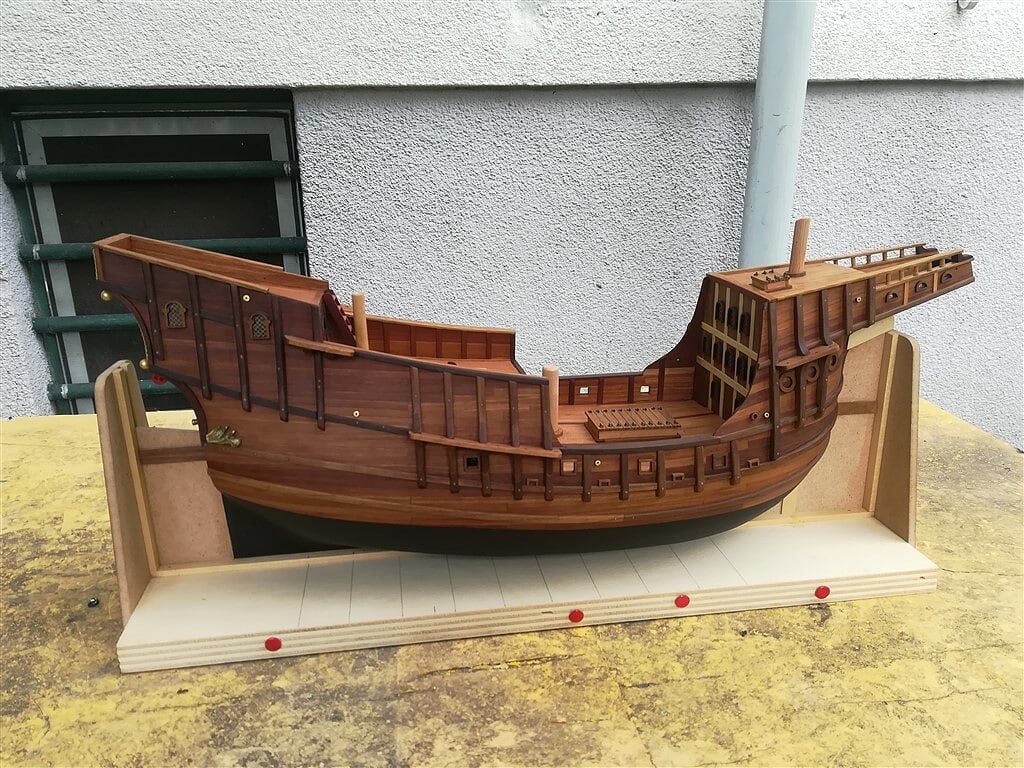
😀😀😀 Let's put the model in its usual, right asset . . . . 😀😀😀
01 Ragusian Carrack/28072019/IMG_20190728_164037.jpg
02 Ragusian Carrack/28072019/IMG_20190728_164049.jpg
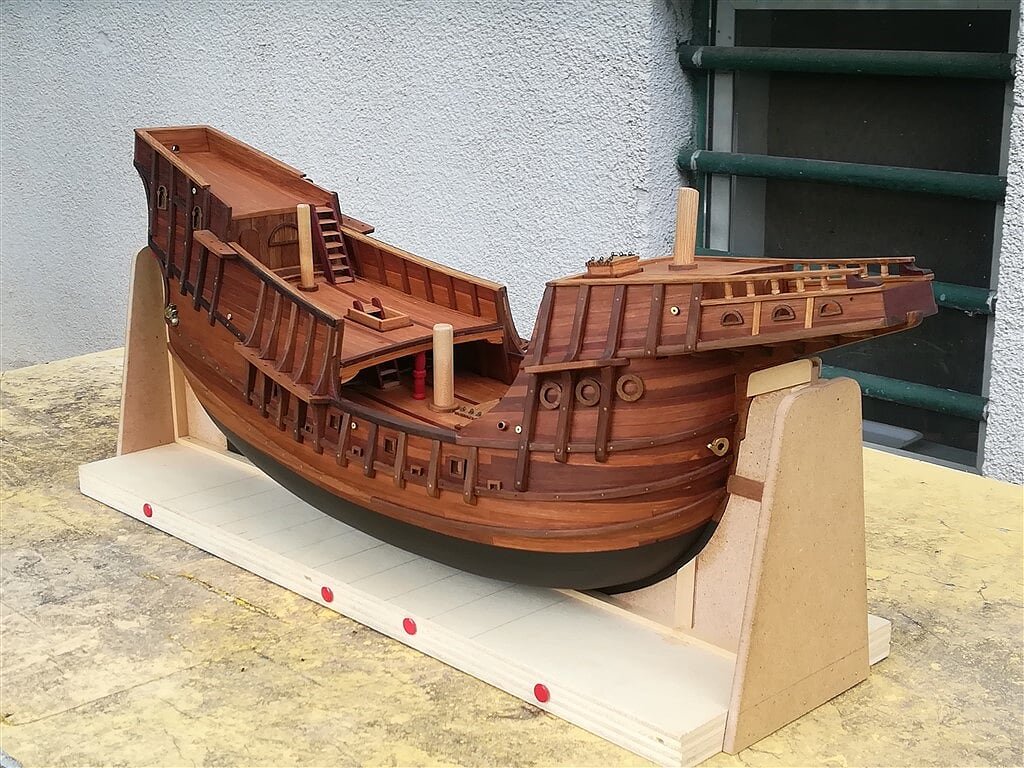
03 Ragusian Carrack/28072019/IMG_20190728_164107.jpg
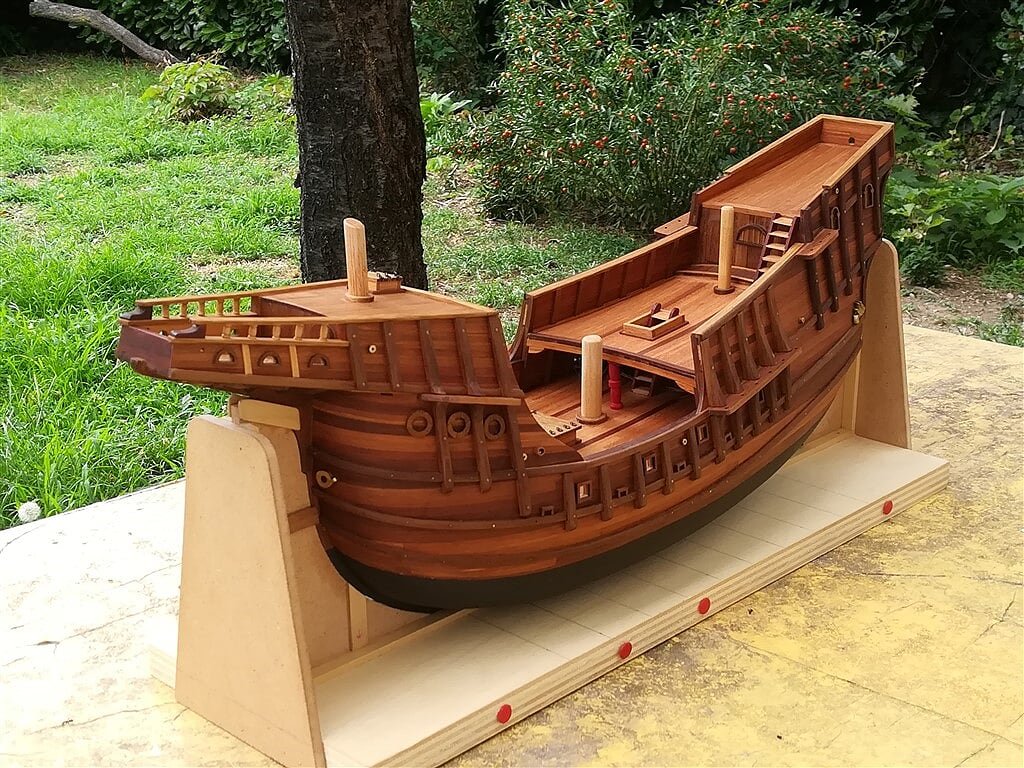
04 Ragusian Carrack/28072019/IMG_20190728_164111.jpg
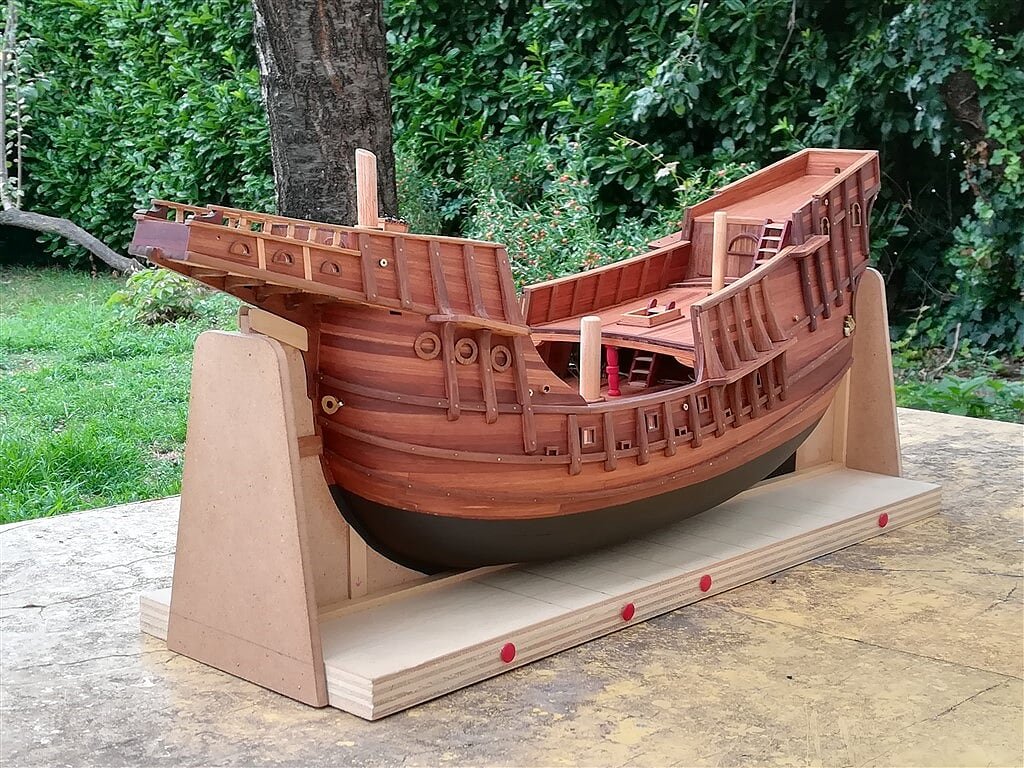
05 Ragusian Carrack/28072019/IMG_20190728_164118.jpg
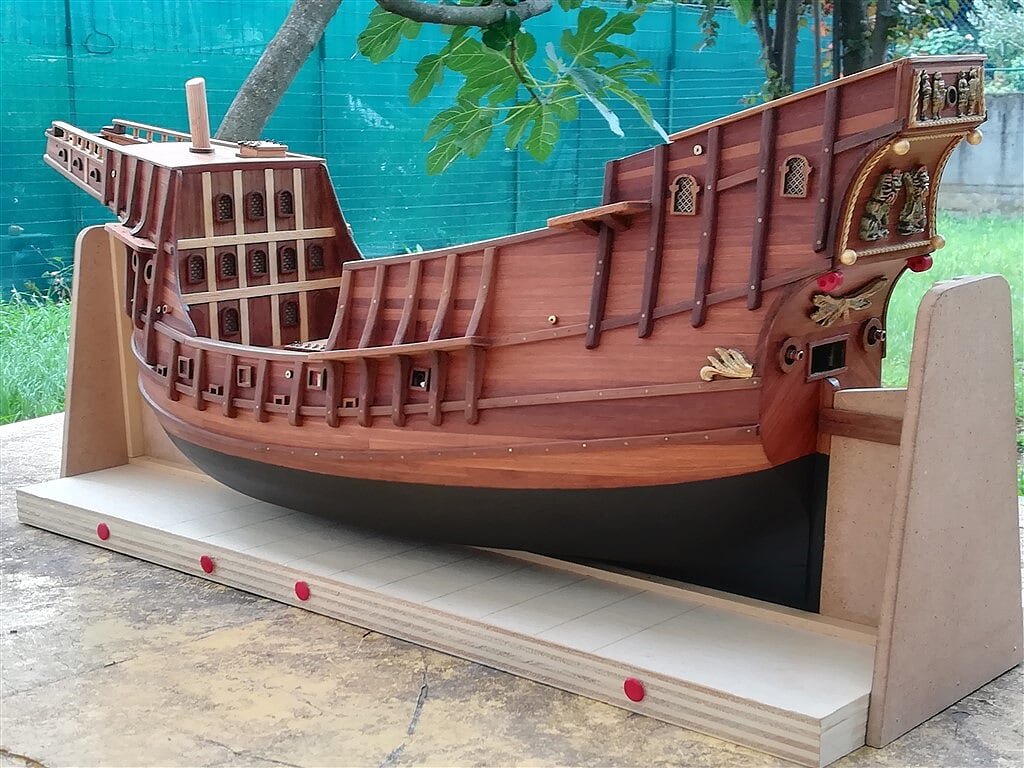
- paulsutcliffe, hexnut, J11 and 9 others
-
 12
12
-
Saturday 27 July 2019
Session dedicated to painting, after a idle week due to many extra modeling commitments.
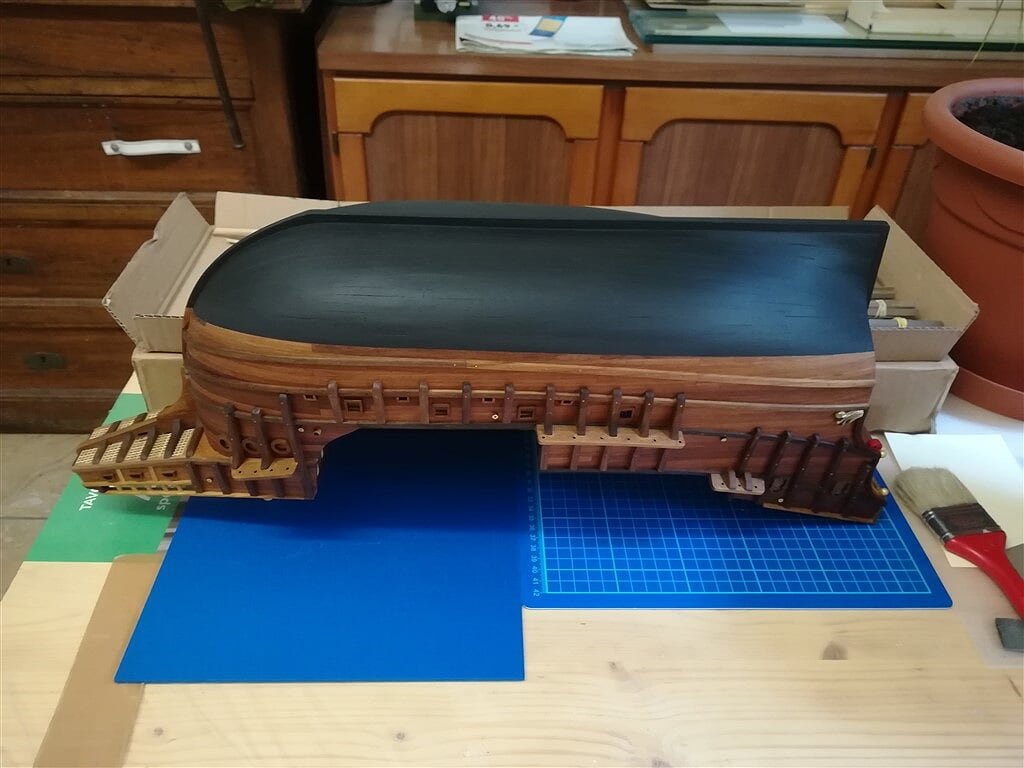
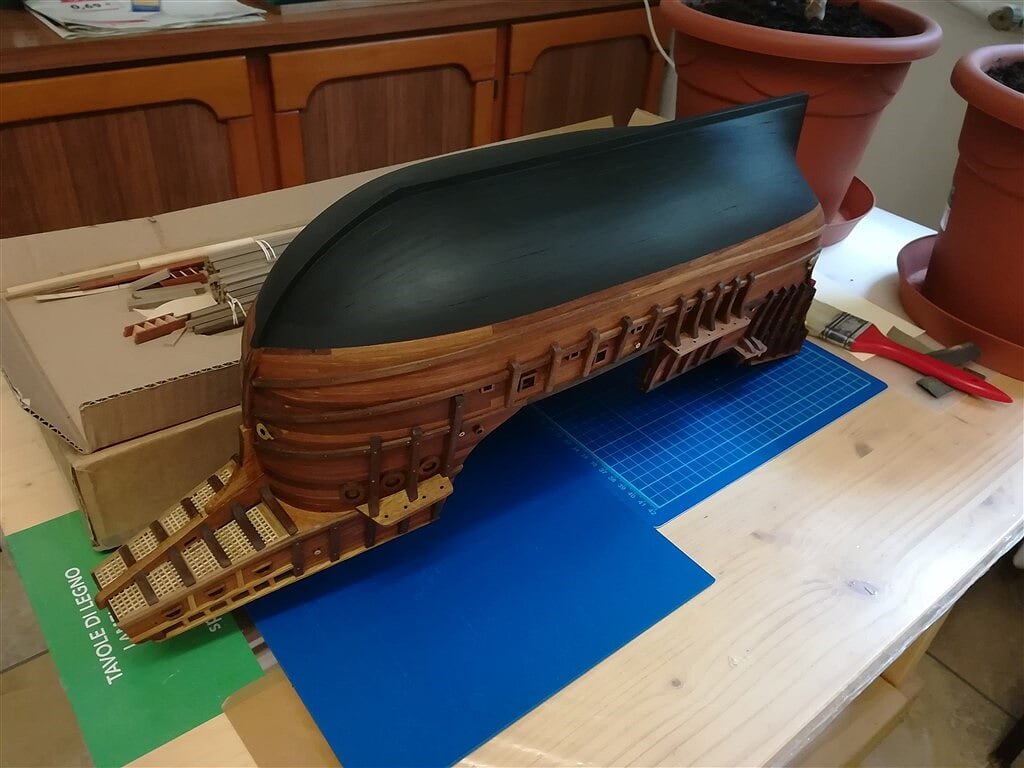
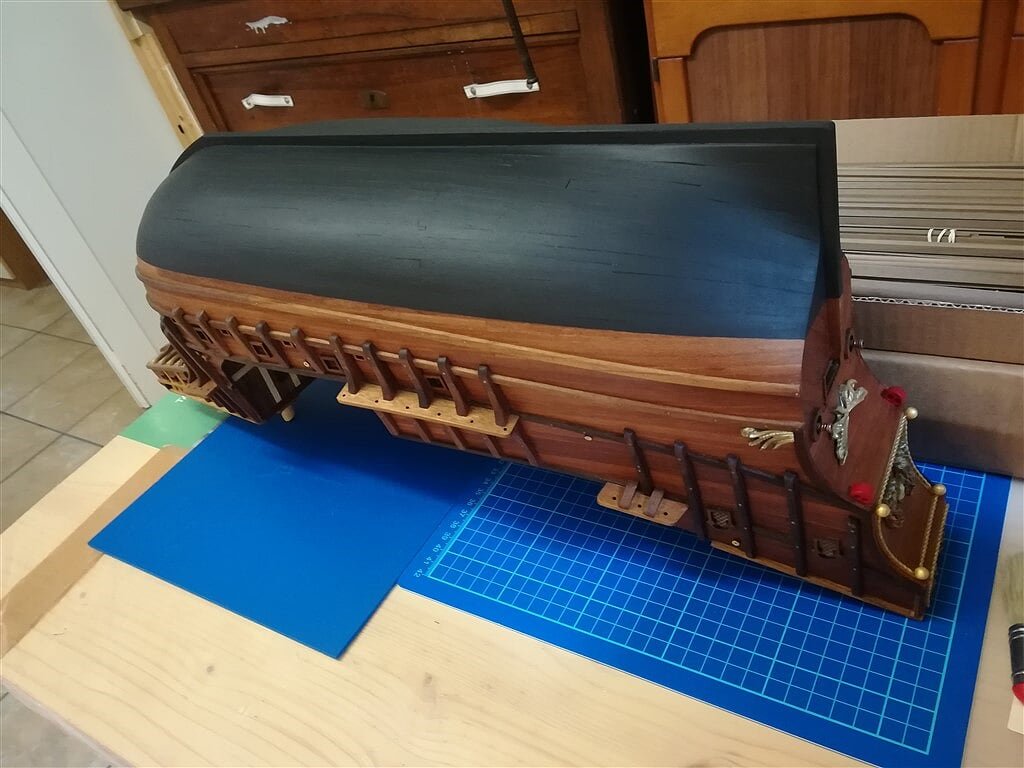
I finished coloring the tops and colored the carrack quickwork with a black paint.
The black colored area does not follow the waterline, as logic would like, but a line almost parallel to the lower wale. This is not an invention of mine but an element envisaged in this way in the project and faithfully reproduced in the photos of the finished model, images presented at the beginning of this log.
For its task I used my well tested technique by using a masking tape with the application, on the protection line, of a coat of matt paint. This before applying the final black color. With this method you generally get a perfect line, and so it was.
Now everything is drying upside down. . . .
Goodbye, Jack.01 Ragusian Carrack/27072019/IMG_20190727_160744.jpg
02 Ragusian Carrack/27072019/IMG_20190727_160751.jpg
03 Ragusian Carrack/27072019/IMG_20190727_160757.jpg
- GrandpaPhil, Elijah, J11 and 5 others
-
 8
8
-
Sunday, July 21st, 2019
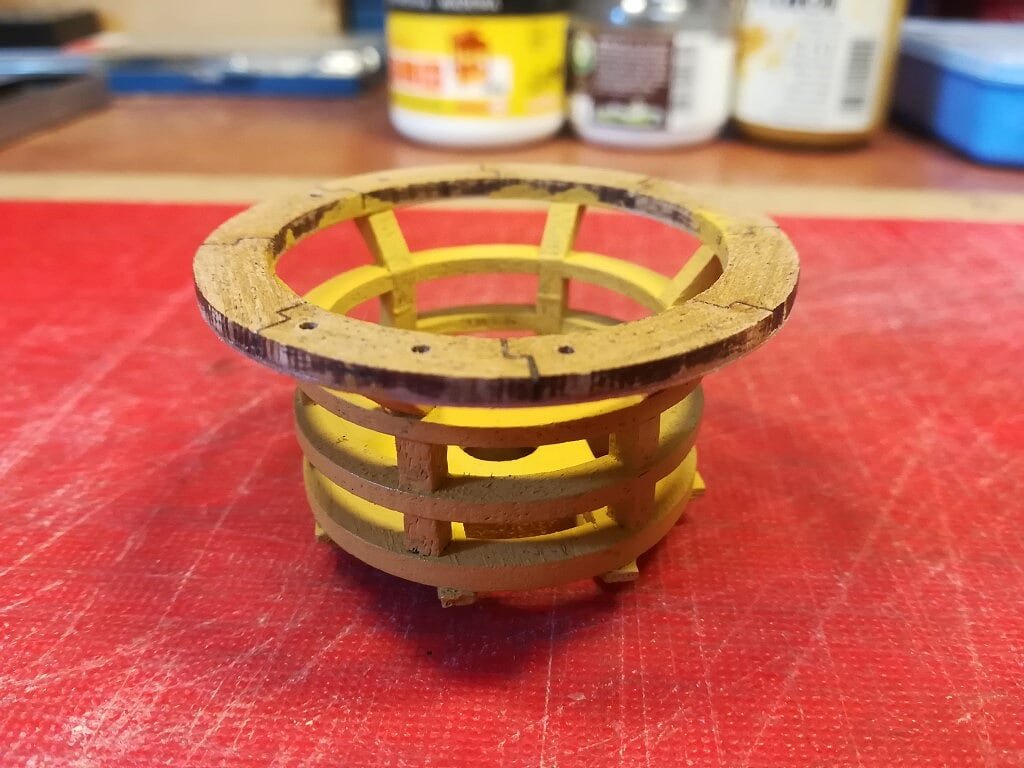
Here are the images of the work done on the main top and the fore top. After the mounting, yesterday I proceeded to apply a coat of acrylic paint just to highlight that there is a little finishing work to do . . . I will see. However it seems to me that everything is going well.
Cheers, Jack.The main top from different viewpoints . . .
01 Ragusian Carrack/20072019/IMG_20190720_171706.jpg
02 Ragusian Carrack/20072019/IMG_20190720_171713.jpg
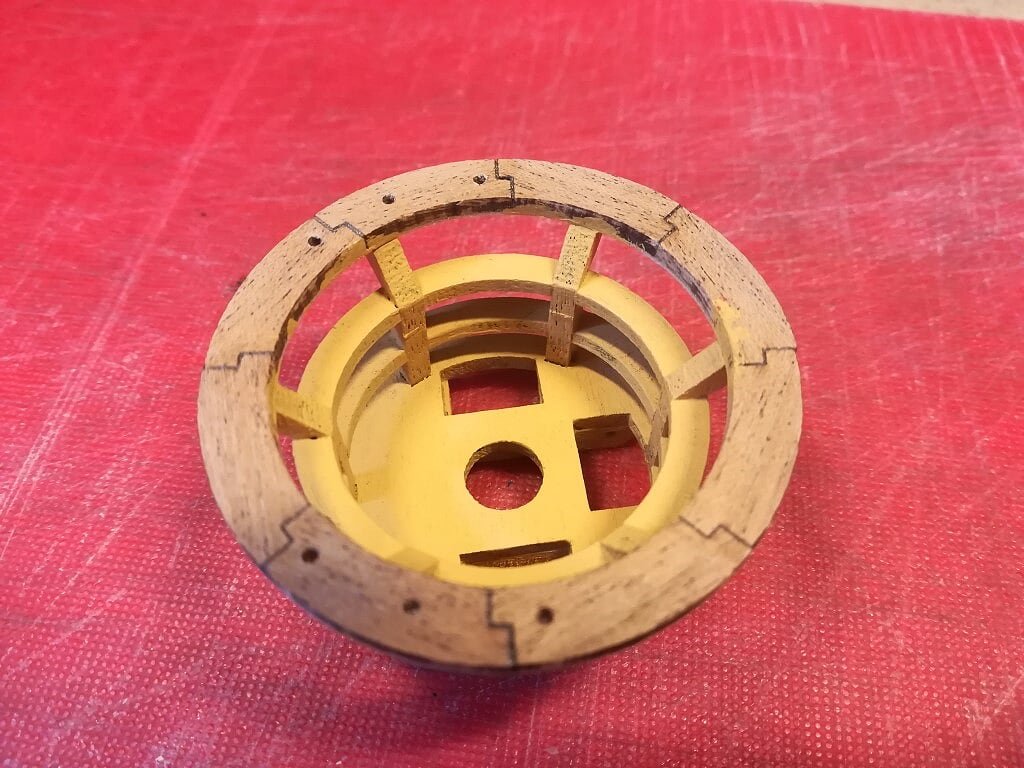
03 Ragusian Carrack/20072019/IMG_20190720_171802.jpg
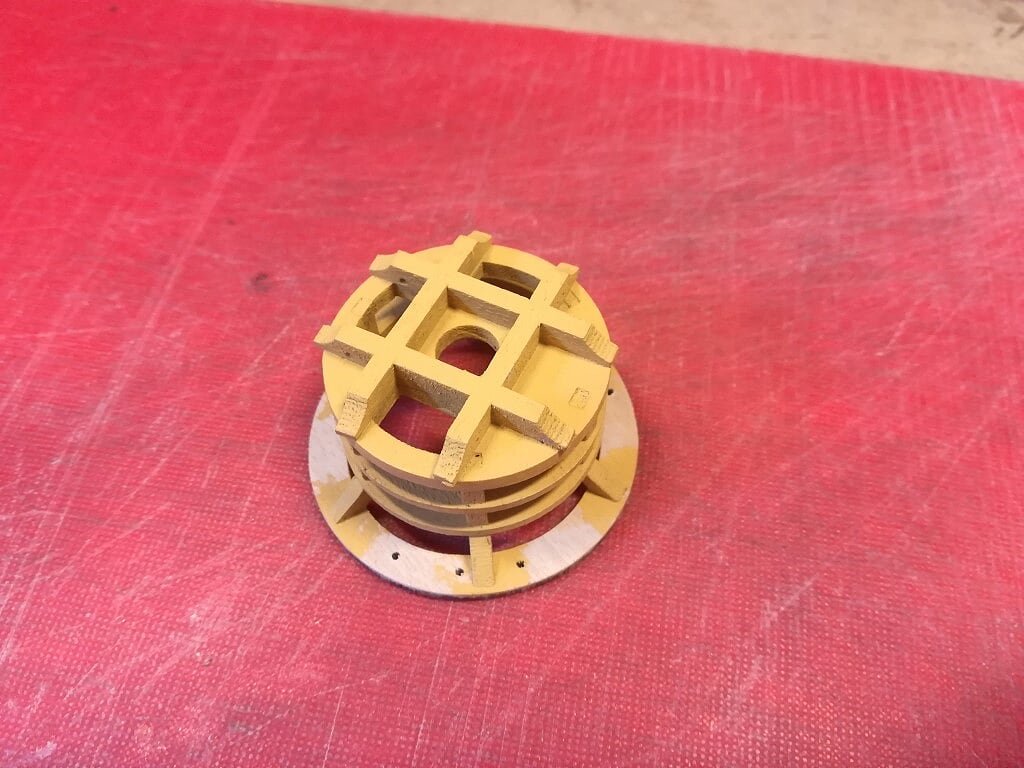
And the fore top, just few smaller the the other . . .
04 Ragusian Carrack/20072019/IMG_20190720_171726.jpg
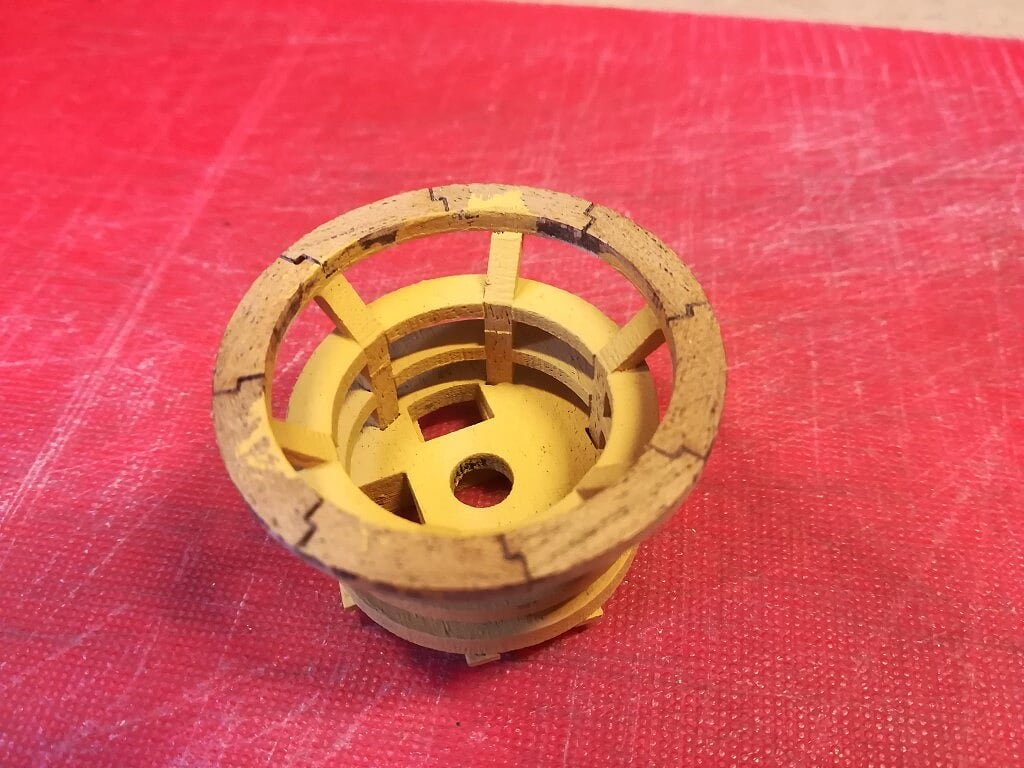
- J11, yvesvidal, GrandpaPhil and 4 others
-
 7
7


Ragusian Carrack by jack.aubrey - FINISHED - Marisstella - 1:59
in - Kit subjects built Up to and including 1500 AD
Posted
Yves, you are my best supporter, many many thanks for your appreciations. Jack.