


Jwvanost
-
Posts
25 -
Joined
-
Last visited
Recent Profile Visitors
338 profile views
.thumb.jpg.6d6ee4bdbfaac2c58ecc77e7b80ae374.jpg)
-
 Nirvana reacted to a post in a topic:
18th century Longboat by fnkershner (Floyd Kershner) - Model Shipways - 1:48
Nirvana reacted to a post in a topic:
18th century Longboat by fnkershner (Floyd Kershner) - Model Shipways - 1:48
-
Nirvana reacted to a post in a topic:
18th century Longboat by fnkershner (Floyd Kershner) - Model Shipways - 1:48
-
Kenneth Powell reacted to a post in a topic:
US Constellation 1798 by Jwvanost - Artesania Latina - Scale 1:85 - 2nd real wooden ship build
-

Question about shaping/sanding with files
Jwvanost replied to Jwvanost's topic in Modeling tools and Workshop Equipment
Wow those are super nice. That place has a lot of interesting stuff. It looks like they have super high quality #11 blades as well. As much as I go through them that would be a solid investment as well. Thanks for sharing. -
There is another one maybe too. Sinsor Valley or something similar? My russing spelling isn't good lol.
-
Tsetsarivich? spelling might be off. Not sure exact spelling?
-
jud reacted to a post in a topic:
Question about shaping/sanding with files
-
Question about shaping/sanding with files
Jwvanost replied to Jwvanost's topic in Modeling tools and Workshop Equipment
Wow that's pretty impressive. It doesn't look to awful complex to do either. THanks so much jud. -
Question about shaping/sanding with files
Jwvanost replied to Jwvanost's topic in Modeling tools and Workshop Equipment
Thanks Jud. I would be interested to hear what type of acid he uses. I can get Caustic Soda pretty easy at work but thats some pretty potent stuff. Not sure if that would be to aggresive or not. Let me know if you find out more, and thanks again. -
So I've found that I use my files as much if not more than my sand paper and sanding tools. I have decent quality files but it seems like they lose their bite very quickly. I keep them clean with a wire brush. So my question, is there a better way to clean/sharpen them? And who makes really good modeling files? Thanks!
-
It is also the little chocolate candy with peanut butter in it. And I'm a transplanted buckeye. Lived my first 32 years in a town called Trenton between Middletown and Hamilton. Can't forget my roots!
-
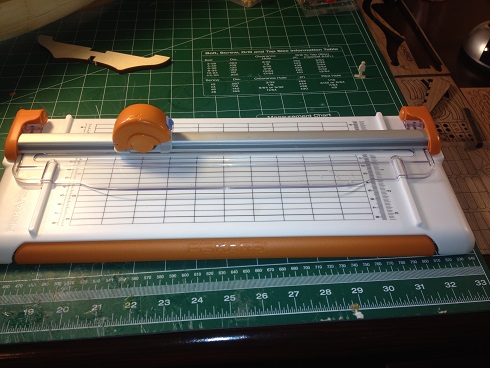
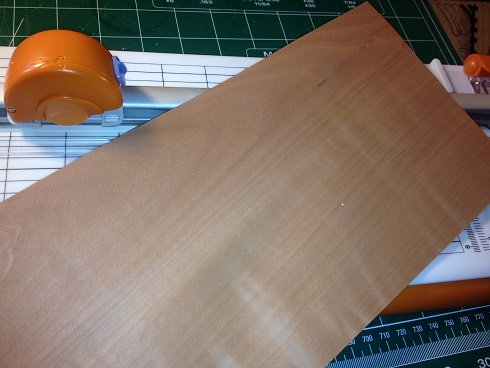
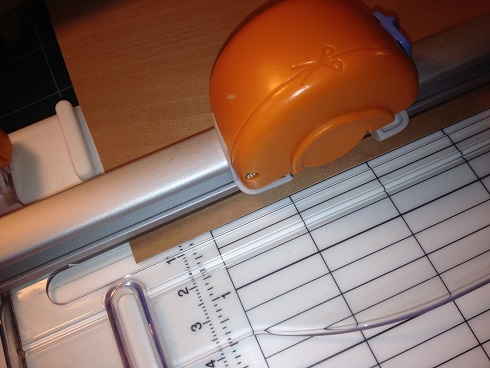
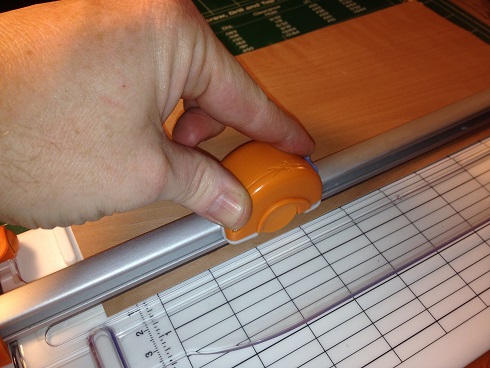
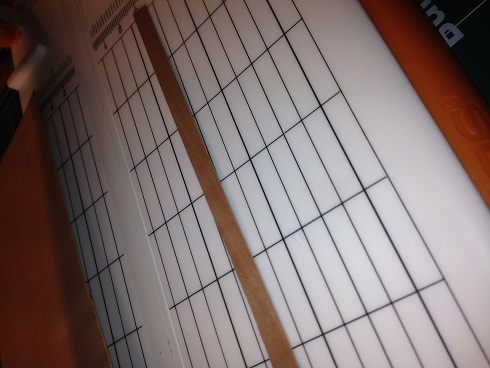
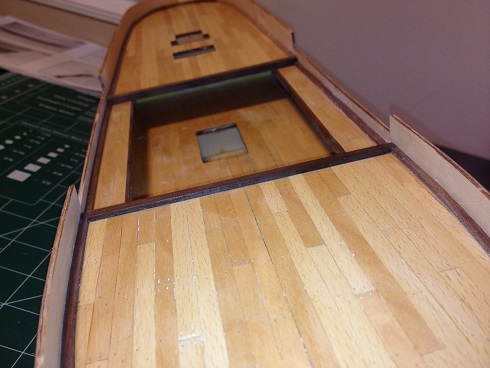
Thanks Michael. It's actually kindof ironic that you post that because I'm originally from SW Ohio between Cincy and Dayton. Small world. So as noted in my first post, I'm listing some of the pictures outlining my homemade plank making technique. This is a $20 paper cutter I got from michaels The next few pictures show some pear veneer that is .6mm thick As you can see I lay it under the cutting head and press it down at the width I want to cut and then Cut it. What I get is a straigh planked stripped right at the 6.5mm width I'm aim for. It does take a little time to get used to the cutting technique on it to keep it straight, and it's by no means as accurate as a top in saw like Byrnes. But if your budge is tight its not bad. You can get veneer in lots of diffent species of wood at woodcraft or rockler, etc. The biggest draw back is that you are limited in the length as this specific cutter only strips down pieces 12" long. I've also found I get a cleaner cut if I make 3-4 back and forth passes, it also lengthens the life of the blade. It's worked well for deck planking and I'm not really having any issues with the hull planking either. Let me know what you all think or if you have any questions.

-
Yeah I live in Seattle, also readily available here as well.
-
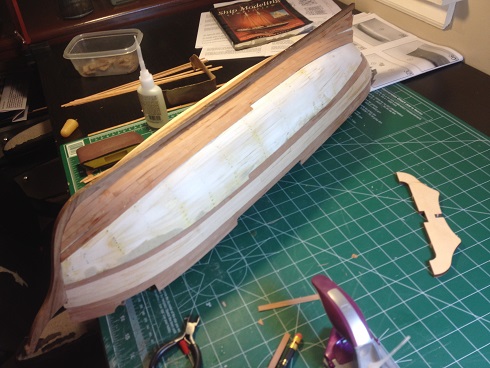
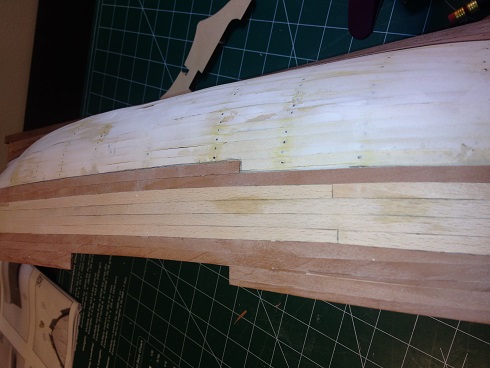
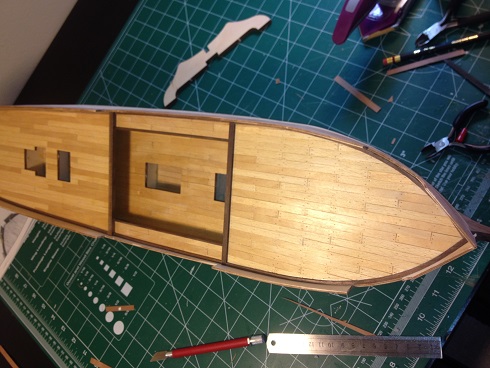
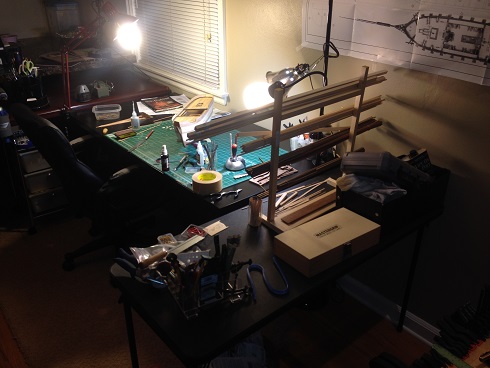
Ok, so here goes my first attempt at a build log. I'm hoping you all enjoy my posts and I will try and update it regularly. This is a bit late in the proccess as I have already gotten the first set of planks down and the deck planking is done and sealed. I am doing some kit bashing as noted in the title. I have read lots of negatives about this specific kits mostly related to the accuracy so rather than focus on getting it authentic I figured I would go for making it mine. My first changes to the stock kit were in the planking. I decided to buy some better wood than the Sapele that comes with the kit and got some Pear veneer. I stripped it down, and also made them a little bigger at 6.5mm instead of the 5mm that comes with the kit. I thought the wider strips looked a little better. For the lighter wood planking along the lower gundeck I went with Birch. I liked the color and its a pretty good wood to work with. I actually used an "odd" technique for cutting my strips. I will post pictures of this later if I get a chance. Below are the pictures of where I currently am on the boat, midway through the second layer planking. Any and all comments and tips are welcome and thanks for taking a look. Also a pic of my work bench.
-
Wow, definitely some twist going on. I'm still a novice myself (and I am planning on trying to attend the meeting on the 31st) 2 things come to mind from my experience with wood... 1. is severe warp in the keel. However that doesn't seem likely because with that much sway the keel would look like an S. 2. My thought is that the slots are severly miscut/missanded causing them not to sit level in the frame. I'm not sure what how the drawings for this kit are but if you have a good solid side view you may be able to adjust these fairly simple. I would use some blue tape or pins to hold them all in place until you can get them to dry. Shim them with some planking scraps maybe if the slots are extra deep. Hopefully someone else can give you some better insite on this. As far as the sanding you noted that you did. I have found a good set of files is priceless in the tight spots. A year ago I would have thought files were a waste of my money. Now, I can't have enough different shapes and sizes. Good luck.
-
SaturnV reacted to a post in a topic:
Possibility of doing this pob???
-
Ok that makes sense. So basically when i cut the initial bulkheads I'll want to go to the widest spot on each of the two lines. Then I'll have the wood need to bevel down. Thanks guys. Much obliged! Johnny
-
Ok. I do see that now in the download area. On the bulkhead drawings there are some that have a black and red line on the drawing. What are thoe two lines representing?
-
I was considering doing this as a pob build. I was curious what others thought of this and if anyone has done it? Thanks. Johnny