Dognut
-
Posts
54 -
Joined
-
Last visited
Content Type
Profiles
Forums
Gallery
Events
Everything posted by Dognut
-
 Hi again, Lawrence - no problem with your photo (thanks!!), it's related to the topic anyway. I also appreciate the input. You've touched on a problem which Nenad also mentioned - aligning the planks with the keel and stem pieces. The more I look into this, the more I'm thinking that the kit has it 'wrong way around'. Surely it would have been easier (and technically more correct) to fit the stem, false keel and stern post FIRST, and then lay on the planking. My way of thinking is that this would give you something to align the planks to. The instructions cover their butt with a simple sentence - "fit the hull planks using glue and pins, ensuring that the plank ends align with the pieces to be added later" Actually, the more I re-read this, the more I realise that this is not the way to do it. Surely when the CS was built, the keel, stern, etc was laid first, and then the hull was planked? Wasn't around then, but I've got a sneaking feeling that it was done that way (more or less?) So - the problem grows. I'm starting to look at how the keel and stem will fit with what I've already done, and see if I can make that work. If not, some more dunking may be called for to loosen the planks further. Fun in my future... On a happier note - I came across this photo the other day, but unfortunately before I could get more details, our internet link froze up. At least I got some "eye candy" for the CS Fleet. Ooops - no go, file too big. I'll get our wizards here to have a go at it. In the meantime, here's another.
- 70 replies
-
- 1
-

-
- cutty sark
- constructo
- (and 1 more)
-
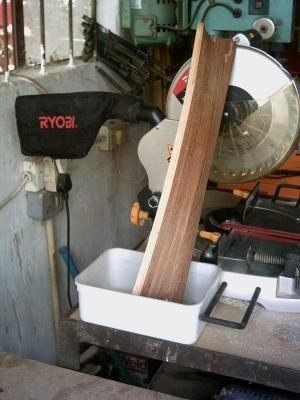
Hi Gents; Spence - I think the "instructions" you refer to are the ones we have to buy seperately: "Shipbuilding for dummies" author A.N. Idiot, and the multi-volume "What Not to do on your build". Only problem with the last one is the section on how to resolve the problems - my copy is suspiciously blank.... I used white wood glue, commonly available down here - made by Henkel. The bit that worried me was their slogan on the bottle "Bonds stronger than wood". Was making enquiries about the Isopropyl-Alchohol, and was just getting some odd looks. Then a carpenter suggested the "water-dunk" method, which worked very well. I've also used this (once) on my cabinet build, when i discovered that one of my doors had been glued wrong way around, so the rabbetts didn't line up. Worked very well! After the water soak - Nenad, it would appear that I didn't drown her, although she is sitting having a good sulk there on the bench.. Glue loosened nicely, and I was able to scrape out all the resulting "goo". The bow planks also popped open, so I may have access in there to repair the damage I did with the first attempt to correct this (some time back, using the Dremel) Apologies for the focus - I'm surprised I was even able to get this.
-
Hey Brian, Thanks for the detailed descriptions - really helps to follow along with. One small comment you made resulted in a major "lightbulb" moment for me. Although I'm nowhere near it on my build, I want to copper the bottom, but my kit doesn't provide this. I was wondering what to substitute with, as hobby supplies here in SA (unless you are into RC aircraft) is difficult to come by. Your comment about the copper sheet maybe being brass, gave me an idea. Get hold of brass shimstock, and try that. Thanks man!! Keep posting - you are being watched (with interest)
-
Hi Nenad, I did smile at your 'elephant stern' reference - but yours can be corrected with a lot of use of Mr Dremel's toys, er, tools. I still have to do some major reconstruction to correct my bow. But, reconstruction seems to be the normal thing here in the CS Fleet. Ah well, what fun...(with the Admiral Of The Fleet's comment - whats the fascination with that little wooden boat of yours - ringing in my ears)
- 4,145 replies
-
- 1
-
-
- cutty sark
- tehnodidakta
- (and 1 more)
-
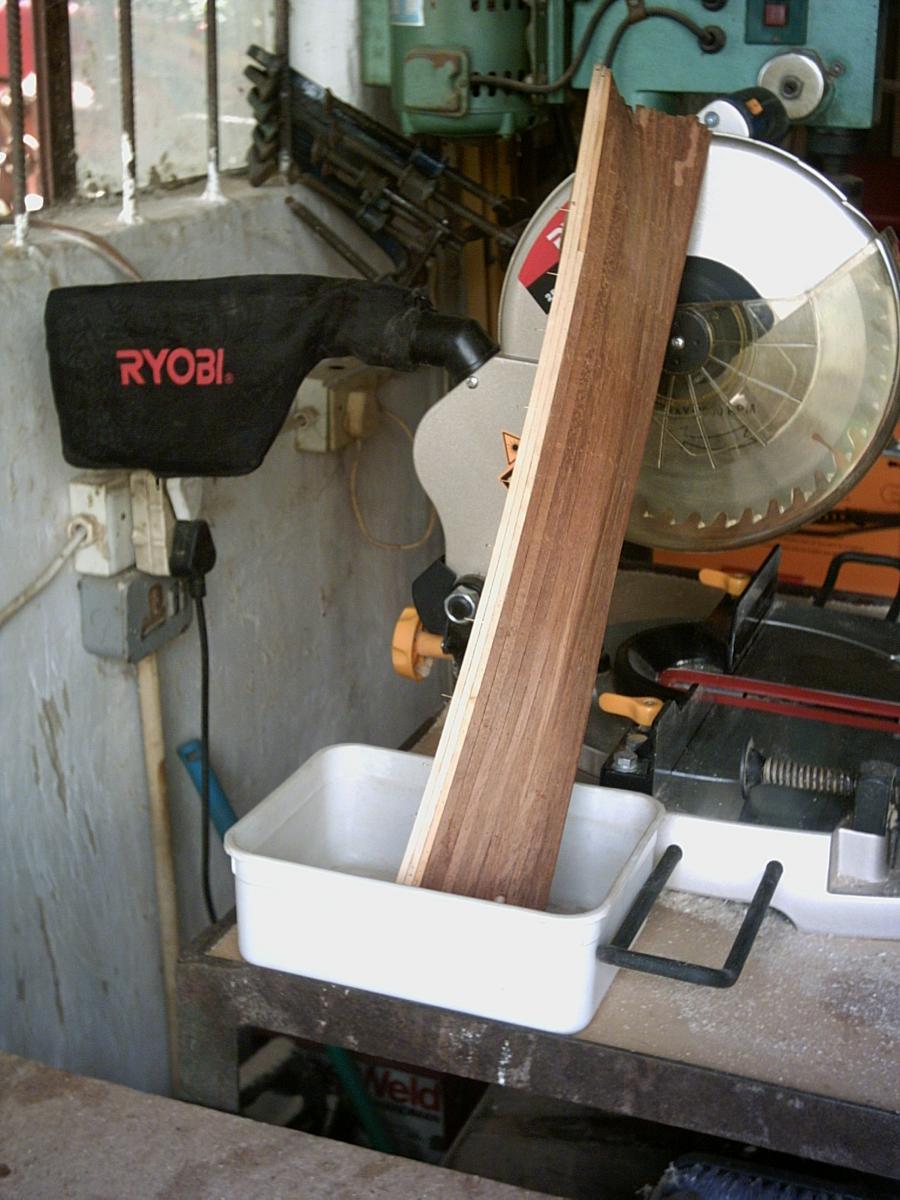
Hi 'CS Fleet' Luckily I've been able to keep the admiralty happy - and I have to be extra careful. You may have seen my reference to my "Admiral of the Fleet" - this title given to my mom, who is now staying with me after my dad passed away last year. As the family matriarch, she gets the title "Admiral of the Fleet". She's not too sure about it though... My cabinet building has been restricted to the day hours (over weekends) as I will NOT operate any tool with spinning blades and big teeth in poor light conditions. I'm very attached to my fingers and hands... So, on the occasional evening, when I'm not too wiped from work, I spend a bit of time on the build. First up was to get the glue loose on the bow, so I could start re-working it. Did this by standing her on her bow in a dish of water, and then it struck me just how funny this looked Not covered anywhere in the instructions
- 70 replies
-
- 1
-
-
- cutty sark
- constructo
- (and 1 more)
-
Hi Bob, thanks for the good wishes. That project is actually going quite well so far - maybe has something to do with the 1:1 scale. I actually got some pictures of the start of my Cutty's "nose job" this weekend.... and then forgot to bring the camera to the office to download photos. Hopefully I'll remember it tomorrow, so I can show that there is some progress, at least. Nenad - I know what you mean about these projects - something fairly simple seems to take on a life of it's own, and next thing you know, you have a major task on your hands. But, as we all have learnt - have to keep the admiralty happy, so there's not too much wondering "whats the fascination with that little wooden boat?" Very, very unprintable thoughts on that comment..
-
Hi "CS Fleet Council" Just checking in - unfortunately no progress, although I get very guilty every time I go into my workshop/shipyard, and see my poor Cutty sitting there on her box, wondering what's going on... Well, the Admiral of the Fleet decided that the kitchen cabinets needed upgrading...and I hate the way companies down here use chipboard (particle board) for cabinet frames. In an ungaurded moment I mentioned that I could do a better job, using the savings to buy better quality materials, etc - and next thing I know - I'm doing kitchen cabinets. Can't really complain though, got a brand new toy out of the deal. Was walking around our local Makro/Walmart, and saw the 'manager's special' - a 254mm (10in?) combination Mitre saw for around R1000 ($100), normal price nearly double that. So - a nice addition to the workshop - just not useable for shipbuildng though...
- 70 replies
-
- 1
-
-
- cutty sark
- constructo
- (and 1 more)
-
Hi again Rob, Once again thanks for your detailed posts - and Nenad for the detailed reply. It struck me that, one "advantage" in my build being so far behind, is that I can look at all the logs, and decide - that worked, that didn't, don't do that, don't even think of this, etc. Now to just get some shipyard time...
-
Hi again to the "CS Fleet" (Nenad, rfolsom, SpencerC), Guys, thanks for all the input and ideas. Would be a great help if I checked my own build log occasionally... Nenad - thanks for that diagram. I was thinking along those lines, so you've just added to my thoughts. Rob - thanks for the photos. I've also been thinking I should be applying woodworking techniques, and this just goes to show that its the way to go. Spence - "putty" is certainly in my future. I also tried (a while ago), just to see how it worked, by using a carpenter's trick: take the sawdust from your sanding efforts, mix with a bit of dilute wood glue, apply to area to be filled in. So maybe a combination of that, and putty. I have already got the bow section loose (CS had a bow-bath), and in the process of scraping out the soft goo/glue, one of the planks snapped off at the first rib. Hmmmmm (this seems to be contagious in this fleet) then started thinking that it would maybe be easier, especially the lower section where my bow started really bulging (Didn't think I could get away with displaying a model with a bulbous bow-foot many years ahead of it's time). Any resulting joints will be covered with the coppering I hope to do (although not part of this kit). But then I also thought - surely on the real ship there are joints anyway - unlikely they would have used planks 980ft long? So I'm not going to get too stressed about plank joins - depending of course, if the CS Fleet council agrees Lastly - Spence, thanks for the tip with the camera. I've already tried this (zooming in instead of getting close and trying to focus) and that shows promise. Still too 'spolit' from my Olympus SLR. Anyway, just got to sort out the lighting issue (or get the inboard flash to work), so photos will follow soon - and then I can progress some more. End of book!
-
Spence - looking good. the left side will be easier as you have the "method" now.
-
Nenad, a quote from John Lennon come to mind: " Life is what happens to you while you're making other plans" I know about work frustrations. Spent the WHOLE morning trying to make my 6-monthly company tax reconciliation balance. Re-checked certificates many times. Only to discover that the program wasn't updating properly...grrrr. All my work mates were staying far away from this growling rottweiler in the finance office.. Hope the home-front situation has improved. Not nice when these things happen.
-
Hi Spencer, second the comment from Rob - good work. Just a little nag - I know it's a bit of a chore, but if you can, maybe, perhaps, possibly post a bit more often? the smal detail steps are what makes our ship.. a heartfelt ASSEBLIEF!! (Afrikaans with emphasis - meaning pleeeeese!)
-
Hi Rob, Nice work on those deadeyes. Makes me think... Thinking... How am I gonna do this on my scale? Sniff - I'm going back to my shipyard...
-
Hi Spence, Maybe I'm being a bit picky, but I was really not happy with the alignment. Unfortunately the camera (digital piece of c@#p), doesn't allow me to get too close, so I can show the problem in it's reality. I'm a bit old school with photos, as I learnt on my 35mm film Olympus SLR (still have it). Anyway, to keep on.. (and watching yours and the others with keen interest)
-
Hi Spence- Your planking alignment with the front stem looks great - and is probably what's intended in the kit. As I've said, in mine, the alignment was nowhere near as close, so I need some major re-work. But, that's how you learn. Great posts - please keep doing so. The SA build of the CS is now very firmly in last place...
-
Hi Rob, I agree with Popeye - super work. Also want to compliment you on your detailed log, and I admire you for posting the blunders as well as successes - it's a huge help to those of us who follow (very slowly) behind..
-
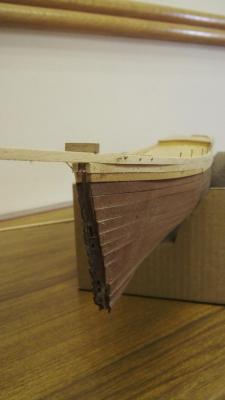
Hi Spence - good point there. However - this picture was taken after I'd done some corrections. If the stem was then placed in the middle, there would have been enough room on either side of it for another stem (therefore 3 times thickness). Taking a cue from the actual ship, I realised that this was 'rather wrong'. Got me thinking - how was the actual ship built? keel and stem etc laid first, and then planked (not the other way around). So I thought that if the stem is in place, you have something to align the planks with - unless I'm wrong, the planks should be flush, not proud of the stem? Let me know what you think.

-
Hi Rob, great work so far. But this now leaves me with a problem with my build - I'm behind you and Nenad: I don't know whether to admire you guys, and try to do similar work on my build (my scale is the smaller at 1:115), or to hate you guys, and still try to do similar work on my build, or to just read your logs, give a lop-sided grin, and still try to do similar work my head spinneth...
-
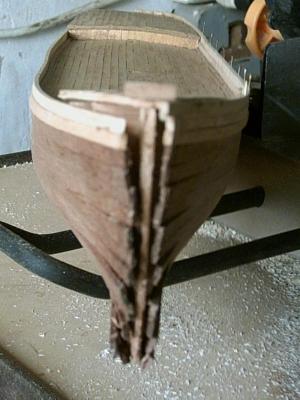
Hi SpenceC What's wrong with my bow.....(Hysterical giggle) - How long have you got? Seriously though: I very carefully follwed the kit instructions, and one step involved gluing a stem reinforcing strip on either side of the false keel, at the bow end. Then, without thinking things through too carefully (I was still trusting the instructions at this point) I then happily (stupidly/idiotically) proceeded with the hull planking. It was only after I had almost completed the planking, that I decided to look how the bow stem piece would fit - and that's when the horror of what I had done hit home. The width at the bow was 3-4 times the thickness of the stem piece. Looking at the bow from the front, I realised that, rather than the clean 'knife' bow that clippers were known for, I had something that would probably have been at home on an icebreaker. Instead of a nice, clean taper to the stem, I had a wide, flared gap. Photo below shows the bow after I had tried, with the help of one of Mr Dremel's tools, to try and correct the mess. Have a look at the bottom - that will give you some idea of my problem, but it was a lot worse. To try and loosen the glue had not occurred to me at that point - this was several years ago, long before I found MSW. I was following another ship modelling forum, but somehow the members there were a bit offputting about "another Cutty Sark". Anyway, I have re-started work, and spent a pleasant evening on the weekend scraping out all the softened glue. Photos to follow, as soon as I can organise some better (camera friendly) lighting.
-
Hmmm - little wonder our builds take so long. we really sweat the little stuff...
-
Great tip - thanks! Glad I saw this before I followed the instructions in the kit which suggests using CA
-
Hey hey, weekend's here! I've been stressing about the bow - but mainly how to get the glue loose. The glue I used, proudly proclaims "for a bond stronger than wood" Not so great when you've made major boo-boo. How to make it let go. MSW research turned up Isopropyl alcohol, so I started looking around here for some. Got some very strange looks. A chance remark here at work, led to the solution from our maintenance guy - who's a cabinetmaker by trade. "soak it in water - that will soften it so you can scrape it out and re-do the work" Ah. Guess what's happening this weekend. Very early launch of my Cutty. (She's gonna get wet) Pictures to follow!
-
Nenad, Don't feel bad. Look at what I did to my poor Cutty - and I have In#^str*!#ction$ ! (Instructions said as a bad-word) Luckily, we have MSW - a problem shared is a problem gone!
- 4,145 replies
-
- 1
-
-
- cutty sark
- tehnodidakta
- (and 1 more)
-
Hi Nenad, Unfortunately, disasters do happen. My remedy for this is to go into the garden, AND PULL OUT SOME WEEDS. Really, really pull them out. Make lots of cave-man type noises while doing this. However, this is where my dog-pack decides that it's better to watch this from a distance - a very safe distance (like from inside the house). When done - you feel much better. The problem is still there, but now you've taken out the aggro on some weeds - and hopefully got some points with the Admiral... None of us smile at your problem - since we will have problems ourselves...(amazing how the weeds have disappeared in the garden)
- 4,145 replies
-
- 2
-
-
- cutty sark
- tehnodidakta
- (and 1 more)
-
At long last, I've made a promise to myself: I'm going to move my CS from the office, back to the workshop/shipyard, and at long last get my build going again. I've set up some bench space - with good lights, and now that the warmer weather is back, good reason to spend some time with glue and wood rather than spreadsheets and figures. Grand move is scheduled for Friday afternoon, so will have just enough time to arrange transport, rent-a-crowd, motorcade and honour-guard. However, I get the nagging feeling that I'm forgetting something.. Camera - check. Batteries - check. Still got this feeling though...