patrickmil
-
Posts
1,171 -
Joined
-
Last visited
Content Type
Profiles
Forums
Gallery
Events
Everything posted by patrickmil
-
 Thankfully that hull plating is not present on the plastic kit hull. I wonder if it's just an artifact from their CAD modeling.
- 52 replies
-
- 1
-

-
- Curtis Wilbur
- I Love Kit
- (and 1 more)
-
I've been seeing a lot of pictures for this really big set and other smaller sets from HS Models. The detail looks exquisite but some of it also seems a bit egregious. This is only an assumption, but looking at the pictures, the dark blue details would be resin? And if that really is the case, some of the molded on detail on the bulkheads, such as little thin wires and other things, might be a touch too much to sand off and replace in resin. Looks like they would also have you remove the VLS systems fore and aft. At some point, they might just look at issuing an entire kit, LOL. The extra detail will be lovely, but some of this might be a little over the top, IMHO.
- 52 replies
-
- 1
-
-
- Curtis Wilbur
- I Love Kit
- (and 1 more)
-
Thank you! Apparently there are quite a few upgrades coming out for this kit now. When it's all said and done, I'm willing to bet the cost of all of the upgrades will far exceed the cost of the kit. That said, the upgrades appear to be very detailed.
- 52 replies
-
- 2
-
-
- Curtis Wilbur
- I Love Kit
- (and 1 more)
-
Hi all! Since it's only once every four years, figured I might as well post an update on February 29th. Nothing really needs discussed that the images can't show off themselves. Thanks for looking!


- 52 replies
-
- 10
-
-

-
- Curtis Wilbur
- I Love Kit
- (and 1 more)
-
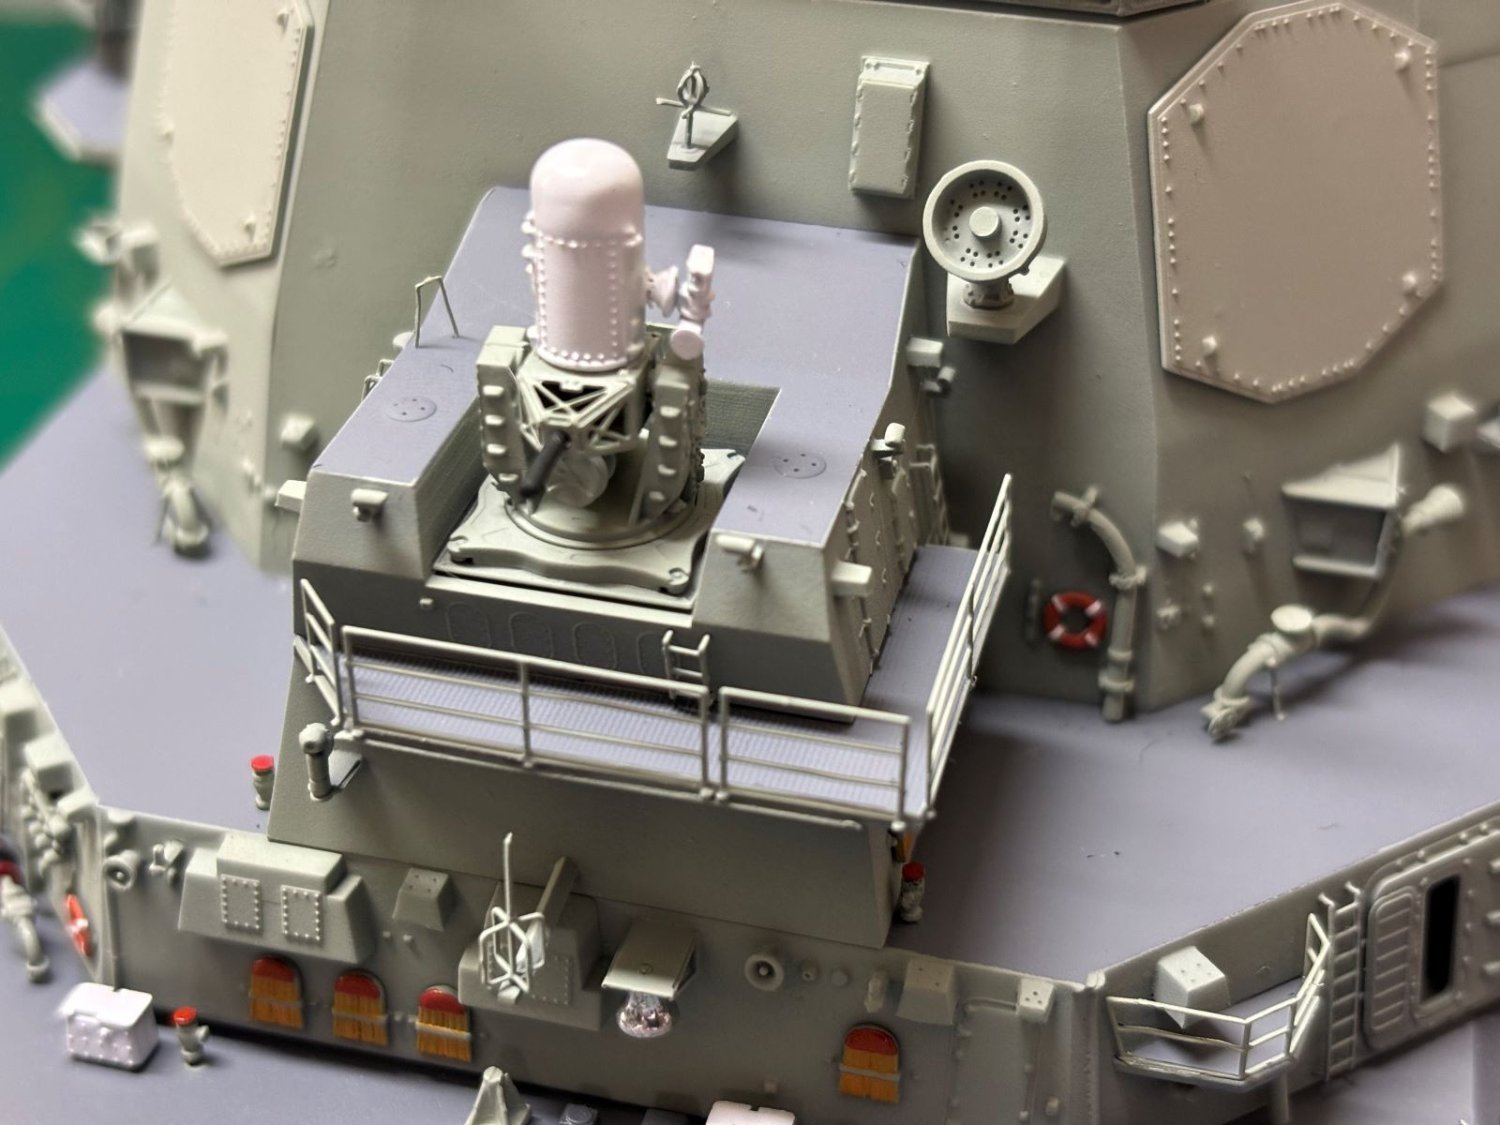
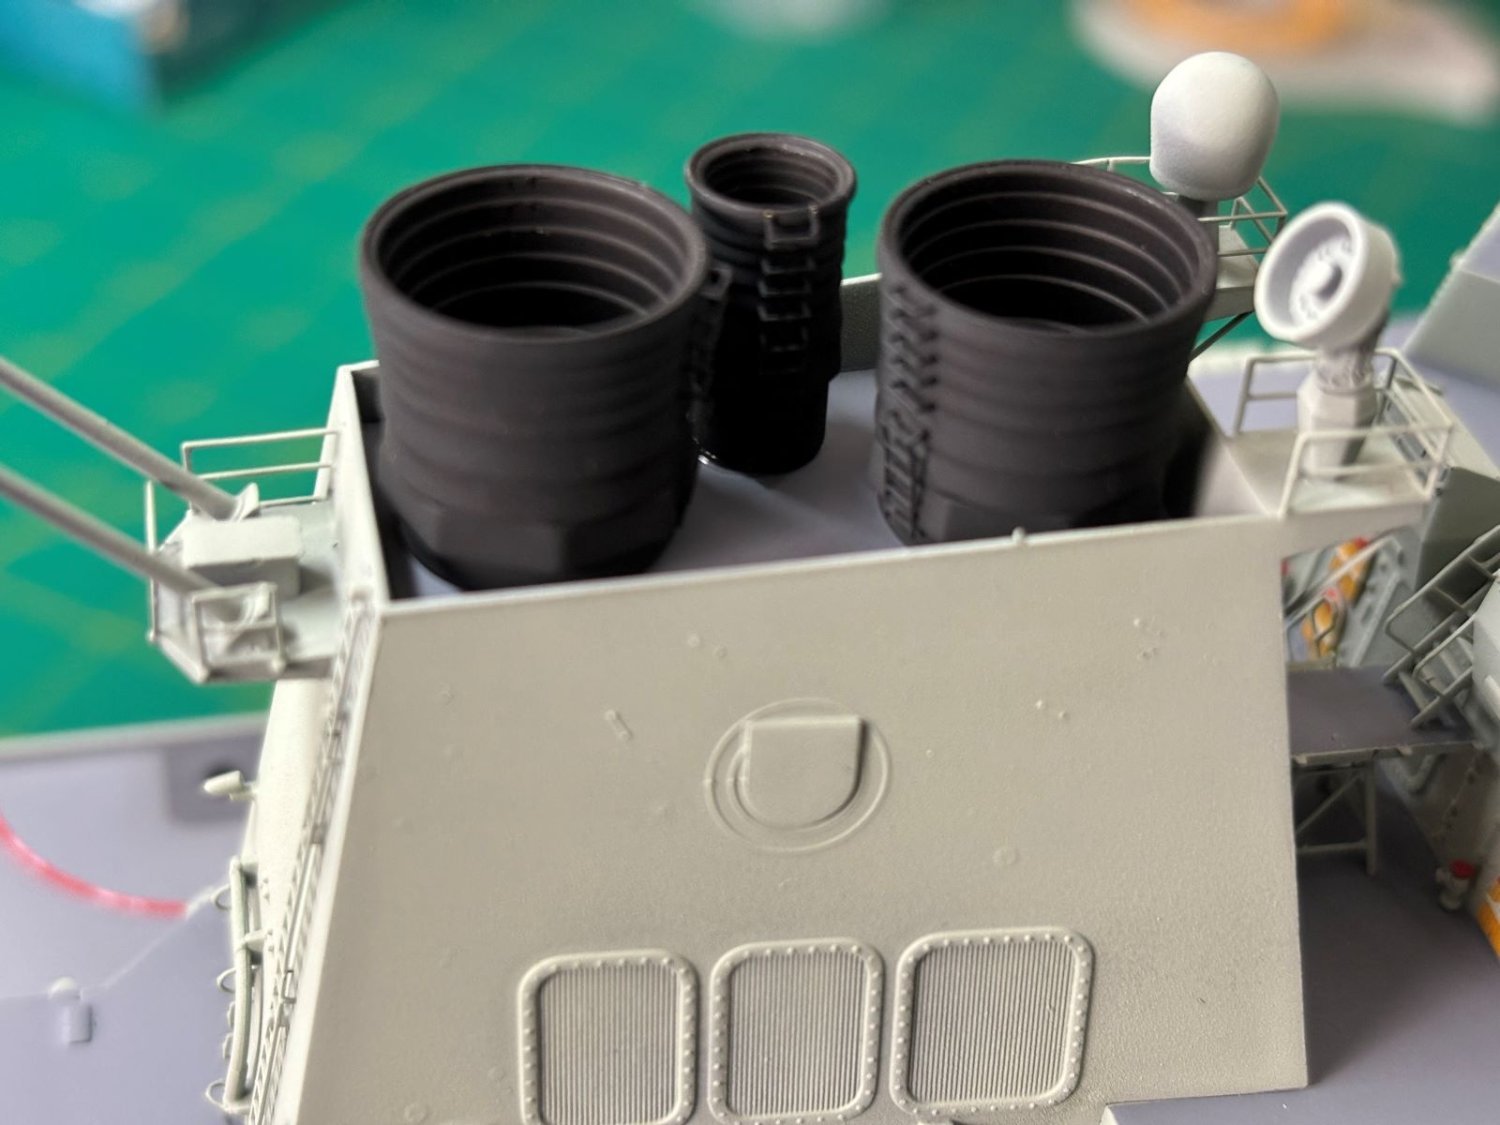
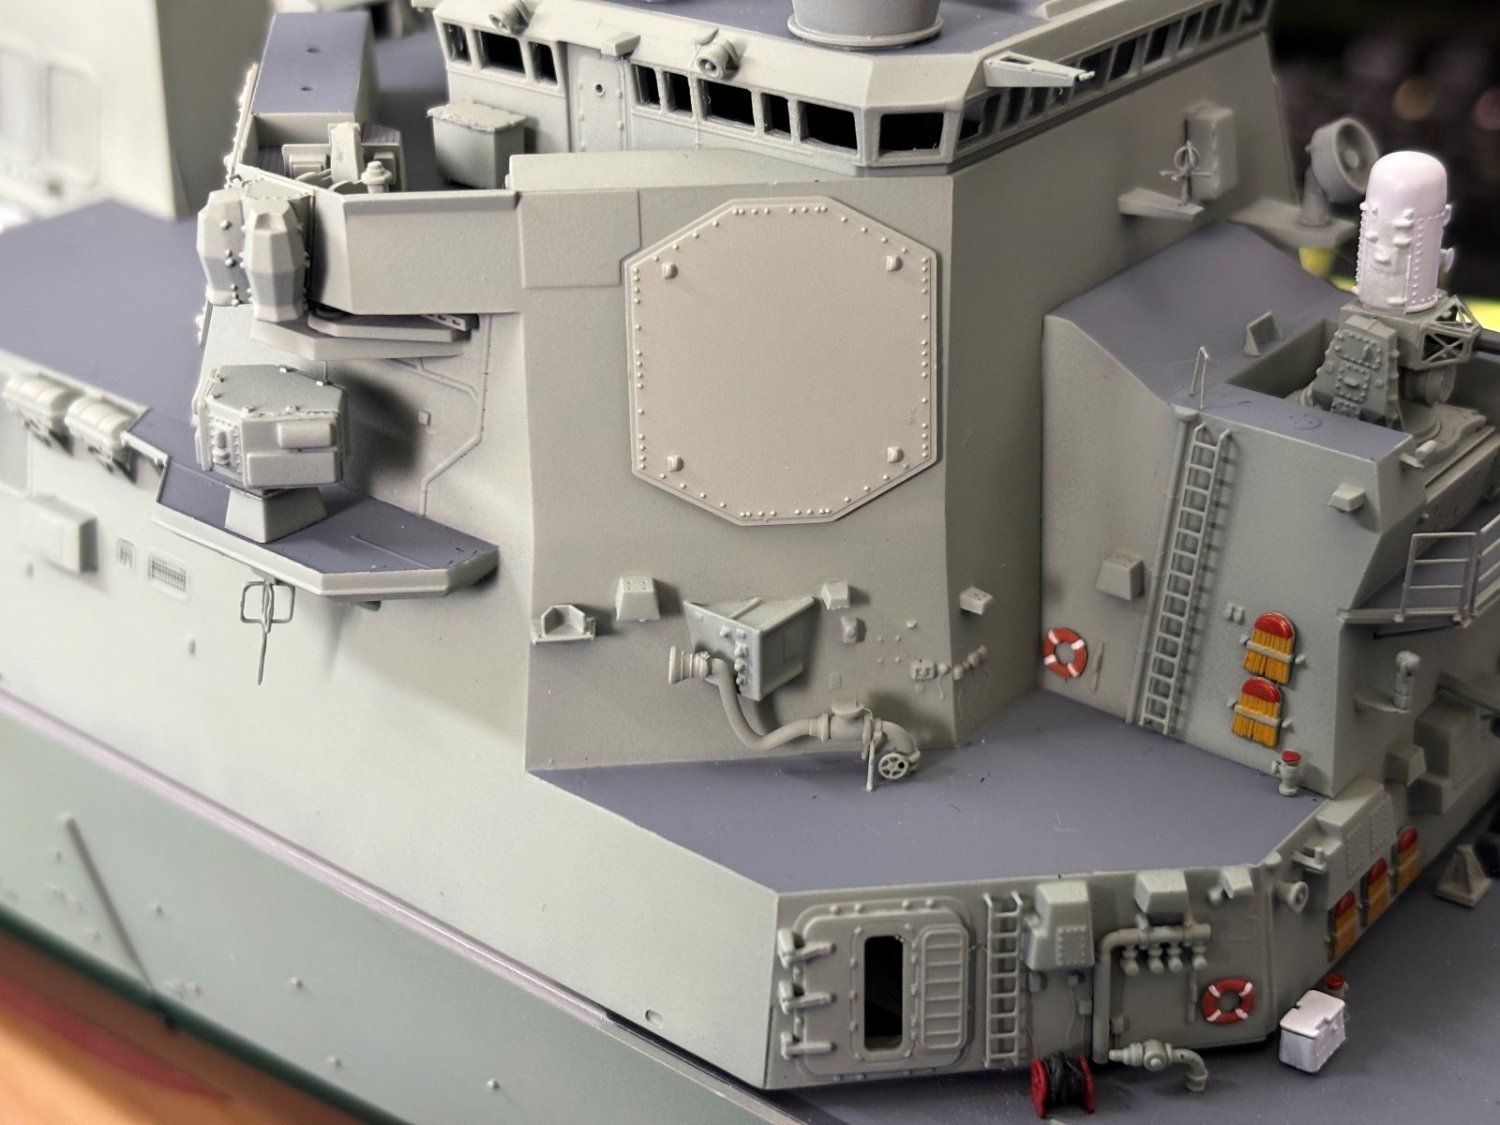
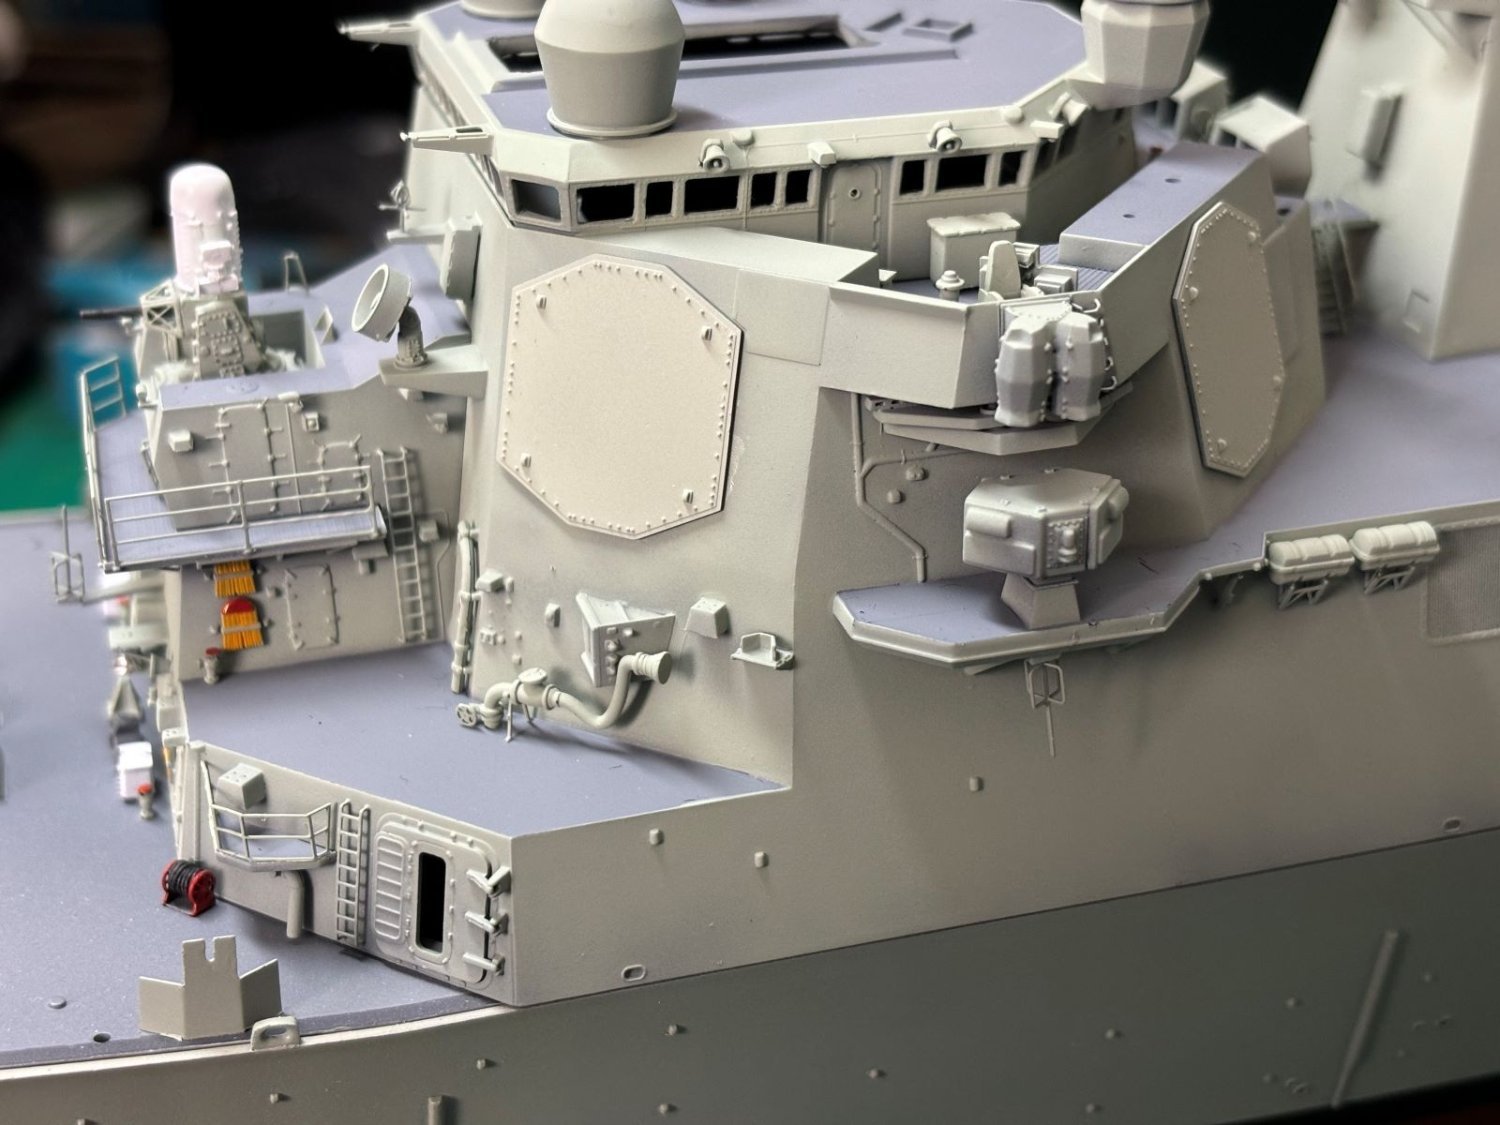
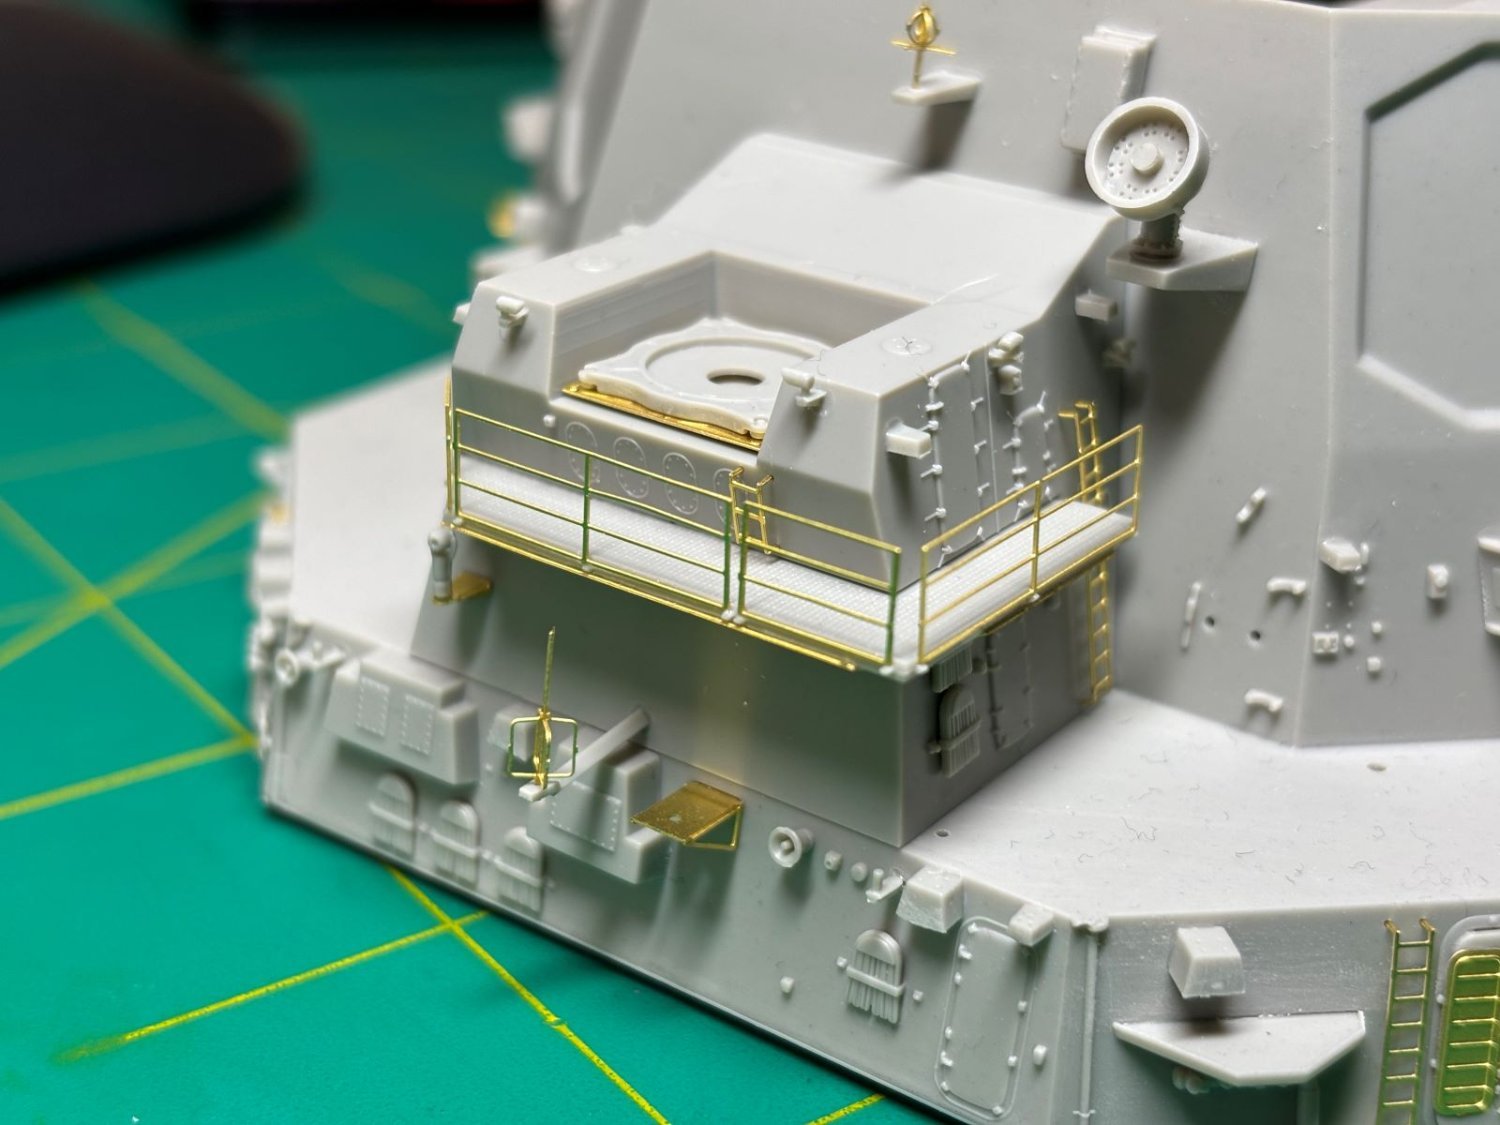
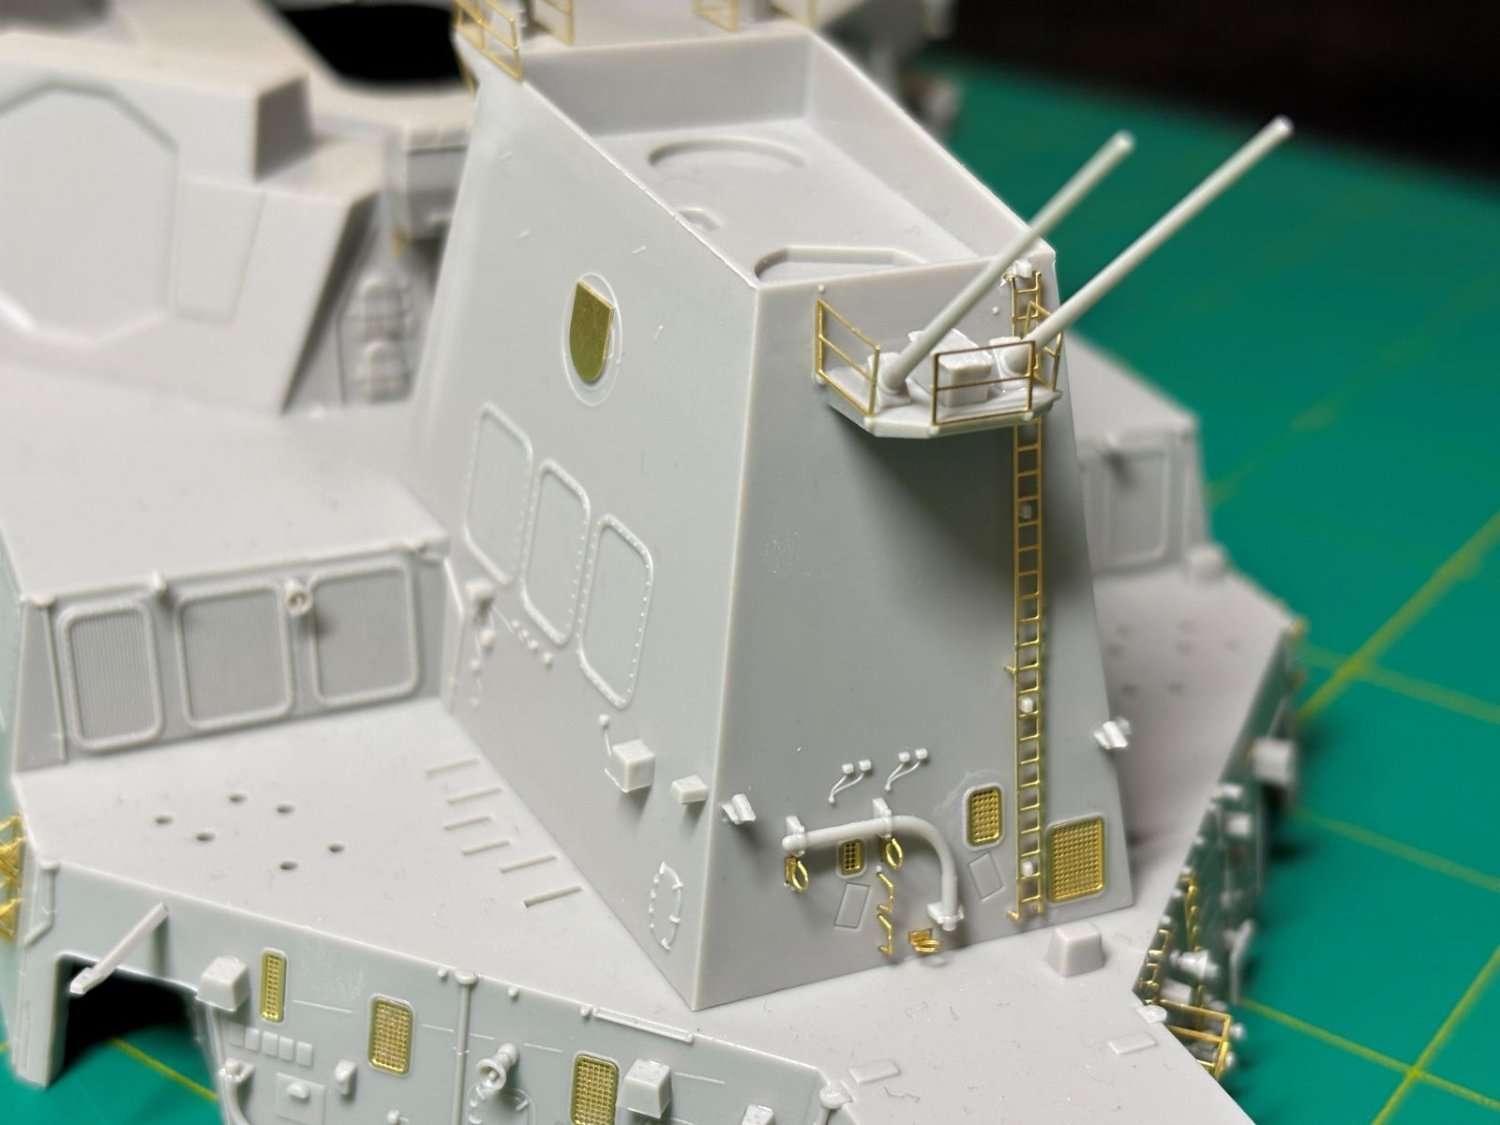
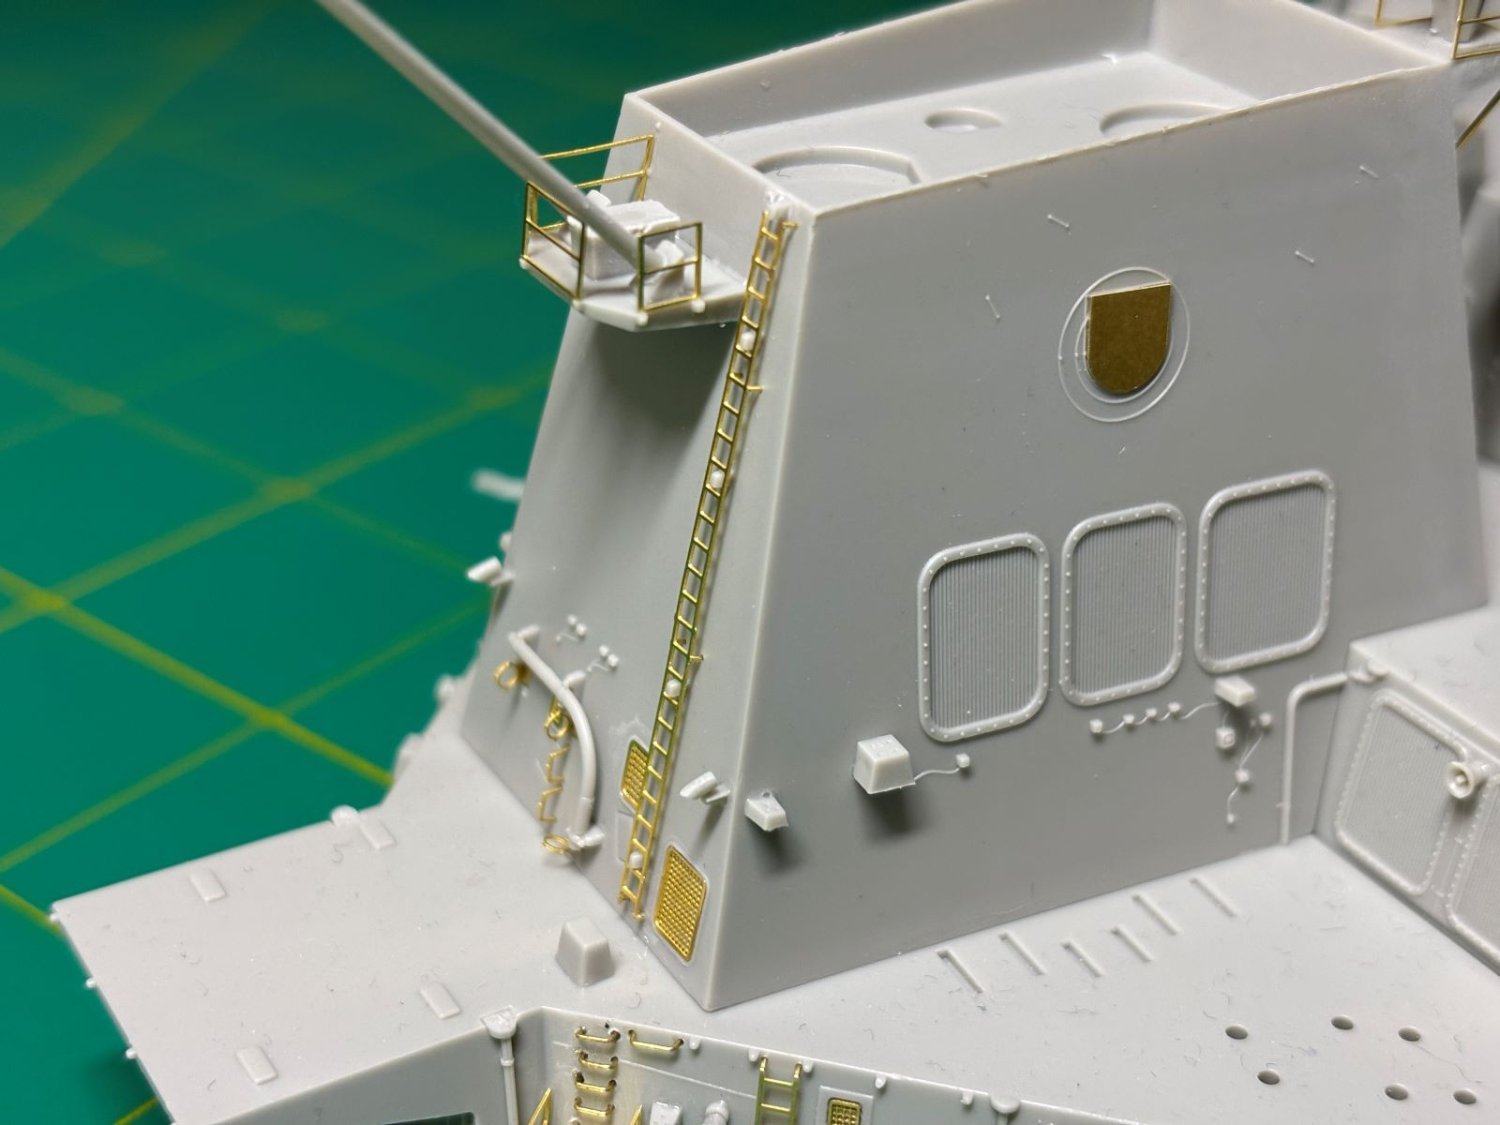
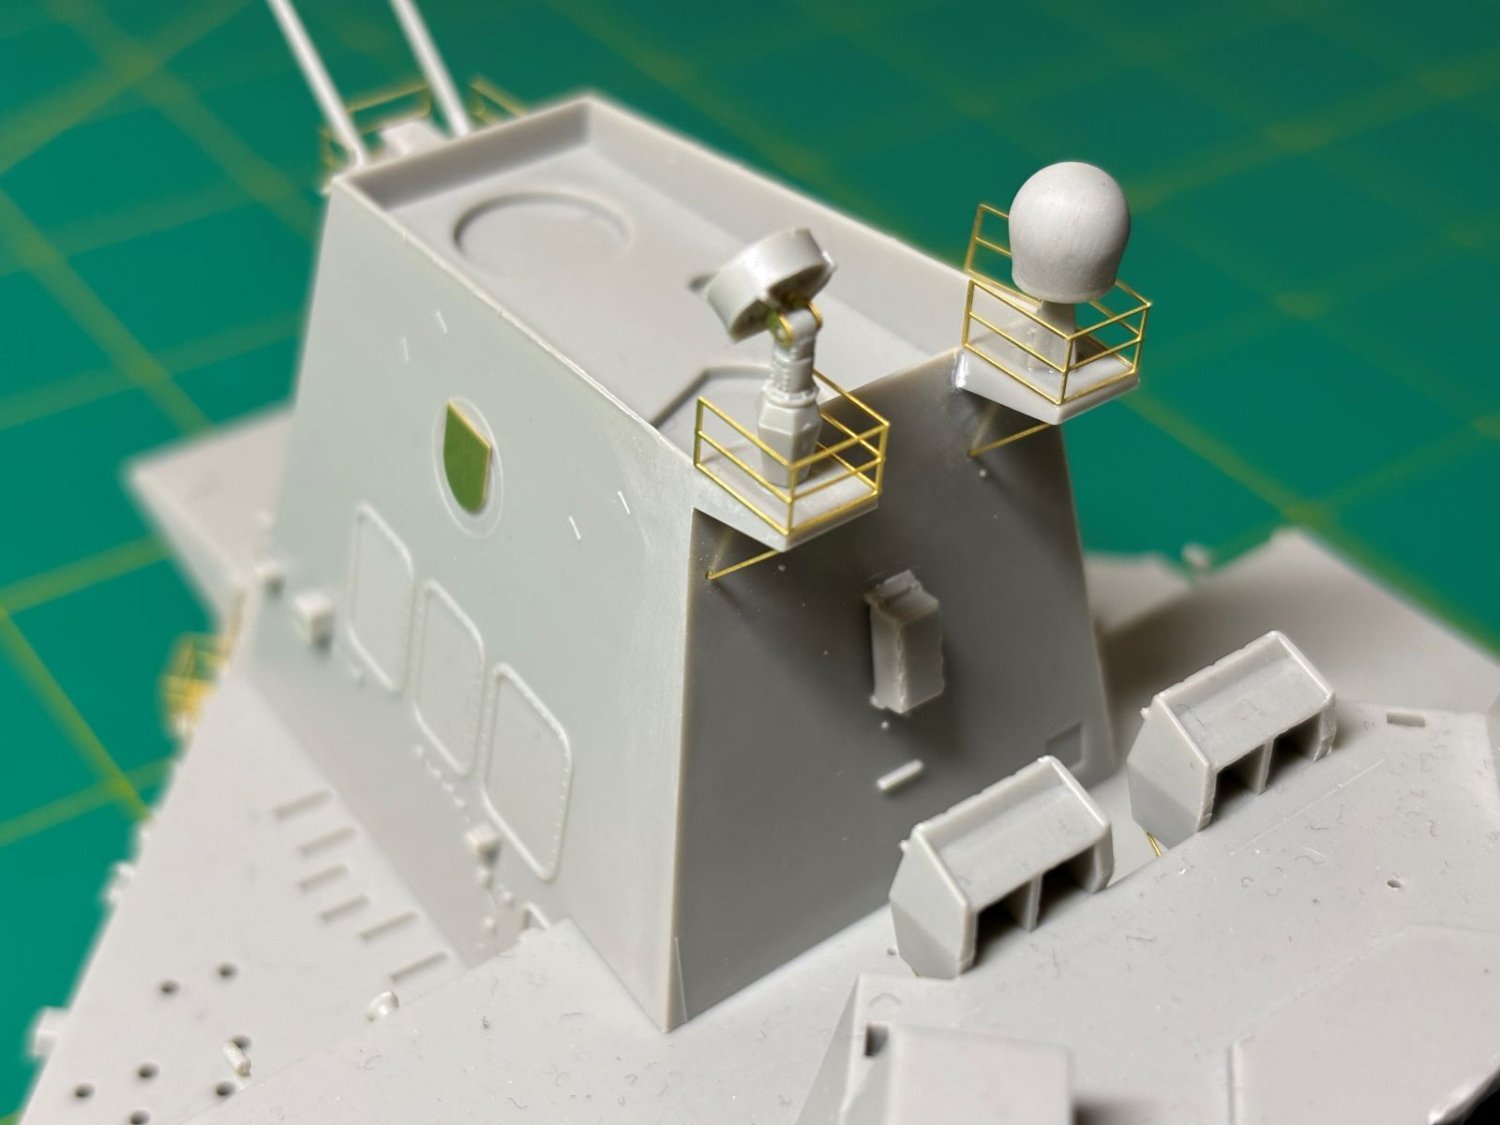
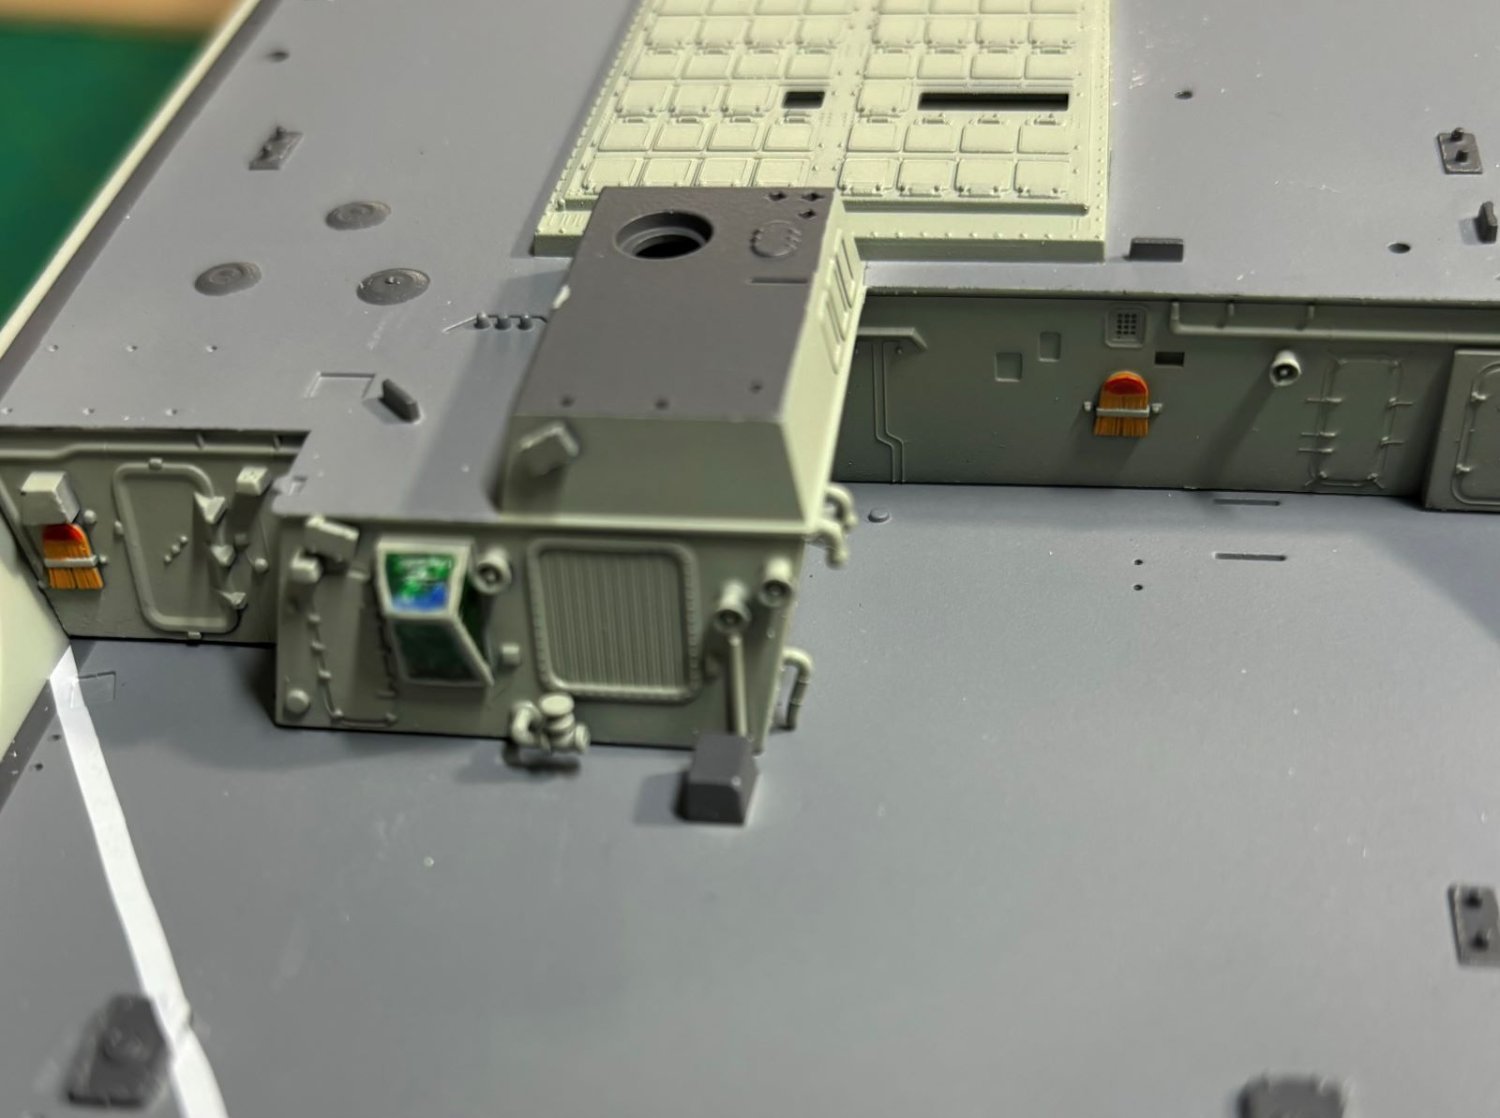
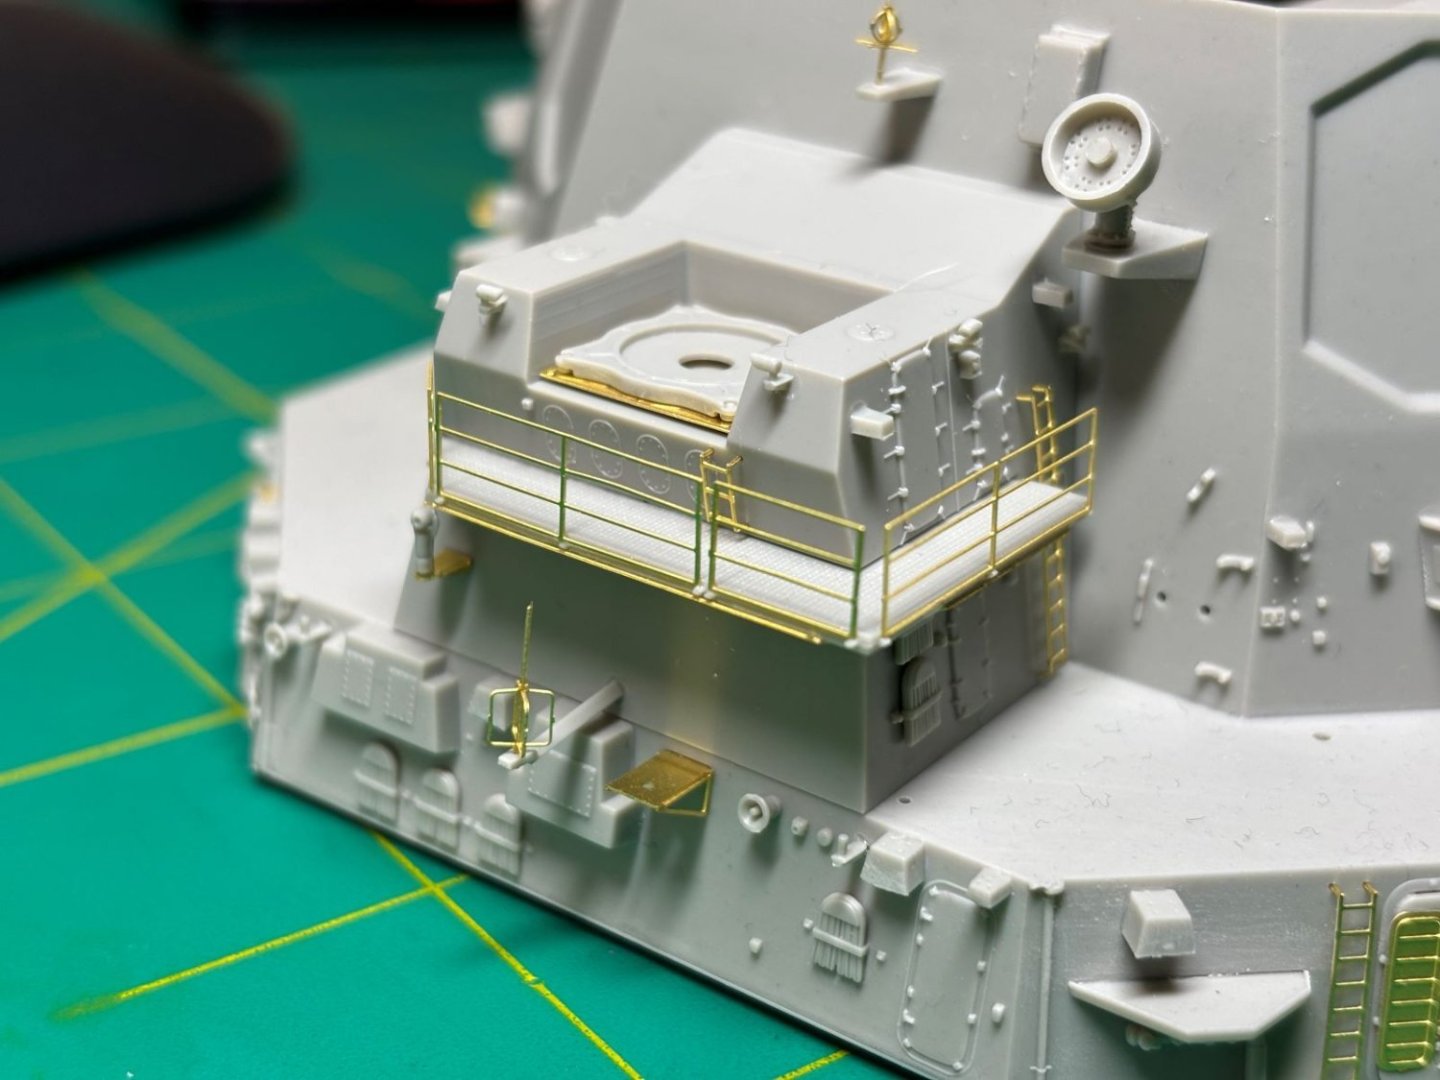
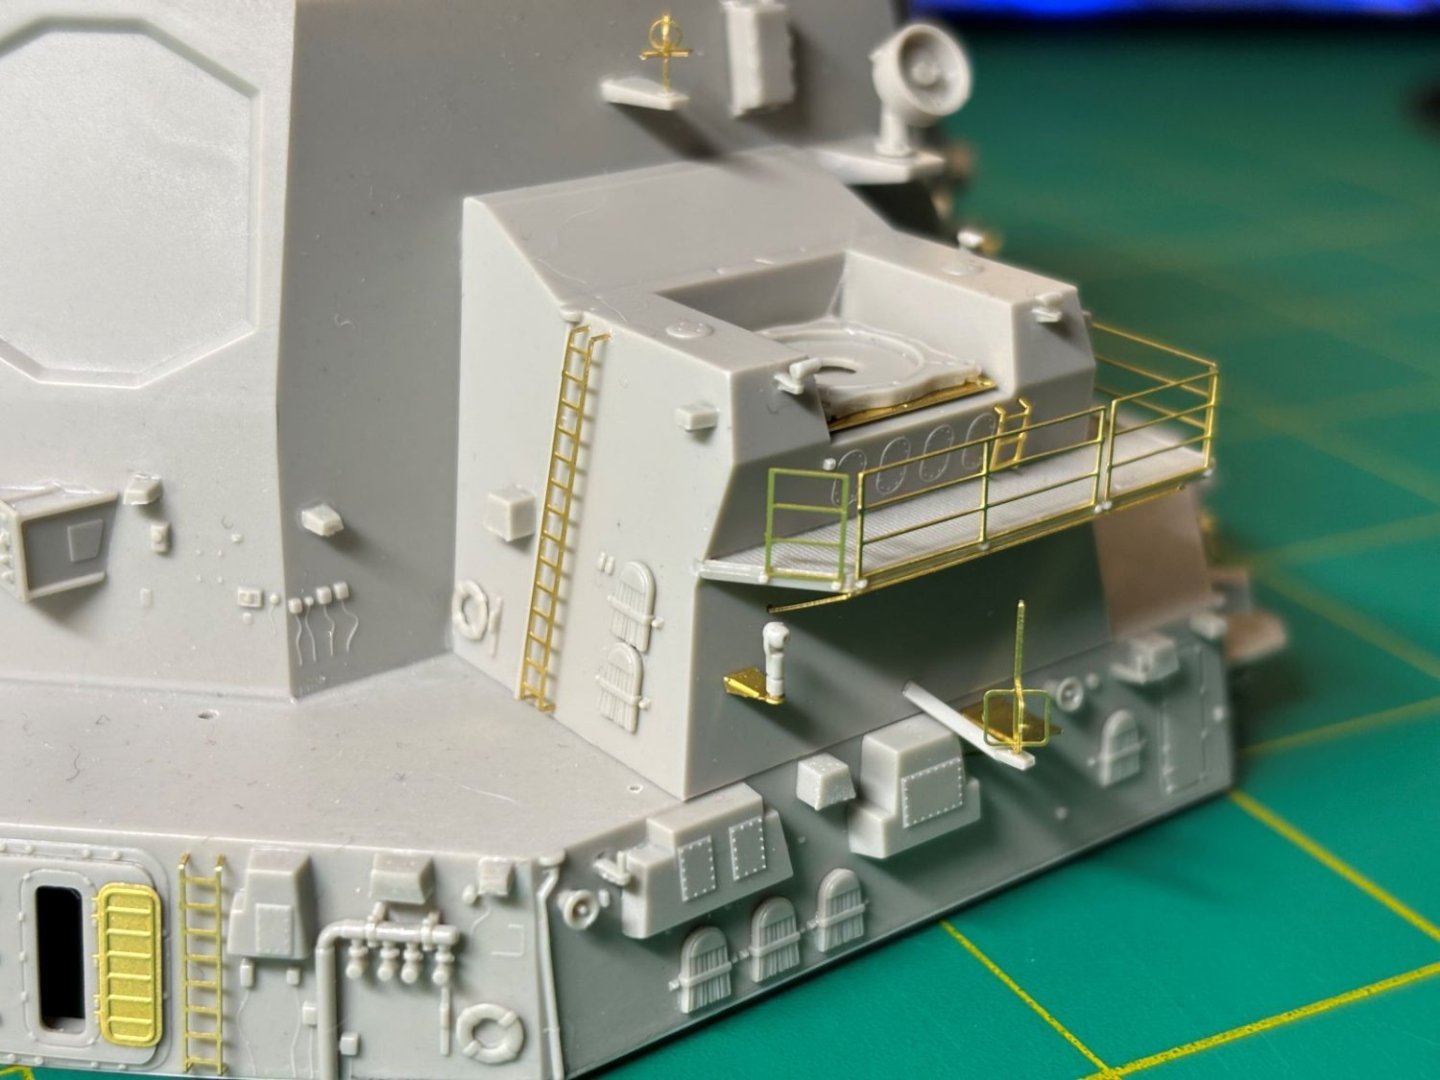
Hi all, Thanks for the looks and likes. It's been a bit since I've posted on this project. I've been pouring a lot of efforts into the main superstructure on this ship. Something I've learned since last time; this kit is actually geared more for a much more recent time period than I had originally thought. Comparisons between the kit and online pictures make this much more clear to me now. Here are some pictures of my progress. I'm still needing to paint and decal much of this before I permanently stick it down to the deck and hull. I hope you all enjoy and thanks for following!


- 52 replies
-
- 10
-
-
- Curtis Wilbur
- I Love Kit
- (and 1 more)
-
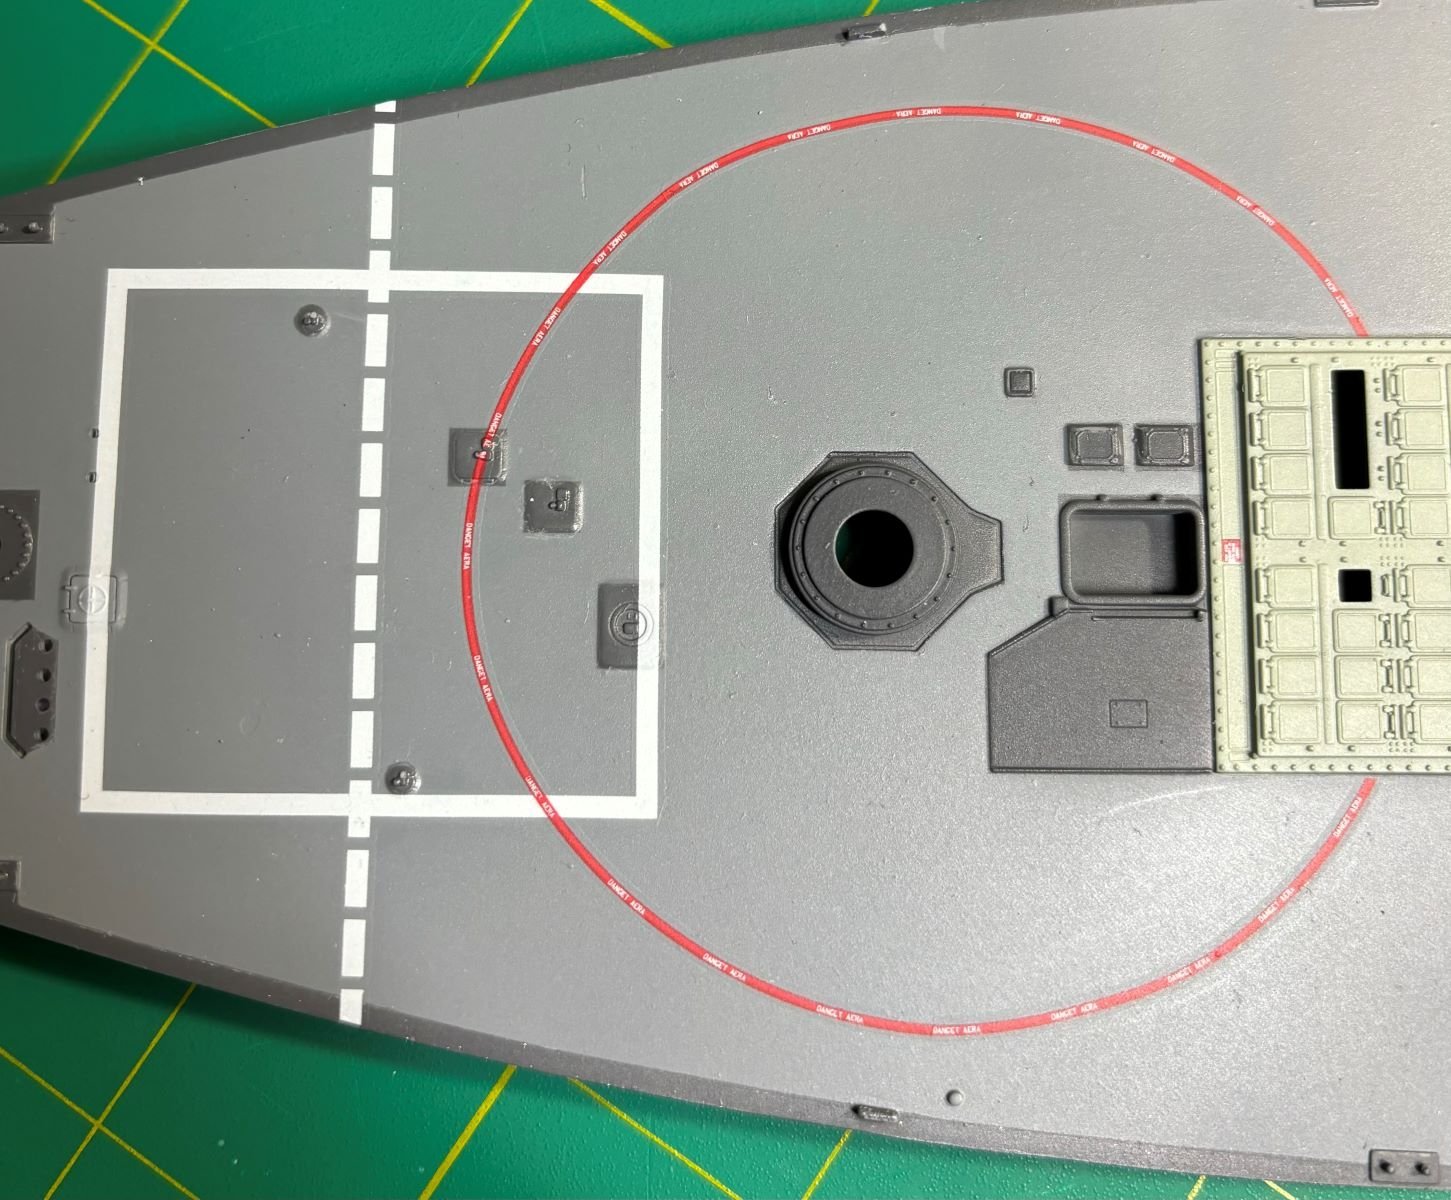
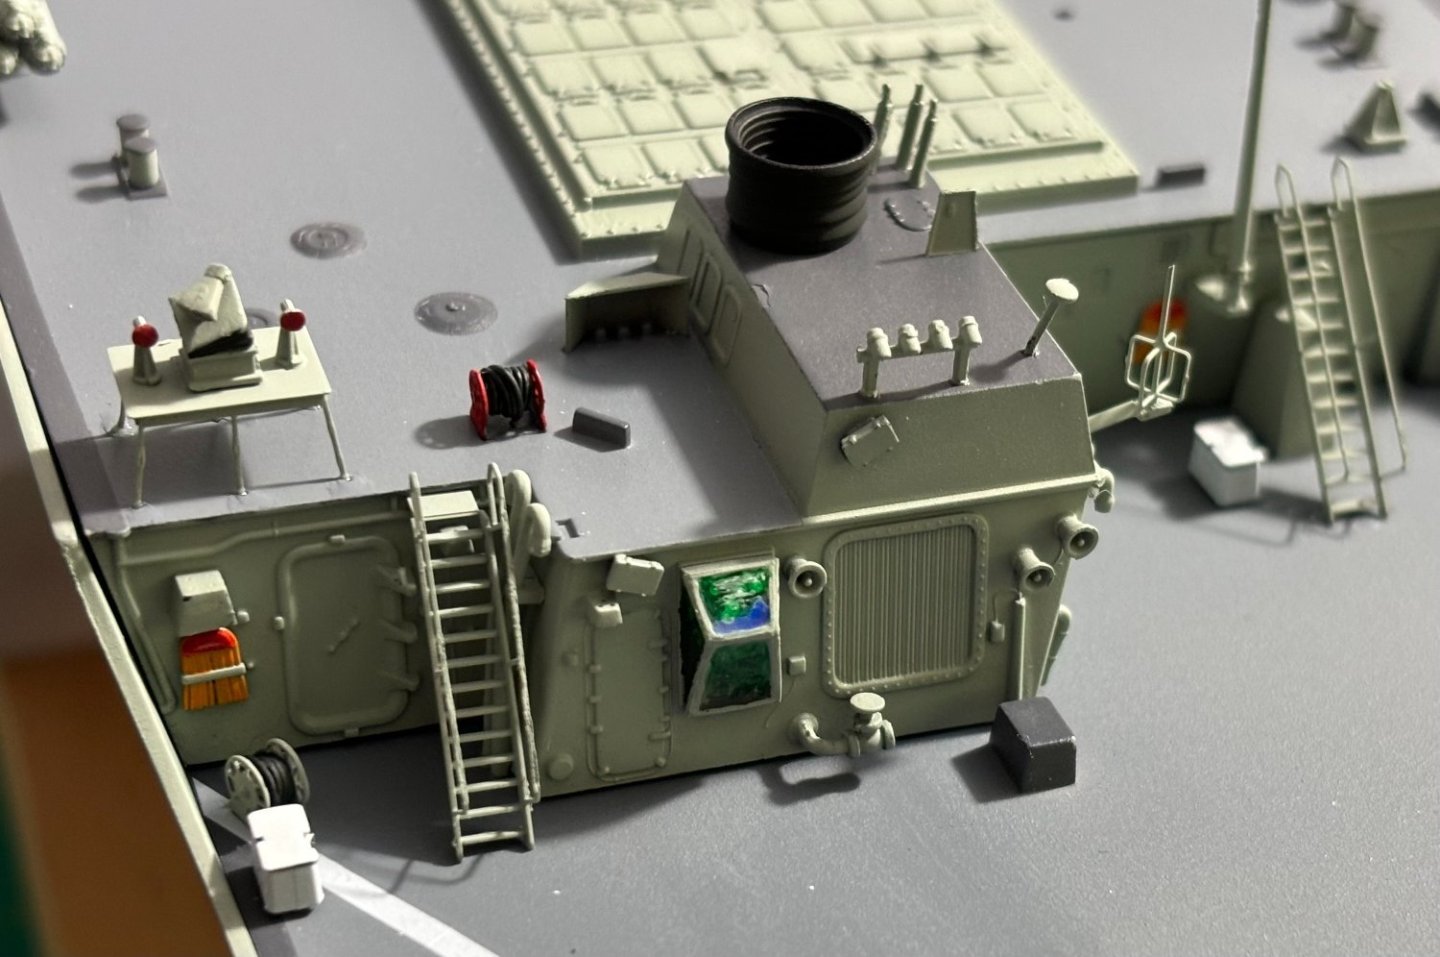
I strayed completely off the kit's recommendations. In fact, I feel like I've strayed off of what most recommendations were. For the vertical surfaces and most of the deck details, I have been using XF-12 (J.N. Grey) over a darker grey to help give some depth. For the decks, the non-skid is painted in XF-53 (Neutral Grey) and the slick-deck is painted in XF-24 (Dark Grey). Some of the details are in white and some are in red, as well. I went with these colors after looking for some time at online resources and these colors looked closest for me and how I wished to represent the subject.
- 52 replies
-
- 3
-
-
- Curtis Wilbur
- I Love Kit
- (and 1 more)
-
The hull is pretty thick, but cutting it for a waterline model is definitely doable with a Dremel or Proxxon, or a lot of manual elbow grease. Edit: to add to the above, this is one 1/200 scale ship where I think waterline would be cool since the hull isn't as large as a bathtub.
- 52 replies
-
- 5
-
-
- Curtis Wilbur
- I Love Kit
- (and 1 more)
-
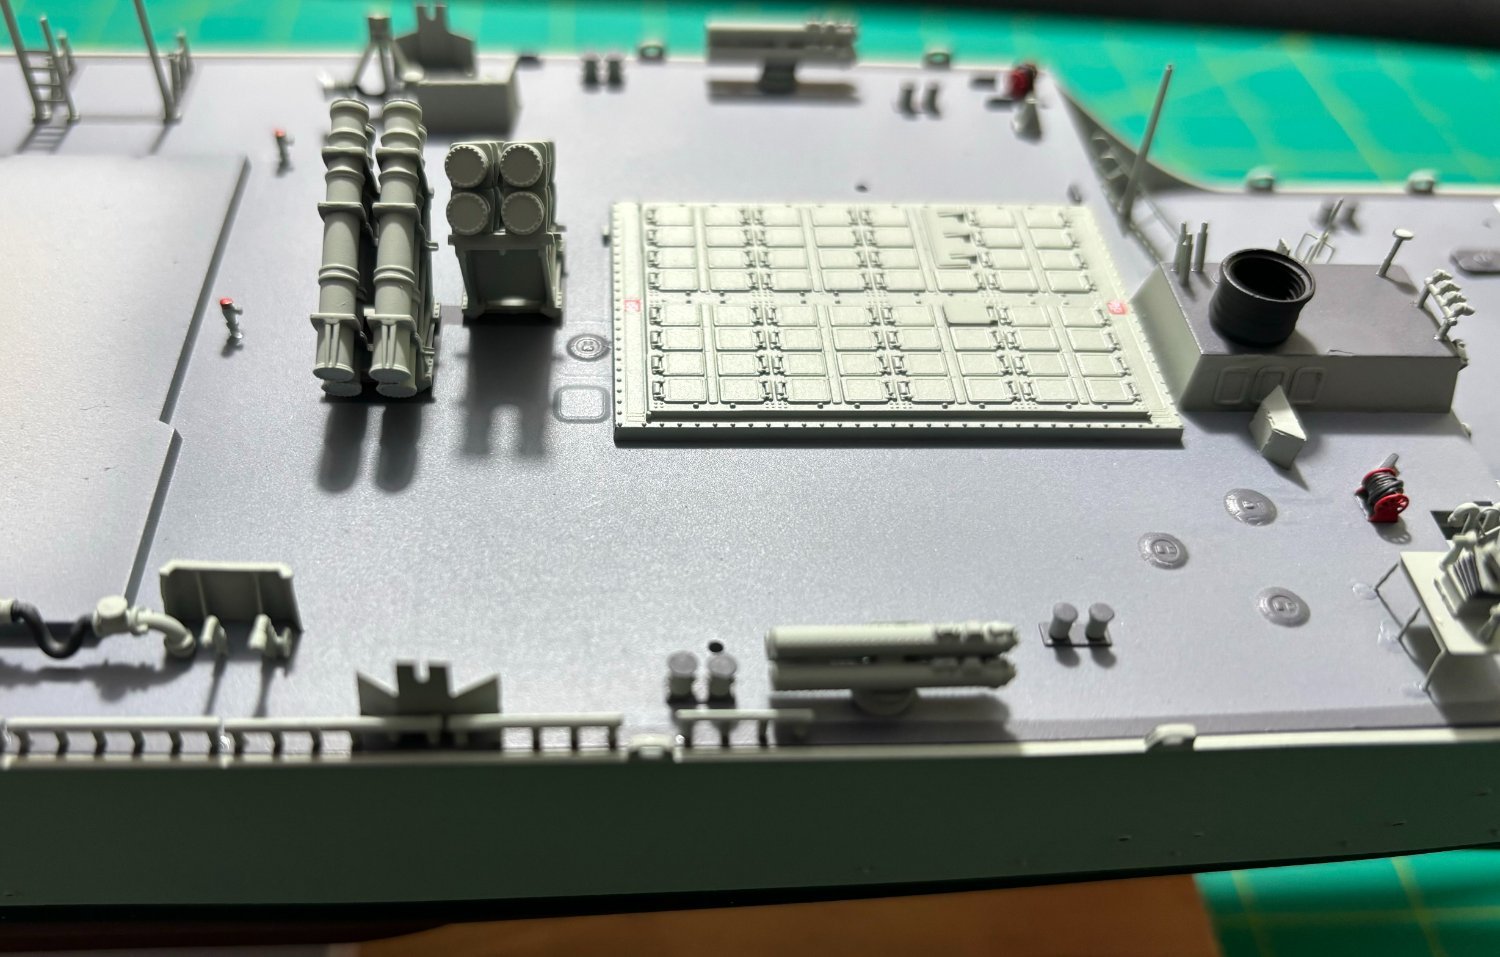
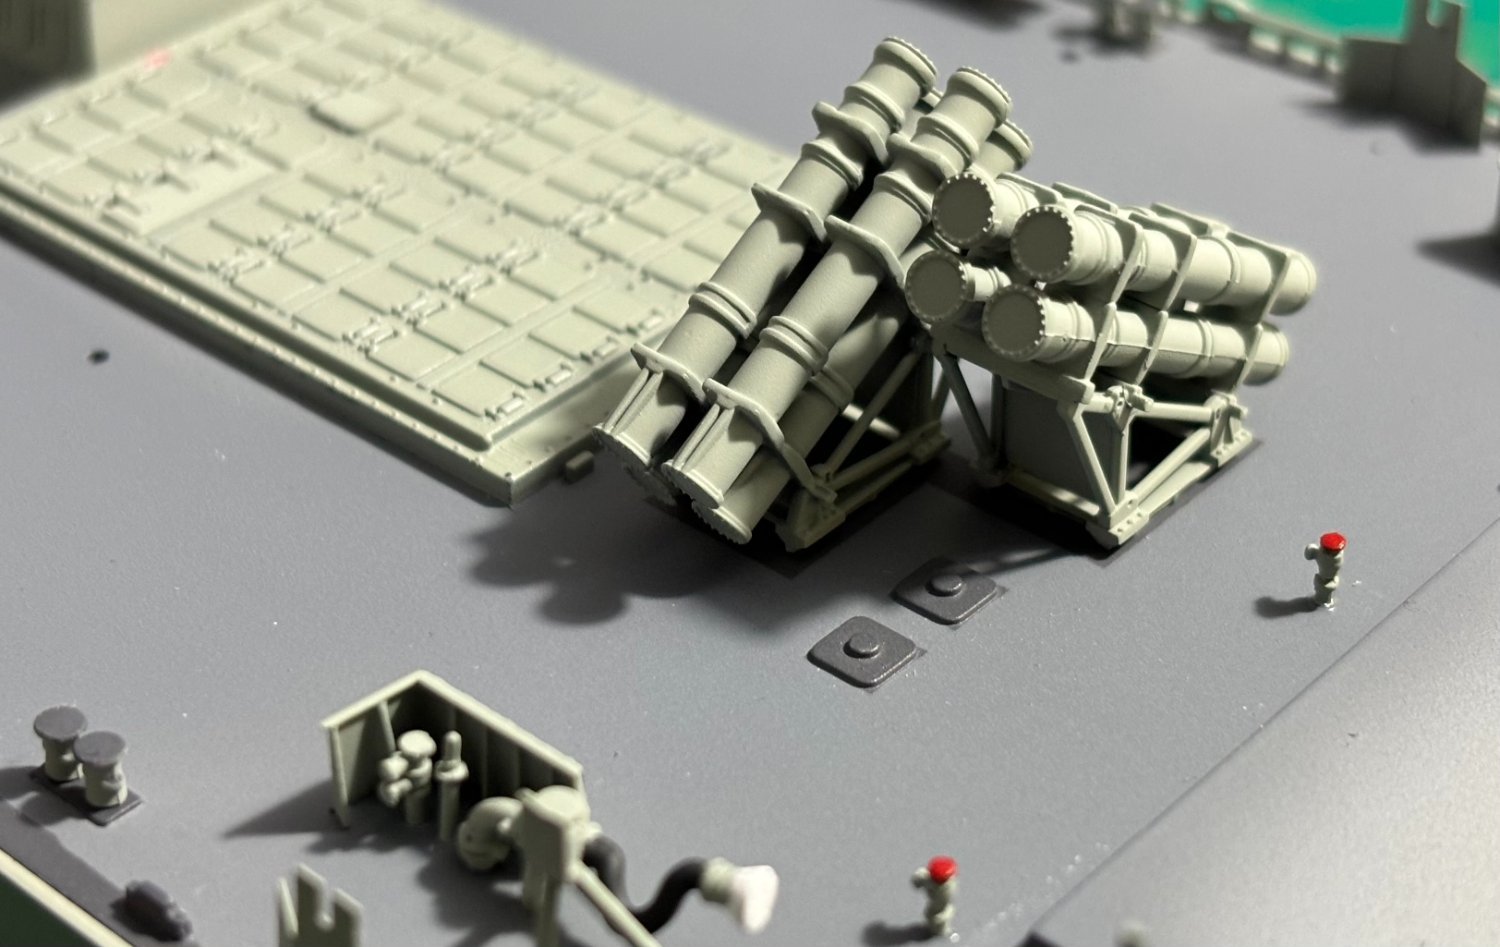
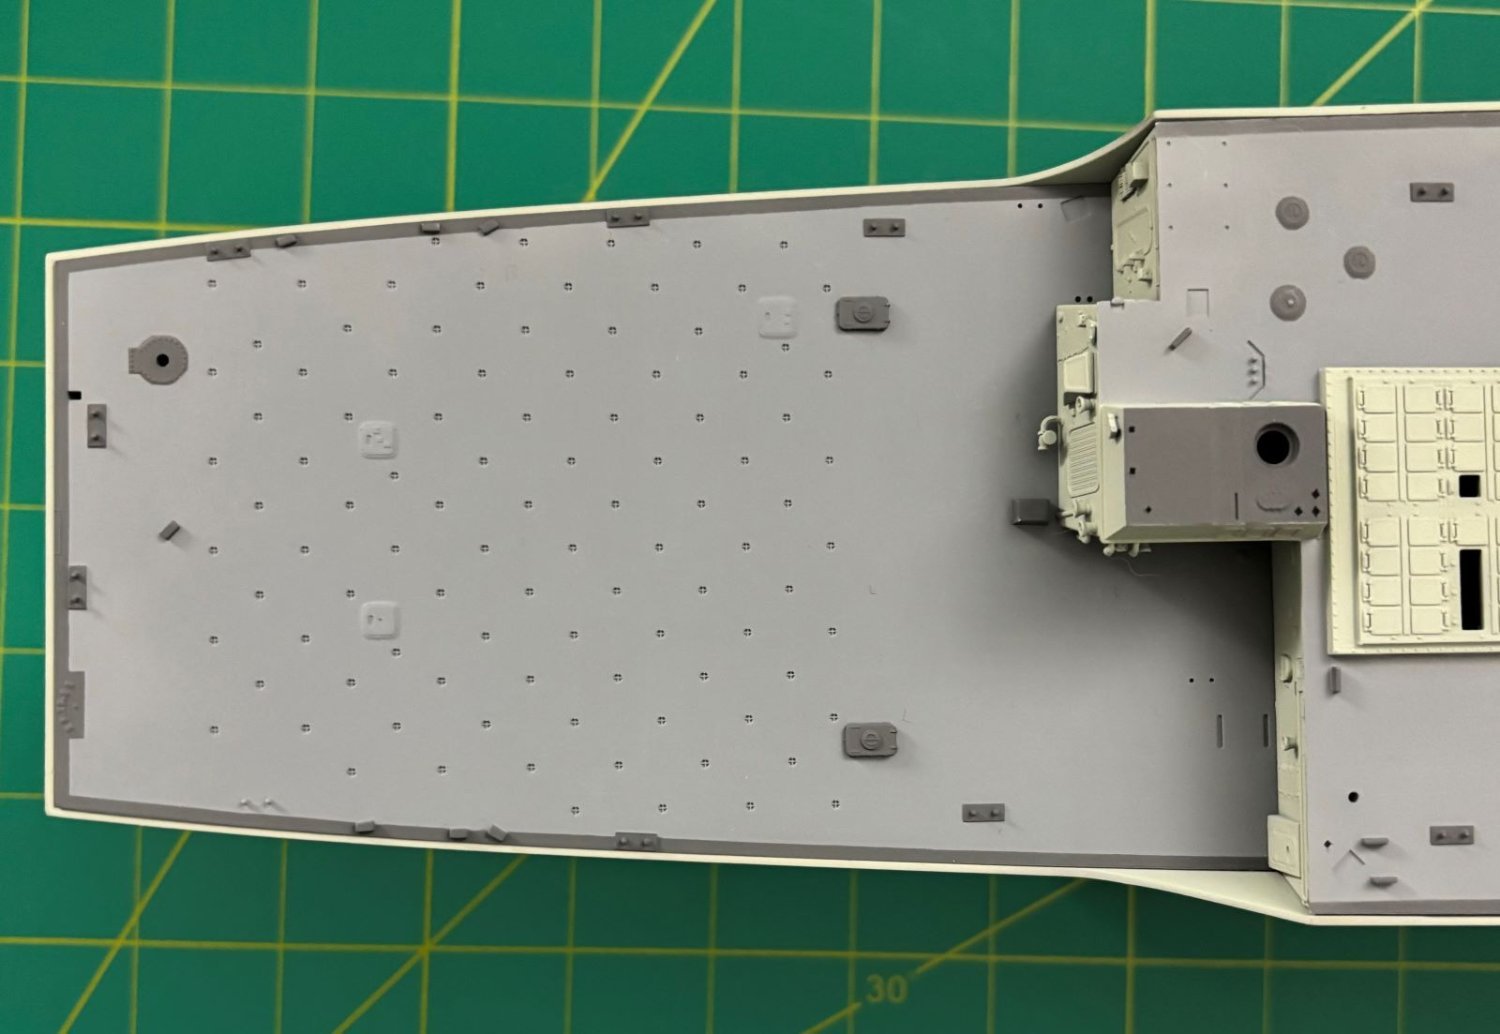
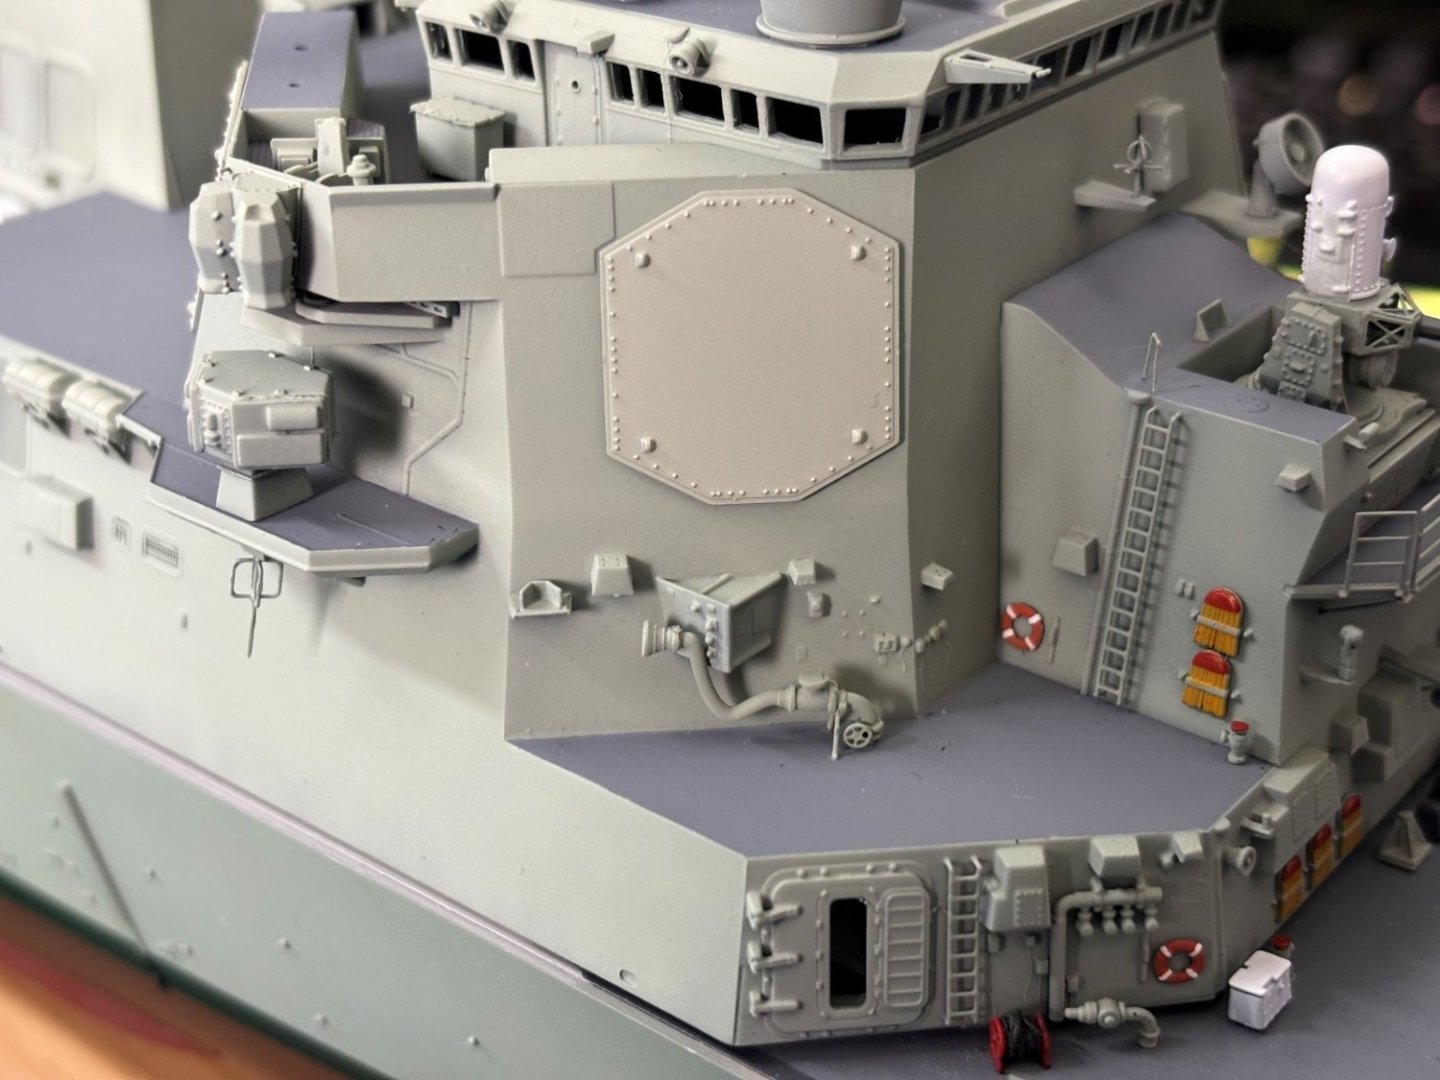
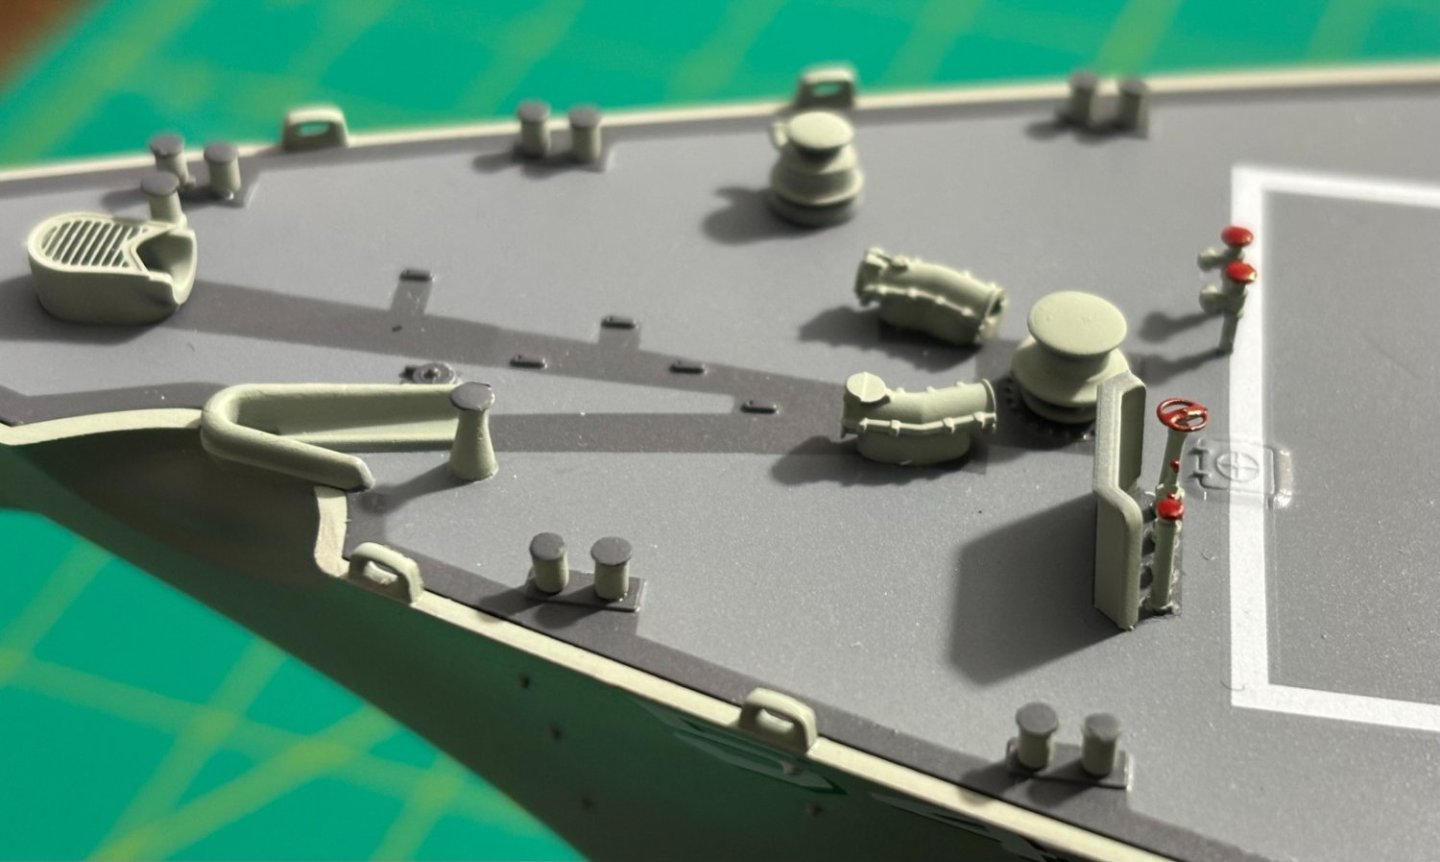
I appreciate all of the likes and comments; they really provide encouragement when this project throws its curve balls at me. I worked through steps 4-12 in the instructions. These steps have you have add many tiny little deck details. These comprise 200+ tiny little parts and I decided to conquer all of those steps in one large "MEGA-STEP" 🤪. I prepared them by separating them from their sprues, cleaning them up as best I could, and then sticking them in groups to paint stirring sticks with tape sticky-side up. Once primed and painted, I was able to detail paint anything needing it and then they all got stuck on the hull and deck. While it's very far from perfect, I'm happy with my results and it passes muster with a one foot viewing distance. Ugh! The macro lens is brutal. I couldn't see that seam line on the Harpoon launcher until the below picture. Thankfully, after worrying about it for several hours, I figured that it should not be easily visible if at all since that side will be facing the funnel structure in pretty close quarters. Thanks for looking in!


- 52 replies
-
- 9
-
-
- Curtis Wilbur
- I Love Kit
- (and 1 more)
-
Thank you very much! I'm going to start looking, but if I don't find one, I'm going to start one; Trumpeter Decals Survivors Club. I'll let ya know how that pans out. 🤣😆🤣😆
- 52 replies
-
- 3
-
-
- Curtis Wilbur
- I Love Kit
- (and 1 more)
-
Thank you very much for the compliment! Your builds are nothing short of extraordinary, especially due to the scales involved.
- 52 replies
-
- 4
-
-
- Curtis Wilbur
- I Love Kit
- (and 1 more)
-
Greg, I really appreciate that. A lot of the credit though has to go to you as an inspiration through some of your impressive ship builds here. Thank you!
- 52 replies
-
- 4
-
-
- Curtis Wilbur
- I Love Kit
- (and 1 more)
-
Hi Scott! I appreciate the compliment! The decal on the aft deck had to be cut into pieces and then carefully aligned. The others went down in single pieces but were a real bear to get lined up right. I hope eventually somebody puts together some aftermarket masks for painting those markings on. I was considering painting them myself, but that turned out to be beyond my skill set to make look good.
- 52 replies
-
- 3
-
-
- Curtis Wilbur
- I Love Kit
- (and 1 more)
-
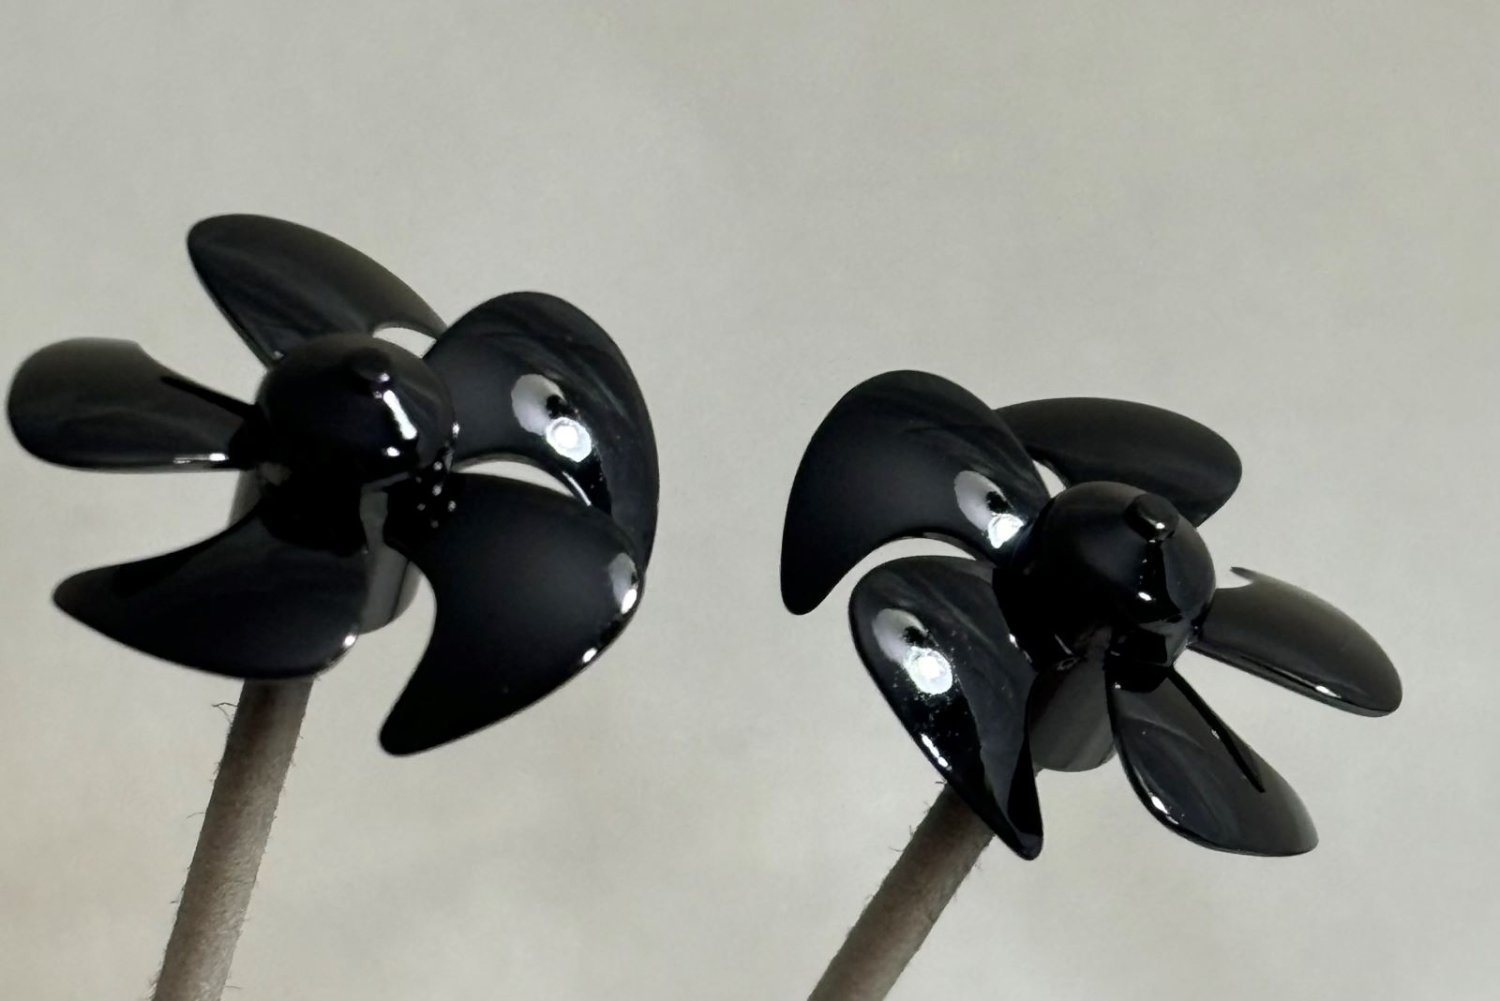
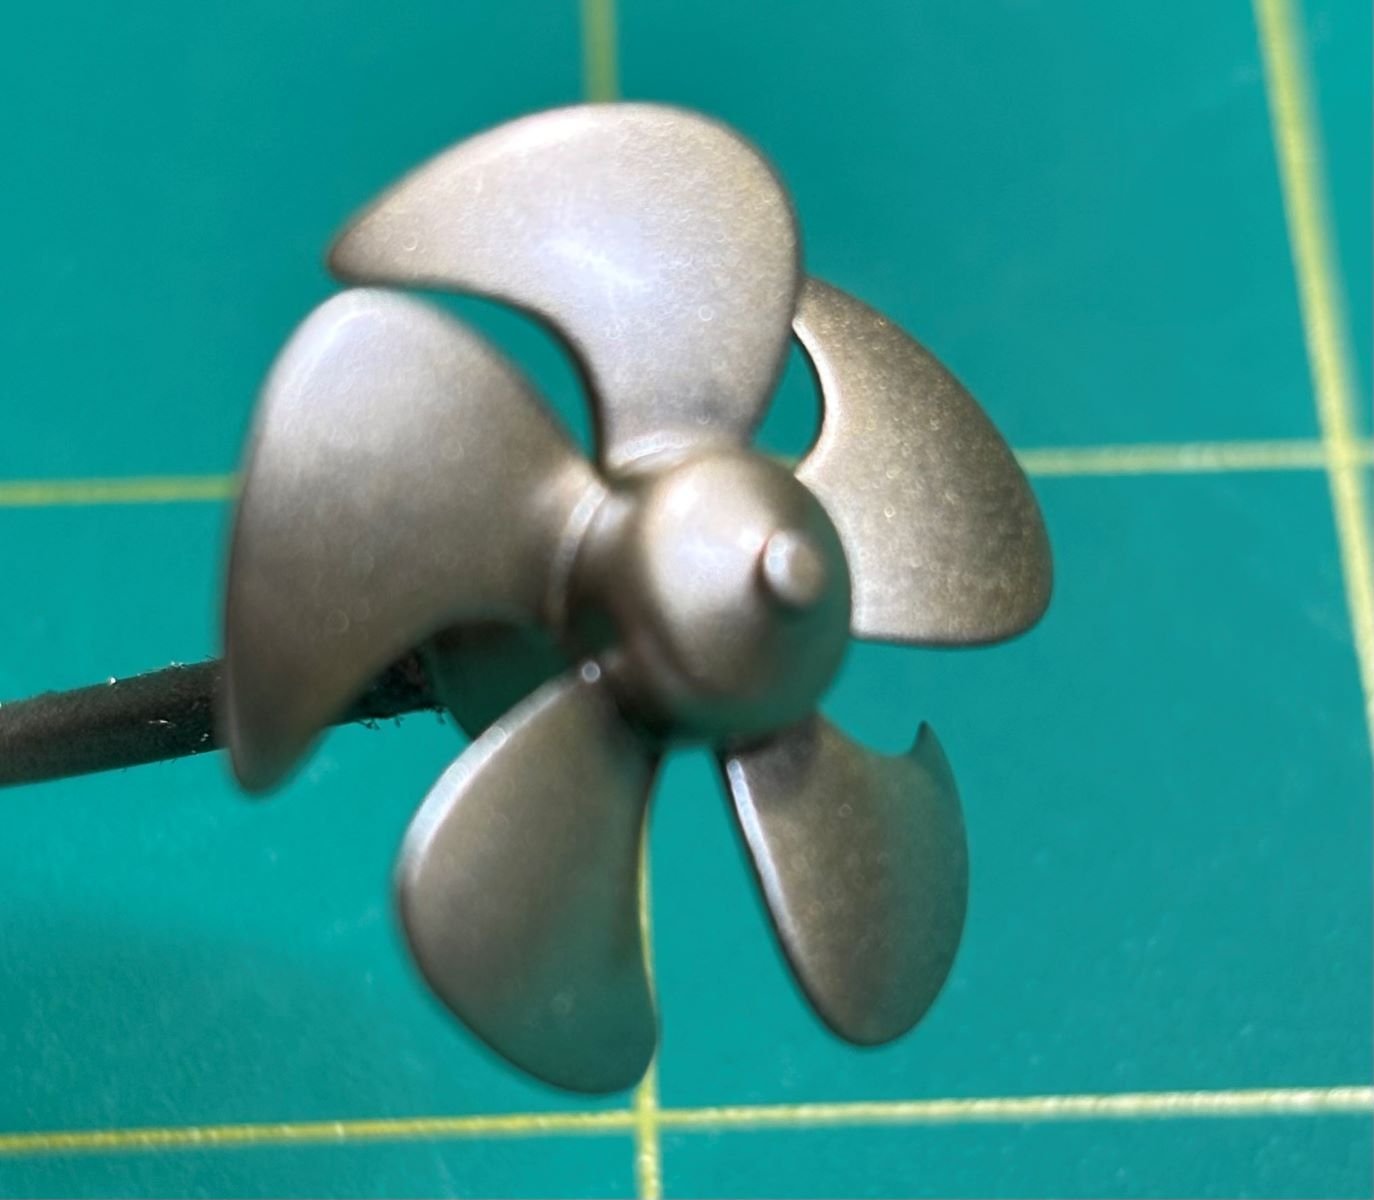
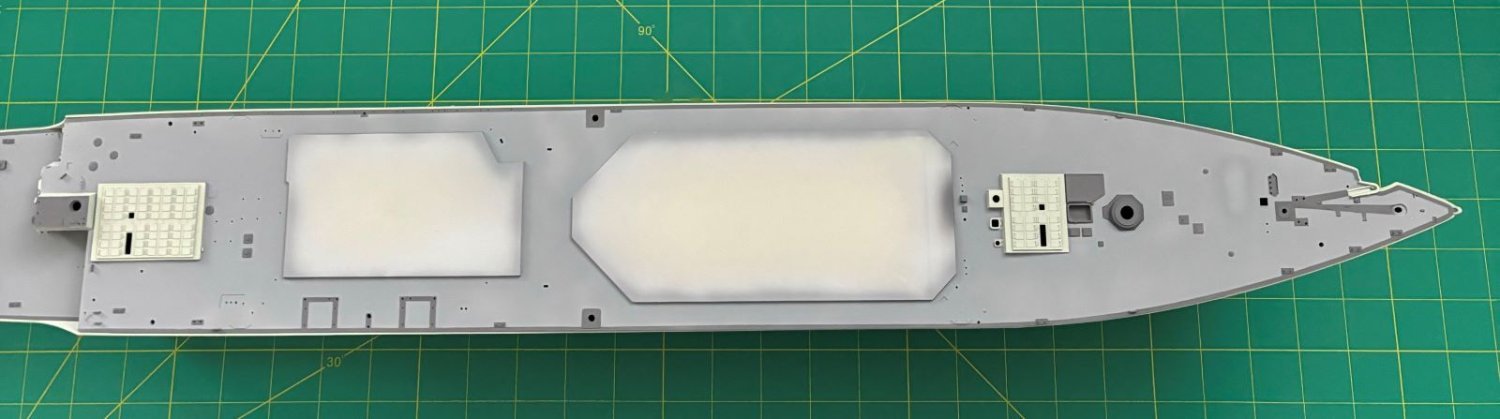
Hi all! Thanks for your likes and following along. I applied decals on the hull and the deck. These were sealed in with clear coats and the carrier film on the decals is almost non-existent now. The deck is glued in place and currently under clamps until I'm certain the glue has fully cured. Also pictured are the propellers that I polished until the plastic parts were shiny, primed with Alclad II Gloss Black Base, and then painted with Bronze top-coated with Gold Titanium. To me, the propellers more closely match pictures of the real things in online resources. I have some pictures of my progress to date. Now begins all of the "fun stuff" with the superstructure and weapon systems. Until next time, thank you and be safe!


- 52 replies
-
- 10
-
-
- Curtis Wilbur
- I Love Kit
- (and 1 more)
-
@ddp, I usually do leave applying decals until last. I'm not with this one. The decals are too large or will need to be cut and reassembled in place, and I do not wish to do so without plenty of places to rest my hands while doing so. Alternatively, if the decals get messed up, I can still mask off and paint the markings while the deck and hull are apart from one another.
- 52 replies
-
- 4
-
-
- Curtis Wilbur
- I Love Kit
- (and 1 more)
-
Hi everybody! I really appreciate your likes and following along. I have no pictures on this reply and it might be a while. It honestly just occurred to me that applying deck and hull decals now would be easier rather than wrestling with further along in the build with the superstructure and other details in place. And to add to that note, the kit's decals give me mixed feelings. On the one hand, they are very thin and the carrier film completely disappears after a clear coat is applied. On the other hand, the thinness lends itself to them easily folding under or onto themselves. The way the decals are laid out is not great. The white lines for the aft deck are printed as one whole decal with other decals in the dead space. Same thing for the white lines in front of the 5" gun up front. My options are to cut them into separate decals and carefully apply them bits at a time, or mask off the decks and spray the white on. This will take some time. Thanks, Patrick
- 52 replies
-
- 4
-
-
- Curtis Wilbur
- I Love Kit
- (and 1 more)
-
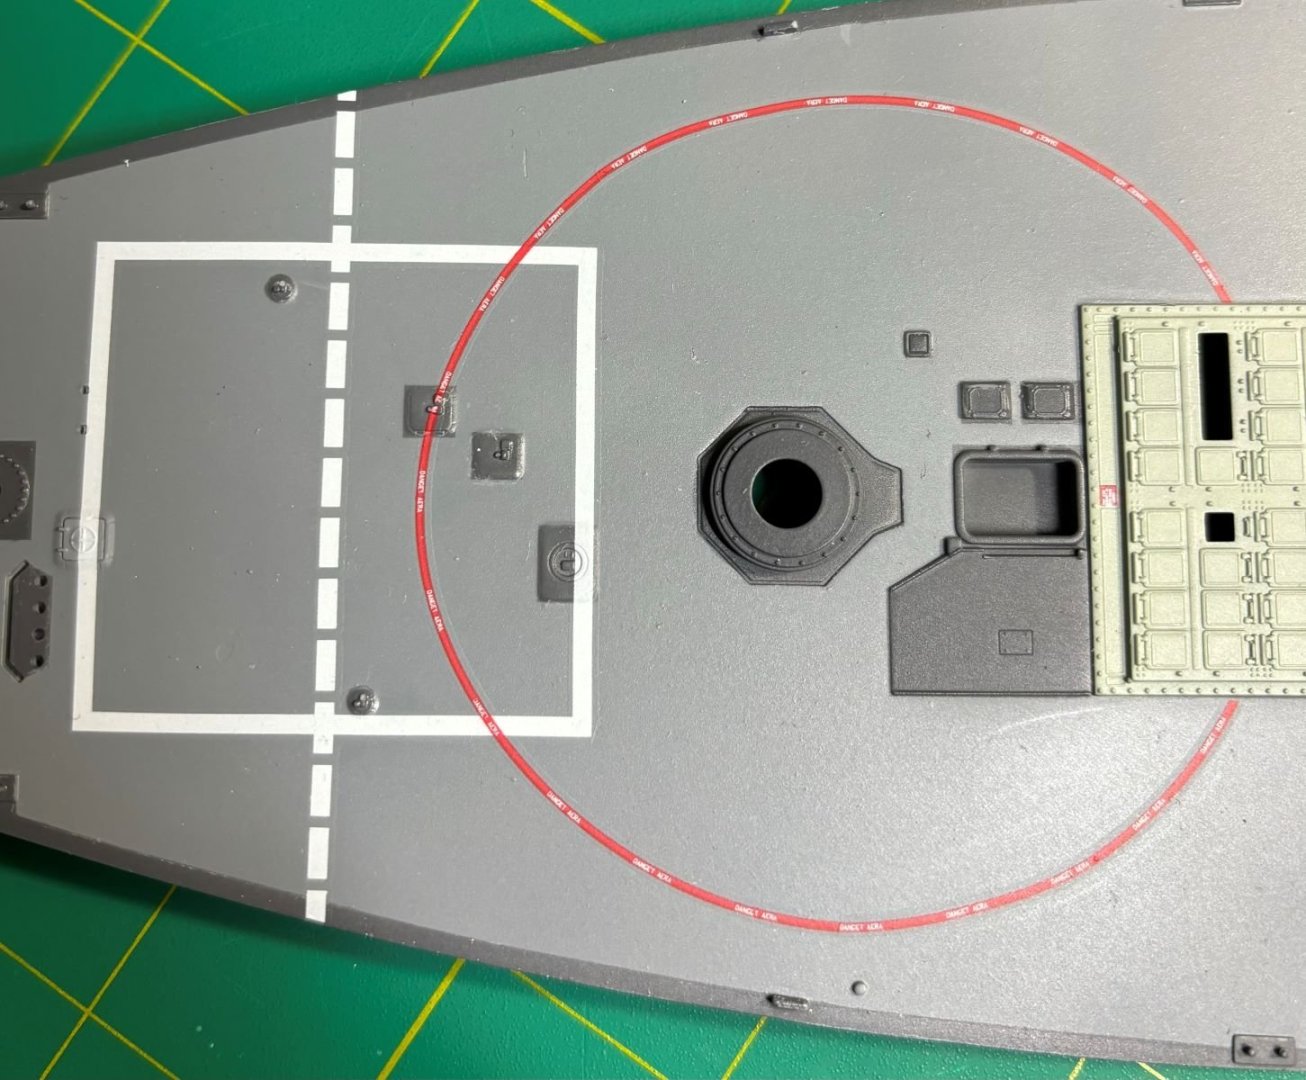
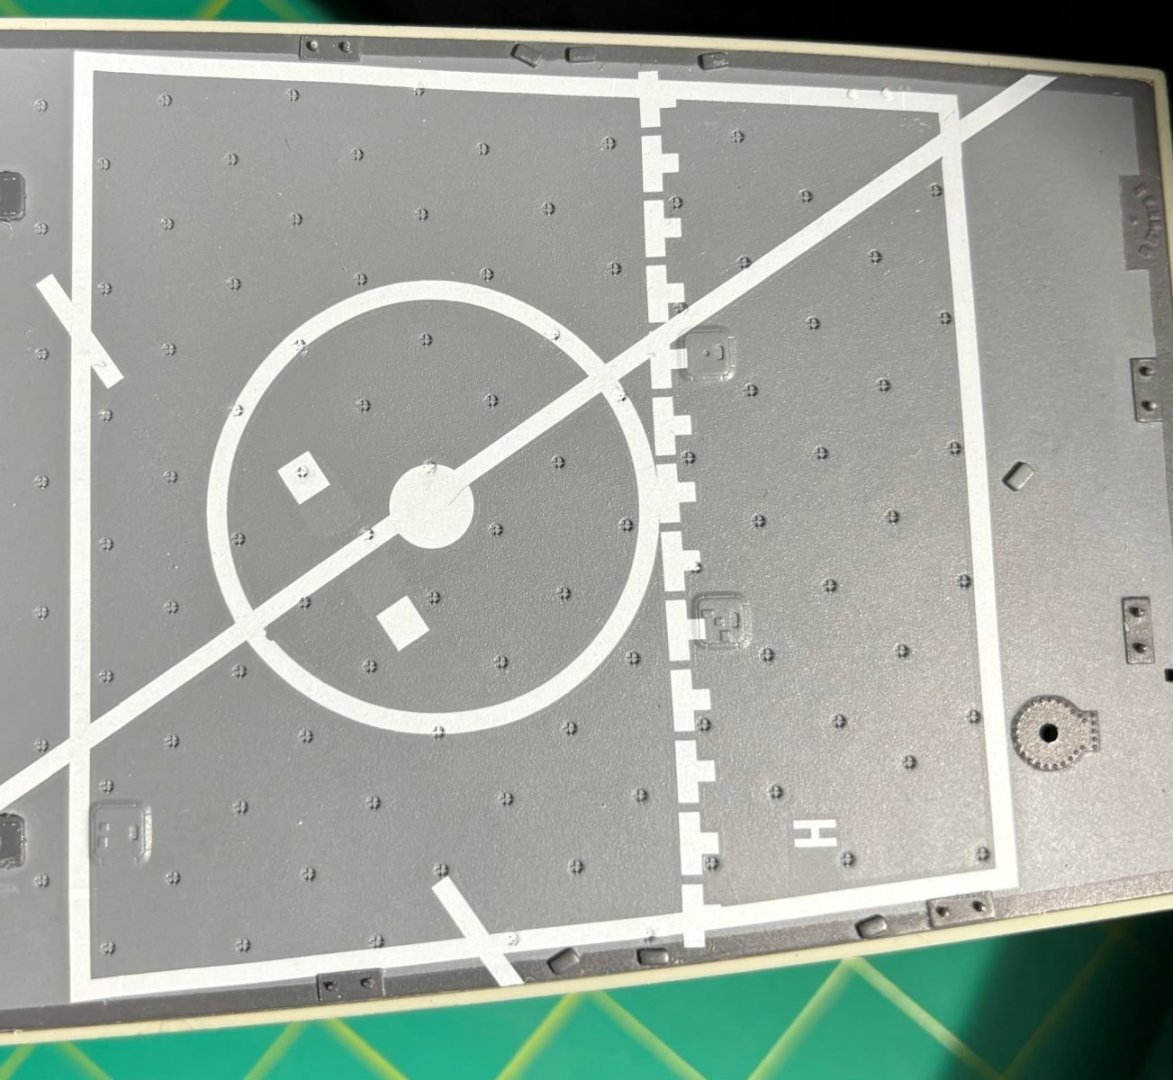
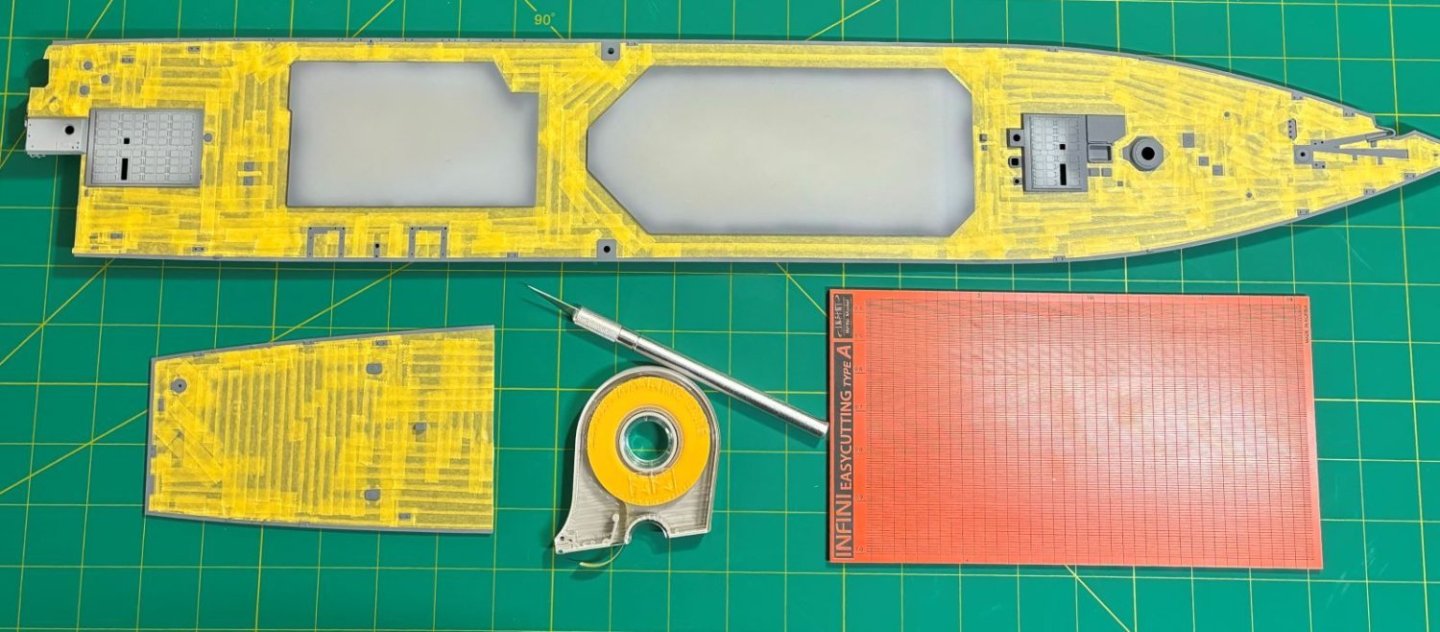
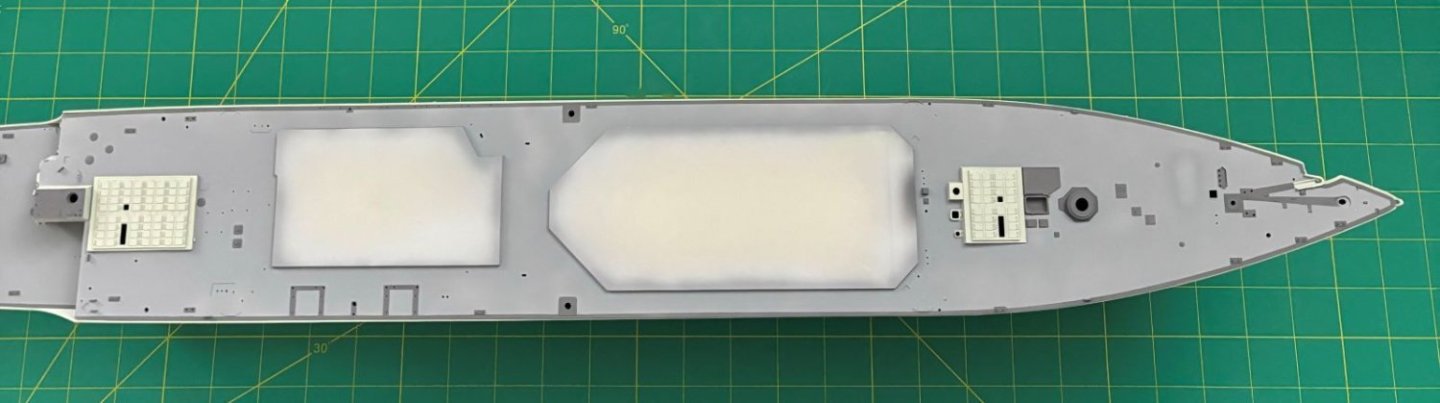
Hello Everybody! Glad to be in 2024, lol. Thank you for all the likes and the comments so far; they are appreciated. I put down XF-53 over the entire deck and then took some painstaking efforts to mask off most of it to apply a darker "trim" color, XF-24. The colors look pretty stark in contrast and the main deck color might look a little light at the moment. After hours and hours of looking at pictures of the real thing, the colors are the closest my eyes will let me pick. That said, the main deck color will be deepening a bit with a clear coat and then darken up a bit with weathering, filters, and washes. I think it will tie things together nicely once done. Oh, as for the where the "trim" color goes, that was another interpretation and how I wished to represent the USS Curtis Wilbur. Unfortunately, there are no pictures that cover every inch of deck during the 90's, so I did the best I could and went with what I thought looked logical and had a nice aesthetic. Well, I brought more pictures. Oh, I owe an explanation for below, lol. I had ordered much wider masking tape; it just wasn't going to get here as soon as I wanted, so I used 6mm. I'm a glutton for punishment. Unfortunately, the color depth from black-basing beneath the XF-12 (JN Grey) isn't showing up terribly well on the camera, but it looks nice in real life. Thanks for looking in!
- 52 replies
-
- 12
-
-
- Curtis Wilbur
- I Love Kit
- (and 1 more)
-
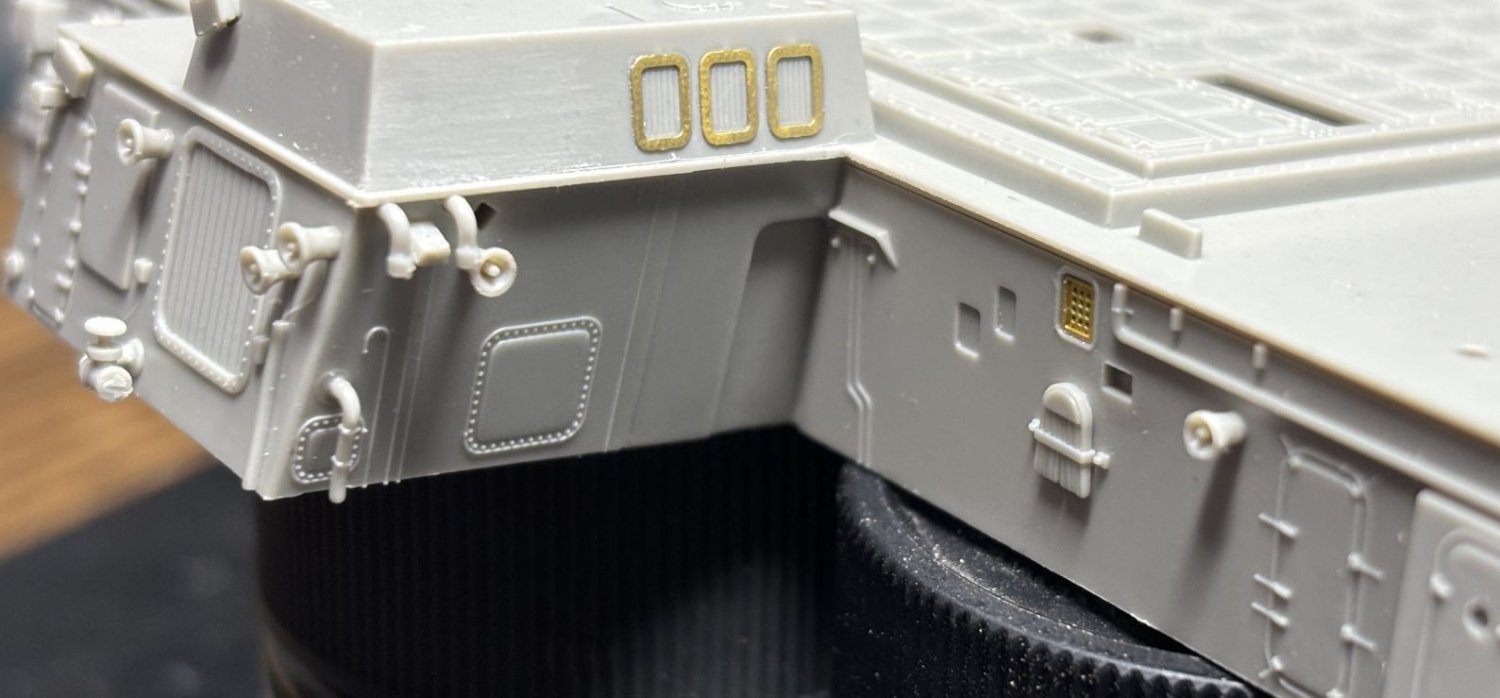
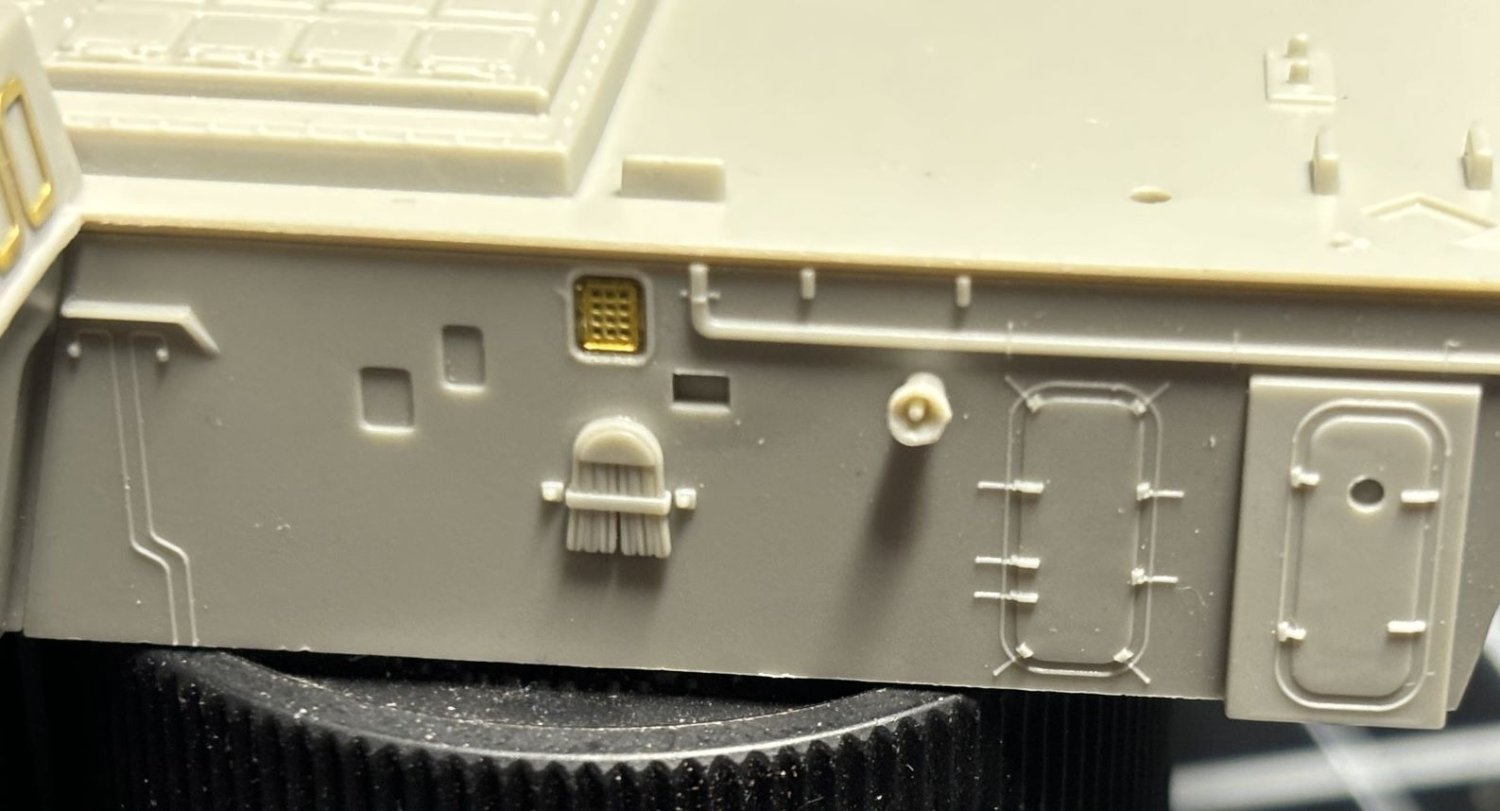
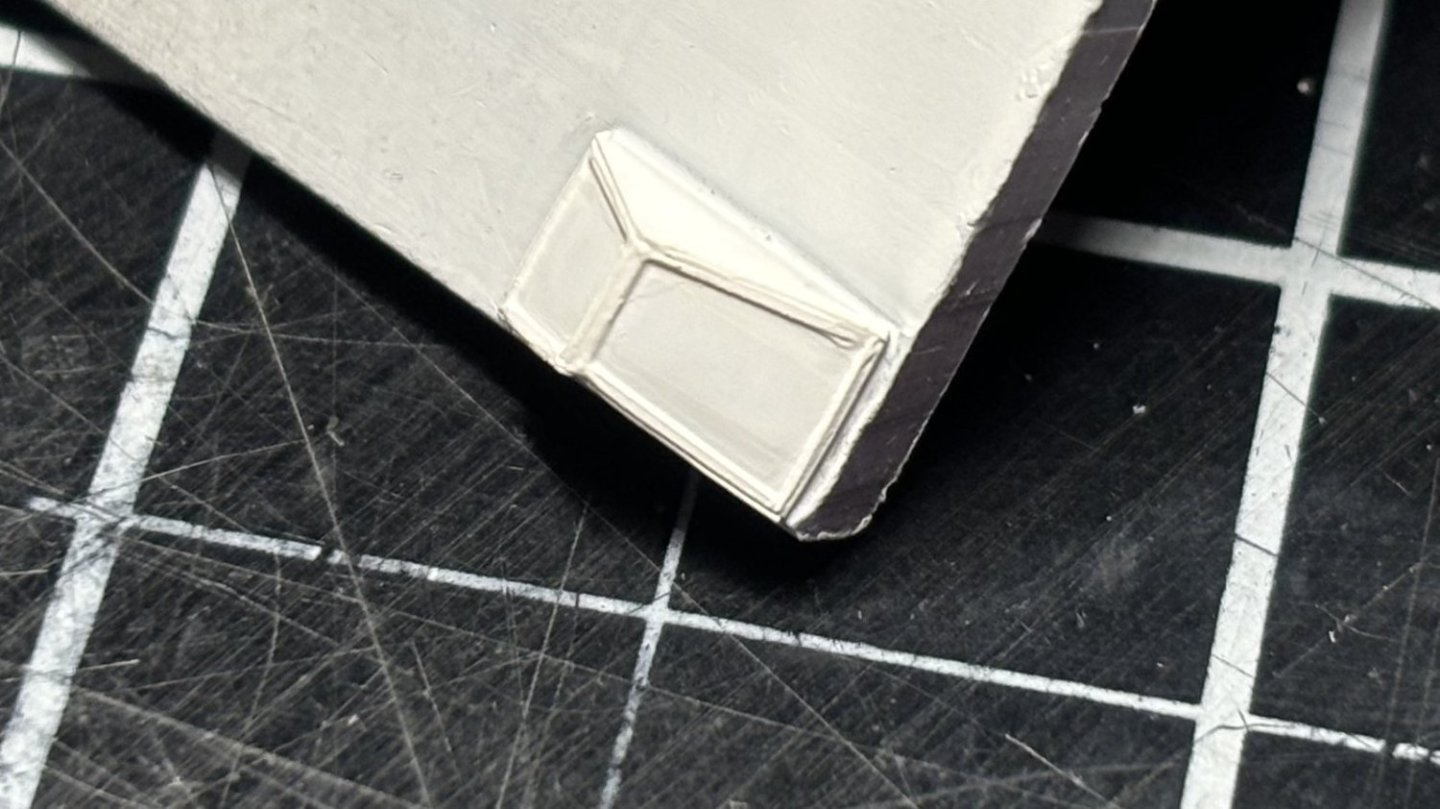
Hi @ddp, Yeah... Initially when I was researching the subject, I came across this website, https://www.seaforces.org/usnships/ddg/DDG-54-USS-Curtis-Wilbur.htm, which is a treasure trove of pictures. The second to last picture of the ship spotlighted that issue quite well too. I wasn't in the mood for major surgery and I'm relatively sure most people wouldn't have noticed. For that matter, I won't me making any real intentional modifications from how the construction of the kit is laid out other than my own choice in paint colors and omitting unseen ridiculousness. The ATC windows in the rear turned out better with my replacement of their photo-etch with my styrene. There doesn't appear to be many other really pieces of photo-etch in front of me, but the universe has this habit of laughing at my plans and perceptions. 🤣 And with that, I do have some pics to share! Thanks for looking in and Happy New Year!!!!


- 52 replies
-
- 12
-
-
- Curtis Wilbur
- I Love Kit
- (and 1 more)
-
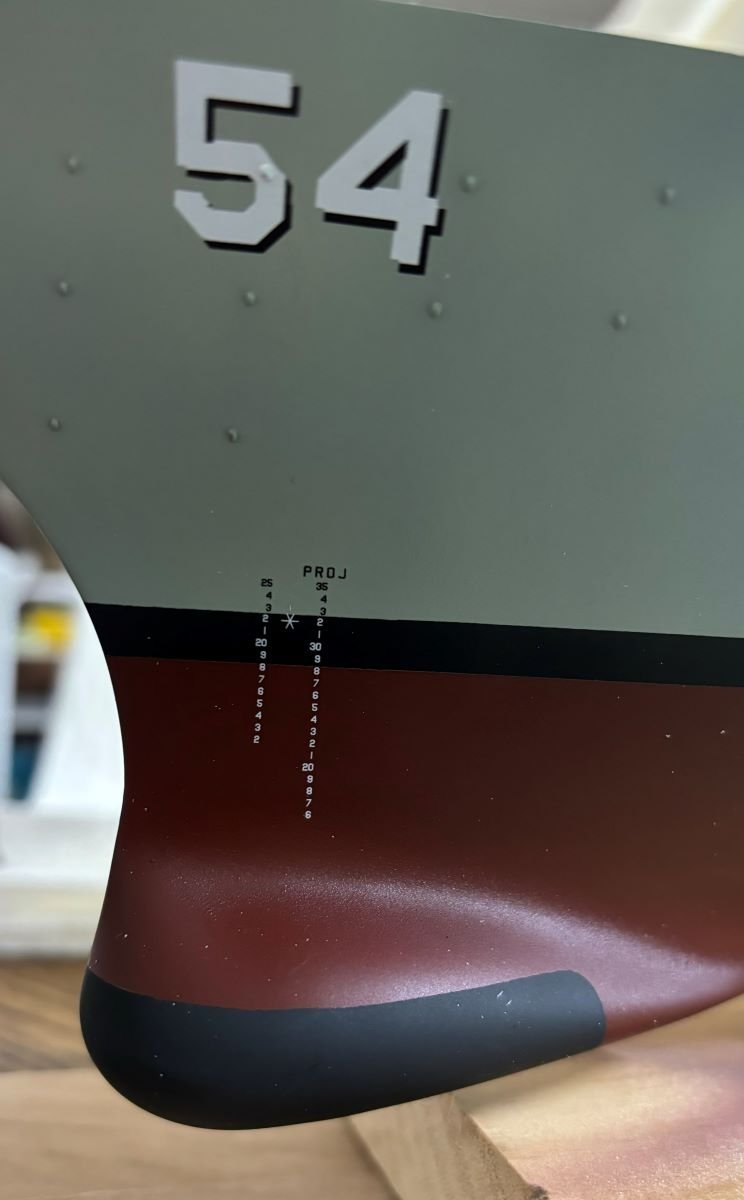
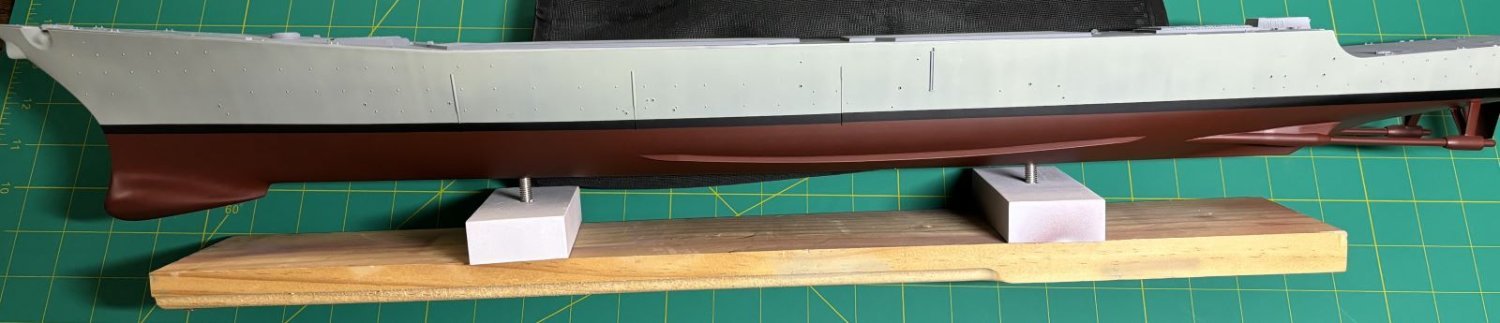
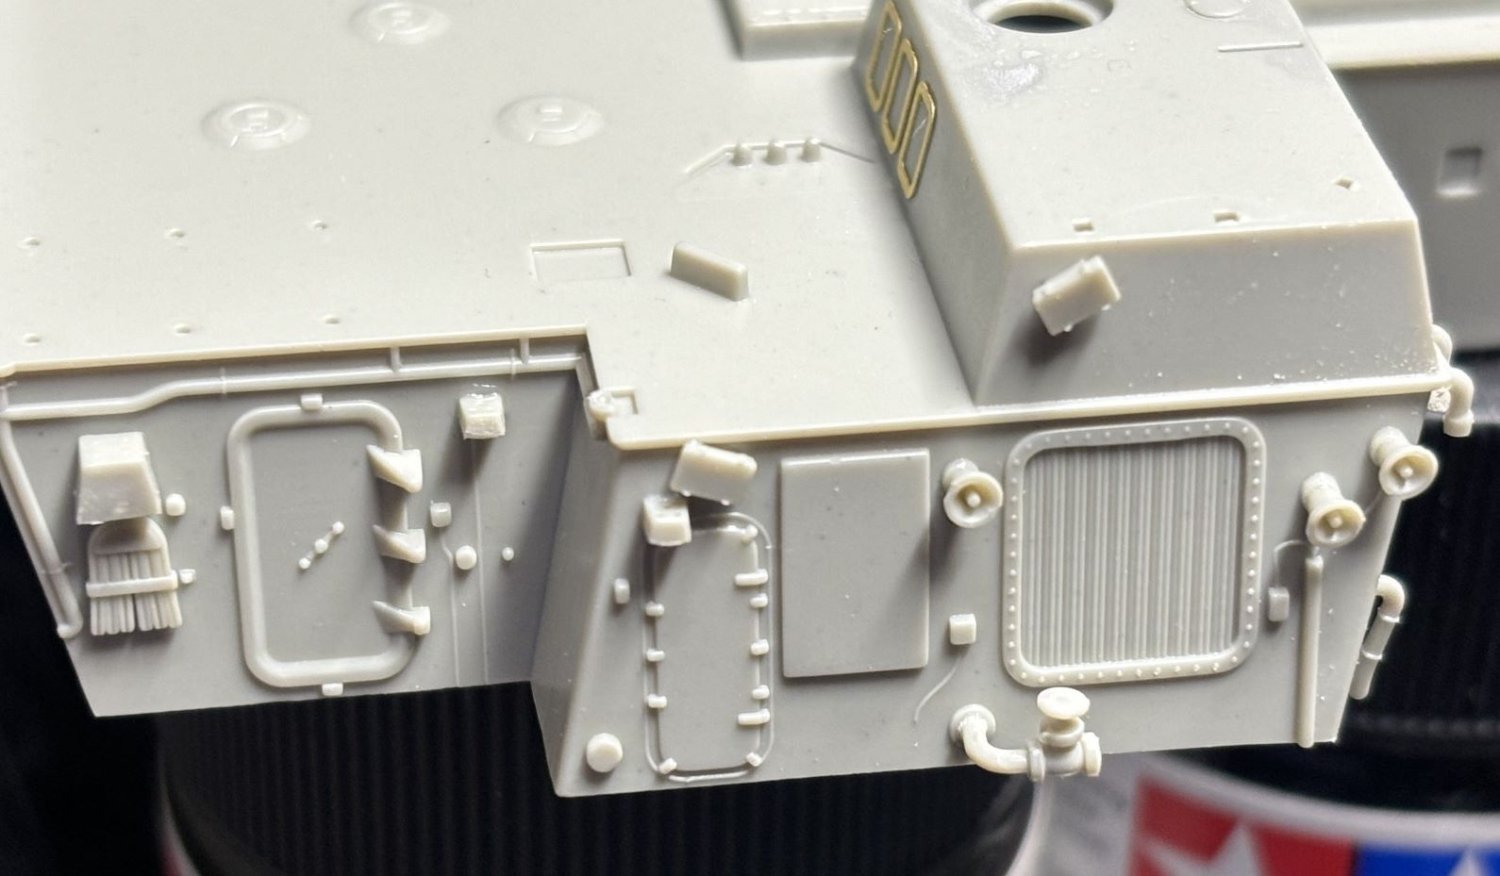
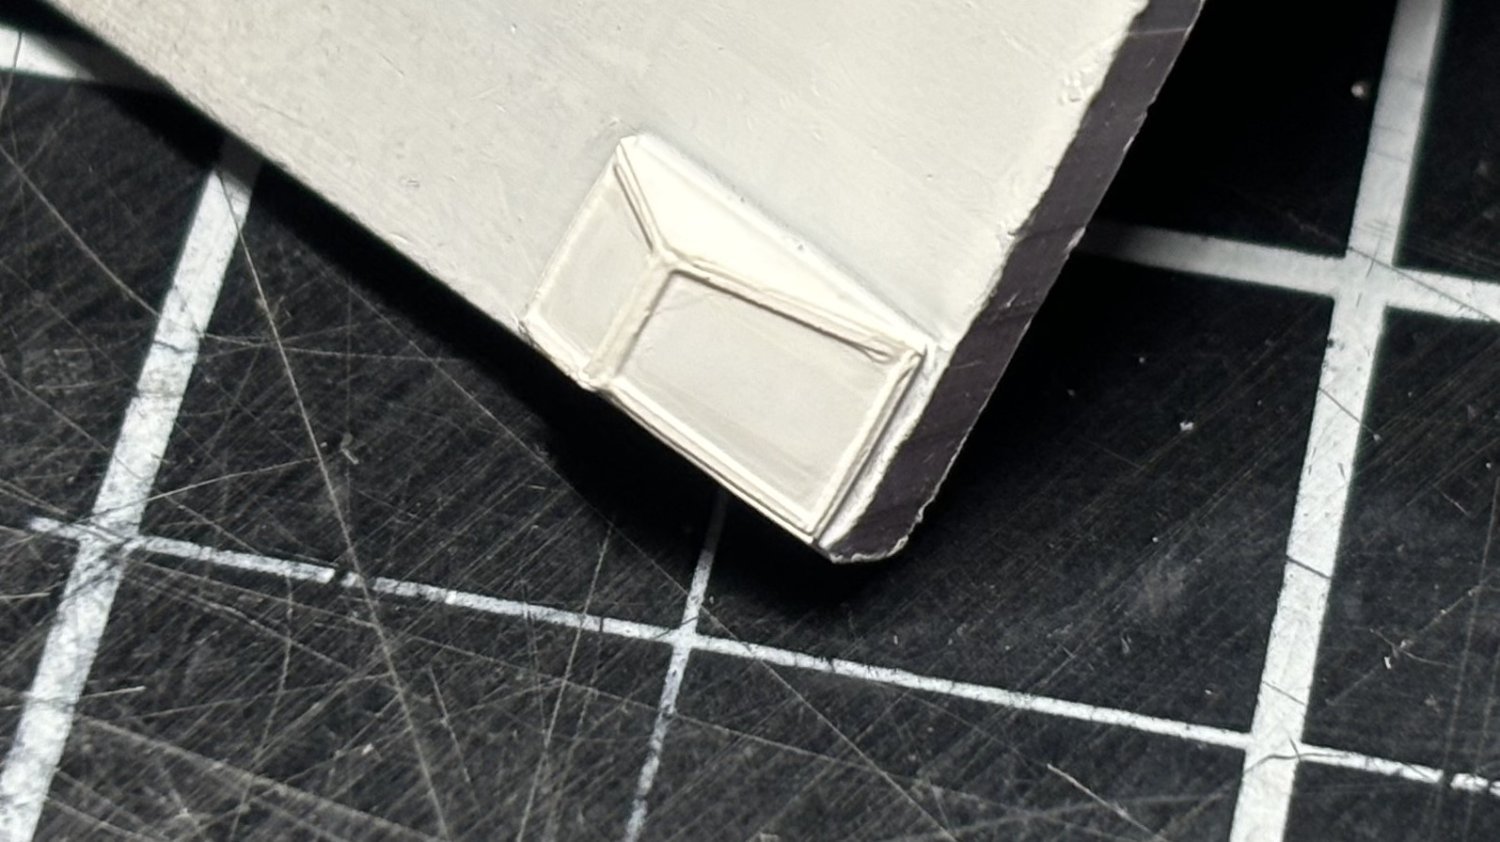
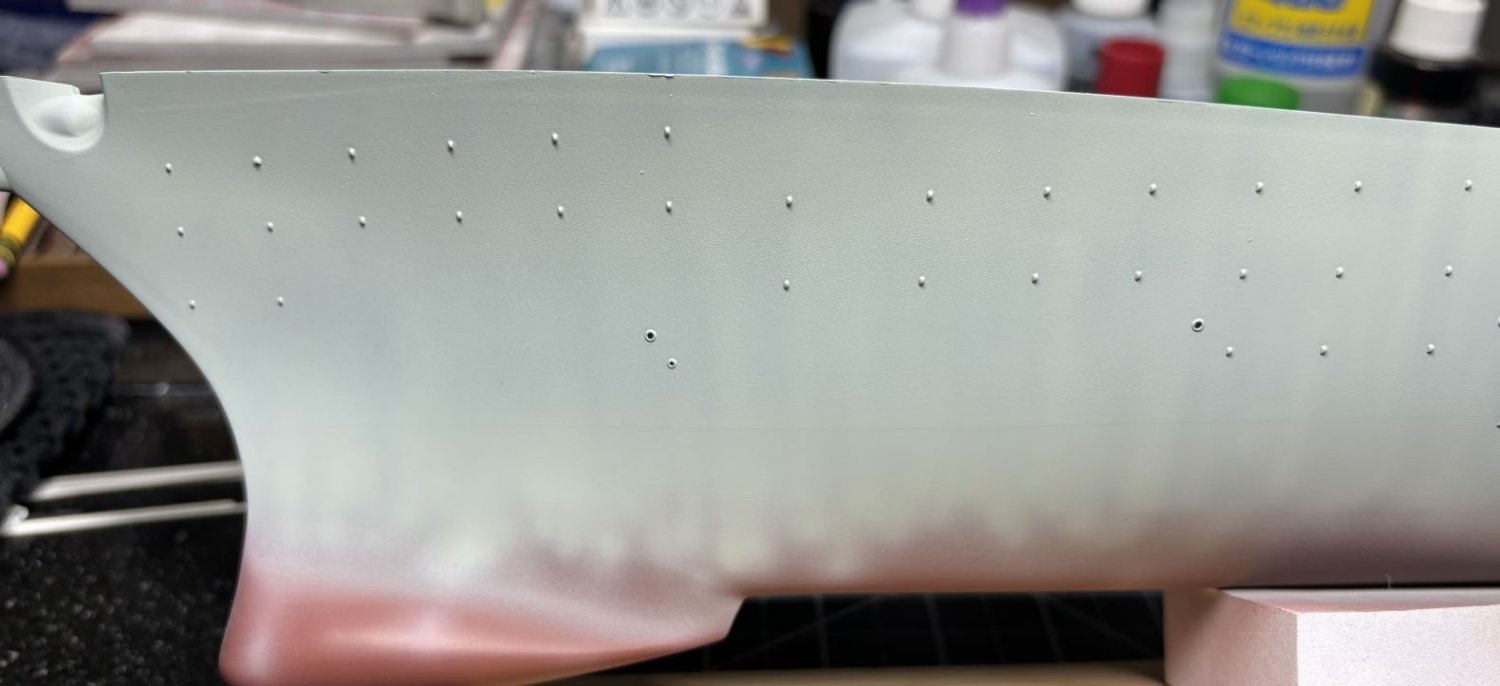
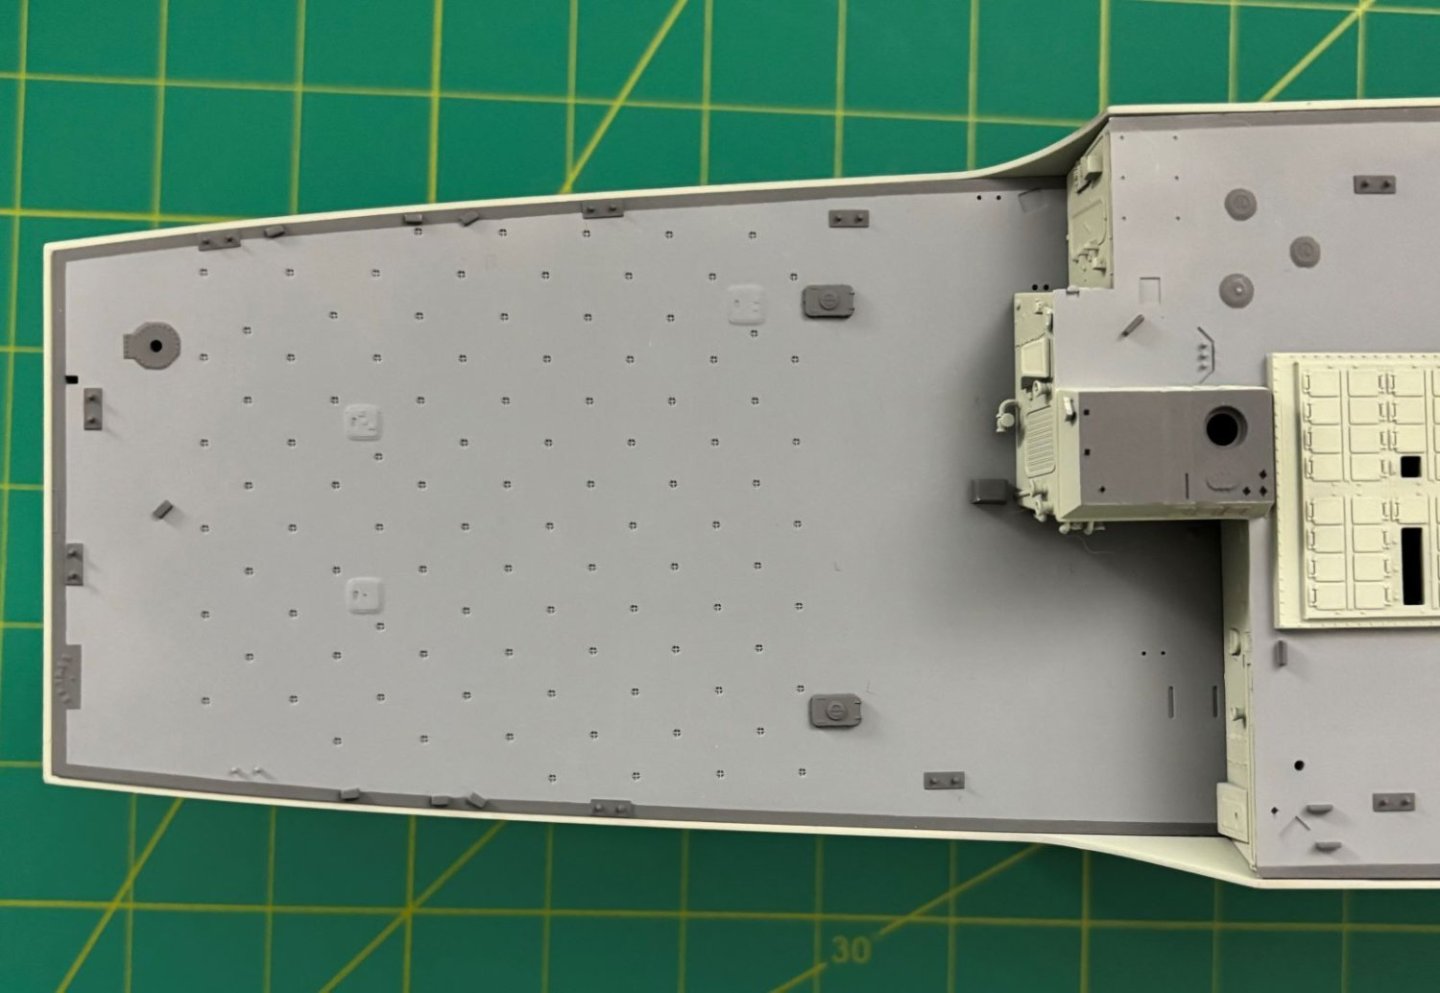
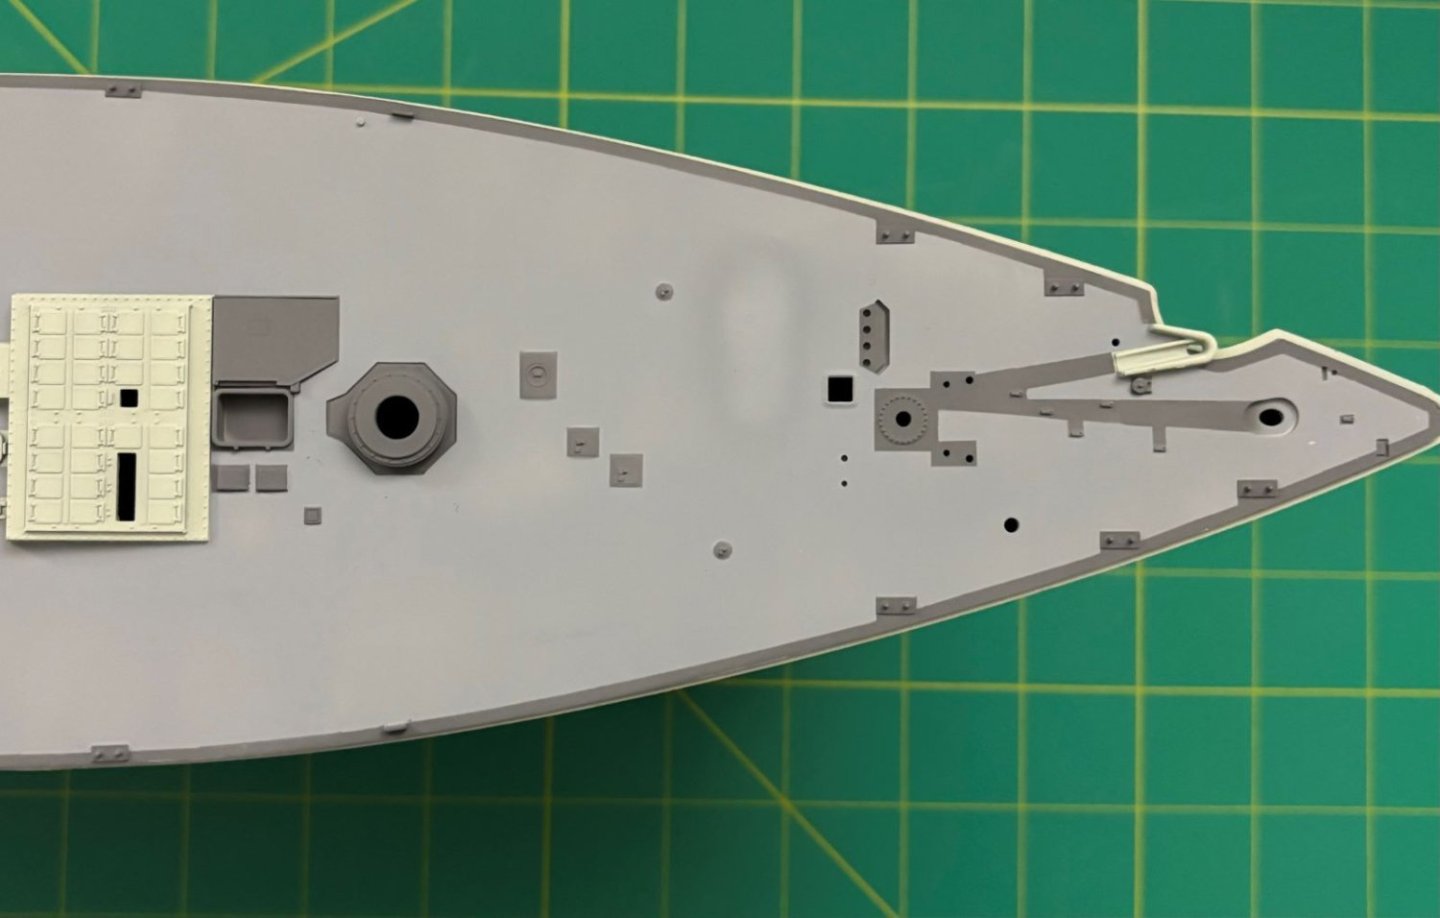
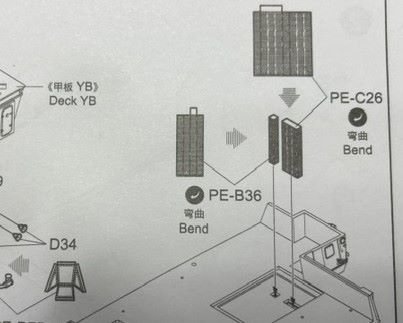
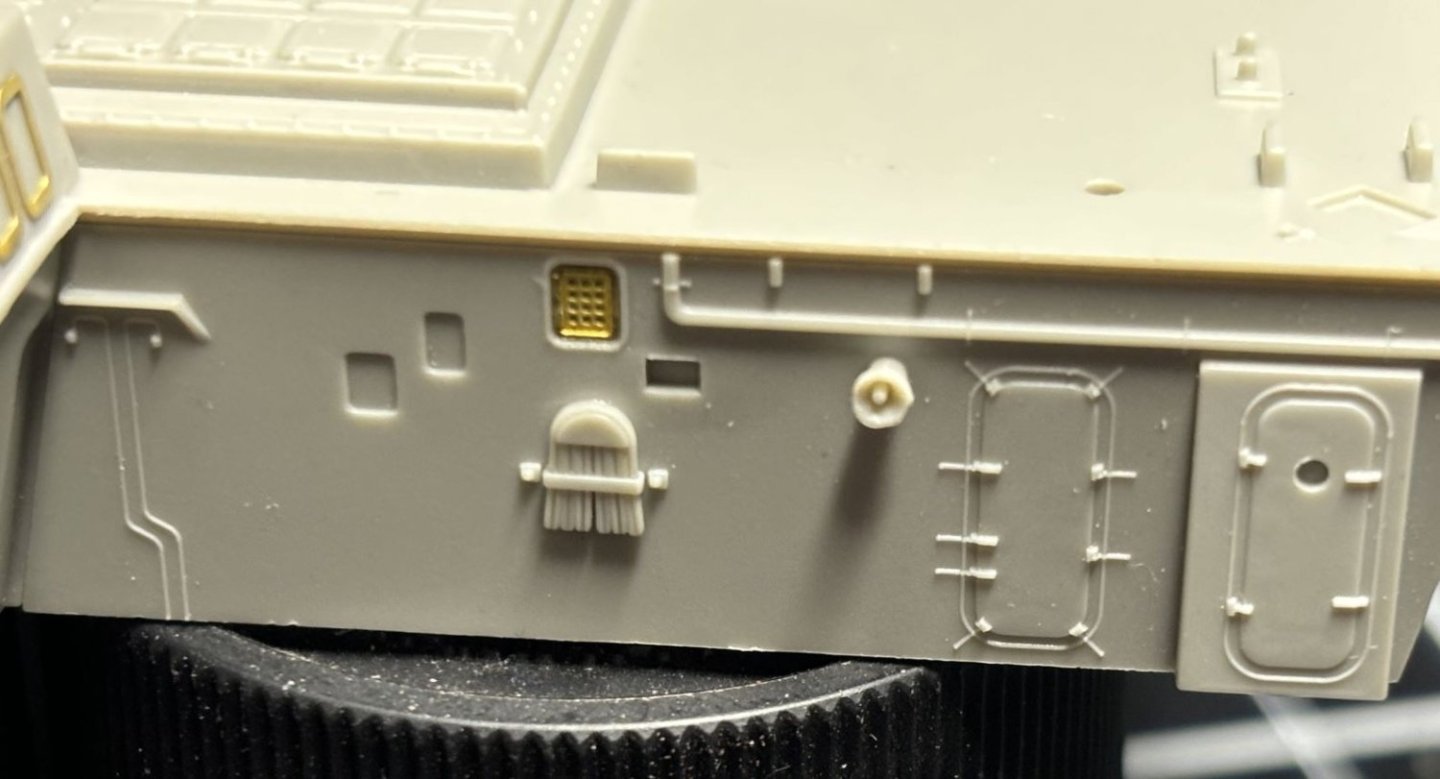
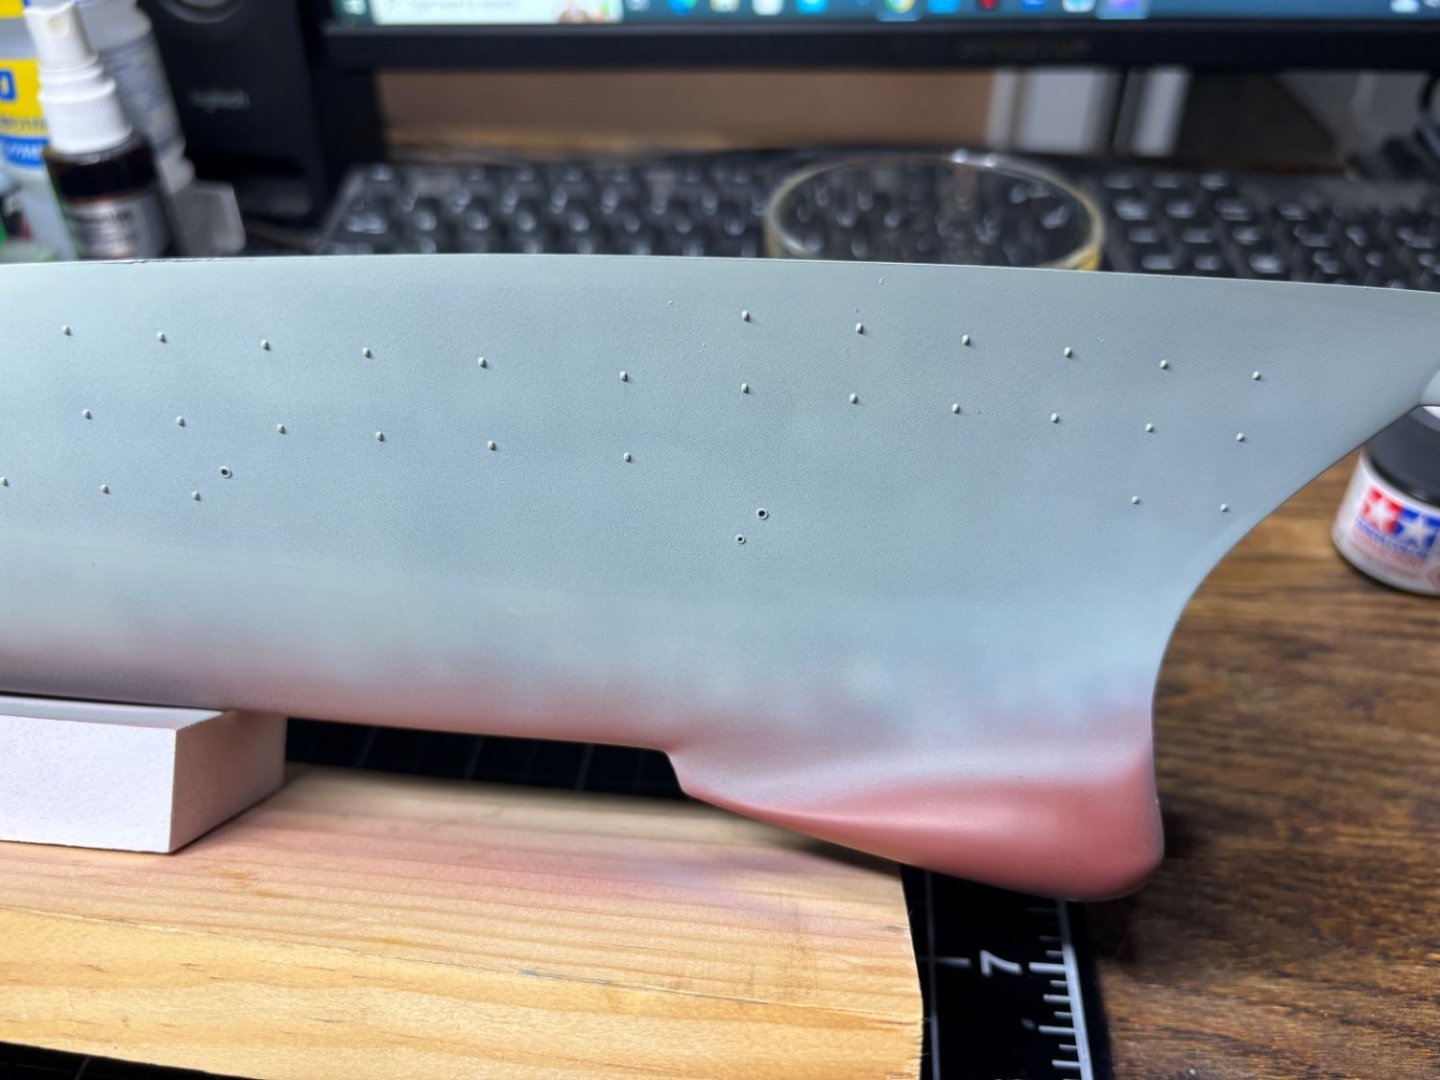
Hi everybody! The hull has its upper half painted in light grey; specifically Tamiya XF-12 IJN Grey. BUT, this is over a light ghost grey Vallejo primer, preshaded using Tamiya XF-24 dark Grey, blended using Tamiya XF-66 Light Grey (not very light, mind you), and then finally top coated with the IJN grey. I feel this gives me the best depth and tonal variation and allowed me to play with the colors to show almost hint at a frame. I still have to mark a proper waterline, paint the black stripe, and then paint the hull red. The grey is the longest I've played with grey tones before and for a change I found it to be very enjoyable. Typically the painting is pure dread for me since I can never match what the masters before me have done. I also constructed Step 1 finally. Some particular "Gotcha"s I came across along the way are all of the pieces are potential carpet monster meals. They are tiny! Also, some of the photo-etch in this kit really sucks. I mean it is terrible and there is no reason for it to be to begin with. The ATC windows, in white primer in one of the photos, is my solution to the photo-etch kit part. The macro is hell on such a tiny part, but from six inches away it does the trick. The photo-etch is made to show windows just like the real deal. The problem here is there is not a single piece of clear plastic to back it, but better yet, every other window on this ship represented in the kit, is molded as solid grey plastic with the intent of being painted. Why the ATC windows get the honorable, yet terribly executed photo-etch, we'll never know. Another dumb issue is the 4 pieces of photo-etch made to represent the vertical launch system tubes. 1. They'll almost never be noticed at all 2. The corrugated outsides will never be seen after gluing the deck in place 3. The inside, that would be visible (with opti-visor), is only plain, flat, shiny, and not etched with any detail in any way. I've included a pic of the instructions showing the offending photo-etch pieces. I opted to replace the ATC windows with styrene and completely disregarded the stupid vertical launch system parts. Hope you like the pics! Below is my solution for the ATC windows. Again, macro is hell on tiny parts. HAHAHAHA And below is a reminder to not forget to paint the inside bulwark here. Thanks so much for looking!!!


- 52 replies
-
- 9
-
-
- Curtis Wilbur
- I Love Kit
- (and 1 more)
-
When you have your channel started, please let us know what the channel name is so I can follow.
-
It looks like you managed quite well. Good work!
-
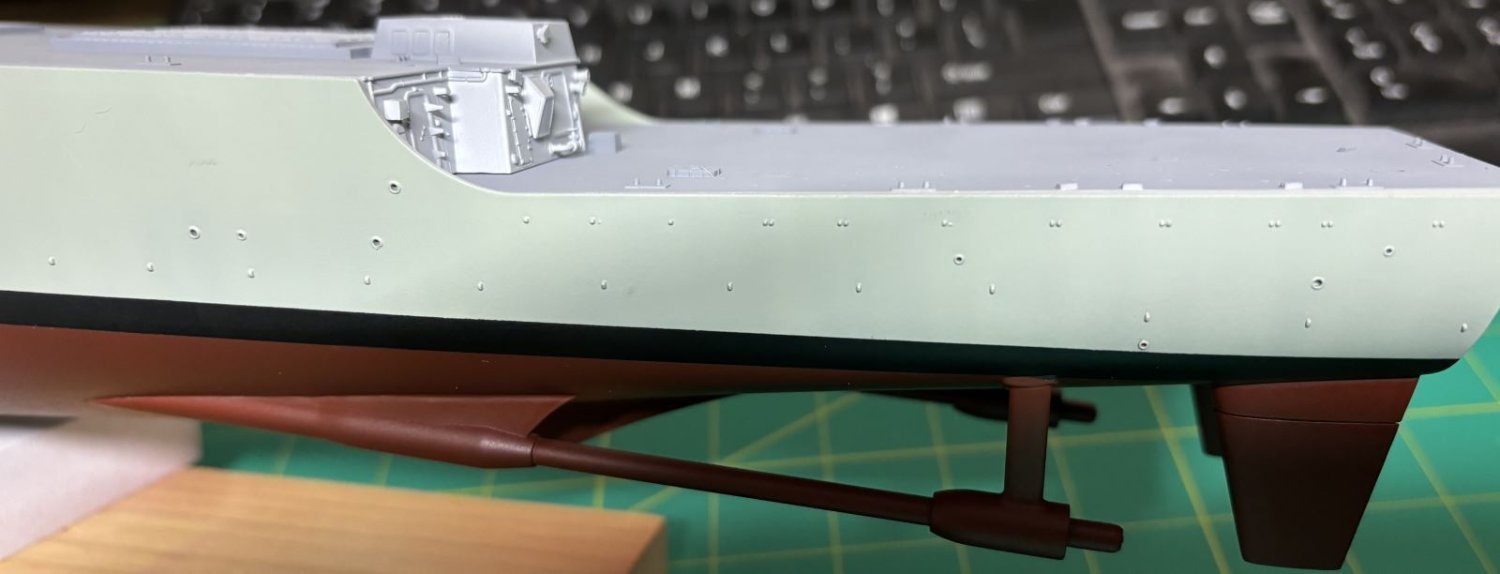
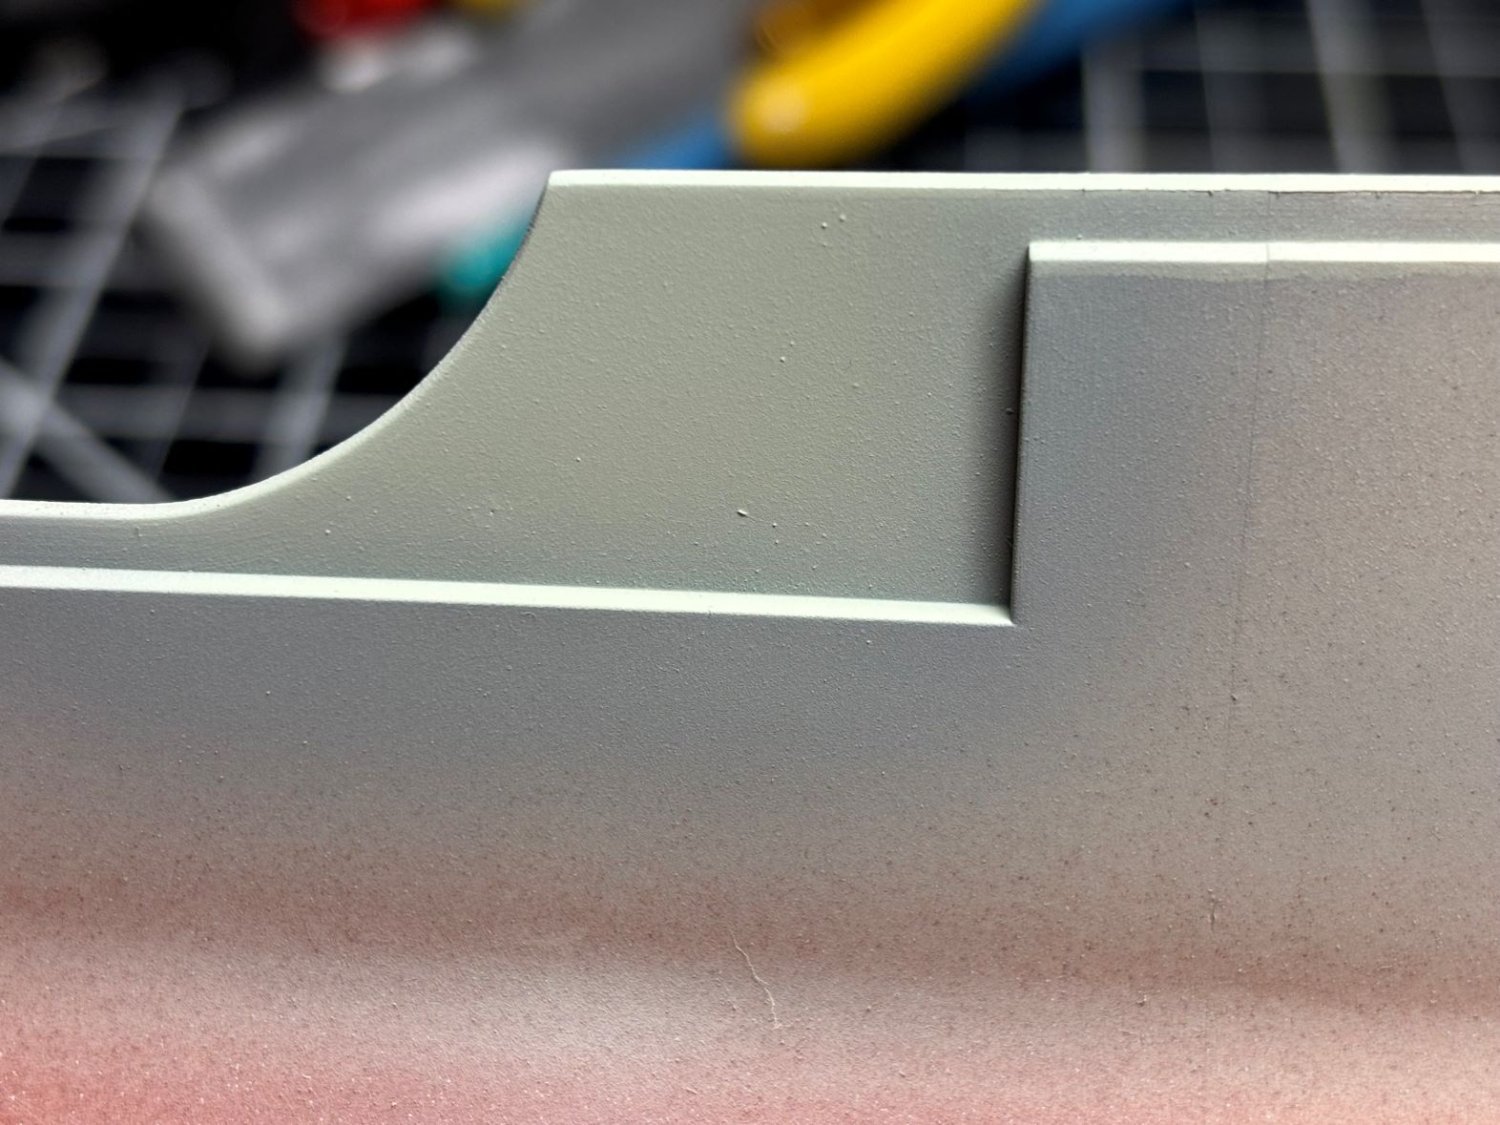
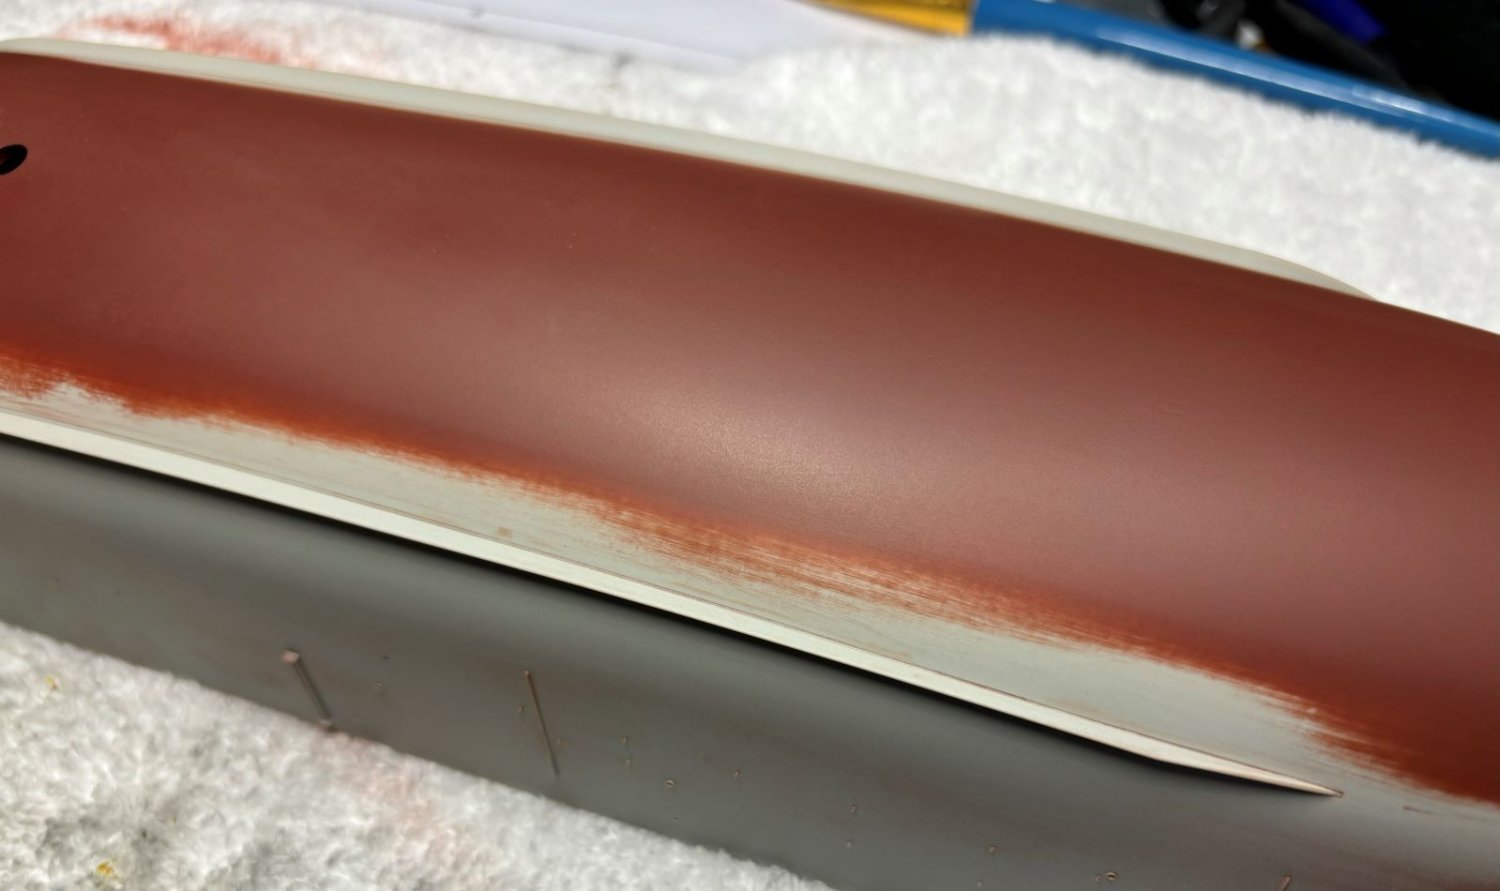
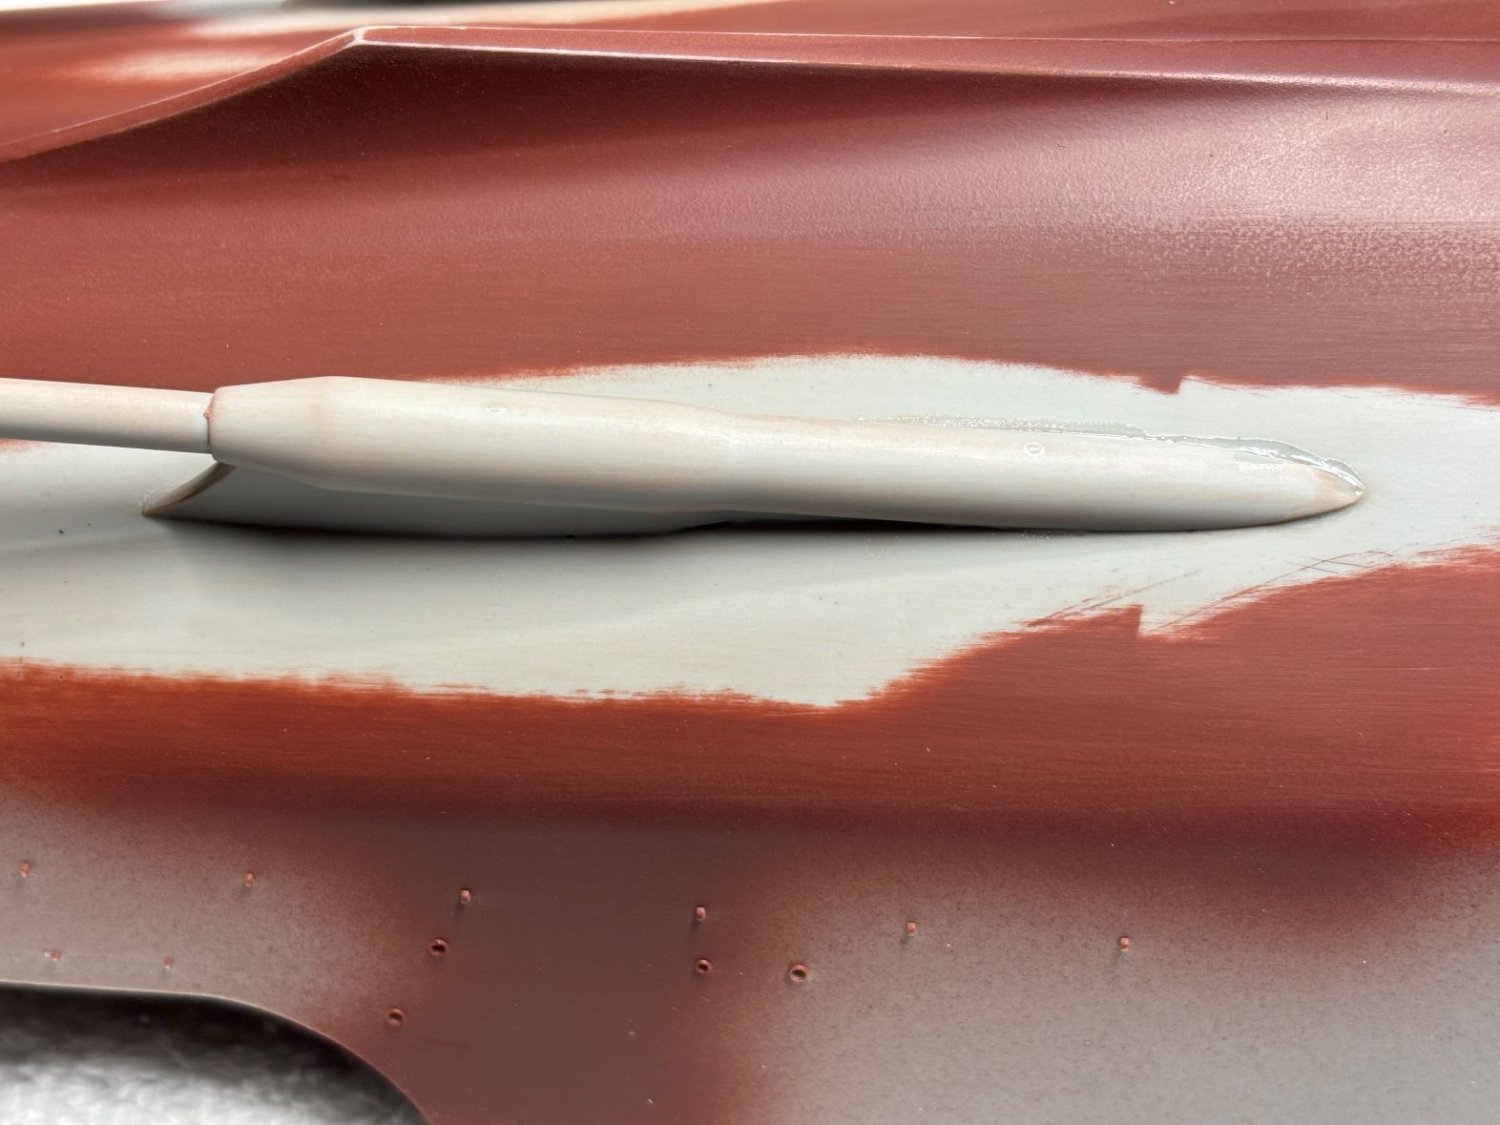
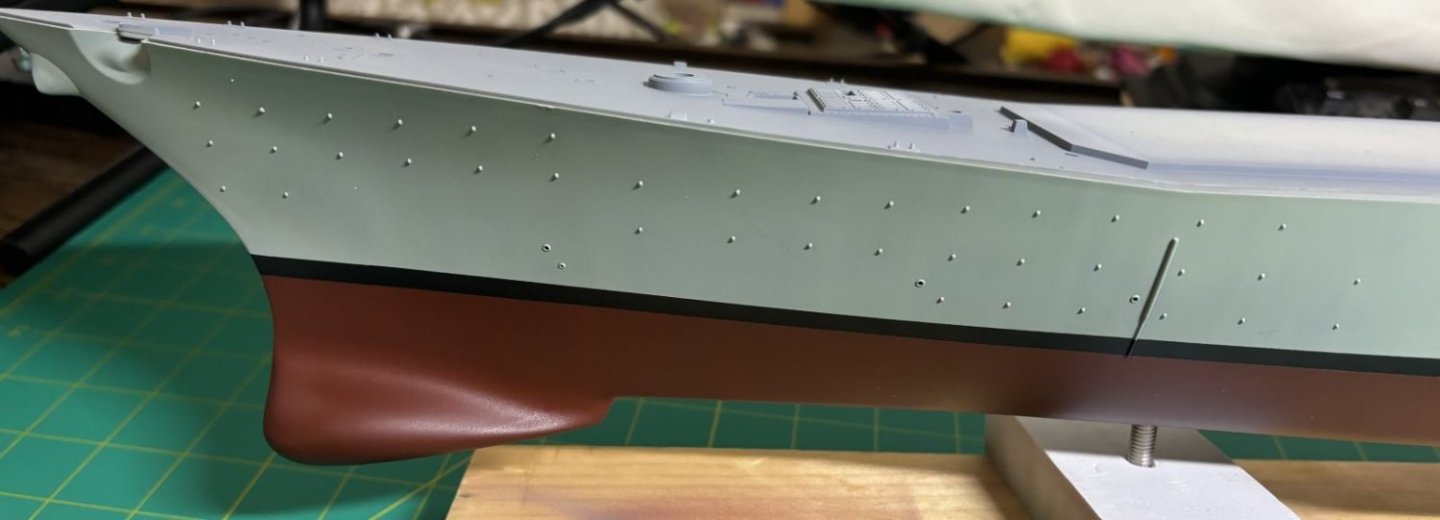
I got some primer on this hull. I used Vallejo German Red Brown surface primer. I sprayed this with a .66 tip at roughly 22 PSI. I bring this up because I have read so many blistering reviews of this primer. It was my first time applying it so based on the reviews, I was apprehensive and took every precaution. It turns out it may be my new favorite airbrushed primer. I didn't thin it at all and cleaned my airbrush afterward with Vallejo airbrush thinner. With the primer in place I was able to see that the majority of my prep work was good but there were a couple of nitpicky spots that needed attention. Once those were covered, I cleaned the remainder of the parts that attach to the hull bottom (except the propellers). When you're about to attach the parts, pay close attention to the positive mounting for the propeller shafts. It's too wide and needs thinned quite a bit. I did so using an curved hobby blade and a dozen test fittings later, the parts snuggled on. I mounted these first, then the bilge keels, then the propeller shaft supports, and finally the rudders. Everything got some reinforcement gluing and then some sanding. I waiting on one trouble spot on the propeller shafts to finish drying so I can make the front, bullet shape look proper. I've attached some pics. Next up will be more priming and then painting. I'm not using the colors called out by I Love Kit so when I get around to painting, I'll be sure to list what I used in case anybody is interested. Thank you for all of the likes and your comments. Thanks for looking in! Patrick


- 52 replies
-
- 11
-
-
- Curtis Wilbur
- I Love Kit
- (and 1 more)
-
Outstanding work! Your Bismark is amazing and I'm very jealous that I don't have one for my collection.