bgarden
-
Posts
74 -
Joined
-
Last visited
Content Type
Profiles
Forums
Gallery
Events
Everything posted by bgarden
-
 Hey guys I thought I would share a bit of news not really to do with the Niagara. Today as the lawyers sign off on everything my wife and I should be the proud new owners of our first house! So If you don't see me posting much over the next week it's because I will be busy moving the work station to it's new location. Ps. Happy belated 4 of July. Brian
 -
Okay Larry, from where I stand (up here north of you) it looks like things are not that bad. I think that what you are seeing is that perhaps your hull could have underwent a bit more fairing. With that said it is important to note that the gun ports taper a little, getting wider towards the bottom. Also it may be worth noting that gun ports towards the sten taper a little more then the gun ports in the middle and he gun ports at the bow tend to taper the most. I don't think that your plank steer is installed poorly but I would suggest that if you are brave enough removing the plank sheer might be helpful, you could over shim the sides of the gun ports that are low and re fair everything to your liking, dry fit the plank sheer and then when ready reinstall it. I had to remove a few planks that had been glued to my hull so far that we're not to my liking, all I did was very carefully and slowly cut loose the problem areas with an exacto knife, but depending on the glue used you could dissolve it to. If I were you I would both shim the gun ports deeper and fair the hull a little more. On my Niagara I had to extend the gun port sill a little, but the trick is not to do it too much. You want to give that ship curves but not too much curves. Brian, ps. Happy 4 of July, you live in a great Country, be proud!
-
I really do love working with CA glue but it can bite you on the butt if you don't give it it's due respect it. Look forward to seeing your work. Brian
-
A very warm welcome Bob, the "Niagara Club" grows stronger everyday. Perhaps if we get enough builders on the forum we can petition the forum to changes its name to model Niagara world... . In any case it is great to have you hear and I will truly enjoy watching your build, which looks like it is off to a great start. I found the framing to be a little tricky, but yours looks like it is moving along smoothly. Great work, Brian
-
Thanks guys it is coming along. Nice to have a few extra hours this weekend to work on it (due to the Canadian long weekend!!!). Brian
-
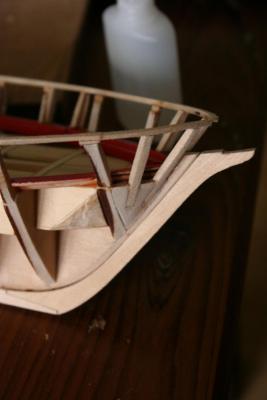
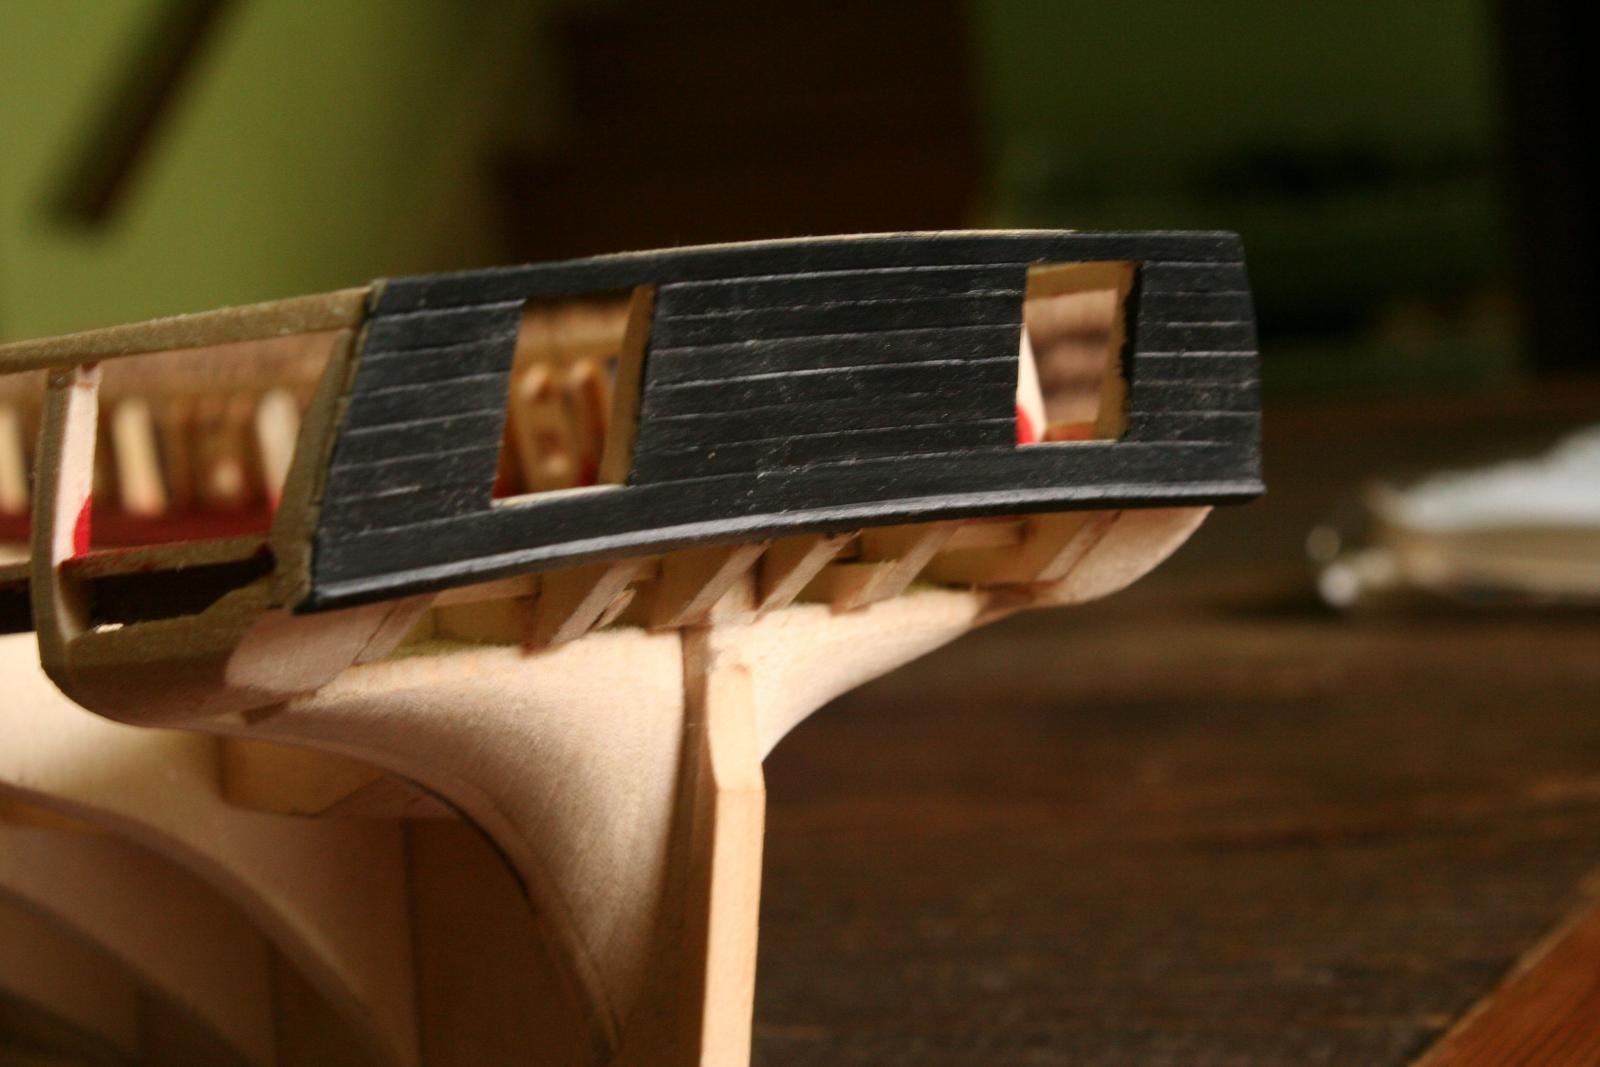
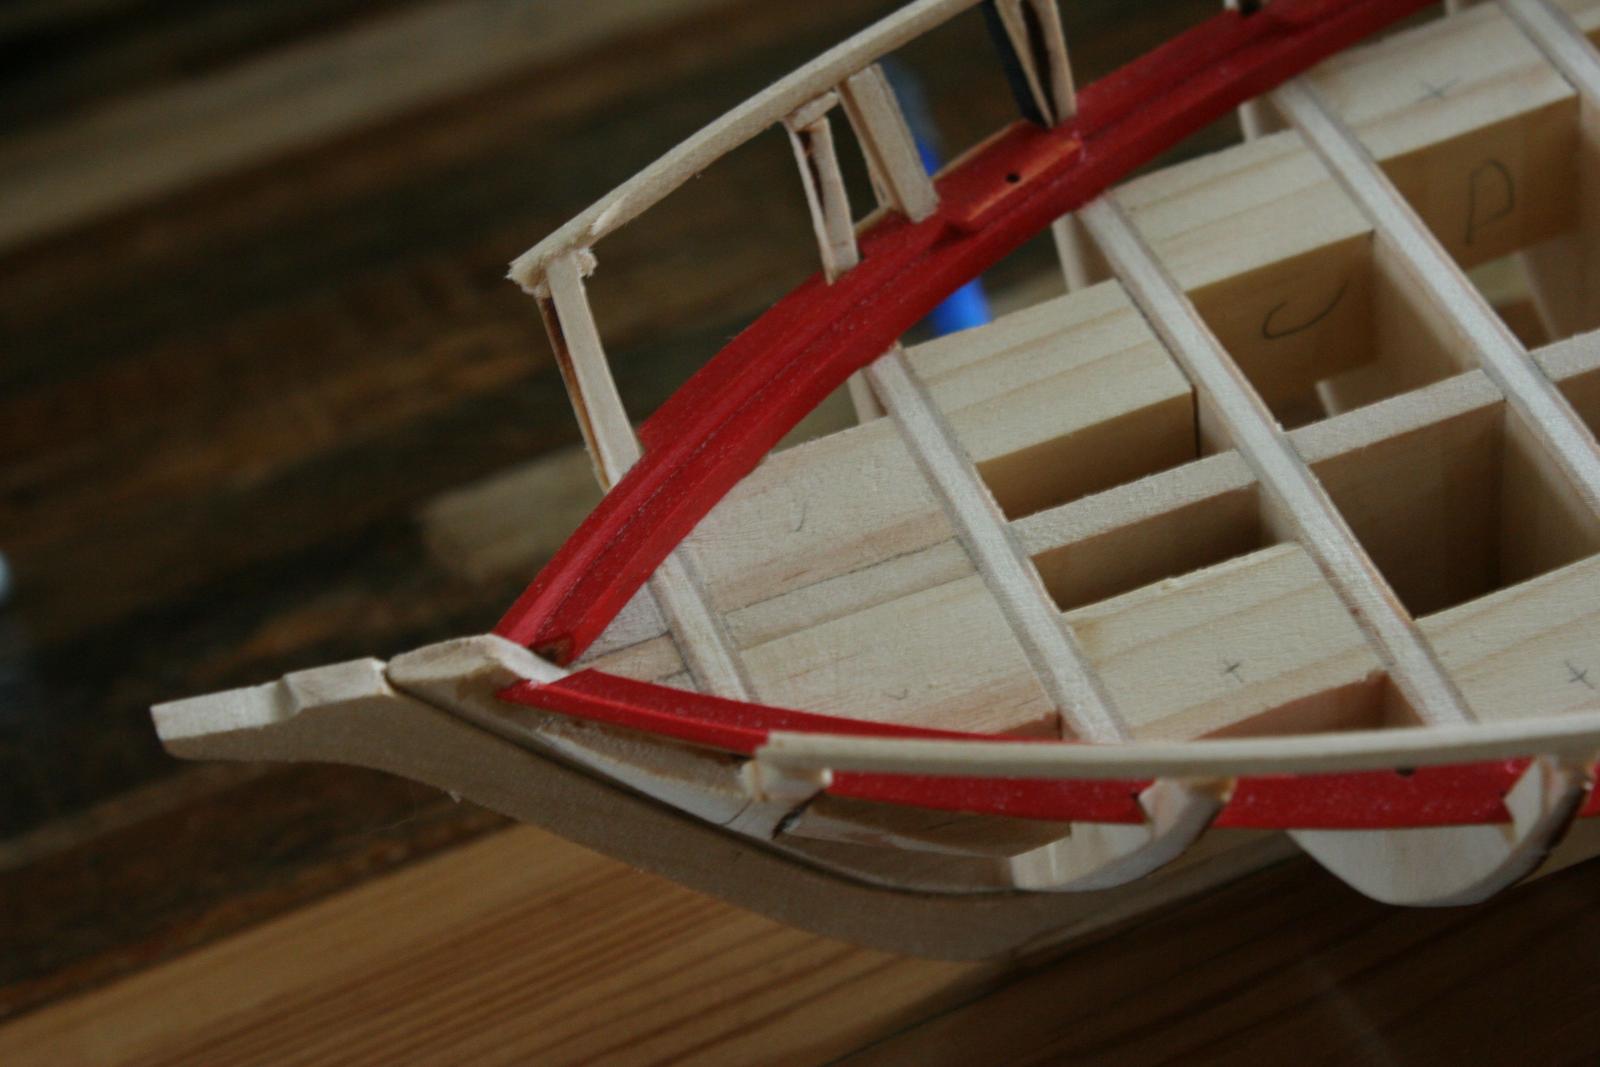
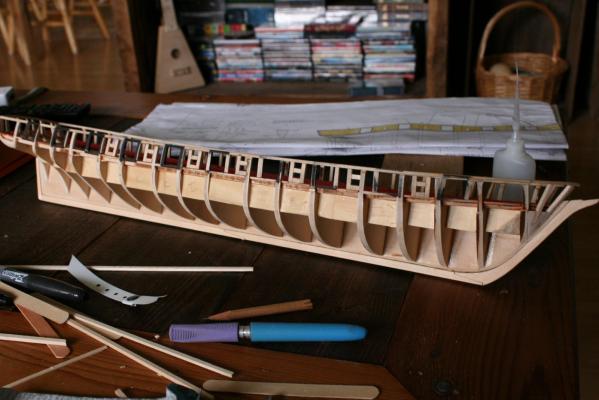
So far this weekend I had quite a bit of time to do some work on the Niagara. Mainly I have focused my attention on the stern counter planking. I am happy with the finished project but I must admit that I did not really match the blue print with complete accuracy, but I will not tell anyone if you don't....and nobody will be the wiser . So in the Plans the First plank in the counter plank series (top down) is only a 3/4 length compared to the others but in mine it worked out better that I used a full length plank. Also I am not sure how well the curvature of the counter planks match the plans (See picture 2 vs. 3). But with all that said I think that I needed to understand that I am not planking the plans but instead I am planking my boat which is similar but never exactly the same. I just hope that I have understood how the hulls planking will meet the counter planking. Also I continued to shape the fashion piece (Picture 4) now that I had the counter planks in place. The Fashion piece is still a little too long at the bottom but I will adjust this when I plank the hull. Also I thought I would show you a rough idea of what a gun port will look like with the red styles installed along the walls of the opening (Picture 5). Brian


-
RIch Wow, I am so glad to "see" some of the great work you are doing, the cannons look so time consuming but so very worth it. I think that when I get to the cannons (and the rigging) I know that I will be so lost, so keep notes so I can follow . As for the height of the cannons I remember reading in another log (for a totally different boat) that the scale of the cannons was a little bit off, so mounting the cannons had to be adjusted in one way or another but in the end I have no doubt that you will do a fantastic job. Brian
-
Larry your work is looking fantastic. It is great to see your inboard planking wrapped up. As for the gap at the bow, you have nicely set yourself up for the installation of the bowsprit. Your opening looks to be too small which is good because you can always open up the gap more with an emery stick or a sharp blade, but it becomes tricky to add to the opening if it is too big. If I can suggest two things...One if you were to build the bowsprit as to the plans size and then open the gap at the bow to the built bowsprit size, that way if you were to be slightly off the plans with your finished bowsprit then there is no worries. Second is to visualize how you plan to build and insert the bowsprit through the hulls planking remember that if you finish the capping and have an opening instead of a slot then it may be more tricky to install the bowsprit and you will need to install all of the inboard detail along the bowsprit after install and awkwardly paint them as a retro fit. Your conversation on your log has been a good heads up for me to have a bit of a game plan. I think that I will leave the main rail and the red stringer on the inboard planking off, install the bowsprit and then lap those things over the bowsprit. But once again your work looks great. Brian
-
Hello ortho85, The first kit that comes to mind and one that I think you may find great support among members here is the Brig Syren by Chuck Passaro through Model Shipways. The price right now is great and he is often poking his head into those who build this kit to give support plus the kit comes with a practicum (step by step instructions). Brian
-
Well thank you guys, and welcome to this part of the forum Edwin! The gun ports turned out not bad, but there are a few things that now thinking back I might have tried differently perhaps. As for Rich, your build or should I say your gun ports look terrific and I may humbly disagree with you, and then come back to agreeing with you about any Big Lebowski quotes!
-
Thank you Tim, your comments are more then kind. I will try to keep photos updated but my skills lend to a rather slow build. Thanks for checking in. Brian
-
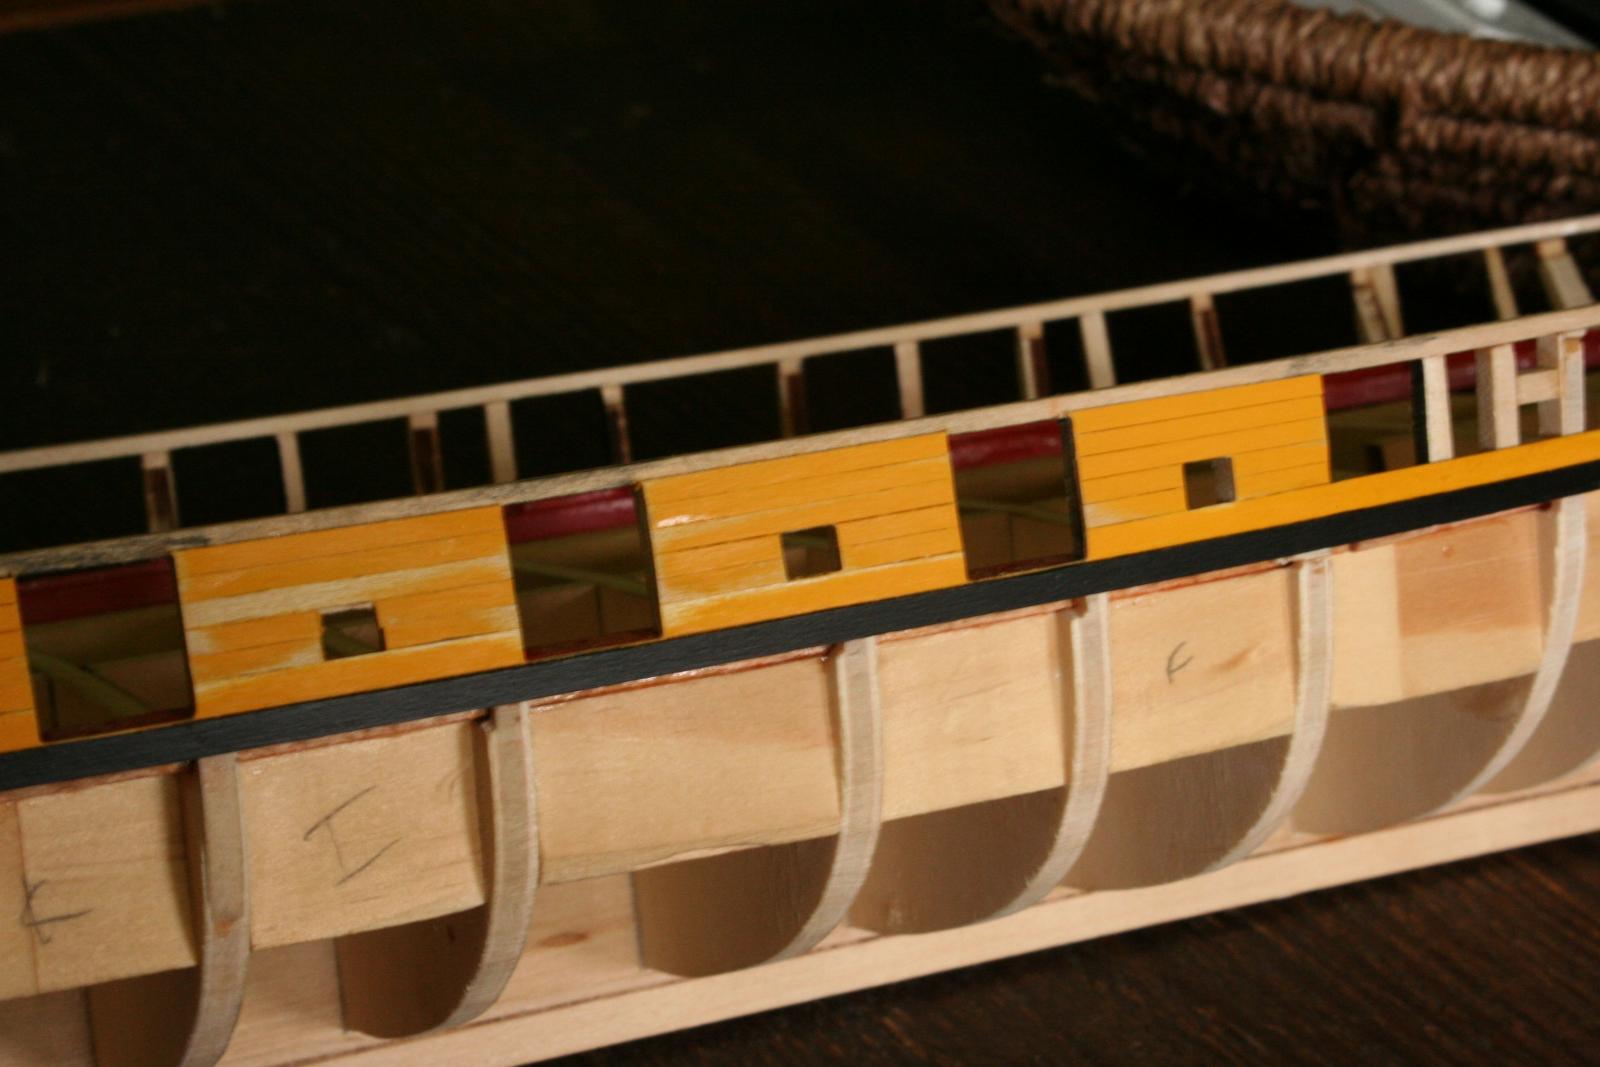
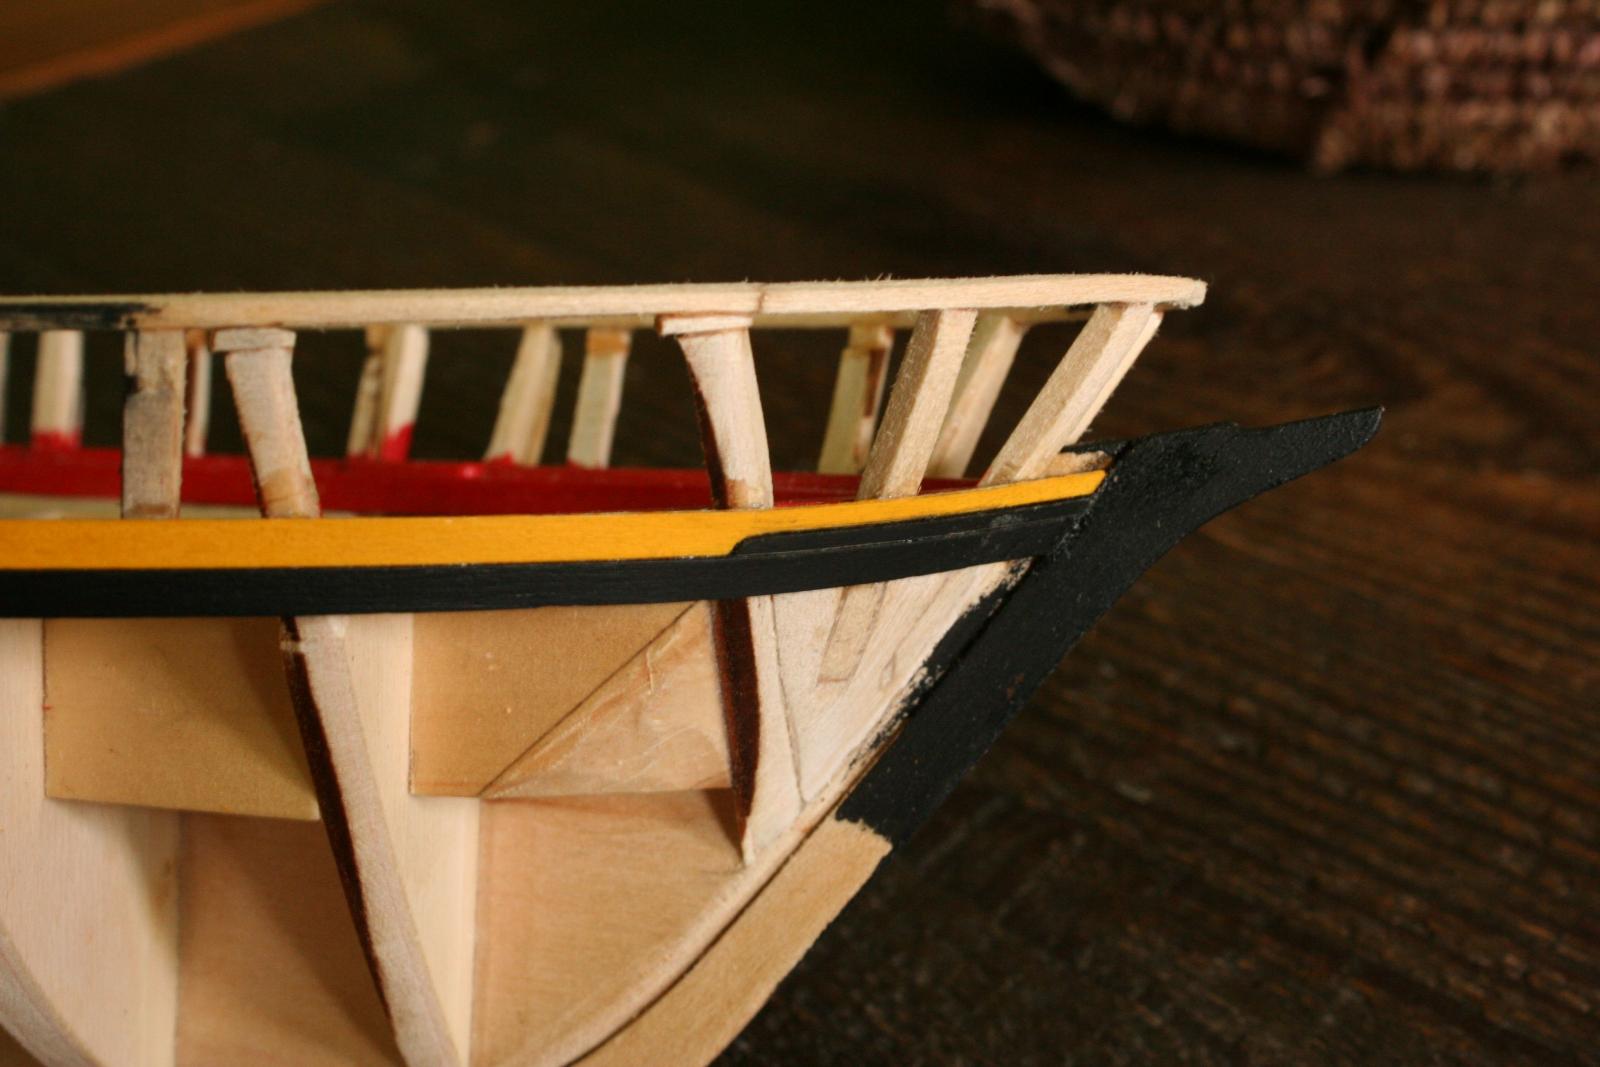
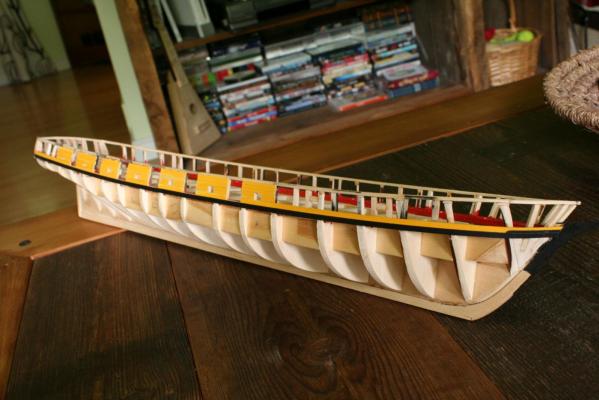
Rich- all I can say is ! Larry- yes a bit of planks and colour goes a long way. As for the boat I thought I would show a bit of where I am at as of today. The upper planks are on the hull and all the ports have been cut and sized to where they need to be. I had a heck of a time with the bow. Getting those planks to turn around the horn of the hull to the keels rabbit while maintaining (from what I could tell) the lines in the blueprint was rather difficult. It looked to me in the plans that the planks maintain a very slight incline as they reach the bow but in the real world the planks wanted to have a much greater incline then the blueprint's would allow. I also did not want to stress the planks too much in shaping it around the hull, so I strived to do the best I could do and to be happy with the result. I also fit a rough fashion piece in place (the bottom half of it is not fitted and still needs to be shaped, something I thought I could try to do after I finish all of the stern planking and Start the hull's planking). I started planking the hull by gluing both the bottom black hull plank to the bottom yellow bulwark plank because they were different in thickness and I wanted to have that detail look uniform, how ever so hard to see, and then plank upwards. The paint job is rough and will need some more coats to make it look good, but that can wait for a while. Here is a few pictures, Brian


-
Boldly done Larry. I must admit that I don't have the guts to try using such a tool, but your finished project looks great. Brian
-
Welcome Bill. I am glad to see another Niagara builder here in the forum. I look forward to seeing your builds of the Niagara. Make sure to start your own log so all of us can tag along. I always thought that it would be interesting to build two of the same model, by the time you get to the second one you have perfected what you need to do and sorted out any areas of confusion that you might have had one the first one. It is too bad that you never got to sail on the Niagara, and I hope that your wife's breast cancer has been caught at an early enough stage for treatment to be sift and easy (as treatment goes). Look forward to seeing you around the forum. Brian
-
Am I seeing your cradle right, is the rails dovetailed into the face plate? If so... wow...and beyond that, wow everything is...wow. Your details are beyond amazing, (does "wow" trump "amazing"?). Seriously, wow. Brian
- 515 replies
-
- 1
-

-
- artesania latina
- whaleboat
- (and 1 more)
-
Rich if I were a betting man I would put my money on it that in due time you will find an employment opportunity that will fit you and your skills, but beyond any of my predictions your attitude through all of this has been self controlled and positive. If there is anything that shows true character is keeping your head up when things are not going as planned. You have qualities that are very rare. Thanks for sharing. Brian Oh and since Larry is not going to inquire about pictures maybe I will...
-
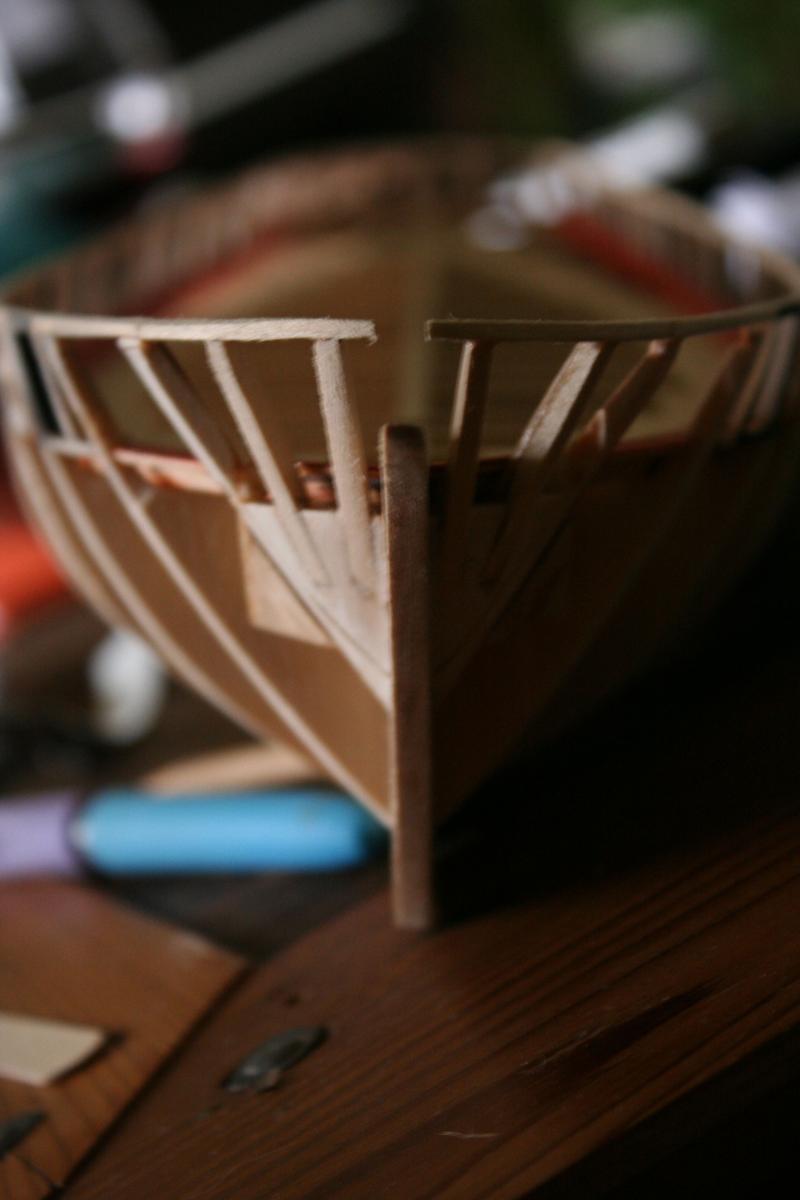
So with the change of the weather and preparing to move to our new house and what is a very intense work schedule, the poor Niagara gets only scraps of time and so I have been a little remove as of late (really due to work). I can't even imagine what it would be like once my wife and I have kids... So I could not help myself. Once I was complete the starboard side ports I did not continue on to the port side but instead I have stared on planking the uppers and the stern. As I see it I will finish the uppers and stern and then go back to the port framing which is only the port side sweep ports at this point. I also want to install the fashion piece (which I am trying to make from one solid piece, but is a bit tricky). But I thought I would share where I am and to help the Niagara club from being M.I.A. Brian


-
Larry while you are struggling through perhaps one of the hard to bear times of the year, I often say to my self in the deepest part of winter here in Canada I wish I had been born in Florida. I love to see the inboard planks but also to see your great paint job. From what I can tell from your pictures you and me think the same (or should can't stay on one task), and have completed the ports framing on one side and instead of completing the other side moving right on to planking instead... Your work looks great.
-
I like your photos of the model saddled on the keel clamp, a number of them look like the ship is heeled over in the wind and I can see the planks and mast and booms that are soon to come as you move along in your build. Great to see the rail on with all the detail of the gun and sweep ports. I must agree that I found the installation of the ports took a surprising amount of time to accomplish. When ever I got a little weighted down with the completion of the ports I would just take a minute and look a the Santisima Trinidad logs. I also must agree with Rich it might be worth a bit of your time to pre paint the planksthear. Great to see your work!!!
-
I don't know why no one has put their vote behind the beautiful 1750 Eagle. Wow, she has great lines and a stern on her like no other, I mean baby's got back! Plus knowing your skills Buck, your wood working would make that model look ten times, maybe even eleven times great then the box would suggest. WIth that said I would put a very close second vote behind the Hind. Brian
- 515 replies
-
- 1
-
-
- artesania latina
- whaleboat
- (and 1 more)
-
Rich, it sounds like the job hunt may be wrapping up!!! I couldn't be happier for you, I will have both my fingers and toes crossed for you today! Your boat look fantastic, and a whole lot closer to being complete. Now your boat really looks like a Niagara. Great job on the water line, I can't see any bleeding along your paint lines (a very difficult thing to do). Great to see your photos. Brian
-
If you want to know my secret to a flawless paint job, it is this, take any picture of your boat in dim light . Brian
- 515 replies
-
- 2
-
-
- artesania latina
- whaleboat
- (and 1 more)
-
Thanks Rich, Bob, Larry, and Buck! I think that this week I will start to paint any of the upper planks that are needed along the rails, and I might also try to make the fashion piece that is needed along the stern. I guess I can start to juggle my time between planking the stern and finishing the framing of the sweep and gun ports. I am not ready to allow my self to get excited about planking the hull yet, but I think I will allow my mind to drift on to how to covering up the bones of my ship. Maybe my pup can lean another hand. Brian P.S. Bob I never knew a cat to take any interest in building a ship, perhaps due to their distaste of water
-
And here is a picture of the sweep ports being started. Brian
-
Hi Joseph, thanks for the well wish's. My wife and I from time to time will drive by the house just to look at the sold sign. It seems a little unreal but completely exciting! I just hope that the current owners haven't seen us driving by with our camera out of the car flapping pictures of the sold sign... As for the boat I am able to squeeze in a bit of work from time to time and have finished the port side gun ports, installed the knighthead and timberhead, and started the sweep ports on the starboard side. As for finishing the framing at the bow, my trusty k-9 friend one day decided to lend me a hand on how to best finish the framing. As it were, I had yet to install the knighthead and timberhead because I was unsure if I could bend the false rail enough with out snapping it. But one day while working on the gun ports my dog had jumped up beside me and in doing so accidentally bumped into the model and snap the false rail at bow (right before the first bulkhead). Naturally I just thought that my dog was a bit clumsy, or that I should not ask him if he wanted to go for a walk while I had the ship in my hands. What he was trying to say to me was that I should cut those pieces free, steam them, bend them, and then reinstall them with the correct curve so that I could then install the knighthead and timber head.... thanks to my puppy