


bluenose2
-
Posts
263 -
Joined
-
Last visited
Content Type
Profiles
Forums
Gallery
Events
Everything posted by bluenose2
-
Sanding and drilling pens
bluenose2 replied to bluenose2's topic in Modeling tools and Workshop Equipment
So further to this topic. The pen starts at it's lowest setting 5000 rpm. Then 10,000 and 18,000 rpm. The optional micro drill bit set has 10 bits ranging from 0.3 to 1.2 mm's. I find it also works well on resin figures. No it does not have collets but I can use the 2.34 mm Dremel and others in this unit. So far So good. -
Hello Les here. I have a new tool to me in my must have tool box. It is the DSPIAE Electric sanding pen. It is a rechargeable mini Dremel like tool. I have used it to drill very small holes and do close grinding. For close in work it kills the Dremel or other similar tools I have. It isn't as powerful as a rotary tool but it fits very well in the hand. You can purchase a tungsten drill bit set separate. The drill was $39.97 Can and the drill bit set was $10.97 here in Edmonton. Please check it out. And no this is not a commercial. Check out their web site to find a distributor near you.
-
Hello Les here. As a painter I get what your talking about. Dap. This product is not rated for this application. If you must, use a solvent based product that is used for exterior siding. Mulco is one. Just be aware that you can't cut the tip fine enough to apply to a very small bead. I would Google " marine caulking" and see what comes up.
-
After some thought I'm going to rig all the same colours. While a ship at sea or under retrofit would replace lines as required I think it would be a bit much and look like a hodgepodge due to it's small size. Thnx for the input.
-
Hello Les here. I am currently building the Corel version of this ship. I have purchased the book Endeavour, by Karl Heinz Marquardt. I believe this to be the best reference book out there. I have made many revisions based on the material. I have built the masts and yards based on this book. Now my dilemma is that the mast and rigging plans don't necessarily agree with each other. So what next? The build plan shows the places where you belay or rig the ship but the book does not. I feel your pain.
-
thx for the info. I'm still on the fence on this one. I like to show my models with a slightly lived in stance.
-
Hello Les here. Is it acceptable to use two different colours of rigging line for the running rigging. Both would be tan but not the same.
-
Epoxy glue
bluenose2 replied to mtaylor's topic in Painting, finishing and weathering products and techniques
Hi Les back. Whenever I use epoxy I wear gloves to limit the contact to my skin. I make sure that I have my vent fan on to evacuate the fumes. -
Epoxy glue
bluenose2 replied to mtaylor's topic in Painting, finishing and weathering products and techniques
Hi Les here. I use Lepage 5 minute epoxy. It's available here in Canada. So far so good. I would be interested in a side by side review. -
Fascinating. I am building the Endeavour and the Beagle. Would these ships have been fitted with these devices?
-
Planking
bluenose2 replied to bluenose2's topic in Building, Framing, Planking and plating a ships hull and deck
Thank you for your responses. I can only imagine a ship rolling out of a yard fresh as a daisy. What would it have looked and smelled like? My new build on the Beagle has made me think if I should make it pristine or like a ship that has done a few years at sea. I don't build any of my models overly weathered as this, only in my opinion shows disrespect for the craft. As this will be my final build, I agree whole heartedly that the final planking of especially walnut may add some limited interest for those who don't know anything about how ships were built in this era but thats not the point. I would like to get this one right so I can look at it and say it's as close as I could get it. Luckily a have a wood supply store in my city so I can get what you have recommended. -
I have a question. I am working on my next build the Beagle. I would like to do something different. I believe that ships of this era where planked primarily with oak not walnut as supplied by the kit suppliers. I have some old growth in my stock and would consider milling it for planking etc. Would this be a good idea and how would I finish all the components? Thnx Les.
-
Hull repairs
bluenose2 replied to bluenose2's topic in Building, Framing, Planking and plating a ships hull and deck
So I think this is what I'm going to try. Take a small sharp blade and very carefully scrape the joint so I don't feel any sharp edge on the joint. Then flood in some Varathane to seal the crack. Then I will see if I can polish and buff the repair. I will use some Novis polishing compound used for Plexiglass scratch repairs and see if this works. If that isn't satisfactory I will mask out and spray new clear coat just like an auto body shop would do for a repair. -
Hull repairs
bluenose2 replied to bluenose2's topic in Building, Framing, Planking and plating a ships hull and deck
The model stays in my basement, were humidity is around 32% and around 18 Celcius. -
Hull repairs
bluenose2 replied to bluenose2's topic in Building, Framing, Planking and plating a ships hull and deck
As this is a static kit I can't get into the back side. I checked for movement between bulkheads but there isn't any. I suspect it is a shrinkage issue as all planks were soaked to get them to conform to the contour of the barrel back hull. -
Hull repairs
bluenose2 replied to bluenose2's topic in Building, Framing, Planking and plating a ships hull and deck
Hope this helps.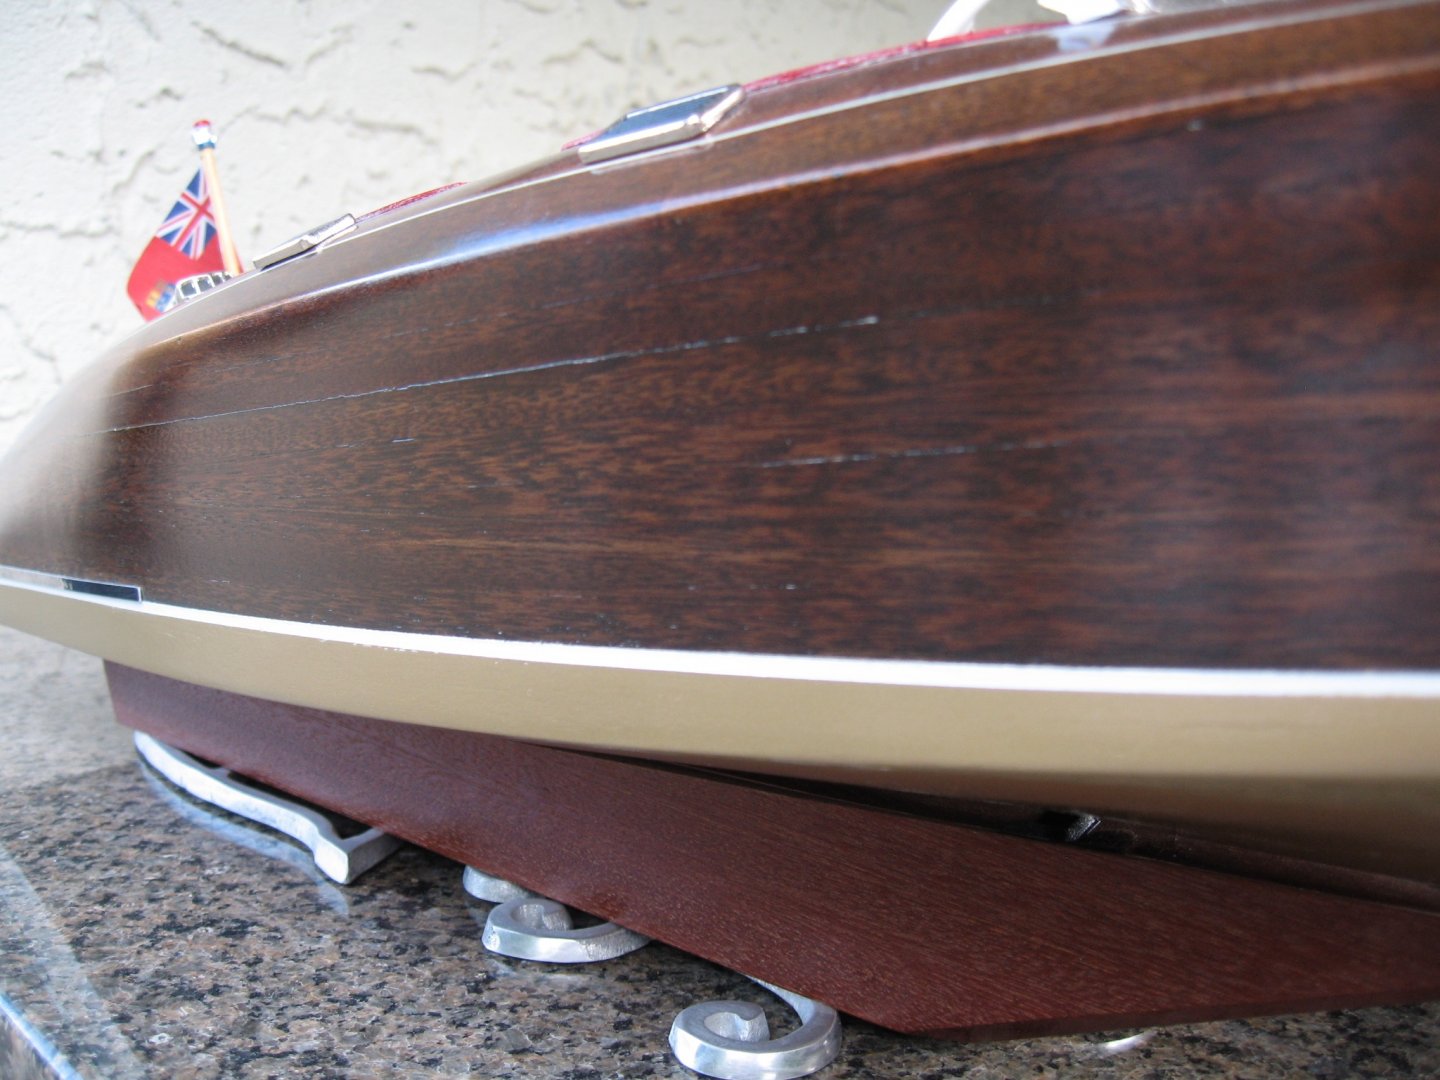
-
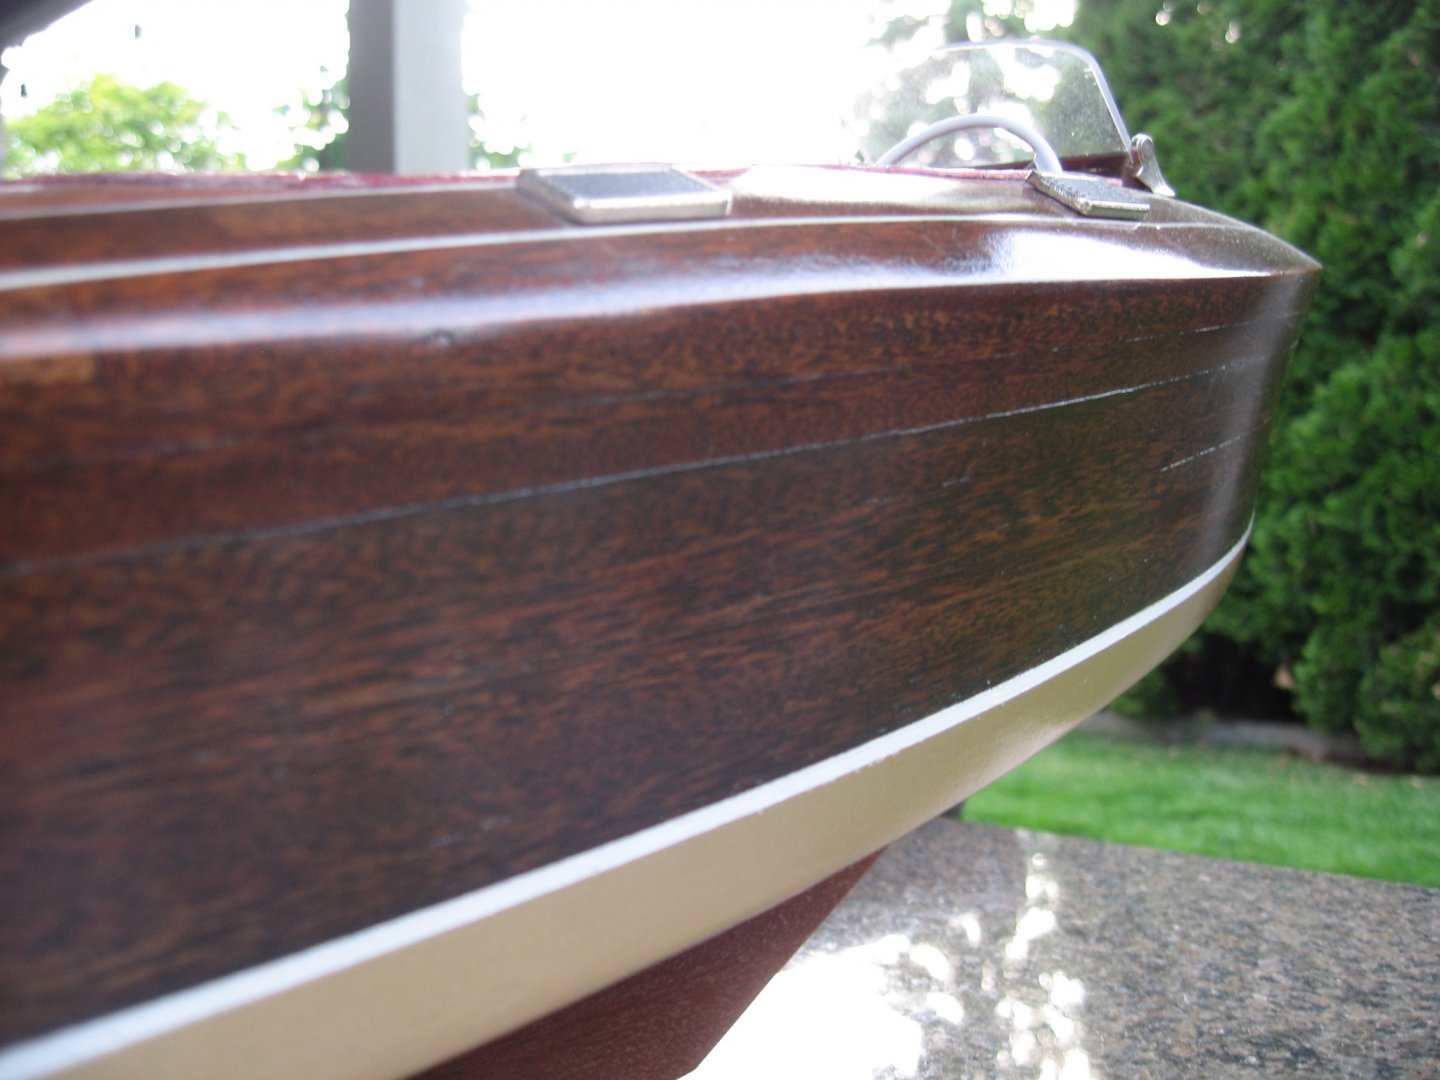
6 years ago I built a Dumas Barrel back boat. I have noticed that two of the planks have separated at the joints. My question is this a repairable issue? I used the correct Chris Craft stain supplied by the supplier but don't have any supply of it any longer. Any recommendations would help.
-
HMCS Oriole by bluenose2
bluenose2 replied to bluenose2's topic in - Build logs for subjects built 1901 - Present Day
You and your brother are lucky men Sailor1234567890. It seems that this craft is a highly coveted assignment for both captain and crew. I would be interesting to see how she does in the Vic Maui race now that she has a new hull. I have downloaded some excellent colour photos of her in port with all the trimmings. I have the book also, called "The People's Boat", by Shirley Hewett. It will be figuring out hull drawings and how to render them into frames to make the hull. The next difficult part will be some of the deck items etc. You can't buy them off the shelf. But other than that I'm stoked to give it a go. -
My table saw and blades are fine. That isn't the issue. My question is if you look at the end of a 3/4" x 4" walnut plank, which way would you rip it to get the most flexible planking? Would you stand it up and rip .5mm strips then rip it to 5mm or lay it flat 3/4" rip .5mm strips then cut to 5mm? And sorry as I said I am talking about walnut, the second planking a lot of manufactures supply in your kit.
-
Sorry all, I am talking walnut. The wood that Mamoli includes in the kit for second planking. Just looking for some advice on which way I should rip my 1x4 planks as the manufacturer would have done.
-
The dimensions are 4mm x .05 mm and 5 mm x .05. Modelers Central sells for $.64 ea US and a British site sells for .05 pounds each. I require 60 pieces so with the exchange on both suppliers I'm looking at nearly $100.00 dollars to get it. I can cut my own for the power required to run my table saw.
-
I don't know what species of wood that Mamoli or Corel uses, but I have a good stock of American oak left over from other cabinet jobs. If you look at the end grain of a 2x4 you'll see concentric rings. I can't see them on my oak as the grain is very tight.
-
Hi Les here. I am finishing up my Beagle but have run out of walnut second planking. To source it pre cut will cost about $100.00 to get it shiped to my house here in Canada. I have some 1x4 planks in my shop. I can cut it on my table saw but I don't know in which direction I would do it. I tried this before and the planks cracked when trying to install them. So do I stand it up tall on the four inch and cut to thickness and then cut to width or the reverse?
-
Power Sander
bluenose2 replied to English Rebel's topic in Painting, finishing and weathering products and techniques
Hi Les here. I purchased a micro lux micro sander #81266 from MicroMark tools. If you require something for detail work this may be a good choice. I use mine regularly for removing glue build up in tight areas and paint bleed on trim. Best part is after you have used up the adhesive sanding pads you just go buy adhesive sheets for random orbital sanders and cut to size. -
Latex wall paints?
bluenose2 replied to Brewerpaul's topic in Painting, finishing and weathering products and techniques
Hello Les here. I agree with reklein on this issue. I was suckered into trying latex paint. Hey a litre or quart is dirt cheap compared to model paints. Also I tried a rattle can on my 1/72 Snowberry. Covered all the detail and had to use laquer thinner to remove it from the photo etch. I don't have experience with Vallejo but I use Tamiya and this is a very good product.


