mkmossop
-
Posts
109 -
Joined
-
Last visited
Content Type
Profiles
Forums
Gallery
Events
Everything posted by mkmossop
-
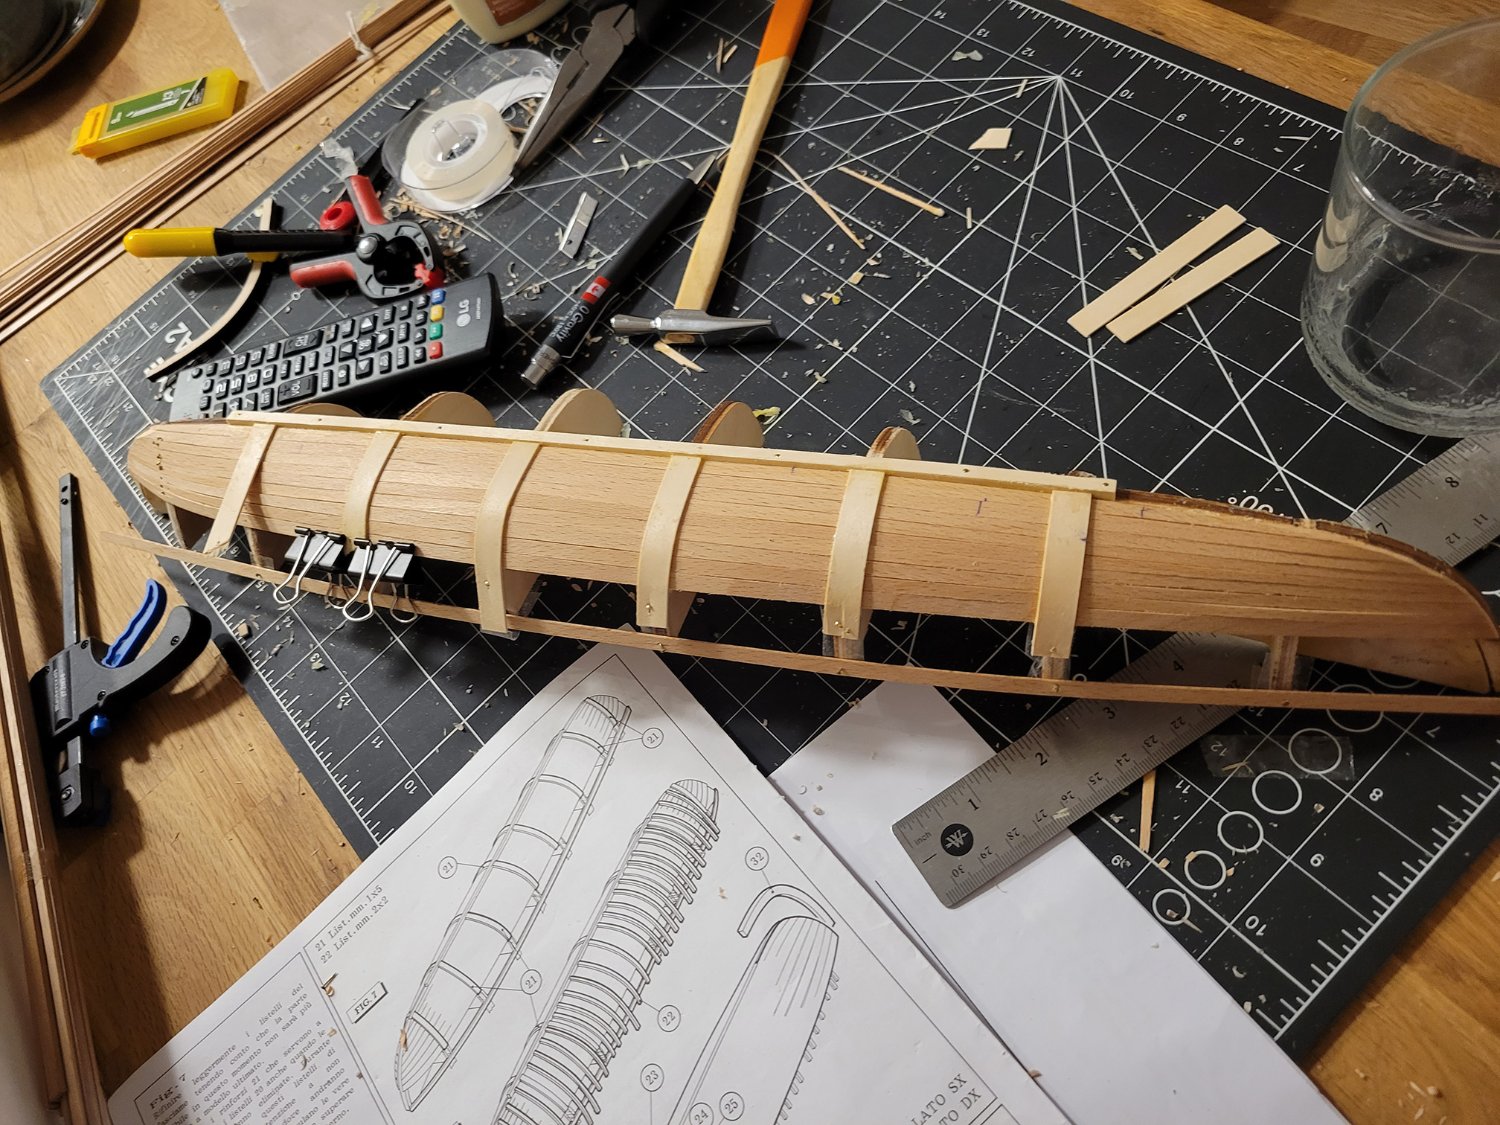
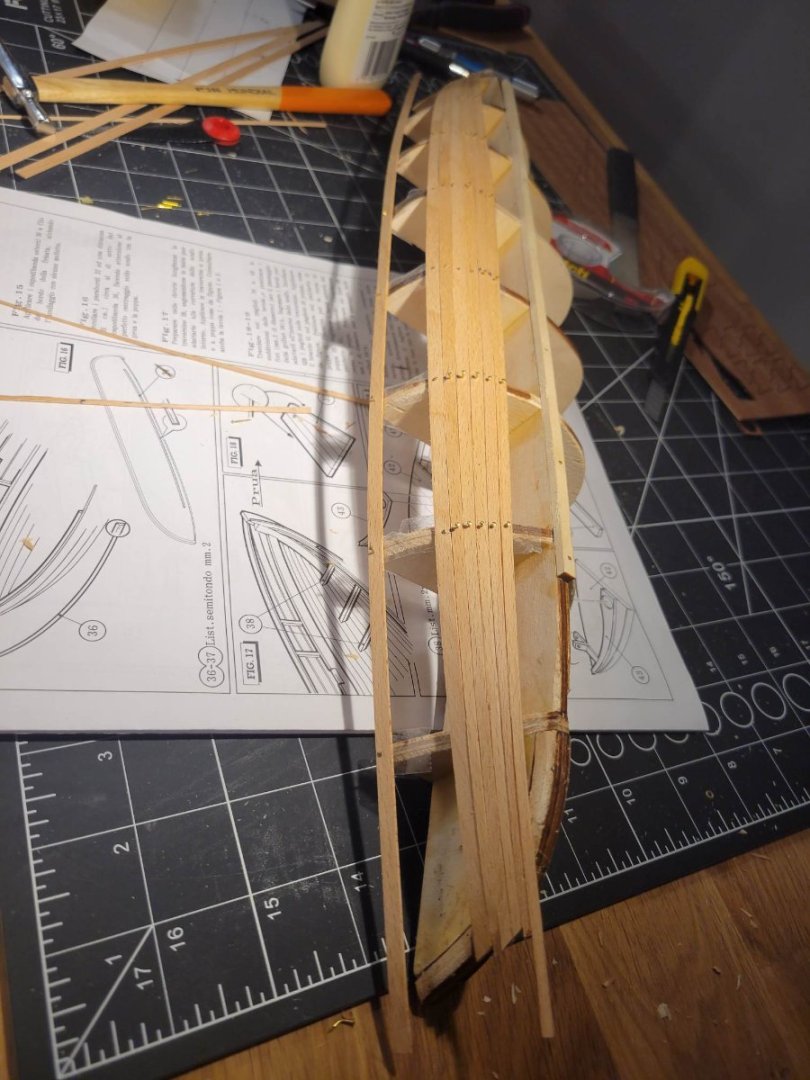
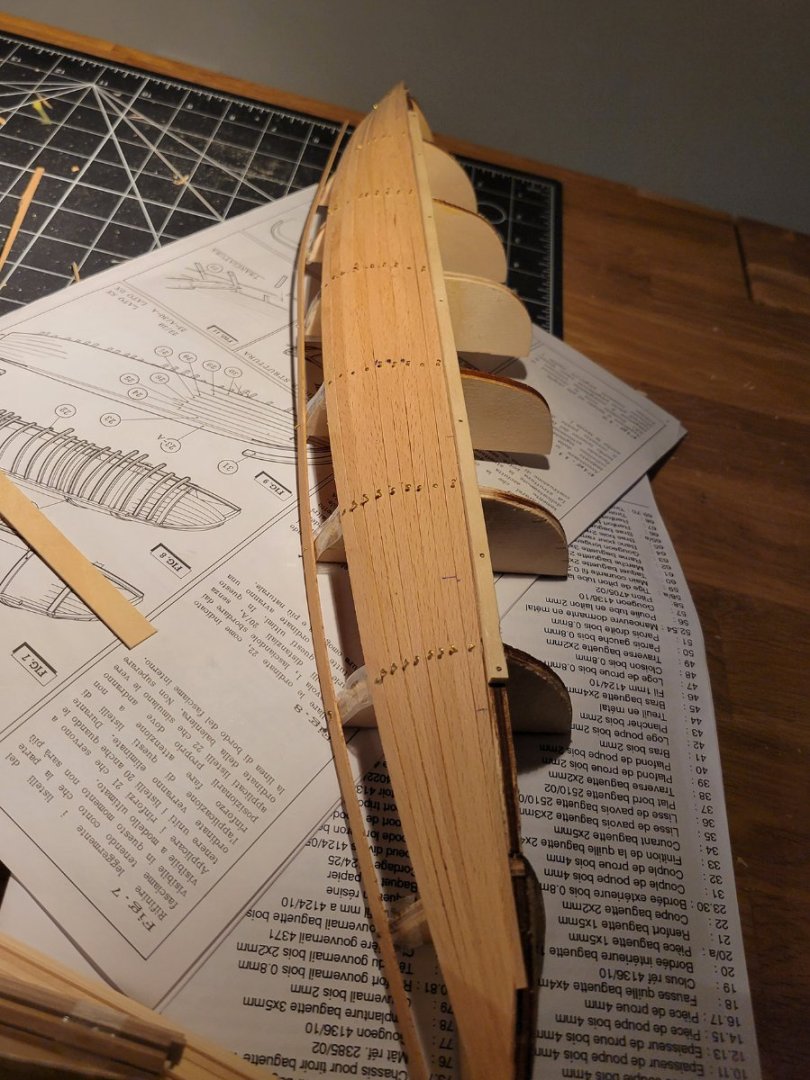
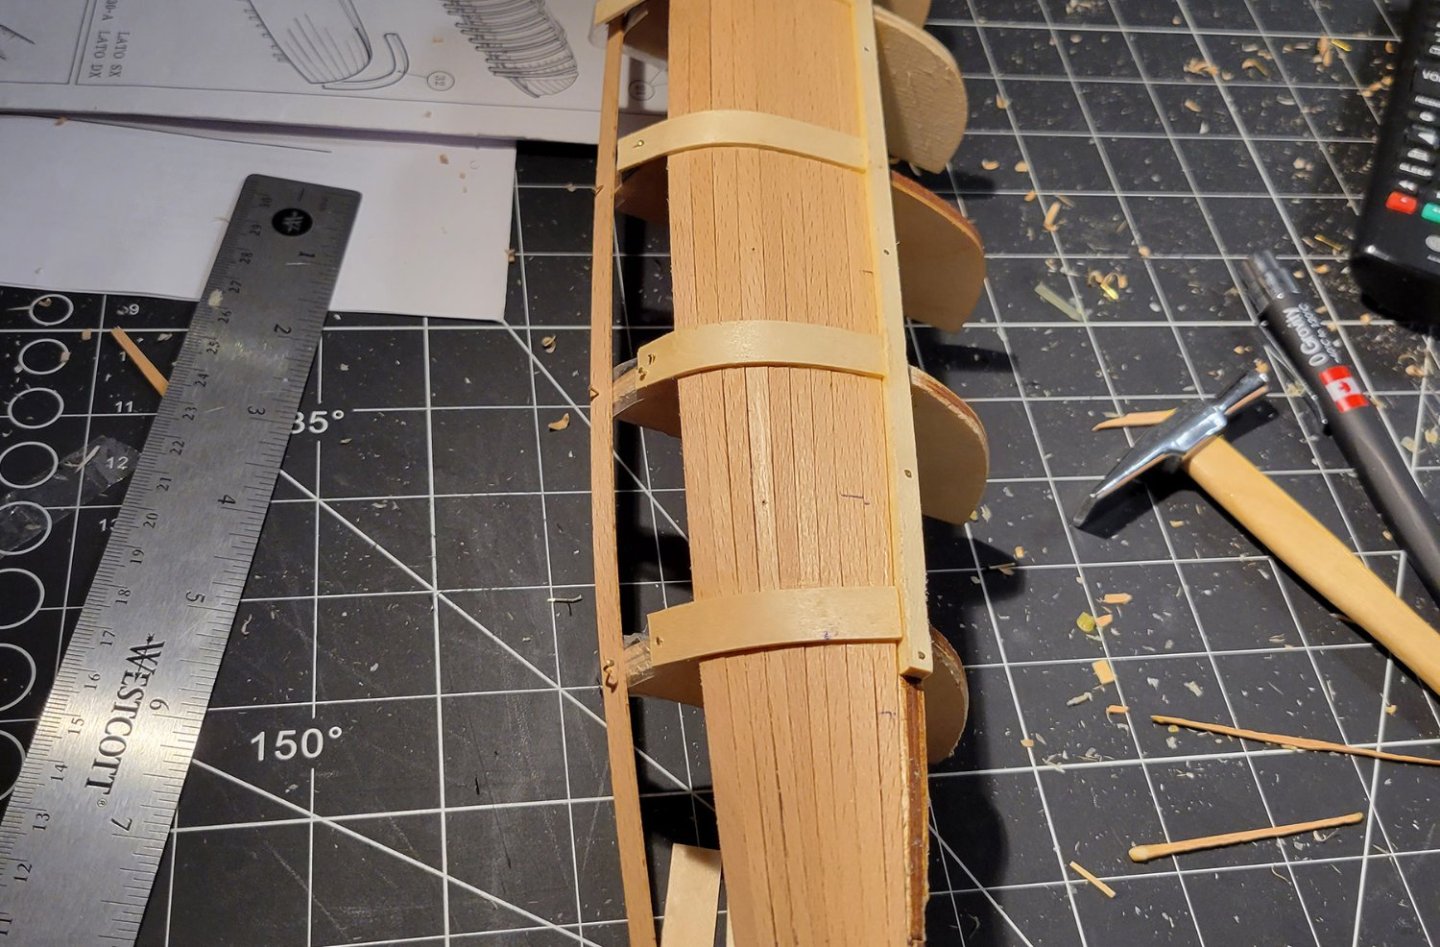
Ok well I read up a bit on tapering and then did my best. Winged it a bit but it seems to have turned out ok for my first time. The last two planks aren't as tapered as the rest of them unfortunately, but overall I think it doesn't look too bad. I'm a little concerned about light coming through small cracks between some of the planks, however I figure I can fill the outside of the cracks with glue and that'll take care of it. Also they were a little uneven before, but are evening out with the supports I'm adding now. And will even out even more with the additional supports to come.

-
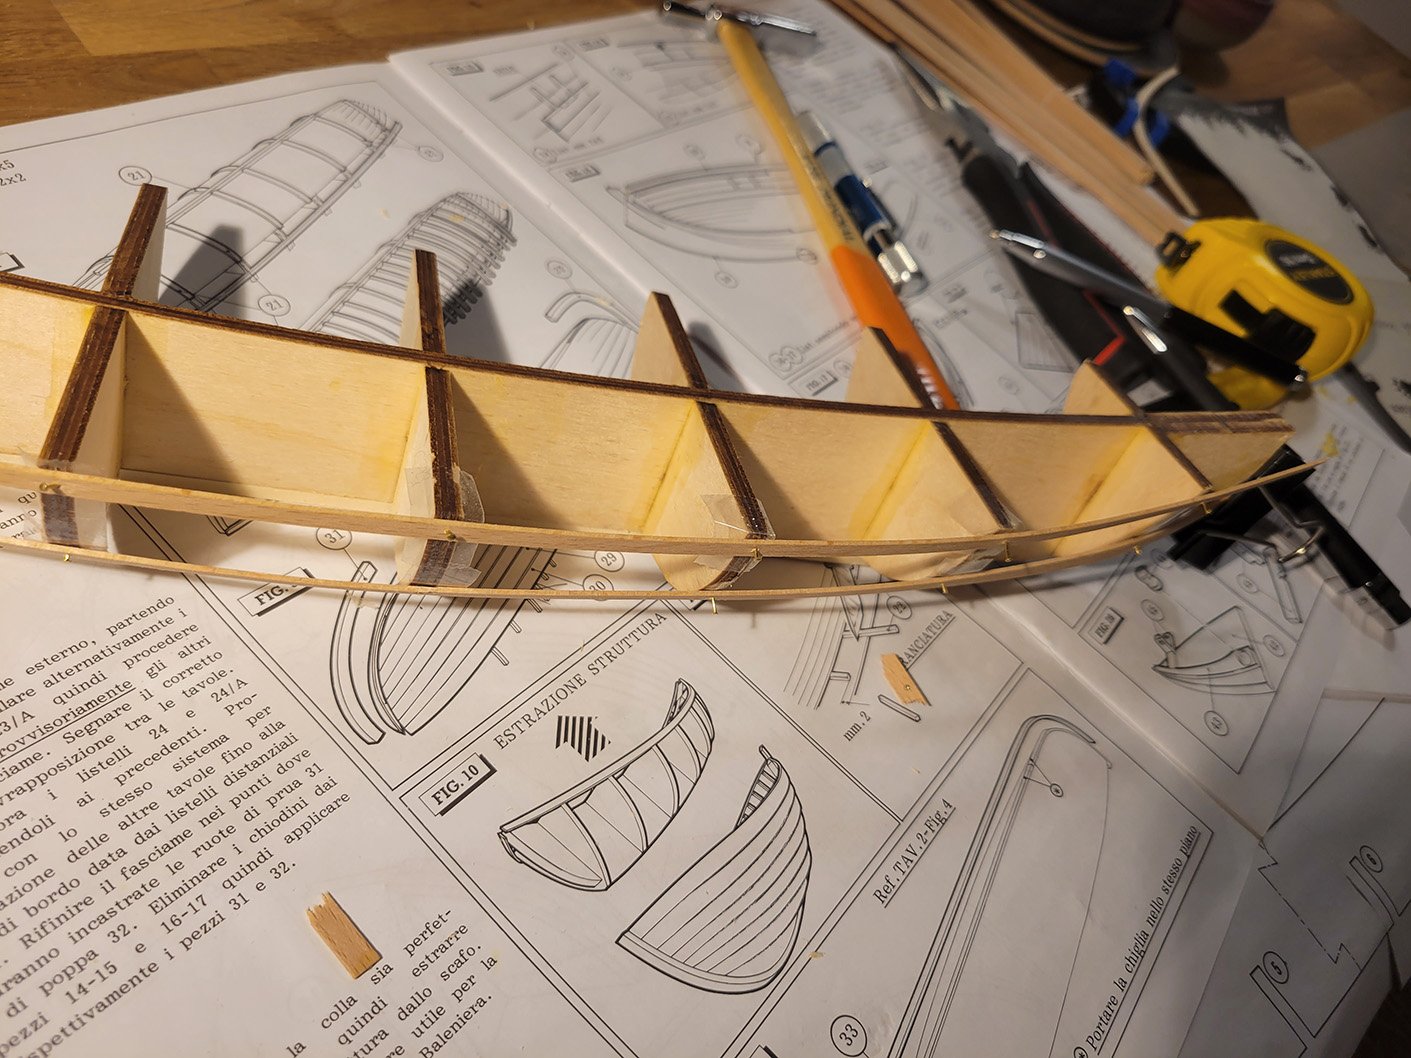
Ok well I figured I'd just start and wing it. I filed all the bulkheads down to where I thought they should be roughly. I'm applying the planks now and fine tuning the filing as I go. The little red and black file is great for this. It's a Japanese finger file I got at a store called Lee Valley Tools. They have all sorts of cool tools there you wouldn't find elsewhere. Anyway so far it hasn't been pretty but it's going ok. The only problem I see so far is that the bottom plank is not close to touching the last bulkhead at the bow. If I were to nail it to the bulkhead it would completely warp the shape of the hull. I figure it's not a huge deal though as long as the shape is smooth? I also have never tapered planks so I will have to figure that out. On my last model I didn't taper them, rather just changed their orientation at the bottom. I found a youtube video explaining how to calculate the amount of taper at each bulkhead, so I will post my progress on that soon. Edit: Also for the life of me I could not figure out what level to start the lower plank at. I looked at a couple other builds I found here and on other forums and both had nine planks at the max width, so that's what I did. I hope that's right. If anyone can help me on that please do.

-
Ok here are a few more... I tried to get a bunch of good angles.


- 29 replies
-
- 4
-

-

-
- santa maria
- amati
- (and 1 more)
-
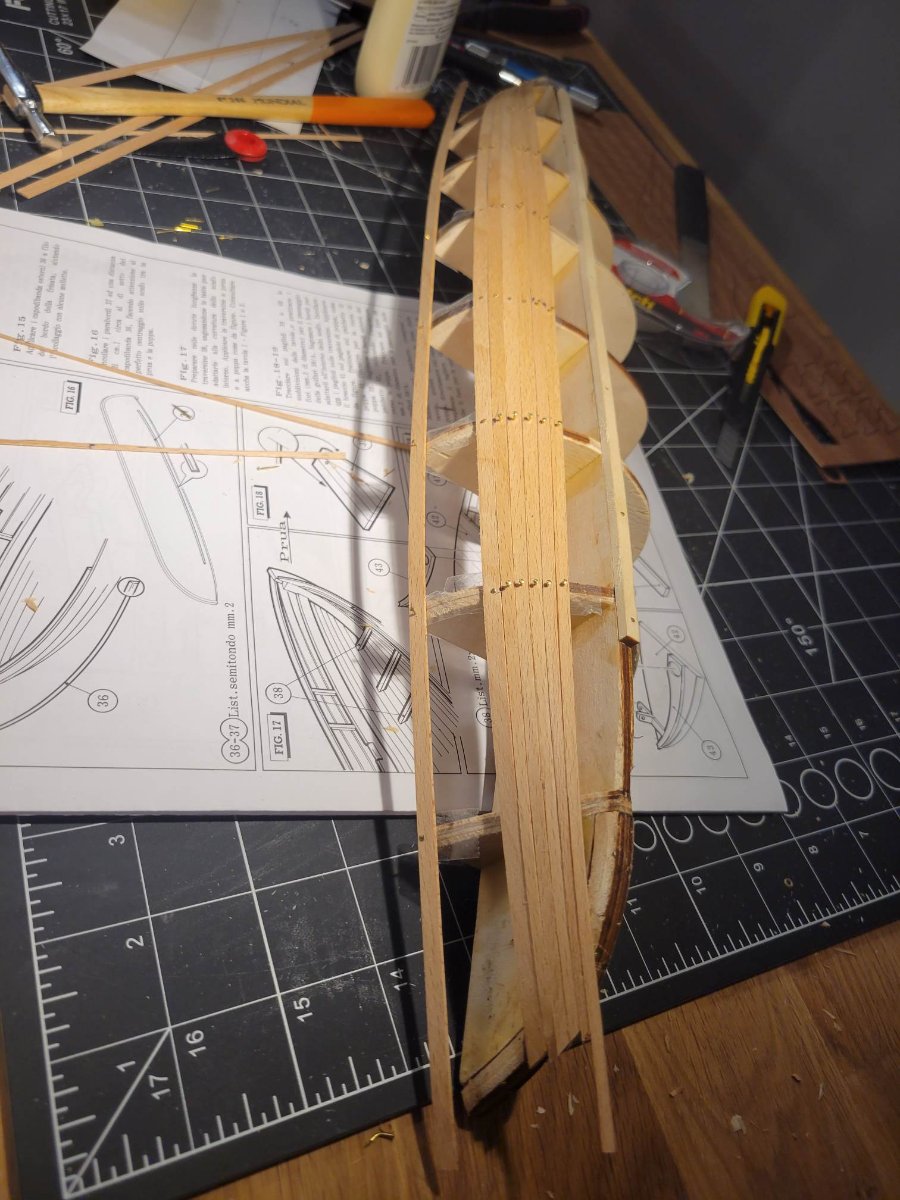
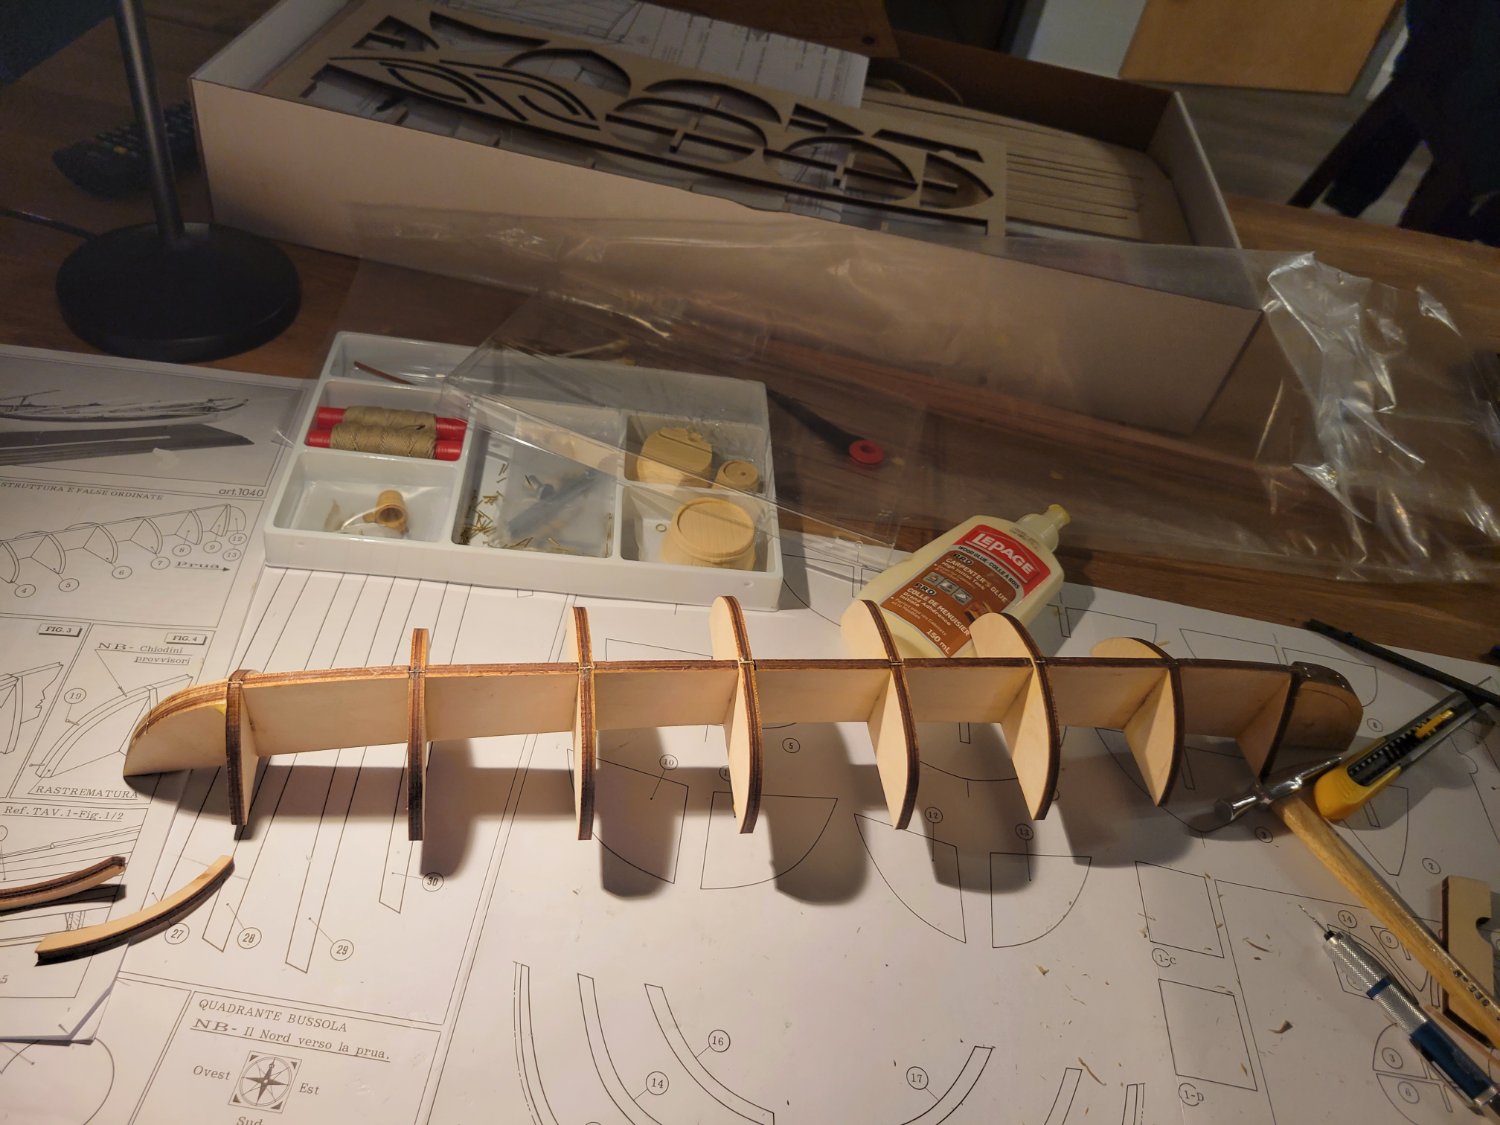
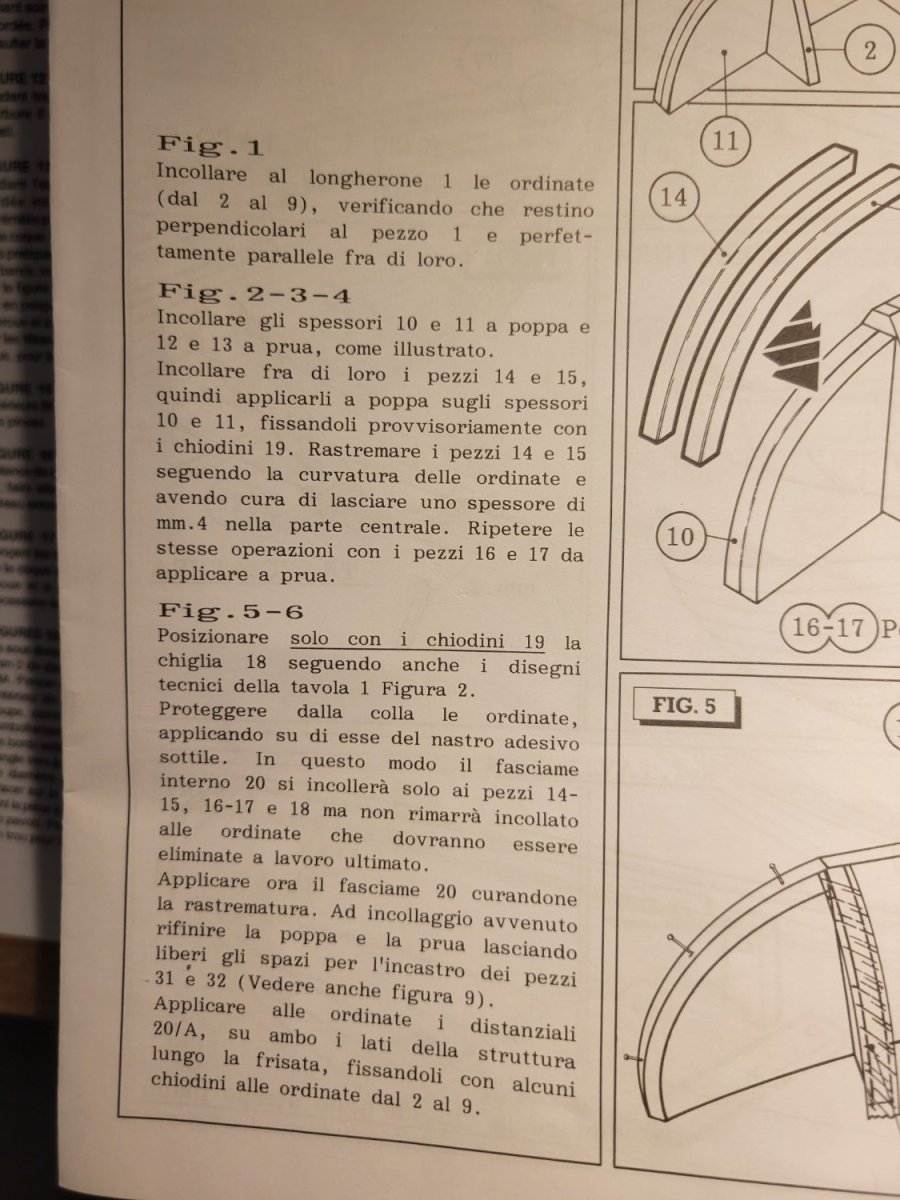
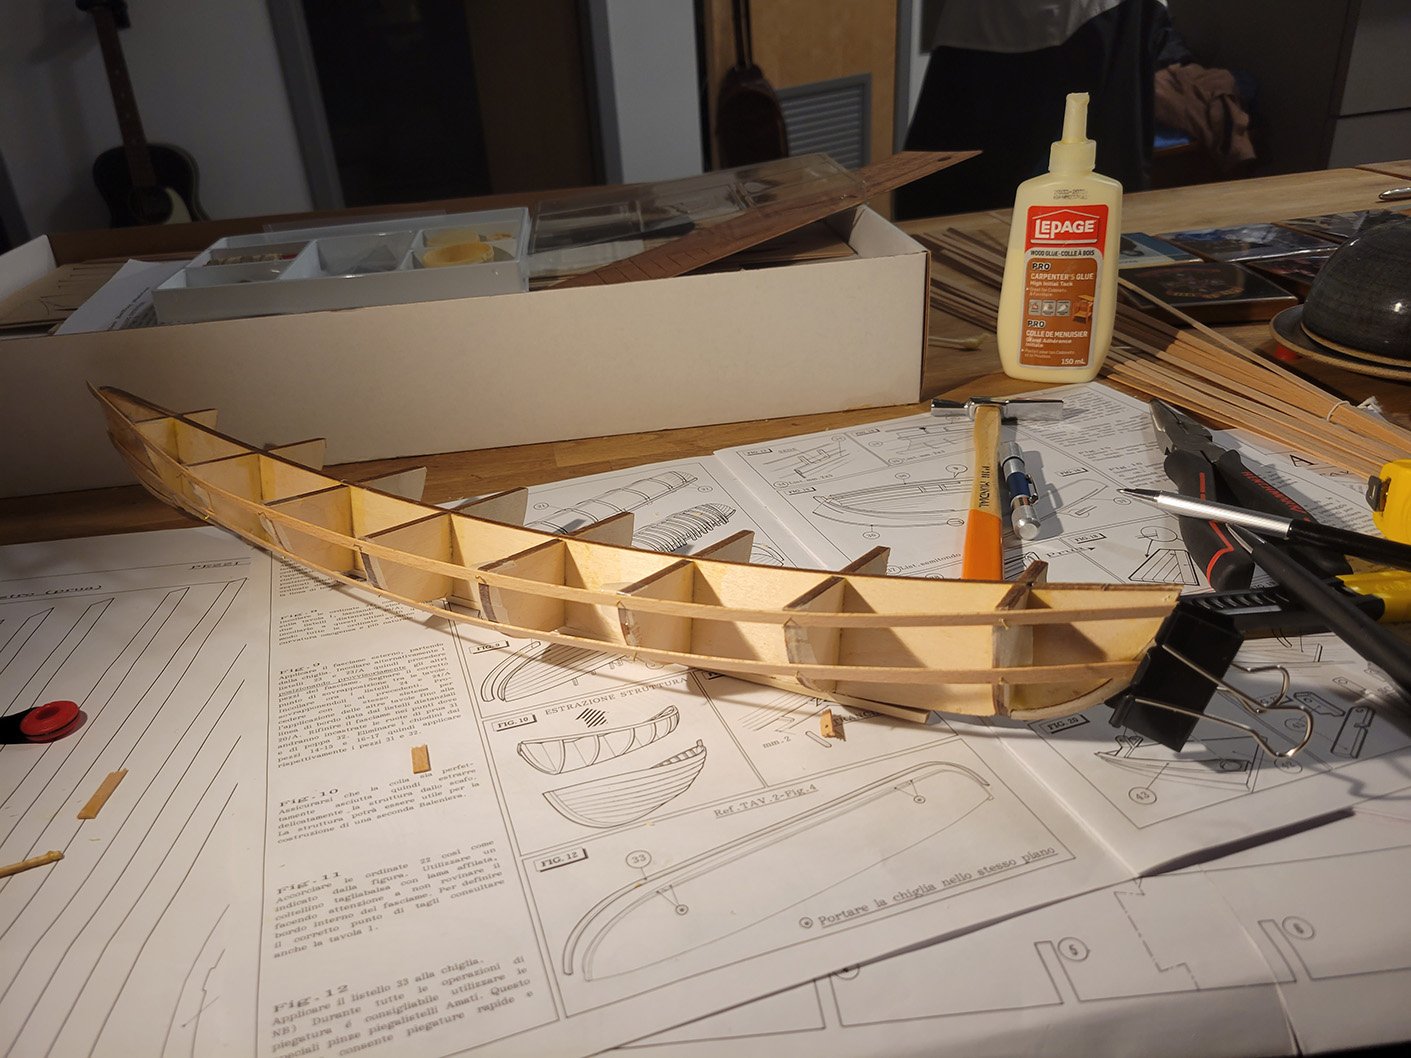
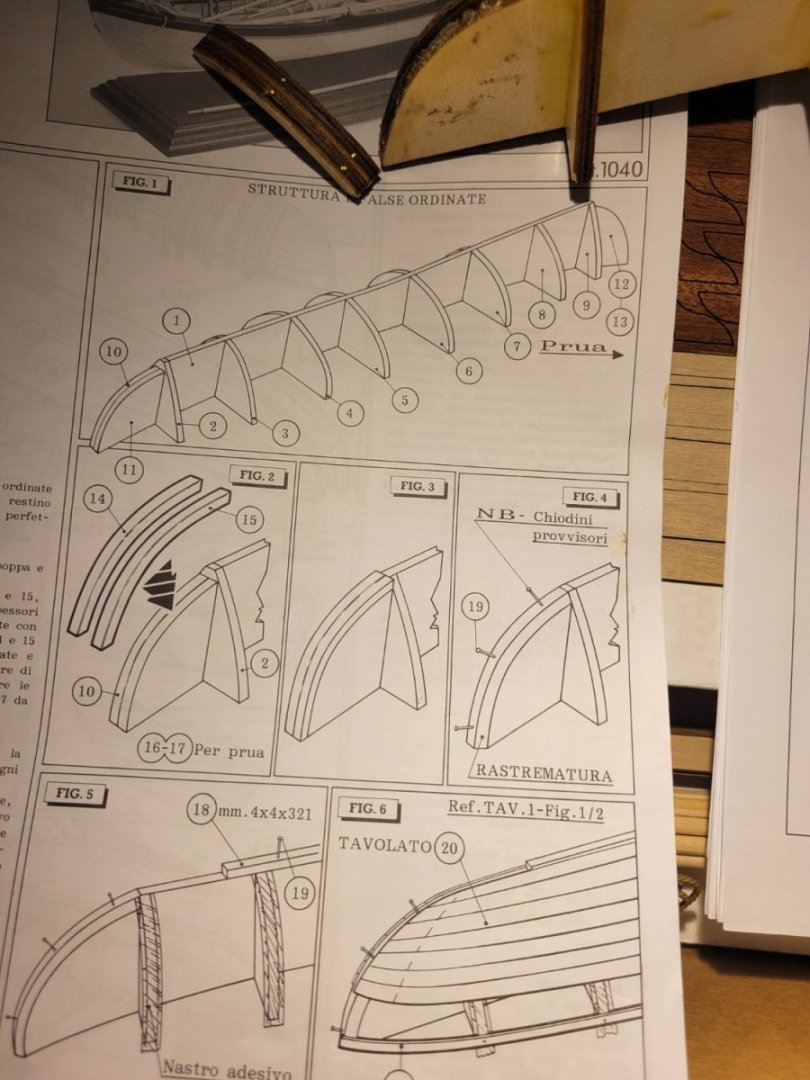
Just starting a new build after a few years off. It's only my second build. I just started building the hull and I'm already stuck and need help lol. My work so far is attached. And I've also attached a picture of the instructions. If I'm correct, pieces 14 and 15 should NOT be glued on to the frame? The frame will be removed later after the planking, but I believe these pieces should be staying on the boat. I don't read Italian and the English version isn't totally clear to me. Secondly if someone could help me with tapering the frame that would be great. I don't remember how I did it on my last build. Do you generally taper each piece of the frame (in the picture pieces 2 - 9) at the same angle, then nail the planks down? Or does it require more precision and you file each piece at different angles, testing the fit of each plank as you go? Hopefully this question makes sense 😅.


-
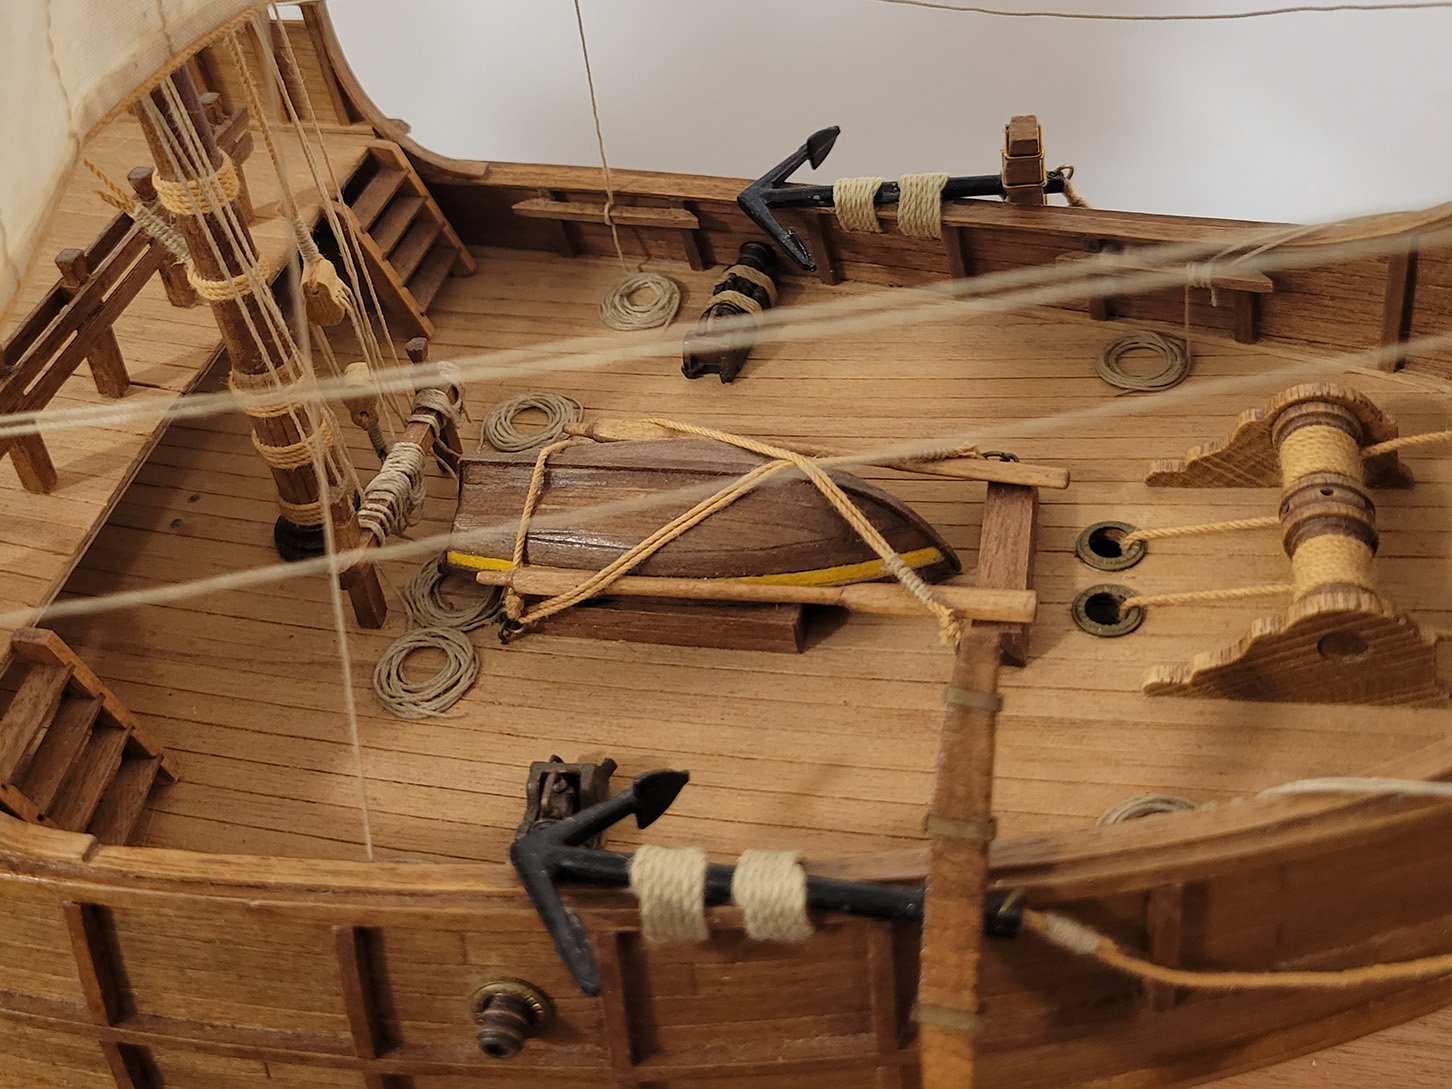
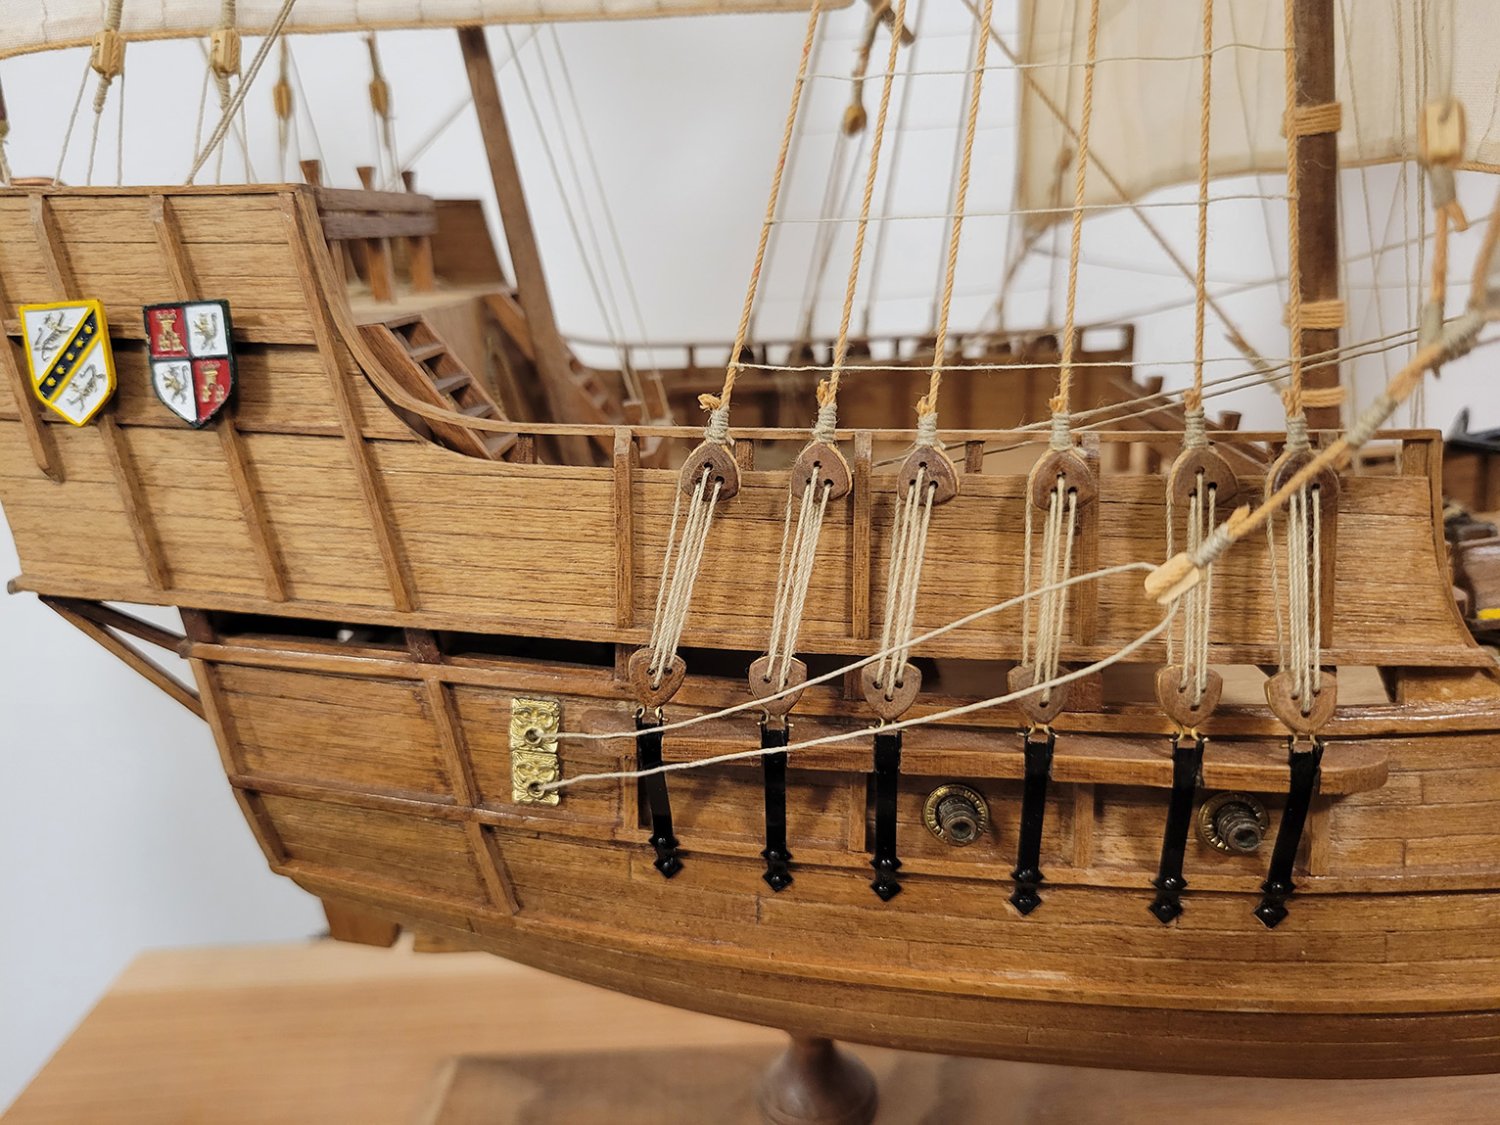
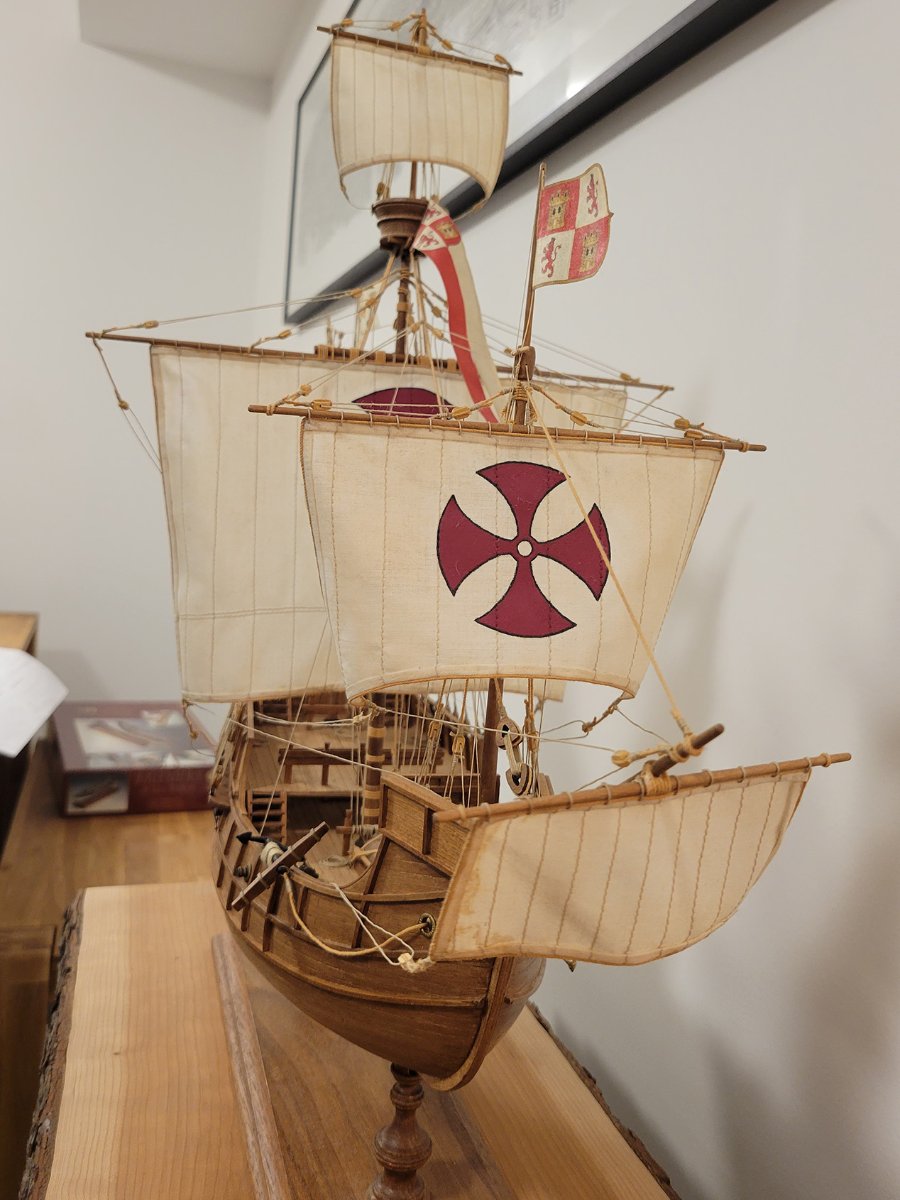
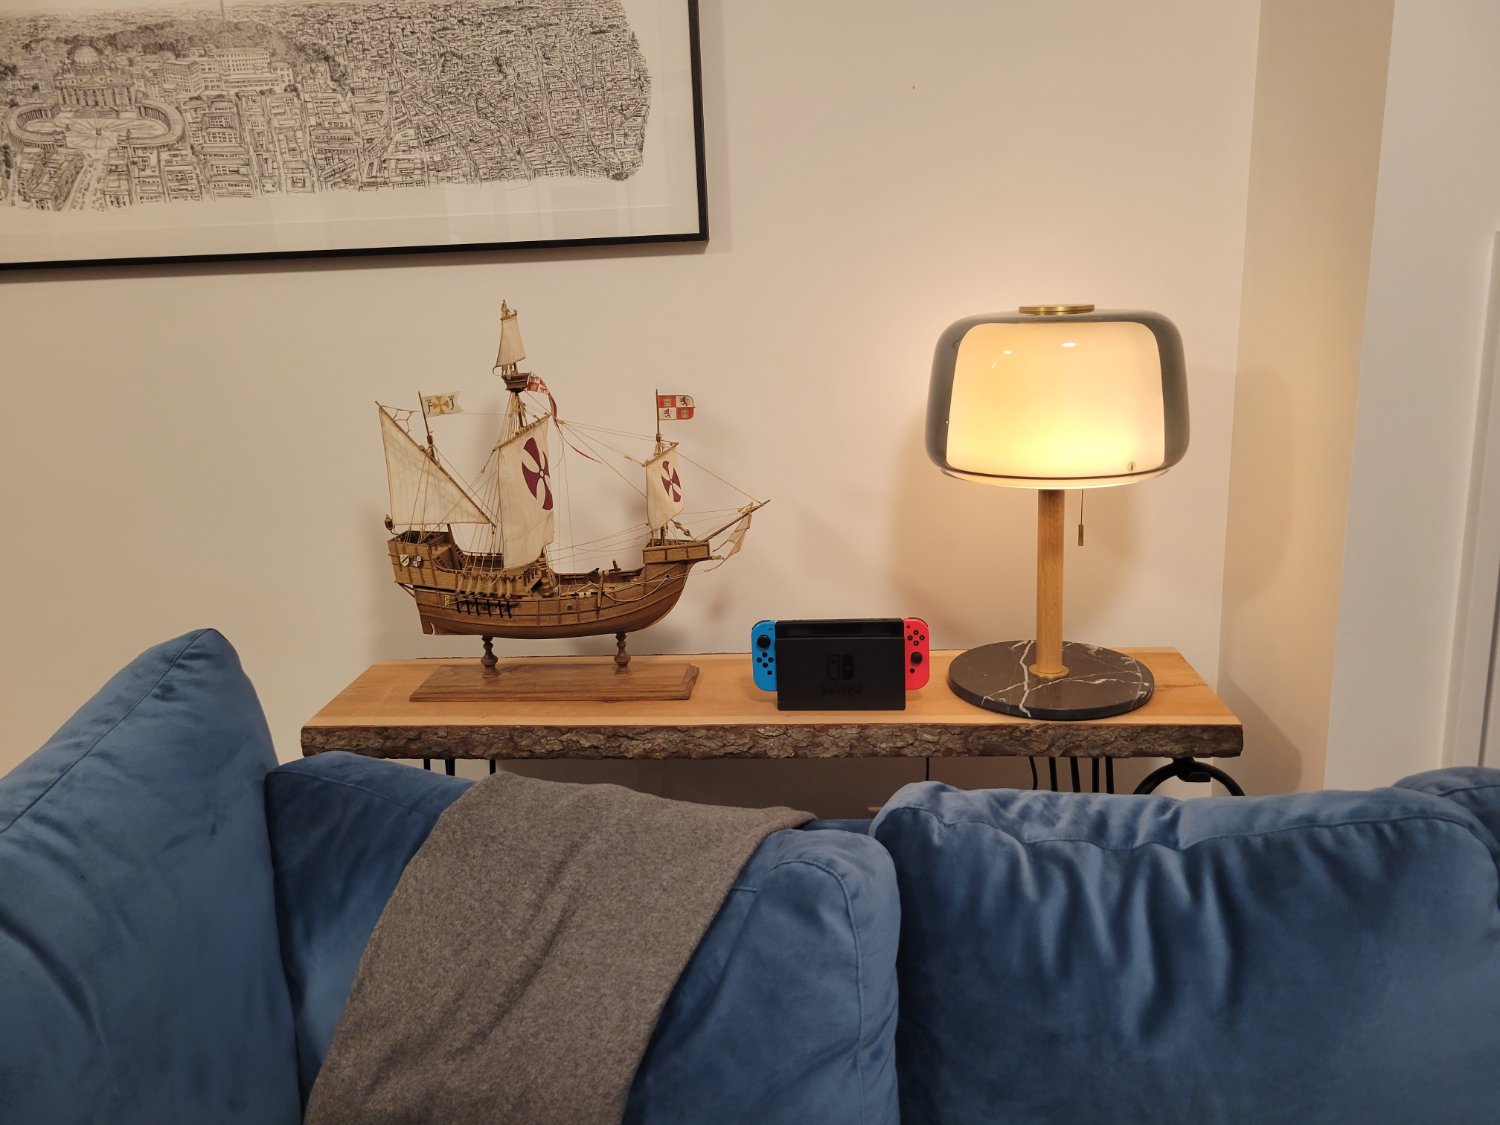
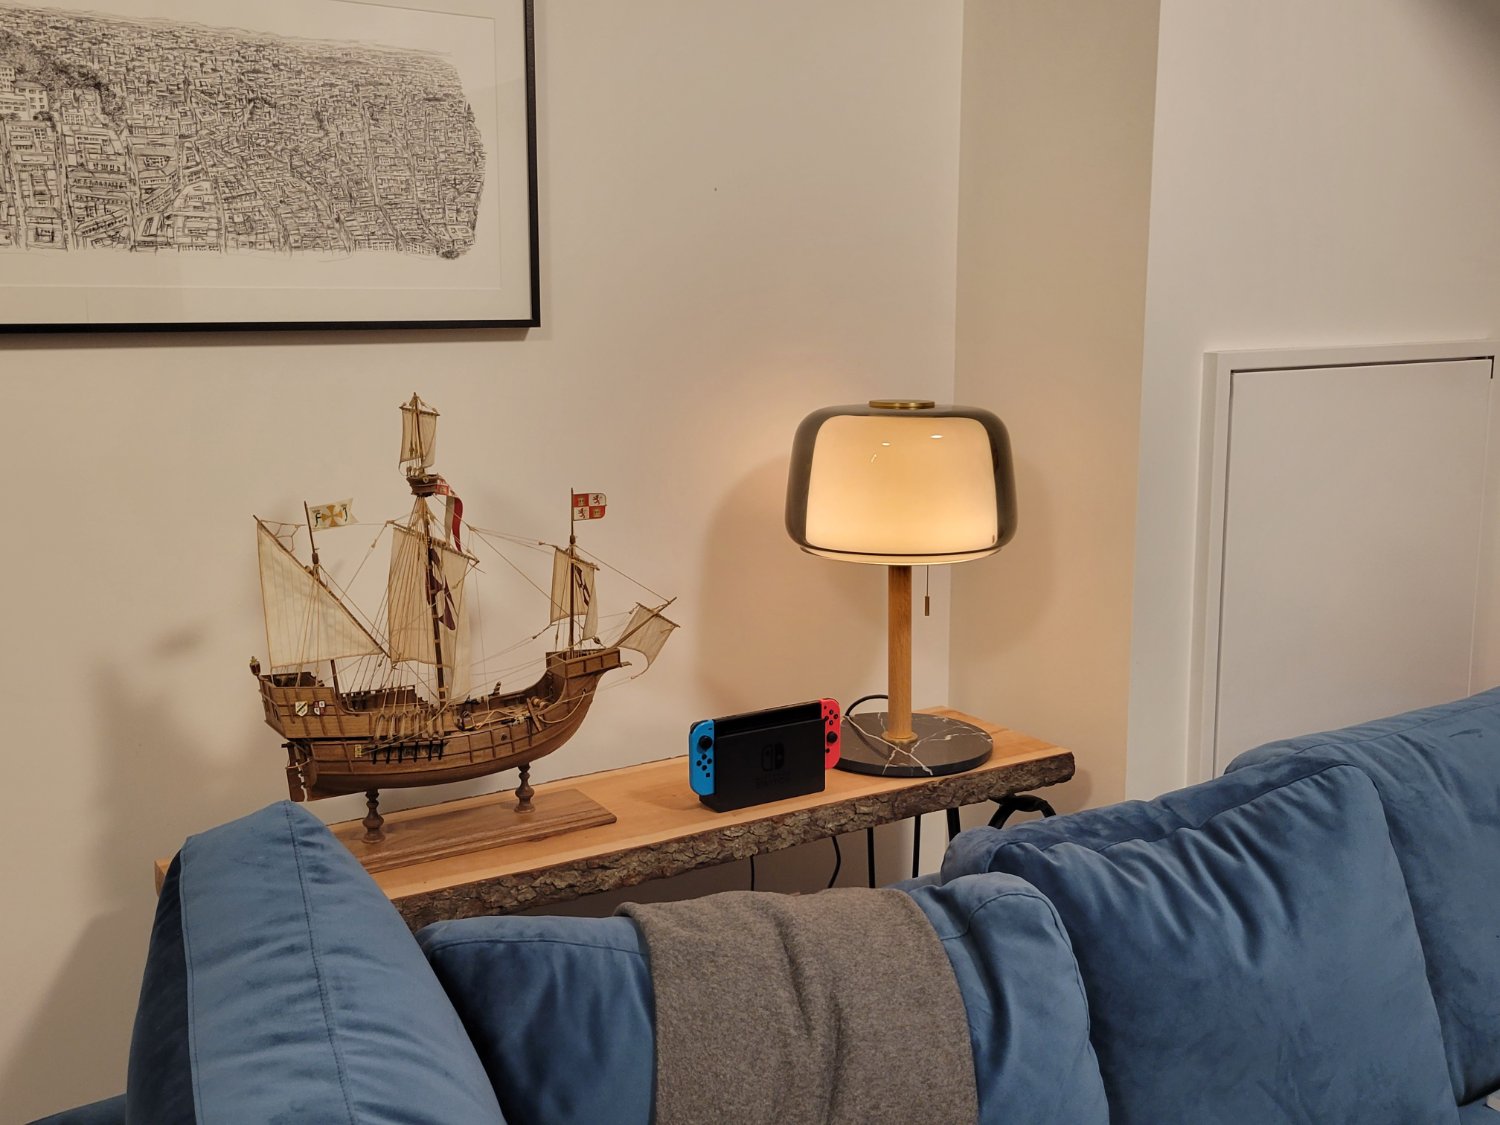
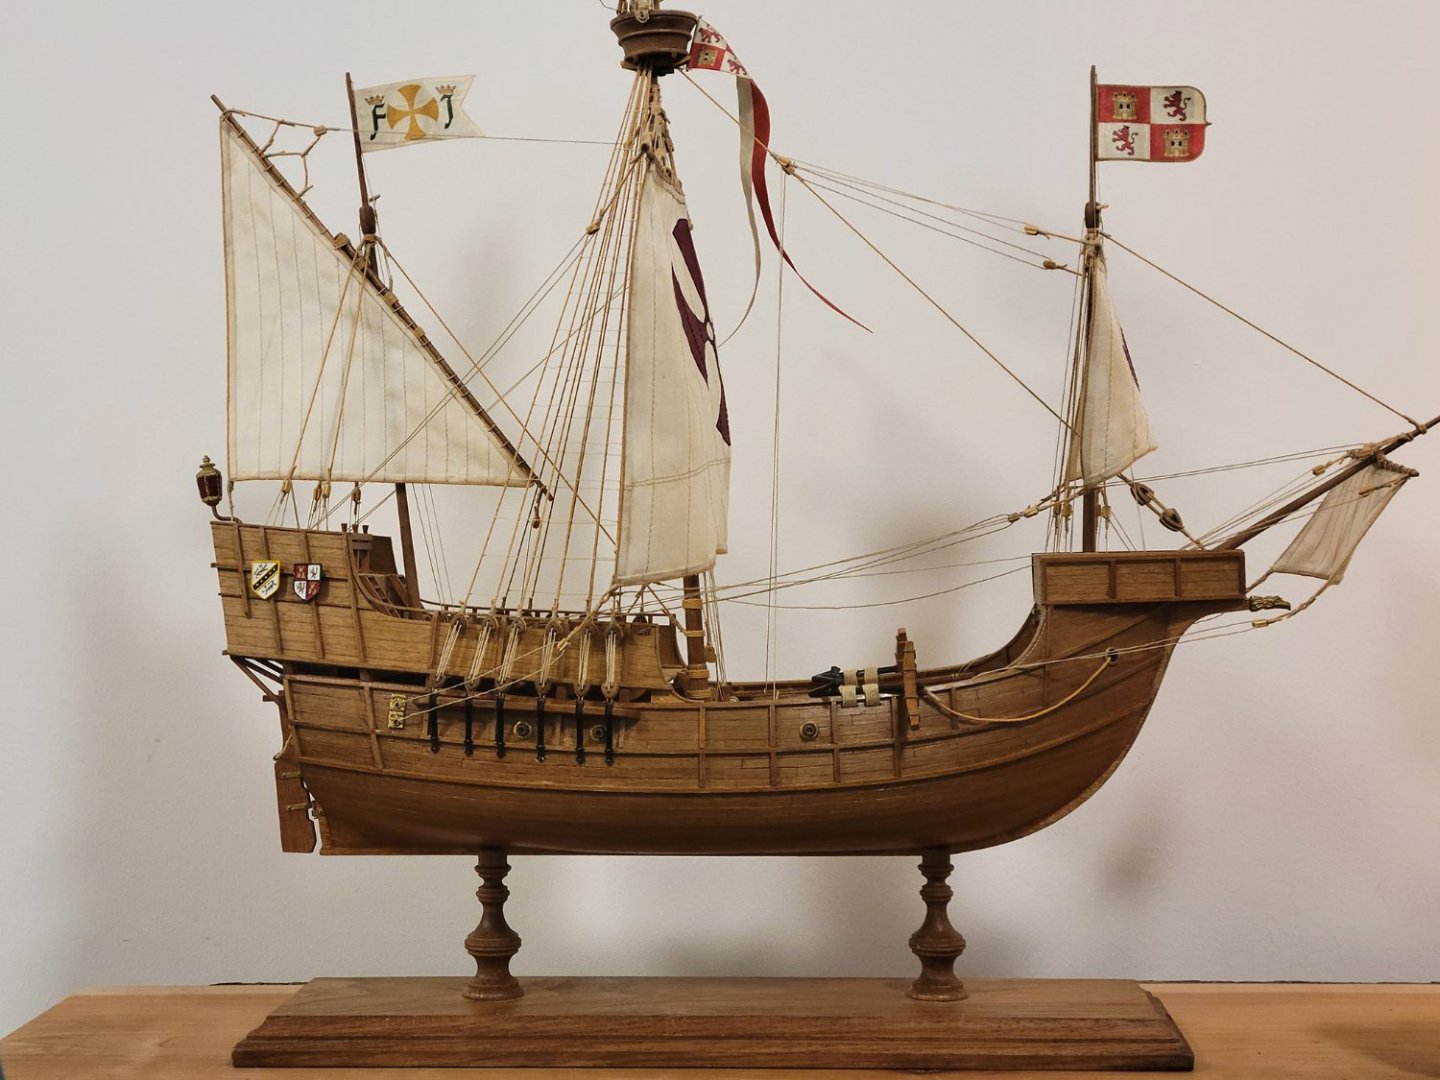
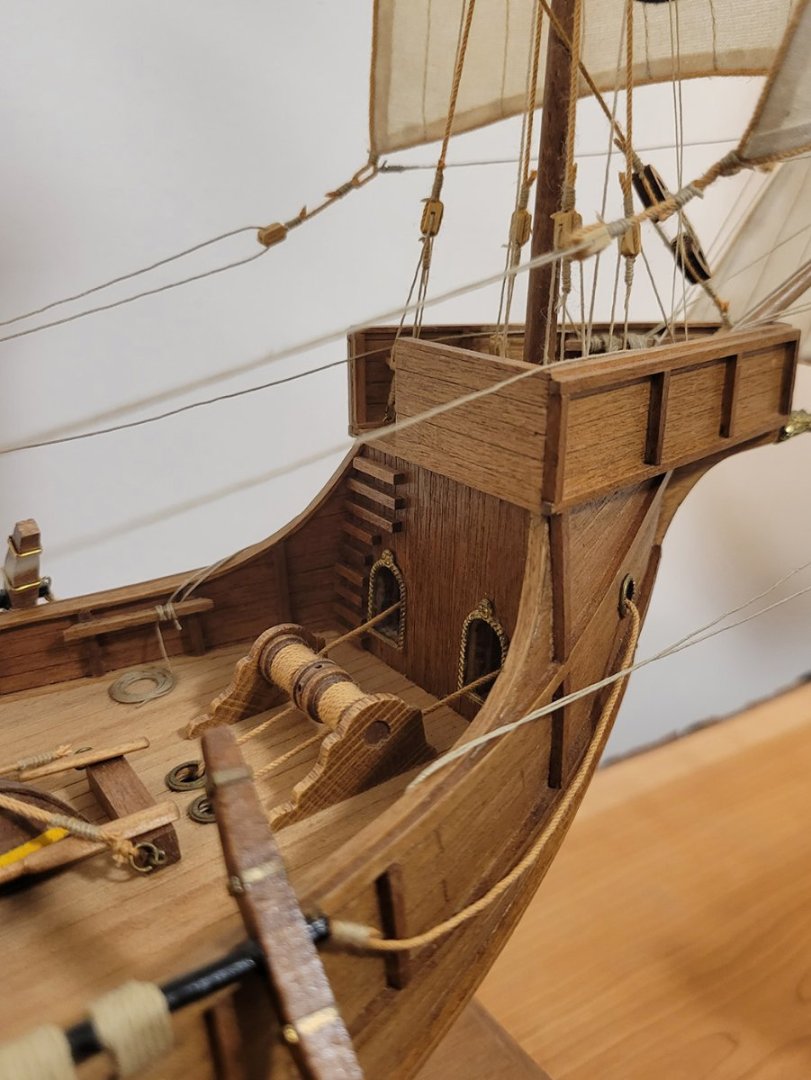
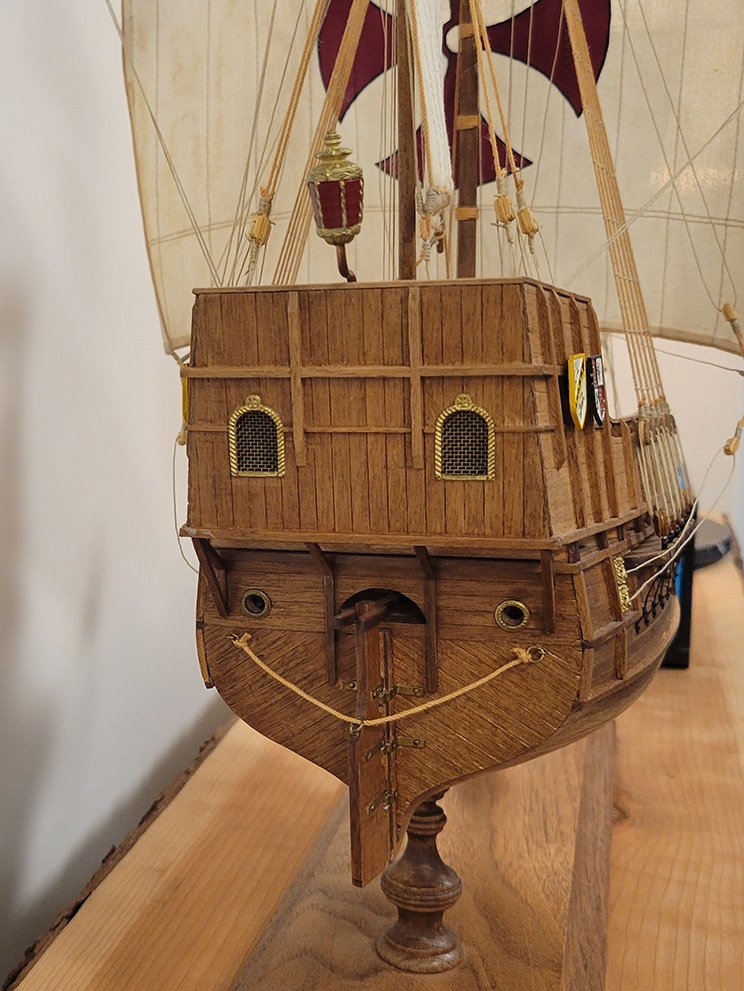
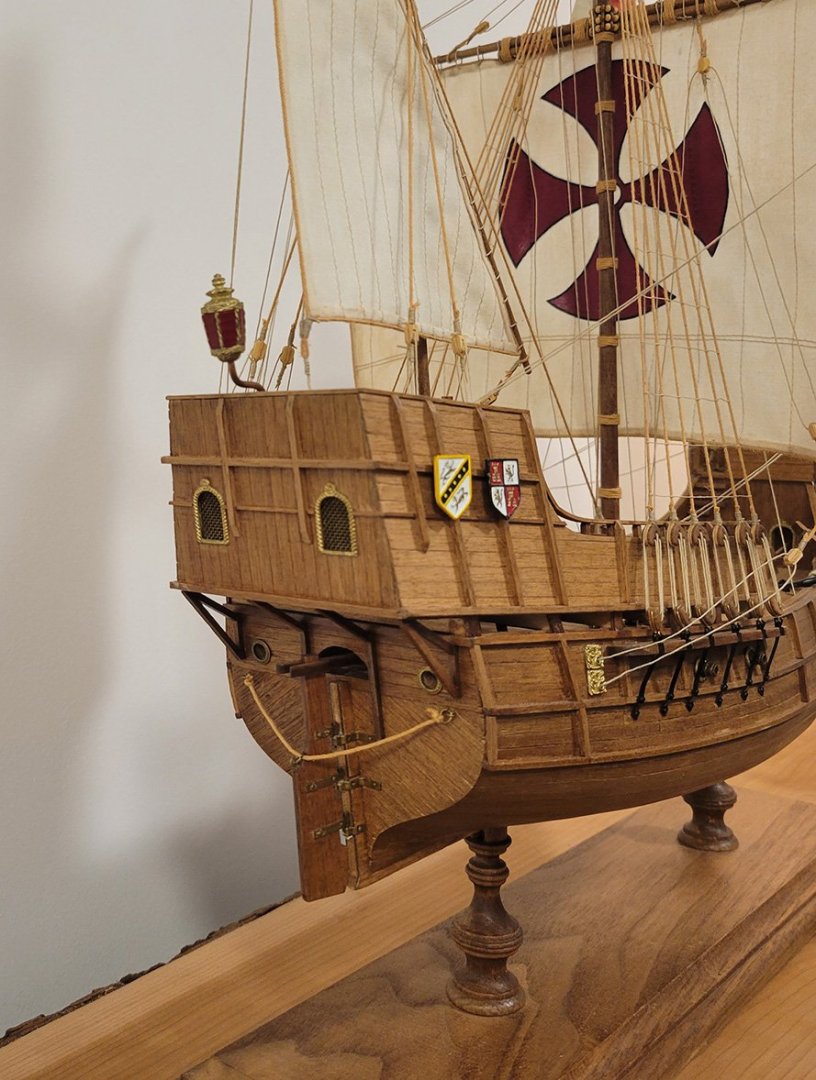
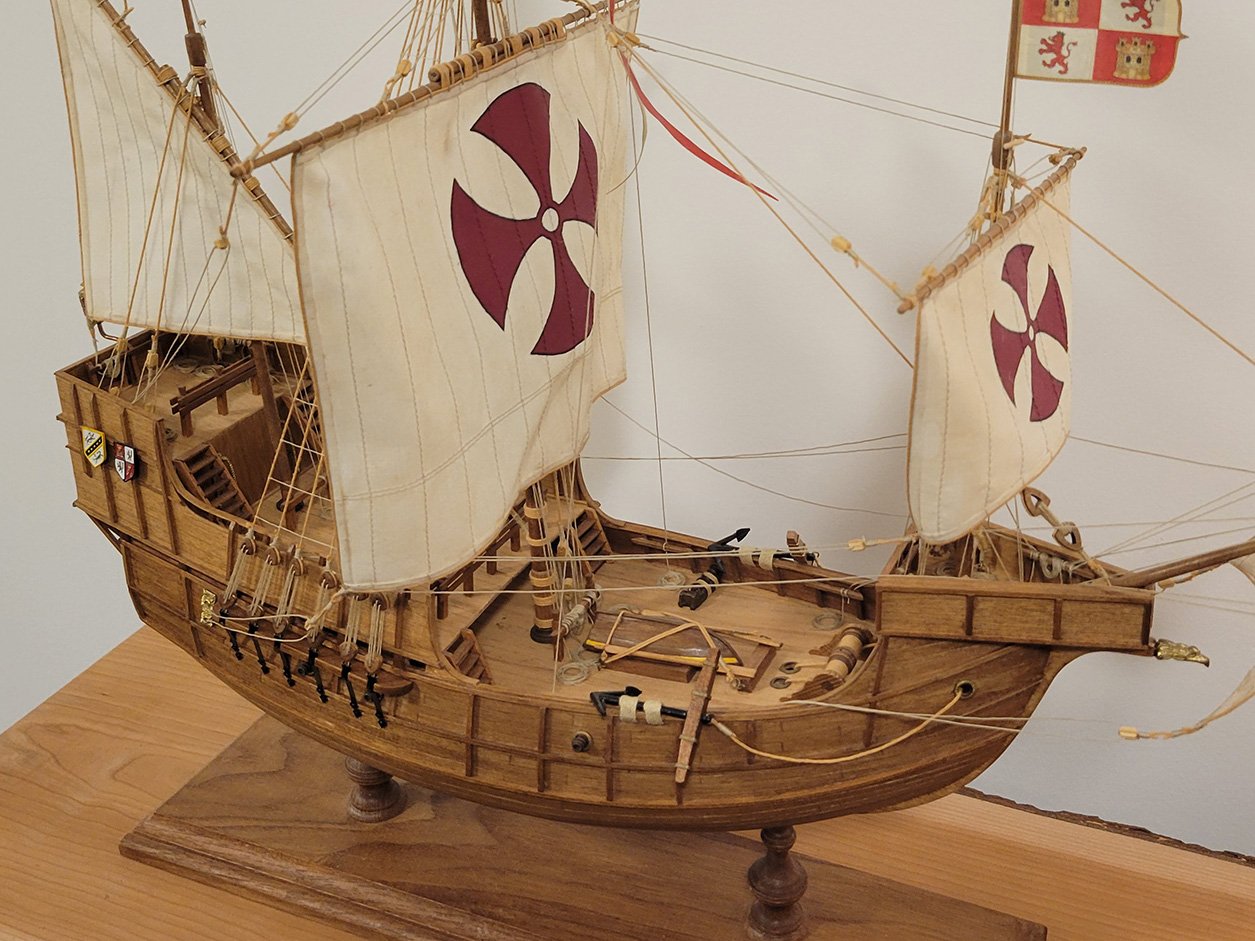
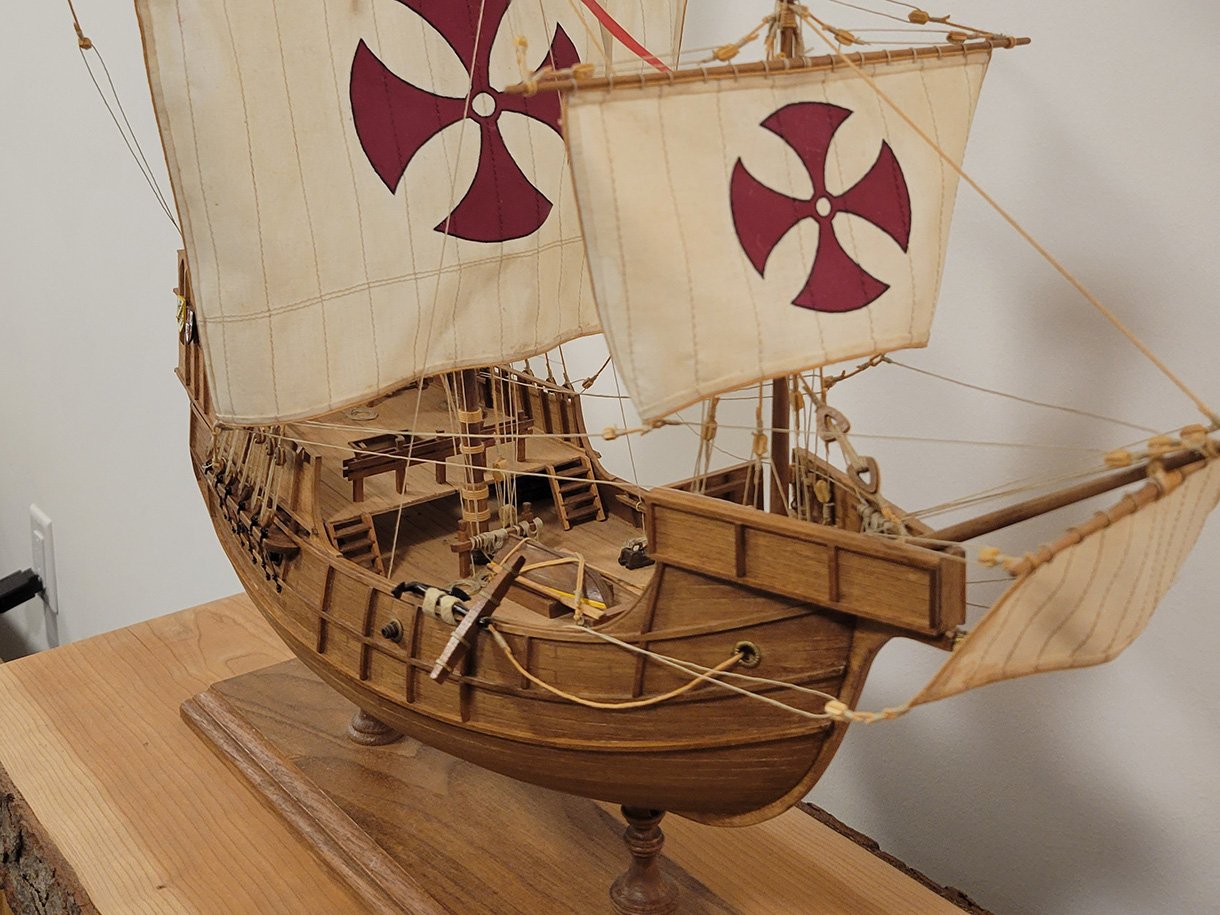
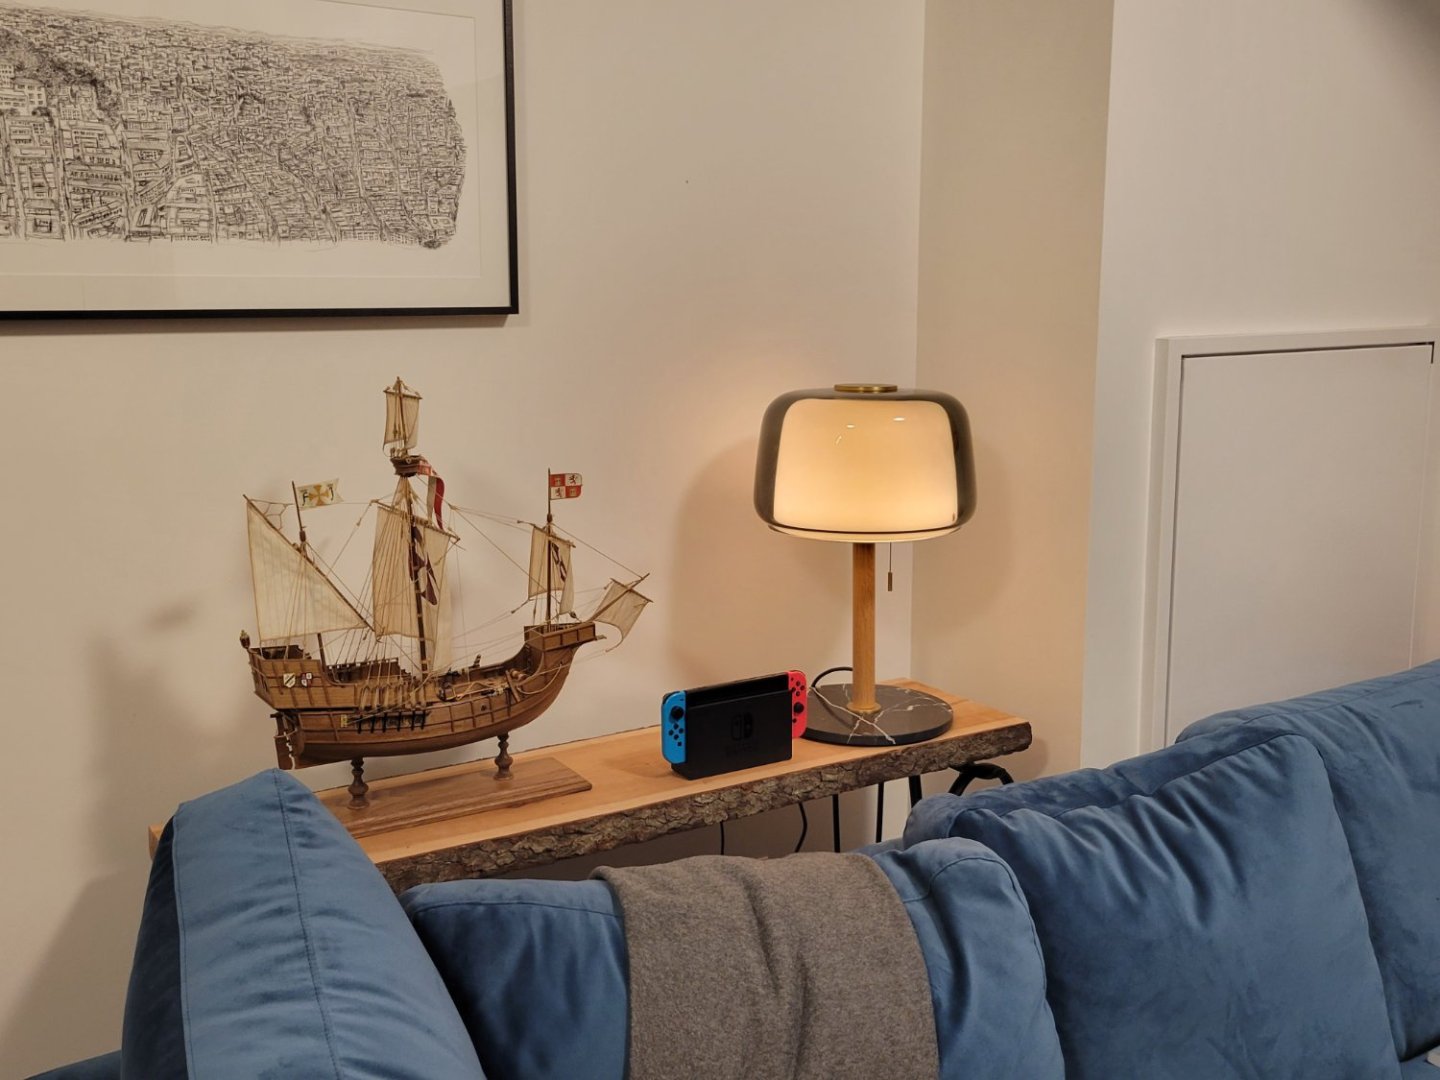
Hey my friend... yes I did finish it finally. I completely forgot that I never finished this build log. I just came on this site to ask some questions about my new model build and saw your question now 😅. I will post some detailed pictures of it in a few days. For now here's just a couple as I just put it up in my new apartment behind my couch. I'm very happy with how it came out considering it's my first one. I spent many many hours on it figuring it all out.

- 29 replies
-
- 4
-
-
-
- santa maria
- amati
- (and 1 more)
-
Hair Spray for Sails and Loose Sail Rigging
mkmossop replied to mkmossop's topic in Masting, rigging and sails
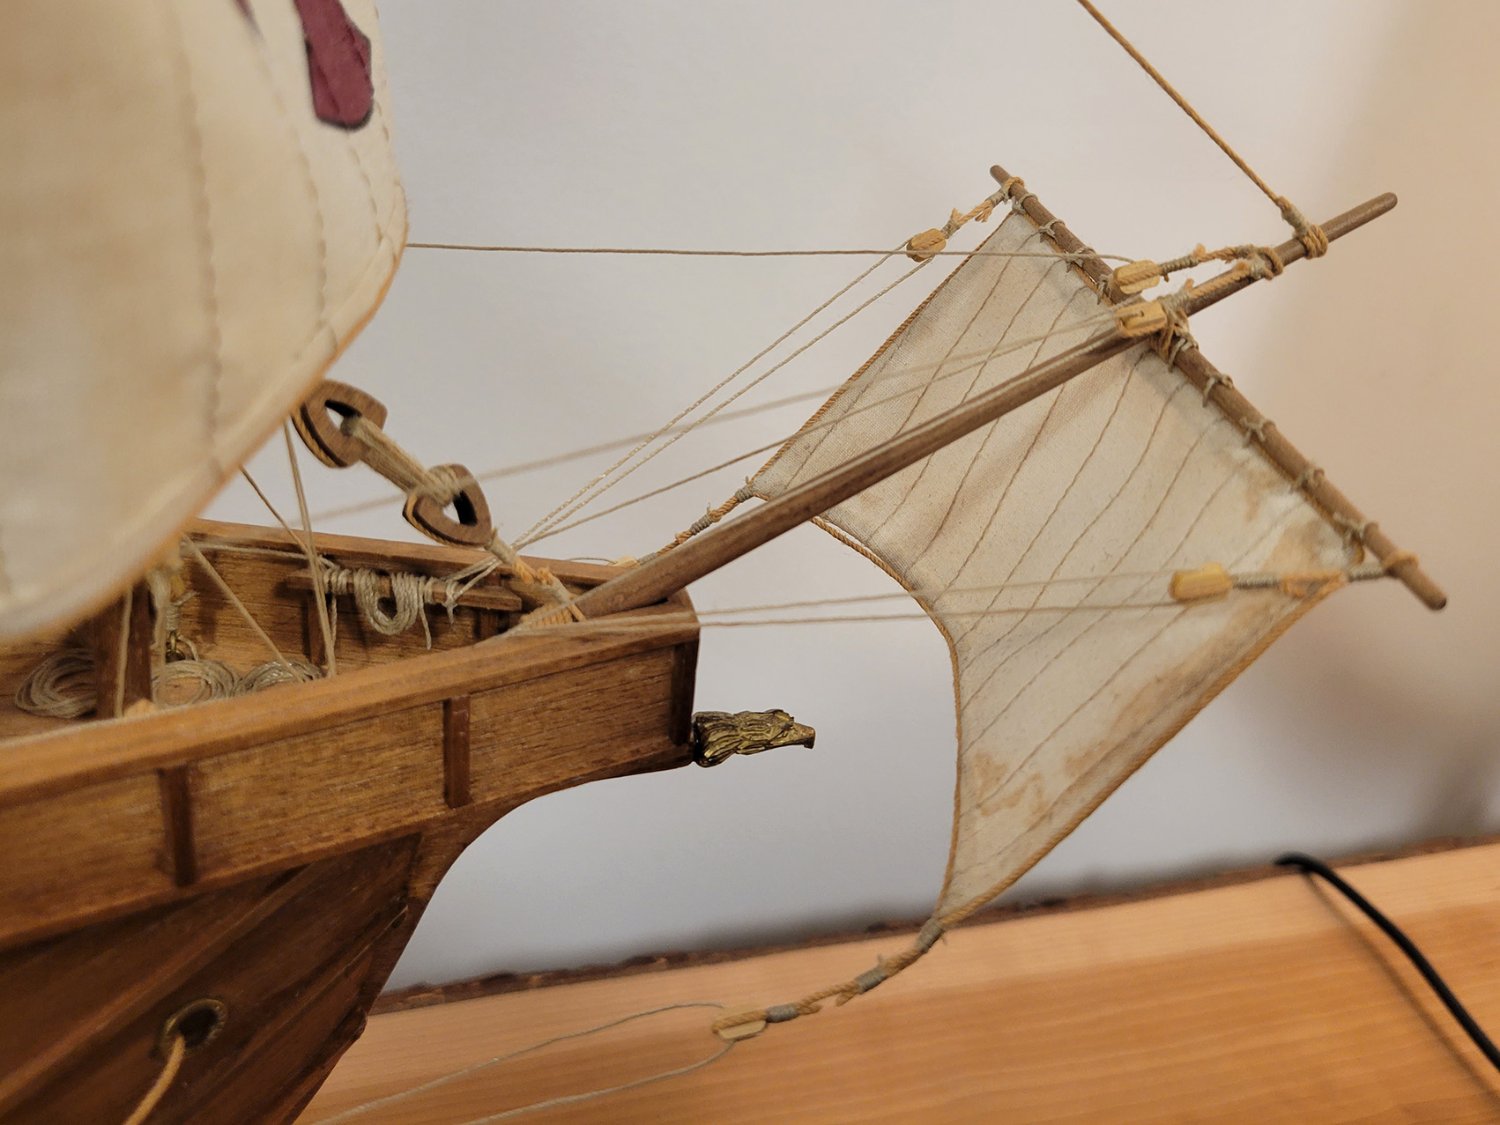
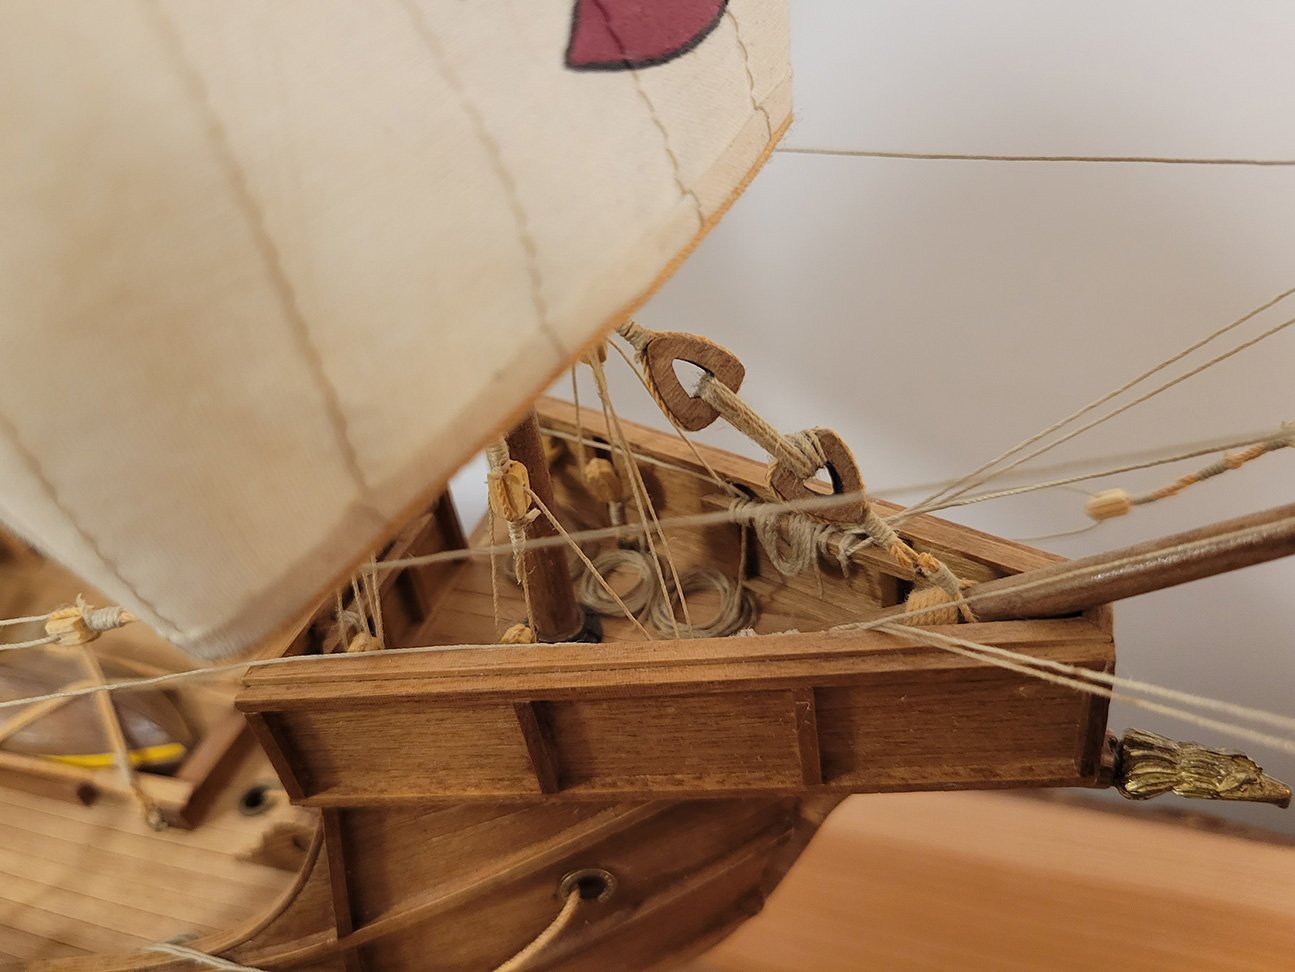
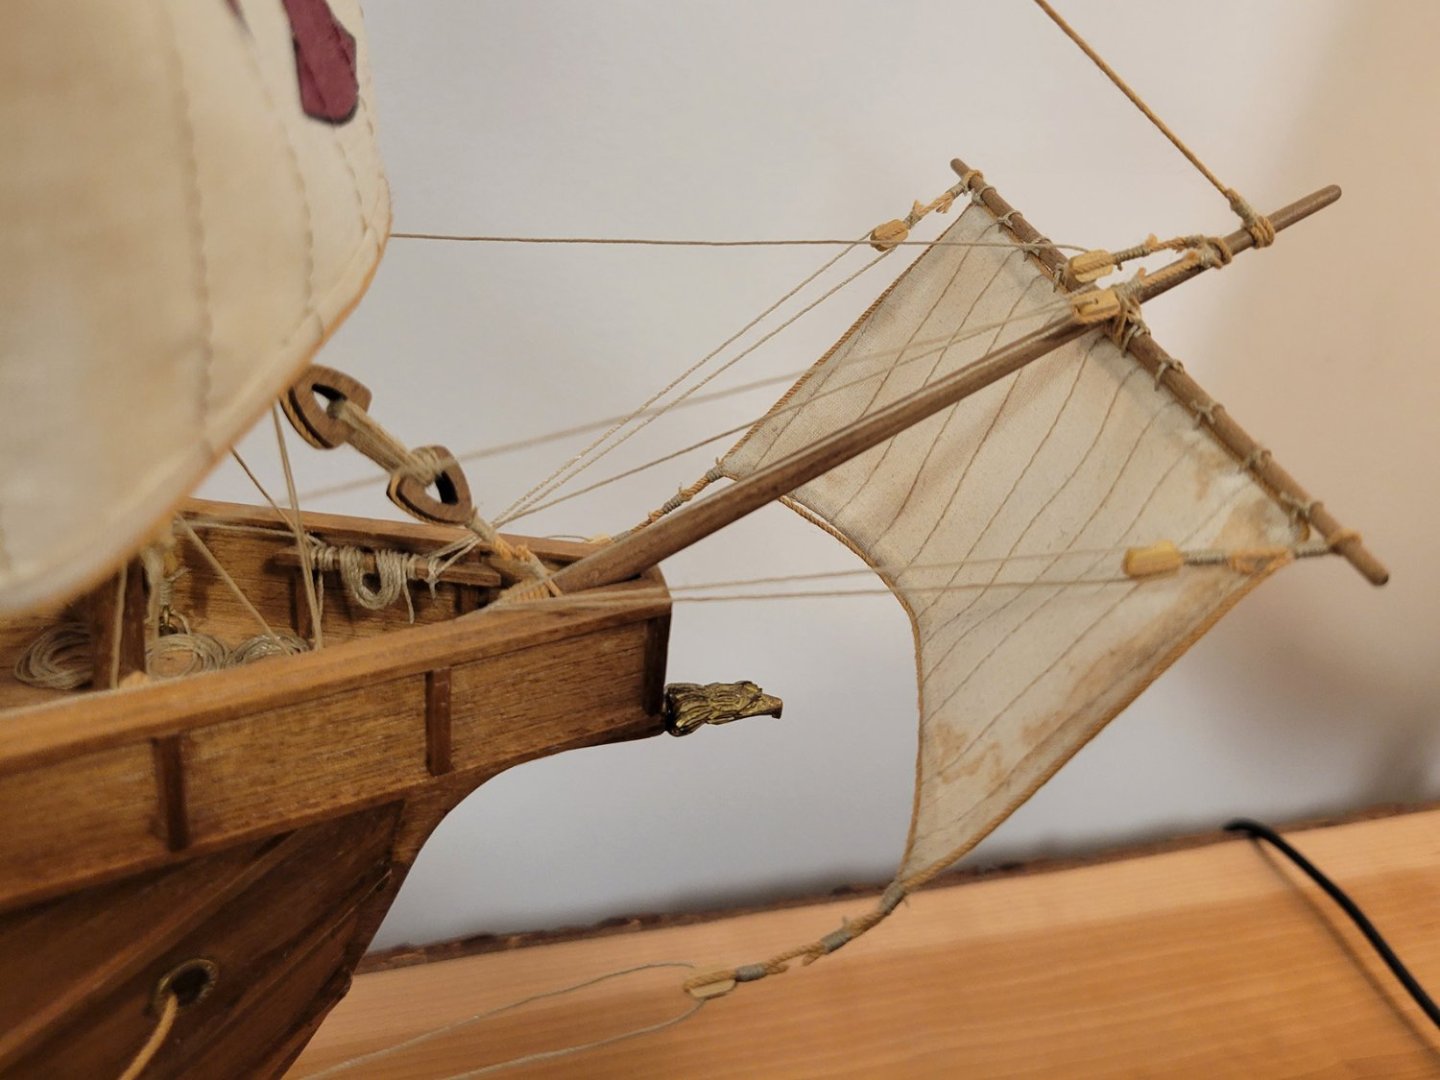
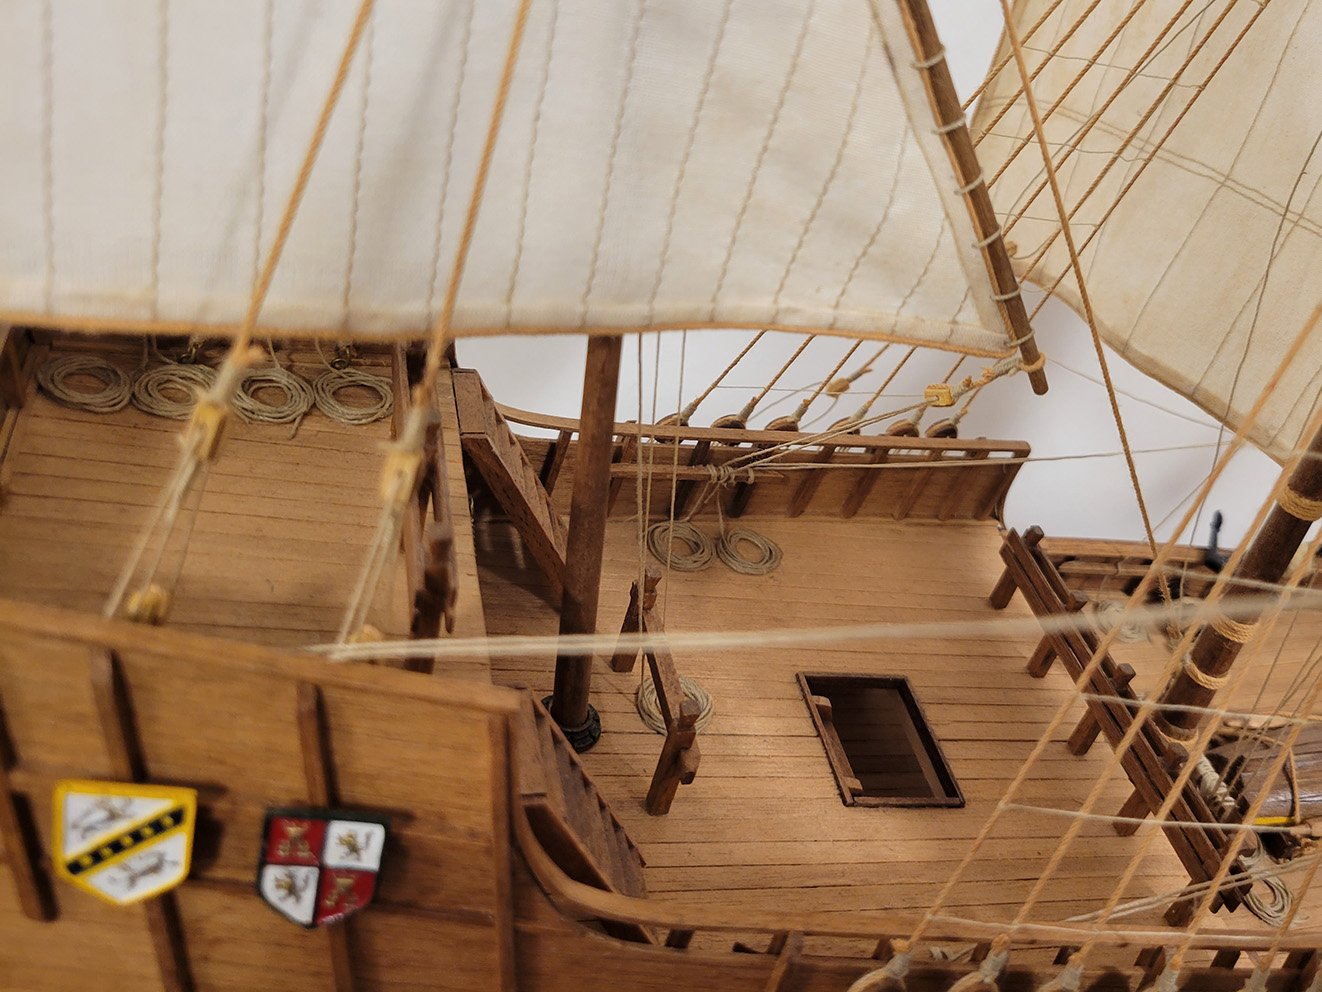
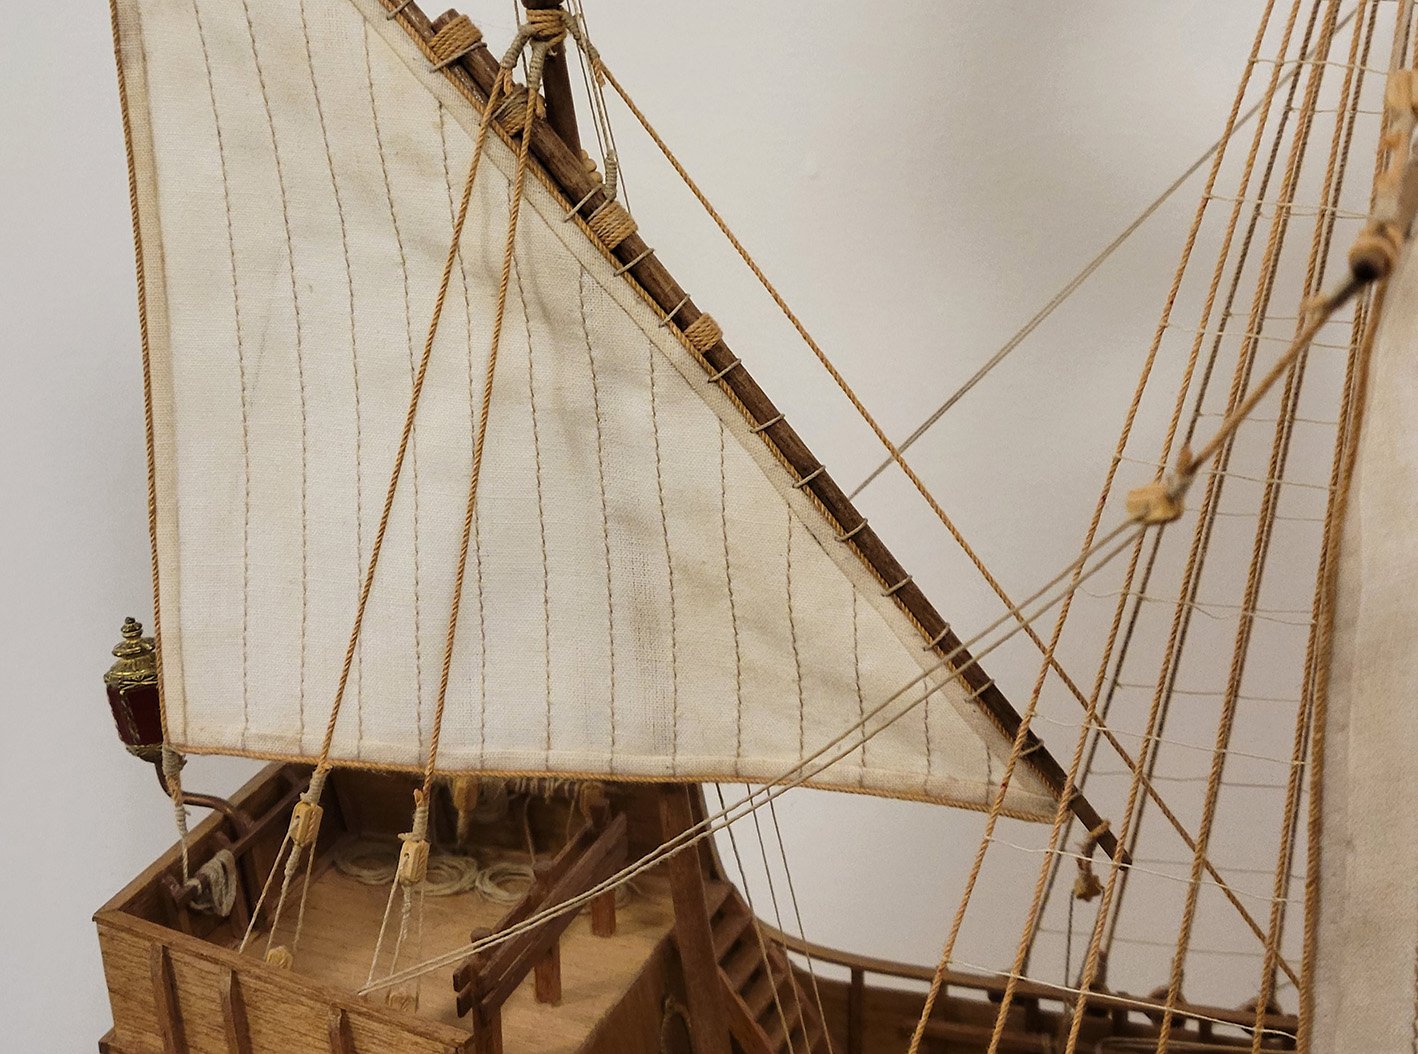
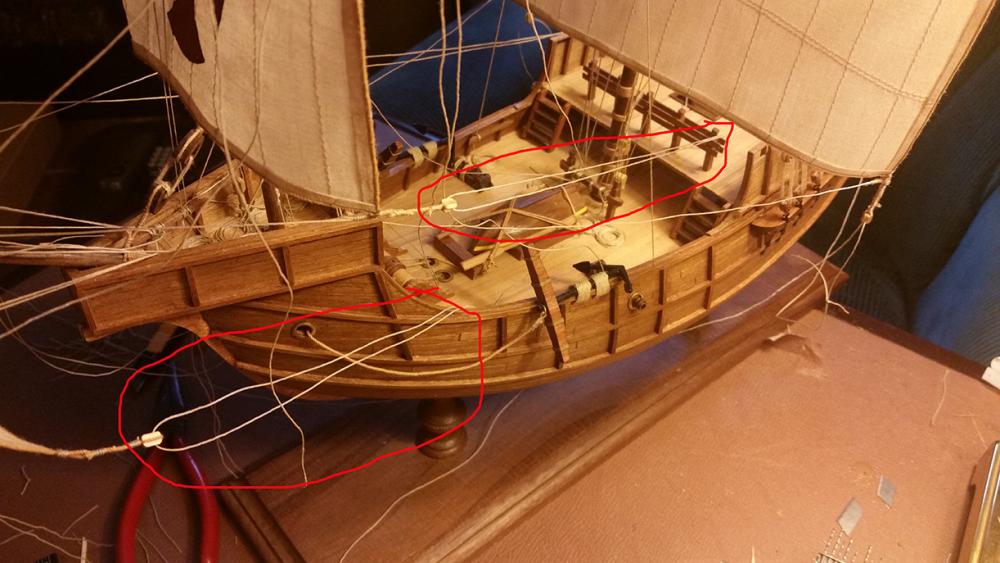
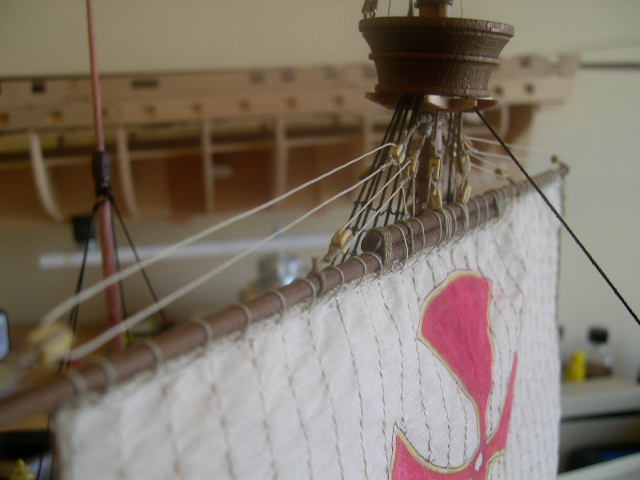
So the hairspray worked pretty well... here are a couple pics. I'm really annoyed I didn't ask about this before... inserting a wire would have solved all this and I would be able to rig the lines tight. I'm considering trying to unfold the bottoms of the sails and add in a wire, but I'll lose it if I mess something up and have to redo them, so I probably won't. Hopefully I can figure something up to get the lines tighter.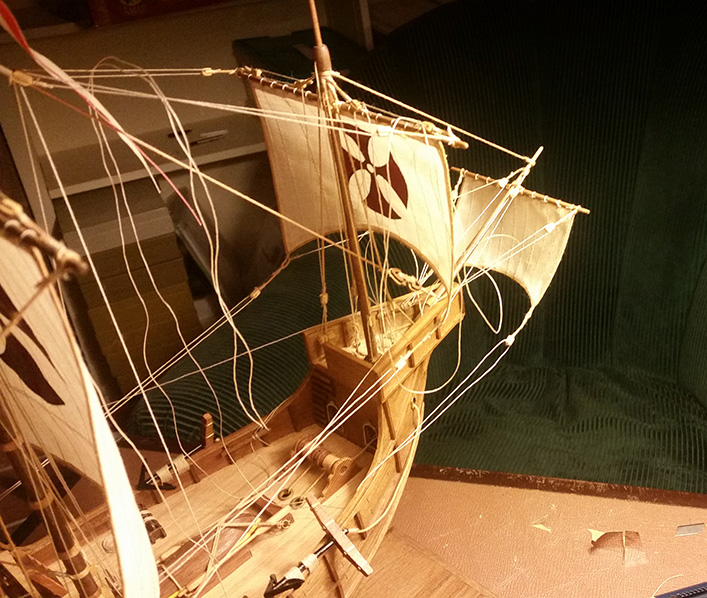

-
Hair Spray for Sails and Loose Sail Rigging
mkmossop replied to mkmossop's topic in Masting, rigging and sails
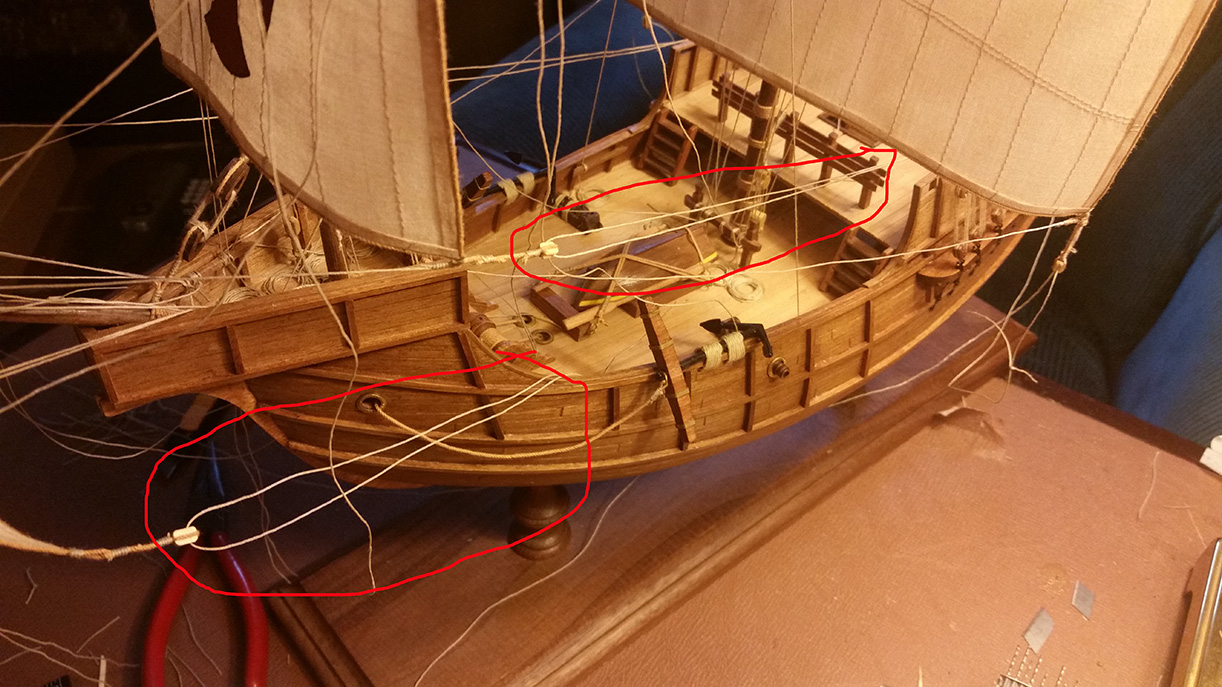
Ah damn... should have thought of the wire... too late for that now. I think the hairspray will work to maintain the sail shape, however I don't know how I'll get the rigging taught. Which one is the sheet line? On the main sail I have the clew line, then one line going back and one going forward. They are semi balanced, but couldn't get them all taught at the same time. I would need the sail to be more rigid. -
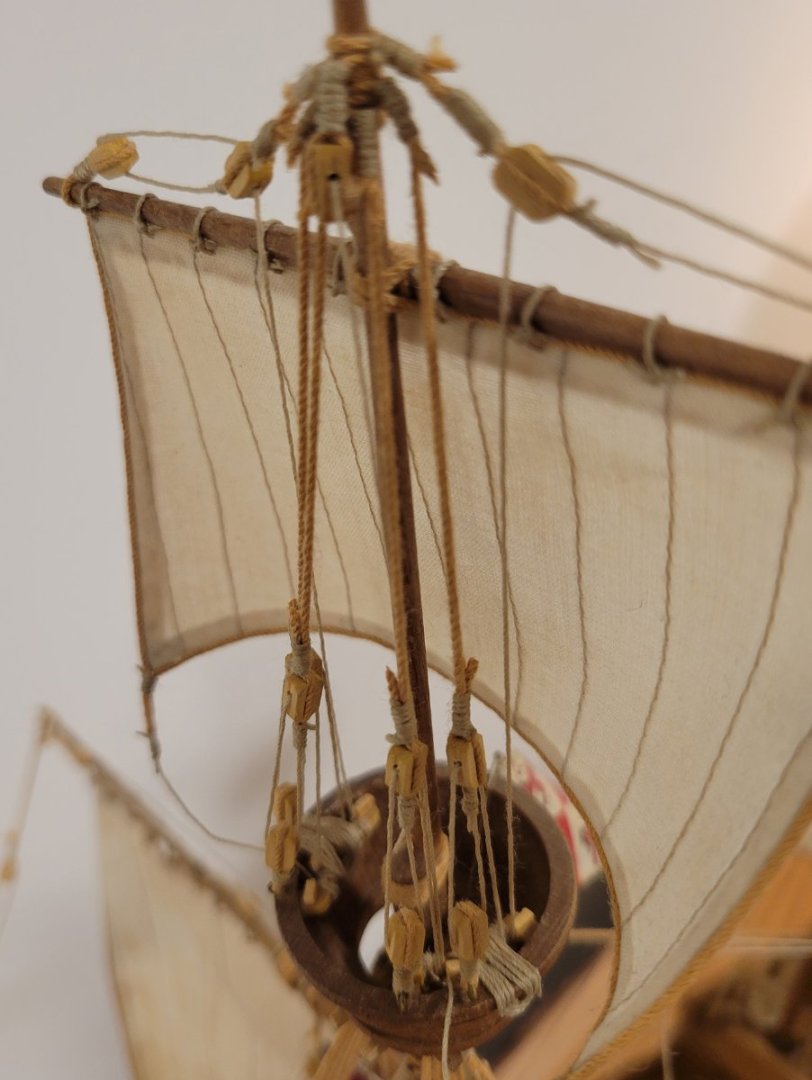
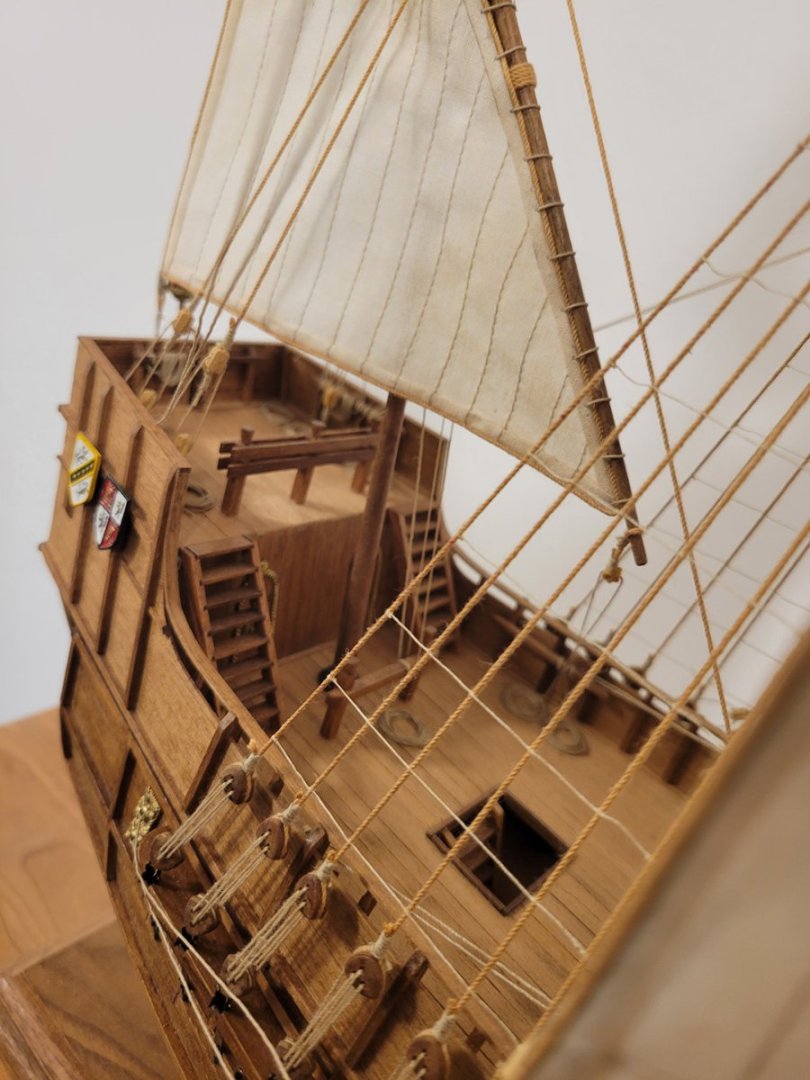
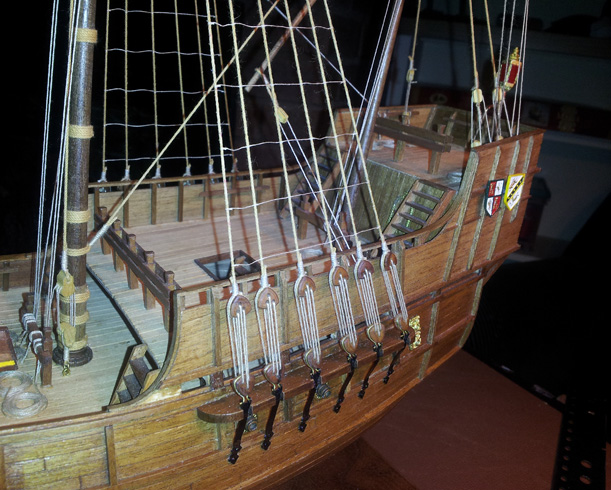
I didn't find much in a search here, but I'm pretty sure I read somewhere a while ago that hair spray works well to puff out sails? I was thinking of trying some on mine later tonight. I have an issue though which I'm not sure the hair spray will fix. The rigging on my sails is loose because of the lack of rigidity in the sails. I'm hoping the stiffening them with the hairspray will help, but I'm not sure. I think the edges of the sails need to be rigid to pull the rigging tight. I guess glue would work, but would probably show. How do people usually fix this? Just leave the rigging loose? I could pull it tight but then the sails would be pulled way way back and would look silly. I worked hard to keep the rest of the rigging (on masts etc) tight since I think it looks much better. Here are a couple pics of the loose sail rigs.
-
Ok cool thanks for your input.
-
Hi Allen, do you have any close up pictures of sewing you've done for your bolt rope?
-
Square knot... cool thanks I'll do one of those.
-
Hmm ok I'll look into those threads. I tried sewing some last night with some regular sized sewing thread and didn't think it looked too great, but maybe it would look better with thinner thread. So from your post I take it most people here sew on the bolt rope? From what I can tell it's actually glued on pretty well, but extra reinforcement would be bad. I just used regular wood glue.
-
Also what type of knot should I use for the robands? I can't find any good info on that.
-
Here's another example. I took this from shipcarpenter's build log on this forum of the same ship. I see he's pulled the sail tight to the yard the whole way. Is this how it should look? Thanks!
- 29 replies
-
- 2
-
-
- santa maria
- amati
- (and 1 more)
-
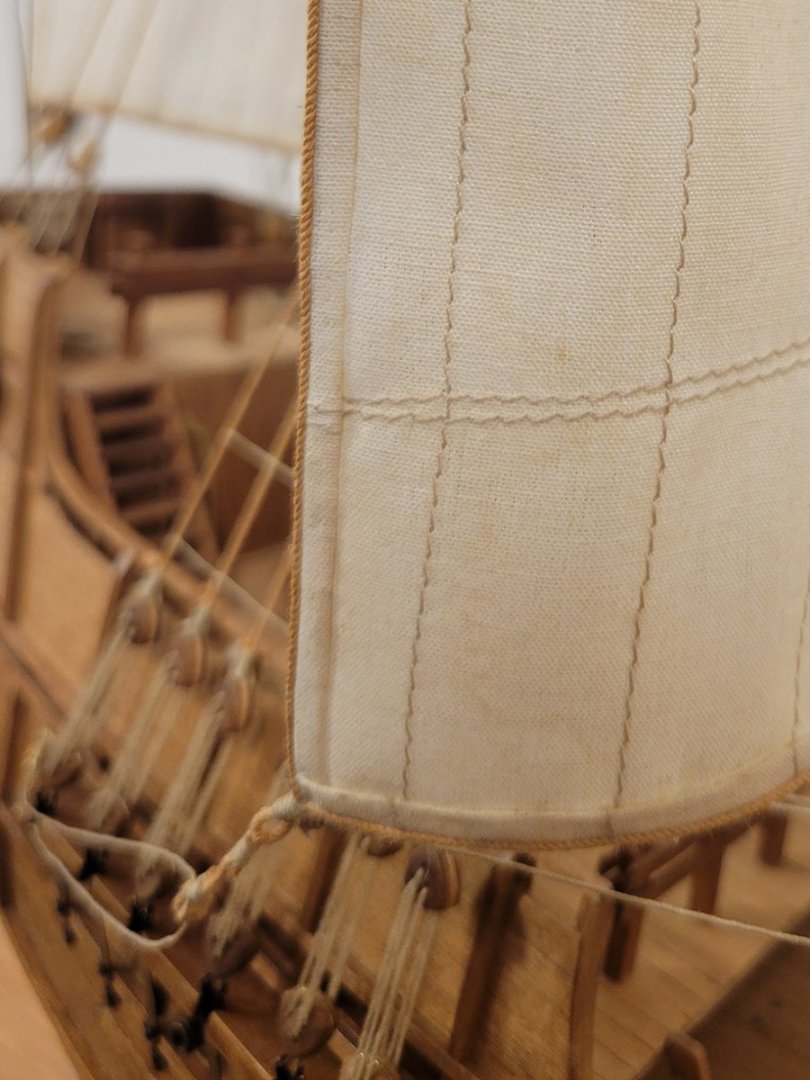
Oh ok... thanks for the informative post. I suppose I could try sewing through the bolt rope, but that would probably be pretty tricky. I've already glued the bolt ropes on... here's one of my sails.
-
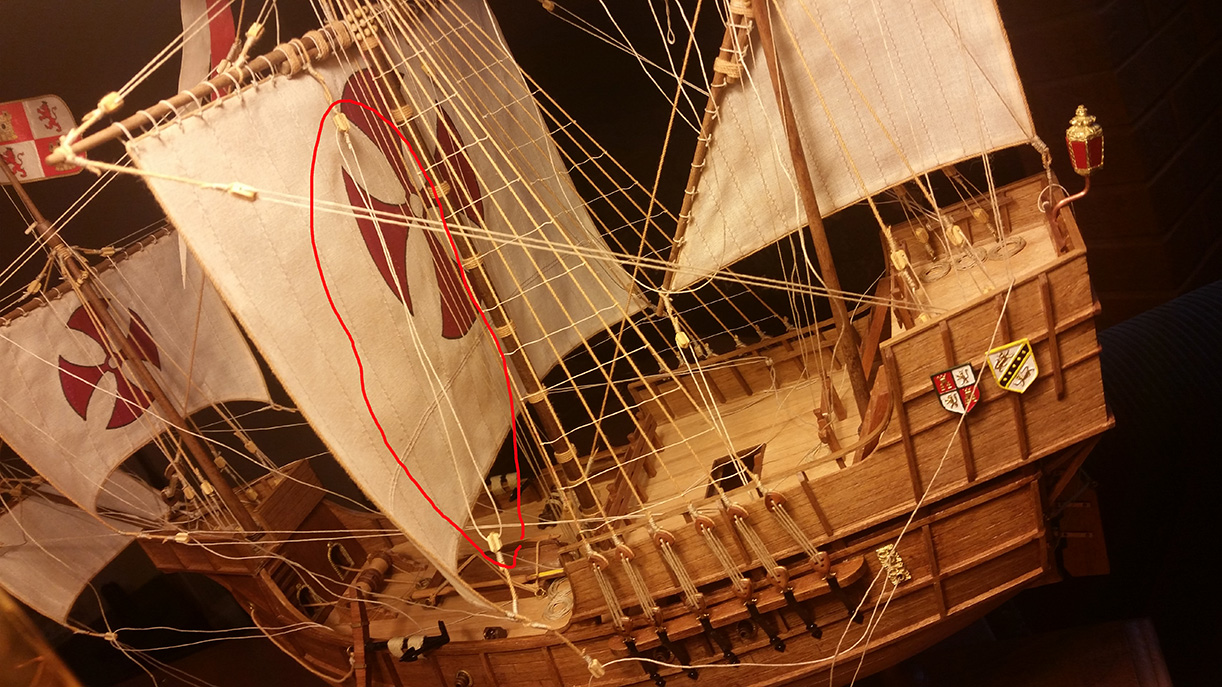
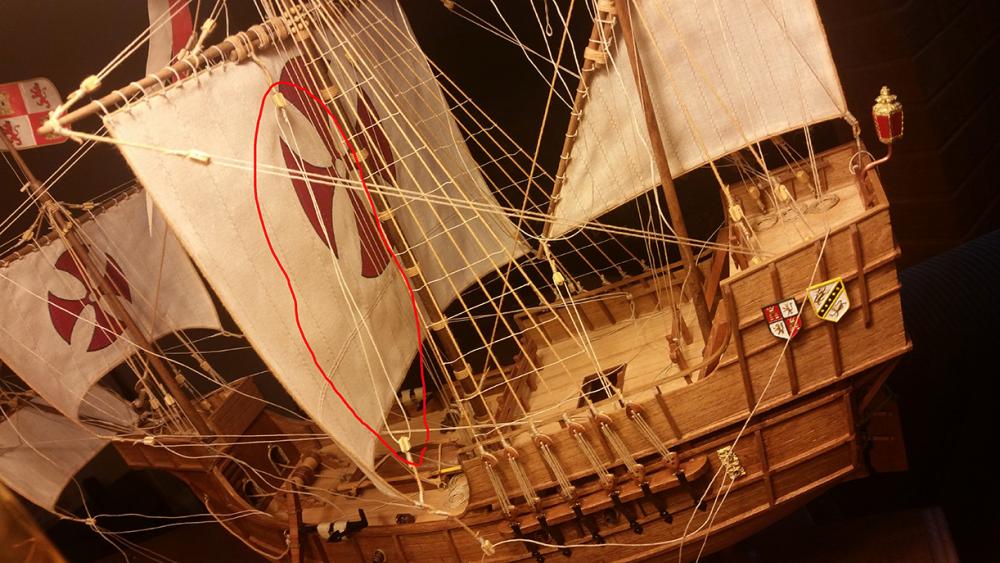
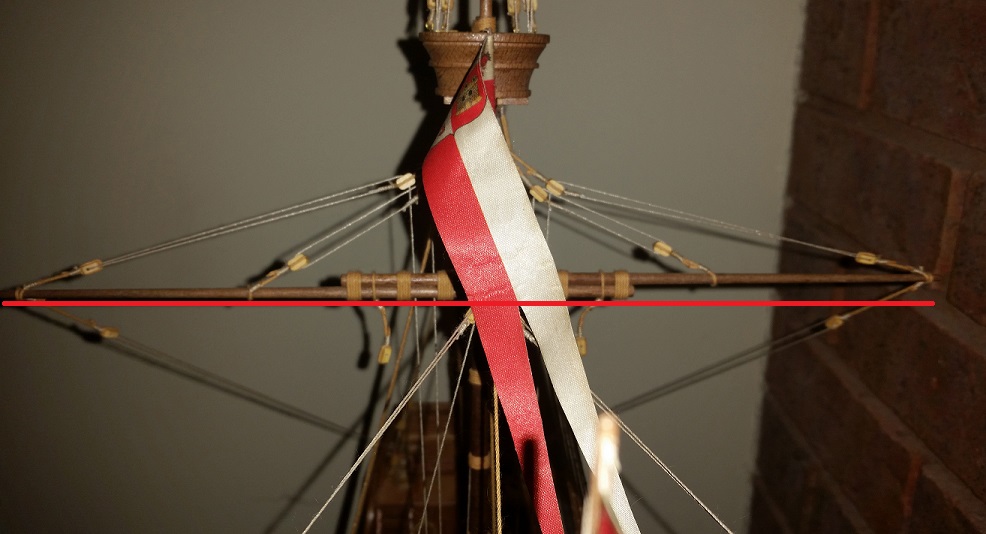
Hey thanks for your help . So I notice that in your picture that although the yard is tapered, the sail is tight against the yard the whole way. I was thinking that you would want to have the sail horizontal the whole way across, and since my yards are tapered, the sail wouldn't be totally flush. Does that make sense? Also here's a picture of my main yard (couldn't take a good one without other stuff in the way). It's two yards stuck together, so as you can see the right side is much higher than the left. Here I would assume there would have to be space between the sail and the yard or else it would look funny. Would it be correct to attach the sail as the red line is drawn?
-
Hey sorry for the late reply and thank your for your help . Before I do the robands though I have to sew whatever this is called (the thread which fastens the rope to the sail). Is there any specific way to sew these, or just do a simple loop around over and over?
-
Not sure I can figure out how to tie that from the diagram, but I'll give it a try. Thanks for your help. This is my model here: http://modelshipworld.com/index.php/topic/3445-santa-maria-by-mkmossop-amati/ So are the robands too thick on the second picture I posted above? From what you said those look about right, or maybe a little too thick. Are there any threads here where I can see how you did your robands?
-
Hey thanks for the reply. Neither of those are mine actually, I found them both online. So how big should the rope be? It looks rather large on the first model. How would I put holes in the sails to make room for the rope, and is there any guide to making a knot like that?
-
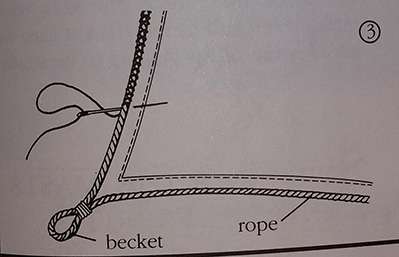
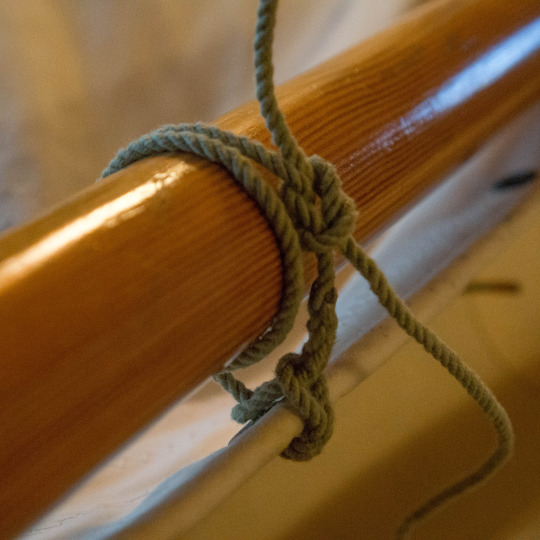
I'm looking for some help in making some robands to attach my sails to the yard. I'm not sure if "roband" is the right term since Google doesn't really give any results for it, but it was used in a model ship building book that I have. This is the only decent picture I could find of a roband: Just curious about what type of knot people use to tie these, and what size rope? Is it more common to just use a simple loop like this? Thanks!
-
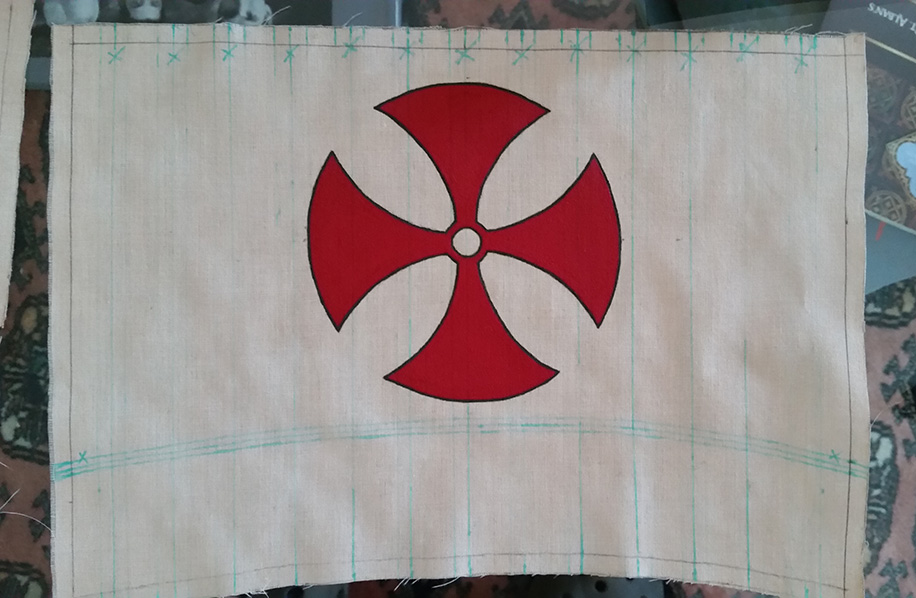
I got rid of the blue lines and ironed out the creases and folded down the edges. Looking for some opinions... should I sew down the folded edges, or just glue them down? I think if I sew them it may look too "busy", and there may be loose thread ends showing. If I glue them it'd look pretty much like it does now, but cleaner. Also I need to glue and sew ropes around the edges... anyone have any tips for that?
-
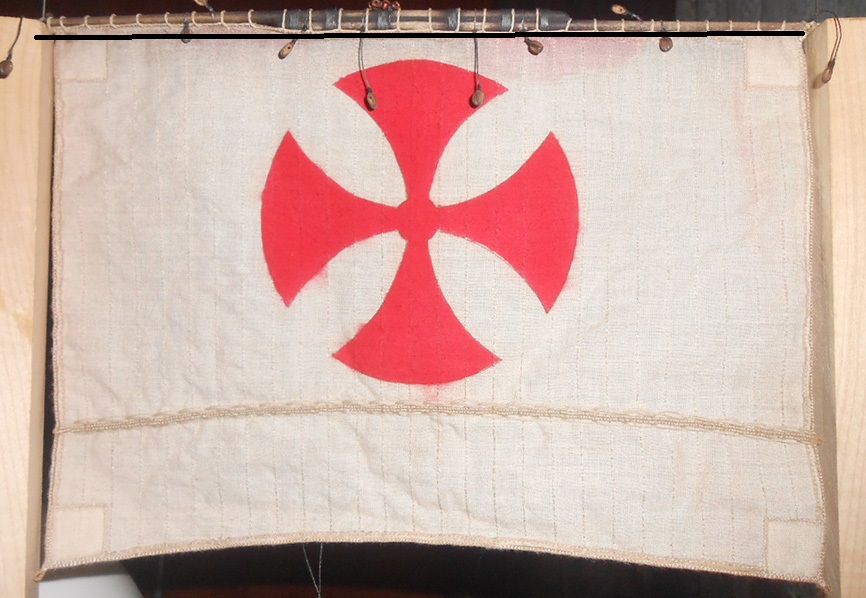
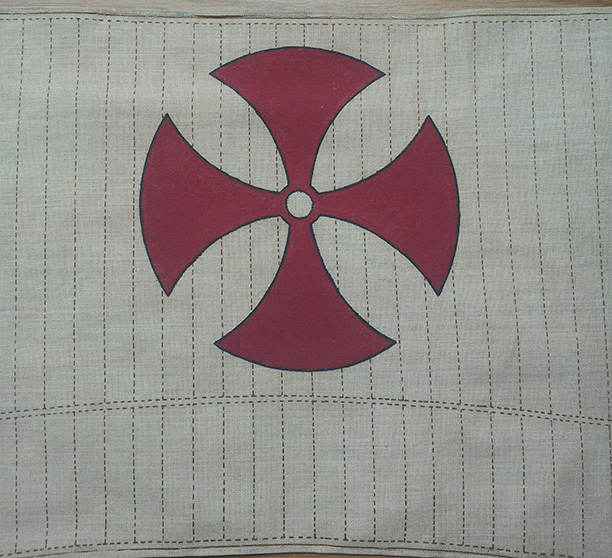
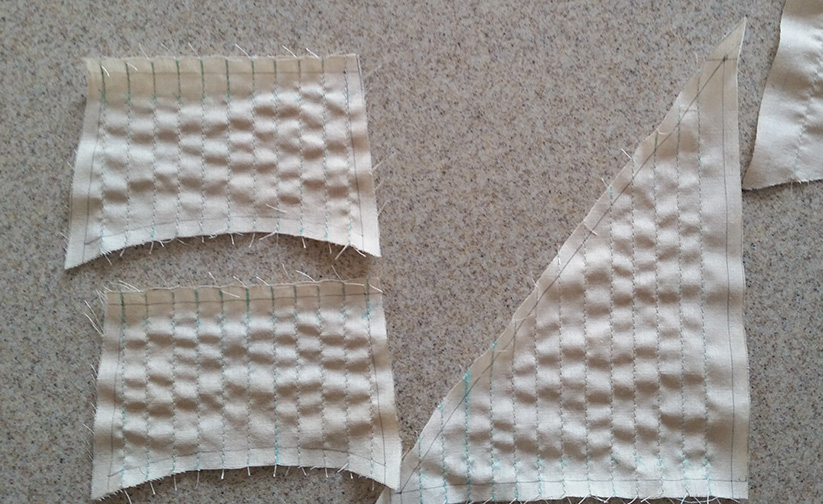
So after struggling with the ratlines for a while I finally got them done. I shortened the distance between the deadeyes a lot, and used very thin thread for the ratlines, which helped me keep the shrouds straight. I know the ratlines are a bit far apart, but I like the look better like that and that's also how the model is on the box cover. I've also been doing a lot of work on the sails. This is a picture of the original sails that came with the kit, where I painted the emblem on. The problem was I couldn't sew over the stitch lines while keeping them totally covered up... the brown stitch lines would show beneath the thread which I thought looked really bad. After trying a bunch of times to get it right I decided to order some new sail material and trace all the stuff by hand with an erasable marker. I was planning on taking them to a professional tailor to get the stitches on perfectly straight, but I was able to do a pretty good job myself I think. Because the material is so thin they're a bit crinkled because the fabric gets pulled up while sewing. I'm gonna pull the stitching and iron them to get some of the crinkles out. Also the blue erasable marker is still there, so I need to wash that off. I'll post the finished product once I wash and straighten them and sew the edges down.
- 29 replies
-
- 1
-
-
- santa maria
- amati
- (and 1 more)
-
I didn't specify, but she did it by machine which is what I was expecting. Is it a better idea to get it done by hand?
-
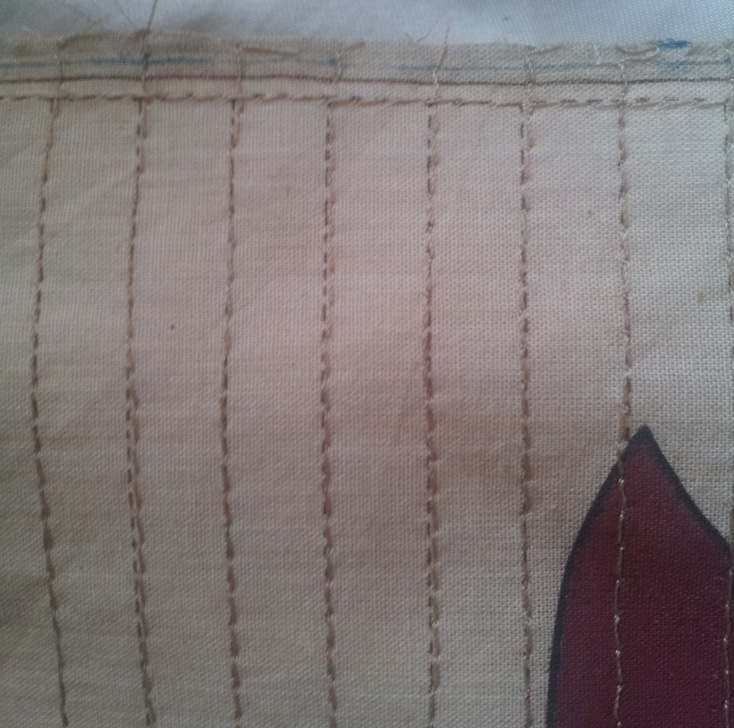
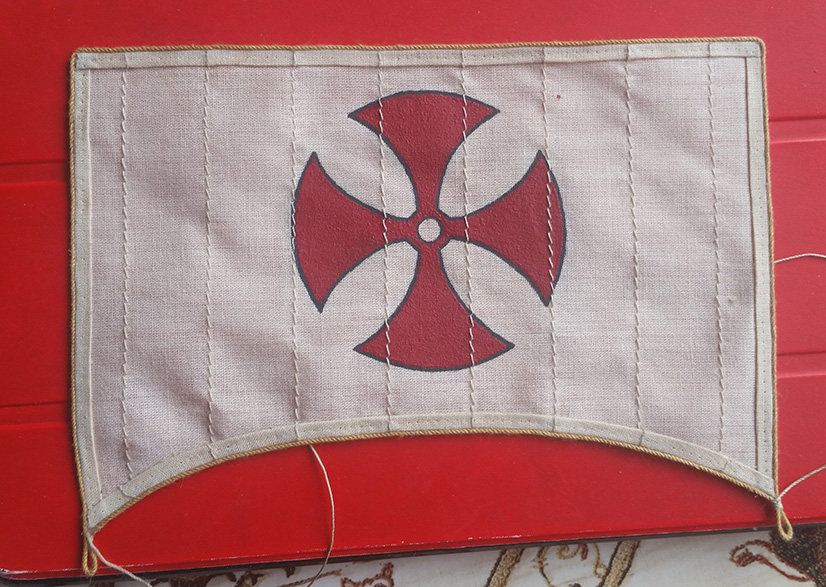
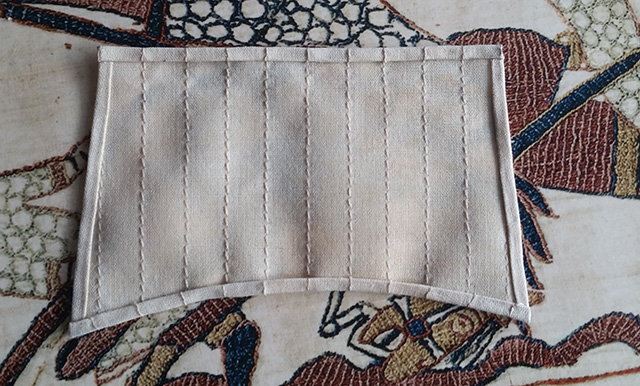
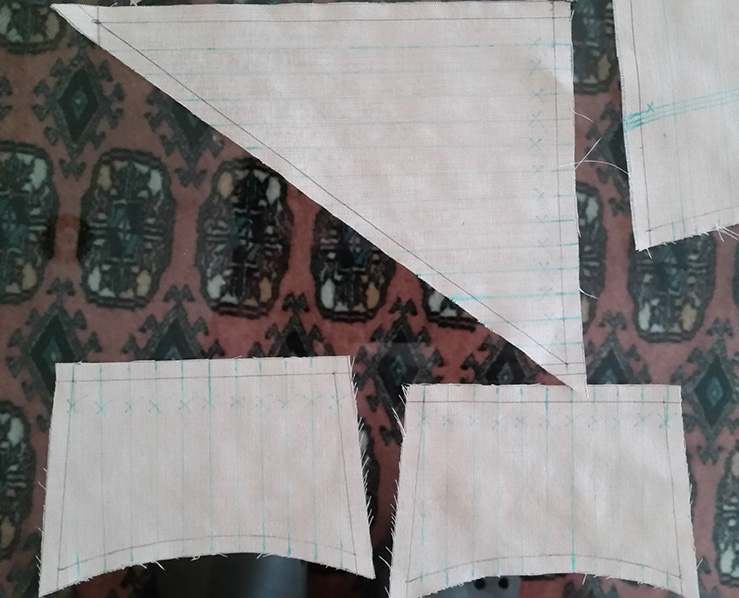
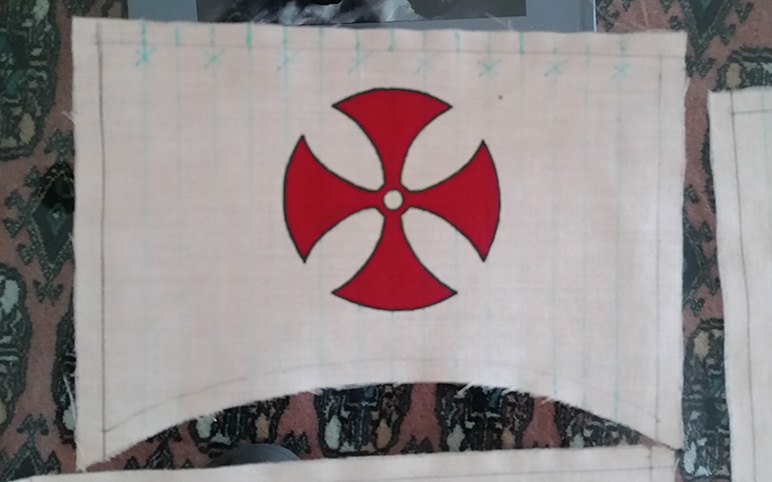
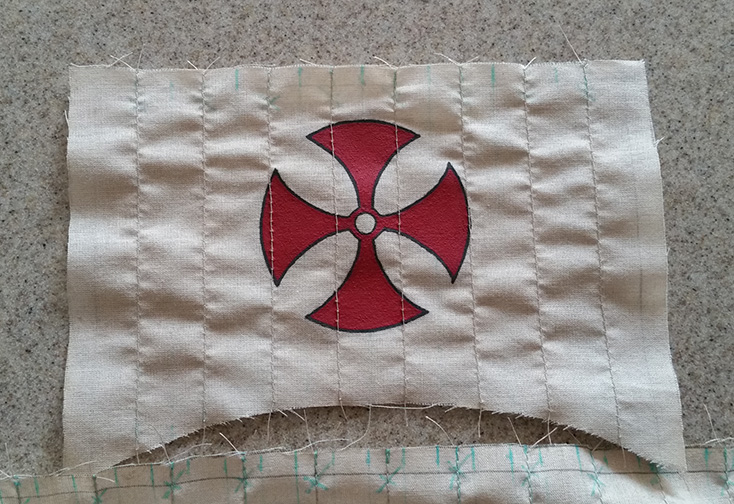
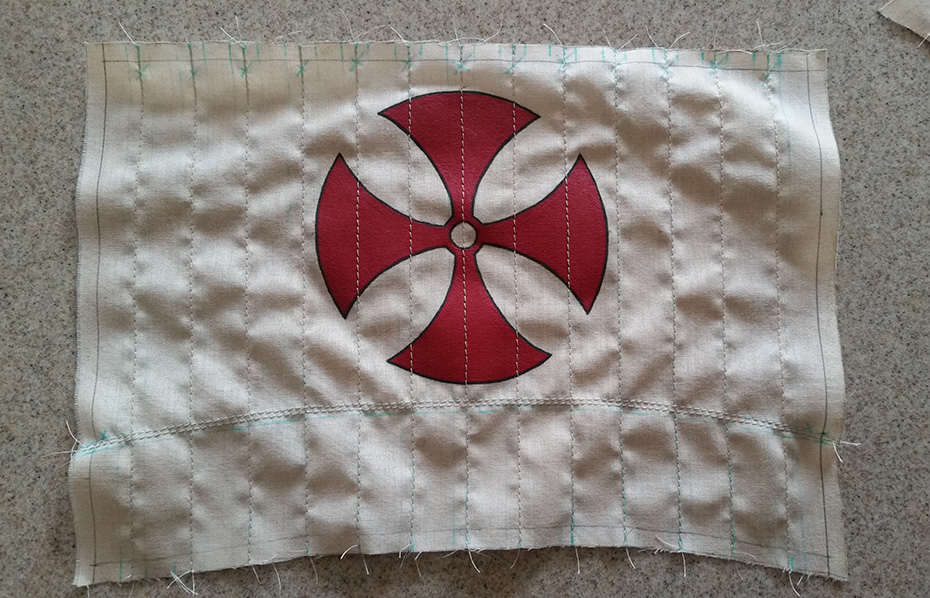
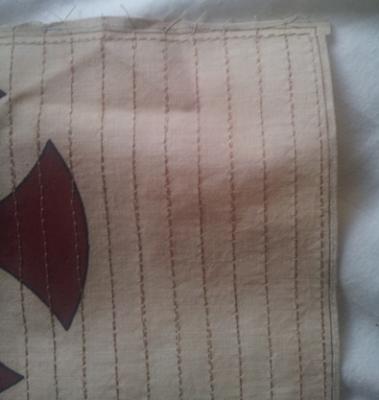
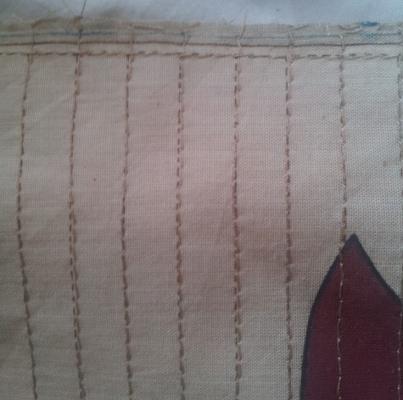
So after trying a bunch on my own to sew the sails and not being happy with my work, I took them to a (supposed) professional, and this is what I got back. I'm not happy at all with what she did. I said specifically that I wanted the dotted brown lines to be covered perfectly with the thread, which she didn't do at all. Is this a decent job or are my standards too high? When I did it myself I had a very tough time to cover the lines perfectly, so I know how hard it is, but I assumed a professional would be able to get it perfect. I think it looks sort of OK from a distance, but up close looks like crap. If it's really so difficult to cover the dotted lines perfectly then maybe I just won't sew them. I may try to contact another seamstress first though.
-
That's interesting about the boltrope. I was going to glue it on and then also sew around it because I thought that was accurate, and that's what I see on model ships... but maybe I won't do that now. I think sewing through the sail can look really good, even though it probably is way out of scale.