peterwwebster
-
Posts
55 -
Joined
-
Last visited
Content Type
Profiles
Forums
Gallery
Events
Everything posted by peterwwebster
-
Hi Like you I have had time off my Victory and having now started up again I am in exactly the same place strucling with sheet 7. You post is a great help when I go back to do it. Your workmanship is amazing Peter
-
Hi Rich. I have suspended my build for the last few months as my wife is ill but just wanted to say I think your build look great Peter
-
Thanks for the advice Guys. I looked replacement brass fittings and it looks like you have to but the whole lot The price CMB give made me fall off my perch. The moral of the storey is only work on a table with a large sheet under it. I will call JoTiKa.
-
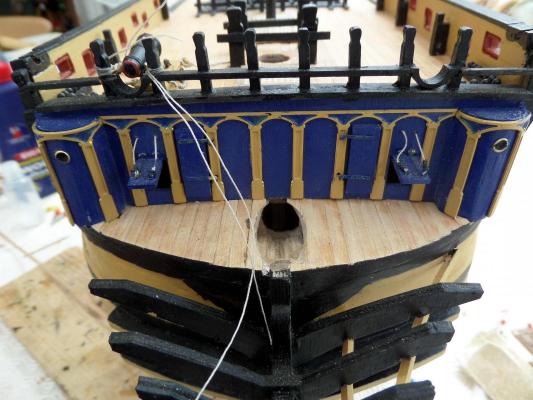
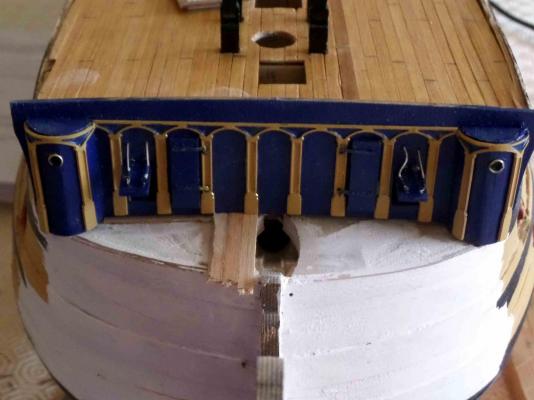
Help! I have been sitting fitting the brass window inserts into the stern fascia on evening and somehow managed to loose one window. I have looked high & low, vacuumed the chair and gone through the stuff in the hover with no effect. I have been trying to make a new window by painting the frames on celluloid, gluing scrap brass strip together, cutting holes in brass plates but nothing seems very promising. Has anyone got and bright ideas please
-
Hi Nick thanks for your comments. I should explain I have a disabled wife and don't get out much. If you do a bit everyday then progress is good until you are careless and have to redo things. I do enjoy the build although is difficult when one spends hours rigging cannon and then hiding them. I hope you enjoy your build Peter
-
Told you it was my age!! If only they had stated the obvious!.
-
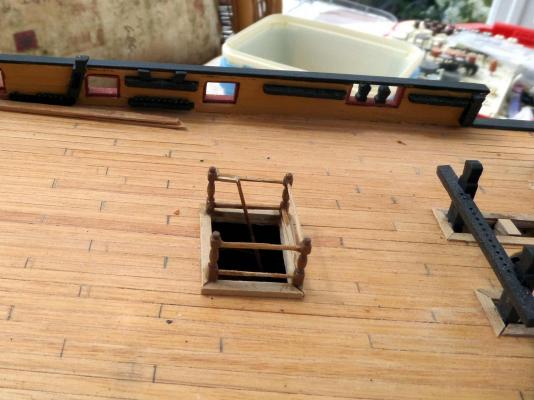
How easily I get confused, it must be my age or something. Looking at the side entry steps, how is it the photo 038 page 41 shows the entry steps to the left of the entry port but the plan sheet 5 shows them on the right. I intend looking at various build logs but !!! Anyway onward & upward
-
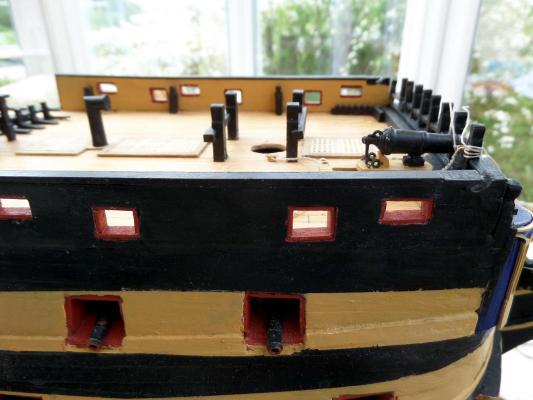
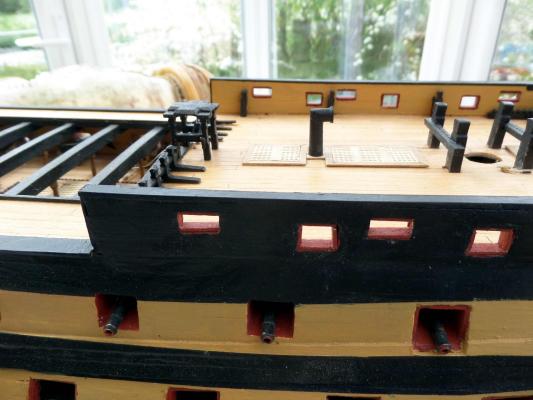
Hi All, I have been very lax in posting pictures so sorry. Anyway I have been busy building and her are some pics to prove it

-
Hi Rich Nice work on your ship. I am no way an expert but so far I have found it best to tie the blocks on to the rigging first, secured with super glue, attach the eyes to the blocks as necessary and then fit the eys to the cannon. You can then thread the rigging through the blocks and suspend the cannon whilst you coil the free end around the line s between the blocks, called flemishing I think. The trick is to get the flemished lines the right length. Then when happy fir the eye bolts to the deck. I have yet to get the length right. I really need to add some photos to be log bu t never seem to get round to it. I will have a go now.
- 414 replies
-
- 1
-

-
- caldercraft
- victory
- (and 1 more)
-
yes the styrene strip worded for me
-
That look very very good rich. Talk about perseverance, Well done.
-
Looks good to me Rich well done
-
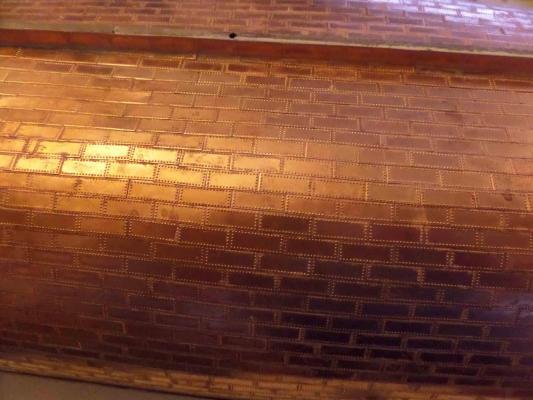
I still think its worth painting the hull in copper so the white doesn't show through the inevitable gaps in the tiling so a coat of primer will hopefully stop any mote absorption and give a base for the copper paint
- 414 replies
-
- 2
-
-
- caldercraft
- victory
- (and 1 more)
-
Is it possible that the planks have curled across their width? That would suggest the wood was too wet for too long and the wood absorbed the water and swelled the grain unevenly hence the curl it could have been damp timber where was it stored ? I would try PVA brushed into the cracks which should get into the cracks and stick them to the first layer of planking. When dry apply a watered down coat over alI. Then I would fill it and sand it and apply an acrylic primer and rub that down and re prime until you are happy with the finish. It all gets cover in tiles so it doesn't matter what it looks like.
- 414 replies
-
- 1
-
-
- caldercraft
- victory
- (and 1 more)
-
Hi Rich What a shame. It certainly looks like the wood has swollen with water from the paint. Looks like a rub down and fill job. I know its a bit late but when I did mine hull i primed it with Dulux acrylic primer first so as to seal the filler and minor gaps and rubbed it down ready to paint. I think that would be a way forward. This ship building is supposed to be fun but sometimes I do wonder. It will all be OK in the end and nobody will know about the trouble you had (Except us fellow sufferers)
- 414 replies
-
- 1
-
-
- caldercraft
- victory
- (and 1 more)
-
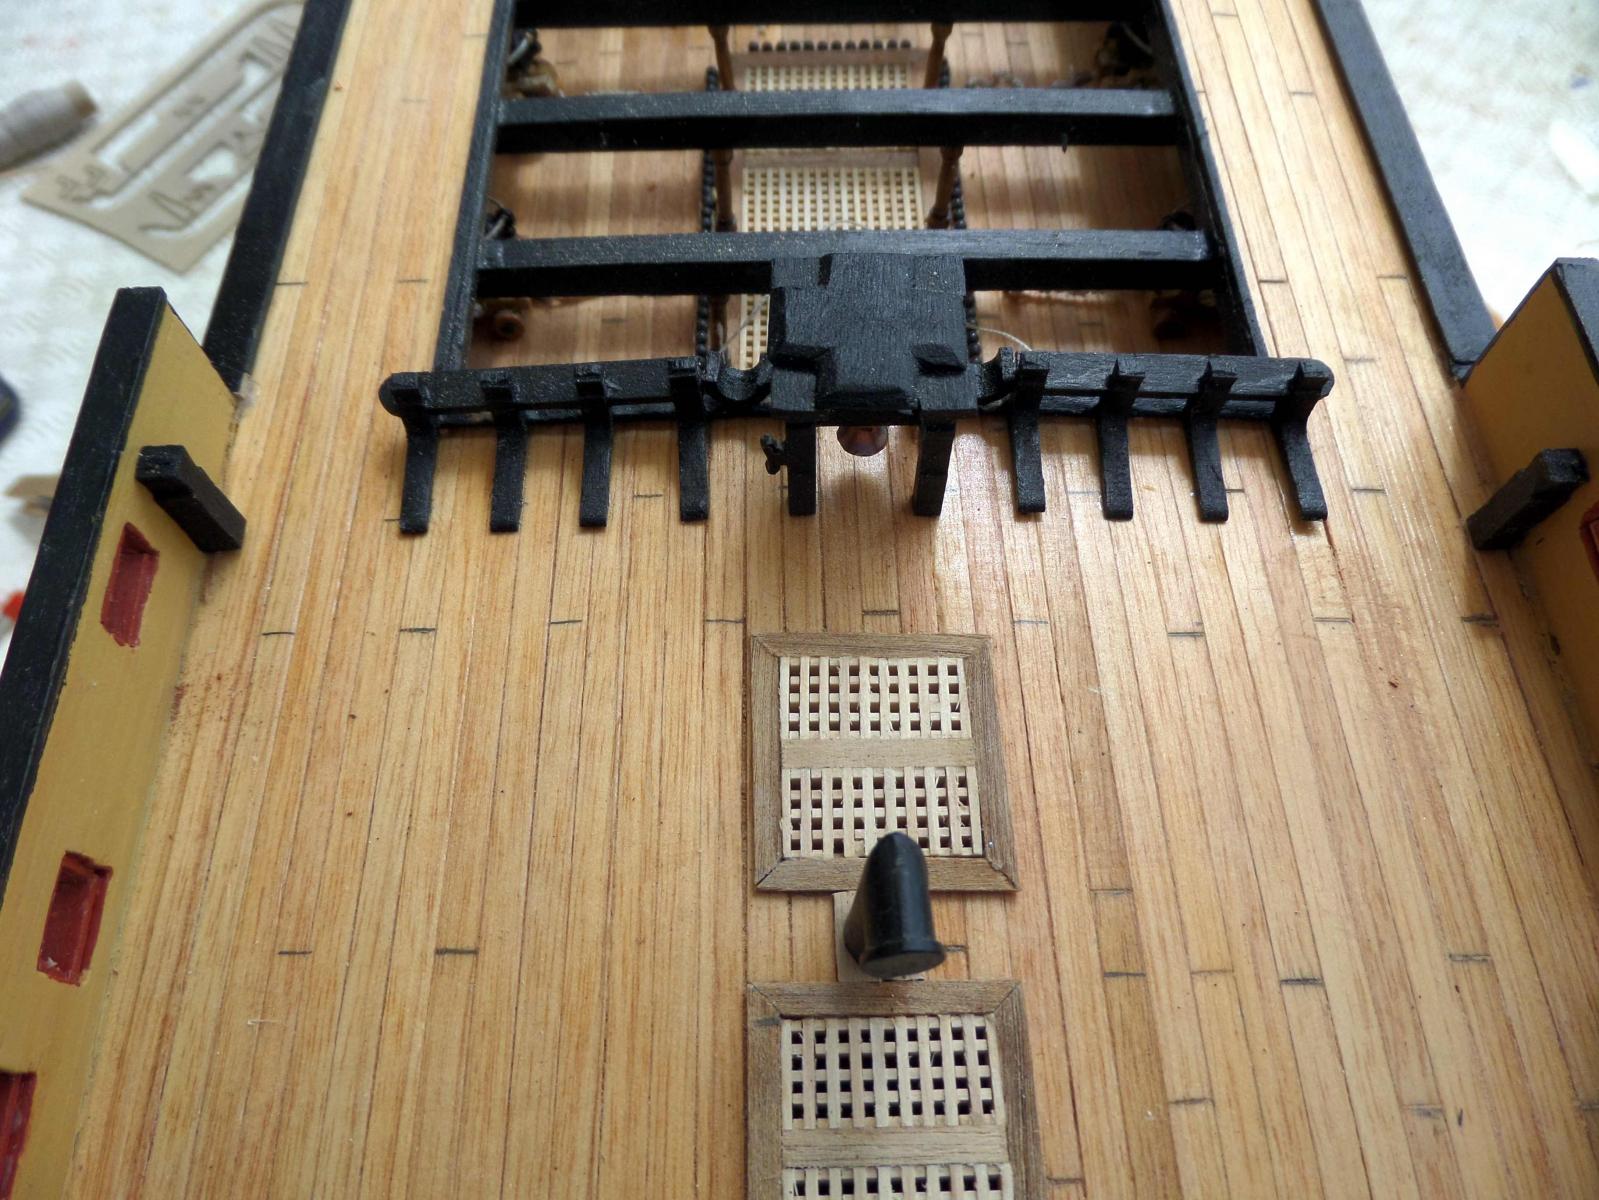
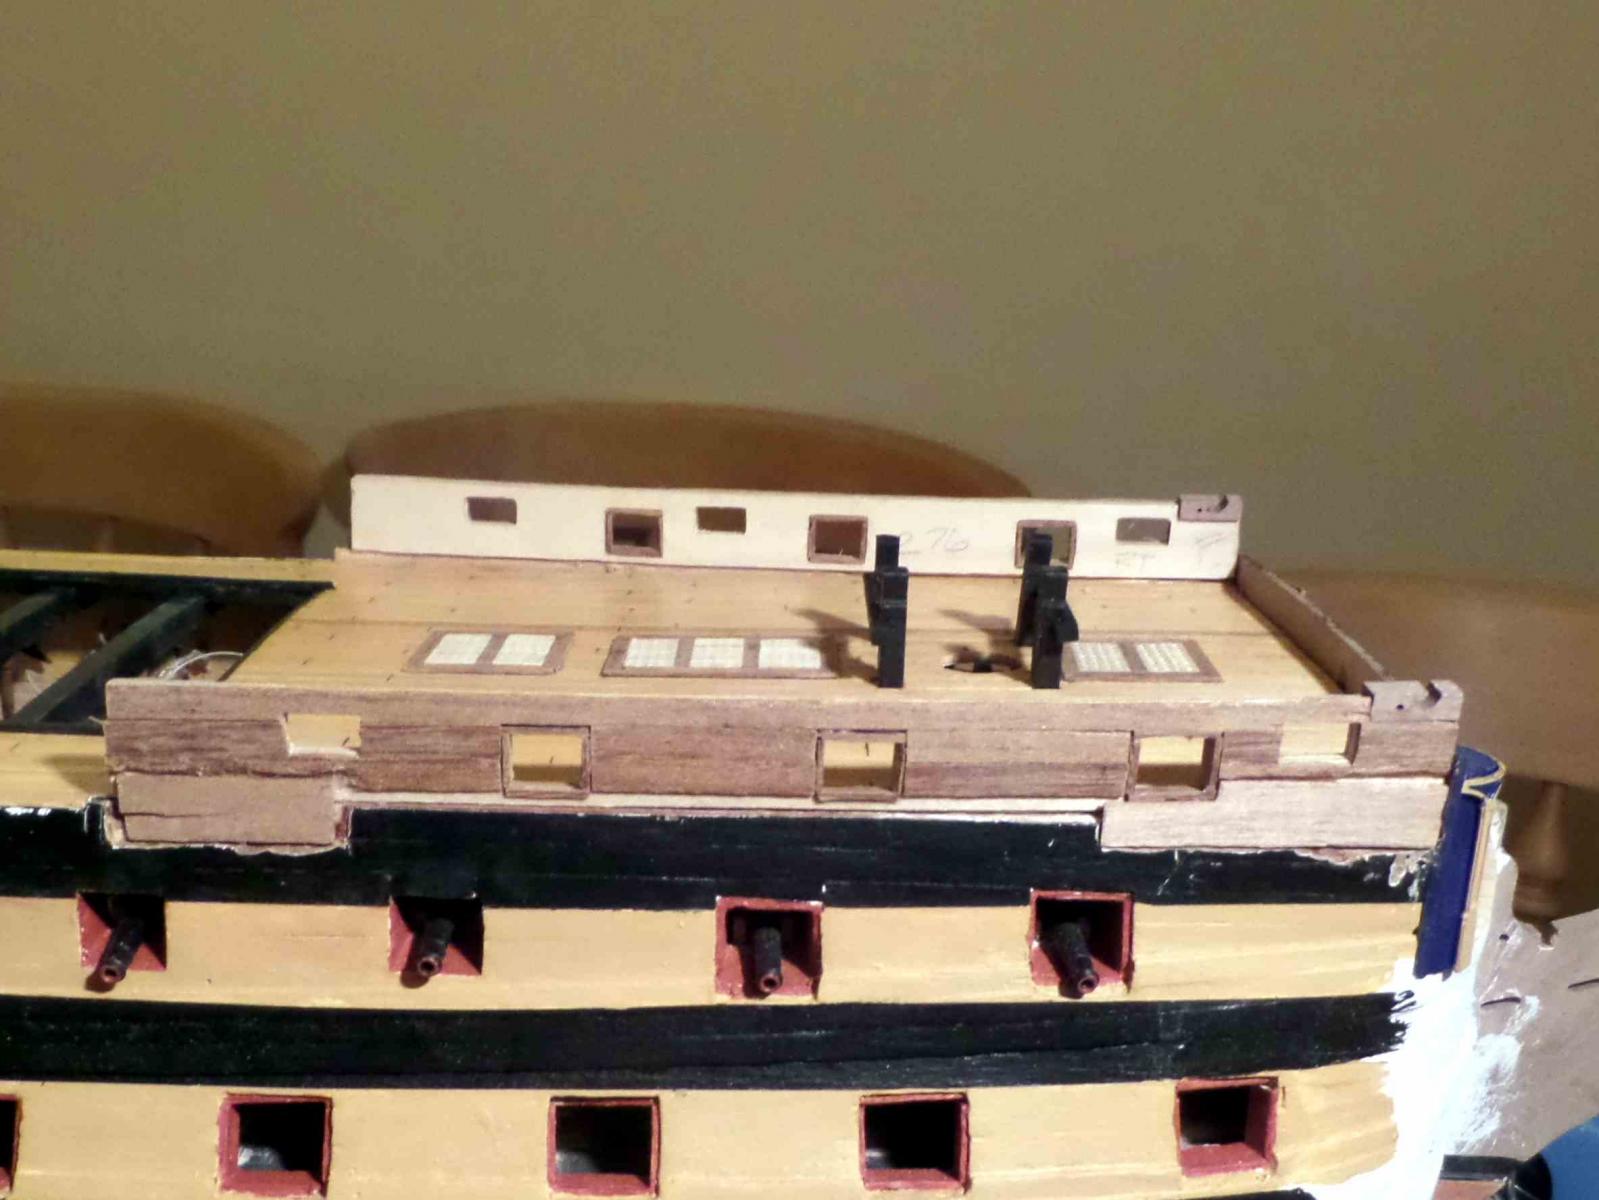
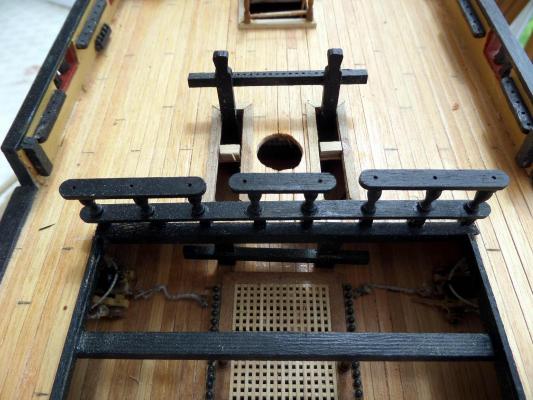
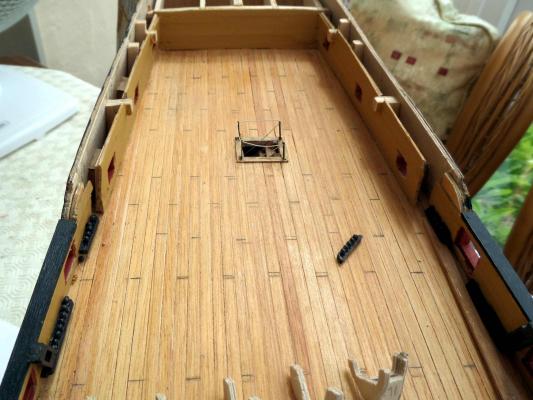
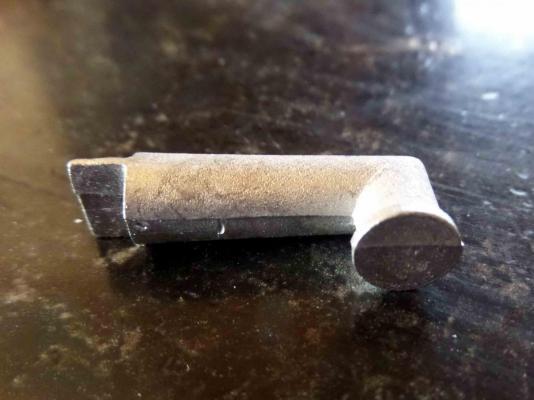
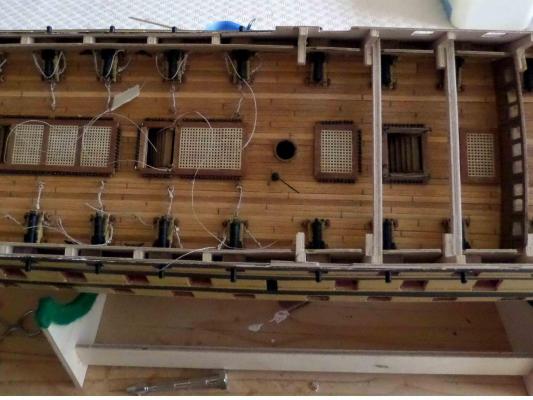
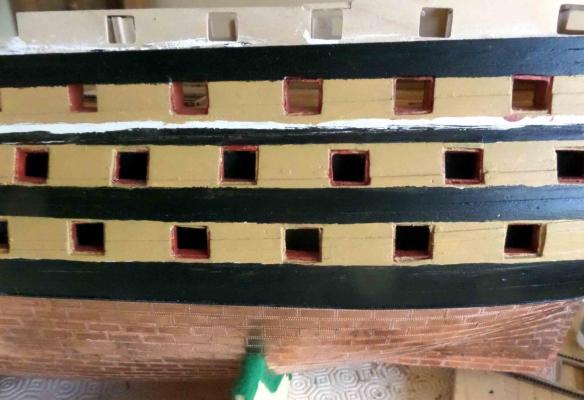
Hello everyone I have been busy building and discovering problems with my build and seem to have not posted anything for ages. Sorry. I think there are lots of good build logs on this site which show you how to do it so I thought I would add some of my pictures to show how not to do it, in the hope that those who follow can avoid making the same mistakes. My main issue has been in fitting the forecastle bulkheads. When the stubs from the main hull bulkheads were removed there is nothing to locate the forecastle bulkhead (part 276). it seems impossible to glue ply edge on to a curved surface so I ended up removing some hull planking and gluing on some wide timber and then super gluing the ply bulkhead onto the back. Lots of filler and paint will hide the join. I also missed the clue where this bulkhead is fitted in line with the step on part 270, page 5, so I now find the space between the forecastle and quarterdeck bulkhead where the capping rail 392, page 21, is fitted is 6 mm too big. Having said that the error in my placing of 276 is nothing like 6 mm so something else is amiss. A I know its seems silly but I was looking for the galley stove chimney as on page 21. No number is given so I had to search the parts list and there it was part 646. There is no picture so I hunted through the white metal and there it was , I think!. See photo By way of a little light diversion I started looking at the Bows page 30. Here we find hawse hole balusters and again the part is not numbered. It turns out to be part 172. There is no good illustration of this but the part supplied has three groves which I assumed are to take the two hawes ropes. Two into three don't go so I decided to make my own version the same size as the original but with two groves to take the two hawes. I don't know if I am right but !! I also managed to get in a muddle on the planking having decided to mark the plank lengths with a shallow saw cut and pencil marks. I tried to take the module across the central gap over the skid beams and obviously with hindsight got it wrong. If I every do this again I think I will try cutting planks to the right length and sticking them one by one. It cant be as bad as the copper tiles. Anyway onward and upward

-
Your coppering looks great. I found it was possible to run copper paint into the gaps between tiles using a very fine brush. any excess can be wiped off before it dries. Onward & upwards
-
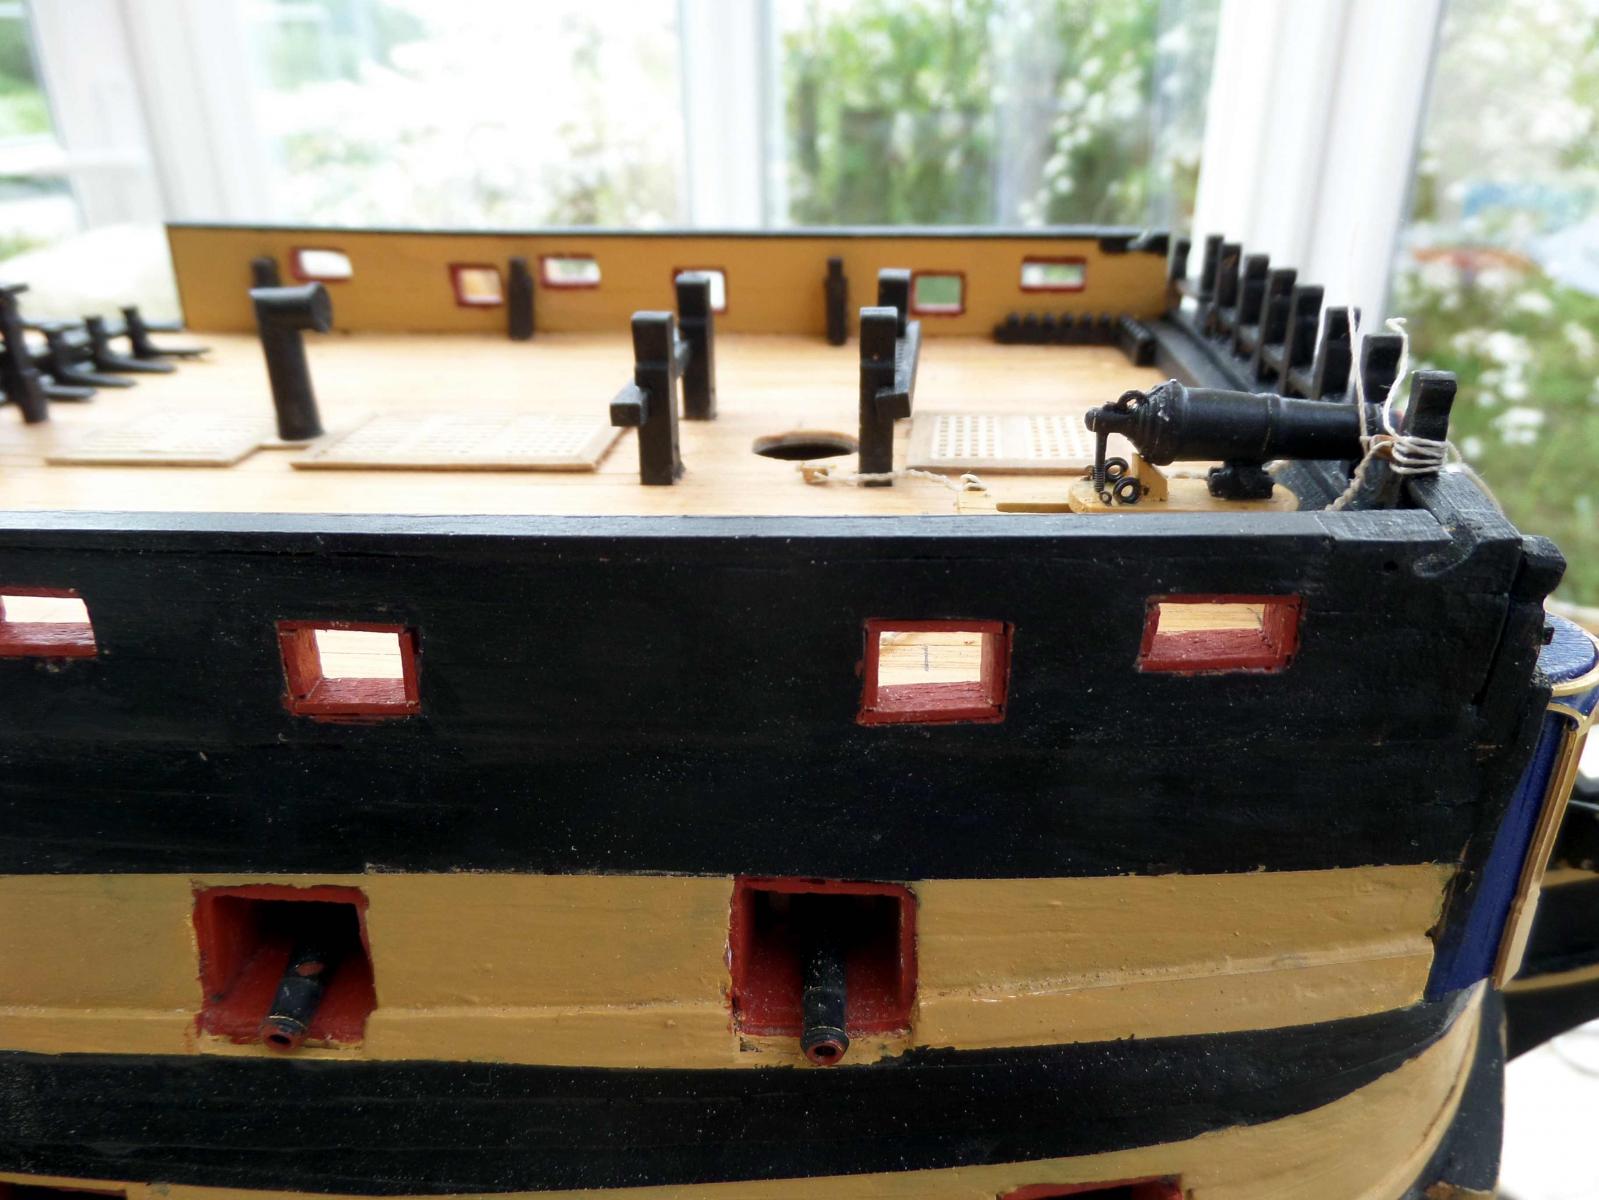
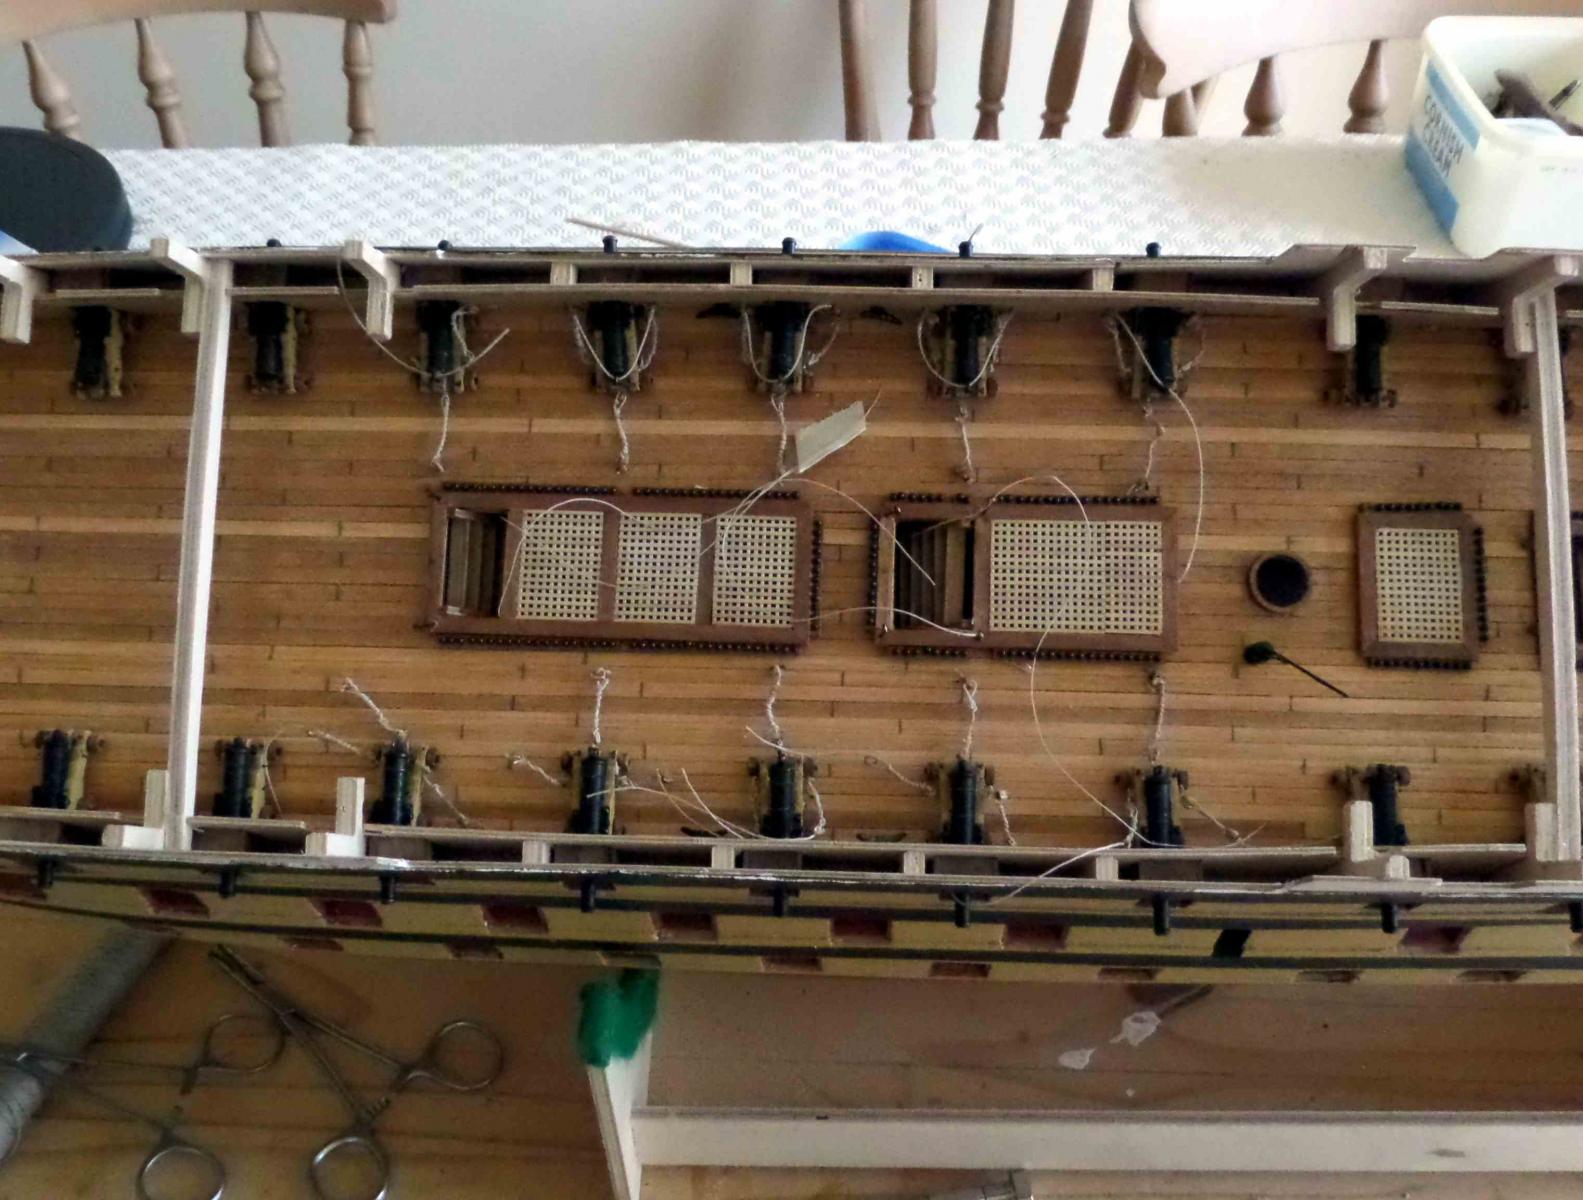
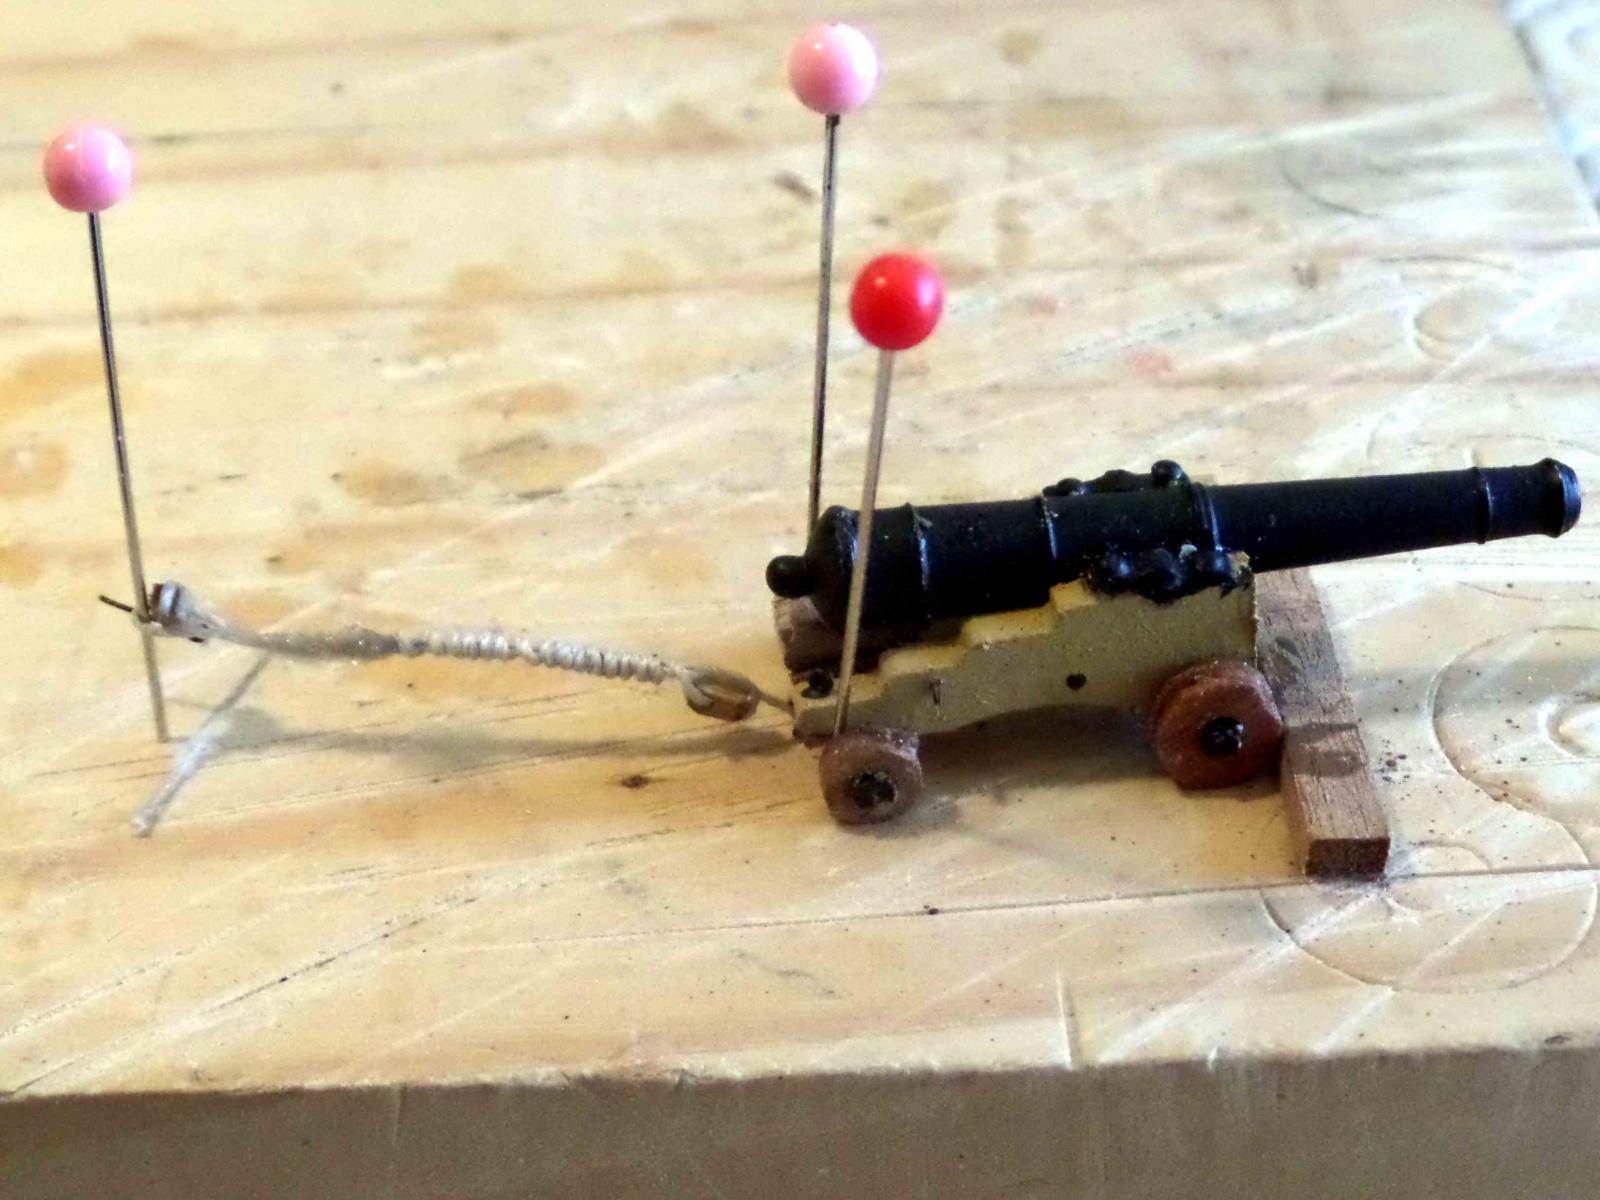
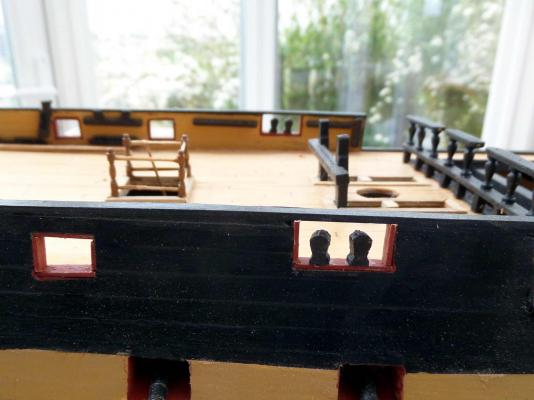
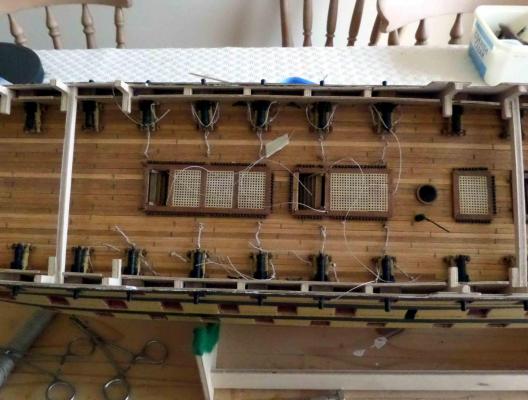
I am about done with rigging the visible cannon. I think it would be easier to rig the eyelets before they are fitted to the hull because I found it difficult to get the tread through the eyes when in the deck. I did that with the back tackle drilled holes in the deck and popped the eyelet in. I gave up trying to thread the breaching tackle heavy thread through the eyelets. I am inclined to remove the eyelet and drill holes in the planking just to poke the thread through. I think it will give the thread a more natural line. On advice I don't intend fitting the steam trunk so main deck will be fitted shortley
-
Yes, think coiled ropes would be better I will try that elsewhere. I have also just realized the rigging I have done is too long but its easy enough to redo. The worst bit was attaching the blocks. I have now got super glue all over the place.
-
I have started rigging cannon. I am not used to such fiddly work so its not easy, my fingers seem to have turned into carrots and its very annoying when the block ping out of the tweezers or forceps. Si far i have retrieved about 4 from strange places so I will find out in due course how many I lost. I finally sorted out a rig for hopefully getting the rear tackle all about the same length and to help with whipping the excess line around the rigging as pic in instructions. Given the difficulty i decided to only do the visible cannon even thought I need the practice so five done five to go! I also think it is easier to for the eyelets after the rigging.It very difficult to thread the rigging through the eyelets when in the hull. Time will tell I also need a moan about the build instructions. Given the cost of this kit and the time its been around It would have been nice for the errors to have been sorted. The most recent issue is on page 16 where the main companionway balusters are numbered (724) whereas the parts list has them as (723) which is correct. Not a major issue but!!

-
Hi Patrick. Can I ask a question about rigging the guns please. I think your idea of the 1mm cord is good, Did you drill out the "Knobs" on the back of the cannon to take the breech ropes? Your post #203 talks about a copper ring but I can't make out what you have done, I was thinking about gluing the rope onto the knob where it runs over the top of the knob and a touch of black paint. Given their location a blind man on a galloping horse would be pleased to see the difference!
-
Thanks to Glennard for the advice on Tamiya masking tape. It works much better than low tack masking although I had some slight bleeding. I have now started looking at rigging the cannon and I am sorry to say I think Caldercraft's guidance is very poor. I had a look at McKay's book "The anatomy of a ship-Victory" which does not give any line drawings but there are two useful photos although they do not answer all the questions. I have had a trawl on the internet and found this web site http://www.ianlawrencemodels.com/gundeckwip10.html I am not an expert model maker but this page ties up with McKay so I will try this method. I think its well worth a look to those about to embark on this part of the kit. Having had a quick look this seems to be a useful web site
-
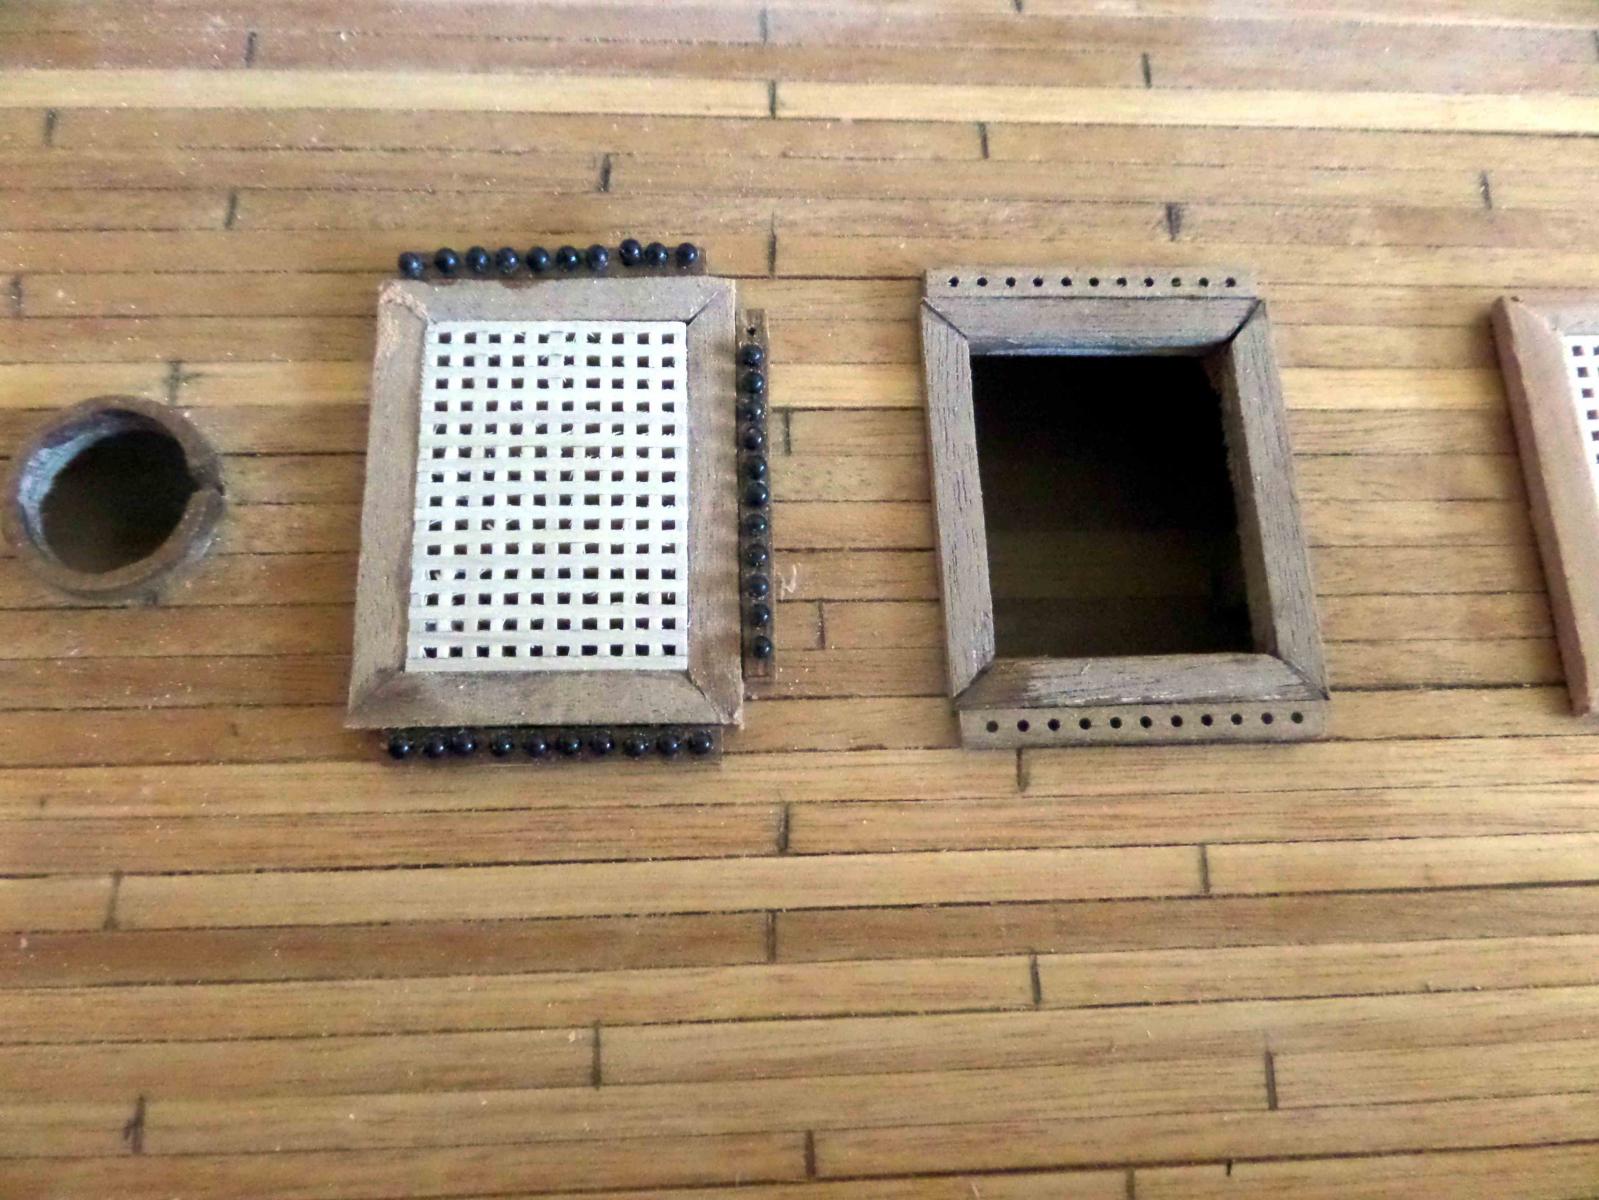
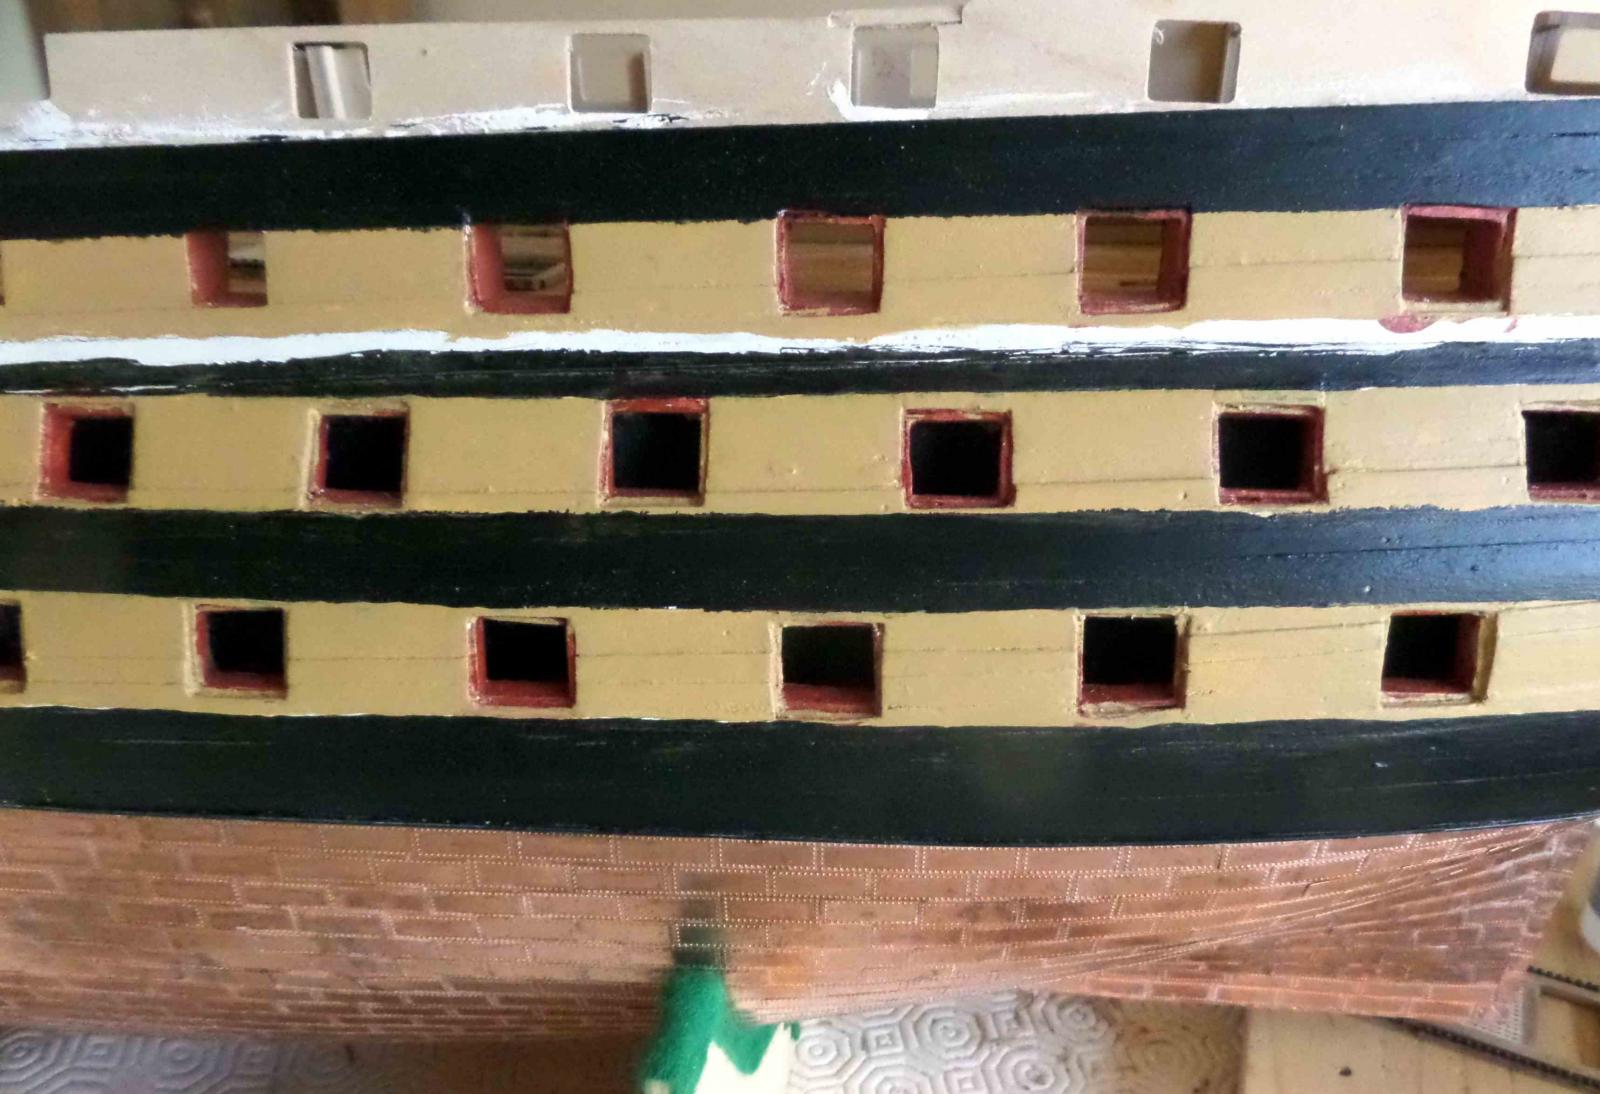
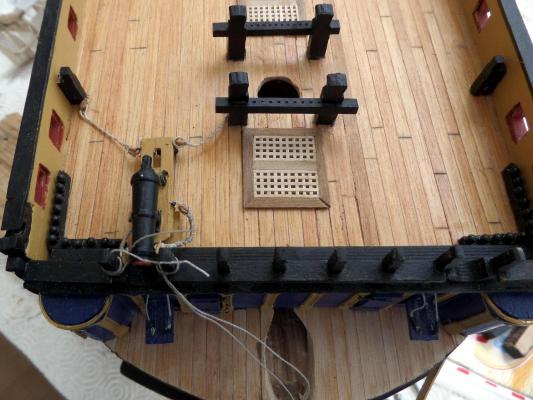
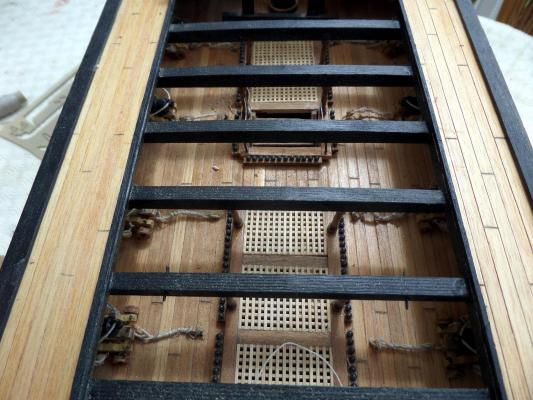
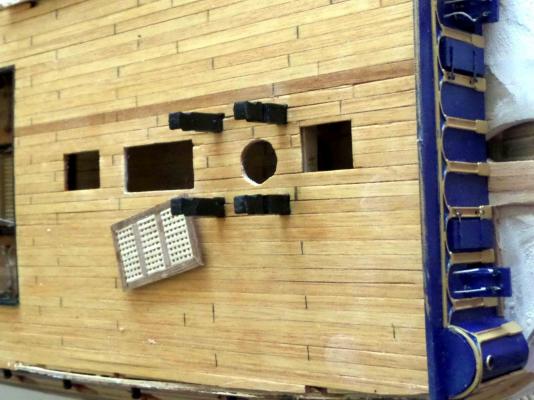
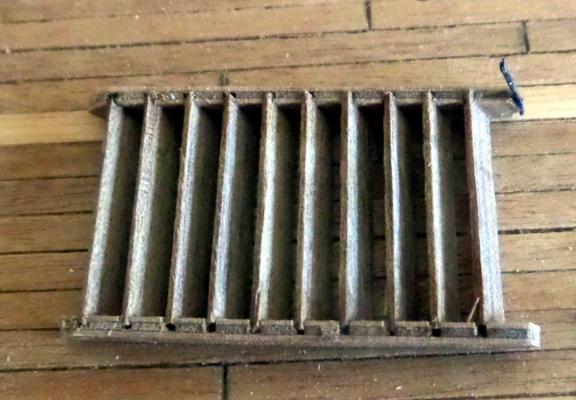
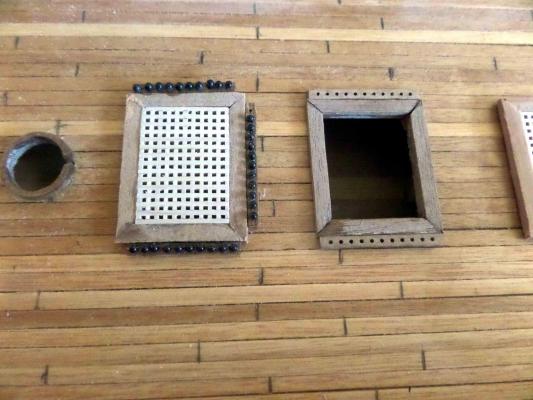
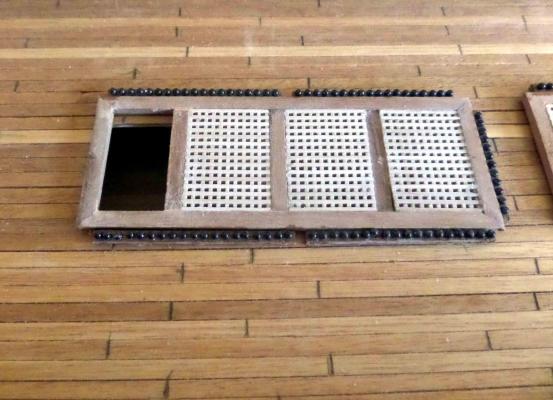
Its nice to have a change from copper plating and get back to building bits. I have been on the gratings. I had trouble deciding which way round the comings went. I found the plans difficult due to the line thickness but ended up with 4mm wide and 3mm high. Still not sure its right so my companion ways may be a bit small. Found the shot garlands fiddly but I am OK with the result. My mitres on the comings are not as good as I would like. I have also had problems with the hull painting. I tried low tack masking tape but the paint bled under the tape. The same with normal tape so I am trying to touch in by hand. It would be nice to get an air brush and mitre guide but its time & money. Here are a few pics Does anyone have any tips for drilling the holes for the dummy gun barrels? It seems to me its difficult to get them central and at the right angle. Has any tried a guide fitted into the ports and a spirit level, it looks fiddly?

-
Hi Rich Your copper work looks very good, well done. Keep up the good work on the boat!!!. Happy new year to everyone
- 414 replies
-
- 1
-
-
- caldercraft
- victory
- (and 1 more)
-
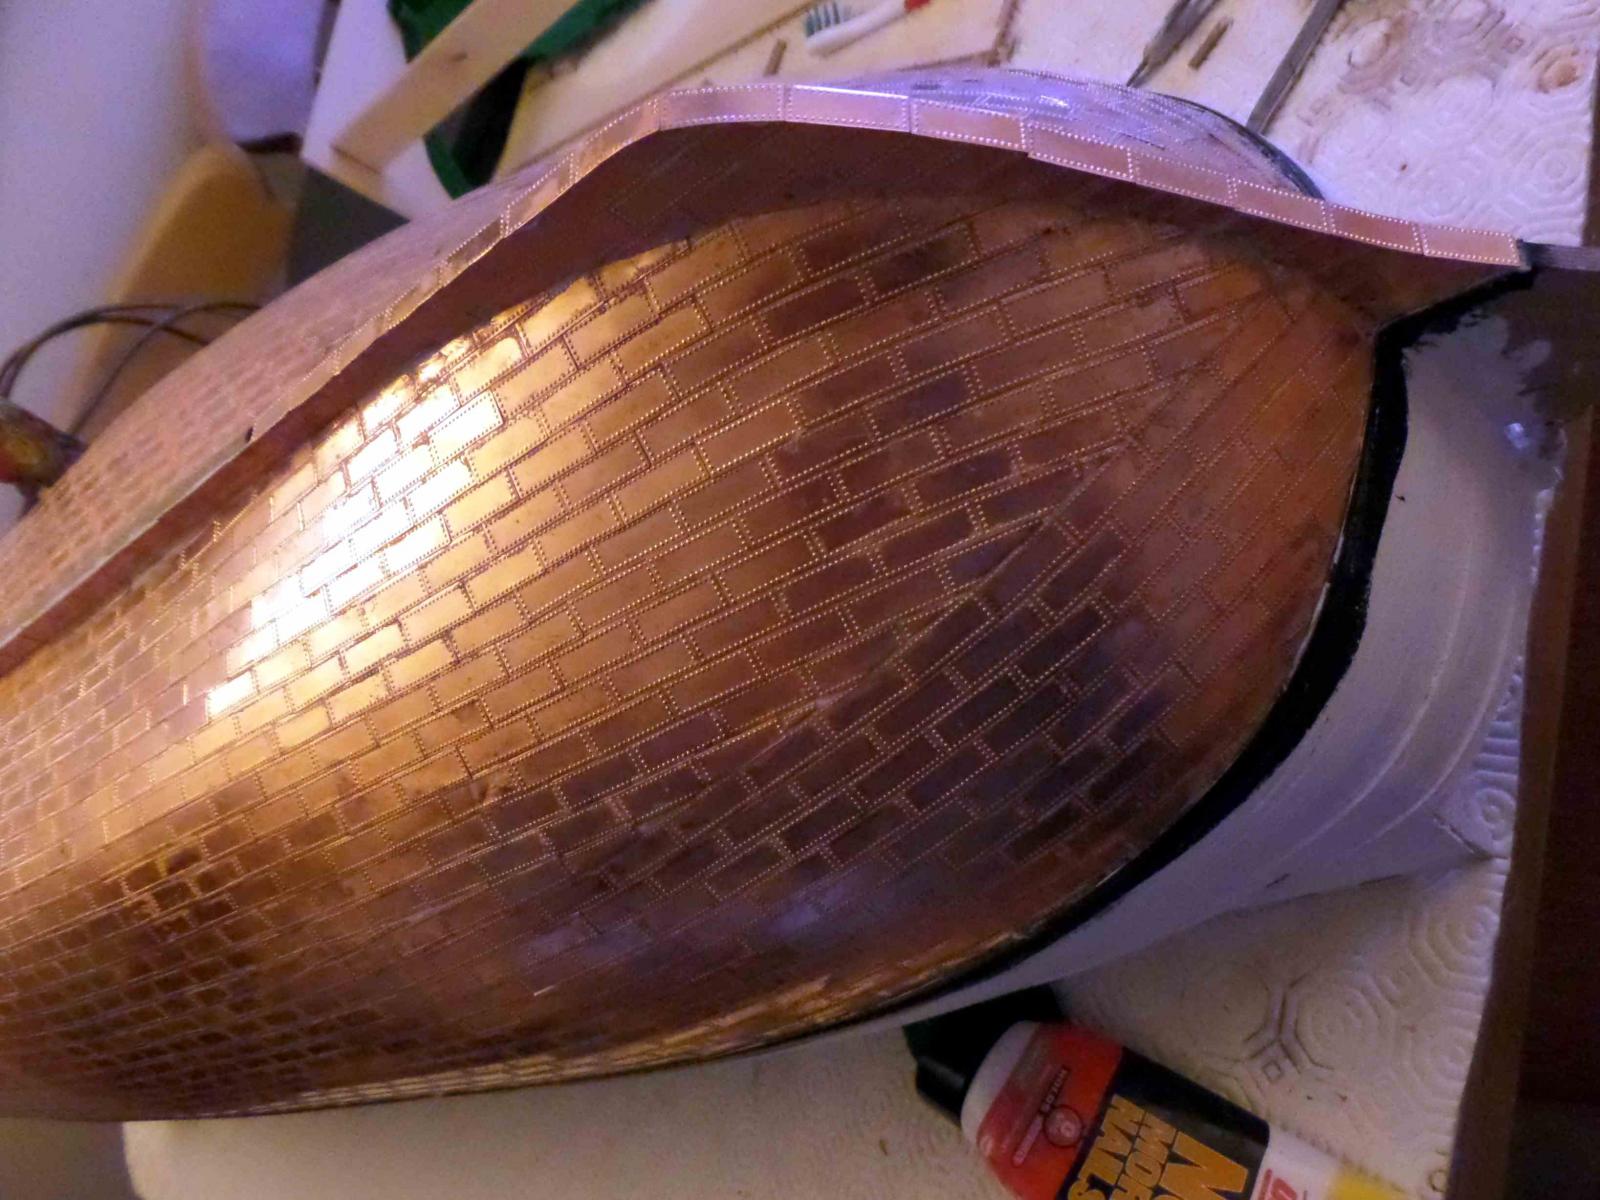
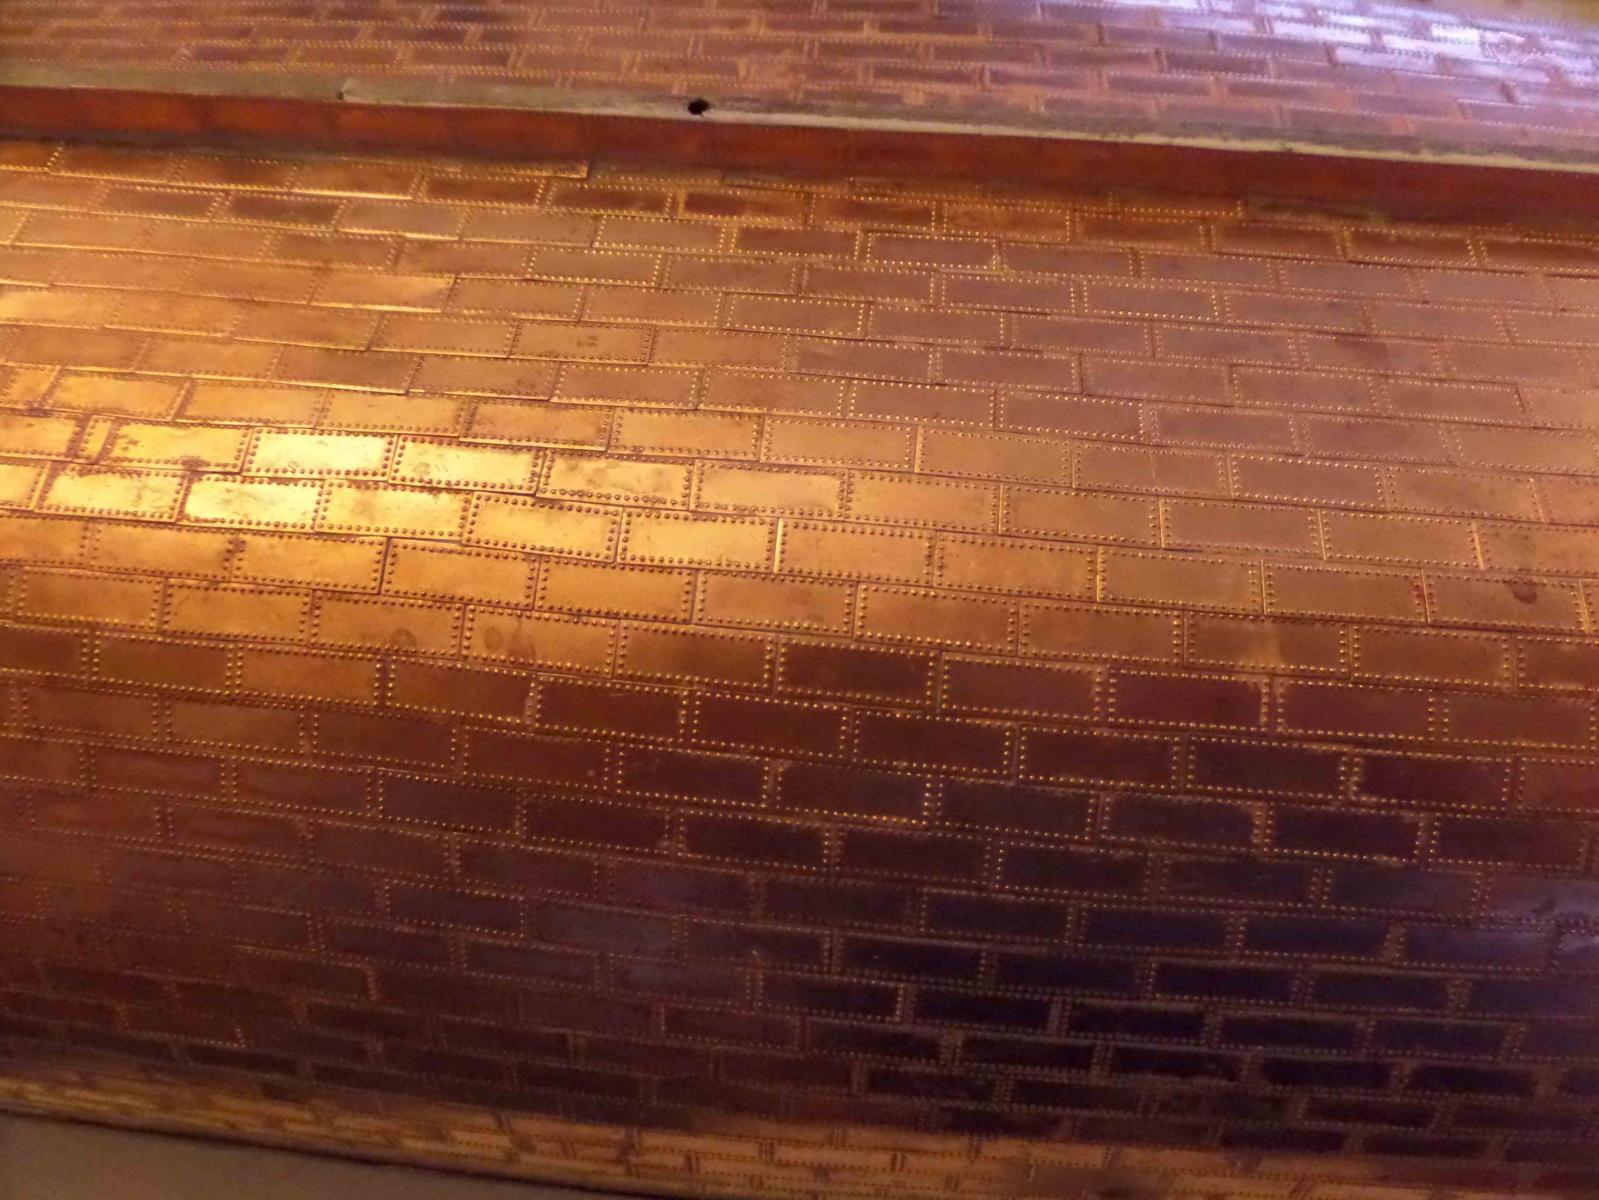
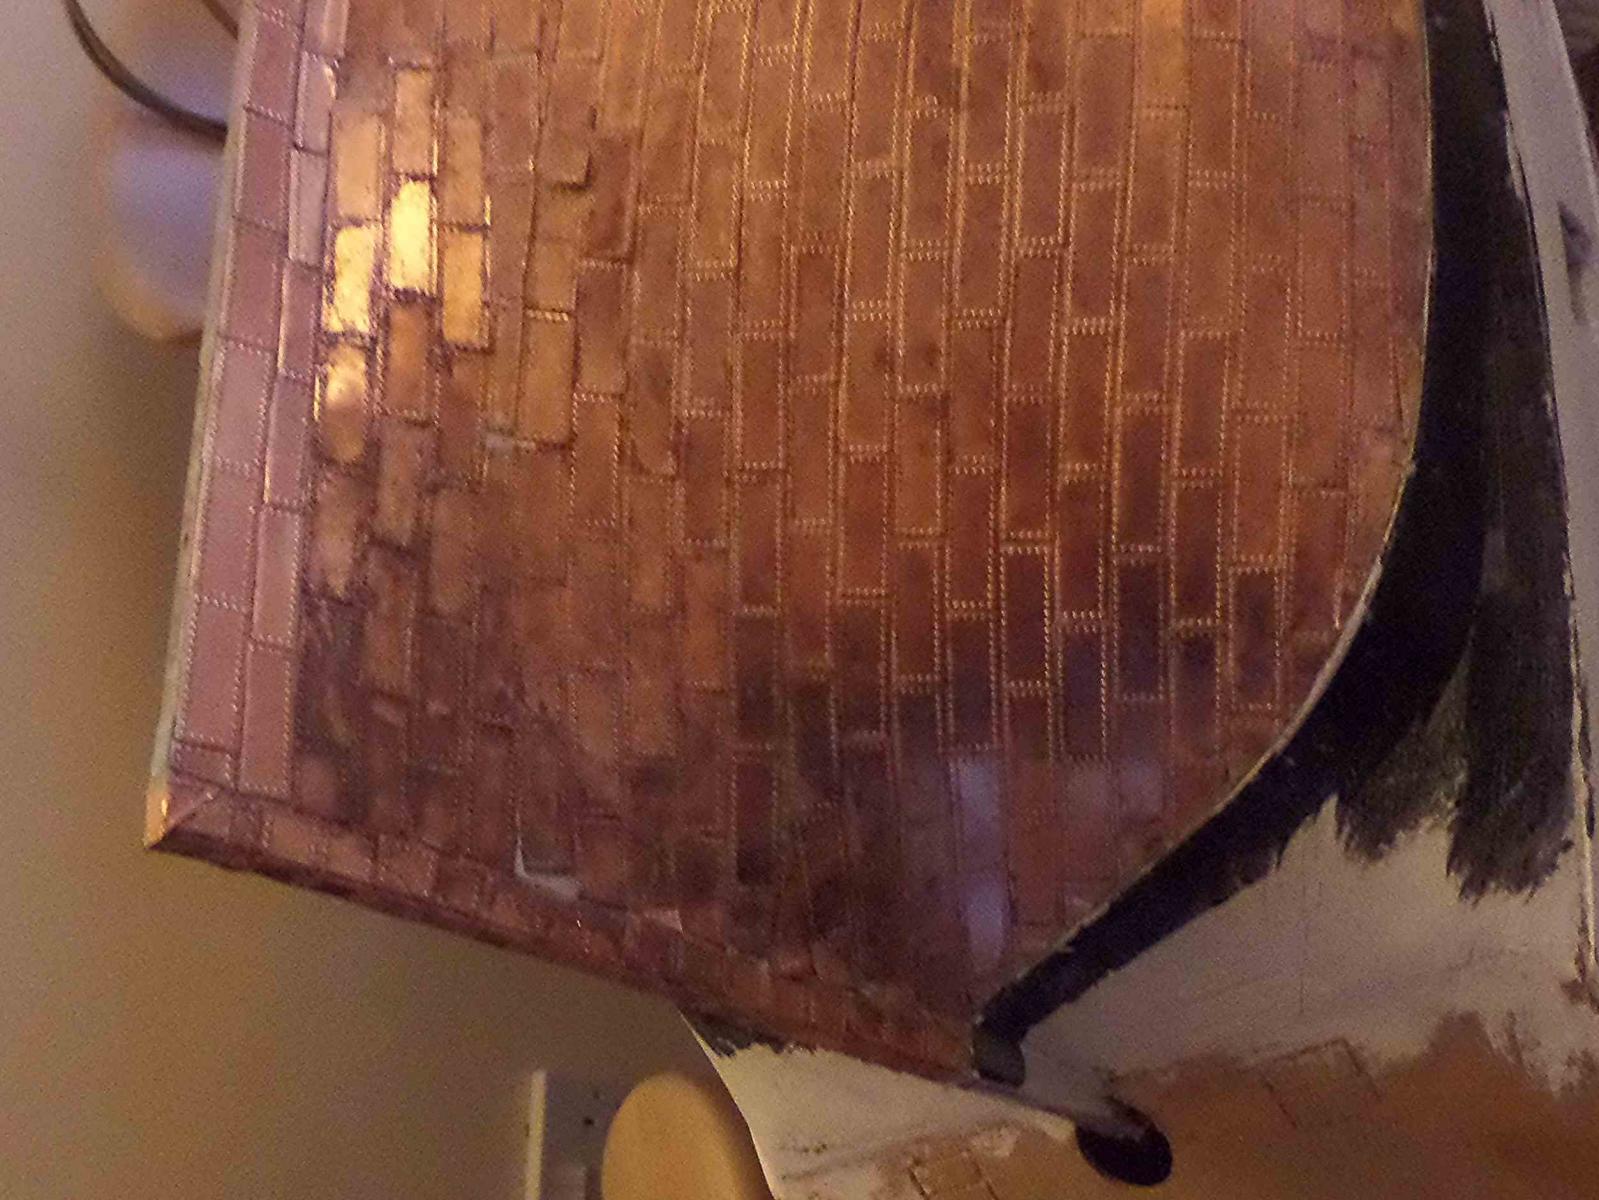
Well I am almost finished with the tiling!!! Despite my best efforts I managed to get some tiles to overlap and there are some that are misaligned but I sure aint taking them all off. I am going to try a bit of copper paint for the white gaps. There is a limit to how small one can cut and fit slivers of copper. The problem also arises where the fine end tends to curl up and get caught. Super glue would solve the issue but generally I found the "No nails worked well. I also managed to get some glue on the top and missed wiping it off so I have some cleaning up to do. I am not too sure about the stern tiling and may take it off. In doing the bow I clad the sides and trimmed the tiles back to fit and then tiles the narrow underside. I am in the process of cutting back the edges of the keel tiles and the result looks OK. There is an issue where the tiles come off if I am too heavy handed in filing the edges but I think so far this is a better way of dealing with the keel. If ever I do this again I will have to find a way of dealing with the little bits where the keel joins the hull. An under layer of copper tape looks worth trying. Anyway here are a few pics